Autodesk Auto CAD Electrical 2011 Instruction Manual Autocad En
User Manual: autodesk AutoCAD Electrical - 2011 - Instruction Manual Free User Guide for Autodesk AutoCAD Software, Manual
Open the PDF directly: View PDF ![]() .
.
Page Count: 2228 [warning: Documents this large are best viewed by clicking the View PDF Link!]
- Contents
- AutoCAD Electrical What's New
- Overview of AutoCAD Electrical Help
- Join the Customer Involvement Program
- What's New in AutoCAD Electrical 2011
- What's New in Previous Releases
- What's New in 2008 Release
- What's New in 2009 Release
- What's New in 2010 Release
- Ribbon Interface
- Migration
- Project Management
- Overview of projects
- Use recently opened projects
- Work with projects
- Create a project
- Add a new drawing to the current project
- Add existing drawings to the current project
- Copy a project
- Group drawings within a project
- Change the order of drawings in the project
- Remove a drawing from the active project
- Assign a description to each drawing
- Preview a drawing
- Pick a different project
- About collaborative design
- Create a drawing
- Change drawing display options
- Overview of project-related files
- Overview of the project file format
- Archive a project
- Delete a project
- Work with Multiple Clients
- Drawing List Report
- IEC tag mode update
- Task list
- Overview of projects
- Drawing and Project Properties
- Symbol Libraries
- Determine symbol block names
- Library Symbol Naming Conventions
- Overview of symbol naming conventions
- Cable Marker Symbols
- Components - General
- Component Location Mark Symbols
- Configuration and Ladder Master Line Reference Symbols
- Connector Symbols
- Hydraulic Symbols
- Inline Wire Marker Symbols
- One-line Symbols
- P&ID Symbols
- Panel Layout Footprint Symbols
- Parametric Twisted Pair Symbols
- PLC I/O Parametric Build Symbols
- Plug/Jack Connector Pin Symbols
- Splice Symbols
- Source/Destination Wire Signal Arrow Symbols
- Stand-alone PLC I/O Point Symbols
- Standalone Terminal Symbols
- User-defined Symbols
- Wire Dot Symbols
- Wire Number Symbols
- Overview of symbol naming conventions
- Split a tag name into two pieces
- Use multiple symbol libraries
- Overview of one-line symbols
- Overview of Hydraulic and P&ID symbols
- Attribute Requirements
- Schematic attributes
- Overview of schematic attributes
- Schematic parent and child components
- One-line
- Wire connection/terminal pin number pairs
- Schematic connector parametric build symbols
- Schematic terminal symbols
- Special Multiple Connection Sequence Terminal symbol
- Source/Destination wire signal symbols
- Stand-alone Source/Destination cross-reference symbols
- In-line wire labels or wire numbers
- PLC single I/O point symbols
- Splice symbols
- Parametric Twisted Pair symbols
- Overview of parent and stand-alone component attributes (TAG1)
- Overview of child component attributes (TAG2)
- Overview of schematic attributes
- Panel attributes
- Attributes for other symbol categories
- Copy attributes
- Schematic attributes
- Managing Library Symbols
- Symbol Builder
- Symbol Preview Guide
- JIC Symbols
- IEC Symbols
- Push Buttons
- Selector Switches
- Breakers, Disconnects
- Fuses, Transformers, Reactors
- Relays, Contacts
- Time Delay Relays
- Motor Control
- Pilot Lights
- PLC I/O
- Terminals, Connectors
- Limit Switches
- Pressure and Temperature Switches
- Proximity Switches
- Miscellaneous Switches
- Solenoids
- Instrumentation and Sensors
- Qualifying Symbols
- Miscellaneous
- One-Line Components
- PLC
- Generate PLC layout modules
- Insert PLC modules
- Overview of the PLC database file
- Single, Stand-alone I/O Points
- Work with PLC styles
- Create PLC I/O Drawings from Spreadsheets
- Circuits
- Component Tools
- Insert schematic components
- Insert or edit child components
- Insert a copy of a component
- Insert from catalog lists
- The schematic lookup file
- Insert from equipment lists
- Insert from panel lists
- Manipulate Components
- Swap contact states
- Component Cross-References
- Insert dashed link lines
- Follow signals
- Show signal paths
- Overview of DIN Rails
- Overview of user data records
- Wire Jumpers
- Component Attribute Tools
- Edit attribute values
- Force attributes to layers
- Manipulate component text
- Manipulate terminal text
- Move description values
- Move attributes
- Hide attributes
- Show attributes
- Rotate attributes
- Change attribute justification
- Change attribute text style
- Change attribute text size
- Rename an attribute
- Add attributes to blocks
- Set tags to fixed
- Retag components
- Change to multi-line text
- Add location codes
- Update child codes
- Location Mark Symbols
- Location box
- Modify library symbols
- Wire/Wire Number Tools
- Overview of wires
- Use wire layers
- Change wire types
- Insert wires
- Insert multiple wires
- Interconnect components
- Trim wires
- Stretch wires
- Bend wires at right angles
- Overview of wire color/gauge labels
- Insert in-line wire markers
- Cable Markers
- Wire Gaps
- Ladder Tools
- Wire Numbers
- Signal Arrows
- Wire Sequencing
- Terminal Tools
- Point-to-Point Wiring Tools
- Project-Wide Tools
- Icon Menus
- BOM and Catalogs
- Reports
- Generate reports
- Schematic Reports
- Generate schematic reports
- Bill of Materials reports
- Component report
- Wire From/To report
- Component Wire List report
- Connector Plug report
- PLC I/O Address and Description report
- PLC I/O Component Connection report
- PLC Modules Used So Far report
- Terminal Numbers report
- Terminal Plan report
- Connector Summary report
- Connector Details report
- Cable Summary report
- Cable From/To report
- Wire Label report
- Generate a schematic report
- Generate schematic reports
- Panel Reports
- Overview of format files
- Run automatic reports
- Export/Import spreadsheet data
- Create user-defined attributes
- Export to Autodesk Inventor Professional
- Panel Layout
- Overview of panel layouts
- Overview of footprint attributes/Xdata
- Panel drawing configuration and defaults
- Relationship between schematic drawings and panel layouts
- Footprint/Terminal Insertion
- Insert panel footprints from a schematic list
- Insert panel footprints using vendor menus
- Insert panel footprints using icon menu
- Insert panel footprints manually
- Insert panel footprints from a catalog list
- Insert footprints from an equipment list
- Insert a copy of a panel footprint
- Use panel templates and assemblies
- Footprint/Terminal Edit
- Layout Wire Connection Annotation
- Lookup Files
- Item Numbers/Balloons
- Nameplates
- Panel Leveling/Sequencing Tools
- Conduit Tools
- Conversion Tools
- Miscellaneous Tools
- Tutorials
- Introduction
- Projects
- Title Block
- Wiring
- Schematic components
- Wire layers
- Circuits
- Surf
- Block swap
- PLC
- Schematic terminals
- Wire numbers
- Panel layout
- Generating reports
- Connector diagrams
- P&ID and Hydraulic diagrams
- Symbol Builder
- Migration of AutoCAD Data
- Interoperability: Inventor and AutoCAD Electrical
- Introduction
- Introduction (continued)
- Part 1: 2D to 3D
- Rename component tags
- Export to XML
- Set the project
- Open the dataset
- Add harness segments
- Add harness segments (continued)
- Import the AutoCAD Electrical data
- Issues
- Assign missing RefDes
- Finish the Import
- Route the wires into the harness segments
- Part 2: 3D to 2D
- Create wires
- Create Wires (continued)
- Route wires
- Export to XML
- Import the Inventor data
- Summary
- Advanced Productivity
- Set up peer-to-peer component relationships
- Create automated pin assignments
- Set up AutoCAD Electrical for multiple users
- Show source and destination markers on cable wires
- Use the PLC Database File Editor
- Customize Circuit Builder
- Circuit Builder overview
- Circuit Builder spreadsheet
- Circuit Builder drawing templates
- Circuit Builder database
- Add a new circuit
- Circuit Builder - How to
- Overview
- Add a multiple catalog option
- Assign different attribute values on a multi-pole insert
- Assign attribute values using AutoLISP
- Conditionally trim or remove a wire segment
- Conditional component insertion
- Control the multi-pole insertion direction
- Control the bus wire spacing
- Define the wire type
- Define the wire type as no wire numbering
- Format the numeric tag of the motor symbol in a wire number
- Format the numeric tag of the motor symbol into other component tags
- Link a child contact to the parent
- Map motor parameters to the motor symbol attributes
- Override the default tag format
- Override the default wire number format
- Predefine attribute values
- Predefine attribute values using annotation presets
- Predefine a wire number
- Set circuit element defaults
- Set up component auto-sizing
- Stretch and connect wiring from a nested template
- Overview
- Build your own symbols
- Add your own symbols, circuits, and commands to the icon menu
- Configure projects for various drawing standards
- Use Autodesk Vault with AutoCAD Electrical
- AutoCAD Electrical Command
- Index

AutoCAD Electrical 2011
User’s Guide
January 2008
©2010 Autodesk, Inc. All Rights Reserved. Except as otherwise permitted by Autodesk, Inc., this publication, or parts thereof, may not be
reproduced in any form, by any method, for any purpose.
Certain materials included in this publication are reprinted with the permission of the copyright holder.
Trademarks
The following are registered trademarks or trademarks of Autodesk, Inc., and/or its subsidiaries and/or affiliates in the USA and other countries:
3DEC (design/logo), 3December, 3December.com, 3ds Max, Algor, Alias, Alias (swirl design/logo), AliasStudio, Alias|Wavefront (design/logo),
ATC, AUGI, AutoCAD, AutoCAD Learning Assistance, AutoCAD LT, AutoCAD Simulator, AutoCAD SQL Extension, AutoCAD SQL Interface,
Autodesk, Autodesk Envision, Autodesk Intent, Autodesk Inventor, Autodesk Map, Autodesk MapGuide, Autodesk Streamline, AutoLISP, AutoSnap,
AutoSketch, AutoTrack, Backburner, Backdraft, Built with ObjectARX (logo), Burn, Buzzsaw, CAiCE, Civil 3D, Cleaner, Cleaner Central, ClearScale,
Colour Warper, Combustion, Communication Specification, Constructware, Content Explorer, Dancing Baby (image), DesignCenter, Design
Doctor, Designer's Toolkit, DesignKids, DesignProf, DesignServer, DesignStudio, Design Web Format, Discreet, DWF, DWG, DWG (logo), DWG
Extreme, DWG TrueConvert, DWG TrueView, DXF, Ecotect, Exposure, Extending the Design Team, Face Robot, FBX, Fempro, Fire, Flame, Flare,
Flint, FMDesktop, Freewheel, GDX Driver, Green Building Studio, Heads-up Design, Heidi, HumanIK, IDEA Server, i-drop, ImageModeler, iMOUT,
Incinerator, Inferno, Inventor, Inventor LT, Kaydara, Kaydara (design/logo), Kynapse, Kynogon, LandXplorer, Lustre, MatchMover, Maya,
Mechanical Desktop, Moldflow, Moonbox, MotionBuilder, Movimento, MPA, MPA (design/logo), Moldflow Plastics Advisers, MPI, Moldflow
Plastics Insight, MPX, MPX (design/logo), Moldflow Plastics Xpert, Mudbox, Multi-Master Editing, Navisworks, ObjectARX, ObjectDBX, Open
Reality, Opticore, Opticore Opus, Pipeplus, PolarSnap, PortfolioWall, Powered with Autodesk Technology, Productstream, ProjectPoint, ProMaterials,
RasterDWG, RealDWG, Real-time Roto, Recognize, Render Queue, Retimer,Reveal, Revit, Showcase, ShowMotion, SketchBook, Smoke, Softimage,
Softimage|XSI (design/logo), Sparks, SteeringWheels, Stitcher, Stone, StudioTools, ToolClip, Topobase, Toxik, TrustedDWG, ViewCube, Visual,
Visual LISP, Volo, Vtour, Wire, Wiretap, WiretapCentral, XSI, and XSI (design/logo).
All other brand names, product names or trademarks belong to their respective holders.
Disclaimer
THIS PUBLICATION AND THE INFORMATION CONTAINED HEREIN IS MADE AVAILABLE BY AUTODESK, INC. "AS IS." AUTODESK, INC. DISCLAIMS
ALL WARRANTIES, EITHER EXPRESS OR IMPLIED, INCLUDING BUT NOT LIMITED TO ANY IMPLIED WARRANTIES OF MERCHANTABILITY OR
FITNESS FOR A PARTICULAR PURPOSE REGARDING THESE MATERIALS.
Published by:
Autodesk, Inc.
111 McInnis Parkway
San Rafael, CA 94903, USA
Contents
Chapter 1 AutoCAD Electrical What's New . . . . . . . . . . . . . . . . . . 1
Overview of AutoCAD Electrical Help . . . . . . . . . . . . . . . . . . . 1
Join the Customer Involvement Program . . . . . . . . . . . . . . . . . 6
What's New in AutoCAD Electrical 2011 . . . . . . . . . . . . . . . . . . 7
What's New in Previous Releases . . . . . . . . . . . . . . . . . . . . . . 9
What's New in 2008 Release . . . . . . . . . . . . . . . . . . . . . . . 13
What's New in 2009 Release . . . . . . . . . . . . . . . . . . . . . . . 19
What's New in 2010 Release . . . . . . . . . . . . . . . . . . . . . . . 25
Ribbon Interface . . . . . . . . . . . . . . . . . . . . . . . . . . . . . . 29
Project tab . . . . . . . . . . . . . . . . . . . . . . . . . . . . . . 29
Project Tools panel . . . . . . . . . . . . . . . . . . . . . . 29
Other Tools panel . . . . . . . . . . . . . . . . . . . . . . . 30
Troubleshooting panel . . . . . . . . . . . . . . . . . . . . 33
Schematic tab . . . . . . . . . . . . . . . . . . . . . . . . . . . . 34
Quick Pick panel . . . . . . . . . . . . . . . . . . . . . . . 34
Insert Components panel . . . . . . . . . . . . . . . . . . . 35
Edit Components panel . . . . . . . . . . . . . . . . . . . . 39
Insert Wires/Wire Numbers panel . . . . . . . . . . . . . . 48
Edit Wires/Wire Numbers panel . . . . . . . . . . . . . . . 52
Other Tools panel . . . . . . . . . . . . . . . . . . . . . . . 57
Power Check Tools panel . . . . . . . . . . . . . . . . . . . 59
Panel tab . . . . . . . . . . . . . . . . . . . . . . . . . . . . . . . 60
Insert Component Footprints panel . . . . . . . . . . . . . 60
Terminal Footprints panel . . . . . . . . . . . . . . . . . . 62
iii
Edit Footprints panel . . . . . . . . . . . . . . . . . . . . . 63
Other Tools panel . . . . . . . . . . . . . . . . . . . . . . . 65
Conduit Tools panel . . . . . . . . . . . . . . . . . . . . . 66
Reports tab . . . . . . . . . . . . . . . . . . . . . . . . . . . . . 67
Schematic panel . . . . . . . . . . . . . . . . . . . . . . . . 67
Panel panel . . . . . . . . . . . . . . . . . . . . . . . . . . 68
Miscellaneous panel . . . . . . . . . . . . . . . . . . . . . . 68
Import/Export Data tab . . . . . . . . . . . . . . . . . . . . . . . 69
Import panel . . . . . . . . . . . . . . . . . . . . . . . . . 69
Export panel . . . . . . . . . . . . . . . . . . . . . . . . . . 70
Conversion Tools tab . . . . . . . . . . . . . . . . . . . . . . . . 71
Tools panel . . . . . . . . . . . . . . . . . . . . . . . . . . 71
Schematic panel . . . . . . . . . . . . . . . . . . . . . . . . 74
Panel panel . . . . . . . . . . . . . . . . . . . . . . . . . . 76
Attributes panel . . . . . . . . . . . . . . . . . . . . . . . . 76
Symbol Builder tab . . . . . . . . . . . . . . . . . . . . . . . . . 79
Edit panel . . . . . . . . . . . . . . . . . . . . . . . . . . . 79
Help panel . . . . . . . . . . . . . . . . . . . . . . . . . . . 80
Toolbars to Ribbons . . . . . . . . . . . . . . . . . . . . . . . . . 80
Main Electrical toolbar . . . . . . . . . . . . . . . . . . . . 80
Main Electrical 2 toolbar . . . . . . . . . . . . . . . . . . . 94
Panel Layout toolbar . . . . . . . . . . . . . . . . . . . . . 104
Conversion toolbar . . . . . . . . . . . . . . . . . . . . . 108
Conduit Marker toolbar . . . . . . . . . . . . . . . . . . . 115
Power Check toolbar . . . . . . . . . . . . . . . . . . . . . 116
Extra Libraries toolbar . . . . . . . . . . . . . . . . . . . . 117
The Ribbon . . . . . . . . . . . . . . . . . . . . . . . . . . . . . 117
Overview of the Ribbon . . . . . . . . . . . . . . . . . . . 117
Display and Organize the Ribbon . . . . . . . . . . . . . . 118
Customize the Ribbon . . . . . . . . . . . . . . . . . . . . 121
Chapter 2 Migration . . . . . . . . . . . . . . . . . . . . . . . . . . . . 123
Migration Utility . . . . . . . . . . . . . . . . . . . . . . . . . . . . . 123
Chapter 3 Project Management . . . . . . . . . . . . . . . . . . . . . . 137
Overview of projects . . . . . . . . . . . . . . . . . . . . . . . . . . . 137
Use recently opened projects . . . . . . . . . . . . . . . . . . . 138
Create a project . . . . . . . . . . . . . . . . . . . . . . . . . . 138
Add a new drawing to the current project . . . . . . . . . . . . . 139
Add existing drawings to the current project . . . . . . . . . . . 139
Group drawings within a project . . . . . . . . . . . . . . . . . 142
Change the order of drawings in the project . . . . . . . . . . . 142
Remove a drawing from the active project . . . . . . . . . . . . 143
Assign a description to each drawing . . . . . . . . . . . . . . . 143
Preview a drawing . . . . . . . . . . . . . . . . . . . . . . . . . 144
iv | Contents
About collaborative design . . . . . . . . . . . . . . . . . . . . . . . . 156
Create a drawing . . . . . . . . . . . . . . . . . . . . . . . . . . . . . 167
Change drawing display options . . . . . . . . . . . . . . . . . . . . 171
Overview of project-related files . . . . . . . . . . . . . . . . . . . . . 174
Overview of the project file format . . . . . . . . . . . . . . . . . . . 182
Archive a project . . . . . . . . . . . . . . . . . . . . . . . . . . . . . 187
Delete a project . . . . . . . . . . . . . . . . . . . . . . . . . . . . . 188
Work with Multiple Clients . . . . . . . . . . . . . . . . . . . . . . . 189
Overview of setup for multiple clients . . . . . . . . . . . . . . 189
Drawing List Report . . . . . . . . . . . . . . . . . . . . . . . . . . . 192
IEC tag mode update . . . . . . . . . . . . . . . . . . . . . . . . . . . 192
Task list . . . . . . . . . . . . . . . . . . . . . . . . . . . . . . . . . . 193
Chapter 4 Drawing and Project Properties . . . . . . . . . . . . . . . . . 199
Overview of project and drawing properties . . . . . . . . . . . . . . 199
Use replaceable parameters . . . . . . . . . . . . . . . . . . . . . . . 236
Save settings to the project file . . . . . . . . . . . . . . . . . . . . . 239
Settings List Utility . . . . . . . . . . . . . . . . . . . . . . . . . . . . 241
Create a template drawing . . . . . . . . . . . . . . . . . . . . . . . . 244
Updating the WD_M Block . . . . . . . . . . . . . . . . . . . . . . . 248
Overview of the WD_M block . . . . . . . . . . . . . . . . . . . 248
Using Layers . . . . . . . . . . . . . . . . . . . . . . . . . . . . . . . 256
Manage layers . . . . . . . . . . . . . . . . . . . . . . . . . . . 256
Use wire layers . . . . . . . . . . . . . . . . . . . . . . . . . . . 264
Change wire types . . . . . . . . . . . . . . . . . . . . . . . . . 273
Chapter 5 Symbol Libraries . . . . . . . . . . . . . . . . . . . . . . . . . 281
Determine symbol block names . . . . . . . . . . . . . . . . . . . . . 281
Library Symbol Naming Conventions . . . . . . . . . . . . . . . . . . 282
Overview of symbol naming conventions . . . . . . . . . . . . 282
Split a tag name into two pieces . . . . . . . . . . . . . . . . . . . . . 298
Use multiple symbol libraries . . . . . . . . . . . . . . . . . . . . . . 299
Overview of one-line symbols . . . . . . . . . . . . . . . . . . . . . . 301
Overview of Hydraulic and P&ID symbols . . . . . . . . . . . . . . . 304
Attribute Requirements . . . . . . . . . . . . . . . . . . . . . . . . . 306
Schematic attributes . . . . . . . . . . . . . . . . . . . . . . . . 306
Overview of schematic attributes . . . . . . . . . . . . . . 306
Overview of parent and stand-alone component attributes
(TAG1) . . . . . . . . . . . . . . . . . . . . . . . . . . . 320
Overview of child component attributes (TAG2) . . . . . . 321
Panel attributes . . . . . . . . . . . . . . . . . . . . . . . . . . 321
Overview of panel attributes . . . . . . . . . . . . . . . . 321
Attributes for other symbol categories . . . . . . . . . . . . . . . 325
Overview of attributes for other symbol categories . . . . . 325
Copy attributes . . . . . . . . . . . . . . . . . . . . . . . . . . . 329
Contents | v
Managing Library Symbols . . . . . . . . . . . . . . . . . . . . . . . 329
Substitute symbols in the library . . . . . . . . . . . . . . . . . 329
Change appearance of existing library symbols . . . . . . . . . . 330
Predefine symbol annotation . . . . . . . . . . . . . . . . . . . 331
Swap blocks . . . . . . . . . . . . . . . . . . . . . . . . . . . . 332
Create a library symbol . . . . . . . . . . . . . . . . . . . . . . 338
Symbol Builder . . . . . . . . . . . . . . . . . . . . . . . . . . . . . . 339
Symbol Builder . . . . . . . . . . . . . . . . . . . . . . . . . . . 339
Symbol Preview Guide . . . . . . . . . . . . . . . . . . 361
Chapter 6 JIC Symbols . . . . . . . . . . . . . . . . . . . . . . . . . . . . 363
Push Buttons . . . . . . . . . . . . . . . . . . . . . . . . . . . . . . . 363
Selector Switches . . . . . . . . . . . . . . . . . . . . . . . . . . . . . 366
Selector Switches . . . . . . . . . . . . . . . . . . . . . . . . . . 366
Illuminated Selector Switches . . . . . . . . . . . . . . . . . . . 370
Fuses, Circuit Breakers, Transformers . . . . . . . . . . . . . . . . . . 374
Fuses and Transformers . . . . . . . . . . . . . . . . . . . . . . 374
Circuit Breakers and Disconnects . . . . . . . . . . . . . . . . . 376
Relays and Contacts . . . . . . . . . . . . . . . . . . . . . . . . . . . 378
Relays and Contacts . . . . . . . . . . . . . . . . . . . . . . . . 378
Latch Relay Coils . . . . . . . . . . . . . . . . . . . . . . . . . . 379
Timers . . . . . . . . . . . . . . . . . . . . . . . . . . . . . . . . . . 380
Time Delay Relays . . . . . . . . . . . . . . . . . . . . . . . . . 380
OFF-Delay Timers . . . . . . . . . . . . . . . . . . . . . . . . . 382
Motor Control . . . . . . . . . . . . . . . . . . . . . . . . . . . . . . 384
Pilot Lights . . . . . . . . . . . . . . . . . . . . . . . . . . . . . . . . 387
Pilot Lights . . . . . . . . . . . . . . . . . . . . . . . . . . . . . 387
Master Test Pilot Lights . . . . . . . . . . . . . . . . . . . . . . 390
Neon Pilot Lights . . . . . . . . . . . . . . . . . . . . . . . . . 391
PLC I/O . . . . . . . . . . . . . . . . . . . . . . . . . . . . . . . . . . 392
Terminals and Connectors . . . . . . . . . . . . . . . . . . . . . . . . 394
Terminals . . . . . . . . . . . . . . . . . . . . . . . . . . . . . . 394
In-Line Wire Labels . . . . . . . . . . . . . . . . . . . . . . . . 397
Power Distribution Blocks . . . . . . . . . . . . . . . . . . . . . 398
Connectors - No Wirenumber Changes . . . . . . . . . . . . . . 399
Connectors - Wirenumber Changes . . . . . . . . . . . . . . . . 403
Limit Switches . . . . . . . . . . . . . . . . . . . . . . . . . . . . . . 407
Pressure and Temperature Switches . . . . . . . . . . . . . . . . . . . 408
Flow and Level Switches . . . . . . . . . . . . . . . . . . . . . . . . . 410
Miscellaneous Switches . . . . . . . . . . . . . . . . . . . . . . . . . 411
Miscellaneous Switches . . . . . . . . . . . . . . . . . . . . . . 411
Single Pole Double Throw Switches . . . . . . . . . . . . . . . . 415
Solenoids . . . . . . . . . . . . . . . . . . . . . . . . . . . . . . . . . 418
Instrumentation . . . . . . . . . . . . . . . . . . . . . . . . . . . . . 419
vi | Contents
Miscellaneous . . . . . . . . . . . . . . . . . . . . . . . . . . . . . . 421
Miscellaneous . . . . . . . . . . . . . . . . . . . . . . . . . . . 421
Electronics . . . . . . . . . . . . . . . . . . . . . . . . . . . . . 423
Cable Markers . . . . . . . . . . . . . . . . . . . . . . . . . . . 426
Power Receptacles . . . . . . . . . . . . . . . . . . . . . . . . . 427
Generic Device Boxes . . . . . . . . . . . . . . . . . . . . . . . 427
Stand-alone Cross-reference Symbols . . . . . . . . . . . . . . . 428
Wire Arrows - Reference Only . . . . . . . . . . . . . . . . . . . 430
One-Line Components . . . . . . . . . . . . . . . . . . . . . . . . . . 431
Connector . . . . . . . . . . . . . . . . . . . . . . . . . . . . . 431
Motor Control . . . . . . . . . . . . . . . . . . . . . . . . . . . 431
Transformer . . . . . . . . . . . . . . . . . . . . . . . . . . . . 433
Terminal . . . . . . . . . . . . . . . . . . . . . . . . . . . . . . 434
Cable Marker . . . . . . . . . . . . . . . . . . . . . . . . . . . . 434
Bus-tap . . . . . . . . . . . . . . . . . . . . . . . . . . . . . . . 435
Miscellaneous . . . . . . . . . . . . . . . . . . . . . . . . . . . 435
Chapter 7 IEC Symbols . . . . . . . . . . . . . . . . . . . . . . . . . . . 437
Push Buttons . . . . . . . . . . . . . . . . . . . . . . . . . . . . . . . 437
Push Buttons . . . . . . . . . . . . . . . . . . . . . . . . . . . . 437
Illuminated Push Buttons . . . . . . . . . . . . . . . . . . . . . 441
Selector Switches . . . . . . . . . . . . . . . . . . . . . . . . . . . . . 442
Selector Switches . . . . . . . . . . . . . . . . . . . . . . . . . . 442
3 Position Selector Switches . . . . . . . . . . . . . . . . . . . . 445
4 Position Selector Switches . . . . . . . . . . . . . . . . . . . . 450
Breakers, Disconnects . . . . . . . . . . . . . . . . . . . . . . . . . . 452
1 Pole Circuit Breakers . . . . . . . . . . . . . . . . . . . . . . . 452
2nd+ Pole Circuit Breakers . . . . . . . . . . . . . . . . . . . . . 454
Power Switches . . . . . . . . . . . . . . . . . . . . . . . . . . . 458
Fusible Disconnects . . . . . . . . . . . . . . . . . . . . . . . . 459
Disconnect 1 Pole . . . . . . . . . . . . . . . . . . . . . . . . . 461
Fuses, Transformers, Reactors . . . . . . . . . . . . . . . . . . . . . . 462
Reactors . . . . . . . . . . . . . . . . . . . . . . . . . . . . . . 462
Fuses . . . . . . . . . . . . . . . . . . . . . . . . . . . . . . . . 463
Fuse Switches . . . . . . . . . . . . . . . . . . . . . . . . . . . . 465
Transformers . . . . . . . . . . . . . . . . . . . . . . . . . . . . 465
Current Transformers . . . . . . . . . . . . . . . . . . . . . . . 467
3 Phase Transformers . . . . . . . . . . . . . . . . . . . . . . . 469
Relays, Contacts . . . . . . . . . . . . . . . . . . . . . . . . . . . . . 473
Relays and Contacts . . . . . . . . . . . . . . . . . . . . . . . . 473
Relays with Suppression . . . . . . . . . . . . . . . . . . . . . . 476
Current Protection Relays . . . . . . . . . . . . . . . . . . . . . 477
Voltage Protection Relays . . . . . . . . . . . . . . . . . . . . . 479
Counter Relays . . . . . . . . . . . . . . . . . . . . . . . . . . . 480
Miscellaneous Relays . . . . . . . . . . . . . . . . . . . . . . . . 481
Time Delay Relays . . . . . . . . . . . . . . . . . . . . . . . . . . . . 482
Contents | vii
Motor Control . . . . . . . . . . . . . . . . . . . . . . . . . . . . . . 485
Motor Control . . . . . . . . . . . . . . . . . . . . . . . . . . . 485
1 Phase Motors . . . . . . . . . . . . . . . . . . . . . . . . . . . 486
3 Phase Motors . . . . . . . . . . . . . . . . . . . . . . . . . . . 487
DC Motors . . . . . . . . . . . . . . . . . . . . . . . . . . . . . 489
Generators . . . . . . . . . . . . . . . . . . . . . . . . . . . . . 490
Motor Starters . . . . . . . . . . . . . . . . . . . . . . . . . . . 491
Pilot Lights . . . . . . . . . . . . . . . . . . . . . . . . . . . . . . . . 492
Pilot Lights . . . . . . . . . . . . . . . . . . . . . . . . . . . . . 492
Standard Lights . . . . . . . . . . . . . . . . . . . . . . . . . . 493
Transformer Lights . . . . . . . . . . . . . . . . . . . . . . . . . 494
Push to Test Lights . . . . . . . . . . . . . . . . . . . . . . . . . 496
LEDs . . . . . . . . . . . . . . . . . . . . . . . . . . . . . . . . 497
Beacons - Flashing . . . . . . . . . . . . . . . . . . . . . . . . . 500
Beacons - Rotating . . . . . . . . . . . . . . . . . . . . . . . . . 502
PLC I/O . . . . . . . . . . . . . . . . . . . . . . . . . . . . . . . . . . 503
Terminals, Connectors . . . . . . . . . . . . . . . . . . . . . . . . . . 505
Terminals . . . . . . . . . . . . . . . . . . . . . . . . . . . . . . 505
In-Line Wire Labels . . . . . . . . . . . . . . . . . . . . . . . . 508
Power Distribution Blocks . . . . . . . . . . . . . . . . . . . . . 509
Connectors - No Wirenumber Changes . . . . . . . . . . . . . . 509
Connectors - Wirenumber Changes . . . . . . . . . . . . . . . . 513
Limit Switches . . . . . . . . . . . . . . . . . . . . . . . . . . . . . . 516
Pressure and Temperature Switches . . . . . . . . . . . . . . . . . . . 520
Proximity Switches . . . . . . . . . . . . . . . . . . . . . . . . . . . . 522
Inductive Switches . . . . . . . . . . . . . . . . . . . . . . . . . 522
Capacitive Switches . . . . . . . . . . . . . . . . . . . . . . . . 524
Magnetic Switches . . . . . . . . . . . . . . . . . . . . . . . . . 526
Photoelectric Emitter Switches . . . . . . . . . . . . . . . . . . 528
Photoelectric Receiver Switches . . . . . . . . . . . . . . . . . . 530
Photoelectric Emitter/Receiver Switches . . . . . . . . . . . . . . 533
Ultrasonic Switches . . . . . . . . . . . . . . . . . . . . . . . . 535
Touch Switches . . . . . . . . . . . . . . . . . . . . . . . . . . . 537
Miscellaneous Switches . . . . . . . . . . . . . . . . . . . . . . . . . 539
Solenoids . . . . . . . . . . . . . . . . . . . . . . . . . . . . . . . . . 545
Instrumentation and Sensors . . . . . . . . . . . . . . . . . . . . . . 547
Qualifying Symbols . . . . . . . . . . . . . . . . . . . . . . . . . . . 551
Operating Devices . . . . . . . . . . . . . . . . . . . . . . . . . 551
Linear Direction of Force or Motion . . . . . . . . . . . . . . . . 557
Rotative Direction of Force or Motion . . . . . . . . . . . . . . . 557
Propagation Flow or Signal . . . . . . . . . . . . . . . . . . . . 558
Energy Flow . . . . . . . . . . . . . . . . . . . . . . . . . . . . 559
Effect . . . . . . . . . . . . . . . . . . . . . . . . . . . . . . . . 560
Radiation . . . . . . . . . . . . . . . . . . . . . . . . . . . . . . 560
Fault . . . . . . . . . . . . . . . . . . . . . . . . . . . . . . . . 561
Winding . . . . . . . . . . . . . . . . . . . . . . . . . . . . . . 562
viii | Contents
Mechanical Controls . . . . . . . . . . . . . . . . . . . . . . . . 565
Mechanical Controls, Latching Device . . . . . . . . . . . . . . 566
Mechanical Controls, Coupling . . . . . . . . . . . . . . . . . . 567
Miscellaneous . . . . . . . . . . . . . . . . . . . . . . . . . . . . . . 568
Miscellaneous . . . . . . . . . . . . . . . . . . . . . . . . . . . 568
Electronics . . . . . . . . . . . . . . . . . . . . . . . . . . . . . 570
Cable Markers . . . . . . . . . . . . . . . . . . . . . . . . . . . 575
Power Receptacles . . . . . . . . . . . . . . . . . . . . . . . . . 576
Generic Device Boxes . . . . . . . . . . . . . . . . . . . . . . . 576
Stand-alone Cross-reference Symbols . . . . . . . . . . . . . . . 577
Wire Arrows - Reference Only . . . . . . . . . . . . . . . . . . . 579
Splice Symbols . . . . . . . . . . . . . . . . . . . . . . . . . . . 580
Annunciations . . . . . . . . . . . . . . . . . . . . . . . . . . . 580
One-Line Components . . . . . . . . . . . . . . . . . . . . . . . . . . 581
Connector . . . . . . . . . . . . . . . . . . . . . . . . . . . . . 581
Motor Control . . . . . . . . . . . . . . . . . . . . . . . . . . . 581
Transformer . . . . . . . . . . . . . . . . . . . . . . . . . . . . 583
Terminal . . . . . . . . . . . . . . . . . . . . . . . . . . . . . . 584
Cable Marker . . . . . . . . . . . . . . . . . . . . . . . . . . . . 584
Bus-tap . . . . . . . . . . . . . . . . . . . . . . . . . . . . . . . 585
Miscellaneous . . . . . . . . . . . . . . . . . . . . . . . . . . . 585
Chapter 8 PLC . . . . . . . . . . . . . . . . . . . . . . . . . . . . . . . . 587
Generate PLC layout modules . . . . . . . . . . . . . . . . . . . . . . 587
Parametric PLC symbols vs. Full Units . . . . . . . . . . . . . . 588
Insert PLC modules . . . . . . . . . . . . . . . . . . . . . . . . . . . 591
Overview of the PLC database file . . . . . . . . . . . . . . . . . . . . 596
Single, Stand-alone I/O Points . . . . . . . . . . . . . . . . . . . . . . 620
Modify single, stand-alone PLC layout symbols . . . . . . . . . 620
Work with PLC styles . . . . . . . . . . . . . . . . . . . . . . . . . . 624
Modify a PLC appearance style . . . . . . . . . . . . . . . . . . 624
Create a PLC style . . . . . . . . . . . . . . . . . . . . . . . . . 624
Add a new PLC style . . . . . . . . . . . . . . . . . . . . . . . . 625
Create PLC I/O Drawings from Spreadsheets . . . . . . . . . . . . . . 626
Overview of the PLC spreadsheet/database format . . . . . . . . 626
Create PLC spreadsheets using RSLogix . . . . . . . . . . . . . . 639
Create PLC drawings from Unity Pro . . . . . . . . . . . . . . . 642
Create XML files for export to Unity Pro . . . . . . . . . . . . . 651
Chapter 9 Circuits . . . . . . . . . . . . . . . . . . . . . . . . . . . . . . 653
Circuit Builder . . . . . . . . . . . . . . . . . . . . . . . . . . . . . . 653
Circuit Builder overview . . . . . . . . . . . . . . . . . . . . . . 653
Spreadsheet . . . . . . . . . . . . . . . . . . . . . . . . . . . . 655
Drawing templates . . . . . . . . . . . . . . . . . . . . . . . . . 659
Electrical standards database file . . . . . . . . . . . . . . . . . 663
Contents | ix
Electrical standards database editor . . . . . . . . . . . . . . . . 681
Use Circuit Builder . . . . . . . . . . . . . . . . . . . . . . . . . 687
Recalculate wire size . . . . . . . . . . . . . . . . . . . . . . . . 720
Reference an existing circuit . . . . . . . . . . . . . . . . . . . . 721
Use circuitry . . . . . . . . . . . . . . . . . . . . . . . . . . . . . . . 724
Add existing circuits to the icon menu . . . . . . . . . . . . . . 727
Chapter 10 Component Tools . . . . . . . . . . . . . . . . . . . . . . . . 737
Insert schematic components . . . . . . . . . . . . . . . . . . . . . . 737
Insert or edit child components . . . . . . . . . . . . . . . . . . . . . 764
Insert a copy of a component . . . . . . . . . . . . . . . . . . . . . . 773
Insert from catalog lists . . . . . . . . . . . . . . . . . . . . . . . . . 776
The schematic lookup file . . . . . . . . . . . . . . . . . . . . . . . . 780
Insert from equipment lists . . . . . . . . . . . . . . . . . . . . . . . 785
Insert from panel lists . . . . . . . . . . . . . . . . . . . . . . . . . . 789
Manipulate Components . . . . . . . . . . . . . . . . . . . . . . . . 796
Manipulate components . . . . . . . . . . . . . . . . . . . . . . 796
Annotate ratings attributes . . . . . . . . . . . . . . . . . . . . 806
Swap contact states . . . . . . . . . . . . . . . . . . . . . . . . . . . 808
Component Cross-References . . . . . . . . . . . . . . . . . . . . . . 809
Cross-Referencing . . . . . . . . . . . . . . . . . . . . . . . . . 809
Check coil/contact count . . . . . . . . . . . . . . . . . . . . . 813
Overview of cross-reference settings . . . . . . . . . . . . . . . . 815
Overview of graphical cross-reference formats . . . . . . . . . . 820
Overview of table cross-reference formats . . . . . . . . . . . . . 824
Update cross-reference tables . . . . . . . . . . . . . . . . . . . 832
Use stand-alone cross-reference symbols . . . . . . . . . . . . . 837
Insert dashed link lines . . . . . . . . . . . . . . . . . . . . . . . . . 845
Follow signals . . . . . . . . . . . . . . . . . . . . . . . . . . . . . . 848
Show signal paths . . . . . . . . . . . . . . . . . . . . . . . . . . . . 849
Overview of DIN Rails . . . . . . . . . . . . . . . . . . . . . . . . . . 849
Overview of user data records . . . . . . . . . . . . . . . . . . . . . . 853
Wire Jumpers . . . . . . . . . . . . . . . . . . . . . . . . . . . . . . . 855
Define wire jumpers . . . . . . . . . . . . . . . . . . . . . . . . 855
Chapter 11 Component Attribute Tools . . . . . . . . . . . . . . . . . . . 859
Edit attribute values . . . . . . . . . . . . . . . . . . . . . . . . . . . 859
Force attributes to layers . . . . . . . . . . . . . . . . . . . . . . . . . 861
Manipulate component text . . . . . . . . . . . . . . . . . . . . . . . 863
Manipulate terminal text . . . . . . . . . . . . . . . . . . . . . . . . 866
Move description values . . . . . . . . . . . . . . . . . . . . . . . . . 867
Move attributes . . . . . . . . . . . . . . . . . . . . . . . . . . . . . 868
Hide attributes . . . . . . . . . . . . . . . . . . . . . . . . . . . . . . 868
Show attributes . . . . . . . . . . . . . . . . . . . . . . . . . . . . . . 869
Rotate attributes . . . . . . . . . . . . . . . . . . . . . . . . . . . . . 869
x | Contents
Change attribute justification . . . . . . . . . . . . . . . . . . . . . . 870
Change attribute text style . . . . . . . . . . . . . . . . . . . . . . . . 871
Change attribute text size . . . . . . . . . . . . . . . . . . . . . . . . 871
Rename an attribute . . . . . . . . . . . . . . . . . . . . . . . . . . . 874
Add attributes to blocks . . . . . . . . . . . . . . . . . . . . . . . . . 875
Set tags to fixed . . . . . . . . . . . . . . . . . . . . . . . . . . . . . 876
Retag components . . . . . . . . . . . . . . . . . . . . . . . . . . . . 878
Change to multi-line text . . . . . . . . . . . . . . . . . . . . . . . . 879
Add location codes . . . . . . . . . . . . . . . . . . . . . . . . . . . . 880
Update child codes . . . . . . . . . . . . . . . . . . . . . . . . . . . . 881
Location Mark Symbols . . . . . . . . . . . . . . . . . . . . . . . . . 883
Substitute location mark symbols for text location codes . . . . 883
Location box . . . . . . . . . . . . . . . . . . . . . . . . . . . . . . . 887
Modify library symbols . . . . . . . . . . . . . . . . . . . . . . . . . 892
Chapter 12 Wire/Wire Number Tools . . . . . . . . . . . . . . . . . . . . 895
Overview of wires . . . . . . . . . . . . . . . . . . . . . . . . . . . . 895
Use wire layers . . . . . . . . . . . . . . . . . . . . . . . . . . . . . . 895
Change wire types . . . . . . . . . . . . . . . . . . . . . . . . . . . . 907
Insert wires . . . . . . . . . . . . . . . . . . . . . . . . . . . . . . . . 912
Insert multiple wires . . . . . . . . . . . . . . . . . . . . . . . . . . . 916
Interconnect components . . . . . . . . . . . . . . . . . . . . . . . . 918
Trim wires . . . . . . . . . . . . . . . . . . . . . . . . . . . . . . . . 919
Stretch wires . . . . . . . . . . . . . . . . . . . . . . . . . . . . . . . 920
Bend wires at right angles . . . . . . . . . . . . . . . . . . . . . . . . 921
Overview of wire color/gauge labels . . . . . . . . . . . . . . . . . . . 922
Insert in-line wire markers . . . . . . . . . . . . . . . . . . . . . . . . 924
Cable Markers . . . . . . . . . . . . . . . . . . . . . . . . . . . . . . 929
Insert cable markers into wires . . . . . . . . . . . . . . . . . . 929
Multiple cable markers . . . . . . . . . . . . . . . . . . . . . . . 947
Edit the cable conductor database . . . . . . . . . . . . . . . . . 953
Edit the list of generic colors . . . . . . . . . . . . . . . . . . . 954
Insert shield symbols . . . . . . . . . . . . . . . . . . . . . . . 954
Wire Gaps . . . . . . . . . . . . . . . . . . . . . . . . . . . . . . . . 956
Manipulate wire gaps . . . . . . . . . . . . . . . . . . . . . . . 956
Ladder Tools . . . . . . . . . . . . . . . . . . . . . . . . . . . . . . . 958
Define and insert new ladders . . . . . . . . . . . . . . . . . . . 958
Modify an existing ladder . . . . . . . . . . . . . . . . . . . . . 963
Wire Numbers . . . . . . . . . . . . . . . . . . . . . . . . . . . . . . 969
Overview of wire numbers . . . . . . . . . . . . . . . . . . . . . 969
Set wire number placement . . . . . . . . . . . . . . . . . . . . 978
Find or replace wire number text . . . . . . . . . . . . . . . . . 986
Encode wire color/gauge information into wire numbers . . . . 987
Fix Wire Numbering . . . . . . . . . . . . . . . . . . . . . . . . 990
Fix wire numbering . . . . . . . . . . . . . . . . . . . . . 990
Reposition Wire Numbers . . . . . . . . . . . . . . . . . . . . . 996
Contents | xi
Reposition wire numbers . . . . . . . . . . . . . . . . . . 996
Modify Wire Numbers . . . . . . . . . . . . . . . . . . . . . . 1007
Modify wire numbers . . . . . . . . . . . . . . . . . . . . 1007
Erase or Hide Wire Numbers . . . . . . . . . . . . . . . . . . . 1008
Erase or hide wire numbers . . . . . . . . . . . . . . . . 1008
Signal Arrows . . . . . . . . . . . . . . . . . . . . . . . . . . . . . . 1010
Signal Arrows . . . . . . . . . . . . . . . . . . . . . . . . . . . 1010
Fan In/Out Markers . . . . . . . . . . . . . . . . . . . . . . . . 1019
Fan In/Out Source and Destination Markers . . . . . . . . 1019
Wire Sequencing . . . . . . . . . . . . . . . . . . . . . . . . . . . . 1026
Control from/to report connection sequencing . . . . . . . . . 1026
Chapter 13 Terminal Tools . . . . . . . . . . . . . . . . . . . . . . . . . 1039
Insert terminals and connectors . . . . . . . . . . . . . . . . . . . . 1039
Multi-Level Terminals . . . . . . . . . . . . . . . . . . . . . . . . . 1053
Overview of terminal relationships . . . . . . . . . . . . . . . 1053
Terminal Properties Lookup . . . . . . . . . . . . . . . . . . . . . . 1058
Overview of terminal properties database . . . . . . . . . . . . 1058
Terminal Strip Editor . . . . . . . . . . . . . . . . . . . . . . . . . . 1064
Use the terminal strip editor . . . . . . . . . . . . . . . . . . . 1064
Generate terminal strip tables . . . . . . . . . . . . . . . . . . 1113
Terminal jumpers . . . . . . . . . . . . . . . . . . . . . . . . . . . . 1121
Terminal strip utilities . . . . . . . . . . . . . . . . . . . . . . . . . 1127
Terminal wire connections . . . . . . . . . . . . . . . . . . . . . . . 1130
Resequence terminal numbers . . . . . . . . . . . . . . . . . . . . . 1132
Overview of connection sequencing . . . . . . . . . . . . . . . . . . 1133
Chapter 14 Point-to-Point Wiring Tools . . . . . . . . . . . . . . . . . . 1139
Working with Connectors . . . . . . . . . . . . . . . . . . . . . . . 1139
Use point-to-point wiring tools . . . . . . . . . . . . . . . . . 1139
Bend wires at right angles . . . . . . . . . . . . . . . . . . . . . . . 1161
Insert multiple bus wiring . . . . . . . . . . . . . . . . . . . . . . . 1162
Import data from Autodesk Inventor Professional Cable &
Harness . . . . . . . . . . . . . . . . . . . . . . . . . . . . . . . . 1163
Overview of the spreadsheet import file structure . . . . . . . . . . . 1174
Insert splices . . . . . . . . . . . . . . . . . . . . . . . . . . . . . . 1184
Chapter 15 Project-Wide Tools . . . . . . . . . . . . . . . . . . . . . . . 1185
Move from reference to reference . . . . . . . . . . . . . . . . . . . 1185
Start the Surfer . . . . . . . . . . . . . . . . . . . . . . . . . . 1185
Continue a previous surf session . . . . . . . . . . . . . . . . . 1186
Move between drawings . . . . . . . . . . . . . . . . . . . . . . . . 1189
Plot one or more drawings . . . . . . . . . . . . . . . . . . . . . . . 1190
Project-wide utility . . . . . . . . . . . . . . . . . . . . . . . . . . . 1193
xii | Contents
Create a project-wide script file . . . . . . . . . . . . . . . . . . . . 1195
Renumber Ladder References . . . . . . . . . . . . . . . . . . . . . . 1195
Project-wide update or retag . . . . . . . . . . . . . . . . . . . . . . 1196
Track drawing changes . . . . . . . . . . . . . . . . . . . . . . . . . 1199
Translate description text . . . . . . . . . . . . . . . . . . . . . . . . 1202
Publish to the Web . . . . . . . . . . . . . . . . . . . . . . . . . . . 1204
Publish to DWF . . . . . . . . . . . . . . . . . . . . . . . . . . . . . 1207
Title Block Utility . . . . . . . . . . . . . . . . . . . . . . . . . . . . 1208
Title block . . . . . . . . . . . . . . . . . . . . . . . . . . . . . 1208
Title Block utility setup . . . . . . . . . . . . . . . . . . . . . . 1210
Title Block setup overview . . . . . . . . . . . . . . . . . 1210
WD_TB attribute method . . . . . . . . . . . . . . . . . 1216
WDT file method . . . . . . . . . . . . . . . . . . . . . . 1218
Title Block Update . . . . . . . . . . . . . . . . . . . . . . . . 1220
Customize LINEx Labels . . . . . . . . . . . . . . . . . . . . . 1224
Map AutoLISP values to the title block . . . . . . . . . . . . . . 1226
Drawing template . . . . . . . . . . . . . . . . . . . . . . . . . 1228
Chapter 16 Icon Menus . . . . . . . . . . . . . . . . . . . . . . . . . . . 1231
Overview of the Icon Menu Wizard . . . . . . . . . . . . . . . . . . 1231
Add a new icon to the menu . . . . . . . . . . . . . . . . . . . 1232
Edit the properties of an existing icon in the menu . . . . . . . 1234
Use alternate icon menus . . . . . . . . . . . . . . . . . . . . . . . . 1259
Modify Icon Menu File Directly . . . . . . . . . . . . . . . . . . . . 1260
Overview of the icon menu file . . . . . . . . . . . . . . . . . 1260
Chapter 17 BOM and Catalogs . . . . . . . . . . . . . . . . . . . . . . . 1265
Catalog database . . . . . . . . . . . . . . . . . . . . . . . . . . . . 1265
Catalog table naming conventions . . . . . . . . . . . . . . . . 1265
Family tables in the default_cat.mdb . . . . . . . . . . . . . . 1267
How to install additional manufacturer content . . . . . . . . . . . . 1273
Overview of the catalog database table structure . . . . . . . . . . . 1274
Overview of the _LISTBOX_DEF catalog database table . . . . . . . . 1277
Create a project-specific catalog database . . . . . . . . . . . . . . . 1279
Catalog Assignment . . . . . . . . . . . . . . . . . . . . . . . . . . 1281
Assign catalog information to components . . . . . . . . . . . 1281
Copy catalog assignments from component to component . . . 1299
Show missing catalog assignments . . . . . . . . . . . . . . . . 1303
Contact Quantity/Pin List Lookup . . . . . . . . . . . . . . . . . . . 1304
Use pin lists . . . . . . . . . . . . . . . . . . . . . . . . . . . . 1304
Set pin list assignments for special uses . . . . . . . . . . . . . 1311
Chapter 18 Reports . . . . . . . . . . . . . . . . . . . . . . . . . . . . . 1315
Generate reports . . . . . . . . . . . . . . . . . . . . . . . . . . . . 1315
Contents | xiii
Schematic Reports . . . . . . . . . . . . . . . . . . . . . . . . . . . 1399
Generate schematic reports . . . . . . . . . . . . . . . . . . . . 1399
Panel Reports . . . . . . . . . . . . . . . . . . . . . . . . . . . . . . 1427
Generate panel reports . . . . . . . . . . . . . . . . . . . . . . 1427
Overview of format files . . . . . . . . . . . . . . . . . . . . . . . . 1441
Run automatic reports . . . . . . . . . . . . . . . . . . . . . . . . . 1495
Export/Import spreadsheet data . . . . . . . . . . . . . . . . . . . . 1499
Create user-defined attributes . . . . . . . . . . . . . . . . . . . . . 1508
Export to Autodesk Inventor Professional . . . . . . . . . . . . . . . 1512
Set up for export to Autodesk Inventor Professional Cable &
Harness . . . . . . . . . . . . . . . . . . . . . . . . . . . . . 1512
Chapter 19 Panel Layout . . . . . . . . . . . . . . . . . . . . . . . . . . 1523
Overview of panel layouts . . . . . . . . . . . . . . . . . . . . . . . 1523
Overview of footprint attributes/Xdata . . . . . . . . . . . . . . . . 1524
Panel drawing configuration and defaults . . . . . . . . . . . . . . . 1527
Relationship between schematic drawings and panel layouts . . . . . 1531
Automatic schematic/panel update . . . . . . . . . . . . . . . 1531
Schematic and panel symbol relationship . . . . . . . . . . . . 1532
Footprint/Terminal Insertion . . . . . . . . . . . . . . . . . . . . . . 1534
Insert panel footprints from a schematic list . . . . . . . . . . 1534
Insert panel footprints using vendor menus . . . . . . . . . . . 1544
Insert panel footprints using icon menu . . . . . . . . . . . . . 1547
Insert panel footprints manually . . . . . . . . . . . . . . . . . 1551
Insert panel footprints from a catalog list . . . . . . . . . . . . 1555
Insert footprints from an equipment list . . . . . . . . . . . . . 1557
Insert a copy of a panel footprint . . . . . . . . . . . . . . . . 1561
Use panel templates and assemblies . . . . . . . . . . . . . . . 1562
Footprint/Terminal Edit . . . . . . . . . . . . . . . . . . . . . . . . 1565
Edit a footprint or panel terminal . . . . . . . . . . . . . . . . 1565
Multiple Catalog . . . . . . . . . . . . . . . . . . . . . . . . . 1578
Copy code values to components . . . . . . . . . . . . . . . . 1581
Delete Footprint . . . . . . . . . . . . . . . . . . . . . . . . . 1584
Layout Wire Connection Annotation . . . . . . . . . . . . . . . . . 1585
Add wire information to footprints . . . . . . . . . . . . . . . 1585
Lookup Files . . . . . . . . . . . . . . . . . . . . . . . . . . . . . . 1592
Use the footprint lookup file . . . . . . . . . . . . . . . . . . . 1592
Item Numbers/Balloons . . . . . . . . . . . . . . . . . . . . . . . . 1599
Add a balloon to a component . . . . . . . . . . . . . . . . . . 1599
Resequencing item numbers . . . . . . . . . . . . . . . . . . . 1602
Fixing item numbers . . . . . . . . . . . . . . . . . . . . . . . 1605
Nameplates . . . . . . . . . . . . . . . . . . . . . . . . . . . . . . . 1608
Insert nameplates . . . . . . . . . . . . . . . . . . . . . . . . . 1608
Panel Leveling/Sequencing Tools . . . . . . . . . . . . . . . . . . . . 1610
Remove sequencing assignments . . . . . . . . . . . . . . . . . 1610
Show sequencing assignments . . . . . . . . . . . . . . . . . . 1611
xiv | Contents
Swap terminal strip wire text . . . . . . . . . . . . . . . . . . . 1611
Chapter 20 Conduit Tools . . . . . . . . . . . . . . . . . . . . . . . . . . 1625
Overview of conduit tools . . . . . . . . . . . . . . . . . . . . . . . 1625
Conduit Marker Intelligence . . . . . . . . . . . . . . . . . . . 1625
Overview of conduit marker support files . . . . . . . . . . . . . . . 1632
Generate a conduit marker report . . . . . . . . . . . . . . . . . . . 1633
Generate a conduit routing report . . . . . . . . . . . . . . . . . . . 1635
Chapter 21 Conversion Tools . . . . . . . . . . . . . . . . . . . . . . . . 1637
Convert promis.e drawing files to AutoCAD Electrical . . . . . . . . 1637
Convert non-AutoCAD Electrical blocks . . . . . . . . . . . . . . . . 1641
Finish mapping values from non-AutoCAD Electrical
blocks . . . . . . . . . . . . . . . . . . . . . . . . . . . . . . 1642
Convert text to an attribute . . . . . . . . . . . . . . . . . . . . . . 1644
Convert Arrows . . . . . . . . . . . . . . . . . . . . . . . . . . . . . 1646
Convert non-AutoCAD Electrical arrows . . . . . . . . . . . . . 1646
Overview of ECDS legacy conversion . . . . . . . . . . . . . . . . . 1647
Tagging and Linking Tools . . . . . . . . . . . . . . . . . . . . . . . 1650
Use tagging and linking tools . . . . . . . . . . . . . . . . . . 1650
Overview of block/attribute mapping . . . . . . . . . . . . . . 1661
Chapter 22 Miscellaneous Tools . . . . . . . . . . . . . . . . . . . . . . . 1667
Overview of power check tools . . . . . . . . . . . . . . . . . . . . . 1667
Overview of pneumatic tools . . . . . . . . . . . . . . . . . . . . . . 1670
Insert hydraulic components . . . . . . . . . . . . . . . . . . . . . . 1675
Insert P&ID components . . . . . . . . . . . . . . . . . . . . . . . . 1680
Troubleshooting Tools . . . . . . . . . . . . . . . . . . . . . . . . . 1685
Overview of real-time error checking . . . . . . . . . . . . . . 1685
Modify invisible data . . . . . . . . . . . . . . . . . . . . . . . 1694
Chapter 23 Tutorials . . . . . . . . . . . . . . . . . . . . . . . . . . . . . 1697
Introduction . . . . . . . . . . . . . . . . . . . . . . . . . . . . . . 1697
Projects . . . . . . . . . . . . . . . . . . . . . . . . . . . . . . . . . 1699
Projects - Introduction . . . . . . . . . . . . . . . . . . . . . . 1699
Working with projects . . . . . . . . . . . . . . . . . . . . . . 1700
Working with drawings . . . . . . . . . . . . . . . . . . . . . . 1703
Title Block . . . . . . . . . . . . . . . . . . . . . . . . . . . . . . . . 1707
Title Block - Introduction . . . . . . . . . . . . . . . . . . . . . 1707
Title Block Utility . . . . . . . . . . . . . . . . . . . . . . . . . 1708
Select method . . . . . . . . . . . . . . . . . . . . . . . . . . . 1710
WD_TB attribute method . . . . . . . . . . . . . . . . . . . . . 1710
Create a title block . . . . . . . . . . . . . . . . . . . . . 1710
Title Block Setup - WD_TB attribute method . . . . . . . 1714
Contents | xv
Create a drawing template . . . . . . . . . . . . . . . . . 1716
Use the template . . . . . . . . . . . . . . . . . . . . . . 1718
Project description lines . . . . . . . . . . . . . . . . . . 1719
Drawing values . . . . . . . . . . . . . . . . . . . . . . . 1719
Title Block Update . . . . . . . . . . . . . . . . . . . . . 1720
Customize project description labels . . . . . . . . . . . . 1722
WDT file method . . . . . . . . . . . . . . . . . . . . . . . . . 1724
Create a title block . . . . . . . . . . . . . . . . . . . . . 1724
Title Block Setup - WDT file method . . . . . . . . . . . . 1728
Create a drawing template . . . . . . . . . . . . . . . . . 1730
Use the template . . . . . . . . . . . . . . . . . . . . . . 1733
Project description lines . . . . . . . . . . . . . . . . . . 1733
Drawing values . . . . . . . . . . . . . . . . . . . . . . . 1734
Title Block Update . . . . . . . . . . . . . . . . . . . . . 1734
Customize project description labels . . . . . . . . . . . . 1736
Wiring . . . . . . . . . . . . . . . . . . . . . . . . . . . . . . . . . . 1738
Wiring - Introduction . . . . . . . . . . . . . . . . . . . . . . 1738
About wires . . . . . . . . . . . . . . . . . . . . . . . . . . . . 1739
Insert wiring . . . . . . . . . . . . . . . . . . . . . . . . . . . 1739
Trim a wire . . . . . . . . . . . . . . . . . . . . . . . . . . . . 1741
Insert a single-phase ladder . . . . . . . . . . . . . . . . . . . . 1742
Resequencing ladders . . . . . . . . . . . . . . . . . . . . . . . 1743
Schematic components . . . . . . . . . . . . . . . . . . . . . . . . . 1744
Schematic components - Introduction . . . . . . . . . . . . . . 1744
About schematic components . . . . . . . . . . . . . . . . . . 1745
Inserting components . . . . . . . . . . . . . . . . . . . . . . 1746
Relocating components . . . . . . . . . . . . . . . . . . . . . 1750
Aligning components . . . . . . . . . . . . . . . . . . . . . . 1754
Inserting components continued . . . . . . . . . . . . . . . . 1754
Editing components . . . . . . . . . . . . . . . . . . . . . . . 1758
Linking components . . . . . . . . . . . . . . . . . . . . . . . 1761
Editing catalog information . . . . . . . . . . . . . . . . . . . 1763
Wire layers . . . . . . . . . . . . . . . . . . . . . . . . . . . . . . . 1767
Wire layers - Introduction . . . . . . . . . . . . . . . . . . . . 1767
Creating a wire layer . . . . . . . . . . . . . . . . . . . . . . . 1768
Changing a wire layer assignment . . . . . . . . . . . . . . . . 1769
Circuits . . . . . . . . . . . . . . . . . . . . . . . . . . . . . . . . . 1770
Circuits - Introduction . . . . . . . . . . . . . . . . . . . . . . 1770
Move an existing circuit . . . . . . . . . . . . . . . . . . . . . 1771
Insert and configure a circuit . . . . . . . . . . . . . . . . . . . 1776
Save and insert a circuit . . . . . . . . . . . . . . . . . . . . . 1784
Insert a saved circuit using WBlock . . . . . . . . . . . . . . . 1790
Insert a one-line motor control circuit . . . . . . . . . . . . . . 1792
Insert a one-line dual power feed circuit . . . . . . . . . . . . . 1797
Reference an existing circuit . . . . . . . . . . . . . . . . . . . 1800
Surf . . . . . . . . . . . . . . . . . . . . . . . . . . . . . . . . . . . 1804
xvi | Contents
Surf - Introduction . . . . . . . . . . . . . . . . . . . . . . . . 1804
Moving between symbols . . . . . . . . . . . . . . . . . . . . 1804
Block swap . . . . . . . . . . . . . . . . . . . . . . . . . . . . . . . 1807
Block swap - Introduction . . . . . . . . . . . . . . . . . . . . 1807
Swapping components . . . . . . . . . . . . . . . . . . . . . . 1807
PLC . . . . . . . . . . . . . . . . . . . . . . . . . . . . . . . . . . . 1809
PLC - Introduction . . . . . . . . . . . . . . . . . . . . . . . . 1809
Inserting PLC modules . . . . . . . . . . . . . . . . . . . . . . 1810
Using multiple insert component . . . . . . . . . . . . . . . . 1814
Annotating PLC I/O descriptions . . . . . . . . . . . . . . . . 1816
Schematic terminals . . . . . . . . . . . . . . . . . . . . . . . . . . 1819
Schematic terminals - Introduction . . . . . . . . . . . . . . . 1819
About schematic terminals . . . . . . . . . . . . . . . . . . . . 1820
Insert terminals . . . . . . . . . . . . . . . . . . . . . . . . . . 1822
Multi-level terminals . . . . . . . . . . . . . . . . . . . . . . . 1825
Modify multi-level associations . . . . . . . . . . . . . . . . . 1827
Terminal Properties . . . . . . . . . . . . . . . . . . . . . . . . 1830
Associate terminals . . . . . . . . . . . . . . . . . . . . . . . . 1832
Wire numbers . . . . . . . . . . . . . . . . . . . . . . . . . . . . . . 1834
Wire numbers - Introduction . . . . . . . . . . . . . . . . . . . 1834
About wire numbers . . . . . . . . . . . . . . . . . . . . . . . 1835
Inserting wire numbers . . . . . . . . . . . . . . . . . . . . . . 1835
Inserting I/O based wire numbers . . . . . . . . . . . . . . . . 1837
Deleting a wire number . . . . . . . . . . . . . . . . . . . . . 1839
Source signal arrows . . . . . . . . . . . . . . . . . . . . . . . 1840
Destination signal arrows . . . . . . . . . . . . . . . . . . . . 1842
Panel layout . . . . . . . . . . . . . . . . . . . . . . . . . . . . . . . 1847
Panel layout - Introduction . . . . . . . . . . . . . . . . . . . . 1847
Insert Footprint (Schematic list) . . . . . . . . . . . . . . . . . 1848
Adding nameplate footprints . . . . . . . . . . . . . . . . . . . 1858
Terminal Strip Editor . . . . . . . . . . . . . . . . . . . . . . . 1862
Generating reports . . . . . . . . . . . . . . . . . . . . . . . . . . . 1868
Generating reports - Introduction . . . . . . . . . . . . . . . . 1868
Generating Bill of Material reports . . . . . . . . . . . . . . . . 1869
Inserting Bill of Material tables into drawings . . . . . . . . . . 1871
Changing format of Bill of Material report . . . . . . . . . . . 1872
Exporting Bill of Material report to spreadsheet . . . . . . . . . 1873
Connector diagrams . . . . . . . . . . . . . . . . . . . . . . . . . . 1874
Connector diagrams - Introduction . . . . . . . . . . . . . . . 1874
About connector diagrams . . . . . . . . . . . . . . . . . . . . 1875
Inserting connectors . . . . . . . . . . . . . . . . . . . . . . . 1875
Wiring connectors . . . . . . . . . . . . . . . . . . . . . . . . 1879
Grouping wires . . . . . . . . . . . . . . . . . . . . . . . . . . 1883
Modifying connectors . . . . . . . . . . . . . . . . . . . . . . 1887
Adding wire numbers . . . . . . . . . . . . . . . . . . . . . . . 1891
Adding connector descriptors . . . . . . . . . . . . . . . . . . 1892
Contents | xvii
P&ID and Hydraulic diagrams . . . . . . . . . . . . . . . . . . . . . 1894
P&ID and Hydraulic diagrams - Introduction . . . . . . . . . . 1894
Setting Up Hydraulic Drawings . . . . . . . . . . . . . . . . . 1895
Inserting Hydraulic Schematic Symbols . . . . . . . . . . . . . 1896
Creating Pipes . . . . . . . . . . . . . . . . . . . . . . . . . . 1900
Completing the Hydraulic Drawing . . . . . . . . . . . . . . . 1905
Setting Up P&ID Drawings . . . . . . . . . . . . . . . . . . . . 1912
Inserting P&ID Schematic Symbols . . . . . . . . . . . . . . . 1916
Creating Pipes . . . . . . . . . . . . . . . . . . . . . . . . . . 1919
Symbol Builder . . . . . . . . . . . . . . . . . . . . . . . . . . . . . 1922
Symbol Builder - Introduction . . . . . . . . . . . . . . . . . . 1922
Creating custom symbols . . . . . . . . . . . . . . . . . . . . . 1923
Adding attributes . . . . . . . . . . . . . . . . . . . . . . . . . 1924
Adding wire connections . . . . . . . . . . . . . . . . . . . . . 1927
Saving the symbol . . . . . . . . . . . . . . . . . . . . . . . . 1930
Migration of AutoCAD Data . . . . . . . . . . . . . . . . . . . . . . 1931
Migration of AutoCAD Data - Introduction . . . . . . . . . . . 1931
About Tagging and Linking Tools . . . . . . . . . . . . . . . . 1932
Exploding Block and Attributes . . . . . . . . . . . . . . . . . 1932
Tagging Schematic Components . . . . . . . . . . . . . . . . . 1934
Linking Schematic Attributes . . . . . . . . . . . . . . . . . . . 1935
Adding Wire Connections . . . . . . . . . . . . . . . . . . . . 1938
Adding Geometry . . . . . . . . . . . . . . . . . . . . . . . . . 1941
Tagging and Linking Panel Components . . . . . . . . . . . . 1942
Updating Panel or Schematic Components . . . . . . . . . . . 1944
Interoperability: Inventor and AutoCAD Electrical . . . . . . . . . . 1946
Introduction . . . . . . . . . . . . . . . . . . . . . . . . . . . 1946
Introduction (continued) . . . . . . . . . . . . . . . . . . . . . 1947
Part 1: 2D to 3D . . . . . . . . . . . . . . . . . . . . . . . . . 1948
Rename component tags . . . . . . . . . . . . . . . . . . . . . 1949
Export to XML . . . . . . . . . . . . . . . . . . . . . . . . . . 1951
Set the project . . . . . . . . . . . . . . . . . . . . . . . . . . 1951
Open the dataset . . . . . . . . . . . . . . . . . . . . . . . . . 1952
Add harness segments . . . . . . . . . . . . . . . . . . . . . . 1955
Add harness segments (continued) . . . . . . . . . . . . . . . . 1958
Import the AutoCAD Electrical data . . . . . . . . . . . . . . . 1961
Issues . . . . . . . . . . . . . . . . . . . . . . . . . . . . . . . 1962
Assign missing RefDes . . . . . . . . . . . . . . . . . . . . . . 1963
Finish the Import . . . . . . . . . . . . . . . . . . . . . . . . . 1966
Route the wires into the harness segments . . . . . . . . . . . 1966
Part 2: 3D to 2D . . . . . . . . . . . . . . . . . . . . . . . . . 1967
Create wires . . . . . . . . . . . . . . . . . . . . . . . . . . . . 1970
Create Wires (continued) . . . . . . . . . . . . . . . . . . . . . 1971
Route wires . . . . . . . . . . . . . . . . . . . . . . . . . . . . 1972
Export to XML . . . . . . . . . . . . . . . . . . . . . . . . . . 1973
Import the Inventor data . . . . . . . . . . . . . . . . . . . . . 1973
xviii | Contents
Summary . . . . . . . . . . . . . . . . . . . . . . . . . . . . . 1977
Chapter 24 Advanced Productivity . . . . . . . . . . . . . . . . . . . . . 1979
Set up peer-to-peer component relationships . . . . . . . . . . . . . 1979
Create automated pin assignments . . . . . . . . . . . . . . . . . . . 1981
Set up AutoCAD Electrical for multiple users . . . . . . . . . . . . . 1984
Show source and destination markers on cable wires . . . . . . . . . 1989
Use the PLC Database File Editor . . . . . . . . . . . . . . . . . . . . 1996
Customize Circuit Builder . . . . . . . . . . . . . . . . . . . . . . . 2005
Circuit Builder overview . . . . . . . . . . . . . . . . . . . . . 2005
Circuit Builder spreadsheet . . . . . . . . . . . . . . . . . . . . 2006
Circuit Builder drawing templates . . . . . . . . . . . . . . . . 2010
Circuit Builder database . . . . . . . . . . . . . . . . . . . . . 2015
Add a new circuit . . . . . . . . . . . . . . . . . . . . . . . . . 2032
Circuit Builder - How to . . . . . . . . . . . . . . . . . . . . . 2043
Overview . . . . . . . . . . . . . . . . . . . . . . . . . . 2043
Build your own symbols . . . . . . . . . . . . . . . . . . . . . . . . 2082
Build your own symbols . . . . . . . . . . . . . . . . . . . . . 2082
Add your own symbols, circuits, and commands to the icon
menu . . . . . . . . . . . . . . . . . . . . . . . . . . . . . . . . . 2112
Configure projects for various drawing standards . . . . . . . . . . . 2119
Use Autodesk Vault with AutoCAD Electrical . . . . . . . . . . . . . 2127
Chapter 25 AutoCAD Electrical Command . . . . . . . . . . . . . . . . . 2135
AutoCAD Electrical Commands . . . . . . . . . . . . . . . . . . . . 2135
Index . . . . . . . . . . . . . . . . . . . . . . . . . . . . . . 2149
Contents | xix
xx

AutoCAD Electrical What's
New
Overview of AutoCAD Electrical Help
The AutoCAD Electrical Help system is a browser-based system available through
context-sensitive links or by accessing it through the Help menu or icon. Key
features of the Help system include:
■There is on-demand access from the F1 function key, ribbons, dialog boxes,
and the command line.
■Navigation tabs in each topic link to related procedures, references, and
concepts.
■The Help menu gives you access to AutoCAD Electrical Help, AutoCAD
Electrical Launchpad, the New Features Workshop and other resources.
What are ways to gain access to Help?
You can get help about a command while you are using it.
Select the Help icon in the upper right. Select the drop-
down arrow to display a menu of help options.
Help Button in ribbon environment
From the menu bar, select Help ➤ Electrical Help Topics
to view the AutoCAD Electrical Help home page.
Help Menu
Press F1 ■At the command prompt, press F1 to open the topic
for the active tool.
1
1
■In a dialog box, press F1 to open the Reference topic
for the active tool.
In a dialog box, click Help to open the Reference topic for
the active tool.
Help button
How is Help organized?
Most of the subjects in the Help system have three topic types: Procedure,
Reference, and Concept. Every Help topic selected from a menu has a tab row
above the topic title. You can click a tab to go to the other available topic
types.
■Procedure topics provide step-by-step procedures for accomplishing
AutoCAD Electrical tasks.
■Reference topics offer detailed descriptions of elements in the dialog box.
■Concept topics provide conceptual information about tools and tasks and
can explain related concepts.
The titles of Help topics are designed to tell you the information they contain:
■Procedure topics start with an action word, for example, "Create projects."
■Reference topics have the names of the dialog box as their titles.
■Concept topics typically start with the words "Use" or “Overview of.”
How do I get around in the Help system?
When you start the Help system, the first thing you see is the AutoCAD
Electrical Help home page.
At the top of every Help window is a navigation bar with
icons. The left-most icon is either Show or Hide, which
Navigation bar
opens or closes the navigation pane of the Help window.
The navigation pane has tabs for Table of Contents, Index,
Search, and Favorites.
Presents an overview of the available documentation in a
list of topics and subtopics. Provides a structure so you can
Table of Contents
always see where you are in Help and quickly jump to
other topics. Click AutoCAD Electrical Command Listing
2 | Chapter 1 AutoCAD Electrical What's New

for an alphabetical list of AutoCAD Electrical tools found in
the menu and toolbars.
You can enter a word in the box to locate the term in the
alphabetical index. Double-click the term to display the
topic, or if multiple topics, to open a list of topics found.
Index
Enter a search word in the box, and click List Topics to view
a list of topics that contain the search word anywhere in
Search
their content. Click a title, and then click Display (or double-
click a title) to open the topic.
With a topic visible in the Help window, click the Favorites
tab and then click Add to add the current topic to a list of
Favorites
favorites. To remove a topic from the list, select the topic
in the list, and then click Remove.
How do I learn the product?
Training programs and products from Autodesk help you learn the key
technical features and improve your productivity. For the latest information
about Autodesk training, visit http://www.autodesk.com/training or contact your
local Autodesk office.
The Autodesk Authorized Training Center (ATC) network delivers
Autodesk-authorized, instructor-led training to design professionals who use
Autodesk software. Autodesk Authorized Training Centers use experienced
and knowledgeable instructors. More than 1,200 ATC sites are available
worldwide to meet your needs for discipline-specific, locally based training.
To find a training center near you, contact your local Autodesk office or visit
http://www.autodesk.com/atc.
Use AutoCAD Electrical Help
AutoCAD Electrical has various learning tools to assist you, whether you are
a newcomer or an experienced CAD user.
To gain access to Help
Use any of the following methods to gain access to Help.
■Select the Help icon in the upper right or select the drop-down arrow to
display a menu of help options.
Overview of AutoCAD Electrical Help | 3
■Select Help ➤ Electrical Help Topics from the menu bar, and then browse
to the desired topic. You can use the tabbed pane to access the Index,
Search, or Table of Contents.
■Press F1 to open the Procedure or Reference Help topic for the active
command.
■In an open dialog box, press F1 or click Help to open the Reference topic
for the active command.
To customize Help
Use any of the following methods to customize Help.
■Click the Hide or Show button in the Help toolbar to control the visibility
of the tabbed pane beside the content window.
■To add a topic to the Favorites tab, select a Help topic, click the Favorites
tab, and then click Add. To delete a topic from the Favorites tab, select the
topic in the list, and then click Delete.
To search Help
Another method for finding Help topics is to use the Search tab.
1Click Show in the browser toolbar if the tabbed navigation pane is not
displayed.
2Click the Search tab.
3Enter text in the search text box, and then click List Topics. Use quotation
marks (" ") around the search criteria to search for a string. Use an asterisk
(*) before or after text as a wildcard.
4Double-click a topic or select a topic, and then click Display to show the
topic.
5You can also select one or more of the following Search options to limit
the results.
■Search previous results
■Match similar words
■Search titles only
4 | Chapter 1 AutoCAD Electrical What's New

6Use operators to refine your Search criteria further. Click the right arrow
next to the search text box, and then select one of the following operators.
■AND Use AND to search for topics with more than one set of your
search criteria.
■OR Use OR to search for topics with at least one of your search criteria.
■NEAR Use Near to search for specified text within close proximity to
each other.
■NOT Use NOT to search for topics that do not include your search
criteria.
To print Help
You can print a single file or you can print sections of the Help.
1In the Help Contents tab, right-click a heading and select Print.
2Select whether to print the selected topic or the selected heading and all
subheadings.
NOTE You can also print a single topic by right-clicking in the file and
selecting Print.
3Click OK.
If you want to print the entire Help system, in the Contents tab, right-click
AutoCAD Electrical Help and select Print. Select the option to print the selected
heading and all subheadings and click OK.
To find out What's New about AutoCAD Electrical
What's New topics describe the new functionality in the most recent AutoCAD
Electrical release.
1Click Help ➤ AutoCAD Electrical Help. In the AutoCAD Electrical Help,
click What's New from the Table of Contents.
You can also open the What's New by selecting Help ➤ Display
Launchpad. Click What's New on the AutoCAD Electrical Launchpad.
2Browse to a feature you want to learn about.
3Click More Information to learn more about the feature.
Overview of AutoCAD Electrical Help | 5

To get started with AutoCAD Electrical
1Select the Help drop-down arrow in the upper right to display a menu of
help options.
2Select Learning Tools ➤ Launchpad.
The AutoCAD Electrical Launchpad screen appears. The Launchpad has
two sections. The top section is for first-time users. It has links to white
papers, the Tutorials, and the AutoCAD Electrical discussion group. The
bottom section has links to places for additional information about
AutoCAD Electrical. You can find out what is new in the current release,
link to the Advanced Productivity home page, and find out more about
additional Autodesk products.
3Click Tutorials on the AutoCAD Electrical Launchpad.
Join the Customer Involvement Program
You are invited to participate in helping guide
the direction of Autodesk design software.
If you participate in the Customer Involvement Program, specific information
about how you use AutoCAD Electrical is forwarded to Autodesk. This
information includes what features you use the most, problems that you
encounter, and other information helpful to the future direction of the
product.
See the following links for more information.
■Learn more about the Autodesk Customer Involvement Program:
http://www.autodesk.com/cip
■Read the Autodesk Privacy Statement: http://www.autodesk.com/cipprivacy
When you join, you will be able to view reports that can help you optimize
your use of AutoCAD Electrical.
To turn the CIP on or off
1On the InfoCenter toolbar, to the right of the Help button, click the
drop-down arrow.
2Click Customer Involvement Program.
6 | Chapter 1 AutoCAD Electrical What's New

3In the Customer Involvement Program dialog box, choose whether you
want to start or stop participating.
4Click OK.
What's New in AutoCAD Electrical 2011
Catalog Lookup
The catalog lookup user-interface enhancements include:
■Control which fields are displayed and the field order in the catalog lookup
dialog box.
■Filter catalog records by selecting existing values from any of the catalog
fields.
■Search for a catalog record based on a value you supply, including
wildcards, for any one of the catalog fields.
■Sort catalog records by clicking the column header of any of the displayed
fields.
■BOM details displayed on the main dialog box (formerly called Catalog
Check).
■Ability to define a default filter value for any catalog field using the
expanded _LISTBOX_DEF table in the catalog database.
■Dialog box tooltips describing the function of each control on the dialog
box.
For More Information on page 1285
Import Wire Type
Wire Types are defined on a per-drawing basis. You can import wire types
from an existing drawing or template to another drawing. Use the Import
button on the Create/Edit Wire Type dialog box to import wire types to the
active drawing. Use the Project-wide Utilities to import wire types to a set of
project drawings.
What's New in AutoCAD Electrical 2011 | 7

For More Information on page 903
Item Numbering enhancements
Item numbering now supports fixed item numbers on panel components. If
Resequence Item Numbers is run later on, fixed item numbers do not change.
Resequence item numbers based on the manufacturer values of the
components. Select the manufacturers from a list of values used in the project.
Only item numbers on components with selected manufacturer values change.
Define the resequence order based on the manufacturer values of the
components. Use the Move Up and Move Down buttons to change the order
of the manufacturers for processing by the Resequence Item Numbers
command.
For More Information on page 1604
Project-specific catalog database
Create a catalog database containing only the catalog values used in the project
drawings. This command takes the default_cat.mdb database and removes all
catalog values not used in the project drawings. Use this smaller catalog
database to:
■Send to a client with the finished project.
■Limit future catalog selections to components used in the project.
For More Information on page 1280
Location Box enhancements
When you insert a Location Box, a check box on the Location Box dialog box
indicates whether to update the location and installation values for the parent
components that fall within the new location box.
AutoCAD Electrical commands are now location box aware. If you insert or
move schematic parent components into an existing location box, location
and installation values update to match the location box. If you move
schematic parent components out of a location box, choose whether to update
component values to match the drawing defaults.
NOTE Circuit commands do not update components within the circuit due to
placement within an existing location box.
For More Information on page 889
8 | Chapter 1 AutoCAD Electrical What's New

Suppress wire collision check
Turn the collision checking off temporarily when inserting wires. Default
behavior is to route around a component when routing a wire from one
specified location to another. If you want the wire to break across any
components encountered as you insert the wire, turn the collision checking
off.
For More Information on page 913
Learning Solutions
■Getting Started exercises added to the online Help.
■Title block tutorial added detailing how to create a template, create a title
block, and define the title block mapping for a title block update.
■Cable Design Interoperability - AutoCAD Electrical and Inventor tutorial
added with exercises in both environments.
For More Information on page 1697
What's New in Previous Releases
The following chart shows which features were added or enhanced in past
releases of AutoCAD Electrical. Click the ‘x’ for detailed information on what
was added or enhanced for a particular release.
2011201020092008Feature
X on page
18
64-bit AutoCAD Electrical
X on page
9
Autodesk Inventor Professional Integration
X on page
23
Autodesk Vault Integration
X on page
18
Catalog Content Updates
X on page
7
Catalog Lookup User-interface
What's New in Previous Releases | 9

2011201020092008Feature
X on page
8
Catalog Database Creation
X on page
26
X on page
19
Circuit Builder
X on page
15
Direct Wire Sequencing
X on page
18
DWG Product Recognition
X on page
28
Electrical Audit
X on page
9
X on page
28
X on page
25
X on page
19
Help Updates
X on page
15
Icon Menu Wizard Enhancements
X on page
18
Improved Performance
X on page
19
InfoCenter
X on page
27
X on page
14
Insert Components from a Menu
X on page
16
Inserting Spare Terminals
X on page
18
Installer Improvements
X on page
8
X on page
21
Item Numbering
X on page
8
Location Box
10 | Chapter 1 AutoCAD Electrical What's New

2011201020092008Feature
X on page
21
Migration Utility
X on page
20
X on page
17
Multi-Level Terminals
X on page
27
One-Line Support
X on page
18
Pin List Data Management
X on page
13
PLC I/O Import/Export
X on page
13
PLC I/O Libraries
X on page
26
Power Feed Support
X on page
23
Project Manager
X on page
25
Ribbon Interface
X on page
22
X on page
13
Spreadsheet to PLC I/O Utility Enhance-
ments
X on page
24
Stand-alone Cross-reference
X on page
22
X on page
14
Surfable Reports
X on page
22
Surfing
X on page
21
Symbol Builder
What's New in Previous Releases | 11

2011201020092008Feature
X on page
27
Symbol Libraries
X on page
22
Table Style Cross-reference Updates
X on page
20
X on page
17
Terminal Jumpers
X on page
20
X on page
17
Terminal Properties Database Editor
X on page
20
X on page
15
Terminal Strip Editor
X on page
24
Terminals
X on page
19
User’s Guide
X on page
9
Wire Collision Avoidance
X on page
23
Wire Connection Improvements
X on page
27
X on page
23
Wire Number Placement
X on page
24
X on page
15
Wire Sequence Updates
X on page
7
Wire Type Creation/Import
12 | Chapter 1 AutoCAD Electrical What's New
What's New in 2008 Release
PLC I/O Import/Export
You can now communicate your electrical designs between AutoCAD Electrical
and Unity Pro from Schneider Electric. Employing the widely used XML
language format, you can transfer design data back and forth while maintaining
structure and organization.
Use the new Unity Pro Export to Spreadsheet tool to import Unity Pro XML
export files. These files aid in the creation of PLC-style ladder drawings and
panel layout drawings (in both vertical and horizontal format) in the active
project. The Unity Pro export files also contain catalog information. You can
reformat the files to generate an equipment list. The list can be used to create
a rack layout drawing used in panel layouts or separate rack layout drawings.
Use the new Unity Pro Export tool to create a Unity Pro I/O variable file (*.xsy)
in the Unity Pro XML format from your AutoCAD Electrical drawings. The
Unity Pro export file is generated from the PLC drawings and their respective
PLC symbols.
For More Information on page 642
PLC I/O Libraries Enhancements
You can quickly create PLC I/O drawings by selecting from a library of over
3,000 intelligent PLC I/O modules. These modules come from the most popular
manufacturers in the industry.
Spreadsheet to PLC I/O Utility Enhancements
You no longer have to create and save the starting drawing for the Spreadsheet
to PLC I/O Utility tool. You can now define a starting drawing file name or
start with the active drawing. Additional enhancements include:
■Default settings are now read automatically the first time you run the tool.
■You can select a settings file and make it the default.
■You can have the newly created drawings added automatically to the end
of the active project.
For More Information on page 630
What's New in 2008 Release | 13
Surfable Reports
When reports are placed into a drawing as a table, click various report cells to
find the corresponding devices within the schematic or panel layout drawings
in the active project.
When surfing on a table inserted by the Terminal Strip Editor, click the title
cell to surf on the Tagstrip value. You can surf on the value even if the Tagstrip
is not included in the title. If you select a cell that is not surfable (such as the
Tag, Catalog, or Wire Number cell) the Tagstrip value is surfed for the terminal
strip.
For More Information on page 1185
Insert Component and Insert Footprint Enhancements
The Insert Component and Insert Footprint dialog boxes are updated to
improve ease of use when selecting components to insert into your drawing.
Enhanced dialog box controls include:
■Menu tree structure
Displays the main menu and submenus from which you can freely navigate.
Clicking the menus displays the corresponding menu icons in the Symbol
Preview window. The menu is created by reading the *.dat file defined in
the Project Properties dialog box.
■Symbol Preview window
Displays the symbol icons and submenu icons corresponding to the selected
menu. Clicking an icon performs one of the following functions based on
the icon properties as defined in the *.dat file: insert a component or circuit,
display a submenu, or execute a command.
■Recently Used
Displays the last components inserted during the current editing session.
The most recently used icon displays at the top. This list follows the view
options setting in the symbol preview window. The total number of icons
displayed depends on the value specified in the Display edit box.
■View
Changes the view display for the Symbol Preview window and Recently
Used window. The current view option is indicated with a check mark.
Options include: Icon with text, Icon only, or List view.
■Tooltips
When you move the cursor over an icon, the icon name and
block/circuit/command names display as tooltip information.
14 | Chapter 1 AutoCAD Electrical What's New
Icon Menu Wizard Enhancements
Use the Icon Menu Wizard to customize the icon menus easily. You can copy
and paste icons from one submenu into another, drag and drop icons to place
the icons that are commonly used at the top of the Symbol Preview window
and the icons that are used less frequently at the bottom of the window, and
create new icons to use when inserting components.
You can also easily modify the existing icon or menu properties like changing
the name, image, or block name. Right-click the menu or icon on the Icon
Menu Wizard dialog box and select Properties. The existing data is overwritten
in the *.dat file with the new changes.
For More Information on page 1231
Direct Wire Sequencing
You can now use the Edit Wire Sequence tool to define additional
direct-to-terminal wire connection sequences in schematic networks. For
example, suppose one side of a schematic terminal is connected to three field
devices. A specific wire connection sequence can be defined to force the
connection reporting, but it is limited to reporting the terminal as a common
connection point for only two of the three field devices. The third device must
be reported as jumpered to one of the other two devices. With the new support
for secondary direct-to-terminal sequences, the third field device can be
sequenced directly to the terminal and the Wire From/To report shows all
three field devices tied directly to the terminal.
For More Information on page 1029
Visual Wiring Sequence Indicators
Once you define additional wire connection sequences, use the Show Wire
Sequence tool to show the new sequencing graphically. When any changes
are made to a wire sequence, the updated information is accurately reflected
in the from/to wire list report.
For More Information on page 1030
Terminal Strip Editor Enhancements
The Terminal Strip Editor provides an easy way to manage and edit terminals
used throughout a project. You can now start designs with a terminal strip
layout drawing representing the terminal strip. In the modified Terminal Strip
Selection dialog box, select a terminal strip for editing. Alternatively, create a
terminal strip definition in the project and maintain its properties in the
graphical terminal strip layout drawing.
What's New in 2008 Release | 15
The Terminal Strip Editor dialog box now has an enhanced grid control with
bolder grid lines that provide better visual definition for the terminal strip.
Other enhancements to the dialog box include:
■The Terminal Pin (TPin) column is now “T.”
■The TERM column is now “Number” to indicate the terminal numbering,
whether it is a wire number or user-defined number.
■The Function column is now “Installation.”
■A new column (on the far left side of the grid) indicates the level definition.
■Tooltip instructions display once you move your cursor over 1 of the tool
buttons in the dialog box.
■There is better context menu support that is based on individual cells.
■The Preview tab is now “Layout Preview.”
■The Cable Preview tab is now “Cable Information.”
New tools are available on the Terminal Strip Editor dialog box. Use the tools
to:
■create associations
■separate levels from a multiple level terminal block into separate terminal
blocks
■reverse the left and right wiring information for a terminal
■edit terminal block properties such as the number of levels and number
of wires per connection.
The Layout Preview tab of the Terminal Strip Editor dialog box was enhanced
to allow table objects in AutoCAD to be inserted as a terminal strip. It allows
for more accurate representations of what is in the Terminal Strip Editor, more
flexibility with the style, and provides a means for automatic updating.
For More Information on page 1064
Inserting Spare Terminals
Extra terminal block definitions and accessory information is now maintained
and saved on the graphical terminal strip layout. You can insert spare terminals
and have them accurately update the Bill of Materials as well as various
terminal reports.
16 | Chapter 1 AutoCAD Electrical What's New
For More Information on page 1102
Multi-Level Terminals
Multi-level terminal blocks are quickly becoming an industry standard. Using
AutoCAD Electrical, you can define and manage the terminal numbers and
levels as well as all connectivity information with no added complexity.
You can now associate schematic terminals to build a multi-level terminal
block that is limited to the number of levels defined in the block properties.
Use the new Add/Modify Associations tool to search project terminal strips
for existing multi-level terminal blocks so that you can define and maintain
terminal associations. Terminals must be in the same terminal strip and be in
the same project to associate together. You can also remove a terminal from
any multi-level relationship and copy terminal properties from one terminal
symbol to another.
Associating schematic terminals combines the terminals into a single terminal
block property definition. The number of schematic terminals that can be
combined is limited to the number of levels defined for the block property.
Terminal associations can also tie together a set of schematic terminal block
symbols to one panel representation of a terminal footprint.
For More Information on page 1053
Terminal Properties Database Editor
Terminal properties data is now managed based on manufacturer. Use the
new Terminal Properties Database Editor tool to:
■select the manufacturer table to edit
■create a new table in the catalog database for the active project.
Terminal Jumper Support
Use the new Edit Jumper tool to add, edit, or remove jumpers between
terminals that share the same potential in a schematic drawing. You can
display temporary line graphics between the primary terminal and secondary
terminals within the same drawing.
Jumpers now display on the panel drawing so you have a visual representation
of jumpers that appear on tabular terminal strips. Cells of a table row are
joined with a graphical jumper that looks like two circles connected by a solid
thick line. Three columns of jumpers are supported within a single jumper
column in the table.
What's New in 2008 Release | 17
Pin List Data Management
Pin list data is now managed based on manufacturer. Use the Pin List Database
Editor tool to select the pin list table to edit or create a table.
The _PINLIST table in the default_cat.mdb file now uses a single PINLIST
column and a single PEER_PINLIST column. The continuation columns were
removed.
For More Information on page 1305
Installer Improvements for Manufacturer Content
You can now selectively install content based on manufacturer, reducing the
size of the content databases and data redundancy. To later install content
from another manufacturer, open the Add or Remove Programs tool in your
Control Panel, select AutoCAD Electrical 2008, and click Change/Remove.
Click Add/Remove Features, click Next on the first screen, and then select the
manufacturers to install on the Manufacturer Contents Selection screen.
Catalog Content Updates
AutoCAD Electrical ships with a catalog database of a manufacturer that
contains over 350,000 components from the most popular vendors in the
industry. These components provide a full spectrum of input and output
devices including switches, sensors, lights, and numerous panel devices, such
as wireway and panel enclosures.
Improved Performance
Significant improvements in running commands that affect other drawings
have dramatically improved the performance of AutoCAD Electrical 2008.
Most notably, the Project Database Service (PDS) now only monitors the active
project.
64-bit AutoCAD Electrical
AutoCAD Electrical now ships in 64-bit and 32-bit versions. The 64-bit version
supports the same functionality as the 32-bit version.
DWG product recognition
Easily identify which Autodesk product created a DWG file and open the file
with the application that owns the DWG file. For example, if the DWG file is
owned by AutoCAD, double-clicking the file in Windows Explorer
automatically opens the file in AutoCAD. When you move the cursor over a
18 | Chapter 1 AutoCAD Electrical What's New
DWG icon, the tooltip identifies which Autodesk product and version was
used to create the DWG.
Parametric Twisted Pair Symbol Enhancements
The icon menus are enhanced to include three new parametric twisted pair
symbols. To insert a twisted pair symbol, click Components > Insert
Component. On the Insert Component icon menu, click Miscellaneous and
click Cable Markers.
User’s Guide
A User’s Guide for AutoCAD Electrical is now available in PDF format. It is
accessible from the Launchpad and the home page of the Help.
InfoCenter
A new search engine, InfoCenter, is included on the title bar of the main
AutoCAD Electrical window. It searches AutoCAD and AutoCAD Electrical
Help systems to give you the most relevant information for any query you
enter. You can filter content and add frequently used content to the Favorites
section.
InfoCenter replaces the Communication Center. It provides notifications of
software and content updates through a balloon notification mechanism. You
can also publish internal content within your team, support RSS feeds, and
easily provide feedback to Autodesk.
What’s New for Previous Releases
You can now quickly see which features were added or enhanced in past
releases of AutoCAD Electrical. This PDF is accessible from the home page of
the AutoCAD Electrical Help. Click the “x” for a particular feature to get more
information about what functionality was added for that release.
What's New in 2009 Release
Circuit Builder
The Circuit Builder feature comes with many predefined motor control circuits.
Insert a circuit by picking from the list of motors and selecting the location
on your drawing. AutoCAD Electrical builds the selected circuit on-the-fly,
matching the rung spacing, adding wiring between components, and
annotating the circuit based on motor horsepower and industry standards.
What's New in 2009 Release | 19
Inserting a custom motor control circuit can also be as easy as a few mouse
clicks. Select the options to define the circuit, such as breaker type, control
circuitry and motor horsepower. Select the location for the circuit and a custom
circuit is built based on the selected options.
You can customize the Circuit Builder feature to build your custom circuits.
The feature uses a spreadsheet and drawing templates. The spreadsheet defines
the available options for the circuit and the defaults for each option. The
drawing template defines the placement for the individual components and
the wiring.
For More Information on page 653
Terminal Strip Editor
Enhancements to the Terminal Strip Editor make it a more comprehensive
utility.
■Controls added to insert, edit, and delete jumpers inside Terminal Strip
Editor.
■Internal jumper support for multi-level terminals based on the catalog
assignment, as defined in the TERMPROPS table, or block properties.
■Columns added for jumper display. Internal jumpers are shown on the
left of the terminal number as squares. Add-on jumpers are shown on the
right as circles.
■Option to launch Automatic Wire Numbering once terminal updates are
complete if jumper changes are made.
■New Jumper Chart option to display graphically all jumpered terminals
in a table object placed on a drawing. These jumper charts are updated
automatically when the graphical terminal strip is updated.
■Additional control over the jumper circles in the table object and jumper
chart.
■Options to split the table object into multiple sections are provided.
Controls for number of rows per section, number of sections per drawing,
section placement, offset distance, and offset direction are available. Use
the Drawing to Preview slider to preview each drawing.
■The Table Preview now takes angle and scale into account.
■An additional Preview is available while defining table settings. This preview
reflects all table settings include drawing template. The preview includes
a list of drawings if the settings result in multiple drawings.
20 | Chapter 1 AutoCAD Electrical What's New
For More Information on page 1064
Symbol Builder
The Symbol Builder now takes advantage of the block editor environment.
All the block editor features are available along with AutoCAD Electrical dialog
boxes. It is easy to adjust the graphics of the component and add the necessary
attributes for each type of AutoCAD Electrical component.
Start with a template supplied with attributes for the specific component type
you want to create. All necessary attributes are immediately available for
insertion along with any optional attributes. Drag them from the dialog box
into your symbol.
When your symbol is ready, save it using the suggested symbol name following
the AutoCAD Electrical naming standards, or enter your own symbol name.
Audit your symbol to see any potential issues with your symbol.
For More Information on page 339
Migration Utility
The Migration utility replaces the Merge utility which dealt exclusively with
the catalog database. The Migration utility lets you merge the catalog database
and supports other files types and settings, including the environment file,
icon menu files, lookup database files, table styles drawing, user circuits, recent
projects, and so on. Some file types allow you to merge the default AutoCAD
Electrical file and your custom file. Other file types allow you to keep your
custom file or overwrite it with the default AutoCAD Electrical file.
Select to migrate from a specific AutoCAD Electrical release. The existing files
are found and listed for migration selection. Select which files to migrate,
define the migration options, and your files from a previous release are ready
for the latest AutoCAD Electrical release. Save the migration settings to use at
a later time or to repeat the migration for another user or computer.
For More Information on page 123
Item Numbering
You can now assign an item number on a per part basis. Each multiple catalog
assignment can receive its own item number. Set the item numbering options
for a project:
1Right-click on the project name in Project Manager.
2Select Properties.
What's New in 2009 Release | 21

3Select the Components tab.
4Click Item Numbering.
5Click Per-Part Number Basis (excluding ASSYCODE combinations).
6Click OK.
NOTE An item number can be assigned to the main catalog entry and any multiple
catalog entries. It cannot be assigned to a catalog entry based on an assembly
code.
The Insert Balloon feature supports multiple balloons per component. If a
component carries multiple item number assignments, multiple balloons are
inserted automatically. When an item number is modified or removed, the
item balloon is updated or deleted.
For More Information on page 211
Surfing
The ability to surf on an item number was added. Right-click an item balloon
and select surf, or type the item number in the Surf dialog box. You can also
surf on an item number in a report table. Run the Surf command and click
the item number text in the report table.
For More Information on page 1187
Cross-referencing
The graphics used to represent each contact type in the table cross-reference
style are now customizable. A graphic drawing (.dwg) file is assigned to a
specific contact block file name through a new cross-reference mapping table
in the catalog lookup database. The assigned graphic drawing file is inserted
as a block in the table cell in the TYPE column.
For More Information on page 228
Spreadsheet to PLC/IO
You can now direct the Spreadsheet to PLC/IO utility to start a new drawing
before generating the next module. Enter the keyword, NEW_DWG, in the
CODE column of the spreadsheet at the point where you want to start a new
drawing. AutoCAD Electrical creates the drawing before generating the next
module in the spreadsheet.
22 | Chapter 1 AutoCAD Electrical What's New

You can now predefine other attributes on the module like the inline device
fields. For example, you want a module to have a Rack value of “2”, an
Installation value of “MACH1”, and a Rating2 value of “Hazardous Duty”. In
the spreadsheet, in the RACK column, enter
“2;INST=MACH1;RATING2=HAZARDOUS DUTY”. When this module is
generated these extra attribute values are assigned.
For More Information on page 626
Vault - Title Block Update
The project description values in Vault can now be written back to AutoCAD
Electrical drawings. Assign these values to the AutoCAD Electrical project
description values. Project descriptions can be used in the AutoCAD Electrical
title block update and the drawing list report. If the project descriptions are
out of date when these features are used, you are prompted to import the
Vault values in to the project descriptions.
3-Phase Wiring
Connecting the 3-phase wiring to the motor symbol is now automatic. When
you insert a motor symbo,l and 3-phase wiring is already present, place the
symbol on or near the wires. The wires are angled and trimmed to meet the
motor symbol.
NOTE For pre-2009 symbols, add a default attribute prompt value “X0STRETCH”
to the X0TERMxx attributes.
Flip Component
When you use the Flip Component feature, existing dashed link lines are
recalculated and reinserted if necessary.
Project Manager
You can now right-click the active project and select Close. The active project
is closed, removed from the list, and the next project becomes the active
project.
Toggle Wire Number
When you toggle a wire number from above or below the wire to an in-line
wire number, the number keeps its original center point, rather than centering
it on the wire.
What's New in 2009 Release | 23
Trim Wire
You can now use the dynamic pan and zoom while using the Trim Wire
command. Start the command and select the Fence option. Select the first
fence point and pan the drawing to select the next fence point. All wires are
trimmed that cross the fence rather than just the wires on the screen.
Edit Wire Sequence
The Edit Wire Sequence command remains active until you choose to exit the
command by not selecting a wire. This feature makes it more efficient to assign
a wire sequence to multiple wire networks.
Cable Conductor Table
Adding a cable with many conductors is more efficient with the Alt+A hot
key. Once you type in the conductor color, press Alt+A to add the conductor
to the list.
COPYTAG for Terminals
Terminals now support the COPYTAG attribute. COPYTAG is the optional
TAG copy attribute. When AutoCAD Electrical updates a TAGSTRIP attribute,
it also looks for and updates any COPYTAG attributes present on the symbol
with a copy of the TAGSTRIP text. A special replaceable parameter, "%T", can
be encoded onto the prompt value of the COPYTAG attribute definition. This
replaceable parameter allows for adding a suffix and/or prefix to the TAGSTRIP
text. If you need more than one extra TAGSTRIP copy on a symbol, name the
attributes COPYTAG01, COPYTAG02, and so on.
Stand-alone Cross Reference
The DESC1 attribute is now supported on stand-alone cross-reference symbols.
You can add a value to this attribute in the Insert/Edit Stand-alone
Signal/Destination dialog boxes. The description field is an available field in
the Stand-alone cross reference report.
Export to Spreadsheet
The option to export information from parent components only was added.
Catalog Content Updates
Pneumatic catalog content was added to the catalog database of over 350,000
components from the most popular vendors of the industry. Additional catalog
content for terminal blocks, PLC, and limit switches, was added.
24 | Chapter 1 AutoCAD Electrical What's New

Help Updates
The New Features Workshop provides an outline and graphical view of new
features this release.
A symbol library preview guide lists the library symbols supplied with AutoCAD
Electrical.
For More Information on page 361
Toolbar Tooltips
Some of the commonly used AutoCAD Electrical commands now provide an
additional level of information in the tooltip. Pause the mouse over the
command icon. The first level of information for that command is displayed.
Continue to pause the mouse over the command icon and the next level of
information is displayed in the tooltip. For more information about any
command, press the F1 key while the tooltip is displayed.
What's New in 2010 Release
Ribbon Interface
To provide easy access to AutoCAD Electrical commands, a ribbon interface
is now available. The ribbon layout is based on workflow and function. See
the Help topic, Ribbon Interface, for more information on the ribbon layout.
For More Information on page 29
Workspaces
AutoCAD Electrical provides three predefined workspaces.
■ACADE & 2D Drafting & Annotation - ribbons that provide the AutoCAD
Electrical tools, and the AutoCAD 2D Drafting and Annotation tools.
■ACADE & 3D Modeling - ribbons that provide the AutoCAD Electrical
tools, and the AutoCAD 3D Modeling tools.
■AutoCAD Electrical Classic - toolbars and pull down menus that provide
the AutoCAD Electrical tools and AutoCAD tools.
To switch to another workspace, you can select the Workspace icon
on the status bar.
What's New in 2010 Release | 25
Circuit Builder goes green
Circuit Builder now provides engineering analysis/green calculations in the
area of power conductor size versus energy losses. Designing to meet minimum
code requirements can conflict with green design.
During the code requirements analysis, Circuit Builder displays parallel energy
loss calculations so you can make better green design decisions. For example,
suppose you must oversize the conductors for a motor to reduce conductor
heating losses. This action results in a higher initial cost. But this higher cost
can potentially be recovered many times over in reduced energy losses in the
wiring over the lifetime of the installation.
For More Information on page 712
Circuit Builder - power feed support
Circuit Builder now provides power feed circuits for insertion.
■Option to add a source arrow symbols at end of the power feed bus.
■Option to add a generic load box representation at the end of the power
feed bus.
■Supports defining a user-created load symbol, for example a variable speed
drive symbol, for insertion at the end of a power feed bus.
■Support for adjusting the load representation based on the rung spacing.
For More Information on page 693
Circuit Builder - additional features
■Wire conductor sizing based upon electrical code requirements.
■Support for split-parallel conductor sizing is available. You can choose to
substitute multiple, smaller diameter conductors to meet the equivalent
ampacity requirement of a single, large diameter conductor.
■Fuse, breaker, disconnect switch, and overload calculations based upon
electrical code requirements.
■Circuit Builder can be set up to predefine motor description text,
installation, location, and text description for individual components in
the circuit.
■Insert a new circuit and reference an existing circuit. This option can
transfer the values from the existing circuit to your new circuit.
26 | Chapter 1 AutoCAD Electrical What's New
■Electrical standards database editor to view, modify, and expand the
ace_electrical_standards.mdb file.
For More Information on page 653
Motor control one-line circuits
AutoCAD Electrical now provides library support and software support to
create motor control one-line diagrams that link back to other drawing types
in a project drawing set.
■New motor control one-line symbol library accessible from the icon menu.
■Circuit Builder helps you build motor control one-line circuits dynamically.
You can design one-line circuits, with component values and wire sizes,
to conform to a given electrical code.
■One-line component symbols can be related to parent/child counterparts
on the schematic and panel layout drawings within a project. You can surf
between one-line and related components, and all related components
update when one is modified.
■Tagging of schematic or panel components using existing commands can
reference a pick list that includes components pulled from the one-line
diagrams.
■Certain schematic reports have a new category option. You select the
category, for example One-Line, and the data is filtered based on that
category. It can also be used to filter a report for Hydraulic, P&ID, or
Pneumatic components.
For More Information on page 301
No wire numbering option for wire layers
Wire layers now have a “no wire numbering” option. These wires behave
normally for inserting, breaking, and scooting components, and show up in
the Wire From/To report.
The Insert Wire Numbers command follows these rules:
■If all wires in the network are on layers set “No” for Wire Numbering, no
new wire number is inserted.
What's New in 2010 Release | 27

■If any wire in the network is on a layer set “Yes” for Wire Numbering, the
existing non-fixed wire number is updated, or a new wire number is
inserted.
■If a wire network already has a non-fixed wire number, it is updated
regardless of the Wire Numbering setting. Use the Delete Wire Numbers
command to remove the wire number.
For More Information on page 266
Electrical Audit
The Electrical Audit can now display the results for the active drawing only.
Run the Electrical Audit, click the Active Drawing button and quickly see the
issues for this drawing only. Open another drawing and the dialog box updates
to display the results for the newly opened drawing. The active drawing must
be part of the active project.
For More Information on page 1689
Help Updates
Reference topics that show command access now include the following
features:
■Command line access
■Ribbon access
■If the location of a command is changed, ribbon and menu access to the
command are updated in the Help system to reflect the new location.
NOTE This dynamic update only works when the Help is used within AutoCAD
Electrical.
28 | Chapter 1 AutoCAD Electrical What's New
Ribbon Interface
Project tab
Project Tools panel
DescriptionCommand
Lists the drawing files associated with each
open project. Use this to add new drawings,
Project Manager
AEPROJECT
reorder drawing files, and change project set-
tings. You cannot have two projects open in
the Project Manager with the same project
name.
Copies an existing project to a new name and
creates renamed copies of the drawing files.
Copy Project
AECOPYPROJECT
Deletes a project and provides the option to
also delete the drawing files in the project.
This is permanent and cannot be undone.
Delete Project
AEDELETEPROJECT
Creates a zip file of the .wdp file for the active
project and one or more drawing files it refer-
Zip Project
AEZIPPROJECT
ences. The zip file can optionally include a
copy of the temporary database file for the
project.
Updates component tags, wire numbers, lad-
der references, and select drawing settings.
Project-Wide Update/Re-
tag
AEPROJUPDATE
Updates wire numbers, component tags, and
attribute text. Allows user-defined scripts to
be applied project-wide.
Project-Wide Utilities
AEUTILITIES
Ribbon Interface | 29
DescriptionCommand
Places an invisible mark on each component
before sending the drawings to a client. When
Mark/Verify DWGs
AEMARKVERIFY
the drawings are returned, a list is generated
that includes any components or wire num-
bers that have been modified, edited, or
copied.
NOTE This command writes information to
the project database file that is used to check
for deleted components. Your drawings must
be named and part of the active project to use
this command.
Other Tools panel
DescriptionCommand
Moves from reference to reference across the
project drawing set. A new window opens and
Surfer
AESURF
the original window closes when Surf is selec-
ted unless you hold the Shift key while running
the command.
Continues a previous surf session from the
point where you left off.
Continue Surfer
AESURFCONT
Loads the drawing listed above the current
drawing in the project explorer, and closes
the current drawing.
Previous DWG
AEPREV
Loads the drawing listed below the current
drawing in the project explorer, and closes
the current drawing.
Next DWG
AENEXT
Migrate database and support files from a
previous version of AutoCAD Electrical to the
current release.
Migration Utility
AEMIGRATION
30 | Chapter 1 AutoCAD Electrical What's New
DescriptionCommand
Translates component description text from
one language to another. Description text and
Language Conversion
AELANG
switch position text is processed on schematic
and panel components.
Opens the current language table for review
and modification. The default table is
wd_lang1.mdb.
Edit Language Database
AELANGDB
You can link some AutoCAD Electrical project
description data entries and some of the
Title Block Setup
AESETUPTITLEBLOCK
drawing values to the attributes in the title
blocks. There are two methods, an attribute
mapping file or a mapping attribute embed-
ded on the title block.
Automates updating title block information
for the current drawing or the entire project
Title Block Update
AEUPDATETITLEBLOCK
drawing set. Project and drawing specific set-
tings are linked to one or more attributes
contained in the title block.
Updates component tagging based on a
change in the IEC tagging mode.
IEC Tag Mode Update
AEUPDATEIECTAG
Replaces the schematic wd_m.dwg block in
the current drawing with a newer copy, and
Update to New WD_M
Block, Values, Layers
converts to the newer configuration values
and layers.
AESWAPWDM
Replaces the schematic wd_m.dwg block in
the current drawing with a newer copy, but
Update to New WD_M
Block, No changes
keeps existing configuration values and layer
names.
AESWAPWDM-
NOCHANGE
Replaces the panel wd_pnlm.dwg block in the
current drawing with a newer copy, and con-
Update to New WD_PN-
LM Block, Values, Layers
verts to the newer configuration values and
layers.
AESWAPPNLM
Project tab | 31
DescriptionCommand
Replaces the panel wd_pnlm.dwg block in the
current drawing with a newer copy, but keeps
existing configuration values and layer names.
Update to New WD_PN-
LM Block, No changes
AESWAPPN-
LMNOCHANGE
Writes the attribute settings for the wd_m
block in the current drawing to the wd_m.dwg
drawing file in the symbol library.
Update Symbol Library
WD_M Block
AECOPY2SYMLIB
Reports the settings of each drawing in the
project, and provides the means to edit the
Settings List Utility
AEDWGCFG
report and update the drawing properties with
the edited values.
Lists extended entity data, xdata, on a selected
object.
Xdata List
AELISTXDATA
Allows display and edit of an object's “1000”
type extended entity data (Xdata).
Xdata Editor
AEXDATA
Turns off the right-click menus in AutoCAD
Electrical.
Right Click Menu Off
AEOFFRIGHTCLICKCON-
TEXTMENU
Turns on the right-click menus in AutoCAD
Electrical.
Right Click Menu On
AEONRIGHTCLICKCON-
TEXTMENU
Adds a new, blank table to the catalog lookup
database file.
Add Catalog Table
AEADDCATALOGTABLE
Creates a project-specific catalog database
containing only the entries used in the project.
Create Project-specific
Catalog Database
32 | Chapter 1 AutoCAD Electrical What's New
DescriptionCommand
AECREATEPROJCATA-
LOG
Moves all objects on a layer in the active
drawing to a different layer.
Move Objects to Layer
AEMOVE2LAYER
Adds the Category field to the PLC database
tables. This field is used by the Spreadsheet
PLC Database Migration
Utility
to PLC I/O utility to determine module place-
ment.
AEPLCMIGRATE
Troubleshooting panel
The Troubleshooting panel is off by default.
DescriptionCommand
Inserts a project drawing as an exploded block
into a new, blank drawing.
Clean DWG Utility
AECLEANDWG
Turns on the display of a real-time listing of
internal calls in AutoCAD Electrical.
Command Trace On
AEONLISPDEBUG
Turns off the display of a real-time listing of
internal calls in AutoCAD Electrical.
Command Trace Off
AEOFFLISPDEBUG
Turns on the display of error messages gener-
ated during temporary MDB file rebuild or
freshen.
MDB Command Trace
On
AEONMDBDEBUG
Project tab | 33
DescriptionCommand
Turns off the display of error messages gener-
ated during temporary MDB file rebuild and
freshen.
MDB Command Trace
Off
AEOFFMDBDEBUG
Turns on the timer for command execution
elapsed time.
Command Timer On
AEONTIMER
Turns off the timer for command execution
elapsed time.
Command Timer Off
AEOFFTIMER
Schematic tab
Quick Pick panel
The Quick Pick panel is off by default.
DescriptionCommand
Activates the icon menu with the relay page
displayed.
Relays
AERELAYMENU
Activates the icon menu with the push button
page displayed.
Push Buttons
AEPUSHBUTTONSMENU
Activates the icon menu with the selector
switch page displayed.
Selector Switches
AESELECTORSWITCH-
MENU
34 | Chapter 1 AutoCAD Electrical What's New
DescriptionCommand
Activates the icon menu with the limit switch
page displayed.
Limit Switches
AELIMITSWITCHMENU
Activates the icon menu with the pilot light
page displayed.
Pilot Lights
AEPILOTLIGHTSMENU
Inserts a user circuit selected from on-screen
icon menu.
Insert Saved Circuit
AESAVEDCIRCUIT
Insert Components panel
DescriptionCommand
Inserts selected components from the icon
menu onto the drawing.
Insert Component
AECOMPONENT
Inserts schematic symbols by choosing a
catalog number or a component description
Insert Component
(Catalog List)
from a user-defined pick list. The data dis-
played in this pick list is stored in a database
AECOMPONENTCAT
in generic Access format. The file name is
wd_picklist.mdb and can be edited with Mi-
crosoft® Access or from Add/Edit/Delete along
the bottom of the pick list's dialog box. The
AutoCAD Electrical normal search path se-
quence is used to locate this file.
This spreadsheet organizes the selected user-
created equipment list and presents the list in
Insert Component
(Equipment List)
a pick list. As you pick an item from the pick
list, the appropriate schematic symbol is found
AECOMPONENTEQ
and inserted in the drawing at your pick point.
You can open a comma-delimited file, Mi-
Schematic tab | 35
DescriptionCommand
crosoft® Excel® spreadsheet, or Microsoft Ac-
cess database file for input.
Lists panel components extracted from your
panel drawing, finds the appropriate schemat-
Insert Component (Panel
List)
ic symbol, and inserts the schematic compon-
ents at your pick point.
AECOMPONENTPNL
Lists panel terminals extracted from your
panel drawing, finds the appropriate schemat-
Insert Terminal (Panel
List)
ic symbol, and inserts the schematic terminals
at your pick point.
AETERMINALPNL
Build a motor control circuit dynamically.Circuit Builder
AECIRCBUILDER
Displays Wire Size Lookup dialog box with
previous calculated data for selected motor or
power feed load representation.
Recalculate Wire Size
AEEDITWS
Inserts a series of similar components at fence
crossing points with underlying wires.
Multiple Insert (Icon
Menu)
AEMULTI
Inserts a copy of the selected component
multiple times at each wire crossing and fence
line intersection point.
Multiple Insert (Pick
Master)
AEMULTIPICK
Inserts WBlocked circuitry (external drawing
file) with automatic component tag update.
Insert WBlocked Circuit
AEWBCIRCUIT
Inserts a user circuit selected from on-screen
icon menu.
Insert Saved Circuit
AESAVEDCIRCUIT
36 | Chapter 1 AutoCAD Electrical What's New
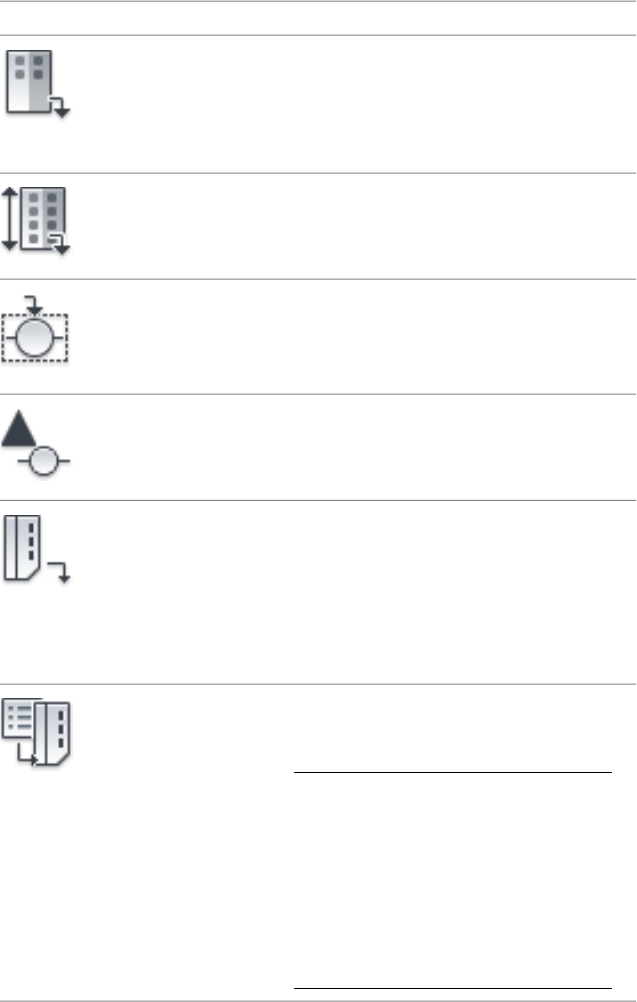
DescriptionCommand
Generates PLC I/O modules on demand, in a
variety of different graphical styles via a para-
Insert PLC (Parametric)
AEPLCP
metric generation technique. It is driven by a
database file (ace_plc.mdb) and a handful of
library symbol blocks.
Inserts PLC I/O modules that are fixed library
symbol blocks.
Insert PLC (Full Units)
AEPLC
Draws a dashed box around selected compon-
ents. A description can be assigned to the box,
Location Box
AELOCATIONBOX
and components within the box can have their
location and installation code(s) changed.
Inserts location marks on symbols that are
identified with location code in text form.
Location Symbols
AELOCATIONSYMBOL
Generates a connector symbol from user-
defined parameters. The symbol is created on
Insert Connector
AECONNECTOR
the fly, and inserted as a block insert into your
active drawing file. Since these are created on
an as-needed based, it eliminates the need for
you to create and maintain a library of connect-
or symbols.
Imports a connector wire list from another
application, such as Autodesk® Inventor™
Professional Cable & Harness.
Insert Connector from
List
AECONNECTORLIST
NOTE If the AutoCAD Electrical drawing is
missing one end of the connector or if a con-
nection was not found, wiring information is
displayed next to the pin and the information
is written into a log file so you know AutoCAD
Electrical was unable to resolve the wire con-
nections in the drawing. The log file name is
{drawing filename.LOG} and is found in the
same folder as the drawing file.
Schematic tab | 37
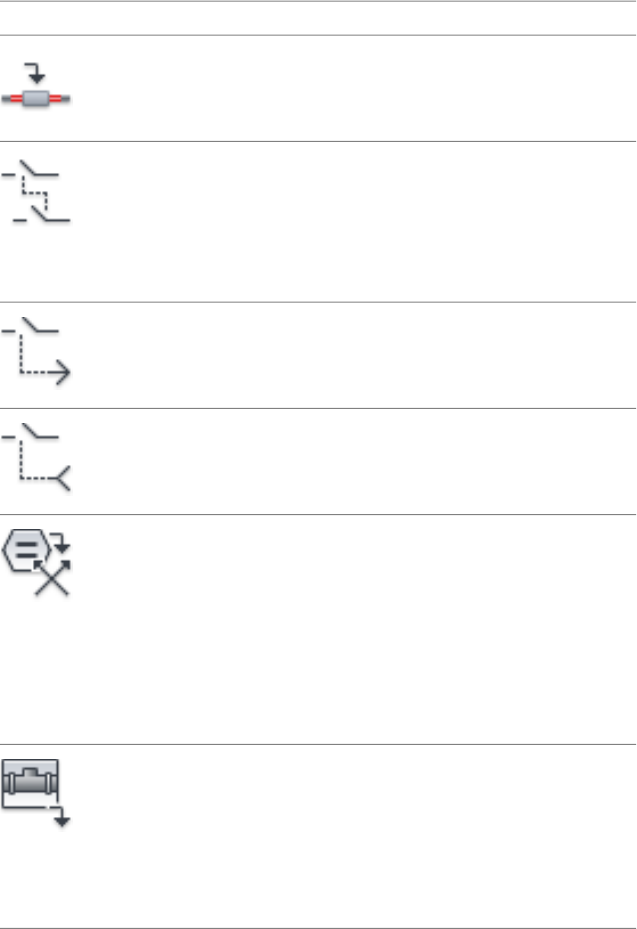
DescriptionCommand
Inserts a splice symbol selected from the on-
screen icon menu.
Insert Splice
AESPLICE
Draws a smart dashed line between stacked
contacts of a multicontact component. When
Link Components with
Dashed Line
the dashed link line inserts, certain attributes
automatically flip to invisible. Use the Attribute
AELINK
Hide command to turn the visibility of the se-
lected attributes back on.
Draws a dashed line from a component to a
“To” arrow symbol.
Insert Reference Arrow -
To
AEREFARROWTO
Draws a dashed line from a component to a
“From” arrow symbol.
Insert Reference Arrow -
From
AEREFARROWFROM
Inserts standalone cross-reference symbol (not
tied to a wire). You use standalone cross-refer-
Insert Stand-Alone Cross-
Reference
ence symbols just as you would wire
source/destination arrow symbols but without
AESAXREF
the wires. Insert a source reference symbol,
and then tie one or more destination reference
symbols to it. These can be on the same
drawing or scattered across the project draw-
ing set.
Inserts Pneumatic components from an on-
screen icon menu. This icon menu can be
Insert Pneumatic Com-
ponents
modified, expanded, or replaced with your
own custom menu. You can change the de-
AEPNEUMATIC
fault icon menu using the Project Properties
dialog box. Use the Icon Menu Wizard to
easily modify the menu.
38 | Chapter 1 AutoCAD Electrical What's New
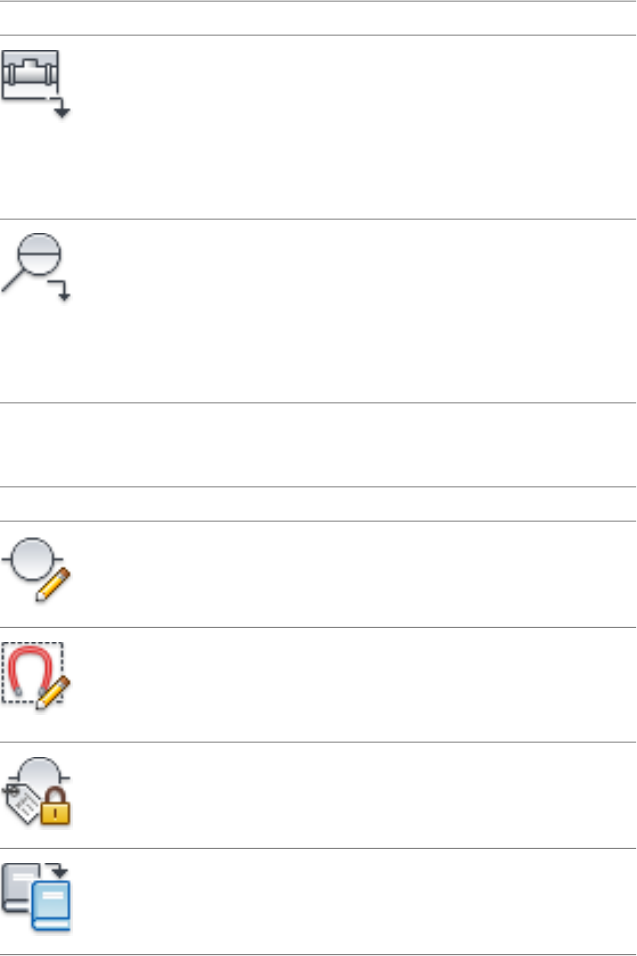
DescriptionCommand
Inserts hydraulic components from an on-
screen icon menu. This icon menu can be
Insert Hydraulic Compon-
ent
modified, expanded, or replaced with your
own custom menu. You can change the de-
AEHYDRAULIC
fault icon menu using the Project Properties
dialog box. Use the Icon Menu Wizard to
easily modify the menu.
Inserts P&ID components from an on-screen
icon menu. This icon menu can be modified,
Insert P&ID Component
AEPID
expanded, or replaced with your own custom
menu. You can change the default icon menu
using the Project Properties dialog box. Use
the Icon Menu Wizard to easily modify the
menu.
Edit Components panel
DescriptionCommand
Edits components, PLC modules, terminal,
wire numbers and signal arrows.
Edit Component
AEEDITCOMPONENT
Adds, changes, or deletes internal jumpers on
a selected component. When wire numbers
Add/Edit Internal Jumper
AEINTERNALJUMPER
are inserted, these internal jumpers are read
and wire numbers are assigned accordingly.
Toggles selected component tag between
fixed and normal.
Fix/UnFix Component
Tag
AEFIXTAG
Inserts or edits catalog part numbers onto the
currently selected component or footprint.
Copy Catalog Assign-
ment
AECOPYCAT
Schematic tab | 39
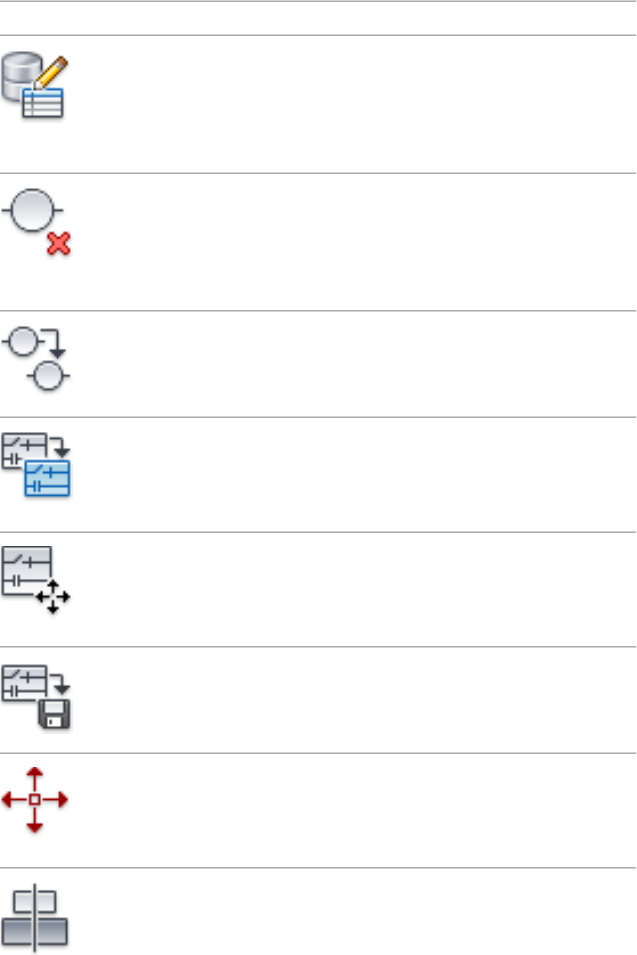
DescriptionCommand
Edits user-defined Xdata on component or
wire numbers and populates the User table in
Edit User Table Data
AEUSERTABLE
project database file. You can add, edit, or re-
move free-form user data records attached to
the selected block insert.
Removes the selected component from the
drawing. If you erase a parent schematic
Delete Component
AEERASECOMP
component, you have the option to search for
related child components, surf to them, and
delete them.
Inserts a copy of an existing component into
the drawing and updates the component tags.
Copy Component
AECOPYCOMP
Copies existing circuits and pastes the copied
circuit to a specified location. The components
Copy Circuit
AECOPYCIRCUIT
are automatically retagged based on their new
line reference locations.
Moves the selected circuit to a specified loca-
tion. The components are automatically re-
Move Circuit
AEMOVECIRCUIT
tagged based on their new line reference loc-
ations and cross-references are updated.
Saves windowed portions of circuitry for later
reuse. Up to 24 circuits can be saved at any
one time in this scratch menu.
Save Circuit to Icon
Menu
AESAVECIRCUIT
Scoots selected components along their con-
nected wires or scoots entire wires, including
Scoot
AESCOOT
components, along the bus. A rectangle indic-
ates the selected items.
Aligns selected components with a master
component. All connected wires are adjusted,
Align
AEALIGN
and wire numbers recentered if necessary. You
can align vertically or horizontally by flipping
40 | Chapter 1 AutoCAD Electrical What's New
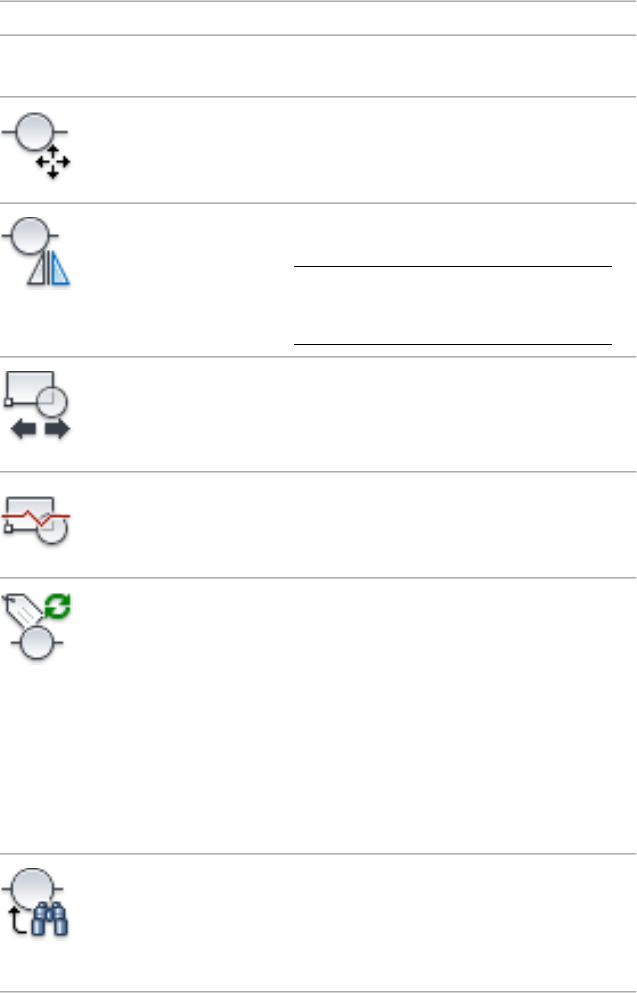
DescriptionCommand
the command by typing V or H at the com-
mand line.
Automatically moves the selected component
to a new position.
Move Component
AEMOVE
Reverses or flips selected component graphics
and its associated attributes
Reverse/Flip Component
AEFLIP
NOTE This tool only operates on a compon-
ent with 2-wire connections (ex: limit switch
contact symbol).
Stretches or compresses the windowed portion
of PLC modules (or any block insert) while
Stretch PLC Module
AESTRETCHPLC
maintaining all of the original block informa-
tion, including attributes.
Splits selected PLC module into two separate
block definitions (i.e. parent and a child or a
child and another child).
Split PLC Module
AESPLITPLC
Retags components with contact updates. Run
this when something changes on your draw-
Retag Components
AERETAG
ing or project that affects the component tags.
This can include revising the ladder line refer-
ence numbers or changing the tag format.
Retag redoes each selected primary compon-
ent tag, and then updates the related second-
ary components. You can select to update a
single component, a group of components, a
drawing, drawings within your project, or the
entire project.
Finds and replaces component and terminal
text values or find and replace substrings
Find/Edit/Replace Com-
ponent Text
within those values. You can do this on the
active drawing or across the project drawing
set.
AEFINDCOMPTEXT
Schematic tab | 41
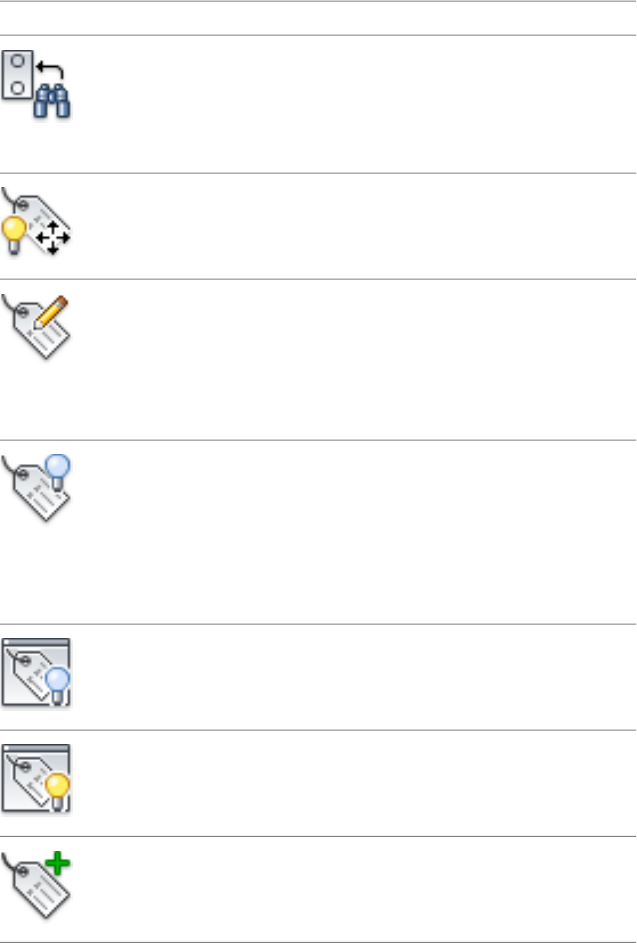
DescriptionCommand
Finds and replaces terminal number text values
or find and replace sub-strings within those
Find/Replace Terminal
Text
values. You can do this on a selection from
the active drawing, the entire active drawing,
or across the project drawing set.
AEFINDTERMTEXT
Moves the selected attributes to a picked
point. The attributes remain tied to the block
inserts
Move/Show Attribute
AEATTSHOW
Edits an attribute's text by picking right on the
attribute. A dialog box displays and you type
Edit Selected Attribute
AEEDITATT
in a new attribute value. This utility also works
on invisible attributes. It finds and displays the
closest attribute to your pick point on a block
insert.
Hides selected attribute; to unhide pick on
block graphics and un-toggle attribute name
Hide Attribute (Single
Picks)
in the list. Select the graphic of a target block
insert to display a listing of all attribute names
AEHIDEATT
and values. You can switch attributes between
hidden and visible or you can edit individual
attribute values.
Hides window selected attributes you specify
in a list of names.
Hide Attributes (Win-
dow/Multiple)
AEHIDEATTRIB
Unhides window selected attributes you spe-
cify in a list of names.
Unhide Attributes (Win-
dow/Multiple)
AESHOWATTRIB
Adds a new attribute to an existing instance
of a block insert.
Add Attribute
AEATTRIBUTE
42 | Chapter 1 AutoCAD Electrical What's New
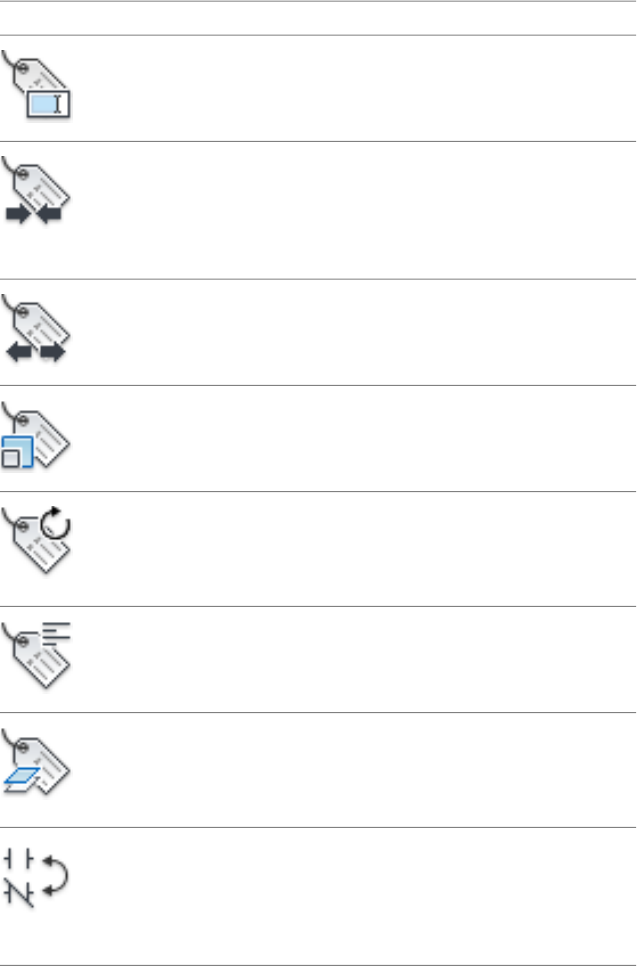
DescriptionCommand
Adds a new attribute to an existing instance
of a block insert.
Rename Attribute
AERENAMEATTRIB
Compresses an attribute to make it fit into a
tight spot (such as between closely spaced
Squeeze Attribute/Text
AEATTSQUEEZE
components). Each click on the attribute dy-
namically changes the attribute's width factor
by 5%.
Expands an attribute. Each click on the attrib-
ute dynamically changes the attribute's width
factor by 5%.
Stretch Attribute/Text
AEATTSTRETCH
Changes attribute text size when components
or wire numbers have already been inserted
onto your drawings.
Change Attribute Size
AEATTSIZE
Rotates the selected attribute text or MTEXT
string 90 degrees from its current orientation.
Rotate Attribute
AEATTROTATE
After rotation, press M and [space] to flip into
the Move Attribute mode.
Changes the justification of wire number text,
component description text, or attributes.
Change Attribute Justific-
ation
AEATTJUSTIFY
Forces attribute text entities to a given layer.
Select the target layer (type it in or select from
Change Attribute Layer
AEATTLAYER
the list), press OK and then select the attrib-
utes to change to the target layer.
Flips a contact from one state (open or closed)
to the other. It looks at the picked contact,
Toggle NO/NC
AETOGGLENONC
reads its block name, and checks the 5th
character position for either 1 or 2. It then
substitutes 1 or 2 for the found character.
Schematic tab | 43
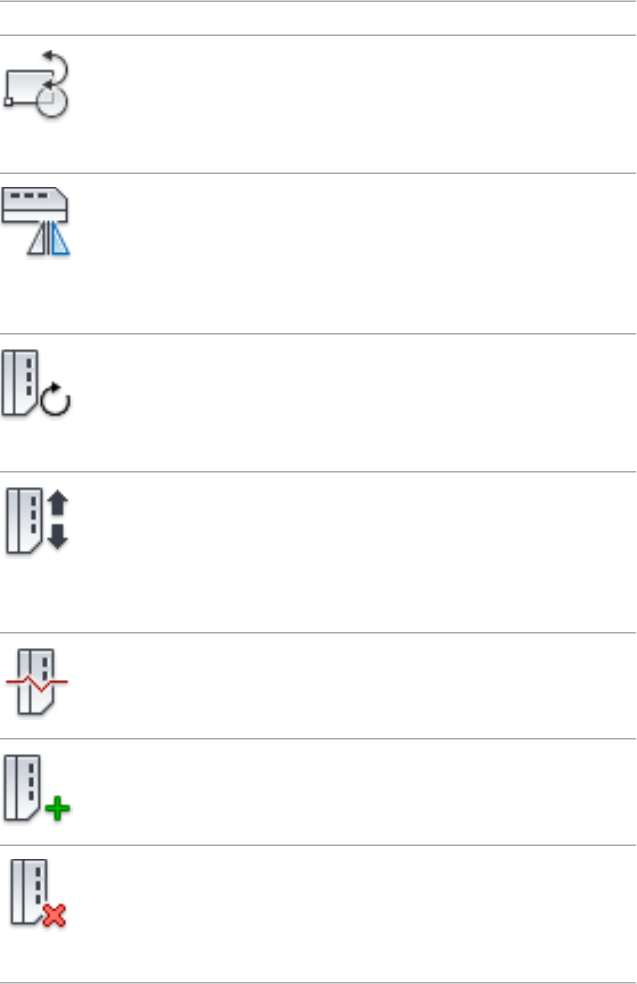
DescriptionCommand
Use to update or change blocks in place. At-
tribute values are retained during the swap-
Swap/Update Block
AESWAPBLOCK
ping process. Wire connections are also
maintained even if the new symbol is slightly
wider or narrower than the original.
Reverses the orientation of the connector
about its horizontal or vertical axis. None of
Reverse Connector
AEREVERSE
the existing wire connections automatically
reroute to the reverse side of the connector
and you will have to resolve wiring using the
wire editing tools.
Rotates the connector about its insertion point
in 90 degree increments. The wire connections
Rotate Connector
AEROTATE
do not reroute with each rotation of the con-
nector. You must resolve wiring using the wire
editing tools.
Increases or decreases the connector's overall
shell length. You might do this to make room
Stretch Connector
AESTRETCH
for new pins or to capture previously added
pins that fell beyond the connector shell. You
identify which end of the connector is to be
altered and the measurement of displacement.
Splits the parametric connector into two sep-
arate block definitions (i.e. parent and a child
or a child and another child).
Split Connector
AESPLIT
Adds pins to an existing connector.Add Connector Pins
AECONNECTORPIN
Removes a pin from an existing connector
and, if the connector has a defined pin list,
Delete Connector Pins
AEERASEPIN
frees this deleted pin to be re-inserted later
on this connector or on a related child of this
connector.
44 | Chapter 1 AutoCAD Electrical What's New
DescriptionCommand
Moves connector pin associated to selected
connector.
Move Connector Pin
AEMOVEPIN
Exchanges one set of connector pin numbers
for another on an existing connector or
between connectors on the drawing.
Swap Connector Pins
AESWAPPINS
NOTE You cannot swap a combination con-
nector with a single plug or receptacle con-
nector. Additionally, you cannot use this tool
to swap pins from one side of a connector to
the other.
Collects and annotates groups of components
that carry the same TAG text string value (such
Component Cross-Refer-
ence
as “101CR”). Components do not have to be
of the same family to be cross-referenced; they
AEXREF
just need to have the same
TAG1/TAG2/TAG_*/TAG attribute values.
Changes the visibility of cross-references. In
most cases the cross-referencing should be
Hide/Unhide Cross-Refer-
ence
visible but there are times when you may not
want the cross-referencing displayed on parent
symbols.
AEHIDEXREF
Updates cross-reference information for two
types of cross-reference symbols: wire number
Update Stand-Alone
Cross-Reference
signal arrow symbols and standalone cross-
reference symbols. It can update your source
AEUPDATESAXREF
or destination signals singly, drawing-wide,
or project-wide.
Converts a long string of relay coil or
source/destination cross-reference text to a
Change Cross-Reference
to Multiple Line Text
multiline text entity (MTEXT). The underlying
attribute value is maintained, but flipped to
AEXREF2TEXT
visible. The MTEXT entity is created at the
same XY location as the underlying attribute.
The MTEXT entity updates, scoots, and be-
Schematic tab | 45
DescriptionCommand
haves as if it is an attribute tied to the compon-
ent block.
Displays all associated and parent components
to the selected component. A complete list of
Cross-Reference Check
AEXREFCHECK
components is extracted from the project
drawing set. The component's tag is read,
then all associated components are found and
listed in the dialog box. A bill of material check
can be performed to see if the item's descrip-
tion indicates that the quantity of contacts
can be accommodated.
Updates child and panel components with
installation, location, and description values
Child Location/Descrip-
tion Update
carried by the associated parent schematic
component.
AECHILDLOCUPDATE
Copies and/or adds cross-reference compon-
ent overrides from another symbol. You can
Copy/Add Component
Override
define components to have different cross-
referencing styles. The settings specified using
AECOPYOVERRIDE
this tool override the drawing properties.
Component overrides are copied when the
component is copied; similarly they are ap-
plied to multiple inserts of the same compon-
ent.
Removes the component overrides so the
cross-referencing commands use the settings
for the drawing or project.
Remove Component
Override
AERMOVERRIDE
Displays a cross-reference table for all stand-
alone PLC I/O points that carry the selected
component tag.
Cross-Reference Table
AESHOWXREFTABLE
Performs mass copies of location, installation,
group, or mount codes to all of the compon-
Copy Installation/Loca-
tion Code Values
ents you select. You either type in the desired
46 | Chapter 1 AutoCAD Electrical What's New
DescriptionCommand
code, pick from an on-line list, or pick a similar
master component.
AECOPYINSTLOC
Associates two or more terminal symbols to-
gether. Associating schematic terminals com-
Associate Terminals
AEASSOCTERMINAL
bines the terminals into a single terminal block
property definition. The number of schematic
terminals that can be combined is limited to
the number of levels defined for the block
properties.
Breaks one or more terminal symbols out of
an existing association. Schematic terminals
Break Apart Terminal As-
sociations
are removed from any multi-tier relationship
and any schematic-panel relationships. Panel
AEBREAKASSOC
terminals are removed from any schematic-
panel relationships.
Displays terminals associated to a selected
terminal.
Show Terminal Associ-
ations
AESHOWTERMASSOC
Edits the jumper information, such as adding
catalog data, or deletes the jumper.
Edit Jumper
AEJUMPER
Copies terminal properties from one terminal
symbol to another. If the application of the
Copy Terminal Block
Properties
terminal properties reduces the number of
levels and the number of terminal symbols
AECOPYTERMINALPROP
exceeds the total allowed, an alert displays
and the properties are not copied.
Shows internal and external terminal block
connections.
Terminal:Show Intern-
al/External Connections
AESHOWTERMCONN
Schematic tab | 47
DescriptionCommand
Marks internal terminal block connections.
Controls which side of a terminal receives in-
ternal wire connections.
Terminal:Mark Internal
Connections
AEMARKTERMINT
Marks external terminal block connections.
Controls which side of a terminal receives ex-
ternal wire connections.
Terminal:Mark External
Connections
AEMARKTEMEXT
Erases internal and external terminal block
connections.
Terminal:Erase Intern-
al/External Connections
AEERASETEMCONN
Insert Wires/Wire Numbers panel
DescriptionCommand
Inserts single line wire segments on a wire
layer (the wire layer does not have to be the
current layer).
Insert Wire
AEWIRE
Inserts an angled (22.5 degree) line wire seg-
ment on a wire layer (the wire layer does not
have to be the current layer).
Insert 22.5 Degree Wire
AE225WIRE
Inserts an angled (45 degree) line wire seg-
ments on a wire layer (the wire layer does not
have to be the current layer).
Insert 45 Degree Wire
AE45WIRE
Inserts an angled (67.5 degree) line wire seg-
ments on a wire layer (the wire layer does not
have to be the current layer).
Insert 67.5 Degree Wire
AE675WIRE
Inserts wires between aligned connection
points on a pair of selected components.
Interconnect Compon-
ents
AECONNECTCOMP
48 | Chapter 1 AutoCAD Electrical What's New
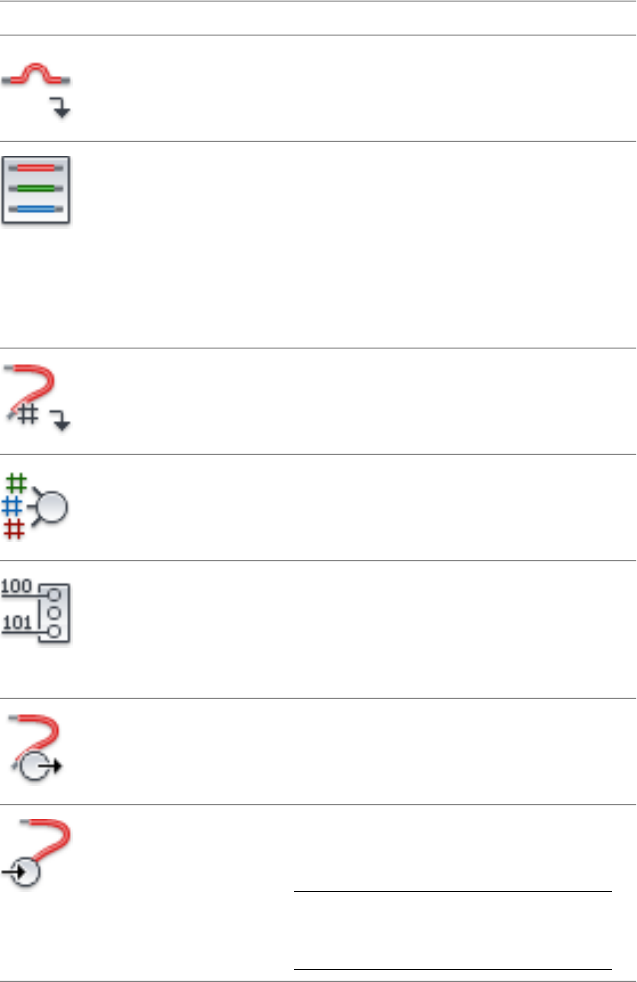
DescriptionCommand
Inserts a gap/loop at the point of two crossing
lines. Gaps are automatically inserted when a
new wire crosses another.
Insert Wire Gap
AEWIREGAP
Inserts vertical or horizontal bus wiring. Bus
spacing defaults to the default ladder rung
Multiple Wire Bus
AEMULTIBUS
spacing for horizontal bus. Multiple bus wiring
automatically breaks and reconnects to any
underlying components that it finds in its
path. If it crosses any existing wiring, wire-
crossing gaps automatically insert (if the
drawing is so configured).
Inserts or updates wire numbers associated
with wire line entities.
Insert Wire Numbers
AEWIRENO
Inserts special wire numbering generally asso-
ciated with 3-phase bus and motor circuits.
3 Phase Wire Numbers
AE3PHASEWIRENO
Inserts wire numbers based on the I/O address
that each PLC connected wire touches. Wire
PLC I/O Wire Numbers
AEPLCWIRENO
numbers go in as FIXED which means that
they will not change if a wire number retag is
run later on.
Copies wire number from a source-arrowed
wire network to any/all associated destination-
arrowed wire network.
Source Signal Arrow
AESOURCE
Retrieves the wire number for a destination-
arrowed wire network from its associated
source-arrowed wire network.
NOTE A Destination signal arrow cannot be
tied to a wire network that carries a pre-as-
signed fixed wire number.
Destination Signal Arrow
AEDESTINATION
Schematic tab | 49
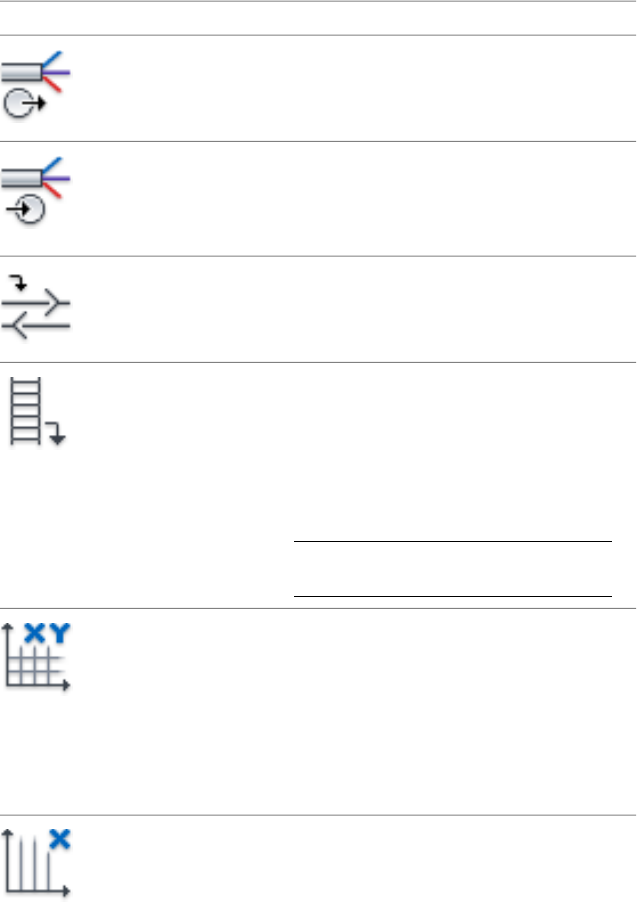
DescriptionCommand
Inserts in-line source marker symbols and
changes the connected wire on the fan-in side
to be on a non-wire layer.
Fan In/Out Source
AEFANINSRC
Changes the connected common wires on the
fan-out side to non-wire layer but leaves the
Fan In/Out Destination
AEFANINDEST
individual segments on the opposite side of
marker on the original wire layer.
Inserts non intelligent, reference-only arrows.Wire Arrows for Refer-
ence Only
AEREFWIREARROWS
Inserts ladders of a set width and length onto
the drawing. There is no limit to the number
Insert Ladder
AELADDER
of ladders that can be inserted into a drawing,
but ladders may not overlap each other. Mul-
tiple ladder fragments in the same vertical
column need to be vertically aligned along
their left-hand side.
NOTE These limitations do not apply when
X-Y Grid or X-Zone referencing is selected.
Inserts the X-Y grid labels for drawings that
use X-Y Grid for the Format Referencing. You
XY Grid Setup
AEXYGRID
can also change other settings from here (such
as origin) instead of going back into the
Drawing Properties dialog box. Your drawing
must be configured for X-Y Grids. Set the
Format Referencing in the Drawing Properties
dialog box to X-Y Grid.
Inserts the X grid labels for drawings that use
X Zones for the Format Referencing. You can
X Zones Setup
AEXZONE
also change other settings from here (such as
origin) instead of going back into the Drawing
Properties dialog box. Your drawing must be
configured for X Zones. Set the Format Refer-
50 | Chapter 1 AutoCAD Electrical What's New
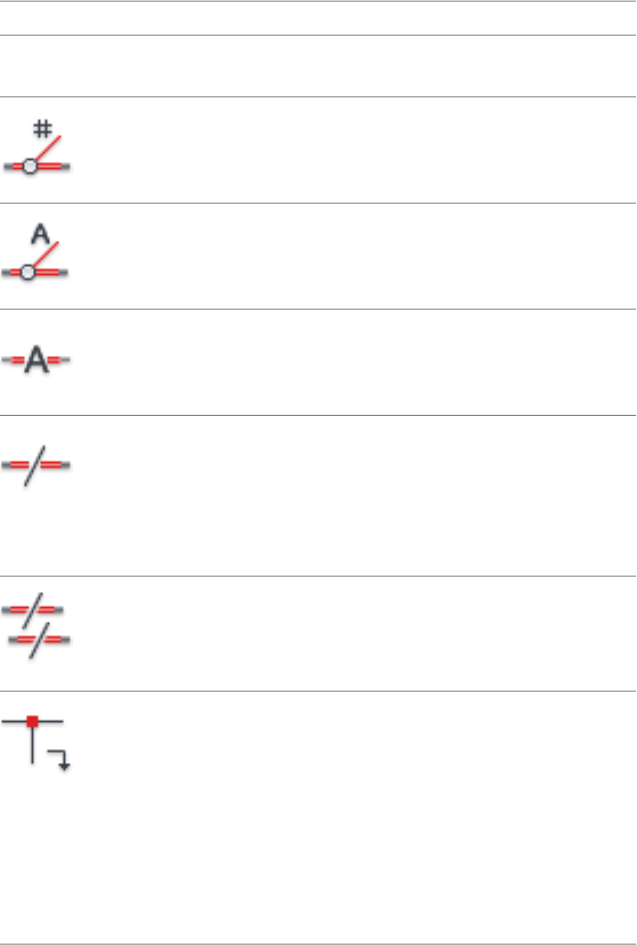
DescriptionCommand
encing in the Drawing Properties dialog box
to X Zones.
Repositions the wire number text with an at-
tached leader.
Wire Number Leader
AEWIRENOLEADER
Inserts wire color gauge labels with a leader
on your drawing's wiring.
Wire Color/Gauge Labels
AEWIRECOLORLABEL
Inserts a reference-only in-line wire label.In-Line Wire Labels
AEINLINEWIRE
Inserts cable markers onto the drawing. Cable
markers carry a cable TAG value, just like any
Cable Markers
AECABLEMARKER
parent/child device combination. They can
also carry a conductor color value (carried as
a RATING1 attribute value on the marker block
symbol).
Inserts all the markers for a particular cable.
In addition, you can edit existing cable marker
Multiple Cable Markers
AEMULTICABLE
sets, or even delete cable markers from this
dialog box.
Inserts a dot tee connection symbol at a
manually drawn wire intersection. If present,
Insert Dot Tee Markers
AEDOTTEE
this replaces an existing angled wire connec-
tion symbol with a dot connection symbol.
You cannot insert a tee connection symbol
into empty space. A valid line wire ending (not
crossing) at a tee intersection somewhere
along the length of another line wire is
needed. This means that it will not insert a tee
connection symbol at a 90-degree wire turn.
Schematic tab | 51
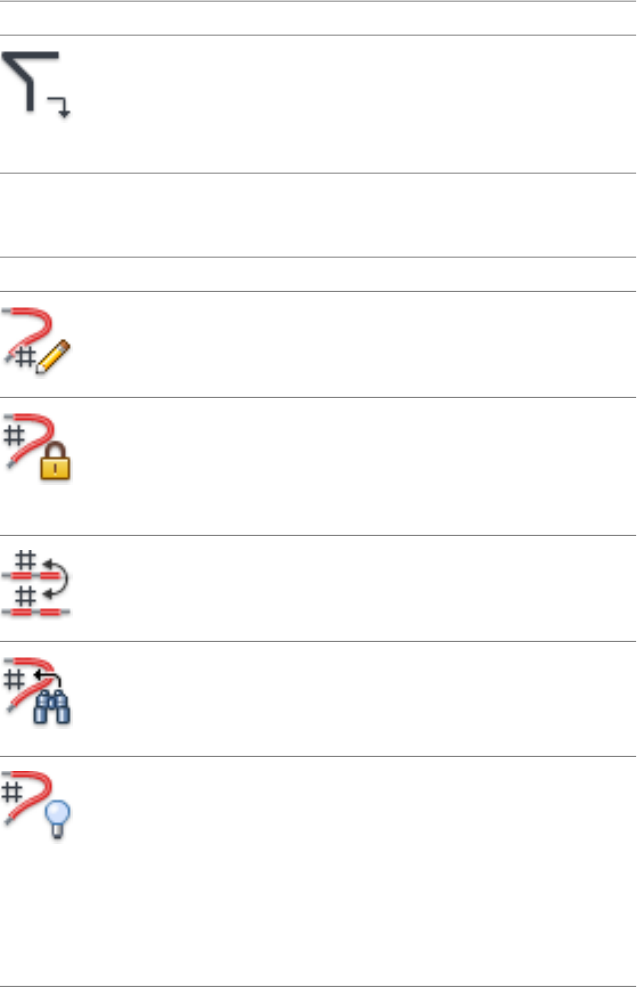
DescriptionCommand
Inserts an angled tee connection symbol at a
manually drawn wire intersection. You cannot
Insert Angled Tee Mark-
ers
insert a tee connection symbol into empty
space. If present, this replaces an existing wire
connection dot with a tee connection symbol.
AEANGLETEE
Edit Wires/Wire Numbers panel
DescriptionCommand
Allows manual edit of an existing wire number
or insert of a new one if none exists.
Edit Wire Number
AEEDITWIRENO
Fixes all or many wire numbers on a drawing
at their current values. Fixing a wire number
Fix Wire Numbers
AEFIXWIRENO
means that the wire number tag is left un-
changed if later processed or reprocessed by
the automatic wire numbering utility.
Swaps wire numbers between two wire net-
works.
Swap Wire Numbers
AESWAPWIRENO
Finds and replaces wire number text values or
substrings within those values. You can do this
Find/Replace Wire Num-
bers
on the active drawing or across the project
drawing set.
AEFINDWIRENO
Moves the wire number to a special hide layer
so that the number is no longer visible on the
Hide Wire Numbers
AEHIDEWIRENO
screen. The new hide layer is created from the
wire number layer name with a “_HIDE” suffix.
For example, if the wire number text layer is
called WIRENO then the hide layer name is
called “WIRENO_HIDE.” The layer is created
automatically when needed and you are asked
if you want to freeze this layer.
52 | Chapter 1 AutoCAD Electrical What's New
DescriptionCommand
Moves the wire number out of the hide layer
so that the number is visible on the screen.
Unhide Wire Numbers
AESHOWWIRENO
Removes a wire segment and dots as required.
You can select a single wire or draw a fence
through multiple wires to trim.
Trim Wire
AETRIM
Deletes selected wire numbers.Delete Wire Numbers
AEERASEWIRENUM NOTE If you erase a wire number and select
right on an extra wire number copy, AutoCAD
Electrical erases just that copy but leaves the
network’s main wire number and any other
copies in place.
Finds the nearest line reference location and
places a ladder rung at that reference position
Add Rung
AERUNG
(both bus wires must be visible on the screen
for this to work. If the new rung encounters a
schematic device floating in space, it tries to
break the wire across the device.
Adjusts the line reference numbering along
the side of the ladders; however it doesn't
change existing ladder rung spacing.
Revise Ladder
AEREVISELADDER
Renumbers the ladder for the selected draw-
ings from the active project.
Renumber Ladder Refer-
ence
AERENUMBERLADDER
Creates and edits wire types. Use the grid
control to sort and select the wire types for
easy modification.
Create/Edit Wire Type
AEWIRETYPE
Changes between wire types and converts
lines to wires. Use the grid control to sort and
select the wire types for easy modification.
Change/Convert Wire
Type
AECONVERTWIRETYPE
Schematic tab | 53
DescriptionCommand
Inserts extra wire numbers anywhere on a wire
network. These copies follow the network's
Copy Wire Number
AECOPYWIRENO
main wire number attribute. If AutoCAD Elec-
trical modifies it, then any wire number copies
on the network also update. Extra wire num-
bers go on their own layer that is defined in
the Define Layers dialog box. If you assign a
color to this layer that is different than the
normal wire number and fixed wire number
layers, then it is easy to tell them apart from
the network's main wire number.
Inserts extra wire numbers such that they ap-
pear in-line with the wire rather than above
Copy Wire Number (In-
Line)
or below the wire. These copies follow the
network's main wire number attribute; if
AECOPYWIRENOIL
AutoCAD Electrical modifies it then any wire
number copies on the network also update.
Extra wire numbers go on their own layer that
is defined in the Define Layers dialog box. If
you assign a color to this layer that is different
than the normal wire number and fixed wire
number layers, then it is easy to tell them apart
from the network's main wire number.
Adjusts the gap between the wire and the wire
number text of wire numbers that are in-line
with the wire.
Adjust In-Line Wire/Label
Gap
AEWIRELABELGAP
Moves an existing wire number from one
segment of the network to another.
Move Wire Number
AEMOVEWIRENO
Lengthens a wire until it meets another wire
or an AutoCAD Electrical component.
Stretch Wire
AESTRETCTWIRE
54 | Chapter 1 AutoCAD Electrical What's New
DescriptionCommand
Bends a wire in a right angle and makes 3
right angle turns to avoid or add geometry.
Bend Wire
AEBENDWIRE
When a wire is defined at a right angle you
can modify the wire and create a new right
angle bend while maintaining the original wire
connections to the components.
NOTE This tool terminates if the bend at-
tempts to connect two different wire networks
or if the bend bypasses more than a single
right angle turn.
Highlights all wires and displays wire number
to wire segment relationships.
Show Wires
AESHOWWIRE
Helps troubleshoot problems with unconnec-
ted or shorted wires and invalid wire crossing
Check/Trace Wire
AETRACEWIRE
gap pointers by single stepping through and
highlighting each connected wire of the selec-
ted wire network.
Flips the wire number across its associated
wire.
Flip Wire Number
AEFLIPWIRENO
Switches the wire number between above or
below and in-line. If the selected wire number
Toggle Wire Number In-
line
is in-line, it toggles to above or below based
on the default Wire Number Placement setting
AETOGGLEWIRENO
in the Drawing Properties dialog box. If it
starts as above or below, the selected wire
number toggles to in-line.
NOTE If there isn't room for a wire number
to become an in-line wire number, it remains
an above or below line wire number.
Schematic tab | 55
DescriptionCommand
Toggles an existing angled tee connection
symbol (or windowed symbols) through a
Toggle Angled Tee
Markers
total of 4 possible orientations. Right-click to
toggle through the various tee connection
AETOGGLETEE
orientations, and press ESC when the appro-
priate one displays. This replaces any dot tee
symbols with angled tee symbols, and then
toggles through the 4 possible orientations
for each.
Flips the gap to the other wire. AutoCAD
Electrical makes the gapped wire solid and
flips the gap/loop to the crossing wire(s).
Flip Wire Gap
AEFLIPWIREGAP
Removes a gap/loop that is no longer needed
in an existing wire.
Delete Wire Gap
AEERASEWIREGAP
Verifies that the invisible Xdata pointers on
both sides of a wire gap/loop are valid. If not,
appropriate pointers are established.
Check/Repair Gap Point-
ers
AEGAPPOINTER
Predefines a wire network's connection se-
quence, either in a single drawing or across
multiple drawing files.
Edit Wire Sequence
AEEDITWIRESEQUENCE
Shows the wire sequence defined using the
Define Wire Sequence tool. If the wire se-
Show Wire Sequence
AESHOWWIRESEQ
quence crosses multiple drawings and you try
to view the sequence as an animation, a dialog
box listing the off-drawing wire connection
information displays so that you can indicate
to go to the other drawings to continue
viewing the sequence.
Updates cross-reference information for two
types of cross-reference symbols. Wire number
Update Signal Refer-
ences
signal arrow symbols and standalone cross-
reference symbols.
AEUPDATESIGREF
56 | Chapter 1 AutoCAD Electrical What's New
DescriptionCommand
Defines a special layer or set of layers for the
wires going out of a Fan In/Out source marker
Fan In/Out - Single Line
Layer
AEFANIN and the wires coming into a destination
marker.
Follows a signal from a specific source or des-
tination symbol and lists the signal code refer-
ences.
List Signal Code
AELISTSIG
Displays signal source and destination paths
on the active drawing.
Show Signal Paths
AESHOWSIG
Updates cable marker assignments defined or
edited in a from/to listing.
Multiple Cable Markers
Update
AEUPDATECABLEMARK-
ERS
Other Tools panel
DescriptionCommand
Converts existing symbols or creates new,
custom components on the fly. It works nicely
Symbol Builder
AESYMBUILDER
for quickly building power supplies, filters,
drives, controllers, and other custom devices
or for converting existing non-AutoCAD Elec-
trical symbols to make them “AutoCAD Elec-
trical smart.” Schematic symbols created or
converted using the Symbol Builder are fully
compatible with AutoCAD Electrical, break
wires upon insertion, and appear in the various
BOM, component, and wire connection re-
ports.
Performs an update of all library symbol scal-
ing and text heights in the folder.
Modify Symbol Library
AEUPDATESYMLIB
Schematic tab | 57
DescriptionCommand
Launches the Icon Menu Wizard to easily
modify or expand an icon menu, or replace
Icon Menu Wizard
AEMENUWIZ
an existing icon menu with your own custom
menu. You can change the default icon menu
using the Project Properties dialog box. The
default icon menu can also be redefined in
“wd.env.”
Defines defaults for component and wire tag
formats, signal references, cross references,
and layers.
Drawing Properties
AEPROPERTIES
Renames layers one by one, or multiple layers
at once by using the Find/Replace method. In
Rename Schematic Lay-
ers
addition to renaming the layer, this also up-
dates the AutoCAD Electrical layer assignment
AERENAMELAYER
information carried on the drawing's WD_M
block. For example, if DEMO-WIRES is cur-
rently assigned as an AutoCAD Electrical wire
layer, and you rename it using this utility, the
new layer name is substituted for DEMO-
WIRES in the AutoCAD Electrical wire layer
name list.
Displays differences between drawing and
project settings. Allows update.
Settings Compare
AESHEETCOMPARE
Creates and modifies PLC I/O module defini-
tions. All editing and creation of PLC data is
PLC Database File Editor
AEPLCDB
stored within the PLC database file
(ACE_PLC.MDB).
Edits the electrical standards database file,
ace_electrical_standards.mdb. The electrical
Electrical Standards
Database Editor
standards database file sets default Circuit
Builder values, defines calculations, and allows
Circuit Builder to perform engineering analysis
AEBDEDITOR
in the area of power conductor size versus
energy losses
58 | Chapter 1 AutoCAD Electrical What's New
DescriptionCommand
Edits a pin list database table in the catalog
database.
Pin List Database Editor
(AEPINLISTTABLE)
Edits a Terminal Properties table in the catalog
database.
Terminal Properties
Database Editor
AETERMDBEDITOR
Edits the records in the schematic_lookup.mdb
file to use for mapping panel footprints and
Schematic Database File
Editor
terminal representations to the equivalent
schematic component block names.
AESCHEMATICDB
Power Check Tools panel
The Power Check Tools panel is off by default.
DescriptionCommand
Marks a component with a power source and
load value. A related routine, when invoked,
Add/Edit Power
Source/Load Levels
then scans the wire interconnections and re-
ports if there is too much load on a given
power source
AEPOWERLOADLEVELS
Marks a component with a PASSPWR flag. The
PASSPWR flag instructs the Power Report to
Mark Component To
Pass Power
pass through the marked component when
calculating the load on a given source. If a
AEPASSPWR
component carries the PASSPWR flag the
Power Report program will pass through the
component and continue looking for load
values on the network.
NOTE Certain components don't need a
PASSPWR flag (such as terminals and contacts)
since they are automatically passed through.
Schematic tab | 59
DescriptionCommand
Scans the wire interconnections and reports
if there is too much load on a given power
source.
Power Load Check Re-
port
AEPOWERLOADREPORT
Panel tab
Insert Component Footprints panel
DescriptionCommand
Inserts panel footprint selected from on-screen
icon menu. This icon menu can be modified,
Insert Footprint (Icon
Menu)
expanded, or replaced with your own custom
menu. You can change the default icon menu
AEFOOTPRINT
using the Project Properties dialog box. Use
the Icon Menu Wizard to easily modify the
menu.
Inserts and annotates panel footprint by refer-
encing the project's schematic component
Insert Footprint (Schem-
atic List)
list. This report provides error checking
between the schematics and the panel layout
AEFOOTPRINTSCH
drawings. The program looks at the selected
components, both schematic and panel, to
find a match in the project. For each schemat-
ic component selected, the routine tries to
find a matching panel component based on
tag, location, and installation information. If
a match is found, then it further compares
catalog information looking for any discrepan-
cies. The program looks at each selected panel
component looking for a matching schematic
component in the same way.
Inserts panel footprint using a generic shape
or by converting an existing non intelligent
AutoCAD block.
Insert Footprint (Manual)
AEFOOTPRINTMAN
60 | Chapter 1 AutoCAD Electrical What's New
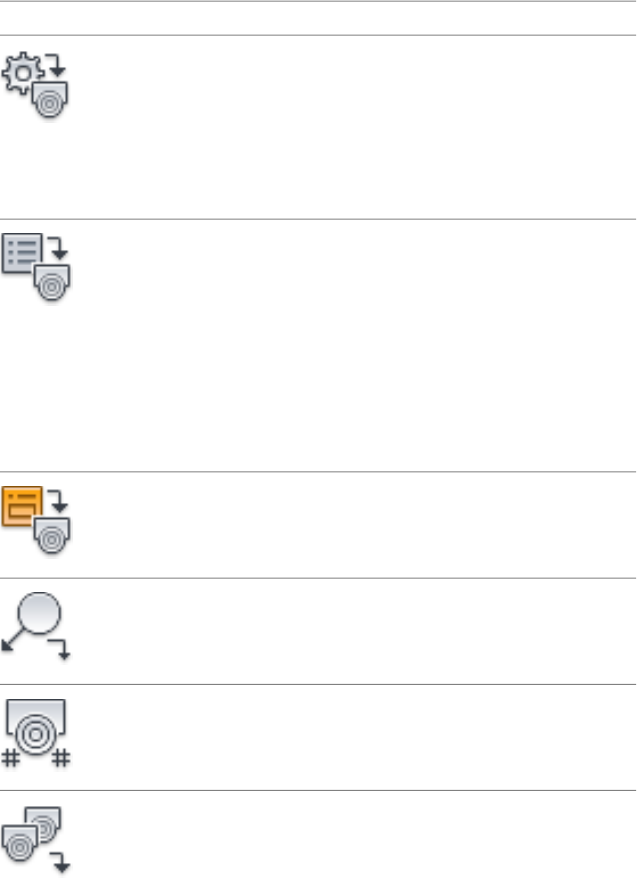
DescriptionCommand
Inserts and annotates panel footprint using
manufacturer-specific icon menu. This can
Insert Footprint (Manu-
facturer Menu)
save a lot of time if you frequently use the
same vendor and panel components. You can
AEFOOTPRINTMFG
even apply this method to create client-specif-
ic menus making it easier to use the vendor
or components that each client prefers.
Inserts and annotates panel footprint from
user-defined list of components with catalog
Insert Footprint (Catalog
List)
assignments. The data displayed in this pick
list is stored in a database in generic Microsoft
AEFOOTPRINTCAT
Access format. The file name is wd_pick-
list.mdb and can be edited with Access or
from Add/Edit/Delete along the bottom of the
pick list's dialog box. The AutoCAD Electrical
normal search path sequence is used to locate
this file.
Inserts and annotates panel footprint from
user-defined list of equipment.
Insert Footprint (Equip-
ment List)
AEFOOTPRINTEQ
Inserts item number balloon.Insert Balloon
AEBALLOON
Annotates panel footprint symbols with wire
connection information extracted from selec-
ted schematics.
Wire Annotation of Panel
Footprint
AEWIREANNOTATION
Inserts WBlocked panel footprint assembly.
Use the Insert Panel Assembly utility instead
Insert Panel Assembly
AEPANELASM
of the AutoCAD Insert/Explode command
when you want to insert a WBlocked group
of panel component footprints with balloons
or nameplates. Since AutoCAD Electrical estab-
lishes invisible Xdata pointers when these are
Panel tab | 61
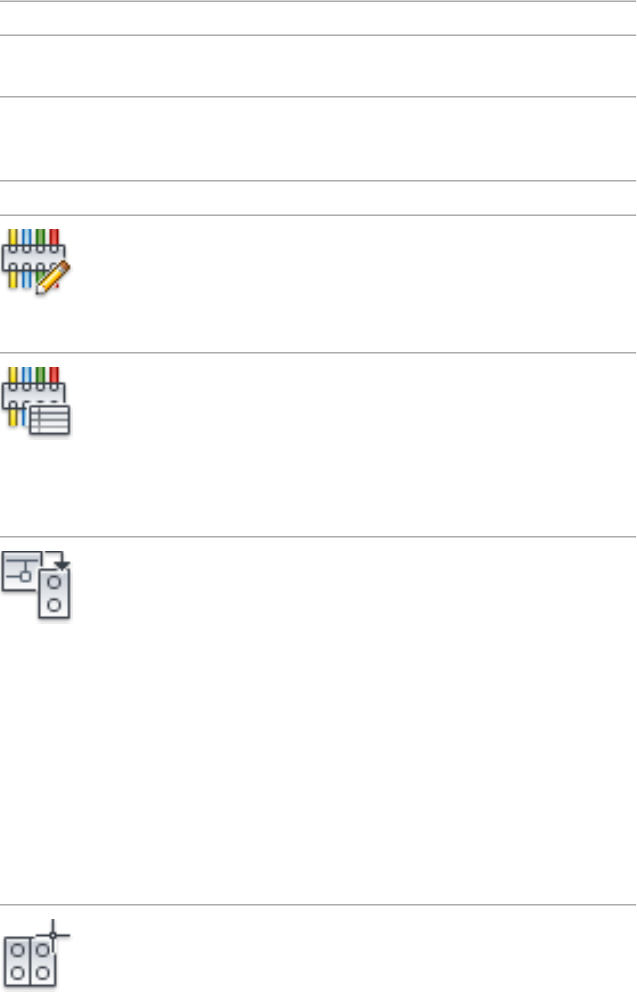
DescriptionCommand
tied to a footprint, they are properly updated
when copied using this utility.
Terminal Footprints panel
DescriptionCommand
Displays terminal strips inside of the active
project database. The combination of Func-
Terminal Strip Editor
AETSE
tion, Location, and Terminal Strip values make
a complete unique record for selection in the
Terminal Strip Selection dialog box.
Controls the Tabular Terminal layout format
automatically. This creates a new drawing file
Terminal Strip Table
Generator
with each section break and automatically
adds them to the project listing. The terminal
AETSEGENERATOR
strip's function (installation) code, location
code, and tag are written to the Page Descrip-
tion Field inside of the Project Listing (*.WDP).
Inserts and annotates panel terminals by refer-
encing the project's schematic terminal list.
Insert Terminal (Schem-
atic List)
This report provides error checking between
the schematic terminals and panel layout ter-
AEPANELTERMINALSCH
minals. The program looks at the selected
terminals, both schematic and panel, looking
for a match in the project. For each schematic
terminal selected, it tries to find a matching
panel terminal based on tag, location, and
installation information. If a match is found,
then it compares catalog information, and
description information, looking for any dis-
crepancies. The program then looks at each
selected panel terminal looking for a matching
schematic terminal in the same way.
Inserts and annotates panel terminal footprint
using a generic shape or by converting an
Insert Terminal (Manual)
AEPANELTERMINAL
existing non intelligent AutoCAD block. Some
62 | Chapter 1 AutoCAD Electrical What's New
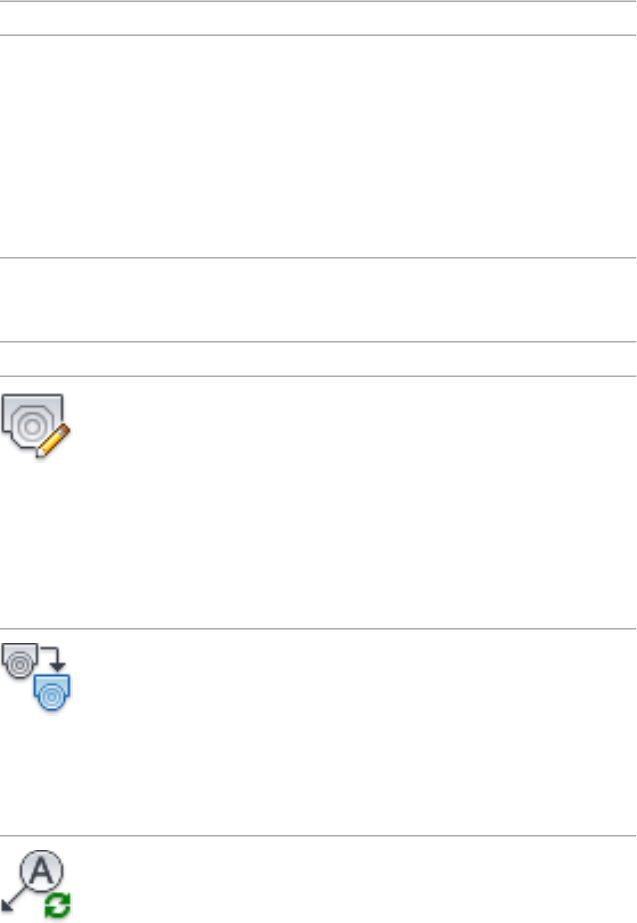
DescriptionCommand
schematic components may not carry manu-
facturer/catalog information or have a part
number assigned that is not listed in the
footprint lookup file. In such a case, AutoCAD
Electrical cannot determine what footprint
block needs to be used so you have to select
to make catalog assignments, select or create
a footprint, or create a lookup entry on the
fly.
Edit Footprints panel
DescriptionCommand
Edits panel footprint or terminal. Converts se-
lected block if it is not AutoCAD Electrical
Edit Footprint
AEEDITFOOTPRINT
compatible. In some cases, a footprint update
may be required due to manufacturer, catalog
or assembly value changes. When asked
whether to manually force a footprint change,
click No to leave the existing footprint block
as is or click Yes to set up a footprint lookup
database file or manually draw a simple foot-
print representation.
Copies selected panel footprint on active
drawing. Use the Copy Footprint tool instead
Copy Footprint
AECOPYFOOTPRINT
of AutoCAD Copy when a panel component
footprint has a balloon or a nameplate associ-
ated to it. Since AutoCAD Electrical establishes
invisible Xdata pointers when these are tied
to a footprint, they are properly updated when
copied using this utility.
Assigns or resequences item number assign-
ments on a drawing or project. This extracts
Resequence Item Num-
bers
all panel components and nameplates and
resequences their item numbers starting at
AERESEQUENCE
the value you provide. Resequencing is based
on the main MFG/CAT/ASSYCODE value
Panel tab | 63
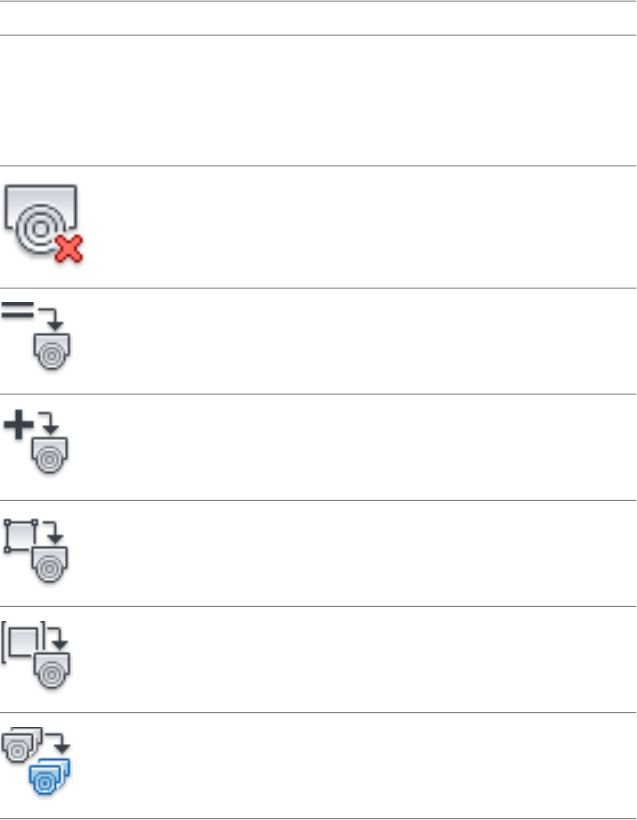
DescriptionCommand
combination. Additional multi-catalog num-
bers on a specific component are ignored.
Only the main part number combination is
used to group similar components together
under a common item number.
Removes the selected footprint from the
drawing. You have the option to search for
Delete Footprint
AEERASECOMP
related components, surf to them, and delete
them.
Copies Installation Code to one or more selec-
ted panel footprints.
Copy Installation Code
AECOPYINST
Copies Location Code to one or more selected
panel footprints.
Copy Location Code
AECOPYLOC
Copies Mount Code to one or more selected
panel footprints.
Copy Mount Code
AECOPYMOUNTCODE
Copies Group Code to one or more selected
panel footprints.
Copy Group Code
AECOPYGROUPCODE
Copies one or more selected panel footprints.Copy Assembly
AECOPYASM
64 | Chapter 1 AutoCAD Electrical What's New
Other Tools panel
DescriptionCommand
Converts existing symbols or creates new,
custom components on the fly. It works nicely
Symbol Builder
AESYMBUILDER
for quickly building power supplies, filters,
drives, controllers, and other custom devices
or for converting existing non-AutoCAD Elec-
trical symbols to make them “AutoCAD Elec-
trical smart.” Schematic symbols created or
converted using the Symbol Builder are fully
compatible with AutoCAD Electrical, break
wires upon insertion, and appear in the various
BOM, component, and wire connection re-
ports.
Launches the Icon Menu Wizard to easily
modify or expand an icon menu, or replace
Icon Menu Wizard
AEMENUWIZ
an existing icon menu with your own custom
menu. You can change the default icon menu
using the Project Properties dialog box. The
default icon menu can also be redefined in
“wd.env.”
Sets panel footprint drawing defaults such as
text sizes and layer assignments. Configuration
Panel Configuration
AEPANELCONFIG
settings are saved as attribute values on a non-
visible block named WD_PNLM (that inserts
at 0,0). If your current drawing does not have
this block present when any AutoCAD Electric-
al panel layout command is invoked, AutoCAD
Electrical pauses and asks you for permission
to insert this block.
Renames panel-related layers and updates
panel drawing settings. The Panel Layer Re-
Rename Panel Layers
AERENAMEPANLELLAYER
name utility makes it easy to rename layers
one by one, or multiple layers at once by using
the Find/Replace method. In addition to re-
naming the layer, this also updates the Auto-
CAD Electrical layer assignment information
carried on the drawing's WD_M block. For
Panel tab | 65
DescriptionCommand
example, if DEMO-WIRES is currently assigned
as an AutoCAD Electrical wire layer, and you
rename it using this utility, the new layer name
is substituted for DEMO-WIRES in the Auto-
CAD Electrical wire layer name list.
Updates selected footprint layer assignments
to match panel drawing settings layer assign-
ments.
Update Footprint Layers
AEFPLAYERS
Converts any piece of non-visible extended
entity data (Xdata) into a visible attribute tied
directly to the footprint block.
Make Xdata Visible
AESHOWXDATA
Edits the catalog number and footprint block
name lookup file. The footprint lookup data-
Footprint Database File
Editor
base links a manufacturer's catalog part num-
bers to appropriate footprint block .dwg files.
AEFOOTPRINTDB
This information is in a multitable Access
database file (footprint_lookup.mdb).
Conduit Tools panel
The Conduit Tools Panel is off by default.
DescriptionCommand
Formats an inter-wiring list from a selection
of interconnected components. Inserts as a
conduit tag.
Conduit Marker (Pick)
AECONDUITMARKER
Formats an inter-wiring list from a subset of a
component from/to report. Inserts as a con-
duit tag.
Conduit Marker
(From/To List)
AECONDUITMARKERL-
IST
66 | Chapter 1 AutoCAD Electrical What's New
DescriptionCommand
Edits conduit marker tag, descriptions, and
wire assignments.
Edit Conduit Marker
AEEDITCONDUITMARK-
ER
Extracts conduit marker information into a
report. Extractable conduit marker symbols
Conduit Marker Report
AECONDUITMARKERRPT
are named “WWAY*.” A conduit can be rep-
resented by a line or a polyline and by itself
does not carry any intelligence. However, you
can insert a conduit marker symbol and asso-
ciate it to a conduit. The conduit marker
symbol then carries wire information intelli-
gence pulled from the AutoCAD Electrical
drawings.
Reports a list of conduit tag assignments that
a given wire or cable passes through.
Wire/Conduit Routing
Report
AEROUTINGREPORT
Extracts schematic wiring information prior to
conduit assignment.
Extract Wire Data
AEEXTRACTWIREDATA
Reports tab
Schematic panel
DescriptionCommand
Generates schematic reports such as Bill of
Material, Component lists, Wire From/To, PLC
descriptions.
Schematic Reports
AESCHEMATICREPORT
Reports tab | 67
DescriptionCommand
Displays components that do not carry a
catalog number assignment. The components
Show Missing Catalog
Assignment
are marked with diamond-shaped temporary
graphics.
AEMISSINGCATREPORT
Displays a report of detected problems or po-
tential problems. You can save this file for ref-
Electrical Audit
AEAUDIT
erence or surf the file to view and correct the
errors.
Displays a report of detected problems or po-
tential problems. You can save this file for ref-
Drawing Audit
AEAUDITDWG
erence or surf the file to view and correct the
errors.
Displays a signal list and exception report.Signal Error/List Report
AESIGNALERRORREPORT
Panel panel
DescriptionCommand
Generates panel reports such as Bill of Materi-
al, Component lists, Nameplates.
Panel Reports
AEPANELREPORT
Miscellaneous panel
DescriptionCommand
Defines a list of reports and their format files
to run automatically.
Automatic Report Selec-
tion
AEAUTOREPORT
68 | Chapter 1 AutoCAD Electrical What's New
DescriptionCommand
Creates and maintains report formatting files.Report Format File Setup
AEFORMATFILE
Creates an attribute text file (*.wda) of user-
defined attributes defined on AutoCAD Elec-
User Defined Attribute
List
trical block files. The User Defined Attribute
List is used by report tools to determine which
AEUDA
additional attributes are listed in a report. The
list file name can be the same as the active
project or named Default to be used by the
entire system. The Default .wda file is saved in
the base project folder, while the <pro-
ject_name>.wda file is saved in the same folder
as the project definition file (*.wdp).
Import/Export Data tab
Import panel
DescriptionCommand
Imports Unity Pro hardware (.xhw) and I/O
variable (.xsy) files into AutoCAD Electrical to
Unity Pro Export to
Spreadsheet
reformat the data into a PLC import spread-
sheet. After the spreadsheet file is created use
AEUNITYPROSS
the Spreadsheet to PLC I/O Utility tool to
automatically create PLC style drawing files.
Creates a set of PLC I/O drawings from
spreadsheet data. A project's PLC I/O require-
Spreadsheet to PLC I/O
Utility
ments, in spreadsheet or database format, can
drive automatic generation of the I/O schem-
AESS2PLC
atic drawings. Your information can be read
directly in Excel format (“.XLS”), as a table in
an Access Database file (.MDB), or you can
save your information out to a comma-delim-
ited format (“CSV”) and then let AutoCAD
Import/Export Data tab | 69
DescriptionCommand
Electrical construct a set of PLC I/O wiring
diagrams directly from your data. Ladders and
modules insert automatically, breaking at the
bottom of one ladder and continuing on the
next (or on to the next drawing).
Imports data from an edited spreadsheet, and
retags or updates components, wire numbers,
terminal text, or PLC I/O.
Update from Spread-
sheet
AEIMPORTSS
Updates project drawings; attribute text only,
from edits to the project's scratch database
file.
Update from Project
Scratch Database
AEIMPORTDB
Inserts comma-delimited spreadsheet data into
a drawing as a table.
Insert Spreadsheet Data
to Table
AEINSERTSSTABLE
Prepares RSLogix 500 exported data to be
processed by the Spreadsheet to PLC I/O
Utility.
RSLogix 500 Export to
Spreadsheet
AERSLOGIX
Export panel
DescriptionCommand
Extracts wire list information into an XML ex-
port file to be used exclusively with Autodesk
Inventor Professional Cable and Harness.
Autodesk Inventor Profes-
sional Export
AEAIPEXPORT
NOTE You must first configure wire number-
ing to be On per Wire Basis for export and set
up the appropriate variables before running
the report.
Creates the Unity Pro I/O variable file (.xsy) in
the Unity Pro XML format. The XML file con-
Unity Pro Export
AEUNITYPRO
70 | Chapter 1 AutoCAD Electrical What's New
DescriptionCommand
tains the PLC I/O addresses and descriptions
for import into the Unity Pro software.
Exports the selected data category to a
comma-delimited, Excel XLS, or Access MDB
file format for editing.
Export to Spreadsheet
AEEXPORT2SS
Conversion Tools tab
Tools panel
DescriptionCommand
Converts drawing files from promis·e to
AutoCAD Electrical. It examines the current
Promis·e Conversion
AEP2E
symbol attributes on the drawing and maps
them to the equivalent AutoCAD Electrical at-
tribute to make them AutoCAD Electrical-
smart.
Adds AutoCAD geometry to a template block
file to be created as part of a unique block in-
Add Geometry
AEGEOMETRY
stance. It creates a new block definition with
the newly added geometry. You can sub-
sequently create a new block file if the block
is exploded.
Adds wire connection attributes to the existing
tagged block file. Select line endpoints or
Add Wire Connections
AEWIRECONN
geometry to add the appropriate wire connec-
tion attributes to. A new block definition is
created with the newly added wire connec-
tions. You can subsequently create a new
block file if the block is exploded.
Explodes attributes and blocks to geometry
and text entities while maintaining the value
Special Explode
AEEXPLODE
previously defined in the attributes. You can
Conversion Tools tab | 71
DescriptionCommand
take advantage of the tagging tools to modify
the text entities to attributes and the linking
tools to make various blocks.
Converts the upper-most line reference num-
ber on a non-intelligent ladder to be AutoCAD
Electrical-aware.
Convert Ladder
AE2LADDER
Changes between wire types and converts
lines to wires. Use the grid control to sort and
select the wire types for easy modification.
Change/Convert Wire
Type
AECONVERTWIRETYPE
Verifies that the invisible Xdata pointers on
both sides of a wire gap/loop are valid. If not,
appropriate pointers are established.
Check/Repair Gap Point-
ers
AEGAPPOINTER
Changes attribute text size when components
or wire numbers have already been inserted
onto your drawings.
Change Attribute Size
AEATTSIZE
Allows display and edit of an object's “1000”
type extended entity data (Xdata).
Xdata Editor
AEXDATA
Takes non-AutoCAD Electrical blocks or
graphics representing a symbol and replaces
Convert to Schematic
Component
it with an AutoCAD Electrical block and trans-
fers the attribute or text values to this new
AutoCAD Electrical block.
AEBLK2SCH
Replace a non-AutoCAD Electrical source arrow
with a smart AutoCAD Electrical source arrow
Convert Block to Source
Arrow
and maps the information to the new Auto-
CAD Electrical source.
AEBLK2SRC
Replaces a non-AutoCAD Electrical destination
arrow with a smart AutoCAD Electrical destin-
ation arrow.
Convert Block to Destin-
ation Arrow
AEBLK2DEST
72 | Chapter 1 AutoCAD Electrical What's New
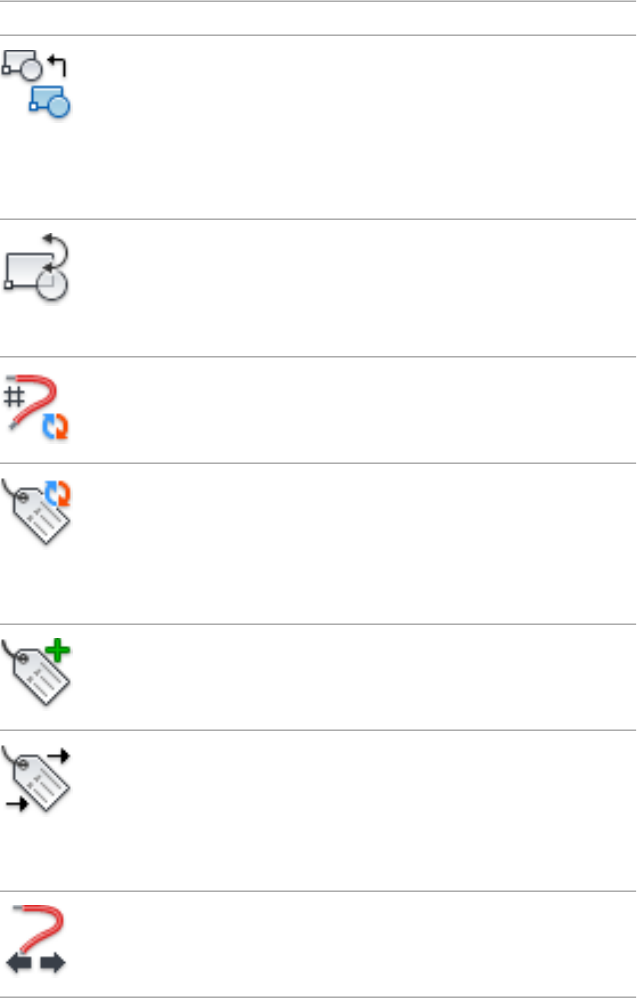
DescriptionCommand
Performs drawing-wide and project-wide block
replacements using a user-defined spread-
Block Replacement
AEBLOCKREPLACE
sheet. This automatically maps the unconver-
ted drawing's non-AutoCAD Electrical block
inserts and attributes to appropriate AutoCAD
Electrical-smart component symbols drawn
from a symbol library.
Use to update or change blocks in place. At-
tribute values are retained during the swap-
Swap/Update Block
AESWAPBLOCK
ping process. Wire connections are also
maintained even if the new symbol is slightly
wider or narrower than the original.
Converts a text object to an AutoCAD Electric-
al compatible wire number.
Convert Text to Wire
Numbers
AETEXT2WIRENO
Converts a text object into an attribute defini-
tion object. This is not an attribute associated
Convert Text to Attrib-
ute Definition
to an already-inserted block. This is an attrib-
ute definition possibly on a library symbol that
AETEXT2ATT
becomes an attribute when the symbol draw-
ing is inserted as a block into another drawing.
Adds a new attribute to an existing instance
of a block insert.
Add Attribute
AEATTRIBUTE
Reassigns attributes from a converted block
to those expected by AutoCAD Electrical. This
Map Attributes from Old
to New
allows you to continue what you started with
Convert to Schematic Component. Use this if
AEMAPATT
you did not finish mapping values from your
non-AutoCAD Electrical block.
Lengthens a wire until it meets another wire
or an AutoCAD Electrical component.
Stretch Wire
AESTRETCTWIRE
Conversion Tools tab | 73
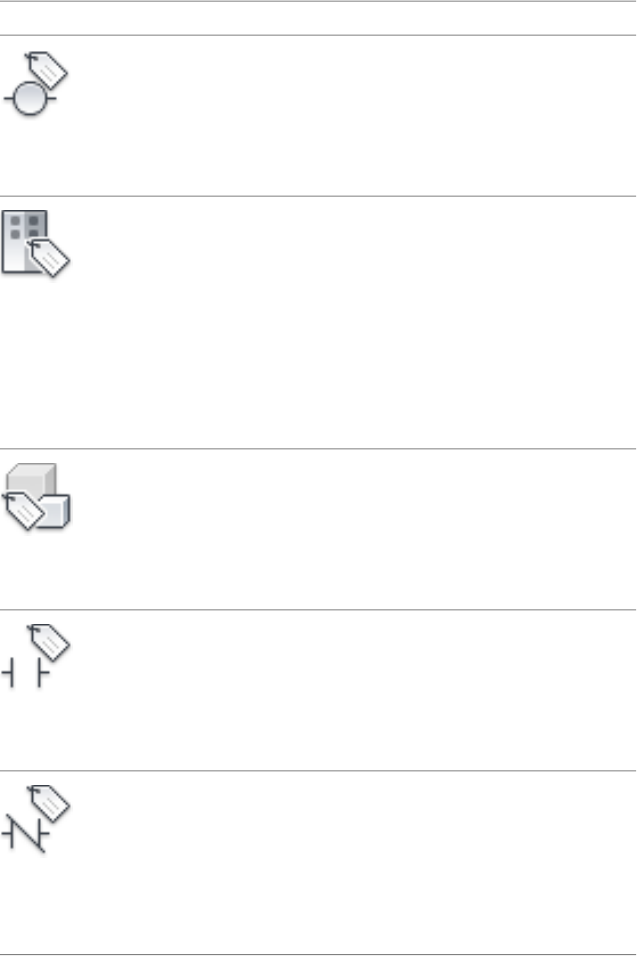
Schematic panel
DescriptionCommand
Makes selected text entities an attributed block
file with the TAG1 attribute visible. The tem-
Tag Schematic Compon-
ent
plate block file (HDV1_CONVERT.DWG or
VDV1_CONVERT.DWG depending on the
AETAGSCH
drawing properties) contains attributes for a
schematic component.
Makes selected text entities an attributed PLC
address associated to a PLC tag. The template
Tag PLC
AETAGPLC
block file (PLCIO_ADDR_CONVERT.DWG,
PLCIO_CONVERT.DWG, PLCIO_V_ADDR_CON-
VERT.DWG, or PLCIO_V_CONVERT.DWG de-
pending on the drawing properties) contains
attributes found useful for PLC addressing.
After the addressing is defined on the block,
select a PLC Tag or place one into the symbol
definition for use with AutoCAD Electrical.
Makes selected text entities an attributed block
file with the TAG2 attribute visible. The tem-
Tag Child
AETAGCHILD
plate block file (HDV2_CONVERT.DWG or
VDV2_CONVERT.DWG depending on the
drawing properties) contains attributes used
for a child component.
Makes selected text entities an attributed block
file with the TAG2 attribute visible. The tem-
Tag Child - N.O.
AETAGNO
plate block file (HDV21_CONVERT.DWG or
VDV21_CONVERT.DWG depending on the
drawing properties) contains attributes used
for a child normally open contact component.
Makes the selected text entities an attributed
block file with the TAG2 attribute visible. The
Tag Child - N.C.
AETAGNC
template block file (HDV22_CONVERT.DWG
or VDV22_CONVERT.DWG depending on the
drawing properties) contains attributes used
for a child normally closed contact compon-
ent.
74 | Chapter 1 AutoCAD Electrical What's New
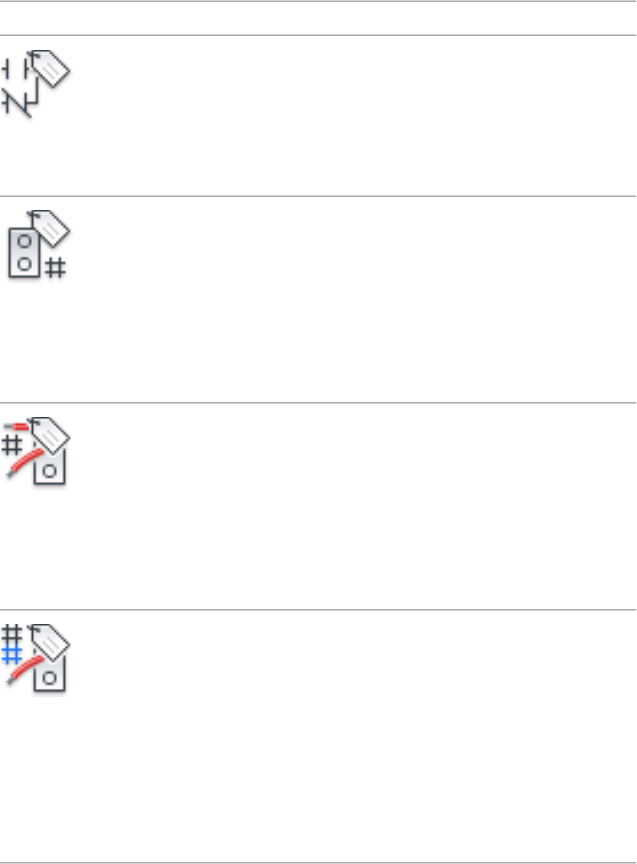
DescriptionCommand
Makes the selected text entities an attributed
block file with the TAG2 attribute visible. The
Tag Child - Form C
AETAGFORMC
template block file (HDV23_CONVERT.DWG
or VDV23_CONVERT.DWG depending on the
drawing properties) contains attributes used
for a child Form C contact component.
Makes the selected text entities an attributed
block file with the TAGSTRIP and TERM01 at-
Tag Schematic Terminal
- Terminal Number
tribute visible. The template block file
(HT0T_CONVERT.DWG or VT0T_CON-
AETAGTERMINAL
VERT.DWG depending on the drawing prop-
erties) contains attributes used for a terminal
block component containing a terminal
number.
Makes the selected text entities an attributed
block file with the TAGSTRIP and WIRENO at-
Tag Schematic Terminal
- Wire Number
tribute visible. The template block file
(HT0W_CONVERT.DWG or VT0W_CON-
AETAGWIRENO
VERT.DWG depending on the drawing prop-
erties) contains attributes used for a terminal
block component containing a wire number
as the terminal number.
Makes the selected text entities an attributed
block file with the TAGSTRIP and TERM01 at-
Tag Schematic Terminal
- Wire Number Change
tribute visible. The template block file
(HT1T_CONVERT.DWG or VT1T_CON-
AETAGWIRENOCHANGE
VERT.DWG depending on the drawing prop-
erties) contains attributes used for a terminal
block component that changes the wire
number. This creates a terminal number block
that has a different wire number for each wire
connected to it.
Conversion Tools tab | 75
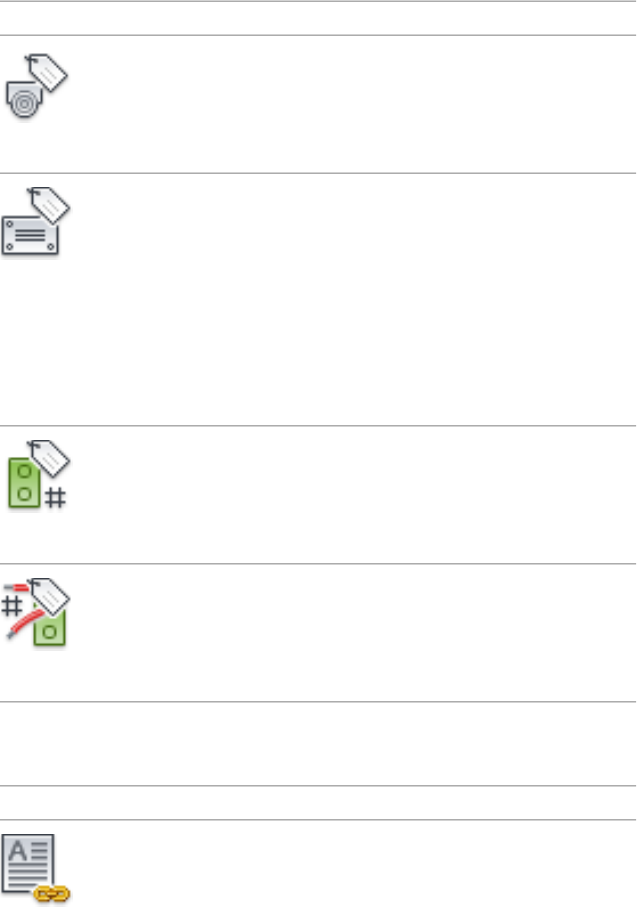
Panel panel
DescriptionCommand
Makes selected text entities an attributed block
file with the P_TAG1 attribute visible. The
Tag Panel Component
AETAGPANEL
template block file (ACE_P_TAG1_CON-
VERT.DWG) contains attributes for a panel
component.
Makes selected text entities an attributed block
file with the DESC1-3 attributes visible. The
Tag Nameplate
AETAGNAMEPLATE
template block file (ACE_NP_CONVERT.DWG)
contains attributes used in nameplate symbols.
If the description text strings were previously
defined as attributes on an AutoCAD Electrical
panel component block definition, the attrib-
ute values on the panel component are hidden
and the nameplate attributes DESC1-3 are
added and made visible.
Makes selected text entities an attributed block
file with the TERM01 terminal number attrib-
Tag Panel Terminal -
Terminal Number
ute visible. The template block file (ACE_TER-
MT_CONVERT.DWG) contains attributes for
terminal numbers.
AETAGPANELTERMINAL
Makes selected text entities an attributed block
file with the WIRENO wire number attribute
Tag Panel Terminal -
Wire Number
visible. The template block file (ACE_TER-
MW_CONVERT.DWG) contains attributes for
panel terminal symbols.
AETAGWIRENO
Attributes panel
DescriptionCommand
Links simple text as Description 1-3 attributes
on an AutoCAD Electrical block file. You can
Link Descriptions
AELINKDESC
link them as description attributes to one or
more existing template block definitions.
During the conversion process, the text entity
76 | Chapter 1 AutoCAD Electrical What's New
DescriptionCommand
is removed and replaced with the next avail-
able description attribute, up to 3.
Links simple text to a PLC address attribute as
PLC I/O address description attributes. During
Link PLC Address Descrip-
tions
the conversion process, the text entity is re-
moved and replaced with the next available
PLC address description attribute, up to 5.
AELINKPLC
Links simple text to a TAGSTRIP attribute as a
terminal number attribute on an AutoCAD
Link Terminal Number
AELINKTERMINAL
Electrical terminal block symbol. During the
conversion process, the text entity is removed
and replaced with the TERM01 or WIRENO
attribute.
Links simple text as manufacturer attributes
on an AutoCAD Electrical block file. The entity
Link Manufacturer
AELINKMFG
value is used as the Manufacturer value for
one or more template block definitions. If only
one template block is selected for the link, the
text entity is removed and replaced with the
Manufacturer attribute.
Links simple text as Catalog Number attributes
on an AutoCAD Electrical block file. The entity
Link Catalog Number
AELINKCAT
value is used as the Catalog Number value for
one or more template block definitions. If only
one template block is selected for the link, the
text entity is removed and replaced with the
Catalog Number attribute.
Links simple text as Location attributes on an
AutoCAD Electrical block file. The entity value
Link Location Code
AELINKLOC
is used as the Location value for one or more
template block definitions. If only one tem-
plate block is selected for the link, the text
entity is removed and replaced with the Loca-
tion attribute.
Conversion Tools tab | 77
DescriptionCommand
Links simple text as Installation attributes on
an AutoCAD Electrical block file. The entity
Link Installation Code
AELINKINST
value is used as the Installation value for one
or more template block definitions. If only one
template block is selected for the link, the text
entity is removed and replaced with the Install-
ation attribute.
Links another string of text to a tag attribute,
creating a split tag. Create the device Tag us-
Link Split Tag
AELINKSPLITTAG
ing the TAG1, TAG, or P_TAG1 attributes, and
then use this tool to select the existing TAG
attribute on the drawing and link another
string of text, creating a split tag situation.
The first TAG becomes the Part1 of the split
tag while the linked portion becomes the Part2
of the split tag.
Links simple text (that is not an attribute
definition or part of geometry) as User (01-99)
Link User
AELINKUSER
attributes on an AutoCAD Electrical block file.
The entity value is used as the user value for
one or more template block definitions. If only
one template block is selected for the link, the
text entity is removed and replaced with the
user attribute, up to 99. Window selection is
allowed.
Links simple text as Rating 1-12 attributes on
an AutoCAD Electrical block file. The entity
Link Rating
AELINKRATING
value is used as the rating value for one or
more template block definitions. If only one
template block is selected for the link, the text
entity is removed and replaced with the rating
attribute, up to 12.
Links simple text as an Item Number attribute
on an AutoCAD Electrical Panel block file.
Link Item Number
AELINKITEM
During the conversion process, the text entity
is removed and replaced with the Item Num-
ber attribute (P_ITEM).
78 | Chapter 1 AutoCAD Electrical What's New
DescriptionCommand
Selects the tagged template block file and
displays everything (such as description, loca-
Show Links
AESHOWLINK
tion, manufacturer, and catalog number
codes) that has been linked to it.
Selects an existing linked attribute and unlinks
the attribute from the symbol, changing the
attribute to AutoCAD text.
Un Link
AEUNLINK
Symbol Builder tab
Edit panel
The Symbol Builder tab is displayed automatically when you use Symbol
Builder.
DescriptionCommand
Displays the Save Symbol Definition dialog
box.
Save Symbol Definition
AESAVESYM
Displays the Symbol Audit dialog box.Symbol Audit
AESYMAUDIT
Switches on and off the visibility of the symbol
builder attribute editor window.
Show Hide Symbol Block
Editor Palette
AEPALETTESHOW
Symbol Builder tab | 79
Help panel
The Symbol Builder tab is displayed automatically when you use Symbol
Builder.
DescriptionCommand
Displays the Symbol builder Help.Symbol Builder Help
Toolbars to Ribbons
Main Electrical toolbar
Command Access
Schematic tab ➤ Insert Components panel ➤ Insert Components drop-down ➤ Icon Menu.
Schematic tab ➤ Insert Components panel ➤ Insert Components drop-down ➤ Catalog
List.
Schematic tab ➤ Insert Components panel ➤ Insert Components drop-down ➤ Equipment
List.
Schematic tab ➤ Insert Components panel ➤ Insert Components drop-down ➤ Panel List.
80 | Chapter 1 AutoCAD Electrical What's New
Command Access
Schematic tab ➤ Insert Components panel ➤ Insert Components drop-down ➤ Terminal
(Panel List).
Schematic tab ➤ Edit Components panel ➤ Swap/Update Block.
Schematic tab ➤ Edit Components panel ➤ Copy Component.
Schematic tab ➤ Insert Components panel ➤ Multiple Insert drop-down ➤ Multiple Insert
(Icon Menu).
Schematic tab ➤ Insert Components panel ➤ Multiple Insert drop-down ➤ Multiple Insert
(Pick Master).
Schematic tab ➤ Insert Components panel ➤ Dashed Link Line drop-down ➤ Link Com-
ponents with Dashed Line.
Schematic tab ➤ Insert Components panel ➤ Dashed Link Line drop-down ➤ Insert Refer-
ence Arrow - To.
Toolbars to Ribbons | 81
Command Access
Schematic tab ➤ Insert Components panel ➤ Dashed Link Line drop-down ➤ Insert Refer-
ence Arrow - From.
Schematic tab ➤ Insert Components panel ➤ Insert PLC drop-down ➤ Insert PLC (Paramet-
ric).
Schematic tab ➤ Insert Components panel ➤ Insert PLC drop-down ➤ Insert PLC (Full
Units).
Import/Export Data tab ➤ Import panel ➤ Unity Pro.
Import/Export Data tab ➤ Import panel ➤ RSLogix 500.
Import/Export Data tab ➤ Import panel ➤ PLC I/O Utility.
Schematic tab ➤ Other Tools panel ➤ ➤ Database Editors drop-down ➤ PLC
Database File Editor.
82 | Chapter 1 AutoCAD Electrical What's New
Command Access
Schematic tab ➤ Insert Components panel ➤ Insert Connector drop-down ➤ Insert Con-
nector.
Schematic tab ➤ Insert Components panel ➤ Insert Connector drop-down ➤ Insert Con-
nector (From List).
Schematic tab ➤ Edit Components panel ➤ Modify Connectors drop-down ➤ Reverse
Connector.
Schematic tab ➤ Edit Components panel ➤ Modify Connectors drop-down ➤ Rotate
Connector
Schematic tab ➤ Edit Components panel ➤ Modify Connectors drop-down ➤ Stretch
Connector.
Schematic tab ➤ Edit Components panel ➤ Modify Connectors drop-down ➤ Split Con-
nector.
Schematic tab ➤ Edit Components panel ➤ Modify Connectors drop-down ➤ Add Con-
nector Pins.
Toolbars to Ribbons | 83
Command Access
Schematic tab ➤ Edit Components panel ➤ Modify Connectors drop-down ➤ Delete
Connector Pins.
Schematic tab ➤ Edit Components panel ➤ Modify Connectors drop-down ➤ Move Con-
nector Pins.
Schematic tab ➤ Edit Components panel ➤ Modify Connectors drop-down ➤ Swap Con-
nector Pins.
Schematic tab ➤ Insert Components panel ➤ Insert Connector drop-down ➤ Insert Splice.
Schematic tab ➤ Insert Components panel ➤ Circuit drop-down ➤ Insert WBlocked Circuit.
Schematic tab ➤ Insert Components panel ➤ Circuit drop-down ➤ Insert Saved Circuit.
Schematic tab ➤ Edit Components panel ➤ Circuit drop-down ➤ Copy Circuit.
84 | Chapter 1 AutoCAD Electrical What's New
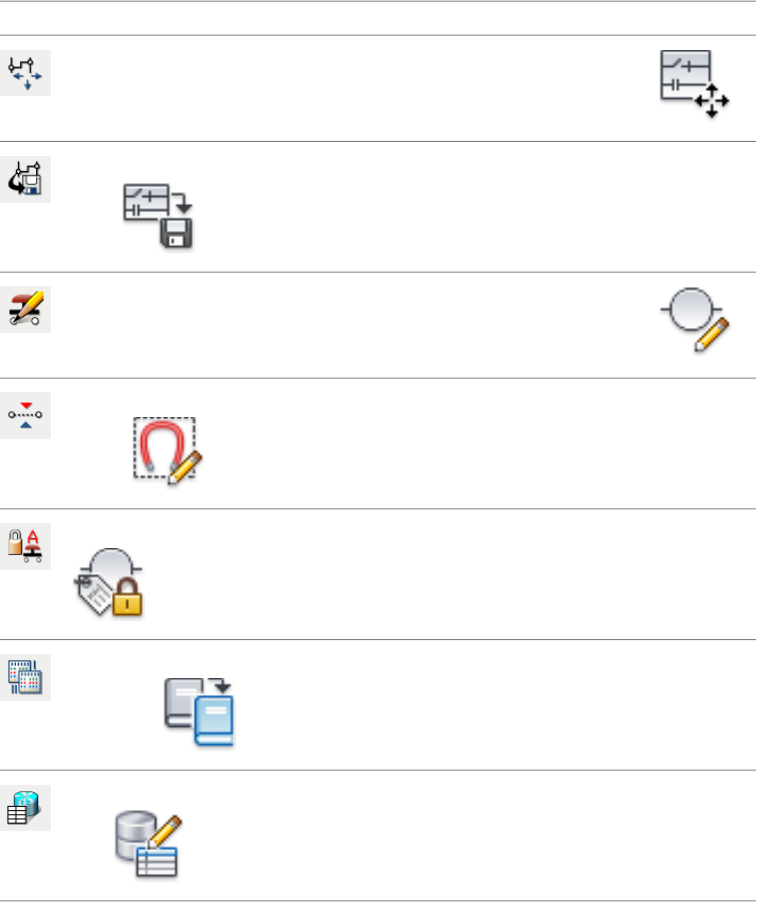
Command Access
Schematic tab ➤ Edit Components panel ➤ Circuit drop-down ➤ Move Circuit.
Schematic tab ➤ Edit Components panel ➤ Circuit drop-down ➤ Save Circuit to Icon
Menu.
Schematic tab ➤ Edit Components panel ➤ Edit Components drop-down ➤ Edit.
Schematic tab ➤ Edit Components panel ➤ Edit Components drop-down ➤ Internal
Jumper.
Schematic tab ➤ Edit Components panel ➤ Edit Components drop-down ➤ Fix/Unfix Tag.
Schematic tab ➤ Edit Components panel ➤ Edit Components drop-down ➤ Copy Catalog
Assignment.
Schematic tab ➤ Edit Components panel ➤ Edit Components drop-down ➤ User Table
Data.
Toolbars to Ribbons | 85
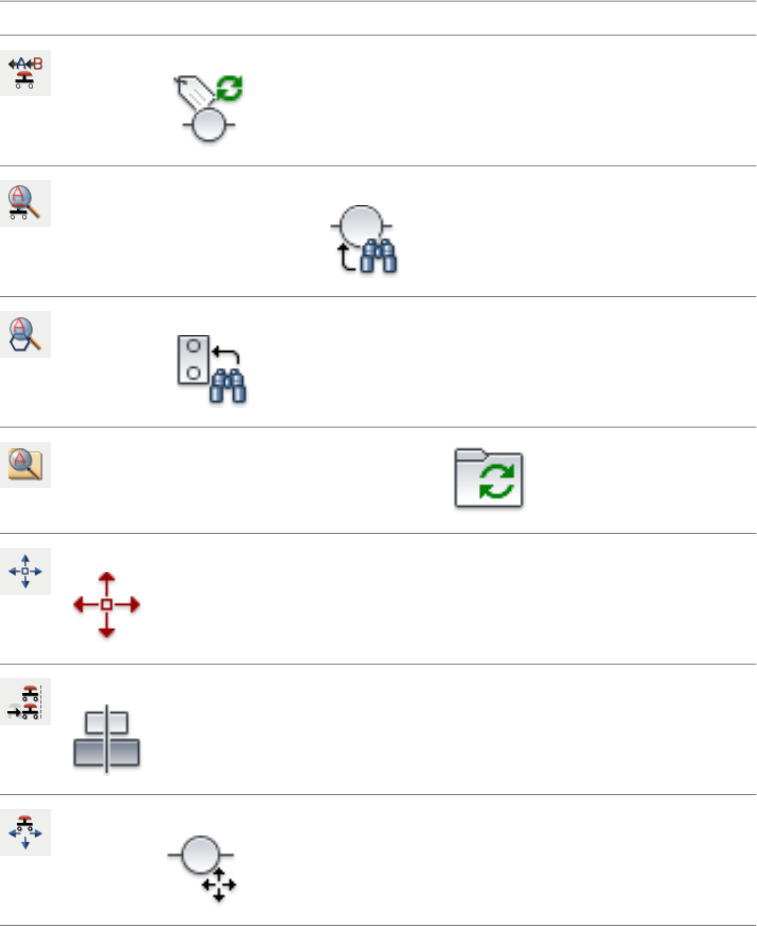
Command Access
Schematic tab ➤ Edit Components panel ➤ Retag Components drop-down ➤ Retag
Components.
Schematic tab ➤ Edit Components panel ➤ Retag Components drop-down ➤
Find/Edit/Replace Component Text.
Schematic tab ➤ Edit Components panel ➤ Retag Components drop-down ➤ Find/Replace
Terminal Text.
Project tab ➤ Project Tools panel ➤ Update/Retag.
Schematic tab ➤ Edit Components panel ➤ Modify Components drop-down ➤ Scoot.
Schematic tab ➤ Edit Components panel ➤ Modify Components drop-down ➤ Align.
Schematic tab ➤ Edit Components panel ➤ Modify Components drop-down ➤ Move
Component.
86 | Chapter 1 AutoCAD Electrical What's New
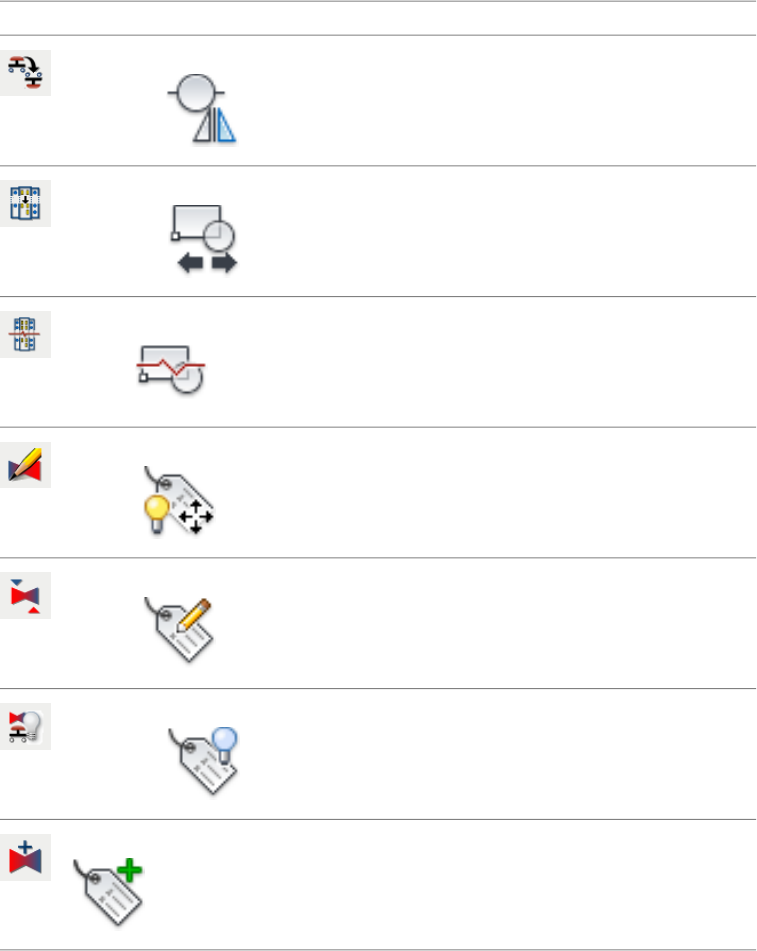
Command Access
Schematic tab ➤ Edit Components panel ➤ Modify Components drop-down ➤ Reverse/Flip
Component.
Schematic tab ➤ Edit Components panel ➤ Modify Components drop-down ➤ Stretch
PLC Module.
Schematic tab ➤ Edit Components panel ➤ Modify Components drop-down ➤ Split PLC
Module.
Schematic tab ➤ Edit Components panel ➤ Modify Attributes drop-down ➤ Move/Show
Attribute.
Schematic tab ➤ Edit Components panel ➤ Modify Attributes drop-down ➤ Edit Selected
Attribute.
Schematic tab ➤ Edit Components panel ➤ Modify Attributes drop-down ➤ Hide Attribute
(Single Pick).
Schematic tab ➤ Edit Components panel ➤ Modify Attributes drop-down ➤ Add Attribute.
Toolbars to Ribbons | 87
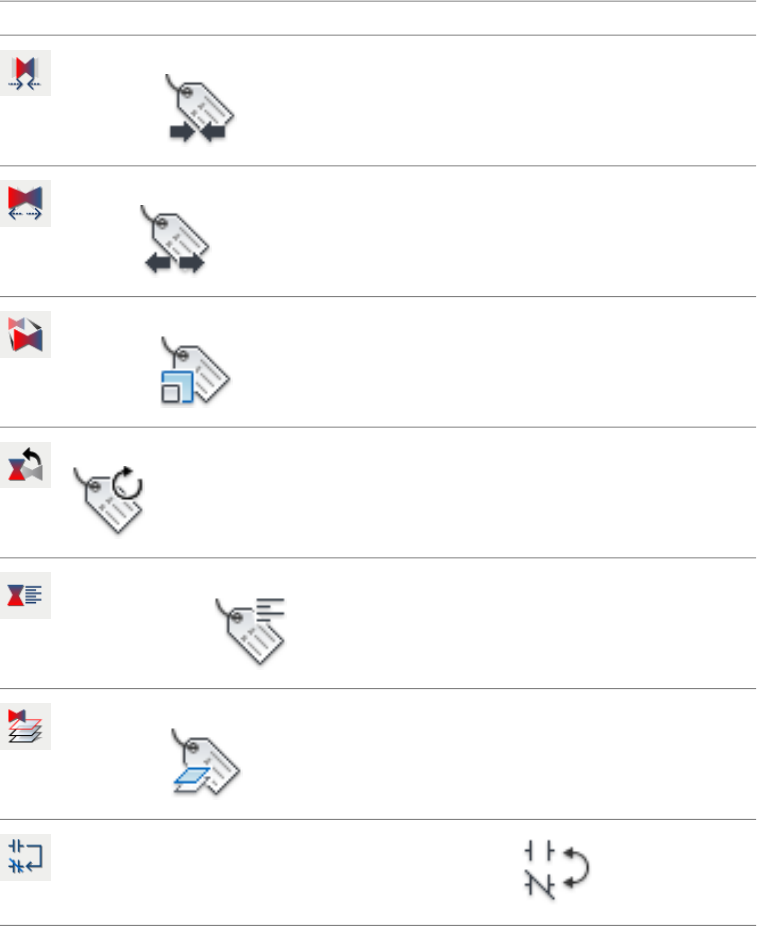
Command Access
Schematic tab ➤ Edit Components panel ➤ Modify Attributes drop-down ➤ Squeeze At-
tribute/Text.
Schematic tab ➤ Edit Components panel ➤ Modify Attributes drop-down ➤ Stretch Attrib-
ute/Text.
Schematic tab ➤ Edit Components panel ➤ Modify Attributes drop-down ➤ Change At-
tribute Size.
Schematic tab ➤ Edit Components panel ➤ Modify Attributes drop-down ➤ Rotate Attribute.
Schematic tab ➤ Edit Components panel ➤ Modify Attributes drop-down ➤ Change At-
tribute Justification.
Schematic tab ➤ Edit Components panel ➤ Modify Attributes drop-down ➤ Change At-
tribute Layer.
Schematic tab ➤ Edit Components panel ➤ Toggle NO/NC.
88 | Chapter 1 AutoCAD Electrical What's New
Command Access
Schematic tab ➤ Edit Components panel ➤ Delete Component.
Schematic tab ➤ Insert Wires/Wire Numbers panel ➤ Insert Wires drop-down ➤ Wire.
Schematic tab ➤ Insert Wires/Wire Numbers panel ➤ Multiple Bus.
Schematic tab ➤ Insert Wires/Wire Numbers panel ➤ Insert Wires drop-down ➤ 22.5 Degree.
Schematic tab ➤ Insert Wires/Wire Numbers panel ➤ Insert Wires drop-down ➤ 45 Degree.
Schematic tab ➤ Insert Wires/Wire Numbers panel ➤ Insert Wires drop-down ➤ 67.5 Degree.
Schematic tab ➤ Edit Wires/Wire Numbers panel ➤ Modify Wires drop-down ➤ Bend Wire.
Toolbars to Ribbons | 89
Command Access
Schematic tab ➤ Insert Wires/Wire Numbers panel ➤ Insert Wires drop-down ➤ Interconnect
Components.
Schematic tab ➤ Insert Wires/Wire Numbers panel ➤ Insert Wires drop-down ➤ Gap.
Schematic tab ➤ Edit Wires/Wire Numbers panel ➤ ➤ Modify Wire Gap drop-down
➤ Flip Wire Gap.
Schematic tab ➤ Edit Wires/Wire Numbers panel ➤ ➤ Modify Wire Gap drop-down
➤ Delete Wire Gap.
Schematic tab ➤ Edit Wires/Wire Numbers panel ➤ ➤ Modify Wire Gap drop-down
➤ Check/Repair Gap Pointers.
Schematic tab ➤ Edit Wires/Wire Numbers panel ➤ Modify Wire Type drop-down ➤
Change/Convert Wire Type.
90 | Chapter 1 AutoCAD Electrical What's New
Command Access
Schematic tab ➤ Edit Wires/Wire Numbers panel ➤ Modify Wire Type drop-down ➤ Cre-
ate/Edit Wire Type.
Schematic tab ➤ Edit Wires/Wire Numbers panel ➤ Modify Wires drop-down ➤ Stretch
Wire.
Schematic tab ➤ Edit Wires/Wire Numbers panel ➤ Modify Wires drop-down ➤ Show
Wires.
Schematic tab ➤ Edit Wires/Wire Numbers panel ➤ Modify Wires drop-down ➤ Check/Trace
Wire.
Schematic tab ➤ Edit Wires/Wire Numbers panel ➤ ➤ Wire Sequence drop-down
➤ Edit Wire Sequence.
Schematic tab ➤ Edit Wires/Wire Numbers panel ➤ ➤ Wire Sequence drop-down
➤ Show Wire Sequence.
Toolbars to Ribbons | 91
Command Access
Schematic tab ➤ Edit Components panel ➤ ➤ Terminal: Show Internal/External
Connections.
Schematic tab ➤ Edit Components panel ➤ ➤ Terminal: Mark Internal Connections.
Schematic tab ➤ Edit Components panel ➤ ➤ Terminal: Mark External Connections.
Schematic tab ➤ Edit Components panel ➤ ➤ Terminal: Erase Internal/External
Connections.
Schematic tab ➤ Insert Wires/Wire Numbers panel ➤ Cable Markers drop-down ➤ Cable
Markers.
Schematic tab ➤ Insert Wires/Wire Numbers panel ➤ Cable Markers drop-down ➤ Multiple
Cable Markers.
92 | Chapter 1 AutoCAD Electrical What's New
Command Access
Schematic tab ➤ Insert Wires/Wire Numbers panel ➤ Insert Dot, Tee Markers drop-down
➤ Insert Dot Tee Markers.
Schematic tab ➤ Insert Wires/Wire Numbers panel ➤ Insert Dot, Tee Markers drop-down
➤ Insert Angled Tee Markers.
Schematic tab ➤ Edit Wires/Wire Numbers panel ➤ ➤ Toggle Angled Tee Markers.
Schematic tab ➤ Insert Wires/Wire Numbers panel ➤ Insert Ladder drop-down ➤ Insert
Ladder.
Schematic tab ➤ Edit Wires/Wire Numbers panel ➤ Modify Ladder drop-down ➤ Revise
Ladder.
Schematic tab ➤ Edit Wires/Wire Numbers panel ➤ Modify Ladder drop-down ➤ Renumber
Ladder Reference.
Schematic tab ➤ Insert Wires/Wire Numbers panel ➤ Insert Ladder drop-down ➤ XY Grid
Setup.
Toolbars to Ribbons | 93
Command Access
Schematic tab ➤ Insert Wires/Wire Numbers panel ➤ Insert Ladder drop-down ➤ X Zones
Setup.
Schematic tab ➤ Edit Wires/Wire Numbers panel ➤ Modify Ladder drop-down ➤ Add
Rung.
Schematic tab ➤ Edit Wires/Wire Numbers panel ➤ Trim Wire.
Main Electrical 2 toolbar
Command Access
Schematic tab ➤ Insert Wires/Wire Numbers panel ➤ Insert Wire Numbers drop-down ➤
Wire Numbers.
Schematic tab ➤ Insert Wires/Wire Numbers panel ➤ Insert Wire Numbers drop-down ➤
3 Phase.
Schematic tab ➤ Insert Wires/Wire Numbers panel ➤ Insert Wire Numbers drop-down ➤
PLC I/O.
94 | Chapter 1 AutoCAD Electrical What's New
Command Access
Schematic tab ➤ Insert Wires/Wire Numbers panel ➤ Wire Number Leader drop-down ➤
Wire Number Leader.
Schematic tab ➤ Insert Wires/Wire Numbers panel ➤ Wire Number Leader drop-down ➤
Wire Color/Gauge Labels.
Schematic tab ➤ Insert Wires/Wire Numbers panel ➤ Wire Number Leader drop-down ➤
In-Line Wire Labels.
Schematic tab ➤ Edit Wires/Wire Numbers panel ➤ Copy Wire Number drop-down ➤
Copy Wire Number.
Schematic tab ➤ Edit Wires/Wire Numbers panel ➤ Copy Wire Number drop-down ➤
Copy Wire Number In-Line.
Schematic tab ➤ Edit Wires/Wire Numbers panel ➤ Copy Wire Number drop-down ➤
Adjust In-Line Wire/Label Gap.
Schematic tab ➤ Edit Wires/Wire Numbers panel ➤ Move Wire Number.
Toolbars to Ribbons | 95
Command Access
Schematic tab ➤ Edit Wires/Wire Numbers panel ➤ Modify Wire Numbers drop-down ➤
Edit Wire Number.
Schematic tab ➤ Edit Wires/Wire Numbers panel ➤ Modify Wire Numbers drop-down ➤
Fix.
Schematic tab ➤ Edit Wires/Wire Numbers panel ➤ Modify Wire Numbers drop-down ➤
Swap.
Schematic tab ➤ Edit Wires/Wire Numbers panel ➤ Modify Wire Numbers drop-down ➤
Find/Replace.
Schematic tab ➤ Edit Wires/Wire Numbers panel ➤ Modify Wire Numbers drop-down ➤
Hide.
Schematic tab ➤ Edit Wires/Wire Numbers panel ➤ Modify Wire Numbers drop-down ➤
Unhide.
Schematic tab ➤ Edit Wires/Wire Numbers panel ➤ Flip Wire Number.
96 | Chapter 1 AutoCAD Electrical What's New
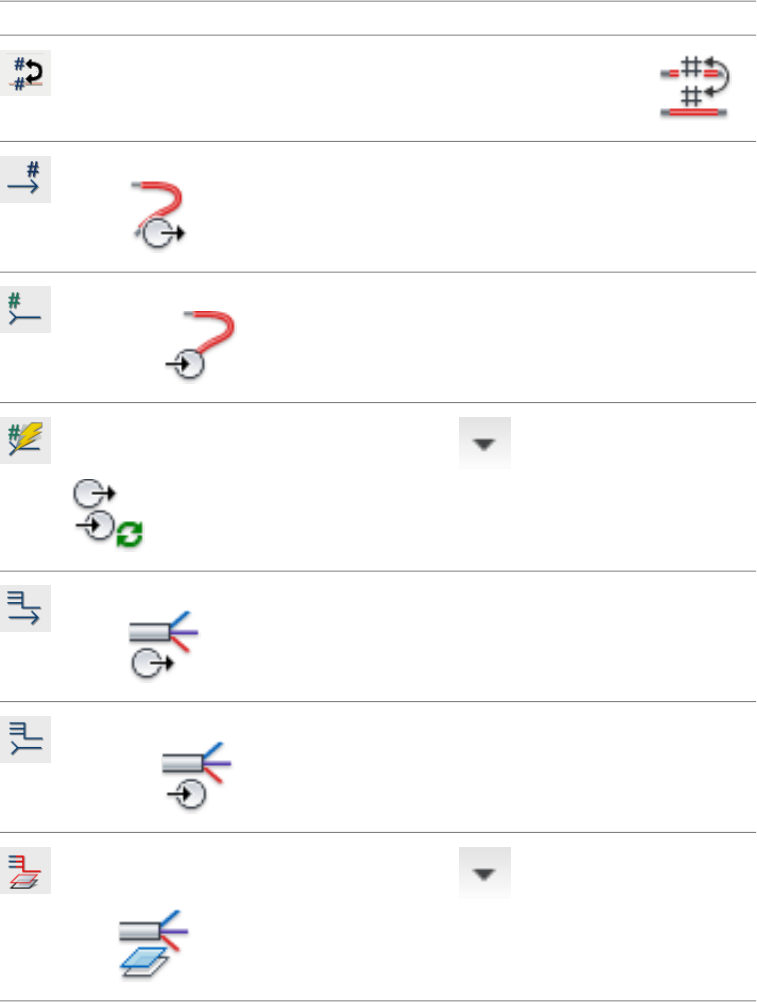
Command Access
Schematic tab ➤ Edit Wires/Wire Numbers panel ➤ Toggle Wire Number In-line.
Schematic tab ➤ Insert Wires/Wire Numbers panel ➤ Signal Arrows drop-down ➤ Source
Arrow.
Schematic tab ➤ Insert Wires/Wire Numbers panel ➤ Signal Arrows drop-down ➤ Destin-
ation Arrow.
Schematic tab ➤ Edit Wires/Wire Numbers panel ➤ ➤ Update Signal References.
Schematic tab ➤ Insert Wires/Wire Numbers panel ➤ Signal Arrows drop-down ➤ Fan In
Source.
Schematic tab ➤ Insert Wires/Wire Numbers panel ➤ Signal Arrows drop-down ➤ Fan Out
Destination.
Schematic tab ➤ Edit Wires/Wire Numbers panel ➤ ➤ Fan In/Out - Single Line
Layer.
Toolbars to Ribbons | 97
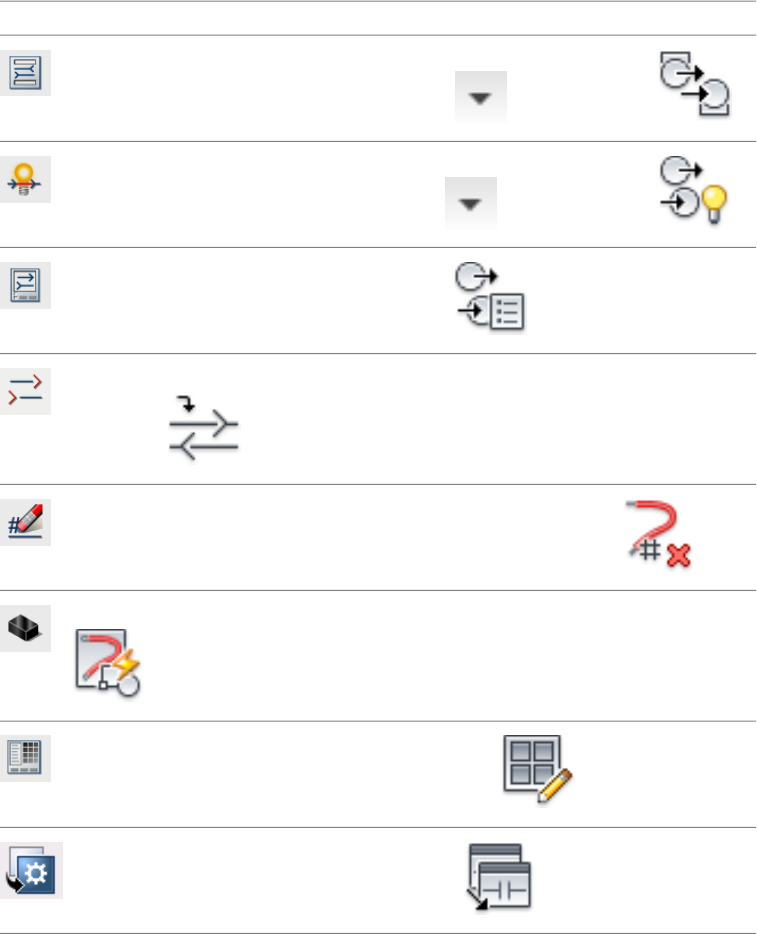
Command Access
Schematic tab ➤ Edit Wires/Wire Numbers panel ➤ ➤ List Signal Code.
Schematic tab ➤ Edit Wires/Wire Numbers panel ➤ ➤ Show Signal Paths.
Reports tab ➤ Schematic panel ➤ Signal Error/List.
Schematic tab ➤ Insert Wires/Wire Numbers panel ➤ Signal Arrows drop-down ➤ Reference
Only Arrows.
Schematic tab ➤ Edit Wires/Wire Numbers panel ➤ Delete Wire Numbers.
Schematic tab ➤ Other Tools panel ➤ Symbol Builder drop-down ➤ Symbol Builder.
Schematic tab ➤ Other Tools panel ➤ Icon Menu Wizard.
Project tab ➤ Other Tools panel ➤ Migration Utility.
98 | Chapter 1 AutoCAD Electrical What's New
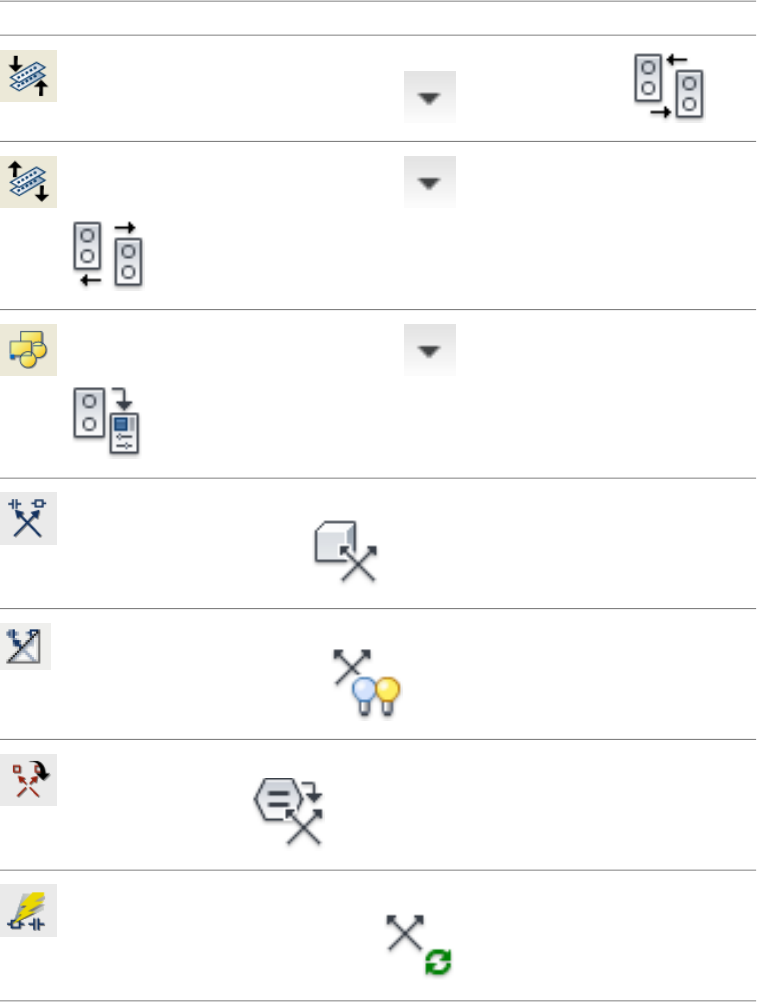
Command Access
Schematic tab ➤ Edit Components panel ➤ ➤ Associate Terminals.
Schematic tab ➤ Edit Components panel ➤ ➤ Break Apart Terminal Associations.
Schematic tab ➤ Edit Components panel ➤ ➤ Copy Terminal Block Properties.
Schematic tab ➤ Edit Components panel ➤ Modify Component Cross-Reference drop-down
➤ Component Cross-Reference.
Schematic tab ➤ Edit Components panel ➤ Modify Component Cross-Reference drop-down
➤ Hide/Unhide Cross-Referencing.
Schematic tab ➤ Insert Components panel ➤ Dashed Link Line drop-down ➤ Insert Stand-
Alone Cross-Referencing.
Schematic tab ➤ Edit Components panel ➤ Modify Component Cross-Reference drop-down
➤ Update Stand-Alone Cross-Referencing.
Toolbars to Ribbons | 99
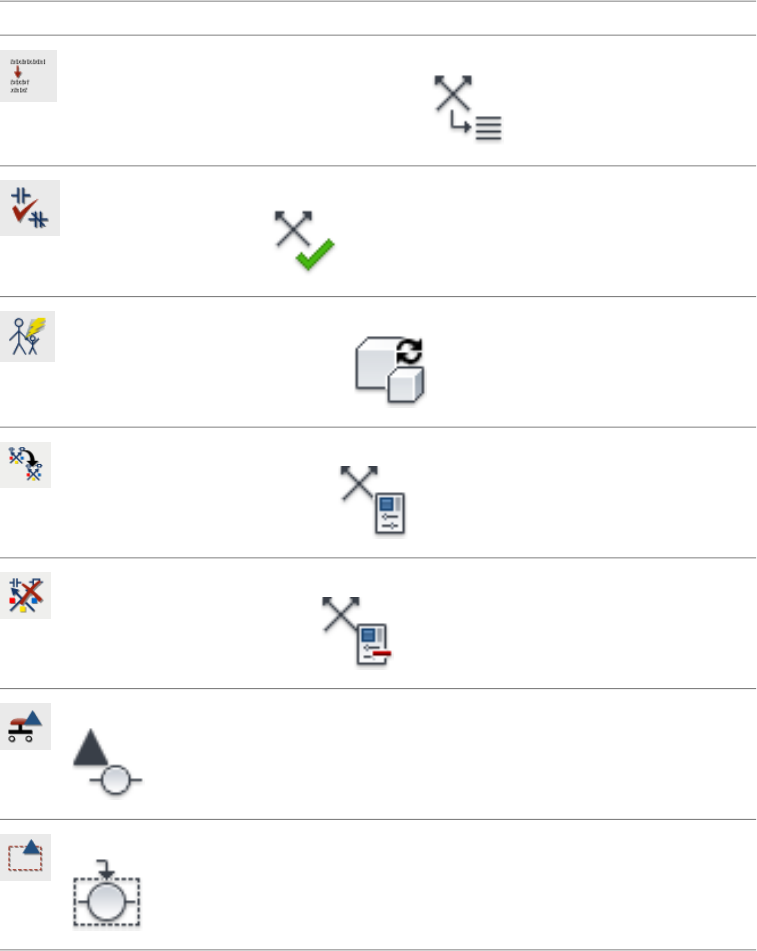
Command Access
Schematic tab ➤ Edit Components panel ➤ Modify Component Cross-Reference drop-down
➤ Change Cross-Reference to Multiple Line Text.
Schematic tab ➤ Edit Components panel ➤ Modify Component Cross-Reference drop-down
➤ Cross-Reference Check.
Schematic tab ➤ Edit Components panel ➤ Modify Component Cross-Reference drop-down
➤ Child Location/Description Update.
Schematic tab ➤ Edit Components panel ➤ Modify Component Cross-Reference drop-down
➤ Copy/Add Component Override.
Schematic tab ➤ Edit Components panel ➤ Modify Component Cross-Reference drop-down
➤ Remove Component Override.
Schematic tab ➤ Insert Components panel ➤ Location Box drop-down ➤ Location Symbols.
Schematic tab ➤ Insert Components panel ➤ Location Box drop-down ➤ Location Box.
100 | Chapter 1 AutoCAD Electrical What's New
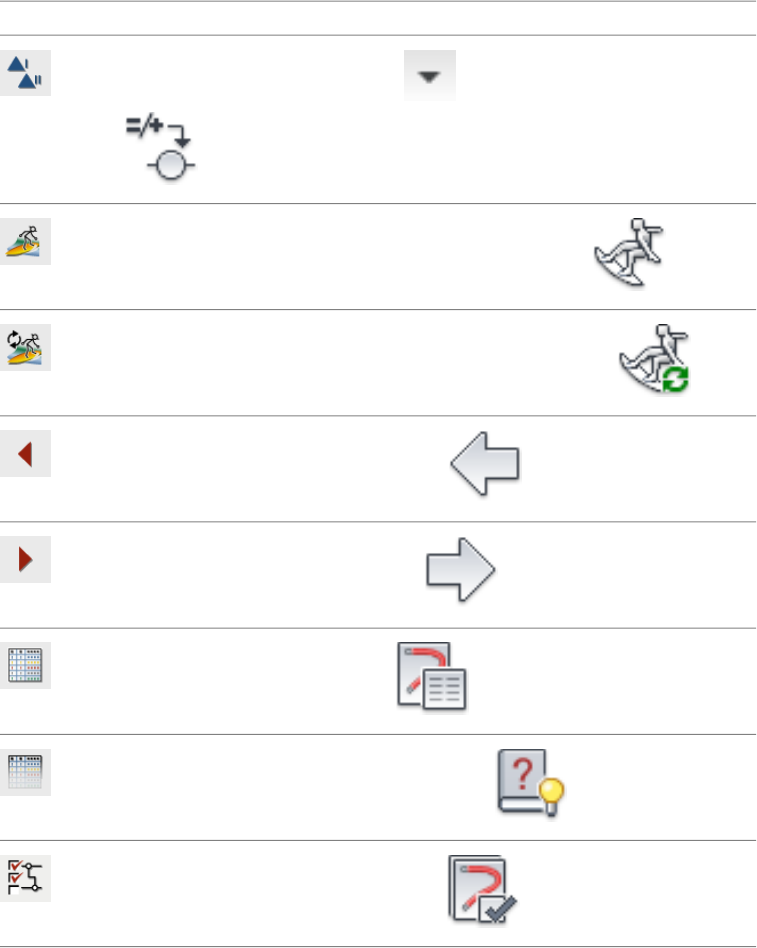
Command Access
Schematic tab ➤ Edit Components panel ➤ ➤ Copy Installation/Location Code
Values.
Project tab ➤ Other Tools panel ➤ Surfer drop-down menu ➤ Surfer.
Project tab ➤ Other Tools panel ➤ Surfer drop-down ➤ Continue Surfer.
Project tab ➤ Other Tools panel ➤ Previous DWG.
Project tab ➤ Other Tools panel ➤ Next DWG.
Reports tab ➤ Schematic panel ➤ Reports.
Reports tab ➤ Schematic panel ➤ Missing Catalog Data.
Reports tab ➤ Schematic panel ➤ Electrical Audit.
Toolbars to Ribbons | 101
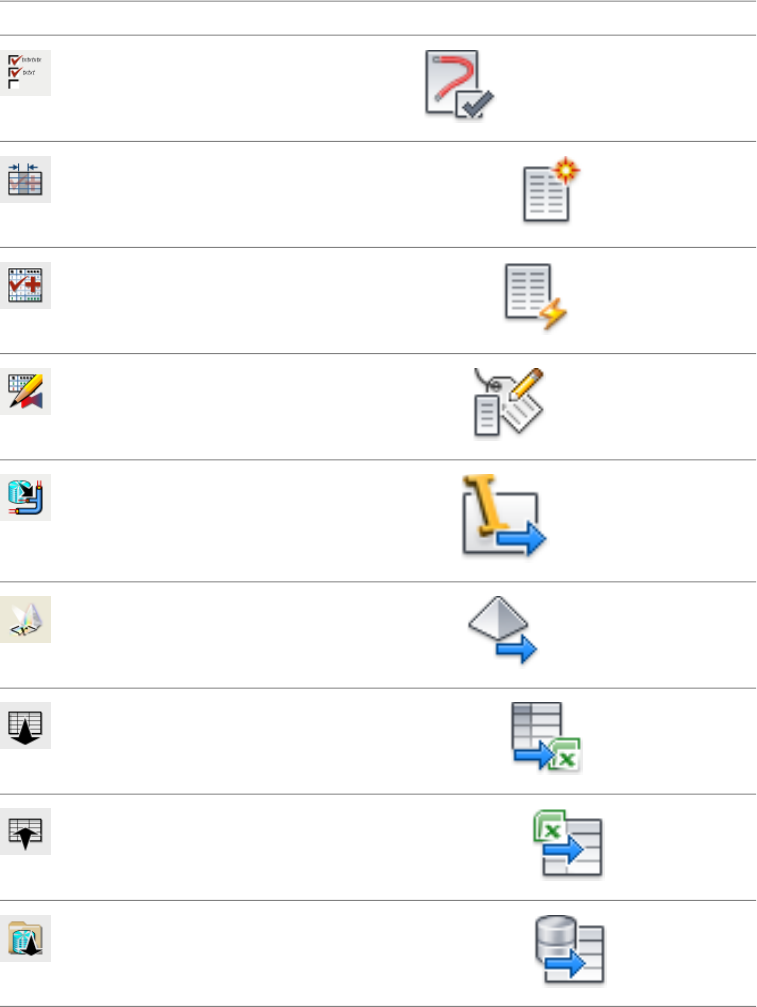
Command Access
Reports tab ➤ Schematic panel ➤ DWG Audit.
Reports tab ➤ Miscellaneous panel ➤ Report Format Setup.
Reports tab ➤ Miscellaneous panel ➤ Automatic Reports.
Reports tab ➤ Miscellaneous panel ➤ User Attributes.
Import/Export Data tab ➤ Export panel ➤ Inventor.
Import/Export Data tab ➤ Export panel ➤ Unity Pro.
Import/Export Data tab ➤ Export panel ➤ To Spreadsheet.
Import/Export Data tab ➤ Import panel ➤ From Spreadsheet.
Import/Export Data tab ➤ Import panel ➤ From Project MDB.
102 | Chapter 1 AutoCAD Electrical What's New
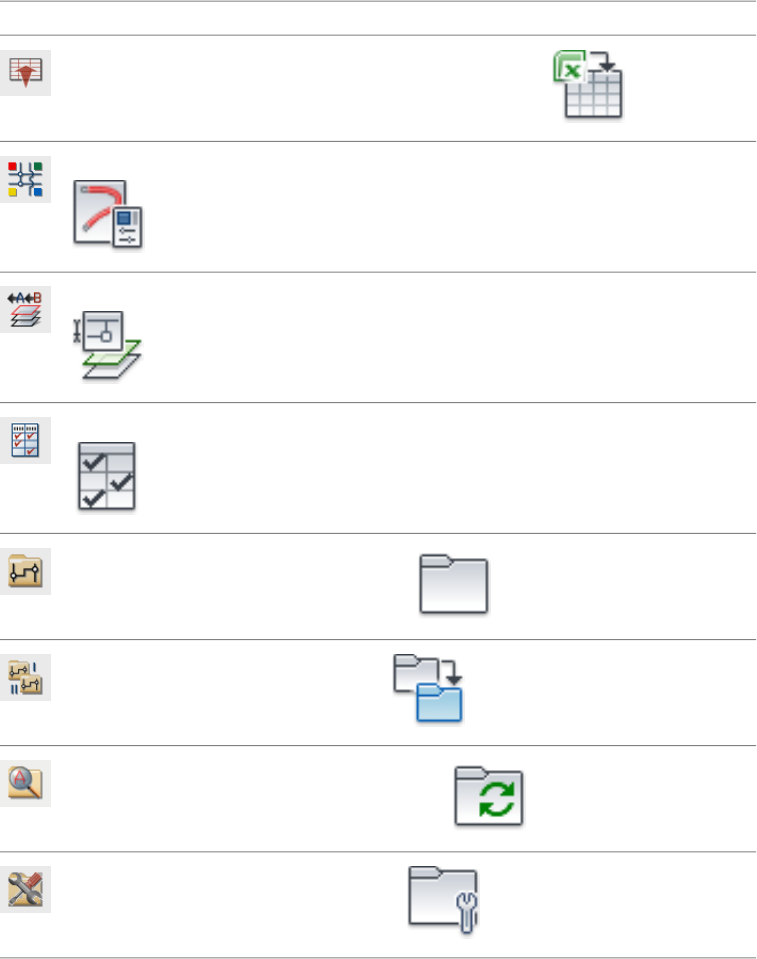
Command Access
Import/Export Data tab ➤ Import panel ➤ Spreadsheet to Table.
Schematic tab ➤ Other Tools panel ➤ Drawing Properties drop-down ➤ Drawing Properties.
Schematic tab ➤ Other Tools panel ➤ Drawing Properties drop-down ➤ Rename Layers.
Schematic tab ➤ Other Tools panel ➤ Drawing Properties drop-down ➤ Settings Compare.
Project tab ➤ Project Tools panel ➤ Manager.
Project tab ➤ Project Tools panel ➤ Copy.
Project tab ➤ Project Tools panel ➤ Update/Retag.
Project tab ➤ Project Tools panel ➤ Utilities.
Toolbars to Ribbons | 103
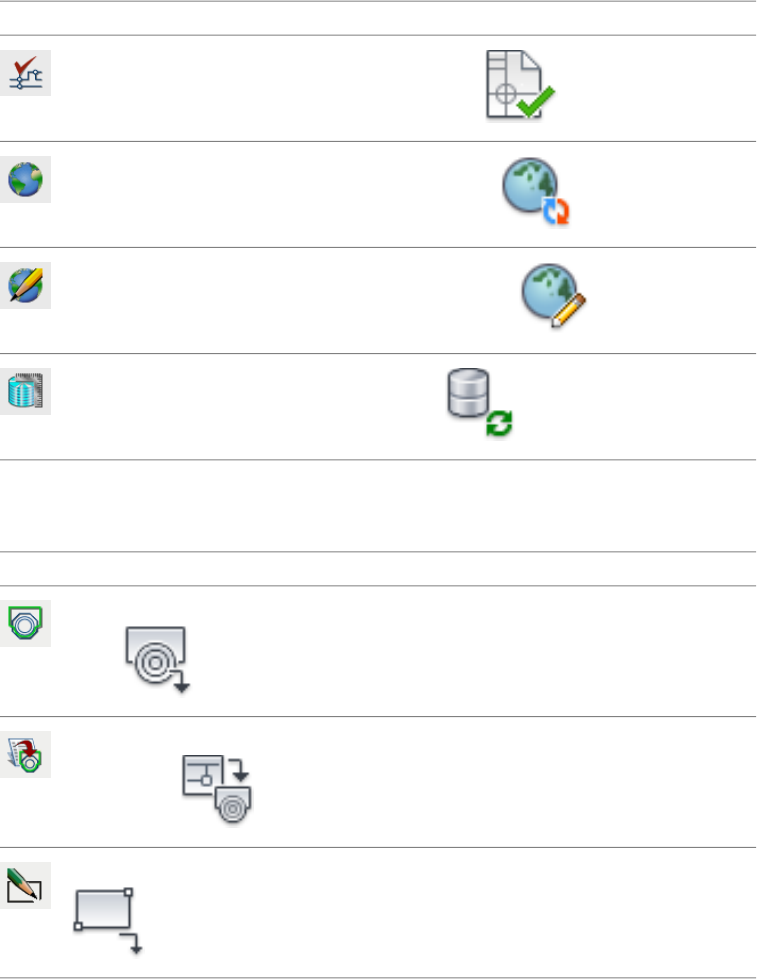
Command Access
Project tab ➤ Project Tools panel ➤ Mark/Verify DWGs.
Project tab ➤ Other Tools panel ➤ Language Conversion.
Project tab ➤ Other Tools panel ➤ Edit Language Database.
tab ➤ panel ➤ Rebuild/Freshen Project Database.
Panel Layout toolbar
Command Access
Panel tab ➤ Insert Component Footprints panel ➤ Insert Footprints drop-down ➤ Icon
Menu.
Panel tab ➤ Insert Component Footprints panel ➤ Insert Footprints drop-down ➤
Schematic List.
Panel tab ➤ Insert Component Footprints panel ➤ Insert Footprints drop-down ➤ Manual.
104 | Chapter 1 AutoCAD Electrical What's New
Command Access
Panel tab ➤ Insert Component Footprints panel ➤ Insert Footprints drop-down ➤ Manu-
facturer Menu.
Panel tab ➤ Insert Component Footprints panel ➤ Insert Footprints drop-down ➤ Catalog
List.
Panel tab ➤ Insert Component Footprints panel ➤ Insert Footprints drop-down ➤ Equip-
ment List.
Panel tab ➤ Terminal Footprints panel ➤ Editor.
Panel tab ➤ Terminal Footprints panel ➤ Table Generator.
Panel tab ➤ Terminal Footprints panel ➤ ➤ Insert Terminals drop-down ➤ Insert
Terminal (Schematic List).
Panel tab ➤ Terminal Footprints panel ➤ ➤ Insert Terminals drop-down ➤ Insert
Terminal (Manual).
Toolbars to Ribbons | 105
Command Access
Panel tab ➤ Edit Footprints panel ➤ Copy Footprint.
Panel tab ➤ Edit Footprints panel ➤ Edit.
Panel tab ➤ Other Tools panel ➤ Panel Configuration drop-down ➤ Make Xdata Visible.
Panel tab ➤ Insert Component Footprints panel ➤ Balloon.
Panel tab ➤ Insert Component Footprints panel ➤ Wire Annotation.
Reports tab ➤ Panel panel ➤ Reports.
tab ➤ panel ➤ Rebuild/Freshen Project Database.
Panel tab ➤ Insert Component Footprints panel ➤ Panel Assembly.
Panel tab ➤ Edit Footprints panel ➤ Copy Assembly.
106 | Chapter 1 AutoCAD Electrical What's New
Command Access
Panel tab ➤ Edit Footprints panel ➤ Copy Codes drop-down ➤ Copy Installation Code.
Panel tab ➤ Edit Footprints panel ➤ Copy Codes drop-down ➤ Copy Location Code.
Panel tab ➤ Edit Footprints panel ➤ Copy Codes drop-down ➤ Copy Mount Code.
Panel tab ➤ Edit Footprints panel ➤ Copy Codes drop-down ➤ Copy Group Code.
Panel tab ➤ Edit Footprints panel ➤ Resequence Item Numbers.
Panel tab ➤ Other Tools panel ➤ ➤ Footprint Database File Editor.
Schematic tab ➤ Other Tools panel ➤ ➤ Database Editors drop-down ➤ Schem-
atic Database File Editor.
Toolbars to Ribbons | 107
Command Access
Panel tab ➤ Other Tools panel ➤ Panel Configuration drop-down ➤ Rename Layers.
Panel tab ➤ Other Tools panel ➤ Panel Configuration drop-down ➤ Update Layers.
Panel tab ➤ Other Tools panel ➤ Panel Configuration drop-down ➤ Configuration.
Conversion toolbar
Command Access
Conversion Tools tab ➤ Tools panel ➤ Special Explode.
Conversion Tools tab ➤ Tools panel ➤ Block Replacement drop-down ➤ Block Replacement.
Conversion Tools tab ➤ Tools panel ➤ Promise Conversion.
Conversion Tools tab ➤ Schematic panel ➤ Tag Component.
108 | Chapter 1 AutoCAD Electrical What's New
Command Access
Conversion Tools tab ➤ Schematic panel ➤ Tag PLC Module.
Conversion Tools tab ➤ Schematic panel ➤ Tag Child Component.
Conversion Tools tab ➤ Schematic panel ➤ Tag Child Contacts drop-down ➤ Tag Child -
N.O..
Conversion Tools tab ➤ Schematic panel ➤ Tag Child Contacts drop-down ➤ Tag Child -
N.C..
Conversion Tools tab ➤ Schematic panel ➤ Tag Child Contacts drop-down ➤ Tag Child -
Form C.
Conversion Tools tab ➤ Schematic panel ➤ Tag Schematic Terminals drop-down ➤ Tag
Schematic Terminal - Terminal Number.
Conversion Tools tab ➤ Schematic panel ➤ Tag Schematic Terminals drop-down ➤ Tag
Schematic Terminal - Wire Number.
Toolbars to Ribbons | 109
Command Access
Conversion Tools tab ➤ Schematic panel ➤ Tag Schematic Terminals drop-down ➤ Tag
Schematic Terminal - Wire Number Change.
Conversion Tools tab ➤ Attributes panel ➤ Link Descriptions.
Conversion Tools tab ➤ Attributes panel ➤ Link Split Tag.
Conversion Tools tab ➤ Attributes panel ➤ Link PLC Address Descriptions.
Conversion Tools tab ➤ Attributes panel ➤ Link Terminal Number.
Conversion Tools tab ➤ Attributes panel ➤ Link Location Code.
Conversion Tools tab ➤ Attributes panel ➤ Link Installation Code.
Conversion Tools tab ➤ Attributes panel ➤ Link Manufacturer.
Conversion Tools tab ➤ Attributes panel ➤ Link Catalog Number.
110 | Chapter 1 AutoCAD Electrical What's New
Command Access
Conversion Tools tab ➤ Attributes panel ➤ Link Rating.
Conversion Tools tab ➤ Attributes panel ➤ Link User.
Conversion Tools tab ➤ Attributes panel ➤ Show Links.
Conversion Tools tab ➤ Attributes panel ➤ Un-Link.
Conversion Tools tab ➤ Tools panel ➤ Add Wire Connections.
Conversion Tools tab ➤ Tools panel ➤ Add Geometry.
Conversion Tools tab ➤ Panel panel ➤ Tag Footprint.
Conversion Tools tab ➤ Panel panel ➤ Tag Nameplate.
Conversion Tools tab ➤ Panel panel ➤ Tag Panel Terminal - Terminal Number.
Toolbars to Ribbons | 111
Command Access
Conversion Tools tab ➤ Panel panel ➤ Tag Panel Terminal - Wire Number.
Conversion Tools tab ➤ Attributes panel ➤ Link Descriptions.
Conversion Tools tab ➤ Attributes panel ➤ Link Split Tag.
Conversion Tools tab ➤ Attributes panel ➤ Link Item Number.
Conversion Tools tab ➤ Attributes panel ➤ Link Location Code.
Conversion Tools tab ➤ Attributes panel ➤ Link Installation Code.
Conversion Tools tab ➤ Attributes panel ➤ Link Manufacturer.
Conversion Tools tab ➤ Attributes panel ➤ Link Catalog Number.
Conversion Tools tab ➤ Attributes panel ➤ Link Rating.
112 | Chapter 1 AutoCAD Electrical What's New
Command Access
Conversion Tools tab ➤ Attributes panel ➤ Link User.
Conversion Tools tab ➤ Attributes panel ➤ Show Links.
Conversion Tools tab ➤ Attributes panel ➤ Un-Link.
Conversion Tools tab ➤ Tools panel ➤ Add Wire Connections.
Conversion Tools tab ➤ Tools panel ➤ Add Geometry.
Conversion Tools tab ➤ Tools panel ➤ Convert Ladder.
Conversion Tools tab ➤ Tools panel ➤ Change/Convert Wire Type drop-down ➤
Change/Convert Wire Type.
Conversion Tools tab ➤ Tools panel ➤ Text Conversion drop-down ➤ Convert Text to Wire
Number.
Toolbars to Ribbons | 113
Command Access
Conversion Tools tab ➤ Tools panel ➤ Schematic Conversion drop-down ➤ Convert Block
to Source Arrow.
Conversion Tools tab ➤ Tools panel ➤ Schematic Conversion drop-down ➤ Convert Block
to Destination Arrow.
Conversion Tools tab ➤ Tools panel ➤ Change/Convert Wire Type drop-down ➤
Check/Repair Gap Pointers.
Conversion Tools tab ➤ Tools panel ➤ Stretch Wire.
Conversion Tools tab ➤ Tools panel ➤ Change Attribute Size.
Conversion Tools tab ➤ Tools panel ➤ Add Attribute.
Conversion Tools tab ➤ Tools panel ➤ Text Conversion drop-down ➤ Convert Text to At-
tribute Definition.
Conversion Tools tab ➤ Tools panel ➤ Xdata Editor.
114 | Chapter 1 AutoCAD Electrical What's New
Command Access
Conversion Tools tab ➤ Tools panel ➤ Schematic Conversion drop-down ➤ Convert to
Schematic Component.
Conversion Tools tab ➤ Tools panel ➤ Map Attributes from Old to New.
Conversion Tools tab ➤ Tools panel ➤ Block Replacement drop-down ➤ Swap/Update
Block.
Conduit Marker toolbar
Command Access
Panel tab ➤ Conduit Marker panel ➤ Conduit Markers drop-down ➤ Insert Marker.
Panel tab ➤ Conduit Marker panel ➤ Conduit Markers drop-down ➤ Insert From List.
Panel tab ➤ Conduit Marker panel ➤ Edit Marker.
Toolbars to Ribbons | 115
Command Access
Panel tab ➤ Conduit Marker panel ➤ Conduit Reports drop-down ➤ Conduit Report.
Panel tab ➤ Conduit Marker panel ➤ Conduit Reports drop-down ➤ Routing Report.
Panel tab ➤ Conduit Marker panel ➤ Conduit Reports drop-down ➤ Extract Wire Data.
Power Check toolbar
Command Access
Schematic tab ➤ Power Check panel ➤ Add/Edit Source/Load.
Schematic tab ➤ Power Check panel ➤ Mark Components To Pass Power.
Schematic tab ➤ Power Check panel ➤ Load Check Report.
116 | Chapter 1 AutoCAD Electrical What's New
Extra Libraries toolbar
Command Access
Schematic tab ➤ Insert Components panel ➤ ➤ Insert Pneumatic Components.
Schematic tab ➤ Insert Components panel ➤ ➤ Insert Hydraulic Components.
Schematic tab ➤ Insert Components panel ➤ ➤ Insert P&ID Components.
The Ribbon
The ribbon is a palette that displays task-based
tools and controls.
Overview of the Ribbon
The ribbon is displayed by default when you open a file, providing a compact
palette of all of the tools necessary to create or modify your drawing.
The Ribbon | 117
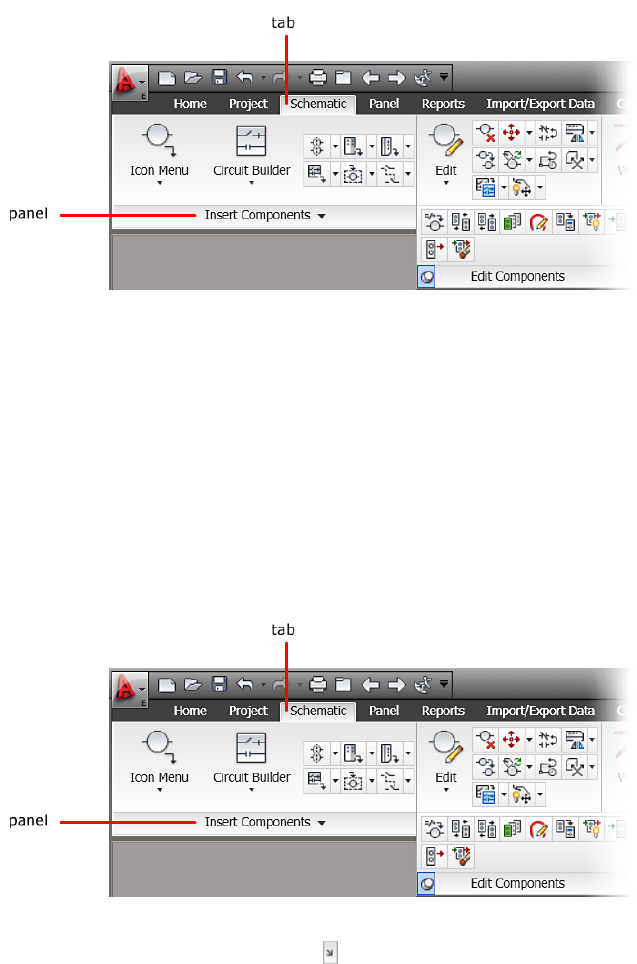
Display and Organize the Ribbon
The horizontal ribbon is displayed across the top of the file window. You can
dock the vertical ribbon to the left or right of the file window.
The vertical ribbon can also float in the file window or on a second monitor.
Ribbon Tabs and Panels
The ribbon is composed of a series of panels, which are organized into tabs
labeled by task. Ribbon panels contain many of the same tools and controls
available in toolbars and dialog boxes.
Some ribbon panels display a dialog box related to that panel. The dialog box
launcher is denoted by an arrow icon, , in the lower-right corner of the
118 | Chapter 1 AutoCAD Electrical What's New
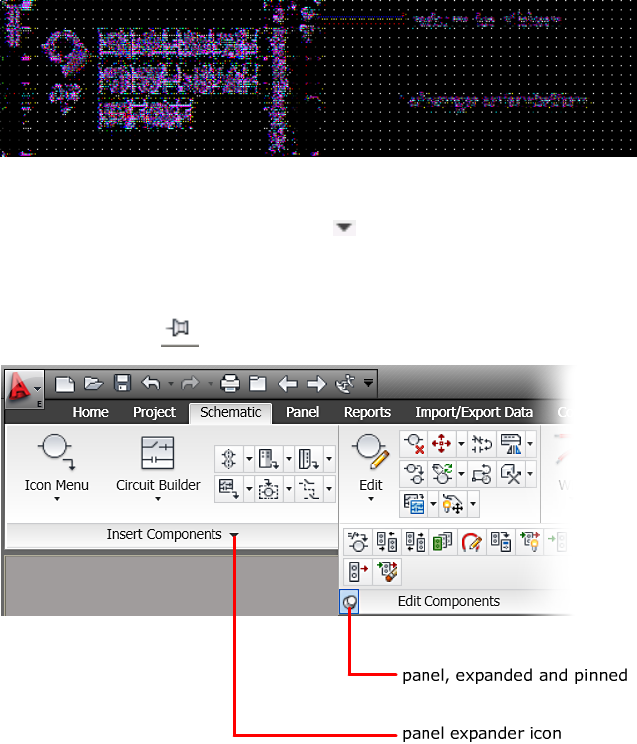
panel. The dialog box launcher indicates that you can display a related dialog
box. Display the related dialog box by clicking the dialog box launcher.
To specify which ribbon tabs and panels are displayed, right-click the ribbon
and, on the shortcut menu, click or clear the names of tabs or panels.
Floating Panels
If you pull a panel off of a ribbon tab and into the drawing area or onto another
monitor, that panel floats where you placed it. The floating panel remains
open until you return it to the ribbon, even if you switch ribbon tabs.
Slideout Panels
An arrow in the middle of a panel title, , indicates that you can slide out
the panel to display additional tools and controls. Click on the title bar of an
open panel to display the slideout panel. By default, a slideout panel
automatically closes when you click another panel. To keep a panel expanded,
click the push pin, , in the bottom-left corner of the slideout panel.
The Ribbon | 119

Contextual Ribbon Tabs
When you select a particular type of object or execute some commands, a
special contextual ribbon tab is displayed instead of a toolbar or dialog box.
The contextual tab is closed when you end the command.
To display the ribbon
■Click Tools menu ➤ Palettes ➤ Ribbon.
NOTE The ribbon displays the ribbon panels associated with the workspace
you used last.
To display the ribbon panels associated with a specific workspace, click
Tools menu ➤ Workspaces.
Command entry: RIBBON
To close the ribbon
■At the Command prompt, enter ribbonclose.
Command entry: RIBBONCLOSE
To minimize the ribbon
There are two buttons to the right of the ribbon tabs, that allow you choose
the ribbon toggle and ribbon minimize states.
■The first button toggles the between the full ribbon state, the default ribbon
state, and the minimize ribbon state.
■The second drop-down button allows you to select the minimize ribbon
state. These are the four minimize ribbon states:
■Minimize to Tabs: Minimizes the ribbon so that only tab titles are
displayed.
■Minimize to Panel Titles: Minimizes the ribbon so that only tab and
panel titles are displayed.
■Minimize to Panel Buttons: Minimizes the ribbon so that only tab titles
and panel buttons are displayed.
■Cycle Through All: Cycles through all four ribbon states in the order,
full ribbon, minimize to panel buttons, minimize to panel titles,
minimize to tabs.
120 | Chapter 1 AutoCAD Electrical What's New

To minimize the ribbon
Pointing device: Double-click the name of the active ribbon tab or anywhere
in the ribbon tab bar.
To return a floating panel to the ribbon
■Hover over the right side of the floating panel and click the Return Panels
to Ribbon icon.
To display or hide a ribbon panel
■Right-click anywhere inside the ribbon. Under Panels, select or unselect
the name of a panel.
To show or hide text labels on ribbon panels
■Right-click the ribbon tab bar and click Show Panel Titles.
Customize the Ribbon
You can customize the ribbon in the following
ways:
■You can create and modify ribbon panels using the Customize User
Interface Editor. See Customize Ribbon Panels in the AutoCAD Customization
Guide.
■You can associate a customizable tool palette group with each tab on the
ribbon. Right-click the ribbon tab to display a list of available tool palette
groups.
■You can change the order of ribbon tabs. Click the tab you want to move,
drag it to the desired position, and release.
■You can change the order of ribbon panels. Click the panel you want to
move, drag it to the desired position, and release.
The Ribbon | 121
■You can convert toolbars into ribbon panels using the Customize User
Interface Editor. See Customize Ribbon Panels in the AutoCAD Customization
Guide.
To display the tool palette group associated with a ribbon
■Right-click a ribbon tab and click Show Related Tool Palette Group.
122 | Chapter 1 AutoCAD Electrical What's New

Migration
Migration Utility
The Migration Utility migrates settings and files from a previous AutoCAD
Electrical release to the current release. Many files within AutoCAD Electrical
are customizable. The Migration Utility migrates these custom changes to the
current release. You select which files to migrate and which migration option
to use. There are three migration workflows:
■Migrate from an earlier release
■Custom migration
■Migrate from saved settings
NOTE The Merge Utility, used to merge database files and panel content, is no
longer a separate utility. It is now part of the Migration Utility.
Files types for migration
The Migration Utility supports many files types. Various default folders are
searched for these file types. The following default paths are searched by the
Migration Utility. You can have the Migration Utility look in other folders.
■Install folder - C:\Program Files\Autodesk\AcadE {version}\
■User Support folder - C:\Documents and Settings\{username}\Application
Data\Autodesk\AutoCAD Electrical {version}\R17.0\{language}\Support\
■Program Support folder - C:\Program Files\Autodesk\AcadE
{version}\Support\
2
123

■Data folder - C:\Documents and Settings\{username}\My
Documents\AcadE {version}\AeData\
■Project folder - C:\Documents and Settings\{username}\My
Documents\AcadE {version}\AeData\Proj
■Library folder - C:\Program Files\Autodesk\AcadE {version}\Libs\
■User folder - C:\Documents and Settings\{username}\Application
Data\Autodesk\AutoCAD Electrical
{version}\R17.0\{language}\Support\User\
■Catalog folder - C:\Documents and Settings\{username}\My
Documents\AcadE {version}\AeData\Catalogs
■PLC folder - C:\Documents and Settings\{username}\My Documents\AcadE
{version}\AeData\PLC
There are two migration options depending on the file type.
■Merge - compare the two files and merge the data according to the selected
options. If overwrite is not selected, only new lines are merged.
■Copy - copy the file in the current version to the selected file. If overwrite
is not selected, only new files are copied.
Use this table to see which files the Migration Utility supports, the default
search paths, and the available migration options for each file type.
Migration OptionsFileDefault FolderFile Type
Copy or Mergewd.envDataEnvironment File
Copy or Merge*.datUser SupportSymbol menu
Copy*.dll and *.slbUser SupportLibrary menu images
Copy*.sld and *.pngUser SupportMiscellaneous slide images
Copy*.bmpPLC and Install\acadeStyle images
Copy or Mergedefault_cat.mdbCatalogsCatalog database
Copy or Mergefootprint_lookup.mdbCatalogsFootprint lookup database
124 | Chapter 2 Migration

Migration OptionsFileDefault FolderFile Type
Copyschematic_look-
up.mdb
CatalogsSchematic lookup database
Copy or Mergeace_plc.mdbPLCPLC database
Copywd_picklist.mdbCatalogsPick list database
Copywddinrl.xlsCatalogsDinrail
Copywd_lang1.mdbCatalogsLanguage conversion data-
base
Copyall foldersLibraryLibrary symbols
Copy*.dwgUserUser circuits
Copy*.dwtRegistry template pathDrawing templates
Copy or Mergetablestyle.dwgProgram supportTable styles
Copy or MergeAcade.linUser SupportLine types
Copylastproj.filUser SupportRecent project list
Copy*.inst, *.loc, *.mnt,
*.grp
UserInstallation, Location,
Mount, Group code
Copy*.wddUser SupportDescription list
Copy*.wdrUser SupportRating defaults
Copy*.wdxUserExternal component tag list
Copy*.wdiUserSpreadsheet to PLC setup
Copy*.wdeUserEquipment list setup
Copy*.wdwUserWire color/gauge label
Copy*.wdnProjectTerminal number filter
Migration Utility | 125

Migration OptionsFileDefault FolderFile Type
Copy*.tslUserTerminal strip table setup
Copy*.wwlProgram SupportConduit setup
CopyGeneric paper size.txtProgram SupportPlot paper size
Copy*.wdtProjectTitle block mapping
Copy*.wdlUserTitle block line label map-
ping
Copywd_fam.datUserFamily tag mapping
Copywdmbblks.bsfUser SupportPLC mapping
Copy*.wdfProgram SupportRSlogix code mapping
Copy*.mapUserUnity Pro symbol mapping
Copy*.udaUserUser-defined attributes
Copy*.setUserReport settings
Copy*.rgfUserReport groups
Table mapping file for catalog merges
You can choose to impose an input mapping file to direct where to place the
data inside the catalog destination database. The mapping file (named
ACEDBMergeUtil.map) is located in the same directory as the main executable
program.
NOTE There are additional mappings for vendors, catalog numbers, and fields.
See the mapping file for information about these mappings. The default file location
is C:\Program Files\Autodesk\AcadE {version}\.
To consolidate all the timer relay (TD) tables into one table, use the mapping
file. It controls which tables to take from the source database and place into
the destination database under a single table.
[Table map]
126 | Chapter 2 Migration

; <SRC_TABLE>=<DEST_TABLE>
TD1N=TD
TD1NT=TD
TD1NF=TD
TD1FT=TD
Wildcard mapping for catalog database tables is allowed on the source (left)
database side of the mapping file. For example, TD*=TD. When the table or
wildcard mapping is used and the source database table is component-specific,
the merge utility places the table name into the WDBLKNAM field of the
destination database. It provides the symbol name for the initial filter used
in the catalog lookup window.
Table mapping files for footprint lookup database merges
A mapping file for the footprint lookup database
(ACEDBMergeUtil_footprint_lookup.map) is provided. This file follows the
same rules as the mapping file for catalog merges (ACEDBMergeUtil.map). No
rules are predefined in this mapping file. The file ia a framework that needs
to be modified to provide customized merges.
NOTE The default file location is C:\Program Files\Autodesk\AcadE {version}\. See
the file for further instructions on how to format and construct the mapping strings.
PLC Database
The Spreadsheet to PLC/IO utility uses the module category to calculate the
insertion point of a module.
■Input module - inserted near the right or bottom bus line of the ladder.
■Output module - inserted near the left or top bus line of the ladder.
■Combination module - inserted centered between the bus lines of the
ladder.
Before AutoCAD Electrical 2009, the Spreadsheet to PLC/IO utility determined
the module category based on the value in the DESCRIPTION field or the PLC
database table name. For example, if the DESCRIPTION field contained the
string “*IN*”, it was considered an input module. In AutoCAD Electrical 2009
and later, the PLC database contains a CATEGORY field. If the PLC database
Migration Utility | 127

file is migrated, the Migration Utility automatically runs the PLC Database
Migration utility using the following default settings.
DI*,AI*,*INP*,*IN *,*IN,*IN/*Input
DO*,AO*,D0*,A0*,*OUT*Output
*OTHER*,IO*,I0*Combination
The PLC Database Migration utility compares the values in the DESCRIPTION
field of the PLC database to default values for input, output, or combination.
If a match is not made, the database table name is compared. If a match is
made to the DESCRIPTION field or table name, the correct CATEGORY value
is entered for that module.
■1 - Input module
■2 - Output module
■3 - Combination module
The PLC Database Migration utility updates all tables in the PLC database
based on these values.
NOTE Blank spaces within the text are included as part of the search string. For
example, “IN{space}*” matches “IN module” but does not match “INPUT”.
wd.env merge
The wd.env file can contain settings that direct AutoCAD Electrical where to
locate certain files. These files can include the catalog and lookup databases,
slide libraries, and user circuits. The paths from the migrated wd.env file are
used when these dependent files are migrated.
For example:
Final wd.envCurrent version wd.envPrevious version
wd.env
Migration Option
WD_CAT=n:\shared\WD_CAT={default path}WD_CAT=n:\shared\Merge - Overwrite
WD_CAT={default
path}
WD_CAT={default path}WD_CAT=n:\shared\Merge
128 | Chapter 2 Migration
If you also select the catalog database for migration, the data from the source
catalog database is migrated to the destination catalog database based on the
selected migration options, for example merge - overwrite. The suggested
destination folder for the migrated catalog database is the path in the migrated
wd.env.
If you change the migration status of the wd.env file, you are prompted to
update these dependent files to make sure that the location of each file matches
the wd.env settings.
Log file
Each time you run the Migration Utility, the migration information is written
to the file acemigration.log. This log file contains the date of the migration,
the user name, and information about the files migrated. The log file is stored
in the User folder. The default location is:
■Windows XP: C:\Documents and Settings\{username}\Application
Data\Autodesk\AutoCAD Electrical {version}\{release number}\{country
code}\Support\User\
■Windows Vista, Windows 7:
C:\Users\{username}\AppData\Roaming\Autodesk\AutoCAD Electrical
{version}\{release number}\{country code}\Support\User\
Back-up copies
A back-up copy of each migrated file is made. The back-up file is created in
the same directory as the original file and its name is the same as the original,
but with the extension ".bak."
NOTE Backup copies are not created for library symbol drawing files and slide
images.
Migrating from an earlier release
The Migration Utility migrates your settings and customized files from an
earlier release of AutoCAD Electrical to the current release.
1Click Project tab ➤ Other Tools panel ➤ Migration Utility.
AutoCAD Electrical searches for previous installations of AutoCAD
Electrical.
Migration Utility | 129

2Select the release to migrate from.
AutoCAD Electrical searches for files from the selected release. Existing
files are selected for migration by default.
3Click the category name in the Migration items list. The files within that
category are shown in the Migration files section.
4 Click within the Copy/Merge Option cell, and select the Browse
tool to change the migration option for a file. The Copy/Merge Options
dialog box opens. Different file types have different migration options.
5Select the Copy/Merge option, including whether to overwrite or not,
and select OK.
6Click within the Source cell and browse to change the source file.
7Click within the Destination cell and browse to change the destination
file.
8Select OK. The Migration Review dialog box opens.
9(optional) Select Save As to save the migration settings to a file to use to
migrate from these saved settings.
10 Review the migration items.
11 Select OK.
12 Review the Migration Complete information.
13 Select Done.
Custom migration
Use the Migration Utility to migrate settings and customized files. When you
select a custom migration, you define each file that you want to migrate. This
option is useful when you have files from an earlier release that are not in the
default location. This option is also used to synchronize multiple computers.
1Click Project tab ➤ Other Tools panel ➤ Migration Utility.
2Select Migrate from: <Custom>.
3Check the box next to the category name.
130 | Chapter 2 Migration

4Click the category name in the Migration items list.
5Click within the Source cell and type the file name or browse to the file
you want to migrate.
6Click within the Destination cell and type the file name or browse to the
destination file.
7 Click within the Copy/Merge Option cell, and select the Browse
tool to change the migration option for the file. The Copy/Merge Options
dialog box opens. Different file types have different migration options.
8Select the Copy/Merge option and select OK.
9Repeat for each file you want to migrate.
10 Select OK. The Migration Review dialog box opens.
11 (optional) Select Save As to save the migration settings to a file that to
use to migrate from these saved settings.
12 Review the migration items.
13 Select OK.
14 Review the Migration Complete information.
15 Select Done.
Migrating from saved settings
Migrating from saved settings is useful if you migrate settings and files on
multiple computers. You define the migration settings on the first computer
and save those settings to an external file. When you use the Migration Utility
on another computer select the file containing the saved settings.
Saving the settings file
1Click Project tab ➤ Other Tools panel ➤ Migration Utility.
2Set your migration settings using either the steps for Migrating from an
earlier release on page 129 or a Custom migration on page 130.
3Select OK on the AutoCAD Electrical Migration Utility dialog box. The
Migration Review dialog box opens.
Migration Utility | 131
4Select Save As to save the migration settings to a file.
5Enter a file name and click Save.
6Continue the migration or Cancel.
Migrating from the saved settings file
1Click Project tab ➤ Other Tools panel ➤ Migration Utility.
2Select External File to migrate from the saved settings.
3Select the saved .migr file and click Open.
4Review the migration items.
5Select OK.
6Review the Migration Complete information.
7Select Done.
AutoCAD Electrical Migration Utility
Migrates settings and files from a previous AutoCAD Electrical release to the
current release.
Ribbon: Project tab ➤ Other Tools panel ➤ Migration Utility.
Toolbar: Miscellaneous
Menu: Projects ➤ Extras ➤ Migration Utility
Command entry: AEMIGRATION
Many files and settings within AutoCAD Electrical are customizable. Select
which files and settings to migrate to the current release, and which option
to use:
■Migrate from an earlier release.
■Custom migration.
■Migrate from saved settings.
132 | Chapter 2 Migration

Migrate from
Select to migrate from a previous version of AutoCAD Electrical or to perform
a custom migration. All installed AutoCAD Electrical versions, 2004 or newer,
are options in the dialog box list. Click External file to browse to a previously
saved migration settings file.
Migration items
Available migration items are listed in a tree structure. Select a file category
check box if you want to migrate files from that category. If you are migrating
from a previous version of AutoCAD Electrical, any existing files are selected
for migration by default. If the category contains additional subcategories,
expand the tree structure to see each level. Highlight the category name to
display the individual files and migration options within the Migration files
section.
Migration files
The Migration files section lists the files, and migration options, for the
category highlighted in the Migration items section. Use this section to change
the migration option, source file, or destination file.
Displays the current migration option. To change the migration
option for a file, select within the Copy/Merge Options cell.
Copy/Merge Options
Opens the Copy/Merge Options dialog box.
Copy/Merge options differ depending on the selected file type.
Displays the current source file or folder for migration. To change
the source file, select within the Source cell
Source
Opens the Select source file dialog box.
Displays the current destination file or folder for migration. To
change the destination file, select within the Destination cell
Destination
Opens the Select destination file dialog box.
Remove the selected files from the list of file for migration.Remove
Opens a preview dialog box showing the migration changes for
the selected file. The Preview button is available only when mer-
Preview
Migration Utility | 133
ging the Environment File, Symbol Menu, or Line Type. Red text
indicates changed lines. Blue text indicates added lines.
Merge/Copy Options
The Migration Utility supports various file types for migration to the current
release of AutoCAD Electrical. Different file types have different migration
options. There are two file migration options: copy or merge.
Copy
If the Copy option is selected, the source file is copied to the file location for
the current release. You can choose to overwrite any existing destination files.
If you choose not to overwrite the existing files, only new files are migrated.
Merge
If the Merge option is selected, you can choose to overwrite existing entries.
You can indicate to maintain the user fields, text value field, and Web
hyperlink field in overwritten records when merging catalog databases. If you
choose not to overwrite existing entries, only new entries are merged.
Migration Options
Provides options for merging the PLC database file.
The Spreadsheet to PLC/IO utility uses the module category to calculate the
insertion point of a module.
■Input module - inserted near the right or bottom bus line of the ladder.
■Output module - inserted near the left or top bus line of the ladder.
■Combination module - inserted centered between the bus lines of the
ladder.
Before AutoCAD Electrical 2009, the Spreadsheet to PLC/IO utility determined
the module category based on the value in the DESCRIPTION field or the
database table name. For example, if the DESCRIPTION field contained the
string “*IN*”, it was considered an input module. In AutoCAD Electrical 2009
and later, the PLC database contains a CATEGORY field.
The Migration utility compares the values in the DESCRIPTION field of the
PLC database to values you assign as input, output, or combination. If a match
is not made, the database table name is compared. If there is a match to the
134 | Chapter 2 Migration
DESCRIPTION field or table name, the CATEGORY value is entered for that
module.
■1 - Input module
■2 - Output module
■3 - Combination module
Enter text, comma delimited, used to match to the DESCRIPTION value.
If there is a match, the module is assigned a CATEGORY value of 1 for input.
Input
Enter text, comma delimited, used to match to the DESCRIPTION value.
If there is a match, the module is assigned a CATEGORY value of 2 for
output.
Output
Enter text, comma delimited, used to match to the DESCRIPTION value.
If there is a match, the module is assigned a CATEGORY value of 3 for
combination.
Combination
Select to overwrite any existing CATEGORY values. If not selected, only
blank CATEGORY fields are modified.
Overwrite existing set-
tings
The Migration utility updates all tables in the PLC database based on these
values.
NOTE Blank spaces within the text are included as part of the search string. For
example, “IN{space}*” matches “IN module” but does not match “INPUT”.
If no match is made for a module, the CATEGORY field is not modified. Use
the PLC Database File Editor to assign a category to a module. Select a
“Spreadsheet to PLC I/O Utility Insertion Point” option on the Module
specifications on page 614 dialog box.
Migration Review
Ribbon: Project tab ➤ Other Tools panel ➤ Migration Utility.
Toolbar: Miscellaneous
Menu: Projects ➤ Extras ➤ Migration Utility
Migration Utility | 135

Command entry: AEMIGRATION
The Migration Review dialog box opens after selecting OK on the AutoCAD
Electrical Migration Utility dialog box. The dialog box displays all the migration
items and the options for each item.
Status: indicates the migration option, such as Merge/Overwrite
or Copy/Overwrite.
Files selected for migration
Source: name and path of the file containing the data to migrate.
Destination: name and path of the file to receive the values from
the source file.
Opens the Save Settings dialog box. Enter a file name to save the
migration settings. This file is used when migrating from an ex-
ternal file on page 131.
Save As
136 | Chapter 2 Migration
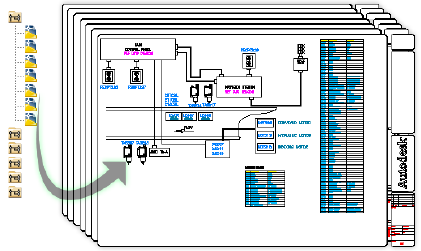
Project Management
Overview of projects
A project is a set of interrelated wiring diagram drawings. An ASCII text file,
called the project file, lists the AutoCAD drawing file names that make up the
wiring diagram set. You can have as many projects as you wish, but only one
project can be active at a time.
An AutoCAD Electrical project file:
■Is an ASCII text file with any path and any name followed by the .WDP
extension.
■Lists the complete path to each wiring diagram drawing included in the
project.
■Carries default settings that can be referenced when new drawings are created
and added to the project.
3
137

Project files default to the directory pointed to by your project subdirectory
(given by the WD_PROJ setting in your environment file). It is not mandatory.
When you create a project file, you can save it to any subdirectory. In some
cases, you may want to store them in client-specific subdirectories to take
advantage of the AutoCAD Electrical ability to access client-specific catalog
files and library symbols.
Use recently opened projects
The Project Manager displays a list of recently opened projects so you can
easily select another project to open without having to browse for it. The
project list is dynamic with the last project you worked on appearing at the
top of the list. The list of recent projects is saved in a text file called lastproj.fil
in the user subdirectory.
■Windows XP: \Documents and Settings\{username}\Application
Data\Autodesk\AutoCAD Electrical {version}\{release}\{country
code}\Support\User\
■Windows Vista, Windows 7:
\Users\{username}\AppData\Roaming\Autodesk\AutoCAD Electrical
{version}\{release}\{country code}\Support\User\
Each line in this file gives the information for one project. The last piece of
data in the line identifies what the project state is when AutoCAD Electrical
is started: "2"=Active, "1"=listed as Open, "0"= not listed in window but available
from the Recent Projects dialog box. If you adjust this file, either manually
with a text editor or programmatically (see the AutoCAD Electrical API Help),
you can control which project is active when AutoCAD Electrical starts up,
and which other projects are shown in the Project Manager window.
Work with projects
Use the Project Manager to create a project, access an existing project, add
drawings to a project, or modify existing information associated with a project.
Create a project
1Click Project tab ➤ Project Tools panel ➤ Manager.
2 On the Project Manager, click the New Project button.
138 | Chapter 3 Project Management

NOTE You can also create a project by right-clicking at the bottom of the
tree inside the Project Manager and selecting New Project or by clicking the
arrow on the Project Selection menu and selecting New Project.
3In the Create New Project dialog box, enter the name for the new project.
The .WDP extension is automatically added to the filename.
4Select or create the directory where you want to save the project.
5(Optional) Specify an existing project file (WDP) to use. Use the default
or click Browse to select a previously defined project definition file.
6(Optional) Click Descriptions to enter descriptions for the project. You
can enter up to 12 description lines per page. You can also select the
check boxes for the information to include in reports generated for the
project.
7(Optional) Click OK-Properties to modify your project default settings
for project settings, components, wire numbering, cross-references, styles,
and drawing formats. All information defined in these tabs is saved to
the project definition file as project and drawing defaults.
8Click OK.
Add a new drawing to the current project
1Click Project tab ➤ Project Tools panel ➤ Manager.
2 On the Project Manager, click the New Drawing button.
3Create a new drawing on page 167 and click OK.
4In the Project Manager, right-click the project name and select Add Active
Drawing. The drawing is added to the end of the existing list.
Add existing drawings to the current project
1Click Project tab ➤ Project Tools panel ➤ Manager.
Overview of projects | 139

2In the Project Manager, right-click the project name, and select Add
Drawings.
3In the Select Files to Add dialog box, select the drawings to add to the
current project. You can select multiple drawings using the Shift or
Control keyboard keys.
NOTE The order in which you select drawings determine how they are listed
in the project drawing list.
4Click Add.
The drawings are added to end of the project drawing list.
Copy a project
Copies an existing project and project specific files to a new name, and creates
renamed copies of the drawing files.
Before you run the Copy Project operation, close the drawings you plan to
copy. The copied project becomes the active project.
1Click Project tab ➤ Project Tools panel ➤ Copy.
2Enter the name of the project to copy.
■Click Copy active project to copy the current project.
■Click Browse to select a project to copy.
3Click OK.
4Select the directory where you want to save the new project.
5Enter the name for the new project. The .WDP extension is automatically
added to the filename.
6Click Save.
7Select one or more drawings to copy to the new project.
■Do All: Selects all drawings from the project drawing list to copy to
the new project.
■Process: Selects one or more drawings from the project drawing list
to copy to the new project.
140 | Chapter 3 Project Management
■Reset: Moves all selected drawings back to the project drawing list.
■Un-select: Moves one or more drawings back to the project drawing
list.
■by Section/sub-section: Selects drawings by sections and subsections.
8Click OK.
9Enter the directory path where to save the new project. If the directory
does not exist, it is created.
10 Select the project-related files to copy. (See the following list.)
11 Click OK.
12 Modify the new drawing file names if necessary.
13 Click OK. The new project becomes the current project.
Project-related files to copy
On the Copy Project: Step 4 -- Enter Base Path for Project Drawings dialog box
you can select the project-related files to copy to the new path. Options
include:
■Title block setup (.wdt)
■Project line labels (.wdl)
■Component description defaults (.wdd)
■Catalog lookup database (cat.mdb)
■Footprint lookup database (lookup.mdb)
■Family code mapping (wd_fam.dat)
■Wire color/gauge label (.wdw)
■Schematic lookup database (schematic_lookup.mdb)
■Location codes (.loc)
■Installation codes (.inst)
■Ratings defaults (.wdr)
■Component tagging (.wdx)
Overview of projects | 141

■Spreadsheet PLC I/O Utility settings (.wdi)
■RSLogix import mapping (.wdf)
■User-defined attributes (.wda)
■Terminal audit filter (.wdn)
Work with project drawings
Use the Project Manager to access an existing project and modify its associated
information.
Group drawings within a project
You can create groups of drawings within your project list by assigning sections
and subsection codes to each drawing. The AutoCAD Electrical project-wide
tagging, cross-referencing, and reporting functions can then operate on the
whole project (default) or, using this section/subsection coding, on just a
portion of the drawing set.
1Click Project tab ➤ Project Tools panel ➤ Manager.
2In the Project Manager, right-click the drawing name, and select Properties
➤ Drawing Properties.
3In the Drawing Properties dialog box, click the Settings on page 220 tab.
4In the Sheet Values section, enter a section or subsection code for the
drawing.
5Click OK.
Repeat for each drawing you want to group, making sure to assign the
same section or subsection code to each.
Change the order of drawings in the project
The order in which drawings appear in the drawing list of the project is the
order in which AutoCAD Electrical processes them in project-wide tagging
and cross-referencing operations. You can change the drawing order using
the Reorder Drawings tool.
142 | Chapter 3 Project Management

1Click Project tab ➤ Project Tools panel ➤ Manager.
2In the Project Manager, right-click the project name, and select Reorder
Drawings.
3Find and highlight the drawing you want to move in the list.
4Click Move Up or Move Down until the drawing moves to the appropriate
position in the list.
5Click OK.
Remove a drawing from the active project
1Click Project tab ➤ Project Tools panel ➤ Manager.
2In the Project Manager, right-click the drawing name, and select Remove.
The drawing is instantly removed from the project but it is not deleted.
NOTE You can remove all drawings from a project by right-clicking the project
name in the Project Manager, and selecting Remove Drawings. Select the drawings
to remove from the Select Drawings to Process dialog box, and click OK.
Assign a description to each drawing
You can assign a 3-line description to each drawing listed in your project. You
can then toggle the project drawing list back and forth between drawing
preview and drawing details. Flipping the drawing list to display the drawing
details can make it easier to find a specific drawing among dozens or hundreds
in a project file.
1Click Project tab ➤ Project Tools panel ➤ Manager.
2In the Project Manager, right-click the drawing name, and select Properties
➤ Drawing Properties.
3In the Drawing Properties ➤ Settings on page 220 dialog box, enter a
description for the drawing.
Overview of projects | 143

Select from a list of predefined descriptions from the active project by
clicking the arrow.
4Click OK.
TIP These descriptions can link to an attribute in the title block for automatic
update.
Preview a drawing
You can preview a drawing from the Project Manager.
1Click Project tab ➤ Project Tools panel ➤ Manager.
2In the Project Manager, select a drawing from the list.
3In the Details pane, click Preview.
An image of the highlighted drawing displays. Once selected, the preview
remains on. Each time you highlight another drawing in the project list
the display updates with an image of the selected drawing.
4Click Details to return to the drawing description for the drawings.
Pick a different project
AutoCAD Electrical displays a list of recently opened projects so you can easily
select another project to open without having to browse for it. The project
list is dynamic with the last project you worked on appearing at the top of
the list. The list of recent projects is saved in a text file called lastproj.fil in
the user subdirectory.
1Click Project tab ➤ Project Tools panel ➤ Manager.
2In the Project Manager, click the arrow on the Project Selection menu,
and select Recent.
3In the Recent Projects dialog box, select the project from the list.
4Click Drawings to see a list of the drawings in the selected project.
In the Project Drawings dialog box, double-click a drawing name to see
a preview of that drawing. Click Pick Project, Open Drawing to make the
144 | Chapter 3 Project Management

selected project the active project and open the selected drawing or click
Back to return to the Recent Projects dialog box.
5(Optional) Click Remove to remove a project from the project list.
6Click OK.
The selected project becomes the active project.
NOTE If you know the drawing name but you are not sure what project the
drawing is in, click Find in the Recent Projects dialog box. In the Find Drawing in
Recent Projects dialog box, enter the name of the drawing (wildcards are accepted)
and click Find. Once a list of possible projects is presented, select the project name
and click Drawing List to see a list of the drawings contained in the project.
Double-click the drawing name in the list to preview the drawing. Click Pick Project,
Open Drawing to activate the project and open the selected drawing.
Project manager
Opens or creates a project of one or more drawings, and configures project-wide
settings.
Ribbon: Project tab ➤ Project Tools panel ➤ Manager.
Toolbar: Main Electrical 2
Menu: Projects ➤ Project ➤ Project Manager
Command entry: AEPROJECT
Lists the drawing files associated with each open project. Add new drawings,
reorder drawing files, and change project settings. Right-click the properties
icon for options to move, size, close, dock, hide, or set the transparency for
the Project Manager.
You can dock the Project Manager into a specific location on the screen or
hide it until you want to use the project tools. Right-click the properties icon
to display options to move, size, close, dock, hide, or set the transparency for
the Project Manager.
NOTE You cannot have two projects open in the Project Manager with the same
project name.
Overview of projects | 145
Right-click menu
You can right-click in empty space in the Project Manager to display the
following options:
Creates a project. Once created, the new project automat-
ically becomes the active project.
New Project
Opens a different project from a file selection dialog box.
In the Select Project File dialog box, navigate to the project
to open and select it.
Open Project
Creates a drawing file and adds it to the active project. The
new drawing displays at the bottom of the project drawing
list for the active project.
New Drawing
Project Selection menu
You can default to a predefined directory by adding an entry to your .env file.
Exit AutoCAD and open the .env file with any generic text editor (such as
Wordpad). Add this line:
WD_PICKPRJDLG, n:/{your directory}/, AutoCAD Electrical default pick proj
Opens a different project from a list of recent projects or
from a file selection dialog box.
Recent
Creates a project. Once created, the new project automat-
ically becomes the active project.
New Project
Opens a different project from a file selection dialog box.
In the Select Project File dialog box, navigate to the project
to open and select it.
Open Project
Allows you to browse to the vault to open a project and
make it active inside of the Project Manager. You must be
Open Project from Vault
logged into the vault. In the Select Project dialog box,
navigate to the project to open and select it. Click the arrow
next to the Open button and select one of the following
options: Open (Check Out), Open (Check Out All), or Open
Read-only.
146 | Chapter 3 Project Management

Buttons
Creates a project. Once created, the new project
automatically becomes the active project.
New Project
Creates a drawing file and adds it to the active
project.
New Drawing
Refreshes the drawing list inside of the Project
Manager.
Refresh
For Vault: Checks for changes in external file
references and updates the Vault icons in the
Project Manager. Files that have changed and
are currently checked out to you are not up-
dated. Files that are checked out to someone
else are updated to their current version. Files
that are checked out to someone else are up-
dated to their current version on your local drive.
If the Vault version is newer, then the Vault icon
indicates that the file needs reloading (the Vault
icon turns red).
Performs pending updates on any drawing files
inside of the active project that have been mod-
ified.
Project Task List
Updates the related line reference numbers,
cross-reference text, device tagging, and signal
Project-Wide Update/Re-
tag
reference updates on the selected drawing files
inside of the active project.
Configures the display options. There are ten
values that can be associated with the drawings
Drawing List Display Con-
figuration
listed so you can display the information based
on your requirements.
Batch plots one or more drawings in the active
project.
Publish/Plot
Overview of projects | 147

Projects
Displays all the open projects in a list. You can have as many projects open as you need, but only
one project can be active at a time. The active project appears in bold text and is always found at
the top of the list. Right-click the project name to display the following project editing options:
Edits the project descriptions. Displays unlimited lines describing the
project. Descriptions can then be included in report headers and title
blocks.
Descriptions
Automates updating title block information for the active drawing or
for the entire project drawing set.
Title Block Update
Generates a report that lists project drawing information from the
title blocks such as drawing descriptions, section, and file names.
Drawing List Report
On the Drawing List Report dialog box, select to run a new report,
redisplay the previously run report or select a format .set file to use
for the report.
Creates a drawing file and adds it to the active project.New Drawing
Adds one or more drawings to the active project. When prompted,
specify whether to apply the project default values to the drawing
settings (in the WD_M block definition).
Add Drawings
Adds an active drawing to the active project. The new drawing ap-
pears at the end of the project drawing list. When prompted, specify
Add Active Drawing
whether to apply the project default values to the drawing settings
(in the WD_M block definition).
Moves drawings up or down in the drawing list for the project. The
order determines how the drawings are processed for project-wide
tagging and cross-referencing operations.
Reorder Drawings
Removes one or more drawings from the current project.Remove Drawings
NOTE The drawing file is not deleted, just the reference to the
drawing.
Performs pending updates on any drawing files inside of the active
project that have been modified.
Task List
Launches dialog boxes to plot the project, publish to the Web, publish
to DWF, or create a zip file of the project.
Publish
148 | Chapter 3 Project Management

Displays the settings for the project and information about the
AutoCAD Electrical environment.
Settings
Displays a list of drawing files that have different settings from the
project definition file (.wdp). If all drawing files match the .wdp, the
Exception List
dialog box indicates that there are no exceptions. You can then use
the Settings Compare tool to display the differences.
Controls project-wide settings including tagging, component cross-
referencing options, and catalog lookup file preferences.
Properties
Makes an open project the active project in the AutoCAD Electrical
session. This option also sends the project list to the top of the dialog
box.
Activate
Closes an open project.Close
NOTE You cannot close the active project; first activate another
project in the list.
You must be logged into the vault to see this menu in the Project
Manager. The status of the selected object determines which vault
commands are available for selection.
Vault
Adds the project definition file (.wdp)
along with its drawing files to the
Check In All
vault. You can vault just the project
file using the Project Check In com-
mand. You can vault the project file
along with its drawing files using the
project Check In All command.
NOTE If files used to support the
project (such as .wdl and .wdt) share
the same file name as the project, they
appear in the Vault Check In All dialog
box.
Reserves and locks the project defini-
tion file along with the associated
Check Out All
drawing files listed in the Project
Manager. If the project definition file
is unavailable for checkout, you can
Overview of projects | 149

still check out the drawings available
for editing.
Adds the project definition file to the
vault and creates a version of the file.
Check In
Use this option if you want to check
in only the project definition file and
none of its drawing file dependencies;
otherwise use Check In All.
NOTE If files used to support the
project (such as .wdl and .wdt) share
the same file name as the project, they
appear in the Vault Check In dialog
box.
Reserves and locks the master project
definition file. Retrieves an updated
Check Out
copy, if necessary. Use this option if
you want to check out only the project
definition file and none of its drawing
file dependencies; otherwise use Check
Out All.
Removes the reservation/lock from the
master project definition file. The
Undo Check Out/Undo
Check Out All
master file is now available for others
to check out. Any modifications made
to the local copy are not checked back
into the vault.
Undo Check Out All removes the lock
from all the checked out drawing files
and project definition file listed in the
Project Manager for the selected pro-
ject.
Retrieves the latest master copy from
the vault and copies it into your
Get Latest/Get Latest All
working folder. The status indicator
displaying a red background indicates
older files.
150 | Chapter 3 Project Management

Project Drawing List
Displays the drawings associated with a project. You can select multiple drawings from the project
list to open, close, remove, apply project defaults, or paste properties all at once. You cannot select
multiple drawings from two or more projects.
The active drawing appears in bold text in the list. By default, the selected drawing highlights in the
project drawing list regardless if the Project Manager is active or not. You can turn off this feature
by clicking the Drawing List Display Configuration button and selecting Show selection highlight
only when active.
Indicates that the file is a drawing file.
Indicates that a drawing file is a reference drawing. To make
a drawing a reference drawing, right-click on the drawing
name and select Properties ➤ Drawing Properties.
Right-click the drawing name to display the following drawing editing options:
Opens the selected drawing in a new window. You can
also double-click a drawing name or select a drawing name
and press Enter to open the drawing.
Open
Closes the selected drawing.Close
Copies the selected drawing into the same or another open
project. Select the folder to copy the drawing to, enter a
Copy To
new file name and select the project to save the drawing
to. When prompted, specify whether to apply the project
default values to the drawing settings (in the WD_M block
definition).
Removes the selected drawing from the current project.Remove
Replaces the selected drawing with one that you select
from a file selection dialog box.
Replace
Renames the selected drawing directly in the drawing list.Rename
Overview of projects | 151

Assigns, edits, and removes section and subsection coding
for a drawing. Assigns drawing descriptions to the drawing
files.
Drawing Properties
Applies project settings to new drawing files where the
project default settings for the drawings were not applied
at creation time.
Apply Project Defaults
Copies the drawing settings and options from one drawing
to one or more drawings.
Copy
NOTE Drawing-specific information (found on the Drawing
Properties ➤ Drawing Settings tab) cannot be copied from
one drawing to another.
Applies the copied drawing settings and options from one
drawing to the selected drawings.
Paste
Displays differences between all drawing settings and their
associated defaults in the project definition file.
Settings Compare
(you must be logged into the vault) Adds a file to the vault
and creates a version of the file. The first time drawing file
Check In
is checked in, the project definition file is checked in at the
same time. The project definition file is vaulted first to es-
tablish a location in the Vault database.
(you must be logged into the vault) Reserves and locks the
master drawing file. Retrieves an updated copy, if necessary.
Check Out
Checks out the drawing files when the project file is under
Vault control.
(you must be logged into the vault) Removes the reserva-
tion/lock from the master drawing file. The master file is
Undo Check Out
now available for others to check out. Any modifications
made to the local copy are not checked back into the vault.
(you must be logged into the vault) Retrieves the latest
master copy from the vault and copies it into your working
Get Latest
folder. The status indicator displaying a red background
indicates older files.
152 | Chapter 3 Project Management

NOTE Two projects can reference the same drawing file. If both projects try to
modify the same drawing with a project-wide tagging or cross-referencing function
it can lead to conflicts.
Details
Switches between displaying drawing previews and drawing descriptions. The
drawing details are updated when you highlight a drawing file and remain
visible until a new drawing file is selected. Use the up and down arrow keys
on your keyboard to switch drawings.
Displays project and drawing detail based on what is highlighted in
the Project pane. Information listed includes the status, file name, file
Details
location, file size, last saved date, and the name of the last user who
modified the file.
Displays the last saved thumbnail view for the highlighted drawing
in the drawing list.
Preview
Vault Status Icons
(you must be logged into the vault) The Vault Status Icons indicate the status
of your local copy of the files as compared against the master copy of those
same files in the vault.
The Vault Status indicate when the local copy is in sync with the master and
when it is not. The tooltips help guide you to the next logical steps - especially
when the local copy is no longer in sync with the master. These icons are
crucial to the overall understanding of how to work in a vaulted environment.
MeaningIcon
File is not in the vault.
File is in the vault and available to be checked out. The version in your working
folder is the same as in the vault. Also referred to as the Latest Version.
File is in the vault and available to be checked out, but the local version is
newer than the latest version in the vault. This status typically means that your
local file was changed without checking it out. If you want to save these changes,
check out the file with the Don'tGet Local Copy option.
Overview of projects | 153
File is in the vault and available to be checked out, but the local copy is out of
date. Get the latest version from the vault.
File is checked out to you and the local version is the same as in the vault. Also
referred to as the Latest Version.
File is checked out to you and the local copy is newer than the latest version in
the vault. This status typically means that you changed the file since it was
checked out but have not checked it back in.
File is checked out to you and the local copy is older than the latest version in
the vault. This status typically means that you started with aversion for the vault
that was older than the latest version, and then checked it out to promote it to
the latest.
File is checked out by someone else, and the local copy is the same as in the
vault. Also referred to as the Latest Version. This condition typically occurs if the
other person did not check changes back into the vault.
File is checked out to someone else, but the local copy is newer than the latest
version in the vault. This condition typically occurs if the other person checked
changes into the vault, but kept the file checked out. Use Refresh from Vault to
update to the latest available version.
File is checked out to someone else, but the local copy is older than the latest
version in the vault. Use Refresh from Vault to update to the latest available
version.
Create new project
Defines the minimum requirements to create an AutoCAD Electrical project
definition file (WDP), the folder in which the project is maintained, and the
settings and options defined within the project.
Ribbon: Project tab ➤ Project Tools panel ➤ Manager.
Toolbar: Main Electrical 2
Menu: Projects ➤ Project ➤ Project Manager
Command entry: AEPROJECT
154 | Chapter 3 Project Management

Click the New Project button or select New Project from the Project Selection
menu.
NOTE You can also create a project by right-clicking at the bottom of the tree
inside the Project Manager, and selecting New Project.
Specifies the name for the new project. Enter a name
to define any of the project properties.
Name
NOTE The .wdp extension is not required in the edit
box.
Specifies the location for a project definition file and
folder definition. If left blank, the project definition
Location
file is created at the WD.ENV project location. Click
Browse to pick a folder where the new project
file/folder is created.
NOTE You cannot have duplicate project names in
the same location.
Creates a folder with the same name as the project
where the drawing files and project definition are
Create Folder with Project Name
stored. The folder is created following the path
defined in the project location edit box.
Specifies the project settings. You can select a previ-
ously defined project setting and apply it to your
Copy Settings from Project File
new project definition file. Click Browse to select a
previously defined project definition file to copy over
and apply settings to the new project being created.
NOTE If blank, copies the settings from the active
project.
Specifies the project descriptions. Descriptions can
be included in report headers and title blocks
Descriptions
Creates the project definition file in the specified
location before opening the Project Properties dialog
OK-Properties
box where you can define default settings and op-
tions for your project which are saved in the project
definition file.
Overview of projects | 155
Copy project: step 1 - select existing project to copy
Ribbon: Project tab ➤ Project Tools panel ➤ Copy.
Toolbar: Project
Menu: Projects ➤ Project ➤ Copy Project
Command entry: AECOPYPROJECT
NOTE If the active drawing is one of them to copy to a new project, cancel the
dialog box, open a new drawing, and then restart the Copy Project command.
Copies the active project.Copy Active Project
Selects another project to copy.Browse
About collaborative design
In a collaborative design environment, several people can work on a project
at the same time. The project file (.WDP) lists all the drawings that are part
of a project. You can use Autodesk Vault with AutoCAD Electrical for drawing
management, version control, and revision labeling.
You must install Autodesk Vault to vault projects. Autodesk Vault prevents
engineers from working on the original version of a project in the vault. To
maintain the relationship between the drawing files that are defined in the
project file, check out all files specified in a project file to modify one or more
files. When edits are complete, the project can be checked back into the vault.
AutoCAD Vault ARX adds vaulting functionality to the Project Manager. Upon
initial start-up of AutoCAD Electrical, you are not logged into the vault. Log
into Autodesk Vault using the File ➤ Vault menu to vault projects. The vault
commands are available by right-clicking a project or drawing within the
AutoCAD Electrical Project Manager. You can use the Project Manager to:
■Check projects in and out of the vault
The most basic requirement of the vault is that you never work directly
on a file in the vault. The projects in the vault are the Masters and cannot
be edited. Check out the project to the working folder on your local drive
156 | Chapter 3 Project Management

to edit it. When you finish working on the project, check the project back
into the vault.
TIP Other people can view updates you made to a project while you continue
modifying the project. Select the Keep Checked Out option on the Check In
dialog box. It checks in the updates you made to the project and keeps the
project checked out to you.
NOTE You must have all references of a project file downloaded to your
working folder to edit the project file.
■View the status of files in a design.
Vault status icons indicate the status of your local copy of the files as
compared against the master copy of those same files in the vault. The
vault status icons indicate when the local copy is in sync with the master
and when it is not. Tooltips provide descriptions of the icons. Pause the
cursor over a status icon to see a detailed description. The tooltips also
help guide you to the next logical steps, especially when the local copy is
no longer in sync with the master. The vault status icons are crucial to the
overall understanding of how to work in a vaulted environment.
NOTE The vault status icons are only available in the list view and only appear
when you are logged into the vault.
Key Concepts
■The master files are stored and maintained in the file store on the Vault
server. The vault database is also located on the server. It can be on the
same or a different server from where the file store is located. The database
maintains the metadata for the files in the file store and the relationships
between those files.
■The vault is referred to as the virtual location of the files. Users do not
work directly on the master files. A file must be checked out from the
virtual location in the vault to a physical location in the working folder
before it can be modified.
■Each user must have a physical location on their disk mapped to the
corresponding vault location. A folder that has been mapped to the root
folder ("$") in a vault is called a working folder. Each Vault user can
optionally set a local working folder (physical location on disk) for the
root of the vault or rely on the default one (C:\My Documents\Vault)
provided by Vault. Setting up a working folder creates a user-defined
About collaborative design | 157

virtual-to-physical mapping that is maintained for as long as the user works
with the vault. The working folder can be changed, but the mapping itself
cannot be removed.
■When you check out a project, that project is copied from the virtual
location in the vault to the physical location in the working folder. When
you are ready to check the project back in, the mapping tells the vault
where to check the files in from.
■Opening a project from the vault checks all files out to the working folder
of the Vault user. In addition, you can open a checked-in file as read-only.
The essential rules to remember when working with AutoCAD Electrical Vault
ARX are:
■The projects in the vault are the masters.
■You can check a project or a single drawing out of the vault to modify it.
■To check out a project for editing, set up a working folder on the disk.
Refer to the Managing Your Data book for more information on AutoCAD
Electrical Vault ARX.
Project manager
Opens or creates a project of one or more drawings, and configures project-wide
settings.
Ribbon: Project tab ➤ Project Tools panel ➤ Manager.
Toolbar: Main Electrical 2
Menu: Projects ➤ Project ➤ Project Manager
Command entry: AEPROJECT
Lists the drawing files associated with each open project. Add new drawings,
reorder drawing files, and change project settings. Right-click the properties
icon for options to move, size, close, dock, hide, or set the transparency for
the Project Manager.
You can dock the Project Manager into a specific location on the screen or
hide it until you want to use the project tools. Right-click the properties icon
158 | Chapter 3 Project Management

to display options to move, size, close, dock, hide, or set the transparency for
the Project Manager.
NOTE You cannot have two projects open in the Project Manager with the same
project name.
Right-click menu
You can right-click in empty space in the Project Manager to display the
following options:
Creates a project. Once created, the new project automat-
ically becomes the active project.
New Project
Opens a different project from a file selection dialog box.
In the Select Project File dialog box, navigate to the project
to open and select it.
Open Project
Creates a drawing file and adds it to the active project. The
new drawing displays at the bottom of the project drawing
list for the active project.
New Drawing
Project Selection menu
You can default to a predefined directory by adding an entry to your .env file.
Exit AutoCAD and open the .env file with any generic text editor (such as
Wordpad). Add this line:
WD_PICKPRJDLG, n:/{your directory}/, AutoCAD Electrical default pick proj
Opens a different project from a list of recent projects or
from a file selection dialog box.
Recent
Creates a project. Once created, the new project automat-
ically becomes the active project.
New Project
Opens a different project from a file selection dialog box.
In the Select Project File dialog box, navigate to the project
to open and select it.
Open Project
Allows you to browse to the vault to open a project and
make it active inside of the Project Manager. You must be
Open Project from Vault
logged into the vault. In the Select Project dialog box,
navigate to the project to open and select it. Click the arrow
About collaborative design | 159

next to the Open button and select one of the following
options: Open (Check Out), Open (Check Out All), or Open
Read-only.
Buttons
Creates a project. Once created, the new project
automatically becomes the active project.
New Project
Creates a drawing file and adds it to the active
project.
New Drawing
Refreshes the drawing list inside of the Project
Manager.
Refresh
For Vault: Checks for changes in external file
references and updates the Vault icons in the
Project Manager. Files that have changed and
are currently checked out to you are not up-
dated. Files that are checked out to someone
else are updated to their current version. Files
that are checked out to someone else are up-
dated to their current version on your local drive.
If the Vault version is newer, then the Vault icon
indicates that the file needs reloading (the Vault
icon turns red).
Performs pending updates on any drawing files
inside of the active project that have been mod-
ified.
Project Task List
Updates the related line reference numbers,
cross-reference text, device tagging, and signal
Project-Wide Update/Re-
tag
reference updates on the selected drawing files
inside of the active project.
Configures the display options. There are ten
values that can be associated with the drawings
Drawing List Display Con-
figuration
listed so you can display the information based
on your requirements.
160 | Chapter 3 Project Management

Batch plots one or more drawings in the active
project.
Publish/Plot
Projects
Displays all the open projects in a list. You can have as many projects open as you need, but only
one project can be active at a time. The active project appears in bold text and is always found at
the top of the list. Right-click the project name to display the following project editing options:
Edits the project descriptions. Displays unlimited lines describing the
project. Descriptions can then be included in report headers and title
blocks.
Descriptions
Automates updating title block information for the active drawing or
for the entire project drawing set.
Title Block Update
Generates a report that lists project drawing information from the
title blocks such as drawing descriptions, section, and file names.
Drawing List Report
On the Drawing List Report dialog box, select to run a new report,
redisplay the previously run report or select a format .set file to use
for the report.
Creates a drawing file and adds it to the active project.New Drawing
Adds one or more drawings to the active project. When prompted,
specify whether to apply the project default values to the drawing
settings (in the WD_M block definition).
Add Drawings
Adds an active drawing to the active project. The new drawing ap-
pears at the end of the project drawing list. When prompted, specify
Add Active Drawing
whether to apply the project default values to the drawing settings
(in the WD_M block definition).
Moves drawings up or down in the drawing list for the project. The
order determines how the drawings are processed for project-wide
tagging and cross-referencing operations.
Reorder Drawings
Removes one or more drawings from the current project.Remove Drawings
NOTE The drawing file is not deleted, just the reference to the
drawing.
About collaborative design | 161

Performs pending updates on any drawing files inside of the active
project that have been modified.
Task List
Launches dialog boxes to plot the project, publish to the Web, publish
to DWF, or create a zip file of the project.
Publish
Displays the settings for the project and information about the
AutoCAD Electrical environment.
Settings
Displays a list of drawing files that have different settings from the
project definition file (.wdp). If all drawing files match the .wdp, the
Exception List
dialog box indicates that there are no exceptions. You can then use
the Settings Compare tool to display the differences.
Controls project-wide settings including tagging, component cross-
referencing options, and catalog lookup file preferences.
Properties
Makes an open project the active project in the AutoCAD Electrical
session. This option also sends the project list to the top of the dialog
box.
Activate
Closes an open project.Close
NOTE You cannot close the active project; first activate another
project in the list.
You must be logged into the vault to see this menu in the Project
Manager. The status of the selected object determines which vault
commands are available for selection.
Vault
Adds the project definition file (.wdp)
along with its drawing files to the
Check In All
vault. You can vault just the project
file using the Project Check In com-
mand. You can vault the project file
along with its drawing files using the
project Check In All command.
NOTE If files used to support the
project (such as .wdl and .wdt) share
the same file name as the project, they
appear in the Vault Check In All dialog
box.
162 | Chapter 3 Project Management

Reserves and locks the project defini-
tion file along with the associated
Check Out All
drawing files listed in the Project
Manager. If the project definition file
is unavailable for checkout, you can
still check out the drawings available
for editing.
Adds the project definition file to the
vault and creates a version of the file.
Check In
Use this option if you want to check
in only the project definition file and
none of its drawing file dependencies;
otherwise use Check In All.
NOTE If files used to support the
project (such as .wdl and .wdt) share
the same file name as the project, they
appear in the Vault Check In dialog
box.
Reserves and locks the master project
definition file. Retrieves an updated
Check Out
copy, if necessary. Use this option if
you want to check out only the project
definition file and none of its drawing
file dependencies; otherwise use Check
Out All.
Removes the reservation/lock from the
master project definition file. The
Undo Check Out/Undo
Check Out All
master file is now available for others
to check out. Any modifications made
to the local copy are not checked back
into the vault.
Undo Check Out All removes the lock
from all the checked out drawing files
and project definition file listed in the
Project Manager for the selected pro-
ject.
Retrieves the latest master copy from
the vault and copies it into your
Get Latest/Get Latest All
About collaborative design | 163

working folder. The status indicator
displaying a red background indicates
older files.
Project Drawing List
Displays the drawings associated with a project. You can select multiple drawings from the project
list to open, close, remove, apply project defaults, or paste properties all at once. You cannot select
multiple drawings from two or more projects.
The active drawing appears in bold text in the list. By default, the selected drawing highlights in the
project drawing list regardless if the Project Manager is active or not. You can turn off this feature
by clicking the Drawing List Display Configuration button and selecting Show selection highlight
only when active.
Indicates that the file is a drawing file.
Indicates that a drawing file is a reference drawing. To make
a drawing a reference drawing, right-click on the drawing
name and select Properties ➤ Drawing Properties.
Right-click the drawing name to display the following drawing editing options:
Opens the selected drawing in a new window. You can
also double-click a drawing name or select a drawing name
and press Enter to open the drawing.
Open
Closes the selected drawing.Close
Copies the selected drawing into the same or another open
project. Select the folder to copy the drawing to, enter a
Copy To
new file name and select the project to save the drawing
to. When prompted, specify whether to apply the project
default values to the drawing settings (in the WD_M block
definition).
Removes the selected drawing from the current project.Remove
Replaces the selected drawing with one that you select
from a file selection dialog box.
Replace
164 | Chapter 3 Project Management

Renames the selected drawing directly in the drawing list.Rename
Assigns, edits, and removes section and subsection coding
for a drawing. Assigns drawing descriptions to the drawing
files.
Drawing Properties
Applies project settings to new drawing files where the
project default settings for the drawings were not applied
at creation time.
Apply Project Defaults
Copies the drawing settings and options from one drawing
to one or more drawings.
Copy
NOTE Drawing-specific information (found on the Drawing
Properties ➤ Drawing Settings tab) cannot be copied from
one drawing to another.
Applies the copied drawing settings and options from one
drawing to the selected drawings.
Paste
Displays differences between all drawing settings and their
associated defaults in the project definition file.
Settings Compare
(you must be logged into the vault) Adds a file to the vault
and creates a version of the file. The first time drawing file
Check In
is checked in, the project definition file is checked in at the
same time. The project definition file is vaulted first to es-
tablish a location in the Vault database.
(you must be logged into the vault) Reserves and locks the
master drawing file. Retrieves an updated copy, if necessary.
Check Out
Checks out the drawing files when the project file is under
Vault control.
(you must be logged into the vault) Removes the reserva-
tion/lock from the master drawing file. The master file is
Undo Check Out
now available for others to check out. Any modifications
made to the local copy are not checked back into the vault.
(you must be logged into the vault) Retrieves the latest
master copy from the vault and copies it into your working
Get Latest
folder. The status indicator displaying a red background
indicates older files.
About collaborative design | 165

NOTE Two projects can reference the same drawing file. If both projects try to
modify the same drawing with a project-wide tagging or cross-referencing function
it can lead to conflicts.
Details
Switches between displaying drawing previews and drawing descriptions. The
drawing details are updated when you highlight a drawing file and remain
visible until a new drawing file is selected. Use the up and down arrow keys
on your keyboard to switch drawings.
Displays project and drawing detail based on what is highlighted in
the Project pane. Information listed includes the status, file name, file
Details
location, file size, last saved date, and the name of the last user who
modified the file.
Displays the last saved thumbnail view for the highlighted drawing
in the drawing list.
Preview
Vault Status Icons
(you must be logged into the vault) The Vault Status Icons indicate the status
of your local copy of the files as compared against the master copy of those
same files in the vault.
The Vault Status indicate when the local copy is in sync with the master and
when it is not. The tooltips help guide you to the next logical steps - especially
when the local copy is no longer in sync with the master. These icons are
crucial to the overall understanding of how to work in a vaulted environment.
MeaningIcon
File is not in the vault.
File is in the vault and available to be checked out. The version in your working
folder is the same as in the vault. Also referred to as the Latest Version.
File is in the vault and available to be checked out, but the local version is
newer than the latest version in the vault. This status typically means that your
local file was changed without checking it out. If you want to save these changes,
check out the file with the Don'tGet Local Copy option.
166 | Chapter 3 Project Management
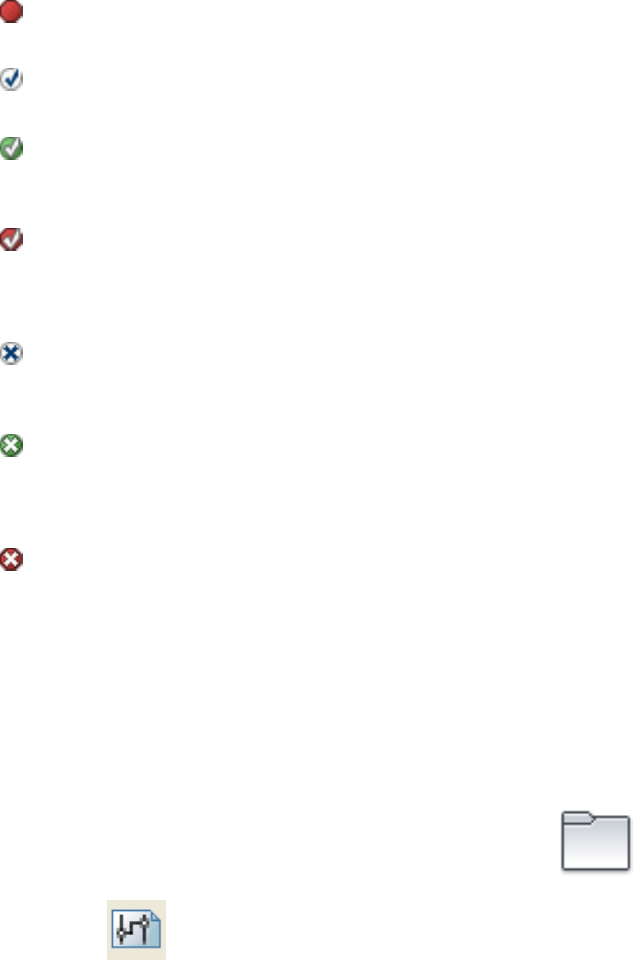
File is in the vault and available to be checked out, but the local copy is out of
date. Get the latest version from the vault.
File is checked out to you and the local version is the same as in the vault. Also
referred to as the Latest Version.
File is checked out to you and the local copy is newer than the latest version in
the vault. This status typically means that you changed the file since it was
checked out but have not checked it back in.
File is checked out to you and the local copy is older than the latest version in
the vault. This status typically means that you started with aversion for the vault
that was older than the latest version, and then checked it out to promote it to
the latest.
File is checked out by someone else, and the local copy is the same as in the
vault. Also referred to as the Latest Version. This condition typically occurs if the
other person did not check changes back into the vault.
File is checked out to someone else, but the local copy is newer than the latest
version in the vault. This condition typically occurs if the other person checked
changes into the vault, but kept the file checked out. Use Refresh from Vault to
update to the latest available version.
File is checked out to someone else, but the local copy is older than the latest
version in the vault. Use Refresh from Vault to update to the latest available
version.
Create a drawing
Create a drawing
Use the Project Manager to create a drawing.
1Click Project tab ➤ Project Tools panel ➤ Manager.
2 In the Project Manager, click the New Drawing tool.
Create a drawing | 167

NOTE You can also create a drawing by right-clicking at the bottom of the
tree inside the Project Manager and selecting New Drawing or by right-clicking
on the active project name and selecting New Drawing.
3In the Create New Drawing dialog box, enter the name for the new
drawing. The .dwg extension is automatically added to the file name.
4Specify the template drawing to use for the creation of the drawing file.
If left blank, the default ACAD.DWT file is used. Click Browse to select a
template drawing or enter the path and name of a template in the box.
5Select or create the directory where you want to save the drawing.
6(Optional) Enter descriptions for the drawing. You can enter up to three
description lines for the drawing file. The description displays in title
block updates, custom drawing properties, and drawing list reports. Select
from a list of predefined descriptions from the active project by clicking
the arrow.
7(Optional) Specify the IEC default values for the project, installation, and
location fields.
8(Optional) Specify the sheet and drawing number value for the WD_M
block definition. Additionally, you can specify the values to use for a
section or subsection.
9(Optional) Click OK-Properties to define settings and options for your
drawing. Changes you make through the Drawing Properties dialog box
are saved as attribute values on the invisible WD_M block of the drawing.
10 Click OK.
Create new drawing
Creates a drawing file to add to the active project.
Ribbon: Project tab ➤ Project Tools panel ➤ Manager.
Toolbar: Main Electrical 2
Menu: Projects ➤ Project ➤ Project Manager
Command entry: AEPROJECT
168 | Chapter 3 Project Management

On the Project Manager, click the New Drawing button.
NOTE You can also create a drawing by right-clicking at the bottom of the tree
inside the Project Manager and selecting New Drawing or by right-clicking on the
active project name and selecting New Drawing.
Drawing File
Specifies the file name for the new drawing. Enter a
file name to define any of the drawing properties or
to create a drawing.
Name
NOTE The .dwg extension is not required in the edit
box.
Specifies the path and filename for an AutoCAD
Electrical template drawing (.dwt) to use for the
Template
creation of a new drawing file. If left blank, the de-
fault ACAD.DWT file is used. Click Browse to select
a template drawing or type in the path and name of
a template.
NOTE The previously used drawing template is re-
tained in the dialog box.
Indicates that the drawing should not be included
in tagging, cross-referencing, and reporting func-
For Reference Only
tions. If selected, the drawing is included in project-
wide plotting and title block operations.
Specifies the location for a drawing file. You can
override the default location for the drawing file and
Location
create additional folders. If left blank, the drawing
file is created at the same location as the definition
file of the active project. Click Browse to pick a folder
where the new drawing is created.
NOTE You cannot have duplicate drawings in the
same location.
Specifies up to three lines of description text for the
drawing file. The description displays in title block
Description 1-3
Create a drawing | 169

updates and custom drawing properties. Select from
a list of predefined descriptions from the active pro-
ject by clicking the arrow.
NOTE Drawing descriptions are disabled when you
are modifying the properties of a drawing that is not
in a project or if the project file is unavailable for edit.
IEC-Style Designators
Specifies IEC default values for the drawing, such as Project (%P), Installation
(%I), and Location (%L) fields. When you insert a component, the %I and %L
default values are used if the Installation and/or Location values would
normally be blank.
Specifies a project code for the drawing settings on
all WD_M blocks. This value can be used as the re-
placeable parameter %P.
Project Code
Specifies the Installation code for the WD_M block
definition. This value can be used as the replaceable
parameter %I.
Installation Code
Specifies the Location code for the WD_M block
definition. This value can be used as the replaceable
parameter %L.
Location Code
Displays a list of Installation or Location codes to se-
lect from the active drawing.
Drawing
Displays a list of previously defined Installation or
Location codes to select from the active project or
from the Default.INST or Default.LOC file.
Project
Sheet Values
Component, wire, and cross-reference tagging use replaceable parameters in
their format. If you reference the sheet number or drawing number in any of
your tagging formats, then specify a default drawing-wide value to use.
Specifies the sheet number value for the drawing settings. This
value can be used as the replaceable parameter %S.
Sheet
170 | Chapter 3 Project Management

Specifies the drawing number value for the drawing settings. This
value can be used as the replaceable parameter %D.
Drawing
Specifies the section value for the drawing file saved in the project
definition file (.wdp). This value can be used as the replaceable
parameter %A.
Section
Specifies the subsection value for the drawing file saved in the
project definition file (.wdp). This value can be used as the replace-
able parameter %B.
Sub-Section
OK-Properties
Creates the drawing file in the specified location before opening the Drawing
Properties dialog box where you can define settings and options for your
drawing. Changes you make through this dialog box are saved as attribute
values on the invisible WD_M block of the drawing. If your current drawing
does not have this required block present when any AutoCAD Electrical
schematic command is invoked, AutoCAD Electrical automatically inserts this
block at 0,0.
Change drawing display options
Change drawing display options
You can use the Drawing List Display Configuration tool to change the way
your drawings are listed in the Project Manager. By default drawings are
identified by the drawing file name in the Project Drawing List.
1Click Project tab ➤ Project Tools panel ➤ Manager.
2 On the Project Manager, click the Drawing List Display
Configuration tool.
3Determine which display options to show in the drawing list. Options
include:
■Installation Code (%I)
Change drawing display options | 171
■Location Code (%L)
■Section
■Sub Section
■Sheet Number (%S)
■Drawing Number (%D)
■Drawing Description 1-3
■File Name
4Select the display option from the Display Options list and click the >>
button or add all of the options by clicking the All >> button.
The display option you selected moves to the Current Display Order list.
To rearrange this list, select an option and click Move Up or Move Down.
To remove an option from the list, select the option and click the <<
button.
5(Optional) Change the character to use between the values in the listing.
The default separator value is a dash (-).
6(Optional) Change the way the selection highlights in the listing
depending on whether the Project Manager is active or not. By default
the drawing file you select in the drawing list is highlighted at all times;
you can select to highlight your selection only when the Project Manager
drawing list is active.
7Click OK.
The Project Drawing List automatically updates in the Project Manager.
Drawing List Display Example
In this example, Sheet Number (%S) and Drawing Description 1 were selected
as the display options and the separator value is a dash.
Drawing List AfterDrawing List Before
1 - Flow and Interconnection diagram, I/O listdemo01.dwg
2 - 3-phase motor control, Control circuitdemo02.dwg
3 - Power supplies, I/O module feedsdemo03.dwg
Drawing list display configuration
172 | Chapter 3 Project Management
Configures the display options. There are ten values that can be associated
with a drawing listed. You can display the information based on your
requirements.
Ribbon: Project tab ➤ Project Tools panel ➤ Manager.
Toolbar: Main Electrical 2
Menu: Projects ➤ Project ➤ Project Manager
Command entry: AEPROJECT
On the Project Manager, click the Drawing List Display Configuration tool.
Lists the values that you can associate to a drawing.Display Options
Moves the selected display option into or from the
Current Display Order. To add an option to the list,
Arrow keys
select the display option from the Display Options
list and click the >> button or add all of the options
by clicking the All >> button. To remove an option
from the list, select the option and click the << but-
ton.
Lists the values to display in the listing. You must
have one entry specified.
Current Display Order
Specifies which character to use between the values
in the listing. Type the character in the input box or
use the default (-).
Separator Value
Changes the way the selection highlights in the list-
ing depending on whether the Project Manager is
Always show selection highlight/Show
selection highlight only when active
active or not. By default the drawing file you select
in the drawing list is highlighted at all times; you can
select to only highlight your selection when the Pro-
ject Manager drawing list is active.
Change drawing display options | 173
Moves the selected display option up one spot in the
Current Display Order list.
Move Up
Moves the selected display option down one spot in
the Current Display Order list.
Move Down
Overview of project-related files
There are some optional project-related files that AutoCAD Electrical supports.
These files provide various functions such as keeping a project consistent,
helping update custom title blocks across a project, or providing custom
settings for various tools such as the PLC I/O module insertion tool.
Optional AutoCAD Electrical project-related files include:
Database for choosing catalog part number assignments.
It is also referenced when automatically generating various
bill of materials reports.
Catalog lookup
It is an Access-format MDB file that is named <pro-
ject>_cat.mdb (project-specific version of a catalog lookup
file) or DEFAULT_CAT.MDB (default catalog lookup file). If
the project-specific .mdb file is used, it needs to be in the
same folder where the <project>.wdp file is located. If a
project-specific version is not found, then the DE-
FAULT_CAT.MDB is searched for in the same folder as the
active project file, and then in the paths defined in subdir-
ectory search sequence "C" below.
Lists various standard component description selections,
accessible by clicking Defaults on the Insert/Edit Compon-
ent and Panel Layout - Component Insert/Edit dialog boxes.
Description defaults
This file can be a family-specific ASCII text file with a .wdd
extension (for example, "PB.WDD" for family “PB” push
buttons). If the family-specific file is not found, then it
searches for a file with the same path and name as the
active project with a .wdd extension (<project>.wdd). If
neither a family-specific or project-specific file is found, it
defaults to searching for a general description file
WD_DESC.WDD in the various AutoCAD Electrical search
paths and AutoCAD support paths (subdirectory search
sequence “A” below). If none are found, it prompts for
browsing to a .wdd description file.
174 | Chapter 3 Project Management
When you click Defaults on the Insert/Edit Component or
Panel Layout - Component Insert/Edit dialog box the con-
tents of the ASCII text file display in a dialog box where
you can select a line of text to use as the description text.
The selected text, up to a “;” comment delimiter if any,
then displays in the description edit box on the Insert/Edit
dialog box. If the selected text has one or more “|” charac-
ters, it is interpreted as having line breaks so the 2nd and
3rd description lines fill in as well.
Component tagging pick list data carried in an external
text file, accessed when you click External List on the In-
External component
sert/Edit dialog box for schematic or panel layouts. The
data in this file can be comma-delimited or space-delimited
and can be in any order. When accessed, the contents of
the file display in a dialog box so you can select a line of
data. It is broken down and displays in a dialog box for
mapping to various attributes carried by the schematic
component or panel footprint symbol being edited.
The elements in the selected line of file data can be mapped
to the edited schematic or footprint symbol's attributes
such as tag, description, location, and catalog part number.
This text file can have a .txt, .csv or .wdx extension. If you
do not browse to and select a specific file, AutoCAD Elec-
trical searches for a file with the same path and name as
the project’s .wdp file but with a .wdx extension. On sub-
sequent command invocations, AutoCAD Electrical defaults
to the previously selected file name.
Overrides the family tag code of the library symbols by
mapping the codes to new values. The tag code of a symbol
Family tag code map
is used in generating the tag-ID of inserted components,
like the "PB" of tag-ID "PB101" or the "K" of tag-ID "-K25."
The file WD_FAM.DAT is searched for in the subdirectory
search sequence "A" below. This is an ASCII text file in the
format of <old>, <new>. For example, the default family
tag code for a JIC library pilot light is “LT” and generates
tags such as “LT101.” To override this tag code and substi-
tute a family code of “LITE” without editing the library
symbols, add this line to the wd_fam.dat: “LT, LITE.”
Database for graphical footprint assignments based on the
catalog part number assignments.
Footprint lookup
Overview of project-related files | 175
A file with the same path and name as the project but with
a “_FOOTPRINT_LOOKUP.MDB” suffix and extension is
searched for first. If the file is not found, then the default
FOOTPRINT_LOOKUP.MDB file is searched for in the same
directory as the project file and then in the subdirectory
search sequence "B" below.
Database for schematic components inserted from panel
footprints.
Schematic lookup
A file with the same path and name as the project but with
a “_SCHEMATIC_LOOKUP.MDB” suffix and extension is
searched for first. If the file is not found, then the default
SCHEMATIC_LOOKUP.MDB file is searched for in the same
directory as the project file and then in the subdirectory
search sequence "B" below.
Lists the default installation codes for selections found in
the Insert/Edit Component and Panel Layout - Component
Installation codes
Insert/Edit dialog boxes (select Include external list from
the installation's Project list subdialog box).
A file with the same path and name as the project with an
.inst extension is searched for first. If the file is not found,
then the DEFAULT.INST file is searched for in the same
directory as the project file and then in the subdirectory
search sequence "A" below.
Lists the default location codes for selections found in the
Insert/Edit Component and Panel Layout - Component In-
Location codes
sert/Edit dialog boxes (select Include external list from the
location's Project list subdialog box).
A file with the same path and name as the project with a
.loc extension is searched for first. If the file is not found,
then the DEFAULT.LOC file is searched for in the same dir-
ectory as the project file and then in the subdirectory search
sequence "A" below.
Lists the default group codes for selections found in the
Panel Layout - Component Insert/Edit dialog box (select
Group codes
Include external list from the location's Project list subdialog
box).
A file with the same path and name as the project with a
.grp extension is searched for first. If the file is not found,
then the DEFAULT.GRP file is searched for in the same dir-
176 | Chapter 3 Project Management
ectory as the project file and then in the subdirectory search
sequence "A" below.
Lists the default mount codes for selections found in the
Panel Layout - Component Insert/Edit dialog boxes (select
Mount codes
Include external list from the location's Project list subdialog
box).
A file with the same path and name as the project with a
.mnt extension is searched for first. If the file is not found,
then the DEFAULT.MNT file is searched for in the same
directory as the project file and then in the subdirectory
search sequence "A" below.
Customizes the generic LINEx labels in the various title
block and project information dialog boxes.
Project labels
A file with the same path and name as the project with a
.wdl extension is searched for first. If the file is not found,
then the DEFAULT_WDTITLE.WDL file is searched for in the
same directory as the project file and then in the subdirect-
ory search sequence "A" below.
Lists the default rating values found in the Insert/Edit
Component and Panel Layout - Component Insert/Edit
Rating defaults
dialog boxes. The contents of this ASCII text file display in
a dialog box. The "|" character can be used to delimit con-
secutive RATINGx value assignments. For example, picking
an entry "30A|60A" would put "30A" into the first RATINGx
attribute and "60A" into the RATING(x+1) attribute.
A file with the same path and name as the project but with
a .wdr extension is searched for first. If the file is not found,
then the default WD_RATINGS.WDR file is searched for in
the subdirectory search sequence "A" below. Alternately, a
family-specific file can be accessed (for example, PS.WDR
for pressure switches).
The .wdn file is a text file used specifically for auditing. In
the .wdn file, terminal numbers are not checked for duplic-
Real-time error checking
ation. You can use wildcards to exclude a range of terminals
for duplication checking such as all terminals with a tag
name starting with "T" and with terminal number "1."
AutoCAD Electrical searches for the <project_name>.wdn
file in the same folder as the project definition file (.wdp).
Overview of project-related files | 177
If <project_name>.wdn is not found, AutoCAD Electrical
looks for the DEFAULT.WDN file in the project folder:
Windows XP: C:\Documents and Settings\{username}\My
Documents\Acade {version}\AeData\Proj\
Windows Vista, Windows 7: C:\Users\{username}\Docu-
ments\Acade {version}\AeData\Proj
The default .wdn file contains the terminal number filers
GND, PE, and E. They are ignored when checking for du-
plication and are not listed in the Electrical Audit report.
Edit this file with an ASCII text editor, such as WordPad.
Defines the optional mapping of RSLogix codes to AutoCAD
Electrical symbol block names for an RSLogix file import.
RSLogix import
A file with the same path and name as the project but with
a .wdf extension is searched for first. If the file is not found,
then the file DEFAULT_RSLOGIX.WDF file is searched for in
the subdirectory search sequence "A" below and, if not
found, file _DEFAULT_RSLOGIX.WDF is then searched for.
Defines the settings for the AutoCAD Electrical Spreadsheet
to PLC I/O Utility.
Spreadsheet to PLC tool
You are prompted to browse to a file with a .wdi extension.
The default settings file is DEMOPLC.WDI.
The attribute name mapping support file for the AutoCAD
Electrical title block update tool.
Title block
A file with the same path and name as the project but with
a .wdt extension is searched for first. If the file is not found,
then the DEFAULT.WDT file is searched for in the same
directory as the project file. If the file is not found, then the
file is searched for in the subdirectory search sequence "A"
below.
An attribute text file of user-defined attributes defined on
AutoCAD Electrical blocks. The User Defined Attribute List
User defined attributes
is used by report tools to determine which additional attrib-
utes are listed in a report. The list file name can be the same
as the active project or named Default to be used by the
entire system. The DEFAULT.WDA file is saved in the base
project folder, while the <project_name>.wda file is saved
in the same folder as the project definition file (.wdp).
178 | Chapter 3 Project Management
Maps color and gauge wire descriptions based on wire
layers.
Wire color and gauge labels
A file with the same path and name as the project but with
a .wdw extension is searched for first. If the file is not found,
then the DEFAULT.WDW file is searched for in the same
directory as the project file. If the file is not found, then the
file is searched for in the subdirectory search sequence "A"
below.
Subdirectory search sequence "A"
1Full path (if full path name given)
2User subdirectory
Windows XP: C:\Documents and Settings\{username}\Application
Data\Autodesk\AutoCAD Electrical {version}\{release}\{country
code}\Support\User\
Windows Vista, Windows 7:
C:\Users\{username}\AppData\Roaming\Autodesk\AutoCAD Electrical
{version}\{release}\{country code}\Support\User\
3Active project's .wdp file subdirectory
4AutoCAD Electrical support
Windows XP: C:\Documents and Settings\{username}\Application
Data\Autodesk\AutoCAD Electrical {version}\{release}\{country
code}\Support\AeData\
Windows Vista, Windows 7:
C:\Users\{username}\AppData\Roaming\Autodesk\AutoCAD Electrical
{version}\{release}\{country code}\Support\AeData\
5AutoCAD Electrical support
Windows XP: C:\Documents and Settings\{username}\Application
Data\Autodesk\AutoCAD Electrical {version}\{release}\{country
code}\Support\
Windows Vista, Windows 7:
C:\Users\{username}\AppData\Roaming\Autodesk\AutoCAD Electrical
{version}\{release}\{country code}\Support\
6AutoCAD Electrical support (C:\Program Files [(x86)]\Autodesk\Acade
{version}\Support\)
Overview of project-related files | 179
7AutoCAD Electrical support (C:\Program Files [(x86)]\Autodesk\Acade
{version}\)
8All paths defined under AutoCAD Options ➤ Files ➤ Support Files
Search Path
Subdirectory search sequence "B"
1Full path (if full path name given)
2User subdirectory
Windows XP: C:\Documents and Settings\{username}\Application
Data\Autodesk\AutoCAD Electrical {version}\{release}\{country
code}\Support\User\
Windows Vista, Windows 7:
C:\Users\{username}\AppData\Roaming\Autodesk\AutoCAD Electrical
{version}\{release}\{country code}\Support\User\
3Catalog lookup subdirectory
Windows XP: C:\Documents and Settings\{username}\My
Documents\Acade {version}\AeData\Catalogs\
Windows Vista, Windows 7: C:\Users\{username}\Documents\Acade
{version}\AeData\Catalogs\
4Panel footprint library base subdirectory
Windows XP: C:\Documents and Settings\All
Users\Documents\Autodesk\Acade {version}\Libs\panel\
Windows Vista, Windows 7: C:\Users\Public\Documents\Autodesk\Acade
{version}\Libs\panel\
5AutoCAD Electrical support
Windows XP: C:\Documents and Settings\{username}\Application
Data\Autodesk\AutoCAD Electrical {version}\{release}\{country
code}\Support\AeData\
Windows Vista, Windows 7:
C:\Users\{username}\AppData\Roaming\Autodesk\AutoCAD Electrical
{version}\{release}\{country code}\Support\AeData\
6AutoCAD Electrical support
Windows XP: C:\Documents and Settings\{username}\Application
Data\Autodesk\AutoCAD Electrical {version}\{release}\{country
code}\Support\
180 | Chapter 3 Project Management
Windows Vista, Windows 7:
C:\Users\{username}\AppData\Roaming\Autodesk\AutoCAD Electrical
{version}\{release}\{country code}\Support\
7AutoCAD Electrical support (C:\Program Files [(x86)]\Autodesk\Acade
{version}\Support\)
8AutoCAD Electrical support (C:\Program Files [(x86)]\Autodesk\Acade
{version}\)
9All paths defined under AutoCAD Options ➤ Files ➤ Support Files
Search Path
Subdirectory search sequence "C"
1Full path (if full path name given)
2User subdirectory
Windows XP: C:\Documents and Settings\{username}\Application
Data\Autodesk\AutoCAD Electrical {version}\{release}\{country
code}\Support\User\
Windows Vista, Windows 7:
C:\Users\{username}\AppData\Roaming\Autodesk\AutoCAD Electrical
{version}\{release}\{country code}\Support\User\
3Catalog lookup subdirectory
Windows XP: C:\Documents and Settings\{username}\My
Documents\Acade {version}\AeData\Catalogs\
Windows Vista, Windows 7: C:\Users\{username}\Documents\Acade
{version}\AeData\Catalogs\
4AutoCAD Electrical support
Windows XP: C:\Documents and Settings\{username}\Application
Data\Autodesk\AutoCAD Electrical {version}\{release}\{country
code}\Support\AeData\
Windows Vista, Windows 7:
C:\Users\{username}\AppData\Roaming\Autodesk\AutoCAD Electrical
{version}\{release}\{country code}\Support\AeData\
5AutoCAD Electrical support
Windows XP: C:\Documents and Settings\{username}\Application
Data\Autodesk\AutoCAD Electrical {version}\{release}\{country
code}\Support\
Overview of project-related files | 181

Windows Vista, Windows 7:
C:\Users\{username}\AppData\Roaming\Autodesk\AutoCAD Electrical
{version}\{release}\{country code}\Support\
6AutoCAD Electrical support (C:\Program Files [(x86)]\Autodesk\Acade
{version}\Support\)
7AutoCAD Electrical support (C:\Program Files [(x86)]\Autodesk\Acade
{version}\)
8All paths defined under AutoCAD Options ➤ Files ➤ Support Files
Search Path
NOTE If the environment file (wd.env) has setting WD_ACADPATHFIRST
uncommented and set to 1, then the last search item, the Options paths, are
searched between steps 1 and 2 above instead of at the very end.
NOTE If the environment file (wd.env) has setting WD_SUP_ALT uncommented
and set to a valid subdirectory path, then it is inserted into the search sequence
just after User.
Overview of the project file format
A “.wdp" project file is a text file that lists the drawing files to treat as a
multi-drawing wiring diagram. AutoCAD Electrical manages this file
automatically. Here is a general breakdown of the .wdp file format:
All lines of text marked with "*[n]" in columns 1-4 followed
by the line of project data (n=1 to xxx)
Project description
Entries marked with "?[n]" in columns 1-4. Many of these
values are mirrored on attributes carried by the invisible
WD_M block of each drawing.
Project default settings
This current project "copy" of the drawing properties set-
tings can migrate to each new AutoCAD Electrical drawing.
It overwrites the defaults carried on the WD_M.dwg library
symbol as it inserts. The WD_M block alert box displays for
permission to insert into a new or non-AutoCAD Electrical
drawing. The check box controls the drawing settings:
OFF - the settings of the drawing are the defaults car-
ried on the WD_M.dwg library symbol.
182 | Chapter 3 Project Management
ON - the settings of the drawing are set to match the
"?[n]" settings listed in the .wdp file of the current
project.
For example, you have an active project that is set up for
a one-of-a-kind wire tagging format that is different from
all your other projects. It is also different from the default
carried on the WD_M.dwg block insert of the symbol lib-
rary. When you start a new drawing for the project, check
this switch on. The special settings of your active project
update the values on the inserted WD_M block insert and
cause it to match the special settings of the project. It
eliminates the need to go back into the properties of a new
drawing and adjust the wire tagging format setting to
match the project.
Marked with "+[1]" in columns 1-4 followed by path or
semicolon delimited paths. If multiple paths, the search for
Default schematic library path
a given library symbol file name includes the sequence of
the paths listed here in the order given.
Marked with "+[2]" in columns 1-4 followed by file. It can
be a full path or just the icon menu file name itself (such
as ACE_JIC_MENU.DAT or ACE_IEC_MENU.DAT).
Schematic icon menu file
Marked with "+[3]" in columns 1-4 followed by base panel
library path or semicolon delimited base paths. If multiple
Default panel library path
paths, the search for a given footprint library symbol in-
cludes the sequence of paths listed here in the order given.
Marked with "+[4]" in columns 1-4 followed by file. It can
be a full path or just the icon menu file name itself (such
as ACE_PANEL_MENU.DAT).
Panel icon menu file
Marked with "+[5]" followed by 1’s bit set = automatic/real-
time cross-referencing mode is “on”, 2’s bit set = peer to
Cross-Reference Options
peer cross-referencing mode is “on”, 4’s bit set = Suppress
Installation/Location codes when match the drawing de-
faults mode is “on”. 0 or entry omitted = all options are
off.
Marked with "+[6]" followed by 1=always use MISC_CAT
for catalog lookup, 2= use MISC_CAT if component-specific
Use MISC_CAT table
Overview of the project file format | 183
table not found, 0 or entry omitted = use component-spe-
cific only.
Marked with "+[9]" followed by comma-delimited list. Gives
a list of project properties ➤ description entries that are
included as a header for generated reports.
LINEx entries for reports
Marked with "+[10]" followed by 0= Combined Installa-
tion/Location component tag mode is “off”, 1= mode is
Combined Installation/Location/Tag
“on”, 3= mode is “on” and include Installation/Location
as a tag prefix.
Marked with "+[11]" followed by 0= allow entered DESC1-
DESC3 to be upper/lower case, missing or 1= force all
entered DESC1-DESC3 values to uppercase.
DESC case mode
Marked with "+[13]" followed by 0 or missing= wire tagging
normal mode (wires combined into one wire number as-
Wire network mode
signment), 1=per wire basis mode (each connected wire
gets its own wire number assignment).
Marked with "+[14]" followed by 0 or missing= add prefix
to TAG when output to reports, 1=suppress adding the
IEC style Installation/Location tag
prefix to TAG for reports, 3=suppress Installation/Location
tag prefix when match drawing-wide Installation/Location
default values for reports. This option is only used when
+[10] above is set to 1 or 3.
Marked with "+[15]" followed by 1= component insert to
auto-fill Installation/Location attributes with drawing de-
Auto-fill Installation/Location
faults, 0 or missing= normal mode (do not auto-fill attribute
values).
Marked with "+[16]" for the format that is to deal with wire
connection entries when there is no existing terminal pin
Schematic- ➤ Panel wire format
number text on the panel wiring diagram device footprint,
meaning annotation ends up formatted into an Mtext en-
tity, and "+[17]" for format of data written onto target
TERMxx/WIRENOxx attributes carried on the panel wiring
diagram device footprint.
Marked with "+[18]" followed by 1= auto-hide a wire
number on a wire network when a wire number terminal
Auto-hide wire number
184 | Chapter 3 Project Management
is present on the network (so that the same wire number
does not display twice on the single wire network), 0=
normal mode (do not hide any wire number text).
Marked with "+[19]" followed by wire number offset value,
0 or blank or missing= normal centering of wire numbers
Wire number offset
on the wire segment, value= offset from left or upper end
of wire segment.
Marked with "+[20]" followed by the file name. If this altern-
ative .env file does not exist or cannot be found, the default
wd.env file is used.
Alternate WD.ENV
Marked with "+[21]" followed by 0= wire number by layer
mode is “off”, 1= mode is “on”, and "+[22]" holds the layer
Wire number by layer
setup. Format of layer setup is semicolon delimited in re-
peating groups of four elements per layer definition. <layer
name>;<tag format>;<starting wire number>;<suffix list>;...
Marked with "+[23]" followed by 0= alternate catalog file
not defined, 1=defined and "+[24]" holds the alternate
catalog lookup file name.
Alternate catalog lookup
Marked with "+[27]" followed by the wire number ranges
to exclude for sequential wire numbering. (blank or miss-
Exclude wire number range
ing= no wire numbers excluded) For example, “100-
199,500-699.”
Marked with "+[29]" followed by 0= normal wire numbering
mode or 1=calculate reference-based wire number based
Wire number terminal override
on the location not the first terminal in the wire network
(or revert to normal wire numbering mode if no terminal
in the network).
Marked with "+[30]" and set as a global variable (default
is 0.0) to aid in the calculation of the "CLEN" column (cal-
Calculation of the "CLEN" column
culated wire length) in a from/to report that is able to map
schematic wire connections to panel physical layouts. This
value is the extra amount to add to each end of a calculated
wire segment for connection purposes.
Marked with "+[31]" and set in the Project Properties dialog
box. The value can be blank (no sort order override) or 0-
Tag/Wire number order
Overview of the project file format | 185
7 for the various horizontal/vertical sort orders listed in the
dialog box.
Marked with "+[32]" followed by 0= real-time error checking
mode is “off”, 1= mode is “on.”
Real-time error checking
Marked with "+[33]" to indicate a string of column names
used in grid column headers in the Wire Type commands.
Grid column headers
Marked with "+[34]" to suppress the dash (-) if it is the first
character of a tag when the Combined installation/location
component tag mode is “on.” See the [+10} entry.
Suppress dash
Marked with "+[35]" to indicate the delimiter character
used to separate multiple panel wire annotation values for
the same wire connection.
Panel wire annotation delimiter
Marked with "+[36]" followed by 1= item assignments per
drawing, 0 or missing= item assignments project wide.
Item number mode
Marked with "+[37]" followed by 1= allow item assignment
for each part number, 0 or missing= allow item assignment
for component only.
Item assignment
Marked with "+[38]" followed by the three character suffix
which defines the Electrical Code Standard used by Circuit
Electrical code standard
Builder when searching for a specific table in ace_electric-
al_standards.mdb on page 2015.
Circuit Builder searches for a table using the following se-
quence:
1Tables with the three character Electrical code
standard suffix.
2Tables without a suffix.
3Tables with an “NEC” suffix.
All remaining entries give the drawing names, and any
special assignments or descriptions, that are part of the
Project drawing list
project. The special assignments or description information
precede the drawing name they are assigned to. Each line
is prefixed with a code. If special "sec/sub" groupings are
defined, then a "=" prefix indicates a “sec” entry for the
drawing and a "==" prefix indicates a "sub" entry . If one
186 | Chapter 3 Project Management

to three lines of description are defined, "===" precedes
each description listed in order. If a drawing is marked "Ref
only", a "====REF" entry precedes it . The drawing name
is given last. The drawing name contains the path relative
to the location of the WDP file of the project.
NOTE The following options are no longer valid since they are now drawing
settings: Cross-reference fill format (+[7]), Cross-reference text between (+[8]) and
Cross-reference order (+[28]). Additionally Project scratch database (+[12]) was
replaced by the PDS.
Archive a project
The zip utility creates a zip file of the current project's .wdp file and one or
more drawing files it references. The zip file can optionally include a copy of
the temporary database file of the project to eliminate the need to rebuild the
database when the project is unzipped at a later date.
For the zip utility to function, a zip application must be installed on the system
running AutoCAD Electrical.
Initial Configuration
1Edit the .env file to point to the zip utility.
2Create an entry for the utility labeled WD_ZIP followed by a comma and
then the full path name to the executable zip program. For example,
WD_ZIP,c:\Program Files [(x86)]\winzip\winzip32.exe.
NOTE All drawings to be included in the zipped file must be closed before
running the zip utility.
This utility can also be accessed from within some AutoCAD Electrical routines
that access and modify multiple drawings.
Archive a drawing set
1Click Project tab ➤ Project Tools panel ➤ Zip.
2Select the drawings to process and click OK.
Archive a project | 187

3In the AutoCAD Electrical Project Zip dialog box, enter the zip name of
the file to create or update.
4Indicate whether to include the project database.
5Click OK.
This utility can also be accessed from within some AutoCAD Electrical routines
that access and modify multiple drawings.
Project zip
Zips the drawing list in the current project with your zipping program.
Ribbon: Project tab ➤ Project Tools panel ➤ Zip.
Menu: Projects ➤ Zip Project
Command entry: AEZIPPROJECT
Select the projects to zip and click OK.
Additionally, the utility can be accessed from within some AutoCAD Electrical
routines that access and modify multiple drawings.
Your zip program may generate an error message if the active drawing is one
of the drawings to zip.
Lists the name and location for the zip file to create.
If you want to update a file, browse to the zip file.
Enter zip file name to create/update
Specifies to include the project database file (.mdb)
in the zip file.
Include project database file
Delete a project
Deleting a project and any of the drawings is permanent and cannot be
undone. Select to delete:
■Project definition file, .wdp
■All project drawings
■Specific drawings from a list of project drawings
188 | Chapter 3 Project Management

Deleting a project
Deletes a project and provides the option to also delete the drawing files in
the project.
1Click Project tab ➤ Project Tools panel ➤ Delete.
2Find and select the .wdp project definition file.
3Click Open.
4Select from the available options:
■Delete “wdp” project list file - deletes the selected .wdp file.
■Delete project’s AutoCAD drawing files - deletes all files listed in the
project definition file unless the List option is used.
■List - select specific drawings to delete from the project drawing list.
Only available if the drawing files option is selected.
Work with Multiple Clients
Overview of setup for multiple clients
You can set up AutoCAD Electrical to deal with multiple clients, each with its
own title block and library requirements. Client-specific drawing borders, title
blocks, parts libraries, and part number lookup files can be set up to be
automatically selected by AutoCAD Electrical when working on the project
of a specific client.
Client subdirectory structure
Set up a subdirectory structure where each client is assigned their own
subdirectory. For example, it might look like the following example:
n:\campbell.nap\
n:\j-m\
n:\jeep_toledo\
Work with Multiple Clients | 189

Set up title block mapping files for clients
Use the AutoCAD Electrical Title block setup tool to create a default.wdt file
for the title block of each client. Store this default.wdt in the base subdirectory
of the client. For example:
n:\campbell.nap\default.wdt
One way to do it:
1Use AutoCAD Electrical to create a project in the base subdirectory of the
client (for example: n:\campbell.nap\dummy.wdp).
2Open the drawing border drawing or any existing drawing that contains
the title block of the client (block with attributes).
3Click Project tab ➤ Other Tools panel ➤ Title Block Setup.
4In the Title block link method dialog box, select the middle option listed
under "Method 1" -- the DEFAULT.WDT file for any project found in
subdirectory n:\campbell.nap.
5Click OK.
6Follow the dialog boxes and pick options to build the default.wdt file.
Customize labels for title blocks
Several title block-related dialog boxes in AutoCAD Electrical display generic
labels like "LINE1", "LINE2", and so on. You can change these labels so that
they match up with the actual link to the title block of the client. For example,
in the ".wdt" mapping file, you might have linked the AutoCAD Electrical
data "LINE10" value to the "DRAWN_BY" attribute on the title block of the
client. What you want to see when AutoCAD Electrical displays a title
block-related dialog box is not "LINE10" but "Drawn by."
1Create a file called default_wdtitle.wdl in the subdirectory of the client
where you store the project (.wdp) files. Use any generic text editor, such
as Windows Notepad or WordPad.
2Edit the file as necessary.
The file should contain one line per label in the format LINEx=label. The
entries do not have to be in order and line numbers may be skipped.
3Save and exit.
190 | Chapter 3 Project Management

Try updating the Title Block from the Project Manager. Notice all of the
updated labels.
Specify client-specific library symbols
If the client has special symbols or text size settings that are different from
the default libraries provided with the AutoCAD Electrical product, create and
maintain a client-specific symbol library subdirectory with smart AutoCAD
Electrical symbols that have been adjusted to meet that standards of the client.
When you start a new project for this client, set the AutoCAD Electrical Symbol
Library path to point at the library of the client.
1In the Project Manager, right-click the project name, and select Properties.
2In the Project Properties ➤ Project Settings dialog box, click the plus
sign (+) next to Schematic Libraries. Click Add and enter the path of the
library into the edit box. Make it the first or only path listed.
It causes AutoCAD Electrical to look in the client-specific symbol library
first before going to a default AutoCAD Electrical symbol library.
3Click OK.
NOTE Make sure you also update the Panel Footprint Library path.
Start a project for a client
1Create and save the AutoCAD Electrical project .wdp file to the base
subdirectory of the client where the default.wdt and wdtitle.wdl files are
stored. Make sure that the new project also points at the symbol library
of the client.
The actual drawings for the project can be stored anywhere but you might
want to store them in a "job number" subdirectory under the base client
subdirectory. For example, for client "Campbell" you have a new project,
12345. Under the N:\campbell.nap network drive subdirectory, create
subdirectory n:\campbell.nap\12345. It is where to save the drawings
for that project.
2Create a project and save it to the base subdirectory.
For example, create project P12345.wdp and save it to
n:\campbell.nap\P12345.wdp (along with any other Campbell projects
that were already created). They are all grouped in this base subdirectory,
but their drawing sets are isolated into unique job number subdirectories).
Overview of setup for multiple clients | 191

With the previous setup, anytime you work on a Campbell project (project
file ".wdp" stored in the n:\campbell.nap directory), AutoCAD Electrical
automatically uses the client-specific title block mapping file
(n:\campbell.nap\default.wdt) and the client-specific dialog box label file
(n:\campbell.nap\wdtitle.wdl).
Drawing List Report
Drawing List Report
Reports the settings of each drawing in the project, and provides the means
to edit the report and update the drawing properties with the edited values.
1Click Project tab ➤ Project Tools panel ➤ Manager.
2In the Project Manager, right-click the project name, and select Drawing
List Report.
3(Optional) In the Drawing List Report dialog box, click Format and browse
to a report format file.
4Click New Report.
5Select the drawings to process.
6Click OK.
The data is displayed in the Report Generator dialog box so you can
change the report format, save to a file, and place the report as a table.
IEC tag mode update
IEC tag mode update
Updates component tagging based on a change in the IEC tagging mode.
Ribbon: Project tab ➤ Other Tools panel ➤ ➤ IEC Tag Mode
Update.
192 | Chapter 3 Project Management

Menu: Projects ➤ IEC Tag Mode - Update
Command entry: AEUPDATEIECTAG
If a change to the IEC component tag mode format is detected, use this tool
to freshen the tag format. It makes sure that component tags are displayed
per the change.
Specifies whether to freshen the entire project, the
active drawing only, or selected components in the
active drawing.
Freshen tags for
Reruns the cross-reference update.Freshen parent/child cross-reference an-
notation
Indicates whether any leading "-" characters for
component tags are suppressed (box checked) or
Remove any leading dash character from
component tags
added (box unchecked). It is controlled from the
Project Properties ➤ Components dialog box.
Switches the visibility of Installation and Location at-
tributes on each component.
Force Installation and Location attributes
to be visible or invisible
Task list
Task list
Change the drawing files that were accumulated while drawing files were
unavailable for editing.
Ribbon: Project tab ➤ Project Tools panel ➤ Manager.
Toolbar: Main Electrical 2
Menu: Projects ➤ Project ➤ Project Manager
Command entry: AEPROJECT
On the Project Manager, click the Project Task List tool or right-click
the project name and select Task List. On the Update from dialog box, select
Update: Select from list of drawings and click OK.
Task list | 193

The tasks that still need to be performed on the selected drawings are listed
in the upper portion of the dialog box. The login name of the user creating
the task, file name, installation and location codes, component tag, type,
status, attribute, old value and new value are all displayed. The 'x' indicates
that the source of the change no longer matches the task list.
Sorts the list of tasks to be performed. You can specify four sorts
to perform on the list.
Sort
Selects all of the tasks in the list. When you click OK, all of the
pending tasks are performed on the selected drawings.
Select All
Removes the selected task from the list.Remove
Miscellaneous Reference files
Project database table data -- project drawing files
update
Project database table data -- project drawing files
update
AutoCAD Electrical maintains a scratch database for a project, stored in
Microsoft Access format that is used to speed up certain project-wide
operations. This file is for scratch use only; it is not part of the intelligence
stored in an AutoCAD Electrical project. If the scratch database file is missing
or corrupted, it is automatically generated from the drawing set of the project.
The scratch database file of the project can be used to write back to text data
carried on symbols on the drawings. With some care (described in the following
section), you can edit the database directly and then import the information
back to the drawings.
The file name is <project>.mdb where <project> matches the current project's
.wdp file name.
Ribbon: Import/Export Data tab ➤ Import panel ➤ From Project MDB.
194 | Chapter 3 Project Management
Toolbar: Schematic Reports
Menu: Projects ➤ Export to Spreadsheet ➤ Update from Project Scratch
Database
Command entry: AEIMPORTDB
Select the database table to update then select the drawings to process. Any
changes are written back to the appropriate objects. Alternately, save the
scratch database file with a new name, edit, and then reference this file when
the command starts.
Cautionary Note
AutoCAD Electrical 2006 and later introduced an automatic scratch database
"freshen" function, Project Database Service (PDS), which complicates use of
this command over previous versions of AutoCAD Electrical. The PDS
automatically updates the scratch project database without your intervention
(and without your knowledge). If you edit the scratch database with all of the
changes you want to write back to your project set, there is a chance that the
PDS comes in, without warning, and remove all of these edits (to match the
current state of the unmodified drawings) before you have a chance to run
the command to update the drawings.
Even if you are careful not to update the drawings while doing the mdb edit
(so that the PDS does not update anything), you can still lose all your edits
when you launch the Update from Project Scratch Database command. It is
because the command, just before it begins the update, may ask you if it is
OK to Qsave the active drawing. If you select OK, then the PDS sees a change
and updates the database (for example, erases changes for current drawing),
just as the command is getting ready to process.
To prevent it, do not update the drawings while editing the scratch database
file and answer "NO" to the Qsave prompt when invoking the actual update
command.
Rebuild database file
Rebuild database file
Rebuilds or freshens the temporary project database.
Toolbar: Project
Rebuild database file | 195

Menu: Projects ➤ Project ➤ Rebuild/Freshen Project Database
Command entry: AEREBUILDDB
■List: Lists the drawings that appear to be out-of-date with the wire
connection table of the project. You can trigger an update when the dialog
box is open or you can defter to auto-update when a wire report is run.
■Include wire connection processing: Indicates to process wire connections
when updating the database file or the wire connection table.
■Freshen only: Updates the wire connection table with the out-of-date files.
■Full rebuild: Performs a full rebuild of the project database file.
Select drawings to process
Select drawings to process
Lists the drawings available to update in the current project.
Select to run any of the project-wide commands.
Selects all of the drawings from the project drawing list.Do All
Selects one or more drawings from the project drawing
list.
Process
Moves all selected drawings back to the project drawing
list.
Reset
Moves one or more drawings back to the project drawing
list.
Un-select
Selects drawings by user-defined sections and subsections.by Section/subsection
Files unavailable for processing
Files unavailable for processing
196 | Chapter 3 Project Management
If some of the drawings selected for processing are unavailable (such as in a
read-only state) this dialog box appears. The file name, status, and location
of the drawing is listed in the dialog box for review.
Tries to gain full write access to the entire list of drawing files
previously selected. If you gain full access, the files are locked out
Retry Now
by you and other users cannot modify until the project-wide
command finishes.
Task (saves) all modifications in a task list to run at a later time.
The task list is maintained inside of the Project Task List database
Task
file (project_update.mdb). Not all commands can write to the
task list. See the following list of commands that can be tasked.
Cancels the update and returns to the Select Drawings to Process
dialog box. Select other files to update or try to gain write access
to the entire list of drawings to process.
Cancel
Processes the command on the drawings that are available for
editing. Changes to unavailable drawings are not saved to the
task list for later updates.
Ignore
Commands that write to the project_udpate.mdb file
■Edit Component
■Retag Component
■Insert or copy a circuit
■Edit Location box
■Find/Edit/Replace
■Set/Edit Wire Connection Sequence
■Changing an IEC setting before running a Retag
■Copy Location/Installation/Mount/Group
■Copy BOM
■Block Swap
■Terminal Strip Editor
■Insert Schematic from Panel
Files unavailable for processing | 197
198

Drawing and Project
Properties
Overview of project and drawing properties
Use the Project Properties dialog box to define settings when creating a project.
Then have the settings used for new drawings or the settings added to the
project. In the Project Properties dialog box, icons indicate whether the settings
apply to project settings or drawing defaults.
Settings that apply to project settings and are saved inside the project definition
file (.wdp).
Settings that are saved in the project file as drawing defaults. Drawing related
data to add to the project when running the Add Drawing command is saved
as Drawing Custom Properties.
4
199
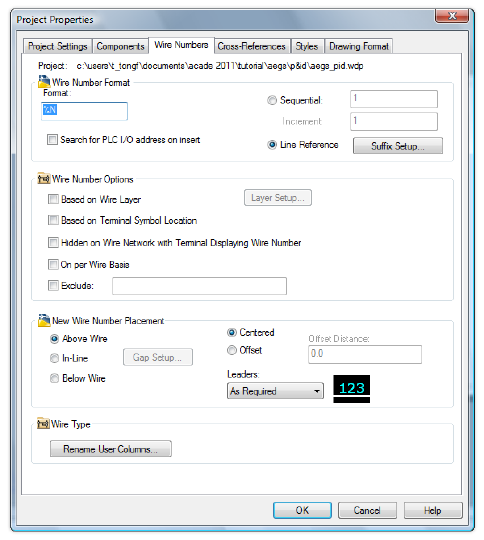
Use the Drawing Properties dialog box to define settings for a new or selected
drawing. These settings override the project properties set in the Project
Properties dialog box. If the drawing is part of a project, the project name
displays in the dialog box. Otherwise, text displays indicating that the drawing
is not part of a project, and drawing-related edit fields saved in the .wdp file
are disabled.
You can specify settings for the project or drawing defaults, components, wire
numbers, cross-references, styles, and the drawing format using either the
Project Properties or Drawing Properties dialog boxes. An overview of the
available options for each tab are listed in the following section.
Settings
Project settings include:
■Library and Icon Menu paths
■Catalog lookup file preferences
■Real-time error checking options
200 | Chapter 4 Drawing and Project Properties
Drawing settings include:
■Drawing type and descriptions
■IEC default values for the Project (%P), Installation (%I), and Location
(%L) fields
■Sheet values for the sheet and drawing in addition to section or subsection
codes
Components
Use this tab to:
■Specify the way new component tags are created.
■Switch between sequential or line reference based tags.
■Set component tag options such as using combined Installation/Location
tags or suppressing the Installation/Location tag on reports.
■Display description text in uppercase.
Wire Numbers
Use this tab to:
■Set the wire number format.
■Switch between sequential or line reference based wire numbers.
■Set wire number options such as hidden numbers, excluded numbers, or
displaying numbers on a per wire basis.
■Set up wire number layer options.
■Define wire number placement: above, below, or in-line.
■Define wire number leaders.
Cross-references
Use this tab to:
■Define the cross-reference annotation format.
■Set cross-reference options such as suppressing Installation/Location codes
or using real-time signal and contact cross-referencing between drawings.
Overview of project and drawing properties | 201

■Set component cross-reference display: text, graphical, or table. You can
also change the display format setup from this dialog box.
Styles
Use this tab to:
■Change default styles for arrows, plcs, fan-in/out markers, and wiring.
■Add or remove layers from the layer list.
Drawing Format
Use this tab to:
■Set the default orientation, spacing, and width values for any new ladders
inserted on the drawing.
■Specify the format referencing style: X-Y Grid, X Zones, or Reference
Numbers.
■Set the scale factor used when inserting new components or wire numbers
on the drawing.
■Set the tag/wire number sort order.
■Define and manage wire and component layers.
Set project or drawing properties
You can specify settings for the project or drawing defaults, components, wire
numbers, cross-references, styles, and the drawing format using either the
Project Properties or Drawing Properties dialog boxes. The following steps are
for setting project properties. To set drawing properties, open the Project
Manager, then right-click the drawing name and select Properties ➤ Drawing
Properties, or click the Drawing Properties tool.
1Click Project tab ➤ Project Tools panel ➤ Manager.
2In the Project Manager, right-click the project name, and select Properties.
NOTE You can also set project properties when you create a project. Create
the project and click OK -Properties in the Create New Project dialog box.
202 | Chapter 4 Drawing and Project Properties
3In the Project Properties dialog box, select the tab to modify properties
for.
4Click OK.
Set project descriptions
You can specify descriptions for use in reports and title block updates. AutoCAD
Electrical supports an unlimited number of description lines.
1Click Project tab ➤ Project Tools panel ➤ Manager.
2In the Project Manager, right-click the project name, and select
Descriptions.
NOTE You can also set project descriptions when you create a project. Create
the project and click Descriptions in the Create New Project dialog box.
3In the Project Description dialog box, enter values for each line.The dialog
box displays 12
description lines at one time.
Displays the first 12 description lines.
Displays the previous 12 description lines.
Displays the next 12 description lines.
Displays the last set of 12 description lines, where one of the lines has a value.
4Select the in reports check box to include the description line in a report
when the Project Lines Header is added.
5Click OK.
Overview of project and drawing properties | 203
See also:
■Customize LINEx Labels on page 1224
■Map AutoLISP values to the title block on page 1226
Project properties: project settings tab
Modify your project default settings for libraries, catalog lookup, and error
checking. All information defined in this tab is saved to the project definition
file as a project default.
Ribbon: Project tab ➤ Project Tools panel ➤ Manager.
Toolbar: Main Electrical 2
Menu: Projects ➤ Project ➤ Project Manager
Command entry: AEPROJECT
In the Project Manager, right-click the project name, and select Properties.
Select the Project Settings tab.
Library and Icon Menu Paths
Select which schematic library, panel library, and icon menus to use.
To modify existing input fields in the tree structure, double-click
the folder (for example, Schematic Libraries) and highlight the
Libraries
path to change. Then browse to the path of the schematic or
base footprint symbol library to use for the project. You can also
include a series of paths for AutoCAD Electrical to search in order.
You can include electrical, pneumatic, or other schematic libraries
in the path.
NOTE The symbol search path includes the User and Project
folders (and potentially the AutoCAD search paths) before the
paths listed here. In the Project Manager, right-click the project
name, and select Settings to view the active search path for the
project.
To use an icon menu for the project that is different from the
default, enter the file name. This menu reference is saved in the
project's .wdp file.
Icon Menu File
204 | Chapter 4 Drawing and Project Properties

NOTE You can only specify one search path for the icon menu.
Adds a new entry into the libraries tree structure.Add
Browses for a folder to select a symbol library or icon menu from.Browse
Removes the selected path from the libraries tree structure.Remove
Moves the selected path up one spot in the libraries tree structure.Move Up
Moves the selected path down one spot in the libraries tree
structure.
Move Down
Brings the default paths from the environment file (WD.ENV) into
the list box tree view for all search paths found underneath the
highlighted folder.
Default
Catalog Lookup File Preference
Searches for the component name as the catalog
table. If the component table is not found, the family
Use component-specific tables
name table is searched. If neither table is found, use
the Catalog Lookup File dialog box to create a com-
ponent or family table or select a different table.
Defines a secondary catalog lookup file.Other File
Searches only the MISC_CAT table. You can search
other component tables if the catalog number is not
found in the MISC_CAT table.
Always use MISC_CAT table
Uses the MISC_CAT table if the component or family
tables are not found in the catalog database.
Use MISC_CAT table only if component-
specific table does not exist
Options
Performs real-time error checking on the project to
determine if duplications of wire numbers or com-
ponent tags occur in the project.
Real-time error checking
An error log file is created for every project regardless
whether you chose to display the real-time warning
dialog box or not. The real-time warning is saved in
Overview of project and drawing properties | 205

the log file named "<project_name>_error.log"and
is saved in the User subdirectory. If a log file exists,
the new content is added to the same file. A blank
line separates one error record from another.
Sets the default wire numbering and component tag
sort order for the project.
Tag/Wire Number Sort Order
Sets the Electrical code standard used by Circuit
Builder. A three character suffix code is saved to
Electrical Code Standard
the.wdp project file. The suffix is used when search-
ing for a specific table in ace_electrical_stand-
ards.mdb on page 2015.
Circuit Builder searches for a table using the following
sequence:
1Tables with the three character Electrical Code
Standard suffix.
2Tables without a suffix.
3Tables with an “NEC” suffix.
Catalog lookup file
It defines a secondary catalog lookup file to use.
Ribbon: Project tab ➤ Project Tools panel ➤ Manager.
Toolbar: Main Electrical 2
Menu: Projects ➤ Project ➤ Project Manager
Command entry: AEPROJECT
On the Project Manager, right-click on the Project name and select Properties.
In the Project Properties ➤ Project Settings dialog box, Catalog Lookup File
Preference section, click Other File.
Specifies to use only one catalog lookup file. The file
that is used depends on what was selected on the
Project Properties ➤ Project Settings dialog box.
Single catalog lookup file
206 | Chapter 4 Drawing and Project Properties

Specifies to define a secondary lookup file for the
project. Catalog lookup files provided with AutoCAD
Optional: Define a secondary catalog
lookup file for this project
Electrical include: default_cat.mdb, footprint_look-
up.mdb, schematic_lookup.mdb, wd_lang1.mdb,
and wd_picklist.mdb.
Defines a secondary catalog lookup file that functions
as such:
■For catalog part number selection, switches to a
secondary catalog lookup file.
■For BOM report generation, queries the second-
ary catalog lookup file when the target part
number is not found in the default file.
Project properties: components tab
Modify your project default settings for components. All information defined
in this tab is saved to the project definition file as project defaults and settings.
Ribbon: Project tab ➤ Project Tools panel ➤ Manager.
Toolbar: Main Electrical 2
Menu: Projects ➤ Project ➤ Project Manager
Command entry: AEPROJECT
In the Project Manager, right-click the project name, and select Properties.
Select the Components tab.
Component TAG Format
Specifies the way new component tags are created.
The tag consists of a minimum of two pieces of in-
Tag Format
formation: a family code and an alphanumeric refer-
ence number (for example, "CR" and "100" to yield
a tag like CR100 or 100CR). Optionally, a component
tag might contain a sheet number or some user-
specified separators. If your format includes the sheet
number %S parameter or the drawing number %D
parameter, enter the values in the edit boxes in the
Drawing Properties ➤ Drawing Settings dialog box.
Overview of project and drawing properties | 207

NOTE AutoCAD Electrical provides a predefined
format for you to use or you can enter your own
format using replaceable parameters on page 236.
NOTE The %N parameter is mandatory in any
component tag format you define.
Searches for a connected PLC I/O module's I/O point.
If found, the I/O address value is substituted for the
"%N" part of the default component tag.
Search for PLC I/O address on insert
NOTE This setting is saved in the MISC_FLAGS attrib-
ute on the WD_M block of the drawing.
Enter the beginning sequential number for the
drawing. Sequential tags can continue uninterrupted
Sequential
from one drawing to the next if you assign the same
beginning sequential number to every drawing in
your project. As you insert components on any
drawing of the project set, AutoCAD Electrical starts
with the value you set and works its way up until it
finds the next unused sequential number tag for the
target component family.
NOTE If you finish a drawing and move to the next,
but return to the first drawing to add another com-
ponent and sequential tag, a gap appears in the
numbering sequence for that drawing. Use the
AutoCAD Electrical Project-wide Update/Retag tool
to retag the whole drawing set.
Set up the unique format tag suffix list. Use this list
to create unique reference-based tags when multiple
Line Reference
components of the same family are located at the
same reference location. (For example, three push
buttons on the same line reference "101" could be
labeled PB101, PB101A, and PB101B -- AutoCAD
Electrical does this using a suffix list of " ", "A", "B",
and so on).
208 | Chapter 4 Drawing and Project Properties

NOTE The component tag suffix is automatically
added to the end of the tag. You can force AutoCAD
Electrical to insert the suffix character somewhere
within the tag format. Use the Suffix position para-
meter, %X, in the component tag format (for ex-
ample, %N%X - %F).
Displays the suffix list. The individual items in the
suffix list are given in the row of edit boxes across
Suffix Setup
the top of the dialog box. List suffix characters for
duplicate family components on the same line refer-
ence or in the same zone (to keep tags unique). The
suffix is added to the end of the component tag. To
add it to the inside of the tag, use "%X" in the Tag
Format. Example:
%N-%F or %N-%F%X = suffix at the end (such as
101-CRA)
%N%X-%F = add to number, before family code
(such as 101A-CR)
Select from the default lists or manually enter your
own suffix list in the row of edit boxes.
Component TAG Options
Uses the combined installation/location tag for inter-
preting component tag names. For example, -100CR
Combined Installation/Location tag mode
relay contact marked with location code PNL1 is in-
terpreted as being associated with a different relay
coil than relay contact -100CR marked with location
code PNL2. If this setting is not selected, both con-
tacts are associated with the same parent relay coil,
-100CR.
Suppresses any single-dash character prefix in an IEC
tag that does not have a leading Installation/Location
Suppress dash when first character of tag
prefix. (For example, "-K101" dash is suppressed to
"K101" but "+LOC1-K101" remains unchanged.)
When switched OFF, it automatically adds a single
dash character to an IEC tag that does not already
have a single leading dash prefix. It also does not
have a leading Installation/Location prefix. (For ex-
Overview of project and drawing properties | 209

ample, tag "K101" becomes "-K101" but "+LOC1-
K101" remains unchanged._
NOTE This suppression takes place automatically in
reports; and takes place graphically only when a
component is inserted, edited, or retagged.
Specifies to exclude the Installation and Location
code values as part of the tag when displaying. For
Format Installation/Location into tag
example, if it is not on, a tag might show up as K16
in the Surf dialog box, but if selected the tag might
show up +AAA-K16 (where AAA is the location).
Suppresses Location and Installation values on com-
ponents if they match the drawing default values.
Suppress Installation/Location in tag when
match drawing default
NOTE Update cross-reference text using the Auto-
CAD Electrical Cross-reference command.
Specifies to exclude Installation and Location values
as part of the tag when displayed in reports.
Suppress Installation/Location in tag on
reports
Fills the Installation and Location edit boxes on the
Insert/Edit component dialog box. The attributes on
Upon insert: automatic fill Installation/Loc-
ation with drawing default or last used
the block with drawing default or last used values (if
no drawing default).If not selected, these edit boxes
and attributes are not filled in and are assumed.
NOTE Avoid using a mixture of drawings in the project when using the Combine
Installation/Location Tag mode. For example, do not include some drawings with
drawing-wide Installation or Location values and some without drawing-wide
values. It can result in a disruption of the child and parent component relationship
under certain circumstances.
Component Options
Forces description text to upper case.Description text upper case
Launches the Item Numbering Setup dialog box. The
dialog box contains options for project or drawing
Item Numbering
wide item numbering, and per-part number or per-
component item numbering.
210 | Chapter 4 Drawing and Project Properties
Item Numbering Setup
Define the item numbering settings for the project.
Ribbon: Project tab ➤ Project Tools panel ➤ Manager.
Toolbar: Main Electrical 2
Menu: Projects ➤ Project ➤ Project Manager
Command entry: AEPROJECT
In the Project Manager, right-click the project name, and select Properties.
Select the Components tab and click Item Numbering.
Sets item numbering to either project-wide or per-
drawing. This setting controls an Item Resequence
Item Numbering Mode
and the “Next>>” buttons on any “Insert/Edit” dialog
boxes.
Per-Component Basis - allow item number assign-
ment to the main catalog part number only.
Item Assignments
Per-Part Number Basis - allow item number assign-
ment for each catalog entry on a component. It in-
cludes the main catalog part number and any mul-
tiple catalog part numbers.
NOTE Item numbers cannot be assigned to part
numbers based on ASSYCODE combinations.
Project properties: wire numbers tab
Modify your project default settings for wire numbers. All information defined
in this tab is saved to the project definition file as project defaults and settings
Ribbon: Project tab ➤ Project Tools panel ➤ Manager.
Toolbar: Main Electrical 2
Menu: Projects ➤ Project ➤ Project Manager
Command entry: AEPROJECT
Overview of project and drawing properties | 211

In the Project Manager, right-click on the project name and select Properties.
Select the Wire Numbers tab.
Wire Number Format
Wire number tags can be sequential or reference-based.
Specifies the way new wire number tags are created. The
wire number tag format must include the %N parameter
Format
that is the base sequential or reference-based value from
the selection described. If your format includes the sheet
number %S parameter or the drawing number %D para-
meter, enter the values in the edit boxes in the Drawing
Properties ➤ Drawing Settings dialog box.
NOTE For reference-based wire number tagging, individual
items in the suffix list are applied to the wire tags to keep
multiple wires in the same reference location unique. These
items are added to the end of the tag, but you can force
AutoCAD Electrical to insert the suffix character somewhere
within the tag format. Use the Suffix position parameter,
%X, in the component tag format (for example, %X%N).
NOTE AutoCAD Electrical provides a predefined format
for you to use or you can enter your own format using re-
placeable parameters on page 236.
Specifies to use PLC I/O address values for wires that con-
nect to an addressed I/O point. This setting overrides both
Search for PLC I/O address on insert
Sequential and Reference-based tagging. New wires or wire
renumbering on the current drawing show PLC I/O address-
based wire numbers automatically.
NOTE Like component tags, AutoCAD Electrical uses the
concept of a wire tag format string with replaceable para-
meters. The %N parameter must always be part of the wire
format string. A typical format string can be just this %N
parameter.
Enter the starting sequential number (alpha, numeric, or
alphanumeric) for the drawing. If you enter the same
Sequential
starting sequential number for every drawing of your wiring
diagram set, AutoCAD Electrical confirms at insertion time
that a new sequential wire number tag is not repeated on
any other drawing.
212 | Chapter 4 Drawing and Project Properties
If you set DEMO1 to 100 and DEMO2 to 200, the wire
numbers on DEMO1 start at 100 and wire numbers on
DEMO2 start at 200. If DEMO1 has more than 100 wire
numbers it starts using wire number 200 and above.
DEMO2 would begin its wire numbers where DEMO1 left
off (making sure that duplicate wire numbers are not as-
signed).
The default is "1". Setting it to "2" with a starting sequential
of "1" would yield wire numbers 1, 3, 5, 7, 9, 11, and so
on.
Increment
Sets the wire number tag suffix. This list is used to create
unique reference-based wire number tags for multiple wire
Line Reference
networks. It begins at the same reference location (such as
wire network beginning at a location per line reference
number, X-Y grid reference, or X-Zone reference).
Displays a suffix list. List suffix characters for wire numbers
beginning on the same line reference or in the same zone
Suffix Setup
(to keep wire numbers unique). Select one of the four
predefined suffix lists or enter your own custom suffix list.
Wire Number Options
Assigns a different wire number format based on the wire
layer.
Based on Wire Layer
Overrides the default wire number format by using layer
defined formats. Change the wire layer name, wire number
format, starting wire sequence, and wire number suffix.
Layer Setup
Specifies to use a wire number terminal on a wire network
as the line reference value for calculating a reference-based
Based on Terminal Symbol Location
wire number. For example, a wire network starts at line
reference 100 and drops down and over on line reference
103. If a schematic terminal symbol carries the WIRENO
attribute located on line reference 103, and this option is
enabled, AutoCAD Electrical calculates a reference-based
wire number using 103 instead of 100. If multiple wire
number terminals exist on this network, the line reference
value of the upper left-most terminal is used.
Overview of project and drawing properties | 213

Specifies to hide the wire number automatically for a wire
network that has a wire number-type terminal.
Hidden on Wire Network with Ter-
minal Displaying Wire Number
Specifies to assign a wire number for each wire rather than
the default one wire number per wire network.
On per Wire Basis
If using sequential wire numbers, specifies the wire number
ranges to exclude. (applied to the %N part of the wire
number tag format)
Exclude
Syntax is <starting>-<ending> to show range (for example
1000-1499). Multiple ranges are allowed and must be
separated with a comma or semi-colon (for example, 1000-
1099;2500-2599;). You can also use 2;4;6 or 2,4,6 for val-
ues not in a range.
New Wire Number Placement
NOTE The Insert Wire Number tool does not take the current wire number setting
(in-line, above or below) into account when updating existing wire numbers. This
setting is used only when inserting new wire numbers. Use the Toggle Wire Number
In-Line tool for flipping existing wire numbers among the three modes.
Places the wire number above the physical wire.Above Wire
Places the wire number in line with the wire.In-Line
Defines spacing between the wire number and the wire itself.Gap Setup
Places the wire number below the physical wire.Below Wire
Specifies to insert the wire number tags in the center of each wire
segment.
Centered
Specifies to insert the wire number tags the specified offset dis-
tance.
Offset
Specifies a fixed, user-defined offset distance from the left or top
of the first wire segment found on the wire network.
Offset Distance
(This option is unavailable for in-line wire numbers) AutoCAD
Electrical places wire numbers on leaders when it determines that
Leaders
the wire number text bumps into something (it does not check
214 | Chapter 4 Drawing and Project Properties
if the leader itself overlays another object). Select the method for
inserting new wire numbers as leaders: As Required, Always, or
Never.
NOTE This change does not affect wire numbers that are already
present on the drawing.
Wire Type
Displays the Rename User Columns dialog box used for renaming User1 to
User20 header columns in the Set Wire Type, Create/Edit Wire Type, and
Change/Convert Wire Type dialog boxes.
Project properties: cross-references tab
Modify your project default settings for cross-referencing. Any new drawing
files created within the project are saved with the project default settings for
cross-referencing.
Ribbon: Project tab ➤ Project Tools panel ➤ Manager.
Toolbar: Main Electrical 2
Menu: Projects ➤ Project ➤ Project Manager
Command entry: AEPROJECT
In the Project Manager, right-click the project name, and select Properties.
Select the Cross-References tab.
Cross-reference Format
Defines the cross-reference annotation format. One replaceable parameter,
%N, must always be part of the cross-reference format string. A typical format
string might be the %N parameter. Use Same Drawing for on-drawing
references and Between Drawings for off-drawing references. You can use the
same format for both.
NOTE AutoCAD Electrical provides some predefined formats for you to use or you
can enter your own format using replaceable parameters on page 236.
Overview of project and drawing properties | 215

Cross-reference Options
Automatically updates relay and wire source and
destination symbols cross-referencing across multiple
drawings.
Real-time signal and contact cross-referen-
cing between drawings
NOTE If this option is not selected, you are promp-
ted to authorize the update. The target drawing is
automatically opened and updated. You then return
to the active drawing. Any unauthorized update is
queued up in a Project Task List. To update the
pending updates, click Project Task List on the Project
Manager.
Cross-references related components while using
pneumatic features. Example: schematic - ➤ pneu-
matic.
Peer to Peer
Suppresses IEC prefixes.Suppress Installation/Location codes when
matching the drawing defaults NOTE Run the Component Cross-reference com-
mand to update any existing cross-referencing text.
Component Cross-reference Display
There are different styles of cross referencing AutoCAD Electrical supports:
Displays cross-referencing as text with any string as a separator
between references on the same attribute.
Text Format
Displays cross-referencing using the AutoCAD Electrical graphical
font or using contact mapping edit boxes while displaying each
reference on a new line.
Graphical Format
Displays cross-referencing in a table object, that automatically
gets updated in real time, so you can define the columns to dis-
play.
Table Format
Displays a dialog box for setting the display defaults for each
component cross-reference display format.
Setup
Project properties: styles tab
216 | Chapter 4 Drawing and Project Properties
Modify your project default settings for various component styles. All
information defined in this tab is saved to the project definition file as project
defaults and settings.
Ribbon: Project tab ➤ Project Tools panel ➤ Manager.
Toolbar: Main Electrical 2
Menu: Projects ➤ Project ➤ Project Manager
Command entry: AEPROJECT
In the Project Manager, right-click on the project name and select Properties.
Select the Styles tab.
Specifies the default wire signal arrow style. Select from
the four predefined styles or a user-defined style. You can
override the default style setting at insertion time.
Arrow Style
TIP For instructions on how to add custom wire arrow
styles, see Add custom signal arrow styles on page 1011.
Specifies the default PLC module style. Select from the five
predefined styles or a user-defined style.
PLC Style
TIP For instructions on how to add custom PLC module
styles, see Add a new PLC style on page 624.
Defines the default Fan In/Out marker style and the layers
for wires going out of a Fan In/Out Source marker and
those coming into a Destination marker.
Fan-In/Out Marker Style
TIP For instructions on how to add custom Fan-In/Out
marker styles, see Add custom fan-in/out marker styles on
page 1023.
Lists the Fan In/Out layers.Layer List
Defines layer names as Fan In/Out layers.Add
Removes the selected layer from the defined layer list.Remove
Overview of project and drawing properties | 217

Specifies the default mode of operation when wires cross
each other: insert gap with no loop, insert gap and loop,
or solid (no gap).
Wire Cross
Specifies the default wire tee marker: none, dot, angle1,
or angle2.
Wire Tee
Project properties: drawing format tab
Allows you to modify your project default settings for drawings. All information
defined in this tab is saved to the project definition file as a project default.
Ribbon: Project tab ➤ Project Tools panel ➤ Manager.
Toolbar: Main Electrical 2
Menu: Projects ➤ Project ➤ Project Manager
Command entry: AEPROJECT
In the Project Manager, right-click on the project name and select Properties.
Select the Drawing Format tab.
Ladder Defaults
Specifies whether to create ladders horizontally or
vertically.
Vertical/Horizontal
Specifies the spacing between each rung.Spacing
Sets the default for the Insert Ladder command. New
ladders you insert do not have line reference number-
ing, by default.
Default: insert new ladders without refer-
ences
Specifies the width of the ladder.Width
Specifies the spacing between each rung in multi-
wire phases.
Multi-wire Spacing
218 | Chapter 4 Drawing and Project Properties

Format Referencing
Specifies the default referencing system. There are three modes:
All referencing is tied to an X-Y grid system of numbers and letters
along the left-hand side and top of the drawing. Set the vertical
X-Y Grid
and horizontal index numbers and letters of your drawing, spa-
cing, and origin in the X-Y grid setup dialog box.
TIP Use negative spacing values for Horizontal or Vertical to
change the origin of the X-Y grid system to be other than the
upper left-hand corner of the drawing.
Like X-Y Grid, but there is not a Y-axis. Set the horizontal labels,
spacing, and origin on the X Zones setup dialog box.
X Zones
TIP Use a negative zone spacing value if you want the zone ref-
erence origin to be at the right side of the drawing.
Each ladder column has a column of assigned reference numbers.Reference Numbers
Specifies how to display reference numbers -number only, num-
bers in a hexagon, the sheet and number values, and so on.
Setup
Scale
Sets the scale factor used when inserting new com-
ponents or wire numbers on the drawing. To insert
Feature Scale Multiplier
everything 25% bigger than normal, change the edit
box value from 1.00 to 1.25. This change does not
affect components and wire numbers that are already
present on the drawing.
Select inch if your drawing is to use library symbols
from the JIC1/JIC125 libraries or mm full size for the
inch/inch scaled to mm/mm full size
metric scaled symbol libraries. It adjusts the wire
connection trap distance that determines whether
closely spaced wire ends connector not.
Tag/Wire Number Order
Sets the default wire numbering and component tag sort order for the drawing.
Your selection overrides the project settings for sort order unless you select
No override.
Overview of project and drawing properties | 219
Layers
Defines and manages wire and component layers.
NOTE No matter which layer is current, wires always go to a wire layer and
components to component layers.
Drawing properties: drawing settings tab
Sets default values for a drawing.
Any drawing
Ribbon: Project tab ➤ Project Tools panel ➤ Manager.
Toolbar: Main Electrical 2
Menu: Projects ➤ Project Manager
Command entry: AEPROJECT
In the Project Manager, right-click the drawing name, and select Properties
➤ Drawing Properties. Select the Drawing Settings tab.
Active drawing
Ribbon: Schematic tab ➤ Other Tools panel ➤ Drawing Properties
drop-down ➤ Drawing Properties.
Toolbar: Main Electrical 2
Menu: Projects ➤ Drawing Properties
Command entry: AEPROPERTIES
Select the Drawing Settings tab.
Sets the values you enter for drawing description, project, installation, location,
sheet, and drawing code. Sets the format for component tags, wire numbers,
cross-references, PLC modules, signal arrows, ladders, and layers. Overrides
the project properties set in the project Properties dialog box.
220 | Chapter 4 Drawing and Project Properties

Drawing File
Specifies the project that the drawing is found in.Project
NOTE If the drawing is not in any of the currently open
projects, "Drawing not in open project" displays instead of
the project name. If the drawing is in an open project but
it cannot be edited, "Project not available for edit" displays
instead of the project name. This alert displays when a
project file is read only, locked by someone else, not
checked out in Vault, or the folder where the project is
located is read only. When the project is not open or
available for edit, you are unable to assign a description for
the drawing.
Specifies up to three lines of description text for the draw-
ing file. The description displays in title block updates and
Description 1-3
custom drawing properties. The values are saved in the
project .wdp file. Select from a list of predefined descriptions
from the active project by clicking the arrow or select a
description from the drawing by clicking Pick.
Indicates that the drawing is not included in tagging, cross-
referencing, and reporting functions. If selected, the
For Reference Only
drawing is included in project-wide plotting and title block
operations. This setting is saved in the project .wdp file.
IEC-Style Designators
Specifies IEC default values for the drawing, such as Project (%P), Installation
(%I), and Location (%L) fields. When you insert a component, the %I and %L
default values are used if the Installation and/or Location values would
normally be blank.
Specifies a project code for the WD_M block definition.
This value can be used as the replaceable parameter %P.
Project Code
Specifies the installation code for the WD_M block defini-
tion. This value can be used as the replaceable parameter
%I.
Installation Code
Specifies the location code for the WD_M block definition.
This value can be used as the replaceable parameter %L.
Location Code
Overview of project and drawing properties | 221

Displays a list of Installation or Location codes from the
active drawing.
Drawing
Displays a list of previously defined Installation or Location
codes in the active project or from the Default.INST or
Default.LOC file.
Project
NOTE Avoid using a mixture of drawings in the project when using the Combine
Installation/Location Tag mode. For example, do not include some drawings with
drawing-wide Installation or Location values and some without drawing-wide
values. It can result in a disruption of the child and parent component relationship
under certain circumstances.
Sheet Values
Component, wire, and cross-reference tagging use replaceable parameters in
their format. If you reference the sheet number or drawing number in any of
your tagging formats, then specify a default drawing-wide value to use.
Specifies the sheet number value for the drawing settings. This value
can be used as the replaceable parameter %S.
Sheet
Specifies the drawing number value for the drawing settings. This
value can be used as the replaceable parameter %D.
Drawing
Specifies the section value for the drawing file saved in the project
definition file (.wdp). This value can be used as the replaceable para-
meter %A.
Section
Specifies the subsection value for the drawing file saved in the project
definition file (.wdp). This value can be used as the replaceable para-
meter %B.
Sub-Section
Drawing properties: components tab
Apply a drawing-specific component settings that are maintained inside the
WD_M block of the drawing.
Any drawing
Ribbon: Project tab ➤ Project Tools panel ➤ Manager.
222 | Chapter 4 Drawing and Project Properties
Toolbar: Main Electrical 2
Menu: Projects ➤ Project Manager
Command entry: AEPROJECT
In the Project Manager, right-click the drawing name, and select Properties
➤ Drawing Properties. Select the Components tab.
Active drawing
Ribbon: Schematic tab ➤ Other Tools panel ➤ Drawing Properties
drop-down ➤ Drawing Properties.
Toolbar: Main Electrical 2
Menu: Projects ➤ Drawing Properties
Command entry: AEPROPERTIES
Select the Components tab.
Specifies the way new component tags are created.
The tag consists of a minimum of two pieces of in-
Tag Format
formation: a family code and an alphanumeric refer-
ence number (for example, "CR" and "100" to yield
a tag like CR100 or 100CR). Optionally, a component
tag might contain a sheet number or some user-
specified separators. If your format includes the sheet
number %S parameter or the drawing number %D
parameter, enter the values in the edit boxes in the
Drawing Properties ➤ Drawing Settings dialog box.
NOTE AutoCAD Electrical provides a predefined
format for you to use or you can enter your own
format using replaceable parameters on page 236.
NOTE The %N parameter is mandatory in any
component tag format you define.
Overview of project and drawing properties | 223

Searches for a connected PLC I/O module's I/O point.
If found, the I/O address value is substituted for the
"%N" part of the default component tag.
Search for PLC I/O address on insert
NOTE This setting is saved in the MISC_FLAGS attrib-
ute on the WD_M block of the drawing.
Enter the beginning sequential number for the
drawing. Sequential tags can continue uninterrupted
Sequential
from one drawing to the next if you assign the same
beginning sequential number to every drawing in
your project. As you insert components on any
drawing of the project set, AutoCAD Electrical starts
with the value you set and works its way up until it
finds the next unused sequential number tag for the
target component family.
NOTE If you finish a drawing and move to the next,
but then later come back to the first drawing to add
another component and sequential tag, a gap ap-
pears in the numbering sequence for that drawing.
Use the AutoCAD Electrical Project-wide Update/Re-
tag tool to retag the whole drawing set.
Set up the unique format tag suffix list. Use this list
to create unique reference-based tags when multiple
Line Reference
components of the same family are located at the
same reference location (for example, three push
buttons on the same line reference "101" could be
labeled PB101, PB101A, and PB101B -- AutoCAD
Electrical does this using a suffix list of " ", "A", "B",
and so on).
NOTE The component tag suffix is automatically
added to the end of the tag, but you can force
AutoCAD Electrical to insert the suffix character
somewhere within the tag format. Use the Suffix
position parameter, %X, in the component tag
format (for example, %N%X - %F).
Displays the suffix list. The individual items in the
suffix list are given in the row of edit boxes across
Suffix Setup
the top of the dialog box. List suffix characters for
duplicate family components on the same line refer-
224 | Chapter 4 Drawing and Project Properties

ence or in the same zone (to keep tags unique). The
suffix is added to the end of the component tag. To
add it to the inside of the tag, use "%X" in the Tag
Format. Example:
%N-%F or %N-%F%X = suffix at the end (such as
101-CRA)
%N%X-%F = add to number, before family code
(such as 101A-CR)
Select from the default lists or manually enter your
own suffix list in the row of edit boxes.
Drawing properties: wire numbers tab
Apply drawing-specific wire number settings. These settings are maintained
inside the WD_M block in the drawing.
Any drawing
Ribbon: Project tab ➤ Project Tools panel ➤ Manager.
Toolbar: Main Electrical 2
Menu: Projects ➤ Project Manager
Command entry: AEPROJECT
In the Project Manager, right-click the drawing name, and select Properties
➤ Drawing Properties. Select the Wire Numbers tab.
Active drawing
Ribbon: Schematic tab ➤ Other Tools panel ➤ Drawing Properties
drop-down ➤ Drawing Properties.
Toolbar: Main Electrical 2
Menu: Projects ➤ Drawing Properties
Command entry: AEPROPERTIES
Select the Wire Numbers tab.
Overview of project and drawing properties | 225

Wire Number Format
Wire number tags can be sequential or reference-based.
Specifies the way new wire number tags are created. The
wire number tag format must include the %N parameter
Format
that is the base sequential or reference-based value per the
selection above. If your format includes the sheet number
%S parameter or the drawing number %D parameter, enter
the values in the edit boxes in the Drawing Properties ➤
Drawing Settings dialog box.
NOTE For reference-based wire number tagging, individual
items in the suffix list are applied to the wire tags to keep
multiple wires in the same reference location unique. These
values are added to the end of the tag, but you can force
AutoCAD Electrical to insert the suffix character somewhere
within the tag format. Use the Suffix position parameter,
%X, in the component tag format (for example, %X%N).
Specifies to use PLC I/O address values for wires that con-
nect to an addressed I/O point. This setting overrides both
Search for PLC I/O address on insert
Sequential and Reference-based tagging. New wires or wire
renumbering on the current drawing shows PLC I/O ad-
dress-based wire numbers automatically.
NOTE Like component tags, AutoCAD Electrical uses the
concept of a wire tag format string with replaceable para-
meters. The %N parameter must always be part of the wire
format string. A typical format string can be just this %N
parameter.
Enter the starting sequential number (alpha, numeric, or
alphanumeric) for the drawing. If you enter the same
Sequential
starting sequential number for every drawing of your wiring
diagram set, AutoCAD Electrical confirms at insertion time
that a new sequential wire number tag is not repeated on
any other drawing.
If you set DEMO1 to 100 and DEMO2 to 200, the wire
numbers on DEMO1 start at 100 and wire numbers on
DEMO2 start at 200. If DEMO1 has more than 100 wire
numbers it starts using wire number 200 and above.
DEMO2 would begin its wire numbers where DEMO1 left
226 | Chapter 4 Drawing and Project Properties

off (making sure that duplicate wire numbers are not as-
signed).
The default is "1." Setting it to "2" with a starting sequential
of "1" would yield wire numbers 1, 3, 5, 7, 9, 11, and so
on.
Increment
Sets the wire number tag suffix. This list is used to create
unique reference-based wire number tags for multiple wire
Line Reference
networks beginning at the same reference location (such
as wire network beginning at a location per line reference
number, X-Y grid reference, or X-Zone reference).
Displays a suffix list. List suffix characters for wire numbers
beginning on the same line reference or in the same zone
Suffix Setup
(to keep wire numbers unique). Select one of the four
predefined suffix lists or enter your own custom suffix list.
New Wire Number Placement
NOTE The Insert Wire Number tool does not take the current wire number setting
(in-line, above or below) into account when updating existing wire numbers. This
setting is used only when inserting new wire numbers. Use the Toggle Wire Number
In-Line tool for flipping existing wire numbers among the three modes.
Places the wire number above the physical wire.Above Wire
Places the wire number inline with the wire.In-Line
Defines spacing between the inline wire number and the wire it-
self.
Gap Setup
Places the wire number below the physical wire.Below Wire
Specifies to insert the wire number tags the specified offset dis-
tance.
Offset
Specifies to insert the wire number tags in the center of each wire
segment.
Centered
Specifies a fixed, user-defined offset distance from the left or top
of the first wire segment found on the wire network.
Offset Distance
Overview of project and drawing properties | 227
(This option is unavailable for in-line wire numbers.) AutoCAD
Electrical places wire numbers on leaders when it determines that
Leaders
the wire number text bumps into something. It does not check
if the leader itself overlays another object. Select the method for
inserting new wire numbers as leaders: As Required, Always, or
Never.
NOTE This change does not affect wire numbers that are already
present on the drawing.
Drawing properties: cross-references tab
Apply a drawing-specific cross-reference settings that are maintained inside
the WD_M block of the drawing. This overrides the project settings since
cross-referencing commands look at the WD_M block as the definition for all
referencing on the drawing during runtime.
Any drawing
Ribbon: Project tab ➤ Project Tools panel ➤ Manager.
Toolbar: Main Electrical 2
Menu: Projects ➤ Project Manager
Command entry: AEPROJECT
In the Project Manager, right-click the drawing name, and select Properties
➤ Drawing Properties. Select the Cross-References tab.
Active drawing
Ribbon: Schematic tab ➤ Other Tools panel ➤ Drawing Properties
drop-down ➤ Drawing Properties.
Toolbar: Main Electrical 2
Menu: Projects ➤ Drawing Properties
Command entry: AEPROPERTIES
228 | Chapter 4 Drawing and Project Properties

Select the Cross-References tab.
Cross-reference Format
Defines the cross-reference annotation format. One replaceable parameter,
%N, must always be part of the cross-reference format string. A typical format
string might be just the %N parameter. Use Same Drawing for on-drawing
references and Between Drawings for off-drawing references. You can use the
same format for both.
NOTE AutoCAD Electrical provides some predefined formats for you to use or you
can enter your own format using replaceable parameters on page 236.
Component Cross-reference Display
There are different styles of cross referencing AutoCAD Electrical supports:
Displays cross-referencing as text with any string as a separator
between references on the same attribute.
Text Format
Displays cross-referencing using the AutoCAD Electrical graphical
font or using contact mapping edit boxes while displaying each
reference on a new line.
Graphical Format
Displays cross-referencing in a table object, that automatically
gets updated in real time. You can define the columns to display.
Table Format
Displays a dialog box for setting the display defaults for each
component cross-reference display format.
Setup
Drawing properties: styles tab
Apply drawing-specific component styles settings. These settings are
maintained inside the WD_M block in the drawing.
Any drawing
Ribbon: Project tab ➤ Project Tools panel ➤ Manager.
Toolbar: Main Electrical 2
Menu: Projects ➤ Project Manager
Overview of project and drawing properties | 229
Command entry: AEPROJECT
In the Project Manager, right-click the drawing name, and select Properties
➤ Drawing Properties. Select the Styles tab.
Active drawing
Ribbon: Schematic tab ➤ Other Tools panel ➤ Drawing Properties
drop-down ➤ Drawing Properties.
Toolbar: Main Electrical 2
Menu: Projects ➤ Drawing Properties
Command entry: AEPROPERTIES
Select the Styles tab.
Specifies the default wire signal arrow style. Select from the four
predefined styles or a user-defined style. You can override the
default style setting at insertion time.
Arrow Style
TIP For instructions on how to add custom wire arrow styles, see
Add custom signal arrow styles on page 1011.
Specifies the default PLC module style. Select from the five pre-
defined styles or a user-defined style.
PLC Style
TIP For instructions on how to add custom PLC module styles,
see Add a new PLC style on page 624.
Defines the default Fan In/Out marker style and the layers for
wires going out of a Fan In/Out Source marker and those coming
into a Destination marker.
Fan-In/Out Marker Style
TIP For instructions on how to add custom Fan-In/Out marker
styles, see Add custom fan-in/out marker styles on page 1023.
Lists the Fan In/Out layers.Layer List
Defines layer names as Fan In/Out layers.Add
Removes the selected layer from the defined layer list.Remove
230 | Chapter 4 Drawing and Project Properties

Specifies the default mode of operation when wires cross each
other: insert gap with no loop, insert gap, and loop, or solid (no
gap).
Wire Cross
Specifies the default wire tee marker: none, dot, angle1, or angle2.Wire Tee
Drawing properties: drawing format tab
Apply a drawing-specific format settings that are maintained inside the WD_M
block of the drawing.
Any drawing
Ribbon: Project tab ➤ Project Tools panel ➤ Manager.
Toolbar: Main Electrical 2
Menu: Projects ➤ Project Manager
Command entry: AEPROJECT
In the Project Manager, right-click the drawing name, and select Properties
➤ Drawing Properties. Select the Drawing Format tab.
Active drawing
Ribbon: Schematic tab ➤ Other Tools panel ➤ Drawing Properties
drop-down ➤ Drawing Properties.
Toolbar: Main Electrical 2
Menu: Projects ➤ Drawing Properties
Command entry: AEPROPERTIES
Select the Drawing Format tab.
Ladder Defaults
Specifies whether to create ladders horizontally or
vertically.
Vertical/Horizontal
Overview of project and drawing properties | 231

Specifies the spacing between each ladder rung.Spacing
Sets the default for the Insert Ladder command. New
ladders you insert do not have line reference number-
ing, by default.
Default: insert new ladders without refer-
ences
Specifies the width of the ladder.Width
Specifies the spacing between each wire in multi-wire
phases.
Multi-wire Spacing
Format Referencing
Specifies the default referencing system. There are three modes:
All referencing is tied to an X-Y grid system of numbers and letters
along the left-hand side and top of the drawing. Set the vertical
X-Y Grid
and horizontal index numbers and letters, spacing, and origin in
the X-Y grid setup dialog box.
TIP Use negative spacing values for Horizontal or Vertical if you
want to change the origin of the X-Y grid system to be other than
the upper left-hand corner of the drawing.
Like X-Y Grid, but there is not a Y-axis. Set the horizontal labels,
spacing, and origin on the X Zones setup dialog box.
X Zones
TIP Use a negative zone spacing value if you want the zone ref-
erence origin to be at the right side of the drawing.
Each ladder column has a column of assigned reference numbers.Reference Numbers
Specifies how to display ladder line reference numbers - number
only, numbers in a hexagon, the sheet and number values, and
so on.
Setup
Scale
Sets the scale factor used when inserting new com-
ponents or wire numbers on the drawing. To insert
Feature Scale Multiplier
everything 25% bigger than normal, change the edit
box value from 1.00 to 1.25. This change does not
232 | Chapter 4 Drawing and Project Properties
affect components and wire numbers that are already
present on the drawing.
Select inch if your drawing is to use library symbols
from the JIC1/JIC125 libraries or mm full size for the
inch/inch scaled to mm/mm full size
metric scaled symbol libraries. It adjusts the wire
connection trap distance that determines whether
closely spaced wire ends connector not.
Tag/Wire Number Order
Sets the default wire numbering sort order for the active drawing.
You can set sorting on a per-drawing basis and override the project-
Sort Order
wide default setting defined in Properties ➤ Wire Numbers dialog
box. For example, you can set the wire numbers to go in a reverse
order from the I/O point on a PLC I/O drawing, but have the wire
numbers going from left to right for non-PLC I/O drawings.
Layers
Defines and manages wire and component layers.Define
NOTE No matter what layer is current, wires always go to a wire
layer and components to component layers.
X zones setup
Use this tool to insert the X grid labels for drawings that use X Zones for the
Format Referencing. You can also change other settings from here (such as
origin) instead of going back into the Drawing Properties dialog box.
Ribbon: Schematic tab ➤ Insert Wires/Wire Numbers panel ➤ Insert
Ladder drop-down ➤ X Zones Setup.
Toolbar: Ladders
Command entry: AEXZONE
Your drawing must be configured for X Zones. Set the Format Referencing in
the Drawing Properties: Drawing Format dialog box to X Zones.
Overview of project and drawing properties | 233

NOTE You can also access this dialog box from the Project Properties or Drawing
Properties dialog boxes. Some options are not available when you access the dialog
box through the properties dialog boxes.
Specifies the origin for the X Zone grid. Click pick to select
the origin on the drawing or enter X and Y values.
Origin
NOTE The Pick button is not available when accessed
through the properties dialog box.
Specifies the spacing between the grid columns. Enter the
horizontal value.
Spacing
(only available when accessed from the ribbon, toolbar, or
menu) Specifies the labels for the grid columns. Enter the
Zone labels
horizontal value. You can enter the first value only or a
complete list. If you enter a list, separate the values with
commas - such as "A, B, C, D."
(only available when accessed from the ribbon, toolbar, or
menu) Specifies whether to insert the grid labels. If you
select to insert the labels, enter the column counts.
Insert zone labels
X-Y grid setup
Use this tool to insert the X-Y grid labels for drawings that use X-Y Grid for
the Format Referencing. You can also change other settings from here (such
as origin) instead of going back into the Drawing Properties dialog box.
234 | Chapter 4 Drawing and Project Properties
Ribbon: Schematic tab ➤ Insert Wires/Wire Numbers panel ➤ Insert
Ladder drop-down ➤ XY Grid Setup.
Command entry: Ladders
Command entry: AEXYGRID
Your drawing must be configured for X-Y Grids. Set the Format Referencing
in the Drawing Properties: Drawing Format dialog box to X-Y Grid.
NOTE You can also access this dialog box from the Project Properties or Drawing
Properties dialog boxes. Some options are not available when you access the dialog
box through the properties dialog boxes.
Specifies the origin for the XY grid. Click pick to select the origin on
the drawing or enter X and Y values.
Origin
NOTE The Pick button is not available when accessed through the
properties dialog box.
Specifies the spacing between the grid columns. Enter the horizontal
and vertical values.
Spacing
Specifies the order that is used from the X-Y grid in determining the
%N part of the tag. If it is set to Horizontal, the horizontal values of
X-Y Format
the grid are used as the first part, and the vertical value as the second.
If Vertical is selected then the vertical values are used for the first part
and the horizontal values used for the second. For example, you have
Horizontal values of A - F and Vertical values of 1 - 9 and it is set to
Overview of project and drawing properties | 235
Horizontal. You might get a %N value of "B2"; if it is set to Vertical
you might get a %N value of "2B."
(only available when accessed from the ribbon, toolbar, or menu)
Specifies the labels for the grid columns. Enter the horizontal and
Grid labels
vertical values. You can enter the first value only or a complete list.
If you enter a list, separate the values with commas - such as "A, B,
C, D."
(only available when accessed from the ribbon, toolbar, or menu)
Specifies whether to insert the grid labels. If you select to insert the
labels, enter the horizontal and vertical column counts.
Insert X-Y grid labels
Use replaceable parameters
The Drawing Properties dialog box makes use of codes as replaceable parameters
that are encoded on to attributes of the invisible WD_M block of the drawing.
For example, if you set your component tag format to be %F%N, this format
is encoded on to the TAGFMT attribute of the WD_M block. When AutoCAD
Electrical assigns a TAG to a component, this format is read and the codes are
replaced with the appropriate values.
Replaceable parameters are also used for device tagging, cross-referencing,
wire numbering, wire annotation, and graphical terminal strips.
For device tagging, cross-referencing and wire numbering
Defined in the Drawing Properties.
Component family code string (for example, "PB," "SS," "CR," "FLT,"
"MTR")
%F
Sheet number of the drawing (for example, "01" entered in upper
right)
%S
Drawing number%D
Wire layer name%G
Sequential or Reference-based number applied to the component%N
Suffix character position for reference-based tagging (not present =
end of tag)
%X
236 | Chapter 4 Drawing and Project Properties

IEC-style project code (default for drawing)%P
IEC-style installation code (default for drawing)%I
IEC-style location code (default for drawing)%L
Project drawing list's SEC value for active drawing%A
Project drawing list's SUB-SEC value for active drawing%B
The %L and %I values used for cross-referencing are the Drawing Default
Location and Installation values from the corresponding Parent or Child
drawing and not the Location and Installation values of the component itself.If
you have a Parent on a drawing that has a default Location of “M” and its
child is on a drawing that has a default Location value of “MC,” the
cross-referencing on the parent shows the “MC” (drawing default location
value of the drawing the child is on) and the child shows the “M” (drawing
default location value of the drawing the parent is on) no matter what the
location value is on either the parent or child.
NOTE If you include %I or %L in the Tag code of the component, you are
prompted to recalculate the tag if you change the Installation or Location value
of the component once it is inserted.
Example of Component Tags
(For relay number 50 on sheet 3)
%F%S%N = CR350
%F%N = CR50
%F-%S-%N = CR-3-50
(For 3 push buttons on line reference 101 using reference-based tagging)
%F%N = PB101, PB101A,PB101B
%N-%F = 101-PB, 101-PBA,101-PBB
%N%X%F = 101-PB, 101A-PB,101B-PB
Example of Wire Number Formats
(For wire number 50 on sheet 3)
%S/%N = 3/50
%N = 50
Use replaceable parameters | 237
W-%S%N = W-350
For defining wire annotation and graphical terminal strips
Terminal pin text%P
Terminal pin TERMDESC text%Q
IEC-style installation code%I
IEC-style location code%L
Mount assignment (on panel footprint equivalent)%M
Group assignment (on panel footprint equivalent)%U
Wire number%W
Cable tag + conductor/core color combination (format is "tag-color")%C
Cable tag%E
Cable conductor/core color%J
Cable tag substituted for wire number if cable tag is non-blank.%V
The wire number is displayed when a cable ID does not exist.
Wire color/gauge (or wire layer name)%G
Cable wire color substituted for wire number if cable color is non-
blank.
%H
The wire layer is displayed when a wire conductor in conjunction
with a cable ID does not exist.
Terminal strip terminal pin assignment%T
Terminal strip TERMDESC text - useful for multi-stack terminals%K
Destination component tag ID. You can use only one of the (%num-
ber) parameters.
%1
Equivalent of "%1:%P" (comp tag:term)%2
Equivalent of "%1:%P:%D" (comp tag:term:termdesc)%3
238 | Chapter 4 Drawing and Project Properties

Equivalent of "%L%1" (IEC comp tag)%4
Equivalent of "%L%1:%P" (tag:term)%5
Equivalent of "%L%1:%P:%D" (tag:term:termdesc)%6
Equivalent of "%I%I%1" (INST prefix+IEC comp tag)%7
Equivalent of "%I%L%1:%P" (tag:term)%8
Equivalent of "%I%L%1:%P:%D" (tag:term:termdesc)%9
The part after the colon(:) is suppressed if the value is blank in %2 - %9
parameters (for example, %2=comp tag:term). The ":term" part is suppressed
if blank.
Save settings to the project file
Save settings to the project file
The changes you make to the configuration of the current drawing are saved
on the invisible WD_M block of the drawing. You can save a copy of these
settings to the project file. It makes the settings available as defaults for new
drawings that you might add later to the project. Alternately, you can retrieve
selected settings previously saved in the project file and assign them to the
current drawing.
1Click Schematic tab ➤ Other Tools panel ➤ Drawing Properties
drop-down ➤ Settings Compare.
AutoCAD Electrical reads both the settings on the WD_M block of the
current drawing and a copy of the settings maintained in the current
project's .wdp file. Any differences are displayed in a three-column dialog
box.
2Highlight the settings you want to copy over from the drawing to the
project or vice versa or click Select All to change all the settings quickly.
3Click Match Project to make the settings of the drawing match the project
defaults or click Match Drawing to make the settings of the project match
the settings of the current drawing.
Save settings to the project file | 239
4Click OK.
NOTE Changing these settings does not automatically change components and
wiring already present in your drawing.
Compare drawing and project settings
Displays differences between project defaults and drawing default properties
and allows an update.
Ribbon: Schematic tab ➤ Other Tools panel ➤ Drawing Properties
drop-down ➤ Settings Compare.
Toolbar: Drawing Properties
Menu: Projects ➤ Settings Compare
Command entry: AESHEETCOMPARE
This tool compares the general/schematic settings carried on the invisible
WD_M block of the drawing with a copy of the settings saved in the project's
.wdp project list file. You can update selected drawing settings (multiple
selection is allowed) to make them match the values carried in the master
project file or vice versa.
If the Settings Description cell displays in light blue the project and drawing
settings do not match. When one column is matched to the other, the cell
changes in color to indicate that the record were changed. The dialog box list
updates automatically when you make changes and then switch between
showing all settings or showing just the different settings.
NOTE Changing these settings does not automatically change components and
wiring already present in your drawing.
NOTE You can also access this dialog box by right-clicking a drawing name in the
Project Manager and selecting Properties ➤ Settings Compare.
You can also right-click any row to access the Match Project or Match Drawing
options.
Shows all of the settings in the drawing.Show All
240 | Chapter 4 Drawing and Project Properties

Displays settings that are different between the WD_M
block and the .wdp file.
Show Differences
Selects all of the settings in the list so you can quickly
change all settings to match either the project or the
drawing.
Select All
Changes the selected drawing setting to make it match
the project. Select the settings from the list, and then click
the button.
Match Project
Changes the selected project default setting to make it
match the drawing. Select the settings from the list, and
then click the button.
Match Drawing
Settings List Utility
Settings List Utility
Reports the settings of each drawing in the project, and provides the means
to edit the report and update the drawing properties with the edited values.
1Click Project tab ➤ Other Tools panel ➤ ➤ Settings List Utility.
2Click Edit Mode.
3Edit the values or change the drawing order.
4Click OK-Return to Report.
5Click Close.
6Select the options for update.
7Click OK.
Edit report
Settings List Utility | 241

Ribbon: Project tab ➤ Other Tools panel ➤ ➤ Settings List
Utility.
Menu: Projects ➤ Extras ➤ Settings List Utility
Command entry: AEDWGCFG
Click Edit Mode.
If you edit the information in the Configuration Report, you have an option
to update the project and drawings with the new information. Re-order the
lines with the Move Up, Move Down, Move to Top, and Move to Bottom
buttons. If you re-order the lines, the order of the drawing list in the project
file (.WDP) can be updated to match.
Moves the currently selected lines up one place in the re-
port.
Move Up
Moves the currently selected lines down one place in the
report.
Move Down
Moves the currently selected lines to the top of the report.Move to Top
Moves the currently selected lines to the bottom of the re-
port.
Move to Bottom
Edit
Edits the values of the currently selected line. Double-click any line to go
directly into edit.
Specifies the drawing name.DWGNAM
If you change any of the Sec data, the Section data held
in the project file (.WDP) can be updated to match.
SEC
If you change any of the SubSec data, the Sub-Section data
held in the project file (.WDP) can be updated to match.
SUBSEC
If you change any of the SH data, the Sheet (%S) field for
that drawing can be updated to match.
SH
242 | Chapter 4 Drawing and Project Properties

If you change any of the SHDWGNAM data, the Dwg no.
(%D) field for that drawing can be updated to match.
SHDWGNAM
If you change any of the IEC_P data, the IEC Project (%P)
field for that drawing can be updated to match.
IEC_P
If you change any of the IEC_I data, the IEC Installation
(%I) field for that drawing can be updated to match.
IEC_I
If you change any of the IEC_L data, the IEC Location (%L)
field for that drawing can be updated to match.
IEC_L
If you change any of the SH-DESC data, the Description
data held in the project file (.WDP) can be updated to
match.
SH-DESC
Update Configuration Changes
Ribbon: Project tab ➤ Other Tools panel ➤ ➤ Settings List
Utility.
Menu: Projects ➤ Extras ➤ Settings List Utility
Command entry: AEDWGCFG
1Click Edit Mode.
2Edit the values or change the drawing order.
3Click OK-Return to Report.
4Click Close.
If you edit the information in the Configuration Report, you have an option
to update the project and drawings with the new information. Re-order the
lines with the Move Up, Move Down, Move to Top, and Move to Bottom
buttons. If you re-order the lines, the order of the drawing list in the project
file (.WDP) can be updated to match.
Update the drawing order in the project file (.WDP).Drawing Order (in .WDP)
Update the Section data held in the project file (.WDP).Section (in .WDP)
Settings List Utility | 243

Update the Sub-Section data held in the project file (.WDP).Sub-Section (in .WDP)
Update the Sheet (%S) data on each drawing.Sheet (%S) (on drawing)
Update the Dwg no. (%D) data on each drawing.Drawing (%D) (on drawing)
Update the IEC Project (%P) data on each drawing.IEC Project (%P) (on drawing)
Update the IEC Installation (%I) data on each drawing.IEC Installation (%I) (on drawing)
Update the IEC Location (%L) data on each drawing.IEC Location (%L) (on drawing)
Update the first Description data held in the project file
(.WDP).
Description (in .WDP)
Create a template drawing
Create a template drawing
Using a template, you can start a new drawing with the WD_M block inserted,
settings adjusted, and standard AutoCAD Electrical layers predefined. With
this template, AutoCAD Electrical does not have to pause and ask permission
to insert the block as you start each new wiring diagram drawing.
1Open a new drawing or start with a copy of your standard drawing
border/title block drawing.
2Click Schematic tab ➤ Other Tools panel ➤ Drawing Properties
drop-down ➤ Drawing Properties.
It triggers AutoCAD Electrical to insert the invisible WD_M block.
3In the Drawing Properties dialog box, modify any drawing settings (such
as layer naming conventions and tagging formats) and click OK.
4Select Format ➤ Layer to create any layers you referenced in the Drawing
Properties dialog box.
5In the AutoCAD Layer Properties Manager dialog box, adjust layer colors
and click Apply.
244 | Chapter 4 Drawing and Project Properties

6Save the drawing as an AutoCAD Drawing Template file with a .DWT
extension.
This template appears in the list of saved templates the next time you
open a new AutoCAD Electrical drawing.
See also:
■Title block on page 1208
■Title Block tutorial on page 1707
Drawing properties: drawing settings tab
Sets default values for a drawing.
Any drawing
Ribbon: Project tab ➤ Project Tools panel ➤ Manager.
Toolbar: Main Electrical 2
Menu: Projects ➤ Project Manager
Command entry: AEPROJECT
In the Project Manager, right-click the drawing name, and select Properties
➤ Drawing Properties. Select the Drawing Settings tab.
Active drawing
Ribbon: Schematic tab ➤ Other Tools panel ➤ Drawing Properties
drop-down ➤ Drawing Properties.
Toolbar: Main Electrical 2
Menu: Projects ➤ Drawing Properties
Command entry: AEPROPERTIES
Select the Drawing Settings tab.
Create a template drawing | 245

Sets the values you enter for drawing description, project, installation, location,
sheet, and drawing code. Sets the format for component tags, wire numbers,
cross-references, PLC modules, signal arrows, ladders, and layers. Overrides
the project properties set in the project Properties dialog box.
Drawing File
Specifies the project that the drawing is found in.Project
NOTE If the drawing is not in any of the currently open
projects, "Drawing not in open project" displays instead of
the project name. If the drawing is in an open project but
it cannot be edited, "Project not available for edit" displays
instead of the project name. This alert displays when a
project file is read only, locked by someone else, not
checked out in Vault, or the folder where the project is
located is read only. When the project is not open or
available for edit, you are unable to assign a description for
the drawing.
Specifies up to three lines of description text for the draw-
ing file. The description displays in title block updates and
Description 1-3
custom drawing properties. The values are saved in the
project .wdp file. Select from a list of predefined descriptions
from the active project by clicking the arrow or select a
description from the drawing by clicking Pick.
Indicates that the drawing is not included in tagging, cross-
referencing, and reporting functions. If selected, the
For Reference Only
drawing is included in project-wide plotting and title block
operations. This setting is saved in the project .wdp file.
IEC-Style Designators
Specifies IEC default values for the drawing, such as Project (%P), Installation
(%I), and Location (%L) fields. When you insert a component, the %I and %L
default values are used if the Installation and/or Location values would
normally be blank.
Specifies a project code for the WD_M block definition.
This value can be used as the replaceable parameter %P.
Project Code
246 | Chapter 4 Drawing and Project Properties

Specifies the installation code for the WD_M block defini-
tion. This value can be used as the replaceable parameter
%I.
Installation Code
Specifies the location code for the WD_M block definition.
This value can be used as the replaceable parameter %L.
Location Code
Displays a list of Installation or Location codes from the
active drawing.
Drawing
Displays a list of previously defined Installation or Location
codes in the active project or from the Default.INST or
Default.LOC file.
Project
NOTE Avoid using a mixture of drawings in the project when using the Combine
Installation/Location Tag mode. For example, do not include some drawings with
drawing-wide Installation or Location values and some without drawing-wide
values. It can result in a disruption of the child and parent component relationship
under certain circumstances.
Sheet Values
Component, wire, and cross-reference tagging use replaceable parameters in
their format. If you reference the sheet number or drawing number in any of
your tagging formats, then specify a default drawing-wide value to use.
Specifies the sheet number value for the drawing settings. This value
can be used as the replaceable parameter %S.
Sheet
Specifies the drawing number value for the drawing settings. This
value can be used as the replaceable parameter %D.
Drawing
Specifies the section value for the drawing file saved in the project
definition file (.wdp). This value can be used as the replaceable para-
meter %A.
Section
Specifies the subsection value for the drawing file saved in the project
definition file (.wdp). This value can be used as the replaceable para-
meter %B.
Sub-Section
Create a template drawing | 247

Updating the WD_M Block
Overview of the WD_M block
A special invisible block must be present on the drawing. The WD_M.dwg is
found in the default symbol library. Here is an attribute list of information
that is carried on the WD_M block of the drawing, sorted by category:
Drawing layout
sheet number for the drawing (%S)SHEET or SHEET_
optional drawing number for the drawing (%D)SHEETDWGNAME
optional IEC project code (%P)IEC_PROJ
optional IEC installation code (%I)IEC_INST
optional IEC location code (%L)IEC_LOC
units scaling factor (1.0 = inch, 1.0 = full-size mm, 25.4 =
inch scaled up to mm)
UNIT_SCL
scaling adjustment (0 = default, 1.25=for 25% bigger)FEATURE_SCL
248 | Chapter 4 Drawing and Project Properties
Ladder defaults
ladder orientation: "H" = horizontal rungs (vertical ladders);
"V" = vertical rungs (horizontal ladders)
RUNGHORV
reference numbering system: ladder line reference-based
or X-Y grid reference-based
REFNUMS
■1 = line reference numbers
■2 = numbers with ruling
■3 = user-defined line reference block
■4 = X-Y grid reference mode
■5 = X-Zone reference mode
default rung spacingRUNGDIST
default ladder widthDLADW
default rung-to-rung line reference increment (default = 1)RUNGINC
draw ladder rungs: 0 = none, 1 = draw all rungs for new
ladder, 2 = skip 1, 3 = skip 2, and so on.
DRWRUNG
3-phase bus spacing valuePH3SPACE
Component tagging
tag mode value: S = sequential, R = reference-basedTAGMODE
starting sequential number of the drawing -for sequential
tagging only (that is, "1")
TAG-START
comma-delimited component tag suffix list -for reference-
based tagging only (that is, "A, B, C")
TAG-RSUF
component tag format specifier (default=%F%N)TAGFMT
Wire number tagging
wire number format: S = sequential, R = reference-basedWIREMODE
Overview of the WD_M block | 249
starting sequential number of the drawing - for sequential
tagging only (that is, "100")
WIRE-START
wire tag suffix list - for reference-based tagging only (that
is, "A,B,C")
WIRE-RSUF
wire tag format specifier (default=%N)WIREFMT
wire number incrementWINC
wire leaders: 0 = only as required, 1 = always insert wire
leaders, 2 = never insert leaders
WLEADERS
wire gap style: 0 = wire gap, 1 = use loops across gaps, 2
= solid crossing
GAP_STYLE
(no gap)
retag and wire numbering sort modeSORTMODE
wire number placement offset distance
(GBL_wd_wnum_offset); same as the project-wide +[19]
WNUM_OFFSET
value in the .wdp file. 0.0 or missing= centered on wire
(default), >0.0 = offset from top or left end by given dis-
tance
WNUM_FLAGS ■1's bit set = (GBL_wd_inline_gap global) auto in line
wire gap adjust "ON" (see WNUM_GAP attribute for
settings list)
■2's +4's bits = 00 default wire number above wire
■01 = below wire
Layer names
component tag layerTAG_LAY
fixed component tag layerTAGFIXED_LAY
description layer of the parent componentDESC_LAY
description layer of the child componentCDESC_LAY
250 | Chapter 4 Drawing and Project Properties
component terminal pin numbers layerTERM_LAY
cross-reference layer of the parent componentXREF_LAY
cross-reference layer of the child componentCXREF_LAY
component location code layerLOC_LAY
component position code layerPOS_LAY
miscellaneous layerMISC_LAY
layer for schematic component graphicsCOMP_LAY
dashed link lines layerLINK_LAY
location box layerLOCBOX_LAY
valid wire layer names where "" = all valid (comma-delimited)WIRELAYS
valid wire numberWIRENO_LAY
extra wire number layerWIRECOPY_LAY
fixed wire layerWIREFIXED_LAY
terminal and signal arrow wire number layerWIREREF_LAY
Fan In/Out
valid layer names for Fan In/Out, single-line wires (comma-
delimited)
FAN_INOUT_LAYS
Fan In/Out symbol style numberFAN_INOUT_STYLE
Cross-reference
cross-reference format specifier (default=%N)XREFFMT
optional cross-reference format for inter-drawing references (that
is, %S-%N)
ALT_XREFFMT
Overview of the WD_M block | 251
cross-reference style: 0 = text, 1 = graphical, 2 = tableXREF_STYLE
1's bit = include unused contacts, 2's bit (if table)= include parent
coil
XREF_FLAGS
0 = separate reference, 1 = contact count totalsXREF_UNUSEDSTYLE
cross-reference fill-with textXREF_FILLWITH
0 = sort by line reference, 1 = sort by pin listXREF_SORT
cross-reference text between references (text style cross-referen-
cing)
XREF_TXTBTWN
0 = contact mapping (text), 1 = graphicXREF_GRAPHIC
0 = JIC, 1 = IECXREF_GRAPHICSTYLE
contact mapping listXREF_CONTACTMAP
table style nameXREF_TBLSTYLE
table titleXREF_TBLTITLE
table fields to includeXREF_TBLINDEX
table available field namesXREF_TBLFLDNAMS
table fields justificationXREF_TBLCOLJUST
Referencing
X coordinate origin for X-Y or X-zoneDATUMX
Y coordinate origin for X-Y or X-zoneDATUMY
horizontal interval spacing for X-Y or X-zoneDISTH
vertical interval spacing for X-Y referencingDISTV
horizontal starting character for X-Y or X-zoneCHAR_H
vertical starting character for X-Y referencingCHAR_V
252 | Chapter 4 Drawing and Project Properties
X-Y referencing format: 0 = V-H, 1 = H-VHOIRZ_FIRST
X-Y delimiter characterXY_DELIM
Styles
PLC module style code (default = 1)PLC_STYLE
default signal arrow style numberARROW_STYLE
Miscellaneous
list of 3 in line wire number/label gap settings (see WNUM_FLAGS
bit 1 for toggle mode); value saved to GBL_wd_inline_gapas a
list. nil or "(num1 num2 num3)"
WNUM_GAP
miscellaneous flagsMISC_FLAGS
■0 = gap
■1 = loop
■2 = no gap
■1's bit = mm full-size
■2's bit = ignore non lay0 lay vector
■4's bit = use plc wire numbers
■8's bit = insert new ladders without references
■16's bit = search for PLC address on component insert
■32+64 bit =
10 = none■
■01 = angle 1
■11 = angle 2
■00 = dot
Change the WD_M block
You can change the WD_M block so that your settings are always the default.
1Open an existing AutoCAD Electrical drawing and set the properties and
layer names.
Overview of the WD_M block | 253
2Save the drawing.
3Click Project tab ➤ Other Tools panel ➤ ➤ Update Symbol
Library WD_M Block.
4Select the WD_M - schematic settings to modify and click OK.
The settings and layer names are collected from the drawing and
appropriate adjustments are made to the WD_M block.
5Save the modified WD_M drawing.
NOTE Update the version of your template drawing of the inserted WD_M
block if a template drawing exists for your project.
6Open your template file.
7Click Project tab ➤ Other Tools panel ➤ ➤ Update to New
WD_M Block, Values, Layers.
The new version of the WD_M block replaces your existing one.
Add missing attributes to the WD_M block
As AutoCAD Electrical adds new features, new attributes are sometimes added
to the default WD_M block. However, if your drawing was created with an
older WD_M block it may not carry these attributes. AutoCAD Electrical
provides an easy way to swap older WD_M blocks with the new WD_M block.
1Select Project tab ➤ Other Tools panel. Select one of the following
options:
Replaces the schematic wd_m.dwg block in the cur-
rent drawing with a newer copy, and converts to the
newer configuration values and layers.
Update to New WD_M Block, Values,
Layers
254 | Chapter 4 Drawing and Project Properties

Replaces the schematic wd_m.dwg block in the cur-
rent drawing with a newer copy, but keeps existing
configuration values and layer names.
Update to New WD_M Block, No Changes
Replaces the panel wd_pnlm.dwg block in the cur-
rent drawing with a newer copy, and converts to the
newer configuration values and layers.
Update to New WD_PNLM Block, Values,
Layers
Replaces the panel wd_pnlm.dwg block in the cur-
rent drawing with a newer copy, but keeps existing
configuration values and layer names.
Update to New WD_PNLM Block, No
Changes
2Select the WD_M drawing to use as the new WD_M block in the drawing.
3Click Open.
Copy active drawing settings to
Writes the attribute settings for the wd_m block in the current drawing to the
wd_m.dwg drawing file in the symbol library.
Ribbon: Project tab ➤ Other Tools panel ➤ ➤ Update Symbol
Library WD_M Block.
Menu: Projects ➤ Swap WD_M or WD_PNLM Blocks ➤ Update Symbol
Library WD_M Block
Command entry: AECOPY2SYMLIB
The WD_M and WD_PNLM blocks carry attribute values that define the default
AutoCAD Electrical settings.
Defines the default schematic settings.WD_M
Defines the default panel settings.WD_PNLM
Alert
A drawing needs an invisible block, WD_M.dwg, on the drawing to be
compatible with AutoCAD Electrical.
Overview of the WD_M block | 255

The WD_M.dwg block is located in the default symbol library. This block
carries about 50 attributes that define settings, layer names, and other default
settings that are referenced by AutoCAD Electrical commands.
NOTE If the drawing includes panel layout symbols, the block WD_PNLM.dwg is
also needed. The WD_M and WD_PNLM blocks can be present on the same
drawing.
To insert a WD_M or WD_PNLM block
■If the WD_M block is not present in a new or existing drawing, click OK
to insert the block at location 0,0.
■If the WD_PNLM block is not present in a new or existing drawing when
using panel layout symbols, click OK to insert the block.
■To force the drawing settings to match the project settings, select the check
box.
Using Layers
Manage layers
Manage layers
AutoCAD Electrical provides tools for managing and renaming panel and
schematic layers. You can use your own layer naming convention with
AutoCAD Electrical, as well as change the layer naming used on an existing
AutoCAD Electrical drawing using the following tools.
Manage panel layers
1Click Panel tab ➤ Other Tools panel ➤ Panel Configuration drop-down
➤ Configuration.
2Click Layers Setup.
3Specify information for the panel component layers, non-text graphic
layers, and nameplate layers.
256 | Chapter 4 Drawing and Project Properties
When AutoCAD Electrical inserts a footprint, it is modified on the fly to
match the layering scheme set up in this dialog box.
4Click OK.
Rename panel layers
The Rename Panel Layers tool makes it easy to rename layers one by one, or
multiple layers at once by using the Find/Replace method. The advantage to
using the AutoCAD Electrical layer rename is that in addition to renaming
the layer, AutoCAD Electrical also updates the AutoCAD Electrical layer
assignment information carried on the WD_PNLM block of the drawing. For
example, if DEMO-PNPG is currently assigned as the Name Plate graphics
layer and you rename it to PNPG using the AutoCAD Electrical rename layer
utility, the new layer name is substituted for DEMO-PNP in the AutoCAD
Electrical Panel layer name list.
1Click Panel tab ➤ Other Tools panel ➤ Panel Configuration drop-down
➤ Rename Layers .
2To edit an individual layer name, select the layer to edit from the list and
click Edit. Enter a new layer name and click OK.
3To edit multiple layer names, click Find/Replace.Enter the text to find
and the text to replace it with in the edit boxes. Click OK.
Manage schematic layers
1Click Schematic tab ➤ Other Tools panel ➤ Drawing Properties
drop-down ➤ Drawing Properties.
2In the Drawing Properties dialog box, click the Drawing Format tab.
3In the Layers section, click Define.
4In the Define Layers dialog box, specify information for the component
layers and wire number layers.
The layer names you choose are what AutoCAD Electrical uses as it inserts
the parts and pieces of component symbols and wire numbers. If the
layer name you enter does not exist when it comes time for AutoCAD
Manage layers | 257
Electrical to insert something onto that layer, AutoCAD Electrical creates
that layer on the fly.
5Click OK.
6In the Drawing Properties dialog box, click OK.
NOTE You can also change layer properties using the Project Manager tool. In
the Project Manager, right-click on the drawing name and select Properties ➤
Drawing Properties (or to change the project default settings, right-click on the
project name and select Properties. The settings are applied to new drawings). In
the Drawing Format tab, Layers section, click Define.
Rename schematic layers
The Rename Schematic Layers tool makes it easy to rename layers one by one,
or multiple layers at once by using the Find/Replace method.
1Click Schematic tab ➤ Other Tools panel ➤ Drawing Properties
drop-down ➤ Rename Layers.
2To edit an individual layer name, select the layer to edit from the list and
click Edit. Enter a new layer name and click OK.
3To edit multiple layer names, click Find/Replace.Enter the text to find
and the text to replace it with in the edit boxes. Click OK.
NOTE You can also change layer properties using the Project Manager tool. In
the Project Manager, right-click on the drawing name and select Properties ➤
Drawing Properties (or to change the project default settings, right-click on the
project name and select Properties. The settings are applied to new drawings). In
the Drawing Format tab, Layers section, click Define.
Define layers
AutoCAD Electrical automatically manages the wire number and component
layers you set up in the drawing settings. No matter which layer is active,
wires always go to a wire layer and components go to component layers.
258 | Chapter 4 Drawing and Project Properties
Ribbon: Schematic tab ➤ Other Tools panel ➤ Drawing Properties
drop-down ➤ Drawing Properties.
Toolbar: Main Electrical 2
Menu: Projects ➤ Drawing Properties
Command entry: AEPROPERTIES
In the Drawing Properties dialog box, click the Drawing Format tab. In the
Layers section, click Define.
NOTE You can also change layer properties using the Project Manager tool. In
the Project Manager, right-click the drawing name, and select Properties ➤
Drawing Properties. (To change the project default settings, right-click the project
name, and select Properties. The settings are applied to new drawings). In the
Drawing Format tab, Layers section, click Define.
The layer names you choose are what AutoCAD Electrical uses as it inserts the
parts and pieces of component symbols and wire numbers. It does not matter
what layer is current at the time. If the layer name you enter does not exist
when it comes time for AutoCAD Electrical to insert something onto that
layer, AutoCAD Electrical creates that layer on the fly.
Component Block Layers
Displays layer names. Type layer names into the edit boxes. A blank entry
inserts that category on the current layer. Multiple categories can be tied to
the same layer name (enter the same layer name into multiple edit boxes).
When a schematic component is inserted, the graphics of the block are inserted
onto the layer listed in the Non text Graphics box. The attribute text of the
block is automatically moved to the layers listed in the other boxes, based
upon attribute function.
Layer name for all non-attribute graphics of a symbolNon-text Graphics
Layer name for all parent and child component name tags
(for example, "CR101")
Component Tags
Layer name for component tags that are fixed and are not
changed if processed by the retag command
Fixed Tags
Manage layers | 259
Layer name for parent functional description text (for ex-
ample, "MASTER RELAY")
Description
Layer name for child contact functional description text (a
copy of the description of the parent)
Description (Child)
Layer name for parent cross-reference textCross-reference
Layer name for child cross-reference textCross-reference (Child)
Layer name for terminal pin number textPin Numbers
Layer name for optional location and installation code textInstallation/Location
Layer name for switch position textPositions
Layer name for all other component annotationMiscellaneous Text
Layer name for dashed lines that can be inserted to show
multiple components linked together
Dashed Link Lines
Layer name for Location BoxesLocation Box
If a given layer name exists, use this switch (Freeze/Thaw)
to hide (freeze) all attributes on that layer. For example, to
Freeze
hide all child cross-reference text, select Freeze next to the
Cross-reference (child) edit box. You can also use the
AutoCAD LAYER command to do the same thing.
As AutoCAD Electrical inserts a component, it moves the
parts and pieces of the symbol to the category layers listed
Apply to entities on layer "0" only
in this dialog box. If you do not want an attribute or the
graphics of a specific electrical symbol block to move to
the defined AutoCAD Electrical layers, create your symbol
with the entities on some layer other than 0, and then select
this switch.
Wire Number Layers
Displays wire number layers.
Layer name for normal wire numbersWire Numbers
260 | Chapter 4 Drawing and Project Properties
Layer name for extra wire number copiesWire Copies
Layer name for fixed wire numbers that do not change
when other wires are renumbered
Fixed Numbers
Layer name for wire number copies that are part of a ter-
minal or signal arrow symbol
Terminal/Signal
If your current layer is BORDER, when you use the AutoCAD Electrical icon
menu to insert a 2-position selector switch. The lines and circles of the switch
symbol automatically go to layer SYMS, the tag of the component to layer
TAGS, the description text to DESC, switch position text to POS, and soon. If
a new wire number inserts as a result of the switch breaking an existing
numbered wire, the wire number automatically goes to layer WIRENO. All of
this happens automatically, while your layer BORDER is current.
Rename schematic or panel layers
Renames schematic-related layers and updates schematic drawing layer
properties.
Rename Panel Layers
Ribbon: Panel tab ➤ Other Tools panel ➤ Panel Configuration
drop-down ➤ Rename Layers.
Toolbar: Panel Miscellaneous
Menu: Panel Layout ➤ Miscellaneous Panel Tools ➤ Rename Panel Layers
Command entry: AERENAMEPANLELLAYER
Rename Schematic Layers
Ribbon: Schematic tab ➤ Other Tools panel ➤ Drawing Properties
drop-down ➤ Rename Layers.
Toolbar: Drawing Properties
Manage layers | 261
Menu: Projects ➤ Rename Schematic Layers
Command entry: AERENAMELAYER
The Layer Rename and Panel Layer Rename utilities rename layers one by one,
or multiple layers at once by using the Find/Replace method. Updates the
AutoCAD Electrical layer assignment information carried on the WD_M and
WD_PNLM blocks in the drawing. For example, if DEMO-WIRES is currently
assigned as an AutoCAD Electrical wire layer, and you rename it using this
utility, the new layer name is substituted for DEMO-WIRES in the AutoCAD
Electrical wire layer name list.
Lists the drawing layer names referenced in either the Drawing
Properties dialog box or the Panel Layout Configuration dialog
box.
Layer Name
Replaces a name or substring within a layer name.Find/Replace
Edits the selected layer name.Edit
Panel component layers
Sets the panel component layers, non-text graphic layers, and nameplate
layers. When AutoCAD Electrical inserts a footprint, it is modified on the fly
to match the layering scheme set up in this dialog box.
Ribbon: Panel tab ➤ Other Tools panel ➤ Panel Configuration
drop-down ➤ Configuration.
Toolbar: Panel Layout
Menu: Panel Layout ➤ Panel Configuration
Command entry: AEPANELCONFIG
Click the Layers Setup button.
Lists all of the component layers. Change the layer
name for a tag by entering a new name in the edit
Panel Component Layers
box. If you do not want an attribute moved to a PNL
layer, place that attribute on some other layer than
“0” on the block. Then, click the Ignore above for
symbol's non-layer “0” entities toggle.
262 | Chapter 4 Drawing and Project Properties
When a panel component is inserted, the block is
inserted on the current layer if it is one of those listed
Non-text Graphic Layers
in the "Non-text Graphics" layer list (wild-cards al-
lowed). If the current layer is not in this list, the block
is inserted on the first layer in the list. Attributes are
moved to the layer defined for its type.
Lists existing nameplate layers for the graphics, tags,
and descriptions.
Nameplate Layers
(Available if a layer exists already) Freezes or thaws
any of the panel layers.
F
Performs a global find and replace on the layer
names.
Find/Replace
Manage layers | 263
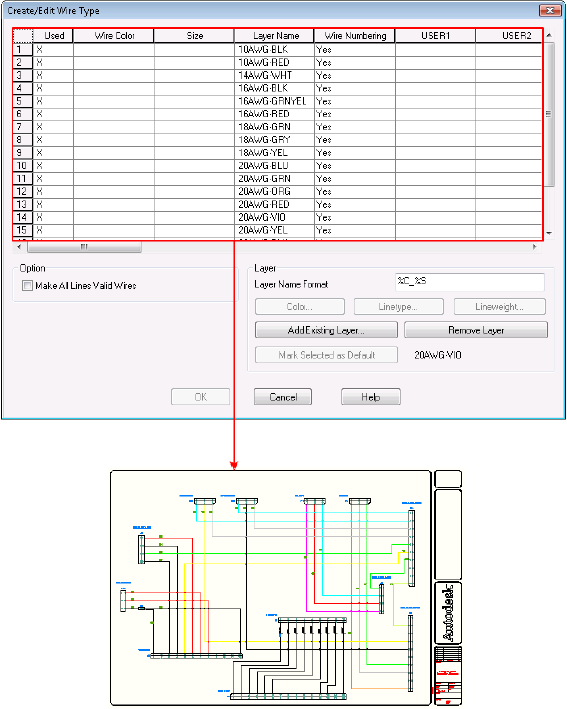
Use wire layers
The Set Wire Type tool is used for setting a wire type for new wires only. The
wire layer name and the associated wire properties (such as wire color, size,
and whether the wire layer is processed for wire numbers) are saved in the
drawing file. The following rules determine the wire layer for a new wire:
■When a wire is created from an existing wire, the new wire takes on the
same layer as the existing wire. It ignores the current layer and the current
wire type.
264 | Chapter 4 Drawing and Project Properties

■When the new wire is started in empty space but ends at an existing wire,
the new wire takes on the wire layer of the ending wire. The current layer
and current wire type are ignored.
■When a new wire is started at an existing wire and ends at another existing
wire, the new wire takes on the layer of the beginning wire.
■If there are no wire layers in the drawing, the new wire is drawn in the
WIRES layer.
■When a wire starts in empty space and ends at the component wire
connection point, the new wire is drawn on the current wire type. The
layer of the wires already tied to the same component connection points
are ignored. The same is true for a wire that starts at the component wire
connection point and ends in empty space.
Use the Create/Edit Wire Type tool to create new or edit existing wire types
or use the Change/Convert Wire Type tool to convert lines to wires.
Create wire types
Wire types for drawings are set up in the Create/Edit Wire Type dialog box.
1Click Schematic tab ➤ Edit Wires/Wire Numbers panel ➤ Modify Wire
Type drop-down ➤ Create/Edit Wire Type.
2In the Create/Edit Wire Type dialog box, click inside the Wire Color
column for a blank row and specify a value for the new wire layer.
3Click inside the Size column and specify a value for the size.
The Layer Name is automatically created. If you specified Wire Color:
Red and Size: 20, the name RED_20 is assigned to the wire layer you are
creating.
4If you do not want wires on this layer processed for wire numbers, select
No for the Wire Numbering option.
5To import wire types from an existing drawing or template, click Import.
■Select the drawing or drawing template containing the wire types for
import.
■On the Import Wire Types dialog box, select the wire types for import.
Use wire layers | 265
■Define how the import function behaves if a wire type exists on the
active drawing.
6Click Color, Linetype, or Lineweight to assign values for the new layer.
NOTE If you want the new wire layer to be the default, click Mark Selected
as Default.
7Click OK.
Add existing wire layers to the drawing
Wire layer names for drawings are set up in the Create/Edit Wire Type dialog
box.
1Click Schematic tab ➤ Edit Wires/Wire Numbers panel ➤ Modify Wire
Type drop-down ➤ Create/Edit Wire Type.
2In the Create/Edit Wire Type dialog box, click Add Existing Layer.
3In the Layers for Line "Wires" dialog box, define the layer name and click
OK. You can either enter a name in the edit box or click Pick to select a
name from the existing layer list.
The layer displays in the wire type grid. If you selected the wrong wire
layer, highlight the layer in the dialog box and click Remove Layer. You
can then go back into the Layers for Line "Wires" dialog box and select
another layer to add.
4In the Create/Edit dialog box, click Color, Linetype, or Lineweight to
assign new values for the layer.
5If you do not want wires on this layer processed for wire numbers, select
No for the Wire Numbering option.
6Click OK.
Create/edit wire type
Defines and edits wire types.
266 | Chapter 4 Drawing and Project Properties

Ribbon: Schematic tab ➤ Edit Wires/Wire Numbers panel ➤ Modify
Wire Type drop-down ➤ Create/Edit Wire Type.
Toolbar: Wires
Menu: Wires ➤ Create/Edit Wire Type
Command entry: AEWIRETYPE
The program saves the wire layer name and associated properties, such as wire
color, size, and whether the wire layer is processed for wire numbers, in the
drawing file. Use the grid control to sort and select wire types to modify.
TIP Use the Change/Convert Wire Type tool to convert lines to wires. You can
also type "T" at the command prompt during wire insertion to use the Set Wire
Type tool.
Wire type grid
Displays the wire types used in the active drawing. The wire layer name and
the wire properties like color, size, whether the wire layer is processed for wire
numbers, and user-defined properties are listed in the grid. An “x” in the Used
column indicates that the layer name is currently used in the drawing. A blank
value in this column indicates that the layer name exists in the drawing but
it is not currently being used. The current wire type is highlighted with a gray
background; selected wire types highlight in blue.
If you do not want wire numbers assigned to wires on a specific layer, select
“No” Wire Numbering for that layer. The Insert Wire Numbers command
follows these rules:
■If all wires in the network are on layers set “No” for Wire Numbering, no
new wire number is inserted.
■If any wire in the network is on a layer set “Yes” for Wire Numbering, the
existing non-fixed wire number is updated or a new wire number is inserted.
■If a wire network already has a non-fixed wire number, it is updated
regardless of the Wire Numbering setting. Use the Delete Wire Numbers
command to remove the wire number.
NOTE Manually maintain wire layer type consistency through signal arrows.
Use wire layers | 267
To rename the User1- User 20 column headers, right-click the project name
in the Project Manager and select Properties. In the Project Properties ➤ Wire
Numbers dialog box, Wire Type section, click Rename User Columns. In the
Rename User Columns dialog box, specify a new column name and click OK.
Renaming of user-defined columns is project-specific. You cannot rename the
Color, Size, or Layer Name columns. All the data corresponding to the header
column can be copied, cut, and pasted to another column.
All text fields are editable except for the Layer Name cell. It cannot be edited
for existing layers. Left-click to edit the cell or right-click in a cell to display
options for modifying the cell contents. If you want to rename a layer,
right-click on a cell and select Rename Layer. Right-click options include:
Copy, Cut, Paste, Delete Layer, and Rename Layer. If it is the default layer,
you cannot delete or remove the layer.
You can select multiple layers to edit or remove by using the Shift or Ctrl keys
on your keyboard while picking the wire layer in the wire type list.
You can move the wire type records inside the grid to whatever position you
want using drag and drop. Select the wire type records to move and drag to
the new position in the grid.
Option
Makes all existing layers valid wire layers and displays
them in the wire type grid.
Make All Lines Valid Wires
If you later decide you want some layers to be wire
layers and others to be line layers, you can deselect
this option. All the layers are removed from the wire
type grid. Add layers again using the Add Existing
Layer option.
Imports wire types from an existing drawing or
drawing template. Once the drawing is specified,
Import
the Import Wire Types on page 903 dialog box dis-
plays. Select the wire types to import.
Layer
Allows you to format the layer name, define or edit the layer color, linetype,
and line weight.
Format the layer name. The program fills the layer
name automatically once you enter a value in color,
Layer Name Format
size based on the format. For example, if you enter
268 | Chapter 4 Drawing and Project Properties

BLK for color and 10AWG for size, the layer name is
filled in as BLK_10AWG based on default %C_%S
format. Placeholders are supported at any place in
the format (that is, "CUST%C-THIN%S).
Valid wire name format codes are:
■%C = Wire Color
■%S = Wire Size
■%1-%5 = User 1 - User 5
Displays the AutoCAD dialog box for Layer colors
election. The Select Color dialog box highlights the
Color
color corresponding to the wire type record. The
default color for new records is white. Undefined
colors for layers use the default color while creating
the layer. Multiple selection is allowed. All wire layers
that were selected can be changed to the color.
Displays the AutoCAD dialog box for linetype selec-
tion. This Select Linetype dialog box highlights the
Linetype
linetype corresponding to the wire type record. The
default linetype for new records is continuous. Un-
defined linetypes for layers use the default linetype
while creating the layer. Multiple selection is allowed.
All wire layers that were selected can be changed to
the desired linetype.
NOTE If you need special linetypes for constructing
P&ID or point to point diagrams, load the special
linetypes from theacade.lin text file.
Displays the AutoCAD dialog box for lineweight se-
lection. The Lineweight dialog box highlights the
Lineweight
lineweight corresponding to the wire type record.
The default lineweight for new records is default.
Undefined lineweights for layers use the default
lineweight while creating the layer. Multiple selection
is allowed. All wire layers that were selected can be
changed to the desired lineweight.
Displays the Layers for Line Wires dialog box for
specifying a layer name. Click Pick to select the layer
Add Existing Layer
Use wire layers | 269

name from the existing layer list consisting of all the
layers in the drawing inclusive of the non-wire layers.
Only lines on pre-selected layers are processed as
wires. Enter a wire layer name in the dialog box. A
wildcard used in the name selects a group of layers
(for example, RED_* selects all layers that begin with
"RED_").
Removes the selected layer name from the wire type
grid. The layer is no longer a valid wire layer, however
Remove Layer
the layer remains in the drawing as an AutoCAD line
layer.
If multiple layers of one color exist in the drawing,
select all layers of that color in the wire type grid to
activate this button. For example, if there are multiple
RED* layers such as RED_AWG18, RED_AWG20,and
RED_AWG25, select all three layers in the wire type
grid to enable the button.
NOTE You cannot remove the wire layer marked as
the default.
Makes the selected layer the default layer for new
wire layers and displays the layer name in the dialog
box.
Mark Selected as Default
OK
NOTE This option is available only when one wire type record is selected in the
list.
Makes the selected wire type the current wire type. If the selected wire type
does not exist on the drawing, the wire layer is created on the fly. The wire
layer name and properties are saved in the drawing file. For the layer to create,
the following rules apply:
■The layer name must be unique
■The layer name cannot be left blank
■The layer name cannot contain special characters such as / \ " : ; ? * | , = '
> <
270 | Chapter 4 Drawing and Project Properties

Import wire types
1Click Schematic tab ➤ Edit Wires/Wire Numbers panel ➤ Modify Wire
Type drop-down ➤ Create/Edit Wire Type.
2Click Import.
The Wire Type Import - Select Master Drawing dialog box displays.
3Select the drawing or drawing template containing the wire types for
import.
4Click Open.
The Import Wire Types dialog box displays.
5Select the wire types for import.
6Define how the import function behaves if a wire type exists on the active
drawing.
Overwrite any Wire Numbering and USERn differences - if checked,
changes the wire numbering setting and all the USER values for the
existing wire type to match the imported wire type.
Update any layer color and linetype differences - if checked, changes
the color and linetype settings for the existing wire layer to match
the imported wire layer.
7Click OK.
The selected wire types and settings display in the Create/Edit Wire Type
dialog.
8Continue adding, importing, and editing wire types in the Create/Edit
Wire Type dialog.
9Click OK.
Import wire types project-wide
1Click Project tab ➤ Project Tools panel ➤ Utilities.
2Select the Import from specified drawing check box.
Use wire layers | 271

3Browse to or enter the name of the drawing or drawing template
containing the wire type definitions for import.
4Click Setup to display the Import Wire Types dialog box.
5Select the wire types for import.
6Define how the import function behaves if a wire type exists on the
drawing being processed.
Overwrite any Wire Numbering and USERn differences - if checked,
changes the wire numbering setting and all the USER values for the
existing wire type to match the imported wire type.
Update any layer color and linetype differences - if checked, changes
the color and linetype settings for the existing wire layer to match
the imported wire layer.
7Click OK and return to the Project-Wide Utilities dialog box.
8Click OK.
The Select Drawings to Process dialog box displays.
9Select the drawings you want to import the selected wire types into.
10 Click OK.
Imports wire types from another drawing or drawing template.
Create/Edit Wire Type
Ribbon: Schematic tab ➤ Edit Wires/Wire Numbers panel ➤ Modify
Wire Type drop-down ➤ Create/Edit Wire Type.
Toolbar: Wires
Menu: Wires ➤ Create/Edit Wire Type
Command entry: AEWIRETYPE
Click the Import button in the Option section.
272 | Chapter 4 Drawing and Project Properties

Project-wide utilities
Ribbon: Project tab ➤ Project Tools panel ➤ Utilities.
Toolbar: Project
Menu: Projects ➤ Project-Wide Utilities
Command entry: AEUTILITIES
Select the Import from specified drawing check box. Browse to or enter the
name of the drawing or drawing template containing the wire type definitions
for import. Click Setup.
Double click a column heading to sort the wire type list by the data in that
column.
Select the wire types to import.Grid
All wire types are initially selected to import. Clears
or selects all wire types to import.
Clear All
Select All
NOTE The button switches between Select All and
Clear All each time it is clicked.
If checked, changes the wire numbering setting and
all the USER values for the existing wire type to match
the imported wire type.
Overwrite any Wire Numbering and
USERn differences
If checked, changes the color and linetype settings
for the existing wire layer to match the imported
wire layer.
Update any layer color and linetype differ-
ences
Change wire types
Change wire types
You can change the wire type using the Change/Convert Wire Type tool or
by typing a "T" at the command prompt during wire insertion commands.
Change wire types | 273

1Click Schematic tab ➤ Edit Wires/Wire Numbers panel ➤ Modify Wire
Type drop-down ➤ Change/Convert Wire Type.
Optionally, you can right-click on an existing wire and select
Change/Convert Wire Type.
2In the Change/Convert Wire Type dialog box, select a wire type record
in the wire type list, or click Pick to select a wire type record from the
drawing.
If you right-clicked on a wire and selected Change/Convert Wire Type,
the wire type corresponding to the selected wire layer is highlighted in
the list.
3Make any selections in the dialog box.
If Change all wires in the wire network is selected, all wires in the wire
network are changed to the new wire type. If unselected, only the selected
wire is changed.
If Convert Lines to Wires is selected, the selected lines are changed to the
new wire type. If unselected, the lines are ignored.
4Click OK.
5Select the wires or lines in the drawing to change and press Enter.
Override wire type at command prompt
During wire insertion, the current wire type displays at the command prompt.
You can override the wire type by typing in the hot key "T" and selecting a
new wire type from the Set Wire Type dialog box. The new wire type becomes
the current wire type and the command continues with the wire insertion.
Use the following commands:
■Click Schematic tab ➤ Insert Wires/Wire Numbers panel ➤ Insert Wires
drop-down ➤ Wire.
■Click Schematic tab ➤ Insert Wires/Wire Numbers panel ➤ Insert Wires
drop-down ➤ 22.5 Degree.
■Click Schematic tab ➤ Insert Wires/Wire Numbers panel ➤ Insert Wires
drop-down ➤ 45 Degree.
■Click Schematic tab ➤ Insert Wires/Wire Numbers panel ➤ Insert Wires
drop-down ➤ 67.5 Degree.
274 | Chapter 4 Drawing and Project Properties

■Click Schematic tab ➤ Insert Wires/Wire Numbers panel ➤ Multiple
Bus.
■Click Schematic tab ➤ Edit Wires/Wire Numbers panel ➤ Modify Ladder
drop-down ➤ Add Rung.
■Click Schematic tab ➤ Insert Wires/Wire Numbers panel ➤ Insert Ladder
drop-down ➤ Insert Ladder.
NOTE If you select Another Bus (Multi-Wire) in the Multiple Wire Bus dialog box,
the wires are drawn on the same wire layer as the existing wire bus. You cannot
type "T" to change the wire type during wire insertion.
Change/convert wire type
Convert lines to wires, or change wires from one wire type to another.
TIP Use the Create/Edit Wire Type tool to create and edit wire types. You can also
type "T" at the command prompt during wire insertion to use the Set Wire Type
tool.
Ribbon: Schematic tab ➤ Edit Wires/Wire Numbers panel ➤ Modify
Wire Type drop-down ➤ Change/Convert Wire Type.
Toolbar: Wires
Menu: Wires ➤ Change/Convert Wire Type
Command entry: AECONVERTWIRETYPE
You can also right-click on an existing wire and select Change/Convert Wire
Type. Use the grid control to sort and select the wire types for modification.
Wire type grid
Displays the wire types used in the active drawing. The wire layer name and
the wire properties like color, size, whether the wire layer is processed for wire
numbers, and user-defined properties are listed in the grid. An 'x' in the Used
column indicates that the layer name is currently used in the drawing. A blank
value in this column indicates that the layer name exists in the drawing but
it is not currently being used.
Change wire types | 275

A “No” in the Wire Numbering column indicates that wires on this layer do
not receive a wire number. The Insert Wire Numbers command follows these
rules:
■If all wires in the network are on layers set “No” for Wire Numbering, no
new wire number is inserted.
■If any wire in the network is on a layer set “Yes” for Wire Numbering, the
existing non-fixed wire number is updated or a new wire number is inserted.
■If a wire network already has a non-fixed wire number, it is updated
regardless of the Wire Numbering setting. Use the Delete Wire Numbers
command to remove the wire number.
NOTE Manually maintain wire layer type consistency through signal arrows.
To rename the User1- User 20 column headers, right-click the project name
in the Project Manager and select Properties. In the Project Properties ➤ Wire
Numbers dialog box, Wire Type section, click Rename User Columns. In the
Rename User Columns dialog box, specify a new column name and click OK.
Renaming of user-defined columns is project-specific. You cannot rename the
Color, Size, or Layer Name columns. All the data corresponding to the header
column can be copied, cut, and pasted to another column.
Pick
Allows you to pick a wire or line in the active drawing. Once you pick a wire,
the corresponding wire type record is highlighted. If you pick a line in the
active drawing, you can add the layer where the line resides to the list of valid
wire layers. A new wire type record is created automatically.
Change/Convert
Changes all the wires in the wire network to the se-
lected wire type record. If unselected, only a single
wire is changed to the selected wire type.
Change All Wire(s) in the Network
Changes the lines to the selected wire type in the
wire type grid.
Convert Line(s) to Wire(s)
OK
NOTE This option is available only when one wire type record is selected in the
list.
276 | Chapter 4 Drawing and Project Properties

Makes the selected wire type the current wire type. If the selected wire type
does not exist on the drawing, the wire layer is created on the fly. The wire
layer name and properties are saved in the drawing file. For the layer to create,
the following rules apply:
■The layer name must be unique
■The layer name cannot be left blank
■The layer name cannot contain special characters such as / \ " : ; ? * | , = '
> <
Set wire type
This tool sets wire types for new wires. Use the grid control to sort and select
the wire types for modification.
TIP Use the Create/Edit Wire Type tool to create and edit wire types or the
Change/Convert Wire Type tool to convert lines to wires.
Type "T" at the command prompt during wire insertion.
Wire type grid
Displays the wire types used in the active drawing. The wire layer name and
the wire properties like color, size, whether the wire layer is processed for wire
numbers, and user-defined properties are listed in the grid. An 'x' in the Used
column indicates that the layer name is currently used in the drawing. A blank
value in this column indicates that the layer name exists in the drawing but
it is not currently being used.
A “No” in the Wire Numbering column indicates that wires on this layer do
not receive a wire number. The Insert Wire Numbers command follows these
rules:
■If all wires in the network are on layers set “No” for Wire Numbering, no
new wire number is inserted.
■If any wire in the network is on a layer set “Yes” for Wire Numbering, the
existing non-fixed wire number is updated or a new wire number is inserted.
■If a wire network already has a non-fixed wire number, it is updated
regardless of the Wire Numbering setting. Use the Delete Wire Numbers
command to remove the wire number.
NOTE Manually maintain wire layer type consistency through signal arrows.
Change wire types | 277

To rename the User1- User 20 column headers, right-click the project name
in the Project Manager and select Properties. In the Project Properties ➤ Wire
Numbers dialog box, Wire Type section, click Rename User Columns. In the
Rename User Columns dialog box, specify a new column name and click OK.
Renaming of user-defined columns is project-specific. You cannot rename the
Color, Size, or Layer Name columns. All the data corresponding to the header
column can be copied, cut, and pasted to another column.
OK
NOTE This option is available only when one wire type record is selected in the
list.
Makes the selected wire type the current wire type. If the selected wire type
does not exist on the drawing, the wire layer is created on the fly. The wire
layer name and properties are saved in the drawing file. For the layer to create,
the following rules apply:
■The layer name must be unique.
■The layer name cannot be left blank.
■The layer name cannot contain special characters such as / \ " : ; ? * | , = '
> <.
Optional ENV file assignment for current project
Optional ENV file assignment for current project
You can create an alternate environment settings ENV file and assign it to the
active project. Customer-specific ENV files can be created to store customer
settings, paths, libraries, and menus. For a given project, you can assign the
appropriate ENV file to the project. The ENV file name reference is saved in
the WDP drawing list file of the project. Whenever the project is selected, the
settings in the referenced ENV file are automatically restored.
Ribbon: Project tab ➤ Project Tools panel ➤ Manager.
Toolbar: Main Electrical 2
Menu: Projects ➤ Project ➤ Project Manager
278 | Chapter 4 Drawing and Project Properties

Command entry: AEPROJECT
Right-click the project name and select Settings. On the Current Settings dialog
box, click Environment file.
Optional ENV file assignment for current project | 279
280
Symbol Libraries
Determine symbol block names
The symbol folder on page 204 contains hundreds of component symbols in
standard AutoCAD ".dwg" file format. They are referenced by AutoCAD Electrical
and its icon menuing system and are inserted as standard AutoCAD blocks with
attributes. There are two ways to determine the block name of an existing
symbol:
METHOD A
Insert the symbol from the AutoCAD Electrical icon menu and then use the
AutoCAD LIST command to display the block name. Add the appropriate library
path as a prefix to this block name to obtain the path to the ".dwg" file of the
symbol. The default library path is
■Windows XP: \Documents and Settings\All
Users\Documents\Autodesk\Acade {version}\libs\{library}\
■Windows Vista, Windows 7: \Users\Public\Documents\Autodesk\Acade
{version}\libs\{library}\
METHOD B
The icon menu on page 204 file lists the symbol descriptions and file names of
all components referenced in the AutoCAD Electrical icon menuing system.
You can pick the symbol names from this file. Here is an example of how the
data looks in this file.
"On delay coil | S2(SHTD1N) | HTD1N".
5
281
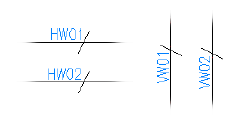
The "|" characters divide the entry into three sections. The first piece is the
description that appears in the side bar of the menu, the second in a
slide-library reference, and the third is the actual symbol file name. In this
example, the file name of the library symbol is htd1n.dwg. The vertical version
of this symbol is vtd1n.dwg.
You can select a different name for a component family by creating or editing
the WD_FAM.dat file. For example, to limit switches be tagged "LIM" instead
of "LS" and you want pilot lights to be "PL" instead of "LT", you would add the
following two lines to the file (or create the file if it does not exist):
LS,LIM
LT,PL
The change takes effect when you exit and reload AutoCAD Electrical. New
limit switch components you insert receive the "LIM" family code annotation
instead of the library default of "LS," and pilot lights are tagged with "PL"
instead of "LT." Use the RETAG command to update previously inserted
components.
Library Symbol Naming Conventions
Overview of symbol naming conventions
AutoCAD Electrical depends on a specific naming convention to enable some
of its automation features to work. Though not mandatory, follow the naming
convention outlined in the following section if you create new AutoCAD
Electrical-smart symbols for use with AutoCAD Electrical. Custom symbols
can take full advantage of the AutoCAD Electrical features.
Cable Marker Symbols
AutoCAD Electrical cable conductor marker symbols follow this convention:
■The first character is "H" or "V" for horizontal wire or vertical wire insertion.
282 | Chapter 5 Symbol Libraries
■The next two characters are "W0." A zero (0) means that the symbol does
not trigger a wire number change through it.
■The fourth character is either 1 or 2: "1" for parent marker or "2" for child
marker.
■The remaining characters are not specified.
Examples:
Parent cable conductor marker, horizontal wire insertionHW01.dwg
Child cable marker, horizontal wire insertionHW02.dwg
Parent cable conductor marker, vertical wire insertionVW01.dwg
Child cable marker, vertical wire insertionVW02.dwg
Components - General
Schematic components such as relays, switches, pilot lights, and discrete motor
control devices (but not PLC I/O symbols) follow this naming convention:
■32-character block name maximum, first character is either "H" or "V" for
horizontal or vertical wire insertion.
■The next two characters are reserved for family type (for example, PB for
push buttons, CR for control relays, LS for limit switches). A zero (0) as the
second character of the family type (for example, a 0 in the overall symbol
name) means that the symbol does not trigger a wire number change
through it. (For example, T0 for terminals, W0 for cable markers, C0 for
connectors.)
■The fourth character is generally a 1 or a 2: 2 for child contacts and 1 for
everything else (parent or standalone component).
■If the symbol is a contact, then the fifth character is a 1 for normally open,
2 for normally closed.
■The remaining characters are not specified. They are used to keep names
unique.
Overview of symbol naming conventions | 283
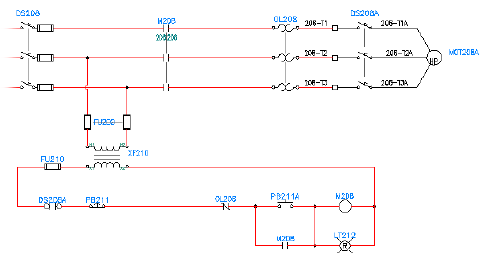
Examples:
Control relay coil, horizontal rung insertionHCR1.dwg
Control relay coil, vertical rung insertionVCR1.dwg
Horizontal relay contact, N.O.HCR21.dwg
Horizontal relay contact, N.C.HCR22.dwg
Horizontal relay contact, N.C., with in-line terminal numbersHCR22T.dwg
Vertical push button, parent contact, N.O.VPB11.dwg
Vertical push button, child contact, N.O.VPB21.dwg
Horizontal limit switch, parent, N.O.HLS11.dwg
Horizontal limit switch, parent, N.O. Held closedHLS11H.dwg
Vertical pilot light, red, press-to-testVLT1RP.dwg
Horizontal cable marker, no wire number change through itHW01.dwg
Component Location Mark Symbols
AutoCAD Electrical expects the location symbol names to begin with the
characters "WDXX."
284 | Chapter 5 Symbol Libraries

Configuration and Ladder Master Line Reference Symbols
AutoCAD Electrical expects to find these block inserts:
Block insert consisting of about 50 invisible attributes. They carry
the settings of the drawing.
WD_M.dwg
Optional block insert consisting of several invisible attributes.
They carry the settings of the drawing for panel layout functions.
WD_PNLM.dwg
Block insert that carries the first line reference number of a ladder
and additional information such as rung spacing and ladder
length.
WD_MLRH.dwg
Same as previous symbol, but for a ladder that lies on its side.WD_MLRV.dwg
Optional, user-defined alternative to WD_MLRH.dwg. AutoCAD
Electrical uses this symbol name when you select 'User Block' from
WD_MLRHX.dwg
the Line Reference Numbers subdialog box of the Drawing
Properties ➤ Drawing Format dialog box (on the Drawing
Properties ➤ Drawing Format dialog box, Format Referencing
section, select Reference Numbers and click Setup).
Same as previous symbol, but for a ladder that lies on its side.WD_MLRVX.dwg
NOTE The ladder line reference block used by AutoCAD Electrical is determined
by the ladder reference configuration selected in the Format Referencing section
of the Drawing Properties ➤ Drawing Format dialog box.
Connector Symbols
■The first character is "H" or "V" for horizontal or vertical orientation.
■The next two characters are "CN" for connector.
■The fourth character is either 1 or 2: 1 for parent or 2 for child.
■The fifth character is "_"
■The sixth character is 1-9 for the style number.
■The seventh character:
(Combo) specifies the plug or jack ID: P = Plug, J = Jack (Receptacle)
(Only) specifies the wire direction: 1 = right, 2 = top, 4 = left; and 8 =
bottom.
Overview of symbol naming conventions | 285
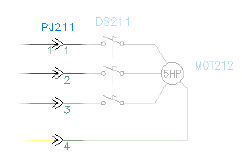
■The eighth character is either "P" or "J": P = Plug, J = Jack (Receptacle)
Examples:
Horizontal parent - single (plug) wiring connects from left or
bottom
HCN1_14P.dwg
Vertical child - single (plug) wiring connects from left or bottomVCN2_18P.dwg
Horizontal parent - single (receptacle) wiring connects from right
or top
HCN1_11J.dwg
Vertical child - single (plug) wiring connects from right or topVCN2_12P.dwg
Upon completion of the parametric build connector, a unique new block
definition is created. Each connector is labeled with a unique naming
convention within the same project.
Horizontal connector; where “nnn” is a random number for
uniqueness
HCN1_14P_nnn
Vertical connector; where “nnn” is a random number for
uniqueness
VCN1_18P_nnn
Hydraulic Symbols
The maximum number of characters for the block name is 32.
■The first character is "H" or "V" for horizontal wire or vertical.
■The next two characters are the first two letters of the family name (for
example, FI for filters, CY for cylinders, PM for pumps). See Overview of
Hydraulic and P&ID on page 304symbols for a list of symbol family names.
■The fourth character is "1" for hydraulic symbols - stand-alone component.
286 | Chapter 5 Symbol Libraries
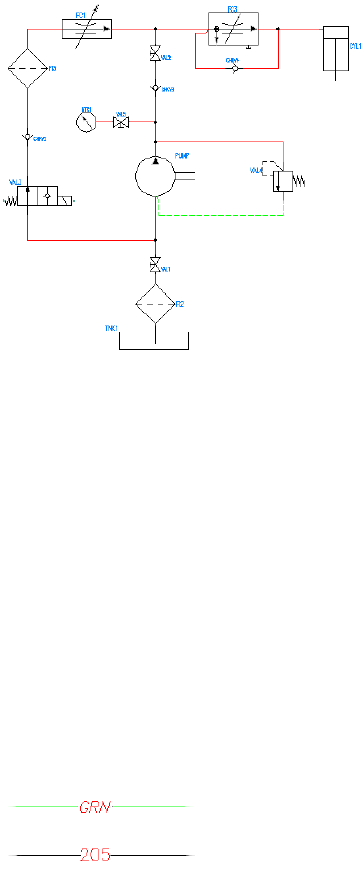
■Use "_" and enter a meaningful name corresponding to the symbol.
Example:
Horizontal standalone cylinder; plunger_cyl is the
meaningful name for the symbol
HCYL1_plunger_cyl.dwg
Inline Wire Marker Symbols
Construct dumb inline wire marker symbols with a tiny piece of "pigtail" line
entity at each connection point. It can be small, but it must be present for
AutoCAD Electrical to correctly "see" the in-line inserted block as it traces the
wire network. Inline wire marker symbols follow this naming convention:
■The first character is "H" or "V" for horizontal wire or vertical wire insertion.
■The next three characters are "T0_"
■The remaining characters are undefined.
Overview of symbol naming conventions | 287
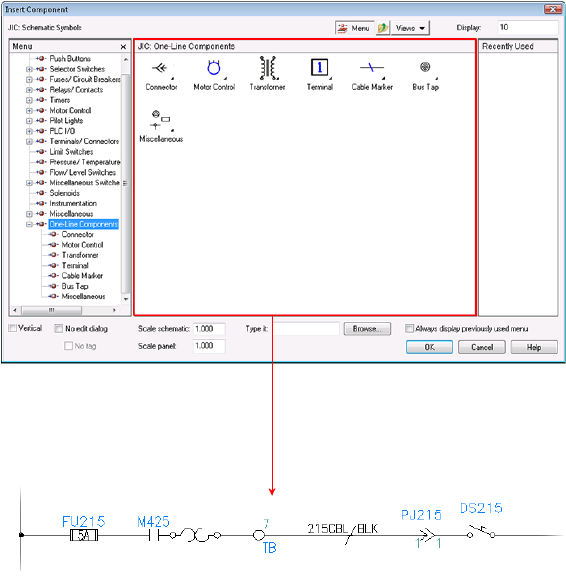
Example:
"RED" inline marker, horizontal wire insertHT0_RED.dwg
One-line Symbols
One-line symbols follow the same naming convention as schematic parent
and child symbols. To make the symbol names unique, the one-line symbol
block names have a “1-” suffix. However, the symbol name does not define
the symbol as a one-line symbol. A one-line symbol is defined by the existence
of a WDTYPE attribute on page 325 with a value of “1-” on the symbol, or a
value of “1-1” for a one-line bus-tap symbol.
The bus-tap symbol can have two functions:
■Provide an anchor point for the one-line circuit representation that begins
at this location.
288 | Chapter 5 Symbol Libraries

■Break into the one-line bus where the circuit connects.
On a dual circuit one-line template, there are three bus-tap symbols. One at
the normal point where the circuit ties into the bus. There is another version
of the symbol on each of the two circuit "legs", each marking the point where
that part of the dual circuit starts. These bus-tap symbols allow various reports
to report accurately on a one-line circuit, whether a single circuit or a dual
circuit representation.
The following bus-tap symbols are supplied:
■HDV1_BT_1-.dwg - with “dot” for horizontal one-line circuit
■VDV1_BT_1-.dwg - with “dot” for vertical one-line circuit
■HDV1_BTT_1-.dwg - “tee” connection for dual horizontal circuit
■VDV1_BTT_1-.dwg - “tee” connection for dual vertical circuit
■HDV1_BTL_1-.dwg - “corner” connection for dual horizontal circuit
■VDV1_BTL_1-.dwg - “corner” connection for dual vertical circuit
NOTE A WDTYPE attribute with a “1-1” value, identifies a bus-tap symbol.
P&ID Symbols
The maximum number of characters for the block name is 32.
■The first character is "H" or "V" for horizontal wire or vertical.
■The next two characters are the first two letters of the family name (for
example, GV for diaphragm valves, IN for instruments, N for nozzles). See
Overview of Hydraulic and P&ID symbols on page 304 for a list of symbol
family names.
■The fourth character is "1" for P&ID symbols - stand-alone component.
■Use "_" and enter a meaningful name corresponding to the symbol.
Overview of symbol naming conventions | 289
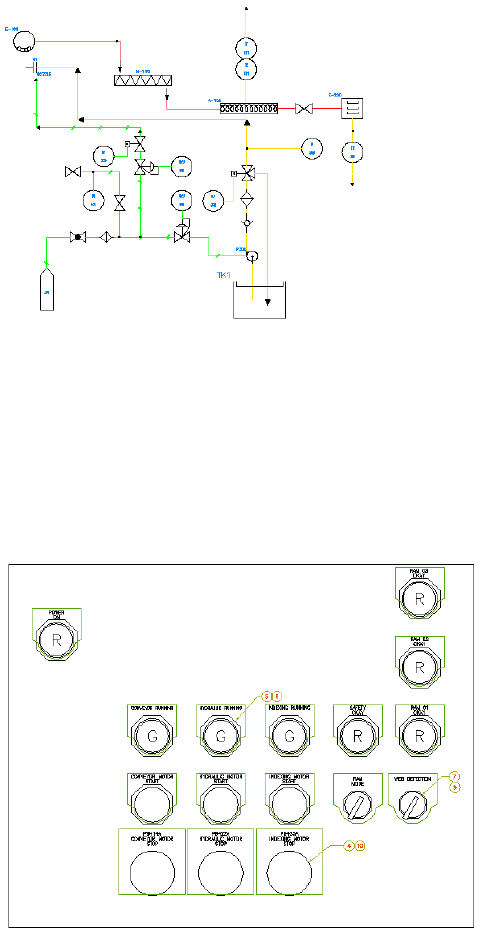
Example:
Vertical standalone cyclone; ver_tank is the meaningful
name for the symbol
VTK1_ver_tank.dwg
Panel Layout Footprint Symbols
There is not a required naming convention to follow, but the name must
adhere to the AutoCAD 32-character block name limit.
290 | Chapter 5 Symbol Libraries
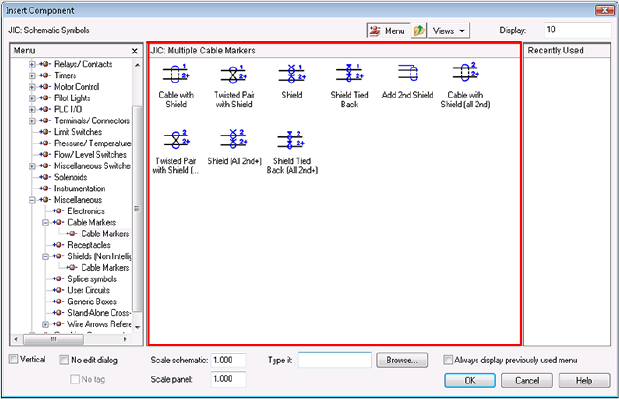
Parametric Twisted Pair Symbols
A parametrically generated twisted pair representation consists to two instances
of the same symbol (there are no parent/child versions). This symbol must
carry attribute ACE_FLAG with a value of "3." Parametric twisted pair symbols
follow this naming convention:
■The first four characters are "HT0_" or "VT0_" for horizontal or vertical
parametric symbols.
■The remaining characters can be anything (default is set to "TW")
Examples:
Horizontal parametric connector symbolHT0_TW.dwg
Vertical parametric connector symbolVT0_TW.dwg
PLC I/O Parametric Build Symbols
These symbols begin with "HP" or "VP" (horizontal rung versus vertical)
followed by a digit 1 through 9. The digit corresponds to the selected PLC
module style or look. (1 through 5 are provided in the AutoCAD Electrical
library, 6 through 9 can be user-defined).
Overview of symbol naming conventions | 291

Plug/Jack Connector Pin Symbols
AutoCAD Electrical connector symbols follow this convention:
■The first character is "H" or "V" for horizontal wire or vertical wire insertion.
■The next two characters are "C0" if the connector does not trigger a wire
number change through it. (The "0" means that the wire number does not
change, or "CN" if the connector DOES trigger a wire number change.)
■The fourth character is either 1 or 2: 1 for parent marker or a 2 for child
marker.
■The remaining characters are not specified.
Splice Symbols
Splices follow this naming convention:
■The first four characters are "HSP1" or "VSP1" for horizontal or vertical
splices.
■The fifth through seventh characters are "001", "002", "003," and so on.
Examples:
Horizontal splice #1HSP1001.dwg
292 | Chapter 5 Symbol Libraries
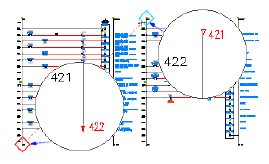
Vertical splice #1VSP1001.dwg
Horizontal splice #3HSP1003.dwg
Source/Destination Wire Signal Arrow Symbols
AutoCAD Electrical wire signal arrow symbols follow this convention:
■The first four characters of these symbol names are either "HA?S" for source
signal arrows or "HA?D" for destination symbol arrows. The "?" character
is the arrow style digit (1 through 4 are provided in the AutoCAD Electrical
library and 5 through 9 can be user-defined).
■Characters 5 through 11 can be user-defined.
You can create your own arrow styles using these unused digits (for example,
HA5S... and HA5D...). For example, copy Autodesk\Acade
{version}\Libs\jic1\ha1s*.dwg to ha5s*.dwg and Autodesk\Acade
{version}\Libs\jic1\ha1d*.dwg to ha5d*.dwg. Access each copied arrow symbols
in AutoCAD and edit to suit. Then, to access your new arrow style, set the
default arrow style to "5" in the Drawing Properties ➤ Styles dialog box.
Standalone Cross-reference Symbols:
Same naming convention as the Source/Destination Signal symbols (that is,
HA?S* and HA?D*) but without a WIRENO attribute present on the symbol.
Stand-alone PLC I/O Point Symbols
These symbols begin with "PLCIO" and can be up to 32 characters long. There
is no naming convention referenced by AutoCAD Electrical other than the
"PLCIO" prefix.
Overview of symbol naming conventions | 293
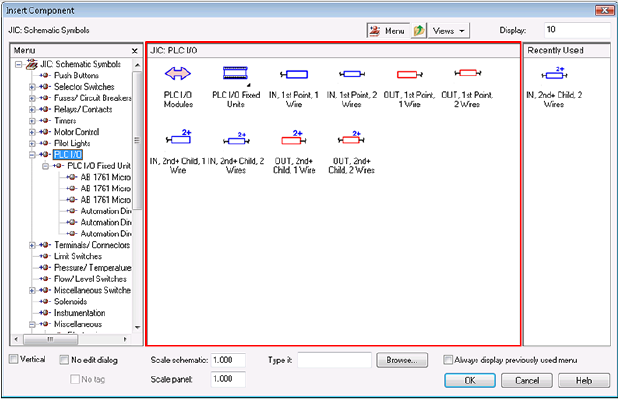
Examples:
AB 1761 model L16-AWA with 0.5 unit rung spacingPLCIO50E1761-L16AWA.dwg
Standalone input point, single wire connectionPLCIOI1T.dwg
Standalone Terminal Symbols
Stand-alone terminals follow this naming convention:
■The first two characters are "HT."
■The third character is "0" if the wire number does not change through the
terminal, "1" if the terminal symbol should trigger a wire number change.
■The fourth character is an underscore (_) if the terminal carries no attributes
for AutoCAD Electrical to process (such as a dumb, unannotated terminal
symbol). Otherwise, the fourth through eighth character positions of the
symbol file name are user-defined.
Examples:
Square terminal with annotation, wire number does not changeHT0001.dwg
Same as previous symbol, but wire number changes through the
terminal
HT1001.dwg
294 | Chapter 5 Symbol Libraries
Dumb, square terminal with no annotation, no wire number
change
HT0_01.dwg
User-defined Symbols
AutoCAD Electrical user-defined symbols follow this convention:
■The first character is "H" or "V" for horizontal wire or vertical wire insertion.
■The next two characters are "ZA" through "ZZ."
■The remaining characters can be user-defined.
Wire Dot Symbols
AutoCAD Electrical expects this symbol name to be "WDDOT.dwg."
Wire Number Symbols
An AutoCAD Electrical wire number is a block insert consisting of a single
wire number attribute. The origin of the block insert lies on its wire with the
wire number attribute floating above, below, or off to the side of the insertion
point of the block.
Examples:
Wire number for horizontal wire insertionWD_WNH.dwg
Wire number for vertical wire insertionWD_WNV.dwg
Extra wire number copy for horizontal wireWD_WCH.dwg
Extra wire number copy for vertical wireWD_WCV.dwg
AutoCAD Electrical also supports inline wire numbers that follow the value
of the main wire number. An inline wire marker has a block name that follows
that of a terminal symbol that does not trigger a wire number change.
Examples:
Inline wire number marker, horizontal wire insertion, short wire
number
HT0_W1.dwg
Inline wire number marker, horizontal wire insertion, longer wire
number
HT0_W3.dwg
Overview of symbol naming conventions | 295
Inline wire number marker, vertical wire insertion, short wire
number
VT0_W1.dwg
Inline wire number, vertical wire insertion, medium wire width,
vertical wire insertion
VT0_W2.dwg
Family type
The second and third characters of the symbol name are reserved for family
type (for example, PB for push buttons, CR for control relays, LS for limit
switches). The family type can be used to determine the catalog lookup table
name on page 1265 and the tag name for a component. The library symbols
supplied with AutoCAD Electrical use the following family types.
DescriptionFamily Type
AmmetersAM
Buzzers, horns, bellsAN
BatteriesBA
Ball ValvesBV
Connectors/pinsC0, CN
CapacitorsCA
Circuit breakersCB
Control relaysCR
Distribution blocksDB
DiodesDI
Device networksDN
DrivesDR
Disconnect switchesDS
Device boxesDV
296 | Chapter 5 Symbol Libraries
DescriptionFamily Type
Enclosures/hardwareEN
Level switchesFL
Frequency metersFM
Flow sensorsFS
Foot switchesFT
FusesFU
Gate valvesGV
Latching relaysLR
Limit switchesLS
Lights, pilot lightsLT
Globe valvesLV
MotorsMO
Motor starters/contactorsMS
OverloadsOL
Push buttonsPB
Pull cord switchesPC
Photo switchesPE
A-plug switchesPG
Power metersPM
Pressure switchesPS
Power suppliesPW
Overview of symbol naming conventions | 297
DescriptionFamily Type
Proximity switchesPX
ResistorsRE
SplicesSP
Selector switchesSS
Surge suppressorsSU
SolenoidsSV
Toggle switchesSW, TG
TerminalsT0, T1
ThermocouplesTC
Timer relaysTD
Temperature switchesTS
Volt metersVM
Variable resistorsVR
Cables, multi-conductor cablesWO
TransformersXF
Split a tag name into two pieces
Split a tag name into two pieces
TAG1_PART1, TAG1_PART2, TAG1_PARTX (as well as TAG2_PART1,
TAG2_PART2, TAG2_PARTX) are alternatives to TAG1 and TAG2 that allow
you to split a tag name into two pieces and, for example, position one piece
above the other on the symbol. You can create drawings with a mix of both
symbols having split tags and other symbols carrying just the single TAG1 or
TAG2 attribute.
298 | Chapter 5 Symbol Libraries

1Open up the .dwg library symbol drawing that you want to modify.
2Rename the TAG1 attribute definition to read TAG1_PART1.
3Add a new attribute definition TAG1_PART2.
4Position both attribute definitions inside of the circle graphics of the
symbol (one above the other).
With this setup, AutoCAD Electrical automatically splits tags like CR104
and 104CR into two pieces (where characters split from numbers to letters)
and apply the pieces to these attributes.
5For instances where there is a delimiter between the character and number
parts of a tag, and you do not want the delimiter to show on one part or
the other of the visible tag, add attribute definition TAG1_PARTX to the
library symbol and mark it "invisible".
AutoCAD Electrical stores the delimiter of the split tag in the attribute.
NOTE If a parent symbol has the single TAG1 attribute, related child symbols can
have split tag attributes and vice versa. If a parent symbol has split tag attributes,
related child symbols do NOT have to have split tag attributes. The default value
character string of the symbol for the tag should be annotated as a default value
on the TAG1_PART1 attribute definition.
Use multiple symbol libraries
You can select the library you want to use for each project. One project might
require a JIC-style library, and another an IEC-style library. Each symbol library
set must be in its own subdirectory, but adhere to the AutoCAD Electrical file
naming convention. You cannot have duplicate symbols in the various symbol
libraries.
To set a symbol library to use for a particular project, right-click the project
name inside the Project Manager, and select Properties. In the Project Properties
➤ Project Settings dialog box, click the plus sign (+) next to Schematic
Libraries or Panel Footprint Libraries. Click Add and enter the path of the
library into the edit box or click Default to use the default libraries.
NOTE You can include electrical, pneumatic, or other schematic libraries in the
path.
Use multiple symbol libraries | 299
You can also include a series of library paths for AutoCAD Electrical to use.
Enter the names of the libraries (in order) with a semicolon between them.
For example:
C:/Documents and Settings/All Users/Documents/Autodesk/Acade
{version}/Libs/;C:/{user path}/{user library}.
AutoCAD Electrical search sequence
AutoCAD Electrical runs through specific search sequences when looking for
your symbols.
1Looks on the drawing for a copy of the requested symbol.
2Checks for the specific file name if a full path name is provided.
3Checks in your user subdirectory (given by the WD_USER setting in the
.env file).
4Checks in the directory where the active project's .wdp file is located.
5Checks in the selected library -- it is the library selected per the active
project.
6Checks the directory containing AutoCAD Electrical support files.
7Checks the current directory.
8Checks the path given by the AutoCAD Electrical environment variable.
How to install additional symbol libraries
During installation, you specified which symbol libraries to install. You can
install additional symbol libraries later.
1From the Control Panel select Add or Remove Programs.
2From the Add or Remove Programs dialog box, select the latest version
of AutoCAD Electrical and click the Change/Remove button.
3On the AutoCAD Electrical Installation Wizard, click Add or Remove
Features.
4On the Add/Remove Features page, click Next.
5On the Manufacturer Content Selection page, click Next.
6On the Select Symbol Libraries page, select the libraries you wish to install
and click Next.
300 | Chapter 5 Symbol Libraries
7Click Next to continue.
Set a symbol library as the default
1Exit AutoCAD Electrical.
2Make a back-up copy of your environment (.env) file. To find the full
name and path of your environment (.env) file, right-click a project name
inside the Project Manager, and select Settings.
3Open the .env file in a text editor such as WordPad.
4Look for a line in the environment file that begins with "WD_LIB."
5Edit this line to reflect the path of your default library. For example if
the path to your new default library is now n:/elec/syms, change the line
to read:
WD_LIB,n:/elec/syms/,AutoCAD Electrical symbols
6Save and close the file.
Another method is to use an AutoCAD Electrical variable in the WD_LIB line
of the .env file. You could use %ACAD_SUP_LAST% or %ACAD_SUP_FIRST%
to point to the last (or first) path defined in your AutoCAD Options ➤ Files
➤ Support file path.
WD_LIB,%ACAD_SUP_LAST%,AutoCAD Electrical symbols
WD_LIB,%ACAD_SUP_FIRST%,AutoCAD Electrical symbols
Overview of one-line symbols
The one-line symbol library consists of all the one-line symbols and is found
under
■Windows XP: C:\Documents and Settings\All
Users\Documents\Autodesk\Acade {version}\Libs\{library}\1-
■Windows Vista, Windows 7: C:\Users\Public\Documents\Autodesk\Acade
{version}\Libs\{library}\1-
Overview of one-line symbols | 301

A one-line symbol can be a parent, child, or terminal. These one-line symbols
use the same attributes as the schematic parent, child, and terminal symbols
but with the following exceptions.
DescriptionAttribute
The attribute must be present and carry a value of “1-” to indicate it
is a one-line symbol, or “1-1” for the one-line bus-tap symbols. A
WDTYPE
bus-tap symbol is used to mark the beginning of a one-line circuit.
Schematic symbols do not carry this attribute or have the attribute
but with a blank value.
Omitted from one-line cable markers symbols since a one-line cable
marker can represent multiple conductors, multiple wires, or core
color assignments.
RATING1
Omitted from one-line terminal symbols since a one-line terminal can
represent multiple independent terminals.
TERM01
If a TERM01 attribute is added to a one-line symbol and carries a non-
blank value, it can be edited in the Insert/Edit Terminal Symbol dialog
box. However, terminal number text on one-line terminal symbols is
not linked back to terminal number assignments on schematic or
panel terminal representations.
NOTE Terminal Strip Editor does not process one-line terminals.
One-line symbols follow the same naming convention as schematic parent
and child symbols. For convenience, the one-line symbols provided have a
“1-” suffix. However, the symbol name does not define the symbol as a one-line
symbol. This is defined by the WDTYPE attribute on page 325 value of “1-” on
the symbol, or a “1-1” on a one-line symbol.
■Motor control one-line symbols are accessible from the icon menu.
■Circuit Builder supports building motor control one-line circuits
dynamically. It allows the design of one-line circuits, with component
values and wire sizes, to conform to a given electrical code.
■One-line component symbols can be related to parent/child counterparts
on the schematic and panel layout drawings within a project. It means
that they can be Surfed together and update each other when one is
modified.
302 | Chapter 5 Symbol Libraries

■Tagging of schematic or panel components using existing commands can
reference a pick list that includes components pulled from the one-line
diagrams.
■Certain component and Bill of Material reports can report only one-line
diagram components.
Bus-tap symbols
The bus-tap symbol can have two functions:
■Provide an anchor point for the one-line circuit representation that begins
at this location.
■Break into the one-line bus where the circuit connects.
On a dual circuit one-line template, there are three bus-tap symbols. One at
the normal point where the circuit ties into the bus. There is another version
of the symbol on each of the two circuit "legs", each marking the point where
that part of the dual circuit starts. These bus-tap symbols allow various reports
to report accurately on a one-line circuit, whether a single circuit or a dual
circuit representation.
The following bus-tap symbols are supplied:
■HDV1_BT_1-.dwg - with “dot” for horizontal one-line circuit
■VDV1_BT_1-.dwg - with “dot” for vertical one-line circuit
■HDV1_BTT_1-.dwg - “tee” connection for dual horizontal circuit
■VDV1_BTT_1-.dwg - “tee” connection for dual vertical circuit
■HDV1_BTL_1-.dwg - “corner” connection for dual horizontal circuit
■VDV1_BTL_1-.dwg - “corner” connection for dual vertical circuit
NOTE A WDTYPE attribute with a “1-1” value, identifies a bus-tap symbol.
Overview of one-line symbols | 303
Overview of Hydraulic and P&ID symbols
The hydraulic symbol library consists of all the hydraulic symbols and is found
under
■Windows XP: C:\Documents and Settings\All
Users\Documents\Autodesk\Acade {version}\Libs\hyd_iso125
■Windows Vista, Windows 7: C:\Users\Public\Documents\Autodesk\Acade
{version}\Libs\hyd_iso125
Hydraulic family names
DescriptionFamily Name
FilterFI
CylinderCYL
Valves (directional, throttle valve, pressure valve)VAL
Flow control valveFC
Check valveCK
ManifoldsMAN
Pressure switchPS
MotorMOT
PumpPMP
Accumulator, compensatorACC, CMP
MeterMTR
Float switchFS
Heat exchanger, heatersHE, HTR
A Piping and Instrumentation Diagram (P&ID) is a schematic illustration of
functional relationship of piping, instrumentation, and system equipment.
P&ID shows all of piping including the physical sequence of branches, reducers,
304 | Chapter 5 Symbol Libraries
valves, equipment, instrumentation, and control interlocks. The P&ID are
used to operate the process system.
The P&ID symbol library consists of all the P&ID symbols and is found under
■Windows XP: C:\Documents and Settings\All
Users\Documents\Autodesk\Acade {version}\Libs\pid
■Windows Vista, Windows 7: C:\Users\Public\Documents\Autodesk\Acade
{version}\Libs\pid
P&ID family names
DescriptionFamily Name
Equipment: Cooling towerCT
Equipment: CycloneTK
Equipment: Engine, exchangerE
Equipment: Turbine, compressorsC
Equipment: FansF
Equipment: Mixer, agitatorsM
Tanks and vesselsTK, V
NozzlesN
PumpsP
FittingsFIT
ValvesGVA
ActuatorsACT
Logic FunctionsLOG
InstrumentationINS
FlowFLW, FE
Overview of Hydraulic and P&ID symbols | 305

Attribute Requirements
Schematic attributes
Overview of schematic attributes
The following items are attribute requirements for various categories of
schematic symbols. Some attributes are used in multiple categories.
Schematic parent and child components
DescriptionAttribute
(Parent only) Attribute for required component tag name (64 charac-
ters maximum). The default value you assign to this attribute definition
TAG1
becomes the family code character string AutoCAD Electrical uses to
build the tag name of the component when the block is inserted into
your schematic. This default value character string is used as the
Family Code (%F) portion of the tag format code of the drawing you
set up in the Drawing Properties dialog box.
Example: The TAG1 attribute definition on the symbol carries a default
value of "MCR" and the tag format of the drawing is "%F%N" where
%N is the placeholder for the line reference number or next sequential
number. As each instance of this symbol is inserted, it is automatically
assigned a tag name with an "MCR" prefix tacked on to the reference
or next sequential number.
NOTE When a component is marked with a fixed tag, this attribute
name is automatically changed with a "F" suffix (that is, TAG1 ➤
TAG1F).
(Child only) This is a copy of the parent component's tag name of
the component (64 characters maximum). If no parent tag is found
TAG2
then AutoCAD Electrical displays the attribute default value of the
definition (for example, "MCR" or "PB" or "X").
(Parent only) Alternate to using a single TAG1 attribute (64 characters
maximum). This allows the component tag name to be split into two
TAG1_PART1
TAG1_PART2
pieces (example: two lines - "MDOT" on first line and "123" on the
second line for a full tag name of "MOT123"). AutoCAD Electrical
pastes the values on these two attributes together when it processes
306 | Chapter 5 Symbol Libraries

DescriptionAttribute
the component. To include a delimiter character in the tag name but
not show it on the drawing (for example, "MOT-123" but just show
"MOT" and "123"), then a third attribute definition marked invisible,
"TAG1_PARTX" can be added to carry the dash delimiter.
NOTE The default for the %F tagging parameter, as described in
TAG1 previously, is carried on the TAG1_PART1 piece of the attribute
pair. If a component with a split tag is marked as Fixed, the attribute
names are automatically changed to "TAG1F_PART1" and
"TAG1F_PART2."
(Child only) Same as previous but for child components (64 characters
maximum).
TAG2_PART1
TAG2_PART2
Optional attribute that can carry a copy of whatever AutoCAD Elec-
trical assigns to the tag name attribute - TAG1 or the split tag attribute
combination (64 characters maximum).
COPYTAG
Attribute used to hold manufacturer name or code (24 characters
maximum). This attribute usually marked as invisible.
MFG
MFG01 - MFG10: Optional invisible attributes for manufacturer name
or code for up to 10 additional "Multiple Catalog" part number as-
signments (24 characters maximum each). If these attributes are not
present and AutoCAD Electrical stores the additional part number
information, it is saved on the inserted symbol as Xdata.
NOTE MFG, CAT, and ASSYCODE generally appear on parent com-
ponents only; not child contact symbols.
Attribute used to hold catalog part number assignment (60 characters
maximum). This attribute is usually marked as invisible.
CAT
CAT01 - CAT10: Optional invisible attributes for catalog number code
for up to 10 additional "Multiple Catalog" part number assignments
(60 characters maximum each). If these attributes are not present
and AutoCAD Electrical stores the additional part number information,
it is saved on the inserted symbol as Xdata.
Invisible attribute for optional subassembly code that causes AutoCAD
Electrical to look for subassembly items to extract into BOM reports
ASSYCODE
(60 characters maximum). Define these subassembly items in the
active catalog lookup file in the ASSYCODE and ASSYLIST fields. The
Schematic attributes | 307
DescriptionAttribute
value for this attribute is set automatically when you make a selection
from the catalog lookup that carries subassembly information.
ASSYCODE01 - ASSYCODE10: Optional invisible attributes for sub-
assembly code for up to 10 additional Multiple Catalog part number
assignments (24 characters maximum each). If these attributes are
not present and AutoCAD Electrical stores the additional part number
information, it is saved on the inserted symbol as Xdata.
Attribute for the item or detail number for a component.ITEM
Invisible attribute that carries the components family type (for ex-
ample, "CR", "TD", "M", "PB"; eight characters maximum). Generally,
FAMILY
the default value of the FAMILY attribute definition is the same as the
default value for the TAG1 or TAG2 attribute of the component. It is
used as a check at the time child components are linked to a parent.
On a family mismatch, an alert dialog box displays.
A generic child device can be linked to any type of parent symbol if
the Family attribute value of the child is left blank. AutoCAD Electrical
fills it in on the fly with the FAMILY code of the parent when the link
is made.
DESC1: Description, first or only line of description text (60 characters
maximum).
DESC1
DESC2
DESC2: second line of description text.DESC3
DESC3: third line of description text.
Optional component installation code (for example, "MACH1"; 24
characters maximum).
INST
Optional component location code (for example, "FIELD", "JBOX2" ;
16 characters maximum).
LOC
(Parent only) Attributes to hold normally open and normally closed
cross-reference annotation. These attributes automatically switch to
XREFNO
XREFNC
invisible if graphical cross-referencing is applied to the component
symbol.
Use this attribute in two ways. Use it for a combined list of normally
open and normally closed contacts. AutoCAD Electrical underlines
XREF
the closed contacts. If XREFNO and XREFNC are present, then this
XREF attribute is used to carry undefined, non-NO/NC references.
308 | Chapter 5 Symbol Libraries

DescriptionAttribute
NOTE If XREF is not present then non-NO/NC contacts are included
with the XREFNO annotation.
Invisible attribute that is present when the symbol is a contact. The
value of this attribute is the de-energized state of the contact (for
CONTACT
example, "NO" or "NC" or any text string with an embedded "NO"
or "NC" such as "NO-TC". Use "NULL" as the value of the contact at-
tribute to exclude the contact from being included in any AutoCAD
Electrical cross-reference text annotation.)
Optional attribute that defines which TERMxx attribute receives the
first PINLIST value. The attribute value is a two character string, for
COMMON
example “02”, that matches with one of the TERMxx attributes found
on the symbol. If this attribute does not exist on the symbol, the first
PINLIST value is assigned to TERM01 and the second to TERM02.
Attribute to mark switch position text where "n" is the position number
digit (POS1 through POS12; 24 characters maximum). You can leave
the default value blank and then fill it in at component insertion time.
POSn
Optional contact state character string to denote relationship between
switch positions and open/closed contact state. It is for display only.
STATE
You can leave the default value blank and then fill it in at component
insertion time.
Optional rating / value attribute text where "n" is a digit starting with
"1" (60 characters maximum). AutoCAD Electrical supports up to 12
RATINGn
RATINGn attributes (for example, RATING1 through RATING12) on
the component symbol. These assignments can be pulled into various
AutoCAD Electrical reports.
Optional invisible attribute that allows AutoCAD Electrical to tie in
dashed link lines automatically between related components (instead
X?LINK
of cross-reference annotation). The "?" is a digit that indicates the
preferred link line connection direction and follows the wire connec-
tion convention (see X?TERMn).
(Parent only) Optional invisible attribute carried on a parent symbol
for storing the allowed contact pin list for the child contacts of the
PINLIST
parent (no limit on characters). If this attribute is not present then
Schematic attributes | 309

DescriptionAttribute
any related pin list data is automatically stored on the symbol as
Xdata.
(Parent only) Like previous attribute, but is used to hold a second pin
list temporarily that is later retrieved during insertion of a peer parent
PEER_PINLIST
device. For example, a reversing motor starter contactor might be a
single component with a single part number, but has a parent coil
and a peer reversing coil. Each is to receive its own unique pin list.
The catalog lookup assignment pulls both sets of pin lists to the par-
ent. Then, inserting the peer reversing coil and referencing the parent,
the pin list of the peer is retrieved from this temporary storage attrib-
ute (or Xdata) on the parent and pulled over to the peer.
(Parent only) Optional attribute carried on a parent symbol used for
setting up a peer-to-peer relationship. It stores the cross-reference
WDTAGALT
tag name of a related symbol shown on a different drawing type (for
example, instrument drawing or pneumatic drawing vs. electrical
schematic. For example, an instrument drawing might be included
in an AutoCAD Electrical project drawing set with a valve marked
"FY201". On the electrical schematics, the solenoid for this instrument
valve is tagged "SV456". The WDTAGALT attribute carried on the
schematic valve symbol can be annotated with the "FY201" instrument
tag name and a WDTAGALT attribute on the symbol of the instrument
diagram carries the "SV456" tag name pointing back at the schematic
representation. With it in place, AutoCAD Electrical can cross-reference
between them, do auto-update, and enable surfing from one drawing
type to the other.
NOTE For cross-referencing to include these peer references, make
sure that the Peer-to-peer toggle is turned on (under Project Properties
➤ Cross-reference tab).
Optional attribute used to define the component category.WDTYPE
1- = one-line
1-1 = one-line bus-tap
HY = hydraulic
PI = P&ID
PN = pneumatic
310 | Chapter 5 Symbol Libraries

DescriptionAttribute
NOTE The WDTYPE value can be a user-defined value. AutoCAD
Electrical reserves all two character values. User-defined values must
be three or four characters long.
Attribute carried on a parent symbol for embedding Internet URL's,
".pdf", ".xls", or ".doc" links that can be surfed on. The attribute value
WD_WEBLINK
should be the URL, .pdf, .xls, or .doc document file name that should
be displayed when selected from the Surf dialog box of the compon-
ent. Multiple weblink attributes can be assigned to a symbol. Use at-
tribute names with the WD_WEBLINK prefix, for example,
WD_WEBLINK1 and WD_WEBLINK2.
One-line
A one-line symbol can be a parent, child, or terminal. These one-line symbols
use the same attributes as the schematic parent, child, and terminal symbols
but with the following exceptions.
DescriptionAttribute
The attribute must be present and carry a value of “1-” to indicate it
is a one-line symbol, or “1-1” for the one-line bus-tap symbols. A
WDTYPE
bus-tap symbol is used to mark the beginning of a one-line circuit.
Schematic symbols do not carry this attribute or have the attribute
but with a blank value.
Omitted from one-line cable markers symbols since a one-line cable
marker can represent multiple conductors, multiple wires, or core
color assignments.
RATING1
Omitted from one-line terminal symbols since a one-line terminal can
represent multiple independent terminals.
TERM01
If a TERM01 attribute is added to a one-line symbol and carries a non-
blank value, it can be edited in the Insert/Edit Terminal Symbol dialog
box. However, terminal number text on one-line terminal symbols is
not linked back to terminal number assignments on schematic or
panel terminal representations.
NOTE Terminal Strip Editor does not process one-line terminals.
Schematic attributes | 311

Wire connection/terminal pin number pairs
DescriptionAttribute
Invisible wire connection attributes where an external wire connects
to the origin point of the attribute. The "n" character is an incremented
X?TERMn
digit starting at "01" used to keep multiple wire connection point at-
tribute names unique. It also provides a link to an associated terminal
number (TERMn) and a terminal description (TERMDESCn) attribute.
The "?" character position is used to identify the preferred wire con-
nection direction:
■1: wire connects to the attribute from the right
■2: wire connects to the attribute from above
■4: wire connects to the attribute from the left
■8: wire connects to the attribute from below
■0: special for motor connections that radiate from a circle.
NOTE When a component is inserted with, nearby wires
try to connect to this type of attribute only if it has a de-
fault prompt value of “X0STRETCH”
If more than 99 terminals are present on a single symbol, the "n"
value can continue with double alpha letters/numbers such as "A0,"
"A1," "AZ," "B0" and so on.
NOTE X?TERMn attributes can be stand-alone, meaning there is not
an associated TERMn attribute.
Optional wire connection description attributes that match up with
X?TERMn wire connection attributes (128 characters maximum). The
X?TERMDESCn
value assigned to each termination description attribute can be ex-
tracted into various wire connection reports or merged onto panel
wiring diagram representations of schematic symbols.
Use these attributes to define a terminal as an internal or external
connection.
Optional terminal pin number attribute where "n" is a two-digit
number (starting at 01) that is used to match up with the correspond-
ing X?TERMn wire connection attribute (ten characters maximum).
TERMn
A single TERMn attribute can have two, three, or four wire connection
attributes associated with it. For example, a round, stand-alone ter-
minal symbol having a single terminal in number attribute TERM01
312 | Chapter 5 Symbol Libraries

DescriptionAttribute
can carry four wire connection attributes to allow connection from
any direction. All four wire number attribute names would end with
01 to link them all to the common terminal pin number attribute.
Optional internal wire jumpers attribute that can be encoded to link
sets of terminals together so AutoCAD Electrical considers them in-
WD_JUMPERS
ternally jumpered when calculating wire number assignments and
processing wire connection and from/to reports. For example, a
WD_JUMPERS attribute value of ((01 02)) flags AutoCAD Electrical to
treat wire connection X?TERM01 as electrically jumpered to
XD?TERM02. WD_JUMPERS attribute value of ((01 04)(02 05 06))
means that wire connection X?TERM01 and X?TERM04 are treated
as internally jumpered together and X?TERM02, X?TERM05, and
X?TERM06 are viewed as jumpered together.
NOTE You can keep jumpers from displaying in Wire From/To reports
by placing the jumpers on a layer that contains the substring "JUMP-
ER."
Schematic connector parametric build symbols
The parametric connector is made up of a series of master symbols; one parent
and multiple children (default library symbol names HCN1_1*.dwg,
VCN1_1*.dwg, HCN2_1*.dwg, VCN2_1*.dwg). See the following list of
attributes for these symbol types.
Parent and Child Pin symbol attributes
(parent symbol has "1" and child has "2" as fourth character of the symbol
name)
DescriptionAttribute
(Parent only) Same as the FAMILY attribute
definition.
TAG1
(Child only) Same as the FAMILY attribute
definition.
TAG2
Same as the FAMILY attribute definition.INST
LOC
Schematic attributes | 313
DescriptionAttribute
(Parent only) Same as the FAMILY attribute
definition.
MFG
CAT
ASSYCODE
Same as the FAMILY attribute definition.FAMILY
Invisible attribute with blank value.GENDER
Invisible attribute with a value of "2" for all
parametric connector symbols and a value of "1"
for splice symbols (1 character maximum).
ACE_FLAG
Same as the FAMILY attribute definition.DESC1
DESC2
DESC3
Same as the FAMILY attribute definition.X?LINK
(Parent only) Invisible attribute with a value of
"HC0" (0 = zero; 32 characters maximum). Flags
WDBLKNAM
access of the "C0" connector table in the catalog
lookup database file.
Parametric Connector - Wire Connection attributes
DescriptionAttribute
Attribute for terminal pin number (for plug pin
number).
TERM01P
Attribute for terminal pin number (for receptacle
pin number).
TERM01J
Invisible wire connection attributes for plug and
receptacle side respectively. The "?" is the wire
connection direction digit (1, 2, 4, or 8).
X?TERM01P
X?TERM01J
Attribute for terminal pin description for plug
side and receptacle side respectively. The "?" digit
is same as the FAMILY attribute definition.
X?TERMDESC01P
X?TERMDESC01J
314 | Chapter 5 Symbol Libraries
DescriptionAttribute
Attribute for wire connection annotation for plug
side and receptacle side respectively. The "?" digit
is same as the FAMILY attribute definition.
X?WIRE01P
X?WIRE01J
Visible attribute, small, single character value (a
".") that must remain visible and must be placed
X?_TINY_DOT_DONT_REMOVE_01P
X?_TINY_DOT_DONT_REMOVE_01J
at the exact insertion location of the XnTERM01P
and XnTERM01J attributes. Maintains wire con-
nection integrity if a connector pin is moved
beyond the end of the connector shell. The "?"
digit is same as the FAMILY attribute definition.
Schematic terminal symbols
Use the following attributes for terminal symbols or multi-connection sequence
terminal symbols (default library symbol block names HT00*.dwg, VT00*.dwg,
HT10*.dwg, VT10*.dwg, HT0W*.dwg, VT0W*.dwg).
DescriptionAttribute
Attribute to carry terminal strip tag name (24 characters maximum).TAGSTRIP
Attribute for wire connection (up to four attributes positioned at each
end of the horizontal and vertical axes of the symbol with the "?" part
giving the wire connection direction digit as described previously).
X?TERM01
Optional attribute for wire connection description.X?TERMDESC01
Attribute used internally by the Terminal Strip Editor command to
sort a terminal strip.
STRIPSEQ
Attribute used internally to associate schematic terminals within one
multi-level terminal or to associate a schematic terminal to its panel
representation.
LINKTERM
Attribute to carry the terminal number assignment (24 characters
maximum). If the terminal is to display the wire number value of the
WIRENO
or TERM01
wire network that it is inserted into, then WIRENO attribute must be
present. Otherwise, if the attribute is to carry a terminal pin assign-
ment independent of the wire number, attribute TERM01 must be
used.
Schematic attributes | 315
DescriptionAttribute
Same as previous attribute.INST
Same as previous attribute.LOC
Same as previous attribute.MFG
CAT
ASSYCODE
Optional invisible attribute with value of "TRMS" to force access of
the TRMS table in catalog lookup (32 characters maximum).
WDBLKNAM
Special Multiple Connection Sequence Terminal symbol
Use the following attributes for this special type of terminal symbol. This
single symbol instance can be used to define a series of up to six terminal strip
inter-connections (example, a wire that passes through a series of shipping
split terminal strips). Default library symbol block names H--1_multi*.dwg,
V--1_multi*.dwg.
DescriptionAttribute
Attribute to carry terminal strip number (16 characters maximum).
Use WD_1_TAGSTRIP for the first terminal strip number and select
WD_#_TAGSTRIP
from WD_2_TAGSTRIP through WD_6_TAGSTRIP for the next terminal
number in the sequence.
Attribute to carry optional terminal number. Use WD_1_TERMNO for
the first terminal strip number and select from WD_2_TERMNO
WD_#_TERMNO
through WD_6_TERMNO for the next terminal number in the se-
quence.
Attribute to carry additional information such as installation, location,
catalog, and item number assignments; and any connected cable
WD_#_INFO
information. Use WD_1_INFO for the first terminal strip number and
select from WD_2_INFO through WD_6_INFO for the next terminal
number in the sequence.
Attribute for wire connections on each end of the symbol, the "?"
character is the wire connection direction, same as previous attribute.
X?TERM01
X?TERM02
316 | Chapter 5 Symbol Libraries
Source/Destination wire signal symbols
These symbols allow a wire to jump from one place to another, either within
a drawing or across multiple drawing. Default library symbol names are
HAxSn.dwg, HAxDn.dwg where "x" = style digit and "n" = orientation 1, 2, 3
or 4.
DescriptionAttribute
Attribute carries unique signal code that is user defined as the symbol
is inserted (32 characters maximum). This value is used to match up
SIGCODE
each source signal symbol with it one or more destination signal
symbols.
Attribute carries a copy of the wire number that gets assigned to the
wire that the signal symbol is attached to (24 characters maximum).
This attribute can be hidden.
WIRENO
Attribute carries the reference location for the matching source or
destination symbols. Updates automatically with the Update Signal
References tool or Auto Wire Numbers tool.
XREF
Optional description attribute (60 characters maximum).DESC1
Optional attribute for the SHEET (%S) value assigned in the Drawing
Settings (12 characters maximum). Updates automatically with the
Update Signal References tool or Auto Wire Numbers tool.
SHEET
Optional attribute for the DWGNAM (%D) value assigned in the
Drawing Settings (40 characters maximum). Updates same as previous
attribute.
DWGNAM
Attribute for wire connection where the "?" character is the wire
connection direction, same as previous attribute.
X?TERM01
Stand-alone Source/Destination cross-reference symbols
These symbols are like the previous ones, except there is no wire connection
attribute and no WIRENO attribute. Default library symbol names are
HAxS1_REF.dwg, HAxD1_REF.dwg where "x" = style digit.
In-line wire labels or wire numbers
These symbols insert into a wire, break the wire, and reconnect at each end.
They carry a text label or wire number in the gap between the connected wire
Schematic attributes | 317
ends. They symbols can dynamically adjust their gap to accommodate the
width of the in-line text. Default library symbol block names are HT0_*.dwg,
VT0_*.dwg.
DescriptionAttribute
Visible attribute for the text label (COLOR) or in-line wire text
(WIRENO) (24 characters maximum). This attribute is center or middle
COLOR
or WIRENO
justified and placed midway between the pair of wire connection at-
tributes listed below.
Pair of invisible wire connection attributes where the wires connect.
Connection is made to the origin point of each attribute. The "?"
X?TERM01
character position in each attribute name identifies the wire connec-
tion direction:
■1: wire connects to the attribute from the right
■2: wire connects to the attribute from above
■4: wire connects to the attribute from the left
■8: wire connects to the attribute from below
Visible attribute, small, single character value (a ".") that must remain
visible and must be placed at the exact insertion location of each of
X?_TINY_DOT_DONT_RE-
MOVE
the XnTERM01 attributes. This attribute allows the gap to auto-adjust
to text width and to maintain connectivity through the symbol if the
in-line label or wire number text is blanked or grows small compared
to the total gap width in the wire.
PLC single I/O point symbols
These attributes must be present on single, stand-alone I/O symbols with one
or two wire connections. Default library symbol block names are PLCIOI*.dwg
and PLCIOO*.dwg.
DescriptionAttribute
Attribute for PLC I/O module tag name (parent / child) with the de-
fault attribute definition value for the parent symbol becoming the
"%F" part of the tag name format (64 characters maximum).
TAG1
TAG2
Attribute for the I/O address (32 characters maximum).TAGA01
Same as above.INST
LOC
318 | Chapter 5 Symbol Libraries
DescriptionAttribute
Same as above.XREF
Attribute for terminal pin number on each side (ten characters max-
imum). If just a single wire connection then the attribute name is
TERM01.
TERM01L
TERM01R
Attributes for wire connections on each side. If just a single wire
connection then the attribute name is X?TERM01 where the "?"
character is the wire connection direction.
X?TERM01L
X?TERM01R
Optional terminal pin description attribute on each side of the symbol
(128 characters maximum). If just a single wire connection then the
attribute name is TERMDESC01.
TERMDESC01L
TERMDESC01R
(Parent only) Same as above.MFG
CAT
ASSYCODE
Attributes to hold up to five lines of description text (60 characters
maximum).
DESCA01 - DESCE01
Optional attributes to hold two lines of general text (example: "Rack"
and "Slot" address numbers; 24 characters maximum).
LINE1
LINE2
(Parent only) Optional attribute for general description purposes (60
characters maximum).
DESC
Same as above - default value "PLC" (eight characters maximum).FAMILY
Splice symbols
DescriptionAttribute
Attribute for wire annotation.XnWIRE01
Attribute for wire annotation.XnWIRE02
Attribute for wire connection description (128 characters maximum).TERMDESCxx
Invisible attribute (value set to "1" to identify a splice symbol) used
for export to Autodesk Inventor Professional (1 character maximum).
ACE_FLAG
Schematic attributes | 319
Parametric Twisted Pair symbols
DescriptionAttribute
Pair of invisible wire connection attributes where the wires
connect. Connection is made to the origin point of each
X?TERM01
attribute. The "?" character position in each attribute name
identifies the wire connection direction:
■1: wire connects to the attribute from the right
■2: wire connects to the attribute from above
■4: wire connects to the attribute from the left
■8: wire connects to the attribute from below
Visible attribute, small, single character value (a ".") that
must remain visible and must be placed at the exact inser-
X?_TINY_DOT_DONT_REMOVE
tion location of each of the XnTERM01 attributes. This at-
tribute is needed to allow the gap to auto-adjust to text
width and to maintain connectivity through the symbol if
the in-line label or wire number text is blanked or grows
small compared to the total gap width in the wire.
Invisible attribute that carries the vertex offset distance
measured from the midpoint of the symbol's two wire
ACE_OFFSET
connection points. A positive value extends the twist
through the gap. A negative value (default) decreases the
height of the twist. A value of 0.0 makes the twist come
up to the wire-gap midpoint.
To change the height of the twist, open the symbol draw-
ing file and edit this attribute definition. The next time you
insert a twisted pair symbol into a new drawing, the twisted
part takes on the new value.
Invisible attribute set to a value of 3 to identify a twisted
pair symbol (1 character maximum).
ACE_FLAG
Overview of parent and stand-alone component attributes
(TAG1)
AutoCAD Electrical puts the tag name of the component on this attribute,
names like "PB101" or "CR-55" (24 characters maximum). The default value
320 | Chapter 5 Symbol Libraries

you assign to this attribute definition at the library symbol level (that is, ".dwg"
file of the symbol opened and displayed in AutoCAD) becomes the family
code character string AutoCAD Electrical uses to build the tag name of the
component when the block is inserted into your wiring diagram. This default
value character string is used as the Family Code (%F) portion of the tag format
code of the drawing you set up in the Drawing Properties ➤ Components
dialog box (example %F%N).
For example, use "PB" for a default value of the attribute definition TAG1 if
the family name you want AutoCAD Electrical to use is "PB" (examples:
"PB100", "100-PB", "PB4-100"). You can override this family name at component
insertion time, a later edit, or automatically by use of the "wd_fam.dat "
mapping file.
NOTE If the TAG1 attribute carries no default value then AutoCAD Electrical uses
the FAMILY attribute value of that symbol.
Overview of child component attributes (TAG2)
AutoCAD Electrical puts a copy of the parent tag name of the component on
the child component attribute (TAG2). During the AutoCAD Electrical tagging
operation, AutoCAD Electrical takes the parent tag name of the coil (carried
on its TAG1 attribute) and copies it to the TAG2 attribute of this contact. If
no parent tag is found then AutoCAD Electrical displays the attribute default
value of the definition.
Panel attributes
Overview of panel attributes
AutoCAD Electrical does not have attribute or naming requirements for the
mechanical footprint block symbols. As AutoCAD Electrical inserts a footprint
symbol into the drawing, it copies various data to the footprint block such as
component/device tag name, description, manufacturer code, and catalog
number. It first looks for target attributes to copy the data to. If not found,
AutoCAD Electrical simply inserts the schematic values as standard AutoCAD,
nonvisible extended entity data (Xdata).
Some manufacturers provide free, to-scale mechanical libraries of their control
components, all in AutoCAD format. Or you may have your own in-house
footprints set up. In either case, since AutoCAD Electrical does not have naming
Panel attributes | 321
or attribute requirements, these libraries can be used as is. When AutoCAD
Electrical inserts such a block footprint symbol, it immediately becomes
AutoCAD Electrical smart.
Footprint block attribute/Xdata names
The following table is a list of footprint block data names that are inserted or
read by AutoCAD Electrical. If the footprint block has an attribute with any
name listed here, AutoCAD Electrical uses that attribute to carry the specific
piece of data. Otherwise, AutoCAD Electrical uses extended entity data with
names based on the data names listed here but with a VIA_WD_ prefix (ex:
"VIA_WD_DESC1").
identifies block as a component footprintFP
identifies block as a terminal footprintFPT
identifies block as a nameplateNP
panel component tag (used on component footprints and nameplates)P_TAG1
description line 1 - 3 (60 char max)DESC1-3
item/detail numberP_ITEM
optional attribute with a value of 1 indicates the item number is fixedITEM_FLAG
manufacturer name (24 char max)MFG
catalog number (60 char max)CAT
optional assembly codeASSYCODE
installation code (24 char max)INST
location code (16 char max)LOC
mount location code (24 char max)MOUNT
group location code (24 char max)GROUPWITH
schematic symbol block name (used for catalog lookup)WDBLKNAM
rating values (60 char max each)RATING1-12
322 | Chapter 5 Symbol Libraries
terminal strip ID (terminal footprints only)P_TAGSTRIP
terminal number (terminal footprints only)TERM
wire number (terminal footprints only)WIRENO
Minimum attribute/Xdata requirements
The following tables are the minimum requirements for AutoCAD Electrical
to recognize a block as a panel footprint, terminal, or nameplate.
Component footprint - block must carry a minimum of one of the following:
VIA_WD_FPXdata name
FP (blank value)Attribute
P_TAG1 (and no attribute NP present)Attribute
Terminal footprint - block must carry a minimum of one of the following:
VIA_WD_FPTXdata name
FPT (blank value)Attribute
Panel nameplate - block must carry a minimum of one of the following:
VIA_WD_NPXdata name
NP (blank value)Attribute
Terminal block footprint symbols
Terminal block footprint symbols require special attributes in their definitions
to help facilitate the Terminal Strip Editor graphical layout. AutoCAD Electrical
generates a physical layout of the terminal strips. It annotates the terminal
number, wire number, and destination device of what is connected to the
terminal block from the attributes. To accomplish this annotation, attributes
Panel attributes | 323
are needed to accommodate the position of text relative to the terminal block
symbol.
DescriptionAttribute
Invisible attribute to carry terminal strip number (24 character max-
imum) for terminal footprint.
P_TAGSTRIP
Invisible attribute for optional terminal location code (for example,
“JBOX1”; 16 characters maximum).
LOC
Invisible attribute for optional terminal installation code (for example,
“MACH1”; 24 characters maximum).
INST
Attribute to carry the terminal pin number assignment (ten characters
maximum). It can be related to the attached wire number or inde-
pendent of the wire number.
TERM
or WIRENO
item/detail numberP_ITEM
optional attribute with a value of 1 indicates the item number is fixedITEM_FLAG
Invisible attribute for optional manufacturer name or code (24 char-
acters maximum).
MFG
Invisible attribute for optional catalog number (60 character maxim-
um).
CAT
Invisible attribute for optional subassembly code that causes AutoCAD
Electrical to look for subassembly items to extract into BOM reports
ASSYCODE
(60 characters maximum). These subassembly items must be defined
in the active catalog lookup file in the ASSYCODE and ASSYLIST fields.
The value for this attribute is set automatically when you make a se-
lection from the catalog "Lookup" that carries subassembly informa-
tion.
Invisible attribute that specifies the WD block name for catalog lookup
(32 characters maximum). Default for terminals is "TRMS."
WDBLKNAM
Invisible attribute or Xdata. Identifies the block insert as a panel item
(that is, a physical footprint representation).
FP
Invisible attribute or Xdata. Identifies the block insert as a panel ter-
minal footprint representation.
FPT
324 | Chapter 5 Symbol Libraries

DescriptionAttribute
Optional attributes for schematic interconnection annotation (24
characters maximum).
WIRENOR
WIRENOL
Optional attributes for schematic interconnection annotation (128
characters maximum).
TERMDESCR
TERMDESCL
Attributes for other symbol categories
Overview of attributes for other symbol categories
WDTYPE attribute
The WDTYPE attribute value specifies a component category for a
non-schematic, non-panel component. It is limited to four characters and can
be user-defined. For some schematic reports, you can select a component
category for the report based on the WDTYPE value.
NOTE AutoCAD Electrical reserves all two-character values. User-defined values
must be three or four characters long.
AutoCAD Electrical uses the following WDTYPE attribute values.
Symbol categoryAttribute Value
One-line1-
One-line bus-tap1-1
HydraulicHY
PneumaticPN
P&IDPI
Attributes for other symbol categories | 325

One-line symbols
A one-line symbol can be a parent, child, or terminal. These one-line symbols
use the same attributes as the schematic parent, child, and terminal symbols
but with the following exceptions.
DescriptionAttribute
The attribute must be present and carry a value of “1-” to indicate it
is a one-line symbol, or “1-1” for the one-line bus-tap symbols. A
WDTYPE
bus-tap symbol is used to mark the beginning of a one-line circuit.
Schematic symbols do not carry this attribute or have the attribute
but with a blank value.
Omitted from one-line cable markers symbols since a one-line cable
marker can represent multiple conductors, multiple wires, or core
color assignments.
RATING1
Omitted from one-line terminal symbols since a one-line terminal can
represent multiple independent terminals.
TERM01
If a TERM01 attribute is added to a one-line symbol and carries a non-
blank value, it can be edited in the Insert/Edit Terminal Symbol dialog
box. However, terminal number text on one-line terminal symbols is
not linked back to terminal number assignments on schematic or
panel terminal representations.
NOTE Terminal Strip Editor does not process one-line terminals.
Hydraulic and P&ID symbols
DescriptionAttribute
Attribute for required component tag name (64 characters maximum).
The default value you assign becomes the family code character string
TAG1
AutoCAD Electrical uses to build the tag name of the component
when the block is inserted into your wiring diagram. This default
value character string is used as the Family Code (%F) portion of the
tag format code of the drawing you set up in the Drawing Properties
➤ Components dialog box (example %F%N).
Optional attribute for component installation code (for example,
"MACH1"; 24 characters maximum).
INST
Optional attribute for component location code (for example, "FIELD";
"JBOX2"; 16 characters maximum).
LOC
326 | Chapter 5 Symbol Libraries

DescriptionAttribute
Invisible attribute that carries the components family type (for ex-
ample, "FI", "INS"; eight characters maximum). Generally, the default
FAMILY
value of the FAMILY attribute definition is the same as the default
value for the TAG1 or TAG2 attribute of the component.
A generic child device can be linked to any type of parent symbol
when the Family attribute value of the child is left blank. AutoCAD
Electrical fills it in on the fly with the FAMILY code of the parent when
the link is made.
Invisible attribute for optional catalog number (60 characters maxim-
um).
CAT
Invisible attribute for optional manufacturer name or code (24 char-
acters maximum).
MFG
Invisible attribute for optional subassembly code that causes AutoCAD
Electrical to extract subassembly items into BOM reports (60 charac-
ASSYCODE
ters maximum). AutoCAD Electrical, not the user, sets the value for
this attribute.
Optional attribute for rating/value text (60 characters maximum).RATING1
DESC1: Description, first or only line of description text (60 characters
maximum).
DESC1, DESC2, DESC3
DESC2: second line of description text.
DESC3: third line of description text.
Optional attribute used to define the component category.WDTYPE
1- = one-line
1-1 = one-line bus-tap
HY = hydraulic
PI = P&ID
PN = pneumatic
NOTE The WDTYPE value can be a user-defined value. AutoCAD
Electrical reserves all two character values. User-defined values must
be three or four characters long.
Attribute carried on a parent symbol used for setting up a "peer-to-
peer" relationship (64 characters maximum). It stores the cross-refer-
WDTAGALT
Attributes for other symbol categories | 327
DescriptionAttribute
ence tag name of a related symbol shown on a different drawing type
(for example, instrument drawing or pneumatic drawing vs. electrical
schematic). For example, an instrument drawing might be included
in an AutoCAD Electrical project drawing set with a valve marked
"FY201". On the electrical schematics, the solenoid for this instrument
valve is tagged "SV456". You can annotate the The WDTAGALT attrib-
ute carried on the schematic valve symbol with the "FY201" instrument
tag name. A WDTAGALT attribute on the symbol of the instrument
diagram carries the "SV456" tag name pointing back at the schematic
representation. AutoCAD Electrical can cross-reference between them,
do auto-update, and enable surfing from one drawing type to the
other.
Attribute used for a combined list of normally open and normally
closed contacts (if XFREFNO and XREFNC are present). Or, used for
XREF
non-NO/NC contacts (if XREFNO and XREFNC are not present).
AutoCAD Electrical underlines the closed contacts.
Optional terminal pin number attribute (ten characters maximum).
Make sure to keep terminal pin number text paired with its wire
connection attributes.
TERM
Invisible wire connection attributes where an external wire connects
to the origin point of the attribute. The 'n' character is an incremented
X?TERMn
digit starting at "01" used to keep multiple wire connection point at-
tribute names unique. The "?" character position is used to identify
the preferred wire connection direction:
■1: wire connects to the attribute from the right
■2: wire connects to the attribute from above
■4: wire connects to the attribute from the left
■8: wire connects to the attribute from below
■0: special for motor connections
If more than 99 terminals are present on a single symbol, the 'n' value
can continue with double alpha letters/numbers such as "A0," "A1,"
"AZ," "B0" and so on.
328 | Chapter 5 Symbol Libraries

Copy attributes
COPYTAG is the optional TAG copy attribute. When AutoCAD Electrical
updates a TAG1, TAG2 or TAGSTRIP attribute, it also looks for and updates
any COPYTAG attributes present on the symbol with a copy of the TAG text.
A special replaceable parameter, "%T", can be encoded onto the COPYTAG
attribute prompt value of the definition. It allows for adding a suffix and/or
prefix to the TAG text. If you need more than one extra TAG copy on a symbol,
name the attributes COPYTAG01, COPYTAG02, and so on. If there is no
prompt value encoded on the attribute definition, AutoCAD Electrical simply
applies a copy of the tag-ID to the COPYTAG* attributes.
For example, you create a large "drive" schematic symbol with a TAG1 attribute
for the tag-ID of the drive. You want some other parts of this single symbol
to carry the TAG1 value plus a suffix like "-POT" and "-DBRES". On your library
symbol, insert an attribute definition "COPYTAG01" with a prompt value of
"%T-POT" near the potentiometer graphic of the symbol and "COPYTAG02"
with a prompt value of "%T-DBRES" near the dynamic braking resistor graphic.
When this symbol is inserted on a schematic drawing, and a TAG is assigned,
AutoCAD Electrical automatically updates each COPYTAG* attribute
accordingly.
Managing Library Symbols
Substitute symbols in the library
You can temporarily substitute an altered symbol for a symbol that is found
in the standard library. Put the .dwg file of the altered symbol in your USER
subdirectory (right-click a project name inside the Project Manager and select
Settings to find the full path). The AutoCAD Electrical component insertion
command always looks at this directory for the requested symbol before going
to the selected symbol library.
NOTE AutoCAD Electrical uses regular AutoCAD blocks. If you insert a block from
one library and then try to insert the same block name from a different library,
you get a copy of the original version of the block. Use the Swap/Update Block
command in AutoCAD Electrical to make the change.
Copy attributes | 329

Change appearance of existing library symbols
Change appearance of existing library symbols
The AutoCAD Electrical symbol libraries are installed in
■Windows XP: \Documents and Settings\All
Users\Documents\Autodesk\Acade {version}\libs\{library}\
■Windows Vista, Windows 7: \Users\Public\Documents\Autodesk\Acade
{version}\libs\{library}\
The default {library} folder depends on installation choices, for example JIC
or IEC. You can modify the ".dwg" version of each symbol to comply with
your specific standards or client requirements.
1Open each symbol up in its native AutoCAD .dwg format (using File ➤
Open).
2Move the tag, description, location, and cross-reference annotation
attribute definitions to different locations to satisfy your drafting standards
(attribute definitions look like text entities).
3Adjust attribute definition text size to meet your requirements but avoid
deleting any of the existing attribute definitions.
Attributes give the symbol full compatibility with AutoCAD Electrical
features.
4Insert additional non-AutoCAD Electrical attributes that your applications
might need.
5Edit these attributes by clicking Show/edit miscellaneous on the AutoCAD
Electrical edit dialog boxes.
NOTE Before you spend a lot of time modifying each library symbol, you may
want to look at the AutoCAD Electrical Modify Symbol Library on page 892 tool.
This tool provides a way to make mass changes to the library of symbols. It has
some options, including scaling each symbol, changing attribute height based on
AutoCAD Electrical attribute type, and picking a different text font for the AutoCAD
Electrical text style.
Tips and Hints
Leave all symbol attribute definitions and geometry on layer "0" and that
entity color assignments are by layer. Let AutoCAD Electrical manage what
330 | Chapter 5 Symbol Libraries

layers the various parts and pieces of your symbol get put on at insertion time.
This layer naming scheme is set up in the Define Layers dialog box If you
want certain layer naming maintained on your inserted components, select
Apply to entities on layer "0" only. With it checked, non-layer "0" entities
maintain their existing layer names as the component inserts into the drawing.
Edit miscellaneous and non-AutoCAD Electrical
attributes
View or edit any attributes that are not predefined AutoCAD Electrical
attributes.
Click Show/edit miscellaneous on any of the Insert/Edit dialog boxes.
The attributes that can be modified depend on which Insert/Edit dialog box
you are working in.
Predefine symbol annotation
Predefine symbol annotation
You can have certain symbols insert with switch position text, terminal pin
numbers, or BOM catalog numbers prefilled with default values.
1Open the .dwg file of the symbol in AutoCAD. The default symbol library
path is
Windows XP: \Documents and Settings\All
Users\Documents\Autodesk\Acade {version}\Libs\{library}\
Windows Vista, Windows 7: \Users\Public\Documents\Autodesk\Acade
{version}\Libs\{library}\
2Use the DDEDIT or PROPERTIES command to change the default attribute
values of the symbol.
For example, let's say that you always want your N.O. limit switch symbol to
insert showing the two terminal pin numbers labeled as "1" and "2." In
AutoCAD, call up and edit these symbol files: HLS11.DWG, VLS11.DWG,
HLS21.DWG, and VLS21.DWG (modify both the jic1 and jic125 versions). In
each case use DDEDIT to change the TERM01 and TERM02 attribute default
values to be "1" and "2" respectively. At insertion time, these values show up
as defaults.
NOTE You can override the default values at insertion time.
Predefine symbol annotation | 331

Swap blocks
The block swapper tool can operate in several different modes:
■Swap Block: Exchanges one block for another, retaining the scale of the
old block, rotation, wire connections, attribute values, and attribute
positions (if Retain is selected). For example, use the tool to swap out a red
standard pilot light with a green one, or drawing-wide, swap out all
standard red pilot lights with red press-test pilot lights.
■Update: Updates all instances of a given block with an updated version of
the same block. Again, all attribute values and wire connections are
retained. For example, an old AutoCAD Electrical project set must be used
on a new project but the client likes the limit switches drawn a bit
differently. Simply make client-specific versions of the limit switch symbols.
Then use the Update option; select any limit switch on the drawing, and
then reference the path to the new version of the symbol. AutoCAD
Electrical quickly replaces all instances of the symbol it finds on the
drawings with the new version of the same symbol. The Library mode
works the same way as the Update mode, but swaps out all the blocks on
the drawings.
When you swap or update a block there may be times when you want the
values of certain attributes mapped to different attribute names. For example,
you may be doing a Library Update and the library symbols you are swapping
out do not use standard AutoCAD Electrical attribute names. You want a quick
way to update the library symbols, but you do not want to lose information
held on the current attributes.
Update or change blocks in place
1Click Schematic tab ➤ Edit Components panel ➤ Swap/Update Block.
2Determine whether you want to exchange one block for another (Option
A) or update all instances of a given block with an updated version of the
same block (0ption B).
332 | Chapter 5 Symbol Libraries

Option A: Select to swap a block one at a time, drawing-wide, or
project-wide.
■Indicate whether to pick a new block from the icon menu, pick a new
block just like another block, or pick a new block from the File dialog
box.
■Determine whether you want to retain old attribute locations, old
block scales, or retag if parent swap causes family changes.
Option B: Select to update a block by replacing it with a new version or
substitute new versions of all blocks.
■Specify the file name of the block that to substitute for all instances
of the selected block.
■Determine whether you want to retain old attribute locations, old
block scales, or copy the attribute values of the old block to new
swapped block.
3Select whether to use the same attribute names or use an attribute
mapping file.
4Click OK.
5If you selected to pick a new block from the icon menu, select the icon
from the Insert Component dialog box.
6Select the component to swap out.
7If you chose to do a project-wide swap, select the drawings to process
and click OK.
The chosen component is replaced with the symbol selected in the Insert
Component dialog box.
Swap block/update block/library swap
Swaps or updates a block insert instance, and maintains existing attribute text
values.
Ribbon: Schematic tab ➤ Edit Components panel ➤ Swap/Update Block.
Swap blocks | 333
Toolbar: Insert Component
Menu: Components ➤ Component Miscellaneous ➤ Swap/Update Block
Command entry: AESWAPBLOCK
■Swap Block: Exchanges one block for another. Select Retain to keep the
scale of the old block, rotation, wire connections, attribute values, and
attribute positions.
■Update: Updates all instances of a given block with an updated version of
the same block.
Wire connections are also maintained even if the new symbol is slightly wider
or narrower than the original.
Swap Block (swap to different block name)
Exchanges one block for another one block at a
time.
Swap a block - one at a time
Exchanges one block for another throughout the
drawing.
Swap a block - drawing wide
Exchanges one block for another throughout the
project.
Swap a block - project wide
Specifies to select a new block from the icon
menu.
Pick new block from icon menu
Specifies to select a new block like the original
block.
Pick new block "just like"
334 | Chapter 5 Symbol Libraries
Specifies to select a new block from the file selec-
tion dialog box.
Browse to new block from file selection dialog
box
Specifies to retain the attribute locations from
the original block.
Retain old attribute locations
Specifies to retain the scale value from the origin-
al block.
Retain old block scale
Specifies to include non-wire lines for reconnec-
tion when the new block swaps in.
Allow undefined Wire Type line reconnections
Automatically retags the component if the Family
code of a component changed due to the swap.
Auto retag if parent swap causes family
change
Otherwise, the tag remains the same even if it
does not match the new component's Family
code of the new component.
Update block (revised or different version of same block name)
Updates all instances of a given block with an
updated version of the same block.
Update a block
Updates all instances of a library symbol with an
updated version of the same symbol
Library swap
Attribute mapping
Uses the same attribute names from the original
block.
Use same attribute names
Allows the values of certain attributes to be
mapped to different attribute names.
Use attribute mapping file
Determines how AutoCAD Electrical should map
the attributes. The file should have two columns
Mapping file
of attribute names. The first column should
contain the current attribute name and the
second column the new attribute name. The
mapping file may be an Excel spreadsheet, a
comma-delimited file (.CSV), or a simple text file
Swap blocks | 335
with a space separating the current attribute
name from the new attribute name.
Library swap -- all drawing
Updates all instances of a library symbol with an updated version of the same
symbol on the active drawing or in a project.
Ribbon: Schematic tab ➤ Edit Components panel ➤ Swap/Update Block.
Toolbar: Insert Component
Menu: Components ➤ Component Miscellaneous ➤ Swap/Update Block
Command entry: AESWAPBLOCK
Select the Library Swap option and click OK.
Path to new block library
Specifies the path for the symbol library that is referenced for the block
substitution. To use a different library, enter its path or click Browse. Check
Include subfolders if the symbols are in folders within the specified path. It
is true for panel footprint symbols.
Insertion scale
Specifies which scale factor to use. 1.0 = full scale;
Configuration Scale = the scale setting in the Drawing
Scale
Properties ➤ Drawing Format dialog box; 25.4 =
inch to millimeter scale factor; and 1/25.4 = milli-
meter to inch scale factor.
Specifies to retain the scale value from the original
block.
Retain old block scale
Specifies to retain the attribute locations from the
original block.
Retain old attribute locations
336 | Chapter 5 Symbol Libraries
Copy attribute values of old block to new swapped block
Specifies whether to copy the attribute values to the new block, to discard all
old values, or to copy the old values only if the new value is blank.
Update block - path\filename of new block
Substitutes a new version of a component block for all inserted instances of
that block found on a drawing or in a project.
Ribbon: Schematic tab ➤ Edit Components panel ➤ Swap/Update Block.
Toolbar: Insert Component
Menu: Components ➤ Component Miscellaneous ➤ Swap/Update Block
Command entry: AESWAPBLOCK
Select the Update a Block option and click OK.
Path\filename of new block
Specifies the path\filename of the block to substitute for all instances of the
selected block. Enter a file name or click Browse.
Insertion scale
Specifies which scale factor to use. 1.0 = full scale;
Configuration Scale = the scale setting in the Drawing
Scale
Properties ➤ Drawing Format dialog box; 25.4 =
inch to millimeter scale factor; and 1/25.4 = milli-
meter to inch scale factor.
Specifies to retain the scale value from the original
block.
Retain old block scale
Specifies to retain the attribute locations from the
original block.
Retain old attribute locations
Copy attribute values of old block to new swapped block
Specifies whether to copy the attribute values to the new block, to discard all
old values, or to copy the old values only if the new value is blank.
Swap blocks | 337

Create a library symbol
Create a library symbol
AutoCAD Electrical uses stock AutoCAD blocks and attributes in its library
symbols. The symbols can be any size and width. You do not have to edit an
external support file or database to register a symbol for use in an AutoCAD
Electrical wiring diagram drawing.
NOTE You can also use the Symbol Builder tool, but the quickest way to create
a symbol might be to start with an existing AutoCAD Electrical compatible symbol.
Start with a copy of a similar type and then modify to suit. Avoid deleting the
existing attribute definitions. Reposition and edit their default values as required.
1Open a new drawing using the appropriate symbol name.
2Insert an exploded copy of an existing AutoCAD Electrical symbol that
somewhat resembles what you need in the new symbol. Consider the
number of wire connection points, rating attributes, and whether your
new symbol is a parent symbol (attribute TAG1) or a child symbol
(attribute TAG2).
3Clean up the graphics. Keep everything on layer 0.
4Reuse attribute definitions from the exploded symbol. Reposition them
as required. Make sure that you keep terminal pin number text paired
with its wire connection attribute (the last two digits of each attribute
name must match, "X4TERM01" wire connection point attribute matched
with "TERM01" terminal pin number text attribute).
5Use DDEDIT to change the TAG1 or TAG2 and the FAMILY attribute
values to the family code. Insert any pre-defined terminal pin, description,
or catalog number attribute values.
6Delete unneeded attribute definitions and graphics.
7Save your work to the jic1, jic125, or user subdirectory (right-click a
project name inside the Project Manager and select Settings to find the
full path). To test it, call up a new or existing AutoCAD Electrical drawing.
Try to insert your new symbol into an existing piece of wire. You can
manually enter the file name of the new symbol using Type it on the
main icon menu page.
Tips and Hints
Pigtails
338 | Chapter 5 Symbol Libraries
Avoid putting wire pigtails on your new symbols. Pigtails can defeat the
AutoCAD Electrical SCOOT command and automatic wire numbering when
two symbols with pigtails bump up against each other. A wire connection
pigtail is mandatory when you insert a short pigtail at a wire connection point
that has no other visible symbol geometry nearby since AutoCAD Electrical
must see something tangible on a symbol at a wire connection point.
Symbol origin
The AutoCAD Electrical library symbols generally have their origin points
centered between the first (or only) pair of wire connection point attributes.
Though it is not mandatory, it helps AutoCAD Electrical determine the correct
orientation for alignment with an underlying wire at insertion time.
Symbol width
There are no restrictions. Every symbol can have a different width. At insertion
time the width of the symbol is determined by reading the locations of its
wire connection attributes (attributes with name X?TERMn).
Wire connection points
A symbol can have hundreds of connection points and a terminal pin number
attribute tied to each (use suffix codes beginning with "01" and ending with
"ZZ").
Component description text
You can insert three lines of description text up to 60 characters long. The
attribute names are DESC1, DESC2, and DESC3 and generally appear on both
parent/stand-alone and child contact symbols. You can insert additional
DESCn attributes on your symbol and edit them with any attribute editing
tool, but AutoCAD Electrical does not process them.
Symbol Builder
Symbol Builder
Defines new AutoCAD Electrical component, terminal, and panel layout library
symbols.
You can convert symbols or create custom components on the fly. Symbols
created or converted using Symbol Builder are fully compatible with AutoCAD
Electrical. They break wires upon insertion, and appear in the bill of material
and various component and wire connection reports.
Symbol Builder | 339
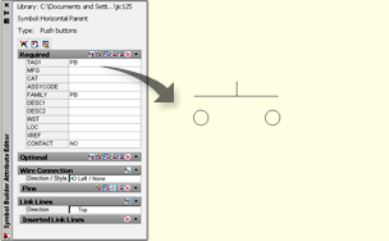
You can exit the Symbol Builder command and re-enter it at any time. You
can also exit the command and use regular AutoCAD commands to edit or
finish the symbol you are creating. The AutoCAD Wblock command writes
it to disk. Each time you re-enter the Symbol Builder tool, select objects from
within the Select Symbol/Objects dialog box. Selecting the objects allows the
tool to track what standard attributes and wire connection points you already
inserted.
New symbols you create are inserted with the AutoCAD Electrical Insert
Component or Insert Panel Component commands. You can add your new
symbol to the icon menu. You can also select it from the Type it or Browse
options in the bottom left-hand corner of the icon menu.
Symbol Types
Schematic symbol is used as a stand-alone symbol or a parent com-
ponent with related secondary contacts. Must have a TAG1, TAG, or
split TAG1 attribute.
Schematic Parent
Schematic secondary symbol that is related to a parent component.
Must have a TAG2 attribute.
Schematic Child
Schematic terminal with terminal number. Must have a TERMNO at-
tribute.
Schematic Terminal
Schematic terminal that follows the wire number rather than having
a terminal number of its own. Must have a WIRENO attribute.
Schematic Terminal
Panel symbol that is not used as a terminal or nameplate. Must have
a P_TAG1 and FP attribute or xdata.
Panel Footprint
Panel terminal symbol. Must have a P_TAGSTRIP and FPT attribute
or xdata.
Panel Terminal
340 | Chapter 5 Symbol Libraries

Panel nameplate symbol. Must have a P_TAG1 and NP attribute or
xdata.
Panel Nameplate
NOTE Panel symbols do not require any attributes but uses xdata for any missing
attributes. This xdata is added when the symbol is inserted using the appropriate
AutoCAD Electrical panel insertion command. All xdata values have a VIA_WD_
prefix followed by the name of the attribute it takes the place of. For example, if
a panel footprint does not have a P_TAG1 attribute it gets a VIA_WD_P_TAG1
xdata when inserted.
Block Editor Environment
Once you make the initial selections, you enter to the Block Editor
environment. Your initial selections can include symbol type, attribute
template, existing objects, and insertion point. In addition to the Block Editor
menus for adding and modifying the symbol graphics, a Symbol Builder
Attribute Editor on page 346 is available for inserting and modifying the
AutoCAD Electrical attributes.
Attribute Template
AutoCAD Electrical expects certain attributes for each symbol type, schematic
parent, schematic child, and so on. Symbol builder uses attribute templates
to facilitate adding these attributes to your symbol. Attribute template drawings
are AutoCAD drawings with AutoCAD Electrical attributes. There are different
attribute templates for different types of symbols and for different family
codes. The supplied attribute templates are in the symbol library folders and
all attribute template drawing names begin with “AT_”.
When you select your symbol type, the associated attribute template is used
to create a list of attributes. The attribute template can contain attributes
defined as required and others as optional. The required attributes are expected
on the specific symbol type you are building. Optional attributes are attributes
that may not be necessary on this symbol type but are supported. For example
rating or switch position attributes. You can insert the attributes individually
as needed, or you can insert all the attributes from the template at one time.
Attribute templates follow the naming convention, AT_{symbol}_{type}. The
{symbol} string is displayed in the Symbol list in the Select Symbol/Objects
dialog box and the {type} string is displayed in the Type list. You can also map
abbreviations for the {type} in the _FAMILY_DESCRIPTION table of the catalog
database, default_cat.mdb. For more information see Create a Symbol Builder
attribute template on page 2105.
Symbol Builder | 341
NOTE The attribute templates do not carry wire connection attributes. Add wire
connection attributes to your symbol as needed. You can create your own wire
connection templates on page 2107 which are used when inserting wire connections.
Creating a symbol
Creating an AutoCAD Electrical symbol includes adding the necessary attributes
based on the symbol type, and for a schematic symbol, selecting an appropriate
file name. Symbol builder uses attributes templates to facilitate adding the
attributes. If you select a schematic symbol type, symbol builder suggests a
file name based on the AutoCAD Electrical naming conventions.
1Click Schematic tab ➤ Other Tools panel ➤ Symbol Builder drop-down
➤ Symbol Builder.
2Select options on the Select Symbol / Objects on page 342 dialog box
making sure to select the attribute template library path, symbol, and
type.
3Click OK to enter the block editor environment.
4Insert attributes on page 345 using the Symbol Builder Attribute Editor on
page 346.
5(schematic symbol) Insert wire connection on page 350 attributes.
6(schematic symbol) Insert link line on page 353 attributes.
7(optional) Audit on page 359 to see any potential issues with the symbol.
8Save on page 356 the symbol.
Select Symbol / Objects
Use this dialog box to define the type of symbol you are creating or editing,
select existing objects, and define the insertion point. Select an existing block
to edit or use it as the starting point for a new symbol.
Ribbon: Schematic tab ➤ Other Tools panel ➤ Symbol Builder
drop-down ➤ Symbol Builder.
342 | Chapter 5 Symbol Libraries

Toolbar: Miscellaneous
Menu: Components ➤ Symbol Library ➤ Symbol Builder
Command entry: AESYMBUILDER
Name
Lists all block definitions in the current drawing. Select an existing block to
edit or use as a starting point for a new symbol. Select <unnamed> to create
a symbol from scratch. Browse to select a drawing file not listed in the current
drawing.
Select From Drawing
Select any existing objects that are to be part of the symbol you want to create
or edit. Existing objects can include an existing block, attributes, attribute
definitions, and any symbol graphics. Select Specify on Screen to select objects
after selecting OK, before entering the Block Editor.
Insertion Point
Enter the insertion point coordinates for the symbol or select Pick Point to
select on the drawing. Select Specify on Screen to specify the insertion point
after selecting OK, before entering the Block Editor. These coordinates become
the 0,0,0 insertion base point for the symbol.
Attribute Template
Select a path to the symbol builder attribute templates. Browse
to the folder or select from a list of the library paths for the current
project.
Library path
NOTE To create a one-line symbol, select the one-line folder
which by default is “1-” under the schematic library folder.
Specify a symbol category such as Horizontal Parent. The category
specifies the horizontal or vertical orientation of the symbol. It
Symbol
also defines whether it is schematic or panel, and within those
categories parent, child, terminal, and so on.
NOTE The list is built dynamically based on the attribute tem-
plates in the selected folder. Attribute template block names begin
with “AT_”.
Symbol Builder | 343
Select the type used to find the appropriate attribute template.Type
Preview
Displays a preview of the selected named block or the objects selected on the
drawing. Selected blocks are shown exploded.
Symbol Configuration
Use this dialog box to select a different attribute template or redefine the
insertion point.
Ribbon: Schematic tab ➤ Other Tools panel ➤ Symbol Builder
drop-down ➤ Symbol Builder.
Toolbar: Miscellaneous
Menu: Components ➤ Symbol Library ➤ Symbol Builder
Command entry: AESYMBUILDER
1Select options on the Select Symbol / Objects on page 342 dialog box.
2Click OK to enter the block editor environment.
3 Select the Symbol Configuration tool.
Select a path to the symbol builder attribute templates. Browse
to the folder or select from a list of the library paths for the current
project.
Library path
Specify a symbol category such as Horizontal Parent. The category
specifies the horizontal or vertical orientation of the symbol. It
Symbol
also defines whether it is schematic or panel, and within those
categories parent, child, terminal, and so on.
NOTE The list is built dynamically based on the attribute tem-
plates in the selected folder. Attribute template block names begin
with “AT_”.
344 | Chapter 5 Symbol Libraries
Select the type. This value is used to find the appropriate attribute
template.
Type
Enter the insertion point coordinates for the symbol or select Pick
point to select on the drawing. Select Specify on Screen to specify
Insertion Point
the insertion point after selecting OK, before entering the Block
Editor. The coordinates become the 0,0,0 insertion base point
for the symbol.
Inserting Attributes
1Click Schematic tab ➤ Other Tools panel ➤ Symbol Builder drop-down
➤ Symbol Builder.
2Select options on the Select Symbol / Objects on page 342 dialog box.
3Click OK to enter the block editor environment.
4If the Symbol Builder Attribute Editor is not visible, click Symbol Builder
tab ➤ Edit panel ➤ Palette Visibility Toggle.
5Select the attribute you want to insert.
6 Click the Insert Attribute tool.
NOTE You can also right-click and select Insert Attribute or drag the attribute
to insert it.
7Select an insertion point for the attribute.
Add an attribute to the list
1 Select the Add Attribute tool.
2Define the attribute tag and properties on the Insert/Edit Attributes dialog
box.
Symbol Builder | 345
3Click Insert to insert the new attribute or click OK to add it to the list.
Symbol Builder Attribute Editor
Use the Symbol Builder Attribute Editor to add, modify, and remove attributes
on the symbol. Menu sections which differ depending on the symbol type.
Ribbon: Schematic tab ➤ Other Tools panel ➤ Symbol Builder
drop-down ➤ Symbol Builder.
Toolbar: Miscellaneous
Menu: Components ➤ Symbol Library ➤ Symbol Builder
Command entry: AESYMBUILDER
1Select options on the Select Symbol / Objects on page 342 dialog box.
2Click OK to enter the block editor environment.
Common Tools
The Symbol Builder Attribute Editor provides a few tools that are common to
any symbol type.
Opens the Symbol Configuration on page 344 dialog box with options to change the at-
tribute template.
Opens the Convert Text to Attribute on page 355 dialog box to map text objects to attrib-
utes.
Opens the Symbol Audit on page 359 dialog box to find any potential issues with the
symbol.
NOTE A right-click menu is available containing functions appropriate for the
selected attributes.
346 | Chapter 5 Symbol Libraries

Required/Optional Attributes Tools
Insert the selected attributes.
NOTE You can also drag to insert the selected attributes.
Opens the Insert/Edit Attributes dialog box to set the properties for the selected attributes.
Convert existing text objects to the selected attributes.
Add an attribute to the list and define its properties.
Remove the selected attributes from the list.
Delete the selected attributes from the symbol.
Indicates the attribute exists on the symbol.
NOTE A right-click menu is available containing functions appropriate for the
selected attributes.
Wire Connection Tools
Wire connection attributes are inserted based on a style and direction selection.
Select the style/direction you want to insert and select the Insert tool. Selecting
Others from the Direction/Style list opens the Insert Wire Connection dialog
box. Select the style, make it the default, define related pin attribute values,
and add multiple wire connections.
Select from a list of wire connection styles and direction. Select Others to launch the
Insert Wire Connections dialog box.
Direction/Style
Insert the selected wire connection attribute.
Symbol Builder | 347
NOTE A right-click menu is available containing functions appropriate for the
selected attributes.
Pin Tools
Pin attributes are added automatically when you add a wire connection
attribute. You can also insert them individually. Use this section to add
optional wire connection attributes, fill in default attribute values, or change
attribute properties.
Opens the Insert/Edit Attributes dialog box to set the properties for the selected attributes.
Convert existing text objects to the selected attributes.
Move a wire connection attribute and its related pin attributes.
Add the optional terminal description attribute to the selected wire connection.
Remove the selected attributes from the list.
Delete the selected attributes from the symbol.
NOTE A right-click menu is available containing functions appropriate for the
selected attributes.
Link Line Tools
Link line attributes are inserted based on a direction selection. Select the
direction you want to insert and select the insert tool.
Select from a list of link line directions.Direction
Insert the selected link line attribute.
348 | Chapter 5 Symbol Libraries
Indicates the attribute exists on the symbol.
NOTE A right-click menu is available containing functions appropriate for the
selected attributes.
Rating/Position Tools
AutoCAD Electrical allows up to 12 rating and position attributes. To insert
the next available attribute, select the Add Next tool and pick an insertion
point.
Add the next attribute to the list and prompt for the insertion point.
Indicates the attribute exists on the symbol.
NOTE A right-click menu is available containing functions appropriate for the
selected attributes.
Insert / Edit Attributes
Use this dialog box to enter default attribute values or modify attribute
properties.
Ribbon: Schematic tab ➤ Other Tools panel ➤ Symbol Builder
drop-down ➤ Symbol Builder.
Toolbar: Miscellaneous
Menu: Components ➤ Symbol Library ➤ Symbol Builder
Command entry: AESYMBUILDER
1Select options on the Select Symbol / Objects on page 342 dialog box.
2Click OK to enter the block editor environment.
Symbol Builder | 349
3 Select an attribute in the grid and click the Property tool, or
double-click an attribute in the grid.
NOTE The Insert button is only available for new attributes added to the list using
the Add tool.
Inserting Wire Connections
Symbol Builder inserts a wire connection template drawing when adding a
wire connection to your symbol. The list of wire connection options is built
dynamically based on the template drawings found in the symbol library path.
1Click Schematic tab ➤ Other Tools panel ➤ Symbol Builder drop-down
➤ Symbol Builder.
2Select options on the Select Symbol / Objects on page 342 dialog box.
3Click OK to enter the block editor environment.
4If the Symbol Builder Attribute Editor is not visible, click Symbol Builder
tab ➤ Edit panel ➤ Palette Visibility Toggle.
5Click the arrow on the Wire Connection section of the Symbol Builder
Attribute Editor to expand the wire connection section.
6Click the Direction/Style list to expand the list of wire connection options.
7Select a wire connection.
NOTE Only the options for the default style are shown in the list. To see
other styles, or to change the default style, select Others.
8 Click the Insert Wire Connection tool.
9Select an insertion point for the attribute.
350 | Chapter 5 Symbol Libraries

NOTE If the wire connection template contains the optional TERMn and
TERMDESCn attributes, they are inserted with the wire connection attribute
and added to the Pins section.
Others
Selecting Others on the Wire Connection Direction/Style list opens the Insert
Wire Connection dialog box. On the Insert Wire Connection dialog box you
can insert multiple wire connection attributes, select from a style other than
the default, or change the default style.
1Define the style and direction.
2Enter the number of wire connections.
3(optional) Select an attribute in the Pin Information section and click
Convert. Select the text for conversion as prompted.
4(optional) Select an attribute in the Pin Information section and click
Delete. The attribute is removed from the list and is not inserted with
the wire connection attribute.
5(optional) Select an attribute in the Pin Information section and click
Properties to define the properties for the attribute using the Insert/Edit
dialog box.
NOTE Pin attributes added with each wire connection may differ based on
symbol type.
6Click Insert.
7Select the wire connection attribute insertion points. The related pin
attributes are inserted relative to the wire connection attribute based on
the wire connection template.
Insert Wire Connections
Use this dialog box to insert multiple wire connection attributes at a time or
to select a style other than the default.
Ribbon: Schematic tab ➤ Other Tools panel ➤ Symbol Builder
drop-down ➤ Symbol Builder.
Symbol Builder | 351

Toolbar: Miscellaneous
Menu: Components ➤ Symbol Library ➤ Symbol Builder
Command entry: AESYMBUILDER
1Select options on the Select Symbol / Objects on page 342 dialog box.
2Click OK to enter the block editor environment.
3Expand the Wire Connection section and select Others from the
Direction/Style list.
Configuration
Select the wire connection style from the list. The list is built dy-
namically based on the wire connection templates in the library
folder. Wire connection templates start with “BB”.
Terminal Style
NOTE See Creating a custom wire connection style on page 2107
to add terminal styles.
Select the direction the wire connects from. The direction determ-
ines the connection attribute name.
Connection Direction
Enter the insertion scale for the wire connection template.Scale
Use the terminal style as the default in the Direction/Style list in
the symbol builder attribute editor. Use the scale value as the
Use this configuration as de-
fault
default insertion scale for wire connection attributes. Select Apply
to save the current settings. Settings are saved automatically
when Insert is selected.
Number and Offset Distance
Enter the number of wire connection attributes to insert.Number
Select the insertion point for each wire connection after clicking
Insert.
Select on screen
Enter the X distance between each wire connection.Row offset
Enter the Y distance between each wire connection.Column offset
352 | Chapter 5 Symbol Libraries

Pin Information
List of optional related pin attributes inserted with the wire con-
nection attributes. Modify the default values.
Name/Default
Dismisses the dialog box. Select a text object for conversion to
the selected attribute.
Convert
Removes the selected attributes from the list so they are not in-
serted with the wire connection attributes.
Delete
Opens the Insert/Edit Attributes dialog box used to define the
properties for the selected attributes.
Properties
See also:
■Wire connection/terminal pin number pairs on page 312
Inserting Link Line Attributes
AutoCAD Electrical uses invisible attributes to tie in dashed link lines
automatically between related components (instead of cross-reference
annotation). The attributes are named X?LINK. The "?" is a digit that indicates
the preferred link line connection direction.
■1: connects to the attribute from the right
■2: connects to the attribute from above
■4: connects to the attribute from the left
■8: connects to the attribute from below
1Click Schematic tab ➤ Other Tools panel ➤ Symbol Builder drop-down
➤ Symbol Builder.
2Select options on the Select Symbol / Objects on page 342 dialog box.
3Click OK to enter the block editor environment.
Symbol Builder | 353
4If the Symbol Builder Attribute Editor is not visible, click Symbol Builder
tab ➤ Edit panel ➤ Palette Visibility Toggle.
5Click the arrow on the Link Lines section of the Symbol Builder Attribute
Editor to expand the section.
6Click the Direction list to expand the list of link line options.
7Select a direction.
8 Click the Insert Link Line tool.
9Select an insertion point for the attribute.
Converting Text
You can convert text objects to attribute definitions on your symbol. The text
value becomes the default value for the attribute when the block is inserted
on a drawing.
1Click Schematic tab ➤ Other Tools panel ➤ Symbol Builder drop-down
➤ Symbol Builder.
2Select options on the Select Symbol / Objects on page 342 dialog box
making sure to select the existing text objects.
3Click OK to enter the block editor environment.
Converting a single text object to an attribute definition
1If the Symbol Builder Attribute Editor is not visible, click Symbol Builder
tab ➤ Edit panel ➤ Palette Visibility Toggle.
2Select the attribute from the list.
3 Click the Convert Text tool at the top of the section for the
attribute.
354 | Chapter 5 Symbol Libraries
4Select the text object.
Converting multiple text objects to attribute definitions
1 Select the Text Convert tool at the top of the Symbol Builder
Attribute Editor to launch the Convert Text to Attribute dialog box.
2Select the text within the Text list.
3Select the arrow next to the attribute name in the Attribute list.
4Repeat for each text object you want to convert.
5Click OK.
Convert Text to Attribute
Ribbon: Schematic tab ➤ Other Tools panel ➤ Symbol Builder
drop-down ➤ Symbol Builder.
Toolbar: Miscellaneous
Menu: Components ➤ Symbol Library ➤ Symbol Builder
Command entry: AESYMBUILDER
1Select options on the Select Symbol / Objects on page 342 dialog box.
2Click OK to enter the block editor environment.
3 Select the Text Convert tool.
If you selected existing text entities, this option converts the existing text
entities to AutoCAD Electrical attributes "in place." Use this dialog box to map
the text objects to attributes for the selected symbol type.
Lists all existing text objects in the symbol.Text
Lists attributes from the symbol builder attribute editor grids that
do not exist on the symbol.
Attribute
Symbol Builder | 355

To convert an existing text object to an attribute, select the text and click the
arrow pointing at the attribute. The text string is used as the default value for
the attribute and the text object is deleted.
Saving the Symbol
Once you have added the attributes and completed the symbol graphics, you
are ready to save your library symbol. The following steps save your symbol
as a .dwg file for insertion on a drawing. They also create an icon image to
use when you add this symbol to an icon menu.
1Click Symbol Builder tab ➤ Edit panel ➤ Done.
The Save Symbol dialog box is displayed.
2Select WBlock in the Destination section.
3Modify the block name as needed.
4Modify the wblock File path as needed.
5Specify the base point for symbol insertion.
6Check Icon image to create a .png file. This image file can be used if you
add the symbol to the icon menu.
NOTE The symbol is not automatically added to the icon menu but can be
added using the Icon Menu Wizard on page 1231.
7Modify the image name as needed.
8Modify the image File path as needed. The default path is the image folder
for the current icon menu.
9Click Details to examine any errors found in the symbol audit on page
359.
10 Click OK to save the symbol.
NOTE If you close the block editor without saving, the dialog box opens
automatically. Select the No button to close the block editor without saving the
symbol changes.
356 | Chapter 5 Symbol Libraries
See also:
■Overview of the Icon Menu Wizard on page 1231
Save Symbol
Ribbon: Schematic tab ➤ Other Tools panel ➤ Symbol Builder
drop-down ➤ Symbol Builder.
Toolbar: Miscellaneous
Menu: Components ➤ Symbol Library ➤ Symbol Builder
Command entry: AESYMBUILDER
1Select options on the Select Symbol / Objects on page 342 dialog box.
2Click OK to enter the block editor environment.
3Modify the symbol as needed as described in related topics.
4Click Symbol Builder tab ➤ Edit panel ➤ Done.
The Save Symbol dialog box is displayed.
NOTE If you close the block editor without saving, this dialog box opens
automatically. The No button on this dialog box closes the block editor without
saving the symbol changes.
Symbol
Select Block to insert your new component into your drawing or
Wblock to save a copy of your new symbol. If Wblock is selected,
the File path is available.
Block/Wblock
NOTE The Block option is not available if you browsed to an
existing symbol on the Select Symbol / Objects on page 342 dialog
box. It is because the drawing file for the library symbol is opened.
The first character of the symbol, “H” for horizontal or “V” for
vertical.
Orientation
Symbol Builder | 357

Symbol Name: The next two characters of the symbol name in-
dicate the family type and can match the symbol to a catalog
lookup table.
Catalog name
NOTE Schematic terminals use “T1” for a terminal that triggers
a wire number change. They use “T0” for a terminal that does
not trigger a wire number change.
WDBLKNAM: On a schematic symbol, the WDBLKNAM value
overrides the catalog lookup table defined by the second and
third characters of the symbol name. The WDBLKNAM value is
always used on panel footprint symbols to match the symbol to
a catalog lookup table.
The fourth character of the symbol name can be a “1” for a parent
symbol, “2” for a child symbol, or user-defined for other symbol
types.
Type
If the symbol is a schematic child, the fifth character is “1” for
normally open or “2” for normally closed, otherwise it is user-
defined.
Contact
Additional characters added to the symbol name to make it
unique.
Unique identifier
The symbol file name. Symbol Builder suggests a file name based
on the orientation, catalog lookup, type, contact, and unique
identifier. Edit the symbol name as needed.
Symbol name
The name of the folder for the symbol. Browse to a folder or enter
in the folder name.
File path
Opens the Symbol Audit dialog box to view the specific errors.Details
Base point
Enter the base point coordinates for the symbol or select Pick point to select
on the drawing. Select Specify on Screen to specify the base point after selecting
OK. The coordinates become the insertion base point for the symbol.
Image
Create an image to use if you add this new symbol to an icon
menu.
Icon image
358 | Chapter 5 Symbol Libraries
See Also: Overview of the Icon Menu Wizard on page 1231
The image file name. Image files are created as a .png file type.Name
The name of the folder for the image file. Browse to a folder or
enter in the folder name.
File path
See also:
■Overview of symbol naming conventions on page 282
Symbol Audit
This dialog box provides audit information on the attributes and symbol name.
The audit information is based on the symbol type.
Ribbon: Schematic tab ➤ Other Tools panel ➤ Symbol Builder
drop-down ➤ Symbol Builder.
Toolbar: Miscellaneous
Menu: Components ➤ Symbol Library ➤ Symbol Builder
Command entry: AESYMBUILDER
1Select options on the Select Symbol / Objects on page 342 dialog box.
2Click OK to enter the block editor environment.
3Add attributes as needed.
4 Select the Audit tool.
The tree structure lists categories of errors found on the symbol. The number
of errors for each category is displayed in parentheses or, (OK) if no errors
exist within the category.
Lists attributes that are in the required group, based on the attrib-
ute template, but are not present on the symbol.
Missing required attributes
Lists attributes with duplicated tags present on the symbol.Duplicated attributes
Symbol Builder | 359
Lists attributes with default values defined on the attribute tem-
plate but are missing on the attributes on the symbol.
Missing values
Lists attributes with default prompts defined on the attribute
template but are missing on the attributes on the symbol.
Missing prompts
Lists attributes missing from common groups, such as MFG, CAT,
ASSYCODE.
Missing group attributes
Lists the attributes on the attribute template but removed from
the list.
Template mismatch
Lists layers other than 0 containing entities.Layers
This error condition exists if neither the X or Y value of the inser-
tion point matches the insertion point of at least one of the wire
connection attributes.
Insertion point
This error condition exists for a horizontal symbol without left or
right wire connection attributes. It also exists for a vertical symbol
without top or bottom wire connection attributes.
Orientation
Select Save As to save the error information as an .xml file for reference.
360 | Chapter 5 Symbol Libraries
Symbol Preview Guide
361
362
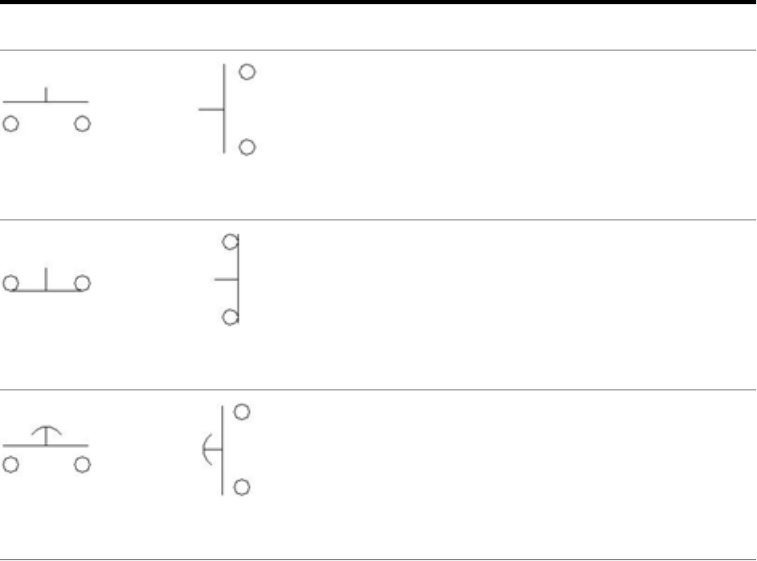
JIC Symbols
Push Buttons
DescriptionVertical SymbolHorizontal Symbol
Push Button Normally Open
VPB11HPB11
Push Button Normally Closed
VPB12HPB12
Mushroom Head Normally Open
VPB11MHPB11M
6
363
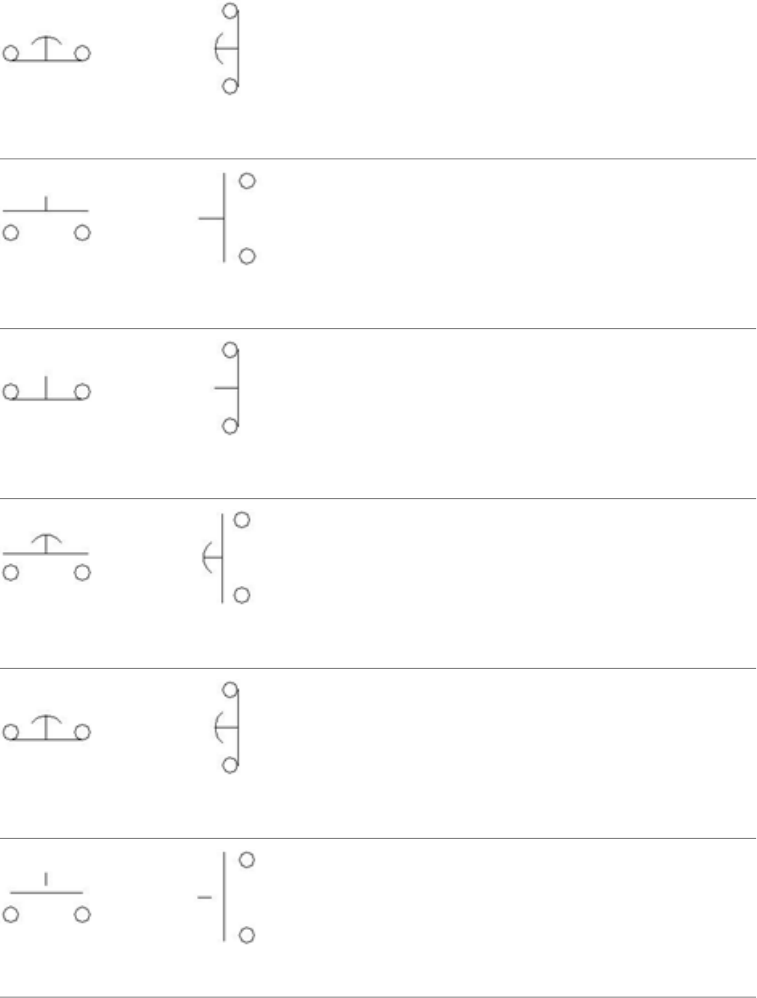
Mushroom Head Normally Closed
VPB12MHPB12M
Illuminated Push Button Normally Open
VPB11LHPB11L
Illuminated Push Button Normally Closed
VPB12LHPB12L
Illuminated Mushroom Head Normally Open
VPB11MLHPB11ML
Illuminated Mushroom Head Normally Closed
VPB12MLHPB12ML
2nd+ Normally Open Contact
VPB21HPB21
364 | Chapter 6 JIC Symbols
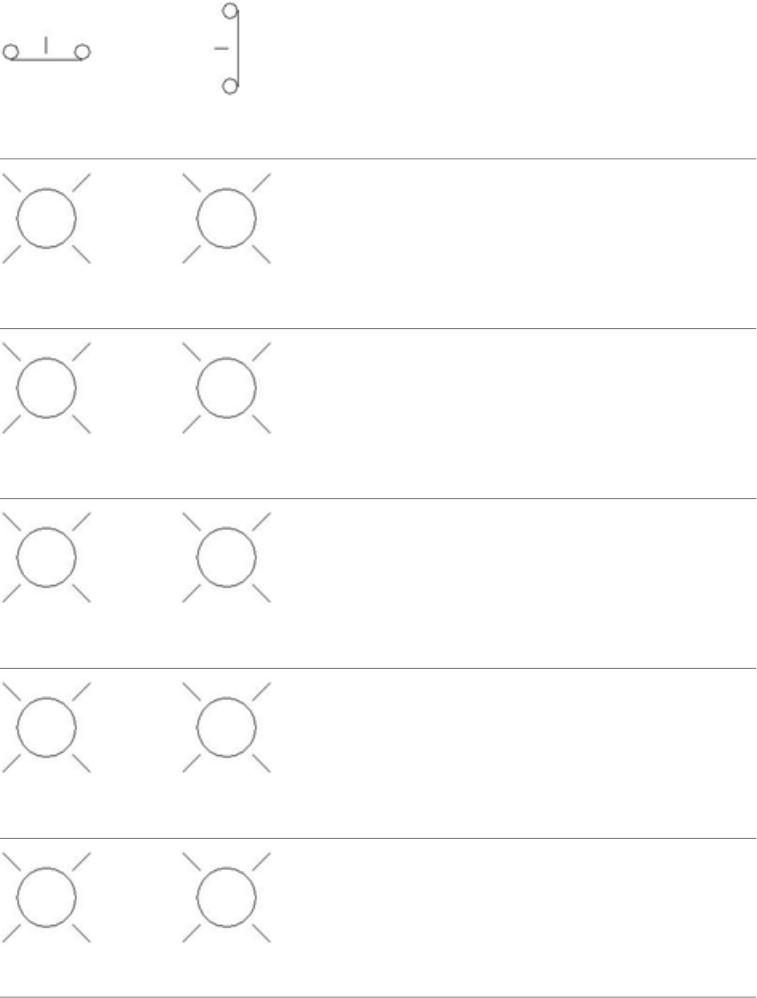
2nd+ Normally Closed Contact
VPB22HPB22
2nd+ Red Light
VPB2RHPB2R
2nd+ Green Light
VPB2GHPB2G
2nd+ Amber Light
VPB2AHPB2A
2nd+ Yellow Light
VPB2YHPB2Y
2nd+ Blue Light
VPB2BHPB2B
Push Buttons | 365
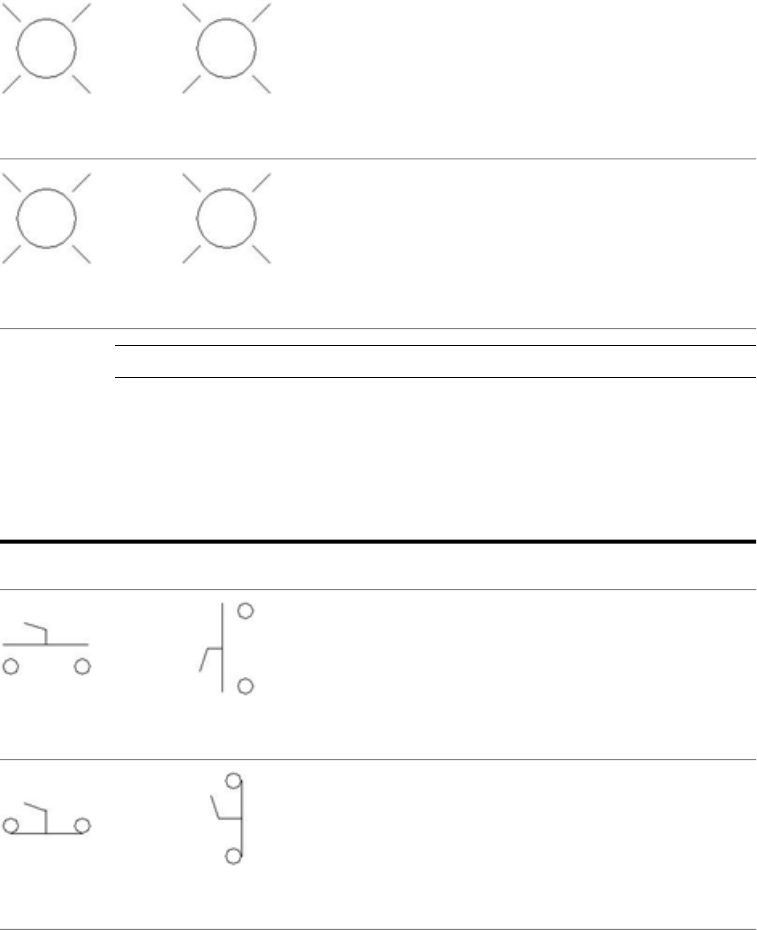
2nd+ White Light
VPB2WHPB2W
2nd+ Clear Light
VPB2CHPB2C
NOTE Lights will receive text to indicate the color at the time of insertion.
Selector Switches
Selector Switches
DescriptionVertical SymbolHorizontal Symbol
2 Position Maintain, Normally Open
VSS112HSS112
2 Position Maintain, Normally Closed
VSS122HSS122
366 | Chapter 6 JIC Symbols
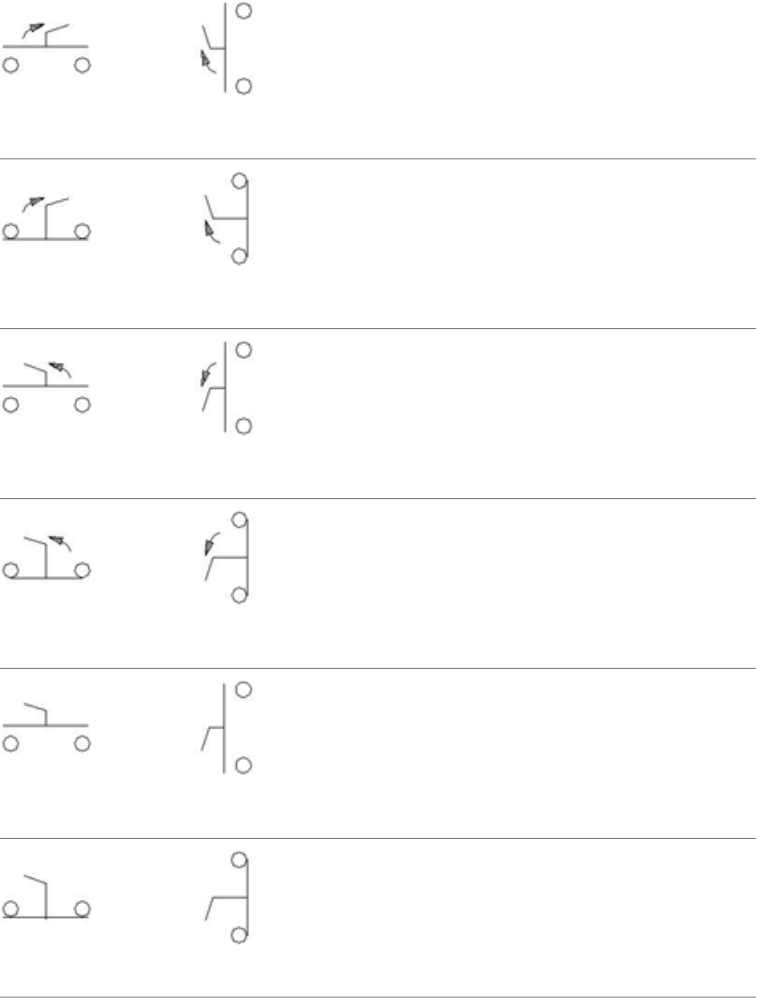
2 Position Normally Open Return From Left
VSS112LHSS112L
2 Position Normally Closed Return From Left
VSS122LHSS122L
2 Position Normally Open Return From Right
VSS112RHSS112R
2 Position Normally Closed Return From Right
VSS122RHSS122R
3 Position Normally Open
VSS113HSS113
3 Position Normally Closed
VSS123HSS123
Selector Switches | 367
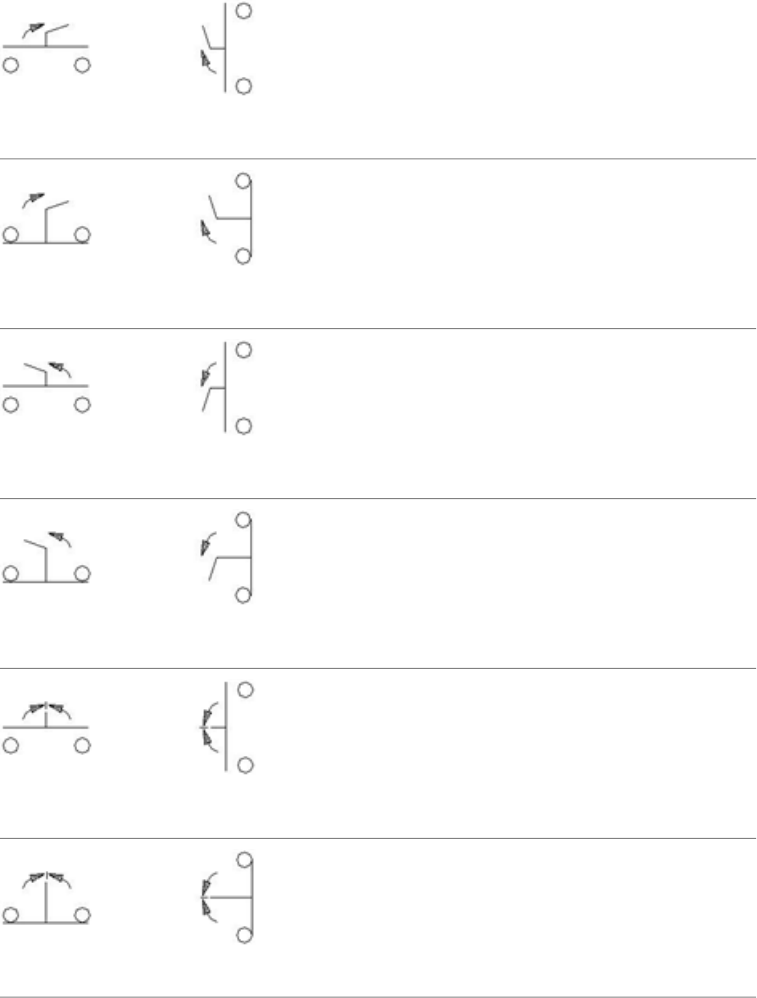
3 Position Normally Open Return From Left
VSS113LHSS113L
3 Position Normally Closed Return From Left
VSS123LHSS123L
3 Position Normally Open Return From Right
VSS113RHSS113R
3 Position Normally Closed Return From Right
VSS123RHSS123R
3 Position Normally Open Return From Both
VSS113BHSS113B
3 Position Normally Closed Return From Both
VSS123BHSS123B
368 | Chapter 6 JIC Symbols

4 Position Normally Open
VSS114HSS114
4 Position Normally Closed
VSS124HSS124
6 Position Normally Open
VSS116HSS116
6 Position Normally Closed
VSS126HSS126
8 Position Normally Open
VSS118HSS118
8 Position Normally Closed
VSS128HSS128
Selector Switches | 369
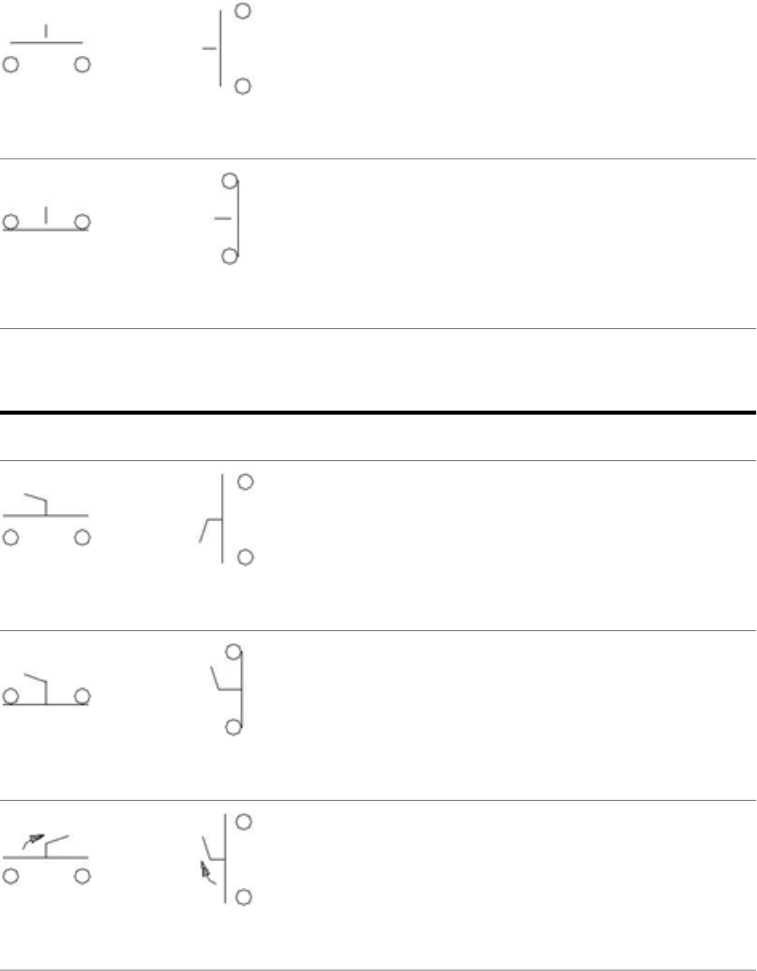
2nd+ Normally Open Contact
VSS21HSS21
2nd+ Normally Closed Contact
VSS22HSS22
Illuminated Selector Switches
DescriptionVertical SymbolHorizontal Symbol
2 Position Normally Open
VSS112IHSS112I
2 Position Normally Closed
VSS122IHSS122I
2 Position Normally Open Return From Left
VSS112LIHSS112LI
370 | Chapter 6 JIC Symbols
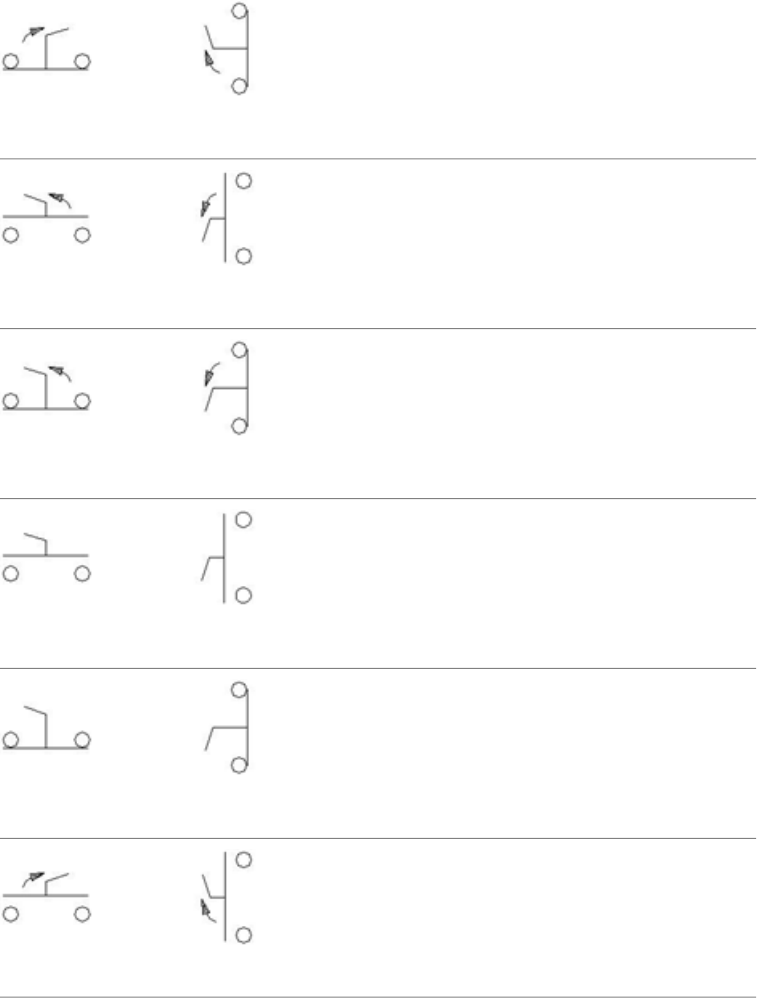
2 Position Normally Closed Return From Left
VSS122LIHSS122LI
2 Position Normally Open Return From Right
VSS112RIHSS112RI
2 Position Normally Closed Return From Right
VSS122RIHSS122RI
3 Position Normally Open
VSS113IHSS113I
3 Position Normally Closed
VSS123IHSS123I
3 Position Normally Open Return From Left
VSS113LIHSS113LI
Illuminated Selector Switches | 371
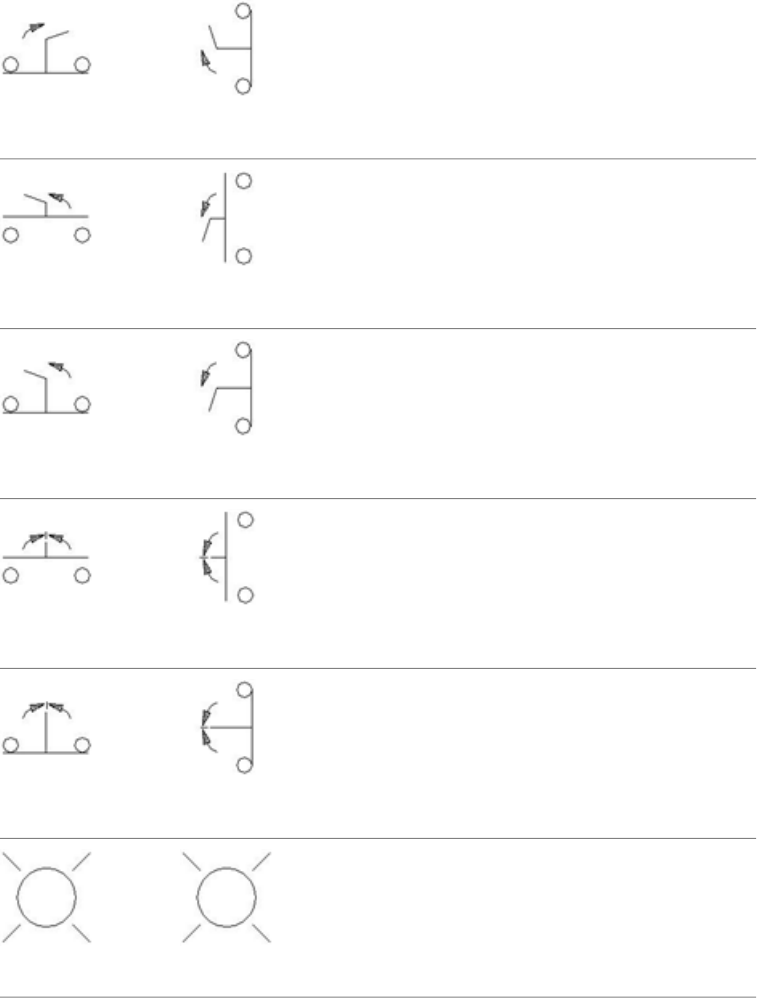
3 Position Normally Closed Return From Left
VSS123LIHSS123LI
3 Position Normally Open Return From Right
VSS113RIHSS113RI
3 Position Normally Closed Return From Right
VSS123RIHSS123RI
3 Position Normally Open Return From Both
VSS113BIHSS113BI
3 Position Normally Closed Return From Both
VSS123BIHSS123BI
Red Light
VSS2RHSS2R
372 | Chapter 6 JIC Symbols

Green Light
VSS2GHSS2G
Amber Light
VSS2AHSS2A
Yellow Light
VSS2YHSS2Y
Blue Light
VSS2BHSS2B
White Light
VSS2WHSS2W
Clear Light
VSS2CHSS2C
Illuminated Selector Switches | 373
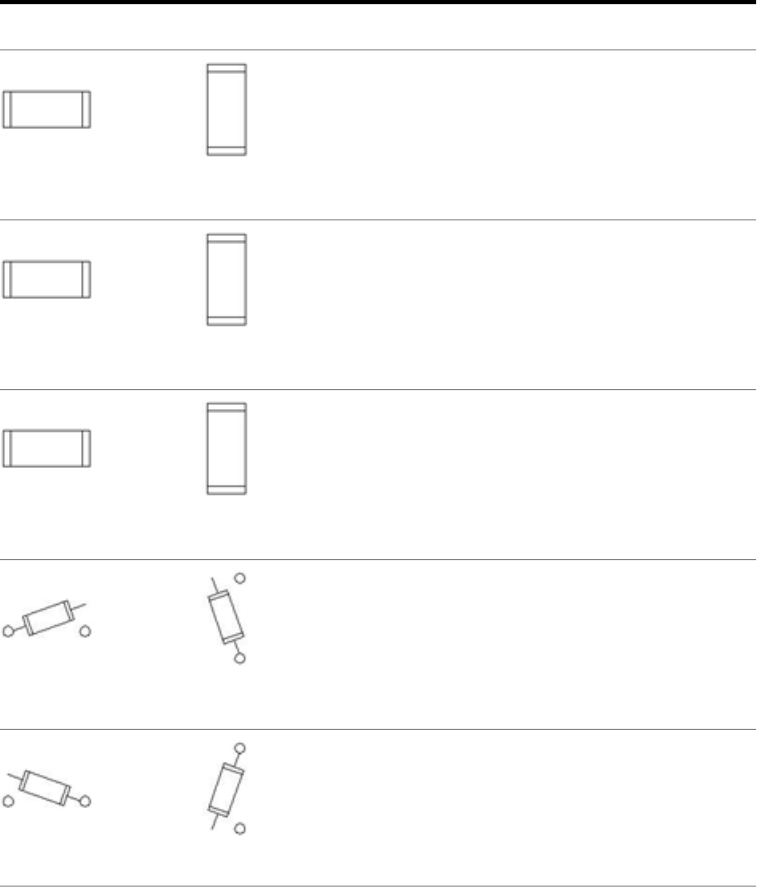
Fuses, Circuit Breakers, Transformers
Fuses and Transformers
DescriptionVertical SymbolHorizontal Symbol
Fuse (Tag)
VFU1HFU1
Fuse
VFU0HFU0
2nd+ Fuse
VFU2HFU2
Fuse Switch (Right)
VDS11FRHDS11FR
Fuse Switch (Left)
VDS11FLHDS11FL
374 | Chapter 6 JIC Symbols
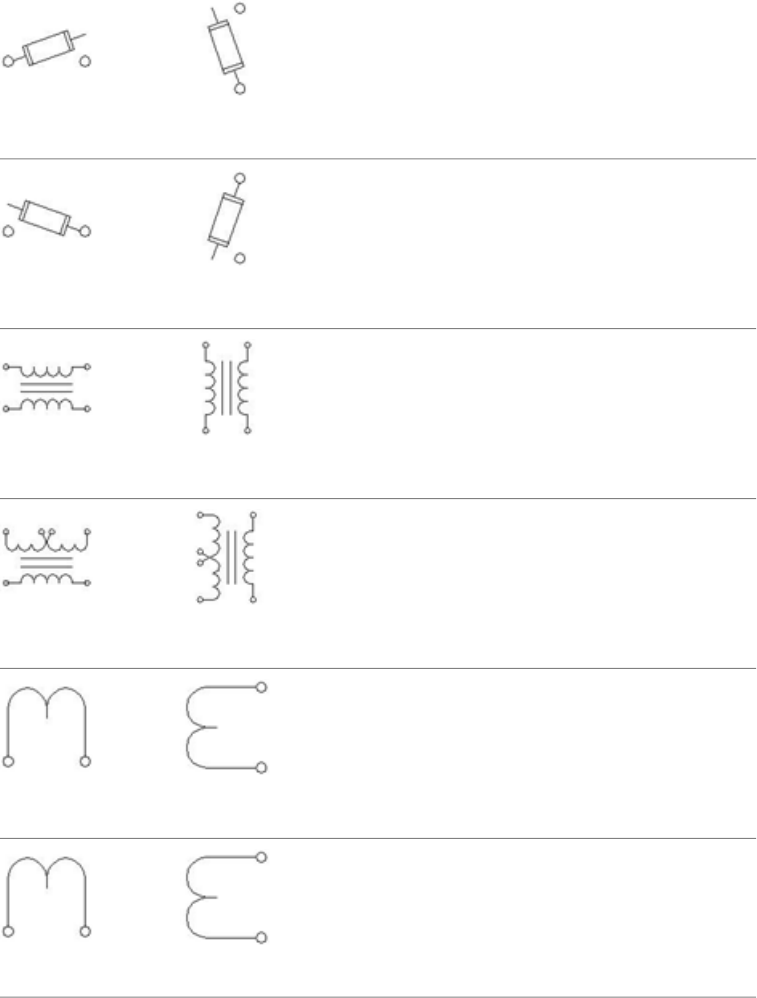
2nd+ Fuse Switch(Right)
VDS21FRHDS21FR
2nd+ Fuse Switch (Left)
VDS21FLHDS21FL
Transformer
VXF1HXF1
Transformer Dual
VXF1DHXF1D
Circuit Transformer
VXF1CTHXF1CT
Potential Transformer
VXF1PTHXF1PT
Fuses and Transformers | 375
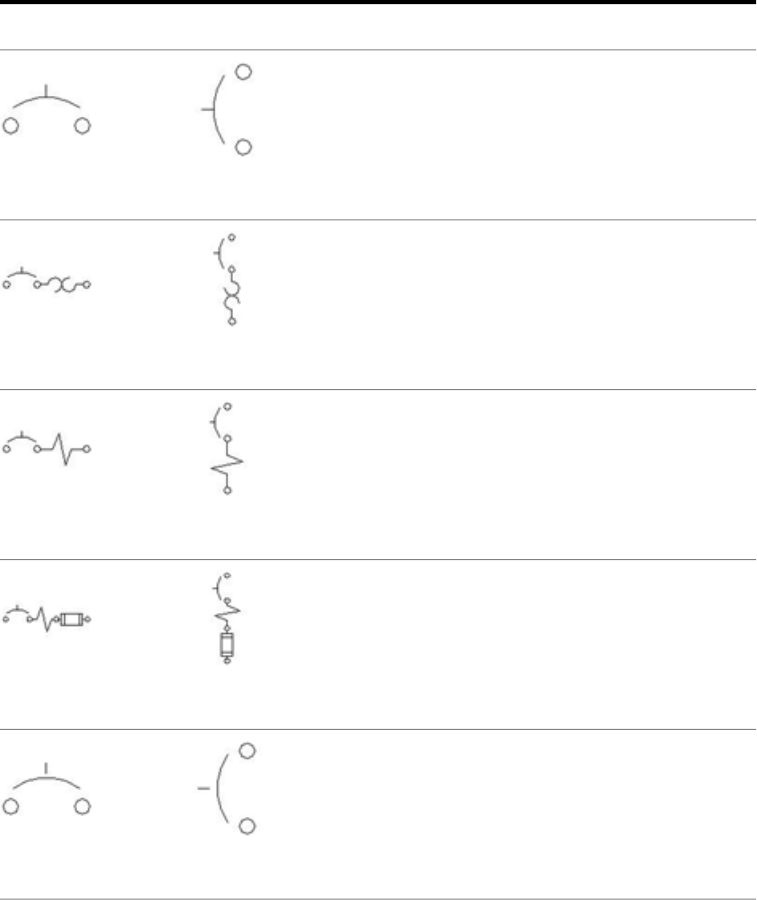
Circuit Breakers and Disconnects
DescriptionVertical SymbolHorizontal Symbol
Circuit Breaker 1 Pole
VCB1HCB1
Thermal Circuit Breaker
VCB11THHCB11TH
Motor Circuit Protector
VCB11MHCB11M
Motor Circuit Protector with Fuse
VCB11MLHCB11ML
2nd+ Circuit Breaker 1 Pole
VCB2HCB2
376 | Chapter 6 JIC Symbols
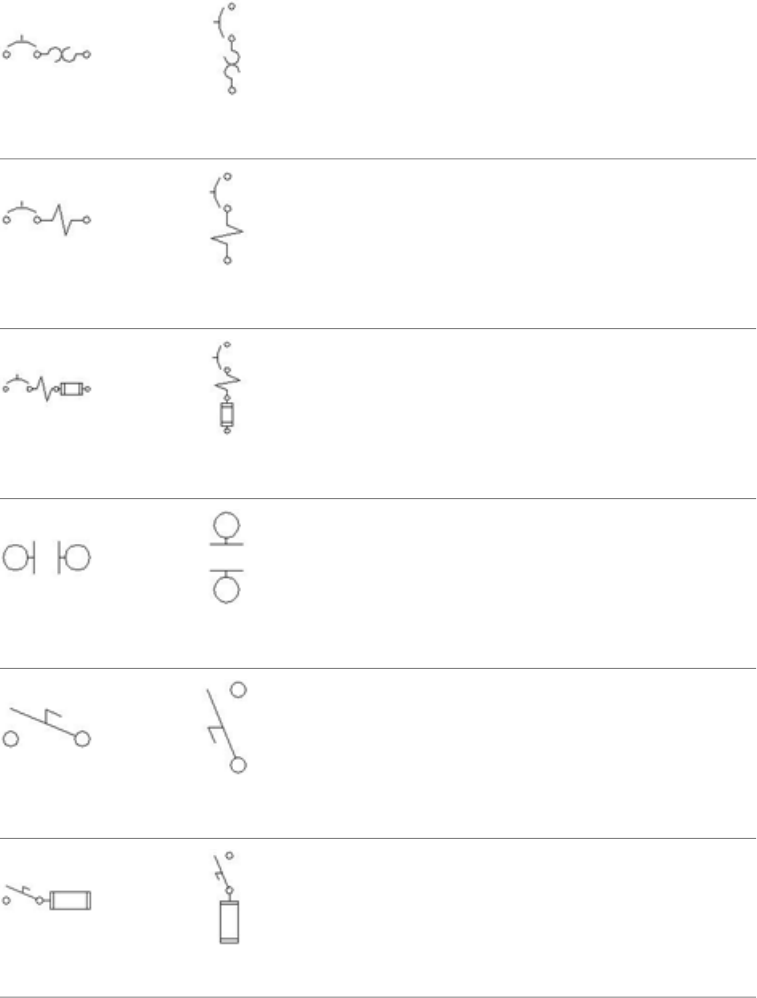
2nd+ Thermal Circuit Breaker
VCB21THHCB21TH
2nd+ Motor Circuit Protector
VCB21MHCB21M
2nd+ Motor Circuit Protector with Fuse
VCB21MLHCB21ML
Circuit Breaker Auxiliary Contact Normally Open
VCB21ITHCB21IT
Disconnect Switch
VDS11HDS11
Fused Disconnect Switch
VDS11FHDS11F
Circuit Breakers and Disconnects | 377
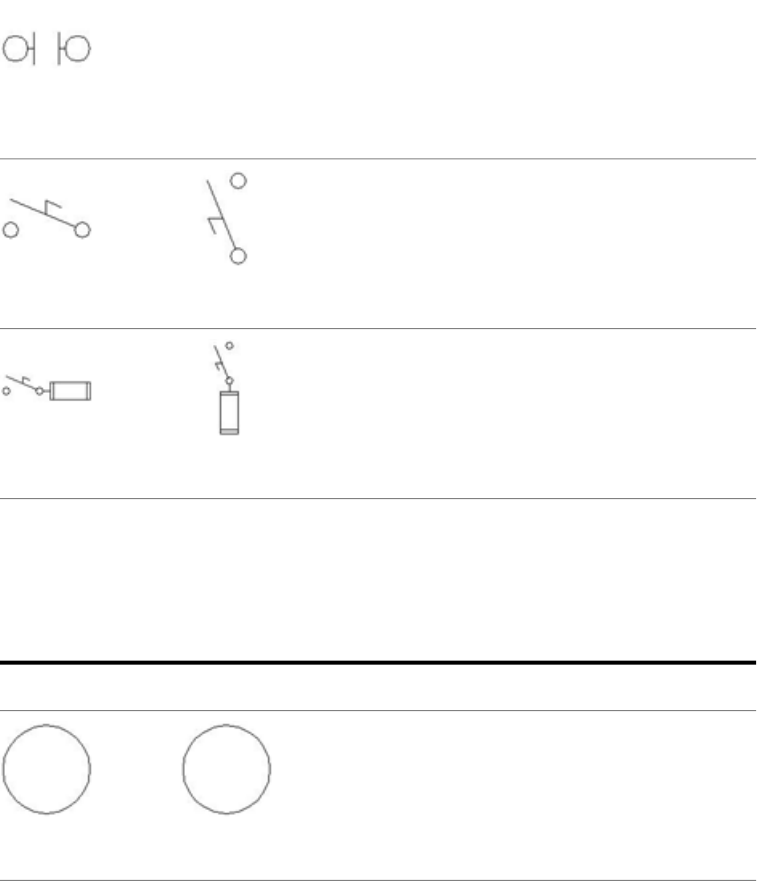
Disconnect Switch Auxiliary Contact Normally Open
HDS21IT
2nd+ Disconnect Switch
VDS21HDS21
2nd+ Fused Disconnect Switch
VDS21FHDS21F
Relays and Contacts
Relays and Contacts
DescriptionVertical SymbolHorizontal Symbol
Relay Coil
VCR1HCR1
378 | Chapter 6 JIC Symbols
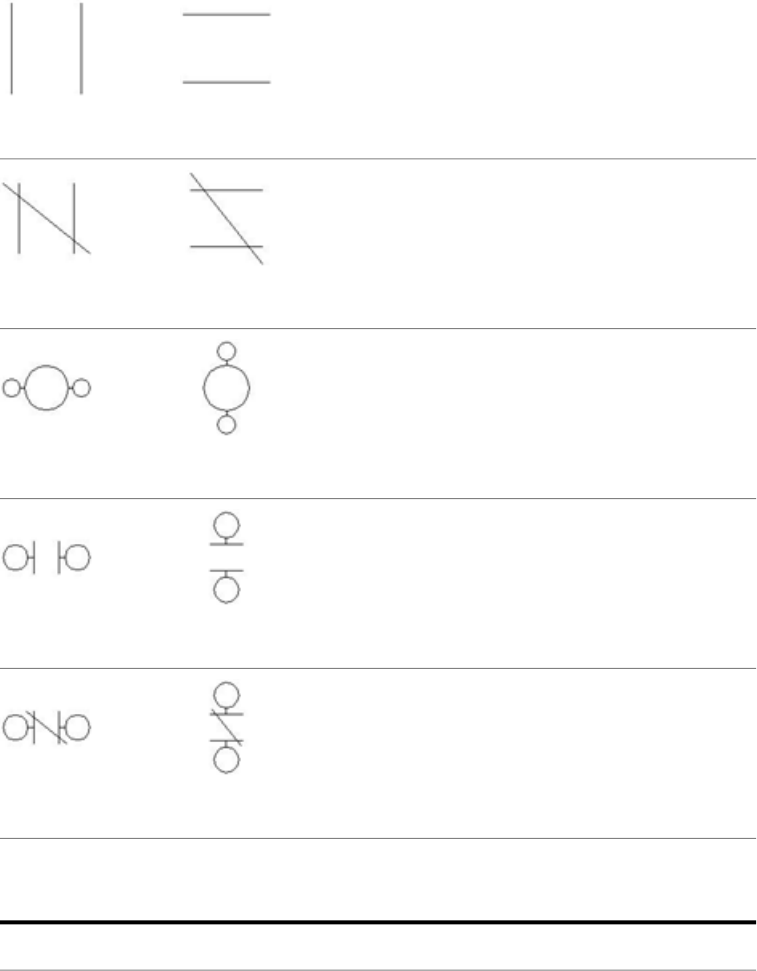
Relay Normally Open Contact
VCR21HCR21
Relay Normally Closed Contact
VCR22HCR22
Standard Coil with Pins
VCR1THCR1T
Relay Normally Open Contact with Pins
VCR21THCR21T
Relay Normally Closed Contact with Pins
VCR22THCR22T
Latch Relay Coils
DescriptionVertical SymbolHorizontal Symbol
Latch Relay Coils | 379
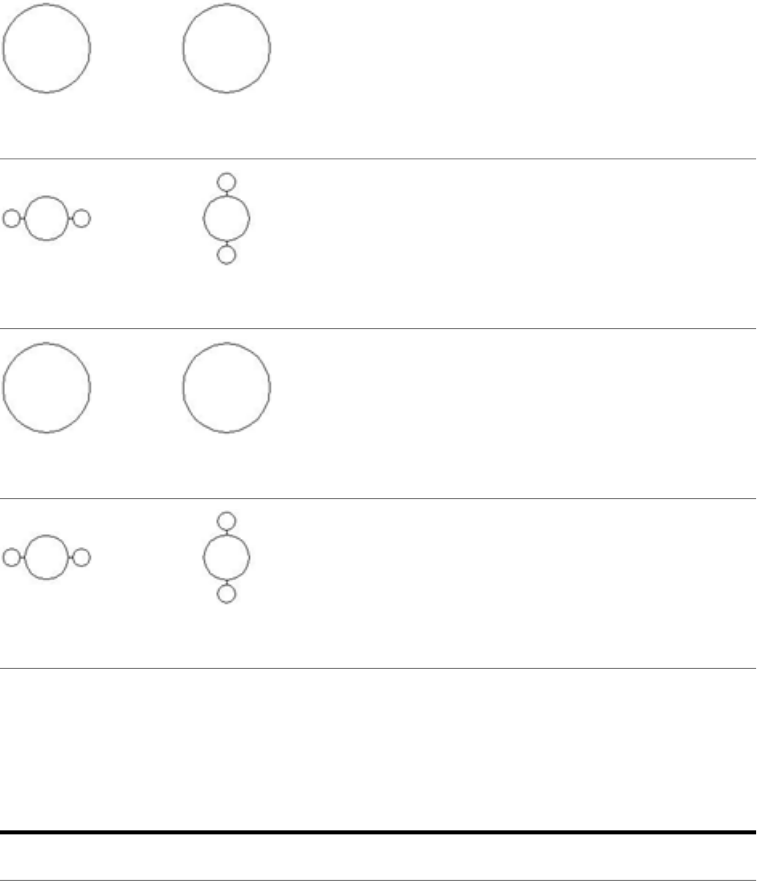
Latch Relay Coil
VLR1HLR1
Latch Relay Coil with pins
VLR1THLR1T
UnLatch Relay Coil
VLR1UHLR1U
UnLatch Relay Coil with pins
VLR1UTHLR1UT
Timers
Time Delay Relays
DescriptionVertical SymbolHorizontal Symbol
380 | Chapter 6 JIC Symbols

ON Delay Coil
VTD1NHTD1N
ON Delay Coil with Pins
VTD1NTHTD1NT
ON Delay Starter
HTD1NM
ON Delay Normally Open - TC
VTD21NHTD21N
ON Delay Normally Closed - TO
VTD22NHTD22N
ON Delay Normally Open - TC with Pins
VTD21NTHTD21NT
Time Delay Relays | 381

ON Delay Normally Closed - TO with Pins
VTD22NTHTD22NT
Instantaneous Normally Open
VTD21IHTD21I
Instantaneous Normally Closed
VTD22IHTD22I
Instantaneous Normally Open with Pins
VTD21ITHTD21IT
Instantaneous Normally Closed with Pins
VTD22ITHTD22IT
OFF-Delay Timers
DescriptionVertical SymbolHorizontal Symbol
382 | Chapter 6 JIC Symbols
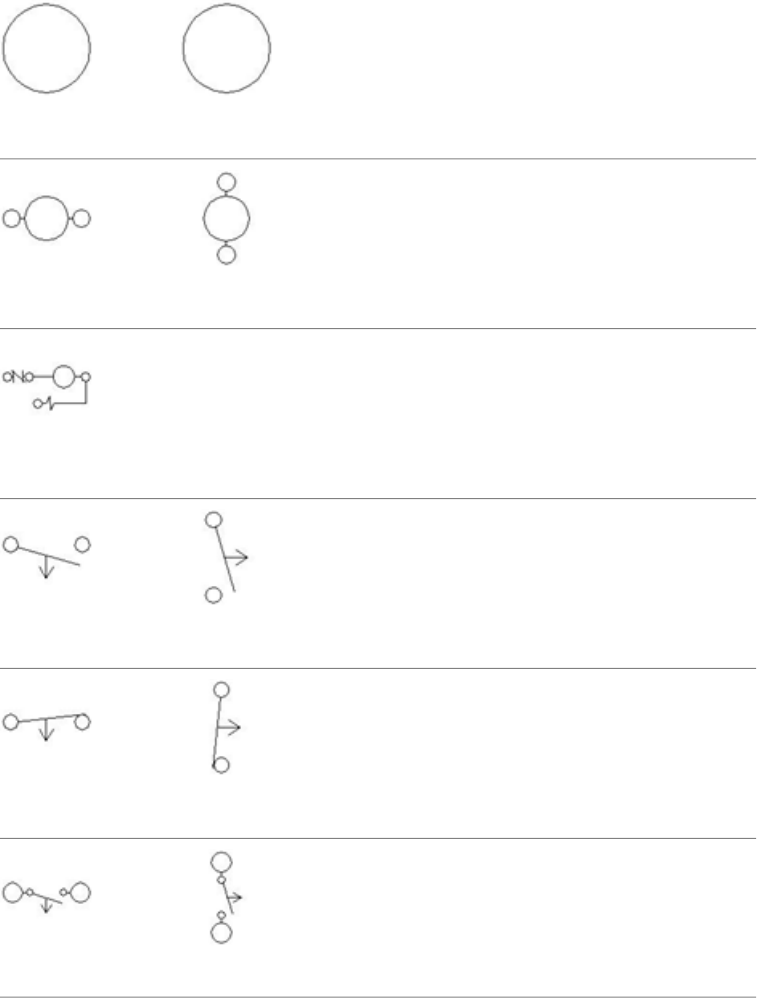
OFF Delay Coil
VTD1FHTD1F
OFF Delay Coil with Pins
VTD1FTHTD1FT
OFF Delay Starter
HTD1FM
OFF Delay Normally Open-TO
VTD21FHTD21F
OFF Delay Normally Closed-TC
VTD22FHTD22F
OFF Delay Normally Open-TO with Pins
VTD21FTHTD21FT
OFF-Delay Timers | 383

OFF Delay Normally Closed-TC with Pins
VTD22FTHTD22FT
Instantaneous Normally Open
VTD21IFHTD21IF
Instantaneous Normally Closed
VTD22IFHTD22IF
Instantaneous Normally Open with Pins
VTD21ITFHTD21ITF
Instantaneous Normally Closed with Pins
VTD22ITFHTD22ITF
Motor Control
DescriptionVertical SymbolHorizontal Symbol
384 | Chapter 6 JIC Symbols
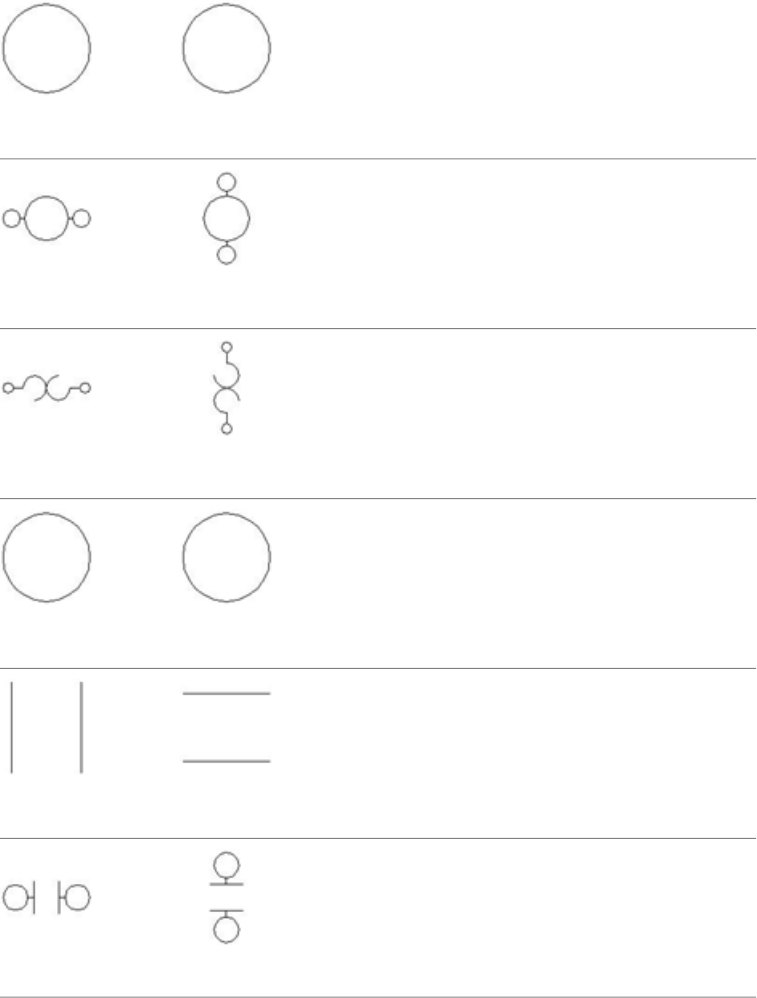
Motor Starter Coil
VMS1HMS1
Motor Starter Coil with Pins
VMS1THMS1T
Overload
VOL11HOL11
3 Phase Motor
VMO13HMO13
2nd+ Starter Contact Normally Open
VMS21HMS21
2nd+ Starter Contact Normally Open with Pins
VMS21THMS21T
Motor Control | 385

2nd+ Overload
VOL21HOL21
1 Phase Motor
VMO12HMO12
2nd+ Starter Contact Normally Closed
VMS22HMS22
2nd+ Starter Contact Normally Closed with Pins
VMS22THMS22T
2nd+ Overload Contact Normally Open
VOL21IHOL21I
2nd+ Overload Contact Normally Closed
VOL22IHOL22I
386 | Chapter 6 JIC Symbols
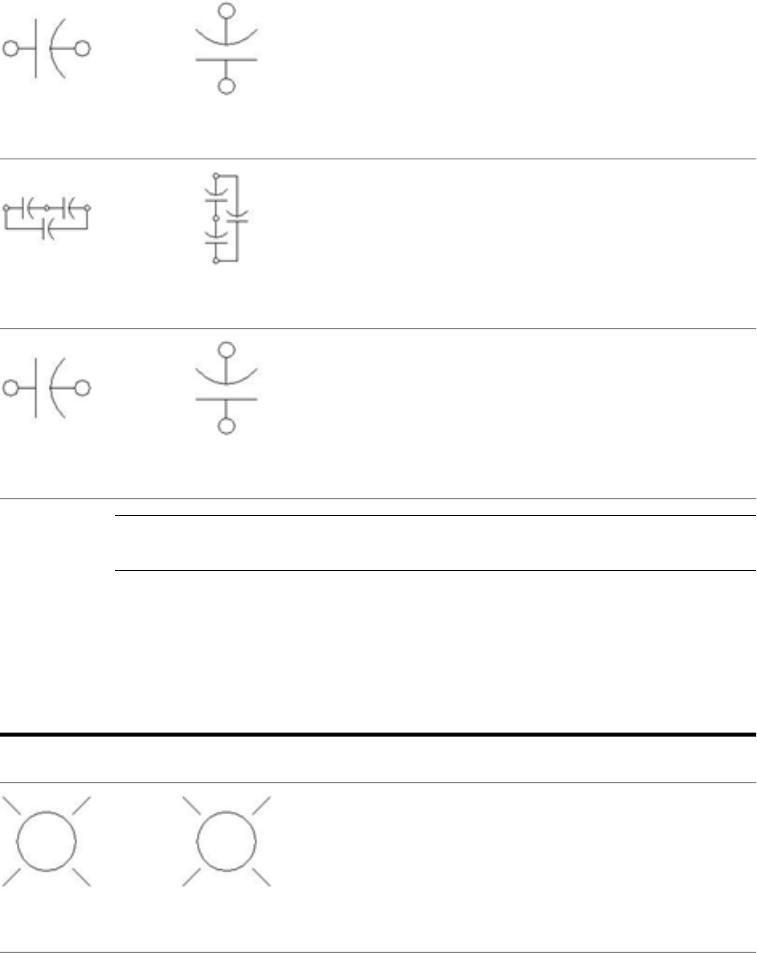
KVAR Capacitor
VCA11HCA11
3 Phase KVAR
VCA113HCA113
2nd+ KVAR Capacitor
VCA21HCA21
NOTE Multi-pole devices are constructed using parent and child symbols to adhere
to the underlying ladder spacing.
Pilot Lights
Pilot Lights
DescriptionVertical SymbolHorizontal Symbol
Red Standard
VLT1RHLT1R
Pilot Lights | 387
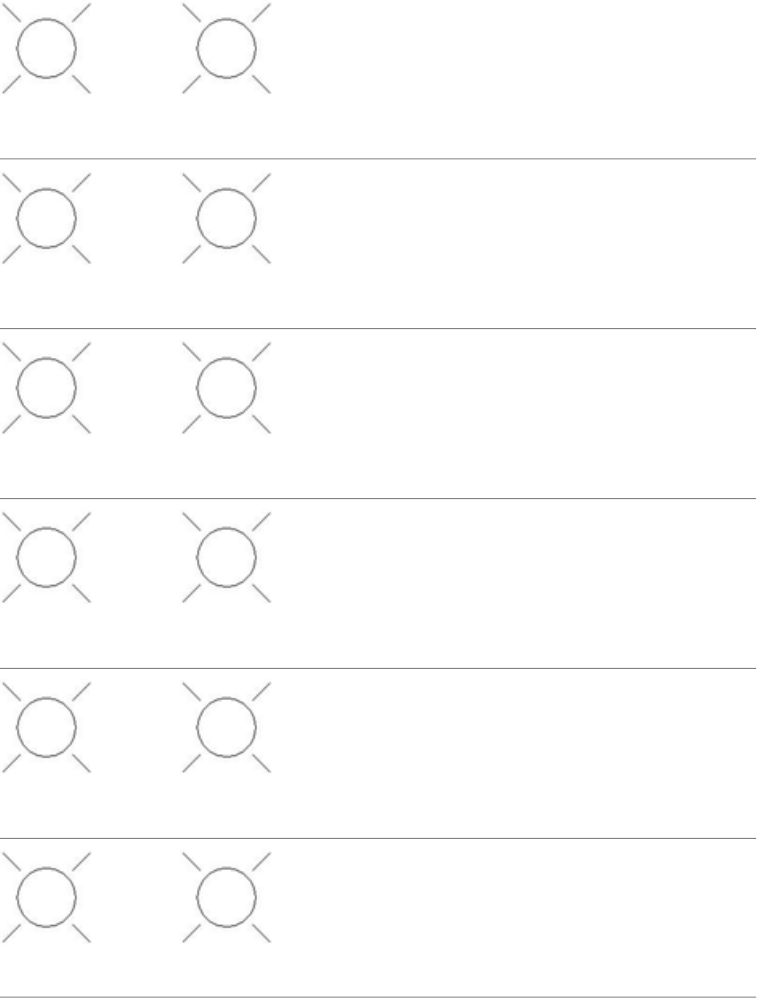
Green Standard
VLT1GHLT1G
Amber Standard
VLT1AHLT1A
Yellow Standard
VLT1YHLT1Y
Blue Standard
VLT1BHLT1B
White Standard
VLT1WHLT1W
Clear Standard
VLT1CHLT1C
388 | Chapter 6 JIC Symbols
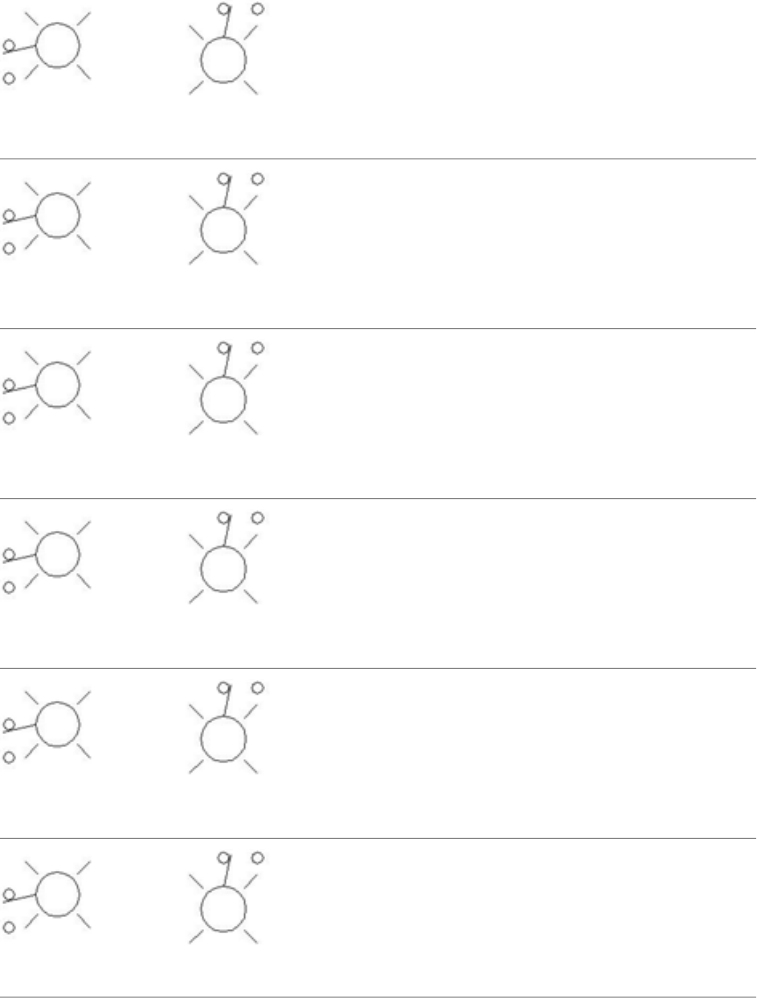
Red Press To Test
VLT1RPHLT1RP
Green Press To Test
VLT1GPHLT1GP
Amber Press To Test
VLT1APHLT1AP
Yellow Press To Test
VLT1YPHLT1YP
Blue Press To Test
VLT1BPHLT1BP
White Press To Test
VLT1WPHLT1WP
Pilot Lights | 389
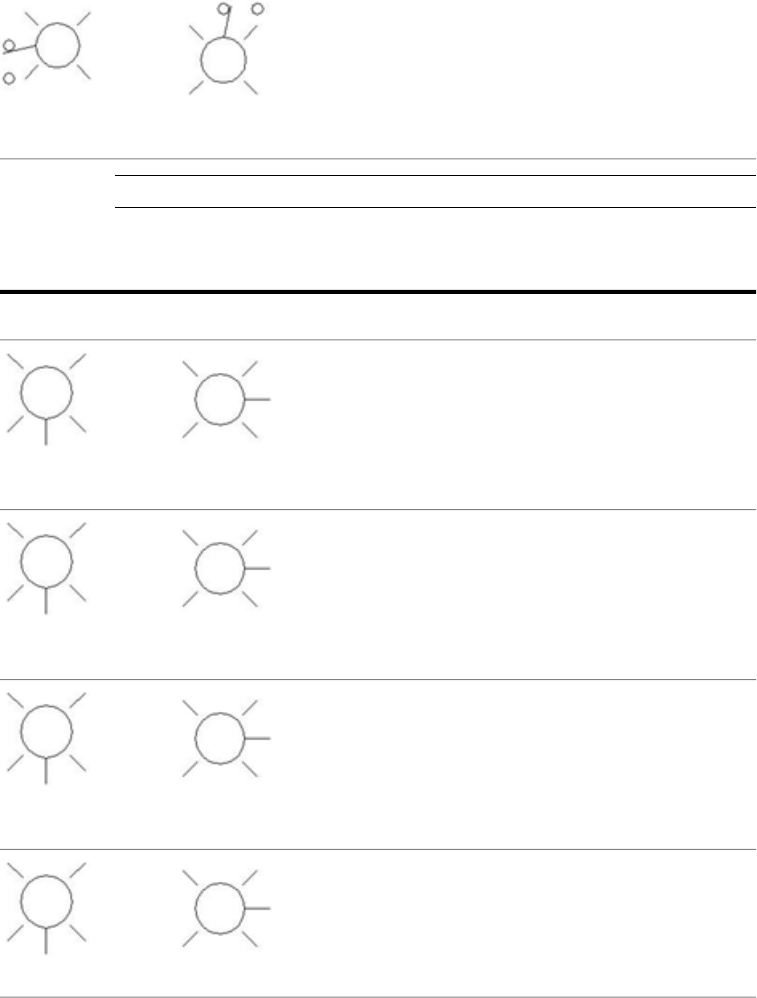
Clear Press To Test
VLT1CPHLT1CP
NOTE Lights receive text to indicate the color at the time of insertion.
Master Test Pilot Lights
DescriptionVertical SymbolHorizontal Symbol
Red Master Test
VLT1RMHLT1RM
Green Master Test
VLT1GMHLT1GM
Amber Master Test
VLT1AMHLT1AM
Yellow Master Test
VLT1YMHLT1YM
390 | Chapter 6 JIC Symbols
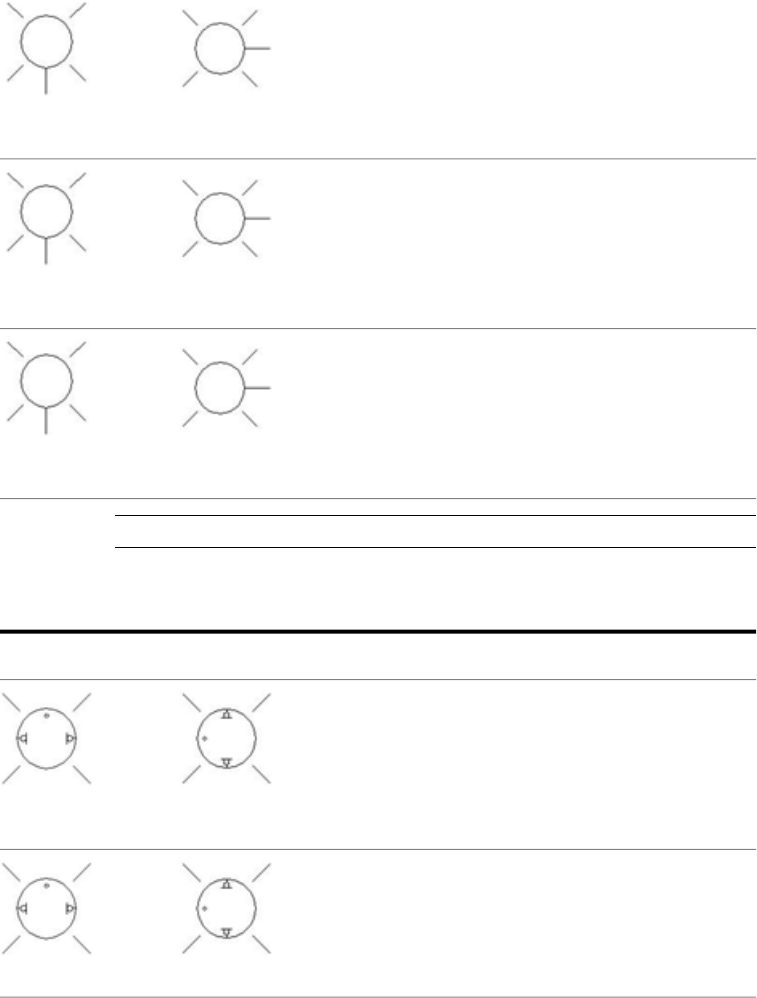
Blue Master Test
VLT1BMHLT1BM
White Master Test
VLT1WMHLT1WM
Clear Master Test
VLT1CMHLT1CM
NOTE Lights receive text to indicate the color at the time of insertion.
Neon Pilot Lights
DescriptionVertical SymbolHorizontal Symbol
Red Standard
VLT1RNHLT1RN
Amber Standard
VLT1ANHLT1AN
Neon Pilot Lights | 391
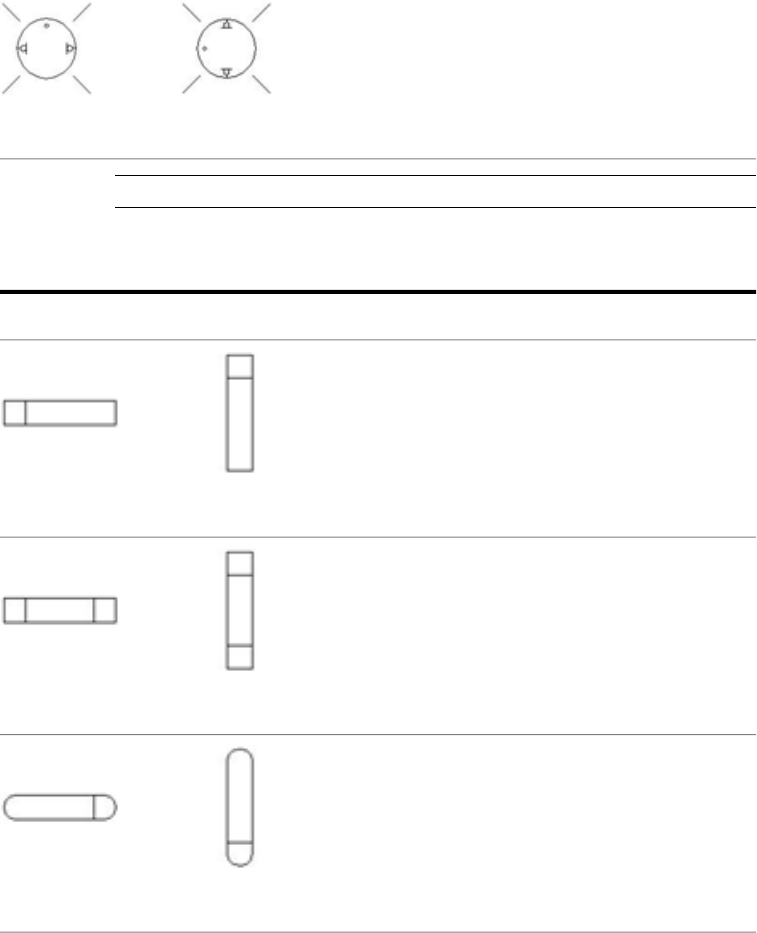
Clear Standard
VLT1CNHLT1CN
NOTE Lights receive text to indicate the color at the time of insertion.
PLC I/O
DescriptionVertical SymbolHorizontal Symbol
IN, 1st Point, 1 Wire
PLCIOI1TVPLCIOI1T
IN, 1st Point, 2 Wires
PLCIOI2TVPLCIOI2T
OUT, 1st Point, 1 Wire
PLCIOO1TVPLCIOO1T
392 | Chapter 6 JIC Symbols
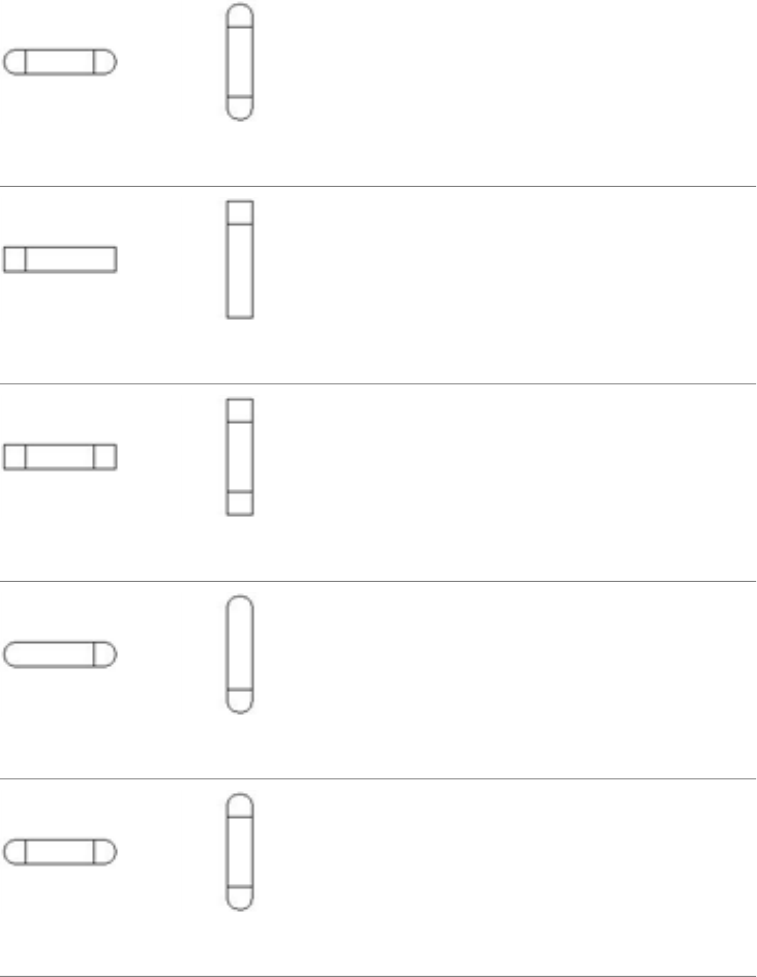
OUT, 1st Point, 2 Wires
PLCIOO2TVPLCIOO2T
IN, 2nd+ Child, one Wire
PLCIOI1VPLCIOI1
IN, 2nd+ Child, 2 Wires
PLCIOI2VPLCIOI2
OUT, 2nd+ Child, 1 Wire
PLCIOO1VPLCIOO1
OUT, 2nd+ Child, 2 Wires
PLCIOO2VPLCIOO2
PLC I/O | 393

Terminals and Connectors
Terminals
DescriptionVertical SymbolHorizontal Symbol
Square
VT0_01HT0_01
Square with Wire Number
VT0W01HT0W01
Square with Terminal Number
VT0001HT0001
Square with Wire Number Change
VT1001HT1001
Round
VT0_02HT0_02
394 | Chapter 6 JIC Symbols
Round with Wire Number
VT0W02HT0W02
Round with Terminal Number
VT0002HT0002
Round with Wire Number Change
VT1002HT1002
Hexagon
VT0_03HT0_03
Hexagon with Wire Number
VT0W03HT0W03
Hexagon with Terminal Number
VT0003HT0003
Terminals | 395

Hexagon with Wire Number Change
VT1003HT1003
Diamond
VT0_04HT0_04
Diamond with Wire Number
VT0W04HT0W04
Diamond with Terminal Number
VT0004HT0004
Diamond with Wire Number Change
VT1004HT1004
Triangle
VT0_05HT0_05
396 | Chapter 6 JIC Symbols
Triangle with Wire Number
VT0W05HT0W05
Triangle with Terminal Number
VT0005HT0005
Triangle with Wire Number Change
VT1005HT1005
In-Line Wire Labels
DescriptionVertical SymbolHorizontal Symbol
In-Line Wire Label
VT0_LGENER-
IC
HT0_LGENER-
IC
In-Line Wire Labels | 397
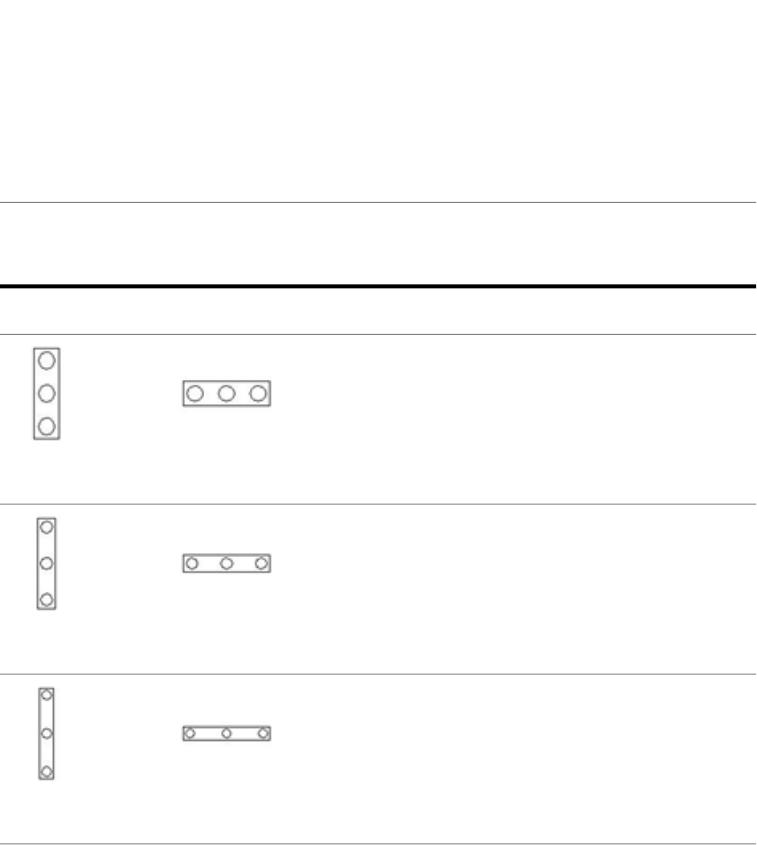
Wire Number Copy
VT0_WGENER-
IC
HT0_WGENER-
IC
Power Distribution Blocks
DescriptionVertical SymbolHorizontal Symbol
3 Terminal, 0.5 Spacing
VDB1350HDB1350
3 Terminal, 0.75 Spacing
VDB1375HDB1375
3 Terminal, 1.0 Spacing
VDB13100HDB13100
398 | Chapter 6 JIC Symbols

Connectors - No Wirenumber Changes
Connectors - No Wirenumber Changes
DescriptionVertical SymbolHorizontal Symbol
Plug/Jack
VC01PJHC01PJ
Jack/Plug
VC01JPHC01JP
Plug/Jack (Combined Tag-Pin)
VC01PJ1HC01PJ1
Jack/Plug (Combined Tag-Pin)
VC01JP1HC01JP1
2nd+ Plug/Jack
VC02PJHC02PJ
Connectors - No Wirenumber Changes | 399

2nd+ Jack/Plug
VC02JPHC02JP
2nd+ Plug/Jack (Combined Tag-Pin)
VC02PJ1HC02PJ1
2nd+ Jack/Plug (Combined Tag-Pin)
VC02JP1HC02JP1
Connectors - No Wirenumber Changes - Spare/Single Side
DescriptionVertical SymbolHorizontal Symbol
Plug Right or up
VC01P_HC01P_
Jack Left or Down
VC01_JHC01_J
400 | Chapter 6 JIC Symbols

Plug Right or up (Combined tag/pin)
VC01P_1HC01P_1
Jack Left or Down (Combined)
VC01_J1HC01_J1
2nd+ Plug Right or up
VC02P_HC02P_
2nd+ Jack Left or Down
VC02_JHC02_J
2nd+ Plug Right or up (Combined)
VC02P_1HC02P_1
2nd+ Jack Left or Down (Combined)
VC02_J1HC02_J1
Connectors - No Wirenumber Changes | 401
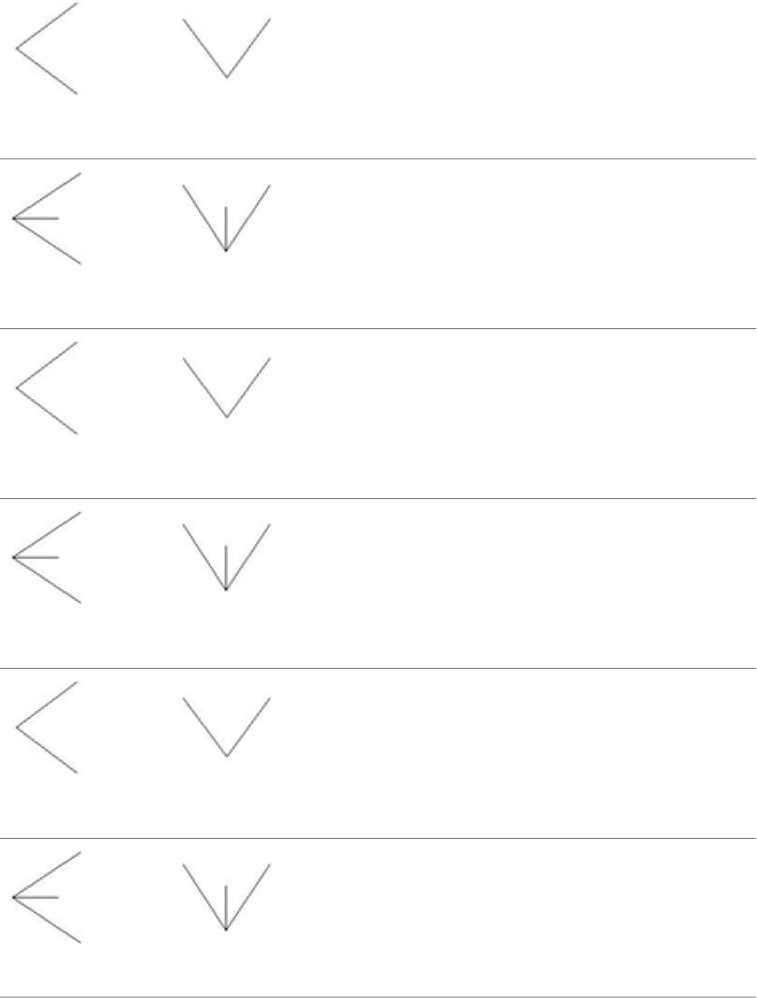
Jack Right or up
VC01J_HC01J_
Plug Left or Down
VC01_PHC01_P
Jack Right or up (Combined)
VC01J_1HC01J_1
Plug Left or Down (Combined)
VC01_P1HC01_P1
2nd+ Jack Right or up
VC02J_HC02J_
2nd+ Plug Left or Down
VC02_PHC02_P
402 | Chapter 6 JIC Symbols

2nd+ Jack Right or up (Combined)
VC02J_1HC02J_1
2nd+ Plug Left or Down (Combined)
VC02_P1HC02_P1
Connectors - Wirenumber Changes
Connectors - Wirenumber Changes
DescriptionVertical SymbolHorizontal Symbol
Plug/Jack
VCN1PJHCN1PJ
Jack/Plug
VCN1JPHCN1JP
Connectors - Wirenumber Changes | 403

2nd+ Plug/Jack
VCN2PJHCN2PJ
2nd+ Jack/Plug
VCN2JPHCN2JP
Connectors - Wirenumber Changes - Spare/Single Side
DescriptionVertical SymbolHorizontal Symbol
Plug Right or up
VCN1P_HCN1P_
Jack Left or Down
VCN1_JHCN1_J
Plug Right or up (Combined tag/pin)
VCN1P_1HCN1P_1
404 | Chapter 6 JIC Symbols

Jack Left or Down (Combined)
VCN1_J1HCN1_J1
2nd+ Plug Right or up
VCN2P_HCN2P_
2nd+ Jack Left or Down
VCN2_JHCN2_J
2nd+ Plug Right or up (Combined)
VCN2P_1HCN2P_1
2nd+ Jack Left or Down (Combined)
VCN2_J1HCN2_J1
Jack Right or up
VCN1J_HCN1J_
Connectors - Wirenumber Changes | 405
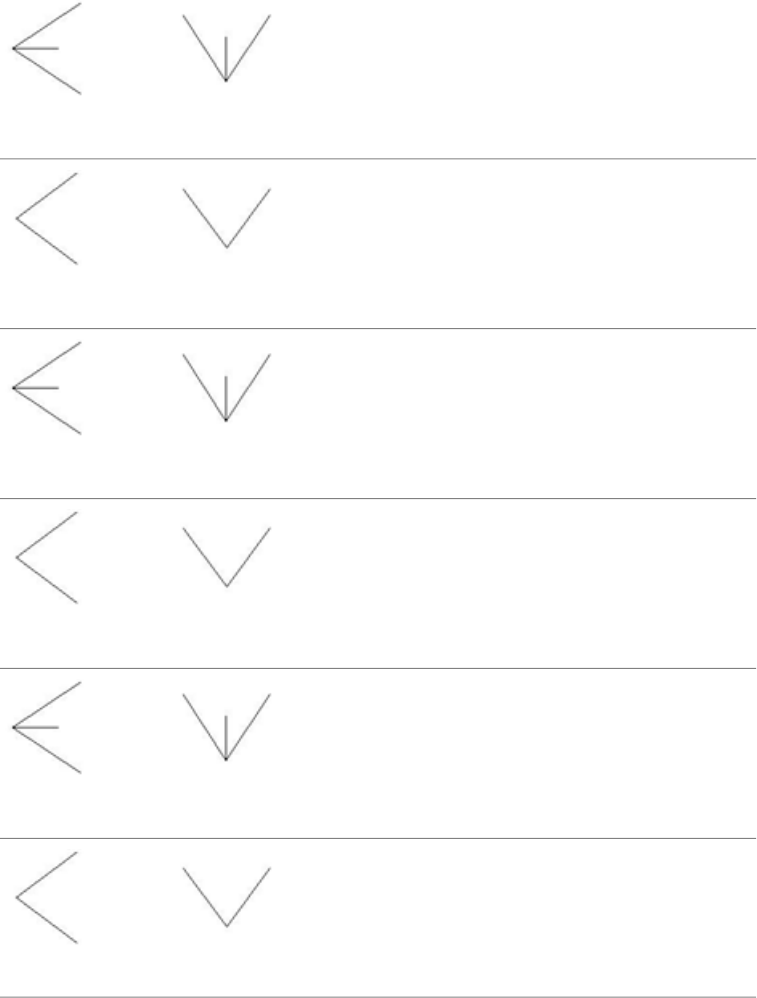
Plug Left or Down
VCN1_PHCN1_P
Jack Right or up (Combined)
VCN1J_1HCN1J_1
Plug Left or Down (Combined)
VCN1_P1HCN1_P1
2nd+ Jack Right or up
VCN2J_HCN2J_
2nd+ Plug Left or Down
VCN2_PHCN2_P
2nd+ Jack Right or up (Combined)
VCN2J_1HCN2J_1
406 | Chapter 6 JIC Symbols

2nd+ Plug Left or Down (Combined)
VCN2_P1HCN2_P1
Limit Switches
DescriptionVertical SymbolHorizontal Symbol
Limit Switch Normally Open
VLS11HLS11
Limit Switch Normally Closed
VLS12HLS12
Limit Switch Normally Open Held Closed
VLS11HHLS11H
Limit Switch Normally Closed Held Open
VLS12HHLS12H
Limit Switches | 407
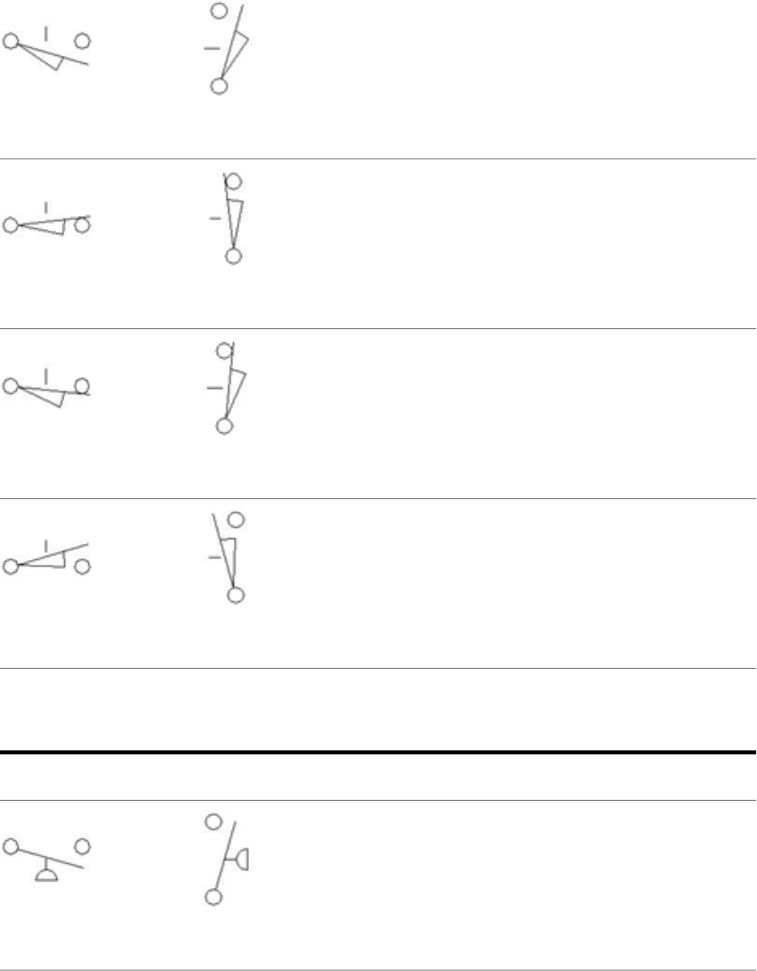
2nd+ Normally Open Contact
VLS21HLS21
2nd+ Normally Closed Contact
VLS22HLS22
2nd+ Normally Open Contact Held Closed
VLS21HHLS21H
2nd+ Normally Closed Contact Held Open
VLS22HHLS22H
Pressure and Temperature Switches
DescriptionVertical SymbolHorizontal Symbol
Pressure Switch, Normally Open
VPS11HPS11
408 | Chapter 6 JIC Symbols
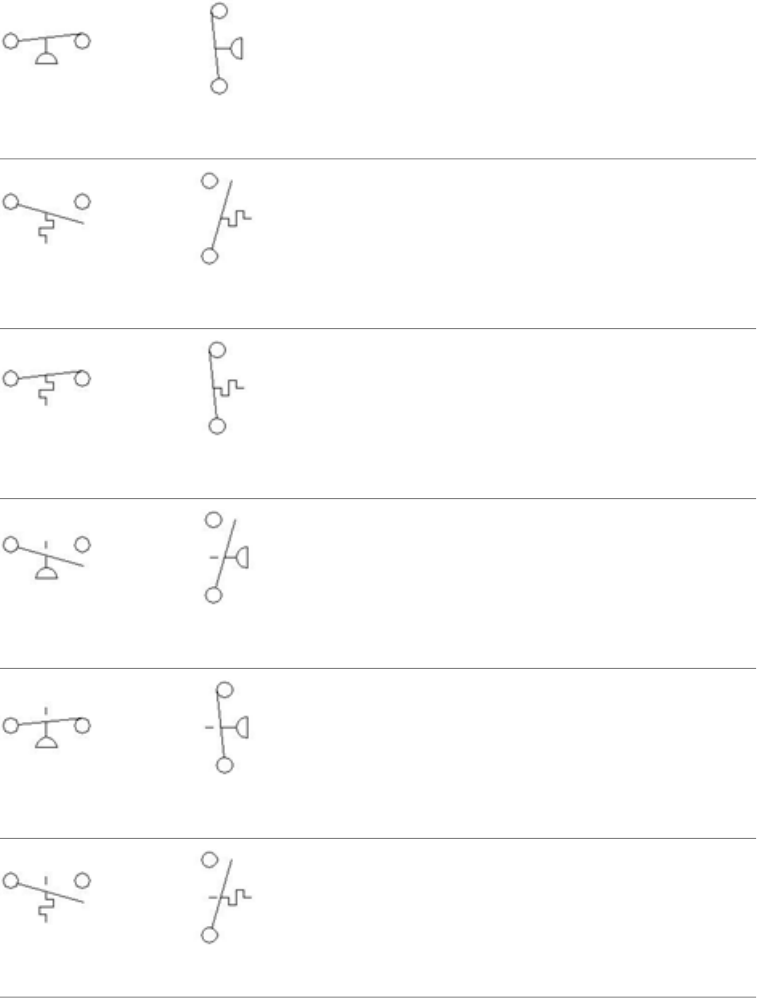
Pressure Switch, Normally Closed
VPS12HPS12
Temperature Switch, Normally Open
VTS11HTS11
Temperature Switch, Normally Closed
VTS12HTS12
2nd+ Pressure Normally Open Contact
VPS21HPS21
2nd+ Pressure Normally Closed Contact
VPS22HPS22
2nd+ Temperature Normally Open Contact
VTS21HTS21
Pressure and Temperature Switches | 409
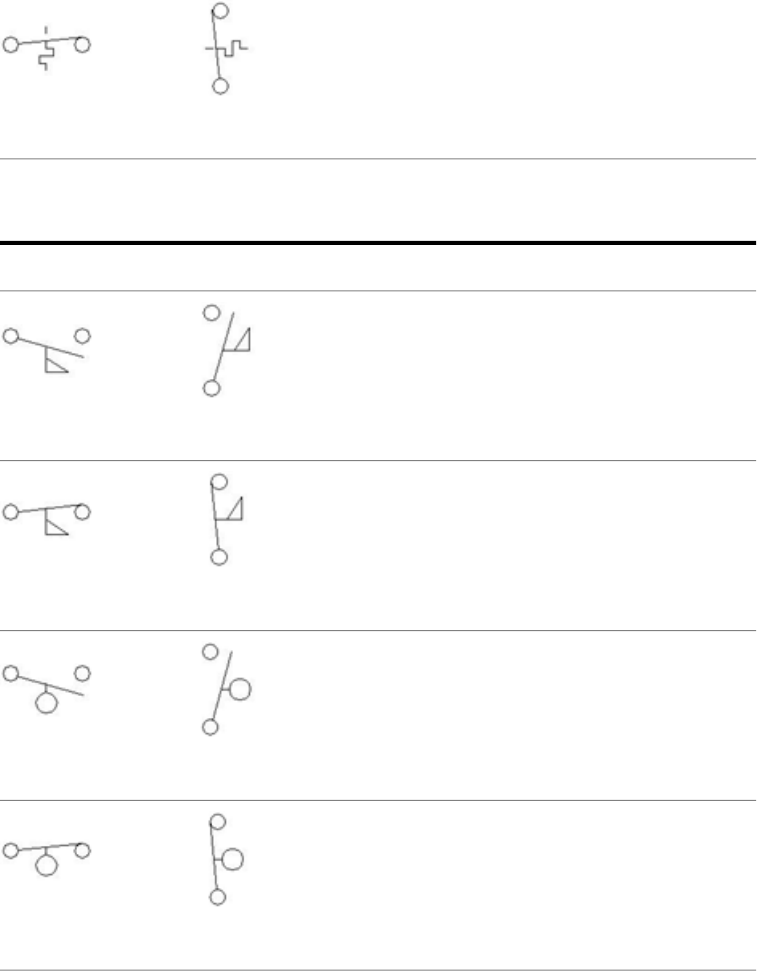
2nd+ Temperature Normally Closed Contact
VTS22HTS22
Flow and Level Switches
DescriptionVertical SymbolHorizontal Symbol
Flow Switch Normally Open
VFS11HFS11
Flow Switch Normally Closed
VFS12HFS12
Level Switch Normally Open
VFL11HFL11
Level Switch Normally Closed
VFL12HFL12
410 | Chapter 6 JIC Symbols
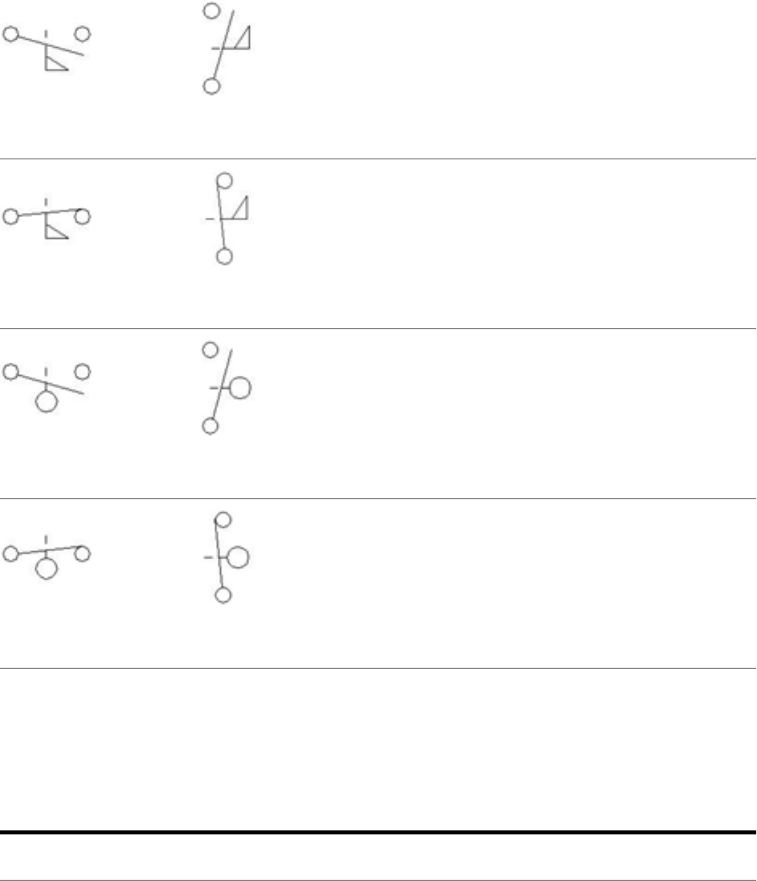
2nd+ Flow Normally Open Contact
VFS21HFS21
2nd+ Flow Normally Closed Contact
VFS22HFS22
2nd+ Level Normally Open Contact
VFL21HFL21
2nd+ Level Normally Closed Contact
VFL22HFL22
Miscellaneous Switches
Miscellaneous Switches
DescriptionVertical SymbolHorizontal Symbol
Miscellaneous Switches | 411
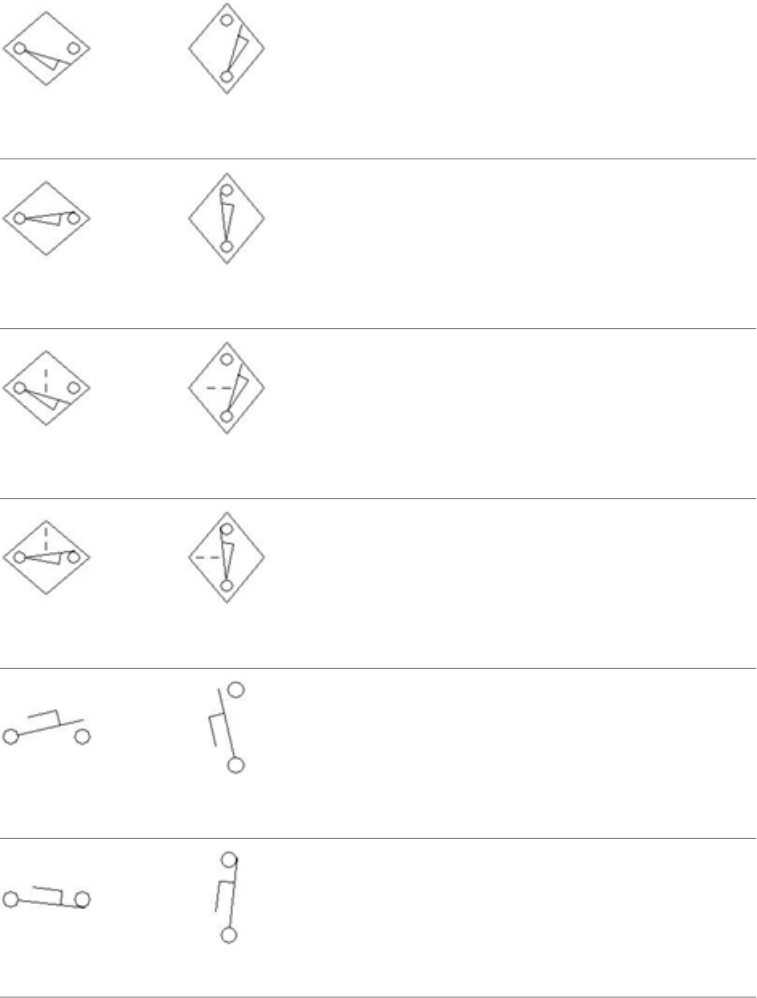
Proximity Switch Normally Open
VPX11HPX11
Proximity Switch Normally Closed
VPX12HPX12
2nd+ Proximity Normally Open Contact
VPX21HPX21
2nd+ Proximity Normally Closed Contact
VPX22HPX22
Foot Switch Normally Open
VFT11HFT11
Foot Switch Normally Closed
VFT12HFT12
412 | Chapter 6 JIC Symbols
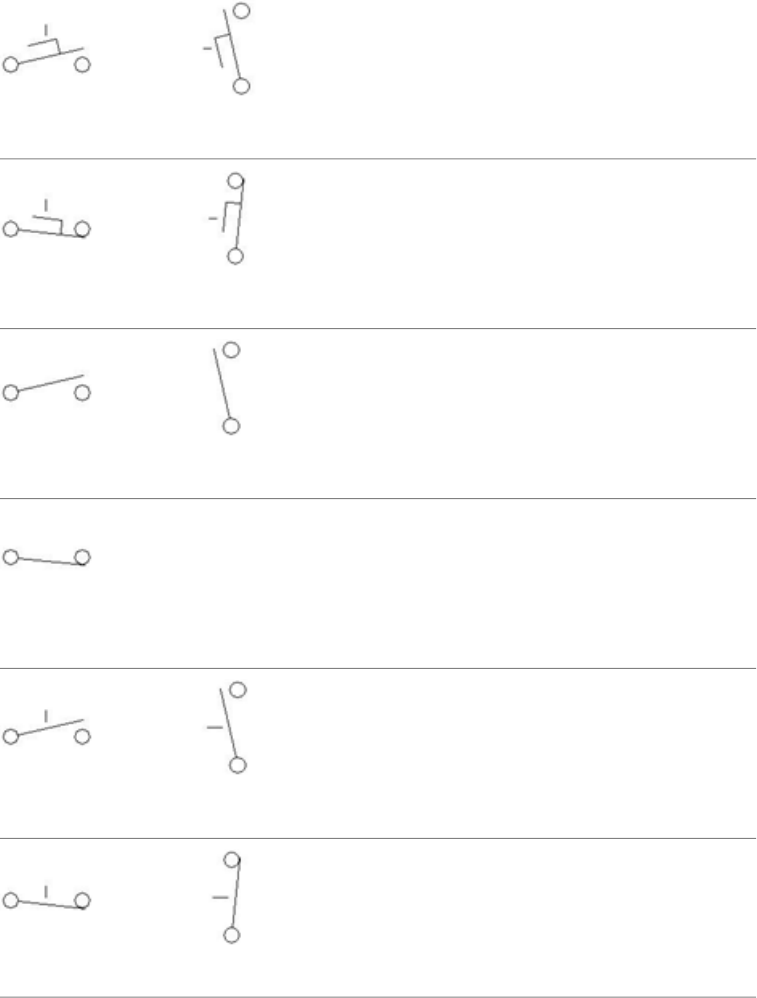
2nd+ Foot Normally Open Contact
VFT21HFT21
2nd+ Foot Normally Closed Contact
VFT22HFT22
Toggle Switch Normally Open
VTG11HTG11
Toggle Switch Normally Closed
HTG12
2nd+ Toggle Normally Open Contact
VTG21HTG21
2nd+ Toggle Normally Closed Contact
VTG22HTG22
Miscellaneous Switches | 413
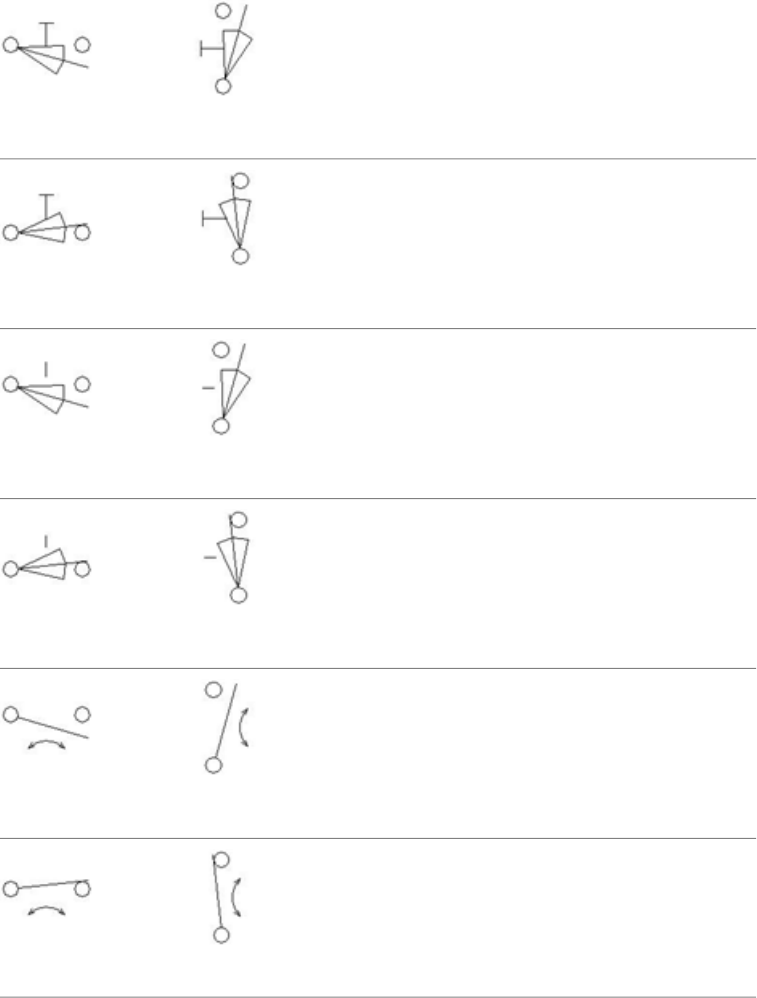
Pull cord Switch Normally Open
VPC11HPC11
Pull cord Switch Normally Closed
VPC12HPC12
2nd+ Pull Cord Normally Open Contact
VPC21HPC21
2nd+ Pull Cord Normally Closed Contact
VPC22HPC22
A-Plug Normally Open
VPG11HPG11
A-Plug Normally Closed
VPG12HPG12
414 | Chapter 6 JIC Symbols
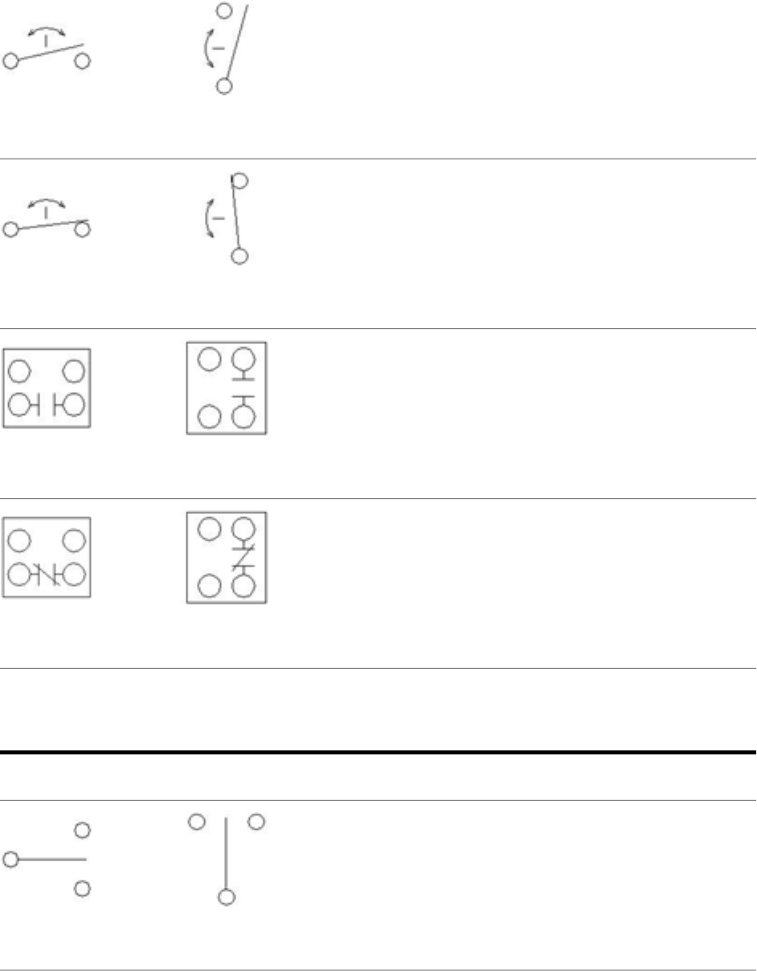
2nd+ A-Plug Normally Open Contact
VPG21HPG21
2nd+ A-Plug Normally Closed Contact
VPG22HPG22
Photo Eye Switch Normally Open
VPE11HPE11
Photo Eye Switch Normally Closed
VPE12HPE12
Single Pole Double Throw Switches
DescriptionVertical SymbolHorizontal Symbol
Single Pole Double Throw Maintained
VTG112HTG112
Single Pole Double Throw Switches | 415

Single Pole Double Throw Return From Down
VTG112DHTG112D
Single Pole Double Throw Return From Up
VTG112UHTG112U
Single Pole Double Throw Return From Both
VTG112BHTG112B
2nd+ Maintained
VTG212HTG212
2nd+ Return From Down
VTG212DHTG212D
2nd+ Return From Up
VTG212UHTG212U
416 | Chapter 6 JIC Symbols

2nd+ Return From Both
VTG212BHTG212B
Single Pole Double Throw Maintained
VTG112RHTG112R
Single Pole Double Throw Return From Down
VTG112DRHTG112DR
Single Pole Double Throw Return From Up
VTG112URHTG112UR
Single Pole Double Throw Return From Both
VTG112BRHTG112BR
2nd+ Maintained
VTG212RHTG212R
Single Pole Double Throw Switches | 417
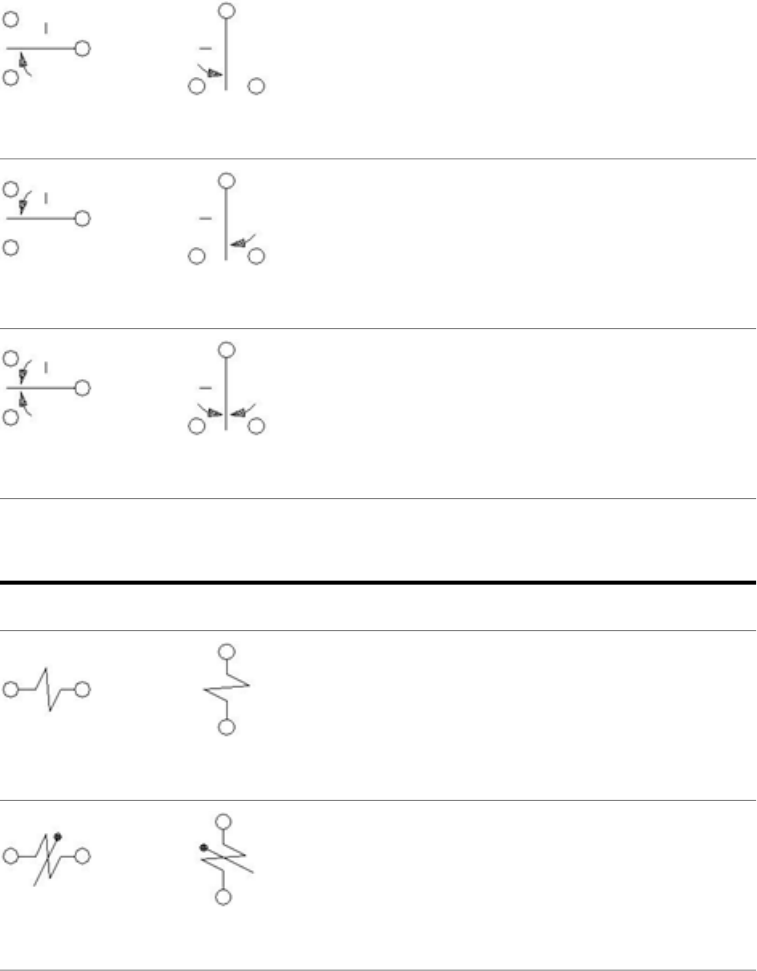
2nd+ Return From Down
VTG212DRHTG212DR
2nd+ Return From Up
VTG212URHTG212UR
2nd+ Return From Both
VTG212BRHTG212BR
Solenoids
DescriptionVertical SymbolHorizontal Symbol
Solenoid
VSV1HSV1
Manual Reset Solenoid
VSV1MHSV1M
418 | Chapter 6 JIC Symbols
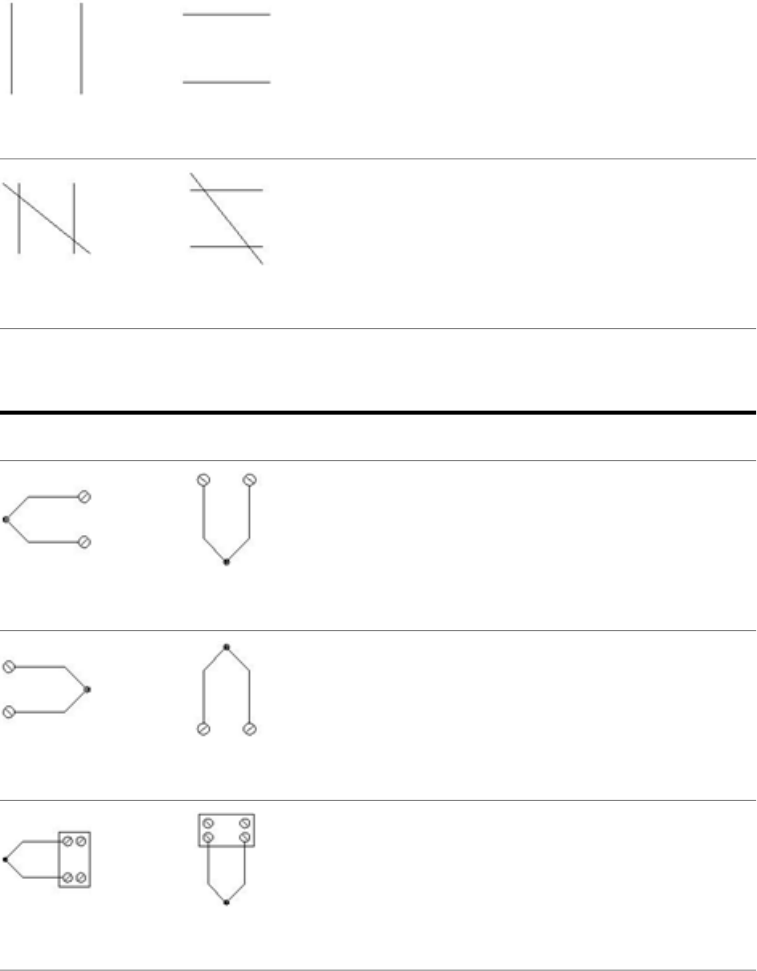
Normally Open Contact
VSV21HSV21
Normally Closed Contact
VSV22HSV22
Instrumentation
DescriptionVertical SymbolHorizontal Symbol
Thermocouple
VTC1LHTC1L
Thermocouple
VTC1RHTC1R
Thermocouple with Terminal Board
VTC1LTBHTC1LTB
Instrumentation | 419

Thermocouple with Terminal Board
VTC1RTBHTC1RTB
Ball valve
VBV1MHBV1M
Gate valve
VGV1MHGV1M
Globe valve
VLV1MHLV1M
Volt Meter
VVM1HVM1
Amp Meter
VAM1HAM1
420 | Chapter 6 JIC Symbols
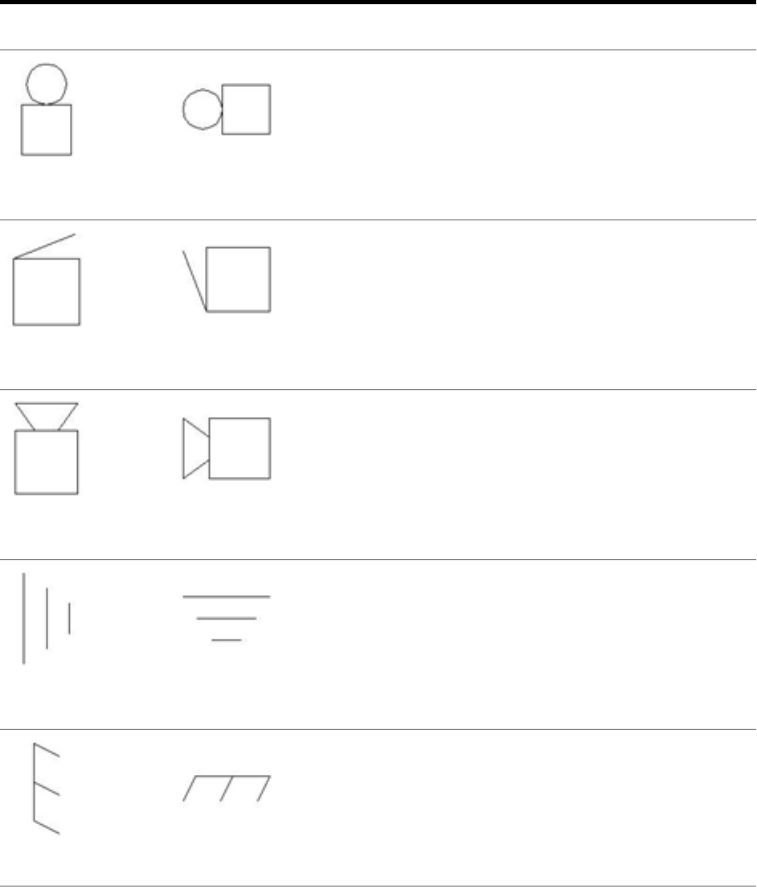
Miscellaneous
Miscellaneous
DescriptionVertical SymbolHorizontal Symbol
Bell
VAN1BHAN1B
Buzzer
VAN1ZHAN1Z
Horn
VAN1HHAN1H
Ground
VGND2HGND2
Earth/Ground
VGND1HGND1
Miscellaneous | 421

Battery
VBA1HBA1
Battery (Flipped)
VBA1RHBA1R
Suppressor (tag)
VSU1HSU1
Suppressor
VSU0HSU0
Enclosure Light
VLT1ENCHLT1ENC
Splice
VSP1001HSP1001
422 | Chapter 6 JIC Symbols
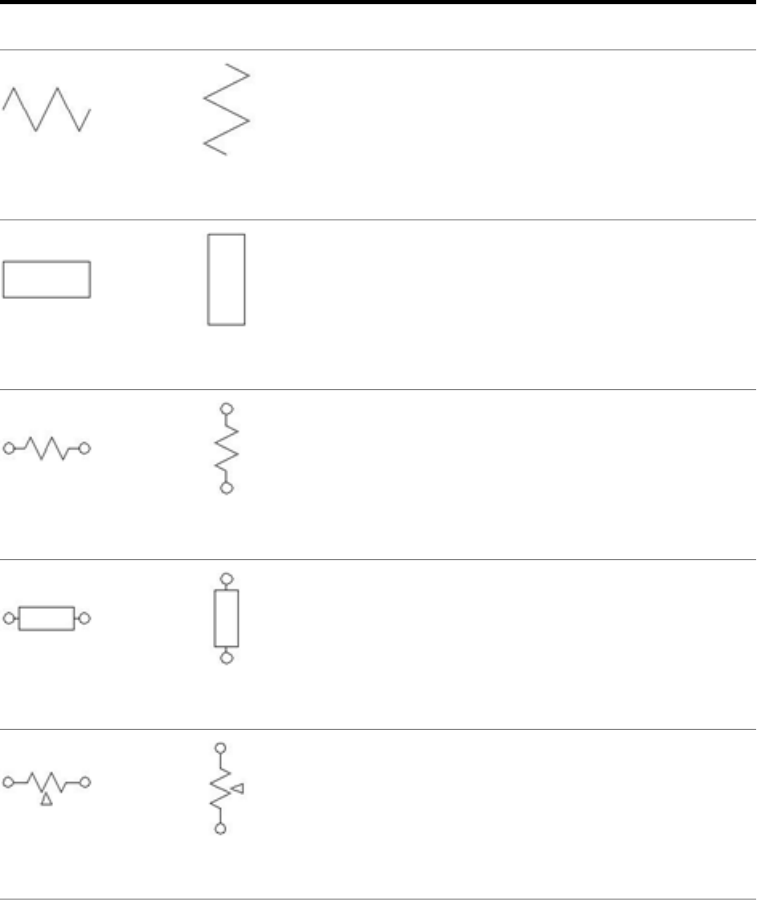
Electronics
DescriptionVertical SymbolHorizontal Symbol
Fixed Resistor
VRE1HRE1
Fixed Resistor (Box)
VRE1BHRE1B
Fixed Resistor with Pins
VRE1THRE1T
Fixed Resistor (Box) with Pins
VRE1TBHRE1TB
Variable Resistor
VVR1TZHVR1TZ
Electronics | 423
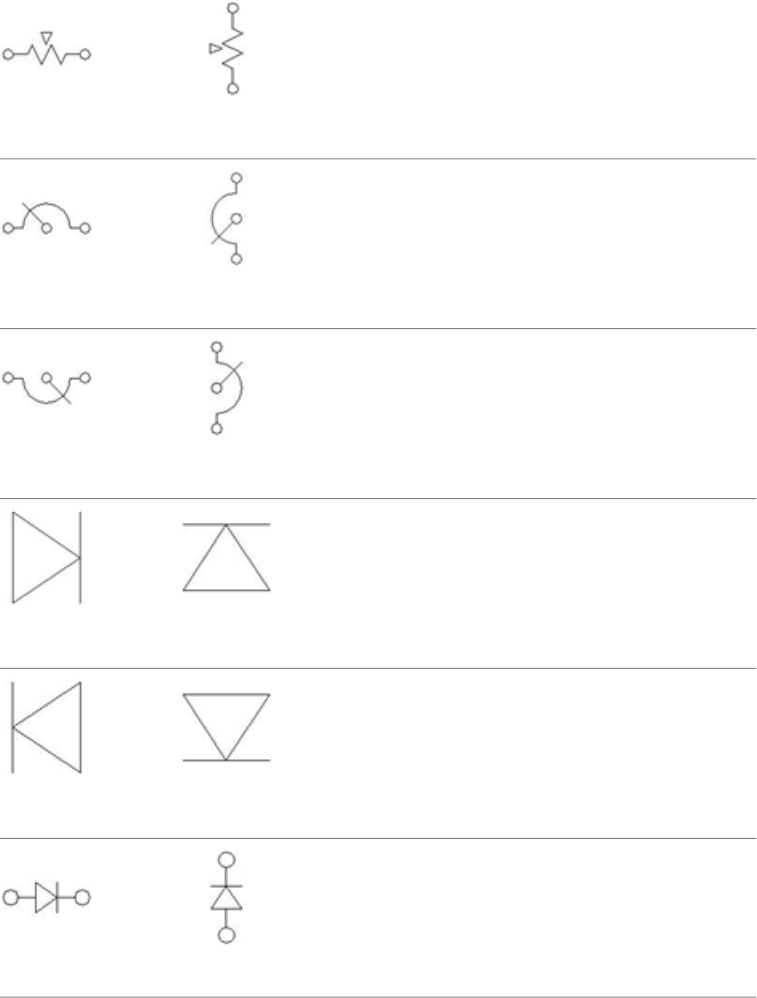
Variable Resistor
VVR1TZRHVR1TZR
Variable Resistor
VVR1HVR1
Variable Resistor
VVR1RHVR1R
Diode
VDI1HDI1
Diode
VDI1RHDI1R
Diode with Pins
VDI1THDI1T
424 | Chapter 6 JIC Symbols

Diode with Pins
VDI1TRHDI1TR
Zener Diode
VDI1ZHDI1Z
Zener Diode
VDI1ZRHDI1ZR
Zener Diode with Pins
VDI1TZHDI1TZ
Zener Diode with Pins
VDI1TZRHDI1TZR
Capacitor
VCA1HCA1
Electronics | 425
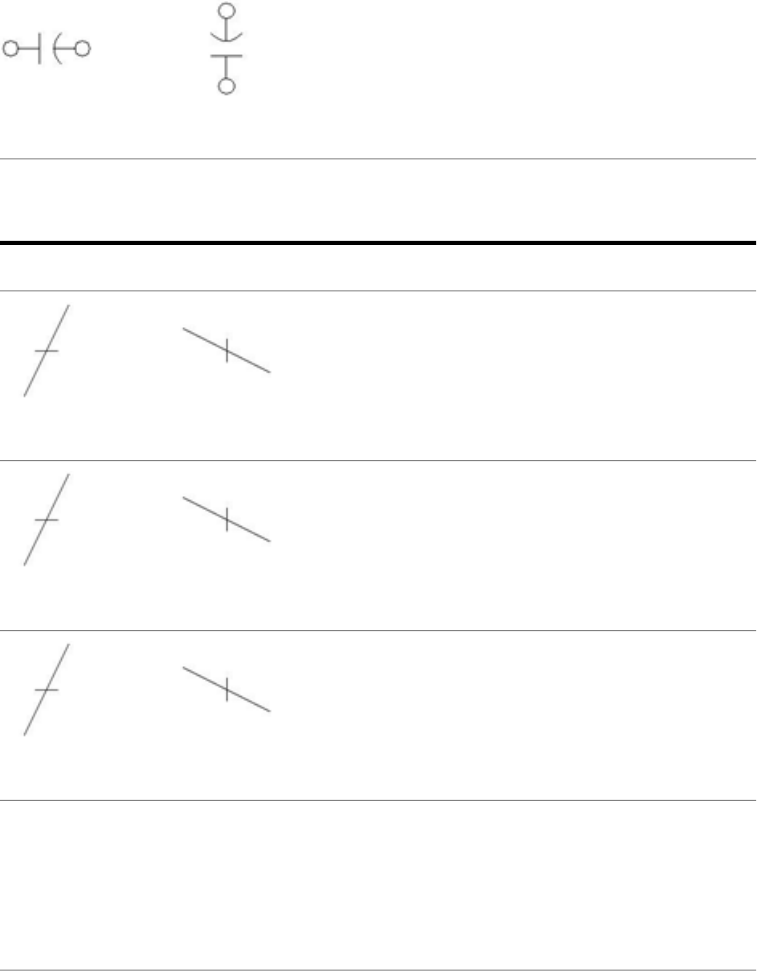
Capacitor with Pins
VCA1THCA1T
Cable Markers
DescriptionVertical SymbolHorizontal Symbol
Cable Marker
VW01HW01
2nd+ Child Marker
VW02HW02
Extra Marker
VT0_CABLEHT0_CABLE
Twisted Pair
VT0_TWHT0_TW
426 | Chapter 6 JIC Symbols
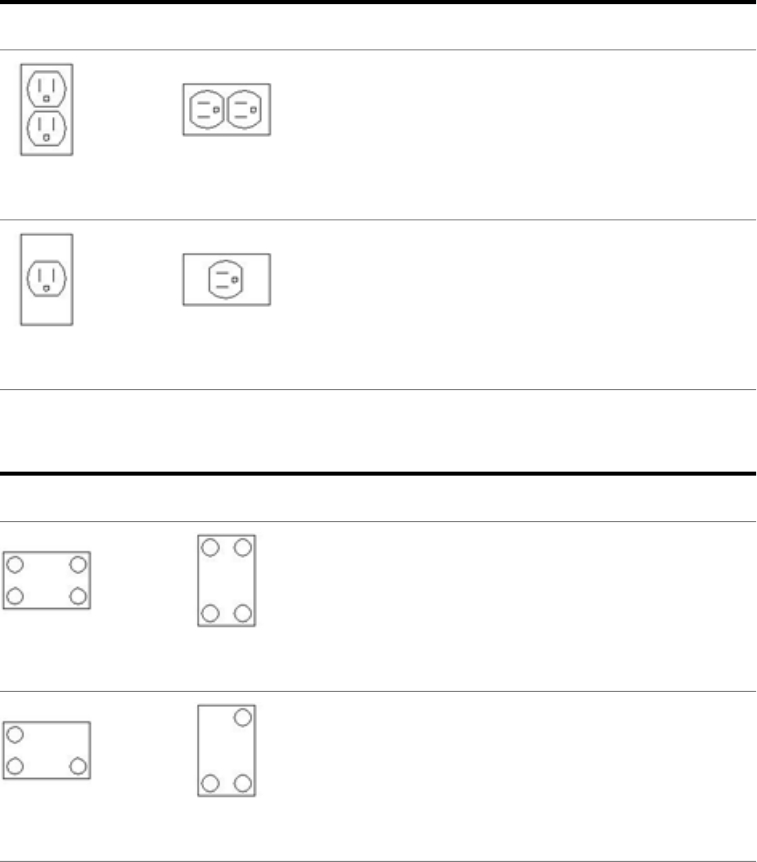
Power Receptacles
DescriptionVertical SymbolHorizontal Symbol
Duplex Receptacle
VCN1RDUPHCN1RDUP
Single Receptacle
VCN1RSGLHCN1RSGL
Generic Device Boxes
DescriptionVertical SymbolHorizontal Symbol
4 Terminals
VDV1TFLHDV1TFL
3 Terminals
VDV1TCHDV1TC
Power Receptacles | 427

3 Terminals
VDV1TBHDV1TB
2 Terminals
VDV1T6HDV1T6
4 Terminals
VDV1TFHDV1TF
3 Terminals
VDV1TEHDV1TE
3 Terminals
VDV1T7HDV1T7
Stand-alone Cross-reference Symbols
DescriptionSymbol
428 | Chapter 6 JIC Symbols

Source Rectangle
HA2S1_REF
Source Hexagon
HA3S1_REF
Source Ellipse
HA5S1_REF
Destination Rectangle
HA2D1_REF
Destination Hexagon
HA3D1_REF
Destination Ellipse
HA5D1_REF
Stand-alone Cross-reference Symbols | 429

Wire Arrows - Reference Only
DescriptionSymbol
Generic Arrow - Left
HA1X1
Generic Arrow - Up
HA1X2
Generic Arrow - Right
HA1X3
Generic Arrow - Down
HA1X4
Arrow Tail - Left
HA1X1Y
430 | Chapter 6 JIC Symbols
Arrow Tail - Up
HA1X2Y
Arrow Tail - Right
HA1X3Y
Arrow Tail - Down
HA1X4Y
One-Line Components
Connector
DescriptionVertical SymbolHorizontal Symbol
Jack/Plug
VC01PJ_1-HC01PJ_1-
Motor Control
DescriptionVertical SymbolHorizontal Symbol
One-Line Components | 431
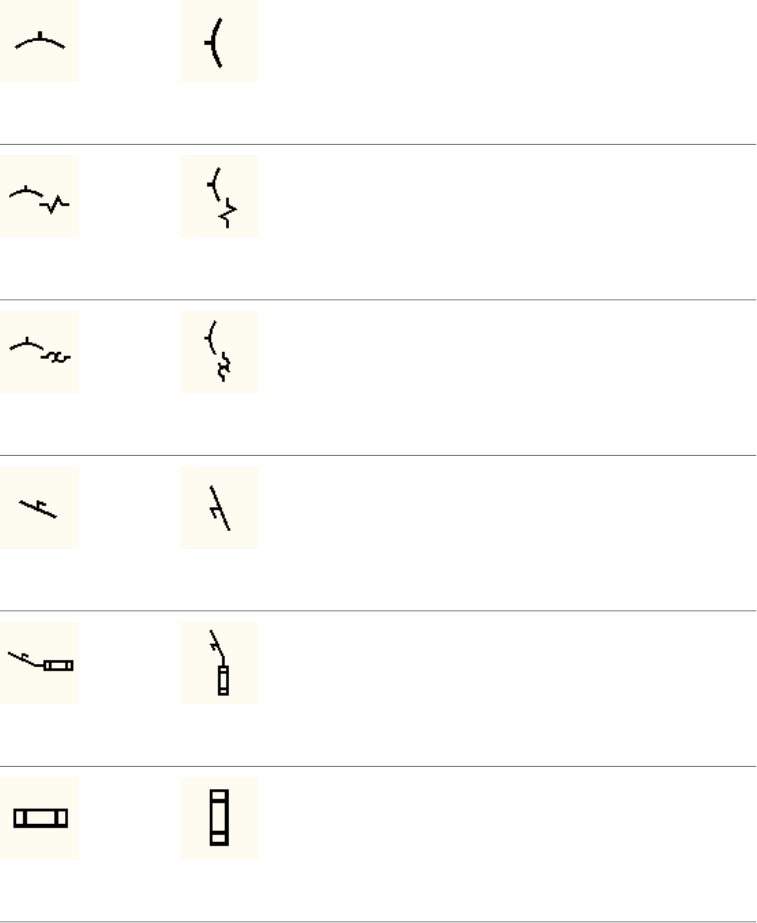
Circuit breaker
VCB11_1-HCB11_1-
Motor circuit protector
VCB11M_1-HCB11M_1-
Thermal circuit breaker
VCB11TH_1-HCB11TH_1-
Disconnect
VDS11_1-HDS11_1-
Fused disconnect
VDS11F_1-HDS11F_1-
Fuse
VFU1_1-HFU1_1-
432 | Chapter 6 JIC Symbols
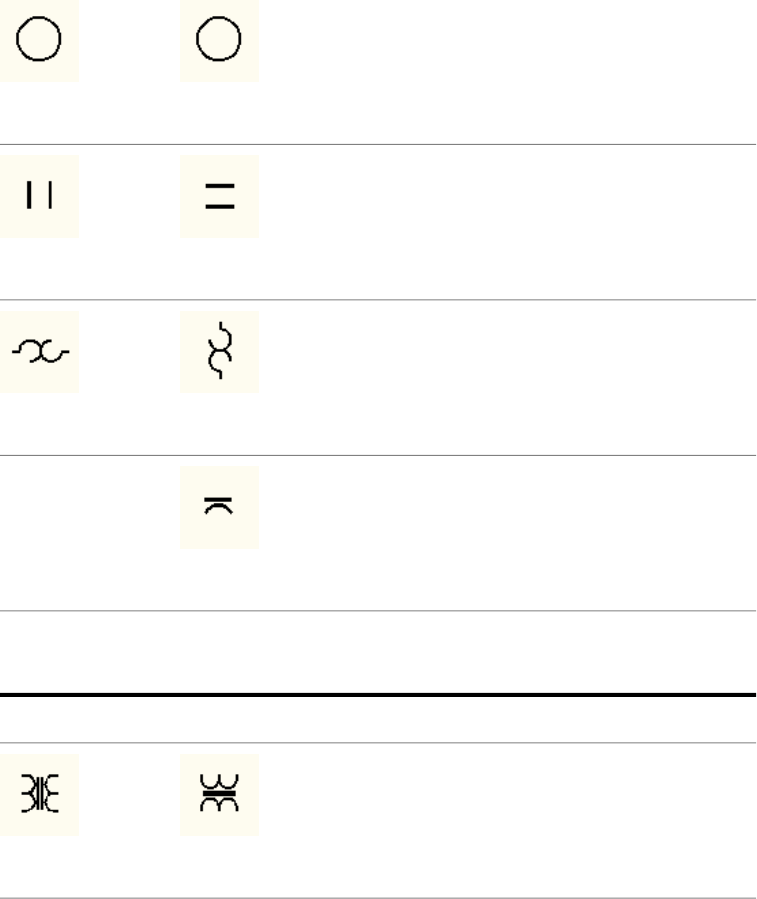
Motor
VMO13_1-HMO13_1-
Motor starter
VMS11_1-HMS11_1-
Overload
VOL1_1-HOL1_1-
Capacitor
VCA113_1-
Transformer
DescriptionVertical SymbolHorizontal Symbol
Transformer 1
VXF1_1-HXF1_1-
Transformer | 433
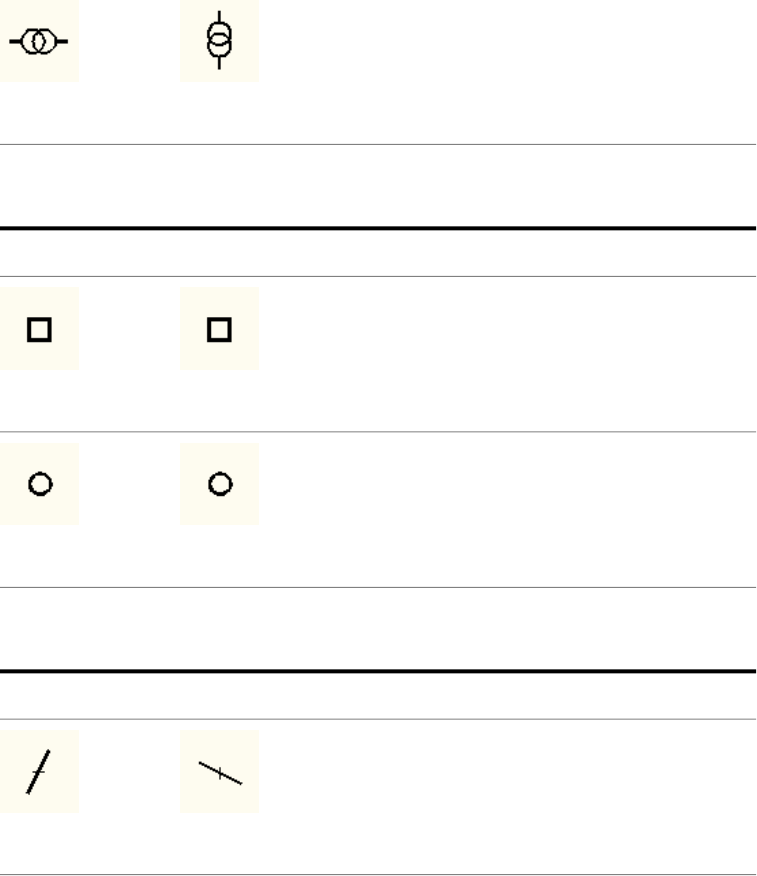
Transformer 2
VXF2_1-HXF2_1-
Terminal
DescriptionVertical SymbolHorizontal Symbol
Square terminal
VT0001_1-HT0001_1-
Round terminal
VT0002_1-HT0002_1-
Cable Marker
DescriptionVertical SymbolHorizontal Symbol
Cable marker
VW01_1-HW01_1-
434 | Chapter 6 JIC Symbols
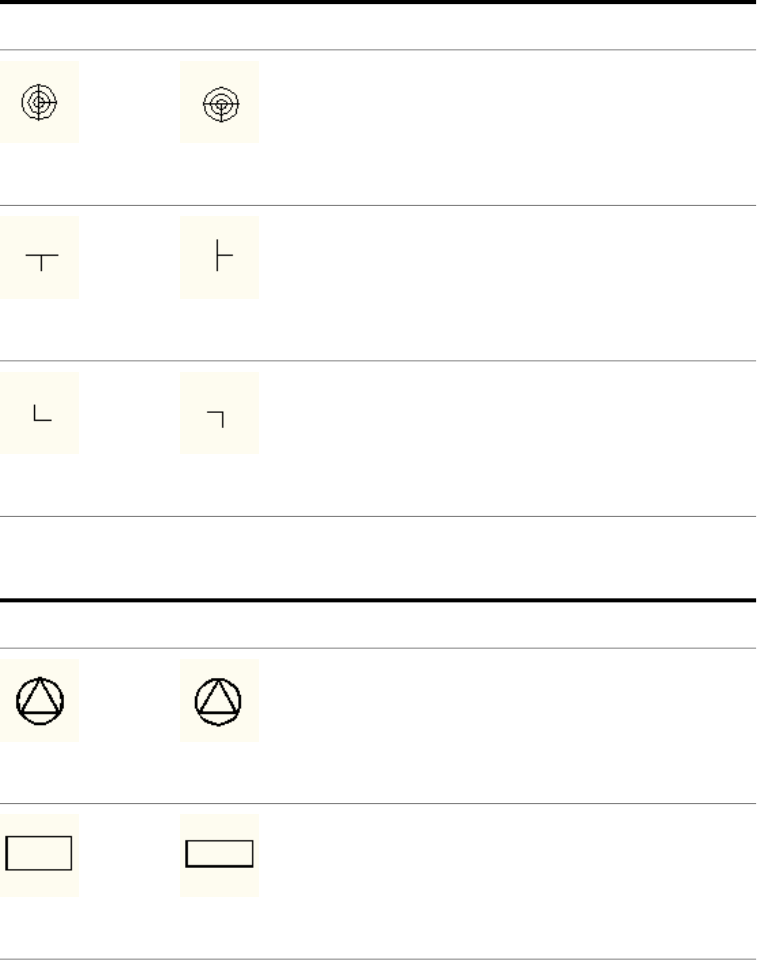
Bus-tap
DescriptionVertical SymbolHorizontal Symbol
Bus-tap - main/dot
VDV1_BT_1-HDV1_BT_1-
Bus-tap - dual/tee
VDV1_BTT_1-HDV1_BTT_1-
Bus-tap - dual/corner
VDV1_BTL_1-HDV1_BTL_1-
Miscellaneous
DescriptionVertical SymbolHorizontal Symbol
Power receptacle
VC01WR_1-HC01WR_1-
Generic load
VDV1_1-HDV1_1-
Bus-tap | 435
436

IEC Symbols
Push Buttons
Push Buttons
DescriptionVertical SymbolHorizontal Symbol
Push Button Normally Open
VPB11HPB11
Push Button Normally Closed
VPB12HPB12
Push Button Normally Open Latching
VPB11LHPB11L
7
437

Push Button Normally Closed Latching
VPB12LHPB12L
Mushroom Head Normally Open
VPB11MHPB11M
Mushroom Head Normally Closed
VPB12MHPB12M
Mushroom Head Normally Open Latching
VPB11MLHPB11ML
Mushroom Head Normally Closed Latching
VPB12MLHPB12ML
Mushroom Head Normally Open Twist Latch
VPB11MTLHPB11MTL
438 | Chapter 7 IEC Symbols

Mushroom Head Normally Closed Twist Latch
VPB12MTLHPB12MTL
Mushroom Head Normally Open Latching, Pull to
Disengage
VPB11S80HPB11S80
Mushroom Head Normally Closed Latching, Pull to
Disengage
VPB12S80HPB12S80
Mushroom Head Normally Open Latching, Key Oper-
ated
VPB11S82HPB11S82
Mushroom Head Normally Closed Latching, Key Op-
erated
VPB12S82HPB12S82
Normally Open Push Button Recessed
VPB11REHPB11RE
Push Buttons | 439

Normally Closed Push Button Recessed
VPB12REHPB12RE
Normally Open Push Button Recessed Latched
VPB11RELHPB11REL
Normally Closed Push Button Recessed Latched
VPB12RELHPB12REL
Normally Open Push Button Positive Make
VPB11PMHPB11PM
Normally Closed Push Button Positive Break
VPB12PBHPB12PB
2nd+ Normally Open Contact
VPB21HPB21
440 | Chapter 7 IEC Symbols
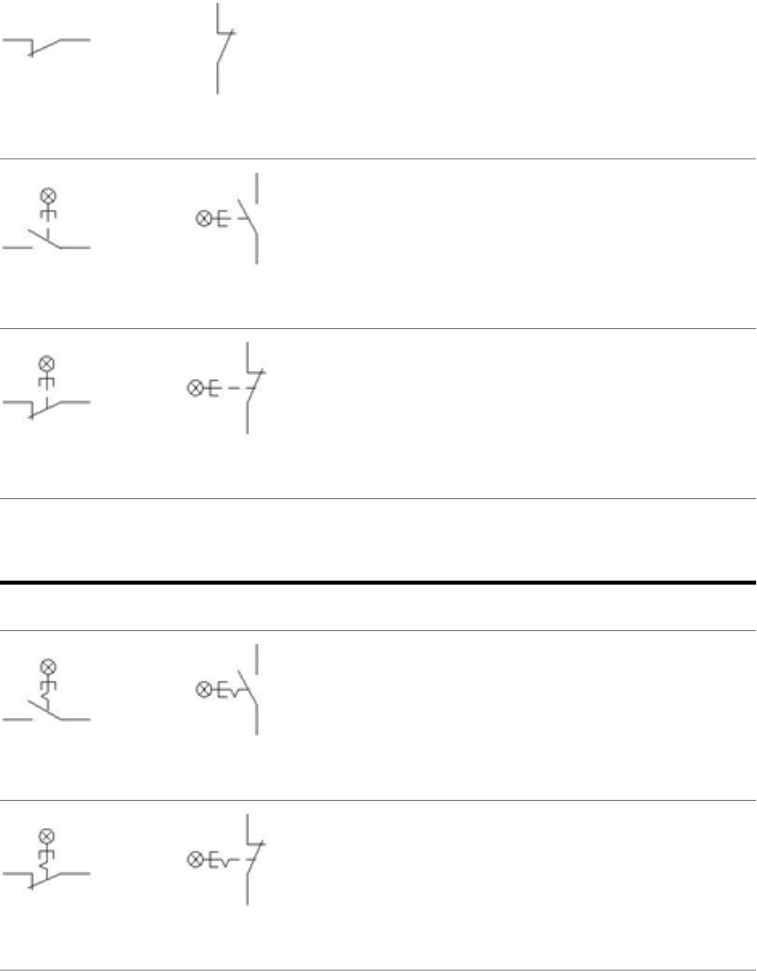
2nd+ Normally Closed Contact
VPB22HPB22
Illuminated Push Button Normally Open
VPB11S75HPB11S75
Illuminated Push Button Normally Closed
VPB12S75HPB12S75
Illuminated Push Buttons
DescriptionVertical SymbolHorizontal Symbol
Non-Auto Return Illuminated Push Button Normally
Open
VPB11S76HPB11S76
Non-Auto return Illuminated Push Button Normally
Closed
VPB12S76HPB12S76
Illuminated Push Buttons | 441

Selector Switches
Selector Switches
DescriptionVertical SymbolHorizontal Symbol
2 Position Maintain, Normally Open
VSS112HSS112
2 Position Maintain, Normally Closed
VSS122HSS122
2 Position Normally Open Return From Left
VSS112LHSS112L
2 Position Normally Closed Return From Left
VSS122LHSS122L
2 Position Normally Open Return From Right
VSS112RHSS112R
442 | Chapter 7 IEC Symbols

2 Position Normally Closed Return From Right
VSS122RHSS122R
2 Position Normally Open with Lamp
VSW11S77HSW11S77
2 Position Normally Closed with Lamp
VSW12S77HSW12S77
Normally Open Contact with Manual Unlatching
VSS2121FHSS2121F
Normally Open Contact with Maintained Position
VSS2122FHSS2122F
Normally Open Anticipated Contact
VSS217FHSS217F
Selector Switches | 443

Normally Open Delayed Contact
VSS218FHSS218F
Normally Closed Contact with Manual Unlatching
VSS2221FHSS2221F
Normally Closed Contact with Maintained Position
VSS2222FHSS2222F
Normally Closed Anticipated Contact
VSS227FHSS227F
Normally Closed Delayed Contact
VSS228FHSS228F
Non-Latched, Normally Open
VSS11NLHSS11NL
444 | Chapter 7 IEC Symbols
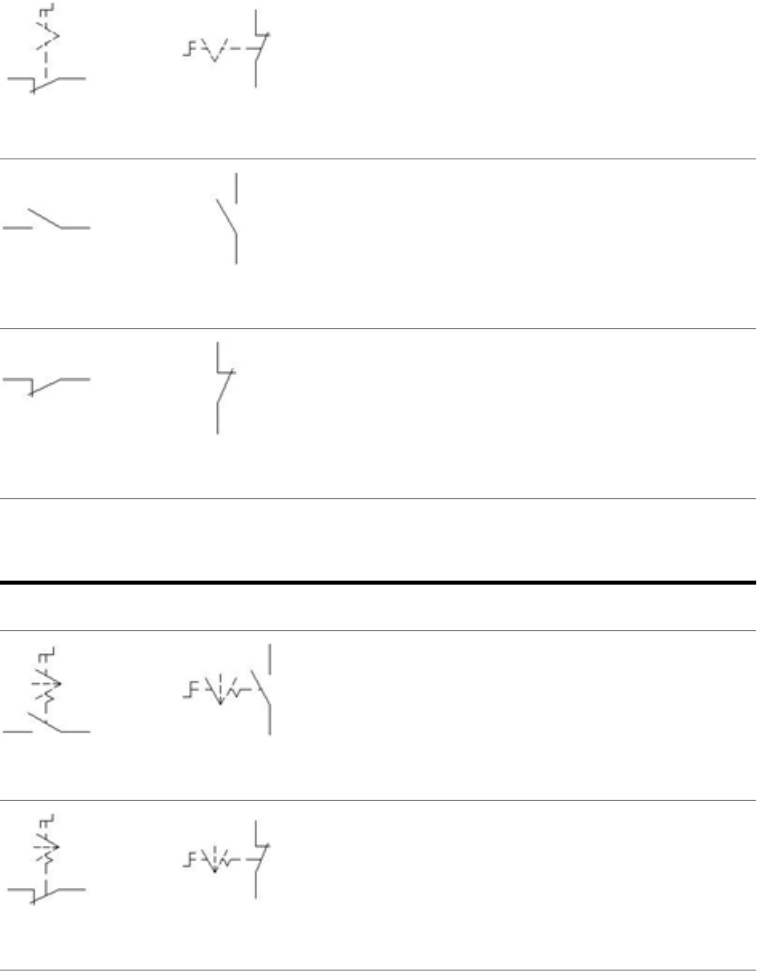
Non-Latched, Normally Closed
VSS12NLHSS12NL
2nd+ Normally Open Contact
VSS21HSS21
2nd+ Normally Closed Contact
VSS22HSS22
3 Position Selector Switches
DescriptionVertical SymbolHorizontal Symbol
3 Position Maintain, Normally Open
VSS113HSS113
3 Position Maintain, Normally Closed
VSS123HSS123
3 Position Selector Switches | 445

3 Position Normally Open Return From Left
VSS113LHSS113L
3 Position Normally Closed Return From Left
VSS123LHSS123L
3 Position Normally Open Return From Right
VSS113RHSS113R
3 Position Normally Closed Return From Right
VSS123RHSS123R
3 Position Normally Open Return From Both
VSS113BHSS113B
3 Position Normally Closed Return From Both
VSS123BHSS123B
446 | Chapter 7 IEC Symbols
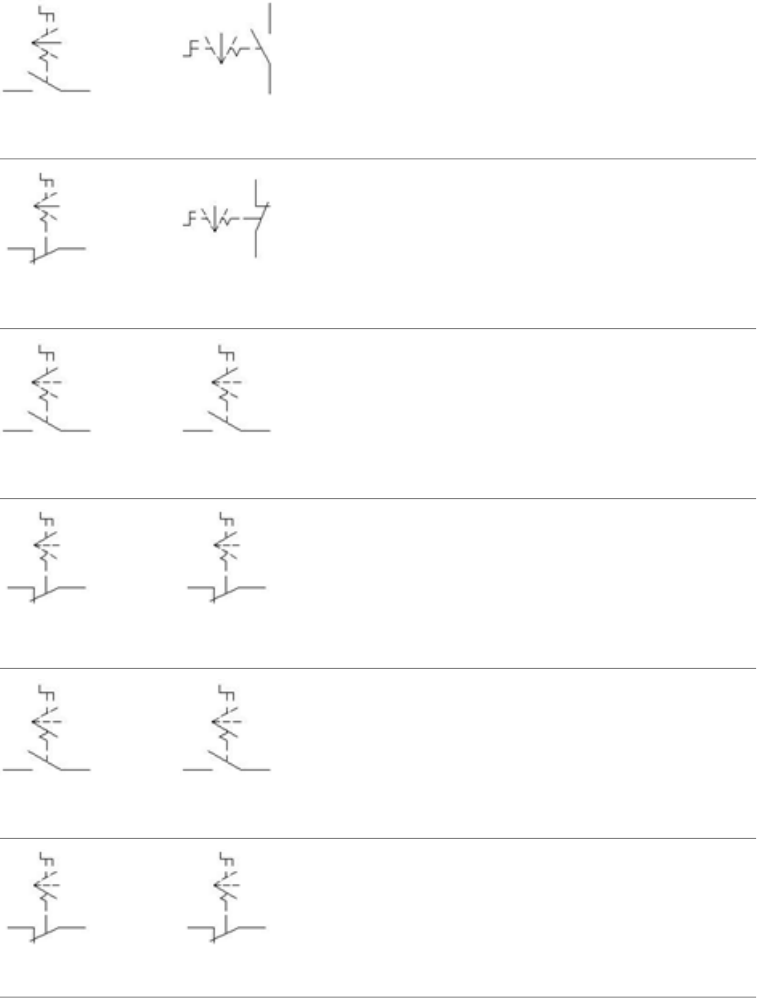
3 Position Normally Open Neutral 0
VSS11S31HSS11S31
3 Position Normally Closed Neutral 0
VSS12S31HSS12S31
3 Position Normally Open Neutral 1
HSS11S32HSS11S32
3 Position Normally Closed Neutral 1
HSS12S32HSS12S32
3 Position Normally Open Neutral 2
HSS11S33HSS11S33
3 Position Normally Closed Neutral 2
HSS12S33HSS12S33
3 Position Selector Switches | 447
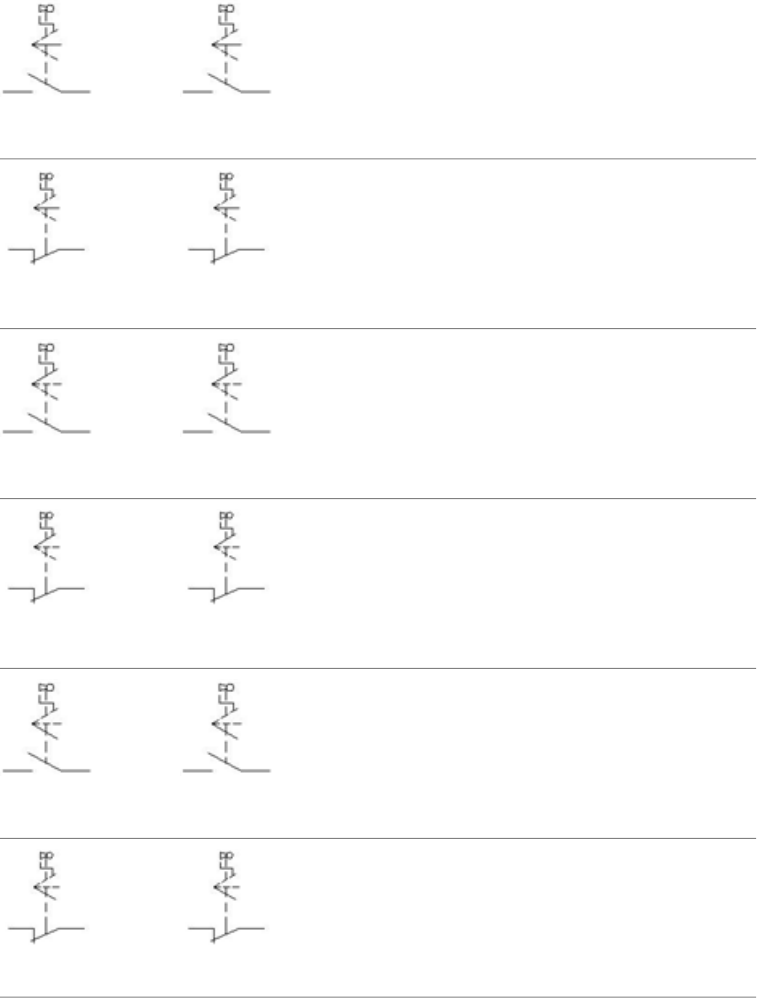
3 Position Normally Open Key Operated Neutral 0
HSS11S40HSS11S40
3 Position Normally Closed Key Operated Neutral 0
HSS12S40HSS12S40
3 Position Normally Open Key Operated Neutral 1
HSS11S41HSS11S41
3 Position Normally Closed Key Operated Neutral 1
HSS12S41HSS12S41
3 Position Normally Open Key Operated Neutral 2
HSS11S42HSS11S42
3 Position Normally Closed Key Operated Neutral 2
HSS12S42HSS12S42
448 | Chapter 7 IEC Symbols
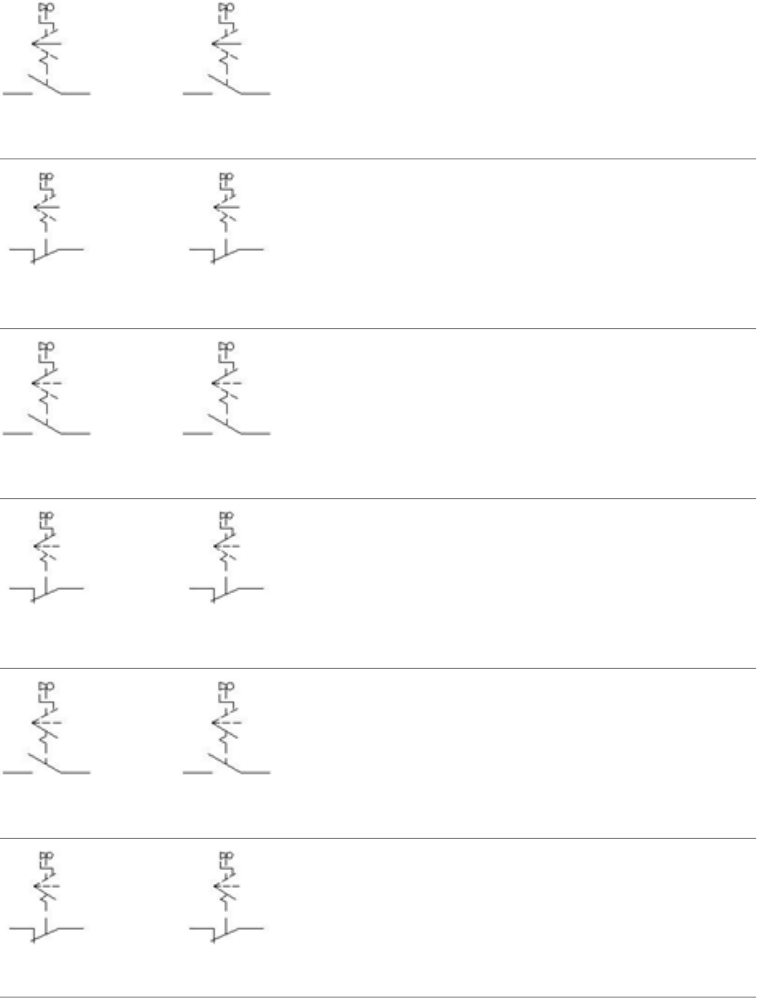
3 Stable Position Normally Open Key Operated
Neutral 0
HSS11S43HSS11S43
3 Stable Position Normally Closed Key Operated
Neutral 0
HSS12S43HSS12S43
3 Stable Position Normally Open Key Operated
Neutral 1
HSS11S44HSS11S44
3 Stable Position Normally Closed Key Operated
Neutral 1
HSS12S44HSS12S44
3 Stable Position Normally Open Key Operated
Neutral 2
HSS11S45HSS11S45
3 Stable Position Normally Closed Key Operated
Neutral 2
HSS12S45HSS12S45
3 Position Selector Switches | 449
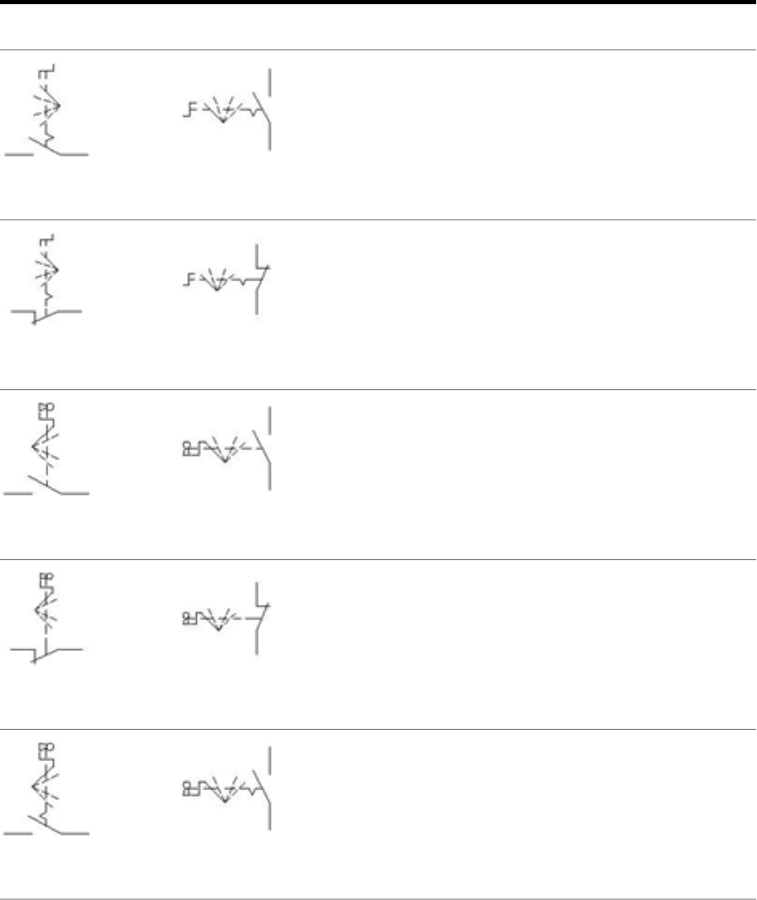
4 Position Selector Switches
DescriptionVertical SymbolHorizontal Symbol
4 Position Maintain, Normally Open
VSS114HSS114
4 Position Maintain, Normally Closed
VSS124HSS124
4 Position Key Selector Normally Open
VSS11S46HSS11S46
4 Position Key Selector Normally Closed
VSS12S46HSS12S46
4 Stable Positions Key Selector Normally Open
VSS11S49HSS11S49
450 | Chapter 7 IEC Symbols
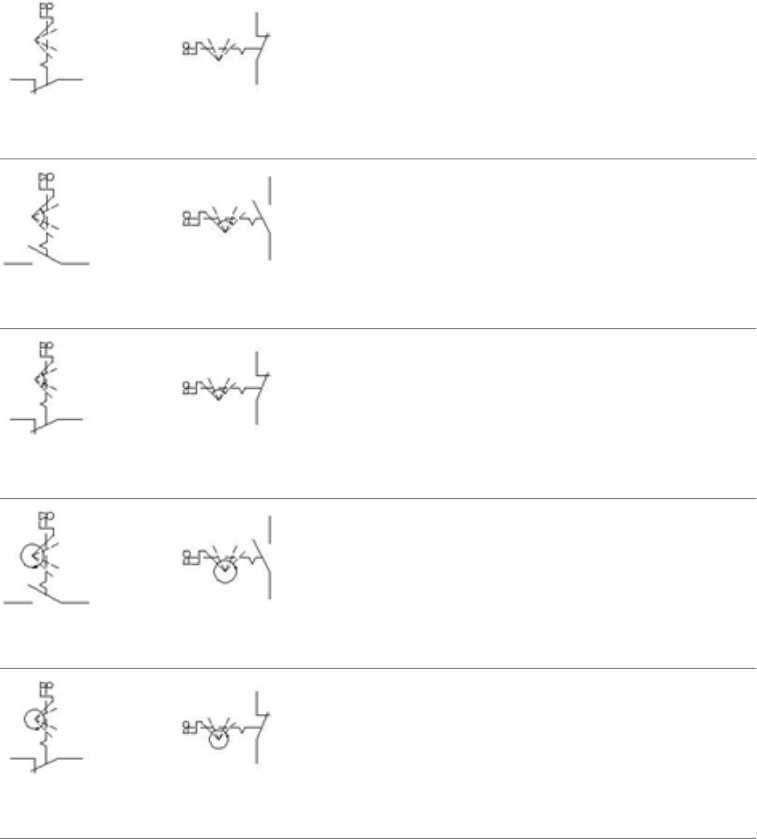
4 Stable Positions Key Selector Normally Closed
VSS12S49HSS12S49
4 Stable Positions Key Selector Normally Open-Rotat-
ing in 2 Ways
VSS11S50HSS11S50
4 Stable Positions Key Selector Normally Closed-Rotat-
ing in 2 Ways
VSS12S50HSS12S50
4 Stable Positions Key Selector Normally Open-Rotat-
ing CW
VSS11S51HSS11S51
4 Stable Positions Key Selector Normally Closed-Rotat-
ing CW
VSS12S51HSS12S51
4 Position Selector Switches | 451
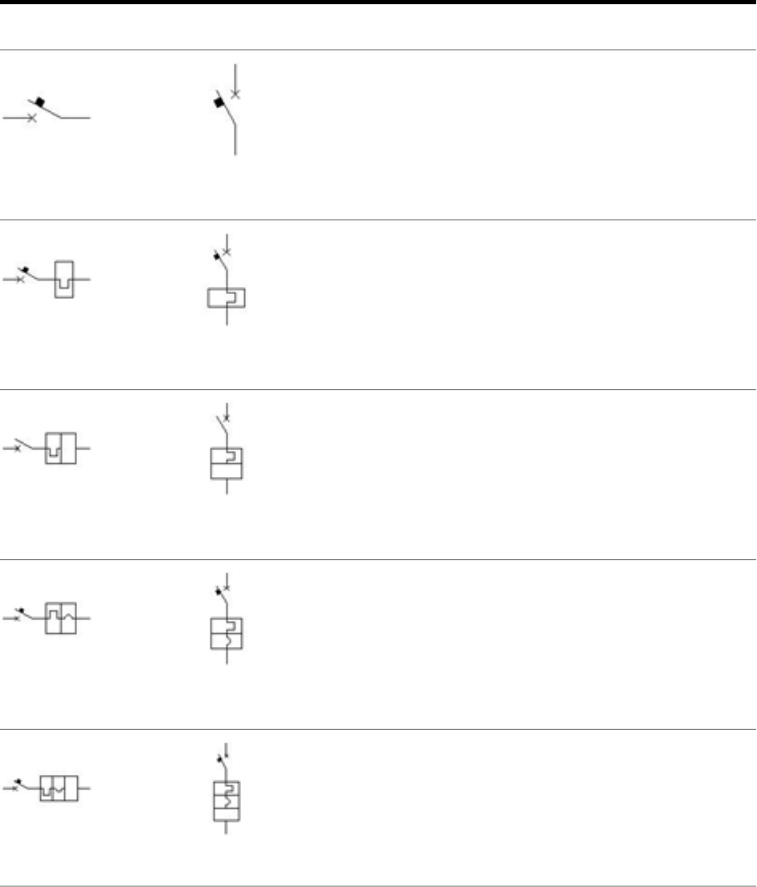
Breakers, Disconnects
1 Pole Circuit Breakers
DescriptionVertical SymbolHorizontal Symbol
Circuit Breaker 1 Pole
VCB1HCB1
Thermal Circuit Breaker
VCB11THHCB11TH
Current Limit/Thermal
VCB11THIHCB11THI
Magneto/Thermal
VCB11Q9HCB11Q9
Magneto/Thermal with Differential
VCB11Q13HCB11Q13
452 | Chapter 7 IEC Symbols
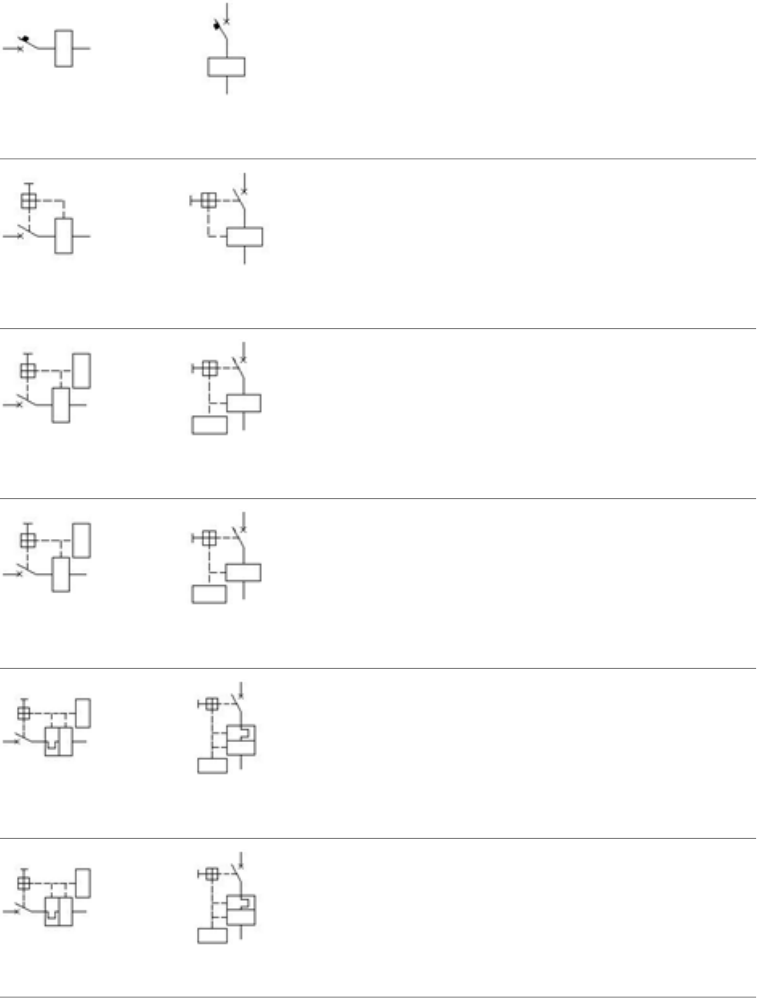
Differential
VCB11Q17HCB11Q17
With Current Protection
VCB11Q29HCB11Q29
With Current Protection and Lack of Voltage Protec-
tion
VCB11Q33HCB11Q33
With Max. Current and Min. Voltage Protection
VCB11Q37HCB11Q37
With Max. Thermal/Current and Min. Voltage Protec-
tion
VCB11Q41HCB11Q41
With Max. Thermal and Min. Voltage Protection
VCB11Q45HCB11Q45
1 Pole Circuit Breakers | 453
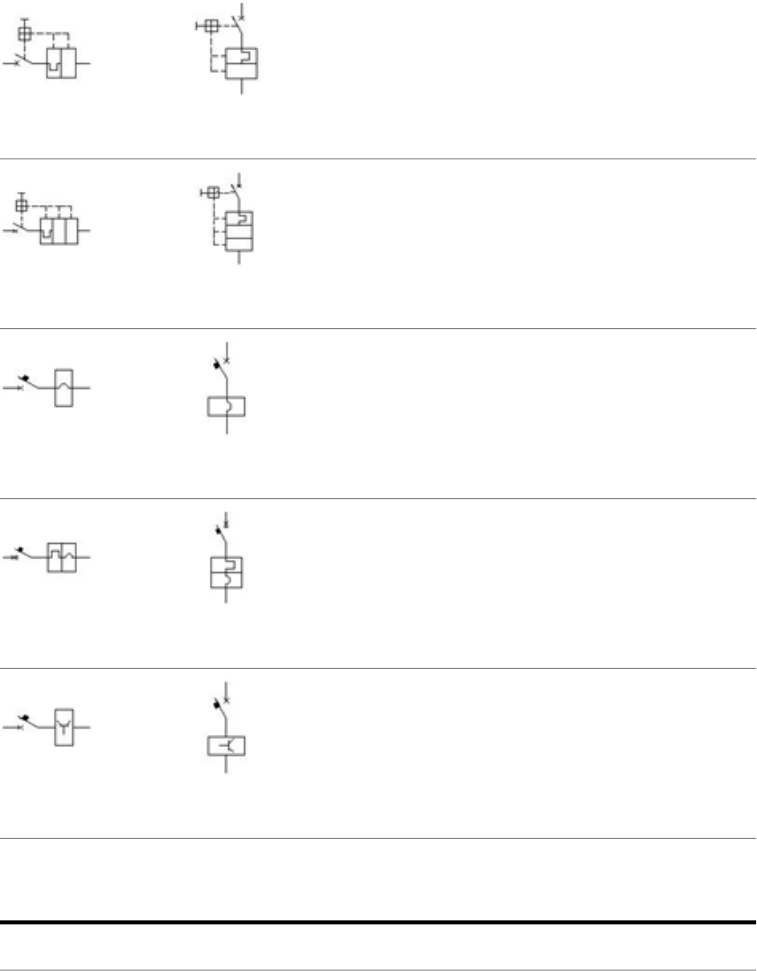
With Max. Thermal and Current Protection
VCB11Q21HCB11Q21
With Max. Thermal Protection and Differential
VCB11Q25HCB11Q25
1 Pole Auto Switch with Magneto
VCB11Q146HCB11Q146
1 Pole Auto Magneto-Thermal Switch/Disconnect
VCB11Q134HCB11Q134
1 Pole Auto Disconnect Switch with Electronic Relay
VCB11Q138HCB11Q138
2nd+ Pole Circuit Breakers
DescriptionVertical SymbolHorizontal Symbol
454 | Chapter 7 IEC Symbols

Circuit Breaker 2nd+ Pole
VCB2HCB2
Thermal 2nd+ Pole
VCB21THHCB21TH
Current Limit/Thermal 2nd+ Pole
VCB21THIHCB21THI
Disconnect 2nd+ Pole
VDS21HDS21
Disconnect Normally Open Auxiliary Contact
VDS21AUXHDS21AUX
Disconnect Normally Closed Auxiliary Contact
VDS22AUXHDS22AUX
2nd+ Pole Circuit Breakers | 455

Auto Return
VCB2120FHCB2120F
With Mechanical Block and Manual Unlatching
VCB2121FHCB2121F
With Maintained Position
VCB2122FHCB2122F
Anticipated Contact
VCB217FHCB217F
Delayed Contact
VCB218FHCB218F
Circuit Breaker Normally Open Auxiliary Contact
VCB21HCB21
456 | Chapter 7 IEC Symbols

Circuit Breaker Normally Closed Auxiliary Contact
VCB22HCB22
Auto Return
VCB2220FHCB2220F
With Mechanical Block and Manual Unlatching
VCB2221FHCB2221F
With Maintained Position
VCB2222FHCB2222F
Anticipated Contact
VCB227FHCB227F
Delayed Contact
VCB228FHCB228F
2nd+ Pole Circuit Breakers | 457

2 P Magneto-Thermal Switch, 1P Protected
VCB1Q142HCB1Q142
4 P Magneto-Thermal Switch, 3P Protected
VCB1Q143HCB1Q143
2 P Magneto-Thermal Switch with Differential, 1P
Protected
VCB1Q144HCB1Q144
4 P Magneto-Thermal Switch with Differential, 3P
Protected
VCB1Q145HCB1Q145
3 P 2 Way Disconnect Switch with Fuses
VDS1Q93HDS1Q93
Power Switches
DescriptionVertical SymbolHorizontal Symbol
458 | Chapter 7 IEC Symbols
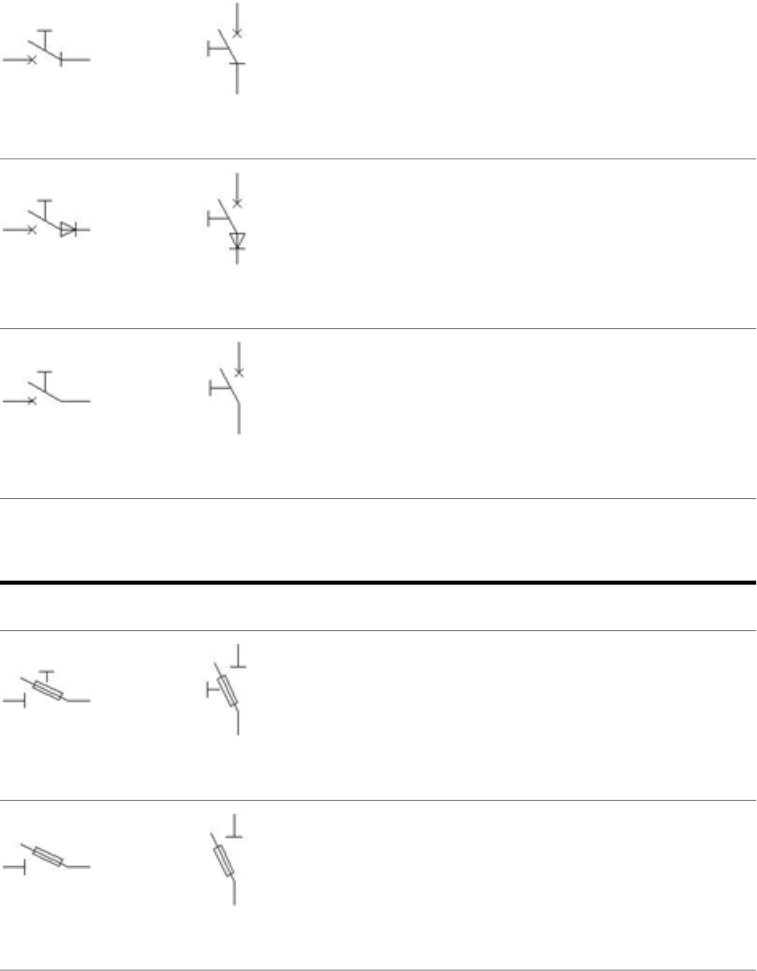
1P with Semiconductors
VCB11Q53HCB11Q53
1P with Semiconductors - unidirectional
VCB11Q57HCB11Q57
2P Power Switch
VCB11Q50HCB11Q50
Fusible Disconnects
DescriptionVertical SymbolHorizontal Symbol
Fused switch
VDS11FHDS11F
2nd+ Pole Fused Switch
VDS21FHDS21F
Fusible Disconnects | 459
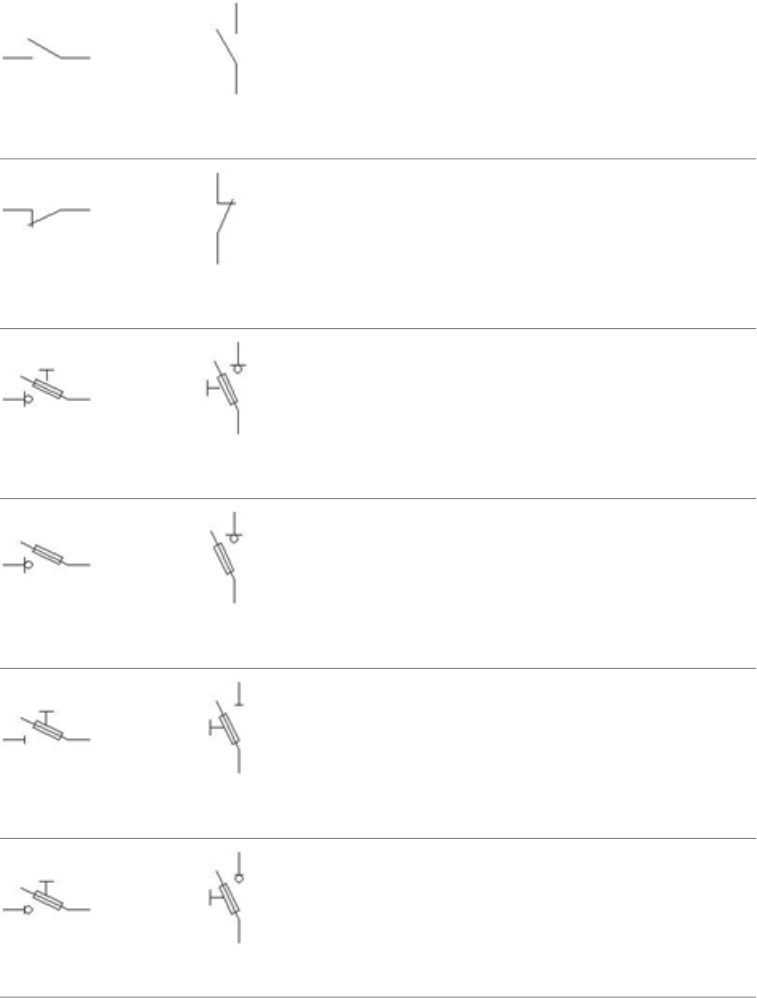
Auxiliary Contact, Normally Open
VDS21AUXHDS21AUX
Auxiliary Contact, Normally Closed
VDS22AUXHDS22AUX
1 Pole on load
VDS1OLHDS1OL
2nd+ Pole on load
VDS2OLHDS2OL
1 Phase Disconnect with Fuse
VDS11Q81HDS11Q81
1 Phase maneuver Switch/Disconnect with Fuse
VDS11Q85HDS11Q85
460 | Chapter 7 IEC Symbols
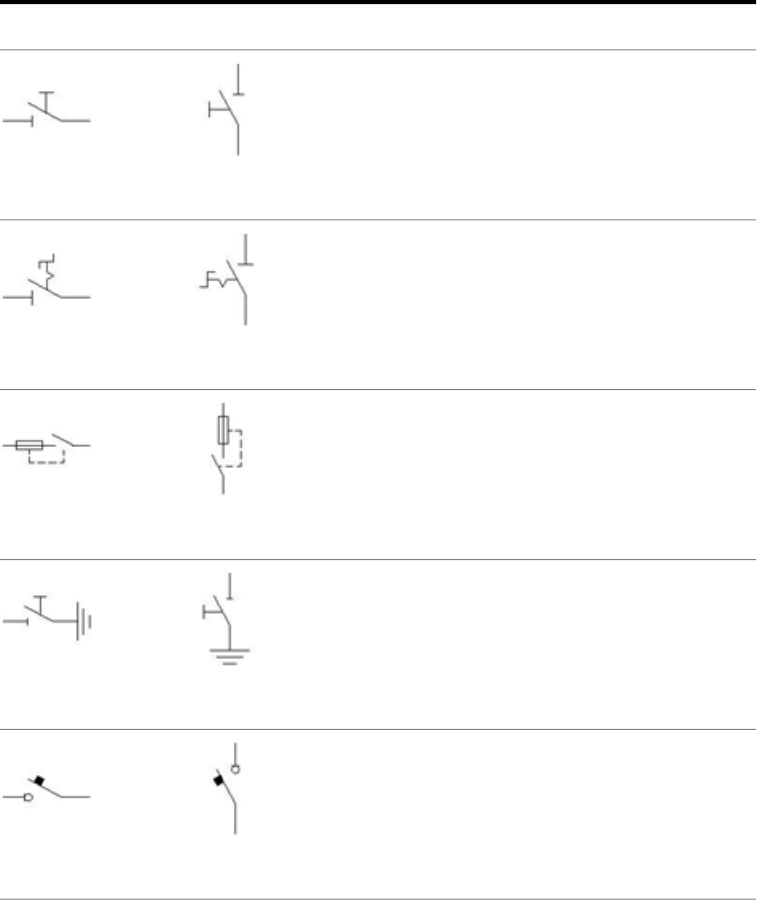
Disconnect 1 Pole
DescriptionVertical SymbolHorizontal Symbol
Disconnect 1 Pole
VDS11Q65HDS11Q65
Disconnect 1 Pole Non-Fused
VDS11HDS11
Maneuver Switch with Fuse
VDS11Q119HDS11Q119
PE Earthing Switch
VDS11Q123HDS11Q123
Power Auto Switch/Disconnect
VDS11Q5HDS11Q5
Disconnect 1 Pole | 461
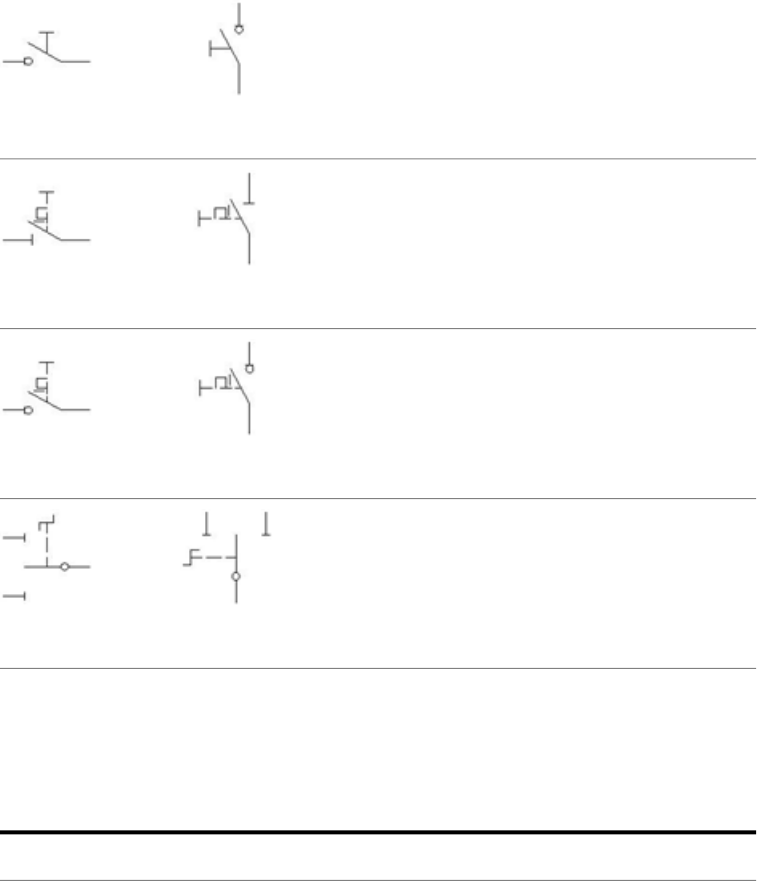
Maneuver Switch/Disconnect
VDS11Q69HDS11Q69
Disconnect with Lock Device
VDS11Q73HDS11Q73
Switch/Disconnect with Lock Device
VDS11Q77HDS11Q77
Two Way Disconnect with 3 Positions
VDS11Q89HDS11Q89
Fuses, Transformers, Reactors
Reactors
DescriptionVertical SymbolHorizontal Symbol
462 | Chapter 7 IEC Symbols

Reactors - General
VRT1HRT1
Reactors - Iron cored
VRT1ICHRT1IC
Inductor With Magnetic Core Air Gap
VRT1L3HRT1L3
Inductor With Magnetic Core Continuously Variable
VRT1L4HRT1L4
Fuses
DescriptionVertical SymbolHorizontal Symbol
Fuse
VFU1HFU1
Fuses | 463
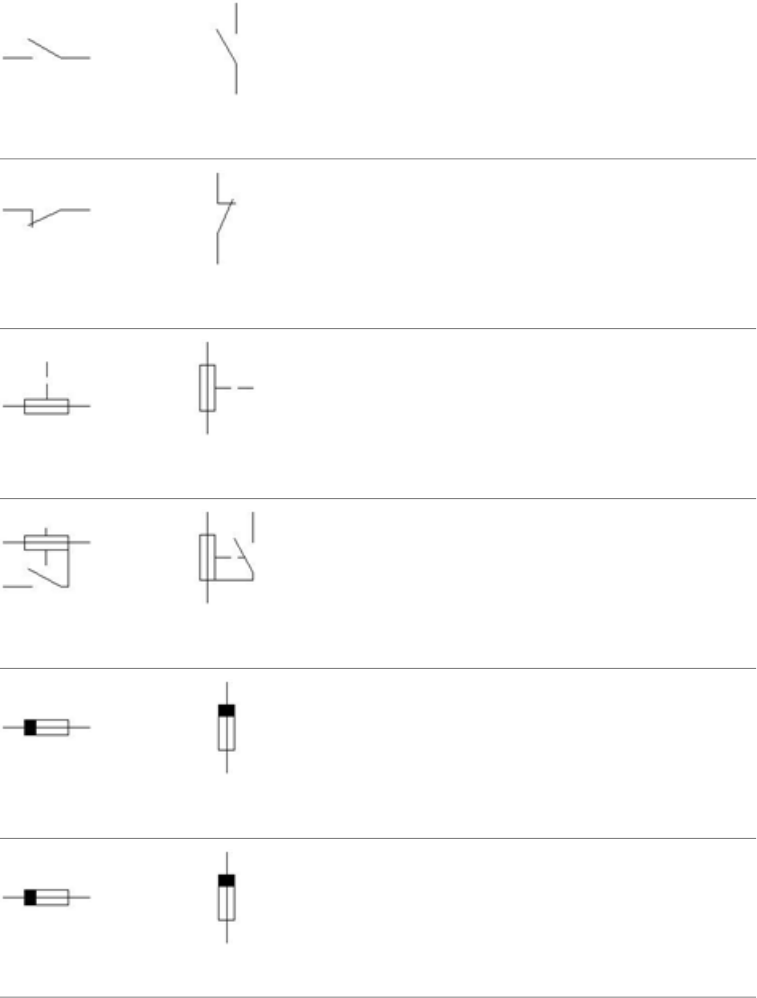
Fuse Auxiliary Contact, Normally Open
VFU21HFU21
Fuse Auxiliary Contact, Normally Closed
VFU22HFU22
Stiker
VFU1STHFU1ST
With alarm contact
VFU1ACHFU1AC
With separate alarm contact
VFU1LSHFU1LS
1 Pole - Live Side
VFU2LSHFU2LS
464 | Chapter 7 IEC Symbols
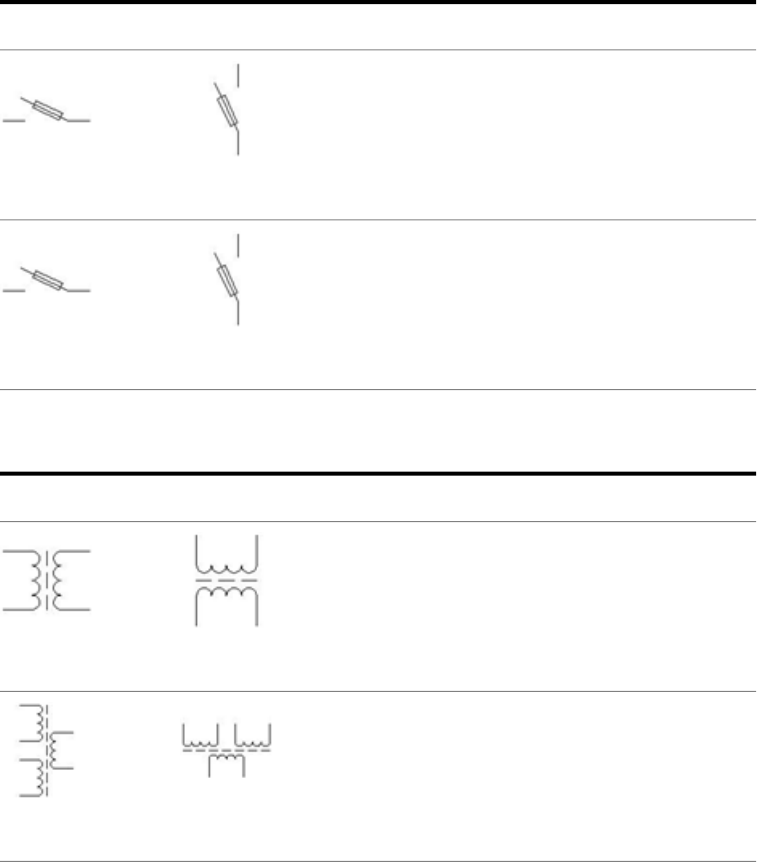
Fuse Switches
DescriptionVertical SymbolHorizontal Symbol
1 Pole
VFU1FSHFU1FS
1 Pole Child
VFU2FSHFU2FS
Transformers
DescriptionVertical SymbolHorizontal Symbol
Transformer
VXF1HXF1
Transformer Dual
VXF1DHXF1D
Fuse Switches | 465
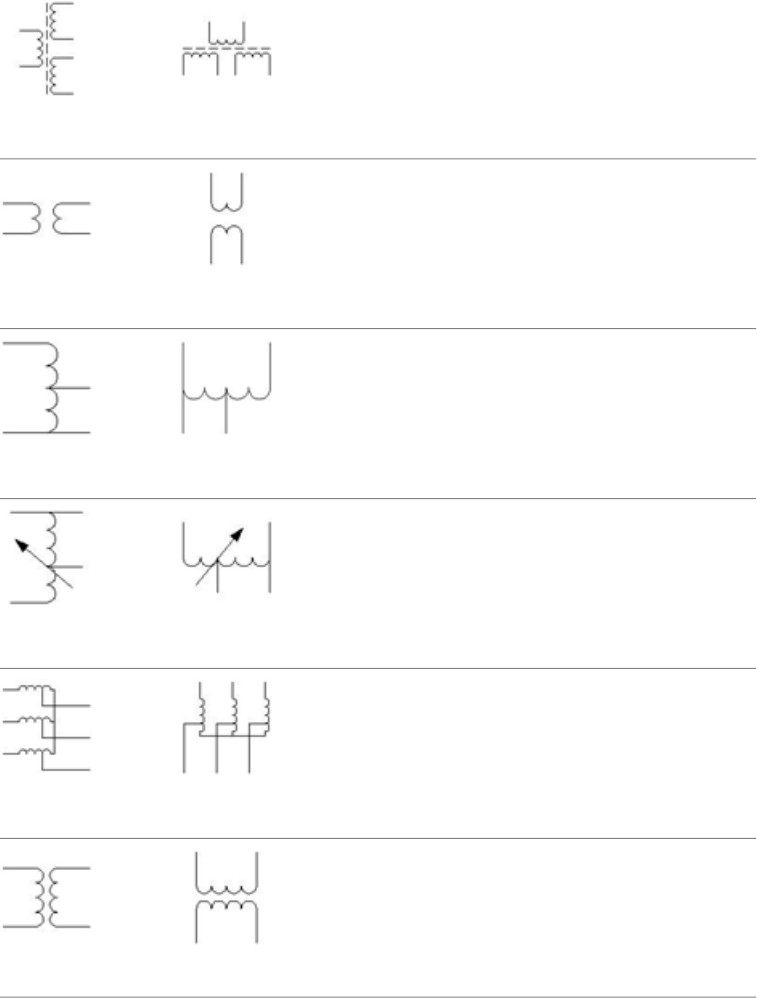
Transformer Dual (flipped)
VXF1DRHXF1DR
Potential Transformer
VXF1PTHXF1PT
Single phase auto
VXF1P1AUTOHXF1P1AUTO
1 Phase Autotransformer
VXF1T18HXF1T18
3 Phase Autotransformer Star Connected
VXF1T19HXF1T19
Power Transformer 1 with 2 Windings
VXF1T2HXF1T2
466 | Chapter 7 IEC Symbols
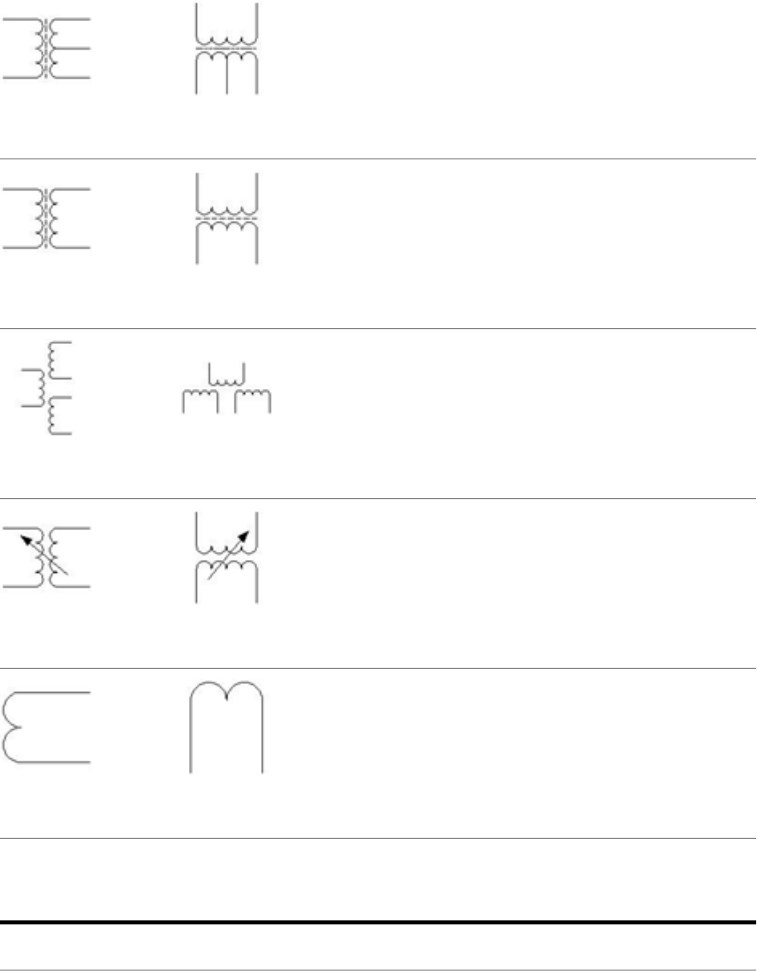
Power Transformer 2 with 2 Windings
VXF1T4HXF1T4
Power Transformer with 2 Windings and Screen
VXF1T3HXF1T3
Power Transformer with 3 Windings
VXF1T6HXF1T6
Adjustable Power Transformer with 2 Windings
VXF1T5HXF1T5
Voltage Transformer
VXF1T34HXF1T34
Current Transformers
DescriptionVertical SymbolHorizontal Symbol
Current Transformers | 467
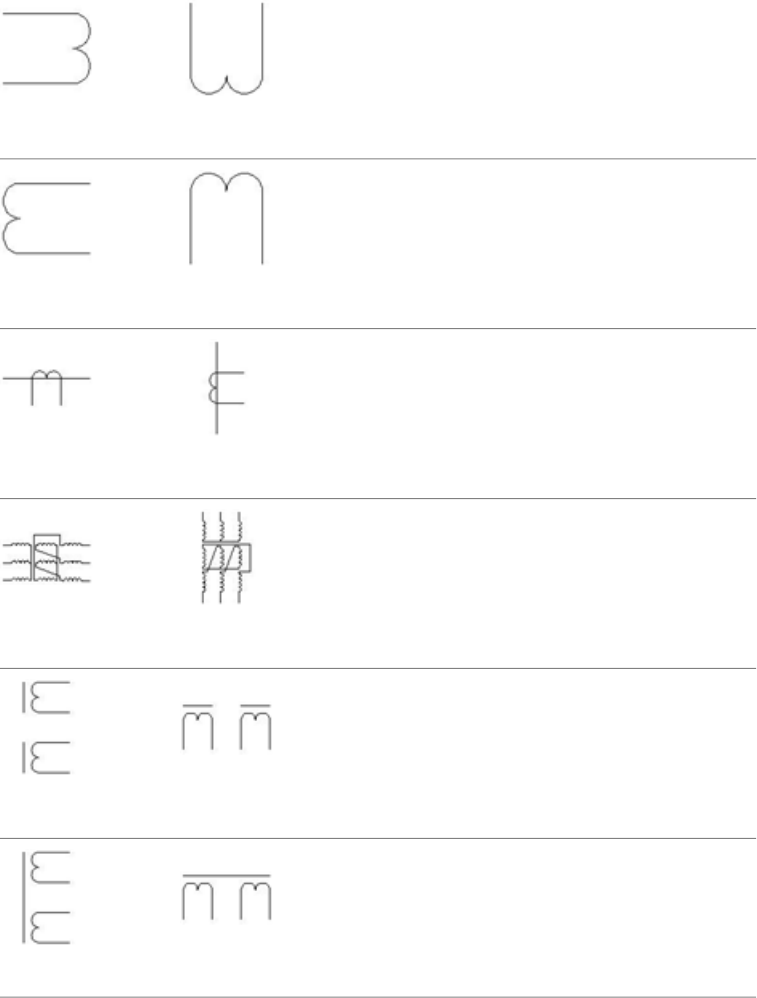
CT Current Transformer
VXF1CTHXF1CT
CT (Flipped)
VXF1CTRHXF1CTR
Current Transformer 2
VXF1T1HXF1T1
With 2 Secondaries - Independent Magnetic Circuits
VXF1T30HXF1T30
With 2 Secondaries - Common Magnetic Circuit
VXF1T31HXF1T31
With Tapped Secondary Winding
VXF1T32HXF1T32
468 | Chapter 7 IEC Symbols
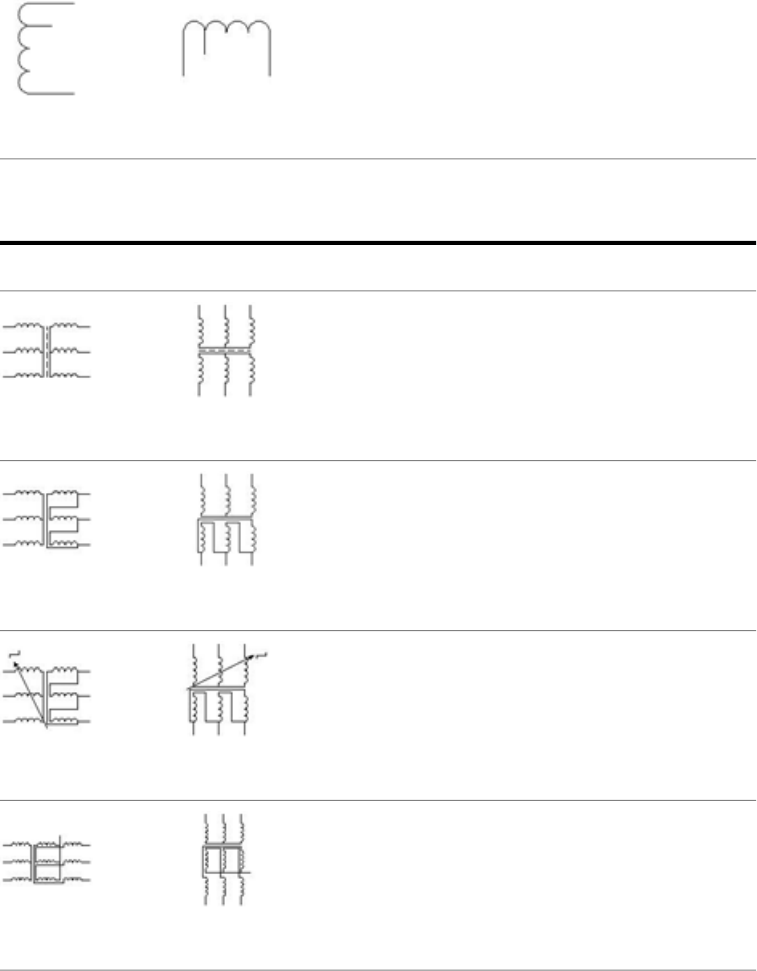
With Conductor Indication
VXF1T33HXF1T33
3 Phase Transformers
DescriptionVertical SymbolHorizontal Symbol
3 Phase
VXF1P3HXF1P3
3 Phase Star/Delta
VXF1P3SDHXF1P3SD
3 Phase Star/Delta Primary with Sockets
VXF1T11HXF1T11
3 Phase Star/Zigzag
VXF1T12HXF1T12
3 Phase Transformers | 469
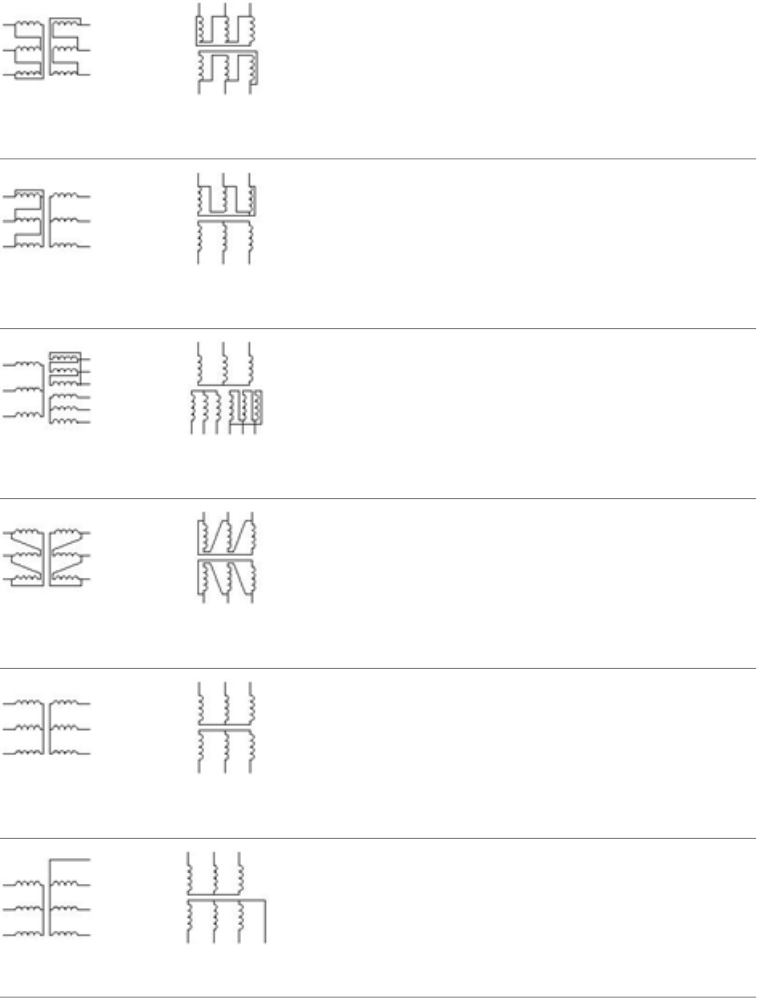
3 Phase Delta/Delta
VXF1T13HXF1T13
3 Phase Delta/Star
VXF1T14HXF1T14
3 Phase Star/Star/Delta with 3 Windings
VXF1T15HXF1T15
3 Phase Delta/Delta
VXF1T20HXF1T20
3 Phase Star/Star
VXF1T7HXF1T7
3 Phase Star/Star Secondary with Neutral
VXF1T8HXF1T8
470 | Chapter 7 IEC Symbols
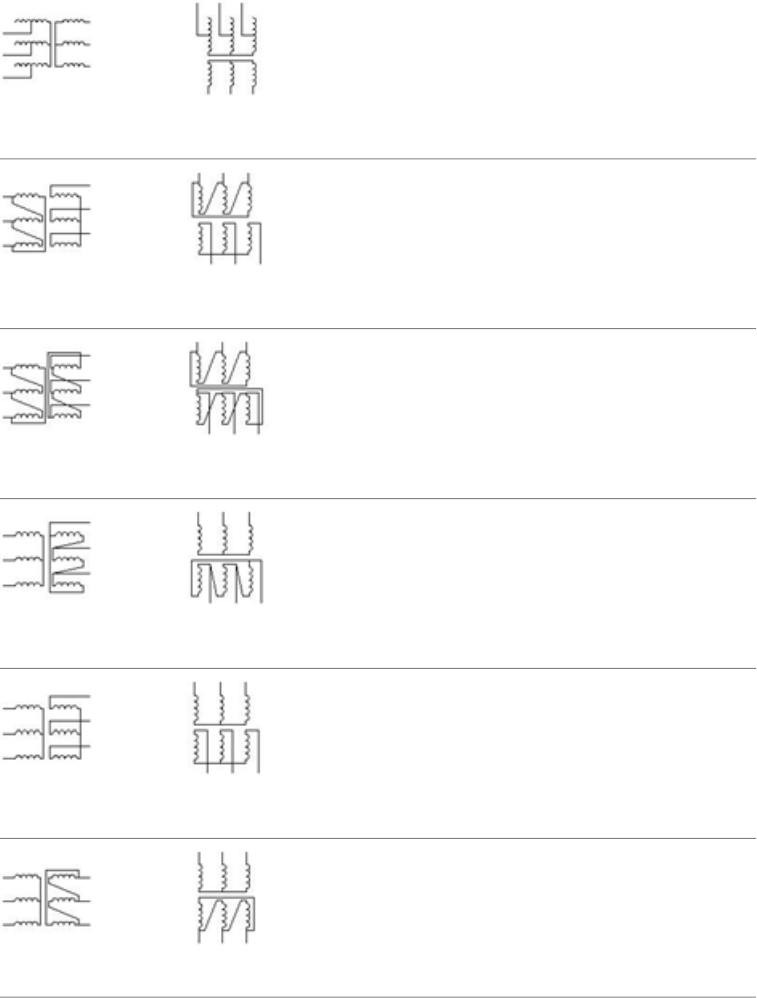
3 Phase Star/Star Primary with Plugs
VXF1T9HXF1T9
3 Phase Dy5
VXF1T21HXF1T21
3 Phase Dd6
VXF1T22HXF1T22
3 Phase Yd5
VXF1T23HXF1T23
3 Phase Yy6
VXF1T24HXF1T24
3 Phase Yd11
VXF1T25HXF1T25
3 Phase Transformers | 471
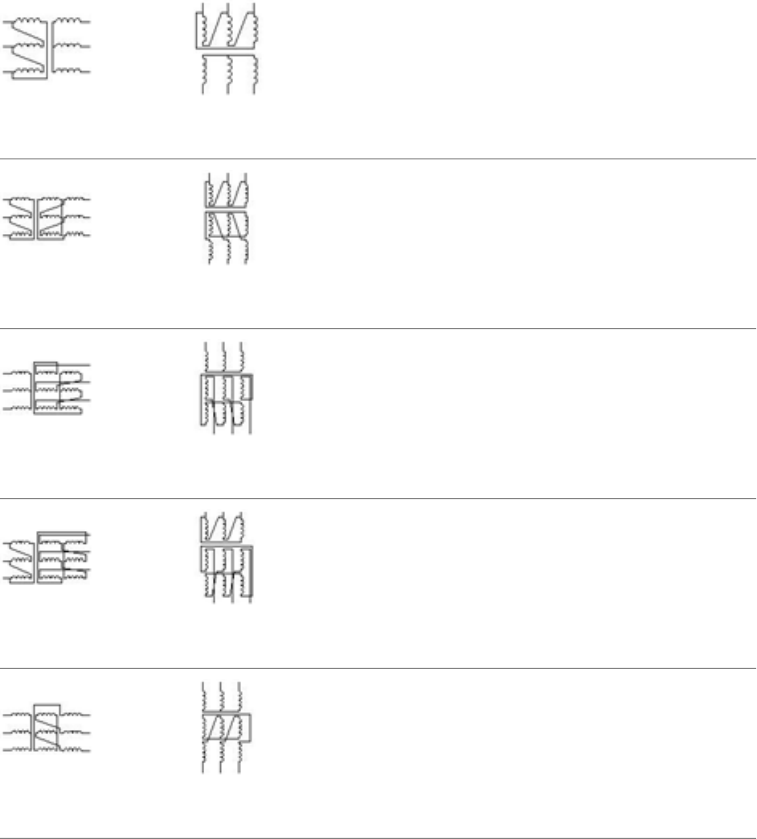
3 Phase Dy11
VXF1T26HXF1T26
3 Phase Dz0
VXF1T27HXF1T27
3 Phase Yz5
VXF1T28HXF1T28
3 Phase Dz6
VXF1T29HXF1T29
3 Phase Yz11
VXF1T30HXF1T30
472 | Chapter 7 IEC Symbols

Relays, Contacts
Relays and Contacts
DescriptionVertical SymbolHorizontal Symbol
Relay Normally Open Contact
VCR21HCR21
Relay Normally Closed Contact
VCR22HCR22
Relay Form C
VCR23RHCR23R
Relay Form C Flipped
VCR23HCR23
Relay Coil
VCR1HCR1
Relays, Contacts | 473
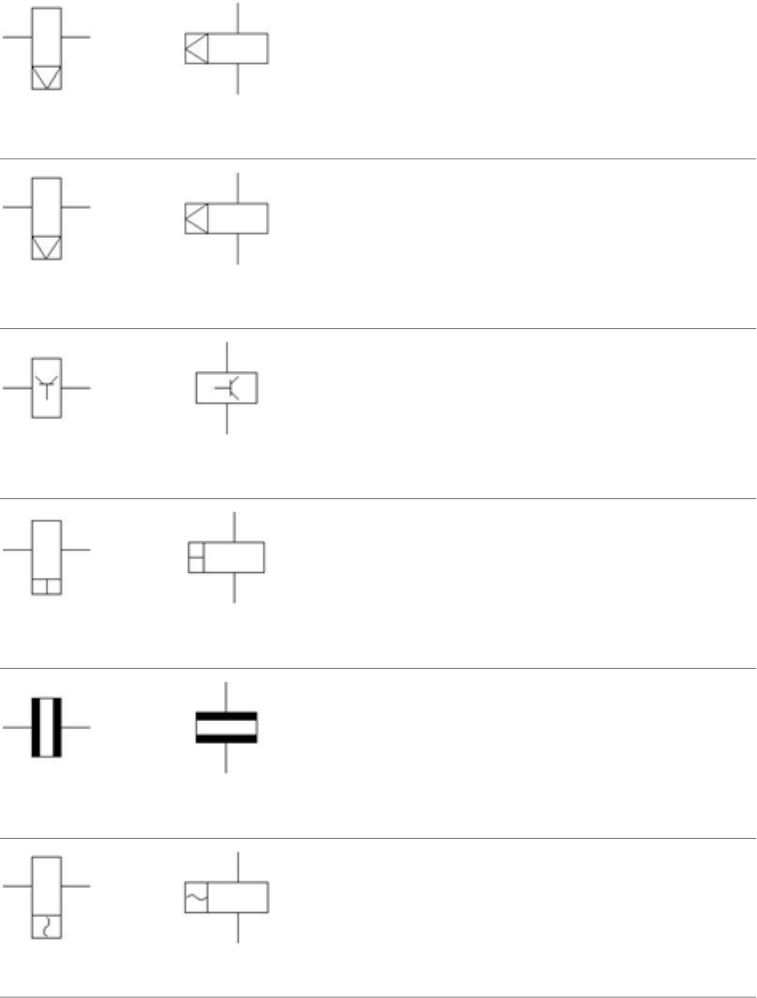
Latch Relay Coil
VLR1HLR1
Latch relay (child coil)
VLR2HLR2
Solid State
VCR1SSDHCR1SSD
High Speed
VCR1HSPHCR1HSP
AC Unaffected
VCR1ACUHCR1ACU
AC
VCR1ACHCR1AC
474 | Chapter 7 IEC Symbols

Polarized
VCR1POLHCR1POL
Measuring
VCR1MSRHCR1MSR
With Mechanical Block and Manual Unlatching
VCR2121FHCR2121F
With Maintained Position
VCR2122FHCR2122F
Anticipated Contact
VCR217FHCR217F
Delayed Contact
VCR218FHCR218F
Relays and Contacts | 475

With Mechanical Block and Manual Unlatching
VCR2221FHCR2221F
With Maintained Position
VCR2222FHCR2222F
Anticipated Contact
VCR227FHCR227F
Delayed Contact
VCR228FHCR228F
Magnetic Protection
VCR1F34HCR1F34
Relays with Suppression
DescriptionVertical SymbolHorizontal Symbol
476 | Chapter 7 IEC Symbols
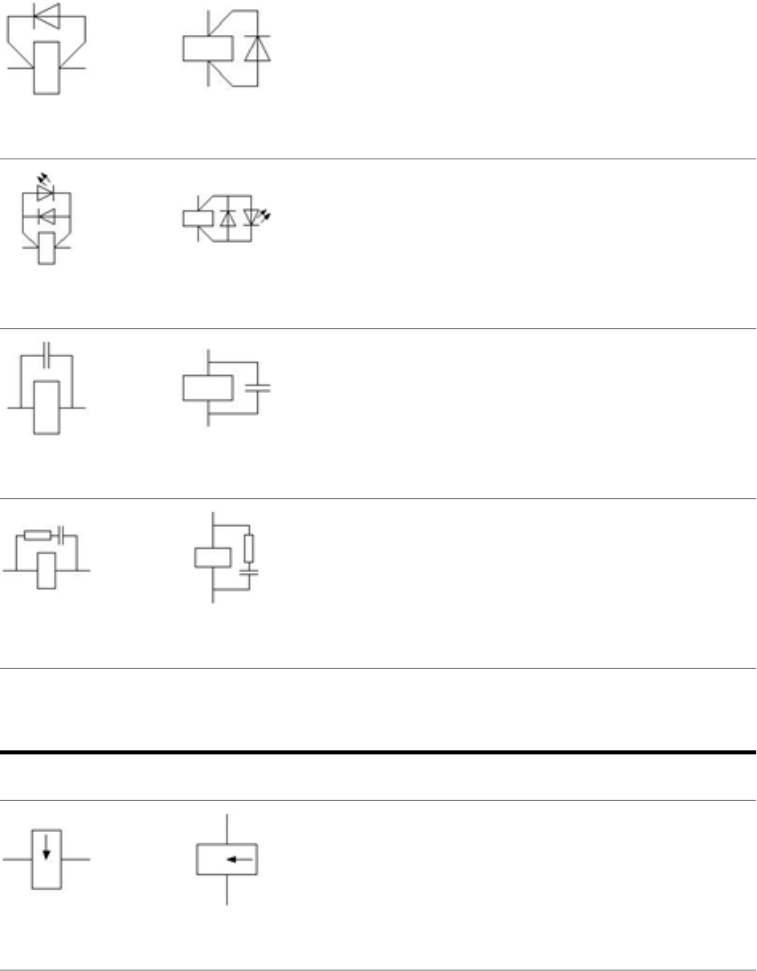
Relay with Integrated Block Diode
VCR1K33HCR1K33
Relay with Integrated Block Diode and Integrated LED
VCR1K35HCR1K35
Relay with Capacitor
VCR1K37HCR1K37
Relay with RC Circuit
VCR1K39HCR1K39
Current Protection Relays
DescriptionVertical SymbolHorizontal Symbol
Come Back Current Protection
VCR1F28HCR1F28
Current Protection Relays | 477

Differential Current Protection
VCR1F29HCR1F29
Differential Current Protection - Relative Value
VCR1F30HCR1F30
Maximum Current Protection
VCR1F25HCR1F25
Minimum Current Protection
VCR1F26HCR1F26
Minimum and Maximum Current Protection
VCR1F27HCR1F27
In Neutral
VCR1F32HCR1F32
478 | Chapter 7 IEC Symbols

In Neutral between 2 Multi-Phase Systems
VCR1F33HCR1F33
Ground Failure Current Protection
VCR1F37HCR1F37
Voltage Protection Relays
DescriptionVertical SymbolHorizontal Symbol
Minimum Voltage Protection
VCR1F35HCR1F35
Maximum Voltage Protection
VCR1F36HCR1F36
Residual Voltage Protection
VCR1F38HCR1F38
Voltage Protection Relays | 479
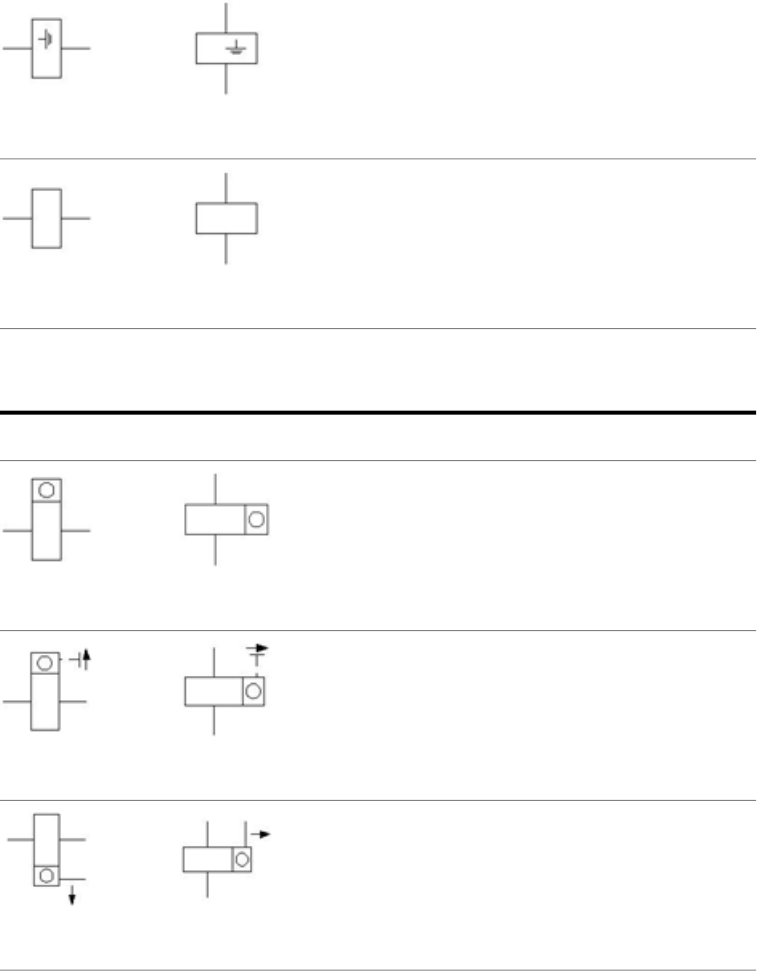
Ground Failure Voltage Protection
VCR1F31HCR1F31
Lack of Voltage Protection
VCR1F39HCR1F39
Counter Relays
DescriptionVertical SymbolHorizontal Symbol
Counter No Reset
VCR1CNNHCR1CNN
Counter Manual Reset
VCR1CNMHCR1CNM
Counter Electronic Reset
VCR1CNEHCR1CNE
480 | Chapter 7 IEC Symbols

Miscellaneous Relays
DescriptionVertical SymbolHorizontal Symbol
Frequency Relay
VCR1F40HCR1F40
Minimum Impedance Relay
VCR1F41HCR1F41
Relay Sensing Lack of Phase in Three Phase System
VCR1F42HCR1F42
Minimum Active Power Relay
VCR1F43HCR1F43
Insulating Relay
VCR1F44HCR1F44
Miscellaneous Relays | 481
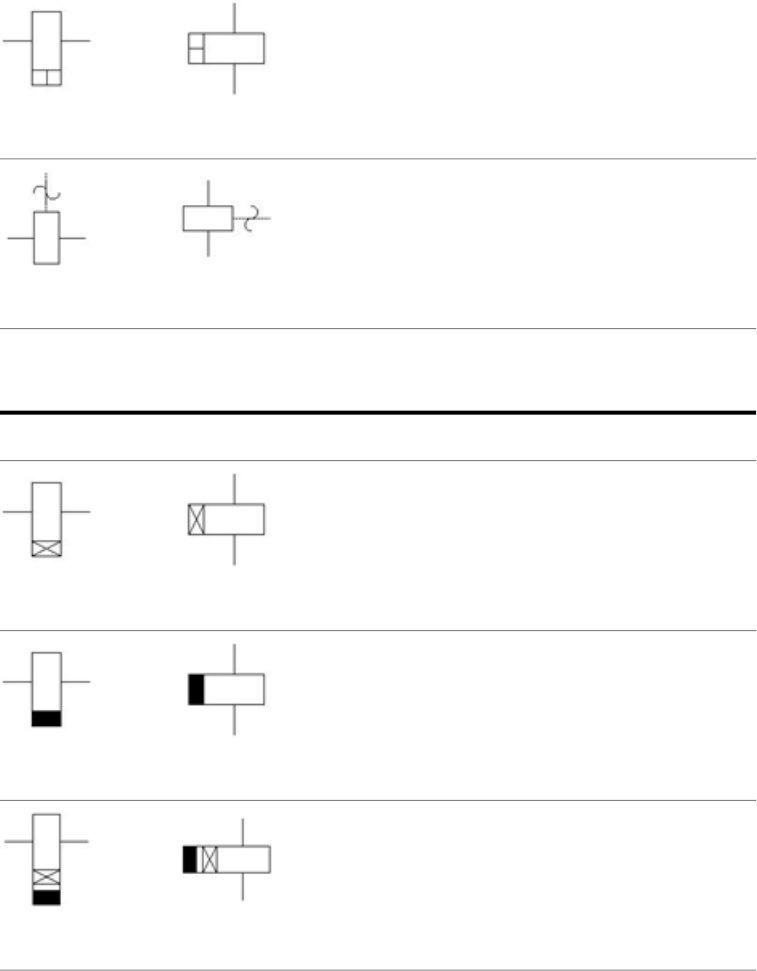
Quick Relay Coil
VCR1K1HCR1K1
Mechanical Resonance Relay
VCR1K11HCR1K11
Time Delay Relays
DescriptionVertical SymbolHorizontal Symbol
ON Delay Coil
VTD1NHTD1N
OFF Delay Coil
VTD1FHTD1F
ON/OFF Delay
VCR1OODHCR1OOD
482 | Chapter 7 IEC Symbols
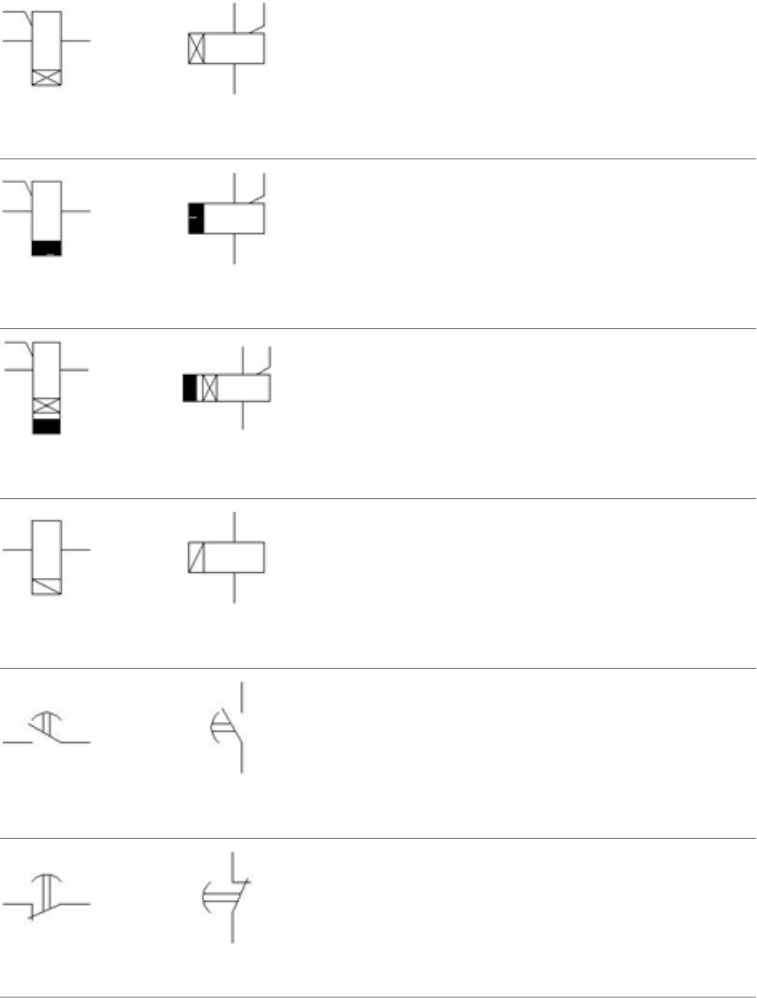
3 Clamp Delay Relay - Energized
VTD1K25HTD1K25
3 Clamp Delay Relay - De-energized
VTD1K27HTD1K27
3 Clamp Delay Relay - Energized/De-energized
VTD1K29HTD1K29
Latency Relay
VTD1K5HTD1K5
ON Delay Normally Open(Delay Close)
VTD21NHTD21N
ON Delay Normally Closed(Delay Open)
VTD22NHTD22N
Time Delay Relays | 483

OFF Delay Normally Open (Instant Close/Delay Open)
VTD21FHTD21F
OFF Delay Normally Closed (Instant Open/Delay
Close)
VTD22FHTD22F
Normally Open Contact (Instant)
VTD21IHTD21I
Normally Closed Contact (Instant)
VTD22IHTD22I
Normally Open Contact (Instant-for Delay Close)
VTD21IFHTD21IF
Normally Closed Contact (Instant-for Delay Close)
VTD22IFHTD22IF
484 | Chapter 7 IEC Symbols
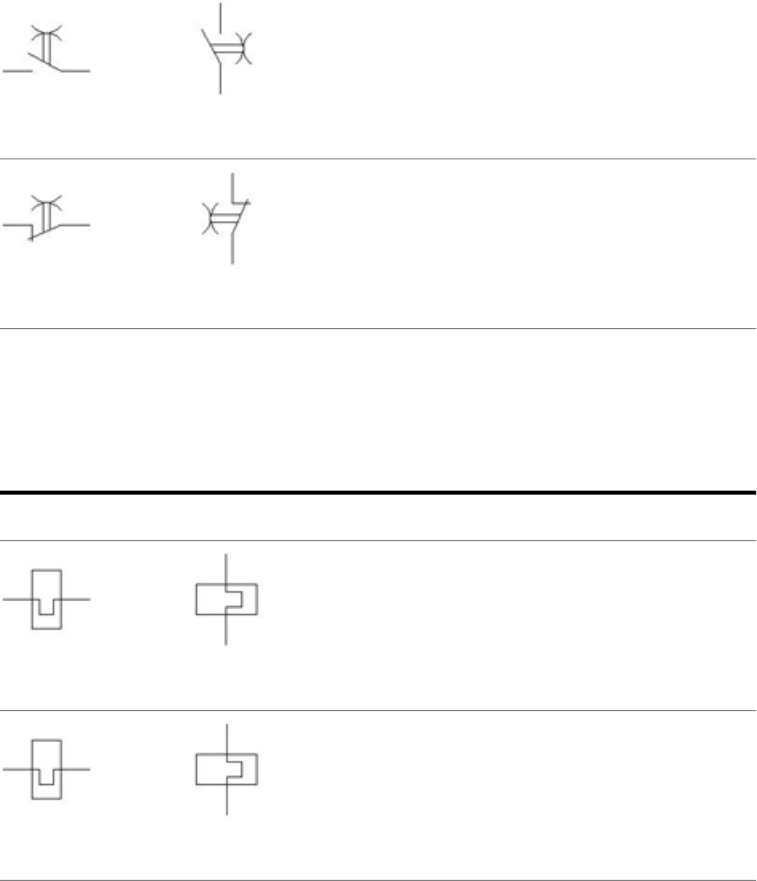
Normally Open Delay ON/OFF
VTD21DOOHTD21DOO
Normally Closed Delay ON/OFF
VTD22DOOHTD22DOO
Motor Control
Motor Control
DescriptionVertical SymbolHorizontal Symbol
Overload, 1 Pole
VOL1HOL1
2nd+ Overload Pole
VOL2HOL2
Motor Control | 485
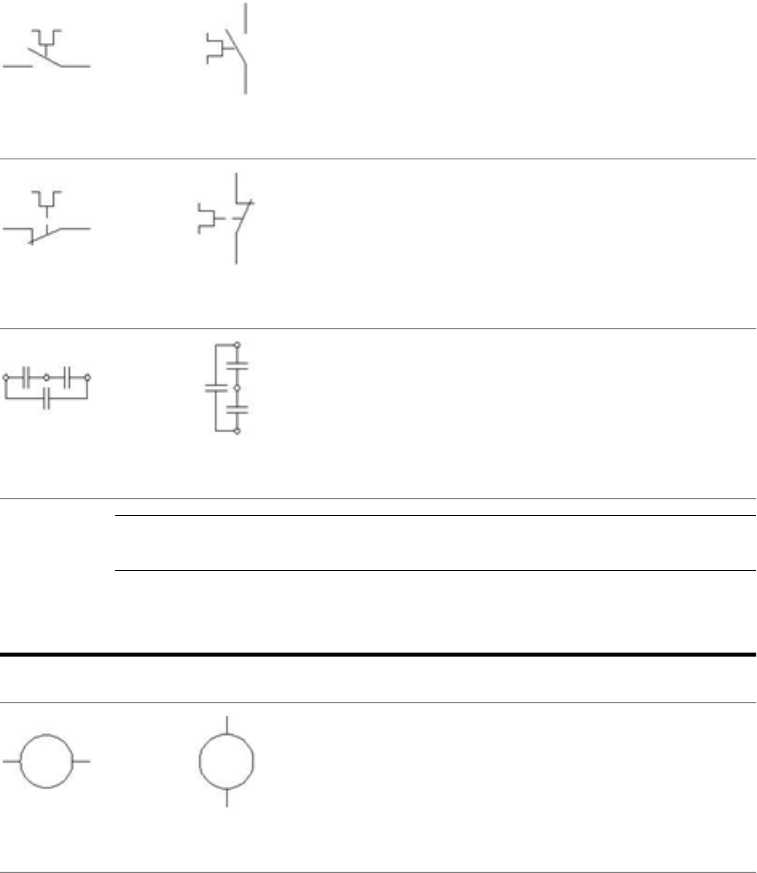
2nd+ Overload, Normally Open Contact
VOL21HOL21
2nd+ Overload, Normally Closed Contact
VOL22HOL22
3 Phase KVAR Capacitor
VCA113HCA113
NOTE Multi-pole devices are constructed using parent and child symbols to adhere
to the underlying ladder spacing.
1 Phase Motors
DescriptionVertical SymbolHorizontal Symbol
1 Phase Motor
VMO12HMO12
486 | Chapter 7 IEC Symbols
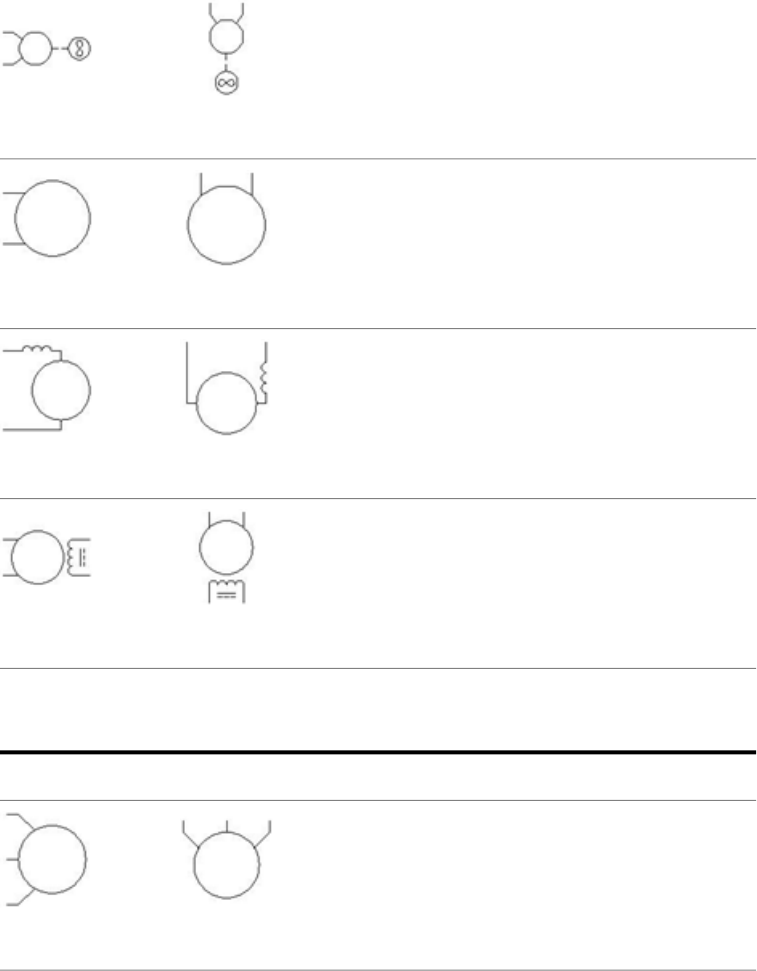
1 Phase Motor with Fan
VMO1M3MHMO1M3M
1 Phase AC Motor
VMO1M9HMO1M9
1 Phase AC Motor in Series Connection
VMO1M10HMO1M10
1 Phase Synchronous AC Motor
VMO1M16HMO1M16
3 Phase Motors
DescriptionVertical SymbolHorizontal Symbol
3 Phase Motor
VMO13HMO13
3 Phase Motors | 487
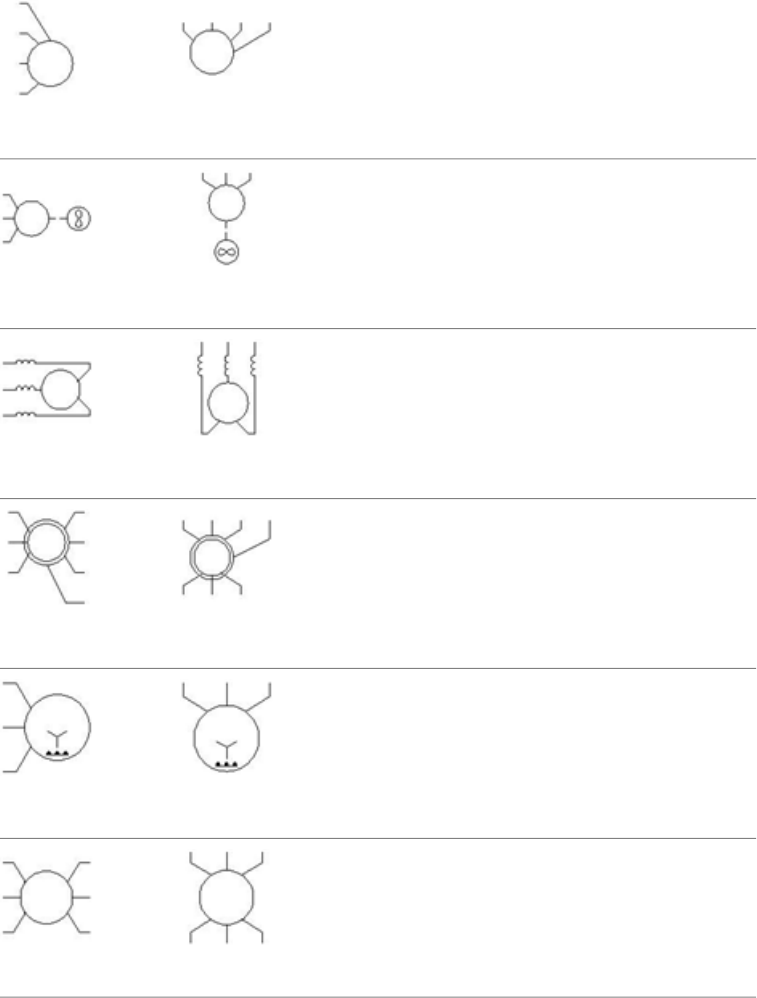
3 Phase Motor (4 Connections)
VMO14HMO14
3 Phase Motor with Fan
VMO1M2HMO1M2
3 Phase Asynchro Motor with Series Excitation
VMO1M3HMO1M3
3 Phase Asynchro Wound-Rotor Motor
VMO1M4HMO1M4
3 Phase Asynchro Star Connected Stator Auto Starter
on Rotor
VMO1M5HMO1M5
3 Phase Asynchro Motor - 6 Pole
VMO1M11HMO1M11
488 | Chapter 7 IEC Symbols
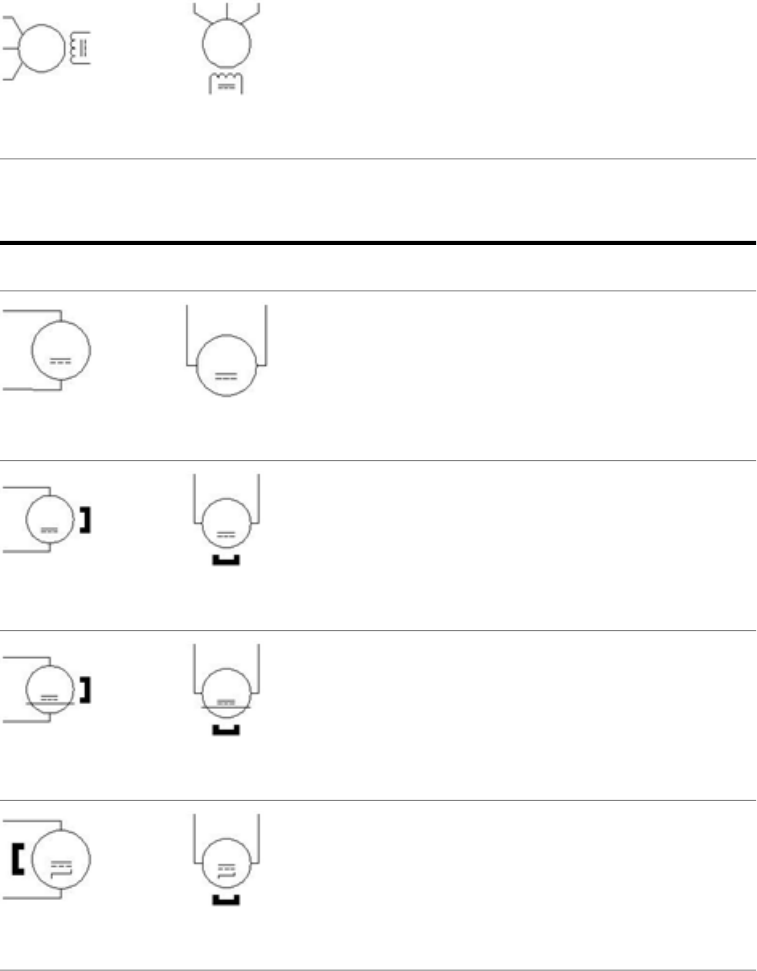
3 Phase Synchronous AC Motor
VMO1M17HMO1M17
DC Motors
DescriptionVertical SymbolHorizontal Symbol
DC Motor
VMO1M6HMO1M6
DC Motor with Permanent Magnets
VMO1M13HMO1M13
DC Motor - Linear with Permanent Magnets
VMO1M14HMO1M14
DC Motor - Stepping with Permanent Magnets
VMO1M15HMO1M15
DC Motors | 489
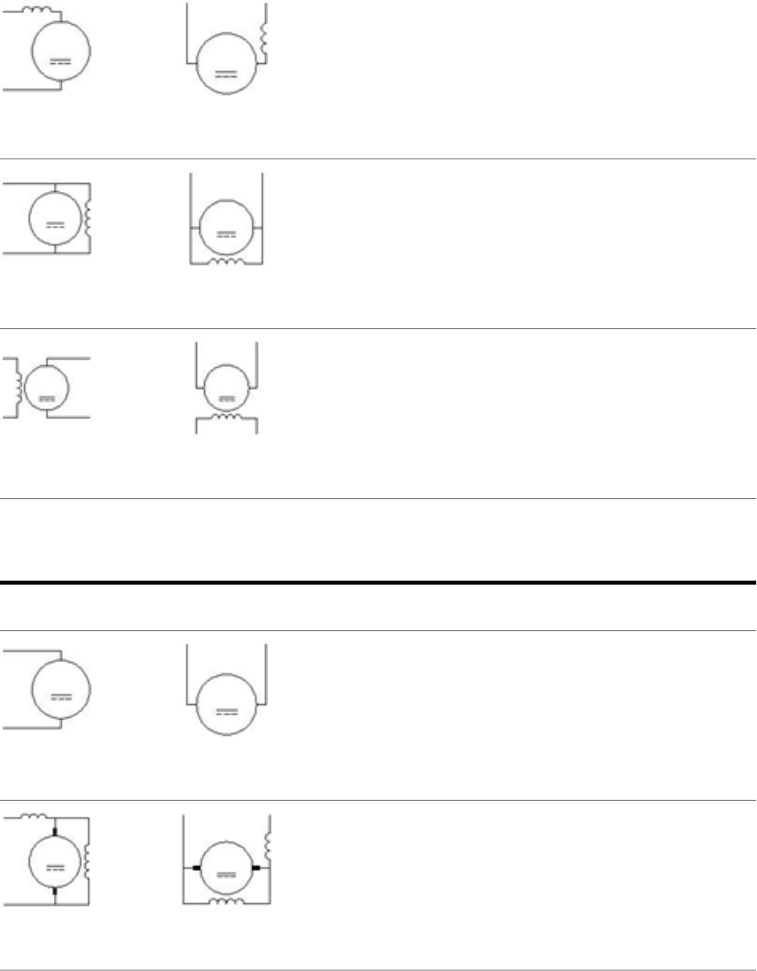
DC Motor - Series Excitation
VMO1M7HMO1M7
DC Motor - Derived Excitation
VMO1M8HMO1M8
DC Motor - Independent Excitation
VMO1M12HMO1M12
Generators
DescriptionVertical SymbolHorizontal Symbol
DC Generator
VPW1G9HPW1G9
DC Generator with Compound Excitation
VPW1G10HPW1G10
490 | Chapter 7 IEC Symbols
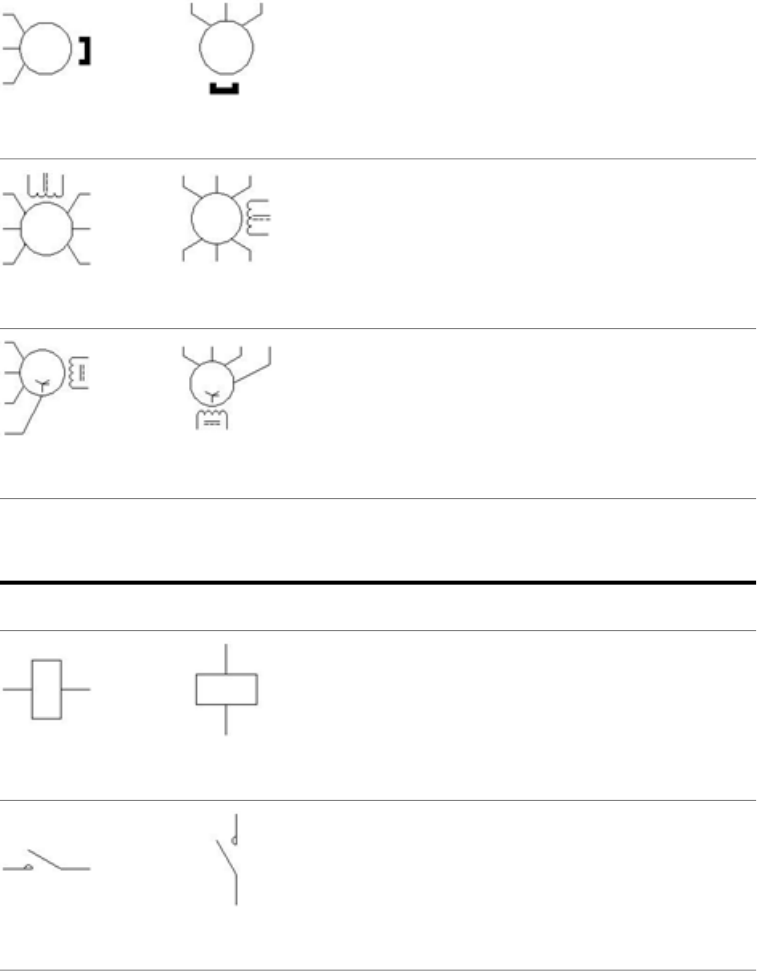
3 Phase Synchro Generator with Permanent Magnets
VPW1G6HPW1G6
3 Phase Synchro Generator 1
VPW1G7HPW1G7
3 Phase Synchro Generator 2
VPW1G8HPW1G8
Motor Starters
DescriptionVertical SymbolHorizontal Symbol
Motor Starter Coil
VMS1HMS1
Motor Starter 1 Pole Normally Open (Power)
VMS21PHMS21P
Motor Starters | 491
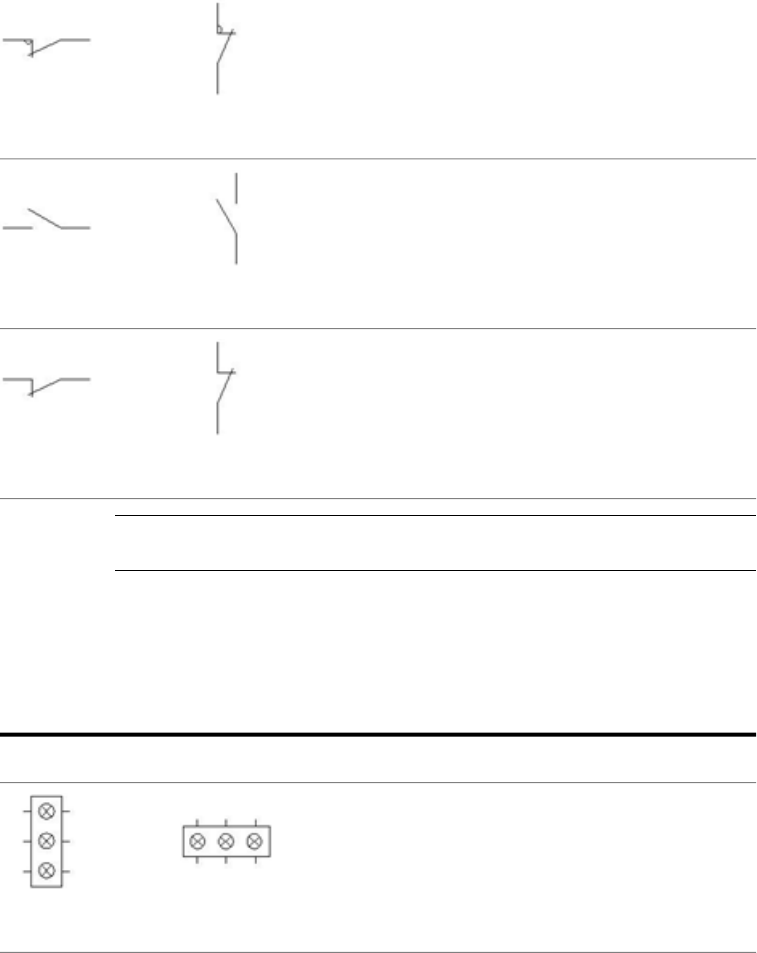
Motor Starter 1 Pole Normally Closed (Power)
VMS22PHMS22P
2nd+ Motor Starter Normally Open
VMS21HMS21
2nd+ Motor Starter Normally Closed
VMS22HMS22
NOTE Multi-pole devices are constructed using parent and child symbols to adhere
to the underlying ladder spacing.
Pilot Lights
Pilot Lights
DescriptionVertical SymbolHorizontal Symbol
Blinking Device
VLT1H21HLT1H21
492 | Chapter 7 IEC Symbols
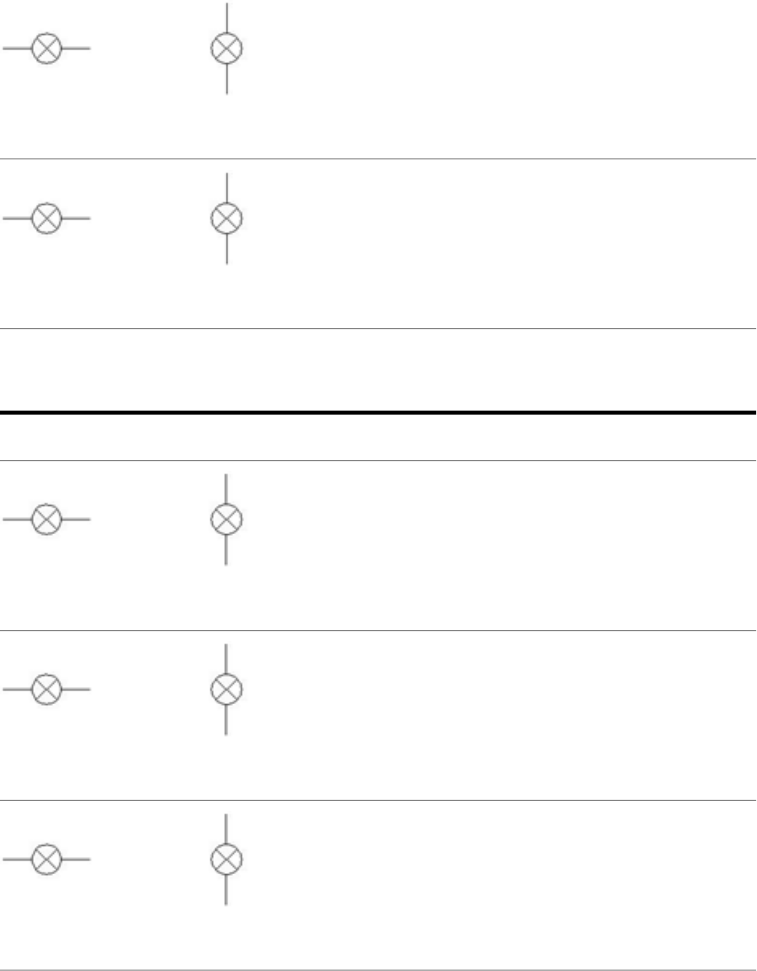
Neon Lamp
VLT1H22HLT1H22
Incandescent Lamp
VLT1H24HLT1H24
Standard Lights
DescriptionVertical SymbolHorizontal Symbol
Red Standard
VLT1RHLT1R
Green Standard
VLT1GHLT1G
Orange Standard
VLT1AHLT1A
Standard Lights | 493
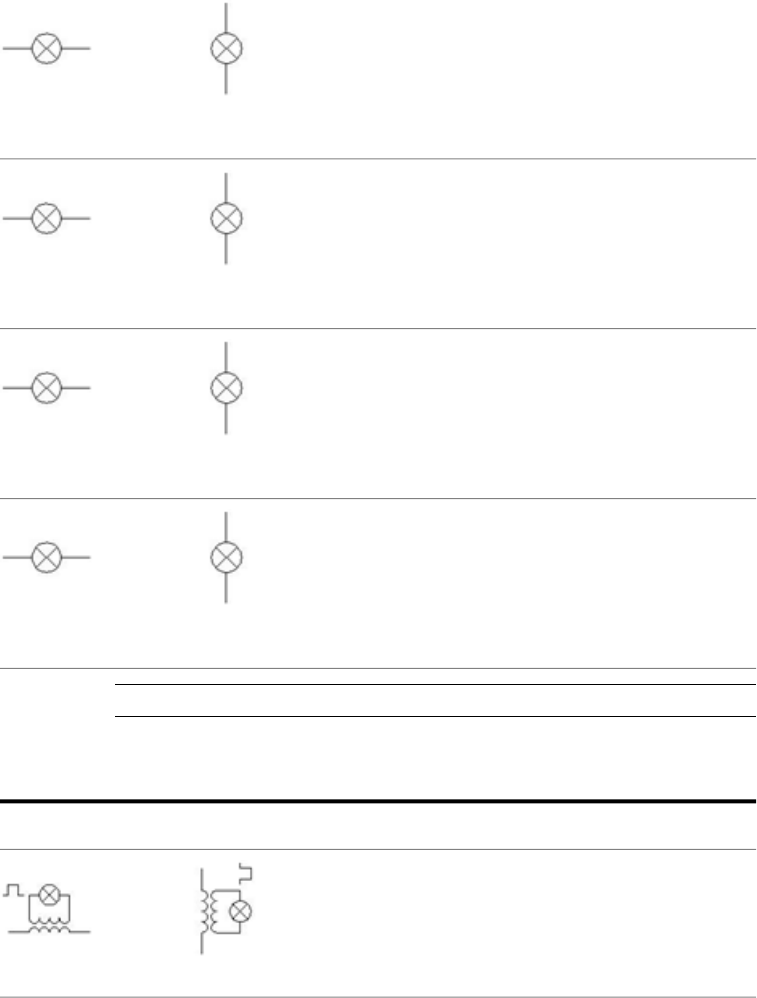
Yellow Standard
VLT1YHLT1Y
Blue Standard
VLT1BHLT1B
White Standard
VLT1WHLT1W
Clear Standard
VLT1CHLT1C
NOTE Lights receive text to indicate the color at the time of insertion.
Transformer Lights
DescriptionVertical SymbolHorizontal Symbol
Blinking Light - Bulb with Transformer
VLT1H10HLT1H10
494 | Chapter 7 IEC Symbols
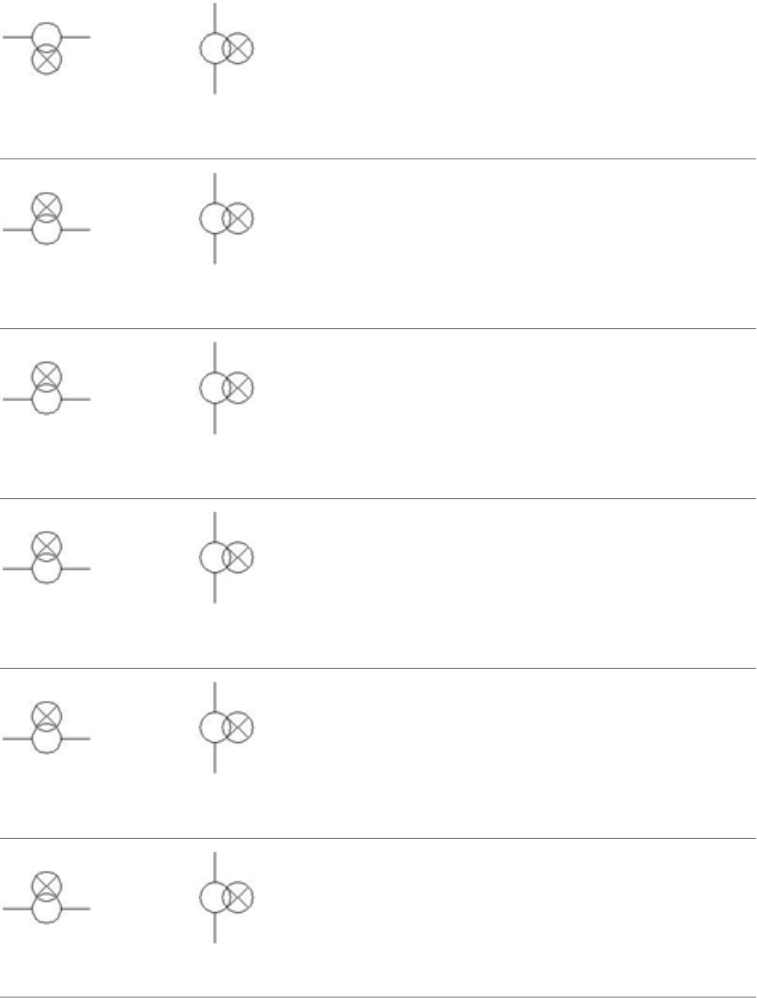
Indicator Lamp Energized by Built-in Transformer
VLT1H23AHLT1H23A
Red
VLT1RTHLT1RT
Green
VLT1GTHLT1GT
Orange
VLT1ATHLT1AT
Yellow
VLT1YTHLT1YT
Blue
VLT1BTHLT1BT
Transformer Lights | 495
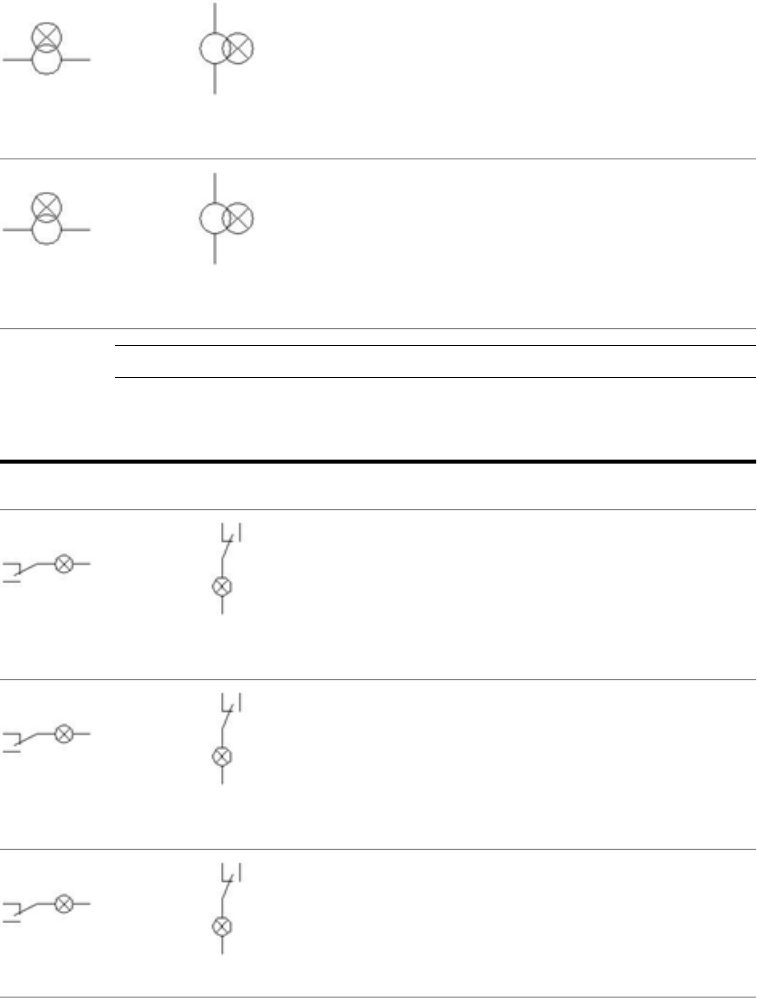
White
VLT1WTHLT1WT
Clear
VLT1CTHLT1CT
NOTE Lights receive text to indicate the color at the time of insertion.
Push to Test Lights
DescriptionVertical SymbolHorizontal Symbol
Red Press To Test
VLT1RPHLT1RP
Green Press To Test
VLT1GPHLT1GP
Orange Press To Test
VLT1APHLT1AP
496 | Chapter 7 IEC Symbols
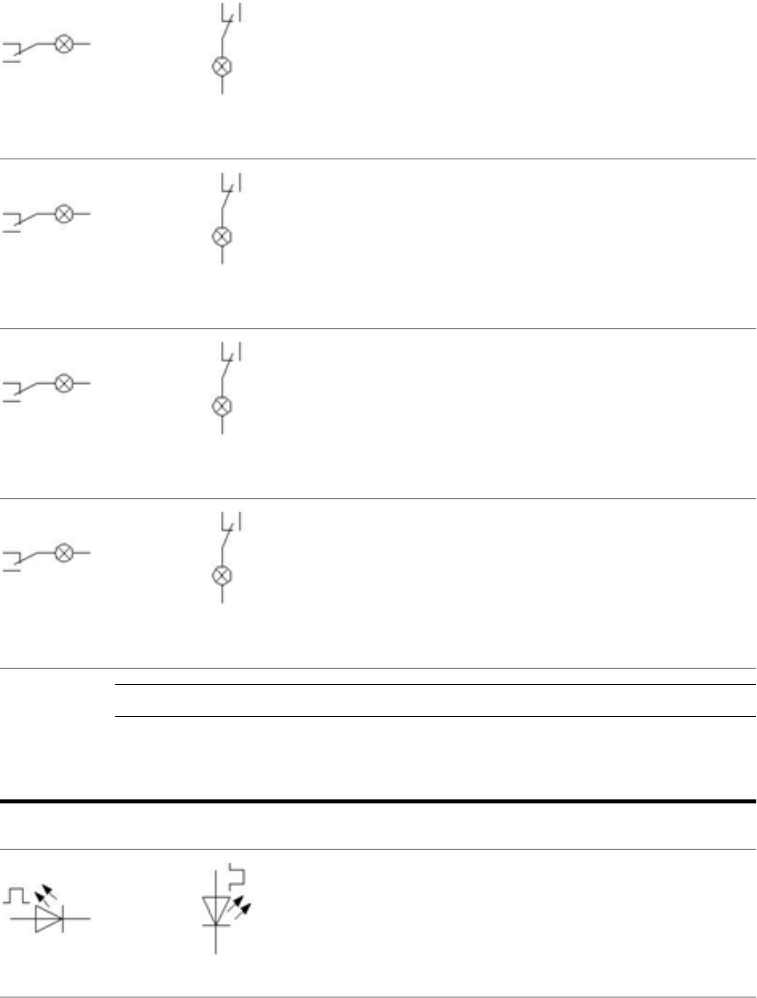
Yellow Press To Test
VLT1YPHLT1YP
Blue Press To Test
VLT1BPHLT1BP
White Press To Test
VLT1WPHLT1WP
Clear Press To Test
VLT1CPHLT1CP
NOTE Lights receive text to indicate the color at the time of insertion.
LEDs
DescriptionVertical SymbolHorizontal Symbol
Blinking LED
VLT1H13HLT1H13
LEDs | 497
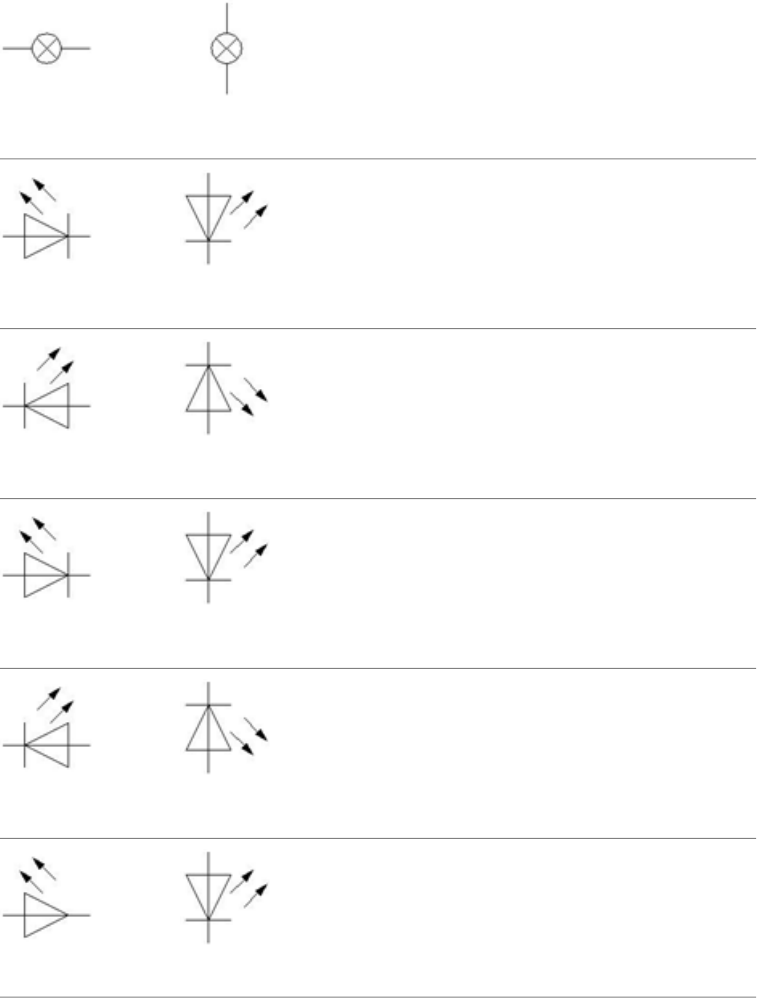
LED Indicator Lamp
VLT1H25HLT1H25
Red
VLT1RLHLT1RL
Red 180
VLT1RLRHLT1RLR
Green
VLT1GLHLT1GL
Green 180
VLT1GLRHLT1GLR
Orange
VLT1ALHLT1AL
498 | Chapter 7 IEC Symbols
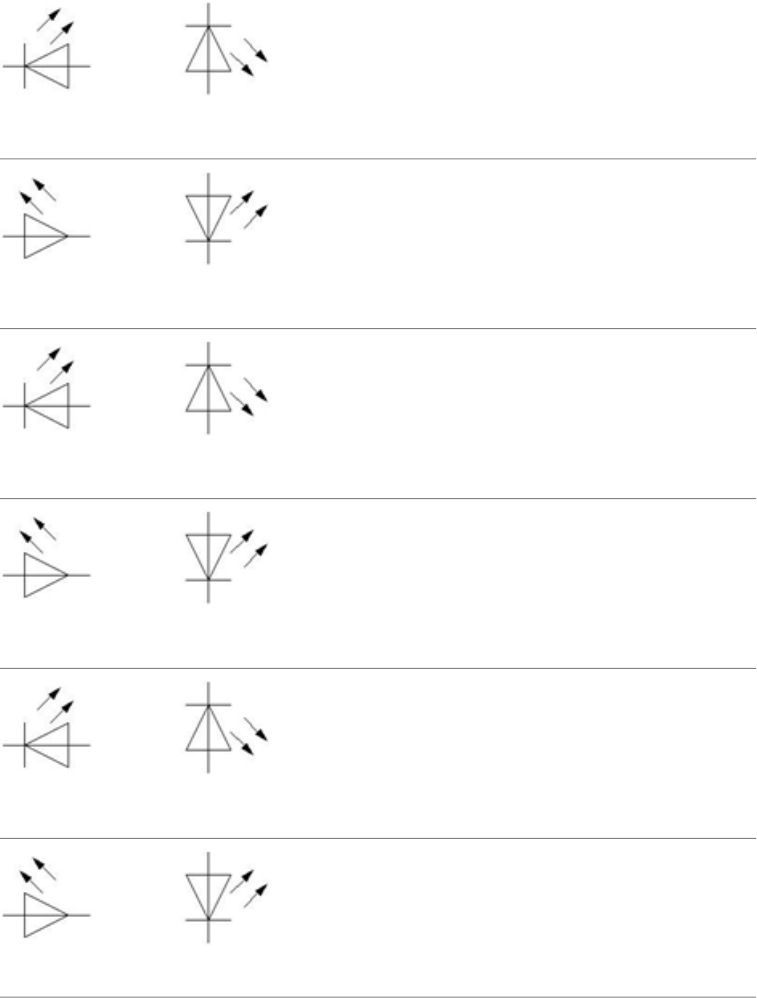
Orange 180
VLT1ALRHLT1ALR
Yellow
VLT1YLHLT1YL
Yellow 180
VLT1YLRHLT1YLR
Blue
VLT1BLHLT1BL
Blue 180
VLT1BLRHLT1BLR
White
VLT1WLHLT1WL
LEDs | 499
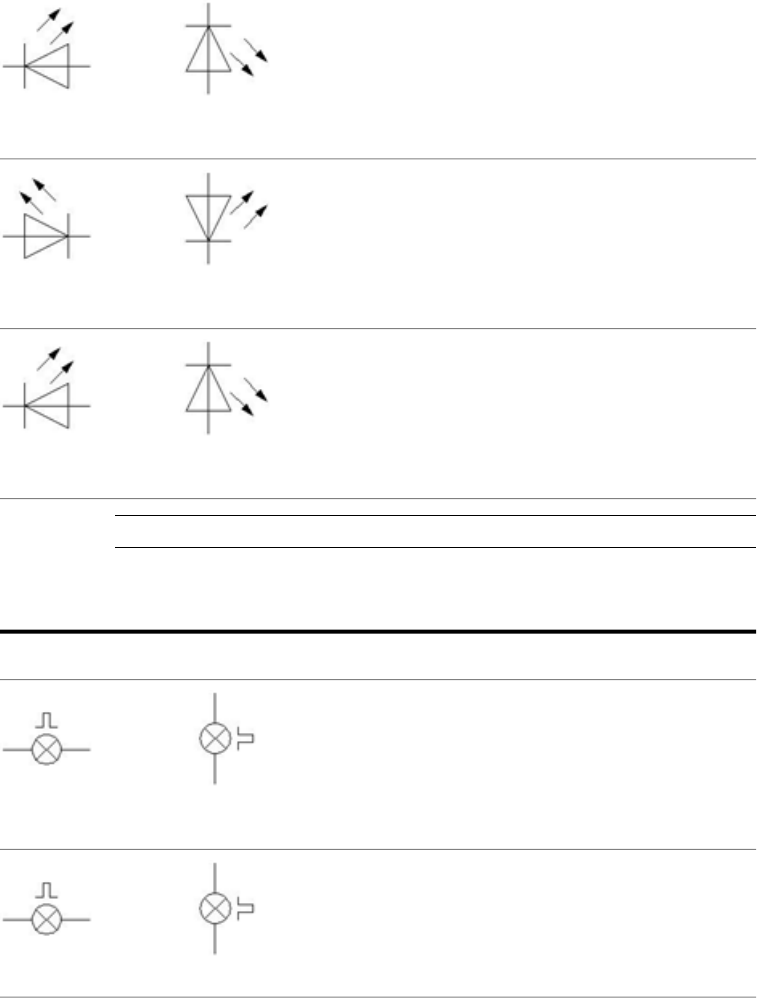
White 180
VLT1WLRHLT1WLR
Clear
VLT1CLHLT1CL
Clear 180
VLT1CLRHLT1CLR
NOTE Lights receive text to indicate the color at the time of insertion.
Beacons - Flashing
DescriptionVertical SymbolHorizontal Symbol
Red
VBE1RFLHBE1RFL
Green
VBE1GFLHBE1GFL
500 | Chapter 7 IEC Symbols
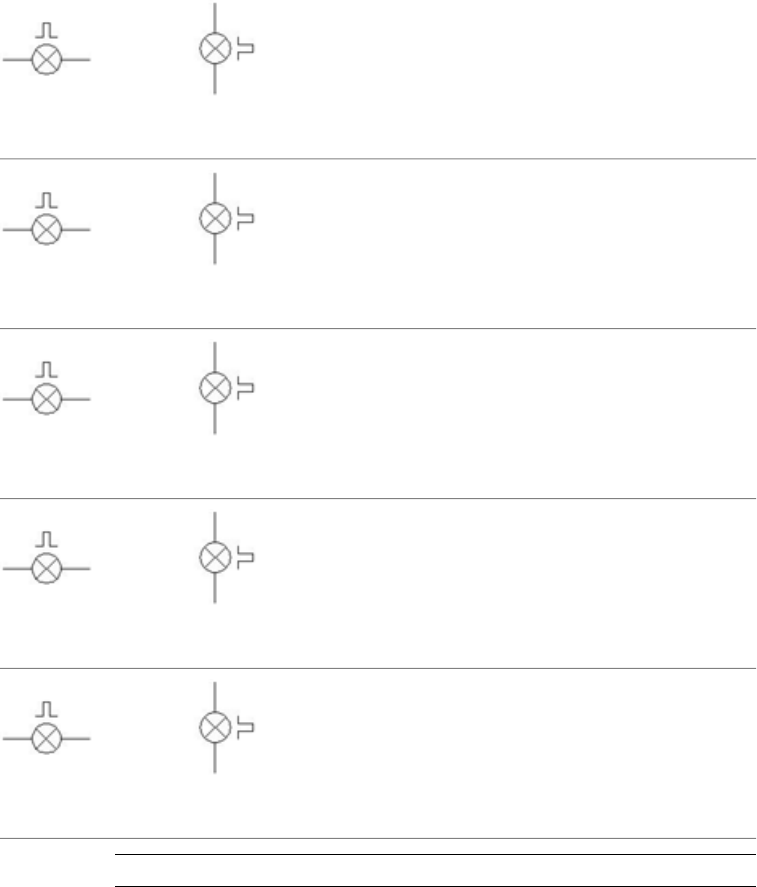
Orange
VBE1AFLHBE1AFL
Yellow
VBE1YFLHBE1YFL
Blue
VBE1BFLHBE1BFL
White
VBE1WFLHBE1WFL
Clear
VBE1CFLHBE1CFL
NOTE Lights receive text to indicate the color at the time of insertion.
Beacons - Flashing | 501
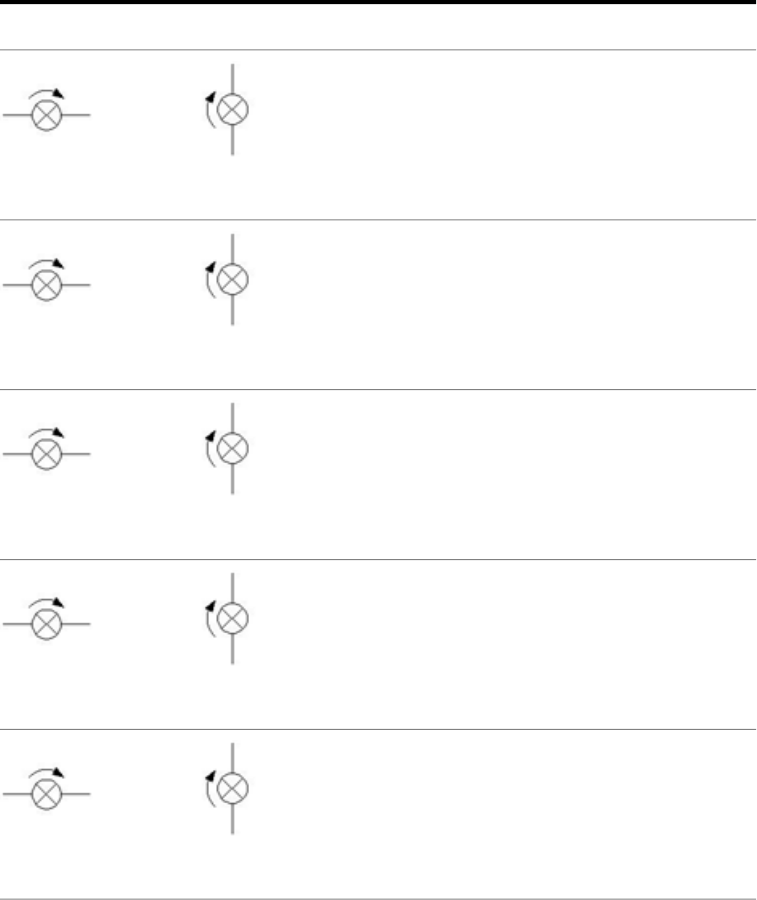
Beacons - Rotating
DescriptionVertical SymbolHorizontal Symbol
Red
VBE1RRTHBE1RRT
Green
VBE1GRTHBE1GRT
Orange
VBE1ARTHBE1ART
Yellow
VBE1YRTHBE1YRT
Blue
VBE1BRTHBE1BRT
502 | Chapter 7 IEC Symbols
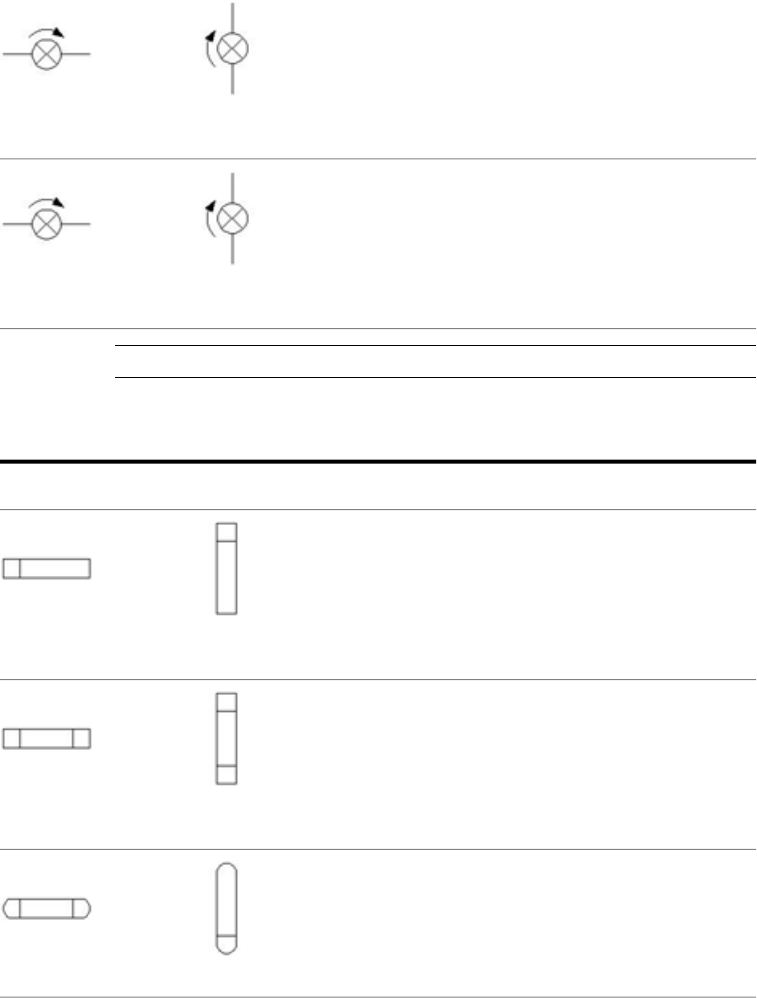
White
VBE1WRTHBE1WRT
Clear
VBE1CRTHBE1CRT
NOTE Lights receive text to indicate the color at the time of insertion.
PLC I/O
DescriptionVertical SymbolHorizontal Symbol
IN, 1st Point, 1 Wire
PLCIOI1TVPLCIOI1T
IN, 1st Point, 2 Wires
PLCIOI2TVPLCIOI2T
OUT, 1st Point, 1 Wire
PLCIOO1TVPLCIOO1T
PLC I/O | 503
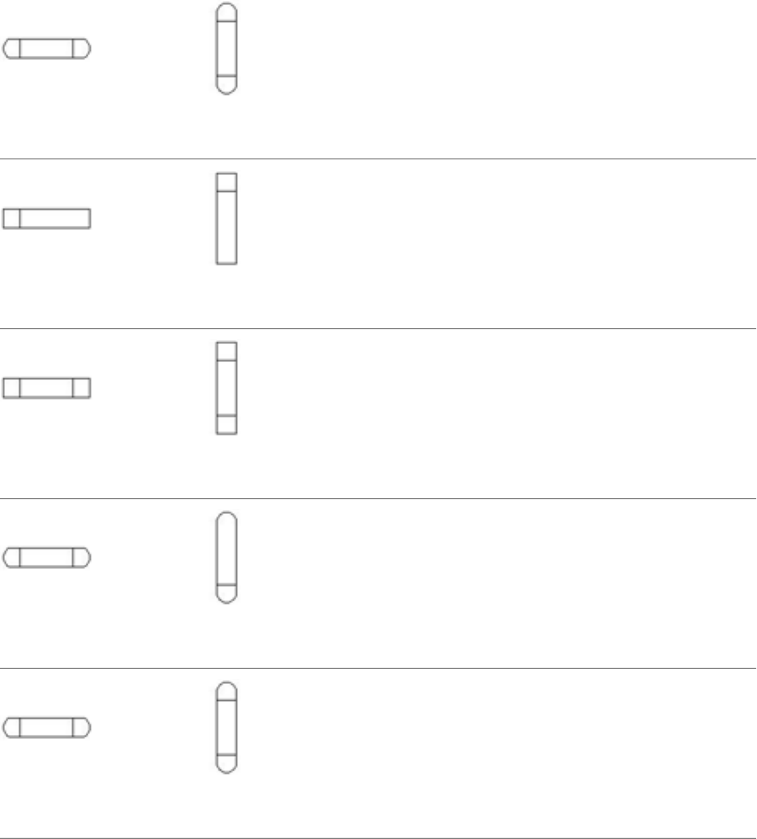
OUT, 1st Point, 2 Wires
PLCIOO2TVPLCIOO2T
IN, 2nd+ Child, 1 Wire
PLCIOI1VPLCIOI1
IN, 2nd+ Child, 2 Wires
PLCIOI2VPLCIOI2
OUT, 2nd+ Child, 1 Wire
PLCIOO1VPLCIOO1
OUT, 2nd+ Child, 2 Wires
PLCIOO2VPLCIOO2
504 | Chapter 7 IEC Symbols

Terminals, Connectors
Terminals
DescriptionVertical SymbolHorizontal Symbol
Square
VT0_01HT0_01
Square with Wire Number
VT0W01HT0W01
Square with Terminal Number
VT0001HT0001
Square with Wire Number Change
VT1001HT1001
Round
VT0_02HT0_02
Terminals, Connectors | 505
Round with Wire Number
VT0W02HT0W02
Round with Terminal Number
VT0002HT0002
Round with Wire Number Change
VT1002HT1002
Hexagon
VT0_03HT0_03
Hexagon with Wire Number
VT0W03HT0W03
Hexagon with Terminal Number
VT0003HT0003
506 | Chapter 7 IEC Symbols

Hexagon with Wire Number Change
VT1003HT1003
Diamond
VT0_04HT0_04
Diamond with Wire Number
VT0W04HT0W04
Diamond with Terminal Number
VT0004HT0004
Diamond with Wire Number Change
VT1004HT1004
Triangle
VT0_05HT0_05
Terminals | 507
Triangle with Wire Number
VT0W05HT0W05
Triangle with Terminal Number
VT0005HT0005
Triangle with Wire Number Change
VT1005HT1005
In-Line Wire Labels
DescriptionVertical SymbolHorizontal Symbol
In-Line Wire Label
VT0_LGEN-
ERIC
HT0_LGEN-
ERIC
Wire Number Copy
VT0_WGEN-
ERIC
HT0_WGEN-
ERIC
508 | Chapter 7 IEC Symbols
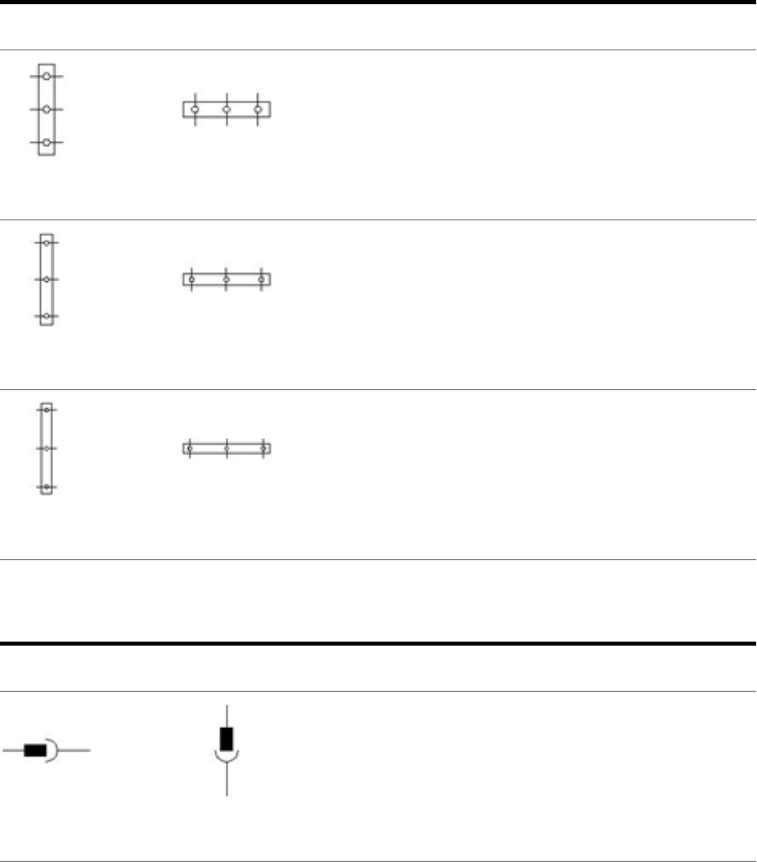
Power Distribution Blocks
DescriptionVertical SymbolHorizontal Symbol
3 Terminal, 10 Unit Spacing
VDB1308HDB1308
3 Terminal, 15 Unit Spacing
VDB1312HDB1312
3 Terminal, 20 Unit Spacing
VDB1316HDB1316
Connectors - No Wirenumber Changes
DescriptionVertical SymbolHorizontal Symbol
Plug/Jack
VC01PJHC01PJ
Power Distribution Blocks | 509
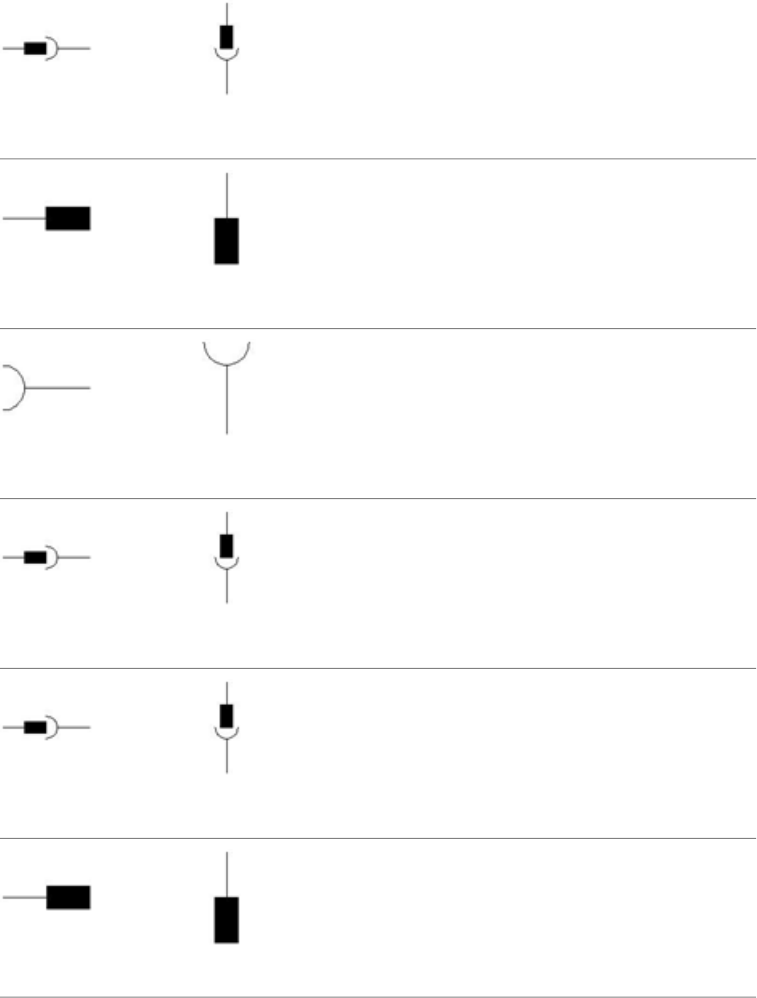
Plug/Jack (common pin number)
VC01PJ1HC01PJ1
Plug Up or Left
VC01P_HC01P_
Jack Down or Right
VC01_JHC01_J
2nd+ Plug/Jack
VC02PJHC02PJ
2nd+ Plug/Jack (common pin number)
VC02PJ1HC02PJ1
2nd+ Plug Up or Left
VC02P_HC02P_
510 | Chapter 7 IEC Symbols
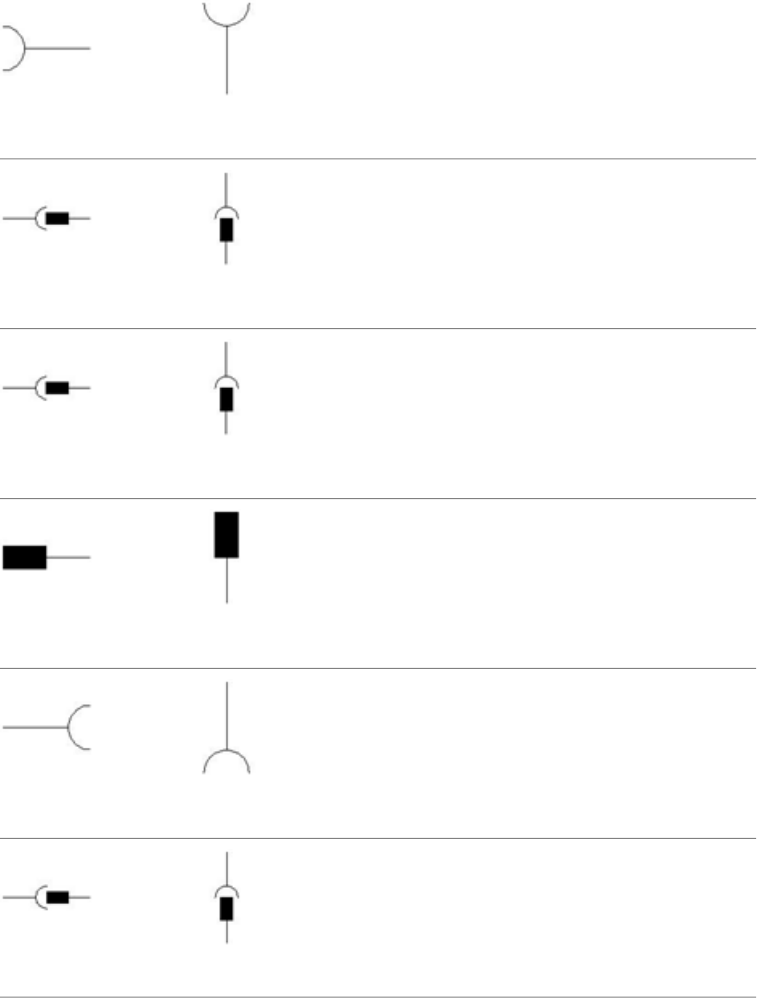
2nd+ Jack Down or Right
VC02_JHC02_J
Jack/Plug
VC01JPHC01JP
Jack/Plug (common pin number)
VC01JP1HC01JP1
Plug Down or Right
VC01_PHC01_P
Jack Up or Left
VC01J_HC01J_
2nd+ Jack/Plug
VC02JPHC02JP
Connectors - No Wirenumber Changes | 511
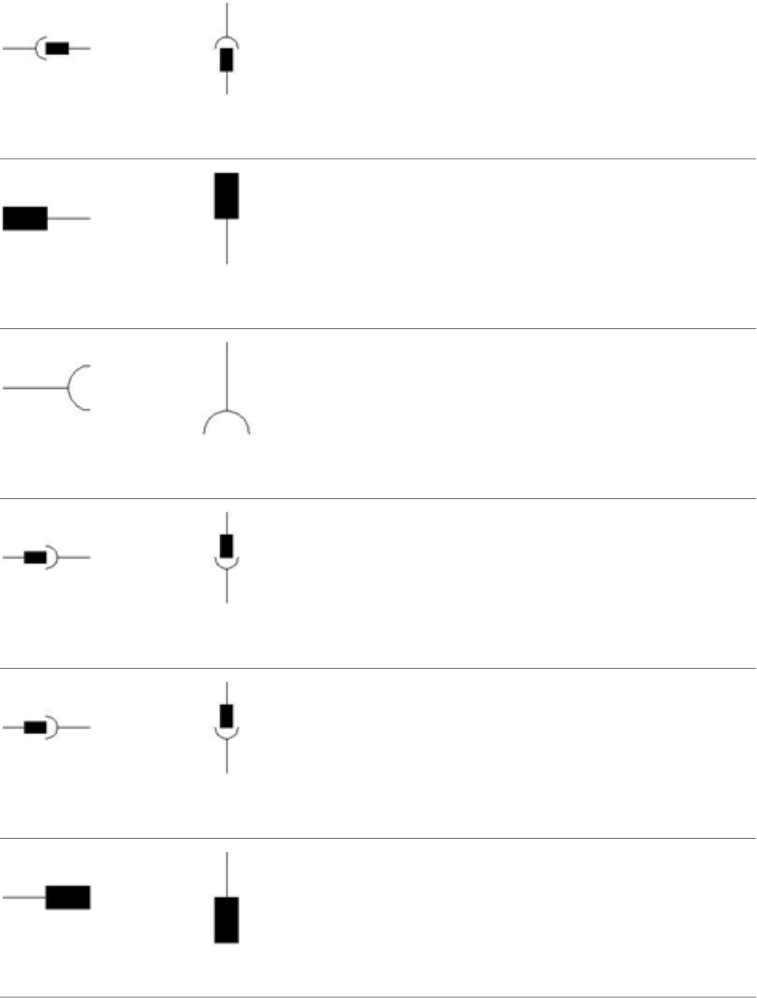
2nd+ Jack/Plug (common pin number)
VC02JP1HC02JP1
2nd+ Plug Down or Right
VC02_PHC02_P
2nd+ Jack Up or Left
VC02J_HC02J_
Plug/Jack
VCN1PJHCN1PJ
Plug/Jack (common pin number)
VCN1PJ1HCN1PJ1
Plug Up or Left
VC01P_HC01P_
512 | Chapter 7 IEC Symbols
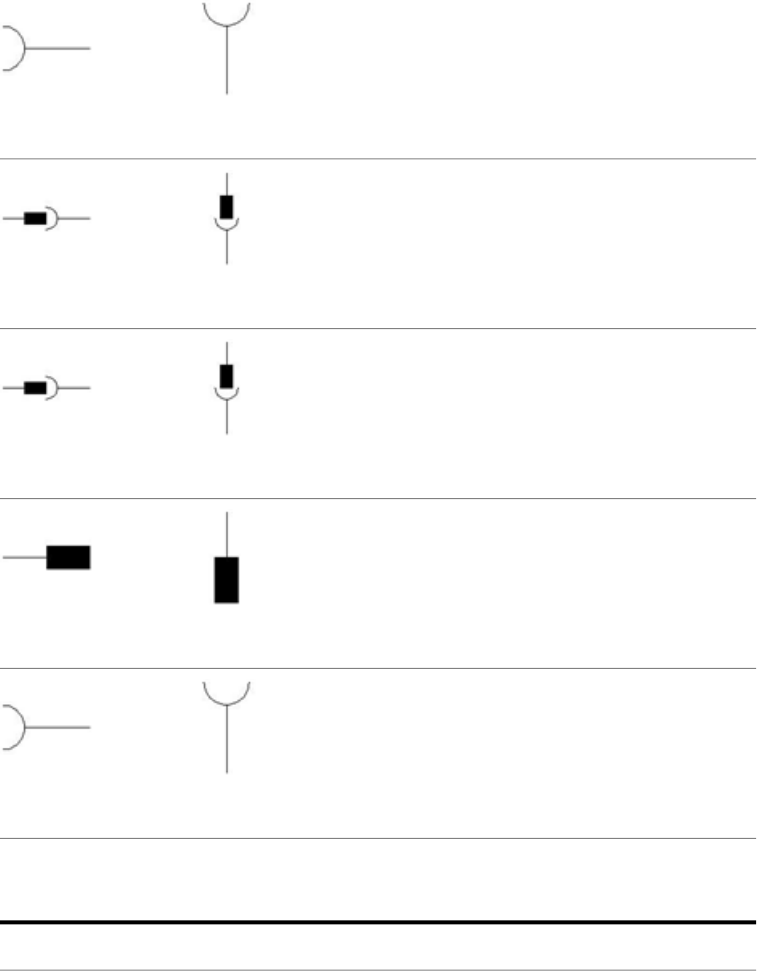
Jack Down or Right
VC01_JHC01_J
2nd+ Plug/Jack
VCN2PJHCN2PJ
2nd+ Plug/Jack (common pin number)
VCN2PJ1HCN2PJ1
2nd+ Plug Up or Left
VC02P_HC02P_
2nd+ Jack Down or Right
VC02_JHC02_J
Connectors - Wirenumber Changes
DescriptionVertical SymbolHorizontal Symbol
Connectors - Wirenumber Changes | 513
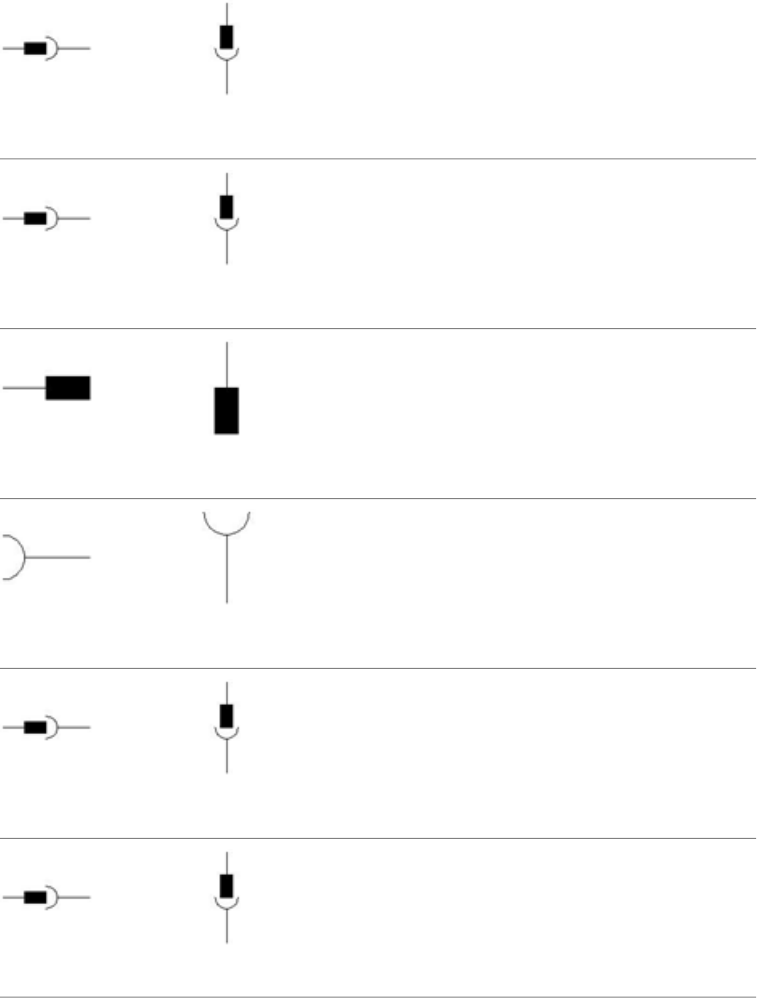
Plug/Jack
VCN1PJHCN1PJ
Plug/Jack (common pin number)
VCN1PJ1HCN1PJ1
Plug Up or Left
VC01P_HC01P_
Jack Down or Right
VC01_JHC01_J
2nd+ Plug/Jack
VCN2PJHCN2PJ
2nd+ Plug/Jack (common pin number)
VCN2PJ1HCN2PJ1
514 | Chapter 7 IEC Symbols
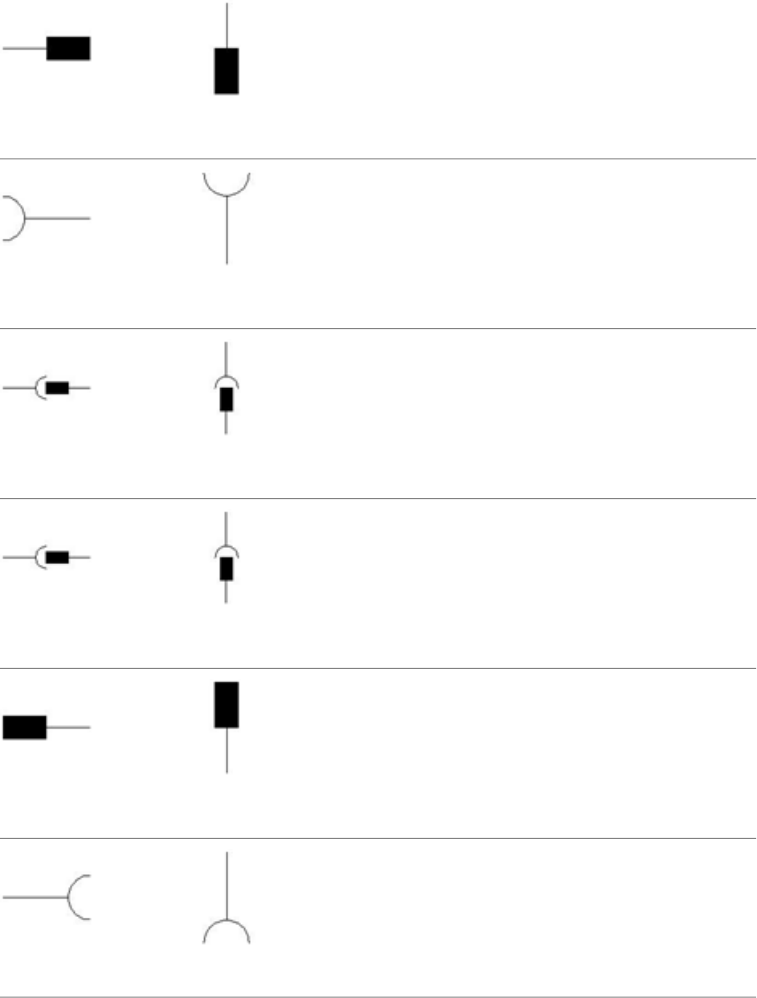
2nd+ Plug Up or Left
VC02P_HC02P_
2nd+ Jack Down or Right
VC02_JHC02_J
Jack/Plug
VCN1JPHCN1JP
Jack/Plug (common pin number)
VCN1JP1HCN1JP1
Plug Down or Right
VC01_PHC01_P
Jack Up or Left
VC01J_HC01J_
Connectors - Wirenumber Changes | 515
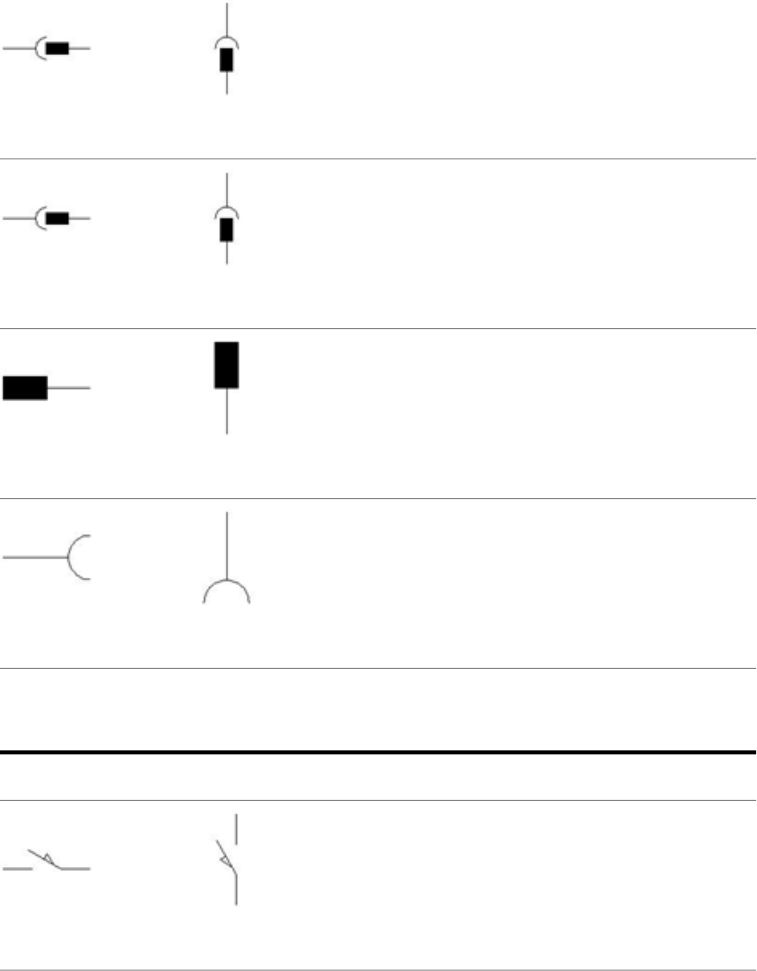
2nd+ Jack/Plug
VCN2JPHCN2JP
2nd+ Jack/Plug (common pin number)
VCN2JP1HCN2JP1
2nd+ Plug Down or Right
VC02_PHC02_P
2nd+ Jack Up or Left
VC02J_HC02J_
Limit Switches
DescriptionVertical SymbolHorizontal Symbol
Limit Switch Normally Open
VLS11HLS11
516 | Chapter 7 IEC Symbols

Limit Switch Normally Closed
VLS12HLS12
Limit Switch, Roller Normally Open
VLS11CHLS11C
Limit Switch, Roller Normally Closed
VLS12CHLS12C
Limit Switch Normally Open - Cam Driven
VLS11S13HLS11S13
Limit Switch Normally Closed - Cam Driven
VLS12S13HLS12S13
Limit Switch Normally Open - Events Driven
VLS11S16HLS11S16
Limit Switches | 517
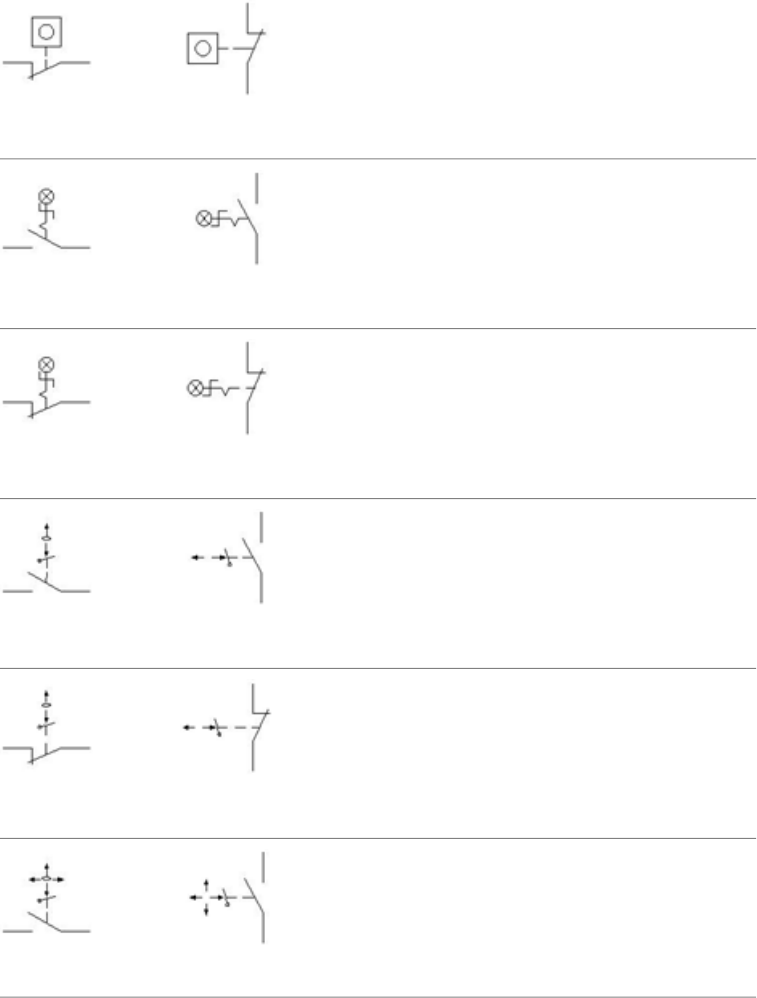
Limit Switch Normally Closed - Events Driven
VLS12S16HLS12S16
2 Position Switch Normally Open with Detents and
Lamp
VLS11S78HLS11S78
2 Position Switch Normally Closed with Detents and
Lamp
VLS12S78HLS12S78
Bi-directional Lever Actuated - Normally Open
VLS11S84HLS11S84
Bi-directional Lever Actuated - Normally Closed
VLS12S84HLS12S84
Four-directional Lever Actuated - Normally Open
VLS11S85HLS11S85
518 | Chapter 7 IEC Symbols
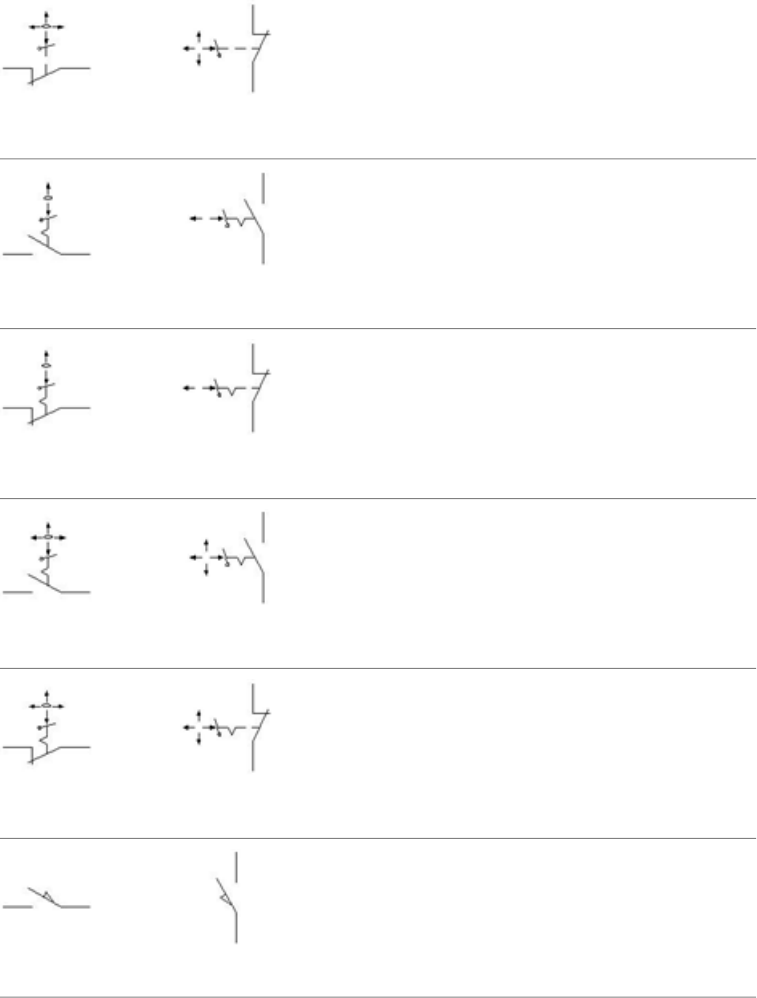
Four-directional Lever Actuated - Normally Closed
VLS12S85HLS12S85
Bi-directional Lever Actuated - Normally Open with
Detent
VLS11S87HLS11S87
Bi-directional Lever Actuated - Normally Closed with
Detent
VLS12S87HLS12S87
Four-directional Lever Actuated - Normally Open with
Detent
VLS11S88HLS11S88
Four-directional Lever Actuated - Normally Closed
with Detent
VLS12S88HLS12S88
2nd+ Normally Open Contact
VLS21HLS21
Limit Switches | 519

2nd+ Normally Closed Contact
VLS22HLS22
Pressure and Temperature Switches
DescriptionVertical SymbolHorizontal Symbol
Pressure Switch, Normally Open
VPS11HPS11
Pressure Switch, Normally Closed
VPS12HPS12
Temperature Switch 1, Normally Open
VTS11HTS11
Temperature Switch 1, Normally Closed
VTS12HTS12
520 | Chapter 7 IEC Symbols

Temperature Switch 2, Normally Open
VTS11S18HTS11S18
Temperature Switch 2, Normally Closed
VTS12S18HTS12S18
Temperature Switch 3, Normally Open
VTS11S74HTS11S74
Temperature Switch 3, Normally Closed
VTS12S74HTS12S74
2nd+ Normally Open Contact
VSW21HSW21
2nd+ Normally Closed Contact
VSW22HSW22
Pressure and Temperature Switches | 521

Proximity Switches
Inductive Switches
DescriptionVertical SymbolHorizontal Symbol
Ferrous
VPX1IHPX1I
Ferrous Proximity Switch, Normally Open
VPX11IHPX11I
Ferrous Proximity Switch, Normally Closed
VPX12IHPX12I
Normally Open 3 Wire
VPX11IN3HPX11IN3
Normally Open 3 Wire 180
VPX11IN3RHPX11IN3R
522 | Chapter 7 IEC Symbols
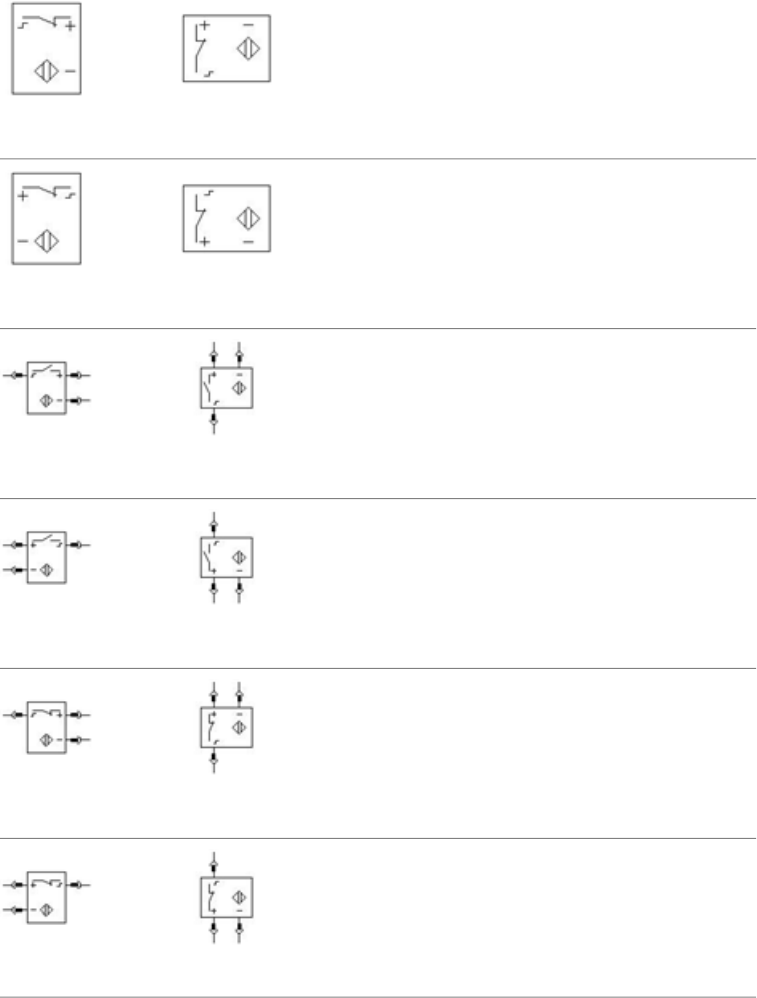
Normally Closed 3 Wire
VPX12IN3HPX12IN3
Normally Closed 3 Wire 180
VPX12IN3RHPX12IN3R
Normally Open 3 Wire with connector
VPX11IN3CHPX11IN3C
Normally Open 3 Wire 180 with connector
VPX11IN3RCHPX11IN3RC
Normally Closed 3 Wire with connector
VPX12IN3CHPX12IN3C
Normally Closed 3 Wire 180 with connector
VPX12IN3RCHPX12IN3RC
Inductive Switches | 523
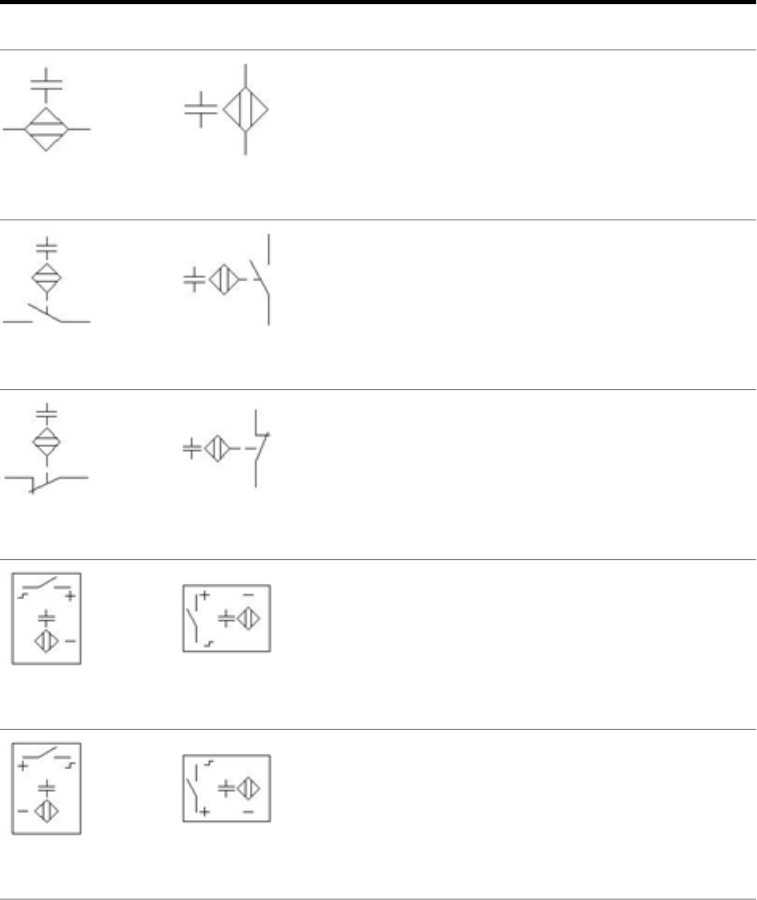
Capacitive Switches
DescriptionVertical SymbolHorizontal Symbol
Capacitive
VPX1CHPX1C
Capacitive Switch, Normally Open
VPX11CHPX11C
Capacitive Switch, Normally Closed
VPX12CHPX12C
Normally Open 3 Wire
VPX11C3HPX11C3
Normally Open 3 Wire 180
VPX11C3RHPX11C3R
524 | Chapter 7 IEC Symbols
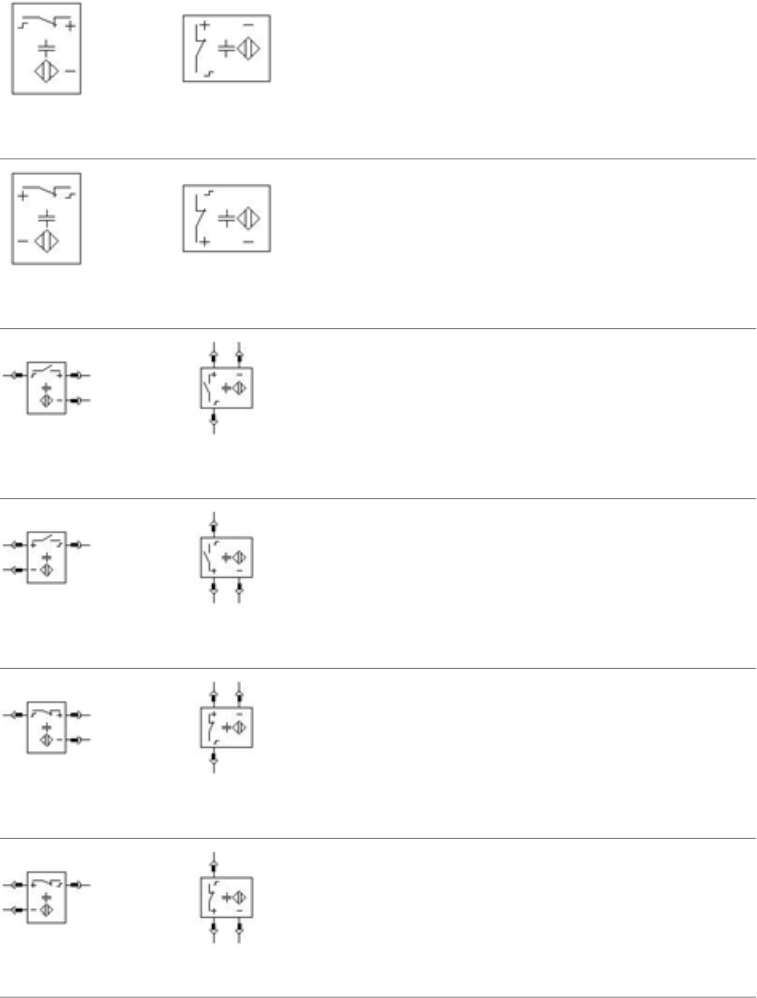
Normally Closed 3 Wire
VPX12C3HPX12C3
Normally Closed 3 Wire 180
VPX12C3RHPX12C3R
Normally Open 3 Wire with connector
VPX11C3CHPX11C3C
Normally Open 3 Wire 180 with connector
VPX11C3RCHPX11C3RC
Normally Closed 3 Wire with connector
VPX12C3CHPX12C3C
Normally Closed 3 Wire 180 with connector
VPX12C3RCHPX12C3RC
Capacitive Switches | 525
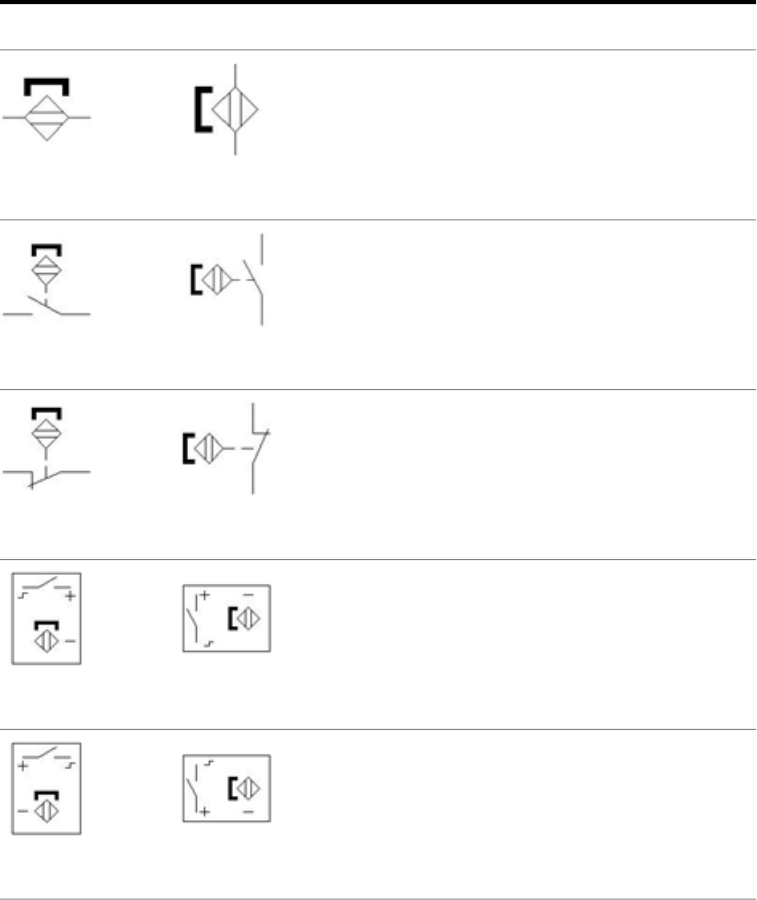
Magnetic Switches
DescriptionVertical SymbolHorizontal Symbol
Magnetic
VPX1MHPX1M
Magnetic Proximity Switch, Normally Open
VPX11MHPX11M
Magnetic Proximity Switch, Normally Closed
VPX12MHPX12M
Normally Open 3 Wire
VPX11M3HPX11M3
Normally Open 3 Wire 180
VPX11M3RHPX11M3R
526 | Chapter 7 IEC Symbols
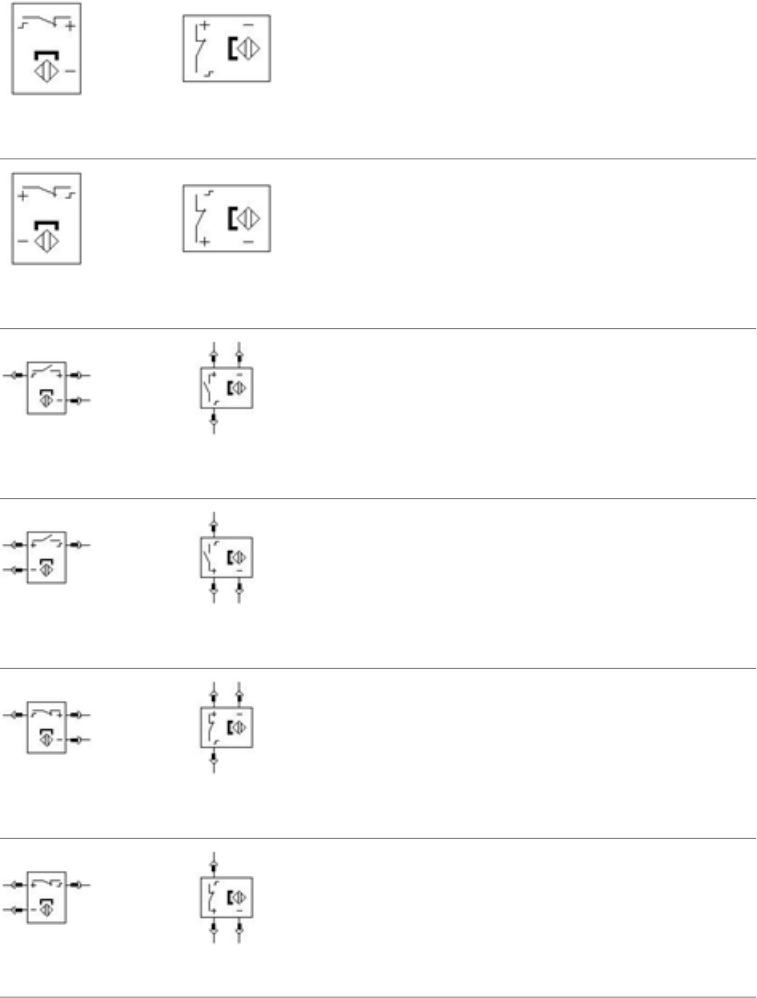
Normally Closed 3 Wire
VPX12M3HPX12M3
Normally Closed 3 Wire 180
VPX12M3RHPX12M3R
Normally Open 3 Wire with connector
VPX11M3CHPX11M3C
Normally Open 3 Wire 180 with connector
VPX11M3RCHPX11M3RC
Normally Closed 3 Wire with connector
VPX12M3CHPX12M3C
Normally Closed 3 Wire 180 with connector
VPX12M3RCHPX12M3RC
Magnetic Switches | 527
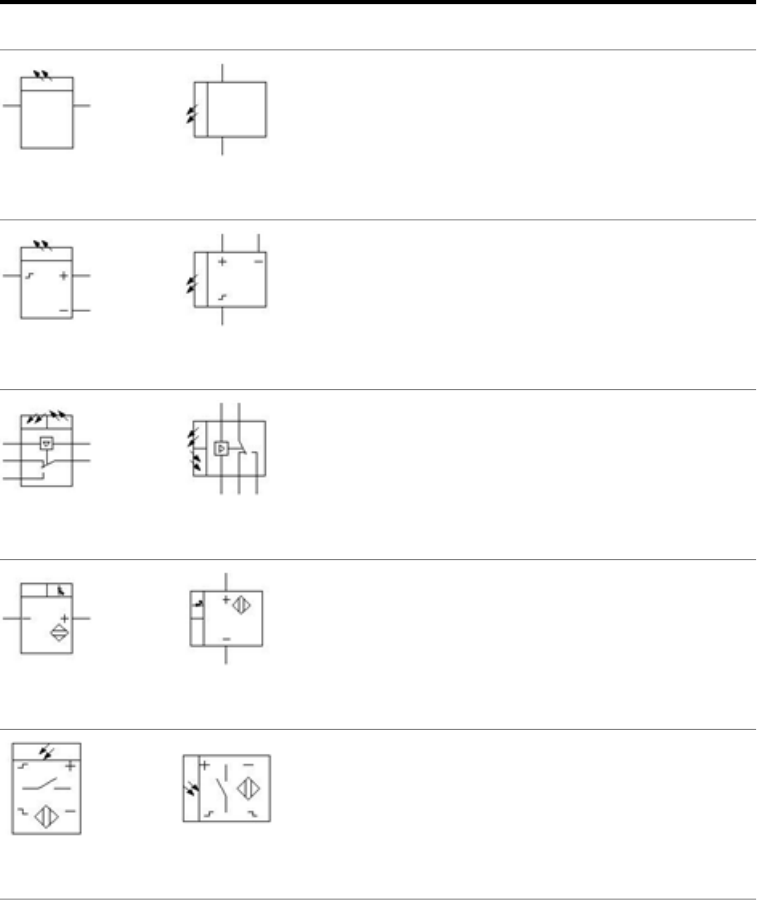
Photoelectric Emitter Switches
DescriptionVertical SymbolHorizontal Symbol
Emitter - AC Driven
VPE1B14HPE1B14
Emitter - DC Driven
VPE1B15HPE1B15
Emitter - Receiver with Form C
VPE13B16SCHPE13B16SC
Emitter - DC Driven
VPE1B20HPE1B20
Normally Open 4 wire
VPE11PE4HPE11PE4
528 | Chapter 7 IEC Symbols
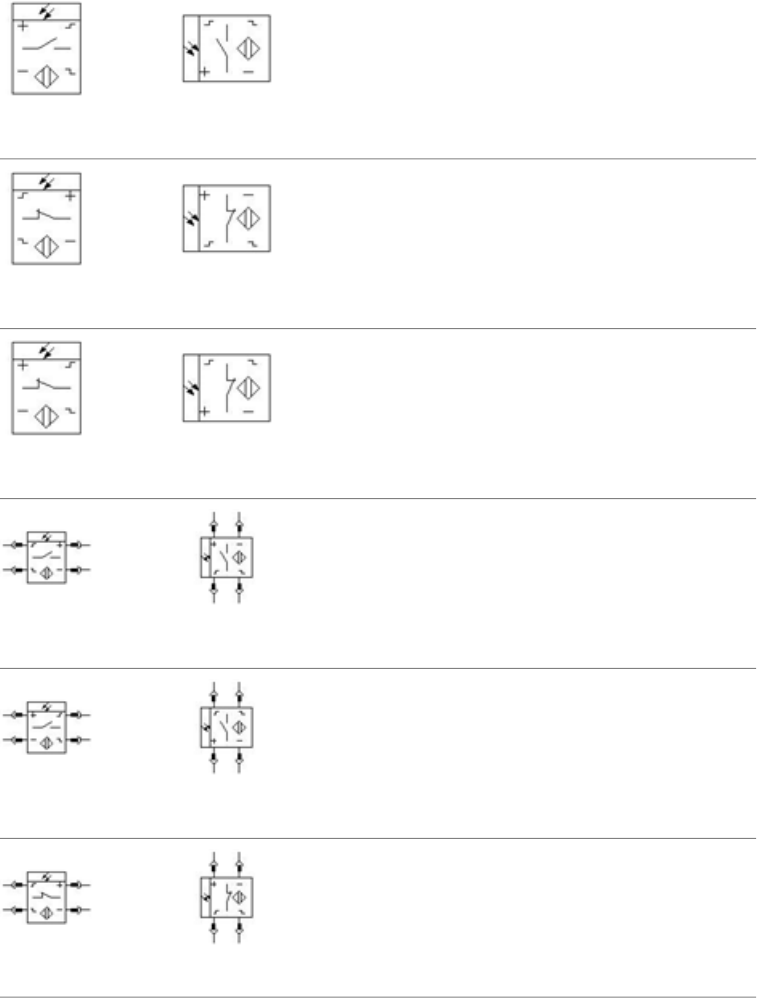
Normally Open 4 wire 180
VPE11PE4RHPE11PE4R
Normally Closed 4 wire
VPE12PE4HPE12PE4
Normally Closed 4 wire 180
VPE12PE4RHPE12PE4R
Normally Open 4 wire with connector
VPE11PE4CHPE11PE4C
Normally Open 4 wire 180 with connector
VPE11PE4RCHPE11PE4RC
Normally Closed 4 wire with connector
VPE12PE4CHPE12PE4C
Photoelectric Emitter Switches | 529
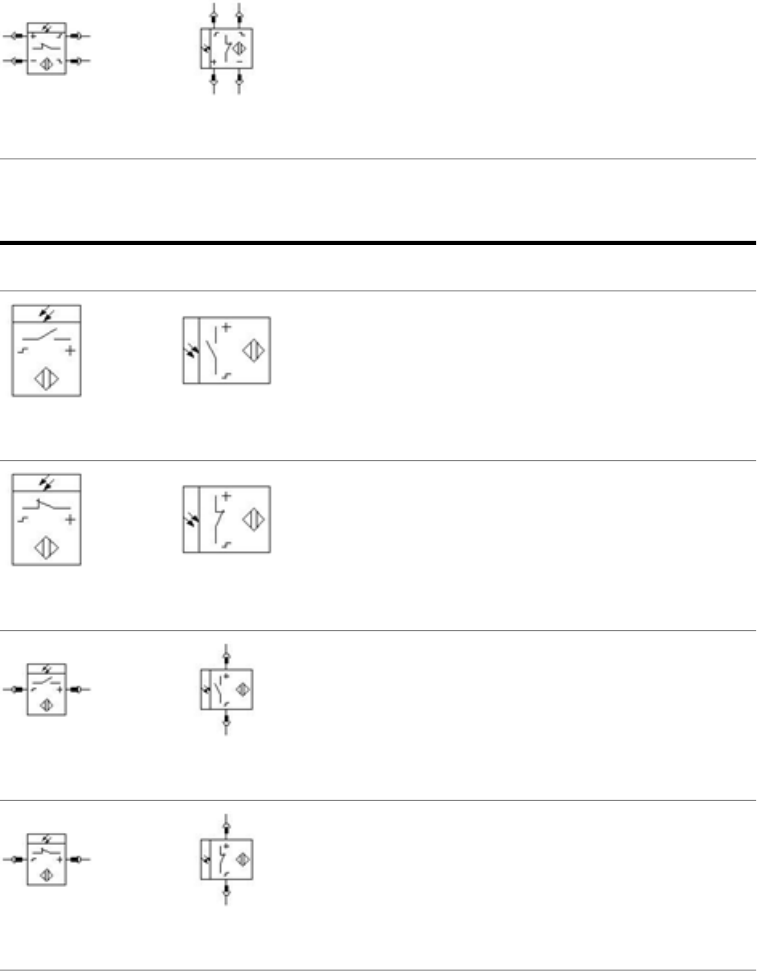
Normally Closed 4 wire 180 with connector
VPE12PE4RCHPE12PE4RC
Photoelectric Receiver Switches
DescriptionVertical SymbolHorizontal Symbol
Normally Open Receiver 2 wire
VPE11PE2HPE11PE2
Normally Closed Receiver 2 wire
VPE12PE2HPE12PE2
Normally Open Receiver 2 wire with connector
VPE11PE2CHPE11PE2C
Normally Closed Receiver 2 wire with connector
VPE12PE2CHPE12PE2C
530 | Chapter 7 IEC Symbols
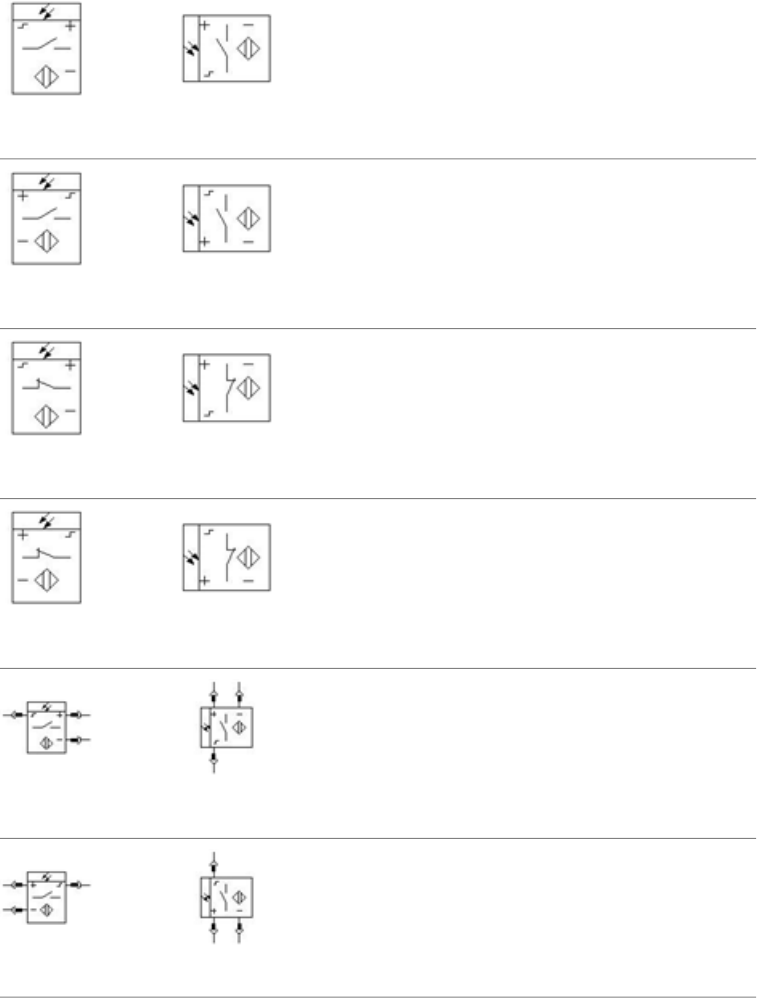
Normally Open Receiver 3 wire
VPE11PE3HPE11PE3
Normally Open Receiver 3 wire 180
VPE11PE3RHPE11PE3R
Normally Closed Receiver 3 wire
VPE12PE3HPE12PE3
Normally Closed Receiver 3 wire 180
VPE12PE3RHPE12PE3R
Normally Open Receiver 3 wire with connector
VPE11PE3CHPE11PE3C
Normally Open Receiver 3 wire 180 with connector
VPE11PE3RCHPE11PE3RC
Photoelectric Receiver Switches | 531
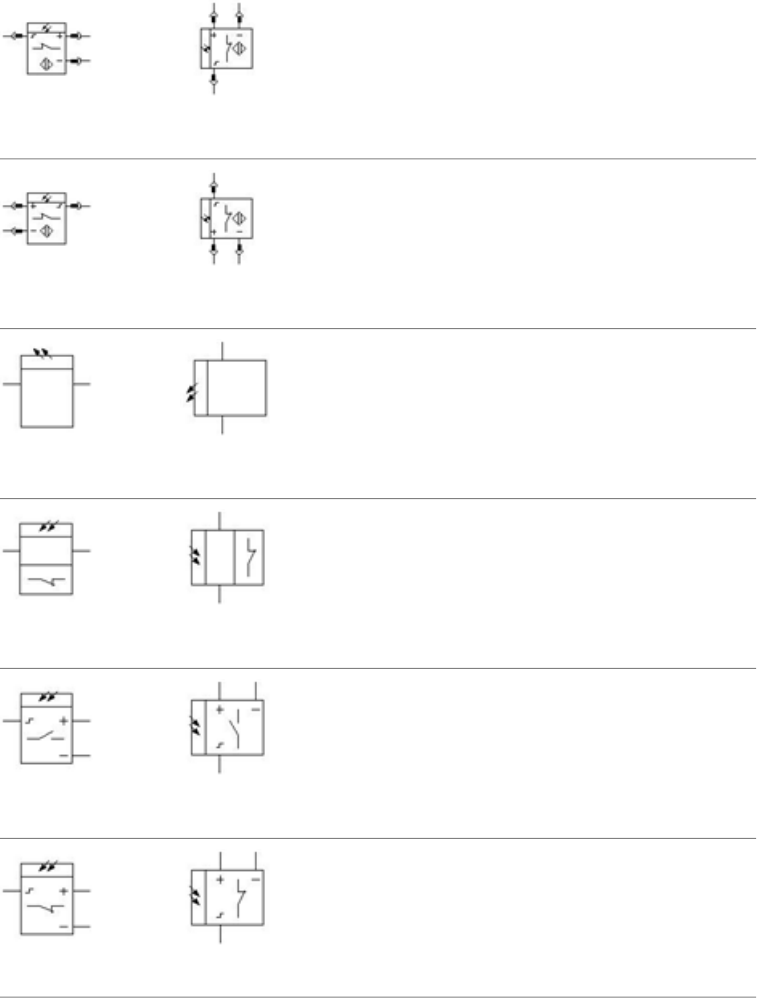
Normally Closed Receiver 3 wire with connector
VPE12PE3CHPE12PE3C
Normally Closed Receiver 3 wire 180 with connector
VPE12PE3RCHPE12PE3RC
Normally Open Receiver - AC Driven
VPE11B14HPE11B14
Normally Closed Receiver - AC Driven
VPE12B14HPE12B14
Normally Open Receiver - DC Driven
VPE11B15HPE11B15
Normally Closed Receiver - DC Driven
VPE12B15HPE12B15
532 | Chapter 7 IEC Symbols
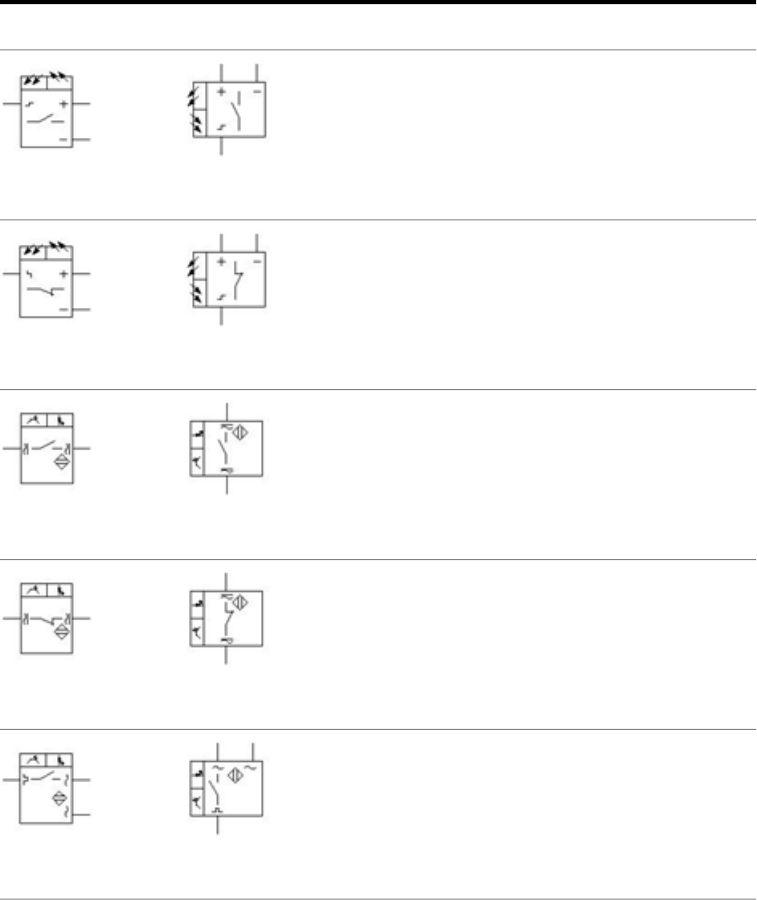
Photoelectric Emitter/Receiver Switches
DescriptionVertical SymbolHorizontal Symbol
Normally Open Emitter-Receiver - DC Driven
VPE11B16HPE11B16
Normally Closed Emitter-Receiver - DC Driven
VPE12B16HPE12B16
Normally Open Emitter-Receiver AC/DC Driven 2 PIN
VPE11B22HPE11B22
Normally Closed Emitter-Receiver AC/DC Driven 2
PIN
VPE12B22HPE12B22
Normally Open Emitter-Receiver AC Driven 3 PIN
VPE11B23HPE11B23
Photoelectric Emitter/Receiver Switches | 533
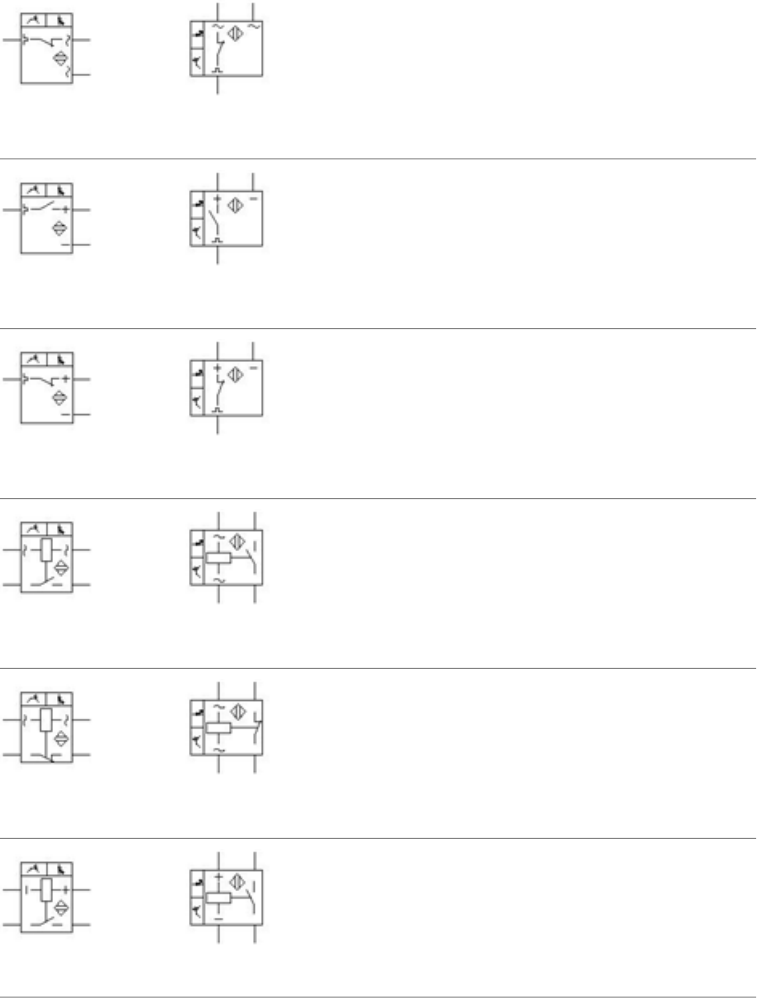
Normally Closed Emitter-Receiver AC Driven 3 PIN
VPE12B23HPE12B23
Normally Open Emitter-Receiver DC Driven 3 PIN
VPE11B24HPE11B24
Normally Closed Emitter-Receiver DC Driven 3 PIN
VPE12B24HPE12B24
Normally Open Emitter-Receiver AC Driven 4 PIN
VPE11B25HPE11B25
Normally Closed Emitter-Receiver AC Driven 4 PIN
VPE12B25HPE12B25
Normally Open Emitter-Receiver DC Driven 4 PIN
VPE11B26HPE11B26
534 | Chapter 7 IEC Symbols
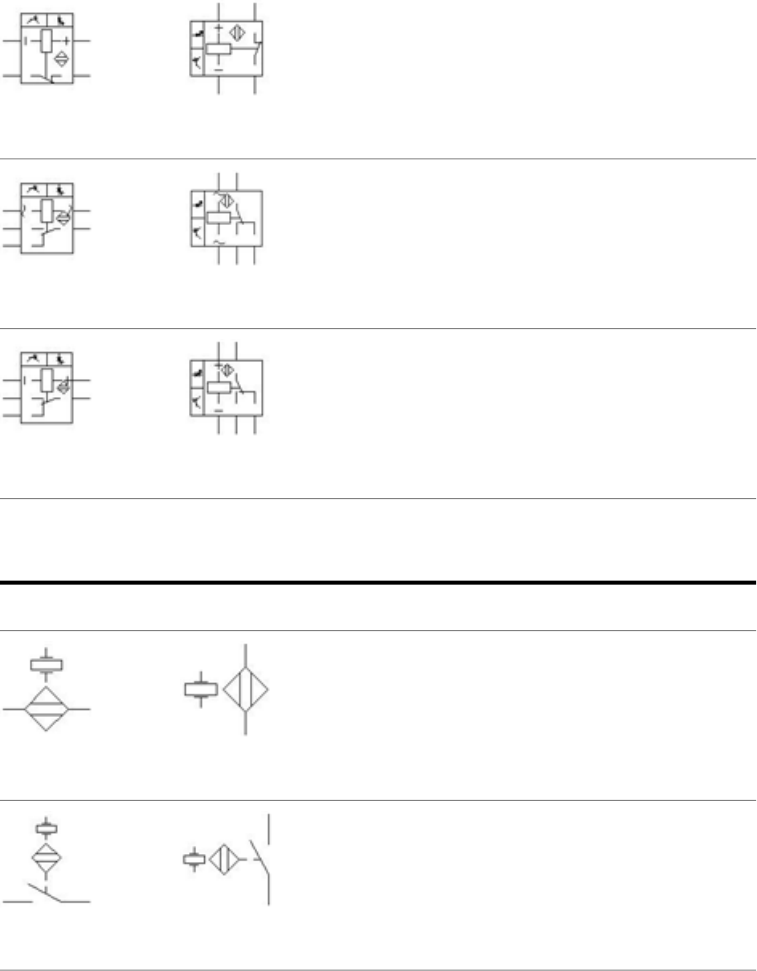
Normally Closed Emitter-Receiver DC Driven 4 PIN
VPE12B26HPE12B26
FORM C Emitter-Receiver AC Driven 5 PIN
VPE13B25SCHPE13B25SC
FORM C Emitter-Receiver DC Driven 5 PIN
VPE13B26SCHPE13B26SC
Ultrasonic Switches
DescriptionVertical SymbolHorizontal Symbol
Ultrasonic
VPX1UHPX1U
Ultrasonic Switch, Normally Open
VPX11UHPX11U
Ultrasonic Switches | 535
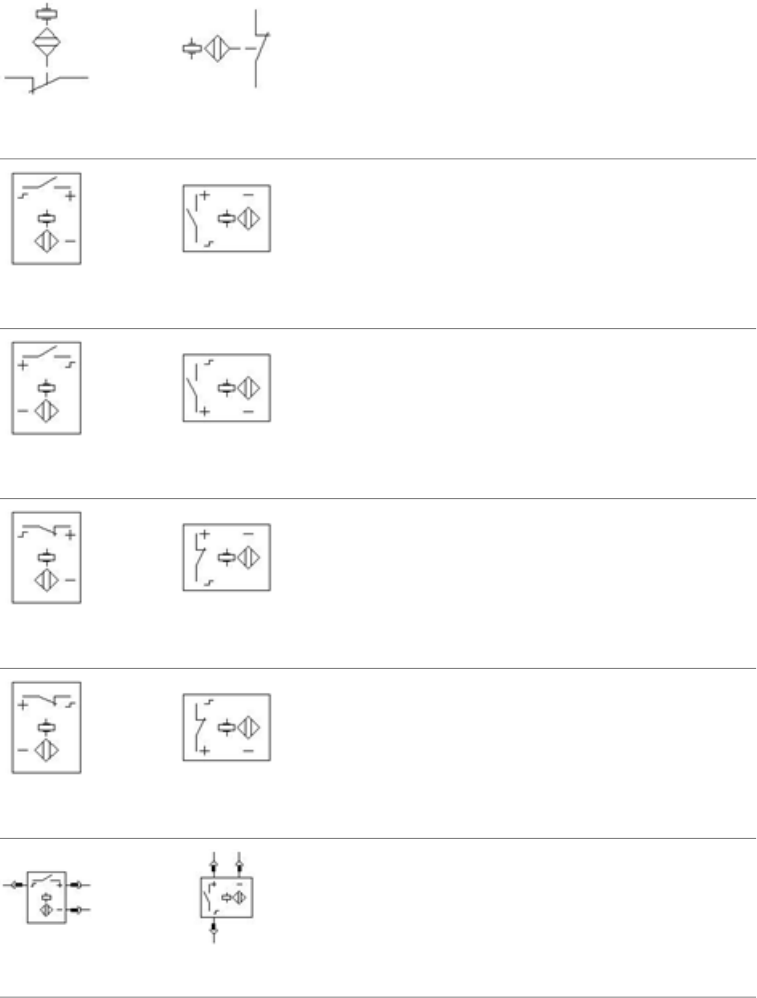
Ultrasonic Switch, Normally Closed
VPX12UHPX12U
Normally Open 3 Wire
VPX11U3HPX11U3
Normally Open 3 Wire 180
VPX11U3RHPX11U3R
Normally Closed 3 Wire
VPX12U3HPX12U3
Normally Closed 3 Wire 180
VPX12U3RHPX12U3R
Normally Open 3 Wire with connector
VPX11U3CHPX11U3C
536 | Chapter 7 IEC Symbols
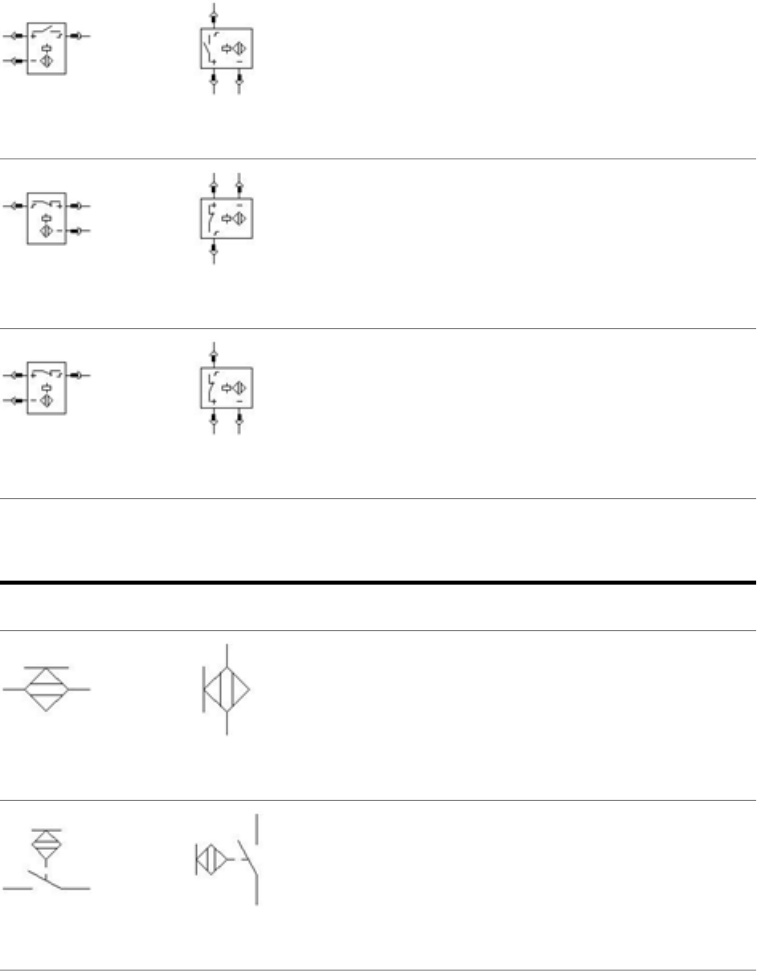
Normally Open 3 Wire 180 with connector
VPX11U3RCHPX11U3RC
Normally Closed 3 Wire with connector
VPX12U3CHPX12U3C
Normally Closed 3 Wire 180 with connector
VPX12U3RCHPX12U3RC
Touch Switches
DescriptionVertical SymbolHorizontal Symbol
Touch
VPX1TSHPX1TS
Touch Sense Proximity Switch, Normally Open
VPX11TSHPX11TS
Touch Switches | 537
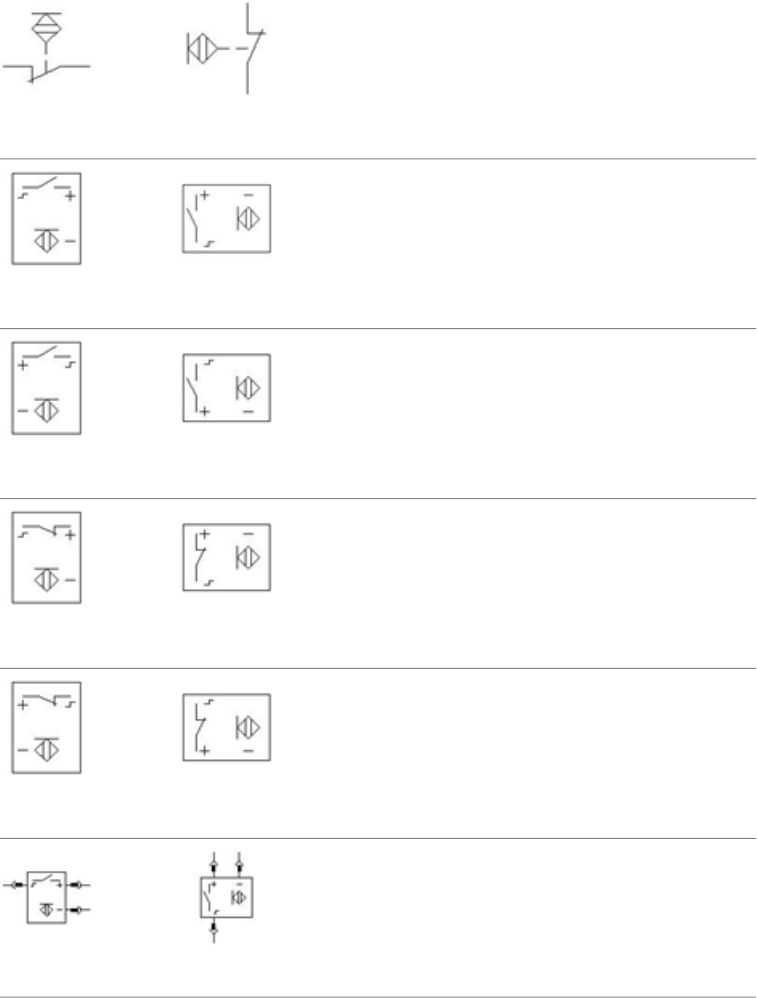
Touch Sense Proximity Switch, Normally Closed
VPX12TSHPX12TS
Normally Open 3 Wire
VPX11TS3HPX11TS3
Normally Open 3 Wire 180
VPX11TS3RHPX11TS3R
Normally Closed 3 Wire
VPX12TS3HPX12TS3
Normally Closed 3 Wire 180
VPX12TS3RHPX12TS3R
Normally Open 3 Wire with Connector
VPX11TS3CHPX11TS3C
538 | Chapter 7 IEC Symbols
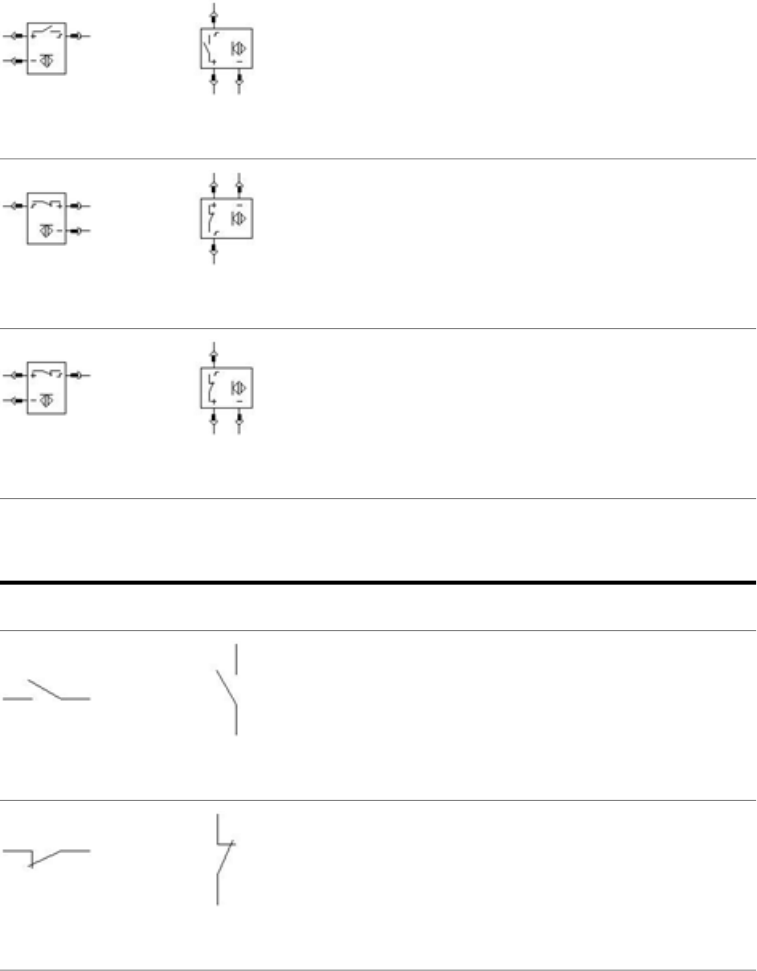
Normally Open 3 Wire 180 with Connector
VPX11TS3RCHPX11TS3RC
Normally Closed 3 Wire with Connector
VPX12TS3CHPX12TS3C
Normally Closed 3 Wire 180 with connector
VPX12TS3RCHPX12TS3RC
Miscellaneous Switches
DescriptionVertical SymbolHorizontal Symbol
Generic Switch, Normally Open
VSW11HSW11
Generic Switch, Normally Closed
VSW12HSW12
Miscellaneous Switches | 539

Float/Level Switch, Normally Open
VFL11HFL11
Float/Level Switch, Normally Closed
VFL12HFL12
Key Switch, Normally Open
VPB11KSHPB11KS
Key Switch, Normally Closed
VPB12KSHPB12KS
Key Switch Latched, Normally Open
VPB11KSLHPB11KSL
Key Switch Latched, Normally Closed
VPB12KSLHPB12KSL
540 | Chapter 7 IEC Symbols

Pull Cord Switch, Normally Open
VPC11HPC11
Pull Cord Switch, Normally Closed
VPC12HPC12
Pull Cord Switch Latched, Normally Open
VPC11LHPC11L
Pull Cord Switch Latched, Normally Closed
VPC12LHPC12L
Foot Switch, Normally Open
VFT11HFT11
Foot Switch, Normally Closed
VFT12HFT12
Miscellaneous Switches | 541

Foot Switch Latched, Normally Open
VFT11LHFT11L
Foot Switch Latched, Normally Closed
VFT12LHFT12L
Lever Switch, Normally Open
VPB11LSHPB11LS
Lever Switch, Normally Closed
VPB12LSHPB12LS
Lever Switch Latched,Normally Open
VPB11LSLHPB11LSL
Lever Switch Latched,Normally Closed
VPB12LSLHPB12LSL
542 | Chapter 7 IEC Symbols

Flow Switch Normally Open
VFS11HFS11
Flow Switch Normally Closed
VFS12HFS12
Flow Switch Normally Open - Gas
VFS11S20HFS11S20
Flow Switch Normally Closed - Gas
VFS12S20HFS12S20
3 Voltage Phase Switch
VSW1S90HSW1S90
3 Voltage Phase-to-Neutral Switch
VSW1S91HSW1S91
Miscellaneous Switches | 543
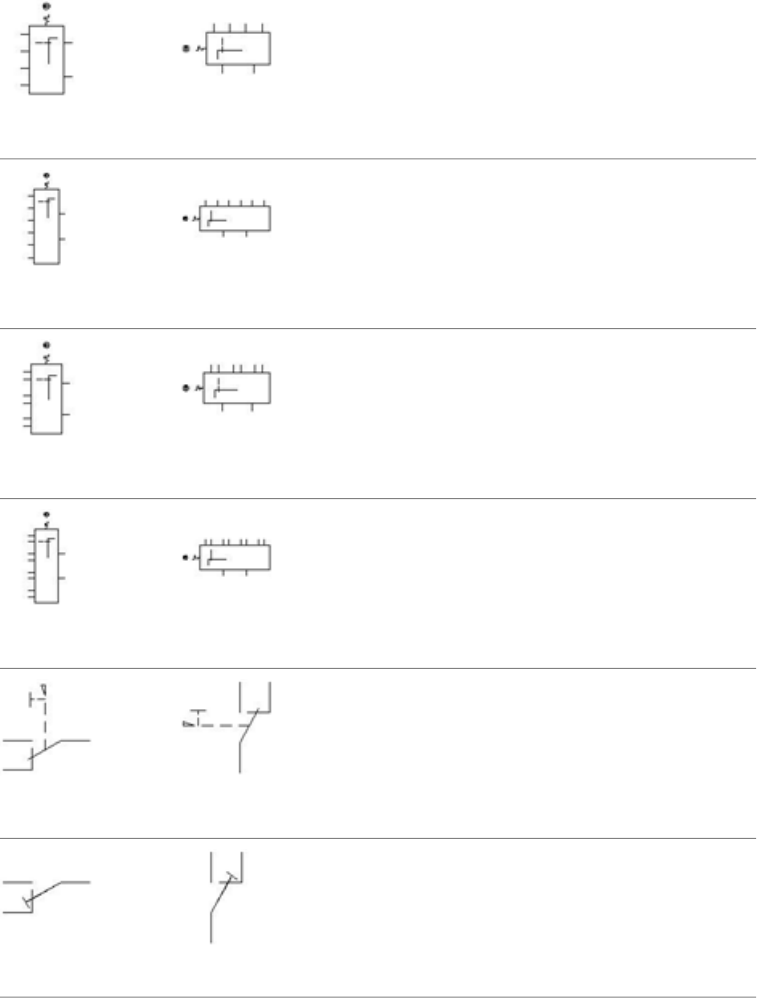
3 Voltage Phase-to-Phase and Phase-to-Neutral Switch
VSW1S92HSW1S92
3 Voltage, 2-Network Phase-to-Phase Switch
VSW1S93HSW1S93
Current Switch For 3 Measurement Points
VSW1S94HSW1S94
Current Switch For 4 Measurement Points
VSW1S95HSW1S95
Change-Over Contact with Mechanical Block and
Manual Unlatching
VSW1SC21_FHSW1SC21_F
Transfer Make Before Break Contact
VSW1SC7_FHSW1SC7_F
544 | Chapter 7 IEC Symbols
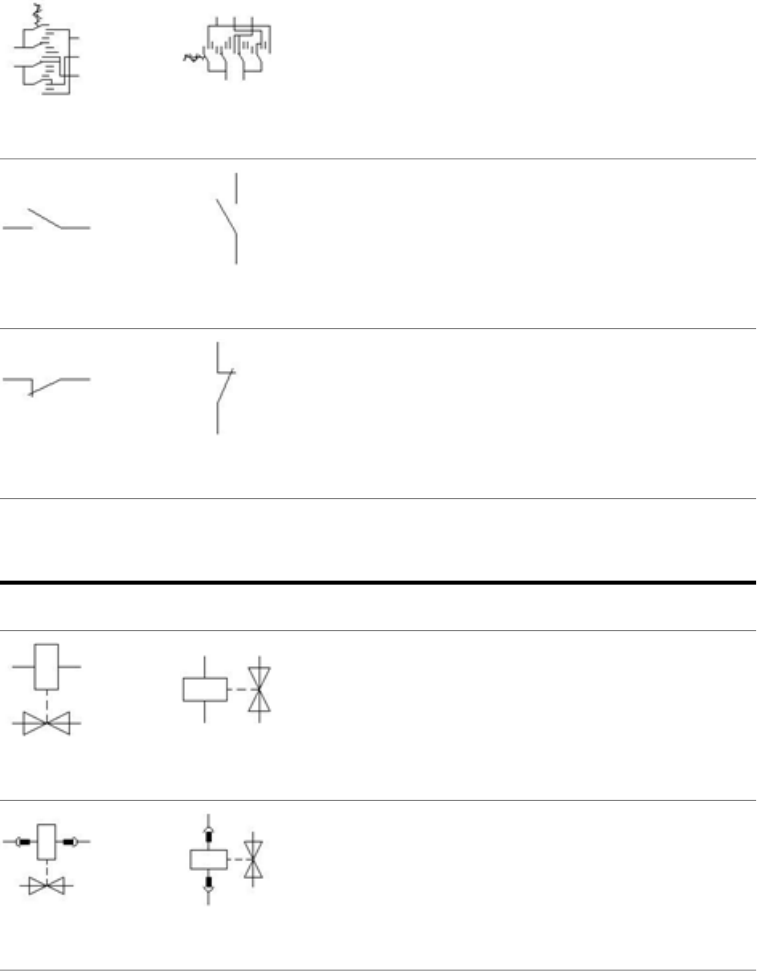
Voltmetric Commutator
VSW1S53HSW1S53
2nd+ Normally Open Contact
VSW21HSW21
2nd+ Normally Closed Contact
VSW22HSW22
Solenoids
DescriptionVertical SymbolHorizontal Symbol
Standard Solenoid Valve
VSV1HSV1
Standard Solenoid Valve with Connection
VSVC1HSVC1
Solenoids | 545

Open Solenoid Valve - Closing
VSV1Y1HSV1Y1
Open Solenoid Valve - Closing According to Solenoid
VSV1Y1AHSV1Y1A
Magnetic Brake
VSV1Y3HSV1Y3
Electromagnetic Brake
VSV1Y4HSV1Y4
Solenoid Valve Auxiliary Normally Open Contact
VSV21HSV21
Solenoid Valve Auxiliary Normally Closed Contact
VSV22HSV22
546 | Chapter 7 IEC Symbols
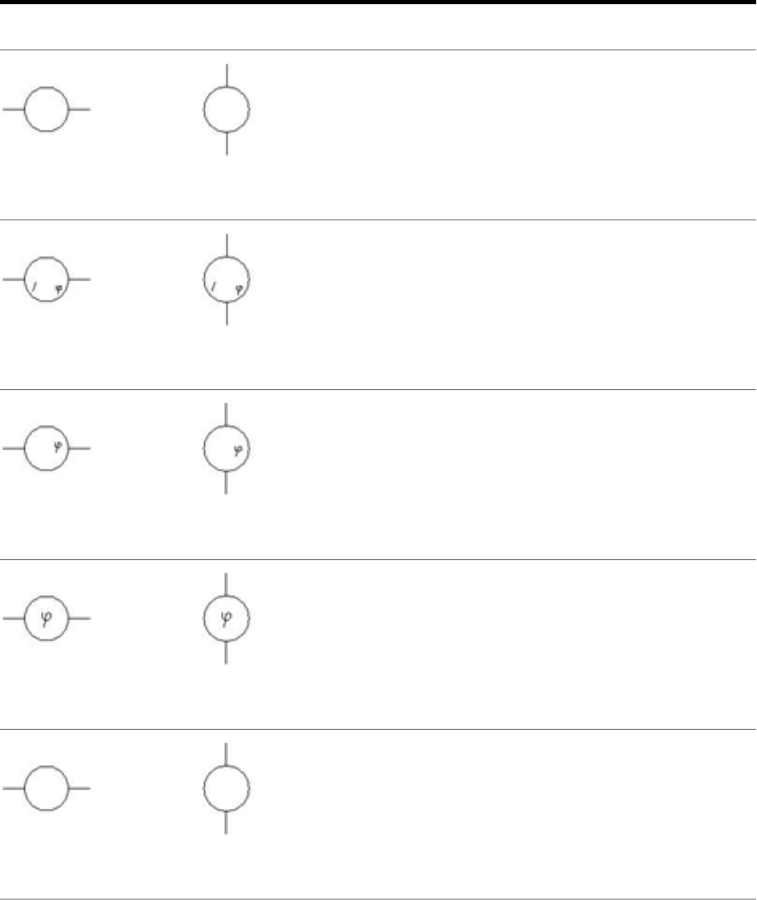
Instrumentation and Sensors
DescriptionVertical SymbolHorizontal Symbol
Voltage Meter
VVM1HVM1
Amperage Meter
VAM1HAM1
Power Factor Meter
VIN1PFMHIN1PFM
Phase Meter
VIN1PHMHIN1PHM
Frequency Meter
VIN1FRMHIN1FRM
Instrumentation and Sensors | 547
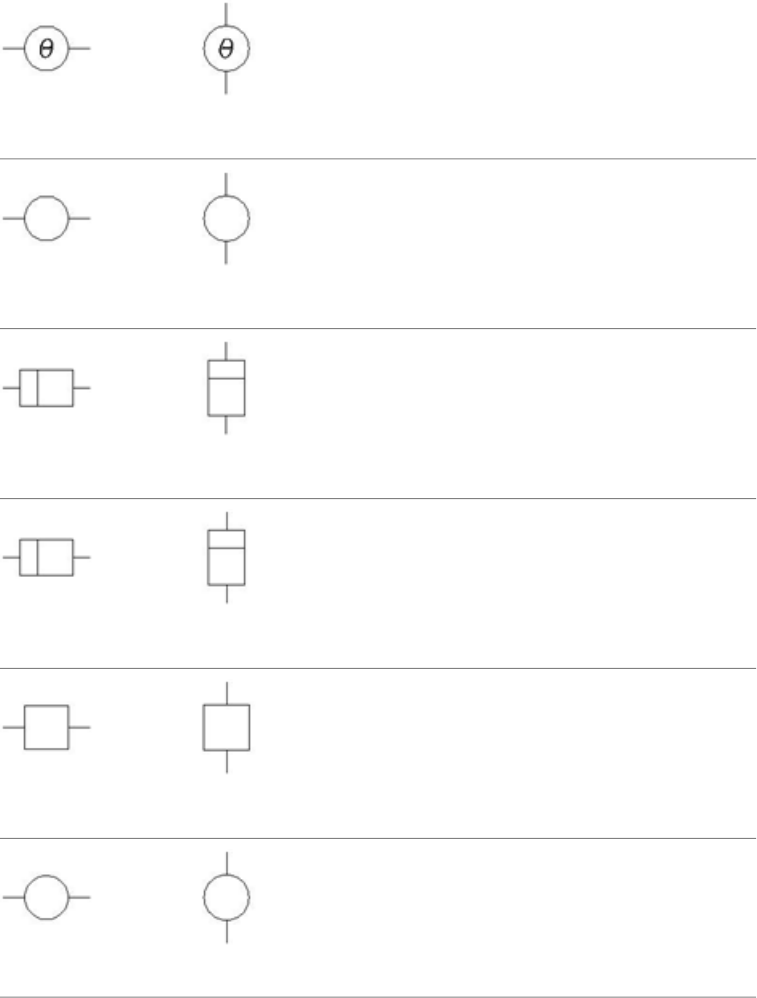
Thermometer
VIN1THMHIN1THM
Tachometer
VIN1TACHIN1TAC
Hour Meter
VIN1HRMHIN1HRM
Ampere-Hour meter
VIN1AHMHIN1AHM
Recording Wattmeter
VIN1P17HIN1P17
Varmeter
VIN1P21HIN1P21
548 | Chapter 7 IEC Symbols
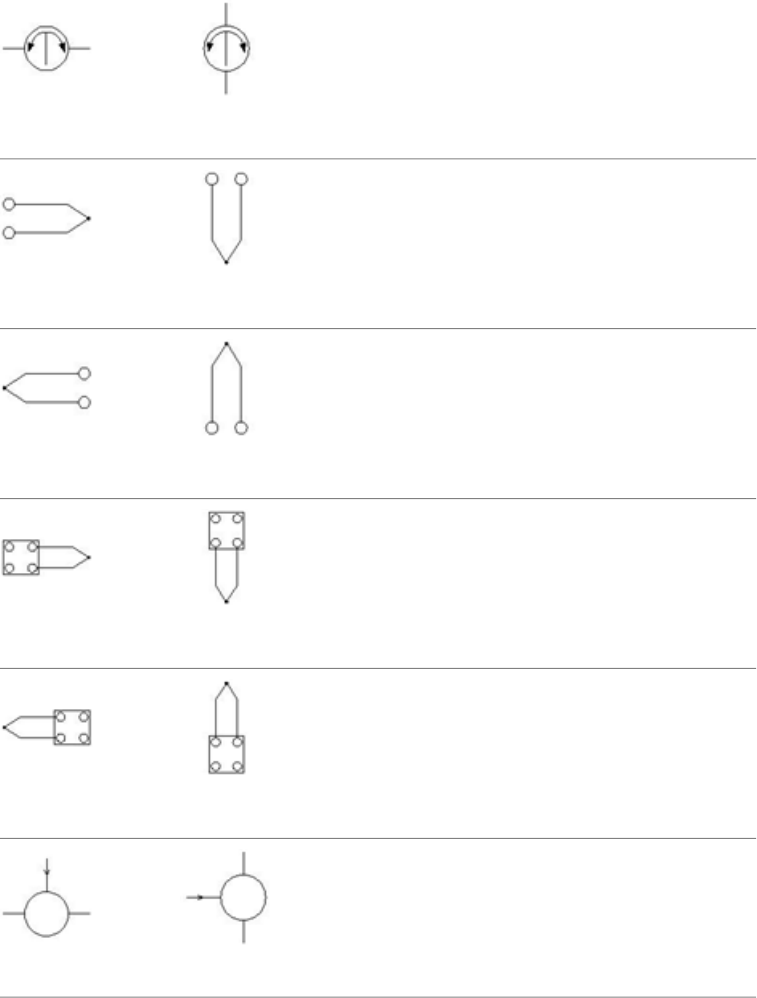
Synchronoscope
VIN1P11HIN1P11
Thermocouple
VTC1LHTC1L
Thermocouple
VTC1RHTC1R
Thermocouple with Terminal Board
VTC1LTBHTC1LTB
Thermocouple with Terminal Board
VTC1RTBHTC1RTB
Active Power Indicator
VIN1P19HIN1P19
Instrumentation and Sensors | 549
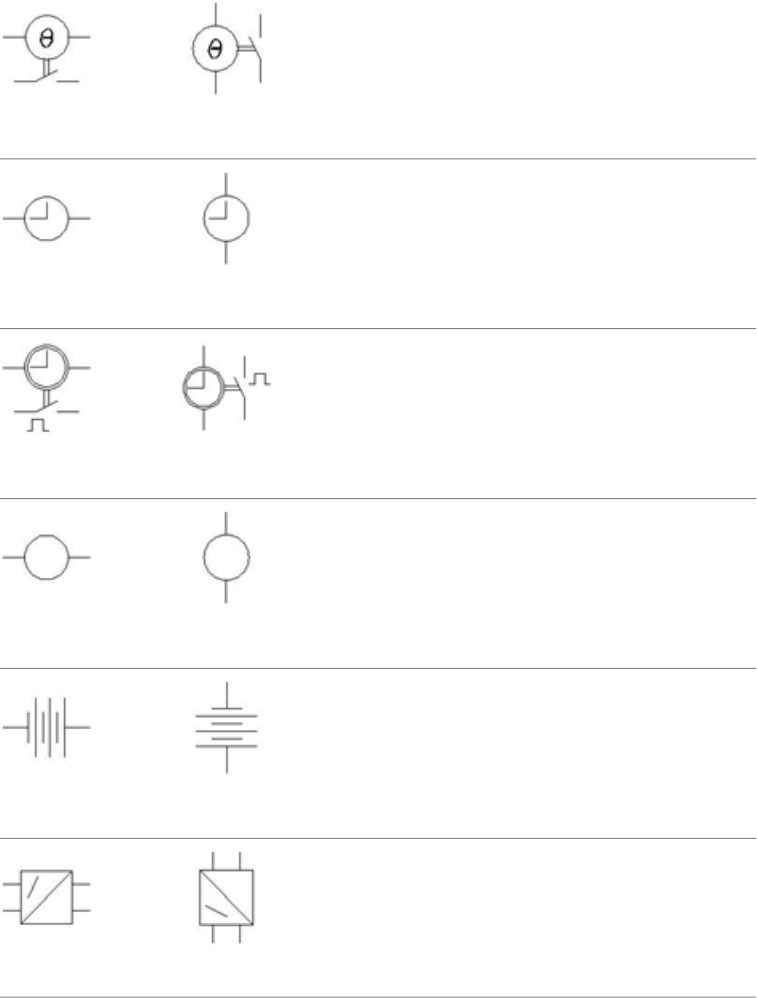
Thermometer/Pyrometer
VIN1P25HIN1P25
Clock
VIN1P29HIN1P29
Normally Open Clock Closing Every Minute
VIN1P33HIN1P33
Differential Voltmeter
VVM1P7HVM1P7
Accumulator Battery
VPW1G4HPW1G4
Pressure/Current Converter
VIN1B10HIN1B10
550 | Chapter 7 IEC Symbols
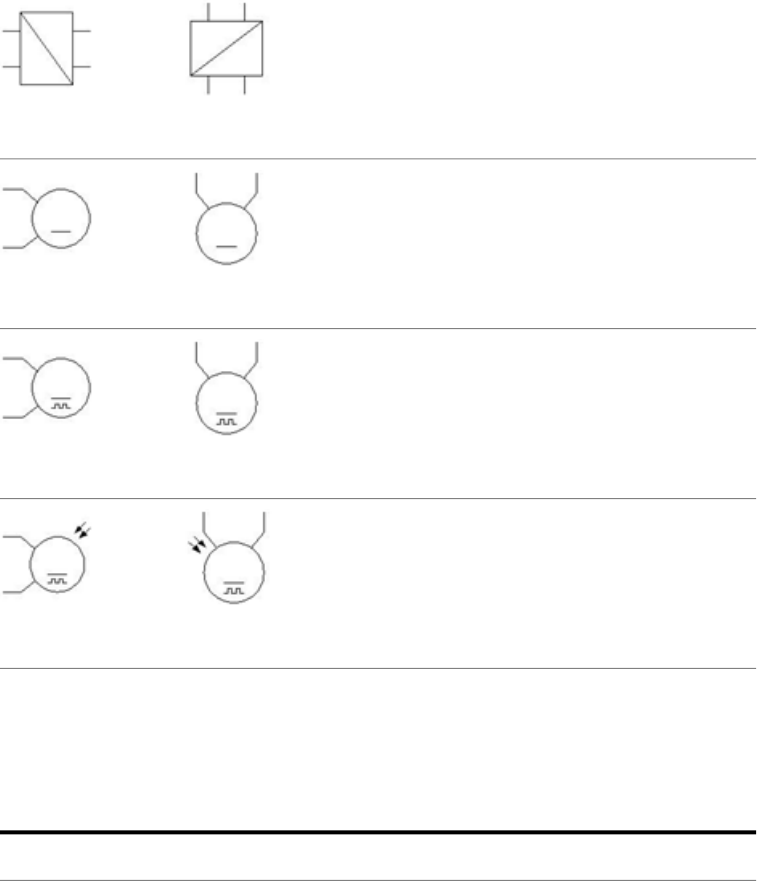
AC-DC Current Converter Single Phase
VIN1G1HIN1G1
Tachometric Dynamo
VIN1B11HIN1B11
Tachometric Dynamo - Impulse
VIN1B12HIN1B12
Tachometric Dynamo - Optical Type
VIN1B13HIN1B13
Qualifying Symbols
Operating Devices
DescriptionSymbol
Qualifying Symbols | 551
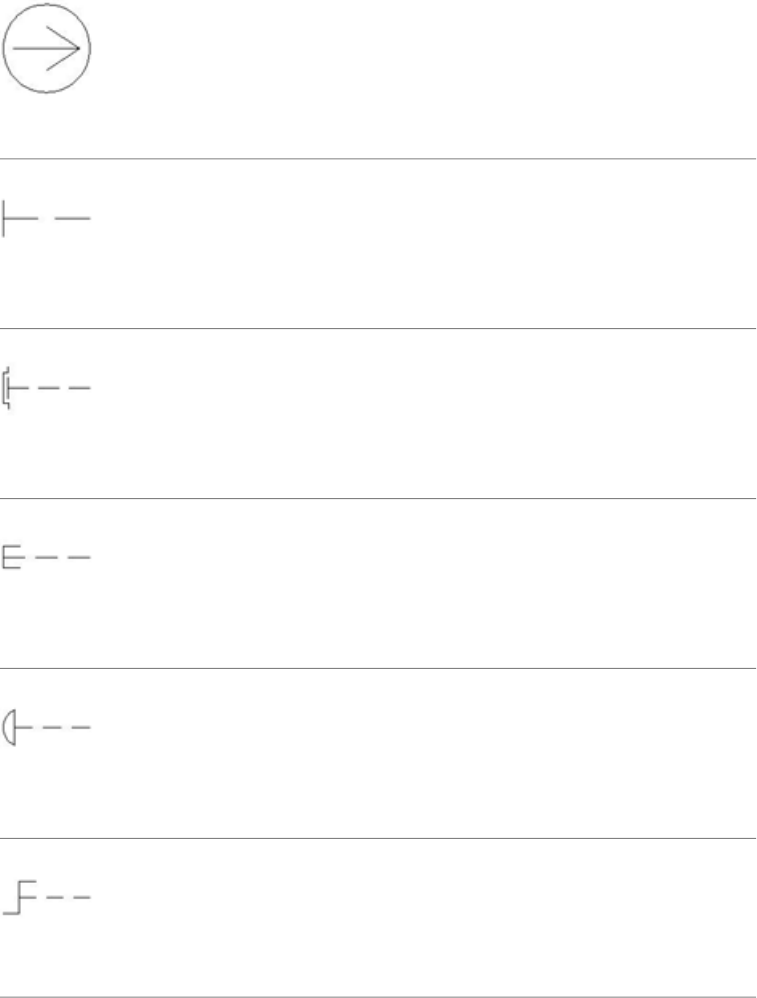
Positive Operation Direction
Q070109
Manual Command General Sign
Q021301
Manual Command with Protected Access
Q021302
Push Button Command
Q021305
Emergency Command
Q021308
Rotary Command
Q021304
552 | Chapter 7 IEC Symbols

Command with Key
Q021313
Foot Actuated Command
Q021310
Lever Command
Q021311
Crank Command
Q021214
Fixed Manual Command
Q021312
Manual Command with Wheel
Q021309
Operating Devices | 553

Actuated by the Level of a Fluid
Q021401
Actuated by the Number of Events
Q021402
Actuated by a Flow of Fluid
Q021403
Actuated by a Gas Flow
Q021404
Motorized Command
Q021326
Timing Command
Q021327
554 | Chapter 7 IEC Symbols

Command with Roll
Q021315
Command with Cam
Q021316
Cam Profile
Q021317
Switch Position Function
Q070106
Switch Position (Flipped)
Q070106R
Disconnector Isolator
Q070103
Operating Devices | 555
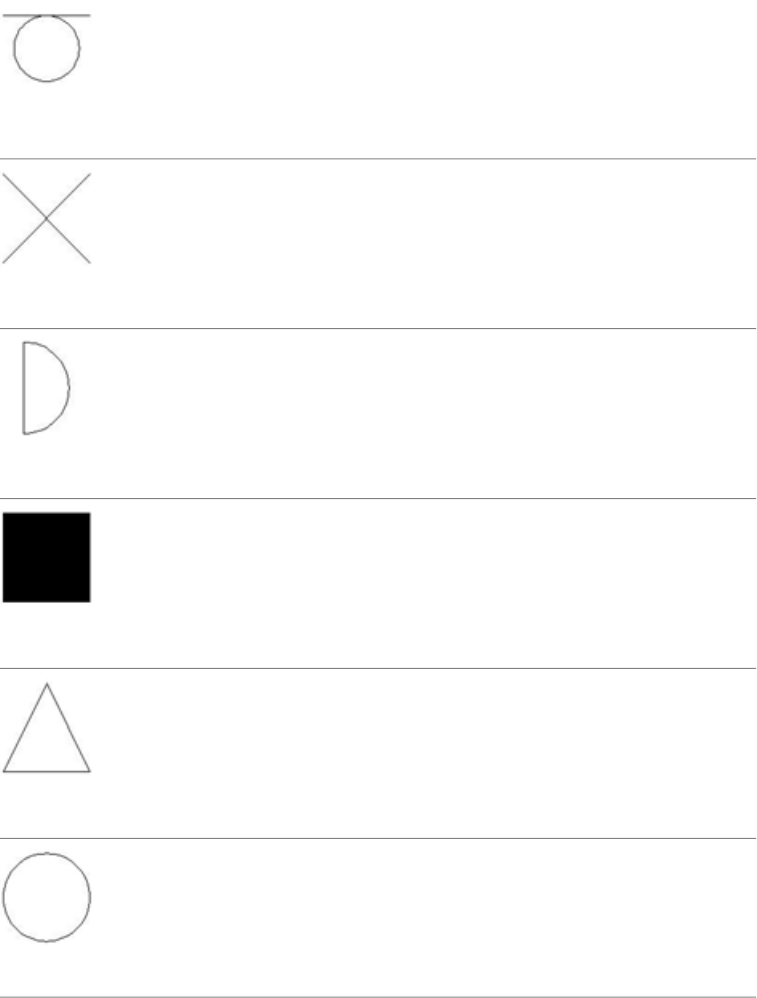
Switch Disconnector Isolator
Q070104
Circuit Breaker Function
Q070102
Power Contactor Function
Q070101
Auto Trip Function
Q070105
Auto Return (Spring Return)
Q070107
Non Auto Return (Stay)
Q070108
556 | Chapter 7 IEC Symbols
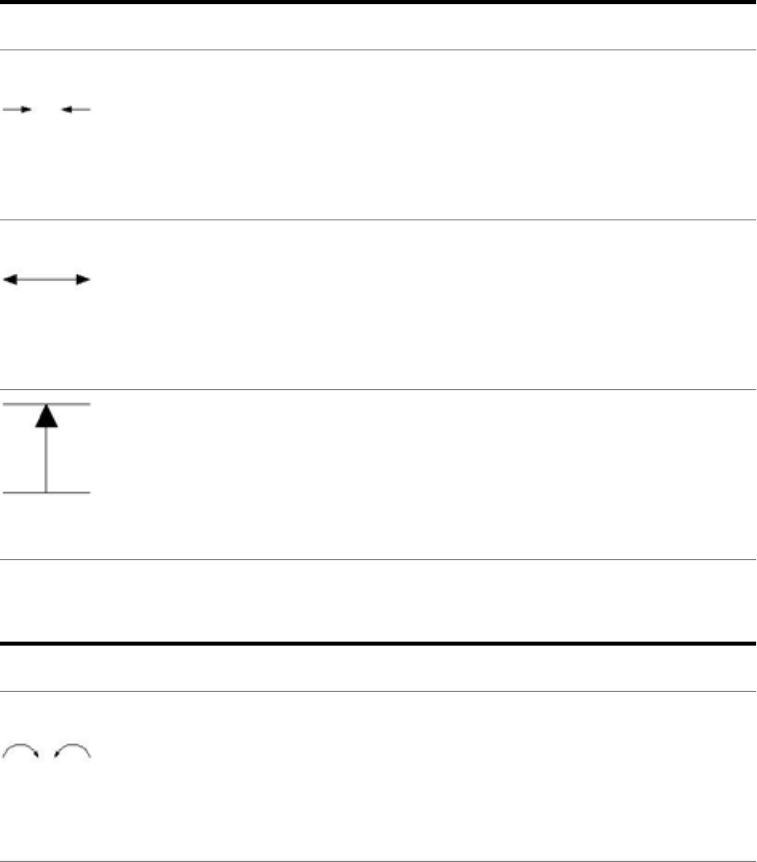
Linear Direction of Force or Motion
DescriptionSymbol
One Way Force Or Movement
Q020401
Two Way Force Or Movement
Q020402
Transition
Q101101
Rotative Direction of Force or Motion
DescriptionSymbol
One Way Force Or Movement
Q020403
Linear Direction of Force or Motion | 557
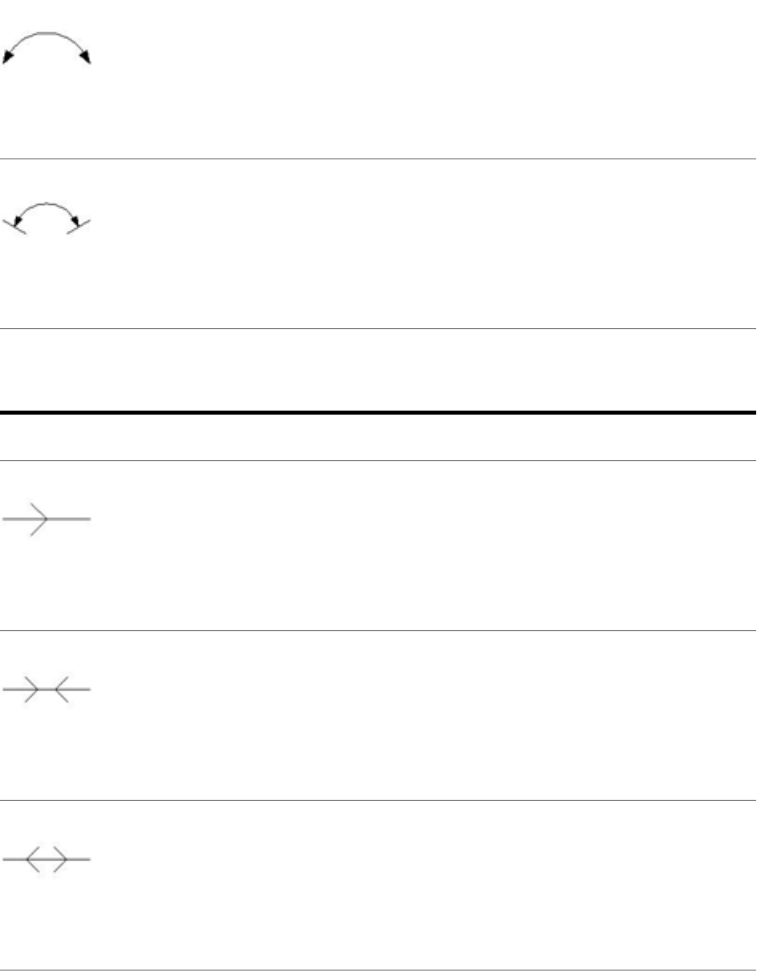
Two Way Force Or Movement
Q020404
Limited Two Way Force Or Movement
Q020405
Propagation Flow or Signal
DescriptionSymbol
One Way Propagation
Q020501
Two Way Simultaneous Transmission Propagation
Q020502
Two Way Alternate Transmission Propagation
Q020503
558 | Chapter 7 IEC Symbols
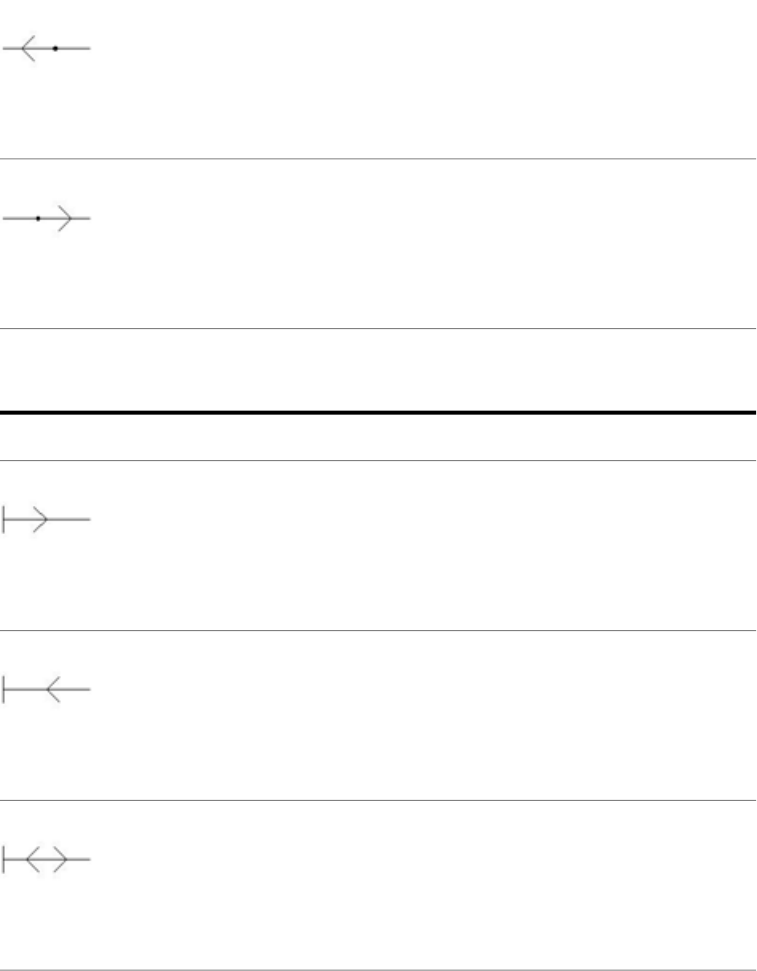
Signal Transmission
Q020504
Signal Reception
Q020505
Energy Flow
DescriptionSymbol
Outbound Energy Flux
Q020506
Inbound Energy Flux
Q020507
Inbound and Outbound Energy Flux
Q020508
Energy Flow | 559
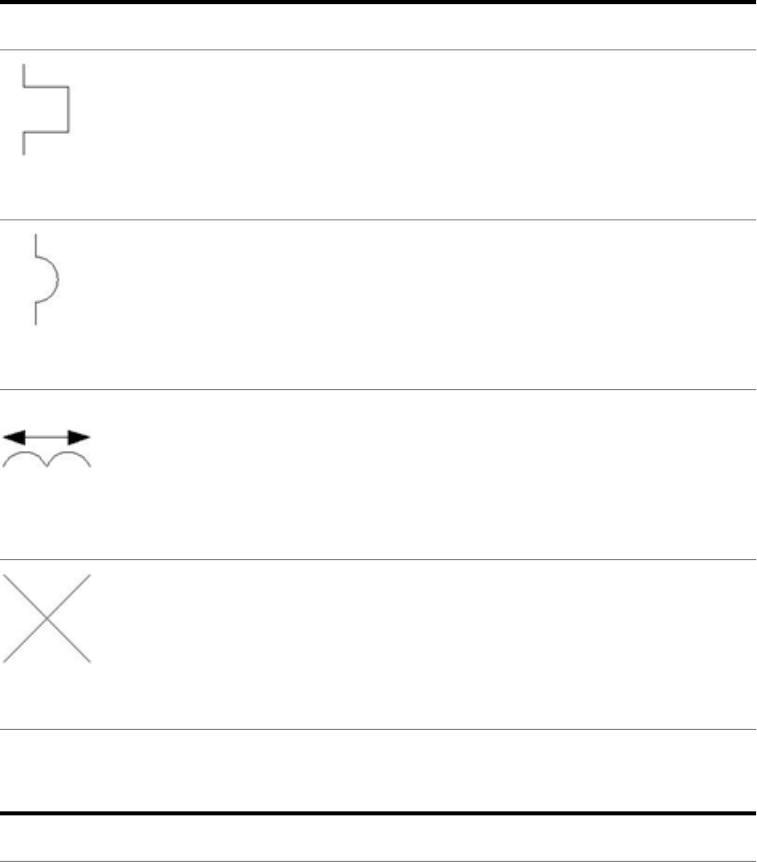
Effect
DescriptionSymbol
Thermal Effect
Q020801
Magnetic Effect
Q020802
Magnetostriction Effect
Q020803
Magnetic Field Effect
Q020804
Radiation
DescriptionSymbol
560 | Chapter 7 IEC Symbols
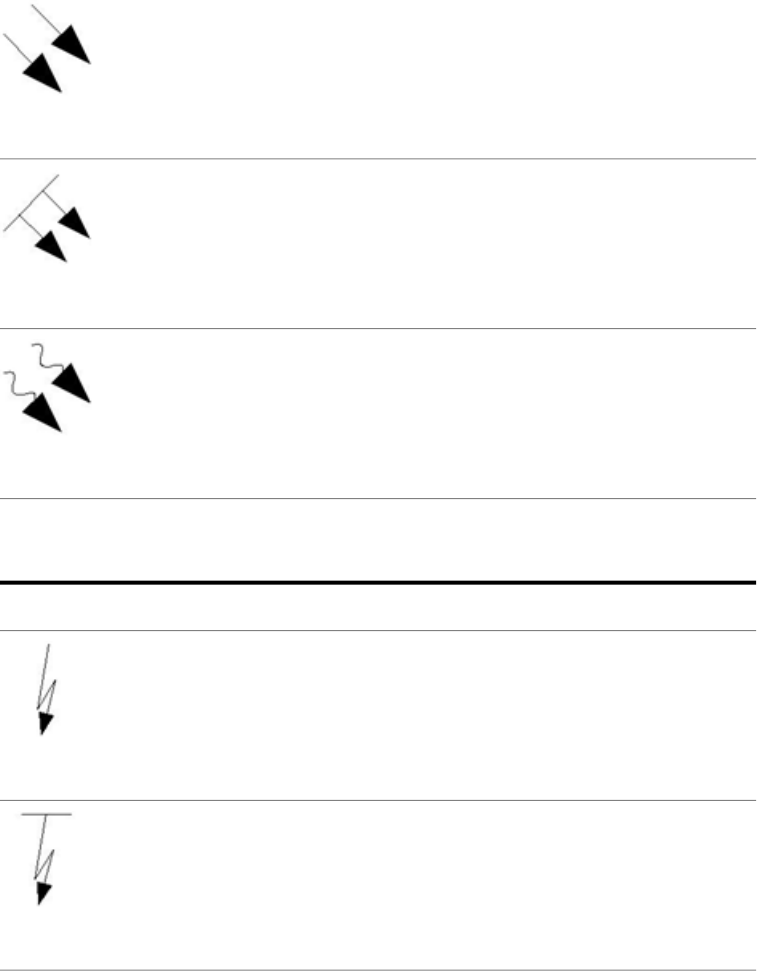
Non Ionizing Coherent Electromagnetic Radiation
Q020901
Non Ionizing Coherent Radiation
Q020902
Ionizing Radiation
Q020903
Fault
DescriptionSymbol
Indication Of Presumed Location Of Failure
Q021701
Failure For Lack Of Insulation
Q021702
Fault | 561
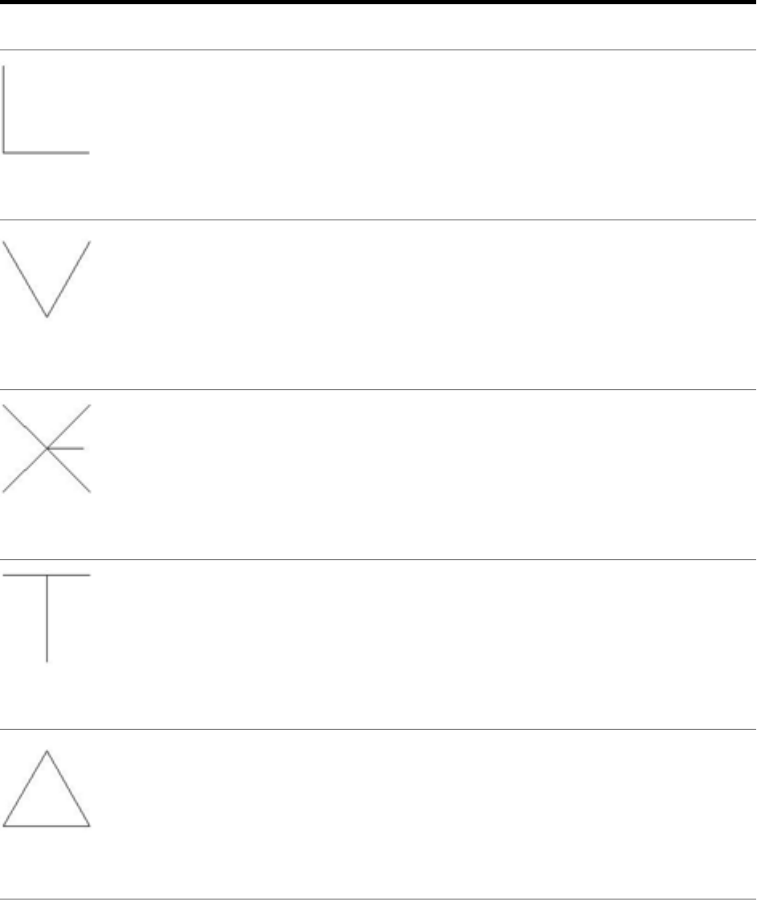
Winding
DescriptionSymbol
2 Phase Winding
Q060201
3 Phase Partial V Winding
Q060202
4 Phase Winding with Accessible Ground
Q060203
3 Phase T Winding
Q060204
3 Phase Delta Winding
Q060205
562 | Chapter 7 IEC Symbols
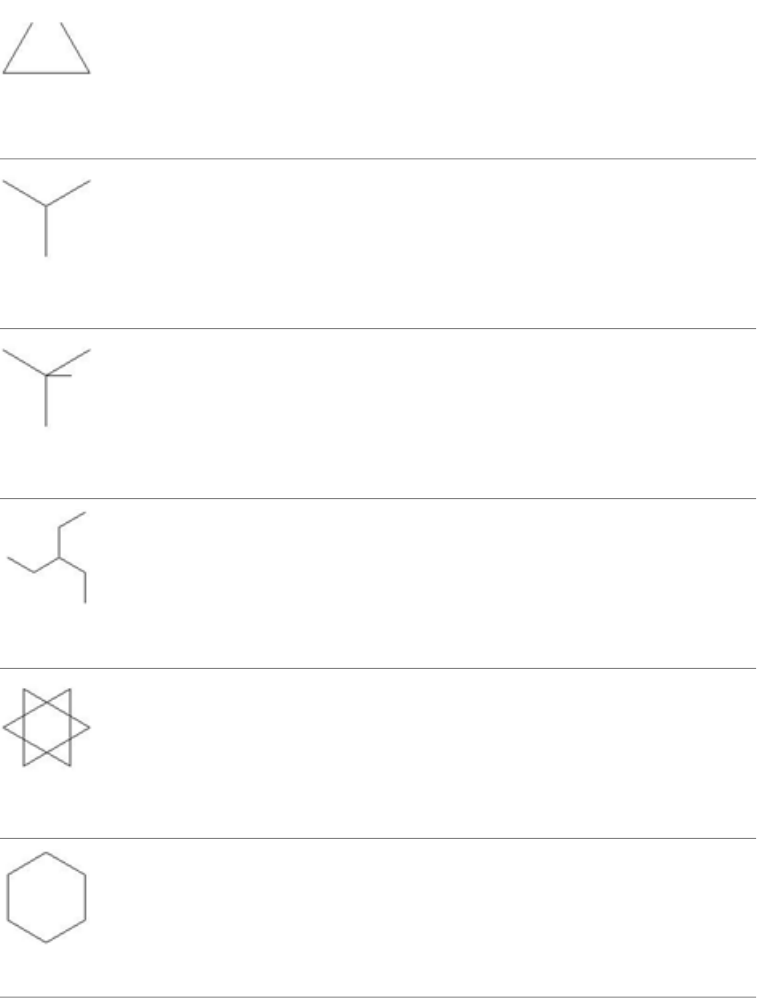
3 Phase Open Delta Winding
Q060206
3 Phase Star Winding
Q060207
3 Phase Star Winding with Accessible Ground
Q060208
3 Phase Zigzag Winding
Q060209
Esaphase Winding with Double Delta
Q060210
Esaphase Polygonal Winding
Q060211
Winding | 563

Esaphase Star Winding
Q060212
Esaphase Double Zigzag Winding with Accessible Ground
Q060213
DC Direct Current Indication
Q020201
DC Direct Current Indication
Q020203
Indication of Rectified Current with an Alternate Component
Q020212
AC Alternate Current Indication
Q020204
564 | Chapter 7 IEC Symbols
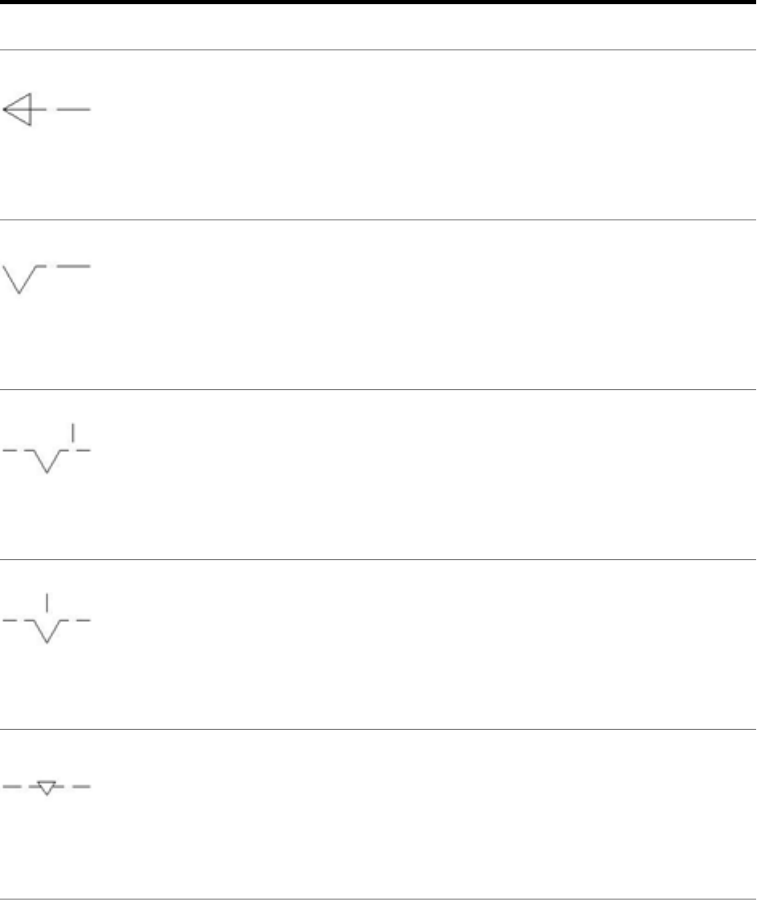
Mechanical Controls
DescriptionSymbol
Auto Return
Q021207
Auto Non Return Stop Latch
Q021208
Stop Latch in Neutral Position
Q021209
Stop Latch Engaged
Q021210
Interlock Between Two Devices
Q021211
Mechanical Controls | 565

Mechanical Controls, Latching Device
DescriptionSymbol
Latch Device Engaged
Q021212
Latch Device in Neutral Position
Q021213
Two Ways Latch Device
Q1020603
Latch Device with Manual Unlatching
Q1020604
Two Ways Latch Device with Key
Q1029603
566 | Chapter 7 IEC Symbols
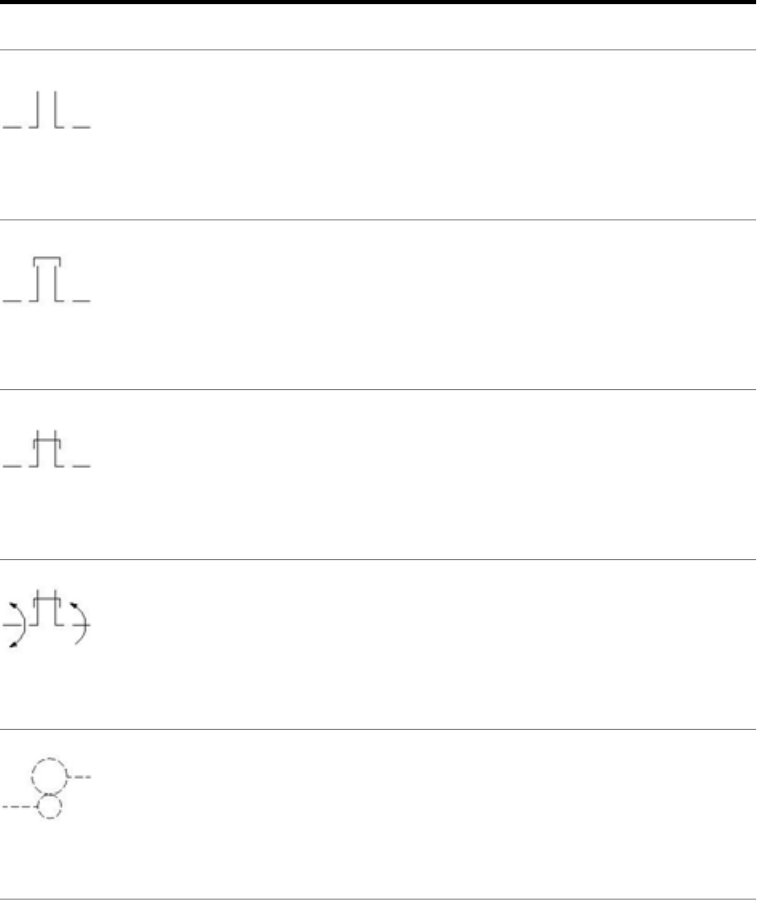
Mechanical Controls, Coupling
DescriptionSymbol
Clutch Joint
Q021216
Disconnected Joint
Q021217
Engaged Joint
Q021218
Engaged Joint
Q021219
Gear Joint
Q021223
Mechanical Controls, Coupling | 567

Miscellaneous
Miscellaneous
DescriptionVertical SymbolHorizontal Symbol
Bell
VAN1BHAN1B
Buzzer
VAN1ZHAN1Z
Horn
VAN1HHAN1H
Siren
VAN1SHAN1S
Whistle
VAN1WHAN1W
568 | Chapter 7 IEC Symbols
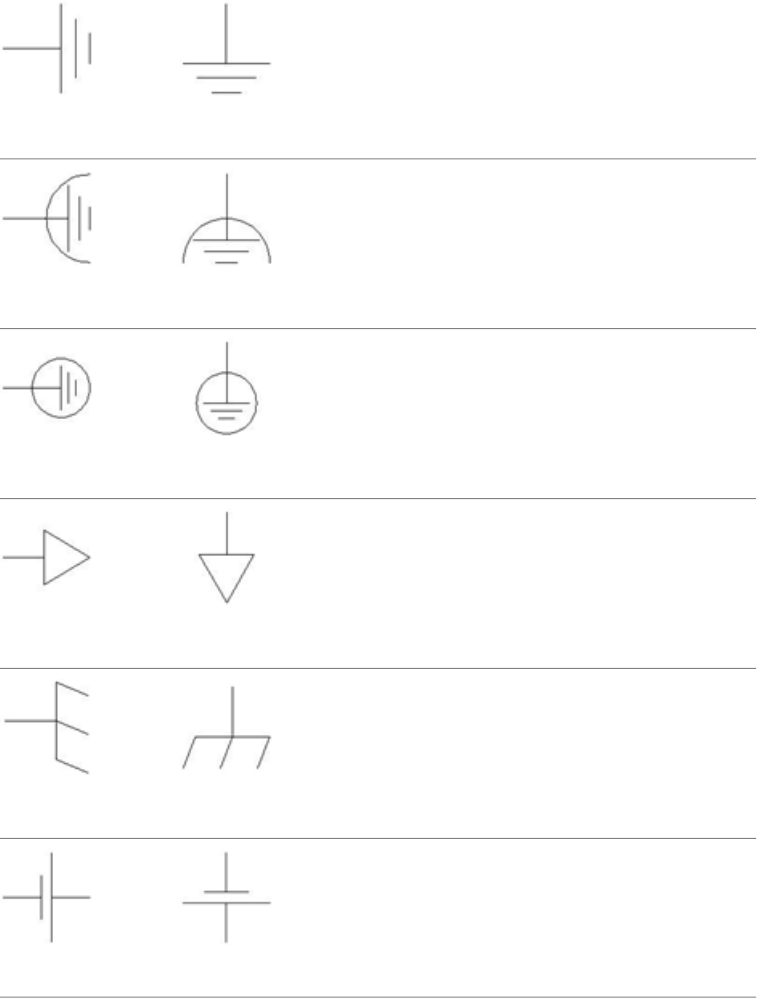
Earth/Ground
VGND2HGND2
Functional Earth
VGND3HGND3
Protective Earth
VGND4HGND4
Protective equipotential bond
VGND5HGND5
Functional Equipotential Bond
VGND1HGND1
Battery
VBA1HBA1
Miscellaneous | 569
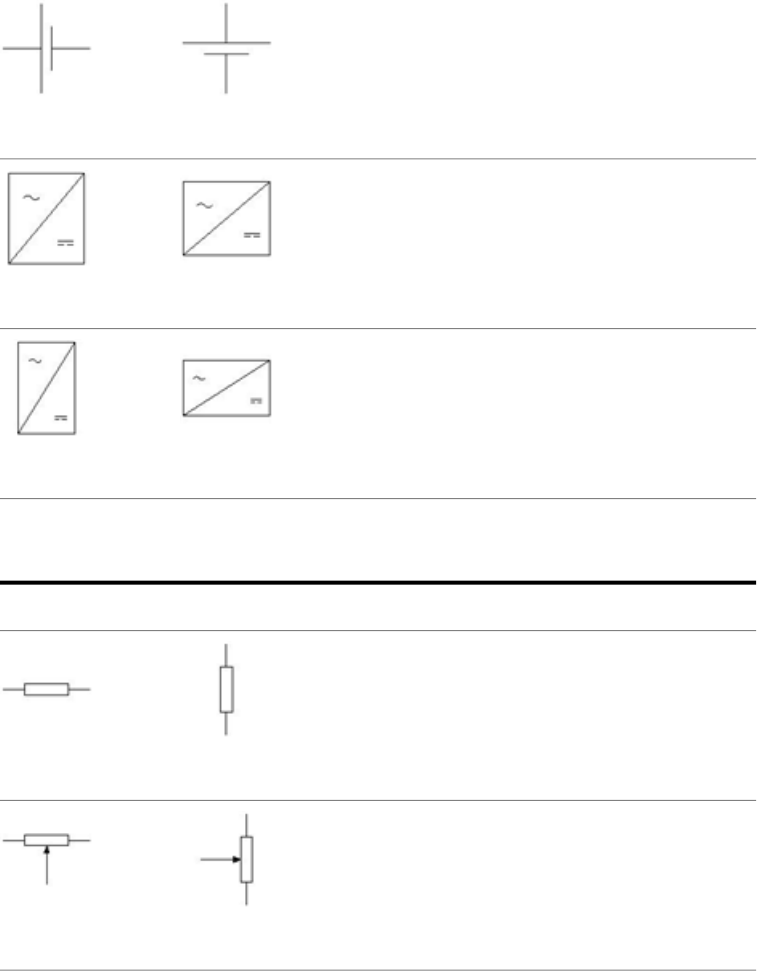
Battery (Flipped)
VBA1RHBA1R
Power Source 1 Phase
VPW1_1PHHPW1_1PH
Power Source 3 Phase
VPW1_3PHHPW1_3PH
Electronics
DescriptionVertical SymbolHorizontal Symbol
Fixed Resistor
VRE1BHRE1B
Variable Resistor
VVR1BHVR1B
570 | Chapter 7 IEC Symbols
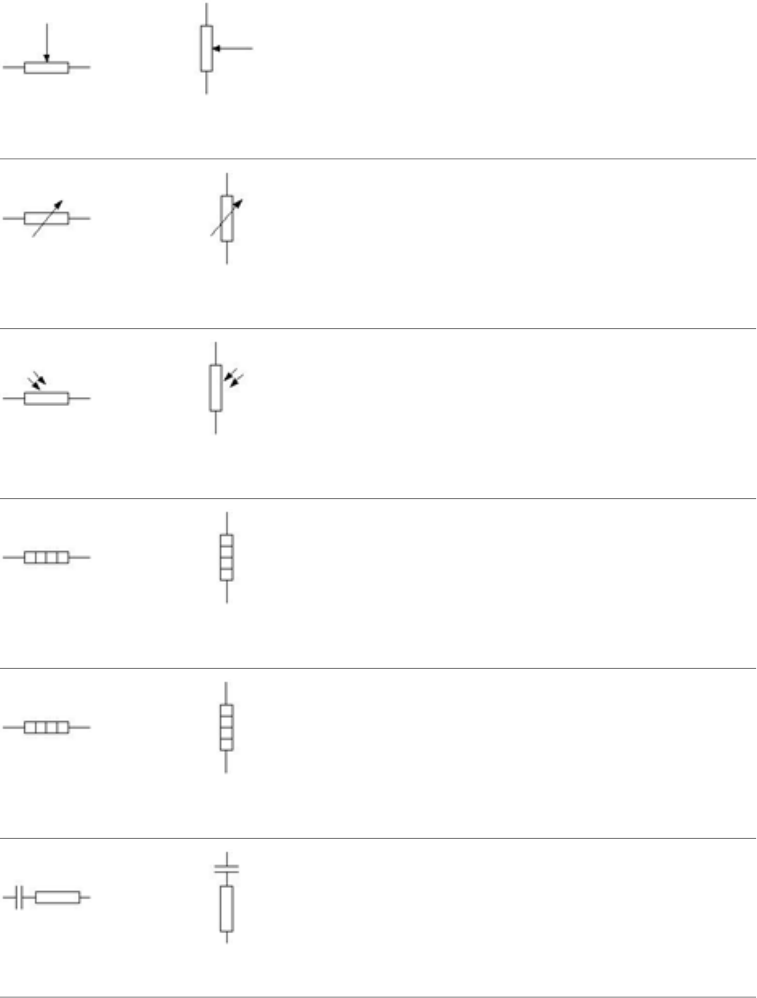
Variable Resistor
VVR1BRHVR1BR
Variable Resistor 2
VVR1R2HVR1R2
Light dependent
VRE1LDRHRE1LDR
Heater Element
VRE1HTHRE1HT
2nd+ Element
VRE2HTHRE2HT
RC Network
VRE1RCNHRE1RCN
Electronics | 571
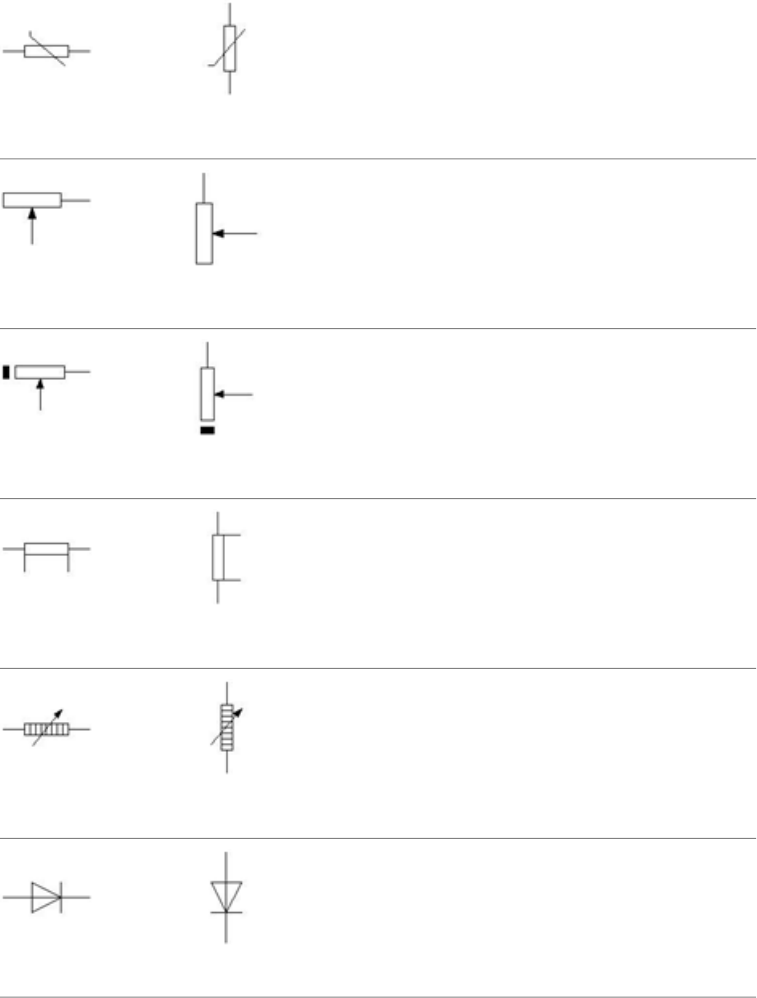
Varistor
VVR1R3HVR1R3
Resistor with Mobile Contact
VVR1R4HVR1R4
Resistor with Mobile Contact and Disconnecting Pos-
ition
VVR1R5HVR1R5
Shunt
VVR1R7HVR1R7
Variable Resistor with Carbon Disks
VVR1R8HVR1R8
Diode
VDI1HDI1
572 | Chapter 7 IEC Symbols
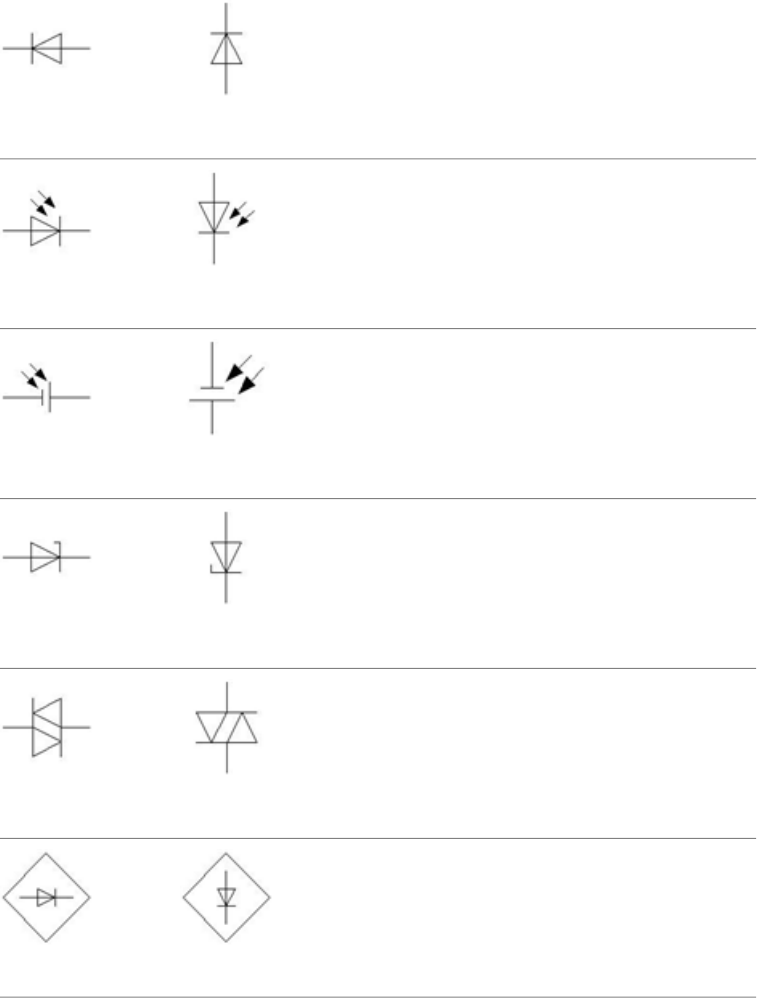
Diode 180
VDI1RHDI1R
Diode Photosensitive
VDI1B4HDI1B4
Diode Photosensitive 2
VDI1B5HDI1B5
Zener Diode - One Way
VDI1V2HDI1V2
Diac Diode - Two Way
VDI1V3HDI1V3
Bridge rectifier
VDI1BRHDI1BR
Electronics | 573
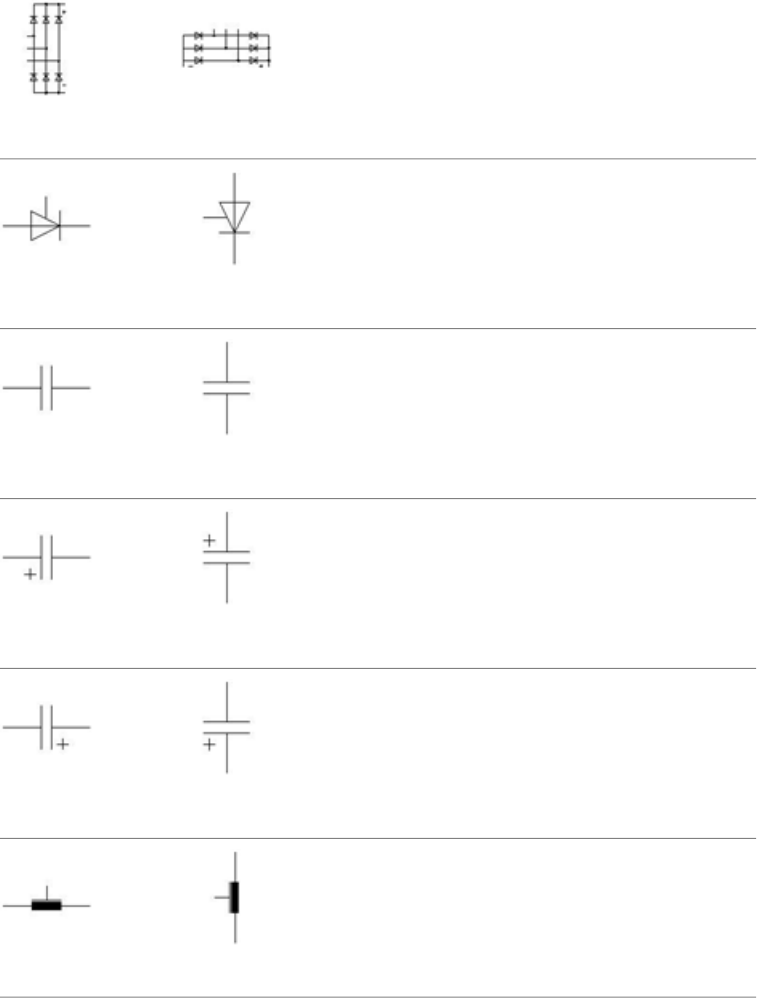
3 Phase Bridge Rectifier
VDI1V5HDI1V5
SCR
VDI1V4HDI1V4
Capacitor
VCA1HCA1
Electrolytic
VCA1ELHCA1EL
Electrolytic 180
VCA1ELRHCA1ELR
Feedthrough Capacitor
VCA1C2HCA1C2
574 | Chapter 7 IEC Symbols
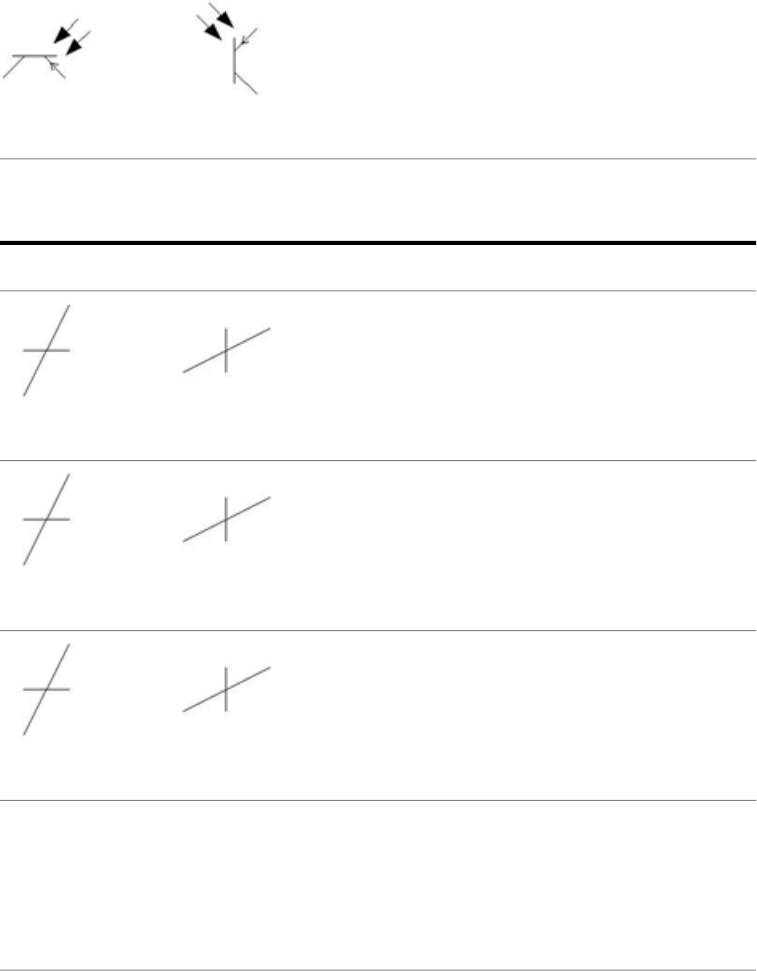
Photosensitive PNP Transistor
VDV1B6HDV1B6
Cable Markers
DescriptionVertical SymbolHorizontal Symbol
Cable Marker
VW01HW01
2nd+ Child Marker
VW02HW02
Extra Marker
VT0_CABLEHT0_CABLE
Twisted Pair
VT0_TWHT0_TW
Cable Markers | 575
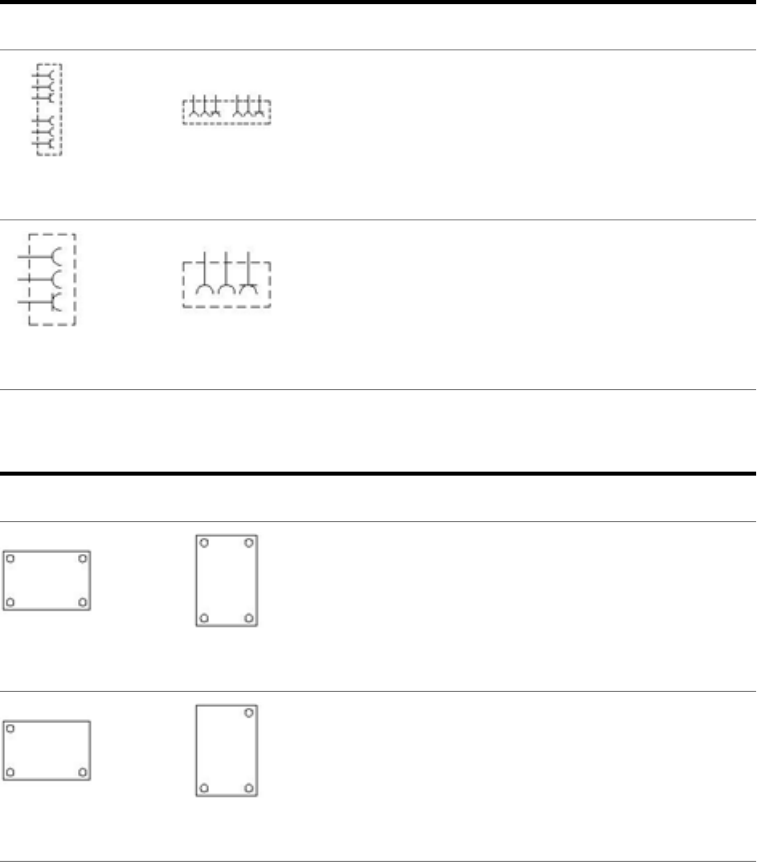
Power Receptacles
DescriptionVertical SymbolHorizontal Symbol
Duplex Receptacle
VCN1RDUPHCN1RDUP
Single Receptacle
VCN1RSGLHCN1RSGL
Generic Device Boxes
DescriptionVertical SymbolHorizontal Symbol
4 Terminals
VDV1TFLHDV1TFL
3 Terminals
VDV1TCHDV1TC
576 | Chapter 7 IEC Symbols

3 Terminals
VDV1TBHDV1TB
2 Terminals
VDV1T6HDV1T6
4 Terminals
VDV1TFHDV1TF
3 Terminals
VDV1TEHDV1TE
3 Terminals
VDV1T7HDV1T7
Stand-alone Cross-reference Symbols
DescriptionSymbol
Stand-alone Cross-reference Symbols | 577

Source Rectangle
HA2S1_REF
Source Hexagon
HA3S1_REF
Source Ellipse
HA5S1_REF
Destination Rectangle
HA2D1_REF
Destination Hexagon
HA3D1_REF
Destination Ellipse
HA5D1_REF
578 | Chapter 7 IEC Symbols

Wire Arrows - Reference Only
DescriptionSymbol
Generic Arrow - Left
HA1X1
Generic Arrow - Up
HA1X2
Generic Arrow - Right
HA1X3
Generic Arrow - Down
HA1X4
Arrow Tail - Left
HA1X1Y
Wire Arrows - Reference Only | 579
Arrow Tail - Up
HA1X2Y
Arrow Tail - Right
HA1X3Y
Arrow Tail - Down
HA1X4Y
Splice Symbols
DescriptionVertical SymbolHorizontal Symbol
Splice
VSP1001HSP1001
Annunciations
DescriptionVertical SymbolHorizontal Symbol
580 | Chapter 7 IEC Symbols
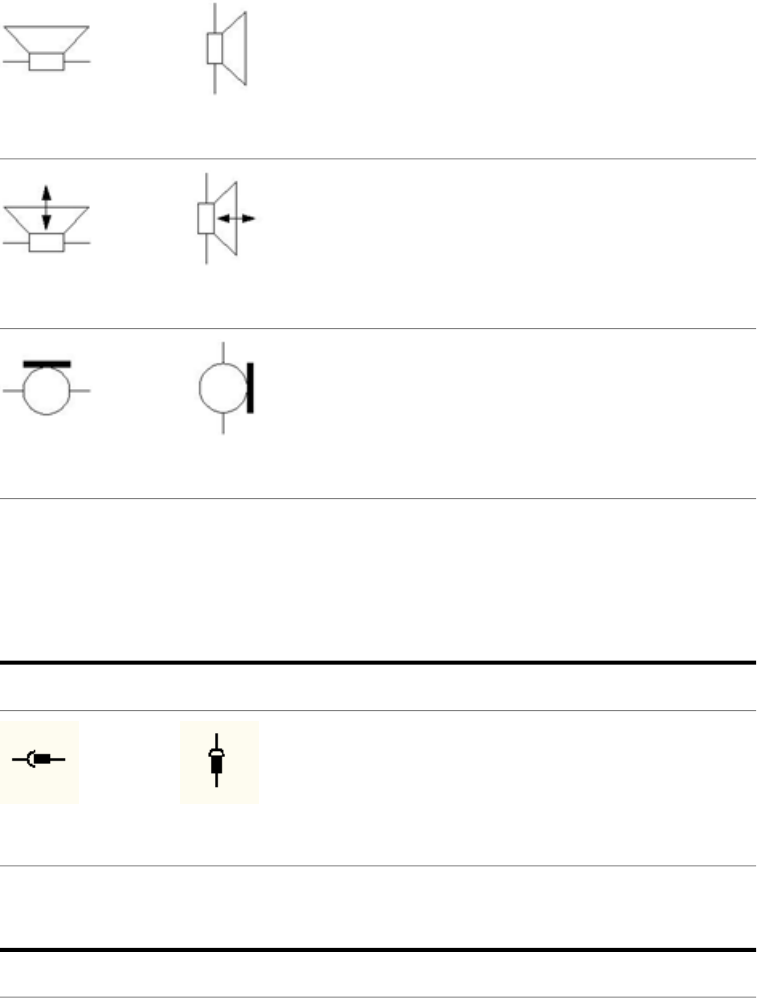
Loudspeaker
VAN1B7HAN1B7
Loudspeaker - Microphone
VAN1B8HAN1B8
Microphone
VAN1B9HAN1B9
One-Line Components
Connector
DescriptionVertical SymbolHorizontal Symbol
Jack/Plug
VC01PJ_1-HC01PJ_1-
Motor Control
DescriptionVertical SymbolHorizontal Symbol
One-Line Components | 581

Circuit breaker
VCB11_1-HCB11_1-
Motor circuit protector
VCB11_1M-HCB11_1M-
Thermal circuit breaker
VCB11TH_1-HCB11TH_1-
Disconnect
VDS11_1-HDS11_1-
Fused disconnect
VDS11F_1-HDS11F_1-
Fuse
VFU1_1-HFU1_1-
582 | Chapter 7 IEC Symbols
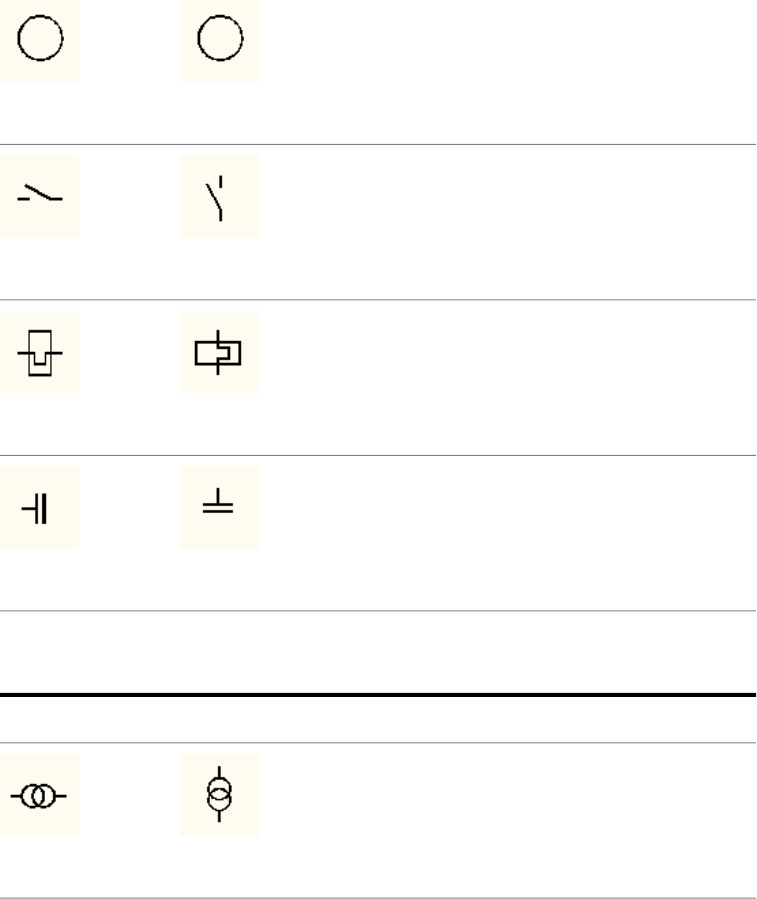
Motor
VMO13_1-HMO13_1-
Motor starter
VMS11_1-HMS11_1-
Overload
VOL1_1-HOL1_1-
Capacitor
VCA113_1-HCA113_1-
Transformer
DescriptionVertical SymbolHorizontal Symbol
Transformer 1
VXF1_1-HXF1_1-
Transformer | 583

Transformer 2
VXF2_1-HXF2_1-
Terminal
DescriptionVertical SymbolHorizontal Symbol
Square terminal
VT0001_1-HT0001_1-
Round terminal
VT0002_1-HT0002_1-
Cable Marker
DescriptionVertical SymbolHorizontal Symbol
Cable marker
VW01_1-HW01_1-
584 | Chapter 7 IEC Symbols
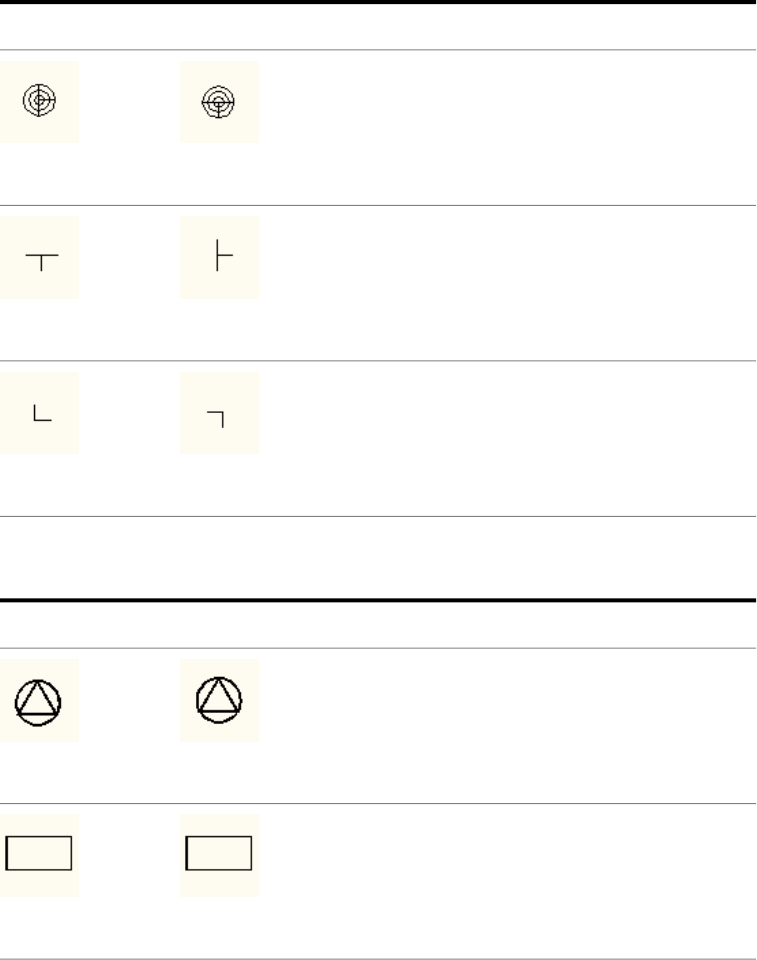
Bus-tap
DescriptionVertical SymbolHorizontal Symbol
Bus-tap - main/dot
VDV1_BT_1-HDV1_BT_1-
Bus-tap - dual/tee
VDV1_BTT_1-HDV1_BTT_1-
Bus-tap - dual/corner
VDV1_BTL_1-HDV1_BTL_1-
Miscellaneous
DescriptionVertical SymbolHorizontal Symbol
Power receptacle
VC01WR_1-HC01WR_1-
Generic load
VDV1_1-HDV1_1-
Bus-tap | 585
586
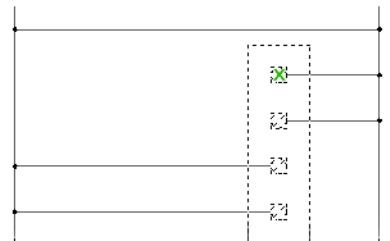
PLC
Generate PLC layout modules
AutoCAD Electrical can generate any of hundreds of different PLC I/O modules
on demand, in a variety of different graphical styles, all without a single,
complete I/O module library symbol resident on the system. Modules
automatically adapt to the underlying ladder rung spacing, whatever that value
is, and can stretch or break into two or more pieces at insertion time. It is possible
because AutoCAD Electrical generates PLC I/O modules through a parametric
generation technique driven by a PLC database (ACE_PLC.MDB).
The PLC database contains the stack sequence and text values to annotate onto
each symbol in the stack. As AutoCAD Electrical builds the module, it reads the
underlying ladder rung spacing and spreads out the stack or compresses it to
match the rung spacing. During the insertion process, you can interrupt it to
break the module and then restart it at a different location.
8
587
Parametric PLC symbols vs. Full Units
Parametric PLC symbols are stored in
■Windows XP: \Documents and Settings\All
Users\Documents\\Autodesk\Acade {version}\libs\{library}\
■Windows Vista, Windows 7: \Users\Public\Documents\Autodesk\Acade
{version}\libs\{library}\
The file names begin with the characters "HP" (Horizontal ladder rungs / PLC)
or "VP" (Vertical ladder rungs) followed by a digit that corresponds to a PLC
I/O style number. Each symbol is a building block with a different arrangement
of attributes and wire connection points. AutoCAD Electrical selects the
appropriate symbols to use, stacks them together in the order defined by the
data file, and produces a completed I/O module.
The PLC database file (ace_plc.mdb) is used to drive the PLC I/O module
generation process. You can modify the PLC database file manually or using
the PLC Database File Editor on page 603 (recommended method). The
AutoCAD Electrical PLC database file (ace_plc.mdb) is installed in
■Windows XP: C:\Documents and Settings\{username}\My
Documents\Acade {version}\AeData\Plc
■Windows Vista, Windows 7:C:\Users\{username}\Documents\Acade
{version}\AeData\Plc
Each Parametric PLC symbol is a building block with a different arrangement
of attributes and wire connection points. AutoCAD Electrical selects the
appropriate symbols to use, stacks them together in the order defined by the
parametric data file, and produces a completed I/O module. AutoCAD Electrical
inserts the symbols based upon the rung spacing of the underlying ladder,
explodes them, draws a rectangular box around the entire assembly, creates
a single block out of the collection, and annotates the attributes of the new
module.
Some PLC units may not lend themselves well to parametric generation. If a
PLC module symbol is built with the appropriate attributes in place and the
symbol name follows naming convention of AutoCAD Electrical (the block
name begins with "PLCIO"), it can be inserted as a single unit using the Insert
PLC (Full Units) on page 591 command. The selected unit inserts into the
ladder, breaks the wires, and then reconnects.
PLC parametric selection
Inserts a parametrically generated PLC I/O module.
588 | Chapter 8 PLC
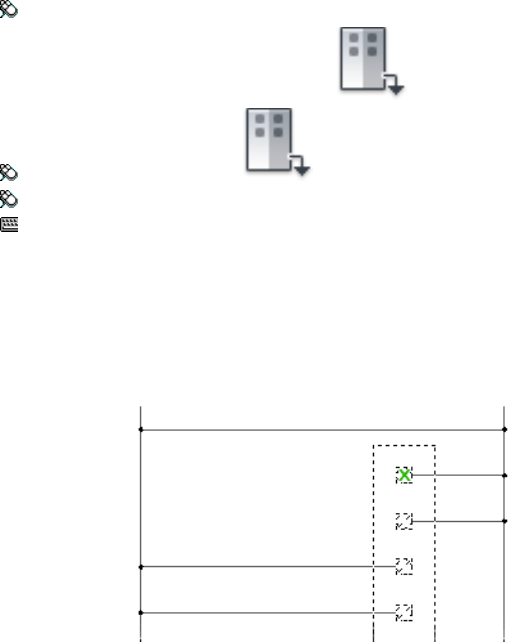
Ribbon: Schematic tab ➤ Insert Components panel ➤ Insert PLC
drop-down ➤ Insert PLC (Parametric).
Toolbar: Main Electrical
Menu: Components ➤ Insert PLC Modules ➤ Insert PLC (Parametric)
Command entry: AEPLCP
Generate PLC I/O modules on demand in a variety of graphical styles with
no complete I/O module library symbols. Modules adapt to the underlying
ladder rung spacing. You can stretch or break them into two or more pieces
at insertion time. A PLC database, ACE_PLC.MDB, drives generation. It contains
the stack sequence and the text values to annotate onto each symbol in the
stack.
Manufacturer Catalog tree
Provides a complete list of the PLC modules available to AutoCAD Electrical.
The Manufacturer Catalog tree is compiled from the database file,
"ace_plc.mdb."
Module List
Displays the defined modules. Once you select a module type or a specific
module from the Manufacturer Catalog tree, AutoCAD Electrical reads through
the information contained in the database. Select from this list to begin the
PLC module insertion process.
Generate PLC layout modules | 589
Graphics Style
Specifies the graphical appearance of the PLC module. Styles 1-5 are provided
with AutoCAD Electrical. Styles 6-9 may be user-defined. Select a style number
and a sample portion of a PLC module displays.
To create a user-defined style: There are about two dozen symbols associated
with each style. They are located in
■Windows XP: \Documents and Settings\All
Users\Documents\Autodesk\Acade {version}\Libs\{library}\
■Windows Vista, Windows 7: \Users\Public\Documents\Autodesk\Acade
{version}\Libs\{library}\
The symbols carry the file name "HP?*.dwg" or "VP?*.dwg" where "?" is the
style number. An easy way to create a style is to copy the symbols of an existing
style to one of the unused style numbers (6, 7, 8, or 9) and edit each library
symbol.
Scale
Specifies the scale for the PLC module. You can also specify to apply a border
to the PLC module upon insertion.
Module layout
Ribbon: Schematic tab ➤ Insert Components panel ➤ Insert PLC
drop-down ➤ Insert PLC (Parametric).
Toolbar: Main Electrical
Menu: Components ➤ Insert PLC Modules ➤ Insert PLC (Parametric)
Command entry: AEPLCP
Select the PLC module to insert, click OK, and place the PLC in the drawing.
Spacing
Specifies the spacing for the module. The module defaults to the underlying
rung spacing. If you wish to override this spacing, modify the number shown
in the spacing edit box. The arrows below this box increment the number by
590 | Chapter 8 PLC

the rung spacing. For example, if the rung spacing is 0.5 then each time you
click ">" the number increases by 0.5.
I/O points
Specifies whether to include all of the points or break the module into many
pieces. You can break a module into as many pieces as you want at insertion
time. It is useful for a module that does not fit into a single ladder column.
You can also add extra space between adjacent I/O points. It allows for the
extra room needed for parallel components. Select Allow Spacers/Breaks and
after each I/O you have the opportunity to insert a space, break the module,
or insert the rest normally. If the module's definition (in the Attributes column
of the Module Terminal Information table of the ace_plc.mdb file or by
selecting the check box in the Break After column of the PLC Database File
Editor dialog box) carries a ";\SPECIAL=BREAK" flag, then the Note highlights
and the module automatically prompts you for permission to break at the
correct point during module insertion.
Include unused/extra connections
Specifies to include all of the extra connections to the PLC. Some modules
may have terminals that are not used (that is, dummy terminals with no
electrical connection). Unused terminals are skipped by default. This results
in the most compact representation of the module, but you can set up the
PLC modules to show unused terminals optionally. It is done by adding in
"\SPECIAL=INCLUDE" and "\SPECIAL=EXCLUDE" flags (in the Attributes
column of the Module Terminal Information table of the ace_plc.mdb file) or
by selecting "When Including Unused" or "When Excluding Unused" in the
Show column of the PLC Database File Editor dialog box.
Insert PLC modules
Insert PLC modules
In AutoCAD Electrical, you can insert either PLC I/O points as independent
symbols or as a complete PLC module into your drawing.
1Click Schematic tab ➤ Insert Components panel ➤ Insert PLC
drop-down ➤ Insert PLC (Full Units).
2In the PLC Fixed Units dialog box, select the PLC module to insert.
Insert PLC modules | 591
3Specify the insertion point on the drawing.
4Add or edit any information in the Edit PLC Module dialog box, and click
OK.
Edit PLC module
Use this dialog box when inserting or editing a PLC module. Specify the values
you need and press OK. The values are then annotated onto the selected
module.
NOTE Editing the first address, I/O point address, or catalog information for a plc
module that was imported using the Unity Pro Export to Spreadsheet tool may
result in problems when you export the data back to Unity Pro. An alert displays
to ask whether you want to proceed with the changes.
Ribbon: Schematic tab ➤ Edit Components panel ➤ Edit Components
drop-down ➤ Edit.
Toolbar: Main Electrical
Menu: Components ➤ Edit Component
Command entry: AEEDITCOMPONENT
Select the PLC module to edit.
Addressing
Specifies the first I/O address for the PLC module.First Address
Lists the available I/O addresses to select from. When you
select an I/O address from the list the I/O Point Description:
Address automatically updates.
List
Lists any I/O points already assigned to the drawing or
project. Select a tag from the list to copy, or to increment
for this new component.
Used: Drawing or Project
592 | Chapter 8 PLC
Tag
Specifies a unique identifier assigned to each I/O point. The tag value can be
manually typed in the edit box.
Options
Substitutes a fixed text string for the %F part of the tag format. Retag
Component can then use this override format value to calculate a new tag for
the PLC module. For example, a certain PLC module must always have an
"IO" family tag value instead of "PLC" so that retag, for example, assigns IO-100
instead of PLC100. To achieve this tag override you would enter "IO-%N" for
the tag override format.
Line1/Line2
Specifies optional description text for the module. May be used to identify
the relative location of the module in the I/O assembly (example: Rack # and
Slot #).
Manufacturer
Lists the manufacturer number for the I/O point. Enter a value or select one
from the Catalog lookup.
Catalog
Lists the catalog number for the I/O point. Enter a value or select one from
the Catalog lookup.
Assembly
Lists the assembly code for the I/O point. The Assembly code is used to link
multiple part numbers together.
Catalog Lookup
Opens the Catalog Information dialog box.
Lists the manufacturer number for the component. Enter a value
or select one from the Catalog lookup.
Manufacturer
Lists the catalog number for the component. Enter a value or se-
lect one from the Catalog lookup.
Catalog
Insert PLC modules | 593
Lists the assembly code for the component. The Assembly code
is used to link multiple part numbers together.
Assembly
Specifies a unique identifier assigned to each component. The
tag value can be manually typed in the edit box.
Item
Opens the PLCIO table in the catalog database from which you
can manually enter or select the Manufacturer or Catalog values.
Catalog Lookup
Search the database for a specific catalog item to assign to the
selected component.
Lists the part numbers used for similar components in the current
drawing.
Drawing
Lists the part numbers used for similar components in the project.
You can search in the active project, another project, or an extern-
al file.
Project
■Active project: All the drawings in the current project are
scanned and the results are listed in a dialog box. Select from
the list to assign your new component with a catalog number
that is consistent with other similar components in the pro-
ject.
■Other project: Scans each listed drawing in a previous project
for the target component type and returns the catalog inform-
ation in a subdialog box. Make your catalog assignment by
picking from the dialog box list.
■External file: You can pull catalog assignments from a gen-
eric ASCII file created by a word processor or output from a
spreadsheet or database program. A dialog box displays the
contents of the selected text file. Find and highlight the ap-
propriate entry. AutoCAD Electrical reads the line of text from
the file and breaks it into its component parts. They are dis-
played in the left-hand dialog box list. For each relevant item,
highlight it, and then pick the appropriate category button
in the center column. The highlighted item is transferred to
the corresponding category (and then to the Insert/Edit dialog
box once OK is clicked).
Inserts or edits extra catalog part numbers on to the selected
component. You can add up to 99 part numbers to any compon-
Multiple BOM
ent. These multiple BOM part numbers appear as sub-assembly
594 | Chapter 8 PLC
part numbers to the main catalog part number in the various
BOM and component reports.
Displays what the selected item looks like in a Bill of Material
template.
Catalog Check
Description
Optional line of description text. May be used to identify the module type
(for example, "16 Discrete Inputs - 24VDC")
I/O Point Description
Specifies the I/O address assignment.Address
Optional description text. Enter up to five lines of descrip-
tion attribute text.
Description 1-5
Selects a description from a module on the current drawing.Next/Pick
Lists the I/O point descriptions currently assigned to each
I/O point on the module or connected, wired devices in a
List descriptions
pick list. Selecting one of the buttons next to this displays
a different list of description in the box below.
Lists I/O point descriptions used so far on the module. Pick
to copy.
I/O
Lists descriptions of wired devices that are found to be
connected to the I/O module. Pick to copy the description.
Wired Devices
Displays contents of an external comma-delimited ASCII
text file of I/O point descriptions. Pick an entry in the file
External File
and then copy the values to edit boxes in the Edit dialog
box.
Installation/Location codes
Changes the installation or location code s. You can search the current drawing
or entire project for installation and location codes. A quick read of all the
current or selected drawing files is done and a list of codes used so far is
returned. Select from the list to update the module automatically with the
installation or location code.
Insert PLC modules | 595

Pins
Assigns pin numbers to the pins that are physically located on the module.
Show/Edit Miscellaneous
View or edit any attributes that are not predefined AutoCAD Electrical
attributes.
Ratings
Specifies values for each ratings attribute. You can enter up to 12 ratings
attributes on a module. Select Defaults to display a list of default values.
NOTE If Ratings is unavailable, the module you are editing does not carry rating
attributes.
Overview of the PLC database file
You can modify the PLC database file manually or using the PLC Database
File Editor on page 603 (recommended method). The AutoCAD Electrical PLC
database file (ace_plc.mdb) is installed in
■Windows XP: C:\Documents and Settings\{username}\My
Documents\Acade {version}\AeData\Plc
■Windows Vista, Windows 7: C:\Users\{username}\Documents\Acade
{version}\AeData\Plc
By default the AutoCAD Electrical PLC database file contains the
"PLC_Manufacturer", "PLC_MSG" and "PLC_Styles" tables in addition to several
module specification and module terminal information tables.
NOTE PLC Parametric build symbols are best used on ANSI D-Size and IEC A1
page sizes.
This table lists the Manufacturer, Series, Type, and Table
Name.
PLC_Manufacturer
This table is for internal use only. We recommend that you
do not edit this table.
PLC_MSG
This table lists the box settings on a per-style basis.PLC_Styles
596 | Chapter 8 PLC

There are two tables for each module type. The Module Specification table
contains information such as the model number, type, description, rating,
and rectangle offset values. The Module Terminal Information table (ends
with "_Data") contains terminal information such as code value, terminal
sequence number, block name, and terminal attributes.
Module Specification table
Example: "allen-bradley_1746_analog_input"
This file lists information that appears in the selection line of the module
listed in the bottom half of the PLC Module Selection dialog box.
Model numberCODE
Module typeTYPE
Number of I/O pointsPOINTS
Description displayed in selection dialog boxDESCRIPTION
Base numbering value (octal, decimal, hex)ADDRESS_BASE
Reserved for future use; currently emptyADDRESS_FORMAT
Optional block to insert at bottom of module
(i.e. DIP switches)
OPTIONAL_BLOCK
Voltage ratingRATING
AutoLISP file to run at module insertion timeLISP
Offsets (right, left, top, and bottom) for the
rectangle that is drawn around the finished stack
of symbols to create an overall module.
BOX_RIGHT, BOX_LEFT,
BOX_TOP_BOX_BOTTOM
BOX_SPLIT_BOTTOM, BOX_SPLIT_TOP
NOTE You can suppress the rectangular box
around the finished module by removing these
entries from the specification table of a module.
METRIC_BOX_RIGHT, METRIC_BOX_LEFT,
METRIC_BOX_TOP, METRIC_BOX_BOTTOM
METRIC_BOX_SPLIT_BOTTOM, MET-
RIC_BOX_SPLIT_TOP
Specifies the insertion position for the module
when inserted during the Spreadsheet to PLC
I/O utility.
CATEGORY
Overview of the PLC database file | 597
■1 = inserted near the right or bottom bus
line of the ladder.
■2 = inserted near the left or top bus line of
the ladder.
■3 = inserted centered between the bus lines
of the ladder.
The following are optional parameters for parametric build symbol placement:
Box color/linetype/layer
You can instruct AutoCAD Electrical to draw the rectangular box using
non-default line properties for color, layer, linetype, or ltscale. Encode this
information as a series of keywords as if you were using the CHPROP command
in AutoCAD to make the change. The keywords are encoded into the
"BOX_RIGHT", "BOX_LEFT", "BOX_TOP" and "BOX_BOTTOM" entries in the
specification table of a module. For example, the following makes the left and
right-hand sides of the enclosing box cyan using linetype 'Hidden2' and the
top and bottom blue using the default linetype:
BOX_RIGHT=0.5 COLOR CYAN LTYPE HIDDEN2
BOX_LEFT=0.5 COLOR CYAN LTYPE HIDDEN2
BOX_TOP=0.5 COLOR BLUE
BOX_BOTTOM=0.375 COLOR BLUE
Module Terminal Information table (ends with _Data)
Example: "allen-bradley_1746_analog_input_Data"
This file contains terminal information for the module type.
Catalog number of the moduleCODE
Terminal sequence numberSEQUENCE
Block name used for insertion. The "?" gets filled in during inser-
tion and the block name uses either a "H" or "V" depending on
the selected orientation.
BLOCK
Optional attributes for the terminal. Includes user attributes, %%x
prompt values, address prefix or suffix, non-sequential addresses,
ATTRIBUTES
598 | Chapter 8 PLC
breaks, reprompt of I/O address, including unused terminals and
special spacing.
The following are optional parameters for parametric build symbol placement:
Use of %%x prompt values
After entering values such as rack, group or slot, the values are available for
use on any subsequent I/O point of the module. If you want to use each I/O
point's TERMDESC_ attribute to carry the I/O address in Rack/Group, bit
number format, do the following:
1Prompt for Rack and Group values in the first entry of the module.
%%1PROMPT=Rack number;%%2PROMPT=Group number.
2Encode the TERMDESC_ value using %%1, %%2, and a bit number suffix.
TERMDESC_=1:%%1%%2/00 for the first I/O point
TERMDESC_=1:%%1%%2/01 for the 2nd I/O point
User Attributes
You can add and annotate your own attributes to the parametric symbols if
they are referenced in the Module Terminal Information table.
Address prefix or suffix
You can include a prefix or suffix to each address value that is inserted. For
example, if you want "IN-" to come in as a prefix for inputs on a given module
you would edit the database file and add ";TAGA_=IN-%%N" to each I/O
parametric data entry in the block of data of the module. The %%N represents
the calculated I/O address and the "IN-" is the prefix that gets added.
Dealing with non-sequential addresses
Some modules may have I/O address assignments that do not sequentially
increment from one terminal to the next. Use the "%%A" flag to represent the
beginning address of the module. In the example shown below, the address
sequence is non-sequential. Note the use of the "TAGA_=%%A+ <some value>"
flags.
ATTRIBUTESBLOCKCODE
TERM_=C,C;MFG=PLC-DIRECT;CAT=D2-
08ND3;...
HP?--WLRD2-08ND3
TERM_=0HP?WA-DQD2-08ND3
Overview of the PLC database file | 599
ATTRIBUTESBLOCKCODE
TERM_=4;TAGA_=%%A+4HP?WA-DRD2-08ND3
TERM_=1;TAGA_=%%A+1HP?WA-DQD2-08ND3
TERM_=5;TAGA_=%%A+5HP?WA-DRD2-08ND3
TERM_=2;TAGA_=%%A+2HP?WA-DQD2-08ND3
TERM_=6;TAGA_=%%A+6HP?WA-DRD2-08ND3
TERM_=3;TAGA_=%%A+3HP?WA-DQD2-08ND3
TERM_=7;TAGA_=%%A+7HP?WA-DRD2-08ND3
Forcing a break
You can pre-define a module break point in the Module Terminal Information
table. Add "\SPECIAL=BREAK" on the line where you want the break to occur.
20 terminals are allowed on the parametric build symbols by default. If the
module exceeds 20 terminals the break is placed in a logical location; such as
after a grouping of I/O addressing. For example, a 32 I/O point card could
have 36 terminals on it, the module definition would run the break command
at 18 (after the first set of 16 I/O addresses). If you want to break the module
sooner you can use the PLC Database File Editor to add the break command
or do the following in the Module Terminal Information table.
HP?WA-D;TERM_07\SPECIAL=BREAK
Triggering for reprompt of I/O address
Some modules include inputs and outputs. You can trigger AutoCAD Electrical
to prompt for a new beginning address number when the parametric build
flips from inputs to outputs or vice versa. Add "\SPECIAL=ADDR_OUT" on
the line where you want a prompt for a new output address or add
"\SPECIAL=ADDR_IN" if you want a prompt for a new beginning input address.
Including unused terminals
Some modules may have terminals that are not used. Unused terminals are
skipped by default, resulting in a compact representation of the module. You
can set up the PLC database file to show unused terminals optionally by adding
"\SPECIAL_INCLUDE" and "\SPECIAL_EXCLUDE" in the Module Terminal
Information table.
600 | Chapter 8 PLC

Special spacing
Normally when AutoCAD Electrical generates a PLC module, it uses the current
rung spacing for I/O and wire connection point spacing. You can override it
by using the "\SPECIAL=SPACINGFACTOR=<val> in the Module Terminal
Information table. When AutoCAD Electrical sees it on an I/O point or wire
connection entry line, it uses a factor of the rung spacing. For example, a
"\SPECIAL=SPACINGFACTOR=0.5" for a given I/O or wire connection entry
flags AutoCAD Electrical to insert this point down 0.5 rung spacing instead
of a full rung spacing. A value of 1.5 inserts the point down an extra half run
spacing than normal while 0.0 inserts the I/O point at the same location as
the preceding one.
For example, the following four lines in a parametric data file inserts four
points spread out over four-ladder rung spaces:
HP?WA-D;TERM_=01
HP?W--;TERM_=COM
HP?W--;TERM_=VDC
HP?WA-D;TERM_=02
If you want the two middle terminal symbols to group into one rung space
instead of taking up two spaces, edit the file to read:
HP?WA-D;TERM_=01
HP?W--;TERM_=COM;\SPECIAL=SPACINGFACTOR=0.5
HP?W--;TERM_=VDC;\SPECIAL=SPACINGFACTOR=0.5
HP?WA-D;TERM_=02
Copy modules
You can copy an entire module into a new module using the PLC Database
File Editor.
1Click Schematic tab ➤ Other Tools panel ➤ ➤ Database Editors
drop-down ➤ PLC Database File Editor.
2In the PLC selection list, right-click on the module that you want to copy
from and select Copy.
Overview of the PLC database file | 601

3Right-click the Type in the tree that you want to copy to.
For example, if you want to copy the new module to Allen-Bradley, 1746,
Discrete Input, you would find Discrete Input under Allen Bradley ➤
1746 in the tree.
4Select Paste Module.
If you attempt to copy a PLC Module part number into a PLC Type that
already has a module with the same name, the PLC Database File Editor
prompts you to change the name of the new module being copied.
5To change the name for the module, right-click the module, select
Rename, and enter a new name.
Adjust the terminal information
When you highlight an exiting module part number in the PLC Database File
Editor tree structure, the terminal grid control becomes populated with the
terminal information previously defined for the module.
1Click Schematic tab ➤ Other Tools panel ➤ ➤ Database Editors
drop-down ➤ PLC Database File Editor.
2Select the module to modify from the tree structure.
Inside the terminal grid control there are drop-down list boxes, text boxes,
and context menus that you can use to modify the terminal information.
3Select the terminals to modify. You can select multiple fields to edit at
the same time by dragging your mouse across contiguous fields or by
holding down the Control key while selecting non-contiguous fields.
You can also select multiple terminals if you want the terminals to carry
the same information.
■If you want to modify the terminals one at a time, either make your
changes on the PLC Database File Editor dialog box (using the
drop-down list boxes or text boxes) or select a single terminal (making
sure to select the entire row if you want to change more than one
field), click the right mouse button, and select Edit Terminal from the
menu.
602 | Chapter 8 PLC
■If you want to modify multiple terminals at the same time, select the
terminals, click the right mouse button, and select Edit Terminal from
the menu.
4In the Select Terminal Information dialog box, make any modifications
to the selected terminals. Changes that you make in this box will be
applied to all of the selected terminals in the terminal grid control.
5Click OK to save your changes and return to the PLC Database File Editor.
6Click Done to save your changes and exit the dialog box or click
Done/Insert to save your changes and insert the PLC module into your
drawing.
PLC database file editor
This tool creates and modifies PLC modules. All editing and creation of PLC
data is stored within the PLC Database File (ACE_PLC.MDB).
Ribbon: Schematic tab ➤ Other Tools panel ➤ ➤ Database
Editors drop-down ➤ PLC Database File Editor.
Toolbar: Insert PLC
Menu: Components ➤ Insert PLC Modules ➤ PLC Database File Editor
Command entry: AEPLCDB
PLC Selection List
Provides a complete list of the PLC data files available to AutoCAD Electrical.
The PLC Selection list uses an expandable and collapsible tree structure for
the PLC categories. These PLC categories are: Manufacturer, Series, Type, and
Part Number. The tree structure supports right-click controls for copying,
renaming, deleting, and creating PLC data.
The right-click controls for the selection list are:
(available only for the PLC branch of the tree structure) Defines a new
manufacturer. The manufacturer then appears in the PLC Selection
tree structure in alphabetical order.
New Manufacturer
Overview of the PLC database file | 603

(available only for the Manufacturer branch of the tree structure)
Defines a new PLC series underneath the respective Manufacturer.
New Series
The series then appears in the PLC Selection tree structure in alpha-
betical order.
(available only for the Series branch of the tree structure) Defines a
new PLC type underneath the respective Manufacturer and Series.
New Type
The type then appears in the PLC Selection tree structure in alphabet-
ical order.
(available only for the Type and Module/Code branches of the tree
structure) Defines a new PLC module underneath the respective
New Module
Manufacturer, Series, and Type. The module then appears in the PLC
Selection tree structure in alphabetical order.
(available only for the Type branch of the tree structure) Copies the
PLC module to the highlighted PLC Type branch. This option becomes
Paste Module
active after you copy or cut a PLC module inside the Module/Code
branch of the tree structure.
Deletes an entire PLC module, type, series, or manufacturer from the
tree structure and the PLC database (ACE_PLC.MDB).
Delete
Renames a PLC module, type, series, or manufacturer in the tree
structure. You cannot have duplicate names in the same branch of
the tree structure.
Rename
(available only for the Module branch of the tree structure) Cuts the
highlighted module code from the tree structure. You can then paste
the code into the same PLC Type, or a new PLC Type category.
Cut
(available only for the Module branch of the tree structure) Copies
the highlighted module code from the tree structure into the same
PLC Type, or a new PLC Type.
Copy
NOTE If you attempt to copy a PLC Module part number into a PLC Type that
already has a module with the same name, the PLC Database File Editor prompts
you to change the name of the new module being copied.
Terminal Grid Control
Highlight a module from the PLC Selection tree structure to populate the
Terminal Grid Control with the terminal information that was previously
604 | Chapter 8 PLC
defined for the module. When creating a PLC module, the PLC Database File
Editor lists as many blank Terminal Type fields since are terminals defined
within the New Module dialog box.
Specifies the type for the terminal. Select from the various predeter-
mined types of addressable terminals and non-addressable terminals.
Terminal Type
Shows terminals that are not used. If Include Unused/Extra Connec-
tions in the Module Layout dialog box is selected, all terminal entries
Show
marked (in the PLC Database File Editor dialog box) with 'when ex-
cluding unused' are skipped and all terminal entries marked with
"when including unused" are shown.
Prompts for a new beginning address number when the parametric
build flips from inputs to outputs or from outputs to inputs. On the
Optional Re-prompt
line where you want AutoCAD Electrical to prompt for a new output
address, select Output. If you want AutoCAD Electrical to prompt for
a new input address, select Input from the list.
Specifies for the module to break automatically after a specific terminal
type. To activate the prompt for an automatic break in the PLC
module, select Break After.
Break After
Overrides the current rung spacing for I/O and wire connection point
spacing. For example, a value of two inserts the point down two times
the rung spacing instead of a full rung spacing.
Spacing Factor
You can right-click any row in the grid control to activate a menu of commands
that allows you to edit the terminal, insert a new terminal before or after the
selected terminal in the grid control, or delete a terminal from the grid control.
You can select multiple fields to update at the same time by dragging your
mouse across contiguous fields or by holding down the Control key while
selecting non-contiguous fields.
Terminal Attributes
Displays attributes associated to the selected terminal. These attributes can
have predefined values, including some values that you specify at insertion
time.
Overview of the PLC database file | 605

New Module
Opens a dialog box for defining the module descriptions and parameters. A
series of boxes are used to type in or select the values required to define the
module.
NOTE If you right-click a type or module in the PLC Selection window and select
New Module, the New Module dialog box opens with data already specified for
the Manufacturer, Series, and Series Type.
Module Specifications
Opens a dialog box for modifying some of the specifications previously defined
during the creation of a new module.
NOTE The Manufacturer, Series, Series Type, Code, and Terminals fields are not
active since they are under the control of the tree structure in the PLC Selection
window and the total number of terminals listed in the Terminal Type grid control.
Save Module
Saves the module to the PLC database file. If you exit the PLC Database File
Editor without clicking Save Module, you get a prompt asking whether to save
your changes.
Style Box Dimensions
Opens a dialog box for defining the module box dimensions (such as the offset
values and line properties) based upon the style number used when the PLC
was created.
NOTE The Module Box Dimensions override the style dimensions.
Settings
Opens a dialog box for adding or updating the symbols available to build a
module.
PLC selection
Selects a module to add to the terminal blocks from. Select the module from
the list and click OK.
606 | Chapter 8 PLC
Ribbon: Schematic tab ➤ Other Tools panel ➤ ➤ Database
Editors drop-down ➤ PLC Database File Editor.
Toolbar: Insert PLC
Menu: Components ➤ Insert PLC Modules ➤ PLC Database File Editor
Command entry: AEPLCDB
Click the Settings button, then click the Add Blocks From Module button.
The dialog box provides a complete list of the PLC modules available to
AutoCAD Electrical. The Manufacturer Catalog list is compiled from the
"ace_plc.mdb" file.
Module box dimensions
Defines the outer box dimensions of the module. The box dimensions are
calculated from the insertion point of the parametrically built PLC symbols.
Ribbon: Schematic tab ➤ Other Tools panel ➤ ➤ Database
Editors drop-down ➤ PLC Database File Editor.
Toolbar: Insert PLC
Menu: Components ➤ Insert PLC Modules ➤ PLC Database File Editor
Command entry: AEPLCDB
Click the New Module or Module Specifications button, and then click the
Module Box Dimensions button.
NOTE A value for the Split Top and Split Bottom dimensions must be set before
you can specify their line properties.
Overview of the PLC database file | 607
Module Box Dimensions
NOTE Enter at least one of the Top, Bottom, Left or Right dimension values to
assign settings specific to this module.
Sets the right, left, top, and bottom offsets for the rectangle that surrounds
the module. The optional Split Top and Split Bottom specify the offsets for a
split module where Split Top specifies the offset for the top of a split module
and Split Bottom specifies the offset for the bottom of the split module. If left
blank, AutoCAD Electrical uses the rectangle Top and Bottom values.
Line Properties
Sets the properties for the lines that make up the box. You can set the color
and linetype using the properties fields. To predefine the color, enter "COLOR
colorname" into the box. For linetype, enter "LTYPE linetypename" into the
box. See the CHPROP command in the AutoCAD Help for more information
about the various properties you can set.
If you do not want the line drawn, enter the keyword “ERASE” or “_E”. If you
want to apply some special procedure to the drawn line, for example, break
the line across terminal graphics, you can reference your custom AutoLISP
function in this box. Within your function use "(entlast)" to reference the
drawn line entity.
Select terminal information
Adds or modifies the type of terminal being used. You can select multiple
fields to edit at the same time by dragging your mouse across contiguous fields
or by holding down the Control key while selecting non-contiguous fields.
Ribbon: Schematic tab ➤ Other Tools panel ➤ ➤ Database
Editors drop-down ➤ PLC Database File Editor.
Toolbar: Insert PLC
Menu: Components ➤ Insert PLC Modules ➤ PLC Database File Editor
Command entry: AEPLCDB
Right-click in the terminal grid control section of the dialog box, and select
Edit Terminal from the menu.
608 | Chapter 8 PLC
The dialog box options enable depending on the fields selected at the time
the dialog box was activated. For example, if you select the Show and Spacing
Factor fields for multiple terminal entries in the Terminal Grid Control section
of the PLC Database File Editor dialog box and then you activate this dialog
box, you can update both fields through this dialog box for the selected
terminals.
Category
Lists the terminal categories to select from. Top Input and Top Output are
addressable terminals, while the Top Terminal category consists of
non-addressable terminals. Other categories to select from are Input, Output,
and Terminal.
Types for Category
Displays the types for the terminal category. Browse the list of images to
determine which terminal type is appropriate for the terminal.
Recently Used
Shows an image of the terminals that were recently used.
Show
Specifies whether to show terminals that are not used. If the 'Include
unused/extra connections' option in the Module Layout dialog box is selected,
all terminal entries marked (in the PLC Database File Editor dialog box) with
'when excluding unused' are skipped.
Optional Re-prompt Address
Specifies whether to prompt for a new beginning address number when the
parametric build flips from inputs to outputs or from outputs to inputs. On
the line where you want AutoCAD Electrical to reprompt for a new output
address, select Output. If you want AutoCAD Electrical to reprompt for a new
input address, select Input from the list.
Break After
Specifies for the module to break automatically after a specific terminal type.
To activate the prompt for an automatic break in the PLC module, check the
Break After check box.
Overview of the PLC database file | 609
Spacing Factor
Overrides the current rung spacing for I/O and wire connection point spacing.
For example, a value of 2 causes AutoCAD Electrical to insert the point down
two times the rung spacing instead of a full rung spacing.
New module
Defines the module descriptions and parameters. A series of boxes are used to
type in or select the values required to define the module.
Ribbon: Schematic tab ➤ Other Tools panel ➤ ➤ Database
Editors drop-down ➤ PLC Database File Editor.
Toolbar: Insert PLC
Menu: Components ➤ Insert PLC Modules ➤ PLC Database File Editor
Command entry: AEPLCDB
Click New Module.
New Module Controls
Specifies the Manufacturer, Series, Series Type, and Code (Catalog Number)
for the new module. Select from the list or enter the name in the edit box.
NOTE If you right-click a type or module in the PLC Selection window and select
New Module, the New Module dialog box opens with data already specified for
the Manufacturer, Series, and Series Type.
PLC Selection Expanded Description Listing Controls
These controls display as an expanded description when the module is
highlighted in the tree structure of the PLC Selection dialog box. They include:
Describes the PLC module being defined.Description
Gives an abbreviated type to the PLC module.Module Type
Specifies whether the PLC module addressing follows an industry
standard. Select from Octal, Decimal, Hexadecimal, and Prompt.
Base Addressing
610 | Chapter 8 PLC

Prompt asks you at module insertion time for Octal, Decimal, and
Hexadecimal.
Specifies the power rating value for the PLC module.Rating
Specifies the total number of terminals defined on the PLC mod-
ule.
Terminals
NOTE It is not active since it is under the control of the total
number of terminals listed in the Terminal Type grid control.
Specifies the total number of termination points on the PLC
module that receives the PLC address attributes.
Addressable Points
AutoCAD Block to insert
Specifies an AutoCAD block file to insert directly below the last I/O point
inserted parametrically. They are typically used for block files that represent
DIP switch settings and notes on how to configure the PLC module.
AutoLISP file to run at module insertion time
Specifies an AutoCAD Lisp routine to run after the program executes the
parametric build of the PLC module. They are typically used for inserting
groups of symbols and wires, or modifying attributes on symbols to
accommodate a more custom PLC module build.
Module Box Dimensions
Opens a dialog box for defining the outer box dimensions of the module. The
box dimensions are calculated from the insertion point of the parametrically
built PLC symbols.
Module Prompts
Opens a dialog box for defining up to nine prompts to use at the time of
module insertion. You can specify the prompt number and the accompanying
text, or you can remove prompts from this dialog box.
Terminal block settings
Adds or updates the symbols available to build a module.
Overview of the PLC database file | 611
Ribbon: Schematic tab ➤ Other Tools panel ➤ ➤ Database
Editors drop-down ➤ PLC Database File Editor.
Toolbar: Insert PLC
Menu: Components ➤ Insert PLC Modules ➤ PLC Database File Editor
Command entry: AEPLCDB
Click Settings.
You can add a terminal to the list by clicking in any box in the last entry of
the list. A blank entry line is added to the bottom of the list. Define the block
name, assign it to a terminal category for selection, give it a description, and
assign a bitmap to uses for dialog box displays.
Block File Name
Defines the AutoCAD drawing file name that is inserted if this terminal is
included in your PLC module. These PLC symbols are stored in the symbol
library of the active project with the other AutoCAD Electrical component
symbols. Their file names begin with the characters "HP" (Horizontal ladder
rungs/PLC) or "VP" (Vertical ladder rungs/PLC) followed by a digit that
corresponds to a PLC I/O style number.
Category
Defines the category for the terminal. When you add a new terminal, you
select from a list of terminal categories and that group of terminals is displayed.
There are some categories by default (such as Input or Output) but you can
add your own by typing in the edit box. This new category is added to the
list.
Unique Description
Specifies the description that appears underneath the terminal in the Select
Terminal Information dialog box.
Sample Bitmap File
Specifies the bitmap file for the terminal type. They are visible on the Select
Terminal Information dialog box. If you are adding your own terminals, you
612 | Chapter 8 PLC
can create corresponding bitmap files. Enter your bitmap name in the box or
Browse for it. The next time you select a terminal type, the bitmap is displayed.
Graphics Style
Specifies the graphical appearance of the PLC module. Styles 1-5 are predefined,
styles 6-9 may be user-defined. Select a style number - a sample portion of a
PLC module displays.
There are about two dozen symbols (with a file name "HP?*.dwg" where "?" is
the style number) associated with each style. They are located in
■Windows XP: \Documents and Settings\All
Users\Documents\\Autodesk\Acade {version}\libs\{library}\
■Windows Vista, Windows 7: \Users\Public\Documents\\Autodesk\Acade
{version}\libs\{library}\
To create a style, copy symbols of an existing style to one of the unused style
numbers (6-9) and edit each library symbol.
View Drawing or View Bitmap
Displays the AutoCAD .dwg or bitmap file for the selected terminal. You can
see the attributes of a specific terminal and the placement of each.
Add Blocks From Module
Opens a dialog box for selecting a module to add terminal blocks from. Select
the module from the list and click OK.
Style box dimensions
Defines the module box dimensions (such as the offset values and line
properties) based upon the style number used when the PLC was created.
Ribbon: Schematic tab ➤ Other Tools panel ➤ ➤ Database
Editors drop-down ➤ PLC Database File Editor.
Toolbar: Insert PLC
Menu: Components ➤ Insert PLC Modules ➤ PLC Database File Editor
Overview of the PLC database file | 613

Command entry: AEPLCDB
Click Style Box Dimensions.
NOTE Set a value for the Split Top and Split Bottom dimensions before specifying
their line properties.
Graphics Style
Specifies the graphical appearance of the PLC module. Styles 1-5 are predefined,
styles 6-9 may be user defined. Select a style number - a sample portion of a
PLC module displays.
There are about two dozen symbols (with a file name "HP?*.dwg" where "?" is
the style number) associated with each style. They are located in
■Windows XP: \Documents and Settings\All
Users\Documents\Autodesk\Acade {version}\libs\{library}\
■Windows Vista, Windows 7: \Users\Public\Documents\Autodesk\Acade
{version}\libs\{library}\
To create a style, copy symbols of an existing to one of the unused style
numbers (6-9) and edit each library symbol.
Module Box Dimensions for Selected Style
Sets the right, left, top, and bottom offsets for the rectangle that surrounds
the module. The optional Split Top and Split Bottom specify the offsets for a
split module where Split Top specifies the offset for the top of a split module
and Split Bottom specifies the offset for the bottom of the split module. If left
blank, the rectangle Top and Bottom values are used.
Line Properties
Sets the properties for the lines that make up the box. You can set the color
and linetype using the properties fields. To predefine the color, enter "COLOR
colorname" into the box. For linetype, enter "LTYPE linetypename" in the
box.
Module specifications
Modifies specifications previously defined during the creation of a new module.
614 | Chapter 8 PLC
Ribbon: Schematic tab ➤ Other Tools panel ➤ ➤ Database
Editors drop-down ➤ PLC Database File Editor.
Toolbar: Insert PLC
Menu: Components ➤ Insert PLC Modules ➤ PLC Database File Editor
Command entry: AEPLCDB
Click Module Specifications.
Module Controls
Specifies the Manufacturer, Series, Series Type, and Code (Catalog Number)
for the module.
NOTE These fields are not active since they are under the control of the tree
structure in the PLC Selection window.
PLC Selection Expanded Description Listing Controls
These controls display as an expanded description when the module is
highlighted in the tree structure of the PLC Selection dialog box. They include:
Describes the PLC module being defined.Description
Gives an abbreviated type to the PLC module.Module Type
Specifies whether the PLC module addressing follows an industry
standard. Select from Octal, Decimal, Hexadecimal, and Prompt.
Base Addressing
Prompt asks you at module insertion time for Octal, Decimal, and
Hexadecimal.
Specifies the power rating value for the PLC module.Rating
Specifies the total number of terminals defined on the PLC mod-
ule.
Terminals
NOTE It is not active since it is under the control of the total
number of terminals listed in the Terminal Type grid control.
Overview of the PLC database file | 615
Specifies the total number of termination points on the PLC
module that receives the PLC address attributes.
Addressable Points
AutoCAD Block to insert
Specifies an AutoCAD block file to insert directly below the last I/O point
inserted parametrically. They are typically used for block files that represent
DIP switch settings and notes on how to configure the PLC module.
AutoLISP file to run at module insertion time
Specifies an AutoCAD Lisp routine to run after the program executes the
parametric build of the PLC module. They are typically used for inserting
groups of symbols and wires, or modifying attributes on symbols to
accommodate a more custom PLC module build.
Spreadsheet to PLC I/O Utility Insertion Position
Specifies the insertion position for this module when inserted during the
Spreadsheet to PLC I/O utility. Select from the list of options, Center, Left/Top,
or Right/Bottom.
■Center - inserted centered between the bus lines of the ladder.
■Left/Top - inserted near the left or top bus line of the ladder.
■Right/Bottom - inserted near the right or bottom bus line of the ladder.
Module Box Dimensions
Opens a dialog box for defining the outer box dimensions of the module. The
box dimensions are calculated from the insertion point of the parametrically
built PLC symbols.
Module Prompts
Opens a dialog box for defining up to nine prompts to use at the time of
module insertion. You can specify the prompt number and the accompanying
text, or you can remove prompts from this dialog box.
Prompts at module insertion time
Defines up to nine prompts to use at the time of module insertion. You can
specify the prompt number and the accompanying text, or you can remove
prompts from this dialog box.
616 | Chapter 8 PLC

Ribbon: Schematic tab ➤ Other Tools panel ➤ ➤ Database
Editors drop-down ➤ PLC Database File Editor.
Toolbar: Insert PLC
Menu: Components ➤ Insert PLC Modules ➤ PLC Database File Editor
Command entry: AEPLCDB
Click the New Module or Module Specifications button, then click the Module
Prompts button.
You can define up to nine different prompts at insertion time.
■To assign a prompt, select the prompt number from the list, enter the
prompt text in the edit box, and click Change.
■To modify a prompt, select the prompt number from the list, modify the
text in the edit box, and click Change.
■To remove a prompt, select the prompt number from the list and click the
Remove Selected Prompt button.
Example
If you assigned RACK NUMBER to the prompt %%1 and SLOT NUMBER to
the prompt %%2. At insertion time, the I/O Point dialog box opens. Enter
values for the RACK NUMBER and SLOT NUMBER fields right before the
module is built. The value you enter in the RACK NUMBER edit box is
temporarily saved in memory under the variable name %%1. The SLOT
NUMBER value is saved under the %%2 variable name.
Use these prompts in the attribute grid to fill in attribute values or partial
attribute values at module insertion time.
PLC Database Migration Utility
The Spreadsheet to PLC/IO utility uses the module category to calculate the
insertion point of a module.
■Input module - inserted near the right or bottom bus line of the ladder.
■Output module - inserted near the left or top bus line of the ladder.
Overview of the PLC database file | 617
■Combination module - inserted centered between the bus lines of the
ladder.
Before AutoCAD Electrical 2009, the Spreadsheet to PLC/IO utility determined
the module category based on the value in the DESCRIPTION field or the
database table name. For example, if the DESCRIPTION field contained the
string “*IN*”, it was considered an input module. In AutoCAD Electrical 2009
and later, the PLC database contains a CATEGORY field.
PLC Database Migration Utility
Ribbon: Project tab ➤ Other Tools panel ➤ ➤ PLC Database
Migration Utility.
Command entry: AEPLCMIGRATE
PLC Database File Editor
Ribbon: Schematic tab ➤ Other Tools panel ➤ ➤ Database
Editors drop-down ➤ PLC Database File Editor.
Toolbar: Insert PLC
Menu: Components ➤ Insert PLC Modules ➤ PLC Database File Editor
Command entry: AEPLCDB
When you use the PLC Database Editor, if the CATEGORY field is not present
in the table for the selected series type, you are prompted to run the PLC
Database Migration utility.
The PLC Database Migration utility compares the values in the DESCRIPTION
field of the PLC database to values you assign as input, output, or combination.
If a match is not made, the database table name is compared. If there is a
match to the DESCRIPTION field or table name, the CATEGORY value is
entered for that module.
■1 - Input module
618 | Chapter 8 PLC

■2 - Output module
■3 - Combination module
Enter text, comma delimited, used to match to the DESCRIPTION value.
If there is a match, the module is assigned a CATEGORY value of 1 for input.
Input
Enter text, comma delimited, used to match to the DESCRIPTION value.
If there is a match, the module is assigned a CATEGORY value of 2 for
output.
Output
Enter text, comma delimited, used to match to the DESCRIPTION value.
If there is a match, the module is assigned a CATEGORY value of 3 for
combination.
Combination
Select to overwrite any existing CATEGORY values. If not selected, only
blank CATEGORY fields are modified.
Overwrite existing set-
tings
The PLC Database Migration utility updates all tables in the PLC database
based on these values.
NOTE Blank spaces within the text are included as part of the search string. For
example, “IN{space}*” matches “IN module” but does not match “INPUT”.
If no match is made for a module, the CATEGORY field is not modified. Use
the PLC Database File Editor to assign a category to a module. Select a
“Spreadsheet to PLC I/O Utility Insertion Point” option on the Module
specifications on page 614 dialog box.
How to re-run the PLC Database Migration Utility
If you do not get the desired results you can run this utility again.
1Using Microsoft Access, open the PLC database file ace_plc.mdb.
2Open the table for the series type.
3Remove the CATEGORY field from the table.
4Save the database file.
5In AutoCAD Electrical, run the PLC Database Migration Utility.
6Enter the text strings for each category.
7Click OK.
Overview of the PLC database file | 619
Single, Stand-alone I/O Points
Modify single, stand-alone PLC layout symbols
The single, stand-alone PLC I/O symbols are in
■Windows XP: \Documents and Settings\All
Users\Documents\Autodesk\Acade {version}\libs\{library}\
■Windows Vista, Windows 7: \Users\Public\Documents\Autodesk\Acade
{version}\libs\{library}\
The symbols do not follow the normal AutoCAD Electrical naming convention.
Their file names must start with "PLCIO" in order for AutoCAD Electrical to
find and process them along with the full PLC modules in the various BOM
and PLC reports. The last three characters need not follow any naming
convention.
Open each in AutoCAD and modify the appearance to suit your needs. Here
are the file names of the default symbols:
First input, single wire leftPLCIOI1T.dwg
2+ input, single wire leftPLCIOI1.dwg
First input, wire left, and rightPLCIOI2T.dwg
2+ input, wire left, and rightPLCIOI2.dwg
First output, wire rightPLCIOO1T.dwg
2+ output, wire rightPLCIOO1.dwg
First output, wire left, and rightPLCIOO2T.dwg
2+ output, wire left, and rightPLCIOO2.dwg
Insert PLC layout points
PLC I/O points can be inserted as independent symbols spread out over your
drawing set. AutoCAD Electrical provides a small set of single I/O point library
symbols that you can expand and modify to suit your needs.
620 | Chapter 8 PLC
1Click Schematic tab ➤ Insert Components panel ➤ Insert Components
drop-down ➤ Icon Menu.
2On the main icon menu select PLC I/O.
NOTE Single I/O points are selected from the second and third rows of the
sub dialog box.
3Select the component to insert and specify an insertion point.
NOTE Select from the upper row for the first I/O point of a module. These
symbols carry attributes for catalog BOM assignment. Select from the bottom
row for the second through nth points of a module (which are children
symbols of the first symbol parent).
4Add or edit any information in the Edit PLC I/O Point dialog box and
click OK.
Annotate stand-alone I/O points
The Edit PLC I/O Point dialog box appears when a stand-alone I/O point
symbol is inserted or edited. Use this dialog box to change your selected I/O
point.
1Click Schematic tab ➤ Insert Components panel ➤ Insert Components
drop-down ➤ Icon Menu.
2Select to insert PLC I/O points (found on the second and third rows of
the sub dialog box) and specify an insertion point.
To edit a point, right-click on an I/O point and select Edit Component
from the context menu.
3Change the I/O point.
4(Optional) To assign the I/O address, click Used: Drawing or Used: Project
to select an I/O address that was used already on a module.
5(Optional) To assign the description, click External File to select the
description from a comma-delimited ASCII text file of available I/O point
descriptions.
Modify single, stand-alone PLC layout symbols | 621
6Click OK and the values are annotated onto the I/O point.
Edit PLC I/O point
Use this dialog box when inserting or editing a stand-alone I/O point symbol.
Specify the values you need and press OK. The values are then annotated onto
the selected I/O point.
Ribbon: Schematic tab ➤ Insert Components panel ➤ Insert
Components drop-down ➤ Icon Menu.
Toolbar: Main Electrical
Menu: Components ➤ Insert Component
Command entry: AECOMPONENT
Select to insert a PLC I/O point. Specify the insertion point on the drawing.
Address
Searches for a wire connection to a nearby PLC I/O address
and, if found, uses the PLC address number in the tag name
of the component.
I/O Address
Lists any I/O addresses already assigned. Select a tag from
the list to copy, or to increment for this new component.
Used: Drawing or Project
Transfers all information from the parent component to
the child component being inserted or edited. If the parent
Parent/Sibling
is visible on the screen, click Parent/Sibling, and select the
parent (or another related contact).
Module Tag/Description
Specifies a unique identifier assigned to each I/O point. The tag value
can be manually typed in the edit box.
Tag
Optional description text for the I/O point. May be used to identify
the relative location of the point in the I/O assembly (for example,
Rack # and Slot #).
Line1/ Line2
622 | Chapter 8 PLC
Lists the manufacturer number for the I/O point. Enter a value or select
one from the Catalog lookup.
Manufacturer
Lists the catalog number for the I/O point. Enter a value or select one
from the Catalog lookup.
Catalog
Lists the assembly code for the I/O point. The Assembly code is used
to link multiple part numbers together.
Assembly
Opens the Catalog Information dialog box from which you can:Catalog Lookup
■Manually enter the Manufacturer or Catalog values.
■Search the database for a specific catalog item to assign.
■Search the drawing or project for a specific catalog item to assign.
■Assign an item number.
Substitutes a fixed text string for the %F part of the tag format. Retag
Component can then use this override format value to calculate a
Options
new tag for the PLC module. For example, a certain PLC module must
always have an "IO" family tag value instead of "PLC" so that retag,
for example, assigns IO-100 instead of PLC100. To achieve this tag
override, enter "IO-%N" for the tag override format.
Optional line of description text. May be used to identify the PLC
type (for example, "16 Discrete Inputs - 24VDC")
Description
I/O Point Description
Specifies optional description text. Enter up to five
lines of description attribute text.
Description 1-5
Selects a description from a module on the current
drawing.
Pick
Displays contents of an external comma-delimited
ASCII text file of I/O point descriptions. Pick an entry
List descriptions: External file
in the file, and then copy the values to edit boxes in
the Edit dialog box.
Modify single, stand-alone PLC layout symbols | 623

Installation/Location codes
Changes the installation or location codes. You can search the current drawing
or entire project for installation and location codes. A quick read of all the
current or selected drawing files is done and a list of codes used so far is
returned. Select from the list to update the module automatically with the
installation or location code.
Pins
Assigns pin numbers to the pins that are physically located on the module.
Assigns terminal description text to available TERMDESC* attributes. Click
List to select from a list of pins associated with the assigned catalog.
Show/Edit Miscellaneous
View or edit any attributes that are not predefined AutoCAD Electrical
attributes.
Ratings
Specifies values for each ratings attribute. You can enter up to 12 ratings
attributes on a module. Select Defaults to display a list of default values.
NOTE If Ratings is unavailable, the module you are editing does not carry rating
attributes.
Work with PLC styles
Modify a PLC appearance style
There are 5 predefined PLC styles provided with AutoCAD Electrical, numbered
1 through 5. If one or more of these do not appeal to you or if you have a
client with specific requirements not met by any of the 5 styles, you can pick
one of the existing styles and modify it.
There are about 3 dozen symbols associated with each style. They are located
in the jic1 subdirectory (or jic125 for the uniform 0.125 text height version).
They carry the file name "HP?*.dwg" where "?" is the style number.
Create a PLC style
An easy way to create a PLC style is to copy the library symbols of an existing
PLC style to one of the unused style numbers (6, 7, 8, or 9) and then edit each
one to suit your needs.
624 | Chapter 8 PLC

For example, copy style 1 to style 6 by copying "\Documents and Settings\All
Users\Documents\Autodesk\Acade {version}\libs\{library}\hp1*.dwg" to
"\Documents and Settings\All Users\Documents\Autodesk\Acade
{version}\libs\{library}\hp6*.dwg" (or, if you are using Windows Vista or
Windows 7, copy "\Users\Public\Documents\Autodesk\Acade
{version}\libs\{library}\hp1*.dwg" to
"\Users\Public\Documents\Autodesk\Acade
{version}\libs\{library}\hp6*.dwg"). Open the hp6*.dwg drawing files in
AutoCAD and modify as required. To access your new style, select "6" in the
style sub dialog box when you prepare to select and insert a new PLC module.
Add a new PLC style
The icon menu graphics that display for the various PLC styles are bitmap
files saved to your \Program Files [(x86)]\Autodesk\Acade {version}\Acade\
folder where AutoCAD Electrical's Insert PLC and Drawing Properties tools
can access them.
1Create the style in AutoCAD.
2Zoom in to the new PLC style.
3Save the file as a bitmap using the following name definition:
■For the Drawing Properties dialog box: the graphic must have the
name P_STYLExH.bmp or P_STYLExV.bmp where 'x' is the PLC style
number (1-9) and H or V indicate the module orientation (horizontal
or vertical)
■For the Insert PLC dialog box: the file name must be STYLExH.bmp
or STYLExV.bmp where 'x' is the PLC style number (1-9) and H or V
indicate the module orientation (horizontal or vertical)
NOTE If the resulting bitmap is too small or off-center, open the source
drawing in AutoCAD again. Resize your AutoCAD graphics window so that
it is more square. Center the image and resave. Repeat until you are satisfied
with the result.
Work with PLC styles | 625
Create PLC I/O Drawings from Spreadsheets
Overview of the PLC spreadsheet/database format
The PLC information can be read from a Microsoft Excel spreadsheet, Access
database table, or a comma-delimited file. AutoCAD Electrical expects to find
certain columns containing the information needed to generate the drawings.
The columns can be in any order defined by your settings. All columns are
optional except the Module part number (Code) column. Three example PLC
data files are found in the User folder: DEMOPLC.XLS, DEMOPLC.CSV, and
DEMOPLC_IEC.XLS. A settings file is also provided to run the Spreadsheet to
PLC I/O Utility: DEMOPLC_IEC.WDI.
Use the Spreadsheet to PLC I/O Utility tool to assign spreadsheet or table
column numbers to the following data categories.
Module data
This can be the code for a parametrically generated module,
or for a full module's library symbol. It can even be a non-
PLC symbol such as a variable speed drive.
Module part numbers (Code)
The I/O address for each I/O point. This value gets annot-
ated to the "TAGA_" attribute.
Address (ADDR)
The rack number of the module, used for the attribute as-
signed to the %%1 Prompt from the parametric data file.
Rack numbers (R)
The group number of the module, used for the attribute
assigned to the %%2 Prompt from the parametric data
file.
Group numbers (G)
The slot number of the module, used for the attribute as-
signed to the %%3 Prompt from the parametric data file.
Slot numbers s
The remote terminal panel ID number of the module, used
for the attribute assigned to the %%4 Prompt from the
parametric data file.
Remote terminal panel (RTP)
The wire number used for each I/O point.Wire numbers
The value assigned to the TAG attribute of the module.Module's tag
626 | Chapter 8 PLC
The value assigned to the installation attribute of the
module.
Module's Installation
The value assigned to the location attribute of the module.Module's Location
The values assigned to the module's 5 description attributes.Description 1-5 (DESC1-DESC5)
The value used to determine if a module is an input or
output module if it cannot be determined from the para-
Voltage/Input/Output (VOLTAGE)
metric data file. For input modules, AutoCAD Electrical
looks for DI, AI, or IN as part of the text string. For output
modules, AutoCAD Electrical looks for DO, AO, or OUT as
part of the text string. For combination modules, it looks
for IO, Other, or both IN and OUT in the text string.
Special PLC values
There are some special values that can be placed in a row to direct special PLC
module features:
Insert this keyword in the ADDRESS column of the spreadsheet where
you want the PLC module to break and continue on the next ladder
BREAK
column. There should not be any other data in the spreadsheet row;
only the word “BREAK” in the address column.
Insert this keyword in the ADDRESS column of the spreadsheet where
you want to add extra space between adjacent I/O points. There
SPACER
should not be any other data in the spreadsheet row; only the word
“SPACER” in the address column.
Insert this keyword into the CODE module part number column right
after the end of the data on the spreadsheet of the previous module.
SKIP
This keyword triggers the utility to skip a ladder before it begins the
next module in the spreadsheet. There should not be any other data
in the spreadsheet row; only the word “SKIP” in the part number
code column.
Insert this keyword into the CODE module part number column right
after the end of the data on the spreadsheet of the previous module.
NEW_DWG
This keyword triggers the utility to skip to the next sheet before it
begins the next module in the spreadsheet. There should not be any
other data in the spreadsheet row; only the word “NEW_DWG” in
the part number code column.
Overview of the PLC spreadsheet/database format | 627
Place an asterisk (*) in front of a device block name to trigger an Insert
Circuit instead of an Insert Component. Any associated TAG, DESC,
*
MFG, and CAT column values for this entry are annotated onto the
first AutoCAD Electrical symbol found on the inserted circuit.
You can predefine other attributes on the module, such as Installation,
Location, and Ratings, using the format
"mainval;attributename2=attributevalue2,” and so on. For example, you want
the module to have a Rack value of “2”, an Installation value of “MACH1”,
and a Rating2 value of “Hazardous Duty”. In the spreadsheet, in the RACK
column, enter “2;INST=MACH1;RATING2=HAZARDOUS DUTY”. When the
module is generated these extra attribute values are assigned.
Inline component data
The PLC Generator supports up to 9 inline components. Replace the numeric
value “n” with the next incrementing number; the first component would
have a tag of D1TAG while the second component would have the tag of
D2TAG. The columns of data are as follows:
The value to use for the TAG attribute of the component. For termin-
als, use this column to encode both the TAG and Terminal Number.
Tag (DnTAG)
Use this format TAGSTRIP:TERM where the colon character separates
the terminal's TAG-ID value from the terminal number to apply to
the TERM attribute. For example, "TB1:25" in the component tag
column puts "TB1" on the TAGSTRIP attribute and "25" on the TERM
attribute.
You can also use the colon delimiter to add pin number assignments
to terminal symbols. Whatever follows the colon is inserted into the
terminal’s TERM01 attribute; in this case, the pin number in your
drawing. For example, if the terminal’s tag name is “TB1” and the
pin number assignment is “1A” you would enter “TB1:1A” into the
DnTAG field.
The values assigned to the DESC attributes of the component. Use
the | symbol to separate text and assign it to DESC1, DESC2, or
Description (DnDESC)
DESC3. For example, if you use "CYCLE|START" in the description
field, "CYCLE" is assigned to DESC1 and "START" to DESC2.
The .dwg file name for the component you want to use.Block (DnBLK)
The value assigned to the location (LOC) attribute of the component.Location (DnLOC)
628 | Chapter 8 PLC
The value assigned to the installation (INST) attribute of the compon-
ent.
Installation
The value assigned to the manufacturer (MFG) attribute of the com-
ponent.
Manufacturer
The value assigned to the catalog (CAT) attribute of the component.Catalog
The value assigned to the assembly code (ASSYCODE) attribute of
the component.
Assembly
You can predefine other attribute values (such as pin number assignments)
using the format
"mainval;attributename2=attributevalue2;attributename3=attributevalue3,”
and so on. Enter it in any inline component column except the Block column
defining the block name of the component. For example, to annotate pins as
“21” and “22”, you can modify the DnLOC field by entering “Field;
TERM01=21;TERM02=22”; where “Field” is the main attribute value and
“TERM01=21” assigns a value of 21 to the component’s TERM01 attribute and
“TERM02=22” assigns a value of 22 to the component’s TERM02 attribute.
Components for input modules are inserted left-to-right, while components
for output modules are inserted right-to-left. The spacing between devices (as
defined in your settings) is maintained even if no component is defined for
a particular column.
Special wiring for inline components
Normally each inline component is wired in series connected from the bus
to the I/O point. AutoCAD Electrical also supports jumpers between adjacent
rungs. To direct AutoCAD Electrical to use a jumper, you encode the jumper
as one of the available inline devices. Use the "|" character as the symbol block
name for the jumper. To control removal of wire connections, follow the "|"
character with four characters to cover upper left, upper right, lower left, and
lower right connections. Use "W" to keep the wire connection and "X" to
remove. For example, a block name of "|WWXW" inserts a jumper and trims
the lower left wire connection. "|XWXW" trims away the left-hand wire
connections of both top and bottom. Just a "|" for the block name is the same
as "|WWWW", all wire connection retained.
Wiring to analog input or output modules might need to loop back to a return
terminal instead of going all the way across to a power bus. You can direct
the generator to pop in a vertical short wire to loop back around. For looping
Overview of the PLC spreadsheet/database format | 629

back to the right, insert "|XWXW" as the first inline device. To loop back to
the left use "|WXWX".
Automatically generate I/O schematic drawings
The PLC I/O requirements of a project, in spreadsheet or database format, can
drive automatic generation of the I/O schematic drawings.
1Click Import/Export Data tab ➤ Import panel ➤ PLC I/O Utility.
2Select the spreadsheet and click Open.
3In the Spreadsheet to PLC I/O Utility dialog box, enter a value for the
beginning line reference number for the first ladder of the drawing. Specify
any other options to use for the ladder reference numbers.
4Specify how you want the module to be placed in the drawing.
5Click Start.
AutoCAD Electrical constructs a set of PLC I/O drawings based on the
information carried in the PLC spreadsheet. Ladders and modules insert
automatically, breaking at the bottom of one ladder and continuing on
the next.
Change and use PLC I/O settings
You have control over many aspects of how these drawings auto-generate.
You also can adapt this tool to an existing spreadsheet or database format that
is different from the example demoplc.xls file format. You can change these
settings each time you run the program or change them once and save your
settings for future use.
Change and save the settings
1Click Import/Export Data tab ➤ Import panel ➤ PLC I/O Utility.
2Select the spreadsheet and click Open.
630 | Chapter 8 PLC

3In the Spreadsheet to PLC I/O Utility dialog box, do one of the following:
■Click Setup to define how the drawings should be set up (based on
the default settings). It includes how many ladders you want inserted,
the type and orientation of the ladders, spacing, and number of rungs.
You can also define the module placement, style, scale, and in-line
device placement and spacing.
■Click Browse to select an existing setting file that you can then edit
and save.
■Click Setup then click Spreadsheet/Table Columns to define what
column in your spreadsheet or database table goes with what data
value in the utility. The first page of this dialog box deals with the
overall module information. The sub-dialog box (accessed from
clicking the More button) identifies the column data for up to nine
in-line connected devices for each I/O point.
4Click Save to save the settings to a file for future use.
5Enter a file name for the settings (the file extension is ".WDI") and click
Save.
Read the settings
1Click Import/Export Data tab ➤ Import panel ➤ PLC I/O Utility.
2Select the spreadsheet and click Open.
3In the Spreadsheet to PLC I/O Utility dialog box, click Browse.
4Select a previously created file (it has a ".WDI" file extension) and click
Open.
Your settings are now restored and are used for the drawings generated
from the selected spreadsheet or database table.
Spreadsheet to PLC I/O utility
Creates a set of PLC I/O drawings from spreadsheet data.
Overview of the PLC spreadsheet/database format | 631
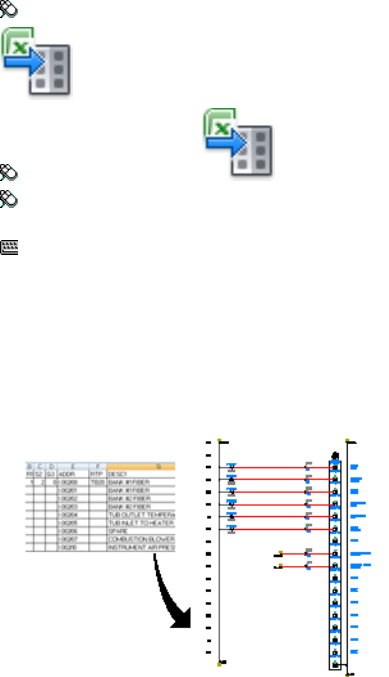
Ribbon: Import/Export Data tab ➤ Import panel ➤ PLC I/O Utility.
Toolbar: Insert PLC
Menu: Components ➤ Insert PLC Modules ➤ Spreadsheet to PLC I/O
Utility
Command entry: AESS2PLC
Select the spreadsheet output file and click Open.
The PLC I/O requirements in spreadsheet or database format can drive
automatic generation of the I/O schematic drawings. The program finds the
columns containing the information necessary to generate the drawings. Your
settings can define the order of the columns. All columns are optional except
for Module part number (Code).
AutoCAD Electrical reads in your information (.xls, .mdb, or .csv format) and
then constructs a set of PLC I/O wiring diagrams directly from your data.
Ladders and modules insert automatically, breaking at the bottom of one
ladder and continuing on the next (or on to the next drawing).
Settings
Select a PLC settings file (.wdi) to use. The default is to use the settings in the
WDIO.LSP file. Specify the settings to use by entering a file name in the box
or clicking Browse to select a file. The path to the selected WDI file displays
underneath the edit box. If you enter the name of the .wdi file, AutoCAD
Electrical searches for the file in the standard search locations in the following
order:
632 | Chapter 8 PLC

1User subdirectory
Windows XP: C:\Documents and Settings\{username}\Application
Data\Autodesk\AutoCAD Electrical {version}\{release}\{country
code}\Support\User\
Windows Vista, Windows 7:
C:\Users\{username}\AppData\Roaming\Autodesk\AutoCAD Electrical
{version}\{release}\{country code}\Support\User\
2Active project's .wdp file subdirectory
3Symbol library paths defined for the active project
4AutoCAD Electrical lookup subdirectory
Windows XP: C:\Documents and Settings\{username}\My
Documents\Acade {version}\AeData\
Windows Vista, Windows 7: C:\Users\{username}\Documents\Acade
{version}\AeData\
5AutoCAD Electrical support (C:\Program Files [(x86)]\Autodesk\Acade
{version}\Support\.)
6Current Directory
7All paths defined under AutoCAD Options ➤ Files ➤ Support Files
Search Path
Click Setup to display the Spreadsheet to PLC I/O Utility Setup dialog box.
Use it to modify and save new setting configurations.
NOTE If you select the .wdi file to use after you make changes in the Spreadsheet
to PLC I/O Utility Setup dialog box, the settings in the .wdi file are used and the
setup changes are not applied.
Ladder Reference Numbering
Specifies the value for the beginning line reference number
for the first ladder of the first drawing. Leading zeros and
Start
embedded alpha characters are supported for line reference
numbering.
Defines if you want your line reference numbers to se-
quence by 1 (default) or by some other amount.
Index
Overview of the PLC spreadsheet/database format | 633

Indicates whether to use the next sequential number for
the first ladder on each successive column or to use the
Column to column
specified value to skip for the first ladder reference of the
next column.
Indicates whether to use the next sequential number for
the first ladder on each successive drawing or to use the
Drawing to drawing
specified value to skip for the first ladder reference of the
next drawing.
Module Placement
There are three options related to module placement. Define if you want each
I/O module to start at the top of a ladder, if you want the module built in a
ladder with the previous module only if it fits completely, or if you want the
module to be built in the same ladder with the previous module and split if
necessary to fill the ladder.
You may have PLC modules with terminal connec-
tions that are unused. Usually AutoCAD Electrical
Include unused/extra connections
leaves them out and the module is built without
showing these terminal connections. Select it to in-
clude the connections in the PLC module.
If you select to place modules within the same ladder,
enter the number of rungs to skip between modules.
NOTE When a module is selected that contains some
of these terminals, they are included if you select this
option.
If you want to show these connections, include them
in the Attributes column of the Module Terminal In-
formation table of the ace_plc.mdb file with
";\\SPECIAL=INCLUDE" following the block informa-
tion or by selecting "When Including Unused" or
"When Excluding Unused" in the Show column of
the PLC Database File Editor dialog box.
Your PLC modules automatically break at a given
point when a "\\SPECIAL=BREAK" code is en-
Allow pre-defined breaks
countered in the block of parametric data of the
module.
634 | Chapter 8 PLC

Drawing File Creation
Indicates to use the open and active drawing file to
begin the PLC placement process.
NOTE It is unavailable if a Starting file name is spe-
cified.
Use active drawing
Specifies the drawing file to begin with for your PLC
drawings. Enter a name or click Browse to select a
Starting file name
file. The .dwg extension is not required and the file
is saved in the same folder as the active .wdp file.
Your spreadsheet may contain enough information
to generate multiple drawings. Select Pause between
Pause between drawings/Free run
drawings to stop between each drawing or select
Free run if you want the program to run completely
to the end without stopping.
NOTE When you select Pause Between Drawings, a
single drawing is generated and then a dialog box
opens allowing you to adjust settings, select to do a
free run, or continue with a pause between drawings.
The Use active drawing option is disabled.
If your ladders use the AutoCAD Electrical Sheet
parameter you can enter a value for the optional
sheet number.
Sheet
Adds newly created drawings to the active project.
The new drawings are added to the end of the pro-
ject’s drawing list.
Add new drawing to active project
Save
Saves the setup information and settings in a .wdi file to reuse.
Spreadsheet to PLC I/O utility setup
Defines how to set up the drawings. Includes how many ladders you want
inserted, the type and orientation of the ladders, spacing, and number of
rungs. You can also define the module placement, style, scale, and inline
device placement and spacing.
Overview of the PLC spreadsheet/database format | 635
Ribbon: Import/Export Data tab ➤ Import panel ➤ PLC I/O Utility.
Toolbar: Insert PLC
Menu: Components ➤ Insert PLC Modules ➤ Spreadsheet to PLC I/O
Utility
Command entry: AESS2PLC
Select the spreadsheet output file and click Open. In the Spreadsheet to PLC
I/O Utility dialog box, click Setup.
NOTE New default values can be programmed into the source file. The program
source file name is "wdio.lsp." Open the file with any ASCII text editor and carefully
edit the values near the top of the file.
Ladder
Specifies the insertion point for first (or only) ladder on the
drawing. Corresponds to the upper left-hand corner of the
ladder.
Origin
Specifies to create a vertical bus ladder (with horizontal
wires) or horizontal bus ladder (with vertical wires).
Orientation
Specifies the default referencing system:Reference numbers
■Numbers Only
■Numbers Ruling
■User Blocks
■X-Y Grid: All referencing is tied to an X-Y grid system
of numbers and letters along the left-hand side and
top of the drawing. Set the vertical and horizontal index
numbers and letters, spacing, and origin in the X-Y
grid setup dialog box.
TIP Use negative spacing values for horizontal
or vertical to change the origin of the XY grid
system to be other than the upper left-hand
corner of the drawing.
636 | Chapter 8 PLC

■X Zones: Like X-Y Grid, but there is not a Y-axis. Set
your horizontal labels, spacing, and origin of the
drawing on the X Zones setup dialog box.
TIP Use a negative zone spacing value if you
want the zone reference origin to be at the right
side of the drawing.
Specifies the width of each ladder (offset distance between
the ladder's two bus wires) from left to right rail.
Width
Specifies the offset distance from the insertion point of one
ladder to the insertion point of the next ladder.
Distance between
Specifies the number of ladders to insert. Vertical ladders
insert left to right. Horizontal ladders insert top to bottom.
Ladders per drawing
Specifies the quantity of line reference / wire rungs per
ladder. This value multiplied by the "Spacing - ladder rung
Rungs per ladder
to rung" value determines the length of the inserted lad-
ders.
Specifies the distance from one rung to the next rung on
a ladder.
Rung spacing
Specifies the quantity of rungs to skip before inserting a
PLC module (0=no skip)
Rung count skip for I/O start
Indicates whether to include/exclude bus rails and rungs.Suppression
Specifies the default wire signal arrow style. Select from
the four predefined styles or a user-defined style. You can
override the default style setting at insertion time.
Signal arrow style
Module
Specifies the default PLC module style. Select
from the five predefined styles or a user-defined
style.
PLC graphical style
Specifies the Input module insertion offset dis-
tance (vertical ladder orientation - measured in
Input offset from neutral
Overview of the PLC spreadsheet/database format | 637

+X direction from right-hand vertical bus; hori-
zontal ladder orientation - measured in +Y direc-
tion from lower horizontal bus).
Specifies the Output module insertion offset dis-
tance (vertical ladder orientation - measured in
Output offset from hot bus
-X direction from the left-hand vertical bus; hori-
zontal ladder orientation - measured in the -Y
direction from the upper horizontal bus).
NOTE If module type cannot be determined or
if it is combination Input and Output, then the
module is inserted down the middle of the lad-
der.
Specifies the maximum number of module I/O
points to insert into each ladder without breaking
the module and continuing it in the next ladder.
Maximum I/O per ladder
Specifies the insertion point offset distance
between one in-line device and the next.
I/O point spacing
Specifies the PLC module scale override value
(default = 1.0). Applies a scale factor to the PLC
Scale
module insertion except for the "Spacing - I/O
point to I/O point" value defined previously. If
Apply this scale to module outline only is selec-
ted, then this scaling factor is applied only to the
outline of the module.
In Line Devices
Specifies the starting offset distance from the
left-hand or upper bus for the first (or only) in-
First input device from hot bus
line device defined for each Input module I/O
point.
Specifies the starting offset distance from the
right-hand or lower bus for the first (or only) in-
First output device from neutral bus
line device defined for each Output module I/O
point.
638 | Chapter 8 PLC

Specifies the insertion point offset distance
between one in-line device and the next.
Spacing between multiple devices
Spreadsheet/Table Columns
Displays the Spreadsheet to PLC I/O Drawing Generator dialog box for
reviewing and mapping spreadsheet columns to attributes on the PLC module
symbol.
Drawing Template
You can force the tool to use a specific template for new drawings. Enter the
template drawing file name with the full path or click Browse to search for an
existing template (it looks in the AutoCAD template folder where all of the
user drawing templates are saved). For the current default template, leave the
value blank. If you do not want to use a template drawing, enter a single dot
in the edit box.
NOTE Make sure that your template does not have any existing ladders.
Save
Saves the spreadsheet information in a .wdi file to reuse. Once you save the
new .wdi file, the Spreadsheet to PLC I/O Utility dialog box redisplays and
the new .wdi file name displays in the Settings edit box.
Create PLC spreadsheets using RSLogix
RSLogix is a PLC programming software package for programming various
Allen-Bradley PLCs. This program has an output function that can write the
I/O information out to an ASCII file. AutoCAD Electrical imports this
information and creates a regular spreadsheet from the data that can then be
used to create PLC drawing files.
Using the RSLogix 500 Import dialog box, you can omit PLC cards, reserve
future locations for PLC cards in drawings, and browse to select a PLC code
from the PLC database. Once you modify the .eas file and apply the PLC data
to categories you can save the data into a PLC import spreadsheet that is used
to create the PLC drawing files.
Create PLC spreadsheets using RSLogix | 639
Export I/O information using RSLogix
Creates a Microsoft Excel spreadsheet file from a RSLogix file to import into
AutoCAD Electrical using the Spreadsheet to PLC I/O Utility tool.
1In RSLogix, export your RSLogix 500 file into .EAS format.
2Click Import/Export Data tab ➤ Import panel ➤ RSLogix 500.
3Select an .EAS or .CSV file and click Open.
4In the RSLogix 500 Import dialog box, select whether the I/O points
should be displayed in 8, 16, or 32-point groupings.
5Pick an I/O module for each set of I/O points. Enter it in the edit box,
select from the PLC dialog box using Browse, or select from the already
used list once you have some modules selected.
6Click OK to assign the module and move on to the next set of points.
7(Optional) To change a module assignment, select the module assignment
and click Change. In the RSLogix 500 Import Change Module dialog box,
change the selected module part number by entering the new module
name in the edit box, selecting it from the PLC dialog box using Browse,
or selecting it from the already used list once you have some modules
selected. Click OK to assign the module and return to the Input Module
dialog box.
8(Optional) Click Omit to skip a set of points, or click Future to skip the
points and add information so AutoCAD Electrical adds a blank column
when generating the drawing from the spreadsheet.
9Enter a name for the spreadsheet once a module was assigned for each
set of points. Click Save.
Use Microsoft Excel to modify your spreadsheet as needed.
10 To create the PLC drawing on page 630 click Import/Export Data tab ➤
Import panel ➤ PLC I/O Utility.
RSLogix 500 import
Imports I/O information from RSLogix and create a regular spreadsheet from
the data to use for the Spreadsheet to PLC I/O generator.
640 | Chapter 8 PLC
Ribbon: Import/Export Data tab ➤ Import panel ➤ RSLogix 500.
Toolbar: Insert PLC
Menu: Components ➤ Insert PLC Modules ➤ RSLogix 500 Export To
Spreadsheet
Command entry: AERSLOGIX
Select an .EAS or .CSV file and click Open.
The text “Input Module x of x” displays underneath the dialog box title bar
to keep track of which module you are editing out of the total number of
modules found in the RSLogix import file.
Specifies whether the I/O points displayed should be
in 8-pt, 16-pt, or 32-pt groupings.
8pt, 16pt, or 32 pt slot addressing
Specifies to display the module in octal or decimal
format.
Default to
Displays the I/O modules already picked for each set
of I/O points. Enter the module name in the edit box,
Module assignment so far
select it from the PLC dialog box using Browse, or
select it from the already used list once you have
some modules selected. Click OK to assign the
module and move on to the next set of points.
Skips a set of points.Omit
Skips the points and adds information so AutoCAD
Electrical adds a blank column when generating the
drawing from the spreadsheet.
Future
RSLogix 500 import change module
Ribbon: Import/Export Data tab ➤ Import panel ➤ RSLogix 500.
Create PLC spreadsheets using RSLogix | 641
Toolbar: Insert PLC
Menu: Components ➤ Insert PLC Modules ➤ RSLogix 500 Export To
Spreadsheet
Command entry: AERSLOGIX
Select an .EAS or .CSV file and click Open. Select one of the module
assignments and click Change.
The text “Change Module x” displays underneath the dialog box title bar to
keep track of which module you are changing.
Displays the I/O modules already picked for each set
of I/O points. Change the selected module part
Select below for module part number as-
signment
number by entering the new module name in the
edit box, selecting it from the PLC dialog box using
Browse, or selecting it from the already used list once
you have some modules selected. Select OK to assign
the module and return to the RSLogix 500 Import
dialog box.
Skips a set of points.Omit
Skips the points and adds information so AutoCAD
Electrical adds a blank column when generating the
drawing from the spreadsheet.
Future
Create PLC drawings from Unity Pro
AutoCAD Electrical imports Unity Pro XML files to aid in the creation of
various types of PLC and Panel Layout drawings in the active project. Unity
Pro supports numerous Schneider Electrical PLC cards, PLC racks, power
supplies, and various accessories.
Unity Pro exports two XML files (.xhw and .xsy) to use in the automatic
creation of AutoCAD Electrical PLC ladder-style drawings. The .xhw file
contains the PLC hardware information such as catalog numbers and starting
addressing information. The .xsy file contains the information about the
software such as variable types (input/output) and i/o addressing information.
These files also contain catalog information that can be reformatted to generate
an equipment list to help in the creation of a rack layout drawing used in
642 | Chapter 8 PLC

Panel Layouts or separate Rack Layout drawings using the Unity Pro Export
to Spreadsheet tool.
Data structure from the Unity Pro Hardware Configuration File
The tree structure data that displays in the Hardware File section of the Unity
Pro Import dialog box is as follows:
The Project node is the topmost node defined in the tree structure.
The label given to the node is the file name of the hardware config-
Project node
uration (.xhw) file that was defined during the export from Unity Pro.
The name of the hardware configuration file can be different from
that of the I/O configuration file.
The Bus Name node consists of the Bus Name Description and the
Bus Number ID.
Bus Name node
Example: Bus 1 Local Quantum Bus
■Bus Name Description: displays the name of the bus and is spe-
cified in the busType element in the .xhw file. (that is, Local
Quantum Bus)
■Bus Number ID: displays the number of the bus and is specified
in the position element of the .xhw file. (that is, Bus 1)
The Rack Location node consists of descriptions, location information,
and a catalog number.
Rack Location and Catalog
Number node
Example: Rack \1.1\1 140XBP0600
■Rack Description: displays the description of the rack and is spe-
cified in the family element of the .xhw file. (i.e. Rack)
■Rack Location: displays the location of the rack and is specified
in the topoAddress element of the .xhw file. (i.e. \1.1\1)
■Rack Catalog Number: displays the catalog number of the rack
and is specified in the partNumber element of the .xhw file. (that
is, 140XBP0600)
The Module Location node consists of descriptions, location informa-
tion, and a catalog number.
Module Location and
Catalog Number node
Example: Supply \1.1\1.1 140CPS21400
■Module Description: displays the description of the module and
is specified in the family element of the .xhw file. (that is, Supply)
Create PLC drawings from Unity Pro | 643

■Module Location: displays the location of the module in the rack
and is specified in the topoAddress of the .xhw file. (that is,
1.1\1.1)
■Module Catalog Number: displays the catalog number of the
module and is specified in the partNumber element of the .xhw
file. (that is, 140CPS21400)
Unity Pro to AutoCAD Electrical Mapping File
The Unity Pro to AutoCAD Electrical mapping file, DEFAULT_UNITY.MAP,
allows you to define the text strings to be placed in the custom field of the
Unity Pro Data Editor to map directly to an AutoCAD Electrical schematic
symbol name.
AutoCAD Electrical Symbol Mapping File Example:
;This file is to be used for mapping of Unity Pro custom strings
;for PLC I/O devices to AutoCAD Electrical schematic symbol names
;Syntax: Value in Custom Field,Symbol Block File Name
;Example: PBNO,HPB11
; PBNC,HPB12
PB NC,HPB12
*2POS*,HSS112
*3POS*,HSS113
The comment fields (marked with ;) at the top of the file are used for
information. The custom field supports spaces in the string and wild cards.
NOTE The distance the remote component is located from the PLC and hot bus
rail is determined by the PLC settings file.
Equipment List Structure and Data
When you click OK on the Unity Pro Import dialog box, a PLC Spreadsheet
file is created along with an Equipment List spreadsheet file. The Equipment
List file includes all of the catalog information in the .xhw file. The structure
of the Equipment List is:
■Column 1 = CATALOG; partNumber variable from the .xhw file
■Column 2 = MANUFACTURER; found in Default_cat.mdb (PLCIO table)
644 | Chapter 8 PLC

■Column 3 = ASSYCODE; column defined (left blank)
■Column 4 = TAG; column defined (left blank)
■Column 5 = LOC; column defined (left blank)
■Column 6 = INST; column defined (left blank)
■Column 7 = DESC1; partFamily variable from the .xhw file
■Column 8 = WDBLKNAM; PLCIO
Import Unity Pro files to a spreadsheet
1In Unity Pro, right-click the configuration file in the project browser and
select Export.
2Enter a file name for the .xhw file and click Export.
3Right-click the Variables & FB Instances file in the project browser and
select Export.
4Enter a file name for the .xsy file and click Export.
NOTE We recommend that you export the files into the same location as
the AutoCAD project (.wdp) file.
If the export was successful, the Unity Pro command window states that
the file was exported with 0 errors or warnings.
5Click Import/Export Data tab ➤ Import panel ➤ Unity Pro.
6Select the Unity Pro hardware configuration file (.xhw) and click Open.
7Select the Unity Pro I/O configuration file (.xsy) and click Open.
Upon successful validation of the files selected for import, the Unity Pro
Import dialog box displays.
8In the Unity Pro Import dialog box, modify the selected files to create a
spreadsheet for PLC import. You can right-click on a module or rack in
the tree structure and select to include or exclude it from being saved
into the spreadsheet file. Do any of the following optional steps:
■Indicate whether to display only modules in the .xhw file that contains
I/O addressing (PLCs).
Create PLC drawings from Unity Pro | 645
■Indicate whether to include inner or outer terminals. Select whether
to place the terminal symbol names in every row or only the names
that have a defined I/O point.
■In the Hardware File section, select the module to modify. The data
relative to the I/O variable file for the selected module displays in the
I/O Variable File section of the dialog box. If you select a module that
does not have addresses (such as power supplies or CPUs) the grid
remains empty.
■Change the symbol name or device tag for any of the I/O points using
the right-click menu options. The Select Symbol option displays the
icon menu from which you can select the symbol name.
■Specify the symbol name to insert for inner and outer terminals in
the spreadsheet. The default symbol name is HT0001 (a terminal that
maintains the wire number potential, has a tag strip ID and terminal
number, and is square). Click the Select from Icon Menu button to
select a terminal to use from the icon menu
9Click OK.
10 Specify a file name and location for the PLC spreadsheet file and click
Save.
11 Specify a file name and location for the Equipment List file and click
Save.
12 To create the PLC drawing on page 630 click Import/Export Data tab ➤
Import panel ➤ PLC I/O Utility.
Unity Pro import
Prepares Unity Pro exported data for the Spreadsheet to PLC I/O utility.
Ribbon: Import/Export Data tab ➤ Import panel ➤ Unity Pro.
Toolbar: Insert PLC
646 | Chapter 8 PLC

Menu: Components ➤ Insert PLC Modules ➤ Unity Pro Export to
Spreadsheet
Command entry: AEUNITYPROSS
Imports Unity Pro hardware (.xhw) and I/O variable (.xsy) files and formats
the data into a PLC import spreadsheet in preparation for the Spreadsheet to
PLC I/O utility. After you create the spreadsheet file, create PLC style drawing
files automatically with the Spreadsheet to PLC I/O utility.
When you click OK, you are prompted to enter a name for the PLC spreadsheet
file. You can save this file in .xls (preferred), .mdb or .csv format. Once you
enter a name (or accept the default) and click Save, you are then prompted
to create an equipment list spreadsheet file. You can save this file in .xls, .mdb
(preferred) or .csv format. The suggested file name is the name of the hardware
import file with the suffix ‘(Equipment).’
Hardware File
The path and file name of the hardware file created from Unity Pro (.xhw)
displays at the top of this section of the dialog box.
Allows you to view and select the hardware configur-
ation from the Unity Pro export files. The tree struc-
ture has four nodes:
Hardware file information
■Unity Project (export file name)
■Bus name
■Rack location and catalog number
■Module location and catalog number
Right-click on a node to include or exclude modules
from being saved into the spreadsheet file. Upon
exclusion the module icon changes to indicate that
it was excluded. You can exclude or include an entire
rack node. Multiple node selection is allowed.
Changed icons:
NOTE If you choose to include modules that do not
contain any I/O addressing, the module catalog
number appears in the Code column of the spread-
sheet.
Create PLC drawings from Unity Pro | 647
Indicates to display only modules in the .xhw file that
contains I/O addressing (PLCs). If a rack node only
Show only I/O modules
includes modules that are not PLC I/O modules, the
entire rack is removed from the tree structure. If a
rack node contains modules with and without I/O
addressing, the modules that do not have I/O ad-
dresses are removed.
Defines a terminal symbol to place into the spread-
sheet on the inner side of the in-line component
(between the I/O point and the in-line component).
Include inner terminals
■All I/O addresses: Places the terminal symbol
name into the row of every I/O address listed in
the import spreadsheet.
■I/O addresses defined: Places the terminal symbol
name into every row where an I/O point is
defined from Unity Pro. The defined address from
Unity Pro is the topographical address coming
from the I/O variable file that contains a value
for the address string.
Defines a terminal symbol to place into the spread-
sheet on the outer side of the in-line component
Include outer terminals
(between the I/O component and the wire connected
to the ladder rail).
■All I/O addresses: Places the terminal symbol
name into the row of every I/O address listed in
the import spreadsheet.
■I/O addresses defined: Places the terminal symbol
name into every row where an I/O point is
defined from Unity Pro. The defined address from
Unity Pro is the topographical address coming
from the I/O variable file that contains a value
for the address string.
I/O Variable File
Once you select a module node from the tree selection the data relative to the
I/O variable file displays for viewing and editing. The path and file name of
648 | Chapter 8 PLC

the I/O variable file created from Unity Pro (.xsy) displays at the top of this
section of the dialog box.
Displays a list of the I/O variables found inside of the
Unity Pro I/O Variable export file (.xsy). Remains
I/O variable file grid
empty if the selected module does not have ad-
dresses (such as power supplies and CPUs).
All I/O points for the respective PLC card display in
the grid (including the points that are undefined).
The total number of I/O points and the order of the
data is determined from the topological address in
the .xsy file in combination with the PLC definition
inside of the AutoCAD Electrical PLC database file
(ACE_PLC.MDB).
NOTE Single and multiple row selection is allowed.
■Address: Displays the address string from the
Unity Pro I/O Variable export file. This field is not
editable in the dialog box.
■Description: Displays the comment field string
associated to the address from the Unity Pro I/O
Variable export file. This field is not editable in
the dialog box.
■Terminal: Defines the placement of a terminal
symbol in line with the PLC I/O point. Select the
check box to place a terminal symbol in the
spreadsheet and drawing file. Since it is not
defined in the Unity Pro export files, it must be
defined before creating the AutoCAD Electrical
import spreadsheet.
■Symbol Name: Displays the AutoCAD Electrical
schematic symbol file name to place in line with
the PLC I/O points. If the symbol is not found in
the schematic symbol library or the custom string
is not mapped to a symbol name in the mapping
file, the name displays in red. Right-click in this
column to select a file name from the icon menu
or to clear the symbol name.
The symbol name is derived from the
value in the Custom field of the Unity
Pro data and the symbol file name that
it is mapped to in the mapping file.
Create PLC drawings from Unity Pro | 649
■Device Tag: Displays the tag value. If left blank,
the normal tagging method for parent compon-
ents is followed while children components re-
main untagged. Click in the column to enter a
value or right-click to copy, cut, or paste a value
into the cell.
Specifies the symbol name to insert for inner termin-
als in the spreadsheet. The default symbol name is
Inner terminal symbol
HT0001 (a terminal that maintains the wire number
potential, has a tag strip ID and terminal number,
and is square). Click the Select from Icon Menu but-
ton to select a terminal to use from the icon menu.
Specifies the symbol name to insert for outer termin-
als in the spreadsheet. The default symbol name is
Outer terminal symbol
HT0001. Click the Select from Icon Menu button to
select a terminal to use from the icon menu.
I/O variable grid right-click options
Right-clicking in the I/O variable grid control allows you to edit the file before
creating the PLC I/O spreadsheet. Multiple selection is allowed.
Displays the icon menu for selection of symbol file
names. Selecting a symbol file name fills in an
Select Symbol
empty grid cell or overwrites the existing text in a
cell.
Selects every row in the grid controlSelect All
Removes every row from selection.Clear All
Makes a selection in the grid for the rows that are
defined with I/O addresses.
Select All Defined I/O
(single selection only) Cuts the selected value (de-
scription, symbol name, or device tag).
Cut
Copies the selected value from one or more grid
cells.
Copy
650 | Chapter 8 PLC

Pastes in the selected value from one or more grids
into the selected grids.
Paste
Selects all inner terminals in the grid.Apply Terminal Inner
Selects all outer terminals in the grid.Apply Terminal Outer
OK + Run
Displays the Save As dialog box where you can quickly save the data to a
spreadsheet and start the PLC drawing creation automatically. The Spreadsheet
to PLC I/O Utility dialog box then opens with the saved spreadsheet already
selected.
Create XML files for export to Unity Pro
The Unity Pro Export command creates the Unity Pro I/O variable file (.xsy)
in the Unity Pro XML format. You can create the file for the active project or
active drawing. AutoCAD Electrical suggests naming the XML data file based
on whether you select to export for the project or a drawing. The default file
name is either “Projectname.xml” or “Drawing filename.xml.”
The Unity Pro export file is generated from the PLC drawings and their
respective PLC symbols. To ensure the proper importing and editing of the
I/O variable file in Unity Pro, the variable name and variable type are
maintained inside of the PLC drawings. Variable names and types are defined
inside of Unity Pro and are the required for bidirectional updates.
NOTE These values are maintained on the PLC module. If you delete the module
from the drawing, the variable name and type are also removed.
Variable names and types are created for new I/O addresses for import back
into Unity Pro. During the AutoCAD Electrical import process, the rest of the
addressing is filled in based on the available I/O points on the module. These
additional I/O points receive a variable name and type upon import into
AutoCAD Electrical.
Takes on the address string as the value.Variable Name
Takes on the same type as the other defined I/O
addresses on the module. If I/O points are not
Variable Type
Create XML files for export to Unity Pro | 651
defined on the module then Boolean characters are
used.
Export a file in the Unity Pro XML format
The AutoCAD Electrical Unity Pro export file is generated from the PLC
drawings and their respective PLC symbols. The variable names and types are
maintained on the PLC module so that the file can be imported back into
Unity Pro.
1Click Import/Export Data tab ➤ Export panel ➤ Unity Pro.
2In the Unity Pro Export dialog box, select to create an export file (.xsy)
for the project or the active drawing and click OK.
3If you selected Project, select the drawings to process and click OK.
4In the Save As dialog box, specify the file name and click Save.
By default the file is saved in the My Documents folder. AutoCAD
Electrical suggests a file name for the XML export file depending on
whether you are creating the file for the project or the active drawing.
Unity Pro export
This tool creates the Unity Pro I/O variable file (.xsy) in the Unity Pro XML
format. The XML file contains the PLC I/O addresses and descriptions for
import into the Unity Pro software.
Ribbon: Import/Export Data tab ➤ Export panel ➤ Unity Pro.
Toolbar: Schematic Reports
Menu: Projects ➤ Reports ➤ Unity Pro Export
Command entry: AEUNITYPRO
Select whether to create an XML export file for the project or for the active
drawing.
652 | Chapter 8 PLC
Circuits
Circuit Builder
Circuit Builder overview
The Circuit Builder tool comes prepopulated with data to build and annotate
a sampling of motor control circuits and power feed circuits. Circuits include
3-phase, single-phase, and one-line circuit representations. Each circuit is built
dynamically, adjusting the power bus to match the wire bus for the drawing,
adding wiring between components, and annotating the elements with suggested
values based upon the selected load. Each time a circuit is configured, it is added
to a history list of circuits. This list provides for quick reinsertion at a later time.
Three items control this feature:
■The spreadsheet on page 655 defines the available circuits, circuit types, and
defaults for each option within a circuit.
■The template on page 659 (.dwg file) for a selected circuit defines the wiring
and the placement position for the individual components on that wiring.
■The electrical standards database on page 663 provides suggested values used
to annotate components of the circuit and the wire size and type of the
power wiring.
Circuit Builder is customizable. You can add new circuit definitions and edit
existing ones.
9
653
Workflow
1Circuit Builder opens the spreadsheet and reads in the first sheet named
“ACE_CIRCS”.
2Circuit Builder shows the list of defined circuits in the Circuit Selection
dialog box.
3Select a circuit to insert or configure. The associated line from the
ACE_CIRCS sheet provides the base drawing template name, and the
name of a circuit code sheet. The circuit code sheet is a separate sheet
within the Circuit Builder spreadsheet.
4The base drawing template for the circuit inserts at your selected location.
5Circuit Builder finds and reads the attributes on all the special marker
blocks on the inserted drawing template.
6Circuit Builder matches each marker block to a specific section in the
circuit codes sheet. This section can be a single spreadsheet row or
multiple consecutive rows in the circuit codes sheet. The section identifies
one of the following:
■The action taken at this marker block location in the circuit. For
example, calculate a wire type, insert a wire number, or adjust rung
spacing.
■Provides a list of component insertion options that can be inserted
at this point in the circuit. For example, presents a selection list
containing a fuse, circuit breaker, or disconnect switch symbol.
Each marker block is processed in sequence, controlled by an ORDER
attribute value carried on each marker block
7A marker block can insert a nested template into the main circuit
template. If the nested template carries its own marker blocks, these
marker blocks are added to the overall list to process. When all marker
blocks have been processed, the circuit is complete.
See also:
■Customize Circuit Builder on page 2005
654 | Chapter 9 Circuits
Spreadsheet
The Circuit Builder spreadsheet, ace_circuit_builder.xls, along with the template
drawings that it references, control what is displayed in the Circuit Selection
and Circuit Configuration dialog box options. The first sheet in the
spreadsheet, ACE_CIRCS, contains the main circuit categories, for example
“3ph Motor Circuit”, and types, for example “Horizontal - FVNR - non
reversing”. Along with this first sheet, are one or more circuit code sheets.
These sheets contain the information necessary to insert or configure a specific
circuit selected from the first sheet.
The ace_circuit_builder.xls circuit builder spreadsheet can be relocated into
any of the normal AutoCAD Electrical or AutoCAD support paths.
The default location for the spreadsheet is:
■Windows XP: C:\Documents and Settings\All
Users\Documents\Autodesk\AcadE {version}\Support\
■Windows Vista, Windows 7: C:\Users\Public\Documents\Autodesk\AcadE
{version}\Support\
The default spreadsheet name, “ace_circuit_builder.xls”, can be overridden
by setting the environment variable, WD_CIRCBUILDER_FNAM, in the wd.env
on page 1984 file.
ACE_CIRCS sheet
Circuit Builder reads the list of circuit categories and types from the first sheet
in the spreadsheet, ACE_CIRCS. This information appears in a tree-structure
selection window in the Circuit Selection dialog box. The ACE_CIRCS sheet
contains the following columns.
A major circuit category displayed at the highest level of the tree structure
in the Circuit Selection dialog box.
CATEGORY
The specific type of circuit within a major category. The circuit types appear
at the second level of the tree structure.
TYPE
The drawing template that is inserted when this circuit is selected. If a
.dwg extension is not present, it is assumed.
DWG_TEMPLATE
The circuit code sheet name that is referenced for the selected circuit
template. This circuit code sheet carries the definitions for all the marker
blocks in the selected drawing template and any nested templates.
SHEET_NAME
Spreadsheet | 655
Code maps to the ANNO_CODE table in the spreadsheet. Allows you to
predefine the description, installation, location, and other key information,
ANNO_CODE
for the motor or load and the individual components that might be inserted
into the circuit.
Circuit code sheets
Once a circuit is selected from the Circuit Selection dialog box (the CATEGORY
and TYPE fields from the ACE_CIRC sheet), the associated drawing template
is inserted (the DWG_TEMPLATE field), and a related circuit code sheet is
ready for reference (the SHEET_NAME field).
The inserted drawing template on page 2010 contains special marker blocks.
Each marker block contains a CODE attribute with a value. This CODE value
is used to match up with a section in the circuit code sheet. The matching
section in the circuit code sheet provides the key information on what action
is required at this physical location in the circuit.
Each circuit code sheet contains the following columns.
Value is matched to the CODE attribute value on the marker block. Each
code corresponds to one circuit element in the list or an action/decision
that takes place at the insertion point of the marker block.
CODE
Text displayed in the Circuit Elements list in the Circuit Configuration dialog
box.
COMMENTS
The default option for a circuit element is marked with an “X”. When a
circuit is inserted rather than configured, all elements marked with "X" are
used to build the selected circuit.
UI_DEF
Title for the group of options in the middle Select section of the Circuit
Configuration dialog box. Each circuit element can have one or more
UI_TITLE
groups of options. For example, the main disconnecting means might
have two groups of options, the disconnecting means itself and an optional
auxiliary contact.
This field can also contain a predefined code to bring up a separate dialog
instead of driving the middle Select section of the main Circuit Configura-
tion dialog box. There are two pre-defined codes:
!MCC_CTRL - invokes the Select Motor on page 710 dialog box when
the Browse button on the Motor Setup section of the Circuit Configur-
ation on page 708 dialog box is selected. It must be combined with
the ace_cb_motor_select API call in the LOOKUP_CMD entry.
656 | Chapter 9 Circuits

!PF_CTRL - invokes the Select Load on page 711 dialog box when the
Browse button on the Load Setup section of the Circuit Configuration
on page 708 dialog box is selected. It must be combined with the
ace_cb_power_feed_select API call in the LOOKUP_CMD entry.
NOTE Include the ace_cb_wire_select API call in the LOOK-
UP_CMD entry to invoke the Wire Size Lookup on page 712
dialog box when the Browse button in the Wire Setup section
of the Circuit Configuration dialog box is selected.
The text to display in the middle Select section for each option within this
group.
UI_PROMPT_LIST
A numerical value assigned to the selection from each group. These numer-
ical values are added up and matched to the value in the UI_SEL column.
UI_VAL
NOTE This value must be inserted as a text value in the spreadsheet and
not as a number. An apostrophe character in front of the number forces
the spreadsheet software to interpret it as a text value. You can also format
the cells specifically as text. The text appears left justified in the cell.
A numerical value matched to the sum total of the values in the UI_VAL
column for each selection made within a group. The COMMAND_LIST
value from this row is used to insert the selected options.
UI_SEL
NOTE This value must be inserted as a text value in the spreadsheet and
not as a number. An apostrophe character in front of the number forces
the spreadsheet software to interpret it as a text value. You can also format
the cells specifically as text. The text appears left justified in the cell.
The command calls to insert the selected options.COMMAND_LIST
NOTE These calls are generally set up using standard AutoLISP format.
Multiple calls can be concatenated in the same cell or in subsequent rows
of the sheet. If multiple rows are used, the UI_SEL value cell is repeated.
Anything after a semi-colon character is interpreted as a comment
Optional command calls to annotate the circuit element. The ANNOT-
ATE_LIST calls execute after all rows of the COMMAND_LIST calls have
executed.
ANNOTATE_LIST
Spreadsheet | 657
Optional command calls to perform the electrical standards database or
catalog lookups for the selected circuit element. This field controls the
right-hand side of the Circuit Configuration dialog.
LOOKUP_CMD
Optional catalog lookup table name. If the option contains multiple com-
ponents, such as a disconnect switch and a fuse, there are multiple columns
where “n” increments for each component.
TABLEn
The title for the component within the Setup & Annotation section on the
Configuration dialog box. If the option contains multiple components,
TITLEn
such as a disconnect switch and a fuse, there are multiple columns where
“n” increments for each component.
ANNO_CODE sheet
Allows you to predefine the description, installation, location, and other key
information for the motor or load and the individual components inserted
into the circuit.
Value is matched to the ANNO_CODE value from the ACE_CIRCS sheet.ANNO_CODE
Value is matched to the CODE value of the marker block on the circuit
template.
CODE
Attribute name on the component inserted at the position of the marker
block.
ATTRIBUTE
Text prompt displayed in the Annotation Presets dialog box.PROMPT
The default value for the attribute if annotation presets are listed on page
708 or applied on page 706. This value can be a text value or an AutoLISP
expression that returns a text value.
DEFAULT
FutureOPTIONS
How Annotation Presets work
1Make a selection from the Circuit Selection dialog box, for example
"Horizontal - FVNR - non reversing". This selection has a value in the
ANNO_CODE cell, "ANNO_3M".
2Circuit Builder finds the group of entries that match up with code
"ANNO_3M" in the ANNO_CODE sheet of ace_circuit_builder.xls.
658 | Chapter 9 Circuits
3If any matching entries are found, the Special Annotation: Presets section
of the Circuit Selection dialog box, is enabled.
4If you select Presets and click the Presets List button, the Annotation
Presets dialog box displays. The rows displaying the entries with non-blank
DEFAULT values are initially marked as Selected.
5Edit the attribute values as necessary and click OK.
6Select to Insert or Configure the circuit.
7Circuit Builder processes each marker block on the circuit template. If
the CODE value matches the CODE value from the ANNO_CODE rows,
the attribute values marked as Selected in the Annotation Presets dialog
box are applied to the target attributes of the inserted component. If a
target attribute is not found, the value is inserted as an Xdata value.
Drawing templates
Each circuit starts with a main drawing template. These main circuit template
drawings are named “ace_cb1*.dwg”. Branching or nested circuit drawing
templates are named “ace_cb2*.dwg”. A branching circuit is a circuit inserted
as an option on to the main circuit, for example a control transformer circuit
or a power factor correction circuit.
The circuit drawing templates use the following naming convention.
■ace_cb1_*.dwg - primary circuit drawing templates
■ace_cb2_*.dwg - branching or nested circuit drawing templates
The default location for the circuit drawing templates is the schematic library
folder:
■Windows XP: C:\Documents and Settings\All
Users\Documents\Autodesk\AcadE {version}\Libs\{library}\
■Windows Vista, Windows 7: C:\Users\Public\Documents\Autodesk\AcadE
{version}\Libs\{library}\
One-line template drawings have a “1-” suffix. The default location is in a
“1-” folder under the schematic library folder.
■Windows XP: C:\Documents and Settings\All
Users\Documents\Autodesk\AcadE {version}\Libs\{library}\1-
Drawing templates | 659

■Windows Vista, Windows 7: C:\Users\Public\Documents\Autodesk\AcadE
{version}\Libs\{library}\1-
NOTE This template drawing naming convention is recommended but is not
required for Circuit Builder to function.
A circuit template contains the wiring framework for the circuit and special
marker blocks. These marker blocks are nothing more than instances of a
standard AutoCAD block, ace_cb_marker_block, carrying three attributes.
These marker blocks tell Circuit Builder that some action or decision is required
at the insertion point of the marker block. The action can be:
■Insert a component.
■Insert a multi-pole component.
■Make a wire type assignment to the underlying wire.
■Insert a wire number on the underlying wire.
■Decide if a branching circuit is needed.
■Decide if an underlying wire stretches and connects to a nearby power
bus.
■Decide if underlying wire bus spacing adjusts.
■Decide if an underlying wire is trimmed.
■Set up the circuit annotation.
NOTE If you choose to Insert a circuit, bypassing the Circuit Configuration dialog
box, the default options, as defined in the Spreadsheet on page 655, for each circuit
element are used.
Marker block attributes
This attribute value provides the link between the marker block on the circuit template
drawing and a section in the circuit codes sheet. The value on this attribute matches
with the CODE column value in the circuit codes sheet for the selected template.
CODE
This attribute value controls the sequence of circuit element display and insertion
within the circuit. Marker blocks are processed in order, from low to high. Assigning
ORDER
the same order value to multiple marker blocks links multiple marker blocks together
for processing as a group. For example, to adjust the spacing between multiple wires
660 | Chapter 9 Circuits
of a 3-phase bus there are three marker blocks with a common CODE value and a
common ORDER value. The ORDER value can be an integer or a decimal number
value. Support for decimal number order values makes it easy to add a marker block
between two others without having to reorder everything.
This attribute value contains miscellaneous annotation values, actions, and flags.
Annotation values are in the format <attribute name>=<attribute value>. Actions can
MISC1
include embedded AutoLISP expressions or programs. Flags are key words that include
enabling child contacts to link to parents and overriding multi-pole build directions.
Flag codes include the following
■_TAGFMT=<value> - override the drawing property component tag format or
wire number format setting for this one instance.
■_PRETAG=<value> - predefine a default alias tag for parent child linking. This
option can be used for situations when the child component is inserted before
the parent. For example, the marker block for the child contact has
"_PRETAG=MR". When the parent coil is inserted, its marker block also has
"_PRETAG=MR". As the circuit completes, the actual tag value of the parent an-
notates on to the child contact. This action is based upon the matching "MR"
alias assigned to each.
■_WIRENO=<value> - predefine a fixed wire number.
■WIRENUMBERS=0 - if a required wire type does not exist, create it and mark it
as No Wire Numbering. If a required wire type does not exist and this flag is
missing or has a value of 1, create it and mark it as Wire Numbering.
■_WIRETYPE=<value> - predefine the wire type layer name.
■_WIRESKIP=<value> - number of wires to skip over when trying to connect to
another wire.
■_MAXTRAPCOUNT=<value> - maximum search distance to look for a wire
connection, given in wire connection trap units. The wire connection trap value
is fixed and is displayed on the Drawing properties: drawing format tab on page
231 for the active drawing.
■_BASE - indicates a base wire, the one that does not move, when setting up to
adjust multiple bus wire spacing. If not defined, the wire that is co-linear with
the insertion point of the template becomes the default base wire.
■_L =<value>- each sublist, delimited by "|" characters, can predefine attribute
values for individual poles of a multi-pole component, set of terminals, or set of
cable markers.
■_D=<value> - define the build direction override for a multi-pole component.
1=build right, 2=build up, 4=build left, 8=build down. Without an override, the
build direction is down for horizontal inserts, and from left to right for vertical
inserts.
Drawing templates | 661

■X=<value or AutoLISP expression> - reposition the marker block in the "X" direc-
tion. For example, "_X=(* 0.5 DIST01)" means adjust the position of this marker
block in the X direction by an amount equal to 0.5 times the bus spacing distance
defined by marker block with a CODE attribute value of "DIST01". This example
can be used to position a marker block for a single phase motor insertion point,
halfway between two power bus wires.
■_Y=<value or AutoLISP expression> - reposition the marker block in the "Y" direc-
tion.
NOTE The flags defined in the circuit drawing marker blocks override any
spreadsheet settings.
Marker block functions
All marker blocks have the same block name, ace_cb_marker_block, but can
have a wide variety of functions. The specific function assigned to a marker
is based on its CODE attribute value and what this code value maps back to
in the circuit code sheet for the circuit template. Here are the categories of
marker block functions:
Blocks that define the circuit properties, such as motor selection.Setup
Blocks that define the wire type layers layer to assign to the wire network under the
block.
Wire Type
Blocks that define a wire number to assign to the wire under the block.Wire Number
Blocks that define the placement of a branching or nested circuit such as a control
circuit at the insertion point of the marker block.
Nested Circuit
Blocks that define the placement of a component, connector, terminal, cable marker,
or a multi-pole component at the insertion point of the marker block.
Component
Blocks that control rung spacing adjustment for the wires under these blocks. Blocks
that are processed as a group must carry common CODE and ORDER attribute values.
Bus Spacing
Blocks that control stretching a wire segment to connect to another wire.Wire Connec-
tions
NOTE The name of the marker block cannot be changed. The Circuit Builder
command only processes marker blocks named "ace_cb_marker_block".
662 | Chapter 9 Circuits

One-line circuit templates
One-line circuit templates use the same marker block concept as three-phase
motor and power feed circuit templates. However, there are a few differences.
There is a single line wire that represents a multi-wire bus. Most of the one-line
circuit templates contain a special "bus-tap" symbol.
The bus-tap symbol can have two functions:
■Provide an anchor point for the one-line circuit representation that begins
at this location.
■Break into the one-line bus where the circuit connects.
On a dual circuit one-line template, there are three of bus-tap symbols. One
at the normal point where the circuit ties into the bus. There is another version
of the symbol on each of the two circuit "legs", each marking the point where
that part of the dual circuit starts. These bus-tap symbols allow various reports
to report accurately on a one-line circuit, whether a single circuit or a dual
circuit representation.
The following bus-tap symbols are supplied:
■HDV1_BT_1-.dwg - with “dot” for horizontal one-line circuit
■VDV1_BT_1-.dwg - with “dot” for vertical one-line circuit
■HDV1_BTT_1-.dwg - “tee” connection for dual horizontal circuit
■VDV1_BTT_1-.dwg - “tee” connection for dual vertical circuit
■HDV1_BTL_1-.dwg - “corner” connection for dual horizontal circuit
■VDV1_BTL_1-.dwg - “corner” connection for dual vertical circuit
NOTE A WDTYPE attribute with a “1-1” value, identifies a bus-tap symbol.
Electrical standards database file
Circuit Builder uses an electrical standards database to define default values,
define engineering calculations, annotate circuits, and provide wire size
recommendations. The electrical standards database,
Electrical standards database file | 663

ace_electrical_standards.mdb, is located in the catalog folder. The default
location is:
■Windows XP: C:\Documents and Settings\{username}\My
Documents\Acade {version}\AeData\Catalogs\
■Windows Vista, Windows 7: C:\Users\{username}\Documents\Acade
{version}\AeData\Catalogs\
Sizing and wire type values are based on information from the electrical
standards database. Circuit Builder looks for a match on the motor size, supply
voltage, and phase. On a match, Circuit Builder provides the Full Load Amp
value, recommended motor power conductor size, and suggested rating values
for various branch circuit protection elements such as circuit breakers, fuses,
and disconnect switches.
The electrical standards database also allows Circuit Builder to provide
engineering estimates and “green” calculations in the area of power conductor
size versus energy losses. Designing to meet minimum code requirements can
conflict with green design. For example, designing to the minimum conductor
size for a given load can provide short-term savings on material cost but run
up longer-term expense due to higher heating loses in the wiring. Over the
life of the installation, the energy lost in heating up the minimum-sized wiring,
instead of reaching the load to do useful work, could be substantial.
During wiring sizing, Circuit Builder displays not only a list of the valid wire
sizes meeting the ampacity requirements of the load, but also a list of the
estimated maximum energy loss cost for each wire size. This set of calculations
allows you to make better green design decisions. For example, you decide to
oversize the conductors for a motor to reduce conductor heating losses. This
results in a higher initial cost for material and installation labor. However,
this cost is recovered many times over in reduced energy losses in the wiring
during the life of the installation.
NOTE The ace_electrical_standards.mdb file replaces the mcc.mdb file used in
previous versions of Circuit Builder.
The electrical standards database contains multiple tables used by Circuit
Builder.
Contains the values used to populate the Select Motor on page
710 dialog box.
MOTOR
664 | Chapter 9 Circuits
Contains the values used to populate the Select Load on page
711 dialog box. This table name can have an optional suffix to
relate it to a specific electrical standards code.
FEED
Options tables contain values defining defaults and options lists
specific to an electrical standard. For example, default to copper
wiring, AWG size standard, and feet for conductor length units.
OPT
Wire ampacity tables contain the ampacity ratings for different
conductor sizes and insulation temperature ratings.
AMP_{wire type}_{wire size stand-
ard}
Grounding conductor sizing tables contain the maximum ampa-
city ratings for different grounding conductor sizes. This inform-
AMPG_{wire type}_{wire size stand-
ard}
ation is used to retrieve the minimum grounding conductor size
and provide a selection list of larger sizes.
Wire insulation tables lists the insulation types, the maximum
temperature rating for each, and de-rating factors for each based
on a series of temperatures.
INSUL_{wire type}_{wire size stand-
ard}
Conductor Reactance/AC Resistance tables contain values used
to estimate single-phase and three-phase voltage drop values.
XL&R_{wire type}_{wire size stand-
ard}
Conduit/raceway descriptions list used with the XL&R_{wire
type}_{wire size standard} tables.
XL&R_DESC
Fill tables contain the ampacity de-rating factors used when
there is more than one current carrying conductor (power wiring,
FILL
not ground, neutral, or control wires) in the same conduit, duct,
or raceway.
Lists the component type descriptions whose sizing ties directly
into the full load amps value (FLA) of the motor or load. The
MOTOR_I_DESC
CODE value maps to the MOTOR_I_CALC and MOTOR_I_MAP
tables.
Lists the formula to calculate the maximum amp value for various
types of components on a per motor type basis.
MOTOR_I_CALC
Maps the calculated FLA for a component to a specific rating
value and an optional catalog assignment.
MOTOR_I_MAP
Electrical standards database file | 665

NOTE Each table name can have an optional suffix to relate it to a specific electrical
standards code.
Motor table
The data in the Motor table is used to populate the Select Motor on page 710
dialog box. Filter the selection list by type, voltage, and frequency. The load
and FLA values for the selected motor are passed back to the Circuit
Configuration dialog box and are used in wire size calculations. The values
are also used to calculate breaker size, fuse size, and disconnect switch rating,
for the selected motor.
The MOTOR table follows this table naming convention:
■MOTOR - if no specific electrical standards table is found, the default table
name to use.
■_{standard} - optional suffix to relate it to a specific electrical standards
code. For example, an “_NEC” suffix could mean that the data for the table
parallels the National Electrical Code. A suffixed MOTOR table name is
not necessary unless you plan to set up the electrical standards database
to support multiple standards.
Feed table
The data in the Feed table is used to populate the Select Load on page 711
dialog box. Filter the selection list by type, voltage, and frequency. The load
and FLA values for the selected feed are passed back to the Circuit
Configuration dialog box and are used in wire size calculations. The values
are also used to calculate breaker size, fuse size, and disconnect switch rating,
for the selected load.
The FEED table follows this table naming convention:
■FEED - if no specific electrical standards table is found, the default table
name to use.
■_{standard} - optional suffix to relate it to a specific electrical standards
code. For example, an “_NEC” suffix could mean that the data for the table
parallels the National Electrical Code. A suffixed FEED table name is not
necessary unless you plan to set up the electrical standards database to
support multiple standards.
666 | Chapter 9 Circuits
Options tables
Options tables contain values defining defaults and options lists specific to
an electrical standard. For example, default to copper wiring, AWG size
standard, and feet for conductor length units.
The OPT table follows this table naming convention:
■OPT - if no specific electrical standards table is found, the default table
name to use.
■_{standard} - optional suffix to relate it to a specific electrical standards
code. For example, an “_NEC” suffix could mean that the data for the table
parallels the National Electrical Code. A suffixed OPT table name is not
necessary unless you plan to set up the electrical standards database to
support multiple standards.
DescriptionName
Default full load amps multiplier value used to determine a maximum load. For
example, the full load amps for a motor is rated at 10 amps and the FLA_MULT
FLA_MULT
default is set to 1.25. The minimum wire size calculation for the wiring for the
motor is based upon an ampacity rating of not 10 amps but 12.5 amps (10
amps x 1.25).
The FLA_MULT factor displays in the Select Motor on page 710 and Wire Size
Lookup on page 712 dialog boxes.
Continuous load correction factor for wire size ampacity de-rating. If the elec-
trical load is anticipated to be a continuous load, a default de-rating factor can
be automatically applied to the wire size ampacity calculation.
C_LOAD
For example, a given electrical code defines the Continuous load correction
factor at a value of 0.8. This means that a given wire size that normally has a
maximum rated ampacity value of 20 amps is de-rated to a maximum ampacity
of 16 amps when the wiring is to power a motor that is expected to be a con-
tinuous load. The wire size calculation may need to select the next larger wire
size.
Default wire metal value used to determine appropriate wire ampacity and wire
insulation table names. For example, “CU” to define copper wiring as the default,
“AL” to define aluminum wiring as the default.
W_METAL
Default wire type standard used to determine appropriate wire ampacity and
wire insulation table names. For example, “AWG” or “MM2”.
W_STD
Electrical standards database file | 667
DescriptionName
Maximum allowable % voltage drop in power wiring. This value can be used
to help calculate an appropriate wire size when the wire run distance is also
defined.
V_DROP
Default insulation type used to determine the ambient temperature correction
factor.
W_INSUL
Wire run distance values for pick list in the Wire Size Lookup dialog box. The
run distance is used for estimated voltage drop calculations in the motor or load
power wiring.
LEN_LIST
Run distance units for power conductors and values for units pick list in the Wire
Size Lookup dialog box. Run distance is used in the estimated voltage drop
calculation. Units are either "FT" for feet or "M" for meters.
LEN_UNITS
Unit cost per kWh. This value is used for estimating a maximum annual cost of
energy loss in the power wiring for a motor or load, assuming a continuous full
load.
KWH_COST
KWh cost units character used in the Wire Size Lookup dialog box showing the
wire loss estimates. For example, “$” for dollar, “ ” for euro.
KWH_COST_UNITS
The code for the electrical standards name for this table. This code on page 182
is saved in the project .wdp file when the standard is applied to a project.
SHORTNAME
The full name of the electrical standards name for this table. This value, extracted
from all the OPT tables, provides the values for the pick list when setting an
FULLNAME
Electrical Code Standard for a project from the Project properties: project settings
tab on page 204.
Run distance units for power conductors and values for units pick list in the Wire
Size Lookup dialog box. Run distance is used in the voltage drop calculation.
LEN_UNITS
Default supply voltage value and values for voltage pick list in the Wire Size
Lookup dialog box.
VOLTS
Default supply phase value and values for phase pick list in the Wire Size Lookup
dialog box. For example, “1” for single-phase, “3” for three-phase.
PHASE
Default value for the minimum wire size when displaying paralleled wire option
in the Wire Size Lookup dialog box. For example, “1-0 AWG”.
PARALLEL_MIN_SIZE
668 | Chapter 9 Circuits
DescriptionName
Default value for the maximum number of wire conductors when displaying
paralleled wire option in the Wire Size Lookup dialog box. For example, “4” for
up to four paralleled wires per phase.
PARALLEL_MAX_CNT
Default ambient temperature correction factor. This value is used in wire type
sizing. It must match up with one of the temperature de-rating column labels
found in the INSUL_* tables. For example, “30C”.
T_AMBIENT
Default power factor for a motor. This value is used in estimated voltage drop
calculations. For example, “0.85”.
M_POWERFACTOR
Default power factor for a power feed. This value is used in estimated voltage
drop calculations. For example, “0.85”.
F_POWERFACTOR
Defines the expression to calculate the minimum grounding conductor ampacity
size. The “I” in the expression represents the motor or load full load amps (FLA).
AMPG_MAX
The result of the expression is then applied to the appropriate AMPG table to
determine the minimum grounding conductor size.
Electrical standards database file | 669

Wire ampacity tables
The wire ampacity tables provide the wire conductor sizes, descriptions, and
maximum FLA ampacity values based on wire size and standard insulation
temperature ratings. This information is used in the following ways:
■Automatically select a default wire size based upon the maximum load
amp value displayed in the Select Motor on page 710 or Select Load on page
711 dialog boxes.
670 | Chapter 9 Circuits
■Automatically calculate or recalculate suggested wire sizes in the Wire Size
Lookup on page 712 dialog box as various parameters and de-rating factors
are applied.
The wire ampacity tables use the following naming convention:
■AMP - the table name prefix.
■_{type} - the wire metal type such as CU for copper, or AL for aluminum.
■_{size} - wire size standard such as AWG, or MM2 for metric.
■_{standard} - optional suffix to relate it to a specific electrical standards
code. For example, an “_NEC” suffix could mean that the data for the table
parallels the National Electrical Code. A suffixed table name is not necessary
unless you plan to set up the electrical standards database to support
multiple standards.
For example, a table named AMP_CU_AWG_NEC contains the wire ampacity
information for copper, AWG sizes, and parallels what is found in the National
Electrical Code.
DescriptionName
Wire size code. This value can be automatically pushed into a wire type layer
name. For example, “12”, “250KCMIL”.
SIZE
Wire size description shown on the Wire Size Lookup dialog box. For example,
“12 AWG”, “250 KCMIL”.
SIZE_DESC
Imperial cross-section value for the wire conductor size.CIRC_MIL
Maximum ampacity rating values for the wire conductor size for each of these
standard ambient temperature ratings. Additional columns can be added or an
60C, 75C, 90C
existing column can be deleted. For example, if local electrical codes do not
support 90C, this field can be removed from the table and does not show up
as an option in the Wire Size Lookup dialog box.
Electrical standards database file | 671
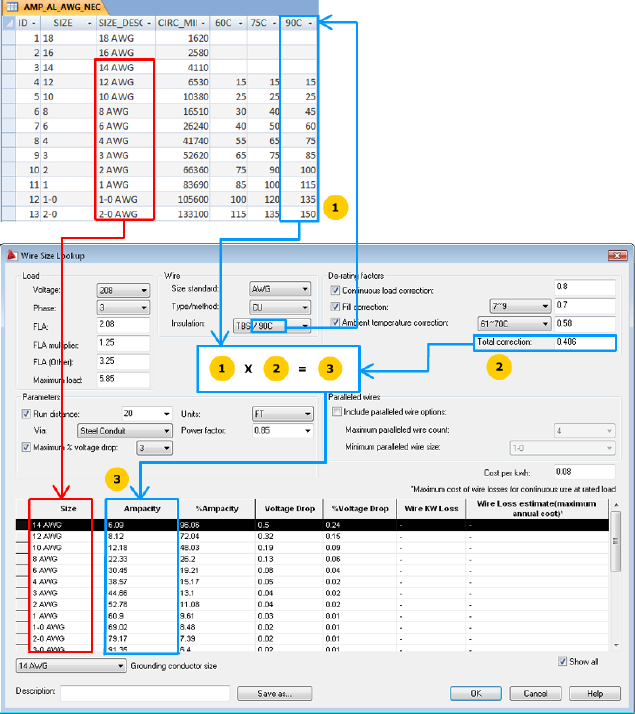
Grounding conductor sizing tables
The grounding conductor sizing tables provide the grounding wire conductor
sizes and maximum FLA ampacity values. This information is used in the
following ways:
■Provide a suggested minimum grounding conductor size based on the amp
value returned by the expression defined in the AMPG_MAX entry in the
OPT table.
672 | Chapter 9 Circuits
■Provide a selection list on the Wire Size Lookup on page 712 dialog box
giving this minimum suggested size plus all larger grounding conductor
sizes.
The grounding conductor sizing tables use the following naming convention:
■AMPG - the table name prefix
■_{type} - the wire metal type such as CU for copper, or AL for aluminum.
■_{size} - wire size standard such as AWG, or MM2 for metric.
■_{standard} - optional suffix to relate it to a specific electrical standards
code. For example, an “_NEC” suffix could mean that the data for the table
parallels the National Electrical Code. A suffixed table name is not necessary
unless you plan to set up the electrical standards database to support
multiple standards.
For example, a table named AMPG_CU_AWG_NEC contains the grounding
conductor sizing information for copper, AWG sizes, and parallels values
found in the National Electrical Code.
DescriptionName
Wire size code. This value can be automatically pushed into a wire type layer
name for the ground wire. For example, “12”, “250KCMIL”.
SIZE
Wire size description shown on the Wire Size Lookup dialog box. For example,
“12 AWG”, “250 KCMIL”.
SIZE_DESC
Maximum amp value associated to this grounding wire size. The value comes
from the result of the expression held in the AMPG_MAX entry of the OPT table.
MAX
Wire insulation tables
The wire insulation tables provide the option to de-rate wire conductor
ampacity based upon expected maximum ambient temperature.
■Automatically select a default wire size based upon the maximum load
amp value, displayed in the Select Motor on page 710 or Select Load on
page 711 dialog boxes, and the default insulation type and ambient
temperature rating defined in the W_INSUL and T_AMBIENT entries of
the OPT table.
Electrical standards database file | 673
■Automatically calculate or recalculate suggested wire sizes in the Wire Size
Lookup on page 712 dialog box as various insulation and temperature
de-rating factors are applied.
The wire insulation tables use the following naming convention:
■INSUL - the table name prefix.
■_{type} - the wire metal type such as CU for copper, or AL for aluminum.
■_{size} - wire size standard such as AWG, or MM2 for metric.
■_{standard} - optional suffix to relate it to a specific electrical standards
code. For example, an “_NEC” suffix could mean that the data for the table
parallels the National Electrical Code. A suffixed table name is not necessary
unless you plan to set up the electrical standards database to support
multiple standards.
For example, a table named INSUL_CU_AWG_NEC contains the wire insulation
information for copper, AWG sizes, and parallels values found in the National
Electrical Code.
DescriptionName
Insulation type code.INSUL
Insulation type description shown on the Wire Size Lookup dialog box.INSUL_DESC
Standard, maximum temperature rating for the insulation type.TEMP
A series of wire conductor ampacity de-rating factor values for maximum ambient
temperature. Columns can be added or deleted. For example, if 30C is the
minimum ambient temperature rating, the 25C column can be removed.
25C-80C
674 | Chapter 9 Circuits
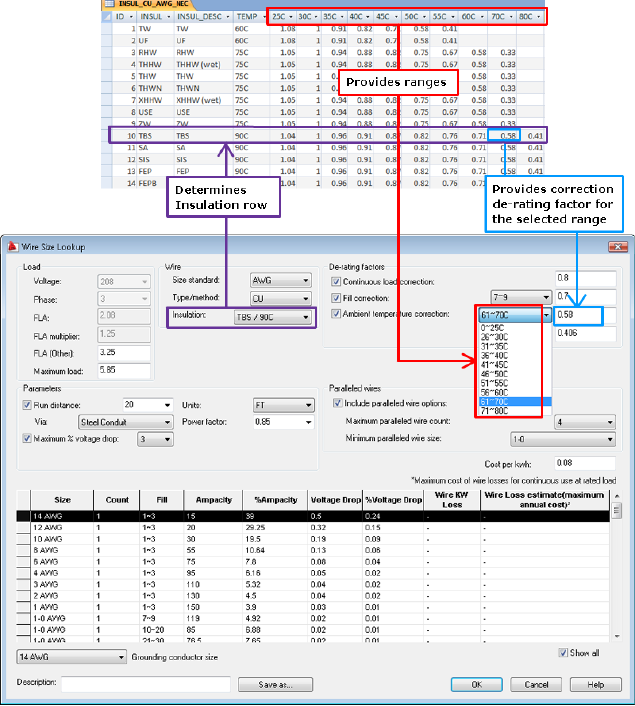
Conductor Reactance / AC Resistance tables
The optional conductor reactance/AC resistance tables provide the reactance
and resistance values for wire size based on conduit type. These values are
used to calculate the voltage drop percentage in power wiring when a run
distance is supplied.
There are two types of tables for this feature. A conduit type description table
and the reactance/resistance data tables.
Conduit type description table
Electrical standards database file | 675
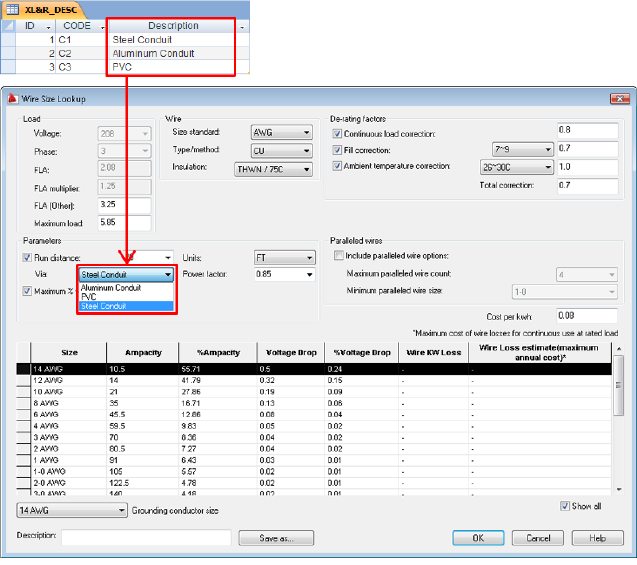
The description table, XL&R_DESC, contains the labels used on the Wire Size
Lookup on page 712 dialog box for the conduit or raceway type selection list.
The labels also map to the columns in the data tables.
Data tables
The conductor reactance/AC resistance data tables use the following naming
convention:
■XL&R - the table name prefix
■_{type} - the wire metal type such as CU for copper, or AL for aluminum.
■_{size} - wire size standard such as AWG, or MM2 for metric.
■_{standard} - optional suffix to relate it to a specific electrical standards
code. For example, an “_NEC” suffix could mean that the data for the table
parallels the National Electrical Code. A suffixed table name is not necessary
unless you plan to set up the electrical standards database to support
multiple standards.
676 | Chapter 9 Circuits
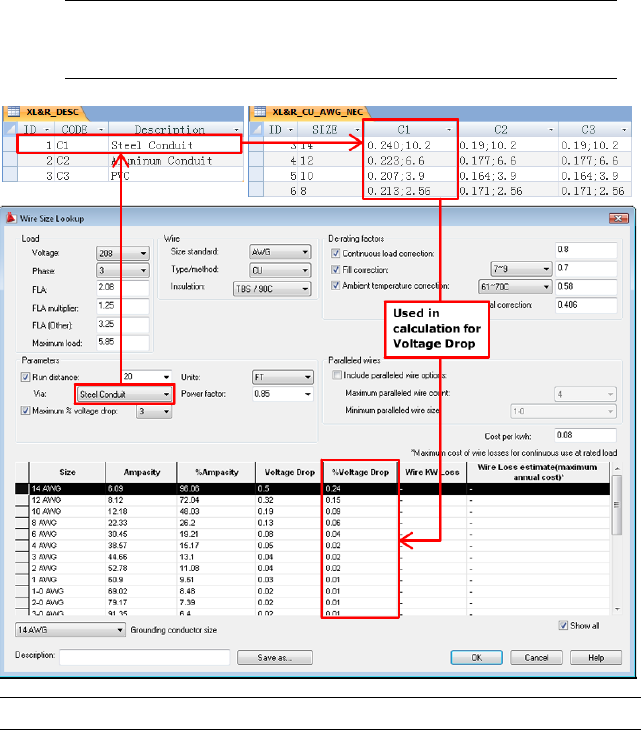
For example, a table named XL&R_CU_AWG_NEC contains the conductor
reactance/AC resistance information for copper, AWG sizes, and parallels
values found in the National Electrical Code.
DescriptionName
Wire size code.SIZE
A set of reactance and resistance values, semi-colon delimited for the conduit
type. The first element is the estimated reactance and the second element is
the AC resistance.
C1-C3
NOTE see the XL&R_DESC table for the corresponding label for each. Data for
additional conduit/raceway types can be added to this table with a correspond-
ing entry added to the XL&R_DESC table.
NOTE See Wire Size Lookup on page 712 for the voltage drop calculation.
Electrical standards database file | 677
Fill tables
When multiple current carrying wire conductors are in the same conduit,
duct, or raceway, the wire ampacity may need to be de-rated. Current carrying
wire conductors are defined as power wiring, not ground, neutral, or control
wires. The Fill table provides the de-rating factor based on the maximum
number of power wire conductors.
The FILL table follows this naming convention:
■FILL - the table name prefix.
■_{standard} - optional suffix to relate it to a specific electrical standards
code. For example, an “_NEC” suffix could mean that the data for the table
parallels the National Electrical Code. A suffixed FILL table name is not
necessary unless you plan to set up the electrical standards database to
support multiple standards.
678 | Chapter 9 Circuits
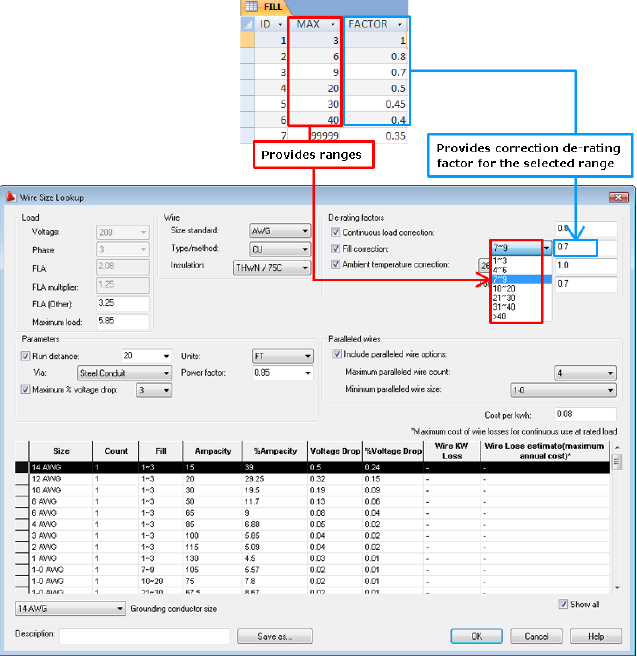
MOTOR_I* tables
A set of three tables containing values used for calculating suggested breaker
size, fuse size, and disconnect switch ratings for a given motor or load amp
value. Each table name can have an optional suffix to relate it to a specific
electrical standards code such as “_NEC” for National Electrical Code.
MOTOR_I_DESC
Lists the component type descriptions whose sizing ties directly into the full
load amps value (FLA) of the motor or load. The CODE value maps to the
MOTOR_I_CALC and MOTOR_I_MAP tables.
Electrical standards database file | 679
MOTOR_I_CALC
Lists the formula to calculate the maximum amp value for various types of
components on a per motor type basis. Each row gives a motor type followed
by columns marked with the codes given in the MOTOR_I_DESC table. Each
cell contains an expression to calculate a FLA value. The FLA value for the
selected motor corresponds to the symbol "I" in the expression.
Valid operations are +-*/^. The “^” character is the exponential function. For
example, I^2 is I squared, while I^0.5 is the square root of I.
If-then-else statements are supported including one level of nested statements.
For example,
■(if (I > 400) then (I * 8) else (I * 11)) - the calculated amp value is eight
times FLA current for 0-400 amps and 11 times for greater than FLA of 400
amps. One level of nesting is supported.
■(if (I >= 9.0) then (I * 1.25) else if (I < 2.0) then (I * 3.0) else (I * 1.67) - the
calculated value is set to (I * 1.67) if I is less than 9 but greater or equal to
2.0 amps. If I is less than 2.0 amps the calculated value is (I * 3.0), and if
greater than or equal to 9.0 amps, it is (I * 1.25).
Valid Boolean operations are >, <. >=. <=, =.
MOTOR_I_MAP
Maps the calculated FLA for a component to a specific rating value and an
optional catalog assignment. The rating value is annotated to the symbol
using the API call c:ace_cb_anno2 in the circuit builder spreadsheet.
The optional catalog assignment is defined in the Default field. Use the
following format:
MFG={manufacturer};CAT={catalog};ASSYCODE={assembly code}
If the ASSYCODE value is not needed, use the format:
MFG={manufacturer};CAT={catalog}
CATALOGSEL table
Circuit Builder uses the CATALOGSEL table to save the catalog selections made
for the motor and other components. The catalog information is saved based
on the motor size. If this same motor size is used later on another circuit, these
previous catalog selections become the default values when they match up
with the configured selections. For example, if the previous circuit was
configured with a 10HP motor with time-delay fuses, and a 10HP motor with
680 | Chapter 9 Circuits

time-delay fuses is selected for the new circuit, the previously used catalog
selection appears as the default.
If the circuit is configured using the Reference an existing circuit on page 721
feature, the values are not used from the CATALOGSEL table but from the
referenced circuit. However, if a new motor is then selected from the Select
Motor on page 710 dialog box, the CATALOGSEL tables values are checked for
a match.
Electrical standards database editor
The electrical standards database editor provides these basic functions to
modify the electrical standards database file.
■Open a table
■Copy and paste a table
■Delete a table
■Edit the contents of a table
For additional capabilities, use Microsoft Access.
See also:
■Electrical standards database file on page 663
Open and close a table
1Click Schematic tab ➤ Other Tools panel ➤ ➤ Database Editors
drop-down ➤ Electrical Standards Database Editor.
2Expand the tree list on the left-hand side of the dialog box.
3Select the table you want to open.
4Right-click and select Open on the context menu.
NOTE You can also double-click a table name to open it.
Electrical standards database editor | 681
5To close a table, move the mouse over the tab for the table. An X is
displayed. Click the X.
6Select Yes to save the changes if prompted.
Copy and paste a table
1Click Schematic tab ➤ Other Tools panel ➤ ➤ Database Editors
drop-down ➤ Electrical Standards Database Editor.
2Expand the tree list on the left-hand side of the dialog box.
3Select the table you want to copy and paste.
NOTE Use the shift or ctrl keys to select multiple tables.
4Right click and select Copy on the context menu.
5Right click again and select Paste.
The Copying Table dialog box displays.
6Enter the name for the new table. If multiple tables were selected to copy,
enter a name for each table as prompted.
To paste a table into a different electrical standard, add the appropriate
suffix to the table name. For example, if you want to paste the default
OPT table to the NEC standard, enter the name OPT_NEC. If the NEC
standard does not exist in the database file, it is created.
NOTE See Electrical standards database file on page 663 for table naming rules.
Delete a table
1Click Schematic tab ➤ Other Tools panel ➤ ➤ Database Editors
drop-down ➤ Electrical Standards Database Editor.
682 | Chapter 9 Circuits
2Expand the tree list on the left-hand side of the dialog box.
3Select the table you want to delete.
NOTE Use the shift or ctrl keys to select multiple tables.
4Right click and select Delete on the context menu.
The Delete Tables task dialog displays.
5Click Yes.
NOTE This change is written to the database file immediately and cannot be
canceled or undone.
Edit a table
1Click Schematic tab ➤ Other Tools panel ➤ ➤ Database Editors
drop-down ➤ Electrical Standards Database Editor.
2Expand the tree list on the left-hand side of the dialog box.
3Select the table you want to open.
4Right-click and select Open on the context menu.
NOTE You can also double-click a table name to open it.
Edit contents
1Click the cell to edit and type to overwrite the contents.
Double-click the cell to edit the contents.
2Click Save.
Add a record
1Click to the left of a row to highlight a row.
2Right-click to display the context menu.
3Click Add New Record.
Electrical standards database editor | 683
The new record is added at the end of the table.
4Enter values in each cell of the new row.
5Click Save.
Delete a record
1Click to the left of a row to highlight a row.
2Right-click to display the context menu.
3Click Delete Record.
4Click Save.
Copy and paste
1Click to the left of a row to highlight a row.
2Right-click to display the context menu.
3Click Copy.
The contents of the row are placed in memory.
4Right-click to display the context menu.
5Click Paste.
The copied record is added at the end of the table.
6Edit the contents of the cells.
7Click Save.
Add a column
1Click a column label.
2Right-click to display the context menu.
3Click Insert Column.
The Insert Column dialog box displays.
4Enter a name for the column.
5Select the column type, Text, or Number.
6Click OK.
The column is added at the end.
684 | Chapter 9 Circuits
7Enter the cell values.
8Click Save.
NOTE Columns can only be added to the AMP, INSUL, MOTOR_I_CALC, and
XL&R tables.
Delete a column
1Click a column label.
2Right-click to display the context menu.
3Click Delete Column.
The Delete Column task dialog displays.
4Click Yes.
NOTE This change is written to the database file immediately and cannot
be canceled or undone.
NOTE Columns can only be deleted from the AMP, INSUL, MOTOR_I_CALC, and
XL&R tables.
Sorting
➤ Double-click a column to sort by the contents of that column.
NOTE Sorting is temporary and is not saved to the file.
Electrical standards database editor
Edits the electrical standards database file.
Ribbon: Schematic tab ➤ Other Tools panel ➤ ➤ Database Editors
drop-down ➤ Electrical Standards Database Editor.
Toolbar: Project
Electrical standards database editor | 685

Menu: Projects ➤ Extras ➤ Electrical Standards Database Editor
Command entry: AEDBEDITOR
Tree structure
The left-hand side lists the existing tables in a tree structure. The highest level
is separated by electrical standard as defined by the table suffix. Any tables
without a suffix are listed under Default. A right-click context menu is available
for the following functions.
Select a table, right-click, and select Open.Open
Double-click the table name to open.
Select a table, right-click, and select Delete.Delete
Use the Shift and Ctrl keys to select multiple tables to delete.
Select a table, right-click, and select Copy.Copy
Use the Shift and Ctrl keys to select multiple tables to delete.
Right-click and select Paste. Enter the new table name. If multiple
tables were copied, you are prompted for each table name. Enter
a new suffix to create a new electrical standard level.
Paste
Table
The right-hand side displays the content of a table for modifying.
Move the mouse to the tab for the table. Click the X.Close the table
Click to the left of a row to highlight a row. Right-click and select
Cut.
Cut
Use the Shift and Ctrl keys, or drag the mouse, to select multiple
records to cut.
Click to the left of a row to highlight a row. Right-click and select
Copy.
Copy
Use the Shift and Ctrl keys, or drag the mouse, to select multiple
records to copy.
After cutting or copying, right-click and select Paste. The records
are appended to the end of the table.
Paste
Right-click to the left of a row and select Add New Record. A
blank record is appended to the end of the table.
Add New Record
686 | Chapter 9 Circuits

Click to the left of a row to highlight a row. Right-click and select
Delete Record.
Delete Record
Click the cell to edit. Type to overwrite the contents.Edit contents
Double-click the cell to edit the contents.
Place the mouse over a column label. Right-click and select Insert
Column. A blank column is appended to the table.
Insert Column
NOTE Columns can only be added to the AMP, INSUL, MO-
TOR_I_CALC, and XL&R tables.
Click the column label. Right-click and select Delete Column.Delete Column
NOTE Columns can only be deleted from the AMP, INSUL,
MOTOR_I_CALC, and XL&R tables.
Double-click a column label to sort the table by the values in that
column.
Sort
NOTE The sorted order is not saved to the database file.
Select the Save button to save all open and modified tables. Select
Save Current to save the current or only open table. Select Save
All to save changes on all open tables.
Save
Select the Close button to exit the editor. The Close dialog dis-
plays for each open and modified table prompting you to save
the changes for that table.
Close
Use Circuit Builder
The Circuit Builder tool comes prepopulated with data to build and annotate
a sampling of motor control circuits and power feed circuits. It includes
three-phase, single-phase, and one-line circuit representations. Each circuit is
built dynamically with the following features:
■Connects to an adjacent power bus.
■Adds wiring between components.
■Annotates selected components with suggested values based upon the
selected load.
Use Circuit Builder | 687

Each time a circuit is configured, it is added to a history list of circuits. This
list provides for quick re-insertion at a later time.
You can customize on page 2005 Circuit Builder to insert other circuit types.
One-line motor control
Circuit Build supplies and uses a one-line symbol library when building a
one-line circuit. Each one-line symbol has a WDTYPE attribute on page 325
with a value of “1-” or “1-1”. The WDTYPE attribute value distinguishes the
one-line symbol from a schematic symbol. A schematic symbol either has no
WDTYPE attribute or a blank WDTYPE attribute value. One-line symbols
follow the same symbol naming on page 288 conventions and have the same
attribute requirements on page 326 as schematic symbols with a few attribute
exceptions.
DescriptionAttribute
The attribute must be present and carry a value of “1-” to indicate it
is a one-line symbol, or “1-1” for the one-line bus-tap symbols. A
WDTYPE
bus-tap symbol is used to mark the beginning of a one-line circuit.
Schematic symbols do not carry this attribute or have the attribute
but with a blank value.
Omitted from one-line cable markers symbols since a one-line cable
marker can represent multiple conductors, multiple wires, or core
color assignments.
RATING1
Omitted from one-line terminal symbols since a one-line terminal can
represent multiple independent terminals.
TERM01
If a TERM01 attribute is added to a one-line symbol and carries a non-
blank value, it can be edited in the Insert/Edit Terminal Symbol dialog
box. However, terminal number text on one-line terminal symbols is
not linked back to terminal number assignments on schematic or
panel terminal representations.
NOTE One-line terminals are not processed by Terminal Strip Editor.
Insert a 3-phase circuit
Builds a circuit based on your selection from a list of available circuits and
circuit elements.
The circuit builds dynamically and matches the rung spacing, adds wiring
between components, and can annotate the circuit with calculated values
based upon the assigned load amperage of the circuit. Circuit Builder extracts
688 | Chapter 9 Circuits
these annotation values from a database based on engineering standards,
motor horsepower, and supply voltage.
1Click Schematic tab ➤ Insert Components panel ➤ Circuit Builder
drop-down ➤ Circuit Builder.
2Select the circuit from the Circuits list. For example:
Circuits: 3ph Motor Circuit, Horizontal - FVNR - non reversing
NOTE You can also select History to display the list of previously configured
circuits.
A circuit inserted from the Circuits list contains all default circuit elements
as defined in the circuit template and circuit builder spreadsheet. See Set
circuit element defaults on page 2075 to change the default circuit setup.
A circuit inserted from the History list contains all circuit elements and
values of the previously configured on page 690 circuit.
3(Optional) Enter a Circuit Scale. This value sets an insertion scale value
for the circuit template drawing.
4(Optional) Enter a Component Scale. This value sets an insertion scale
value for the individual components inserted while building the circuit.
5(Optional) Enter a Horizontal Rung Spacing.
6(Optional) Enter a Vertical Rung Spacing.
7(Optional) Select to apply some specific annotation:
■Presets on page 2072 - defined in the ANNO_CODE sheet of the Circuit
Builder spreadsheet file that map to the selected circuit.
Use Circuit Builder | 689

■Reference an existing circuit on page 723 - reference values from an
existing circuit selected from a list of circuits extracted from the active
project. The state of the Retag new components check box controls
the retagging of the components within the new circuit. Values can
include catalog assignment, component descriptions, annotation
values, and more.
NOTE This option is not available if the circuit is selected from the History
list.
8Select Insert.
9Select an insertion point location on the drawing.
Configure a 3-phase circuit
1Click Schematic tab ➤ Insert Components panel ➤ Circuit Builder
drop-down ➤ Circuit Builder.
2Select the circuit from the Circuits list. For example:
Circuits: 3ph Motor Circuit, Horizontal - FVNR - non reversing
NOTE You can also select History to display the list of previously inserted
circuits.
3(Optional) Enter a Circuit Scale. This value sets an insertion scale value
for the circuit template.
4(Optional) Enter a Component Scale. This value sets an insertion scale
value for the individual components inserted while building the circuit.
5(Optional) Enter a Horizontal Rung Spacing.
6(Optional) Enter a Vertical Rung Spacing.
7(Optional) Select to apply some specific annotation:
■Presets on page 2072 - defined in the ANNO_CODE sheet of the Circuit
Builder spreadsheet file that map to the selected circuit.
■Reference an existing circuit on page 723 - reference values from an
existing circuit selected from a list of circuits extracted from the active
project. The state of the Retag new components check box controls
690 | Chapter 9 Circuits
the retagging of the components within the new circuit. Values can
include catalog assignment, component descriptions, annotation
values, and more.
NOTE This option is not available if the circuit is selected from the History
list.
8Select Configure.
9Select an insertion point location on the drawing. The template drawing
for the selected circuit is inserted at the specified location. The template
drawing contains marker blocks. Each block is marked with a code value
that links to instructions for either inserting a component, wire number,
or adjusting the wiring of the circuit.
The dialog box has three sections, Circuit Elements, Select, and Setup &
Annotations. The options differ depending on the circuit and circuit
element selected.
10 Select a circuit element, for example:
Circuit Elements: Motor Setup
11 Click the Motor Setup Browse button to display the Select Motor
dialog box. This dialog box is where you select the motor and horsepower
or KW size from the electrical standards database. For other components,
the Catalog lookup dialog box displays. You can also type in values for
each entry.
12 Click the Wire Setup Browse button to display the Wire Size Lookup
dialog box. This dialog box is where you select or adjust the wire size
based on an analysis of the load and various installation parameters. You
can also type in values for each entry.
13 Select a circuit element, for example:
Circuit Elements: Disconnecting means
The options for this circuit element, defined in the circuit builder
spreadsheet, are displayed in the Select section.
14 Select the options for this circuit element, for example:
Main Disconnect: Circuit breaker
Include N.O. auxiliary contact: Yes
Use Circuit Builder | 691
15 (Optional) Modify values in the Setup & Annotations section for the
selected circuit element.
NOTE Depending upon how this circuit element is set up in the circuit builder
spreadsheet, this section may not be available for circuit element modification.
Select the Browse button to make a part number assignment from
the Catalog lookup dialog box. The “TABLE” entry defines the catalog
lookup table for the component in the circuit builder spreadsheet. You
can also type in values for each entry.
16 Repeat to configure each circuit element.
17 (Optional) Enter a name for the circuit. This name is added to the History
list on the Circuit Selection dialog box and makes it easier to find this
same circuit for future re-insertion.
18 Select from one of three ways to insert the circuit elements.
Click to insert just the highlighted circuit element.
Click to insert all the circuit elements up to and including the
highlighted circuit element.
Click to insert all the circuit elements.
NOTE If the circuit contains a nested template, the circuit elements tree
structure may expand when the nested circuit is inserted into the overall
circuit. You may need to go back and configure the circuit elements that are
part of the nested template.
19 Select Done. The circuit is finalized by:
■Remaining untagged child components are matched up with parent
components and tags are assigned.
692 | Chapter 9 Circuits
■The selection information for the circuit is applied to the main
component of the circuit, for example the motor or load symbol.
■The remaining marker blocks are removed from the circuit template
for any circuit elements not inserted.
NOTE The Circuit Elements list is built dynamically based on the template for the
selected circuit. As the circuit elements are inserted, if the element contains a
nested circuit, the circuit element becomes expandable so you can configure the
nested circuit elements.
Insert a power feed circuit
1Click Schematic tab ➤ Insert Components panel ➤ Circuit Builder
drop-down ➤ Circuit Builder.
2Select the power feed circuit. For example:
Circuits: 3ph Power Feed, Horizontal - Single feed
NOTE You can also select History to display the list of previously inserted
circuits.
A circuit inserted from the Circuits list contains all default circuit elements
as defined in the circuit template and circuit builder spreadsheet. See
Customize Circuit Builder on page 2005 to change the default circuit setup.
A circuit inserted from the History list contains all circuit elements and
values of the previously inserted circuit.
3(Optional) Enter a Circuit Scale. This value sets an insertion scale value
for the circuit template.
4(Optional) Enter a Component Scale. This value sets an insertion scale
value for the individual components inserted while building the circuit.
5(Optional) Enter a Horizontal Rung Spacing.
6(Optional) Enter a Vertical Rung Spacing.
7(Optional) Select to apply some specific annotation:
■Presets on page 2072 - defined in the ANNO_CODE sheet of the Circuit
Builder spreadsheet file that map to the selected circuit.
Use Circuit Builder | 693
■Reference an existing circuit on page 723 - reference values from an
existing circuit selected from a list of circuits extracted from the active
project. The state of the Retag new components check box controls
the retagging of the components within the new circuit. Values can
include catalog assignment, component descriptions, annotation
values, and more.
NOTE This option is not available if the circuit is selected from the History
list.
8Select Insert.
9Select an insertion point location on the drawing.
Configure a power feed circuit
1Click Schematic tab ➤ Insert Components panel ➤ Circuit Builder
drop-down ➤ Circuit Builder.
2Select the circuit from the Circuits list. For example:
Circuits: 3ph Power Feed, Horizontal - Single feed.
NOTE You can also select History to display the list of previously inserted
circuits.
3(Optional) Enter a Circuit Scale. This value sets an insertion scale value
for the circuit template.
4(Optional) Enter a Component Scale. This value sets an insertion scale
value for the individual components inserted while building the circuit.
5(Optional) Enter a Horizontal Rung Spacing.
6(Optional) Enter a Vertical Rung Spacing.
7(Optional) Select to apply some specific annotation:
■Presets on page 2072 - defined in the ANNO_CODE sheet of the Circuit
Builder spreadsheet file that map to the selected circuit.
■Reference an existing circuit on page 723 - reference values from an
existing circuit selected from a list of circuits extracted from the active
project. The state of the Retag new components check box controls
694 | Chapter 9 Circuits

the retagging of the components within the new circuit. Values can
include catalog assignment, component descriptions, annotation
values, and more.
NOTE This option is not available if the circuit is selected from the History
list.
8Select Configure.
9Select an insertion point location on the drawing. The template drawing
for the power feed is inserted at the specified location. The template
drawing contains marker blocks, with instructions for building the circuit,
and the circuit wiring.
The dialog box has three sections, Circuit Elements, Select, and Setup &
Annotations. The options differ depending on the circuit selected.
10 Select a circuit element, for example:
Circuit Elements: Load
The options for this circuit element, driven from the circuit builder
spreadsheet, are displayed in the Select section.
11 Select the option for this circuit element, for example:
Load: Generic box
12 Select another circuit element, for example:
Circuit Elements: Load Setup
13 Click the Load Setup Browse button to display the Select Load
dialog box. This dialog box is where you select the load from the electrical
standards database. For other components, the Catalog lookup dialog
box displays. You can also type in values for each entry.
14 Click the Wire Setup Browse button to display the Wire Size Lookup
dialog box. This dialog box is where you select or adjust the wire size
based on an analysis of the load and various installation parameters. You
can also type in values for each entry.
15 Repeat to configure each circuit element.
Use Circuit Builder | 695
16 (Optional) Enter a name for the circuit. This name is added to the History
list on the Circuit Selection dialog box and makes it easier to find for
future re-insertion.
17 Select from one of three ways to insert the circuit elements.
Click to insert just the highlighted circuit element.
Click to insert all the circuit elements up to and including the
highlighted circuit element.
Click to insert all the circuit elements.
NOTE If the circuit contains a nested template, go back and configure the
circuit elements in the nested template.
18 Select Done. The circuit is finalized by:
■Remaining untagged child components are matched up with parent
components and tags are assigned.
■The selection information for the circuit is applied to the main
component of the circuit.
■The remaining marker blocks are removed from the circuit template
for any circuit elements not inserted.
Configure a dual power feed circuit
A dual power feed circuit has two distinct circuits running off the same bus-tap.
Each circuit can be independently configured.
1Click Schematic tab ➤ Insert Components panel ➤ Circuit Builder
drop-down ➤ Circuit Builder.
696 | Chapter 9 Circuits

2Select the circuit from the Circuits list. For example:
Circuits: 3ph Power Feed, Horizontal - Dual feed.
NOTE You can also select History to display the list of previously inserted
circuits.
3(Optional) Enter a Circuit Scale. This value sets an insertion scale value
for the circuit template.
4(Optional) Enter a Component Scale. This value sets an insertion scale
value for the individual components inserted while building the circuit.
5(Optional) Enter a Horizontal Rung Spacing.
6(Optional) Enter a Vertical Rung Spacing.
7(Optional) Select to apply some specific annotation:
■Presets on page 2072 - defined in the ANNO_CODE sheet of the Circuit
Builder spreadsheet file that map to the selected circuit.
■Reference an existing circuit on page 723 - reference values from an
existing circuit selected from a list of circuits extracted from the active
project. The Retag new components check box controls the retagging
of the components. Values can include catalog assignment, component
descriptions, annotation values, and more.
NOTE This option is not available if the circuit is selected from the History
list.
8Select Configure.
9Select an insertion point location on the drawing. The template drawing
for the dual power feed is inserted at the specified location. The template
drawing contains marker blocks, with instructions for building the circuit,
and the circuit wiring.
The dialog box has three sections, Circuit Elements, Select, and Setup &
Annotations. The options differ depending on the circuit selected.
NOTE The circuit elements with a “(2)” prefix make up the second circuit.
10 Select a circuit element, for example:
Circuit Elements: Load
Use Circuit Builder | 697

The options for this circuit element, driven from the circuit builder
spreadsheet, are displayed in the Select section.
11 Select the option for this circuit element, for example:
Load: Generic box
12 Select another circuit element, for example:
Circuit Elements: Load Setup
13 Click the Load Setup Browse button to display the Select Load
dialog box. This dialog box is where you select the load from the electrical
standards database. For other components, the Catalog lookup dialog
box displays. You can also type in values for each entry.
14 Click the Wire Setup Browse button to display the Wire Size Lookup
dialog box. This dialog box is where you select or adjust the wire size
based on an analysis of the load and various installation parameters. You
can also type in values for each entry.
15 Repeat to configure each circuit element including the ones with the
“(2)” prefix indicating they are part of the second circuit.
16 (Optional) Enter a name for the circuit. This name is added to the History
list on the Circuit Selection dialog box and makes it easier to find for
future re-insertion.
17 Select from one of three ways to insert the circuit elements.
Click to insert just the highlighted circuit element.
Click to insert all the circuit elements up to and including the
highlighted circuit element.
Click to insert all the circuit elements.
698 | Chapter 9 Circuits

NOTE If the circuit contains a nested template you, go back and configure
the circuit elements in the nested template.
18 Select Done. The circuit is finalized by:
■Remaining untagged child components are matched up with parent
components and tags are assigned.
■The selection information for the circuit is applied to the main
component of the circuit.
■The remaining marker blocks are removed from the circuit template
for any circuit elements not inserted.
Insert a one-line circuit
Builds a one-line circuit based on your selection from a list of available circuits
and circuit elements.
Circuit Builder builds the circuit dynamically and annotates the circuit.
Annotation values are extracted from a database based on engineering
standards, motor horsepower, and supply voltage.
NOTE Add the one-line library search path on page 204 to the project so Circuit
Builder can find the one-line circuit templates. By default, the one-line library is
installed in a 1- folder under the schematic library folder.
1Click Schematic tab ➤ Insert Components panel ➤ Circuit Builder
drop-down ➤ Circuit Builder.
2Select a one-line circuit from the Circuits list. For example:
Circuits: One-line Motor Circuit, Vertical - FVNR - non reversing.
NOTE You can also select History to display the list of previously inserted
circuits.
3(Optional) Enter a Circuit Scale. This value sets an insertion scale value
for the circuit template.
4(Optional) Enter a Component Scale. This value sets an insertion scale
value for the individual components inserted while building the circuit.
Use Circuit Builder | 699
5(Optional) Select to apply some specific annotation:
■Presets on page 2072 - defined in the ANNO_CODE sheet of the Circuit
Builder spreadsheet file that map to the selected circuit.
■Reference an existing circuit on page 723 - reference values from an
existing circuit selected from a list of circuits extracted from the active
project. The state of the Retag new components check box controls
the retagging of the components within the new circuit. Values can
include catalog assignment, component descriptions, annotation
values, and more.
NOTE This option is not available if the circuit is selected from the History
list.
6Select Insert.
A circuit inserted from the Circuits list contains all default circuit elements
as defined in the circuit template and circuit builder spreadsheet. See Set
circuit element defaults on page 2075 to change default circuit setup.
7Select an insertion point location on the drawing.
Configure a one-line circuit
Configures and builds a one-line circuit based on your selection from a list of
available circuits and circuit elements.
NOTE Add the one-line library search path on page 204 to the project so Circuit
Builder can find the one-line circuit templates. By default, the one-line library is
installed in a 1- folder under the schematic library folder.
1Click Schematic tab ➤ Insert Components panel ➤ Circuit Builder
drop-down ➤ Circuit Builder.
2Select the circuit from the Circuits list. For example:
Circuits: One-line Motor Circuit, Vertical - FVNR - non reversing
NOTE You can also select History to display the list of previously inserted
circuits.
700 | Chapter 9 Circuits

3(Optional) Enter a Circuit Scale. This value sets an insertion scale value
for the circuit template.
4(Optional) Enter a Component Scale. This value sets an insertion scale
value for the individual components inserted while building the circuit.
5(Optional) Select to apply some specific annotation:
■Presets on page 2072 - defined in the ANNO_CODE sheet of the Circuit
Builder spreadsheet file that map to the selected circuit.
■Reference an existing circuit on page 723 - reference values from an
existing circuit selected from a list of circuits extracted from the active
project. The state of the Retag new components controls the retagging
of the components within the new circuit. Values can include catalog
assignment, component descriptions, annotation values, and more.
NOTE This option is not available if the circuit is selected from the History
list.
6Select Configure.
7Select an insertion point location on the drawing. The template drawing
for the selected circuit is inserted at the specified location. The template
drawing contains marker blocks, with instructions for building the circuit,
and the circuit wiring.
The dialog box has three sections, Circuit Elements, Select, and Setup &
Annotations. The options differ depending on the circuit and circuit
element selected.
8Select a circuit element, for example:
Circuit Elements: Motor Setup
9 Click the Motor Setup Browse button to display the Select Motor
dialog box. This dialog box is where you select the motor and horsepower
or KW size from the electrical standards database. For other components,
the Catalog lookup dialog box displays. You can also type in values for
each entry.
10 Click the Wire Setup Browse button to display the Wire Size Lookup
dialog box. This dialog box is where you select or adjust the wire size
Use Circuit Builder | 701
based on an analysis of the load and various installation parameters. You
can also type in values for each entry.
11 Select a circuit element, for example:
Circuit Elements: Disconnecting means
The options for this circuit element, defined in the circuit builder
spreadsheet, are displayed in the Select section.
12 Select the options for this circuit element, for example:
Main Disconnect: Disconnect switch and fuses
13 (Optional) Modify values in the Setup & Annotations section for the
selected circuit element.
NOTE Depending upon how this circuit element is set up in the circuit builder
spreadsheet, this section may not be available for circuit element modification.
Select the Browse button to make a part number assignment from
the Catalog lookup dialog box. The “TABLE” entry for the component
in the circuit builder spreadsheet defines the catalog lookup table. You
can also type in values for each entry.
14 Repeat to configure each circuit element.
15 (Optional) Enter a name for the circuit. This name is added to the History
list on the Circuit Selection dialog box and makes it easier to find for
future re-insertion.
16 Select from one of three ways to insert the circuit elements.
Click to insert just the highlighted circuit element.
Click to insert all the circuit elements up to and including the
highlighted circuit element.
702 | Chapter 9 Circuits
Click to insert all the circuit elements.
NOTE If the circuit contains a nested template, go back and configure the
circuit elements in the nested template.
17 Select Done. The circuit is finalized by:
■Remaining untagged child components are matched up with parent
components and tags are assigned.
■The selection information for the circuit is applied to the main
component of the circuit.
■The remaining marker blocks are removed from the circuit template
for any circuit elements not inserted.
Configure a dual one-line circuit
NOTE Add the one-line library search path on page 204 to the project so Circuit
Builder can find the one-line circuit templates. By default, the one-line library is
installed in a 1- folder under the schematic library folder.
1Click Schematic tab ➤ Insert Components panel ➤ Circuit Builder
drop-down ➤ Circuit Builder.
2Select the circuit from the Circuits list. For example:
Circuits: One-line Motor Circuit, Vertical - Dual FVNR - non reversing
NOTE You can also select History to display the list of previously inserted
circuits.
3(Optional) Enter a Circuit Scale. This value sets an insertion scale value
for the circuit template.
4(Optional) Enter a Component Scale. This value sets an insertion scale
value for the individual components inserted while building the circuit.
Use Circuit Builder | 703
5(Optional) Select to apply some specific annotation:
■Presets on page 2072 - defined in the ANNO_CODE sheet of the Circuit
Builder spreadsheet file that map to the selected circuit.
■Reference an existing circuit on page 723 - reference values from an
existing circuit selected from a list of circuits extracted from the active
project.The state of the Retag new components controls the retagging
of the components within the new circuit. Values can include catalog
assignment, component descriptions, annotation values, and more.
NOTE This option is not available if the circuit is selected from the History
list.
6Select Configure.
7Select an insertion point location on the drawing. The template drawing
for the selected circuit is inserted at the specified location. The template
drawing contains marker blocks, with instructions for building the circuit,
and the circuit wiring.
The dialog box has three sections, Circuit Elements, Select, and Setup &
Annotations. The options differ depending on the circuit and circuit
element selected.
NOTE The circuit elements with a “(2)” prefix make up the second circuit.
8Select a circuit element, for example:
Circuit Elements: Motor Setup
9 Click the Motor Setup Browse button to display the Select Motor
dialog box. This dialog box is where you select the motor and horsepower
or KW size from the electrical standards database. For other components,
the Catalog lookup dialog box displays. You can also type in values for
each entry.
10 Select the Wire Setup Browse button to display the Wire Size Lookup
dialog box. This dialog box is where you select or adjust the wire size
based on an analysis of the load and various installation parameters. You
can also type in values for each entry.
11 Select a circuit element, for example:
704 | Chapter 9 Circuits
Circuit Elements: Disconnecting means
The options for this circuit element, defined in the circuit builder
spreadsheet, are displayed in the Select section.
12 Select the options for this circuit element, for example:
Main Disconnect: Disconnect switch and fuses
13 (Optional) Modify values in the Setup & Annotations section for the
selected circuit element.
NOTE Depending upon how this circuit element is set up in the circuit builder
spreadsheet, this section may not be available for circuit element modification.
Select the Browse button to make a part number assignment from
the Catalog lookup dialog box. The “TABLE” entry for the component
in the circuit builder spreadsheet defines the catalog lookup table. You
can also type in values for each entry.
14 Repeat to configure each circuit element including the ones with the
“(2)” prefix indicating they are part of the second circuit.
15 (Optional) Enter a name for the circuit. This name is added to the History
list on the Circuit Selection dialog box for future insertion.
16 Select from one of three ways to insert the circuit elements.
Click to insert just the highlighted circuit element.
Click to insert all the circuit elements up to and including the
highlighted circuit element.
Click to insert all the circuit elements.
NOTE If the circuit contains a nested template, go back and configure the
circuit elements in the nested template.
Use Circuit Builder | 705
17 Select Done. The marker blocks are removed from the circuit template
for any circuit elements not inserted.
Circuit Selection
Select to insert a circuit. A circuit is built based on a circuit template assigned
to the selected circuit type. The rung spacing of the circuit adjusts to match
the rung spacing setting for the drawing (Drawing properties: drawing format
tab on page 231). Each individual device is inserted at a location predefined
on the circuit template. Devices are annotated based on values in the Circuit
Builder spreadsheet. The spreadsheet file name is displayed near the top of
the Circuit Selection dialog box.
Ribbon: Schematic tab ➤ Insert Components panel ➤ Circuit Builder
drop-down ➤ Circuit Builder.
Toolbar: Main Electrical
Menu: Components ➤ Circuit Builder
Command entry: AECIRCBUILDER
The tree structure is created by reading the ACE_CIRCS sheet of
the circuit builder spreadsheet and constructing the tree from
Circuits
the data found in columns CATEGORY and TYPE. The default
spreadsheet file is ace_circuit_builder.xls.
The tree has two levels. The first level is the circuit category, for
example 3-phase Motor Circuit. The second level is the circuit
type, for example Horizontal - Full Voltage Non-reversing.
Expands the dialog box to show the history of configured and
inserted circuits.
History>>
Collapses the dialog box to hide the history of configured and
inserted circuits.
History<<
Select a previously inserted circuit, including all annotation values,
to insert or configure. Select a circuit from this history list and
History
then select Insert or Configure. Select Delete to remove the dis-
played circuit from the history listing.
706 | Chapter 9 Circuits

NOTE This option is not available if Reference existing circuit is
selected.
Sets an insertion scale value for the entire template.
Circuit Scale
Sets an insertion scale value for the individual compon-
ents inserted while building the circuit.
Component Scale
Sets the 3-phase horizontal rung spacing for the circuit.
The ladder rung spacing for the drawing is the default
value.
Horizontal Rung Spacing
Sets the 3-phase vertical rung spacing for the circuit.
The multi-wire spacing for the drawing is the default
value.
Vertical Rung Spacing
Specifies to ignore special annotation options.
None
Specifies whether to use the preset annotation values
from the circuit builder spreadsheet.
Presets
Displays the Annotation dialog box. Use this dialog
box to specify which annotation values from the
spreadsheet ANNO_CODE sheet to apply.
Presets - List
Specifies whether to use annotation values from an
existing circuit.
Reference existing circuit
NOTE This option is not available if the circuit is selected from
the history list. Select <Default> from the History list to re-enable
the Reference existing circuit option.
Displays the Existing Circuits dialog box showing the
existing circuits found in the active project. Select a
Reference existing circuit - List
circuit from the list. The values from the selected circuit
are applied to the new circuit.
When Reference existing circuit is selected, specifies
whether to retag the components inserted as part of
the new circuit.
Retag new components
Inserts the circuit with all default circuit elements and settings.Insert
Use Circuit Builder | 707

Opens the Circuit Configuration dialog box. Modify the options
for the circuit and insert it.
Configure
Annotation Presets
Predefine component attribute values in the ANNO_CODE on page 2072 sheet
of the Circuit Builder spreadsheet file. The values are applied to the
components when the circuit is inserted.
Specifies which preset annotation values to apply. Double click
to edit a value. Highlight a row before selecting Drawing or Pro-
ject to display a dialog with a list of used values for the attribute.
Selection grid
Clears all selections.
Clear all
Displays a dialog box with a list of values used on the
active drawing for the highlighted attribute.
Drawing
Displays a dialog box with a list of values used within
the project for the highlighted attribute.
Project
Circuit Configuration
This dialog box provides options to configure a circuit before inserting it. You
can configure the circuit both in terms of the physical devices and the device
annotation values.
Ribbon: Schematic tab ➤ Insert Components panel ➤ Circuit Builder
drop-down ➤ Circuit Builder.
Toolbar: Main Electrical
Menu: Components ➤ Circuit Builder
Command entry: AECIRCBUILDER
On the Select Circuit dialog box, select a circuit and click Configure.
Enter a name for the circuit. This name is added to the History
list on the Circuit Selection dialog box for future insertion.
Name
708 | Chapter 9 Circuits
Displays the circuit elements for the selected circuit for configur-
ing. The tree structure is created dynamically based on the circuit
template. Select a circuit element to configure it.
Circuit Elements
Select the options for the highlighted circuit element.Select
NOTE The displayed options, along with default values, are
defined in the circuit builder spreadsheet.
Enter device annotation values, rung spacing, and wire type for
the circuit.
Setup & Annotation
NOTE The displayed values for the circuit are based on a motor
or load lookup in the electrical standards database.
Inserts only the highlighted circuit element.
Inserts all the circuit elements up to and including the
highlighted circuit element.
Inserts all the circuit elements.
Reverses the most recently inserted circuit element.
Displays the Select Motor or Select Load dialog box. Use this
dialog box to specify settings by selecting from a list of predefined
parameters.
Motor or Load Setup
Temporarily closes the dialog box so that you can select an exist-
ing motor or power feed and reuse the existing values.
Motor or Load Setup
Use Circuit Builder | 709
Displays the Wire Size Lookup dialog box. Use this dialog to select
a wire size based on load and various other parameters.
Wire Setup
Select Motor
Browse the motor lookup table in the electrical standards database,
ace_electrical_standards.mdb, and select the appropriate motor and annotation
values. You can also modify the motor lookup table from this dialog box.
Ribbon: Schematic tab ➤ Insert Components panel ➤ Circuit Builder
drop-down ➤ Circuit Builder.
Toolbar: Main Electrical
Menu: Components ➤ Circuit Builder
Command entry: AECIRCBUILDER
On the Select Circuit dialog box, select a circuit, click Configure, and then
select the Motor Setup Browse button.
Filter the listing based on motor type. Select <All> from the list
to turn off filtering for this field.
Type
Filter the listing based on motor voltage. Select <All> from the
list to turn off filtering for this field.
Voltage (V)
Filter the listing based on motor frequency. Select <All> from the
list to turn off filtering for this field.
Frequency (HZ)
Select a motor to pass the values back to the Circuit Configuration
dialog box.
Selection grid
Specifies whether you can edit or select the values.
Values you edit are written back to the electrical
standards database file.
Edit or add records
710 | Chapter 9 Circuits
Temporarily closes the dialog box so that you can select
an existing motor symbol and reuse the values from
the motor.
Displays or sets the full load amps (FLA) value. The FLA
value is multiplied by the FLA Multiplier value to cal-
culate the Maximum load value.
FLA
Sets the multiplier factor. The FLA value is multiplied
by this value to calculate the Maximum load value.
FLA multiplier
Displays the calculated maximum load based on the
product of FLA and FLA multiplier.
Maximum load
NOTE The initial default values used for Voltage and the FLA multiplier are
controlled from the active OPT table in the electrical standards database file.
Select Load
Browse the load table, named FEED in the electrical standards database file,
ace_electrical_standards.mdb, and select the appropriate load and annotation
values. You can also modify the lookup table from this dialog box.
Ribbon: Schematic tab ➤ Insert Components panel ➤ Circuit Builder
drop-down ➤ Circuit Builder.
Toolbar: Main Electrical
Menu: Components ➤ Circuit Builder
Command entry: AECIRCBUILDER
On the Select Circuit dialog box, select a power feed circuit, click Configure,
and then select the Load Setup Browse button.
Filter the listing based on load type. Select <All> from the list to
turn off filtering for this field.
Type
Filter the listing based on voltage. Select <All> from the list to
turn off filtering for this field.
Voltage (V)
Use Circuit Builder | 711

Filter the listing based on phase. Select <All> from the list to turn
off filtering for this field.
Phase
Select a load to pass the values back to the Circuit Configuration
dialog box.
Selection grid
Specifies whether you can edit or select the values. Values you
edit are written back to the electrical standards database file.
Edit or add records
Temporarily closes the dialog box so that you can select
an existing power feed load symbol and reuse its values.
Displays or sets the full load amps (FLA) value. The FLA value is
multiplied by the FLA Multiplier value to calculate the Maximum
load value.
FLA
Sets the multiplier factor. The FLA value is multiplied by this value
to calculate the Maximum load value.
FLA multiplier
Displays the calculated maximum load based on the product of
FLA and FLA multiplier.
Maximum load
NOTE The initial default values used for Voltage and the FLA multiplier are
controlled from the active OPT table in the electrical standards database file.
Wire Size Lookup
Specify the wire parameters and select a wire size from a list of wire sizes that
meet or exceed the parameters. Estimated energy losses per wire size can
provide valuable information in this selection.
Ribbon: Schematic tab ➤ Insert Components panel ➤ Circuit Builder
drop-down ➤ Circuit Builder.
Toolbar: Main Electrical
Menu: Components ➤ Circuit Builder
Command entry: AECIRCBUILDER
712 | Chapter 9 Circuits
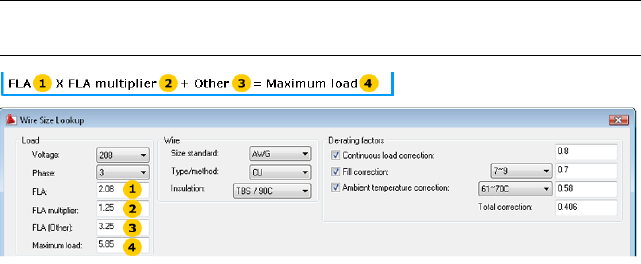
On the Select Circuit dialog box, select a circuit, click Configure, enter the
Motor Setup parameters, and then select the Wire Setup Browse button.
Load
Sets the voltage for the wire conductor.
Voltage
Sets the phase of the electrical power.
Phase
Sets the full load amps carried by the wire conductors.
FLA
Sets the value that is multiplied by the FLA value to
calculate the maximum load for the wire conductors.
FLA multiplier
Sets the amp value of any additional loads to be com-
bined with the main motor or load and fed from this
Other
common branch circuit set of conductors. This value
is added to the product of the FLA times FLA multiplier.
Displays the calculated maximum load for the conduct-
ors. It is based on the FLA (Other) value added to the
product of the FLA times the FLA multiplier value.
Maximum load
NOTE Controls are disabled if the values are predefined on the Circuit
Configuration dialog.
Wire
Sets the wire standard. Directs Circuit Builder to use
specific tables from the electrical standards database
Size standard
for that wire size standard. The available values are ex-
tracted from the electrical standards database table
names.
Use Circuit Builder | 713
Sets the wire metal type. Directs Circuit Builder to use
specific tables from the electrical standards database
Type/method
for that wire metal type. The available values are extrac-
ted from the electrical standards database table names.
Sets the wire insulation and temperature rating type.
The available values are extracted from the electrical
standards database file.
Insulation
De-rating factors
Specifies whether to include a continuous load de-rating
factor in the calculation of the wire ampacity. For ex-
ample, continuous equals three hours or longer.
Continuous load correction
When Continuous load correction is on, sets the de-
rating factor. This value is used in the total de-rating
factor used to calculate wire ampacity.
Specifies whether to include a fill correction de-rating
factor in the calculation of the wire ampacity.
Fill correction
When Fill correction is on, sets the range of current
carrying conductors that are grouped in a common
conduit, raceway, or cable.
When Fill correction is on, sets the de-rating factor for
the selected fill range. This value is used in the total
de-rating factor used to calculate wire ampacity.
Specifies whether to use a de-rating factor for an elev-
ated ambient temperature.
Ambient temperature correc-
tion
When Ambient temperature correction is on, sets the
range of maximum ambient temperature.
When Ambient temperature correction is on, sets the
correction factor value. This value is used in the total
de-rating factor used to calculate wire ampacity.
Displays the calculated total correction factor based on
the individual de-rating settings. You can manually set
Total correction
the total de-rating value. The value is multiplied with
the defined ampacity to calculate the actual de-rated
ampacity of the wire.
714 | Chapter 9 Circuits
Parameters
Specifies whether to consider the length of the wire
run in calculation of the voltage drop.
Run distance
When Run distance is on, sets the distance.
When Run distance is on, sets the distance units.
Units
When Run distance is on, sets the type of conduit or
raceway which affects the voltage drop calculation. The
Via
available types are extracted from the electrical stand-
ards database file.
When Run distance is on, sets the power factor value
used to calculate the voltage drop.
Power factor
Specifies whether to apply a maximum percent voltage
drop limit on what size wires are appropriate.
Maximum % voltage drop
When Maximum voltage drop is on, sets the acceptable
maximum percentage of voltage drop along the wire
length.
Paralleled wires
Specifies whether to include paralleled wire options in
the display. When on, the display includes entries
Include paralleled wire op-
tions
consisting of two or more smaller size conductors per
phase to meet the ampacity requirement of the load.
When Include paralleled wire options is on, sets the
maximum conductors per phase to use in the calcula-
tion and display.
Maximum paralleled wire
count
When Include paralleled wire options is on, sets the
minimum wire size to use for paralleled conductor
calculations.
Minimum paralleled wire size
Cost per kwh
Sets the cost per kilowatt hour used in the wire loss calculations.
Use Circuit Builder | 715

Wire grid
Displays the available wire conductors, extracted from the electrical standards
database, for selection. Wires that do not meet the ampacity requirements are
shown in red.
Wire sizes extracted from the wire ampacity table in the electrical
standards database.
Size
When Include Paralleled Wire options is on, indicates the number
of conductors per phase.
Count
When Include Paralleled Wire options is on, indicates the fill cal-
culation which takes into account the fill correction.
Fill
NOTE This value is displayed regardless of the state of the Fill
correction check box when the Include Paralleled Wire options
is on.
Calculated ampacity for the conductor. It is the ampacity, extrac-
ted from the wire ampacity table, multiplied by the total correc-
tion de-rating factor.
Ampacity
The Maximum load value divided by the Ampacity. It indicates
if the wire is close to being fully loaded.
%Ampacity
The calculated voltage drop from one end of the power run to
the other. It can only be calculated if the conductor length is
defined.
Voltage Drop
716 | Chapter 9 Circuits
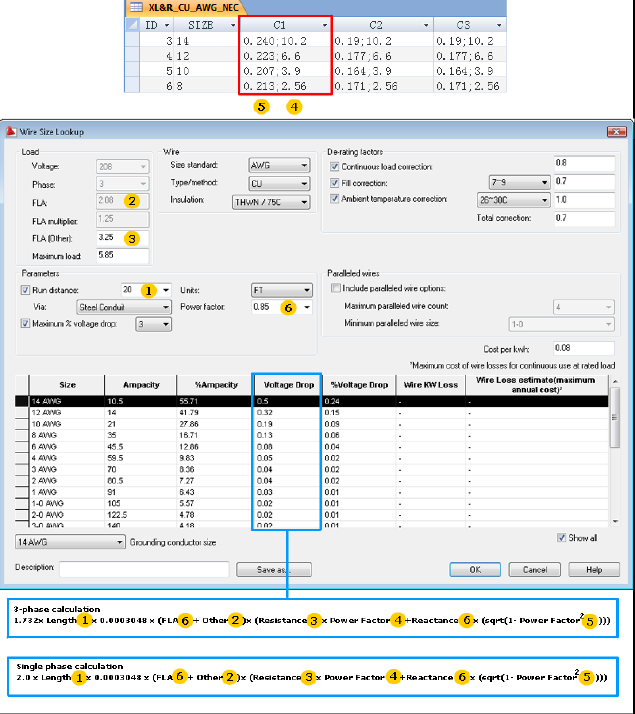
The Voltage Drop value divided by the applied voltage and mul-
tiplied by 100.
%Voltage Drop
Calculated from the Voltage Drop and FLA.Wire KW Loss
Use Circuit Builder | 717
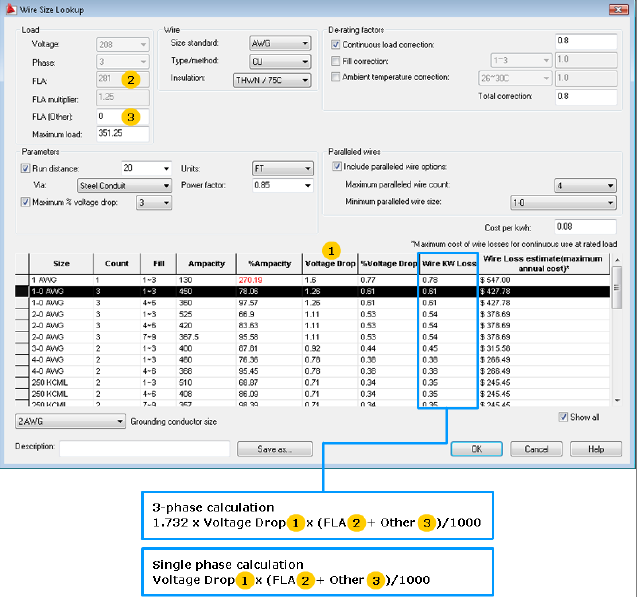
Maximum cost of wire losses for continuous use at rated load.Wire Loss estimate (maximum
annual cost)
718 | Chapter 9 Circuits
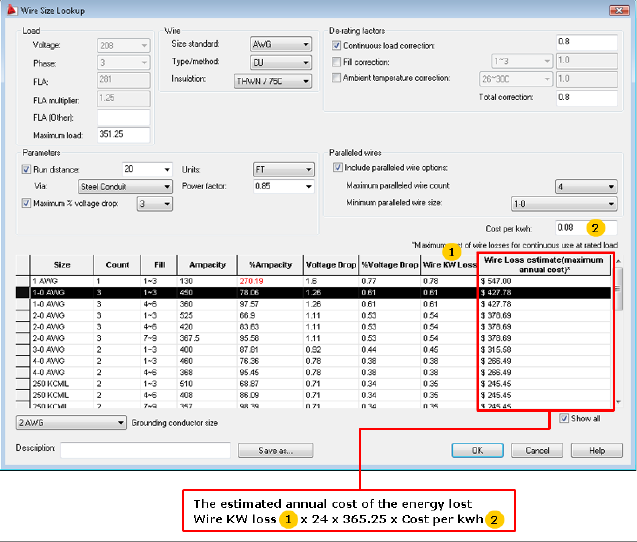
Specifies whether to display entries where the %Ampa-
city value is greater than 100%. When Show all is on,
Show all
values that are greater than 100% are shown in red.
Entries >= 300% ampacity are never shown in the list.
Grounding conductor size
Displays the minimum size grounding conductor based on the FLA of the
motor or power feed. Select a larger conductor size from the list.
The suggested wire conductor size is determined from the appropriate AMPG*
table in the electrical standards database on page 663 file.
Save as
Saves the current settings, wire options, and identifying
values from the Select Motor dialog box as an external
file.
Save as
Use Circuit Builder | 719

Assigns a description for the parameters and wire op-
tions. Uses this description when you select Save as to
Description
save the current settings and wire options as an external
file.
Recalculate wire size
Recalculating wire size
Displays Wire Size Lookup dialog box with previous calculated data for selected
motor or power feed load representation.
1Click Schematic tab ➤ Insert Components panel ➤ Circuit Builder
drop-down ➤ Recalculate Wire Size.
2Select the motor or power feed load symbol.
The Wire Size Lookup dialog box displays.
NOTE If the necessary load xdata does not exist on the selected motor or
load symbol, the Select Motor or Select Load dialog box displays first.
3Adjust the parameters as necessary.
4Select a wire conductor size from the list.
5Select a grounding conductor size. A suggested minimum size is
preselected. This is controlled by the appropriate AMPG* table in the
electrical standards database file.
6(Optional) Enter a description for the parameters, click Save As, and enter
a name for the output file
The input parameters, wire sizes, and selected wire size are saved to an
external file. This can be either a new file or appended to an existing file
in xls, csv, or text format.
7Click OK.
The new wire layer name is determined, preserving any color substring in the
existing layer name, and the connected wires are updated.
Recalculate wire size
720 | Chapter 9 Circuits

Displays Wire Size Lookup dialog box with previous calculated data for selected
motor or power feed load representation.
Ribbon: Schematic tab ➤ Insert Components panel ➤ Circuit Builder
drop-down ➤ Recalculate Wire Size.
Toolbar: Main Electrical
Menu: Wires ➤ Recalculate Wire Size
Command entry: AEEDITWS
When Circuit Builder inserts a circuit, the parameters used to size the wires
are saved on the motor or load symbol as xdata. To recalculate the wire size,
select the motor or load symbol when prompted. The Wire Size Lookup on
page 712 dialog box displays the existing values as defaults. Make design
decisions, adjusting parameters as needed, and select an appropriate wire size.
The wire layer name is updated to reflect the selected size.
NOTE If the xdata does not exist on the selected motor or load symbol, the Select
Motor or Select Load dialog box displays first.
Reference an existing circuit
When a new circuit is inserted, you can reference an existing circuit picked
from a list of circuits pulled from the active project. The components, values,
descriptions, and tag assignments from the selected circuit, become defaults
for the new circuit.
This feature can be especially useful when inserting 3-phase circuits based on
existing one-line circuits. The components for each circuit element for the
one-line circuit become the default for the new 3-phase circuit. The tag
assignments and values are pulled across from the referenced one-line circuit.
Alternately, new component tags are generated if the option “Retag new
component” is selected.
Referencing an existing circuit uses xdata (AutoCAD Extended Entity Data)
added on the motor or load symbol by Circuit Builder when the circuit is
inserted.
VIA_WD_CB_CIRCCODES - semi-colon delimited list of template marker
codes, inserted component handles, and spreadsheet UI_VAL selection
Reference an existing circuit | 721

values. The template marker code maps the values from the components
in the existing circuit to the components in the new circuit.
VIA_WD_CB_CIRCPARAMS - comma-delimited list that includes data
returned from any Select Motor or Select Load dialog box.
VIA_WD_CB_CIRCPARAMS2 - list of motor or load wire size assignments.
VIA_WD_CB_CIRCSELECT - comma-delimited list that includes the template
name, spreadsheet file name, and sheet name.
NOTE If there are no existing circuits in the active project that carry the
VIA_WD_CB_CIRCCODE xdata, the “Reference Existing Circuit” option is disabled.
Referencing an existing circuit depends on:
■Marker block CODE values
■UI_VAL values from the circuit builder spreadsheet
Marker Block CODE values
Referencing an existing circuit depends on finding matching marker block
CODE values used in both the referenced circuit and the circuit being inserted
or configured. For example, a referenced one-line circuit used marker block
code Q001 to trigger insertion of the main disconnecting means. The new
three-line schematic circuit being inserted needs to have a marker block code
Q001 marking where the three-pole disconnecting means is to be inserted.
The result is that component values from the referenced circuit are applied
to components in the new circuit when the marker block on page 659 codes
match.
Spreadsheet UI_VAL values
The default circuit element options are controlled by both the CODE value
and the UI_VAL from the circuit codes sheet on page 655 of the circuit builder
spreadsheet. There may be multiple options for a particular CODE value. For
example, the main disconnecting means may have the following options,
each with a UI_VAL assigned.
UI_VALMain Disconnecting Means Option
2Disconnect switch - non-fused
4Disconnect switch and fuses
722 | Chapter 9 Circuits

UI_VALMain Disconnecting Means Option
6Disconnect switch and fuses (time-delay)
8Fuses
10Fuses (time-delay)
12Circuit Breaker
14Circuit Breaker-thermal/inverse-time
16Circuit Breaker-magnetic/instantaneous
0None
For example, the one-line circuit used the Disconnect switch and fuses
(time-delay) option with a UI_VAL of “6”. When the 3-phase circuit references
this one-line circuit, the disconnecting means option with a UI_VAL of “6”
becomes the default. If a matching UI_VAL is not found for a particular marker
block CODE value, the default as defined by the “X” in the UI_DEF column
is used.
Reference an existing circuit
1Click Schematic tab ➤ Insert Components panel ➤ Circuit Builder
drop-down ➤ Circuit Builder.
2Select the circuit from the Circuits list or select History to display the list
of previously configured circuits.
3(Optional) Enter a Circuit Scale. This value sets an insertion scale value
for the circuit template.
4(Optional) Enter a Component Scale. This value sets an insertion scale
value for the individual components inserted while building the circuit.
5(Optional) Enter a Horizontal Rung Spacing.
6(Optional) Enter a Vertical Rung Spacing.
7Select Reference Existing Circuit.
Reference an existing circuit | 723
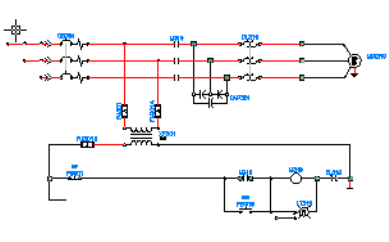
8Select the List button. The Existing Circuits dialog box displays with a
row for each circuit carrying the necessary xdata.
9Select a circuit row.
10 Select OK.
11 Select to Retag new components or use the same tags as the referenced
circuit.
12 Select Insert or Configure. Default circuit elements and values for the
circuit are based on the referenced circuit.
13 Continue as described in Insert a 3-phase circuit on page 688 or Configure
a 3-phase circuit on page 690.
14 Select Done.
Use circuitry
You can save groupings of components, wires, ladders, and other entities as
circuits. Like blocks, saved circuits are inserted as a single object. Saved circuits
save time when your projects require common arrangements of components,
such as motor starters or control circuits.
When you use any of the AutoCAD Electrical Insert Circuit commands to
insert a circuit, the circuit explodes. Wire numbers and component tags are
updated according to the tag settings of the current drawing. However, fixed
tags are not updated.
Copy circuitry
Copies windowed circuitry in the active drawing, and includes automatic
update of the component tag.
724 | Chapter 9 Circuits
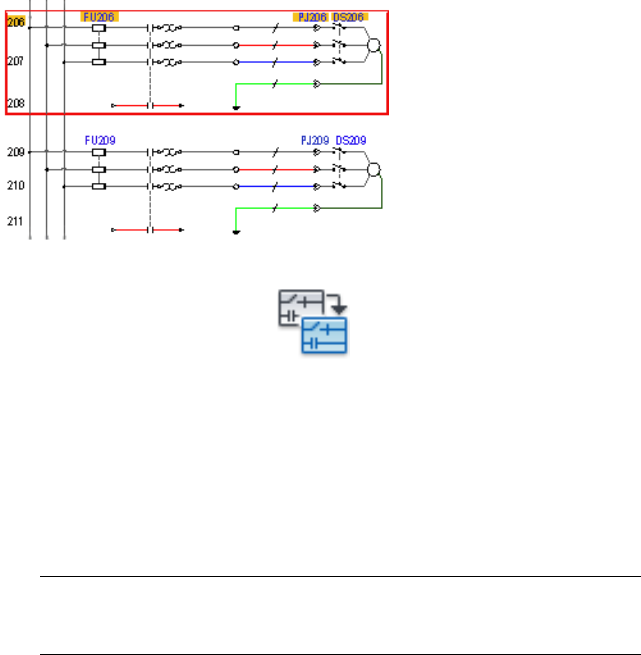
The components are retagged automatically based on their new line reference
locations. If the circuit you copied contains fixed wire numbers or component
tags, you have the options to keep them or update them based on the new
line reference locations.
1Click Schematic tab ➤ Edit Components panel ➤ Circuit
drop-down ➤ Copy Circuit.
2Select the components and wires to copy. Carefully window (from left
to right) around the circuit, making sure to capture the connection wires
and dots that tie in to the vertical bus.
3Press Enter.
4(Optional) Press M to make multiple copies of the selected circuit.
5Select the base point and then the second point for the copy.
NOTE If the circuit you copied contains any fixed wire numbers or component
tags, specify to keep them, blank them out, retag all the found tags, or keep
all orphan contacts.
Move circuitry
Moves windowed circuitry on an active drawing to a new insertion point with
automatic component tag update.
Moves the selected circuit to a specified location. Retags components
automatically based on their new line reference locations, and updates
cross-references.
Use circuitry | 725
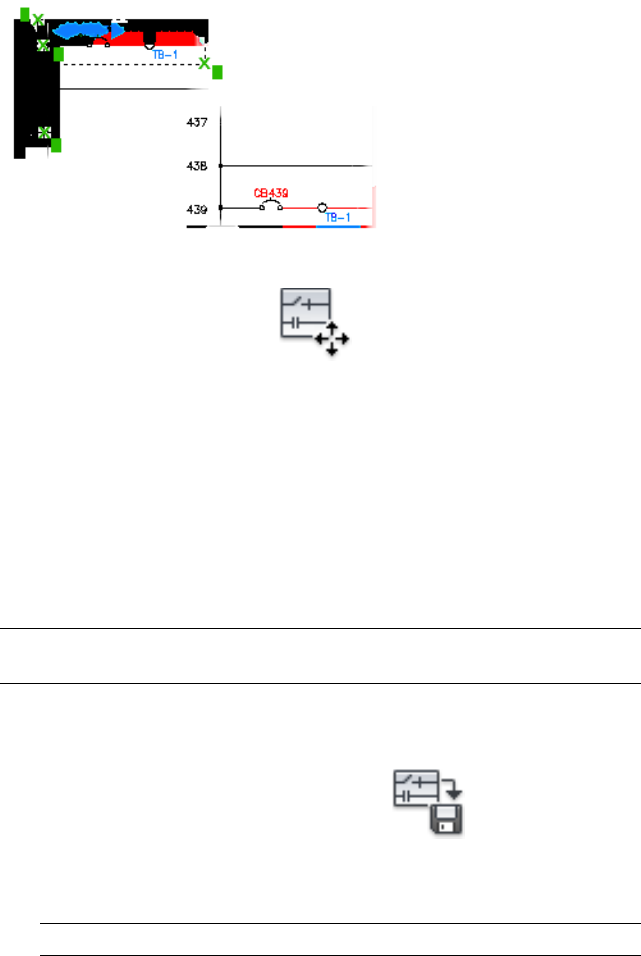
1Click Schematic tab ➤ Edit Components panel ➤ Circuit
drop-down ➤ Move Circuit.
2Select the circuit to move. Carefully window (from left to right) around
the circuit, making sure to capture the connection wires and dots that
tie in to the vertical bus.
3Press Enter.
4Select the base point, and then the second point for the move.
Save circuit portions for later use
Use this tool to save circuit portions for later use.
NOTE You can also use the AutoCAD WBLOCK command to save circuits to disk
and then use the Insert Wblocked Circuit tool to insert the circuit.
1Zoom around the circuit to save so that it fills your screen.
2Click Schematic tab ➤ Edit Components panel ➤ Circuit
drop-down ➤ Save Circuit To Icon Menu.
3On the Save Circuit to Icon Menu dialog box, right-click in the Symbol
Preview window and select Add icon ➤ New circuit.
NOTE You can also click the arrow on the Add tab and select New circuit.
726 | Chapter 9 Circuits

4On the Create New Circuit dialog box, specify:
■Name of the icon.
■Image file to use. Make sure to select Create PNG from current screen
image.
■Circuit drawing file name.
NOTE If you did not zoom in on the circuit in the previous step 1, you
can click Zoom on the Create New Circuit dialog box to zoom around
the circuit to save.
5Click OK.
6Select the insertion base point of the circuit.
7Window around the circuit (from left to right), capturing all the
appropriate components and wiring and press Enter.
AutoCAD Electrical processes the circuit and saves it to your AutoCAD
Electrical user subdirectory.
NOTE You can overwrite the user subdirectory using the wd_usercktdir setting
in the environment (.env) file. For example, if wd_usercktdir is enabled and
set to “N:\Electrical\Circuits”, the new circuit and image file are saved to
N:\Electrical\Circuits.
AutoCAD Electrical creates and adds a new circuit icon (.png) of your
circuit to the bottom of the symbol preview window.
Add existing circuits to the icon menu
Use the Save Circuit to Icon Menu tool to add existing circuits to the icon
menu. You can then select the circuit from the Insert Component dialog box
for insertion into a drawing.
1Click Schematic tab ➤ Edit Components panel ➤ Circuit
drop-down ➤ Save Circuit To Icon Menu.
2On the Save Circuit to Icon Menu dialog box, right-click in the Symbol
Preview window and select Add icon ➤ Add circuit.
NOTE You can also click the arrow on the Add tab and select Add circuit.
Use circuitry | 727
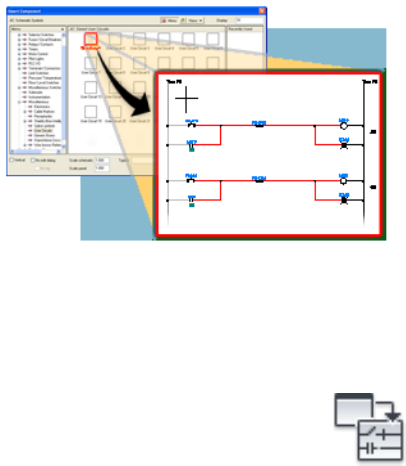
3On the Add Existing Circuit dialog box, specify:
■Name of the icon.
■Image file to use. Make sure to select Create PNG from current screen
image.
■Existing circuit name.
4Click OK.
The existing circuit is added to the bottom of the symbol preview window.
Insert a saved circuit
Inserts a previously saved circuit you select from the icon menu.
After you specify an insertion point, the circuit inserts and the component
tags update. The circuit behaves as if you inserted components and wires one
at a time.
You can insert circuits you saved using the Save Circuit to Icon Menu tool or
circuits that you saved using WBLOCK command in AutoCAD. You can then
edit the component tags, run the wire numbering tool, or add or delete
components and wiring.
1Click Schematic tab ➤ Insert Components panel ➤ Circuit
drop-down ➤ Insert Saved Circuit.
2On the Insert Component dialog box, select the circuit you want to insert
into the drawing from the Symbol Preview window.
3Click OK.
728 | Chapter 9 Circuits
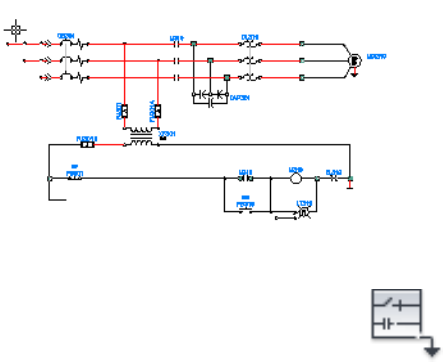
4On the Circuit Scale dialog box, click OK to use the defaults or specify a
scale and then click OK.
5Specify the insertion point on the drawing.
Insert a WBlocked circuit
Inserts WBlocked circuitry (external drawing file) with automatic update of
the component tag.
Inserts a previously saved group of components, wires, ladders, and other
entities as circuits. Saved circuits insert as a single object and are then exploded.
Component tags update according to the tag settings in the drawing. Fixed
tags do not update. Saved circuits provide common arrangements of
components, such as motor starters or control circuits in projects.
1Click Schematic tab ➤ Insert Components panel ➤ Circuit
drop-down ➤ Insert WBlocked Circuit.
2On the Insert WBlocked Circuit dialog box, select the circuit you want
to insert into the drawing and click Open.
3On the Circuit Scale dialog box, click OK to use the defaults or specify a
scale and then click OK.
4Specify the insertion point on the drawing.
Insert component
This icon menu can be modified, expanded, or replaced with a custom menu.
You can change the default icon menu using the Library and Icon Menu Paths
section of the Project properties: project settings tab on page 204. Use the Icon
Use circuitry | 729
Menu Wizard to modify the menu. The default icon menu can also be redefined
in wd.env. Add entry "WD_MENU" for schematic icon menu and "WD_PMENU"
for panel layout icon menu.
Insert Component
Ribbon: Schematic tab ➤ Insert Components panel ➤ Insert Components
drop-down ➤ Icon Menu.
Toolbar: Main Electrical
Menu: Components ➤ Insert Component
Command entry: AECOMPONENT
Multiple Insert (Icon Menu)
Ribbon: Schematic tab ➤ Insert Components panel ➤ Multiple Insert
drop-down ➤ Multiple Insert (Icon Menu).
Toolbar: Main Electrical
Menu: Components ➤ Multiple Insert ➤ Multiple Insert (Icon Menu)
Command entry: AEMULTI
NOTE This dialog box is also accessed when inserting Pneumatic, Hydraulic, or
P&ID components; in-line wire labels; stand-alone cross-reference symbols; cable
markers; and saved circuits.
Select an icon picture or the component type from the Menu tree structure.
The main menu in the tree structure is displayed as the menu heading just
above the menu tree structure.
Tabs ■Menu: Changes the visibility of the Menu tree view.
■Up one level: Displays the menu that is one level before the
current menu in the Menu tree view. This option is unavail-
able if the main menu is selected in the Menu tree view.
730 | Chapter 9 Circuits

■Views: Changes the view display for the Symbol Preview
window and Recently Used window. The current view option
is indicated with a check mark. Options include: Icon with
text, Icon only or List view.
The tree structure is created by reading the icon menu file (.dat).
The tree structure is based on the arrangement order of submenus
defined in the .dat file.
Menu
Displays the symbol and submenu icons corresponding to the
menu or the submenu selected in the Menu tree structure.
Symbol Preview window
Clicking on the icon performs one of the following functions
based on the icon properties as defined by the .dat file:
■Inserts the symbol or circuit onto the drawing
■Executes a command
■Displays a submenu
NOTE When you move the cursor over an icon, the icon name
and block/circuit/command name display as tooltip information.
Displays the last components inserted during the current editing
session; the most recently used icon displays in the top. This list
Recently Used
follows the view options setting in the symbol preview window
(icon only, icon with text or list view). The total number of icons
displayed depends on the value specified in the Display edit box.
Specifies the number of icons to display in the Recently Used list
box. Enter integer numbers only; the default value is 10.
Display
Inserts the icon using a vertical or horizontal orientation. This
value is opposite the default ladder rung orientation for the
drawing.
Vertical/Horizontal
Turns off the Insert/Edit Component dialog box when inserting
symbols onto the drawing. To add component detail later, click
the Edit Component tool, and select the component to edit.
No edit dialog
Inserts the component, untagged (that is, without assigning a
unique Component Tag). The untagged value that displays is the
No tag
TAG1/TAG2 default value for the component. To add component
Use circuitry | 731
detail later, click the Edit Component tool, and select the com-
ponent to edit.
Indicates to display the previously used menu each time you open
the Insert Component dialog box. For example, if you insert a
Always display previously used
menu
push button from the Push Buttons menu, the next time you
open the Insert Component dialog box the Push Button menu
displays by default.
Specifies the component block insertion scale. This defaults to
the value set in the Drawing Properties ➤ Drawing Format dialog
Scale schematic
box. Once set, this value is remembered until reset or until the
drawing editing session ends.
Specifies the footprint insertion scale. This defaults to the value
set in the Drawing Properties ➤ Drawing Format dialog box.
Scale panel
Once set, this value is remembered until reset or until the drawing
editing session ends.
Manually type in the component block to insert.Type it
Browses to and selects the component to insert.Browse
Right-click menus
Options for the Menu tree structure view
Right-click on the main menu or submenu in the Menu tree structure view
to display the following options:
■Expand/Collapse: Toggles the visibility of the menus.
■Properties: Opens a Properties dialog box to view the existing menu or
submenu properties like the menu name, image, or submenu title. Use the
Icon Menu Wizard to change any menu properties.
Options for the Symbol Preview window
Right-click an icon or in empty space in the Symbol Preview window to display
the following options:
■View: Changes the view display for the Symbol Preview window and
Recently Used window. The current view option is indicated with a check
mark. Options include: Icon with text, Icon only or List view.
732 | Chapter 9 Circuits
■Properties: (available for icons only) Opens a Properties dialog box to view
the existing symbol icon properties like the icon name, image, block names
and so on. Use the Icon Menu Wizard to change any icon properties.
Pneumatic, Hydraulic, and P&ID icon menus
The Menu tree structure displays the symbols for the selected component type
(pneumatic, hydraulic, or P&ID). The Insert Pneumatic Component, Insert
Hydraulic Component, and Insert P&ID Component tools are accessed from
the Schematic tab ➤ Insert Components panel on the ribbon or the Extra
Library toolbar.
Insert Pneumatic Component
Insert Hydraulic Component
Insert P&ID Component
Save circuit to icon menu
Saves windowed circuitry to the Saved User Circuits page of the icon menu.
Ribbon: Schematic tab ➤ Edit Components panel ➤ Circuit
drop-down ➤ Save Circuit To Icon Menu.
Toolbar: Circuits
Menu: Components ➤ Save Circuit To Icon Menu
Command entry: AESAVECIRCUIT
Saves windowed portions of circuitry for later reuse. You can save up to 24
circuits at a time in this menu.
Use circuitry | 733
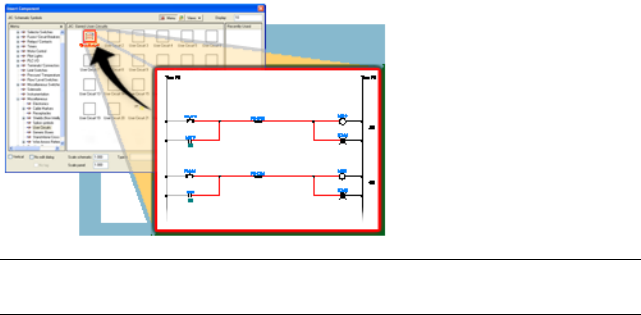
TIP To get a good icon picture for the circuit button, zoom in close to the circuit
you plan to save so that it fills the screen.
The tree structure is created by reading the icon menu file (*.dat).
The tree structure is based on the arrangement order of submenus
defined in the .dat file.
Menu
Tabs ■Menu: Changes the visibility of the Menu tree view.
■Up one level: Displays the menu that is one level before the
current menu in the Menu tree view.
■Views: Changes the view display for the Symbol Preview
window. The current view option is indicated with a check
mark. Options include: Icon with text, Icon only, or List view.
■Add: Modifies the icon menu by adding icons for circuits or
a new submenu.
Displays the symbol images corresponding to the menu or the
submenu selected in the Menu section.
Symbol Preview window
You can drag icons within the Symbol Preview window for re-
arrangement (multiple selection is allowed). For example, place
commonly used icons at the top and rarely used icons at the
bottom of the window.
734 | Chapter 9 Circuits
Symbol Preview right-click menu
Right-click in empty space in the Symbol Preview window to display the
following options:
■View: Changes the view display for the Symbol Preview window. The
current view option is marked with a check mark. Options include: Icon
with text, Icon only, or List view.
■Add Icon: Adds new circuit icons or an existing circuit into the Symbol
Preview window.
■New Submenu: Creates a submenu in the Symbol Preview window and
the tree structure.
■Cut: Removes the selected icon from the Symbol Preview window. You
can then paste the icon into the desired submenu.
■Copy: Makes a copy of the highlighted icon and stores it in the Paste
clipboard. You can then paste the icon into the desired submenu.
■Paste: Adds the copied or cut icon to the highlighted submenu.
■Delete: Deletes the icon.
■Properties: Opens a Properties dialog box to modify the existing symbol
icon properties like the icon name, image, or block names. The existing
data in the *.dat file is overwritten with your changes.
NOTE You can change the user circuit menu number (default is 19) by editing
this command in the CUI editor.
Circuit scale
Use this tool to specify the scale and options for circuit insertion.
Insert Saved Circuit
Ribbon: Schematic tab ➤ Insert Components panel ➤ Circuit
drop-down ➤ Insert Saved Circuit.
Toolbar: Circuits
Menu: Components ➤ Insert Saved Circuit
Use circuitry | 735
Command entry: AESAVEDCIRCUIT
Insert WBlocked Circuit
Ribbon: Schematic tab ➤ Insert Components panel ➤ Circuit
drop-down ➤ Insert WBlocked Circuit.
Toolbar: Circuits
Menu: Components ➤ Insert WBlocked Circuit
Command entry: AEWBCIRCUIT
Specifies the insertion scale.Custom scale
Moves all non-layer "0" line entities to a valid wire
layer.
Move all lines to wire layers
Indicates not to erase wire numbers if they are fixed.Keep all fixed wire numbers
Indicates not to erase the source arrows of the circuit.Keep all source arrows
Updates the layers of the circuit per AutoCAD Elec-
trical assignment.
Update circuit's text layers as required
Leaves the tag ID alone if parent is not found.Don't blank out orphan contacts
736 | Chapter 9 Circuits
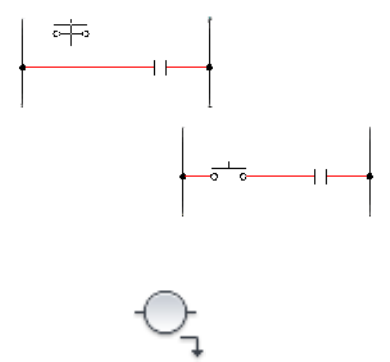
Component Tools
Insert schematic components
Insert schematic components
Inserts a component you select from the icon menu.
Pick an insertion point on the drawing. The orientation of the symbol tries to
match the underlying wire. The wire breaks automatically if the symbol lands
on it or very near it.
1Click Schematic tab ➤ Insert Components panel ➤ Insert Components
drop-down ➤ Icon Menu.
2In the Insert Component dialog box, select the starting orientation for the
component: horizontal or vertical.
10
737
3(Optional) If you want to turn off the Insert/Edit Component dialog box
when inserting symbols onto the drawing select No Edit dialog box.
4(Optional) If you want to insert the component, untagged (for example,
without assigning a unique Component Tag) select No Tag. The untagged
value that displays is the TAG1/TAG2 default value of the component.
5Select the component to insert (such as Push Buttons ➤ Push Button
N.O.) Select an icon picture or the component type from the left-hand
list.
The right-hand column of the menu displays the last ten components
inserted during the current editing session.
6Specify the insertion point in the drawing.
The orientation of the symbol tries to match the underlying wire. The
wire breaks automatically if the symbol lands on it.
7On the Insert/Edit Component dialog box, annotate the component.
8Click OK.
Insert component
This icon menu can be modified, expanded, or replaced with a custom menu.
You can change the default icon menu using the Library and Icon Menu Paths
section of the Project properties: project settings tab on page 204. Use the Icon
Menu Wizard to modify the menu. The default icon menu can also be redefined
in wd.env. Add entry "WD_MENU" for schematic icon menu and "WD_PMENU"
for panel layout icon menu.
Insert Component
Ribbon: Schematic tab ➤ Insert Components panel ➤ Insert Components
drop-down ➤ Icon Menu.
Toolbar: Main Electrical
Menu: Components ➤ Insert Component
Command entry: AECOMPONENT
738 | Chapter 10 Component Tools

Multiple Insert (Icon Menu)
Ribbon: Schematic tab ➤ Insert Components panel ➤ Multiple Insert
drop-down ➤ Multiple Insert (Icon Menu).
Toolbar: Main Electrical
Menu: Components ➤ Multiple Insert ➤ Multiple Insert (Icon Menu)
Command entry: AEMULTI
NOTE This dialog box is also accessed when inserting Pneumatic, Hydraulic, or
P&ID components; in-line wire labels; stand-alone cross-reference symbols; cable
markers; and saved circuits.
Select an icon picture or the component type from the Menu tree structure.
The main menu in the tree structure is displayed as the menu heading just
above the menu tree structure.
Tabs ■Menu: Changes the visibility of the Menu tree view.
■Up one level: Displays the menu that is one level before the
current menu in the Menu tree view. This option is unavail-
able if the main menu is selected in the Menu tree view.
■Views: Changes the view display for the Symbol Preview
window and Recently Used window. The current view option
is indicated with a check mark. Options include: Icon with
text, Icon only or List view.
The tree structure is created by reading the icon menu file (.dat).
The tree structure is based on the arrangement order of submenus
defined in the .dat file.
Menu
Displays the symbol and submenu icons corresponding to the
menu or the submenu selected in the Menu tree structure.
Symbol Preview window
Clicking on the icon performs one of the following functions
based on the icon properties as defined by the .dat file:
■Inserts the symbol or circuit onto the drawing
■Executes a command
■Displays a submenu
Insert schematic components | 739

NOTE When you move the cursor over an icon, the icon name
and block/circuit/command name display as tooltip information.
Displays the last components inserted during the current editing
session; the most recently used icon displays in the top. This list
Recently Used
follows the view options setting in the symbol preview window
(icon only, icon with text or list view). The total number of icons
displayed depends on the value specified in the Display edit box.
Specifies the number of icons to display in the Recently Used list
box. Enter integer numbers only; the default value is 10.
Display
Inserts the icon using a vertical or horizontal orientation. This
value is opposite the default ladder rung orientation for the
drawing.
Vertical/Horizontal
Turns off the Insert/Edit Component dialog box when inserting
symbols onto the drawing. To add component detail later, click
the Edit Component tool, and select the component to edit.
No edit dialog
Inserts the component, untagged (that is, without assigning a
unique Component Tag). The untagged value that displays is the
No tag
TAG1/TAG2 default value for the component. To add component
detail later, click the Edit Component tool, and select the com-
ponent to edit.
Indicates to display the previously used menu each time you open
the Insert Component dialog box. For example, if you insert a
Always display previously used
menu
push button from the Push Buttons menu, the next time you
open the Insert Component dialog box the Push Button menu
displays by default.
Specifies the component block insertion scale. This defaults to
the value set in the Drawing Properties ➤ Drawing Format dialog
Scale schematic
box. Once set, this value is remembered until reset or until the
drawing editing session ends.
Specifies the footprint insertion scale. This defaults to the value
set in the Drawing Properties ➤ Drawing Format dialog box.
Scale panel
Once set, this value is remembered until reset or until the drawing
editing session ends.
Manually type in the component block to insert.Type it
740 | Chapter 10 Component Tools

Browses to and selects the component to insert.Browse
Right-click menus
Options for the Menu tree structure view
Right-click on the main menu or submenu in the Menu tree structure view
to display the following options:
■Expand/Collapse: Toggles the visibility of the menus.
■Properties: Opens a Properties dialog box to view the existing menu or
submenu properties like the menu name, image, or submenu title. Use the
Icon Menu Wizard to change any menu properties.
Options for the Symbol Preview window
Right-click an icon or in empty space in the Symbol Preview window to display
the following options:
■View: Changes the view display for the Symbol Preview window and
Recently Used window. The current view option is indicated with a check
mark. Options include: Icon with text, Icon only or List view.
■Properties: (available for icons only) Opens a Properties dialog box to view
the existing symbol icon properties like the icon name, image, block names
and so on. Use the Icon Menu Wizard to change any icon properties.
Pneumatic, Hydraulic, and P&ID icon menus
The Menu tree structure displays the symbols for the selected component type
(pneumatic, hydraulic, or P&ID). The Insert Pneumatic Component, Insert
Hydraulic Component, and Insert P&ID Component tools are accessed from
the Schematic tab ➤ Insert Components panel on the ribbon or the Extra
Library toolbar.
Insert Pneumatic Component
Insert Hydraulic Component
Insert schematic components | 741
Insert P&ID Component
Insert/edit component
Edits a component, PLC module, terminal block, wire number, or signal arrow.
Insert Component
Ribbon: Schematic tab ➤ Insert Components panel ➤ Insert
Components drop-down ➤ Icon Menu.
Toolbar: Main Electrical
Menu: Components ➤ Insert Component
Command entry: AECOMPONENT
Select the component type to insert and specify the insertion point on the
drawing.
Edit Component
Ribbon: Schematic tab ➤ Edit Components panel ➤ Edit Components
drop-down ➤ Edit.
Toolbar: Main Electrical
Menu: Components ➤ Edit Component
Command entry: AEEDITCOMPONENT
Select the component to edit.
You can go back to a component at any time and edit values such as tag,
catalog assignment, location, installation, descriptions, ratings, and
miscellaneous values. Related components update to match the new values.
While inserting a component for the first time you establish its tag definition
inside of the project. If the component could potentially reference other
742 | Chapter 10 Component Tools

components found on different drawing files in the project, the relationship
must be established before editing. The steps to link the new component with
related components are:
1Insert a new component and change the component tag as needed.
2Click OK and insert the component on the drawing.
3Right-click the component and select Edit Component.
4Change the description, catalog data, and so on, as needed.
5Click OK.
6In the Update Related Components dialog box, click Yes-Update to update
the related components with your changes. Click Skip to update only the
component you edited.
NOTE Some options are not available depending on whether you are inserting a
single component or multiple components.
Component Tag
Any existing tags appear in the edit box. To define the component tag, edit
the existing tag or type a specific tag in the edit box. Select Fixed if you do
not want this tag to update on a retag.
If you enter an existing component tag during the insert/edit process, a
warning dialog box displays. (Turn off the warning in the Project Properties
➤ Project Settings dialog box. It temporarily disables the warning dialog box
for the current session of AutoCAD Electrical). It alerts you of the duplication
and suggests alternative tag names based on the user-defined format. You can
select whether to use the duplicated tag or use a new tag that is suggested (or
you can type in a new tag).
NOTE An error log file is created for every project regardless of whether you chose
to display the real-time warning dialog box or not. The real-time warning is saved
in the log file named "<project_name>_error.log" and is saved in the User
subdirectory.
Searches for a wire connection to a nearby PLC I/O address and,
if found, uses the PLC address number in the tag name of the
component.
Use PLC Address
Insert schematic components | 743
Lists used component tag names. Select a tag from the list to
copy, or to increment for this new component. Initially, the list
Tags Used: Schematic
includes schematic parent components in the same family as the
current component. Select to include children, all families, panel,
and one-line components in the list.
Lists used panel component tag names. Select a tag from the list
to copy, to this new component. An “x” in front of the tag indic-
Tags Used: Panel
ates there is a schematic component already inserted. An “o” in
front of the tag indicates a schematic component exists but there
is mismatch on Catalog and Manufacturer values between the
two.
Assigns a tag from an external list file. You can reference an ASCII
text file in comma or space delimited format to help annotate
External List
the component's description, tag, catalog, and other information
of the component.
Substitutes a fixed text string for the %F part of the tag format.
Enter a tag format override in the edit box. Retag Component
Options
uses this override format value to calculate a new tag for the se-
lected component.
Catalog Data
You can do a drawing-wide or project-wide listing of similar components with
their catalog assignments. During your editing session, the last MFG / CAT /
ASSYCODE assignment for each component type you insert into your wiring
diagram is remembered. When you insert another component of that type,
the previous catalog assignment of the component is set as the default
(assuming a previous one was made during the current editing session).
Lists the manufacturer number for the component. Enter a value
or select one from the Catalog lookup.
Manufacturer
Lists the catalog number for the component. Enter a value or se-
lect one from the Catalog lookup.
Catalog
Lists the assembly code for the component. The Assembly code
is used to link multiple part numbers together.
Assembly
Specifies a unique identifier assigned to each component. The
tag value can be manually typed in the edit box.
Item
744 | Chapter 10 Component Tools
Specifies the quantity number for the part number (blank=1).
This value gets inserted into the "SUBQTY" column of the BOM
report.
Count
Opens the catalog database of the component from which you
can manually enter or select the Manufacturer or Catalog values.
Lookup
Search the database for a specific catalog item to assign to the
selected component.
Scans the previous project to find an instance of the selected
component and returns the component values. You can then
Previous
make your catalog assignment by picking from the dialog box
list.
Lists the part numbers used for similar components in the current
drawing.
Drawing
Lists the part numbers used for similar components in the project.
You can search in the active project, another project, or an extern-
al file.
Project
■Active project: All the drawings in the current project are
scanned and the results are listed in a dialog box. Select from
the list to assign your new component with a catalog number
that is consistent with other similar components in the pro-
ject.
■Other project: Scans each listed drawing in a previous project
for the target component type and returns the catalog inform-
ation in a subdialog box. Make your catalog assignment by
picking from the dialog box list.
■External file: You can pull catalog assignments from a gen-
eric ASCII file created by a word processor or output from a
spreadsheet or database program. A dialog box displays the
contents of the selected text file. Find and highlight the ap-
propriate entry. AutoCAD Electrical reads the line of text from
the file and breaks it into its component parts. They are dis-
played in the left-hand dialog box list. For each relevant item,
highlight it, and then pick the appropriate category button
in the center column. The highlighted item is transferred to
the corresponding category (and then to the Insert/Edit dialog
box once OK is clicked).
Insert schematic components | 745

Inserts or edits extra catalog part numbers on to the selected
component. You can add up to 99 part numbers to any compon-
Multiple Catalog
ent. These multiple BOM part numbers appear as sub-assembly
part numbers to the main catalog part number in the various
BOM and component reports.
Displays what the selected item looks like in a Bill of Material
template.
Catalog Check
Ratings
Specifies values for each ratings attribute. You can enter up to 12 ratings
attributes on a component. Select Defaults to display a list of default values.
NOTE If Ratings is unavailable, the component you are editing does not carry
rating attributes.
Description
Up to three lines of description attribute text can be entered.
Displays a list of descriptions found in the current drawing so you
can pick similar descriptions to edit.
Drawing
Displays a list of descriptions found in the project so you can pick
similar descriptions to edit.
Project
Opens an ASCII text file from which you can select standard descrip-
tions.
Defaults
Picks a description from a component on the current drawing.Pick
If a symbol does not have the DESC1-3 attributes, the description edit boxes
are unavailable. To put descriptions on fuse symbols (or other symbols without
these attributes), open the fuse library symbols in AutoCAD Electrical and add
the DESC1, DESC2, and DESC3 attribute definitions. Fuse symbol file names
are HFU*.dwg and VFU*.dwg.
Cross-Reference
Overrides the WD_M block settings of the drawing with
component-specific cross-reference settings.
Component override
746 | Chapter 10 Component Tools
Click Setup to edit the component cross-reference settings
manually.
A pin list database table is consulted when a part number
is added or an existing part number is changed on a parent
Reference NO/ Reference NC
symbol. If a match on the Manufacturer, Catalog, and As-
sembly values of the part number in the database table is
found, the associated contact count and pin number in-
formation is retrieved and placed on the parent component.
Click NO/NC Setup to view or manually edit pin list data
values.
Installation Code
Changes the installation codes. You can search the current drawing or entire
project for installation codes. A quick read of all the current or selected drawing
files is done and a list of installation codes used so far is returned. Select from
the list to update the component with the installation code automatically.
Assign short installation codes to components like "PNL" and "FIELD" so you
can create installation-specific BOM and component lists later.
Location Code
Changes the location codes. You can search the current drawing or entire
project for location codes. A quick read of all the current or selected drawing
file is done and a list of location codes used so far is returned. Select from the
list to update the component with the location code automatically.
Assign short location codes to components like "PNL" and "FIELD" so you can
extract cable from/to reports and location-specific BOM reports later. (For
example, BOM for all field cables, BOM for all PNL cables.)
Show/Edit Miscellaneous
View or edit any attributes that are not predefined AutoCAD Electrical
attributes.
Pins
Assigns pin numbers to the pins that are physically located on the component.
For Connectors: Once a connector is inserted onto the block definition of the
drawing file, you can edit the connector pins found inside of the connector.
Click List to display the Connector Pin Numbers in Use dialog box where you
can edit the pin numbers and descriptions.
Insert schematic components | 747
Switch Positions
Labels the positions of a selector switch.
OK-Repeat
(not available when editing components) Inserts the new component onto
the drawing and then inserts another 'just like' component.
Insert/edit component: IEC
Assign values on the component such as tag, catalog, location, installation,
descriptions, ratings, and miscellaneous values. Related components update
to match the new values.
The Insert/Edit Component dialog box is for working in IEC mode. If you are
working in JIC mode, the dialog box displays differently.
While inserting a component for the first time you establish its tag definition
inside of the project. If the component could potentially reference other
components found on different drawing files in the project, the relationship
must be established before editing. The steps to link the new component with
related components are:
1Insert a new component and change the component tag as needed.
2Click OK and insert the component on the drawing.
3Right-click the component and select Edit Component.
4Change the description, catalog data, and so on, as needed.
5Click OK.
6In the Update Related Components dialog box, click Yes-Update to update
the related components with your changes. Click Skip to update only the
component you edited.
Insert Component
Ribbon: Schematic tab ➤ Insert Components panel ➤ Insert
Components drop-down ➤ Icon Menu.
Toolbar: Main Electrical
748 | Chapter 10 Component Tools
Menu: Components ➤ Insert Component
Command entry: AECOMPONENT
Select the component type to insert and specify the insertion point on the
drawing.
Edit Component
Ribbon: Schematic tab ➤ Edit Components panel ➤ Edit Components
drop-down ➤ Edit.
Toolbar: Main Electrical
Menu: Components ➤ Edit Component
Command entry: AEEDITCOMPONENT
Select the component to edit.
You can go back to any component at any time and make changes.
NOTE Some options are not available depending on whether you are inserting a
single component or multiple components. To insert multiple components, select
Components ➤ Multiple Insert ➤ Multiple Insert (Icon Menu).
Installation
Changes the installation codes. You can search the current drawing or entire
project for installation codes. A quick read of all the current or selected drawing
file is done and a list of installation codes used so far is returned. Select from
the list to update the component automatically with the installation code.
Assign short installation codes to components like "PNL" and "FIELD" so you
can create installation-specific BOM and component lists later.
Location
Changes the location codes. You can search the current drawing or entire
project for location codes. A quick read of all the current or selected drawing
files is done and a list of location codes used so far is returned. Select from
the list to update the component automatically with the location code.
Insert schematic components | 749

Assign short location codes to components like "PNL" and "FIELD" so you can
extract cable from/to reports and location-specific BOM reports later. (For
example, BOM for all field cables, BOM for all PNL cables.)
Component Tag
Any existing tags appear in the edit box. To define the component tag, edit
the tag or type a specific tag in the edit box. Select Fixed if you do not want
this tag to update on a retag.
If you enter an existing component tag during the insert/edit process, a
warning dialog box displays. This alerts you of the duplication and suggests
alternative tag names based on the user-defined format. You can select whether
to use the duplicated tag or use a new tag that is suggested (or you can type
in a new tag).
NOTE The combined value of the component tag, installation code, and location
code is used for error checking in IEC mode.
Searches for a wire connection to a nearby PLC I/O address
and, if found, uses the PLC address number in the tag name
of the component.
Use PLC Address
Lists used component tag names. Select a tag from the list
to copy, or to increment for this new component. Initially,
Tags Used: Schematic
the list includes schematic parent components in the same
family as the current component. Select to include children,
all families, panel, and one-line components in the list.
Lists used panel component tag names. Select a tag from
the list to copy, to this new component. An “x” in front of
Tags Used: Panel
the tag indicates there is a schematic component already
inserted. An “o” in front of the tag indicates a schematic
component exists but there is mismatch on Catalog and
Manufacturer values between the two.
Assigns a tag from an external list file.External List
Substitutes a fixed text string for the %F part of the tag
format. Enter a tag format override in the edit box. Retag
Options
Component uses this override format value to calculate a
new tag for the selected component.
750 | Chapter 10 Component Tools
Description
Up to three lines of description attribute text can be entered.
Displays a list of descriptions found in the current drawing so you
can pick similar descriptions to edit.
Drawing
Displays a list of descriptions found in the project so you can pick
similar descriptions to edit.
Project
Opens an ASCII text file from which you can quickly pick standard
descriptions.
Defaults
Picks a description from a component on the current drawing.Pick
Catalog Data
You can do a drawing-wide or project-wide listing of similar components with
their catalog assignments. During your editing session, the last MFG / CAT /
ASSYCODE assignment for each component type you insert into your wiring
diagram is remembered. When you insert another component of that type,
the previous catalog assignment of the component is set as the default
(assuming a previous one was made during the current editing session).
Lists the manufacturer number for the component. Enter
a value or select one from the Catalog lookup.
Manufacturer
Lists the catalog number for the component. Enter a value
or select one from the Catalog lookup.
Catalog
Lists the assembly code for the component. The Assembly
code is used to link multiple part numbers together.
Assembly
Specifies a unique identifier assigned to each component.
The tag value can be manually typed in the edit box.
Item
Specifies the quantity number for the part number
(blank=1). This value gets inserted into the "SUBQTY"
column of the BOM report.
Count
Opens the catalog database of the component from which
you can manually enter or select the Manufacturer or
Lookup
Catalog values. Search the database for a specific catalog
item to assign to the selected component.
Insert schematic components | 751

Scans the previous project to find an instance of the selec-
ted component and returns the component values.
Previous
Lists the part numbers used for similar components in the
current drawing.
Drawing
Lists the part numbers used for similar components in the
project.
Project
Inserts or edits extra catalog part numbers on to the selec-
ted component. You can add up to ten part numbers to
Multiple Catalog
any component. These multiple BOM part numbers appear
as subassembly part numbers to the main catalog part
number in the various BOM and component reports.
Displays what the selected item looks like in a Bill of Mater-
ial template.
Catalog Check
Cross-Reference
Overrides the WD_M block settings of the drawing with
component-specific cross-reference settings.
Component override
Click Setup to edit the component cross-reference settings
manually.
A pin list database table is consulted when a part number
is added or an existing part number is changed on a parent
Reference NO/ Reference NC
symbol. If a match on Manufacturer, Catalog, and Assembly
values in the database table of the part number is found,
the associated contact count and pin number information
is retrieved and placed on the parent component.
Click NO/NC Setup to view or manually edit pin list data
values.
Ratings
Specifies values for each ratings attribute. You can enter up to 12 ratings
attributes on a component. Select Defaults to display a list of default values.
NOTE If the Ratings choice is unavailable, the component you are editing does
not carry rating attributes.
752 | Chapter 10 Component Tools

Show/Edit Miscellaneous
View or edit any attributes that are not predefined AutoCAD Electrical
attributes.
Pins
Assigns pin numbers to the pins that are physically located on the component.
For Connectors: Once a connector is inserted onto the block definition of the
drawing file, you can edit the connector pins found inside of the connector.
Displays pairs of pins in the first column, the plug pin values in the
second column, and the receptacle pin values in the last column.
Pins
Enter a new pin number value in the edit boxes or click the arrows
to either increase or decrease both plug and receptacle values by one.
Edit
Lists all the pins previously used in the project and the next available
pin assignment that can be used.
List
Multiple bill of material information
This tool allows you to insert or edit extra catalog part numbers on to the
currently selected component or footprint. You can add up to 99 additional
part numbers to any schematic or panel component on-the-fly. These multiple
BOM part numbers appear as subassembly part numbers to the main catalog
part number in the various BOM and component reports.
On the Insert/Edit Component or Panel Layout - Component Insert/Edit dialog
box, Catalog Data section, click Multiple Catalog.
NOTE You can also access this dialog box by clicking Multiple Catalog on the
Copy Catalog Assignment on page 1299 dialog box.
The additional catalog part numbers are saved on the symbol as
MFGn/CATn/ASSYCODEn attribute values. The "n" is the sequential code
value "01" through "99" selected in the top list box. If these attributes are not
present on the symbols, AutoCAD Electrical saves the information as Extended
Entity Data (Xdata) on the block insert.
Sequential code
Adds up to 99 extra part numbers (in addition to the main catalog part
number). Pick which one you want to add or inspect/edit. Click the list button
to show all extra part numbers carried on the component.
Insert schematic components | 753

Catalog Data
Specifies the catalog part number information such as the manufacturer and
catalog number.
Count
Specifies the quantity number for the extra part number (blank=1). This value
gets inserted into the "SUBQTY" column of a BOM report.
Unit
Specifies the unit of measure, which can be displayed in the component list
report.
Parts Catalog Lookup
Lists the catalog database table that is to be referenced for the description
information for the given Manufacturer/Catalog/Assembly combination. For
each catalog entry, provide a name for the catalog look-up table. For the main
catalog entry, this information is provided on the symbol itself but may not
be there for these catalog entries. Select List to pick from a list of tables that
are contained in your catalog database file or Misc to use the MISC_CAT table.
Catalog Lookup
Checks for and displays catalog table information in the Parts Catalog dialog
box for the selected component type.
Catalog Check
Quickly performs a Bill of Material check and displays the result.
Item Number
Assign an item number to the catalog number.
If checked, marks an item number as fixed. If you
run Resequence Item Numbers on page 1602 later on,
fixed item numbers do not change.
fixed
NOTE The fixed check box is available only when
assigning the catalog to panel components.
Finds the assigned manufacturer, catalog, assembly
code combination on components on the active
Drawing: Find
drawing. If a match is found, the item number is
754 | Chapter 10 Component Tools

assigned to this catalog. If a match is not found, a
dialog box displays where you enter an item number
or use the next available.
NOTE If the Item Numbering Mode on page 211 is
Accumulate Project Wide, this button is disabled.
Lists the item numbers along with each manufac-
turer, catalog, assembly code combinations in use
on the active drawing.
Drawing: List
NOTE If the Item Numbering Mode on page 211 is
Accumulate Project Wide, this button is disabled.
Finds the assigned manufacturer, catalog, assembly
code combination on components on the drawings
Project: Find
in the active project. If a match is found, the item
number is assigned to this catalog. If a match is not
found, a dialog box displays where you enter an
item number or use the next available.
NOTE If the Item Numbering Mode on page 211 is
Reset with Each Drawing, this button is disabled.
Lists the item numbers along with each manufac-
turer, catalog, assembly code combinations in use
on the drawings in the active project.
Project: List
NOTE If the Item Numbering Mode on page 211 is
Reset with Each Drawing, this button is disabled.
If the Item Assignments on page 211 project setting is set Per-Component Basis,
this section is disabled.
Multiple catalog part number assignments
This dialog box displays the order in which the extra part numbers appear in
the various AutoCAD Electrical reports. You can add up to 99 additional part
number assignments to a component.
On the Insert/Edit Component or Panel Layout - Component Insert/Edit dialog
box, Catalog Data section, click Multiple Catalog. Click Sequential Code: List
on the Multiple Bill of Material Information dialog box.
Insert schematic components | 755
NOTE You can also access this dialog box by clicking Multiple Catalog on the
Copy Catalog Assignment on page 1299dialog box and clicking Sequential Code:
List.
To change the order, highlight the part number and click Move Up or Move
Down to move it in the list.
Tags in use
Displays a listing of all component tags found on the schematic for the project.
Insert Component
Ribbon: Schematic tab ➤ Insert Components panel ➤ Insert
Components drop-down ➤ Icon Menu.
Toolbar: Main Electrical
Menu: Components ➤ Insert Component
Command entry: AECOMPONENT
Select the component type to insert and specify the insertion point on the
drawing. In the Insert/Edit Component dialog box, click Tags Used: Schematic.
Edit Component
Ribbon: Schematic tab ➤ Edit Components panel ➤ Edit Components
drop-down ➤ Edit.
Toolbar: Main Electrical
Menu: Components ➤ Edit Component
Command entry: AEEDITCOMPONENT
Select the component to edit. In the Insert/Edit Component dialog box, click
Tags Used:Schematic.
Sorts the list by component tag, drawing sequence,
or description.
Sort
756 | Chapter 10 Component Tools
Shows all parent components for related family codes
in the project. (Default)
Show parent/stand-alone references
Shows the children along with the parent for related
family codes in the project.
Show child references
Shows all devices from all families in the project.Show all components for all families
Displays all panel components.Show all panel components
Shows all one-line components for related family
codes in the project.
Show one-line components
Changes the current drawing visible in the tag list
and updates the data in the project database.
Freshen
Applies the selected line to the edited component.Copy Tag
Provides the next available tag (sequence or line ref-
erence number) for the device type selected in the
dialog box.
Calculate Next
Panel tag list
Displays a listing of all component tags found on the panel drawings for the
project.
Insert Component
Ribbon: Schematic tab ➤ Insert Components panel ➤ Insert
Components drop-down ➤ Icon Menu.
Toolbar: Main Electrical
Menu: Components ➤ Insert Component
Command entry: AECOMPONENT
Select the component type to insert and specify the insertion point on the
drawing. In the Insert/Edit Component dialog box, click Tags Used: Panel.
Insert schematic components | 757
Edit Component
Ribbon: Schematic tab ➤ Edit Components panel ➤ Edit Components
drop-down ➤ Edit.
Toolbar: Main Electrical
Menu: Components ➤ Edit Component
Command entry: AEEDITCOMPONENT
Select the component to edit. In the Insert/Edit Component dialog box, click
Tags Used: Panel.
Sorts the list by component tag, installation code, location code, or
sheet number.
Sort
Changes the current drawing visible in the tag list and updates the
data in the project database.
Freshen
Option: tag format "family" override
AutoCAD Electrical provides a way to override a component tag but still update
the reference number portion on a retag.
Insert Component
Ribbon: Schematic tab ➤ Insert Components panel ➤ Insert
Components drop-down ➤ Icon Menu.
Toolbar: Main Electrical
Menu: Components ➤ Insert Component
Command entry: AECOMPONENT
Select the component type to insert and specify the insertion point on the
drawing. In the Insert/Edit Component dialog box, click the Options button
in the Component Tag area.
758 | Chapter 10 Component Tools
Edit Component
Ribbon: Schematic tab ➤ Edit Components panel ➤ Edit Components
drop-down ➤ Edit.
Toolbar: Main Electrical
Menu: Components ➤ Edit Component
Command entry: AEEDITCOMPONENT
Select the component to edit. In the Insert/Edit Component dialog box, click
the Options button in the Component Tag area.
You can substitute a fixed text string for the %F part of the tag format for a
component. Retag can then use the override format value to calculate a new
tag for the component. For example, a certain relay component must always
have an "MC-R" family tag value instead of "CR" so that retag assigns MC-R100
instead of CR100. To achieve this tag override, enter "MC-R%N" for the tag
format.
Component annotation from external file
This tool pulls information from a selected line in an external space or
comma-delimited text file and assigns its text to a specific attribute/xdata on
the component. The default extension for this file is ".wdx" but can also be
".csv" or ".txt." The file format is free-form.
Insert Component
Ribbon: Schematic tab ➤ Insert Components panel ➤ Insert
Components drop-down ➤ Icon Menu.
Toolbar: Main Electrical
Menu: Components ➤ Insert Component
Command entry: AECOMPONENT
Select the component type to insert and specify the insertion point on the
drawing. In the Insert/Edit Component dialog box, click External List. Select
Insert schematic components | 759
the .wdx, .csv, or .txt file to reference and click Open. Select a line of data
from the list and click OK.
Edit Component
Ribbon: Schematic tab ➤ Edit Components panel ➤ Edit Components
drop-down ➤ Edit.
Toolbar: Main Electrical
Menu: Components ➤ Edit Component
Command entry: AEEDITCOMPONENT
Select the component to edit. In the Insert/Edit Component dialog box, click
External List. Select the .wdx, .csv, or .txt file to reference and click Open.
Select a line of data from the list and click OK.
Select a value from the list of data elements on the left, then click one of the
buttons next to the attribute name to assign the value to.
Overwrites the existing value in the edit box with the selected value.Overwrite
Adds the selected value to the edit box. The value is appended to
any existing value.
Add
Descriptions
Standard Description lists can be created in ASCII text files with a .WDD file
extension. You may create project-related list, component family lists, a generic
list, or any type of description list.
Ribbon: Schematic tab ➤ Edit Components panel ➤ Edit Components
drop-down ➤ Edit.
Toolbar: Main Electrical
Menu: Components ➤ Edit Component
Command entry: AEEDITCOMPONENT
760 | Chapter 10 Component Tools

Select the component to edit. Click Defaults in the Description section of the
Insert/Edit Component dialog box.
Highlight an entry from the list and click OK, or click Pick File to select a
different file and description list.
Displays the values for the description file.Descriptions panel
Selects a different file and description list.Pick File
Displays the Language Database file (WD_LANG1.MDB) for the
AutoCAD Electrical Language Conversion tool.
Language
Displays a project .wdd file (if not already displayed).Project
Displays a family .wdd file (if not already displayed). For example,
if the component has the family code “PB” for push buttons and
a file called PB.WDD exists, it displays when you click Family.
Family
Displays a generic file (WD_DESC.WDD) if not already displayed.General
Opens a dialog box for adding or editing description text (DESC1,
DESC2, and DESC3) for the file. Enter a value or click Edit File to
edit the file using WordPad.
Add/Edit
Inserts the selected text into line Description 1. Any existing text
in description lines 2 and 3 is left untouched (for example, insert-
ing dual language descriptions).
OK-Description 1
Inserts the selected text into line Description 2. Any existing text
in description lines 1 and 3 is left untouched.
OK-Description 2
Inserts the selected text into line Description 3. Any existing text
in description lines 1 and 2 is left untouched.
OK-Description 3
Select description from AutoCAD Electrical
language table
Opens the current language table for review. The default table is wd_lang1.mdb
Ribbon: Schematic tab ➤ Edit Components panel ➤ Edit Components
drop-down ➤ Edit.
Insert schematic components | 761
Toolbar: Main Electrical
Menu: Components ➤ Edit Component
Command entry: AEEDITCOMPONENT
Select the component to edit. Click the Defaults button in the Description
section of the Insert/Edit Component dialog box, and click Language.
NOTE Use the Edit Language Database File on page 1203 tool to modify the language
table.
Selects a predefined language.Select language
NOTE Language matches are not case sensitive, but phrase
substitutions are made exactly as entered in the language
table.
Displays a phrase list for the selected language.Phrase list in selected language
Specifies which language to use for the selected phrase.Pick language/Phrase to use
Selects a different file and description list.Pick File
Displays a project .wdd file (if not already displayed).Project
Displays a family .wdd file (if not already displayed). For
example, if the component has the family code “PB” for
Family
push buttons and a file called PB.WDD exists, it displays
when you click Family.
Displays a generic file (WD_DESC.WDD) if not already dis-
played.
Generic
Select description text format
Specifies how to handle description text in the selected language.
Ribbon: Schematic tab ➤ Edit Components panel ➤ Edit Components
drop-down ➤ Edit.
762 | Chapter 10 Component Tools

Toolbar: Main Electrical
Menu: Components ➤ Edit Component
Command entry: AEEDITCOMPONENT
Select the component to edit. In the Insert/Edit Component dialog box,
Description section, click Defaults. In the Descriptions dialog box, click
Language. Select the phrase and language to edit and click OK.
Specifies whether to display the selected description text
in one line or across multiple lines. Examples of what the
description looks like appear next to the options.
1 Line, 2 Lines, 3 Lines
Overrides the selected description text. You can use the
default text or type modifications in the edit box. The "|"
character forces a line break.
Manual edit/override
Inserts selected description text into the first description
text line of the component, leaving any existing text in
OK ➤ Description 1
lines 2 and 3 as is. However, if you selected two Lines above
and click OK ➤ Description 1, the description text displays
in description lines 1 and 2 in the Insert/Edit Component
dialog box.
Inserts selected description text into the second description
text line of the component, leaving any existing text in
lines 1 and 3 as is.
OK ➤ Description 2
Inserts text starting at the second description text line of
the component, leaving any existing text in the first line
as is.
OK ➤ Description 2,3
NOTE These components are useful for inserting description text in dual languages.
Pin numbers in use
Lists all the pins previously used in the project and the available pins that can
be assigned to a component. The component tag displays below the title bar
in the dialog box.
Insert schematic components | 763
Ribbon: Schematic tab ➤ Edit Components panel ➤ Edit Components
drop-down ➤ Edit.
Toolbar: Main Electrical
Menu: Components ➤ Edit Component
Command entry: AEEDITCOMPONENT
Select the component to edit. In the Insert/Edit Component dialog box, Pins
section, click List.
The three lists display all available pins to assign to the compon-
ent. The number in parenthesis () indicates the single or pair of
Pin List
pins for the component. Pins can be Unused NO Pairs, Unused
Form-C contacts, and undefined.
Displays the sheet number and potential reference line number
where the connector definition is located in the project.
Sheet, Reference
Displays the contact type (for example, "NO" or "NC"). It is the
value carried by the CONTACT attribute of the component. If no
attribute is present or this attribute is blank, then this field is blank.
Type
Displays the pin numbers already in use in the project.Pins
Displays the wire numbers carried on wires attached to each of
the pins above. If no wire connection to the pin, or if the wire
does not carry a wire number assignment, then this field is blank.
Wire Numbers
Insert or edit child components
Insert or edit child component
Insert Component
Ribbon: Schematic tab ➤ Insert Components panel ➤ Insert
Components drop-down ➤ Icon Menu.
764 | Chapter 10 Component Tools
Toolbar: Main Electrical
Menu: Components ➤ Insert Component
Command entry: AECOMPONENT
Select the child component type to insert and specify the insertion point on
the drawing.
Multiple Insert (Icon Menu)
Ribbon: Schematic tab ➤ Insert Components panel ➤ Multiple Insert
drop-down ➤ Multiple Insert (Icon Menu).
Toolbar: Main Electrical
Menu: Components ➤ Multiple Insert ➤ Multiple Insert (Icon Menu)
Command entry: AEMULTI
Select the child component type to insert and select the fence points on the
drawing for insertion at each point where the fence crosses an underlying
wire.
Edit Component
Ribbon: Schematic tab ➤ Edit Components panel ➤ Edit Components
drop-down ➤ Edit.
Toolbar: Main Electrical
Menu: Components ➤ Edit Component
Command entry: AEEDITCOMPONENT
Select the child component to edit.
You can go back to any component at any time and make changes.
Insert or edit child components | 765

Component Tag
The parent tag value can be manually typed into the edit box or selected from
a drawing-wide or project-wide list of similar components. If the parent is
visible on the screen, click Parent/Sibling and select the parent (or another
related contact). This transfers all information automatically to the child
contact being inserted or edited.
NOTE Only components of the same category are displayed in the Drawing or
Project lists. For example, if the child is a one-line component, only one-line
components are listed. The category for a component is defined by the WDTYPE
attribute on page 325 value. If this attribute is missing or blank, category "schematic"
is assumed.
Catalog Data
If the child component does not have MFG and CAT attributes, this section
is not included on the dialog box.
Lists the manufacturer number for the component. Enter a value
or select one from the Catalog lookup.
Manufacturer
Lists the catalog number for the component. Enter a value or se-
lect one from the Catalog lookup.
Catalog
Lists the assembly code for the component. The Assembly code
is used to link multiple part numbers together.
Assembly
Specifies a unique identifier assigned to each component. The
tag value can be manually typed in the edit box.
Item
Specifies the quantity number for the part number (blank=1).
This value gets inserted into the "SUBQTY" column of the BOM
report.
Count
Opens the catalog database of the component from which you
can manually enter or select the Manufacturer or Catalog values.
Lookup
Search the database for a specific catalog item to assign to the
selected component.
Scans the previous project to find an instance of the selected
component and returns the component values. You can then
Previous
make your catalog assignment by picking from the dialog box
list.
766 | Chapter 10 Component Tools
Lists the part numbers used for similar components in the current
drawing.
Drawing
Lists the part numbers used for similar components in the project.
You can search in the active project, another project, or an extern-
al file.
Project
■Active project: All the drawings in the current project are
scanned and the results are listed in a dialog box. Select from
the list to assign your new component with a catalog number
that is consistent with other similar components in the pro-
ject.
■Other project: Scans each listed drawing in a previous project
for the target component type and returns the catalog inform-
ation in a subdialog box. Make your catalog assignment by
picking from the dialog box list.
■External file: You can pull catalog assignments from a gen-
eric ASCII file created by a word processor or output from a
spreadsheet or database program. A dialog box displays the
contents of the selected text file. Find and highlight the ap-
propriate entry. AutoCAD Electrical reads the line of text from
the file and breaks it into its component parts. They are dis-
played in the left-hand dialog box list. For each relevant item,
highlight it, and then pick the appropriate category button
in the center column. The highlighted item is transferred to
the corresponding category (and then to the Insert/Edit dialog
box once OK is clicked).
Inserts or edits extra catalog part numbers on to the selected
component. You can add up to 99 part numbers to any compon-
Multiple Catalog
ent. These multiple BOM part numbers appear as sub-assembly
part numbers to the main catalog part number in the various
BOM and component reports.
Displays what the selected item looks like in a Bill of Material
template.
Catalog Check
Ratings
Specifies values for each ratings attribute. You can enter up to 12 ratings
attributes on a component. Select Defaults to display a list of default values.
Insert or edit child components | 767

NOTE If Ratings is grayed out, the component you are editing does not carry
rating attributes.
Description
Up to 3 lines of description attribute text can be entered. These lines are
automatically filled with a copy of the parent's description text if the parent
Tag name is picked using one of the methods above. You can enter descriptions
or select a description from a component on the current drawing.
Cross-reference
AutoCAD Electrical automatically fills in cross-reference text when the
cross-reference command is run.
NOTE If the Cross-reference edit box is grayed out, the component you are editing
does not carry an XREF attribute.
Installation Code
Changes the installation code(s). You can search the current drawing or entire
project for installation codes. AutoCAD Electrical does a quick read of all the
current or selected drawing files and returns a list of all installation codes used
so far. Pick from the list to automatically update the component with the
installation code.
Assigning short installation codes to components like "PNL" and "FIELD" allow
you to later create installation-specific BOM and component lists.
Location Code
Changes the location code(s). You can search the current drawing or entire
project for location codes. A quick read of all the current or selected drawing
files is done and a list of location codes used so far is returned. Pick from the
list to automatically update the component with the location code.
Assigning short location codes to components like "PNL" and "FIELD" allow
you to later extract cable from/to reports and location-specific BOM reports
(ex: BOM for all field cables, BOM for all PNL cables).
Show/Edit Miscellaneous
View or edit any attributes that are not predefined AutoCAD Electrical
attributes.
768 | Chapter 10 Component Tools
Pins
Assigns pin numbers to the pins that are physically located on the component.
OK-Repeat
(not available when editing components) Inserts the new component onto
the drawing and then inserts another 'just like' component.
Insert or edit child component: IEC
This is Insert/Edit Child Component dialog box for working in IEC mode. If
you are working in JIC mode, the dialog box will display differently.
Insert Component
Ribbon: Schematic tab ➤ Insert Components panel ➤ Insert
Components drop-down ➤ Icon Menu.
Toolbar: Main Electrical
Menu: Components ➤ Insert Component
Command entry: AECOMPONENT
Select the child component type to insert and specify the insertion point on
the drawing.
Multiple Insert (Icon Menu)
Ribbon: Schematic tab ➤ Insert Components panel ➤ Multiple Insert
drop-down ➤ Multiple Insert (Icon Menu).
Toolbar: Main Electrical
Menu: Components ➤ Multiple Insert ➤ Multiple Insert (Icon Menu)
Command entry: AEMULTI
Select the child component type to insert and select the fence points on the
drawing for insertion at each point where the fence crosses an underlying
wire.
Insert or edit child components | 769
Edit Component
Ribbon: Schematic tab ➤ Edit Components panel ➤ Edit Components
drop-down ➤ Edit.
Toolbar: Main Electrical
Menu: Components ➤ Edit Component
Command entry: AEEDITCOMPONENT
Select the child component to edit.
You can go back to any component at any time and make changes.
Installation
Changes the installation codes. You can search the current drawing or entire
project for installation codes. A quick read of all the current or selected drawing
files is done and a list of installation codes used so far is returned. Select from
the list to automatically update the component with the installation code.
Assign short installation codes to components like "PNL" and "FIELD" so you
can create installation-specific BOM and component lists later.
Location
Changes the location codes. You can search the current drawing or entire
project for location codes. A quick read of all the current or selected drawing
files is done and a list of location codes used so far is returned. Select from
the list to automatically update the component with the location code.
Assign short location codes to components like "PNL" and "FIELD" so you can
extract cable from/to reports and location-specific BOM reports later. (For
example, BOM for all field cables, BOM for all PNL cables.)
Component Tag
The parent tag value can be manually typed into the edit box or selected from
a drawing-wide or project-wide list of similar components. If the parent is
visible on the screen, Click Parent/Sibling and select the parent (or another
related contact). This transfers all information automatically to the child
contact being inserted or edited.
770 | Chapter 10 Component Tools

NOTE Only components of the same category are displayed in the Drawing or
Project lists. For example, if the child is a one-line component, only one-line
components are listed. The category for a component is defined by the WDTYPE
attribute on page 325 value.
Description
Up to 3 lines of description attribute text can be entered. These lines are
automatically filled with a copy of the parent's description text if the parent
Tag name is picked using one of the methods described previously. You can
enter descriptions or select a description from a component on the current
drawing.
Catalog Data
If the child component does not have MFG and CAT attributes, this section
is not included on the dialog box.
Lists the manufacturer number for the component. Enter a value
or select one from the Catalog lookup.
Manufacturer
Lists the catalog number for the component. Enter a value or se-
lect one from the Catalog lookup.
Catalog
Lists the assembly code for the component. The Assembly code
is used to link multiple part numbers together.
Assembly
Specifies a unique identifier assigned to each component. The
tag value can be manually typed in the edit box.
Item
Specifies the quantity number for the part number (blank=1).
This value gets inserted into the "SUBQTY" column of the BOM
report.
Count
Opens the catalog database of the component from which you
can manually enter or select the Manufacturer or Catalog values.
Lookup
Search the database for a specific catalog item to assign to the
selected component.
Scans the previous project to find an instance of the selected
component and returns the component values. You can then
Previous
make your catalog assignment by picking from the dialog box
list.
Insert or edit child components | 771
Lists the part numbers used for similar components in the current
drawing.
Drawing
Lists the part numbers used for similar components in the project.
You can search in the active project, another project, or an extern-
al file.
Project
■Active project: All the drawings in the current project are
scanned and the results are listed in a dialog box. Select from
the list to assign your new component with a catalog number
that is consistent with other similar components in the pro-
ject.
■Other project: Scans each listed drawing in a previous project
for the target component type and returns the catalog inform-
ation in a subdialog box. Make your catalog assignment by
picking from the dialog box list.
■External file: You can pull catalog assignments from a gen-
eric ASCII file created by a word processor or output from a
spreadsheet or database program. A dialog box displays the
contents of the selected text file. Find and highlight the ap-
propriate entry. AutoCAD Electrical reads the line of text from
the file and breaks it into its component parts. They are dis-
played in the left-hand dialog box list. For each relevant item,
highlight it, and then pick the appropriate category button
in the center column. The highlighted item is transferred to
the corresponding category (and then to the Insert/Edit dialog
box once OK is clicked).
Inserts or edits extra catalog part numbers on to the selected
component. You can add up to 99 part numbers to any compon-
Multiple Catalog
ent. These multiple BOM part numbers appear as sub-assembly
part numbers to the main catalog part number in the various
BOM and component reports.
Displays what the selected item looks like in a Bill of Material
template.
Catalog Check
Ratings
Specifies values for each ratings attribute. You can enter up to 12 ratings
attributes on a component. Select Defaults to display a list of default values.
772 | Chapter 10 Component Tools
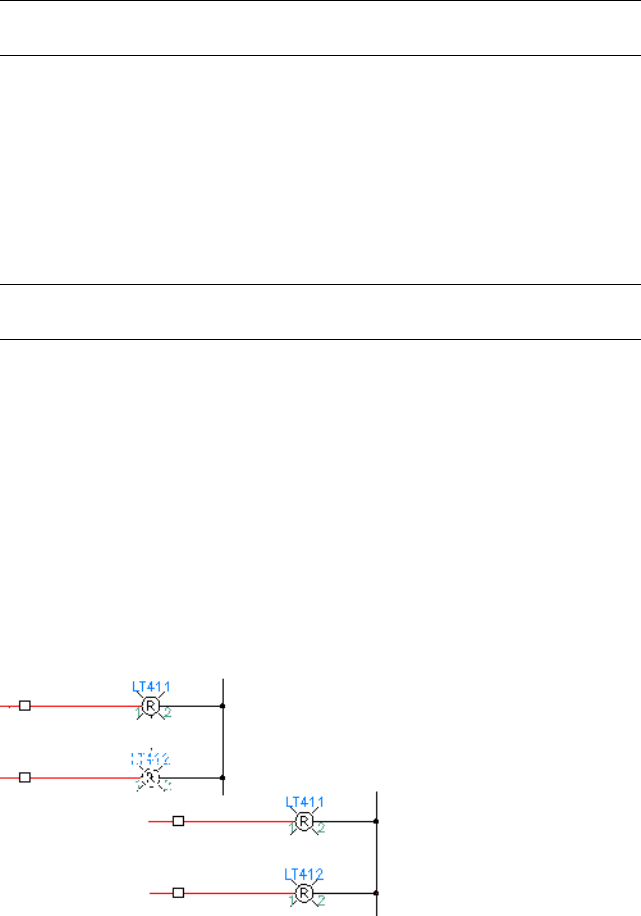
NOTE If Ratings is grayed out, the component you are editing does not carry any
rating attributes.
Show/Edit Miscellaneous
View or edit any attributes that are not predefined AutoCAD Electrical
attributes.
Cross-reference
AutoCAD Electrical automatically fills in cross-reference text when the
cross-reference command is run.
NOTE If the Cross-reference edit box is grayed out, the component you are editing
does not carry an XREF attribute.
Pins
Assigns pin numbers to the pins that are physically located on the component.
Insert a copy of a component
Insert a copy of an existing component
Copies a component you select in a drawing to a point you specify, and
includes automatic update of the component tag.
A copied component automatically breaks any underlying wires. You can edit
the component values brought over from the original component.
Insert a copy of a component | 773
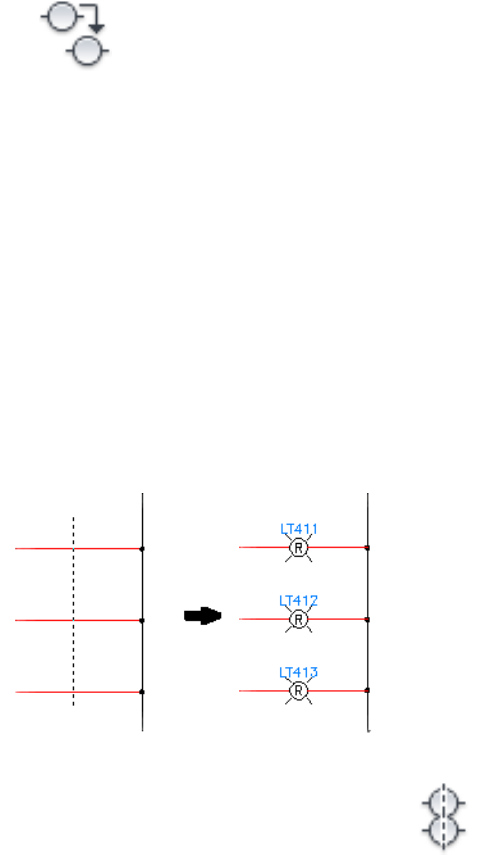
1Click Schematic tab ➤ Insert Components panel ➤ Copy Component.
2Select a component from the drawing just like the new one you want to
insert.
3Select the insertion point.
This inserts a copy of the symbol you selected and then displays the
Insert/Edit Component dialog box, so you can finish annotating the
component.
4Click OK.
Insert similar components at fence crossing points
Inserts a component selected from the icon menu at points where the fence
you define crosses a wire.
Each point where the fence crosses a wire is an optional insertion point. The
operation inserts each component and breaks any underlying wires. You can
edit the component values.
1Click Schematic tab ➤ Insert Components panel ➤ Multiple Insert
drop-down ➤ Multiple Insert (Icon Menu).
2Select the component type from the Insert Component: Schematic
Symbols dialog box.
3Select the component from the selection dialog box.
774 | Chapter 10 Component Tools
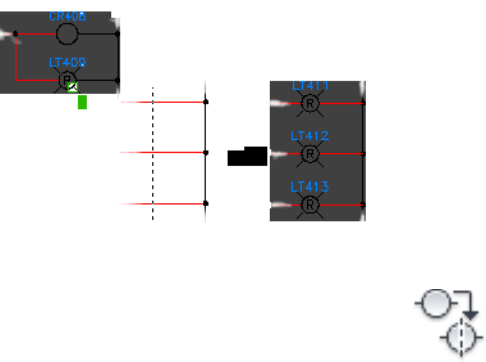
4Select a point above the first wire that you want to process.
5Select a point below the final wire for processing, and then right-click to
end the command.
6With each possible insertion point (that is, fence crossing point with a
wire) a dialog box displays, prompting you to decide whether to keep the
insertion, keep all of the insertions, or skip to the next one.
If you keep the insertion point, the regular Insert/Edit dialog box is
displayed, where you finish annotating the component.
7Click OK to complete the operation.
Copy a component to fence crossing points
Inserts copies of a selected component at each point where a defined fence
crosses a wire.
With each possible insertion point, specify whether to keep the insertion,
keep all the insertions, or skip to the next one.
1Click Schematic tab ➤ Insert Components panel ➤ Multiple Insert
drop-down ➤ Multiple Insert (Pick Master).
2Select the component to copy.
3Select a point above the first wire that you want to process.
4Select a point below the final wire for processing, and then right-click to
end the command.
Insert a copy of a component | 775

5With each possible insertion point (that is, fence crossing point with a
wire) a dialog box displays. Specify whether to keep the insertion, keep
all of the insertions, or skip to the next one.
If you keep the insertion point, the regular Insert/Edit dialog box is
displayed, where you finish annotating the component.
6Click OK to complete the operation.
Insert from catalog lists
Insert components from catalog lists
Use this to annotate the selected schematic (or panel) component with the
catalog number or a component description selected from a user-defined pick
list and insert it into the drawing.
NOTE This procedure uses schematic tools, but the same procedure can be done
using panel tools.
1Click Schematic tab ➤ Insert Components panel ➤ Insert Components
drop-down ➤ Catalog List.
2Sort the component list by catalog, description, or manufacturer.
3Select the component to insert.
4(Optional) Click Edit to make any changes to the catalog record. Modify
the record in the Edit Record dialog box and click OK.
5(Optional) Click Add to create a new record. If the new record is similar
to an existing record, highlight the existing record before you click Add.
Modify the record in the Add Record dialog box and click OK.
6Click OK.
7Specify an insertion point in the active drawing.
8Make any changes in the Insert/Edit Component dialog box and click
OK.
Schematic component or panel footprint
776 | Chapter 10 Component Tools
Inserts schematic or panel symbols by choosing a catalog number or a
component description from a user-defined pick list. The data displayed in
this pick list is stored in a database in generic Access format. The file name is
wd_picklist.mdb and can be edited with Access or from Add/Edit/Delete along
the bottom of the dialog box for the pick list. The AutoCAD Electrical normal
search path sequence is used to locate this file.
Insert Component (Catalog List)
Ribbon: Schematic tab ➤ Insert Components panel ➤ Insert Components
drop-down ➤ Catalog List.
Toolbar: Insert Component
Menu: Components ➤ Insert Component (Lists) ➤ Insert Component
(Catalog List)
Command entry: AECOMPONENTCAT
Insert Footprint (Catalog List)
Ribbon: Panel tab ➤ Insert Component Footprints panel ➤ Insert
Footprints drop-down ➤ Catalog List.
Toolbar: Insert Footprint (Lists)
Menu: Panel Layout ➤ Insert Footprint (Lists) ➤ Insert Footprint (Catalog
List)
Command entry: AEFOOTPRINTCAT
Both schematic and panel layout symbols can be included in the pick list
database. Only schematic or panel entries are displayed at a time depending
on whether the routine is called from the AutoCAD Electrical or Panel Layout
toolbar.
Specifies how to sort the record list. You can sort by description,
catalog number, or manufacturer code.
Sort by
Opens a dialog box for creating a record. If the footprint block is not
in an AutoCAD or an AutoCAD Electrical search path, include the part
Add
Insert from catalog lists | 777
of the path to append to one of these search paths (or you can enter
the full path). If the new record is like an existing record, highlight
the existing record before you click Add.
Opens a dialog box for editing a record. Highlight the record and
click Edit. Modify the record in the displayed dialog box.
Edit
Removes an existing record.Delete
Add or edit record
Insert Component (Catalog List)
Ribbon: Schematic tab ➤ Insert Components panel ➤ Insert Components
drop-down ➤ Catalog List.
Toolbar: Insert Component
Menu: Components ➤ Insert Component (Lists) ➤ Insert Component
(Catalog List)
Command entry: AECOMPONENTCAT
Click Add or Edit.
Insert Footprint (Catalog List)
Ribbon: Panel tab ➤ Insert Component Footprints panel ➤ Insert
Components drop-down ➤ Catalog List.
Toolbar: Insert Footprint (Lists)
Menu: Panel Layout ➤ Insert Footprint (Lists) ➤ Insert Footprint (Catalog
List)
Command entry: AEFOOTPRINTCAT
Click Add or Edit.
778 | Chapter 10 Component Tools

NOTE When you add a record you must indicate if the component or circuit is
Schematic or Panel and you need to indicate if it should be inserted as a block or
exploded upon insert (as you would for a circuit). Then, at a minimum, you need
to define the block name and either the catalog number or description.
Select Schematic or Panel Device
Specifies if the component (or circuit) is Schematic or Panel.
Single block or explode on insert
Specifies if it should be inserted as a block or exploded upon insert (as you
would for a circuit).
Minimum of Block Name and either Description or Catalog
■Block/Assembly/Circuit: The Block value can be a symbol name or AutoLISP
expression. If the footprint block is not in an AutoCAD search path or an
AutoCAD Electrical search path, include the part of the path that needs
to be appended to one of these search paths (or enter the full path to the
footprint block). Use Browse to locate the block name.
■Description: Specifies the optional comment for the footprint record. This
is for reference in this file only. It does not get extracted into any AutoCAD
Electrical report
■Catalog: (not used for exploded inserts) The Catalog value may contain
wildcards. Wildcard characters include:
* = match any characters
? = match any single character
# = match any single numeric digit
@ = match any single alphabetic character
NOTE If the catalog number actually has a character in it like #, then precede
it with the ` char, example "F120#10" would be "F120`#10"
Optional Values
(These options are not available for exploded inserts) Options for specifying
the manufacturer code, assembly code, and text values. If the catalog
information includes an ASSYCODE value, include it in the record to ensure
a complete match. If the same footprint is used no matter what the ASSYCODE
value is (ex: different combinations of contact blocks on a base relay) then
use " * " wildcard character for the ASSYCODE value in the record.
Insert from catalog lists | 779
The TEXTVALS value can be used to filter your pick list based on the
component's FAMILY code value. For this to work, the text substring
"FAMILY=<family code>" needs to be somewhere in each line of text to be
displayed. The TEXTVALS field can also be used to auto-fill attribute values
on insertion. For example, if the line includes the substring
"MFG=AB;CAT=1492;LOC=PNL1" then the MFG, CAT, and LOC edit boxes
will auto-fill with the values "AB", "1492", and "PNL1" respectively.
The schematic lookup file
The schematic lookup file maps catalog information from a panel component
or equipment list to a specific schematic component library symbol. AutoCAD
Electrical supplies a starter lookup file called schematic_lookup.mdb in Access
".mdb" file format. Within the database file are tables based on Manufacturer
codes. When you select a panel footprint from an AutoCAD Electrical extract
file or select a panel footprint from a catalog lookup file, it carries a
manufacturer code, on the MFG attribute. AutoCAD Electrical takes this MFG
code, goes to the matching table name in the schematic lookup database and
tries to find a match on the manufacturer, catalog number and assembly code
(if non-blank). If a match is found, AutoCAD Electrical retrieves the component
block path/name (or AutoCAD Electrical command list) from the matching
record and inserts the schematic component representation into the drawing.
You must expand and modify these tables to meet your specific schematic
needs. You can do this using tools provided with AutoCAD Electrical or
through the use of a database program that can read/write the Access file
format. You may use the MDB file (schematic_lookup.mdb) or a project-specific
schematic lookup file, called <project>_schematic_lookup.mdb. If the
project-specific .mdb file is used, it needs to be in the same subdirectory as
the <project>.wdp file.
Lookup file naming convention: AutoCAD Electrical takes the target footprint's
MFG code and looks for a table, in your Access schematic_lookup.mdb file
with that name. For example, if the footprint's MFG value is SQD, then
AutoCAD Electrical searches for a schematic lookup table called SQD;
manufacturer code of AB yields the table name AB.
Lookup file format
All fields contain characters except for RECNUM, which is automatically
numbered in the list for you. Fields may be blank and may use wildcards, with
780 | Chapter 10 Component Tools

the exception of SCHEMATIC_BLKNAM. Each record consists of these fields
(in this order):
Manufacturer name (same as attribute value)MANUFACTURER
Catalog part numberCATALOG
Assembly code part number linkASSEMBLYCODE
Assigned description text (DESC1-DESC3)FUNCTION_DESCRIPTION
Block name of the panel footprint insertPANEL_BLKNAM
Blank for component queries, 'T' or 'W' for terminal
queries
CATEGORY
Name used to tie into catalog lookup table (ex. PB11,
CR)
WDBLKNAM
Schematic symbol block name or special insert
command flag
SCHEMATIC_BLKNAM
Description of the schematic block nameCOMMENTS
Record number (automatically numbered in the list)RECNUM
Table query sequence
Queries on this database can be multi-level until a hit is returned. The first
level is a query on the MFG/CAT/ASSYCODE fields. If 0 records are returned,
a second query is done on just the CATALOG field (or the CATEGORY field
if working with terminals). If 0 records are returned, a third query is done on
the WDBLKNAM field. If this fails to return any records, a final query is made
on keywords in the FUNCTION_DESCRIPTION field.
NOTE When querying panel terminals, the second query is on the CATEGORY
field, which contains a 'T' or 'W'. This query determines which symbols to display
in the Insert dialog box. The 'T' displays a list of terminal symbols for terminal
numbers, while the 'W' displays a list of terminal symbols for wire number terminals.
When multiple block name choices are returned, they are displayed in a pick
list along with any comments from each matching record. If a match is not
The schematic lookup file | 781

found or if matches are found and you choose not to use any of them, the
displayed Insert dialog box offers several other options. You can:
■Pick from AutoCAD Electrical's icon menu
■Browse to the symbol file (available from the icon menu)
■Enter a symbol name into the edit box (available from the icon menu)
■Pick a 'just like schematic component to get the schematic block name
Edit schematic lookup files
1Click Schematic tab ➤ Other Tools panel ➤ ➤ Database Editors
drop-down ➤ Schematic Database File Editor.
2(Optional) Click Sort to sort the database fields so that you can quickly
find the record you are looking for.
3(Optional) Click Find or Replace to jump to the next occurrence of the
specified text or to replace the existing text.
4(Optional) Click Filter to filter the listing based on certain values in the
table. After you define the values to filter, apply the filter in the database
editing window.
5Decide if you want to edit an existing record or add a new one.
■If you decide to edit an existing record, select the record to edit and
click Edit on the Edit dialog box or double-click the record in the list.
■If you decide to add a new record, click Add New or Add Copy on the
Edit dialog box.
6Add or edit the record values and click OK.
Your new record is added to the list. You can also immediately see any
changes you made to an existing record.
7Click Save/Exit.
Edit
782 | Chapter 10 Component Tools
Use this tool to add or modify records in the schematic_lookup.mdb file to
use for mapping panel footprints and terminal representations to the
equivalent schematic component block names.
Ribbon: Schematic tab ➤ Other Tools panel ➤ ➤ Database
Editors drop-down ➤ Schematic Database File Editor.
Toolbar: Panel Miscellaneous
Menu: Panel Layout ➤ Database File Editor ➤ Schematic Database File
Editor
Command entry: AESCHEMATICDB
This lookup database table is a catalog lookup Access .mdb file that can be
expanded as needed. Use either Microsoft Access or this dialog box to add
new entries, edit or delete entries from the table.
Sorts the list of database records using either an alphanumeric sort
or number values. You can specify four sorts to perform on the list.
Sort
Specifies the value to find and then jumps to the next occurrence of
the specified text. This searches in a specific column or in the entire
table.
Find
Indicates to replace the find value with the new text string that you
specify.
Replace
Filters the listing based on certain values in the table. Picking the
blank entry in the list removes the filter for that field. After you define
the values to filter, apply the filter in the database editing window.
Filter
Displays the Edit Record dialog box for modifying the existing record
in the database.
Edit
Displays the Edit New Record dialog box for entering a new record
into the database.
Add New
Displays the Edit Copied Record dialog box for modifying and copying
the record to make a new record. You cannot have two duplicate
copies in the database.
Add Copy
The schematic lookup file | 783
Removes the selected record from the database.Delete
Edit record
Edit new, existing, or copied records in the schematic_lookup.mdb database.
Ribbon: Schematic tab ➤ Other Tools panel ➤ ➤ Database
Editors drop-down ➤ Schematic Database File Editor.
Toolbar: Panel Miscellaneous
Menu: Panel Layout ➤ Database File Editor ➤ Schematic Database File
Editor
Command entry: AESCHEMATICDB
Click Add New, Add Copy, or Edit or double-click on a record in the Edit
dialog box.
Manufacturer name (same as attribute value)MANUFACTURER
Catalog part numberCATALOG
Assembly code part number linkASSEMBLYCODE
(Optional) Assigned description text (DESC1-DESC3)FUNCTION_DESCRIPTION
Block name of the panel footprint insertPANEL_BLKNAM
Blank for component queries, 'T' or 'W' for terminal queriesCATEGORY
Name used to tie into catalog lookup table (ex. PB11, CR)WDBLKNAM
Schematic symbol block name or special insert command
flag. Click Command List to add a command rather than
a single block name.
SCHEMATIC_BLKNAM
Description of the schematic block nameCOMMENTS
784 | Chapter 10 Component Tools

Insert from equipment lists
This tool lists BOM data extracted from your equipment list and finds the
appropriate schematic symbol by querying the schematic_lookup.mdb on
page 780. It inserts the schematic components at your pick point. Each line or
record in the equipment list represents a single entry into the Equipment in
dialog box for schematic component selection. The quantity for a selected
catalog number is not considered when inserting schematic components.
Insert components from equipment lists
Use this to annotate the selected schematic (or panel) component with the
panel footprint or equipment list data and insert it into the drawing.
NOTE This procedure uses schematic tools, but the same procedure can be done
using panel tools.
1Click Schematic tab ➤ Insert Components panel ➤ Insert Components
drop-down ➤ Equipment List.
2Select the spreadsheet file to use and click Open.
3If multiple sheets/tables were found in the data file, select the table to
edit.
4Click OK.
5On the Settings dialog box, determine whether to use the default settings
or select a file of previously saved settings.
■Default Settings: The View/Edit Settings options become available to
modify the default settings. Modify the settings or click OK to continue
with the insert using the default settings.
■Read Settings: Select the file (*.wde) to read the settings from and
click Open.
6(Optional) Click Spreadsheet/Table columns to define the order of the
data in the selected equipment list file.
On the Equipment List Spreadsheet Settings dialog box, assign column
numbers to the data categories (such as Manufacturer, Catalog, and
Installation).
7(Optional) Click Save Settings to save the settings to a file for later recall.
Insert from equipment lists | 785

8On the Settings dialog box, click OK.
9In the Schematic equipment in (or the Panel equipment in) dialog box,
review the components by sorting or performing a catalog check.
10 Select the component to insert on the drawing.
11 Make any changes to the scale, orientation, or rotation angle for the
component.
12 Select the method for inserting the component into the drawing:
■Insert: Finds and inserts a schematic (or panel) component for the
highlighted equipment list component.
■Pick File: Picks a file for the insert. Select an existing AutoCAD
Electrical extracted equipment list component list file or extract a
fresh copy of panel component data from the database for the current
project.
■Convert Existing: (for Panel components only) Inserts the data for the
selected entry on an existing non-AutoCAD Electrical block insert.
This instantly converts the block to a smart AutoCAD Electrical
footprint.
13 In the Insert dialog box, select the block name to insert from the list.
14 Click OK.
Settings
This spreadsheet organizes the selected user-created equipment list and presents
the list in a pick list. As you pick an item from the pick list, the appropriate
schematic symbol is found and inserted in the drawing at your pick point.
Your equipment list can be an AutoCAD Electrical-generated Component
report, or it can be a list of motors giving horsepower and starter type along
with motor ID and descriptions.
NOTE You can open a comma-delimited file, Excel spreadsheet, or Access database
file for input.
Insert Component (Equipment List)
Ribbon: Schematic tab ➤ Insert Components panel ➤ Insert Components
drop-down ➤ Equipment List.
786 | Chapter 10 Component Tools
Toolbar: Insert Component (Lists)
Menu: Components ➤ Insert Component (Lists) ➤ Insert Component
(Equipment List)
Command entry: AECOMPONENTEQ
Select the spreadsheet file to use and click Open. Click the table to edit and
click OK.
Insert Footprint (Equipment List)
Ribbon: Panel tab ➤ Insert Component Footprints panel ➤ Insert
Footprints drop-down ➤ Equipment List.
Toolbar: Insert Footprint (Lists)
Menu: Panel Layout ➤ Insert Footprint (Lists) ➤ Insert Footprint
(Equipment List)
Command entry: AEFOOTPRINTEQ
Select the spreadsheet file to use and click Open. Click the table to edit and
click OK.
Uses the default settings for managing equipment lists.Default settings
Reads and uses the settings for a previously saved file.Read settings
Defines the order of the data in the selected equipment list
file. Assign column numbers to data categories (such as
Spreadsheet/Table columns
Manufacturer, Catalog, and Installation) in the Equipment
List Spreadsheet Settings dialog box.
Saves the column information in a text file for reuse. The
filename is user-defined with the extension .wde.
Save settings
Schematic equipment in
You can select to insert a single schematic component or multiple components
from the equipment list.
Insert from equipment lists | 787
Ribbon: Schematic tab ➤ Insert Components panel ➤ Insert Components
drop-down ➤ Equipment List.
Toolbar: Insert Component (Lists)
Menu: Components ➤ Insert Component (Lists) ➤ Insert Component
(Equipment List)
Command entry: AECOMPONENTEQ
Select the spreadsheet file to use and click Open. Specify to use default or
previously saved settings and click OK.
Sort List
Sorts the list of components. You can specify four sorts to perform on the list.
Catalog Check
Performs a Bill of Material check and displays the result. This is enabled if the
selected equipment list item contains catalog data.
TAG Options
Specifies whether to use the component tag as listed in the equipment list or
recalculate the schematic tag based on the tagging settings of the drawing.
When a component that doesn't have a tag is selected from the list, this switch
is automatically set to Use auto-generated schematic TAG.
Modifies the schematic component tag based
upon the drawing settings.
Use auto-generated schematic TAG
Maintains the tag as defined in the component
listing and sets the tag to fixed in the schematic.
Use Equipment List TAG
Scale
Specifies the block insert scale. (1.0 = full)
Vertical/Horizontal
Changes the default drawing orientation.
788 | Chapter 10 Component Tools
Insert
Finds and inserts a schematic component for the highlighted equipment list
component. The query of the schematic_lookup.mdb file returns one or more
block names based on data that appears in the pick list. The results are
displayed in the Insert dialog box along with a short description of each choice.
Pick File
Picks a file for the insert. Select an existing AutoCAD Electrical extracted
equipment list component list file or extract a fresh copy of panel component
data from the current project's database.
Insert
This dialog box displays the result of a query on the schematic_lookup.mdb
file. Select the appropriate block to insert from the list and click OK. The
selected schematic component is then annotated with the panel footprint or
equipment list data and inserted into the drawing. You can also select one of
the methods below to insert an alternative symbol.
Click Insert on the Panel terminals, Panel components, or Schematic
equipment list in dialog boxes.
Displays the icon menu from which you can select the schematic
component to insert. This is different than the schematic symbols
Icon Menu
in the list and should not be considered another way to select
the same components.
Copies a "just like" component and annotates it with the panel
data.
Copy Component
Insert from panel lists
Let your project set of panel layout drawings help drive the schematic wiring
diagrams. AutoCAD Electrical finds a match for the panel footprint in the
schematic lookup database on page 780 to determine the correct schematic
symbol to insert.
If a copy of the panel data is not in memory, then AutoCAD Electrical prompts
you to select which panel data you want to extract. Make your selection in
the dialog box and click OK. A list of all panel footprints is extracted. Select
from the panel list and place the schematic symbol on the wiring diagram.
Insert from panel lists | 789

Insert components or terminals from panel lists
After the schematic component is selected and inserted in the drawing, all
panel-related information is copied to the schematic. Use the Insert/Edit
Component dialog box to make any additional changes to the new schematic
component.
1Click Schematic tab ➤ Insert Components panel ➤ Insert Components
drop-down ➤ Panel List.
or to insert terminals
Click Schematic tab ➤ Insert Components panel ➤ Insert Components
drop-down ➤ Terminal (Panel List).
2Specify whether to extract the panel component/terminal list for the
active drawing or the active project.
3Specify any installation or location codes to extract.
4Click OK.
5If you are extracting for the entire project, select which drawing files to
process, and click OK.
6On the Panel Components (or Panel Terminals) dialog box, select from
the list of panel components/terminals to insert the schematic symbol
on the schematic drawing.
To modify the pick list so you can easily find the component or terminal
to select, click Sort List, Display, or Mark Existing.
7Click Insert.
8On the Insert dialog box, select which block name to insert from the list.
If you want to insert an alternative block that is not in the list, click Icon
Menu to select a component from the icon menu or click Copy
Component to insert a component 'just like' another existing component.
9Click OK.
10 Select the insertion point on the drawing.
11 Make any changes to the inserted component in the Insert/Edit
Component dialog box and click OK.
Panel layout list -> schematic components insert
790 | Chapter 10 Component Tools
This tool lists panel components extracted from your panel drawing, finds
the appropriate schematic symbol, and inserts the schematic components at
your pick point.
Ribbon: Schematic tab ➤ Insert Components panel ➤ Insert Components
drop-down ➤ Panel List.
Toolbar: Insert Component
Menu: Components ➤ Insert Component (Panel List)
Command entry: AECOMPONENTPNL
Specifies to export the data for the active drawing
or the entire active project.
Extract component list for
Creates a comma-delimited file of the panel compon-
ent data. The extracted file name is the same as the
Save list to external file
project by default (project_name.WD4). You can
display this data in spreadsheet format (open it in
comma-delimited "CSV" format), edit, and then save.
Uses a previous project's panel component list to
create a spreadsheet listing. After the initial extrac-
tion, a list of panel components displays for selection.
Browse
Extracts only the information for components with
specific installation values. Once you pick Named
Installation Codes to extract
Installations, you can type the installation code in
the box or click List: Drawing or List: Project to select
from a list of used installation codes.
Extracts only the information for components with
specific location values. Once you pick Named Loca-
Location Codes to extract
tion, you can type the location code in the box or
click List: Drawing or List: Project to select from a list
of used location codes.
Panel components
This presents a list of all panel components extracted from the project's panel
layout drawings. As you pick an item from the pick list, the appropriate
Insert from panel lists | 791

schematic symbol is found and inserted in the drawing at your pick point.
After the selection of the schematic component and the annotation of the
device tag, all panel-related information such as descriptions, installation, and
location codes are copied to the schematic.
You can select to insert a single schematic component or multiple components
from the panel list.
Ribbon: Schematic tab ➤ Insert Components panel ➤ Insert Components
drop-down ➤ Panel List.
Toolbar: Insert Component
Menu: Components ➤ Insert Component (Panel List)
Command entry: AECOMPONENTPNL
Select Project and click OK. Select the files to process and click OK.
Sort List
Sorts the list of panel components. You can specify four sorts to perform on
the list.
Reload
Reopens the Panel Layout List ➤ Schematic Components Insert dialog box
so you can re-extract data or select a saved external file to use.
Mark Existing
Matches panel components extracted from the project database with schematic
components previously placed into the drawing and marks any existing
components. An "x" displays in left-hand column for any listed panel
component tag that already has its schematic component inserted on the
drawing and there is an exact match on catalog and manufacturer values
between the two. An "o" displays if the tags match but there is mismatch on
catalog and manufacturer values between the two.
Display
Specifies to show all extracted panel data or hide the panel data that has a
matching schematic component.
792 | Chapter 10 Component Tools
Catalog Check
Performs a Bill of Material check and displays the result. This is enabled if the
selected panel item contains catalog data.
TAG Options
Specifies whether to use the panel tag as is, or recalculate the schematic tag
based on the tagging settings of the drawing. When a component that doesn't
have a tag is selected from the list, this switch is automatically set to Use
auto-generated schematic TAG.
Modifies the schematic component tag based on the
drawing settings. If a new tag is generated when in-
Use auto-generated schematic TAG
serting the schematic component, the source panel
footprint is updated with the generated tag. The
active drawing is automatically updated, while up-
dates on other drawings are maintained inside of the
update task file (project_name.upd) for later modific-
ation of the panel drawings to match the new
schematic component tag.
Maintains the tag as defined in the panel component
listing and sets the tag to fixed in the schematic.
Use panel footprint TAG
Scale
Specifies the block insert scale. (1.0 = full) The drawing scale is used as the
default.
Vertical
Changes the default drawing orientation.
Insert
Finds and inserts a schematic component for the highlighted panel component.
The query of the schematic_lookup.mdb file returns one or more block names
based on data that appears in the pick list. The results are displayed in the
Insert dialog box along with a short description of each choice.
Pick File
Picks a file for the insert. Select an existing AutoCAD Electrical extracted panel
component list file or extract a fresh copy of panel component data from the
current project's database.
Insert from panel lists | 793

Panel terminal list -> schematic terminals insert
This report provides error checking between the schematics and the panel
layout drawings. The program looks at the selected drawings, both schematic
and panel, looking for a match. For each panel component, the routine tries
to find a matching schematic component based on tag, location, and
installation information. If a match is found, then it compares catalog
information looking for any discrepancies.
Ribbon: Schematic tab ➤ Insert Components panel ➤ Insert Components
drop-down ➤ Terminal (Panel List).
Toolbar: Insert Component
Menu: Components ➤ Insert Terminal (Panel List)
Command entry: AETERMINALPNL
Specifies to export the data for the active drawing
or multiple drawings in the active project.
Extract terminal list for
Creates a comma-delimited file of the panel compon-
ent data. The extracted file name is the same as the
Save list to external file
project by default (project_name.WD4). You can
display this data in spreadsheet format (open it in
comma-delimited "CSV" format), edit, and then save.
Uses a previous project's terminal list to create a
spreadsheet listing. After the initial extraction, a list
of terminals displays for selection.
Browse
Extracts only the information for panel terminals with
specific installation values. Once you pick Named
Installation Codes to extract
Installation, you can type the installation code in the
box or click List: Drawing or List: Project to select
from a list of used installation codes.
Extracts only the information for panel terminals with
specific location values. Once you pick Named Loca-
Location Codes to extract
tion, you can type the location code in the box or
click List: Drawing or List: Project to select from a list
of used location codes.
794 | Chapter 10 Component Tools
Panel terminals
This presents a list of all panel terminals extracted from the project's panel
layout drawings. As you pick an item from the pick list, the appropriate
schematic terminal is found and inserted in the drawing at your pick point.
After the selection of the schematic terminal and the annotation of the device
tag, all panel-related information such as descriptions, installation, and location
codes are copied to the schematic.
You can select to insert a single terminal block or multiple terminal blocks
from the panel list.
Ribbon: Schematic tab ➤ Insert Components panel ➤ Insert Components
drop-down ➤ Terminal (Panel List).
Toolbar: Insert Component
Menu: Components ➤ Insert Terminal (Panel List)
Command entry: AETERMINALPNL
Select Project and click OK. Select the files to process and click OK.
Sorts the list of panel terminals. You can specify four sorts to perform
on the list.
Sort List
Reopens the Panel Terminal List ➤ Schematic Terminals Insert dialog
box so you can re-extract data or select a saved external file to use.
Reload
Matches schematic components extracted from the project database
with panel terminal components and marks any existing components.
Mark Existing
An "x" displays in left-hand column for any listed panel component
tag that already has its schematic inserted on the drawing and there
is an exact match on catalog and manufacturer values between the
two. An "o" displays if the tags match but there is mismatch on
catalog and manufacturer values between the two.
Specifies to show all extracted panel data or hide the panel data that
has a matching schematic component.
Display
Performs a Bill of Material check and displays the result. This is enabled
if the selected panel terminal contains catalog data.
Catalog Check
Insert from panel lists | 795
Displays the last symbol selected through the insert process. You can
clear the selection and go back through the insert process to select
Last symbol used
the schematic terminal symbol or you can automatically insert the
last symbol used by not making any changes.
Specifies the block insert scale. (1.0 = full)Scale
Changes the default drawing orientation.Rotate
Finds and inserts a schematic terminal for the highlighted panel ter-
minal. A query of the schematic_lookup.mdb file returns one or more
Insert
block names based on data that appears in the pick list. The results
are displayed in the Insert dialog box along with a short description
of each choice.
Specifies to pick a file for the insert. Select an existing AutoCAD
Electrical extracted panel terminal list file or extract a fresh copy of
panel component data from the current project's database.
Pick File
Manipulate Components
Manipulate components
You can manipulate components by moving, stretching, splitting, aligning,
or deleting them.
Delete components
The Delete Component command lets you remove the selected component.
The broken wires are repaired and any resulting instances of multiple wire
numbers now assigned to a single wire network are reconciled. In the case of
a child contact, AutoCAD Electrical looks for its parent on the current drawing
and removes the deleted contact from the parent's cross-reference annotation
(if the parent is on some other drawing then a separate run of the
Cross-reference command may be required on the drawing set). If you erase
a parent schematic component you will have the option to search for related
child components, surf to them, and optionally delete them.
796 | Chapter 10 Component Tools
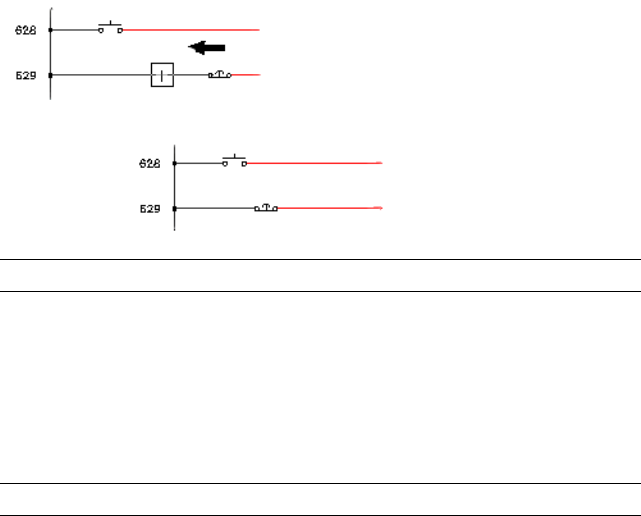
Scoot components/wire segments
The Scoot command lets you quickly reposition components and wire
segments. Select directly on a component to slide just that component along
its connected wire(s). Wires remain connected to components and existing
wire numbers re-center. The component’s movement will be constrained along
the wire segment. To scoot a ladder rung, including all its components and
wire numbers, select directly on any wire segment that makes up the rung.
Scoot works on wire numbers, components, terminals, PLC I\O modules, jogs
in dashed link lines, signal arrows, wires, and wires with wire-crossing loops.
NOTE Components constrained by connected wiring at right angles will not scoot.
Align components/wire numbers
The Align Components command aligns the selected component with a master
component that you select. All connected wires will be adjusted, and wire
numbers re-centered if necessary. You can align vertically or horizontally by
flipping the command with a V or H character and a [space] entered on the
command line.
NOTE The Align Component command can be used on panel layout symbols.
Move components
The Move Component command removes the selected component from its
current location/wire connection and inserts it into a new position. AutoCAD
Electrical uses a rotated version of the symbol, if necessary, as it breaks and
reconnects any underlying wires. AutoCAD Electrical attempts to repair the
broken wires and reconcile multiple wire numbers left over in the component's
vacated position. If you use this command and select on a panel footprint,
AutoCAD Electrical issues the normal AutoCAD Move command.
Manipulate components | 797
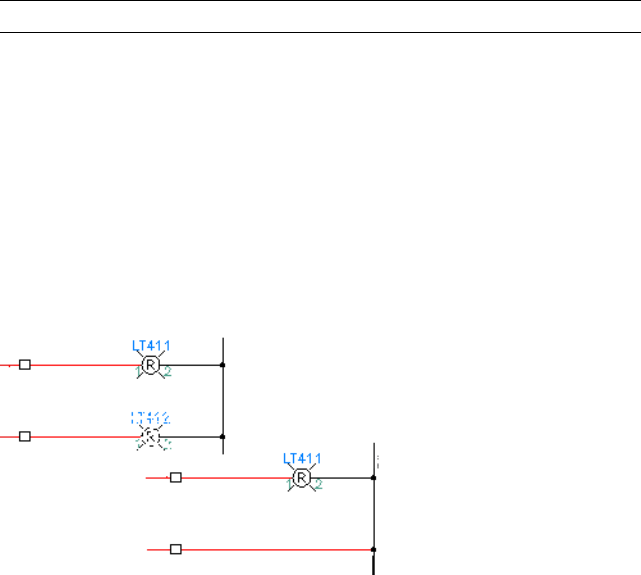
Move component attributes
The Move/Show Attributes command removes the selected attribute from its
current location and inserts it into a new position. If you accidentally pick on
the block's graphics instead of an attribute, this move command will kick into
the attribute Display/Edit mode instead.
Stretch PLC modules
The Stretch PLC Module command is a very handy feature, especially for PLC
modules. Let's say you have a PLC module and you need to add a couple
components in parallel on a particular rung and you did not leave enough
room between the I/O points. What do you do? You could erase everything
and rebuild the module and then reinsert the components, redo the wiring,
etc. or you could use the Stretch PLC Module command.
NOTE The block name itself is changed to make it unique.
Split PLC modules
The Split PLC Module command is especially handy for splitting PLC modules
once they have been built or inserted. Maybe you need to move the last few
I/O terminal points to another ladder to make room for some other devices.
Delete components
Deletes the components you select, and corrects resulting wire gaps.
For a child contact, Delete Component updates the cross-reference on the
parent. If you erase a parent schematic component, you have the option to
search for related components and delete them.
798 | Chapter 10 Component Tools
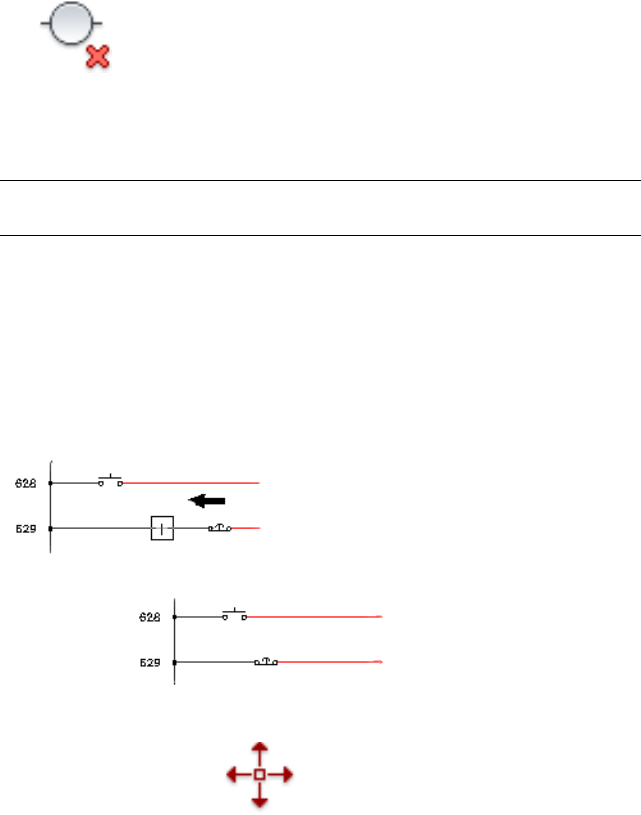
1Click Schematic tab ➤ Edit Components panel ➤ Delete Component.
2Select the components to delete.
3Press Enter.
NOTE If you erase a parent schematic component, you have the option to search
for related child components, surf to them, and delete them.
Scoot components/wire segments
Scoots wire numbers, components, wire segments, link lines, PLC text, and
signal arrows.
Scoot quickly repositions components and wire segments. Click a component
to slide just that component along its connected wires. Wires remain connected
and existing wire numbers center themselves. To scoot a ladder rung, including
all its components and wire numbers, click any wire segment.
1Click Schematic tab ➤ Edit Components panel ➤ Modify Components
drop-down ➤ Scoot .
2Select the component to scoot along its connected wires or select the
wire segment to scoot the entire wire, including components, along the
bus. A rectangle indicates the selected items.
3Move your cursor to the appropriate position and click. The items scoot
and reconnect.
Manipulate components | 799
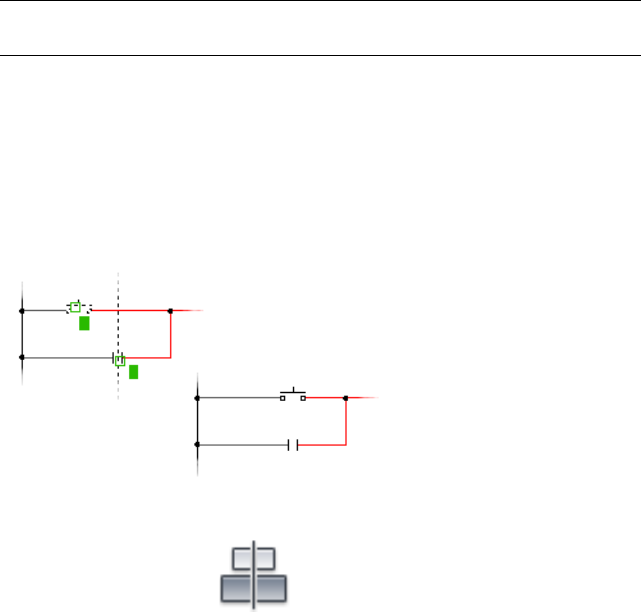
NOTE You can run the Auto-Retag operation on the components if they move to
a new line reference, or update the child cross-references only.
Align components/wire numbers
Aligns selected components or wire numbers with the selected master.
Select the components individually or with a window. Align adjusts all
connected wires, and recenters wire numbers. Align vertically or horizontally
by flipping the command with a V or H character followed by a [space] entered
on the command line.
1Click Schematic tab ➤ Edit Components panel ➤ Modify Components
drop-down ➤ Align.
2Select the master component to align with. A temporary line appears
showing the alignment position.
3Select the components to move into alignment with the selected master
component. You can select the components individually or by windowing.
All connected wires are adjusted, and wire numbers recentered if
necessary. You can align vertically or horizontally by flipping the
command with a V or H character and a [space] entered on the command
line.
Move components
Moves a component you select in a drawing to a point you specify, and
includes automatic update of the component tag.
A Move Component operation breaks and reconnects any underlying wires,
and inserts a rotated version of the symbol, if necessary. It repairs broken wires
800 | Chapter 10 Component Tools
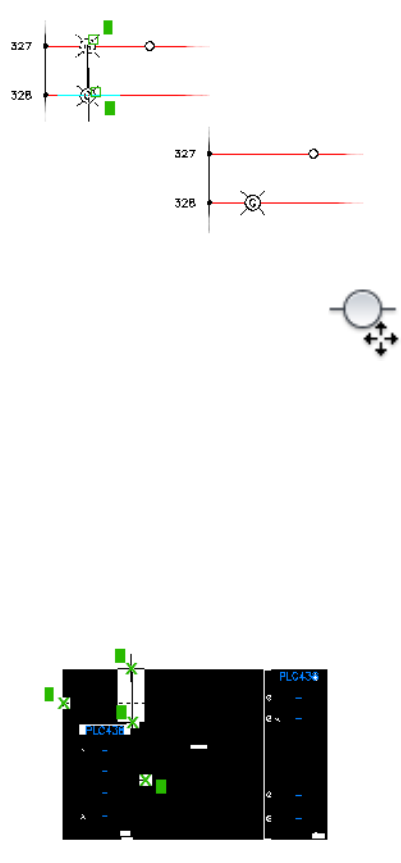
and removes unnecessary wire numbers left in the position the component
vacated.
1Click Schematic tab ➤ Edit Components panel ➤ Modify Components
drop-down ➤ Move Component.
2Select the component to move.
3Select the insertion point for the move. The component automatically
moves to the selected position.
Stretch PLC modules
Stretches or compresses a windowed portion of a PLC module (or any block
insert).
Maintains all the original block information, including attributes.
Manipulate components | 801

1Click Schematic tab ➤ Edit Components panel ➤ Modify Components
drop-down ➤ Stretch PLC Module.
2Select the blocks to stretch using a crossing window or crossing polygon
window.
3Press Enter.
4Select your base and second point of displacement.
The exploded blocks stretch and are then rebuilt (maintaining all the
original block information, including attributes).
Split PLC modules
1Click Schematic tab ➤ Edit Components panel ➤ Modify Components
drop-down ➤ Split PLC Module.
2Select the block to split.
3Select the split point or enter “M” to select the objects for the new child
component using a crossing window or crossing polygon.
Keep windowing until all objects are selected. To cancel the selection of
any object, press U and select as usual.
4Define the origin point for the new block. You can enter the coordinates
or click Pick Point and select the origin point on the drawing.
5Set the break type: no lines, straight lines, jagged lines, or draw it.
6(Optional) Select to reposition the child block to move it as part of this
command.
7Click OK.
8To reposition the child block, select a point on the screen to place the
block.
Split block
Use this tool to split blocks or parametric connectors into 2 separate block
definitions (for example, parent and a child or a child and another child).
802 | Chapter 10 Component Tools
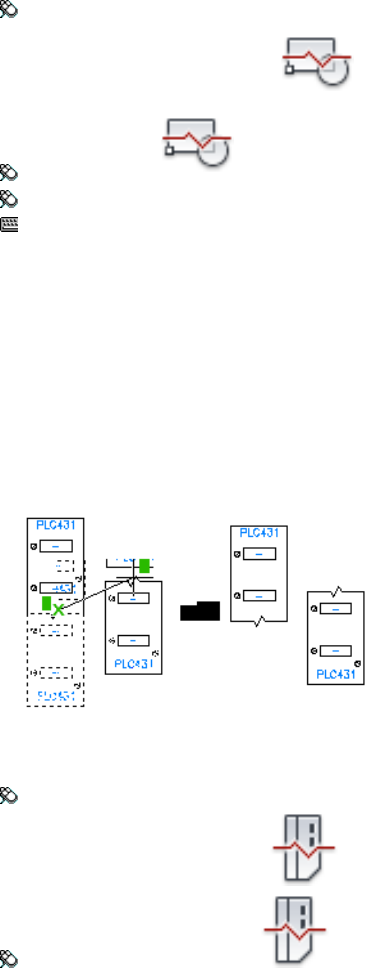
Split PLC Module
Ribbon: Schematic tab ➤ Edit Components panel ➤ Modify Components
drop-down ➤ Split PLC Module.
Toolbar: Scoot
Menu: Components ➤ Component Miscellaneous ➤ Split PLC Module
Command entry: AESPLITPLC
Select the block to split and specify the split point.
You specify:
■Origin point for the new block
■Break type
■Layer for the child block
■Whether to reposition the child block
Split Connector
Ribbon: Schematic tab ➤ Edit Components panel ➤ Modify Connectors
drop-down ➤ Split Connector.
Toolbar: Insert Connector
Manipulate components | 803
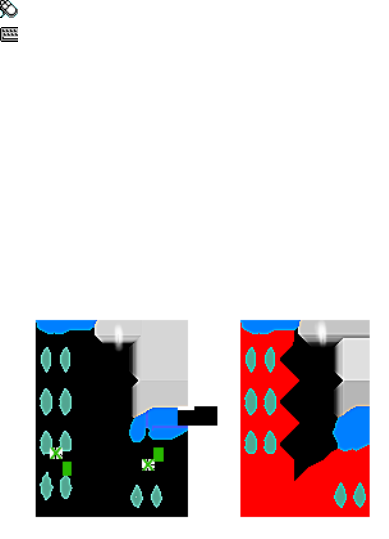
Menu: Components ➤ Insert Connector ➤ Split Connector
Command entry: AESPLIT
Select the connector to split and specify the split point.
You specify the following:
■Origin point for the new block
■Break type
■Layer for the child block
■Whether to reposition the child block
Specifies the origin point for the new block. The default is
in-line with the first set of pins on the split-off piece. If you
Child Base Point
do not want to accept the default, enter the coordinates
or click Pick Point and select the origin point on the draw-
ing.
Specifies the break type: no lines, straight lines, jagged
lines, or draw it. The default is set to jagged lines. Click
Draw to manually draw the break type on the drawing.
Break Type
Specifies the layer for the child block. You can accept the
default or click List to select the layer from a list of existing
layers.
Layer
Specifies to reposition the child block to move it as part of
this command.
Reposition Child Block
804 | Chapter 10 Component Tools
Reverse/flip components
Use this tool to reverse or flip selected component graphics and its associated
attributes.
NOTE This tool only operates on a component with 2-wire connections (for
example, limit switch contact symbol).
1Click Schematic tab ➤ Edit Components panel ➤ Modify Components
drop-down ➤ Reverse/Flip Component.
2Select whether to reverse or flip the component.
NOTE Components are reversed perpendicular to the axis formed by the
two wire connections or flipped along the axis of the wire connection.
3(Optional) Select to reverse or flip the graphics only.
Reverse/flip component
Reverses or flips the orientation of a component.
Ribbon: Schematic tab ➤ Edit Components panel ➤ Modify Components
drop-down ➤ Reverse/Flip Component.
Toolbar: Scoot
Menu: Components ➤ Reverse/Flip Component
Command entry: AEFLIP
Available when a component has only two wire connections. Specify to reverse
or flip only the graphics, or include component attributes.
Manipulate components | 805
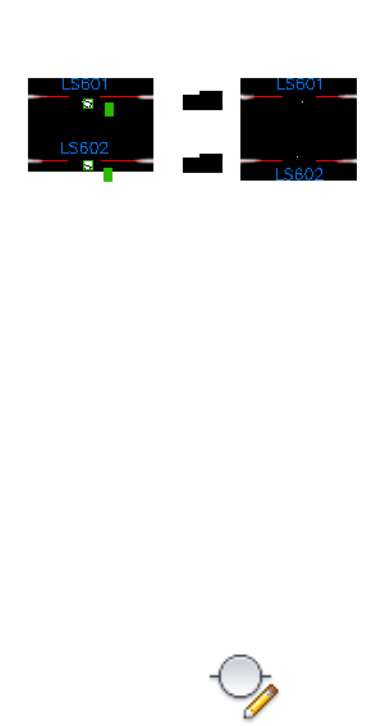
Reverses the component graphics and the attributes perpendicular
to the axis formed by the two wire connections.
Reverse
Flips the component graphics and the attributes along the axis
of the wire connection (for example, from top-side of the wire
to the bottom and vice versa).
Flip
Specifies to reverse or flip only the graphics; component attributes
are not modified.
Graphics only
Annotate ratings attributes
Annotate ratings attributes
1Click Schematic tab ➤ Edit Components panel ➤ Edit Components
drop-down ➤ Edit.
2Click the Show All Ratings button in the Insert/Edit Components dialog
box.
The View/Edit Rating Value dialog box displays, letting you enter values
for each ratings attribute.
3Click the Defaults button next to the edit box to display the list of default
values.
4Select a line from the file to map its values to the available rating
attributes.
806 | Chapter 10 Component Tools
Notice that a single line may carry multiple values with each value
separated by a "|" character. Any text that follows a semi-colon is
considered a comment and will be ignored.
5Choose whether to select a different file or add a new entry to the ratings
defaults file.
6Click OK to finish the operation.
You may create multiple .WDR files. AutoCAD Electrical will look for a generic
defaults file called WD_RATINGS.WDR stored in the AutoCAD Electrical
support directory. You may also create a project-specific file with the same
name and path as the project with the .WDR extension. You may also have
Family-specific files named for the Family code of the component with the
.WDR extension. For example, if the component has the family code "PB" for
push buttons and a file called PB.WDR exists, it will display when you select
the "Family" button.
NOTE If the Show All Ratings button is disabled, the component you are editing
does not have a rating attribute.
Ratings defaults
AutoCAD Electrical allows up to 12 Ratings attributes on a component. To
help you annotate these attributes AutoCAD Electrical lets you pick from a
list of defaults. To take advantage of this feature you need to create/modify a
text file with a .WDR extension. This file is a simple text file and can be edited
with any editor such as WordPad.
Ribbon: Schematic tab ➤ Edit Components panel ➤ Edit Components
drop-down ➤ Edit.
Toolbar: Main Electrical
Menu: Components ➤ Edit Component
Command entry: AEEDITCOMPONENT
Click the Show All Ratings button, and then click Defaults.
Displays the values for the rating attribute.Ratings panel
Selects a different file and description list.Pick File
Annotate ratings attributes | 807
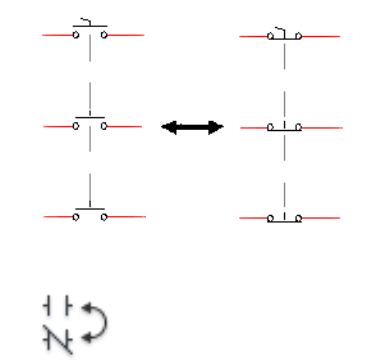
Displays a project .WDD file (if it is not already displayed).Project
Displays family-specific files named for the Family code of the
component. For example, if the component has the family code
Family
"PB" for push buttons and a file called PB.WDD exists, it will dis-
play when you select the Family button.
Displays a generic file (WD_DESC.WDD) if it is not already dis-
played.
Generic
Adds a new entry to the rating defaults file. Enter a value in the
dialog box or click Edit File to edit the file using WordPad.
Add/Edit
Swap contact states
Swap contact states
Switches a selected component between the Normally Open and Normally
Closed contact states.
The program looks at the selected contact, reads its block name, and checks
the fifth character for either 1 or 2. It looks for a matching block name with
the opposite 1 or 2, and swaps this block for the existing block.
1Click Schematic tab ➤ Edit Components panel ➤ Toggle NO/NC.
2Select the component to toggle.
808 | Chapter 10 Component Tools

3(Optional) Type Ctrl + Z to undo the contact swap if you selected the
wrong component.
Existing attribute text is preserved on the flipped contact. If the maximum
contact counts are carried by the parent symbol, the maximum counts
are checked so that they are not exceeded by the flip.
Component Cross-References
Cross-Referencing
Cross-referencing is based on collecting and annotating groups of components
that carry the same TAG text string value (for example, 101CR). Components
do not have to be of the same family to be cross-referenced, but they must
have the same TAG1/TAG2/TAG_*/TAG attribute values.
Cross-reference data is annotated on to attributes XREFNO and XREFNC for
N.O and N.C. references respectively. Alternately, if attribute XREF is present,
both N.O. and N.C. references are combined into a single cross-reference text
string.
The AutoCAD Electrical Component Cross-reference tool creates two text
reports in the process of annotating components with cross-reference
information. The Cross-reference report gives a listing of each component
and quantity and locations of child contacts. The Exception/Error report lists
the exceptions AutoCAD Electrical found as it processed the drawing or drawing
set. Exceptions include child contact with no parent and parent relay coil
with no child contacts found.
Cross-Reference
1Click Schematic tab ➤ Edit Components panel ➤ Modify Component
Cross-Reference drop-down ➤ Component Cross-Reference.
2Select to process:
■Project - select from a list of project drawings to process.
■Active drawing (all) - process all components on the active drawing.
■Active drawing (pick) - select components to process.
Component Cross-References | 809

3Click OK.
4If Active drawing (all) is not selected, select the components or drawings
to process.
The components are cross-referenced and the Cross-Reference Report or
Error/Exception Report dialog box displays.
5Select from the options:
■Cross-reference - display the Cross-Reference Report which gives a
listing of each component and quantity and locations of child
contacts.
■Exception - display the Error/Exception Report which lists the
exceptions found. Exceptions include child contacts with no parent
and parent relay coils with no child contacts.
■Surf - surf to components listed in the Error/Exception report.
■Print - print the displayed report.
6Click Close.
Component cross-reference
Adds or updates cross-reference text on related parent and child components.
Ribbon: Schematic tab ➤ Edit Components panel ➤ Modify Component
Cross-Reference drop-down ➤ Component Cross-Reference.
Toolbar: Main Electrical 2
Menu: Components ➤ Cross-Reference ➤ Component Cross-Reference
Command entry: AEXREF
The drawing properties define the cross-referencing format. Component
Cross-reference creates both a listing of each component with the quantity
and locations of child contacts, and an exception report.
810 | Chapter 10 Component Tools
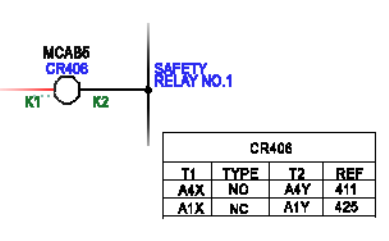
Cross-referencing is based upon collecting and annotating groups of
components that carry the same TAG text string value (such as "101CR").
Components do not have to be of the same family to be cross-referenced; they
must have the same TAG1/TAG2/TAG_*/TAG attribute values.
Cross-reference data is annotated on to attributes "XREFNO" and "XREFNC"
for N.O and N.C. references respectively. Alternately, if attribute XREF is
present, both N.O. and N.C. references are combined into a single
cross-reference text string.
Specifies to run the report on selected components,
the current drawing, or the entire project.
Run Cross-Reference on
Displays the last Cross-Reference report.Cross-reference
Displays the last Exception/Error report.Exception
Using other dialog boxes to set cross-reference options
■The cross-reference format is set up on the Drawing Properties ➤
Cross-Reference dialog box. It is on a per-drawing basis and can include
sheet and drawing ID, line or grid-reference location, and fixed punctuation.
■A project-wide option to fill unused contact references with a user-defined
text string is available using the Project Manager on page 215 tool.
Right-click the project name and select Properties. In the Project Properties
➤ Cross-References dialog box, Component Cross-Reference Display
section, select Text Format and click Setup.
■Real-time cross-reference update can be turned on or off on the Project
Properties ➤ Cross-References dialog box.
Cross-Referencing | 811

Surfing on Cross-Reference Exception reports
1Click Schematic tab ➤ Edit Components panel ➤ Modify Component
Cross-Reference drop-down ➤ Component Cross-Reference.
2Select to process: the project, active drawing, or selected components.
■Project - select from a list of project drawings to process.
■Active drawing (all) - process all components on the active drawing.
■Active drawing (pick) - select components to process.
3Click OK.
4If the Active drawing (all) option is not selected, select the components
or drawings to process.
The components are cross-referenced and the Cross-Reference Report or
Error/Exception Report dialog box displays.
5Select Exception to display the Error/Exception Report.
6Select Surf.
AutoCAD Electrical changes to surfer mode.
7Double-click any listed error/exception entry in the Surf dialog box.
AutoCAD Electrical surfs to the appropriate drawing and zooms up on
the offending contact.
8Click Edit to correct the error, and then surf to the next one.
Change cross-reference visibility
This tool changes the visibility of the cross-reference XREF attribute. In most
cases, the cross-referencing should be visible but there are times when you
may not want the cross-referencing displayed on parent symbols.
1Click Schematic tab ➤ Edit Components panel ➤ Modify Component
Cross-Reference drop-down ➤ Hide/Unhide Cross-Referencing.
2Select the objects whose cross-referencing you want to hide or display.
Single selection, window selection, or multiple selection is allowed.
812 | Chapter 10 Component Tools
3Right-click to end the selection and apply the command.
Exclude contacts when cross-referencing
You can exclude the contact from being included in any AutoCAD Electrical
cross-reference text annotation.
1Enter ATTEDIT at the command line.
2Select the contact that you want to exclude from cross-referencing.
3Change the CONTACT attribute value to “NULL”.
4Click OK.
NOTE Run the Cross-reference command to update the cross-referencing on the
parent symbol.
Check coil/contact count
Using the Cross-Reference Check on page 813 tool, AutoCAD Electrical first
extracts a complete list of components from the project drawing set. Then it
prompts you to select a component to check. AutoCAD Electrical reads the
tag of the component, finds all associated child components, and lists them
in a dialog box. It also displays the assigned catalog number of the parent (if
one exists). You can do a catalog check to see if the description of the item
indicates that the quantity of contacts can be accommodated.
Component reference listing
The Cross-Reference Check tool displays all associated and parent components
to the selected component.
Ribbon: Schematic tab ➤ Edit Components panel ➤ Modify Component
Cross-Reference drop-down ➤ Cross-Reference Check.
Toolbar: Cross-Reference
Menu: Components ➤ Cross-Reference ➤ Cross-Reference Check
Command entry: AEXREFCHECK
Check coil/contact count | 813
A complete list of components is extracted from the project drawing set. The
tag of the component is read, then all associated components are found and
listed in the dialog box. A bill of material check can be performed to see if the
description of the item indicates that the quantity of contacts can be
accommodated.
References
■N.O. references: Lists the number of normally open contacts assigned to
the selected component.
■N.C. references: Lists the number of normally closed contacts assigned to
the selected component.
■Other references: Lists the number of child devices that are neither NO
or NC contacts. They can include pins of a connector, form C contacts, or
general devices that are being referenced.
■Reference listing: Lists the type, number, location, installation, and
description text for the reference.
Parent Information
■Manufacturer code: Lists the associated manufacturing code of the parent
(if one exists).
■Catalog number: Lists the associated catalog number of the parent (if one
exists).
■Assembly code: Lists the associated assembly code of the parent (if one
exists).
■Catalog Check: Creates a BOM description for the selected component
using the catalog number of the parent component.
Comparing the description (2 available) with the contact count (3 required)
reveals a needed adjustment.
■Catalog lookup: Opens the parts catalog to look up component-specific
catalog information.
814 | Chapter 10 Component Tools

Overview of cross-reference settings
Cross-reference settings are supported at the project, drawing, and component
level.
Settings are maintained inside of the project defini-
tion file (.wdp). Once settings are created for the
Project Cross-Reference Settings
project, AutoCAD Electrical applies those settings to
new, existing, and copied drawings inside of the
project. Ultimately, cross-reference settings are writ-
ten to the WD_M block of the drawing file to use
during normal operations.
Settings are maintained on the WD_M block of the
drawing. When the cross-reference command is run,
Drawing Cross-Reference Settings
AutoCAD Electrical uses the drawing settings to de-
termine the cross-reference types. During program
runtime, the cross-reference command looks at the
WD_M block as the definition for all referencing on
the drawing.
Settings are maintained at the component to override
the drawing's WD_M block settings of the drawing.
Component Cross-Reference Settings
During program runtime, the cross-reference com-
mand first looks to the component definition before
the WD_M block as the definition for referencing the
component on the drawing.
During normal operation of cross-referencing commands, AutoCAD Electrical
looks to the component for its settings information before using the drawing
settings. If the component has settings defined, they are used. If there are both
component and drawing cross-reference settings on the same drawing, the
component settings are used where applied and the drawing settings are used
for the rest of the components.
Set cross-referencing display
Cross-reference settings are supported at the project, drawing, and component
level. Changes you make to the settings are automatically updated in real
time.
TIP To set display settings for a specific component that are different from the
drawing, use the Copy/Add Component Override tool.
Overview of cross-reference settings | 815

1Click Project tab ➤ Project Tools panel ➤ Manager.
2In the Project Manager, right-click the project or drawing name, and
select Properties.
NOTE Selecting the project applies changes to the project definition file and
not the drawing. Apply the settings to drawings to see display changes.
3Click the Cross-references tab. In the Component Cross-reference Display
section, select Text, Graphical, or Table Format and click Setup.
■Text Format: Displays cross-referencing as text with any user-defined
string as a separator between references on the same attribute.
■Graphical Format: Displays cross-referencing using the AutoCAD
Electrical graphical font or using contact mapping edit boxes while
displaying each reference on a new line.
■Table Format: Displays cross-referencing in a table object so you can
define the columns to display.
4Specify the format for the cross-reference display.
The Preview box shows an image that shows an example of the
cross-referencing format being defined.
5Select the display options.
TIP See the Reference topics for each cross-reference display format to learn
about the various display options.
6If you selected to use the Table Format style, specify the table style and
table title. Select a table style from the list. The list initially displays table
styles from the active drawing and from the table styles drawing. Click
Browse to select a drawing with the desired table style. Once selected, the
table style is applied to the Table Styles drawing.
To set the table title:
■Select the allowable replaceable parameter entry from the selection
list
■Enter the replaceable parameter
■Enter text
816 | Chapter 10 Component Tools
7Click OK.
If you selected to use the Table Format style, the table location is based
on the cross reference attribute position. You can move the table to any
location on the drawing and the table remains in the new position for
that symbol.
Cross-reference component override
You can define components to have different cross-referencing styles. The
settings specified using this tool override the drawing properties. Component
overrides are copied when the component is copied; similarly they are applied
to multiple inserts of the same component.
Ribbon: Schematic tab ➤ Edit Components panel ➤ Modify Component
Cross-Reference drop-down ➤ Copy/Add Component Override.
Toolbar: Cross-Reference
Menu: Components ➤ Cross-Reference ➤ Copy/Add Component
Override
Command entry: AECOPYOVERRIDE
NOTE You can also access this when you use Insert Component on page 742.
Select the component type to insert and specify the insertion point on the drawing.
In the Insert/Edit Component dialog box, Cross-Reference section, select
Component override and click Setup.
Select the component with settings to copy or override.
Defines the cross-reference annotation format. One
replaceable parameter, %N, must always be part of
Cross-Reference Format
the cross-reference format string. A typical format
string might be just the %N parameter. Use the up-
per section for on-drawing references and the bottom
section for off-drawing references. You can use the
same format for both.
Overview of cross-reference settings | 817
NOTE If your format includes the sheet number %S
parameter or the drawing number %D parameter,
enter the values in the edit boxes in Sheet Values
section of the Drawing Properties ➤ Drawing Set-
tings dialog box.
There are different styles of cross referencing Auto-
CAD Electrical supports:
Component Cross-Reference Display
■Text Format: Displays cross-referencing as text
with any user-defined string as a separator
between references on the same attribute.
■Graphical Format: Displays cross-referencing
using the AutoCAD Electrical graphical font or
contact mapping edit boxes while displaying
each reference on a new line.
■Table Format: Displays cross-referencing in a
table object, that automatically gets updated in
real time, while allowing you to define the
columns to display.
Click Setup to display a dialog box for setting the
display defaults for each component cross-reference
display format.
Remove component overrides
You can apply overrides to a component so its settings override those of the
drawing or project. Use this tool to remove the component overrides so the
cross-referencing commands use the settings for the drawing or project.
Ribbon: Schematic tab ➤ Edit Components panel ➤ Modify Component
Cross-Reference drop-down ➤ Remove Component Override.
Toolbar: Cross-Reference
Menu: Components ➤ Cross-Reference ➤ Remove Component Override
Command entry: AERMOVERRIDE
Select to remove the component overrides on the project, active drawing, or
selected components on the drawing.
818 | Chapter 10 Component Tools
Project and Active drawing (all) remove overrides on all components on the
drawings while Active drawing (pick) removes overrides for selected
components only.
Text cross-reference format setup
This format displays cross-referencing as text with any user-defined string as
a separator between references on the same cross-reference attribute.
NOTE Mtext cross-referencing can still be used on selected components that use
text cross-referencing.
Ribbon: Project tab ➤ Project Tools panel ➤ Manager.
Toolbar: Main Electrical 2
Menu: Projects ➤ Project ➤ Project Manager
Command entry: AEPROJECT
In the Project Manager, right-click the project or drawing name and select
Properties. Click the Cross-References tab. In the component Cross-Reference
Display section, select Text Format, and click Setup.
NOTE You can also access this when you use Insert Component on page 742.
Select the component type to insert and specify the insertion point on the drawing.
In the Insert/Edit Component dialog box, Cross-Reference section, select
Component override and click Setup. In the Cross-reference component override
dialog box, select Text Format, and click Setup.
Format
The Reference Separator edit box allows you to define any string as a separator
between references on the same attribute. Spaces are allowed. The default
separator is a comma. Use "|" anywhere in the edit box to change the XREF
attribute to multi-line text and add a carriage return after each reference. The
separator value is applied to the drawing settings in the WD_M block definition
or the component to override the drawing settings.
When there are 2 or more references on the same cross-reference attribute
each reference is separated by the specified separator. If you use a comma as
the separator the references would look like the following examples:
NO 412,633
Overview of cross-reference settings | 819
NO 20.3,21.3
Preview
Displays an image that shows an example of the cross-referencing format
being defined.
Options
Displays the child symbols that are not referenced
or being used in the project pin list.
Display Unused Children (Contacts)
Displays each unused child symbol in its own refer-
ence.
Separate Reference
Displays the total count of all unused child symbols
in a single reference.
Contact Count Totals
Specifies what should be displayed in the unused
reference position for both Separate and Contact
Fill Reference With
Count options. If left empty, a space appears where
the referencing would be displayed. For example if
you enter the text "SP" for spares, "SP" displays in the
referencing.
Displays the referencing in the order that the contacts
are found in the line reference of the project.
Cross-Referencing Sorted by Line Refer-
ence
Displays the referencing in the order that the Pin List
is defined on the parent component. It is sorted re-
Cross-Referencing Sorted by Pin List Order
gardless if the pins are displayed as part of the refer-
encing.
Overview of graphical cross-reference formats
When you use the graphical cross-reference format style, the preview image
changes to show what the cross-reference looks like in the drawing.
Graphic Font Format:
Displays the cross-reference format using the JIC or IEC/GB/JIS graphical font.
The setting is applied to the graphical font regardless of the tagging mode
820 | Chapter 10 Component Tools
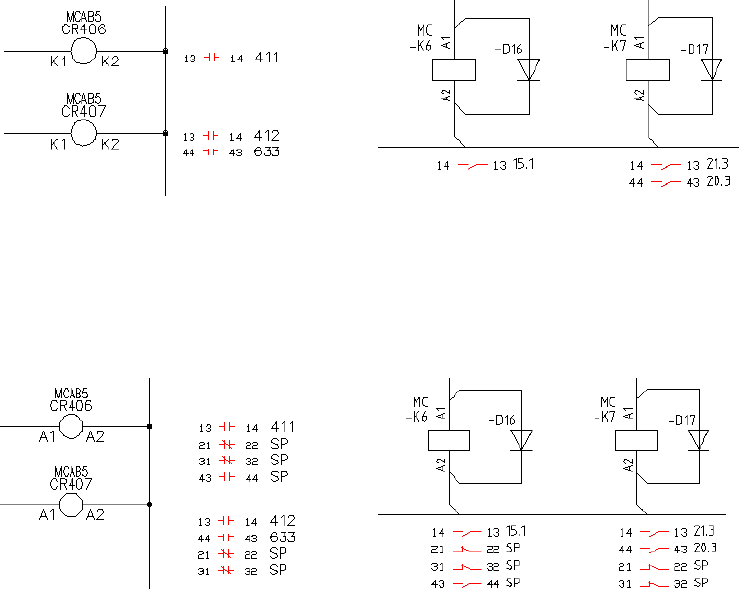
assigned in the project properties. This setting is taken from drawing properties
if there are no cross-reference overrides specified on the inserted component.
IEC
JIC
The following example displays cross-referencing next to the symbol in the
graphic font format while the unused children (contacts) are displayed as
separate references. The Fill Reference With value is “SP.”
IEC
JIC
Contact Mapping Format:
Overview of graphical cross-reference formats | 821
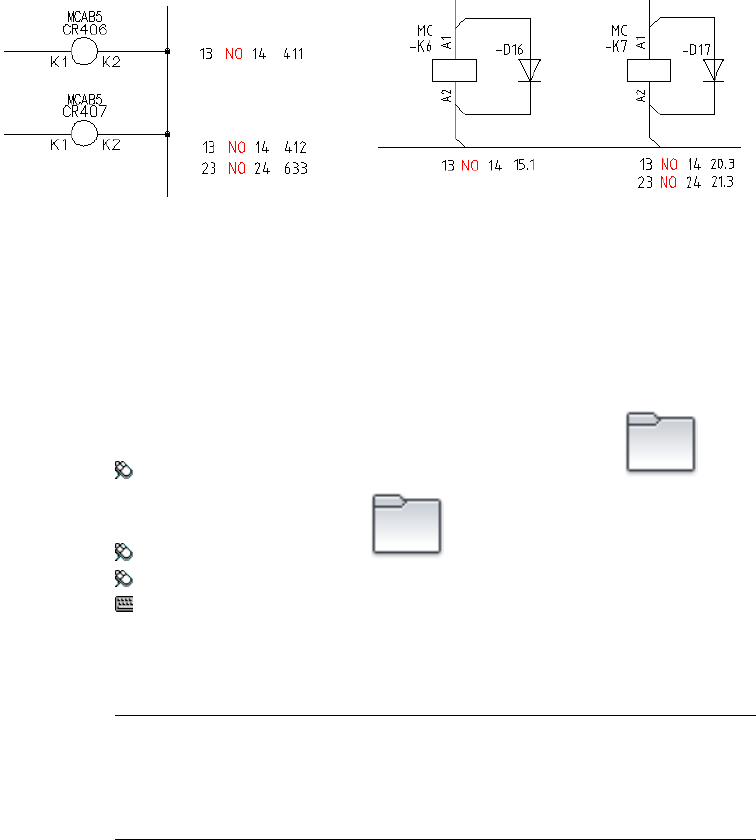
Displays the cross-reference format using cross-referencing type values (NO,
NC, NONC).
IEC
JIC
Graphical cross-reference format setup
This format displays cross-referencing using the AutoCAD Electrical graphical
font or using contact mapping edit boxes while displaying each reference on
a new line.
Ribbon: Project tab ➤ Project Tools panel ➤ Manager.
Toolbar: Main Electrical 2
Menu: Projects ➤ Project ➤ Project Manager
Command entry: AEPROJECT
In the Project Manager, right-click the project or drawing name and select
Properties. Click the Cross-References tab. In the component Cross-Reference
Display section, select Graphical Format, and click Setup.
NOTE You can also access this when you use Insert Component on page 742.
Select the component type to insert and specify the insertion point on the drawing.
In the Insert/Edit Component dialog box, Cross-Reference section, select
Component override, and click Setup. In the Cross-reference component override
dialog box, select Graphical Format, and click Setup.
822 | Chapter 10 Component Tools

Format
In the event where there are 2 or more references for the same component,
each reference is entered into a new line.
Displays the cross-reference format using a graphical font.
Select to use the JIC font or the IEC font. The setting is ap-
Graphic Font
plied to the graphical font regardless of the tagging mode
assigned in the project properties.
The JIC image font style displays the cross-referencing using
the JIC style normally open, normally close, and Form C
contact types.
The IEC/GB/JIS image font style displays the cross-referen-
cing using the IEC style normally open, normally close, and
Form C contact types.
Displays the cross-reference format using cross-referencing
type values (NO, NC, NONC). Enter the format into the
edit boxes.
Contact Mapping
Preview
Displays an image that shows an example of the cross-referencing format
being defined.
Options
Displays the child symbols that are not referenced
or being used in the project pin list.
Display Unused Children (Contacts)
Displays each unused child symbol in its own refer-
ence. It is dependent on pin list count.
Separate Reference
Displays the total count of all unused child symbols
in a single reference.
Contact Count Totals
Specifies what to display in the unused reference
position for both Separate and Contact Count op-
Fill Reference With
tions. If left empty, a space appears where the refer-
encing would be displayed. For example if you enter
the text "SP" for spares, "SP" displays in the referen-
cing.
Overview of graphical cross-reference formats | 823
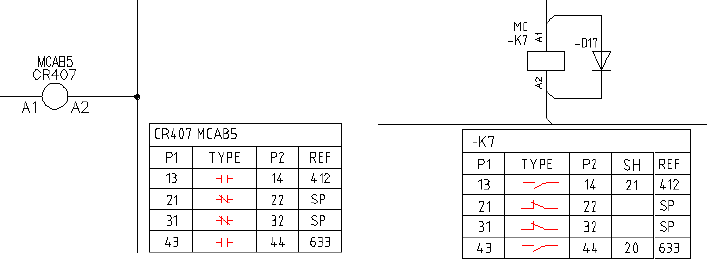
Overview of table cross-reference formats
When you use the table cross-reference format style, the preview image changes
to show what the cross-reference looks like in the drawing.
Graphic Font Format:
Displays the cross-reference format using the JIC or IEC graphical font. The
setting is applied to the graphical font regardless of the tagging mode assigned
in the project properties.
The following examples display the table cross-referencing using the graphic
font format inside the table style. The Fill Reference With value is "SP" for
unused children (contacts).
IEC
JIC
Contact Mapping Format:
824 | Chapter 10 Component Tools
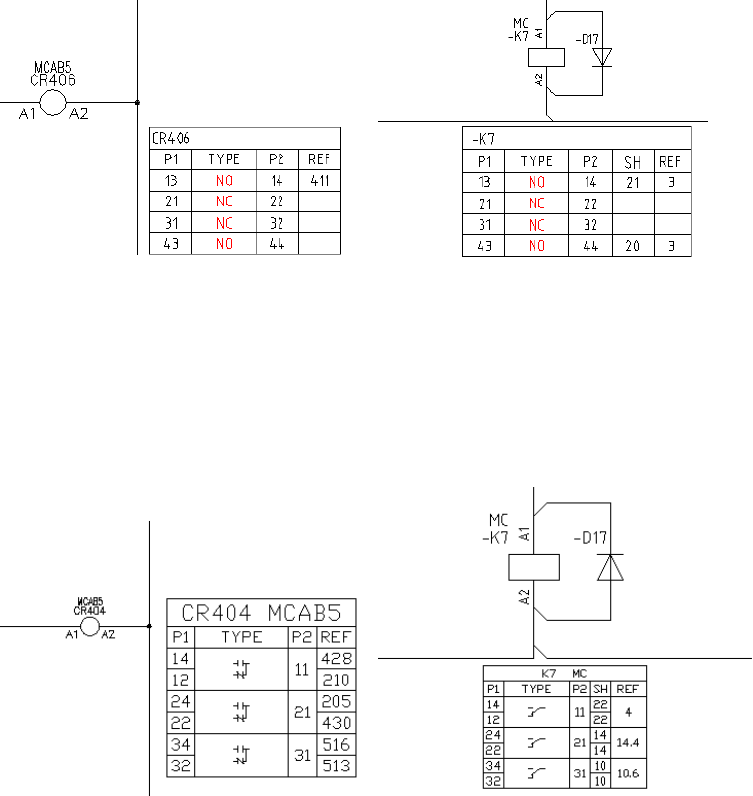
Displays the cross-reference format using cross-referencing type values (NO,
NC, NONC).
IEC
JIC
Symbol Mapping Format:
Displays the cross-reference format using an AutoCAD block (.dwg) file to
represent the contact type. The _XREF_GRAPHICS table in the catalog lookup
database defines the symbol mapping. The schematic library folders for the
active project are searched for the mapped symbols for insertion.
IECJIC
Overview of table cross-reference formats | 825
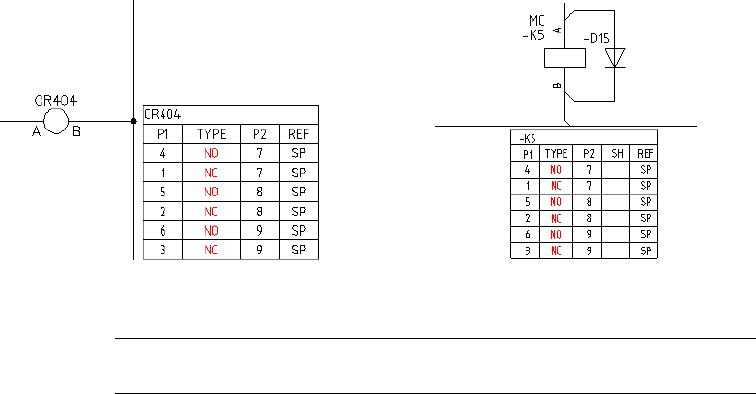
Form C contacts and tables
A typical type of contact is a Form C contact type. It is comprised of 2 contacts;
1 open and 1 closed where they share a common terminal pin number. You
can choose to insert both of the Form C contacts as two individual symbols,
or together as one symbol.
Example: Two symbols make up the Form C contact
The common pin is on the right-hand side next to the referencing column
and displays in the P2 column of the table.
IEC
JIC
NOTE If using the symbol mapping method, a single symbol represents the Form
C contact, even if two separate contacts are inserted.
Example: Single symbol makes up the Form C contact
826 | Chapter 10 Component Tools
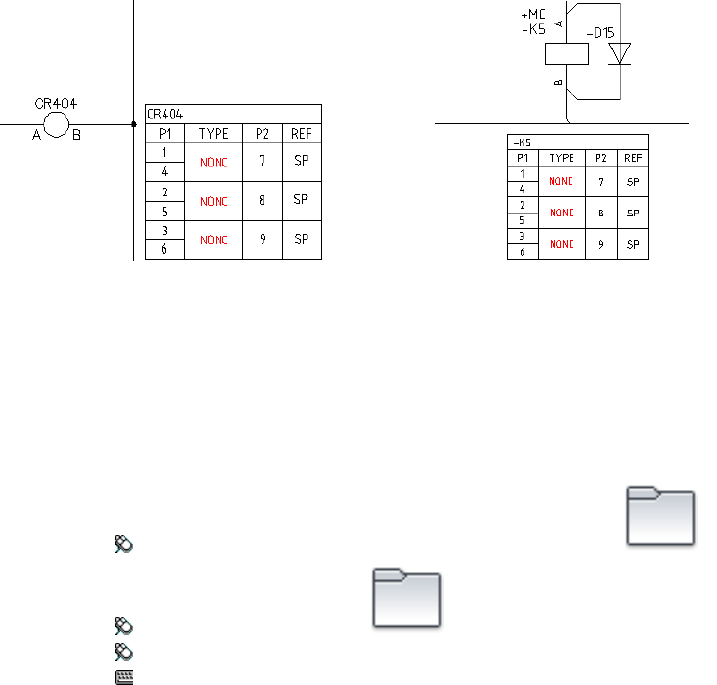
The common pin is on the right-hand side next to the referencing column
and displays in the P2 column of the table.
IEC
JIC
Table cross-reference format setup
This format displays cross-referencing in a table object that automatically gets
updated in real time, so you can define the columns to display. To display
component cross-referencing in a table, select a predefined table style and
define the column labels to display.
Ribbon: Project tab ➤ Project Tools panel ➤ Manager.
Toolbar: Main Electrical 2
Menu: Projects ➤ Project ➤ Project Manager
Command entry: AEPROJECT
In the Project Manager, right-click the project or drawing name, and select
Properties. Click the Cross-references tab. In the component Cross-reference
Display section, select Table Format, and click Setup.
If new contacts are added to the component, the cross-referencing table
automatically updates. The table location is based on cross-reference attributes.
You can move the table to any location on the drawing and the table remains
in the new position.
If you change the table setup once a table has been inserted onto the drawing,
run the Component Cross-reference tool to update the table.
Overview of table cross-reference formats | 827
NOTE You can also access this dialog box by selecting Schematic tab ➤ Insert
Components panel ➤ Icon Menu. Select the component type to insert and specify
the insertion point on the drawing. In the Insert/Edit Component dialog box,
Cross-reference section, select Component override, and click Setup. In the
Cross-reference component override dialog box, select Table Format, and click
Setup.
Format
Displays the cross-reference format using a graphical font. Select to
use the JIC font or the IEC/GB/JIS font. The setting is applied to the
Graphic Font
graphical font regardless of the tagging mode assigned in the project
properties.
The JIC image font style displays the cross-refer-
encing using the JIC style normally open, nor-
mally close, and Form C contact types.
The IEC/GB/JIS image font style displays the
cross-referencing using the IEC style normally
open, normally close, and Form C contact types.
Displays the cross-reference format using cross-referencing type values
(NO, NC, NONC). Enter the format into the edit boxes.
Contact Mapping
Displays the cross-reference format using mapped graphic block
drawings. Click Edit on page 830 to modify the mapping settings.
Symbol Mapping
See Learn about table cross-reference formats on page 820 for examples of the
format styles.
Preview
Displays an image that shows an example of the cross-referencing format
being defined.
Options
Displays the reference information for the parent
component inside the cross-reference format.
Display Parent (Coil)
828 | Chapter 10 Component Tools
Displays the child symbols that are not referenced
or being used in the project pin list.
Display Unused Children (Contacts)
Displays each unused child symbol in its own refer-
ence.
Separate Reference
Displays the total count of all unused child symbols
in a single reference.
Contact Count Totals
Specifies what to display in the unused reference
position for both Separate and Contact Count op-
Fill Reference With
tions. If left empty, a space appears where the refer-
encing would be displayed. For example if you enter
the text "SP" for spares, "SP" displays in the referen-
cing.
Table Style
Table styles are defined within a drawing file to determine the size, shape,
style, and font of a table object. There is always a table style on a drawing.
The standard table style cannot be deleted. Various style drawing files that
determine the drawing-related settings are provided with AutoCAD Electrical.
The Table Styles drawing (TableStyle.dwg) defines a series of table objects that
are used in the selection process and then copied to the drawing files.
Select a table style from the list. The list initially displays table styles from the
active drawing and the TableStyle.dwg. Click Browse to select a drawing with
the desired table style. Once selected, the table style can be applied to the
Table Styles drawing. If the selected style does not exist on the TableStyle.dwg
it is copied to it. When a drawing is referenced the style is then copied from
the TableStyle.dwg.
Click Define Columns to open the Cross-reference Table Data Fields to Display
dialog box to define the columns for the table cross-referencing.
Table Title
Controls the replaceable parameters and carriage returns. Select the allowable
replaceable parameter entry from the selection list, enter the replaceable
parameter to use, or enter text for the table title. Add a carriage return inside
of the string by using "|" anywhere in the Table Title edit box.
Overview of table cross-reference formats | 829
NOTE If the replaceable parameter does not include a value from the drawing, a
blank space is displayed in the table title. If the title line is left blank, the table does
not show the title row.
Edit cross-reference symbol mapping table
AutoCAD Electrical checks a cross-reference symbol mapping table when the
cross-reference table uses the symbol mapping format. This table maps a
contact block name to a graphic drawing name. This graphic drawing is
inserted as a block in the TYPE column of the cross-reference table for the
contact.
Project Manager
Ribbon: Project tab ➤ Project Tools panel ➤ Manager.
Toolbar: Main Electrical 2
Menu: Projects ➤ Project ➤ Project Manager
Command entry: AEPROJECT
Right-click the project or drawing name, and select Properties. Click the
Cross-References tab. In the component Cross-Reference Display section, select
Table Format and click Setup. On the Cross-Reference Format Setup dialog
box select Symbol Mapping, and click Edit.
Drawing Properties
Ribbon: Schematic tab ➤ Other Tools panel ➤ Drawing Properties
drop-down ➤ Drawing Properties.
Toolbar: Main Electrical 2
Menu: Projects ➤ Drawing Properties
Command entry: AEPROPERTIES
Click the Cross-References tab. In the component Cross-Reference Display
section, select Table Format and click Setup. On the Cross-Reference Format
Setup dialog box select Symbol Mapping, and click Edit.
830 | Chapter 10 Component Tools

NOTE You can also access this when you use Insert Component on page 742.
Select the component type to insert and specify the insertion point on the drawing.
In the Insert/Edit Component dialog box, Cross-Reference section, select
Component override, and click Setup. In the Cross-reference component override
dialog box, select Table Format, and click Setup. On the Cross-Reference Format
Setup dialog box select Symbol Mapping, and click Edit.
This database table is a table within the catalog lookup Access .mdb file. The
default file name is default_cat.mdb, table _XREF_GRAPHICS, and is populated
with a sample of symbol mapping data. Expand this table as needed. Use your
copy of Microsoft Access or use this dialog box to add new entries, add entries
based on existing entries, edit, and delete entries from the table.
Sorts the list of database records using either an alphanumeric sort
or number values. You can specify four sorts to perform on the list.
Sort
Find the next instance of the text you enter. Select to look in the entire
table or a specific field. Select to match the entire field, part of the
Find
field, or the beginning of the field with the entered text. Make it case
sensitive by clicking Match case.
Indicates to replace the find value with the new text string that you
specify.
Replace
Filters the listing based on certain values in the table. Picking the
blank entry in the list removes the filter for that field. After you define
the values to filter, apply the filter in the database editing window.
Filter
Displays the Edit Record dialog box for modifying the existing record
in the database.
Edit
Displays the Edit New Record dialog box for entering a new record
into the database.
Add New
Displays the Edit Copied Record dialog box for modifying and copying
the record to make a new record. You cannot have two duplicate
copies in the database.
Add Copy
Removes the selected record from the database.Delete
Overview of table cross-reference formats | 831

Table Format
Arranges the order of the records so that certain wildcard patterns
are used before others. For example, the contact symbol
SEARCHORDER
HCR217F.dwg matches two different SYMBOL values, “*217F*” and
“*21*”. Since “*217F*” has a lower SEARCHORDER value, its
GRAPHIC symbol is used in the cross-reference table.
The contact symbol block name or wild card to map to a graphic
block name. The following codes are supported to handle special
cases.
SYMBOL
■A+B map one graphic block where two separate NO/NC contacts
exist for a given coil and the pins match up with a Form-C in the
PINLIST for that coil.
■SP=NO map a spare normally open contact
■SP=NC map a spare normally closed contact
■SP=<> map a spare convertible contact
■SP=NONC map a spare form-c contact
■SP=NO2 map a spare normally open contact that is part of a
form-c definition
■SP=NC2 map a spare normally closed contact that is part of a
form-c definition
NOTE The spare contacts are shown only if the
cross-reference option to display the unused child contacts is selected.
The name of the block (.dwg) file that is inserted into the table cell
when the block name of the contact matches the SYMBOL value.
GRAPHIC
Explains the purpose of the wild-card pattern and graphic.COMMENTS
Update cross-reference tables
The table style cross-referencing provides support for replaceable parameters
to define and display in the table title. Some AutoCAD Electrical commands
take it into account when modifications are made to the drawing and the
cross-reference table is later updated.
If a component with a cross-reference table is deleted, the table is also
deleted from the drawing.
Delete Component
832 | Chapter 10 Component Tools

If a component is retagged (retag, move component, move circuit, edit
component) the cross-reference table updates if the tag is part of the title.
Component Retag
If a replaceable parameter is modified for a component that has a cross-
reference table, the table title updates to reflect the changes.
Edit Component
When copying a different catalog number to a parent symbol, the PINLIST
and contact count may update and the cross-reference table updates in
real time.
Copy Catalog Assignment
If IEC drawing-wide Location or Installation values change, the cross-refer-
ence table title updates to reflect the changes.
IEC Tagging Mode
If a circuit with a cross-reference table is copied, the table title updates
with the new tag values.
Copy Circuit
If inserting a parent component with a cross-reference table, the table in-
serts at the cross-reference attribute locations (XREF and XREFNO). If in-
Insert Component
serting a child component, the cross-reference table updates for the parent
component.
If scooting a parent component with a cross-reference table, the table also
scoots along the wire.
Scoot
NOTE If you change the component catalog number or add a multiple BOM
catalog number to the component (both change the Pin List data) the
cross-reference table updates as soon as you exit out of the Insert/Edit Component
dialog box. Additionally, if you modify the Pin List manually on the parent
component, the cross-reference table updates with the new pin numbers and the
modified contact count once the Insert/Edit Component dialog box is exited.
Commands that do not support real-time cross-reference updates include:
■Component Find and Replace
■Spreadsheet Export and Import
Set cross-referencing display
Cross-reference settings are supported at the project, drawing, and component
level. Changes you make to the settings are automatically updated in real
time.
Update cross-reference tables | 833

TIP To set display settings for a specific component that are different from the
drawing, use the Copy/Add Component Override tool.
1Click Project tab ➤ Project Tools panel ➤ Manager.
2In the Project Manager, right-click the project or drawing name, and
select Properties.
NOTE Selecting the project applies changes to the project definition file and
not the drawing. Apply the settings to drawings to see display changes.
3Click the Cross-references tab. In the Component Cross-reference Display
section, select Text, Graphical, or Table Format and click Setup.
■Text Format: Displays cross-referencing as text with any user-defined
string as a separator between references on the same attribute.
■Graphical Format: Displays cross-referencing using the AutoCAD
Electrical graphical font or using contact mapping edit boxes while
displaying each reference on a new line.
■Table Format: Displays cross-referencing in a table object so you can
define the columns to display.
4Specify the format for the cross-reference display.
The Preview box shows an image that shows an example of the
cross-referencing format being defined.
5Select the display options.
TIP See the Reference topics for each cross-reference display format to learn
about the various display options.
6If you selected to use the Table Format style, specify the table style and
table title. Select a table style from the list. The list initially displays table
styles from the active drawing and from the table styles drawing. Click
Browse to select a drawing with the desired table style. Once selected, the
table style is applied to the Table Styles drawing.
To set the table title:
■Select the allowable replaceable parameter entry from the selection
list
834 | Chapter 10 Component Tools

■Enter the replaceable parameter
■Enter text
7Click OK.
If you selected to use the Table Format style, the table location is based
on the cross reference attribute position. You can move the table to any
location on the drawing and the table remains in the new position for
that symbol.
Table cross-reference format setup
This format displays cross-referencing in a table object that automatically gets
updated in real time, so you can define the columns to display. To display
component cross-referencing in a table, select a predefined table style and
define the column labels to display.
Ribbon: Project tab ➤ Project Tools panel ➤ Manager.
Toolbar: Main Electrical 2
Menu: Projects ➤ Project ➤ Project Manager
Command entry: AEPROJECT
In the Project Manager, right-click the project or drawing name, and select
Properties. Click the Cross-references tab. In the component Cross-reference
Display section, select Table Format, and click Setup.
If new contacts are added to the component, the cross-referencing table
automatically updates. The table location is based on cross-reference attributes.
You can move the table to any location on the drawing and the table remains
in the new position.
If you change the table setup once a table has been inserted onto the drawing,
run the Component Cross-reference tool to update the table.
NOTE You can also access this dialog box by selecting Schematic tab ➤ Insert
Components panel ➤ Icon Menu. Select the component type to insert and specify
the insertion point on the drawing. In the Insert/Edit Component dialog box,
Cross-reference section, select Component override, and click Setup. In the
Cross-reference component override dialog box, select Table Format, and click
Setup.
Update cross-reference tables | 835

Format
Displays the cross-reference format using a graphical font. Select to
use the JIC font or the IEC/GB/JIS font. The setting is applied to the
Graphic Font
graphical font regardless of the tagging mode assigned in the project
properties.
The JIC image font style displays the cross-refer-
encing using the JIC style normally open, nor-
mally close, and Form C contact types.
The IEC/GB/JIS image font style displays the
cross-referencing using the IEC style normally
open, normally close, and Form C contact types.
Displays the cross-reference format using cross-referencing type values
(NO, NC, NONC). Enter the format into the edit boxes.
Contact Mapping
Displays the cross-reference format using mapped graphic block
drawings. Click Edit on page 830 to modify the mapping settings.
Symbol Mapping
See Learn about table cross-reference formats on page 820 for examples of the
format styles.
Preview
Displays an image that shows an example of the cross-referencing format
being defined.
Options
Displays the reference information for the parent
component inside the cross-reference format.
Display Parent (Coil)
Displays the child symbols that are not referenced
or being used in the project pin list.
Display Unused Children (Contacts)
Displays each unused child symbol in its own refer-
ence.
Separate Reference
Displays the total count of all unused child symbols
in a single reference.
Contact Count Totals
836 | Chapter 10 Component Tools

Specifies what to display in the unused reference
position for both Separate and Contact Count op-
Fill Reference With
tions. If left empty, a space appears where the refer-
encing would be displayed. For example if you enter
the text "SP" for spares, "SP" displays in the referen-
cing.
Table Style
Table styles are defined within a drawing file to determine the size, shape,
style, and font of a table object. There is always a table style on a drawing.
The standard table style cannot be deleted. Various style drawing files that
determine the drawing-related settings are provided with AutoCAD Electrical.
The Table Styles drawing (TableStyle.dwg) defines a series of table objects that
are used in the selection process and then copied to the drawing files.
Select a table style from the list. The list initially displays table styles from the
active drawing and the TableStyle.dwg. Click Browse to select a drawing with
the desired table style. Once selected, the table style can be applied to the
Table Styles drawing. If the selected style does not exist on the TableStyle.dwg
it is copied to it. When a drawing is referenced the style is then copied from
the TableStyle.dwg.
Click Define Columns to open the Cross-reference Table Data Fields to Display
dialog box to define the columns for the table cross-referencing.
Table Title
Controls the replaceable parameters and carriage returns. Select the allowable
replaceable parameter entry from the selection list, enter the replaceable
parameter to use, or enter text for the table title. Add a carriage return inside
of the string by using "|" anywhere in the Table Title edit box.
NOTE If the replaceable parameter does not include a value from the drawing, a
blank space is displayed in the table title. If the title line is left blank, the table does
not show the title row.
Use stand-alone cross-reference symbols
You use stand-alone cross-reference symbols just as you would wire
source/destination arrow symbols but without the wires. Insert a source
reference symbol, and then tie one or more destination reference symbols to
Use stand-alone cross-reference symbols | 837

it. They can be on the same drawing or scattered across the project drawing
set.
Insert stand-alone cross-reference symbols
You use stand-alone cross-reference symbols just as you would wire
source/destination arrow symbols but without the wires. Insert a source
reference symbol, and then tie one or more destination reference symbols to
it. They can be on the same drawing or scattered across the project drawing
set.
1Click Schematic tab ➤ Insert Components panel ➤ Dashed Link Line
drop-down ➤ Insert Stand-Alone Cross-Referencing.
2On the Insert Component dialog box, select the cross-reference symbol
to insert from the Symbol Preview window.
You can also enter the symbol to insert in the Type it edit box or click
Browse to select a symbol to insert.
3Specify the insertion point on the drawing.
4On the Stand-alone Source Cross-Reference Symbol dialog box, specify
the unique name for the source/destination pair. You can select the code:
■From a list of recently used codes.
■From a list of codes on the active drawing.
■From a list of codes in the active project.
■From a destination cross-reference symbol.
5Click OK.
Create stand-alone cross-reference symbols
1Create a blank drawing file and save it following the library symbol
naming conventions.
2Copy a .dwg file of an existing symbol to the new file.
3Edit and save the file.
4Add the file to the icon menu.
838 | Chapter 10 Component Tools
Update stand-alone cross-reference symbol annotations
1Click Schematic tab ➤ Edit Components panel ➤ Modify Component
Cross-Reference drop-down ➤ Update Stand-Alone Cross-Referencing.
The Update Wire Signal and Stand-Alone Cross-Reference dialog box
displays.
2Specify whether to update the cross-reference annotation between pairs
of stand-alone cross-reference symbols.
3Specify to update the cross-references for the entire drawing or one at a
time.
4Click OK.
Insert component
This icon menu can be modified, expanded, or replaced with a custom menu.
You can change the default icon menu using the Library and Icon Menu Paths
section of the Project properties: project settings tab on page 204. Use the Icon
Menu Wizard to modify the menu. The default icon menu can also be redefined
in wd.env. Add entry "WD_MENU" for schematic icon menu and "WD_PMENU"
for panel layout icon menu.
Insert Component
Ribbon: Schematic tab ➤ Insert Components panel ➤ Insert Components
drop-down ➤ Icon Menu.
Toolbar: Main Electrical
Menu: Components ➤ Insert Component
Command entry: AECOMPONENT
Use stand-alone cross-reference symbols | 839
Multiple Insert (Icon Menu)
Ribbon: Schematic tab ➤ Insert Components panel ➤ Multiple Insert
drop-down ➤ Multiple Insert (Icon Menu).
Toolbar: Main Electrical
Menu: Components ➤ Multiple Insert ➤ Multiple Insert (Icon Menu)
Command entry: AEMULTI
NOTE This dialog box is also accessed when inserting Pneumatic, Hydraulic, or
P&ID components; in-line wire labels; stand-alone cross-reference symbols; cable
markers; and saved circuits.
Select an icon picture or the component type from the Menu tree structure.
The main menu in the tree structure is displayed as the menu heading just
above the menu tree structure.
Tabs ■Menu: Changes the visibility of the Menu tree view.
■Up one level: Displays the menu that is one level before the
current menu in the Menu tree view. This option is unavail-
able if the main menu is selected in the Menu tree view.
■Views: Changes the view display for the Symbol Preview
window and Recently Used window. The current view option
is indicated with a check mark. Options include: Icon with
text, Icon only or List view.
The tree structure is created by reading the icon menu file (.dat).
The tree structure is based on the arrangement order of submenus
defined in the .dat file.
Menu
Displays the symbol and submenu icons corresponding to the
menu or the submenu selected in the Menu tree structure.
Symbol Preview window
Clicking on the icon performs one of the following functions
based on the icon properties as defined by the .dat file:
■Inserts the symbol or circuit onto the drawing
■Executes a command
■Displays a submenu
840 | Chapter 10 Component Tools

NOTE When you move the cursor over an icon, the icon name
and block/circuit/command name display as tooltip information.
Displays the last components inserted during the current editing
session; the most recently used icon displays in the top. This list
Recently Used
follows the view options setting in the symbol preview window
(icon only, icon with text or list view). The total number of icons
displayed depends on the value specified in the Display edit box.
Specifies the number of icons to display in the Recently Used list
box. Enter integer numbers only; the default value is 10.
Display
Inserts the icon using a vertical or horizontal orientation. This
value is opposite the default ladder rung orientation for the
drawing.
Vertical/Horizontal
Turns off the Insert/Edit Component dialog box when inserting
symbols onto the drawing. To add component detail later, click
the Edit Component tool, and select the component to edit.
No edit dialog
Inserts the component, untagged (that is, without assigning a
unique Component Tag). The untagged value that displays is the
No tag
TAG1/TAG2 default value for the component. To add component
detail later, click the Edit Component tool, and select the com-
ponent to edit.
Indicates to display the previously used menu each time you open
the Insert Component dialog box. For example, if you insert a
Always display previously used
menu
push button from the Push Buttons menu, the next time you
open the Insert Component dialog box the Push Button menu
displays by default.
Specifies the component block insertion scale. This defaults to
the value set in the Drawing Properties ➤ Drawing Format dialog
Scale schematic
box. Once set, this value is remembered until reset or until the
drawing editing session ends.
Specifies the footprint insertion scale. This defaults to the value
set in the Drawing Properties ➤ Drawing Format dialog box.
Scale panel
Once set, this value is remembered until reset or until the drawing
editing session ends.
Manually type in the component block to insert.Type it
Use stand-alone cross-reference symbols | 841

Browses to and selects the component to insert.Browse
Right-click menus
Options for the Menu tree structure view
Right-click on the main menu or submenu in the Menu tree structure view
to display the following options:
■Expand/Collapse: Toggles the visibility of the menus.
■Properties: Opens a Properties dialog box to view the existing menu or
submenu properties like the menu name, image, or submenu title. Use the
Icon Menu Wizard to change any menu properties.
Options for the Symbol Preview window
Right-click an icon or in empty space in the Symbol Preview window to display
the following options:
■View: Changes the view display for the Symbol Preview window and
Recently Used window. The current view option is indicated with a check
mark. Options include: Icon with text, Icon only or List view.
■Properties: (available for icons only) Opens a Properties dialog box to view
the existing symbol icon properties like the icon name, image, block names
and so on. Use the Icon Menu Wizard to change any icon properties.
Pneumatic, Hydraulic, and P&ID icon menus
The Menu tree structure displays the symbols for the selected component type
(pneumatic, hydraulic, or P&ID). The Insert Pneumatic Component, Insert
Hydraulic Component, and Insert P&ID Component tools are accessed from
the Schematic tab ➤ Insert Components panel on the ribbon or the Extra
Library toolbar.
Insert Pneumatic Component
Insert Hydraulic Component
842 | Chapter 10 Component Tools

Insert P&ID Component
Stand-alone source or destination cross-reference
symbol
You use stand-alone cross-reference symbols just as you would wire
source/destination arrow symbols but without the wires. Insert a source
reference symbol and then tie one or more destination reference symbols to
it. They can be on the same drawing or scattered across the project drawing
set.
Ribbon: Schematic tab ➤ Insert Components panel ➤ Dashed Link Line
drop-down ➤ Insert Stand-Alone Cross-Referencing.
Toolbar: Cross-Reference
Menu: Components ➤ Cross-Reference ➤ Insert Stand-Alone
Cross-Reference
Command entry: AESAXREF
Select the cross-reference component to insert and place it on the drawing.
Specifies the unique name for the source/destination pair. This links
each source cross-reference symbol to its destination cross-reference
symbols.
Code
(for Hexagon symbols only) Displays the sheet (Drawing Property)
value for the drawing the matching symbol.
Sheet
Displays the line reference value for the matching symbol.Reference
(optional) Specifies the description for the symbol.Description
Provides a list of source or destination symbols inserted this AutoCAD
session.
Recent
Displays drawing-wide pick lists of all source/destination codes used
so far.
Drawing
Use stand-alone cross-reference symbols | 843
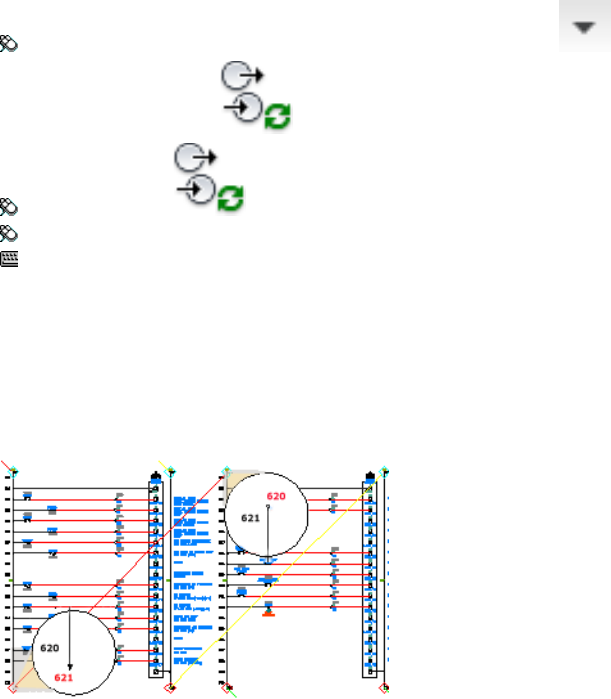
Displays project-wide pick lists of all source/destination codes used
so far.
Project
Picks the matching symbol from the active drawing.Pick
Saves changes and updates the related destination symbols with any
changes.
OK+ Update Destination
Update wire signal and stand-alone cross-reference
Updates signal source and destination cross-reference text and wire numbers.
Ribbon: Schematic tab ➤ Edit Wires/Wire Numbers panel ➤ ➤
Update Signal References.
Toolbar: Signals
Menu: Wires ➤ Signal References ➤ Update Signal References
Command entry: AEUPDATESIGREF
Update source or destination signals singly, drawing-wide, or project-wide.
You can update cross-reference information for 2 types of cross-reference
symbols:
■Wire number signal arrow symbols
■Stand-alone cross-reference symbols
844 | Chapter 10 Component Tools
Wire Signals
Updates the from/to cross-reference annotation on
each wire network source and destination arrow
symbol.
Update source/destination cross-refer-
ences
Makes the wire number tags on the destination end
match the wire number carried on the source end
of each wire signal pair.
Update source/destination wire number
tags
Stand-Alone Cross-Reference Symbols
Set up the desired cross-reference format in the Cross-Reference Format section
of the Drawing Properties ➤ Cross-Reference dialog box. It is on a per-drawing
basis.
Updates the cross-reference annotation between
pairs of stand-alone cross-reference symbols. They
Update stand-alone cross-reference sym-
bols
are wire number signal symbols, but without a
WIRENO attribute and do not attach to wires. They
can float. See Stand-alone source or destination cross-
reference symbol on page 843.
Insert dashed link lines
Insert a dashed link line
Links selected components with a dashed line.
The TAG, description, and cross-referencing attributes of the second through
last components you select for linking become invisible. The Unhide Attribute
command turns the visibility of the selected attributes back on. Components
must have X?LINK attributes to link.
Insert dashed link lines | 845
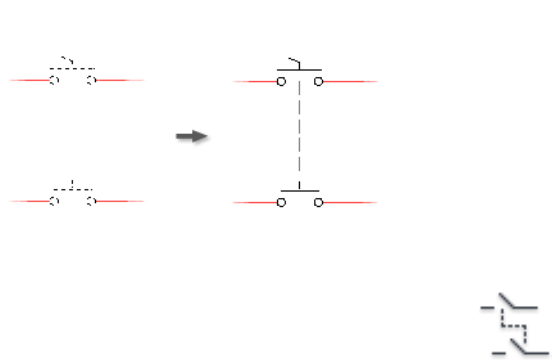
1Click Schematic tab ➤ Insert Components panel ➤ Dashed Link Line
drop-down ➤ Link Components with Dashed Line.
2Select the contacts in the order you want the dashed link line drawn.
AutoCAD Electrical changes the contact's annotation to invisible and
draws a dashed link line from the bottom of the upper contact to the top
of the new contact. The line is a polyline drawn on the layer name defined
on the Define Layers dialog box.
3(Optional) Use the AutoCAD Layer command to assign a different line
type to the layer.
4(Optional) Use the Scoot command to reposition any jog in the dashed
link line.
5(Optional) To remove a dashed link line, run the command again,
selecting in the same order as before.
The dashed line toggles off and the hidden attribute annotation reappears.
See also:
■Overview of schematic attributes on page 306
Insert dashed link lines to arrows
This tool draws a dashed line from a component to a "To" arrow symbol.
846 | Chapter 10 Component Tools

1Click Schematic tab ➤ Insert Components panel ➤ Dashed Link Line
drop-down ➤ Insert Reference Arrow - To.
2Select the contact to draw the line from.
3Select where the arrow endpoint should be on the drawing.
4Insert a description for the dashed link line in the Description dialog box
and click OK.
The line is a polyline drawn on the layer name defined on the Drawing
Properties ➤ Drawing Format ➤ Layers:Define ➤ Define Layers dialog
box.
5(Optional) Use the AutoCAD Layer command to assign a different line
type to the layer.
6(Optional) Use the Scoot command to reposition any jog in the dashed
link line.
7(Optional) Use the AutoCAD Erase command to remove the dashed link
line.
Insert dashed link lines from arrows
This tool draws a dashed line from a component to a "From" arrow symbol.
1Click Schematic tab ➤ Insert Components panel ➤ Dashed Link Line
drop-down ➤ Insert Reference Arrow - From.
2Select the contact to draw the line from.
3Select where the arrow endpoint should be on the drawing.
4Insert a description for the dashed link line in the Description dialog box
and click OK.
The line is a polyline drawn on the layer name defined on the Drawing
Properties ➤ Drawing Format ➤ Layers:Define ➤ Define Layers dialog
box.
5(Optional) Use the AutoCAD Layer command to assign a different line
type to the layer.
Insert dashed link lines | 847
6(Optional) Use the Scoot command to reposition any jog in the dashed
link line.
7(Optional) Use the AutoCAD Erase command to remove the dashed link
line.
Follow signals
Follow a signal for a source or destination signal
Use the List Signal Code tool to follow a signal from a specific source or
destination symbol.
1Click Schematic tab ➤ Edit Wires/Wire Numbers panel ➤ ➤
List Signal Code.
2Select the signal marker to list. The signal code dialog box appears. All
source and destination references for the signal code are listed in the
three boxed groups.
3Review the references for the signal code.
4Click the Surf button to navigate to any of the references.
5Click Cancel when you are finished reviewing the signal references.
Signal code
Follows a signal from a specific source or destination symbol and lists the
signal code references.
Ribbon: Schematic tab ➤ Edit Wires/Wire Numbers panel ➤ ➤
List Signal Code.
Toolbar: Signals
848 | Chapter 10 Component Tools
Menu: Wires ➤ Signal References ➤ List Signal Code
Command entry: AELISTSIG
All source and destination references for the signal code are listed in the three
boxed groups:
Shows the references on upstream (previous)
drawings.
Previous drawings (sheet/reference)
Shows the references on the current drawing.Current drawing
Shows references on downstream (next) draw-
ings.
Downstream drawings (sheet/reference)
Navigates to any of the references.Surf
Show signal paths
Show signal path
Displays signal source and destination paths on the active drawing.
Ribbon: Schematic tab ➤ Edit Wires/Wire Numbers panel ➤ ➤
Show Signal Paths.
Toolbar: Signals
Menu: Wires ➤ Signal References ➤ Show Signal Paths
Command entry: AESHOWSIG
Signal paths are drawn using temporary graphics. Redraw to erase.
Overview of DIN Rails
The Din Rail is generated based on data held in a Microsoft Excel spreadsheet
called WDDINRL.XLS. Each row in the main worksheet, DIN_RAIL, represents
a rail type. The Manufacturer, Catalog, and Description fields are used to create
the drop-down list on the dialog box. In addition, each rail type has a
corresponding worksheet named to match the catalog number. This worksheet
Show signal paths | 849
defines some parameters based on the number of slots calculated from the
rail length.
Spreadsheet fields
Manufacturer.MFG
Catalog Number.CAT
Assembly code.ASSYCODE
Description used for dialog listing only.DESC
Din rail width; distance between the top and bottom rail
lines.
RAILWID
Distance between the din rail centerlines.RAILCEN
Distance between the din rail centerlines; used for nonsym-
metrical din rails.
RAILCEN1
Distance between bottom center line and the slot centers;
used for nonsymmetrical din rails.
RAILCEN2
Distance from the origin of the din rail to the center of the
slots; used for off-center din rails.
RAIL2SLOTCEN
Distance from the origin of the din rail to the din rail bot-
tom; used for off-center din rails.
RAIL2ENDBASE
Standard length of din rail.RAILLENSTD
Minimum length of rail piece.RAILLENMIN
Distance from the beginning of the din rail to the center
of the first slot.
SLOTOFS
Distance between slots measured from the center of each
slot.
SLOTCEN2CEN
Length of each slot. Enter a SLOTLEN of 0.0 to generate a
block without slots.
SLOTLEN
Width of each slot.SLOTWID
850 | Chapter 10 Component Tools
Distance from channel line to the origin; repeated for each
channel line.
CHANNEL
Distance from origin to channel end for each channel.CHANNEL_END
Length of rail to shift from one piece of rail to the next to
make sure last piece is not less than the minimum length.
MIN_SHIFT
Name of AutoCAD block for the drill hole.NCHOLE
Allow standoff brackets, Yes or No. If No, then the button
is disabled on the dialog. If Yes, the button is enabled and
you can select standoff brackets.
BRKT
Name of AutoCAD block for standoff bracket.BRKT_NAME
Manufacturer for standoff bracket. Added as Multi-BOM
on the created Din Rail block.
BRKT_MFG
Catalog number for standoff bracket. Added as Multi-BOM
on the created Din Rail block.
BRKT_CAT
Assembly code for standoff bracket. Added as Multi-BOM
on the created Din Rail block.
BRKT_ASMB
Name used to tie into the catalog lookup table. Values are
either DIN or WW based on whether the spreadsheet record
CATALOG_TABLE
is a din or wire way. This determines whether the DIN or
WW table (of the default_cat.mdb) displays when you click
Catalog Lookup on the Panel Layout - Component In-
sert/Edit dialog box.
Parametric building of wire ways
You can create generic wire way records in the spreadsheet (wddinrl.xls) for
parametric building of wire ways. To do so, add the following records in the
spreadsheet:
■MFG = PANDUIT
■CAT = Generic
■DESC = Wire duct, 3.25"x3.11" tall, slotted
Overview of DIN Rails | 851
■RAILLENSTD = 72
■WDBLKNAM = WW
■MFG = PANDUIT
■CAT = Generic
■DESC = Wire duct, 3.92"x1.89" tall, slotted
■RAILLENSTD = 78.72
■WDBLKNAM = WW
In the Din Rail dialog box, select one of these records as the Rail Type and
click OK. In the Panel Layout - Component Insert/Edit dialog box, Catalog
section, click Catalog Lookup. The Parts catalog dialog box now displays wire
ways with Manufacturer = PANDUIT and Type = Slotted. Select a suitable wire
way from the list.
Line properties
There may be times that you want to specify a color, linetype, or layer for a
particular line entity that makes up the Din Rail. You can do this with a few
optional spreadsheet fields. For the 2 end lines, you add 2 columns in your
spreadsheet, each called END_PROP. The first one is for the left end, the second
is for the right end. The format is COLOR colorname LAYER layername LTYPE
linetype. For example, COLOR 9 LAYER MISC LTYPE HIDDEN2. It is expecting
a single space between the values. If you leave the field blank, or leave out
one of the properties, it draws the lines using the current defaults. For the
channel lines, it works similarly, but the columns should be called
CHANNEL_PROP. Put them in the same order as the CHANNEL values. For
example, you want the inner lines to be font HIDDEN2 and the CHANNEL
columns are in this order, 0.69 0.49 -0.49 -0.69, this means the inner lines are
the second and third channel columns. So the CHANNEL_PROP columns are:
■First column: leave blank
■Second column LTYPE HIDDEN2
■Third column: LTYPE HIDDEN2
■Fourth column: blank
Use this field to define the properties for the end lines.END_PROP
852 | Chapter 10 Component Tools
Use this field to define the properties for the channel lines.CHANNEL_PROP
Din rail
Ribbon: Panel tab ➤ Insert Component Footprints panel ➤ Insert
Footprints drop-down ➤ Icon Menu.
Toolbar: Panel Layout
Menu: Panel Layout ➤ Insert Footprint (Icon Menu)
Command entry: AEFOOTPRINT
Select DIN Rail from the list.
Once the information is entered and you click OK, the Din Rail is generated.
Each Din Rail section is created as a separate block. If you selected Standoff
brackets, each bracket is a separate block. Some AutoCAD Electrical information
is added to each block so it can be treated as an AutoCAD Electrical Panel
entity. The AutoCAD Electrical edit dialog appears for the first Din Rail section
and the first bracket, if applicable.
Lists the rail types to select from.Rail Type
Specifies the origin and length of the component. Type
the information into each edit box or click Pick Rail Info to
Origin and length
pick the origin on your drawing and then drag the mouse
to define the rail length.
Specifies to orient the din rail horizontally or vertically.Orientation
Specifies the scale to use for the din rail.Scale
Specifies to mount the panel at NC holes, standoffs, or
none.
Panel mounting
Overview of user data records
AutoCAD Electrical supports a user table in the project database. You can add
your own application data to any AutoCAD Electrical block insert (components,
Overview of user data records | 853
footprints, wire numbers, terminals, wire jump arrows). A copy of this
information is extracted and maintained in a USER table in the project
database. This allows you to do queries on the project database file (in
Microsoft Access format) and access all of this user information carried on all
entities project-wide. This data is stored on the entities as invisible extended
entity data. You are free to use this data in any way you see fit.
Examples: storing explicit wire sequencing information, cable or wire lengths,
routing information, storing special parts information, descriptions, or MRP
data, storing engineering notes, setup, or maintenance information, and so
on.
Each application data record that you add to an entity can be up to 255
characters long. A single AutoCAD Electrical entity can carry several hundred
of these records. Each record is tracked on the entity by entity handle plus a
three digit record number beginning at "000". This same information is
automatically maintained, project-wide, by AutoCAD Electrical in the user
table of the project's database file.
Edit user table data
You can add, edit, or remove free-form user data records attached to the
selected block insert. These records are stored in a user database table in the
project database file.
Ribbon: Schematic tab ➤ Edit Components panel ➤ Edit Components
drop-down ➤ User Table Data.
Toolbar: Edit Component
Menu: Components ➤ Component Miscellaneous ➤ Edit User Table
Data
Command entry: AEUSERTABLE
Lists the record number for the selected block insert.Record number
Lists the user data for the record number.Data
Specifies the new data for the selected record number. Note that
there is a 255 character maximum per record.
Edit
Adds a new user data record. A separate dialog box displays where
you can enter the record data and number.
Add new
854 | Chapter 10 Component Tools

Removes the selected record number from the database. If no
user data records are found on the block insert, an alert is dis-
played in the dialog box prompting you to add a new record.
Delete record
Wire Jumpers
Define wire jumpers
Define wire jumpers
You can create internal jumpers on a selected component using the Add/Edit
Internal Jumper tool. When wire numbers are inserted using AutoCAD
Electrical, these internal jumpers are read and wire numbers are assigned
accordingly.
If you select to jumper two pins on a component together, an alert displays
indicating that internal jumpering will cause a conflict with the existing wire
number assignments. If you click Continue, an internal jumper inserts between
the two pins on the component; you need to rerun the Insert Wire Numbers
tool to reconcile these two different wire numbers now jumpered together. If
you click Cancel, the internal jumper data is not inserted.
NOTE You can keep jumpers from displaying in Wire From/To reports by placing
the jumpers on a layer that contains the substring "JUMPER."
Add wire jumpers from a list
1Click Schematic tab ➤ Edit Components panel ➤ Edit Components
drop-down ➤ Internal Jumper.
2Select the component.
3Select terminals from the list.
Drag your mouse to select contiguous terminals or use the CTRL button
to select noncontiguous terminals.
4Click Add.
Wire Jumpers | 855

Add wire jumpers by picking
1Click Schematic tab ➤ Edit Components panel ➤ Edit Components
drop-down ➤ Internal Jumper.
2Select the component.
3Click Pick. The dialog closes. You can select as many terminals as you
want.
Try to select as near the terminal as you can since AutoCAD Electrical
finds the closest connection terminal to your selected point.
4After you select the terminals, press Enter and the dialog displays.
Notice that the selected terminals are highlighted in the list.
5Click Add to finish defining the jumper.
Change an existing jumper assignment
1Click Schematic tab ➤ Edit Components panel ➤ Edit Components
drop-down ➤ Internal Jumper.
2Select the component.
3Select the jumper from the list on the right.
Once selected, the terminals that are part of this jumper assignment are
highlighted on the terminal list.
4Reselect the terminals to be jumpered, using the Shift and CTRL keys as
needed.
5Click Update once the appropriate terminals are highlighted.
Wire jumpers
You can add, change, or delete internal jumpers on a selected component.
When wire numbers are inserted, these internal jumpers are read and wire
numbers are assigned accordingly.
If you select to jumper two pins on a component together, an alert displays
indicating that internal jumpering will cause a conflict with the existing wire
number assignments. If you click Continue, an internal jumper inserts between
856 | Chapter 10 Component Tools
the two pins on the component; you need to rerun the Insert Wire Numbers
tool to reconcile these two different wire numbers now jumpered together. If
you click Cancel, the internal jumper data is not inserted.
Ribbon: Schematic tab ➤ Edit Components panel ➤ Edit Components
drop-down ➤ Internal Jumper.
Toolbar: Edit Component
Menu: Components ➤ Component Miscellaneous ➤ Add/Edit Internal
Jumper
Command entry: AEINTERNALJUMPER
Adds an internal jumper assignment.Add
Changes an existing jumper assignment.Update
Removes the selected jumper assignment from the list.Delete
Selects the terminals to add to a jumper assignment. Try
to select as close to the terminal as you can. AutoCAD
Pick
Electrical finds the closest connection terminal to your se-
lected point.
Displays the current jumper assignments. AutoCAD Electric-
al draws temporary lines between the jumpered terminals.
These graphics disappear when you perform a Regen.
Show Jumpers
Define wire jumpers | 857
858

Component Attribute Tools
Edit attribute values
Edit the attribute text value of a component
You can use three different tools to edit component information.
Using the Edit Component tool
The standard way is to use the regular Edit Component command and edit the
tag value from the Insert/Edit Component dialog box.
1Click Schematic tab ➤ Edit Components panel ➤ Edit Components
drop-down ➤ Edit.
2Select the component to edit.
3Edit the tag value in the Insert/Edit Component dialog box.
4Click OK to complete the edit.
Using the Edit Selected Attribute tool
Lets you pick right on the attribute. This tool also works on invisible attributes.
It finds and displays the closest attribute to your pick point on a block insert.
11
859

1Click Schematic tab ➤ Edit Components panel ➤ Modify Attributes
drop-down ➤ Edit Selected Attribute.
2Select the attribute to edit.
A dialog box displays and lets you type in a new attribute value.
3Enter a new attribute value in the Edit Attribute dialog box.
Click Pick to select another attribute whose text you want to use for the
selected attribute. You can also click the arrow keys to increment or
decrement the attribute value.
4Click OK.
To edit an invisible attribute: pick on the block insert near where the invisible
attribute is located. AutoCAD Electrical finds and displays the nearest attribute
of your pick point. AutoCAD Electrical displays an "x" at the origin of the
attribute.
Using the Move/Show Attribute tool
You can use the AutoCAD Electrical Move/Show Attribute command to edit
the attribute text of a component.
1Click Schematic tab ➤ Edit Components panel ➤ Modify Attributes
drop-down ➤ Move/Show Attribute.
2Pick on the graphics of the component (not on the attribute text itself;
otherwise it flips into Attribute Move mode). If there are no graphics to
pick on (such as wire number block/attribute or ladder line reference
block/attribute), type "B" and space and then pick on any attribute on
the block insert. This forces the command into attribute display mode.
The Show/Hide Attributes dialog box opens, listing all of the attributes
and their values of the component.
3Check the Edit Attributes box in the upper right-hand corner of the dialog
box.
4Select the attribute you want to edit from the list.
A dialog box opens and lets you type in a new attribute value.
860 | Chapter 11 Component Attribute Tools
5Type in a new attribute value in the Edit Attribute dialog box.
You can click the arrow keys to increment or decrement the attribute
value.
6Click OK.
NOTE You can also use any attribute editing command to edit an AutoCAD
Electrical attribute values of the component. For example, use the AutoCAD
DDATTE command.
Edit attribute
This tool lets you edit the text an attribute by picking right on the attribute.
A dialog box pops up and you type in a new attribute value. This tool also
works on invisible attributes. It finds and displays the closest attribute to your
pick point on a block insert.
Ribbon: Schematic tab ➤ Edit Components panel ➤ Modify Attributes
drop-down ➤ Edit Selected Attribute.
Toolbar: Edit Attributes
Menu: Components ➤ Attributes ➤ Edit Selected Attribute
Command entry: AEEDITATT
Specifies the attribute text. You can click the arrow keys to
increment or decrement the attribute value.
Attribute value
Selects another attribute whose text you want to use for
the selected attribute.
Pick
Force attributes to layers
Force attributes to a different layer
This tool changes the layer assignment for selected attributes.
Force attributes to layers | 861
1Click Schematic tab ➤ Edit Components panel ➤ Modify Attributes
drop-down ➤ Change Attribute Layer.
2Specify the target layer:
■Type the name in the box.
■Click List to select from a list of layers in the active drawing.
■Click Wires to change to the layer used for wire numbers on wires.
The default layer is WIRENO. It is defined on the WIRENO_LAY
attribute of the WD_M block.
■Click Terminals to change to the layer used for wire numbers on
terminals and source or destination signal arrows. The default layer
is WIREREF. It is defined on the WD_M WIREREF_LAY attribute of
WD_M block.
3Click OK.
4Select the attributes to change to the target layer.
NOTE Windowing of attributes is not supported. You must pick them
individually.
Force attribute/text to a different layer
This tool changes the layer assignment for selected attributes.
Ribbon: Schematic tab ➤ Edit Components panel ➤ Modify Attributes
drop-down ➤ Change Attribute Layer.
Toolbar: Edit Attributes
Menu: Components ➤ Attributes ➤ Change Attribute Layer
Command entry: AEATTLAYER
Specifies the target layer.Change to Layer
862 | Chapter 11 Component Attribute Tools

Lists the layers in the active drawing. Select a layer from
this list or enter the layer name in the Change to Layer box.
List
Forces the tool to change to the layer used for wire number
text placed on wires. The default layer is WIRENO. It is
defined on the WIRENO_LAY attribute of the WD_M block.
Wires
Forces the tool to change to the layer used for wire number
text placed on terminals and source or destination signal
Terminals
arrows. The default layer is WIREREF. It is defined on the
WIREREF_LAY attribute of the WD_M block.
Manipulate component text
Find, edit, or replace component text
1Click Schematic tab ➤ Edit Components panel ➤ Retag Components
drop-down ➤ Find/Edit/Replace Component Text.
2Choose to process either the current drawing or the project and click OK.
The drawing or project set is scanned to find all the AutoCAD Electrical
components and the current attribute text values.
■If you chose to process the project, select the drawings to process and
add them to the Drawings to Process list. Click OK to continue the
operation.
■If you chose to process the drawing by picks, select the components
to process and press Enter.
The Find/Edit/Replace dialog box displays, allowing you to define
your search and replace parameters.
3Click the Find check box next to the attribute you want to find.
4Enter the attribute value or click the List button to select the value from
a list of current text values.
5Click the Replace check box for the selected attribute and type a new text
string in the edit box.
Manipulate component text | 863
6Select to find and replace the exact text value or substrings within the
attribute value.
7Click Start Search to begin the find and replace operation. Each found
match is displayed in a separate dialog box. You can edit, replace, skip
to the next, or replace all of the found values.
An example of search criteria
To change all of the Location Codes marked "PNL1" to "PNL2A" you would:
■Set the Location Code find value to "PNL1."
■Set the Location Code replace value to "PNL2A."
■Click All so the text is only replaced if the entire text value matches the
find value.
Find/edit/replace (drawing or project)
Edits component text and catalog values using a find/edit/replace operation.
Ribbon: Schematic tab ➤ Edit Components panel ➤ Retag Components
drop-down ➤ Find/Edit/Replace Component Text.
Toolbar: Retag
Menu: Components ➤ Component Tagging ➤ Find/Edit/Replace
Component Text
Command entry: AEFINDCOMPTEXT
Find and replace component values, or find and replace substrings within
those values. Process the active drawing or the project drawing set. Updates
only the components on the drawings selected to process.
864 | Chapter 11 Component Attribute Tools
Specifies the value to find. Initially, only the Find (F) toggles are
enabled.
Find
Replaces the find value with the new text string that you specify.Replace
Displays a list of the current text values for the selected attribute.
Select from this list to define your find parameter.
List
Replaces the text only if the entire text value matches the find
value.
All
Replaces the text if any part of the text value matches the find
value.
Part
Starts the search in the drawing or project for the find values that
are specified. Each found match is displayed. You can edit, re-
Start search
place, skip to the next, or replace all of the values with the spe-
cified replace value.
NOTE This tool does not support wildcard characters.
Find/edit/replace component text
Edits component text and catalog values using a find/edit/replace operation.
Ribbon: Schematic tab ➤ Edit Components panel ➤ Retag Components
drop-down ➤ Find/Edit/Replace Component Text.
Manipulate component text | 865
Toolbar: Retag
Menu: Components ➤ Component Tagging ➤ Find/Edit/Replace
Component Text
Command entry: AEFINDCOMPTEXT
Decide if you want to run the component retag across selected components,
the active drawing, or the entire project.
Manipulate terminal text
Find or replace terminal text
1Click Schematic tab ➤ Edit Components panel ➤ Retag Components
drop-down ➤ Find/Replace Terminal Text.
2Select to replace the Full, exact match, or a substring match.
3If you chose to perform a substring match, select whether only the first
occurrence within the text value should be replaced.
4Define your find and replace with values.
5Click OK to begin the find and replace operation.
6Choose to process either the current drawing or the project and click OK.
■If you chose to process the project, select the drawings to process and
add them to the Drawings to Process list. Click OK to continue the
operation.
■If you chose to process the drawing by picks, select the components
to process and press Enter.
7The drawing or project set is scanned to find all the terminals and the
current terminal text values. The find value is replaced with the specified
replace value.
Find/replace terminal text
866 | Chapter 11 Component Attribute Tools
This tool lets you find and replace terminal number text values or find and
replace substrings within those values. You can do it on a selection from the
active drawing, the entire active drawing, or across the project drawing set.
Ribbon: Schematic tab ➤ Edit Components panel ➤ Retag Components
drop-down ➤ Find/Replace Terminal Text.
Toolbar: Retag
Menu: Components ➤ Component Miscellaneous ➤ Find/Replace Terminal
Text
Command entry: AEFINDTERMTEXT
Specifies to replace the text only if the entire text value matches
the find value.
Full,exact match
Specifies to replace the text if any part of the text value matches
the find value.
Substring match
Specifies that only the first occurrence within the text value should
be replaced.
First occurrence only
Specifies the value you wish to find.Find
Specifies the text string to replace the find value with.Replace with
Move description values
Push descriptions up or down
AutoCAD Electrical supports three lines of description text on schematic
components. If some only have one or two lines of description, the description
may seem to float too high above the device. You can use these tools to move
the description attribute values up or down to another position.
1Enter AEUPATTRIBDESC at the command prompt.
or
Enter AEDOWNATTRIBDESC at the command prompt.
Move description values | 867

2Select the schematic components to process.
■Push Description Up: DESC2 and DESC3 are pushed up to the DESC1
and DESC2 attribute positions when blanks are found.
■Push Description Down: DESC1 and DESC2 are pushed up to the
DESC2 and DESC3 attribute positions when blanks are found.
Move attributes
Move component attributes
1Click Schematic tab ➤ Edit Components panel ➤ Modify Attributes
drop-down ➤ Move/Show Attribute.
2Select the attributes to move and press Enter.
You can pick the components individually or by windowing. The
attributes highlight with a rectangular box drawn around them.
3Select the base and insertion points for the move. The attribute follows
your cursor and is automatically moved to the selected position.
The attributes remain tied to the block inserts.
Hide attributes
Hide attributes
Pick on the graphic of a target block insert to display a listing of all attribute
names and values. You can switch attributes between hidden and visible or
you can edit individual attribute values.
1Click Schematic tab ➤ Edit Components panel ➤ Modify Attributes
drop-down ➤ Hide Attributes (Single Picks).
or
868 | Chapter 11 Component Attribute Tools

Click Schematic tab ➤ Edit Components panel ➤ Modify Attributes
drop-down ➤ Hide Attributes (Window/Multiple).
2Select the attributes to hide or pick on block graphics to display a list of
attributes. The attribute is hidden immediately after it is selected.
You can window attributes to hide by typing W and [space]. Do a crossing
window (right to left) to capture the attributes you want to hide.
3(Optional) Type U and [space] to unhide the attribute.
Show attributes
Show attributes
1Click Schematic tab ➤ Edit Components panel ➤ Modify Attributes
drop-down ➤ Unhide Attributes (Window/Multiple).
2Select the attributes to display by drawing a crossing window around the
attributes on the drawing.
3Press Enter.
4Select one or more attribute to flip to visible from the list.
5Click OK.
Rotate attributes
Rotate component attributes
1Click Schematic tab ➤ Edit Components panel ➤ Modify Attributes
drop-down ➤ Rotate Attribute.
Show attributes | 869
2Select the attribute text, text, or MTEXT string to rotate 90 degrees from
its current orientation.
After rotation, press M and [space] to flip into the Move Attribute mode.
Change attribute justification
Change attribute justification
Use this tool to change the justification of wire number text, component
description text, or any attribute.
1Click Schematic tab ➤ Edit Components panel ➤ Modify Attributes
drop-down ➤ Change Attribute Justification.
2Select the appropriate justification from the list, or click Pick Master to
select an attribute on the drawing that has the justification you want to
use.
3Select the attributes or text objects one at a time, or enter W, and then
window your objects.
4Click OK.
Change attribute/text justification
Use this tool to change the justification of wire number text, component
description text, or attributes.
Ribbon: Schematic tab ➤ Edit Components panel ➤ Modify Attributes
drop-down ➤ Change Attribute Justification.
Toolbar: Edit Attributes
Menu: Components ➤ Attributes ➤ Change Attribute Justification
Command entry: AEATTJUSTIFY
Lists the justification choices to choose from.Select Justification
870 | Chapter 11 Component Attribute Tools

Selects an attribute or text entity on the drawing whose justifica-
tion you want to use.
Pick Master
Once you select your attributes or text objects, each object updates to match
the selected justification.
Change attribute text style
Change attribute text style
Use this tool to adjust the font assignment (either project-wide or
drawing-wide) to the text style “WD” or “WD_IEC.”
1Click Project tab ➤ Project Tools panel ➤ Utilities.
2In the Project-Wide Utilities dialog box, Change Attribute section, select
Change Style and click Setup.
3In the Project-Wide AutoCAD Electrical Style Change dialog box, select
the font name to apply to text style WD or WD_IEC and click OK.
4In the Project-Wide Utilities dialog box, click OK.
5In the Batch Process Drawings dialog box, select to process the project
and click OK.
6In the Select Drawings to Process dialog box, select to process specific
files or click Do All to process all of the drawings in the active project.
Click OK.
AutoCAD Electrical processes the selected drawings and adjusts the text
style WD or WD_IEC to the specified font name.
Change attribute text size
Change attribute text size
To make permanent changes to the symbol text heights, adjust the attribute
definitions on the library symbols themselves.
Change attribute text style | 871

Use the change attribute size utility
1Click Schematic tab ➤ Edit Components panel ➤ Modify Attributes
drop-down ➤ Change Attribute Size.
2Select your new attribute size by either picking on a similar text or
attribute entity or by manually entering the size value into the edit box.
3Enter the new width factor into the edit box. Make sure that you click to
apply the width.
4Select to change the attribute name by picking individual attributes, by
type, or by typing a specific attribute name.
■If you chose to select one attribute at a time, select the attributes in
the drawing. The attribute text automatically changes to the new
attribute size.
■If you chose to change all attributes of a certain type, select an example
attribute and window the entire drawing. It finds and adjusts all
attributes of the same name to your specified size.
■If you chose to type in an attribute name, type the name in the edit
box. (Wildcards are allowed.) You can include a series of attribute
names to match by separating each attribute name with a semicolon.
5Press OK and window the entire drawing.
6Press Enter.
Use the project-wide utilities
1Click Project tab ➤ Project Tools panel ➤ Utilities.
2In the Project-Wide Utilities dialog box, Change Attribute section, select
Change Attribute Size and click Setup.
3In the Project-Wide Attribute Size Change dialog box, select the attribute
types to change.
4Enter the text height and optional width factor and click OK.
5In the Project-Wide Utilities dialog box, click OK.
872 | Chapter 11 Component Attribute Tools
6In the Batch Process Drawings dialog box, select to process the project
and click OK.
7In the Select Drawings to Process dialog box, select the drawings to process
and click OK.
AutoCAD Electrical processes the selected drawings and adjusts the target
attributes to the specified value.
Use the squeeze and stretch text utilities
Use the Squeeze attribute tool to compress an attribute to make it fit into a
tight spot (such as between closely spaced components). Use the Stretch
attribute tool to expand an attribute. Each click on the attribute dynamically
changes the width factor of the attribute by 5%.
1Click Schematic tab ➤ Edit Components panel ➤ Modify Attributes
drop-down ➤ Squeeze Attribute/Text.
2Select the attribute text to change.
The text is automatically compressed.
1Click Schematic tab ➤ Edit Components panel ➤ Modify Attributes
drop-down ➤ Stretch Attribute/Text.
2Select the attribute text to change.
The text automatically stretches.
Change attribute size
Use this tool to change attribute text size quickly when components or wire
numbers were already inserted onto your drawings.
Ribbon: Schematic tab ➤ Edit Components panel ➤ Modify Attributes
drop-down ➤ Change Attribute Size.
Change attribute text size | 873

Toolbar: Edit Attributes
Menu: Components ➤ Attributes ➤ Change Attribute Size
Command entry: AEATTSIZE
Selects the new attribute size by picking a similar text or attribute.Pick
Specifies the attribute size value.Size
Specifies the attribute width value.Width
Applies the new size or width values to the selected attributes.Apply
Changes the size of the attributes as you select them.Single
Changes all attributes of a certain type. Select an example attrib-
ute for AutoCAD Electrical to determine the name of the attribute.
By name
All attributes of the same name are found and adjusted to your
specified size.
Specifies an attribute name for AutoCAD Electrical to match,
wildcard characters are allowed. Window an area containing the
Type it
attributes you want changed. All attributes that match the typed
name are found and adjusted to the specified size.
For example, you want to change all the description attributes
on all the PLC modules on your drawing. Select "Type it," and
then enter "DESC*" for the attribute name. Window the entire
drawing. You can include a series of attribute names to match
by separating each attribute name with a semi-colon. (Example:
"DESC*;TAG*")
Rename an attribute
Rename attribute
Renames an attribute on a single instance of an inserted block.
874 | Chapter 11 Component Attribute Tools
1Click Schematic tab ➤ Edit Components panel ➤ Modify Attributes
drop-down ➤ Rename Attribute.
2Select directly on the attribute you want to rename.
3Enter the new attribute name.
4Press Enter.
Add attributes to blocks
Add an attribute to a block
Use this tool to add an attribute to one insert instance of a block. The block
does not need to be an AutoCAD Electrical block.
1Click Schematic tab ➤ Edit Components panel ➤ Modify Attributes
drop-down ➤ Add Attribute.
2Select the block.
3Define the attribute name, value, height, justification, and visibility.
4Click OK to create the attribute.
5Select the attribute location on the drawing.
NOTE Added attributes do not become part of the block definition. They disappear
during the Explode command and when inserting another instance of the same
block.
Add attribute
Adds a new attribute to an instance of an AutoCAD Electrical block already
inserted into the drawing file. The attribute can be user-defined or an AutoCAD
Electrical-specific attribute.
Add attributes to blocks | 875
Ribbon: Schematic tab ➤ Edit Components panel ➤ Modify Attributes
drop-down ➤ Add Attribute.
Toolbar: Edit Attributes
Menu: Components ➤ Attributes ➤ Add Attribute
Command entry: AEATTRIBUTE
Specifies text used to identify the attribute (attribute tag).Name
Specifies the attribute text. This value is displayed on the drawing
and used in reports.
Value
NOTE It can be left blank.
Specifies the height for the attribute value.Height
Specifies the justification for the attribute value.Justification
Indicates whether the attribute is visible on the drawing.Invisible
Set tags to fixed
Set component tags to fixed
Fix selected tags
NOTE To unfix a component tag, in the Fixed/Unfixed Component Tag Marking
dialog box, select Force selected tags to unfixed (normal), click OK, and select the
tag to unfix.
1Click Schematic tab ➤ Edit Components panel ➤ Edit Components
drop-down ➤ Fix/Unfix Tag.
876 | Chapter 11 Component Attribute Tools
2In the Fixed/Unfixed Component Tag Marking dialog box, select whether
to force selected tags to fixed or switch a tag between being fixed or
unfixed and click OK.
■Force selected tags to fixed: Select the component to fix. Right-click
to accept the selection.
■Single edit switch fixed/unfixed: Select the component to fix. In the
Fix/Unfix Component Tag dialog box, select Make it Fixed and click
OK.
Fix tags project-wide
1Click Project tab ➤ Project Tools panel ➤ Utilities.
2In the Project-Wide Utilities dialog box, Component Tags section, select
Set all Parent Component Tags to fixed.
To unfix tags project-wide, select Set all Parent Component Tags to
normal.
3Click OK.
4In the Batch Process Drawings dialog box, select to process the project,
and click OK.
5In the Select Drawings to Process dialog box, select the drawings to
process, and click OK.
Fixed/unfix component tag
Use this tool to mark a component tag as fixed. The tag is unaffected if the
drawing is later reprocessed by a Retag command.
Ribbon: Schematic tab ➤ Edit Components panel ➤ Edit Components
drop-down ➤ Fix/Unfix Tag.
Toolbar: Edit Component
Menu: Components ➤ Component Tagging ➤ Fix/UnFix Component Tag
Command entry: AEFIXTAG
Set tags to fixed | 877

Select whether to force selected tags to fixed, force selected tags to unfixed,
or switch a tag between being fixed or unfixed.
AutoCAD Electrical changes the attribute of the component to a fixed layer
as defined in the Define Layers dialog box.
Retag components
Retag recalculates each selected primary component tag, and updates the
related components. You can update a single component, a group of
components, a drawing, drawings within your project, or the entire project.
Run Retag Components when something changes on your drawing or project
that affects the component tags. It can include revising the ladder line reference
numbers or changing the tag format. Retag recalculates each selected primary
component tag, and then updates the related components. The Tag format is
set up on the Drawing Properties ➤ Components dialog box.
The introduction of one-line components has added an additional type of
primary component. Within a project you can represent a component with
both a schematic parent symbol and a one-line parent symbol. These are
considered peer components. The retag function uses the following rules when
retagging these peer components:
■If you retag a schematic parent, the tag value of the one-line parent is
updated to match.
■If you retag a one-line parent, the tag value of the schematic parent is
updated to match.
■If you run a project-wide retag, the first one encountered gets retagged and
the peer is updated to match.
■If you run a project-wide retag and either the schematic parent tag or the
one-line parent tag is fixed, the components are not retagged.
NOTE All one-line components are identified by a WDTYPE “1-” attribute value.
Retag components
Retags single, windowed, drawing wide, and project-wide components with
contact updates.
878 | Chapter 11 Component Attribute Tools
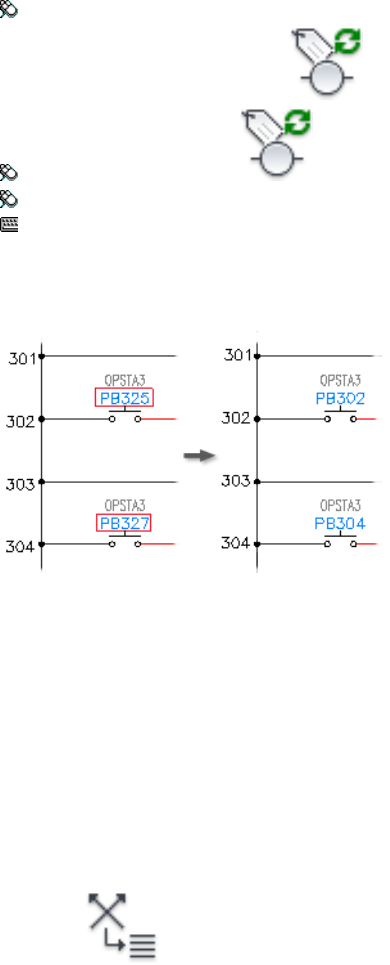
Ribbon: Schematic tab ➤ Edit Components panel ➤ Retag Components
drop-down ➤ Retag Components.
Toolbar: Main Electrical
Menu: Components ➤ Component Tagging ➤ Retag Components
Command entry: AERETAG
Retag recalculates each selected primary component tag, and updates the
related components. You can update a single component, a group of
components, a drawing, drawings within your project, or the entire project.
Change to multi-line text
Convert text to a multi-line text entity
This tool converts a long string of relay coil or source/destination
cross-reference text to a multiline text entity (MTEXT). The underlying attribute
value is maintained, but flipped to visible. The MTEXT entity is created at the
same XY location as the underlying attribute. The MTEXT entity updates,
scoots, and behaves as if it is an attribute tied to the component block.
1Click Schematic tab ➤ Edit Components panel ➤ Modify Component
Cross-Reference drop-down ➤ Change Cross-Reference to Multiple Line
Text.
Change to multi-line text | 879

2Select the text string to change.
3Type a new text string for the selected text.
Use the Text Formatting dialog box to change the text style and size. You
can also right-click and select from the context menu options.
4Use the grips or double-click the text to bring up text formatting options
to reformat the reference string into multiple lines.
5Click OK.
Add location codes
Add location codes to components
You can add Location codes to components after they were created or you
can set a default Location code to use for all components that are inserted
into a drawing.
Add Location codes on a per-drawing basis
First, set your project to use automatic fill for Location values, and then set
the default for the drawing. You have a default Location value for each new
component that you insert (whether field or panel) on the same drawing.
1Click Project tab ➤ Project Tools panel ➤ Manager.
2In the Project Manager, right-click the project name, and select Properties.
3In the Project Properties ➤ Components dialog box, Component TAG
Options section, select Upon insert: automatic fill Installation/Location
with drawing default or last used. Click OK.
4Open the drawing to set the default location value for.
5Click Schematic tab ➤ Other Tools panel ➤ Drawing Properties
drop-down ➤ Drawing Properties.
6In the Drawing Properties ➤ Drawing Settings dialog box, IEC - Style
Designators section, enter a default Location value. Click OK.
880 | Chapter 11 Component Attribute Tools

TIP You can click Drawing or Project to select a Location value that was
already in either the active drawing or project.
The next time you insert a new component on this drawing, the Location
code are prefilled with the drawing default.
Add a Location code to a saved component
1Open a .dwg file of the saved symbol in AutoCAD.
2Use the ATTDEF command to add the new attribute or copy an attribute
definition and rename it.
3Save the drawing file.
The symbol now contains an AutoCAD Electrical Location value attribute.
Update child codes
Update child location codes
A child contact should carry the same location code that is present on its
parent component. If relay coil CR101 is marked "PNL1," then all CR101
contacts should also carry this location code. In addition, if a child component
carries MFG and CAT attributes, they should carry the same information as
the parent.
1Click Schematic tab ➤ Edit Components panel ➤ Modify Component
Cross-Reference drop-down ➤ Child Location/Description Update.
2Select the values to match to those values carried on the schematic parent
component.
3Click OK.
4Select the components to update in your drawing and right-click or type
"ALL" to process the entire drawing.
AutoCAD Electrical quickly extracts a listing of all parent components
and pertinent codes from all drawings listed in the current project and
applies them to the child contacts you selected on the active drawing.
Update child codes | 881
Child contact and panel update from schematic
parent
This tool updates child and panel components with installation, location, and
description values carried by the associated parent schematic component.
Ribbon: Schematic tab ➤ Edit Components panel ➤ Modify Component
Cross-Reference drop-down ➤ Child Location/Description Update.
Toolbar: Cross-Reference
Menu: Components ➤ Cross-Reference ➤ Child Location/Description
Update
Command entry: AECHILDLOCUPDATE
Installation/Location Attributes
Specifies to update the child and panel components
with the parent installation code.
Installation codes
Specifies to update the child and panel components
with the parent location code.
Location codes
Specifies to update the child and panel components
with the parent description text.
Description text
Specifies that the description should always match
the parent description text.
Description to always match parent
Specifies that the description should only be up-
dated to match the parent description text if the
child description values are blank.
Description update only if child blank
Specifies to update the child and panel components
with the parent rating values.
Rating values
Manufacturer/Catalog part number values
Specifies to update the child and panel components
with the parent Manufacturer/Catalog part number
values.
Manufacturer/Catalog part number values
882 | Chapter 11 Component Attribute Tools

Specifies that the Manufacturer/Catalog should al-
ways match the parent Manufacturer/Catalog val-
ues.
Manufacturer/Catalog to always match schematic
parent
Specifies that the Manufacturer/Catalog should
only be updated to match the parent Manufac-
Manufacturer/Catalog update only if child is blank
turer/Catalog text if the child Manufacturer/Catalog
values are blank.
NOTE If you choose to update the Manufacturer/Catalog, it does not carry to the
children unless they carry the Manufacturer and Catalog attributes.
Location Mark Symbols
Substitute location mark symbols for text location codes
Substitute location mark symbols for text location codes
You can insert location marks on symbols that are identified with location
code in text form.
Add a location code to a component
If you try to insert a location mark symbol on a component with a blank
location code, you are prompted to enter the location code before selecting a
marker. Once you insert a location code, a location mark symbol can be
associated to it and the component.
1Click Schematic tab ➤ Insert Components panel ➤ Location Box
drop-down ➤ Location Symbols.
2Select a component to add the symbol to and press Enter.
If a location code is not associated to the component, the Add Location
to Component dialog box displays.
3Specify the location code by typing it, clicking component that carries
the location value, or by selecting from a list of location codes used on
the drawing or in the project.
Location Mark Symbols | 883
4Click OK.
Insert a location mark symbol
1Click Schematic tab ➤ Insert Components panel ➤ Location Box
drop-down ➤ Location Symbols.
2Select a component to add the symbol to and press Enter.
3From the Location Symbols dialog box, select the symbol to associate
with the component and click OK.
The attribute text becomes invisible and the location symbol inserts at
its location.
You can reposition the location marks with the AutoCAD Move command.
If you scoot the symbol, the mark moves with it.
NOTE You cannot assign the same mark to two different locations.
Remove a location mark symbol
1Click Schematic tab ➤ Insert Components panel ➤ Location Box
drop-down ➤ Location Symbols.
2Select a component to remove the symbol from and press Enter.
The location mark symbols are removed and the original location attribute
is visible again.
Add a new symbol to the menu
The Location Symbols menu is driven by a text file (wd_locs.dat) that you can
modify.
1Create the mark symbol, save it to
Windows XP: \Documents and Settings\All
Users\Documents\Autodesk\Acade {version}\Libs\{library}\
Windows Vista, Windows 7: \Users\Public\Documents\Autodesk\Acade
{version}\Libs\{library}\
884 | Chapter 11 Component Attribute Tools

with a file name that begins with "WDXX" (for example,
"WDXXSQ1.DWG")
Create an AutoCAD slide of the symbol and save the resulting .sld file.
2Open the drawing in AutoCAD and center it on the screen.
3Type MSLIDE at the command prompt.
4Enter
Windows XP: \Documents and Settings\{username}\Application
Data\Autodesk\AutoCAD Electrical {version}\wdxxsq1.sld
Windows Vista, Windows 7:
\Users\{username}\AppData\Roaming\Autodesk\AutoCAD Electrical
{version}\wdxxsq1.sld
as the file name to create.
5Click Save.
6Make a backup copy of
Windows XP: \Documents and Settings\{username}\Application
Data\Autodesk\AutoCAD Electrical {version}\{release}\{country
code}\Support\wd_locs.dat
Windows Vista, Windows 7:
Users\{username}\AppData\Roaming\Autodesk\AutoCAD Electrical
{version}\{release}\{country code}\Support\wd_locs.dat
7Edit wd_locs.dat with a text file editor (such as WordPad).
8Add the reference to the new mark symbol (for example, "Special Square
| WDXXSQ1.SLD | WDXXSQ1").
NOTE You can also do this using the AutoCAD Electrical Icon Menu Wizard.
Location symbols
Location mark symbols are block inserts with block names that begin with
"WDXX". Default symbols are included in the AutoCAD Electrical symbol
library (ex: in JIC1 subdirectory). You can edit the symbol appearance by just
calling up in AutoCAD and modifying to suit. You can substitute "smart"
geometric symbols for text "location" code values. The location text is hidden
and replaced by a geometric shape. They are smart in that they update if the
underlying component location code changes.
Substitute location mark symbols for text location codes | 885
Ribbon: Schematic tab ➤ Insert Components panel ➤ Location Box
drop-down ➤ Location Symbols.
Toolbar: Main Electrical 2
Menu: Components ➤ Component Tagging ➤ Location Symbols
Command entry: AELOCATIONSYMBOL
Select a component to add the symbol to and press Enter.
Some location symbol options include: Filled Triangle, Filled Square, Filled
Diamond, Filled Circle, 1/2 Filled Triangle, 1/2 Filled Square, 1/2 Filled
Diamond, and 1/2 Filled Circle.
Adding custom symbols to menu
You can create additional symbols if you wish. Follow the WDXX... naming
convention and add to the icon menu as illustrated in the following section.
The icon menu is driven by an ASCII text file, wd_locs.dat. Edit this file to
add references for your own location mark symbols. You can also add
additional submenu pages to the menu in a manner like that of the Insert
Component icon menu file.
Example WD_LOCS.DAT file with user-added submenus 100 and 101:
**M0
L4
L O C A T I O N S Y M B O L S
Filled Triangle | loc2(s_wdxxt) | wdxxt
Filled Square | loc2(s_wdxxs) | wdxxs
Filled Diamond | loc2(s_wdxxd) | wdxxd
Filled Circle | loc2(s_wdxxc) | wdxxc
Remote station syms | remote.sld | $S=M100
Customer symbols | cust.sld | $S=M101
**M100
L4W
886 | Chapter 11 Component Attribute Tools

R E M O T E S T A T I O N S Y M B O L S
Main Operator sta | wdxx_mos | wdxx_mos
Wash-down sta | wdxx_wds | wdxx_wds
**M101
L2
C U S T O M E R S Y M B O L S
Customer power | wdxx_cp | wdxx_cp
Customer furnished | wdxx_cf | wdxx_cf
NOTE You only need to define the L*W row if you plan on using this .dat file in
a version of AutoCAD Electrical before AutoCAD Electrical 2008.
Location box
A location box is drawn around devices to designate that they are physically
in a different location/installation than the other devices in the drawing. The
box is a closed polyline and can be a rectangle or some other orthogonal shape.
The Location and installation codes for the parent components within the
location box update to match the location box. You can assign a description
to the box. The program prompts for updates to related components and panel
footprints.
AutoCAD Electrical commands are location box aware:
■Inserting or moving a component into a location box updates the location
and installation values of the component.
■Moving a component out of a location box prompts the option to update
the location and installation values of the component to match the drawing
values.
■The insertion point of a component determines whether it is considered
inside or outside a location box.
AutoCAD Electrical circuit commands are not location box aware. For example,
if a circuit is inserted and some of the components fall within a location box,
the components are not updated.
NOTE Using standard AutoCAD commands do not trigger any updates.
Location box | 887

The layer assigned to the Location Box feature determines the color and
linetype of the polyline. Assign the layer on the Drawing properties: drawing
format tab on page 231 dialog box.
Insert Location Box
Inserts a location box around one or more components. You have the option
to update the location and installation codes for the parent components within
the box to match the location box. You can assign a description to the location
box.
1Click Schematic tab ➤ Insert Components panel ➤ Location Box
drop-down ➤ Location Box.
2To insert a rectangular box, respond to the prompts as follows:
Specify first corner point or (9=orthogonal shape):
Select a location for the first corner of the rectangle
Specify second point:
Select a location for the second corner of the rectangle
3To insert an orthogonal shape, respond to the prompts as follows:
Specify first corner point or (9=orthogonal shape):
Press 9 ENTER
Specify starting corner:
Select a location for the first corner of the shape
Select next corner:
Select a location for the next corner of the shape
Continue selecting locations until ready to close the shape.
Press C ENTER
Specify description insertion point:
Select a location for the description text for the location box.
The Location Box dialog box displays.
4Enter the Location value for the box.
■Browse - displays the Location Codes dialog box where you can select
a location code used in the project, on the active drawing, or from an
external .LOC file.
888 | Chapter 11 Component Attribute Tools

■Pick “Like” - temporarily exits the Location Box dialog box so you can
select an existing location code value on the drawing.
5Enter the Installation value for the box.
■Browse - displays the Installation Codes dialog box where you can
select an installation code used in the project, on the active drawing,
or from an external .INST file.
■Pick “Like” - temporarily exits the Location Box dialog box so you can
select an existing installation code value on the drawing.
6Select whether to update the location and installation values of the parent
components within the box to match the values of the location box.
7Select the visibility for the location and installation attributes of all
components within the box.
8Define the optional description text for the location box.
■Text Height - enter the height or select the Pick Height button to
select a text object on the drawing with the desired height.
■Description Insertion Point - change the location for the description
text. If the box is not a rectangle, this button is disabled.
■Box description - enter the description value.
■Use =Installation+Location Values - enter a predefined value based on
the location box values.
■Use Location-Installation Values - enter a predefined value based on
the location box values.
■Drawing - displays the All Location Box Descriptions - Drawing dialog
box. Select a description from the list.
■Pick “Like” - temporarily exits the Location Box dialog box so you can
select an existing description value on the drawing.
9Click OK.
NOTE Use the Edit Component command to edit a location box.
Location box
Inserts a location box around one or more components.
Location box | 889
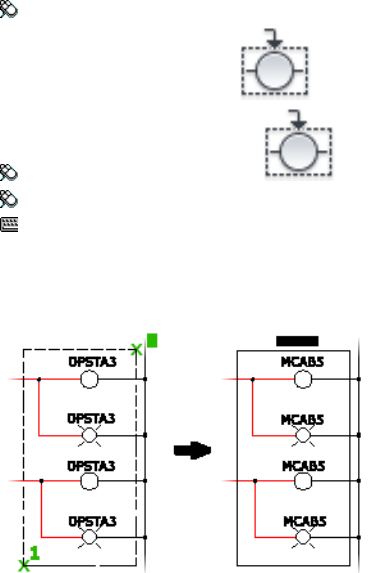
Ribbon: Schematic tab ➤ Insert Components panel ➤ Location Box
drop-down ➤ Location Box.
Toolbar: Location Symbols
Menu: Components ➤ Component Tagging ➤ Location Box
Command entry: AELOCATIONBOX
You have the option to update the location and installation codes for the
parent components within the box to match the location box. You can assign
a description to the box.
Installation/Location Codes
Specifies the location code.Location
■Browse - displays the Location Codes dialog
box where you can select a location code used
in the project, on the active drawing, or from
an external .LOC file.
■Pick “Like” - temporarily exits the Location Box
dialog box so you can select an existing loca-
tion code value on the drawing.
Specifies the installation code.Installation
■Browse - displays the Installation Codes dialog
box where you can select an installation code
used in the project, on the active drawing, or
from an external .INST file.
890 | Chapter 11 Component Attribute Tools

■Pick “Like” - temporarily exits the Location Box
dialog box so you can select an existing install-
ation code value on the drawing.
By default, all location and installation values on
schematic parent symbols inside the location box,
Update existing parent symbols values to match
the location box
update to match the values of the location box.
Uncheck this option to keep the values on the
symbols.
By default, location and installation values on all
symbols are made invisible.
Force Installation and Location attributes to be
visible or invisible
■Uncheck so no visibility changes are made.
■If checked, select to set the visibility for the
location and installation attributes.
Dashed Box Information
Specifies the description height. Description height
can be entered in the edit box or picked from an
existing device from the active drawing.
Text Height
Specifies the description text.Box Description
Specifies the description insertion point: top, bot-
tom, left or right. Enter a description to enable the
button.
Description Insert Point
NOTE If the location box is not a rectangle, this
button is disabled.
Enters ={installation value}+{location value} as the
box description.
Use =Installation+Location Values
Enters {location value}-{installation value} as the
box description.
Use Location-Installation Values
Searches the active drawing for location box descrip-
tions. Displays the list in the All Location Box De-
Drawing
scriptions - Drawing dialog box. Select a description
from the list.
Location box | 891
Picks a description from a component in the active
drawing.
Pick “Like”
NOTE Use the AutoCAD Electrical Edit Component to change the Location Box
values.
Modify library symbols
Change library symbol attribute size
Use the Modify Symbol Library tool to change the attribute description size
for library symbols.
NOTE Make a backup copy of the library you plan to modify (such Windows XP:
\Documents and Settings\All Users\Documents\Autodesk\Acade {version}\libs\jic1
library, or Windows Vista, Windows 7: \Users\Public\Documents\Autodesk\Acade
{version}\libs\jic1 ). If the conversion does not give you the results you expect you
can restore the symbols, adjust the settings, and then rerun.
1Click Schematic tab ➤ Other Tools panel ➤ Symbol Builder drop-down ➤
Modify Symbol Library.
2Select the folder containing the library symbols you wish to convert and
press OK.
The Symbol Library Attribute Text/Scale Resize dialog box displays. You
can change the attribute size based on the AutoCAD Electrical attribute
type.
3Select the attributes to change. Notice that you can change the attributes
for parent/stand-alone symbols separate from the child/contact symbols.
4Enter the new value and click Start.
The first library symbol is immediately opened. Changes are made to the
selected attributes. The drawing is saved, and the operation moves on to
the next symbol. I t continues until each symbol is updated.
NOTE You can also use this tool to change the default text width or the text font
used for the text style of AutoCAD Electrical.
892 | Chapter 11 Component Attribute Tools
Symbol library attribute text/scale resize
Ribbon: Schematic tab ➤ Other Tools panel ➤ Symbol Builder
drop-down ➤ Modify Symbol Library.
Menu: Components ➤ Symbol Library ➤ Modify Symbol Library
Command entry: AEUPDATESYMLIB
Select the folder and click OK.
Specifies the new scale for the symbol. A value of
1.0 = no change.
Re-scale symbol
Specifies the new polyline width for the symbol. It
is useful when modifying the polyline width for the
Change polyline width
one-line library symbols but works on any symbol
with polylines.
Specifies which command to run using the built-in
AutoLISP programming in AutoCAD Electrical. Enter
the AutoLISP code in the edit box.
Run AutoLISP “(command...)” expression
Specifies the new width for the attribute text.Force attributes to fixed text width
Specifies the default text width and font used for
the text style in AutoCAD Electrical. Choose the
desired style from the list.
Change “WD” style
Specifies to perform a save even if you did not
modify the symbol library.
Do a save even if no change
Specifies the text height for the following attributes:
parent or child components, installation and loca-
Force attributes to fixed text heights
tion codes, position, state, component terminal
pins, parent and child descriptions and cross-refer-
ences.
Modify library symbols | 893
894

Wire/Wire Number Tools
Overview of wires
AutoCAD Electrical treats line entities as wires when the lines are found on an
AutoCAD Electrical-defined wire layer. You can have many wire layers set up
on your drawing. Each wire layer has a descriptive name like "RED_16" or
"BLK_14_THW" and is assigned a screen color to mimic the wire color visually.
Wires do not have to begin or end at snap points, and they do not have to be
orthogonal (they can be skewed at any angle).
A wire network is one or more wire line segments and optional branches that
interconnect and form an electrically unbroken conductor. Wire segments of
the network may contain in-line terminals and wire crossing gaps. All segments
of a wire network receive the same wire number unless you select On per Wire
Basis in the Wire Number Options section of the Project Properties ➤ Wire
Numbers dialog box (on the Project Manager, right-click the project name and
select Properties). When multiple wires are tied to a common wire connection
point, each wire is treated as an independent wire network and receives its own
unique wire number assignment by AutoCAD Electrical
NOTE A wire connection point should only have up to three wire connections tied
to it. Adding more wires to a single point prevents the angled wire connection to
tie uniquely to the wire connection point.
Use wire layers
The Set Wire Type tool is used for setting a wire type for new wires only. The
wire layer name and the associated wire properties (such as wire color, size, and
12
895

whether the wire layer is processed for wire numbers) are saved in the drawing
file. The following rules determine the wire layer for a new wire:
■When a wire is created from an existing wire, the new wire takes on the
same layer as the existing wire. It ignores the current layer and the current
wire type.
■When the new wire is started in empty space but ends at an existing wire,
the new wire takes on the wire layer of the ending wire. The current layer
and current wire type are ignored.
■When a new wire is started at an existing wire and ends at another existing
wire, the new wire takes on the layer of the beginning wire.
■If there are no wire layers in the drawing, the new wire is drawn in the
WIRES layer.
■When a wire starts in empty space and ends at the component wire
connection point, the new wire is drawn on the current wire type. The
layer of the wires already tied to the same component connection points
are ignored. The same is true for a wire that starts at the component wire
connection point and ends in empty space.
Use the Create/Edit Wire Type tool to create new or edit existing wire types
or use the Change/Convert Wire Type tool to convert lines to wires.
Create wire types
Wire types for drawings are set up in the Create/Edit Wire Type dialog box.
1Click Schematic tab ➤ Edit Wires/Wire Numbers panel ➤ Modify Wire
Type drop-down ➤ Create/Edit Wire Type.
2In the Create/Edit Wire Type dialog box, click inside the Wire Color
column for a blank row and specify a value for the new wire layer.
3Click inside the Size column and specify a value for the size.
The Layer Name is automatically created. If you specified Wire Color:
Red and Size: 20, the name RED_20 is assigned to the wire layer you are
creating.
4If you do not want wires on this layer processed for wire numbers, select
No for the Wire Numbering option.
896 | Chapter 12 Wire/Wire Number Tools

5To import wire types from an existing drawing or template, click Import.
■Select the drawing or drawing template containing the wire types for
import.
■On the Import Wire Types dialog box, select the wire types for import.
■Define how the import function behaves if a wire type exists on the
active drawing.
6Click Color, Linetype, or Lineweight to assign values for the new layer.
NOTE If you want the new wire layer to be the default, click Mark Selected
as Default.
7Click OK.
Add existing wire layers to the drawing
Wire layer names for drawings are set up in the Create/Edit Wire Type dialog
box.
1Click Schematic tab ➤ Edit Wires/Wire Numbers panel ➤ Modify Wire
Type drop-down ➤ Create/Edit Wire Type.
2In the Create/Edit Wire Type dialog box, click Add Existing Layer.
3In the Layers for Line "Wires" dialog box, define the layer name and click
OK. You can either enter a name in the edit box or click Pick to select a
name from the existing layer list.
The layer displays in the wire type grid. If you selected the wrong wire
layer, highlight the layer in the dialog box and click Remove Layer. You
can then go back into the Layers for Line "Wires" dialog box and select
another layer to add.
4In the Create/Edit dialog box, click Color, Linetype, or Lineweight to
assign new values for the layer.
5If you do not want wires on this layer processed for wire numbers, select
No for the Wire Numbering option.
6Click OK.
Create/edit wire type
Use wire layers | 897
Defines and edits wire types.
Ribbon: Schematic tab ➤ Edit Wires/Wire Numbers panel ➤ Modify
Wire Type drop-down ➤ Create/Edit Wire Type.
Toolbar: Wires
Menu: Wires ➤ Create/Edit Wire Type
Command entry: AEWIRETYPE
The program saves the wire layer name and associated properties, such as wire
color, size, and whether the wire layer is processed for wire numbers, in the
drawing file. Use the grid control to sort and select wire types to modify.
TIP Use the Change/Convert Wire Type tool to convert lines to wires. You can
also type "T" at the command prompt during wire insertion to use the Set Wire
Type tool.
Wire type grid
Displays the wire types used in the active drawing. The wire layer name and
the wire properties like color, size, whether the wire layer is processed for wire
numbers, and user-defined properties are listed in the grid. An “x” in the Used
column indicates that the layer name is currently used in the drawing. A blank
value in this column indicates that the layer name exists in the drawing but
it is not currently being used. The current wire type is highlighted with a gray
background; selected wire types highlight in blue.
If you do not want wire numbers assigned to wires on a specific layer, select
“No” Wire Numbering for that layer. The Insert Wire Numbers command
follows these rules:
■If all wires in the network are on layers set “No” for Wire Numbering, no
new wire number is inserted.
■If any wire in the network is on a layer set “Yes” for Wire Numbering, the
existing non-fixed wire number is updated or a new wire number is inserted.
■If a wire network already has a non-fixed wire number, it is updated
regardless of the Wire Numbering setting. Use the Delete Wire Numbers
command to remove the wire number.
898 | Chapter 12 Wire/Wire Number Tools

NOTE Manually maintain wire layer type consistency through signal arrows.
To rename the User1- User 20 column headers, right-click the project name
in the Project Manager and select Properties. In the Project Properties ➤ Wire
Numbers dialog box, Wire Type section, click Rename User Columns. In the
Rename User Columns dialog box, specify a new column name and click OK.
Renaming of user-defined columns is project-specific. You cannot rename the
Color, Size, or Layer Name columns. All the data corresponding to the header
column can be copied, cut, and pasted to another column.
All text fields are editable except for the Layer Name cell. It cannot be edited
for existing layers. Left-click to edit the cell or right-click in a cell to display
options for modifying the cell contents. If you want to rename a layer,
right-click on a cell and select Rename Layer. Right-click options include:
Copy, Cut, Paste, Delete Layer, and Rename Layer. If it is the default layer,
you cannot delete or remove the layer.
You can select multiple layers to edit or remove by using the Shift or Ctrl keys
on your keyboard while picking the wire layer in the wire type list.
You can move the wire type records inside the grid to whatever position you
want using drag and drop. Select the wire type records to move and drag to
the new position in the grid.
Option
Makes all existing layers valid wire layers and displays
them in the wire type grid.
Make All Lines Valid Wires
If you later decide you want some layers to be wire
layers and others to be line layers, you can deselect
this option. All the layers are removed from the wire
type grid. Add layers again using the Add Existing
Layer option.
Imports wire types from an existing drawing or
drawing template. Once the drawing is specified,
Import
the Import Wire Types on page 903 dialog box dis-
plays. Select the wire types to import.
Use wire layers | 899

Layer
Allows you to format the layer name, define or edit the layer color, linetype,
and line weight.
Format the layer name. The program fills the layer
name automatically once you enter a value in color,
Layer Name Format
size based on the format. For example, if you enter
BLK for color and 10AWG for size, the layer name is
filled in as BLK_10AWG based on default %C_%S
format. Placeholders are supported at any place in
the format (that is, "CUST%C-THIN%S).
Valid wire name format codes are:
■%C = Wire Color
■%S = Wire Size
■%1-%5 = User 1 - User 5
Displays the AutoCAD dialog box for Layer colors
election. The Select Color dialog box highlights the
Color
color corresponding to the wire type record. The
default color for new records is white. Undefined
colors for layers use the default color while creating
the layer. Multiple selection is allowed. All wire layers
that were selected can be changed to the color.
Displays the AutoCAD dialog box for linetype selec-
tion. This Select Linetype dialog box highlights the
Linetype
linetype corresponding to the wire type record. The
default linetype for new records is continuous. Un-
defined linetypes for layers use the default linetype
while creating the layer. Multiple selection is allowed.
All wire layers that were selected can be changed to
the desired linetype.
NOTE If you need special linetypes for constructing
P&ID or point to point diagrams, load the special
linetypes from theacade.lin text file.
Displays the AutoCAD dialog box for lineweight se-
lection. The Lineweight dialog box highlights the
Lineweight
lineweight corresponding to the wire type record.
The default lineweight for new records is default.
Undefined lineweights for layers use the default
900 | Chapter 12 Wire/Wire Number Tools

lineweight while creating the layer. Multiple selection
is allowed. All wire layers that were selected can be
changed to the desired lineweight.
Displays the Layers for Line Wires dialog box for
specifying a layer name. Click Pick to select the layer
Add Existing Layer
name from the existing layer list consisting of all the
layers in the drawing inclusive of the non-wire layers.
Only lines on pre-selected layers are processed as
wires. Enter a wire layer name in the dialog box. A
wildcard used in the name selects a group of layers
(for example, RED_* selects all layers that begin with
"RED_").
Removes the selected layer name from the wire type
grid. The layer is no longer a valid wire layer, however
Remove Layer
the layer remains in the drawing as an AutoCAD line
layer.
If multiple layers of one color exist in the drawing,
select all layers of that color in the wire type grid to
activate this button. For example, if there are multiple
RED* layers such as RED_AWG18, RED_AWG20,and
RED_AWG25, select all three layers in the wire type
grid to enable the button.
NOTE You cannot remove the wire layer marked as
the default.
Makes the selected layer the default layer for new
wire layers and displays the layer name in the dialog
box.
Mark Selected as Default
OK
NOTE This option is available only when one wire type record is selected in the
list.
Makes the selected wire type the current wire type. If the selected wire type
does not exist on the drawing, the wire layer is created on the fly. The wire
layer name and properties are saved in the drawing file. For the layer to create,
the following rules apply:
■The layer name must be unique
Use wire layers | 901

■The layer name cannot be left blank
■The layer name cannot contain special characters such as / \ " : ; ? * | , = '
> <
Import wire types
1Click Schematic tab ➤ Edit Wires/Wire Numbers panel ➤ Modify Wire
Type drop-down ➤ Create/Edit Wire Type.
2Click Import.
The Wire Type Import - Select Master Drawing dialog box displays.
3Select the drawing or drawing template containing the wire types for
import.
4Click Open.
The Import Wire Types dialog box displays.
5Select the wire types for import.
6Define how the import function behaves if a wire type exists on the active
drawing.
Overwrite any Wire Numbering and USERn differences - if checked,
changes the wire numbering setting and all the USER values for the
existing wire type to match the imported wire type.
Update any layer color and linetype differences - if checked, changes
the color and linetype settings for the existing wire layer to match
the imported wire layer.
7Click OK.
The selected wire types and settings display in the Create/Edit Wire Type
dialog.
8Continue adding, importing, and editing wire types in the Create/Edit
Wire Type dialog.
9Click OK.
902 | Chapter 12 Wire/Wire Number Tools

Import wire types project-wide
1Click Project tab ➤ Project Tools panel ➤ Utilities.
2Select the Import from specified drawing check box.
3Browse to or enter the name of the drawing or drawing template
containing the wire type definitions for import.
4Click Setup to display the Import Wire Types dialog box.
5Select the wire types for import.
6Define how the import function behaves if a wire type exists on the
drawing being processed.
Overwrite any Wire Numbering and USERn differences - if checked,
changes the wire numbering setting and all the USER values for the
existing wire type to match the imported wire type.
Update any layer color and linetype differences - if checked, changes
the color and linetype settings for the existing wire layer to match
the imported wire layer.
7Click OK and return to the Project-Wide Utilities dialog box.
8Click OK.
The Select Drawings to Process dialog box displays.
9Select the drawings you want to import the selected wire types into.
10 Click OK.
Import Wire Types
Imports wire types from another drawing or drawing template.
Create/Edit Wire Type
Ribbon: Schematic tab ➤ Edit Wires/Wire Numbers panel ➤ Modify
Wire Type drop-down ➤ Create/Edit Wire Type.
Use wire layers | 903
Toolbar: Wires
Menu: Wires ➤ Create/Edit Wire Type
Command entry: AEWIRETYPE
Click the Import button in the Option section.
Project-wide utilities
Ribbon: Project tab ➤ Project Tools panel ➤ Utilities.
Toolbar: Project
Menu: Projects ➤ Project-Wide Utilities
Command entry: AEUTILITIES
Select the Import from specified drawing check box. Browse to or enter the
name of the drawing or drawing template containing the wire type definitions
for import. Click Setup.
Double click a column heading to sort the wire type list by the data in that
column.
Select the wire types to import.Grid
All wire types are initially selected to import. Clears
or selects all wire types to import.
Clear All
Select All
NOTE The button switches between Select All and
Clear All each time it is clicked.
If checked, changes the wire numbering setting and
all the USER values for the existing wire type to match
the imported wire type.
Overwrite any Wire Numbering and
USERn differences
If checked, changes the color and linetype settings
for the existing wire layer to match the imported
wire layer.
Update any layer color and linetype differ-
ences
Project-wide utilities
904 | Chapter 12 Wire/Wire Number Tools

Provides the means for operations on wire numbers, component tags, attribute
text, wire types, and item numbers. You can define scripts and apply them
project-wide.
Ribbon: Project tab ➤ Project Tools panel ➤ Utilities.
Toolbar: Project
Menu: Projects ➤ Project-Wide Utilities
Command entry: AEUTILITIES
Select project drawings and perform any of the following:
■Erase, reset, fix, or unfix wire numbers.
■Fix or unfix component tags.
■Fix or unfix item numbers.
■Clear signal cross-referencing.
■Run a user-specified script file.
■Change attribute text size or style.
■Import wire types from another drawing or drawing template.
You can have multiple drawings open at any time. However, to maximize
performance and memory usage, minimize the number of open drawings
when running project-wide commands.
Wire Numbers
Select to keep wire numbers the same, erase specified wire numbers, reset
specified wire numbers, or set wire numbers to fixed or normal.
Signal Arrow Cross-reference text
Select to maintain the signal arrow cross-reference text or to remove all signal
arrow cross-reference text across the current project.
Use wire layers | 905

Parent Component Tags: Fix/Unfix
Select to maintain the component tags or to set all parent component tags to
fixed or normal across the current project.
Item Numbers: Fix/Unfix
Select to maintain the item numbers or to set all item numbers to fixed or
normal across the current project. If you run Resequence Item Numbers on
page 1602 later on, fixed item numbers do not change.
Change Attribute
Click Setup to select the attributes to change, and then
enter the height and width definitions for the selected at-
tributes.
Change Attribute Size
NOTE If you do not want the attribute height or width to
change, do not enter a value definition.
Click Setup to select a text font to apply to the text style
used on component attributes.
Change Style
For each drawing
Enter the name or browse to a command script file to use for each drawing
in the current project or to purge all blocks.
Wire Types
Imports wire types defined on another drawing or drawing template. Enter
the drawing or template name or browse to it using the browse button. The
program reads the specified drawing and extracts all wire type information.
Click Setup to display the Import Wire Types on page 903 dialog box where
you:
■Select the wire types to import.
■Define whether to overwrite any Wire Numbering and USERn differences
for existing wire types.
■Define whether to overwrite color and linetype differences for existing
wire layers.
906 | Chapter 12 Wire/Wire Number Tools

Change wire types
Change wire types
You can change the wire type using the Change/Convert Wire Type tool or
by typing a "T" at the command prompt during wire insertion commands.
1Click Schematic tab ➤ Edit Wires/Wire Numbers panel ➤ Modify Wire
Type drop-down ➤ Change/Convert Wire Type.
Optionally, you can right-click on an existing wire and select
Change/Convert Wire Type.
2In the Change/Convert Wire Type dialog box, select a wire type record
in the wire type list, or click Pick to select a wire type record from the
drawing.
If you right-clicked on a wire and selected Change/Convert Wire Type,
the wire type corresponding to the selected wire layer is highlighted in
the list.
3Make any selections in the dialog box.
If Change all wires in the wire network is selected, all wires in the wire
network are changed to the new wire type. If unselected, only the selected
wire is changed.
If Convert Lines to Wires is selected, the selected lines are changed to the
new wire type. If unselected, the lines are ignored.
4Click OK.
5Select the wires or lines in the drawing to change and press Enter.
Override wire type at command prompt
During wire insertion, the current wire type displays at the command prompt.
You can override the wire type by typing in the hot key "T" and selecting a
new wire type from the Set Wire Type dialog box. The new wire type becomes
the current wire type and the command continues with the wire insertion.
Use the following commands:
■Click Schematic tab ➤ Insert Wires/Wire Numbers panel ➤ Insert Wires
drop-down ➤ Wire.
Change wire types | 907
■Click Schematic tab ➤ Insert Wires/Wire Numbers panel ➤ Insert Wires
drop-down ➤ 22.5 Degree.
■Click Schematic tab ➤ Insert Wires/Wire Numbers panel ➤ Insert Wires
drop-down ➤ 45 Degree.
■Click Schematic tab ➤ Insert Wires/Wire Numbers panel ➤ Insert Wires
drop-down ➤ 67.5 Degree.
■Click Schematic tab ➤ Insert Wires/Wire Numbers panel ➤ Multiple
Bus.
■Click Schematic tab ➤ Edit Wires/Wire Numbers panel ➤ Modify Ladder
drop-down ➤ Add Rung.
■Click Schematic tab ➤ Insert Wires/Wire Numbers panel ➤ Insert Ladder
drop-down ➤ Insert Ladder.
NOTE If you select Another Bus (Multi-Wire) in the Multiple Wire Bus dialog box,
the wires are drawn on the same wire layer as the existing wire bus. You cannot
type "T" to change the wire type during wire insertion.
Change/convert wire type
Convert lines to wires, or change wires from one wire type to another.
TIP Use the Create/Edit Wire Type tool to create and edit wire types. You can also
type "T" at the command prompt during wire insertion to use the Set Wire Type
tool.
Ribbon: Schematic tab ➤ Edit Wires/Wire Numbers panel ➤ Modify
Wire Type drop-down ➤ Change/Convert Wire Type.
Toolbar: Wires
Menu: Wires ➤ Change/Convert Wire Type
Command entry: AECONVERTWIRETYPE
You can also right-click on an existing wire and select Change/Convert Wire
Type. Use the grid control to sort and select the wire types for modification.
908 | Chapter 12 Wire/Wire Number Tools

Wire type grid
Displays the wire types used in the active drawing. The wire layer name and
the wire properties like color, size, whether the wire layer is processed for wire
numbers, and user-defined properties are listed in the grid. An 'x' in the Used
column indicates that the layer name is currently used in the drawing. A blank
value in this column indicates that the layer name exists in the drawing but
it is not currently being used.
A “No” in the Wire Numbering column indicates that wires on this layer do
not receive a wire number. The Insert Wire Numbers command follows these
rules:
■If all wires in the network are on layers set “No” for Wire Numbering, no
new wire number is inserted.
■If any wire in the network is on a layer set “Yes” for Wire Numbering, the
existing non-fixed wire number is updated or a new wire number is inserted.
■If a wire network already has a non-fixed wire number, it is updated
regardless of the Wire Numbering setting. Use the Delete Wire Numbers
command to remove the wire number.
NOTE Manually maintain wire layer type consistency through signal arrows.
To rename the User1- User 20 column headers, right-click the project name
in the Project Manager and select Properties. In the Project Properties ➤ Wire
Numbers dialog box, Wire Type section, click Rename User Columns. In the
Rename User Columns dialog box, specify a new column name and click OK.
Renaming of user-defined columns is project-specific. You cannot rename the
Color, Size, or Layer Name columns. All the data corresponding to the header
column can be copied, cut, and pasted to another column.
Pick
Allows you to pick a wire or line in the active drawing. Once you pick a wire,
the corresponding wire type record is highlighted. If you pick a line in the
active drawing, you can add the layer where the line resides to the list of valid
wire layers. A new wire type record is created automatically.
Change/Convert
Changes all the wires in the wire network to the se-
lected wire type record. If unselected, only a single
wire is changed to the selected wire type.
Change All Wire(s) in the Network
Change wire types | 909
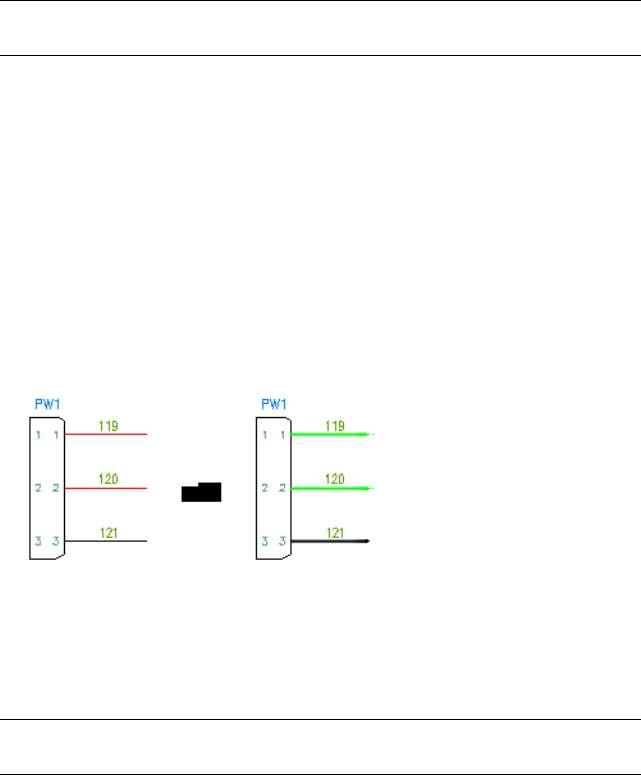
Changes the lines to the selected wire type in the
wire type grid.
Convert Line(s) to Wire(s)
OK
NOTE This option is available only when one wire type record is selected in the
list.
Makes the selected wire type the current wire type. If the selected wire type
does not exist on the drawing, the wire layer is created on the fly. The wire
layer name and properties are saved in the drawing file. For the layer to create,
the following rules apply:
■The layer name must be unique
■The layer name cannot be left blank
■The layer name cannot contain special characters such as / \ " : ; ? * | , = '
> <
Use the grid control to sort and select the wire types for modification.
Set wire type
This tool sets wire types for new wires. Use the grid control to sort and select
the wire types for modification.
TIP Use the Create/Edit Wire Type tool to create and edit wire types or the
Change/Convert Wire Type tool to convert lines to wires.
Type "T" at the command prompt during wire insertion.
910 | Chapter 12 Wire/Wire Number Tools

Wire type grid
Displays the wire types used in the active drawing. The wire layer name and
the wire properties like color, size, whether the wire layer is processed for wire
numbers, and user-defined properties are listed in the grid. An 'x' in the Used
column indicates that the layer name is currently used in the drawing. A blank
value in this column indicates that the layer name exists in the drawing but
it is not currently being used.
A “No” in the Wire Numbering column indicates that wires on this layer do
not receive a wire number. The Insert Wire Numbers command follows these
rules:
■If all wires in the network are on layers set “No” for Wire Numbering, no
new wire number is inserted.
■If any wire in the network is on a layer set “Yes” for Wire Numbering, the
existing non-fixed wire number is updated or a new wire number is inserted.
■If a wire network already has a non-fixed wire number, it is updated
regardless of the Wire Numbering setting. Use the Delete Wire Numbers
command to remove the wire number.
NOTE Manually maintain wire layer type consistency through signal arrows.
To rename the User1- User 20 column headers, right-click the project name
in the Project Manager and select Properties. In the Project Properties ➤ Wire
Numbers dialog box, Wire Type section, click Rename User Columns. In the
Rename User Columns dialog box, specify a new column name and click OK.
Renaming of user-defined columns is project-specific. You cannot rename the
Color, Size, or Layer Name columns. All the data corresponding to the header
column can be copied, cut, and pasted to another column.
OK
NOTE This option is available only when one wire type record is selected in the
list.
Makes the selected wire type the current wire type. If the selected wire type
does not exist on the drawing, the wire layer is created on the fly. The wire
layer name and properties are saved in the drawing file. For the layer to create,
the following rules apply:
■The layer name must be unique.
■The layer name cannot be left blank.
Change wire types | 911

■The layer name cannot contain special characters such as / \ " : ; ? * | , = '
> <.
Insert wires
Insert wires
Inserts wire with automatic connection and wire crossing gaps or loops.
1Click Schematic tab ➤ Insert Wires/Wire Numbers panel ➤ Insert
Wires drop-down ➤ Wire.
Click the Insert Wires drop-down to access the Insert 22.5, 45, or 67.5
Degree Wire tools.
2Select the starting point of the wire. You can start a wire segment in
empty space, from an existing wire segment, or from an existing
component. If you start from a component, the wire segment is started
at the nearest wire connection attribute to your pick point on that symbol.
During wire insertion, the current wire type displays at the command
prompt.
T = override the current wire type. Select a new wire type from the
Set/Edit Wire Type dialog box. The new wire type becomes the current
wire type and the command continues with the wire insertion.
X = show the wire connection points when the wire approaches a
component.
TAB = temporarily disable or enable collision checking during wire
insertion.
This setting is remembered only for the current session. Collision
checking is on when AutoCAD Electrical restarts.
V = force a vertical direction for the wire segment.
H = force a horizontal direction for the wire segment.
C = insert the next wire segment at the current cursor location and
continue wire insertion.
3Select the ending point of the wire. You can end the wire segment or
angled segment in empty space, from an existing wire segment, or from
912 | Chapter 12 Wire/Wire Number Tools
an existing component. If it ends at a wire segment, a dot (wddot.dwg)
is applied, if appropriate. If it ends at another component, the nearest
wire connection attribute is found and connected to your pick point on
that symbol.
NOTE If the distance between two horizontal wires is relatively small, the
vertical wire crossing them avoids inserting loop gaps. The wire trap distance
setting is used to see whether wire loop gaps are possible or not. Reduce the
scale factor or increase the distance between two wires to insert gap loops.
If the wire was an angled wire, press “N” to switch to normal 90-degree
wire mode. The wire picks up at the end of the angled wire segment and
defaults to horizontal or vertical.
NOTE A wire connection point has up to three wire connections tied to it. Adding
more wires to a single point prevents the angled wire connection to tie uniquely
to the wire connection point.
Insert a wire
Inserts wire with automatic connection and wire crossing gaps or loops.
Ribbon: Schematic tab ➤ Insert Wires/Wire Numbers panel ➤ Wire.
Toolbar: Wires
Menu: Wires ➤ Insert Wire
Command entry: AEWIRE
Inserts a line or series of lines on a defined wire layer in AutoCAD Electrical.
A drawing can have multiple wire layers. Wires do not have to begin or end
at snap points, and can be at any angle. A wire network is one or more wire
segments and optional branches that interconnect and form an electrically
unbroken conductor.
Insert wires | 913
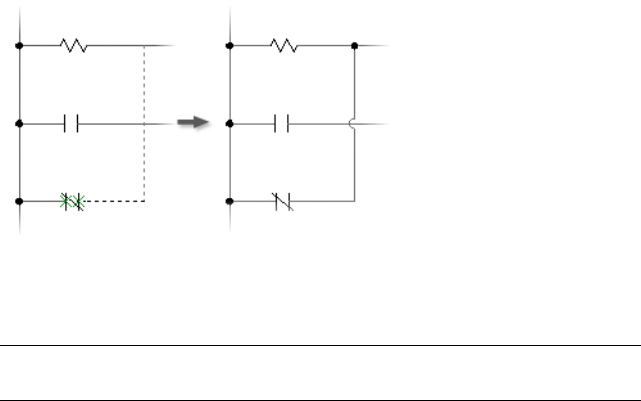
You can insert single or angled (22.5, 45, or 67.5 degree) line wire segments
on a wire layer (the wire layer does not have to be the current layer). AutoCAD
Electrical supports scooting components along angled wires.
NOTE The AutoCAD Insert Line command can also be used to insert AutoCAD
Electrical wires on a valid wire layer.
Displays the Set Wire Type dialog box where you set the
wire type for new wires.
Wiretype
Shows the wire connection points on a component when
the wire is close to the component. The points are shown
with temporary graphics.
Show connections
Forces the wire in a vertical direction from the previous
selection point. This option is available after selecting the
first point for the wire.
Start Vertical
Forces the wire in a horizontal direction from the previous
selection point. This option is available after selecting the
first point for the wire.
Start Horizontal
Inserts the next wire segment at the current cursor location
and continues wire insertion.
Continue
Temporarily disables or enables the collision checking dur-
ing wire insertion. This setting is remembered only for the
Collision off
current session. Collision checking is on when AutoCAD
Electrical restarts.
The setting is saved in the global variable
GBL_wd_skip_collision_check. A value of 1 indicates to skip
914 | Chapter 12 Wire/Wire Number Tools
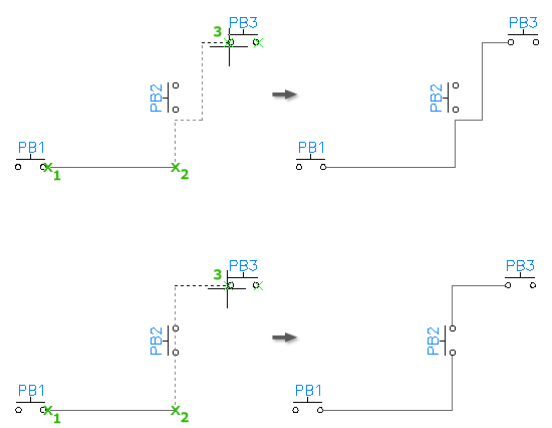
collision checking. A value of nil or 0 means to do collision
checking. The default setting is nil.
Collision checking on
Collision checking off
Insert wires | 915
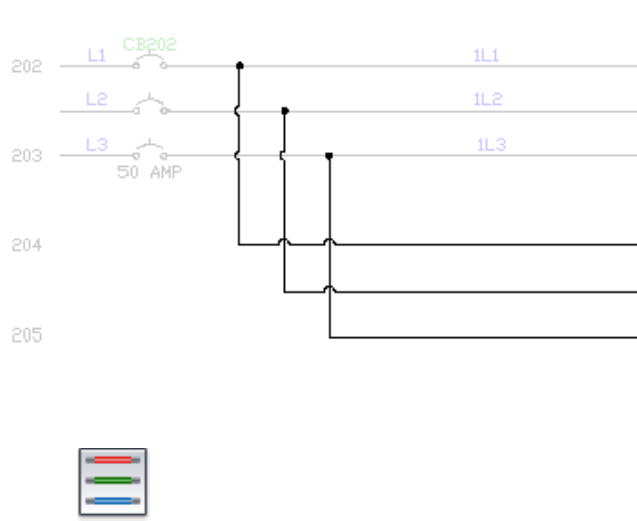
Insert multiple wires
Insert multiple wires
1Click Schematic tab ➤ Insert Wires/Wire Numbers panel ➤ Multiple
Bus.
2Set the horizontal and vertical spacing for the wires.
3Specify where to start the wires.
4Set the number of wires to 3, and click OK.
During wire insertion, the current wire type displays at the command
prompt. The current wire type indicates the layer name in which the new
wires are drawn. You can override it by typing "T" and selecting a new
wire type from the Set/Edit Wire Type dialog box. The new wire type
becomes the current wire type and the command continues with the wire
insertion.
5If starting at a component or bus, select the component. Drag the cursor
slowly to the right as the second and third phases latch on to their
appropriate vertical wires. You can see the three wires stretch straight
across the screen.
916 | Chapter 12 Wire/Wire Number Tools
As you pull the 3-phase wire out, you can turn a corner by moving your
cursor out of line with the bus. To reverse the phase sequence of the turn,
press F.
6Right-click to terminate the wires. The wires and wire connection dots
insert, and loops are automatically inserted at wire crossing points.
NOTE If the distance between two horizontal wires is relatively small, the
vertical wire crossing them avoids inserting loop gaps. The wire trap distance
setting is used to see whether wire loop gaps are possible or not. Reduce the
scale factor or increase the distance between two wires to insert gap loops.
To tie the new 3-phase wire to an existing bus, but with reversed sequence,
start the new 3-phase wire connected at the last wire on the existing bus.
Move the cursor backward across the other wires until the connections
are made, and then move the cursor forward again. This results in a
reversed sequence connection.
TIP If you have trouble connecting a new 3-phase wire to an existing bus, start
the command and select the starting point on the existing bus. Move the cursor
slowly across the other wires of the bus. AutoCAD Electrical has a better chance
of finding them and correctly connecting the new wiring.
Multiple wire bus
Inserts a multiple wire bus with automatic connections.
Ribbon: Schematic tab ➤ Insert Wires/Wire Numbers panel ➤ Multiple
Bus.
Toolbar: Wires
Menu: Wires ➤ Multiple Wire Bus
Command entry: AEMULTIBUS
Multiple bus wiring breaks automatically and reconnects to any underlying
components in its path. If it crosses existing wiring, wire-crossing gaps insert
automatically based on the drawing properties. You define the number of
wires.
Insert multiple wires | 917
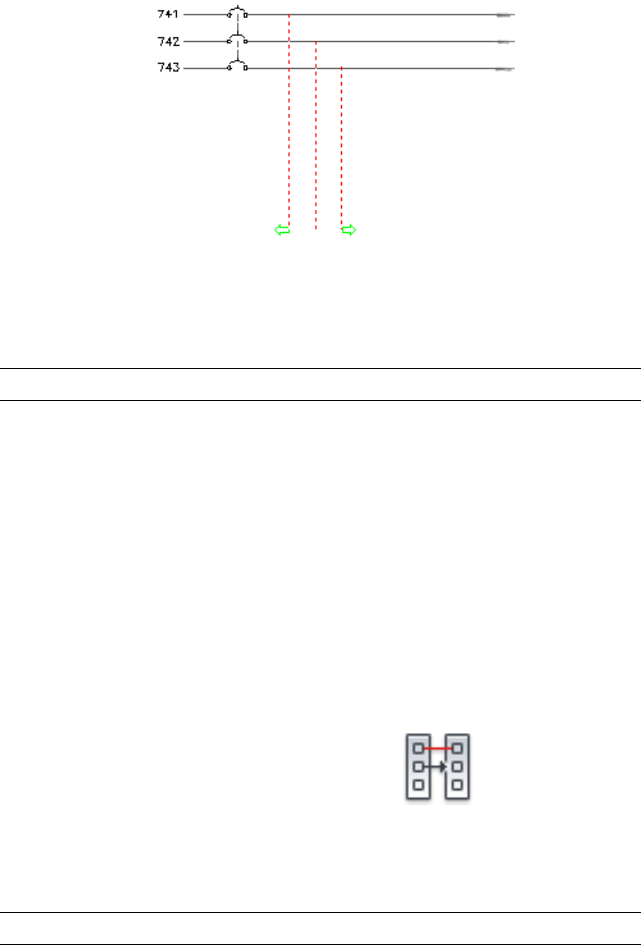
Inserts vertical or horizontal bus wiring. Bus spacing defaults to the default
ladder rung spacing for horizontal bus. For a vertical bus, the spacing is the
default value defined in the Ladder Defaults section in the Drawing Properties
➤ Drawing Format dialog box.
NOTE You can use the Scoot command to adjust bus spacing after insertion.
Specifies the horizontal spacing between the wires.Horizontal
Specifies the vertical spacing between the wires.Vertical
Interconnect components
Interconnect components
Inserts wires between aligned connection points on a pair of selected
components.
1Click Schematic tab ➤ Insert Wires/Wire Numbers panel ➤ Insert Wires
drop-down ➤ Interconnect Components.
2Select the first component.
3Select the second component.
NOTE Wires are added only if the wire connection points are aligned.
918 | Chapter 12 Wire/Wire Number Tools
Trim wires
Trim wires
Use this tool to remove a wire segment and wire tees as required. You can pick
on a single wire or draw a fence through multiple wires to trim.
1Click Schematic tab ➤ Edit Wires/Wire Numbers panel ➤ Trim Wire.
2Select the wire segment to remove on the drawing or type F followed by
a [space] to remove multiple wires at once.
3If you are removing multiple wires, draw a fence through the wires to
trim.
A Zoom Extents is triggered when a wire runs off the screen. If this zooming
back and forth becomes annoying during multiple trims, then zoom back so
that all the circuitry is shown on the screen. Or press Z and [space] at the trim
prompt. It triggers a Zoom Extents that persists through the rest of the
trimming edits.
NOTE You can use the AutoCAD Erase command to remove wires, but wire
connection dots or tees are not removed automatically.
Trim wire
Trims wire between wire connections.
Ribbon: Schematic tab ➤ Edit Wires/Wire Numbers panel ➤ Trim Wire.
Toolbar: Main Electrical
Menu: Wires ➤ Trim Wire
Command entry: AETRIM
Removes a wire segment and any wire tees or dots. Pick on a single wire, draw
a fence, or draw a crossing window to select the wires to trim.
Trim wires | 919
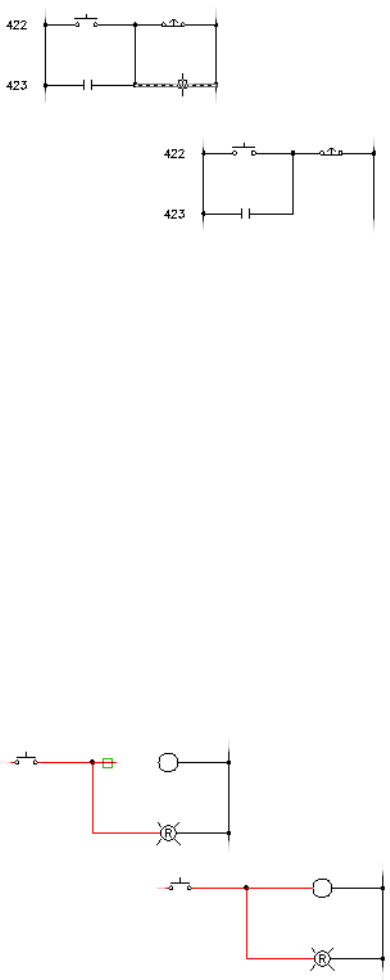
Draw a fence line through all wire segments to trim.Fence
Zoom Extents so that all wire segments are visible on the
screen.
Zext
Draw a crossing window selecting all wire segments to
trim.
Crossing
Select a single wire segment to trim.Select wire to trim
Stretch wires
Stretch wires
Stretches or trims the end of a wire segment to the nearest wire or in-line
component wire connection point.
Select the wire, and the program automatically finds the wire or component
in its path.
920 | Chapter 12 Wire/Wire Number Tools
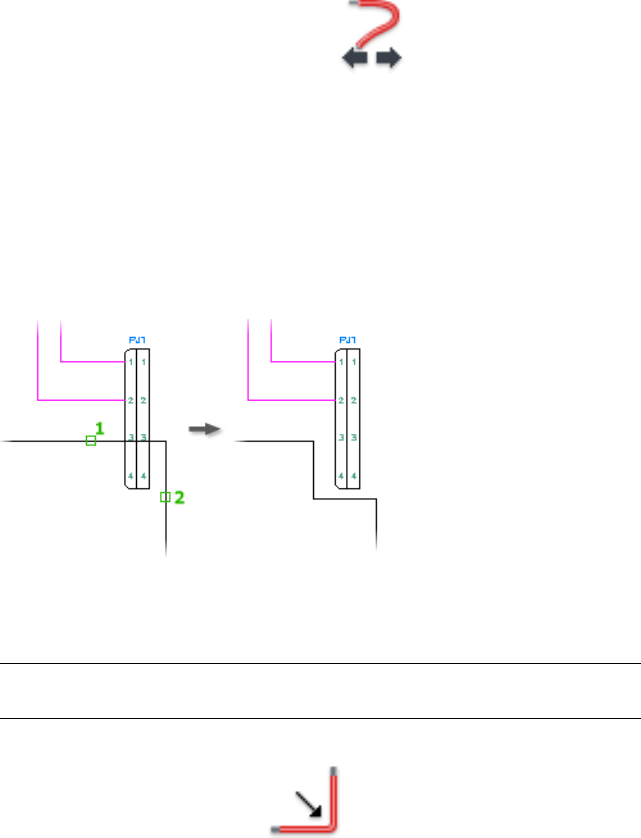
1Click Schematic tab ➤ Edit Wires/Wire Numbers panel ➤ Modify
Wires drop-down ➤ Stretch Wire.
2Select the end of the wire to stretch.
Bend wires at right angles
Bend wires at right angles
Bends a wire in a right angle and makes three right angle turns to avoid or
add geometry.
You can modify the wire defined at a right angle. You can replace the right
angle bend while maintaining the original wire connections to the
components.
NOTE This tool terminates if the bend attempts to connect two different wire
networks or if the bend bypasses more than a single right-angle turn.
1Click Schematic tab ➤ Edit Wires/Wire Numbers panel ➤ Modify Wires
drop-down ➤ Bend Wire.
2Select one of the two wires that make up a right-angle turn.
3Select the opposing wire that makes up the right-angle turn.
The additional wire segments are added based on the right-angle direction.
Bend wires at right angles | 921
4Right-click to exit the command.
Overview of wire color/gauge labels
When you select a wire to label, AutoCAD Electrical reads the layer name of
the wire, retrieves the matching text label, and inserts it as a label/leader on
the drawing. The resulting wire color/gauge label is automatically revised if
you change the wire layer of a labeled wire.
The mapping file is an ASCII text file with a ".wdw" extension. The default
mapping file, default.wdw, is referenced if a project-specific .wdw file is not
found. The mapping file lists each wire layer name followed by the wire
color/gauge label text to assign to that wire layer.
You can easily set up or edit these labels. Select the wire color/gauge tool and
select Setup to display the setup dialog. All the valid layer names of the current
drawing are listed in the upper dialog box list along with any matching labels
found in the ".wdw" file (if it exists). Highlight any layer name and type in
the label you want to associate with it. Use the "|" character to trigger a line
break within your label text. For example, "RED_14_THHN:RED|AWG#14"
causes wire labels for layer "RED_14_THHN" to display as two-line "RED" and
"AWG#14" labels. Your entries are saved to the ".wdw" file for instant reference
as you insert wire color/gauge labels.
About automatic wire leaders
AutoCAD Electrical places wire numbers on leaders when it determines that
the wire number text bumps into something (it does not check if the leader
itself collides with something). AutoCAD Electrical first makes 15 tiny step
checks in the "up" direction. If it fails it checks 15 steps in the down direction.
If it fails, it tries at approximately 60-degree angles. If all checks fail, it leaves
the wire number where it originally was going to put it. This entire process
takes just a split second.
Leader checks are triggered when wire numbers are inserted or they re-center
due to an adjacent SCOOT operation. If a component is scooted and the result
is enough room for a wire number on a leader to do without the leader,
AutoCAD Electrical automatically removes the leader and positions the wire
number just above the wire.
Map wire type labels to each wire layer
This tool maps a wire color/gauge/wire type label to each wire layer.
922 | Chapter 12 Wire/Wire Number Tools
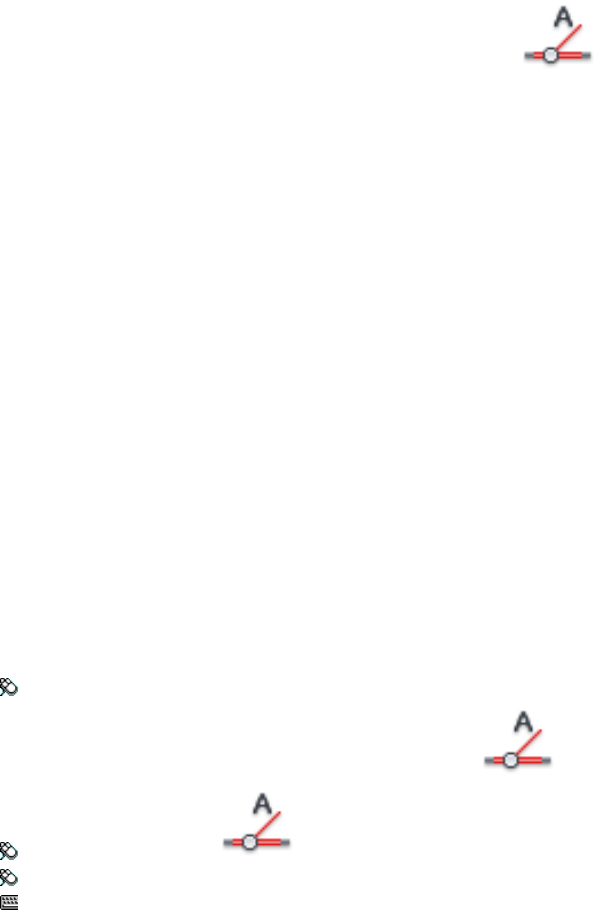
1Click Schematic tab ➤ Insert Wires/Wire Numbers panel ➤ Wire
Number Leader drop-down ➤ Wire Color/Gauge Labels.
2Click Setup to change the text size, arrow style, and layers for the label.
■Select the layer name to add/modify the default color/gauge text string
for wire labels and leaders.
To add or modify the default color/gauge text string, select the layer
name from the list in the Wire label color/gauge setup dialog box. To
add new wire layer names, use the Create/Edit Wire Type on page 897
dialog box.
■Set the text size, arrow size, arrow type, and gap size for the leader.
The label text size follows the current AutoCAD DIMTXT setting and
the arrow size defaults to the current AutoCAD DIMASZ setting.
■Specify the leader layer and text layer.
■Click OK to apply the changes to the wire labels. The specified leader
and text layers are displayed in the dialog box under the Setup button.
3Select how to place the label in the drawing: automatic placement by
AutoCAD Electrical, by picking the leader location point, or by picking
the location for the text label with no leader. If you picked Auto
placement, AutoCAD Electrical looks for a clear spot and insert the
leader/label automatically.
Insert wire color/gauge labels
Inserts a wire color /gauge label with or without a leader..
Ribbon: Schematic tab ➤ Insert Wires/Wire Numbers panel ➤ Wire
Number Leader drop-down ➤ Wire Color/Gauge Labels.
Toolbar: Wire Leaders
Menu: Wires ➤ Wire Numbers Miscellaneous ➤ Wire Color/Gauge Labels
Command entry: AEWIRECOLORLABEL
Overview of wire color/gauge labels | 923
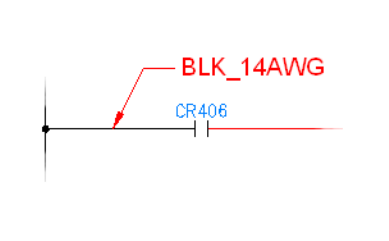
In Setup, set the default color/gauge text string, text size, arrow size, gap size,
and arrow type for the wire label/leaders. In the Create/Edit Wire Type dialog
box, add new wire layer names.
Sets the default color/gauge text string, text size, arrow
size, gap size, and arrow type for the wire label/leaders.
Setup
To add or modify the default color/gauge text string, select
the layer name from the list in the Wire label color/gauge
setup dialog box. To add new wire layer names, use the
Wires ➤ Create/Edit Wire Type dialog box.
Places the text label (with no leader) at a selected location.Manual/No Leader
Places the label on the drawing automatically. AutoCAD
Electrical looks for a good spot to place the label and the
Auto Placement
label is automatically placed without any picking on your
part.
Places the label at the selected leader location point.Manual
Insert in-line wire markers
Insert in-line wire markers
Inserts a reference-only in-line wire label.
Labels can identify a special signal name or conductor color. Wire numbering
and reporting ignore these reference-only labels.
924 | Chapter 12 Wire/Wire Number Tools
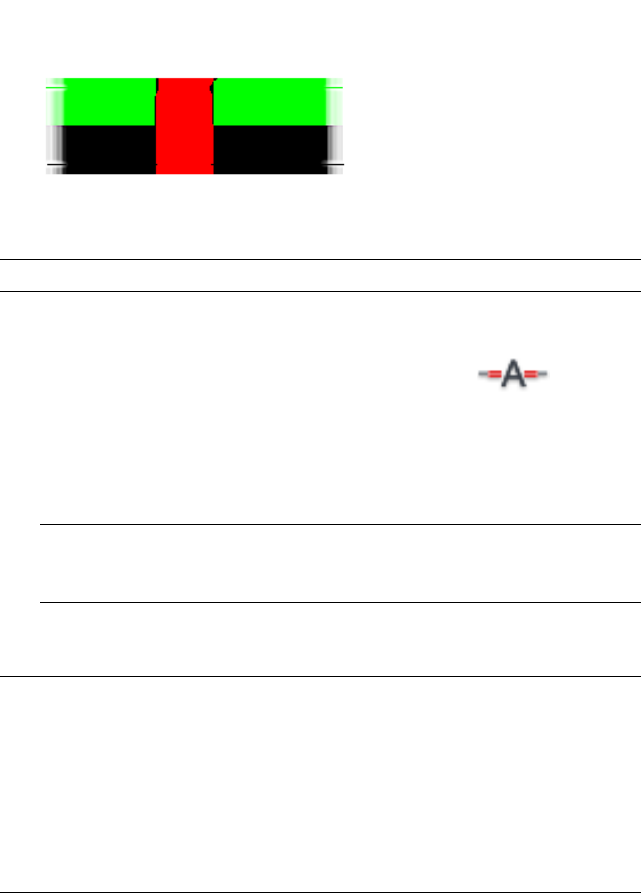
NOTE The wire breaks around the inline marker.
1Click Schematic tab ➤ Insert Wires/Wire Numbers panel ➤ Wire
Number Leader drop-down ➤ In-Line Wire Labels.
The Insert Component dialog displays with a selection of predefined
in-line markers and user-defined markers.
2Select a marker and place it on a wire.
NOTE If the label is too wide, use the Squeeze Attribute/Text tool. You can
also use the Adjust In-Line Wire/Label Gap tool to adjust the gap width rather
than squeezing the attribute to fit the gap.
3Press ESC to exit the command.
TIP You can also create wider marker symbols by following the block naming
convention for terminal symbols on page 294. For example, the horizontal Red
marker's file name is C:\Documents and Settings\All
Users\Documents\Autodesk\Acade 2007\Libs\Jic1\jic1\HTO_RED.dwg and the
vertical version is C:\Documents and Settings\All
Users\Documents\Autodesk\Acade {version}\Libs\Jic1\jic1\VTO_RED.dwg.
Libraries are in C:\Users\Public\Documents\Autodesk\Acade 2007\Libs\ on a
Windows Vista or Windows 7 installation. AutoCAD Electrical keys off of the first
four characters of the block/drawing name.
Insert component
This icon menu can be modified, expanded, or replaced with a custom menu.
You can change the default icon menu using the Library and Icon Menu Paths
Insert in-line wire markers | 925

section of the Project properties: project settings tab on page 204. Use the Icon
Menu Wizard to modify the menu. The default icon menu can also be redefined
in wd.env. Add entry "WD_MENU" for schematic icon menu and "WD_PMENU"
for panel layout icon menu.
Insert Component
Ribbon: Schematic tab ➤ Insert Components panel ➤ Insert Components
drop-down ➤ Icon Menu.
Toolbar: Main Electrical
Menu: Components ➤ Insert Component
Command entry: AECOMPONENT
Multiple Insert (Icon Menu)
Ribbon: Schematic tab ➤ Insert Components panel ➤ Multiple Insert
drop-down ➤ Multiple Insert (Icon Menu).
Toolbar: Main Electrical
Menu: Components ➤ Multiple Insert ➤ Multiple Insert (Icon Menu)
Command entry: AEMULTI
NOTE This dialog box is also accessed when inserting Pneumatic, Hydraulic, or
P&ID components; in-line wire labels; stand-alone cross-reference symbols; cable
markers; and saved circuits.
Select an icon picture or the component type from the Menu tree structure.
The main menu in the tree structure is displayed as the menu heading just
above the menu tree structure.
Tabs ■Menu: Changes the visibility of the Menu tree view.
■Up one level: Displays the menu that is one level before the
current menu in the Menu tree view. This option is unavail-
able if the main menu is selected in the Menu tree view.
926 | Chapter 12 Wire/Wire Number Tools

■Views: Changes the view display for the Symbol Preview
window and Recently Used window. The current view option
is indicated with a check mark. Options include: Icon with
text, Icon only or List view.
The tree structure is created by reading the icon menu file (.dat).
The tree structure is based on the arrangement order of submenus
defined in the .dat file.
Menu
Displays the symbol and submenu icons corresponding to the
menu or the submenu selected in the Menu tree structure.
Symbol Preview window
Clicking on the icon performs one of the following functions
based on the icon properties as defined by the .dat file:
■Inserts the symbol or circuit onto the drawing
■Executes a command
■Displays a submenu
NOTE When you move the cursor over an icon, the icon name
and block/circuit/command name display as tooltip information.
Displays the last components inserted during the current editing
session; the most recently used icon displays in the top. This list
Recently Used
follows the view options setting in the symbol preview window
(icon only, icon with text or list view). The total number of icons
displayed depends on the value specified in the Display edit box.
Specifies the number of icons to display in the Recently Used list
box. Enter integer numbers only; the default value is 10.
Display
Inserts the icon using a vertical or horizontal orientation. This
value is opposite the default ladder rung orientation for the
drawing.
Vertical/Horizontal
Turns off the Insert/Edit Component dialog box when inserting
symbols onto the drawing. To add component detail later, click
the Edit Component tool, and select the component to edit.
No edit dialog
Inserts the component, untagged (that is, without assigning a
unique Component Tag). The untagged value that displays is the
No tag
TAG1/TAG2 default value for the component. To add component
Insert in-line wire markers | 927
detail later, click the Edit Component tool, and select the com-
ponent to edit.
Indicates to display the previously used menu each time you open
the Insert Component dialog box. For example, if you insert a
Always display previously used
menu
push button from the Push Buttons menu, the next time you
open the Insert Component dialog box the Push Button menu
displays by default.
Specifies the component block insertion scale. This defaults to
the value set in the Drawing Properties ➤ Drawing Format dialog
Scale schematic
box. Once set, this value is remembered until reset or until the
drawing editing session ends.
Specifies the footprint insertion scale. This defaults to the value
set in the Drawing Properties ➤ Drawing Format dialog box.
Scale panel
Once set, this value is remembered until reset or until the drawing
editing session ends.
Manually type in the component block to insert.Type it
Browses to and selects the component to insert.Browse
Right-click menus
Options for the Menu tree structure view
Right-click on the main menu or submenu in the Menu tree structure view
to display the following options:
■Expand/Collapse: Toggles the visibility of the menus.
■Properties: Opens a Properties dialog box to view the existing menu or
submenu properties like the menu name, image, or submenu title. Use the
Icon Menu Wizard to change any menu properties.
Options for the Symbol Preview window
Right-click an icon or in empty space in the Symbol Preview window to display
the following options:
■View: Changes the view display for the Symbol Preview window and
Recently Used window. The current view option is indicated with a check
mark. Options include: Icon with text, Icon only or List view.
928 | Chapter 12 Wire/Wire Number Tools

■Properties: (available for icons only) Opens a Properties dialog box to view
the existing symbol icon properties like the icon name, image, block names
and so on. Use the Icon Menu Wizard to change any icon properties.
Pneumatic, Hydraulic, and P&ID icon menus
The Menu tree structure displays the symbols for the selected component type
(pneumatic, hydraulic, or P&ID). The Insert Pneumatic Component, Insert
Hydraulic Component, and Insert P&ID Component tools are accessed from
the Schematic tab ➤ Insert Components panel on the ribbon or the Extra
Library toolbar.
Insert Pneumatic Component
Insert Hydraulic Component
Insert P&ID Component
Cable Markers
Insert cable markers into wires
You can insert parent and child cable marker symbols into wires. These markers
carry a cable TAG value, just like any parent/child device combination. They
can also carry a conductor color value on the RATING1 attribute value. The
parent symbol can have catalog part number information. If the catalog for
the cable is referenced in the cable conductor database table on page 953,
AutoCAD Electrical can track conductors used versus conductors available.
Cable Markers | 929
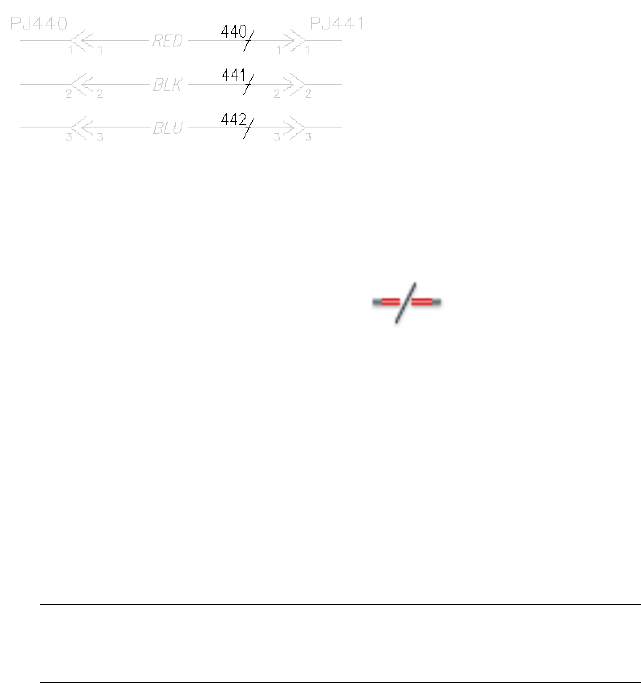
Insert cable markers into wires
You can insert parent and child cable markers into wires. These markers carry
a cable TAG value, just like any parent/child device combination.
1Click Schematic tab ➤ Insert Wires/Wire Numbers panel ➤ Cable
Markers drop-down ➤ Cable Markers.
2In the Insert Component dialog box, select the cable marker to insert
and pick the insertion point on the drawing.
The Insert/Edit Cable Marker dialog box displays.
3Set the cable tag by keeping the default, using the buttons, or typing in
a new tag.
Select Fixed to mark this tag that it is not updated on a future retag.
4Define the wire color by selecting it from a list or typing the color ID in
the edit box.
NOTE If this area is unavailable, the component you are editing does not
carry a RATING1 attribute. The one-line cable marker symbols by default do
not have a RATING1 attribute.
Subsequent insertions of child cable markers, tied back to the parent
through any of the normal methods, causes AutoCAD Electrical to offer
the next conductor color of the cable as a default.
5Assign the catalog information, description, location and installation
codes, and references for the tag.
6Click OK.
If a parent cable marker was inserted, the Insert Some Child Components
dialog box displays. Insert child cable markers automatically that are tied
to the parent.
930 | Chapter 12 Wire/Wire Number Tools
NOTE If the parent is a one-line symbol, the Insert Some Child Components
dialog box does not display.
7If you want to insert child markers, change the dialog box and click Ok
insert Child. If you do not want any child markers to be associated with
the parent marker, click Close.
NOTE You can use the Dashed Link Line command to insert linked lines between
the symbols.
Insert component
This icon menu can be modified, expanded, or replaced with a custom menu.
You can change the default icon menu using the Library and Icon Menu Paths
section of the Project properties: project settings tab on page 204. Use the Icon
Menu Wizard to modify the menu. The default icon menu can also be redefined
in wd.env. Add entry "WD_MENU" for schematic icon menu and "WD_PMENU"
for panel layout icon menu.
Insert Component
Ribbon: Schematic tab ➤ Insert Components panel ➤ Insert Components
drop-down ➤ Icon Menu.
Toolbar: Main Electrical
Menu: Components ➤ Insert Component
Command entry: AECOMPONENT
Multiple Insert (Icon Menu)
Ribbon: Schematic tab ➤ Insert Components panel ➤ Multiple Insert
drop-down ➤ Multiple Insert (Icon Menu).
Toolbar: Main Electrical
Menu: Components ➤ Multiple Insert ➤ Multiple Insert (Icon Menu)
Insert cable markers into wires | 931

Command entry: AEMULTI
NOTE This dialog box is also accessed when inserting Pneumatic, Hydraulic, or
P&ID components; in-line wire labels; stand-alone cross-reference symbols; cable
markers; and saved circuits.
Select an icon picture or the component type from the Menu tree structure.
The main menu in the tree structure is displayed as the menu heading just
above the menu tree structure.
Tabs ■Menu: Changes the visibility of the Menu tree view.
■Up one level: Displays the menu that is one level before the
current menu in the Menu tree view. This option is unavail-
able if the main menu is selected in the Menu tree view.
■Views: Changes the view display for the Symbol Preview
window and Recently Used window. The current view option
is indicated with a check mark. Options include: Icon with
text, Icon only or List view.
The tree structure is created by reading the icon menu file (.dat).
The tree structure is based on the arrangement order of submenus
defined in the .dat file.
Menu
Displays the symbol and submenu icons corresponding to the
menu or the submenu selected in the Menu tree structure.
Symbol Preview window
Clicking on the icon performs one of the following functions
based on the icon properties as defined by the .dat file:
■Inserts the symbol or circuit onto the drawing
■Executes a command
■Displays a submenu
NOTE When you move the cursor over an icon, the icon name
and block/circuit/command name display as tooltip information.
Displays the last components inserted during the current editing
session; the most recently used icon displays in the top. This list
Recently Used
follows the view options setting in the symbol preview window
(icon only, icon with text or list view). The total number of icons
displayed depends on the value specified in the Display edit box.
932 | Chapter 12 Wire/Wire Number Tools
Specifies the number of icons to display in the Recently Used list
box. Enter integer numbers only; the default value is 10.
Display
Inserts the icon using a vertical or horizontal orientation. This
value is opposite the default ladder rung orientation for the
drawing.
Vertical/Horizontal
Turns off the Insert/Edit Component dialog box when inserting
symbols onto the drawing. To add component detail later, click
the Edit Component tool, and select the component to edit.
No edit dialog
Inserts the component, untagged (that is, without assigning a
unique Component Tag). The untagged value that displays is the
No tag
TAG1/TAG2 default value for the component. To add component
detail later, click the Edit Component tool, and select the com-
ponent to edit.
Indicates to display the previously used menu each time you open
the Insert Component dialog box. For example, if you insert a
Always display previously used
menu
push button from the Push Buttons menu, the next time you
open the Insert Component dialog box the Push Button menu
displays by default.
Specifies the component block insertion scale. This defaults to
the value set in the Drawing Properties ➤ Drawing Format dialog
Scale schematic
box. Once set, this value is remembered until reset or until the
drawing editing session ends.
Specifies the footprint insertion scale. This defaults to the value
set in the Drawing Properties ➤ Drawing Format dialog box.
Scale panel
Once set, this value is remembered until reset or until the drawing
editing session ends.
Manually type in the component block to insert.Type it
Browses to and selects the component to insert.Browse
Right-click menus
Options for the Menu tree structure view
Insert cable markers into wires | 933

Right-click on the main menu or submenu in the Menu tree structure view
to display the following options:
■Expand/Collapse: Toggles the visibility of the menus.
■Properties: Opens a Properties dialog box to view the existing menu or
submenu properties like the menu name, image, or submenu title. Use the
Icon Menu Wizard to change any menu properties.
Options for the Symbol Preview window
Right-click an icon or in empty space in the Symbol Preview window to display
the following options:
■View: Changes the view display for the Symbol Preview window and
Recently Used window. The current view option is indicated with a check
mark. Options include: Icon with text, Icon only or List view.
■Properties: (available for icons only) Opens a Properties dialog box to view
the existing symbol icon properties like the icon name, image, block names
and so on. Use the Icon Menu Wizard to change any icon properties.
Pneumatic, Hydraulic, and P&ID icon menus
The Menu tree structure displays the symbols for the selected component type
(pneumatic, hydraulic, or P&ID). The Insert Pneumatic Component, Insert
Hydraulic Component, and Insert P&ID Component tools are accessed from
the Schematic tab ➤ Insert Components panel on the ribbon or the Extra
Library toolbar.
Insert Pneumatic Component
Insert Hydraulic Component
Insert P&ID Component
Insert or edit cable marker (parent wire)
934 | Chapter 12 Wire/Wire Number Tools
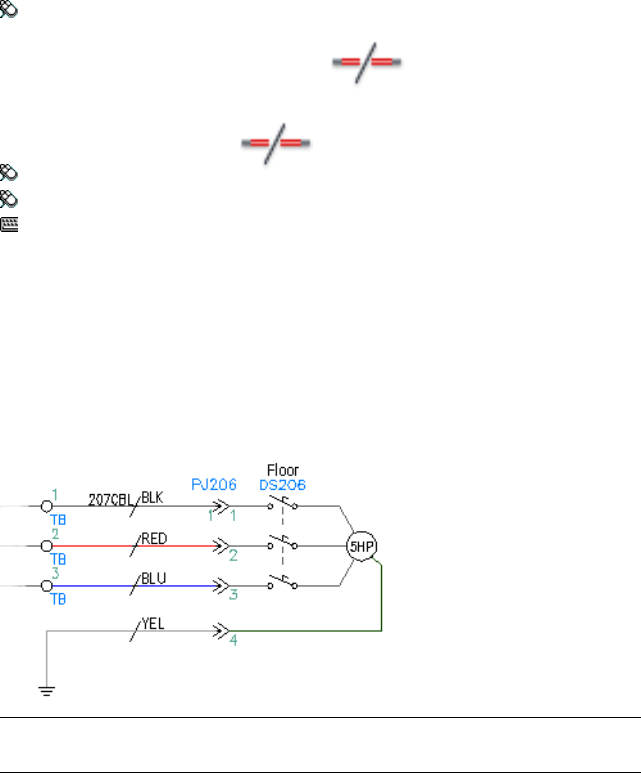
Inserts parent and child cable markers.
Ribbon: Schematic tab ➤ Insert Wires/Wire Numbers panel ➤ Cable
Markers drop-down ➤ Cable Markers.
Toolbar: Main Electrical
Menu: Wires ➤ Cables ➤ Cable Markers
Command entry: AECABLEMARKER
In the Insert Component dialog box, select the marker to insert from the
Symbol Preview window and specify the insertion point.
A cable marker carries a component tag value, like any parent/child device
combination. It also carries a conductor color value, carried on the RATING1
attribute on the marker block symbol. The parent symbol can carry catalog
part number information. If the cable is referenced in the cable conductor
database table in the catalog database, the application can track conductors
used versus conductors available.
NOTE A one-line cable marker symbol, as defined by a WDTYPE attribute on page
325 value of “1-”, does not carry the RATING1 attribute.
Cable Tag
There are a few ways to define the tag for this cable. If there is an existing tag,
it appears in the edit box. If not, you can type a specific tag in the edit box.
Insert cable markers into wires | 935

Make sure that you select Fixed if you want AutoCAD Electrical to mark this
tag so it is not updated on a retag.
Searches for a wire connection to a nearby PLC I/O address
and, if found, uses the PLC address number in the tag name
of the component.
Use PLC Address
Uses the location codes of the connecting components.Use End Locations
Lists any cable tag names in the same family as the current
cable. Select a tag from the list to copy, or to increment
for this new cable marker.
Tags: Used so far
Assigns a tag from an external list file. You can reference
an ASCII text file in comma or space delimited format to
External List
help annotate the description, tag, catalog, and other in-
formation of the component.
Wire Color/ID
Set the conductor color code by manually entering it in the edit box or
selecting from the project, drawing, or generic pick list.
Select from a list of colors. The list is defined in the file, cblcolor.dat
on page 954.
Generic
Lists the wire colors used for similar cable markers in the current
drawing.
Drawing
Lists the wire colors used for similar cable markers in the project.Project
NOTE If this area is unavailable, the component you are editing does not carry a
RATING1 attribute.
Catalog Data
You can instruct AutoCAD Electrical to do a drawing-wide or project-wide
listing of similar cable markers with their catalog assignments. During your
editing session, the last MFG / CAT / ASSYCODE assignment for each
component type you insert into your wiring diagram is remembered. When
you insert another component of that type, the catalog assignment of the
936 | Chapter 12 Wire/Wire Number Tools
previous component is set as the default. (The assumption is that a previous
one was made during the current editing session).
Lists the manufacturer number for the cable marker. Enter a value or
select one from the Catalog lookup.
Manufacturer
Lists the catalog number for the cable marker. Enter a value or select
one from the Catalog lookup.
Catalog
Lists the assembly code for the cable marker. The Assembly code is
used to link multiple part numbers together.
Assembly
Specifies a unique identifier assigned to each cable marker. The tag
value can be manually typed in the edit box.
Item
Specifies the quantity number for the part number (blank=1). This
value gets inserted into the "SUBQTY" column of the BOM report.
Count
Opens the catalog database of the cable marker from which you can
manually enter or select the Manufacturer or Catalog values. Search
Lookup
the database for a specific catalog item to assign to the selected cable
marker.
Scans the previous project to find an instance of the selected cable
marker and returns the marker values. You can then make your catalog
assignment by picking from the dialog box list.
Previous
Lists the part numbers used for similar cable markers in the current
drawing.
Drawing
Lists the part numbers used for similar cable markers in the project.
You can search in the active project, another project, or in an external
file.
Project
■Active project: All the drawings in the current project are scanned
and the results are listed in a dialog box. Select from the list to
assign your new cable marker with a catalog number that is
consistent with other similar cable markers in the project.
■Other project: Scans each listed drawing in a previous project
for the target cable marker type and returns the catalog informa-
tion in a subdialog box. Make your catalog assignment by picking
from the dialog box list.
■External file: You can pull catalog assignments from a generic
ASCII file created by a word processor or output from a spread-
Insert cable markers into wires | 937
sheet or database program. A dialog box displays the contents
of the selected text file. Find and highlight the desired entry.
AutoCAD Electrical reads the line of text from the file and breaks
it into its component parts. They are displayed in the left-hand
dialog box list. For each relevant item, highlight it and then pick
the appropriate category button in the center column. The
highlighted item is transferred to the corresponding category
(and then to the Insert/Edit dialog box once OK is clicked).
Inserts or edits extra catalog part numbers on to the selected cable
markers. You can add up to ten part numbers to any cable markers.
Multiple Catalog
These multiple BOM part numbers appear as subassembly part
numbers to the main catalog part number in the various BOM and
component reports.
Displays what the selected item looks like in a Bill of Material template.Catalog Check
Description
One, two, or three lines of description attribute text can be entered.
Displays a list of descriptions found in the current drawing so you
can pick similar descriptions to edit.
Drawing
Displays a list of descriptions found in the project so you can pick
similar descriptions to edit.
Project
Opens an ASCII text file from which you can select standard descrip-
tions.
Defaults
Picks a description from a cable marker on the current drawing.Pick
Child conductor references
Overrides the WD_M block settings of the drawing with
component-specific cross-reference settings.
Component override
Click Setup to edit the component cross-reference settings
manually.
AutoCAD Electrical automatically fills in cross-reference text
when the cross-reference command is run.
Cross Reference
938 | Chapter 12 Wire/Wire Number Tools

Installation Code
Changes the installation codes. You can search the current drawing or entire
project for installation codes. AutoCAD Electrical does a quick read of all the
current or selected drawing files and returns a list of all installation codes used
so far. Pick from the list to update the component automatically with the
installation code.
Assign short installation codes to components like "PNL" and "FIELD." Later,
you can take full advantage of the AutoCAD Electrical ability to create
location-specific BOM and component lists.
Location Code
Changes the location codes. You can search the current drawing or entire
project for location codes. AutoCAD Electrical does a quick read of all the
current or selected drawing files and returns a list of all location codes used
so far. Pick from the list to update the component with the location code
automatically.
Assign short location codes to components like "PNL" and "FIELD." Later, you
can take full advantage of the AutoCAD Electrical ability to extract wire and
cable from/to reports, and location-specific BOM reports. (For example, BOM
for all field cables, BOM for all PNL cables.)
Show/edit miscellaneous
View or edit any attributes that are not predefined AutoCAD Electrical
attributes.
Insert or edit cable marker (parent wire): IEC
Cable markers carry a cable TAG value, just like any parent/child device
combination. They can also carry a conductor color value (carried as a
RATING1 attribute value on the marker block symbol). The parent symbol
has provision to carry MFG/CAT part number information. If the particular
cable is referenced in the AutoCAD Electrical cable conductor database table
(_W0_CBLWIRES within your Access catalog file), AutoCAD Electrical can
track conductors used versus conductors available.
Ribbon: Schematic tab ➤ Insert Wires/Wire Numbers panel ➤ Cable
Markers drop-down ➤ Cable Markers.
Insert cable markers into wires | 939
Toolbar: Main Electrical
Menu: Wires ➤ Cables ➤ Cable Markers
Command entry: AECABLEMARKER
Select Cable Marker from the list.
It is Insert/Edit Cable Marker (Parent wire) dialog box for working in IEC mode.
If you work in JIC mode, the dialog box displays differently.
Installation
Changes the installation codes. You can search the current drawing or entire
project for installation codes. A quick read of all the current or selected drawing
files is done and a list of installation codes used so far is returned. Select from
the list to update the component with the installation code automatically.
Assign short installation codes to components like "PNL" and "FIELD" so you
can create location-specific BOM and component lists later.
Location
Changes the location codes. You can search the current drawing or entire
project for location codes. A quick read of all the current or selected drawing
files is done and a list of location codes used so far is returned. Select from
the list to update the component automatically with the location code.
Assign short location codes to components like "PNL" and "FIELD." You can
extract cable from/to reports and location-specific BOM reports later (for
example, BOM for all field cables, BOM for all PNL cables).
Cable Tag
Any existing tags appear in the edit box. To define the cable tag, edit the tag
or type a specific tag in the edit box. Select Fixed if you do not want this tag
to update on a retag.
Searches for a wire connection to a nearby PLC I/O address
and, if found, uses the PLC address number in the tag name
of the component.
Use PLC address
Uses the location codes of the connecting components.Use end locations
940 | Chapter 12 Wire/Wire Number Tools
Lists any cable tag names in the same family as the current
cable. Select a tag from the list to copy, or to increment
for this new cable marker.
Tags: Used so far
Assigns a tag from an external list file.External list file
Description
Up to three lines of description attribute text can be entered. These lines are
automatically filled with a copy of the description text of the parent if the
parent TAG name is picked using one of the methods previously described.
Displays a list of descriptions found in the current drawing so you
can pick similar descriptions to edit.
Drawing
Displays a list of descriptions found in the project so you can pick
similar descriptions to edit.
Project
Opens an ASCII text file from which you can select standard descrip-
tions.
Defaults
Picks a description from a component on the current drawing.Pick
Catalog Data
You can instruct AutoCAD Electrical to do a drawing-wide or project-wide
listing of similar cable markers with their catalog assignments. During your
editing session, the last MFG / CAT / ASSYCODE assignment for each
component type you insert into your wiring diagram is remembered. When
you insert another component of that type, the catalog assignment of the
previous component is set as the default. The assumption is that a previous
one was made during the current editing session.
Lists the manufacturer number for the cable marker. Enter a value or
select one from the Catalog lookup.
Manufacturer
Lists the catalog number for the cable marker. Enter a value or select
one from the Catalog lookup.
Catalog
Lists the assembly code for the cable marker. The Assembly code is
used to link multiple part numbers together.
Assembly
Insert cable markers into wires | 941
Specifies a unique identifier assigned to each cable marker. The tag
value can be manually typed in the edit box.
Item
Specifies the quantity number for the part number (blank=1). This
value gets inserted into a “SUBQTY" column of a BOM report.
Count
Opens the catalog database of the cable marker from which you can
manually enter or select the Manufacturer or Catalog values. Search
Lookup
the database for a specific catalog item to assign to the selected cable
marker.
Scans the previous project to find an instance of the selected cable
marker and returns the marker values. You can then make your catalog
assignment by picking from the dialog box list.
Previous
Lists the part numbers used for similar cable markers in the current
drawing.
Drawing
Lists the part numbers used for similar cable markers in the project.
You can search in the active project, another project, or in an external
file.
Project
■Active project: All the drawings in the current project are scanned
and the results are listed in a dialog box. Select from the list to
assign your new cable marker with a catalog number that is
consistent with other similar cable markers in the project.
■Other project: Scans each listed drawing in a previous project
for the target cable marker type and returns the catalog informa-
tion in a subdialog box. Make your catalog assignment by picking
from the dialog box list.
■External file: You can pull catalog assignments from a generic
ASCII file created by a word processor or output from a spread-
sheet or database program. A dialog box displays the contents
of the selected text file. Find and highlight the desired entry.
AutoCAD Electrical reads the line of text from the file and breaks
it into its component parts. They are displayed in the left-hand
dialog box list. For each relevant item, highlight it and then pick
the appropriate category button in the center column. The
highlighted item is transferred to the corresponding category
(and then to the Insert/Edit dialog box once OK is clicked).
942 | Chapter 12 Wire/Wire Number Tools
Inserts or edits extra catalog part numbers on to the selected cable
markers. You can add up to ten part numbers to any cable markers.
Multiple Catalog
These multiple BOM part numbers appear as subassembly part
numbers to the main catalog part number in the various BOM and
component reports.
Displays what the selected item looks like in a Bill of Material template.Catalog Check
Wire Color/ID
Set the conductor color code by manually entering it in the edit box or
selecting from the project, drawing, or generic pick list.
Select from a list of colors. The list is defined in the file, cblcolor.dat
on page 954.
Generic
Lists the wire colors used for similar cable markers in the current
drawing.
Drawing
Lists the wire colors used for similar cable markers in the project.Project
Child conductor references
AutoCAD Electrical automatically fills in cross-reference text when the
cross-reference command is run.
Show/edit miscellaneous
View or edit any attributes that are not predefined AutoCAD Electrical
attributes.
Insert or edit cable marker (2nd+ wire of cable)
Cable markers carry a cable TAG value, just like any parent/child device
combination. They can also carry a conductor color value (carried as a
RATING1 attribute value on the marker block symbol).
Ribbon: Schematic tab ➤ Insert Wires/Wire Numbers panel ➤ Cable
Markers drop-down ➤ Cable Markers.
Toolbar: Main Electrical
Insert cable markers into wires | 943

Menu: Wires ➤ Cables ➤ Cable Markers
Command entry: AECABLEMARKER
Select 2+ Child Marker from the list.
Component Tag
If the parent is visible on screen, click Parent/Sibling and select the parent (or
another related marker). It automatically transfers all information to the child
marker being inserted or edited.
The parent cable tag value can be manually typed in the
edit box or selected from a drawing-wide or project-wide
list of existing cables.
Tag
Lists the component tags used for similar cable markers in
the current drawing.
Drawing
Lists the component tags used for similar cable markers in
the project.
Project
Transfers all information from the parent cable marker to
the child cable marker being inserted or edited. If the parent
Parent/Sibling
is visible on the screen, click Parent/Sibling and select the
parent (or another related contact).
Wire Color/ID
Set the conductor color code by manually entering it in the edit box or
selecting from the project, drawing, or generic pick list. If the parent marker
carries a part number, you can select the next unused color from a used/unused
pick list.
Select from a list of colors. The list is defined in the file, cblcolor.dat
on page 954.
Generic
Lists the wire colors used for similar cable markers in the current
drawing.
Drawing
Lists the wire colors used for similar cable markers in the project.Project
NOTE If this area is unavailable, the component you are editing does not carry a
RATING1 attribute.
944 | Chapter 12 Wire/Wire Number Tools
Description
Up to three lines of description attribute text can be entered. These lines are
automatically filled with a copy of the description text of the parent if the
parent TAG name is picked using one of the methods previously described.
Click Pick to copy a description from a cable marker on the current drawing.
Parent cable marker cross-reference
AutoCAD Electrical automatically fills in cross-reference text when the
cross-reference command is run.
Installation Code
Changes the installation codes. You can search the current drawing or entire
project for installation codes. A quick read of all the current or selected drawing
files is done and a list of installation codes used so far is returned. Select from
the list to update the component automatically with the installation code.
Assign short installation codes to components like "PNL" and "FIELD." You
can take full advantage of the AutoCAD Electrical ability to create
location-specific BOM and component lists later.
Location Code
Changes the location codes. You can search the current drawing or entire
project for location codes. A quick read of all the current or selected drawing
files is done and a list of location codes used so far is returned. Select from
the list to update the component automatically with the location code.
Assign short location codes to components like "PNL" and "FIELD." You can
take full advantage of the AutoCAD Electrical ability to extract wire and cable
from/to reports, and location-specific BOM reports later. (For example, BOM
for all field cables, BOM for all PNL cables.)
Show/edit miscellaneous
View or edit any attributes that are not predefined AutoCAD Electrical
attributes.
Insert or edit cable marker (2nd+ wire of cable):
IEC
Cable markers carry a cable TAG value, just like any parent/child device
combination. They can also carry a conductor color value (carried as a
RATING1 attribute value on the marker block symbol).
Insert cable markers into wires | 945
Ribbon: Schematic tab ➤ Insert Wires/Wire Numbers panel ➤ Cable
Markers drop-down ➤ Cable Markers.
Toolbar: Main Electrical
Menu: Wires ➤ Cables ➤ Cable Markers
Command entry: AECABLEMARKER
Select 2+ Child Marker from the list.
It is Insert/Edit Cable Marker (2nd+ wire of cable) dialog box for working in
IEC mode. If you work in JIC mode, the dialog box displays differently.
Installation
Changes the installation codes. You can search the current drawing or entire
project for installation codes. A quick read of all the current or selected drawing
files is done and a list of installation codes used so far is returned. Select from
the list to update the component automatically with the installation code.
Assign short installation codes to components like "PNL" and "FIELD" so you
can create location-specific BOM and component lists later.
Location
Changes the location codes. You can search the current drawing or entire
project for location codes. A quick read of all the current or selected drawing
files is done and a list of location codes used so far is returned. Select from
the list to update the component automatically with the location code.
Assign short location codes to components like "PNL" and "FIELD." You can
extract cable from/to reports and location-specific BOM reports later (for
example, BOM for all field cables, BOM for all PNL cables).
Component Tag
The parent cable tag value can be manually typed into the edit box or selected
from a drawing-wide or project-wide list of existing cables. If the parent is
visible on screen, click Parent/Sibling and select the parent or another related
marker. It automatically transfers all information to the child marker being
inserted or edited.
946 | Chapter 12 Wire/Wire Number Tools
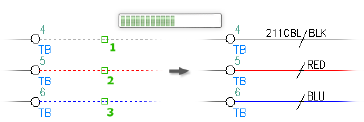
Description
Up to three lines of description attribute text can be entered. These lines are
automatically filled with a copy of the description text of the parent if the
parent TAG name is picked using one of the methods previously described.
Wire Color/ID
Set the conductor color code by manually entering it in the edit box or
selecting from the project, drawing, or generic pick list. If the parent marker
carries a part number, you can select the next unused color from a used/unused
pick list.
Select from a list of colors. The list is defined in the file, cblcolor.dat
on page 954.
Generic
Lists the wire colors used for similar cable markers in the current
drawing.
Drawing
Lists the wire colors used for similar cable markers in the project.Project
Parent cable marker cross-reference
AutoCAD Electrical automatically fills in cross-reference text when the
cross-reference command is run.
Show/edit miscellaneous
View or edit any attributes that are not predefined AutoCAD Electrical
attributes.
Multiple cable markers
AutoCAD Electrical provides a way to insert all the markers for a particular
cable from one dialog box. In addition, you can edit existing cable marker
sets, or even delete cable markers from a single dialog box.
Multiple cable markers | 947
Insert multiple cable markers
1Click Schematic tab ➤ Insert Wires/Wire Numbers panel ➤ Cable
Markers drop-down ➤ Multiple Cable Markers.
2Select to run a report for the project or drawing and click OK.
AutoCAD Electrical processes the drawing or project before the Location
Code Selection for From/To Reporting dialog box displays.
3Pick the location codes from the left and right-hand lists.
NOTE Components that have no assigned location code are grouped under
a generic "(??)" code.
4Make any necessary changes in the From/To combination box and click
OK when you are ready to run the report.
The Cable Insert/Edit dialog box displays.
5Define which wires are part of the cable by using the Include, Include
All, Remove, and Remove All buttons.
The wires for the cable are listed in the Wires Included in Cable portion
of the dialog box.
6Set the cable tag by keeping the default, using the buttons, or typing in
a new tag. Select Fixed to mark this for this so that it is not updated on
a future retag.
7Set the wire color by selecting it from a list or typing the color in the edit
box.
Subsequent insertions of child cable markers, tied back to the parent
through any of the normal methods causes AutoCAD Electrical to offer
the next conductor color of the cable as a default.
8Assign the catalog information, description, location and installation
codes, and references for the tag.
9Click Insert/Update Now to insert the cable or click Insert/Update Later
to save the changes for later.
If you chose Now, any affected drawings are opened and the cable markers
are inserted or updated. If you chose to insert/update later, your changes
are saved in a file called 'projnam_cblmrkin.upd' in the same directory
path as your project file. When you are ready to insert the cables, select
948 | Chapter 12 Wire/Wire Number Tools
Schematic tab ➤ Edit Wires/Wire Numbers panel ➤ ➤ Multiple
Cable Markers Update from the ribbon.
Multiple cable markers
This tool first extracts components and wiring. Then you select "From" and
"To" location code combinations to report. AutoCAD Electrical filters and
formats the wiring and connected component data and reports each wire and
what is connected at each end. Components that have no assigned location
code are grouped under a generic "(??)" code. Component wiring that
daisy-chains along a common bus (for example, hot or neutral bus) may not
report in the connected sequence you expect. (You can use the AutoCAD
Electrical Wire Sequence command to define wire connection sequencing for
wire networks that have three or more interconnected components).
Ribbon: Schematic tab ➤ Insert Wires/Wire Numbers panel ➤ Cable
Markers drop-down ➤ Multiple Cable Markers.
Toolbar: Cable Markers
Menu: Wires ➤ Cables ➤ Multiple Cable Markers
Command entry: AEMULTICABLE
Specifies to process the report for the project, the
entire drawing, or picked components in the draw-
ing.
From/To report for
Lists drawings that appear to be out-of-date with the
wire connection table of the project.
List
Updates the wire connection table to include the
drawings that are out-of-date.
Freshen wire connection table
Displays a listing of report settings files that have a
prefix equal to the report type shown in the dialog
box.
Format
Cable insert or edit
Multiple cable markers | 949
Cable markers carry a cable TAG value and a conductor color value (carried
as a RATING1 attribute value on the marker block symbol).
Ribbon: Schematic tab ➤ Insert Wires/Wire Numbers panel ➤ Cable
Markers drop-down ➤ Multiple Cable Markers.
Toolbar: Cable Markers
Menu: Wires ➤ Cables ➤ Multiple Cable Markers
Command entry: AEMULTICABLE
Make your selections and click OK on the Wire From/To Report and the
Location Code Selection for From/To Reporting dialog boxes.
Wires from extract
Lists the wires that match the From/To locations (from the Wire From/To
Report) and are not part of a cable yet. No cable marker was inserted on this
wire. Use Add All, Add, Remove All, and Remove to define which wires are
part of the cable. Sort the lists to make it easier to find the wires. Click Change
Format to define which fields of information to show in the list to facilitate
finding the wires to include in your cable.
Cables
Lists any existing cables and the wires that belong to each cable. If there are
no existing cables, then the only item in Cables is "newCBL1." Select New
anytime you want to define a new cable. Otherwise, to edit a cable, select its
tag from this list.
Cable Tag
There are a few ways to define the tag for the cable. If there is an existing tag,
it appears in the edit box. If not, you can type a tag in the edit box. Make sure
that you select Fixed if you want AutoCAD Electrical to mark this tag so it is
no updated on a retag.
Uses the location codes of the connecting components.Cable End Locations
Lists any cable tags already assigned. Select a tag from the
list to copy, or to increment for this new cable.
Tags: Used so far
950 | Chapter 12 Wire/Wire Number Tools
Assigns a tag from an external list file.External List File
Description
Up to three lines of description attribute text can be entered. Use List Drawing
and List Project to pick similar descriptions to edit. Default opens an ASCII
text file from which you can quickly pick standard descriptions.
Installation Code
Assign short installation codes to components like "PNL" and "FIELD" so you
can take full advantage of the AutoCAD Electrical ability to create
location-specific BOM and component lists later.
Location Code
Assign short location codes to components like "PNL" and "FIELD." You can
take full advantage of the AutoCAD Electrical ability to extract wire and cable
from/to reports, and location-specific BOM reports later. (For example, BOM
for all field cables, BOM for all PNL cables.)
Catalog Data
MFG and CAT numbers can be manually entered or picked from Catalog
lookup. The Assembly code is used to link multiple part numbers together.
Use Drawing and Project to quickly list of part numbers used for like
components. If the part number you select has a color conductor list associated
with it, the available conductor colors and a list of used ones is tracked.
Lists the manufacturer number for the cable marker. Enter a value or
select one from the Catalog lookup.
Manufacturer
Lists the catalog number for the cable marker. Enter a value or select
one from the Catalog lookup.
Catalog
Lists the assembly code for the cable marker. The Assembly code is
used to link multiple part numbers together.
Assembly
Specifies a unique identifier assigned to each cable marker. The tag
value can be manually typed in the edit box.
Item
Opens the catalog database of the cable from which you can manually
enter or select the Manufacturer or Catalog values. Search the data-
base for a specific catalog item to assign to the selected cable.
Lookup
Multiple cable markers | 951
Scans the previous project to find an instance of the selected cable
and returns the cable values. You can then make your catalog assign-
ment by picking from the dialog box list.
Previous
Lists the part numbers used for similar cables in the current drawing.Drawing
Lists the part numbers used for similar cables in the project. You can
search in the active project, another project, or in an external file.
Project
■Active project: All the drawings in the current project are scanned
and the results are listed in a subdialog box. Select from the list
to assign your new cable with a catalog number that is consistent
with other similar cables in the project.
■Other project: Scans each listed drawing in a previous project
for the target cable type and returns the catalog information in
a subdialog box. Make your catalog assignment by picking from
the dialog box list.
■External file: You can pull catalog assignments from a generic
ASCII file created by a word processor or output from a spread-
sheet or database program. A dialog box displays the contents
of the selected text file. Find and highlight the desired entry.
AutoCAD Electrical reads the line of text from the file and breaks
it into its component parts. They are displayed in the left-hand
dialog box list. For each relevant item, highlight it and then pick
the appropriate category button in the center column. The
highlighted item is transferred to the corresponding category
(and then to the Insert/Edit dialog box once OK is clicked).
Inserts or edits extra catalog part numbers on to the selected cable.
You can add up to ten part numbers to any cable. These multiple
Multiple Catalog
BOM part numbers appear as subassembly part numbers to the main
catalog part number in the various BOM and component reports.
Displays what the selected item looks like in a Bill of Material template.Catalog Check
Wire Colors
Set the conductor color code by manually entering it in the edit box or by
picking from a color list. The list displays the wire colors for the cable. If you
have already selected catalog information, the colors in the list correspond to
the specific cable type. If you have not assigned catalog information, the list
is a generic set of colors.
952 | Chapter 12 Wire/Wire Number Tools

To assign a color to a particular wire, select the wire in the list of wires for the
cable. Assign the color by selecting it from the list or type it in the edit box.
You can assign a color to all wires at one time by selecting Follow Color List.
It assigns a color to each wire of the selected cable even if the wire already has
a color assigned to it.
Setup
Opens a dialog box for setting the parent cable marker symbol, the cable
marker placement on the wire, and options for hiding children attributes.
Insert/Update Now
Opens any affected drawings and automatically inserts or updates any cable
markers.
Insert/Update Later
Saves your changes in a file called 'projnam_cblmrkin.upd' in the same
directory path as your project file. The changes are accumulated in this file
until you are ready for them. Select Schematic tab ➤ Edit Wires/Wire Numbers
➤ ➤ Multiple Cable Markers Update from the ribbon to insert or
update the cable markers that were saved.
Edit the cable conductor database
You can edit the cable conductor database table (_W0_CBLWIRES in the
default_cat.mdb file) just like any other AutoCAD Electrical catalog table. The
main Access database catalog file can be named either default_cat.mdb or
<project> _cat.mdb. You can open it in Microsoft Access or you can edit it
from within AutoCAD Electrical. To do so, right-click a cable marker and select
Edit Component from the context menu. In the Insert/Edit Cable Marker
dialog box, Catalog Data section, click Lookup. In the Parts Catalog dialog
box, click Conductor List.
Cable conductor database “_WO_CBLWIRES” table structure
The records in the cable conductor database table are structured as follows:
DescriptionWidthField name
Catalog number of cable60Catalog
Edit the cable conductor database | 953

Manufacturer code24Manufacturer
Conductor color or ID code24Conductor
Conductor gauge description24Gauge
Auto number field (used internally)N/ARecnum
For a given cable part number, there is a record for each conductor within
that cable. For example, a 15-conductor Belden type 8486 cable has 15 records;
one for each conductor in that cable type. The Manufacturer and Catalog
fields for all 15 records are marked "BELDEN" and "8486." The Conductor field
carries each unique color ID of the conductor.
Edit the list of generic colors
Edit the list of generic colors
1Using a text file editor such as Notepad, open the file, cblcolor.dat.
■Windows XP: C:\Documents and Settings\{username}\Application
Data\Autodesk\AutoCAD Electrical {version}\{release
number}\{language}\Support\
■Windows Vista, Windows 7:
C:\Users\{username}\AppData\Roaming\Autodesk\AutoCAD
Electrical {version}\{release number}\{country code}\Support\
2Add, edit, or delete colors as needed.
3Save the file.
NOTE Do not remove the arrow at the end of the file.
Insert shield symbols
Insert shield symbols
AutoCAD Electrical provides a few special Shield symbols that graphically
represent the cable shield type. There are "dumb" shields that do not carry an
AutoCAD Electrical tag and there are cable marker/shields that carry an
AutoCAD Electrical tag. You can have parent and child shields. You can insert
954 | Chapter 12 Wire/Wire Number Tools
them one at a time and relate them as you would any other component or
insert a group at a time.
1Click Schematic tab ➤ Insert Components panel ➤ Insert Components
drop-down ➤ Icon Menu.
2On the Insert Component dialog box, click the Miscellaneous button.
3Click the Shields button.
4Select the type of shield to insert into the drawing.
5Pick the points on each wire for the shield/cable marker and right-click
to end the selection. The shield inserts into the drawing.
If you chose to insert a cable marker with a shield, the standard Insert/Edit
Cable Marker dialog box displays.
NOTE Each successive symbol is automatically related to the parent (the
top/left-most wire) as it is inserted.
Add a second shield to a cable/shield representation
You can add a second shield representation to an existing set of cable/shield
markers.
1Click Schematic tab ➤ Insert Wires/Wire Numbers panel ➤ Cable
Markers drop-down ➤ Cable Markers.
2Select to Add 2nd Shield.
3Select an existing shield marker (either select the first or last cable/marker
shield symbol).
4Specify the insertion point and right-click to end the selection.
Custom shield symbols
A special command, “wd_cblshld_bld {type}”, is used to insert the shield
symbols and connecting lines. The {type} parameter indicates which library
symbols to use to generate the shield and whether to cross the connecting
lines or not. There are three symbols that are used to generate the cable shield,
Insert shield symbols | 955

a top (HW01_#), middle (HW02_#B), and bottom (HW02_#) symbol. The “#”
indicates whether the connecting lines should cross or not. A “1” results in
straight connecting lines, and a “2” results in crossing connecting lines.
You can create you own custom top and bottom shield symbols by copying
the existing symbols and adding a suffix to the symbol names after the “_#”.
For example, a new top shield symbol might be called HW01_1U, and the
corresponding bottom symbol, HW02_1U. Modify the symbols to meet your
needs. In the icon menu on page 1239 add a new command option calling
“wd_cblshld_bld 1P”.
NOTE The same middle shield symbol can be used for all types.
Wire Gaps
Manipulate wire gaps
Manipulate wire gaps
Insert wire gaps
When a new wire crosses another, a gap/loop is inserted automatically. Under
some conditions, it is necessary to add a gap/loop manually at the point of
two crossing wires.
1Click Schematic tab ➤ Insert Wires/Wire Numbers panel ➤ Insert
Wires drop-down ➤ Gap.
956 | Chapter 12 Wire/Wire Number Tools
2Select the wire to remain solid.
3Select the crossing wire to have the gap.
The gap inserts into the second wire.
NOTE You can turn off the automatic gap/loop feature by selecting Solid in the
Wiring Style section of the Drawing Properties ➤ Style dialog box.
Remove wire gaps
Deletes gaps/loops that are no longer needed in an existing wire.
1Click Schematic tab ➤ Edit Wires/Wire Numbers panel ➤ ➤
Modify Wire Gap drop-down ➤ Delete Wire Gap.
2Select the wire segments near the unneeded gaps.
The gap is removed from the second wire.
Flip wire gaps
The Flip Gap command switches a wire crossing gap or loop to the other
crossing wire.
The gapped wire becomes solid and the gap/loop flips to the crossing wire.
Manipulate wire gaps | 957
1Click Schematic tab ➤ Edit Wires/Wire Numbers panel ➤ ➤
Modify Wire Gap drop-down ➤ Flip Wire Gap.
2Select the wire that has the gap/loops to flip. You can also window the
wires containing the gaps to flip by pressing a W, then windowing the
wires.
AutoCAD Electrical makes the gapped wire solid and flips the gap/loop
to the crossing wires.
Ladder Tools
Define and insert new ladders
Set ladder defaults
You can set the new ladder width and spacing defaults by modifying a template
or the attribute definitions. These default values are carried on the invisible
WD_M block.
Using a template
Use these steps if you are using a template drawing with a pre-inserted WD_M
block.
1Open the template drawing in AutoCAD Electrical (it has a ".dwt"
extension).
958 | Chapter 12 Wire/Wire Number Tools

2Click Schematic tab ➤ Other Tools panel ➤ Drawing Properties
drop-down ➤ Drawing Properties.
3In the Drawing Properties dialog box, click the Drawing Format tab.
4In the Ladder Defaults section, make the appropriate changes and click
OK.
5Save and exit the template drawing.
Changing attribute values
1Open the WD_M drawing found at:
Windows XP: \Documents and Settings\All
Users\Documents\Autodesk\Acade {version}\libs\{library}\WD_M.dwg
Windows Vista, Windows 7: \Users\Public\Documents\Autodesk\Acade
{version}\libs\{library}\WD_M.dwg
2Change the default values of the attribute definitions.
■DLADW: default ladder width
■RUNGDIST: default ladder rung spacing
■PH3SPACE: default 3-phase spacing
3Save and exit the drawing.
You can permanently change the relative position of line reference numbers
and text size by modifying the RUNGFIRST attribute definition.
1Display the drawing of the MLR block. The file names found at
Windows XP: \Documents and Settings\All
Users\Documents\Autodesk\Acade {version}\libs\{library}\
Windows Vista, Windows 7: \Users\Public\Documents\Autodesk\Acade
{version}\libs\{library}\
are:
■WD_MLRH.dwg: for horizontal rung / vertical ladders
■WD_MLRV.dwg: for vertical rung / horizontal ladders
Define and insert new ladders | 959
■WD_MLRHX.dwg: hexagon-shaped user block (horizontal rung /
vertical ladders)
■WD_MLRVX.dwg: hexagon-shaped user block (vertical rung /
horizontal ladders)
2Change the default values as desired, but do not delete any of the
attributes you find.
3Move or change the text size of the RUNGFIRST attribute definition.
4Save and exit the drawing.
Insert new ladder
There is no limit to the number of ladders that can be inserted into a drawing,
but ladders cannot overlap each other. You can insert a new ladder at any
time. Multiple ladder fragments in the same vertical column must be vertically
aligned along their left-hand side. These limitations do not apply when X-Y
Grid or X-Zone referencing is selected.
1Click Schematic tab ➤ Insert Wires/Wire Numbers panel ➤ Insert
Ladder drop-down ➤ Insert Ladder.
2Specify the width and spacing of the ladder.
3Specify the first reference, index, and rungs.
Index is the increment number for line reference numbering (default =
1). If you do not want every line reference number to show up then you
can use the AutoCAD Erase command to get rid of the extras. Do not
erase the top-most line reference number. It is the MLR block of the ladder
and carries the intelligence.
NOTE It is not necessary to enter a value for the length since it is calculated
once the first reference, index, and rung values are set.
4Specify whether to create a one-phase or three-phase ladder. If you select
to create a three-phase ladder, the Width and Draw Rungs options are
unavailable.
5Specify how to draw the rungs.
No Bus just draws the line reference numbers, while No Rungs just draws
the hot and neutral bus with rungs. Add rungs with the AutoCAD
960 | Chapter 12 Wire/Wire Number Tools
Electrical Add Rung command or the Insert Wire tool. Select Yes to include
a rung automatically at every reference location (skip = 0) or every other
line reference position (skip = 1). You can specify whether to skip rungs;
specifying a value of Skip = 4 means that four rungs are skipped for every
one that is drawn.
6Click OK.
7Specify the start position of the ladder. Enter a start and end value or
pick a point on the drawing.
During ladder insertion, the current wire type displays at the command
prompt. You can override it by typing in the hotkey "T" and selecting a
new wire type from the Set Wire Type dialog box. The new wire type
becomes the current wire type and the command continues with the
ladder insertion.
8Specify the last reference number for the ladder. If you entered values in
the step above, this step is not necessary.
9Click to insert the ladder.
NOTE Use AutoCAD Move to relocate an entire ladder. Make sure you that get
the entire ladder including the first line reference number (the MLR block insert).
Select the Revise Ladder button and then click Cancel on the dialog box. Using
this command forces AutoCAD Electrical to reread and update its internal ladder
location list.
Insert ladder
Inserts a ladder with rungs and line reference numbers as specified in drawing
properties.
Ribbon: Schematic tab ➤ Insert Wires/Wire Numbers panel ➤ Insert
Ladder drop-down ➤ Insert Ladder.
Toolbar: Wires
Menu: Wires ➤ Ladders ➤ Insert Ladder
Command entry: AELADDER
You can insert any number of ladders into a drawing. Ladders cannot overlap
other ladders. You can insert a new ladder at any time.
Define and insert new ladders | 961
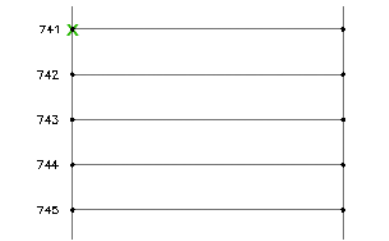
During ladder insertion, the current wire type displays at the command
prompt. You can override it by typing in the hotkey “T” and selecting a new
wire type from the Set/Edit Wire Type dialog box. The new wire type becomes
the current wire type and the command continues with the ladder insertion.
Specifies the width of the ladder.Width
Specifies the spacing between each rung.Spacing
Specifies both the length of the ladder and the number of rungs.
You can enter the total ladder length, the number of ladder rungs,
Length
or leave both blank. You can manually pick the beginning and
ending points of the ladder.
Specifies the beginning line reference for the ladder. Index is the
increment number for line reference numbering (default = 1). If
1st reference
you do not want every line reference number to show up then
you can use the AutoCAD Erase command to get rid of the extras.
Do not erase the top-most line reference number. It is the MLR
block of the ladder and carries the intelligence of the ladder.
Specifies whether to create a one-phase or three-phase ladder. If
you select to create a three-phase ladder, the Width and Draw
Rungs options are unavailable.
Phase
Specifies how to draw the rungs. No Bus just draws the line refer-
ence numbers, while No Rungs just draws the hot and neutral
Draw rungs
bus with rungs. Add rungs with the AutoCAD Electrical Add Rung
command or the Insert Wire tool. Select Yes to include a rung
automatically at every reference location (skip = 0) or every other
line reference position (skip = 1). You can specify whether to skip
962 | Chapter 12 Wire/Wire Number Tools
rungs; specifying a value of Skip = 4 means that four rungs are
skipped for every one that is drawn.
Modify an existing ladder
Renumber an existing ladder
1Click Schematic tab ➤ Edit Wires/Wire Numbers panel ➤ Modify Ladder
drop-down ➤ Revise Ladder.
2Enter the new beginning line reference number and click OK.
NOTE It does not update existing components or wire numbers.
3To update component tags to match the new line reference number, click
Schematic tab ➤ Edit Components panel ➤ Retag Components
drop-down ➤ Retag Components.
4To update the wire numbers, click Schematic tab ➤ Insert Wires/Wire
Numbers panel ➤ Insert Wire Numbers drop-down ➤ Wire Numbers.
Select Tag/retag ALL.
If off-page wire connections are involved, make sure that you click
Cross-reference Signals on the Wire Tagging dialog box.
5Click Pick Individual Wires and select the wires to retag.
Change the size of a ladder
You can use the Revise Ladder tool to shorten, lengthen, widen, or compress
an existing ladder.
To lengthen or shorten the ladder:
Modify an existing ladder | 963

1Click Schematic tab ➤ Edit Wires/Wire Numbers panel ➤ Modify Ladder
drop-down ➤ Revise Ladder.
2Change the column of line reference numbers to match the appropriate
ladder length and click OK.
3Select the AutoCAD Stretch command from the menu to lengthen or
shorten the ladder.
To widen or compress the ladder:
1Click Schematic tab ➤ Edit Components panel ➤ Modify Components
drop-down ➤ Scoot.
2Select the vertical rail of the ladder and pull it out or push it in.
3To put components back into neat columns -
Click Schematic tab ➤ Edit Components panel ➤ Modify Components
drop-down ➤ Align.
4Select the components to align and press Enter.
Reposition a ladder
You can reposition an existing ladder on your drawing using the AutoCAD
Move command.
1Select the AutoCAD Move command from the menu.
2Select the ladder, making sure to include the first line reference number.
3Click Schematic tab ➤ Edit Wires/Wire Numbers panel ➤ Modify Ladder
drop-down ➤ Revise Ladder.
4Click Cancel.
964 | Chapter 12 Wire/Wire Number Tools
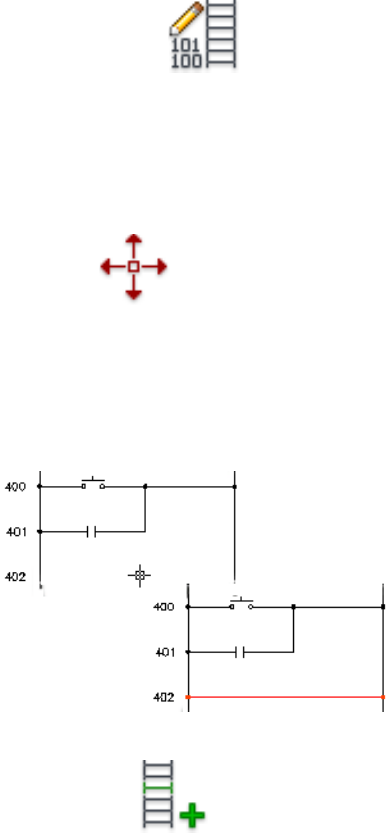
This forces AutoCAD Electrical to reread and update its internal ladder
location list.
Change rung spacing
1Click Schematic tab ➤ Edit Wires/Wire Numbers panel ➤ Modify Ladder
drop-down ➤ Revise Ladder.
2Change the column of line reference numbers to the desired rung spacing
and ladder length.
3Scoot (or the AutoCAD Stretch command) to move the existing rungs to
their new rung locations.
Click Schematic tab ➤ Edit Components panel ➤ Modify Components
drop-down ➤ Scoot.
Insert rungs
Adds a ladder rung at the line reference nearest to a point you select inside
the ladder.
Both bus wires must be visible on the screen.
1Click Schematic tab ➤ Edit Wires/Wire Numbers panel ➤ Modify Ladder
drop-down ➤ Add Rung.
Modify an existing ladder | 965
2Select a blank space anywhere between the hot and neutral bus wires to
add the rung.
During rung insertion, the current wire type displays at the command
prompt. You can override it by typing in the hotkey "T" and selecting a
new wire type from the Set/Edit Wire Type dialog box. The new wire type
becomes the current wire type and the command continues with the
rung insertion.
If the new rung encounters a schematic device floating in space, it tries
to break the wire across the device.
Convert line reference numbers
Use them to convert the upper-most line reference number on a non-intelligent
ladder to be aware of AutoCAD Electrical.
1Click Conversion Tools tab ➤ Tools panel ➤ Convert Ladder.
2Select the top line reference number and press Enter.
The Modify Line Reference Numbers dialog box displays.
3Specify the desired rung spacing, ladder length, and starting reference
number.
4Click OK.
Modify line reference numbers
Renumbers ladder references and adjusts ladder-specific settings.
Revise Ladder
Ribbon: Schematic tab ➤ Edit Wires/Wire Numbers panel ➤ Modify
Ladder drop-down ➤ Revise Ladder.
Toolbar: Ladders
Menu: Wires ➤ Ladders ➤ Revise Ladder
Command entry: AEREVISELADDER
966 | Chapter 12 Wire/Wire Number Tools
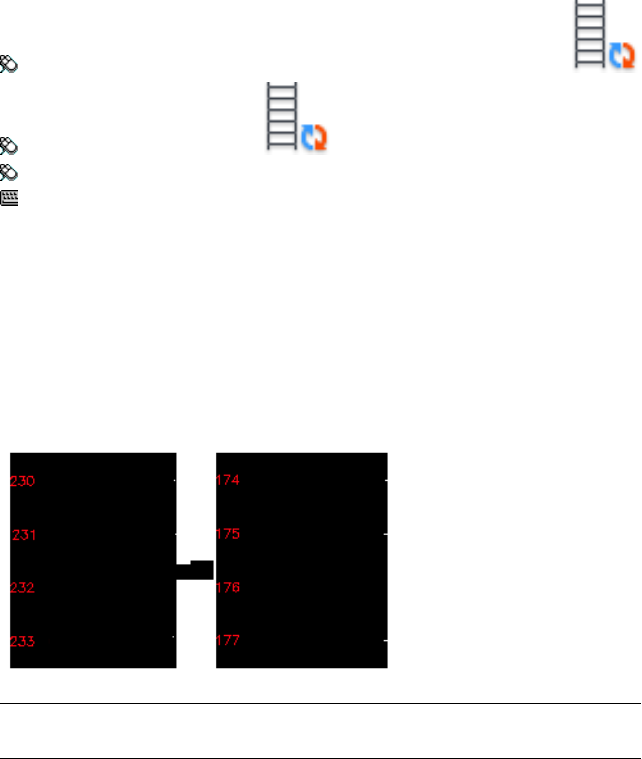
Convert Ladder
Ribbon: Conversion Tools tab ➤ Tools panel ➤ Convert Ladder.
Toolbar: Conversion Tools
Menu: Wires ➤ Ladders ➤ Convert Ladder
Command entry: AE2LADDER
Select the top line reference number and press Enter.
When converting line reference numbering using the Convert Ladder tool,
select only the first line reference number to determine location, size, and
justification of the new line reference numbers being converted. Once OK is
pressed, existing ladder information is erased and the new smart ladder is
inserted.
You can adjust the line reference numbering along the side of the ladders.
The existing ladder rung spacing does not change.
NOTE Updating the reference numbers of the ladder does not update existing
components or wire numbers.
Specifies the spacing between each rung.Rung spacing
Specifies the number of rungs for each ladder.Rung count
Specifies the length of the ladder by adjusting the
begin and end reference numbers. The first line ref-
Reference numbers
erence number on each ladder is a smart AutoCAD
block and attributes. All the rest of the numbers are
Modify an existing ladder | 967
text entities (that can be erased, but do not erase
the top or first line reference number).
Specifies the line reference number increment value
(default=1). Selecting Redo forces a refresh of line
reference numbering.
Index
Specifies the format for placing wire numbers. (de-
fault = configure wire number format value) You can
Wire number format
specify a unique automatic wire numbering format
on a per ladder basis (ex: one ladder of 24-volt wiring
requiring wire numbers with a unique prefix or suffix,
ex: %NVDC).
Renumber Ladders
Renumbers ladder references project-wide.
Ribbon: Schematic tab ➤ Edit Wires/Wire Numbers panel ➤ Modify
Ladder drop-down ➤ Renumber Ladder Reference.
Toolbar: Ladders
Menu: Wires ➤ Ladders ➤ Renumber Ladder Reference
Command entry: AERENUMBERLADDER
Enter the first ladder line reference number.1st drawing, 1st ladder, 1st line ref-
erence number
Select an option for ladders on subsequent drawings.2nd drawing and beyond
■Use next sequential reference - increment from the last
line reference on the previous drawing.
■Skip, drawing to drawing count - enter an amount to
skip for the first ladder reference of the next drawing.
968 | Chapter 12 Wire/Wire Number Tools
Wire Numbers
Overview of wire numbers
Wire numbers are blocks or attributes inserted on a line wire entity. AutoCAD
Electrical assigns each wire number type to its own layer. You can assign a
different color to each of these layers so you can easily tell them apart. There
are four types of wire numbers: Normal, Fixed, Extra, and Signal.
Wire numbers that are free to update when you rerun the Insert Wire
Numbers command.
Normal
Wire numbers that are fixed to their current value. They do not update
with subsequent runs of the Insert Wire Numbers command.
Fixed
Extra copies of the Normal or Fixed wire number that are assigned
to a given wire network. A single wire network has one Normal or
Extra
one Fixed wire number (but not both). It cannot have many extra
copies of the wire number inserted at various locations on the net-
work.
Wire numbers for terminals and signal arrows.Terminal/Signal
Wire tag formats
The origin of a wire number block must lie on the wire segment, though the
text attribute can move away from the wire. AutoCAD Electrical uses the
concept of a wire tag format string with replaceable parameters. One
replaceable parameter, %N, must always be part of the wire format string. A
typical format string might be just this %N parameter.
Replaceable parameters for defining a default wire number tag format are:
Sheet number of the drawing%S
Drawing number%D
Sequential or reference-based number applied to the component%N
Suffix character position for reference-based tagging (not present =
end of tag)
%X
Wire Numbers | 969

IEC-style project code (default for drawing)%P
IEC-style "installation" code (default for drawing)%I
IEC-style "location" code (default for drawing)%L
Examples: Wire beginning on line reference "100" of sheet "02" yields these
wire number tags for the following formats:
wire number = 100%N
wire number = W100W%N
wire number = 02-100%S-%N
wire number = 02100%S%N
wire number = 02:100%S : %N
Automatically insert wire numbers
This tool quickly processes and tags wires on the current drawing, wires in
the project, or individually picked wires.
1Click Schematic tab ➤ Insert Wires/Wire Numbers panel ➤ Insert Wire
Numbers drop-down ➤ Wire Numbers.
2Select to tag all wires or only new wires.
3Select to process and tag wires with sequential wire numbers or with wire
numbers based on the line reference location of the wire network.
4(Optional) Set other tagging options such as:
■specify the wire tag format to use
■specify the wire layer format
■force all wire numbers to be fixed
■update cross-reference text on wire signal source and destination
symbols
■update the database for wire signal source and destination symbols
970 | Chapter 12 Wire/Wire Number Tools
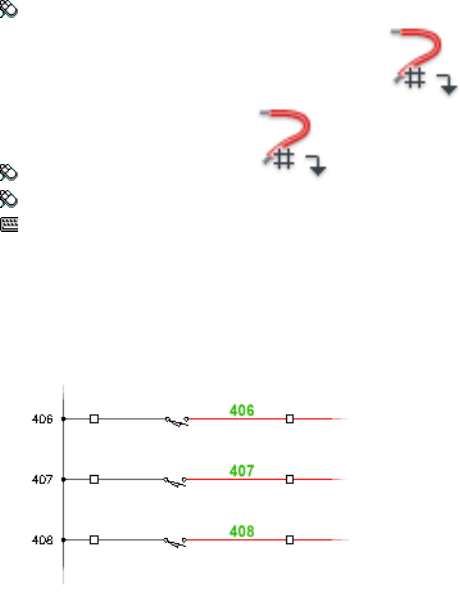
5Select to tag the selected wires, wires on a drawing, or wires in a project.
Wire tagging
Inserts wire numbers as specified in drawing properties.
Ribbon: Schematic tab ➤ Insert Wires/Wire Numbers panel ➤ Insert
Wire Numbers drop-down ➤ Wire Numbers.
Toolbar: Main Electrical 2
Menu: Wires ➤ Insert Wire Numbers
Command entry: AEWIRENO
Wire numbers are blocks with attributes inserted on a line wire entity. There
are four types of wire numbers: Normal, Fixed, Extra, and Signal. The AutoCAD
Electrical application assigns each wire number type to its own layer. You can
assign different colors to these layers.
AutoCAD Electrical processes wire line entities into wire networks, and inserts
or updates wire numbers associated with them.
Specifies to process all the wiring or just the un-
tagged (new) wires.
To do
Specifies to use the sequential or line-reference based
setting for the drawing.
Wire tag mode
Specifies the wire tag format to use for overriding
the format set in the Drawing Properties dialog box.
Format override
Overview of wire numbers | 971
Overrides the default wire number format (set in the
Layers section of the Drawing Properties ➤ Drawing
Format dialog box) by using layer-defined formats.
Use wire layer format overrides
Forces all wire numbers to be fixed (they do not up-
date if wire number retagging is run again at a later
date).
Insert as fixed
Updates cross-reference text on wire signal source
and destination symbols.
Cross-reference Signals
Updates the database for wire signal source and
destination symbols.
Freshen database (for Signals)
Tags or retags wiring project-wide.Project-wide
Tags or retags the selected wiring on the current
drawing only.
Pick individual wires
Tags or retags wiring on the current drawing.Drawing-wide
Wire tagging (project-wide)
AutoCAD Electrical processes wire line entities into wire networks, and inserts
or updates wire numbers associated with them across a project.
Ribbon: Schematic tab ➤ Insert Wires/Wire Numbers panel ➤ Insert
Wire Numbers drop-down ➤ Wire Numbers.
Toolbar: Main Electrical 2
Menu: Wires ➤ Insert Wire Numbers
Command entry: AEWIRENO
Select Sequential and click Project-Wide.
Specifies to use the sequential or line-reference based setting for the
drawing.
Wire tag mode
Starts at the wire number specified for
that drawing (as set in the Drawing
Sequential (1st tag
defined for each drawing)
972 | Chapter 12 Wire/Wire Number Tools

Properties > Wire Numbers on page
979 dialog box). A starting wire num-
ber must be assigned for each draw-
ing.
Allows you to type in a starting wire
number and increments from there,
Sequential (consecutive
drawing to drawing)
ignoring the defined setting of the
starting wire number.
Sets the wire number based on the
line-reference value.
Reference-based tags
Specifies to process all the wiring or just the untagged (new) wires.To do
Updates cross-reference text on wire signal source and destination
symbols.
Cross-reference Signals
Updates the database for wire signal source and destination symbols.Freshen database (for Sig-
nals)
Specifies the wire tag format to use for overriding the format set in
the Drawing Properties dialog box.
Format override
Overrides the default wire number format (set in the Layers section
of the Drawing Properties ➤ Drawing Format dialog box) by using
layer-defined formats.
Use wire layer format
overrides
Forces all wire numbers to be fixed (they do not update if wire number
retagging is run again at a later date).
Insert as fixed
Insert special wire numbering
This tool speeds up the process of inserting special wire numbering associated
with 3-phase bus and motor circuits. It can also be used in a continuous mode.
You can insert a long series of incrementing wire numbers and assign each,
in turn, to the wires you pick.
1Click Schematic tab ➤ Insert Wires/Wire Numbers panel ➤ Insert Wire
Numbers drop-down ➤ 3 Phase.
Overview of wire numbers | 973

2Enter a base starting number in the edit box or click Pick to select an
existing attribute value on the active drawing.
If the picked text carries a numeric substring, it is extracted and inserted
into the Base edit box.
3Enter an optional Prefix and/or Suffix value or choose from a default pick
list by clicking List.
The prefix or suffix value can be a comma-delimited string with each
entry applied in sequence to the Wire Numbers section. The section is at
the right-hand side of the dialog box.
4Set the hold and increment options for each of the edit box values as
required. Pay attention to the proposed generated wire numbers in the
right-hand side of the dialog box.
5Set the number of wire numbers needed in the bottom right-hand side
of the dialog box.
TIP Select None to generate a continuous list of incrementing wire numbers.
6Select OK.
7Select the wires for the wire numbers, either single picks or using the
Fence selection.
Fence selection inserts the wire numbers at the crossing points while
single selections use the default wire number placement of the drawing.
(For example, centered on the wire segment.)
Tips and Hints
■Tab out of an edit box to start the Wire Numbers listing to update.
■You can add to the default prefix and suffix list display. Create an ASCII
text file and list each prefix/suffix entry, one per line in the file. Name the
file <projectname>.3ph (where "projectname" is the name of your active
project) or default.3ph and put the file in any folder that is part of the
search path list AutoCAD Electrical.
■The wire number assignments go in as Fixed.They hold the values that
you have assigned and do not retag with a subsequent run of the Insert
Wire Numbers command).
NOTE If this tool does not meet your needs, use the Edit Wire Number tool to
assign fixed wire numbers one at a time.
974 | Chapter 12 Wire/Wire Number Tools
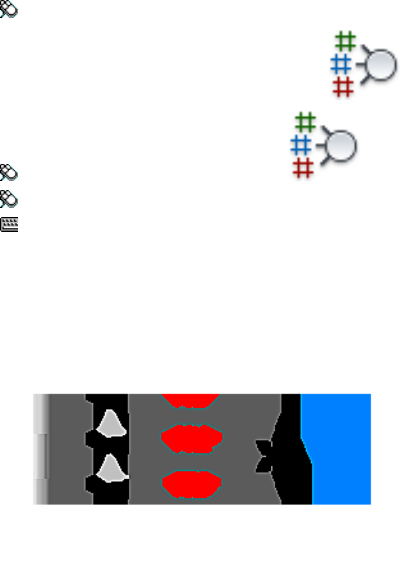
3 phase wire numbering
Inserts fixed wire numbers using incrementing prefixes and suffixes for 3 phase
circuits. This tool speeds up the process of inserting special wire numbering
associated with 3-phase bus and motor circuits.
Ribbon: Schematic tab ➤ Insert Wires/Wire Numbers panel ➤ Insert
Wire Numbers drop-down ➤ 3 Phase.
Toolbar: Insert Wire Numbers
Menu: Wires ➤ Wire Numbers Miscellaneous ➤ 3 Phase Wire Numbers
Command entry: AE3PHASEWIRENO
You can use 3 Phase Wire Numbers in a continuous mode. You can insert a
long series of incrementing wire numbers and assign each, in turn, to the
selected wires.
You can add to the default prefix and suffix list display. Create an ASCII text
file and list each prefix/suffix entry, one per line in the file. Name the file
<projectname>.3ph (where "projectname" is the name of your active project)
or default.3ph and put the file in any folder that is part of search path list of
AutoCAD Electrical.
Specifies the prefix value for the wire numbers. Enter a value or click
List to choose from a default pick list.
Prefix
Specifies the base starting number for the wire numbers. Enter a value
or click Pick to select an existing attribute value on the active drawing.
Base
Overview of wire numbers | 975
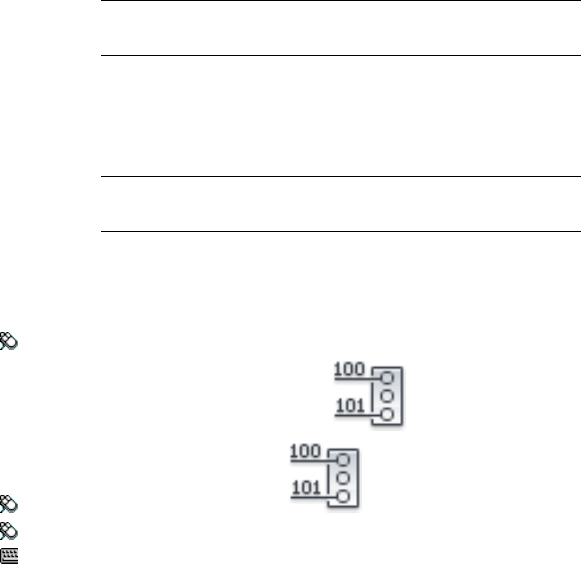
Specifies the suffix value for the wire numbers. Enter a value or click
List to choose from a default pick list.
Suffix
Specifies whether to hold or increment the prefix, base, and suffix
values for all wire numbers that are entered onto the drawing. For
Hold/Increment
example, if you set Base = 100/Increment and Suffix = L1/Hold, the
wire numbers are 100L1, 101L1, 102L1.
Displays a preview of the wire numbers to insert onto the drawing.Wire Numbers
TIP Tab out of an edit box to trigger the Wire Numbers listing to
update.
Specifies the maximum number of wire numbers. When you select a
new option (3, 4, or None) the Wire Numbers section automatically
Maximum
updates with a preview. It is based on the value selected in relation
to the options specified for the prefix, base, and suffix values.
TIP Select None to generate a continuous list of incrementing wire
numbers
PLC I/O wire numbers
Inserts wire numbers based on connected PLC I/O address values.
Ribbon: Schematic tab ➤ Insert Wires/Wire Numbers panel ➤ Insert
Wire Numbers drop-down ➤ PLC I/O.
Toolbar: Insert Wire Numbers
Menu: Wires ➤ Wire Numbers Miscellaneous ➤ PLC I/O Wire Numbers
Command entry: AEPLCWIRENO
Wire numbers go in as fixed. If you run a wire number retag later on, fixed
wire numbers do not change.
976 | Chapter 12 Wire/Wire Number Tools
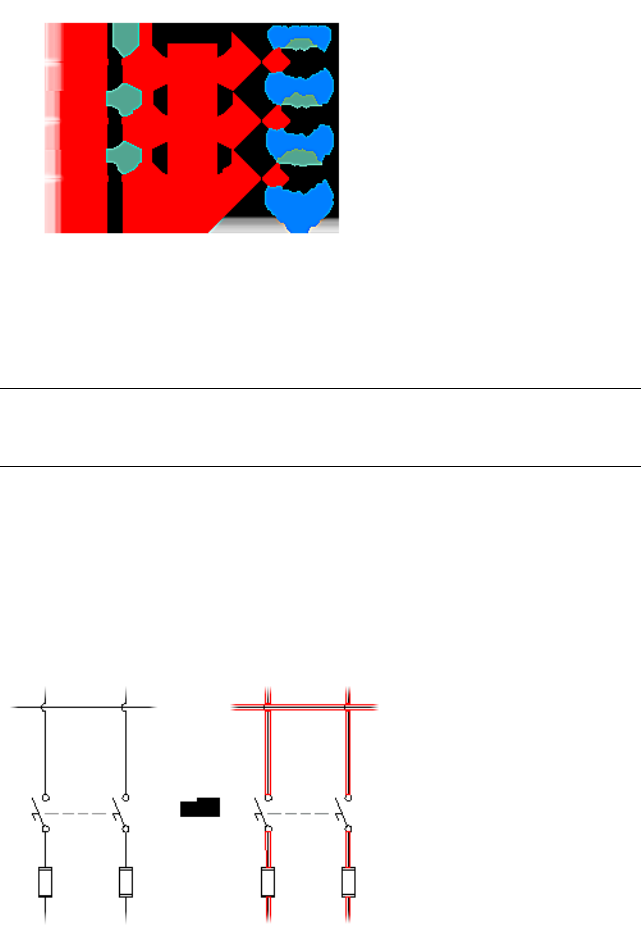
Specifies the wire tag format for the plc wire.I/O Wire Tag Format:
Uses an exact wire number match on the address. The
options are I:%n or O:%n.
Predefined:
NOTE For automatic wire numbering based strictly on the actual I/O address,
open the Drawing Properties dialog box, and click the Wire Number tab. In the
Wire Numbering section, select Search for I/O address on insert.
Check line entities
Some problems with wire numbering (or lack thereof) can be traced to line
wires not being on a valid wire layer. The solution is to move the line entities
to a valid AutoCAD Electrical wire layer using the Change/Convert Wire Type
on page 908 tool.
Make a quick check of what is a wire and what is not. It highlights in bright
red every line entity that is on a valid AutoCAD Electrical wire layer.
Select the AutoCAD Redraw command to remove the highlights.
Overview of wire numbers | 977

1Click Schematic tab ➤ Edit Wires/Wire Numbers panel ➤ Modify Wires
drop-down ➤ Show Wires.
2Select whether to show the wires. All lines (wires) on wire layers are
highlighted in:
■Bright red - regular wires.
■Magenta - wires on layers defined as No Wire Numbering.
3Select whether to show the origin point for each wire number attribute
text entity. The origin of a wire number block must lie on the wire
segment, though the text attribute may be moved away from the wire.
NOTE Do not use the AutoCAD Move command to move the attribute.
4Select whether to highlight the wire number attribute text pointed to by
each Xdata pointer. Xdata pointers identify which wire number insert
goes with which wire segment.
Set wire number placement
Set wire number placement
You can set the wire number placement for new wires inserted in a single
drawing or for the entire project. It does not update existing wire numbers.
TIP Change the position of an existing wire number using the Toggle Wire Number
In-Line tool.
1Click Project tab ➤ Project Tools panel ➤ Manager.
2In the Project Manager, right-click on the project name and select
Properties (or click the drawing name, and select Properties ➤ Drawing
Properties).
If you change this setting in the project properties, the drawings already
in the project do not get this setting.
978 | Chapter 12 Wire/Wire Number Tools
NOTE You can also automatically set wire number placement using the
Drawing Properties tool. Follow these steps.
3In the Project or Drawing Properties dialog box, click the Wire Numbers
tab.
4In the Wire Number Placement section, select how you want to place
new wire numbers automatically: above, below, or inline of the wire.
■Above Wire: Places the wire number above the physical wire.
■In-Line: Places the wire number in line with the wire. Click Gap Setup
to define the spacing between the wire number and the wire itself.
■Below Wire: Places the wire number below the physical wire.
5Click OK.
NOTE Use the Copy Wire Number (In-Line) tool to insert individual wire numbers
inline with the wire rather than above or below the wire in the active drawing.
Apply drawing-specific wire number settings. These settings are maintained
inside the WD_M block in the drawing.
Any drawing
Ribbon: Project tab ➤ Project Tools panel ➤ Manager.
Toolbar: Main Electrical 2
Menu: Projects ➤ Project Manager
Command entry: AEPROJECT
In the Project Manager, right-click the drawing name, and select Properties
➤ Drawing Properties. Select the Wire Numbers tab.
Active drawing
Ribbon: Schematic tab ➤ Other Tools panel ➤ Drawing Properties
drop-down ➤ Drawing Properties.
Set wire number placement | 979

Toolbar: Main Electrical 2
Menu: Projects ➤ Drawing Properties
Command entry: AEPROPERTIES
Select the Wire Numbers tab.
Wire Number Format
Wire number tags can be sequential or reference-based.
Specifies the way new wire number tags are created. The
wire number tag format must include the %N parameter
Format
that is the base sequential or reference-based value per the
selection above. If your format includes the sheet number
%S parameter or the drawing number %D parameter, enter
the values in the edit boxes in the Drawing Properties ➤
Drawing Settings dialog box.
NOTE For reference-based wire number tagging, individual
items in the suffix list are applied to the wire tags to keep
multiple wires in the same reference location unique. These
values are added to the end of the tag, but you can force
AutoCAD Electrical to insert the suffix character somewhere
within the tag format. Use the Suffix position parameter,
%X, in the component tag format (for example, %X%N).
Specifies to use PLC I/O address values for wires that con-
nect to an addressed I/O point. This setting overrides both
Search for PLC I/O address on insert
Sequential and Reference-based tagging. New wires or wire
renumbering on the current drawing shows PLC I/O ad-
dress-based wire numbers automatically.
NOTE Like component tags, AutoCAD Electrical uses the
concept of a wire tag format string with replaceable para-
meters. The %N parameter must always be part of the wire
format string. A typical format string can be just this %N
parameter.
Enter the starting sequential number (alpha, numeric, or
alphanumeric) for the drawing. If you enter the same
Sequential
starting sequential number for every drawing of your wiring
diagram set, AutoCAD Electrical confirms at insertion time
980 | Chapter 12 Wire/Wire Number Tools

that a new sequential wire number tag is not repeated on
any other drawing.
If you set DEMO1 to 100 and DEMO2 to 200, the wire
numbers on DEMO1 start at 100 and wire numbers on
DEMO2 start at 200. If DEMO1 has more than 100 wire
numbers it starts using wire number 200 and above.
DEMO2 would begin its wire numbers where DEMO1 left
off (making sure that duplicate wire numbers are not as-
signed).
The default is "1." Setting it to "2" with a starting sequential
of "1" would yield wire numbers 1, 3, 5, 7, 9, 11, and so
on.
Increment
Sets the wire number tag suffix. This list is used to create
unique reference-based wire number tags for multiple wire
Line Reference
networks beginning at the same reference location (such
as wire network beginning at a location per line reference
number, X-Y grid reference, or X-Zone reference).
Displays a suffix list. List suffix characters for wire numbers
beginning on the same line reference or in the same zone
Suffix Setup
(to keep wire numbers unique). Select one of the four
predefined suffix lists or enter your own custom suffix list.
New Wire Number Placement
NOTE The Insert Wire Number tool does not take the current wire number setting
(in-line, above or below) into account when updating existing wire numbers. This
setting is used only when inserting new wire numbers. Use the Toggle Wire Number
In-Line tool for flipping existing wire numbers among the three modes.
Places the wire number above the physical wire.Above Wire
Places the wire number inline with the wire.In-Line
Defines spacing between the inline wire number and the wire it-
self.
Gap Setup
Places the wire number below the physical wire.Below Wire
Set wire number placement | 981
Specifies to insert the wire number tags the specified offset dis-
tance.
Offset
Specifies to insert the wire number tags in the center of each wire
segment.
Centered
Specifies a fixed, user-defined offset distance from the left or top
of the first wire segment found on the wire network.
Offset Distance
(This option is unavailable for in-line wire numbers.) AutoCAD
Electrical places wire numbers on leaders when it determines that
Leaders
the wire number text bumps into something. It does not check
if the leader itself overlays another object. Select the method for
inserting new wire numbers as leaders: As Required, Always, or
Never.
NOTE This change does not affect wire numbers that are already
present on the drawing.
Project properties: wire numbers tab
Modify your project default settings for wire numbers. All information defined
in this tab is saved to the project definition file as project defaults and settings
Ribbon: Project tab ➤ Project Tools panel ➤ Manager.
Toolbar: Main Electrical 2
Menu: Projects ➤ Project ➤ Project Manager
Command entry: AEPROJECT
In the Project Manager, right-click on the project name and select Properties.
Select the Wire Numbers tab.
Wire Number Format
Wire number tags can be sequential or reference-based.
Specifies the way new wire number tags are created. The
wire number tag format must include the %N parameter
Format
that is the base sequential or reference-based value from
the selection described. If your format includes the sheet
982 | Chapter 12 Wire/Wire Number Tools

number %S parameter or the drawing number %D para-
meter, enter the values in the edit boxes in the Drawing
Properties ➤ Drawing Settings dialog box.
NOTE For reference-based wire number tagging, individual
items in the suffix list are applied to the wire tags to keep
multiple wires in the same reference location unique. These
items are added to the end of the tag, but you can force
AutoCAD Electrical to insert the suffix character somewhere
within the tag format. Use the Suffix position parameter,
%X, in the component tag format (for example, %X%N).
NOTE AutoCAD Electrical provides a predefined format
for you to use or you can enter your own format using re-
placeable parameters on page 236.
Specifies to use PLC I/O address values for wires that con-
nect to an addressed I/O point. This setting overrides both
Search for PLC I/O address on insert
Sequential and Reference-based tagging. New wires or wire
renumbering on the current drawing show PLC I/O address-
based wire numbers automatically.
NOTE Like component tags, AutoCAD Electrical uses the
concept of a wire tag format string with replaceable para-
meters. The %N parameter must always be part of the wire
format string. A typical format string can be just this %N
parameter.
Enter the starting sequential number (alpha, numeric, or
alphanumeric) for the drawing. If you enter the same
Sequential
starting sequential number for every drawing of your wiring
diagram set, AutoCAD Electrical confirms at insertion time
that a new sequential wire number tag is not repeated on
any other drawing.
If you set DEMO1 to 100 and DEMO2 to 200, the wire
numbers on DEMO1 start at 100 and wire numbers on
DEMO2 start at 200. If DEMO1 has more than 100 wire
numbers it starts using wire number 200 and above.
DEMO2 would begin its wire numbers where DEMO1 left
off (making sure that duplicate wire numbers are not as-
signed).
Set wire number placement | 983
The default is "1". Setting it to "2" with a starting sequential
of "1" would yield wire numbers 1, 3, 5, 7, 9, 11, and so
on.
Increment
Sets the wire number tag suffix. This list is used to create
unique reference-based wire number tags for multiple wire
Line Reference
networks. It begins at the same reference location (such as
wire network beginning at a location per line reference
number, X-Y grid reference, or X-Zone reference).
Displays a suffix list. List suffix characters for wire numbers
beginning on the same line reference or in the same zone
Suffix Setup
(to keep wire numbers unique). Select one of the four
predefined suffix lists or enter your own custom suffix list.
Wire Number Options
Assigns a different wire number format based on the wire
layer.
Based on Wire Layer
Overrides the default wire number format by using layer
defined formats. Change the wire layer name, wire number
format, starting wire sequence, and wire number suffix.
Layer Setup
Specifies to use a wire number terminal on a wire network
as the line reference value for calculating a reference-based
Based on Terminal Symbol Location
wire number. For example, a wire network starts at line
reference 100 and drops down and over on line reference
103. If a schematic terminal symbol carries the WIRENO
attribute located on line reference 103, and this option is
enabled, AutoCAD Electrical calculates a reference-based
wire number using 103 instead of 100. If multiple wire
number terminals exist on this network, the line reference
value of the upper left-most terminal is used.
Specifies to hide the wire number automatically for a wire
network that has a wire number-type terminal.
Hidden on Wire Network with Ter-
minal Displaying Wire Number
Specifies to assign a wire number for each wire rather than
the default one wire number per wire network.
On per Wire Basis
984 | Chapter 12 Wire/Wire Number Tools

If using sequential wire numbers, specifies the wire number
ranges to exclude. (applied to the %N part of the wire
number tag format)
Exclude
Syntax is <starting>-<ending> to show range (for example
1000-1499). Multiple ranges are allowed and must be
separated with a comma or semi-colon (for example, 1000-
1099;2500-2599;). You can also use 2;4;6 or 2,4,6 for val-
ues not in a range.
New Wire Number Placement
NOTE The Insert Wire Number tool does not take the current wire number setting
(in-line, above or below) into account when updating existing wire numbers. This
setting is used only when inserting new wire numbers. Use the Toggle Wire Number
In-Line tool for flipping existing wire numbers among the three modes.
Places the wire number above the physical wire.Above Wire
Places the wire number in line with the wire.In-Line
Defines spacing between the wire number and the wire itself.Gap Setup
Places the wire number below the physical wire.Below Wire
Specifies to insert the wire number tags in the center of each wire
segment.
Centered
Specifies to insert the wire number tags the specified offset dis-
tance.
Offset
Specifies a fixed, user-defined offset distance from the left or top
of the first wire segment found on the wire network.
Offset Distance
(This option is unavailable for in-line wire numbers) AutoCAD
Electrical places wire numbers on leaders when it determines that
Leaders
the wire number text bumps into something (it does not check
if the leader itself overlays another object). Select the method for
inserting new wire numbers as leaders: As Required, Always, or
Never.
NOTE This change does not affect wire numbers that are already
present on the drawing.
Set wire number placement | 985
Wire Type
Displays the Rename User Columns dialog box used for renaming User1 to
User20 header columns in the Set Wire Type, Create/Edit Wire Type, and
Change/Convert Wire Type dialog boxes.
Find or replace wire number text
Find or replace wire number text
Find and replace wire number text values, or find and replace substrings within
those values. Process the active drawing or the project drawing set.
1Click Schematic tab ➤ Edit Wires/Wire Numbers panel ➤ Modify Wire
Numbers drop-down ➤ Find/Replace.
2Specify whether to replace the text only if the entire wire number text
string matches the Replace value or to replace the text anywhere within
the wire number text string.
3Enter up to three different Find/Replace values, and then click Go.
4Choose to process the project, the current drawing, or selected wire
numbers on the current drawing.
AutoCAD Electrical scans the selection looking for all the AutoCAD
Electrical wire number text values and replacing text as instructed.
Find or replace wire numbers
Edits wire numbers using a find and replace operation.
Ribbon: Schematic tab ➤ Edit Wires/Wire Numbers panel ➤ Modify
Wire Numbers drop-down ➤ Find/Replace.
Toolbar: Edit Wire Numbers
Menu: Wires ➤ Wire Numbers Miscellaneous ➤ Find/Replace Wire
Numbers
Command entry: AEFINDWIRENO
986 | Chapter 12 Wire/Wire Number Tools
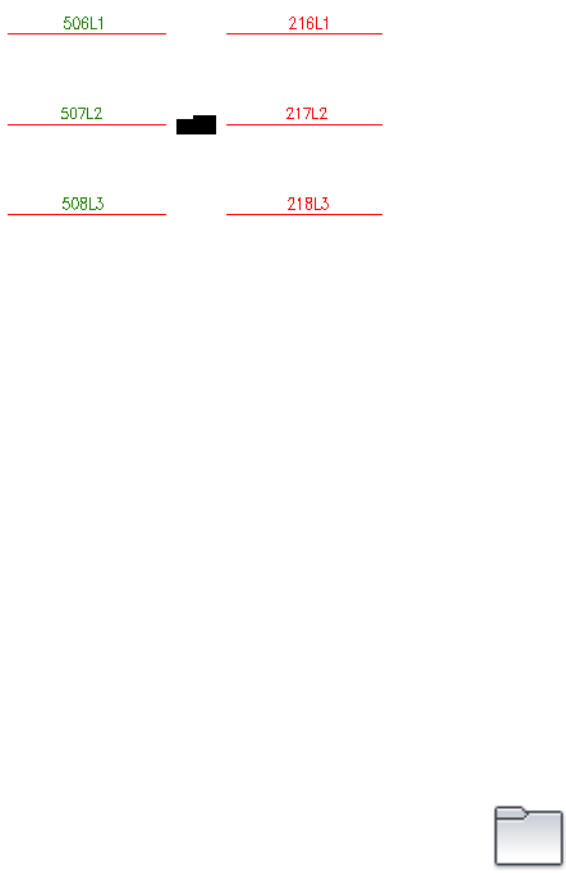
Find and replace wire number text values, or find and replace substrings within
those values. Process the active drawing or the project drawing set.
Specifies to replace the text only if the entire text value
matches the find value.
Full, exact match
Specifies to replace the text if any part of the text value
matches the find value.
Substring match
Specifies to replace only the first occurrence within the text
value.
First occurrence only
Specifies the value you wish to find.Find
Specifies the text string to replace the find value with.Replace
Encode wire color/gauge information into wire numbers
Encode wire color/gauge information into wire numbers
Use the Wire Layer/Format Overrides tool to have wire numbering
automatically insert with wire color, gauge, and type information encoded
into the wire number itself. For example, you can have wire numbers like
123-RD-14 or 124-BLK-10 instead of 123 or 124.
1Click Project tab ➤ Project Tools panel ➤ Manager.
2In the Project Manager, right-click the project name, and select Properties.
Encode wire color/gauge information into wire numbers | 987
3In the Project Properties dialog box, click the Wire Numbers tab.
4In the Wire Number Options section, select Based on Wire Layer and
then click Layer Setup.
The Assign Wire Numbering Formats by Wire Layers dialog box opens.
Enter each wire layer name and the wire number format that you want
to see for wire numbers on that wire layer. For example, let's say that you
routinely use wire layers "RED_14_THHN" and "BLK_10_XHHN" in
drawings in your project. Whenever you have a wire number on the red
wire, you want AutoCAD Electrical to append a "-RD-14" suffix
automatically to the wire number. For wire numbers generated on wires
drawn on layer BLK_10_XHHN, you want AutoCAD Electrical to append
a "-BLK-10" suffix to the wire number automatically.
5In the Assign Wire Numbering Formats by Wire Layers dialog box, enter
RED_14_THHN in the Wire Layer Name box and enter %N-RD-14 in the
Wire Number Format For Layer box.
6Click Add.
7Enter BLK_10_XHHN in the Wire Layer Name box and enter %N-BLK-10
in the Wire Number Format For Layer box. Click Add.
8Repeat until you have all possible wire layers set up.
This information is stored in the project's .wdp file and is applied across
all drawings listed in your project.
9Click OK.
Now when you run the Insert Wire Numbers command on any drawing in
your project, nonfixed wire numbers update if they are associated with wires
that are tagged in your override list.
Assign wire numbering formats by wire layers
The default format of a wire number is defined in the AutoCAD Electrical
Project Properties dialog box. This format is used for all wire numbers inserted
on a drawing. However, there are times when you want certain types of wires
to be numbered in a different way (that is, to carry a different format).
AutoCAD Electrical allows you to override the default wire number format by
using layer defined formats. For example, your default wire number format is
%N. It takes on the line reference number (in Reference Mode) or the sequential
number (in Sequential Mode). If there are multiple wire numbers on a particular
line reference a suffix is used from the defined suffix list to make the wire
number unique.
988 | Chapter 12 Wire/Wire Number Tools
Ribbon: Schematic tab ➤ Insert Wires/Wire Numbers panel ➤ Insert
Wire Numbers drop-down ➤ Wire Numbers.
Toolbar: Main Electrical 2
Menu: Wires ➤ Insert Wire Numbers
Command entry: AEWIRENO
Click Use Wire Layer Format Overrides Setup.
NOTE You can also access this dialog box by selecting Based on Wire Layer and
then clicking Layer Setup in the Wire Number Options section of the Project
Properties ➤ Wire Numbers dialog box.
Lists all defined wire layer formats.Wire list
Adds the new wire layer format to the list.Add
Updates the selected wire layer format with the changes
you specified in the dialog box.
Update
Removes the new wire layer format from the list.Delete
Specifies the name for the wire layer to modify. Type the
layer name or select from the list of valid wire layers. Wild
cards are allowed.
Wire layer name
Displays a list of valid wire layers.List
Automatically enters the default value for the format, se-
quence start, and suffix list fields.
Default
Defines the format override.Wire number format for layer
Specifies the sequential start number for the layer. Use it if
you are using Sequential Mode.
Starting wire sequence
Specifies a unique suffix list. The suffix list must be a comma
delimited string. Use it if you are using Reference Mode.
Wire number suffix list for layer
Encode wire color/gauge information into wire numbers | 989

Replaceable parameters for device tagging and wire numbering
Component family code string (ex: "PB", "SS", "CR", "FLT", "MTR")%F
Sheet number of the drawing (ex: "01" entered in upper right)%S
Drawing number%D
Wire layer name of the drawing%G
Sequential or Reference-based number applied to the component%N
Suffix character position for reference-based tagging (not present =
end of tag)
%X
IEC-style project code (default for drawing)%P
IEC-style installation code (default for drawing)%I
IEC-style location code (default for drawing)%L
Project drawing list's SEC value for active drawing%A
Project drawing list's SUB-SEC value for active drawing%B
NOTE If you include %I or %L in the Tag code of the component, you are
prompted to recalculate the tag if you change the Installation or Location value
of the component once it is inserted.
Fix Wire Numbering
Fix wire numbering
Fix a wire number
In some cases, certain wire numbers must be preassigned. They can include
motor wiring that must include special suffix values or other wiring, such as
instrumentation, that might not follow the default numbering convention.
Manually edit the wire number and flip it to fixed. Fixing a wire number
means that the wire number tag is left unchanged if later processed or
reprocessed by the automatic wire numbering utility.
990 | Chapter 12 Wire/Wire Number Tools

1Click Schematic tab ➤ Edit Wires/Wire Numbers panel ➤ Modify Wire
Numbers drop-down ➤ Edit Wire Number.
2Select a wire or select an existing wire number. If a wire number exists,
the Modify/Fix/Unfix dialog box displays. However, if a wire number
does not exist on the selected wire, the Insert Wire Number dialog box
displays.
NOTE If the selected wire is on a layer defined as No Wire Numbering, the
Insert Wire Number dialog box does not display. An alert displays indicating
that the layer is set as No Wire Numbering.
3Edit the wire number or enter a new wire number. If you are inserting a
wire number, use the arrows or click Pick to select the appropriate wire
number. Pick speeds up the task if you have some special wire numbers
to edit manually.
4Select to make the wire number visible or hidden.
5To fix the wire number, select Fixed and click OK. If the wire number is
already fixed and you want to turn it back into a regular wire number,
clear the check box and click OK.
Fix all wire numbers
There are times when you want to fix all or many wire numbers on a drawing
at their current values. Use the Fix Wire Numbers tool and identify all the
wiring you want AutoCAD Electrical to mark as fixed.
If you run a wire number retag later on, fixed wire numbers do not change.
Fix Wire Numbering | 991
1Click Schematic tab ➤ Edit Wires/Wire Numbers panel ➤ Modify Wire
Numbers drop-down ➤ Fix.
2Select a wire number or component to fix.
3Right-click when you are done selecting the wires. You can check whether
the wire is fixed by clicking the Edit Wire Number tool, selecting the
wire, and reviewing the dialog box.
Fix/unfix all wire numbers project-wide
You can quickly fix or unfix all wire numbers across the active project using
the Project-Wide Utilities tool.
1Click Project tab ➤ Project Tools panel ➤ Utilities.
2In the Project-Wide Utilities dialog box, Wire Numbers section, select Set
all wire numbers to fixed or Set all wire numbers to normal, and click
OK.
3Select the drawings to process and click OK.
Modify/fix/unfix
Provides the means to edit a wire number or inserts a new one where none
exists.
Ribbon: Schematic tab ➤ Edit Wires/Wire Numbers panel ➤ Modify
Wire Numbers drop-down ➤ Edit Wire Number.
Toolbar: Main Electrical 2
Menu: Wires ➤ Edit Wire Number
Command entry: AEEDITWIRENO
Edit Wire Number provides the means to:
■Modify the wire number value
992 | Chapter 12 Wire/Wire Number Tools
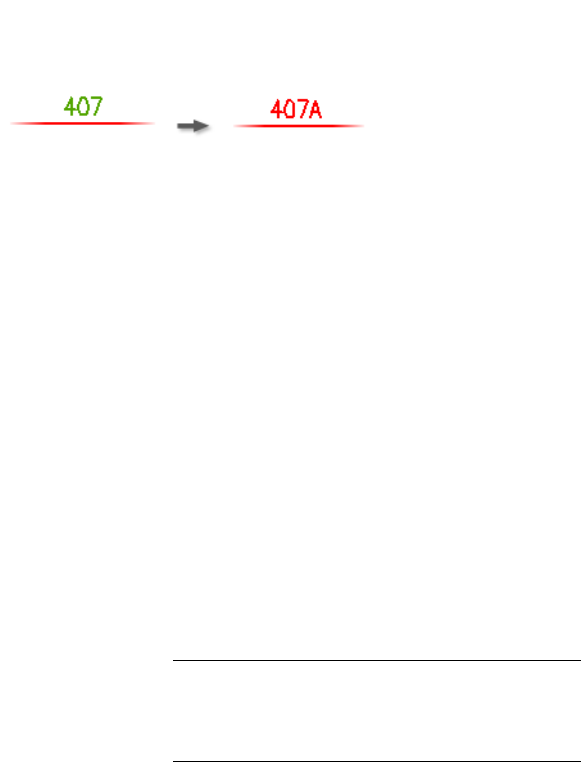
■Fix or unfix the wire number
■Change the visibility of the wire number
When a wire number is fixed, the wire number attribute is renamed and moved
to a special fixed wire number layer. Assigning a different color to this layer
makes it easy to identify which wire numbers are fixed and which are normal.
The layer name for fixed wire numbers is entered in the Define Layers dialog
box (from the Drawing Properties ➤ Drawing Format dialog box).
Specifies the wire number to edit. Use the arrows to scroll
through possible wire numbers.
Wire Number
If you enter an existing wire number during the insert/edit
process, a warning dialog box displays. Turn off the warning
in the Project Properties ➤ Project Settings dialog box. It
temporarily disables the warning dialog box for the current
session of AutoCAD Electrical). This alerts you of the duplic-
ation and suggests alternative wire number based on the
user-defined format. You can select whether to use the
duplicated wire number, use a new wire number that is
suggested, or you can type in a wire number.
NOTE An error log file is created for every project regard-
less whether you chose to display a dialog box or not. The
warning is saved in the log file named "<project_name>_er-
ror.log" and is saved in the User subdirectory.
Prefills the wire number edit box with the text entity you
select. Use Up or Down to quickly increment or decrement
the wire number.
Pick
Fix Wire Numbering | 993

Fixes the wire number so that it does not change if later
processed by the automatic wire numbering utility.
Make it Fixed
Displays or hides the wire number on the drawing. Hidden
wire numbers are still present and appear in wire reports.
Visible/Hidden
See also: Erase or hide wire numbers on page 1008
Restores the previous screen view. Do a zoom extents to
follow an untagged wire that travels off screen.
Zoom
Project-wide utilities
Provides the means for operations on wire numbers, component tags, attribute
text, wire types, and item numbers. You can define scripts and apply them
project-wide.
Ribbon: Project tab ➤ Project Tools panel ➤ Utilities.
Toolbar: Project
Menu: Projects ➤ Project-Wide Utilities
Command entry: AEUTILITIES
Select project drawings and perform any of the following:
■Erase, reset, fix, or unfix wire numbers.
■Fix or unfix component tags.
■Fix or unfix item numbers.
■Clear signal cross-referencing.
■Run a user-specified script file.
■Change attribute text size or style.
■Import wire types from another drawing or drawing template.
You can have multiple drawings open at any time. However, to maximize
performance and memory usage, minimize the number of open drawings
when running project-wide commands.
994 | Chapter 12 Wire/Wire Number Tools

Wire Numbers
Select to keep wire numbers the same, erase specified wire numbers, reset
specified wire numbers, or set wire numbers to fixed or normal.
Signal Arrow Cross-reference text
Select to maintain the signal arrow cross-reference text or to remove all signal
arrow cross-reference text across the current project.
Parent Component Tags: Fix/Unfix
Select to maintain the component tags or to set all parent component tags to
fixed or normal across the current project.
Item Numbers: Fix/Unfix
Select to maintain the item numbers or to set all item numbers to fixed or
normal across the current project. If you run Resequence Item Numbers on
page 1602 later on, fixed item numbers do not change.
Change Attribute
Click Setup to select the attributes to change, and then
enter the height and width definitions for the selected at-
tributes.
Change Attribute Size
NOTE If you do not want the attribute height or width to
change, do not enter a value definition.
Click Setup to select a text font to apply to the text style
used on component attributes.
Change Style
For each drawing
Enter the name or browse to a command script file to use for each drawing
in the current project or to purge all blocks.
Wire Types
Imports wire types defined on another drawing or drawing template. Enter
the drawing or template name or browse to it using the browse button. The
program reads the specified drawing and extracts all wire type information.
Fix Wire Numbering | 995

Click Setup to display the Import Wire Types on page 903 dialog box where
you:
■Select the wire types to import.
■Define whether to overwrite any Wire Numbering and USERn differences
for existing wire types.
■Define whether to overwrite color and linetype differences for existing
wire layers.
Reposition Wire Numbers
Reposition wire numbers
Scoot wire numbers
If you want to move a wire number along its wire segment, use Scoot and pick
right on the wire number.
1Click Schematic tab ➤ Edit Components panel ➤ Modify Components
drop-down ➤ Scoot.
2Select the wire number to slide along its connected wires or select the
wire segment itself to scoot the entire wire, including the components,
along the bus. You can scoot an entire rung up or down. A rectangle
drawn in temporary graphics indicates the selected items.
3Move your cursor to the appropriate position and click your mouse
button.
The items scoot and reconnect.
Move a wire number
Moves an existing wire number to a selected location on the same wire
network.
Select a location on the wire segment to define a new position for the wire
number.
996 | Chapter 12 Wire/Wire Number Tools
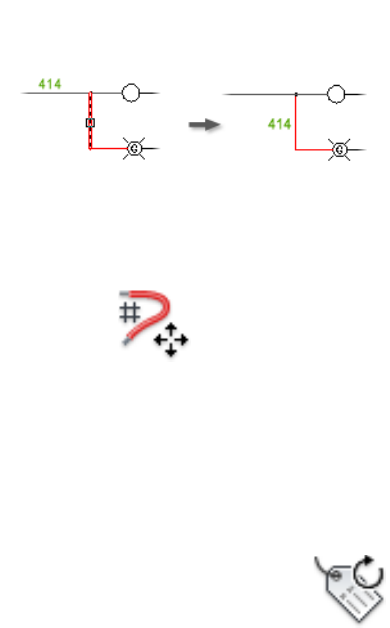
1Click Schematic tab ➤ Edit Wires/Wire Numbers panel ➤ Move Wire
Number.
2Select the wire segment where you want the wire number repositioned.
It is not required that you pick on the existing wire number first.
The wire number automatically moves to the selected position.
Rotate a wire number
1Click Schematic tab ➤ Edit Components panel ➤ Modify Attributes
drop-down ➤ Rotate Attribute.
2Select the wire number text to rotate 90 degrees from its current
orientation.
Each click the wire number text rotates it another 90 degrees
counter-clockwise.
Reposition the wire number text with an attached leader
Inserts, modifies, or collapses a leader on a selected wire number.
Pick directly on the wire number text, and then identify the new position.
Right click or press Enter to exit the command.
Reposition Wire Numbers | 997
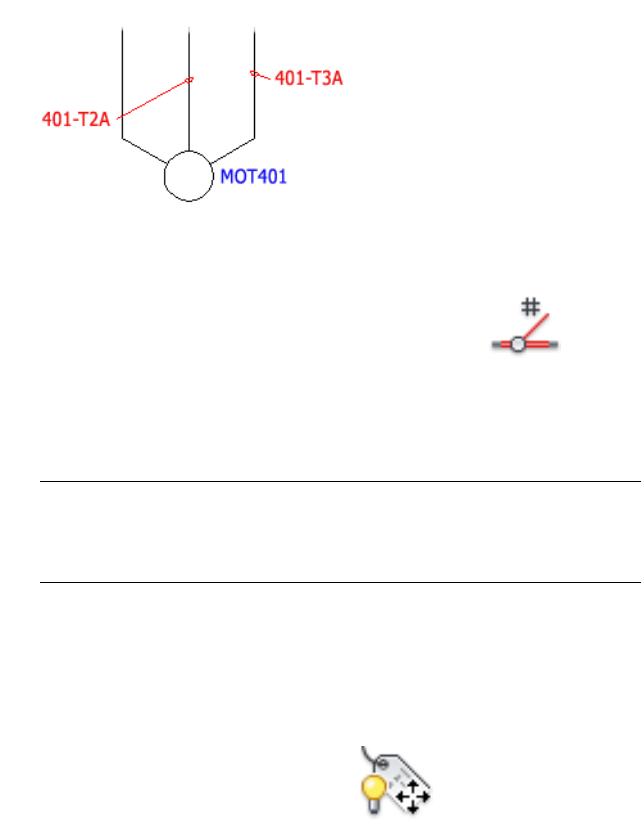
1Click Schematic tab ➤ Insert Wires/Wire Numbers panel ➤ Wire
Number Leader drop-down ➤ Wire Number Leader.
2Select the wire number text.
3Select the new position for the wire number. Right-click or press Enter
to position the wire number.
NOTE You can type "C" at the command prompt to collapse the wire leader
back to the wire number block. You can do it immediately after inserting a
leader if you determine that you do not want the leader. Or, rerun the
command if you want to remove the leader from existing wire numbers.
Move the wire number without use of a leader
If you want to reposition the wire number without use of a leader, use the
Move Attribute utility.
1Click Schematic tab ➤ Edit Components panel ➤ Modify Attributes
drop-down ➤ Move/Show Attribute.
2Select the attributes to move and press Enter.
You can pick the components individually or by windowing. Each
attribute highlights with a rectangular box drawn around it.
3Select the base and insertion points for the move. The attribute follows
your cursor and is automatically moved to the selected position.
The attributes remain tied to the parent block inserts.
998 | Chapter 12 Wire/Wire Number Tools
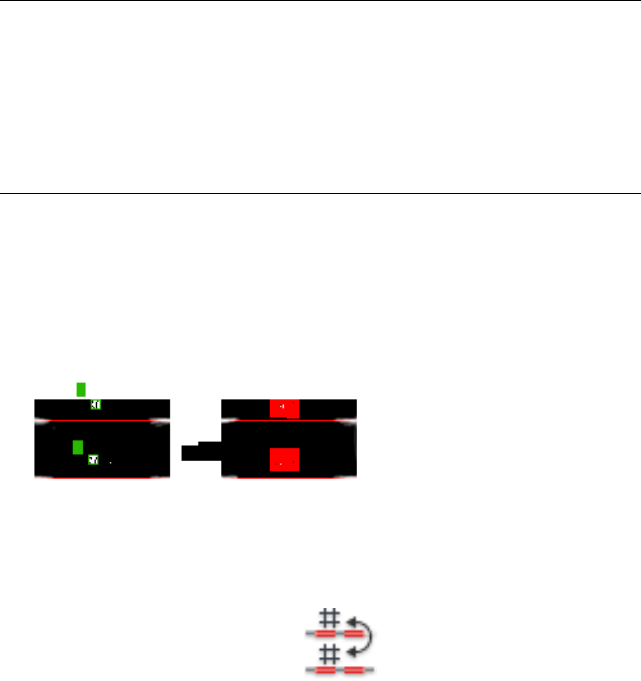
NOTE Avoid using the AutoCAD MOVE command to reposition a wire number.
An AutoCAD Electrical smart wire number is an invisible block with one visible
wire number attribute associated with it. The X-Y insertion point of the block must
physically lie on the wire segment. If it is forced off the segment during an AutoCAD
MOVE command, then AutoCAD Electrical no longer sees it linked to the wire. To
use straight AutoCAD commands to reposition a wire number, use GRIPS to move
the wire number attribute or any other attribute position editing command. You
reposition the wire number attribute but not its underlying block insertion point.
Swap wire numbers
Swaps two wire numbers on separate wire networks.
Select the two wire networks, or pick the existing wire number text.
1Click Schematic tab ➤ Edit Wires/Wire Numbers panel ➤ Modify Wire
Numbers drop-down ➤ Swap.
2Select the first wire or number and then select the second wire or number.
The wire numbers automatically switch positions.
Copy wire numbers
Inserts an extra copy of a wire number.
A copy of a wire number follows the main wire number of a network. You can
position the copy anywhere on a wire network. If AutoCAD Electrical modifies
a main wire number, the copies of the wire number update as well. Extra wire
numbers go on the Wire Copies layer defined in the drawing properties.
Reposition Wire Numbers | 999
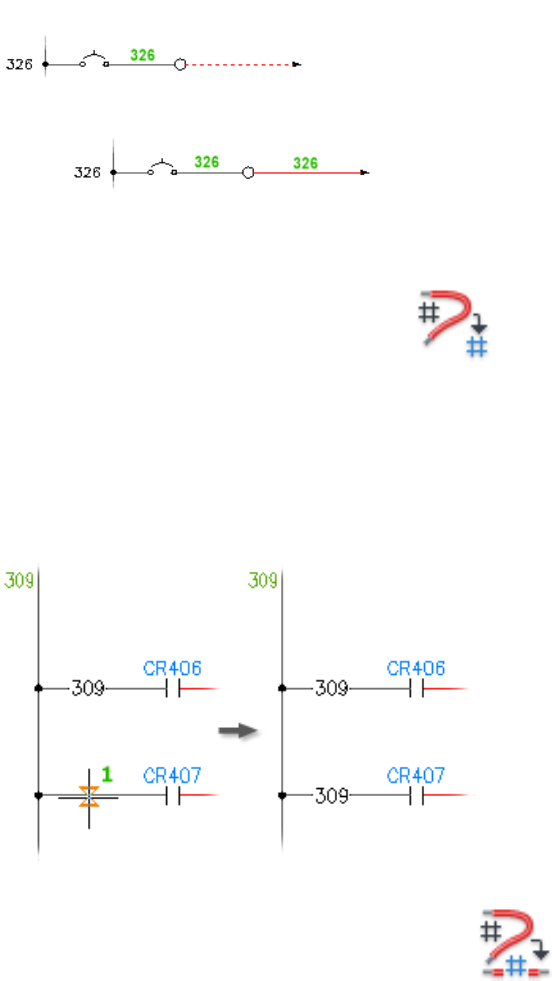
1Click Schematic tab ➤ Edit Wires/Wire Numbers panel ➤ Copy Wire
Number drop-down ➤ Copy Wire Number.
2Select the wire location where you want the extra wire number to insert.
Position wire numbers in-line with the wire
Inserts an extra copy of a wire number in-line at a pick point.
Positions wire numbers in-line with the wire rather than above or below the
wire.
1Click Schematic tab ➤ Edit Wires/Wire Numbers panel ➤ Copy Wire
Number drop-down ➤ Copy Wire Number In-line.
1000 | Chapter 12 Wire/Wire Number Tools

2Specify the insertion point for the wire number.
3In the Insert Wire Number dialog box, enter the wire number. Use Pick
to select similar text from the drawing, or click the arrows to increment
or decrement the wire number.
4Click OK. The wire number is automatically inserted in-line with the
wire.
If the gap between the wire and the wire number text is not large enough
you can change the gap setup.
5Click Schematic tab ➤ Edit Wires/Wire Numbers panel ➤ Copy Wire
Number drop-down ➤ Adjust In-Line Wire/Label Gap.
6Type S and press Enter to open the In-Line Wire Label Gap Setup dialog
box.
7Adjust the values as necessary to define the adjustment for the gap size.
■A: Specifies the width between the end of the wire and the text. The
second option for setting "A" is the snap setting for the width. The
width stays constant until the text grows to a point where the Text +
A + A gets past the current gap width in the wire. The gap width then
jumps up to the next snap width increment. If this second value is
set to 0.25, the gaps in the wires are always going to be at 0.25
increments (0.25, 0.5, 0.75, 1.0). If this middle value is left at 0.0, then
the snap distance is 0 and the gap in the wire grows or shrinks
smoothly as the wire text grows or shrinks.
■C: Specifies the minimum gap width by setting a fixed size value. If
you want fixed spacing for the in-line wire number gap, enter a size
value in the C edit box. A non-blank C value gives the minimum gap
width even if the wire number is a single character or was blanked
out.
The gap is adjusted for the selected wire number.
Reposition Wire Numbers | 1001
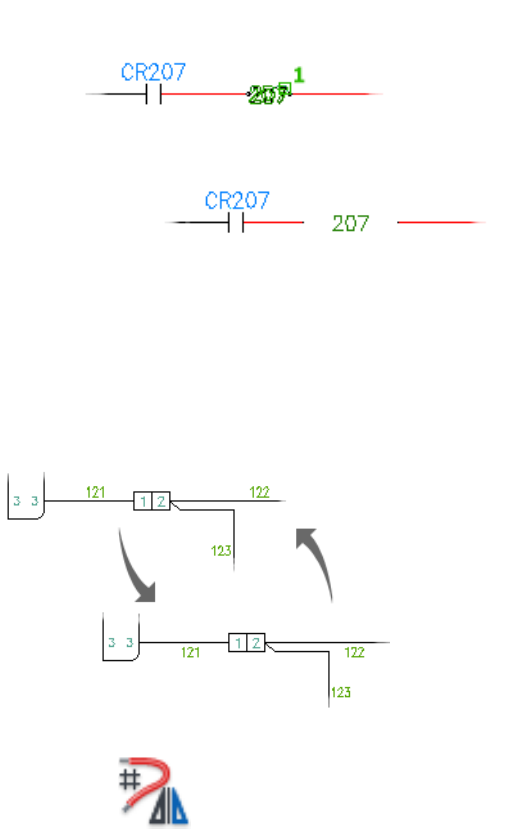
Mirror a wire number
Moves a selected wire number to the same position on the other side of the
wire.
Select each wire number to flip.
1Click Schematic tab ➤ Edit Wires/Wire Numbers panel ➤ Flip Wire
Number.
2Select the wire number to mirror.
Each wire number selected is mirrored across its associated wire.
1002 | Chapter 12 Wire/Wire Number Tools
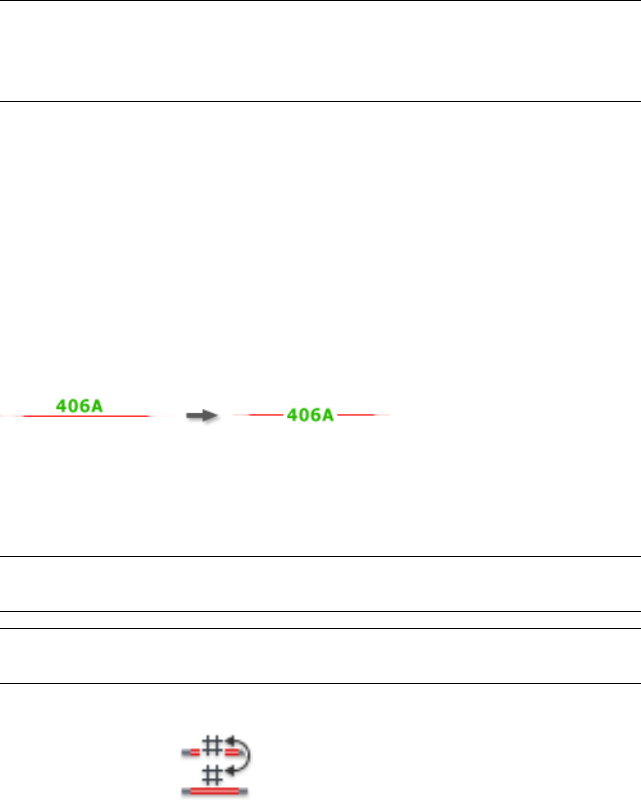
TIP Use the Toggle Wire Number In-Line tool to move a wire number from
above/below the wire to in-line. If the wire number is already in-line, the wire
number moves to the position defined in the Drawing properties: wire numbers
tab on page 225.
Toggle wire number position
Switches a wire number between drawing properties above or below and
in-line.
If the wire number you select is in-line, it switches to above or below based
on the drawing properties. If it starts as above or below, the selected wire
number switches to in-line.
NOTE If there is not room for a wire number to become an in-line wire number,
it remains an above or below line wire number.
TIP Use the Flip Wire Number tool to switch a wire number between above and
below the wire.
1Click Schematic tab ➤ Edit Wires/Wire Numbers panel ➤ Toggle Wire
Number In-line.
2Select the wire number to toggle. You can select on the wire number or
on the wire itself.
3Right-click to exit the command.
Apply drawing-specific wire number settings. These settings are maintained
inside the WD_M block in the drawing.
Reposition Wire Numbers | 1003
Any drawing
Ribbon: Project tab ➤ Project Tools panel ➤ Manager.
Toolbar: Main Electrical 2
Menu: Projects ➤ Project Manager
Command entry: AEPROJECT
In the Project Manager, right-click the drawing name, and select Properties
➤ Drawing Properties. Select the Wire Numbers tab.
Active drawing
Ribbon: Schematic tab ➤ Other Tools panel ➤ Drawing Properties
drop-down ➤ Drawing Properties.
Toolbar: Main Electrical 2
Menu: Projects ➤ Drawing Properties
Command entry: AEPROPERTIES
Select the Wire Numbers tab.
Wire Number Format
Wire number tags can be sequential or reference-based.
Specifies the way new wire number tags are created. The
wire number tag format must include the %N parameter
Format
that is the base sequential or reference-based value per the
selection above. If your format includes the sheet number
%S parameter or the drawing number %D parameter, enter
the values in the edit boxes in the Drawing Properties ➤
Drawing Settings dialog box.
1004 | Chapter 12 Wire/Wire Number Tools

NOTE For reference-based wire number tagging, individual
items in the suffix list are applied to the wire tags to keep
multiple wires in the same reference location unique. These
values are added to the end of the tag, but you can force
AutoCAD Electrical to insert the suffix character somewhere
within the tag format. Use the Suffix position parameter,
%X, in the component tag format (for example, %X%N).
Specifies to use PLC I/O address values for wires that con-
nect to an addressed I/O point. This setting overrides both
Search for PLC I/O address on insert
Sequential and Reference-based tagging. New wires or wire
renumbering on the current drawing shows PLC I/O ad-
dress-based wire numbers automatically.
NOTE Like component tags, AutoCAD Electrical uses the
concept of a wire tag format string with replaceable para-
meters. The %N parameter must always be part of the wire
format string. A typical format string can be just this %N
parameter.
Enter the starting sequential number (alpha, numeric, or
alphanumeric) for the drawing. If you enter the same
Sequential
starting sequential number for every drawing of your wiring
diagram set, AutoCAD Electrical confirms at insertion time
that a new sequential wire number tag is not repeated on
any other drawing.
If you set DEMO1 to 100 and DEMO2 to 200, the wire
numbers on DEMO1 start at 100 and wire numbers on
DEMO2 start at 200. If DEMO1 has more than 100 wire
numbers it starts using wire number 200 and above.
DEMO2 would begin its wire numbers where DEMO1 left
off (making sure that duplicate wire numbers are not as-
signed).
The default is "1." Setting it to "2" with a starting sequential
of "1" would yield wire numbers 1, 3, 5, 7, 9, 11, and so
on.
Increment
Sets the wire number tag suffix. This list is used to create
unique reference-based wire number tags for multiple wire
Line Reference
networks beginning at the same reference location (such
as wire network beginning at a location per line reference
number, X-Y grid reference, or X-Zone reference).
Reposition Wire Numbers | 1005

Displays a suffix list. List suffix characters for wire numbers
beginning on the same line reference or in the same zone
Suffix Setup
(to keep wire numbers unique). Select one of the four
predefined suffix lists or enter your own custom suffix list.
New Wire Number Placement
NOTE The Insert Wire Number tool does not take the current wire number setting
(in-line, above or below) into account when updating existing wire numbers. This
setting is used only when inserting new wire numbers. Use the Toggle Wire Number
In-Line tool for flipping existing wire numbers among the three modes.
Places the wire number above the physical wire.Above Wire
Places the wire number inline with the wire.In-Line
Defines spacing between the inline wire number and the wire it-
self.
Gap Setup
Places the wire number below the physical wire.Below Wire
Specifies to insert the wire number tags the specified offset dis-
tance.
Offset
Specifies to insert the wire number tags in the center of each wire
segment.
Centered
Specifies a fixed, user-defined offset distance from the left or top
of the first wire segment found on the wire network.
Offset Distance
(This option is unavailable for in-line wire numbers.) AutoCAD
Electrical places wire numbers on leaders when it determines that
Leaders
the wire number text bumps into something. It does not check
if the leader itself overlays another object. Select the method for
inserting new wire numbers as leaders: As Required, Always, or
Never.
NOTE This change does not affect wire numbers that are already
present on the drawing.
1006 | Chapter 12 Wire/Wire Number Tools

Modify Wire Numbers
Modify wire numbers
Increment wire numbers
You can force new incremental wire numbers (as opposed to line referenced
numbers) to increment by more than one during insertion.
1Click Schematic tab ➤ Other Tools panel ➤ Drawing Properties
drop-down ➤ Drawing Properties.
2Click the Wire Numbers tab.
3In the Wire Number Format section, select Sequential and set the
increment value.
4(Optional) For this increment value to be your standard for all new
drawings, follow the same procedure in the Project Properties ➤ Wire
Numbers dialog box.
NOTE You can also do it by creating an electrical template drawing with the
wd_m block pre-inserted and the increment value pre-assigned.
Change the default wire number size
You must change several block inserts in each of the symbol libraries you use.
The wire number block drawings to adjust are: wd_wnh.dwg (horizontal wire
number), wd_wnv.dwg (vertical wire number), wd_wch.dwg (horizontal extra
wire number copy), and wd_wcv.dwg (vertical extra wire number copy). You
can find them in your AutoCAD Electrical symbol library.
■Windows XP: C:\Documents and Settings\All
Users\Documents\Autodesk\Acade {version}\Libs\{library}\
■Windows Vista, Windows 7: C:\Users\Public\Documents\Autodesk\Acade
{version}\Libs\{library}\
1Determine which schematic symbol library is in use and open drawing
"wd_wnh.dwg" in AutoCAD.
Modify Wire Numbers | 1007

2Change the text size of the WIRENO attribute definition.
3Save the drawing.
4Open drawings "wd_wnv.dwg", "wd_wch.dwg", and "wd_wcv.dwg."
5Repeat steps 2 and 3 for each.
NOTE You will not see these new, resized wire numbers on existing drawings
unless you erase all the wire numbers and purge the drawing of the old block
inserts.
Make wire numbers on vertical wires come in rotated 90
degrees
You can make wire numbers for vertical wires come in automatically rotated
90 degrees so the wire number lays along the wire.
1Determine which schematic symbol library is in use and open drawing
"wd_wnv.dwg" in AutoCAD.
2Rotate the WIRENO attribute 90 degrees using the AutoCAD Rotate
command.
3Save the drawing.
4Open drawing "wd_wcv.dwg."
5Repeat steps 2 and 3.
Erase or Hide Wire Numbers
Erase or hide wire numbers
Erase or hide wire numbers
Erase a wire number
Deletes selected wire numbers.
Deletes the main wire number of a network, or a wire number copy. Select a
wire number copy precisely to erase just that copy, leaving the main wire
number of the network and any other copies in place. Select the main wire
number to delete it and all wire number copies.
1008 | Chapter 12 Wire/Wire Number Tools
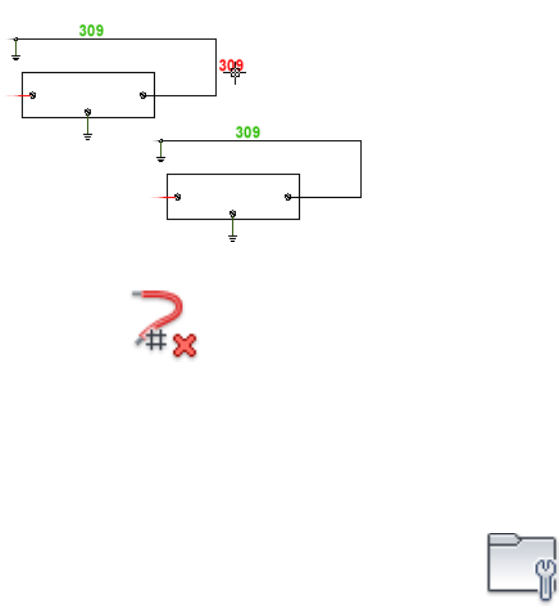
1Click Schematic tab ➤ Edit Wires/Wire Numbers panel ➤ Delete Wire
Numbers.
2Select the wire number or pick on any wire in the network.
3Press Enter. The wire number is automatically deleted. Extra wire number
copies can also be deleted.
Erase all wire numbers project-wide
1Click Project tab ➤ Project Tools panel ➤ Utilities.
2Select to remove all wire numbers or keep fixed wire numbers and click
OK.
3Select which drawings you want to process and click OK.
The selected drawings are processed and the wire numbers change across
the project.
Hide/unhide wire numbers
Hide wire numbers
AutoCAD Electrical automatically hides wire numbers when the wire number
is on the same network as a terminal symbol that carries a copy of the wire
number (WIRENO attribute). You can hide or show wire numbers manually.
Erase or Hide Wire Numbers | 1009
1Click Schematic tab ➤ Edit Wires/Wire Numbers panel ➤ Modify Wire
Numbers drop-down ➤ Hide.
2Select a wire number or the wire it is associated to. AutoCAD Electrical
moves the wire number to a special hide layer and the number is no
longer visible on the screen.
The new hide layer is created from the wire number layer name with a
"_HIDE" suffix. For example, if the wire number text layer is called
WIRENO then the hide layer name is called "WIRENO_HIDE". The layer
is created automatically when needed and you are asked if you want to
freeze this layer.
Unhide wire numbers
1Click Schematic tab ➤ Edit Wires/Wire Numbers panel ➤ Modify Wire
Numbers drop-down ➤ Unhide.
2Select a wire number or the wire the hidden number is associated to.
AutoCAD Electrical moves the wire number out of the hide layer and the
number is visible on the screen.
NOTE Do not use the Hide Wire Number and Unhide Wire Number tools on in-line
wire numbers.
See also:
■Modify/fix/unfix on page 992
Signal Arrows
Signal Arrows
AutoCAD Electrical uses a named source/destination concept. You identify a
wire network to be the source, insert a source arrow on that network, and
assign a source code name to it. On the wire network that is to be a
1010 | Chapter 12 Wire/Wire Number Tools
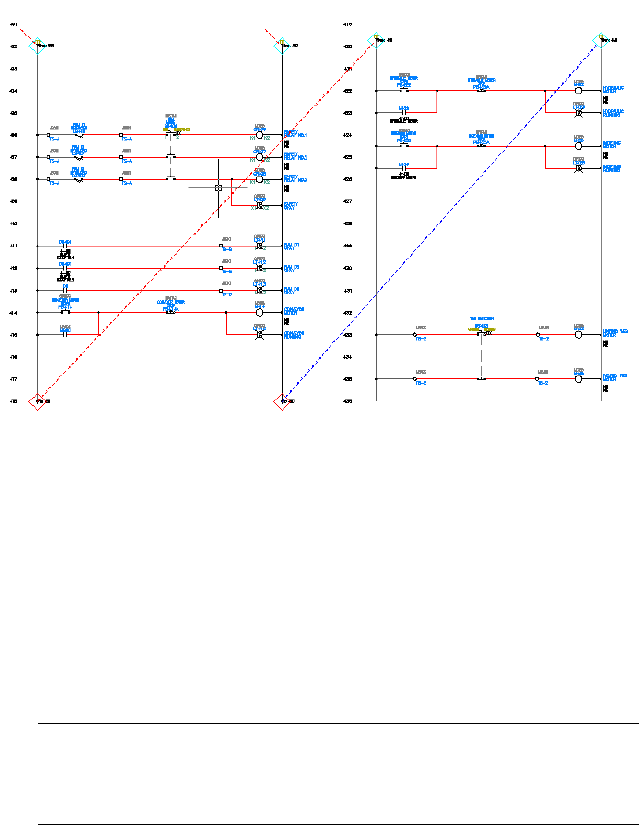
continuation of the same wire number, whether on the same drawing or a
different drawing in the project, insert a destination arrow. Give it the same
code name that you gave to its source. AutoCAD Electrical matches source
code names with destination names and copies source wire numbers over to
the destination wire networks.
Add custom signal arrow styles
The icon menu graphics that display for the various signal styles are bitmap
files saved to your C:\Program Files [(x86)]\Autodesk\Acade {version}\Acade\
folder where AutoCAD Electrical's Insert Signal utilities and Drawing Properties
tool can access them.
1Create the style in AutoCAD.
2Zoom in to the new arrow style.
3Save the file as a bitmap using the following name definition:
A_STYLExh.bmp where "x" is the arrow style 1-9.
NOTE If the resulting bitmap is too small or off-center, open the source
drawing in AutoCAD again. Resize your AutoCAD graphics window so that
it is more square. Center the image and resave. Repeat until you are satisfied
with the result.
Signal Arrows | 1011
Modify signal arrow prefix
When a source or destination signal arrow is inserted it is cross-referenced.
The source arrow has the reference for the destination arrow. The destination
arrow has the reference for the source arrow. The cross-reference text can carry
a prefix, for example “to” on a source arrow and “from” on a destination
arrow. This prefix value is defined on the signal arrow library symbol. You
can change the prefix by modifying the library symbol.
1Open the signal arrow library symbol.
See Source/Destination Wire Signal Arrow Symbols on page 293 to
determine the name of the signal arrow you want to modify.
2Enter DDEDIT at the command line.
3Click the XREF attribute.
4Edit the Prompt value.
5Click OK.
6Save the symbol.
NOTE Purge existing drawings of this symbol before inserting this modified symbol.
Insert destination code
Inserts a wire Destination signal arrow with a wire number from a matching
Source.
Ribbon: Schematic tab ➤ Insert Wires/Wire Numbers panel ➤ Signal
Arrows drop-down ➤ Destination Arrow.
Toolbar: Signals
Menu: Wires ➤ Signal References ➤ Destination Signal Arrow
Command entry: AEDESTINATION
The program retrieves the wire number for a destination-arrowed wire network
from its associated source-arrowed wire network. Enter the same number,
word, or phrase the source arrow carries to link to it.
1012 | Chapter 12 Wire/Wire Number Tools
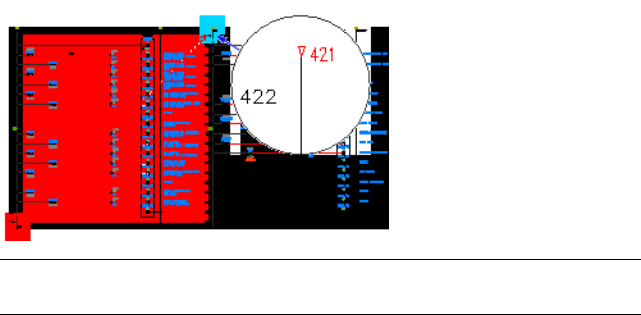
NOTE A Destination signal arrow cannot be tied to a wire network that carries a
pre-assigned fixed wire number.
Specifies the code for the destination signal. Enter a unique
number/word/phrase, 32-character maximum, for AutoCAD
Code
Electrical to use to link the destination wire network intern-
ally to any source wire networks.
(optional) Specifies the description for the destination sig-
nal.
Description
Opens an ASCII text file from which you can quickly pick
standard descriptions.
Defaults
Picks from recently inserted codes.Recent
Displays drawing-wide pick lists of all source/destination
codes used so far.
Drawing
Displays project-wide pick lists of all source/destination
codes used so far.
Project
Picks on an existing wire network. AutoCAD Electrical
searches it for an existing source arrow and retrieves its
signal code for use on this new destination arrow.
Pick
Specifies the arrow style to use for the destination signal.
There are currently nine styles to choose from.
Signal Arrow Style
Finishes the destination arrow insert and updates the source
arrow with this destination arrow.
Ok + Update Source
Signal Arrows | 1013
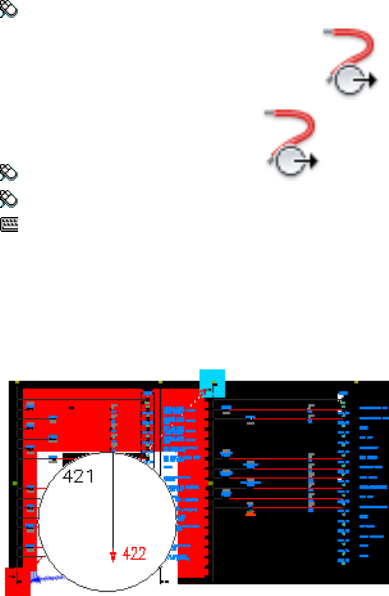
Signal - source code
Inserts a wire Source signal arrow and transfers its wire number to destination
wire networks.
Ribbon: Schematic tab ➤ Insert Wires/Wire Numbers panel ➤ Signal
Arrows drop-down ➤ Source Arrow.
Toolbar: Main Electrical 2
Menu: Wires ➤ Signal References ➤ Source Signal Arrow
Command entry: AESOURCE
The wire number from a source-arrowed wire network copies to all associated
destination-arrowed wire networks. Enter a unique number, word, or phrase
of 32 characters maximum to link the source wire network to all destination
wire networks internally.
Specifies the code for the source signal. Enter a
unique number/word/phrase, 32-character maxim-
Code
um, for AutoCAD Electrical to use to link the source
wire network internally to any destination wire
networks.
Places the specified value into the code box. It is
useful for using the next number in a sequence.
Use
(optional) Specifies the description for the source
signal.
Description
1014 | Chapter 12 Wire/Wire Number Tools

Opens an ASCII text file from which you can quickly
pick standard descriptions.
Defaults
Picks from recently inserted codes.Recent
Displays drawing-wide pick lists of all source/destin-
ation codes used so far.
Drawing
Displays project-wide pick lists of all source/destin-
ation codes used so far.
Project
Follows the selected wire network looking for a
destination arrow at the other end. If found, repeat
its signal code for this new source arrow.
Search
Picks on an existing wire network. AutoCAD Elec-
trical searches it for an existing destination arrow
Pick
and retrieves its signal code for use on this new
source arrow.
Specifies the arrow style to use for the source signal.
Select from the four predefined styles or a user-
defined style.
Signal Arrow Style
Finishes the source arrow insert and updates the
destination arrow with this source arrow.
OK + Update Destination
Project properties: styles tab
Modify your project default settings for various component styles. All
information defined in this tab is saved to the project definition file as project
defaults and settings.
Ribbon: Project tab ➤ Project Tools panel ➤ Manager.
Toolbar: Main Electrical 2
Menu: Projects ➤ Project ➤ Project Manager
Command entry: AEPROJECT
Signal Arrows | 1015

In the Project Manager, right-click on the project name and select Properties.
Select the Styles tab.
Specifies the default wire signal arrow style. Select from
the four predefined styles or a user-defined style. You can
override the default style setting at insertion time.
Arrow Style
TIP For instructions on how to add custom wire arrow
styles, see Add custom signal arrow styles on page 1011.
Specifies the default PLC module style. Select from the five
predefined styles or a user-defined style.
PLC Style
TIP For instructions on how to add custom PLC module
styles, see Add a new PLC style on page 624.
Defines the default Fan In/Out marker style and the layers
for wires going out of a Fan In/Out Source marker and
those coming into a Destination marker.
Fan-In/Out Marker Style
TIP For instructions on how to add custom Fan-In/Out
marker styles, see Add custom fan-in/out marker styles on
page 1023.
Lists the Fan In/Out layers.Layer List
Defines layer names as Fan In/Out layers.Add
Removes the selected layer from the defined layer list.Remove
Specifies the default mode of operation when wires cross
each other: insert gap with no loop, insert gap and loop,
or solid (no gap).
Wire Cross
Specifies the default wire tee marker: none, dot, angle1,
or angle2.
Wire Tee
Drawing properties: styles tab
Apply drawing-specific component styles settings. These settings are
maintained inside the WD_M block in the drawing.
1016 | Chapter 12 Wire/Wire Number Tools
Any drawing
Ribbon: Project tab ➤ Project Tools panel ➤ Manager.
Toolbar: Main Electrical 2
Menu: Projects ➤ Project Manager
Command entry: AEPROJECT
In the Project Manager, right-click the drawing name, and select Properties
➤ Drawing Properties. Select the Styles tab.
Active drawing
Ribbon: Schematic tab ➤ Other Tools panel ➤ Drawing Properties
drop-down ➤ Drawing Properties.
Toolbar: Main Electrical 2
Menu: Projects ➤ Drawing Properties
Command entry: AEPROPERTIES
Select the Styles tab.
Specifies the default wire signal arrow style. Select from the four
predefined styles or a user-defined style. You can override the
default style setting at insertion time.
Arrow Style
TIP For instructions on how to add custom wire arrow styles, see
Add custom signal arrow styles on page 1011.
Specifies the default PLC module style. Select from the five pre-
defined styles or a user-defined style.
PLC Style
TIP For instructions on how to add custom PLC module styles,
see Add a new PLC style on page 624.
Signal Arrows | 1017
Defines the default Fan In/Out marker style and the layers for
wires going out of a Fan In/Out Source marker and those coming
into a Destination marker.
Fan-In/Out Marker Style
TIP For instructions on how to add custom Fan-In/Out marker
styles, see Add custom fan-in/out marker styles on page 1023.
Lists the Fan In/Out layers.Layer List
Defines layer names as Fan In/Out layers.Add
Removes the selected layer from the defined layer list.Remove
Specifies the default mode of operation when wires cross each
other: insert gap with no loop, insert gap, and loop, or solid (no
gap).
Wire Cross
Specifies the default wire tee marker: none, dot, angle1, or angle2.Wire Tee
Wire signal or stand-alone reference report
There are two types of reports that can be generated: one on wire signal
source/destination codes and one on stand-alone reference codes.
Ribbon: Reports tab ➤ Schematic panel ➤ Signal Error/List.
Toolbar: Signals
Menu: Wires ➤ Signal References ➤ Signal Error/List Report
Command entry: AESIGNALERRORREPORT
Runs a report that lists all the signal source and des-
tinations used on the project drawing set. The excep-
Wire Signal Source/Destination codes re-
port
tion report lists problem areas such as a destination
signal with no source found or a source signal that
does not tie to a destination.
Click Format on the subdialog box to select from a
listing of report settings files found that have a prefix
equal to the selected report type.
1018 | Chapter 12 Wire/Wire Number Tools
Runs a report that lists all the stand-alone source and
destinations used on the project drawing set. The
Stand-alone Reference Source/Destination
codes report
exception report lists problem areas such as a destin-
ation reference with no source found or a source
reference that does not tie to a destination.
Click Format on the subdialog to select from a listing
of report settings files found that have a prefix equal
to the selected report type.
Continues surfing on problems related to the selected
report.
Surf
Fan In/Out Markers
Fan In/Out Source and Destination Markers
There are times when you want to show source and destination markers on
the individual wires of a cable, but you want to show the wires coming together
to form the cable.
When a Fan In/Out marker is inserted, AutoCAD Electrical breaks the wire
and changes the layer of one side of the wire to a special layer. If you are
inserting a source marker, then the wire coming out of the marker is changed.
If it is a destination marker, the wire coming into the marker is changed. You
can use the AutoCAD Electrical Fan In/Out - Single Line Layer command to
change a wire to one of these layers.
Fan In/Out Markers | 1019
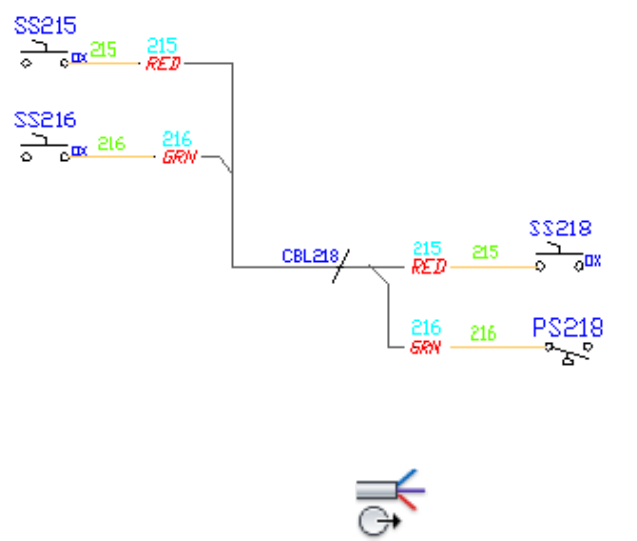
Add source markers
1Click Schematic tab ➤ Insert Wires/Wire Numbers panel ➤ Signal
Arrows drop-down ➤ Fan In Source.
2Select the style and orientation for the markers and click OK.
3Select the insertion point on the screen for the marker.
The Signal-Source Code dialog box displays.
4Enter a source code for the marker and optionally a description. Enter a
unique number/word/phrase, 32-character maximum, for AutoCAD
Electrical to use to link the source wire network internally to any/all
destination wire networks.
5Select how you want to view the signal codes used so far:
■Display drawing-wide or project-wide pick lists of all source/destination
codes used so far
■Follow the selected wire network looking for a destination arrow at
the other end. If found, repeat its signal code for this new source
arrow.
1020 | Chapter 12 Wire/Wire Number Tools
■Pick on an existing wire network. AutoCAD Electrical searches it for
an existing destination arrow and retrieves its signal code for use on
this new source arrow.
6Specify the arrow style to use for the destination signal.
7Click OK.
The Source/Destination Signal Markers (for Fan In/Out) dialog box
displays. You have a few options for inserting the matching destination
marker:
■Do not insert the matching destination marker.
■Do not insert the matching destination marker after each source.
■Insert the matching destination marker.
■Automatically insert the matching destination markers for each source.
NOTE If the destination wires are nearby it may be easiest to insert them right
away. If they are on another drawing you can wait until later to insert them.
Add destination markers
1Click Schematic tab ➤ Insert Wires/Wire Numbers panel ➤ Signal
Arrows drop-down ➤ Fan Out Destination.
2Select the style and orientation for the markers and click OK.
3Select the wire for the destination marker.
The Insert Destination Code dialog box displays.
4Enter the code or select Recent to see a list of the recent markers inserted.
5Specify the arrow style to use for the destination signal.
6Continue selecting wires until all destination markers were inserted.
Set marker styles and layers
The AutoCAD Electrical Fan In/Out feature relies on layering to work. You
can select the default Fan In/Out marker style here along with defining the
layers for the wires.
Fan In/Out Markers | 1021

1Click Schematic tab ➤ Other Tools panel ➤ Drawing Properties
drop-down ➤ Drawing Properties.
2In the Drawing Properties dialog box, click the Style tab.
If you have an older drawing, you may be warned about an older version
of the WD_M block. If that happens, go ahead and swap the WD_M block
and try again.
3In the Fan-In/Out Marker Style section, set the default marker style.
4Define the layers for the wires. Click Add to define layer names as Fan
In/Out layers.
5Click OK.
Define fan-in/out layers
You can define a special layer or set of layers for the wires going out of a Fan
In/Out Source marker and the wires coming into a Destination marker.
1Click Schematic tab ➤ Edit Wires/Wire Numbers panel ➤ ➤
Fan In/Out - Single line Layer.
The list displays only layers that are already assigned as Fan In/Out Layers
as defined in the drawing properties setup.
2Use Pick if you are not sure of the layer you want, but you have a line on
your drawing on that layer. You can also use it if the layer of the line is
not defined as a Fan In/Out layer and you want to add it on the fly.
3Select whether to make the layer current.
4Check the box to change the existing fan in/out lines if you want to make
sure that you only change the layers of wires that are already defined as
Fan In/Out wires. Otherwise AutoCAD Electrical can convert any selected
lines to the Fan In/Out layer.
1022 | Chapter 12 Wire/Wire Number Tools
Add custom fan-in/out marker styles
The icon menu graphics that display for the various Fan In/Out marker styles
are bitmap files saved to your C:\Program Files [(x86)]\Autodesk\Acade
{version}\Acade\ folder where s Fan In/Out utilities and Drawing Properties
tool can access them.
1Create the style in AutoCAD.
2Zoom in to the new Fan In/Out marker style.
3Save the file as a bitmap using the following name definition:
StylexVI.bmp and StylexVO.bmp where "x" is the fan-in/out marker style
1-9.
NOTE If the resulting bitmap is too small or off-center, open the source
drawing in AutoCAD again. Resize your AutoCAD graphics window so that
it is more square. Center the image and resave. Repeat until you are satisfied
with the result.
Fan-in/fan-out signal source
Inserts an in-line, fan in/out source marker.
Ribbon: Schematic tab ➤ Insert Wires/Wire Numbers panel ➤ Signal
Arrows drop-down ➤ Fan In Source.
Toolbar: Signals
Menu: Wires ➤ Signal References ➤ Fan In/Out Source
Command entry: AEFANINSRC
Show source and destination markers on the individual wires of a cable, but
show the wires coming together to form the cable.
Fan In/Out Markers | 1023
Uses set of in-line source/destination symbols that follow the naming format
of ha#s?_inline.dwg and ha#d?_inline.dwg where # = style number and ? =
1,2,3,4 orientation number (just like with existing source/destination arrows).
Running new commands inserts in-line source marker symbols and changes
the connected wire on the fan-in side to be on a non-wire layer. Putting
matching destination in-line markers at the fan-out end does the same. It
changes the connected common wires on the fan-out side to a non-wire layer.
It leaves the individual segments on the opposite side of marker on the original
wire layer. The AutoCAD Electrical source/destination update or Auto Wire
Number command then makes the match-up annotation, whether the
fan-in/fan-out are on the same or different drawings.
Specifies the style for the source marker. Some op-
tions are: Solid (wire num/desc), Break (wire num -
Source marker style
small gap/desc), Break (medium gap/desc), and Break
(wide gap/desc).
Specifies the orientation for the markers. Options
are: above, below, right, or left.
Wire connection orientation
Fan-in/fan-out signal destination
Inserts an in-line, fan in/out destination marker.
Ribbon: Schematic tab ➤ Insert Wires/Wire Numbers panel ➤ Signal
Arrows drop-down ➤ Fan Out Destination.
Toolbar: Signals
1024 | Chapter 12 Wire/Wire Number Tools

Menu: Wires ➤ Signal References ➤ Fan In/Out Destination
Command entry: AEFANINDEST
Show source and destination markers on the individual wires of a cable, but
show the wires coming together to form the cable.
Uses set of in-line source/destination symbols that follow the naming format
of ha#s?_inline.dwg and ha#d?_inline.dwg where # = style number and ? =
1,2,3,4 orientation number (just like with existing source/destination arrows).
Running new commands inserts in-line source marker symbols and changes
connected wire on the fan-in side to be on a non-wire layer. Putting matching
destination in-line markers at the fan-out end does the same. It changes the
connected common wires on the fan-out side to non-wire layer. It leaves the
individual segments on the opposite side of marker on the original wire layer.
The AutoCAD Electrical source/destination update or Automatic Wire Number
command then makes the match-up annotation, whether the fan-in/fan-out
are on the same or different drawings.
Specifies the style for the destination marker. Some
options are: Solid (wire num/desc), Break (wire num
Destination marker style
- small gap/desc), Break (medium gap/desc), and
Break (wide gap/desc).
Specifies the orientation for the markers. Options
are: above, below, right, or left.
Wire connection orientation
Fan-in/out - single line layer
You can define a special layer or set of layers for the wires going out of a Fan
In/Out source marker and the wires coming into a destination marker.
Fan In/Out Markers | 1025
Ribbon: Schematic tab ➤ Edit Wires/Wire Numbers panel ➤ ➤
Fan In/Out - Single line Layer.
Toolbar: Signals
Menu: Wires ➤ Signal References ➤ Fan In/Out - Single line Layer
Command entry: AEFANIN
Displays only layers that are already assigned as Fan
In/Out Layers as defined in the drawing properties
setup.
Fan-In/Out Line Layers
Picks similar fan-in/out lines from the drawing. You
can use it if the layer of the line is not defined as a
Fan In/Out layer and you want to add it on the fly.
Pick
Changes only the layers of wires that are already
defined as Fan In/Out wires. Otherwise AutoCAD
Change existing wires only (no convert)
Electrical can convert any selected lines to the Fan
In/Out layer.
Changes all the wires to the selected layer that is as-
sociated with the selected wire network. If this option
is not selected, only the selected wire changes.
One pick gets all connected wires
Makes the selected layer the current layer.Make selected layer current
Wire Sequencing
Control from/to report connection sequencing
A wire network consisting of three or more interconnected components
introduces potential unknowns into a from/to connection report. Does A
connect to B and then jumper to C or does C connect to A and jumper to B?
By default, AutoCAD Electrical reports from/to connections on a single network
by first grouping devices by common Location codes and sequentially reports
1026 | Chapter 12 Wire/Wire Number Tools

the inter-wiring of each group. It then ties each common Location group with
a single from/to wire connection. For wire connections with the same Location
group (or if all devices have the same Location value or no Location value),
AutoCAD Electrical attempts to sort the wire connections by physical location
on the drawing and report the from/to connections in that order.
NOTE You can keep jumpers from displaying in Wire From/To reports by placing
the jumpers on a layer that contains the substring "JUMPER."
AutoCAD Electrical provides several methods to more specifically define wire
connection sequencing.
NOTE You can run one or more sequencing methods simultaneously, even in the
same wire network, since there is a hierarchy of which methods take precedence
over others.
Angled Tee Wire Connection Method
The use of angled tee wire connections can influence the wire connection
sequence reporting. The orientation of the tee symbol defines the sequencing.
Each symbol carries attribute WDWSEQ with a three-digit value indicating
the preferred wire sequencing order. The 90-degree turn or the straight-through
section (depending on the style of the angled tee symbol) indicates the
beginning of the sequence. The 45-degree turn is the secondary connection.
AutoCAD Electrical reports each wire connection as it is shown.
This method of influencing from/to connection sequence reporting can fail
to give expected results when the orientation of multiple angled tee connection
symbols results in either:
■An illogical or impossible connection configuration.
■More than two wires routed to a given wire connection point on a device.
Set the automatic angled wire tee insert mode (instead of tee intersection dots)
in the Project Properties ➤ Styles dialog box.
NOTE Schematic wire sequencing and Direct-to-Terminal wire sequencing, if
present, overrides the Angled Tee connection sequencing.
Schematic Wire Connection Sequence Method
This method involves touching the connection sequence for each wire network
containing three or more interconnected components. AutoCAD Electrical
places an incrementing connection sequence value on each wire connection
Control from/to report connection sequencing | 1027

point. It is saved as a three-digit Xdata value, starting with “001” on the wire
connection attribute. When any of the AutoCAD Electrical From/To reports
processes wire networks containing this incrementing sequencing data, the
from/to wire connections order accordingly.
NOTE Schematic wire connection and Direct-to-Terminal sequencing methods
on a given wire network take precedence over all other sequencing methods. For
example, if a wire network is sequenced with the Edit Wire Sequence tool, the
sequencing influence normally provided by angled tee marker symbols used in
the wire network is overridden.
Direct-to-Terminal Wire Connection Sequence Method
This method defines additional Direct-to-Terminal wire connection sequences.
For example, one side of a schematic terminal might be connected to three
devices. A specific wire connection sequence (using the Schematic Wire
Connection sequence method previously described) can be defined to force
the connection reporting. It is limited to reporting the terminal as a common
connection point between only two of the three devices. The third device
would default to being reported as jumpered to one of the other two devices.
Additional secondary Direct-to-Terminal sequences can be defined so that the
third device can be sequenced directly to the terminal. You can also directly
sequence two terminals together. The result is that the From/To connection
reporting shows all three devices tied directly to the terminal.
NOTE The limit of Direct-to-Terminal sequences that you can define in a single
wire network is 50.
Level/Routing Method
This method brings the panel layout into play to affect the reporting sequence
in the various From/To reports. The panel layout or panel wiring diagram
layout representations are assigned level/routing codes consisting of a four-level
hierarchy plus a sequence number. As schematic wire networks are processed
for the From/To reports, the existence of panel layout representations that are
marked with level/routing values is checked. If this information is found for
all the devices of the network being processed, the connections of the network
are sorted by this hierarchy and sequence information. The result is a set of
From/To reported connections that follow the level/routing data carried by
the layout.
NOTE Schematic wire sequencing and Direct-to-Terminal wire sequencing, if
present, override the influence of Level/Routing sequencing.
1028 | Chapter 12 Wire/Wire Number Tools
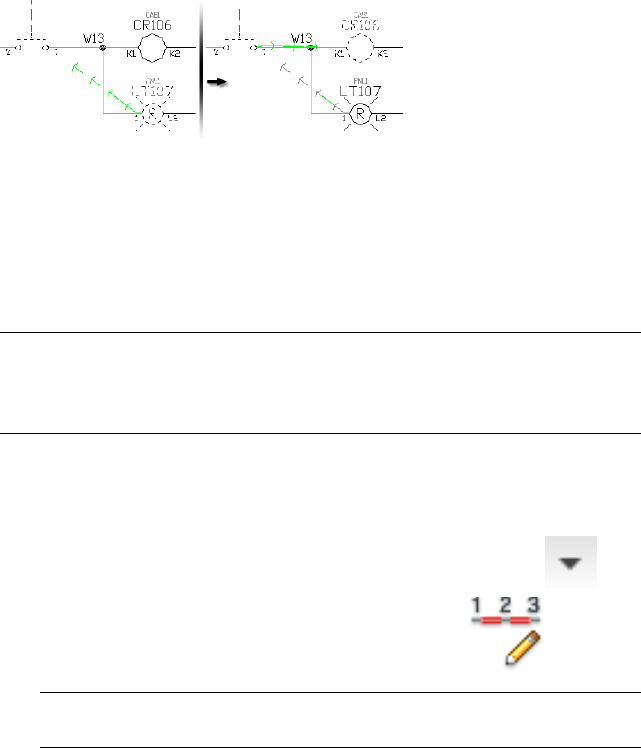
Edit the connection sequence of a wire network
You can explicitly define the wire connection sequence of any wire networks
consisting of three or more interconnected devices.You control how AutoCAD
Electrical analyzes the circuits (such as the order of the contents in the
WFRM2ALL table in the project’s scratch database file) and how from/to
connection information is output to various reports or annotated on to
physical footprint representations (using the Wire Annotation of Panel
Footprint on page 1588 tool).
NOTE The asterisk (*) next to a wire in the Wire Connection Sequence portion of
the Edit Wire Connection Sequence dialog box indicates that the device wire
connection is on another drawing. A “t” indicates that the device is a schematic
terminal and is a candidate for Direct-to-Terminal sequencing.
This tool predefines the connection sequence of a wire network. The network
can be either fully contained on the active drawing or pass across multiple
drawings using signal source/destination symbols.
1Click Schematic tab ➤ Edit Wires/Wire Numbers panel ➤ ➤
Wire Sequence drop-down ➤ Edit Wire Sequence.
NOTE You can also access this tool by right-clicking on any wire segment in
the wire network.
2Select any wire segment on the wire network you want to process.
3On the Edit Wire Connection Sequence dialog box, adjust the connection
to connection sequencing in the list by clicking Move Up or Move Down
or click Pick Mode to define the sequencing by actual picks at each wire
connection point.
Control from/to report connection sequencing | 1029

NOTE Pick Mode is unavailable when you are working with a wire network
that crosses multiple drawing files. If you are working with wire networks that
jump to one or more additional drawings, click Freshen to update the wire
connectivity database with any out-of-date files.
4(Optional) To connect additional components directly to a given terminal,
select the components and the terminal (marked with a “t” in the
left-hand column) in the Wire Connection Sequence list and click Add.
A copy of the terminal and the actual component move to the
Direct-to-Terminal Secondary Sequences list at the bottom of the dialog
box. You can then click Move Up or Move Down to change the order of
the sequence (if you selected two or more devices plus a terminal) or
remove a sequence by selecting the sequence and clicking Reset.
5Click OK-new.
Writes the sequence information back to the component wire connections
(as Xdata on the wire connection attributes and optionally to terminal
symbols in the case of Direct-to-Terminal Secondary sequencing).
6(Optional) Right-click a wire on the wire network and select Wire Sequence
➤ Show Wire Sequence. Press the spacebar to advance through the
sequence.
You can also view the results of your sequencing by running the Wire
From/To report.
Show a defined wire sequence
Show the defined wire sequence on the selected wire network. You can also
right-click any wire segment in the wire network to access this tool.
1030 | Chapter 12 Wire/Wire Number Tools
1Click Schematic tab ➤ Edit Wires/Wire Numbers panel ➤ ➤
Wire Sequence drop-down ➤ Show Wire Sequence.
NOTE You can also access this tool by right-clicking on any wire segment in
the wire network.
2Press the Space bar to step through the defined wire sequence.
NOTE If the wire sequence crosses multiple drawings and you try to view the
sequence as an animation, a dialog box listing the off-drawing wire connection
information displays so that you can indicate to go to the other drawings to
continue viewing the sequence.
Insert wire tee markers
Use the tee marker tools to insert dot tee markers or angled tee markers at
existing wire tee intersections. If a tee marker is present, the tools change
existing markers from dot to angled or from angled to dot. This dot and angled
tee insertion happens automatically when you use the Insert Wire tool and
the drawing is set up (in the Drawing Properties ➤ Styles dialog box) for dots
or angled tee symbols at intersections.
You cannot insert a tee connection symbol into empty space. A valid line wire
ending (not crossing) at a tee intersection somewhere along the length of
another line wire is needed. It does not insert a tee connection symbol at a
simple 90-degree wire turn. You can right-click on any inserted tee markers
for access to editing tools such as Toggle Angled Tee Markers, Delete
Component, Scoot, or Insert Wire.
Insert dot tee markers
Inserts wire connection dots at tee intersections.
Replaces any existing angled wire connection symbol with a dot connection
symbol. To insert the dot tee markers automatically as each wire tee
intersection is created, set the default Wire Tee connection in the Wiring Style
section of the Drawing Properties: Styles dialog box.
Control from/to report connection sequencing | 1031
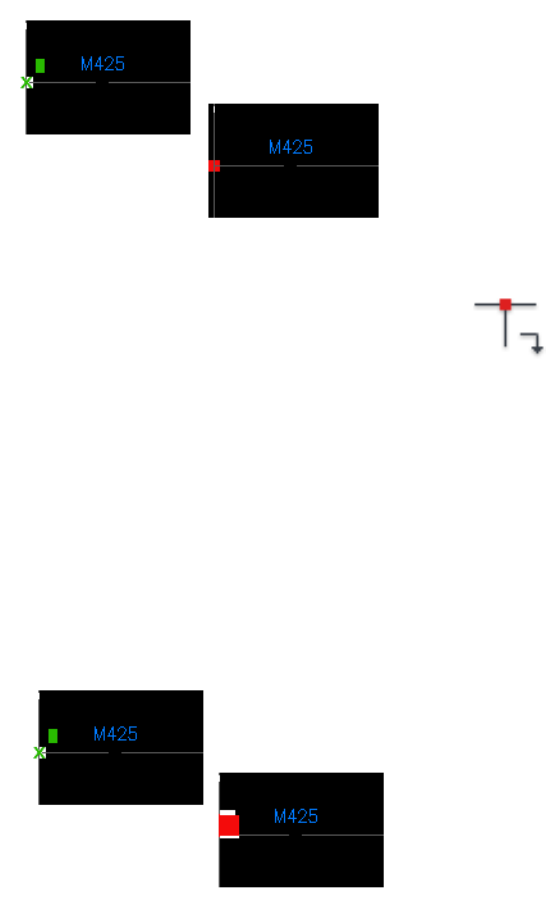
1Click Schematic tab ➤ Insert Wires/Wire Numbers panel ➤ Insert Dot,
Tee Markers drop-down ➤ Insert Dot Tee Markers.
2Select at or near the intersection point.
Right-click on the marker and select Delete Component to remove an
inserted tee connection symbol and heal the wires.
Insert angled tee markers
Inserts an angled tee connection symbol at an existing wire intersection.
Replaces any existing dot wire connection symbol with an angled connection
symbol. To insert the angled tee markers automatically as each wire tee
intersection is created, set the default Wire Tee connection in the Wiring Style
section of the Drawing Properties: Styles dialog box.
1032 | Chapter 12 Wire/Wire Number Tools
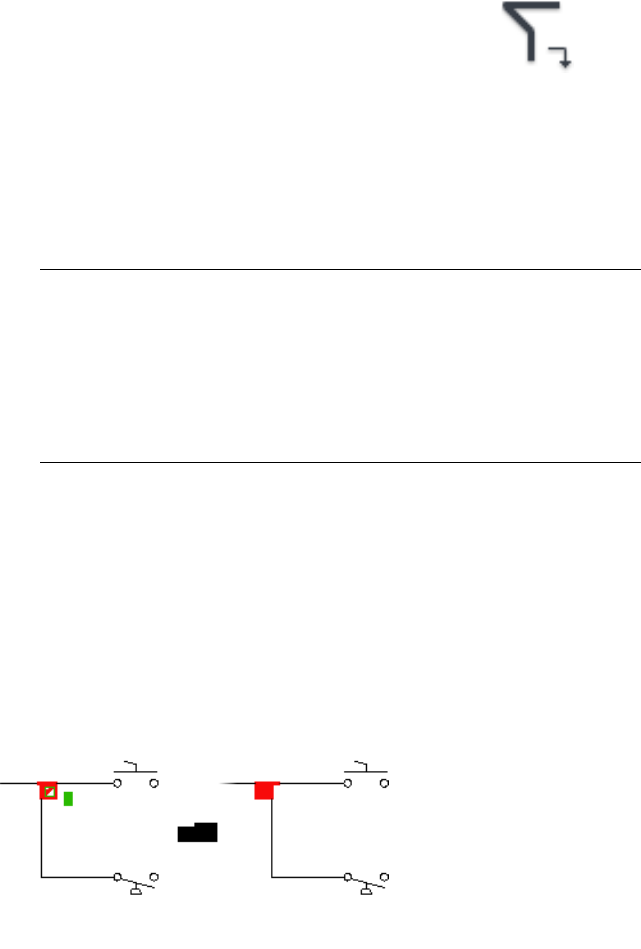
1Click Schematic tab ➤ Insert Wires/Wire Numbers panel ➤ Insert Dot,
Tee Markers drop-down ➤ Insert Angled Tee Markers.
2Select at or near the intersection point.
If a dot marker is present, it is deleted and replaced by the angled tee
symbol.
3After the symbol inserts and reconnects to the wiring, press the spacebar
or Enter to switch the inserted tee through four different orientations.
Press Esc when the appropriate orientation displays.
NOTE To change the orientation of the tee symbol after insertion, right-click
on the marker and select Toggle Angled Tee Markers (or select the tool from
the ribbon or toolbar). To customize the appearance of these symbols, edit
the tee symbols stored in the selected schematic symbol library. These tee
symbol names are HT0_###.dwg and VT0_###.dwg where # = combinations
of 1,2,4, and 8. Each symbol carries attribute WDWSEQ with a three-digit
value indicating wire connection sequence priority for the three wire
connection points of the symbol.
Right-click the marker and select Delete Component to remove an inserted
tee connection symbol and heal the wires.
Toggle angled tee markers
Toggles an existing angled tee connection symbol, or windowed symbols,
through a total of four possible orientations.
Right-click or press the spacebar to step through the various tee connection
orientations. Press ESC when the appropriate orientation displays.
Control from/to report connection sequencing | 1033
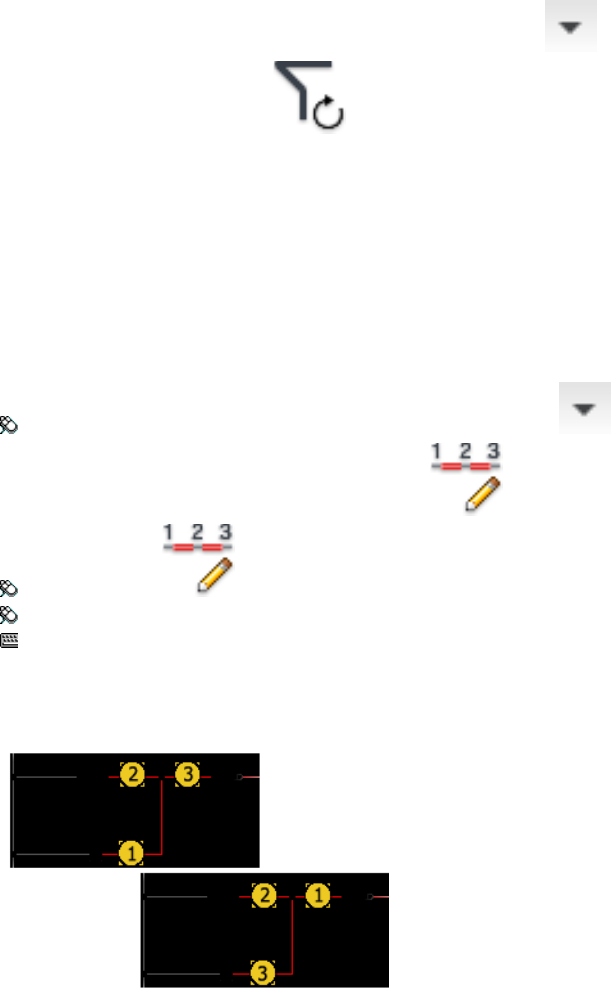
1Click Schematic tab ➤ Edit Wires/Wire Numbers panel ➤ ➤
Toggle Angled Tee Markers.
2Select or window the tee connections to change.
3Right-click or press the spacebar to toggle through the various tee
connection orientations, and press Esc when the appropriate one displays.
Replaces any dot tee symbols with angled tee symbols and then cycles
through the four possible orientations for each.
Edit wire connection sequence
Defines a wire connection sequence to control wire from/to reporting.
Ribbon: Schematic tab ➤ Edit Wires/Wire Numbers panel ➤ ➤
Wire Sequence drop-down ➤ Edit Wire Sequence.
Toolbar: Wires
Menu: Wires ➤ Wire Miscellaneous ➤ Edit Wire Sequence
Command entry: AEEDITWIRESEQUENCE
Predefine the connection sequence of a wire network. The network can be
fully contained on the active drawing, or can pass across multiple drawings
using signal source/destination symbols.
1034 | Chapter 12 Wire/Wire Number Tools

Defining the sequence gives you control over how AutoCAD Electrical analyzes
the circuits including:
■The order of the contents in the WFRM2ALL table in the project database
file
■How from/to connection information is output to various reports
■Annotation on physical footprint representations (using the Wire
Annotation of Panel Footprint on page 1588 tool).
NOTE You can also access it by right-clicking on any segment of a wire network
and selecting Wire Sequence ➤ Edit Wire Sequence.
Provides these features to define the sequence order:
■Sort the components by physical location.
■Move the components up or down in the listing.
■Pick mode, in the active drawing only, where you pick the wire connection
points to define the connection sequence.
Once you specify the sequencing, you can use the Show Wire Sequences tool
to view the sequence or use the Wire From/To reporting tool to see how the
sequencing is reported.
NOTE Your dialog box differs depending on whether you selected to modify the
sequence of a wire network that is connected to a terminal. When a terminal is
part of the selected wire network, you have an option to define secondary
Direct-to-Terminal wire connection sequences.
Lists the wires and terminals found in the circuit.
The * indicates that the wire is on another drawing
Wire Connection Sequence
and the “t” indicates that the entry is a terminal
and a candidate for a direct-to-terminal secondary
sequence definition.
NOTE Components connected on the far side of
a terminal (on a side opposite of the picked wire
network) are not displayed in the list, even if the
terminal is one that does not change the wire
number through it.
Control from/to report connection sequencing | 1035

Defines the sequence by actual picks at or very near
each wire connection point. Pick near each wire
Pick Mode
connection in the order of how you want the wiring
sequence to proceed from component to compon-
ent.
NOTE Pick Mode is unavailable when you are
working with a wire network that crosses multiple
drawing files.
Automatically sorts the wire connection display by
the installation and location values. If previously
sorted, the sort is reversed.
Sort Location
Moves the selected wire connection up one space
in the wire order list.
Move Up
Moves the selected wire connection down one
space in the wire order list.
Move Down
Lists additional sequences where a component
connection (or terminal connection) is to be repor-
ted as being directly wired to a selected terminal.
Direct-to-Terminal Secondary Sequences
Moves the selected components to the Direct-to-
Terminal Secondary Sequences list along with a
Add
copy of the selected terminal. Select the compon-
ents and terminal to sequence together for this
button to be available.
If you select multiple components to daisy-chain
to the terminal (by holding CTRL key down), the
first selected component displays ties directly to
the terminal.
(available only when an entry in the sequence is
highlighted) Removes the selected sequencing from
Reset
the Direct-to-Terminal Secondary Sequences list.
The component is moved back to the Wire Connec-
tion Sequence list.
Indicates whether the component is undefined (-),
reported on the internal side of the terminal (I) or
Connection
reported on the external side of the terminal (E). If
1036 | Chapter 12 Wire/Wire Number Tools

selected, an I or E displays in the PD1 or PD2
column (Point Description) of the Wire From/To
report.
Updates the wire connectivity database (the
WFRM2ALL table) with wire connection information
from any out-of-date files.
Freshen
NOTE If all drawings are up-to-date, this button is
disabled. If not, the button is enabled and the count
of out-of-date drawings displays next to the button.
Removes the wire connection sequence override
information from a wire network. It consists of
Remove All
Xdata assignments on component wire connection
attributes and optional Xdata assignments on ter-
minal symbols if any Direct-to-Terminal sequences
are defined.
NOTE If the network includes one or more IEC-
style wire “Tee” connection symbols, the sequen-
cing defined by their placement and orientation is
not affected. The result is that values may remain
in the Current column.
Applies the wire connection sequence information
in the form of Xdata to the wire connection points
OK-new
and terminals of the selected wire network. This
sequence data is then maintained inside the draw-
ing file. It is later extracted into the project scratch
database file to control the format of wire connec-
tions listed in the WFRM2ALL table.
Control from/to report connection sequencing | 1037
1038

Terminal Tools
Insert terminals and connectors
Terminal symbols on the schematic are a representation of wire connection
points. The terminal symbol representation on the schematic can have
associations with the physical terminal block on the panel drawing. To insert
a terminal, select the Insert Component command to display the icon menu,
and then select Terminals/Connectors.
There are four types of terminal behavior that you can select from and five main
terminal styles (square, round, hexagon, diamond, and triangle). Each type of
terminal behavior is controlled by the terminal block name.
Non-intelligent terminals. They do not show up in reports.
*//
Terminals that take on a terminal number that matches the wire number passing
through or connected to the terminal.
Terminals that carry a user-defined terminal number.
Terminals that force a new wire number to generate as a wire passes through
the terminal.
13
1039
Insert terminals
You can select from five main terminal styles (square, round, hexagon,
diamond, and triangle). Each type of terminal behavior is controlled by the
terminal block name.
1Click Schematic tab ➤ Insert Components panel ➤ Insert Components
drop-down ➤ Icon Menu.
2Click the Terminals/Connectors button.
3Select a terminal symbol to insert.
4Specify the insertion point.
5On the Insert/Edit Terminal Symbol dialog box, annotate the terminal
symbol including (but not limited to) the terminal number, tag strip
value, and catalog information.
Insert/edit terminal symbol
Annotates the terminal by tracking which terminal numbers and terminal
strip ID names were used so far.
Insert Component
Ribbon: Schematic tab ➤ Insert Components panel ➤ Insert Components
drop-down ➤ Icon Menu.
Toolbar: Main Electrical
Menu: Components ➤ Insert Component
Command entry: AECOMPONENT
Select Terminals and Connectors, select the terminal to insert, and specify the
insertion point on the drawing.
1040 | Chapter 13 Terminal Tools
Edit Component
Ribbon: Schematic tab ➤ Edit Components panel ➤ Edit Components
drop-down ➤ Edit.
Toolbar: Main Electrical
Menu: Components ➤ Edit Component
Command entry: AEEDITCOMPONENT
Select the terminal to edit.
Terminal
These controls determine the overall tagging of the terminal block in the
project. The Installation, Location, and Tag Strip values define which strip
the terminal belongs to. The symbol block file name displays at the top of the
Terminal group.
NOTE Assign short installation or location codes to components like "PNL" and
"FIELD" to take full advantage later of the AutoCAD Electrical ability to create
installation or location-specific Bill of Materials and component lists.
Changes the installation codes. Click Browse to
search the active drawing, entire project, and an
Installation
external list (default.inst) for installation codes. Pick
from the list to update the component automatic-
ally with the installation code.
Changes the location codes. Click Browse to search
the active drawing, entire project, and an external
Location
list (default.loc) for location codes. Pick from the
list to update the component automatically with
the location code.
Specifies the Tag ID given to the terminal strip. If
there is an existing name, it appears in the edit box;
if not, you can enter a specific ID name.
Tag Strip
Click the < and > buttons to increment or decre-
ment the last digit/character in the Tag Strip value.
Insert terminals and connectors | 1041

Specifies the terminal number. If there is not PIN-
LIST information, the < and > buttons increment
Number
or decrement the terminal number. You can also
click Pick to select a text object or an attribute on
the active drawing to use for the terminal number.
When inserting a new terminal, the highest terminal
number in the strip is identified and the default
terminal number for the new terminal increments
by 1.
NOTE This is unavailable when the terminal symbol
does not have a TERM01 attribute or when the
terminal number is the same as the wire number.
Modify Properties/Associations
These controls support associations between schematic terminal symbols and
their panel terminal footprint or between multiple schematic terminal symbols.
There are certain conditions that you cannot associate terminals using the
Modify Properties/Associations options:
■The drawing is not part of the active project.
■You are using the Insert Terminal (Panel List) tool. However, once you exit
the Insert Terminal (Panel List) tool and the terminal is inserted onto the
drawing, you can modify the associations using these tools.
■The terminals were inserted by the Terminal Strip Editor tool.
■The terminals are one-line terminal symbols.
Displays the Add/Modify Associations dialog box
where you can select terminal strips and their re-
Add/Modify
spective blocks to make an association to the ter-
minal symbol being inserted or edited.
NOTE It is disabled if the active drawing is not part
of the active project.
Selects another terminal symbol on the active
drawing to associate to. You can select only one
terminal symbol to make the association.
Pick
1042 | Chapter 13 Terminal Tools

NOTE While in selection mode, you can use Pan
or Zoom to find the terminal symbol to select.
Removes the terminal being edited out of the
defined association. The properties from the original
Break Out
association and the levels of the terminal are
maintained.
Displays the Block Properties dialog box where you
can define and maintain terminal block properties.
Block Properties
NOTE It is disabled if the active drawing is not part
of the active project.
Properties/Associations
The list box displays the current status of the association of the edited terminal.
It lists all associated terminal symbols from the schematic and terminal panel
footprints. If the terminal symbol is being inserted for the first time, the list
box only displays the reference for itself. The number of levels defined in the
block properties displays at the top of the Properties/Associations group. The
terminal being edited is highlighted in the list box.
You can double-click in the list to modify the terminal association in the
Add/Modify Associations dialog box.
Lists the level description defined in the terminal
block properties. This data is entered into the
Label
LnnLABEL attribute if present; otherwise, it is placed
into xdata.
Lists the terminal numbers defined in the associ-
ation. Only one terminal number is allowed per
Number
level and each level displays its respective terminal
number or text. Panel terminal symbols do not
display terminal numbers.
Lists the pin numbers defined on the left side of the
terminal block. This data is entered into the
PinL
LnnPINL attribute if present; otherwise, it is placed
into xdata.
Insert terminals and connectors | 1043

Lists the pin numbers defined on the right side of
the terminal block. This data is entered into the
PinR
LnnPINR attribute if present; otherwise, it is placed
into xdata.
Lists the reference location of the terminal symbol
in the project. The syntax is ‘Sheet,Reference’ based
on the drawing configuration.
Reference
NOTE This area is disabled if the terminal is a one-line symbol. Multi-level or panel
relationships are not supported for one-line terminals.
Project List
These controls allow for quick selection of terminal strips and terminal
numbers used throughout the active project.
Shows all the previously defined terminal strips in
the active project.
Project List
When inserting a new terminal, this list is populated
with the Installation, Location and TAGSTRIP values
of the previously inserted terminal.
Lists all terminal numbers found, either drawing-
wide or project-wide, whose Tag Strip value
matches the highlighted Tag Strip value.
Numbers Used
Catalog Data
You can do a drawing-wide or project-wide listing of similar terminals with
their catalog assignments. During your editing session, the last MFG / CAT /
ASSYCODE assignment for each terminal type you insert into your wiring
diagram is remembered. When you insert another terminal of that type, the
catalog assignment of the previous terminal is set as the default (assuming a
previous one was made during the current editing session).
Lists the manufacturer name for the terminal. Enter a value or
select one from the Catalog lookup.
Manufacturer
Lists the catalog number for the terminal. Enter a value or select
one from the Catalog lookup.
Catalog
1044 | Chapter 13 Terminal Tools
Lists the assembly code for the terminal. The Assembly code is
used to link multiple part numbers together.
Assembly
Specifies a unique identifier assigned to each terminal. The value
can be manually typed in the edit box.
Item
Opens the catalog database of the terminal from which you can
select the Manufacturer and Catalog values. Search the database
for a specific catalog item to assign to the selected terminal.
Catalog Lookup
Lists the part numbers used for similar terminals in the active
drawing.
Drawing
Lists the part numbers used for similar terminals in the project.
You can search in the active project, another project, or in an
external file.
Project
■Active project: All the drawings in the active project are
scanned and the results are listed in a dialog box. Select from
the list to assign your new terminal with a catalog number
that is consistent with other similar terminals in the project.
■Other project: Scans each listed drawing in a previous project
for the target terminal type and returns the catalog informa-
tion in a sub-dialog box. Make your catalog assignment by
picking from the list.
■External file: You can pull catalog assignments from a gen-
eric ASCII file created by a word processor or output from a
spreadsheet or database program. A dialog box displays the
contents of the selected text file. Find and highlight the de-
sired entry. AutoCAD Electrical reads the line of text from the
file and breaks it into its component parts. These are displayed
in the left-hand list. For each relevant item, highlight it and
then pick the appropriate category button in the center
column. The highlighted item is transferred to the correspond-
ing category (and then to the Insert/Edit dialog box once OK
is clicked).
Inserts or edits extra catalog part numbers on to the selected
terminal. You can add up to ten part numbers to any terminal.
Multiple Catalog
These multiple BOM part numbers appear as subassembly part
numbers to the main catalog part number in the various BOM
and terminal reports.
Insert terminals and connectors | 1045

Extracts the details from the catalog database to display what the
selected item looks like in a Bill of Material template.
Catalog Check
Descriptions
Specifies the optional description attribute text to assign to the terminal block
(up to three lines of text can be specified). Click Browse to search for all
terminal descriptions in the project or active drawing. Select the description
you want to copy to the edited terminal block by selecting it in the list and
clicking OK.
NOTE These edit boxes are disabled if the terminal does not carry the attributes
(such as ratings).
Opens an ASCII text file (wd_desc.wdd or <pro-
ject>.wdd) from which you can select standard
descriptions.
Defaults
Picks a description from a component on the cur-
rent drawing.
Pick
Ratings
You can enter up to 12 ratings attributes on a component. The View/Edit
Rating Values dialog box lets you enter values for each ratings attribute. Select
the Defaults button next to the edit box to display a list of default values.
NOTE If this button is unavailable, the component you are editing does not carry
any rating attributes.
Show/Edit Miscellaneous
View or edit any attributes that are not predefined AutoCAD Electrical
attributes.
Add/modify associations
This tool searches project terminal strips for existing terminal blocks, allowing
you to associate a terminal symbol to an existing association or terminal.
1046 | Chapter 13 Terminal Tools

Insert Component
Ribbon: Schematic tab ➤ Insert Components panel ➤ Insert Components
drop-down ➤ Icon Menu.
Toolbar: Main Electrical
Menu: Components ➤ Insert Component
Command entry: AECOMPONENT
Select Terminals and Connectors from the dialog box and specify the insertion
point on the drawing. In the Insert/Edit Terminal Symbol dialog box, Modify
Properties/Associations section, click Add/Modify.
Edit Component
Ribbon: Schematic tab ➤ Edit Components panel ➤ Edit Components
drop-down ➤ Edit.
Toolbar: Main Electrical
Menu: Components ➤ Edit Component
Command entry: AEEDITCOMPONENT
Select the terminal to edit. In the Insert/Edit Terminal Symbol dialog box,
Modify Properties/Associations section, click Add/Modify.
NOTE This option is also available from the Panel Layout - Insert/Edit Terminal
Footprint dialog box.
Modifications to the terminal symbol associations affect every terminal symbol
in the association so all drawings must be available for editing. You cannot
edit other terminal associations from this dialog box; only the associations of
the selected terminal symbol can be edited.
Insert terminals and connectors | 1047

Active Association
Use this section to modify the terminal number. The Installation, Location,
and Tag Strip values are not editable.
Displays the Installation value defined for the edited
terminal symbol.
Installation
Displays the Location value defined for the edited
terminal symbol.
Location
Displays the tag strip value defined for the edited
terminal symbol.
Tag Strip
(Unavailable for panel terminals) Specifies the ter-
minal number. The displayed value is defined in
the TERM01 attribute on the terminal symbol.
Number
NOTE If this value is the wire number defined in
the WIRENO attribute on the terminal symbol, you
cannot change the value.
Displays all terminal symbols that are currently as-
sociated to the terminal being edited. The terminal
Active Associations grid
symbol that is being edited is highlighted in light
blue. Right-click on a terminal symbol to move it
up or down one level or select a terminal symbol
and drag it to a new level location. Label and Pin
information do not move with the terminal symbol
number and reference since it is part of the terminal
block property definition.
NOTE The panel symbol association is always at
the bottom and cannot be selected for movement.
■Level numbering: Displays a level number for
each level that is defined in the terminal prop-
erties. The level numbering for the panel sym-
bol is “#.”
■Label: Lists the level description defined in the
terminal block properties.
■Number: Lists the terminal numbers defined
in the association. Only one terminal number
is allowed per level and each level displays its
respective terminal number or text. Panel ter-
1048 | Chapter 13 Terminal Tools

minal symbols do not display terminal numbers.
Terminal levels with an assignment and a ter-
minal that has not been assigned a terminal
number display a “???” in this column.
■PinL: Lists the pin numbers defined on the left
side of the terminal block. This data is entered
into the LnnPINL attribute if present; otherwise,
it is placed into Xdata.
■PinR: Lists the pin numbers defined on the right
side of the terminal block. This data is entered
into the LnnPINR attribute if present; otherwise,
it is placed into Xdata
Pin numbering is related to the terminal
level and not the terminal tag number
instance.
■Reference: Lists the reference location for the
terminal symbol in the project. The syntax is
“Sheet,Reference” based on the drawing con-
figuration.
Select Association
Displays all terminal strips inside of the active pro-
ject. The tree contains three nodes to aid in finding
Terminal Strips
a specific terminal block in the project. The nodes
are: active project name, Tag Strip value (Installa-
tion and Location included) and terminal blocks.
■Active Project node: Displays the name of the
active project.
■Tag Strip Value node: Displays the
entire Installation, Location, and Tag Strip val-
ues for all terminal strips in the active project.
The terminal block quantity displays at the end
of the node string in parenthesis.
■ or Terminal Block node: Dis-
plays the terminal numbers defined on the
block (separated by commas). The number of
Insert terminals and connectors | 1049

levels defined in the block properties displays
at the end of the node string in parenthesis.
For example, 1,21,GND (3).
If a level is not represented on the
schematic, an empty space represents
it: 1, , GND (3). If a terminal has been
assigned to the level, but the terminal
does not have a number assignment, a
‘???’ represents it: 1,???,GND (3).
Displays all levels of the terminal selected in the
tree. Select the level to place the edited terminal
Select Association grid
in and right-click to run the associate command (or
click Associate).
Adds the edited terminal symbol to the terminal
association. A terminal number is then inserted into
Associate
the Number column and the Reference column is
updated with the terminal reference defined in the
drawing properties.
NOTE The grid row must be selected before you
can perform the association.
This option is unavailable until you select a level in
the grid control when editing a schematic terminal
or until you select a terminal from the tree control
when editing a panel footprint. A grid selection is
not required for panel footprints since the footprint
is associated to the entire terminal, not an individual
level.
Terminal block properties
Use this dialog box to control the number of levels assigned to a multiple level
terminal block. You can control the level description, number of wires per
connection, pins right, pins left and internal jumpers. The terminal block
properties are maintained on every terminal symbol in its association.
1050 | Chapter 13 Terminal Tools
Insert Component
Ribbon: Schematic tab ➤ Insert Components panel ➤ Insert Components
drop-down ➤ Icon Menu.
Toolbar: Main Electrical
Menu: Components ➤ Insert Component
Command entry: AECOMPONENT
Select Terminals and Connectors from the dialog box and specify the insertion
point on the drawing. In the Insert/Edit Terminal Symbol dialog box, click
Block Properties.
Edit Component
Ribbon: Schematic tab ➤ Edit Components panel ➤ Edit Components
drop-down ➤ Edit.
Toolbar: Main Electrical
Menu: Components ➤ Edit Component
Command entry: AEEDITCOMPONENT
Select the terminal to edit. In the Insert/Edit Terminal Symbol dialog box,
click Block Properties.
NOTE You can also access this dialog box by clicking Edit Terminal Block Properties
on the Terminal Strip Editor dialog box.
The default level for any terminal symbol that is placed into the project that
is not associated to another is 0.
Displays the Manufacturer value that is currently assigned to the terminal
being edited.
Manufacturer
Displays the Catalog Number value that is currently assigned to the
terminal being edited.
Catalog Number
Insert terminals and connectors | 1051

Displays the Assembly Code value that is currently assigned to the ter-
minal being edited.
Assembly Code
Specifies the number of levels for the terminal. The grid expands for
editing based on the number of levels specified. You can then define
the level description, wires per connection and pins.
Levels
Displays the terminal levels. You can edit and maintain properties of the
terminal block here.
Terminal Block Property
Definition grid
■Level Description: Specifies the description for the levels of the
terminal block. Text you enter here displays in the Insert/Edit Ter-
minal Symbol and Terminal Block Properties dialog boxes. This value
is a terminal property that is maintained on every symbol in its asso-
ciation.
■Wires per Connection: Specifies the number of wires allowed per
connection for the terminal connection point.
NOTE These properties do not limit the number of connec-
tions allowed on the schematic.
■Pin Left/Pin Right: Specifies labels for pin numbers associated to
the terminal destinations. These fill in the LnnPINL and LnnPINR
attributes on the terminal block when its level is selected. This value
is a terminal property that is maintained on every symbol in its asso-
ciation.
■Internal Jumper: Graphically indicates internal jumpers assigned
between levels.
Internally jumper the levels currently selected in the grid.
Delete the internal jumper currently assigned to the levels selected in
the grid
Clears all terminal block properties.Clear
NOTE Properties for a level cannot be cleared if there is a schematic
terminal representing that level (other than the terminal being edited),
or there is an external jumper on that level.
1052 | Chapter 13 Terminal Tools

Terminal block property attributes
The values in the grid are stored as follows. The “nn” represents the level
number and is always stored as two digits (that is, 01, 02, and so on):
AttributeData
LnnLABELLevel Description (60 characters maximum)
LnnWIREPERCWires Per Connection (three characters maximum)
LnnPINLPin Left (12 characters maximum)
LnnPINRPin Right (12 characters maximum)
LnnINJUMPInternal Jumper
(255 characters maximum)
NOTE If these attributes are not present, the data is placed into Xdata with the
same name, only with a “VIA_WD_” prefix.
Multi-Level Terminals
Overview of terminal relationships
AutoCAD Electrical supports two types of relationships for terminals:
schematic-to-schematic and schematic-to-panel.
NOTE Since one-line terminal symbols likely represent multiple, independent
terminals, they cannot be associated to other schematic or panel terminals. A
one-line terminal must be updated manually. A one-line terminal symbol is defined
by a WDTYPE attribute on page 325 value of “1-”.
Schematic-to-Schematic
The schematic-to-schematic relationship defines separate schematic terminal
symbols as one multi-level (also referred to as multi-tier or multi-stack) terminal
block. On the schematic drawing, each schematic terminal symbol represents
one level of the multi-level terminal block.
NOTE Multiple terminal symbols for one level are not currently supported.
Multi-Level Terminals | 1053
The number of levels for the block is defined as a block property. Each level
carries certain characteristics, such as a label, wires per connection, left pin,
and right pin. Each schematic terminal symbol carries all the block properties
for each level so that removing one terminal symbol does not remove the
block properties. If a block property is modified, all the terminal symbols
update.
An ID value held on the LINKTERM attribute or Xdata, associates the terminal
symbols. When a terminal symbol is inserted, by default it is seen as a
standalone terminal (it has no associations) and receives a new LINKTERM
value. When the terminal is associated to another, the LINKTERM value
updates so that each terminal carries the same LINKTERM value. Changing
or removing the LINKTERM value breaks any associations that terminal has.
To associate schematic terminals, first add block properties. The number of
terminals you can associate is limited to the number of levels defined in the
block properties. Once block properties are established you can associate
schematic terminals to build a multi-level terminal block by:
■Click Schematic tab ➤ Edit Components panel ➤ ➤ Associate
Terminals.
You select a master terminal and then select each terminal symbol to
associate to the master.
■Clicking Pick on the Insert/Edit Terminal Symbol dialog box. It adds the
edited symbol into an association with the picked terminal.
■Clicking Add/Modify on the Insert/Edit Terminal Symbol dialog box. It
adds the edited symbol into an association with any schematic terminal
in the project.
Prebuilt circuits can contain associated terminals. These relationships are
maintained when the circuit is inserted. Copying a circuit also maintains these
relationships within the copied circuit.
When the Bill of Materials report is run, these separate terminal symbols that
make up one multi-level terminal, are counted as one in the quantity.
Schematic-to-Panel
The schematic-to-panel relationship is used mainly for updating. If the
schematic or panel is modified, the other updates to reflect the changes. This
1054 | Chapter 13 Terminal Tools
relationship is like component relationships, which are based on the TAG
value. The TAGSTRIP, Installation, and Location values must match for the
terminals to associate together. The association number on the LINKTERM is
also taken into account when creating a relationship between the schematic
terminal and its panel representation. Block properties are not required to
associate a schematic to panel terminal. Once they are associated, modifications
on one results in modifications on the other.
You can associate a schematic and panel terminal automatically by:
■Click Panel tab ➤ Terminal Footprints panel ➤ ➤ Insert
Terminals drop-down ➤ Insert Terminal (Schematic List).
■Click Schematic tab ➤ Insert Components panel ➤ Insert Components
drop-down ➤ Terminal (Panel List).
For multi-level terminals, the Insert Terminal (Schematic List) tool shows only
one terminal for insertion regardless of how many schematic terminal
symbols/levels there are for that multi-level block. The Insert Terminal (Panel
List) tool shows one terminal for each level for insertion.
NOTE Panel terminals inserted by the Terminal Strip Editor are automatically
associated to the schematic representation.
You can click the Associate terminals on page 1055 tool to select terminals to
associate or click Add/Modify on the Panel Layout - Terminal Insert/Edit dialog
box to add the panel terminal to an association with a schematic terminal on
any drawing in the project.
Associate terminals
Use the Associate Terminals tool to associate two or more terminal symbols
together. Associating schematic terminals combines the terminals into a single
terminal block property definition. The number of schematic terminals that
can be combined is limited to the number of levels defined for the block
properties.
Associating a panel terminal provides a way to define a particular panel
footprint to represent a schematic block property definition.
Overview of terminal relationships | 1055
1Click Schematic tab ➤ Edit Components panel ➤ ➤ Associate
Terminals.
2Select a terminal symbol to use as the master. It is used as the basis for
any terminal property definition.
NOTE Your terminal symbol must have block properties defined. To define
block properties, right-click on the symbol and select Edit Component. In
the Insert/Edit Terminal Symbol dialog box, click Block Properties.
3Select additional terminal symbols to add to the association of the master
terminal.
4Press Enter to associate the terminals.
The catalog data, block properties, Tagstrip value, Installation code and
Location code are copied from the master terminal and added to the
terminals in the association.
NOTE If the number of selected terminals exceeds the total number of levels
defined in the block properties, an alert displays and the extra terminals are not
added to the association.
Tips and Hints
■This tool works on terminal symbols on the same drawing only.
■If the master terminal is already part of another association, the existing
association is maintained and the newly selected terminal symbols join
the association.
■If the selected terminals are part of their own association, they are removed
from the association and added to the new association with the selected
master terminal.
■Terminals placed onto the drawing using the Terminal Strip Editor cannot
be added to an association using this tool.
1056 | Chapter 13 Terminal Tools
Show terminal associations
Use the Show Terminal Associations tool to display the current associations
for the selected terminals. AutoCAD Electrical draws temporary lines between
the associated terminals. These graphics disappear the next time you do a
Regen.
1Click Schematic tab ➤ Edit Components panel ➤ ➤ Show
Terminal Associations.
2Select the terminals you want to view the associations of.
Red dashed lines are drawn between the terminals that are associated to
the selected terminal. A list of the associated terminals also displays at
the command prompt.
Break apart terminal associations
Use the Break Apart Terminal Associations tool to break a terminal symbol
out of an existing association. Schematic terminals are removed from any
multi-tier relationship and any schematic-panel relationships. Panel terminals
are removed from any schematic-panel relationships.
NOTE The properties of the existing terminal association are maintained on each
symbol.
1Click Schematic tab ➤ Edit Components panel ➤ ➤ Break Apart
Terminal Associations.
2Select the terminal to remove from the association. Repeat for each
terminal you want to break out of its associations.
3Press Enter.
Copy terminal block properties
Use the Copy Terminal Block Properties tool to copy terminal properties from
one terminal symbol to another. If the application of the terminal properties
Overview of terminal relationships | 1057
reduces the number of levels and the number of schematic terminal symbols
in the association exceeds the total allowed, an alert displays and the properties
are not copied.
1Click Schematic tab ➤ Edit Components panel ➤ ➤ Copy
Terminal Block Properties.
2Select the master terminal to copy properties from.
3Select the terminals to apply the properties to.
4Press Enter.
Terminal Properties Lookup
Overview of terminal properties database
The terminal properties database file (_TERMPROPS table in the
default_cat.mdb) can be viewed, edited, and expanded using the Terminal
Properties Database Editor tool. The terminal properties table holds the
terminal properties based on the manufacturer, catalog, and assembly code
entries. When a catalog assignment is made to a terminal, it looks to the
terminal properties table for a matching entry and pulls out and assigns the
properties when a match is found. The following wild cards are supported in
the catalog field:
■* = matches any characters
■? = matches a single character
■# = matches a single numeric digit
■@ = matches a single alphabetic character
Structure of the terminal properties database table
(Microsoft Access internal use)RECNUM
1058 | Chapter 13 Terminal Tools

Manufacturer code (value must be consistent with
the catalog lookup files; 24 characters maximum)
MANUFACTURER
Catalog number (use wild cards as much as pos-
sible; 60 characters maximum)
CATALOG
AutoCAD Electrical internal assembly code (must
be consistent with the catalog lookup files; 60
characters maximum)
ASSEMBLYCODE
Number of levels for the terminalLEVELS
Levels description/level definition (255 characters
maximum)
LEVELDESCRIPTION
Pin label definition for the left side of the terminal
(255 characters maximum)
TPINL
Pin label definition for the right side of the terminal
(255 characters maximum)
TPINR
Definition of the wiring constraints (255 characters
maximum)
WIRESPERCONNECTION
Levels within a multi-tier terminal that are jumpered
together. A comma (,) is used as a delimiter
INTERNALJUMPER
between each level within a jumper definition. A
semicolon (;) is used as a delimiter between jumper
definitions within a terminal.
For example, if all levels of a four-level terminal are
jumpered together, the value is “1,2,3,4”. If levels
1 and 2 are jumpered together, and 3 and 4 are
jumpered together, the value is “1,2;3,4”.
NOTE When dealing with a multi-tier terminal, a comma (,) is used as a delimiter
for the LevelDescription, WiresPerConnection, TPINR, and TPINL fields. For example,
the LevelDescription may be “UPPER,LOWER” and the WiresPerConnection may
be “2,2.”
Overview of terminal properties database | 1059
Edit terminal properties database
Use the Terminal Properties Database Editor tool to edit the terminal properties
database, located in the catalog database.
1Click Schematic tab ➤ Other Tools panel ➤ ➤ Database Editors
drop-down ➤ Terminal Properties Database Editor.
2In the Select Terminal Properties Table dialog box, select the table to edit
and click Edit.
NOTE You can also create a table by entering the manufacturer name in the
edit box and clicking Create.
3In the Edit dialog box:
■To edit a record, click Sort, Filter, or Find to search for the record to
edit. Select the record from the list and click Edit.
■To create a record, click Add New, or select an existing record and
click Add Copy to create a record based on an existing one.
■To delete an existing record, select the record in the list and click
Delete.
4To edit or create a record, in the Edit Record dialog box, specify the values
to assign to the record and click OK.
5In the Edit dialog box, click Save/Exit.
Select terminal properties table
Use this tool to select the relevant _TERMPROPS table to edit or create a new
one.
Ribbon: Schematic tab ➤ Other Tools panel ➤ ➤ Database
Editors drop-down ➤ Terminal Properties Database Editor.
Menu: Components ➤ Terminals ➤ Terminal Properties Database Editor
1060 | Chapter 13 Terminal Tools

Command entry: AETERMDBEDITOR
Lists all of the TERMPROPS tables that are in the
catalog database. The “(Default)” manufacturer is
used to edit the generic _TERMPROPS table.
Select or Type Manufacturer
Select the table to edit or enter a name for a new
one.
Displays the proper table name in the catalog
database. This text changes depending on which
Table
manufacturer is selected. For example, if you select
SQD, then _TERMPROPS_SQD displays.
(Available only when you enter the name of a
manufacturer.) Creates a table in the catalog data-
Create
base with the specified name and adds the table
to the list of manufacturers. Once a table is created,
the Edit (Table: _TERMPROPS_manufacturer) dialog
box displays so you can edit the new table.
NOTE The following characters are not allowed in
the table name: ~ @ # $ % ^ & * - + = \ { } “ ‘ ; : ?
/ < > , ! [ ] |. These characters are replaced with an
underscore (_) if entered in the edit box.
(available only after a manufacturer is selected from
the list) Opens the Edit (Table: _TERMPROPS_man-
Edit
ufacturer) dialog box so you can edit the selected
TERMPROPS table.
Edit
AutoCAD Electrical consults a terminal properties database table when a catalog
assignment is made to a terminal. Use it to edit the terminal properties
database.
Ribbon: Schematic tab ➤ Other Tools panel ➤ ➤ Database
Editors drop-down ➤ Terminal Properties Database Editor.
Menu: Components ➤ Terminals ➤ Terminal Properties Database Editor
Command entry: AETERMDBEDITOR
Overview of terminal properties database | 1061
Specify the table to create and click Create or select the table to edit and click
Edit.
This lookup database table is a table within the catalog lookup Access .mdb
file. The default file name is default_cat.mdb, table _TERMPROPS, and comes
populated with a sample of vendor data. You can expand this table as needed.
Use your own copy of Microsoft Access or use this dialog box to add new
entries, add entries based on existing entries, edit, and delete entries from the
table.
Sorts the list of database records using either an alphanumeric sort
or number values. You can specify four sorts to perform on the list.
Sort
Find the next instance of the text you enter. Select to look in the entire
table or a specific field. Select to match the entire field, part of the
Find
field, or just the beginning of the field with the entered text. Choose
to make it case sensitive by clicking Match case.
Indicates to replace the find value with the new text string that you
specify.
Replace
Filters the listing based on certain values in the table. Picking the
blank entry in the list removes the filter for that field. After you define
the values to filter, apply the filter in the database editing window.
Filter
Displays the Edit Record dialog box for modifying the existing record
in the database.
Edit
Displays the Edit New Record dialog box for entering a new record
into the database.
Add New
Displays the Edit Copied Record dialog box for modifying and copying
the record to make a new record. You cannot have two duplicate
copies in the database.
Add Copy
Removes the selected record from the database.Delete
Edit record
1062 | Chapter 13 Terminal Tools

Ribbon: Schematic tab ➤ Other Tools panel ➤ ➤ Database
Editors drop-down ➤ Terminal Properties Database Editor.
Menu: Components ➤ Terminals ➤ Terminal Properties Database Editor
Command entry: AETERMDBEDITOR
Specify the table to create and click Create or select the table to edit and click
Edit. In the Edit dialog box, click Add New, Add Copy, or Edit.
(Microsoft Access internal use)RECNUM
Manufacturer code (value must be consistent with
the catalog lookup files; 24 characters maximum)
MANUFACTURER
Catalog number (use wild cards as much as pos-
sible; 60 characters maximum).
CATALOG
AutoCAD Electrical internal assembly code (must
be consistent with the catalog lookup files; 60
characters maximum)
ASSEMBLYCODE
Number of levels for the terminalLEVELS
Levels description/level definition (255 characters
maximum)
LEVELDESCRIPTION
Pin label definition for the left side of the terminal
(255 characters maximum)
TPINL
Pin label definition for the right side of the terminal
(255 characters maximum)
TPINR
Definition of the wiring constraints (255 characters
maximum)
WIRESPERCONNECTION
Definition of levels jumpered together within a
multi-tier terminal. (255 characters maximum)
INTERNALJUMPER
A comma (,) is used as a delimiter between each
level within a jumper definition. A semicolon (;) is
Overview of terminal properties database | 1063
used as a delimiter between jumper definitions
within a terminal.
For example, if all levels of a four level terminal are
jumpered together, the value is “1,2,3,4”. If levels
1 and 2 are jumpered together, and 3 and 4 are
jumpered together, the value is “1,2;3,4”.
When dealing with a multi-tier terminal, a comma (,) is used as a delimiter
for the LevelDescription, TPINL, TPINR, and WiresPerConnection fields. For
example, the LevelDescription may be “UPPER, LOWER” and the
WiresPerConnection may be “2,2.”
Terminal Strip Editor
Use the terminal strip editor
Use terminal blocks to connect devices that require quick disconnect or
disassembly during product shipment, while at other times they can be used
to distribute power to other devices. The Terminal Strip Editor defines the
locations for these connected devices during the system design process.
Terminal strip editing is primarily used towards the end of the control system
design cycle to expedite the labeling, numbering, and rearranging of terminals
on a terminal strip.
A document that is created to facilitate the construction of a terminal strip
and all of its wiring is a terminal strip layout drawing. These drawings display
the general arrangement of all the terminal blocks that belong to a specific
terminal strip. You can also display the wiring and device connection
information next to the terminal block symbol using the Terminal Strip Editor.
You can rely on the terminal strip layout drawing for all information regarding
the terminal strip without having to reference the schematic drawings.
The Installation (INST), Location (LOC) and Tag Strip (TAG_STRIP) values are
used to determine the uniqueness of a terminal strip no matter which standard
is used in the active project (such as IEC or JIC).
After changes are made with the Terminal Strip Editor, the changes are written
back to the schematic drawing for future updates, and a graphical or tabular
drawing of a terminal strip layout is created. Your drawing must be part of
the active project to perform updates.
1064 | Chapter 13 Terminal Tools

NOTE If you change an existing graphical terminal strip, the Terminal Strip Editor
requires that the terminal strip is refreshed or placed on a drawing in the active
project so the information is saved.
If the Terminal Strip Editor encounters an error and is unable to start, a log
file (named TSE_Error_<date and time>.log) is created in the same location as
the project file. The log information includes details about the user name,
project name, date, time, terminal strip tag, installation, and location. It also
includes details about the specific terminal such as the drawing it is on, the
handle of the terminal, and the issue with the terminal.
Wiring Constraints
The Terminal Strip Editor can add or remove extra terminals based on the
assigned wiring constraints. Wiring constraints is the limitation of the number
of wires that can be connected to a particular device (for example, terminal).
When modifying terminals, you can assign the number of wires allowed for
each side of the terminal in the Wires Per Connection section of the Terminal
Block Properties dialog box.
Extra terminals get placed only when editing a terminal using the Terminal
Strip Editor. Once you define the Wires Per Connection value, the Terminal
Strip Editor checks to see if there are more wires/devices connected to a side
of the terminal than what is allowed. If it finds the defined constraint to
exceed, the Terminal Strip Editor adds an additional terminal and moves the
destination that is exceeding the constraint to the new terminal. The new
terminal has the same destination, property, and catalog assignment as the
original terminal. The moved destination is placed in the same level of the
new terminal as it was in the original terminal. The extra terminals are reflected
in the Bill of Materials.
When a terminal strip is edited with the Terminal Strip Editor, the need for
extra terminals is re-evaluated and they are removed if the constraints are no
longer exceeded. If the main footprint terminal is removed from the
association, the extras are removed.
Insert a terminal strip using the Terminal Strip Editor
1Click Panel tab ➤ Terminal Footprints panel ➤ Editor.
2On the Terminal Strip Selection dialog box, click New.
Use the terminal strip editor | 1065

NOTE If you want to use the Installation, Location, and Tag Strip values from
an existing terminal, select the terminal before you click New.
3On the Terminal Strip Definition dialog box, specify the Installation code,
Location code, Tag Strip value, and number of terminal blocks to define
on the terminal strip.
4Click OK.
5Select the tab to edit: Terminal Strip, Catalog Code Assignment, Cable
Information, or Layout Preview.
■Terminal Strip tab: Modify the terminal block properties, spare
terminals, accessories, multi-level terminals, and destination locations.
■Catalog Code Assignment tab: In addition to what can be done in
the Terminal Strip tab, you can assign, delete, copy, or paste catalog
part numbers to terminal blocks.
■Cable Information tab: View the terminal destination locations based
on the cable assignments. Modify the terminal block properties, spare
terminals, and terminal tag or number.
■Layout Preview tab: Create graphical terminal strip or table object
drawings of the selected terminal strip. You can preview the terminal
strip in the Preview window before inserting the terminal strip.
6On the Layout Preview tab, click Insert.
7Specify the terminal strip insertion point on the drawing.
Select a terminal strip to edit
Modifies existing or creates new terminal strips. Produces graphical or tabular
representations.
Modifies an entire terminal strip or individual terminals. Assigns catalog values,
resequences terminal numbers, adds jumpers and jumper charts, adds spares
and accessories. Inserts or updates graphical or tabular terminal strip layouts.
1066 | Chapter 13 Terminal Tools
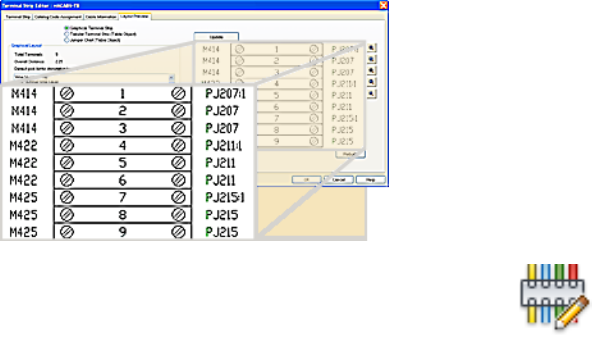
1Click Panel tab ➤ Terminal Footprints panel ➤ Editor.
2Select which terminal strip to edit on the Terminal Strip Selection dialog
box and click Edit.
3Select the tab to edit: Terminal Strip, Catalog Code Assignment, Cable
Information, or Layout Preview.
■Terminal Strip tab: Modify the terminal block properties, spare
terminals, accessories, multi-level terminals, and destination locations.
■Catalog Code Assignment tab: In addition to what can be done in
the Terminal Strip tab, you can assign, delete, copy, or paste catalog
part numbers to terminal blocks.
■Cable Information tab: View the terminal destination locations based
on the cable assignments. Modify the terminal block properties, spare
terminals, and terminal tag or number.
■Layout Preview tab: Create graphical terminal strip or table object
drawings of the selected terminal strip. You can preview the terminal
strip in the Preview window before inserting the terminal strip.
4Modify the terminal strip and click OK.
To place the terminal strip, click Insert on the Layout Preview tab. You
can also click Rebuild or Refresh to update the edited graphical or table
object terminal strip in place.
Use the terminal strip editor | 1067

Insert a terminal strip table in multiple sections
A terminal strip table can be added through the Terminal Strip Editor or with
the Terminal Strip Table Generator tool. A terminal strip can be split into
multiple table sections by changing your table settings.
Terminal Strip Editor
1Click Panel tab ➤ Terminal Footprints panel ➤ Editor.
2Make your selection on the Terminal Strip Selection dialog box and click
Edit.
3Click the Layout Preview tab.
4Select Settings.
5Enter the number of rows you want for each section. If the table break
falls between rows within one terminal definition, the entire terminal
definition is placed in the next table section. This results in a table section
with fewer rows than defined.
NOTE If the terminal definition is the first one in the section and exceeds the
number of rows per section, the entire terminal definition is kept together in
one section.
6Specify how many table sections you want to place on each drawing.
Unless you insert all the sections on the active drawing, new drawings
are created for the table sections.
7 Specify the X and Y placement or select the Pick Point button to
pick a point on the drawing. This value is used for the first table section
on each drawing.
8Specify the distance you want between each section if you are placing
more than one section per drawing.
9Specify the direction to place each section after the first table section.
10 Specify the offset base point. This option indicates whether you want the
distance value measured from insertion point to insertion point, or the
gap between the sections.
1068 | Chapter 13 Terminal Tools
11 Specify the file name for the first drawing. The last character of the file
name is incremented for each new drawing.
12 (Optional) Specify a template file to use.
13 Click OK.
Terminal Strip Table Generator
1Click Panel tab ➤ Terminal Footprints panel ➤ Table Generator.
2Select Settings.
3Enter the number of rows you want for each section. If the table break
falls between rows within one terminal definition, the entire terminal
definition is placed in the next table section. This results in a table section
with fewer rows than defined.
NOTE If the terminal definition is the first one in the section and exceeds the
number of rows per section, the entire terminal definition is kept together in
one section.
4Specify how many table sections you want to place on each drawing.
Unless you insert all the sections on the active drawing, new drawings
are created for the table sections.
5 Specify the X and Y placement or select the Pick Point button to
pick a point on the drawing. This value is used for the first table section
on each drawing.
6Specify the distance you want between each section if you are placing
more than one section per drawing.
7Specify the direction to place each section after the first table section.
8Specify the offset base point. This option indicates whether you want the
distance value measured from insertion point to insertion point or the
gap between the sections.
9Specify the file name for the first drawing. The last character of the file
name is incremented for each new drawing.
Use the terminal strip editor | 1069
10 (Optional) Specify a template file to use.
11 Click OK.
Assign a jumper
Use this method to assign an external jumper between one or more terminals
within the same terminal strip.
1Click Panel tab ➤ Terminal Footprints panel ➤ Editor.
2Select which terminal strip to edit on the Terminal Strip Selection dialog
box and click Edit.
3Select the terminal rows you wish to jumper together. If you wish to
jumper to a specific level within a multi-level terminal, select the row for
just that level.
NOTE The rows you select are considered one jumper and can receive only
one catalog assignment.
4 Select the Assign Jumper tool.
5(Optional) Enter catalog data on the Edit/Delete Jumpers dialog box.
6Select OK.
NOTE Use the Edit Jumper on page 1123 tool to jumper terminals that belong to
different terminal strips.
Insert a jumper chart
A jumper chart is a terminal strip inserted on a drawing as a table object
specifically to view jumpers within a terminal strip. An existing jumper chart
is refreshed automatically when the graphical terminal strip is updated or
reinserted using the Insert, Rebuild, or Refresh commands within Terminal
Strip Editor or Terminal Strip Table Generator.
1070 | Chapter 13 Terminal Tools

1Click Panel tab ➤ Terminal Footprints panel ➤ Editor.
2Select which terminal strip to edit on the Terminal Strip Selection dialog
box and click Edit.
3Select the Layout Preview tab.
4Select Jumper Chart (Table Object).
5Select your options:
■Table Style: Select from a list of table styles.
■Define Columns: Define the columns to include, column order, column
titles, and the jumper circles display.
■Row Style: Define specific row styles to use for the selected table style
■Layer: Define the specific layer for the table.
■Table Title: Define a title for the table by entering text, selecting from
a list of variables, or a combination.
■Display: Select what to include.
6Select Insert. You can also click Rebuild or Refresh to update the jumper
chart in place.
NOTE You can insert or update a jumper chart by pointing at a panel terminal,
right-clicking, and selecting Insert Jumper Chart from the menu. The last saved
settings for the jumper chart are used.
Terminal strip selection
Displays terminal strips inside of the active project. The combination of
Installation, Location, and Terminal Strip values make a complete unique
record for selection in the Terminal Strip Selection dialog box.
Ribbon: Panel tab ➤ Terminal Footprints panel ➤ Editor.
Toolbar: Panel Layout
Use the terminal strip editor | 1071
Menu: Panel Layout ➤ Terminal Strip Editor
Command entry: AETSE
NOTE Empty fields from the schematic display empty boxes in the selection
window to indicate that no value was defined by the user in the schematic drawing.
Sort the entire table by selecting the individual column headers. Do any of
the following:
■To edit a terminal strip, select the terminal strip and click Edit.
■To create a terminal strip, click New.
■To create a terminal strip based on an existing one, select the terminal
strip and click New.
Terminal strip definition
This dialog box controls the naming of the terminal strip, Installation and
Location codes, and default options for the terminal blocks being created.
Ribbon: Panel tab ➤ Terminal Footprints panel ➤ Editor.
Toolbar: Panel Layout
Menu: Panel Layout ➤ Terminal Strip Editor
Command entry: AETSE
On the Terminal Strip Selection dialog box, click New.
Use the following options to create a terminal strip definition that was not
placed into the schematic. Some of the properties are written to each terminal
symbol on the graphical terminal strip layout drawing.
Specifies the Installation code value for the new
terminal strip. Click Browse to display a list of exist-
Installation
ing installation values found in the active drawing,
entire project, or an external list (default.inst). Pick
from the list to update the component automatic-
ally with the installation code.
Specifies the Location code value for the new ter-
minal strip. Click Browse to display a list of existing
Location
1072 | Chapter 13 Terminal Tools

location values found in the active drawing, entire
project, or an external list (default.inst). Pick from
the list to update the component automatically
with the location code.
Specifies the strip tag name for the new terminal
strip. You cannot have duplicate terminal strip
names in the active project.
Terminal Strip
Specifies the number of blocks the terminal strip is
made up of. This value is not maintained on any of
Number of Terminal Blocks
the terminal symbols in the graphical terminal strip
layout.
If the Installation and Location values are left blank, the terminal strip is
created using only the strip tag name. The Installation (INST), Location (LOC)
and Tag Strip (TAG_STRIP) values are used to determine the uniqueness of a
terminal strip no matter which standard is used in the active project (such as
IEC or JIC).
Terminal strip editor: terminal strip tab
Modifies terminal numbering, sorting, and destination settings. The terminals
display in the center of the list box, with the destinations on both sides.
Ribbon: Panel tab ➤ Terminal Footprints panel ➤ Editor.
Toolbar: Panel Layout
Menu: Panel Layout ➤ Terminal Strip Editor
Command entry: AETSE
Make your selection on the Terminal Strip Selection dialog box and click Edit
or New. Click the Terminal Strip tab.
You can sort the terminal blocks inside of the Terminal Strip Editor dialog
box by selecting the column headers. The first click on the header sorts the
column in ascending order. The second click sorts in descending order. The
sort criteria applies to all tabs inside of the Terminal Strip Editor dialog box
so you do not have to sort again if you switch between tabs.
Use the terminal strip editor | 1073
Terminal Listing
There are three sections to the grid: Internal Destination, Terminal Block
Information, and External Destination. The bold vertical grid lines make it
easier to determine the differences in these sections. The horizontal grid lines
delineate between wires connected to the terminal blocks. Each row indicates
one wire per side. The bold horizontal grid lines make it easier to distinguish
separations between terminal blocks on the strip.
Select the terminal blocks for editing. Multiple blocks can be selected using
either the Shift or Control key while highlighting rows, or by clicking and
dragging the mouse.
NOTE You can right-click any row in the terminal listing to access any of the
editing tools found in the button groupings at the bottom of the dialog box. You
can also right-click to select or deselect all of the terminals in the strip.
Displays the devices on the left side of the terminal strip.Internal Destination
Displays the terminal block number, terminal device pin
connection descriptions and jumpers. These values display
Terminal Block Information
in the Terminal Listing with a blue background indicating
that they are associated to the terminal block.
NOTE Internal jumpers are indicated with squares and are
on the left side. External jumpers are indicated with circles
and are on the right side.
Displays the devices on the right side of the terminal strip.External Destination
A single line entry terminal block has only two wires connected with its
destinations on opposing sides (left/right). Use the terminal block properties
to connect more wires to the terminal block, which changes the block into a
multiple-line terminal entry.
Properties
Defines or edits terminal block properties. When a
multi-level terminal block is selected, the properties
Edit Terminal Block Properties
are edited for all levels of the terminal. The defined
properties are assigned to every terminal symbol in
its association.
You can define up to 99 terminal levels in the block
properties.
1074 | Chapter 13 Terminal Tools
Copies terminal block properties from one terminal
to paste into another terminals.
Copy Terminal Block Properties
Pastes the previously copied terminal block properties
into the selected terminals.
Paste Terminal Block Properties
Terminal
Modifies the selected terminal block. Any modifica-
tions to the ID (Installation, Location, Terminal Strip)
Edit Terminal
removes the terminal block from its current terminal
strip into the modified or newly defined terminal strip.
You can perform a search of the project for current
installation and location codes.
Moves the highlighted terminal blocks from the active
terminal strip to the terminal strip defined in the Reas-
Reassign Terminal
sign Terminal dialog box. You can perform a search
of the project for current installation and location
codes.
Renumbers all, or a partial list, of terminal blocks from
the active terminal strip. On the Renumber Terminal
Renumber Terminals
Strip dialog box, specify the new starting number and
other options for renumbering the terminal.
NOTE You cannot renumber a terminal that uses a
wire number as its terminal number. Additionally,
duplicate terminal numbers are not restricted.
Moves an entire terminal (including all levels and any
extra terminals created due to wiring constraints) on
Move Terminal
the terminal strip. You can move the terminal block
up or down in the listing or manually pick a new pos-
ition on the terminal strip listing.
Spare
Inserts spare terminal blocks on the active terminal
strip. Use the Insert Spare Terminal dialog box to
Insert Spare Terminal
define a terminal block number or name, specify the
Use the terminal strip editor | 1075
number of spares to insert, and to insert the spare
terminals previous or below the highlighted terminal.
You can add up to 10,000 spare terminals into the
terminal block.
NOTE Spare terminal assignments are temporary for
the current session of the Terminal Strip Editor. Place
the graphical terminal strip layout on the drawing
during the current session if you want to keep the
spare terminal assignments. You are prompted to In-
sert or Rebuild the terminal strip before you can exit
Terminal Strip Editor.
Inserts one or more accessories (such as terminal end
barriers or partitions) into the terminal strip.
Insert Accessory
NOTE Accessory terminal assignments are temporary
for the current session of the Terminal Strip Editor.
Place the graphical terminal strip layout on the draw-
ing during the current session if you want to keep the
accessory terminal assignments. You are prompted to
Insert or Rebuild the terminal strip before you can exit
Terminal Strip Editor.
Deletes the spare terminal block or accessory on the
terminal strip listing.
Delete Spare Terminals/Accessories
Destinations
Toggles an entire location code from an Internal des-
tination to an External destination or from an External
Toggle Location
destination to an Internal destination. You do not have
to select any terminal blocks from the terminal listing.
Toggles an entire installation code from an Internal
destination to an External destination or from an Ex-
Toggle Installation
ternal destination to an Internal destination. You do
not have to select any terminal blocks from the termin-
al listing.
Changes the destination from Internal (left) to External
(right) or from External to Internal.
Toggle Terminal Destinations
1076 | Chapter 13 Terminal Tools

Switches both destination values for the highlighted
terminal block. The Internal destinations switch to the
Switch Terminal Destinations
External (right) destinations, while all External destin-
ations switch to Internal destinations.
Moves the destinations within the terminal/level
definition. All the selected destinations are moved up
Move Destination
or down within the level they belong to. Only the
destinations for cloned blocks due to wire constraints
can cross the boundary of the level they originally
belong to.
Jumpers
Jumpers together the selected terminals or levels.Assign Jumper
Edits a catalog assignment for a jumper, removes ter-
minals or levels from a jumper definition or deletes a
jumper.
Edit/Delete Jumper
Multi-Level
Combines two or more terminal blocks from any
drawing into a single multiple-level terminal block.
Associate Terminals
You are alerted if you select too many levels to associ-
ate. You can then decrease the number of selected
levels or use the Break Apart Terminal Associations
tool to separate out one of the levels in the new asso-
ciation.
Separates one or more levels from the multiple level
terminal block into separate terminal blocks. When
Break Apart Terminal Associations
the new terminal definitions are created, they retain
the same properties as the original terminal.
■One terminal: Breaks the selected levels from
their original association and adds them into a
new association together.
■Separate terminals: Breaks the selected levels
from their original association and adds each level
into a new individual association. These levels
Use the terminal strip editor | 1077

occupy the same level in their new terminal
definition, and new terminals are assigned the
same properties as the original definition from
which they were originally associated in.
Terminal strip editor: catalog code assignment tab
Modifies terminal catalog numbers. The terminals display in the center of the
list box, with associated catalog number information and destinations on
both sides.
Ribbon: Panel tab ➤ Terminal Footprints panel ➤ Editor.
Toolbar: Panel Layout
Menu: Panel Layout ➤ Terminal Strip Editor
Command entry: AETSE
Make your selection on the Terminal Strip Selection dialog box and click Edit
or New. Click the Catalog Code Assignment tab.
You can sort the terminal blocks inside of the Terminal Strip Editor dialog
box by selecting the column headers. The first click on the header sorts the
column in ascending order. The second click sorts in descending order. The
sort criteria applies to all tabs inside of the Terminal Strip Editor dialog box
so you do not have to sort again if you switch between tabs.
Terminal Listing
There are three sections to the grid: Internal Destination, Terminal Block
Information, and External Destination. The bold vertical grid lines make it
easier to determine the differences in these sections. The horizontal grid lines
delineate between wires connected to the terminal blocks; each row indicates
one wire per side. The bold horizontal grid lines make it easier to distinguish
separations between terminal blocks on the strip.
Select the terminal blocks for editing. Multiple blocks can be selected using
either the Shift or Control key while highlighting rows, or by clicking and
dragging the mouse.
1078 | Chapter 13 Terminal Tools
NOTE You can right-click on any row in the terminal listing to access any of the
editing tools found in the button groupings at the bottom of the dialog box. You
can also right-click to select or deselect all of the terminals in the strip.
Displays the devices on the left side of the terminal strip.Internal Destination
Displays the terminal block number, terminal device pin
connection descriptions, jumpers, and catalog data. These
Terminal Block Information
values display in the Terminal Listing with a blue back-
ground indicating that they are associated to the terminal
block.
NOTE Internal jumpers are indicated with squares and are
on the left side. External jumpers are indicated with circles
and are on the right side.
Displays the devices on the right side of the terminal strip.External Destination
A single line entry terminal block has only two wires connected with its
destinations on opposing sides (left/right). Use the terminal block properties
to connect more wires to the terminal block, which changes the block into a
multiple-line terminal entry.
Properties
Defines or edits terminal block properties. When a
multi-level terminal block is selected, the properties
Edit Terminal Block Properties
are edited for all levels of the terminal. The defined
properties are assigned to every terminal symbol in
its association.
You can define up to 99 terminal levels in the block
properties.
Copies terminal block properties from one terminal
to paste into another terminals.
Copy Terminal Block Properties
Pastes the previously copied terminal block properties
into the selected terminals.
Paste Terminal Block Properties
Use the terminal strip editor | 1079
Terminal
Modifies the selected terminal block. Any modifica-
tions to the ID (Installation, Location, Terminal Strip)
Edit Terminal
removes the terminal block from its current terminal
strip into the modified or newly defined terminal strip.
You can perform a search of the project for current
installation and location codes.
Moves the highlighted terminal blocks from the active
terminal strip to the terminal strip defined in the Reas-
sign Terminal dialog box.
Reassign Terminal
Renumbers all, or a partial list, of terminal blocks from
the active terminal strip. On the Renumber Terminal
Renumber Terminals
Strip dialog box, specify the new starting number and
other options for renumbering the terminal.
NOTE You cannot renumber a terminal that uses a
wire number as its terminal number. Additionally,
duplicate terminal numbers are not restricted.
Moves an entire terminal (including all levels and any
extra terminals created due to wiring constraints) on
Move Terminal
the terminal strip. You can move the terminal block
up or down in the listing or manually pick a new pos-
ition on the terminal strip listing.
Spare
Inserts spare terminal blocks on the active terminal
strip. Use the Insert Spare Terminal dialog box to
Insert Spare Terminal
define a terminal block number or name, specify the
number of spares to insert, and to insert the spare
terminals previous or below the highlighted terminal.
You can add up to 10,000 spare terminals into the
terminal block.
1080 | Chapter 13 Terminal Tools
NOTE Spare terminal assignments are temporary for
the current session of the Terminal Strip Editor. Place
the graphical terminal strip layout on the drawing
during the current session if you want to keep the
spare terminal assignments. You are prompted to In-
sert or Rebuild the terminal strip before you can exit
Terminal Strip Editor.
Inserts one or more accessories (such as terminal end
barriers or partitions) into the terminal strip.
Insert Accessory
NOTE Accessory terminal assignments are temporary
for the current session of the Terminal Strip Editor.
Place the graphical terminal strip layout on the draw-
ing during the current session if you want to keep the
accessory terminal assignments. You are prompted to
Insert or Rebuild the terminal strip before you can exit
Terminal Strip Editor.
Deletes the spare terminal block or accessory on the
terminal strip listing.
Delete Spare Terminals/Accessories
Destinations
Toggles an entire location code from an Internal des-
tination to an External destination or from an External
Toggle Location
destination to an Internal destination. You do not have
to select any terminal blocks from the terminal listing.
Toggles an entire installation code from an Internal
destination to an External destination or from an Ex-
Toggle Installation
ternal destination to an Internal destination. You do
not have to select any terminal blocks from the termin-
al listing.
Changes the destination from Internal (left) to External
(right) or from External to Internal.
Toggle Terminal Destinations
Switches both destination values for the highlighted
terminal block. The Internal destinations switch to the
Switch Terminal Destinations
Use the terminal strip editor | 1081

External (right) destinations, while all External destin-
ations switch to Internal destinations.
Moves the destinations within the terminal/level
definition. All the selected destinations are moved up
Move Destination
or down within the level they belong to. Only the
destinations for cloned blocks due to wire constraints
can cross the boundary of the level they originally
belong to.
Jumpers
Jumpers together the selected terminals or levels.Assign Jumper
Edits a catalog assignment for a jumper, removes ter-
minals or levels from a jumper definition or deletes a
jumper.
Edit/Delete Jumper
Multi-Level
Combines two or more terminal blocks from any
drawing into a single multiple-level terminal block.
Associate Terminals
You are alerted if you select too many levels to associ-
ate. You can then decrease the number of selected
levels or use the Break Apart Terminal Associations
tool to separate out one of the levels in the new asso-
ciation.
Separates one or more levels from the multiple level
terminal block into separate terminal blocks. When
Break Apart Terminal Associations
the new terminal definitions are created, they retain
the same properties as the original terminal.
■One terminal: Breaks the selected levels from
their original association and adds them into a
new association together.
■Separate terminals: Breaks the selected levels
from their original association and adds each level
into a new individual association. These levels
occupy the same level in their new terminal
definition, and new terminals are assigned the
1082 | Chapter 13 Terminal Tools
same properties as the original definition from
which they were originally associated in.
Catalog
Assigns catalog part numbers to the selected terminal
blocks, spare terminals, or accessories. The catalog
Assign Catalog Number
number assignments are written back to the schematic
and panel drawings. It displays the Parts Catalog dia-
log box. Once the catalog number is selected from
the Parts Catalog dialog box, the Catalog Manufac-
turer and Part Number are entered into the Terminal
Strip Editor dialog box.
Removes the catalog part numbers previously assigned
to terminal block, spare terminal, or accessory (either
Delete Catalog Number
within the Terminal Strip Editor or the schematic
drawing).
Copies catalog part numbers of one terminal to paste
to other terminal blocks within the Terminal Strip Ed-
itor.
Copy Catalog Number
Pastes catalog part numbers (and terminal block
properties) of one terminal to another single terminal
Paste Catalog Number
or multiple terminal blocks within the Terminal Strip
Editor.
Terminal strip editor: cable information tab
Displays cable previews for terminal blocks. The terminals are displayed in
the center of the list box with the cable name, wire conductor information,
and device destination information on both sides.
Ribbon: Panel tab ➤ Terminal Footprints panel ➤ Editor.
Toolbar: Panel Layout
Menu: Panel Layout ➤ Terminal Strip Editor
Command entry: AETSE
Use the terminal strip editor | 1083

Make your selection on the Terminal Strip Selection dialog box and click Edit
or New. Click the Cable Preview tab.
You can sort the terminal blocks inside of the Terminal Strip Editor dialog
box by selecting the column headers. The first click on the header sorts the
column in ascending order. The second click sorts in descending order. The
sort criteria applies to all tabs inside of the Terminal Strip Editor dialog box
so you do not have to sort again if you switch between tabs.
Terminal Listing
There are three sections to the grid: Internal Destination, Terminal Block
Information, and External Destination. The bold vertical grid lines make it
easier to determine the differences in these sections. The horizontal grid lines
delineate between wires connected to the terminal blocks; each row indicates
one wire per side. The bold horizontal grid lines make it easier to distinguish
separations between terminal blocks on the strip.
Select the terminal blocks for editing. Multiple blocks can be selected using
either the Shift or Control key while highlighting rows, or by clicking and
dragging the mouse.
NOTE You can right-click on any row in the terminal listing to access any of the
editing tools found in the button groupings at the bottom of the dialog box. You
can also right-click to select or deselect all of the terminals in the strip.
Displays the devices on the left side of the terminal strip.Internal Destination
Displays the terminal block number, terminal device pin
connection descriptions, jumpers, and cable information.
Terminal Block Information
These values display in the Terminal Listing with a blue
background indicating that they are associated to the ter-
minal block.
NOTE Internal jumpers are indicated with squares and are
on the left side. External jumpers are indicated with circles
and are on the right side.
Displays the devices on the right side of the terminal strip.External Destination
A single line entry terminal block has only two wires connected with its
destinations on opposing sides (left/right). Use the terminal block properties
to connect more wires to the terminal block, which changes the block into a
multiple-line terminal entry.
1084 | Chapter 13 Terminal Tools
Properties
Defines or edits terminal block properties. When a
multi-level terminal block is selected, the properties
Edit Terminal Block Properties
are edited for all levels of the terminal. The defined
properties are assigned to every terminal symbol in
its association.
You can define up to 99 terminal levels in the block
properties.
Copies terminal block properties from one terminal
to paste into another terminal.
Copy Terminal Block Properties
Pastes the previously copied terminal block properties
into the selected terminals.
Paste Terminal Block Properties
Terminal
Modifies the selected terminal block. Any modifica-
tions to the ID (Installation, Location, Terminal Strip)
Edit Terminal
removes the terminal block from its current terminal
strip into the modified or newly defined terminal strip.
You can perform a search of the project for current
installation and location codes.
Moves the highlighted terminal blocks from the active
terminal strip to the terminal strip defined in the Reas-
sign Terminal dialog box.
Reassign Terminal
Renumbers all, or a partial list, of terminal blocks from
the active terminal strip. On the Renumber Terminal
Renumber Terminals
Strip dialog box, specify the new starting number and
other options for renumbering the terminal.
NOTE You cannot renumber a terminal that uses a
wire number as its terminal number. Additionally,
duplicate terminal numbers are not restricted.
Moves an entire terminal (including all levels and any
extra terminals created due to wiring constraints) on
Move Terminal
the terminal strip. You can move the terminal block
Use the terminal strip editor | 1085
up or down in the listing or manually pick a new pos-
ition on the terminal strip listing.
Spare
Inserts spare terminal blocks on the active terminal
strip. Use the Insert Spare Terminal dialog box to
Insert Spare Terminal
define a terminal block number or name, specify the
number of spares to insert, and to insert the spare
terminals previous or below the highlighted terminal.
You can add up to 10,000 spare terminals into the
terminal block.
NOTE Spare terminal assignments are temporary for
the current session of the Terminal Strip Editor. Place
the graphical terminal strip layout on the drawing
during the current session if you want to keep the
spare terminal assignments. You are prompted to In-
sert or Rebuild the terminal strip before you can exit
Terminal Strip Editor.
Inserts one or more accessories (such as terminal end
barriers or partitions) into the terminal strip.
Insert Accessory
NOTE Accessory terminal assignments are temporary
for the current session of the Terminal Strip Editor.
Place the graphical terminal strip layout on the draw-
ing during the current session if you want to keep the
accessory terminal assignments. You are prompted to
Insert or Rebuild the terminal strip before you can exit
Terminal Strip Editor.
Deletes the spare terminal block or accessory on the
terminal strip listing.
Delete Spare Terminals/Accessories
Destinations
Toggles an entire location code from an Internal des-
tination to an External destination or from an External
Toggle Location
destination to an Internal destination. You do not have
to select any terminal blocks from the terminal listing.
1086 | Chapter 13 Terminal Tools
Toggles an entire installation code from an Internal
destination to an External destination or from an Ex-
Toggle Installation
ternal destination to an Internal destination. You do
not have to select any terminal blocks from the termin-
al listing.
Changes the destination from Internal (left) to External
(right) or from External to Internal.
Toggle Terminal Destinations
Switches both destination values for the highlighted
terminal block. The Internal destinations switch to the
Switch Terminal Destinations
External (right) destinations, while all External destin-
ations switch to Internal destinations.
Moves the destinations within the terminal/level
definition. All the selected destinations are moved up
Move Destination
or down within the level they belong to. Only the
destinations for cloned blocks due to wire constraints
can cross the boundary of the level they originally
belong to.
Jumpers
Jumpers together the selected terminals or levels.Assign Jumper
Edits a catalog assignment for a jumper, removes ter-
minals or levels from a jumper definition or deletes a
jumper.
Edit/Delete Jumper
Terminal strip editor: layout preview tab
Controls a preview display of the terminal strip in graphical or tabular layout.
It helps determine the best way to generate a terminal layout before placing
the image on the drawing file.
Ribbon: Panel tab ➤ Terminal Footprints panel ➤ Editor.
Use the terminal strip editor | 1087
Toolbar: Panel Layout
Menu: Panel Layout ➤ Terminal Strip Editor
Command entry: AETSE
Make your selection on the Terminal Strip Selection dialog box and click Edit
or New. Click the Layout Preview tab.
Graphical Terminal Strip/Table Object Terminal Strip/Jumper Chart
Specifies the type of terminal strip to generate. The dialog box options change
depending on whether you are creating a graphical, tabular, or jumper chart
type of terminal strip.
You can insert an AutoCAD table object as a tabular terminal strip. It allows
for more accurate representations of what is in the Terminal Strip Editor, more
flexibility with the look and style, and provides a means of automatic updating.
You can insert a jumper chart which is an AutoCAD table object representing
the terminal strip with certain columns pre-defined to include any jumpers
defined.
Graphical Layout
Generates a graphical representation including terminal footprints, terminal
numbers, wiring information, and terminal destination information.
Displays the total number of terminal block symbols needed
to create the terminal strip layout.
Total Terminals
Displays the overall distance the terminal strip footprint
takes up when placed on the active drawing.
Overall Distance
Lists some common formatting types. You are not limited
to the selections provided by the default pick list. The re-
Default pick list for Annotation
format
placeable parameter variables can be displayed in any
combination including hard-coded characters such as
dashes, brackets, and parenthesis.
Determines the formatting of the wiring information asso-
ciated with the terminal destination. You can define variable
Annotation Format
information to display the contents of the Terminal Strip
Editor. One field is for the left-hand side, while the other
is for the right-hand side of the terminal footprint.
1088 | Chapter 13 Terminal Tools

NOTE You can leave this field blank if you do not want the
annotation format added to the preview.
Specifies the scale to use when inserting the graphical
representation onto the drawing file.
Scale on Insert
Specifies the angle to use when inserting the graphical
representation onto the drawing file. Select from the list of
pre-defined angles.
Angle on Insert
NOTE The angle and scale values are reflected in the preview.
Tabular Layout for a Table Object
The following options are available if you selected to create a Tabular Terminal
Strip (Table Object).
Specifies the table style to use for the tabular report.
Select from the list or click Browse to browse to and
Table Style
select another drawing file whose table styles you
want to use.
NOTE If the selected table style is not in the
TableStyle.dwg file, it is added.
Defines the columns on page 1110 to include, order,
headings, justification, and jumper circles display
for the tabular report.
Define Columns
Defines specific row styles to use for the selected
table style. On the Select Row Cell Styles dialog
Row Styles
box, select the table style and row cell styles to use
and click OK.
Defines the specific layer for the tabular terminal
strip to place on when inserted. On the Select Table
Layer
Layer dialog box, select the layer name from the
list of layers on the active drawing and click OK.
Defines a title for the table. Enter a title, select from
a list of variables or use a combination of both.
Table Title
When selecting from the list, the selection is added
to the end of the string if one exists in the edit box.
Use the terminal strip editor | 1089
Displays the total number of rows needed to create
the terminal strip table layout. For example, even
Total Rows
though the terminal strip contains only 86 termin-
als, the table format may present more rows in a
multi-line terminal situation.
Displays the number of rows per section as defined
on the Table Settings dialog box.
Number of Rows per Section
Displays the number of sections needed based on
the total rows and the number of rows per section.
Number of Sections
Displays the number of sections to place on each
drawing as defined on the Table Settings dialog
box.
Number of Sections per Drawing
Displays the number of drawings necessary to
generate the terminal strips using the current table
settings.
Number of Drawings
Defines the table settings on page 1093 such as
number of rows per section, number of sections
Settings
per drawing, table, and section placement, section
offset, scale, angle, first drawing name if a new
drawing is needed, and the template to use for any
new drawings generated.
Browses for any saved settings (in a *.tsl file) that
you previously created.
Browse
Saves the settings to an external file (with extension
*.tsl) that you can later reuse. The default folder
Save As
location is the User folder in the Documents and
Settings or Users location.
Uses the default settings for creating the tabular
report.
Default
Slides to change which drawing to preview if your
table settings define a multi-section table that spans
multiple drawings.
Drawing to Preview
1090 | Chapter 13 Terminal Tools

NOTE All table sections are inserted or updated,
not just the table sections in the drawing preview.
NOTE The selections are stored in the table when it is inserted and the next time
the terminal strip is edited, the settings are read back in.
Jumper Chart
The following options are available if you selected to create a Jumper Chart
(Table Object).
Specifies the table style to use for the tabular report.
Select from the list or click Browse to browse to and
Table Style
select another drawing file whose table styles you
want to use.
NOTE If the selected table style is not in the
TableStyle.dwg file, it is added.
Defines the columns to include, order, headings,
justification, and jumper circles display for the
jumper chart.
Define Columns
Defines specific row styles to use for the selected
table style. On the Select Row Cell Styles dialog
Row Styles
box, select the table style and row cell styles to use
and click OK.
Defines the specific layer for the tabular terminal
strip be place on when inserted. On the Select Table
Layer
Layer dialog box, select the layer name from the
list of layers on the active drawing and click OK.
Defines a title for the table. Enter a title, select from
a list of variables or use a combination of both.
Table Title
When selecting from the list, the selection is added
to the end of the string if one exists in the edit box.
Include all terminals and accessories for the terminal
strip in the table.
Display all terminals and accessories
Use the terminal strip editor | 1091

Include only the terminals that are jumpered and
all accessories for the terminal strip in the table,
leaving out any terminals that are not jumpered.
Display only jumpered terminals and accessories
Include only the terminals that are jumpered in the
table, leaving out all accessories and any terminals
that are not jumpered.
Display only jumpered terminals
Select to display all rows for each terminal even if
there is no connected component. The number of
Show Unused Wire Connections in Table
rows is defined by the Wires per Connection value
for the terminal.
NOTE A terminal without any connected compon-
ents has one row in the table.
Specifies the scale and angle of the table sections
when inserted. These settings are reflected in the
preview.
Scale/Angle on Insert
Saves the settings to the file, JumperChart.tjc, that
is used whenever a jumper chart is inserted or re-
Save
built. The folder location is the User folder which
by default is in the Documents and Settings or Users
folder.
Uses the default settings for creating the jumper
chart.
Default
You can also insert or refresh a jumper chart from the right-click menu. Select
a panel terminal, right-click, and select Insert Jumper Chart. If there is an
existing jumper chart for the terminal strip a dialog box opens. Select Insert
or Refresh from the dialog box. Pick an insertion point if you are inserting
the jumper chart.
Update
Refreshes the preview window with any changes made with the preview
controls or the Terminal Strip Editor. If you modify the settings for the output,
you can refresh the preview.
1092 | Chapter 13 Terminal Tools

Use icons or the right-click menu to zoom and pan inside of the preview
window.
Increases the apparent size of the objects in the pre-
view.
Zoom In
Decreases the apparent size of the objects in the pre-
view.
Zoom Out
Zooms to display the terminal strip extents.Zoom Extents
Restores the original view.Zoom Original
Zooms to display an area specified by a rectangular
window.
Zoom Window
Insert
Places the terminal strip.
Rebuild
Updates an existing terminal strip that was previously inserted by the Terminal
Strip Editor in place. If the terminal strip exists in the project, the terminal
strip is located, deleted and rebuilt in place without prompting you to select
a new insertion point.
Refresh
(Not available for graphical terminal strips.) Refreshes the data within an
existing tabular terminal strip. A new table is not inserted.
Terminal strip table settings
Use the terminal strip editor | 1093
Defines the settings for the Terminal Strip table object.
Terminal Strip Editor
Ribbon: Panel tab ➤ Terminal Footprints panel ➤ Editor.
Toolbar: Panel Layout
Menu: Panel Layout ➤ Terminal Strip Editor
Command entry: AETSE
Make your selection on the Terminal Strip Selection dialog box and click Edit.
Click the Layout Preview tab and select Tabular Terminal Strip (Table Object).
Click Settings.
Terminal Strip Table Generator
Ribbon: Panel tab ➤ Terminal Footprints panel ➤ Table Generator.
Toolbar: Terminal Footprint
Menu: Panel Layout ➤ Terminal Strip Table Generator
Command entry: AETSEGENERATOR
Specifies how many rows for each table section. If
the table break falls between rows within one ter-
Rows Per Section
minal definition, the entire terminal definition is
placed in the next table section. This results in a
table section with fewer rows than defined.
NOTE If the terminal definition is the first one in
the section and exceeds the number of rows per
section, the entire terminal definition is kept togeth-
er in one section.
Specifies how many table sections to insert on each
drawing. All sections are placed on new drawings
Sections Per Drawing
1094 | Chapter 13 Terminal Tools

unless the option “Insert All Sections on Active
Drawing” is selected.
NOTE The “Insert All Sections on Active Drawing”
option is not available when using the Terminal
Strip Table Generator tool.
Specifies where to place the table in the drawing.
You can enter x and y values or pick a point on the
screen.
Section Placement
Specifies the distance between sections, offset dir-
ection, and the base point for the distance measure-
ment.
Section Offset
■Distance: Specifies the distance between sec-
tions.
■Direction: Specifies the direction for the offset.
■Base Point: Specifies the base point for the
distance measurement between sections.
Specifies the scale and angle of the table sections
when inserted. These settings are reflected in the
preview.
Scale/Angle on Insert
Drawing Information for Table Output ■First Drawing Name: Specifies a starting
drawing file location and file name to use for
the automatic creation of the drawing files. The
drawings are automatically added to the active
project and display at the end of the drawing
list in the Project Manager. The last character
of the drawing file name is incremented for
each drawing created.
■Template: Specifies the template file to use for
any new drawings. Enter a template file name
or click Browse to search for and select a tem-
plate file.
Select to display all rows for each terminal even if
there is no connected component. The Wires per
Show Unused Wire Connections in Table
Connection value for the terminal defines the
number of rows.
Use the terminal strip editor | 1095
NOTE A terminal without any connected compon-
ents has one row in the table.
Opens a preview dialog box to view each drawing
as it will look when generated. All table settings are
reflected in the preview.
Preview
Terminal block properties
Use this dialog box to control the number of levels assigned to a multiple level
terminal block. You can control the level description, number of wires per
connection, pins right, pins left and internal jumpers. The terminal block
properties are maintained on every terminal symbol in its association.
Insert Component
Ribbon: Schematic tab ➤ Insert Components panel ➤ Insert Components
drop-down ➤ Icon Menu.
Toolbar: Main Electrical
Menu: Components ➤ Insert Component
Command entry: AECOMPONENT
Select Terminals and Connectors from the dialog box and specify the insertion
point on the drawing. In the Insert/Edit Terminal Symbol dialog box, click
Block Properties.
Edit Component
Ribbon: Schematic tab ➤ Edit Components panel ➤ Edit Components
drop-down ➤ Edit.
Toolbar: Main Electrical
Menu: Components ➤ Edit Component
Command entry: AEEDITCOMPONENT
1096 | Chapter 13 Terminal Tools

Select the terminal to edit. In the Insert/Edit Terminal Symbol dialog box,
click Block Properties.
NOTE You can also access this dialog box by clicking Edit Terminal Block Properties
on the Terminal Strip Editor dialog box.
The default level for any terminal symbol that is placed into the project that
is not associated to another is 0.
Displays the Manufacturer value that is currently assigned to the terminal
being edited.
Manufacturer
Displays the Catalog Number value that is currently assigned to the
terminal being edited.
Catalog Number
Displays the Assembly Code value that is currently assigned to the ter-
minal being edited.
Assembly Code
Specifies the number of levels for the terminal. The grid expands for
editing based on the number of levels specified. You can then define
the level description, wires per connection and pins.
Levels
Displays the terminal levels. You can edit and maintain properties of the
terminal block here.
Terminal Block Property
Definition grid
■Level Description: Specifies the description for the levels of the
terminal block. Text you enter here displays in the Insert/Edit Ter-
minal Symbol and Terminal Block Properties dialog boxes. This value
is a terminal property that is maintained on every symbol in its asso-
ciation.
■Wires per Connection: Specifies the number of wires allowed per
connection for the terminal connection point.
NOTE These properties do not limit the number of connec-
tions allowed on the schematic.
■Pin Left/Pin Right: Specifies labels for pin numbers associated to
the terminal destinations. These fill in the LnnPINL and LnnPINR
attributes on the terminal block when its level is selected. This value
is a terminal property that is maintained on every symbol in its asso-
ciation.
■Internal Jumper: Graphically indicates internal jumpers assigned
between levels.
Use the terminal strip editor | 1097

Internally jumper the levels currently selected in the grid.
Delete the internal jumper currently assigned to the levels selected in
the grid
Clears all terminal block properties.Clear
NOTE Properties for a level cannot be cleared if there is a schematic
terminal representing that level (other than the terminal being edited),
or there is an external jumper on that level.
Terminal block property attributes
The values in the grid are stored as follows. The “nn” represents the level
number and is always stored as two digits (that is, 01, 02, and so on):
AttributeData
LnnLABELLevel Description (60 characters maximum)
LnnWIREPERCWires Per Connection (three characters maximum)
LnnPINLPin Left (12 characters maximum)
LnnPINRPin Right (12 characters maximum)
LnnINJUMPInternal Jumper
(255 characters maximum)
NOTE If these attributes are not present, the data is placed into Xdata with the
same name, only with a “VIA_WD_” prefix.
Edit terminal
Edits individual terminals/levels.
Ribbon: Panel tab ➤ Terminal Footprints panel ➤ Editor.
1098 | Chapter 13 Terminal Tools

Toolbar: Panel Layout
Menu: Panel Layout ➤ Terminal Strip Editor
Command entry: AETSE
Make your selection on the Terminal Strip Selection dialog box and click Edit.
On the Terminal Strip, Catalog Code Assignment, or Cable Information tab,
select the level to modify. In the Terminals section, click Edit Terminal.
Changes the installation codes. Click Browse to
display a list of existing installation values found in
Installation Code
the active drawing, entire project, or an external
list (default.inst). Pick from the list to update the
component automatically with the installation code.
Changes the location codes. Click Browse to display
a list of existing location values found in the active
Location Code
drawing, entire project, or an external list (de-
fault.inst). Pick from the list to automatically update
the component automatically with the location
code.
Specifies the Tag ID given to the terminal strip. If
there is an existing name, it appears in the edit box.
Terminal Strip
If not, you can enter a specific ID name or click the
< and > buttons to increment or decrement the last
digit/character in the Tag Strip value.
Specifies the ID number for the terminal. If the
catalog values of the terminal carry PINLIST inform-
Number
ation, you can step through the available pin
numbers using < or >. If there is not PINLIST inform-
ation, these buttons just increment or decrement
the terminal number. You can also click Pick to se-
lect a text object or an attribute on the active
drawing to use for the terminal number.
When inserting a new terminal, the highest terminal
number in the strip is identified and the default
terminal number for the new terminal increments
by 1.
Use the terminal strip editor | 1099
NOTE It is unavailable when the terminal symbol
does not have a TERM01 attribute or when the
terminal number is the same as the wire number.
NOTE Installation Code, Location Code, and Terminal Strip are disabled when
editing an accessory.
Reassign terminal
Reassigns the selected terminals to another terminal strip within the active
project. Multiple selection is allowed.
NOTE Any terminal strips that have terminals added or removed using the Reassign
Terminal tool must be inserted on the drawing or rebuilt. If you did not update
the graphical terminal strip layout for the edited strip, you are prompted to select
the appropriate action from the alert dialog box.
Ribbon: Panel tab ➤ Terminal Footprints panel ➤ Editor.
Toolbar: Panel Layout
Menu: Panel Layout ➤ Terminal Strip Editor
Command entry: AETSE
Make your selection on the Terminal Strip Selection dialog box and click Edit.
On the Terminal Strip, Catalog Code Assignment, or Cable Information tab,
select the terminal to modify. In the Terminals section, click Reassign Terminal.
The default values are representative of the current terminal strip assignment.
As you select terminal strips in the grid, the values in the text boxes update
to reflect your selection. If you enter your own values and a matching terminal
strip does not currently exist, a new one is created.
Specifies the Installation code for the selected ter-
minal. If there is an existing name, it appears in the
Installation Code
edit box. If not, you can enter a new value. Click
Browse to display a list of existing installation values
found in the active drawing, entire project, or an
external list (default.inst). Pick from the list to up-
date the component automatically with the install-
ation code.
1100 | Chapter 13 Terminal Tools
Specifies the Location code for the selected termin-
al. If there is an existing name, it appears in the edit
Location Code
box. If not, you can enter a new value. Click Browse
to display a list of existing location values found in
the active drawing, entire project, or an external
list (default.inst). Pick from the list to update the
component automatically with the location code.
Specifies the Tag ID given to the terminal strip. If
there is an existing name, it appears in the edit box.
If not, you can enter a new value.
Terminal Strip
Renumber terminal strip
Renumbers terminals within a terminal strip. You are prompted to insert the
graphical terminal strip if you renumber a terminal that has one or more levels
still available.
NOTE You cannot renumber a terminal that uses a wire number as its terminal
number. Additionally, duplicate terminal numbers are not restricted.
Ribbon: Panel tab ➤ Terminal Footprints panel ➤ Editor.
Toolbar: Panel Layout
Menu: Panel Layout ➤ Terminal Strip Editor
Command entry: AETSE
Make your selection on the Terminal Strip Selection dialog box and click Edit.
On the Terminal Strip, Catalog Code Assignment, or Cable Information tab,
select the level to modify. In the Terminals section, click Renumber Terminals.
Defines the starting value for the terminal numbers.
This value can be alpha, numeric, or a combination
Terminal Renumber starting with
of both. The default value is the lowest value of the
selected terminals.
Indicates to process the terminals starting with the
last level and work its way back to 1, in order
Start with Bottom Level
(5,4,3,2,1). If unselected, the tool starts with level
1 and moves forward (1,2,3,4,5).
Use the terminal strip editor | 1101

Indicates to process only the terminals that are a
numeric value, all terminals containing an alpha
character are ignored and are not renumbered.
Ignore Alphanumeric Terminals
Indicates to ignore any accessories in the terminal
strip during the renumber command.
Ignore Accessories
Specifies whether to renumber the terminal based
on terminal or level. Per Terminal processes the
Renumber
entire terminal at a time while Per Level processes
each level at a time.
Insert spare terminal
Adds spare terminals to the edited terminal strip.
Ribbon: Panel tab ➤ Terminal Footprints panel ➤ Editor.
Toolbar: Panel Layout
Menu: Panel Layout ➤ Terminal Strip Editor
Command entry: AETSE
Make your selection on the Terminal Strip Selection dialog box and click Edit.
On the Terminal Strip, Catalog Code Assignment, or Cable Information tab,
select a terminal from the list. In the Spare section, click Insert Spare Terminal.
Defines the starting terminal number for inserting
spares. The default value is “SPARE.” Select Incre-
Number
ment if you want to increment the terminal ID
when the spare terminal is inserted. If the quantity
is set to less than 2, you cannot increment the ID.
If you are inserting multi-level terminals as defined
by the catalog assignment, each level of a terminal
receives the same number assignment if you select
Increment. For example, if you insert 3 spare ter-
minals and they are defined as three level terminals,
all three levels on terminal 1 are designated as 1,
2 as 2, and 3 as 3. To modify them, edit the spare
terminal or use the Renumber Terminals tool to get
the numbering format you want.
1102 | Chapter 13 Terminal Tools

Specifies a numeric value for the number of spare
terminals to insert. The default value is 1. Use < or
> to increment the value by a single step.
Quantity
Lists the manufacturer number for the spare termin-
al. Enter a value or select one from the Catalog
lookup.
Manufacturer
Lists the catalog number for the spare terminal.
Enter a value or select one from the Catalog lookup.
Catalog
Lists the assembly code for the spare terminal. The
Assembly code is used to link multiple part numbers
together.
Assembly
Opens the catalog database of the spare terminal
from which you can manually enter or select the
Catalog Lookup
Manufacturer or Catalog values. Search the data-
base for a specific catalog item to assign to the se-
lected spare terminal.
Once you define the starting number and the
number of spare terminals to insert, click Insert
Insert Above/Insert Below
Above to insert the defined spare terminals above
the selected terminal in the grid, or Insert Below to
insert the spares below the selected terminal.
Insert accessory
Inserts terminal accessories such as end barriers and dividers, into the terminal
strip.
Ribbon: Panel tab ➤ Terminal Footprints panel ➤ Editor.
Toolbar: Panel Layout
Menu: Panel Layout ➤ Terminal Strip Editor
Command entry: AETSE
Use the terminal strip editor | 1103

Make your selection on the Terminal Strip Selection dialog box and click Edit.
On the Terminal Strip, Catalog Code Assignment, or Cable Information tab,
select the terminal in the list. In the Spare section, click Insert Accessory.
Defines the starting terminal number for inserting
accessories. Select Increment if you want to incre-
Number
ment the terminal ID when the accessory is inserted.
If the quantity is set to less than 2, you cannot in-
crement the ID.
Specifies a numeric value for the number of accessor-
ies to insert. The default value is 1. Use < or > to
increment the value by a single step.
Quantity
Lists the manufacturer number for the accessory.
Enter a value or select one from the Catalog lookup.
Manufacturer
Lists the catalog number for the accessory. Enter a
value or select one from the Catalog lookup.
Catalog
Lists the assembly code for the accessory. The As-
sembly code is used to link multiple part numbers
together.
Assembly
Opens the catalog database of the accessory from
which you can manually enter or select the Manu-
Catalog Lookup
facturer or Catalog values. Search the database for
a specific catalog item to assign to the selected ac-
cessory.
Once you define the starting number and the
number of accessories to insert, click Insert Above
Insert Above/Insert Below
to insert the defined accessories above the selected
terminal in the grid, or Insert Below to insert the
accessories below the selected terminal.
Toggle location codes
Toggles destinations based on their location codes from one side of the terminal
to the other.
Ribbon: Panel tab ➤ Terminal Footprints panel ➤ Editor.
1104 | Chapter 13 Terminal Tools
Toolbar: Panel Layout
Menu: Panel Layout ➤ Terminal Strip Editor
Command entry: AETSE
Make your selection on the Terminal Strip Selection dialog box and click Edit.
On the Terminal Strip, Catalog Code Assignment, or Cable Information tab,
Destinations section, click Toggle Location.
NOTE If components are present that have a blank value for the location code,
question marks (??) display in the dialog box.
Lists connections to the terminal that reside in the
same location as the terminal.
Internal Destination
Lists connections to the terminal that reside in a
different location than the terminal.
External Destination
Toggles/moves locations from one side of the ter-
minal to the other. Select the location value to
move in either list and click the appropriate button.
Toggle External to Internal/Toggle Internal to
External
Toggle installation code
Toggles destinations based on their installation codes from one side of the
terminal to the other.
Ribbon: Panel tab ➤ Terminal Footprints panel ➤ Editor.
Toolbar: Panel Layout
Menu: Panel Layout ➤ Terminal Strip Editor
Command entry: AETSE
Make your selection on the Terminal Strip Selection dialog box and click Edit.
On the Terminal Strip, Catalog Code Assignment, or Cable Information tab,
Destinations section, click Toggle Installation.
Use the terminal strip editor | 1105
NOTE If components are present that have a blank value for the installation code,
questions marks (??) displays in the dialog box.
Lists connections to the terminal that reside in the
same location as the terminal.
Internal Destination
Lists connections to the terminal that reside in a
different location than the terminal.
External Destination
Toggles/moves locations from one side of the ter-
minal to the other. Select the installation value to
move in either list and click the appropriate button.
Toggle External to Internal/Toggle Internal to
External
Associate terminals
Use this tool to combine two or more terminal blocks from any drawing into
a single multiple-level terminal block. You are alerted if you select too many
levels to associate. You can then decrease the number of selected levels or use
the Break Apart Terminal Associations tool to separate out one of the levels
in the new association.
Ribbon: Panel tab ➤ Terminal Footprints panel ➤ Editor.
Toolbar: Panel Layout
Menu: Panel Layout ➤ Terminal Strip Editor
Command entry: AETSE
Make your selection on the Terminal Strip Selection dialog box and click Edit.
On the Terminal Strip or Catalog Code Assignment tab, select the level to
modify. In the Multi-Level section, click Associate Terminals.
The number of levels you selected to add to the association displays at the
top of the dialog box.
Lists only the terminals that have enough available
levels that can accommodate the number of levels
you chose to associate.
Terminals
Displays the terminal information for the terminal
selected in the tree control.
Terminal grid
1106 | Chapter 13 Terminal Tools

■Level numbering: Displays a level number for
each level that is defined in the terminal prop-
erties. The level numbering of the panel symbol
is a pound symbol (#).
■Label: Lists the level description defined in the
terminal block properties.
■Number: Lists the terminal numbers defined in
the association. Only one terminal number is
allowed per level and each level displays its re-
spective terminal number or text. Panel termin-
al symbols do not display terminal numbers.
Terminal levels with an assignment and a ter-
minal that was not assigned a terminal number
display question marks (???) in this column.
■PinL: Lists the pin numbers defined on the left
side of the terminal block. This data is entered
into the L0nPINL attribute if present; otherwise,
it is placed into xdata.
■PinR: Lists the pin numbers defined on the right
side of the terminal block. This data is entered
into the L0nPINR attribute if present; otherwise,
it is placed into xdata.
Pin numbering is related to the terminal
level and not the terminal tag number
instance.
■Reference: Lists the reference location of the
terminal symbol in the project. The syntax is
“Sheet,Reference” based on the drawing con-
figuration.
Adds the selected terminal symbol to the terminal
association selected on the Terminal Strip Editor
Associate
dialog box. The selections are processed from top
to bottom in the Terminal Strip Editor grid and
populate the available levels in the new association
from the first available once you click OK.
NOTE The grid row must be selected before you
can perform the association.
Use the terminal strip editor | 1107
Moves the selected terminal up or down one level
within the terminal definition.
Move Up/Move Down
Edit/Delete Jumpers
Use this to edit the jumper information, such as catalog data, remove terminals
from a jumper, or delete a jumper.
Ribbon: Panel tab ➤ Terminal Footprints panel ➤ Editor.
Toolbar: Panel Layout
Menu: Panel Layout ➤ Terminal Strip Editor
Command entry: AETSE
Make your selection on the Terminal Strip Selection dialog box and click Edit.
Select the terminals with the jumper defined and select the Edit/Delete Jumper
tool.
Lists all of the jumpers, grouped by Jumper ID, at-
tached to the selected terminal. If this dialog box
Jumpers to Terminals
is used within the Assign Jumper function, only the
jumper being assigned is displayed.
NOTE You cannot assign a jumper between termin-
als from different terminal strips using Terminal
Strip Editor. If a jumper across terminals strips exists,
it is displayed but you cannot modify it using Ter-
minal Strip Editor. It must be modified using the
Edit Jumper on page 1123 tool.
Specifies the catalog data for the jumper between
the primary terminal and the selected terminal.
Catalog Data
■Manufacturer: Specifies the manufacturer
name.
■Catalog: Specifies the catalog number.
■Assembly: Specifies the assembly code.
■Item: Specifies the item value.
■Count: Specifies how the catalog data is used
in the Bill of Materials. When multiple terminals
1108 | Chapter 13 Terminal Tools

are jumpered together, you can have a single
catalog item represent a jumper bar that spans
the selection, or single jumpers between each
terminal.
■Lookup: Displays the catalog database from
which you can select the Manufacturer and
Catalog values.
■Project: Lists the part numbers used for similar
components in the active project.
■Copy: Copies catalog values from the selected
jumper in to memory for this session of Auto-
CAD Electrical, to b paste into another jumper.
■Paste: Paste the previously copied catalog val-
ues into the selected jumpers.
■Clear: Clear catalog values for the selected
jumpers.
Select the jumper label, terminal strip, or a single
terminal to perform one of the following actions:
Delete
■Jumper label: Deletes the jumper from all of
the terminals.
■Terminal strip: Deletes the terminals in that
group from the jumper. If there are no remain-
ing terminals in the group, the jumper is de-
leted.
■Single terminal: Deletes the terminal from the
jumper. If it is the last terminal deleted, the
entire jumper is deleted.
Select row cell styles
Defines row styles to use in the table style. The selections are stored in the
table when it is inserted and the next time the terminal strip is edited, the
settings are read back in.
Ribbon: Panel tab ➤ Terminal Footprints panel ➤ Editor.
Use the terminal strip editor | 1109
Toolbar: Panel Layout
Menu: Panel Layout ➤ Terminal Strip Editor
Command entry: AETSE
Make your selection on the Terminal Strip Selection dialog box and click Edit.
On the Layout Preview tab, select Tabular Terminal Strip (Table Object). Click
Row Styles.
Selects a table style from the active drawing to use.
This overrides what is defined in the Terminal Strip
Editor dialog box.
Table Style
Lists available row cell styles from the selected table
style. Select a specific row style to used for termin-
Terminal
als, spare terminals, and extra terminals that are
inserted due to wiring constraints.
Lists available row cell styles from the selected table
style. Select a specific row style to used for accessor-
ies.
Accessory
Terminal Strip Table Data Fields to Include
Defines the columns for your tabular terminal report. The selections are stored
in the table when it is inserted and the next time the terminal strip is edited,
all of the settings are read back in.
Ribbon: Panel tab ➤ Terminal Footprints panel ➤ Editor.
Toolbar: Panel Layout
Menu: Panel Layout ➤ Terminal Strip Editor
Command entry: AETSE
Make your selection on the Terminal Strip Selection dialog box and click Edit.
On the Layout Preview tab, select Tabular Terminal Strip (Table Object). Click
Define Columns.
Lists the available fields for formatting the table. Select a
field from the list to transfer it into the Fields to Report list.
Available Fields
1110 | Chapter 13 Terminal Tools

Lists the fields to display in the table.Fields to Report
Removes the selected field or all fields from the Fields to
Report list.
Remove/Remove All
Moves the selected field up one spot in the Fields to Report
list.
Move Up
Moves the selected field down one spot in the Fields to
Report list.
Move Down
Specifies the cell style for the table. Within the table styles,
you can define different cell styles to use. They give the
Cell Style
added flexibility to customize how the terminal strip ap-
pears. As you select one of the fields to report you can as-
sign a cell style to the selection.
Displays the name for the field that is selected in the Fields
to Report section of the dialog box. Use the default name
or enter a new name in the edit box.
Name
Specifies the column width to set for the selected Field to
Report. Enter a positive numeric value in the edit box.
Width
Specifies that jumper circles are always shown, and how
many, even if a jumper connection is not defined for that
terminal.
Always show jumper circles
NOTE This control is available only when the “Jumper”
field is selected.
Specifies that internal jumper squares are always shown,
and how many, even if a jumper connection is not defined
for that terminal.
Always show internal jumper
squares
NOTE This control is available only when the “Jumper-In-
ternal” field is selected.
Available Fields
Left Installation column in the Terminal Strip Editor grids.Installation1
Left Location column in the Terminal Strip Editor grids.Location1
Use the terminal strip editor | 1111
Left Device column in the Terminal Strip Editor grids.Device1
Left Pin column in the Terminal Strip Editor grids.Pin1
Left Wire column in the Terminal Strip Editor grids.Wire1
Left Type column in the Terminal Strip Editor grids.Type1
Left Cable column in the Terminal Strip Editor Cable Information
grid.
Cable1
Left Conductor column in the Terminal Strip Editor Cable Inform-
ation grid.
Conductor1
Left T column in the Terminal Strip Editor grids.T1
Number column in the Terminal Strip Editor grids.Number
Right T column in the Terminal Strip Editor grids.T2
Manufacturer column in the Terminal Strip Editor Catalog Code
Assignment grid.
Manufacturer
Catalog column in the Terminal Strip Editor Catalog Code Assign-
ment grid.
Catalog
Right Conductor column in the Terminal Strip Editor Cable In-
formation grid.
Conductor2
Right Cable column in the Terminal Strip Editor Cable Information
grid.
Cable2
Right Type column in the Terminal Strip Editor grids.Type2
Right Wire column in the Terminal Strip Editor grids.Wire2
Right Pin column in the Terminal Strip Editor grids.Pin2
Right Device column in the Terminal Strip Editor grids.Device2
Right Location column in the Terminal Strip Editor grids.Location2
Right Installation column in the Terminal Strip Editor grids.Installation2
1112 | Chapter 13 Terminal Tools

Column for displaying defined jumpers.Jumper
Generate terminal strip tables
Use the Terminal Strip Table Generator tool to insert one terminal strip or
multiple terminal strips as table objects. There are options to insert a terminal
strip as a single table object or to split the terminal strip into multiple table
objects. New drawings are created as needed and are automatically added to
the active project. This tool can also be used to rebuild or refresh existing
terminal strip tables within the active project.
Insert terminal strip tables onto drawings
1Click Panel tab ➤ Terminal Footprints panel ➤ Table Generator.
2Select the terminal strips to create tables from.
3Specify the file name for the first drawing. We recommend that you add
a numeric suffix to the file name since the last character of the file name
is incremented for each new drawing.
4(Optional) Specify a template file to use.
5Specify the table settings:
■Specify the table style, row style, table title, and layer.
■Select Settings to define the X and Y placement values.
■(Optional) Select Define Columns to define the columns to include,
column order, labels and if you want to show jumper circles.
■(Optional) Select Settings to split the terminal strip into table sections
based on rows per section, sections per drawing and specify the section
offset values.
6Select whether to insert the tables in new drawings, rebuild an existing
terminal strip or refresh an existing terminal strip.
7Click OK.
Generate terminal strip tables | 1113
Insert a terminal strip table in multiple sections
A terminal strip table can be added through the Terminal Strip Editor or with
the Terminal Strip Table Generator tool. A terminal strip can be split into
multiple table sections by changing your table settings.
Terminal Strip Editor
1Click Panel tab ➤ Terminal Footprints panel ➤ Editor.
2Make your selection on the Terminal Strip Selection dialog box and click
Edit.
3Click the Layout Preview tab.
4Select Settings.
5Enter the number of rows you want for each section. If the table break
falls between rows within one terminal definition, the entire terminal
definition is placed in the next table section. This results in a table section
with fewer rows than defined.
NOTE If the terminal definition is the first one in the section and exceeds the
number of rows per section, the entire terminal definition is kept together in
one section.
6Specify how many table sections you want to place on each drawing.
Unless you insert all the sections on the active drawing, new drawings
are created for the table sections.
7 Specify the X and Y placement or select the Pick Point button to
pick a point on the drawing. This value is used for the first table section
on each drawing.
8Specify the distance you want between each section if you are placing
more than one section per drawing.
9Specify the direction to place each section after the first table section.
10 Specify the offset base point. This option indicates whether you want the
distance value measured from insertion point to insertion point, or the
gap between the sections.
1114 | Chapter 13 Terminal Tools

11 Specify the file name for the first drawing. The last character of the file
name is incremented for each new drawing.
12 (Optional) Specify a template file to use.
13 Click OK.
Terminal Strip Table Generator
1Click Panel tab ➤ Terminal Footprints panel ➤ Table Generator.
2Select Settings.
3Enter the number of rows you want for each section. If the table break
falls between rows within one terminal definition, the entire terminal
definition is placed in the next table section. This results in a table section
with fewer rows than defined.
NOTE If the terminal definition is the first one in the section and exceeds the
number of rows per section, the entire terminal definition is kept together in
one section.
4Specify how many table sections you want to place on each drawing.
Unless you insert all the sections on the active drawing, new drawings
are created for the table sections.
5 Specify the X and Y placement or select the Pick Point button to
pick a point on the drawing. This value is used for the first table section
on each drawing.
6Specify the distance you want between each section if you are placing
more than one section per drawing.
7Specify the direction to place each section after the first table section.
8Specify the offset base point. This option indicates whether you want the
distance value measured from insertion point to insertion point or the
gap between the sections.
9Specify the file name for the first drawing. The last character of the file
name is incremented for each new drawing.
Generate terminal strip tables | 1115
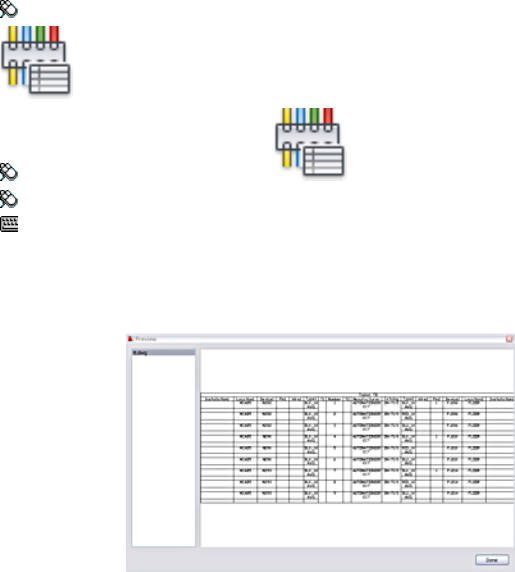
10 (Optional) Specify a template file to use.
11 Click OK.
Terminal strip table generator
Creates drawing files with tabular terminal strip layouts.
Ribbon: Panel tab ➤ Terminal Footprints panel ➤ Table Generator.
Toolbar: Terminal Footprint
Menu: Panel Layout ➤ Terminal Strip Table Generator
Command entry: AETSEGENERATOR
Terminal Strip Table Generator inserts one terminal strip or multiple terminal
strips as table objects. It places all table sections on new drawings, and adds
new drawings to the active project.
Each terminal strip selected begins on a separate drawing. The installation
code, location code, and tag values of the terminal strip are written to the
Drawing Description Field inside of the project file (*.wdp).
Terminal Strip Selection
Lists all terminal strips in the active project. Select the terminal strips to use
for automatically creating the drawing files. You can select a single terminal
strip or multiple strips. Multiple strips can be selected using either the Shift
or Control keys while highlighting rows, or by clicking and dragging the
mouse. Terminal strips are created using an AutoCAD table object.
1116 | Chapter 13 Terminal Tools

Table Settings
Specifies the table style to use for the table. Select
from the list or click Browse to browse to and select
Table Style
another drawing file whose table styles you want
to use.
NOTE If the selected table style is not in the
TableStyle.dwg file, it is added.
Defines the columns on page 1110 to include, order,
headings, justification, and jumper circles display
for the jumper chart.
Define Columns
Defines specific row styles to use for the selected
table style. On the Select Row Cell Styles dialog
Row Styles
box, select the table style and row cell styles to use
and click OK.
Defines the specific layer for the tabular terminal
strip to place on when inserted. On the Select Table
Layer
Layer dialog box, select the layer name from the
list of layers on the active drawing and click OK.
Defines a title for the table. Enter a title, select from
a list of variables or use a combination of both.
Table Title
When selecting from the list, the selection is added
to the end of the string if one exists in the edit box.
Displays the total number of rows needed to create
the terminal strip table layout. For example, even
Total Rows
though the terminal strip contains only 86 termin-
als, the table format may present more rows in a
multi-line terminal situation.
Displays the number of rows per section as defined
on the Table Settings dialog box.
Number of Rows per Section
Displays the number of sections needed based on
the total rows and the number of rows per section.
Number of Sections
Displays the number of sections to place on each
drawing as defined on the Table Settings dialog
box.
Number of Sections per Drawing
Generate terminal strip tables | 1117

Displays the number of drawings necessary to
generate the terminal strip using the current table
settings.
Number of Drawings
Defines the table settings on page 1093 such as
number of rows per section, number of sections
Settings
per drawing, table, and section placement, section
offset, scale, angle, first drawing name if a new
drawing is needed, and the template to use for any
new drawings generated.
Browses for any saved settings (in a *.tsl file) that
you previously created.
Browse
Saves the settings to an external file (with extension
*.tsl) that you can later reuse. The default folder
Save As
location is the User folder in the Documents and
Settings or Users location.
Uses the default settings for creating the table.Default
Insert/Rebuild/Refresh
Creates new drawings for each table or table sec-
tions based on the defined table settings and adds
the drawings to the active project.
Insert
NOTE If the selected strip is found in the project,
existing table sections are deleted and new draw-
ings are created and new tables placed.
Updates existing tables that were already placed.
If the terminal strip exists in the project, table sec-
Rebuild
tions are located, deleted, and rebuilt in place
without prompting you to select a new insertion
point.
NOTE If the selected terminal strip is not found in
the project, an alert displays asking if you want to
insert the missing strip in a new drawing. If you
click Yes, the terminal strip is inserted. If you click
No, the terminal strip is not inserted. The terminal
strips that were found are updated.
1118 | Chapter 13 Terminal Tools
Refreshes the data within an existing tabular termin-
al strip; a new table is not inserted.
Refresh
NOTE If the selected terminal strip is not found in
the project, an alert displays asking if you want to
insert the missing strip in a new drawing. If you
click Yes, the terminal strip is inserted. If you click
No, the terminal strip is not inserted. The terminal
strips that were found are updated.
Terminal strip table settings
Defines the settings for the Terminal Strip table object.
Terminal Strip Editor
Ribbon: Panel tab ➤ Terminal Footprints panel ➤ Editor.
Toolbar: Panel Layout
Menu: Panel Layout ➤ Terminal Strip Editor
Command entry: AETSE
Make your selection on the Terminal Strip Selection dialog box and click Edit.
Click the Layout Preview tab and select Tabular Terminal Strip (Table Object).
Click Settings.
Terminal Strip Table Generator
Ribbon: Panel tab ➤ Terminal Footprints panel ➤ Table Generator.
Toolbar: Terminal Footprint
Menu: Panel Layout ➤ Terminal Strip Table Generator
Command entry: AETSEGENERATOR
Specifies how many rows for each table section. If
the table break falls between rows within one ter-
Rows Per Section
Generate terminal strip tables | 1119

minal definition, the entire terminal definition is
placed in the next table section. This results in a
table section with fewer rows than defined.
NOTE If the terminal definition is the first one in
the section and exceeds the number of rows per
section, the entire terminal definition is kept togeth-
er in one section.
Specifies how many table sections to insert on each
drawing. All sections are placed on new drawings
Sections Per Drawing
unless the option “Insert All Sections on Active
Drawing” is selected.
NOTE The “Insert All Sections on Active Drawing”
option is not available when using the Terminal
Strip Table Generator tool.
Specifies where to place the table in the drawing.
You can enter x and y values or pick a point on the
screen.
Section Placement
Specifies the distance between sections, offset dir-
ection, and the base point for the distance measure-
ment.
Section Offset
■Distance: Specifies the distance between sec-
tions.
■Direction: Specifies the direction for the offset.
■Base Point: Specifies the base point for the
distance measurement between sections.
Specifies the scale and angle of the table sections
when inserted. These settings are reflected in the
preview.
Scale/Angle on Insert
Drawing Information for Table Output ■First Drawing Name: Specifies a starting
drawing file location and file name to use for
the automatic creation of the drawing files. The
drawings are automatically added to the active
project and display at the end of the drawing
list in the Project Manager. The last character
1120 | Chapter 13 Terminal Tools

of the drawing file name is incremented for
each drawing created.
■Template: Specifies the template file to use for
any new drawings. Enter a template file name
or click Browse to search for and select a tem-
plate file.
Select to display all rows for each terminal even if
there is no connected component. The Wires per
Show Unused Wire Connections in Table
Connection value for the terminal defines the
number of rows.
NOTE A terminal without any connected compon-
ents has one row in the table.
Opens a preview dialog box to view each drawing
as it will look when generated. All table settings are
reflected in the preview.
Preview
Terminal jumpers
Terminal jumpers can be internal, as defined by the block properties of a
multi-level terminal, or an external add-on jumper.
Internal jumpers
You can define internal jumpers for a multi-level terminal to indicate that
certain levels are jumpered together. Define the internal jumpers directly in
the terminal block properties on page 1050. Or, associate an internal jumper
definition with a specific catalog in the Terminal Properties Lookup on page
1058 tables. When the catalog is assigned to a terminal, the internal jumpers
are assigned to each terminal in the association.
NOTE A separate catalog value cannot be assigned to internal jumpers. If the
internal jumper is an option for the catalog, we recommend using an assembly
code on page 1295 to link multiple catalog values.
External jumpers
External or add-on jumpers can jumper together any two or more terminals.
Use the Edit Jumper on page 1122 tool to define an external jumper or, define
Terminal jumpers | 1121

the jumper from within Terminal Strip Editor on page 1070. A catalog value can
be assigned to an external jumper.
Edit terminal jumpers
Use the Edit Jumper tool to jumper two or more terminals together in a
schematic diagram. The terminals to be jumpered can be on the same drawing
or span multiple drawings within the same project. Choose one of the
following workflows for editing terminal jumpers:
Workflow 1:
1Click Schematic tab ➤ Edit Components panel ➤ ➤ Edit
Jumper.
2Select the primary terminal.
3Do one of the following:
■Select the secondary terminal on the drawing to create a jumper to
the primary terminal. You cannot select a terminal that is part of
another jumper.
■Enter Browse (B) at the command line to browse to and select the
secondary terminal in the Select Terminals to Jumper dialog box.
4(Optional) Continue selecting any terminals to add to the jumper.
5Press Enter to create the jumper or enter Edit (E) to edit the jumpers.
6(Optional) If you selected to edit the jumpers, make modifications in the
Edit Terminal Jumpers dialog box and click OK.
7(Optional) Enter Show (S) at the command line to draw temporary broken
lines between the primary terminal and secondary terminals within the
same drawing.
Workflow 2:
1122 | Chapter 13 Terminal Tools

1Click Schematic tab ➤ Edit Components panel ➤ ➤ Edit
Jumper.
2Press Enter at the command line.
3Select the terminals to be jumpered (from the left tree view) and click
the arrow to copy to the right tree view.
4Do one of the following:
■Click Edit to create the jumper or edit the jumpers on the selected
terminal.
■Click Close to return to the command prompt and:
■(Optional) Select additional terminals in the drawing to add to
the jumper.
■Press Enter to create the jumper or enter Edit (E) to edit the
jumpers.
■(Optional) If you selected to edit the jumpers, make modifications
in the Edit Terminal Jumpers dialog box and click OK.
■(Optional) Enter Show (S) at the command line to draw temporary
broken lines between the primary terminal and secondary terminals
within the same drawing.
5Click Cancel to cancel the operation.
See also:
■Assign a jumper in Terminal Strip Editor on page 1070
Select terminals to jumper
Use this to select a terminal from a list of all the terminals in the active project.
Terminal jumpers | 1123

Ribbon: Schematic tab ➤ Edit Components panel ➤ ➤ Edit
Jumper.
Menu: Components ➤ Terminals ➤ Edit Jumper
Command entry: AEJUMPER
Enter Browse (B) at the command line or first select a terminal and then enter
Browse (B) to select additional terminals.
As you select a terminal, the drawing in which that terminal resides displays
under the tree views or under the terminal preview window.
Lists all of the terminal strips and terminals in the
active project. Select the terminals to jumper togeth-
Schematic Terminals
er; as you make your selection, the terminals are
bolded in the left tree and added to the Jumper
Terminals list.
Terminal nodes have a graphic on the left side to
indicate whether the terminal has a jumper at-
tached to it. An empty circle indicates that there is
not a jumper and the filled circle means that a
jumper exists.
Lists the terminals that are jumpered into a single
jumper group, including any terminals selected at
the command prompt.
Jumper Terminals
The > button copies the selected terminals to the
Jumper Terminals list; the selected terminals are
then bolded in the Schematic Terminals list.
< or >
The < button removes the selected terminals from
the Jumper Terminals list and unbolds the terminal
in the Schematic Terminals list.
Creates a jumper across the selected terminals and
displays the Edit Terminal Jumpers dialog box.
Edit
Displays the selected terminal in a preview window
at the bottom of the dialog box.
View
1124 | Chapter 13 Terminal Tools

NOTE You can select to view a schematic terminal
or tabular view of the entire terminal strip. If you
select a terminal strip from the Schematic Terminal
list and click View, a tabular view of the terminal
strip displays, showing a layout of the connected
terminals.
By default the preview window is hidden. It can be
toggled using Show and Hide once a terminal is
viewed.
Switches the visibility of the preview window at the
bottom of the dialog box.
Hide/Show
Shows a graphical representation of the selected
terminals. You can pan the image using the left
Preview window
mouse button or the Pan tool. You can zoom the
image using the mouse wheel or the various zoom
tools.
Edit terminal jumpers
Edits the jumper information (such as adding catalog data) or deletes the
jumper.
Ribbon: Schematic tab ➤ Edit Components panel ➤ ➤ Edit
Jumper.
Menu: Components ➤ Terminals ➤ Edit Jumper
Command entry: AEJUMPER
Enter Edit (E) at the command line or first select a terminal and then enter
Edit (E).
Lists all of the jumpers (grouped by Jumper ID) at-
tached to the selected terminal.
Jumpers to Terminals
Specifies the catalog data for the jumper between
the primary terminal and the selected terminal. If
Catalog Data
the selected terminal is not jumpered these options
are disabled.
Terminal jumpers | 1125
■Manufacturer: Specifies the manufacturer
name.
■Catalog: Specifies the catalog number.
■Assembly: Specifies the assembly code.
■Item: Specifies the item value.
■Count: Specifies how the catalog data is used
in the Bill of Materials. When multiple terminals
are jumpered together, you can have a single
catalog item represent a jumper bar that spans
the selection, or single jumpers between each
terminal.
■Lookup: Displays the catalog database from
which you can select the Manufacturer and
Catalog values.
■Drawing: Lists the part numbers used for sim-
ilar components in the active drawing.
■Project: Lists the part numbers used for similar
components in the active project.
■Copy: Copies catalog values from the selected
jumper in to memory for this session of Auto-
CAD Electrical, to b paste into another jumper.
■Paste: Paste the previously copied catalog val-
ues into the selected jumpers.
■Clear: Clear catalog values for the selected
jumpers.
Select the jumper label, terminal strip, or a single
terminal to perform one of the following actions:
Delete
■Jumper label: Deletes the jumper from all of
the terminals.
■Terminal strip: Deletes the terminals in that
group from the jumper. If there are no remain-
ing terminals in the group, the jumper is de-
leted.
■Single terminal: Deletes the terminal from the
jumper. If it is the last terminal to delete, the
entire jumper is deleted.
1126 | Chapter 13 Terminal Tools
Displays the selected terminal in a preview window
at the bottom of the dialog box.
View
By default the preview window is hidden. It can be
switched using Show and Hide once a terminal is
viewed.
Switches the visibility of the preview window at the
bottom of the dialog box.
Hide/Show
Shows a graphical representation of the selected
terminals. You can pan the image using the left
Preview window
mouse button or Pan tool. You can zoom the image
using the mouse wheel or the various zoom tools.
Terminal strip utilities
Create terminal strips
Use the terminal strip utilities to create non-intelligent terminal strips. The
terminal numbers can be imported from a file, windowed on one or more
drawings, individually picked, or typed in by hand.
1Select to pick or window the text and/or attribute values you want to
import into the terminal strip generator utility -
Enter AETERMLIST at the command prompt.
or select the file containing the terminal text -
Enter AETERMLISTFROMFILE at the command prompt.
2In the Terminal Strip Representation dialog box, sort, add, remove, and
rearrange the terminal strip layout.
3Click OK.
The Terminal Strip Representation Setup dialog box displays. Set the text
size, terminal height and width sizes, and terminal strip orientation.
4Make your selections and click OK.
5Select the insertion point for your terminal strip.
Terminal strip utilities | 1127

Modify an existing terminal strip
1Re-invoke the command, window the existing terminal strip to capture
the existing terminal numbers.
2Cancel the command.
3Delete the old terminal strip.
4Re-invoke the terminal strip utility.
5Make any edits and re-insert the terminal strip.
Terminal strip representation
Terminal List (Manual Picks)
Menu: Components ➤ Terminals ➤ Terminal Strip Utilities ➤ Terminal
List (Manual Picks)
Command entry: AETERMLIST
Terminal List (From File).
Menu: Components ➤ Terminals ➤ Terminal Strip Utilities ➤ Terminal
List (From File)
Command entry: AETERMLISTFROMFILE
You can sort, add, remove, and re-arrange the terminal strip layout. You can
even go to other schematic drawings and add more to the list (just click Cancel,
go to the next drawing, and re-invoke the utility - it remembers what you
have accumulated so far).
Defines the label for the spare terminals.Define spare
Sorts the list of terminals in ascending order.Sort
Rearranges the list of terminals in descending order.Reverse sort
Moves the selected terminal up one spot in the terminal list.Move up
Moves the selected terminal down one spot in the terminal list.Move down
Creates a terminal to add to the terminal strip. Specify the termin-
al name/number, the number of terminals to insert, and indicate
whether to make the new terminal the spare terminal.
Insert new
1128 | Chapter 13 Terminal Tools

Opens the Edit dialog box so you can change the terminal text
or count.
Edit
Removes the selected terminal from the terminal list.Cut
Makes a copy of the selected terminal and stores it in the Paste
clipboard.
Copy
Adds the copied terminal into the terminal list from the clipboard.Paste
Temporarily dismisses the dialog box and allows you to select
more terminals for the list.
Pick
Terminal strip representation - setup
Annotates the text size, height and width sizes, and orientation of the terminal
strip.
Terminal List (Manual Picks)
Menu: Components ➤ Terminals ➤ Terminal Strip Utilities ➤ Terminal
List (Manual Picks)
Command entry: AETERMLIST
Select the terminal to modify and click OK.
Terminal List (From File).
Menu: Components ➤ Terminals ➤ Terminal Strip Utilities ➤ Terminal
List (From File)
Command entry: AETERMLISTFROMFILE
Select the terminal to modify and click OK.
Terminal Text
Specifies to align the text to the left, center, or right side of the ter-
minal strip.
Text
Sets the height of the terminal strip.Height
Sets the width of the terminal strip.Width
Specifies the layer for the table text. The selected layer is displayed
next to the button on the dialog box.
Layer
Terminal strip utilities | 1129
Terminal pitch and Terminal width
Sets the spacing between entries in the terminal strip.Terminal pitch (spacing)
Sets the width for the terminal strip.Terminal width
Changes the terminal width value to .750 if selected.Use .750
Terminal Ruling
Creates a single box around the terminal strip.Box Around
Creates lines between entries in the terminal strip.Between Entries
Specifies which line the terminal strip starts at.Start Line
Specifies which line the terminal strip ends at.End
Specifies the layer for the table ruling lines. The selected layer is dis-
played next to the button on the dialog box.
Layer
Terminal Strip Orientation
Specifies to display the terminal strip vertically.Vertical
Specifies to rotate the terminal strip 90 degrees in a
counter-clockwise direction.
Rotate 90 degrees (counter-clockwise)
Specifies to rotate the terminal strip 90 degrees in a
clockwise direction.
Rotate -90 degrees (clockwise)
Terminal wire connections
Control terminal wire connections
Schematic and panel layout/wiring diagram terminal symbols can carry
TERMDESC attribute values used to control which side of a terminal is to
receive internal or external wire connections. Schematic terminals use attributes
X1TERMDESC01 for the right wire connection, X2TERMDESC01 for the top,
X4TERMDESC01 for the left, and X8TERMDESC01 for bottom wire
connections.
1130 | Chapter 13 Terminal Tools

Show terminal internal/external connections
This tool shows the state of the invisible attribute values for selected objects.
The values are shown with red and green arrows.
1Click Schematic tab ➤ Edit Components panel ➤ ➤ Terminal:
Show Internal/External Connections.
2Select the objects to show the connection codes for. You can pick on
individual objects or select a group of objects using a boundary box.
Mark internal connections
This tool marks attributes with an 'I' for internal wiring.
1Click Schematic tab ➤ Edit Components panel ➤ ➤ Terminal:
Mark Internal Connections.
2Select near a wire connection point of the terminal. The attribute is
marked with an arrow to indicate whether it is an internal.
Mark external connections
This tool marks attributes with an 'E' for external wiring.
1Click Schematic tab ➤ Edit Components panel ➤ ➤ Terminal:
Mark External Connections.
2Select near the wire connection point of a terminal. The attribute is
marked with an arrow to indicate whether it is an external value.
Terminal wire connections | 1131
Erase connection codes
1Click Schematic tab ➤ Edit Components panel ➤ ➤ Terminal:
Erase Internal/External Connections.
2Select near the wire connection point of a terminal to erase the connection
code. (I= internal, E= external)
Resequence terminal numbers
Resequence terminal numbers
AutoCAD Electrical provides utilities to make it easy to resequence the terminal
numbers across one or many drawings. These utilities do not resequence
terminals that carry a wire number as the terminal number.
Terminal Renumber (Pick Mode)
1Enter AETERMRENUMPICK at the command prompt.
2Enter the first terminal number to use and press Enter.
3Select each terminal in order on the screen.
The terminal number updates automatically, incrementing with each
pick.
4Right-click to exit the command.
Terminal Renumber (Project-Wide)
1Enter AETERMRENUM at the command prompt.
The Project-wide Schematic Terminal Resequence dialog box displays.
2Enter the terminal strip tag ID and the starting terminal number.
3If you want to refine the search, enter an installation or location code to
use when searching the drawings.
Click Project or Drawing to select an installation or location code from
existing terminal numbers.
4Click OK.
1132 | Chapter 13 Terminal Tools
5In the Select Drawings to Process dialog box, select the drawings to search
through, and click OK.
NOTE These tools do not renumber panel terminals. Use the Terminal Strip editor
Renumber on page 1101 to resequence a terminal strip that contains panel terminals.
Project-wide schematic terminal renumber
Resequences the terminal numbers across one or many drawings.
Menu: Components ➤ Terminals ➤ Terminal Strip Utilities ➤ Terminal
Renumber (Project-Wide)
Command entry: AETERMRENUM
NOTE This tool does not resequence terminals that carry a wire number as the
terminal number.
Specifies the terminal strip ID to use when searching
each drawing for terminals. Only terminals with this
ID are updated.
Tag-ID
Updates a terminal only if it matches the Terminal
Strip ID, Location, and Installation values specified.
Include Installation/Location in terminal
strip Tag-ID match
Refines the search by including an installation value.Installation code
Refines the search by including a location value.Location code
Specifies the number to begin the terminal strip with;
you can use alphanumeric values. The default value
is 1.
Starting terminal number
After you click OK, select the drawings to process from the active project.
NOTE This tool does not renumber panel terminals. Use the Terminal Strip editor
Renumber on page 1101 to resequence a terminal strip that contains panel terminals.
Overview of connection sequencing
The Multi-Connection Sequence Terminal symbol allows a single in-line
schematic symbol to represent a sequence of wire connections passing through
two or more (up to six) terminal strips. For example, a wire connection that
Overview of connection sequencing | 1133

must pass through a series of shipping split terminal strips can be represented
by a single in-line wire schematic symbol (instead of having to show each
individual terminal in the sequence).
Two sample symbols are provided. Their appearance may be edited or new
ones created as required. They are inserted using the AutoCAD Electrical Insert
Component tool. Browse to insert. The symbol names are
H - - 1_MULTI_CONN.dwgwire number changes through the symbol
H - - 1_MULTI_CONN_NOCHG.dwg wire number does not change through
it
A dialog box interface lets you encode multiple connection sequence
information on to six sets of attribute groups carried on the symbol:
WD_1_TAGSTRIP Attribute to carry first terminal strip number (16 character
maximum)
WD_1_TERMNO Attribute to carry optional terminal number
WD_1_INFO Attribute to carry additional information such as installation,
location, catalog and item number assignments, and any connected cable
information
WD_2_TAGSTRIP Same as previous but for second terminal in the sequence
WD_2_TERMNO Same as previous but for second terminal in the sequence
WD_2_INFO Same as previous but for second terminal in the sequence
through maximum of
WD_6_TAGSTRIPSame as previous but for sixth terminal in the sequence
WD_6_TERMNO Same as previous but for sixth terminal in the sequence
WD_6_INFO Same as previous but for sixth terminal in the sequence
Click the entry to edit and select the Edit button.
NOTE For AutoCAD Electrical to recognize this symbol as a multi-connection
sequence terminal symbol, at a minimum it must carry attribute named
WD_1_TAGSTRIP. Multi-connection sequence terminal symbols do not support
some AutoCAD Electrical auto-update and surfing features.
Edit multi-connection sequence terminal symbol
1134 | Chapter 13 Terminal Tools
Ribbon: Schematic tab ➤ Insert Components panel ➤ Insert Components
drop-down ➤ Icon Menu.
Toolbar: Main Electrical
Menu: Components ➤ Insert Component
Command entry: AECOMPONENT
Enter "H--1_MULTI_CONN_NOCHG" in the Type It box and click OK. Specify
the insertion point on the drawing.
Select any entry within a group to view/edit that group.
Opens the Edit entry dialog box so you can change values such
as the tag-ID, terminal number, or Installation code.
Edit
Saves your changes by writing the data to attributes on the
symbol (most of these attributes are set as invisible).
Save Changes
Edit entry
Ribbon: Schematic tab ➤ Insert Components panel ➤ Insert Components
drop-down ➤ Icon Menu.
Toolbar: Main Electrical
Menu: Components ➤ Insert Component
Command entry: AECOMPONENT
Enter "H--1_MULTI_CONN_NOCHG" in the Type It box and click OK. Specify
the insertion point on the drawing. In the Edit Multi-Connection Sequence
Terminal Symbol dialog box, select one of the six series-connected entries and
click Edit.
This in-line component lets you manually define a connection sequence of
up to six series-connected terminal strip points. All are embedded in this single
graphical component but are fully reported in the various wire connection
reports.
Overview of connection sequencing | 1135
For example, you might have a wire that connects from a push button and
goes out to a field device. But to get to the field device, the wire connection
must pass through a local terminal strip, then a shipping split terminal strip,
on to a field connection terminal strip, and finally a terminal strip near the
field device. Instead of showing all four series-connected terminals in the wire,
you can substitute this single "multi-connection sequence" terminal
representation and manually define the connection sequence.
Tag - ID
Terminal strip tag-ID
Terminal Number
Terminal strip terminal number
Miscellaneous
Edit box shows saved data values defined by the following selections.
Installation Code
Changes the installation code assignment. You can search the current drawing
or entire project for installation codes. A quick read of all the current or selected
drawing file is done and a list of installation codes used so far is returned.
Select from the list to update the component automatically with the
installation code.
Assign short installation codes to components like "PNL" and "FIELD" so you
can create location-specific BOM and component lists later.
Location Code
Changes the location codes. You can search the current drawing or entire
project for location codes. A quick read of all the current or selected drawing
file is done and a list of location codes used so far is returned. Select from the
list to update the component automatically with the location code.
Assign short location codes to components like "PNL" and "FIELD" so you can
extract cable from/to reports and location-specific BOM reports later. (For
example, BOM for all field cables, BOM for all PNL cables.)
Catalog Data
You can do a drawing-wide or project-wide listing of similar components with
their catalog assignments. During your editing session, the last MFG / CAT /
ASSYCODE assignment for each component type you insert into your wiring
1136 | Chapter 13 Terminal Tools
diagram is remembered. When you insert another component of that type,
the previous catalog assignment of the component is set as the default
(assuming a previous one was made during the current editing session).
Scans each drawing for the target component type and returns
a list of what was found. You can make your catalog assignment
by selecting from the list.
Find
Opens the catalog database of the catalog from which you can
manually enter or select the Manufacturer or Catalog values.
Catalog Lookup
Search the database for a specific catalog item to assign to the
selected component.
Lists the part numbers used for similar components in the current
drawing.
Drawing
Lists the part numbers used for similar components in the project.
You can search in the active project, another project, or in an
external file.
Project
■Active project: All the drawings in the current project are
scanned and the results are listed in a dialog box. Select from
the list to assign your new component with a catalog number
that is consistent with other similar components in the pro-
ject.
■Other project: Scans each listed drawing in a previous project
for the target component type and returns the catalog inform-
ation in a sub-dialog box. Make your catalog assignment by
picking from the list.
■External file: You can pull catalog assignments from a gen-
eric ASCII file created by a word processor or output from a
spreadsheet or database program. A dialog box displays the
contents of the selected text file. Find and highlight the de-
sired entry. AutoCAD Electrical reads the line of text from the
file and breaks it into its component parts. These are displayed
in the left-hand list. For each relevant item, highlight it and
then pick the appropriate category button in the center
column. The highlighted item is transferred to the correspond-
ing category (and then to the Insert/Edit dialog box once OK
is clicked).
Displays what the selected item looks like in a Bill of Material
template.
Catalog Check
Overview of connection sequencing | 1137
Wire entering this connection
Click Internal, External, or Both to change the Connection Code (I=Internal,
E=External). The code changes the Miscellaneous value as follows:
LEFT_TERMDESC=I (for Internal), LEFT_TERMDESC=E (for External).
Wire leaving this connection
Click Internal, External, or Both to change the Connection Code (I=Internal,
E=External). The code changes the Miscellaneous value as follows:
RIGHT_TERMDESC=I (for Internal), RIGHT_TERMDESC=E (for External).
Manually define the wire number that leaves this terminal con-
nection and goes to the next. If it is the last terminal in the se-
Wire number
quence, this wire number assignment is ignored and the actual
wire number connecting the right-hand side of the symbol is
used.
Manually define the wire layer assignment. If it is the last terminal
in the sequence, this value is ignored.
Wire layer
Manually define the cable marker tag-ID. If it is the last terminal
in the sequence, this value is ignored.
Cable
Manually define a cable marker conductor color value. If it is the
last terminal in the sequence, this value is ignored.
Conductor
Delete this entry
Removes the displayed terminal sequence from the overall list and moves any
following entry positions up to fill in the gap.
Insert new before this one
Moves the current display terminal sequence down one position and creates
a new, empty entry ahead of it. There is a maximum of six total positions.
Insert new after this one
Pushes all of the following sequences down one position and creates a new,
empty entry just after the displayed entry. There is a maximum of six total
positions.
1138 | Chapter 13 Terminal Tools

Point-to-Point Wiring Tools
Working with Connectors
Use point-to-point wiring tools
Ladder Style Schematic
Point-to-Point Style Schematic
In addition to the tools specifically related to connectors, you can utilize other
AutoCAD Electrical tools for editing your point-to-point wiring diagrams.
Use the Edit Component tool to edit the pin assign-
ments on the parametrically generated connectors.
Edit Pin Numbers
Use the Link Components (Dashed Line) tool to insert
dash linked lines between parent and split-off child
parametric connector symbols.
Connector Dash Link Lines
Use the Scoot tool to reposition the parametric con-
nector along the same direction as the connected
wiring.
Scoot Connector
14
1139

Use the Scoot tool to move wires attached to pins
on the connectors. The wire scoots and the connector
Scoot Wire
pin along with it while the overall connector shell
stays fixed.
Use the Insert Wires tool to route single-wire connec-
tions. Use the Multiple Wire Bus tool, Component
mode, to insert and route multiple wires in one tool.
Insert Wires
NOTE A wire connection point should only have up
to three wire connections tied to it. Adding more
wires to a single point prevents the angled wire
connection to tie uniquely to the wire connection
point.
Insert connectors
Use this tool to insert a parametrically generated connector symbols.
1Click Schematic tab ➤ Insert Components panel ➤ Insert Connector
drop-down ➤ Insert Connector.
2In the Insert connector dialog box, specify the pin spacing and pin count.
(Optional) For pin count, click Pick and draw a fence showing the length
of the appropriate connector.
3Specify whether to build the connector using fixed pin spacing or to have
it compress or expand to match the pins up with underlying wire
crossings.
4Specify whether to insert the entire connector all at once or to insert it
manually, pin by pin, with an option to insert spacers or to break the
connector into 2 or more pieces.
5Click the Rotate or Flip buttons to change the display of the connector
symbol.
The preview image updates to reflect your changes to the connector
display options.
6(Optional) Click Details for more options to define settings for the size,
shape, and display of the parametrically built connector symbols.
7Click Insert.
1140 | Chapter 14 Point-to-Point Wiring Tools

A preview outline of the connector displays for placement on the drawing.
It shows rounded corners for the plug side of the connector. An 'x'
indicates the insertion point of the connector and the arrow indicates
the plug side wire connection direction.
8Specify the insertion point on the drawing or enter Z (zoom), P (pan), X,
V, or Tab at the command prompt to change the connector orientation
before insertion. Review the sections below to see how Tab, V key, or X
key changes your connector orientation.
If you selected to allow spacers/breaks, in the Custom Pin Spaces/Breaks
dialog box, click Break Symbol Now to break the connector and display
the Connector Layout dialog box for defining how you want the rest of
the pins inserted on the drawing.
Reverse connector using the Tab key
Prior to committing the connector outline to the drawing, you can press Tab
to reverse the connector either about its long axis or end for end. If the
connector is vertical, a series of TAB keystrokes cycles the image through these
four orientations:
TAB 3TAB 2TAB 1Start point
Rotate connector using the V key
Press "V" at the command prompt to switch between vertical and horizontal
orientations. Based on where the outline is in the flip process, the Tab keystroke
reverses the connector either about its long axis or end for end. When in its
Use point-to-point wiring tools | 1141
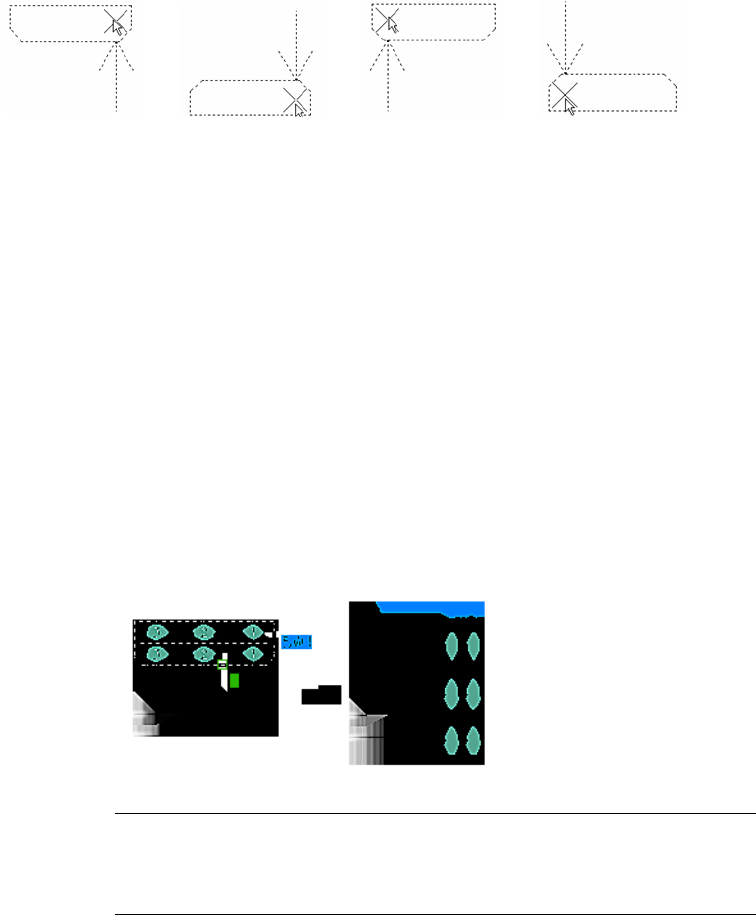
horizontal orientation, a series of Tabs cycles the image through these four
orientations
TAB 3TAB 2TAB 1Start point
Switch layout using the X key
Press "X" at the command prompt to toggle between "Fixed Spacing" and "At
Wire Crossings." Press the X key, and then move the connector preview over
the wires so the connector stretches to align each pin with the underlying
wire spacing. The connector stretches only to meet the underlying spacing
when the first pin lands on a wire. If the size of the connector exceeds the
total number of wires underlying the connector, the remaining pins follow
the specified fixed spacing value.
Rotate connectors
Rotates a connector image in 90 degree increments.
Existing wire connections do not reroute with each rotation of the connector.
Use the wire editing tools to resolve wiring.
NOTE This command differs from the standard ROTATE command in that it
renames the wire connection attributes to maintain full compatibility with the
Insert Wire command, and it can hold the terminal pin text and tag-ID attributes
in their current orientation.
1142 | Chapter 14 Point-to-Point Wiring Tools
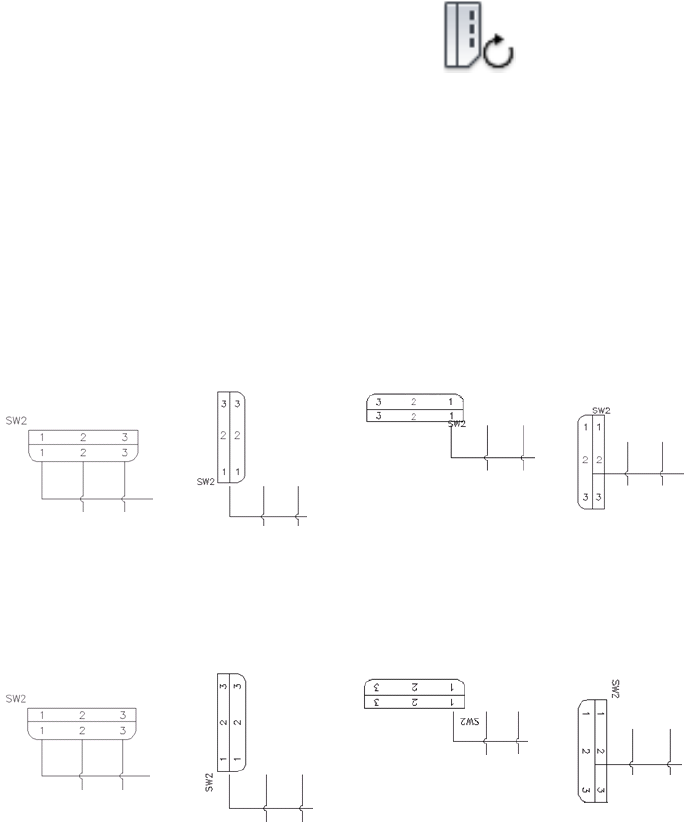
1Click Schematic tab ➤ Edit Components panel ➤ Modify Connectors
drop-down ➤ Rotate Connector.
2Specify whether to hold the current attribute orientation.
If you select Yes (default), the attribute text orientation does not rotate
as the connector rotates.
3Select the connector to rotate.
The connector automatically rotates 90 degrees.
4Keep clicking the connector until the appropriate position is reached.
5Press Enter or Esc to exit the command.
Example: Hold attribute orientation = yes
Third RotateSecond RotateFirst RotateOriginal
Example: Hold attribute orientation = no
Third RotateSecond RotateFirst RotateOriginal
Reverse connectors
Reverses the connector image about its long axis.
Use point-to-point wiring tools | 1143
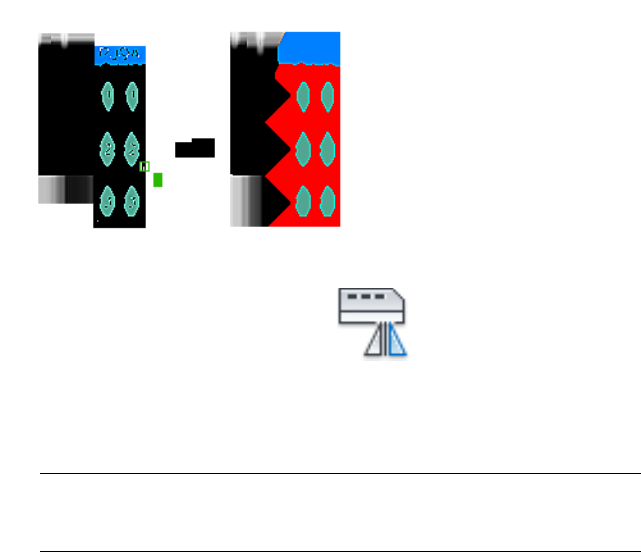
Existing wire connections do not automatically reroute to the reverse side of
the connector. Use the wire editing tools to resolve wiring.
1Click Schematic tab ➤ Edit Components panel ➤ Modify Connectors
drop-down ➤ Reverse Connector.
2Select the connector to reverse.
The connector automatically reverses depending on its original
orientation.
NOTE For a single receptacle connector with no rounded corners, the
appearance of the graphics appears unchanged, but the wire connection
attributes actually move to the other side of the connector.
3Press Enter or Esc to exit the command.
Stretch connectors
You can increase or decrease the overall shell length of the connector. Identify
which end of the connector to alter and the measurement of displacement.
1144 | Chapter 14 Point-to-Point Wiring Tools
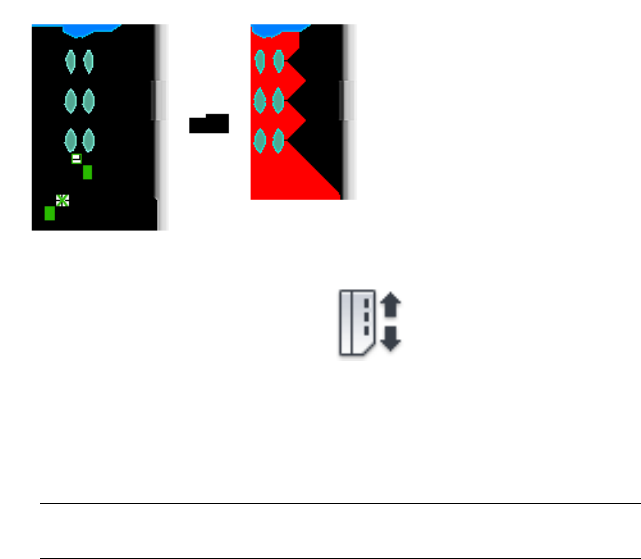
1Click Schematic tab ➤ Edit Components panel ➤ Modify Connectors
drop-down ➤ Stretch Connector.
2Specify the end of the connector to stretch.
3Specify where you want the connector to end (second point of
displacement). Either drag your mouse to the appropriate location or
enter coordinates.
NOTE You can press TAB during the stretch to change the visibility of the
connector attributes. See the Tips and Hints below for more information.
4Press Enter or Esc to exit the command.
Tips and Hints
■Stretch Connector does not support window selection.
■Turn Snap ON.
■The stretch begins at the end of the connector. There is not a first point
of displacement.
■If the stretched connector end runs over the top of the connector's tag-ID
attribute (attribute name TAG1 or TAG2), then this attribute along with
attributes INST, LOC, DESC1, DESC2, and DESC3 relocate with the stretch.
Pressing TAB during the stretch changes the visibility of these attributes.
If turned ON, the attributes display as temporary graphics that move with
the stretch cursor; if turned OFF, the temporary graphics are not visible.
Use point-to-point wiring tools | 1145
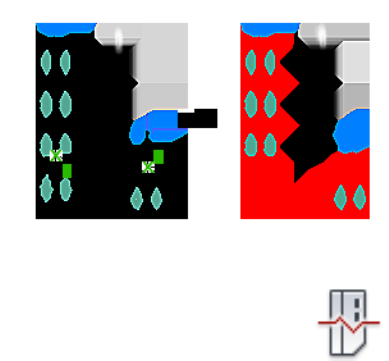
■Avoid stretching one end of a connector all the way to the other end of
the connector.
Split connector
Use this tool to split the parametric connector into two separate block
definitions (for example, parent and a child or a child and another child).
You specify:
■Origin point for the new block
■Break type
■Layer for the child block
■Whether to reposition the child block
1Click Schematic tab ➤ Edit Components panel ➤ Modify Connectors
drop-down ➤ Split Connector.
2Select the connector block to split.
3Specify the split point (i.e. pick between two sets of pins).
4(Optional) Define the origin point for the new block. The default is preset
to be in-line with the first set of pins on the split-off piece. If you do not
want to accept the default, you can enter the coordinates or click Pick
Point, and then select the origin point on the drawing.
5(Optional) Set the break type: no lines, straight lines, jagged lines, or draw
it. The default is set to jagged lines.
1146 | Chapter 14 Point-to-Point Wiring Tools
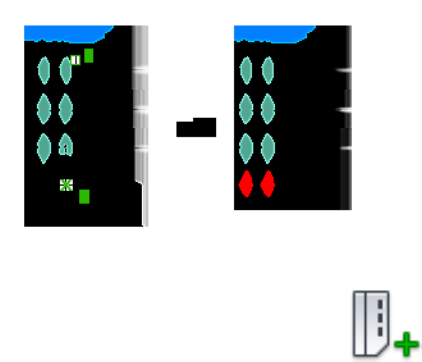
6(Optional) Select to reposition the child block to move it as part of this
command.
7Click OK.
8To reposition the child block, select a point on the screen to place the
block.
9Press Enter or Esc to exit the command.
Add pins to a connector
Adds connector pins to an existing connector.
To make room for the new pins:
■Stretch Connector - stretch the connector shell
■Move Connector Pin - move existing pins
■Scoot - scoot wires with attached pins
1Click Schematic tab ➤ Edit Components panel ➤ Modify Connectors
drop-down ➤ Add Connector Pins.
2Select the connector.
3Specify where to insert the next available pin number (displayed on the
command line) or press R+space to manually define the new starting pin
number.
The next available pin numbering is based on the existing pins and an
optional pin list associated to the selected connector. The PINLIST values
Use point-to-point wiring tools | 1147
defined on the parent symbol are queried in the project database to
determine the next available pin number on the connector component.
This checks across the entire project to find the pin numbers used on
both parent and any child connector symbols. If a PINLIST value is not
defined, then the next available sequential pin number (based on existing
pins) is used. Pin assignments can be numbers or letters or combinations
of both.
4Press Enter or Esc to exit the command.
Tips and Hints
■Turn Snap ON.
■Pins can be added inside the shell or beyond either end of the connector
shell.
■Pins are inserted along the connector's centerline axis, even if your pick
point is far off to one side of the connector.
■Connectors can be stretched later to accommodate new pins added beyond
either end of the connector.
■Pins can be added between the original pins; pins can then be moved or
scooted to accommodate spacing.
■Pins can be lined up with a pin on another connector. After selecting the
Add Connector Pins tool, select the connector to add the pin to, press Shift
+ right-click to display the Object Snaps options, select Insert and click the
pin to align the new pin to. The new pin is inserted onto the selected
component and is lined up with the pin on the other connector.
Delete pins from connectors
Deletes connector pins from an existing connector.
If the connector has a defined pin list, free this deleted pin for later insertion
on this connector or on a related child of this connector.
1148 | Chapter 14 Point-to-Point Wiring Tools
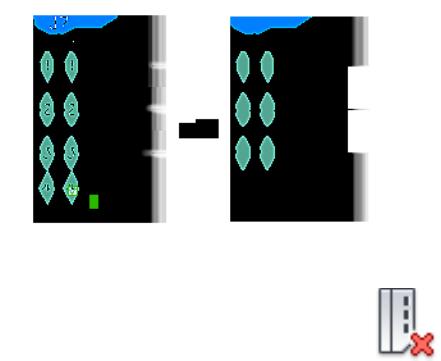
1Click Schematic tab ➤ Edit Components panel ➤ Modify Connectors
drop-down ➤ Delete Connector Pins.
2Pick the pins to delete from the connectors.
The pin number attribute on the connector block disappears. This attribute
along with associated wire connection and description attributes are not
immediately removed from the connector. They are renamed so that they
are effectively ignored. If the connector is subsequently stretched or split,
then these deleted pin attributes are purged from the connector block
instance.
3Press Enter or Esc to exit the command.
Tips and Hints
■Deleting a pin that has a connected wire does not remove the wire. In this
case, the wire no longer is connected to the connector. It appears to be a
wire that is unconnected at the connector end.
Swap pin numbers
Swaps pin numbers on existing connectors.
Exchange one set of connector pin numbers for another on an existing
connector or between connectors on the drawing.
Use point-to-point wiring tools | 1149
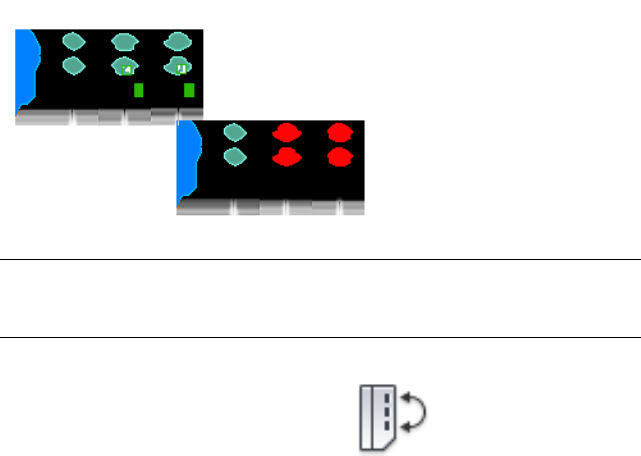
NOTE You cannot swap a combination connector with a single plug or receptacle
connector. Additionally, you cannot use this tool to swap pins from one side of a
connector to the other.
1Click Schematic tab ➤ Edit Components panel ➤ Modify Connectors
drop-down ➤ Swap Connector Pins.
2Select the connector pin to swap.
Temporary graphics are drawn around the selected pin number indicating
that it has been included in the "swap" list.
3Select the pin that you want to swap with the selected pin.
The connector pins are swapped between the two selections.
4Select another set of pins to swap or press Enter or Esc to exit the
command.
Move pins
Moves the connector pin associated to a selected connector.
The pin relocates along the centerline axis of the connector, even if the pick
point is off to one side of the connector. You can specify a location beyond
either end of the current connector shell. Use Stretch Connector to extend
the shell to enclose these pins.
1150 | Chapter 14 Point-to-Point Wiring Tools
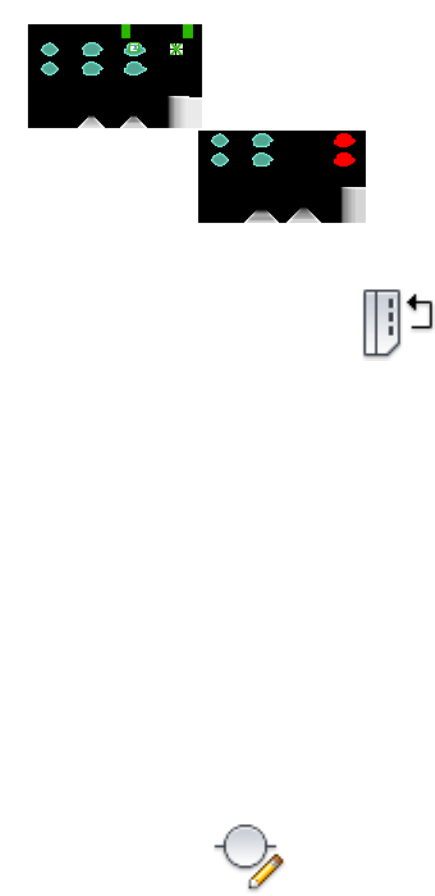
1Click Schematic tab ➤ Edit Components panel ➤ Modify Connectors
drop-down ➤ Move Connector Pins.
2Select the connector pin to move.
3Specify the new location for the pin.
The pin relocates along the connector's centerline axis, even if your pick
point is far off to one side of the connector. You can also specify a location
beyond either end of the current connector shell, and then use the Stretch
Connector tool to extend the shell to enclose these pins.
4Press Enter or Esc to exit the command.
Edit connector pin numbers
Once the connector is inserted onto the drawing file's block definition, you
can edit the connector pins found inside of the connector. Use the Connector
Pin Numbers in Use dialog box to edit the pins defined on the parametric
connector. Connector symbols have attributes to define Installation and
Location codes, manufacturing data, component tagging and descriptions,
and pin assignments.
1Click Schematic tab ➤ Edit Components panel ➤ Edit Components
drop-down ➤ Edit.
2Select the connector.
3In the Insert/Edit Component dialog box, Pins section, click List.
Use point-to-point wiring tools | 1151
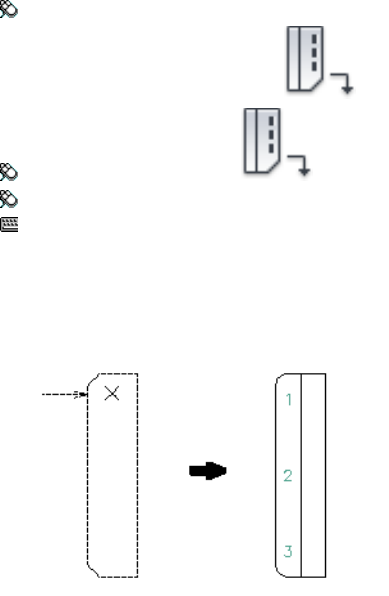
4In the Connector Pin Numbers in Use dialog box, select a pair of pins to
modify.
5In the Pin Number section, enter a new pin number value in the edit
boxes or click the arrows to either increase or decrease both plug and
receptacle values by one.
6(Optional) Enter a description for the plug or receptacle terminal.
7Click OK.
Insert connector
Generates a connector dynamically from parameters you specify, and inserts
it at a specified location.
Ribbon: Schematic tab ➤ Insert Components panel ➤ Insert Connector
drop-down ➤ Insert Connector.
Toolbar: Main Electrical
Menu: Components ➤ Insert Connector ➤ Insert Connector
Command entry: AECONNECTOR
You select an orientation, connector type, such as plug/receptacle combination,
and enter fixed pin spacing or adapt the pin spacing to underlying wires, and
so on. Insert Connector negates the need to create and maintain a large library
of schematic connector symbols.
1152 | Chapter 14 Point-to-Point Wiring Tools
Click Details to expand the dialog box to provide more options to define
settings for the size, shape, and display of the parametrically built connector
symbols.
Layout
Determines the overall appearance of the parametric connector, including
pin spacing and pin count.
Specifies the distance between the pin wire connections.
This value initially defaults to the Rung Spacing defined in
Pin Spacing
Drawing Properties ➤ Drawing Format ➤ Ladder Defaults
- Spacing setting for the drawing file.
Specifies the number of pins associated with the connector.
This is required to parametrically build the connector.
Pin Count
This is an alternate Pick method for determining the Pin
Count for the new connector. You can do a fence selection
Pick
of crossed wires or you can define a starting point and
ending point in empty space. For the fence selection, a pin
exists for every wire intersection with the AutoCAD fence
line. For example, if you cross five wires with the fence pick
points, the pin count value will be 5. On the other hand,
if you select endpoints in empty space, the total number
of pins is based upon dividing the distance between the
two pick points by the Pin Spacing value.
Generates the connector with a fixed spacing from one pin
to the next. This is the Pin Spacing value. If the Pin Spacing
Fixed Spacing
edit box is left blank, the fixed spacing value defaults to
the drawing's ladder default spacing value.
Modifies the pin placement to have the pins coincide with
underlying wires. The connector stretches or compresses
At Wire Crossings
to match up with underlying wires as it inserts on to the
drawing.
If the connector has more pins than underlying wires, the
excess pins are added at the end of the connector using
the default fixed spacing value.
Specifies either the starting pin number for an incrementing
series of pin numbers or the actual comma-delimited list
Pin List
of pin numbers to be used on the connector. For example,
Use point-to-point wiring tools | 1153
a pin list entry of "1" for a connector with the Pin Count
set to 8 generates a connector with pins labeled "1" through
"8." On the other hand, a pin list entry of
"1,2,3,4,A,B,C,GND" generates an 8-pin connector with
pins labeled "1", "2", "3", "4", "A", "B", "C", "GND."
If the Pin List edit box is left blank, the connector number-
ing starts at 1 and continues up through the Pin Count
value. If you define more pin list data than pin count, the
pins are used in the order they are defined. The entire list
is saved on the connector as PINLIST xdata. This can be
later referenced to add missing pins (Add Connector Pin
tool) or to assign unused pins to a child instance of the
parent connector.
Creates the connector without further prompts (i.e. no
option for inserting spacers or for breaking the connector
into 2 or more pieces).
Insert All
Gives you manual control over the insertion of the connect-
or. Displays the Custom Pin Spaces/Breaks dialog box that
Allow Spacers/Breaks
prompts you for the insertion of each connector pin prior
to committing the connector block definition to the draw-
ing file. The running count of pins inserted versus total pins
defined for the connector is listed at the top of the dialog
box. Select an option for inserting the other pins:
■Insert Next Connection: Continues building the con-
nector by inserting the next pin (repeated prompting
until all pins are inserted).
■Add Spacer: Adds a spacer in place of a pin on the
connector in order to leave room for a future pin or to
skip over a wire that is not to be broken by the connect-
or. The connector stretches its length to account for
this extra blank space.
■Break Symbol Now: Breaks connector and begins
prompt back at the connector layout dialog box. If you
terminate the command without inserting the re-
mainder of the connector, you can go to another
drawing and restart the command. You can continue
with the previous connector or discard the saved data
and start with a new one.
1154 | Chapter 14 Point-to-Point Wiring Tools

NOTE This insert of a continued, broken connect-
or must be done during the current AutoCAD
Electrical session.
■Cancel Custom: Inserts the remaining pins into the
connector without any further prompts.
Defines the new connector block definition as a child of a
parent connector. This means that after it is created it needs
Start Connector As Child
to be linked to a parent connector through a common tag-
ID value (select Edit Component and link to parent using
any of the normal methods).
Creates the child symbol with a jagged or broken top. If
unselected, the child symbol has a rounded corner determ-
Start with Break
ined by the radius dimension defined in the Size section of
the dialog box.
Orientation
Use to quickly change the connector's orientation prior to placing it into the
drawing file. This orientation change also modifies the preview to reflect the
selection.
Switches the orientation of the parametric con-
nector insertion between horizontal and vertical.
Rotate
Flips the connector about its long axis.Flip
Type
Determines the type of connector to be built as to whether it includes the
plug/receptacle combination or if it will display either the plug side or the
receptacle side.
Creates the connector as a single block file showing
both the plug and receptacle.
Plug/Receptacle Combination
Use point-to-point wiring tools | 1155
Sets the property of the connector symbol to change
the wire number through a plug/receptacle connect-
Wire Number Change
or symbol. By default, the wire numbers are main-
tained through a plug/receptacle connector.
Creates a plug/receptacle combination connector
with a line down the middle of the block to indicate
Add Divider Line
the separation of the plug and receptacle. This line
becomes part of the block definition for the connect-
or.
Creates the connector as a single block file showing
the plug representation only.
Plug Only
Creates the connector as a single block file showing
the receptacle representation only.
Receptacle Only
Display
Use to define the connector's placement on the drawing relative to other
connectors and the drawing border. This controls which side of the connector
the plug will be displayed, whether the connector goes in vertically or
horizontally, and whether the pins are visible.
Specifies whether the connector inserts vertically or horizontally.Connector
Specifies which direction the plug portion of the connector comes
in relative to the overall plug/receptacle parametric build. The
plug representation is displayed with rounded corners.
Plug
Options include vertical with the plug to the left, vertical with
the plug to the right, horizontal with the plug to the bottom, or
horizontal with the plug to the top.
Specifies which pin numbers are visible or hidden on the connect-
or. In the case of a plug/receptacle combination, options include
Pins
showing both sides, showing the plug only, showing the recept-
acle only, or hiding both.
If you select to make the pins on the plug or receptacle invisible,
the attribute and its value are still defined in the block definition
on the drawing file.
If you selected Plug Only or Receptacle Only for the Type, the
pin display options are show or hide only. These show or hide
the pin numbers on a single plug or receptacle symbol.
1156 | Chapter 14 Point-to-Point Wiring Tools
Hidden pins are still present on the symbol, but they are marked
invisible. Values assigned to the hidden pins will still show up in
various wire connection from/to reports. You can unhide hidden
attributes using the Move/Show Attribute tool.
Size
The values in the edit boxes define the parameters used to build the graphical
outline that represents the shell of the connector.
Specifies the width of the receptacle side of the connector. This
value can be the same as the plug side.
Receptacle
Specifies the width of the plug side of the connector.Plug
Specifies the distance from the first pin of the connector to the
top end of the connector.
Top
Specifies the distance from the last pin of the connector to the
bottom end of the connector.
Bottom
Specifies the fillet radius for the rounded portion of the plug
representation. If left blank or if you enter a 0.0 value, then the
Radius
corner is drawn without a fillet. If the radius value exceeds the
Plug width value, the radius value will be internally set back to
be equal to the plug width value.
Insert
Inserts the connector symbol on the drawing. If a pin count was not defined,
an error message appears indicating that you must define a pin count before
proceeding. A preview outline of the connector displays for placement on the
drawing. It shows angled corners for the plug side of the connector. An 'x'
indicates the insertion point of the connector. An arrow indicates the plug
side wire connection direction for plug/receptacle or plug-only connector
inserts or shows the wire connection direction for a receptacle-only connector
insert
Prior to committing the connector outline to the drawing, you can press TAB
on your keyboard to flip the connector through four different orientations or
press the "V" key to switch between vertical and horizontal orientations.
Connector layout
Use point-to-point wiring tools | 1157
Ribbon: Schematic tab ➤ Insert Components panel ➤ Insert Connector
drop-down ➤ Insert Connector.
Toolbar: Main Electrical
Menu: Components ➤ Insert Connector ➤ Insert Connector
Command entry: AECONNECTOR
In the Insert Connector dialog box, select Allow Spacers/Breaks and click
Insert. In the Custom Pin Spaces/Breaks dialog box, click Break Symbol Now.
Selecting Break Symbol Now on the Custom Pin Spaces/Breaks dialog box
breaks the connector and displays this dialog box for defining how you want
the rest of the pins inserted on the drawing.
Pin Spacing
Specifies the distance between the pin wire connections. This value initially
defaults to the Rung Spacing defined in Drawing Properties ➤ Drawing Format
➤ Ladder Defaults - Spacing setting for the drawing file.
Creates the connector pin spacing as fixed. The spacing is driven
by the Pin Spacing value. If the Pin Spacing edit box is left blank,
Fixed Spacing
the fixed spacing value is determined from the drawing's ladder
defaults spacing value.
Modifies the connector to have the pins coincide with underlying
wires. The connector stretches or compresses to match up with
underlying wires as it inserts on to the drawing.
At Wire Crossings
If the connector has more pins than underlying wires, the excess
pins are added at the end of the connector using the default fixed
spacing value.
Pin Insertion
Creates the connector without further prompts (for example, no
option for inserting spacers or for breaking the connector into 2
Insert All
or more pieces). When you click OK on the Connector Layout
dialog box, the block definition is committed to the drawing and
the command is complete.
1158 | Chapter 14 Point-to-Point Wiring Tools
Gives you manual control over the insertion of the connector.
Displays the Custom Pin Spaces/Breaks dialog box that prompts
Allow Spacers/Breaks
you for the insertion of each connector pin prior to committing
the connector block definition to the drawing file. The running
count of pins inserted versus total pins defined for the connector
is listed at the top of the dialog box. Select an option for inserting
the other pins:
■Insert Next Connection: Continues building the connector
by inserting the next pin (repeated prompting until all pins
are inserted).
■Add Spacer: Adds a spacer in place of a pin on the connector
in order to leave room for a future pin or to skip over a wire
that is not to be broken by the connector. The connector
stretches its length to account for this extra blank space.
■Break Symbol Now: Breaks connector and begins prompt
back at the Connector Layout dialog box. If you terminate
the command without inserting the remainder of the connect-
or, you can go to another drawing and restart the command.
You can continue with the previous connector or discard the
saved data and start with a new one.
NOTE This insert of a continued, broken connector
must be done during the current AutoCAD Electrical
session.
■Cancel Custom: Inserts the remaining pins into the connector
without any further prompts.
Connector pin numbers in use
Lists all of the pins previously used in the project and the available pins that
can be assigned to a connector. The connector tag and pin count displays
below the title bar in the dialog box.
Ribbon: Schematic tab ➤ Edit Components panel ➤ Edit Components
drop-down ➤ Edit.
Toolbar: Main Electrical
Use point-to-point wiring tools | 1159

Menu: Components ➤ Edit Component
Command entry: AEEDITCOMPONENT
Select the connector to edit. In the Insert/Edit Component dialog box, Pins
section, click List.
NOTE You can edit pin numbers when a row is selected in the grid.
Displays all available pins to be assigned to the parametrically-built
connector. The number in parenthesis () indicates the single or pair
Pin List
of pins for the connector. The first column is the value assigned to
TERM01 or TERM01P while the second column assigns its number to
TERM02 or TERM02J. Select the pin from the list to populate the grid.
The Pin list table in the catalog database (default_cat.mdb) supports
connectors drawn in the ladder diagram or connector diagram
schematics.
Displays an 'x' for all pins that are displayed since they are part of the
connector and not selected on the block being edited (the pins may
x
be on a different drawing or part of another symbol). Only the pin
numbers associated to the block selected are editable; the controls
at the bottom of the dialog box are disabled if a pin with an 'x' is se-
lected from the list.
Displays the sheet number and potential reference line number where
the connector definition is located in the project.
Sheet, Reference
Displays the plug pin number. The value changes automatically if you
edit it in the Pin Numbers section of the dialog box.
Plug
Displays the terminal descriptions that are associated to the wire
connection point. The first Description column displays the description
for the plug; the second displays the description for the receptacle.
Description
Displays the receptacle pin number. The value changes automatically
if you edit it in the Pin Numbers section of the dialog box.
Receptacle
Displays the wire numbers on either side of the combination connector
or a single wire number based on whether or not the connector is a
simple plug or jack.
Wire Numbers
1160 | Chapter 14 Point-to-Point Wiring Tools
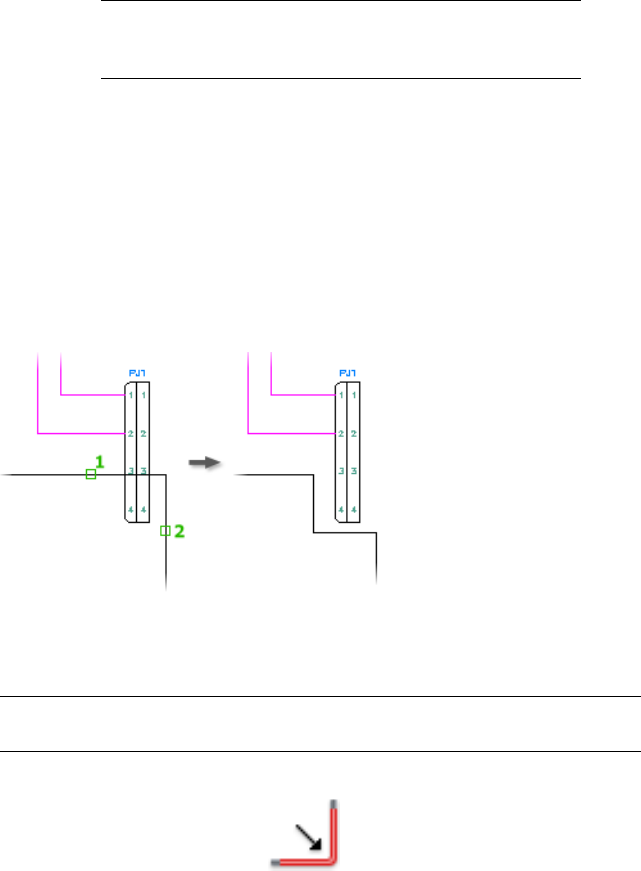
Displays the plug and receptacle pin numbers for the selected row.
Enter a new value in the edit box or click the arrows to increment or
decrement both numbers on the plug and receptacle.
Pin Numbers
NOTE If you replace pin numbers through editing, the replaced pin
numbers may go back into the Pin List if they were originally defined
in the Pin List range.
Edits the plug and receptacle terminal descriptions. The value you
enter in the edit box displays in the Description column of the grid.
Pin Descriptions
Bend wires at right angles
Bend wires at right angles
Bends a wire in a right angle and makes three right angle turns to avoid or
add geometry.
You can modify the wire defined at a right angle. You can replace the right
angle bend while maintaining the original wire connections to the
components.
NOTE This tool terminates if the bend attempts to connect two different wire
networks or if the bend bypasses more than a single right-angle turn.
1Click Schematic tab ➤ Edit Wires/Wire Numbers panel ➤ Modify Wires
drop-down ➤ Bend Wire.
2Select one of the two wires that make up a right-angle turn.
Bend wires at right angles | 1161

3Select the opposing wire that makes up the right-angle turn.
The additional wire segments are added based on the right-angle direction.
4Right-click to exit the command.
Insert multiple bus wiring
Insert multiple bus wiring
1Click Schematic tab ➤ Insert Wires/Wire Numbers panel ➤ Multiple
Bus.
2Set the horizontal and vertical spacing for the wires.
3Select the mode for defining the "starting at" position.
■Starting at component wire connection points: Select the radio button
and click OK. Select or window-select the wire connection points on
the component.
■Starting from another bus: Select the number of wires (using the
buttons or type in the edit box) and click OK. Specify the connection
point on the existing wire bus for the first wire of the new bus. Slowly
move the cursor over the other existing wires of the bus to allow the
new bus wires to connect.
■Starting in empty space: Select the starting direction (Horizontal or
Vertical), select the number of wires (using the buttons or type in the
edit box), and click OK. Specify the starting point in space for the first
wire of the new bus.
During wire insertion, the current wire type displays at the command
prompt. If starting at a component or in empty space, you can override
this by typing in the hotkey "T" and selecting a new wire type from the
Set/Edit Wire Type dialog box. The new wire type becomes the current
wire type and the command continues with the wire insertion.
As you pull the wires out, phantom wires display on your cursor indicating
the direction and number of wires to be placed on the drawing. You can
turn a corner by moving your cursor out of line with the bus. To reverse
or flip the turn's phase sequence, press "F" + Enter. The phantom wire
1162 | Chapter 14 Point-to-Point Wiring Tools
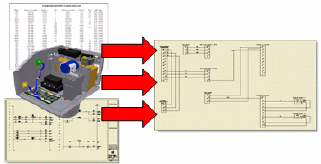
display displays in red when it detects that the routing approaches within
a wire connection trap distance of another wire.
4Click a point on the screen to set the endpoint of the wires or press "C"
+ Enter to lock down the current routing and continue to draw multiple
wires. If the bus approaches a multi-connection device, such as a
connector, it attempts to align the spacing of the bus wires to match with
the wire connections.
5Right-click to create the wires. The wires and wire connection dots insert,
and loops or gaps (if configured) automatically insert at wire crossing
points.
Import data from Autodesk Inventor Professional
Cable & Harness
From the XML export from Autodesk Inventor Professional (AIP) into AutoCAD
Electrical, you can select from a list of connectors defined in the export, and
then place the connectors onto a 2D drawing file. After the connectors are
inserted onto the drawing, click Wire on the Connector Selection dialog box
to place all wire connections to all components on the drawing file. AutoCAD
Electrical parses the file data to determine all wire From and To connections.
Once the wiring information is determined, the wires are routed making sure
to miss existing geometry on the drawing. The wire insertion tool finds the
best possible route with the fewest amount of wire loops in between the
connection reducing the requirement on gap pointers. The wires are connected
in the appropriate position on the connector representation.
As the wires are inserted, the wire types in the XML file are applied to the
Wire Layer in the AutoCAD Electrical drawing. Additionally, wire numbers
and cable marker symbols are inserted onto the drawing. The wire numbers
are inserted following the drawing's wire number setting (above wire, in-line
with wire, or below wire). The first cable marker listed in the XML file is
Import data from Autodesk Inventor Professional Cable & Harness | 1163
inserted as the parent and the subsequent markers of the same reference
designator (Cable Tag) are inserted as children.
Certain Autodesk Inventor Professional wire property names need to be
maintained inside of AutoCAD Electrical. You must make sure that your
column header names (set in the Rename User Columns dialog box) match
the property names coming out of the Autodesk Inventor Professional XML
export (set in the Autodesk Inventor Custom Properties dialog box). For
example, the property CORE SIZE maps to a user column of the Create/Edit
Wire Type dialog box if there is a column header defined as "CORE SIZE." If
mapping does not exist then the data is not maintained inside of your
AutoCAD Electrical drawing file.
Autodesk Inventor Professional properties mapped to AutoCAD Electrical
attributes
There are four Autodesk Inventor Professional assembly entity types that get
general and custom properties: component occurrences, Wire (From/To)
occurrences, cable occurrences, and splice occurrences.
DescriptionAIP Property TypeProperty Name
Component Properties
Component RefDes - TAG1 attribute
in AutoCAD Electrical
OccurrenceConnector REF DES
Autodesk Inventor part number -
Xdata in AutoCAD Electrical
DefinitionPART NUMBER
Manufacturer - Xdata in AutoCAD
Electrical
DefinitionVENDOR
Save on component - Xdata in Auto-
CAD Electrical
Definition, CustomSTRIP LENGTH
Defined in the component library
definition (part editing) - Xdata in
AutoCAD Electrical
Definition, CustomVarious user-defined *
Defined in the harness occurrence
level - Xdata in AutoCAD Electrical
Occurrence, CustomVarious user-defined *
Wire Properties
1164 | Chapter 14 Point-to-Point Wiring Tools
Unique wire number ID (occurrence
name) - AutoCAD Electrical wire
OccurrenceWire ID
number; WIRENO attribute in Auto-
CAD Electrical
Wire library definition data saved in
Cable & Harness library XML - wire
layer name in AutoCAD Electrical
DefinitionWire Definition
Defined in the wire library definition
(part editing) - Xdata in AutoCAD
Electrical
Definition, CustomVarious user-defined *
Defined in the harness occurrence
level - Xdata in AutoCAD Electrical
Occurrence, CustomVarious user-defined *
Cable Properties
Unique cable ID - TAG 1 attribute in
AutoCAD Electrical
OccurrenceCable ID
Cable library definition data saved in
Cable & Harness library XML - Xdata
in AutoCAD Electrical
DefinitionCable Definition
Cable conductor ID - RATING1 attrib-
ute in AutoCAD Electrical
DefinitionCable Wire Name
Defined in the cable library definition
(part editing) - Xdata in AutoCAD
Electrical
Definition, CustomVarious user-defined *
Defined in the harness occurrence
level - Xdata in AutoCAD Electrical
Occurrence, CustomVarious user-defined *
Splice Properties
Unique splice ID - TAG1 attribute in
AutoCAD Electrical
OccurrenceSplice ID
Splice library definition data saved in
Cable & Harness Library XML - Xdata
in AutoCAD Electrical
DefinitionSplice Definition
Import data from Autodesk Inventor Professional Cable & Harness | 1165
Defined in the splice library definition
(part editing) - Xdata in AutoCAD
Electrical
Definition, CustomVarious user-defined *
Defined in the harness occurrence
level - Xdata in AutoCAD Electrical
Occurrence, CustomVarious user-defined *
* Properties that are not defined in Autodesk Inventor Professional but are
still usable in AutoCAD Electrical.
Import connector wire lists
Use the Insert Connector from List tool to import a connector wire list from
another application, such as Autodesk Inventor Professional Cable & Harness.
NOTE If the AutoCAD Electrical drawing is missing one end of the connector or
if a connection was not found, wiring information is displayed next to the pin.
The information is written into a log file so you know AutoCAD Electrical was
unable to resolve the wire connections in the drawing. The log file name is {drawing
file name.LOG} and is found in the same folder as the drawing file.
1In Autodesk Inventor Professional Cable & Harness, define wire names
and connections for your assembly file.
2Define cable tags and conductor IDs and their connections in the assembly
file.
3Select the harness ID in the model browser and select Export Harness
Data from the Cable and Harness panel.
You are prompted to select a file name and location for the export of
harness component and wiring data. An XML file is created for import
into AutoCAD Electrical.
4In AutoCAD Electrical, create a drawing file.
5Click Schematic tab ➤ Insert Components panel ➤ Insert Connector
drop-down ➤ Insert Connector (From List.
6In the Connector List File Selection dialog box, select a connector list file
to import into AutoCAD Electrical and click Open.
7In the Connector Selection dialog box, define the connectors to insert
onto the drawing.
1166 | Chapter 14 Point-to-Point Wiring Tools
If the connector is placed or was previously placed into the project, an
'x' displays in the Placed column.
■(Optional) Specify whether to build the connector using fixed pin
spacing or to have it compress or expand to match up the pins with
underlying wire crossings.
■(Optional) Specify whether to insert the entire connector all at once
or to insert it manually, pin by pin, with an option to insert spacers
or to break the connector into two or more pieces.
■(Optional) Click the Rotate or Flip buttons to change the display of
the connector symbol.
■(Optional) Click Details for more options to define settings for the
size, shape, and display of the parametrically built connector symbols.
8Select the connectors to insert from the list and click Insert.
9Click the insertion point in the drawing for each connector.
10 In the Connector Selection dialog box, continue selecting the connectors
to insert and place them onto the drawing.
11 When all connectors are placed on the drawing, click Wire It.
Wires are generated in the drawing. Layers and XRECORDS are defined
in the drawing and applied to the lines. Wire numbers are also placed in
the drawing based on wire placement settings.
NOTE You can place the connectors on the drawing and add wires at a later time.
To do so, follow steps 1 - 9. When you want to add wires, open the Connector
Selection dialog box, and click Wire It.
Connector selection
From the XML export from Autodesk Inventor Professional into AutoCAD
Electrical, you can select from a list of connectors defined in the export, and
then place the connectors onto a 2D drawing file.
Ribbon: Schematic tab ➤ Insert Components panel ➤ Insert Connector
drop-down ➤ Insert Connector (From List).
Import data from Autodesk Inventor Professional Cable & Harness | 1167

Toolbar: Insert Connector
Menu: Components ➤ Insert Connector ➤ Insert Connector from List
Command entry: AECONNECTORLIST
The first time you run this tool, select the connector list file (.xml, .xls, .mdb,
and.csv) in the Connector List File Selection dialog box and click Open. The
connector list file is retained in memory for subsequent selections of this tool.
NOTE If you select to open a spreadsheet or database that contains multiple sheets
or tables, the Select Input Source dialog box appears. This dialog box lets you
select the sheet or table to open.
Connector List
Columns are not editable. You can sort the connector details alphanumerically
by clicking the column headers.
Displays an "x" if the connector is placed or was previously placed
into the project.
Placed
Displays the Installation code for the connector, if defined in the
XML import file.
Installation
Displays the Location code for the connector, if defined in the
XML import file.
Location
Displays the reference designation (RefDes) for the connector
from the Autodesk Inventor Professional (AIP) assembly or tags
found in the XML import file.
Tag
Displays the total pin count for the tag.Total Pins
Displays the number of pins wired inside of the AIP assembly
found in the import file.
Wired Pins
Displays the occurrence name of the part defined in the AIP
browser. The occurrence name is typically the part number of
the component, however you can overwrite the name.
Description
Show All displays all connectors in the grid whether they have
been placed or not while Hide Placed removes previously placed
connectors from the grid list.
Show All/Hide Placed
1168 | Chapter 14 Point-to-Point Wiring Tools

Displays all connectors found in the import file in the grid display.
The static text shows the total number of connector components
listed in the grid control.
Connectors
Displays all splices found in the import file in the grid display.
The static text shows the total number of splices listed in the grid
control.
Splices
NOTE If there is a selection active when filtering the list and one or more of the
selected rows drops out of the display, a warning message displays letting you
decide to proceed or not.
Layout
Specifies the spacing for the distance between pin connections
on their parametrically built connector symbol. The default spa-
Pin Spacing
cing is defined from the Rung Spacing setting for the drawing.
The edited value is persistent for the AutoCAD Electrical session
and reverts to the default upon every time you start the applica-
tion
Creates the connector pin spacing as fixed. The fixed spacing
value is driven from the Pin Spacing setting.
Fixed Spacing
Modifies the connector to have the pins meet the underlying
wires. AutoCAD Electrical searches the wires and stretches the
connector before adding the block definition to the drawing
At Wire Crossings
If there are more pins associated to the connector than there are
wires, AutoCAD Electrical finds the wires first, then continues the
connector definition at the fixed spacing
Creates the connector using the number of pins wired in the AIP
assembly and found in the import file. This option reduces the
Wired Pins
size of the overall connector based upon pins used and not library
definition. If this option is not selected, the connector is created
using the total pins on the connector as defined in the export/im-
port file.
Creates the connector without inserting spacers or breaking the
connector. When you click Insert the block definition is committed
to the drawing and the command is complete.
Insert All
Import data from Autodesk Inventor Professional Cable & Harness | 1169

Displays the Custom Pin/Spaces dialog box that prompts you for
the insertion of each connector pin before committing the con-
Allow Spacers/Breaks
nector block definition to the drawing file. The number of pins
inserted in the block definition out of the total number of pins
defined in the connector is indicated at the top of the dialog box.
Select an option for inserting the other pins:
■Insert Next Connection: Continues adding pins to the con-
nector until all are defined
■Add Spacer: Adds a spacer in place of a pin on the connector;
connector stretches its definition.
■Break Symbol Now: Breaks connector and begins prompt
back at the connector layout dialog box.
■Cancel Custom: Places connector in as if you selected Insert
all on the portion it is working on. Does not remove preceding
break commands.
Defines a symbol to use to display a splice in the wire. Type in a
symbol name to use when inserting splices or click Browse to se-
Splice Symbol Name
lect the symbol name to use. If left blank, once you click Insert,
an error message displays. Select a Splice Symbol Name to insert
the splice onto the drawing.
Orientation
Quickly change the connectors orientation before placing it into the drawing
file. This orientation change also modifies the preview to reflect the selection.
Switches the orientation of the parametric con-
nector insertion between horizontal and vertical.
Rotate
Flips the connector insertion about its long axis.Flip
Type
Determines the overall style of the connector.
Creates the connector as one AutoCAD Electrical
block file with both the plug and receptacle.
Plug/Receptacle Combination
1170 | Chapter 14 Point-to-Point Wiring Tools
Sets the property of the connector symbol to change
the wire number through the connector symbol. By
Wire Number Change
default, the wire numbering is the same on both
sides of the connector.
Creates the connector with a line down the middle
of the block to indicate the separation of the plug
Add Divider Line
and receptacle. This line becomes part of the block
definition for the connector.
Creates the connector as a single block file with the
plug representation only.
Plug Only
Creates the connector as a single block file with the
receptacle representation only.
Receptacle Only
Display
Defines the placement for the connector on the drawing relative to other
connectors and the drawing border. This controls which side of the connector
the plug is displayed, whether the connector goes in vertically or horizontally,
and whether the pins are visible.
Specifies whether the connector comes into the drawing vertically or
horizontally relative to other connectors and the drawing border.
Connector
Specifies which direction the plug portion of the connector comes in
relative to the overall plug/receptacle parametric build. The plug
representation is displayed with rounded corners.
Plug
Options include:
■Vertical with the plug to the left
■Vertical with the plug to the right
■Horizontal with the plug to the bottom
■Horizontal with the plug to the top
Specifies which pin numbers are visible or hidden on the connector.
Options include showing both sides, showing the plug only, showing
the receptacle only, or hiding both.
Pins
If you select to make the pins on the plug or receptacle invisible, the
attribute and its value are still defined in the block definition on the
drawing file.
Import data from Autodesk Inventor Professional Cable & Harness | 1171
If you selected Plug Only or Receptacle Only for the Type, the pin
display options are show or hide only. These show or hide the pin
numbers on a single plug or receptacle symbol.
Size
Defines the outside shell size for the connector. The values in the edit boxes
build the graphical shell that represents the connector on the point to point
diagram.
Specifies the overall thickness of the receptacle side of the con-
nector. This value can be the same as the plug side.
Receptacle
When the connector is built, the receptacle side wire connection
attribute is moved from the insertion point on the divider line to
the outside line representing the receptacle. The associated ter-
minal pin attribute (TERM01_) travels half the distance as the
wire connection attribute placing itself in the middle between
the dimension on the divider line.
Specifies the overall thickness of the plug side of the connector.
This value can be the same as the receptacle side.
Plug
When the connector is built, the plug side wire connection attrib-
ute is moved from the insertion point on the divider line to the
outside line representing the plug. The associated terminal pin
attribute (TERM01_) travels half the distance as the wire connec-
tion attribute placing itself in the middle between the dimension
on the divider line.
Specifies the distance from the top or breaking point of the con-
nector to the first or next wire connection point. This feature
Top
determines where the top line is drawn relative to the first master
symbol insertion point. The distance is used for the entire con-
nector or breaking the connector.
Specifies the distance from the bottom or breaking point of the
connector to the last or previous wire connection point. This
Bottom
feature determines where the bottom line is drawn relative to the
last master symbol insertion point. The distance is used for the
entire connector or breaking the connector.
Specifies the radial dimension of the rounded portion of the plug
representation. If left blank, a radius is not created on the plug
Radius
connector. If you enter a value that exceeds the overall plug side
1172 | Chapter 14 Point-to-Point Wiring Tools

distance, the radius value is erased. The radius is not created on
the plug connector.
Pick File
Displays the Connector List File Selection dialog box to select a new file for
import.
Wire It
Reviews connectors placed on the active drawing and runs the wiring
commands to make connections between the connectors.
■When both ends of the wire connections are found on the active drawing,
the wires are generated between the two points. Wire numbering is added
based on current configurations.
■When only one end of the wire connection is found on the active drawing,
text is placed next to the connector in the X?WIREnn wire annotation
attribute on the connector symbol. This text is overwritten when the second
end of the wire is placed on the drawing and the Wire It command is run
again.
■When neither connection for a wire is on the active drawing, the wiring
command is ignored until you add the connectors into the drawing file.
NOTE If the AutoCAD Electrical drawing is missing one end of the connector or
if a connection was not found, wiring information is displayed next to the pin.
The information is written into a log file so you know AutoCAD Electrical was
unable to resolve the wire connections in the drawing. The log file name is {drawing
filename.LOG} and is found in the same folder as the drawing file.
Insert
Upon selection of one or more rows in the grid display, this button is enabled.
Once selected, the parametric connector program launches to create a
connector image in the drawing.
Places one connector at a time and returns to the Connect-
or Selection dialog box with the connector row marked as
'x.'
Single row selection
Places the selected connectors in consecutive order. Steps
through the list of connectors previously selected in the
Multiple row selection
Import data from Autodesk Inventor Professional Cable & Harness | 1173

dialog box, placing them in the drawing one at a time.
After the connectors are created the Connector Selection
dialog box appears with the connector rows marked as 'x.'
Overview of the spreadsheet import file structure
You can select various file types (including XLS, CSV, MDB, and XML) to
import into AutoCAD Electrical. For the Insert Connector from List tool to
work, the spreadsheet and CSV import file must have the following structure.
The spreadsheet for import allows 27 columns per record. The first row in the
CSV or XLS file is treated as a header row, and is skipped in the import. All
columns must exist and the required fields (bolded) determine the connector
to be used in the Connector Selection dialog box.
NOTE The structure of this file does not apply to an XML import.
Column TypePurposeFieldPosition
TextCMP1: C = Connector/ S = SpliceTYPE11
TextInstallation Code of CMP1INST12
TextLocation Code of CMP1LOC13
TextComponent 1CMP14
TextConnected pin on CMP1PIN15
TextDescription of CMP1DESC16
TextCatalog number for CMP1CAT17
TextManufacturer of CAT1MFG18
TextAssembly code for CMP1ASM19
TextCMP2: C = Connector/S = SpliceTYPE210
TextInstallation Code of CMP2INST211
TextLocation Code of CMP2LOC212
1174 | Chapter 14 Point-to-Point Wiring Tools
TextComponent 2CMP213
TextConnected pin on CMP2PIN214
TextDescription of CMP2DESC215
TextCatalog number of CMP2CAT216
TextManufacturer of CAT2MFG217
TextAssembly code for CMP2ASM218
TextWire number (may be blank)WIRENO19
TextWire layer nameWIRELAY20
TextCable Installation CodeCBLINST21
TextCable Location CodeCBLLOC22
TextCable tag nameCBL23
TextCable wire (conductor) colorCBLWCLR24
TextCable catalog itemCBLCAT25
TextCable catalog manufacturerCBLMFG26
TextCable assembly codeCBLASM27
The MDB file must contain a table with the abovementioned 27 columns.
Each column should be defined using the VARCHAR data type of an
appropriate size to suit the data. The names of the columns in the table are
not important, but the position is.
Import connector wire lists
Use the Insert Connector from List tool to import a connector wire list from
another application, such as Autodesk Inventor Professional Cable & Harness.
Overview of the spreadsheet import file structure | 1175

NOTE If the AutoCAD Electrical drawing is missing one end of the connector or
if a connection was not found, wiring information is displayed next to the pin.
The information is written into a log file so you know AutoCAD Electrical was
unable to resolve the wire connections in the drawing. The log file name is {drawing
file name.LOG} and is found in the same folder as the drawing file.
1In Autodesk Inventor Professional Cable & Harness, define wire names
and connections for your assembly file.
2Define cable tags and conductor IDs and their connections in the assembly
file.
3Select the harness ID in the model browser and select Export Harness
Data from the Cable and Harness panel.
You are prompted to select a file name and location for the export of
harness component and wiring data. An XML file is created for import
into AutoCAD Electrical.
4In AutoCAD Electrical, create a drawing file.
5Click Schematic tab ➤ Insert Components panel ➤ Insert Connector
drop-down ➤ Insert Connector (From List.
6In the Connector List File Selection dialog box, select a connector list file
to import into AutoCAD Electrical and click Open.
7In the Connector Selection dialog box, define the connectors to insert
onto the drawing.
If the connector is placed or was previously placed into the project, an
'x' displays in the Placed column.
■(Optional) Specify whether to build the connector using fixed pin
spacing or to have it compress or expand to match up the pins with
underlying wire crossings.
■(Optional) Specify whether to insert the entire connector all at once
or to insert it manually, pin by pin, with an option to insert spacers
or to break the connector into two or more pieces.
■(Optional) Click the Rotate or Flip buttons to change the display of
the connector symbol.
■(Optional) Click Details for more options to define settings for the
size, shape, and display of the parametrically built connector symbols.
1176 | Chapter 14 Point-to-Point Wiring Tools
8Select the connectors to insert from the list and click Insert.
9Click the insertion point in the drawing for each connector.
10 In the Connector Selection dialog box, continue selecting the connectors
to insert and place them onto the drawing.
11 When all connectors are placed on the drawing, click Wire It.
Wires are generated in the drawing. Layers and XRECORDS are defined
in the drawing and applied to the lines. Wire numbers are also placed in
the drawing based on wire placement settings.
NOTE You can place the connectors on the drawing and add wires at a later time.
To do so, follow steps 1 - 9. When you want to add wires, open the Connector
Selection dialog box, and click Wire It.
Connector selection
From the XML export from Autodesk Inventor Professional into AutoCAD
Electrical, you can select from a list of connectors defined in the export, and
then place the connectors onto a 2D drawing file.
Ribbon: Schematic tab ➤ Insert Components panel ➤ Insert Connector
drop-down ➤ Insert Connector (From List).
Toolbar: Insert Connector
Menu: Components ➤ Insert Connector ➤ Insert Connector from List
Command entry: AECONNECTORLIST
The first time you run this tool, select the connector list file (.xml, .xls, .mdb,
and.csv) in the Connector List File Selection dialog box and click Open. The
connector list file is retained in memory for subsequent selections of this tool.
NOTE If you select to open a spreadsheet or database that contains multiple sheets
or tables, the Select Input Source dialog box appears. This dialog box lets you
select the sheet or table to open.
Overview of the spreadsheet import file structure | 1177

Connector List
Columns are not editable. You can sort the connector details alphanumerically
by clicking the column headers.
Displays an "x" if the connector is placed or was previously placed
into the project.
Placed
Displays the Installation code for the connector, if defined in the
XML import file.
Installation
Displays the Location code for the connector, if defined in the
XML import file.
Location
Displays the reference designation (RefDes) for the connector
from the Autodesk Inventor Professional (AIP) assembly or tags
found in the XML import file.
Tag
Displays the total pin count for the tag.Total Pins
Displays the number of pins wired inside of the AIP assembly
found in the import file.
Wired Pins
Displays the occurrence name of the part defined in the AIP
browser. The occurrence name is typically the part number of
the component, however you can overwrite the name.
Description
Show All displays all connectors in the grid whether they have
been placed or not while Hide Placed removes previously placed
connectors from the grid list.
Show All/Hide Placed
Displays all connectors found in the import file in the grid display.
The static text shows the total number of connector components
listed in the grid control.
Connectors
Displays all splices found in the import file in the grid display.
The static text shows the total number of splices listed in the grid
control.
Splices
NOTE If there is a selection active when filtering the list and one or more of the
selected rows drops out of the display, a warning message displays letting you
decide to proceed or not.
1178 | Chapter 14 Point-to-Point Wiring Tools
Layout
Specifies the spacing for the distance between pin connections
on their parametrically built connector symbol. The default spa-
Pin Spacing
cing is defined from the Rung Spacing setting for the drawing.
The edited value is persistent for the AutoCAD Electrical session
and reverts to the default upon every time you start the applica-
tion
Creates the connector pin spacing as fixed. The fixed spacing
value is driven from the Pin Spacing setting.
Fixed Spacing
Modifies the connector to have the pins meet the underlying
wires. AutoCAD Electrical searches the wires and stretches the
connector before adding the block definition to the drawing
At Wire Crossings
If there are more pins associated to the connector than there are
wires, AutoCAD Electrical finds the wires first, then continues the
connector definition at the fixed spacing
Creates the connector using the number of pins wired in the AIP
assembly and found in the import file. This option reduces the
Wired Pins
size of the overall connector based upon pins used and not library
definition. If this option is not selected, the connector is created
using the total pins on the connector as defined in the export/im-
port file.
Creates the connector without inserting spacers or breaking the
connector. When you click Insert the block definition is committed
to the drawing and the command is complete.
Insert All
Displays the Custom Pin/Spaces dialog box that prompts you for
the insertion of each connector pin before committing the con-
Allow Spacers/Breaks
nector block definition to the drawing file. The number of pins
inserted in the block definition out of the total number of pins
defined in the connector is indicated at the top of the dialog box.
Select an option for inserting the other pins:
■Insert Next Connection: Continues adding pins to the con-
nector until all are defined
■Add Spacer: Adds a spacer in place of a pin on the connector;
connector stretches its definition.
■Break Symbol Now: Breaks connector and begins prompt
back at the connector layout dialog box.
Overview of the spreadsheet import file structure | 1179

■Cancel Custom: Places connector in as if you selected Insert
all on the portion it is working on. Does not remove preceding
break commands.
Defines a symbol to use to display a splice in the wire. Type in a
symbol name to use when inserting splices or click Browse to se-
Splice Symbol Name
lect the symbol name to use. If left blank, once you click Insert,
an error message displays. Select a Splice Symbol Name to insert
the splice onto the drawing.
Orientation
Quickly change the connectors orientation before placing it into the drawing
file. This orientation change also modifies the preview to reflect the selection.
Switches the orientation of the parametric con-
nector insertion between horizontal and vertical.
Rotate
Flips the connector insertion about its long axis.Flip
Type
Determines the overall style of the connector.
Creates the connector as one AutoCAD Electrical
block file with both the plug and receptacle.
Plug/Receptacle Combination
Sets the property of the connector symbol to change
the wire number through the connector symbol. By
Wire Number Change
default, the wire numbering is the same on both
sides of the connector.
Creates the connector with a line down the middle
of the block to indicate the separation of the plug
Add Divider Line
and receptacle. This line becomes part of the block
definition for the connector.
Creates the connector as a single block file with the
plug representation only.
Plug Only
1180 | Chapter 14 Point-to-Point Wiring Tools
Creates the connector as a single block file with the
receptacle representation only.
Receptacle Only
Display
Defines the placement for the connector on the drawing relative to other
connectors and the drawing border. This controls which side of the connector
the plug is displayed, whether the connector goes in vertically or horizontally,
and whether the pins are visible.
Specifies whether the connector comes into the drawing vertically or
horizontally relative to other connectors and the drawing border.
Connector
Specifies which direction the plug portion of the connector comes in
relative to the overall plug/receptacle parametric build. The plug
representation is displayed with rounded corners.
Plug
Options include:
■Vertical with the plug to the left
■Vertical with the plug to the right
■Horizontal with the plug to the bottom
■Horizontal with the plug to the top
Specifies which pin numbers are visible or hidden on the connector.
Options include showing both sides, showing the plug only, showing
the receptacle only, or hiding both.
Pins
If you select to make the pins on the plug or receptacle invisible, the
attribute and its value are still defined in the block definition on the
drawing file.
If you selected Plug Only or Receptacle Only for the Type, the pin
display options are show or hide only. These show or hide the pin
numbers on a single plug or receptacle symbol.
Size
Defines the outside shell size for the connector. The values in the edit boxes
build the graphical shell that represents the connector on the point to point
diagram.
Specifies the overall thickness of the receptacle side of the con-
nector. This value can be the same as the plug side.
Receptacle
Overview of the spreadsheet import file structure | 1181
When the connector is built, the receptacle side wire connection
attribute is moved from the insertion point on the divider line to
the outside line representing the receptacle. The associated ter-
minal pin attribute (TERM01_) travels half the distance as the
wire connection attribute placing itself in the middle between
the dimension on the divider line.
Specifies the overall thickness of the plug side of the connector.
This value can be the same as the receptacle side.
Plug
When the connector is built, the plug side wire connection attrib-
ute is moved from the insertion point on the divider line to the
outside line representing the plug. The associated terminal pin
attribute (TERM01_) travels half the distance as the wire connec-
tion attribute placing itself in the middle between the dimension
on the divider line.
Specifies the distance from the top or breaking point of the con-
nector to the first or next wire connection point. This feature
Top
determines where the top line is drawn relative to the first master
symbol insertion point. The distance is used for the entire con-
nector or breaking the connector.
Specifies the distance from the bottom or breaking point of the
connector to the last or previous wire connection point. This
Bottom
feature determines where the bottom line is drawn relative to the
last master symbol insertion point. The distance is used for the
entire connector or breaking the connector.
Specifies the radial dimension of the rounded portion of the plug
representation. If left blank, a radius is not created on the plug
Radius
connector. If you enter a value that exceeds the overall plug side
distance, the radius value is erased. The radius is not created on
the plug connector.
Pick File
Displays the Connector List File Selection dialog box to select a new file for
import.
1182 | Chapter 14 Point-to-Point Wiring Tools

Wire It
Reviews connectors placed on the active drawing and runs the wiring
commands to make connections between the connectors.
■When both ends of the wire connections are found on the active drawing,
the wires are generated between the two points. Wire numbering is added
based on current configurations.
■When only one end of the wire connection is found on the active drawing,
text is placed next to the connector in the X?WIREnn wire annotation
attribute on the connector symbol. This text is overwritten when the second
end of the wire is placed on the drawing and the Wire It command is run
again.
■When neither connection for a wire is on the active drawing, the wiring
command is ignored until you add the connectors into the drawing file.
NOTE If the AutoCAD Electrical drawing is missing one end of the connector or
if a connection was not found, wiring information is displayed next to the pin.
The information is written into a log file so you know AutoCAD Electrical was
unable to resolve the wire connections in the drawing. The log file name is {drawing
filename.LOG} and is found in the same folder as the drawing file.
Insert
Upon selection of one or more rows in the grid display, this button is enabled.
Once selected, the parametric connector program launches to create a
connector image in the drawing.
Places one connector at a time and returns to the Connect-
or Selection dialog box with the connector row marked as
'x.'
Single row selection
Places the selected connectors in consecutive order. Steps
through the list of connectors previously selected in the
Multiple row selection
dialog box, placing them in the drawing one at a time.
After the connectors are created the Connector Selection
dialog box appears with the connector rows marked as 'x.'
Overview of the spreadsheet import file structure | 1183
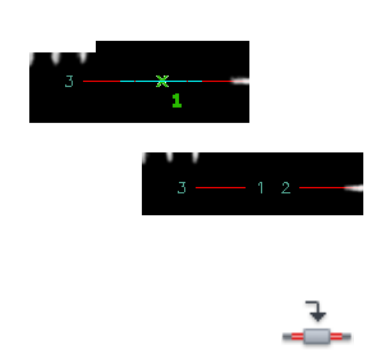
Insert splices
Insert splices
Inserts a splice symbol selected from the icon menu.
The splice symbol is an in-line connection symbol allowing one or more wires
to connect at each end. The default splice symbol triggers a wire number
change through the symbol.
1Click Schematic tab ➤ Insert Components panel ➤ Insert Connector
drop-down ➤ Insert Splice.
The Splice Symbols dialog box displays.
2Select the splice to insert from the icon menu, enter the splice name in
the Type it box, or click Browse to browse to and select the symbol from
another location.
3Click OK.
4Pick the insertion point on the drawing. Place the symbol on an existing
wire, causing the symbol to break the wire or place it in empty space
(where you can later draw a wire through the symbol or connect one or
more wires to each end of it).
The Insert/Edit Component dialog box displays.
5Assign the catalog information, description, and other information as
required.
6Click OK.
1184 | Chapter 14 Point-to-Point Wiring Tools

Project-Wide Tools
Move from reference to reference
Move from reference to reference
Use the Surfer tool to move from reference to reference across the project drawing
set. A new window opens and the original window closes when Surf is selected
unless you hold the Shift key while running the command.
Start the Surfer
1Click Project tab ➤ Other Tools panel ➤ Surfer drop-down ➤ Surfer.
2Select a component tag, catalog number, wire number, or item number on
the current drawing. Or, press Enter to use the Type it to Surf it dialog box
to enter the component tag, catalog number, wire number, or item number.
NOTE You can also select a report table cell containing any of them to surf
on. If the selected cell does not contain any of the surf-able fields, AutoCAD
Electrical looks in the selected row for a surf-able field. If the report is the Wire
From/To or Component Wire List report, it looks for the Wire Number field
first, then a Tag field, and finally a Catalog Number field. If the report is a Bill
of Materials report, it looks for a Catalog Number field first, then the Tag field.
For all other reports, AutoCAD Electrical looks for the Tag field first, then the
Catalog Number field. If a non-surfable cell is selected, it looks for the
component tag, then a wire number, and finally a catalog number.
15
1185

All references relating to the component, including panel layout and
panel nameplate references, display in the Surf dialog box
3Double-click any reference listed in the Surf dialog box to zoom in on
the selected reference. If the reference is on one or more drawings, each
drawing opens automatically.
TIP Use the Type column to select the object to surf to. The codes are as
follows:
■C - Component Symbol
■P - Parent or Standalone Schematic or One-Line Symbol
NOTE A one-line symbol is indicated by a “1-” value in the Category
column.
■T - Terminal
■W - Wire Number
■# - Panel Layout Symbol
■# np - Panel Layout nameplate reference
4Using the Surf dialog box, edit the component, display a BOM listing for
each reference or select a different component reference.
5Click Close.
Continue a previous surf session
At any time, you can continue a previous surf session from the point where
it left off.
1Click Project tab ➤ Other Tools panel ➤ Surfer drop-down ➤ Continue
Surfer.
All references relating to the component, including panel layout and
panel nameplate references, are displayed in the Surf dialog box.
2Double-click any reference listed in the Surf dialog box to zoom in on
the selected reference.
1186 | Chapter 15 Project-Wide Tools
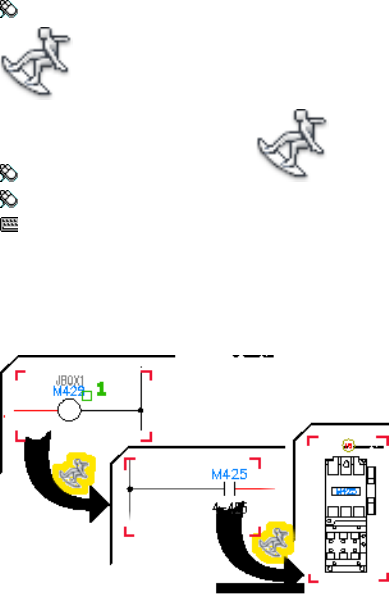
If the reference is on one or more drawings, each drawing is opened
automatically.
3Using the Surf dialog box, edit the component, display a BOM listing for
each reference or select a different component reference.
4Click Close.
Surf
Surfs to related references of an item you select.
Ribbon: Project tab ➤ Other Tools panel ➤ Surfer drop-down ➤ Surfer.
Toolbar: Main Electrical 2
Menu: Projects ➤ Surfer
Command entry: AESURF
Moves from reference to reference across the project drawing set. You can surf
on a component tag, catalog number, wire number, item number, or a report
table cell containing any of these types of values. Surf a wire network following
source and destination signals.
When surfing on a table inserted by the Terminal Strip Editor, you can select
the title cell to surf on the Tagstrip value even if the Tagstrip is not included
in the title. If you select a cell that is not surfable (such as the Tag, Catalog,
or Wire Number cell) the Tagstrip value is surfed for the terminal strip.
Move from reference to reference | 1187

NOTE Your dialog box can differ depending on whether you are moving from
reference to reference across the project drawing set or looking for problems
related to wire signal source or destination codes.
When surfing for source or destination signals, the Surf dialog box displays
the type (Src or Dst), sheet/reference value and description.
Displays the extra non-Installation/Location
matching references when in IEC tagging mode. If
Show more
unselected, only the exact surf matches display in
the list.
NOTE Unavailable if there are not any non-Install-
ation/Location matching references or if you are
not in IEC tagging mode.
changes on the active drawing visible to the surfing
tool.
Freshen
Edits a reference using the Insert/Edit Component
dialog box.
Edit
Displays a BOM listing of the highlighted reference.Catalog Check
NOTE The reference must have catalog and man-
ufacturer values.
Moves the view in the active viewport.Pan
Saves the current zoom factor on the WD_M block.Zoom Save
Increases the apparent magnification of the drawing
area. The zoom factor is related to the smaller of
Zoom In
the active default dimension text size of the drawing
(DIMTXT) and text size (TEXTSIZE). The smaller this
value is, the closer the zoom is on the reference.
Delete the instance that is currently displayed.Delete
NOTE Child and other related devices are not de-
leted.
Changes the component terminal or signal refer-
ence you want to surf.
Pick New List
1188 | Chapter 15 Project-Wide Tools

Reduces the apparent magnification of the drawing
area.
Zoom Out
Goes directly to the reference of the highlighted
entry.
Go to
Special codes in the surf list box
Component symbolc
Parent or standalone schematic or one-line symbolp
NOTE A one-line symbol is indicated by a “1-” value in the Category
column.
Terminalt
Wire numberw
Panel layout symbol#
Panel layout nameplate reference# np
Move between drawings
Move between drawings
Use Next and Previous to move among the drawings inside of the active
project. A new window is opened and the original window is closed when
Next or Previous are selected unless you hold the Shift key while running the
commands.
1Open a drawing file from the active project.
2Click Project tab ➤ Other Tools panel ➤ Next DWG.
or
Move between drawings | 1189

Click Project tab ➤ Other Tools panel ➤ Previous DWG.
3Continue moving among the drawings until the file you are looking for
is opened.
4Select Window ➤ {drawing file name} to close the drawing after you
modify anything.
You can also close a drawing file by right-clicking the file name in the
Project Manager and selecting Close from the context menu.
Plot one or more drawings
Plot one or more drawings
Batch plot the full drawing set or a subsection of the drawing set.
1Click Project tab ➤ Project Tools panel ➤ Manager.
2 On the Project Manager, click the arrow on the Publish/Plot tool,
and select Plot Project.
3Select one or more drawings to plot.
4Click OK.
5In the Batch Plotting Options and Order dialog box, select the layout tab
to plot.
6Select the output device.
■Use plot config (.pc3): Click to use an existing plotter configuration
file (.pc3), enter the file name or click Browse to select the file.
A plotter configuration file contains information such as the device
driver and model, the output port to which the device is connected,
and various device-specific settings.
■Use layout tab’s default: Click to use the default plotter configuration.
1190 | Chapter 15 Project-Wide Tools
7Click Detailed Plot Configuration mode to turn on or turn off the options
set within the Detailed Plot Configuration Option dialog box.
8Click ON or OFF.
9Select the order to output the plot:
■OK: Output plots in the selected order.
■OK-Reverse: Output plots in the reverse order.
10 Click OK to save any open drawings.
11 Click OK Project.
Batch plotting options and order
Batch plot the full drawing set or a subsection of the drawing set.
Ribbon: Project tab ➤ Project Tools panel ➤ Manager.
Toolbar: Main Electrical 2
Menu: Projects ➤ Project ➤ Project Manager
Command entry: AEPROJECT
On the Project Manager, click the arrow on the Publish/Plot tool , and
select Plot Project. Select the drawings to process and click OK.
Layout tab to plot
Selects the layout tab to plot. Change the tab by selecting from the pick list.
(Optional) For each drawing
Run an optional script file containing a list of com-
mands to execute BEFORE the plot command is is-
sued.
Run a pre-plot command script file
The default script file name is preplot.scr, located in
AutoCAD Electrical user subdirectory.
Plot one or more drawings | 1191

Run an optional script file containing a list of com-
mands to execute AFTER the plot command is issued.
Run a post-plot command script file
The default script file name is postplot.scr, located
in AutoCAD Electrical user subdirectory.
NOTE Changes to drawings are not saved during
the plotting process. Additionally, the plot time and
date stamp text is discarded after the plot is com-
plete. To preserve changes made during the plotting
process, add the QSAVE command into the pre- or
post-plot script file.
Output device name
A plotter configuration file contains information such as the device driver and model, the output
port to which the device is connected, and various device-specific settings.
Use an existing plotter configuration file (.pc3).Use plot config (.pc3)
Use the default plotter configuration.Use layout tab's default
NOTE If you are plotting to a file you must also select the Yes: plot to= option.
The plot file name is generated automatically based on the drawing name. The
plot folder is the same as the drawing.
Detailed plot configuration mode
Turns detailed plot configuration options on or off.
Enter an optional page setup name when plot
configuration options are turned off.
Optional page setup name
Select an option for the pick list when plot con-
figuration options are turned off.
Pick list (from current drawing)
Plot to file
Enter a subdirectory to plot to or leave blank to plot to the subdirectory where
the drawings are located.
1192 | Chapter 15 Project-Wide Tools
Order
Outputs plots in the selected orderOK
Outputs plots in the reverse order.OK-Reverse
Project-wide utility
Project-wide utilities
Provides the means for operations on wire numbers, component tags, attribute
text, wire types, and item numbers. You can define scripts and apply them
project-wide.
Ribbon: Project tab ➤ Project Tools panel ➤ Utilities.
Toolbar: Project
Menu: Projects ➤ Project-Wide Utilities
Command entry: AEUTILITIES
Select project drawings and perform any of the following:
■Erase, reset, fix, or unfix wire numbers.
■Fix or unfix component tags.
■Fix or unfix item numbers.
■Clear signal cross-referencing.
■Run a user-specified script file.
■Change attribute text size or style.
■Import wire types from another drawing or drawing template.
You can have multiple drawings open at any time. However, to maximize
performance and memory usage, minimize the number of open drawings
when running project-wide commands.
Project-wide utility | 1193

Wire Numbers
Select to keep wire numbers the same, erase specified wire numbers, reset
specified wire numbers, or set wire numbers to fixed or normal.
Signal Arrow Cross-reference text
Select to maintain the signal arrow cross-reference text or to remove all signal
arrow cross-reference text across the current project.
Parent Component Tags: Fix/Unfix
Select to maintain the component tags or to set all parent component tags to
fixed or normal across the current project.
Item Numbers: Fix/Unfix
Select to maintain the item numbers or to set all item numbers to fixed or
normal across the current project. If you run Resequence Item Numbers on
page 1602 later on, fixed item numbers do not change.
Change Attribute
Click Setup to select the attributes to change, and then
enter the height and width definitions for the selected at-
tributes.
Change Attribute Size
NOTE If you do not want the attribute height or width to
change, do not enter a value definition.
Click Setup to select a text font to apply to the text style
used on component attributes.
Change Style
For each drawing
Enter the name or browse to a command script file to use for each drawing
in the current project or to purge all blocks.
Wire Types
Imports wire types defined on another drawing or drawing template. Enter
the drawing or template name or browse to it using the browse button. The
program reads the specified drawing and extracts all wire type information.
1194 | Chapter 15 Project-Wide Tools

Click Setup to display the Import Wire Types on page 903 dialog box where
you:
■Select the wire types to import.
■Define whether to overwrite any Wire Numbering and USERn differences
for existing wire types.
■Define whether to overwrite color and linetype differences for existing
wire layers.
Create a project-wide script file
Create a project-wide script file
You can run an AutoCAD script file against one or more drawings in the
current project.
For example, to ensure that all drawings are set to model space and zoomed
extents:
1Create an ASCII text script file called model_ext.scr.
2Add the following AutoCAD commands and AutoLISP functions:
(setvar "TILEMODE" 0)
ZOOM EXT
(load "c:\\myprograms\\chktitle.lsp")
NOTE Double backslashes must be used.
CHKTITLE
QSAVE
3Test the script for proper operation.
■On the current drawing, issue the SCRIPT command, followed by the
script file name.
■If the script runs properly, it is ready for project-wide use.
Renumber Ladder References
Renumber Ladders
Create a project-wide script file | 1195
Renumbers ladder references project-wide.
Ribbon: Schematic tab ➤ Edit Wires/Wire Numbers panel ➤ Modify
Ladder drop-down ➤ Renumber Ladder Reference.
Toolbar: Ladders
Menu: Wires ➤ Ladders ➤ Renumber Ladder Reference
Command entry: AERENUMBERLADDER
Enter the first ladder line reference number.1st drawing, 1st ladder, 1st line ref-
erence number
Select an option for ladders on subsequent drawings.2nd drawing and beyond
■Use next sequential reference - increment from the last
line reference on the previous drawing.
■Skip, drawing to drawing count - enter an amount to
skip for the first ladder reference of the next drawing.
Project-wide update or retag
Project-wide update or retag
Resequences or updates component tags, wire numbers, cross references, signal
references, select drawing properties, ladders, and title blocks.
Ribbon: Project tab ➤ Project Tools panel ➤ Update/Retag.
Toolbar: Project
Menu: Projects ➤ Project-Wide Update/Retag
Command entry: AEPROJUPDATE
In one command, modify drawing properties and sheet values, renumber
ladders, retag components, redo cross referencing, and update title blocks.
1196 | Chapter 15 Project-Wide Tools

Component Retag
Retag all nonfixed components.
NOTE If Ladder References Resequence is selected, the component retag process
is performed after the ladder resequencing is complete.
Component Cross-reference Update
Updates the cross-referencing for components on selected drawings.
NOTE Cross-references are updated after other options such as component retag
or ladder resequencing are performed.
Wire Number and Signal Tag/Retag
Sets options for wire number retagging.
Click Setup to display the Wire Tagging (project-wide) dialog box. Here you
can insert or update wire numbers associated with wire line networks across
a project
Ladder References
Renumbers each ladder sequentially.
Defines options for starting reference numbers and
how to sequence ladders from drawing to drawing.
Resequence Setup
Renumbers the ladder for the selected drawings from
the active project.
Renumber Ladders dialog box
1Enter the ladder reference number for
the first drawing.
Project-wide update or retag | 1197

2For all subsequent drawings:
■Select to use the next sequential
reference.
■Select Skip, drawing to drawing
count to enter an amount to skip for
the first ladder reference of the next
drawing.
Moves ladder references up if drawings were added
to the middle of a project or moves ladder references
down if drawings were removed from the project.
Bump Up or Down
NOTE Enter a negative number to move ladder ref-
erences down.
Sheet (%S value)
Automates resequencing the sheet value on consecutive drawings.
Enter a number to start the resequencing.Resequence - Start with
Select to move the current sheet value up or down
by a given count.
Bump-Up/Down by
Drawing (%D value)
Performs a project-wide update of the %D “DWG NAME” parameter of the
drawing.
Other Configuration Settings
Updates the drawing parameters related to component, cross-reference, and
wire tagging modes and format project-wide.
Title Block Update
Automates updating title block information for the active drawing or the
entire project drawing set.
1198 | Chapter 15 Project-Wide Tools
Track drawing changes
The Mark/Verify tool can help you track changes made to a project drawing
set during any phase in the engineering process. Before you send your drawings
out for review, use the Mark option. Each AutoCAD Electrical component,
wire number, and beginning ladder reference is invisibly marked and referenced
in a table in the scratch database file of the current project. When the drawings
are returned, you can use the Verify option to generate a report of changes.
The report includes a list of all added, changed, copied, and deleted
components and wire numbers. Changes made using AutoCAD, AutoCAD LT,
or AutoCAD Electrical are all detected.
For AutoCAD Electrical to detect if a component or wire number is deleted,
it must reference the MARKVERIFY table that is saved in the database file of
the project. If the project database file is erased after the Mark option is run,
then a subsequent Verify command cannot report deleted items since it is
limited to reporting only changes involving new inserts, copies, and edited
components and wire numbers.
The Verify command detects and reports changes to the following:
■Component TAG name (such as CR101 changed to CR101A)
■Description text
■Switch position text, rating values
■Beginning PLC module address value
■Terminal pin numbers (both stand-alone terminals and component pin
numbers)
■Catalog number, manufacturer, assembly code value
■Location/Installation code values
■Wire numbers
■Beginning ladder reference number
■Wire Source/Destination codes
■Deleted items - Project database maintained
Track drawing changes | 1199

Track changes made to a drawing set
Use this tool to insert comments in your drawings before sending them for
review. Once the drawings are returned to you, run this tool again to see any
changes that were made to the drawing set.
1Click Project tab ➤ Project Tools panel ➤ Mark/Verify DWGs.
2Specify to mark either the project or the current drawing.
3Specify to mark AutoCAD Electrical components. You can also select:
■Include non-AutoCAD Electrical blocks to mark all blocks even if they
do not carry AutoCAD Electrical intelligence.
■Select Include wires/lines to detect changes to any lines or wires in
the drawings.
4Click OK.
5Enter your initials and any comments about the drawing set, and then
click OK. This information (along with the current time and date) is
included in later reporting.
Invisible flags are placed on the wire numbers and component tags. These
flags do not change the appearance or functioning of the drawings.
However, they may increase the drawing size by a small amount.
6After you make edits to the drawings or receive the drawings back from
your client, reopen the drawings in AutoCAD Electrical so you can verify
the changes.
7Use the Mark/Verify Drawings command to report the accumulated
changes made to the drawing set.
8Specify to verify the drawings and click OK.
A list of the detected changes is displayed in a report dialog box.
9Specify to display the data in the AutoCAD Electrical report format, save
the report, or print the changes. You can also select to surf through the
list to examine each detected change in context.
Mark and verify
Marks drawings to track changes. Verifies drawings to report changes.
1200 | Chapter 15 Project-Wide Tools
Ribbon: Project tab ➤ Project Tools panel ➤ Mark/Verify DWGs.
Toolbar: Project
Menu: Projects ➤ Mark/Verify Drawings
Command entry: AEMARKVERIFY
Creates a list of changes made after the drawings are marked. The report
includes added, changed, copied, and deleted components or wire numbers.
Detects changes made using AutoCAD, AutoCAD LT, or AutoCAD Electrical.
This tool places invisible data on each component to track additions and
modifications. Information is written to the project database file to check for
deleted components. Your drawings must be named and part of the active
project to use this command.
NOTE This command writes information to the project database file that is used
to check for deleted components. Your drawings must be named and part of the
active project to use this command.
Specifies to mark or verify the active drawing or
process all drawings in the current project.
Mark/verify drawing or project
Places invisible information on all AutoCAD Electrical
components including blocks not created in AutoCAD
Electrical, lines, and wires.
Mark
Generates a list of changes since the drawings were
marked.
Verify
Removes all invisible mark data.Remove
Redisplays the last check mark exception report.Previous
Continues surfing on exceptions generated the last
time the mark/verify command was used.
Surf
Displays any mark data found on the drawing.Current drawing statistics
Track drawing changes | 1201
Translate description text
Translate description text
Converts description or switch position component text from one language
to another. When AutoCAD Electrical finishes it displays a report listing what
was successfully translated and what was not. You can use this report to surf
to the problem areas (where a phrase could not be translated) and make manual
edits one by one.
1Click Project tab ➤ Other Tools panel ➤ Language Conversion.
2Select to run the command on the entire project, the active drawing,
selected drawings, or on selected objects in the drawing.
3Select the "From" and "To" languages to use.
4Specify if multiple lines of the component description text are translated
based on exact or partial matches.
By default, the conversion looks for exact matches on the description
labels you select with partial match as an option.
5Click OK and the components or drawings you want to process.
TIP You can add more phrases to the translation table using the Edit Language
Database File tool (Project tab ➤ Other Tools panel ➤ Edit Language Database)
and rerun the language swap to obtain more satisfactory results.
Language conversion
Translates component description text from one language to another.
Description text and switch position text is processed on schematic and panel
components.
Ribbon: Project tab ➤ Other Tools panel ➤ Language Conversion.
Toolbar: Project
1202 | Chapter 15 Project-Wide Tools
Menu: Projects ➤ Language Conversion ➤ Language Conversion
Command entry: AELANG
Performs language translation on the entire project, the
active drawing, selected drawings, or on selected objects
in the drawing.
Run language swap on
Translates from the current language to another language.From To
Translates the selected item.What to do
Determines if multiple lines of the component description
text are translated based on exact or partial matches.
Translation on
NOTE By default, translation is performed on exact matches only.
Edit: language lookup file
Opens the current language table for review and modification. The default
table is wd_lang1.mdb
Ribbon: Project tab ➤ Other Tools panel ➤ Edit Language Database.
Toolbar: Project
Menu: Projects ➤ Language Conversion ➤ Edit Language Database File
Command entry: AELANGDB
Selects a predefined language.Select language
NOTE Language matches are NOT case sensitive,
but phrase substitutions are made exactly as entered
in the language table.
Adds a new column to the database with a blank
entry for each existing phrase associated with the
new language name.
Add a Language
Deletes a language from the predefined language
table.
Delete Language
Translate description text | 1203

Displays a phrase list for the selected language.Phrase list in selected language
Adds a blank entry to the end of each language list
and the translations for phrase list at the bottom of
the dialog box.
New phrase
Adds a copy of each translation of the selected phrase
to the end of each language list.
Copy phrase
Deletes all translations of the selected phrase from
the database.
Delete phrase
Displays phrases from the selected language. Double-
click a phrase to edit.
Translations for phrase above - Select to
edit
Publish to the Web
Publish to the Web
Creates HTML Web pages from drawings you select in the active project.
1Enter AEPUBLISH2WEB at the command prompt.
2In the Publish to Web dialog box, select a location to store the drawing
files.
3Select an image format.
■DWF: Design web format files are vector-based representations of
drawing (.DWG) files.
NOTE DWF is the recommended image format as it supports intra-drawing
surfing from a component tag or component description list.
■JPEG: Joint Photographics Experts Group files are raster-based. We do
no recommend this format for large files that contain text.
■PNG: Portable Network Graphics files are raster-based like JPEG images,
but PNG provides a higher quality output.
4Click OK.
1204 | Chapter 15 Project-Wide Tools

5Select one or more drawing to publish to the Web.
■Do All: Selects all drawings from the project drawing list to publish
to the web.
■Process: Selects one or more drawings from the project drawing list
to publish to the web.
■Reset: Moves all selected drawings back to the project drawing list.
■Un-select: Moves one or more drawings back to the project drawing
list.
■by Section/sub-section: Selects drawings by sections and subsections.
6Click OK.
7Enter a name for the project banner for the Web page.
8Enter one or more project titles for the Web page.
9Select the method to output drawing images to the Web page.
10 Click OK.
11 Enter an output device name.
12 Press ENTER to select no as the default when prompted to select to write
the plot to a file [Yes/No]
13 Press ENTER to select no as the default when prompted to save change
to page setup [Yes/No]
14 Press ENTER to select yes as the default when prompted proceed with
plot [Yes/No]
The progress of the plot job is displayed. When complete, you are notified
that the plot and publish job is complete.
Publish to web - temporary folder for build
Creates a Web page of selected drawings in the current project. The Web pages
and associated support files are saved in the specified folder, enabling preview,
and testing before posting to the Web. If the folder does not exist, one is
created.
Ribbon: Project tab ➤ Project Tools panel ➤ Manager.
Publish to the Web | 1205
On the Project Manager, click the arrow on the Publish/Plot tool , and
select Plot Project. Select the drawings to process and click OK.
Menu: Projects ➤ Publish to Web
Command entry: AEPUBLISH2WEB
Design Web format files are vector-based representations of drawing
(.DWG) files.
DWF
NOTE DWF is the recommended image format as it supports intra-
drawing surfing from a component tag or component description
list.
Joint Photographics Experts Group files are raster-based. We do not
recommend this format for large files that contain text.
JPEG
Portable Network Graphics files are raster-based like JPEG images, but
PNG provides a higher quality output.
PNG
AutoCAD Electrical publish to Web - banner, title
text, options
Ribbon: Project tab ➤ Project Tools panel ➤ Manager.
On the Project Manager, click the arrow on the Publish/Plot tool , and
select Plot Project. Select the drawings to process and click OK.
Menu: Projects ➤ Publish to Web
Command entry: AEPUBLISH2WEB
Specify or create a folder location for the files to save and click OK. Select the
drawings to process and click OK.
Creates the text string that forms the banner for the Web
page. The default is the .WDP file name and its path for
the current project.
Banner
Creates the text that appears below the banner. The default
is the current project's first four project description LINEx
values.
Title Text
1206 | Chapter 15 Project-Wide Tools

Creates the drawing images using the AutoCAD Plot to
DWF function. The plot mode can be Model, Layout1, or
As Saved.
Layout to output
Uses the plot configuration file for generating the .DWF
drawing images.
Configuration name
NOTE To override, set WD_DWF_PC3 in the wd.env envir-
onment settings file.
Automates the surf and zoom capabilities on components
on the drawing image displayed on the Web. Intra-drawing
Build intra-drawing surf pick lists
surfing is available once the page creation process is com-
plete.
NOTE This option slows the .DWF plotting process.
Copies the .DWG files or creates .DXF file copies of the
drawings and posts them on the Web page. You can drag
these files from the Web page into an AutoCAD session.
Allow drag and drop
Publish to DWF
Publish to DWF
Publishes drawings in the active project to DWF files.
1Enter AEPUBLISH2DWF at the command prompt.
2Select one or more drawing to publish to DWF.
■Do All: Selects all drawings from the project drawing list to publish
to DWF.
■Process: Selects one or more drawings from the project drawing list
to publish to DWF.
■Reset: Moves all selected drawings back to the project drawing list.
■Un-select: Moves one or more drawings back to the project drawing
list.
■by Section/sub-section: Selects drawings by sections and subsections.
3Select Publish Setup options.
Publish to DWF | 1207
4Click OK.
5Click Publish.
The progress of the plot job is displayed. When complete, you are notified
that the plot and publish job is complete.
Title Block Utility
Title block
AutoCAD Electrical can link to your drawing title block if it consists of an
AutoCAD block with attributes. The title block border drawing can be inserted
as a block on any AutoCAD drawing or on an AutoCAD drawing template on
page 1228 file.
1208 | Chapter 15 Project-Wide Tools
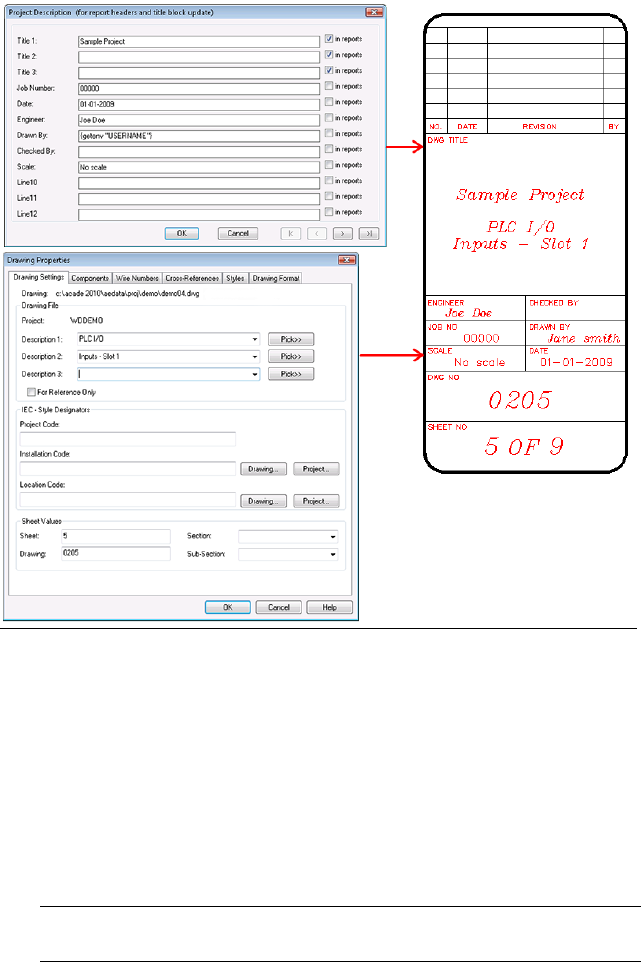
Create a title block
The title block is a border drawing inserted as an AutoCAD block on another
drawing. The title block utility can update attributes on the title block.
1Start a blank new drawing.
2Draw your drawing border using standard AutoCAD commands and
objects.
3Enter ATTDEF at the command prompt to insert attribute definition
objects.
NOTE When the border drawing is inserted as a block on another drawing,
attribute definition objects become attributes.
Title block | 1209

4Enter the Tag name, for example DESC1, DESC2, SHEET, SHEET_TOTAL.
5Set any other attribute definition properties and values.
6Select OK.
7Specify the insertion point.
8Repeat for each attribute definition for the title block.
9Save the border drawing as a DWG file.
This drawing is inserted as a block on another drawing. It can be also be
inserted when creating a drawing template on page 1228 file, DWT. A drawing
template file is used to provide consistency in the drawings that you create
by providing standard style, settings, layers, and border.
NOTE Run Title Block utility setup on page 1210 with this border drawing file active
if using the WD_TB attribute method on page 1216 to link AutoCAD Electrical values
to the title block.
Title Block utility setup
Title Block setup overview
AutoCAD Electrical can link project description lines and some of the drawing
properties to attributes on the drawing title block . There are two methods:
■WD_TB attribute method on page 1216 - mapping information embedded
on the title block.
■WDT file method on page 1218 - external attribute mapping file.
During a title block update, AutoCAD Electrical follows this sequence to
determine which method to use.
1210 | Chapter 15 Project-Wide Tools
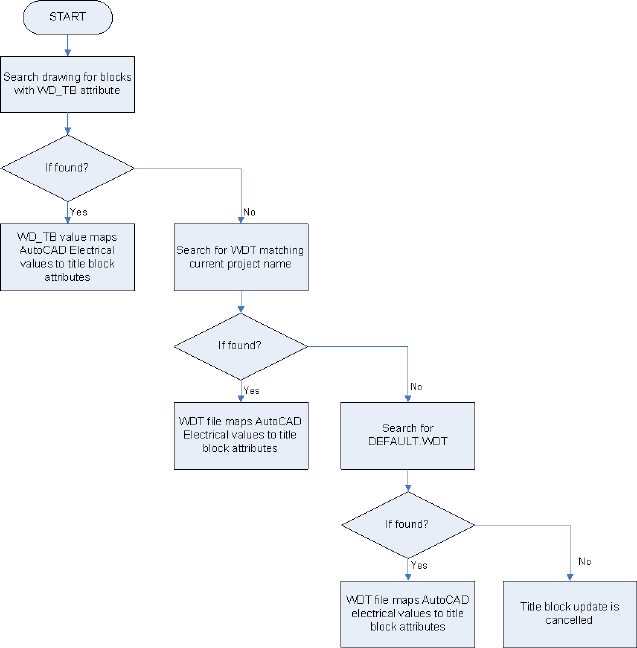
AutoCAD Electrical values
AutoCAD Electrical can map the following project and drawing specific values
to attributes on the title block.
DescriptionMapping Code
project description line, where “x” is the project de-
scription line number
LINEx
sheet number value (the %S value) assigned in the
Drawing Properties dialog box
SHEET
number of drawings in the active project (the "N"
value in title block "SHEET x of "N")
SHEETMAX
Title Block utility setup | 1211
DescriptionMapping Code
drawing name value (the %D value) assigned in the
Drawing Properties dialog box
DWGNAM
the drawing descriptions assigned in the Drawing
Properties dialog box
DD1 (or DWGDESC), DD2, DD3
optional Section code assigned in the Drawing
Properties dialog box
DWGSEC
optional Subsection code assigned in the Drawing
Properties dialog box
DWGSUB
drawing file name without path or extensionFILENAME
drawing file name with path and extensionFULLFILENAME
drawing file name with .dwg extension onlyFILENAMEEXT
IEC Project value of the drawing assigned in the
Drawing Properties dialog box
IEC_P
IEC Installation value of the drawing assigned in the
Drawing Properties dialog box
IEC_I
IEC Location value of the drawing assigned in the
Drawing Properties dialog box
IEC_L
current time (24-hr military format)PLOTTIME
current time (12 hr am/pm format)PLOTTIME12
current date (MM:DD:YYYY format)PLOTDATE
current date (MM:DD:YY format)PLOTDATEMMDDYY
current date (YY:MM:DD format)PLOTDATEYYMMDD
current date (YYYY:MM:DD format)PLOTDATEYYYYMMDD
You can also map user-defined values on page 1215 such as fixed text within
quotes, environment variables, system variables, and AutoLISP variables.
1212 | Chapter 15 Project-Wide Tools

NOTE The Title Block Setup utility maps the appropriate codes based on selections
on the Title Block Setup dialog box.
Set up multiple descriptions
AutoCAD Electrical allows three description lines per drawing. If more
description lines are needed, each description line can be broken into multiple
pieces by the “|” character. Each piece is then mapped to a different attribute
on the title block.
For example, to map the first description line to three attributes, use this
format:
attrname1|attrname2|attrname3=DD1
Then, in the Description 1 value in the Drawing properties: drawing settings
tab on page 220 dialog box, delimit the value with “|” at the break points. For
example, “Main cabinet|120VAC|PLC I/O”. The Update Title Block command
splits this string of text across the three title block attributes.
NOTE The Title Block Setup command does not support this method. Use a text
editor, such as Notepad, to edit your WDT file manually. Use the DDEDIT command
to edit the WD_TB attribute definition manually.
Setup title block update
Creates or modifies the link between title block attributes and project and
drawing values.
Ribbon: Project tab ➤ Other Tools panel ➤ Title Block Setup.
Menu: Projects ➤ Title Block Setup
Command entry: AESETUPTITLEBLOCK
The link between AutoCAD Electrical and the title block is defined by either
an external WDT text file or by an invisible WD_TB attribute added to your
existing title block. If the WDT method is used, you can use a project-specific
file or the Default.wdt file. In either case, the title block attribute names are
mapped to the project-wide LINEx values and to several drawing-specific
setting values.
Title Block utility setup | 1213

Method 1
Create a project-specific mapping file that only references for
drawings in the current project. The file name is the same as the
project name with a .wdt extension.
Project.wdt
Create a default mapping file in the project's subdirectory that is
referenced if a project-specific file is not found and if a WD_TB
attribute is not present in the title block.
DEFAULT.WDT
Create a default mapping file in the default AutoCAD Electrical
subdirectory that is referenced if a project-specific file is not found
and if a WD_TB attribute is not present in the title block.
DEFAULT.WDT
NOTE When using this method, open a drawing that contains the title block
inserted as a block before running the Title Block Setup.
Method 2
The title block contains an invisible attribute with a value that defines the
mapping between the title block and AutoCAD Electrical. No external WDT
file is required because the mapping information is self-contained on the title
block.
The attribute name = WD_CODE mapping information is encoded on the
WD_TB attribute on the title block of the drawing. The value of the attribute
gives the mapping information in the format of a semi-colon delimited text
string. For example:
TITLE-1=LINE1;TITLE-2=LINE2;SH=SHEET;SH_TOTAL=SHEET_MAX
where project wide values for LINE1 and LINE2 codes update attributes TITLE-1
and TITLE-2. The %S sheet value is copied to the title block attribute SH, and
the number of drawing files in the project is written out to attribute SH_TOTAL.
NOTE When using this method, open the title block base drawing that contains
the attribute definition objects before running the Title Block Setup.
Title block setup
Defines what pieces of AutoCAD Electrical project data or drawing specific
data that AutoCAD Electrical should copy to that attribute. The information
is written to the WDT file on page 1218 or the WD_TB attribute on page 1216
depending on the method chosen.
1214 | Chapter 15 Project-Wide Tools
Ribbon: Project tab ➤ Other Tools panel ➤ Title Block Setup.
Menu: Projects ➤ Title Block Setup
Command entry: AESETUPTITLEBLOCK
Specify the title block link method, enter a block name, and click OK.
Lists the available title block names.Title block name
Adds new title blocks to the project. Enter a block name. For multiple
blocks, separate with a comma. For example, DEMOTBLK,DEMOTBLK2,DE-
MOTBLK3
Add New
Edits the selected title block.Edit
Removes the selected title block.Remove
Selects an attribute directly on the drawing if you do not know the name
of attribute.
Pick on
Specifies the attribute to use for the drawing, project, or plotting value.
Select an attribute from the list.
Attribute
Shows the project, drawing-specific, and plotting values.Project Values / Drawing
Values / Plotting Values
Displays the first set of description lines
Displays the previous set of description lines
Displays the next set of description lines
Displays the last set of description lines, where one of the lines has a value
Maps attributes to text constants or AutoLISP values.User Defined
Title block setup (user-defined)
Title Block utility setup | 1215

Assigns text constants and AutoLISP expressions to a title block attribute.
Ribbon: Project tab ➤ Other Tools panel ➤ Title Block Setup.
Menu: Projects ➤ Title Block Setup
Command entry: AESETUPTITLEBLOCK
Specify the title block link method, enter a block name, and click OK. Click
User Defined on the Title Block Setup dialog box.
Lists the attributes and assigned text constant or
AutoLISP expression.
Current User-defined Assignments
Modify an existing link by selecting it from the attrib-
ute list. To clear an existing link, select -none- from
the attribute list.
Attributes
Enter a text constant or an AutoLISP expression to
assign to the attribute. For example, you can assign
Text constant or AutoLISP expression
(getvar “LOGINNAME”) to attribute DWGBY, or you
can assign YourName to DWGBY.
Adds the text constant or AutoLISP expression to the
user-defined list.
Update list
WD_TB attribute method
An invisible attribute on a title block of the drawing, named "WD_TB," is
encoded with the mapping information. This method eliminates the need for
an external mapping text file. The format is <attribute
name>=<LINEx>;<attribute name>=<LINEx>. Here is an example of what the
WD_TB attribute value would be:
PROJ_TITLE=LINE1;DRAW_TITLE1=LINE2;DRAW_TITLE2=DWGDESC;PROJ_NUM=LINE4
Use the Title Block Setup utility to assign this information to the WD_TB
attribute. The Title Block Setup utility works directly on the WD_TB attribute
definition and cannot be used on a drawing with the title block inserted as a
block. Open the base title block DWG file before running the Title Block Setup.
1216 | Chapter 15 Project-Wide Tools
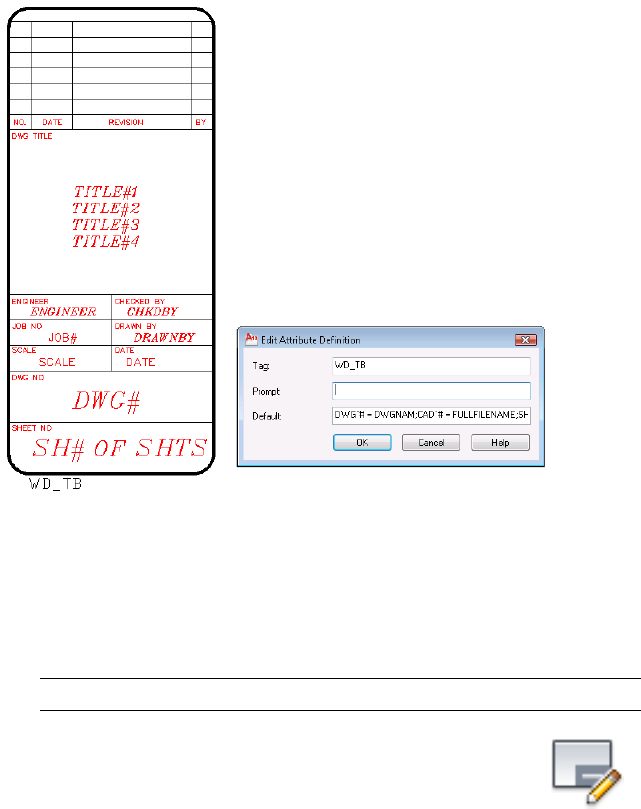
Map a title block using the WD_TB attribute method
Create a mapping for the title block on the WD_TB attribute definition.
1Open the title block base drawing that contains the attribute definition
objects.
IMPORTANT Do not open a drawing with the title block inserted as a block.
2Click Project tab ➤ Other Tools panel ➤ Title Block Setup.
3Select the title block link method: Method 2: WD_TB attrib.
An invisible attribute contained in the title block defines the attribute
mapping.
4Click OK.
Title Block Setup reads the attribute definitions and the Title Block Setup
dialog box displays.
Title Block utility setup | 1217

NOTE Ann alert displays if no attribute definition objects are found.
5In the Title Block Setup dialog box, select the attribute from each list to
map to its corresponding AutoCAD Electrical value.
6Click Drawing Values to assign drawing specific and plotting values.
7Click User Defined to map attributes to text constants or AutoLISP values.
8Click OK.
9Title Block Setup updates the WD_TB attribute definition with the selected
mappings.
NOTE If a WD_TB attribute definition does not exist, the Title Block Setup
inserts it at 0,0.
10 Save the drawing.
Insert this title block base drawing as a block on each drawing in the project
before running the Title Block Update.
WDT file method
A text file defines which AutoCAD Electrical values are mapped to the drawing
title block attributes. Use the Title Block Setup utility or any text editor to
create or modify the WDT mapping file. When using the Title Block Setup
utility, open a drawing with the title block inserted as a block.
File Format
The mapping file is created and updated by the Title Block Setup utility. It
can be edited directly using a text editor such as Notepad or WordPad. It is
important to maintain the following format.
The first line defines the title block names. For example,
BLOCK = TITLE
NOTE Title Block Update ignores any line that begins with a semi-colon.
If your title block/revision block consists of multiple blocks, you can encode
two or more block names into the WDT file. For example, the following line
tells AutoCAD Electrical to look for and update blocks called TB, TB-REV, and
TB-ISSUE. Each block name is separate by a comma.
1218 | Chapter 15 Project-Wide Tools

BLOCK = TB,TB-REV,TB-ISSUE
You can also use wildcards to define title blocks. For example, the drawing
could have any of three different title block sizes, named TITLE-SIZEB,
TITLE-SIZEC, or TITLE-SIZED. The following line tells AutoCAD Electrical to
find and update the title block no matter what size is used on the drawing.
BLOCK = TITLE-SIZE*
The lines that follow the block definition, map the attribute names on that
block to specific AutoCAD Electrical values. For example,
PROJ_TITLE = LINE1
DRAW_TITLE1 = LINE2
DRAW_TITLE2 = DWGDESC
PROJ_NUM = LINE4
SX = SHEETMAX
SH = SHEET
PLOTTIME = PLOTTIME
PLOTDATE = PLOTDATE
NOTE The AutoCAD Electrical batch plotting routine uses the PLOTTIME and
PLOTDATE entries in this file.
Place a backwards apostrophe character in front of the attribute name if the
attribute tag name of the title block contains one or more wildcard characters
(# @ . * ? ~ [ ] - ). For example, '[REV] = LINE5, where the title block attribute
name is [REV].
Map a title block using the WDT file method
Create a mapping for the title block using an external WDT file.
1Open a drawing that contains the title block inserted as a block.
2Click Project tab ➤ Other Tools panel ➤ Title Block Setup.
3Select a title block link method:Method 1:
■<Project> .WDT file Create a project-specific mapping file with the
same file name as the active project name and a WDT extension.
Title Block utility setup | 1219

■DEFAULT.WDT Create a default mapping file in the same folder as
the project file. This file is used if a project-specific file does not exist.
■DEFAULT.WDT Create a default mapping file in the default AutoCAD
Electrical support folder. This file is used if a project-specific file does
not exist and no DEFAULT.WDT file exists in the project folder.
NOTE Title Block Update looks first for any blocks with a WD_TB attribute.
If the WD_TB attribute is found, the WDT file is ignored.
4Click OK.
If the .WDT file exists:
■Click View to view and edit the file.
■Click Overwrite to create a file.
■Click Edit to modify the existing file.
NOTE If no existing file is found, identify the AutoCAD block name of the
title block.
5In the Title Block Setup dialog box, select the attribute from each list to
map to its corresponding AutoCAD Electrical value.
6Click Drawing Values to assign drawing specific and plotting values.
7Click User Defined to map attributes to text constants or AutoLISP values.
8Click OK.
9Title Block Setup updates or creates the WDT file with the selected
mappings.
Title Block Update
AutoCAD Electrical can link to your drawing title block if it consists of an
AutoCAD block with attributes. The title block utility:
■Automates project-wide title block updates.
■Supports multiple title blocks per drawing.
■Maps AutoCAD Electrical project description lines to specific attributes.
1220 | Chapter 15 Project-Wide Tools

■Maps AutoCAD Electrical per-drawing values to specific attributes.
■Maps AutoLISP values, system variables, or environment variables to specific
attributes.
■Provides two title block linking methods, WD_TB attribute on page 1216 and
WDT file on page 1218.
Update the title block project-wide
Before running the Title Block Update, enter the project description on page
203 lines and drawing values on page 220 that are mapped to attributes on the
title block.
1Click Project tab ➤ Other Tools panel ➤ Title Block Update.
The Update Title Block dialog box displays.
2Select the values to update on the title block, along with SHEET and
SHEETMAX if new drawings were added to your project.
NOTE If you want to save these selections, click Save. The settings are stored
in the default.wdu file.
3(Optional) Select Resequence sheet %S value.
Renumbers the sheet values and changes the sheet max value. It is
commonly used when drawings are added to the project drawing set.
4(Optional) Select Activate each drawing to process.
NOTE This option is necessary if there are user-defined values mapped to
the title block that require activating the drawing to retrieve the values.
5Click OK Project-Wide.
6Select to process all the drawings in the project and click OK.
Update title block
Automates updating title block information for the current drawing or the
entire project drawing set. Project and drawing specific settings are linked to
one or more attributes contained in the title block.
Title Block Update | 1221
This tool assumes that you have a border with mapped attributes using the
WDT file or a mapping attribute (WD_TB) inside of the border. It specifies
which attribute on the border to update with text from the Update Title Block
dialog box.
NOTE The labels for each Project Description Line are customized by an optional
WDL on page 1224 file.
Ribbon: Project tab ➤ Other Tools panel ➤ Title Block Update.
Toolbar: Main Electrical 2
Menu: Projects ➤ Project ➤ Project Manager
From Project Manager, right-click the project name and select Title Block
Update.
Command entry: AEUPDATETITLEBLOCK
Select Lines to Update (Project Description Lines)
Lists project-wide LINE1 through LINExx description lines.
Selects the displayed set of project description linesSelect All
Clears the displayed set of project description linesClear All
Displays the first set of description lines
Displays the previous set of description lines
Displays the next set of description lines
Displays the last set of description lines, where one of the lines has a
value
1222 | Chapter 15 Project-Wide Tools
Saves the list of checked boxes to a file called default.wdu. The de-
fault.wdu file is saved in the user folder.
Save
Select Lines to Update (per-drawing values)
Lists drawing-specific values.
The drawing descriptions assigned in the Drawing
Properties dialog box. Up to three drawing descrip-
Drawing Description
tions can be added to a drawing. The drawing de-
scription codes DD1 (or DWGDESC), DD2 and DD3
are used for the three description lines.
The drawing section code assigned in the Drawing
Properties dialog box.
Drawing Section
The drawing subsection code assigned in the Draw-
ing Properties dialog box.
Drawing Sub-section
The file name without an extension.Filename
The file name with the appropriate extension.File/extension
The full file name and the path name where the file
is located.
Full Filename
IEC Project value of the drawing assigned in the
Drawing Properties dialog box.
P
IEC Installation value of the drawing assigned in the
Drawing Properties dialog box.
I
IEC Location value of the drawing assigned in the
Drawing Properties dialog box.
L
The %D value of the drawing settings.Drawing (%D value)
The %S value of the drawing settings.Sheet (%S value)
The maximum count of drawings in the project.Sheet maximum
Title Block Update | 1223
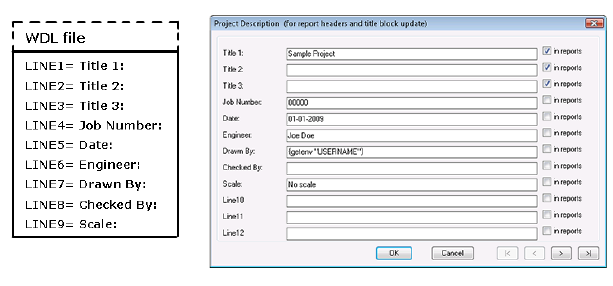
Renumbers the sheet number for each drawing in
the project set or for a selected portion of the project
drawing set.
Resequence sheet %S values
Activate each drawing to process
Specifies to activate every drawing so you can update the title block lines on
selected drawings in the project. This option is necessary only if there are
some user-defined values that require activating the drawing.
OK Active Drawing Only
Updates the text for the selected lines on the active drawing only.
OK Project-wide
Updates the text for the selected lines on selected drawings in the project.
Customize LINEx Labels
The title block and project description dialog boxes in AutoCAD Electrical
display generic labels like “LINE1”, “LINE2”, and so on. You can change these
labels so they match up with the link to the title block. For example, you have
linked the AutoCAD Electrical data “LINE10” value to the “DRAWN_BY”
attribute on the title block. What you want to see when AutoCAD Electrical
displays a title block-related dialog box is not “LINE10” but “Drawn by.” A
text file with a WDL extension defines the custom labels.
AutoCAD Electrical looks in the following order for a WDL file.
1224 | Chapter 15 Project-Wide Tools
1 <projname>_wdtitle.wdl - where <projname> matches the name of the
active project in the same folder as the project WDT file.
2 default_wdtitle.wdl - in the same folder as the project WDT file.
3 default_wdtitle.wdl - in a folder in the AutoCAD Electrical search
sequence.
The file contains one line per label in the format LINEx=label. The entries do
not have to be in order and line numbers can be skipped. For example:
LINE1 = Project Title 1
LINE2 =Title 2
LINE3 = Title 3
LINE4 = Project Number
Customize LINEx labels
The generic LINEx labels in the various title block and project description
dialog boxes can be customized.
1Use any generic text editor such as Notepad or WordPad to create one of
the following files:
■<projname>_wdtitle.wdl - where <projname> matches the name of
the active project. Save the file in the same folder as the project WDT
file.
■default_wdtitle.wdl - save the file in the same folder as the project
WDT file.
■default_wdtitle.wdl - save the file in a folder in the AutoCAD Electrical
search sequence.
2The file contains one line per label in the format LINEx=label. The entries
do not have to be in order and line numbers can be skipped.
LINE1 = Project Title 1
LINE2 =Title 2
LINE3 = Title 3
LINE4 = Project Number
LINE5 = Date
LINE6 = Engineer
LINE7 = Drawn By
Customize LINEx Labels | 1225
LINE8 = Checked By
LINE9 = Scale
3Save and exit the text file.
4Open AutoCAD Electrical and test.
Search sequence for .wdl files
You can create different WDL files for different projects. The search sequence
is as follows:
1Look in the same folder as the .WDP file for the project, for a file called
<projname>_WDTITLE.WDL where <projname> matches the name of
the active project.
2Look in the same folder as the .WDP file for the project for a file called
DEFAULT_WDTITLE.WDL.
3If WD_ACADPATHFIRST flag is present in wd.env file, look for
DEFAULT_WDTITLE.WDL in ACAD paths.
4Look for DEFAULT_WDTITLE.WDL in the AutoCAD Electrical USER
folder.
5Look for DEFAULT_WDTITLE.WDL in the base AutoCAD Electrical folder.
6If WD_SUP_ALT is defined in the wd.env file, look for
DEFAULT_WDTITLE.WDL in the specified path.
7Look for DEFAULT_WDTITLE.WDL in ACAD paths (if
WD_ACADPATHFIRST flag is not set in the wd.env).
Map AutoLISP values to the title block
You can map system variable values, or values extracted by AutoLISP programs,
to attributes on the title block.
■Assign on page 1227 a variable to one of the project description lines which
then maps to an attribute on the title block.
■Map on page 1215 a variable directly to an attribute on the title block
1226 | Chapter 15 Project-Wide Tools

NOTE If the expression is a full AutoLISP function, it must return a string value
(not an integer, real, list, or nil value). The program must be encoded into the
project description data as "(load 'filename.lsp')." It must be self-starting upon
load.
See also:
■Set project descriptions on page 203
Assign a variable to a project description line
For example, the environment variable “USERNAME” contains a value that
must show up on the drawing title block.
1Click Project tab ➤ Project Tools panel ➤ Manager.
2In the Project Manager, right-click the project name, and select
Descriptions.
3Enter the AutoLISP function (getenv "USERNAME") on one of the
description lines.
4Select OK.
5Using either the WD_TB attribute method on page 1216method or the WDT
file method on page 1218, map the project line to the appropriate attribute
on the title block, for example “DWGBY”.
6Click Project tab ➤ Other Tools panel ➤ Title Block Update.
The Update Title Block dialog box displays.
7Check the appropriate project description line for update.
NOTE Check the Activate each drawing to process if the variable is drawing
specific.
8Select the drawings for updating.
During the title block update AutoCAD Electrical evaluates the expression,
and writes that value out to the attribute that is mapped to the project
Map AutoLISP values to the title block | 1227

description line (mapped in the .wdt file or on the WD_TB attribute value
carried by the title block).
Drawing template
A drawing template file is used to provide consistency in the drawings that
you create by providing standard styles and settings.
When a drawing template file is used to start a new drawing it can:
■Predefine AutoCAD Electrical drawing properties such as component
tagging, wire numbering format, and so on.
■Predefine layers and layer properties.
■Predefine wire layers.
■Provide your drawing border and title block.
By default, drawing template files are stored in the template folder, where they
are easily accessible.
Create a drawing template
A drawing template file is used to provide consistency in the drawings that
you create by providing standard style, settings, layers, and border.
1Start a new drawing using the acad.dwt template.
2Click Home tab ➤ Block panel ➤ Insert.
3Browse to the title block DWG created for the border.
4Click OK.
5Insert at 0,0,0.
NOTE Attributes are invisible if no default values are assigned.
6Click Schematic tab ➤ Other Tools panel ➤ Drawing Properties.
1228 | Chapter 15 Project-Wide Tools

7Set the default drawing properties such as component tagging, wire
numbering, cross-referencing, and so on.
8Click OK.
9Click Schematic tab ➤ Edit Wires/Wire Numbers panel ➤ Create/Edit
Wire Type.
10 Add wire layers as needed. Set the properties, color, linetype, and
lineweight for each layer.
11 Click OK.
12 Enter SAVEAS at the command prompt.
13 Enter the file name.
14 Set the file type as AutoCAD Drawing Template (*.dwt).
15 Click Save.
See also:
■Create a title block on page 1209
■Use wire layers on page 895
■Project and Drawing Properties on page ?
Drawing template | 1229
1230
Icon Menus
Overview of the Icon Menu Wizard
Use the Icon Menu Wizard to customize the icon menus easily.
■Copy, cut, and paste icons from one submenu into another.
■Drag icons to place those icons that are commonly used at the top, and
those icons that are used less frequently at the bottom of the window.
■Create new icons to use when inserting components.
■Add new icon menu pages.
Once you click OK in any of the Add Icon dialog boxes, the following happens:
■The new icon is created and saved depending on the status of the WD_SLB
code in the environment file (.env).
If WD_SLB is disabled in the environment file, the Images folder of the
corresponding icon menu .dat file is created (if it does not exist) and new
images are saved here.
Windows XP: C:\Documents and Settings\{username}\Application
Data\Autodesk\AutoCAD Electrical {version}\{release}\{country
code}\Support\Images\
Windows Vista, Windows 7:
C:\Users\{username}\AppData\Roaming\Autodesk\AutoCAD Electrical
{version}\{release}\{country code}\Support\Images\
If you browsed to an existing image, the image is copied to the Images folder.
If WD_SLB is enabled, the Images folder corresponding to the folder defined
by the WD_SLB is created (if it does not exist) and new images are saved
here. If the WD_SLB value is “N:\Electrical\Menu” then the folder
16
1231

N:\Electrical\Menu\Images is created and used. If you browsed to an
existing image, the image is copied to the Images folder.
NOTE You can enclose the image path within quotation marks if you do not
want the images copied to the Images folder. The .dat file saves the absolute
path instead. For example, if the image file edit box contains
“C:\Desktop\push_button.png,” then the push_button.png is not copied to
the Image folder.
■The new icon is added to the end of the existing icon images in the Symbol
Preview window of the Icon Menu Wizard dialog box.
■The relative path of the new icon information is written to the .dat file
once you click OK in the Icon Menu Wizard dialog box. However, the
complete path of the block or circuit is saved in the .dat file if the Block
Name edit box or the File name edit box contains the complete path of
the drawing file.
Add or modify icons using the icon menu wizard
Adds new or edits existing items and pages on the AutoCAD Electrical icon
menus.
■Copy, cut, and paste icons from one submenu into another.
■Drag icons within the Symbol Preview window to rearrange. Place icons
used commonly at the top.
■Create an icon for components or circuits you insert, or an AutoCAD
Electrical command you run.
The Icon Menu Wizard can be used to add or modify icons for both the
schematic and panel symbol libraries. You can add new menu pages to the
AutoCAD Electrical icon menu, and then populate them with your own custom
symbols. Each new page can have icon selections that cascade down to other
new menu pages.
Add a new icon to the menu
1Create an AutoCAD Electrical compatible library symbol. For schematic
symbols, follow the guidelines regarding the symbol ".dwg" file naming
convention and required attributes.
1232 | Chapter 16 Icon Menus

2Click Schematic tab ➤ Other Tools panel ➤ Icon Menu Wizard.
3On the Select Menu File dialog box, select the menu file (.dat) to modify
and click OK.
4On the Icon Menu Wizard dialog box, select Add ➤ Component to add
a new icon to the menu.
You can alternately select Command, New Circuit, Add Circuit or New
Submenu depending on which type of icon you want to add.
■Component: Adds an icon that inserts a component into the drawing.
■Command: Adds an icon that runs an AutoCAD Electrical command
when selected.
■New Circuit: Creates a circuit and adds the icon (that is created from
a new circuit) that inserts the circuit into the drawing.
■Add Circuit: Adds an icon (created from an existing circuit) that inserts
the circuit into the drawing.
■New Submenu: Adds an icon that opens a submenu page when
selected. You can then select an icon from the submenu to insert the
specified component into the drawing or run an AutoCAD Electrical
command.
5On the Add Icon - Component dialog box, define the required information
(such as symbol file name, image file, and block name) for the icon menu
button. To select the image file of the icon, enter text, and then click
Browse to select an existing image file. Click Pick to select a block from
the active drawing (the block name then appears in the Image File edit
box). Or, click Active to select the active drawing to use as the icon image
file name.
The icon options to define are different depending on which type of icon
you are adding to the menu file (.dat).
6Click OK.
The new icon displays at the bottom of the Symbol Preview window.
7On the Icon Menu Wizard dialog box, click OK.
Overview of the Icon Menu Wizard | 1233

8Click Schematic tab ➤ Insert Components panel ➤ Insert Components
drop-down ➤ Icon Menu.
On the Insert Component dialog box, select the new icon.
Edit the properties of an existing icon in the menu
1Create an AutoCAD Electrical compatible library symbol. For schematic
symbols, follow the guidelines regarding the symbol ".dwg" file naming
convention and required attributes.
2Click Schematic tab ➤ Other Tools panel ➤ Icon Menu Wizard.
3On the Select Menu File dialog box, select the menu file to modify and
click OK.
4On the Icon Menu Wizard dialog box, right-click the icon to edit and
select Properties.
5On the Properties - Component (Command, Circuit or Submenu) dialog
box, edit the required information (such as symbol file name, image file,
and block name) for the icon menu button. To select the image file of
the icon, enter text, and then click Browse to select an existing image
file. Click Pick to select a block from the active drawing (the block name
then appears in the Image File edit box), or click Active to select the active
drawing to use as the icon image file.
The icon options to define are different depending on which type of icon
you are editing.
6Click OK.
Icon menu wizard
Modifies the icon menu. You can rearrange icons using drag and drop in the
Symbol Preview window, add icons, create new submenus, delete icons,
cut/copy/paste icons, and modify icon properties.
Ribbon: Schematic tab ➤ Other Tools panel ➤ Icon Menu Wizard.
1234 | Chapter 16 Icon Menus

Toolbar: Miscellaneous
Menu: Components ➤ Symbol Library ➤ Icon Menu Wizard
Command entry: AEMENUWIZ
NOTE You can lock the icon menu (.dat) file using the Windows File Properties
dialog box so unauthorized users cannot modify the .dat file. In the Windows File
Properties dialog box, set the file attributes to Read-only.
The tree structure is created by reading the icon menu file (.dat).
The displayed nodes are based on the order of arrangement of
submenus defined in the .dat file.
Menu
Tabs ■Menu: Changes the visibility of the Menu tree view.
■Up one level: Displays the menu that is one level before the
current menu in the Menu tree view.
■Views: Changes the view display for the Symbol Preview
window. The current view option is indicated with a check
mark. Options include: Icon with text, Icon only or List view.
■Add: Modifies the icon menu by adding icons for commands,
components, or circuits or add a new submenu.
Displays the symbol images corresponding to the menu or the
submenu selected in the Menu section.
Symbol Preview window
You can drag icons within the Symbol Preview window for re-
arrangement (multiple selection is allowed) such as placing
commonly used icons at the top and rarely used icons at the
bottom of the window.
NOTE When you move the cursor over an icon, the icon name,
and block/circuit/command name display as tooltip information.
Right-click menus
Options for the Menu tree structure view
Right-click a menu or submenu in the Menu tree structure view to display the
following options:
■Expand/Collapse: Toggles the visibility of the menus.
Overview of the Icon Menu Wizard | 1235

■New submenu: Creates a submenu in the tree structure and the Symbol
Preview window.
■Cut: (available for submenus only) Removes the selected submenu and its
contents from the list. You can then paste the submenu into another
submenu or a main menu.
NOTE The menu number does not change during a Cut and Paste. For
example, if you cut menu number 100 and paste it into another submenu
page, the pasted menu page is still menu number 100.
■Copy: (available for submenus only) Makes a copy of the highlighted
submenu and stores it in the Paste clipboard. You can then paste the
submenu and its contents into another submenu or a main menu.
NOTE A new menu number is created for the pasted submenu. The next
available menu number (greater than 99) is assigned.
■Paste: Adds the copied or cut submenu to the highlighted menu or
submenu.
■Delete: (available for submenus only) Deletes the submenu and all related
content.
■Properties: Opens a Properties dialog box to modify the existing menu or
submenu properties like the menu name, image, or submenu title. The
existing data in the *.dat file is overwritten with your changes once you
click OK.
Options for the Symbol Preview window
Right-click an icon or in empty space in the Symbol Preview window to display
the following options:
■View: Changes the view display for the Symbol Preview window. The
current view option is indicated with a check mark. Options include: Icon
with text, Icon only or List view.
■Add icon: Adds new icons (component, command, or circuit) or adds an
existing circuit into the Symbol Preview window.
■New submenu: Creates a submenu in the Symbol Preview window and the
tree structure.
1236 | Chapter 16 Icon Menus
■Cut: Removes the selected icon from the Symbol Preview window. You
can then paste the icon into the desired submenu.
■Copy: Makes a copy of the highlighted icon and stores it in the Paste
clipboard. You can then paste the icon into the appropriate submenu.
■Paste: Adds the copied or cut icon to the highlighted submenu.
■Delete: Deletes the icon.
■Properties: Opens a Properties dialog box to modify the existing symbol
icon properties like the icon name, image, or block names. The existing
data in the *.dat file is overwritten with your changes once you click OK.
Add icon - component
The icon name and symbol block name are saved in the active *.dat file (such
as ACE_JIC_MENU.DAT) once you click OK the Icon Menu Wizard dialog box.
The icon then displays at the end of the existing icon images in the Symbol
Preview window of the Insert Component dialog box.
Ribbon: Schematic tab ➤ Other Tools panel ➤ Icon Menu Wizard.
Toolbar: Miscellaneous
Menu: Components ➤ Symbol Library ➤ Icon Menu Wizard
Command entry: AEMENUWIZ
Select the menu file to modify and click OK. In the Icon Menu Wizard dialog
box click Add and then select Component.
You can also access this dialog box by right-clicking in the Symbol Preview
window of the Icon Menu Wizard dialog box and selecting Add Icon ➤
Component.
TIP To determine which *.dat file is active, in the Project Properties dialog box,
Project Settings tab, Library, and Icon Menu Paths section, expand the Schematic
Icon Menu File option. It is the schematic icon menu file listed in the *.wdp file.
Overview of the Icon Menu Wizard | 1237

Icon Details
Defines the icon name and image.
Displays an image preview of the specified image
file.
Preview
Specifies the name to appear in the icon, the descrip-
tion text, and the tool tip for the icon.
Name
Specifies the image file to use for the new icon. You
can enter the image file name (or complete path) or
select it using one of the following methods:
Image file
■Browse: Finds an existing image to use for the
icon. You can browse for .sld or .png images.
■Pick: Selects an existing block name on the cur-
rent drawing to use as the image file name. For
example, if you select block HPB11, the image
file name edit box displays “HPB11”.
■Active: (It is unavailable if the drawing is a new
drawing and was not saved) Selects the active
drawing name to use as the Image file. For ex-
ample, if the active drawing name is “demo005”,
then the image file edit box has “demo005” lis-
ted as the file name.
The browsed image is copied to the Images folder
and saved as a relative path in the .dat file. Enclose
the image path in quotation marks if you do not want
the image copied to the Images folder. Save the
complete path instead of the relative path in the .dat
file. The entered image file name can be names like
"PB1" or "CONTROL RELAY," file names with an ex-
tension such as “pb1.png”. Or, it can follow the
syntax {slide_library or dll file (slide or .png)}. For
example, "S2(pb)" or "S7(control_relay)".
NOTE The image file name cannot contain invalid
characters such as \ / : " ? < > | and only .png and
.sld image files are supported.
Creates the .png image file from the current screen
image. If the specified image file does not exist, this
Create PNG from current screen image
1238 | Chapter 16 Icon Menus

option is selected by default. If you do not want to
create the icon from the displayed image of the cur-
rent drawing, clear the check box.
NOTE This option is unavailable if you enter an im-
age file name with the syntax {slide_library or dll file
(slide or .png)}. For example, “S2(pb)” or “S7(con-
trol_relay)”. It is also unavailable if the Image File edit
box contains the image file path instead of the image
file name.
(Available only when Create PNG from current screen
image is selected.) Zooms in on the current screen
Zoom
image using the AutoCAD Zoom command. Once
you exit Zoom mode and press Enter, the dialog box
redisplays so you can finish defining the new icon.
(This option appears once the Image file is specified.)
Indicates the full path of the image file location where
Location
the new images are created or the browsed images
are copied to. If you entered a file name with the
syntax {slide_library or dll file (slide or .png)} for the
image file, the path of the .dat file or the WD_SLB
folder displays here.
Block Name to Insert
Defines the symbol block that is inserted when you click the icon in the Insert
Component dialog box.
Specifies the symbol block name. The file name of the
symbol can be typed into the edit box or you can enter it
using one of the following methods:
Block Name
■Browse: Finds an existing WBlocked drawing (*.dwg)
file to assign to the icon. In this case the complete path
of the drawing file is inserted in the edit box.
■Pick: Selects an existing block on the current drawing
(for example, block recently created with Symbol
Builder). WBlocked version (.dwg) must exist.
■Active: Inserts the active drawing as a block.
Add icon - command
Overview of the Icon Menu Wizard | 1239
An icon can be configured to trigger an AutoCAD command, trigger an
AutoCAD Electrical command, or run a script file. The icons that trigger
insertion of multi-pole schematic symbol assemblies, one-line symbols, and
panel footprints are examples that require encoding of special AutoCAD
Electrical commands.
The icon name and command string are saved in the active *.dat file (such as
ACE_JIC_MENU.DAT) once you click OK on the Icon Menu Wizard dialog
box. The icon then displays at the end of the existing icon images in the
Symbol Preview window of the Insert Component dialog box.
NOTE If you are modifying the panel menu file, use this option for inserting panel
symbols. Also, use it for inserting 3-pole schematic symbols or one-line symbols.
Ribbon: Schematic tab ➤ Other Tools panel ➤ Icon Menu Wizard.
Toolbar: Miscellaneous
Menu: Components ➤ Symbol Library ➤ Icon Menu Wizard
Command entry: AEMENUWIZ
Select the menu file to modify and click OK. On the Icon Menu Wizard dialog
box click Add, and then select Command.
You can also access this dialog box by right-clicking in the Symbol Preview
window of the Icon Menu Wizard dialog box and selecting Add Icon ➤
Command.
TIP To determine which *.dat file is active, in the Project Properties dialog box,
Project Settings tab, Library, and Icon Menu Paths section, expand the Schematic
Icon Menu File option. It is the schematic icon menu file listed in the *.wdp file.
Icon Details
Defines the icon name and image.
Displays an image preview of the specified image file.Preview
Specifies the name to appear in the icon, the description text, and
the tool tip for the icon.
Name
1240 | Chapter 16 Icon Menus

Specifies the image file to use for the new icon. You can enter the
image file name (or complete path) or select it using one of the fol-
lowing methods:
Image file
■Browse: Finds an existing image to use for the icon. You can
browse for .sld or .png images.
■Pick: Selects an existing block name on the current drawing to
use as the image file name. For example, if you select block
HPB11, the image file name edit box displays “HPB11.”
■Active: (It is unavailable if the drawing is a new drawing and was
not saved) Selects the active drawing name to use as the Image
file. For example, if the active drawing name is “demo005,” then
the image file edit box has “demo005” listed as the file name.
The browsed image is copied to the Images folder and saved as a
relative path in the .dat file. Enclose the image path in quotation
marks if you do not want the image copied to the Images folder. Save
the complete path instead of the relative path in the .dat file. The
entered image file name can be names like "PB1" or "CONTROL RE-
LAY," file names with an extension such as “pb1.png,” or it can follow
the syntax {slide_library or dll file (slide or .png)}. For example,
"S2(pb)" or "S7(control_relay)."
NOTE The image file name cannot contain invalid characters such
as \ / : " ? < > | and only .png and .sld image files are supported.
Creates the .png image file from the current screen image. If the
specified image file does not exist, this option is selected by default.
Create PNG from current
screen image
If you do not want to create the icon from the displayed image of
the current drawing, clear the check box.
NOTE This option is unavailable if you enter an image file name with
the syntax {slide_library or dll file (slide or .png)}” For example,
“S2(pb)” or “S7(control_relay)”. It is also unavailable if the Image File
edit box contains the image file path instead of the image file name.
(Available only when Create PNG from current screen image is selec-
ted.) Zooms in on the current screen image using AutoCAD Pan
Zoom
command. Once you exit Pan mode and press Enter, the dialog box
redisplays so you can finish defining the new icon.
(This option appears once the Image file is specified.) Indicates the
full path of the image file location where the new images are created
Location
or the browsed images are copied to. If you entered a file name with
Overview of the Icon Menu Wizard | 1241
the syntax {slide_library or dll file (slide or .png)} for the image file,
the path of the .dat file or the WD_SLB folder displays here.
Command to Execute
NOTE If you select an AutoCAD Electrical command, manually enter the additional
parameters as indicated.
Specifies to start an AutoCAD command or AutoCAD Electrical routine.
You can enter the command name to execute with arguments.
Command
Click List to select from a list of AutoCAD Electrical commands for
panel, schematic multi-pole symbol, and one-line symbol inserts. It
makes it easier for you to build the appropriate command to insert
a symbol.
Displays the command parameters for a specific AutoCAD Electrical
command. If the command does not have any parameters, the value
“none” displays.
Parameters
Create new circuit
The icon name and circuit drawing name are saved in the active *.dat file
(such as ACE_JIC_MENU.DAT) once you click OK on the Icon Menu Wizard
dialog box. The icon then displays at the end of the existing icon images in
the Symbol Preview window of the Insert Component dialog box.
Ribbon: Schematic tab ➤ Other Tools panel ➤ Icon Menu Wizard.
Toolbar: Miscellaneous
Menu: Components ➤ Symbol Library ➤ Icon Menu Wizard
Command entry: AEMENUWIZ
Select the menu file to modify and click OK. In the Icon Menu Wizard dialog
box click Add, and then select New Circuit.
You can also access this dialog box by right-clicking in the Symbol Preview
window of the Icon Menu Wizard dialog box and selecting Add Icon ➤ New
Circuit.
1242 | Chapter 16 Icon Menus

TIP To determine which *.dat file is active, in the Project Properties dialog box,
Project Settings tab, Library, and Icon Menu Paths section, expand the Schematic
Icon Menu File option. It is the schematic icon menu file listed in the *.wdp file.
Icon Details
Defines the icon name and image.
Displays an image preview of the specified image file.Preview
Specifies the name to appear in the icon, the description
text, and the tool tip for the icon.
Name
Specifies the image file to use for the new icon. You can
enter the image file name (or complete path) or select it
using one of the following methods:
Image file
■Browse: Finds an existing image to use for the icon.
You can browse for .sld or .png images.
■Pick: Selects an existing block name on the current
drawing to use as the image file name. For example,
if you select block HPB11, the image file name edit box
displays “HPB11.”
■Active: (This method is unavailable if the drawing is a
new drawing and has not been saved) Selects the active
drawing name to use as the Image file. For example,
if the active drawing name is “demo005,” then the
image file edit box has “demo005” listed as the file
name.
The browsed image is copied to the User folder if
wd_userckt_dir is disabled in the .env file.
NOTE The User folder can be overridden by the wd_user-
ckt_dir defined folder if the environment code is enabled
in the .env file.
Enclose the image path in quotation marks if you do not
want the image copied to the User folder. Save the com-
plete path instead of the relative path in the .dat file. The
entered image file name can be names like "PB1" or
"CONTROL RELAY," file names with an extension such as
“pb1.png,” or it can follow the syntax {slide_library or dll
file (slide or .png)}. For example, "S2(pb)" or "S7(control_re-
lay)."
Overview of the Icon Menu Wizard | 1243

NOTE The image file name cannot contain invalid charac-
ters such as \ / : " ? < > | and only .png and .sld image files
are supported.
Creates the .png image file from the current screen image.
If the specified image file does not exist, this option is selec-
Create PNG from current screen
image
ted by default. If you do not want to create the icon from
the displayed image of the current drawing, clear the check
box.
NOTE This option is unavailable if you enter an image file
name with the syntax {slide_library or dll file (slide or
.png)}” For example, “S2(pb)” or “S7(control_relay)”. It is
also unavailable if the Image File edit box contains the im-
age file path instead of the image file name.
(Available only when Create PNG from current screen image
is selected) Zooms in on the current screen image using
Zoom
AutoCAD Zoom command. Once you exit Zoom mode
and press Enter, the dialog box redisplays so you can finish
defining the new icon.
(This option appears once the Image file is specified) Indic-
ates the full path of the image file location where the new
Location
images are created or the browsed images are copied to.
If you entered a file name with the syntax {slide_library or
dll file (slide or .png)} for the image file, the path of the
.dat file or the WD_SLB folder displays here.
Circuit Drawing File
Defines the circuit file name that is created.
Specifies the file name for the circuit. Enter a drawing file name to
use.
File Name
Displays the complete path of the new drawing file that is created.
The default user circuit folder is the User folder if the wd_usercktdir
Location
code is disabled in the environment file. If wd_usercktdir is enabled,
the folder defined by this code is used as the user circuit folder.
Add existing circuit
1244 | Chapter 16 Icon Menus
The icon name and circuit drawing name are saved in the active *.dat file
(such as ACE_JIC_MENU.DAT) once you click OK on the Icon Menu Wizard
dialog box. The icon then displays at the end of the existing icon images in
the Symbol Preview window of the Insert Component dialog box.
Ribbon: Schematic tab ➤ Other Tools panel ➤ Icon Menu Wizard.
Toolbar: Miscellaneous
Menu: Components ➤ Symbol Library ➤ Icon Menu Wizard
Command entry: AEMENUWIZ
Select the menu file to modify and click OK. In the Icon Menu Wizard dialog
box click Add, and then select Add Circuit.
You can also access this dialog box by right-clicking in the Symbol Preview
window of the Icon Menu Wizard dialog box and selecting Add Icon ➤ Add
Circuit.
TIP To determine which *.dat file is active, in the Project Properties dialog box,
Project Settings tab, Library, and Icon Menu Paths section, expand the Schematic
Icon Menu File option. It is the schematic icon menu file listed in the *.wdp file.
Icon Details
Defines the icon name and image.
Displays an image preview of the specified image file.Preview
Specifies the name to appear in the icon, the description text, and
the tool tip for the icon.
Name
Specifies the image file to use for the new icon. You can enter the
image file name (or complete path) or select it using one of the fol-
lowing methods:
Image file
■Browse: Finds an existing image to use for the icon. You can
browse for .sld or .png images.
■Pick: Selects an existing block name on the current drawing to
use as the image file name. For example, if you select block
HPB11, the image file name edit box displays “HPB11.”
Overview of the Icon Menu Wizard | 1245

■Active: (It is unavailable if the drawing is a new drawing and was
not saved) Selects the active drawing name to use as the Image
file. For example, if the active drawing name is “demo005,” then
the image file edit box has “demo005” listed as the file name.
If the circuit drawing file name contains the path of the drawing file
referring to the User folder or the wd_userckt_dir defined folder, the
browsed image is copied to the User folder if wd_userckt_dir is dis-
abled in the .env file or the wd_userckt_dir defined folder if
wd_userckt_dir is enabled in the .env file.
If the circuit drawing file name contains the path of the drawing file
that does not refer to the User or wd_userckt_dir defined folder, the
browsed image is copied to the Images folder and saved as a relative
path in the .dat file. Enclose the image path in quotation marks if you
do not want the image copied to the Images folder and to save the
complete path instead of the relative path in the .dat file. The entered
image file name can be names like "PB1" or "CONTROL RELAY," file
names with an extension such as “pb1.png,” or it can follow the
syntax {slide_library or dll file (slide or .png)}. For example, "S2(pb)"
or "S7(control_relay)."
NOTE The image file name cannot contain invalid characters such
as \ / : " ? < > | and only .png and .sld image files are supported.
Creates the .png image file from the current screen image. If the
specified image file does not exist, this option is selected by default.
Create PNG from current
screen image
If you do not want to create the icon from the displayed image of
the current drawing, clear the check box.
NOTE This option is unavailable if you enter an image file name with
the syntax {slide_library or dll file (slide or .png)}” For example,
“S2(pb)” or “S7(control_relay)”. It is also unavailable if the Image File
edit box contains the image file path instead of the image file name.
(Available only when Create PNG from current screen image is selec-
ted) Zooms in on the current screen image using AutoCAD Zoom
Zoom
command. Once you exit Zoom mode and press Enter, the dialog
box redisplays so you can finish defining the new icon.
(It appears once the Image file is specified) Indicates the full path of
the image file location where the new images are created or the
Location
browsed images are copied to. If you entered a file name with the
syntax {slide_library or dll file (slide or .png)} for the image file, the
path of the .dat file or the WD_SLB folder displays here.
1246 | Chapter 16 Icon Menus
Circuit Name to Insert
Defines the circuit to insert when you click the icon.
Specifies the file name for the circuit. Enter a drawing file
name to use, click Browse to select a drawing, or click
Active to use the active drawing name as the circuit name.
File Name
Create new submenu
The icon name and submenu are saved in the active *.dat file (such as
ACE_JIC_MENU.DAT) once you click OK on the Icon Menu Wizard dialog
box. The icon then displays at the end of the existing icon images in the
Symbol Preview window of the Insert Component dialog box.
Ribbon: Schematic tab ➤ Other Tools panel ➤ Icon Menu Wizard.
Toolbar: Miscellaneous
Menu: Components ➤ Symbol Library ➤ Icon Menu Wizard
Command entry: AEMENUWIZ
Select the menu file to modify and click OK. In the Icon Menu Wizard dialog
box click Add, and then select New Submenu.
You can also access this dialog box by right-clicking in the Symbol Preview
window of the Icon Menu Wizard dialog box and selecting New Sub Menu.
TIP To determine which *.dat file is active, in the Project Properties dialog box,
Project Settings tab, Library, and Icon Menu Paths section, expand the Schematic
Icon Menu File option. It is the schematic icon menu file listed in the *.wdp file.
Icon Details
Defines the icon name and image.
Displays an image preview of the specified image file.Preview
Specifies the name to appear in the icon, the description text, and
the tool tip for the icon.
Name
Overview of the Icon Menu Wizard | 1247

Specifies the image file to use for the new icon. You can enter the
image file name (or complete path) or select it using one of the fol-
lowing methods:
Image file
■Browse: Finds an existing image to use for the icon. You can
browse for .sld or .png images.
■Pick: Selects an existing block name on the current drawing to
use as the image file name. For example, if you select block
HPB11, the image file name edit box displays “HPB11.”
■Active: (It is unavailable if the drawing is a new drawing and was
not saved) Selects the active drawing name to use as the Image
file. For example, if the active drawing name is “demo005,” then
the image file edit box has “demo005” listed as the file name.
The browsed image is copied to the Images folder and saved as a
relative path in the .dat file. Enclose the image path in quotation
marks if you do not want the image copied to the Images folder and
to save the complete path instead of the relative path in the .dat file.
The entered image file name can be names like "PB1" or "CONTROL
RELAY," file names with an extension such as “pb1.png,” or it can
follow the syntax {slide_library or dll file (slide or .png)}. For example,
"S2(pb)" or "S7(control_relay)."
NOTE The image file name cannot contain invalid characters such
as \ / : " ? < > | and only .png and .sld image files are supported.
Creates the .png image file from the current screen image. If the
specified image file does not exist, this option is selected by default.
Create PNG from current
screen image
If you do not want to create the icon from the displayed image of
the current drawing, clear the check box.
NOTE This option is unavailable if you enter an image file name with
the syntax {slide_library or dll file (slide or .png)}” For example,
“S2(pb)” or “S7(control_relay)”. It is also unavailable if the Image File
edit box contains the image file path instead of the image file name.
(Available only when Create PNG from current screen image is selec-
ted) Zooms in on the current screen image using AutoCAD Zoom
Zoom
command. Once you exit Zoom mode and press Enter, the dialog
box redisplays so you can finish defining the new icon.
(This option appears once the Image file is specified) Indicates the
full path of the image file location where the new images are created
Location
or the browsed images are copied to. If you entered a file name with
1248 | Chapter 16 Icon Menus
the syntax {slide_library or dll file (slide or .png)} for the image file,
the path of the .dat file or the WD_SLB folder displays here.
Submenu
This section displays the menu number of the submenu page and allows you
to define the submenu title.
Displays the menu number of the submenu page for refer-
ence.
Menu Number
Specifies the submenu title that is used in the Insert Com-
ponent dialog box. It is automatically specified but you can
edit the title.
NOTE The submenu icon name and the menu title can be
different. For example, the icon name is Cable Markers but
the submenu title is Special Cable Markers.
Menu Title
Properties - main menu
Use this tool to modify the existing menu properties such as changing the
menu name. Your changes overwrite the information in the .dat file
Ribbon: Schematic tab ➤ Other Tools panel ➤ Icon Menu Wizard.
Toolbar: Miscellaneous
Menu: Components ➤ Symbol Library ➤ Icon Menu Wizard
Command entry: AEMENUWIZ
Select the menu file to modify and click OK. In the Icon Menu Wizard dialog
box right-click the menu file to modify (for example, JIC Symbols) and select
Properties.
Specifies the name of the main menu. The default
changes depending on which menu you are work-
ing with (for example, JIC Symbols).
Name
Displays the file name and full path of the menu
file. (for example, ace_jic_menu.dat).
Menu File
Overview of the Icon Menu Wizard | 1249
Properties - component
Use this tool to modify the existing symbol icon properties such as changing
the icon name, image, or block name. Your changes overwrite the information
in the .dat file.
Ribbon: Schematic tab ➤ Other Tools panel ➤ Icon Menu Wizard.
Toolbar: Miscellaneous
Menu: Components ➤ Symbol Library ➤ Icon Menu Wizard
Command entry: AEMENUWIZ
Select the menu file to modify and click OK. In the Icon Menu Wizard dialog
box right-click on the component icon to modify and select Properties.
TIP To determine which *.dat file is active, in the Project Properties dialog box,
Project Settings tab, Library, and Icon Menu Paths section, expand the Schematic
Icon Menu File option. It is the schematic icon menu file listed in the *.wdp file.
Icon Details
Defines the icon name and image.
Displays an image preview of the specified image
file.
Preview
Specifies the name to appear in the icon, the descrip-
tion text, and the tool tip for the icon.
Name
Specifies the image file to use for the new icon. You
can enter the image file name (or complete path) or
select it using one of the following methods:
Image file
■Browse: Finds an existing image to use for the
icon. You can browse for .sld or .png images.
■Pick: Selects an existing block name on the cur-
rent drawing to use as the image file name. For
example, if you select block HPB11, the image
file name edit box displays “HPB11.”
1250 | Chapter 16 Icon Menus

■Active: (This option is unavailable if the drawing
is a new drawing and was not saved) Selects the
active drawing name to use as the Image file.
For example, if the active drawing name is
“demo005,” then the image file edit box has
“demo005” listed as the file name.
The browsed image is copied to the Images folder
and saved as a relative path in the .dat file. Enclose
the image path in quotation marks if you do not want
the image copied to the Images folder and to save
the complete path instead of the relative path in the
.dat file. The entered image file name can be names
like "PB1" or "CONTROL RELAY," file names with an
extension such as “pb1.png,” or it can follow the
syntax {slide_library or dll file (slide or .png)}. For
example, "S2(pb)" or "S7(control_relay)."
NOTE The image file name cannot contain invalid
characters such as \ / : " ? < > | and only .png and
.sld image files are supported.
(Available only when you edit the image file) Creates
the .png image file from the current screen image.
Create PNG from current screen image
If the specified image file does not exist, this option
is selected by default. If you do not want to create
the icon from the displayed image of the current
drawing, clear the check box.
NOTE This option is unavailable if you enter an im-
age file name with the syntax {slide_library or dll file
(slide or .png)}” For example, “S2(pb)” or “S7(con-
trol_relay)”. It is also unavailable if the Image File edit
box contains the image file path instead of the image
file name.
(Available only when Create PNG from current screen
image is selected) Zooms in on the current screen
Zoom
image using AutoCAD Zoom command. Once you
exit Zoom mode and press Enter, the dialog box re-
displays so you can finish defining the new icon.
(This option appears once the Image file is specified)
Indicates the full path of the image file location where
Location
Overview of the Icon Menu Wizard | 1251
the new images are created or the browsed images
are copied to. If you entered a file name with the
syntax {slide_library or dll file (slide or .png)} for the
image file, the path of the .dat file or the WD_SLB
folder displays here.
Block Name to Insert
Defines the symbol block that is inserted when you click the icon in the Insert
Component dialog box.
Specifies the symbol block name. You can type the file
name of the symbol into the edit box or you can enter it
using one of the following methods:
Block Name
■Browse: Finds an existing WBlocked drawing (*.dwg)
file to assign to the icon. In this case the complete path
of the drawing file is inserted in the edit box.
■Pick: Selects an existing block on the current drawing
(for example, block recently created with Symbol
Builder). WBlocked version (.dwg) must exist.
■Active: Inserts the active drawing as a block.
Properties - command
Use this tool to modify the existing icon properties such as changing the icon
name, image, or command. Your changes overwrite the information in the
.dat file.
Ribbon: Schematic tab ➤ Other Tools panel ➤ Icon Menu Wizard.
Toolbar: Miscellaneous
Menu: Components ➤ Symbol Library ➤ Icon Menu Wizard
Command entry: AEMENUWIZ
Select the menu file to modify and click OK. In the Icon Menu Wizard dialog
box right-click on the command icon to modify and select Properties.
1252 | Chapter 16 Icon Menus

TIP To determine which *.dat file is active, in the Project Properties dialog box,
Project Settings tab, Library, and Icon Menu Paths section, expand the Schematic
Icon Menu File option. It is the schematic icon menu file listed in the *.wdp file.
Icon Details
Defines the icon name and image.
Displays an image preview of the specified image file.Preview
Specifies the name to appear in the icon, the description text, and
the tool tip for the icon.
Name
Specifies the image file to use for the new icon. You can enter the
image file name (or complete path) or select it using one of the fol-
lowing methods:
Image file
■Browse: Finds an existing image to use for the icon. You can
browse for .sld or .png images.
■Pick: Selects an existing block name on the current drawing to
use as the image file name. For example, if you select block
HPB11, the image file name edit box displays “HPB11.”
■Active: (This option is unavailable if the drawing is a new drawing
and was not saved) Selects the active drawing name to use as
the Image file. For example, if the active drawing name is
“demo005,” then the image file edit box has “demo005” listed
as the file name.
The browsed image is copied to the Images folder and saved as a
relative path in the .dat file. Enclose the image path in quotation
marks if you do not want the image copied to the Images folder and
to save the complete path instead of the relative path in the .dat file.
The entered image file name can be names like "PB1" or "CONTROL
RELAY," file names with an extension such as “pb1.png,” or it can
follow the syntax {slide_library or dll file (slide or .png)}. For example,
"S2(pb)" or "S7(control_relay)."
NOTE The image file name cannot contain invalid characters such
as \ / : " ? < > | and only .png and .sld image files are supported.
(Available only when you edit the image file) Creates the .png image
file from the current screen image. If the specified image file does not
Create PNG from current
screen image
exist, this option is selected by default. If you do not want to create
Overview of the Icon Menu Wizard | 1253

the icon from the displayed image of the current drawing, clear the
check box.
NOTE This option is unavailable if you enter an image file name with
the syntax {slide_library or dll file (slide or .png)}” For example,
“S2(pb)” or “S7(control_relay)”. It is also unavailable if the Image File
edit box contains the image file path instead of the image file name.
(Available only when Create PNG from current screen image is selec-
ted) Zooms in on the current screen image using AutoCAD Zoom
Zoom
command. Once you exit Zoom mode and press Enter, the dialog
box redisplays so you can finish defining the new icon.
(This option appears once the Image file is specified) Indicates the
full path of the image file location where the new images are created
Location
or the browsed images are copied to. If you entered a file name with
the syntax {slide_library or dll file (slide or .png)} for the image file,
the path of the .dat file or the WD_SLB folder displays here.
Command to Execute
Defines the command to execute when you click the icon.
NOTE If you select an AutoCAD Electrical command you must manually enter the
additional parameters as indicated.
Specifies to execute an AutoCAD command or AutoCAD Electrical
routine. You can enter the command name to execute with argu-
ments.
Command
Click List to select from a list of AutoCAD Electrical commands for
panel and schematic multi-pole symbol inserts. It makes it easier for
you to build the appropriate command to insert a symbol.
Displays the command parameters for a specific AutoCAD Electrical
command. If the command does not have any parameters, the value
“none” displays.
Parameters
Properties - circuit
Use this tool to modify the existing icon properties such as changing the icon
name, image, or circuit name. Your changes overwrite the information in the
.dat file.
1254 | Chapter 16 Icon Menus

Ribbon: Schematic tab ➤ Other Tools panel ➤ Icon Menu Wizard.
Toolbar: Miscellaneous
Menu: Components ➤ Symbol Library ➤ Icon Menu Wizard
Command entry: AEMENUWIZ
Select the menu file to modify and click OK. In the Icon Menu Wizard dialog
box right-click on the circuit icon to modify and select Properties.
TIP To determine which *.dat file is active, in the Project Properties dialog box,
Project Settings tab, Library, and Icon Menu Paths section, expand the Schematic
Icon Menu File option. It is the schematic icon menu file listed in the *.wdp file.
Icon Details
Defines the icon name and image.
Displays an image preview of the specified image file.Preview
Specifies the name to appear in the icon, the description
text, and the tool tip for the icon.
Name
Specifies the image file to use for the new icon. You can
enter the image file name (or complete path) or select it
using one of the following methods:
Image file
■Browse: Finds an existing image to use for the icon.
You can browse for .sld or .png images.
■Pick: Selects an existing block name on the current
drawing to use as the image file name. For example,
if you select block HPB11, the image file name edit box
displays “HPB11.”
■Active: (This option is unavailable if the drawing is a
new drawing and was not saved) Selects the active
drawing name to use as the Image file. For example,
if the active drawing name is “demo005,” then the
image file edit box has “demo005” listed as the file
name.
Overview of the Icon Menu Wizard | 1255

If the circuit drawing file name contains the path of the
drawing file referring to the User folder or the wd_user-
ckt_dir defined folder, the browsed image is copied to the
User folder if wd_userckt_dir is disabled in the .env file or
the wd_userckt_dir defined folder if wd_userckt_dir is en-
abled in the .env file. If the file does not exist, the Create
Circuit alert dialog box displays asking you if you want to
create the circuit.
If the circuit drawing file name contains the path of the
drawing file that does not refer to the User or wd_user-
ckt_dir defined folder, the browsed image is copied to the
Images folder and saved as a relative path in the .dat file.
Enclose the image path in quotation marks if you do not
want the image copied to the Images folder and to save
the complete path instead of the relative path in the .dat
file. The entered image file name can be names like "PB1"
or "CONTROL RELAY," file names with an extension such
as “pb1.png,” or it can follow the syntax {slide_library or
dll file (slide or .png)}. For example, "S2(pb)" or "S7(con-
trol_relay)."
NOTE The image file name cannot contain invalid charac-
ters such as \ / : " ? < > | and only .png and .sld image files
are supported.
(Available only when you edit the image file) Creates the
.png image file from the current screen image. If the spe-
Create PNG from current screen
image
cified image file does not exist, this option is selected by
default. If you do not want to create the icon from the
displayed image of the current drawing, clear the check
box.
NOTE This option is unavailable if you enter an image file
name with the syntax {slide_library or dll file (slide or
.png)}” For example, “S2(pb)” or “S7(control_relay)”. It is
also unavailable if the Image File edit box contains the im-
age file path instead of the image file name.
(Available only when Create PNG from current screen image
is selected) Zooms in on the current screen image using
Zoom
AutoCAD Zoom command. Once you exit Zoom mode
and press Enter, the dialog box redisplays so you can finish
defining the new icon.
1256 | Chapter 16 Icon Menus
(This option appears once the Image file is specified) Indic-
ates the full path of the image file location where the new
Location
images are created or the browsed images are copied to.
If you entered a file name with the syntax {slide_library or
dll file (slide or .png)} for the image file, the path of the
.dat file or the WD_SLB folder displays here.
Circuit Name to Insert
Defines the circuit file name that is created.
Specifies the complete path and file name of the new drawing file
that is created. The default user circuit folder is the User folder if the
File Name
wd_usercktdir code is disabled in the environment file. If wd_usercktdir
is enabled, the folder defined by this code is used as the user circuit
folder.
Properties - submenu
Use this tool to modify the existing icon properties such as changing the icon
name, image, or submenu title. Your changes overwrite the information in
the .dat file.
Ribbon: Schematic tab ➤ Other Tools panel ➤ Icon Menu Wizard.
Toolbar: Miscellaneous
Menu: Components ➤ Symbol Library ➤ Icon Menu Wizard
Command entry: AEMENUWIZ
Select the menu file to modify and click OK. In the Icon Menu Wizard dialog
box right-click on the submenu to modify and select Properties.
TIP To determine which *.dat file is active, in the Project Properties dialog box,
Project Settings tab, Library, and Icon Menu Paths section, expand the Schematic
Icon Menu File option. It is the schematic icon menu file listed in the *.wdp file.
Overview of the Icon Menu Wizard | 1257

Icon Details
Defines the icon name and image.
Displays an image preview of the specified image file.Preview
Specifies the name to appear in the icon, the description text, and
the tool tip for the icon.
Name
Specifies the image file to use for the new icon. You can enter the
image file name (or complete path) or select it using one of the fol-
lowing methods:
Image file
■Browse: Finds an existing image to use for the icon. You can
browse for .sld or .png images.
■Pick: Selects an existing block name on the current drawing to
use as the image file name. For example, if you select block
HPB11, the image file name edit box displays “HPB11.”
■Active: (This option is unavailable if the drawing is a new drawing
and was not saved) Selects the active drawing name to use as
the Image file. For example, if the active drawing name is
“demo005,” then the image file edit box has “demo005” listed
as the file name.
The browsed image is copied to the Images folder and saved as a
relative path in the .dat file. Enclose the image path in quotation
marks if you do not want the image copied to the Images folder and
to save the complete path instead of the relative path in the .dat file.
The entered image file name can be names like "PB1" or "CONTROL
RELAY," file names with an extension such as “pb1.png,” or it can
follow the syntax {slide_library or dll file (slide or .png)}. For example,
"S2(pb)" or "S7(control_relay)."
NOTE The image file name cannot contain invalid characters such
as \ / : " ? < > | and only .png and .sld image files are supported.
(Available only when you edit the image file) Creates the .png image
file from the current screen image. If the specified image file does not
Create PNG from current
screen image
exist, this option is selected by default. If you do not want to create
the icon from the displayed image of the current drawing, clear the
check box.
1258 | Chapter 16 Icon Menus

NOTE This option is unavailable if you enter an image file name with
the syntax {slide_library or dll file (slide or .png)}” For example,
“S2(pb)” or “S7(control_relay)”. It is also unavailable if the Image File
edit box contains the image file path instead of the image file name.
(Available only when Create PNG from current screen image is selec-
ted) Zooms in on the current screen image using AutoCAD Pan
Zoom
command. Once you exit Pan mode and press Enter, the dialog box
redisplays so you can finish defining the new icon.
(This option appears once the Image file is specified) Indicates the
full path of the image file location where the new images are created
Location
or the browsed images are copied to. If you entered a file name with
the syntax {slide_library or dll file (slide or .png)} for the image file,
the path of the .dat file or the WD_SLB folder displays here.
Submenu
This section displays the menu number of the submenu page and allows you
to define the submenu title.
Displays the menu number of the submenu page for refer-
ence.
Menu Number
Specifies the submenu title that is used in the Insert Com-
ponent dialog box. It is automatically specified but you can
edit the title if desired.
NOTE The submenu icon name and the menu title can be
different. For example, the icon name is Cable Markers but
the submenu title is Special Cable Markers.
Menu Title
Use alternate icon menus
AutoCAD Electrical defaults to icon menu ACE_<standard>_MENU.DAT (where
<standard>= JIC, IEC, AS, GB, HYD, JIS, PID, or PNEU) for schematic symbols
and ACE_PANEL_MENU.DAT for panel symbols. These menu files are found
in:
■Windows XP: C:\Documents and Settings\{username}\Application
Data\Autodesk\AutoCADElectrical {version}\{release}\{country
code}\Support\
Use alternate icon menus | 1259

■Windows Vista, Windows 7:
C:\Users\{username}\AppData\Roaming\Autodesk\AutoCADElectrica
{version}l\{release}\{country code}\Support\
You can create alternate or project-specific icon menus and have AutoCAD
Electrical automatically use them instead of these defaults.
An icon menu can be tied to a project so that when the project is active,
AutoCAD Electrical references that special icon menu instead of the AutoCAD
Electrical normal menu. The full path of the alternate menu and file name is
saved in the project's .wdp file. You can save an alternate menu for schematic
symbols and one for panel symbols.
Assign specific icon menu files to a project
1Click Project tab ➤ Project Tools panel ➤ Manager.
2Make sure that the project is the active project, right-click on the project
name, and select Properties.
3In the Project Properties ➤ Project Settings dialog box, click the plus
sign (+) next to Schematic Icon Menu File or Panel Icon Menu File. Click
inside the edit box to change the path of the icon menu, click Browse to
search for and select an icon menu, or click Default to use the default
icon menu.
4Click OK.
NOTE If you make custom images or libraries for the menu, copy them to the
same subdirectory as the menu file since AutoCAD Electrical looks for menu images
in the directory of the active menu file.
Modify Icon Menu File Directly
Overview of the icon menu file
AutoCAD Electrical supplies several default icon (.dat) menus for schematic
symbols and one for panel symbols. For example, the JIC schematic icon menu
1260 | Chapter 16 Icon Menus

is defined by the contents of file ACE_JIC_MENU.DAT file and the panel menu
is ACE_PANEL_MENU.DAT. These menu files are found in:
■Windows XP: \Documents and Settings\{username}\Application
Data\Autodesk\AutoCAD Electrical {version}\{release}\{country
code}\Support\
■Windows Vista, Windows 7:
\Users\{username}\AppData\Roaming\Autodesk\AutoCAD Electrical
{version}\{release}\{country code}\Support\
The other icon menu files include: ACE_AS_MENU, ACE_GB_MENU,
ACE_JIS_MENU, ACE_IEC_MENU, ACE_HYD_MENU, ACE_PID_MENU,
ACE_PNEU_MENU and WD_ABECAD.
There may be times when you want to bypass the Icon Menu Wizard and edit
the .dat text file directly using any text editor (such as Microsoft Notepad). It
is important to maintain the menu file structure, otherwise your menu may
not activate properly.
Here are the first few lines of the first page and a submenu (JIC: Push Buttons)
of the ACE_JIC_MENU.DAT file. Refer to it in the following sections.
**M0
D0
JIC: Schematic Symbols
Push Buttons |s2(s_pb)|$S=M3
Selector Switches |s2(s_ss)|$S=M6
Limit Switches |s2(s_zs)|$S=M8
**M3
D5W
JIC: Push Buttons
Push Button NO |s2(shpB11)|HPB11
Push Button NC |s2(shpB12)|HPB12
NOTE You can have an unlimited number of icons on each menu page. Before
AutoCAD Electrical 2008, you were limited to 24 icons per page.
Overview of the icon menu file | 1261

Page structure of the icon menu
Each menu page starts with a menu number line preceded by two asterisks
(**). The next line is an AutoCAD Electrical code, which defines the menu
page format (such as how many rows, how many icon buttons per row). It is
used for .dat files that are used before AutoCAD Electrical 2008. The next line
is the title, with optional column labels, for the menu page. The rest of the
lines define the information for each icon button on the menu page. These
icons can either launch a command, insert a component or open a submenu.
Menu number**M0
Main menu title. In the Insert Component dialog
box, it is the main menu title in the Menu tree se-
JIC Symbols
lection view and is also displayed above the Symbol
Preview window of the dialog box.
Description text of the icon. It is also the tooltip for
the submenu page, command, or component to
Push Buttons
insert. In this example, clicking Push Buttons in the
Insert Component dialog box opens a submenu.
Image information with the syntax: slide_lib-
rary_name(slide or .png). In this example, the slide
s2(s_pb)
library (or resource dll library) is “s2” and the slide
file (or .png image) is “s_pb.”
NOTE If both s_pb.png and s_pb.sld exist, Auto-
CAD Electrical searches for the .png file first. If not
found, looks for the s_pb.sld file.
Submenu trigger. The syntax is: $S=menu number.
In this example, menu 3 is used for push buttons.
$S=M3
It is used to develop the Menu tree structure in the
Insert Component dialog box.
Icon function - submenu trigger
Submenu number**M3
(Used for .dat files before AutoCAD Electrical 2008)
Indicates the number of rows in the menu. In
D5W
AutoCAD Electrical 2008, you can have any number
of rows or columns in your menu. This value is only
1262 | Chapter 16 Icon Menus
used to structure .dat files in older versions of
AutoCAD Electrical.
Submenu page title. This displays below the main
menu (JIC Symbols) in the Menu tree structure view
of the Insert Component dialog box.
JIC: Push Buttons
Add submenu pages
Enter the definition for any new submenu pages at the bottom of the .dat file.
A new Special Symbols submenu page added using the Icon Menu Wizard
adds the following lines of text:
**M101
S P E C I A L S Y M B O L S
Explanation:
Menu page number. User-created menu pages
should begin at 100 since AutoCAD Electrical uses
1-99 for its own use.
**M101
Menu page titleS P E C I A L S Y M B O L S
Icon function - insert component
Description text of the icon. It is also the tool tip
for the component to insert. In this example, click-
Push Button N.O.
ing Push Button N.O. in the Insert Component
dialog box inserts the component in the drawing.
Image information with the syntax: slide_lib-
rary_name(slide or .png). In this example, the slide
s2(shpB11)
library (or resource dll library) is “s2” and the slide
file (or .png image) is “shpB11.”
Specifies the block name. The block name is
searched in the symbol library search path as
HPB11
defined by the Project Properties dialog box and is
inserted into the drawing.
Each entry consists of three parts separated by "|" characters. The first part is
the text that is displayed in the Menu tree structure view or as a tool tip in
Overview of the icon menu file | 1263
the Symbol Preview window. The second part is the slide (or .png) name.
Include the path to the .SLD. If the slide is contained within a slide library (or
resource dll library) the format here is library_name (slide_name). The third
part is the actual icon function. The function can be a symbol name to insert,
a submenu trigger, or a command. A line that looks like this can be added by
the menu wizard to insert a special switch:
Special Switch | hzs11.sld| HZS11
Icon function - execute command
Clicking on an icon in the icon menu can also execute an AutoCAD Electrical
command. The following example shows the syntax for commands:
3 Pole Disconnect |s1(shds13)|$c=wd_3unit HDS11
Description text of the icon. It is also the tool tip
for the command. In this example, clicking 3 Pole
3 Pole Disconnect
Disconnect in the Insert Component dialog box
runs a command.
Image information with the syntax: slide_lib-
rary_name(slide or .png). In this example, the slide
s1(shds13)
library (or resource dll library) is “s1” and the slide
file (or .png image) is “shds13.”
Code that executes a command. The syntax is:
$C=command name {command parameters}. In
$C=wd_3unit
this example, the command wd_3unit is run when
the icon is clicked.
Specifies the command parameters.HDS11
1264 | Chapter 16 Icon Menus
BOM and Catalogs
Catalog database
Sample catalog information is furnished with the default AutoCAD Electrical
installation. The information is held in tables in a Microsoft Access database
file (.mdb) which are populated with sample vendor data. Expand and modify
these tables to meet your specific BOM reporting needs. Use tools provided with
AutoCAD Electrical, or use a database program that can read/write the Access
file format.
The .mdb file is a single file that is named <project>_cat.mdb or default_cat.mdb.
If the project-specific.mdb file is used, it must be in the same subdirectory as
the <project>.wdp file is located. Here is the AutoCAD Electrical search sequence:
■First choice -- <project>_cat.mdb (in project's subdirectory of the project)
■Second choice -- default_cat.mdb (in subdirectory of the project)
■Third choice -- default_cat.mdb (in user subdirectory)
■Fourth choice -- default_cat.mdb (in subdirectory of the catalog)
Catalog information can be carried on parent or stand-alone components that
have MANUFACTURER, CATALOG, and optional ASSEMBLYCODE attributes.
You can assign catalog information to the attributes of a component at
component insertion time or any time later during an edit of the component.
Catalog table naming conventions
Each primary or stand-alone component type can have an associated table in
your Access mdb file. This approach is taken for both performance reasons and
to exclude invalid choices. For example, you cannot assign a blue press-test
pilot part number to a standard red pilot light symbol. There can be multiple
17
1265
catalog tables for the same component family. Alternately, all master test and
all neon pilot lights (of all colors) can be combined into a single catalog table
named LT. AutoCAD Electrical determines the default catalog lookup table
name based on the WDBLKNAM attribute.
The following example references a custom master control relay with block
name “HCR1_MC_PWR.”
If your symbol does not carry the WDBLKNAM attribute:
1The symbol is checked for the WDBLKNAM attribute (or Xdata). It is not
found.
2The block name is read (“HCR1_MC_PWR”) minus its first character (the
orientation character “H” or “V”). The default_cat.mdb file is searched
for a table named “CR1_MC_PWR.”
3If this table exists, it is used. If this table does not exist, and the block
name is eight characters or more, AutoCAD Electrical starts removing
characters from the block name, looking for a table name match with
each character removed. This process continues until only seven characters
remain. Table names that it would look for in sequence would be
“CR1_MC_PW”, “CR1_MC_P”, “CR1_MC_.”
4If there is not a match on the last table name, AutoCAD Electrical checks
for the family-specific table (CR). It is the second and third character of
the block name.
5If this table exists, it is used. If it does not exist, a MISC_CAT table is
looked for if the active properties of the project are set up to use this
catch-all table.
6If all these items fail, AutoCAD Electrical stops looking (if running a
report) or prompts you to add a table to the default_cat.mdb file (if you
are inserting or editing a component).
If your symbol includes the invisible WDBLKNAM attribute with a value of
“HCRM”:
1The symbol is checked for the WDBLKNAM attribute (or Xdata). It is
found. The attribute value of “HCRM” is used instead of the block name
and proceeds to step 2.
2The leading “H” or “V” character is removed. The default_cat.mdb file
searches for a table named “CRM.”
3If this table exists, it is used. If the table does not exist, and the attribute
value is eight characters or more, AutoCAD Electrical starts removing
1266 | Chapter 17 BOM and Catalogs
characters from the attribute value, looking for a table name match with
each character removed. This process continues until only seven characters
remain. In this case, characters are not removed.
4If there is not a match on the last table name, AutoCAD Electrical checks
for a family-specific table (CR). It is the second and third character of the
original WDBLKNAM value (HCRM).
5If this table exists, it is used. If it does not exist, a MISC_CAT table is
looked for if the properties of the active project are set up to use this
catch-all table.
6If all these items fail, AutoCAD Electrical stops looking (if running a
report) or prompts you to add a table to the default_cat.mdb file (if you
are inserting or editing a component).
If you want your custom symbol to go to table “CRM” in the catalog database
file instead of the existing table “CR” you must:
1Add the WDBLKNAM attribute to your master control relay coil library
symbols with a value of “HCRM” or “VCRM” (the orientation does not
matter).
Manually add the CRM table in your catalog lookup database file.
2Click Project tab ➤ Other Tools panel ➤ ➤ Add Table to Catalog
Database.
NOTE AutoCAD Electrical always goes to the fixed table names for PLC I/O modules
(PLCIO), terminals (TRMS) and cable markers (W0). Panel layout symbols must
always use the WDBLKNAM attribute or Xdata without the leading H or V character.
Family tables in the default_cat.mdb
The list of tables available in the default_cat.mdb is shown in the following
table. All tables are family-specific and one table is created for each family.
DescriptionFamily Code/Table
Name
Table used by Symbol Builder to map the attribute template type to
a symbol type description. The description is displayed in the Type
_FAMILY_DESCRIPTION
Catalog database | 1267
DescriptionFamily Code/Table
Name
list on the Select Symbol / Objects on page 342 dialog box. See Create
a Symbol Builder attribute template on page 2105.
Allows starting MFG/TYPE/RATING combinations to be predefined
for each catalog lookup table, when AutoCAD Electrical would nor-
_LISTBOX_DEF
mally default to the values given in the first record of the selected
catalog lookup table. See Overview of the LISTBOX_DEF catalog
database table on page 1277.
Default pin list data table. AutoCAD Electrical also contains manufac-
turer-specific pin list tables that have the same format as the _PINLIST
_PINLIST
table. The naming convention for manufacturer-specific tables is:
_PINLIST_AB or _PINLIST_AROMAT. AutoCAD Electrical first searches
manufacturer-specific tables; if not found, it then searches the default
_PINLIST table. See Use pin lists on page 1304.
Default terminal properties data table. AutoCAD Electrical also contains
manufacturer-specific terminal properties tables that have the same
_TERMPROPS
format as the _TERMPROPS table. The naming convention for manu-
facturer-specific tables is: _TERMPROPS_AB or _TERMPROPS_AROMAT.
AutoCAD Electrical first searches manufacturer-specific tables; if not
found, it then searches the default _TERMPROPS table. See Edit ter-
minal properties database on page 1060.
Cable conductors. See Edit the cable conductor database on page
953.
_W0_CBLWIRES
Table cross-reference style symbol mapping table. Maps a contact
block name to a graphic drawing name. This graphic drawing is in-
_XREF_GRAPHICS
serted as a block in the TYPE column of the cross-reference table for
the contact. See Edit cross-reference symbol mapping table on page
830.
AmmetersAM
Buzzers, horns, bellsAN
Circuit breakersCB
Connectors/pinsC0
1268 | Chapter 17 BOM and Catalogs
DescriptionFamily Code/Table
Name
Control relaysCR
Din RailDI
Device networksDN
DiodesDO
DrivesDR
Disconnect switchesDS
Enclosures/hardwareEN
Frequency metersFM
Flow sensorsFS
Foot switchesFT
FusesFU
Latching relaysLR
Limit switchesLS
Lights, pilot lightsLT
MiscellaneousMISC
MotorsMO
Motor starters/contactorsMS
NameplatesNP
OverloadsOL
Push buttonsPB
Photo switchesPE
Catalog database | 1269
DescriptionFamily Code/Table
Name
Programmable logic controllersPLCIO
Power metersPM
ActuatorsPNEU-ACT
LubricatorsPNEU-ALU
CylindersPNEU-CYL
Flow ControlPNEU-FLC
FiltersPNEU-FLT
Pressure GaugesPNEU-MET
SilencersPNEU-MFL
ManifoldsPNEU-MNF
MotorsPNEU-MOT
NozzlesPNEU-NOZ
Push buttonsPNEU-OPR
PumpsPNEU-PMP
ReservoirsPNEU-TNK
SuctionPNEU-VAC
ValvesPNEU-VLV
Pressure switchesPS
Power suppliesPW
Proximity switchesPX
ResistorsRE
1270 | Chapter 17 BOM and Catalogs

DescriptionFamily Code/Table
Name
Selector switchesSS
Surge suppressorsSU
Toggle switchesSW
Timer relaysTD
Terminal blocksTRMS
Temperature switchesTS
Volt metersVM
Cables, multi-conductor cablesWO
Wire waysWW
TransformersXF
Move the catalog database file
In Project Manager, right-click the project name and select Settings to find
the location of the default_cat.mdb file. If you want to move this file to another
directory, such as a shared network drive, then edit a small text file to tell
AutoCAD Electrical where to look.
1Move the file to your new drive:directory.
2Exit AutoCAD. Edit the .env file with a text editor like WordPad or
Notepad. Use the Settings option on the Project Manager to find the full
path.
3Find the WD_CAT entry. Change the line to point to the new location
for the catalog file. For example, you move them to n:/electric/catalogs/
on your network drive. Change this line to:
WD_CAT,n:/electric/catalogs/,AutoCAD Electrical catalog file.
4Save and exit the file.
NOTE AutoCAD Electrical looks for a project-specific MDB file first, called
<project>_cat.mdb, in the subdirectory of the project.
Catalog database | 1271
Define a secondary catalog lookup file for a project
You can use two catalog database files when working with an AutoCAD
Electrical project: the first file can contain the catalog information that you
commonly use, and the second file can contain the full list of catalog content
available with AutoCAD Electrical.
1Copy the default_cat.mdb file and save it with a different name (such as
full_catalog.mdb).
2Modify the original default_cat.mdb file to contain only the catalog
information that you commonly use. Save this file as default_cat.mdb.
3In AutoCAD Electrical, right-click on the project name in the Project
Manager and select Properties.
4On the Project Properties ➤ Project Settings dialog box, Catalog Lookup
File Preference section, click Other File.
5On the Catalog Lookup File dialog box, select Optional: Define a
secondary catalog lookup file for this project.
6Browse to and select the file you created in step 1 (full_catalog.mdb) and
click Open.
For each project you set up this file for, you only see the content from
your default_cat.mdb file in the Parts Catalog dialog box. For catalog
information that is in the full catalog database file (full_catalog.mdb),
click Secondary File on the Database drop-down on the Parts Catalog
dialog box. The Parts Catalog dialog box temporarily switches to the
secondary catalog lookup file.
1272 | Chapter 17 BOM and Catalogs
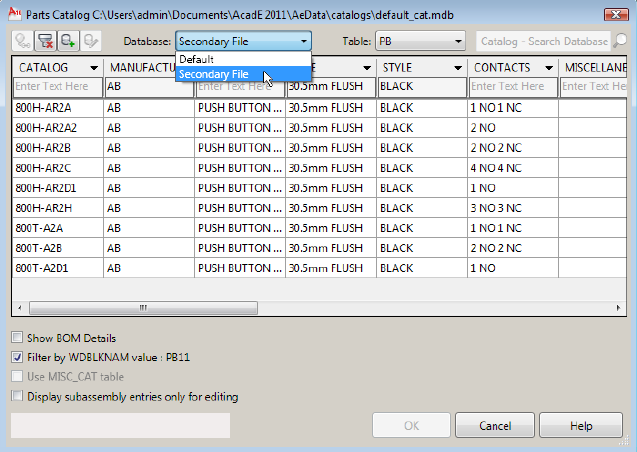
How to install additional manufacturer content
During installation, you specified which manufacturer content to install. You
can install additional manufacturer content later.
1Close all instances of AutoCAD Electrical.
2From the Windows Control Panel select Add or Remove Programs.
3From the Add or Remove Programs dialog box, select the latest version
of AutoCAD Electrical and click the Change/Remove button.
4On the AutoCAD Electrical Installation Wizard, click Add or Remove
Features.
5On the Add/Remove Features page, click Next.
6On the Manufacturer Content Selection page, select all the manufacturers
you wish to install. Click Next.
7On the Select Symbol Libraries page, click Next.
8Click Next to continue.
How to install additional manufacturer content | 1273
Overview of the catalog database table structure
AutoCAD Electrical uses the first 16 fields for its own which includes three
user fields for your use. You can insert additional fields beyond the 16th one,
but they are ignored when generating reports. Here are the 16 fields accessed
by AutoCAD Electrical. (They must remain in this order in the database
records.)
DescriptionWidthField Name
Catalog number.60CATALOG
Manufacturer code; abbreviations are allowed.24MANUFACTURER
Generic description.150DESCRIPTION
Generic type (field name varies based on table
name).
100TYPE
Generic rating (field name varies based on table
name).
100RATING
First miscellaneous text field (header cell is based
on the component family).
100MISCELLANEOUS1
Second miscellaneous text field (header cell is
based on the component family).
100MISCELLANEOUS2
Code to flag that this item has subassembly
items. Use a unique name code to link this main
60ASSEMBLYCODE
catalog item with other subassembly items.
Spaces are allowed.
Code to flag as a subassembly item of a main
item.
24ASSEMBLYLIST
Subassembly quantity (blank = quantity of 1).8ASSEMBLYQUANTITY
Field #1 for other information.100USER1
Field #2 for other information.100USER2
Field #3 for other information.100USER3
1274 | Chapter 17 BOM and Catalogs

DescriptionWidthField Name
Optional user-defined RATING/miscellaneous
attribute values.
255TEXTVALUES
Associate .pdf files or Web URL to component.255WEBLINK
AutoCAD Electrical block name minus the first
character of the block name since the first char-
60WDBLKNAM
acter is the orientation of block (H= Horizontal,
V= Vertical).
TEXTVALUES rating and miscellaneous attribute value assignment
An optional 14th field named TEXTVALUES can be added to any catalog
lookup table. This field can be used to vector text values to specific attributes
on the edited component. The format for the text data encoded into this field
is:
<attribute tag name1>=<text value>;<attribute tag name2>=<text value>
For example, a current catalog entry must annotate the component block
attributes RATING1 and RATING2 with "ON DELAY" and "5-30 sec"
respectively. Insert the following text string into the TEXTVALUES edit box:
RATING1=ON DELAY;RATING2=5-30 sec
TIP Rating attributes that are common among all component types make the
population of the catalog database easier.
When inserting or editing components, if you make a catalog selection that
comes with a non-blank TEXTVALUES, AutoCAD Electrical breaks apart the
field value and searches for the target attributes on the edited symbol. If found,
the target attributes of the component are updated with the encoded data
pulled from the user-selected catalog lookup record. To use this value:
1Add this field to any catalog database table if it does not exist.
2Trigger AutoCAD Electrical to display the target catalog lookup table.
(Insert a component and then select Catalog Lookup on the Insert/Edit
Component dialog box.)
3On the Parts Catalog dialog box, pick the appropriate part number and
click Edit Catalog Entry.
Overview of the catalog database table structure | 1275

4On the Edit Record dialog box, type a value into the TEXTVALUES edit
box and click OK.
If the TEXTVALUES field did not exist in the selected catalog table, it is
added to each record in the database. If it did exist, your new value is
saved in the TEXTVALUES field for the selected record of the catalog
number.
WEBLINK assignment
Sometimes, you want to see more information about your component than
can be held in the catalog database. For example, suppose you want to see a
picture of the item or get its specifications. Use the 15th field in the catalog
database to set up the WEBLINK to achieve the result you need. If the WEBLINK
field for the selected part is a Web URL, your Internet browser launches and
displays it. If it is an image file, PDF, spreadsheet, or some other document
type, the application associated with that file extension (for example, "Open
With...") starts and displays the contents of the file.
NOTE For PDF display, you can include the page number to display upon
document open. Add a space and the page number after the PDF file name in the
WEBLINK field value (for example, C:\\rockwell\\700series.pdf 13). It does not
work for PDF files loaded across the Web.
If the View Web Link button on the Parts Catalog dialog box is disabled, the
catalog lookup record does not have a WEBLINK field defined as the 15th
field. To add this field, select the Edit Catalog Entry button on the Parts Catalog
dialog box.
A Weblink assignment can show up in the Surf dialog box. If you select a
parent component to surf on, and it carries a catalog assignment that references
a Weblink value, it displays in the surf selection dialog box along with the
other related component references. Double-clicking the Weblink reference
launches your browser or appropriate application.
NOTE Picking on a child component to initialize in the Surf dialog box does not
display a Weblink referenced by a related parent. Pick the parent carrying the
catalog assignment.
WDBLKNAM assignment
The WDBLKNAM value filters the symbol names that display in the Parts
catalog dialog box. The Filter by WDBLKNAM value option on the Parts Catalog
dialog box suppresses what data displays when a catalog lookup is run for a
particular component. If you perform a catalog lookup on a symbol with block
1276 | Chapter 17 BOM and Catalogs

name “HTD1_xxx” and the Filter by WDBLKNAM value option is selected,
the only records that display are listed in the TD table of the catalog database
file that have a blank WDBLKNAM value or a value in the WDBLKNAM field
that matches the block name of the symbol. For example, a catalog lookup
on an on-delay coil (HTD1N.dwg or VTD1N.dwg) displays all blank
WDBLKNAM entries and all entries that include “TD1N” somewhere in the
WDBLKNAM field. If this option is not selected, the query ignores the check
on the WDBLKNAM field and returns all catalog information.
You can do one of the following to determine how your catalog content is
filtered:
1Add your block name to all WDBLKNAM fields in the catalog table. Using
the example above, you would add the block name to the TD table.
2Add an invisible WDBLKNAM attribute to your symbol. Using the previous
example, name your symbol “HTD1F” for an off-delay coil or “HTD1N”
for an on-delay coil.
3Rename your block with the appropriate prefix (for example, “VTD1F”)
followed by a substring “$$” and any other suffix to make the block name
unique. The catalog lookup in AutoCAD Electrical sees the “$$” and
assumes that it, and anything after it, is ignored. It treats your symbol as
if the block name were just the basic name of “VTD1F.”
TIP Option 2 or 3 is preferred.
Overview of the _LISTBOX_DEF catalog database
table
This optional table can be included in the catalog database file. It allows you
to predefine filtering of the catalog entries on the Parts Catalog dialog box.
AutoCAD Electrical normally shows all the entries for the selected catalog
lookup table.
Filtering values can be defined differently for each catalog lookup table. The
first field defines the catalog lookup table name. The next fields follow the
same format and order as the catalog lookup table structure on page 1274. Leave
the field blank if you do not want to filter the records based on the values in
that field. Access automatically handles the last field, which is the record
number.
Overview of the _LISTBOX_DEF catalog database table | 1277
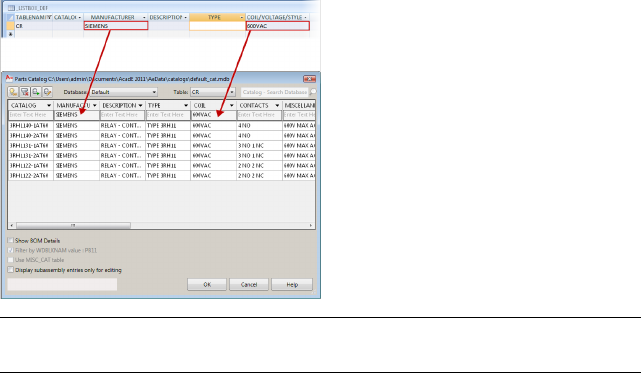
1When the Parts Catalog dialog box displays, the program checks to see
if the component already has a catalog defined.
2If no catalog is defined, the program checks the _LISTBOX_DEF table for
a record with a TABLENAME value that matches the table name on page
1265 for the component.
3If a TABLENAME match is found, the program filters the records displayed
in the Parts Catalog dialog box using the non-blank values from the
_LISTBOX_DEF record.
For example, when you first insert a relay coil symbol and open the Parts
Catalog dialog box, you want the "CR" catalog table display to default to
Allen-Bradley part numbers for "TYPE P" relays. Use a copy of Microsoft Access
to open the catalog lookup file, and select table _LISTBOX_DEF. Insert a record
with these field values: TABLENAME "CR", MANUFACTURER "AB", and TYPE
"TYPE P". The text you enter must exactly match existing field values in the
target table. Save and exit. Now, when you insert a relay coil and select Catalog
Lookup, the dialog box opens with these filters predefined.
NOTE The column names in the _LISTBOX_DEF table do not affect the
functionality.
Terminals
Terminals always default to the TRMS table in the catalog lookup. However,
the _LISTBOX_DEF table supports 2 special TABLENAME values for terminals
1278 | Chapter 17 BOM and Catalogs
to make it easier when assigning a catalog to a terminal accessory or terminal
jumper.
■TRMS(H) - defines the filters when adding terminal accessories from
Terminal Strip Editor.
For example: TABLENAME=TRMS(H), MANUFACTURER = AB, TYPE =
HARDWARE
■TRMS(J) - defines the filters when adding terminal jumpers from Terminal
Strip Editor or the Edit Jumper command.
For example: TABLENAME=TRMS(H), MANUFACTURER = AB, TYPE =
HARDWARE, RATING = JUMPER.
Create a project-specific catalog database
Sample catalog information is furnished with the default AutoCAD Electrical
installation. The information is held in tables in a Microsoft Access Database
file (.mdb) which are populated with sample vendor data. This database can
potentially hold hundreds of thousands of entries. Your project likely uses a
small percentage of these entries. You can create a project-specific catalog
database containing only the entries used in your project.
■Send a copy of this smaller catalog database to your client with the finished
project.
■Limit catalog selection to components already used in the project.
Creating a project-specific catalog database
Creates a catalog database of items used in the active project.
1Click Project tab ➤ Other Tools panel ➤ ➤ Create
Project-specific Catalog Database.
2Confirm the catalog database name. If necessary, enter or browse to a
different catalog file name.
3If a secondary catalog file on page 1272 is defined in the project properties,
the name is shown in the Secondary catalog file edit box. This file name
cannot be changed.
Create a project-specific catalog database | 1279
4Select whether to save the catalog file to the project folder with the file
name {project name}_cat.mdb.
Yes - the file becomes the new project catalog lookup file.
No - the project does not reference the file. Define the database file
name and folder.
5Click OK.
The specified catalog database file is copied to the new name. Entries that are
not used in the project are removed from the new file. All reference tables
with names that begin with an underscore (_) are copied intact to the new
file.
Create Project-Specific Catalog Lookup File
Creates a catalog database of items used in the active project.
Ribbon: Project tab ➤ Other Tools panel ➤ ➤ Create
Project-specific Catalog Database.
Command entry: AECREATEPROJCATALOG
The specified catalog database file is copied to the new name. Entries that are
not used in the project are removed from the new file. All reference tables
with names that begin with an underscore (_) are copied intact to the new
file.
Displays the main catalog file assigned to the active project. If the
active project is already using a project-specific catalog file, the pro-
gram displays the default_cat.mdb file.
Main catalog file
If there is a secondary catalog lookup on page 1272 defined, displays
the name. The secondary catalog file name cannot be changed.
Secondary catalog file
NOTE If no secondary catalog file is defined for the project, this
control is disabled.
Yes - automatically create the project-specific catalog file in the same
folder as the WDP file for the active project. The file name is pre-
defined as {project name}_cat.mdb.
Save in project folder
1280 | Chapter 17 BOM and Catalogs
No - enables the new project-specific file edit box and browse button.
Enter or browse to the file name and folder. The file name is pre-
defined as {project name}_cat.mdb but stored in the user folder
defined in the WD_USER entry of the wd.env file.
Displays the file path for the project specific-catalog file.Location
Catalog Assignment
Assign catalog information to components
Vendor catalog parts lookup and assignment is crucial to enabling AutoCAD
Electrical to create various detailed BOM reports automatically. It is also a key
step in the workflow between control schematic wiring diagrams and derived
physical panel layouts. Catalog parts lookup is through a multitable Microsoft
Access database file (default_cat.mdb) shipped with AutoCAD Electrical. It is
populated with some commonly used component part numbers and
descriptions from some of the major electrical controls vendors. The database
content is found at:
■Windows XP: C:\Documents and Settings\{username}\My
Documents\Acade {version}\AeData\Catalogs\
■Windows Vista, Windows 7: C:\Users\{username}\Documents\Acade
{version}\AeData\Catalogs\
Catalog information is carried on a parent or stand-alone component. You
can define exactly where AutoCAD Electrical looks for this catalog information,
allowing great flexibility in how you keep your catalog information. There
are some ways to assign your catalog information to a component:
Use the Component Insert/Edit dialog box
The AutoCAD Electrical Insert/Edit dialog box appears when you insert a new
component or edit one. Click Lookup to view the catalog database file of the
component. It is where you can search the database for a specific catalog item
to assign to the selected component.
Catalog Assignment | 1281
Use a project-specific catalog file
You can set up a project catalog file with all the component types of the project
in it. The file must reside in the subdirectory of the project. Name the file
either default_cat.mdb or<project>_cat.mdb. AutoCAD Electrical references
this file first before looking in the user subdirectory or the catalogs subdirectory
(as defined in wd.env).
Use a miscellaneous catalog file
You can set up a general catalog table within the .mdb file with all component
types in it. AutoCAD Electrical references this table, if it exists. The table name
is MISC_CAT. If found, this catalog information displays in the dialog box for
component catalog number selection. In the Insert/Edit dialog box, Catalog
Data section, click Lookup. In the Parts Catalog dialog box, click Miscellaneous.
Use the last used assignment
During your editing session, AutoCAD Electrical remembers the last MFG /
CAT / ASSYCODE assignment you make for each component inserted into
your wiring diagram. When you insert another component of that type,
AutoCAD Electrical presents the previous catalog assignment of the component
as the default. This assumes that a previous catalog assignment was made
during the current editing session.
Perform a drawing or project-wide search
In the Insert/Edit dialog box, Catalog Data section, click Project to instruct
AutoCAD Electrical to create a drawing-wide or project-wide listing of similar
components with their catalog assignments.
Pull information from another project
AutoCAD Electrical quickly scans a previous project, finds the instance of that
component, and returns the catalog information to you. It is accomplished
without leaving your active drawing. In the Insert/Edit dialog box, click Project.
In the Find: Catalog Assignments dialog box, select Other project and click
OK. AutoCAD Electrical processes the project you select. It quickly scans each
listed drawing for the target component type and returns a list of what it
found. You can then make your catalog assignment by picking from this list.
Pull from an external file
You can pull catalog assignments from a generic ASCII file created by a word
processor or output from a spreadsheet or database program. In the Insert/Edit
1282 | Chapter 17 BOM and Catalogs
dialog box, Catalog Data section, click Project. In the Find: Catalog
Assignments dialog box, select External file, and click OK.
Pull from your own external database application
AutoCAD Electrical provides a means to bypass its internal catalog part number
look-up and temporarily pass control to your custom catalog part number
selection application. In the Insert/Edit dialog box, Catalog Data section, click
Lookup. But instead of immediately accessing the appropriate catalog look-up
table, AutoCAD Electrical passes control to your application. You make the
MFG/CAT/ASSYCODE selection in your own database program. Your
application formats your selection and passes it back to AutoCAD Electrical.
Add multiple BOM catalog numbers to a component
You can add additional part numbers to any schematic or panel component
on the fly. These multiple BOM part numbers appear as subassembly part
numbers to the main catalog part number in the various BOM and component
reports. In the Insert/Edit dialog box, click Multiple Catalog to show a dialog
box for adding the extra catalog part numbers.
Assign catalog information
1Insert or edit a schematic component symbol on your drawing.
The Insert/Edit Component dialog box displays so you can assign
component-specific information to the new component.
2In the Insert/Edit Component dialog box, Catalog Data section, click
Lookup to choose a vendor part number to assign to this instance of the
component.
AutoCAD Electrical reads the AutoCAD block name of the inserted
component and determines the correct table to access in the catalog
lookup database file (default_cat.mdb).
The WDBLKNAM field in the family table is used as the first filter when
opening the catalog lookup window for the selection of catalog numbers.
This filter is on by default and removes invalid selections from the catalog
lookup window.
3Sort the catalog records.
■Click the column heading to sort the catalog records based on the
values in the selected field. The first click sorts from A to Z so the
lowest values are at the top of the column. The second click sorts from
Z to A.
Assign catalog information to components | 1283

■Click the drop-down arrow on the column heading and select a sort
option from the menu.
4To filter the catalog records, click the drop-down arrow on the column
heading. A list of unique values for the selected field displays. Select the
fields to show or hide from the list.
NOTE If there are over 450 unique values to display, the list is not available.
5Search the entire catalog database for a catalog value.
■Enter a catalog value in the search box. Catalog Database Search -
Wildcards on page 1291 are allowed.
■Click the search icon. If the catalog is found, the Catalog Search Results
on page 1291 dialog box displays.
■Select a catalog table from the list of tables. The list of matching
catalog values displays.
■Select a catalog value from the list.
■Click OK. The catalog value is assigned to the component. The Parts
Catalog dialog box displays.
6To search within a field, enter a value in the search box at the top of the
field. The matching catalog records display as you enter the search value.
NOTE Delete the text in the search field to clear the search for the field.
Select the Clear All button to clear all field search values.
7To reorder the columns, click a column heading and drag it to the desired
position in the grid display.
NOTE To reset the column order to the original catalog order, right-click on
a column header and click Reset Column sequence.
8Change the columns displayed or column sizing.
■Right-click on a column header.
■Check the columns to display.
■Uncheck the columns to hide.
■Select from the column sizing options.
1284 | Chapter 17 BOM and Catalogs
NOTE Changing the display does not affect the catalog database, only the
way the catalog records are viewed.
9In the Parts catalog dialog box, select the vendor and catalog part number
to use.
The invisible MANUFACTURER, CATALOG, and ASSEMBLYCODE
attributes of the block are populated with the key values pulled from the
selected record in the target table. Various description and miscellaneous
field values from the picked record are not saved on the attributes of the
block. Only the MANUFACTURER, CATALOG, and ASSEMBLYCODE
values are saved.
When you finish modifying component information, you can run the
Schematic Bill of Material report. The report queries the MANUFACTURER,
CATALOG, and ASSEMBLYCODE attribute values of the inserted component.
AutoCAD Electrical then formats and outputs a detailed BOM report.
Parts catalog
Select a catalog value from the catalog database to assign to the selected
component. Search the database for a specific catalog item. Filter the database
list based on selected or entered values. Add or modify catalog database values.
Insert Component
Ribbon: Schematic tab ➤ Insert Components panel ➤ Insert
Components drop-down ➤ Icon Menu.
Toolbar: Main Electrical
Menu: Components ➤ Insert Component
Command entry: AECOMPONENT
Select the component type to insert and specify the insertion point on the
drawing. Click Catalog Data: Lookup.
Assign catalog information to components | 1285
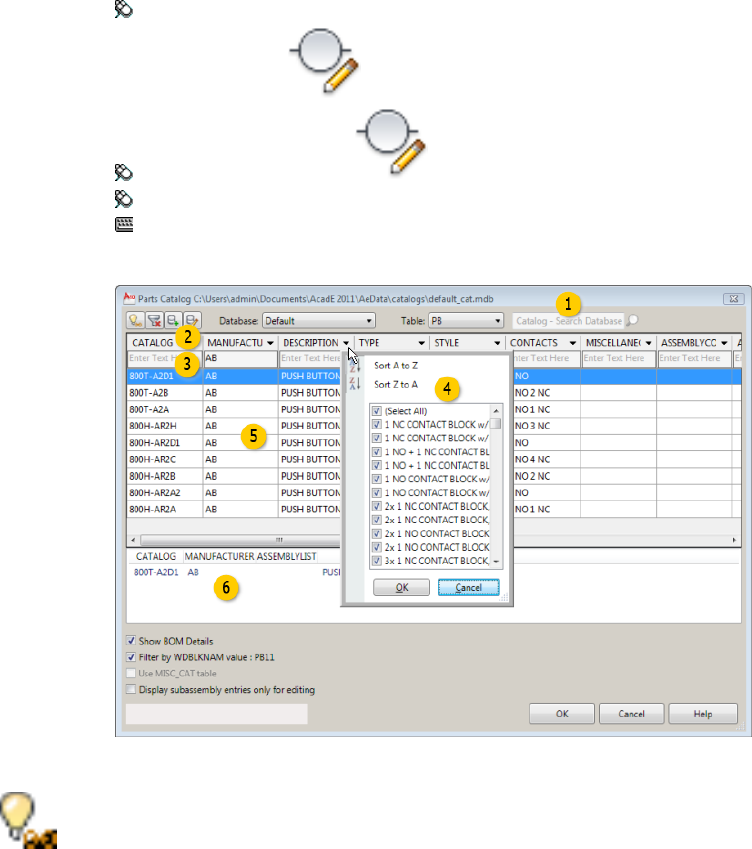
Edit Component
Ribbon: Schematic tab ➤ Edit Components panel ➤ Edit Components
drop-down ➤ Edit.
Toolbar: Main Electrical
Menu: Components ➤ Edit Component
Command entry: AEEDITCOMPONENT
Select the component to edit. Click Catalog Data: Lookup.
Displays more information about the component, such as
pictures, specifications, or a Web URL. Use the 15th field
in the catalog database to set up the link.
View Web Link
If the WEBLINK field for the selected part is a Web URL, your Internet
browser launches and displays it. If it is an image file, PDF, spread-
sheet, or some other document type, the application associated with
the file extension (for example, "Open With...") launches and displays
the contents of the file.
1286 | Chapter 17 BOM and Catalogs
NOTE Also available on the right-click context menu.
Clears all selected filters or entered search values. This op-
tion does not clear the Filter by WDBLKNAM value option.
Clear All Filters
NOTE Also available on the right-click context menu.
Adds a catalog item to the catalog database file with values
you enter on the Add Catalog Record on page 1295 dialog
Add Catalog Entry
box. If you select an existing catalog entry, the fields pop-
ulate with values from that entry.
NOTE Also available on the right-click context menu when clicking
an entry in the grid or the BOM Details area.
Edits a catalog record. In the Parts Catalog dialog box, se-
lect the catalog record to edit. In the Edit Catalog Record
dialog box, change any values.
Edit Catalog Entry
NOTE Also available on the right-click context menu when clicking
an entry in the grid or the BOM Details area.
Selects a catalog database between the defined alternate
database and the default catalog database.
Database
Displays a list of the component tables in the active catalog
database. Select a table, or create a table.
Table
Select New Table to create a table. To create a component-specific
table, select the Component button from the Add new table to MDB
on page 1298 dialog box.
NOTE If you select to create a table, and then cancel the dialog box
before adding any data to the table, the blank table is deleted.
Searches the catalog field across the entire catalog database.
The Catalog Search Results on page 1291 dialog box displays
the search results. Catalog Database Search - Wildcards on
page 1291 are allowed.
Sorts the catalog database information when you click the
column headings. Filters the catalog database by values
you select in the drop-down list.
Assign catalog information to components | 1287
Searches the catalog database for data with fields that
match the entered text.
NOTE The field search assumes an ending “*” wildcard allowing it
to display matching values as you enter the search value.
■Sorts the catalog database information.
■Filters the catalog database by values you select in the drop-down
list.
NOTE If there are over 450 unique values to display, the drop-down
list is not available.
Displays the catalog entries that match the current settings.
Displays the results when Show BOM Details is checked. The main
catalog and any related subassembly items are shown. Right-click on
a catalog entry in the BOM details area to edit the entry or add a
copy of the entry to the catalog database.
Performs a check of the Bill of Material, and displays the
result for the selected catalog value.
Show BOM Details
Filters the symbol names using the WDBLKNAM on page
1276value. If you select this option, records that contain a
Filter by WDBLKNAM name
WDBLKNAM value that does not match the symbol block
name do not display in the catalog list.
If this option is not selected, the query ignores the check on the
WDBLKNAM field and returns all catalog information.
Displays records defined as subassemblies in the catalog
display. You can edit the subassembly items you display.
You cannot assign a subassembly directly to a component.
Display subassembly entries
only for editing
A value in the ASSEMBLYLIST field defines a record as a subassembly
item. The data for the subassembly items are used in reports.
References a table called MISC_CAT. This general catalog
table in the database file is set up with all component types.
Use MISC_CAT table
1288 | Chapter 17 BOM and Catalogs
If found, this catalog information displays in the dialog
box for component catalog number selection.
If the table does not exist, it is created automatically. Use
the Add Catalog Entry button to add records.
Opens the Edit Catalog Conductor List dialog box. Edit
the cable conductor database table (_W0_CBLWIRES) for
the selected Manufacturer and Catalog combination.
Conductor List
You can delete or change existing cables or add new ones to the list.
Available for cable markers only.
Default filters
A catalog table can contain thousands of records. The program uses this default
filtering when the Parts Catalog dialog box displays:
■If the component has a catalog assignment, filters based on the
manufacturer, type, and style for that catalog.
■If the component does not have a catalog assignment, filters based on the
_LISTBOX_DEF on page 1277 entry for the catalog table.
■If the component does not have a catalog assignment, and no
_LISTBOX_DEF entry exists for the table, the program filters on the
manufacturer, type, and style of the first record in the catalog table.
NOTE Manufacturer is the second field, type is the fourth field, and style is the
fifth field in a catalog table regardless of the actual column labels.
Column display
Click a column header and drag the column to the desired position in the
display to change the column display order.
Right-click over a column heading to display the context menu.
Assign catalog information to components | 1289
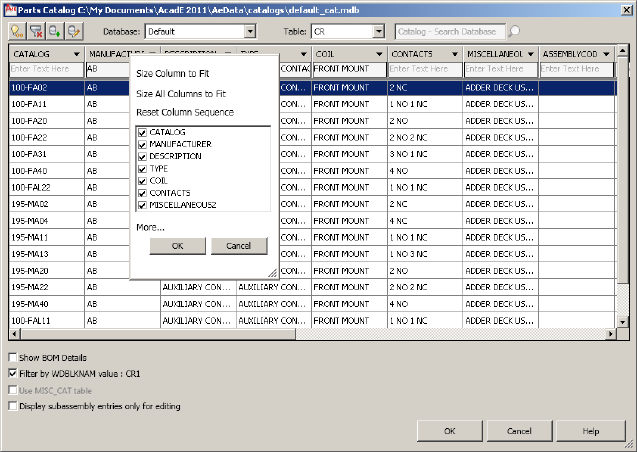
Adjusts the size of the column under the cursor to
fit the text values within that column.
Size Column to Fit
Adjusts the size of all columns to fit the text values
within each column.
Size All Columns to Fit
Resets the column sequence to match the column
order in the catalog database.
Reset Column sequence
Shows a listing of column names and current visibil-
ity. A check mark indicates the column is included
Column name listing
in the display. Select which columns to display and
which to hide.
Displays Columns dialog box listing all available
columns. Use this listing if not all columns display in
the menu.
More
The column display settings are remembered across AutoCAD Electrical
sessions. The catalog database column order remains unchanged. Only the
display changes.
1290 | Chapter 17 BOM and Catalogs
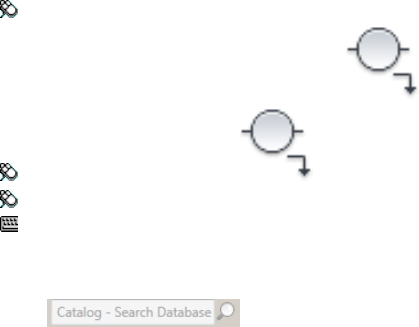
Catalog Database Search - Wildcards
DefinitionCharacter
Matches any numeric digit# (pound)
Matches any alphabetic character.@ (at)
Matches any string and can be used anywhere in the
search string
* (asterisk)
Matches any single character; for example, ?BC
matches ABC, 3BC, and so on
? (question mark)
Matches anything but the pattern; for example;
~*AB*matches all strings that do not contain AB
~ (tilde)
Reads the next character literally; for example, ‘~AB
matches ~AB
‘ (reverse quote)
Catalog Search Results
Displays the catalog values search results based on a catalog search from the
Parts Catalog dialog box.
Insert Component
Ribbon: Schematic tab ➤ Insert Components panel ➤ Insert
Components drop-down ➤ Icon Menu.
Toolbar: Main Electrical
Menu: Components ➤ Insert Component
Command entry: AECOMPONENT
Select the component type to insert and specify the insertion point on the
drawing. Click Catalog Data: Lookup. Enter a search value and select the search
icon.
Assign catalog information to components | 1291
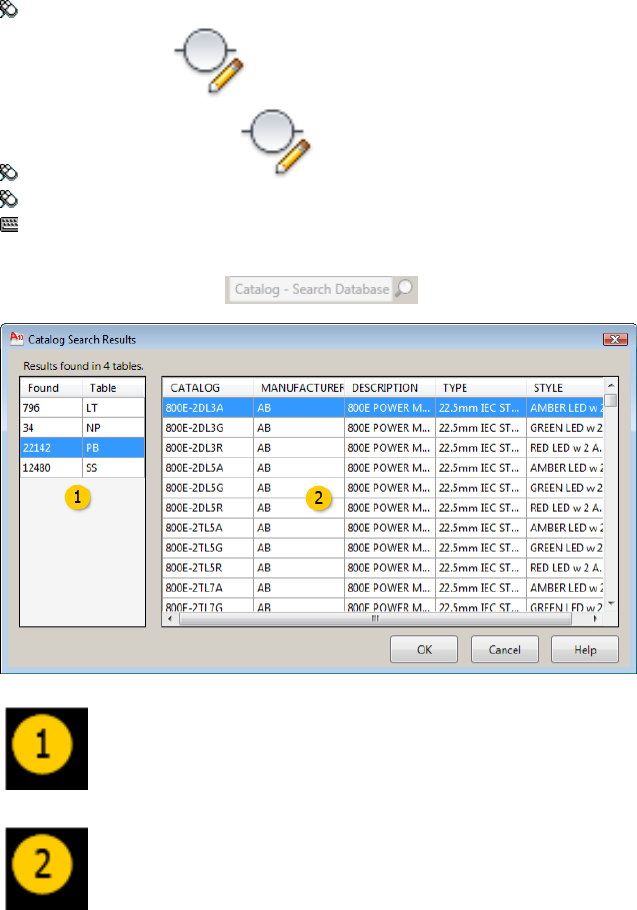
Edit Component
Ribbon: Schematic tab ➤ Edit Components panel ➤ Edit Components
drop-down ➤ Edit.
Toolbar: Main Electrical
Menu: Components ➤ Edit Component
Command entry: AEEDITCOMPONENT
Select the component to edit. Click Catalog Data: Lookup. Enter a search value
and select the search icon.
Displays a list of the tables , and the number of records in the table,
containing the catalog value. Select a table to display the records within
that table that match the search value.
Displays the catalog records in the selected table that match the search
value. Click a column heading to sort the records based on the values
in that column.
1292 | Chapter 17 BOM and Catalogs
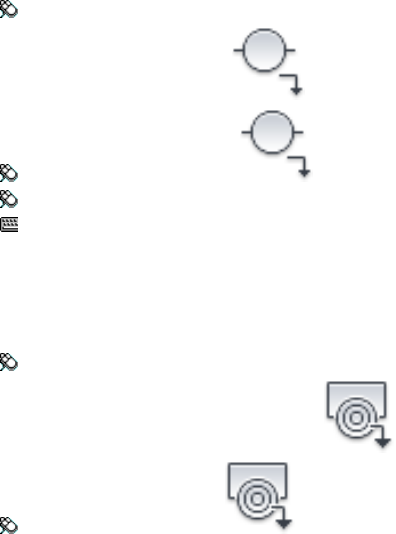
Assigns the selected catalog value to the component on the Parts
Catalog dialog box.
OK
Catalog values
Lists the catalog part number information for any or all components (or
footprints) that have the same family block name (WDBLKNAM value) as the
component being edited.
Displays its bill of materials description.Catalog Check
Copies the highlighted catalog information to the com-
ponent being edited.
OK
Component catalog lookup
This tool creates a component-specific or general family catalog table.
Insert Component
Ribbon: Schematic tab ➤ Insert Components panel ➤ Insert Components
drop-down ➤ Icon Menu.
Toolbar: Main Electrical
Menu: Components ➤ Insert Component
Command entry: AECOMPONENT
On the Insert/Edit dialog box, click Catalog Lookup. If there is no catalog table
for the component, an alert displays. Click OK.
Insert Footprint (Icon Menu)
Ribbon: Panel tab ➤ Insert Component Footprints panel ➤ Insert
Footprints drop-down ➤ Icon Menu.
Toolbar: Panel Layout
Assign catalog information to components | 1293

Menu: Panel Layout ➤ Insert Footprint (Icon Menu)
Command entry: AEFOOTPRINT
On the Insert/Edit dialog box, click Catalog Lookup. If there is no catalog table
for the footprint, an alert displays. Click OK.
Option A
Creates a catalog table now.
Creates a component-specific catalog table. The
name of this catalog table matches the block name
Component
for the component (minus the "H" or "V" first letter).
For example, both horizontal and vertical versions
of a standard, N.O. push button ("HPB11" and
"VPB11") reference the same component-specific
catalog look up table "PB11".
Creates a family catalog table. The name of this
catalog table consists of the 2nd and 3rd characters
Family
of the block name for the component. For panel
footprints, the name consists of the first two char-
acters of the WDBLKNAM value. For example, all
the limit switch blocks used on your schematics
have "LS" embedded in their block names: "HLS11",
"HLS12", "VLS11", and so on. Instead of a compon-
ent-specific catalog file, you can create a general
limit switch catalog look up table, "LS." This table
is referenced if a component-specific version is not
found.
Option B
References a miscellaneous table.
References a table called "MISC_CAT." This general
catalog table is set up in the .mdb file with all
Miscellaneous
component types in it. If found, this catalog inform-
ation displays in the dialog box for component
catalog number selection.
Modify or expand catalog tables
You can edit entries in a catalog table or even add new catalog items on-the-fly
using AutoCAD Electrical.
1294 | Chapter 17 BOM and Catalogs

1Force AutoCAD Electrical to reference the appropriate catalog table. Insert
a new component related to the catalog table you want to edit, or pick
an existing component of that type to edit with the Edit Component
tool.
For example, suppose you want to add some new components to the
catalog table for standard red pilot lights (LT1R). Use AutoCAD Electrical
to insert a new red pilot light symbol, or edit a red pilot light symbol.
2From the Insert/Edit dialog box, select Catalog lookup. Now you have
triggered AutoCAD Electrical to open the desired catalog table.
3Select Add Catalog Entry to add a new item or select Edit Catalog
Entry to edit the selected database record. AutoCAD Electrical
displays the new or existing catalog record in a dialog box.
4Make the necessary changes and click OK to exit the Add/Edit Catalog
Entry dialog box.
To add a new table to the catalog file:
■Insert a new component that triggers AutoCAD Electrical to ask permission
to create the table.
■On the Parts catalog on page 1285 dialog box, select Table: New Table.
■Run Add new table to catalog database on page 1298.
Add or edit catalog record
■Add Catalog Entry - adds a catalog item to the catalog database file with
values you enter on the Add Catalog Record dialog box. If you select an
existing catalog entry, the fields populate with values from that entry.
■Edit Catalog Entry - edits a catalog record. In the Parts Catalog dialog box,
select the catalog record to edit. In the Edit Catalog Record dialog box,
change any values.
Assign catalog information to components | 1295
Insert Component
Ribbon: Schematic tab ➤ Insert Components panel ➤ Insert
Components drop-down ➤ Icon Menu.
Toolbar: Main Electrical
Menu: Components ➤ Insert Component
Command entry: AECOMPONENT
Select the component type to insert and specify the insertion point on the
drawing. Click Catalog Data: Lookup. In the Parts Catalog dialog box, click
Add Catalog Entry or Edit Catalog Entry.
Edit Component
Ribbon: Schematic tab ➤ Edit Components panel ➤ Edit Components
drop-down ➤ Edit.
Toolbar: Main Electrical
Menu: Components ➤ Edit Component
Command entry: AEEDITCOMPONENT
Select the component to edit. Click Catalog Data: Lookup. In the Parts Catalog
dialog box, click Add Catalog Entry or Edit Catalog Entry.
AutoCAD Electrical uses the first ten fields for its own use plus reserves an
additional three user fields for your use. You can insert additional fields, but
AutoCAD Electrical ignores them when it constructs various reports.
Specifies the catalog number.Catalog
Specifies the number of parts to add to the BOM. A blank
Count indicates a quantity of 1. A valid non-blank Count
is 1 through 100.
Count
Specifies the manufacturer for the catalog part.Manufacturer
1296 | Chapter 17 BOM and Catalogs
Specifies the optional description text for the catalog part.Description
Specifies the type for the catalog part.Type
The type of value can vary based on the type of component.
This value populates the fifth field in the catalog record.
Coil/Voltage/Color
Specifies the contacts or the first miscellaneous field as-
signed to the part. The type of value can vary based on the
Miscellaneous/Contacts
type of component. This value populates the sixth field in
the catalog record.
Specifies miscellaneous text to assign to the part.Miscellaneous
Specifies the code to flag that this item has subassembly
items. "As main- ➤ subassembly" activates the Assembly
Assemblycode
Code edit box. Use a unique name code to link this main
catalog item with other subassembly items. This code can
be up to 60 characters. Spaces are allowed.
Specifies the code to flag as a subassembly item of a main
item. To enter the ASSEMBLYLIST value, select "As sub-
Assemblylist
assembly" and enter the exact name of the ASSEMBLYCODE
value carried by its main component. You can select the
ASSEMBLYCODE list switch to speed up the process.
Specifies user information. AutoCAD Electrical provides
three blank user fields for your use. Each can be a maximum
User 1,2,3
of 24 characters wide and are extracted into BOM reports
along with all the other fields.
Specifies optional user-defined RATING/misc attribute val-
ues. This field is used to assign text values to specific attrib-
Textvalue
utes on the edited component. The format for the text data
encoded into this field is:
<attribute tag name1>=<text value>;<attribute tag
name2>=<text value>
Specifies the .pdf file or Web URL to associate to the com-
ponent. If the Weblink entry is a Web URL, your Internet
Weblink
browser displays it. If it is an image file, .pdf, spreadsheet,
or some other document type, then the application associ-
Assign catalog information to components | 1297
ated with that file extension (for example, "Open With...")
displays the file.
NOTE For ".pdf" display, you can include the page number
to display upon document open. Add a space and the page
number after the .pdf file name in the WEBLINK field value
(for example, c:\\rockwell\\700series.pdf 13).
Specifies the schematic block name (used for catalog
lookup - that is, PB11, CR) of the catalog record. It serves
WDBLKNAM
as a filtration of the catalog records based on the schematic
block name. This field is used in the Filter by WDBLKNAM
value when opening up the catalog lookup dialog box.
This filter provides the mechanism to remove invalid selec-
tions from the catalog lookup window, much like the
component-specific tables.
NOTE Use a comma to separate multiple symbol block
names.
Displays all the specified values in all upper case.Force text to uppercase
Deletes the catalog record.Delete
NOTE Only available on the Edit Catalog Record dialog
box.
Add new table to MDB
Adds a new, blank table to the selected database file.
Ribbon: Project tab ➤ Other Tools panel ➤ ➤ Add Table to
Catalog Database.
Menu: Projects ➤ Extras ➤ Add Table To Catalog Database
Command entry: AEADDCATALOGTABLE
1298 | Chapter 17 BOM and Catalogs

NOTE This dialog is also accessed when a new table on page 1294 is added to the
catalog database from the Parts Catalog dialog box.
Specifies the file name of the Catalog Database file to
modify.
MDB file to modify
Lists the existing tables found in the file.Existing tables
Specifies the name of new table to add to the selected
catalog database. The new, blank table inserts with the
Table Name
default fields defined (for example, the fields needed for
the catalog lookup function).
Creates a component-specific table for the catalog data-
base.
Component
NOTE Only available when accessed from the Parts Catalog
dialog box.
Specifies the description for the table. If the selected data-
base file is a catalog file, an entry is also added to the
Table Description
_FAMILY_DESCRIPTION on page 1267 table. The entry con-
tains the table name and description.
Copy catalog assignments from component to
component
Copy catalog assignments from component to component
Copies a component catalog number assignment to other selected components.
Select the master component from which to copy the catalog data. Select the
components to which you copy the catalog data.
Copy catalog assignments from component to component | 1299
1Click Schematic tab ➤ Edit Components panel ➤ Edit Components
drop-down ➤ Copy Catalog assignment.
2Select the master component from which to copy the catalog data.
3Select the part number information by clicking Catalog Lookup, Find:
Drawing Only, Multiple Catalog, or Catalog Check.
■Catalog Lookup: Select the catalog table information in the Parts
Catalog dialog box for the selected component type and click OK.
■Find: Drawing Only: Select from the catalog part number information
for any/all component footprints that have the same family block
name as the component being edited. Click OK.
■Multiple Catalog: Insert extra catalog part numbers onto the currently
selected component or footprint. You can add up to 99 additional
part numbers to any schematic or panel component on-the-fly. Click
OK.
■Catalog Check: Quickly performs a bill of material check and displays
the result.
4Click OK.
5Select the devices to copy the catalog data to.
NOTE Child or related devices are not automatically updated. They must be
included in the selection.
Multiple bill of material information
1300 | Chapter 17 BOM and Catalogs

This tool allows you to insert or edit extra catalog part numbers on to the
currently selected component or footprint. You can add up to 99 additional
part numbers to any schematic or panel component on-the-fly. These multiple
BOM part numbers appear as subassembly part numbers to the main catalog
part number in the various BOM and component reports.
On the Insert/Edit Component or Panel Layout - Component Insert/Edit dialog
box, Catalog Data section, click Multiple Catalog.
NOTE You can also access this dialog box by clicking Multiple Catalog on the
Copy Catalog Assignment on page 1299 dialog box.
The additional catalog part numbers are saved on the symbol as
MFGn/CATn/ASSYCODEn attribute values. The "n" is the sequential code
value "01" through "99" selected in the top list box. If these attributes are not
present on the symbols, AutoCAD Electrical saves the information as Extended
Entity Data (Xdata) on the block insert.
Sequential code
Adds up to 99 extra part numbers (in addition to the main catalog part
number). Pick which one you want to add or inspect/edit. Click the list button
to show all extra part numbers carried on the component.
Catalog Data
Specifies the catalog part number information such as the manufacturer and
catalog number.
Count
Specifies the quantity number for the extra part number (blank=1). This value
gets inserted into the "SUBQTY" column of a BOM report.
Unit
Specifies the unit of measure, which can be displayed in the component list
report.
Parts Catalog Lookup
Lists the catalog database table that is to be referenced for the description
information for the given Manufacturer/Catalog/Assembly combination. For
each catalog entry, provide a name for the catalog look-up table. For the main
catalog entry, this information is provided on the symbol itself but may not
Copy catalog assignments from component to component | 1301

be there for these catalog entries. Select List to pick from a list of tables that
are contained in your catalog database file or Misc to use the MISC_CAT table.
Catalog Lookup
Checks for and displays catalog table information in the Parts Catalog dialog
box for the selected component type.
Catalog Check
Quickly performs a Bill of Material check and displays the result.
Item Number
Assign an item number to the catalog number.
If checked, marks an item number as fixed. If you
run Resequence Item Numbers on page 1602 later on,
fixed item numbers do not change.
fixed
NOTE The fixed check box is available only when
assigning the catalog to panel components.
Finds the assigned manufacturer, catalog, assembly
code combination on components on the active
Drawing: Find
drawing. If a match is found, the item number is
assigned to this catalog. If a match is not found, a
dialog box displays where you enter an item number
or use the next available.
NOTE If the Item Numbering Mode on page 211 is
Accumulate Project Wide, this button is disabled.
Lists the item numbers along with each manufac-
turer, catalog, assembly code combinations in use
on the active drawing.
Drawing: List
NOTE If the Item Numbering Mode on page 211 is
Accumulate Project Wide, this button is disabled.
Finds the assigned manufacturer, catalog, assembly
code combination on components on the drawings
Project: Find
in the active project. If a match is found, the item
number is assigned to this catalog. If a match is not
found, a dialog box displays where you enter an
item number or use the next available.
1302 | Chapter 17 BOM and Catalogs

NOTE If the Item Numbering Mode on page 211 is
Reset with Each Drawing, this button is disabled.
Lists the item numbers along with each manufac-
turer, catalog, assembly code combinations in use
on the drawings in the active project.
Project: List
NOTE If the Item Numbering Mode on page 211 is
Reset with Each Drawing, this button is disabled.
If the Item Assignments on page 211 project setting is set Per-Component Basis,
this section is disabled.
Multiple catalog part number assignments
This dialog box displays the order in which the extra part numbers appear in
the various AutoCAD Electrical reports. You can add up to 99 additional part
number assignments to a component.
On the Insert/Edit Component or Panel Layout - Component Insert/Edit dialog
box, Catalog Data section, click Multiple Catalog. Click Sequential Code: List
on the Multiple Bill of Material Information dialog box.
NOTE You can also access this dialog box by clicking Multiple Catalog on the
Copy Catalog Assignment on page 1299dialog box and clicking Sequential Code:
List.
To change the order, highlight the part number and click Move Up or Move
Down to move it in the list.
Show missing catalog assignments
Use the Show Missing Catalog Assignments tool to indicate graphically or list
the parent or stand-alone components that do not carry catalog information
on the active drawing.
Click Reports tab ➤ Schematic panel ➤ Missing Catalog Data.
Displays the components that do not carry catalog information.
They are marked on the screen with a red diamond shape drawn
Show
Show missing catalog assignments | 1303

around the insertion point of the symbol in temporary graphics.
A REDRAW restores the screen to its original state.
Extracts the information from the active drawing or project and
displays a list of parent or stand-alone components without
catalog information.
Report
TIP Extracted BOM data can be output to a spreadsheet file,
mdb database file, text report file, or comma-delimited for export
to a spreadsheet or database program. It can also be inserted, in
tabular form, on the current AutoCAD drawing.
Contact Quantity/Pin List Lookup
Use pin lists
AutoCAD Electrical can automatically track how many contacts were assigned
to a device like a relay or timer coil. When a newly inserted contact exceeds
a predefined limit, AutoCAD Electrical can alert you. AutoCAD Electrical can
also track available terminal pin number pairs as you insert each new contact.
It can also automatically give you the next available pair as a default.
To enable this feature, maximum contact count and pin number pair
information is assigned to the parent symbol (ex: relay or timer coil symbol).
It is carried as Xdata under the name VIA_WD_PINLIST. If a PINLIST attribute
is present on the parent device, the pin list is carried on this invisible attribute.
A copy of this pin list data is carried in the Access catalog database file of the
project (<project>_cat.mdb or default_cat.mdb) in a table called _PINLIST or
_PINLIST_{manufacturer}. This information can be assigned manually. It can
also be automatically retrieved from a pin list database table when a catalog
part number is assigned to the parent device. As each contact is inserted and
referenced back to the parent, AutoCAD Electrical checks the pin information
carried on the parent and verifies that a contact of the proper type is available.
If so, it retrieves the next pair of contact pin numbers from the parent and
displays as defaults for the new contact.
The AutoCAD Electrical automatic pin list lookup and assignment at
component insertion time is not limited to devices that have contacts. You
can encode two wire devices like pilot lights or proximity switch into the
database file. Insert the MFG and CAT numbers and fill in the COILPINS field
with the terminal pin numbers. Leave the PINLIST field blank. When you
1304 | Chapter 17 BOM and Catalogs

insert one of these devices and perform a Catalog lookup and part number
selection, AutoCAD Electrical quickly looks for a MFG/CAT match in the pin
list database. On a match AutoCAD Electrical pulls out the coil pin numbers
of the device and automatically inserts them on to the newly inserted device.
Pin list data carried on the parent
When AutoCAD Electrical annotates a parent coil or other device with the
pin list information, AutoCAD Electrical inserts it on the following attributes
(if present):
The pin list format string of 3-element groups, one for each
available contact
PINLIST
Maximum N.O. contact count, blank means undefined, 0 means
none allowed
MAXNO
Maximum N.C. contact countMAXNC
Maximum convertible contact countMAXNONC
If these attributes are not present, AutoCAD Electrical encodes the data on to
the symbol as extended entity data. If AutoCAD Electrical finds a MFG/CAT
match in the pin list database and retrieves the encoded pin list information,
it pre-fills the MAXNO, MAXNC, and MAXNONC values with the quantities
derived from the decoded pin list data.
To view or manually edit these values, select Edit Component and click the
NO/NC Setup button on the Insert/Edit dialog box. AutoCAD Electrical
maintains a copy of the PINLIST information of the parent in the scratch
database file of the project (in Microsoft Access format). You can view it by
opening the PINLIST table of the user\<projname>.mdb database file.
Modify the pin list database
The pin list database file can be viewed, edited, and expanded using the Pin
List Database Editor tool.
NOTE This tool is not limited to relays and timers, but can be extended to other
switch types that can have extra contacts, plug/jacks, and stand-alone PLC I/O
points.
Use pin lists | 1305
1Click Schematic tab ➤ Other Tools panel ➤ ➤ Database Editors
drop-down ➤ Pin List Database Editor.
2In the Select Pin List Table dialog box, select the table to edit and click
Edit.
NOTE You can also create a table by entering the manufacturer name in the
edit box and clicking Create.
3In the Edit dialog box:
■To edit a record, click Sort, Filter, or Find to search for the record to
edit. Select the record from the list and click Edit.
■To create a record, click Add New, or select an existing record and
click Add Copy to create a record based on an existing one.
■To delete an existing record, select the record in the list and click
Delete.
4To edit or create a record, in the Edit Record dialog box, specify the values
to assign to the record and click OK.
5In the Edit dialog box, click Save/Exit.
Select pin list table
This tool allows you to select the relevant PINLIST table to edit or create a
new one.
Ribbon: Schematic tab ➤ Other Tools panel ➤ ➤ Database
Editors drop-down ➤ Pin List Database Editor.
Menu: Components ➤ Cross-Reference ➤ Pin List Database Editor
Command entry: (AEPINLISTTABLE)
Lists the PINLIST tables found in the catalog data-
base. The “(Default)” manufacturer is used to edit
the generic _PINLIST table.
Select or Type Manufacturer
1306 | Chapter 17 BOM and Catalogs
Select the table to edit or enter a name for a new
one.
Displays the proper table name in the catalog
database. This text changes depending on which
Table
manufacturer is selected. For example, if you select
SQD, then _PINLIST_SQD appears.
Creates a table in the catalog database with the
specified name and adds the table to the list of
Create
manufacturers. Once a table is created, the Edit
(Table: _PINLIST_manufacturer) dialog box appears
so you can edit the new table. This choice is avail-
able only when you enter the name of a manufac-
turer.
NOTE The following characters are not allowed in
the table name: ~ @ # $ % ^ & * - + = \ { } “ ‘ ; : ?
/ < > , ! [ ] |. If entered in the edit box, these char-
acters are replaced with an underscore (_).
(available only after a manufacturer is selected from
the list) Opens the Edit (Table: _PINLIST_manufac-
Edit
turer) dialog box so you can edit the selected PIN-
LIST table.
Edit
AutoCAD Electrical consults a pin list database table when a part number is
added or an existing part number is changed on a parent schematic symbol.
If AutoCAD Electrical finds a match on the MFG, CAT, and optional ASSYCODE
values for the part number in this database table, then the associated contact
count and pin number information is retrieved and placed on the parent
schematic component.
Ribbon: Schematic tab ➤ Other Tools panel ➤ ➤ Database
Editors drop-down ➤ Pin List Database Editor.
Menu: Components ➤ Cross-Reference ➤ Pin List Database Editor
Command entry: (AEPINLISTTABLE)
Use pin lists | 1307
Specify the table to create and click Create or select the table to edit and click
Edit.
This lookup database table is a table within the catalog lookup Access .mdb
file. The default file name is default_cat.mdb, table _PINLIST, and comes
populated with a sample of vendor data. You can expand this table as needed.
Use your own copy of Microsoft Access or this dialog box to add new entries,
add entries based on existing entries, edit, and delete entries from the table.
Sorts the list of database records using either an alphanumeric sort
or number values. You can specify four sorts to perform on the list.
Sort
Sorts the list of database records using either an alphanumeric sort
or number values. You can specify four sorts to perform on the list.
Find
Indicates to replace the find value with the new text string that you
specify.
Replace
Filters the listing based on certain values in the table. Picking the
blank entry in the list removes the filter for that field. After you define
the values to filter, apply the filter in the database editing window.
Filter
Displays the Edit Record dialog box for modifying the existing record
in the database.
Edit
Displays the Edit New Record dialog box for entering a new record
into the database.
Add New
Displays the Edit Copied Record dialog box for modifying and copying
the record to make a new record. You cannot have two duplicate
copies in the database.
Add Copy
Removes the selected record from the database.Delete
Structure of the pin list database table
(Microsoft Access internal use)RECNUM
Manufacturer code (value must be consistent with the
catalog lookup files)
MANUFACTURER
Catalog number (use wildcards as much as possible)CATALOG
1308 | Chapter 17 BOM and Catalogs
AutoCAD Electrical internal assembly code (must be con-
sistent with the catalog lookup files)
ASSEMBLYCODE
Terminal pin numbers for coils (separate multiple pins with
commas)
COILPINS
Contact type and pin numbersPINLIST
Terminal pin numbers for peer coilPEER_COILPINS
Contact type and pin numbersPEER_PINLIST
Edit record
Ribbon: Schematic tab ➤ Other Tools panel ➤ ➤ Database
Editors drop-down ➤ Pin List Database Editor.
Menu: Components ➤ Cross-Reference ➤ Pin List Database Editor
Command entry: (AEPINLISTTABLE)
Specify the table to create and click Create or select the table to edit and click
Edit. In the Edit dialog box, click Add New, Add Copy, or Edit.
MANUFACTURER
Specifies the Manufacturer code (value must be consistent with the catalog
lookup files).
CATALOG
Specifies the Catalog number (use wildcards as much as possible).
ASSEMBLYCODE
Specifies the AutoCAD Electrical internal assembly code (must be consistent
with the catalog lookup files).
COILPINS
Specifies the terminal pin numbers for a coil. This value is generally two pin
numbers separated by a comma (for example, K1,K2), but is not limited to
just two pin numbers. At insertion/annotation time, AutoCAD Electrical applies
Use pin lists | 1309
this list to the TERMxx attributes it finds on the parent symbol. If the parent
itself can be either a N.O. or N.C. contact, encode the COILPINS field like the
PINLIST field. For example, a value of "1,A1,A2;2,B1,B2" for a target mfg/cat
record in the _PINLIST table applies pins "A1/A2" to the parent device pins if
the device is a generic N.O., and "B1/B2" if it is a generic N.C. device. Repeat
these values in the PINLIST field so that AutoCAD Electrical can correctly track
all contacts.
PINLIST
Specifies the Contact type and pin numbers. This value is a sequence of two
or more element groups with each group defining one available child contact
element for the device. For a two terminal contact, there are three elements
in the group. It follows this format:
Contact type, terminal pin, terminal pin
In this format, Contact type = 1 for N.O., 2 for N.C., 0 for convertible contact,
3 for Form-C (NO/NC pair), 4 for multi-pole terminal strips or undefined type,
and 5 for multiple-pin or stacked terminals. AutoCAD Electrical also allows a
description label associated with a pin pair. To add description labels, encode
the _PINLIST database table entry using a format like:
1,A1X,A1Y;1,A2X,A2Y,*aux contact=";2,B1X,B2Y,*NC=;
In this format, the optional comment is always the last element of the sublist
and follows an asterisk character. If no asterisk is present, then the comment
is interpreted as another pin number). The previous example would display
in the pin list pick list dialog box as:
A1X,A1Y
aux contact=A2X,A2Y
NC=B1X,B2Y
Convertible contacts encoded as type 0, followed by two pin numbers, assume
that the pin numbers do not change when a contact is flipped between N.O.
and N.C. If the pin number of the contact changes based on the difference
between the N.O. and N.C. configurations, encode each type 0 entry as
"0,pinNO,pinNO,pinNC,pinNC;". The first two entries after the "0" flag give
the pin number for the N.O. configuration and the second two for the N.C.
configuration. AutoCAD Electrical picks the correct pair based upon the contact
type being inserted or edited.
For contact type 3 (Form-C), the pins must be entered in this order: common
pin, NO pin, NC pin. A Form-C contact set with NO on pin 5, NC on pin 6,
and pin 8 common to both contacts would be encoded as 3,8,5,6 where "3"
1310 | Chapter 17 BOM and Catalogs
flags "Form-C", "8" is the common pin, "5" is the NO pin, and "6" is the NC
pin.
PEER_COILPINS, PEER_PINLIST
There can be two additional "PEER_" fields in the _PINLIST table for defining
special cases where a single part number calls out two parent devices. For
example, a reversing motor starter part number can include two parent
contactor coils, one for forward and one for reverse. Each parent coil symbol
must have its own pin list assignment. You set up the coil pins and pin list
data of the second coil in the PEER_COILPINS and PEER_PINLIST fields for
the common part number.
■PEER_COILPINS: Terminal pin numbers for peer coils.
■PEER_PINLIST: Contact type and pin numbers.
Set pin list assignments for special uses
You can set up subcategories of type 4 pin combinations so that some apply
to specific contact types and other pin combinations to other contact types.
You can also use a type 4 PINLIST assignment to track and control how many
schematic terminal symbols can be tied to a given terminal tag-ID.
For filtering of special contact use
You can set up subcategories of type 4 pin combinations so that some apply
to specific contact types and other pin combinations to other contact types.
Encode the Pin List entries with a "4" plus a character to provide further
filtering of what contacts are available for a given child contact. At the contact
end, an attribute PINLIST_TYPE (or Xdata of the same name) must carry a
value of "4" plus a character to match up with the coding in the pin list string.
For example, a given device has 5 N.O. contacts but they are not all the same.
Three of them are motor contacts and 2 are auxiliary control contacts. Two
different schematic symbols are created - one to be used to show the heavy-duty
motor starter contacts and another symbol to be used for auxiliary contacts.
Set up the motor starter contact symbol with attribute PINLIST_TYPE with a
value of "4C" and the auxiliary contact symbol with PINLIST_TYPE value "4A".
In the _PINLIST database table, encode the pin list information of the part
number with type "4" entries but use "4A" and "4C" to differentiate which
contact pin combinations are for the auxiliary contacts and which ones are
for the starter contacts.
Set pin list assignments for special uses | 1311

4A,1L,2L;4A,1R,2R;4C,L1,T1;4C,L2,T2;4C,L3,T3
When either symbol is inserted and associated with the parent, AutoCAD
Electrical sees the PINLIST_TYPE value of the symbol. The contact combinations
that do not apply to the inserted component type are filtered out. When you
insert a N.O. auxiliary motor starter contact (preset with PINLIST_TYPE
attribute value of 4A), you trigger AutoCAD Electrical to pick the next available
4A pin list combination of 1L/2L or 1R/2R. When you insert a N.O. main
motor contact symbol (present with PINLIST_TYPE attribute value of 4C), you
trigger AutoCAD Electrical to pick the next available 4C pin list combination
(L1/T1, L2/T2, or L3/T3).
For multipole terminal block units
You can also use a type 4 PINLIST assignment to track and control how many
schematic terminal symbols can be tied to a given terminal tag-ID, such as
when a given terminal strip has a fixed number of terminals. For example,
suppose you have a fixed, 6-pole terminal strip unit. The manufacturer code
is AB and the catalog part number is 1492-HJ86 with pin markings on the
terminal strip identified as 1 through 6. Set up the _PINLIST database with
the AB and 1492-HJ86 combo defining a PINLIST of 4,1;4,2;4,3;4,4;4,5;4,6. In
the schematic, insert the first terminal of a 6-pole terminal strip, with a TAG-ID
of "TB-1" and do a catalog lookup. Assign the "AB" part number "1492-HJ86."
AutoCAD Electrical finds the pin list information and applies it to the first
peer terminal symbol as an attribute value. As you insert additional terminals
for this TB-1 terminal strip, AutoCAD Electrical tracks what the next available
terminal number is (based on the first PINLIST data of the terminal). When
you try to insert the seventh terminal for TB-1, you are alerted that there are
no more terminals available for this multi-pole terminal strip.
NOTE This information was previously found in a separate Access file called
wd_pins.mdb. When you use the conversion tools to convert your old .dbf catalog
files to the Access file, this file is converted to the _PINLIST table within the catalog
file.
For convertible contact pin annotations
Sometimes a relay can have contacts stamped with pin designations for one
orientation and another set of pin designations for another orientation. For
example, suppose a relay has pin designations “A” and “B” for the contact in
its Normally Open (N.O.) orientation. If you flip the convertible contact over,
it operates as a Normally Closed (N.C.) contact, and the pin designations of
the contact that are now visible are stamped with “C” and “D.”
1312 | Chapter 17 BOM and Catalogs

You can set up your type “0” pin list assignment to handle different pin
assignments depending on the physical orientation of the contact in the relay
body by encoding the symbol PINLIST of the relay coil like:
0,1A,1B,1C,1D;0,2A,2B,2C,2D;0,3A,3B,3C,3D;0,4A,4B,4C,4D
Each type “0” contact (convertible contact flag) is followed by four pin
assignments instead of the normal two. The first two assignments default to
the contact when it is inserted as a N.O. contact. If the contact is flipped to
N.C., the last two assignments are applied.
Modify the PINLIST data for four convertible contacts
1Insert a relay coil.
2On the Insert/Edit Component dialog box, Cross-reference section, click
NO/NC Setup.
3Enter the PINLIST data (shown previously) in the Pin List field on the
Maximum NO/NC counts and/or allowed Pin numbers dialog box.
4Insert a N.O. contact and associate it to the parent coil.
The pin assignments are “1A” and “1B.”
5Click Schematic tab ➤ Edit Components panel ➤ Toggle NO/NC.
6Select the N.O. contact to flip it to a N.C. contact.
The pin assignments automatically update to “1C” and “1D.”
Set pin list assignments for special uses | 1313
1314
Reports
Generate reports
There is a lot of flexibility with AutoCAD Electrical reports, which can be run
manually or automatically. AutoCAD Electrical extracts multiple fields into each
report type. Different reports contain different fields of information. When
running a report, you can select which fields to include and which fields to
ignore. You can also add your own fields by creating a user-defined attribute
support file (.wda) using the User Defined Attributes List tool. Any attributes
listed in your User Defined Attributes file are added as available fields to each
report. You can strip out some of the field columns of data and create other
useful types of reports. For example, run a component report, strip out everything
except the TAGNAME, DESC1, DESC2, and DESC3 field columns and you have
a legend plate report. If you don't see the specific report that you need, take
advantage of the AutoCAD Electrical flexibility and create your own.
There are some features that are common to most of the AutoCAD Electrical
reports. You can extract by location or installation values, edit the report, change
the report format, post-process the report with your own programs, save the
report out to a file, print the report, and put the report on your drawing as a
table.
AutoCAD Electrical provides a number of Schematic on page 1399 and Panel on
page 1427 reports. Reports can be formatted from the Report Generator dialog
box or preformatted using Format Files (.set files).
Modify report templates
You can modify Microsoft Excel report templates "wd_template.xls" and
"wd_template_w_macro.xls" so that the report displays the way you need it to
without having to manually modify the report output each time a report is run.
You can change the orientation of a template file to open in Landscape mode
18
1315

rather than Portrait mode by modifying the template and saving it. Run a
report and save to an Excel file. When the Excel file is opened, it displays in
Landscape mode.
NOTE If you are using the Export Drawing to Spreadsheet tool, modify the
"wd_xls_all_template.txt" template.
TIP Changing some of the setup on template files (such as changing the text in
the first row or the sheet names) can cause the export to fail. Before modifying
any template files, save copies so that you can revert back to the original version
if necessary.
Place reports on drawings
Once you generate a report you can place it on a drawing or drawings by
clicking "Put on Drawing" in the Report Generator dialog box. This displays
the Table Generation Setup dialog box where you can select options to format
the look of the table.
Report tables can be updated once they have been inserted, saving you the
trouble of the setup each time. When a report table is inserted, some
intelligence is added to the table object so AutoCAD Electrical can determine
which report this table was for. There are three items that make a report table
unique:
■The report that generated the table (i.e. Bill of Materials, Wire From/To,
Component, and so on.)
■The scope of the report (for example, project, active drawing, and so on.)
■The format file (.set file) used to generate the report
If a report is run and a table exists that matches these three items, then instead
of inserting a new report table, the existing table objects update with the
current information.
If you want to insert a report table that will not be updated, select "Insert New
(not updatable)." This inserts a report table without the intelligence so that
when you run the same report again, the table is not updated.
Break report tables
You may want to break a report into multiple tables. You can do this from
the Table Generation dialog box without having to run the report multiple
times or clicking "Put on Drawing" multiple times. You can break the report
table by specifying the number of rows per section. If an entry in the report
1316 | Chapter 18 Reports
contains multiple lines of text, such as a Bill of Materials description, each
line of text is considered a row. A table will not be broken in the middle of a
multi-line entry but the entire entry is moved to the next section.
You can also break a report into sections based on some report fields. This
must be selected in the Report Generator dialog box. Different reports may
have different Special Breaks available. After you select Special Breaks, and
click Put on Drawing, the Apply Special Breaks option is available in the Table
Generation Setup dialog box. This option inserts a table object for each section
based on the Special Breaks. These multiple table objects (if inserted as
updatable) are considered one report table by AutoCAD Electrical and can be
updated and edited as one report using the AutoCAD Electrical Edit Component
command.
Breaking a Report Table across Multiple Drawings
You can break a report table across multiple drawings if the scope of the report
is set to Project and not Active Drawing. In the Table Generation Setup dialog
box, once you have defined a break as described above, you can define how
many table sections should be placed on each drawing. A blank Sections On
Drawing value indicates unlimited sections on the same drawing and you are
not prompted for another drawing. Once you enter a Sections On Drawing
value, when you reach that value you are prompted for another drawing. If
you select a new drawing, you can enter the folder and name for the drawing.
Once generated, the drawing is added to the AutoCAD Electrical project. These
multiple table objects (if inserted as updatable) are considered one report table
by AutoCAD Electrical and can be updated and edited as one report using the
AutoCAD Electrical Edit Component command.
Wildcard Filtering
You can filter reports based on wild-carded Installation and Location code
assignments. For example, if you mark all of the customer-supplied schematic
components and existing equipment with a Location code of “CUST” you can
then filter any report using the Location code. To run a report (such as a Bill
of Material report) of only the customer-supplied items, select Named Location
and enter “CUST” as the Location code in the Location Codes to extract section
of the report dialog box and click OK.
You can also run a report of all of the components that are not
customer-supplied. To do this, either enter all of the used location codes
separated by commas in the Location code edit box of the report dialog box
or enter “~CUST” as the Location code in the report dialog box. The tilde (~)
prefix causes the report to show everything except components with a Location
code of “CUST.”
Generate reports | 1317
AutoLisp-supported wildcard characters:
DefinitionCharacter
Matches any single numeric digit.# (pound)
Matches any single alphabetic character.@ (at)
Matches any single non-alphanumeric character.. (period)
Matches any character sequence, including an
empty one and it can be used anywhere in the
search pattern: beginning, middle, or end.
* (asterisk)
Matches any single character.? (question mark)
If it is the first character in the pattern, it matches
anything except the pattern.
~ (tilde)
Matches any one of the characters enclosed in the
brackets.
[...]
Matches any single characters not enclosed in the
brackets.
[~...]
Used inside brackets to specify a range for a single
character.
- (hyphen)
Separates two patterns., (comma)
Escapes special characters (reads the next character
literally).
‘ (reverse quote)
Table generation setup
This displays your report as a table on your drawing. Once you select OK from
the Table Generation Setup dialog box, your cursor will look like a box with
a small "x" in the corner. The box is the size the table will be when generated.
This allows easy placement of the table on your active drawing file. To use
object snap mode, enter an "S" at the command line and AutoCAD Electrical
will flip to a normal AutoCAD pick mode so you can use an object snap.
Click the Put on Drawing button on any of the report generation dialog boxes.
1318 | Chapter 18 Reports
Table
The available options depend on whether a matching table exists when you
click the Put on Drawing button. If there isn't a matching table on the drawing,
the Insert New and Insert New (non-updatable) options are available. If a
matching table exists on the drawing, the Insert New (non-updatable) and
Update Existing options are available.
Inserts a new updatable table. If there is an existing
table, new (non-updatable) tables are inserted.
Insert New
Inserts tables with no intelligence.Insert New (non-updatable)
Updates existing tables. If existing tables do not exist,
new updatable tables are inserted.
Update Existing
Text
Defines the height, color, and line spacing for the text used in the table. To
define the text color, click the Text Color box. The standard AutoCAD color
selection dialog box opens, displaying the color selections.
The minimum Spacing value is based on the specified text height and the
vertical cell margin of the table style. If you change the text height the spacing
value automatically recalculates. If it is too small it is changed to the minimum
value. If you change the spacing value it is compared to the minimum value.
If it is too small an alert displays and the value adjusts to the minimum value.
Column Labels
Defines whether to include the column heading, the color of title text labels,
and the visibility of the column labels.
Uses the column headings as the first row of the
table.
Include Column Labels
To define the title text color, click the Label Color
box. The standard AutoCAD color selection dialog
box opens, displaying the color selections.
Label Color
Indicates to only show the title on the first section
of the table, if multiple sections are used. If not selec-
ted, the labels will be shown on all table sections.
Show Labels on First Section Only
Generate reports | 1319
Title
Defines the table title attributes.
Shows the report's time and date above the table.Include time/date
Shows the project description lines above the table.
You select which lines will display in the project de-
scription dialog box.
Include project info
Shows the report's title above the table. When the
checkbox is active, you may modify the default report
title.
Include title line
Specifies to include special break values for the title
line of each section. Special break values will appear
Include special break values
on each respective section regardless if the Show
Title on First Section Only checkbox is selected.
Specifies what color to use for the table title. To
define the text color, click the Title Color box. The
Title color
standard AutoCAD color selection dialog box opens,
displaying the color selections.
Indicates to only show the title on the first section
of the table, if multiple sections are used. If not selec-
ted, the labels will be shown on all table sections.
Show Title on First Section Only
Layer
Specifies which layer to place the table on.
Column Width
Specifies the method to use for calculating the width of the columns. You can
either have AutoCAD Electrical automatically calculate the column width
based on text values for each field or you can define a width for each column.
The text will word wrap if the column width is less than the overall length of
the text string.
Borders
Specifies whether to display borders around the table. You can display all table
borders, a border around just the outside of the table, or not have any borders
at all.
1320 | Chapter 18 Reports
First New Section Placement
Specifies where to place the table in the drawing. You can enter x and y values
or pick a point on the screen. The table appears at the specified coordinates
once you click the OK button.
Row Definition
Specifies the number of table rows, the start and end lines, the number of
rows for each section, and whether to build the table from the bottom up.
The starting and ending lines reflect the total number of rows
displayed in the Report Generator dialog box. These values default
to previously used values on subsequent runs of the report.
Start Line/End
Creates the table from the bottom to the top; meaning that the
last line is created first and the first line is created last. The table
Build Up
title appears at the bottom of the report table when this option
is selected.
Breaks the table sections based upon the selected break criteria.
For example, if you select Manufacturer as the Special Break and
Apply Special Breaks
there are 15 different manufacturers in the report, your report
will be broken into 15 sections.
Specifies the maximum number of rows for the table or section,
determining when to split the table.
Rows for Each Section/Rows
Directs AutoCAD Electrical to add blank lines at the end of a table
section if necessary until the number of rows equals the Rows
Force to Maximum Rows
setting. Individual records cannot be split into two separate sec-
tions.
Section Definition
Defines the number of sections on the drawing and the distance between
sections on the same drawing. If the Sections value is set to 1, the X-Distance
and Y-Distance options are disabled.
Specifies the maximum number of table sections for this report.
A blank value indicates an unlimited number of sections on one
drawing.
Sections
Specifies the X-distance from the end of one table section to the
beginning of the next. The sections are on the same drawing.
X-Distance
Generate reports | 1321

Specifies the Y-distance from the end of one table section to the
beginning of the next. The sections are on the same drawing.
Y-Distance
Optional script file reference
This provides the option to save the report file to a script file. You can set up
this script file to automatically know the file name of the report you just
created. For AutoCAD 2000 and later, the report's file name can be retrieved
using the AutoLISP expression (v1-bb-ref 'FNAM).
Click the Save to File button on a report dialog box (such as Schematic Bill of
Materials). Select the report type, click OK, select the file to save, and click
Save.
The file location and name for your report is displayed at the top of the dialog
box.
Passes the report file to a script file. This provides
a link to post-processing the data or automatically
passing it on to another application.
Run Script
Closes the dialog box without creating a script file.Close - no script
Script file options reference
Displays if the report file was created and saved. The report filename and
location are displayed in the title bar of the dialog box. You can execute a
script file and passes the report filename to it. The filename is carried in an
AutoLISP variable called FNAM.
Click the Save to File button on a report dialog box (such as Schematic Bill of
Materials). Select the report type, click OK, select the file to save, and click
Save. In the Optional Script File dialog box, select Run Script.
Edit report
Use this utility to modify a report before you insert it on to your drawing as
a ruled text table.
Click the Edit Mode button on any of the report dialog boxes (such as
Schematic Bill of Materials).
NOTE Different options are available depending on which type of report you are
editing.
1322 | Chapter 18 Reports
New Lines
Indicates to add new lines above or below the selected line, or as a sub-assembly
of the selected line.
■Add from Catalog: Opens a subdialog box for selecting which catalog
lookup table to open. From this catalog table, you can select a part to add
to the report.
■Add New: Creates a new report line entry. Enter the values in the input
boxes and click OK.
■Add Copy: Creates a copy of the selected line entry. Modify the values in
the input boxes and click OK.
Edit or Delete lines
■Edit: Opens a subdialog box for editing the values for the selected line.
■Delete: Removes the selected line from the report.
If you do not select all of the lines that make up a single entry, AutoCAD
Electrical automatically deletes all the report lines that make up that entire
entry. However, if the report contains sub-assembly items, they are not
deleted when the main entry is deleted.
Re-order lines
Re-orders the lines with the Sort, Move Up, Move Down, Move to Top, and
Move to Bottom buttons.
■Move Up: Moves the currently selected line(s) up one place in the report.
■Move Down: Moves the currently selected line(s) down one place in the
report.
■Move to Top: Moves the currently selected line(s) to the top of the report.
■Move to Bottom: Moves the currently selected line(s) to the bottom of the
report.
■Smart Swap: Swaps "*1" with "*2" values in all selected lines. For example,
in the Wire From/To report there may be field names LOC1 and LOC2.
LOC1 is the location code for the component at one end of the wire and
LOC2 is the location code for the component at the other end. This feature
swaps the values of these fields.
Report generator
Generate reports | 1323
Displays the results of the report generation. The dialog box options that are
available depend on which report you are creating.
Schematic Reports
Ribbon: Reports tab ➤ Schematic panel ➤ Reports.
Toolbar: Main Electrical 2
Menu: Projects ➤ Reports ➤ Schematic Reports
Command entry: AESCHEMATICREPORT
Specify whether to process the project, the active drawing, or selected
components, and click OK
Panel Reports
Ribbon: Reports tab ➤ Panel panel ➤ Reports.
Toolbar: Panel Layout
Menu: Projects ➤ Reports ➤ Panel Reports
Command entry: AEPANELREPORT
Specify whether to process the project, the active drawing, or selected
components, and click OK
Header
Displays the selected items at the top of each section in the report.
Displays the header information inside the report. Select to add
the time/date, a title line, project lines, or column labels.
Add
Displays the selected header item at the top of the first section
only. The header information is no longer displayed at the top
of each section.
First Section Only
1324 | Chapter 18 Reports
Breaks
Controls how the report breaks across multiple pages. Only one check box
can be selected at a time. Specify whether to add page breaks or special breaks
to the report.
Breaks the report at the 58th line.Add page breaks
Specifies the value that controls the section break.
You can break the report into sections based on the
Special breaks
special break selected from the list. The list displays
the report-specific content to apply to the special
break. For example, selecting Wire Layer displays the
wire label records in different sections based on the
wire layer data.
Adds the special break value to the header. For ex-
ample, if you select a special break of Installation/Loc-
Add special break values to header
ation, the values provided for these devices in the
schematic are displayed in the report section header.
Suppress subcatalog entries
(for Component Report only) The component report displays all components
and their related catalog numbers. A component can have one or many catalog
numbers associated to it based upon whether or it is set up with subcatalog
numbers or if you choose to assign multiple BOM items to the component.
This removes the extra catalog numbers from the report and displays only the
primary catalog number from the Insert/Edit Component dialog box.
Pin chart
(for Connector Plug Report only)
The Connector Plug report displays the wiring information associated to a
pin symbol in the form of a chart based upon a similar Component tag.
Selecting "On" displays another dialog box to set up the chart and yields just
the specified information into the report generator for printing, saving to a
file, or placing in a table on the drawing.
Displays all component tag names in the report.Tag Name
Eliminates any duplicate pin numbers for the selected
plug from the report.
Remove duplicated pin numbers
Generate reports | 1325
Displays the wiring information from the left or right
side of the pin symbols. This displays what is connec-
ted to the pin and the wiring information.
Left Side / Right Side
Identifies additional pin numbering not defined in
the schematic for spare pin connections. For ex-
Fill In Missing Pin Numbers
ample, the connector may have used four out of nine
pins in the schematic and those are the connections
that are being reported. You can then display the
five spare pin connections by selecting this check
box and identifying the first pin number as 1 and
the last as 9. Label for spares displays a text string
under the wire number column in the report.
Internal/external codes left/right
(for Terminal Plan Report only) Allows the Terminal Plan report to take
advantage of terminals that have the optional "I" (Internal) and "E" (external)
codes on the wire connection. With this check box selected, you can select
from the radio buttons below it to sort within an entry. You can show all of
the Internal or External connections on the left or on the right of the wire
connection.
Squeeze
Specifies whether to reduce the width of the report. Select 1 for maximum
squeezing and 3 for minimum squeezing.
Add blanks between entries
Adds a blank line between report entries.
Insert as Terminal Strip
(for Panel Terminal Strip Report only) Opens the Panel Terminal Strip Graphical
Report - Parameters dialog box for defining a graphical representation of the
terminal strip to place on the active drawing file.
Plug/Male side - Jack/Female side - Show All
(for Connector Details Report only) These three radio buttons work with the
Type attribute value of either P or J for Plug (male) or Jack (female). When the
pin symbol is created you can define a Type attribute that defines these
1326 | Chapter 18 Reports

characteristics. Then when reporting you can select Plug or Jack to filter the
overall report (or you can choose to show all).
Sort
Sorts the report. You can specify four sorts to perform on the list.
User Post
Sets up options for running a post-process report before saving the report to
a file or inserting as a table onto your drawing. AutoCAD Electrical supports
calling a LISP file that can be customized to meet any post-processing needs
for a report. Each LISP file also has an associated dialog definition .dcl file
with the same name. When you click User Post, the dialog box displays the
available options. Select an option and the lisp routine runs a function against
the data and returns to the Report Generator Window.
The LISP routine can be modified to meet your needs. Use these tables to
determine the name of the .lsp and .dcl files for a report.
NOTE Example User Post files are not supplied for all reports.
User post file name for .lsp and .dclSchematic Report
BOMBill of Materials - Normal Tallied Format
BOM_LOCBill of Materials - Normal Tallied Format (Group by
Installation/Location)
PUR_BOMBill of Materials - Display in Tallied Purchase List
Format
TAG_BOMBill of Materials - Display in “By Tag” Format
NOCATMissing Bill of Material
COMPComponent
WIREFRM2Wire From/To
WIRECONComponent Wire List
PJCONConnector Plug
PLCPLC I/O Address and Descriptions
Generate reports | 1327
User post file name for .lsp and .dclSchematic Report
PLCCONPLC I/O Component Connection
PLC_USEDPLC Modules Used So Far
TERMTerminal Numbers
TERMPLANTerminal Plan
QPINRPTConnector Summary
PINRPTConnector Detail
CBLCable Summary
CBLCONCable From/To
WIRELABELWire Label
User post file name for .lsp and .dclPanel Report
BOMPNLBill of Materials - Normal Tallied Format
PBOM_LOCBill of Materials - Normal Tallied Format (Group by
Installation/Location)
PUR_PBOMBill of Materials - Display in Tallied Purchase List
Format
TAG_PBOMBill of Materials - Display in “By Tag” Format
PNLCOMPComponent
PNL_NPNameplate
PNLWCONWire Connection
PNLXCPTComponent Exception
PNLTXCPTTerminal Exception
PNLWANNOWire Annotation Exception
1328 | Chapter 18 Reports
User post file name for .lsp and .dclPanel Report
LEVBLNKMissing Level/Sequence Assignments
Display Setup
(for Wire Label report only) Sets up options for label quantity, horizontal or
vertical arrangement of data, display selection of wire labels and cable labels,
and total number of columns for displaying the report.
Displays the wire label for all wires in the specified
format.
Display Wire Label
Displays the cable labels in the specified format.Display Cable Label
Arranges the wire label horizontally or vertically
across the columns.
Label Arrangement
Specifies the quantity of wire labels or cable labels.
Wire labels are generated for every wire connection
while cable labels are generated once for every cable.
Label Quantity per Connection
Arranges the wire labels in the specified number of
columns.
Number of Columns to Display
Change Report Format
Changes what data fields are reported and the order in which they appear.
(for Wire Label report only) There are two categories that you can change the
report format for: wire label or cable label. Once you modify the report format,
you can save it for future use. The wire and cable label formats are stored in
the same file.
Surf
Surfs to the offending symbols. This is generally used for the Missing
Level/Sequence Assignments and Wire Annotation Exception reports.
Edit Mode/Edit Wire Label/Edit Cable Label
Modifies the report before you insert it to your drawing. You can move data
up or down in the report, add lines from a catalog, and delete lines.
Generate reports | 1329
Put on Drawing
(Not applicable for Wire Label reports) Opens the Table Generation Setup
dialog box for specifying how to display your report as a table on your drawing.
NOTE Tables should be placed on drawings that are part of the active project
only.
Once wire label reports are placed on the drawing in table format they are not
editable using the Edit Component tool. You must use the AutoCAD table
edit command to edit the table.
Save to File
Saves the report to a file. Select the type of output file from the Save Report
to File dialog box. You can define multiple file outputs. Choose from: ASCII
report, Comma Delimited, Excel spreadsheet, Access database, and XML format.
NOTE Depending on the file type, you may have the ability to include the project's
LINEx values. These are the values in the 24 description lines entered for the project.
Print
Prints the report. Select the printer, print range, and number of copies.
Conduit marker data fields to display
Changes what data fields are reported and the order in which they appear.
Ribbon: Panel tab ➤ Conduit Tools panel ➤ Conduit Reports drop-down
➤ Conduit Report.
Toolbar: Conduit Reports
Menu: Panel Layout ➤ Conduit Marker Tools ➤ Conduit Marker Report
Command entry: AECONDUITMARKERRPT
Run the report and click Change Report Format on the Report Generator dialog
box.
Lists the available fields for formatting the report (including
user-defined attributes). Select a field from the list to
transfer it into the Fields to Report list.
Available Fields
1330 | Chapter 18 Reports
Lists the fields to display in the report.Fields to Report
Removes the selected field or all fields from the Fields to
Report list.
Remove/Remove All
Moves the selected field up one spot in the Fields to Report
list.
Move Up
Moves the selected field down one spot in the Fields to
Report list.
Move Down
Specifies the vertical and horizontal justification (Top Left,
Middle Center, Bottom Right) of any column and the
Change field name/justification
column label (default is Top Left). The vertical portion of
the justification (Top, Middle, Bottom) is only used for the
Put on Drawing report feature. For example, if you select
"Top Right" the report is right-justified during the display,
printing and when saved to a file (the "top" portion is ig-
nored). If you put the report on the drawing, the report
justification is top right.
Available Fields
Component tag nameTAG
Conduit size (diameter)SIZE
Manufacturer or vendor name (i.e. Siemens)MFG
Catalog part number assignmentCAT
Optional assembly code value used in catalog lookup query to
get part number groups
ASSYCODE
Wire numberWIRENO
Wire layerWIRELAY
Wire type descriptionWIREDESC
Wire gauge or diameterWIREDIA
Type of spare or unused wiresSPARES
Generate reports | 1331

Count of spare or unused wiresSP/CNT
Description attribute values 1-2DESC1-2
Entity handle numberHDL
Sheet - the %S valueSH
Length (calculated wire length)LEN
"From" device's installation code (must end with "1")INST1
"From" device's location code (must end with "1")LOC1
"From" device's component tag ID (must end with "1")CMP1
"From" device's wire connection terminal number (must end with
"1")
PIN1
"To" device's installation code (must end with "2")INST2
"To" device's location code (must end with "2")LOC2
"To" device's component tag ID (must end with "2")CMP2
"To" device's wire connection terminal number (must end with
"2")
PIN2
Cable tagCBL
Cable wire or cable core colorCBLWC
Drawing list data fields to display
Changes what data fields are reported and the order in which they appear.
Ribbon: Project tab ➤ Project Tools panel ➤ Manager.
Toolbar: Main Electrical 2
Menu: Projects ➤ Project ➤ Project Manager
1332 | Chapter 18 Reports

Command entry: AEPROJECT
In the Project Manager, right-click the project name and select Drawing List
Report. Run the report and click Change Report Format on the Report
Generator dialog box.
Lists the available fields for formatting the report (including
user-defined attributes). Select a field from the list to
transfer it into the Fields to Report list.
Available Fields
Lists the fields to display in the report.Fields to Report
Removes the selected field or all fields from the Fields to
Report list.
Remove/Remove All
Moves the selected field up one spot in the Fields to Report
list.
Move Up
Moves the selected field down one spot in the Fields to
Report list.
Move Down
Specifies the vertical and horizontal justification (Top Left,
Middle Center, Bottom Right) of any column and the
Change field name/justification
column label (default is Top Left). The vertical portion of
the justification (Top, Middle, Bottom) is only used for the
Put on Drawing report feature. For example, if you select
"Top Right" the report is right-justified during the display,
printing and when saved to a file (the "top" portion is ig-
nored). If you put the report on the drawing, the report
justification is top right.
Available Fields
NOTE Additional fields may display if the drawing or project is set up with a title
block association. The title block association can be made either through the
Acade_title block with the WD_TB attribute or if there is a .WDT file (can be
project-specific or just a default one).
AutoCAD drawing file name (.dwg)FILENAME
Sheet - the %S valueSH
Drawing name - the %D valueSHDWGNAM
Generate reports | 1333

Drawing SEC assignmentSEC
Drawing SUBSEC assignmentSUBSEC
Drawing one-line description textDWGDESC
AutoCAD drawing file name (.dwg) with complete pathFULLFILENAME
Cable insert/edit data fields to display
Changes what data fields are reported and the order in which they appear.
Ribbon: Schematic tab ➤ Insert Wires/Wire Numbers panel ➤ Cable
Markers drop-down ➤ Multiple Cable Markers.
Toolbar: Cable Markers
Menu: Wires ➤ Cables ➤ Multiple Cable Markers
Command entry: AEMULTICABLE
Run the report. Select the location codes for the report and click Change
Format on the Cable Insert/Edit dialog box.
Lists the available fields for formatting the report (including
user-defined attributes). Select a field from the list to
transfer it into the Fields to Report list.
Available Fields
Lists the fields to display in the report.Fields to Report
Removes the selected field or all fields from the Fields to
Report list.
Remove/Remove All
Moves the selected field up one spot in the Fields to Report
list.
Move Up
Moves the selected field down one spot in the Fields to
Report list.
Move Down
Specifies the vertical and horizontal justification (Top Left,
Middle Center, Bottom Right) of any column and the
Change field name/justification
column label (default is Top Left). The vertical portion of
1334 | Chapter 18 Reports
the justification (Top, Middle, Bottom) is only used for the
Put on Drawing report feature. For example, if you select
"Top Right" the report is right-justified during the display,
printing and when saved to a file (the "top" portion is ig-
nored). If you put the report on the drawing, the report
justification is top right.
Available Fields
Wire numberWIRENO
"From" device's location code (must end with "1")LOC1
"From" device's component tag ID (must end with "1")CMP1
"From" device's wire connection terminal pin number (must end with
"1")
PIN1
"To" device's location code (must end with "2")LOC2
"To" device's component tag ID (must end with "2")CMP2
"To" device's wire connection terminal pin number (must end with
"2")
PIN2
Wire layer "From" device (must end with "1")WLAY1
Wire layer "To" device (must end with "2")WLAY2
Line or grid reference location for "From" device (must end with "1")REF1
Line or grid reference location for "To" device (must end with "2")REF2
Sheet assignment for "From" device (must end with "1")SH1
Sheet assignment for "To" device (must end with "2")SH2
Cable tagCBL
Cable wire or cable core colorCBLWC
Cable location attribute valueCBLLOC
Generate reports | 1335
Cable manufacturer attribute valueCBLMFG
Cable catalog part numberCBLCAT
Cable ASSYCODE assignmentCBLASMB
Cable description attribute values 1 - 3DESC1CBL - DESC3CBL
Cable parent or child (parent = 1, child = 2)CBLP1C2
"From" device's component tag and component terminal pin numberCMP:PIN1
"To" device's component tag and component terminal pin numberCMP:PIN2
"From" device's drawing section assignment (must end with "1")SEC1
"From" device's drawing sub-section assignment (must end with "1")SUB1
"To" device's drawing section assignment (must end with "2")SEC2
"To" device's drawing sub-section assignment (must end with "2")SUB2
"From" device's installation code (must end with "1")INST1
"To" device's installation code (must end with "2")INST2
"From" device's IEC tag name (must end with "1")IECCMP1
"To" device's IEC tag name (must end with "2")IECCMP2
"From" device's wire connection TERMDESC value (must end with
"1")
PD1
"To" device's wire connection TERMDESC value (must end with "2")PD2
"From" device's wire connection sequence value (must end with "1")SEQ1
"To" device's wire connection sequence value (must end with "2")SEQ2
"From" device's panel equivalent level (WDLEV) value (must end with
"1")
PNLWDLEV1
1336 | Chapter 18 Reports
"To" device's panel equivalent level (WDLEV) value (must end with
"2")
PNLWDLEV2
"From" device's entity handle value (must end with "1")CMPHDL1
"To" device's entity handle value (must end with "2")CMPHDL2
"From" device's drawing DWGIX value as listed in FILETIME table of
project scratch database (must end with "1")
DWGIX1
"To" device's drawing DWGIX value as listed in FILETIME table of
project scratch database (must end with "2")
DWGIX2
"From" device's drawing %D value (must end with "1")DWGNAM1
"To" device's drawing %D value (must end with "2")DWGNAM2
Cable entity's handle valueCBLHDL
Cable installation assignmentCBLINST
Cable's drawing DWGIX value as listed in FILETIME table of project
scratch database
CBLDWGIX
"From" device's connected wire line entity handle value (must end
with "1")
WIREHDL1
"To" device's connected wire line entity handle value (must end with
"2")
WIREHDL2
"From" device's wire connection point direction - i.e. 4 = connects
from left (must end with "1")
XDIR1
"To" device's wire connection point direction - i.e. 2 = connects from
above (must end with "2")
XDIR2
"From" wire connection's physical X-coordinate value (must end with
"1")
PNLX1
"From" wire connection's physical Y-coordinate value (must end with
"1")
PNLY1
Generate reports | 1337

"From" wire connection's physical Z-coordinate value (must end with
"1")
PNLZ1
Panel wire "From" connection point's direction - i.e. 4 = connects
from left, 1 = right, 2 = above, 8 = below (must end with "1")
PNLXDIR1
"To" wire connection's physical X-coordinate value (must end with
"2")
PNLX2
"To" wire connection's physical Y-coordinate value (must end with
"2")
PNLY2
"To" wire connection's physical Z-coordinate value (must end with
"2")
PNLZ2
Panel wire "To" connection point's direction - i.e. 4 = connects from
left, 1 = right, 2 = above, 8 = below (must end with "2")
PNLXDIR2
Panel layout calculated wire lengthCLEN
Panel bill of material data fields to report
Changes what data fields are reported and the order in which they appear.
Ribbon: Reports tab ➤ Panel panel ➤ Reports.
Toolbar: Panel Layout
Menu: Projects ➤ Reports ➤ Panel Reports
Command entry: AEPANELREPORT
Select Bill of Material from the report list. Run the report and click Change
Report Format on the Report Generator dialog box.
Lists the available fields for formatting the report (including
user-defined attributes). Select a field from the list to
transfer it into the Fields to Report list.
Available Fields
Lists the fields to display in the report.Fields to Report
1338 | Chapter 18 Reports
Removes the selected field or all fields from the Fields to
Report list.
Remove/Remove All
Moves the selected field up one spot in the Fields to Report
list.
Move Up
Moves the selected field down one spot in the Fields to
Report list.
Move Down
Specifies the vertical and horizontal justification (Top Left,
Middle Center, Bottom Right) of any column and the
Change field name/justification
column label (default is Top Left). The vertical portion of
the justification (Top, Middle, Bottom) is only used for the
Put on Drawing report feature. For example, if you select
"Top Right" the report is right-justified during the display,
printing and when saved to a file (the "top" portion is ig-
nored). If you put the report on the drawing, the report
justification is top right.
Available Fields
The fields that are available depend on the report options you selected when
running the report.
Item number assignmentITEM
Not applicable or not usedN/A
QuantityQTY
Subassembly quantitySUB
Catalog part number assignmentCATALOG
Manufacturer or vendor name (i.e. Siemens)MFG
Optional assembly code value used in catalog lookup query to get
part number groups
ASSYCODE
Multi-line description columnDESCRIPTION
General description line of textDESC
Generate reports | 1339

2nd query field (middle pulldown on Catalog Lookup dialog box)QUERY2
3rd query field (right-hand pulldown on Catalog Lookup dialog box)QUERY3
Catalog lookup data fieldMISC1-2
User field in catalog lookup databaseUSER1-3
Catalog Database (vendor database) table nameTABNAM
Component tag namesTAGS
Entity handle numberHDL
"From" device's drawing DWGIX value as listed in FILETIME table of
project scratch database
DWGIX
Panel component exception data fields to report
Changes what data fields are reported and the order in which they appear.
Ribbon: Reports tab ➤ Panel panel ➤ Reports.
Toolbar: Panel Layout
Menu: Projects ➤ Reports ➤ Panel Reports
Command entry: AEPANELREPORT
Select Component Exception from the report list. Run the report and click
Change Report Format on the Report Generator dialog box.
Lists the available fields for formatting the report (including
user-defined attributes). Select a field from the list to
transfer it into the Fields to Report list.
Available Fields
Lists the fields to display in the report.Fields to Report
Removes the selected field or all fields from the Fields to
Report list.
Remove/Remove All
1340 | Chapter 18 Reports
Moves the selected field up one spot in the Fields to Report
list.
Move Up
Moves the selected field down one spot in the Fields to
Report list.
Move Down
Specifies the vertical and horizontal justification (Top Left,
Middle Center, Bottom Right) of any column and the
Change field name/justification
column label (default is Top Left). The vertical portion of
the justification (Top, Middle, Bottom) is only used for the
Put on Drawing report feature. For example, if you select
"Top Right" the report is right-justified during the display,
printing and when saved to a file (the "top" portion is ig-
nored). If you put the report on the drawing, the report
justification is top right.
Available Fields
Tag ID value (attributes "TAG", "TAG1", "TAGSTRIP",
"P_TAG1")
TAGNAME
Installation attribute valueINST
Location attribute valueLOC
Comment or explanation of issueCOMMENT
Value of the problem area on the footprint component;
shows the value on the panel layout (i.e. If the Comment
PNL
is "Mismatch LOC", the LOC attribute is different between
the Panel Layout and Schematic components).
Value of the problem area on the component; shows the
value on the schematic drawing (i.e. If the Comment is
SCHEM
"Mismatch LOC", the LOC attribute is different between
the Panel Layout and Schematic components).
Entity handle numberHDL
Sheet - the %S valueSH
Drawing name - the %D valueSHDWGNAM
Generate reports | 1341

AutoCAD drawing file name (.dwg) with complete pathFULLFILENAME
AutoCAD drawing file name (.dwg)FILENAME
Panel component data fields to report
Changes what data fields are reported and the order in which they appear.
Ribbon: Reports tab ➤ Panel panel ➤ Reports.
Toolbar: Panel Layout
Menu: Projects ➤ Reports ➤ Panel Reports
Command entry: AEPANELREPORT
Select Component from the report list. Run the report and click Change Report
Format on the Report Generator dialog box.
Lists the available fields for formatting the report (including
user-defined attributes). Select a field from the list to
transfer it into the Fields to Report list.
Available Fields
Lists the fields to display in the report.Fields to Report
Removes the selected field or all fields from the Fields to
Report list.
Remove/Remove All
Moves the selected field up one spot in the Fields to Report
list.
Move Up
Moves the selected field down one spot in the Fields to
Report list.
Move Down
Specifies the vertical and horizontal justification (Top Left,
Middle Center, Bottom Right) of any column and the
Change field name/justification
column label (default is Top Left). The vertical portion of
the justification (Top, Middle, Bottom) is only used for the
Put on Drawing report feature. For example, if you select
"Top Right" the report is right-justified during the display,
printing and when saved to a file (the "top" portion is ig-
1342 | Chapter 18 Reports
nored). If you put the report on the drawing, the report
justification is top right.
Available Fields
Item number assignmentITEM
Tag ID value (attributes "TAG", "TAG1", "TAGSTRIP", "P_TAG1")TAGNAME
CountCNT
Units of measurement (i.e. AMPS, VOLTS, mA)UNITS
Sub-quantitySUBQTY
Manufacturer or vendor name (i.e. Siemens)MFG
Catalog part number assignmentCAT
Description attribute values 1-3DESC1-3
Line reference or X-Y grid reference or X-Zone referenceREF
Installation attribute valueINST
Location attribute valueLOC
Mount attribute value; panel layout optional attribute for user-defined
"panel mounting" assignment
MOUNT
GROUPWITH attribute value; panel layout optional attribute for user-
defined "group with" assignment
GROUP
Rating 1 - 12 attribute valuesRATING1-12
Catalog one-line description textCATDESC
QUERY1 field pulled from catalog lookup and formatted into output
report
QUERY1
2nd query field (middle pulldown on Catalog Lookup dialog box)QUERY2
Catalog lookup data fieldMISC1-2
Generate reports | 1343

User field in catalog lookup databaseUSER1-3
parent = 1, child = 2P1C2
Related to the name of the component's catalog lookup tableWDBLKNAM
Block nameBLOCK
Entity handle numberHDL
Type of component (J = plug-jack connector, P = PLC I/O, C = cable
marker)
CATEGORY
Optional assembly code value used in catalog lookup query to get
part number groups
ASSYCODE
Sheet - the %S valueSH
Drawing name - the %D valueSHDWGNAM
Drawing section assignmentSEC
Drawing sub-section assignmentSUBSEC
Component familyFAMILY
Related tag ID of device on alternate drawing typeWDTAGALT
Alternate type of symbol (for example, "PN" for pneumatic, "HY" for
hydraulic)
WDTYPE
AutoCAD drawing file name (.dwg)FILENAME
Panel missing level/sequence assignments data
fields to report
Changes what data fields are reported and the order in which they appear.
Ribbon: Reports tab ➤ Panel panel ➤ Reports.
1344 | Chapter 18 Reports
Toolbar: Panel Layout
Menu: Projects ➤ Reports ➤ Panel Reports
Command entry: AEPANELREPORT
Select Missing Level/Sequence Assignments from the report list. Run the report
and click Change Report Format on the Report Generator dialog box.
Lists the available fields for formatting the report (including
user-defined attributes). Select a field from the list to
transfer it into the Fields to Report list.
Available Fields
Lists the fields to display in the report.Fields to Report
Removes the selected field or all fields from the Fields to
Report list.
Remove/Remove All
Moves the selected field up one spot in the Fields to Report
list.
Move Up
Moves the selected field down one spot in the Fields to
Report list.
Move Down
Specifies the vertical and horizontal justification (Top Left,
Middle Center, Bottom Right) of any column and the
Change field name/justification
column label (default is Top Left). The vertical portion of
the justification (Top, Middle, Bottom) is only used for the
Put on Drawing report feature. For example, if you select
"Top Right" the report is right-justified during the display,
printing and when saved to a file (the "top" portion is ig-
nored). If you put the report on the drawing, the report
justification is top right.
Available Fields
Tag ID value (attributes "TAG", "TAG1", "TAGSTRIP", "P_TAG1")TAGNAME
Installation attribute valueINST
Location attribute valueLOC
Generate reports | 1345

Mount attribute value; panel layout optional attribute for user-defined
"panel mounting" assignment
MOUNT
GROUPWITH attribute value; panel layout optional attribute for user-
defined "group with" assignment
GROUP
Entity handle numberHDL
Type of component (J = plug-jack connector, P = PLC I/O, C = cable
marker)
CATEGORY
Description attribute values 1-3DESC1-3
Sheet - the %S valueSH
Drawing name - the %D valueSHDWGNAM
AutoCAD drawing file name (.dwg)FILENAME
Panel wire annotation exception data fields to
report
Changes what data fields are reported and the order in which they appear.
Ribbon: Reports tab ➤ Panel panel ➤ Reports.
Toolbar: Panel Layout
Menu: Projects ➤ Reports ➤ Panel Reports
Command entry: AEPANELREPORT
Select Wire Annotation Exception from the report list. Run the report and
click Change Report Format on the Report Generator dialog box.
Lists the available fields for formatting the report (including
user-defined attributes). Select a field from the list to
transfer it into the Fields to Report list.
Available Fields
Lists the fields to display in the report.Fields to Report
1346 | Chapter 18 Reports
Removes the selected field or all fields from the Fields to
Report list.
Remove/Remove All
Moves the selected field up one spot in the Fields to Report
list.
Move Up
Moves the selected field down one spot in the Fields to
Report list.
Move Down
Specifies the vertical and horizontal justification (Top Left,
Middle Center, Bottom Right) of any column and the
Change field name/justification
column label (default is Top Left). The vertical portion of
the justification (Top, Middle, Bottom) is only used for the
Put on Drawing report feature. For example, if you select
"Top Right" the report is right-justified during the display,
printing and when saved to a file (the "top" portion is ig-
nored). If you put the report on the drawing, the report
justification is top right.
Available Fields
Tag ID value (attributes "TAG", "TAG1", "TAGSTRIP", "P_TAG1")TAGNAME
Wire connection terminal pin numberPIN
Wire numberWIRENO
Alternate type of symbol (for example, "PN" for pneumatic, "HY" for
hydraulic)
WTYPE
Installation attribute valueINST
Location attribute valueLOC
Mount attribute value; panel layout optional attribute for user-defined
"panel mounting" assignment
MOUNT
GROUPWITH attribute value; panel layout optional attribute for user-
defined "group with" assignment
GROUP
Component and connection information on one end of wire (must
end with "1")
END1
Generate reports | 1347

Component and connection information on one end of wire (must
end with "2")
END2
WDBLKNAM attribute value used for the linking of symbols to tables
in the Default CAT database
BLKNAME
"From" device's drawing DWGIX value as listed in FILETIME table of
project scratch database
DWGIX
Entity handle numberHDL
Type of component (J = plug-jack connector, P = PLC I/O, C = cable
marker, FP = Panel Footprint, FPT = terminal footprint)
CATEGORY
Wire connection point description attribute valuePDESC
Values of R or L; used for terminal block symbols where we identify
the wire annotation attributes with an R or L for Right or Left of the
symbol
SFX
Sheet - the %S valueSH
Drawing name - the %D valueSHDWGNAM
Cable tagCBL
Wire annotation textTEXT
Panel nameplate data fields to report
Changes what data fields are reported and the order in which they appear.
Ribbon: Reports tab ➤ Panel panel ➤ Reports.
Toolbar: Panel Layout
Menu: Projects ➤ Reports ➤ Panel Reports
Command entry: AEPANELREPORT
1348 | Chapter 18 Reports
Select Nameplate from the report list. Run the report and click Change Report
Format on the Report Generator dialog box.
Lists the available fields for formatting the report (including
user-defined attributes). Select a field from the list to
transfer it into the Fields to Report list.
Available Fields
Lists the fields to display in the report.Fields to Report
Removes the selected field or all fields from the Fields to
Report list.
Remove/Remove All
Moves the selected field up one spot in the Fields to Report
list.
Move Up
Moves the selected field down one spot in the Fields to
Report list.
Move Down
Specifies the vertical and horizontal justification (Top Left,
Middle Center, Bottom Right) of any column and the
Change field name/justification
column label (default is Top Left). The vertical portion of
the justification (Top, Middle, Bottom) is only used for the
Put on Drawing report feature. For example, if you select
"Top Right" the report is right-justified during the display,
printing and when saved to a file (the "top" portion is ig-
nored). If you put the report on the drawing, the report
justification is top right.
Available Fields
Tag ID value (attributes "TAG", "TAG1", "TAGSTRIP", "P_TAG1")TAGNAME
Description attribute values 1-3DESC1-3
Manufacturer or vendor name (i.e. Siemens)MFG
Catalog part number assignmentCATALOG
Block nameBLKNAME
Nameplate tied in with this footprint device tagWITH
Location attribute valueLOC
Generate reports | 1349

Mount attribute value; panel layout optional attribute for user-defined
"panel mounting" assignment
MOUNT
GROUPWITH attribute value; panel layout optional attribute for user-
defined "group with" assignment
GROUP
Installation attribute valueINST
Sheet - the %S valueSH
Drawing name - the %D valueSHDWGNAM
Item number assignmentITEM
Rating 1 - 12 attribute valuesRATING1-12
Switch position description text (1 - 12)POS1-12
Entity handle numberHDL
"From" device's drawing DWGIX value as listed in FILETIME table of
project scratch database
DWGIX
Panel terminal exception data fields to report
Changes what data fields are reported and the order in which they appear.
Ribbon: Reports tab ➤ Panel panel ➤ Reports.
Toolbar: Panel Layout
Menu: Projects ➤ Reports ➤ Panel Reports
Command entry: AEPANELREPORT
Select Terminal Exception from the report list. Run the report and click Change
Report Format on the Report Generator dialog box.
Lists the available fields for formatting the report (including
user-defined attributes). Select a field from the list to
transfer it into the Fields to Report list.
Available Fields
1350 | Chapter 18 Reports
Lists the fields to display in the report.Fields to Report
Removes the selected field or all fields from the Fields to
Report list.
Remove/Remove All
Moves the selected field up one spot in the Fields to Report
list.
Move Up
Moves the selected field down one spot in the Fields to
Report list.
Move Down
Specifies the vertical and horizontal justification (Top Left,
Middle Center, Bottom Right) of any column and the
Change field name/justification
column label (default is Top Left). The vertical portion of
the justification (Top, Middle, Bottom) is only used for the
Put on Drawing report feature. For example, if you select
"Top Right" the report is right-justified during the display,
printing and when saved to a file (the "top" portion is ig-
nored). If you put the report on the drawing, the report
justification is top right.
Available Fields
Tag ID value (attributes "TAG", "TAG1", "TAGSTRIP", "P_TAG1")TAGNAME
Installation attribute valueINST
Location attribute valueLOC
Comment or explanation of issueCOMMENT
Value of the problem area on the footprint component; shows the
value on the panel layout (i.e. If the Comment is "Mismatch LOC",
PNL
the LOC attribute is different between the Panel Layout and Schem-
atic components).
Value of the problem area on the component; shows the value on
the schematic drawing (i.e. If the Comment is "Mismatch LOC", the
SCHEM
LOC attribute is different between the Panel Layout and Schematic
components).
Entity handle numberHDL
Generate reports | 1351
Sheet - the %S valueSH
Drawing name - the %D valueSHDWGNAM
AutoCAD drawing file name (.dwg) with complete pathFULLFILENAME
AutoCAD drawing file name (.dwg)FILENAME
Panel wire connection data fields to report
Changes what data fields are reported and the order in which they appear.
Ribbon: Reports tab ➤ Panel panel ➤ Reports.
Toolbar: Panel Layout
Menu: Projects ➤ Reports ➤ Panel Reports
Command entry: AEPANELREPORT
Select Wire Connection from the report list. Run the report and click Change
Report Format on the Report Generator dialog box.
Lists the available fields for formatting the report (including
user-defined attributes). Select a field from the list to
transfer it into the Fields to Report list.
Available Fields
Lists the fields to display in the report.Fields to Report
Removes the selected field or all fields from the Fields to
Report list.
Remove/Remove All
Moves the selected field up one spot in the Fields to Report
list.
Move Up
Moves the selected field down one spot in the Fields to
Report list.
Move Down
Specifies the vertical and horizontal justification (Top Left,
Middle Center, Bottom Right) of any column and the
Change field name/justification
column label (default is Top Left). The vertical portion of
the justification (Top, Middle, Bottom) is only used for the
1352 | Chapter 18 Reports
Put on Drawing report feature. For example, if you select
"Top Right" the report is right-justified during the display,
printing and when saved to a file (the "top" portion is ig-
nored). If you put the report on the drawing, the report
justification is top right.
Available Fields
Tag ID value (attributes "TAG", "TAG1", "TAGSTRIP", "P_TAG1")TAGNAME
Wire connection terminal pin numberPIN
Wire numberWIRENO
Alternate type of symbol (for example, "PN" for pneumatic, "HY" for
hydraulic)
WTYPE
Installation attribute valueINST
Location attribute valueLOC
Mount attribute value; panel layout optional attribute for user-defined
"panel mounting" assignment
MOUNT
GROUPWITH attribute value; panel layout optional attribute for user-
defined "group with" assignment
GROUP
Component and connection information on one end of wire (must
end with "1")
END1
Component and connection information on one end of wire (must
end with "2")
END2
Manufacturer or vendor name (i.e. Siemens)MFG
Catalog part number assignmentCAT
Optional assembly code value used in catalog lookup query to get
part number groups
ASSYCODE
WDBLKNAM attribute value used for the linking of symbols to tables
in the Default CAT database
BLKNAME
Generate reports | 1353

Item number assignment on Panel drawings; there is no correlation
between schematic and panel item number attributes
ITEM
"From" device's drawing DWGIX value as listed in FILETIME table of
project scratch database
DWGIX
Entity handle numberHDL
Type of component (J = plug-jack connector, P = PLC I/O, C = cable
marker, FP = Panel Footprint, FPT = terminal footprint)
CATEGORY
Wire connection point description attribute valuePDESC
Values of R or L; used for terminal block symbols where we identify
the wire annotation attributes with an R or L for Right or Left of the
symbol
SFX
Sheet - the %S valueSH
Drawing name - the %D valueSHDWGNAM
X-coordinateX
Y-coordinateY
Z-coordinateZ
Cable tagCBL
Wire annotation textTEXT
Bill of material data fields to report
Changes what data fields are reported and the order in which they appear.
Ribbon: Reports tab ➤ Schematic panel ➤ Reports.
Toolbar: Main Electrical 2
Menu: Projects ➤ Reports ➤ Schematic Reports
Command entry: AESCHEMATICREPORT
1354 | Chapter 18 Reports
Select Bill of Material from the report list. Run the report and click Change
Report Format on the Report Generator dialog box.
Lists the available fields for formatting the report (including
user-defined attributes). Select a field from the list to
transfer it into the Fields to Report list.
Available Fields
Lists the fields to display in the report.Fields to Report
Removes the selected field or all fields from the Fields to
Report list.
Remove/Remove All
Moves the selected field up one spot in the Fields to Report
list.
Move Up
Moves the selected field down one spot in the Fields to
Report list.
Move Down
Specifies the vertical and horizontal justification (Top Left,
Middle Center, Bottom Right) of any column and the
Change field name/justification
column label (default is Top Left). The vertical portion of
the justification (Top, Middle, Bottom) is only used for the
Put on Drawing report feature. For example, if you select
"Top Right" the report is right-justified during the display,
printing and when saved to a file (the "top" portion is ig-
nored). If you put the report on the drawing, the report
justification is top right.
The Description field can be multilined. If you include the
Description field in your report, choose which lines make
Lines for description
up this field. Switch on and off the specific fields to define
the Description.
Available Fields
The fields that are available depend on the display options you selected when
running the report. Some fields are not applicable in certain display options.
Item number assignment; purchase list items for Purchase Tallied
Format reports.
ITEM
Generate reports | 1355
Not applicable or not used; if a report does not use a particular field,
N/A is used to line up the raw data and make them consistent
between all formats for the BOM
N/A
QuantityQTY
Subassembly quantitySUB
Catalog part number assignmentCATALOG
Manufacturer or vendor name (i.e. Siemens)MFG
Optional assembly code value used in catalog lookup query to get
part number groups
ASSYCODE
Multiline description columnDESCRIPTION
General component description line of textDESC
2nd query field (middle pulldown on Catalog Lookup dialog box)QUERY2
3rd query field (right-hand pull-down on Catalog Lookup dialog box)QUERY3
Catalog lookup data fieldsMISC1-2
User fields in catalog lookup databaseUSER1-3
Catalog database table nameTABNAM
Component tag namesTAGS or TAG
Installation attribute valueINST
Location attribute valueLOC
Entity handle numberHDL
DWGIX value as listed in FILETIME table of project scratch databaseDWGIX
Cable summary data fields to report
Changes what data fields are reported and the order in which they appear.
1356 | Chapter 18 Reports

Ribbon: Reports tab ➤ Schematic panel ➤ Reports.
Toolbar: Main Electrical 2
Menu: Projects ➤ Reports ➤ Schematic Reports
Command entry: AESCHEMATICREPORT
Select Cable Summary from the report list. Run the report and click Change
Report Format on the Report Generator dialog box.
Lists the available fields for formatting the report (including
user-defined attributes). Select a field from the list to
transfer it into the Fields to Report list.
Available Fields
Lists the fields to display in the report.Fields to Report
Removes the selected field or all fields from the Fields to
Report list.
Remove/Remove All
Moves the selected field up one spot in the Fields to Report
list.
Move Up
Moves the selected field down one spot in the Fields to
Report list.
Move Down
Specifies the vertical and horizontal justification (Top Left,
Middle Center, Bottom Right) of any column and the
Change field name/justification
column label (default is Top Left). The vertical portion of
the justification (Top, Middle, Bottom) is only used for the
Put on Drawing report feature. For example, if you select
"Top Right" the report is right-justified during the display,
printing and when saved to a file (the "top" portion is ig-
nored). If you put the report on the drawing, the report
justification is top right.
Available Fields
Cable tagCBL
Description attribute values 1-3DESC1-3
Generate reports | 1357
Manufacturer or vendor name (i.e. Siemens)MFG
Catalog part number assignmentCAT
Optional assembly code value used in catalog lookup query to get
part number groups
ASSYCODE
Cable BOM single line description field (pulled from the catalog
lookup file for the cable's catalog part number query)
CBLDESCCAT
Cable BOM query1 value (pulled from the catalog lookup file for the
cable's catalog part number query)
CBLQ1CAT
Cable BOM query2 value (pulled from the catalog lookup file for the
cable's catalog part number query)
CBLQ2CAT
Cable BOM miscellaneous fields (pulled from the catalog lookup file
for the cable's catalog part number query)
CBLMISC1CAT-
CBLMISC2CAT
Cable BOM user fields (pulled from the catalog lookup file for the
cable's catalog part number query)
CBLUSER1CAT-
CBLUSER3CAT
Line reference or X-Y grid reference or X-Zone referenceREF
Location attribute valueLOC
Sheet - the %S valueSH
Drawing name - the %D valueSHDWGNAM
Entity handle numberHDL
Installation attribute valueINST
"From" device's drawing DWGIX value as listed in FILETIME table of
project scratch database
DWGIX
Cable from/to data fields to report
Changes what data fields are reported and the order in which they appear.
1358 | Chapter 18 Reports

Ribbon: Reports tab ➤ Schematic panel ➤ Reports.
Toolbar: Main Electrical 2
Menu: Projects ➤ Reports ➤ Schematic Reports
Command entry: AESCHEMATICREPORT
Select Cable From/To from the report list. Run the report. Select the location
codes for the report and click Change Report Format on the Report Generator
dialog box.
Lists the available fields for formatting the report (including
user-defined attributes). Select a field from the list to
transfer it into the Fields to Report list.
Available Fields
Lists the fields to display in the report.Fields to Report
Removes the selected field or all fields from the Fields to
Report list.
Remove/Remove All
Moves the selected field up one spot in the Fields to Report
list.
Move Up
Moves the selected field down one spot in the Fields to
Report list.
Move Down
Specifies the vertical and horizontal justification (Top Left,
Middle Center, Bottom Right) of any column and the
Change field name/justification
column label (default is Top Left). The vertical portion of
the justification (Top, Middle, Bottom) is only used for the
Put on Drawing report feature. For example, if you select
"Top Right" the report is right-justified during the display,
printing and when saved to a file (the "top" portion is ig-
nored). If you put the report on the drawing, the report
justification is top right.
Available Fields
Wire numberWIRENO
"From" device's location code (must end with "1")LOC1
Generate reports | 1359
"From" device's component tag ID (must end with "1")CMP1
"From" device's wire connection terminal number (must end with
"1")
PIN1
"To" device's location code (must end with "2")LOC2
"To" device's component tag ID (must end with "2")CMP2
"To" device's wire connection terminal number (must end with "2")PIN2
Wire layer "From" device (must end with "1")WLAY1
Wire layer "To" device (must end with "2")WLAY2
Line or grid reference location for "From" device (must end with "1")REF1
Line or grid reference location for "To" device (must end with "2")REF2
Sheet assignment for "From" device (must end with "1")SH1
Sheet assignment for "To" device (must end with "2")SH2
Cable tagCBL
Cable wire or cable core colorCBLWC
Cable location attribute valueCBLLOC
Cable Manufacturer attribute valueCBLMFG
Cable catalog part numberCBLCAT
Cable ASSYCODE assignmentCBLASMB
Cable BOM single line description field (pulled from the catalog
lookup file for the cable's catalog part number query)
CBLDESCCAT
Cable BOM query1 value (pulled from the catalog lookup file for the
cable's catalog part number query)
CBLQ1CAT
Cable BOM query2 value (pulled from the catalog lookup file for the
cable's catalog part number query)
CBLQ2CAT
1360 | Chapter 18 Reports
Cable BOM miscellaneous fields (pulled from the catalog lookup file
for the cable's catalog part number query)
CBLMISC1CAT -
CBLMISC2CAT
Cable BOM user fields (pulled from the catalog lookup file for the
cable's catalog part number query)
CBLUSER1CAT -
CBLUSER3CAT
Cable description attribute values 1 - 3DESC1CBL-DESC3CBL
Cable parent or child (parent = 1, child = 2)CBLP1C2
"From" device's component tag and component terminal pin numberCMP:PIN1
"To" device's component tag and component terminal pin numberCMP:PIN2
"From" device's drawing section assignmentSEC1
"From" device's drawing sub-section assignmentSUB1
"TO" device's drawing section assignmentSEC2
"TO" device's drawing sub-section assignmentSUB2
"From" device's installation codeINST1
"To" device's installation codeINST2
"From" device's IEC tag name (must end with "1")IECCMP1
"To" device's IEC tag name (must end with "2")IECCMP2
"From" device's wire connection TERMDESC value (must end with
"1")
PD1
"To" device's wire connection TERMDESC value (must end with "2")PD2
"From" device's wire connection sequence value (must end with "1")SEQ1
"To" device's wire connection sequence value (must end with "2")SEQ2
"From" device's panel equivalent level (WDLEV) value (must end with
"1")
PNLWDLEV1
Generate reports | 1361
"To" device's panel equivalent level (WDLEV) value (must end with
"2")
PNLWDLEV2
"From" device's entity handle value (must end with "1")CMPHDL1
"To" device's entity handle value (must end with "2")CMPHDL2
"From" device's drawing DWGIX value as listed in FILETIME table of
project scratch database (must end with "1")
DWGIX1
"To" device's drawing DWGIX value as listed in FILETIME table of
project scratch database (must end with "2")
DWGIX2
"From" device's drawing properties %D value (must end with "1")DWGNAM1
"To" device's drawing properties %D value (must end with "2")DWGNAM2
Cable entity's handle valueCBLHDL
Cable entity's handle valueCBLINST
Cable's drawing DWGIX value as listed in FILETIME table of project
scratch database
CBLDWGIX
"From" device's connected wire line entity handle value (must end
with "1")
WIREHDL1
"To" device's connected wire line entity handle value (must end with
"2")
WIREHDL2
"From" device's wire connection point direction - i.e. 4 = connects
from left (must end with "1")
XDIR1
"To" device's wire connection point direction - i.e. 2 = connects from
above (must end with "2")
XDIR2
"From" wire connection's physical X-coordinate value (must end with
"1")
PNLX1
"From" wire connection's physical Y-coordinate value (must end with
"1")
PNLY1
1362 | Chapter 18 Reports

"From" wire connection's physical Z-coordinate value (must end with
"1")
PNLZ1
Panel wire "From" connection point's direction - i.e. 4 = connects
from left, 1 = right, 2 = above, 8 = below (must end with "1")
PNLXDIR1
"To" wire connection's physical X-coordinate value (must end with
"2")
PNLX2
"To" wire connection's physical Y-coordinate value (must end with
"2")
PNLY2
"To" wire connection's physical Z-coordinate value (must end with
"2")
PNLZ2
Panel wire "To" connection point's direction - i.e. 4 = connects from
left, 1 = right, 2 = above, 8 = below (must end with "2")
PNLXDIR2
Panel layout calculated wire lengthCLEN
"From" device's optional user fieldUSER1_1 to USER20_1
"To" device's optional user fieldUSER1_2 to USER20_2
Cable label data fields to report
Changes what data fields are reported and the order in which they appear.
Ribbon: Reports tab ➤ Schematic panel ➤ Reports.
Toolbar: Main Electrical 2
Menu: Projects ➤ Reports ➤ Schematic Reports
Command entry: AESCHEMATICREPORT
Select Wire Label from the report list. Run the report and click Cable Label
on the Report Generator dialog box.
Lists the available fields for formatting the report (including
user-defined attributes). Select a field from the list to
transfer it into the Fields to Report list.
Available Fields
Generate reports | 1363

Lists the fields to display in the report.Fields to Report
Removes the selected field or all fields from the Fields to
Report list.
Remove/Remove All
Moves the selected field up one spot in the Fields to Report
list.
Move Up
Moves the selected field down one spot in the Fields to
Report list.
Move Down
Specifies the special character to separate the selected fields.
Enter a special character to separate the selected fields in-
Separator
side the list box. Do this by selecting a field from the Fields
to Report list, define the separator, select another field,
define a separator, and so on. You can also select the sep-
arator from a list.
The "\n" symbol stands for the new line. When you use
this as separator, the field displays in the new (next) line.
Available Fields
Cable nameCBL
Location of "From" componentsLOC1
Components that are in the "From" end of cableFROM_CMPS
Location of "To" componentsLOC2
Components that are in the "To" end of cableTO_CMPS
Cable's description lines 1-3DESC1CBL-DESC3CBL
PLC component connection data fields to report
Changes what data fields are reported and the order in which they appear.
Ribbon: Reports tab ➤ Schematic panel ➤ Reports.
1364 | Chapter 18 Reports

Toolbar: Main Electrical 2
Menu: Projects ➤ Reports ➤ Schematic Reports
Command entry: AESCHEMATICREPORT
Select PLC I/O Component Connection from the report list. Run the report
and click Change Report Format on the Report Generator dialog box.
Lists the available fields for formatting the report (including
user-defined attributes). Select a field from the list to
transfer it into the Fields to Report list.
Available Fields
Lists the fields to display in the report.Fields to Report
Removes the selected field or all fields from the Fields to
Report list.
Remove/Remove All
Moves the selected field up one spot in the Fields to Report
list.
Move Up
Moves the selected field down one spot in the Fields to
Report list.
Move Down
Specifies the vertical and horizontal justification (Top Left,
Middle Center, Bottom Right) of any column and the
Change field name/justification
column label (default is Top Left). The vertical portion of
the justification (Top, Middle, Bottom) is only used for the
Put on Drawing report feature. For example, if you select
"Top Right" the report is right-justified during the display,
printing and when saved to a file (the "top" portion is ig-
nored). If you put the report on the drawing, the report
justification is top right.
Available Fields
Wire number associated with PLC I/O pointPLCWNUM
PLC tag ID value (attribute "TAG" or "TAG1")PLCTAG
PLC I/O point address (attribute "TAGAxx" where xx is "01"
- "xx")
PLCADDR
Generate reports | 1365
PLC I/O description text lines 1 - 5PLCDESCA-PLCDESCE
PLC I/O terminal text value, attribute TERMxxPLCTERM
PLC I/O terminal description text value, attribute TERM-
DESCxx
PLCTERMDESC
PLC I/O module's Installation attribute valuePLCINST
PLC I/O module's Location attribute valuePLCLOC
Wire layer nameWLAY
PLC I/O module's Manufacturer attribute valuePLCMFG
PLC I/O module's Catalog part numberPLCCAT
PLC I/O module's ASSYCODE attribute valuePLCASSYCODE
PLC I/O terminal attribute suffix value (the "xx" part of
TERMxx)
PLCTERMCODE
PLC Drawing DWGIX value as listed in FILETIME table of
project
PLCDWGIX
PLC I/O module's AutoCAD handle valuePLCHDL
PLC I/O module's LINE1 attribute value (miscellaneous text
such as "Rack" or "Slot")
PLCLINE1
PLC I/O module's LINE2 attribute value (miscellaneous text
such as "Rack" or "Slot")
PLCLINE2
Connected component tag ID (attributes "TAG1", "TAG2",
"TAGSTRIP")
CMPTAG
Connected component description attribute values 1 - 3CMPDESC1-3
Connected component Installation attribute valueCMPINST
Connected component Location attribute valueCMPLOC
1366 | Chapter 18 Reports
Connected component TERMxx attribute value (the side
that connects to the PLC I/O point)
CMPTERM
Connected component TERMDESCxx attribute value (the
side that connects to the PLC I/O point)
CMPTERMDESC
Connected component Manufacturer attribute valueCMPMFG
Connected component catalog part numberCMPCAT
Connected component ASSYCODE attribute valueCMPASSYCODE
Connected component's Drawing DWGIX value as listed
in FILETIME table of project scratch database
CMPDWGIX
Connected component's AutoCAD handle valueCMPHDL
Connected component's AutoCAD block nameCMPBLKNAM
Connected terminal's TAGSTRIP attribute valueTERMTAG
Connected terminal's Installation attribute valueTERMINST
Connected terminal's Location attribute valueTERMLOC
Connected terminal's TERM or TERM01 attribute valueTERMTERM
Connected terminal's TERMDESC01 attribute valueTERMTERMDESC
Connected terminal's Manufacturer attribute valueTERMMFG
Connected terminal's catalog part numberTERMCAT
Connected terminal's ASSYCODE attribute valueTERMASSYCODE
Connected terminal's Drawing DWGIX value as listed in
FILETIME table of project scratch database
TERMDWGIX
Connected terminal's AutoCAD handle valueTERMHDL
Connected terminal's AutoCAD block nameTERMBLKNAM
Cable tagCBL
Generate reports | 1367

Cable wire or cable core colorCBLWC
Cable entity's handle valueCBLHDL
Component wire list data fields to report
Changes what data fields are reported and the order in which they appear.
Ribbon: Reports tab ➤ Schematic panel ➤ Reports.
Toolbar: Main Electrical 2
Menu: Projects ➤ Reports ➤ Schematic Reports
Command entry: AESCHEMATICREPORT
Select Component Wire List from the report list. Run the report and click
Change Report Format on the Report Generator dialog box.
Lists the available fields for formatting the report (including
user-defined attributes). Select a field from the list to
transfer it into the Fields to Report list.
Available Fields
Lists the fields to display in the report.Fields to Report
Removes the selected field or all fields from the Fields to
Report list.
Remove/Remove All
Moves the selected field up one spot in the Fields to Report
list.
Move Up
Moves the selected field down one spot in the Fields to
Report list.
Move Down
Specifies the vertical and horizontal justification (Top Left,
Middle Center, Bottom Right) of any column and the
Change field name/justification
column label (default is Top Left). The vertical portion of
the justification (Top, Middle, Bottom) is only used for the
Put on Drawing report feature. For example, if you select
"Top Right" the report is right-justified during the display,
printing and when saved to a file (the "top" portion is ig-
1368 | Chapter 18 Reports
nored). If you put the report on the drawing, the report
justification is top right.
Available Fields
Wire numberWIRENO
Wire connection terminal pin numberPIN
Tag ID value (attributes "TAG", "TAG1", "TAGSTRIP", "P_TAG1")TAGNAME
Location attribute valueLOC
Wire layer nameWLAY
parent = 1, child = 2P1C2
Line reference or X-Y grid reference or X-Zone referenceREF
Sheet - the %S valueSH
Drawing name - the %D valueSHDWGNAM
Block nameBLKNAME
Entity handle numberHDL
Wire connection X?TERMxx suffix. (for example, for attribute
X4TERM05 the value would be "05")
XTERM
CableCBL
Cable wire or cable core colorCBLWC
Contact attribute value; Normally Open (NO) or Normally Closed
(NC) contact state
NONC
Drawing section assignmentSEC
Drawing sub-section assignmentSUBSEC
Component wire connection TERMDESCxx valueTERMDESC
Generate reports | 1369

Installation attribute valueINST
Description attribute values 1-3DESC1-3
Manufacturer or vendor name (i.e. Siemens)MFG
Catalog part number assignmentCATALOG
Optional assembly code value used in catalog lookup query to get
part number groups
ASSYCODE
Rating 1 - 12 attribute valuesRATING1-12
Wire connection X?TERMxx attribute's entity handle nameXTERMHDL
Wire connection X?TERMxx attribute's direction code and suffixXDIR
"From" device's drawing DWGIX value as listed in FILETIME table of
project scratch database
DWGIX
Connector details data fields to report
Changes what data fields are reported and the order in which they appear.
Ribbon: Reports tab ➤ Schematic panel ➤ Reports.
Toolbar: Main Electrical 2
Menu: Projects ➤ Reports ➤ Schematic Reports
Command entry: AESCHEMATICREPORT
Select Connector Details from the report list. Run the report and click Change
Report Format on the Report Generator dialog box.
Lists the available fields for formatting the report (including
user-defined attributes). Select a field from the list to
transfer it into the Fields to Report list.
Available Fields
Lists the fields to display in the report.Fields to Report
1370 | Chapter 18 Reports
Removes the selected field or all fields from the Fields to
Report list.
Remove/Remove All
Moves the selected field up one spot in the Fields to Report
list.
Move Up
Moves the selected field down one spot in the Fields to
Report list.
Move Down
Specifies the vertical and horizontal justification (Top Left,
Middle Center, Bottom Right) of any column and the
Change field name/justification
column label (default is Top Left). The vertical portion of
the justification (Top, Middle, Bottom) is only used for the
Put on Drawing report feature. For example, if you select
"Top Right" the report is right-justified during the display,
printing and when saved to a file (the "top" portion is ig-
nored). If you put the report on the drawing, the report
justification is top right.
Available Fields
Tag ID of plug/jack connectorCONNECTOR
Wire connection terminal pin numberPIN
Child contact type; P = Plug and J = JackTYPE
Wire numberWIRENO
Description attribute values 1-3DESC1-3
Manufacturer or vendor name (i.e. Siemens)MFG
Catalog part number assignmentCATALOG
Optional assembly code value used in catalog lookup query to get
part number groups
ASSYCODE
Line reference or X-Y grid reference or X-Zone referenceREF
Installation attribute valueINST
Location attribute valueLOC
Generate reports | 1371

Sheet - the %S valueSH
Drawing name - the %D valueSHDWGNAM
Entity handle number; used internally for programming or customiz-
ation
HDL
Rating 1 - 12 attribute valuesRATING1-12
"From" device's drawing DWGIX value as listed in FILETIME table of
project scratch database; used internally for programming or custom-
ization
DWGIX
Connector plug data fields to report
Changes what data fields are reported and the order in which they appear.
Ribbon: Reports tab ➤ Schematic panel ➤ Reports.
Toolbar: Main Electrical 2
Menu: Projects ➤ Reports ➤ Schematic Reports
Command entry: AESCHEMATICREPORT
Select Connector Plug from the report list. Run the report and click Change
Report Format on the Report Generator dialog box.
Lists the available fields for formatting the report (including
user-defined attributes). Select a field from the list to
transfer it into the Fields to Report list.
Available Fields
Lists the fields to display in the report.Fields to Report
Removes the selected field or all fields from the Fields to
Report list.
Remove/Remove All
Moves the selected field up one spot in the Fields to Report
list.
Move Up
Moves the selected field down one spot in the Fields to
Report list.
Move Down
1372 | Chapter 18 Reports
Specifies the vertical and horizontal justification (Top Left,
Middle Center, Bottom Right) of any column and the
Change field name/justification
column label (default is Top Left). The vertical portion of
the justification (Top, Middle, Bottom) is only used for the
Put on Drawing report feature. For example, if you select
"Top Right" the report is right-justified during the display,
printing and when saved to a file (the "top" portion is ig-
nored). If you put the report on the drawing, the report
justification is top right.
Available Fields
Wire numberWIRENO
Wire connection terminal pin numberPIN
Tag ID value (attributes "TAG", "TAG1", "TAGSTRIP", "P_TAG1")TAGNAME
Location attribute valueLOC
Wire layer nameWLAY
parent = 1, child = 2P1C2
Line reference or X-Y grid reference or X-Zone referenceREF
Sheet - the %S valueSH
Drawing name - the %D valueSHDWGNAM
Block nameBLKNAME
Entity handle numberHDL
Wire connection X?TERMxx attribute's direction code and suffixXDIR
CableCBL
Cable wire or cable core colorCBLWC
Drawing section assignmentSEC
Drawing sub-section assignmentSUBSEC
Generate reports | 1373
Component wire connection TERMDESCxx valueTERMDESC
Installation attribute valueINST
Description attribute values 1-3DESC1-3
Manufacturer or vendor name (for example, Siemens)MFG
Catalog part number assignmentCATALOG
Optional assembly code value used in catalog lookup query to get
part number groups
ASSYCODE
Rating 1 - 12 attribute valuesRATING1-12
Wire connection X?TERMxx attribute's entity handle nameXTERMHDL
"From" device's drawing DWGIX value as listed in FILETIME table of
project scratch database
DWGIX
Connector summary data fields to report
Changes what data fields are reported and the order in which they appear.
Ribbon: Reports tab ➤ Schematic panel ➤ Reports.
Toolbar: Main Electrical 2
Menu: Projects ➤ Reports ➤ Schematic Reports
Command entry: AESCHEMATICREPORT
Select Connector Summary from the report list. Run the report and click
Change Report Format on the Report Generator dialog box.
Lists the available fields for formatting the report (including
user-defined attributes). Select a field from the list to
transfer it into the Fields to Report list.
Available Fields
Lists the fields to display in the report.Fields to Report
1374 | Chapter 18 Reports
Removes the selected field or all fields from the Fields to
Report list.
Remove/Remove All
Moves the selected field up one spot in the Fields to Report
list.
Move Up
Moves the selected field down one spot in the Fields to
Report list.
Move Down
Specifies the vertical and horizontal justification (Top Left,
Middle Center, Bottom Right) of any column and the
Change field name/justification
column label (default is Top Left). The vertical portion of
the justification (Top, Middle, Bottom) is only used for the
Put on Drawing report feature. For example, if you select
"Top Right" the report is right-justified during the display,
printing and when saved to a file (the "top" portion is ig-
nored). If you put the report on the drawing, the report
justification is top right.
Available Fields
Tag ID of plug/jack connectorCONNECTOR
Maximum number of pinsMAX
Count of used or in-use pinsUSED
List of wire connection pin number in usePINSUSED
Pin numbers repeatedREPEATS
Installation attribute valueINST
Location attribute valueLOC
Manufacturer or vendor name (i.e. Siemens)MFG
Catalog part number assignmentCATALOG
Optional assembly code value used in catalog lookup query to get
part number groups
ASSYCODE
Entity handle numberHDL
Generate reports | 1375
"From" device's drawing DWGIX value as listed in FILETIME table of
project scratch database
DWGIX
Component data fields to report
Changes what data fields are reported and the order in which they appear.
Ribbon: Reports tab ➤ Schematic panel ➤ Reports.
Toolbar: Main Electrical 2
Menu: Projects ➤ Reports ➤ Schematic Reports
Command entry: AESCHEMATICREPORT
Select Component from the report list. Run the report and click Change Report
Format on the Report Generator dialog box.
Lists the available fields for formatting the report
(including user-defined attributes). Select a field from
the list to transfer it into the Fields to Report list.
Available Fields
Lists the fields to display in the report.Fields to Report
Removes the selected field or all fields from the Fields
to Report list.
Remove/Remove All
Moves the selected field up one spot in the Fields to
Report list.
Move Up
Moves the selected field down one spot in the Fields
to Report list.
Move Down
Specifies the vertical and horizontal justification (Top
Left, Middle Center, Bottom Right) of any column
Change field name/justification
and the column label (default is Top Left). The vertic-
al portion of the justification (Top, Middle, Bottom)
is only used for the Put on Drawing report feature.
For example, if you select "Top Right" the report is
right-justified during the display, printing and when
saved to a file (the "top" portion is ignored). If you
1376 | Chapter 18 Reports
put the report on the drawing, the report justification
is top right.
Available Fields
Item number assignmentITEM
Tag ID value (attributes "TAG", "TAG1", "TAGSTRIP", "P_TAG1")TAGNAME
Count on panel componentCNT
Units of measurement (i.e. AMPS, VOLTS, mA) on panel componentUNITS
Subassembly quantitySUBQTY
Manufacturer or vendor name (for example, Siemens)MFG
Catalog part number assignmentCAT
Description attribute values 1-3DESC1-3
Line reference or X-Y grid reference or X-Zone referenceREF
Installation attribute valueINST
Location attribute valueLOC
Rating 1 - 12 attribute valuesRATING1-12
Catalog one-line description textCATDESC
QUERY1 field pulled from catalog lookupQUERY1
2nd query field (middle pulldown on Catalog Lookup dialog box)QUERY2
Catalog lookup data fieldsMISC1-2
User fields in catalog lookup databaseUSER1-3
parent = 1, child = 2P1C2
Name of the component's catalog lookup tableWDBLKNAM
Generate reports | 1377

Block nameBLOCK
Entity handle numberHDL
Type of component (J = plug-jack connector, P = PLC I/O, C = cable
marker)
CATEGORY
Optional assembly code value used in catalog lookup query to get
part number groups
ASSYCODE
Sheet - the %S valueSH
Drawing name - the %D valueSHDWGNAM
Drawing SEC assignmentSEC
Drawing SUBSEC assignmentSUBSEC
Component familyFAMILY
Tag-ID of device on alternate drawing typeWDTAGALT
Alternate type of symbol (for example, "PN" for pneumatic, "HY" for
hydraulic)
WDTYPE
AutoCAD drawing .dwg file name (with full path)FILENAME
Missing bill of material data fields to report
Changes what data fields are reported and the order in which they appear.
Ribbon: Reports tab ➤ Schematic panel ➤ Reports.
Toolbar: Main Electrical 2
Menu: Projects ➤ Reports ➤ Schematic Reports
Command entry: AESCHEMATICREPORT
1378 | Chapter 18 Reports
Select Missing Bill of Material from the report list. Run the report and click
Change Report Format on the Report Generator dialog box.
Lists the available fields for formatting the report (including
user-defined attributes). Select a field from the list to
transfer it into the Fields to Report list.
Available Fields
Lists the fields to display in the report.Fields to Report
Removes the selected field or all fields from the Fields to
Report list.
Remove/Remove All
Moves the selected field up one spot in the Fields to Report
list.
Move Up
Moves the selected field down one spot in the Fields to
Report list.
Move Down
Specifies the vertical and horizontal justification (Top Left,
Middle Center, Bottom Right) of any column and the
Change field name/justification
column label (default is Top Left). The vertical portion of
the justification (Top, Middle, Bottom) is only used for the
Put on Drawing report feature. For example, if you select
"Top Right" the report is right-justified during the display,
printing and when saved to a file (the "top" portion is ig-
nored). If you put the report on the drawing, the report
justification is top-right.
Available Fields
Tag ID value (attributes "TAG", "TAG1", "TAGSTRIP", "P_TAG1")TAGNAME
Installation attribute valueINST
Location attribute valueLOC
Description attribute values 1-3DESC1-3
Line reference or X-Y grid reference or X-Zone referenceREF
Catalog database table nameTABNAM
Entity handle numberHDL
Generate reports | 1379

Type of component (J = plug-jack connector, P = PLC I/O, C = cable
marker)
CATEGORY
Sheet - the %S valueSH
Drawing name - the %D valueSHDWGNAM
AutoCAD drawing .dwg file name (with full path)FILENAME
Wire from/to data fields to report
Changes what data fields are reported and the order in which they appear.
Ribbon: Reports tab ➤ Schematic panel ➤ Reports.
Toolbar: Main Electrical 2
Menu: Projects ➤ Reports ➤ Schematic Reports
Command entry: AESCHEMATICREPORT
Select Wire From/To from the report list. Run the report. Select the location
codes for the report and click Change Report Format on the Report Generator
dialog box.
Lists the available fields for formatting the report (including
user-defined attributes). Select a field from the list to
transfer it into the Fields to Report list.
Available Fields
Lists the fields to display in the report.Fields to Report
Removes the selected field or all fields from the Fields to
Report list.
Remove/Remove All
Moves the selected field up one spot in the Fields to Report
list.
Move Up
Moves the selected field down one spot in the Fields to
Report list.
Move Down
Specifies the vertical and horizontal justification (Top Left,
Middle Center, Bottom Right) of any column and the
Change field name/justification
1380 | Chapter 18 Reports
column label (default is Top Left). The vertical portion of
the justification (Top, Middle, Bottom) is only used for the
Put on Drawing report feature. For example, if you select
"Top Right" the report is right-justified during the display,
printing and when saved to a file (the "top" portion is ig-
nored). If you put the report on the drawing, the report
justification is top right.
Available Fields
Wire numberWIRENO
"From" device's location code (must end with "1")LOC1
"From" device's component tag ID (must end with "1")CMP1
"From" device's wire connection terminal number (must end with
"1")
PIN1
"To" device's location code (must end with "2")LOC2
"To" device's component tag ID (must end with "2")CMP2
"To" device's wire connection terminal number (must end with "2")PIN2
Wire layer "From" device (must end with "1")WLAY1
Wire layer "To" device (must end with "2")WLAY2
Line or grid reference location for "From" device (must end with "1")REF1
Line or grid reference location for "To" device (must end with "2")REF2
Sheet assignment for "From" device (must end with "1")SH1
Sheet assignment for "To" device (must end with "2")SH2
Cable tagCBL
Cable wire or cable core colorCBLWC
Cable location attribute valueCBLLOC
Generate reports | 1381
Cable manufacturer attribute valueCBLMFG
Cable catalog part numberCBLCAT
Cable ASSYCODE assignmentCBLASMB
Cable description attribute values 1 - 3DESC1CBL-DESC3CBL
Cable parent or child (parent = 1, child = 2)CBLP1C2
"From" device's component tag and component terminal pin numberCMP:PIN1
"To" device's component tag and component terminal pin numberCMP:PIN2
"From" device's drawing section assignment (must end with "1")SEC1
"From" device's drawing sub-section assignment (must end with "1")SUB1
"To" device's drawing section assignment (must end with "2")SEC2
"To" device's drawing sub-section assignment (must end with "2")SUB2
"From" device's installation code (must end with "1")INST1
"To" device's installation code (must end with "2")INST2
"From" device's IEC tag name (must end with "1")IECCMP1
"To" device's IEC tag name (must end with "2")IECCMP2
"From" device's wire connection TERMDESC value (must end with
"1")
PD1
"To" device's wire connection TERMDESC value (must end with "2")PD2
"From" device's wire connection sequence value (must end with "1")SEQ1
"To" device's wire connection sequence value (must end with "2")SEQ2
"From" device's panel equivalent panel (WDLEV) value (must end with
"1")
PNLWDLEV1
1382 | Chapter 18 Reports
"To" device's panel equivalent panel (WDLEV) value (must end with
"2")
PNLWDLEV2
"From" device's entity handle value (must end with "1")CMPHDL1
"To" device's entity handle value (must end with "2")CMPHDL2
"From" device's drawing DWGIX value as listed in FILETIME table of
project scratch database (must end with "1")
DWGIX1
"To" device's drawing DWGIX value as listed in FILETIME table of
project scratch database (must end with "2")
DWGIX2
"From" device's drawing %D value (must end with "1")DWGNAM1
"To" device's drawing %D value (must end with "2")DWGNAM2
Cable entity's handle valueCBLHDL
Cable entity's installation attribute valueCBLINST
Cable's drawing DWGIX value as listed in FILETIME table of project
scratch database
CBLDWGIX
"From" device's connected wire line entity handle value (must end
with "1")
WIREHDL1
"To" device's connected wire line entity handle value (must end with
"2")
WIREHDL2
"From" device's wire connection point direction - i.e. 4 = connects
from left (must end with "1")
XDIR1
"To" device's wire connection point direction - i.e. 2 = connects from
above (must end with "2")
XDIR2
"From" wire connection's physical X-coordinate value (must end with
"1")
PNLX1
"From" wire connection's physical Y-coordinate value (must end with
"1")
PNLY1
Generate reports | 1383

"From" wire connection's physical Z-coordinate value (must end with
"1")
PNLZ1
Panel wire "From" connection point's direction - i.e. 4 = connects
from left, 1 = right, 2 = above, 8 = below (must end with "1")
PNLXDIR1
"To" wire connection's physical X-coordinate value (must end with
"2")
PNLX2
"To" wire connection's physical Y-coordinate value (must end with
"2")
PNLY2
"To" wire connection's physical Z-coordinate value (must end with
"2")
PNLZ2
Panel wire "To" connection point's direction - i.e. 4 = connects from
left, 1 = right, 2 = above, 8 = below (must end with "2")
PNLXDIR2
Panel layout calculated wire lengthCLEN
"From" device's optional user fieldUSER1_1 to USER20_1
"To" device's optional user fieldUSER1_2 to USER20_2
PLC I/O address and descriptions data fields to
report
Changes what data fields are reported and the order in which they appear.
Ribbon: Reports tab ➤ Schematic panel ➤ Reports.
Toolbar: Main Electrical 2
Menu: Projects ➤ Reports ➤ Schematic Reports
Command entry: AESCHEMATICREPORT
1384 | Chapter 18 Reports
Select PLC I/O Address and Descriptions from the report list. Run the report
and click Change Report Format on the Report Generator dialog box.
Lists the available fields for formatting the report (including
user-defined attributes). Select a field from the list to
transfer it into the Fields to Report list.
Available Fields
Lists the fields to display in the report.Fields to Report
Removes the selected field or all fields from the Fields to
Report list.
Remove/Remove All
Moves the selected field up one spot in the Fields to Report
list.
Move Up
Moves the selected field down one spot in the Fields to
Report list.
Move Down
Specifies the vertical and horizontal justification (Top Left,
Middle Center, Bottom Right) of any column and the
Change field name/justification
column label (default is Top Left). The vertical portion of
the justification (Top, Middle, Bottom) is only used for the
Put on Drawing report feature. For example, if you select
"Top Right" the report is right-justified during the display,
printing and when saved to a file (the "top" portion is ig-
nored). If you put the report on the drawing, the report
justification is top right.
Available Fields
Tag ID value (attributes "TAG", "TAG1", "TAGSTRIP",
"P_TAG1")
TAGNAME
PLC I/O point's address assignmentADDR
Terminal or terminal number assignment (not the STRIP-
ID value)
TERM
Component wire connection TERMDESCxx valueTERMDESC
PLC I/O point description attribute values (lines 1-5)DESCA-DESCE
Line referenceLREF
Generate reports | 1385
Wire numberWIRENO
Installation attribute valueINST
Location attribute valueLOC
Manufacturer or vendor name (for example, Siemens)MFG
Catalog part number assignmentCAT
Optional assembly code value used in catalog lookup query
to get part number groups
ASSYCODE
PLC I/O LINE1 attribute description textLINE1
PLC I/O LINE2 attribute description textLINE2
Entity handle numberHDL
Wire connection X?TERMxx attribute's entity handle nameXTERMHDL
Wire connection X?TERMxx attribute suffix (the "xx")TERMCODE
Sheet - the %S valueSH
Drawing name - the %D valueSHDWGNAM
Drawing's IEC project default - the %P valueIEC_P
Drawing's IEC Installation default - the %I valueIEC_I
Drawing's IEC Location default - the %L valueIEC_L
Drawing section assignmentSEC
Drawing sub-section assignmentSUBSEC
"From" device's drawing DWGIX value as listed in FILETIME
table of project scratch database
DWGIX
Terminal numbers data fields to report
Changes what data fields are reported and the order in which they appear.
1386 | Chapter 18 Reports

Ribbon: Reports tab ➤ Schematic panel ➤ Reports.
Toolbar: Main Electrical 2
Menu: Projects ➤ Reports ➤ Schematic Reports
Command entry: AESCHEMATICREPORT
Select Terminal Numbers from the report list. Run the report and click Change
Report Format on the Report Generator dialog box.
Lists the available fields for formatting the report (including
user-defined attributes). Select a field from the list to
transfer it into the Fields to Report list.
Available Fields
Lists the fields to display in the report.Fields to Report
Removes the selected field or all fields from the Fields to
Report list.
Remove/Remove All
Moves the selected field up one spot in the Fields to Report
list.
Move Up
Moves the selected field down one spot in the Fields to
Report list.
Move Down
Specifies the vertical and horizontal justification (Top Left,
Middle Center, Bottom Right) of any column and the
Change field name/justification
column label (default is Top Left). The vertical portion of
the justification (Top, Middle, Bottom) is only used for the
Put on Drawing report feature. For example, if you select
"Top Right" the report is right-justified during the display,
printing and when saved to a file (the "top" portion is ig-
nored). If you put the report on the drawing, the report
justification is top right.
Available Fields
Terminal strip TAGSTRIP ID nameSTRIP-ID
Terminal or terminal number assignment (not the STRIP-
ID value)
TERM
Generate reports | 1387

Wire numberWIRENO
Installation attribute valueINST
Location attribute valueLOC
Line reference or X-Y grid reference or X-Zone referenceREF
Sheet - the %S valueSH
Drawing name - the %D valueSHDWGNAM
Block nameBLKNAME
Manufacturer or vendor name (i.e. Siemens)MFG
Catalog part number assignmentCAT
Optional assembly code value used in catalog lookup query
to get part number groups
ASSYCODE
Description attribute values 1-3DESC1-3
Rating 1 - 12 attribute valuesRATNG1-12
Entity handle numberHDL
"From" device's drawing DWGIX value as listed in FILETIME
table of project scratch database
DWGIX
PLC modules used so far data fields to report
Changes what data fields are reported and the order in which they appear.
Ribbon: Reports tab ➤ Schematic panel ➤ Reports.
Toolbar: Main Electrical 2
Menu: Projects ➤ Reports ➤ Schematic Reports
Command entry: AESCHEMATICREPORT
1388 | Chapter 18 Reports
Select PLC Modules Used So Far from the report list. Run the report and click
Change Report Format on the Report Generator dialog box.
Lists the available fields for formatting the report (including
user-defined attributes). Select a field from the list to
transfer it into the Fields to Report list.
Available Fields
Lists the fields to display in the report.Fields to Report
Removes the selected field or all fields from the Fields to
Report list.
Remove/Remove All
Moves the selected field up one spot in the Fields to Report
list.
Move Up
Moves the selected field down one spot in the Fields to
Report list.
Move Down
Specifies the vertical and horizontal justification (Top Left,
Middle Center, Bottom Right) of any column and the
Change field name/justification
column label (default is Top Left). The vertical portion of
the justification (Top, Middle, Bottom) is only used for the
Put on Drawing report feature. For example, if you select
"Top Right" the report is right-justified during the display,
printing and when saved to a file (the "top" portion is ig-
nored). If you put the report on the drawing, the report
justification is top right.
Available Fields
PLC beginning addressADDR_BEG
PLC ending addressADDR_END
PLC tag valueTAG
Manufacturer or vendor name (i.e. Siemens)MFG
Catalog part number assignmentCAT
Optional assembly code value used in catalog lookup query to get
part number groups
ASSYCODE
Generate reports | 1389

PLC I/O LINE1 attribute description textLINE1
PLC I/O LINE2 attribute description textLINE2
Installation attribute valueINST
Location attribute valueLOC
Line reference or X-Y grid reference or X-Zone referenceREF
Sheet - the %S valueSH
Drawing name - the %D valueSHDWGNAM
Drawing section assignmentSEC
Drawing sub-section assignmentSUBSEC
General description line of textDESC
Entity handle numberHDL
"From" device's drawing DWGIX value as listed in FILETIME table of
project scratch database
DWGIX
Terminal plan data fields to report
Changes what data fields are reported and the order in which they appear.
Ribbon: Reports tab ➤ Schematic panel ➤ Reports.
Toolbar: Main Electrical 2
Menu: Projects ➤ Reports ➤ Schematic Reports
Command entry: AESCHEMATICREPORT
1390 | Chapter 18 Reports
Select Terminal Plan from the report list. Run the report and click Change
Report Format on the Report Generator dialog box.
Lists the available fields for formatting the report
(including user-defined attributes). Select a field from
the list to transfer it into the Fields to Report list.
Available Fields
Lists the fields to display in the report.Fields to Report
Removes the selected field or all fields from the Fields
to Report list.
Remove/Remove All
Moves the selected field up one spot in the Fields to
Report list.
Move Up
Moves the selected field down one spot in the Fields
to Report list.
Move Down
Specifies the vertical and horizontal justification (Top
Left, Middle Center, Bottom Right) of any column
Change field name/justification
and the column label (default is Top Left). The vertic-
al portion of the justification (Top, Middle, Bottom)
is only used for the Put on Drawing report feature.
For example, if you select "Top Right" the report is
right-justified during the display, printing and when
saved to a file (the "top" portion is ignored). If you
put the report on the drawing, the report justification
is top right.
Available Fields
"From" device's installation codeINST1
"From" device's location code (must end with "1")LOC1
"From" device's component tag ID (must end with "1")CMP1
"From" device's wire connection terminal number (must end with
"1")
PIN1
"From" device's wire connection TERMDESC value (must end with
"1")
PD1
Generate reports | 1391
Layer of wire connecting to device component 1 (must end with "1")LAYCMP1
Cable ID tied to device component 1 (must end with "1")CBL1
Cable wire color tied to device component 1 (must end with "1")CBLWC1
Wire number tied to device component 1 (must end with "1")WNUM1
Layer of wire connecting to terminal side 1 (must end with "1")LAYTRM1
Terminal strip TAGSTRIP ID nameSTRIP-ID
Terminal pin TERMDESC value for the first wire connection (must end
with "1")
TD1
Terminal or terminal number assignment (not the STRIP-ID value)TERM
Terminal pin TERMDESC value for the second wire connection (must
end with "2")
TD2
Terminal symbol's installation valueTINST
Terminal symbol's location valueTLOC
Layer of wire connecting to terminal side 2 (must end with "2")LAYTRM2
Wire number tied to device component 2 (must end with "2")WNUM2
Cable ID tied to device component 2 (must end with "2")CBL2
Cable wire color tied to device component 2 (must end with "2")CBLWC2
Layer of wire connecting to device component 2 (must end with "2")LAYCMP2
"To" device's wire connection TERMDESC value (must end with "2")PD2
"To" device's wire connection terminal number (must end with "2")PIN2
"To" device's component tag ID (must end with "2")CMP2
"To" device's installation codeINST2
"To" device's location code (must end with "2")LOC2
1392 | Chapter 18 Reports

Sheet - the %S valueSH
Line reference or X-Y grid reference or X-Zone referenceREF
Entity handle numberHDL
"From" device's wire connection point direction - i.e. 4 = connects
from left (must end with "1")
XDIR1
"To" device's wire connection point direction - i.e. 2 = connects from
above (must end with "2")
XDIR2
"From" device's drawing DWGIX value as listed in FILETIME table of
project scratch database
DWGIX
Wire label data fields to report
Changes what data fields are reported and the order in which they appear.
Ribbon: Reports tab ➤ Schematic panel ➤ Reports.
Toolbar: Main Electrical 2
Menu: Projects ➤ Reports ➤ Schematic Reports
Command entry: AESCHEMATICREPORT
Select Wire Label from the report list. Run the report and click Wire Label on
the Report Generator dialog box.
Lists the available fields for formatting the report (including
user-defined attributes). Select a field from the list to
transfer it into the Fields to Report list.
Available Fields
Lists the fields to display in the report.Fields to Report
Removes the selected field or all fields from the Fields to
Report list.
Remove/Remove All
Moves the selected field up one spot in the Fields to Report
list.
Move Up
Generate reports | 1393
Moves the selected field down one spot in the Fields to
Report list.
Move Down
Specifies the special character to separate the selected fields.
Enter a special character to separate the selected fields in-
Separator
side the list box. Do this by selecting a field from the Fields
to Report list, define the separator, select another field,
define a separator, and so on. You can also select the sep-
arator from a list.
The "\n" symbol stands for the new line. When you use
this as separator, the field displays in the new (next) line.
Available Fields
Wire numberWIRENO
Component that connects to a wire (at any end) and is written to
the wire label
CMP
Wire connection terminal pin number of the component that the
wire connects with
PIN
Wire conduit routing data fields to display
Changes what data fields are reported and the order in which they appear.
Ribbon: Panel tab ➤ Conduit Tools panel ➤ Conduit Reports drop-down
➤ Routing Report.
Toolbar: Conduit Reports
Menu: Panel Layout ➤ Conduit Marker Tools ➤ Wire/Conduit Routing
Report
Command entry: AEROUTINGREPORT
Run the report and click Change Report Format on the Report Generator dialog
box.
Lists the available fields for formatting the report (including
user-defined attributes). Select a field from the list to
transfer it into the Fields to Report list.
Available Fields
1394 | Chapter 18 Reports
Lists the fields to display in the report.Fields to Report
Removes the selected field or all fields from the Fields to
Report list.
Remove/Remove All
Moves the selected field up one spot in the Fields to Report
list.
Move Up
Moves the selected field down one spot in the Fields to
Report list.
Move Down
Specifies the vertical and horizontal justification (Top Left,
Middle Center, Bottom Right) of any column and the
Change field name/justification
column label (default is Top Left). The vertical portion of
the justification (Top, Middle, Bottom) is only used for the
Put on Drawing report feature. For example, if you select
"Top Right" the report is right-justified during the display,
printing and when saved to a file (the "top" portion is ig-
nored). If you put the report on the drawing, the report
justification is top right.
Available Fields
Cable tagCBL
Cable wire or cable core colorCBLWC
Wire numberWIRENO
"From" device's installation code (must end with "1")INST1
"From" device's location code (must end with "1")LOC1
"From" device's component tag ID (must end with "1")CMP1
"From" device's wire connection terminal number (must end with
"1")
PIN1
"To" device's installation code (must end with "2")INST2
"To" device's location code (must end with "2")LOC2
"To" device's component tag ID (must end with "2")CMP2
Generate reports | 1395

"To" device's wire connection terminal number (must end with "2")PIN2
Wire layer nameWLAY
Conduit routing path descriptionROUTING
Cross-reference table data fields to display
Changes what data fields are reported and the order in which they appear.
Ribbon: Project tab ➤ Project Tools panel ➤ Manager.
Toolbar: Main Electrical 2
Menu: Projects ➤ Project ➤ Project Manager
Command entry: AEPROJECT
In the Project Manager, right-click the project or drawing name and select
Properties. Click the Cross-references tab. In the component Cross-reference
Display section, select Table Format and click Setup. In the Table
Cross-reference Format Setup dialog box, Table Style section, click Define
Columns.
NOTE This can also be accessed from the Insert/Edit Component, Cross-reference
section. Select Component override and click Setup. In the Cross-reference
component override dialog box, select Table Format and click Setup.
Lists the available fields for formatting the report (including
user-defined attributes). Select a field from the list to
transfer it into the Fields to Report list.
Available Fields
Lists the fields to display in the report.Fields to Report
Removes the selected field or all fields from the Fields to
Report list.
Remove/Remove All
Moves the selected field up one spot in the Fields to Report
list.
Move Up
1396 | Chapter 18 Reports
Moves the selected field down one spot in the Fields to
Report list.
Move Down
Specifies the vertical and horizontal justification (Top Left,
Middle Center, Bottom Right) of any column and the
Change field name/justification
column label (default is Top Left). The vertical portion of
the justification (Top, Middle, Bottom) is only used for the
Put on Drawing report feature. For example, if you select
"Top Right" the report is right-justified during the display,
printing and when saved to a file (the "top" portion is ig-
nored). If you put the report on the drawing, the report
justification is top right.
Available Fields
Wire number - first wire connection on symbol (TERM01)W1
Terminal pin number - first wire connection (TERM01)T1
Contact type - can be user defined and come from the Contact attrib-
ute on the child symbol - this gets overwritten from the contact
mapping in the dialog box
TYPE
Terminal pin number - second wire connection (TERM02)T2
Wire number - second wire connection (TERM02)W2
Line reference or X-Y grid reference or X-Zone referenceREF
Sheet - the %S valueSH
Drawing name - the %D valueSHDWGNAM
AutoCAD drawing file name (.dwg)FILENAME
AutoCAD drawing file name (.dwg) with complete pathFULLFILENAME
Data fields to display
Changes what data fields are reported and the order in which they appear.
Generate reports | 1397

Ribbon: Schematic tab ➤ Edit Components panel ➤ Modify Component
Cross-Reference drop-down ➤ Cross-Reference Table.
Menu: Components ➤ Cross-Reference ➤ Cross-Reference Table
Command entry: AESHOWXREFTABLE
Select the component to evaluate. Click Change Report Format on the Report
Generator dialog box.
Lists the available fields for formatting the report (including
user-defined attributes). Select a field from the list to
transfer it into the Fields to Report list.
Available Fields
Lists the fields to display in the report.Fields to Report
Removes the selected field or all fields from the Fields to
Report list.
Remove/Remove All
Moves the selected field up one spot in the Fields to Report
list.
Move Up
Moves the selected field down one spot in the Fields to
Report list.
Move Down
Specifies the vertical and horizontal justification (Top Left,
Middle Center, Bottom Right) of any column and the
Change field name/justification
column label (default is Top Left). The vertical portion of
the justification (Top, Middle, Bottom) is only used for the
Put on Drawing report feature. For example, if you select
"Top Right" the report is right-justified during the display,
printing and when saved to a file (the "top" portion is ig-
nored). If you put the report on the drawing, the report
justification is top right.
Available Fields
Wire number - first wire connection on symbol (TERM01)W1
Terminal pin number - first wire connection (TERM01)T1
1398 | Chapter 18 Reports
Contact type - can be user defined and come from the Contact attrib-
ute on the child symbol - this gets overwritten from the contact
mapping in the dialog box
TYPE
Terminal pin number - second wire connection (TERM02)T2
Wire number - second wire connection (TERM02)W2
Line reference or X-Y grid reference or X-Zone referenceREF
Sheet - the %S valueSH
Drawing name - the %D valueSHDWGNAM
AutoCAD drawing file name (.dwg)FILENAME
AutoCAD drawing file name (.dwg) with complete pathFULLFILENAME
Schematic Reports
Generate schematic reports
AutoCAD Electrical has multiple schematic reports that you can run.
Bill of Materials reports
The Bill of Material reports report only components with assigned BOM
information. These reports provide the following BOM-related features:
■Extract BOM reports on demand, active drawing, or project-wide
■Extract BOM reports on a per-location basis
■Change BOM report format
■Output BOM reports to ASCII report file
■Export BOM data to a spreadsheet or database program
■Insert BOM as a table right on an AutoCAD drawing
■List parent or stand-alone components without catalog information
Schematic Reports | 1399
Component report
This report performs a project-wide extract of all components found on your
wiring diagram set. This data includes component tags, location codes, location
reference, description text, ratings, catalog information, and block names.
Wire From/To report
If you marked components and/or terminals with location codes, you can
make good use of this report. This report first extracts component, terminal,
location code, and wire connection information from every drawing in the
project set. Then it displays a location list dialog box where you can make
your report's "from" and "to" location selections. All the location codes
AutoCAD Electrical found on the drawing set are listed on each side of this
dialog box. Location "(??)" is also included in the list if AutoCAD Electrical
found any component or stand-alone terminal that did not have an assigned
location code.
Component Wire List report
This report extracts the component wire connection data and displays it in a
dialog box. Each entry shows a connection to a component, the wire number,
component tag name, terminal pin number, component location code (if
present), and the layer that the connected wire is on.
Connector Plug report
This report extracts plug/jack connection reports and optionally generates pin
charts. Since each wire tied to each connector pin displays in the report, each
pin has two entries. One entry is for the 'in' wire and the other is for the 'out'
wire. To create a more useful report, select the PIN chart 'on' radio button at
the bottom of the Report Generator dialog box. Make sure the Remove
duplicated pin numbers toggle is checked and click OK. It reformats the report
so each pin is listed only once.
PLC I/O Address and Description report
This report lists each PLC module and its beginning and ending I/O address
numbers. It scans your drawing set and returns all individual I/O connection
points it finds. It includes up to five lines of description text and the connected
wire number for each I/O point.
PLC I/O Component Connection report
This report scans the selected drawings and returns information about any
components connected to PLC I/O points. Data for the report starts at each
1400 | Chapter 18 Reports
wire connection point and follows the connected wire. The first terminal
symbol, fuse symbol, or connector symbol that is hit reports in the column
marked with default "TERMTAG" label. The first schematic component reports
in the column with the "CMPTAG" label. If there are multiple instances, the
one closest to the PLC I/O point is the one that shows up in the report column.
PLC Modules Used So Far report
For this report, AutoCAD Electrical quickly scans the wiring diagram set. It
returns in a few moments and displays the I/O modules it finds. Each entry
shows the beginning and ending address of the module.
Terminal Numbers report
This project-wide, stand-alone report lists all instances of terminals. Each entry
includes information tied directly to the terminal such as terminal number,
terminal strip number, and location code.
Terminal Plan report
This project-wide, stand-alone report does a wire network extraction. It takes
longer to generate, but the report includes wire number and wire layer name
information.
Connector Summary report
This report lists a single line for each connector tag along with pins used,
maximum pins allowed (if the parent carries the PINLIST information), and
a list of any repeated pin numbers used. You can run this report across the
project or for a single component.
Connector Details report
This report extracts the component wire connection data and displays it in a
dialog box. Each entry shows a connection to a component, the wire number,
component tag name, terminal pin number, component location code (if
present), and the layer that the connected wire is on.
Cable Summary report
This project-wide cable conductor report gives a report listing all the cable
marker tags (parent tags) found.
Generate schematic reports | 1401

Cable From/To report
This project-wide cable conductor report lists the "from / to" for each cable
conductor. It also lists the parent cable number of the conductor, conductor
color code, and wire number (if present).
Wire Label report
This report lists wire markers/labels and can be used to create physical wire
or cable labels.
Generate a schematic report
Generates schematic reports, such as Bills of Material, Component lists, Wire
From/To, and PLC descriptions.
Select which drawings to process. The report displays options to:
■Change included fields.
■Add or modify data.
■Print.
■Save to a file.
■Put on the drawings as table objects.
1Click Reports tab ➤ Schematic panel ➤ Reports.
2Select which schematic report to generate from the report list.
3Select to process the project, current drawing, or selected components.
4Specify any report options (if applicable).
5Select installation or location codes to extract (if applicable).
6Indicate whether to update the project database or the wire connection
table with out-of-date drawings.
7Click OK.
1402 | Chapter 18 Reports

8In the Report Generator Window, sort, format, or edit the data before
sending the information to the printer, file, or the active drawing file.
■Edit Mode: Modifies the report before you insert it to your drawing.
You can move data up or down in the report, add lines from a catalog,
and delete lines.
■Put on Drawing: Opens the Table Generation Setup dialog box for
specifying how to display your report as a table on your drawing.
■Save to File: Saves the report to a file. Select the type of output file
from the Save Report to File dialog box. You can define multiple file
outputs. Choose from: ASCII report, Comma Delimited, Excel
spreadsheet, Access database, and XML format.
■User Post: Switch specific functions against the data in the report.
When you select a switch, the LISP routine runs a function against
the data and returns to the Report Generator Window.
■Change Report Format: Changes what data fields are reported and
the order in which they appear. You can change the justification of
any column and the column label. The Description field can be
multi-lined. If you include the Description field in your report, you
choose which lines make up this field. Switch on and off the specific
fields to define the Description.
9Once all modifications have been made to the report, save the report,
place the report on the drawing as a table, or print the report.
Schematic bill of material
The Bill of Material reports report only components with assigned BOM
information.
Ribbon: Reports tab ➤ Schematic panel ➤ Reports.
Toolbar: Main Electrical 2
Menu: Projects ➤ Reports ➤ Schematic Reports
Command entry: AESCHEMATICREPORT
Select Bill of Material from the report list.
Specify whether to process the project or the active drawing.
Generate schematic reports | 1403
Category
By default, the report lists schematic components. Select a different Category
to run the report for one-line, one-line bus-tap, hydraulic, pneumatic, P&ID,
or user-defined components. These components are each identified by a unique
WDTYPE attribute on page 325 value.
Include options
Specifies to include cable information in the report.Include Cables
Specifies to include connector information in the
report.
Include Connectors
Specifies to include jumper information in the re-
port.
Include Jumpers
Specifies to cable, connector, and jumper informa-
tion in the report.
All the above
Lists each individual Tag-ID and terminal number
combination if selected. If unselected (default), the
List terminal numbers
terminals are combined on the same Tag-ID strip
into a single entry with a quantity.
Display option
Identical component or component/assemblies are
tallied and reported as single line items (example:
Normal Tallied Format
Red push-button operator 800EP-F4 with 800E-A3L
latch and two 800E-3X10 N.O. contact blocks).
Identical component or component/assemblies
with the same installation/location codes are tallied
and reported as single line items.
Normal Tallied Format (Group by Installa-
tion/Location)
Each part becomes its own line item (example: no
longer any sub-assembly items) and each is tallied
Display in Tallied Purchase List Format
across all component types. For example, all 800E-
3X10 N.O. contact blocks for all components are
reported as a single line item.
1404 | Chapter 18 Reports
All instances of a given component-ID or terminal
tag are processed together and then reported as a
single entry.
Display in By TAG Format
Installation Codes to Extract
Extracts only the information for components with specific installation values.
Indicate to process all components that carry part number values, components
without an installation code, or only components marked with a location
code that matches that entered in the edit box. Wild-cards are supported.
Once you pick Named Installation, type the installation code in the box or
click List: Drawing or List: Project to select from a list of used installation
codes. You can also create a report from multiple installation codes. AutoCAD
Electrical automatically creates a comma-delimited list for the named
installation search.
Location Codes to Extract
Extracts only the information for components with specific location values.
Indicate to process all components that carry part number values, components
without a location code, or only components marked with a location code
that matches that entered in the edit box. For example, BOM report for
components marked "OP STA 2". Wild-cards are supported.
Once you pick Named Location, type the location code in the box or click
List: Drawing or List: Project to select from a list of used location codes. You
can also create a report from multiple location codes. AutoCAD Electrical
automatically creates a comma-delimited list for the named location search.
Freshen Project Database
Specifies for AutoCAD Electrical to update the project database to include any
out-of-date drawing files.
Format
Changes the format of the extracted data. The subdialog box lists the format
files to select from.
Schematic cable summary
This project-wide cable conductor report gives a report listing all of the cable
marker tags (parent tags) found.
Generate schematic reports | 1405

Ribbon: Reports tab ➤ Schematic panel ➤ Reports.
Toolbar: Main Electrical 2
Menu: Projects ➤ Reports ➤ Schematic Reports
Command entry: AESCHEMATICREPORT
Select Cable Summary from the report list.
Category
By default, the report lists schematic components. Select a different Category
to run the report for one-line, one-line bus-tap, hydraulic, pneumatic, P&ID,
or user-defined components. These components are each identified by a unique
WDTYPE attribute on page 325 value.
Installation Codes to Extract
Extracts only the information for components with specific installation values.
Indicate to process all components that carry part number values, components
without an installation code, or only components marked with a location
code that matches that entered in the edit box. Wild-cards are supported.
Once you pick Named Installation, type the installation code in the box or
click List: Drawing or List: Project to select from a list of used installation
codes. You can also create a report from multiple installation codes. AutoCAD
Electrical automatically creates a comma-delimited list for the named
installation search.
Location Codes to Extract
Extracts only the information for components with specific location values.
Indicate to process all components that carry part number values, components
without a location code, or only components marked with a location code
that matches that entered in the edit box. For example, BOM report for
components marked "OP STA 2". Wild-cards are supported.
Once you pick Named Location, type the location code in the box or click
List: Drawing or List: Project to select from a list of used location codes. You
can also create a report from multiple location codes. AutoCAD Electrical
automatically creates a comma-delimited list for the named location search.
1406 | Chapter 18 Reports

Freshen Project Database
Specifies for AutoCAD Electrical to update the project database to include any
out-of-date drawing files.
Format
Changes the format of the extracted data. The subdialog box lists the format
files to select from.
Schematic cable from/to
This project-wide cable conductor report lists the "from / to" for each cable
conductor. It also lists the parent cable number of the conductor, conductor
color code, and wire number (if present).
Ribbon: Reports tab ➤ Schematic panel ➤ Reports.
Toolbar: Main Electrical 2
Menu: Projects ➤ Reports ➤ Schematic Reports
Command entry: AESCHEMATICREPORT
Select Cable From/To from the report list.
Specify whether to process the project, the active drawing, or selected cables.
Category
By default, the report lists schematic components. Select a different Category
to run the report for one-line, one-line bus-tap, hydraulic, pneumatic, P&ID,
or user-defined components. These components are each identified by a unique
WDTYPE attribute on page 325 value.
Freshen Project Database
Specifies for AutoCAD Electrical to update the project database to include any
out-of-date drawing files.
Format
Changes the format of the extracted data. The dialog box lists the format files
to select from.
Schematic PLC I/O component connection
Generate schematic reports | 1407

This report scans the selected drawings and returns information about any
components connected to PLC I/O points. Data for the report starts at each
wire connection point and follows the connected wire. The first terminal
symbol, fuse symbol, or connector symbol that is hit reports in the column
marked with default "TERMTAG" label. The first schematic component reports
in the column with the "CMPTAG" label. If there are multiple instances, the
one closest to the PLC I/O point is the one that shows up in the report column.
Ribbon: Reports tab ➤ Schematic panel ➤ Reports.
Toolbar: Main Electrical 2
Menu: Projects ➤ Reports ➤ Schematic Reports
Command entry: AESCHEMATICREPORT
Select PLC I/O Component Connection from the report list.
Specify whether to process the project or the active drawing.
Installation Codes to Extract
Extracts only the information for components with specific installation values.
Indicate to process all components that carry part number values, components
without an installation code, or only components marked with a location
code that matches that entered in the edit box. Wild-cards are supported.
Once you pick Named Installation, type the installation code in the box or
click List: Drawing or List: Project to select from a list of used installation
codes. You can also create a report from multiple installation codes. AutoCAD
Electrical automatically creates a comma-delimited list for the named
installation search.
Location Codes to Extract
Extracts only the information for components with specific location values.
Indicate to process all components that carry part number values, components
without a location code, or only components marked with a location code
that matches that entered in the edit box. For example, BOM report for
components marked "OP STA 2". Wild-cards are supported.
Once you pick Named Location, type the location code in the box or click
List: Drawing or List: Project to select from a list of used location codes. You
1408 | Chapter 18 Reports

can also create a report from multiple location codes. AutoCAD Electrical
automatically creates a comma-delimited list for the named location search.
List
Lists drawings that appear to be out-of-date with the wire connection table
of the project.
Freshen Wire Connection Table
Specifies for AutoCAD Electrical to update the wire connection table to include
any out-of-date drawing files.
Format
Changes the format of the extracted data. The subdialog box lists the format
files to select from.
Schematic component wire list
This report extracts the component wire connection data and shows it in a
dialog box. Each entry shows a connection to a component, the wire number,
component tag name, terminal pin number, component location code (if
present), and the layer that the connected wire is on.
Ribbon: Reports tab ➤ Schematic panel ➤ Reports.
Toolbar: Main Electrical 2
Menu: Projects ➤ Reports ➤ Schematic Reports
Command entry: AESCHEMATICREPORT
Select Component Wire List from the report list.
Specify whether to process the project, active drawing, or select components.
Options
Specifies to include stand-alone terminals or plug-jack connectors in the report.
Installation Codes to Extract
Extracts only the information for components with specific installation values.
Indicate to process all components that carry part number values, components
Generate schematic reports | 1409

without an installation code, or only components marked with a location
code that matches that entered in the edit box. Wild-cards are supported.
Once you pick Named Installation, type the installation code in the box or
click List: Drawing or List: Project to select from a list of used installation
codes. You can also create a report from multiple installation codes. AutoCAD
Electrical automatically creates a comma-delimited list for the named
installation search.
Location Codes to Extract
Extracts only the information for components with specific location values.
Indicate to process all components that carry part number values, components
without a location code, or only components marked with a location code
that matches that entered in the edit box. For example, BOM report for
components marked "OP STA 2". Wild-cards are supported.
Once you pick Named Location, type the location code in the box or click
List: Drawing or List: Project to select from a list of used location codes. You
can also create a report from multiple location codes. AutoCAD Electrical
automatically creates a comma-delimited list for the named location search.
List
Lists drawings that appear to be out-of-date with the wire connection table
of the project.
Freshen Wire Connection Table
Specifies for AutoCAD Electrical to update the wire connection table to include
any out-of-date drawing files.
Format
Changes the format of the extracted data. The subdialog box lists the format
files to select from.
Schematic connector details
AutoCAD Electrical extracts the component wire connection data and displays
it in a dialog box. Each entry shows a connection to a component, the wire
number, component tag name, terminal pin number, component location
code (if present), and the layer that the connected wire is on.
Ribbon: Reports tab ➤ Schematic panel ➤ Reports.
1410 | Chapter 18 Reports

Toolbar: Main Electrical 2
Menu: Projects ➤ Reports ➤ Schematic Reports
Command entry: AESCHEMATICREPORT
Select Connector Details from the report list.
Specify whether to process the project or a single pick.
Category
By default, the report lists schematic components. Select a different Category
to run the report for one-line, one-line bus-tap, hydraulic, pneumatic, P&ID,
or user-defined components. These components are each identified by a unique
WDTYPE attribute on page 325 value.
Installation Codes to Extract
Extracts only the information for components with specific installation values.
Indicate to process all components that carry part number values, components
without an installation code, or only components marked with a location
code that matches that entered in the edit box. Wild cards are supported.
After you click Named Installation, type the installation code in the box, or
click List: Drawing or List: Project to select from a list of used installation
codes. You can also create a report from multiple installation codes. AutoCAD
Electrical automatically creates a comma-delimited list for the named
installation search.
Location Codes to Extract
Extracts only the information for components with specific location values.
Indicate to process all components that carry part number values, components
without a location code, or only components marked with a location code
that matches that entered in the edit box. For example, BOM report for
components marked "OP STA 2". Wild cards are supported.
After you click Named Location, type the location code in the box, or click
List: Drawing or List: Project to select from a list of used location codes. You
can also create a report from multiple location codes. AutoCAD Electrical
automatically creates a comma-delimited list for the named location search.
Generate schematic reports | 1411

Freshen Project Database
Specifies for AutoCAD Electrical to update the project database to include any
out-of-date drawing files.
Format
Changes the format of the extracted data. The dialog box lists the format files
to select from.
Schematic connector plug
This report extracts plug/jack connection reports and optionally generates pin
charts. Since each wire tied to each connector pin displays in the report, each
pin has two entries - one for the 'in' wire and one for the 'out' wire. To create
a more useful report, select the PIN chart 'on' radio button at the bottom of
the Report Generator dialog box. Make sure the Remove duplicated pin
numbers toggle is checked and click OK. It reformats the report so each pin
is listed only once.
Ribbon: Reports tab ➤ Schematic panel ➤ Reports.
Toolbar: Main Electrical 2
Menu: Projects ➤ Reports ➤ Schematic Reports
Command entry: AESCHEMATICREPORT
Select Connector Plug from the report list.
Specify whether to process the project, the active drawing, or selected wires.
Category
By default, the report lists schematic components. Select a different Category
to run the report for one-line, one-line bus-tap, hydraulic, pneumatic, P&ID,
or user-defined components. These components are each identified by a unique
WDTYPE attribute on page 325 value.
Installation Codes to Extract
Extracts only the information for components with specific installation values.
Indicate to process all components that carry part number values, components
without an installation code, or only components marked with a location
code that matches that entered in the edit box. Wild cards are supported.
1412 | Chapter 18 Reports

After you click Named Installation, type the installation code in the box, or
click List: Drawing or List: Project to select from a list of used installation
codes. You can also create a report from multiple installation codes. AutoCAD
Electrical automatically creates a comma-delimited list for the named
installation search.
Location Codes to Extract
Extracts only the information for components with specific location values.
Indicate to process all components that carry part number values, components
without a location code, or only components marked with a location code
that matches that entered in the edit box. For example, BOM report for
components marked "OP STA 2." Wild cards are supported.
After you click Named Location, type the location code in the box, or click
List: Drawing or List: Project to select from a list of used location codes. You
can also create a report from multiple location codes. AutoCAD Electrical
automatically creates a comma-delimited list for the named location search.
List
Lists drawings that appear to be out-of-date with the wire connection table
of the project.
Freshen Wire Connection Table
Specifies for AutoCAD Electrical to update the wire connection table to include
any out-of-date drawing files.
Format
Changes the format of the extracted data. The dialog box lists the format files
to select from.
Schematic connector summary
This report lists a single line for each connector tag along with pins used,
maximum pins allowed (if the parent carries the PINLIST information), and
a list of any repeated pin numbers used. You can run this report across the
project or for a single component.
Ribbon: Reports tab ➤ Schematic panel ➤ Reports.
Generate schematic reports | 1413
Toolbar: Main Electrical 2
Menu: Projects ➤ Reports ➤ Schematic Reports
Command entry: AESCHEMATICREPORT
Select Connector Summary from the report list.
Specify whether to process the project or a single pick.
Category
By default, the report lists schematic components. Select a different Category
to run the report for one-line, one-line bus-tap, hydraulic, pneumatic, P&ID,
or user-defined components. These components are each identified by a unique
WDTYPE attribute on page 325 value.
Installation Codes to Extract
Extracts only the information for components with specific installation values.
Indicate to process all components that carry part number values, components
without an installation code, or only components marked with a location
code that matches that entered in the edit box. Wild cards are supported.
After you click Named Installation, type the installation code in the box, or
click List: Drawing or List: Project to select from a list of used installation
codes. You can also create a report from multiple installation codes. AutoCAD
Electrical automatically creates a comma-delimited list for the named
installation search.
Location Codes to Extract
Extracts only the information for components with specific location values.
Indicate to process all components that carry part number values, components
without a location code, or only components marked with a location code
that matches that entered in the edit box. For example, BOM report for
components marked "OP STA 2." Wild cards are supported.
After you click Named Location, type the location code in the box, or click
List: Drawing or List: Project to select from a list of used location codes. You
can also create a report from multiple location codes. AutoCAD Electrical
automatically creates a comma-delimited list for the named location search.
1414 | Chapter 18 Reports

Freshen Project Database
Specifies for AutoCAD Electrical to update the project database to include any
out-of-date drawing files.
Format
Changes the format of the extracted data. The dialog box lists the format files
to select from.
Schematic component
This report extracts the component wire connection data and displays it in a
dialog box. Each entry shows a connection to a component, the wire number,
component tag name, terminal pin number, component location code (if
present), and the layer that the connected wire is on.
Ribbon: Reports tab ➤ Schematic panel ➤ Reports.
Toolbar: Main Electrical 2
Menu: Projects ➤ Reports ➤ Schematic Reports
Command entry: AESCHEMATICREPORT
Select Component from the report list.
Specify whether to process the project or the active drawing.
Category
By default, the report lists schematic components. Select a different Category
to run the report for one-line, one-line bus-tap, hydraulic, pneumatic, P&ID,
or user-defined components. These components are each identified by a unique
WDTYPE attribute on page 325 value.
Options
Specifies to include components, cable markers, or connectors in the report.
You can also indicate to include the children for the selected options.
Installation Codes to Extract
Extracts only the information for components with specific installation values.
Indicate to process all components that carry part number values, components
Generate schematic reports | 1415

without an installation code, or only components marked with a location
code that matches that entered in the edit box. Wild cards are supported.
After you click Named Installation, type the installation code in the box, or
click List: Drawing or List: Project to select from a list of used installation
codes. You can also create a report from multiple installation codes. AutoCAD
Electrical automatically creates a comma-delimited list for the named
installation search.
Location Codes to Extract
Extracts only the information for components with specific location values.
Indicate to process all components that carry part number values, components
without a location code, or only components marked with a location code
that matches that entered in the edit box. For example, BOM report for
components marked "OP STA 2." Wild cards are supported.
After you click Named Location, type the location code in the box, or click
List: Drawing or List: Project to select from a list of used location codes. You
can also create a report from multiple location codes. AutoCAD Electrical
automatically creates a comma-delimited list for the named location search.
Freshen Project Database
Specifies for AutoCAD Electrical to update the project database to include any
out-of-date drawing files.
Format
Changes the format of the extracted data. The dialog box lists the format files
to select from.
Schematic missing bill of material
Extracts the information from the active drawing or project and displays a list
of parent or stand-alone components without catalog information.
Ribbon: Reports tab ➤ Schematic panel ➤ Reports.
Toolbar: Main Electrical 2
Menu: Projects ➤ Reports ➤ Schematic Reports
Command entry: AESCHEMATICREPORT
1416 | Chapter 18 Reports
Select Missing Bill of Material from the report list.
Specify whether to process the project or the active drawing.
Category
By default, the report lists schematic components. Select a different Category
to run the report for one-line, one-line bus-tap, hydraulic, pneumatic, P&ID,
or user-defined components. These components are each identified by a unique
WDTYPE attribute on page 325 value.
Options
Specifies to include components, cable markers, connectors, or terminals in
the report.
Installation Codes to Extract
Extracts only the information for components with specific installation values.
Indicate to process all components that carry part number values, components
without an installation code, or only components marked with a location
code that matches that entered in the edit box. Wild cards are supported.
After you click Named Installation, type the installation code in the box, or
click List: Drawing or List: Project to select from a list of used installation
codes. You can also create a report from multiple installation codes. AutoCAD
Electrical automatically creates a comma-delimited list for the named
installation search.
Location Codes to Extract
Extracts only the information for components with specific location values.
Indicate to process all components that carry part number values, components
without a location code, or only components marked with a location code
that matches that entered in the edit box. For example, BOM report for
components marked "OP STA 2." Wild cards are supported.
After you click Named Location, type the location code in the box, or click
List: Drawing or List: Project to select from a list of used location codes. You
can also create a report from multiple location codes. AutoCAD Electrical
automatically creates a comma-delimited list for the named location search.
Freshen Project Database
Specifies for AutoCAD Electrical to update the project database to include any
out-of-date drawing files.
Generate schematic reports | 1417
Format
Changes the format of the extracted data. The dialog box lists the format files
to select from.
Schematic wire from/to
If you marked components and/or terminals with location codes, you can
make good use of this report. AutoCAD Electrical first extracts component,
terminal, location code, and wire connection information from every drawing
in the project set. Then it displays a location list dialog box where you can
make your report's "from" and "to" location selections. All the location codes
AutoCAD Electrical found on the drawing set are listed on each side of this
dialog box. Location "(??)" is also included in the list if AutoCAD Electrical
found any component or stand-alone terminal that didn't have an assigned
location code.
Ribbon: Reports tab ➤ Schematic panel ➤ Reports.
Toolbar: Main Electrical 2
Menu: Projects ➤ Reports ➤ Schematic Reports
Command entry: AESCHEMATICREPORT
Select Wire From/To from the report list.
Specify whether to process the project, the active drawing, or selected wires.
Category
By default, the report lists schematic components. Select a different Category
to run the report for one-line, one-line bus-tap, hydraulic, pneumatic, P&ID,
or user-defined components. These components are each identified by a unique
WDTYPE attribute on page 325 value.
List
Lists drawings that appear to be out-of-date with the wire connection table
of the project.
Freshen Wire Connection Table
Specifies for AutoCAD Electrical to update the wire connection table to include
any out-of-date drawing files.
1418 | Chapter 18 Reports

Format
Changes the format of the extracted data. The dialog box lists the format files
to select from.
Schematic PLC I/O address and descriptions
This report lists each PLC module and its beginning and ending I/O address
numbers. It scans your drawing set and returns all individual I/O connection
points it finds. It includes up to five lines of description text and the connected
wire number for each I/O point.
Ribbon: Reports tab ➤ Schematic panel ➤ Reports.
Toolbar: Main Electrical 2
Menu: Projects ➤ Reports ➤ Schematic Reports
Command entry: AESCHEMATICREPORT
Select PLC I/O Address and Descriptions from the report list.
Installation Codes to Extract
Extracts only the information for components with specific installation values.
Indicate to process all components that carry part number values, components
without an installation code, or only components marked with a location
code that matches that entered in the edit box. Wild cards are supported.
After you click Named Installation, type the installation code in the box, or
click List: Drawing or List: Project to select from a list of used installation
codes. You can also create a report from multiple installation codes. AutoCAD
Electrical automatically creates a comma-delimited list for the named
installation search.
Location Codes to Extract
Extracts only the information for components with specific location values.
Indicate to process all components that carry part number values, components
without a location code, or only components marked with a location code
that matches that entered in the edit box. For example, BOM report for
components marked "OP STA 2." Wild cards are supported.
After you click Named Location, type the location code in the box, or click
List: Drawing or List: Project to select from a list of used location codes. You
Generate schematic reports | 1419

can also create a report from multiple location codes. AutoCAD Electrical
automatically creates a comma-delimited list for the named location search.
Freshen Project Database
Specifies for AutoCAD Electrical to update the project database to include any
out-of-date drawing files.
Format
Changes the format of the extracted data. The dialog box lists the format files
to select from.
Schematic terminal numbers
This project-wide, stand-alone report lists all instances of terminals. Each entry
includes information tied directly to the terminal such as terminal number,
terminal strip number, and location code.
Ribbon: Reports tab ➤ Schematic panel ➤ Reports.
Toolbar: Main Electrical 2
Menu: Projects ➤ Reports ➤ Schematic Reports
Command entry: AESCHEMATICREPORT
Select Terminal Numbers from the report list.
Specify whether to process the project or the active drawing.
Installation Codes to Extract
Extracts only the information for components with specific installation values.
Indicate to process all components that carry part number values, components
without an installation code, or only components marked with a location
code that matches that entered in the edit box. Wild cards are supported.
After you click Named Installation, type the installation code in the box, or
click List: Drawing or List: Project to select from a list of used installation
codes. You can also create a report from multiple installation codes. AutoCAD
Electrical automatically creates a comma-delimited list for the named
installation search.
1420 | Chapter 18 Reports

Location Codes to Extract
Extracts only the information for components with specific location values.
Indicate to process all components that carry part number values, components
without a location code, or only components marked with a location code
that matches that entered in the edit box. For example, BOM report for
components marked "OP STA 2." Wild cards are supported.
After you click Named Location, type the location code in the box, or click
List: Drawing or List: Project to select from a list of used location codes. You
can also create a report from multiple location codes. AutoCAD Electrical
automatically creates a comma-delimited list for the named location search.
Freshen Project Database
Specifies for AutoCAD Electrical to update the project database to include any
out-of-date drawing files.
Format
Changes the format of the extracted data. The dialog box lists the format files
to select from.
Schematic terminal plan
This project-wide, stand-alone report does a wire network extraction. It takes
longer to generate, but the report includes wire number and wire layer name
information.
Ribbon: Reports tab ➤ Schematic panel ➤ Reports.
Toolbar: Main Electrical 2
Menu: Projects ➤ Reports ➤ Schematic Reports
Command entry: AESCHEMATICREPORT
Select Terminal Plan from the report list.
Specify whether to process the project, active drawing, or select components.
Installation Codes to Extract
Extracts only the information for components with specific installation values.
Indicate to process all components that carry part number values, components
Generate schematic reports | 1421

without an installation code, or only components marked with a location
code that matches that entered in the edit box. Wild cards are supported.
After you click Named Installation, type the installation code in the box, or
click List: Drawing or List: Project to select from a list of used installation
codes. You can also create a report from multiple installation codes. AutoCAD
Electrical automatically creates a comma-delimited list for the named
installation search.
Location Codes to Extract
Extracts only the information for components with specific location values.
Indicate to process all components that carry part number values, components
without a location code, or only components marked with a location code
that matches that entered in the edit box. For example, BOM report for
components marked "OP STA 2." Wild cards are supported.
After you click Named Location, type the location code in the box, or click
List: Drawing or List: Project to select from a list of used location codes. You
can also create a report from multiple location codes. AutoCAD Electrical
automatically creates a comma-delimited list for the named location search.
List
Lists drawings that appear to be out-of-date with the wire connection table
of the project.
Freshen Wire Connection Table
Specifies for AutoCAD Electrical to update the wire connection table to include
any out-of-date drawing files.
Format
Changes the format of the extracted data. The dialog box lists the format files
to select from.
Schematic PLC modules used so far
For the PLC Modules Used So Far report, AutoCAD Electrical quickly scans
the wiring diagram set. It returns in a few moments and displays the I/O
modules it finds. Each entry shows the beginning and ending address of the
module.
Ribbon: Reports tab ➤ Schematic panel ➤ Reports.
1422 | Chapter 18 Reports

Toolbar: Main Electrical 2
Menu: Projects ➤ Reports ➤ Schematic Reports
Command entry: AESCHEMATICREPORT
Select PLC Modules Used So Far from the report list.
Installation Codes to Extract
Extracts only the information for components with specific installation values.
Indicate to process all components that carry part number values, components
without an installation code, or only components marked with a location
code that matches that entered in the edit box. Wild-cards are supported.
After you click Named Installation, type the installation code in the box, or
click List: Drawing or List: Project to select from a list of used installation
codes. You can also create a report from multiple installation codes. AutoCAD
Electrical automatically creates a comma-delimited list for the named
installation search.
Location Codes to Extract
Extracts only the information for components with specific location values.
Indicate to process all components that carry part number values, components
without a location code, or only components marked with a location code
that matches that entered in the edit box. For example, BOM report for
components marked "OP STA 2." Wild cards are supported.
After you click Named Location, type the location code in the box, or click
List: Drawing or List: Project to select from a list of used location codes. You
can also create a report from multiple location codes. AutoCAD Electrical
automatically creates a comma-delimited list for the named location search.
Freshen Project Database
Specifies for AutoCAD Electrical to update the project database to include any
out-of-date drawing files.
Format
Changes the format of the extracted data. The dialog box lists the format files
to select from.
Schematic wire label
Generate schematic reports | 1423
This report lists wire markers/labels and can be used to create physical wire
or cable labels.
Ribbon: Reports tab ➤ Schematic panel ➤ Reports.
Toolbar: Main Electrical 2
Menu: Projects ➤ Reports ➤ Schematic Reports
Command entry: AESCHEMATICREPORT
Select Wire Label from the report list.
Specify whether to process the project, the active drawing, or selected wires.
NOTE If you select Active drawing (pick), click the wire rather than the wire
number.
Installation Codes to Extract
Extracts only the information for components with specific installation values.
Indicate to process all components that carry part number values, components
without an installation code, or only components marked with a location
code that matches that entered in the edit box. Wildcards are supported.
Once you pick Named Installation, type the installation code in the box or
click List: Drawing or List: Project to select from a list of used installation
codes. You can also create a report from multiple installation codes. AutoCAD
Electrical automatically creates a comma-delimited list for the named
installation search.
Location Codes to Extract
Extracts only the information for components with specific location values.
Indicate to process all components that carry part number values, components
without a location code, or only components marked with a location code
that matches that entered in the edit box. For example, BOM report for
components marked "OP STA 2". Wild-cards are supported.
Once you pick Named Location, type the location code in the box or click
List: Drawing or List: Project to select from a list of used location codes. You
can also create a report from multiple location codes. AutoCAD Electrical
automatically creates a comma-delimited list for the named location search.
1424 | Chapter 18 Reports

List
Lists drawings that appear to be out-of-date with the wire connection table
of the project.
Freshen Wire Connection Table
Specifies for AutoCAD Electrical to update the wire connection table to include
any out-of-date drawing files.
Format
Changes the format of the extracted data. The dialog box lists the format files
to select from.
Location code selection for from/to reporting
When you select to run a Wire From/To report, AutoCAD Electrical extracts
component, terminal, location code, and wire connection information from
the selected drawings. This dialog box allows you to make your report’s “from”
and “to” location selections. All the location codes AutoCAD Electrical found
on the drawing set are listed on each side of this dialog box. Location “(??)”
is also included in the list if AutoCAD Electrical found any component or
stand-alone terminals that did not have an assigned location code.
Ribbon: Reports tab ➤ Schematic panel ➤ Reports.
Toolbar: Main Electrical 2
Menu: Projects ➤ Reports ➤ Schematic Reports
Command entry: AESCHEMATICREPORT
Select Wire From/To from the report list. Specify whether to process the project,
active drawing, or selected wires.
Select location codes from the left and right-hand lists to build the report’s
from/to combinations shown in the middle of the dialog box. Click OK to
display the report. AutoCAD Electrical quickly filters and formats the extracted
data and presents it in the Report Generator dialog box. You can then save it
Generate schematic reports | 1425
to a text report file, a comma-delimited file to import into a spreadsheet or
database program, or insert it on to a drawing in table format.
Displays the “from” (left-hand list) and “to” location
codes (right-hand list) found on the drawings.
Location codes
Clicking a location code moves the selected code
from these lists to the Report From/To list in the
center of the dialog box.
Displays the combination of location codes you
selected from the Location Code lists. This is used
to generate the Wire From/To report.
Report From/To
Buttons ■All >> or All <<: Adds or removes all the location
codes from the Report From/To list depending
on which side of the dialog box the button is
located.
■<< or> > : Removes the selected location code
from the Report From/To list.
Displays the Select Multiple From/To Location
Combinations for Report dialog box. Each location
Multiple Combinations
code in the “From” side is linked to each location
code in the “To” side of the report. For example,
if you select MACHINE (from) and FLOOR (to) in
addition to MCAB5 (from) and JBOX1 (to) the fol-
lowing combinations are created:
MACHINE -> FLOOR
MACHINE -> JBOX1
MCAB5 -> FLOOR
MCAB5 -> JBOX1
Each of the combinations is processed and com-
bined into a single report. Adjust the list as needed
(for example, you can select to remove highlighted
combinations or keep only those combinations you
highlight in the list) and click OK.
Includes reversed wire connections in the report. If
unselected, some Wire From/To combinations may
be excluded due to wire sequencing.
Include reverse sequences
1426 | Chapter 18 Reports

Panel Reports
Generate panel reports
AutoCAD Electrical has multiple panel reports that you can run.
Bill of Material report
This report parallels the Schematic BOM report, but deals with panel
component and terminal footprint symbols and nameplates. Optionally, it
can include schematic items that are not referenced on the panel layouts (for
example, field devices). You can customize the scope of the report by filtering
on certain location values (for example, report for CAB1 items only), process
only a subset of drawings, or include/exclude certain categories of items. The
report displays and tallies like items (for example, same part number) together.
Those with extra subassembly items are shown with a SUB multiplier value.
Component report
This report lists every occurrence of a smart panel component footprint found
on the current drawing or in the project drawing set. You can customize the
scope of the report by filtering on certain location values (for example, report
for CAB1 items only), process only a subset of drawings, or include/exclude
certain categories of items. Each extracted panel component is listed as its
own line item. If it has a part number that results in subassembly part numbers,
or has been individually annotated with multi-BOM part numbers, each
additional part number is a line item right below the main line item.
NOTE This report will not include panel terminals unless you check that option.
Nameplate report
This report is similar to the panel component report, but filters out all but
nameplate symbols.
Wire Connection report
Wire connection reports, extracted from the schematic wiring diagrams, can
be formatted and inserted next to panel footprint symbols as simple wiring
tables. AutoCAD Electrical extracts and formats a small report of wire
connection information for the selected components, referencing the wire
extract file. If your footprint symbols carry the AutoCAD Electrical X?TERMxx
Panel Reports | 1427
attributes, AutoCAD Electrical reports their XYZ wire connection location.
The location is offset by the value defined in Panel Configuration dialog box.
Component Exception report
This report provides error checking between the schematics and panel layout
drawings. AutoCAD Electrical looks at the selected components, both schematic
and panel, looking for a match in the project. For each schematic component
selected, it tries to find a matching panel component based on tag, location,
and installation information. If a match is found, it compares catalog and
description information, looking for any discrepancies. AutoCAD Electrical
then looks at each selected panel component looking for a matching schematic
component in the same way.
Terminal Exception report
This report provides error checking between the schematic terminals and
panel layout terminals. AutoCAD Electrical looks at the selected terminals,
both schematic and panel, looking for a match in the project. For each
schematic terminal selected, it tries to find a matching panel terminal. If a
match is found, it compares catalog information, looking for any discrepancies.
AutoCAD Electrical then looks at each selected panel terminal looking for a
matching schematic terminal in the same way.
Wire Annotation Exception report
This report lists which physical component symbol does not have a From and
a To for wire annotation information. For wire annotation, the panel
component symbols contain wiring information as either attributed or Mtext
data. This is used as a troubleshooting mechanism to aid in the assignment
of wiring annotation. End1 is the end of the wire that contains the annotation
and End2 is the end of the wire that was annotated on End1, but is not found
in the range of drawings selected.
Missing Level/Sequencing Assignments report
This report lists which component symbols do not have leveling and
sequencing information already assigned to them. This is used as a
troubleshooting mechanism to aid in the assignment of leveling and
sequencing information to provide better wire routing capabilities.
Generate a panel report
Generates panel reports, such as Bills of Material, Component lists, and
Nameplates.
1428 | Chapter 18 Reports

Select which drawings to process. The report displays options to:
■Change included fields.
■Add or modify data.
■Print.
■Save to a file.
■Put on the drawings as table objects.
1Click Reports tab ➤ Panel panel ➤ Reports.
2Select which panel report to generate from the report list.
3Select to process the project, active drawing, or selected components.
4Select installation or location codes to extract (if applicable).
5Specify to extract any installation or location codes (if applicable).
6Indicate whether to update the project database with out-of-date drawings.
7Click OK.
8In the Report Generator Window, sort, format, or edit the data before
sending the information to the printer, file, or the active drawing file.
■Edit Mode: Modifies the report before you insert it in your drawing.
You can move data up or down in the report, add lines from a catalog,
and delete lines.
■Put on Drawing: Opens the Table Generation Setup dialog box for
specifying how to display your report as a table on your drawing.
■Save to File: Saves the report to a file. Select the type of output file
from the Save Report to File dialog box. You can define multiple file
outputs. Choose from: ASCII report, Comma Delimited, Excel
spreadsheet, Access database, and XML format.
■User Post: Switches specific functions against the data in the report.
When you select a switch, the LISP routine runs a function against
the data and returns to the Report Generator Window.
■Change Report Format: Changes which data fields are reported and
the order in which they appear. You can change the justification of
Generate panel reports | 1429
any column and the column label. The Description field can be
multi-lined. If you include the Description field in your report, you
choose which lines make up this field. Switch on and off the specific
fields to define the Description.
9Once all modifications have been made to the report, save the report,
place the report on the drawing as a table, or print the report.
Panel bill of materials
This report parallels the Schematic BOM report, but deals with panel
component and terminal footprint symbols and nameplates. Optionally, it
can include schematic items that are not referenced on the panel layouts (for
example, field devices). You can customize the scope of the report by filtering
on certain location values (for example, report for CAB1 items only), process
only a subset of drawings, or include/exclude certain categories of items. The
report displays and tallies like items (for example, same part number) together.
Those with extra subassembly items are shown with a "SUB" multiplier value.
Ribbon: Reports tab ➤ Panel panel ➤ Reports.
Toolbar: Panel Layout
Menu: Projects ➤ Reports ➤ Panel Reports
Command entry: AEPANELREPORT
Select Bill of Material from the report list.
Specify whether to process the project or the active drawing.
Include options
Specifies to include nameplate information in the
report.
Include Nameplates
Specifies to include connector information in the
report.
Include Cable/Connectors
Specifies to cable, connector, and nameplate inform-
ation in the report.
All the above
1430 | Chapter 18 Reports
Lists each individual Tag-ID and terminal number
combination if selected. If unselected (default), the
List terminal numbers
terminals are combined on the same Tag-ID strip
into a single entry with a quantity.
Specifies to include jumper information in the re-
port.
Include Jumpers
Specifies to include all schematic component inform-
ation not found on the panel layout in the report.
Full: include schematic components not refer-
enced on panel layout
Display option
Identical component or component/assemblies are
tallied and reported as single line items (Ex: Red
Normal Tallied Format
push-button operator 800EP-F4 with 800E-A3L latch
and two 800E-3X10 N.O. contact blocks).
Identical component or component/assemblies
with the same installation/location codes are tallied
and reported as single line items.
Normal Tallied Format (Group by Installa-
tion/Location)
Each part becomes its own line item (i.e. no longer
any sub-assembly items) and each is tallied across
Display in Tallied Purchase List Format
all component types. For example, all 800E-3X10
N.O. contact blocks for all components are reported
as a single line item.
All instances of a given component-ID or terminal
tag are processed together and then reported as a
single entry.
Display in By TAG Format
Installation Codes to Extract
Extracts only the information for components with specific installation values.
Indicate to process all components that carry part number values, components
without an installation code, or only components marked with a location
code that matches that entered in the edit box. Wild-cards are supported.
Once you pick Named Installation, type the installation code in the box or
click List: Drawing or List: Project to select from a list of used installation
codes. You can also create a report from multiple installation codes. AutoCAD
Generate panel reports | 1431

Electrical automatically creates a comma-delimited list for the named
installation search.
Location Codes to Extract
Extracts only the information for components with specific location values.
Indicate to process all components that carry part number values, components
without a location code, or only components marked with a location code
that matches that entered in the edit box. For example, BOM report for
components marked "OP STA 2." Wild cards are supported.
After you click Named Location, type the location code in the box, or click
List: Drawing or List: Project to select from a list of used location codes. You
can also create a report from multiple location codes. AutoCAD Electrical
automatically creates a comma-delimited list for the named location search.
Freshen Project Database
Specifies for AutoCAD Electrical to update the project database to include any
out-of-date drawing files.
Format
Changes the format of the extracted data. The dialog box lists the format files
to select from.
Panel component exception
This report provides error checking between the schematics and panel layout
drawings. AutoCAD Electrical looks at the selected components, both schematic
and panel, looking for a match in the project. For each schematic component
selected, it tries to find a matching panel component based on tag, location,
and installation information. If a match is found, it compares catalog and
description information, looking for any discrepancies. AutoCAD Electrical
then looks at each selected panel component looking for a matching schematic
component in the same way.
Ribbon: Reports tab ➤ Panel panel ➤ Reports.
Toolbar: Panel Layout
Menu: Projects ➤ Reports ➤ Panel Reports
Command entry: AEPANELREPORT
1432 | Chapter 18 Reports
Select Component Exception from the report list.
Specify whether to process the project, active drawing, or a selected component.
Conditions for Report
Specifies which conditions the report checks for: whether the panel item is
on the schematic, whether the schematic item is on a panel, if there are
multiple instances of the terminal, and if there is a mismatch between
schematic and panel terminals.
Installation Codes to Extract
Extracts only the information for components with specific installation values.
Indicate to process all components that carry part number values, components
without an installation code, or only components marked with a location
code that matches that entered in the edit box. Wild cards are supported.
Once you pick Named Installation, type the installation code in the box or
click List: Drawing or List: Project to select from a list of used installation
codes. You can also create a report from multiple installation codes. AutoCAD
Electrical automatically creates a comma-delimited list for the named
installation search.
Location Codes to Extract
Extracts only the information for components with specific location values.
Indicate to process all components that carry part number values, components
without a location code, or only components marked with a location code
that matches that entered in the edit box. For example, BOM report for
components marked "OP STA 2." Wild cards are supported.
After you pick Named Location, type the location code in the box or click
List: Drawing or List: Project to select from a list of used location codes. You
can also create a report from multiple location codes. AutoCAD Electrical
automatically creates a comma-delimited list for the named location search.
Redisplay Last Run
Displays the previously extracted report.
Format
Changes the format of the extracted data. The subdialog box lists the format
files to select from.
Panel component
Generate panel reports | 1433

This report lists every occurrence of a smart panel component footprint found
on the current drawing or in the project drawing set. You can customize the
scope of the report by filtering on certain location values (for example, report
for CAB1 items only), process only a subset of drawings, or include/exclude
certain categories of items. Note: this report will not include panel terminals
unless you check that option. Each extracted panel component is listed as its
own line item. If it has a part number that results in subassembly part numbers,
or has been individually annotated with multi-BOM part numbers, each
additional part number is a line item right below the main line item.
Ribbon: Reports tab ➤ Panel panel ➤ Reports.
Toolbar: Panel Layout
Menu: Projects ➤ Reports ➤ Panel Reports
Command entry: AEPANELREPORT
Select Component from the report list.
Specify whether to process the project or the active drawing.
Options
Specifies to include nameplates or terminals in the report. You can also indicate
to skip components with blank device TAG values or blank manufacturer or
catalog values.
Installation Codes to Extract
Extracts only the information for components with specific installation values.
Indicate to process all components that carry part number values, components
without an installation code, or only components marked with a location
code that matches that entered in the edit box. Wild-cards are supported.
Once you pick Named Installation, type the installation code in the box or
click List: Drawing or List: Project to select from a list of used installation
codes. You can also create a report from multiple installation codes. AutoCAD
Electrical automatically creates a comma-delimited list for the named
installation search.
1434 | Chapter 18 Reports

Location Codes to Extract
Extracts only the information for components with specific location values.
Indicate to process all components that carry part number values, components
without a location code, or only components marked with a location code
that matches that entered in the edit box. For example, BOM report for
components marked "OP STA 2". Wild-cards are supported.
After you select Named Location, type the location code in the box or click
List: Drawing or List: Project to select from a list of used location codes. You
can also create a report from multiple location codes. AutoCAD Electrical
automatically creates a comma-delimited list for the named location search.
Freshen Project Database
Specifies for AutoCAD Electrical to update the project database to include any
out-of-date drawing files.
Format
Changes the format of the extracted data. The dialog box lists the format files
to select from.
Missing level/sequence assignments
This report lists which component symbols do not have leveling and
sequencing information already assigned to them. This is used as a
troubleshooting mechanism to aid in the assignment of leveling and
sequencing information to provide better wire routing capabilities.
Ribbon: Reports tab ➤ Panel panel ➤ Reports.
Toolbar: Panel Layout
Menu: Projects ➤ Reports ➤ Panel Reports
Command entry: AEPANELREPORT
Select Missing Level/Sequencing Assignments from the report list.
In the Missing Level/Sequence Assignments dialog box, click Show to display
temporary graphics around the insertion point of the panel layout symbols
or click Report to run the report.
Specify whether to process the project or the active drawing.
Generate panel reports | 1435

Installation Codes to Extract
Extracts only the information for components with specific installation values.
Indicate to process all components that carry part number values, components
without an installation code, or only components marked with a location
code that matches that entered in the edit box. Wild-cards are supported.
Once you pick Named Installation, type the installation code in the box or
click List: Drawing or List: Project to select from a list of used installation
codes. You can also create a report from multiple installation codes. AutoCAD
Electrical automatically creates a comma-delimited list for the named
installation search.
Location Codes to Extract
Extracts only the information for components with specific location values.
Indicate to process all components that carry part number values, components
without a location code, or only components marked with a location code
that matches that entered in the edit box. For example, BOM report for
components marked "OP STA 2". Wild-cards are supported.
Once you pick Named Location, type the location code in the box or click
List: Drawing or List: Project to select from a list of used location codes. You
can also create a report from multiple location codes. AutoCAD Electrical
automatically creates a comma-delimited list for the named location search.
Format
Changes the format of the extracted data. The subdialog box lists the format
files to select from.
Wire annotation exception
This report lists which physical component symbol does not have a From and
a To for wire annotation information. For wire annotation, the panel
component symbols contain wiring information as either attributed or Mtext
data. This is used as a troubleshooting mechanism to aid in the assignment
of wiring annotation. End1 is the end of the wire that contains the annotation
and End2 is the end of the wire that was annotated on End1, but is not found
in the range of drawings selected.
Ribbon: Reports tab ➤ Panel panel ➤ Reports.
1436 | Chapter 18 Reports

Toolbar: Panel Layout
Menu: Projects ➤ Reports ➤ Panel Reports
Command entry: AEPANELREPORT
Select Wire Annotation Exception from the report list.
Specify whether to process the project or the active drawing.
Installation Codes to Extract
Extracts only the information for components with specific installation values.
Indicate to process all components that carry part number values, components
without an installation code, or only components marked with a location
code that matches that entered in the edit box. Wild-cards are supported.
Once you pick Named Installation, type the installation code in the box or
click List: Drawing or List: Project to select from a list of used installation
codes. You can also create a report from multiple installation codes. AutoCAD
Electrical automatically creates a comma-delimited list for the named
installation search.
Location Codes to Extract
Extracts only the information for components with specific location values.
Indicate to process all components that carry part number values, components
without a location code, or only components marked with a location code
that matches that entered in the edit box. For example, BOM report for
components marked "OP STA 2". Wild-cards are supported.
Once you pick Named Location, type the location code in the box or click
List: Drawing or List: Project to select from a list of used location codes. You
can also create a report from multiple location codes. AutoCAD Electrical
automatically creates a comma-delimited list for the named location search.
Format
Changes the format of the extracted data. The subdialog box lists the format
files to select from.
Panel nameplate
This report is similar to the panel component report, but filters out all but
nameplate symbols.
Generate panel reports | 1437

Ribbon: Reports tab ➤ Panel panel ➤ Reports.
Toolbar: Panel Layout
Menu: Projects ➤ Reports ➤ Panel Reports
Command entry: AEPANELREPORT
Select Nameplate from the report list.
Specify whether to process the project, active drawing, or a selected component.
Installation Codes to Extract
Extracts only the information for components with specific installation values.
Indicate to process all components that carry part number values, components
without an installation code, or only components marked with a location
code that matches that entered in the edit box. Wild-cards are supported.
Once you pick Named Installation, type the installation code in the box or
click List: Drawing or List: Project to select from a list of used installation
codes. You can also create a report from multiple installation codes. AutoCAD
Electrical automatically creates a comma-delimited list for the named
installation search.
Location Codes to Extract
Extracts only the information for components with specific location values.
Indicate to process all components that carry part number values, components
without a location code, or only components marked with a location code
that matches that entered in the edit box. For example, BOM report for
components marked "OP STA 2." Wild cards are supported.
Once you pick Named Location, type the location code in the box or click
List: Drawing or List: Project to select from a list of used location codes. You
can also create a report from multiple location codes. AutoCAD Electrical
automatically creates a comma-delimited list for the named location search.
Redisplay Last Run
Displays the previously extracted report.
1438 | Chapter 18 Reports

Format
Changes the format of the extracted data. The dialog box lists the format files
to select from.
Panel terminal exception
This report provides error checking between the schematic terminals and
panel layout terminals. AutoCAD Electrical looks at the selected terminals,
both schematic and panel, looking for a match in the project. For each
schematic terminal selected, it tries to find a matching panel terminal. If a
match is found, it compares catalog information, looking for any discrepancies.
AutoCAD Electrical then looks at each selected panel terminal looking for a
matching schematic terminal in the same way.
Ribbon: Reports tab ➤ Panel panel ➤ Reports.
Toolbar: Panel Layout
Menu: Projects ➤ Reports ➤ Panel Reports
Command entry: AEPANELREPORT
Select Terminal Exception from the report list.
Specify whether to process the project, active drawing, or a selected component.
Conditions for Report
Specifies which conditions the report checks for: whether the panel item is
on the schematic, whether the schematic item is on a panel, if there are
multiple instances of the terminal, and if there is a mismatch between
schematic and panel terminals.
Installation Codes to Extract
Extracts only the information for components with specific installation values.
Indicate to process all components that carry part number values, components
without an installation code, or only components marked with a location
code that matches that entered in the edit box. Wild-cards are supported.
Once you pick Named Installation, type the installation code in the box or
click List: Drawing or List: Project to select from a list of used installation
codes. You can also create a report from multiple installation codes. AutoCAD
Generate panel reports | 1439

Electrical automatically creates a comma-delimited list for the named
installation search.
Location Codes to Extract
Extracts only the information for components with specific location values.
Indicate to process all components that carry part number values, components
without a location code, or only components marked with a location code
that matches that entered in the edit box. For example, BOM report for
components marked "OP STA 2." Wild cards are supported.
Once you pick Named Location, type the location code in the box or click
List: Drawing or List: Project to select from a list of used location codes. You
can also create a report from multiple location codes. AutoCAD Electrical
automatically creates a comma-delimited list for the named location search.
Redisplay Last Run
Displays the previously extracted report.
Format
Changes the format of the extracted data. The dialog box lists the format files
to select from.
Panel wire connection
Wire connection reports, extracted from the schematic wiring diagrams, can
be formatted and inserted next to panel footprint symbols as simple wiring
tables. AutoCAD Electrical extracts and formats a small report of wire
connection information for the selected components, referencing the wire
extract file. If your footprint symbols carry the AutoCAD Electrical X?TERMxx
attributes, AutoCAD Electrical reports their XYZ wire connection location.
The location is offset by the value defined in Panel Configuration dialog box.
Ribbon: Reports tab ➤ Panel panel ➤ Reports.
Toolbar: Panel Layout
Menu: Projects ➤ Reports ➤ Panel Reports
Command entry: AEPANELREPORT
Select Wire Connection from the report list.
1440 | Chapter 18 Reports
Specify whether to process the project, active drawing, or a selected component.
Installation Codes to Extract
Extracts only the information for components with specific installation values.
Indicate to process all components that carry part number values, components
without an installation code, or only components marked with a location
code that matches that entered in the edit box. Wild-cards are supported.
After you pick Named Installation, type the installation code in the box or
click List: Drawing or List: Project to select from a list of used installation
codes. You can also create a report from multiple installation codes. AutoCAD
Electrical automatically creates a comma-delimited list for the named
installation search.
Location Codes to Extract
Extracts only the information for components with specific location values.
Indicate to process all components that carry part number values, components
without a location code, or only components marked with a location code
that matches that entered in the edit box. For example, BOM report for
components marked "OP STA 2." Wild cards are supported.
After you pick Named Location, type the location code in the box or click
List: Drawing or List: Project to select from a list of used location codes. You
can also create a report from multiple location codes. AutoCAD Electrical
automatically creates a comma-delimited list for the named location search.
Redisplay Last Run
Displays the previously extracted report.
Format
Changes the format of the extracted data. The dialog box lists the format files
to select from.
Overview of format files
A Format File (.set file) can be used to pre-format a report for both
manually-run reports and automatic reports. When running automatic reports,
more options are used within the .set file, since user input is not required for
each report (automatic reports are covered in next section). You can create as
many format files as you want. If you are using updatable, intelligent tables,
a format file is the third item that makes a report table unique. If you want
Overview of format files | 1441

to be able to insert multiple updatable tables for the same report with the
same scope you need to use different format files for each report. If you are
not inserting updatable tables, or the report or scope is different, then you do
not need to use different format files.
A format file defines which fields to include from the available fields, the field
order, justification, and column label. This information from the format file
is used for both manual and automatic reports. When running automatic
reports, the format file can also contain information for saving the report to
file(s) and/or putting the report on the drawing(s) as a report table. The Report
Format File Setup dialog box allows you to create or modify your format files.
You can enter in X-Y coordinates for the first section or click Pick to select a
location. If you are breaking your report table into sections and are allowing
multiple table sections per drawing, you can define the distance from one
table section to the next. The value entered here is the distance between the
end of one table section and the start of the next. For example, if you want 2
inches between table sections horizontally, enter a 2 as the X-Distance value.
A blank value is interpreted as zero.
NOTE Your format file can be saved using any file name but is given a ".set" file
extension. The format files can be edited using any text file editor but it is not
recommended since the syntax for the files is somewhat complicated. It is
recommended that you use the Report Format File Setup dialog box to create or
modify your format files. If you are going to use Automatic Reports to create output
files click "Save Report to File".
You can select each file type available for the selected report and enter one
file name per type. If multiple file types are selected, when the report is run
using the Automatic Reports, each file is created from that report data.
Define format files
Creates and maintains a report formatting file.
A format (.set) file pre-formats both automatic reports and reports you run
manually. A format file defines:
■Fields to include from the available fields
■Field order and justification
■Column labels
■File output options
■Table output options
1442 | Chapter 18 Reports

1Click Reports tab ➤ Miscellaneous panel ➤ Report Format Setup.
NOTE You can also open this dialog box by clicking Format File Setup on
the Automatic Report Selection on page 1497 dialog box.
2Select which report to generate a format file for or open an existing format
file.
3Specify any report options (if applicable).
4Select installation or location codes to extract (if applicable).
5(Optional) Select to add special break values to the page header. Selecting
a special break of Installation/Location, displays the values for these
devices in the report section header.
6Sort or format the data before saving the format file.
TIP If you are going to use the format file in automatic reports you should
define either the Save Report to File options and/or Put on Drawing options
since the reports are not displayed in the Report Generator dialog box.
■Save Report to File: Saves the report to a file. Select the type of output
file from the Save Report to File dialog box. You can define multiple
file outputs. Choose from: ASCII report, Comma Delimited, Excel
spreadsheet, Access database, and XML format.
■Change Report Fields: Changes which data fields are reported and
the order in which they appear. You can change the justification of
any column and the column label. The Description field can be
multi-lined. If you include the Description field in your report, you
choose which lines make up this field. Switch on and off the specific
fields to define the Description.
■Put on Drawing: Opens the Table Generation Setup on page 1318 dialog
box for specifying how to display your report as a table on your
drawing.
■Sort Fields: Controls the sorting order of fields in the report.
7Save the format file for later retrieval and usage when generating reports.
Overview of format files | 1443

8Click Done.
Report format file setup - panel bill of material
Ribbon: Reports tab ➤ Miscellaneous panel ➤ Report Format Setup.
Toolbar: Schematic Reports
Menu: Projects ➤ Reports ➤ Report Format File Setup
Command entry: AEFORMATFILE
Select Bill of Material from the Panel report
Include options
Specifies whether to include nameplates, cable/connectors, or both in the
report. You can also indicate whether to include schematic components not
referenced on the panel layout.
Display option
■Normal Tallied Format: identical component or component/assemblies
are tallied and reported as single line items (Ex: Red push-button operator
800EP-F4 with 800E-A3L latch and two 800E-3X10 N.O. contact blocks).
■Normal Tallied Format (Group by Installation/Location): identical
component or component/assemblies with the same installation/location
codes are tallied and reported as single line items.
■Display in Tallied Purchase List Format: each part becomes its own line
item (i.e. no longer any sub-assembly items) and each is tallied across all
component types. For example, all 800E-3X10 N.O. contact blocks for all
components are reported as a single line item.
■Display in By TAG Format: all instances of a given component-ID or
terminal tag are processed together and then reported as a single entry.
Installation Codes to Extract
Extracts only the information for components with specific installation values.
Indicate to process all components, components without an installation code,
1444 | Chapter 18 Reports

or only components marked with an installation code that matches that
entered in the edit box. Wild-cards are supported.
Once you pick the Named Installation button, you can simply type the
installation code in the box or click the List: Drawing or List: Project button
to select from a list of used installation codes.
Location Codes to Extract
Extracts only the information for components with specific location values.
Indicate to process all components, components without a location code, or
only components marked with a location code that matches that entered in
the edit box. Wild-cards are supported.
Once you pick the Named Location button, you can simply type the location
code in the box or click the List: Drawing or List: Project button to select from
a list of used location codes.
Report options
■Save Report to File: Saves the report to a file. Select the type of output file
from the Save Report to File dialog box. You can define multiple file outputs
using this dialog box. Choose from: ASCII report (.rep), Comma Delimited
(.csv), Excel spreadsheet (.xls), Access database (.mdb), and XML (.xml)
format.
The First Section Only button indicates to only show the selected option
(such as title line or time and date) on the first section of the report, if
multiple sections are used. If not selected, the selected options will be
shown on all report sections.
■Change Report Fields: Changes what data fields are reported and the order
in which they appear. You can also change the justification of any column
and even the column label. The Description field is handled a little
differently than the other fields. This field can be a multi-line field which
is actually made up of multiple fields. If you include the Description field
in your report, you choose which lines make up this field. Just toggle on
and off the specific fields to define the Description.
■Put on Drawing: Opens the Table Generation Setup dialog box for
specifying how to display your report as a table on your drawing.
■Sort Fields: Controls the sorting order of the fields in the report.
NOTE The options are saved in the format file after you click OK on the subdialog
boxes. If you are working in an unnamed format file, you have to save the data
after you select Done in order to keep the changes you have made.
Overview of format files | 1445

Breaks
■Special breaks: Specifies the value that controls the section break. The
drop-down list displays the report-specific content to apply to the special
break.
■Add Special break values to header: Adds the special break value to the
page header. For example, if you select a special break of
Installation/Location, the values provided for these devices in the panel
are displayed in the report section header.
Format File
Format files define specific criteria applied to the report before generating the
report to screen, printer, file, or automatic generation. The format files are
saved to the 'Documents and Settings\{user name}' subdirectory or 'Users\{user
name}' on a Windows Vista or Windows 7 installation.
■Open Format File: Selects format files to edit. The Report Format Settings
File Selection dialog box opens and displays a list of format files (.set) in
the user subdirectory. Select a file to edit from the list and click OK.
■Save Format File: Saves a format file on the hard disk for later retrieval and
usage when generating reports.
■Save As Format File: Saves a format file that you opened and modified with
a different name.
Report format file setup - panel component
exception
Ribbon: Reports tab ➤ Miscellaneous panel ➤ Report Format Setup.
Toolbar: Schematic Reports
Menu: Projects ➤ Reports ➤ Report Format File Setup
Command entry: AEFORMATFILE
Select Component Exception from the Panel report list.
1446 | Chapter 18 Reports
Conditions for Report
Specifies which conditions the report checks for: the panel item is not on the
schematic, the schematic item is not on a panel, multiple instances of the
component, and if there is a mismatch between schematic components and
panel components.
Installation Codes to Extract
Extracts only the information for components with specific installation values.
Indicate to process all components, components without an installation code,
or only components marked with an installation code that matches that
entered in the edit box. Wild-cards are supported.
Once you pick the Named Installation button, you can simply type the
installation code in the box or click the List: Drawing or List: Project button
to select from a list of used installation codes.
Location Codes to Extract
Extracts only the information for components with specific location values.
Indicate to process all components, components without a location code, or
only components marked with a location code that matches that entered in
the edit box. Wild-cards are supported.
Once you pick the Named Location button, you can simply type the location
code in the box or click the List: Drawing or List: Project button to select from
a list of used location codes.
Report options
■Save Report to File: Saves the report to a file. Select the type of output file
from the Save Report to File dialog box. You can define multiple file outputs
using this dialog box. Choose from: ASCII report (.rep), Comma Delimited
(.csv), Excel spreadsheet (.xls), Access database (.mdb), and XML (.xml)
format.
The First Section Only button indicates to only show the selected option
(such as title line or time and date) on the first section of the report, if
multiple sections are used. If not selected, the selected options will be
shown on all report sections.
■Change Report Fields: Changes what data fields are reported and the order
in which they appear. You can also change the justification of any column
and even the column label. If you include the Description field in your
report, you choose which lines make up this field. Just toggle on and off
the specific fields to define the Description.
Overview of format files | 1447

■Put on Drawing: Opens the Table Generation Setup dialog box for
specifying how to display your report as a table on your drawing.
■Sort Fields: Controls the sorting order of the fields in the report.
NOTE The options are saved in the format file after you click OK on the subdialog
boxes. If you are working in an unnamed format file, you have to save the data
after you select Done in order to keep the changes you have made.
Breaks
■Special breaks: Specifies the value that controls the section break. The
drop-down list displays the report-specific content to apply to the special
break.
■Add Special break values to header: Adds the special break value to the
page header. For example, if you select a special break of
Installation/Location, the values provided for these devices in the panel
are displayed in the report section header.
Format File
Format files define specific criteria applied to the report before generating the
report to screen, printer, file, or automatic generation. The format files are
saved to the 'Documents and Settings\{user name}' subdirectory or 'Users\{user
name}' on a Windows Vista or Windows 7 installation.
■Open Format File: Selects format files to edit. The Report Format Settings
File Selection dialog box opens and displays a list of format files (.set) in
the user subdirectory. Select a file to edit from the list and click OK.
■Save Format File: Saves a format file on the hard disk for later retrieval and
usage when generating reports.
■Save As Format File: Saves a format file that you opened and modified with
a different name.
Report format file setup - panel component
Ribbon: Reports tab ➤ Miscellaneous panel ➤ Report Format Setup.
1448 | Chapter 18 Reports

Toolbar: Schematic Reports
Menu: Projects ➤ Reports ➤ Report Format File Setup
Command entry: AEFORMATFILE
Select Component from the Panel report list.
Options
Specifies to include nameplates, cables, connectors, terminals, or all of them
in the report. You can also indicate to skip components with blank device
TAG values or blank manufacturer or catalog values.
Installation Codes to Extract
Extracts only the information for components with specific installation values.
Indicate to process all components, components without an installation code,
or only components marked with an installation code that matches that
entered in the edit box. Wild-cards are supported.
Once you pick the Named Installation button, you can simply type the
installation code in the box or click the List: Drawing or List: Project button
to select from a list of used installation codes.
Location Codes to Extract
Extracts only the information for components with specific location values.
Indicate to process all components, components without a location code, or
only components marked with a location code that matches that entered in
the edit box. Wild-cards are supported.
Once you pick the Named Location button, you can simply type the location
code in the box or click the List: Drawing or List: Project button to select from
a list of used location codes.
Report options
■Save Report to File: Saves the report to a file. Select the type of output file
from the Save Report to File dialog box. You can define multiple file outputs
using this dialog box. Choose from: ASCII report (.rep), Comma Delimited
(.csv), Excel spreadsheet (.xls), Access database (.mdb), and XML (.xml)
format.
The First Section Only button indicates to only show the selected option
(such as title line or time and date) on the first section of the report, if
Overview of format files | 1449

multiple sections are used. If not selected, the selected options will be
shown on all report sections.
■Change Report Fields: Changes what data fields are reported and the order
in which they appear. You can also change the justification of any column
and even the column label. If you include the Description field in your
report, you choose which lines make up this field. Just toggle on and off
the specific fields to define the Description.
■Put on Drawing: Opens the Table Generation Setup dialog box for
specifying how to display your report as a table on your drawing.
■Sort Fields: Controls the sorting order of the fields in the report.
NOTE The options are saved in the format file after you click OK on the subdialog
boxes. If you are working in an unnamed format file, you have to save the data
after you select Done in order to keep the changes you have made.
Breaks
■Special breaks: Specifies the value that controls the section break. The
drop-down list displays the report-specific content to apply to the special
break.
■Add Special break values to header: Adds the special break value to the
page header. For example, if you select a special break of
Installation/Location, the values provided for these devices in the panel
are displayed in the report section header.
Format File
Format files define specific criteria applied to the report before generating the
report to screen, printer, file, or automatic generation. The format files are
saved to the 'Documents and Settings\{user name}' subdirectory or 'Users\{user
name}' on a Windows Vista or Windows 7 installation.
■Open Format File: Selects format files to edit. The Report Format Settings
File Selection dialog box opens and displays a list of format files (.set) in
the user subdirectory. Select a file to edit from the list and click OK.
■Save Format File: Saves a format file on the hard disk for later retrieval and
usage when generating reports.
■Save As Format File: Saves a format file that you opened and modified with
a different name.
1450 | Chapter 18 Reports

Report format file setup - missing level/sequence
assignments
Ribbon: Reports tab ➤ Miscellaneous panel ➤ Report Format Setup.
Toolbar: Schematic Reports
Menu: Projects ➤ Reports ➤ Report Format File Setup
Command entry: AEFORMATFILE
Select Missing Level/Sequence Assignments from the Panel report list.
Installation Codes to Extract
Extracts only the information for components with specific installation values.
Indicate to process all components, components without an installation code,
or only components marked with an installation code that matches that
entered in the edit box. Wild-cards are supported.
After you pick the Named Installation button, you can type the installation
code in the box or click the List: Drawing or List: Project button to select from
a list of used installation codes.
Location Codes to Extract
Extracts only the information for components with specific location values.
Indicate to process all components, components without a location code, or
only components marked with a location code that matches that entered in
the edit box. Wild-cards are supported.
After you pick the Named Location button, you can type the location code
in the box or click the List: Drawing or List: Project button to select from a
list of used location codes.
Report options
■Save Report to File: Saves the report to a file. Select the type of output file
from the Save Report to File dialog box. You can define multiple file
outputs. Choose from: ASCII report (.rep), Comma Delimited (.csv), Excel
spreadsheet (.xls), Access database (.mdb), and XML (.xml) format.
The First Section Only button indicates to only show the selected option
(such as title line or time and date) on the first section of the report, if
Overview of format files | 1451

multiple sections are used. If not selected, the selected options are shown
on all report sections.
■Change Report Fields: Changes what data fields are reported and the order
in which they appear. You can also change the justification of any column
and even the column label. The Description field is handled a little
differently than the other fields. This field can be a multi-line field which
is actually made up of multiple fields. If you include the Description field
in your report, choose which lines make up this field. Switch on and off
the specific fields to define the Description.
■Put on Drawing: Opens the Table Generation Setup dialog box for
specifying how to display your report as a table on your drawing.
■Sort Fields: Controls the sorting order of the fields in the report.
NOTE The options are saved in the format file after you click OK in the dialog
boxes. If you are working in an unnamed format file, you must save the data after
you select Done to keep the changes.
Format File
Format files define specific criteria applied to the report before generating the
report to screen, printer, file, or automatic generation. The format files are
saved to the 'Documents and Settings\{user name}' subdirectory or 'Users\{user
name}' on a Windows Vista or Windows 7 installation.
■Open Format File: Selects format files to edit. The Report Format Settings
File Selection dialog box opens and displays a list of format files (.set) in
the user subdirectory. Select a file to edit from the list and click OK.
■Save Format File: Saves a format file on the hard disk for later retrieval and
usage when generating reports.
■Save As Format File: Saves a format file that you opened and modified with
a different name.
Report format file setup - wire annotation
exception
Ribbon: Reports tab ➤ Miscellaneous panel ➤ Report Format Setup.
1452 | Chapter 18 Reports

Toolbar: Schematic Reports
Menu: Projects ➤ Reports ➤ Report Format File Setup
Command entry: AEFORMATFILE
Select Wire Annotation Exception from the Panel report list.
Installation Codes to Extract
Extracts only the information for components with specific installation values.
Indicate to process all components, components without an installation code,
or only components marked with an installation code that matches that
entered in the edit box. Wild cards are supported.
After you click the Named Installation button, you can type the installation
code in the box, or click the List: Drawing or List: Project button to select from
a list of used installation codes.
Location Codes to Extract
Extracts only the information for components with specific location values.
Indicate to process all components, components without a location code, or
only components marked with a location code that matches that entered in
the edit box. Wild cards are supported.
After you click the Named Location button, you can type the location code
in the box, or click the List: Drawing or List: Project button to select from a
list of used location codes.
Report options
■Save Report to File: Saves the report to a file. Select the type of output file
from the Save Report to File dialog box. You can define multiple file outputs
using this dialog box. Choose from: ASCII report (.rep), Comma Delimited
(.csv), Excel spreadsheet (.xls), Access database (.mdb), and XML (.xml)
format.
The First Section Only button indicates to only show the selected option
(such as title line or time and date) on the first section of the report, if
multiple sections are used. If not selected, the selected options are shown
on all report sections.
■Change Report Fields: Changes what data fields are reported and the order
in which they appear. You can also change the justification of any column
and even the column label. The Description field is handled a little
differently than the other fields. This field can be a multi-line field which
Overview of format files | 1453
is actually made up of multiple fields. If you include the Description field
in your report, you choose which lines make up this field. Switch on and
off the specific fields to define the Description.
■Put on Drawing: Opens the Table Generation Setup dialog box for
specifying how to display your report as a table on your drawing.
■Sort Fields: Controls the sorting order of the fields in the report.
NOTE The options are saved in the format file after you click OK in the dialog
boxes. If you are working in an unnamed format file, you must save the data after
you select Done to keep the changes.
Format File
Format files define specific criteria applied to the report before generating the
report to screen, printer, file, or automatic generation. The format files are
saved to the "Documents and Settings\{user name}" subdirectory or 'Users\{user
name}' on a Windows Vista or Windows 7 installation.
■Open Format File: Selects format files to edit. The Report Format Settings
File Selection dialog box opens and displays a list of format files (.set) in
the user subdirectory. Select a file to edit from the list and click OK.
■Save Format File: Saves a format file on the hard disk for later retrieval and
usage when generating reports.
■Save As Format File: Saves a format file that you opened and modified with
a different name.
Report format file setup - panel nameplate
Ribbon: Reports tab ➤ Miscellaneous panel ➤ Report Format Setup.
Toolbar: Schematic Reports
Menu: Projects ➤ Reports ➤ Report Format File Setup
Command entry: AEFORMATFILE
Select Nameplate from the Panel report list.
1454 | Chapter 18 Reports
Installation Codes to Extract
Extracts only the information for components with specific installation values.
Indicate to process all components, components without an installation code,
or only components marked with an installation code that matches that
entered in the edit box. Wild-cards are supported.
Once you pick the Named Installation button, you can simply type the
installation code in the box or click the List: Drawing or List: Project button
to select from a list of used installation codes.
Location Codes to Extract
Extracts only the information for components with specific location values.
Indicate to process all components, components without a location code, or
only components marked with a location code that matches that entered in
the edit box. Wild-cards are supported.
Once you pick the Named Location button, you can simply type the location
code in the box or click the List: Drawing or List: Project button to select from
a list of used location codes.
Report options
■Save Report to File: Saves the report to a file. Select the type of output file
from the Save Report to File dialog box. You can define multiple file outputs
using this dialog box. Choose from: ASCII report (.rep), Comma Delimited
(.csv), Excel spreadsheet (.xls), Access database (.mdb), and XML (.xml)
format.
The First Section Only button indicates to only show the selected option
(such as title line or time and date) on the first section of the report, if
multiple sections are used. If not selected, the selected options will be
shown on all report sections.
■Change Report Fields: Changes what data fields are reported and the order
in which they appear. You can also change the justification of any column
and even the column label. If you include the Description field in your
report, you choose which lines make up this field. Just toggle on and off
the specific fields to define the Description.
■Put on Drawing: Opens the Table Generation Setup dialog box for
specifying how to display your report as a table on your drawing.
■Sort Fields: Controls the sorting order of the fields in the report.
Overview of format files | 1455

NOTE The options are saved in the format file after you click OK on the subdialog
boxes. If you are working in an unnamed format file, you have to save the data
after you select Done in order to keep the changes you have made.
Breaks
■Special breaks: Specifies the value that controls the section break. The
drop-down list displays the report-specific content to apply to the special
break.
■Add Special break values to header: Adds the special break value to the
page header. For example, if you select a special break of
Installation/Location, the values provided for these devices in the panel
are displayed in the report section header.
Format File
Format files define specific criteria applied to the report before generating the
report to screen, printer, file, or automatic generation. The format files are
saved to the 'Documents and Settings\{user name}' subdirectory or 'Users\{user
name}' on a Windows Vista or Windows 7 installation.
■Open Format File: Selects format files to edit. The Report Format Settings
File Selection dialog box opens and displays a list of format files (.set) in
the user subdirectory. Select a file to edit from the list and click OK.
■Save Format File: Saves a format file on the hard disk for later retrieval and
usage when generating reports.
■Save As Format File: Saves a format file that you opened and modified with
a different name.
Report format file setup - panel terminal exception
Ribbon: Reports tab ➤ Miscellaneous panel ➤ Report Format Setup.
Toolbar: Schematic Reports
Menu: Projects ➤ Reports ➤ Report Format File Setup
Command entry: AEFORMATFILE
1456 | Chapter 18 Reports
Select Terminal Exception from the Panel report list.
Conditions for Report
Specifies which conditions the report checks for: the panel item is not on the
schematic, the schematic item is not on a panel, multiple instances of the
terminal, and if there is a mismatch between schematic terminals and panel
terminals.
Installation Codes to Extract
Extracts only the information for components with specific installation values.
Indicate to process all components, components without an installation code,
or only components marked with an installation code that matches that
entered in the edit box. Wild-cards are supported.
Once you pick the Named Installation button, you can simply type the
installation code in the box or click the List: Drawing or List: Project button
to select from a list of used installation codes.
Location Codes to Extract
Extracts only the information for components with specific location values.
Indicate to process all components, components without a location code, or
only components marked with a location code that matches that entered in
the edit box. Wild-cards are supported.
Once you pick the Named Location button, you can simply type the location
code in the box or click the List: Drawing or List: Project button to select from
a list of used location codes.
Report options
■Save Report to File: Saves the report to a file. Select the type of output file
from the Save Report to File dialog box. You can define multiple file outputs
using this dialog box. Choose from: ASCII report (.rep), Comma Delimited
(.csv), Excel spreadsheet (.xls), Access database (.mdb), and XML (.xml)
format.
The First Section Only button indicates to only show the selected option
(such as title line or time and date) on the first section of the report, if
multiple sections are used. If not selected, the selected options will be
shown on all report sections.
■Change Report Fields: Changes what data fields are reported and the order
in which they appear. You can also change the justification of any column
and even the column label. If you include the Description field in your
Overview of format files | 1457

report, you choose which lines make up this field. Just toggle on and off
the specific fields to define the Description.
■Put on Drawing: Opens the Table Generation Setup dialog box for
specifying how to display your report as a table on your drawing.
■Sort Fields: Controls the sorting order of the fields in the report.
NOTE The options are saved in the format file after you click OK on the subdialog
boxes. If you are working in an unnamed format file, you have to save the data
after you select Done in order to keep the changes you have made.
Breaks
■Special breaks: Specifies the value that controls the section break. The
drop-down list displays the report-specific content to apply to the special
break.
■Add Special break values to header: Adds the special break value to the
page header. For example, if you select a special break of
Installation/Location, the values provided for these devices in the panel
are displayed in the report section header.
Format File
Format files define specific criteria applied to the report before generating the
report to screen, printer, file, or automatic generation. The format files are
saved to the 'Documents and Settings\{user name}' subdirectory or 'Users\{user
name}' on a Windows Vista or Windows 7 installation.
■Open Format File: Selects format files to edit. The Report Format Settings
File Selection dialog box opens and displays a list of format files (.set) in
the user subdirectory. Select a file to edit from the list and click OK.
■Save Format File: Saves a format file on the hard disk for later retrieval and
usage when generating reports.
■Save As Format File: Saves a format file that you opened and modified with
a different name.
Report format file setup - panel wire connection
1458 | Chapter 18 Reports

Ribbon: Reports tab ➤ Miscellaneous panel ➤ Report Format Setup.
Toolbar: Schematic Reports
Menu: Projects ➤ Reports ➤ Report Format File Setup
Command entry: AEFORMATFILE
Select Wire Connection from the Panel report list.
Installation Codes to Extract
Extracts only the information for components with specific installation values.
Indicate to process all components, components without an installation code,
or only components marked with an installation code that matches that
entered in the edit box. Wild-cards are supported.
Once you pick the Named Installation button, you can simply type the
installation code in the box or click the List: Drawing or List: Project button
to select from a list of used installation codes.
Location Codes to Extract
Extracts only the information for components with specific location values.
Indicate to process all components, components without a location code, or
only components marked with a location code that matches that entered in
the edit box. Wild-cards are supported.
Once you pick the Named Location button, you can simply type the location
code in the box or click the List: Drawing or List: Project button to select from
a list of used location codes.
Report options
■Save Report to File: Saves the report to a file. Select the type of output file
from the Save Report to File dialog box. You can define multiple file outputs
using this dialog box. Choose from: ASCII report (.rep), Comma Delimited
(.csv), Excel spreadsheet (.xls), Access database (.mdb), and XML (.xml)
format.
The First Section Only button indicates to only show the selected option
(such as title line or time and date) on the first section of the report, if
Overview of format files | 1459

multiple sections are used. If not selected, the selected options will be
shown on all report sections.
■Change Report Fields: Changes what data fields are reported and the order
in which they appear. You can also change the justification of any column
and even the column label. If you include the Description field in your
report, you choose which lines make up this field. Just toggle on and off
the specific fields to define the Description.
■Put on Drawing: Opens the Table Generation Setup dialog box for
specifying how to display your report as a table on your drawing.
■Sort Fields: Controls the sorting order of the fields in the report.
NOTE The options are saved in the format file after you click OK on the subdialog
boxes. If you are working in an unnamed format file, you have to save the data
after you select Done in order to keep the changes you have made.
Breaks
■Special breaks: Specifies the value that controls the section break. The
drop-down list displays the report-specific content to apply to the special
break.
■Add Special break values to header: Adds the special break value to the
page header. For example, if you select a special break of
Installation/Location, the values provided for these devices in the panel
are displayed in the report section header.
Format File
Format files define specific criteria applied to the report before generating the
report to screen, printer, file, or automatic generation. The format files are
saved to the 'Documents and Settings\{user name}' subdirectory or 'Users\{user
name}' on a Windows Vista or Windows 7 installation.
■Open Format File: Selects format files to edit. The Report Format Settings
File Selection dialog box opens and displays a list of format files (.set) in
the user subdirectory. Select a file to edit from the list and click OK.
■Save Format File: Saves a format file on the hard disk for later retrieval and
usage when generating reports.
■Save As Format File: Saves a format file that you opened and modified with
a different name.
1460 | Chapter 18 Reports

Report format file setup - schematic bill of
material
Ribbon: Reports tab ➤ Miscellaneous panel ➤ Report Format Setup.
Toolbar: Schematic Reports
Menu: Projects ➤ Reports ➤ Report Format File Setup
Command entry: AEFORMATFILE
Select Bill of Material from the Schematic report list.
Category
By default, the report lists schematic components. Select a different Category
to run the report for one-line, one-line bus-tap, hydraulic, pneumatic, P&ID,
or user-defined components. These components are each identified by a unique
WDTYPE attribute on page 325 value.
Include options
Specifies to include cables, connectors, or both in the report.
Display option
■Normal Tallied Format: identical component or component/assemblies
are tallied and reported as single line items (for example, Red push-button
operator 800EP-F4 with 800E-A3L latch and two 800E-3X10 N.O. contact
blocks).
■Normal Tallied Format (Group by Installation/Location): identical
component or component/assemblies with the same installation/location
codes are tallied and reported as single line items.
■Display in Tallied Purchase List Format: each part becomes its own line
item (for example, no longer any subassembly items) and each is tallied
across all component types. For example, all 800E-3X10 N.O. contact blocks
for all components are reported as a single line item.
■Display in By TAG Format: all instances of a given component-ID or
terminal tag are processed together and reported as a single entry.
Overview of format files | 1461

Installation Codes to Extract
Extracts only the information for components with specific installation values.
Indicate to process all components, components without an installation code,
or only components marked with an installation code that matches that
entered in the edit box. Wild-cards are supported.
Once you click Named Installation, you can type the installation code in the
box or click List: Drawing or List: Project to select from a list of used installation
codes.
Location Codes to Extract
Extracts only the information for components with specific location values.
Indicate to process all components, components without a location code, or
only components marked with a location code that matches that entered in
the edit box. Wild-cards are supported.
Once you click Named Location, you can type the location code in the box
or click List: Drawing or List: Project to select from a list of used location codes.
Report options
■Save Report to File: Saves the report to a file. Select the type of output file
from the Save Report to File dialog box. You can define multiple file
outputs. Choose from: ASCII report (.rep), Comma Delimited (.csv), Excel
spreadsheet (.xls), Access database (.mdb), and XML (.xml) format.
First Section Only shows only the selected option (such as title line or time
and date) on the first section of the report if multiple sections are used. If
not checked, the selected options are shown on all report sections.
■Change Report Fields: Changes what data fields are reported and the order
in which they appear. You can change the justification of any column and
the column label. The Description field can be multi-lined. If you include
the Description field in your report, you choose which lines make up this
field. Toggle on and off the specific fields to define the Description.
■Put on Drawing: Opens the Table Generation Setup dialog box for
specifying how to display your report as a table on your drawing.
■Sort Fields: Controls the sorting order of the fields in the report.
NOTE The options are saved in the format file after you click OK on the dialog
boxes. If you are working in an unnamed format file, you must save the data after
you click Done to keep the changes you made.
1462 | Chapter 18 Reports

Breaks
■Special breaks: Specifies the value that controls the section break. The list
displays the report-specific content to apply to the special break.
■Add Special break values to header: Adds the special break value to the
page header. For example, if you select a special break of
Installation/Location, the values provided for these devices in the schematic
are displayed in the report section header.
Format File
Format files define specific criteria applied to the report before generating the
report to screen, printer, file, or automatic generation. The format files are
saved to the 'Documents and Settings\{user name}' subdirectory or 'Users\{user
name}' on a Windows Vista or Windows 7 installation.
■Open Format File: Selects format files to edit. The Report Format Settings
File Selection dialog box opens and displays a list of format files (.set) in
the user subdirectory. Select a file to edit from the list and click OK.
■Save Format File: Saves a format file on the hard drive for later retrieval
and usage when generating reports.
■Save As Format File: Saves a format file that you opened and modified with
a different name.
Report format file setup - schematic cable from/to
Ribbon: Reports tab ➤ Miscellaneous panel ➤ Report Format Setup.
Toolbar: Schematic Reports
Menu: Projects ➤ Reports ➤ Report Format File Setup
Command entry: AEFORMATFILE
Select Cable From/To from the Schematic report list
Category
By default, the report lists schematic components. Select a different Category
to run the report for one-line, one-line bus-tap, hydraulic, pneumatic, P&ID,
Overview of format files | 1463

or user-defined components. These components are each identified by a unique
WDTYPE attribute on page 325 value.
Report options
■Save Report to File: Saves the report to a file. Select the type of output file
from the Save Report to File dialog box. You can define multiple file outputs
using this dialog box. Choose from: ASCII report (.rep), Comma Delimited
(.csv), Excel spreadsheet (.xls), Access database (.mdb), and XML (.xml)
format.
The First Section Only button indicates to only show the selected option
(such as title line or time and date) on the first section of the report, if
multiple sections are used. If not selected, the selected options will be
shown on all report sections.
■Change Report Fields: Changes what data fields are reported and the order
in which they appear. You can also change the justification of any column
and even the column label. If you include the Description field in your
report, you choose which lines make up this field. Just toggle on and off
the specific fields to define the Description.
■Put on Drawing: Opens the Table Generation Setup dialog box for
specifying how to display your report as a table on your drawing.
■Sort Fields: Controls the sorting order of the fields in the report.
NOTE The options are saved in the format file after you click OK on the subdialog
boxes. If you are working in an unnamed format file, you have to save the data
after you select Done in order to keep the changes you have made.
Breaks
■Special breaks: Specifies the value that controls the section break. The
drop-down list displays the report-specific content to apply to the special
break.
■Add Special break values to header: Adds the special break value to the
page header. For example, if you select a special break of
Installation/Location, the values provided for these devices in the schematic
are displayed in the report section header.
Format File
Format files define specific criteria applied to the report before generating the
report to screen, printer, file, or automatic generation. The format files are
1464 | Chapter 18 Reports

saved to the 'Documents and Settings\{user name}' subdirectory or 'Users\{user
name}' on a Windows Vista or Windows 7 installation.
■Open Format File: Selects format files to edit. The Report Format Settings
File Selection dialog box opens and displays a list of format files (.set) in
the user subdirectory. Select a file to edit from the list and click OK.
■Save Format File: Saves a format file on the hard disk for later retrieval and
usage when generating reports.
■Save As Format File: Saves a format file that you opened and modified with
a different name.
Report format file setup - schematic cable
summary
Ribbon: Reports tab ➤ Miscellaneous panel ➤ Report Format Setup.
Toolbar: Schematic Reports
Menu: Projects ➤ Reports ➤ Report Format File Setup
Command entry: AEFORMATFILE
Select Cable Summary from the Schematic report list.
Category
By default, the report lists schematic components. Select a different Category
to run the report for one-line, one-line bus-tap, hydraulic, pneumatic, P&ID,
or user-defined components. These components are each identified by a unique
WDTYPE attribute on page 325 value.
Installation Codes to Extract
Extracts only the information for components with specific installation values.
Indicate to process all components, components without an installation code,
or only components marked with an installation code that matches that
entered in the edit box. Wild-cards are supported.
Once you pick the Named Installation button, you can simply type the
installation code in the box or click the List: Drawing or List: Project button
to select from a list of used installation codes.
Overview of format files | 1465

Location Codes to Extract
Extracts only the information for components with specific location values.
Indicate to process all components, components without a location code, or
only components marked with a location code that matches that entered in
the edit box. Wild-cards are supported.
Once you pick the Named Location button, you can simply type the location
code in the box or click the List: Drawing or List: Project button to select from
a list of used location codes.
Report options
■Save Report to File: Saves the report to a file. Select the type of output file
from the Save Report to File dialog box. You can define multiple file outputs
using this dialog box. Choose from: ASCII report (.rep), Comma Delimited
(.csv), Excel spreadsheet (.xls), Access database (.mdb), and XML (.xml)
format.
The First Section Only button indicates to only show the selected option
(such as title line or time and date) on the first section of the report, if
multiple sections are used. If not selected, the selected options will be
shown on all report sections.
■Change Report Fields: Changes what data fields are reported and the order
in which they appear. You can also change the justification of any column
and even the column label. If you include the Description field in your
report, you choose which lines make up this field. Just toggle on and off
the specific fields to define the Description.
■Put on Drawing: Opens the Table Generation Setup dialog box for
specifying how to display your report as a table on your drawing.
■Sort Fields: Controls the sorting order of the fields in the report.
NOTE The options are saved in the format file after you click OK on the subdialog
boxes. If you are working in an unnamed format file, you have to save the data
after you select Done in order to keep the changes you have made.
Breaks
■Special breaks: Specifies the value that controls the section break. The
drop-down list displays the report-specific content to apply to the special
break.
■Add Special break values to header: Adds the special break value to the
page header. For example, if you select a special break of
1466 | Chapter 18 Reports
Installation/Location, the values provided for these devices in the schematic
are displayed in the report section header.
Format File
Format files define specific criteria applied to the report before generating the
report to screen, printer, file, or automatic generation. The format files are
saved to the 'Documents and Settings\{user name}' subdirectory or 'Users\{user
name}' on a Windows Vista or Windows 7 installation.
■Open Format File: Selects format files to edit. The Report Format Settings
File Selection dialog box opens and displays a list of format files (.set) in
the user subdirectory. Select a file to edit from the list and click OK.
NOTE You cannot open format files created before AutoCAD Electrical 2005
for this report.
■Save Format File: Saves a format file on the hard disk for later retrieval and
usage when generating reports.
■Save As Format File: Saves a format file that you opened and modified with
a different name.
Report format file setup - schematic PLC I/O
component connection
Ribbon: Reports tab ➤ Miscellaneous panel ➤ Report Format Setup.
Toolbar: Schematic Reports
Menu: Projects ➤ Reports ➤ Report Format File Setup
Command entry: AEFORMATFILE
Select PLC I/O Component Connection from the Schematic report list.
Installation Codes to Extract
Extracts only the information for components with specific installation values.
Indicate to process all components, components without an installation code,
Overview of format files | 1467

or only components marked with an installation code that matches that
entered in the edit box. Wild-cards are supported.
Once you pick the Named Installation button, you can simply type the
installation code in the box or click the List: Drawing or List: Project button
to select from a list of used installation codes.
Location Codes to Extract
Extracts only the information for components with specific location values.
Indicate to process all components, components without a location code, or
only components marked with a location code that matches that entered in
the edit box. Wild-cards are supported.
Once you pick the Named Location button, you can simply type the location
code in the box or click the List: Drawing or List: Project button to select from
a list of used location codes.
Report options
■Save Report to File: Saves the report to a file. Select the type of output file
from the Save Report to File dialog box. You can define multiple file outputs
using this dialog box. Choose from: ASCII report (.rep), Comma Delimited
(.csv), Excel spreadsheet (.xls), Access database (.mdb), and XML (.xml)
format.
The First Section Only button indicates to only show the selected option
(such as title line or time and date) on the first section of the report, if
multiple sections are used. If not selected, the selected options will be
shown on all report sections.
■Change Report Fields: Changes what data fields are reported and the order
in which they appear. You can also change the justification of any column
and even the column label. If you include the Description field in your
report, you choose which lines make up this field. Just toggle on and off
the specific fields to define the Description.
■Put on Drawing: Opens the Table Generation Setup dialog box for
specifying how to display your report as a table on your drawing.
■Sort Fields: Controls the sorting order of the fields in the report.
NOTE The options are saved in the format file after you click OK on the subdialog
boxes. If you are working in an unnamed format file, you have to save the data
after you select Done in order to keep the changes you have made.
1468 | Chapter 18 Reports
Breaks
■Special breaks: Specifies the value that controls the section break. The
drop-down list displays the report-specific content to apply to the special
break.
■Add Special break values to header: Adds the special break value to the
page header. For example, if you select a special break of
Installation/Location, the values provided for these devices in the schematic
are displayed in the report section header.
Format File
Format files define specific criteria applied to the report before generating the
report to screen, printer, file, or automatic generation. The format files are
saved to the 'Documents and Settings\{user name}' subdirectory or 'Users\{user
name}' on a Windows Vista or Windows 7 installation.
■Open Format File: Selects format files to edit. The Report Format Settings
File Selection dialog box opens and displays a list of format files (.set) in
the user subdirectory. Select a file to edit from the list and click OK.
NOTE You cannot open format files created before AutoCAD Electrical 2005
for this report.
■Save Format File: Saves a format file on the hard disk for later retrieval and
usage when generating reports.
■Save As Format File: Saves a format file that you opened and modified with
a different name.
Report format file setup - schematic component
wire list
Ribbon: Reports tab ➤ Miscellaneous panel ➤ Report Format Setup.
Toolbar: Schematic Reports
Menu: Projects ➤ Reports ➤ Report Format File Setup
Command entry: AEFORMATFILE
Overview of format files | 1469
Select Component Wire List from the Schematic report list.
Options
Specifies to include stand-alone terminals or plug-jack connectors in the report.
Installation Codes to Extract
Extracts only the information for components with specific installation values.
Indicate to process all components, components without an installation code,
or only components marked with an installation code that matches that
entered in the edit box. Wild-cards are supported.
Once you pick the Named Installation button, you can simply type the
installation code in the box or click the List: Drawing or List: Project button
to select from a list of used installation codes.
Location Codes to Extract
Extracts only the information for components with specific location values.
Indicate to process all components, components without a location code, or
only components marked with a location code that matches that entered in
the edit box. Wild-cards are supported.
Once you pick the Named Location button, you can simply type the location
code in the box or click the List: Drawing or List: Project button to select from
a list of used location codes.
Report options
■Save Report to File: Saves the report to a file. Select the type of output file
from the Save Report to File dialog box. You can define multiple file outputs
using this dialog box. Choose from: ASCII report (.rep), Comma Delimited
(.csv), Excel spreadsheet (.xls), Access database (.mdb), and XML (.xml)
format.
The First Section Only button indicates to only show the selected option
(such as title line or time and date) on the first section of the report, if
multiple sections are used. If not selected, the selected options will be
shown on all report sections.
■Change Report Fields: Changes what data fields are reported and the order
in which they appear. You can also change the justification of any column
and even the column label. If you include the Description field in your
report, you choose which lines make up this field. Just toggle on and off
the specific fields to define the Description.
1470 | Chapter 18 Reports

■Put on Drawing: Opens the Table Generation Setup dialog box for
specifying how to display your report as a table on your drawing.
■Sort Fields: Controls the sorting order of the fields in the report.
NOTE The options are saved in the format file after you click OK on the subdialog
boxes. If you are working in an unnamed format file, you have to save the data
after you select Done in order to keep the changes you have made.
Breaks
■Special breaks: Specifies the value that controls the section break. The
drop-down list displays the report-specific content to apply to the special
break.
■Add Special break values to header: Adds the special break value to the
page header. For example, if you select a special break of
Installation/Location, the values provided for these devices in the schematic
are displayed in the report section header.
Format File
Format files define specific criteria applied to the report before generating the
report to screen, printer, file, or automatic generation. The format files are
saved to the 'Documents and Settings\{user name}' subdirectory or 'Users\{user
name}' on a Windows Vista or Windows 7 installation.
■Open Format File: Selects format files to edit. The Report Format Settings
File Selection dialog box opens and displays a list of format files (.set) in
the user subdirectory. Select a file to edit from the list and click OK.
NOTE You cannot open format files created before AutoCAD Electrical 2005
for this report.
■Save Format File: Saves a format file on the hard disk for later retrieval and
usage when generating reports.
■Save As Format File: Saves a format file that you opened and modified with
a different name.
Report format file setup - schematic connector
details
Overview of format files | 1471

Ribbon: Reports tab ➤ Miscellaneous panel ➤ Report Format Setup.
Toolbar: Schematic Reports
Menu: Projects ➤ Reports ➤ Report Format File Setup
Command entry: AEFORMATFILE
Select Connector Details from the Schematic report list.
Category
By default, the report lists schematic components. Select a different Category
to run the report for one-line, one-line bus-tap, hydraulic, pneumatic, P&ID,
or user-defined components. These components are each identified by a unique
WDTYPE attribute on page 325 value.
Installation Codes to Extract
Extracts only the information for components with specific installation values.
Indicate to process all components, components without an installation code,
or only components marked with an installation code that matches that
entered in the edit box. Wild-cards are supported.
Once you pick the Named Installation button, you can simply type the
installation code in the box or click the List: Drawing or List: Project button
to select from a list of used installation codes.
Location Codes to Extract
Extracts only the information for components with specific location values.
Indicate to process all components, components without a location code, or
only components marked with a location code that matches that entered in
the edit box. Wild-cards are supported.
Once you pick the Named Location button, you can simply type the location
code in the box or click the List: Drawing or List: Project button to select from
a list of used location codes.
Report options
■Save Report to File: Saves the report to a file. Select the type of output file
from the Save Report to File dialog box. You can define multiple file outputs
1472 | Chapter 18 Reports

using this dialog box. Choose from: ASCII report (.rep), Comma Delimited
(.csv), Excel spreadsheet (.xls), Access database (.mdb), and XML (.xml)
format.
The First Section Only button indicates to only show the selected option
(such as title line or time and date) on the first section of the report, if
multiple sections are used. If not selected, the selected options will be
shown on all report sections.
■Change Report Fields: Changes what data fields are reported and the order
in which they appear. You can also change the justification of any column
and even the column label. If you include the Description field in your
report, you choose which lines make up this field. Just toggle on and off
the specific fields to define the Description.
■Put on Drawing: Opens the Table Generation Setup dialog box for
specifying how to display your report as a table on your drawing.
■Sort Fields: Controls the sorting order of the fields in the report.
NOTE The options are saved in the format file after you click OK on the subdialog
boxes. If you are working in an unnamed format file, you have to save the data
after you select Done in order to keep the changes you have made.
Breaks
■Special breaks: Specifies the value that controls the section break. The
drop-down list displays the report-specific content to apply to the special
break.
■Add Special break values to header: Adds the special break value to the
page header. For example, if you select a special break of
Installation/Location, the values provided for these devices in the schematic
are displayed in the report section header.
Format File
Format files define specific criteria applied to the report before generating the
report to screen, printer, file, or automatic generation. The format files are
saved to the 'Documents and Settings\{user name}' subdirectory or 'Users\{user
name}' on a Windows Vista or Windows 7 installation.
■Open Format File: Selects format files to edit. The Report Format Settings
File Selection dialog box opens and displays a list of format files (.set) in
the user subdirectory. Select a file to edit from the list and click OK.
Overview of format files | 1473

■Save Format File: Saves a format file on the hard disk for later retrieval and
usage when generating reports.
■Save As Format File: Saves a format file that you opened and modified with
a different name.
Report format file setup - schematic connector
plug
Ribbon: Reports tab ➤ Miscellaneous panel ➤ Report Format Setup.
Toolbar: Schematic Reports
Menu: Projects ➤ Reports ➤ Report Format File Setup
Command entry: AEFORMATFILE
Select Connector Plug from the Schematic report list.
Category
By default, the report lists schematic components. Select a different Category
to run the report for one-line, one-line bus-tap, hydraulic, pneumatic, P&ID,
or user-defined components. These components are each identified by a unique
WDTYPE attribute on page 325 value.
Installation Codes to Extract
Extracts only the information for components with specific installation values.
Indicate to process all components, components without an installation code,
or only components marked with an installation code that matches that
entered in the edit box. Wild-cards are supported.
Once you pick the Named Installation button, you can simply type the
installation code in the box or click the List: Drawing or List: Project button
to select from a list of used installation codes.
Location Codes to Extract
Extracts only the information for components with specific location values.
Indicate to process all components, components without a location code, or
1474 | Chapter 18 Reports

only components marked with a location code that matches that entered in
the edit box. Wild-cards are supported.
Once you pick the Named Location button, you can simply type the location
code in the box or click the List: Drawing or List: Project button to select from
a list of used location codes.
Report options
■Save Report to File: Saves the report to a file. Select the type of output file
from the Save Report to File dialog box. You can define multiple file outputs
using this dialog box. Choose from: ASCII report (.rep), Comma Delimited
(.csv), Excel spreadsheet (.xls), Access database (.mdb), and XML (.xml)
format.
The First Section Only button indicates to only show the selected option
(such as title line or time and date) on the first section of the report, if
multiple sections are used. If not selected, the selected options will be
shown on all report sections.
■Change Report Fields: Changes what data fields are reported and the order
in which they appear. You can also change the justification of any column
and even the column label. If you include the Description field in your
report, you choose which lines make up this field. Just toggle on and off
the specific fields to define the Description.
■Put on Drawing: Opens the Table Generation Setup dialog box for
specifying how to display your report as a table on your drawing.
■Sort Fields: Controls the sorting order of the fields in the report.
NOTE The options are saved in the format file after you click OK on the subdialog
boxes. If you are working in an unnamed format file, you have to save the data
after you select Done in order to keep the changes you have made.
Breaks
■Special breaks: Specifies the value that controls the section break. The
drop-down list displays the report-specific content to apply to the special
break.
■Add Special break values to header: Adds the special break value to the
page header. For example, if you select a special break of
Installation/Location, the values provided for these devices in the schematic
are displayed in the report section header.
Overview of format files | 1475

Format File
Format files define specific criteria applied to the report before generating the
report to screen, printer, file, or automatic generation. The format files are
saved to the 'Documents and Settings\{user name}' subdirectory or 'Users\{user
name}' on a Windows Vista or Windows 7 installation.
■Open Format File: Selects format files to edit. The Report Format Settings
File Selection dialog box opens and displays a list of format files (.set) in
the user subdirectory. Select a file to edit from the list and click OK.
■Save Format File: Saves a format file on the hard disk for later retrieval and
usage when generating reports.
■Save As Format File: Saves a format file that you opened and modified with
a different name.
Report format file setup - schematic connector
summary
Ribbon: Reports tab ➤ Miscellaneous panel ➤ Report Format Setup.
Toolbar: Schematic Reports
Menu: Projects ➤ Reports ➤ Report Format File Setup
Command entry: AEFORMATFILE
Select Connector Summary from the Schematic report list.
Category
By default, the report lists schematic components. Select a different Category
to run the report for one-line, one-line bus-tap, hydraulic, pneumatic, P&ID,
or user-defined components. These components are each identified by a unique
WDTYPE attribute on page 325 value.
Installation Codes to Extract
Extracts only the information for components with specific installation values.
Indicate to process all components, components without an installation code,
or only components marked with an installation code that matches that
entered in the edit box. Wild-cards are supported.
1476 | Chapter 18 Reports

Once you pick the Named Installation button, you can simply type the
installation code in the box or click the List: Drawing or List: Project button
to select from a list of used installation codes.
Location Codes to Extract
Extracts only the information for components with specific location values.
Indicate to process all components, components without a location code, or
only components marked with a location code that matches that entered in
the edit box. Wild-cards are supported.
Once you pick the Named Location button, you can simply type the location
code in the box or click the List: Drawing or List: Project button to select from
a list of used location codes.
Report options
■Save Report to File: Saves the report to a file. Select the type of output file
from the Save Report to File dialog box. You can define multiple file outputs
using this dialog box. Choose from: ASCII report (.rep), Comma Delimited
(.csv), Excel spreadsheet (.xls), Access database (.mdb), and XML (.xml)
format.
The First Section Only button indicates to only show the selected option
(such as title line or time and date) on the first section of the report, if
multiple sections are used. If not selected, the selected options will be
shown on all report sections.
■Change Report Fields: Changes what data fields are reported and the order
in which they appear. You can also change the justification of any column
and even the column label. If you include the Description field in your
report, you choose which lines make up this field. Just toggle on and off
the specific fields to define the Description.
■Put on Drawing: Opens the Table Generation Setup dialog box for
specifying how to display your report as a table on your drawing.
■Sort Fields: Controls the sorting order of the fields in the report.
NOTE The options are saved in the format file after you click OK on the subdialog
boxes. If you are working in an unnamed format file, you have to save the data
after you select Done in order to keep the changes you have made.
Overview of format files | 1477

Breaks
■Special breaks: Specifies the value that controls the section break. The
drop-down list displays the report-specific content to apply to the special
break.
■Add Special break values to header: Adds the special break value to the
page header. For example, if you select a special break of
Installation/Location, the values provided for these devices in the schematic
are displayed in the report section header.
Format File
Format files define specific criteria applied to the report before generating the
report to screen, printer, file, or automatic generation. The format files are
saved to the 'Documents and Settings\{user name}' subdirectory or 'Users\{user
name}' on a Windows Vista or Windows 7 installation.
■Open Format File: Selects format files to edit. The Report Format Settings
File Selection dialog box opens and displays a list of format files (.set) in
the user subdirectory. Select a file to edit from the list and click OK.
■Save Format File: Saves a format file on the hard disk for later retrieval and
usage when generating reports.
■Save As Format File: Saves a format file that you opened and modified with
a different name.
Report format file setup - schematic component
Ribbon: Reports tab ➤ Miscellaneous panel ➤ Report Format Setup.
Toolbar: Schematic Reports
Menu: Projects ➤ Reports ➤ Report Format File Setup
Command entry: AEFORMATFILE
Select Component from the Schematic report list.
1478 | Chapter 18 Reports
Category
By default, the report lists schematic components. Select a different Category
to run the report for one-line, one-line bus-tap, hydraulic, pneumatic, P&ID,
or user-defined components. These components are each identified by a unique
WDTYPE attribute on page 325 value.
Options
Specifies whether to include components, cable markers, or connectors in the
report. You can also indicate to include the children for any of the selected
options.
Installation Codes to Extract
Extracts only the information for components with specific installation values.
Indicate to process all components, components without an installation code,
or only components marked with an installation code that matches that
entered in the edit box. Wild-cards are supported.
Once you pick the Named Installation button, you can simply type the
installation code in the box or click the List: Drawing or List: Project button
to select from a list of used installation codes.
Location Codes to Extract
Extracts only the information for components with specific location values.
Indicate to process all components, components without a location code, or
only components marked with a location code that matches that entered in
the edit box. Wild-cards are supported.
Once you pick the Named Location button, you can simply type the location
code in the box or click the List: Drawing or List: Project button to select from
a list of used location codes.
Report options
■Save Report to File: Saves the report to a file. Select the type of output file
from the Save Report to File dialog box. You can define multiple file outputs
using this dialog box. Choose from: ASCII report (.rep), Comma Delimited
(.csv), Excel spreadsheet (.xls), Access database (.mdb), and XML (.xml)
format.
The First Section Only button indicates to only show the selected option
(such as title line or time and date) on the first section of the report, if
multiple sections are used. If not selected, the selected options will be
shown on all report sections.
Overview of format files | 1479

■Change Report Fields: Changes what data fields are reported and the order
in which they appear. You can also change the justification of any column
and even the column label. If you include the Description field in your
report, you choose which lines make up this field. Just toggle on and off
the specific fields to define the Description.
■Put on Drawing: Opens the Table Generation Setup dialog box for
specifying how to display your report as a table on your drawing.
■Sort Fields: Controls the sorting order of the fields in the report.
NOTE The options are saved in the format file after you click OK on the subdialog
boxes. If you are working in an unnamed format file, you have to save the data
after you select Done in order to keep the changes you have made.
Breaks
■Special breaks: Specifies the value that controls the section break. The
drop-down list displays the report-specific content to apply to the special
break.
■Add Special break values to header: Adds the special break value to the
page header. For example, if you select a special break of
Installation/Location, the values provided for these devices in the schematic
are displayed in the report section header.
Format File
Format files define specific criteria applied to the report before generating the
report to screen, printer, file, or automatic generation. The format files are
saved to the 'Documents and Settings\{user name}' subdirectory or 'Users\{user
name}' on a Windows Vista or Windows 7 installation.
■Open Format File: Selects format files to edit. The Report Format Settings
File Selection dialog box opens and displays a list of format files (.set) in
the user subdirectory. Select a file to edit from the list and click OK.
■Save Format File: Saves a format file on the hard disk for later retrieval and
usage when generating reports.
■Save As Format File: Saves a format file that you opened and modified with
a different name.
Report format file setup - schematic missing bill
of material
1480 | Chapter 18 Reports

Ribbon: Reports tab ➤ Miscellaneous panel ➤ Report Format Setup.
Toolbar: Schematic Reports
Menu: Projects ➤ Reports ➤ Report Format File Setup
Command entry: AEFORMATFILE
Select Missing Bill of Material from the Schematic report list.
Category
By default, the report lists schematic components. Select a different Category
to run the report for one-line, one-line bus-tap, hydraulic, pneumatic, P&ID,
or user-defined components. These components are each identified by a unique
WDTYPE attribute on page 325 value.
Options
Specifies whether to include components, cable markers, connectors, or
terminals in the report. You can select one or multiple options to include.
Installation Codes to Extract
Extracts only the information for components with specific installation values.
Indicate to process all components, components without an installation code,
or only components marked with an installation code that matches that
entered in the edit box. Wild-cards are supported.
Once you pick the Named Installation button, you can simply type the
installation code in the box or click the List: Drawing or List: Project button
to select from a list of used installation codes.
Location Codes to Extract
Extracts only the information for components with specific location values.
Indicate to process all components, components without a location code, or
only components marked with a location code that matches that entered in
the edit box. Wild-cards are supported.
Once you pick the Named Location button, you can simply type the location
code in the box or click the List: Drawing or List: Project button to select from
a list of used location codes.
Overview of format files | 1481

Report options
■Save Report to File: Saves the report to a file. Select the type of output file
from the Save Report to File dialog box. You can define multiple file outputs
using this dialog box. Choose from: ASCII report (.rep), Comma Delimited
(.csv), Excel spreadsheet (.xls), Access database (.mdb), and XML (.xml)
format.
The First Section Only button indicates to only show the selected option
(such as title line or time and date) on the first section of the report, if
multiple sections are used. If not selected, the selected options will be
shown on all report sections.
■Change Report Fields: Changes what data fields are reported and the order
in which they appear. You can also change the justification of any column
and even the column label. The Description field is handled a little
differently than the other fields. This field can be a multi-line field which
is actually made up of multiple fields. If you include the Description field
in your report, you choose which lines make up this field. Just toggle on
and off the specific fields to define the Description.
■Put on Drawing: Opens the Table Generation Setup dialog box for
specifying how to display your report as a table on your drawing.
■Sort Fields: Controls the sorting order of the fields in the report.
NOTE The options are saved in the format file after you click OK on the subdialog
boxes. If you are working in an unnamed format file, you have to save the data
after you select Done in order to keep the changes you have made.
Breaks
■Special breaks: Specifies the value that controls the section break. The
drop-down list displays the report-specific content to apply to the special
break.
■Add Special break values to header: Adds the special break value to the
page header. For example, if you select a special break of
Installation/Location, the values provided for these devices in the schematic
are displayed in the report section header.
Format File
Format files define specific criteria applied to the report before generating the
report to screen, printer, file, or automatic generation. The format files are
1482 | Chapter 18 Reports

saved to the 'Documents and Settings\{user name}' subdirectory or 'Users\{user
name}' on a Windows Vista or Windows 7 installation.
■Open Format File: Selects format files to edit. The Report Format Settings
File Selection dialog box opens and displays a list of format files (.set) in
the user subdirectory. Select a file to edit from the list and click OK.
■Save Format File: Saves a format file on the hard disk for later retrieval and
usage when generating reports.
■Save As Format File: Saves a format file that you opened and modified with
a different name.
Report format file setup - schematic wire from/to
Ribbon: Reports tab ➤ Miscellaneous panel ➤ Report Format Setup.
Toolbar: Schematic Reports
Menu: Projects ➤ Reports ➤ Report Format File Setup
Command entry: AEFORMATFILE
Select Wire From/To from the Schematic report list.
Category
By default, the report lists schematic components. Select a different Category
to run the report for one-line, one-line bus-tap, hydraulic, pneumatic, P&ID,
or user-defined components. These components are each identified by a unique
WDTYPE attribute on page 325 value.
Report options
■Save Report to File: Saves the report to a file. Select the type of output file
from the Save Report to File dialog box. You can define multiple file outputs
using this dialog box. Choose from: ASCII report (.rep), Comma Delimited
(.csv), Excel spreadsheet (.xls), Access database (.mdb), and XML (.xml)
format.
The First Section Only button indicates to only show the selected option
(such as title line or time and date) on the first section of the report, if
Overview of format files | 1483

multiple sections are used. If not selected, the selected options will be
shown on all report sections.
■Change Report Fields: Changes what data fields are reported and the order
in which they appear. You can also change the justification of any column
and even the column label. If you include the Description field in your
report, you choose which lines make up this field. Just toggle on and off
the specific fields to define the Description.
■Put on Drawing: Opens the Table Generation Setup dialog box for
specifying how to display your report as a table on your drawing.
■Sort Fields: Controls the sorting order of the fields in the report.
NOTE The options are saved in the format file after you click OK on the subdialog
boxes. If you are working in an unnamed format file, you have to save the data
after you select Done in order to keep the changes you have made.
Format File
Format files define specific criteria applied to the report before generating the
report to screen, printer, file, or automatic generation. The format files are
saved to the 'Documents and Settings\{user name}' subdirectory or 'Users\{user
name}' on a Windows Vista or Windows 7 installation.
■Open Format File: Selects format files to edit. The Report Format Settings
File Selection dialog box opens and displays a list of format files (.set) in
the user subdirectory. Select a file to edit from the list and click OK.
■Save Format File: Saves a format file on the hard disk for later retrieval and
usage when generating reports.
■Save As Format File: Saves a format file that you opened and modified with
a different name.
Report format file setup - schematic PLC/IO
address and descriptions
Ribbon: Reports tab ➤ Miscellaneous panel ➤ Report Format Setup.
1484 | Chapter 18 Reports

Toolbar: Schematic Reports
Menu: Projects ➤ Reports ➤ Report Format File Setup
Command entry: AEFORMATFILE
Select PLC I/O Address and Descriptions from the Schematic report list.
Installation Codes to Extract
Extracts only the information for components with specific installation values.
Indicate to process all components, components without an installation code,
or only components marked with an installation code that matches that
entered in the edit box. Wild-cards are supported.
Once you pick the Named Installation button, you can simply type the
installation code in the box or click the List: Drawing or List: Project button
to select from a list of used installation codes.
Location Codes to Extract
Extracts only the information for components with specific location values.
Indicate to process all components, components without a location code, or
only components marked with a location code that matches that entered in
the edit box. Wild-cards are supported.
Once you pick the Named Location button, you can simply type the location
code in the box or click the List: Drawing or List: Project button to select from
a list of used location codes.
Report options
■Save Report to File: Saves the report to a file. Select the type of output file
from the Save Report to File dialog box. You can define multiple file outputs
using this dialog box. Choose from: ASCII report (.rep), Comma Delimited
(.csv), Excel spreadsheet (.xls), Access database (.mdb), and XML (.xml)
format.
The First Section Only button indicates to only show the selected option
(such as title line or time and date) on the first section of the report, if
multiple sections are used. If not selected, the selected options will be
shown on all report sections.
■Change Report Fields: Changes what data fields are reported and the order
in which they appear. You can also change the justification of any column
and even the column label. If you include the Description field in your
Overview of format files | 1485

report, you choose which lines make up this field. Just toggle on and off
the specific fields to define the Description.
■Put on Drawing: Opens the Table Generation Setup dialog box for
specifying how to display your report as a table on your drawing.
■Sort Fields: Controls the sorting order of the fields in the report.
NOTE The options are saved in the format file after you click OK on the subdialog
boxes. If you are working in an unnamed format file, you have to save the data
after you select Done in order to keep the changes you have made.
Breaks
■Special breaks: Specifies the value that controls the section break. The
drop-down list displays the report-specific content to apply to the special
break.
■Add Special break values to header: Adds the special break value to the
page header. For example, if you select a special break of
Installation/Location, the values provided for these devices in the schematic
are displayed in the report section header.
Format File
Format files define specific criteria applied to the report before generating the
report to screen, printer, file, or automatic generation. The format files are
saved to the 'Documents and Settings\{user name}' subdirectory or 'Users\{user
name}' on a Windows Vista or Windows 7 installation.
■Open Format File: Selects format files to edit. The Report Format Settings
File Selection dialog box opens and displays a list of format files (.set) in
the user subdirectory. Select a file to edit from the list and click OK.
■Save Format File: Saves a format file on the hard disk for later retrieval and
usage when generating reports.
■Save As Format File: Saves a format file that you opened and modified with
a different name.
Report format file setup - schematic terminal
numbers
1486 | Chapter 18 Reports

Ribbon: Reports tab ➤ Miscellaneous panel ➤ Report Format Setup.
Toolbar: Schematic Reports
Menu: Projects ➤ Reports ➤ Report Format File Setup
Command entry: AEFORMATFILE
Select Terminal Numbers from the Schematic report list.
Installation Codes to Extract
Extracts only the information for components with specific installation values.
Indicate to process all components, components without an installation code,
or only components marked with an installation code that matches that
entered in the edit box. Wild-cards are supported.
Once you pick the Named Installation button, you can simply type the
installation code in the box or click the List: Drawing or List: Project button
to select from a list of used installation codes.
Location Codes to Extract
Extracts only the information for components with specific location values.
Indicate to process all components, components without a location code, or
only components marked with a location code that matches that entered in
the edit box. Wild-cards are supported.
Once you pick the Named Location button, you can simply type the location
code in the box or click the List: Drawing or List: Project button to select from
a list of used location codes.
Report options
■Save Report to File: Saves the report to a file. Select the type of output file
from the Save Report to File dialog box. You can define multiple file outputs
using this dialog box. Choose from: ASCII report (.rep), Comma Delimited
(.csv), Excel spreadsheet (.xls), Access database (.mdb), and XML (.xml)
format.
The First Section Only button indicates to only show the selected option
(such as title line or time and date) on the first section of the report, if
Overview of format files | 1487

multiple sections are used. If not selected, the selected options will be
shown on all report sections.
■Change Report Fields: Changes what data fields are reported and the order
in which they appear. You can also change the justification of any column
and even the column label. If you include the Description field in your
report, you choose which lines make up this field. Just toggle on and off
the specific fields to define the Description.
■Put on Drawing: Opens the Table Generation Setup dialog box for
specifying how to display your report as a table on your drawing.
■Sort Fields: Controls the sorting order of the fields in the report.
NOTE The options are saved in the format file after you click OK on the subdialog
boxes. If you are working in an unnamed format file, you have to save the data
after you select Done in order to keep the changes you have made.
Breaks
■Special breaks: Specifies the value that controls the section break. The
drop-down list displays the report-specific content to apply to the special
break.
■Add Special break values to header: Adds the special break value to the
page header. For example, if you select a special break of
Installation/Location, the values provided for these devices in the schematic
are displayed in the report section header.
Format File
Format files define specific criteria applied to the report before generating the
report to screen, printer, file, or automatic generation. The format files are
saved to the 'Documents and Settings\{user name}' subdirectory or 'Users\{user
name}' on a Windows Vista or Windows 7 installation.
■Open Format File: Selects format files to edit. The Report Format Settings
File Selection dialog box opens and displays a list of format files (.set) in
the user subdirectory. Select a file to edit from the list and click OK.
■Save Format File: Saves a format file on the hard disk for later retrieval and
usage when generating reports.
■Save As Format File: Saves a format file that you opened and modified with
a different name.
1488 | Chapter 18 Reports

Report format file setup - schematic terminal plan
Ribbon: Reports tab ➤ Miscellaneous panel ➤ Report Format Setup.
Toolbar: Schematic Reports
Menu: Projects ➤ Reports ➤ Report Format File Setup
Command entry: AEFORMATFILE
Select Terminal Plan from the Schematic report list.
Installation Codes to Extract
Extracts only the information for components with specific installation values.
Indicate to process all components, components without an installation code,
or only components marked with an installation code that matches that
entered in the edit box. Wild-cards are supported.
Once you pick the Named Installation button, you can simply type the
installation code in the box or click the List: Drawing or List: Project button
to select from a list of used installation codes.
Location Codes to Extract
Extracts only the information for components with specific location values.
Indicate to process all components, components without a location code, or
only components marked with a location code that matches that entered in
the edit box. Wild-cards are supported.
Once you pick the Named Location button, you can simply type the location
code in the box or click the List: Drawing or List: Project button to select from
a list of used location codes.
Report options
■Save Report to File: Saves the report to a file. Select the type of output file
from the Save Report to File dialog box. You can define multiple file outputs
using this dialog box. Choose from: ASCII report (.rep), Comma Delimited
(.csv), Excel spreadsheet (.xls), Access database (.mdb), and XML (.xml)
format.
The First Section Only button indicates to only show the selected option
(such as title line or time and date) on the first section of the report, if
Overview of format files | 1489

multiple sections are used. If not selected, the selected options will be
shown on all report sections.
■Change Report Fields: Changes what data fields are reported and the order
in which they appear. You can also change the justification of any column
and even the column label. If you include the Description field in your
report, you choose which lines make up this field. Just toggle on and off
the specific fields to define the Description.
■Put on Drawing: Opens the Table Generation Setup dialog box for
specifying how to display your report as a table on your drawing.
■Sort Fields: Controls the sorting order of the fields in the report.
NOTE The options are saved in the format file after you click OK on the subdialog
boxes. If you are working in an unnamed format file, you have to save the data
after you select Done in order to keep the changes you have made.
Breaks
■Special breaks: Specifies the value that controls the section break. The
drop-down list displays the report-specific content to apply to the special
break.
■Add Special break values to header: Adds the special break value to the
page header. For example, if you select a special break of
Installation/Location, the values provided for these devices in the schematic
are displayed in the report section header.
Format File
Format files define specific criteria applied to the report before generating the
report to screen, printer, file, or automatic generation. The format files are
saved to the 'Documents and Settings\{user name}' subdirectory or 'Users\{user
name}' on a Windows Vista or Windows 7 installation.
■Open Format File: Selects format files to edit. The Report Format Settings
File Selection dialog box opens and displays a list of format files (.set) in
the user subdirectory. Select a file to edit from the list and click OK.
NOTE You cannot open format files created before AutoCAD Electrical 2005
for this report.
■Save Format File: Saves a format file on the hard disk for later retrieval and
usage when generating reports.
1490 | Chapter 18 Reports

■Save As Format File: Saves a format file that you opened and modified with
a different name.
Report format file setup - schematic PLC modules
used so far
Ribbon: Reports tab ➤ Miscellaneous panel ➤ Report Format Setup.
Toolbar: Schematic Reports
Menu: Projects ➤ Reports ➤ Report Format File Setup
Command entry: AEFORMATFILE
Select PLC Modules Used So Far from the Schematic report list.
Installation Codes to Extract
Extracts only the information for components with specific installation values.
Indicate to process all components, components without an installation code,
or only components marked with an installation code that matches that
entered in the edit box. Wild-cards are supported.
Once you pick the Named Installation button, you can simply type the
installation code in the box or click the List: Drawing or List: Project button
to select from a list of used installation codes.
Location Codes to Extract
Extracts only the information for components with specific location values.
Indicate to process all components, components without a location code, or
only components marked with a location code that matches that entered in
the edit box. Wild-cards are supported.
Once you pick the Named Location button, you can simply type the location
code in the box or click the List: Drawing or List: Project button to select from
a list of used location codes.
Report options
■Save Report to File: Saves the report to a file. Select the type of output file
from the Save Report to File dialog box. You can define multiple file outputs
using this dialog box. Choose from: ASCII report (.rep), Comma Delimited
Overview of format files | 1491

(.csv), Excel spreadsheet (.xls), Access database (.mdb), and XML (.xml)
format.
The First Section Only button indicates to only show the selected option
(such as title line or time and date) on the first section of the report, if
multiple sections are used. If not selected, the selected options will be
shown on all report sections.
■Change Report Fields: Changes what data fields are reported and the order
in which they appear. You can also change the justification of any column
and even the column label. If you include the Description field in your
report, you choose which lines make up this field. Just toggle on and off
the specific fields to define the Description.
■Put on Drawing: Opens the Table Generation Setup dialog box for
specifying how to display your report as a table on your drawing.
■Sort Fields: Controls the sorting order of the fields in the report.
NOTE The options are saved in the format file after you click OK on the subdialog
boxes. If you are working in an unnamed format file, you have to save the data
after you select Done in order to keep the changes you have made.
Breaks
■Special breaks: Specifies the value that controls the section break. The
drop-down list displays the report-specific content to apply to the special
break.
■Add Special break values to header: Adds the special break value to the
page header. For example, if you select a special break of
Installation/Location, the values provided for these devices in the schematic
are displayed in the report section header.
Format File
Format files define specific criteria applied to the report before generating the
report to screen, printer, file, or automatic generation. The format files are
saved to the 'Documents and Settings\{user name}' subdirectory or 'Users\{user
name}' on a Windows Vista or Windows 7 installation.
■Open Format File: Selects format files to edit. The Report Format Settings
File Selection dialog box opens and displays a list of format files (.set) in
the user subdirectory. Select a file to edit from the list and click OK.
1492 | Chapter 18 Reports

■Save Format File: Saves a format file on the hard disk for later retrieval and
usage when generating reports.
■Save As Format File: Saves a format file that you opened and modified with
a different name.
Report format file setup - schematic wire label
The options are saved in the format file after you click OK on the dialog boxes.
If you are working in an unnamed format file, you must save the data after
you click Done to keep the changes you made.
Ribbon: Reports tab ➤ Miscellaneous panel ➤ Report Format Setup.
Toolbar: Schematic Reports
Menu: Projects ➤ Reports ➤ Report Format File Setup
Command entry: AEFORMATFILE
Select Wire Label from the Schematic report list.
Report Filter
Displays the wire label for all wires, except
those that are part of a cable.
Display Wire Label
Displays the cable labels in the specified
format.
Display Cable Label
Change Report Fields
Changes which data fields are reported and the order in which they appear.
You can change the justification of any column and the column label.
There are two categories that you can change the report format for: wire label
or cable label. Once you modify the report format, you can save it for future
use. The wire and cable label formats are stored in the same file.
Overview of format files | 1493

Label Quantity per Connection
Specifies the quantity of wire labels or cable labels. Wire labels are generated
for every wire connection while cable labels are generated once for every cable.
Number of Columns to Display
Arranges the wire labels in the specified number of columns.
Horizontal/Vertical Arrangement
Arranges the wire label horizontally or vertically across the columns.
Save Report to File
Saves the report to a file. Select the type of output file from the Save Report
to File dialog box. You can define multiple file outputs. Choose from: ASCII
report (.rep), Comma Delimited (.csv), Excel spreadsheet (.xls), Access database
(.mdb), and XML (.xml) format.
First Section Only shows only the selected option (such as title line or time
and date) on the first section of the report if multiple sections are used. If not
checked, the selected options are shown on all report sections.
Put on Drawing
Opens the Table Generation Setup dialog box for specifying how to display
your report as a table on your drawing.
NOTE Once wire label reports are placed on the drawing in table format they are
not editable using the Edit Component tool. You must use the AutoCAD table edit
command to edit the table.
Breaks
Specifies the value that controls the section break.
The list displays the report-specific content to apply
to the special break.
Special Breaks
Adds the special break value to the page header. For
example, if you select a special break of Installa-
Add Special Break Values to Header
tion/Location, the values provided for these devices
in the schematic are displayed in the report section
header.
1494 | Chapter 18 Reports
Installation Codes to Extract
Extracts only the information for components with specific installation values.
Indicate to process all components, components without an installation code,
or only components marked with an installation code that matches that
entered in the edit box. Wild-cards are supported.
Once you click Named Installation, you can type the installation code in the
box or click List: Drawing or List: Project to select from a list of used installation
codes.
Location Codes to Extract
Extracts only the information for components with specific location values.
Indicate to process all components, components without a location code, or
only components marked with a location code that matches that entered in
the edit box. Wild-cards are supported.
Once you click Named Location, you can type the location code in the box
or click List: Drawing or List: Project to select from a list of used location codes.
Format File
Format files define specific criteria applied to the report before generating the
report to screen, printer, file, or automatic generation. The format files are
saved to the 'Documents and Settings\{user name}' subdirectory or 'Users\{user
name}' on a Windows Vista or Windows 7 installation.
Selects format files to edit. The Report Format Settings File
Selection dialog box opens and displays a list of format files
Open Format File
(.set) in the user subdirectory. Select a file to edit from the
list and click OK.
Saves a format file on the hard drive for later retrieval and
usage when generating reports.
Save Format File
Saves a format file that you opened and modified with a
different name.
Save As Format File
Run automatic reports
The Automatic Report Selection tool allows you to run multiple reports at one
time. The Report Generator dialog box is not displayed for each report and
no user input is required once launched. This feature can be used to generate
Run automatic reports | 1495

any number of output files or to automatically place report tables on drawings.
The first step to using the Automatic Reports feature is to create the format
files using the Report Format File Setup dialog box defining the report options
and output as described above. You can create any number of format files for
the same report if you use the same report with different options. Once your
format files are created you are ready to run the reports automatically.
If any of your selected format files contain Table Output, if there are no
existing, updatable matching report tables, the report tables insert on new
drawings. If you are running multiple reports with multiple table output, each
report gets its own. You can specify the first drawing name for any necessary
new drawings and the template name. Subsequent drawing names generate
automatically by incrementing the previous drawing's name.
If you frequently run the same group of reports you can save the set of format
files as a Report Grouping. To set up a Report Grouping, add all your format
files as if you are going to run the reports then click Save Report Grouping.
The information about the format files is saved in a Report Grouping file with
an ".rgf" extension. The next time you want to run that report set, open the
Automatic Reports Selection dialog box, click Open Report Grouping, and
select the ".rgf" file you previously saved; you are ready to run the reports.
When you click OK, the reports run in the selected order. If the format file
contains output options, the files are created. If the format file contains table
output options that report's tables are inserted. If existing, matching report
tables are found, they are updated, otherwise new table objects insert on new
drawings.
Generate a report using format files
1Click Reports tab ➤ Miscellaneous panel ➤ Automatic Reports.
2Select which report to generate from the schematic or panel report list.
3Specify the format file to use for the selected report. If there aren't any
format files to select from, you must click the Format File Setup button
to create and save a format file.
4Click the Add button to add the report name and format file to the
Selected Reports list. This button is not active until both a report name
and format file are selected.
5Continue adding more reports to the Selected Reports list.
1496 | Chapter 18 Reports
For the File and Table Output options, an 'X' indicates that the automatic
generation will run that portion, while an 'O' indicates that it will not
run that portion.
6Modify the output of a report type by selecting the report in the Selected
Reports list and then clicking the Modify Output button. Make changes
in the subdialog box and click OK.
7Save the list of report names and format files for later retrieval and usage.
8Specify a starting drawing file location and filename, and the drawing
template file to use for the automatic creation of the drawing files.
9Click OK to generate a report for the selected type(s).
Automatic report selection
Defines a list of reports and their format files, and runs the reports
automatically.
Ribbon: Reports tab ➤ Miscellaneous panel ➤ Automatic Reports.
Toolbar: Schematic Reports
Menu: Projects ➤ Reports ➤ Automatic Report Selection
Command entry: AEAUTOREPORT
Automatic Report Selection generates any number of output files, and places
report tables on drawings. You select the desired reports and click OK.
NOTE All drawings are automatically added to the bottom of the Project Listing.
Report Name
Displays a list of all schematic and panel reports available for automatic report
generation. Not every AutoCAD Electrical report is available for this command.
Format File Name
Displays a list of format files. These format files are associated with a particular
report name. If there aren't any format files to select from, you must click the
Format File Setup button to create and save a format file.
Run automatic reports | 1497
The Browse button allows you to search for a specific format file that is not
displayed in the list.
Control buttons
■Modify Output: Changes the output types for individually selected reports.
Each format file definition can determine whether the report is set to a
file or table on the drawing, or both. Select a file in the Selected Reports
list, click the Modify Output button, and click either of the toggle buttons
to turn on or off the output type.
■Add: Adds the report name and format file to the Selected Reports list. This
button is not active until both a report name and format file are selected.
■Remove: Removes individual reports from the Selected Reports list. Select
the file from the list so that it is highlighted and press the Remove button.
■Remove All: Removes all of the reports from the Selected Reports list. There
is no need to select the files in the list; simply press the Remove All button.
Selected Reports
Displays the current active listing of all reports for the report generation. The
list displays the report name and format file name, as well as indicators that
show if the report output is a file or table.
For the File and Table Output options, an 'X' indicates that the automatic
generation will run that portion, while an 'O' indicates that it will not run
that portion.
Open or Save Report Grouping
Allows you to define an alias (grouping) file with a pre-defined list of reports
for later retrieval and usage. You can make many grouping files for different
customer types and configurations. The Report Grouping files are maintained
in the Documents and Settings\{user name} subdirectory or Users\{user name}
on a Windows Vista or Windows 7 installation. The file names have an .rgf
file extension.
■Open Report Grouping: Opens a previously saved grouping of report names
and format files.
■Save Report Grouping: Saves a file that contains the list of report names
and format files for later retrieval and usage. You may define a list of reports
based upon which customer is using the report data and the format that
customer would like to see the reports in.
1498 | Chapter 18 Reports
Drawing Information for Table Output
Specifies a starting drawing file location and filename, and the drawing
template file to use for the automatic creation of the drawing files. You can
select a template drawing file to use for the automatic creation of drawing
files. Type in a template filename or use the Browse button to search for and
select a template file. It is advised to start the first drawing filename with a
numeric suffix.
NOTE If you enter just a filename, the drawing files will be created and saved in
the active project path.
Export/Import spreadsheet data
Update drawings from spreadsheet data
Use this to edit component tags, descriptions, catalog assignments, wire
numbers, or PLC I/O descriptions from a spreadsheet and then have your edits
update your drawings. Your spreadsheet/database edits can update existing
or blank values on existing components, terminals, PLC I/O modules, and
wire numbers but it cannot insert new items into the drawings.
1Click Import/Export Data tab ➤ Export panel ➤ To Spreadsheet.
2Select the data category to export.
If you select General, information for the categories marked with an
asterisk (*) is extracted. Each category is saved to a separate sheet
(spreadsheet format) or table (database format). The tab-delimited or
comma-delimited formats are not available when writing out to multiple
categories.
3Click OK.
4In the Data Export dialog box, specify to export the spreadsheet data for
the current drawing or the entire project.
5Specify the output format (Microsoft Excel, Access file, Tab-delimited
ASCII, or Comma-delimited ASCII) and the location codes to extract, and
click OK.
Export/Import spreadsheet data | 1499
AutoCAD Electrical creates a file of the data pulled from your wiring
diagram drawings.
6Open this file in any spreadsheet or database program for view and edit.
Caution: If you selected a Tab or Comma-delimited ASCII format, import
all fields as text. Some spreadsheet programs may try to convert some
fields into numeric or scientific notation values. You may need to save
the AutoCAD Electrical extracted data to a file with a .txt extension and
then use the spreadsheet's import wizard to force all fields to be classified
as text.
NOTE Do not edit the HDL and DWGNAME fields. These are used by the
Update from Spreadsheet utility to link your edits back to the correct drawing
and correct block insert on that drawing.
7After editing, save the spreadsheet data back out to its original format.
8(Optional) Before importing the spreadsheet data back into the drawing
or project, add additional columns to the spreadsheet data. Label each
column with a target ATTRIBUTE name.
During the import function, AutoCAD Electrical checks for these new
attributes and updates them with data you entered into the spreadsheet.
9Click Import/Export Data tab ➤ Import panel ➤ From Spreadsheet.
10 Select the spreadsheet and click Open.
11 In the Update Drawings per Spreadsheet Data dialog box, specify to import
the spreadsheet data for the current drawing or the entire project.
12 Select any other import options and click OK. The data for the project
or drawing automatically updates to match the edits on the spreadsheet.
All spreadsheet update changes are automatically logged, complete with
time and date, in a text file saved to the AutoCAD Electrical user
subdirectory.
If you edit the BLOCK field in the spreadsheet and assign a different block
name, AutoCAD Electrical tries to find the new block during the update.
If found, the old block is switched to the new one.
Export to spreadsheet
1500 | Chapter 18 Reports
Exports project data to a comma-delimited, Excel spreadsheet, or Access
database file so you can examine and edit the data.
Ribbon: Import/Export Data tab ➤ Export panel ➤ To Spreadsheet.
Toolbar: Schematic Reports
Menu: Projects ➤ Export to Spreadsheet ➤ Export to Spreadsheet
Command entry: AEEXPORT2SS
You can edit component tags, descriptions, catalog assignments, wire numbers,
and PLC I/O descriptions in the spreadsheet. Import the changes from the
spreadsheet using Update from Spreadsheet. The spreadsheet can update
existing components and wire numbers with your edits. If the block name is
modified, it can swap one block for another. It cannot insert new items into
drawings.
Limitation: Your spreadsheet edits can update existing or blank values on
existing components, terminals, PLC I/O modules, and wire numbers but it
cannot insert new items into the drawings. It only changes existing values.
Component data export
This utility copies components to a comma-delimited, Excel XLS, or Access
MDB file format for editing.
NOTE The User-defined attributes list on page 1508 can be used to add fields to the
spreadsheet if an attribute from a component is not exported by default.
Ribbon: Import/Export Data tab ➤ Export panel ➤ To Spreadsheet.
Toolbar: Schematic Reports
Menu: Projects ➤ Export to Spreadsheet ➤ Export to Spreadsheet
Command entry: AEEXPORT2SS
Select Component from the list.
Export/Import spreadsheet data | 1501
Data export for
Specifies to export the data for the active drawing or the entire project.
Output format
Specifies the format for outputting the spreadsheet.
Location Codes to extract
Extracts only the information for components with specific location values.
After you pick Named Location, type the location code in the box or click
List: Drawing or List: Project to select from a list of used location codes. You
can also create a report from multiple location codes. AutoCAD Electrical
automatically creates a comma-delimited list for the named location search.
General data export
This utility copies all the data categories to a comma-delimited, Excel XLS, or
Access MDB file format for editing.
Ribbon: Import/Export Data tab ➤ Export panel ➤ To Spreadsheet.
Toolbar: Schematic Reports
Menu: Projects ➤ Export to Spreadsheet ➤ Export to Spreadsheet
Command entry: AEEXPORT2SS
Select General from the list.
Data export for
Specifies to export the data for the active drawing or the entire project.
Output format
Specifies the format for outputting the spreadsheet.
Location Codes to extract
Extracts only the information for components with specific location values.
After you pick Named Location, type the location code in the box or click
List: Drawing or List: Project to select from a list of used location codes. You
1502 | Chapter 18 Reports
can also create a report from multiple location codes. AutoCAD Electrical
automatically creates a comma-delimited list for the named location search.
PLC I/O header information export
This utility copies PLC I/O header information to a comma-delimited, Excel
XLS, or Access MDB file format for editing.
Ribbon: Import/Export Data tab ➤ Export panel ➤ To Spreadsheet.
Toolbar: Schematic Reports
Menu: Projects ➤ Export to Spreadsheet ➤ Export to Spreadsheet
Command entry: AEEXPORT2SS
Select PLC I/O header information from the list.
Data export for
Specifies to export the data for the active drawing or the entire project.
Output format
Specifies the format for outputting the spreadsheet.
Location Codes to extract
Extracts only the information for components with specific location values.
After you pick Named Location, type the location code in the box or click
List: Drawing or List: Project to select from a list of used location codes. You
can also create a report from multiple location codes. AutoCAD Electrical
automatically creates a comma-delimited list for the named location search.
PLC I/O connection export
This utility copies PLC I/O wire connections to a comma-delimited, Excel XLS,
or Access MDB file format for editing.
Ribbon: Import/Export Data tab ➤ Export panel ➤ To Spreadsheet.
Export/Import spreadsheet data | 1503
Toolbar: Schematic Reports
Menu: Projects ➤ Export to Spreadsheet ➤ Export to Spreadsheet
Command entry: AEEXPORT2SS
Select PLC I/O wire connections from the list.
Data export for
Specifies to export the data for the active drawing or the entire project.
Output format
Specifies the format for outputting the spreadsheet.
Location Codes to extract
Extracts only the information for components with specific location values.
After you pick Named Location, type the location code in the box or click
List: Drawing or List: Project to select from a list of used location codes. You
can also create a report from multiple location codes. AutoCAD Electrical
automatically creates a comma-delimited list for the named location search.
PLC I/O address/description export
This utility copies PLC I/O address/descriptions to a comma-delimited, Excel
XLS, or Access MDB file format for editing.
Ribbon: Import/Export Data tab ➤ Export panel ➤ To Spreadsheet.
Toolbar: Schematic Reports
Menu: Projects ➤ Export to Spreadsheet ➤ Export to Spreadsheet
Command entry: AEEXPORT2SS
Select PLC I/O address/descriptions from the list.
Data export for
Specifies to export the data for the active drawing or the entire project.
1504 | Chapter 18 Reports

Output format
Specifies the format for outputting the spreadsheet.
Location Codes to extract
Extracts only the information for components with specific location values.
After you pick Named Location, type the location code in the box or click
List: Drawing or List: Project to select from a list of used location codes. You
can also create a report from multiple location codes. AutoCAD Electrical
automatically creates a comma-delimited list for the named location search.
Panel layout data export
This utility copies panel components to a comma-delimited, Excel XLS, or
Access MDB file format for editing.
NOTE The User-defined attributes list on page 1508 can be used to add fields to the
spreadsheet if an attribute from a component is not exported by default.
Ribbon: Import/Export Data tab ➤ Export panel ➤ To Spreadsheet.
Toolbar: Schematic Reports
Menu: Projects ➤ Export to Spreadsheet ➤ Export to Spreadsheet
Command entry: AEEXPORT2SS
Select Panel components from the list.
Data export for
Specifies to export the data for the active drawing or the entire project.
Output format
Specifies the format for outputting the spreadsheet.
Location Codes to extract
Extracts only the information for components with specific location values.
After you pick Named Location, type the location code in the box or click
List: Drawing or List: Project to select from a list of used location codes. You
Export/Import spreadsheet data | 1505
can also create a report from multiple location codes. AutoCAD Electrical
automatically creates a comma-delimited list for the named location search.
Panel terminals data export
This utility copies panel terminals to a comma-delimited, Excel XLS, or Access
MDB file format for editing.
NOTE The User-defined attributes list on page 1508 can be used to add fields to the
spreadsheet if an attribute from a component is not exported by default.
Ribbon: Import/Export Data tab ➤ Export panel ➤ To Spreadsheet.
Toolbar: Schematic Reports
Menu: Projects ➤ Export to Spreadsheet ➤ Export to Spreadsheet
Command entry: AEEXPORT2SS
Select Panel terminals from the list.
Data export for
Specifies to export the data for the active drawing or the entire project.
Output format
Specifies the format for outputting the spreadsheet.
Location Codes to extract
Extracts only the information for components with specific location values.
After you pick Named Location, type the location code in the box or click
List: Drawing or List: Project to select from a list of used location codes. You
can also create a report from multiple location codes. AutoCAD Electrical
automatically creates a comma-delimited list for the named location search.
Terminal data export
This utility copies terminals to a comma-delimited, Excel XLS, or Access MDB
file format for editing.
1506 | Chapter 18 Reports
NOTE The User-defined attributes list on page 1508 can be used to add fields to the
spreadsheet if an attribute from a component is not exported by default.
Ribbon: Import/Export Data tab ➤ Export panel ➤ To Spreadsheet.
Toolbar: Schematic Reports
Menu: Projects ➤ Export to Spreadsheet ➤ Export to Spreadsheet
Command entry: AEEXPORT2SS
Select Terminals from the list.
Data export for
Specifies to export the data for the active drawing or the entire project.
Output format
Specifies the format for outputting the spreadsheet.
Location Codes to extract
Extracts only the information for components with specific location values.
After you pick Named Location, type the location code in the box or click
List: Drawing or List: Project to select from a list of used location codes. You
can also create a report from multiple location codes. AutoCAD Electrical
automatically creates a comma-delimited list for the named location search.
Update drawings per spreadsheet data
Imports data from an edited spreadsheet, and retags or updates components,
wire numbers, terminal text, or PLC I/O.
Ribbon: Import/Export Data tab ➤ Import panel ➤ From Spreadsheet.
Toolbar: Schematic Reports
Export/Import spreadsheet data | 1507

Menu: Projects ➤ Export to Spreadsheet ➤ Update from Spreadsheet
Command entry: AEIMPORTSS
Select the spreadsheet and click Open.
Export project data using Export to Spreadsheet. Edit the data and import
changes to update the project drawings. The spreadsheet can update existing
components and wire numbers with your edits. If the block name is modified,
it can swap one block for another. It cannot insert new items into the drawings.
Process
Specifies to import the spreadsheet data for the current drawing or the entire
project.
Force spreadsheet new values to uppercase
Forces all new spreadsheet values to be displayed in uppercase.
Flip any updated tag/wire number values to fixed
Fixes all updated tag or wire number values. A fixed component tag does not
update when the retag command is run. The tag name keeps its fixed value.
Create user-defined attributes
You can define your own attributes onto AutoCAD Electrical block files and
modify user-defined attributes using the AutoCAD Attribute Edit command
or the Show/Edit Miscellaneous option on the AutoCAD Electrical Insert/Edit
Component dialog box. The maximum allowable entries for reading or
exporting any *.wda file is 150.
Use the User Defined Attribute List tool to add these non-AutoCAD Electrical
attributes in the AutoCAD Electrical report generators. Otherwise only those
attributes defined inside of AutoCAD Electrical for each component category
are processed in the project database and subsequent reports.
NOTE If the User Defined Attribute list contains AutoCAD Electrical attributes,
they are added to the report if not already included.
The attributes listed in the User Defined Attribute list are also added to the
fields exported in the Export to Spreadsheet feature for Components on page
1501, Components (parents only) on page 1501, Terminals (stand alone) on page
1506, Panel components on page 1505, or Panel terminals on page 1506.
1508 | Chapter 18 Reports
NOTE You can edit the attribute text file (*.wda) in Notepad; however, you must
set the Encoding to Unicode in the Open and Save dialog boxes.
The Project Database Service (PDS) saves all non-AutoCAD Electrical-aware
attributes from block files into the project for processing. The PDS maintains
these database entries when the drawing file is saved and monitors them in
real-time as if they are normal components in the project. Once the PDS
successfully places the attribute values of all blocks from the drawing files into
the AutoCAD Electrical project database, the report generator program is able
to place the listed attribute values into the report generators if a *.wda file is
found with the appropriate name in any of the search paths and has the correct
format.
NOTE The report format files (*.set) support the user-defined attributes for
automatic report generation. If a set file declares an attribute tag that is not found
in the User Defined Attribute List, the column in the report is empty. The
user-defined attributes display in the Change Report Format dialog boxes (on the
Report Generator dialog box, click Change Report Format).
Edit user-defined attribute list
Once you add an attribute to an AutoCAD Electrical block, you can edit the
attribute using the Show/Edit Miscellaneous option in the Insert/Edit
Component dialog box or using the Enhanced Attribute Editor tool accessed
by double-clicking on an AutoCAD block in the drawing. Attributes can then
be added to the user-defined attribute list for report generation.
1Click Reports tab ➤ Miscellaneous panel ➤ User Attributes.
2In the User Defined Attribute List dialog box, click inside the Attribute
Tag column for Row 1. Click Pick.
3Select the attribute from the drawing.
The attribute displays in the Attribute Tag column in Row 1.
4(Optional) Specify the column width, justification, and column title for
the attribute for report generation purposes.
Click in a cell to edit the cell or right-click in a cell to copy, cut, or paste
contents from one cell into another. If left blank, default values are used.
5Repeat for any additional attributes.
6Click OK.
Create user-defined attributes | 1509
If this is the first time the grid content is being saved, the Save As dialog
box displays. Enter the file name and click Save. This is generally
<project_name>.wda or default.wda.
NOTE Click Save As if an existing file needs to be saved in a different location
or with a different name.
User-defined attribute list
Creates or modifies a list of attributes to report.
Ribbon: Reports tab ➤ Miscellaneous panel ➤ User Attributes.
Toolbar: Schematic Reports
Menu: Projects ➤ Reports ➤ User Defined Attribute List
Command entry: AEUDA
Each report type has a set of predefined fields available to include in the report.
The User Defined Attribute List provides additional attributes to add as available
fields for all reports.
This tool creates an attribute text file (*.wda) of user-defined attributes defined
on AutoCAD Electrical block files. The User Defined Attribute List is used by
report tools to determine which additional attributes are listed in a report.
The list file name can be the same as the active project or named Default to
be used by the entire system. The Default.wda file is saved in the base project
folder, while the <project_name>.wda file is saved in the same folder as the
project definition file (*.wdp).
NOTE Attributes can be added to existing block files using the Add Attribute tool
or the AutoCAD ATTDEF command. Edit attributes using the Show/Edit
Miscellaneous option in the Insert/Edit Component dialog box or using the
Enhanced Attribute Editor tool accessed by double-clicking an AutoCAD Electrical
block in the drawing.
1510 | Chapter 18 Reports

Sort the list by clicking any of the column headers or move rows up or down
in the list by highlighting multiple rows and dragging the selection on the
sequence number list to the appropriate position.
Edits and displays the list of attribute tags to be made available
in the Report Generator. The attribute tags can be in any order
Attribute Tag
in the list. Enter text, click in the cell to edit, or right-click in the
cell to pick, copy, cut, or paste a value.
NOTE An attribute tag is required and must be specified before
you can edit any of the other fields in its row.
Edits and displays the column width for the attribute tag. Enter
a number, click in the cell to edit, or right-click in the cell to copy
or cut a value.
Column Width
NOTE If left blank, the column width is restricted to 24 charac-
ters.
Edits and displays the justification of the attribute tag text. Click
in the cell and select from Top Left, Top Center, Top Right, Middle
Justification
Left, Middle Center, Middle Right, Bottom Left, Bottom Center,
or Bottom Right justification. The justification definition can be
modified inside the Change Report Format dialog box.
NOTE If left blank, Top Left justification is used.
Edits and displays the column header title in the Report Generator
dialog box. Enter text, click in the cell to edit, or right-click in the
Column Title
cell to copy, cut, or paste a value. The column title can be modi-
fied inside the Change Report Format dialog box.
NOTE If left blank, the attribute tag is used as the column
header.
Selects an attribute from the drawing to use as the Attribute Tag.Pick
Browses for an existing User Defined Attribute List file for editing.Open
Creates a new User Defined Attribute List file with extension .wda.Save As
Create user-defined attributes | 1511

Right-click options
Allows selection of an attribute from the drawing. This is available
only for the Attribute Tag.
Pick
Copies the cell contents to paste in another.Copy
Removes the cell contents to paste in another.Cut
Places the copied or cut cell contents in a new cell.Paste
NOTE You can also copy, cut, and paste entire row contents from one row to
another (one at a time), however you cannot paste the row contents into a single
cell.
Export to Autodesk Inventor Professional
Set up for export to Autodesk Inventor Professional
Cable & Harness
You can export wire list information from AutoCAD Electrical and directly
import it into Autodesk Inventor Professional Cable & Harness. In order to
merge electrical and mechanical data, you must first create a one-to-one
mapping from the electrical data to the mechanical assembly. Make sure the
following are correctly set up before running the report.
Pin numbers on component symbols
The pin numbers on the component symbols in AutoCAD Electrical must
correspond to the Pin Name property on the equivalent pin in Autodesk
Inventor Professional Cable & Harness. Use the Pin Properties dialog box in
Autodesk Inventor Professional Cable & Harness to change the pin name
property. The pin number is the TERMxx attribute value on an AutoCAD
Electrical component or terminal.
Component tags
Each component is defined with a unique Tag ID classified as the Component
Tag. The component tags on each component in AutoCAD Electrical must
correspond to the unique identifier or reference designator (RefDes property
value) for the corresponding electrical part instance in the designated harness
1512 | Chapter 18 Reports

assembly in the Cable & Harness application. Use the Part Properties dialog
box in Autodesk Inventor Professional Cable & Harness to change the RefDes
property.
You can define attributes on components in AutoCAD Electrical that can map
to properties when exported to Autodesk Inventor Professional. These attributes
can be component definition (catalog database) or component occurrence
specific. Use the Edit Component tool to edit the occurrence of a component.
Upon selection of a catalog number from the AutoCAD Electrical catalog
database, component definition properties can be applied to the component
occurrence and the information exported into the XML file.
NOTE When you apply additional parts to the component occurrence, their
respective component definition properties can also be applied in the overall
component occurrence. Up to ten additional part numbers can be applied to the
occurrence of a component. Each of these catalog numbers can have their own
set of component definition properties.
Wires
In order to map wires from the schematic to the 3D design, each wire needs
a persistent tag or number used to uniquely identify it within the design. The
wire number in AutoCAD Electrical is used as the Wire ID property value in
Cable & Harness. The cabling application needs a From/To list with a unique
identifier to track inputs from multiple wire lists and to know when wires
have moved or been updated on subsequent imports. The wires in the
schematic must be fixed, mapped to a wire in the Cable & Harness Wire
Library, and have distinct wires into the same pin.
NOTE The wire number must be unique for individual From and To connections
and a wire network ladder style cannot be used.
You can define attributes and properties on a wire that can map to properties
when exported to Autodesk Inventor Professional. These attributes can be
wire definition (wire type) or wire occurrence specific. Use the Edit Wire
Number tool to edit the wire number. Upon selection of a wire type from the
Set/Edit Wire Type dialog box, wire definition properties can be applied to
the wire layer occurrence and the information exported into the XML file.
Wire layers
Not all nets in a schematic are physical wires; some are representative of other
types of connections, such as those made by attaching a component to a bus
bar. When attempts are made to map these nets in a harness assembly, the
corresponding pins/parts are often not present. Only the nets that are to be
Set up for export to Autodesk Inventor Professional Cable & Harness | 1513

mapped into wires in 3D should be drawn with a layer identified as a wire for
inclusion in the output report file for Autodesk Inventor Professional Cable
& Harness. If a wire that is included in the custom report output file is not
recognized as a library wire in the Cable & Harness Library during the Import
Wire List process, the wire occurrence will not be imported.
The layers defined in AutoCAD Electrical must first be defined as valid wire
layers. Each AutoCAD Electrical wire layer must then correspond to a valid
library wire in the Cable & Harness Library. While the wire layer in AutoCAD
Electrical is just a label or name, the Cable & Harness wire definition defines
how the wire is displayed - including size (outer diameter and gauge) and
color.
Cables
When cables are used in the schematic, the name of the cable conductor (wire)
layer defined in the drawing of AutoCAD Electrical must correspond to a valid
cable definition in the Cable & Harness Library. The Wire Color/ID of each
conductor in AutoCAD Electrical must correspond to a Conductor ID used in
that cable definition in the Cable & Harness Library. This Wire Color/ID can
be overwritten on each cable conductor occurrence by selecting Edit
Component on a cable marker and making the change in the Insert / Edit
Cable Marker dialog box. The Conductor list in the AutoCAD Electrical catalog
can also be changed to reflect the same Conductor ID used in Cable & Harness.
The cable occurrence definition is made up of one parent symbol and multiple
children symbols depending on the number of wires included. Upon selection
of a catalog number from the AutoCAD Electrical catalog database, component
definition properties can be applied to the component occurrence and the
information exported into the XML file.
NOTE When you apply additional parts to the component occurrence, their
respective component definition properties can also be applied in the overall
component occurrence. Up to ten additional part numbers can be applied to the
occurrence of a component. Each of these catalog numbers can have their own
set of component definition properties.
Splices
Each splice is defined with a Splice ID (component tag). The Splice ID in
AutoCAD Electrical is used as the RefDes property value in Cable & Harness.
Use the Edit Component tool to edit the splice component. Upon selection
of a catalog number from the AutoCAD Electrical catalog database, splice
definition properties can be applied to the component occurrence and the
information exported into the XML file.
1514 | Chapter 18 Reports

NOTE When you apply additional parts to the component occurrence, their
respective splice definition properties can also be applied in the overall component
occurrence. Up to ten additional part numbers can be applied to the occurrence
of a component. Each of these catalog numbers can have their own set of
component definition properties.
Branches and Ts in nets
Branches and Ts in nets are not valid on nets imported into Cable & Harness.
These types of representations map to multiple possible physical configurations.
The exact physical intent of each wire must be depicted in the wiring diagram.
Both non-physical and physical splices must be used so that each net that
represents a wire has only two nodes: a From and a To. In AutoCAD Electrical,
direct connections into a component must be created (no Ts) so that each
physical wire has a definitive From component/pin and a To component/pin.
AutoCAD Electrical attributes mapped to Autodesk Inventor Professional
properties
There are four Autodesk Inventor Professional assembly entity types that get
AutoCAD Electrical attributes: components, wires, cable, and splices.
DescriptionAttribute TypeAttribute TAG
Component Properties
Installation and Location code; associ-
ated to the component tag (RefDes)
OccurrenceINST & LOC
Component TAG - RefDes property
name
OccurrenceTAG1 & TAG2
Descriptions used to describe the
component
OccurrenceDESC1- DESC3
Main AutoCAD Electrical catalog
number - Part Number property name
in Autodesk Inventor Professional
OccurrenceCAT
Manufacturer - Vendor of Part Number
property name in Autodesk Inventor
Professional
OccurrenceMFG
Set up for export to Autodesk Inventor Professional Cable & Harness | 1515
Assembly code for part - if part is a
subset of an assembly
OccurrenceASSYCODE
Multiple BOM part numbersOccurrenceCAT01-10
Multiple BOM Manufacturer associ-
ated to the Multiple BOM part num-
bers
OccurrenceMFG01-10
Multiple BOM Assembly codes associ-
ated to the Multiple BOM part num-
bers
OccurrenceASSYCODE01-10
Rating information associated to the
component definition
OccurrenceRATING1-12
Family code definition - FAMILY attrib-
ute on AutoCAD Electrical block file
DefinitionFAMILY
Block name definition used for catalog
lookup
DefinitionWDBLKNAM
Wire Properties
Unique wire number ID - AutoCAD
Electrical wire number
OccurrenceWIRENO
Wire layer name (AutoCAD Layer) -
Wire Definition name in Autodesk In-
ventor Professional
OccurrenceLAYER NAME
Wire layer properties (Xrecords on
AutoCAD layer) - Definition custom
DefinitionLayer Name - Wire Proper-
ties Xrecords
properties on the wire number in
Autodesk Inventor Professional
Wire attributes on wire number block
file - Occurrence custom properties on
OccurrenceWIRENO attributes
WIRENO01-10
the wire number in Autodesk Inventor
Professional
Cable ID Properties
1516 | Chapter 18 Reports
Installation and Location code; associ-
ated to the component tag (RefDes)
OccurrenceINST & LOC
Component TAG - RefDes property
name
OccurrenceTAG1 & TAG2
Cable conductor ID; AutoCAD Electric-
al Rating1 attribute - Cable Wire name
OccurrenceRATING1
in Autodesk Inventor Professional; add
a numeric value along with the con-
ductor color
Descriptions used to describe the
component
OccurrenceDESC1- DESC3
Main AutoCAD Electrical catalog
number - Part Number property name
in Autodesk Inventor Professional
OccurrenceCAT
Manufacturer - Vendor of Part Number
property name in Autodesk Inventor
Professional
OccurrenceMFG
Assembly code for part - if part is a
subset of an assembly
OccurrenceASSYCODE
Multiple BOM part numbersOccurrenceCAT01-10
Multiple BOM Manufacturer associ-
ated to the Multiple BOM part num-
bers
OccurrenceMFG01-10
Multiple BOM Assembly codes associ-
ated to the Multiple BOM part num-
bers
OccurrenceASSYCODE01-10
Family code definition - FAMILY attrib-
ute on AutoCAD Electrical block file
DefinitionFAMILY
Block name definition used for catalog
lookup
DefinitionWDBLKNAM
Splice Properties
Set up for export to Autodesk Inventor Professional Cable & Harness | 1517
Installation and Location code; associ-
ated to the component tag (RefDes)
OccurrenceINST & LOC
Component TAG - RefDes property
name
OccurrenceTAG1
Descriptions used to describe the
component
OccurrenceDESC1- DESC3
Main AutoCAD Electrical catalog
number - Part Number property name
in Autodesk Inventor Professional
OccurrenceCAT
Manufacturer - Vendor of Part Number
property name in Autodesk Inventor
Professional
OccurrenceMFG
Assembly code for part - if part is a
subset of an assembly
OccurrenceASSYCODE
Multiple BOM part numbersOccurrenceCAT01-10
Multiple BOM Manufacturer associ-
ated to the Multiple BOM part num-
bers
OccurrenceMFG01-10
Multiple BOM Assembly codes associ-
ated to the Multiple BOM part num-
bers
OccurrenceASSYCODE01-10
Rating information associated to the
component definition
OccurrenceRATING1-12
Family code definition - FAMILY attrib-
ute on AutoCAD Electrical block file
DefinitionFAMILY
Block name definition used for catalog
lookup
DefinitionWDBLKNAM
1518 | Chapter 18 Reports

Output reports to Autodesk Inventor Professional Cable
and Harness
Use this tool to export component, connector, wiring/cable, and splice data
from your 2D connector drawing into an XML file that can then be imported
into Autodesk Inventor Professional to aid in the generation of a cable and
harness assembly.
NOTE You must first configure wire numbering to be "On per Wire Basis" for
export and set up the appropriate variables before running the report.
1Click Import/Export Data tab ➤ Export panel ➤ Inventor.
2In the Autodesk Inventor Professional Export dialog box, specify whether
to process the project or current drawing and click OK.
3In the Autodesk Inventor Professional XML File Export dialog box, define
the location and filename for the export file. By default file is saved with
a .xml extension to:
Windows XP: C:\Documents and Settings\{username}\My Documents
Windows Vista, Windows 7: C:\Users\{username}\Documents
Configure wire numbering for export
There are several steps to set up the wire numbering convention in AutoCAD
Electrical for the import of data into Autodesk Inventor Professional Cable
and Harness.
Define wire layers
Layers defined in AutoCAD Electrical must be defined as valid wire layers.
While the following steps do not create the layers on the drawings that need
to be mapped into the Cable and Harness Library, they tell AutoCAD Electrical
which layers are treated as valid wire types.
1Click Schematic tab ➤ Edit Wires/Wire Numbers panel ➤ Modify Wire
Type drop-down ➤ Create/Edit Wire Type.
Set up for export to Autodesk Inventor Professional Cable & Harness | 1519

2In the Create/Edit Wire Type dialog box, click Add Existing Layer to add
the wire line layers in use in the schematic to the list to be recognized as
layers by AutoCAD Electrical.
3In the Layers for Line Wires dialog box, enter the layer name or pick a
wire from the existing layer list.
A wildcard used in the name selects a group of layers. For example, RED_*
selects all layers that begin with "RED_."
4Click OK.
5In the Create/Edit Wire Type dialog box, click OK.
NOTE You can also change layer properties using the Project Manager tool. In
the Project Manager, right-click on the project name and select Properties. In the
Drawing Format tab, Layers section, click Define.
Set unique wire IDs
You need to assign each wire a unique wire ID or number before they can be
imported into another application.
1Click Project tab ➤ Project Tools panel ➤ Manager.
2In the project listing, right-click the project name, and select Properties.
3In the Project Properties dialog box, click the Wire Numbers tab.
4In the Wire Number Options section, select On per Wire Basis.
5Click OK.
Fix wire numbering
You must fix the wire numbers so they stay the same for subsequent imports
into Autodesk Inventor Professional Cable and Harness. Do this after the wire
numbers have been assigned. Use any of the following procedures to fix wire
numbers.
Automatic wire numbering:
1520 | Chapter 18 Reports
1Click Schematic tab ➤ Insert Wires/Wire Numbers panel ➤ Insert Wire
Numbers drop-down ➤ Wire Numbers.
2In the Wire Tagging dialog box, select Insert as Fixed if it is not already
selected.
3Click Project-wide, Drawing-wide, or Pick Individual Wires depending
on which method you want to use to update your wire numbers.
Manually inserting wire numbers:
1Click Schematic tab ➤ Edit Wires/Wire Numbers panel ➤ Modify Wire
Numbers drop-down ➤ Edit Wire Number.
2Click a wire that does not currently have a wire number assigned to it.
3In the Insert wire number dialog box, select Make it Fixed to force the
wire number to a fixed state.
4Click OK.
Inserting wire numbers using project-wide utilities:
1Click Project tab ➤ Project Tools panel ➤ Utilities.
2In the Project-Wide Utilities dialog box, select Set all wire numbers to
fixed.
3Click OK. All wire numbers in the project are now flagged as fixed.
Autodesk Inventor Professional export
Creates an XML file, and exports component and wiring data for Autodesk
Inventor Professional into it.
Ribbon: Import/Export Data tab ➤ Export panel ➤ Inventor.
Set up for export to Autodesk Inventor Professional Cable & Harness | 1521
Toolbar: Schematic Reports
Menu: Import/Export Data ➤ Export ➤ Autodesk Inventor Professional
Export
Command entry: AEAIPEXPORT
Extracts wire list information into an XML export file for use exclusively in
Autodesk Inventor Professional Cable and Harness. Before you run the export,
configure wire numbering to be On per Wire Basis for export and set up the
appropriate variables.
Select to export the active drawing or the entire project.
The Autodesk Inventor Professional XML File Export dialog box then displays
allowing you to define a location and filename for the export file. By default
the file is saved with an .xml extension to:
■Windows XP: C:\Documents and Settings\{username}\My Documents
■Windows Vista, Windows 7: C:\Users\{username}\Documents
You can change the location and the last saved folder is persistent.
1522 | Chapter 18 Reports
Panel Layout
Overview of panel layouts
Panel Layout tools create intelligent mechanical / panel layout drawings. Here
are the key features:
■Layouts can be driven from information carried on the AutoCAD Electrical
schematic wiring diagram drawings or they can be constructed independently
of schematics.
■AutoCAD Electrical places no requirements on special naming or attribute
requirements on mechanical footprint symbols. Vendor-supplied footprint
symbols, in AutoCAD format, can be used as is with AutoCAD Electrical.
■Bi-directional update capabilities allow certain schematic wiring diagram
edits to update the panel drawings automatically and vice versa.
■Wire number, wire color/gauge information, and connection sequencing
data can be extracted directly from the schematics and annotated on to the
panel footprint representations.
■AutoCAD Electrical extracts various reports from these smart panel layout
drawings including panel BOM, panel component/item lists, nameplate
reports, and schematic versus panel exception reports.
Access panel layout tools
You access the AutoCAD Electrical panel layout command set from either the
main Panel Layout option on the Electrical pull-down menu or from a
panel-specific toolbar.
19
1523
Using the ribbon
Select the various panel layout commands from the Panel tab on page 60 on
the ribbon in AutoCAD Electrical.
Using the pull-down menu
Select the various panel layout commands from Panel Layout menu in
AutoCAD Electrical.
Using the toolbar
If the Panel Layout toolbar is not visible, you can turn it on by right-clicking
on a toolbar and selecting ACE:Panel Layout.
Using the mouse
Put your cursor over any panel component and click your right mouse button
for a quick shortcut to AutoCAD Electrical commands. A component-specific
menu displays at your cursor position.
Double-click the component itself to edit that component. The AutoCAD
Electrical double-click feature is disabled if "selection" mode in AutoCAD is
set to "Noun/Verb selection" (that is, system variable PICKFIRST is set to 1).
Overview of footprint attributes/Xdata
AutoCAD Electrical does not have attribute or naming requirements for the
mechanical footprint block symbols. As AutoCAD Electrical inserts a footprint
symbol into the drawing, it copies various data to the footprint block such as
component/device tag name, description, manufacturer code, and catalog
number. It first looks for target attributes to copy the data to. If not found,
AutoCAD Electrical simply inserts the schematic values as standard AutoCAD,
nonvisible extended entity data (Xdata).
Some manufacturers provide free, to-scale mechanical libraries of their control
components, all in AutoCAD format. Or you may have your own in-house
footprints set up. In either case, since AutoCAD Electrical does not have naming
or attribute requirements, these libraries can be used as is. When AutoCAD
Electrical inserts such a block footprint symbol, it immediately becomes
AutoCAD Electrical smart.
Footprint block attribute/Xdata names
The following table is a list of footprint block data names that are inserted or
read by AutoCAD Electrical. If the footprint block has an attribute with any
1524 | Chapter 19 Panel Layout
name listed here, AutoCAD Electrical uses that attribute to carry the specific
piece of data. Otherwise, AutoCAD Electrical uses extended entity data with
names based on the data names listed here but with a VIA_WD_ prefix (ex:
"VIA_WD_DESC1").
identifies block as a component footprintFP
identifies block as a terminal footprintFPT
identifies block as a nameplateNP
panel component tag (used on component footprints and nameplates)P_TAG1
description line 1 - 3 (60 char max)DESC1-3
item/detail numberP_ITEM
optional attribute with a value of 1 indicates the item number is fixedITEM_FLAG
manufacturer name (24 char max)MFG
catalog number (60 char max)CAT
optional assembly codeASSYCODE
installation code (24 char max)INST
location code (16 char max)LOC
mount location code (24 char max)MOUNT
group location code (24 char max)GROUPWITH
schematic symbol block name (used for catalog lookup)WDBLKNAM
rating values (60 char max each)RATING1-12
terminal strip ID (terminal footprints only)P_TAGSTRIP
terminal number (terminal footprints only)TERM
wire number (terminal footprints only)WIRENO
Overview of footprint attributes/Xdata | 1525
Minimum attribute/Xdata requirements
The following tables are the minimum requirements for AutoCAD Electrical
to recognize a block as a panel footprint, terminal, or nameplate.
Component footprint - block must carry a minimum of one of the following:
VIA_WD_FPXdata name
FP (blank value)Attribute
P_TAG1 (and no attribute NP present)Attribute
Terminal footprint - block must carry a minimum of one of the following:
VIA_WD_FPTXdata name
FPT (blank value)Attribute
Panel nameplate - block must carry a minimum of one of the following:
VIA_WD_NPXdata name
NP (blank value)Attribute
Select Xdata to change to a block attribute
This tool converts any piece of invisible extended entity data (Xdata) into a
visible attribute tied directly to the footprint block.
Ribbon: Panel tab ➤ Other Tools panel ➤ Panel Configuration
drop-down ➤ Make Xdata Visible.
Toolbar: Edit Footprint Component
Menu: Panel Layout ➤ Make Xdata Visible
Command entry: AESHOWXDATA
Select a footprint.
After you click Insert, the dialog box disappears. Click the location for the
attribute. The attribute inserts, is linked to the footprint block, and the dialog
1526 | Chapter 19 Panel Layout
box redisplays. Repeat the process to convert other pieces of Xdata quickly
into visible attributes.
Displays all AutoCAD Electrical-related pieces of extended entity
data (Xdata).
Xdata
Specifies the height for the attribute value.Height
Specifies the justification for the attribute value.Justification
Indicates whether the attribute is visible on the screen.Visibility
Opens a sub-dialog for setting the values for rating attributes.Ratings
Sets the width factor and text style for the attributes.Style
NOTE To add or modify the Xdata, use the AutoCAD Electrical Xdata Editor.
Panel drawing configuration and defaults
Configuration settings are saved as attribute values on a nonvisible block
named WD_PNLM. If your current drawing does not have this block present
when any AutoCAD Electrical panel layout command is invoked, AutoCAD
Electrical pauses and asks you for permission to insert this block. It inserts at
0,0 but this location is not critical. The key point is that the nonvisible block
must be present somewhere on the drawing.
NOTE You can make this block visible by typing ATTMODE at the AutoCAD
command line prompt, changing the value from 1 to 2, and then typing REGEN.
Panel drawing configuration and defaults
Sets panel footprint drawing defaults, such as footprint insertion scale, balloon
setup, and layer assignments.
Ribbon: Panel tab ➤ Other Tools panel ➤ Panel Configuration
drop-down ➤ Configuration.
Toolbar: Panel Layout
Panel drawing configuration and defaults | 1527

Menu: Panel Layout ➤ Panel Configuration
Command entry: AEPANELCONFIG
Panel Configuration saves settings as attribute values on a non-visible block
named WD_PNLM. In any panel layout command, if this block is not present
in the current drawing a message box displays asking permission to insert the
block. The location of the block is not critical.
Item Numbering
Specifies the number/letter to use as the first item number. AutoCAD Electrical
manages item number, drawing-wide, or project-wide (over many drawings),
so that the same number is always applied to identical components.
Balloon
Opens a subdialog box for setting the type of balloon marker (circle, ellipse,
polygon, text), marker size, margin, and text gap.
Footprint layers
Opens the Panel Component Layers subdialog box for setting the panel
component layers, non-text graphic layers, and nameplate layers. Panel
footprint layering works in the same way AutoCAD Electrical schematic
layering. When AutoCAD Electrical inserts a footprint, it is modified on the
fly to match the layering scheme set up in this dialog box.
Wiring level defaults
Sets the optional 3-digit wiring level codes. They are applied as defaults when
codes are not defined on panel layout components or terminal strip
representations. Preferred wire connection sequence follows this level and
numeric-code-within-level hierarchy.
Default spacing for multiple inserts
Specifies the x and y distance spacing for multiple footprint inserts.
Footprint insert
Specifies the default insert scale for panel footprint symbols. Also specifies
whether to insert the attribute template drawings and the scale to use.
You can set up to have visible attributes added to any footprint automatically
at footprint insertion time. Using non-intelligent footprint representations
1528 | Chapter 19 Panel Layout
can insert with smart AutoCAD Electrical attributes added automatically, on
the fly.
There are five attribute template drawings:
component footprintswd_ptag_addattr_comp.dwg
terminal footprintswd_ptag_addattr_trm.dwg
terminal with wire no. as terminal numberwd_ptag_addattr_wtrm.dwg
balloonswd_ptag_addattr_itemballoon.dwg
terminal footprints (when inserted by
Level/Sequencing tools)
Wd_ptag_addattr_pnltermstrip.dwg
If the appropriate attribute template exists, the following steps are performed
when a panel footprint is inserted.
1Find the center of the footprint by collecting and averaging the objects
that make up the footprint.
2Insert the attribute template at the calculated center of the footprint.
3Make sure there are no duplicate attributes. If duplicate attributes are
found, the attribute from the footprint is kept.
4Reblock the added attributes with the inserted footprint.
5Add the schematic data to the footprint. If the target attribute exists, the
data is added as attribute data. If the target attribute does not exist, the
data is added as invisible Xdata.
Uncheck the Enabled check box if you do not want AutoCAD Electrical to
search for the attribute template drawing. If enabled, select a scale factor, 1.0
to insert as is, or select to scale to a specific text height.
Panel wire connection report XYZ offset reference
Specifies the x, y, or z-offset value for the mtext added next to a panel
component when adding the wire connection information. Use the Setup
button to define the default wire connection text format.
Format: schematic layout wire connection
annotation
Panel drawing configuration and defaults | 1529
Defines the default wire connection text format.
Ribbon: Panel tab ➤ Other Tools panel ➤ Panel Configuration
drop-down ➤ Configuration.
Toolbar: Panel Layout
Menu: Panel Layout ➤ Panel Configuration
Command entry: AEPANELCONFIG
Click Panel wire connection report XYZ offset reference Setup.
After you add wire numbers to your schematics and extract this information,
you are ready to annotate your panel footprint symbols with this information.
The information is added to the drawing in two different ways:
■Build your panel footprint symbols with some target attributes that are
used for the wire connection information.
■Mtext is automatically added next to a symbol if the target attributes are
not found.
NOTE You can build two sets of panel footprint symbols, one set that does not
carry the target attributes for wire information and a set that does. When you
insert your panel symbols from the schematic extract, select Use Footprint tables
to access the first set of symbols or Use Wiring diag tables to access the second
set.
Format
There are two format edit boxes on the dialog box. The "Full" format is used
if AutoCAD Electrical does not find the target attributes and inserts MTEXT.
The "Partial" format is used if AutoCAD Electrical finds the target attributes
(described later). Each format uses parameters that are then replaced with the
specific wire information. AutoCAD Electrical provides some pre-defined
formats for you to select from the list box at the right. Or you can enter your
own format using replaceable parameters on page 236.
Parameters must be separated by nonblank delimiters for AutoCAD Electrical
to be able to re-extract wiring diagram information into reports. For example,
"%T=%W %1 %G" is not acceptable because there is only a space between the
1530 | Chapter 19 Panel Layout

%W and %1 and %G parameters. Acceptable formats include "%T=%W (%1)
%G" or "%T=%W / %1 (%G)" or "%T=%W (%1) %G".
NOTE You cannot use commas in the format. They signal multiple wire connection
annotations onto a single wire connection attribute.
Additional options for the "To" component tag
Additional options to include in the text.
Adds the terminal text as a suffix.Add terminal pin as a suffix to tag
Adds any terminal description value as a suffix.Add terminal description to tag
Adds any installation value as a prefix.Include installation prefix to IEC tag
format
View/Test
Allows a preview or test of the report.
Suppress any duplicated annotation on each terminal
Indicates to hide duplicated annotations so that they do not show on the
report.
Relationship between schematic drawings and
panel layouts
Automatic schematic/panel update
AutoCAD Electrical provides bi-directional updating between schematic
components and the associated footprint blocks. The link is through the
common tag identifier, for example, schematic relay coil, CR406, links to the
panel layout footprint that carries a CR406 tag value.
Bi-directional updates follow these rules:
■Edits to a schematic parent update associated schematic child symbols,
panel footprints, nameplates, and peer one-line symbols.
Relationship between schematic drawings and panel layouts | 1531
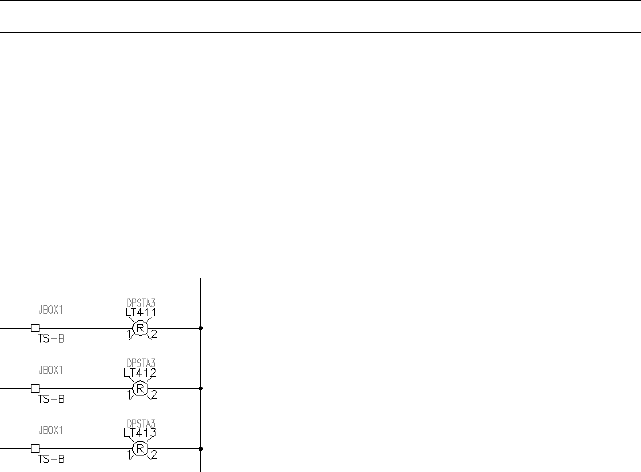
■Edits to a panel footprint update the associated schematic parent, child
symbols, nameplates, and peer one-line symbols.
■Edits to a panel nameplate update the associated schematic parent, child
symbols, panel footprints, and peer one-line symbols.
■Edits to a schematic child do not update the associated schematic parent,
panel footprints, nameplates, or peer one-line symbols.
■Edits to a one-line terminal do not update any other terminal symbols.
Schematic and panel symbol relationship
The schematic ladder diagram can be created first and the physical panel
layout created from the schematic drawing.
Each symbol shown on the schematic ladder diagrams can map to a scaled,
physical representation on the panel layout drawings. The physical layout
drawing might be a control panel enclosure door layout. The door layout
shows where to mount each component and can indicate the size of the hole
in the sheet metal door for mounting.
NOTE One-line terminals are not mapped to panel layout terminals.
Example
For example, pilot light components come in many styles, sizes, and ratings
from dozens of vendors. On the schematic ladder diagrams, all pilot lights of
a given type are identified by the same schematic symbol whether they are
miniature pilot lights or a large, explosion projected pilot light. It is on the
physical panel layouts where the pilot lights are shown as they actually look
and in actual size (that is, the physical footprint representation).
Look at the three pilot light symbols shown in this schematic drawing.
1532 | Chapter 19 Panel Layout
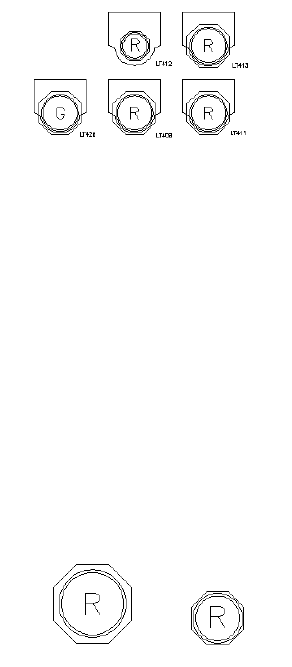
LT411 and LT413 are assigned an Allen-Bradley part number for a 30-mm
pilot light (catalog part number 800H-PR16R). LT412 is given a part number
for a smaller, 22.5-mm pilot light (catalog part number 800MR-P16RS). The
manufacturer and catalog part number assignments are carried on invisible
attributes MFG and CAT on each instance of the red pilot light symbol. All
three symbols look the same on the schematic since they are the same
AutoCAD block symbol. The difference is the assigned part number attribute
values that each carries.
The three red pilot lights are represented as footprints in the panel layout as
shown. Notice that LT412 (the 22.5-mm pilot light) appears smaller than the
others.
Footprint Mapping
On the physical panel layout drawing, these pilot light symbols are inserted
as footprint blocks using the Insert Footprint (Schematic List) on page 1536 tool.
AutoCAD Electrical knows which physical representation block symbol to use
for each instance of the pilot light schematic symbol based on the
manufacturer and part number assignments applied to the MFG/CAT attributes.
The vendor name and part number are mapped to the correct footprint drawing
(.dwg) file. This drawing is then inserted as a block on the panel layout
drawing.
There are two key elements that make this work:
■Vendor footprint library (.dwg) files - two symbols from this library are
shown here. They are for Allen-Bradley red pilot lights 30 mm and 22.5-mm
styles respectively.
Schematic and panel symbol relationship | 1533
■Footprint mapping file on page 1592 (footprint_lookup.mdb) - a table is
assigned to each manufacturer.
Footprint/Terminal Insertion
Insert panel footprints from a schematic list
Let your project set of schematic wiring diagrams help drive the panel layout.
Component catalog number information comes directly from manufacturer
and catalog data carried on each electrical component. AutoCAD Electrical
finds a match for the manufacturer and catalog number combination in the
footprint look-up file to determine the correct footprint block to insert.
If you start with panel layouts before you create schematics, schematic pick
list data is not available to automate footprint selection and annotation. An
alternative is available. If you list your panel components in a spreadsheet
and in a format that AutoCAD Electrical expects, this spreadsheet data can
become your schematic pick list data for panel layout.
Component spreadsheet data format
The spreadsheet data must be in this order and have 28 columns of data and
be saved in a "CSV comma delimited" text format. Most of the fields can be
left blank:
Component tag id (ex: "PB101")TAG1
Optional installation codeINST2
Optional location codeLOC3
Optional mount codeMOUNT4
Optional group codeGROUPWIDTH5
Manufacturer codeMFG6
Catalog numberCAT7
Optional catalog assembly codeASM8
1534 | Chapter 19 Panel Layout
Optional count valueCNT9
Optional unit of measureUM10
Three lines of description textDESC1-DESC311-13
Schematic block name (used to determine cata-
log lookup table name)
BLKNAM14
Optional rating valuesRATING1-1215-26
Optional item number assignmentITEM27
(blank)28
Panel terminals spreadsheet data format
The spreadsheet data for panel terminals must be in this order and have 30
columns of data and be saved in a "CSV comma delimited" text format. Most
of the fields can be left blank:
Terminal strip tag id (ex: "TB1")TAGSTRIP1
Optional installation codeINST2
Optional location codeLOC3
Optional mount codeMOUNT4
Optional group codeGROUPWIDTH5
Manufacturer codeMFG6
Catalog numberCAT7
Optional catalog assembly codeASM8
Optional count valueCNT9
Optional unit of measureUM10
Optional description textDESC1-DESC311-13
Insert panel footprints from a schematic list | 1535

Optional schematic block name (blank)BLOCK14
Optional rating valuesRATING1-1215-26
Optional item number assignmentITEM27
Terminal numberTERMNO28
(blank)29
Optional wire number tied to terminalWIRENO30
Schematic spreadsheet data of previous project
If your new project is like a previous project, you can use the schematics of
the previous project to create a component or terminal spreadsheet listing. It
can then help drive the new panel layout of the project.
Open the previous project in AutoCAD Electrical. From the Panel Layout
menu, select Insert Footprint (Schematic List) or Insert Terminal (Schematic
List). On the selection dialog box, check the Save List to External File option
and then extract from the project. AutoCAD Electrical creates a
comma-delimited file of the schematic data. You can then display this data
in spreadsheet format (open it in comma-delimited "CSV" format), edit, and
then save back out. Now follow the procedure described for picking and
inserting the panel component or terminal footprints from the spreadsheet
driven pick list.
Insert panel footprints from a schematic list
1Insert a schematic symbol in a drawing. In the Insert/Edit Component
dialog box, assign Component Tag, Manufacturer, and Catalog values
and click OK.
2Save the drawing and navigate to the drawing you want to add a panel
footprint to.
3Click Panel tab ➤ Insert Component Footprints panel ➤ Insert
Footprints drop-down ➤ Schematic List.
4In the Schematic Components List ➤ Panel Layout Insert dialog box,
select Project and click OK.
1536 | Chapter 19 Panel Layout
5In the Select Drawings to Process dialog box, select the drawing that has
the schematic symbol you inserted. Click Process, and then click OK.
This extracts a list of all schematic devices found in the drawing and
displays them in a dialog box for selection.
6In the Schematic Components dialog box, select the schematic component
you inserted and click Insert.
■AutoCAD Electrical takes the manufacturer attribute value (MFG) and
finds a table in the footprint_lookup.mdb file with this name.
■AutoCAD Electrical queries this specific vendor table using the catalog
attribute value (CAT) of the selected entry and returns the block name
from the matched record.
■The Insert Footprint command starts and prompts for the insertion
point for the footprint block.
7Pick the insertion point and orientation.
■The values of the schematic symbol are copied to the footprint
representation.
■The selected item is checked off the list in the Schematic Components
dialog box (an "x" appears in the left-hand column) to track what has
been inserted.
8In the Panel Layout - Component Insert/Edit dialog box, click OK.
9In the Schematic Components dialog box, click Close.
Schematic components list -> panel layout insert
Inserts and annotates a panel footprint by referencing the schematic
component list in the project.
Ribbon: Panel tab ➤ Insert Component Footprints panel ➤ Insert
Footprints drop-down ➤ Schematic List.
Toolbar: Component Footprint
Menu: Panel Layout ➤ Insert Footprint (Schematic List)
Command entry: AEFOOTPRINTSCH
Insert panel footprints from a schematic list | 1537

Schematic diagrams can help drive the panel layout. Each electrical component
carries manufacturer and catalog data with catalog number information. A
matching manufacturer and catalog number combination in the footprint
look-up file determines the correct footprint block to insert. The list of
schematic components checks off the panel footprints you insert.
This tool provides error checking between the schematics and the panel layout
drawings. The program looks at the selected components, both schematic and
panel, to find a match in the project. For each schematic component selected,
the routine tries to find a matching panel component based on tag, location,
and installation information. If a match is found, then it further compares
catalog information looking for any discrepancies. The program looks at each
selected panel component looking for a matching schematic component in
the same way.
NOTE One-line components are not extracted into the schematic component list
and are not matched up with panel footprint representations.
If you start with panel layouts before you create schematics, schematic pick
list data is not available to automate footprint selection and annotation. If
you list your panel components in a spreadsheet and in a format that AutoCAD
Electrical expects, this spreadsheet data can become your schematic pick list
data for panel layout.
Extract component list for
Specifies to export the data for the active drawing or the entire project.
Save list to external file
Uses the schematics of a previous project to create a component or terminal
spreadsheet listing. It can help drive the panel layout of a new project.
AutoCAD Electrical creates a comma-delimited file of the schematic data. You
can display this data in spreadsheet format (open it in comma-delimited "CSV"
format), edit, and then save back out.
Location Codes to extract
Extracts only the information for components with specific location values.
Once you pick Named Location, type the location code in the box or click
List: Drawing or List: Project to select from a list of used location codes. You
can also create a report from multiple location codes. AutoCAD Electrical
automatically creates a comma-delimited list for the named location search.
Schematic terminals list -> panel layout insert
1538 | Chapter 19 Panel Layout
Inserts and annotates a panel terminal by referencing the schematic terminal
list in the project.
Ribbon: Panel tab ➤ Terminal Footprints panel ➤ ➤ Insert
Terminals drop-down ➤ Insert Terminal (Schematic List).
Toolbar: Terminal Footprint
Menu: Panel Layout ➤ Insert Terminal (Schematic List)
Command entry: AEPANELTERMINALSCH
This tool provides error checking between the schematic terminals and panel
layout terminals. The program looks at the selected terminals, both schematic
and panel, to find a match in the project. For each schematic terminal selected,
the program tries to find a matching panel terminal based on a unique
LINKTERM value or tag, location, installation, and terminal number
information. If a match is found, then it further compares catalog information
looking for any discrepancies. The program looks at each selected panel
terminal looking for a matching schematic terminal in the same way.
NOTE One-line terminals are not extracted into the schematic terminal list and
are not matched up with panel terminal footprint representations.
If you start with panel layouts before you create schematics, schematic pick
list data is not available to automate footprint selection and annotation. If
you list your panel components in a spreadsheet and in a format that AutoCAD
Electrical expects, this spreadsheet data can become your schematic pick list
data for panel layout.
Extract component list for
Specifies to export the data for the active drawing or the entire project.
Save list to external file
Uses previous schematics for the project to create a component or terminal
spreadsheet listing. It can help drive the panel layout of the new project.
AutoCAD Electrical creates a comma-delimited file of the schematic data. You
can display this data in spreadsheet format (open it in comma-delimited "CSV"
format), edit, and then save back out.
Insert panel footprints from a schematic list | 1539
Location Codes to extract
Extracts only the information for components with specific location values.
Once you pick Named Location, type the location code in the box or click
List: Drawing or List: Project to select from a list of used location codes. You
can also create a report from multiple location codes. AutoCAD Electrical
automatically creates a comma-delimited list for the named location search.
Schematic components or terminals
AutoCAD Electrical processes the project drawing set. It presents a list of all
parent components or terminals (plus any child components/terminals that
carry non-blank MFG/CAT values) extracted from the schematic wiring
diagrams of the project. First, you pick from this schematic list, and then place
the equivalent footprint on the layout. AutoCAD Electrical determines the
equivalent footprint block automatically through a manufacturer/catalog
match pulled from the footprint look-up file.
NOTE One-line component and terminals are not included in the list.
Insert Footprint (Schematic List)
Ribbon: Panel tab ➤ Insert Component Footprints panel ➤ Insert
Footprints drop-down ➤ Schematic List.
Toolbar: Component Footprint
Menu: Panel Layout ➤ Insert Footprint (Schematic List)
Command entry: AEFOOTPRINTSCH
Select Project and click OK. Select the files to process and click OK.
Insert Terminal (Schematic List)
Ribbon: Panel tab ➤ Terminal Footprints panel ➤ ➤ Insert
Terminals drop-down ➤ Insert Terminal (Schematic List).
1540 | Chapter 19 Panel Layout
Toolbar: Terminal Footprint
Menu: Panel Layout ➤ Insert Terminal (Schematic List)
Command entry: AEPANELTERMINALSCH
Select Project and click OK. Select the files to process and click OK.
Sort List
Sorts the list of schematic footprints. You can specify four sorts to perform on
the list.
Reload
Reinitializes the display. Causes the dialog box to return to the Schematic
components (or terminals) list panel layout insert dialog box.
Mark Existing
Puts an "x" in the left-hand column position for any listed schematic
component (or terminal) tag that already has its footprint inserted on the
panel layout. There must be an exact match on Catalog and Manufacturer
values between the two. Displays a "o" if the tags match but there is mismatch
on Catalog and Manufacturer values between the two.
Display
Specifies to show all or hide the existing compon-
ents or terminals.
Show All/Hide Existing
Shows a full listing of the main catalog numbers
plus the multiple catalog entries. Each multiple
Multiple Catalog [+]
catalog entry displays in the list as a line entry, al-
lowing you to insert each entry as a separate foot-
print.
Catalog Check
Quickly performs a Bill of Material check and displays the result.
Footprint Scale
Specifies the block insert scale. (1.0 = full)
Insert panel footprints from a schematic list | 1541
Rotate
Specifies the block rotation angle. (blank = "ask")
External Program
Executes external user routine to retrieve footprint block name and/or catalog
data. Requires WD_XCAT reference in wd.env and a user AutoLISP file to
manage the data send/receive with the external routine.
Manual
Specifies to pick the insertion point manually.
Insert
Finds and inserts footprint for highlighted component (or terminal). It is based
upon a match between the catalog part number of the schematic symbol and
an entry in a footprint lookup file. If no match is found you are prompted to
draw the footprint manually, add an entry in the lookup file, or select an
existing footprint drawing file.
Accesses the standard footprint look-up table that
matches the MFG code of the device. This table is
Use Footprint tables
set up to insert a full mechanical representation of
the device.
Accesses an alternate table in the footprint look-up
table. This table matches the MFG code but at-
Use Wiring diagram tables
taches an "_WD" suffix. The tables with the "_WD"
suffix are set up to insert a symbol that carries the
wire connection attributes.
Convert Existing
Inserts data of a selected entry on an existing dumb block insert. It instantly
converts the block to a smart AutoCAD Electrical footprint.
Pick File
Specifies to pick a file for the insert. Select an existing AutoCAD Electrical
Schematic extracted component (or terminal) list file or extract a fresh copy
of schematic component (or terminal) data from the database of the current
project.
Spacing for component or footprint insertion
1542 | Chapter 19 Panel Layout

Run any of the component, footprint, or terminal insertion from list
commands (such as Insert Component (Panel List) on page 790).Select the
drawings to process and click OK. Select multiple components or terminals
to insert and click Insert.
The components display in the list box in the order they are inserted. To
modify the order, select an item from the list, then select Move Up or Move
Down in the list.
Specifies the location for each component or terminal
using the Insert dialog box.
Prompt for each location
(for component insertion only) Specifies the location
for all the components. Specify the insertion points
Fence Insertion
on the drawing and right-click. The Insert/Edit dialog
box displays. Once you click OK on the Insert/Edit
dialog box, the component inserts on the drawing.
Specifies the location for the first component (or
terminal). The values in the X-distance and Y-distance
Use uniform spacing
boxes are used to calculate the insertion coordinates
for the remaining components (or terminals).
NOTE You can set the default values for the X-dis-
tance and Y-distance in the Panel Configuration dia-
log box.
(for footprint insertion only) Suppresses the edit
dialog box that normally appears each time a com-
Suppress edit dialog and prompts
ponent (or terminal) is inserted. The Panel Insert/Edit
dialog box displays after each insert if this option is
not selected.
Moves the selected component or terminal up one
spot in the list.
Move Up
Moves the selected component or terminal down
one spot in the list.
Move Down
Rearranges the list of terminals in descending order.Reverse
Sorts the list of terminals in ascending order.Re-sort
Insert panel footprints from a schematic list | 1543
Insert panel footprints using vendor menus
Pick the item from a vendor icon menu that is preset with specific catalog
number data and footprint block names. Choosing from this menu supplies
AutoCAD Electrical with the manufacturer and catalog information and the
footprint block name, bypassing any look-up.
It can save time if you frequently use the same vendor and panel components.
You can apply this method to create client-specific menus making it easier to
use the vendor or components that each client prefers.
Insert panel footprints using vendor menus
A vendor icon menu is preset with specific catalog number data and footprint
block names. Choosing from this menu supplies the manufacturer and catalog
information and the footprint block name, bypassing any look-up.
1Click Panel tab ➤ Insert Component Footprint panel ➤ Insert Footprints
drop-down ➤ Manufacturer Menu .
2In the Vendor Menu Selection dialog box, select the vendor menu to use
and click OK. You can select one from the list or click Browse to search
for a vendor (.pnl) menu file.
NOTE This dialog box is also available by clicking Vendor Menu Select on
the Vendor Panel Footprint dialog box after a vendor is first selected.
3In the Vendor Panel Footprint dialog box, select the component to insert
from the Symbol Preview window and click OK.
Clicking an icon inserts the footprint into the active drawing as defined
by the command in the .pnl file.
4Select the insertion point on the screen.
Vendor menu selection
Ribbon: Panel tab ➤ Insert Component Footprints panel ➤ Insert
Footprints drop-down ➤ Manufacturer Menu.
1544 | Chapter 19 Panel Layout
Toolbar: Component Footprint
Menu: Panel Layout ➤ Insert Footprint (Manufacturer Menu)
Command entry: AEFOOTPRINTMFG
NOTE This dialog box is also available by clicking Vendor Menu Select on the
Vendor Panel Footprint dialog box after a vendor is first selected.
The vendor icon menu files that are found in AutoCAD Electrical are listed in
the dialog box.
Vendor panel footprint
Ribbon: Panel tab ➤ Insert Component Footprints panel ➤ Insert
Footprints drop-down ➤ Manufacturer Menu.
Toolbar: Component Footprint
Menu: Panel Layout ➤ Insert Footprint (Manufacturer Menu)
Command entry: AEFOOTPRINTMFG
Select the vendor menu to use and click OK.
Clicking an icon inserts the footprint into the active drawing as defined by
the command in the .pnl file.
Tabs ■Menu: Changes the visibility of the Menu tree view.
■Up one level: Displays the menu that is one level before the
current menu in the Menu tree view. It is unavailable if the
main menu is selected in the Menu tree view.
■Views: Changes the view display for the Symbol Preview
window and Recently Used window. The current view option
is indicated with a check mark. Options include: Icon with
text, Icon only or List view.
The tree structure is created by reading the icon menu file (*.dat).
The tree structure is based on the arrangement order of submenus
defined in the .dat file.
Menu
Insert panel footprints using vendor menus | 1545
Displays the symbol images corresponding to the menu or the
submenu selected in the Menu section. Clicking on the icon in-
Symbol Preview window
serts the footprint into the active drawing as defined by the
command in the .pnl file.
Displays the last components inserted during the current editing
session; the most recently used icon displays in the top. This list
Recently Used
box follows the view options setting in the symbol preview win-
dow (icon, icon with text or list view). The total number of icons
displayed depends on the value specified in the Display edit box.
Specifies the number of icons to display in the Recently Used list
box. Enter integer numbers only; the default value is 10.
Display
Turns off the Insert/Edit Component dialog box when inserting
symbols onto the drawing. To add component detail later, click
the Edit Component tool, and select the component to edit.
No edit dialog box
Inserts the component, untagged (that is, without assigning a
unique Component Tag). The untagged value that displays is the
No tag
TAG1/TAG2 default value of the component. To add component
detail later, click the Edit Component tool, and select the com-
ponent to edit.
Indicates to display the previously used menu each time you open
the Insert Component dialog box. For example, if you insert a
Always display previously used
menu
push button from the Push Buttons menu, the next time you
open the Insert Component dialog box the Push Button menu
displays by default.
Specifies the component block insertion scale. This defaults to
the value set in the Panel Drawing Configuration dialog box.
Scale
Once set, this value is remembered until reset or until the drawing
editing session ends. There are separate scale factors for schem-
atic and panel components.
Displays the Vendor Menu Selection dialog box.Vendor Menu Select
Manually type in the component block to insert.Type it
Browses to and selects the component to insert.Browse
1546 | Chapter 19 Panel Layout
Right-click menus
Options for the Menu tree structure view
Right-click the main menu or submenu in the Menu tree structure view to
display the following options:
■Expand/Collapse: Toggles the visibility of the folders.
■Properties: Opens a Properties dialog box to modify the existing menu or
submenu properties like the menu name, image, or submenu title. Use the
Icon Menu Wizard to change any menu properties.
Options for the Symbol Preview window
Right-click an icon or in empty space in the Symbol Preview window to display
the following options:
■View: Changes the view display for the Symbol Preview window and
Recently Used window. The current view option is indicated with a check
mark. Options include: Icon with text, Icon only or List view.
■Properties: (available for icons only) Opens a Properties dialog box to
modify the existing symbol icon properties like the icon name/image/block
names and so on. Use the Icon Menu Wizard to change any icon properties.
Insert panel footprints using icon menu
Pick a general component category from a generic icon menu (such as pilot
lights). Once a component is selected, choose from the options available to
insert the footprint.
■Choice A - make catalog assignment for automatic footprint selection.
AutoCAD Electrical finds a match for the manufacturer and catalog number
combination in the footprint look-up file to determine the correct footprint
block to insert.
■Choice B - manual footprint selection or creation.
■Choice C - in cases where a manufacturer and catalog is given but is not
in a lookup file, AutoCAD Electrical enables this option allowing you to
add an entry in the footprint look-up database file.
Insert panel footprints using icon menu | 1547
Insert panel footprints using icon menu
1Click Panel tab ➤ Insert Component Footprints panel ➤ Insert
Footprints drop-down ➤ Icon Menu.
2In the Insert Footprint dialog box, select the component to insert from
the Symbol Preview window and click OK.
3On the Footprint on page 1552 dialog box, choose one of the following:
■Choice A - make catalog assignment for automatic footprint selection.
■Choice B - manual footprint selection or creation.
■Choice C - in cases where a manufacturer and catalog is given but is
not in a lookup file, AutoCAD Electrical enables this option allowing
you to add an entry in the footprint look-up database file.
4Insert or draw the footprint.
5Enter values in the Panel Layout - Component Insert/Edit dialog box.
6Click OK.
Insert footprint
Inserts a panel footprint you select from the icon menu.
Ribbon: Panel tab ➤ Insert Component Footprints panel ➤ Insert
Footprints drop-down ➤ Icon Menu.
Toolbar: Panel Layout
Menu: Panel Layout ➤ Insert Footprint (Icon Menu)
Command entry: AEFOOTPRINT
You can insert smart footprint outlines of electrical components and devices
onto layout drawings. You pick the insertion point and orientation for the
footprint. Assign values on the footprint such as tag, catalog assignment,
location, installation, descriptions, ratings, and miscellaneous values.
1548 | Chapter 19 Panel Layout
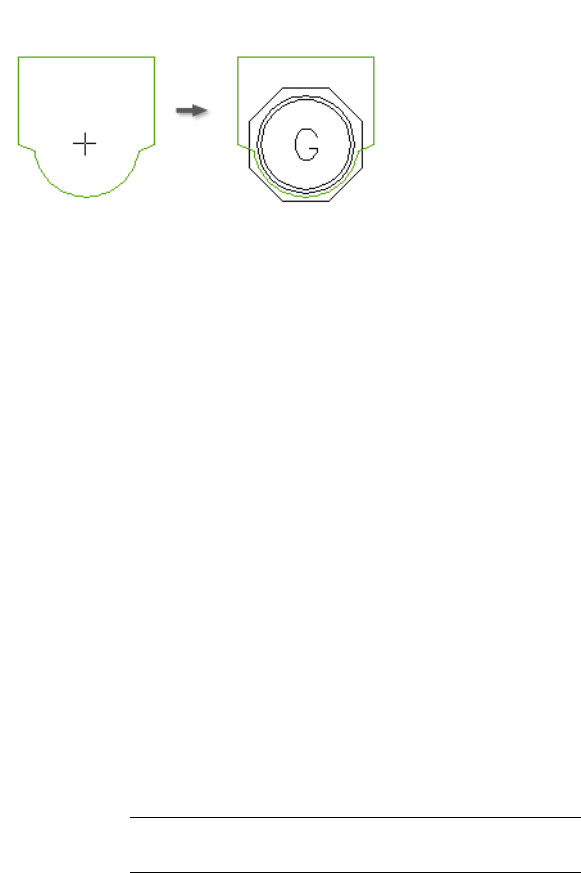
Select an icon picture or the component type from the Menu tree structure.
The main menu in the tree structure is displayed as the menu heading just
above the menu tree structure.
This icon menu can be modified, expanded, or replaced with your own custom
menu. You can change the default icon menu using the Library and Icon
Menu Paths section of the Project properties: project settings tab on page 204.
Use the Icon Menu Wizard to modify the menu easily. The default icon menu
can also be redefined in "wd.env". Add entry "WD_MENU" for schematic icon
menu and "WD_PMENU" for panel layout icon menu.
Tabs ■Menu: Changes the visibility of the Menu tree view.
■Up one level: Displays the menu that is one level before the
current menu in the Menu tree view. It is unavailable if the
main menu is selected in the Menu tree view.
■Views: Changes the view display for the Symbol Preview
window and Recently Used window. The current view option
is indicated with a check mark. Options include: Icon with
text, Icon only or List view.
The tree structure is created by reading the icon menu file (.dat).
The tree structure is based on the arrangement order of submenus
defined in the .dat file.
Menu
NOTE If the program cannot find any of the icon menu files listed
in the .wdp, an alert dialog box appears.
Displays the symbol images corresponding to the menu or the
submenu selected in the Menu section. Clicking on the icon
Symbol Preview window
performs one of the following functions based on the icon prop-
erties as defined by the .dat file:
Insert panel footprints using icon menu | 1549

■Executes a command
■Displays a submenu
NOTE When you move the cursor over an icon, the icon name
and block/circuit/command name display as tooltip information.
Displays the last components inserted during the current editing
session; the most recently used icon displays in the top. The list
Recently Used
box follows the view options setting in the symbol preview win-
dow (icon, icon with text or list view) and the total number of
icons displayed depends on the value specified in the Display edit
box.
Specifies the number of icons to display in the Recently Used list
box. Enter integer numbers only; the default value is 10.
Display
Turns off the Insert/Edit Component dialog box when inserting
symbols onto the drawing. To add component detail later, click
the Edit Component tool, and select the component to edit.
No edit dialog box
Inserts the component, untagged (example: without assigning
a unique Component Tag). The untagged value that displays is
No tag
the TAG1/TAG2 default value of the component. To add compon-
ent detail later, click the Edit Component tool, and select the
component to edit.
Indicates to display the previously used menu each time you open
the Insert Component dialog box. For example, if you insert a
Always display previously used
menu
push button from the Push Buttons menu, the next time you
open the Insert Component dialog box the Push Button menu
displays by default.
Specifies the component block insertion scale. This defaults to
the value set in the Panel Drawing Configuration dialog box.
Scale schematic
Once set, this value is remembered until reset or until the drawing
editing session ends.
Specifies the footprint insertion scale. This defaults to the value
set in the Panel Drawing Configuration dialog box. Once set, this
Scale panel
value is remembered until reset or until the drawing editing ses-
sion ends.
1550 | Chapter 19 Panel Layout

Manually type in the component block to insert.Type it
Browses to and selects the component to insert.Browse
Right-click menus
Options for the Menu tree structure view
Right-click the main menu or submenu in the Menu tree structure view to
display the following options:
■Expand/Collapse: Toggles the visibility of the menus.
■Properties: Opens a Properties dialog box to view the existing menu or
submenu properties like the menu name, image, or submenu title. Use the
Icon Menu Wizard to change any menu properties.
Options for the Symbol Preview window
Right-click an icon or in empty space in the Symbol Preview window to display
the following options:
■View: Changes the view display for the Symbol Preview window and
Recently Used window. The current view option is indicated with a check
mark. Options include: Icon with text, Icon only or List view.
■Properties: (available for icons only) Opens a Properties dialog box to view
the existing symbol icon properties like the icon name/image/block names
and so on. Use the Icon Menu Wizard to change any icon properties.
Insert panel footprints manually
Select to use a generic marker only, draw shapes, select a similar footprint,
choose from a file dialog box, or pick on an existing block on the current
drawing to convert it to AutoCAD Electrical on the fly.
Insert panel footprints manually
1Click Panel tab ➤ Insert Component Footprints panel ➤ Insert
Footprints drop-down ➤ Manual.
Insert panel footprints manually | 1551
2In the Insert Component Footprint -- Manual dialog box, select:
■Use generic marker only - Insert a block to annotate with the tag,
description text, and so on, of the component.
■Draw shapes - draw a rectangle, circle, or octagon to represent the
component.
■Pick “just like” footprint - Select a block from the drawing.
■Browse - pick a block from a list of files on disk.
■Pick - pick a non-AutoCAD Electrical block on the drawing to change
into a smart AutoCAD Electrical block.
3Insert or draw the footprint.
4Enter values in the Panel Layout - Component Insert/Edit dialog box.
5Click OK.
Footprint
Some schematic components may not carry manufacturer/catalog information
or have a part number assigned that is not listed in the footprint lookup file.
In such a case, AutoCAD Electrical cannot determine which footprint block
to use, so you must select to make catalog assignments, select or create a
footprint, or create a lookup entry on the fly.
Insert Footprint (Icon Menu)
Ribbon: Panel tab ➤ Insert Component Footprints panel ➤ Insert
Footprints drop-down ➤ Icon Menu.
Toolbar: Panel Layout
Menu: Panel Layout ➤ Insert Footprint (Icon Menu)
Command entry: AEFOOTPRINT
Select the footprint to insert.
Choice A - make catalog assignment for automatic footprint selection
Enter catalog information, or if there is not a catalog assignment use the
catalog lookup to find and select catalog information. An attempt is made to
1552 | Chapter 19 Panel Layout
find a match in the footprint lookup of the manufacturer or the _PNLMISC
miscellaneous lookup file.
Choice B - manual footprint selection or creation
Skips the catalog assignment. Select from the available options to insert a
footprint.
Inserts a block with the tag, description text, and so
on, of the component.
Use generic marker only
Draws a rectangle, circle, or octagon to represent
the component. Text and hidden information inser-
ted when drawn.
Draw shapes
Select a block from the drawing.Pick "just like" footprint
Pick a block from a list of .DWG files on disk.Browse
Pick a non-AutoCAD Electrical block on the drawing
to be instantly changed into a smart AutoCAD Elec-
trical block.
Pick
Pick your own ABECAD install to link to.ABECAD
Choice C - add entry to footprint database
A footprint lookup database table matches MFG/CAT part number
combinations with their appropriate footprint blocks. In cases where a
MFG/CAT number is given but is not in a lookup file, AutoCAD Electrical
enables this option.
There are two categories of panel footprint lookup files: manufacturer and
miscellaneous.
Adds a new entry to the manufacturer-specific foot-
print lookup table and matches it with an existing
Add Entry to Manufacturer
footprint block or drawing file. It has the same name
as the manufacturer name of the component.
Adds a new entry to a miscellaneous (catch all)
footprint lookup table called "_PNLMISC". It adds
Add Entry to Miscellaneous
the MFG/CAT combination to the footprint lookup
table and matches it with an existing footprint block
Insert panel footprints manually | 1553
or library symbol. If the lookup table does not exist,
it is created.
Insert Footprint (Manual)
Ribbon: Panel tab ➤ Insert Component Footprints panel ➤ Insert
Footprints drop-down ➤ Manual.
Toolbar: Component Footprint
Menu: Panel Layout ➤ Insert Footprint (Manual)
Command entry: AEFOOTPRINTMAN
Skips the catalog assignment. Select to draw a simple footprint representation
of the selected device, browse for a footprint block file, pick on an existing
block on the current drawing to convert it to AutoCAD Electrical-smart on
the fly, or invoke an external program to find and insert a footprint
representation of a given catalog number.
Inserts a block with the tag, description text, and so
on, of the component.
Use generic marker only
Draws a rectangle, circle, or octagon to represent
the component. Text and hidden information inser-
ted when drawn.
Draw shapes
Select a block from the drawing.Pick "just like" footprint
Pick a block from a list of .DWG files on disk.Browse
Pick a non-AutoCAD Electrical block on the drawing
to be instantly changed into a smart AutoCAD Elec-
trical block.
Pick
Pick your own ABECAD install to link to.ABECAD
1554 | Chapter 19 Panel Layout

Insert panel footprints from a catalog list
Inserts panel symbols by choosing a catalog number or a component
description from a user-defined pick list. The data displayed in this pick list
is stored in a database in generic Access format. The file name is
wd_picklist.mdb and can be edited with Access or from Add/Edit/Delete along
the bottom of the dialog box of the pick list.
Insert panel footprints from a catalog list
Insert a panel symbol by choosing a catalog number or a component
description from a user-defined pick list. The data displayed in this pick list
is stored in a database in generic Access format. The file name is
wd_picklist.mdb and can be edited with Access or from Add/Edit/Delete along
the bottom of the dialog box of the pick list.
1Click Panel tab ➤ Insert Component Footprints panel ➤ Insert
Footprints drop-down ➤ Catalog List.
2In the Panel footprint: Select and Insert by or Description Pick dialog
box, select a component.
3Click OK.
4Select the insertion point and orientation.
5Enter values in the Panel Layout - Component Insert/Edit dialog box.
6Click OK.
Schematic component or panel footprint
Inserts schematic or panel symbols by choosing a catalog number or a
component description from a user-defined pick list. The data displayed in
this pick list is stored in a database in generic Access format. The file name is
wd_picklist.mdb and can be edited with Access or from Add/Edit/Delete along
the bottom of the dialog box for the pick list. The AutoCAD Electrical normal
search path sequence is used to locate this file.
Insert panel footprints from a catalog list | 1555

Insert Component (Catalog List)
Ribbon: Schematic tab ➤ Insert Components panel ➤ Insert Components
drop-down ➤ Catalog List.
Toolbar: Insert Component
Menu: Components ➤ Insert Component (Lists) ➤ Insert Component
(Catalog List)
Command entry: AECOMPONENTCAT
Insert Footprint (Catalog List)
Ribbon: Panel tab ➤ Insert Component Footprints panel ➤ Insert
Footprints drop-down ➤ Catalog List.
Toolbar: Insert Footprint (Lists)
Menu: Panel Layout ➤ Insert Footprint (Lists) ➤ Insert Footprint (Catalog
List)
Command entry: AEFOOTPRINTCAT
Both schematic and panel layout symbols can be included in the pick list
database. Only schematic or panel entries are displayed at a time depending
on whether the routine is called from the AutoCAD Electrical or Panel Layout
toolbar.
Specifies how to sort the record list. You can sort by description,
catalog number, or manufacturer code.
Sort by
Opens a dialog box for creating a record. If the footprint block is not
in an AutoCAD or an AutoCAD Electrical search path, include the part
Add
of the path to append to one of these search paths (or you can enter
the full path). If the new record is like an existing record, highlight
the existing record before you click Add.
Opens a dialog box for editing a record. Highlight the record and
click Edit. Modify the record in the displayed dialog box.
Edit
1556 | Chapter 19 Panel Layout

Removes an existing record.Delete
Insert footprints from an equipment list
This tool lists data extracted from your equipment list, finds the appropriate
panel symbol by querying the footprint_lookup.mdb, and inserts the panel
footprint at your pick point. Each line or record in the equipment list represents
a single entry into the Panel Equipment in {file name} dialog box for schematic
component selection. The quantity for a selected catalog number is not
supported.
Insert footprints from an equipment list
1Click Panel tab ➤ Insert Component Footprints panel ➤ Insert
Footprints drop-down ➤ Equipment List.
2Browse to and select your equipment list.
3Select the sheet name if prompted.
4Define the settings for the equipment list on the Settings dialog box. This
includes assigning column numbers to data categories, such as
Manufacturer, Catalog, and Installation.
5Click OK on the Settings dialog box. The equipment is displayed in the
Panel equipment in {file name} dialog box.
6Select an item and click Insert.
■AutoCAD Electrical takes the manufacturer attribute value (MFG) and
finds a table in the footprint_lookup.mdb file with this name.
■AutoCAD Electrical queries this specific vendor table using the catalog
attribute value (CAT) of the selected entry and returns the block name
from the matched record.
■The Insert Footprint command starts and prompts for the insertion
point for the footprint block.
7Pick the insertion point and orientation.
■The values from the equipment list are copied to the footprint
representation.
Insert footprints from an equipment list | 1557
8In the Panel Layout - Component Insert/Edit dialog box, enter additional
component values and click OK.
9In the Panel equipment in {file name} dialog box, click Close.
Panel equipment in
You can select to insert a single panel footprint or multiple footprints from
the equipment list.
Ribbon: Panel tab ➤ Insert Component Footprints panel ➤ Insert
Footprints drop-down ➤ Equipment List.
Toolbar: Insert Footprints (Lists)
Menu: Panel Layout ➤ Insert Footprint (Lists) ➤ Insert Footprint
(Equipment List)
Command entry: AEFOOTPRINTEQ
Select the spreadsheet file to use and click Open. Specify to use the default
settings or previously saved settings and click OK.
Sort List
Sorts the list of components. You can specify four sorts to perform on the list.
Catalog Check
Performs a Bill of Material check and displays the result. Enabled if the selected
panel component contains catalog data.
Footprint scale
Specifies the block insert scale. (1.0 = full)
Rotate
Specifies the block rotation angle. (blank = "ask")
1558 | Chapter 19 Panel Layout
External Program
Executes an external user routine to retrieve the footprint block name and
catalog data. Requires the WD_XCAT reference in the wd.env and a user
AutoLISP file to manage the data send/receive with the external routine.
Manual
Specifies to pick the panel footprint manually. The Panel Component dialog
box displays, so you can define the footprint to use.
Insert
Finds and inserts footprint for the highlighted component. It is based on a
match between the catalog part number of the footprint symbol and an entry
in a schematic lookup file. If 0 matches are found, you are prompted to draw
the footprint manually, add an entry in the lookup file, or select an existing
footprint drawing file. If multiple components are selected in the list, the
Spacing for Footprint Insertion dialog box displays. Define how to insert the
first component of each device.
Accesses the standard footprint lookup table that matches
the MFG code of the device. This table is set up to insert a
full mechanical representation of the device.
Use Footprint tables
Accesses an alternate table in the footprint lookup table.
This table matches the MFG code but attaches an "_WD"
Use Wiring diagram tables
suffix. The tables with the "_WD" suffix are set up to insert
a symbol that carries the wire connection attributes.
Convert Existing
Inserts selected data on an existing "dumb" block insert. It converts the block
to a smart AutoCAD Electrical footprint.
Pick File
Allows you to pick a file for the insert. Select an existing AutoCAD Electrical
extracted panel component list file or extract a fresh copy of panel component
data from the current database of the project.
Settings
This spreadsheet organizes the selected user-created equipment list and presents
the list in a pick list. As you pick an item from the pick list, the appropriate
schematic symbol is found and inserted in the drawing at your pick point.
Insert footprints from an equipment list | 1559
Your equipment list can be an AutoCAD Electrical-generated Component
report, or it can be a list of motors giving horsepower and starter type along
with motor ID and descriptions.
NOTE You can open a comma-delimited file, Excel spreadsheet, or Access database
file for input.
Insert Component (Equipment List)
Ribbon: Schematic tab ➤ Insert Components panel ➤ Insert Components
drop-down ➤ Equipment List.
Toolbar: Insert Component (Lists)
Menu: Components ➤ Insert Component (Lists) ➤ Insert Component
(Equipment List)
Command entry: AECOMPONENTEQ
Select the spreadsheet file to use and click Open. Click the table to edit and
click OK.
Insert Footprint (Equipment List)
Ribbon: Panel tab ➤ Insert Component Footprints panel ➤ Insert
Footprints drop-down ➤ Equipment List.
Toolbar: Insert Footprint (Lists)
Menu: Panel Layout ➤ Insert Footprint (Lists) ➤ Insert Footprint
(Equipment List)
Command entry: AEFOOTPRINTEQ
Select the spreadsheet file to use and click Open. Click the table to edit and
click OK.
Uses the default settings for managing equipment lists.Default settings
Reads and uses the settings for a previously saved file.Read settings
1560 | Chapter 19 Panel Layout
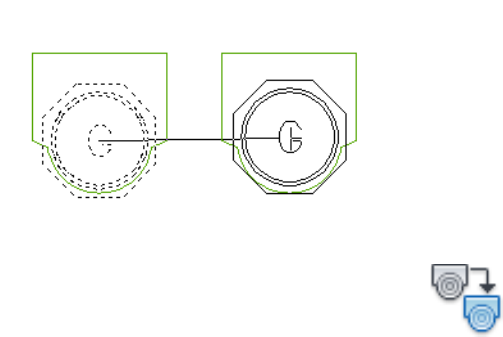
Defines the order of the data in the selected equipment list
file. Assign column numbers to data categories (such as
Spreadsheet/Table columns
Manufacturer, Catalog, and Installation) in the Equipment
List Spreadsheet Settings dialog box.
Saves the column information in a text file for reuse. The
filename is user-defined with the extension .wde.
Save settings
Insert a copy of a panel footprint
Insert a copy of a panel footprint
Copies a selected panel footprint on the active drawing.
Use the Copy Footprint tool instead of AutoCAD Copy when a panel
component footprint has a balloon or a nameplate associated with it. The
program establishes invisible Xdata pointers tied to a footprint, and updates
them in the Copy Footprint operation.
1Click Panel tab ➤ Edit Footprints panel ➤ Copy Footprint.
2Select the panel component to copy.
3Click the drawing to specify the insertion point or enter a value.
The Panel Layout - Component Insert/Edit dialog box displays.
4Specify any necessary values such as the component tag, catalog
information, or description.
5Click OK.
Insert a copy of a panel footprint | 1561
Use panel templates and assemblies
You can use templates to create a panel layout drawing or to add attributes
to footprints automatically during insertion time. You can Wblock assemblies
of panel components out to disk for insertion later.
Panel layout template drawings
You can set up an AutoCAD template drawing for panel layout drawings with
the WD_PNLM block pre-inserted and set up with your own default settings.
You can also set up client-specific template drawings and reference the
appropriate one when starting a new AutoCAD Electrical panel drawing.
Attribute template drawings
You can set up to have visible attributes added to any footprint automatically
at footprint insertion time. Using non-intelligent footprint representations
can insert with smart AutoCAD Electrical attributes added automatically, on
the fly.
There are five attribute template drawings:
component footprintswd_ptag_addattr_comp.dwg
terminal footprintswd_ptag_addattr_trm.dwg
terminal with wire no. as terminal numberwd_ptag_addattr_wtrm.dwg
balloonswd_ptag_addattr_itemballoon.dwg
terminal footprints (when inserted by
Level/Sequencing tools)
Wd_ptag_addattr_pnltermstrip.dwg
If the appropriate attribute template exists, the following steps are performed
when a panel footprint is inserted.
1Find the center of the footprint by collecting and averaging the objects
that make up the footprint.
2Insert the attribute template at the calculated center of the footprint.
3Make sure there are no duplicate attributes. If duplicate attributes are
found, the attribute from the footprint is kept.
4Reblock the added attributes with the inserted footprint.
1562 | Chapter 19 Panel Layout
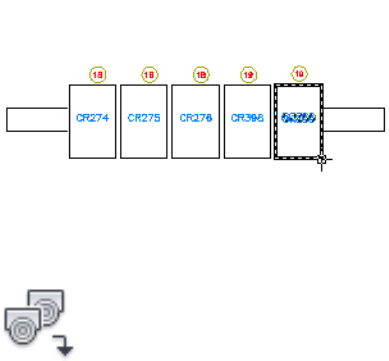
5Add the schematic data to the footprint. If the target attribute exists, the
data is added as attribute data. If the target attribute does not exist, the
data is added as invisible Xdata.
Panel assembly
You can Wblock assemblies of panel components out to disk for insertion
later. Use the Insert Panel Assembly utility instead of the AutoCAD
Insert/Explode command when to insert a WBlocked group of panel
component footprints with balloons or nameplates. Since AutoCAD Electrical
establishes invisible Xdata pointers when they are tied to a footprint, they are
properly updated when inserted using this utility. Use the Copy Assembly
utility to copy panel assemblies on the active drawing.
Insert panel footprint assemblies
Inserts a WBlocked panel footprint assembly.
Use the Insert Panel Assembly utility instead of the AutoCAD Insert/Explode
command to insert a group of panel component footprints with balloons or
nameplates. The program establishes invisible Xdata pointers tied to a
footprint, and updates them in the Insert Panel Assembly operation.
1Click Panel tab ➤ Insert Component Footprints panel ➤ Panel
Assembly.
2Specify whether to add the intelligence needed for each block to be treated
as an AutoCAD Electrical footprint.
3Click OK.
Use panel templates and assemblies | 1563
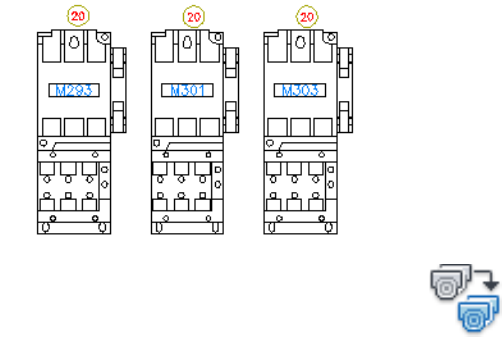
4In the Wblocked Assembly to Insert dialog box, select the assembly and
click Open.
5Specify the insertion point for the block.
6Enter a rotation angle or press Enter to use the default.
Your block is inserted onto the drawing at your picked point.
Copy panel footprint assemblies
Copies one or more selected panel footprints.
The Copy Assembly utility copies a group of panel component footprints,
balloons, and nameplates. You select the balloons or nameplates to copy with
the footprints. The program establishes invisible Xdata pointers tied to a
footprint and updates them in the operation.
1Click Panel tab ➤ Edit Footprints panel ➤ Copy Assembly.
2Select the panel components to copy and right-click.
3Enter a base point or displacement value.
4Specify the second point and right-click.
1564 | Chapter 19 Panel Layout
Footprint/Terminal Edit
Edit a footprint or panel terminal
You can go back to a component at any time and edit values, such as tag,
catalog assignment, location, installation, descriptions, ratings, and
miscellaneous values. Related components update to match new values. In
some cases, a footprint updates due to manufacturer, catalog, or assembly
value changes.
Panel layout - component insert/edit
Edits the panel footprint or terminal. Converts a selected block if not
compatible with AutoCAD Electrical.
Insert Footprint (Icon Menu)
Ribbon: Panel tab ➤ Insert Component Footprints panel ➤ Insert
Footprints drop-down ➤ Icon Menu.
Toolbar: Panel Layout
Menu: Panel Layout ➤ Insert Footprint (Icon Menu)
Command entry: AEFOOTPRINT
Select the footprint to insert and specify the insertion point on the drawing.
Edit Footprint
Ribbon: Panel tab ➤ Edit Footprints panel ➤ Edit.
Toolbar: Panel Layout
Menu: Panel Layout ➤ Edit Footprint
Command entry: AEEDITFOOTPRINT
Select the footprint or nameplate to edit.
Footprint/Terminal Edit | 1565

You can go back to a footprint at any time and edit values, such as tag, catalog
assignment, location, installation, descriptions, ratings, and miscellaneous
values. Related components update to match new values. In some cases, a
footprint updates due to manufacturer, catalog, or assembly value changes.
NOTE The dialog box options differ depending on whether you are inserting or
editing a footprint or nameplate.
Item Number
It is automatically assigned when the catalog part number values match an
existing component that is already assigned an Item number. If no existing
match is found, you can manually enter an item number. These item numbers,
which can be linked to "smart" balloons, display in panel BOM and component
lists.
If checked, marks an item number as fixed. If you run Resequence
Item Numbers on page 1602 later on, fixed item numbers do not
change.
fixed
Scans for the target component catalog assignment and assigns the
item number if a match is found. If a catalog match is not found, a
dialog box is displayed for item number assignment.
Find
Displays a list of numbers found in the current drawing or project.List
Finds the next available item number.Next
Catalog Data
Does a drawing or project-wide listing of similar components with their catalog
assignments. During your editing session, the last MFG / CAT / ASSYCODE
assignment for each component type you insert into your wiring diagram is
1566 | Chapter 19 Panel Layout
remembered. When you insert another component of that type, the catalog
assignment of the previous component is set as the default (assuming a
previous one was made during the current editing session).
Lists the manufacturer number for the footprint. Enter a value or select
one from the Catalog lookup.
Manufacturer
Lists the catalog number for the footprint. Enter a value or select one
from the Catalog lookup.
Catalog
Lists the assembly code for the footprint. The Assembly code is used
to link multiple part numbers together.
Assembly
Specifies the quantity number for the part number (blank=1). This
value gets inserted into the "SUBQTY" column of a BOM report
Count
Specifies the unit of measure, which can be displayed in the compon-
ent list report.
Unit
Opens the catalog database of the component from which you can
manually enter or pick the Manufacturer or Catalog values. Search
Catalog Lookup
the database for a specific catalog item to assign to the currently se-
lected component.
Lists the part numbers used for similar components in the current
drawing.
Drawing
Lists the part numbers used for similar components in the project.Project
Inserts or edits extra catalog part numbers on to the currently selected
component. You can add up to 99 part numbers. These multiple
Multiple Catalog
BOM part numbers appear as subassembly part numbers to the main
catalog part number in the various BOM and component reports.
Show how the selected item displays like in a Bill of Material template.Catalog Check
Rating
Specifies values for each ratings attribute. You can enter up to 12 ratings
attributes on a terminal. Select Show All Ratings to display a list of default
values.
Edit a footprint or panel terminal | 1567

NOTE If this button is unavailable, the component you are editing does not carry
any rating attributes.
Component Tag
Any existing tags appear in the edit box. To define the component tag, edit
the tag or type a specific tag in the edit box. Select Fixed if you do not want
to update this tag on a retag.
Applies an ID tag number to link the panel component back to its
equivalent device on the schematics.
Schematic List
Assigns a tag from an external list file.External list file
Description
Enter up to three lines of description attribute text.
Displays a list of descriptions found in the current drawing so you
can select similar descriptions to edit.
Drawing
Displays a list of descriptions found in the project so you can pick
similar descriptions to edit.
Project
Opens an ASCII text file from which you can select standard descrip-
tions.
Defaults
Installation/Location Codes
Changes the installation, location, mount, and group codes. You can search
the current drawing or entire project for the codes. A quick read of all the
current or selected drawing files is done and a list of installation codes used
so far is returned. Select from the list to update the component with the codes
automatically.
Assign short installation codes to components like "PNL" and "FIELD" so you
can take full advantage of the AutoCAD Electrical ability to create
location-specific BOM and component lists later.
Switch Positions
Labels the positions of a selector switch.
1568 | Chapter 19 Panel Layout
Show/Edit Miscellaneous
View or edit any attributes that are not predefined AutoCAD Electrical
attributes.
Panel layout - terminal insert/edit
Insert Terminal (Manual)
Ribbon: Panel tab ➤ Terminal Footprints panel ➤ Insert Terminals
drop-down ➤ Insert Terminal (Manual).
Toolbar: Terminal Footprint
Menu: Panel Layout ➤ Insert Terminal (Manual)
Command entry: AEPANELTERMINAL
Select the method for inserting a terminal strip and place the terminal strip
on the drawing.
Edit Footprint
Ribbon: Panel tab ➤ Edit Footprints panel ➤ Edit.
Toolbar: Panel Layout
Menu: Panel Layout ➤ Edit Footprint
Command entry: AEEDITFOOTPRINT
Tag Strip
These controls determine the overall tagging of the terminal strip in the project.
The Installation, Location, and Tag Strip values define which strip the terminal
belongs to.
Edit a footprint or panel terminal | 1569

NOTE You can assign short installation or location codes to components like "PNL"
and "FIELD" to take full advantage of the AutoCAD Electrical ability to create
installation or location-specific BOM and component lists.
Changes the installation codes. Click Browse to
search the active drawing, entire project, and an
Installation
external list (default.inst) for installation codes. Pick
from the list to update the component with the
installation code automatically.
Changes the location codes. Click Browse to search
the active drawing, entire project, and an external
Location
list (default.loc) for location codes. Pick from the
list to update the component with the location
code automatically.
Specifies the Tag ID given to the terminal strip. If
there is an existing name, it appears in the edit box.
Tag Strip
If not, you can enter a specific ID name or click the
< and > buttons to increment or decrement the last
digit/character in the Tag Strip value.
Specifies the terminal number. If there is not PIN-
LIST information, the < and > buttons increment
Number
or decrement the terminal number. You can also
click Pick to select a text object or an attribute on
the active drawing to use for the terminal number.
If the panel footprint is already associated to a
schematic symbol, this edit box is already populated
with its value.
Modify Properties/Associations
These controls support associations between schematic terminal symbols and
their panel terminal footprint and between multiple schematic terminal
symbols.
1570 | Chapter 19 Panel Layout

NOTE You cannot associate terminals using the Add/Modify or Break Out Panel
options when you insert a terminal using the Insert Terminal (Schematic List) tool.
However, once the terminal is inserted onto the drawing, you can modify the
associations using these tools.
Displays the Add/Modify Associations dialog box.
Select terminal strips and their respective blocks to
Add/Modify
make an association to the terminal symbol being
inserted or edited.
NOTE It is disabled if the active drawing is not part
of the active project.
Removes the selected terminal symbol out of the
defined association. The properties from the original
Break Out Panel
association and the levels of the terminal are
maintained.
Displays the Block Properties dialog box where you
can define and maintain terminal block properties.
Block Properties
NOTE It is disabled if the active drawing is not part
of the active project.
Properties/Associations
The list box displays the status of the edited terminals association. It lists all
associated terminal symbols from the schematic and terminal panel footprints.
If the terminal symbol is being inserted for the first time, the list box only
displays the reference for itself. The number of levels defined in the block
properties displays at the top of the Properties/Associations group. The terminal
number being edited is highlighted in the list box.
You can double-click in the list to modify the terminal association in the
Add/Modify Associations dialog box.
NOTE Pin numbering is related to the terminal level and not the terminal tag
number instance.
Lists the level description defined in the terminal
block properties.
Label
Edit a footprint or panel terminal | 1571
Lists the terminal numbers defined in the associ-
ation. Only one terminal number is allowed per
Number
level and each level displays its respective terminal
number or text. Panel terminal symbols do not
display terminal numbers.
Lists the pin numbers defined left side of the termin-
al block. This data is entered into the L0nPINL at-
PinL
tribute if present; otherwise, it is placed in the
xdata.
Lists the pin numbers defined on the right side of
the terminal block. This data is entered into the
PinR
L0nPINR attribute if present; otherwise, it is placed
in the xdata.
Lists the reference location of the terminal symbol
in the project. The syntax is ‘Sheet,Reference’ based
on the drawing configuration.
Reference
Catalog Data
You can do a drawing-wide or project-wide listing of similar terminals with
their catalog assignments. During your editing session, the last MFG / CAT /
ASSYCODE assignment for each terminal you insert into your wiring diagram
is remembered. When you insert another terminal of that type, the previous
catalog assignment of the terminal is set as the default (assuming a previous
one was made during the current editing session).
Lists the manufacturer name for the terminal. Enter a value or
select one from the Catalog lookup.
Manufacturer
Lists the catalog number for the terminal. Enter a value or select
one from the Catalog lookup.
Catalog
Lists the assembly code for the terminal. The Assembly code is
used to link multiple part numbers together.
Assembly
Specifies a unique identifier assigned to each terminal. The tag
value can be manually typed in the edit box. Click the Item button
to launch the Item Number dialog box to:
Item
■Search the drawing or project for an item value assigned to
this catalog.
1572 | Chapter 19 Panel Layout
■Fix the item number. If checked, marks an item number as
fixed. If you run Resequence Item Numbers on page 1602 later
on, fixed item numbers do not change.
Opens the catalog database of the terminal from which you can
select the Manufacturer and Catalog values. Search the database
for a specific catalog item to assign to the selected terminal.
Catalog Lookup
Lists the part numbers used for similar terminals in the current
drawing.
Drawing
Lists the part numbers used for similar terminals in the project.
You can search in the active project, another project, or in an
external file.
Project
■Active project: All the drawings in the active project are
scanned and the results are listed in a dialog box. Select from
the list to assign your new terminal with a catalog number
that is consistent with other similar terminals in the project.
■Other project: Scans each listed drawing in a previous project
for the target terminal type and returns the catalog informa-
tion in a subdialog box. Make your catalog assignment by
picking from the list.
■External file: You can pull catalog assignments from a gen-
eric ASCII file created by a word processor or output from a
spreadsheet or database program. A dialog box displays the
contents of the selected text file. Find and highlight the de-
sired entry. AutoCAD Electrical reads the line of text from the
file and breaks it into its component parts. They are displayed
in the left-hand list. For each relevant item, highlight it and
then pick the appropriate category button in the center
column. The highlighted item is transferred to the correspond-
ing category (and then to the Insert/Edit dialog box once OK
is clicked).
Inserts or edits extra catalog part numbers on to the selected
terminal. You can add up to ten part numbers. These multiple
Multiple Catalog
BOM part numbers appear as subassembly part numbers to the
main catalog part number in the various BOM and terminal re-
ports.
Edit a footprint or panel terminal | 1573

Extracts the details from the catalog database to display what the
selected item looks like in a Bill of Material template.
Catalog Check
Descriptions
Specifies the optional description attribute text to assign to the terminal block
(up to three lines of text can be specified). Click Browse to search for all
terminal descriptions in the project or active drawing. Select the description
you want to copy to the edited terminal block by selecting it in the list and
clicking OK.
Ratings
Specifies values for each ratings attribute. You can enter up to 12 ratings
attributes on a terminal. Select Show All Ratings to display a list of default
values.
NOTE If this button is unavailable, the terminal you are editing does not carry
any rating attributes.
Mount or Group
Changes the mount and group codes. You can search the current drawing or
entire project for the codes. A quick read of all the current or selected drawing
files is done and a list of codes used so far is returned. Select from the list to
update the component automatically with the codes.
Show/Edit Miscellaneous
View or edit any attributes that are not predefined AutoCAD Electrical
attributes.
External List
Assigns information from an external list to specified data in the Panel Layout
- Terminal Insert/Edit dialog box. Any existing information from the dialog
box appears in the edit box. To define the information from the selected file,
highlight the appropriate information in the Choices list. Select the appropriate
button next to the edit box.
Add/modify associations
This tool searches project terminal strips for existing terminal blocks, allowing
you to associate a terminal symbol to an existing association or terminal.
1574 | Chapter 19 Panel Layout

Insert Component
Ribbon: Schematic tab ➤ Insert Components panel ➤ Insert Components
drop-down ➤ Icon Menu.
Toolbar: Main Electrical
Menu: Components ➤ Insert Component
Command entry: AECOMPONENT
Select Terminals and Connectors from the dialog box and specify the insertion
point on the drawing. In the Insert/Edit Terminal Symbol dialog box, Modify
Properties/Associations section, click Add/Modify.
Edit Component
Ribbon: Schematic tab ➤ Edit Components panel ➤ Edit Components
drop-down ➤ Edit.
Toolbar: Main Electrical
Menu: Components ➤ Edit Component
Command entry: AEEDITCOMPONENT
Select the terminal to edit. In the Insert/Edit Terminal Symbol dialog box,
Modify Properties/Associations section, click Add/Modify.
NOTE This option is also available from the Panel Layout - Insert/Edit Terminal
Footprint dialog box.
Modifications to the terminal symbol associations affect every terminal symbol
in the association so all drawings must be available for editing. You cannot
edit other terminal associations from this dialog box; only the associations of
the selected terminal symbol can be edited.
Edit a footprint or panel terminal | 1575

Active Association
Use this section to modify the terminal number. The Installation, Location,
and Tag Strip values are not editable.
Displays the Installation value defined for the edited
terminal symbol.
Installation
Displays the Location value defined for the edited
terminal symbol.
Location
Displays the tag strip value defined for the edited
terminal symbol.
Tag Strip
(Unavailable for panel terminals) Specifies the ter-
minal number. The displayed value is defined in
the TERM01 attribute on the terminal symbol.
Number
NOTE If this value is the wire number defined in
the WIRENO attribute on the terminal symbol, you
cannot change the value.
Displays all terminal symbols that are currently as-
sociated to the terminal being edited. The terminal
Active Associations grid
symbol that is being edited is highlighted in light
blue. Right-click on a terminal symbol to move it
up or down one level or select a terminal symbol
and drag it to a new level location. Label and Pin
information do not move with the terminal symbol
number and reference since it is part of the terminal
block property definition.
NOTE The panel symbol association is always at
the bottom and cannot be selected for movement.
■Level numbering: Displays a level number for
each level that is defined in the terminal prop-
erties. The level numbering for the panel sym-
bol is “#.”
■Label: Lists the level description defined in the
terminal block properties.
■Number: Lists the terminal numbers defined
in the association. Only one terminal number
is allowed per level and each level displays its
respective terminal number or text. Panel ter-
1576 | Chapter 19 Panel Layout
minal symbols do not display terminal numbers.
Terminal levels with an assignment and a ter-
minal that has not been assigned a terminal
number display a “???” in this column.
■PinL: Lists the pin numbers defined on the left
side of the terminal block. This data is entered
into the LnnPINL attribute if present; otherwise,
it is placed into Xdata.
■PinR: Lists the pin numbers defined on the right
side of the terminal block. This data is entered
into the LnnPINR attribute if present; otherwise,
it is placed into Xdata
Pin numbering is related to the terminal
level and not the terminal tag number
instance.
■Reference: Lists the reference location for the
terminal symbol in the project. The syntax is
“Sheet,Reference” based on the drawing con-
figuration.
Select Association
Displays all terminal strips inside of the active pro-
ject. The tree contains three nodes to aid in finding
Terminal Strips
a specific terminal block in the project. The nodes
are: active project name, Tag Strip value (Installa-
tion and Location included) and terminal blocks.
■Active Project node: Displays the name of the
active project.
■Tag Strip Value node: Displays the
entire Installation, Location, and Tag Strip val-
ues for all terminal strips in the active project.
The terminal block quantity displays at the end
of the node string in parenthesis.
■ or Terminal Block node: Dis-
plays the terminal numbers defined on the
block (separated by commas). The number of
Edit a footprint or panel terminal | 1577

levels defined in the block properties displays
at the end of the node string in parenthesis.
For example, 1,21,GND (3).
If a level is not represented on the
schematic, an empty space represents
it: 1, , GND (3). If a terminal has been
assigned to the level, but the terminal
does not have a number assignment, a
‘???’ represents it: 1,???,GND (3).
Displays all levels of the terminal selected in the
tree. Select the level to place the edited terminal
Select Association grid
in and right-click to run the associate command (or
click Associate).
Adds the edited terminal symbol to the terminal
association. A terminal number is then inserted into
Associate
the Number column and the Reference column is
updated with the terminal reference defined in the
drawing properties.
NOTE The grid row must be selected before you
can perform the association.
This option is unavailable until you select a level in
the grid control when editing a schematic terminal
or until you select a terminal from the tree control
when editing a panel footprint. A grid selection is
not required for panel footprints since the footprint
is associated to the entire terminal, not an individual
level.
Multiple Catalog
This tool allows you to insert or edit extra catalog part numbers on to the
currently selected component or footprint. You can add up to 99 additional
part numbers to any schematic or panel component on-the-fly. These multiple
BOM part numbers appear as subassembly part numbers to the main catalog
part number in the various BOM and component reports.
Multiple bill of material information
1578 | Chapter 19 Panel Layout

This tool allows you to insert or edit extra catalog part numbers on to the
currently selected component or footprint. You can add up to 99 additional
part numbers to any schematic or panel component on-the-fly. These multiple
BOM part numbers appear as subassembly part numbers to the main catalog
part number in the various BOM and component reports.
On the Insert/Edit Component or Panel Layout - Component Insert/Edit dialog
box, Catalog Data section, click Multiple Catalog.
NOTE You can also access this dialog box by clicking Multiple Catalog on the
Copy Catalog Assignment on page 1299 dialog box.
The additional catalog part numbers are saved on the symbol as
MFGn/CATn/ASSYCODEn attribute values. The "n" is the sequential code
value "01" through "99" selected in the top list box. If these attributes are not
present on the symbols, AutoCAD Electrical saves the information as Extended
Entity Data (Xdata) on the block insert.
Sequential code
Adds up to 99 extra part numbers (in addition to the main catalog part
number). Pick which one you want to add or inspect/edit. Click the list button
to show all extra part numbers carried on the component.
Catalog Data
Specifies the catalog part number information such as the manufacturer and
catalog number.
Count
Specifies the quantity number for the extra part number (blank=1). This value
gets inserted into the "SUBQTY" column of a BOM report.
Unit
Specifies the unit of measure, which can be displayed in the component list
report.
Parts Catalog Lookup
Lists the catalog database table that is to be referenced for the description
information for the given Manufacturer/Catalog/Assembly combination. For
each catalog entry, provide a name for the catalog look-up table. For the main
catalog entry, this information is provided on the symbol itself but may not
Multiple Catalog | 1579

be there for these catalog entries. Select List to pick from a list of tables that
are contained in your catalog database file or Misc to use the MISC_CAT table.
Catalog Lookup
Checks for and displays catalog table information in the Parts Catalog dialog
box for the selected component type.
Catalog Check
Quickly performs a Bill of Material check and displays the result.
Item Number
Assign an item number to the catalog number.
If checked, marks an item number as fixed. If you
run Resequence Item Numbers on page 1602 later on,
fixed item numbers do not change.
fixed
NOTE The fixed check box is available only when
assigning the catalog to panel components.
Finds the assigned manufacturer, catalog, assembly
code combination on components on the active
Drawing: Find
drawing. If a match is found, the item number is
assigned to this catalog. If a match is not found, a
dialog box displays where you enter an item number
or use the next available.
NOTE If the Item Numbering Mode on page 211 is
Accumulate Project Wide, this button is disabled.
Lists the item numbers along with each manufac-
turer, catalog, assembly code combinations in use
on the active drawing.
Drawing: List
NOTE If the Item Numbering Mode on page 211 is
Accumulate Project Wide, this button is disabled.
Finds the assigned manufacturer, catalog, assembly
code combination on components on the drawings
Project: Find
in the active project. If a match is found, the item
number is assigned to this catalog. If a match is not
found, a dialog box displays where you enter an
item number or use the next available.
1580 | Chapter 19 Panel Layout

NOTE If the Item Numbering Mode on page 211 is
Reset with Each Drawing, this button is disabled.
Lists the item numbers along with each manufac-
turer, catalog, assembly code combinations in use
on the drawings in the active project.
Project: List
NOTE If the Item Numbering Mode on page 211 is
Reset with Each Drawing, this button is disabled.
If the Item Assignments on page 211 project setting is set Per-Component Basis,
this section is disabled.
Multiple catalog part number assignments
This dialog box displays the order in which the extra part numbers appear in
the various AutoCAD Electrical reports. You can add up to 99 additional part
number assignments to a component.
On the Insert/Edit Component or Panel Layout - Component Insert/Edit dialog
box, Catalog Data section, click Multiple Catalog. Click Sequential Code: List
on the Multiple Bill of Material Information dialog box.
NOTE You can also access this dialog box by clicking Multiple Catalog on the
Copy Catalog Assignment on page 1299dialog box and clicking Sequential Code:
List.
To change the order, highlight the part number and click Move Up or Move
Down to move it in the list.
Copy code values to components
Copy code values to components
Use this tool to insert or copy installation, location, group, or mount code
values to selected components. These values extract into various reports and
may be useful for sorting or grouping purposes. Copied values show up on
the target footprints as an attribute value if an attribute is present or as invisible
Xdata.
NOTE This procedure uses the Copy Location Code tool, but you can use the
same steps for any of the Panel Location Copy tools.
Copy code values to components | 1581
1Click Panel tab ➤ Edit Footprints panel ➤ Copy Codes drop-down ➤
Copy Location code.
2In the Copy Installation\Location\Mount\Group to components dialog
box, select the code names you want to copy.
3Enter a value for the code:
■Pick Master: Select a panel component from the drawing carrying the
desired values for the all the codes you want to copy.
■Enter a value in the edit box.
■Drawing: Select a value from a list of values used on the active drawing.
■Project: Select a value from a list of values used in the project.
■Pick: Select a panel component from the drawing carrying the desired
value for the specific code.
4Click OK.
NOTE Schematic components only update installation or location values when
the component carries an installation or location attribute respectively. Panel
components update with either of the two data categories whether target attributes
are present or not.
Copy installation\location\mount\group to
components
This tool lets you do mass copies of location, installation, group, or mount
codes to all the components you select. You either type in the code, pick from
an online list, or pick a similar master component.
Copy Installation Code
Ribbon: Panel tab ➤ Edit Footprints panel ➤ Copy Codes drop-down
➤ Copy Installation Code.
Toolbar: Copy Codes
1582 | Chapter 19 Panel Layout

Menu: Panel Layout ➤ Panel Miscellaneous Tools ➤ Copy Installation
Code
Command entry: AECOPYINST
Copy Location Code
Ribbon: Panel tab ➤ Edit Footprints panel ➤ Copy Codes drop-down
➤ Copy Location code.
Toolbar: Copy Codes
Menu: Panel Layout ➤ Panel Miscellaneous Tools ➤ Copy Location
Code
Command entry: AECOPYLOC
Copy Mount Code
Ribbon: Panel tab ➤ Edit Footprints panel ➤ Copy Codes drop-down
➤ Copy Mount code.
Toolbar: Copy Codes
Menu: Panel Layout ➤ Panel Miscellaneous Tools ➤ Copy Mount Code
Command entry: AECOPYMOUNTCODE
Copy Group Code
Ribbon: Panel tab ➤ Edit Footprints panel ➤ Copy Codes drop-down
➤ Copy Group code.
Toolbar: Copy Codes
Menu: Panel Layout ➤ Panel Miscellaneous Tools ➤ Copy Group Code
Copy code values to components | 1583

Command entry: AECOPYGROUPCODE
Retrieves existing values by selecting a panel component from the
drawing carrying the desired Installation or Location value you wish
to copy.
Pick master
Specifies to copy the installation code that you enter in the edit box.Installation
Specifies to copy the location code that you enter in the edit box.Location
Specifies to copy the mount code that you enter in the edit box.Mount
Specifies to copy the group code that you enter in the edit box.Group
Selects a value for the code from a list of values used on the current
drawing.
Drawing
Selects a value for the code from a list of values used in the project.Project
Selects a value for the code from a master list of values of the com-
ponent.
Pick
Delete Footprint
Delete a footprint
Deletes the footprints you select, and removes any associated balloons.
You can search for related components, surf to them, and delete them.
1584 | Chapter 19 Panel Layout

1Click Panel tab ➤ Edit Footprints panel ➤ Delete Footprint.
2Select the footprints to delete.
3Press Enter.
Layout Wire Connection Annotation
Add wire information to footprints
Insert schematic wire connection information on to panel footprint
representations. After you add wire numbers to your schematics, annotate
panel footprint symbols with this information. You can build panel footprint
symbols with target attributes used for the wire connection information. If
these attributes are not present on the panel footprint, an MTEXT entity is
added to carry the wire information.
Target Attributes
If the panel footprint blocks carry certain target attributes, they are used for
the wire information. Each wire connection attribute definition is tied to a
terminal attribute definition (TERMxx) by the matching two digit suffix on
each attribute tag pair. The default value of the TERMxx attribute is used to
match up the wire connection information from the schematic components.
■TERMxx - incremented for each wire connection. Carries the default pin
value for the wire connection. The two digit suffix relates the attribute to
the wire annotation attributes, WIRENOxx, WDEVxx, and WLEVxx.
■WIRENOxx - wire connection information is written to this attribute.
Optionally, use WIRENOxxA, WIRENOxxB, and so on, to separate multiple
wire connections across multiple attributes.
■WDEVxx - if present, the connected component part of the annotation is
broken out and placed on this attribute.
■WLAYxx - if present, the connected wire layer part of the annotation is
broken out and placed on this attribute.
For example, here is a footprint representation for a 4-pole relay.
Layout Wire Connection Annotation | 1585
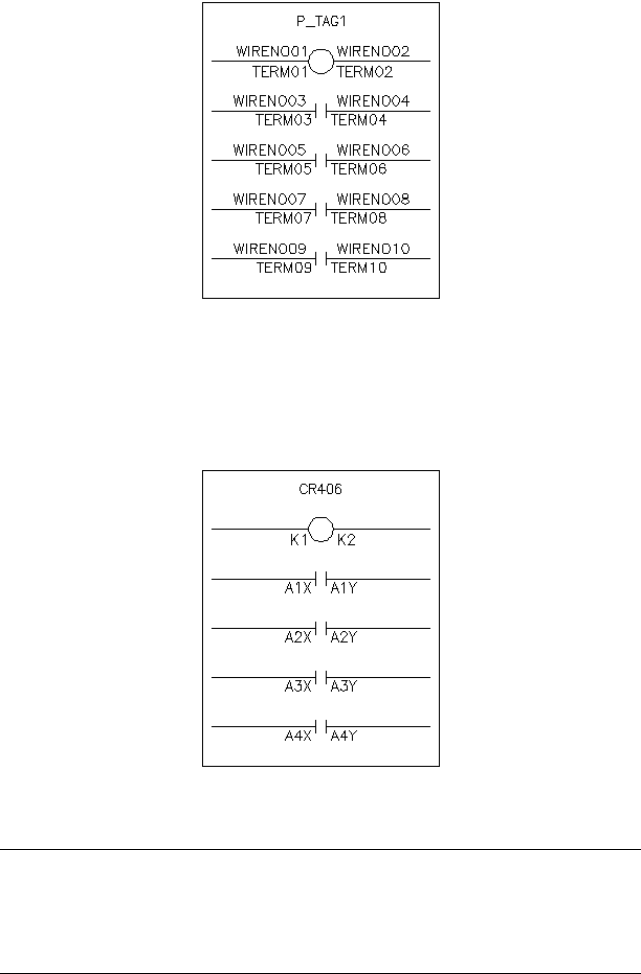
The TERMxx attribute definition default values match the default pin values
for the relay, for example:
■Parent coil - K1, K2
■Child contact pairs - A1X/A1Y, A2X/ A2Y, A3X/A3Y, A4X/A4Y
When the wire connection information is added to the footprint, the match
is made based on the TERMxx value match.
NOTE You can build two sets of panel footprint symbols: one set that does not
carry the target attributes for wire information and a set that does. When you
insert your panel symbols from the schematic extract, select Use Footprint Tables
to access the first set of symbols or select Use Wiring Diagram Tables to access the
second set.
1586 | Chapter 19 Panel Layout
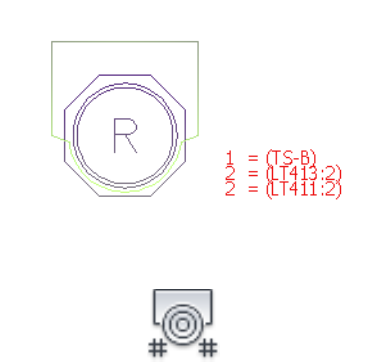
MText
The default MText insertion point is the same as the insertion point of the
footprint block. The default text size either matches that of existing wire
number attributes found on the footprint symbol or, if none present, the
MText size is forced to match the current value of the AutoCAD system variable
"TEXTSIZE".
To predefine the MText insertion point, text size, and text style on footprint
blocks, insert an invisible attribute "WXREF" on your footprint block library
symbol. Open up each footprint symbol in AutoCAD and insert a blank
attribute definition "WXREF". Put its origin at the point where you want
AutoCAD Electrical to insert the MText wire connection information. Mark
this attribute definition invisible and set its text size and style to the desired
MText size and style.
Add wire information to footprints
Inserts schematic wire connection information on to panel footprint
representations.
After you add wire numbers to your schematics, annotate panel footprint
symbols with this information. You can build panel footprint symbols with
target attributes used for the wire connection information. If these attributes
are not present on the panel footprint, a new or updated MTEXT entity displays
the wire information.
1Click Panel tab ➤ Insert Component Footprints panel ➤ Wire
Annotation.
2Specify to export the data for the active drawing or the entire project and
click OK.
Add wire information to footprints | 1587
3Select the wire numbering format to use.
4Select the layout devices to update with the schematic wire connection
information.
5Click OK.
6If you are exporting the data for the entire project, select the drawings
to process, and click OK.
Schematic wire numbers -> panel wiring diagram
Annotates panel footprint symbols with wire connection information extracted
from selected schematics.
Ribbon: Panel tab ➤ Insert Component Footprints panel ➤ Wire
Annotation.
Toolbar: Panel Layout
Menu: Panel Layout ➤ Wire Annotation of Panel Footprint
Command entry: AEWIREANNOTATION
Specifies to create an annotation for the active
drawing, object in the drawing, or the entire project.
Panel connection annotation for
Updates the wire connection table with the out-of-
date files
Freshen
Lists the drawings that appear to be out-of-date with
the wire connection table of the project.
List
Specifies to update only the report - not the drawing.Report only (no drawing update)
Extracts only the information for components with
specific location values. Once you pick Named Loca-
Location Codes to extract
tion, type the location code in the box or click List:
Drawing or List: Project to select from a list of used
location codes. AutoCAD Electrical automatically
creates a comma-delimited list for the named location
search.
1588 | Chapter 19 Panel Layout
Replaceable parameters for defining wire annotation
Terminal pin text%P
Terminal pin TERMDESC text%Q
IEC-style installation code%I
IEC-style location code%L
Mount assignment (on panel footprint equivalent)%M
Group assignment (on panel footprint equivalent)%U
Wire number%W
Cable tag + conductor/core color combination (format is "tag-color")%C
Cable tag%E
Cable conductor/core color%J
Cable tag substituted for wire number if cable tag is non-blank.%V
The wire number is displayed when a cable ID does not exist.
Wire color/gauge (or wire layer name)%G
Cable wire color substituted for wire number if cable color is non-blank.%H
The wire layer is displayed when a wire conductor in conjunction with a cable
ID does not exist.
Terminal strip terminal pin assignment%T
Terminal strip TERMDESC text - useful for multi-stack terminals%K
Destination component tag ID. You can use only one of the (%number) para-
meters.
%1
Equivalent of "%1:%P" (component tag:term)%2
Equivalent of "%1:%P:%D" (component tag:term:termdesc)%3
Equivalent of "%L%1" (IEC component tag)%4
Add wire information to footprints | 1589
Equivalent of "%L%1:%P" (tag:term)%5
Equivalent of "%L%1:%P:%D" (tag:term:termdesc)%6
Equivalent of "%I%I%1" (INST prefix+IEC component tag)%7
Equivalent of "%I%L%1:%P" (tag:term)%8
Equivalent of "%I%L%1:%P:%D" (tag:term:termdesc)%9
The part after the ":" is suppressed if the value is blank in %2 - %9 parameters.
For example, %2=comp tag:term. The ":term" part is suppressed if blank.
Schematic layout wire connection annotation
Defines the wire connection text format.
Ribbon: Panel tab ➤ Insert Component Footprints panel ➤ Wire
Annotation.
Toolbar: Panel Layout
Menu: Panel Layout ➤ Wire Annotation of Panel Footprint
Command entry: AEWIREANNOTATION
Make your selections and click OK.
NOTE You can build two sets of panel footprint symbols: one set that does not
carry the target attributes for wire information and a set that does. When you
insert your panel symbols from the schematic extract, select Use Footprint Tables
to access the first set of symbols or select Use Wiring Diagram Tables to access the
second set.
Format
There are two format edit boxes on the dialog box. The "Full" format is used
if the target attributes are not found and MText is inserted. The "Partial" format
is used if the target attributes are found (described later). Each format uses
parameters that are then replaced with the specific wire information. AutoCAD
Electrical provides some predefined formats for you to select from the list box
1590 | Chapter 19 Panel Layout

at the right; or you can enter your own format using replaceable parameters
on page 236.
Parameters must be separated by non-blank delimiters for AutoCAD Electrical
to be able to re-extract wiring diagram information into reports. For example,
"%T=%W %1 %G" is not acceptable because there is only a space between the
%W and %1 and %G parameters. Acceptable formats include "%T=%W (%1)
%G" or "%T=%W / %1 (%G)" or "%T=%W (%1) %G".
NOTE You cannot use commas in the format. They signal multiple wire connection
annotations onto a single wire connection attribute.
Additional options for the "To" component tag
Additional options to include in the text.
Adds the terminal text as a suffix.Add terminal pin as a suffix to tag
Adds any terminal description value as a suffix.Add terminal description to tag
Adds any installation value as a prefix.Include installation prefix to IEC tag
format
View/Test
Allows a preview or test of the report.
Suppress any duplicated annotation on each terminal
Indicates to hide duplicated annotations so that they do not show on the
report.
Delimiter between multiple instances on same line of text
Enter the character used to separate multiple panel wire annotation values
for the same wire connection.
If wire numbering converts to MText
The default MText insertion point is the same as the insertion point of the
footprint block. The default text size either matches that of existing wire
number attributes found on the footprint symbol or, if none present, the
MText size is forced to match the current value of the AutoCAD system variable
"TEXTSIZE".
Add wire information to footprints | 1591

To predefine the MText insertion point, text size, and text style on footprint
blocks, insert an invisible attribute "WXREF" on your footprint block library
symbol. Open up each footprint symbol in AutoCAD and insert a blank
attribute definition "WXREF". Put its origin at the point where you want
AutoCAD Electrical to insert the MText wire connection information. Mark
this attribute definition invisible and set its text size and style to the desired
MText size and style.
NOTE You can define the default wire connection text format using the Panel
Configuration on page 1527 dialog box. Click Panel Wire Connection Report XYZ
Offset Reference Setup.
Lookup Files
Use the footprint lookup file
Let your project set of schematic wiring diagrams help drive the panel layout
using the Insert Footprint (Schematic List) on page 1534 feature. AutoCAD
Electrical uses the footprint lookup database (footprint_lookup.mdb) to identify
the footprints corresponding to the MANUFACTURER, CATALOG, and
ASSEMBLYCODE attribute values of the schematic symbols. The database
content is found at:
■Windows XP: C:\Documents and Settings\{username}\My
Documents\Acade {version}\AeData\Catalogs\
■Windows Vista, Windows 7: C:\Users\{username}\Documents\Acade
{version}\AeData\Catalogs\
How it works
1You select a component from an AutoCAD Electrical extract file or select
a component from an equipment list.
2AutoCAD Electrical uses the manufacturer code of the component to
determine the table name in the lookup file.
3AutoCAD Electrical looks for a match in the manufacturer table for the
catalog number (plus ASSEMBLYCODE if not blank).
4If a match is found, AutoCAD Electrical retrieves the footprint block
path/name (or optional geometry definition) from the matching record.
1592 | Chapter 19 Panel Layout
5You insert the footprint representation into the drawing.
AutoCAD Electrical search sequence
1st choice -- <project>_footprint_lookup.mdb in the subdirectory of the project
2nd choice -- footprint_lookup.mdb in the subdirectory of the project
3rd choice -- footprint_lookup.mdb in user subdirectory
4th choice -- footprint_lookup.mdb in panel subdirectory
5th choice -- AutoCAD search paths
Table naming convention
AutoCAD Electrical takes the MFG code of the target footprint and looks for
a table, in the footprint_lookup.mdb file, with that name. For example, if the
MFG value of the footprint is SQD, then AutoCAD Electrical searches for a
schematic lookup table called SQD. Manufacturer code of AB yields the table
name AB.
The footprint lookup file supplied with AutoCAD Electrical points to symbols
that are full-size physical representations of the device. There may be times
you want to insert a footprint that is not necessarily a physical representation,
but one that carries wire connection attributes on page 1585. With this type of
symbol AutoCAD Electrical can annotate the symbol with schematic wire
connection data to create a panel wiring diagram drawing. From the Schematic
Components dialog box, if you select “Use Wiring diagram tables”, AutoCAD
Electrical accesses an alternate table in the footprint lookup table. This table
matches the MFG code but attaches a "_WD" suffix. The tables with the "_WD"
suffix are set up to insert a symbol that carries the wire connection attributes.
You must expand and modify these tables to meet your specific panel footprint
needs. You can do this using tools provided with AutoCAD Electrical or
through the use of a database program that can read/write the Access file
format.
Table format
Footprint lookup tables are in a Microsoft Access database file. Each record
consists of these fields (in this order):
Catalog number, wild cards allowedCATALOG
Optional assembly code value - internal AutoCAD Electrical use onlyASSEMBLYCODE
Use the footprint lookup file | 1593

Footprint block name with partial path or geometry definitionBLKNAM
Optional short description used for display purposes onlyDESCRIPTION
Block name vs. geometry definition
You can encode a simple geometry definition in place of a footprint path/block
name in the lookup file. For example, if a footprint shape for a given part
number is a 3x4 rectangle, instead of creating and saving a 3x4 rectangle as
a Wblocked .dwg file, you can encode the instructions for drawing the rectangle
in the lookup file like the following syntax:
("LINE" "0,0" "@4.00,0" "@0,3.00" "@-4.00,0" "C")
The previous example follows the command sequence you type in to create
the footprint outline. When AutoCAD Electrical comes across it instead of a
path/block name in the lookup file, it executes the command sequence and
blocks it on the fly.
Edit footprint lookup files
You can make edits and additions to footprint lookup files using the Footprint
Database File Editor tool or you can edit them directly using Microsoft Access.
1Click Panel tab ➤ Other Tools panel ➤ ➤ Footprint Database
File Editor.
2Select the Edit Existing Table button.
3Select the table to edit and click OK.
4In the Footprint lookup dialog box, decide if you want to edit a record
or add a new one.
■If you decide to edit a record, select the record to edit and click Edit
Record.
■If you decide to add a new record, click Add New.
5Add or edit the record values and click OK.
1594 | Chapter 19 Panel Layout
The Catalog Number and Footprint block name, at a minimum, must be
filled in to provide a key field for the search and a block or geometry
definition for the matching footprint.
Your new record is added to the list. You can also immediately see any
changes you made to an existing record.
6Click Save to save your changes and keep the dialog box open for more
editing, or click OK / Save/ Exit to save your changes and close the dialog
box.
Panel footprint lookup database file editor
Edits the catalog number --> footprint block name lookup file.
Ribbon: Panel tab ➤ Other Tools panel ➤ ➤ Footprint Database
File Editor.
Toolbar: Panel Miscellaneous
Menu: Panel Layout ➤ Database File Editor ➤ Footprint Database File
Editor
Command entry: AEFOOTPRINTDB
The program uses the footprint lookup database to map catalog information
from a schematic component to a specific panel footprint library symbol.
There is a table for each manufacturer code.
Each entry in the table maps a given part number to its footprint block name.
The table name must match the manufacturer code.
Opens a sub-dialog box for editing existing manufacturer
footprint lookup tables.
Edit existing table
Opens a sub-dialog box for creating new manufacturer
footprint lookup tables.
Create new table
Opens a sub-dialog box for creating a blank footprint
lookup file. This option is available if a Footprint_look-
up.mdb file does not exist in the designated location.
Create empty file
Use the footprint lookup file | 1595
Footprint lookup
This tool allows you to examine the records and, modify, delete, or add records.
Ribbon: Panel tab ➤ Other Tools panel ➤ ➤ Footprint Database
File Editor.
Toolbar: Panel Miscellaneous
Menu: Panel Layout ➤ Database File Editor ➤ Footprint Database File
Editor
Command entry: AEFOOTPRINTDB
Select the Edit Existing Table button, select the table to edit, and click OK.
Opens a sub-dialog box for editing a record. Highlight the record
and click the Edit button. Modify the record in the displayed sub-
dialog box.
Edit record
Removes an existing record.Delete
Opens a sub-dialog box for creating a record. Fill in the fields. If the
footprint block is not in an AutoCAD search path or an AutoCAD
Add new
Electrical search path, include the part of the path that must be ap-
pended to one of these search paths (or you can enter the full path).
If the new record is like an existing record, highlight the existing re-
cord before you click the Add button.
Add or edit footprint record
This tool makes edits and additions to footprint look-up files. Edit them directly
using Microsoft Access.
Ribbon: Panel tab ➤ Other Tools panel ➤ ➤ Footprint Database
File Editor.
1596 | Chapter 19 Panel Layout

Toolbar: Panel Miscellaneous
Menu: Panel Layout ➤ Database File Editor ➤ Footprint Database File
Editor
Command entry: AEFOOTPRINTDB
Select the Edit Existing Table button, select the table to edit, and click OK.
Click Add New or Edit Record on the Footprint Lookup dialog box.
NOTE The Catalog Number and Footprint block name, at a minimum, must be
filled in to provide a key field for the search and a block or geometry definition
for the matching footprint.
Catalog Number
Specifies the catalog part number for the record. Click View to display a list
of catalog fields on a per table basis. The catalog value may contain wildcards.
Wildcard characters include:
* = match any characters
? = match any single character
# = match any single numeric digit
@ = match any single alphabetic character
Assembly code
Specifies the assembly code for the record.
Footprint block name
The Block value can be a symbol name or AutoLISP expression. If the footprint
block is not in an AutoCAD search path or an AutoCAD Electrical search path,
include the part of the path that must be appended to one of these search
paths (or enter the full path to the footprint block).
NOTE Add an asterisk prefix to explode the footprint on insertion.
Locates the block name.Browse
Captures the block name if it exists on the current
drawing.
Pick
Use the footprint lookup file | 1597
Substitutes a simple on-the-fly generated outline
for the matching footprint. Several shapes are se-
lectable or you can manually enter the definition.
Geometry
Opens an AutoCAD Electrical icon menu page for
the block you specify in the Catalog Number sec-
tion of the dialog box.
Icon Menu
Enter the menu name or browse for it. Once selec-
ted, click List to see a list of the submenu pages
defined within that icon menu to select from or
enter the number of the menu page to display and
click OK.
The menu number corresponding to the catalog
number is then saved in the footprint lookup table.
Comment
Specifies the optional comment for the footprint record. This is for reference
in this file only. It does not get extracted into any AutoCAD Electrical report.
Syntax for encoding an icon menu page display for footprint selection
(wdmenu "n:/myfolder/my_lookup_menu.dat" 5)
where
"n:/myfolder/my_lookup_menu.dat" = your AutoCAD Electrical icon menu
file
5 = the "*Mx" page number in that menu (x = 5)
This syntax is entered into the third edit box, the one labeled "Footprint block
name," where the AutoCAD block name normally goes. It signals AutoCAD
Electrical to open the icon menu file and jump to the menu page number ("5"
in this example). Then AutoCAD Electrical waits for you to pick from the icon
menu selection. The specific footprint block path/name to use is encoded into
the icon menu file page "5" (excerpt from example "my_lookup_menu.dat"
AutoCAD Electrical icon menu file shown in the following example).
**M5
300 AMP FRAME MCP
2-D plan view|mcp_300_2dpv.sld|"MCP300-2Dp.dwg"
3-D plan insertion|mcp_300_3dpv.sld|"MCP300-3Dp.dwg"
1598 | Chapter 19 Panel Layout
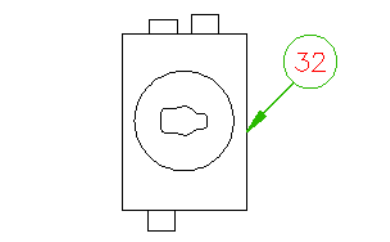
2-D side view|mcp_300_2dsv.sld|$C=wd_infpx "MCP300-2Ds.dwg"
3-D side insertion|mcp_300_3dsv.sld|$C=wd_infpx "MCP300-3Ds.dwg"
When you select an icon from the icon menu, it returns the footprint block
".dwg" file to use. This technique of footprint selection is useful for situations
where there may be multiple possible orientations of a given footprint part
number.
Item Numbers/Balloons
Add a balloon to a component
Assign an item or detail number to the main part number of a component or
each multiple catalog part number through the Insert/Edit dialog box. It is
stored as a data value on the block itself. To bring this item number out to a
visible label, a balloon for example, use the Insert Balloon command and pick
somewhere on the block. The item number of the component is retrieved,
and then you are prompted to select start/end for a leader.
A single item number attribute, B_ITEM, is inserted on the balloon symbol.
You can set up a template to have additional visible attributes added to the
balloon automatically at insertion time. Create this drawing with the attribute
definitions you want to include with the balloon symbol:
\panel\wd_ptag_addattr_itemballoon.dwg.
If an existing template is found, a copy of it gets exploded and merged (that
is, blocked with the balloon as AutoCAD Electrical inserts it into the drawing).
Item Numbers/Balloons | 1599
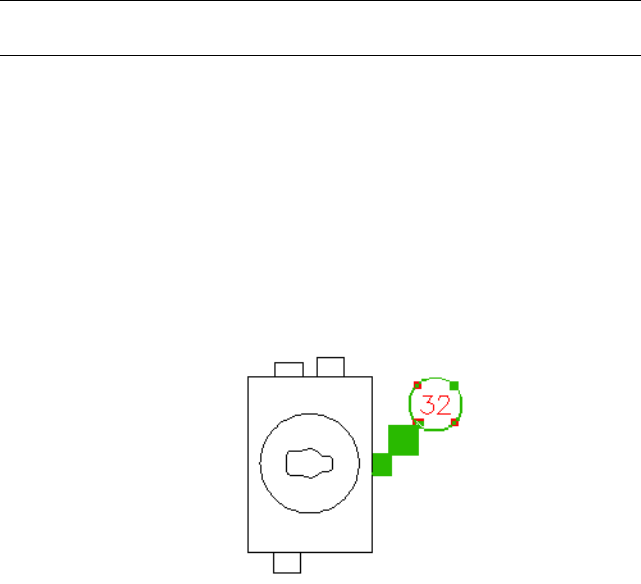
The AutoCAD Electrical item balloon labels are smart in that they update
automatically if the item number of the component is changed through the
EDIT dialog box.
NOTE If the component has multiple item numbers, a multiple balloon is built
up showing all item numbers.
See also:
■Item Numbering Setup on page 211
Add an item number balloon to a component
Inserts a balloon containing the item number of a selected component.
Prompts direct you to select points for an optional leader arrow. The item
number in a balloon updates automatically when the item number changes
on the component. You define the balloon type, text size, and arrow type
with balloon setup.
Prompts direct you to select points for an optional leader arrow. The item
number in a balloon updates automatically when the item number changes
on the component. You define the balloon type, text size, and arrow type
with balloon setup.
1600 | Chapter 19 Panel Layout
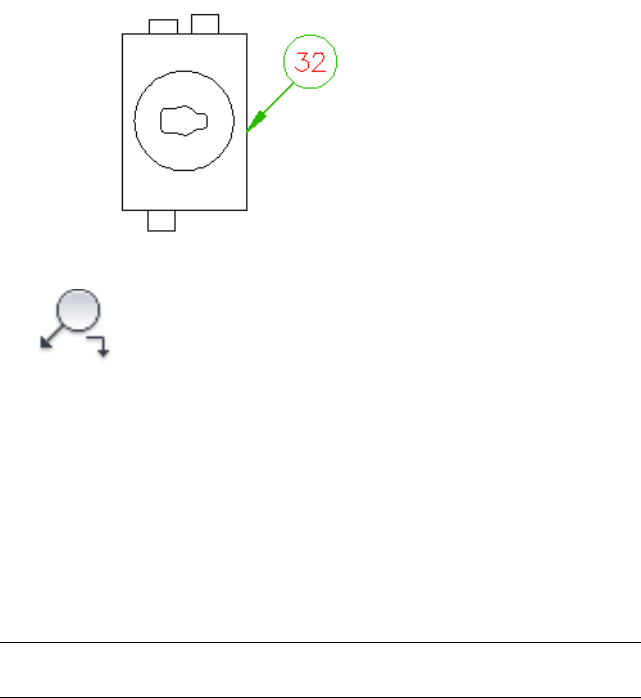
1Click Panel tab ➤ Insert Component Footprints panel ➤ Balloon.
2Select the component for the balloon or press S at the command line
prompt to open the Balloon Setup dialog box.
3Specify the leader start or balloon insertion point.
4Specify the leader end and press Enter when you finish specifying the
leader.
You can also press Enter without specifying the leader end to create the
balloon at the first picked point (the balloon does not have a leader).
5Enter the item number if prompted and click OK.
NOTE You can also preset the balloon shape, size, text size, and arrow type from
the balloon setup section on the Panel Configuration dialog box.
See also:
■Item Numbering Setup on page 211
Panel balloon setup
Sets the type of balloon marker for the footprint, marker size, margin, and
text gap.
Add a balloon to a component | 1601
Ribbon: Panel tab ➤ Other Tools panel ➤ Panel Configuration
drop-down ➤ Configuration.
Toolbar: Panel Layout
Menu: Panel Layout ➤ Panel Configuration
Command entry: AEPANELCONFIG
Click Balloon Setup.
Specifies the type and size of balloon marker to insert. Choose from
Circle, Ellipse, Polygon, and None.
Balloon
Circle - select either Diameter or Fit. Enter the diameter value or the
Fit Margin, which sizes the circle automatically to fit the text plus the
margin value.
Ellipse - select either Axis or Fit. Enter the horizontal and vertical axis
sizes or the Fit Margin.
Polygon - select a polygon shape by picking on the current shape
icon. Choose either Diameter or Fit.
None (text only) - enter the gap value (the amount of space between
the end of the leader line and the text).
Specifies the text size for the marker.Text
Specifies the arrowhead and size. Choose the type of arrowhead for
the leader from the list and enter the arrowhead size in the box. These
values correspond to AutoCAD leader/dimension system variables.
Arrow
Resequencing item numbers
All Panel components and nameplates are extracted and their item numbers
resequenced starting at the value you provide.
■Assigns incrementing item numbers for each new part number or multiple
catalog number depending on the Item Numbering Setup on page 211.
■Ability to process only the components with blank item numbers, or process
all. Processing all components overwrites existing item numbers.
■Updates existing balloons to match the new item number.
1602 | Chapter 19 Panel Layout

■Assigns the same item number to repeated part numbers. This is done on
a drawing basis or project basis depending on the Item Numbering Setup
on page 211.
■Fixed item numbers do not change. If multiple components have the same
item number but only one is marked fixed, the item number is not
resequenced.
■Ability to process components based on selected manufacturers.
■Ability to control the process order based on manufacturer.
Resequence item numbers
1Click Panel tab ➤ Edit Footprints panel ➤ Resequence Item Numbers.
2Specify the beginning number to use.
3If you want to assign item numbers only to components that do not
already have one, check Process blank items only.
4Specify to process the data for the current drawing or the entire project.
If you select Project, you are able to select which drawings from within
the project. If you select Current Drawing only, AutoCAD Electrical does
not check other drawings for existing item number assignments.
5If you want to process only the components with certain manufacturer
values:
■Uncheck Process all. The list displays containing all manufacturers
used in the project.
■Select which manufacturers to process using the Add and Remove
buttons. Select a manufacturer or group of manufacturers and click
Add or Remove.
■Change the order of processing using the Move Up and Move Down
buttons. Select a manufacturer or group of manufacturers and click
Move Up or Move Down. The default order is alphabetical.
6Click OK.
7If Project is selected, select the drawings to process.
Resequencing item numbers | 1603
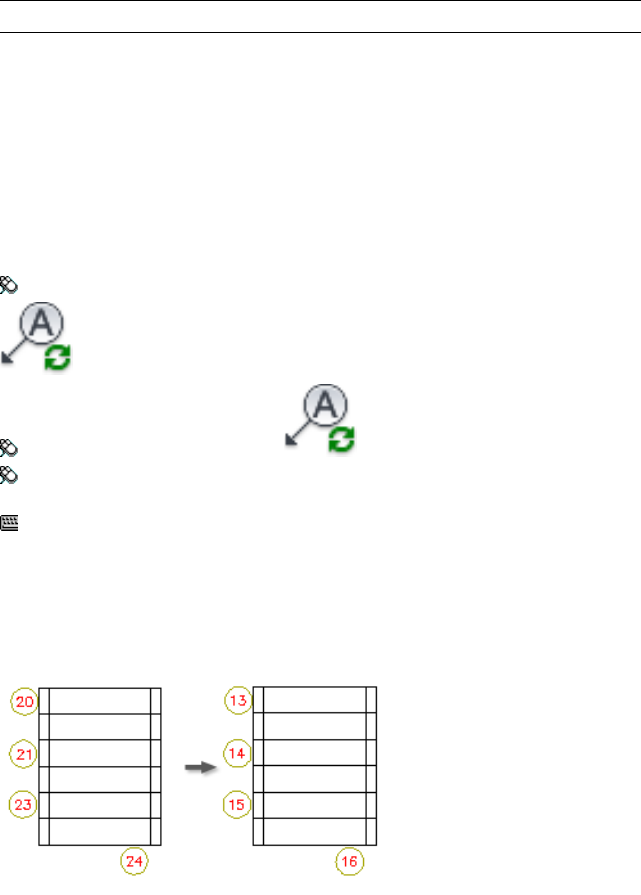
NOTE Fixed item numbers do not change.
See also:
■Item Numbering Setup on page 211
■Fixing item numbers on page 1605
Resequence panel item numbers
Extracts all panel components and resequences their item numbers starting
at the value you provide.
Ribbon: Panel tab ➤ Edit Footprints panel ➤ Resequence Item Numbers.
Toolbar: Panel Miscellaneous
Menu: Panel Layout ➤ Miscellaneous Panel Tools ➤ Resequence Item
Numbers
Command entry: AERESEQUENCE
Resequencing is based on the main MFG/CAT/ASSYCODE value combination.
Based on your item numbering setup, it either ignores or assigns an item
number to additional multi-catalog numbers. Fixed item numbers do not
change.
Specifies the beginning number to use. Add leading zeros
if desired (ex: "001" instead of "1") to enable better report
sorting on item number.
Start
1604 | Chapter 19 Panel Layout

Check to skip any existing item numbers even if not fixed.Process blank items only
Project - process the entire project.Drawings to Process
Active drawing (all) - process components on the active
drawing only.
Active drawing (pick) - select the components for pro-
cessing.
Defines the manufacturers to process and the order to
process them. If you want to process only the components
with certain manufacturers or define the order:
Manufacturers to Process
■Uncheck Process all. The list of all manufacturers used
in the project displays.
■Check Allow duplicate item numbers to allow duplic-
ate item numbers between the selected manufacturers
and existing item numbers on components with unse-
lected manufacturers.
■Use the Add and Remove buttons to indicate which
manufacturers to process. Select a manufacturer or
group of manufacturers and click Add or Remove.
■Use the Move Up and Move Down buttons to change
the order of processing. Select a manufacturer or group
of manufacturers and click Move Up or Move Down.
The default order is alphabetical.
NOTE The default process order is alphabetical.
See also:
■Item Numbering Setup on page 211
Fixing item numbers
Assign an item or detail number to the main part number of a component or
each multiple catalog part number through the Insert/Edit dialog box. If you
do not want an item number to change when you run Resequence Item
Numbers on page 1602 later on, mark an item number as fixed.
Fixing item numbers | 1605

Mark an individual item number as fixed on the Insert/Edit dialog box for the
panel component. Run the Project-wide utility on page 1193 to fix or unfix all
item numbers.
Fix/unfix all item numbers project-wide
1Click Project tab ➤ Project Tools panel ➤ Utilities.
2Select from the options on the Item Numbers: Fix/Unfix drop-down list.
No Change - do not modify the status of any existing item numbers.
This option is the default.
Set all to fixed - change all existing items numbers to fixed. If you
run Resequence Items Numbers later on, fixed item numbers do not
change.
Set all to normal - clear all fixed item numbers. If you run Resequence
Items Numbers later on, normal item numbers update.
3Click OK.
The Select Drawings to Process dialog box displays.
4Select the drawings you want to process.
5Click OK.
Project-wide utilities
Provides the means for operations on wire numbers, component tags, attribute
text, wire types, and item numbers. You can define scripts and apply them
project-wide.
Ribbon: Project tab ➤ Project Tools panel ➤ Utilities.
Toolbar: Project
Menu: Projects ➤ Project-Wide Utilities
Command entry: AEUTILITIES
1606 | Chapter 19 Panel Layout
Select project drawings and perform any of the following:
■Erase, reset, fix, or unfix wire numbers.
■Fix or unfix component tags.
■Fix or unfix item numbers.
■Clear signal cross-referencing.
■Run a user-specified script file.
■Change attribute text size or style.
■Import wire types from another drawing or drawing template.
You can have multiple drawings open at any time. However, to maximize
performance and memory usage, minimize the number of open drawings
when running project-wide commands.
Wire Numbers
Select to keep wire numbers the same, erase specified wire numbers, reset
specified wire numbers, or set wire numbers to fixed or normal.
Signal Arrow Cross-reference text
Select to maintain the signal arrow cross-reference text or to remove all signal
arrow cross-reference text across the current project.
Parent Component Tags: Fix/Unfix
Select to maintain the component tags or to set all parent component tags to
fixed or normal across the current project.
Item Numbers: Fix/Unfix
Select to maintain the item numbers or to set all item numbers to fixed or
normal across the current project. If you run Resequence Item Numbers on
page 1602 later on, fixed item numbers do not change.
Change Attribute
Click Setup to select the attributes to change, and then
enter the height and width definitions for the selected at-
tributes.
Change Attribute Size
Fixing item numbers | 1607

NOTE If you do not want the attribute height or width to
change, do not enter a value definition.
Click Setup to select a text font to apply to the text style
used on component attributes.
Change Style
For each drawing
Enter the name or browse to a command script file to use for each drawing
in the current project or to purge all blocks.
Wire Types
Imports wire types defined on another drawing or drawing template. Enter
the drawing or template name or browse to it using the browse button. The
program reads the specified drawing and extracts all wire type information.
Click Setup to display the Import Wire Types on page 903 dialog box where
you:
■Select the wire types to import.
■Define whether to overwrite any Wire Numbering and USERn differences
for existing wire types.
■Define whether to overwrite color and linetype differences for existing
wire layers.
Nameplates
Insert nameplates
A nameplate is inserted on to the drawing as a block. It can either be referenced
to an existing component footprint block or inserted as a stand-alone
nameplate.
When tied to a component footprint, the component footprint is the parent
and the nameplate is a child of that parent. AutoCAD Electrical establishes
the link automatically by using invisible Xdata pointers on each block. It is
different from the schematic parent/child link where a common "TAG1/TAG2"
tag ID defines the relationship. AutoCAD Electrical automatically annotates
the nameplate with the description data lines and tag value of the parent (if
the nameplate block carries these target attribute names).
1608 | Chapter 19 Panel Layout

Insert a nameplate
Several generic, rectangular nameplates with stretchable boundaries are
provided. Three generic nameplates are shown on the panel icon menu
nameplates page. Each of them consists of a nested block, which AutoCAD
Electrical explodes and groups upon insertion. The rectangular outline of the
resulting nameplate can be stretched using AutoCAD Grips or the Stretch
Window command.
1Click Panel tab ➤ Insert Component Footprints panel ➤ Insert
Footprints drop-down ➤ Icon Menu.
2Select Nameplates from the list.
3Select the desired nameplate from the dialog box.
4Pick the target footprint and press Enter.
To insert a stand-alone nameplate, simply press Enter without first
selecting a component.
5Pick the insertion point and move your cursor to rotate the nameplate
to the desired alignment. Click the left mouse button to end the dynamic
insertion.
6Specify the nameplate tag, description, installation and location codes,
and catalog data in the Panel Layout - Nameplate Insert/Edit dialog box.
AutoCAD Electrical immediately annotates the nameplate with a copy
of the description data that it finds carried on the footprint (which is the
same description that is found on the schematic representation of the
component).
7Click OK to insert the nameplate.
TIP Use AutoCAD MOVE command to position the nameplate in relation to the
parent footprint.
Create your own stretchable nameplates
Use this example to create your own stretchable nameplate symbols.
1On a new blank drawing, insert the attribute definitions P_TAG1, and
DESC1 through DESC3.
2Save the drawing as npxxtd3.dwg.
Insert nameplates | 1609

3On a new blank drawing, insert the first drawing as a block at 0,0 using
the AutoCAD Insert command.
4Draw a polyline rectangle around the block.
5Save the drawing as _npxxtd3.dwg.
6Click Panel tab ➤ Other Tools panel ➤ Icon Menu Wizard.
7Select the panel icon menu, for example ACE_PANEL_MENU.DAT.
8Double-click Nameplates to open the nameplates menu page.
9Click the Add button and select Command.
10 Enter:
Name: Generic, TAG and 3 DESC
Image file: Active
Command: wd_inrnp_xg "" "" "" "_NPXXTD3"
11 Click OK on the Add Icon - Command dialog box.
12 Click OK on the Icon Menu Wizard dialog box.
Panel Leveling/Sequencing Tools
Remove sequencing assignments
Remove sequencing assignments
Routing assignments found on components, boundary boxes, or terminals
can be removed when no longer needed.
1Enter AEREMOVELEVEL at the command prompt.
2Select the terminal strip, component, or boundary box to remove the
assignments from.
The leveling assignments are automatically removed.
3Press ESC to exit the command.
1610 | Chapter 19 Panel Layout
Show sequencing assignments
Show sequencing assignments
You can select a supplementary terminal strip to display its defined leveling
assignments to the command line. You can also select two panel footprint
symbols to display wire connection information in a visual path on the screen.
Show terminal strip sequencing assignments
1Enter AESHOWTERMINALSEQ at the command prompt.
2Select a supplementary terminal strip.
The leveling assignments for the selected terminal strip display in the
command line. You see something like: LEV4-LEV1=001-001-001-001.
3Press ESC to exit the command.
Show footprint sequencing assignments
1Enter AESHOWFPSEQUENCE at the command prompt.
2Select footprint to show the routing path from.
3Select the device to show the path to.
The wire connection information for the selected footprints display on
the screen.
4Press ESC to exit the command.
Swap terminal strip wire text
Swap terminal strip wire text
Swaps wire annotation text from one side of the terminal strip to the other.
The Internal and External default definition applies when the terminal strip
is initially placed.
1Enter AEPANELTERMINALSWAPTEXT at the command prompt.
2Select the wire annotation text to swap.
The wire annotation is flipped to the other side of the selected terminal
strip.
3Press ESC to exit the command.
Show sequencing assignments | 1611

View/edit panel component connection sequence
View/edit panel component connection sequence
This tool allows you to view and rearrange the sequencing of all panel footprint
components that share a common set of Level 1-4 level code assignments.
This coding, when present, influences the way that AutoCAD Electrical
calculates the wire connection from/to sequence. As it processes the schematic
component representations and wiring, it checks for any coding found on the
panel footprint and panel terminal strip representations. When present, it
adjusts the from/to sequencing accordingly.
NOTE Leveling is required before assigning sequencing on the panel footprints.
Toolbar: Panel Level/Sequencing
Menu: Panel Layout ➤ Panel Level/Sequencing ➤ View/Edit Component
Sequence
Command entry: AEVIEWCOMPSEQ
Select a footprint with a set of level codes assigned to it.
The components that have level codes matching the picked footprint are
displayed in the list box in the order they are inserted. It includes panel
footprint components that might appear on drawings other than the active
drawing (marked with "*" in the list). To modify the order, select an entry in
the list, then select Move Up or Move Down in the list. Multiple selection is
supported.
Moves the selected components up one spot in the list.Move Up
Moves the selected components down one spot in the list.Move Down
Defines the sequence by actual picks at each component. Pick
near each component in the order of how you want the sequence
Pick Mode
to proceed from component to component. Picking is limited to
components on the active drawing.
Removes the component sequence information from all listed
components.
Remove All
Saves the sequence assignments and writes them out to the
panel footprint representations. The data is stored on attribute
OK-new
1612 | Chapter 19 Panel Layout
WDLEV or as extended entity data (xdata) on the symbol if the
target attribute is not available.
Copy level assignments
Copy level assignments
Define or capture a common set of level assignments for panel footprint
components and then copy these 3-digit level codes to one or multiple
footprints. This coding, when present, influences the way that AutoCAD
Electrical calculates the wire connection from/to sequence. As it processes the
schematic component representations and wiring, it checks for any coding
found on the panel footprint and panel terminal strip representations. When
present, it adjusts the from/to sequencing accordingly.
Toolbar: Panel Level/Sequencing
Menu: Panel Layout ➤ Panel Level/Sequencing ➤ Copy Level
Assignments
Command entry: AECOPYLEVEL
You can type in the level assignments or select from
the drawing using Pick. Categories: Level 4 (shipping
Level 4/Level 3/Level 2/Level 1
split - highest level), Level 3 (unit), Level 2 (cubical),
and Level 1 (pan or plate - lowest level). You can
copy all level information or unselect one or more
level categories before copying.
An enabled, blank edit box indicates to erase any
existing values and forces the use of the drawing-
wide default value. If an edit box is unavailable, the
existing value is not overwritten. Use the switches to
enable or disable the edit box for each level category.
Applicable only the level assignments to copy to
panel terminal strip representations, and the terminal
Terminal strips only
strips are referenced on the schematics as well as the
panel layout drawing. (In other words, they are not
supplementary terminal strips that are only represen-
ted on the panel layout drawings).
Select this option, and then select one of the follow-
ing:
Copy level assignments | 1613
■Disable (Default) AutoCAD Electrical treats the
terminal connections through the terminal strip
normally. It uses the level category code assign-
ments of the terminal to influence how the
from/to wire sequencing is calculated.
■Enable Processes the connection calculations of
the terminal last. It checks each of the terminal
potentials of the strip against those on any sup-
plementary terminal strip found that is at the
same level combination. For each potential
match, it attempts to make the from/to calcula-
tion for that terminal to be a simple jumper as-
signment from the terminal strip's terminal up
to the supplementary terminal strip. When a
match is not found, the from/to calculation
through the terminal strip operates in a normal
fashion.
Selects the footprint representation on the drawing
to copy the leveling code from.
Pick
Insert panel wiring diagram terminal strip
representation
Insert panel wiring diagram terminal strip
representation
Define a rectangle as a supplementary terminal strip to use in the wiring
routing information over large control system equipment.
Toolbar: Panel Level/Sequencing
Menu: Panel Layout ➤ Panel Level/Sequencing ➤ Insert Terminal Strip
Representation
Command entry: AETERMINALSTRIP
Inserts a terminal strip with just the tag of the com-
ponent, description text, and so on.
Use generic marker only
1614 | Chapter 19 Panel Layout
Draws a rectangle, circle, or octagon to represent
the terminal strip. Text and hidden information are
inserted when drawn.
Draw shapes
Select a terminal strip from the drawing.Pick "just like" footprint
Pick a terminal strip from a list of .DWG files on disk.Browse
Pick a non-AutoCAD Electrical block on the drawing
to be instantly changed into a smart AutoCAD Elec-
trical block.
Pick
Insert/edit panel level assignment: terminal strip
Insert/edit panel level assignment: terminal strip
Use this tool to view, assign, or edit 3-digit level codes on panel terminal strip
representations. This coding, when present, influences the way that AutoCAD
Electrical calculates the wire connection from/to sequence. As it processes the
schematic component representations and wiring, it checks for any coding
found on the panel footprint and panel terminal strip representations. If
present, it adjusts the from/to sequencing accordingly.
This panel terminal strip coding can trigger supplementary or "shipping split"
terminal strip references, not necessarily shown on the schematics, to be
inserted into the schematic from/to wiring calculation. Specific wire connection
sequencing defined directly on the schematics using the Define Wire Sequence
command override this Panel level/sequencing assignment mechanism.
Toolbar: Panel Level/Sequencing
Menu: Panel Layout ➤ Panel Level/Sequencing ➤ Insert/Edit Panel
Level Assignment
Command entry: AEPANELLEVEL
Select an existing panel terminal strip representation.
Default
Displays a dialog box to set the drawing-wide default assignments for each of
the four level categories. Values entered here become the default level
Insert/edit panel level assignment: terminal strip | 1615

assignments for all unassigned panel layout footprint component and terminal
strip representations on the active drawing.
NOTE This dialog box can also be accessed from the Panel Configuration dialog
box.
Enter the optional 3-digit level codes (for example, 001, 002, and so on) for
one or more of the four level categories. For example, if everything on the
active drawing is in the fourth cubical of the second unit, and all of this is
part of the first shipping split section, enter 004 for level category 2 (for
example, cubical), 002 for level category 3 (for example, unit), and 001 for
level category 4 (for example, highest category shipping section). With these
defaults in place only the lowest level category 1 must be assigned on an
individual panel terminal strip basis.
Pick
Selects a panel layout footprint symbol or terminal strip representation on
the active drawing and copies its level category settings over to the currently
edited component. Multiple picks are allowed with each additional pick
prompting you to overwrite or append.
Level 4/Level 3/Level 2/Level 1 edit boxes
Shows the valid level code or codes assigned to each of the four level categories,
Level 4 = shipping split (highest level), Level 3 = unit, Level 2 = cubical, and
Level 1 = pan/plate (lowest level). The level code assignments should be 3-digit
values and match up with level codes of panel layout footprints whose wiring
is to pass through the terminal strip. Multiple code entries are comma
separated.
If codes are not defined in the edit boxes, the drawing-wide default values
displayed in the left-hand column of uneditable edit boxes are used (if defined).
Level code/location
Controls whether the Level 1 edit box displays the 3-digit level code
assignments or the LOC attribute value of the device. This location display
mode is for display purpose only; the underlying 3-digit Level 1 code is always
used for the sorting installation.
Level 4/Level 3/Level 2/Level 1 radio buttons
Selects the level category at which the terminal strip representation operates.
The categories are Level 4 = shipping split (highest level), Level 3 = unit, Level
2 = cubical, and Level 1 = pan/plate (lowest level). The level code assignment
1616 | Chapter 19 Panel Layout
codes should be 3-digit values and match up with level codes of panel layout
footprints whose wiring is to pass through the terminal strip. Multiple code
entries are comma separated.
Jumper Directly to Supplementary Terminal Strip: Enable/Disable
This option is applicable to the terminal strip only if it is referenced on the
schematics as well as the panel layout drawing (that is, it is not a
supplementary terminal strip that only is represented on the panel layout
drawings).
AutoCAD Electrical treats the terminal connections through this ter-
minal strip normally. It uses the level category code assignments of
Disable
the terminal to influence how the from/to wire sequencing is calcu-
lated.
AutoCAD Electrical saves this connection calculations of the terminal
until last. It then checks each of the terminal "potentials" of the strip
Enable
against those on any supplementary terminal strip found that is at
the "same" level combination. For each potential match, it attempts
to make the from/to calculation for that terminal to be a simple
jumper assignment from the terminal strip's terminal up to the sup-
plementary terminal strip. When no match is found, the from/to cal-
culation through the terminal strip is done in a normal fashion.
Connection left/right
Two-character code that controls whether the Level 1 assignments show "Panel
Terminal Strip Report" connection information on the internal or external
side of the terminal block. The first character represents the left side of the
terminal strip and the second character represents the right side.
Refers to the side of the terminal that "receives" wire connections
from panel footprint components marked with the target Level 1
code.
Internal (I)
Refers to the side of the terminal strip with wiring going off to other
Level 1 through four codes.
External (E)
Means that both internal and external wiring is on the same side of
the terminal strip with the other side empty, code of "x". (for example,
for customer connections).
Both (B)
Insert/edit panel level assignment: terminal strip | 1617
For example, a single Level 1 terminal strip marked with Level 1 code
"001,002,004" runs between three back plates with mounted components,
two on the left (footprint Level 1 codes of "001" and "002") and one on the
right (footprint Level 1 codes "004"). If the terminal strip is marks as follows:
"IE 001," "IE 002," and "EI 004," then wiring leaving the left-hand back plates
attach to the terminal strip on the left-hand side ("I" in the first character
position) and wiring leaving the right-hand plate attaches to the right side of
the terminal strip ("I" in the second character position).
Maximum wires per terminal connection
Defines the number of wires (either 1 or 2 per side) allowed per terminal
connection in the Panel Terminal Strip report.
Maximum terminals
Defines the total number of terminal blocks on the entire supplementary
terminal strip for the Panel Terminal Strip report. A blank value indicates that
the terminal strip length is undefined.
Maximum/minimum wire size
Determines a range of wire sizes allowable to be connected to the
supplementary terminal strip. Wires that are outside the allowed range of the
terminal strip bypass it. A blank value in both maximum and minimum edit
boxes indicates that this check is not performed.
A connected wire's size is extracted from the wire line's layer name. AutoCAD
Electrical simply parses the wire's layer name for the first numeric value found
within the name. For example, a wire layer name based on metric wire sizes
of "WHITE-2.5MM^2" yields a size value of "2.5". A wire layer that might be
set up for AWG wire sizes, "RED_14_XHW", indicates a size value of "14".
For example, the project used AWG-style wire sizes with layer names to match
(for example, BLK_12_THHN and RED_16_MTW). The terminal block accepts
wire sizes from thin AWG 24 through heavy AWG 12. Set up the maximum
edit box to read "12" and the minimum edit box to read "24."
Allowed level to level connection direction
Select from:
Wiring from 3-digit code assignments both higher and lower than
the terminal's assigned operating level code (the "Level 1-4 radio
All
buttons" described previously) can pass freely through this terminal
strip.
1618 | Chapter 19 Panel Layout
Wiring from 3-digit code assignments higher than this terminal's as-
signed operating level code can pass through this terminal strip.
Higher only
Wiring from 3-digit code assignments lower than this terminal's as-
signed operating level code can pass through this terminal strip.
Lower only
Example: the middle "002" shipping section has a Level 4 terminal strip at the
left-hand end and another at the right-hand end. Wiring from anywhere in
the first "001" shipping section must come in through the left-hand terminal
strip. It is marked "Lower only". Wiring going on to the next shipping section
"003" must pass through the right-hand terminal strip, marked "Higher only".
Multiple terminal strip usage priority
Provides priority for wiring information to apply to the supplementary terminal
strip. If there can be multiple, valid terminal strip paths that match up with
the level code combination of a given from/to inter-connection, the path
chosen is influenced by this priority setting.
Level code edit: boundary box
Level code edit: boundary box
Use this tool to view or edit 3-digit level codes for boundary boxes. Devices
placed within the boundary box take on the level codes of the boundary. The
dialog box lists the number of device footprints found within the boundary
and the number of devices that currently do not match the boundary default.
Toolbar: Toolbar2
Menu: Panel Layout ➤ Panel Level/Sequencing ➤ Insert/Edit Boundary
Box Assignment
Command entry: AEBOUNDRYBOX
Select a boundary box.
Sets the drawing-wide defaults to use for the wire level codes. It
references the panel drawing files default leveling assignment
Default
values defined in the Panel Configuration dialog box. Enter op-
tional 3-digit level codes. They are applied as defaults when codes
are not defined on footprint devices.
Level code edit: boundary box | 1619
Specifies which level codes to use in the sequencing. Level 4 =
ship split, Level 3 = unit, Level 2 = cubical, and Level 1 =
Level 4/Level 3/Level 2/Level
1
pan/plate. The leveling assignment codes should be 3-digit values
since they are used in for sorting component data in the project
database. If codes are not defined in the edit boxes, the drawing-
wide default values are used.
Indicates whether the level codes are displayed in the Level 1 input
field or in the location code of the device defined on the schem-
atic.
Level code/location
Selects another physical footprint symbol on the drawing to copy
the level codes from.
Pick
Insert/edit panel level assignment: component
Insert/edit panel level assignment: component
Use this tool to view, assign, or edit 3-digit level codes and 4-digit sequence
codes on panel footprint components. This coding, when present, can
influence the way that AutoCAD Electrical calculates the wire connection
from/to sequence. As it processes the schematic component representations
and wiring, it checks for any coding found on the panel footprint and panel
terminal strip representations. If present, it adjusts the from/to sequencing
accordingly.
This panel level assignment coding also can trigger supplementary or "shipping
split" terminal strip references, not necessarily shown on the schematics, to
be inserted into the schematic from/to wiring calculation. Specific wire
connection sequencing defined directly on the schematics using the Define
Wire Sequence command overrides this Panel level/sequencing assignment
mechanism.
Toolbar: Panel Level/Sequencing
Menu: Panel Layout ➤ Panel Level/Sequencing ➤ Insert/Edit Panel
Level Assignment
Command entry: AEPANELLEVEL
Select an existing footprint component.
1620 | Chapter 19 Panel Layout

Default
Displays a dialog box to set the drawing-wide default assignments for each of
the four level categories. Values entered here become the default level
assignments for all unassigned panel layout footprint component and terminal
strip representations on the active drawing.
NOTE This dialog box can also be accessed from the Panel Configuration dialog
box.
Enter the optional 3-digit level codes (for example, 001, 002, and so on) for
one or more of the four level categories. For example, if everything on the
active drawing is in the fourth cubical of the second unit, and all of this is
part of the first shipping split section, enter 004 for level category 2 (for
example, cubical), 002 for level category 3 (for example, unit), and 001 for
level category 4 (for example, highest category shipping section). With these
defaults in place only the lowest level category 1 must be assigned on an
individual panel terminal strip basis.
Level 4/Level 3/Level 2/Level 1
Shows the level code assigned to each of the four level categories, Level 4 =
shipping split (highest level), Level 3 = unit, Level 2 = cubical, and Level 1 =
pan/plate (lowest level). The level code assignments should be 3-digit values
and chosen with the idea that their sort order on a per-level category basis
influences the actual inter-level wire sequence calculation.
The List button for each level category displays a dialog box showing the level
combinations that are assigned so far. Picking from this dialog box assigns
those same level category assignments to the currently edited panel layout
footprint. If codes are not defined in the edit boxes, the drawing-wide default
values displayed in the left-hand column of non-editable edit boxes are used
(if defined).
Level code/location
Controls whether the Level 1 edit box displays the 3-digit level code assignment
or the LOC attribute value of the device. This location display mode is for
display purpose only. The underlying 3-digit Level 1 code is always used for
the sorting installation.
Pick
Selects another panel layout footprint symbol or terminal strip representation
on the active drawing and copies its settings over to the currently edited
component
Insert/edit panel level assignment: component | 1621

Bypass terminal strips
Controls the wiring bypass of this component of one or more level categories
of supplementary terminal strips. For example, special signal wiring passes
from the currently edited component to some other components in a different
cubical/unit/ship split section. To disable any supplementary terminal strip
connections that might automatically be included in the from/to calculations
between this edited component and other connected components identified
in other level assignment combinations, switch all four bypass options on.
Sequence on Level 1
Influences the wire connection sequencing of the schematic components
whose physical footprints share the same combination of four level category
assignments. The sequence assignment is a 4-digit number (for example, 0001,
0002, and so on) and is sorted to give a default wire connection sequence.
For example, all of the push button and pilot light footprint representations
on a door layout carry the same Level 1 through Level 4 category code
assignments, but carry sequence value assignments that increase from left to
right and top to bottom on the layout. This means that AutoCAD Electrical
calculates the from/to connections for a common wire starting at the top left
and leaving the door at the component located in the bottom right-hand
corner.
Pick list for panel terminal strip report/graphical report
Pick list for panel terminal strip report/graphical
report
Select a supplementary terminal strip representation to display wiring
information inside of a report generator dialog box, and later insert a terminal
strip layout drawing.
Toolbar: Panel Level/Sequencing
Menu: Panel Layout ➤ Panel Level/Sequencing ➤ Panel Terminal Strip
Report
Command entry: AETERMINALSTRIPREPORT
All supplementary terminal strips found in the active drawing display in the
dialog box. Select from the list or click Pick to select the terminal strip from
the drawing. Once the terminal strip is selected (either from the list or the
active drawing), the report displays in the Report Generator dialog box.
1622 | Chapter 19 Panel Layout
In the Report Generator dialog box, click Insert as Terminal Strip to define a
graphical representation of the terminal strip for placement on the active
drawing file.
Panel terminal strip graphical report parameters
Panel terminal strip graphical report parameters
Toolbar: Panel Level/Sequencing
Menu: Panel Layout ➤ Panel Level/Sequencing ➤ Panel Terminal Strip
Report
Command entry: AETERMINALSTRIPREPORT
Select a terminal strip and click OK. In the Report Generator dialog box, click
Insert as Terminal Strip.
Defines the height of the terminal strip text.Text height
Defines the width of the boxes that make up the terminal
strip.
Terminal box width
Defines the height of the boxes that make up the terminal
strip.
Terminal box height
Inserts the graphical report as a set of grouped objects.
You can select any member of the group or select the group
Group the terminals/text
as a whole. You can toggle group selection on and off by
pressing CTRL+H or SHIFT+CTRL+A.
Specifies the orientation for the terminal strip: vertical, left
to right, or right to left.
Orientation
Each format uses parameters that are then replaced with
the specific wire connection information. AutoCAD Electrical
Wire connection format
provides a predefined default format for you to select from
the button. You can also enter your own format using the
replaceable parameters on page 236.
Displays extra terminals at the bottom of the graphical
representation.
Add spare terminals
Panel terminal strip graphical report parameters | 1623
1624
Conduit Tools
Overview of conduit tools
AutoCAD Electrical provides a set of utilities to help you label, size, and report
on conduits. A conduit can be represented by a line or a poly line and by itself
does not carry any intelligence. However, you may insert a conduit marker
symbol and associate it to a conduit. The conduit marker symbol then carries
wire information intelligence pulled from the AutoCAD Electrical drawings.
The first time (per AutoCAD session) that you insert a conduit marker, instruct
AutoCAD Electrical to read the wire information. You can read the wire
information from multiple drawings within the project, the current drawing,
or read the existing WFRM2ALL table in the scratch database.
The conduit marker is a block inserted to add intelligence to a line or pline
representing a conduit on a layout drawing. There are four blocks, called
WWAYT, WWAYB, WWAYL, and WWAYR. The blocks are identical except for
the insert point, T=top, B=bottom, L=left, R=right. The program picks which
block based on the leader drawn.
Conduit Marker Intelligence
Each marker receives a unique tag number. Use Setup to define
the next tag.
C_TAG
Conduit size, that is, 3/4"C_SIZE
Optional description line 1DESC1
Optional description line 2DESC2
20
1625

Wire information for each wire included in the conduit. Wire# ;
Wire Layer ; Wire Description ; Wire Size
WIREINFO#
Spare wires defined. Wire Description ; CountW_SPARES#
Insert conduit markers
Use the Conduit Marker (Pick) tool
1Click Panel tab ➤ Conduit Tools panel ➤ Conduit Markers drop-down
➤ Insert Marker.
2Type S and press Enter to set up the conduit marker.
3Specify the text for the marker tag and the scale for the marker block.
Click OK.
4Select the line that represents the conduit for the marker on the drawing.
5Click points to define the leader and press Enter.
6Select the conduit tag and press Enter.
7Specify the conduit tag, catalog information, conduit size, description,
or included wires in the Insert or Edit Conduit/WirewayLabel dialog box.
The conduit marker symbol carries wire information intelligence pulled
from the AutoCAD Electrical drawings.
8Click OK.
Use the Conduit Marker (From/To List) tool
1Click Panel tab ➤ Conduit Tools panel ➤ Conduit Markers drop-down
➤ Insert From List.
2Select the line that represents the conduit for the marker on the drawing.
3Click points to define the leader and click Enter or the right mouse button.
4Select the location codes for the conduit marker and click OK. These build
the From/To combination for the Wire Run From/To Report.
1626 | Chapter 20 Conduit Tools
5Specify the conduit tag, catalog information, conduit size, description,
or included wires in the Insert or Edit Conduit/WirewayLabel dialog box.
The conduit marker symbol carries wire information intelligence pulled
from the AutoCAD Electrical drawings.
6Click OK.
Edit all conduit marker information
Once you insert the conduit marker, you may need to supply some additional
information for the marker. You can add the information at the time you
insert the marker or select Edit Conduit Marker after it is inserted.
1Click Panel tab ➤ Conduit Tools panel ➤ Edit Marker.
2Pick the conduit to edit.
3Change the conduit tag, catalog information, conduit size, description,
or included wires in the Insert or Edit Conduit/Wireway Label dialog box.
4Click OK.
Insert or edit conduit/wire way label
There are three ways to insert a conduit marker depending on where you want
to pick the wire information from. You can get the wire information from an
actual device on your drawing represented by either a schematic symbol or a
panel layout footprint symbol. You may also pull the wire information out
of a wire from/to report based on your schematics. Finally, you can extract
the information from multiple conduit markers to combine together into a
separate conduit marker.
Conduit Marker (Pick)
Ribbon: Panel tab ➤ Conduit Tools panel ➤ Conduit Markers drop-down
➤ Insert Marker.
Toolbar: Conduit Markers
Menu: Panel Layout ➤ Conduit Marker Tools ➤ Conduit Marker (Pick)
Overview of conduit tools | 1627
Command entry: AECONDUITMARKER
Select the line that represents the conduit, click to define the leader, and then
select layout devices or branching conduit markers and press Enter.
Conduit Marker (From/To List)
Ribbon: Panel tab ➤ Conduit Tools panel ➤ Conduit Markers drop-down
➤ Insert From List.
Toolbar: Conduit Markers
Menu: Panel Layout ➤ Conduit Marker Tools ➤ Conduit Marker
(From/To List)
Command entry: AECONDUITMARKERLIST
Select the line that represents the conduit, click to define the leader.
Edit Conduit Marker
Ribbon: Panel tab ➤ Conduit Tools panel ➤ Edit Marker.
Toolbar: Conduit Markers
Menu: Panel Layout ➤ Conduit Marker Tools ➤ Edit Conduit Marker
Command entry: AEEDITCONDUITMARKER
Select an existing conduit marker.
Conduit Tag
AutoCAD Electrical selects a default conduit tag which can be overridden at
any time. Click Drawing to use a tag used for similar conduits in the active
drawing or click Project to use a tag used for similar conduits in the project.
See Conduit Marker Setup on page 1631 to define the default format for the
conduit tags.
1628 | Chapter 20 Conduit Tools
Size
The conduit size can be selected from the list of available sizes or entered in
the box. To make it a little easier, AutoCAD Electrical can calculate the
percentage full for each conduit size available. To do this AutoCAD Electrical
needs 2 support files on page 1632 containing wire size information and conduit
size information. If there is not a .WW1 file or if the wire sizes are not in the
file, the calculations are not made.
Catalog Area
Assign catalog information to the conduit that will be extracted into a bill of
materials report. You can do a drawing-wide or project-wide listing of similar
conduits with their catalog assignments.
Lists the manufacturer number for the component. Enter a value or
select one from the Catalog lookup.
Manufacturer
Lists the catalog number for the component. Enter a value or select
one from the Catalog lookup.
Catalog
Lists the assembly code for the component. The Assembly code is
used to link multiple part numbers together.
Assembly
Specifies a unique identifier assigned to each component. The tag
value can be manually typed in the edit box.
Item
Scans each drawing for the target conduit type and returns a list of
what was found. You can make your catalog assignment by selecting
from the list.
Find
Opens the catalog database of the conduit from which you can
manually enter or select the Manufacturer or Catalog values. Search
Lookup
the database for a specific catalog item to assign to the selected
conduit.
Scans the previous project to find an instance of the selected conduit
and returns the conduit values. You can then make your catalog as-
signment by picking from the dialog box list.
Previous
Lists the part numbers used for similar conduits in the current drawing.Drawing
Overview of conduit tools | 1629
Lists the part numbers used for similar conduits in the project. You
can search in the active project, another project, or in an external
file.
Project
■Active project: All of the drawings in the current project are
scanned and the results are listed in a sub-dialog box. Select from
the list to assign your new conduit with a catalog number that
is consistent with other similar conduits in the project.
■Other project: Scans each listed drawing in a previous project
for the target component type and returns the catalog information
in a sub-dialog box. Make your catalog assignment by picking
from the dialog box list.
■External file: You can pull catalog assignments from a generic
ASCII file created by a word processor or output from a spread-
sheet or database program. A dialog box displays the contents
of the selected text file. Find and highlight the desired entry.
AutoCAD Electrical reads the line of text from the file and breaks
it into its component parts. They are displayed in the left-hand
dialog box list. For each relevant item, highlight it and then pick
the appropriate category button in the center column. The
highlighted item transfers to the corresponding category (and
then to the Insert/Edit dialog box once OK is clicked).
Inserts or edits extra catalog part numbers onto the selected conduit.
You can add up to ten part numbers to any conduit. These multiple
Multiple Catalog
BOM part numbers appear as subassembly part numbers to the main
catalog part number in the various BOM and conduit reports.
Displays what the selected item looks like in a Bill of Material template.Catalog Check
Description
Optional description lines.
Wires to include in conduit/wireway
Define which wires to include in this conduit. Select from the available list
in the upper box and add to the included list in the lower box. At any time
you can pick from a from/to list by clicking Add Wires from List, or you can
add wires from additional devices by clicking Pick Devices.
Adds wires by picking from a from/to list.Add Wires from List
1630 | Chapter 20 Conduit Tools
Adds wires from additional devices.Pick Devices
Defines the spares to include in the conduit.Spares
Sorts the list of conduit wires using an alphanumeric sort.Sort
Report/Print
Opens the Report Generator dialog box for running a Conduit marker report.
Conduit marker setup
The conduit marker is a block inserted to add intelligence to a line or pline
representing a conduit on a layout drawing. There are four blocks, called
WWAYT, WWAYB, WWAYL, and WWAYR. The blocks are identical except
for the insert point, T=top, B=bottom, L=left, R=right. The program picks
which block based on the leader drawn.
Ribbon: Panel tab ➤ Conduit Tools panel ➤ Conduit Markers drop-down
➤ Insert Marker.
Toolbar: Conduit Markers
Menu: Panel Layout ➤ Conduit Marker Tools ➤ Conduit Marker (Pick)
Command entry: AECONDUITMARKER
Type S and press Enter.
Specifies the marker tag. Each conduit marker receives a unique tag.
Enter the text for the next tag. Each successive tag is incremented
from the previous tag.
Conduit tag
Defines the scale to insert the conduit marker block.Scale
Add spare wires
Defines the spare wires to include in your conduit.
Ribbon: Panel tab ➤ Conduit Tools panel ➤ Conduit Markers drop-down
➤ Insert Marker.
Overview of conduit tools | 1631
Toolbar: Conduit Markers
Menu: Panel Layout ➤ Conduit Marker Tools ➤ Conduit Marker (Pick)
Command entry: AECONDUITMARKER
Click the Spares button on the Insert/Edit Conduit/Wireway Label dialog box.
Lists the spare wires that can be added to the conduit. The
list is built from the .WDW support file.
Select wires from
If the wire type is not listed, type your spare wire description
in the edit box.
Type it
Lists the wires that to add to the conduit.Wires to Add
Specifies the number of wires to add to the conduit. Adjust
your quantity by typing the number or by selecting the
<or > buttons.
Count
If you type the quantity, select this button to see the new
quantity in the list.
Update Quantity
Overview of conduit marker support files
AutoCAD Electrical has a couple of support files containing wire size
information and conduit size information: the .wdw file and the .ww1 file.
These files are simple text files that can be edited with any text editor such as
WordPad.
.WDW file
The .WDW file contains the wire information. You may have a different file
for each project. Create a projname.wdw file and put in the same directory as
your project file (.WDP). To use the same file for all projects, create or modify
the DEFAULT.WDW file in the USER folder. In the Project Manager, right-click
the project name and select Settings to find the full path.
There should be a separate line in the file for each AutoCAD Electrical wire
layer. The line has three fields, each field separated by a semi-colon.The first
field is the actual wire layer name used on the drawing. The second field is
the wire layer description. This description is used in the AutoCAD Electrical
Wire Color/Gauge Label tool. The third field is the wire size.
1632 | Chapter 20 Conduit Tools

For example, if you have a wire layer called 14_RED_THHN and you want the
wire color/gauge label to read #14AWG RED for this layer, and the wire itself
has a wire diameter of 0.0087, the line in the .WDW file would read:
14_RED_THHN;#14AWGRED;0.0087
.WW1 file
The .WW1 file contains the conduit information. You may have a different
file for each project. Simply create a projname.ww1 file and put in the same
directory as your project file (.WDP). If you want to use the same file for all
projects, then create or modify the DEFAULT.WW1 file in the USER folder (in
the Project Manager, right-click the project name and select Settings to find
the full path).
There should be a separate line in the file for each conduit. Each line has two
fields. The first field is the conduit size that is shown in the Conduit Marker
dialog box. The second field is the conduit size (the inner cross-sectional area
of the conduit) so AutoCAD Electrical can determine how full the conduit is
once you add up all the wire diameter sizes from the wires (pulled from the
.WDW file). For example, if you have a 1-inch conduit with an inner diameter
of 0.8 resulting in a cross-sectional area of 0.5024, the line in the .WW1 file
reads:
1";0.5024
NOTE If you create a .WW1 file AutoCAD Electrical shows only the conduits listed
in this file in the Conduit Marker dialog box.
Generate a conduit marker report
Generate a conduit marker report
You must have at least one conduit marker with wire connections on your
drawing in order to run this report.
1Click Panel tab ➤ Conduit Tools panel ➤ Conduit Reports drop-down
➤ Conduit Report.
2Specify whether to run the report across selected drawings from the
project, the current drawing, or selected conduit markers.
Generate a conduit marker report | 1633
You can specify to display the last report run from this dialog box instead
of running a new report by clicking the Redisplay Last Run button.
3Click OK.
4Select the drawings or conduit markers to process (depending on whether
the report is run across the projector selected markers).
5In the Report Generator dialog box, change the report format. You can
specify to add the time and date, title line, project lines, column labels,
page numbers, and blank spaces between report entities.
6(Optional) Click Edit Mode to edit the report.
7If the report is formatted correctly, specify to print the report, put it on
the drawing, or save the report to a file.
Conduit marker report
This utility extracts conduit marker information into a report. Extractable
conduit marker symbols are named "WWAY*". A conduit can be represented
by a line or a polyline and by itself does not carry any intelligence. However,
you can insert a conduit marker symbol and associate it to a conduit. The
conduit marker symbol then carries wire information intelligence pulled from
the AutoCAD Electrical drawings.
Ribbon: Panel tab ➤ Conduit Tools panel ➤ Conduit Reports drop-down
➤ Conduit Report.
Toolbar: Conduit Reports
Menu: Panel Layout ➤ Conduit Marker Tools ➤ Conduit Marker Report
Command entry: AECONDUITMARKERRPT
Decide if you want to run the report across selected drawings from the project,
the active drawing, or selected conduit markers.
1634 | Chapter 20 Conduit Tools
Generate a conduit routing report
Generate a conduit routing report
You must have at least one conduit marker with wire connections on your
drawing in order to run this report.
1Click Panel tab ➤ Conduit Tools panel ➤ Conduit Reports drop-down
➤ Routing Report.
2Specify whether to run the report across selected drawings from the
project, the current drawing, or selected conduit markers.
You can specify to display the last report run from this dialog box instead
of running a new report by clicking the Redisplay Last Run button.
3Click OK.
4Select the drawings or conduit markers to process (depending on whether
the report is run across the projector selected markers).
5In the Report Generator dialog box, change the report format. You can
specify to add the time and date, title line, project lines, column labels,
page numbers, and blank spaces between report entities.
6(Optional) Click Edit Mode to edit the report.
7If the report is formatted correctly, specify to print the report, put it on
the drawing, or save the report to a file.
Wire/conduit routing report
AutoCAD Electrical provides a set of utilities to help you label, size, and report
on conduits. A conduit can be represented by a line or a poly line and by itself
does not carry any intelligence. However, you can insert a conduit marker
symbol and associate it to a conduit. The conduit marker symbol then carries
wire information intelligence pulled from the AutoCAD Electrical drawings.
Ribbon: Panel tab ➤ Conduit Tools panel ➤ Conduit Reports drop-down
➤ Routing Report.
Generate a conduit routing report | 1635
Toolbar: Conduit Reports
Menu: Panel Layout ➤ Conduit Marker Tools ➤ Wire/Conduit Routing
Report
Command entry: AEROUTINGREPORT
Decide if you want to run the report across selected drawings from the project,
the active drawing, or selected conduit markers.
1636 | Chapter 20 Conduit Tools
Conversion Tools
Convert promis.e drawing files to AutoCAD
Electrical
The promis·e® Conversion tool converts drawing files from promis·e to AutoCAD
Electrical, while maintaining graphical elements. The drawing file data is
converted into a format that can be edited and maintained in AutoCAD
Electrical. You can convert a single drawing file or an entire project.
A log file is created in the same location as the drawing file or project to display
all modifications. The log file name is either [drawing file name]_cnv.log or
[project name]_cnv.log.
The conversion does the following:
■Inserts the WD_M block if it does not exist in the drawing.
■Searches for Installation/Location drawing-wide defaults.
■Searches for blocks, cross-reference tables, and field boxes.
■Extracts a list of cross-reference symbols.
■Processes cable marker symbols, PLC modules, line entities, wire connection
point, cross-reference tables, and block inserts.
■Copies footprint P_TAG1 values to the associated nameplate.
■Renames terminal block names.
■Cleans up cross-reference inserts.
■Flips ladder line references to AutoCAD Electrical “smart.”
21
1637

■Processes wire numbers.
■Inserts a copy of the WD_PNLM block at 0,0.
NOTE You cannot see the command window messages during conversion unless
you turn on the command trace mode on page 1686 debug tool.
Convert promis·e drawings to AutoCAD Electrical drawings
Use to convert promis·e drawings to AutoCAD Electrical "smart" drawings.
1Click Conversion Tools tab ➤ Tools panel ➤ Promis·e Conversion.
2Select to convert the active drawing, multiple drawings in the active
project, or an entire promis·e project.
3Click OK.
4If you selected Convert Multiple Drawings, Active Project select the
drawings to process and click OK.
5If you selected Convert promis·e Project select the promis·e project
mapping file and click Open. Select the drawings to process and click OK.
In the Convert promis·e Project dialog box:
■Select the project to convert and click Open.
■Select the installation codes to convert.
■(Optional) Make any changes to project, installation, and drawing
naming.
■(Optional) Make any changes to the conversion setup, or symbol
libraries.
Make sure that the specified symbol library path contains the
wd_m.dwg block necessary for the conversion.
■Enter the AutoCAD Electrical project path into the text box.
■Click OK.
1638 | Chapter 21 Conversion Tools
NOTE If the project file exists and is marked active, the conversion cannot
finish. You must have another project open so AutoCAD Electrical can
temporarily activate the other project, delete the active project (the one being
overwritten), write the new .wdp file and reactivate the project.
promis·e conversion
This tool converts drawing files from promis·e to AutoCAD Electrical. It
examines the current symbol attributes on the drawing and maps them to the
equivalent AutoCAD Electrical attribute to make them AutoCAD Electrical
"smart."
Ribbon: Conversion Tools tab ➤ Tools panel ➤ Promis·e Conversion.
Toolbar: Conversion Tools
Menu: Projects ➤ Conversion Tools ➤ Promis·e Conversion
Command entry: AEP2E
Converts only the open and active drawing file from
promis·e format to AutoCAD Electrical. Drawing files
Convert Active Drawing Only
are not renamed or added to the project. This option
is unavailable if the active drawing is unnamed.
Converts drawing files that are already associated
with the active project.
Convert Multiple Drawings, Active Project
Selects an existing promis·e project and uses your
AutoCAD Electrical project definitions to rename the
Convert promis·e Project
folders and files to adhere to the names defined in-
side of promis·e. The drawing files are found in the
promis·e structure.
Convert promis·e project
Defines the conversion process from promis·e to AutoCAD Electrical. Once
you click OK, it creates AutoCAD Electrical project definition file and folders,
and then copies the drawing files into the new folders.
Convert promis.e drawing files to AutoCAD Electrical | 1639
NOTE You cannot see the command window messages during conversion unless
you turn on the command trace mode on page 1686 debug tool.
Ribbon: Conversion Tools tab ➤ Tools panel ➤ Promis·e Conversion.
Toolbar: Conversion Tools
Menu: Projects ➤ Conversion Tools ➤ Promis·e Conversion
Command entry: AEP2E
Select Convert promis·e Project and click OK. Select the promis·e mapping
file and click Open.
promis·e Projects
Lists the promis·e projects defined in the project mapping
file.
Project Names
Lists the installation codes defined in the project installation
mapping file and the number of selected drawings.
Installation Codes
The drawing count shows the number of drawings in the selected promis·e
Project.
AutoCAD Electrical Project
Uses replaceable parameters to name projects (%P),
installations (%I), drawing file names (%S), and
Naming (Project, Installation, Drawing)
folders. Replaceable parameters take on the values
from the promis·e mapping files, however you can
add additional characters.
Specifies pre- and post-processing script files to run
against the entire project, and the AutoCAD Electrical
Conversion Setup
support files to use (Default_wdtitle.wdl and De-
fault.wdt). After you select the desired support file,
it is renamed and placed in the same folder as the
new project definition file (*.WDP). You also have
1640 | Chapter 21 Conversion Tools

the option to save the command line error message
to a log file.
Opens the Project Properties ➤ Project Settings
dialog box for selecting library search paths and icon
menu files for the new project.
Symbol Libraries
Conversion destination (base folder)
Specifies the AutoCAD Electrical project path. It is where the new project
folder and drawing files are located. A path must be specified before the
conversion can take place.
Convert non-AutoCAD Electrical blocks
Convert non-AutoCAD Electrical blocks
This utility takes non-AutoCAD Electrical blocks or graphics representing a
symbol and replaces them with an AutoCAD Electrical block and transfers the
attribute or text values to this new AutoCAD Electrical block.
1Click Conversion Tools tab ➤ Tools panel ➤ Schematic Conversion
drop-down ➤ Convert to Schematic Component.
2Pick your non-AutoCAD Electrical block containing attributes and text
entities.
3Pick an AutoCAD Electrical block from the Insert Component dialog box
to use in its place.
4Specify the insertion point.
5From the Component Parent/Stand-Alone Annotation dialog box, assign
text/attribute values to AutoCAD Electrical attribute names and click
Done.
If your non-AutoCAD Electrical block has attributes, or you picked some
text entities, the dialog box includes buttons to make it easier to assign
your values to AutoCAD Electrical attributes.
Convert non-AutoCAD Electrical blocks | 1641
Finish mapping values from non-AutoCAD Electrical blocks
Use this utility to continue what you started with the Convert to Schematic
Component tool. Use it if you did not finish mapping values from your
non-AutoCAD Electrical block.
1Click Conversion Tools tab ➤ Tools panel ➤ Map Attributes from Old
to New.
2Select the block for additional attributes.
3Optionally, select any non-AutoCAD Electrical block or text objects to
map values to the AutoCAD Electrical attributes and click Done.
Component annotation
These utilities replace non-AutoCAD Electrical blocks or graphics representing
symbols with AutoCAD Electrical blocks, transferring the attribute or text
values to the new AutoCAD Electrical block.
Convert to Schematic Component
Ribbon: Conversion Tools tab ➤ Tools panel ➤ Schematic Conversion
drop-down ➤ Convert to Schematic Component.
Toolbar: Conversion Tools
Menu: Projects ➤ Conversion Tools ➤ Convert Drawing ➤ Convert to
Schematic Component
Command entry: AEBLK2SCH
Map Attributes from Old to New
Ribbon: Conversion tab ➤ Tools panel ➤ Map Attributes from Old to
New.
1642 | Chapter 21 Conversion Tools
Toolbar: Conversion Tools
Menu: Projects ➤ Conversion Tools ➤ Convert Drawing ➤ Map
Attributes from Old to New
Command entry: AEMAPATT
The left-side of the dialog box lists the text or attributes to map to an AutoCAD
Electrical block while the right-side of the dialog box lists valid attribute fields
to fill in.
NOTE Your options may differ depending on how you accessed the dialog box.
(available only if you select non-AutoCAD Electrical
elements) Lists the available text values to assign to
Text value
the attributes. All AutoCAD Electrical attributes for
the block inserted are displayed in the Text Value list
(if there is a block to map with existing attribute
values).
(available only if you select non-AutoCAD Electrical
elements) Transfers the text value to the selected at-
=
tribute. Select a value from the list at the left and
then pick the "="button next to the desired AutoCAD
Electrical attribute.
(available only if you select non-AutoCAD Electrical
elements) Appends the text value to the end of the
+
current value for the selected attribute. Select a value
from the list at the left and then pick the "+"button
next to the target AutoCAD Electrical attribute.
Picks text or attribute objects from the drawing to
assign to the AutoCAD Electrical attribute.
Pick
Makes the AutoCAD Electrical attribute visible or in-
visible.
Hide
Lists the installation, location, mount, and group
annotations already used on the current drawing or
project.
Drawing/Project
Convert non-AutoCAD Electrical blocks | 1643
Opens sub-dialog boxes for changing the attribute
list to reflect ratings, pins, and so on.
Miscellaneous, Ratings, Positions, Pins
Deletes a non-AutoCAD Electrical block once you
map all the attributes.
Delete original non-AutoCAD Electrical
block
Replaces the picked text with the new AutoCAD
Electrical attribute. To leave the selected text as is,
then make sure that you turn this option off.
Delete picked text objects
Defines an area of the drawing to fill the graphics
window. Click to define the graphics window; the
Zoom window
image is then zoomed to the area that you defined
in the window.
Zooms the selected block to the size of the graphics
window.
Zoom extents
Increases the magnification of the view so the blocks
appear larger.
Zoom in
Decreases the magnification of the view so the blocks
appear smaller.
Zoom out
Shifts the location of the view without changing the
magnification. Use the Pan button to move the view
Pan
in the graphics window in any direction planar to
the screen.
Convert text to an attribute
Convert text to an attribute
This tool converts a text object into an attribute definition. The original text
string becomes the default value of the attribute. For example, if you convert
the text “120 VOLTS AC” to an attribute definition with a tag name of
“RATING1”, the original text becomes the default value of the attribute.
1644 | Chapter 21 Conversion Tools
1Click Conversion Tools tab ➤ Tools panel ➤ Text Conversion
drop-down ➤ Convert Text to Attribute Definition.
2Select the text entity to convert.
3Define the attribute tag name. Enter a value or click the arrows to
increment or decrement the displayed attribute tag name (for example,
click the > button to increment the tag name “RATING5” to “RATING6”).
4Click OK.
Convert text to attribute definition
Converts a text object (that is not associated to a block) into an attribute
definition. You can convert an attribute definition on a library symbol that
becomes an attribute when the symbol drawing is inserted as a block into
another drawing. For example, if you convert the text “120 VOLTS AC” to an
attribute definition with a tag name of “RATING1”, the original text becomes
the default value of the attribute.
Ribbon: Conversion Tools tab ➤ Tools panel ➤ Text Conversion
drop-down ➤ Convert Text to Attribute Definition.
Toolbar: Conversion Tools
Menu: Components ➤ Attributes ➤ Convert Text to Attribute Definition
Command entry: AETEXT2ATT
Specifies the attribute tag to assign to the selected
text. Enter a value or click the arrows to increment
Attribute tag name
or decrement the displayed attribute tag name (for
example, click the > button to increment the tag
name “RATING5” to “RATING6”).
Convert text to a wire number
Converts a text object to a wire number compatible with AutoCAD Electrical.
Convert text to an attribute | 1645

1Click Conversion Tools tab ➤ Tools panel ➤ Text Conversion
drop-down ➤ Convert Text to Wire Number.
2Select the wire near the text to convert.
3Select the text to convert.
Convert Arrows
Convert non-AutoCAD Electrical arrows
Convert non-AutoCAD Electrical arrows
Use the Convert Block to Source Arrow tool to replace a non-AutoCAD
Electrical source arrow with a smart AutoCAD Electrical source arrow and map
the information to the new AutoCAD Electrical source.
Use the Convert Block to Destination Arrow tool to replace a non-AutoCAD
Electrical destination arrow with a smart AutoCAD Electrical destination arrow.
Convert a block to a source arrow
1Click Conversion Tools tab ➤ Tools panel ➤ Schematic Conversion
drop-down ➤ Convert Block to Source Arrow.
2Select your non-AutoCAD Electrical source block and/or any text related
to it that you might want to map to the new AutoCAD Electrical source.
3Select the wire end for the source arrow.
4Define the Source Signal Code and click OK.
5Define attribute values.
1646 | Chapter 21 Conversion Tools

Convert a block to a destination arrow
1Click Conversion Tools tab ➤ Tools panel ➤ Schematic Conversion
drop-down ➤ Convert Block to Destination Arrow.
2Select your non-AutoCAD Electrical destination block and/or any text
related to it that you might want to map to the new AutoCAD Electrical
destination.
3Select the wire end for the destination arrow.
4Define the Destination Signal Code and click OK.
5Define attribute values.
Overview of ECDS legacy conversion
For this conversion to be effective, AutoCAD Electrical must have information
to swap AutoCAD Electrical type blocks with the blocks used on your ECDS
drawings. It also must know how to map the values carried on each attribute
on the blocks. This information is all supplied in an Access database file called
WDVIACMP.MDB.
COMPSWSAP table
The COMPSWAP table tells AutoCAD Electrical how to swap blocks. It is simply
a list of the blocks used on your ECDS drawings with a corresponding list of
AutoCAD Electrical blocks. When the converter is run, AutoCAD Electrical
looks for the block in the ECDS list and if it finds it, swaps it out for the block
in the AutoCAD Electrical list.
If the origin for the AutoCAD Electrical block is different from the ECDS block,
enter an XY Offset. To use multiple AutoCAD Electrical blocks to "build up"
the ECDS symbol, use an available AutoCAD Electrical command
$C=wd_via_cv_3unit, followed by the individual block names.
ATTRMAP table
The ATTRMAP table tells AutoCAD Electrical how to map the information
held on the attributes within each block. For each attribute used on the ECDS
blocks, enter the AutoCAD Electrical attribute name in the next column to
create the attribute map. Then when AutoCAD Electrical swaps out the blocks,
the information carried on the individual attributes are not lost.
Overview of ECDS legacy conversion | 1647

Notice the line mapping the attribute DESCRIPTION to DESC#. If you have
blocks that contain multiple copies of the same attribute, for example,
DESCRIPTION, you can map them to separate AutoCAD Electrical attributes
such as DESC1, DESC2, DESC3. The "#" in the AutoCAD Electrical Attribute
field, indicates that each time a DESCRIPTION attribute is found within a
block, the AutoCAD Electrical attribute name should be incremented by 1
(starting with 1).
IOATTRMAP table
The IOATTRMAP table is the same as the ATTRMAP table but is used when a
PLC block is swapped out. This accounts for some of the same attributes being
mapped differently for PLC blocks than other blocks.
Convert using the ECDS to Electrical Database Builder
The Access database file used for the ECDS to Electrical converter,
WDVIACMP.MDB, can be modified directly with Microsoft Access or with the
ECDS to Electrical Database Builder tool.
1Enter AEECDS2ACADEDB at the command prompt.
2Select the line within the list to edit.
Individual values appear in the edit boxes.
3Edit the necessary fields and click Update.
4Add a new line to the database by filling in the fields and clicking Add.
5Delete a line by selecting the line and clicking Delete.
6Click OK.
Convert VIA ECDS or Jr. Project to AutoCAD
Electrical
If you used ECDS, you may have drawings you want to use with AutoCAD
Electrical. AutoCAD Electrical provides a conversion tool that converts the
intelligence of your ECDS drawings to the intelligence that AutoCAD Electrical
expects.
Menu: Projects ➤ Extras ➤ ECDS Legacy Conversion ➤ ECDS to
Electrical Drawing Convert
Command entry: AEECDS2ACADEDWG
1648 | Chapter 21 Conversion Tools

Project Options
Specifies the ECDS project name. Enter your ECDS
project name or browse for it.
Existing VIA ECDS or Jr. Project (.VPJ)
Specifies the AutoCAD Electrical project name. Enter
an AutoCAD Electrical project name, either existing
AutoCAD Electrical Project (.WDP)
or new. If you are adding the drawings to an existing
AutoCAD Electrical project make sure that you select
that option, otherwise the .WDP project files are
overwritten. The ECDS drawings are copied to anoth-
er location before they are converted. A default loca-
tion for the converted drawings is supplied, but you
can enter any location. If the directory does not exist,
AutoCAD Electrical creates it.
Specifies the path to the schematic symbol library to
use for the project. A default search path is supplied
Library path
pointing to the Symbol library of converted symbols.
You can include electrical, pneumatic, or other
schematic libraries in the path. You can also include
a series of paths for AutoCAD Electrical to search in
order.
Adds the path for a specific library of converted
symbols. AutoCAD Electrical provides three libraries
Symbol1, Symbol2, Symbol3
of converted symbols. These symbols look just like
the older ECDS symbols but carry the expected
AutoCAD Electrical attributes. The path to those
symbols is added to your search path. Also, when
you select your project to convert, AutoCAD Electrical
reads the old ECDS PROJECT.CFG, and look for the
Symbol library name. You can also type in any direct-
ory path you wish.
NOTE The libraries of converted symbols are sup-
plied in a zip file called ConvSym.zip. Before running
the conversion utility, unzip the libraries. Unzip
pointing to your /Program Files/Autodesk/Acade
.../Support directory but make sure that you use the
folder names within the zip file. The zip file creates
three subdirectories called "Converted Symbol1,"
"Converted Symbol2," and "Converted Symbol3."
Overview of ECDS legacy conversion | 1649
Drawing Options
Your drawings are copied to another directory and converted; the original
drawings are not changed.
Specifies the path for the converted drawings. If the
directory does not exist it is created.
Copy Directory
Sets up the drawing defaults that are used for each
drawing. The defaults are read from your ECDS
PROJECT.CFG file, if possible.
Drawing Configuration
AutoCAD Electrical presents a list of drawings in your ECDS project. Select
the drawings you want to convert. AutoCAD Electrical then calls up each
drawing, converts the intelligence and saves it. A log file is created named
projnam_cv.log and saved in the same directory as the .WDP file. The log file
contains information about any problems encountered in the conversion.
Tagging and Linking Tools
Use tagging and linking tools
Apply these manual tools to enable nonblocked geometry to be made AutoCAD
Electrical-aware. The existing geometry stays in place and is unblocked. Key
text entities are converted to attributes with user picks and are linked into a
generic, nongraphical block insert. Wire connection attributes can also be
merged into this generic block insert. The process to convert it from dumb
text, circle, and line entities takes only moments to complete. The result
appears as a fully functional AutoCAD Electrical-aware block insert.
Tagging results:
■The selected text entities are replaced with a template block file.
■The TAG attribute takes on the value of the converted text.
■The TAG attribute is set to fixed.
■The color of the TAG attribute is by layer. The attribute is the same layer
as defined on the WD_M block.
■The TAG attribute takes on the same ACAD properties as the tagged text.
1650 | Chapter 21 Conversion Tools

Linking results:
■The selected text entities are replaced with an AutoCAD Electrical attribute.
■Colors change to distinguish visually what was already converted as defined
in the WD_M block.
■Temporary lines display the link.
Wire Connection Results:
■Visual indicators (x) appear where the wire connection attributes were
already applied.
■Wire connection attributes, terminal attributes, and terminal description
attributes are added.
■The block definition is automatically modified during the attribute addition
process.
■Terminal attribute colors change to distinguish visually what was already
converted as defined in the WD_M block.
Add Geometry Results:
■TAG1, TAG2, PLC TAG, and TAGSTRIP attributes are defined and selected
first.
■The block definition is automatically modified.
■The color of the geometry changes by layer to distinguish visually what
was already converted as defined in the WD_M block.
Tag and link components
You can do multiple tagging and linkages without exiting the commands.
NOTE This procedure uses schematic components, but the same procedure can
be done using panel components.
Initial set-up
1Click Conversion Tools tab ➤ Tools panel ➤ Special Explode.
2Explode any existing blocks.
Use tagging and linking tools | 1651

It explodes attributes and blocks to geometry and text entities while
maintaining the value previously defined in the attribute.
3Select the wire layer from the grid to add wire lines to.
The selected wire layer highlights in blue to indicate which layer is
selected; the current wire layer highlights in gray.
4Click Conversion Tools tab ➤ Tools panel ➤ Change/Convert Wire
Type drop-down ➤ Change/Convert Wire Type.
5Click Pick and select wire lines from the drawing to add to a wire layer.
6Click OK.
Tag components
1Click the Conversion Tools tab, Schematic panel, to access any of the
schematic tagging commands.
2Select the text entity to replace with the component TAG1 template block
file.
The selected text string highlights indicating what was selected for
conversion.
3Right-click to apply the tag.
4(Optional) Tag any other text entities with the proper block file.
5Right-click to exit the Tagging command. Right-click a few times before
exiting, if necessary.
Link components
1Click the Conversion Tools tab, Attributes panel, to access any of the
linking commands.
2Select the existing tagged TAG1 block definition.
3Right-click to apply the selection.
4Select the text to link to the tagged attribute. The selected text properties
are applied to the new attribute.
Colors change to distinguish visually what was converted and temporary
lines display the link.
1652 | Chapter 21 Conversion Tools
5Right-click to create the link.
6(Optional) Link any other text entities to the proper attribute.
7Right-click to exit the Linking command. Right-click a few times before
exiting, if necessary.
Add geometry and wire connections
1Click Conversion Tools tab ➤ Tools panel ➤ Add Wire Connections.
2Select the block to tie the wire connections to.
3Select the endpoint of the wire or a position on a symbol. Press Shift,
right-click, and select Endpoint from the menu to select the endpoint
easily.
4After you define the wire connection attribute, you can select the terminal
text if the drawing contains the value. If not, continue with the next wire
connection attribute.
5Right-click to apply the selection.
Visual indicators (x) appear where the wire connection attributes were
already applied.
6Repeat the selection for the other endpoint.
7Right-click to exit the command. Right-click a few times before exiting,
if necessary.
8Click Conversion Tools tab ➤ Tools panel ➤ Add Geometry.
9Select the block to add the geometry to.
10 Pick or window select the geometry to associate to the template block
file.
11 Right-click to apply the selection.
12 Specify the insertion point.
Special explode
Use tagging and linking tools | 1653
Use this tool to explode attributes and blocks to geometry and text entities
while maintaining the value previously defined in the attributes. You can take
advantage of the tagging tools to modify the text entities to attributes and
the linking tools to make various blocks.
NOTE Use AutoCAD Explode to convert Mtext to normal text for tagging and
linking.
Ribbon: Conversion Tools tab ➤ Tools panel ➤ Special Explode.
Toolbar: Conversion Tools
Menu: Projects ➤ Conversion Tools ➤ Special Explode
Command entry: AEEXPLODE
Select the block to explode into separate text entities and geometry.
Tag schematic
Use these tools to convert text entities into an attributed block. Through the
insertion of a template block, you have control over which attributes are
inserted and visible. All necessary attribute definitions are automatically placed.
During the tagging process, the text entity is removed and replaced with a
template block file that contains multiple attributes used in AutoCAD Electrical.
Click Conversion Tools tab ➤ Schematic panel. Select one of the schematic
tagging commands from the list.
Click any of the tagging tools. Select the text entity to replace with the
component TAG1 template block file, and right-click to apply the tag.
Makes selected text entities an attributed block
file with the TAG1 attribute visible. The template
Tag Schematic Compon-
ent
block file (HDV1_CONVERT.DWG or
VDV1_CONVERT.DWG depending on the draw-
ing properties) contains attributes for a schematic
component.
Makes selected text entities an attributed PLC
address associated to a PLC tag. The template
Tag PLC
block file (PLCIO_ADDR_CONVERT.DWG,
PLCIO_CONVERT.DWG, PLCIO_V_ADDR_CON-
1654 | Chapter 21 Conversion Tools

VERT.DWG, or PLCIO_V_CONVERT.DWG depend-
ing on the drawing properties) contains attrib-
utes found useful for PLC addressing. After the
addressing is defined on the block, select a PLC
Tag or place one into the symbol definition for
use with AutoCAD Electrical.
Makes selected text entities an attributed block
file with the TAG2 attribute visible. The template
Tag Child
block file (HDV2_CONVERT.DWG or
VDV2_CONVERT.DWG depending on the draw-
ing properties) contains attributes used for a child
component.
Makes selected text entities an attributed block
file with the TAG2 attribute visible. The template
Tag Child - N.O.
block file (HDV21_CONVERT.DWG or
VDV21_CONVERT.DWG depending on the
drawing properties) contains attributes used for
a child normally open contact component.
Makes the selected text entities an attributed
block file with the TAG2 attribute visible. The
Tag Child - N.C.
template block file (HDV22_CONVERT.DWG or
VDV22_CONVERT.DWG depending on the
drawing properties) contains attributes used for
a child normally closed contact component.
Makes the selected text entities an attributed
block file with the TAG2 attribute visible. The
Tag Child - Form C
template block file (HDV23_CONVERT.DWG or
VDV23_CONVERT.DWG depending on the
drawing properties) contains attributes used for
a child Form C contact component.
Makes the selected text entities an attributed
block file with the TAGSTRIP and TERM01 attrib-
Tag Schematic Terminal -
Terminal Number
ute visible. The template block file (HT0T_CON-
VERT.DWG or VT0T_CONVERT.DWG depending
on the drawing properties) contains attributes
used for a terminal block component containing
a terminal number.
Use tagging and linking tools | 1655

Makes the selected text entities an attributed
block file with the TAGSTRIP and WIRENO attrib-
Tag Schematic Terminal -
Wire Number
ute visible. The template block file
(HT0W_CONVERT.DWG or VT0W_CON-
VERT.DWG depending on the drawing proper-
ties) contains attributes used for a terminal block
component containing a wire number as the
terminal number.
Makes the selected text entities an attributed
block file with the TAGSTRIP and TERM01 attrib-
Tag Schematic Terminal -
Wire Number Change
ute visible. The template block file (HT1T_CON-
VERT.DWG or VT1T_CONVERT.DWG depending
on the drawing properties) contains attributes
used for a terminal block component that
changes the wire number. It creates a terminal
number block that has a different wire number
for each wire connected to it.
Tag panel
Use these tools to convert text entities into an attributed block file. Through
the insertion of a template block, you have control over which attributes are
inserted and visible. All necessary attribute definitions are automatically placed.
During the tagging process, the text entity is removed and replaced with a
template block file that contains multiple attributes used in AutoCAD Electrical.
Click Conversion Tools tab ➤ Panel panel. Select one of the panel tagging
commands from the list.
Click any of the tagging tools. Select the text entity to replace with the
component TAG1 template block file and right-click to apply the tag.
Makes selected text entities an attributed block
file with the P_TAG1 attribute visible. The tem-
Tag Panel Component
plate block file (ACE_P_TAG1_CONVERT.DWG)
contains attributes for a panel component.
Makes selected text entities an attributed block
file with the DESC1-3 attributes visible. The
Tag Nameplate
template block file (ACE_NP_CONVERT.DWG)
contains attributes used in nameplate symbols.
If the description text strings were previously
defined as attributes on an AutoCAD Electrical
1656 | Chapter 21 Conversion Tools

panel component block definition, the attribute
values on the panel component are hidden and
the nameplate attributes DESC1-3 are added and
made visible.
Makes selected text entities an attributed block
file with the TERM01 terminal number attribute
Tag Panel Terminal - Ter-
minal Number
visible. The template block file (ACE_TER-
MT_CONVERT.DWG) contains attributes for ter-
minal numbers.
Makes selected text entities an attributed block
file with the WIRENO wire number attribute vis-
Tag Panel Terminal - Wire
Number
ible. The template block file (ACE_TERMW_CON-
VERT.DWG) contains attributes for panel terminal
symbols.
Link
Use these tools to associate nonblocked text to previously placed blocks.
Through the modification of a template block, you have control over which
attributes are inserted and visible. All necessary attribute definitions are placed
using the properties of the existing text entities, such as justification, height,
and location. If multiple template block files are selected, the value of the text
is added to the previously defined template block attributes as hidden attributes
and the text is not removed.
Click Conversion Tools tab ➤ Attributes panel. Select one of the linking
commands from the list.
Click any of the linking tools. Select the existing tagged TAG1 block definition,
and right-click to apply the selection. Select the text to link to the tagged
attribute. The selected text properties are applied to the new attribute.
Right-click to create the link.
Links simple text as Description 1-3 attributes on
an AutoCAD Electrical block file. You can link
Link Description
them as description attributes to one or more
existing template block definitions. During the
conversion process, the text entity is removed
and replaced with the next available description
attribute, up to 3.
Use tagging and linking tools | 1657

Links simple text to a PLC address attribute as
PLC I/O address description attributes. During
Link PLC Address Descrip-
tion
the conversion process, the text entity is removed
and replaced with the next available PLC address
description attribute, up to 5.
Links simple text to a TAGSTRIP attribute as a
terminal number attribute on an AutoCAD Elec-
Link Terminal Number
trical terminal block symbol. During the conver-
sion process, the text entity is removed and re-
placed with the TERM01 or WIRENO attribute.
Links simple text as manufacturer attributes on
an AutoCAD Electrical block file. The entity value
Link Manufacturer
is used as the Manufacturer value for one or more
template block definitions. If only one template
block is selected for the link, the text entity is
removed and replaced with the Manufacturer
attribute.
Links simple text as Catalog Number attributes
on an AutoCAD Electrical block file. The entity
Link Catalog Number
value is used as the Catalog Number value for
one or more template block definitions. If only
one template block is selected for the link, the
text entity is removed and replaced with the
Catalog Number attribute.
Links simple text as Location attributes on an
AutoCAD Electrical block file. The entity value is
Link Location Code
used as the Location value for one or more tem-
plate block definitions. If only one template block
is selected for the link, the text entity is removed
and replaced with the Location attribute.
Links simple text as Installation attributes on an
AutoCAD Electrical block file. The entity value is
Link Installation Code
used as the Installation value for one or more
template block definitions. If only one template
block is selected for the link, the text entity is
removed and replaced with the Installation attrib-
ute.
1658 | Chapter 21 Conversion Tools

Links another string of text to a tag attribute,
creating a split tag. Create the device Tag using
Link Split Tag
the TAG1, TAG, or P_TAG1 attributes. Then use
this tool to select the existing TAG attribute on
the drawing and link another string of text, cre-
ating a split tag situation. The first TAG becomes
the Part1 of the split tag while the linked portion
becomes the Part2 of the split tag.
Links simple text (that is not an attribute defini-
tion or part of geometry) as User (01-99) attrib-
Link User
utes on an AutoCAD Electrical block file. The
entity value is used as the user value for one or
more template block definitions. If only one
template block is selected for the link, the text
entity is removed and replaced with the user at-
tribute, up to 99. Window selection is allowed.
Links simple text as Rating 1-12 attributes on an
AutoCAD Electrical block file. The entity value is
Link Rating
used as the rating value for one or more template
block definitions. If only one template block is
selected for the link, the text entity is removed
and replaced with the rating attribute, up to 12.
Links simple text as an Item Number attribute
on an AutoCAD Electrical Panel block file. During
Link Item Number
the conversion process, the text entity is removed
and replaced with the Item Number attribute
(P_ITEM).
Displays links for a selected block.Show Links
Unlinks a selected linked attribute from a symbol.Un Link
Add geometry
Use tagging and linking tools | 1659
Use this tool to add AutoCAD geometry to a template block file to be created
as part of a unique block instance. It creates a block definition with the newly
added geometry. You can later create a block file if the block is exploded.
Ribbon: Conversion Tools tab ➤ Tools panel ➤ Add Geometry.
Toolbar: Link Schematic
Menu: Projects ➤ Conversion Tools ➤ Link Schematic ➤ Add
Geometry
Command entry: AEGEOMETRY
Select the block to add the geometry to. Pick or window select the geometry
to associate to the template block file, and right-click to apply the selection.
Specify an insertion point.
Add wire connections
Use this tool to add wire connection attributes to the existing tagged block
file. Select line endpoints or geometry to add the appropriate wire connection
attributes to. A new block definition is created with the newly added wire
connections. You can later create a block file if the block is exploded.
Ribbon: Conversion Tools tab ➤ Tools panel ➤ Add Wire Connections.
Toolbar: Link Schematic
Menu: Projects ➤ Conversion Tools ➤ Link Schematic ➤ Add Wire
Connections
Command entry: AEWIRECONN
Select the block TAG or PLC Address to tie the wire connection to. Select the
wire end or pick near the selected block to select a location if no wire exists.
If you picked a location, the Wire Direction dialog box displays. Select where
you want the wire to come from: above, right, below, or left of the selected
block. Right-click to apply the wire connection.
Show links
1660 | Chapter 21 Conversion Tools
Use this tool to select the tagged template block file and display everything
(such as description, location, manufacturer, and catalog number codes) that
has been linked to it.
Ribbon: Conversion Tools tab ➤ Attributes panel ➤ Show Links.
Toolbar: Link Schematic
Menu: Projects ➤ Conversion Tools ➤ Link Schematic ➤ Show Links
Command entry: AESHOWLINK
Select a single link by picking or multiple links by windowing. Temporary line
graphics show what was previously linked.
Un link
Use this tool to select an existing linked attribute and unlink the attribute
from the symbol, changing the attribute to AutoCAD text.
Ribbon: Conversion Tools tab ➤ Attributes panel ➤ Un-Link.
Toolbar: Link Schematic
Menu: Projects ➤ Conversion Tools ➤ Link Schematic ➤ Un Link
Command entry: AEUNLINK
Select the link to remove; the link between the attributes and the block it is
associated to is removed.
Overview of block/attribute mapping
You can perform drawing-wide or project-wide block replacements using a
user-defined Microsoft Excel spreadsheet and an AutoCAD Electrical-aware
symbol library that it references. The spreadsheet performs a lookup for each
block name and finds the corresponding new block. Each new block drawing
is pulled from the AutoCAD Electrical symbol library and inserted (scaled and
rotated as required) in the drawing. The spreadsheet is checked to copy the
old attribute values to the appropriate new names on the newly inserted block.
This process continues across the drawing, and terminates when no more
Overview of block/attribute mapping | 1661
block names remain. It automatically continues to the next drawing if
project-wide mode is selected.
The mapping spreadsheet has two parts: Attribute mapping defaults and Block
name mapping. Each section is a sheet within the spreadsheet and must follow
a defined column format. The sheets must be in order, where sheet 1 defines
the attribute mapping and sheet 2 defines the block mapping.
General mapping of old attribute names to new at-
tribute names so that the old values on the blocks
Attribute mapping defaults
can be copied to the swapped AutoCAD Electrical-
smart block.
Maps existing specific or wild-carded block names
to the new AutoCAD Electrical block to use during
Block name mapping
the block instance swap. Each row of this spreadsheet
is a mapping record for an old name to a new name
swap.
Attribute mapping sheet format
Attribute tag found on the legacy, non-AutoCAD
Electrical block insert. Wildcards and AutoLISP-style
punctuation for wildcards are supported.
Column A / Old Attribute Name
Attribute tag name found on the AutoCAD Electrical
block insert. Wildcards and AutoLISP-style punctu-
ation for wildcards are supported.
Column B / AcadE Attribute Name
Block name mapping sheet format
Legacy, non-AutoCAD Electrical block insert name.
Wildcards and AutoLISP-style punctuation for wild-
cards are supported.
Column A / Old Block Name
AutoCAD Electrical block name to use as a replace-
ment for all instances of the block query match on
columns A and C.
Column B / AcadE Block Name
Optional. AutoLISP expression, or attribute definition,
along with column A are what the program uses to
Column C / Filtering Expression
query the table to find the correct mapping entry for
a given block name to swap.
1662 | Chapter 21 Conversion Tools

If blank, the new block swaps in at the same scale as
the existing block it replaces. If this field is not blank,
Column D/ Scale Multiplier
the swapped block is scaled up or down per the
multiplier value of the field.
If blank, the new block swaps in at the same XY co-
ordinate as the existing block it replaces. If not blank
Column E / X-Y Offset
and in the format of a coordinate pair, the swapped
block inserts offset from the origin of the original
block by this XY amount.
Defines specific attribute Old=New mapping that is
not defined in sheet 1 or is to override what is found
Column F / Attribute name overrides
in sheet 1. Multiple entries in this field are supported
with this syntax: Old1=New1;Old2=New2.
Defines specific attribute values to insert into the
newly swapped attributes. Multiple entries in this
Column G / Attribute Value Overrides
field are supported with this syntax:
New1=val1;New2=val2. An entry of "New1=" blanks
out that attribute value.
The block replacement process generates a log file of the results. The log file
({projectname}_cnv.log) is created in the same folder as the .wdp project file.
The following conditions are reported:
■Problem finding/opening mapping spreadsheet
■Problem inserting WD_M block (if not already present)
■Legacy block name not mapped to an AutoCAD Electrical block
■AutoCAD Electrical block not found in library search path
■Problem inserting AutoCAD Electrical block
■Legacy attribute name not mapped
Map block values using a user-defined spreadsheet
NOTE A user-defined spreadsheet is required for this tool. Refer to the "Learn
about block/attribute mapping" file for help on creating the spreadsheet if you do
not already have one created.
Overview of block/attribute mapping | 1663
1Click Conversion Tools tab ➤ Tools panel ➤ Block Replacement
drop-down ➤ Block Replacement.
2Select to run the block replacement for the entire project, the active
drawing, or a selected component on the active drawing.
3Click OK.
4On the Select Mapping Spreadsheet dialog box, select the spreadsheet to
use for mapping the blocks and attributes.
5Click Open.
If you select an existing spreadsheet the block replacement automatically
begins. If the spreadsheet file does not exist you are presented with the
option to create the spreadsheet framework for the block/attribute
mapping.
If a spreadsheet was not found, on the Spreadsheet Not Found dialog
box, click OK to run through the drawing set of the active project. Fill in
a blank spreadsheet with extracted block names and attributes. Only the
first column of each of the sheets are filled in. You can then add the
block/attribute mapping information and then rerun the command using
the new spreadsheet.
Block replacement
Performs drawing-wide and project-wide block replacements using a
user-defined spreadsheet. It automatically maps the non-AutoCAD Electrical
block inserts of the unconverted drawing and attributes to appropriate
AutoCAD Electrical-smart component symbols drawn from a symbol library.
Ribbon: Conversion Tools tab ➤ Tools panel ➤ Block Replacement
drop-down ➤ Block Replacement.
Toolbar: Conversion Tools
Menu: Projects ➤ Conversion Tools ➤ Block Replacement
Command entry: AEBLOCKREPLACE
1664 | Chapter 21 Conversion Tools
Select to run the block replacement on the entire project, the active drawing,
or a single symbol on the active drawing.
Overview of block/attribute mapping | 1665
1666
Miscellaneous Tools
Overview of power check tools
You can add information to your schematic components to indicate power
source and load values using the supplied Power Check tools. Once these values
are added, you can run the Power Load Check Report to scan the wire
interconnections and report if there is too much load on a given power source.
There are 3 tools to use for checking power source/load:
Marks a component with a power source and load
value. The value is added to an AutoCAD Electrical
Add/Edit Power Source/Load Levels
connection attribute. This dialog box contains a list
of available connection points. If you select near the
connection point for the power value it is preselected
in the dialog box. Enter the power source and load
value and an optional units value. These values are
saved on the connection point as invisible xdata.
Marks a component with a PASSPWR flag. The
PASSPWR flag instructs the Power Report to pass
Set Pass Power
through the marked component when calculating
the load on a given source. If a component carries
the PASSPWR flag the Power Report program passes
through the component and continue looking for
load values on the network
Looks for any components assigned as a power
source and then follows any wires connected to that
Power Load Check Report
terminal. When a load is hit, it stops reading on that
wire segment and does not search past the load. For
22
1667
example, if you apply a supply value to the left power
bus on a ladder, there are a bunch of pilot lights and
relay coils in the ladder. AutoCAD Electrical goes
down the left bus and checks each connected rung.
It reads through contact and terminals, but when it
hits a load on a rung, it accumulates the load value
(if present) and stops going any further on that rung.
The utility still checks the other rungs tied to the left-
hand bus and attempts to find more loads.
Tip: Adding Xdata to library symbols before insertion
You can add the Xdata on the library symbol before inserting it. If a drawing
already contains that block, use the Update Block option before running the
report. Open the library symbol and use the Xdata Editor to add Xdata directly
onto the appropriate TERM## attribute. The following xdata can be added at
the library level:
■Source - VIA_WD_PWR_SRC
■Load - VIA_WD_PWR_LOAD
■Unit - VIA_WD_PWR_UNIT
■Potential - VIA_WD_POTENTIAL
Set power source/load value
This utility marks a component with a power source and load value. A related
routine, when invoked, then scans the wire interconnections and reports if
there is too much load on a given power source.
Ribbon: Schematic tab ➤ Power Check Tools panel ➤ Add/Edit
Source/Load.
Toolbar: Power Check
Menu: wires ➤ Wire Numbers Miscellaneous ➤ Power Check ➤
Add/Edit Power Source/Load Levels
Command entry: AEPOWERLOADLEVELS
1668 | Chapter 22 Miscellaneous Tools

Select the component for the power source or load value. The value is added
to an AutoCAD Electrical connection attribute. This dialog box contains a list
of available connection points. If you select near the connection point for the
power value it is preselected in the dialog box. Enter the power source and
load value and an optional units value. These values are saved on the
connection point as invisible xdata.
NOTE As you add these power source or load values, think of AutoCAD Electrical
tracing through these components to see what the load is on the power source.
Pick the terminal to which the value is added accordingly.
Source/load assignment
Indicates to set the source or load value.Source/Load
Specifies the source or load value to save on the connection point.Value
(Optional) Specifies the units for the source or load value. Select
from the drop-down list to specify the units.
Units
Potential assignment
Optional for voltage level mismatch checks. Select from the drop-down list
to specify the potential value.
Set pass power
This utility marks a component with a PASSPWR flag. The PASSPWR flag
instructs the Power Report to pass through the marked component when
calculating the load on a given source. If a component carries the PASSPWR
flag the Power Report program passes through the component and continue
looking for load values on the network.
NOTE Certain components do not need a PASSPWR flag (such as terminals and
contacts) since they are automatically 'passed' through.
Ribbon: Schematic tab ➤ Power Check Tools panel ➤ Pass Component.
Toolbar: Power Check
Overview of power check tools | 1669
Menu: Wires ➤ Wire Numbers Miscellaneous ➤ Power Check ➤ Mark
Component to Pass Power
Command entry: AEPASSPWR
Each selected component is displayed in the list. If the component already
carries the PASSPWR flag, a * appears next to the tag. To set or unset the
PASSPWR flag, click the tag of the component in the list.
Power source/load report
Once a component is marked with a power source and load value, this utility
scans the wire interconnections and reports if there is too much load on a
given power source.
Ribbon: Schematic tab ➤ Power Check Tools panel ➤ Load Check
Report.
Toolbar: Power Check
Menu: Wires ➤ Wire Numbers Miscellaneous ➤ Power Check ➤ Power
Load Check Report
Command entry: AEPOWERLOADREPORT
Select to run the report on the project, selected components in the active
drawing, or all components in the active drawing. You can also select to
redisplay the last Power Check report.
Overview of pneumatic tools
Use the Insert Pneumatic Component tool on the Schematic tab ➤ Insert
Components panel to insert your Pneumatic symbols. Then use all of the
AutoCAD Electrical drafting and editing tools to modify the pneumatic layout,
including Stretch, Trim and Scoot.
The Icon Menu provides easy access to pneumatic library symbols. The
pneumatic symbol library consists of all the pneumatic symbols and is found
at
■Windows XP: \Documents and Settings\All
Users\Documents\Autodesk\Acade {version}\Libs\pneu_iso125
1670 | Chapter 22 Miscellaneous Tools
■Windows Vista, Windows 7: \Users\Public\Documents\Autodesk\Acade
{version}\Libs\pneu_iso125
Recommended Settings for drawing pneumatic diagrams
Where this can be setValueSetting
Drawing Properties ➤ Drawing
Format
HorizontalLadder Orientation
Insert component
This icon menu can be modified, expanded, or replaced with a custom menu.
You can change the default icon menu using the Library and Icon Menu Paths
section of the Project properties: project settings tab on page 204. Use the Icon
Menu Wizard to modify the menu. The default icon menu can also be redefined
in wd.env. Add entry "WD_MENU" for schematic icon menu and "WD_PMENU"
for panel layout icon menu.
Insert Component
Ribbon: Schematic tab ➤ Insert Components panel ➤ Insert Components
drop-down ➤ Icon Menu.
Toolbar: Main Electrical
Menu: Components ➤ Insert Component
Command entry: AECOMPONENT
Multiple Insert (Icon Menu)
Ribbon: Schematic tab ➤ Insert Components panel ➤ Multiple Insert
drop-down ➤ Multiple Insert (Icon Menu).
Toolbar: Main Electrical
Menu: Components ➤ Multiple Insert ➤ Multiple Insert (Icon Menu)
Command entry: AEMULTI
Overview of pneumatic tools | 1671

NOTE This dialog box is also accessed when inserting Pneumatic, Hydraulic, or
P&ID components; in-line wire labels; stand-alone cross-reference symbols; cable
markers; and saved circuits.
Select an icon picture or the component type from the Menu tree structure.
The main menu in the tree structure is displayed as the menu heading just
above the menu tree structure.
Tabs ■Menu: Changes the visibility of the Menu tree view.
■Up one level: Displays the menu that is one level before the
current menu in the Menu tree view. This option is unavail-
able if the main menu is selected in the Menu tree view.
■Views: Changes the view display for the Symbol Preview
window and Recently Used window. The current view option
is indicated with a check mark. Options include: Icon with
text, Icon only or List view.
The tree structure is created by reading the icon menu file (.dat).
The tree structure is based on the arrangement order of submenus
defined in the .dat file.
Menu
Displays the symbol and submenu icons corresponding to the
menu or the submenu selected in the Menu tree structure.
Symbol Preview window
Clicking on the icon performs one of the following functions
based on the icon properties as defined by the .dat file:
■Inserts the symbol or circuit onto the drawing
■Executes a command
■Displays a submenu
NOTE When you move the cursor over an icon, the icon name
and block/circuit/command name display as tooltip information.
Displays the last components inserted during the current editing
session; the most recently used icon displays in the top. This list
Recently Used
follows the view options setting in the symbol preview window
(icon only, icon with text or list view). The total number of icons
displayed depends on the value specified in the Display edit box.
Specifies the number of icons to display in the Recently Used list
box. Enter integer numbers only; the default value is 10.
Display
1672 | Chapter 22 Miscellaneous Tools
Inserts the icon using a vertical or horizontal orientation. This
value is opposite the default ladder rung orientation for the
drawing.
Vertical/Horizontal
Turns off the Insert/Edit Component dialog box when inserting
symbols onto the drawing. To add component detail later, click
the Edit Component tool, and select the component to edit.
No edit dialog
Inserts the component, untagged (that is, without assigning a
unique Component Tag). The untagged value that displays is the
No tag
TAG1/TAG2 default value for the component. To add component
detail later, click the Edit Component tool, and select the com-
ponent to edit.
Indicates to display the previously used menu each time you open
the Insert Component dialog box. For example, if you insert a
Always display previously used
menu
push button from the Push Buttons menu, the next time you
open the Insert Component dialog box the Push Button menu
displays by default.
Specifies the component block insertion scale. This defaults to
the value set in the Drawing Properties ➤ Drawing Format dialog
Scale schematic
box. Once set, this value is remembered until reset or until the
drawing editing session ends.
Specifies the footprint insertion scale. This defaults to the value
set in the Drawing Properties ➤ Drawing Format dialog box.
Scale panel
Once set, this value is remembered until reset or until the drawing
editing session ends.
Manually type in the component block to insert.Type it
Browses to and selects the component to insert.Browse
Right-click menus
Options for the Menu tree structure view
Right-click on the main menu or submenu in the Menu tree structure view
to display the following options:
■Expand/Collapse: Toggles the visibility of the menus.
Overview of pneumatic tools | 1673

■Properties: Opens a Properties dialog box to view the existing menu or
submenu properties like the menu name, image, or submenu title. Use the
Icon Menu Wizard to change any menu properties.
Options for the Symbol Preview window
Right-click an icon or in empty space in the Symbol Preview window to display
the following options:
■View: Changes the view display for the Symbol Preview window and
Recently Used window. The current view option is indicated with a check
mark. Options include: Icon with text, Icon only or List view.
■Properties: (available for icons only) Opens a Properties dialog box to view
the existing symbol icon properties like the icon name, image, block names
and so on. Use the Icon Menu Wizard to change any icon properties.
Pneumatic, Hydraulic, and P&ID icon menus
The Menu tree structure displays the symbols for the selected component type
(pneumatic, hydraulic, or P&ID). The Insert Pneumatic Component, Insert
Hydraulic Component, and Insert P&ID Component tools are accessed from
the Schematic tab ➤ Insert Components panel on the ribbon or the Extra
Library toolbar.
Insert Pneumatic Component
Insert Hydraulic Component
Insert P&ID Component
1674 | Chapter 22 Miscellaneous Tools

Insert hydraulic components
Insert hydraulic components
Use the Insert Hydraulic Component tool to insert a component into the
drawing.
1Click Schematic tab ➤ Insert Components panel ➤ ➤ Insert
Hydraulic Component.
2On the Insert Component dialog box, select the starting orientation for
the component: horizontal or vertical.
3(Optional) If you want to turn off the Insert/Edit Component dialog box
when inserting symbols onto the drawing, select No edit dialog box.
4(Optional) If you want to insert the component, untagged (for example,
without assigning a unique Component Tag) select No tag. The untagged
value that displays is the TAG1/TAG2 default value of the component.
5Select the component to insert (such as Filters ➤ Centrifugal) from the
Symbol Preview window.
The Recently Used column displays components inserted during the
current editing session. You can also select the component to insert from
this list.
6Specify the insertion point in the drawing.
The orientation of the symbol tries to match the underlying wire. The
wire breaks automatically if the symbol lands on it.
7In the Insert/Edit Component dialog box, annotate the component.
8Click OK.
Recommended Settings for drawing Hydraulic diagrams
Where this can be setMetric UnitInch UnitSetting
Tools ➤ Drafting Settings
2.50.125Grid Size
Tools ➤ Drafting Settings
2.50.125Snap
Insert hydraulic components | 1675
Drawing Properties ➤ Drawing
Format
201Scale Factor
Drawing Properties ➤ Drawing
Format
HorizontalHorizontalLadder Orienta-
tion
Insert component
This icon menu can be modified, expanded, or replaced with a custom menu.
You can change the default icon menu using the Library and Icon Menu Paths
section of the Project properties: project settings tab on page 204. Use the Icon
Menu Wizard to modify the menu. The default icon menu can also be redefined
in wd.env. Add entry "WD_MENU" for schematic icon menu and "WD_PMENU"
for panel layout icon menu.
Insert Component
Ribbon: Schematic tab ➤ Insert Components panel ➤ Insert Components
drop-down ➤ Icon Menu.
Toolbar: Main Electrical
Menu: Components ➤ Insert Component
Command entry: AECOMPONENT
Multiple Insert (Icon Menu)
Ribbon: Schematic tab ➤ Insert Components panel ➤ Multiple Insert
drop-down ➤ Multiple Insert (Icon Menu).
Toolbar: Main Electrical
Menu: Components ➤ Multiple Insert ➤ Multiple Insert (Icon Menu)
Command entry: AEMULTI
1676 | Chapter 22 Miscellaneous Tools

NOTE This dialog box is also accessed when inserting Pneumatic, Hydraulic, or
P&ID components; in-line wire labels; stand-alone cross-reference symbols; cable
markers; and saved circuits.
Select an icon picture or the component type from the Menu tree structure.
The main menu in the tree structure is displayed as the menu heading just
above the menu tree structure.
Tabs ■Menu: Changes the visibility of the Menu tree view.
■Up one level: Displays the menu that is one level before the
current menu in the Menu tree view. This option is unavail-
able if the main menu is selected in the Menu tree view.
■Views: Changes the view display for the Symbol Preview
window and Recently Used window. The current view option
is indicated with a check mark. Options include: Icon with
text, Icon only or List view.
The tree structure is created by reading the icon menu file (.dat).
The tree structure is based on the arrangement order of submenus
defined in the .dat file.
Menu
Displays the symbol and submenu icons corresponding to the
menu or the submenu selected in the Menu tree structure.
Symbol Preview window
Clicking on the icon performs one of the following functions
based on the icon properties as defined by the .dat file:
■Inserts the symbol or circuit onto the drawing
■Executes a command
■Displays a submenu
NOTE When you move the cursor over an icon, the icon name
and block/circuit/command name display as tooltip information.
Displays the last components inserted during the current editing
session; the most recently used icon displays in the top. This list
Recently Used
follows the view options setting in the symbol preview window
(icon only, icon with text or list view). The total number of icons
displayed depends on the value specified in the Display edit box.
Specifies the number of icons to display in the Recently Used list
box. Enter integer numbers only; the default value is 10.
Display
Insert hydraulic components | 1677
Inserts the icon using a vertical or horizontal orientation. This
value is opposite the default ladder rung orientation for the
drawing.
Vertical/Horizontal
Turns off the Insert/Edit Component dialog box when inserting
symbols onto the drawing. To add component detail later, click
the Edit Component tool, and select the component to edit.
No edit dialog
Inserts the component, untagged (that is, without assigning a
unique Component Tag). The untagged value that displays is the
No tag
TAG1/TAG2 default value for the component. To add component
detail later, click the Edit Component tool, and select the com-
ponent to edit.
Indicates to display the previously used menu each time you open
the Insert Component dialog box. For example, if you insert a
Always display previously used
menu
push button from the Push Buttons menu, the next time you
open the Insert Component dialog box the Push Button menu
displays by default.
Specifies the component block insertion scale. This defaults to
the value set in the Drawing Properties ➤ Drawing Format dialog
Scale schematic
box. Once set, this value is remembered until reset or until the
drawing editing session ends.
Specifies the footprint insertion scale. This defaults to the value
set in the Drawing Properties ➤ Drawing Format dialog box.
Scale panel
Once set, this value is remembered until reset or until the drawing
editing session ends.
Manually type in the component block to insert.Type it
Browses to and selects the component to insert.Browse
Right-click menus
Options for the Menu tree structure view
Right-click on the main menu or submenu in the Menu tree structure view
to display the following options:
■Expand/Collapse: Toggles the visibility of the menus.
1678 | Chapter 22 Miscellaneous Tools

■Properties: Opens a Properties dialog box to view the existing menu or
submenu properties like the menu name, image, or submenu title. Use the
Icon Menu Wizard to change any menu properties.
Options for the Symbol Preview window
Right-click an icon or in empty space in the Symbol Preview window to display
the following options:
■View: Changes the view display for the Symbol Preview window and
Recently Used window. The current view option is indicated with a check
mark. Options include: Icon with text, Icon only or List view.
■Properties: (available for icons only) Opens a Properties dialog box to view
the existing symbol icon properties like the icon name, image, block names
and so on. Use the Icon Menu Wizard to change any icon properties.
Pneumatic, Hydraulic, and P&ID icon menus
The Menu tree structure displays the symbols for the selected component type
(pneumatic, hydraulic, or P&ID). The Insert Pneumatic Component, Insert
Hydraulic Component, and Insert P&ID Component tools are accessed from
the Schematic tab ➤ Insert Components panel on the ribbon or the Extra
Library toolbar.
Insert Pneumatic Component
Insert Hydraulic Component
Insert P&ID Component
Insert hydraulic components | 1679

Insert P&ID components
Insert P&ID components
Use the Insert P&ID Component tool to insert a component into the drawing.
1Click Schematic tab ➤ Insert Components panel ➤ ➤ Insert
P&ID Components.
2In the Insert Component dialog box, select the starting orientation for
the component: horizontal or vertical.
3(Optional) If you want to turn off the Insert/Edit Component dialog box
when inserting symbols onto the drawing, select No edit dialog box.
4(Optional) If you want to insert the component, untagged (for example,
without assigning a unique Component Tag), select No tag. The untagged
value that displays is the TAG1/TAG2 default value of the component.
5Select the component to insert from the Symbol Preview window.
The Recently Used column displays components inserted during the
current editing session. You can also select the component to insert from
this list.
6Specify the insertion point in the drawing.
The orientation of the symbol tries to match the underlying wire. The
wire breaks automatically if the symbol lands on it.
7In the Insert/Edit Component dialog box, annotate the component.
8Click OK.
Recommended Settings for drawing P & ID diagrams
Where this can be setMetric UnitInch UnitSetting
Tools ➤ Drafting Settings
2.50.125Grid Size
Tools ➤ Drafting Settings
2.50.125Snap
1680 | Chapter 22 Miscellaneous Tools

Drawing Properties ➤ Drawing
Format
201Scale Factor
Drawing Properties ➤ Drawing
Format
VerticalVerticalLadder Orienta-
tion
Insert component
This icon menu can be modified, expanded, or replaced with a custom menu.
You can change the default icon menu using the Library and Icon Menu Paths
section of the Project properties: project settings tab on page 204. Use the Icon
Menu Wizard to modify the menu. The default icon menu can also be redefined
in wd.env. Add entry "WD_MENU" for schematic icon menu and "WD_PMENU"
for panel layout icon menu.
Insert Component
Ribbon: Schematic tab ➤ Insert Components panel ➤ Insert Components
drop-down ➤ Icon Menu.
Toolbar: Main Electrical
Menu: Components ➤ Insert Component
Command entry: AECOMPONENT
Multiple Insert (Icon Menu)
Ribbon: Schematic tab ➤ Insert Components panel ➤ Multiple Insert
drop-down ➤ Multiple Insert (Icon Menu).
Toolbar: Main Electrical
Menu: Components ➤ Multiple Insert ➤ Multiple Insert (Icon Menu)
Command entry: AEMULTI
Insert P&ID components | 1681

NOTE This dialog box is also accessed when inserting Pneumatic, Hydraulic, or
P&ID components; in-line wire labels; stand-alone cross-reference symbols; cable
markers; and saved circuits.
Select an icon picture or the component type from the Menu tree structure.
The main menu in the tree structure is displayed as the menu heading just
above the menu tree structure.
Tabs ■Menu: Changes the visibility of the Menu tree view.
■Up one level: Displays the menu that is one level before the
current menu in the Menu tree view. This option is unavail-
able if the main menu is selected in the Menu tree view.
■Views: Changes the view display for the Symbol Preview
window and Recently Used window. The current view option
is indicated with a check mark. Options include: Icon with
text, Icon only or List view.
The tree structure is created by reading the icon menu file (.dat).
The tree structure is based on the arrangement order of submenus
defined in the .dat file.
Menu
Displays the symbol and submenu icons corresponding to the
menu or the submenu selected in the Menu tree structure.
Symbol Preview window
Clicking on the icon performs one of the following functions
based on the icon properties as defined by the .dat file:
■Inserts the symbol or circuit onto the drawing
■Executes a command
■Displays a submenu
NOTE When you move the cursor over an icon, the icon name
and block/circuit/command name display as tooltip information.
Displays the last components inserted during the current editing
session; the most recently used icon displays in the top. This list
Recently Used
follows the view options setting in the symbol preview window
(icon only, icon with text or list view). The total number of icons
displayed depends on the value specified in the Display edit box.
Specifies the number of icons to display in the Recently Used list
box. Enter integer numbers only; the default value is 10.
Display
1682 | Chapter 22 Miscellaneous Tools
Inserts the icon using a vertical or horizontal orientation. This
value is opposite the default ladder rung orientation for the
drawing.
Vertical/Horizontal
Turns off the Insert/Edit Component dialog box when inserting
symbols onto the drawing. To add component detail later, click
the Edit Component tool, and select the component to edit.
No edit dialog
Inserts the component, untagged (that is, without assigning a
unique Component Tag). The untagged value that displays is the
No tag
TAG1/TAG2 default value for the component. To add component
detail later, click the Edit Component tool, and select the com-
ponent to edit.
Indicates to display the previously used menu each time you open
the Insert Component dialog box. For example, if you insert a
Always display previously used
menu
push button from the Push Buttons menu, the next time you
open the Insert Component dialog box the Push Button menu
displays by default.
Specifies the component block insertion scale. This defaults to
the value set in the Drawing Properties ➤ Drawing Format dialog
Scale schematic
box. Once set, this value is remembered until reset or until the
drawing editing session ends.
Specifies the footprint insertion scale. This defaults to the value
set in the Drawing Properties ➤ Drawing Format dialog box.
Scale panel
Once set, this value is remembered until reset or until the drawing
editing session ends.
Manually type in the component block to insert.Type it
Browses to and selects the component to insert.Browse
Right-click menus
Options for the Menu tree structure view
Right-click on the main menu or submenu in the Menu tree structure view
to display the following options:
■Expand/Collapse: Toggles the visibility of the menus.
Insert P&ID components | 1683

■Properties: Opens a Properties dialog box to view the existing menu or
submenu properties like the menu name, image, or submenu title. Use the
Icon Menu Wizard to change any menu properties.
Options for the Symbol Preview window
Right-click an icon or in empty space in the Symbol Preview window to display
the following options:
■View: Changes the view display for the Symbol Preview window and
Recently Used window. The current view option is indicated with a check
mark. Options include: Icon with text, Icon only or List view.
■Properties: (available for icons only) Opens a Properties dialog box to view
the existing symbol icon properties like the icon name, image, block names
and so on. Use the Icon Menu Wizard to change any icon properties.
Pneumatic, Hydraulic, and P&ID icon menus
The Menu tree structure displays the symbols for the selected component type
(pneumatic, hydraulic, or P&ID). The Insert Pneumatic Component, Insert
Hydraulic Component, and Insert P&ID Component tools are accessed from
the Schematic tab ➤ Insert Components panel on the ribbon or the Extra
Library toolbar.
Insert Pneumatic Component
Insert Hydraulic Component
Insert P&ID Component
1684 | Chapter 22 Miscellaneous Tools

Troubleshooting Tools
Overview of real-time error checking
Although AutoCAD Electrical checks for duplicated schematic component
reference designations and wire numbers during the insert or edit process,
you have the option of displaying the warning in real time. Real-time error
checking is enabled by default in the Project Properties ➤ Project Settings
on page 204 tab.
If you enter an existing component tag/wire number during the insert/edit
process, a warning dialog box displays. This alerts you of the duplication and
suggests alternative tag names based on the user-defined format. You can
select whether to use the duplicated tag or use a new tag that is suggested (or
you can type in a new tag).
NOTE The combined value of the component tag and installation code is used
for error checking in IEC mode.
An error log file is created for every project if you chose to display the real-time
warnings. The real-time warning is saved in the log file named
"<project_name>_error.log" and is saved in the User subdirectory. If a log file
exists, the new content is added to the same file. A blank line separates one
error record from another.
About the .wdn file
The .wdn file is a text file used specifically for auditing terminals. Terminal
numbers listed in this file are not checked for duplication. Use wildcards to
exclude a range of terminals for duplication checking such as all terminals
with a tag name starting with "T" and with terminal number "1." AutoCAD
Electrical searches for the <project_name>.wdn file in the same folder as the
project definition file (*.wdp). If <project_name>.wdn is not found, AutoCAD
Electrical looks for the default.wdn file in the project folder.
■Windows XP: C:\Documents and Settings\{username}\My
Documents\Acade {version}\AeData\Proj\
■Windows Vista, Windows 7: C:\Users\{username}\Documents\Acade
{version}\AeData\Proj\
The default .wdn file contains the terminal number filters GND, PE, and E.
They are ignored when checking for duplication and are not listed in the
Electrical Audit report.
Troubleshooting Tools | 1685

Use the troubleshooting tools
There are many tools to use for troubleshooting your AutoCAD Electrical
drawing.
Use the audit tool
Use this tool to identify and clean up some types of problems that affect an
AutoCAD Electrical drawing. The Electrical Audit tool displays a report of
detected problems for the active project. You can save this file for reference
or surf the file to view and correct the errors.
1Click Reports tab ➤ Schematic panel ➤ Electrical Audit.
When you run the command, the progress bar describes the progress of
the audit process. Once the audit is complete, a text box displays the total
number of errors found.
2Click Details to view the detected problems.
3(Optional) Click Active Drawing to view the detected problems for the
active drawing only.
4Click any of the tabs highlighted with an error icon.
They are the areas where problems were found in your project. If no errors
are found, the Details button is not enabled.
5Click an audit record in the dialog box and click Go To (or double-click
the audit record).
Once you browse to an error location an 'x' appears in the audit dialog
box.
6Fix the error using any of the AutoCAD Electrical editing tools.
After correcting the error, you can select another audit record in the
dialog box for correction.
7Click Close after correcting errors, Save As/Save All if you want to save
the report, or Print if you want to print the report.
NOTE Run the Drawing audit on page 1692 tool to perform wire-related clean-up
functions automatically.
1686 | Chapter 22 Miscellaneous Tools
Clean the drawings
1Click Project tab ➤ Troubleshooting panel ➤ Clean DWG Utility.
2On the Clean Drawing Utility dialog box, select the drawings to clean:
drawings in the active project, a single drawing, or all drawings in a
selected folder.
3(Optional) Click Purge All to run the AutoCAD Purge command and
purges all unused items (such as block definitions, dimension styles,
layers, linetypes, and text styles).
4Click OK.
5If you selected to clean all drawings in the active project, select the
drawings to process and click OK.
New, clean copies of the selected drawings are created and inserted into
the drawing.
Use the debug tool
If you receive a message that AutoCAD Electrical is having trouble updating
your scratch database file of the project, turn on the Debug Trace. It can help
track down the problem. Select one of the following commands:
■Click Project tab ➤ Troubleshooting panel ➤ MDB Command Trace
drop-down ➤ MDB Command Trace On.
To turn the tracing off,
Click Project tab ➤ Troubleshooting panel ➤ MDB Command Trace
drop-down ➤ MDB Command Trace Off.
■Click Project tab ➤ Troubleshooting panel ➤ Command Trace drop-down
➤ Command Trace On.
To turn the tracing off,
Overview of real-time error checking | 1687
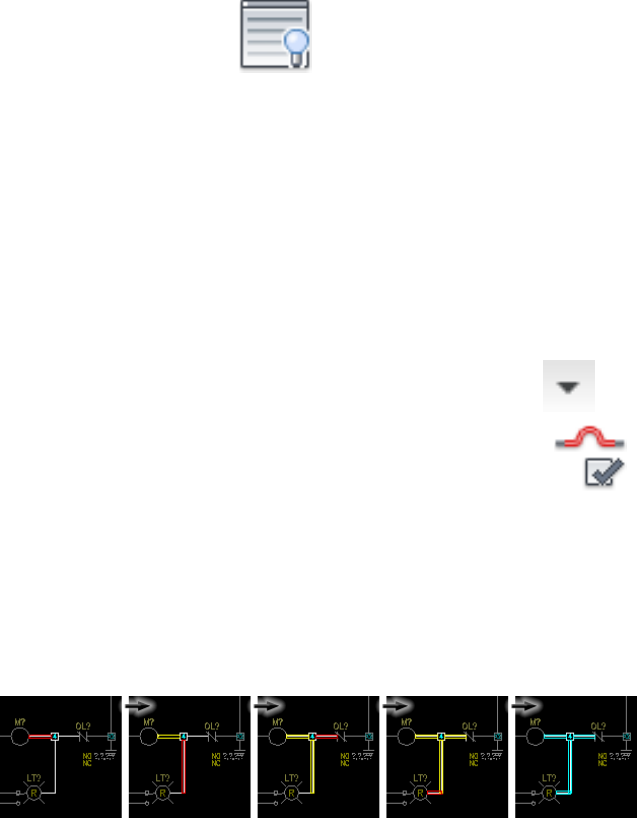
Click Project tab ➤ Troubleshooting panel ➤ Command Trace drop-down
➤ Command Trace Off.
Check, repair, or trace wire and gap pointers
The Check/Repair Gap Pointers utility verifies that the invisible Xdata pointers
on both sides of a wire gap/loop are valid. If not, appropriate pointers are
established. The Check/Trace a Wire utility single steps through and highlights
each connected wire of the selected wire network.
Check/repair wire gaps
Use this utility to create wire number jumps (on the current drawing) without
resorting to individual signal source/destination arrow symbols.
1Click Schematic tab ➤ Edit Wires/Wire Numbers panel ➤ ➤
Modify Wire Gap drop-down ➤ Check/Repair Gap Pointers.
2Click the Check/Repair Gap Pointers tool.
3Select each wire segment as directed.
Gap data is added as needed. The result of the check/repair is shown in
the command prompt area.
Check/trace a wire
Troubleshoot problems with unconnected or shorted wires and invalid wire
crossing gap pointers.
1688 | Chapter 22 Miscellaneous Tools

1Click Schematic tab ➤ Edit Wires/Wire Numbers panel ➤ Modify Wires
drop-down ➤ Check/Trace Wire.
2Select a wire on the network. You can select "A" to show All Segments. If
you prefer to step through wire by wire, press the spacebar.
3Determine whether to pan or zoom the selected wire.
The connected wire segments endpoints are shown in the command
prompt area.
Check multiple wires
1Click Reports tab ➤ Schematic panel ➤ DWG Audit.
2Select whether to process the active drawing or the entire project, and
click OK.
3Indicate which areas to check for errors. You can look for problems related
to missing wires segments which were linked through wire crossing gap
pointers. You can also clean up wires pointing to nonexistent wire
numbers and erase wire numbers that are not linked to a wire network.
Show all valid wire segments by having each outlined in temporary
graphics. Temporary graphics are shown as:
■Bright red - regular wires
■Magenta - wires on layers defined as No Wire Numbering.
4Click OK.
The Drawing Audit utility displays a report of wire-related clean-up
functions that were performed.
Electrical audit
Detects problems related to wires and components, and describes the problems
in a dialog box on a series of tabs.
Ribbon: Reports tab ➤ Schematic panel ➤ Electrical Audit.
Overview of real-time error checking | 1689
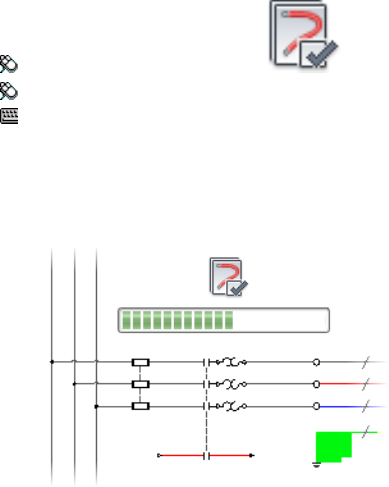
Toolbar: Schematic Reports
Menu: Projects ➤ Reports ➤ Electrical Audit
Command entry: AEAUDIT
When you run Electrical Audit, a progress bar shows the progress of the audit
process. Once the audit is complete, a text box displays the total number of
errors found. The Details option lists the detected problems. You can go to
the location of an error within the project and correct the error.
Displays the audit information for all the drawings in the
active project.
Project
Displays the audit information for the active drawing only.
If a different drawing becomes active, the display updates
Active Drawing
for that drawing. If the active drawing is not part of the
project, the Active Drawing control is disabled and the
Project control is selected.
Displays the unconnected wires for the active project. The
report lists the unconnected wire number, location point,
Wire - No Connection
error message, and the drawing where the error occurs. If
there is not a record of a wire number, the wire number
column is blank.
Displays missing or duplicated wire numbers for the active
project. The report lists the duplicated wire number, error
Wire Exception
message, and the drawing where the error occurs. If a wire
number is missing, the wire number column is blank.
1690 | Chapter 22 Miscellaneous Tools

Displays the duplicated cable and wire id for the active
project. The report lists the duplicated cable tags or cable
Cable Exception
tags with duplicated wire id, error message, reference of
the cable tag, and the drawing where the error occurs.
Displays components with no bill of material part assign-
ments. The report lists the component reference designa-
Component - No Catalog Number
tion tag, component category, reference of the component
tag, error message, and the drawing where the error occurs.
Displays the duplicated components. The report lists the
component reference designation tag, component cat-
Component Duplication
egory, reference of the component tag error message, and
the drawing where the error occurs.
Displays component connections with no connected wires.
The report lists the component reference designation tag,
Component - No Connection
component category, reference of the component tag, error
message, and the drawing where the error occurs.
Displays components in the wire network that carry a
mixture of different WDTYPE on page 325 attribute values.
Mixed Component Network
For example, a one-line symbol (WDTYPE value of “1-”)
connected to a schematic symbol (WDTYPE value missing
or blank).
Displays duplicated schematic terminal numbers. The report
lists the terminal tag id and duplicated terminal number,
Terminal Duplication
reference of the terminal number, error message, and the
drawing where the error occurs.
NOTE Terminal numbers listed in WDN files (located in
the same folder as the project definition file (*.wdp)) are
not checked for duplications. You can use wildcards to ex-
clude a range of terminals for duplication checking using
this text file.
Displays duplicated component pin assignments. The report
lists the schematic component reference designation tag
Pin Exception
and component wire connection pin, reference of the
component tag, error message, and the drawing where
the error occurs.
Overview of real-time error checking | 1691
Displays any children without a parent schematic compon-
ent. The report lists the component reference designation
Contacts
tag for the child without a parent, reference of the child
component tag, error message, and the drawing where
the error occurs.
Displays the recovery tip so that you can fix the error.Recovery Tip
Goes to the error location within the project and correct
the error. It is enabled when you select a single audit record
Go To
in the dialog box. Once you browse to an error location
an "x" appears in the left-hand column of the Electrical
Audit dialog box.
NOTE You can also double-click an audit record to go to
the error location.
Saves the audit report. Save As saves only the active report
while Save All saves the complete audit report.
Save As/Save All
Prints the audit report.Print
NOTE A blank Category value indicates a schematic component.
Drawing audit
Detects problems related to wire numbers in the active project and displays a
report of them.
Ribbon: Reports tab ➤ Schematic panel ➤ DWG Audit.
Toolbar: Schematic Reports
Menu: Projects ➤ Reports ➤ Drawing Audit
Command entry: AEAUDITDWG
1692 | Chapter 22 Miscellaneous Tools
Drawing Audit identifies and cleans up some of the problems that can affect
an AutoCAD Electrical drawing. Save the error report file for reference or surf
the file to view and correct errors.
Specifies to run the audit on the active drawing or selected
drawings in the active project.
Audit drawing or project
Redisplays the last audit report that was run. You can then
surf to the performed function, save the report, or print
the report for reference.
Previous
Goes to the error location within the drawing where the
error occurred and was fixed.
Surf
After you click OK, you can select the type of drawing audit to run. If you selected to audit the
project, select the drawings in the active project to audit, and click OK.
Looks for problems related to missing wires which were
connected through gap pointers. Also see Check / Repair
Gap Pointers on page 1688.
Wire gap pointers
Looks for and cleans up wires pointing to nonexistent wire
numbers (it is the opposite of wire number floaters). Also
looks for bad color/gauge label pointers.
Bogus wire number and color/gauge
label pointers
Looks for and erases zero length line entities on the wire
layer.
Zero length wires
Looks for and erases wire numbers that are not linked to a
wire network (for example, the wire was manually erased
but wire number remains).
Wire number floaters
Draws an outline around each wire entity.Show wires (mark in red)
■Bright red outline - regular wires
■Magenta outline - wires on layers defined as No Wire
Numbering.
(Available when running on the active drawing only.)
Overview of real-time error checking | 1693

Modify invisible data
Modify invisible data
For some functions AutoCAD Electrical adds invisible information to a block
insert or even to a specific attribute. This invisible data is called Xdata. To add
or modify this invisible data, AutoCAD Electrical provides an Xdata editor.
Edit existing invisible data
1Click Project tab ➤ Other Tools panel ➤ ➤ Xdata Editor.
2Select an attribute in the drawing.
3If Xdata exists for the attribute, select the Xdata to edit from the list in
the dialog box.
The existing name and value are shown in the edit boxes allowing you
to edit them.
4Edit the name and value as needed. Once you click out of the edit box,
the name, or value are updated in the list.
5Click Save Changes to update the selected block or attribute with the
Xdata changes.
Add invisible data to an attribute
1Click Project tab ➤ Other Tools panel ➤ ➤ Xdata Editor.
2Select an attribute in the drawing.
If the selected block or attribute does not carry any Xdata, the list box
indicates it.
3Click Add New.
1694 | Chapter 22 Miscellaneous Tools

4Enter the name for the Xdata and its value. Click OK.
5Click Save Changes to update the selected block or attribute with the
Xdata changes.
Xdata editor
For some functions AutoCAD Electrical adds invisible information to a block
insert or even to a specific attribute. This invisible data is called Xdata. To add
or modify this invisible data, AutoCAD Electrical provides an Xdata editor.
Ribbon: Project tab ➤ Other Tools panel ➤ ➤ Xdata Editor.
Menu: Projects ➤ Extras ➤ Xdata Editor
Command entry: AEXDATA
The dialog box displays showing any existing Xdata information. If the selected
block or attribute does not carry any Xdata, the list box indicates it. If the
selected block or attribute carries any Xdata already, the names and values
are displayed in the list box at the top of the dialog box.
Specifies the Xdata name. To edit the name, click it in the list.
The existing name is shown in the edit boxes allowing you to
Name
edit it. Once you click out of the edit box, the name is updated
in the list.
Specifies the Xdata value. To edit the value, click it in the list. The
existing value is shown in the edit boxes allowing you to edit it.
Value
Once you click out of the edit box, the value is updated in the
list.
Adds new Xdata information. Enter in the application name for
the Xdata and its value.
Add New
Removes the selected Xdata from the list.Delete Xdata
Modify invisible data | 1695
1696

Tutorials
Introduction
AutoCAD Electrical currently supports the following industry standards: JIC
(US), IEC (Europe), JIS (Japan), GB (China) and AS (Australia). Although AutoCAD
Electrical supports many standards, these exercises follow the JIC standard and
sample drawing set.
The exercises are grouped into main topics. Each main topic contains one or
more individual exercises. You can perform the main topics in any order but
perform the exercises within a main topic in order.
It is assumed that you have a working knowledge of the AutoCAD interface and
tools. If you do not, review the AutoCAD online documentation.
It is recommended that you have a working knowledge of Microsoft® Windows®
2000 or Windows® XP, and a working knowledge of electrical design and
schematic ladder wiring diagrams.
NOTE Turn off the AutoCAD Dynamic Input feature (found on the status bar) before
starting the exercises.
The tutorial uses a naming convention when referring to ribbon commands.
For example, in the selection path Schematic tab ➤ Insert Components panel ➤
Circuit Builder, Schematic is the name of the tab, Insert Components is the name
of the panel on the tab, and Circuit Builder is the name of the command.
23
1697
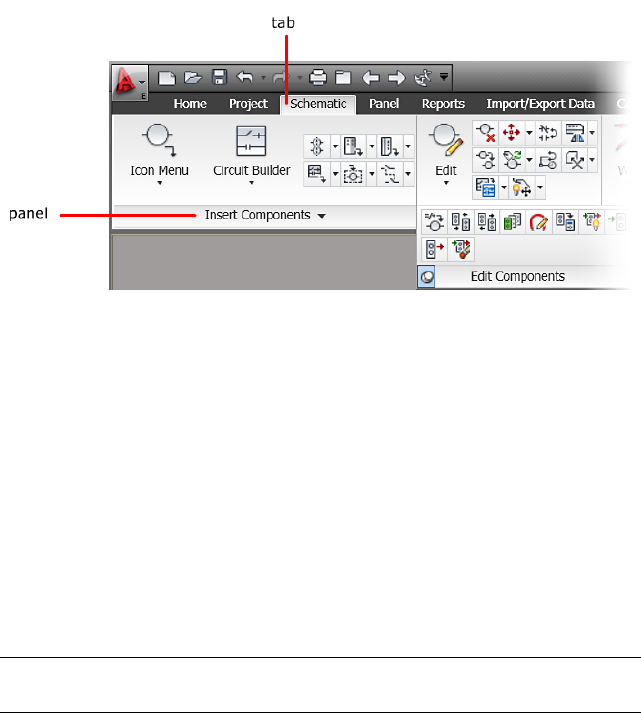
Backup exercise files
Backup exercise files are found at Documents and Settings\{username}\My
Documents\Acade {version}\Aedata\Tutorial\Aegs. If you make a mistake while
working through the exercises, browse to and copy the demo files to your
project folder.
Completed exercise files for each tutorial are found at Documents and
Settings\{username}\My Documents\Acade
{version}\Aedata\Tutorial\Aegs\Completed\{tutorial_name}\. If you do not
complete the exercises in order, browse to and copy the files for the prior
tutorial to your project folder. For example, if you skipped the Projects tutorial
and are starting with the Wiring tutorial, copy the Documents and
Settings\{username}\My Documents\Acade
{version}\Aedata\Tutorial\Aegs\Projects\ exercise files to the project folder.
NOTE Backup exercise files are found at Users\{username}\Documents\Acade
{version}\Aedata\Tutorial\Aegs on a Windows Vista or Windows 7 installation.
Manufacturers used
The exercises use two manufacturers: Allen Bradley and Siemens. Install both
manufacturers to have the same results that are shown here. Follow these
steps to install content from these manufacturers.
1Open the Add or Remove Programs tool in your Control Panel.
2Select AutoCAD Electrical
3Click Change/Remove.
4Click Add/Remove Features.
1698 | Chapter 23 Tutorials
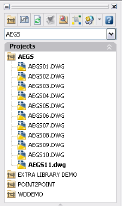
5Click Next on the first screen.
6Select AB and Siemens on the Manufacturer Contents Selection screen
and click Next.
7Click Next on the Symbol Libraries screen.
8Click Next to continue.
Projects
Projects - Introduction
Create a project and add drawings with Project Manager.
10 minutesTime required
Copy all files located inPrerequisites:
Documents and Settings\{username}\My Documents\Acade {version}\Aedata\Tutorial\Ae-
gs\Projects
Windows XP
to
Documents and Settings\{username}\My Documents\Acade {version}\Aedata\Proj\Aegs
Users\{username}\Documents\Acade {version}\Aedata\Tutorial\Aegs\ProjectsWindows Vista,
toWindows 7
Users\{username}\Documents\Acade {version}\Aedata\Proj\Aegs
You learn to:
■Understand projects
Projects | 1699
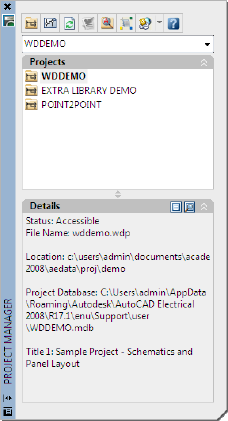
■Create a project
■Set project properties
■Create a drawing
■Add drawings to a project
■View drawings in a project
Working with projects
AutoCAD Electrical is a project-based system. An ASCII text with a .wdp
extension defines each project. This project file contains a list of project
information, default project settings, drawing properties, and drawing file
names. You can have an unlimited number of projects; however, only one
project can be active at a time.
Use the Project Manager to add new drawings, reorder drawing files, and
change project settings. You cannot have two projects open in the Project
Manager with the same project name. By default, the Project Manager is open
and docked on the left-hand side of your screen. You can dock the Project
Manager into a specific location on the screen or hide it until you want to use
the project tools. Right-click the properties icon to display options to move,
size, close, dock, hide, or set the transparency for the Project Manager.
1700 | Chapter 23 Tutorials
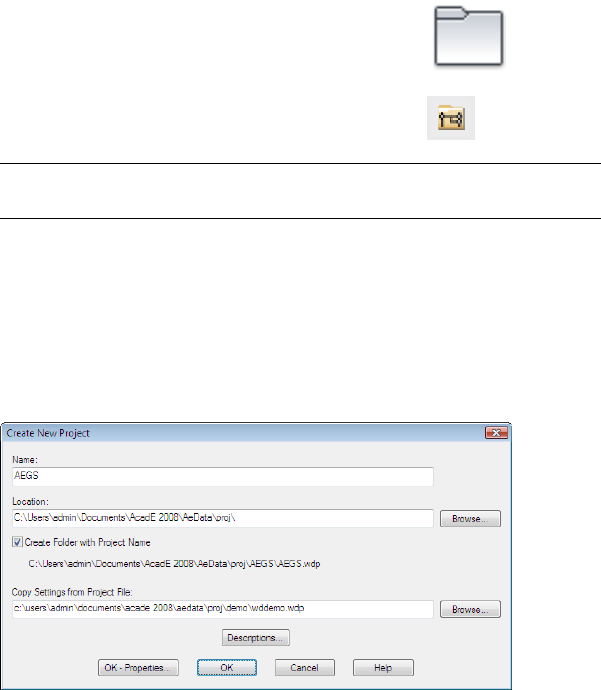
Create an AutoCAD Electrical project
1Click Project tab ➤ Project Tools panel ➤ Manager.
2In the Project Manager, click the New Project tool.
NOTE You can also use the Project Manager to open an existing project. In
the Project Manager, click the project selection arrow and select Open Project.
3In the Create New Project dialog box, specify:
Name: AEGS
A name must be entered to define any of the project properties. The .wdp
extension is not required in the edit box.
4Make sure wddemo.wdp is specified in the Copy Settings from Project File
edit box.
5Click OK-Properties.
Your new project is added to the current projects list and automatically
becomes the active project.
The Project Properties dialog box displays, where you can modify your project
default settings. All information defined on these tabs are saved to the project
definition file as project defaults and settings.
Working with projects | 1701
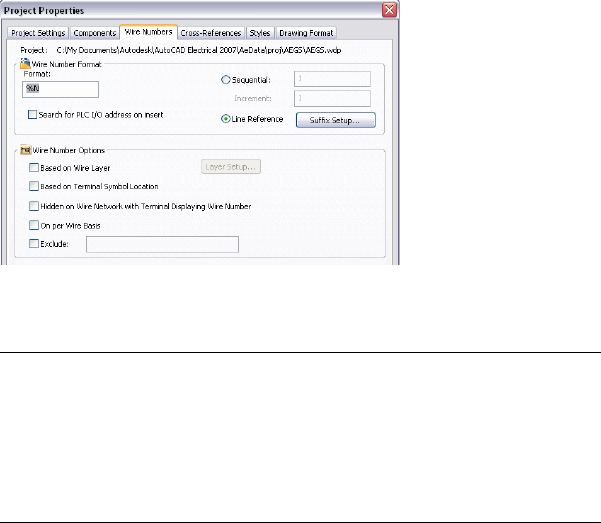
Set project properties
1In the Project Properties dialog box, click the Components tab.
2In the Component Tag Format section, verify that Line Reference is
selected.
This selection creates unique reference-based tags when multiple
components of the same family are located at the same reference location.
When reference-based tagging is used, a suffix variable is required to keep
components of the same family type unique. For example, three push
buttons on line reference 101 could be labeled PB101, PB101A, and
PB101B. Click Suffix Setup to change the suffix variable.
3Click the Wire Numbers tab.
4In the Wire Number Format section, verify that Line Reference is selected.
This selection creates unique reference-based wire number tags for
multiple wire networks beginning at the same reference location. When
reference-based numbering is used, a suffix variable is required to keep
wires on the same reference line or in the same reference zone unique.
Click Suffix Setup to change the suffix variable.
5Review the various options on the different tabs of the Project Properties
dialog box.
NOTE In the Project Properties dialog box, icons indicate whether the settings
apply to project settings or drawing defaults. Settings that apply to project
settings have the project icon next to them and are saved inside the project
definition file (*.wdp). Settings that are saved in the project file as drawing
defaults have the drawing icon next to them. Drawing related data to add
to the project when running the Add Drawing command is saved as Drawing
Custom Properties.
1702 | Chapter 23 Tutorials

6Click OK.
Working with drawings
A single project file can have drawings located in many different directories.
There is no limit to the number of drawings in a project. You can add drawings
to your project at any time. When you create a drawing, using the New
Drawing tool, it is automatically added to the active project.
Many of the drawing settings used by AutoCAD Electrical are stored in a smart
block on the drawing named WD_M.dwg. Each AutoCAD Electrical drawing
should contain only one copy of the WD_M block. If multiple WD_M blocks
are present, the settings cannot be stored and read consistently.
Create a drawing
1In the Project Manager, click the New Drawing tool.
2In the Create New Drawing dialog box, specify:
Name: AEGS11
Description 1: Bill of Materials Report
3Click Browse next to the Template edit box.
A set of templates (*.dwt files) installed with AutoCAD Electrical contain
settings for various kinds of drawings, such as acad.dwt and
ACAD_ELECTRICAL.dwt.
You can create your own templates, or use any drawing as a template.
You can save a drawing at any stage of completion as a template file.
When you use a drawing as a template, the settings in that drawing are
used in the new drawing. The changes you make to a drawing that is
based on a template do not affect the template file.
AutoCAD Electrical fully supports the use of AutoCAD template files. To
make an AutoCAD drawing compatible with AutoCAD Electrical, select
an AutoCAD Electrical command to modify the drawing.
4In the Select template dialog box, select ACAD_ELECTRICAL.dwt, and
click Open.
Working with drawings | 1703
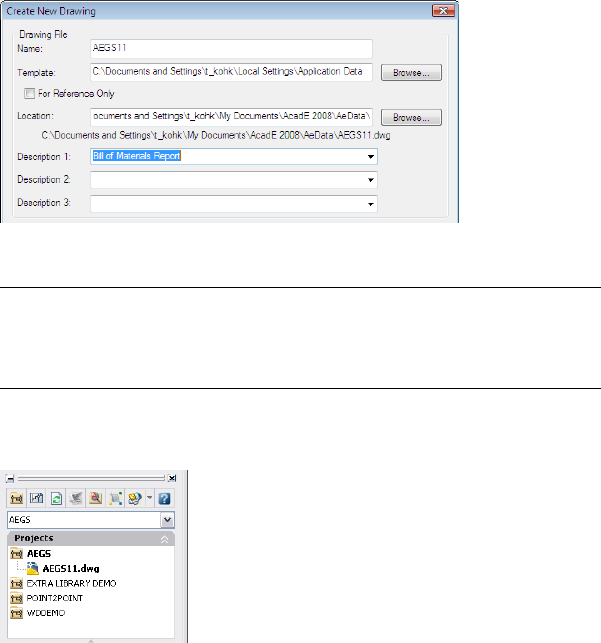
5In the Create New Drawing dialog box, click OK.
NOTE You could click OK-Properties to display the Drawing Properties dialog
box. This dialog box has options like the options found in the Project
Properties dialog box. It defines drawing-specific settings that are maintained
inside the WD_M block of the drawing.
6In the Project Manager, double-click the project name (AEGS) to display
the drawing files. AEGS11 is the only file in the list.
Add drawings to the project
1In the Project Manager, right-click AEGS, and select Add Drawings.
2In the Select Files to Add dialog box, select drawings AEGS01.dwg to
AEGS10.dwg and click Add.
3When asked whether to apply the project default values to the drawing
settings, click Yes.
The Project Manager lists the files under the AEGS folder. New drawings
that you add from this point on are added at the end of the drawing
order. You now have access to the files required for the exercises in this
book.
1704 | Chapter 23 Tutorials
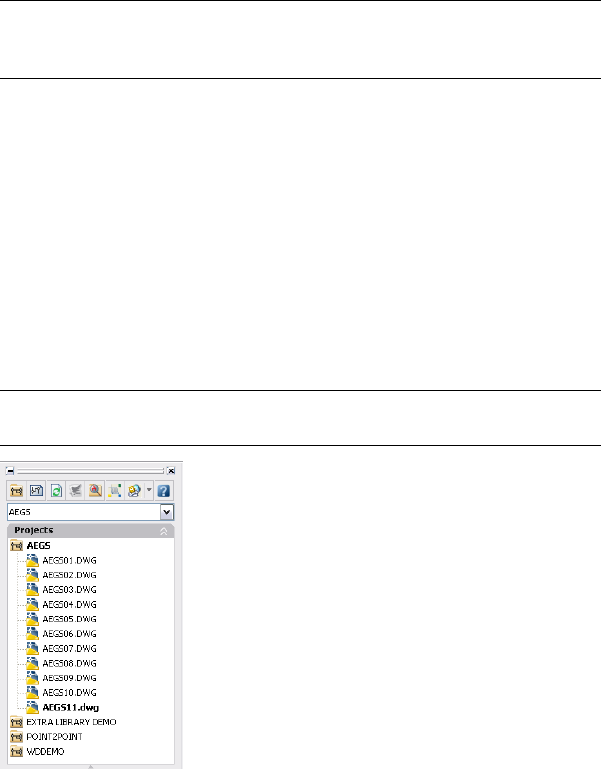
NOTE Two projects can reference the same drawing file. However, if both
projects try to modify the same drawing with a project-wide tagging or
cross-referencing function, it can lead to conflicts.
The drawing order in the Project Manager determines how AutoCAD
Electrical processes the drawings during project-wide operations such as
resequencing and wire numbering.
4In the Project Manager, right-click the project name, and select Reorder
Drawings.
5In the Reorder Drawings dialog box, select AEGS10.dwg and AEGS11.dwg
and click Move Down until the drawings are at the bottom of the list.
6Click OK.
AEGS11.dwg is now at the bottom of the project drawing file list in the
Project Manager.
NOTE The active drawing displays in bold text in the project drawing list.
You can easily see which file you are working in.
You can add descriptions for each drawing to the project file. You can reuse
drawing descriptions in title block attributes and associate them with AutoCAD
Electrical reports.
Add the description of a drawing you add
1In the Project Manager, right-click AEGS10.dwg, and select Properties ➤
Drawing Properties.
Working with drawings | 1705
2In the Drawing Properties ➤ Drawing Settings dialog box, Drawing File
section, specify:
Description 1: Connector Drawing
3Click OK.
4In the Project Manager, select AEGS10.dwg.
5In the Project Manager, Details section, review the drawing descriptions.
The drawing details update when you highlight a drawing file and remain
visible until a new drawing file is selected. Displayed information includes
the status, file name, file location, file size, last saved date, and the name
of the last user who modified the file.
Use the Project Manager to preview drawings easily. Moving among drawings
using the up and down keys does not open the drawing. It changes the preview
or details display in the Project Manager.
View drawings in a project
1In the Project Manager, select AEGS04.dwg.
2In the Project Manager, Details section, click Preview.
3Continue to click the drawing name you want to preview or use the up
and down arrow keys to scroll through the drawing files.
4When you finish viewing the drawings, click Details to return to the
drawing details view.
If a project drawing is currently open and you want to move to the previous
or next drawing in the list of the project, use the Previous Project Drawing
and Next Project Drawing tools. When you move among drawings, any
unsaved changes to the current drawing are saved, the drawing is closed, and
the requested drawing is opened.
1706 | Chapter 23 Tutorials

View project drawings when a drawing is open
1In the Project Manager, double-click AEGS04.dwg.
2To view the drawings, Click Project tab ➤ Other Tools panel ➤ Previous
DWG.
or Click Project tab ➤ Other Tools panel ➤ Next DWG.
A new window opens and the original window closes when you click the
navigation tools unless you hold the Shift key while clicking the tools.
Title Block
Title Block - Introduction
Title Block | 1707
Create a title block and link it to the Title Block Update. Select either the
WD_TB attribute method or the WDT file method, and perform only the
exercises for that method. The same files are used for both methods.
40 minutesTime required
Copy all files located inPrerequisites:
Documents and Settings\{username}\My Documents\Acade {version}\Aedata\Tutorial\Ae-
gs\Title Block
Windows XP
to
Documents and Settings\{username}\My Documents\Acade {version}\Aedata\Proj\Aegs
Users\{username}\Documents\Acade {version}\Aedata\Tutorial\Aegs\Title BlockWindows Vista,
toWindows 7
Users\{username}\Documents\Acade {version}\Aedata\Proj\Aegs
You learn to:
■Create a title block border drawing.
■Link to Title Block Update using the WD_TB attribute method.
■Link to Title Block Update using the WDT file method.
■Create a template drawing file using the title block.
■Customize project description dialog box labels.
Title Block Utility
AutoCAD Electrical can link project description lines and some of the drawing
properties to attributes on the drawing title block. The title block utility:
■automates project-wide title block updates
■supports multiple title blocks per drawing
■maps AutoCAD Electrical project description lines to specific attributes
■maps AutoCAD Electrical per-drawing values to specific attributes
■maps AutoLISP values, system variables, or environment variables to specific
attributes.
1708 | Chapter 23 Tutorials
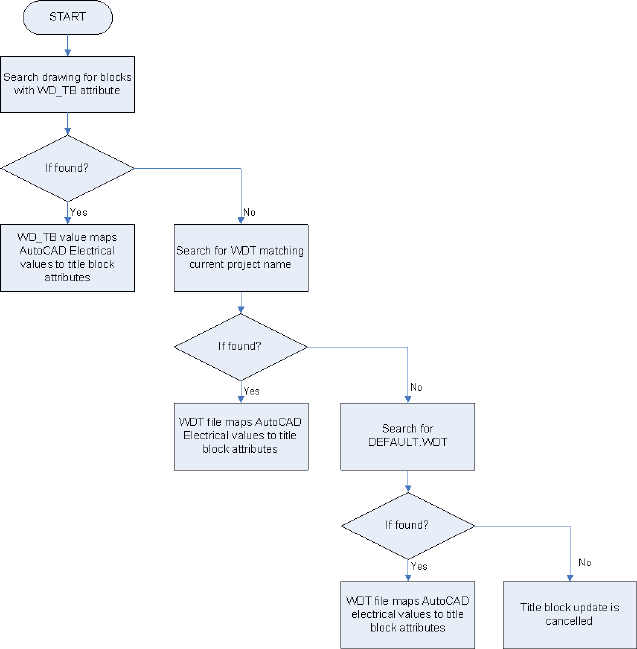
AutoCAD Electrical uses two methods to map the AutoCAD Electrical values
to attributes on the title block:
■WD_TB attribute method - mapping information embedded on the title
block. This option is self-contained in the drawing and requires no external
file. It is limited to the number of characters that can be placed on a single
attribute.
■WDT file method - external attribute mapping file. This option can update
the attributes on existing title blocks, even if the title block does not contain
the WD_TB attribute.
During a title block update, AutoCAD Electrical follows this sequence to
determine which method to use.
Title Block Utility | 1709

Select method
Select either the WD_TB attribute method on page 1710 or the WDT file method
on page 1724, and perform only the exercises for that method.
WD_TB attribute method
Create a title block
IMPORTANT Select either the WD_TB attribute method or the WDT file method
and perform only the exercises for that method. The same files are used for either
method.
The title block is a border drawing inserted as an AutoCAD block on another
drawing. The title block border drawing can be inserted as a block on an
AutoCAD drawing template file. If your drawing title block consists of an
AutoCAD block with attributes, AutoCAD Electrical can link to it.
➤ Start a blank new drawing and draw your border using standard AutoCAD
commands and objects.
Or
1Open ACADE_TITLE_BORDER.DWG in:
■Windows XP: Documents and Settings\{username}\My Documents\Acade
{version}\Aedata\Proj\Aegs
■Windows Vista, Windows 7: Users\{username}\Documents\Acade
{version}\Aedata\Proj\Aegs
This drawing contains a sample border without any of the attribute
definition objects.
1710 | Chapter 23 Tutorials
2Zoom in for attribute definition placement.
3Enter ATTDEF at the command prompt to insert attribute definition objects.
NOTE When the border drawing is inserted as a block on another drawing,
attribute definition objects become attributes.
WD_TB attribute method | 1711

4Enter the Tag name SH#.
5Set any other attribute definition properties and values, such as text style,
height, and justification.
6Select OK.
7Specify the insertion point.
1712 | Chapter 23 Tutorials

8Repeat for each attribute definition for the title block as shown.
9Enter SAVEAS at the command prompt.
10 Enter File name: acade_title.
11 Select Files of type: AutoCAD Drawing (*.dwg)
12 Click Save.
WD_TB attribute method | 1713

Title Block Setup - WD_TB attribute method
An invisible attribute on a title block of the drawing, named "WD_TB," is
encoded with the mapping information. This method eliminates the need for
an external mapping text file.
1Click Project tab ➤ Project Tools panel ➤ Manager.
2If AEGS is not the active project, activate the AEGS project.
If AEGS is in the list of open projects:
■Select AEGS and right-click.
■Click Activate.
If AEGS is not in the list of open projects:
■Select the project list drop-down.
■Click Open Project.
■On the Select Project File dialog box, navigate to and select the
AEGS.WDP file.
■Click Open.
3Open the title block base drawing created previously, ACADE_TITLE.DWG,
that contains the attribute definition objects.
4Click Project tab ➤ Other Tools panel ➤ Title Block Setup.
5Select the title block link method: Method 2: WD_TB attrib.
6Click OK.
Title Block Setup reads the attribute definitions. The Title Block Setup
dialog box displays. Each drop-down list contains all the attribute
definition objects found on the drawing.
1714 | Chapter 23 Tutorials

NOTE If no attribute definition objects are found on the drawing, an alert
displays.
7In the Title Block Setup dialog box, select the attribute from each list to
map to its corresponding project description line.
TITLE#1 ➤ LINE1
TITLE#2 ➤ LINE2
JOB# ➤ LINE4
DRAWNBY ➤ LINE6
8Click Drawing Values to assign drawing specific values.
9Select the attribute from each list to map to its corresponding drawing
value.
DWG# ➤ Drawing (%D value)
SH# ➤ Sheet (%S value)
SHTS ➤ Sheet Maximum
TITLE#3 ➤ Drawing Description 1
TITLE#4 ➤ Drawing Description 2
WD_TB attribute method | 1715

10 Click OK.
Title Block Setup updates the WD_TB attribute definition with the selected
mappings. If a WD_TB attribute definition does not exist, Title Block
Setup inserts it at 0,0.
11 Save the drawing.
Show Me: Title Block Setup - WD_TB attribute method
Click the Play arrow to start the animation.
Create a drawing template
A drawing template file is used to provide consistency in the drawings that
you create by providing standard styles and settings.
When a drawing template file is used to start a new drawing it can:
■Predefine AutoCAD Electrical drawing properties such as component
tagging, wire numbering format, and so on.
■Predefine layers and layer properties.
■Predefine wire layers.
■Provide your drawing border and title block.
By default, drawing template files are stored in the template folder, where they
are easily accessible.
1Enter QNEW at the command prompt to start a new drawing.
2Select the acad.dwt template.
3Click Open.
4Enter INSERT at the command prompt.
5Click Browse.
6Navigate to and select the title block ACADE_TITLE.DWG created for the
border.
7Click Open.
1716 | Chapter 23 Tutorials
8On the Insert dialog box, make sure the Explode option is not checked.
9Click OK.
10 Specify the insertion point at 0,0,0.
11 If prompted for attribute values, leave them blank.
NOTE Attributes are invisible if no default values are assigned.
12 Click Schematic tab ➤ Other Tools panel ➤ Drawing Properties.
The alert displays.
13 Click OK to insert the WD_M block.
14 Set the default drawing properties such as component tagging, wire
numbering, cross-referencing, and so on.
NOTE No specific changes are needed for this tutorial.
15 Click OK.
16 Click Schematic tab ➤ Edit Wires/Wire Numbers panel ➤ Create/Edit
Wire Type.
WD_TB attribute method | 1717

17 Add wire layers as needed. Set the properties, color, linetype, and
lineweight for each layer. For example:
■In the Create/Edit Wire Type dialog box, click inside the Wire Color
column for a blank row and enter RED for a new wire layer.
■Click inside the Size column and enter 12 for the size.
The Layer Name RED_12 is automatically created.
■Click Color.
■Select Red and click OK.
■Click OK.
The layer is created and defined as a wire layer.
18 Enter SAVEAS at the command prompt.
19 Set the file type as AutoCAD Drawing Template (*.dwt).
20 Enter the file name, AEGS_ELECTRICAL.
21 Click Save.
The Template Options dialog box displays.
22 Select OK.
23 Close the drawing, AEGS_ELECTRICAL.DWT.
Use the template
1If AEGS is not the active project, in the Project Manager, right-click AEGS
and select Activate.
2In the Project Manager, click the New Drawing tool.
3In the Create New Drawing dialog box, specify:
Name: AEGS11
Description 1: Title Block
Description 2: Exercise
4Click Browse next to the Template edit box.
5In the Select template dialog box, select AEGS_ELECTRICAL.dwt, and click
Open.
1718 | Chapter 23 Tutorials

6In the Create New Drawing dialog box, click OK.
7On the Apply Project Defaults to Drawing Settings dialog box, click No.
Project Manager creates the drawing using the template containing the
title block.
Project description lines
The Title Block Update utility can update attributes on your title block with
the project description lines.
1Click Project tab ➤ Project Tools panel ➤ Manager.
2If AEGS is not the active project, in the Project Manager, right-click AEGS
and select Activate.
3In the Project Manager, right-click the project name, and select
Descriptions.
4In the Project Description dialog box, enter values:
Line 1: Tutorial Project
Line 2: AutoCAD Electrical
Line 4: Job #01000
Line 6: {your name}
5Click OK.
Drawing values
The Title Block Update utility can update attributes on your title block with
certain drawing property values.
1In the Project Manager, double-click to expand the AEGS project.
2Right-click on drawing AEGS11 and select Properties ➤ Drawing
Properties.
WD_TB attribute method | 1719
3Enter values:
Sheet: 11
Drawing: 0211
NOTE Drawing Description 1 and 2 were defined when the drawing was
created.
4Click OK.
5Save the drawing.
Title Block Update
1If AEGS is not the active project, in the Project Manager, right-click AEGS
and select Activate.
2In the Project Manager, double-click to expand the AEGS project.
3Double-click drawing AEGS11 to open it.
4Click Project tab ➤ Other Tools panel ➤ Title Block Update.
The Update Title Block dialog box displays.
5Select the project and drawing values to update on the title block.
■LINE1
■LINE2
■LINE4
■LINE6
■Drawing Description: 1 and 2
■Drawing (%D value)
■Sheet (%S value)
■Sheet maximum
■Resequence sheet %S values: 1
1720 | Chapter 23 Tutorials
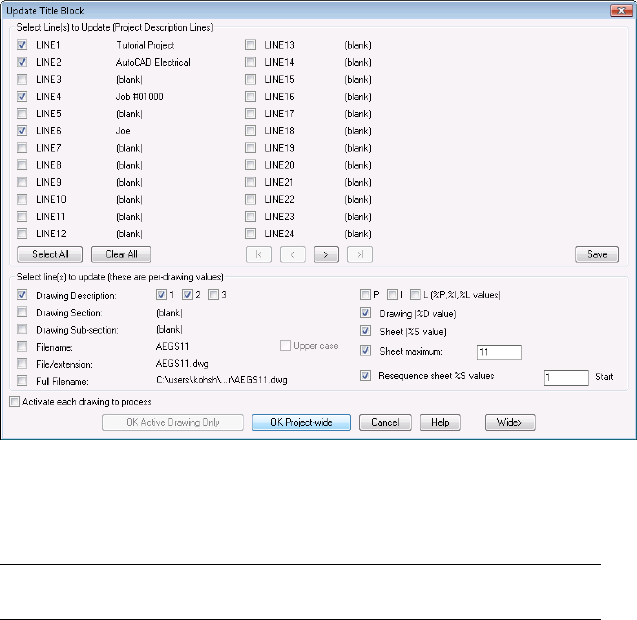
6Click OK Project-Wide.
7Select drawings AEGS01 through AEGS05, and AEGS11 to process. Click
Process v.
NOTE Drawings AEGS01 through AEGS05 are supplied with the WD_TB
attribute on the title block for this exercise.
8Click OK.
WD_TB attribute method | 1721

Customize project description labels
The title block and project description dialog boxes in AutoCAD Electrical
display generic labels like “LINE1”, “LINE2”, and so on. You can change these
labels so they match up with the link to the title block. For example, you have
linked the AutoCAD Electrical data “LINE4” value to the “JOB#” attribute on
the title block. What you want to see when AutoCAD Electrical displays a title
block-related dialog box is not “LINE4” but “Job Number.” A text file with a
WDL extension defines the custom labels.
1Use any generic text editor like Notepad or Wordpad and start a new text
file.
2Enter the lines as shown:
LINE1 = Title 1
LINE2 = Title 2
LINE3 = Title 3
LINE4 = Job Number
LINE5 = Date
LINE6 = Drawn By
1722 | Chapter 23 Tutorials

LINE7 = Engineer
LINE8 = Checked By
LINE9 = Scale
3Save the file as AEGS_WDTITLE.WDL in the project folder.
■Windows XP: Documents and Settings\{username}\My Documents\Acade
{version}\Aedata\Proj\Aegs
■Windows Vista, Windows 7: Users\{username}\Documents\Acade
{version}\Aedata\Proj\Aegs
4Switch over to AutoCAD Electrical.
5Click Project tab ➤ Project Tools panel ➤ Manager.
6If AEGS is not the active project, in the Project Manager, right-click AEGS
and select Activate.
7In the Project Manager, right-click the project name, and select
Descriptions.
The labels match the values in the WDL file.
WD_TB attribute method | 1723
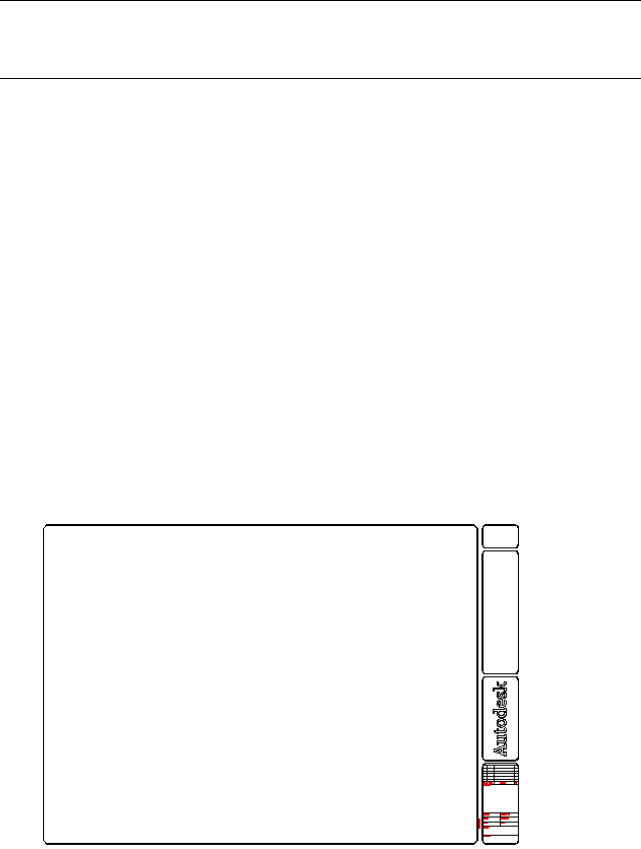
WDT file method
Create a title block
IMPORTANT Select either the WD_TB attribute method or the WDT file method
and perform only the exercises for that method. The same files are used for either
method.
The title block is a border drawing inserted as an AutoCAD block on another
drawing. The title block border drawing can be inserted as a block on an
AutoCAD drawing template file. If your drawing title block consists of an
AutoCAD block with attributes, AutoCAD Electrical can link to it.
➤ Start a blank new drawing and draw your border using standard AutoCAD
commands and objects.
Or
1Open ACADE_TITLE_BORDER.DWG in:
■Windows XP: Documents and Settings\{username}\My Documents\Acade
{version}\Aedata\Proj\Aegs
■Windows Vista, Windows 7: Users\{username}\Documents\Acade
{version}\Aedata\Proj\Aegs
This drawing contains a sample border without any of the attribute
definition objects.
1724 | Chapter 23 Tutorials

2Zoom in for attribute definition placement.
3Enter ATTDEF at the command prompt to insert attribute definition objects.
NOTE When the border drawing is inserted as a block on another drawing,
attribute definition objects become attributes.
4Enter the Tag name SH#.
WDT file method | 1725
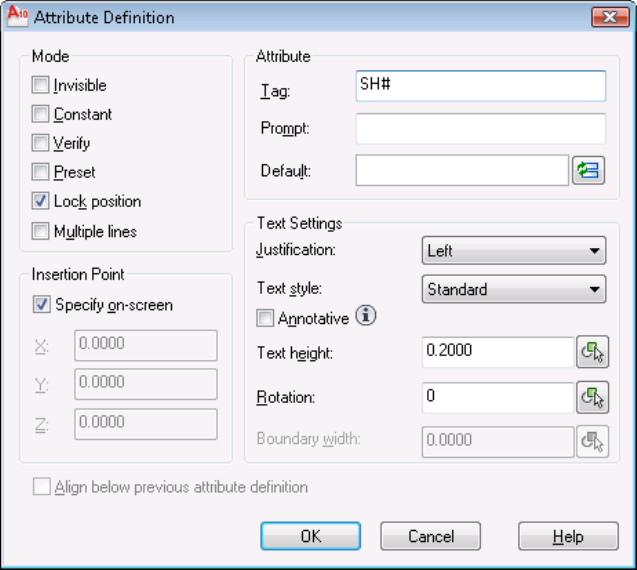
5Set any other attribute definition properties and values, such as text style,
height, and justification.
6Select OK.
7Specify the insertion point.
1726 | Chapter 23 Tutorials

8Repeat for each attribute definition for the title block as shown.
9Enter SAVEAS at the command prompt.
10 Enter File name: acade_title.
11 Select Files of type: AutoCAD Drawing (*.dwg)
12 Click Save.
WDT file method | 1727

Title Block Setup - WDT file method
A text file defines which AutoCAD Electrical values are mapped to the drawing
title block attributes. Use the Title Block Setup utility to create or modify the
WDT mapping file.
1Click Project tab ➤ Project Tools panel ➤ Manager.
2If AEGS is not the active project, activate the AEGS project.
If AEGS is in the list of open projects:
■Select AEGS and right-click.
■Click Activate.
If AEGS is not in the list of open projects:
■Select the project list drop-down.
■Click Open Project.
■On the Select Project File dialog box, navigate to and select the
AEGS.WDP file.
■Click Open.
3Open the title block base drawing created previously, ACADE_TITLE.DWG,
that contains the attribute definition objects.
NOTE Title Block Setup, WDT file method, can also be used on a drawing
with the title block inserted as a block.
4Click Project tab ➤ Other Tools panel ➤ Title Block Setup.
5Select the title block link method:Method 1: <Project> .WDT file.
A project-specific file, with the same name and location as the active
project and a WDT extension, defines the attribute mapping.
6Click OK.
1728 | Chapter 23 Tutorials
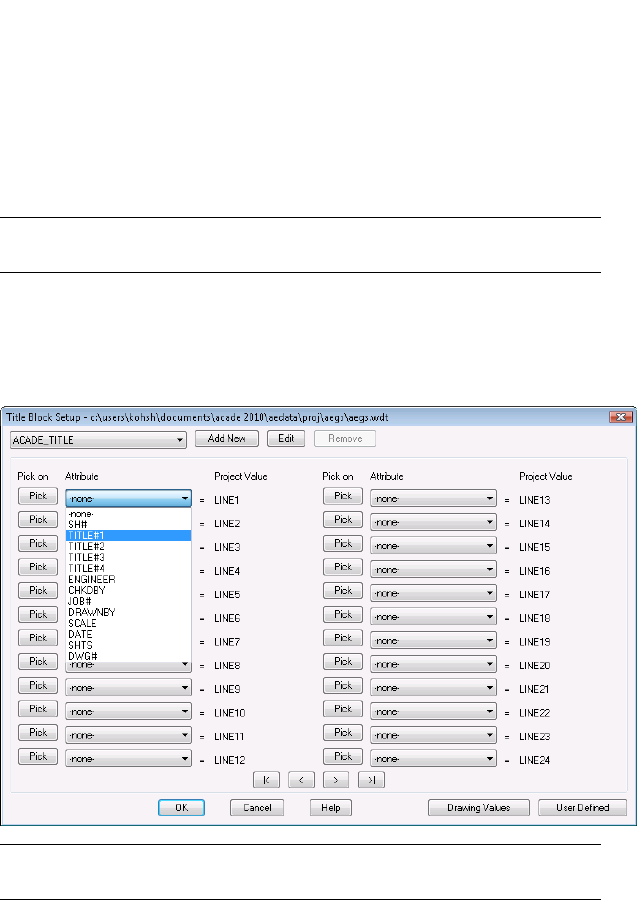
7Click Active Drawing.
NOTE If running Title Block Setup on a drawing with ACADE_TITLE inserted
as a block, select Pick Block and select on the block.
8Click OK.
Title Block Setup reads the attribute definitions and the Title Block Setup
dialog box displays. Each drop-down list contains all the attribute
definition objects found on the drawing.
NOTE If no attribute definition objects are found on the drawing, an alert
displays.
9In the Title Block Setup dialog box, select the attribute from each list to
map to its corresponding project description line.
TITLE#1 ➤ LINE1
WDT file method | 1729

TITLE#2 ➤ LINE2
JOB# ➤ LINE4
DRAWNBY ➤ LINE6
10 Click Drawing Values to assign drawing specific values.
11 Select the attribute from each list to map to its corresponding drawing
value.
DWG# ➤ Drawing (%D value)
SH# ➤ Sheet (%S value)
SHTS ➤ Sheet Maximum
TITLE#3 ➤ Drawing Description 1
TITLE#4 ➤ Drawing Description 2
12 Click OK.
13 Title Block Setup creates AEGS.WDT with the selected mappings.
Show Me: Title Block Setup - WDT file method
Click the Play arrow to start the animation.
Create a drawing template
A drawing template file is used to provide consistency in the drawings that
you create by providing standard styles and settings.
When a drawing template file is used to start a new drawing it can:
■Predefine AutoCAD Electrical drawing properties such as component
tagging, wire numbering format, and so on.
■Predefine layers and layer properties.
■Predefine wire layers.
■Provide your drawing border and title block.
1730 | Chapter 23 Tutorials
By default, drawing template files are stored in the template folder, where they
are easily accessible.
1Enter QNEW at the command prompt to start a new drawing.
2Select the acad.dwt template.
3Click Open.
4Enter INSERT at the command prompt.
5Click Browse.
6Navigate to and select the title block ACADE_TITLE.DWG created for the
border.
7Click Open.
8On the Insert dialog box, make sure the Explode option is not checked.
9Click OK.
10 Specify the insertion point at 0,0,0.
11 If prompted for attribute values, leave them blank.
NOTE Attributes are invisible if no default values are assigned.
12 Click Schematic tab ➤ Other Tools panel ➤ Drawing Properties.
The alert displays.
WDT file method | 1731

13 Click OK to insert the WD_M block.
14 Set the default drawing properties such as component tagging, wire
numbering, cross-referencing, and so on.
NOTE No specific changes are needed for this tutorial.
15 Click OK.
16 Click Schematic tab ➤ Edit Wires/Wire Numbers panel ➤ Create/Edit
Wire Type.
17 Add wire layers as needed. Set the properties, color, linetype, and
lineweight for each layer. For example:
■In the Create/Edit Wire Type dialog box, click inside the Wire Color
column for a blank row and enter RED for a new wire layer.
■Click inside the Size column and enter 12 for the size.
The Layer Name RED_12 is automatically created.
■Click Color.
■Select Red and click OK.
■Click OK.
The layer is created and defined as a wire layer.
18 Enter SAVEAS at the command prompt.
19 Set the file type as AutoCAD Drawing Template (*.dwt).
20 Enter the file name, AEGS_ELECTRICAL.
21 Click Save.
The Template Options dialog box displays.
22 Select OK.
23 Close the drawing, AEGS_ELECTRICAL.DWT.
1732 | Chapter 23 Tutorials

Use the template
1If AEGS is not the active project, in the Project Manager, right-click AEGS
and select Activate.
2In the Project Manager, click the New Drawing tool.
3In the Create New Drawing dialog box, specify:
Name: AEGS11
Description 1: Title Block
Description 2: Exercise
4Click Browse next to the Template edit box.
5In the Select template dialog box, select AEGS_ELECTRICAL.dwt, and click
Open.
6In the Create New Drawing dialog box, click OK.
7On the Apply Project Defaults to Drawing Settings dialog box, click No.
Project Manager creates the drawing using the template containing the
title block.
Project description lines
The Title Block Update utility can update attributes on your title block with
the project description lines.
1Click Project tab ➤ Project Tools panel ➤ Manager.
2If AEGS is not the active project, in the Project Manager, right-click AEGS
and select Activate.
3In the Project Manager, right-click the project name, and select
Descriptions.
4In the Project Description dialog box, enter values:
Line 1: Tutorial Project
Line 2: AutoCAD Electrical
WDT file method | 1733

Line 4: Job #01000
Line 6: {your name}
5Click OK.
Drawing values
The Title Block Update utility can update attributes on your title block with
certain drawing property values.
1In the Project Manager, double-click to expand the AEGS project.
2Right-click on drawing AEGS11 and select Properties ➤ Drawing
Properties.
3Enter values:
Sheet: 11
Drawing: 0211
NOTE Drawing Description 1 and 2 were defined when the drawing was
created.
4Click OK.
5Save the drawing.
Title Block Update
1If AEGS is not the active project, in the Project Manager, right-click AEGS
and select Activate.
2In the Project Manager, double-click to expand the AEGS project.
3Double-click drawing AEGS11 to open it.
4Click Project tab ➤ Other Tools panel ➤ Title Block Update.
The Update Title Block dialog box displays.
1734 | Chapter 23 Tutorials
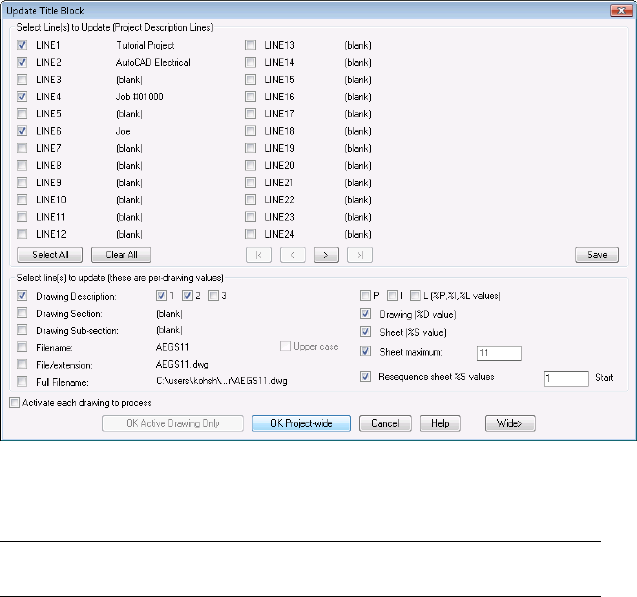
5Select the project and drawing values to update on the title block.
■LINE1
■LINE2
■LINE4
■LINE6
■Drawing Description: 1 and 2
■Drawing (%D value)
■Sheet (%S value)
■Sheet maximum
■Resequence sheet %S values: 1
6Click OK Project-Wide.
7Select drawings AEGS06 through AEGS11 to process. Click Process v.
NOTE Drawings AEGS01 through AEGS05 are supplied with the WD_TB
attribute on the title block for this exercise.
WDT file method | 1735

8Click OK.
Customize project description labels
The title block and project description dialog boxes in AutoCAD Electrical
display generic labels like “LINE1”, “LINE2”, and so on. You can change these
labels so they match up with the link to the title block. For example, you have
linked the AutoCAD Electrical data “LINE4” value to the “JOB#” attribute on
the title block. What you want to see when AutoCAD Electrical displays a title
block-related dialog box is not “LINE4” but “Job Number.” A text file with a
WDL extension defines the custom labels.
1Use any generic text editor like Notepad or Wordpad and start a new text
file.
2Enter the lines as shown:
LINE1 = Title 1
LINE2 = Title 2
LINE3 = Title 3
LINE4 = Job Number
1736 | Chapter 23 Tutorials

LINE5 = Date
LINE6 = Drawn By
LINE7 = Engineer
LINE8 = Checked By
LINE9 = Scale
3Save the file as AEGS_WDTITLE.WDL in the project folder.
■Windows XP: Documents and Settings\{username}\My Documents\Acade
{version}\Aedata\Proj\Aegs
■Windows Vista, Windows 7: Users\{username}\Documents\Acade
{version}\Aedata\Proj\Aegs
4Switch over to AutoCAD Electrical.
5Click Project tab ➤ Project Tools panel ➤ Manager.
6If AEGS is not the active project, in the Project Manager, right-click AEGS
and select Activate.
7In the Project Manager, right-click the project name, and select
Descriptions.
The labels match the values in the WDL file.
WDT file method | 1737

Wiring
Wiring - Introduction
Insert and modify wires and ladders.
20 minutesTime required
Copy all files located inPrerequisites:
Documents and Settings\{username}\My Documents\Acade {version}\Aedata\Tutorial\Ae-
gs\Wiring
Windows XP
to
Documents and Settings\{username}\My Documents\Acade {version}\Aedata\Proj\Aegs
Users\{username}\Documents\Acade {version}\Aedata\Tutorial\Aegs\WiringWindows Vista,
toWindows 7
Users\{username}\Documents\Acade {version}\Aedata\Proj\Aegs
You learn to:
■Understand wires
■Insert wires
■Add ladder rungs
■Trim wires
■Insert a ladder
■Resequence ladder line reference numbers
1738 | Chapter 23 Tutorials

About wires
AutoCAD Electrical treats AutoCAD® line entities as wires when the lines are
placed on an AutoCAD Electrical defined wire layer. The number of wire layers
available in AutoCAD Electrical is unlimited. These lines get tagged with wire
numbers and show up in various wire connection reports.
Two wire segments connect if the end of one wire segment touches or falls
within a small trap distance of any part of the other wire segment. This
connection can be at the end of the other wire or anywhere along the length
of the other wire.
If the wire end falls within a trap distance from the wire connection-point
attribute of a component, AutoCAD Electrical considers a wire connected to
a component.
The following rules determine the wire layer for a new wire segment:
■Wires that begin or end in space, or begin and end at a component
connection point. They are put on the current layer (if it is a wire layer),
or on the first wire layer AutoCAD Electrical finds in a layer name search.
■Wires that begin at an existing wire are put on the same layer as the
beginning wire.
■Wires that begin in space or at a component and end at an existing wire
take on the layer of the ending wire.
Insert wiring
You can start or end a wire segment in empty space, from an existing wire
segment, or from an existing component. If you start from a component, the
wire segment snaps to the wire connection terminal closest to your pick point
on that symbol. If the wire segment ends at another wire segment, a DOT
(block name wddot.dwg) is applied if appropriate. If it ends at another
component, the segment connects to the wire connection terminal closest to
your pick point on that symbol.
NOTE When inserting wires, if a wire already occupies a wire connection point,
the new wire is drawn as an angled wire connection.
About wires | 1739
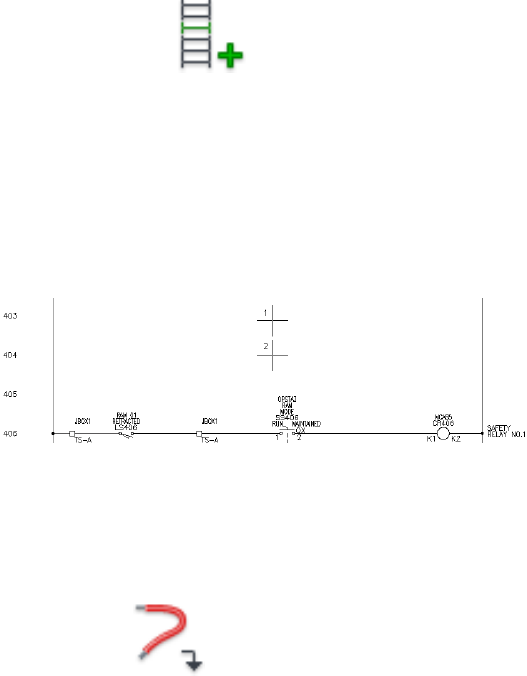
Insert wiring
1If AEGS is not the active project, in the Project Manager, right-click AEGS
and select Activate.
2In the Project Manager, double-click AEGS to expand the drawing list.
3In the Project Manager, Project Drawing List, double-click AEGS04.dwg.
4Zoom in on the upper left corner of the drawing. Make sure the hot and
neutral vertical wires are displayed.
5Click Schematic tab ➤ Edit Wires/Wire Numbers panel ➤ Modify Ladder
drop-down ➤ Add Rung.
6Respond to the prompts as follows:
Add rung passing through this location or [wiretype (T)]:
Select a location between the two vertical bus wires beside line reference 403
(1)
Add rung passing through this location or [wiretype (T)]:
Select a location between the two vertical bus wires beside line reference 404,
underneath the newly created rung (2), press ENTER
Two horizontal wires are created automatically between the vertical bus
wires at the closest line reference location.
Create two vertical wires between two horizontal wires
1Click Schematic tab ➤ Insert Wires/Wire Numbers panel ➤ Insert Wires
drop-down ➤ Wire.
2Respond to the prompts as follows:
1740 | Chapter 23 Tutorials
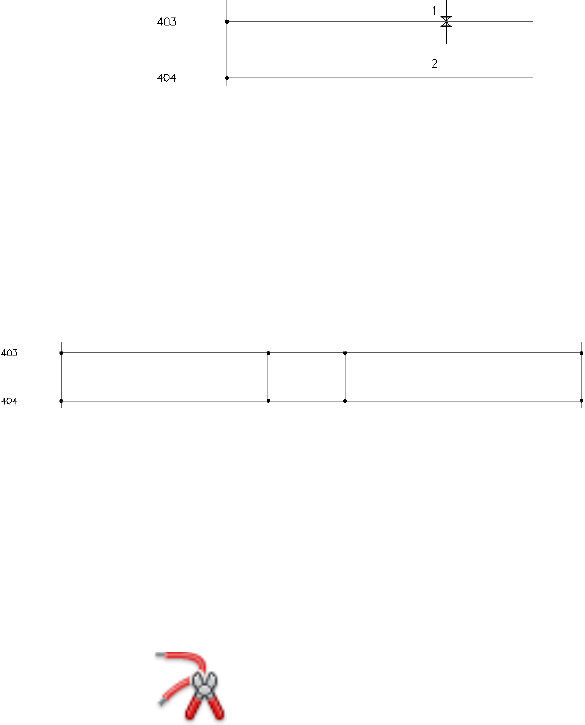
Specify wire start or [wireType/X=show connections]:
Select the top wire at line reference 403(1)
Specify wire end or [V=start Vertical/H=start
Horizontal/Continue]: Select the lower wire at line reference 404 (2)
The color of temporary graphics changes for a new wire when AutoCAD
Electrical can connect the wire to an existing wire.
Each component wire connection point displays as a green x at the wire
connection when you enter X + ENTER during wire insertion. If you pan
or zoom, repeat the command to view the wire connection points.
3Insert another wire to the right of the new wire.
4Press ENTER to exit the command.
The inserted wires resemble the following image.
Trim a wire
After you insert wires, you can trim them. The Trim Wire tool removes wire
segments. You can trim single or multiple wires.
Trim a wire
1Click Schematic tab ➤ Edit Wires/Wire Numbers panel ➤ Trim Wire.
2Respond to the prompts as follows:
Fence/Crossing/Zext/<Select wire to TRIM>:
Specify the wire segment at line reference 404 between the two vertical wires
(1), right-click
Trim a wire | 1741
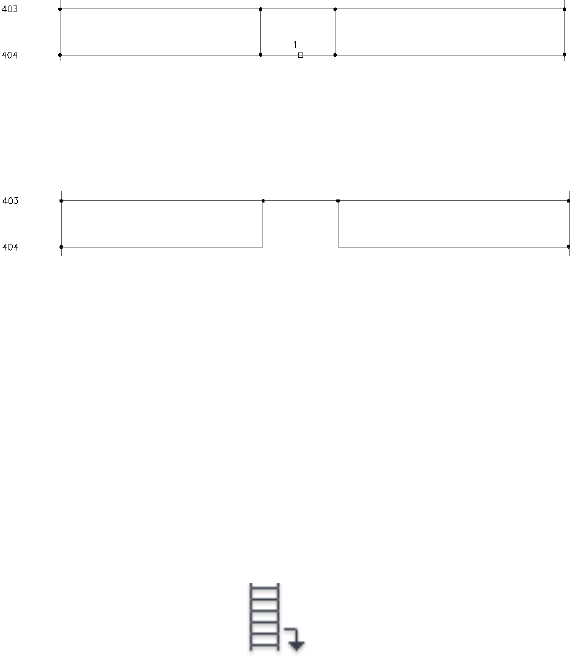
Wire segments are trimmed back to a connecting dot, a component, or
completely if neither is encountered along the segment. Any connection
dots that are no longer needed are removed.
The trimmed wire resembles the following image.
Insert a single-phase ladder
You can insert a ladder into a drawing at any time. A drawing can have
multiple ladders, as well as single-phase and three-phase ladders. The ladders
can have different parameters, such as rung spacing, number of rungs, and
ladder width.
Insert a single-phase ladder
1Open AEGS05.dwg.
2Click Schematic tab ➤ Insert Wires/Wire Numbers panel ➤ Insert Ladder
drop-down ➤ Insert Ladder.
3In the Insert Ladder dialog box, specify:
Width: 9.000
Spacing: 1.0000
1st Reference: 519
Index: 1
Rungs: 18
Phase: 1 Phase
Draw Rungs: Yes
Skip: 0
1742 | Chapter 23 Tutorials
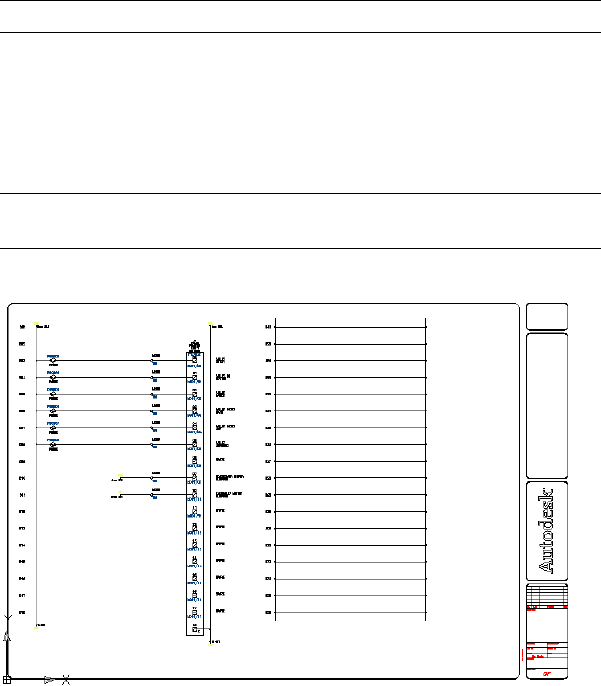
You do not specify the Length since it is automatically calculated once
the first Reference, Index, and Rungs are specified.
NOTE Reference 519 represents Page 5, Reference 19.
4Click OK.
5Respond to the prompts as follows:
Specify start position of first rung or [wireType]:
Enter 16, 21 press ENTER
NOTE You can also specify the start position of the first rung by left-clicking
a location on the drawing with your mouse.
A single phase ladder is inserted in the drawing.
Resequencing ladders
AutoCAD Electrical drawings can be easily renumbered and retagged with a
minimum of manual clean-up. You can resequence line reference numbers,
component tags, and wire numbers. It is useful when a drawing has been
copied from a previous project and the line reference numbers and tagging
format of the drawing do not conform to the project requirements.
Resequencing ladders | 1743
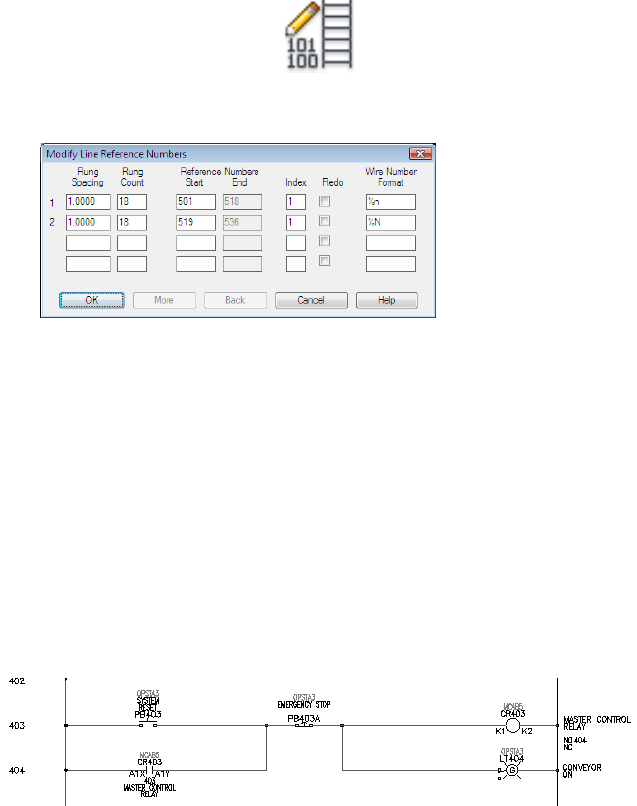
Resequence ladder line reference numbers
1Click Schematic tab ➤ Edit Wires/Wire Numbers panel ➤ Modify Ladder
drop-down ➤ Revise Ladder.
The Modify Line Reference Numbers dialog box displays a list of ladders
in the drawing.
2Change the beginning line reference numbers for each ladder. Change
the first ladder to 101 (column 1, line 01) and the second ladder to 201
(column 2, line 01).
3Click OK.
The reference numbers update along each ladder.
Schematic components
Schematic components - Introduction
Insert and modify schematic components.
45 minutesTime required
Copy all files located inPrerequisites:
1744 | Chapter 23 Tutorials
Documents and Settings\{username}\My Documents\Acade {version}\Aedata\Tutorial\Ae-
gs\Schematic components
Windows XP
to
Documents and Settings\{username}\My Documents\Acade {version}\Aedata\Proj\Aegs
Users\{username}\Documents\Acade {version}\Aedata\Tutorial\Aegs\Schematic compon-
ents
Windows Vista,
Windows 7
to
Users\{username}\Documents\Acade {version}\Aedata\Proj\Aegs
You learn to:
■Understand schematic components
■Insert a parent component
■Scoot a component
■Insert a child component
■Align components
■Edit a component
■Link components
■Edit catalog information
■Add a catalog entry
About schematic components
An AutoCAD Electrical schematic component is an AutoCAD® block with
certain expected attributes. When inserting components, use AutoCAD
Electrical tools to:
■Break wires
■Assign unique component tags
■Cross-reference related components
■Enter values for catalog information, component descriptions, location
codes, and so on
About schematic components | 1745
AutoCAD Electrical supplies a schematic symbol dialog box for finding and
inserting schematic components. It also triggers some additional features.
■Automatic wire breaks
■Component tagging
■Real-time cross-referencing
■Component annotation
Inserting components
AutoCAD Electrical employs a parent/child relationship for schematic
components. The parent coil symbol and the child contact symbols represent
a relay coil with a certain number of contacts. When the parent coil symbol
is inserted, it is assigned a unique component tag. When the child contact
symbols are inserted, the child is related to the parent and the parent tag is
assigned to the child symbol.
In this exercise, you insert components on the wires previously defined in
AEGS04.dwg.
Insert a parent component
1If AEGS is not the active project, in the Project Manager, right-click AEGS
and select Activate.
2In the Project Manager, double-click AEGS to expand the drawing list.
3In the Project Manager, Project Drawing List, double-click AEGS04.dwg.
4Zoom in on the upper left corner of the drawing.
5Click Schematic tab ➤ Insert Components panel ➤ Insert Components
drop-down ➤ Icon Menu.
6In the Insert Component: JIC Schematic Symbols dialog box, click Relays/
Contacts.
7In the JIC: Relays and Contacts dialog box, click Relay Coil.
1746 | Chapter 23 Tutorials
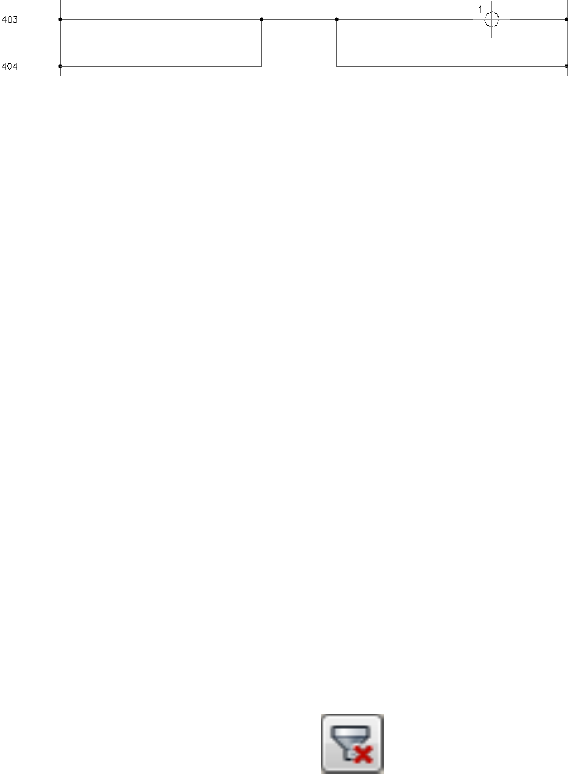
8Respond to the prompts as follows:
Specify insertion point:
Position the component on the wire at line reference 403 near the neutral wire
and click (1)
If you select directly on the wire or near to it, the coil symbol breaks the
underlying ladder wire and reconnects. If the underlying wire did not
break, you did not select close enough to the wire. To try again, click
Cancel on the Insert/Edit Component dialog box. Right-click or press
ENTER to repeat the command. Turning on Snap helps (0.125 is a good
setting to use).
This tool inserts components into alignment with underlying wires, it
does not align components side-to-side. If you want to insert components
in neat columns, you have three options: use AutoCAD Snap when
inserting components; use the Scoot command to move components and
connected wires in place; or use the Align Component tool.
9In the Insert/Edit Component dialog box, verify that the Component
Tag is set to CR403.
AutoCAD Electrical automatically determines the unique tag name for
the new relay based on the line reference location that you inserted the
symbol on. “CR” indicates that it is a control relay and “403” indicates
that the symbol is on line reference 403. If you inserted this symbol on
line reference 404 then the tag name would be “CR404.”
You can assign a catalog number to the component that can be extracted
into reports. There are two pieces of BOM catalog information:
manufacturer code and catalog number. These values are carried as
invisible attributes on the symbol. You can type in values for each or
select the BOM information from an on-line catalog database file.
10 In the Catalog Data section, click Lookup.
11 On the Parts Catalog dialog box, click to clear all predefined
filters. Click Yes to confirm.
12 On the Parts Catalog dialog box each column has an edit field to enter
search text. Enter:
Inserting components | 1747
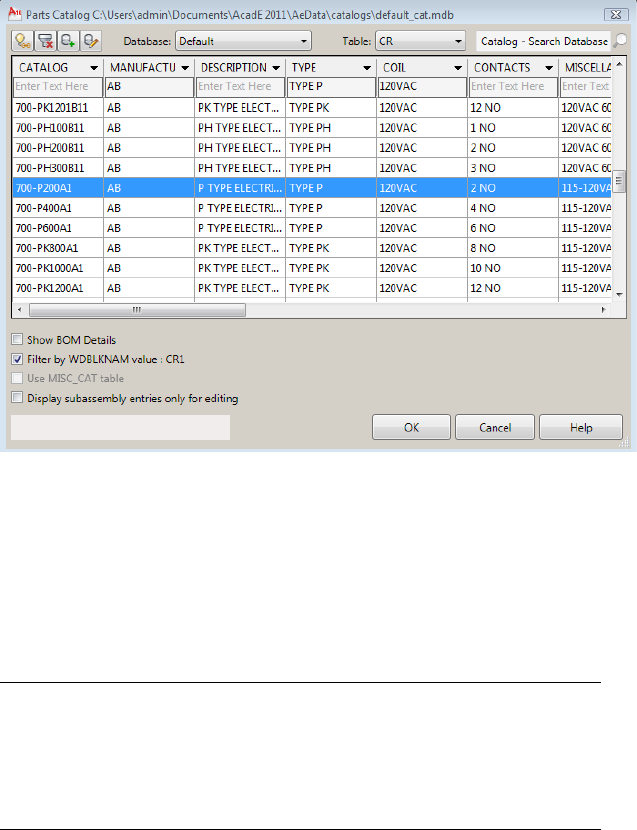
MANUFACTURER: AB
TYPE: TYPE P
COIL: 120VAC
13 Change the catalog assignment to 700-P200A1.
14 Click the Show BOM Details check box.
The dialog box expands to show the BOM information. Review the BOM
information associated with the selected part number.
15 In the Parts catalog dialog box, click OK.
The selected manufacturer code and catalog number display in the
Insert/Edit Component dialog box. When you click OK on the dialog
box, the values transfers to the symbol.
NOTE Sample catalog information is provided with AutoCAD Electrical in
Access Database format (.mdb). If your company uses its own internal coding
system instead of manufacturer catalog numbers, substitute those numbers
into catalog database files of AutoCAD Electrical. If you use your own system
and reference a number of vendors, extra user fields are available in all the
sample database files.
1748 | Chapter 23 Tutorials

16 In the Insert/Edit Component dialog box, Description section, specify:
Line 1: MASTER CONTROL
Line 2: RELAY
Up to three lines of description text can be entered as a description for
components. If the third description line is unavailable, the symbol does
not carry an attribute for a third line of description.
NOTE You can specify a description by entering text or by clicking Defaults
to select from a list of standard component descriptions.
17 In the Insert/Edit Component dialog box, Location code section, click
Drawing.
AutoCAD Electrical does a quick read of the drawing file and returns a
list of all location codes used so far.
18 In the All Locations - Drawing dialog box, select MCAB5 and click OK.
NOTE You can also include an external “LOC” location list in the project
“LOC” list to help with consistency. To use this feature, create a file called
default.loc and put it in an AutoCAD Electrical search directory. The format
for this text file is each location on its own line in the file with no leading
spaces. You can also create a project-specific file by naming it the same as
your project but with a .loc extension.
19 In the Insert/Edit Component dialog box, the pin values are inserted
based on the selected catalog number:
Pins: 1: K1
Pins: 2: K2
Inserting components | 1749
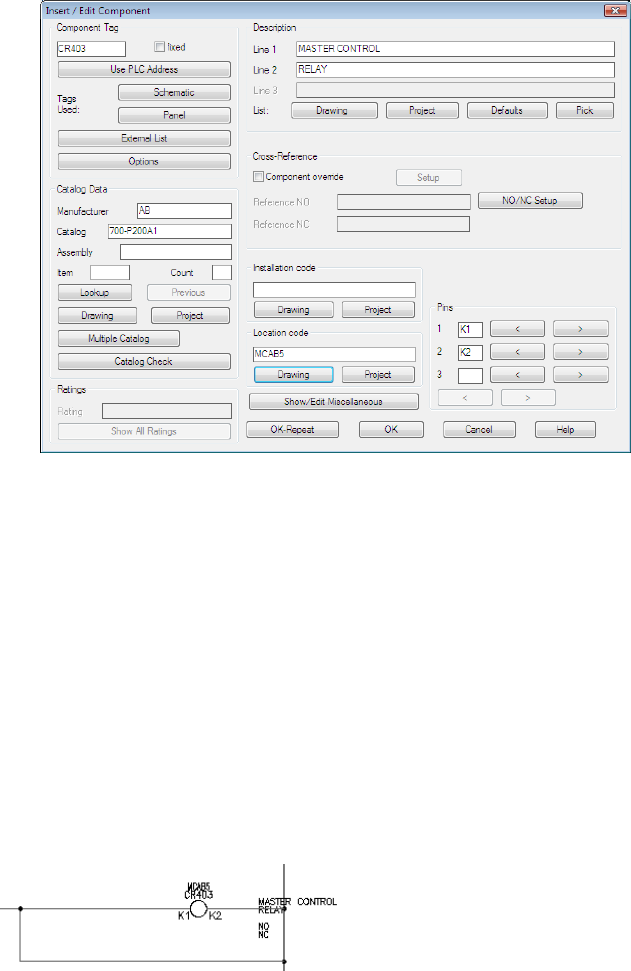
20 In the Insert/Edit Component dialog box, click OK.
Any values entered here are saved as attribute values on the symbol itself.
Relocating components
If the component was not inserted in the correct location, you can scoot the
component. Use the Scoot tool to select a component or wire number and
slide it back and forth along the wire while keeping everything connected.
You can select a wire or a whole rung of circuitry and scoot it to a new position.
If there are any parent components among the scooted items, you are asked
if you want to retag the scooted components.
The Scoot tool works on wire numbers, components, terminals, PLC I/O
modules, jogs in dashed link lines, signal arrows, wires, and wires with
wire-crossing loops.
1750 | Chapter 23 Tutorials
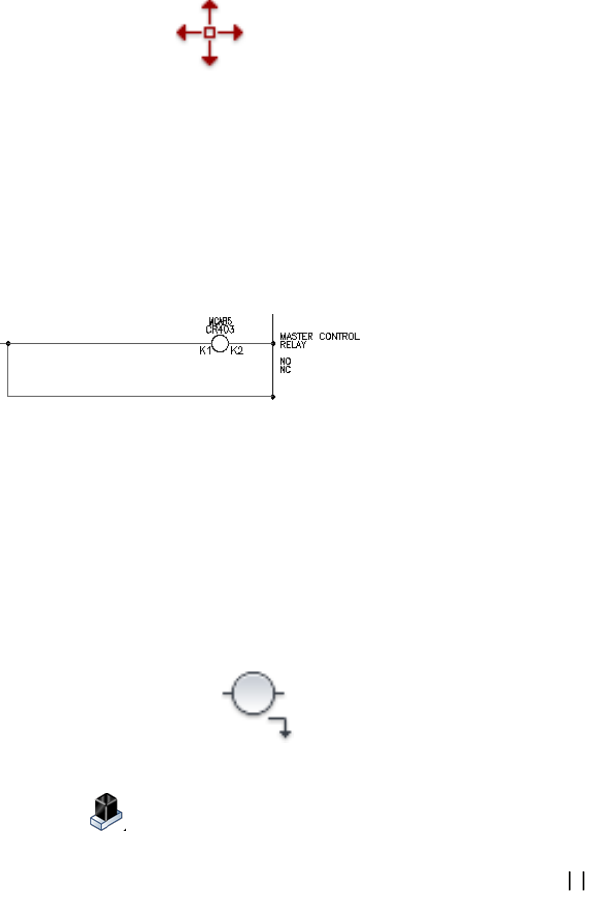
Scoot a component
1Click Schematic tab ➤ Edit Components panel ➤ Modify Components
drop-down ➤ Scoot.
2Respond to the prompts as follows:
Select component, wire, or wire number for SCOOT:
Select the component that was inserted at line reference 403
The cursor changes to a box.
Select component, wire, or wire number for SCOOT: to
Move the cursor to the right and click, right-click to exit the command
The component moves to its new location.
You can use the Scoot tool to grab a component or a wire number and
slide it back and forth along a wire. You can grab a wire or a whole rung
of circuitry and scoot it to a new position, while keeping everything
connected.
The steps to insert a parent component and a child component are the same,
except when you annotate the symbol.
Insert a child component
1Click Schematic tab ➤ Insert Components panel ➤ Insert Components
drop-down ➤ Icon Menu.
2In the Insert Component: JIC Schematic Symbols dialog box, click Relays/
Contacts.
3In the JIC: Relays and Contacts dialog box, click Relay NO Contact.
Relocating components | 1751
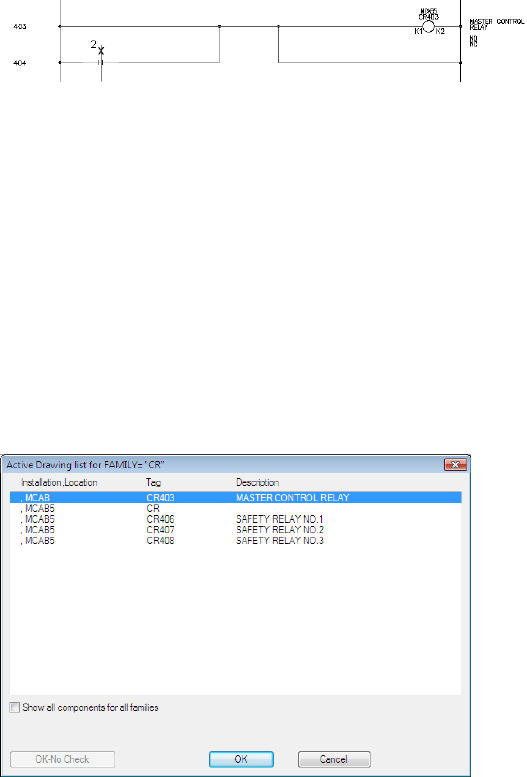
4Respond to the prompts as follows:
Specify insertion point:
Position the cursor on the wire at line reference 404 near the hot wire and click
(1)
The Insert/Edit Child Component dialog box displays. Notice that
AutoCAD Electrical did not automatically assign a tag name for the relay
contact; there is just a generic “CR” in the edit box. Determine the relay
contact tag name. A relay contact is a child component that must link
to a parent relay coil on a drawing in the active project. The child gets
the same tag name that is found on the parent relay coil.
Assign the tag name by clicking Parent/Sibling and picking the parent in
the drawing. Or, click Drawing or Project to select from a list of
components with the same family name.
5In the Insert/Edit Child Component dialog box, Component Tag section,
click Drawing.
6In the Active Drawing list for FAMILY=”CR” dialog box, select:
MCAB5 CR403 MASTER CONTROL RELAY
7Click OK.
The values of the parent are immediately transferred to the contact.
1752 | Chapter 23 Tutorials
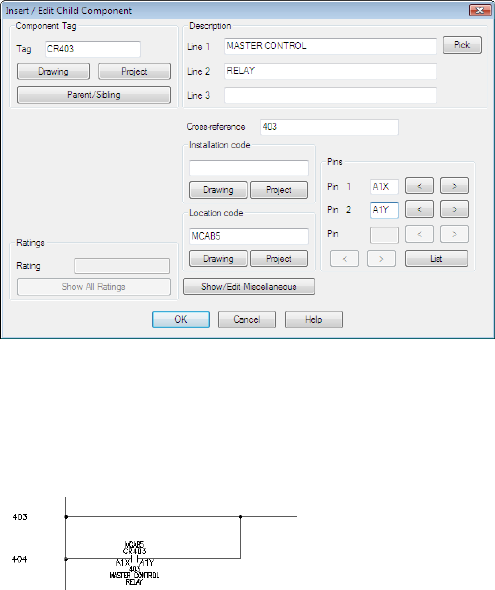
8In the Insert/Edit Child Component dialog box, verify that the following
options are specified:
Component Tag: CR403
Description: Line 1: MASTER CONTROL
Description: Line 2: RELAY
Cross-reference: 403
Location code: MCAB5
Pins: Pin 1: A1X
Pins: Pin 2: A1Y
9In the Insert/Edit Child Component dialog box, click OK.
The child component is inserted. It is cross-referenced in real time. The
coil is annotated with the line reference number of the new child contact.
The child contact gets annotated with the line reference location of the
parent coil.
Relocating components | 1753
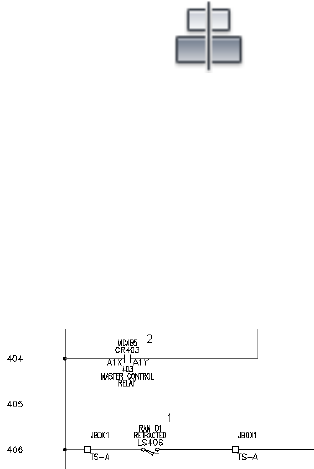
Aligning components
Align the normally open relay contact with an existing component. After you
insert a component, you can align or edit it as necessary.
Align a component
1Click Schematic tab ➤ Edit Components panel ➤ Modify Components
drop-down ➤ Align.
2Respond to the prompts as follows:
Pick component to align with (Horizontal/<Vertical>):
Select the normally open limit switch component near the hot wire at line
reference 406 (1)
A dashed line displays.
Select objects:
Select the previously inserted child contact component near the hot wire at line
reference 404 (2), right-click
The aligned component is placed.
Inserting components continued
Now you insert a system reset push button, pilot light, and an emergency stop
push button to make up the circuit.
1754 | Chapter 23 Tutorials
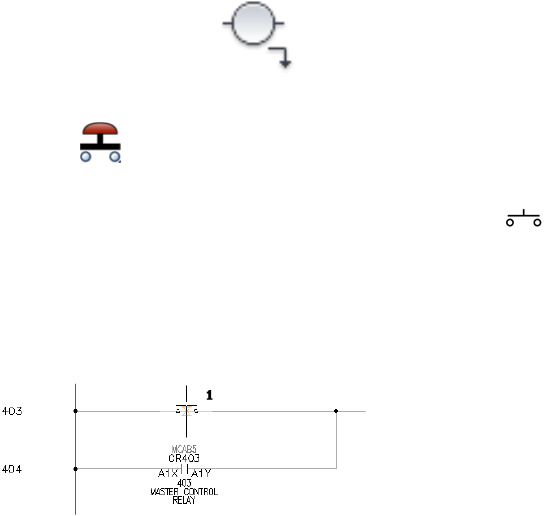
Insert a system reset button
1Click Schematic tab ➤ Insert Components panel ➤ Insert Components
drop-down ➤ Icon Menu.
2In the Insert Component: JIC Schematic Symbols dialog box, click Push
Buttons.
3In the JIC: Push Buttons dialog box, click Push Button NO.
4Respond to the prompts as follows:
Specify insertion point:
Position the push button on the wire at line reference 403 near the hot wire
and click (1)
5In the Insert/Edit Component dialog box, verify the following:
Component Tag: PB403
AutoCAD Electrical automatically assigned the tag name based on the
line reference.
6In the Descriptions section, specify:
Line 1: SYSTEM
Line 2: RESET
7In the Location code section, click Drawing.
8In the All Locations - Drawing dialog box, select OPSTA3 and click OK.
9In the Insert/Edit Component dialog box, click OK.
Inserting components continued | 1755
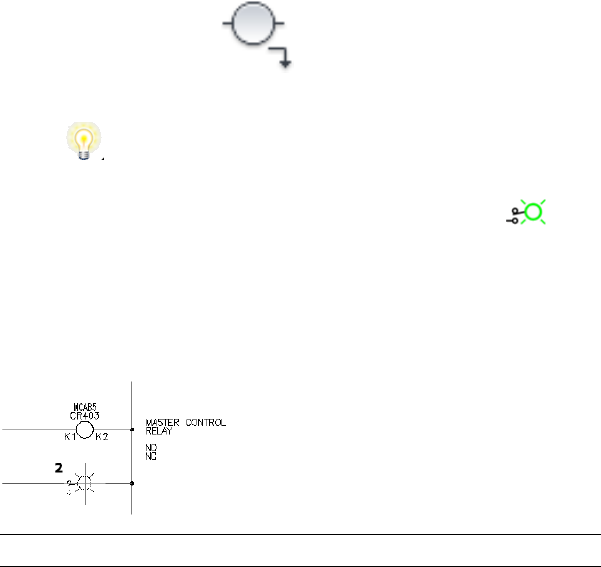
Insert a pilot light
1Click Schematic tab ➤ Insert Components panel ➤ Insert Components
drop-down ➤ Icon Menu.
2In the Insert Component: JIC Schematic Symbols dialog box, click Pilot
Lights.
3In the JIC: Pilot Lights dialog box, click Green Press to Test.
4Respond to the prompts as follows:
Specify insertion point:
Position the pilot light on the wire at line reference 404 near the neutral wire
and click (2)
TIP Having Snap turned on makes positioning the pilot light easier.
5In the Insert/Edit Component dialog box, verify:
Component Tag: LT404
6In the Descriptions section, specify:
Line 1: CONVEYOR
Line 2: ON
7In the Location code section, click Drawing.
8In the All Locations - Drawing dialog box, select OPSTA3 and click OK.
9In the Insert/Edit Component dialog box, click OK.
1756 | Chapter 23 Tutorials
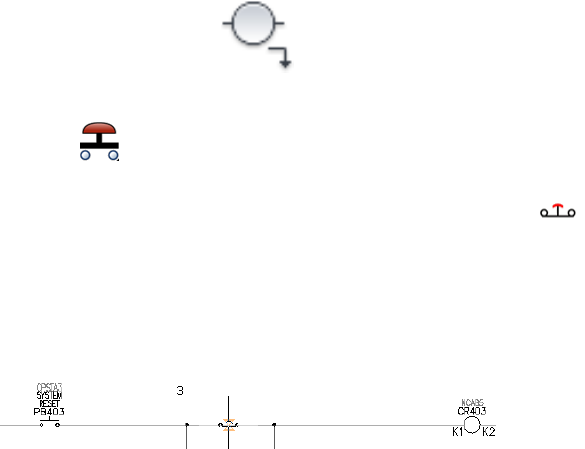
Insert a push button for emergency stop
1Click Schematic tab ➤ Insert Components panel ➤ Insert Components
drop-down ➤ Icon Menu.
2In the Insert Component: JIC Schematic Symbols dialog box, click Push
Buttons.
3In the JIC: Push Buttons dialog box, click Mushroom Head NC.
4Respond to the prompts as follows:
Specify insertion point:
Position the push button on the middle of the wire at line reference 403 and
click (3)
5In the Insert/Edit Component dialog box, verify:
Component Tag: PB403A
AutoCAD Electrical automatically assigned the tag name based on the
line reference. It added the “A” suffix since it is your second push button
on this line reference.
6In the Descriptions section, specify:
Line 1: EMERGENCY STOP
7In the Location code section, click Drawing.
8In the All Locations - Drawing dialog box, select OPSTA3 and click OK.
9In the Insert/Edit Component dialog box, click OK.
Your finished schematic resembles the following:
Inserting components continued | 1757
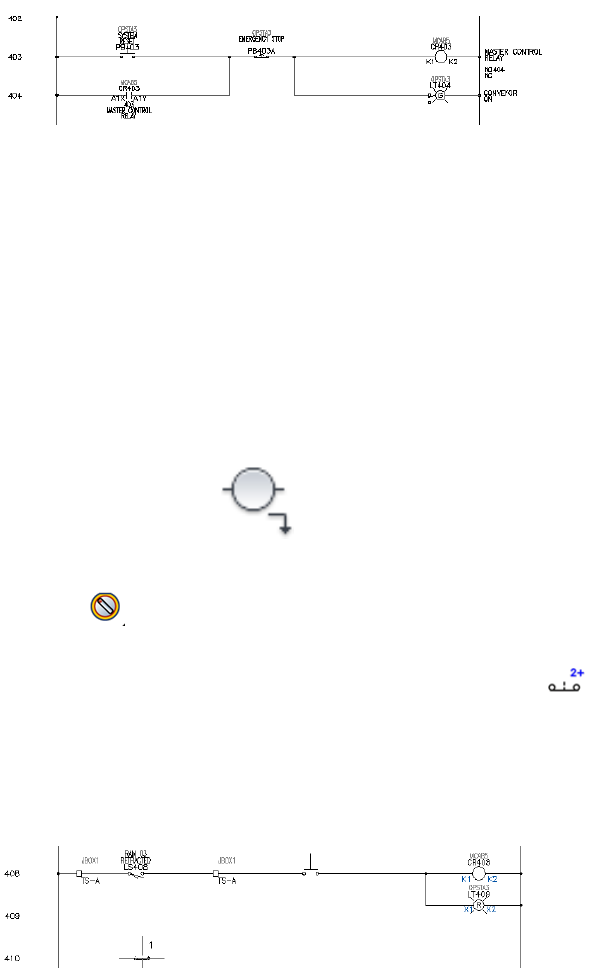
Editing components
You can go back to a component at any time and change it. You can change
description, tag, catalog number, location code, terminal numbers, and rating
values using the Edit Component tool.
Insert a child contact
1Zoom in on the blank ladder rung at line reference 410.
2Press F9 to turn on SNAP .
3Click Schematic tab ➤ Insert Components panel ➤ Insert Components
drop-down ➤ Icon Menu.
4In the Insert Component: JIC Schematic Symbols dialog box, click Selector
Switches.
5In the JIC: Selector Switches dialog box, click 2nd+ NC Contact.
6Respond to the prompts as follows:
Specify insertion point:
Position the selector switch at line reference 410 near the left side of the ladder
and click (1)
1758 | Chapter 23 Tutorials
7In the Insert/Edit Child Component dialog box, click OK.
Insert a pilot light
1Click Schematic tab ➤ Insert Components panel ➤ Insert Components
drop-down ➤ Icon Menu.
2In the Insert Component: JIC Schematic Symbols dialog box, click Pilot
Lights.
3In the JIC: Pilot Lights dialog box, click Blue Press to Test.
4Respond to the prompts as follows:
Specify insertion point:
Position the pilot light at line reference 410 near the neutral wire but exactly
in line with the selector switch and click (2)
5In the Insert/Edit Component dialog box, verify:
Component Tag: LT410
6In the Descriptions section, specify:
Line 1: MAINT
Line 2: MODE
7In the Insert/Edit Component dialog box, click OK.
Edit a child contact
1Press F9 to turn off SNAP .
Editing components | 1759
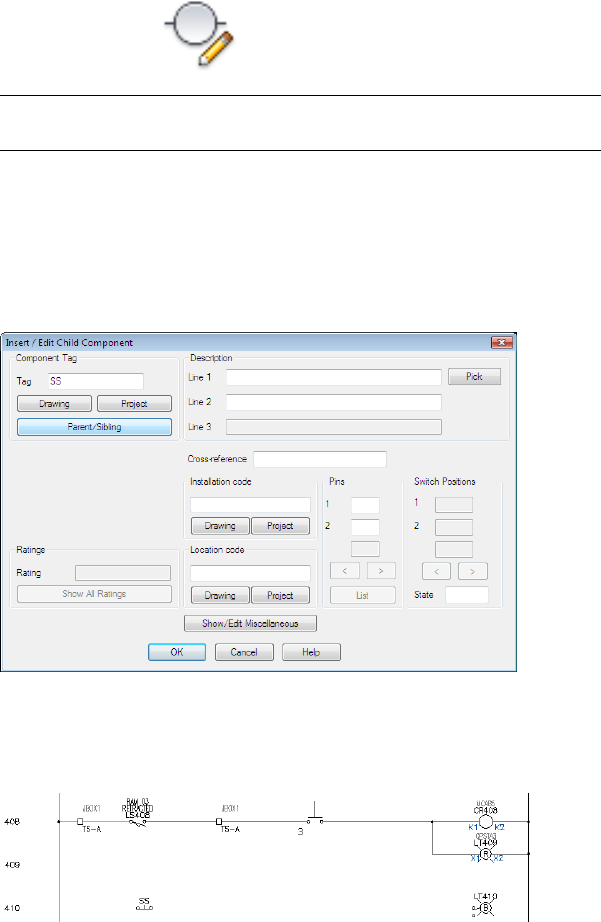
2Click Schematic tab ➤ Edit Components panel ➤ Edit Components
drop-down ➤ Edit.
NOTE You can also right-click on a component and select Edit Component
from the context menu.
3Respond to the prompts as follows:
Select component/cable/location box to EDIT:
Select the selector switch on line reference 410
4In the Insert/Edit Child Component dialog box, Component Tag section,
click Parent/Sibling.
5Respond to the prompts as follows:
Select component:
Select the bottom sibling contact (3) of the existing switch on line reference 408
1760 | Chapter 23 Tutorials
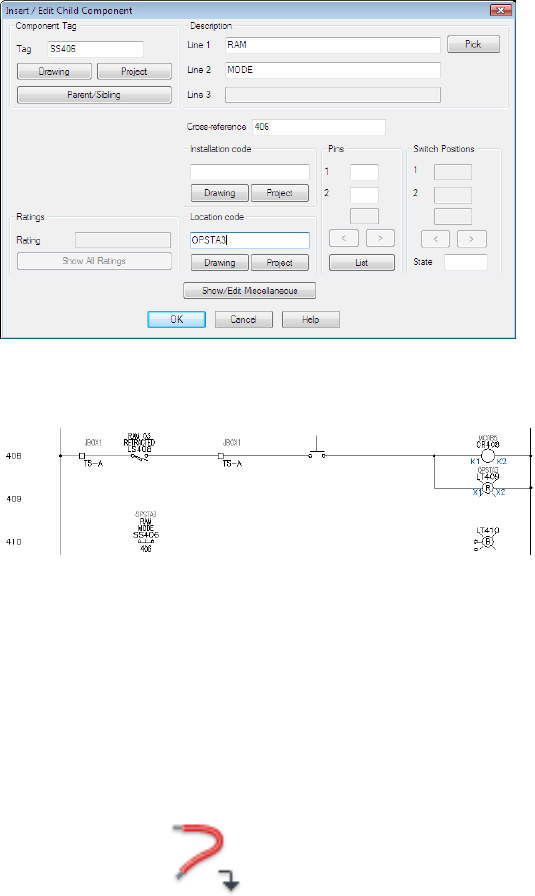
AutoCAD Electrical reads the sibling contact and transfers the appropriate
annotation to your new switch contact.
6In the Insert/Edit Child Component dialog box, click OK.
The sibling contact information displays on the drawing.
Linking components
In this exercise, you link the selector switch you inserted to the existing RAM
MODE selector switch residing on line reference 406 through 408 using dashed
link lines.
Connect components using wires
1Click Schematic tab ➤ Insert Wires/Wire Numbers panel ➤ Insert Wires
drop-down ➤ Wire.
2Respond to the prompts as follows:
Linking components | 1761
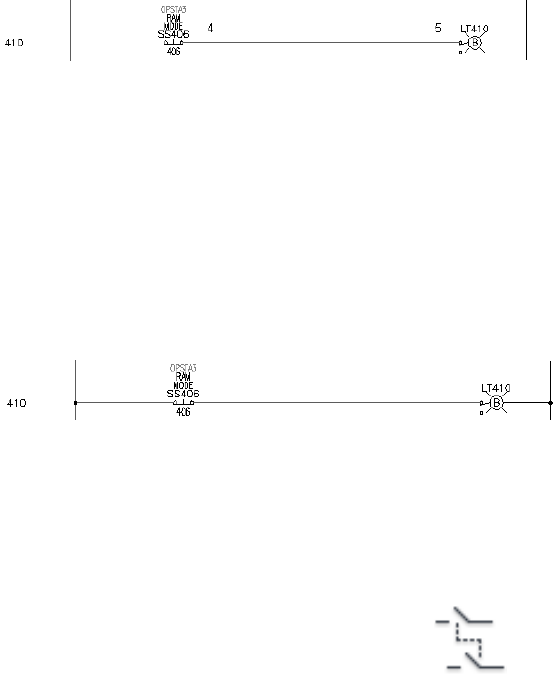
Specify wire start or [wireType/X=show connections]:
Click the wire connection point on the right-hand side of the switch contact (4)
Specify wire end or [Continue]:
Drag the wire to the right and click the wire connection point on the left-hand
side of the blue pilot light (5)
Specify wire start or [Scoot/wireType/X=show connections]:
Click the left-hand side of the switch contact
Specify wire end or [Continue]:
Drag the wire to the left and click the left-hand vertical bus wire
The wire automatically ends on the bus and inserts a wire connection
dot.
3Repeat the process to connect the right-hand side of the blue pilot light
to the vertical bus wire.
4Right-click and select Enter to finish creating the wire connections.
If you lay a wire over the top of a series of components, AutoCAD
Electrical automatically breaks and reconnects to the underlying wire
connection points.
Link components
1Click Schematic tab ➤ Insert Components panel ➤ Dashed Link Line
drop-down ➤ Link Components with Dashed Line.
2Respond to the prompts as follows:
Component to link from:
Click the contact of the switch on line reference 408 (6)
Component to link to:
Click anywhere on your new switch contact (7), right-click
1762 | Chapter 23 Tutorials
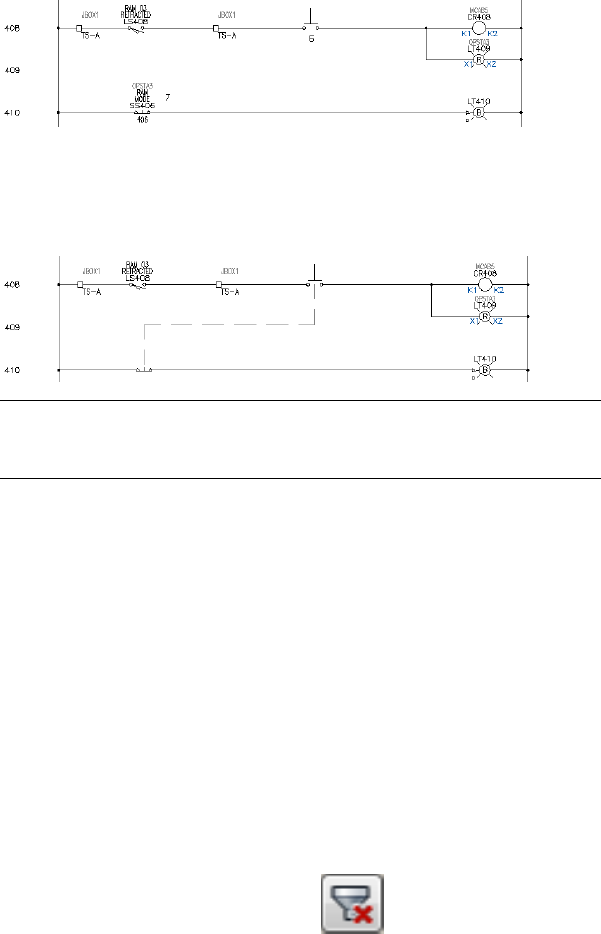
The annotation of the contact is changed to invisible. A dashed link line
is drawn from the bottom of the upper contact to the top of your new
contact.
Your finished schematic resembles the following:
NOTE The Scoot command is fully compatible with dashed line links. Scooting
one contact left or right causes both links to update automatically. You can
even scoot the horizontal “jog” in the dashed link line up or down.
Editing catalog information
Sample catalog information is supplied with AutoCAD Electrical. The
information is held in tables in an Access Database file (.mdb) that is populated
with sample vendor data.
You can use filter criteria in the catalog lookup to display catalog numbers
selectively for a component type.
Filter catalog data
1Right-click LT410 and select Edit Component.
2In the Insert/Edit Component dialog box, Catalog Data section, click
Lookup.
3On the Parts Catalog dialog box, click to clear all predefined
filters. Click Yes to confirm.
Editing catalog information | 1763
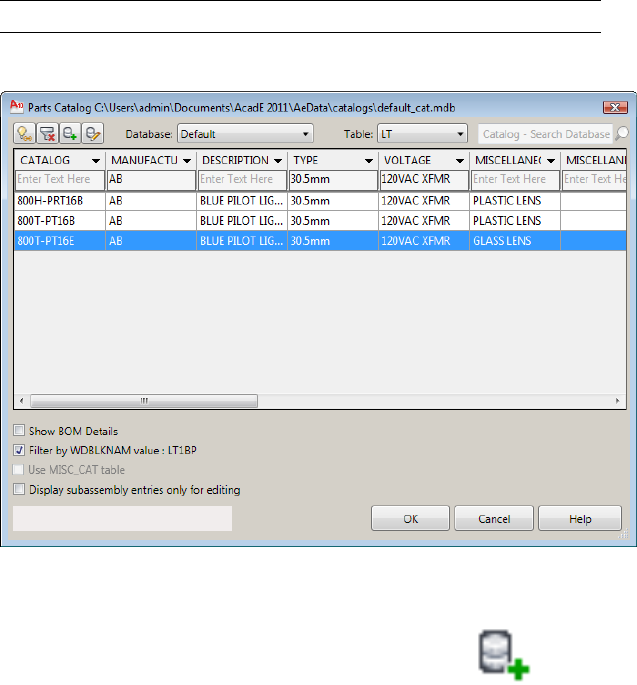
4On the Parts Catalog dialog box each column has an edit field to enter
search text. Enter:
Manufacturer: AB
Type: 30.5mm
Voltage: 120VAC XFMR
Each column also has a drop-down list containing the available field
values. You can set the filter criteria to get a different set of catalog
numbers. Each time you make a selection from one of these lists, the
catalog selection is filtered.
NOTE If there are too many unique values to display, the list is not available.
5Change the catalog assignment to 800T-PT16E.
Add a catalog entry
1In the Parts Catalog dialog box, click Add Catalog Entry.
1764 | Chapter 23 Tutorials
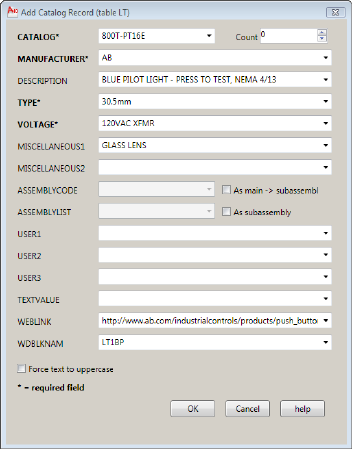
The entries are prefilled with the information for the currently assigned
catalog part number. It is easy to add a new entry with similar
information.
2In the Add Catalog Record dialog box, specify:
Catalog: BOG-123B
Manufacturer: BOGUS
The catalog lookup works most efficiently when field values that are
meant to be the same are the same in both spelling and capitalization.
The drop-down list for each field helps you maintain consistency as you
add new catalog items.
3Click the drop-down list for the Description field.
AutoCAD Electrical does a quick scan of the existing catalog file. It collects
and displays a list of all the different description field values found in
the catalog.
4Select BLUE PILOT LIGHT - PRESS TO TEST, NEMA 4/13 and click OK.
5In the Add Catalog Record dialog box, click the drop-down lists for Type,
Voltage, and Miscellaneous fields. Select the values shown in the following
image if not already selected.
Editing catalog information | 1765
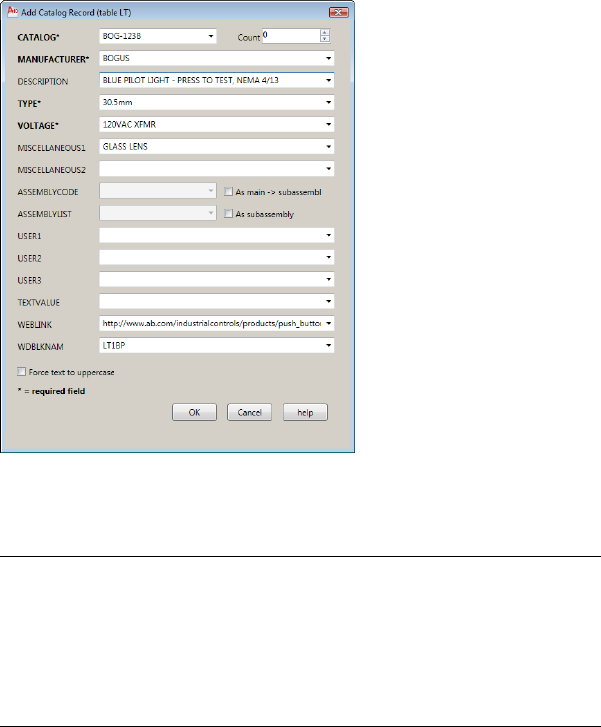
AutoCAD Electrical provides three blank user fields for your own internal
use. Each can be a maximum of 24 characters wide and are extracted into
BOM reports along with all the other fields.
NOTE You can add catalog entries with a subassembly. To link a subassembly
with the main, the catalog part numbers share the same codes. In the Edit
Catalog Record dialog box, select As main->sub, enter the ASSYCODE, and
click OK. The ASSYCODE must be unique since it links the main catalog item
with subassembly items. To add the subassembly item, in the Add Catalog
Record dialog box, create a catalog entry, select As sub, enter an
ASSEMBLYLIST code, and click OK.
6In the Add Catalog Record dialog box, click OK.
As the new entry is being added to the file, the Parts Catalog dialog box
displays.
7In the Parts Catalog dialog box, select the BOG-123B catalog entry and
click OK.
8In the Insert/Edit Component dialog box, click OK.
1766 | Chapter 23 Tutorials
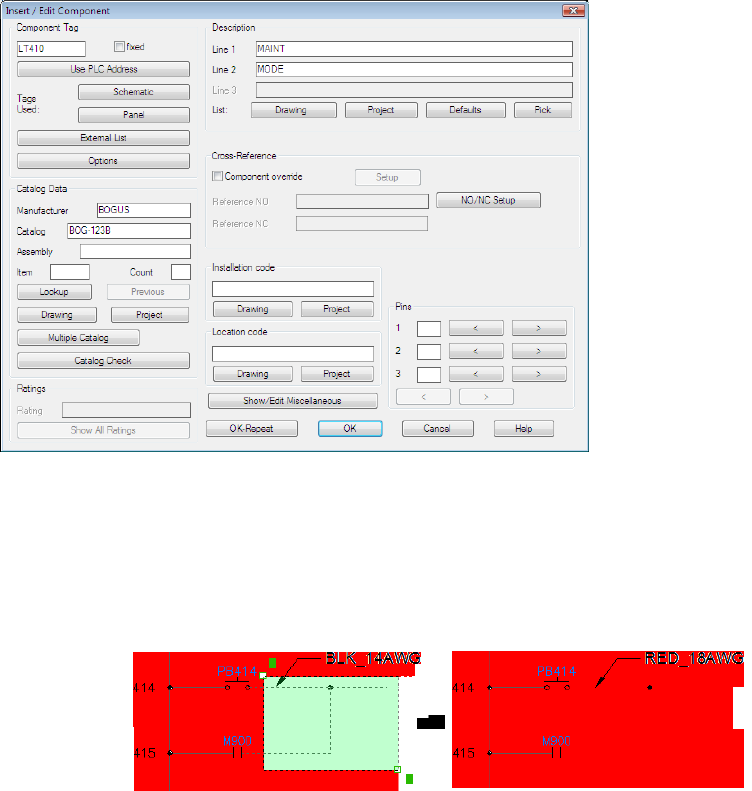
Wire layers
Wire layers - Introduction
Create and modify wire layers.
10 minutesTime required
Copy all files located inPrerequisites:
Documents and Settings\{username}\My Documents\Acade {version}\Aedata\Tutorial\Ae-
gs\Wire layers
Windows XP
Wire layers | 1767

to
Documents and Settings\{username}\My Documents\Acade {version}\Aedata\Proj\Aegs
Users\{username}\Documents\Acade {version}\Aedata\Tutorial\Aegs\Wire layersWindows Vista,
toWindows 7
Users\{username}\Documents\Acade {version}\Aedata\Proj\Aegs
You learn to:
■Create wire layers
■Change wire layer assignments
Creating a wire layer
Create wire layer
1If AEGS is not the active project, in the Project Manager, right-click AEGS
and select Activate.
2In the Project Manager, double-click AEGS to expand the drawing list.
3In the Project Manager, Project Drawing List, double-click AEGS04.dwg.
4Click Schematic tab ➤ Edit Wires/Wire Numbers panel ➤ Modify Wire
Type drop-down ➤ Create/Edit Wire Type.
The Create/Edit Wire Type dialog box lists all the valid wire layers that
are defined for the active drawing. The wire layer name and the wire
properties like color, size, and user-defined properties are listed in the
grid.
5Click inside the Wire Color column for a blank row and enter BLU as the
wire color.
6Click inside the Size column and enter 14AWG as the size.
The Layer Name is automatically created.
1768 | Chapter 23 Tutorials
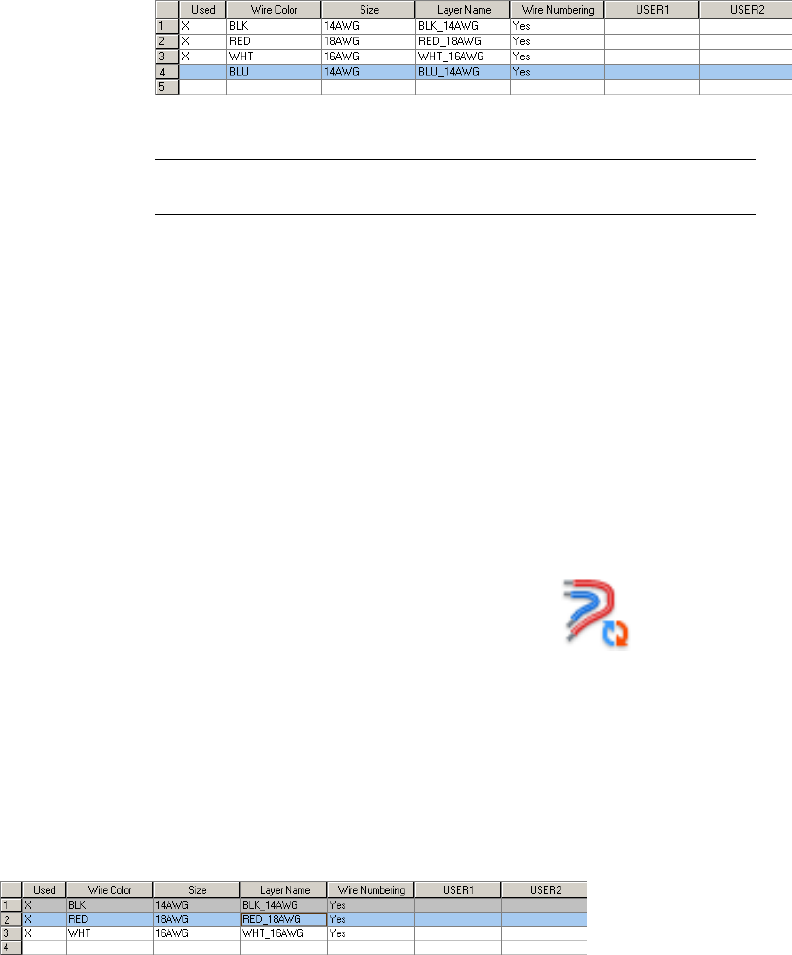
7Click Color in the Layer section. Select blue and click OK.
NOTE If you want the new wire layer to be the default, click Mark Selected
as Default.
8Click OK.
Changing a wire layer assignment
When a wire is inserted, the wire ends up on the first valid wire layer as defined
in the Drawing Properties dialog box. You can place wires on different wire
layers. You can use the AutoCAD® PROPERTIES command to move a wire to
the correct layer or you can use the Wire Layer utility.
Change wire layer assignments
1Zoom in on the upper left corner of the drawing.
2Click Schematic tab ➤ Edit Wires/Wire Numbers panel ➤ Modify Wire
Type drop-down ➤ Change/Convert Wire Type.
The Change/Convert Wire Type dialog box lists all the valid wire layers
that are defined for the active drawing. The wire layer name and the wire
properties like color, size, and user-defined properties are listed in the
grid. An “X” in the Used column indicates the layer name is currently
being used.
3Select RED_18AWG.
The wire type highlights in blue in the dialog box indicating that it is
the wire type to change.
Changing a wire layer assignment | 1769
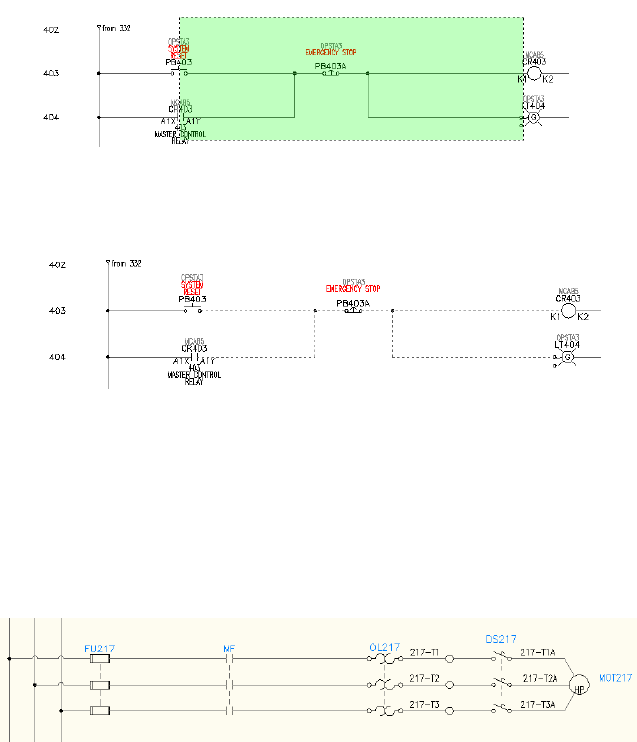
4Click OK.
5Respond to the prompts as follows:
Select Objects:
Window from left to right around the wires as shown and press ENTER
Before you press ENTER, the wires display as dashed lines to indicate that
they have been selected. Once you press ENTER the lines display in red
indicating that they have been moved to the RED_18AWG wire layer.
6Repeat to move any other wiring onto another wire layer.
Circuits
Circuits - Introduction
Create circuits with Circuit Builder. Save and insert a saved circuit.
60 minutesTime required
1770 | Chapter 23 Tutorials

Copy all files located inPrerequisites:
Documents and Settings\{username}\My Documents\Acade {version}\Aedata\Tutorial\Ae-
gs\Circuits
Windows XP
to
Documents and Settings\{username}\My Documents\Acade {version}\Aedata\Proj\Aegs
Users\{username}\Documents\Acade {version}\Aedata\Tutorial\Aegs\CircuitsWindows Vista,
toWindows 7
Users\{username}\Documents\Acade {version}\Aedata\Proj\Aegs
You learn to:
■Move a circuit
■Insert a circuit using Circuit Builder
■Save and insert a saved circuit
■Insert a saved circuit using WBLOCK
Move an existing circuit
When you move a circuit, most of the parent components contained in the
circuit automatically retag since the drawing is set up for reference-based
component tagging. In the process of moving the circuit, you change the
reference locations of the moved components. Related child components
update to match the new parent tags, including references on other drawings
in the project.
NOTE Tagging updates vary depending on your default tagging configurations.
Move the location of a circuit
1If AEGS is not the active project, in the Project Manager, right-click AEGS
and select Activate.
2In the Project Manager, double-click AEGS to expand the drawing list.
3In the Project Manager, Project Drawing List, double-click AEGS02.dwg.
4Zoom in on the lower left corner of the drawing. Make sure the 3-phase
motor circuit at line reference 215 is visible.
Move an existing circuit | 1771
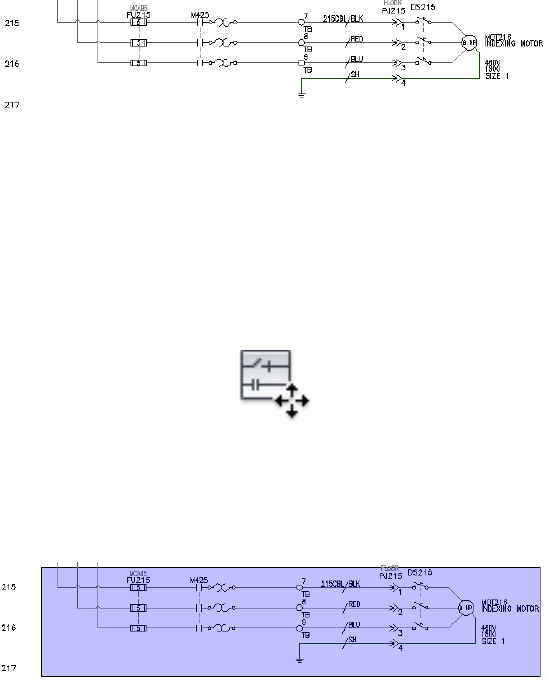
This circuit has component tags
■“FU215” on the 3-pole fuse
■“215CBL” on the multi-conductor cable
■“DS215” on the disconnect switch
■“MOT216” on the motor
5Click Schematic tab ➤ Edit Components panel ➤ Circuit
drop-down ➤ Move Circuit.
6Respond to the prompts as follows:
Select Objects:
Window select the circuit on line reference 215 to capture the connection wire
and dots that tie in to the vertical bus, right-click
Press F9 to turn on SNAP .
Specify base point or displacement:
Select a base point and then select a point on line reference 214
The circuitry is moved, the affected components are retagged, and
cross-references are updated based on the new line reference. Each of the
listed parent component tags decrement by one. For example, fuse FU215
became FU 214.
1772 | Chapter 23 Tutorials
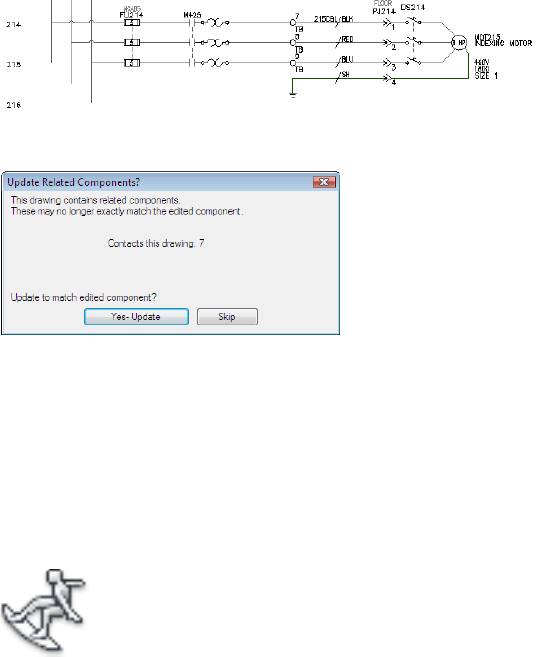
7In the Update Related Components dialog box, click Yes-Update.
Related child references on the active drawing update to match the newly
retagged parent components.
8In the Update other drawings dialog box, click OK.
Related child components and panel layout references on other drawings
update to match the parent components on the moved circuit.
9If asked to save the drawing, click OK.
10 Click Project tab ➤ Other Tools panel ➤ Surfer drop-down ➤ Surfer.
11 Select FU214 on the drawing.
The Surf dialog box displays three references on sheet 2 and one reference
on sheet 9.
12 Double-click the reference on Sheet 9.
Surfer goes to the panel layout drawing and zooms in on the physical
representation of this 3-pole fuse. Notice that the physical representation
of the fuse block tag updated because the circuit was moved.
13 Double-click the first entry in the dialog box to return to the original
AEGS02.dwg drawing.
14 Click Close.
Move an existing circuit | 1773

Moving the motor circuit up one line reference spacing opened up a bit more
room to add a new circuit below it. The next step is to extend the 3-phase bus
down to line reference 218 and over to the right to begin building a new motor
circuit.
Extending the 3-phase bus
1Click Schematic tab ➤ Edit Wires/Wire Numbers panel ➤ Trim Wire.
2Respond to the prompts as follows:
Fence/Crossing/Zext/<Select wire to TRIM>:
Click the bottom ends of the three dangling wires, right-click
You can insert vertical or horizontal 3-phase wiring. Three-phase wiring
automatically breaks and reconnects to any underlying components that
it finds in its path. If it crosses any existing wiring, wire-crossing gaps are
inserted.
3Click Schematic tab ➤ Insert Wires/Wire Numbers panel ➤ Multiple
Bus.
4In the Multiple Wire Bus dialog box, select:
Horizontal Spacing: 0.5
Vertical Spacing: 0.5
Starting at: Another Bus (Multiple Wires)
Number of Wires: 3
1774 | Chapter 23 Tutorials
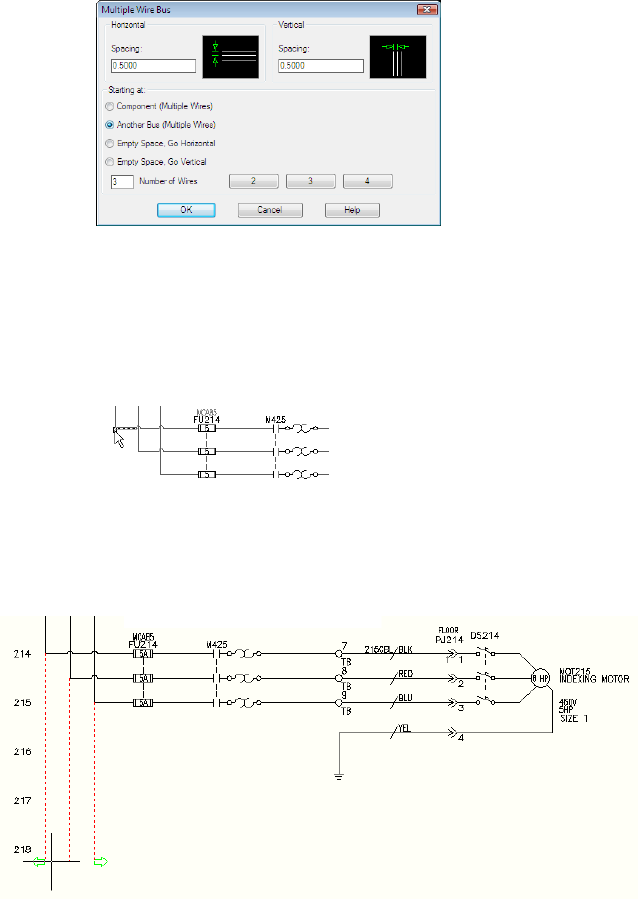
5Click OK.
6Respond to the prompts as follows:
Select existing wire to begin multi-phase bus connection:
Select the bottom corner of the left-most vertical bus on line reference 214 as
shown
Select existing wire to begin multi-phase bus connection: to
Pull the cursor down to line reference 218.
Temporary graphics show the proposed routing of the extended bus.
7Click to create the wires.
8Right-click to exit the command.
Move an existing circuit | 1775
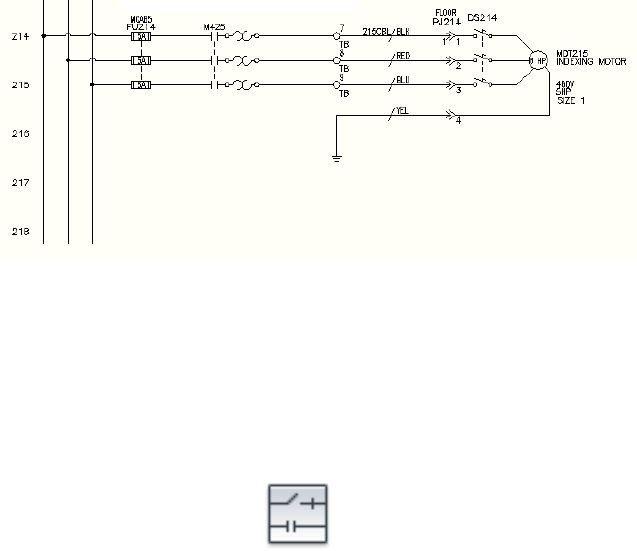
The 3-phase bus and wire connection dot symbols are inserted on the
drawing.
Insert and configure a circuit
You now construct a new motor circuit on the extended 3-phase bus.
Insert and configure the circuit
1Click Schematic tab ➤ Insert Components panel ➤ Circuit Builder
drop-down ➤ Circuit Builder.
2The Circuit Selection dialog box displays.
1776 | Chapter 23 Tutorials
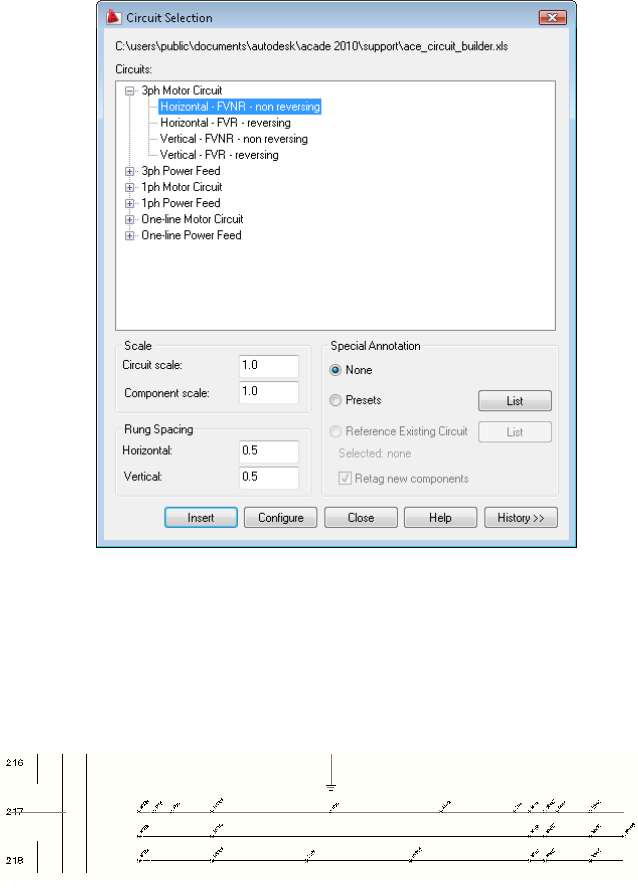
3Expand 3ph Motor Circuit.
4Select Horizontal - FVNR - non reversing.
5Change the Rung Spacing: Horizontal to 0.5.
6Select Configure.
7Specify insertion point at rung 217.
Insert and configure a circuit | 1777
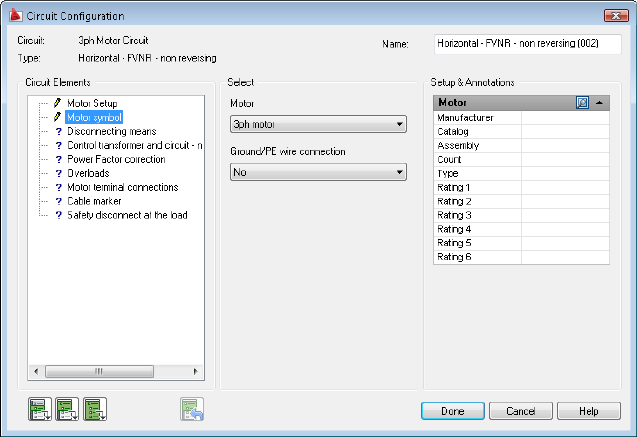
Circuit Configuration
A circuit is made up of individual circuit elements and the wiring that connects
them. Circuit Builder inserts a template drawing. This template contains the
base wiring for the circuit and strategically positioned “marker blocks”.
The “marker blocks” control what circuit elements are presented in the Circuit
Configuration dialog box. For example, a “marker block” indicates the need
for a Disconnecting Means in the circuit. Various options for the Disconnecting
Means are presented in the dialog box. The option selected for this circuit
element is inserted at the location of the “marker block”. Circuit Builder
dynamically builds the complete circuit based on the selections you make on
this dialog box.
1In the Circuit Elements section, select Motor symbol.
In the Select section, select Motor: 3ph motor,
Ground/PE wire connection: No.
2In the Circuit Elements section, select Disconnecting Means.
In the Select section, select Main Disconnect: Fuses,
Include N.O. auxiliary contact: No.
1778 | Chapter 23 Tutorials
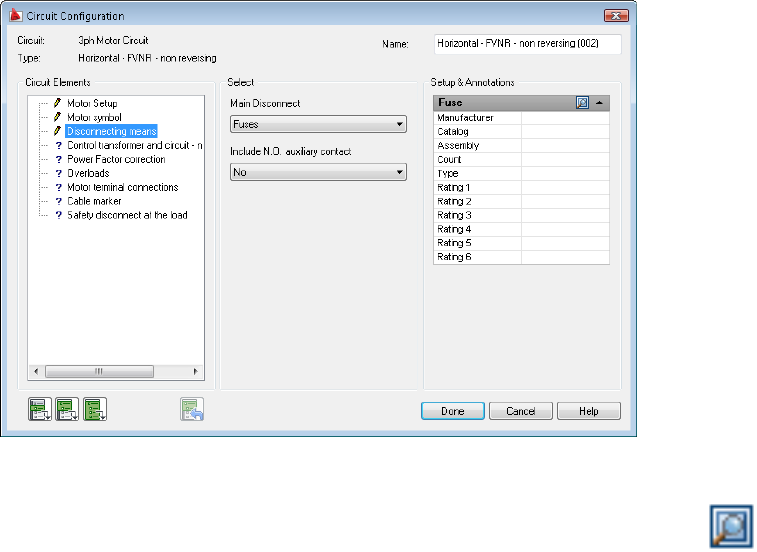
Setup & Annotation section: The options within this section change
according to your selections in the Circuit Elements and Select sections.
Type in values or select the Browse button to access a lookup table.
Select an entry from the lookup table to obtain values for the individual
settings. If the circuit option is a component, the catalog lookup opens.
3In the Circuit Elements section, select Control transformer and circuit -
non-reversing.
In the Select section, select Include control circuit: None.
Insert and configure a circuit | 1779
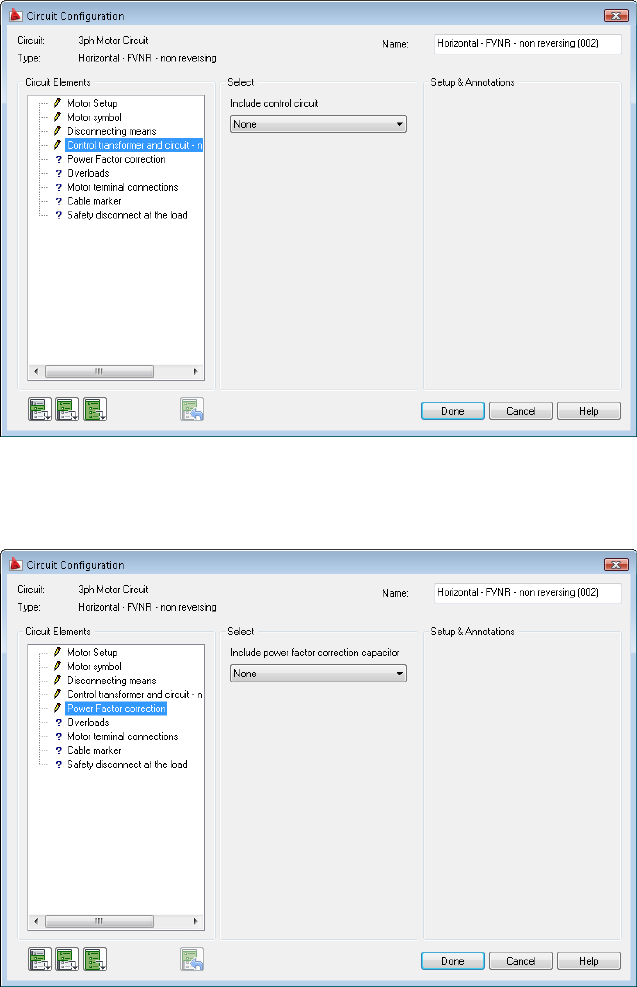
4In the Circuit Elements section, select Power Factor correction.
In the Select section, select Include power factor correction capacitor:
None.
1780 | Chapter 23 Tutorials
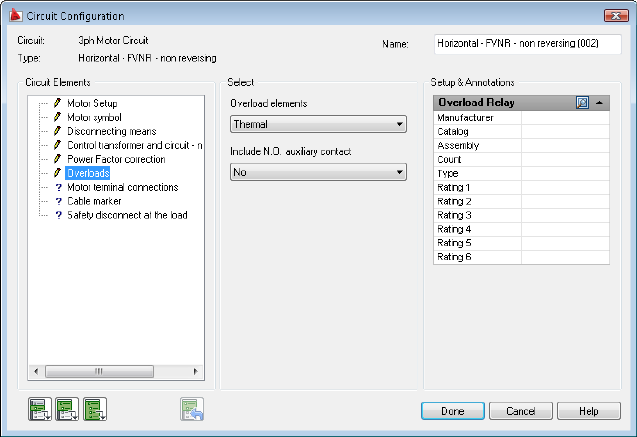
5In the Circuit Elements section, select Overloads.
In the Select section, select Overload elements: Thermal,
Include N.O. auxiliary contact: No.
6In the Circuit Elements section, select Motor terminal connections.
In the Select section, select Motor connection terminals: Round.
Insert and configure a circuit | 1781
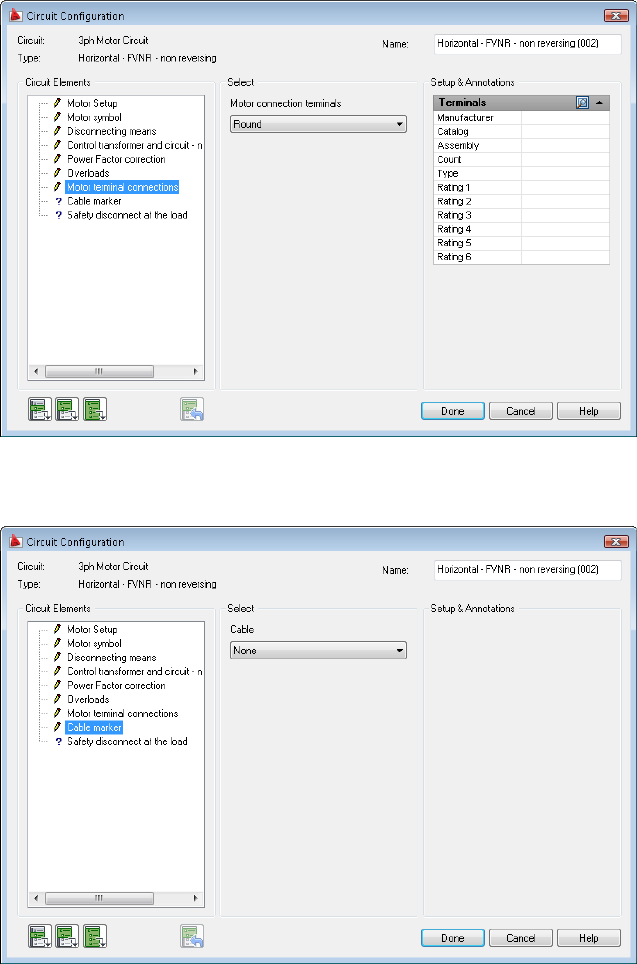
7In the Circuit Elements section, select Cable marker.
In the Select section, select Cable: None.
1782 | Chapter 23 Tutorials
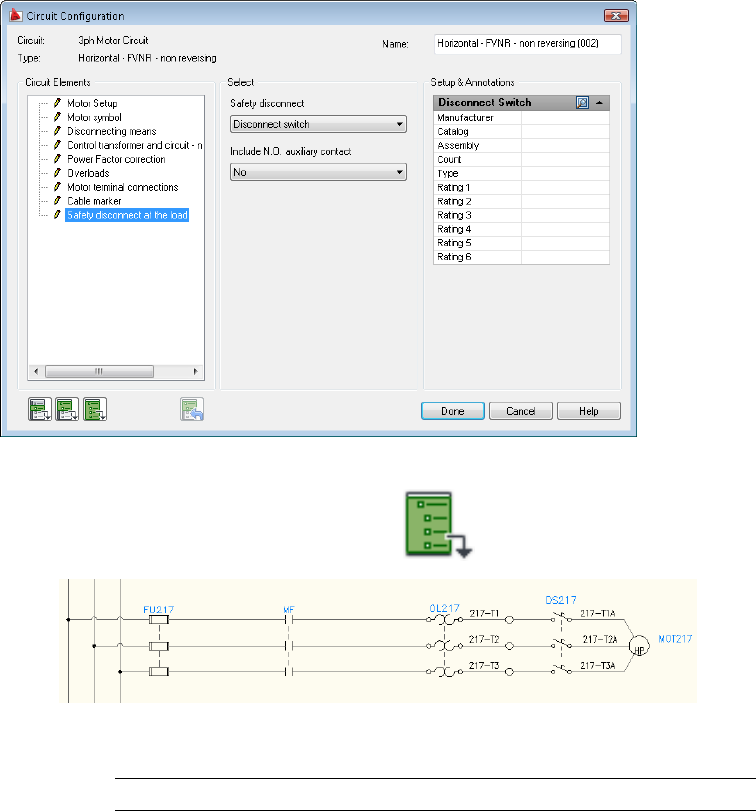
8In the Circuit Elements section, select Safety disconnect at the load.
In the Select section, select Safety disconnect: Disconnect switch,
Include N.O. auxiliary contact: No.
9Select the Insert all circuit elements tool. Circuit Builder inserts each of
the selected circuit elements.
10 Select Done.
NOTE See the Circuit Builder topics later in this section for more examples.
Insert and configure a circuit | 1783
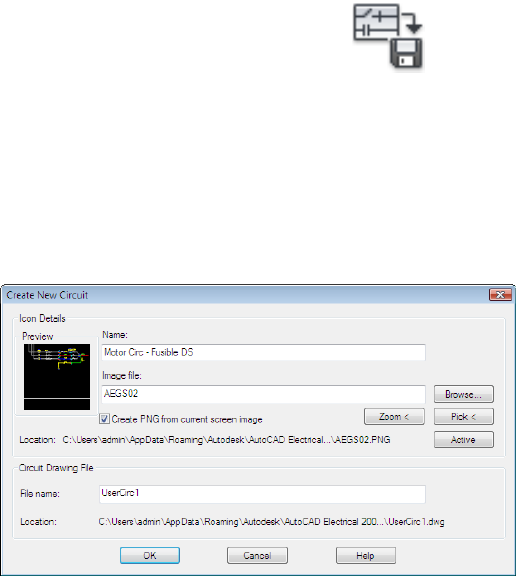
Save and insert a circuit
AutoCAD®Electrical makes saving and inserting pre-drawn circuits easy and
convenient. You can save and insert from a user circuits page on the Insert
Component icon menu. You can also use the normal AutoCAD® WBlock
command to save selected circuitry to disk. Use the Insert Circuit command
to insert WBlocked circuits into the active drawing.
Save your circuit for use in the future
1Zoom around the circuit so that it fills your screen.
2Click Schematic tab ➤ Edit Components panel ➤ Circuit
drop-down ➤ Save Circuit To Icon Menu.
3On the Save Circuit to Icon Menu dialog box, click Add ➤ New circuit.
4On the Create New Circuit dialog box, specify:
Name: Motor Circ - Fusible DS
Image file: Click Active and check Create PNG from current screen
image
File name: UserCirc1
5Click OK.
6Respond to the prompts as follows:
Base point:
1784 | Chapter 23 Tutorials
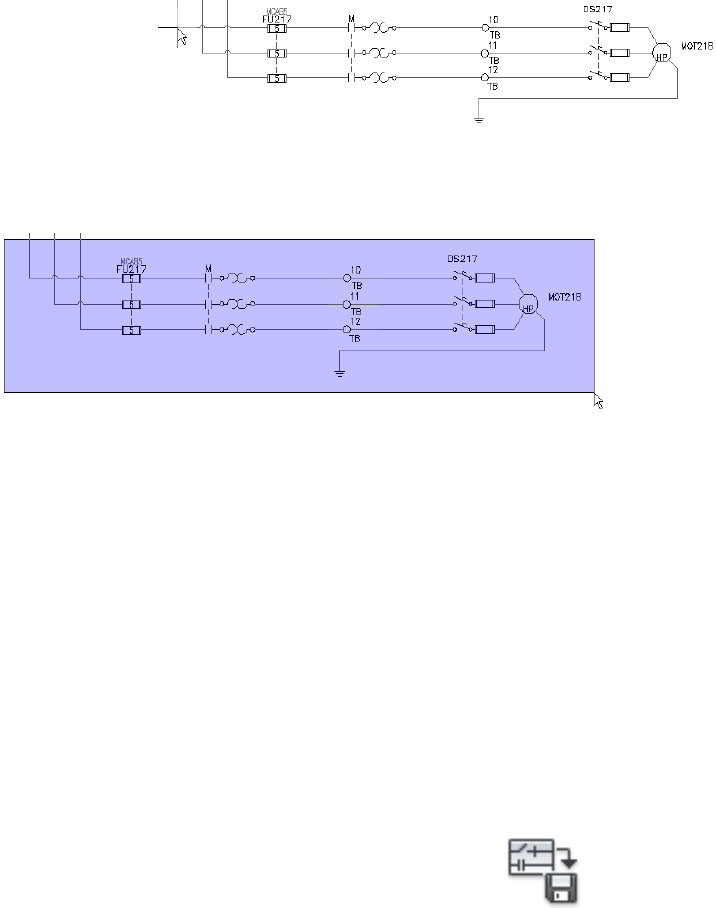
Select the left-most wire connection point where the circuit ties into the left-hand
vertical bus wire
Select objects:
Window around the circuit from left to right to capture all the components and
wiring, but exclude the vertical bus, press ENTER
7On the Save Circuit to Icon Menu dialog box, click OK.
The circuit is saved to your AutoCAD Electrical user folder. It can be
quickly accessed from the Insert Component icon menu or from the
Insert Saved Circuit tool.
The new motor has a 3-pole motor contactor child reference but there is not
a parent motor starter relay coil to operate it. The motor start coil circuit must
be added on a control schematic in the project drawing set and linked back
to the new motor circuit.
Insert motor start coil circuit to control schematic
1Open AEGS04.dwg.
2Zoom on the upper-right hand ladder column so the full circuit on line
reference 422-423 displays.
3Click Schematic tab ➤ Edit Components panel ➤ Circuit
drop-down ➤ Save Circuit To Icon Menu.
Save and insert a circuit | 1785
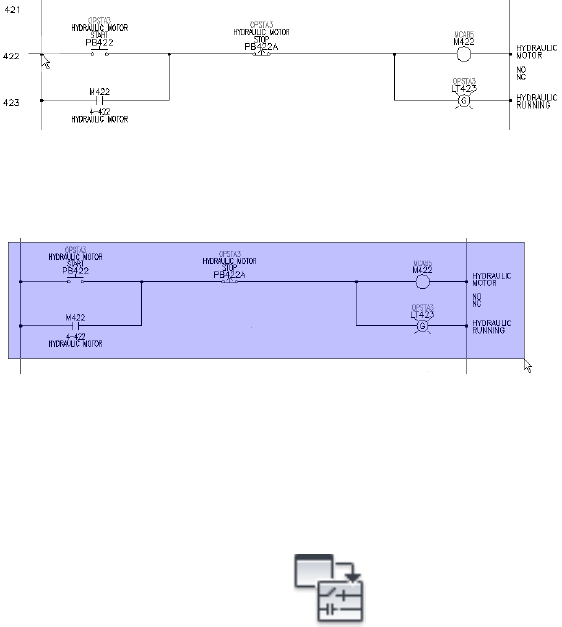
4On the Save Circuit to Icon Menu dialog box, click Add ➤ New circuit.
5On the Create New Circuit dialog box, specify:
Name: Motor starter circ
Image file: Active and Create PNG from current screen image
File name: UserCirc2
Click OK.
6Respond to the prompts as follows:
Base point: Select the left-most wire connection point at line reference 422
Select objects:
Window around the circuit from left to right to capture all the components and
wiring, but exclude the vertical bus, press ENTER
7On the Save Circuit to Icon Menu dialog box, click OK.
Insert a circuit you saved for reuse
1Pan to display the blank area between line references 426 - 432.
2Click Schematic tab ➤ Insert Components panel ➤ Circuit
drop-down ➤ Insert Saved Circuit.
3In the JIC: Saved User Circuits dialog box, select the Motor starter circ
button.
4In the Circuit Scale dialog box, click OK.
1786 | Chapter 23 Tutorials

5Respond to the prompts as follows:
Specify insertion point:
Place the circuit insertion point on the vertical bus wire at line reference 427,
left-click to insert the circuit.
The circuit inserts and updates. Tags automatically update to reflect the
new line reference number, and parent/child relationships defined inside
of the circuit update accordingly.
6Right-click the M427 coil symbol and select Edit Component.
7In the Insert/Edit Component dialog box, specify:
Description Line 2: MOTOR NO. 2
Click OK.
8In the Update Related Components dialog box, click Yes-Update.
Linking the parent coil to the child contactor
1Open AEGS02.dwg and zoom on the untagged 3-pole motor
contact/overloads on line reference 217.
2Right-click the “M” contact and select Edit Component.
The Insert/Edit Child Component displays. Enter the exact parent coil
tag into the Component Tag box to establish the link between the parent
and the child contacts. Currently the Component Tag is M.
3In the Insert/Edit Child Component dialog box, Component Tag section,
click Project.
4In the Complete Project list for Family=”M” dialog box, select M427
HYDRAULIC MOTOR NO. 2 and click OK.
Save and insert a circuit | 1787
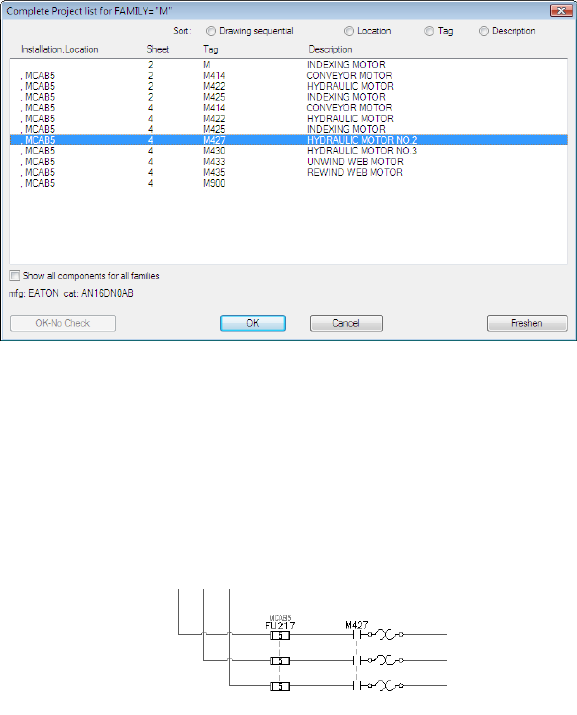
The tag M427 is now displayed in the Component Tag edit box. Notice
that the description, cross-reference, and location code boxes have also
updated.
5In the Insert/Edit Child Component dialog box, click OK.
6In the Update linked components dialog box, click OK.
The components are now linked. If you go back to drawing AEGS04.dwg
and look at the motor starter coil, it shows references to these three child
contacts (plus one seal contact around PB427).
Using the icon menu to add a motor
1Reopen drawing AEGS04.dwg and zoom to the blank area at line references
430-431.
2Repeat the steps for inserting the saved Motor starter circ circuit.
3In the Circuit Scale dialog box, click OK.
4Insert the circuit at line reference 430.
5Right-click the M430 coil symbol, and select Edit Component.
1788 | Chapter 23 Tutorials

6In the Insert/Edit Component dialog box, specify:
Description Line 2: MOTOR NO. 3
Click OK.
7In the Update related components dialog box, click Yes-Update.
8Open drawing AEGS02.dwg and zoom to the blank area at line references
204-206.
9Repeat the steps for inserting a saved circuit, but this time insert the
Motor Circ - Fusible DS circuit.
10 In the Circuit Scale dialog box, click OK.
11 Respond to the prompts as follows:
Specify insertion point:
Position the motor circuit so that the insertion point lands on the left-hand
vertical bus at line reference 204, left-click to insert the circuit.
Notice that the fuse, disconnect, and motor automatically retag based
on their reference locations.
12 Right-click the M child motor contact symbol, and select Edit Component.
13 In the Insert/Edit Child Component dialog box, Component Tag section,
click Project.
14 In the Complete Project list for Family=”M” dialog box, select M430
HYDRAULIC MOTOR NO. 3 and click OK.
The tag M430 is now displayed in the Component Tag edit box. Notice
that the description, cross-reference, and location code boxes have also
updated.
15 In the Insert/Edit Child Component dialog box, click OK.
16 In the Update linked components dialog box, click OK.
Save and insert a circuit | 1789
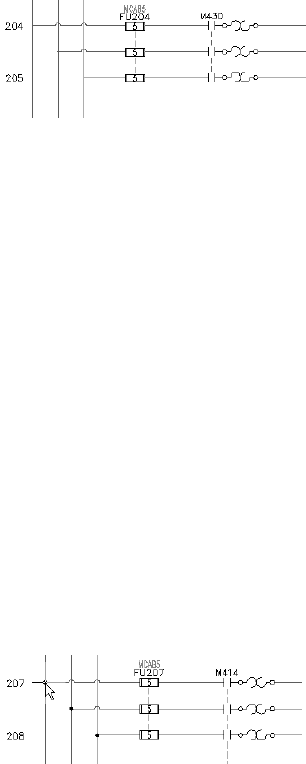
Insert a saved circuit using WBlock
Another method for saving and inserting circuits is to use the AutoCAD WBlock
command to save the circuit to disk. A separate Insert Circuit command is
used to browse to a selected saved circuit and insert it into the active drawing.
This method allows unlimited circuits to be constructed and saved to disk.
They can be arranged into a set of shared subfolders for easy browsing and
retrieval using the Insert Circuit command.
Saving a circuit using WBlock
1Pan to display the 3-phase motor circuit at line references 207 - 209.
2Enter wblock at the command line and press ENTER.
3In the Write Block dialog box, click Pick point.
4Respond to the prompts as follows:
Specify insertion base point:
Select the intersection of the left vertical bus with the upper horizontal wire at
line reference 207
5In the Write Block dialog box, click Select objects.
6Respond to the prompts as follows:
Select objects: Window from left to right around the full circuit, right-click
1790 | Chapter 23 Tutorials
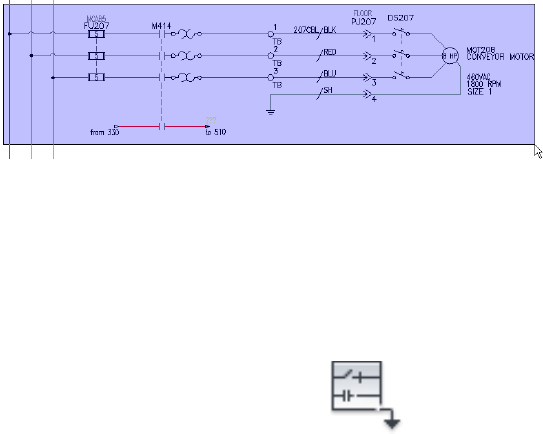
7In the Write Block dialog box, enter a name for the saved circuit. Take
note of the location where the drawing file is being saved.
8Click OK.
Inserting a WBlocked circuit
1Click Schematic tab ➤ Insert Components panel ➤ Circuit
drop-down ➤ Insert WBlocked Circuit.
2In the Insert Wblocked Circuit dialog box, browse to the folder containing
the circuit you saved.
3Select the WBlocked motor circuit, and click Open.
4In the Circuit Scale dialog box, select:
Move all lines to wire layers
Keep all source arrows
Update circuit’s text layers as required
Click OK.
5Respond to the prompts as follows:
Specify insertion point: Select any blank spot on your drawing
The parent component tags that are not set to Fixed automatically retag
based on the insertion point. It is like the behavior when inserting a
circuit using the icon menu method.
6Delete the circuit.
Insert a saved circuit using WBlock | 1791

Insert a one-line motor control circuit
In this exercise, you insert and configure a one-line motor control circuit using
Circuit Builder.
➤ In the Project Manager, Project Drawing List, double-click One-Line.dwg.
One-Line.dwg contains a one-line bus. This wire is drawn on a wire layer
defined as No Wire Numbering. Such a wire layer behaves normally for
inserting, breaking, and scooting components. These wires also show up
in the from/to report. Wire numbers are not placed on these wires during
the Insert Wire Numbers process.
Insert the one-line circuit
1Click Schematic tab ➤ Insert Components panel ➤ Circuit Builder
drop-down ➤ Circuit Builder.
The Circuit Selection dialog box displays.
2Expand One-line Motor Circuit.
3Select Vertical - FVNR - non reversing.
4Click Configure.
5Specify an insertion point on the one-line bus.
1792 | Chapter 23 Tutorials
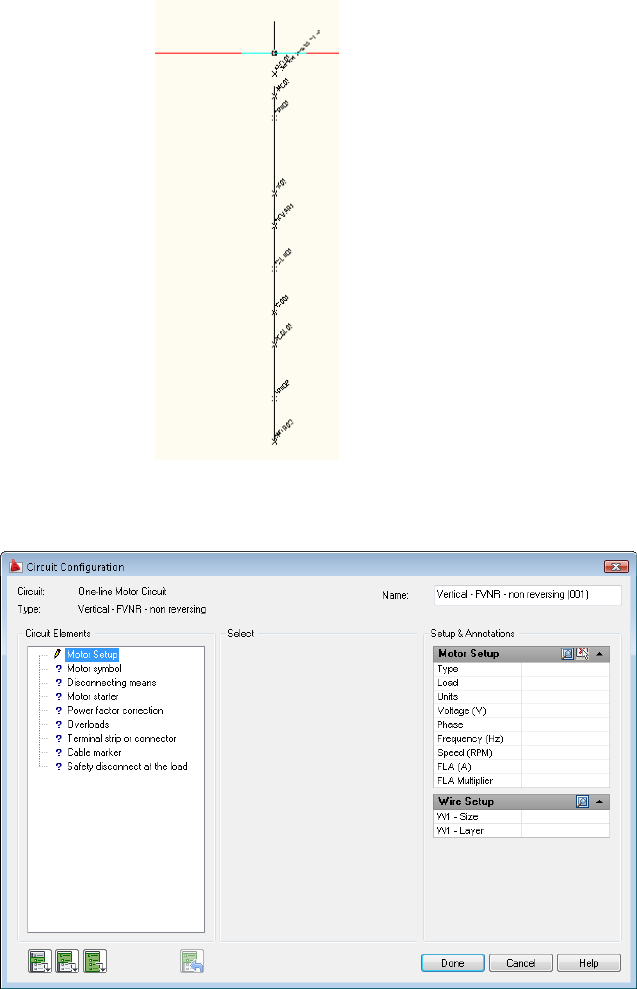
The Circuit Configuration dialog box displays.
6In the Circuit Elements section, select Motor Setup.
Insert a one-line motor control circuit | 1793
7 In the Setup & Annotations: Motor Setup section, select the Browse
button.
The Motor Table Not Found dialog box displays. The sample project is
set up to use the NEC standard. However, a MOTOR_NEC table is not
supplied, only a default MOTOR table.
8Select Use default table.
The Select Motor dialog box displays.
9Select Type: Induction, Voltage (V): 480, and Frequency (HZ): 60.
10 Select the row that shows Load: 15, Units: HP, Phase: 3, Speed (RPM):
3600, FLA (A) 18.6.
NOTE The values used to populate this dialog box are defined in the MOTOR*
tables in the electrical standards database file, ace_electrical_standards.mdb.
11 Click OK.
The values are entered in the Motor Setup section. A default wire size,
based on the load for the motor, is selected and shown in the Wire Setup
section.
12 In the Setup & Annotations: Wire Setup section, select the Browse
button.
The Wire Size Lookup dialog box displays. The minimum wire size is
preselected. The size is based on the load for the selected motor.
NOTE When Show all is on, wires where the %Ampacity value is greater than
100% and less than 300%, are shown in red.
The values in the Load section are populated with the values from the
Motor Setup. The options available within this dialog box are defined in
the electrical standards database file, ace_electrical_standards.mdb.
13 In the Wire section, select Size standard: AWG, Type/method: CU,
Insulation: THWN / 75C.
14 In the De-rating factors section, select the Ambient temperature correction
option.
1794 | Chapter 23 Tutorials

This option directs Circuit Builder to use a de-rating factor for an elevated
ambient temperature. These values are defined in the electrical standards
database file.
15 Select 36~40C from the drop-down list.
The de-rating factor is extracted from the electrical standards database
file and entered in the dialog box. The wire size grid is adjusted based on
the new total de-rating factor. Based on this de-rating factor the minimum
wire size can change.
16 Select the Run distance option.
This option directs Circuit Builder to consider the length of the wire run
in the voltage drop calculation. Additional columns display in the wire
selection grid showing Voltage drop, wire KW loss, and wire loss cost
estimate.
17 Select 200 from the drop-down list.
Circuit Builder displays parallel energy loss calculations to allow you to
make better green design decisions. For example, you can oversize the
conductors for a motor to reduce conductor heating losses. It results in
a higher initial cost, material, and installation labor, which is recovered
many times over in reduced energy losses in the wiring during the life of
the motor.
18 Select a wire size in the grid based on the values shown.
19 Select a Grounding conductor size. The minimum size is preselected based
on the load of the motor.
20 Click OK.
21 Select Circuit Elements: Motor Symbol.
22 In the Setup & Annotations: Motor section, select the Browse
button.
The Parts catalog dialog box displays.
23 Select a catalog value and click OK.
NOTE Circuit Builder does not preselect the catalog based on the parameters
entered previously.
24 Continue selecting Circuit Elements:
Insert a one-line motor control circuit | 1795

Disconnecting means: Disconnect switch and fuses
Motor starter: Yes
Power factor correction: No
Overloads: None
Terminal strip or connector: None
Cable marker: Yes
Safety disconnect at the load: None
25 Click to insert all circuit elements.
26 Click Done.
27 Click Schematic tab ➤ Edit Components panel ➤ Edit Components
drop-down ➤ Edit.
1796 | Chapter 23 Tutorials

28 Select the motor symbol.
29 On the Insert/Edit Component dialog box, enter FIELD for the Location
code and MY MOTOR for Description Line 1.
30 Save the drawing.
Insert a one-line dual power feed circuit
In this part of the exercise, you insert a dual power feed circuit. A dual circuit
has two distinct circuits running off the same bus-tap. Each circuit can be
independently configured.
1Click Schematic tab ➤ Insert Components panel ➤ Circuit Builder
drop-down ➤ Circuit Builder.
2The Circuit Selection dialog box displays.
3Select One-line Power Feed: Vertical - Dual feed.
4Click Configure.
5Specify an insertion point on the one-line bus.
Insert a one-line dual power feed circuit | 1797
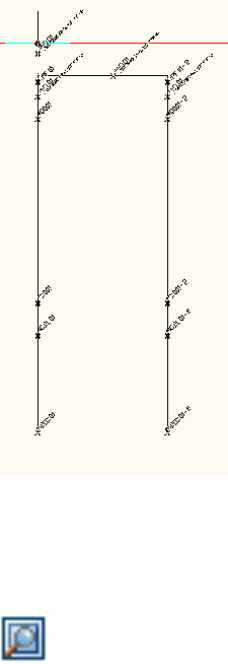
The Circuit Configuration dialog box displays. Notice that some circuit
elements have a “(2)” prefix. These elements make up the second circuit
in the dual circuit.
6In the Circuit Elements section, select Load Setup.
7 In the Setup & Annotations: Load Setup section, select the Browse
button.
The Select Load dialog box displays.
8Select Type: Transformer, Voltage (V): 480, and Phase: 3.
9Select an entry from the grid and click OK.
10 Continue selecting Circuit Elements for the first circuit:
Load: Generic box
Disconnecting means: None
Terminal strip or connector: Square
Cable marker: None
11 In the Circuit Elements section, select (2) Load Setup.
1798 | Chapter 23 Tutorials

12 In the Setup & Annotations: Load Setup section, select the Browse
button.
The Select Load dialog box displays.
13 Select Type: Transformer, Voltage (V): 480, and Phase: 3.
14 Select an entry from the grid and click OK.
15 Continue selecting Circuit Elements for the second circuit:
(2) Load: Source arrow
(2) Disconnecting means: Disconnect switch and fuses
(2) Terminal strip or connector: None
(2) Cable marker: None
16 Click to insert all circuit elements.
17 Click Done.
Insert a one-line dual power feed circuit | 1799
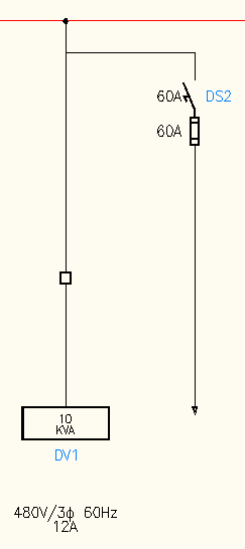
18 Save the drawing.
Reference an existing circuit
When a new circuit is inserted, you can reference an existing circuit picked
from a list of circuits pulled from the active project. The components, values,
descriptions, and tag assignments from the selected circuit, become defaults
for the new circuit. Tags are recalculated if the option “Retag new components”
is selected.
In this exercise, you insert a 3-phase motor control circuit referencing the
one-line motor control circuit inserted earlier.
1Start a new blank drawing and save it as Three-Line.dwg.
2In Project Manager, right-click on the project name and select Add Active
Drawing.
1800 | Chapter 23 Tutorials

3Click Yes to apply the project default values to the drawing settings.
4Click Schematic tab ➤ Insert Wires/Wire Numbers panel ➤ Insert Ladder
drop-down ➤ Insert Ladder.
5Insert a 3-phase ladder.
6Click Schematic tab ➤ Insert Components panel ➤ Circuit Builder
drop-down ➤ Circuit Builder.
7The Circuit Selection dialog box displays.
8Select 3ph Motor Circuit: Horizontal - FVNR - non reversing.
9Select Reference Existing Circuit.
10 Select the List button.
The Existing Circuits dialog box displays.
11 Select the one-line motor control circuit inserted on One-Line.dwg, MOT1.
12 Click OK.
The CODE and UI_VAL values from the circuit codes sheet of the circuit
builder spreadsheet control the default circuit element options. For
example, the one-line circuit used the Disconnect switch and fuses option
with a UI_VAL of “4”. When the 3-phase circuit references this one-line
circuit, the disconnecting means option with a UI_VAL of “4” becomes
the default. If a matching UI_VAL is not found for a particular marker
block CODE value, the default as defined by the “X” in the UI_DEF
column is used.
When the new circuit is built, component values from the referenced
circuit are applied to components in the new circuit only if the marker
block on page 659 code matches.
13 Turn off the Retag new components check box.
Reference an existing circuit | 1801
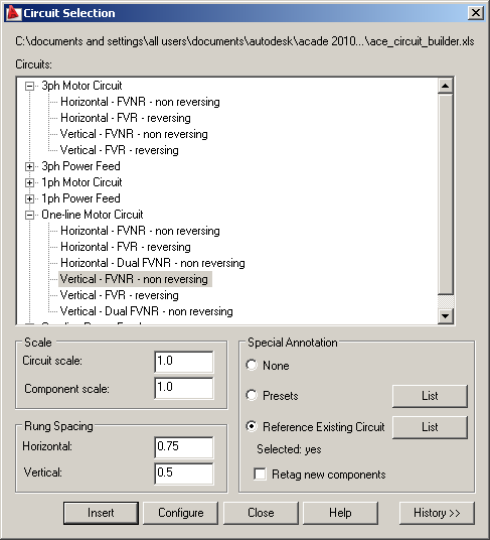
It directs Circuit Builder to use the tags from the one-line circuit for the
components with matching marker block code values.
14 Select Configure.
15 Select an insertion point on the bus for the new circuit.
16 Verify that the same circuit elements as the referenced one-line motor
circuit are selected. The default options are based on the referenced circuit.
SelectCircuit Elements
Motor: 3ph motorMotor symbol
Ground/PE wire connection: No
Main Disconnect: Disconnect switch and FusesDisconnecting means
Include N.O. Auxiliary contact: No
Include control circuit: NoneControl transformer and circuit - non-re-
versing
1802 | Chapter 23 Tutorials
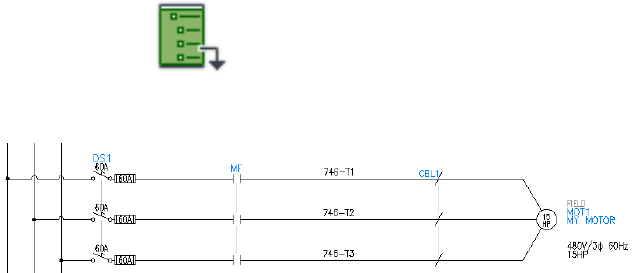
SelectCircuit Elements
Include power factor correction capacitor: NonePower Factor correction
Overload elements: NoneOverloads
Include N.O. auxiliary contact: No
Motor connection terminals: NoneMotor terminal connections
Cable: YesCable marker
Safety disconnect: NoneSafety disconnect at the load
Include N.O. auxiliary contact: No
17 Click to insert all circuit elements.
18 Click Done.
The circuit is inserted and the component values from the one-line circuit are
applied. The motor symbol receives the same catalog value and horsepower
rating. The main disconnect switch receives the same rating values for the
switch and the fuses. The motor symbol receives the values modified on the
one-line circuit after it was inserted.
Reference an existing circuit | 1803
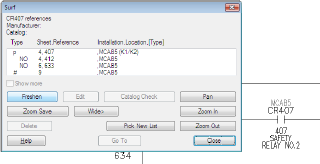
Surf
Surf - Introduction
Move between related components with Surfer.
10 minutesTime required
Copy all files located inPrerequisites:
Documents and Settings\{username}\My Documents\Acade {version}\Aedata\Tutorial\Ae-
gs\Surf
Windows XP
to
Documents and Settings\{username}\My Documents\Acade {version}\Aedata\Proj\Aegs
Users\{username}\Documents\Acade {version}\Aedata\Tutorial\Aegs\SurfWindows Vista,
toWindows 7
Users\{username}\Documents\Acade {version}\Aedata\Proj\Aegs
You learn to:
■Use the Surfer tool
Moving between symbols
Use the AutoCAD Electrical Surf utility to move from component reference
to reference across the project drawing set quickly.
1If AEGS is not the active project, in the Project Manager, right-click AEGS
and select Activate.
2In the Project Manager, double-click AEGS to expand the drawing list.
3In the Project Manager, Project Drawing List, double-click AEGS04.dwg.
1804 | Chapter 23 Tutorials
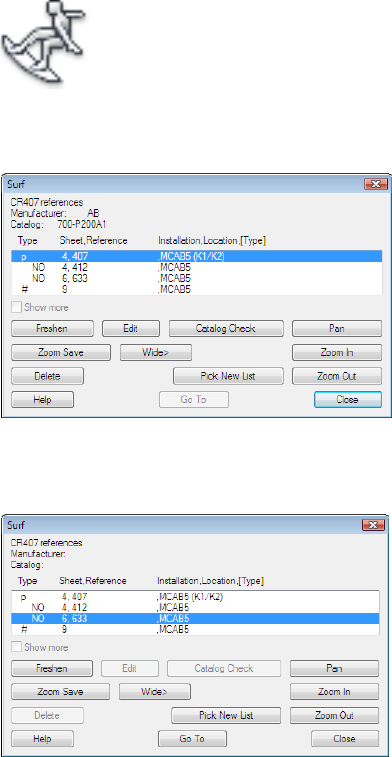
4Zoom on the upper left-hand portion of the first ladder column.
5Click Projects tab ➤ Other Tools panel ➤ Surfer drop-down ➤ Surfer.
6Click anywhere on relay coil CR407.
All instances of CR407 appear in the Surf dialog box.
7Select the reference on sheet 6.
8Click Go To.
The instance of CR407 on sheet 6 is surfed to and displayed in the drawing
next to the Surf dialog box.
Moving between symbols | 1805
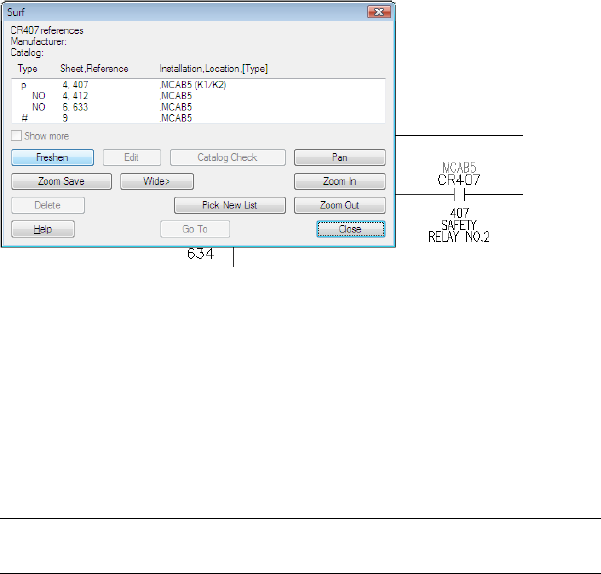
9Select the reference on sheet 9.
10 Click Go To.
You can edit or delete the component using options in the Surf dialog
box.
11 Double-click the first entry in the Surf dialog box to return to the original
AEGS04.dwg drawing.
12 Click Close.
NOTE If AutoCAD Electrical senses that a change has been made to the
drawing while surfing, drawing files are saved. .
1806 | Chapter 23 Tutorials
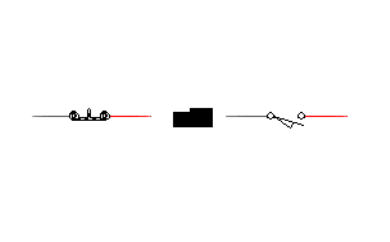
Block swap
Block swap - Introduction
Swap components while maintaining wire connections with Swap/Update
Block.
10 minutesTime required
Copy all files located inPrerequisites:
Documents and Settings\{username}\My Documents\Acade {version}\Aedata\Tutorial\Ae-
gs\Block swap
Windows XP
to
Documents and Settings\{username}\My Documents\Acade {version}\Aedata\Proj\Aegs
Users\{username}\Documents\Acade {version}\Aedata\Tutorial\Aegs\Block swapWindows Vista,
toWindows 7
Users\{username}\Documents\Acade {version}\Aedata\Proj\Aegs
You learn to:
■Use the Block Swap tool
Swapping components
Use the Swap Block tool to swap one component for another in a single
drawing or project-wide. For example, swapping a proximity switch with a
limit switch.
Block swap | 1807
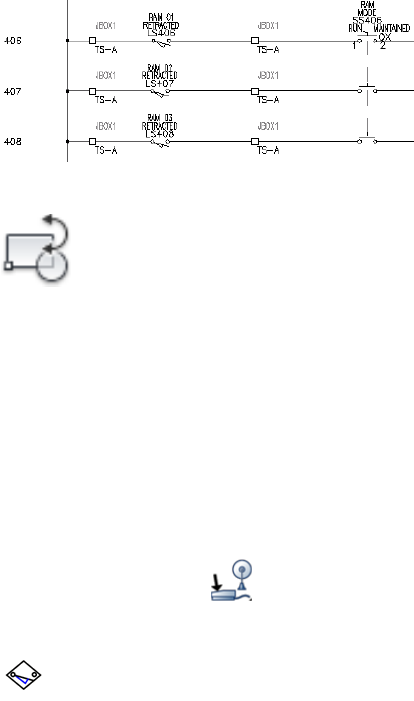
Swap switches while keeping wire connections
1If AEGS is not the active project, in the Project Manager, right-click AEGS
and select Activate.
2In the Project Manager, double-click AEGS to expand the drawing list.
3In the Project Manager, Project Drawing List, double-click AEGS04.dwg.
4Zoom in on the limit switch on line reference 406.
5Click Schematic tab ➤ Edit Components panel ➤ Swap/Update Block.
6In the Swap Block/ Update Block/ Library Swap dialog box, specify:
Option A: Swap a Block - drawing wide
Pick new block from icon menu
Retain old block scale
Auto re tag if parent swap causes FAMILY change
Attribute Mapping: Use Same Attribute Names (default)
Click OK.
7In the Insert Component: JIC Schematic Symbols dialog box, click
Miscellaneous Switches.
8In the JIC: Other Switch Types dialog box, click Proximity Switch NO.
9Respond to the prompts as follows:
Select component type to swap out: Select the limit switch, LS406
1808 | Chapter 23 Tutorials
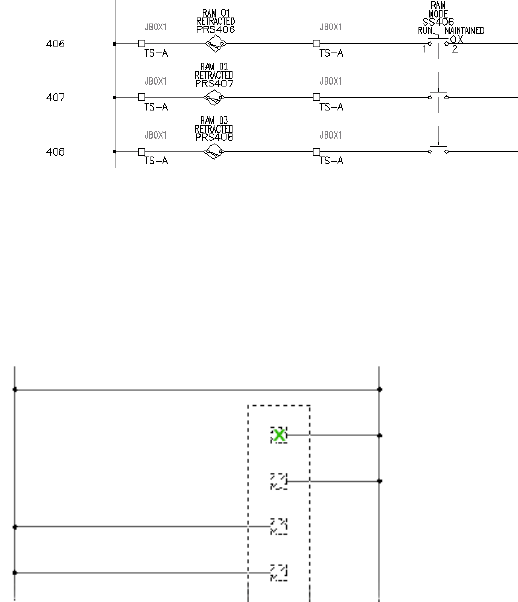
The limit switch symbol disappears and the proximity switch symbol
inserts. All existing text annotation transfers to the new symbols and the
wires reconnect.
PLC
PLC - Introduction
Insert PLC modules and connected devices.
30 minutesTime required
Copy all files located inPrerequisites:
Documents and Settings\{username}\My Documents\Acade {version}\Aedata\Tutorial\Ae-
gs\PLC
Windows XP
to
Documents and Settings\{username}\My Documents\Acade {version}\Aedata\Proj\Aegs
Users\{username}\Documents\Acade {version}\Aedata\Tutorial\Aegs\PLCWindows Vista,
toWindows 7
PLC | 1809

Users\{username}\Documents\Acade {version}\Aedata\Proj\Aegs
You learn to:
■Understand PLC parametric build
■Insert a PLC module
■Remove ladder rungs
■Use multiple insert component
■Annotate PLC I/O descriptions
Inserting PLC modules
AutoCAD Electrical generates any of hundreds of different PLC I/O modules
on demand. The modules generate in various different graphical styles, all
without a single, complete I/O module library symbol resident on the system.
Modules adapt to the underlying ladder rung spacing, whatever that value is.
They can be stretched or broken into two or more pieces at insertion time.
To insert a PLC module, you select the module and pick a location. AutoCAD
Electrical builds and inserts the module, using a small set of library symbols.
Insert a PLC module
1If AEGS is not the active project, in the Project Manager, right-click AEGS
and select Activate.
2In the Project Manager, double-click AEGS to expand the drawing list.
3In the Project Manager, Project Drawing List, double-click AEGS05.dwg.
4Click Schematic tab ➤ Insert Components panel ➤ Insert PLC
drop-down ➤ Insert PLC (Parametric).
5In the PLC Parametric Selection dialog box, select:
Manufacturer: Allen-Bradley
Series: 1746
Type: Discrete Input
Part Number: 1746-IA16
1810 | Chapter 23 Tutorials
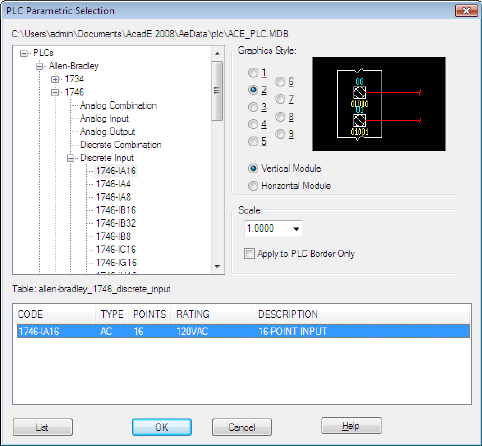
Graphics Style: 2, Vertical Module
6Click OK.
7Respond to the prompts as follows:
Specify PLC module insertion point or [Z=zoom, P=pan]:
Pick a point on wire line reference 520 closer to the right side, ensure the X is
near the horizontal wire, click
Inserting PLC modules | 1811
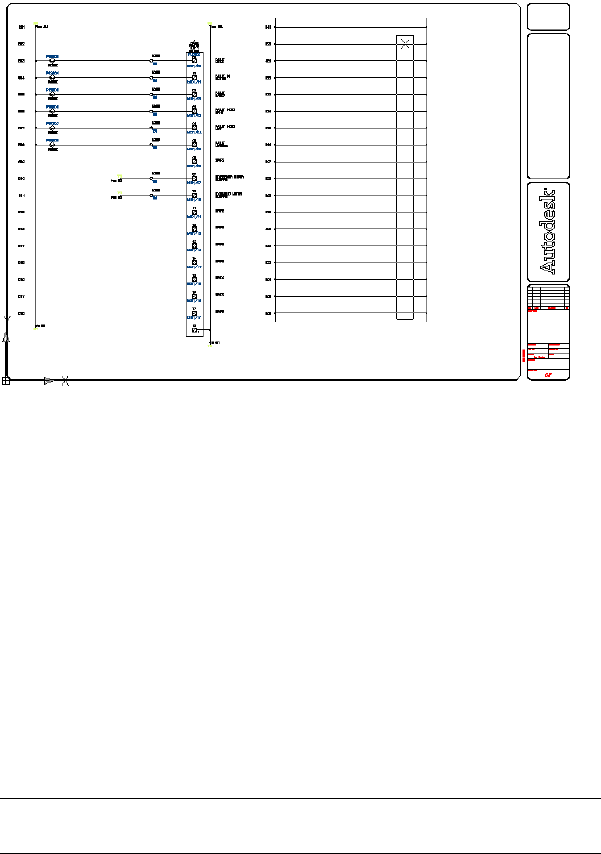
8In the Module Layout dialog box, verify the default settings:
Spacing: 1.0000
I/O Points: Insert all
Click OK.
AutoCAD Electrical reads the vertical rung spacing of your ladder and
calculates how long the module is going to be. It multiplies the rung
spacing by the number of wire connections specified by the module you
selected.
Temporary graphics display a representation of the module (with the
spacing defined) to help position the module on the ladder.
9In the I/O Point dialog box, specify:
Rack Number: 1
Slot Number: 1
NOTE Specify the values by either entering text into the edit boxes or by
clicking the arrows.
10 Click OK.
11 In the I/O Address dialog box, specify:
Beginning address: I:11/00
1812 | Chapter 23 Tutorials
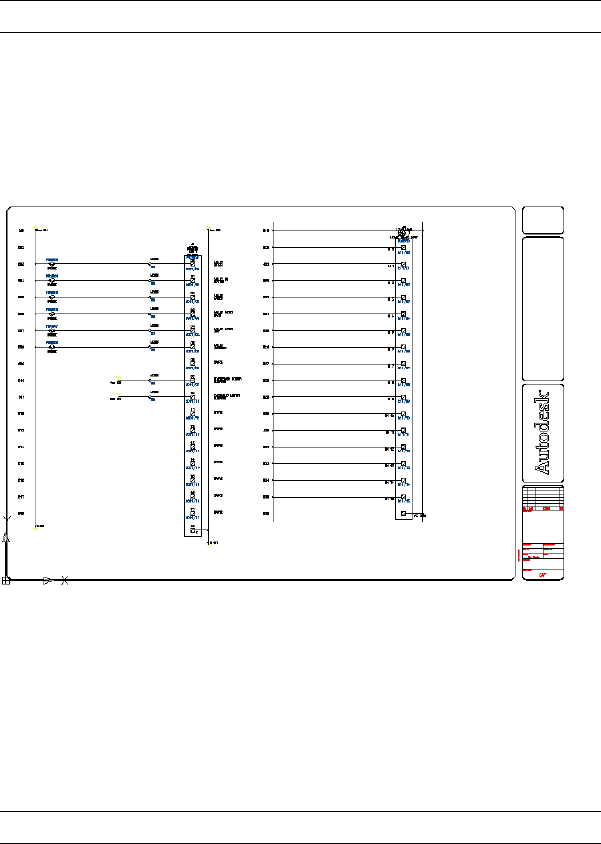
NOTE You can also select the beginning address from the Quick picks list.
12 Click OK.
13 In the I/O Addressing dialog box, click Decimal.
The PLC module is inserted into your drawing with incremental address
numbers already annotated as the module goes in, it breaks and
reconnects to underlying wires.
You can break an I/O module into as many pieces as you want at insertion
time. It is great for high-density modules that do not fit into a single
ladder column. Use the Allow spacers/breakers option in the Module
Layout dialog box at insertion time to do it.
You can also add extra space between adjacent I/O points using the Stretch
Block tool. This feature leaves extra room when you know ahead of time
that a certain I/O point will have additional components wired tied to a
single I/O point after a PLC module is inserted.
NOTE It can be used on any block, not just a PLC module.
Inserting PLC modules | 1813
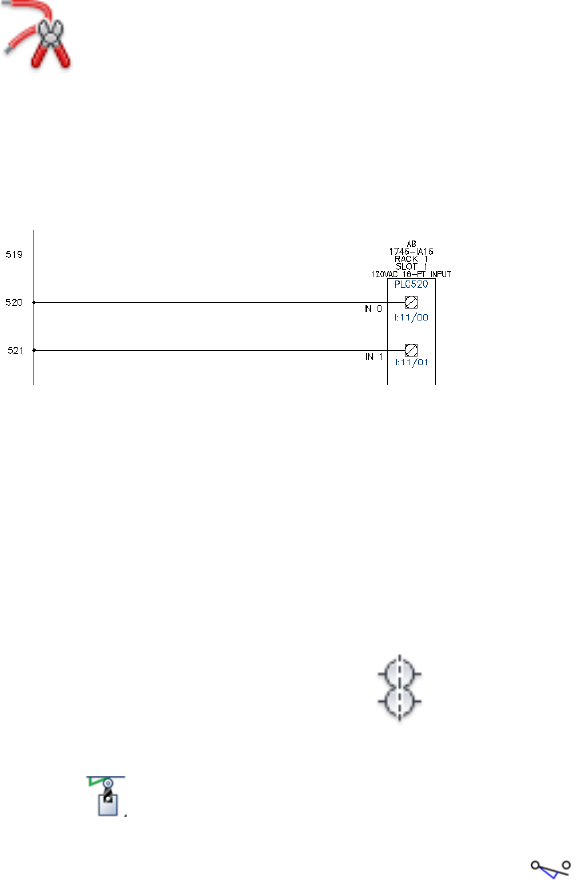
Remove ladder rungs
1Click Schematic tab ➤ Edit Wires/Wire Numbers panel ➤ Trim Wire.
2Respond to the prompts as follows:
Fence/Crossing/Zext/<Select wire to TRIM>:
Select the ladder rung at line reference 519, right-click
The ladder rung is removed from your drawing.
Using multiple insert component
You can insert components into wires that are tied to the PLC module. Use
the Multiple Insert Component tool to insert a string of normally open limit
switches.
Insert a limit switch
1Click Schematic tab ➤ Insert Components panel ➤ Multiple Insert
drop-down ➤ Multiple Insert (Icon Menu).
2In the Insert Component: JIC Schematic Symbols dialog box, click Limit
Switches.
3In the JIC: Limit Switches dialog box, select Limit Switch, NO.
4Respond to the prompts as follows:
1814 | Chapter 23 Tutorials
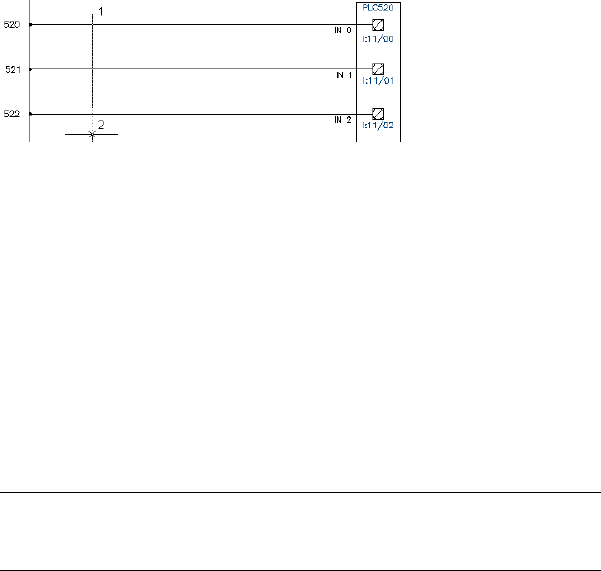
Component Fence, From Point:
Select above the wire at line reference 520 (1)
Component Fence, From Point: to:
Drag below the wire at line reference 522, click the point (2), right-click
5In the Keep dialog box, select:
Keep this one
Show edit dialog box after each
Click OK
6In the Insert/Edit Component dialog box, specify:
Component Tag: LS520
Description: Line 1: PALLET ENTERING
Description: Line 2: STATION
Location code: MACHINE
Click OK.
NOTE In the Insert/Edit Component dialog box, Component Tag section,
you can use the Use PLC Address button to add the I/O Address as the
component tag.
7In the Keep dialog box, select:
Keep this one
Show edit dialog box after each
Click OK
8In the Insert/Edit Component dialog box, specify:
Component Tag: LS521
Description: Line 1: PALLET INSIDE
Description: Line 2: STATION
Using multiple insert component | 1815
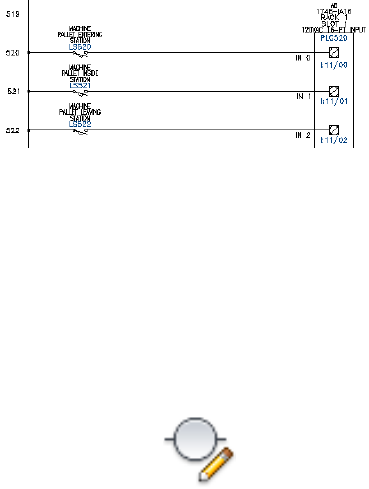
Location code: MACHINE
Click OK.
9In the Keep dialog box, select:
Keep this one
Show edit dialog box after each
Click OK
10 In the Insert/Edit Component dialog box, specify:
Component Tag: LS522
Description: Line 1: PALLET LEAVING
Description: Line 2: STATION
Location code: MACHINE
Click OK.
The normally open limit switches are inserted into the drawing.
Annotating PLC I/O descriptions
You can add description text to a PLC module using the Edit Component tool.
You can change the descriptions at any time. However, edit each split PLC
piece separately.
Add description text
1Click Schematic tab ➤ Edit Components panel ➤ Edit Components
drop-down ➤ Edit.
2Respond to the prompts as follows:
Select component/cable/location box to EDIT:
1816 | Chapter 23 Tutorials
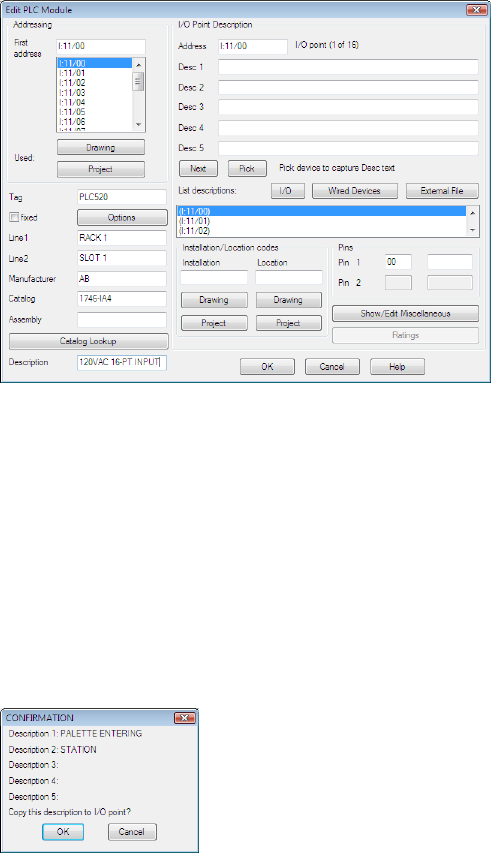
Select anywhere on the top portion of the PLC module
The Edit PLC Module dialog box displays.
This dialog box provides spaces for you to enter description text for each
I/O point. Assume that the descriptions already assigned to the connected
limit switches are like what you want to use for the PLC I/O point
descriptions.
3In the Edit PLC Module dialog box, click Wired Devices.
AutoCAD Electrical follows the connected wire for each I/O point
backwards. If it finds a connected component, the component description
text is retrieved. Each description displays in a dialog box list.
4For the first I/O address (I:11/00), select the first description (PALLET
ENTERING STATION) in the extracted device list.
The Confirmation dialog box displays.
5Make sure that the correct description is specified and click OK.
Annotating PLC I/O descriptions | 1817
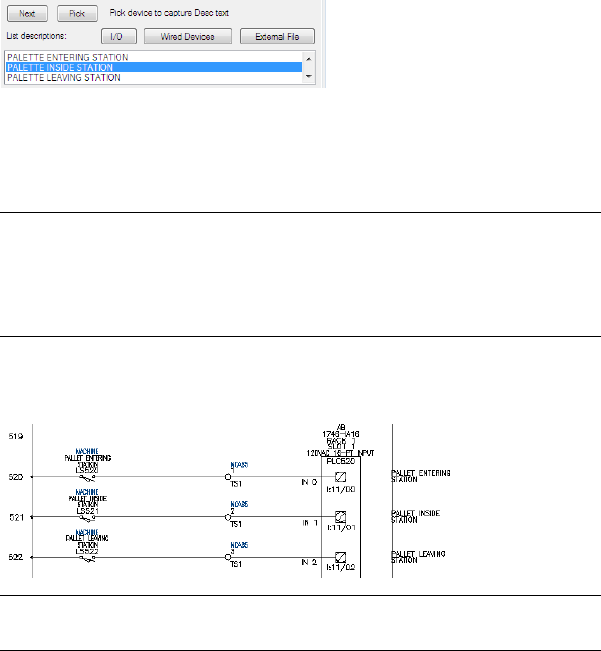
6Click Next to highlight I/O address 1:11/01 in the Addressing list.
The corresponding device description highlights automatically.
7Select the highlighted description, PALLET INSIDE STATION, and click
OK.
8Repeat this process for the remaining I/O point.
NOTE Alternately you can use Pick to capture existing description text from
a connected device. To do so, in the Edit PLC Module dialog box, click Pick,
and then select the component whose text you want to copy. AutoCAD
Electrical reads the existing DESC text values on the component and transfers
a copy to the DESC boxes in the Edit PLC Module dialog box.
9In the Edit PLC Module dialog box, click OK.
Your descriptions appear on the module.
NOTE If your PLC description is not where you want it, use the Scoot tool
to scoot the description to a new location.
1818 | Chapter 23 Tutorials
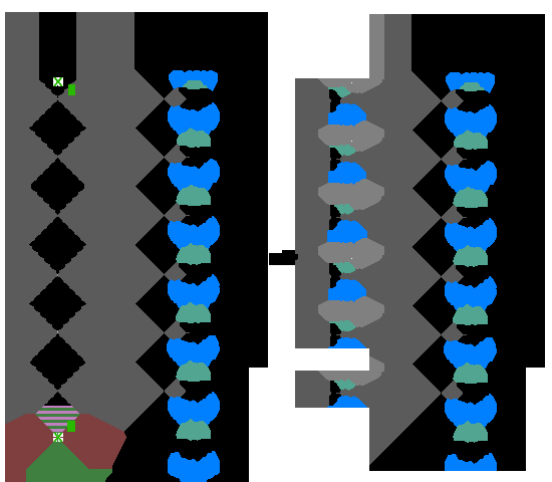
Schematic terminals
Schematic terminals - Introduction
Insert and modify schematic terminals. Define multi-level schematic terminals.
45 minutesTime required
Copy all files located inPrerequisites:
Documents and Settings\{username}\My Documents\Acade {version}\Aedata\Tutorial\Ae-
gs\Schematic terminals
Windows XP
to
Documents and Settings\{username}\My Documents\Acade {version}\Aedata\Proj\Aegs
Users\{username}\Documents\Acade {version}\Aedata\Tutorial\Aegs\Schematic terminalsWindows Vista,
toWindows 7
Users\{username}\Documents\Acade {version}\Aedata\Proj\Aegs
Schematic terminals | 1819

You learn to:
■Understand terminal relationships
■Insert terminals
■Assign terminal block properties
■Define a multi-level terminal
■Associate terminals
About schematic terminals
AutoCAD Electrical supports two types of relationships for terminals:
schematic-to-schematic and schematic-to-panel.
NOTE Since one-line terminal symbols likely represent multiple, independent
terminals, they cannot be associated to other schematic or panel terminals. A
one-line terminal must be updated manually. A one-line terminal symbol is defined
by a WDTYPE attribute on page 325 value of “1-”.
Schematic-to-Schematic
The schematic-to-schematic relationship defines separate schematic terminal
symbols as one multi-level (also referred to as multi-tier or multi-stack) terminal
block. On the schematic drawing, each schematic terminal symbol represents
one level of the multi-level terminal block.
NOTE Multiple terminal symbols for one level are not currently supported.
The number of levels for the block is defined as a block property. Each level
carries certain characteristics, such as a label, wires per connection, left pin,
and right pin. Each schematic terminal symbol carries all the block properties
for each level so that removing one terminal symbol does not remove the
block properties. If a block property is modified, all the terminal symbols
update.
An ID value held on the LINKTERM attribute or Xdata, associates the terminal
symbols. When a terminal symbol is inserted, by default it is seen as a
standalone terminal (it has no associations) and receives a new LINKTERM
value. When the terminal is associated to another, the LINKTERM value
updates so that each terminal carries the same LINKTERM value. Changing
or removing the LINKTERM value breaks any associations that terminal has.
1820 | Chapter 23 Tutorials

To associate schematic terminals, first add block properties. The number of
terminals you can associate is limited to the number of levels defined in the
block properties. Once block properties are established you can associate
schematic terminals to build a multi-level terminal block by:
■Click Schematic tab ➤ Edit Components panel ➤ ➤ Associate
Terminals.
You select a master terminal and then select each terminal symbol to
associate to the master.
■Clicking Pick on the Insert/Edit Terminal Symbol dialog box. It adds the
edited symbol into an association with the picked terminal.
■Clicking Add/Modify on the Insert/Edit Terminal Symbol dialog box. It
adds the edited symbol into an association with any schematic terminal
in the project.
Prebuilt circuits can contain associated terminals. These relationships are
maintained when the circuit is inserted. Copying a circuit also maintains these
relationships within the copied circuit.
When the Bill of Materials report is run, these separate terminal symbols that
make up one multi-level terminal, are counted as one in the quantity.
Schematic-to-Panel
The schematic-to-panel relationship is used mainly for updating. If the
schematic or panel is modified, the other updates to reflect the changes. This
relationship is like component relationships, which are based on the TAG
value. The TAGSTRIP, Installation, and Location values must match for the
terminals to associate together. The association number on the LINKTERM is
also taken into account when creating a relationship between the schematic
terminal and its panel representation. Block properties are not required to
associate a schematic to panel terminal. Once they are associated, modifications
on one results in modifications on the other.
About schematic terminals | 1821
You can associate a schematic and panel terminal automatically by:
■Click Panel tab ➤ Terminal Footprints panel ➤ ➤ Insert
Terminals drop-down ➤ Insert Terminal (Schematic List).
■Click Schematic tab ➤ Insert Components panel ➤ Insert Components
drop-down ➤ Terminal (Panel List).
For multi-level terminals, the Insert Terminal (Schematic List) tool shows only
one terminal for insertion regardless of how many schematic terminal
symbols/levels there are for that multi-level block. The Insert Terminal (Panel
List) tool shows one terminal for each level for insertion.
NOTE Panel terminals inserted by the Terminal Strip Editor are automatically
associated to the schematic representation.
You can click the Associate terminals on page 1055 tool to select terminals to
associate or click Add/Modify on the Panel Layout - Terminal Insert/Edit dialog
box to add the panel terminal to an association with a schematic terminal on
any drawing in the project.
Insert terminals
Insert terminals
1If AEGS is not the active project, in the Project Manager, right-click AEGS
and select Activate.
2In the Project Manager, double-click AEGS to expand the drawing list.
3In the Project Manager, Project Drawing List, double-click AEGS05.dwg.
4Click Schematic tab ➤ Insert Components panel ➤ Multiple Insert
drop-down ➤ Multiple Insert (Icon Menu).
1822 | Chapter 23 Tutorials
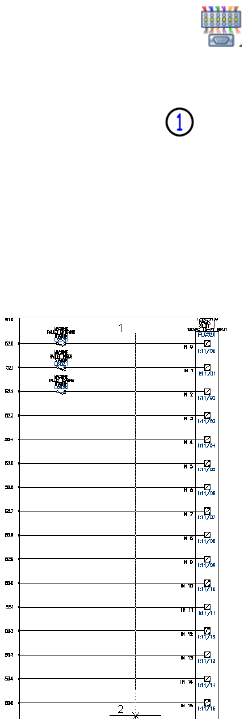
5In the Insert Component: JIC Schematic Symbols dialog box, click
Terminals/Connectors.
6In the JIC: Terminals and Connectors dialog box, click Round with
Terminal Number.
7Respond to the prompts as follows:
Component Fence, From Point: Select above wire at line reference 520 (1)
Component Fence, From Point: to:
Select below wire at line reference 535 (2), left click to end command, right-click
to add terminal
8In the Keep dialog box, select Keep this one.
Click OK.
9In the Insert/Edit Terminal Symbol dialog box, Terminal section, specify:
Location: MCAB5
Tag Strip: TS1
Number: 1
Insert terminals | 1823
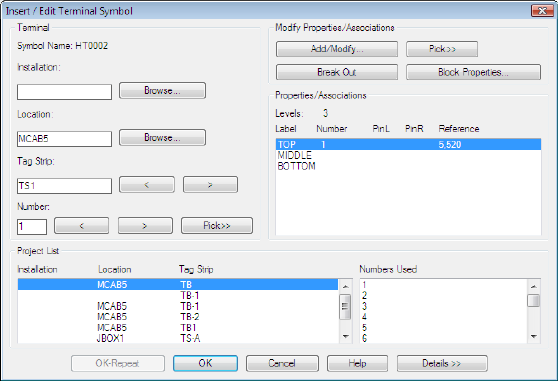
10 Click OK.
11 In the Keep dialog box, select:
Keep all, don’t ask
Clear Show edit dialog box after each
Click OK
The terminals are automatically added to your drawing.
1824 | Chapter 23 Tutorials
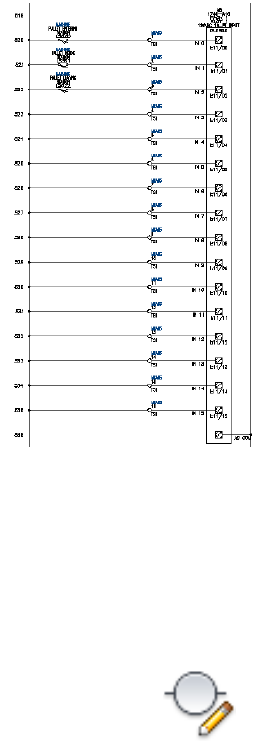
Multi-level terminals
Multi-level terminals
1In the Project Manager, Project Drawing List, double-click AEGS02.dwg.
2Click Schematic tab ➤ Edit Components panel ➤ Edit Components
drop-down ➤ Edit.
3Select the round terminal on rung 217. The Insert/Edit Terminal Symbol
dialog box displays, where you can annotate the terminal properties and
associations.
4In the Insert/Edit Terminal Symbol dialog box, Project List section, select
Tag Strip TB.
5Enter Location: MCAB5 and Number: 10.
Multi-level terminals | 1825
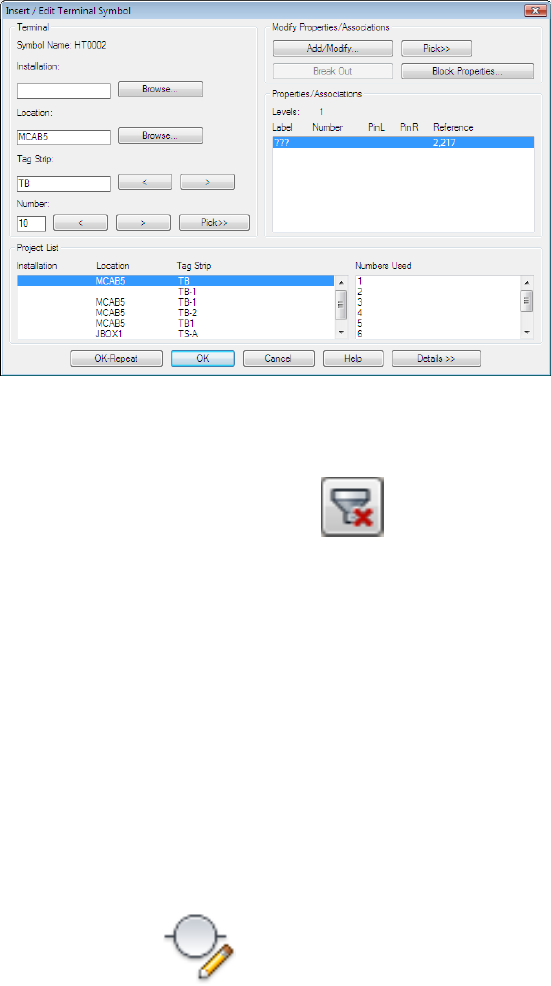
6Click Details >>.
7In the Catalog Data section, click Catalog Lookup.
8On the Parts Catalog dialog box, click to clear all predefined
filters. Click Yes to confirm.
9On the Parts Catalog dialog box each column has an edit field to enter
search text. Enter:
Manufacturer: SIEMENS
Type: MULTI-LEVEL
Rating: 20 AMPS
10 Select part 8WA1 011-3JF16 and click OK.
The Manufacturer and Catalog information for the selected part displays
in the Catalog Data section of the Insert/Edit Terminal Symbol dialog
box.
11 On the Insert/Edit Terminal Symbol dialog box, click OK.
12 Click Schematic tab ➤ Edit Components panel ➤ Edit Components
drop-down ➤ Edit.
1826 | Chapter 23 Tutorials
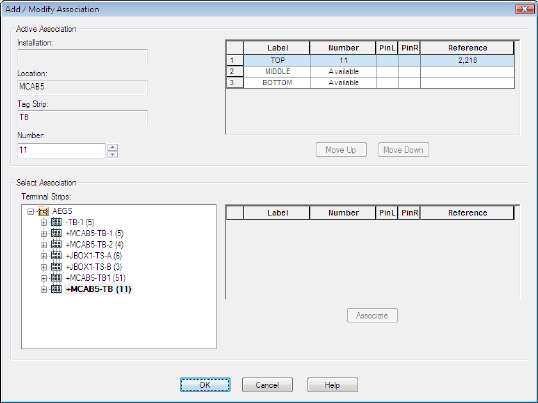
13 Select the middle terminal between rungs 217 and 218. The Insert/Edit
Terminal Symbol dialog box displays.
14 In the Insert/Edit Terminal Symbol dialog box, Project List section, select
Tag Strip TB.
15 Enter Location: MCAB5 and Number: 11.
Modify multi-level associations
Modify multi-level terminal associations
1On the Insert/Edit Terminal Symbol dialog box, Modify
Properties/Associations section, click Add/Modify.
2On the Add/Modify Association dialog box, Select Association section,
expand the active project node. The active node is bold in the list.
3Select the terminal block node you inserted on line reference 217 (10, ,
(3)).
The terminal numbers defined on the block are listed, separated by
commas. The number of levels defined in the block properties displays
at the end of the node string in parenthesis. For example, 1,21,GND (3).
An empty space represents a level not represented on the schematic: 1, ,
Modify multi-level associations | 1827
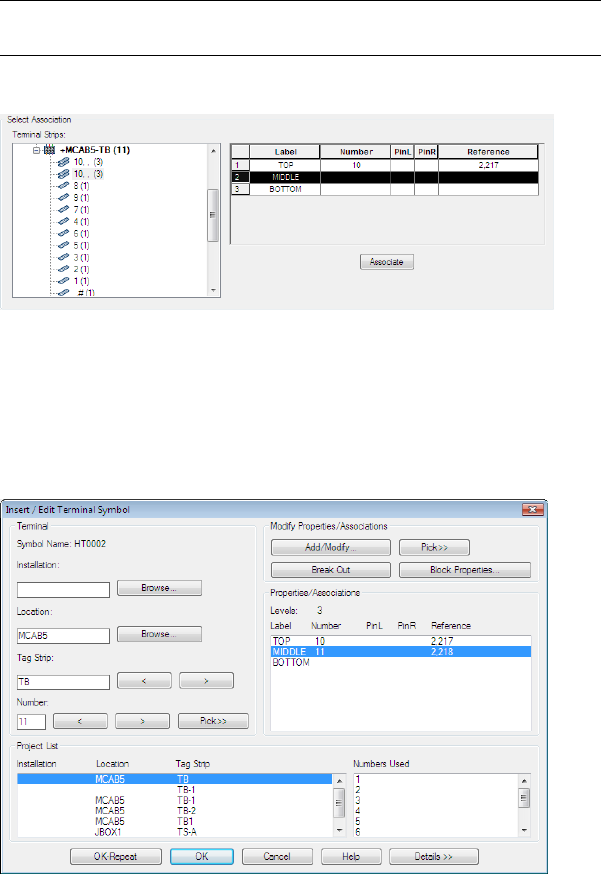
GND (3). A ‘???’ represents a terminal assigned to the level, but the
terminal does not have a number assignment: 1,???,GND (3).
NOTE The grid to the right populates with the definition for the selected
terminal: Level 1 has Label = TOP, Number = 10, Reference = 2,217.
4Select Level 2 in the grid and click Associate.
Once you click Associate, the middle level updates with the terminal
number in the grid in the Active Association section of the dialog box.
5Click OK.
The level assignments display in the Properties/Associations section of
the Insert/Edit Terminal Symbol dialog box. Notice that the terminal is
three levels and levels 1 and 2 are now assigned.
6On the Insert/Edit Terminal Symbol dialog box, click OK.
1828 | Chapter 23 Tutorials
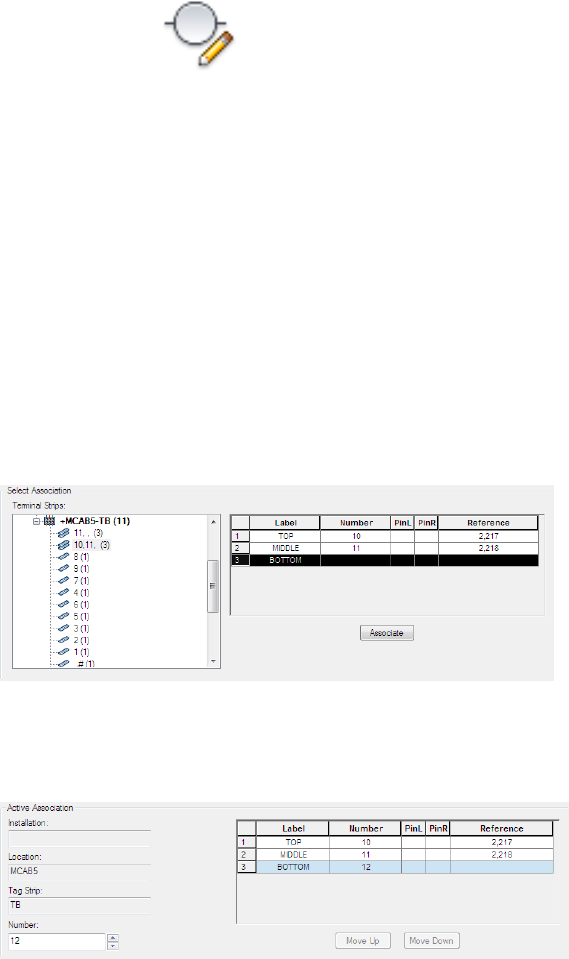
7Click Schematic tab ➤ Edit Components panel ➤ Edit Components
drop-down ➤ Edit.
8Select the bottom terminal on rung 218. The Insert/Edit Terminal Symbol
dialog box displays.
9In the Insert/Edit Terminal Symbol dialog box, Project List section, select
Tag Strip TB.
10 Enter Location: MCAB5 and Number: 12.
11 On the Insert/Edit Terminal Symbol dialog box, Modify
Properties/Associations section, click Add/Modify.
12 On the Add/Modify Association dialog box, Select Association section,
expand the active project node.
13 Select the terminal block node you inserted on line reference 217 (10,11,
(3)). Notice that the node properties updated to reflect that levels 1 and
2 are assigned and that level 3 is still blank/available.
14 Select Level 3 in the grid and click Associate.
Once you click Associate, the bottom level updates with the terminal
number in the grid in the Active Association section of the dialog box.
You can rearrange the levels by selecting a level and clicking Move Up
or Move Down.
Modify multi-level associations | 1829
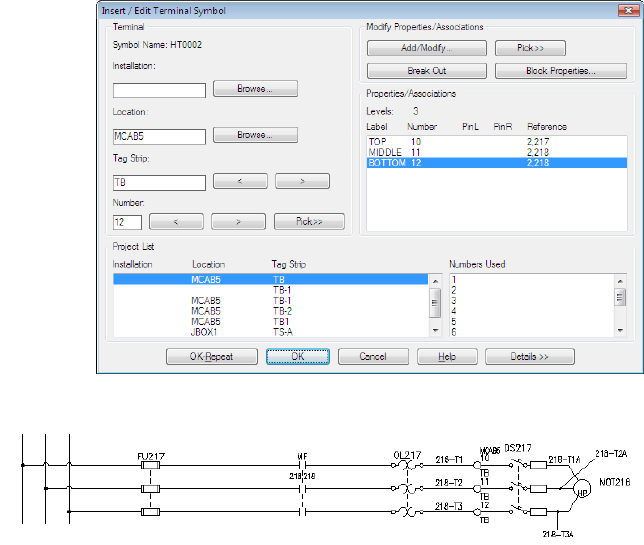
15 Click OK.
The level assignments display in the Properties/Associations section of
the Insert/Edit Terminal Symbol dialog box. Notice that levels 1, 2, and
3 are now assigned.
16 On the Insert/Edit Terminal Symbol dialog box, click OK.
Terminal Properties
You can modify an existing terminal to make it a multi-level terminal block
and then associate terminals to the master terminal block.
Modify terminal properties
1Right-click terminal 4 on line reference 211 and select Edit Component.
2On the Insert/Edit Terminal Symbol dialog box, Catalog Data section,
delete the Manufacturer and Catalog information.
3In the Modify Properties/Associations section, click Block Properties.
1830 | Chapter 23 Tutorials
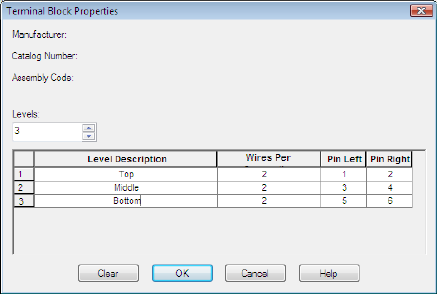
4On the Terminal Block Properties dialog box, specify:
Levels: 3
Level 1
Level Description: Top
Wires Per Connection: 2
PinL: 1
PinR: 2
Level 2
Level Description: Middle
Wires Per Connection: 2
PinL: 3
PinR: 4
Level 3
Level Description: Bottom
Wires Per Connection: 2
PinL: 5
PinR: 6
Click OK.
Notice on the Insert/Edit Terminal Symbol dialog box,
Properties/Associations section that the block now has three levels.
Terminal 4 is assigned to the top level of the block.
Terminal Properties | 1831
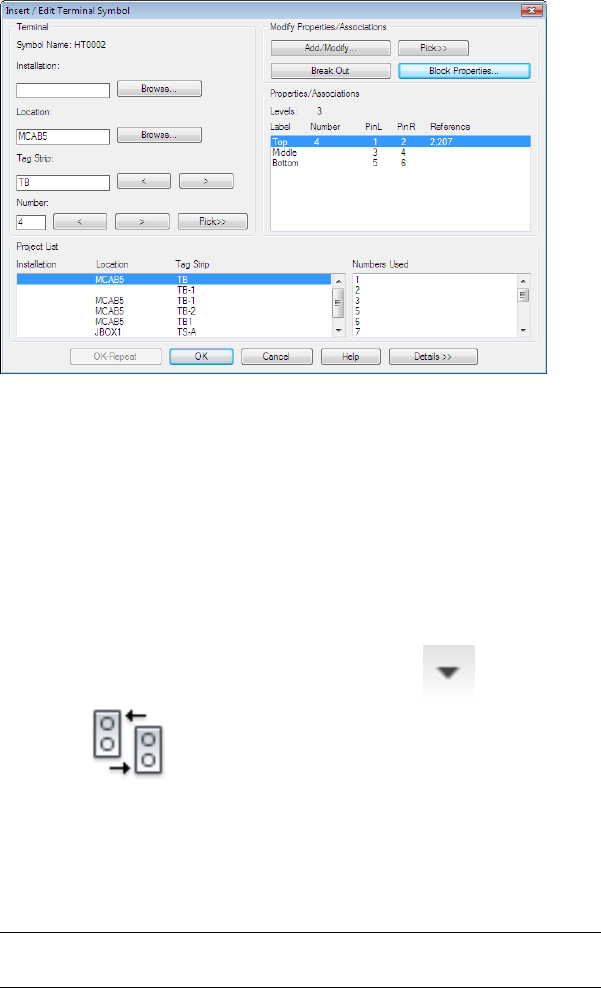
5On the Insert/Edit Terminal Symbol dialog box, click OK.
6On the Update other drawings dialog box, click OK.
7If asked to save the drawing, click OK.
Associate terminals
Associate terminals
1Click Schematic tab ➤ Edit Components panel ➤ ➤ Associate
Terminals.
2Respond to the prompts as follows:
Select “Master” terminal: Select terminal 4 on line reference 211
Pick terminal: Select terminal 5
Pick terminal: Select terminal 6, right-click
NOTE The command prompt area indicates that the terminal was added as
level 02 or level 03 once you pick the terminal.
1832 | Chapter 23 Tutorials
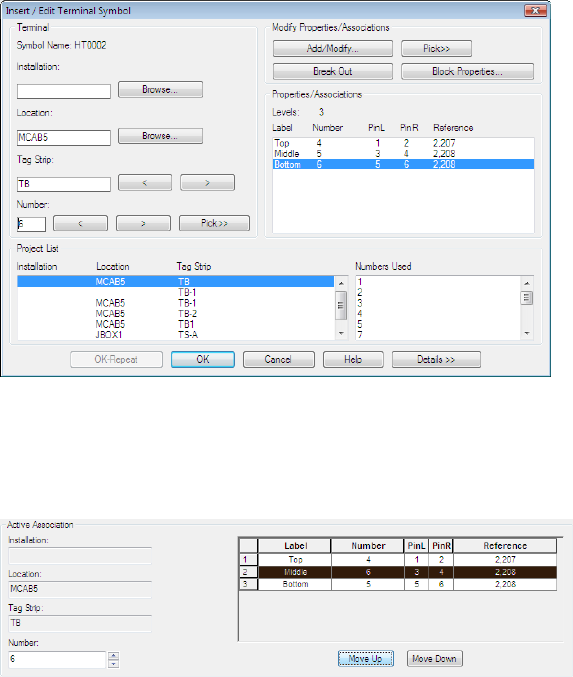
3Right-click terminal 6 and select Edit Component.
On the Insert/Edit Terminal Symbol dialog box, Properties/Associations
section, all three levels have been assigned. You can now move a terminal
to another level using the Add/Modify Association dialog box.
4On the Insert/Edit Terminal Symbol dialog box, Modify
Properties/Associations section, click Add/Modify.
5On the Add/Modify Association dialog box, Active Association section,
highlight level 3 in the grid and click Move Up.
The grid updates to reflect the move. Notice that terminal 6 is now
assigned to level 2.
6Click OK.
7On the Insert/Edit Terminal Symbol dialog box, click OK.
8If asked to update related components, click Yes-Update.
Associate terminals | 1833
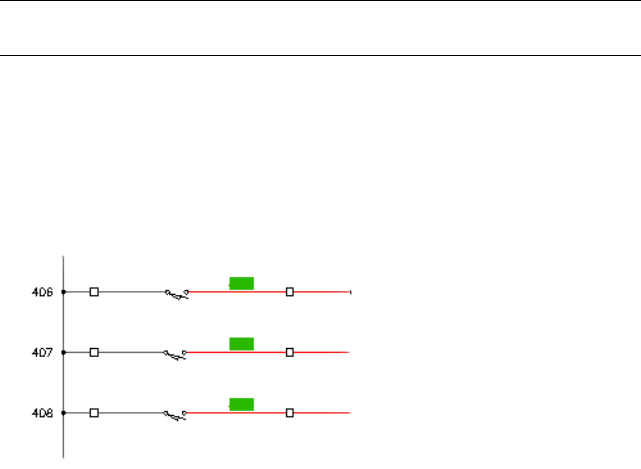
NOTE If the terminals are not all on the same drawing you can associate them
using the Add/Modify Association dialog box.
Wire numbers
Wire numbers - Introduction
Insert wire numbers and signal arrows.
45 minutesTime required
Copy all files located inPrerequisites:
Documents and Settings\{username}\My Documents\Acade {version}\Aedata\Tutorial\Ae-
gs\Wire numbers
Windows XP
to
Documents and Settings\{username}\My Documents\Acade {version}\Aedata\Proj\Aegs
Users\{username}\Documents\Acade {version}\Aedata\Tutorial\Aegs\Wire numbersWindows Vista,
toWindows 7
Users\{username}\Documents\Acade {version}\Aedata\Proj\Aegs
You learn to:
■Understand wire numbers
■Insert wire numbers
■Insert I/O based wire numbers
1834 | Chapter 23 Tutorials
■Delete wire numbers
■Understand signal arrows
■Insert a source arrow
■Insert a destination arrow
About wire numbers
Wire numbers can be assigned to any existing wires on an individual selection,
an entire drawing, selected drawings in a project, or an entire project.
AutoCAD® Electrical assigns a unique wire number to each wire network. A
wire network consists of one or more wires that are electrically connected.
Inserting wire numbers
You can process and tag wires with sequential wire numbers or with wire
numbers based upon the line reference location start of the wire network.
When wire numbers are automatically inserted into a drawing, the numbers
are not duplicated.
AutoCAD Electrical works from left to right, top to bottom as it processes wire
networks by default. You can change the direction of wire numbering using
the Project Properties ➤ Wire Numbers dialog box (in the Project Manager.
Right-click the project name, and select Properties. In the Project Properties
dialog box, click the Wire Numbers tab).
Insert wire numbers automatically
1If AEGS is not the active project, in the Project Manager, right-click AEGS
and select Activate.
2In the Project Manager, double-click AEGS to expand the drawing list.
3In the Project Manager, Project Drawing List, double-click AEGS04.dwg.
4Zoom in on the top portion of the wire network on the left side of the
drawing.
About wire numbers | 1835
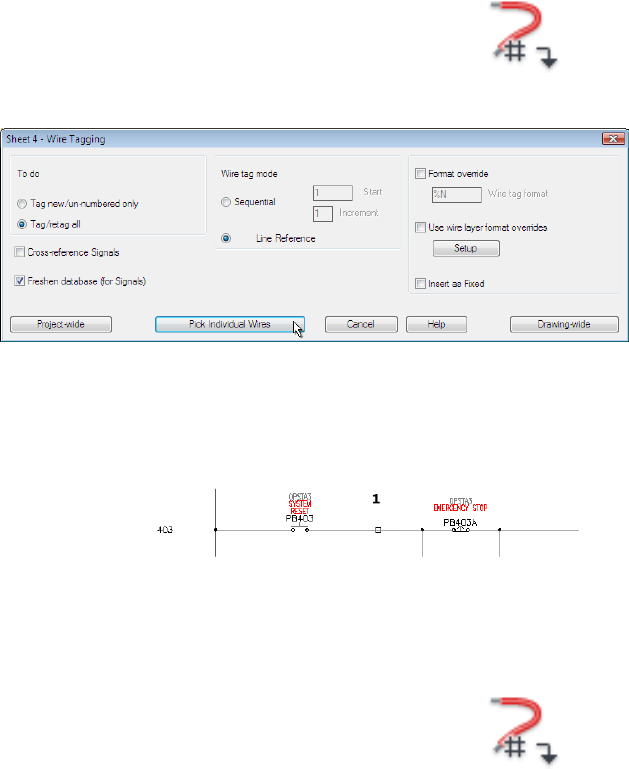
5Click Schematic tab ➤ Insert Wires/Wire Numbers panel ➤ Insert Wire
Numbers drop-down ➤ Wire Numbers.
6In the Sheet 4 - Wire Tagging dialog box, click Pick Individual Wires.
7Respond to the prompts as follows:
Select objects:
Select the wire segment between the two push buttons on line reference 403 (1),
right-click
The wire number is placed.
Add wire numbers to the entire drawing
1Click Schematic tab ➤ Insert Wires/Wire Numbers panel ➤ Insert Wire
Numbers drop-down ➤ Wire Numbers.
2In the Sheet 4 - Wire Tagging dialog box, click Drawing-wide.
Wire numbers are assigned to each segment in your drawing.
1836 | Chapter 23 Tutorials
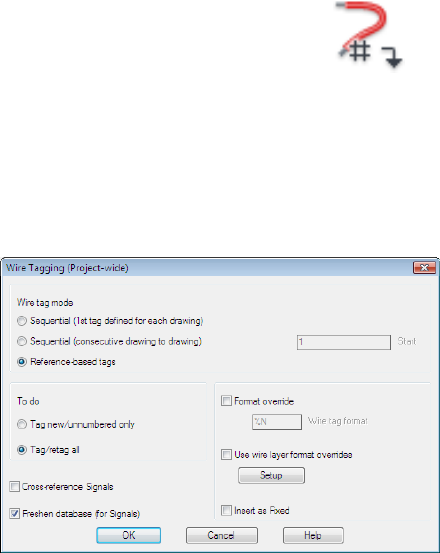
Add wire numbers project-wide
1Click Schematic tab ➤ Insert Wires/Wire Numbers panel ➤ Insert Wire
Numbers drop-down ➤ Wire Numbers.
2In the Sheet 4 - Wire Tagging dialog box, click Project-wide.
3In the Wire Tagging (Project-wide) dialog box, verify:
Wire tag mode: Reference-based tags
To do: Tag/retag all
Freshen database (for Signals)
4Click OK.
5In the Select Drawings to Process dialog box, Project Drawing List section,
press SHIFT as you select AEGS03.dwg and AEGSO04.dwg. Click Process.
6Verify AEGS03.dwg and AEGS04.dwg are listed as the drawings to process
and click OK.
7If asked to save the drawing, click OK.
Wire numbers are processed for the selected drawings.
Inserting I/O based wire numbers
You can insert wire numbers based on the I/O address that each PLC connected
wire touches. The wire numbers insert with your specified format as fixed wire
Inserting I/O based wire numbers | 1837
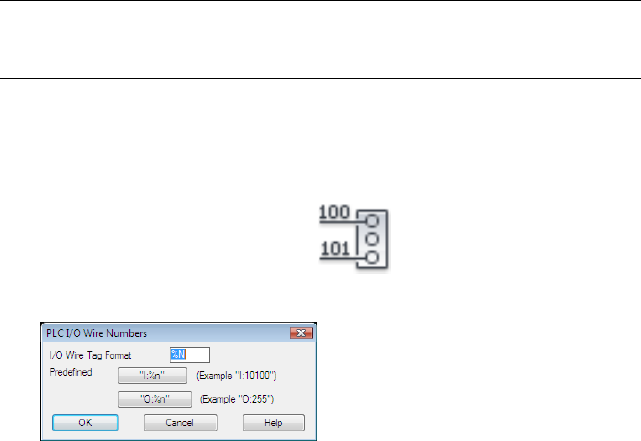
numbers. If a wire number retag is run later on, fixed wire numbers do not
change.
NOTE If you want PLC I/O based wire numbering to be the automatic default for
a drawing, set it up in the Drawing Properties dialog box. Select the Search for
PLC I/O address on insert toggle.
Insert PLC I/O wire numbers
1Open AEGS05.dwg.
2Click Schematic tab ➤ Insert Wires/Wire Numbers panel ➤ Insert Wire
Numbers drop-down ➤ PLC I/O.
The PLC I/O Wire Numbers dialog box displays.
The default format is %N, the address number. The wire number is the
same as its connected I/O address number.
3Click I:%n to change the wire number format.
It adds an ‘I’ prefix to each wire number that ties to the input module.
4Click OK.
5Respond to the prompts as follows:
Select I/O module to process: Select anywhere on the PLC module
Select objects: Select all the connected wires to process, right-click
1838 | Chapter 23 Tutorials
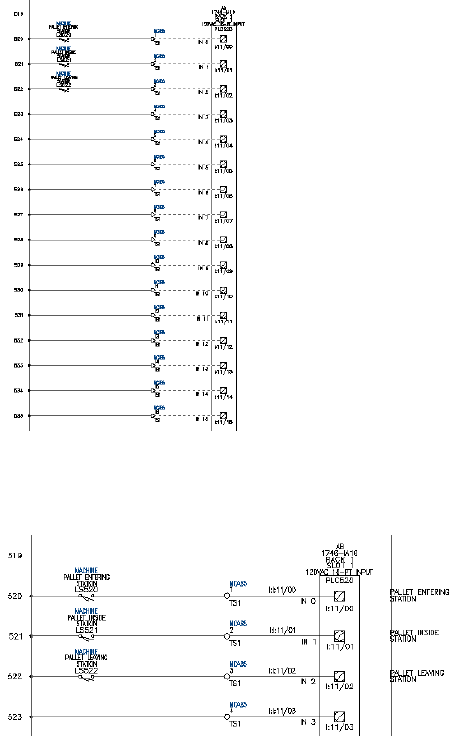
The wire numbers are inserted with the specified format. If some of the
I/O points short-circuit to other I/O points, the last point wire number
prevails for that common wire network.
Deleting a wire number
You can use the Delete Wire Numbers tool to select a wire number or to pick
on any wire of the network.
Deleting a wire number | 1839

Delete a wire number
1Click Schematic tab ➤ Edit Wires/Wire Numbers panel ➤ Delete Wire
Numbers.
2Respond the prompts as follows:
Select objects: Enter all, press ENTER
The wires in the network change to dashed lines, representing the wires
from which the wire numbers will be erased.
3Press ENTER again to erase the wire numbers.
Source signal arrows
AutoCAD Electrical uses a named source/destination concept. You identify a
wire network to be the source, insert a source arrow on that network, and
assigning a source code name to it. On the wire network that is to be a
continuation of the same wire number (whether on the same drawing or a
different drawing in the project), insert a destination arrow. Give it the same
code name that you gave to its source. AutoCAD Electrical reprocesses your
drawing set for wire numbering update. It matches source code names with
destination names and copies source wire numbers over to the destination
wire networks.
You can attach a source signal to a wire segment of a wire network. It enables
the wire number assigned to the network to jump and continue to another
network on the current drawing or on one or more drawings in the project.
The source and destination are also helpful with the Wire From/To reports
and connection information.
Attach a source signal arrow
1Open AEGS03.dwg.
2Click Schematic tab ➤ Insert Wires/Wire Numbers panel ➤ Signal Arrows
drop-down ➤ Source Arrow.
3Respond to the prompts as follows:
1840 | Chapter 23 Tutorials
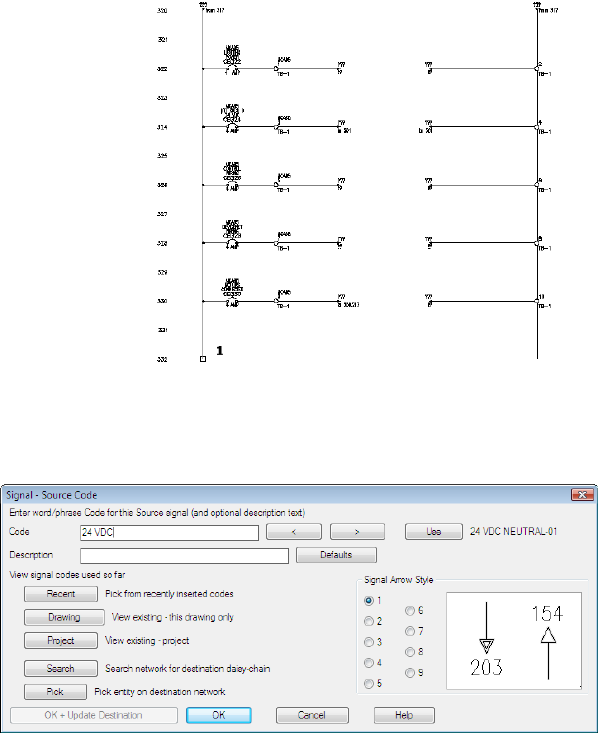
Select wire end for Source:
Select the end of the hot wire on the schematic on the right side of the drawing
at line reference 332 (1)
4In the Signal - Source Code dialog box, specify:
Code: 24 VDC
Signal Arrow Style: 1
AutoCAD Electrical allows one description line on a source arrow. This
description can then be carried over to the associated destination arrow.
You can define some default description lines to make them easier to
enter without typing them in each time. AutoCAD Electrical looks for a
file called WDSRCDST.WDD. This file is a simple text file with each line
being read as a separate description. If this file exists, the Defaults button
Source signal arrows | 1841
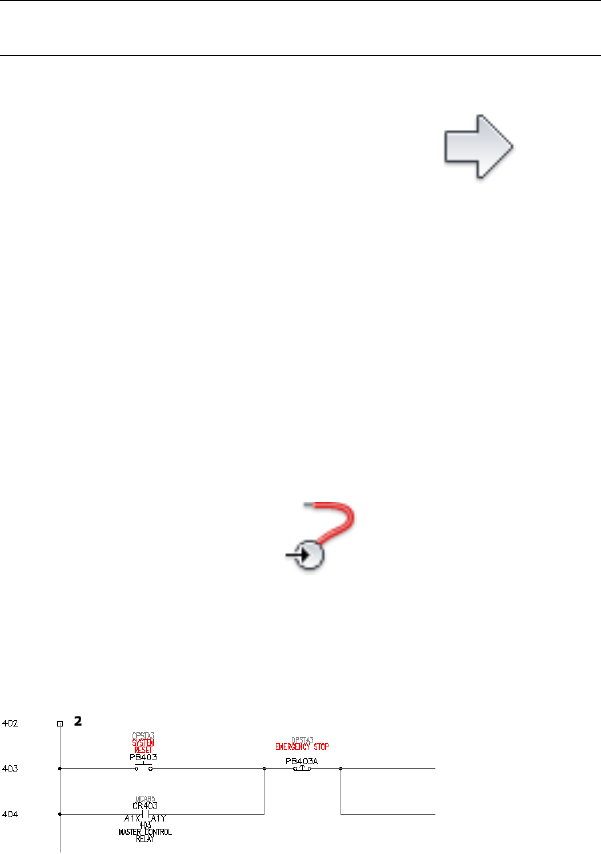
is available on the Signal - Source Code and Insert Destination Code
dialog boxes.
5Click OK.
6In the Source/Destination Signal Arrows dialog box, click No.
NOTE Click No to insert the signal arrows on the next drawing. Click OK to
insert the signal arrows on the current drawing.
7To access AEGS04.dwg
Click Project tab ➤ Other Tools panel ➤ Next DWG.
Now you are ready to insert a destination signal arrow.
Destination signal arrows
After the source signal arrow is attached to a wire in the drawing, you can
attach a destination signal to a wire segment of a wire network. It enables the
wire number assigned to another source wire network to carry over to the
current network automatically.
Attach a destination signal
1Click Schematic tab ➤ Insert Wires/Wire Numbers panel ➤ Signal Arrows
drop-down ➤ Destination Arrow.
2Respond to the prompts as follows:
Select wire end for Destination:
Select the top of the hot wire on the schematic on the left side of the drawing
at line reference 402 (2)
1842 | Chapter 23 Tutorials
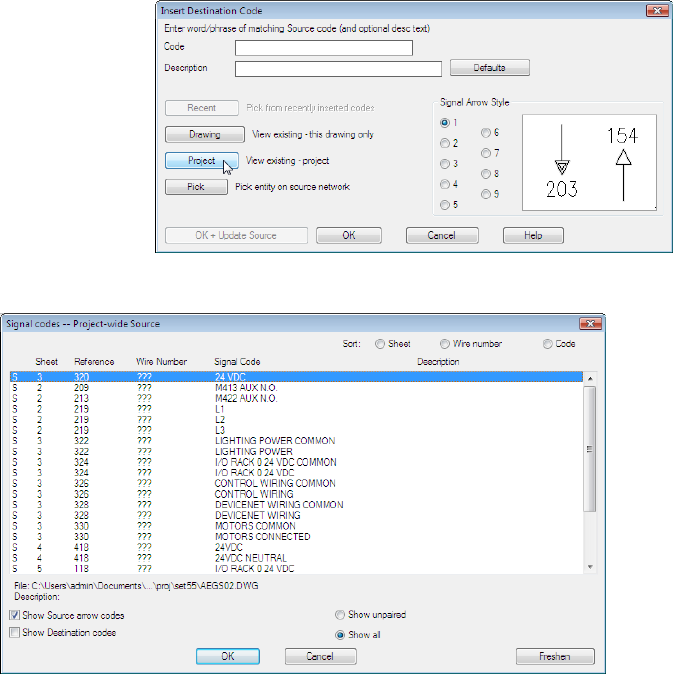
3In the Insert Destination Code dialog box, click Project.
4In the Signal codes -- Project-wide Source dialog box, select the following:
5Click OK.
6In the Insert Destination Code dialog box, verify:
Code: 24 VDC
Signal Arrow Style: 1
Click OK + Update Source.
The cross-references for your signal insert into the drawing above the hot
wire.
Destination signal arrows | 1843
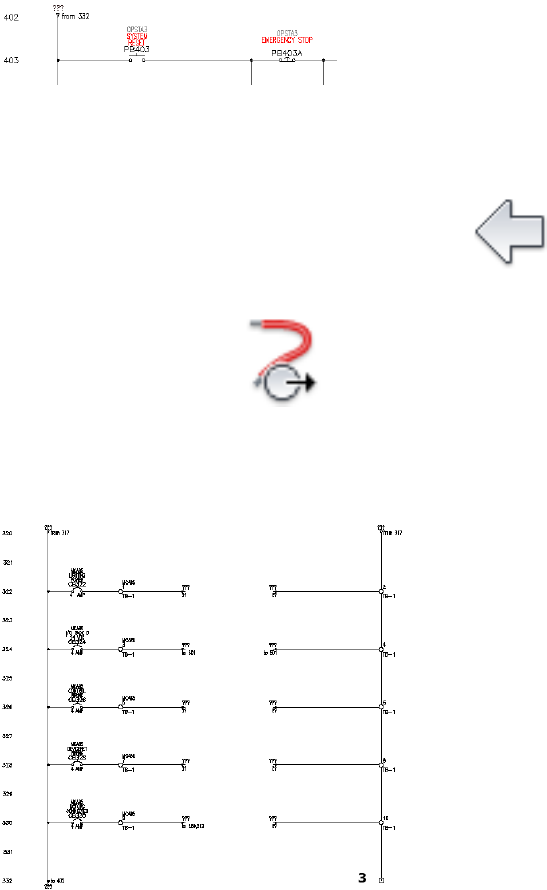
Attach source and destination signals to the neutral wires.
1To return to AEGS03.dwg
Click Project tab ➤ Other Tools panel ➤ Previous DWG.
2Click Schematic tab ➤ Insert Wires/Wire Numbers panel ➤ Signal Arrows
drop-down ➤ Source Arrow.
3Respond to the prompts as follows:
Select wire end for Source:
Select the bottom of the neutral wire at line reference 332 (3)
4In the Signal - Source Code dialog box, specify:
Code: 24 VDC NEUTRAL
Click OK.
1844 | Chapter 23 Tutorials
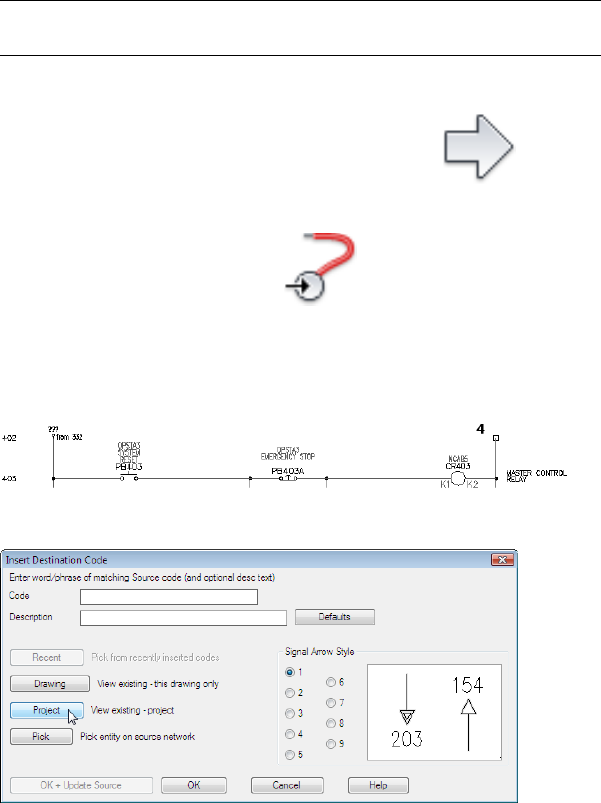
5In the Source/Destination Signal Arrows dialog box, click No.
NOTE Click No to insert the signal arrows on the next drawing. Click OK to
insert the signal arrows on the current drawing.
6To open AEGS04.dwg
Click Project tab ➤ Other Tools panel ➤ Next DWG.
7Click Schematic tab ➤ Insert Wires/Wire Numbers panel ➤ Signal Arrows
drop-down ➤ Destination Arrow.
8Respond to the prompts as follows:
Select wire end for Destination:
Select the top of the neutral wire at line reference 402 (4)
9In the Insert Destination Code dialog box, click Project.
10 In the Signal codes -- Project-wide Source dialog box, select the following:
Destination signal arrows | 1845
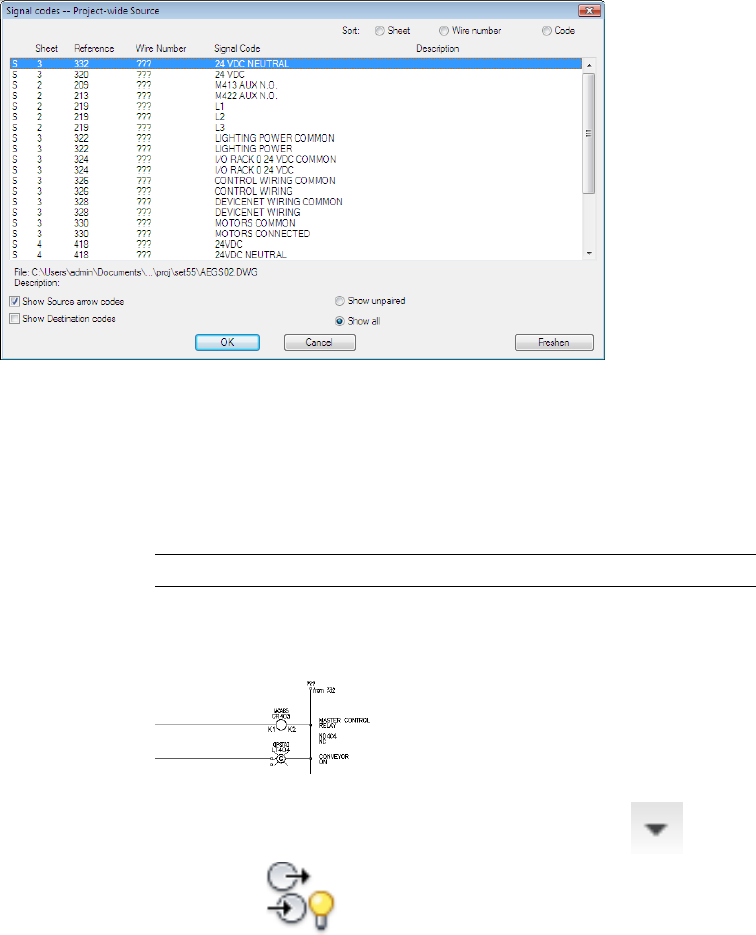
11 Click OK.
12 In the Insert Destination Code dialog box, verify:
Code: 24 VDC NEUTRAL
Signal Arrow Style: 1
Click OK + Update Source.
NOTE If asked to change the destination wire layer, click Yes.
The cross-references for your signal insert into the drawing above the
neutral wire.
13 Click Schematic tab ➤ Edit Wires/Wire Numbers panel ➤ ➤ Show
Signal Paths.
Temporary graphics illustrate the flow of the signals on your drawings.
1846 | Chapter 23 Tutorials
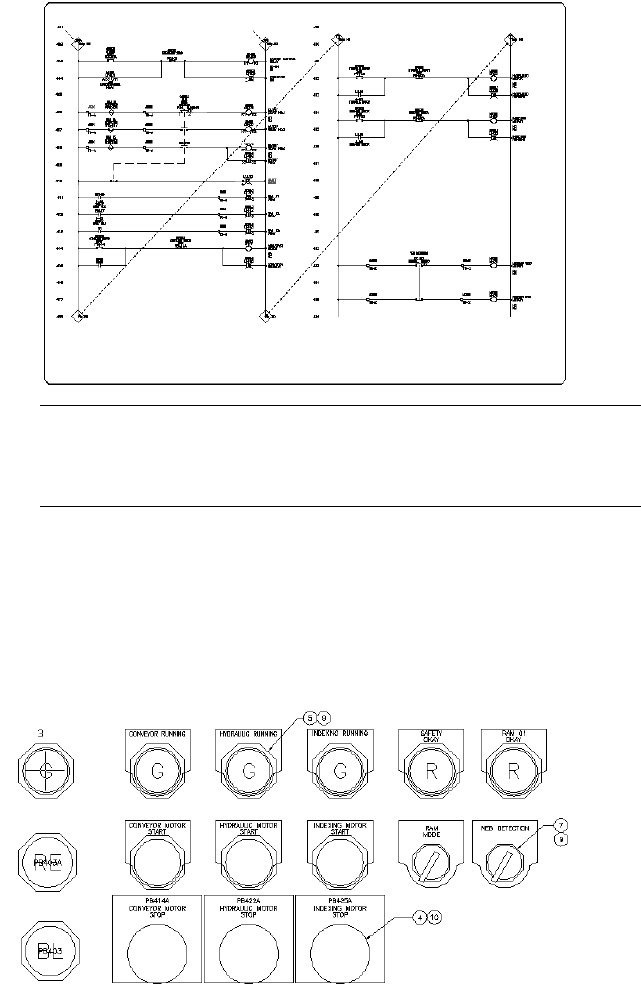
NOTE There is no limit to the number of source and destination links you
can set up. One source network can jump to multiple destinations on one or
many drawings. A wire can carry both a destination signal and a source signal
pointing to the next daisy-chained destination.
Panel layout
Panel layout - Introduction
Panel layout | 1847
Insert and edit panel footprints. Insert and modify a graphical terminal strip
with Terminal Strip Editor.
45 minutesTime required
Copy all files located inPrerequisites:
Documents and Settings\{username}\My Documents\Acade {version}\Aedata\Tutorial\Ae-
gs\Panel layout
Windows XP
to
Documents and Settings\{username}\My Documents\Acade {version}\Aedata\Proj\Aegs
Users\{username}\Documents\Acade {version}\Aedata\Tutorial\Aegs\Panel layoutWindows Vista,
toWindows 7
Users\{username}\Documents\Acade {version}\Aedata\Proj\Aegs
You learn to:
■Insert panel footprints based on schematic components
■Insert nameplates
■Use the Terminal Strip Editor
Insert Footprint (Schematic list)
Using the AutoCAD Electrical Panel Layout tools, you can select from a list of
schematic components. Place the footprint component directly into a panel
layout. The footprint remains linked to the original schematic component,
so you can perform bidirectional updating between schematic components
and the associated footprint blocks.
Select schematic component footprints
1If AEGS is not the active project, in the Project Manager, right-click AEGS
and select Activate.
2In the Project Manager, double-click AEGS to expand the drawing list.
3Open AEGS08.dwg.
1848 | Chapter 23 Tutorials
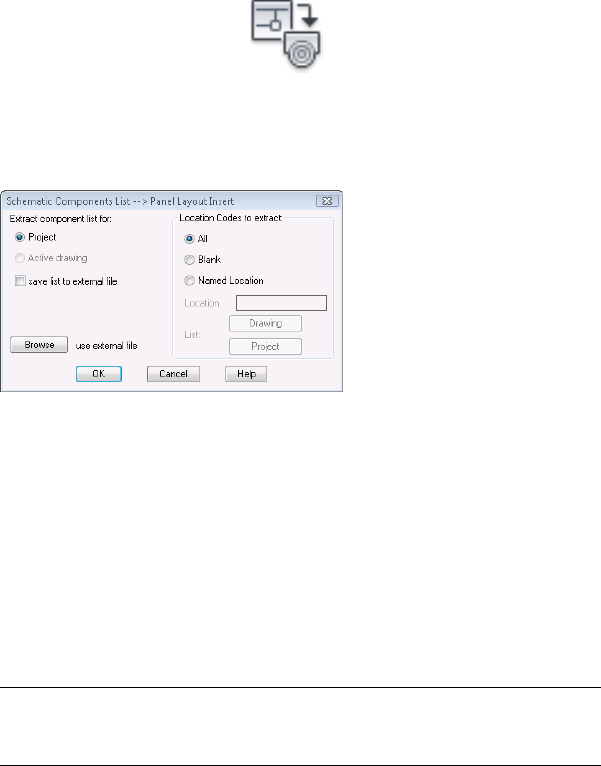
4Click Panel tab ➤ Insert Component Footprints panel ➤ Insert Footprints
drop-down ➤ Schematic List.
5In the Schematic Component List -- Panel Layout Insert dialog box, verify:
Extract component list for: Project
Location Codes to extract: All
6Click OK.
7In the Select Drawings to Process dialog box, select AEGS04.dwg and click
Process.
8Verify that AEGS04.dwg is listed in the Drawing to Process section and
click OK.
9In the Schematic Components (active project) dialog box, click Mark
Existing. An x marks the footprints that are already placed in the project.
You cannot insert the same component multiple times. If you select an
item with an x, the Insert button is disabled.
NOTE An o next to a component in the list indicates that a panel component
with a matching component tag was found, but the catalog information does
not match.
Insert Footprint (Schematic list) | 1849
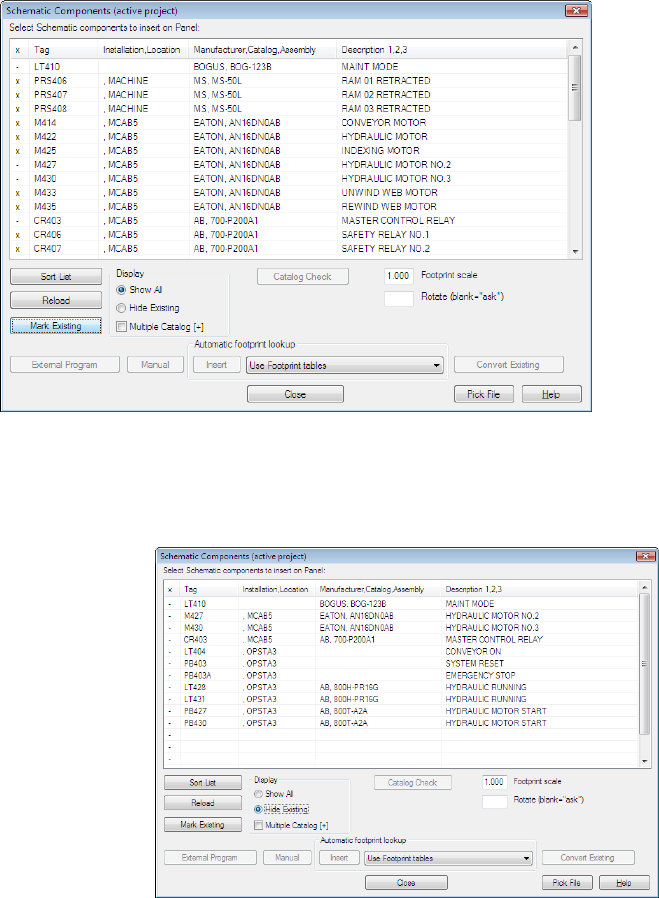
10 In the Schematic Components (active project) dialog box, Display section,
select Hide Existing.
The schematic component footprints not yet inserted into the panel
layout are displayed.
Now you can begin to insert schematic component footprints manually
on the panel layout.
1850 | Chapter 23 Tutorials
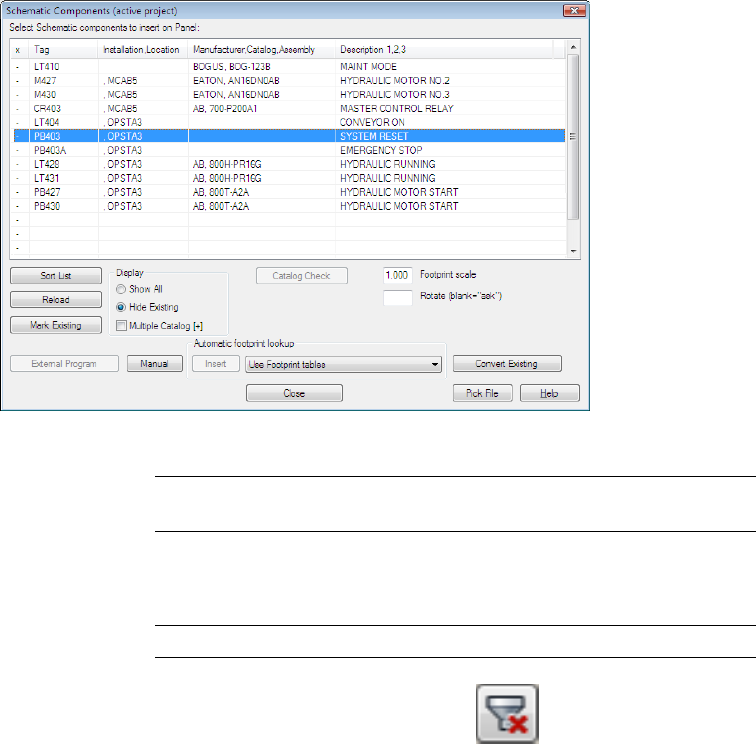
Insert the system reset footprint manually
1In the Schematics Components (active project) dialog box, select PB403
OPSTA3 SYSTEM RESET.
2Click Manual.
NOTE The Manual button is used when schematic component footprints do
not have a manufacturer and catalog number defined.
The next step is to make a catalog assignment for the automatic footprint.
3In the Footprint dialog box, Choice A section, click Catalog lookup.
NOTE Use Choice B to enter a graphic without selecting a catalog number.
4On the Parts Catalog dialog box, click to clear all predefined
filters. Click Yes to confirm.
5On the Parts Catalog dialog box each column has an edit field to enter
search text. Enter:
MANUFACTURER: AB
CATALOG: 800T
Insert Footprint (Schematic list) | 1851
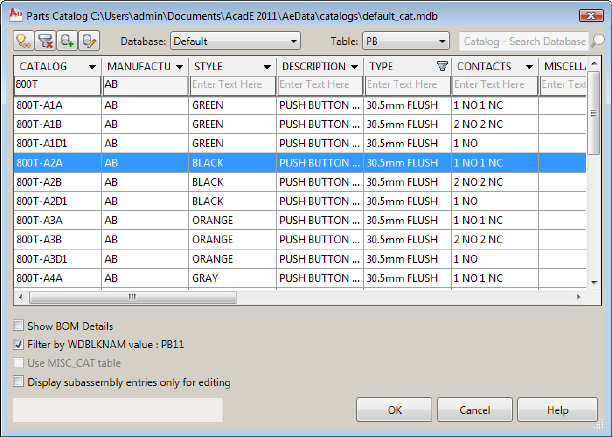
6Change the catalog assignment to 800T-A2A 1 NO 1 NC BLACK PUSH
BUTTON - MOMENTARY, NEMA 4/13 and click OK.
7In the Footprint dialog box, Choice A section, verify:
Manufacturer: AB
Catalog: 800T-A2A
Click OK.
8Respond to the prompts as follows:
Select Location for PB403: Select to the left of PB414A (1)
Select Location for PB403: <Ortho on> select ROTATION:
Right-click to place the push button
1852 | Chapter 23 Tutorials
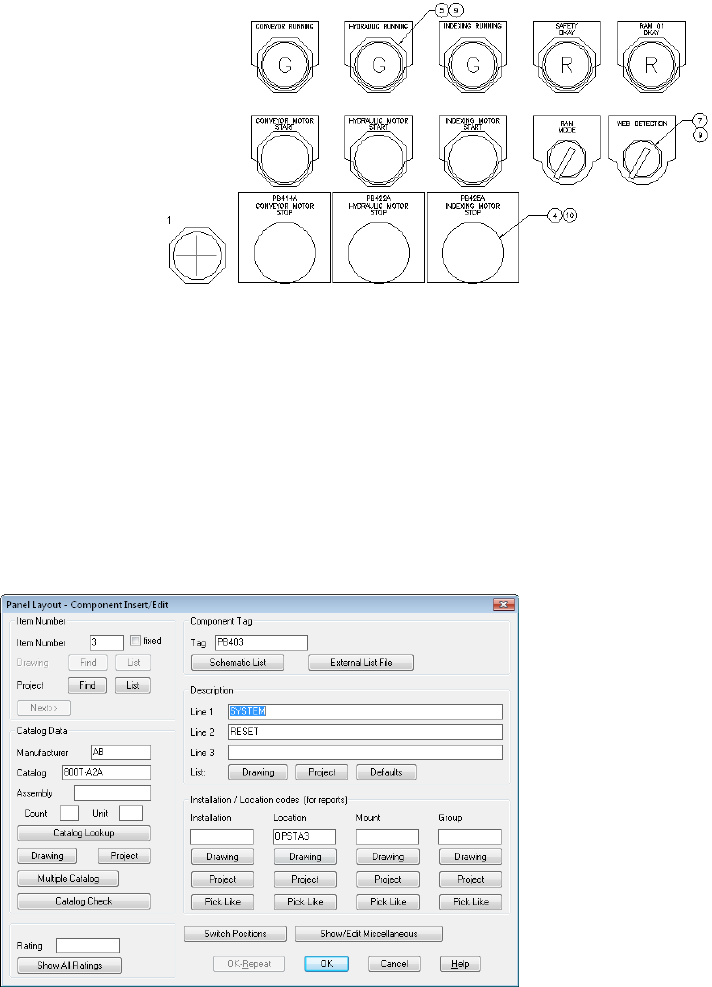
The component may already have an Item Number assigned. If AutoCAD
Electrical finds a component with the same catalog information, it
automatically assigns the same item number to this new component. If
no item number is assigned, and you think a matching component exists,
use one of the Find buttons to look through the drawing or project. If
no matching component is found, click Next to assign an item number
to this footprint. This button updates each time you insert a footprint
and assign an item number. This item or detail number is used for BOM
and component reporting and can be referenced by optional balloon
labels tied to the footprint. If you do not want the item number to change
if Resequence Item Numbers is run later on, check fixed next to the item
number.
Insert Footprint (Schematic list) | 1853
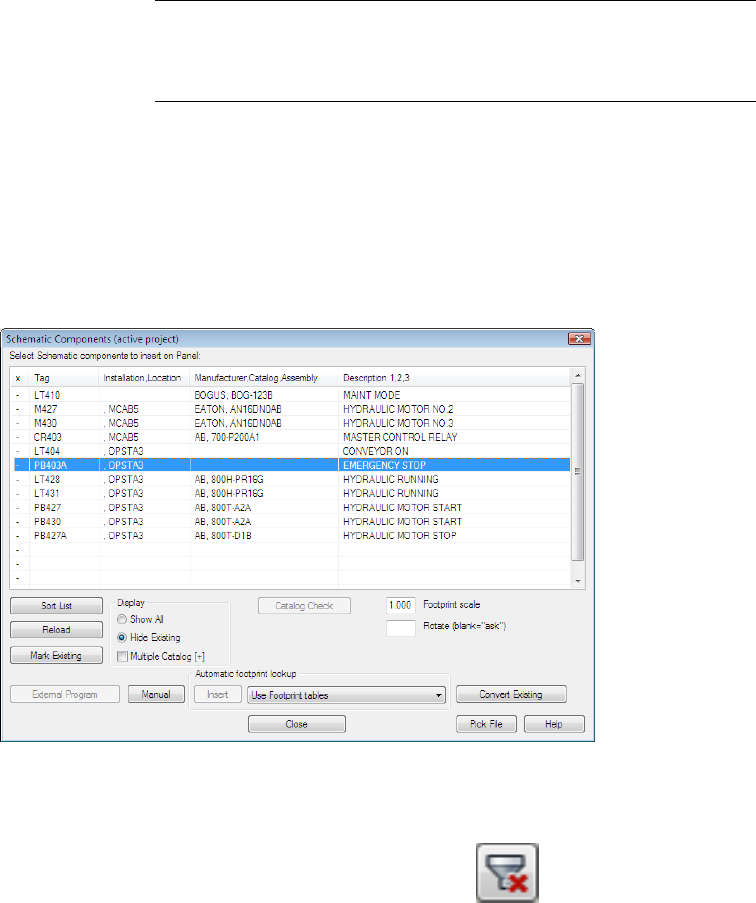
NOTE The Panel Layout - Component Insert/Edit dialog box displays each
time you insert a panel footprint. Information from the schematic
representation is automatically carried over to the panel footprint
representation.
9In the Panel Layout - Component Insert/Edit dialog box, click OK.
The Schematics Component (active project) dialog box redisplays. You
can continue inserting components from the schematic list of the project.
Insert the emergency stop footprint manually
1In the Schematic Components (active project) dialog box, select: PB403A
OPSTA3 EMERGENCY STOP.
2Click Manual.
3In the Footprint dialog box, Choice A section, click Catalog lookup.
4On the Parts Catalog dialog box, click to clear all predefined
filters. Click Yes to confirm.
5On the Parts Catalog dialog box each column has an edit field to enter
search text. Enter:
1854 | Chapter 23 Tutorials
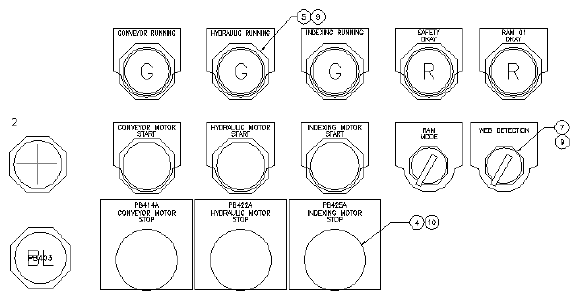
Manufacturer: AB
Type: 30.5mm
Style: Red
6Change the catalog assignment to 800T-D6A 1NO-1NC PUSH
BUTTON-MUSHROOM, NEMA 4/13 and click OK.
7In the Footprint dialog box, Choice A section, verify:
Manufacturer: AB
Catalog: 800T-D6A
Click OK.
8Respond to the prompts as follows:
Select Location for PB403A: Select to the left of Conveyor Motor Start (2)
Select Location for PB403A: <Ortho on> select ROTATION:
Right-click to place the push button
9In the Panel Layout - Component Insert/Edit dialog box, click OK.
Insert the light footprint manually
1In the Schematic Components (active project) dialog box, select LT404
OPTSTA3 CONVEYOR ON.
Insert Footprint (Schematic list) | 1855
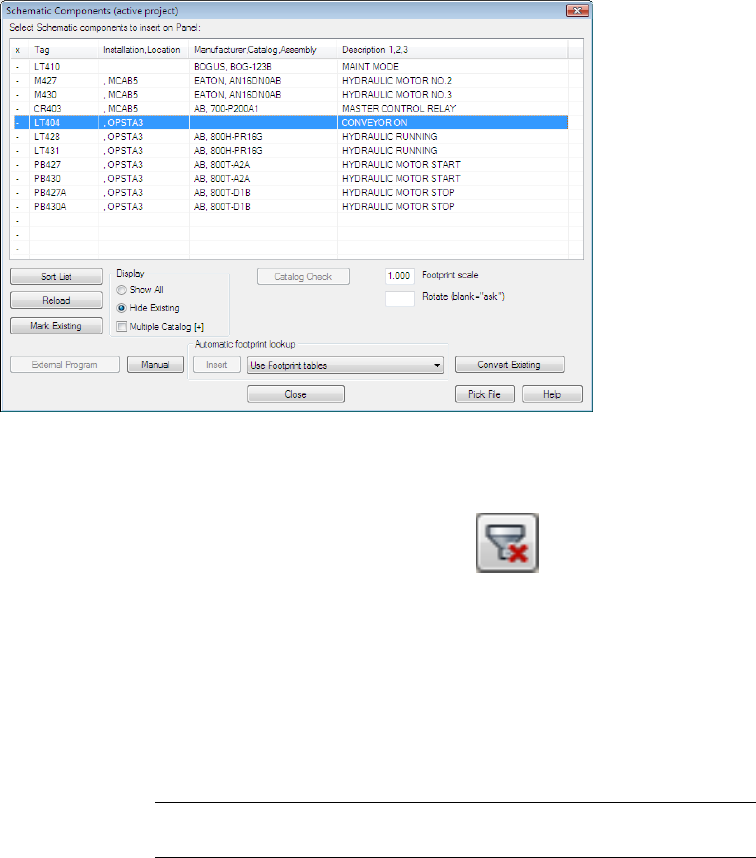
2Click Manual.
3In the Footprint dialog box, Choice A section, click Catalog lookup.
4On the Parts Catalog dialog box, click to clear all predefined
filters. Click Yes to confirm.
5On the Parts Catalog dialog box each column has an edit field to enter
search text. Enter:
MANUFACTURER: AB
TYPE: 30.5mm
6Change the catalog assignment to 800H-QRT24G PLASTIC LENS
24VAC/VDC FULL VOLT GREEN PILOT and click OK.
NOTE Click a column header to sort the catalog records based on the values
in a specific field.
1856 | Chapter 23 Tutorials
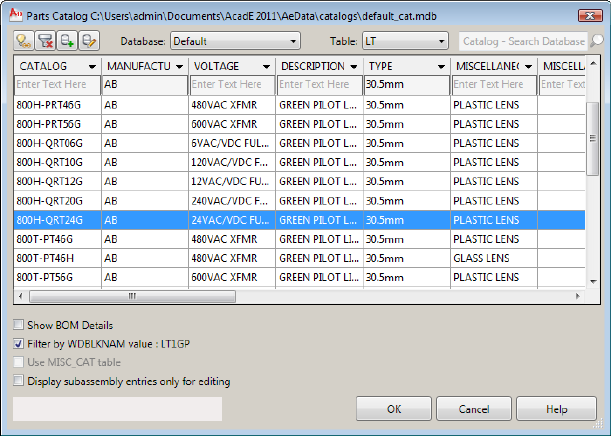
7In the Footprint dialog box, Choice A section, verify:
Manufacturer: AB
Catalog: 800H-QRT24G
Click OK.
8Respond to the prompts:
Select Location for LT404:
Select to the left of the Conveyor Running light (3)
Select Location for LT404: <Ortho on> select ROTATION:
Right-click to place the pilot light
Insert Footprint (Schematic list) | 1857
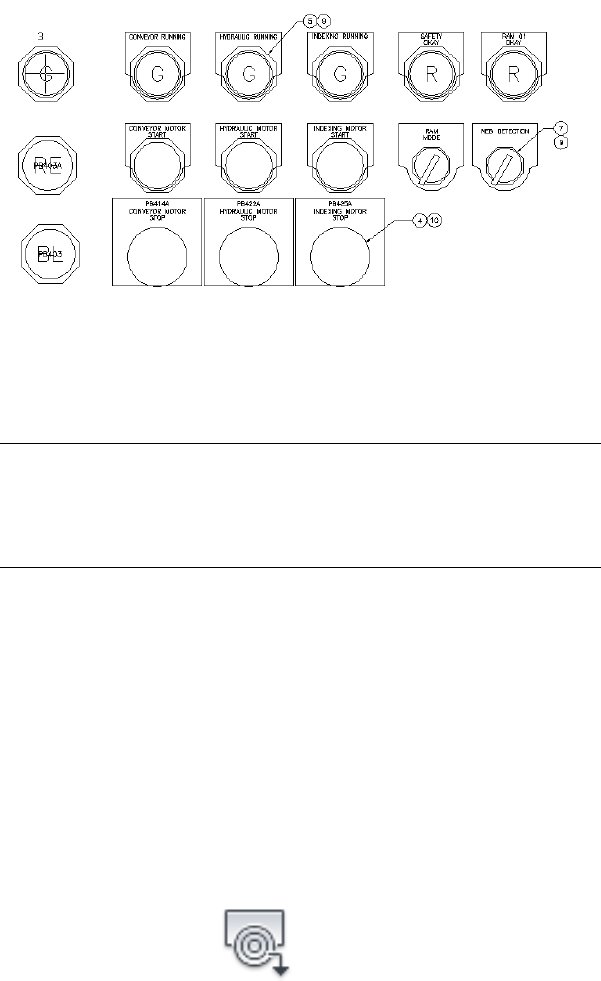
9In the Panel Layout - Component Insert/Edit dialog box, click OK.
In the Schematics Components (active project) dialog box, notice the
master control relay must still be placed.
10 In the Schematic Components (active project) dialog box, click Close.
NOTE You can modify a footprint at any time using the Edit Footprint tool.
Since there is bidirectional update capabilities between the schematics and
the panel layout drawings, it is possible to introduce some inconsistencies
between the two during edit. AutoCAD Electrical alerts you to check other
drawings first, and then update any affected drawings.
11 In the Update other drawings dialog box, click OK.
12 If asked to save the drawing, click OK.
Adding nameplate footprints
You can add nameplates to the panel layout. Nameplates are associated with
existing component footprints. Nameplates can be inserted from the main
panel icon menu or from a vendor menu.
Insert an automotive type nameplate
1Click Panel tab ➤ Insert Component Footprints panel ➤ Insert Footprints
drop-down ➤ Icon Menu.
1858 | Chapter 23 Tutorials
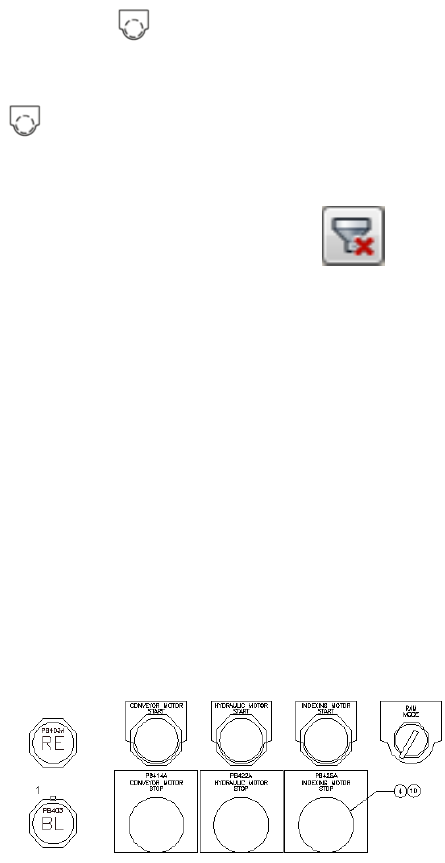
2In the Insert Footprint: Panel Layout Symbols dialog box, click
Nameplates.
3In the Panel: Nameplates dialog box, click Nameplate, Catalog Lookup.
4In the Nameplate dialog box, Choice A section, click Catalog Lookup.
5On the Parts Catalog dialog box, click to clear all predefined
filters. Click Yes to confirm.
6On the Parts Catalog dialog box each column has an edit field to enter
search text. Enter:
MANUFACTURER: AB
TYPE: 800T Automotive
7Change the catalog assignment to 800T-X701 Red Blank Name Plate and
click OK.
8In the Nameplate dialog box, Choice A section, verify:
Manufacturer: AB
Catalog: 800T-X701
Click OK.
9Respond to the prompts as follows:
Select objects: Select PB403 (1), right-click to the place the nameplate
As you select each footprint to insert, the nameplate block inserts. The
Panel Layout - Nameplate Insert/Edit dialog box displays where you can
annotate the nameplate and assign a BOM item number if needed.
Adding nameplate footprints | 1859
10 In the Panel Layout - Nameplate Insert/Edit dialog box, click OK.
NOTE A tag name links the data on the nameplate a tag name to the footprint
and to the schematic component of the same name. Changing the tag name of
any of these three representations triggers a prompt for permission to update the
other related instances.
Insert a half round nameplate
1Click Panel tab ➤ Insert Component Footprints panel ➤ Insert Footprints
drop-down ➤ Icon Menu.
2In the Insert Footprint: Panel Layout Symbols dialog box, click
Nameplates.
3In the Panel: Nameplates dialog box, click Nameplate, Catalog Lookup.
4In the Nameplate dialog box, Choice A section, click Catalog Lookup.
5On the Parts Catalog dialog box, click to clear all predefined
filters. Click Yes to confirm.
6On the Parts Catalog dialog box each column has an edit field to enter
search text. Enter:
MANUFACTURER: AB
TYPE: 800T
7Change the catalog assignment to 800T-X59E Gray Custom Text Name
Plate and click OK.
1860 | Chapter 23 Tutorials
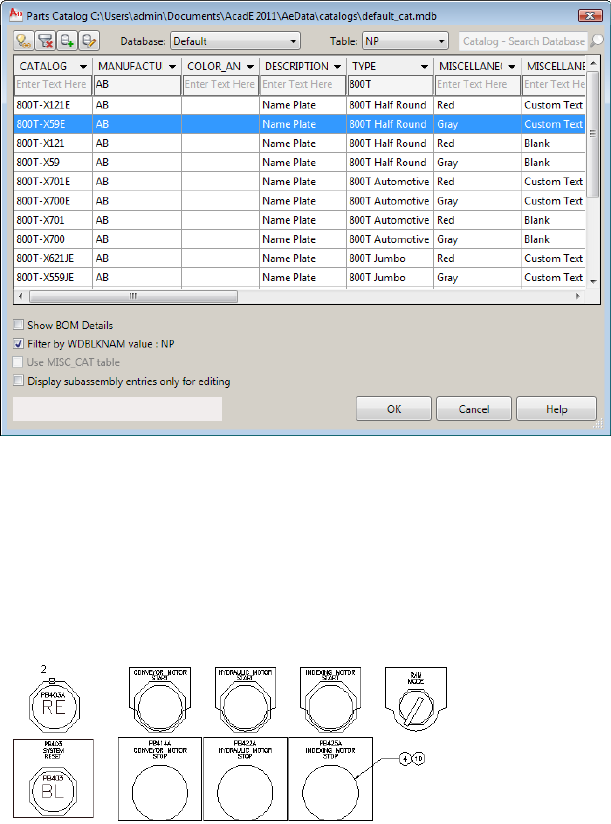
8In the Nameplate dialog box, Choice A section, verify:
Manufacturer: AB
Catalog: 800T-X59E
Click OK.
9Respond to the prompts as follows:
Select objects: Select PB403A (2), right-click to place the nameplate
10 In the Panel Layout - Nameplate Insert/Edit dialog box, click OK.
The nameplate is inserted.
Adding nameplate footprints | 1861
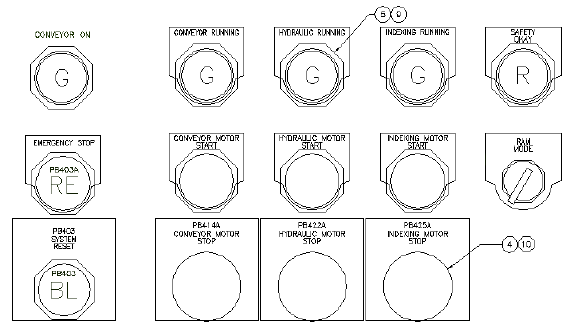
Terminal Strip Editor
Terminal blocks connect devices that require quick disconnect or disassembly
during product shipment. They can also be used to distribute power to other
devices. The Terminal Strip Editor easily and quickly defines the locations for
these connected devices during the system design process. Terminal strip
editing is primarily used towards the end of the control system design cycle
to expedite the labeling, numbering, and rearranging of terminals on a terminal
strip.
Copy and paste terminal properties
1Open AEGS09.dwg.
The terminal strip to edit, “TB”, is already placed on the drawing. Zoom
in on terminal strip “TB” to see what the terminal strip currently looks
like.
1862 | Chapter 23 Tutorials
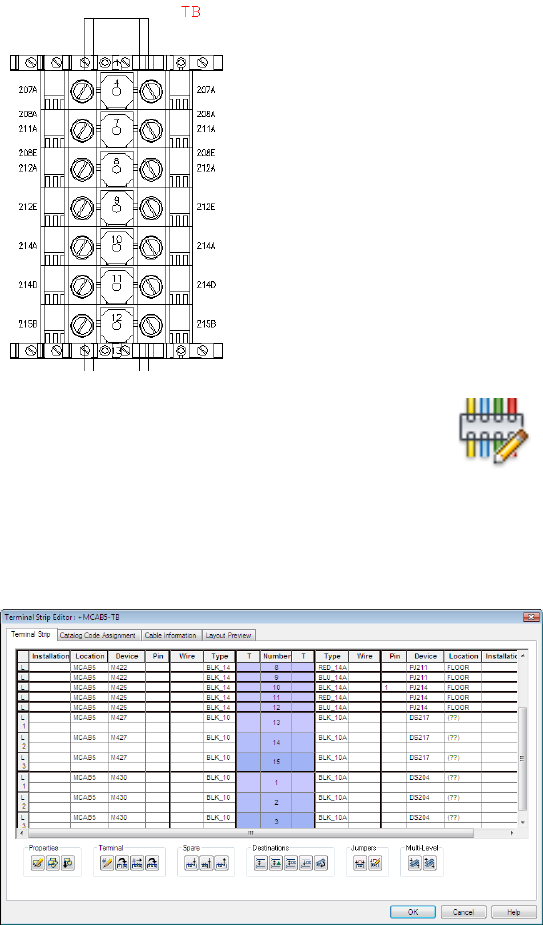
2Click Panel tab ➤ Terminal Footprints panel ➤ Editor.
3On the Terminal Strip Selection dialog box, select Terminal Strip “TB”
and click Edit.
4On the Terminal Strip Editor dialog box, Terminal Strip tab, select terminal
1 in the grid.
Terminal Strip Editor | 1863
5In the Terminal section, click the Move Terminal button.
6In the Move Terminal dialog box, click Pick Above. In the Terminal Strip
Editor grid, select terminal 4.
NOTE You can also use the Move Up tool to move terminal 1 to the top of
the grid.
Click Done.
7Select terminal 4 in the grid.
8In the Properties section, click the Copy Terminal Block Properties button.
Notice that when you click Copy Terminal Block Properties, terminals 5
and 6 also highlight. It is because terminals 4, 5, and 6 are associated. If
you copy the properties from one of these terminals, you also copy the
properties from the associated terminals. The Copy Terminal Block
Properties tool then copies the properties from the terminals to one or
many terminals within the same terminal strip.
9Select terminal 7 and 10 in the grid by holding down the CTRL key while
you select the terminals.
10 In the Properties section, click the Paste Terminal Block Properties button.
The properties you copied from terminal 4 are pasted to terminals 7 and
10. Notice that both terminals are now 3-tiered terminals with level 1
assigned for both.
1864 | Chapter 23 Tutorials
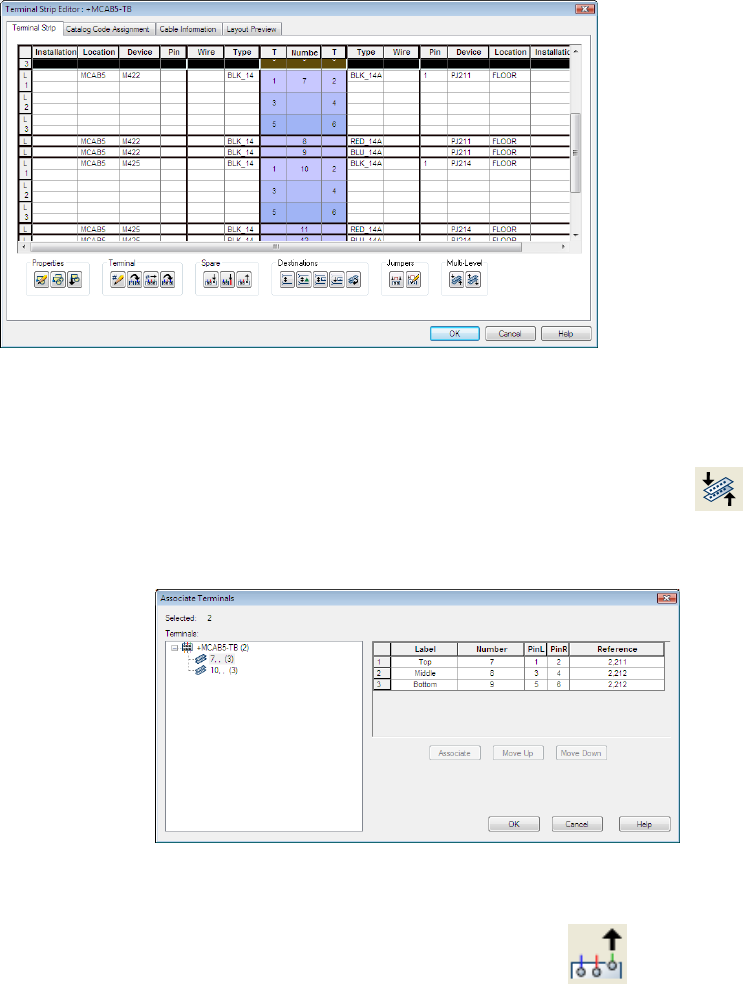
Associate terminals
1Select terminals 8 and 9 in the grid.
2In the Multi-Level section, click the Associate Terminals button.
3On the Associate Terminals dialog box, select terminal 7, , (3) and click
Associate.
Click OK.
4In the Spare section, click Delete Spare Terminals/Accessories to remove
the blank terminals resulting from the Associate.
Terminal Strip Editor | 1865
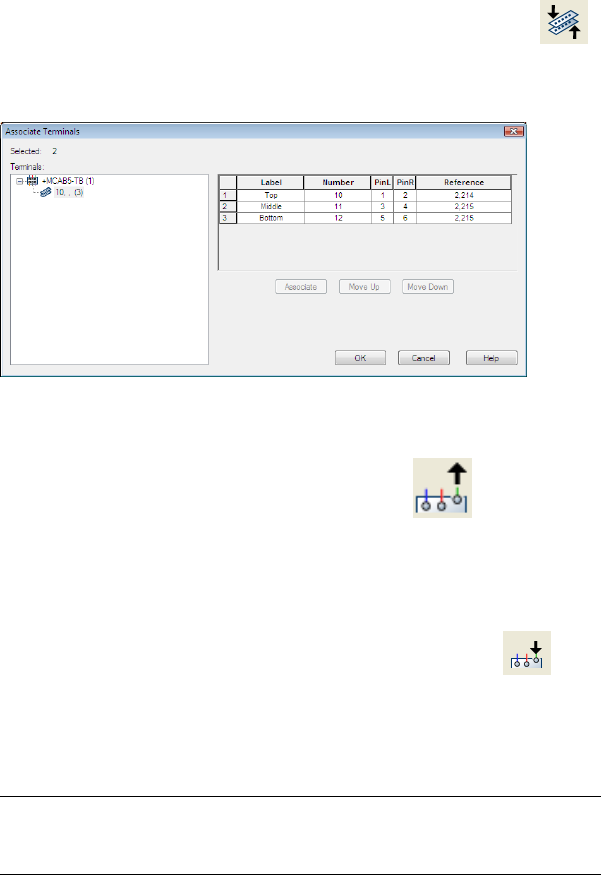
5On the Terminal Strip Editor dialog box, select terminals 11 and 12 in
the grid.
6In the Multi-Level section, click the Associate Terminals button.
7On the Associate Terminals dialog box, select terminal 10, , (3) and click
Associate.
Click OK.
8In the Spare section, click Delete Spare Terminals/Accessories to remove
the blank terminals resulting from the Associate.
Insert spare terminals and accessories
1Select terminal 7 in the grid.
2In the Spare section, click the Insert Spare Terminal button.
3On the Insert Spare Terminal dialog box, specify:
Number: SPARE
Quantity: 1
NOTE You can also assign catalog information for the spare terminal from
the Insert Spare Terminal dialog box by clicking Catalog Lookup. If needed,
you can then select the part from the Parts Catalog dialog box.
Click Insert Above.
1866 | Chapter 23 Tutorials
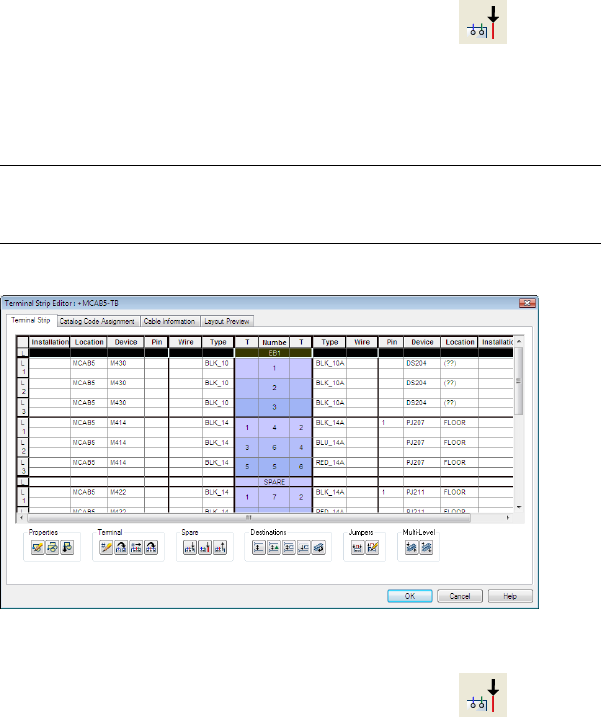
Now you insert accessories (end barriers) into the terminal strip - one at
the top and one at the bottom of the terminal strip.
4Select terminal 1 in the grid.
5In the Spare section, click the Insert Accessory button.
6On the Insert Accessory dialog box, specify:
Number: EB1
Quantity: 1
NOTE You can also assign catalog information for the accessory from the
Insert Accessory dialog box by clicking Catalog Lookup. You can then select
the part from the Parts Catalog dialog box.
Click Insert Above.
7Select terminal 15 in the grid.
8In the Spare section, click the Insert Accessory button.
9On the Insert Accessory dialog box, specify:
Number: EB2
Quantity: 1
Click Insert Below.
Terminal Strip Editor | 1867
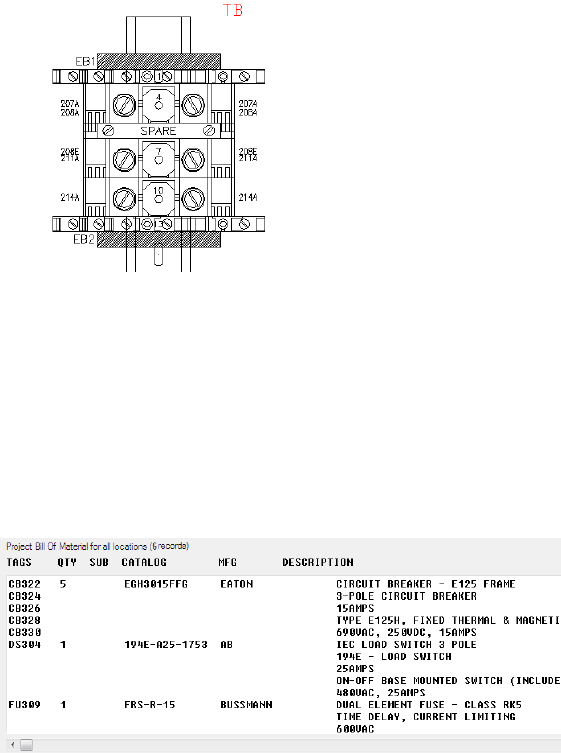
Insert the terminal strip into the drawing
1On the Terminal Strip Editor dialog box, click the Layout Preview tab.
2Select Graphical Terminal Strip as the terminal type to insert into the
drawing.
3Enter 2.0 in Scale on Insert.
4Click Rebuild.
5On the Terminal Strip Editor dialog box, click OK.
6On the Terminal Strip Selection dialog box, click OK.
Generating reports
Generating reports - Introduction
1868 | Chapter 23 Tutorials
Generate and work with reports.
30 minutesTime required
Copy all files located inPrerequisites:
Documents and Settings\{username}\My Documents\Acade {version}\Aedata\Tutorial\Ae-
gs\Generating reports
Windows XP
to
Documents and Settings\{username}\My Documents\Acade {version}\Aedata\Proj\Aegs
Users\{username}\Documents\Acade {version}\Aedata\Tutorial\Aegs\Generating reportsWindows Vista,
toWindows 7
Users\{username}\Documents\Acade {version}\Aedata\Proj\Aegs
You learn to:
■Generate a report
■Insert a report on to a drawing
■Change the format of a report
■Export the report to a spreadsheet
Generating Bill of Material reports
Using AutoCAD Electrical, you can perform a project-wide extract of all BOM
data found on your project drawing set. The data is extracted from the project
database, matched with standard entries in the catalog database, and then
additional fields are pulled from the catalog files. You can:
■Format this data into various report configurations
■Output to report files
■Export to a spreadsheet or database program
■Place in an AutoCAD Electrical drawing
Generate a Bill of Material (BOM) report
1If AEGS is not the active project, in the Project Manager, right-click AEGS
and select Activate.
Generating Bill of Material reports | 1869
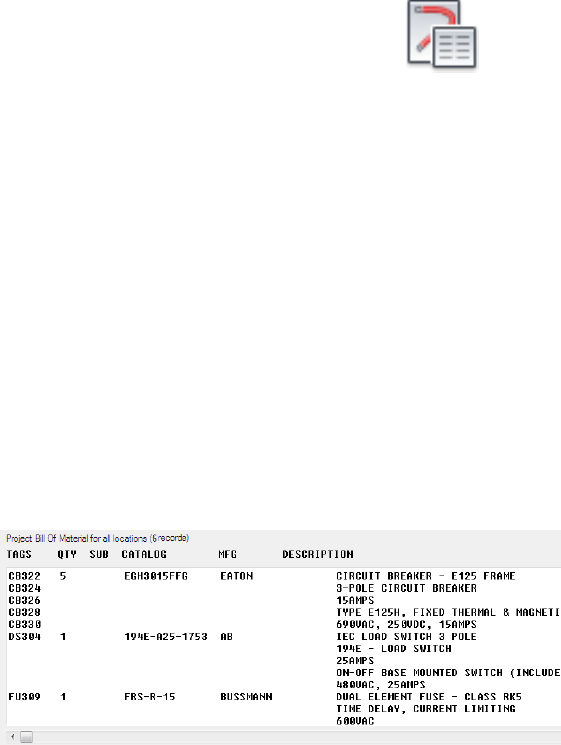
2In the Project Manager, double-click AEGS to expand the drawing list.
3Open AEGS11.dwg.
4Click Reports tab ➤ Schematic panel ➤ Reports.
5In the Schematic Reports dialog box, select:
Report Name: Bill of Material
Bill of Material: Project
Verify that the following options are specified:
Include options: All the above
Display option: Normal Tallied Format
Installation Codes to extract: All
Location Codes to extract: All
Click OK.
6In the Select Drawings to Process dialog box, select AEGS03.DWG, and
click Process.
7Verify that AEGS03.DWG displays in the Drawings to Process section of
the dialog box and click OK.
The generated report displays in the Report Generator dialog box.
8In the Report Generator dialog box, select:
Header: Time/Date
Header: Column Labels
Add blanks between entries
1870 | Chapter 23 Tutorials
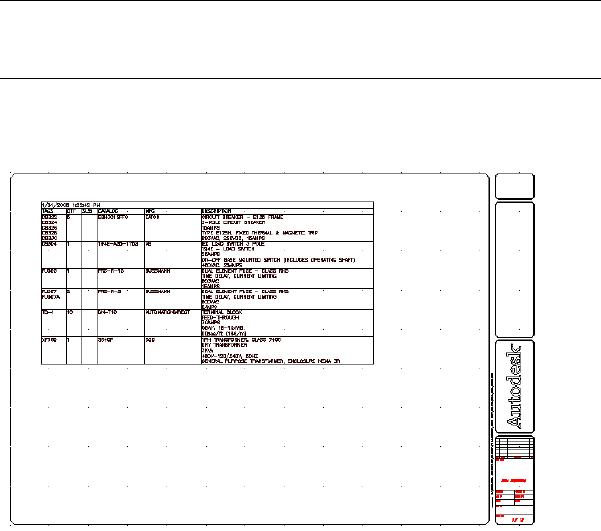
Inserting Bill of Material tables into drawings
Insert a BOM into the drawing in tabular format
1With the BOM report displayed in the dialog box, click Put on Drawing.
2In the Table Generation Setup dialog box, select:
Column Labels: Include column labels
Title: Include time/date
Column Width: Calculate automatically
Borders: All Borders
Click OK.
NOTE The extents of the BOM table are displayed in temporary graphics.
Press Z to zoom down, or R to flip into real-time pan and zoom mode, if
necessary.
3The table outline moves with your cursor. Position the table, and then
click to place the table. The BOM table is built where you placed it.
4In the Report Generator, click Close.
Inserting Bill of Material tables into drawings | 1871
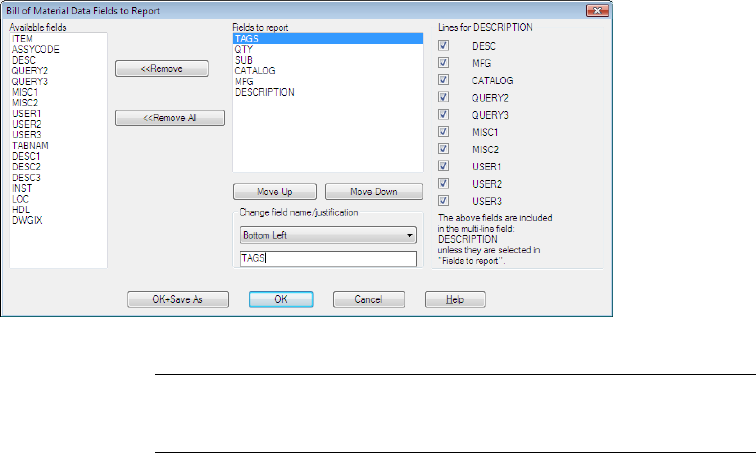
Changing format of Bill of Material report
Each AutoCAD Electrical report is customizable:
■Define which data fields are reported
■Define the order in which they appear
■Define the justification of any column
■Define the column labels
Remove the TAGS columns from the BOM
1Erase the table, or UNDO, and rerun the BOM extract for AEGS03.DWG.
2In the Report Generator dialog box, click Change Report Format.
In the Bill of Materials Data Fields to Report dialog box, Fields to report
section, the fields that format the BOM are displayed.
3Select TAGS in the Fields to report list.
4Click <<Remove.
The TAGS field is moved out of Fields to report and into Available fields.
NOTE You can also select a field in the Available fields list to add it to the
report. You can rearrange columns using the Move Up and Move Down
buttons. Clicking Ok-Save As saves these settings to a file for later use.
5Click OK.
1872 | Chapter 23 Tutorials
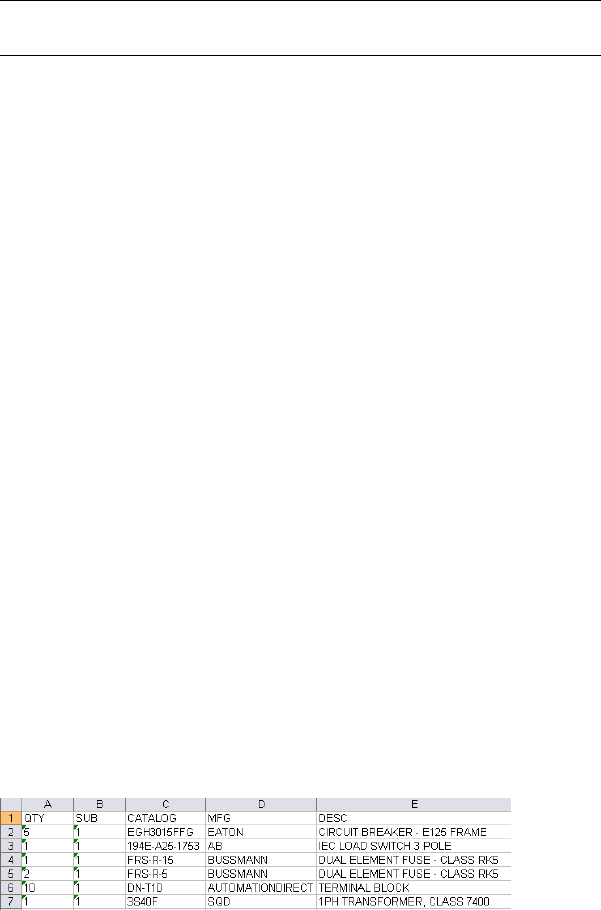
NOTE This new format becomes the default the next time you extract a BOM
report.
The BOM data in the Report Generator dialog box is reformatted and
displayed.
6Scroll down the report to verify that the component tags column is
removed.
7Insert the new version of the BOM table into the drawing.
Exporting Bill of Material report to spreadsheet
You can move your BOM to a spreadsheet, database, or any other application
that can read data in a comma-delimited or Microsoft®Access® format.
Export the BOM to an Excel® spreadsheet
1In the Report Generator dialog box, click Save to File.
2In the Save Report to File dialog box, select Excel spreadsheet format (.xls)
and click OK.
3In the Select file for report dialog box, enter an output file name or click
OK to accept the default name BOM.xls. Click Save.
4In the Optional Script File dialog box, click Close - No Script.
5In Excel, click File ➤ Open.
6Browse to the location where you saved the spreadsheet. The default is
C:\Documents and Settings\{username}\My Documents or
C:\Users\{username}\My Documents on a Windows Vista or Windows 7
installation. Select the spreadsheet.
7Click Open.
Your BOM data displays in spreadsheet format. You can slide the column
borders to expose the full column of text for each field. The first six columns
Exporting Bill of Material report to spreadsheet | 1873
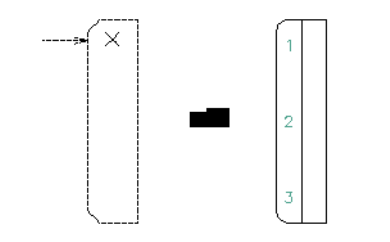
of the spreadsheet are shown in the previous image. The first column is the
tallied quantity, followed by subassembly quantity, catalog number, and
manufacturer code. The remaining fields are the fields extracted from the
mfg/cat combo query on the external catalog look-up file.
Connector diagrams
Connector diagrams - Introduction
Insert, modify, and wire connectors.
45 minutesTime required
Copy all files located inPrerequisites:
Documents and Settings\{username}\My Documents\Acade {version}\Aedata\Tutorial\Ae-
gs\Connector diagrams
Windows XP
to
Documents and Settings\{username}\My Documents\Acade {version}\Aedata\Proj\Aegs
Users\{username}\Documents\Acade {version}\Aedata\Tutorial\Aegs\Connector diagramsWindows Vista,
toWindows 7
Users\{username}\Documents\Acade {version}\Aedata\Proj\Aegs
You learn to:
■Understand connectors
■Insert a connector
1874 | Chapter 23 Tutorials
■Wire connectors
■Insert in-line connectors
■Stretch a connector
■Add a connector pin
■Move a connector pin
■Add connector descriptors
About connector diagrams
The connector wiring tools help you more easily create and work with
point-to-point style wiring schematics (as opposed to ladder-style schematics).
Although some of these tools are useful for ladder-style schematics, they are
tuned to work well with drawings that are heavy on point-to-point connector
diagrams. Instead of creating and maintaining a large library of schematic
connector symbols, each symbol is generated parametrically. It is generated
on the fly, per user input and at user-defined orientation. A connector toolbar
contains tools for creating and editing connectors.
Inserting connectors
The Insert Connector tool generates a connector symbol from user-defined
parameters. The symbol is created on the fly and inserted as a block insert
into your active drawing file. Since they are created on an as needed basis, it
eliminates the need for you to create and maintain a library of connector
symbols.
Change drawing properties
1If AEGS is not the active project, in the Project Manager, right-click AEGS
and select Activate.
2In the Project Manager, double-click AEGS to expand the drawing list.
3Open AEGS10.dwg.
About connector diagrams | 1875
4Click Schematic tab ➤ Other Tools panel ➤ Drawing Properties
drop-down ➤ Drawing Properties.
5On the Drawing Properties ➤ Components dialog box, select Sequential.
6On the Drawing Properties ➤ Wire Numbers dialog box, New Wire
Number Placement section, select In-Line.
7Click OK.
Add connectors to the drawing
1Click Schematic tab ➤ Insert Components panel ➤ Insert Connector
drop-down ➤ Insert Connector.
2On the Insert Connector dialog box, specify:
Pin Spacing: 1.0
Pin Count: 15
Fixed Spacing
Pin List: 1
Insert All
3Click the Flip button to flip the connector about its long axis.
The preview looks like the following image.
1876 | Chapter 23 Tutorials
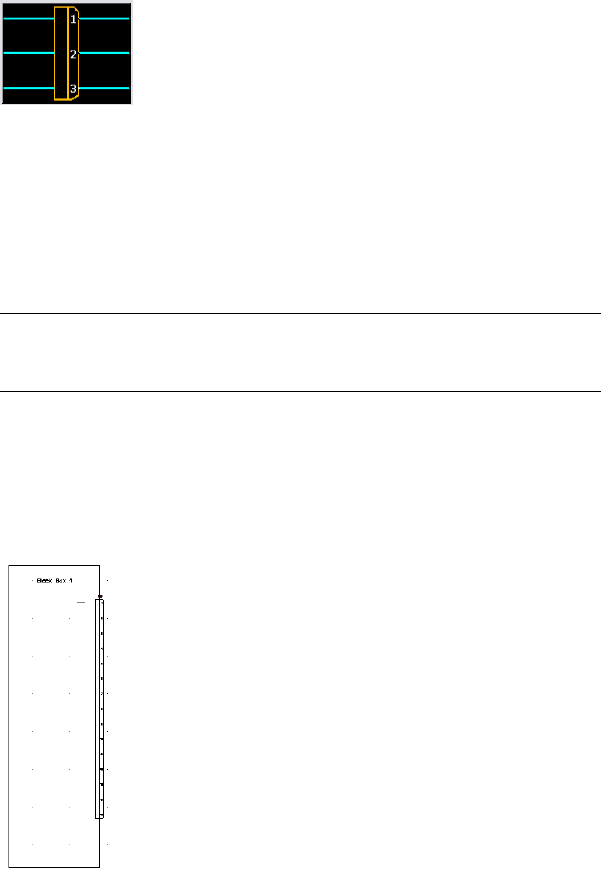
4Click Insert.
A preview outline of the connector displays for placement on the drawing.
It shows rounded corners for the plug side of the connector. An “x”
indicates the insertion point of the connector. An arrow indicates the
plug side wire connection direction for plug/receptacle or plug-only
connector inserts or shows the wire connection direction for a
receptacle-only connector insert.
NOTE Before committing the connector outline to the drawing, press TAB
to flip the connector through four different orientations. Or, press the V key
to switch between vertical and horizontal orientations.
5Respond to the prompts as follows:
Specify insertion point or [Z=zoom, P=pan, X=wire crossing,
V=horizontal/vertical, TAB=flip]:
Select to place the connector in the middle of the right-hand border of Black
Box 1
The connector was automatically assigned a component tag of PJ1.
Inserting connectors | 1877
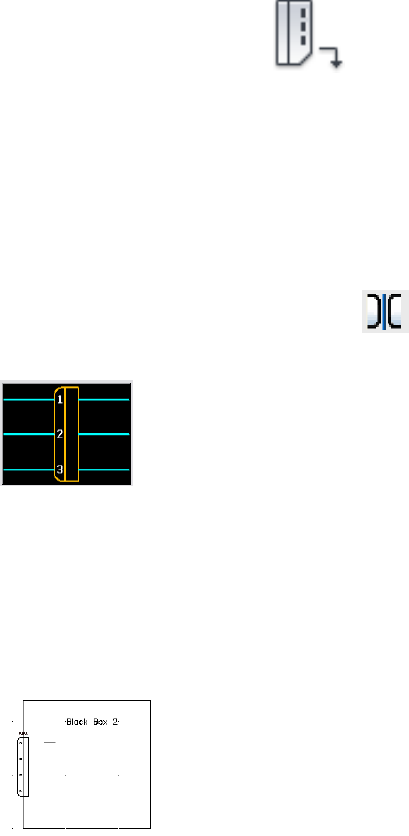
6Click Schematic tab ➤ Insert Components panel ➤ Insert Connector
drop-down ➤ Insert Connector.
7On the Insert Connector dialog box, specify:
Pin Spacing: 0.75
Pin Count: 4
Fixed Spacing
Pin List: A
Insert All
8Click the Flip button to flip the connector.
The preview looks like the following image.
9Click Insert.
10 Respond to the prompts as follows:
Specify insertion point or [Z=zoom, P=pan, X=wire crossing,
V=horizontal/vertical, TAB=flip]:
Select to place the connector in the middle of the left-hand border of Black Box
2
The connector was automatically assigned a component tag of PJ2.
11 Repeat steps 6 - 10 to place connectors on Black Box 3 and Black Box 4.
The connectors are assigned tags PJ3 and PJ4 respectively.
1878 | Chapter 23 Tutorials
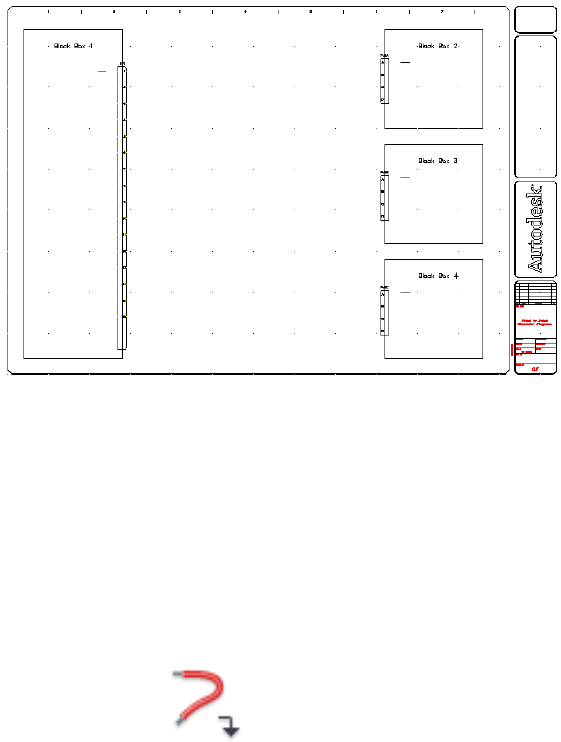
Wiring connectors
Black Box 1 is associated to a larger component such as a power box. Black
Box 2 - Black Box 4 are smaller components that are part of the power box.
The components must be wired together. The easiest way to do it is to use the
Insert Wire and Multiple Wire Bus tools.
Wire the connectors together
1Click Schematic tab ➤ Insert Wires/Wire Numbers panel ➤ Insert Wires
drop-down ➤ Wire.
2Respond to the prompts as follows:
Specify wire start or [wireType/X=show connections]:
Click PJ1 at pin 1 on Black Box 1
Specify wire end or [Continue]: Click PJ2 at pin A on Black Box 2
3Repeat to connect PJ1 (Pin 2) to PJ3 (Pin A) and PJ1 (Pin 3) to PJ4 (Pin
A). Right-click to exit the command.
Wiring connectors | 1879
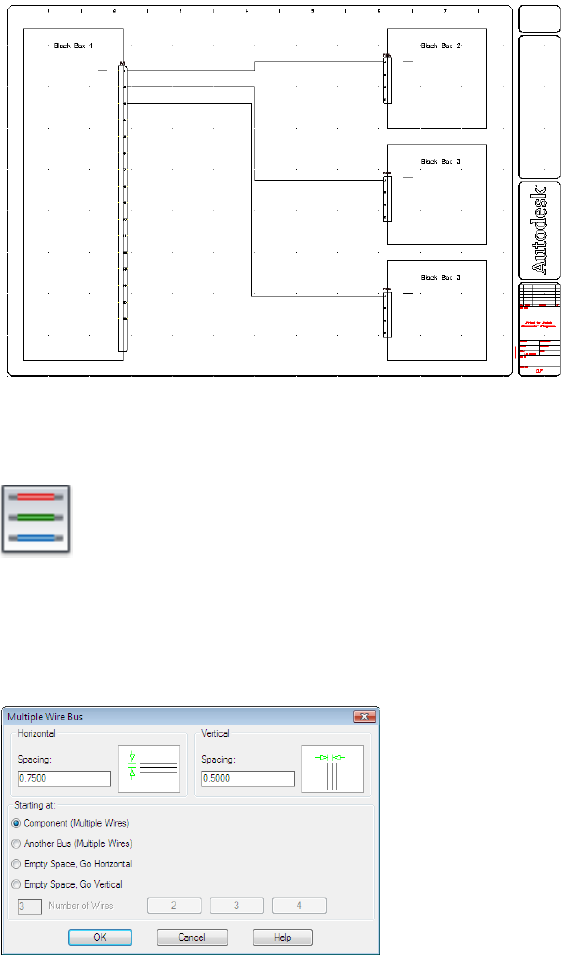
Notice that the Insert Wire tool drew the wire between the connectors
while avoiding any existing geometry on the screen.
4Click Schematic tab ➤ Insert Wires/Wire Numbers panel ➤ Multiple Bus.
5On the Multiple Wire Bus dialog box, specify:
Horizontal Spacing: 0.75
Vertical Spacing: 0.50
Starting at: Component (Multiple Wires)
1880 | Chapter 23 Tutorials
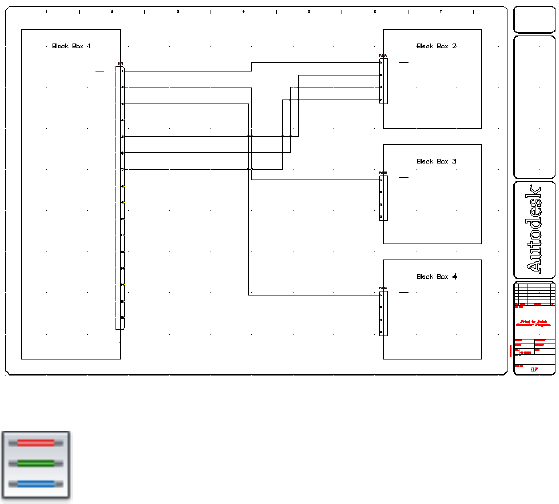
6Click OK.
7Respond to the prompts as follows:
Window select starting wire connection points
Select pins 5-7 on Black Box 1 (1) and right-click
to (T= wiretype):
Drag the wires to the right past the three wires you inserted,
to Point (Continue/Flip):
Drag up the wires towards PJ2 on Black Box 2, enter Cand press ENTER (to
continue and lock the drag)
to (Continue/Flip):
Drag the wires to the right and connect to pins B-D on PJ2 (2)
8Click Schematic tab ➤ Insert Wires/Wire Numbers panel ➤ Multiple Bus.
9On the Multiple Wire Bus dialog box, click OK to use the previous settings.
10 Respond to the prompts as follows:
Window select starting wire connection points:
Select pins 9-11 on Black Box 1 and right-click
Wiring connectors | 1881

to (T= wiretype):
Drag the wires to the right,
to Point (Continue/Flip):
Drag up the wires towards PJ3 on Black Box 3, enter C, and press ENTER (to
continue and lock the drag)
to (Continue/Flip):
Drag the wires to the right and connect to pins B-D on PJ3
11 Click Schematic tab ➤ Insert Wires/Wire Numbers panel ➤ Multiple Bus.
12 On the Multiple Wire Bus dialog box, click OK to use the previous settings.
13 Respond to the prompts as follows:
Window select starting wire connection points:
Select pins 13-15 on Black Box 1 and press ENTER
to (T= wiretype):
Drag the wires to the right,
to Point (Continue/Flip):
Drag the wires down towards PJ4 on Black Box 4, press C, and press ENTER (to
continue and lock the drag)
to (Continue/Flip):
Drag the wires to the right and connect to pins B-D on PJ4
1882 | Chapter 23 Tutorials
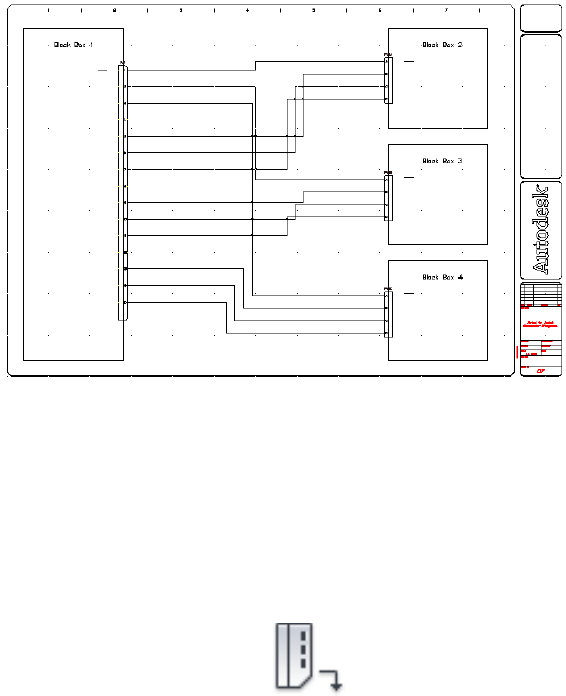
Grouping wires
Now that you wired the connectors together, you insert in-line connectors to
group the wires.
Insert in-line connectors
1Click Schematic tab ➤ Insert Components panel ➤ Insert Connector
drop-down ➤ Insert Connector.
2On the Insert Connector dialog box, specify:
Pin Spacing: 1.0
Pin Count: 3
At Wire Crossing
Pin List: 1
Insert All
3Click Details.
4On the Type section, clear the Add Divider Line box.
Grouping wires | 1883
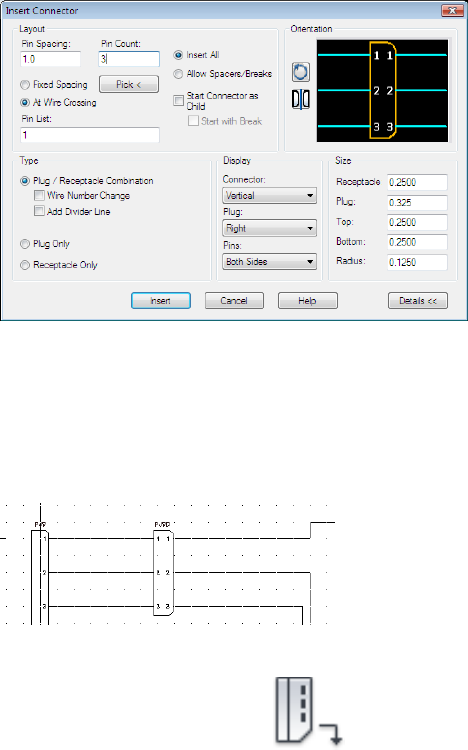
5On the Display section, set Plug to Right and Pins to Both Sides.
6On the Size section, set the Plug to 0.325.
7Click Insert.
8Respond to the prompts as follows:
Specify insertion point or [Z=zoom, P=pan, X=wire crossing,
V=horizontal/vertical, TAB=flip]:
Select to place the connector on the wires connected to PJ1, Pins 1-3
9Click Schematic tab ➤ Insert Components panel ➤ Insert Connector
drop-down ➤ Insert Connector.
10 On the Insert Connector dialog box, specify:
Pin Spacing: 1.0
Pin Count: 9
At Wire Crossing
Pin List: 1
1884 | Chapter 23 Tutorials
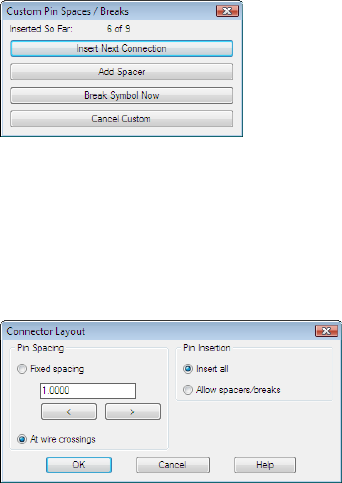
Allow Spacers/Breaks
11 Click Insert.
12 Respond to the prompts as follows:
Specify insertion point or [Z=zoom, P=pan, X=wire crossing,
V=horizontal/vertical, TAB=flip]:
Select to place the connector starting on the line at PJ1, Pin 5
Notice how the connector expands when you cross the wires.
13 On the Custom Pin Spaces/Breaks dialog box, click Insert Next
Connection.
The dialog box displays which connector pin has been inserted so far.
Keep clicking Insert Next Connection until you place six of the nine
connections.
14 When the Custom Pin Spaces/Breaks dialog box says “Inserted So Far: 6
of 9,” click Break Symbol Now.
15 Respond to the prompts as follows:
Specify insertion point or [Z=zoom, P=pan, X=wire crossing,
V=horizontal/vertical, TAB=flip]:
Select to place the connector starting on the line at PJ1, Pin 13
16 On the Connector Layout dialog box, select Insert All.
17 Click OK.
Grouping wires | 1885
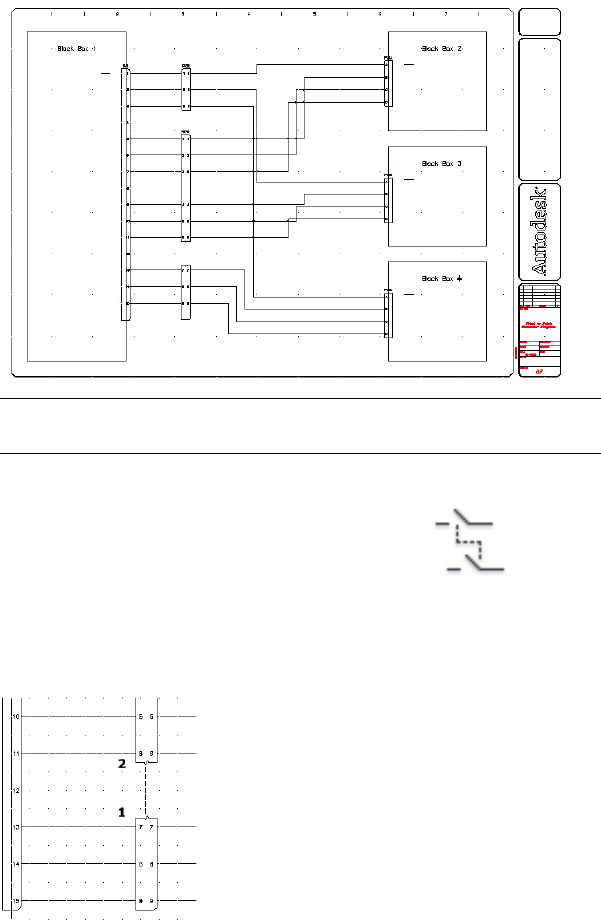
NOTE Another method is to insert the entire connector and then use the
Split Connector tool to break the existing connector.
18 Click Schematic tab ➤ Insert Components panel ➤ Dashed Link Line
drop-down ➤ Link Components with Dashed Line.
19 Respond to the prompts as follows:
Component to link from: Select the bottom portion of PJ6 (1)
component to link to: Select the top portion of PJ6 (2), right-click
1886 | Chapter 23 Tutorials
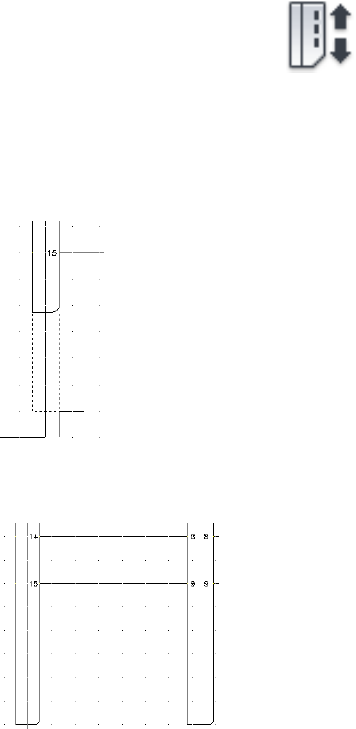
Modifying connectors
The Insert Connector toolbar has tools for modifying connectors and connector
pins. You can also add, remove, or move the pins found inside of the
connector.
Stretch existing connectors
1Click Schematic tab ➤ Edit Components panel ➤ Modify Connectors
drop-down ➤ Stretch Connector.
2Respond to the prompts as follows:
Specify which end of connector to stretch: Select the bottom of PJ1
Specify second point of displacement:
Pull the connector down towards the bottom of Black Box 1
3Repeat for PJ6, pulling the bottom of the connector down so that it is
even with PJ1.
Modifying connectors | 1887
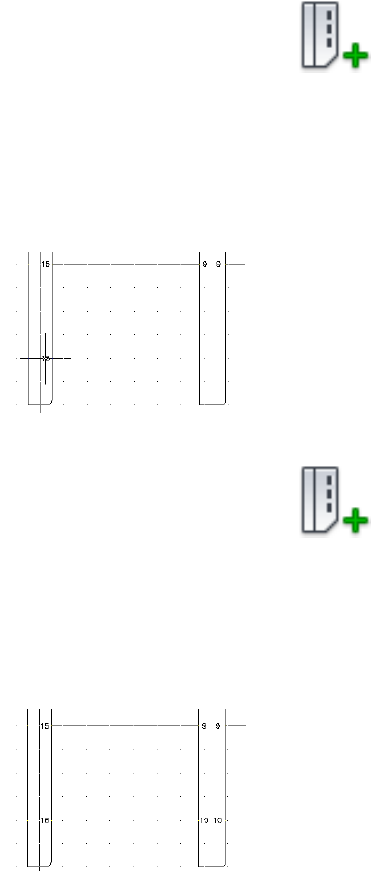
Add connector pins
1Click Schematic tab ➤ Edit Components panel ➤ Modify Connectors
drop-down ➤ Add Connector Pins.
2Respond to the prompts as follows:
Select connector: Select PJ1
Specify where to insert new pin or [Reset]<16>:
Select 4 spaces down from pin 15 on PJ1, right-click, and select Enter
The next available pin number (16) inserts at the selected point.
3Click Schematic tab ➤ Edit Components panel ➤ Modify Connectors
drop-down ➤ Add Connector Pins.
4Respond to the prompts as follows:
Select connector: Select PJ6
Specify where to insert new pin or [Reset]<10>:
Select the new pin 16 on PJ1 to insert pin 10 in-line with it, right-click and
select Enter
1888 | Chapter 23 Tutorials
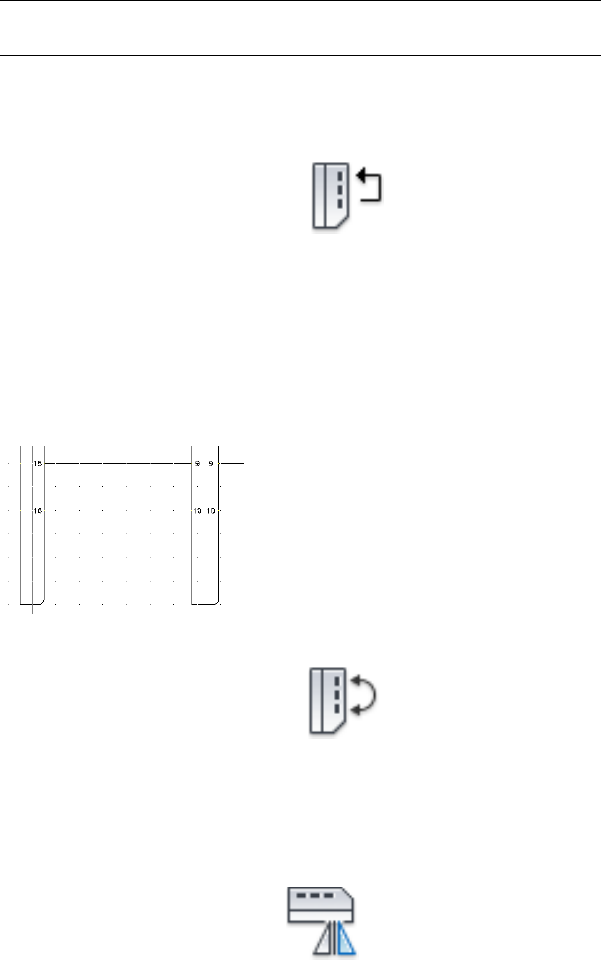
NOTE You can delete pins using the Delete Connector Pins tool. Select the
pin you want to delete and it is automatically removed from the connector.
Modify connector pins
1Click Schematic tab ➤ Edit Components panel ➤ Modify Connectors
drop-down ➤ Move Connector Pins.
2Respond to the prompts as follows:
Select connector pin to move: Select pin 16 on PJ1
Specify new location for pin 16: Select 2 spaces up on PJ1
Select connector pin to move: Select pin 10 on PJ6
Specify new location for pin 10:
Select pin 16 on PJ1 to move pin 10 in-line with it, right-click
3Click Schematic tab ➤ Edit Components panel ➤ Modify Connectors
drop-down ➤ Swap Connector Pins.
4Respond to the prompts as follows:
Select connector pin: Select pin 16 on PJ1
Select connector pin: swap with: Select pin 12 on PJ1, right-click
5Click Schematic tab ➤ Edit Components panel ➤ Modify Connectors
drop-down ➤ Reverse Connector.
Modifying connectors | 1889
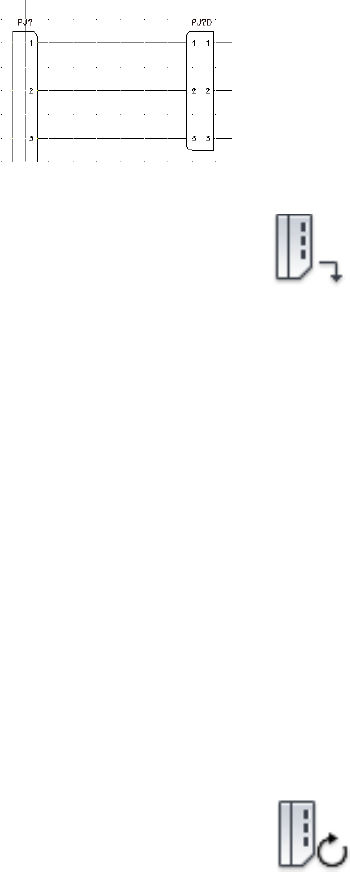
6Respond to the prompts as follows:
Select connector to Reverse: Select the top in-line connector, right-click
7Click Schematic tab ➤ Insert Components panel ➤ Insert Connector
drop-down ➤ Insert Connector.
8On the Insert Connector dialog box, specify:
Pin Spacing: 1.0
Pin Count: 2
Fixed Spacing
Pin List: 1
Insert All
9Click Details.
10 On the Type section, select Add Divider Line.
11 On the Display section, set Pins to Plug Side.
12 Click Insert.
13 Respond to the prompts as follows:
Specify insertion point or [Z=zoom, P=pan, X=wire crossing,
V=horizontal/vertical, TAB=flip]:
Select to place the connector on the top of Black Box 1
14 Click Schematic tab ➤ Edit Components panel ➤ Modify Connectors
drop-down ➤ Rotate Connector.
15 Respond to the prompts as follows:
1890 | Chapter 23 Tutorials
Select connector to Rotate or [Hold]:
Select the new connector, right-click, and select Enter
Adding wire numbers
Wire numbers are blocks or attributes inserted on a line wire entity. AutoCAD®
Electrical assigns each wire number type to its own layer. You can assign a
different color to each of these layers so you can easily tell them apart. The
wire number placement is set to in-line as defined on the Drawing Properties
➤ Wire Numbers dialog box.
Insert wire numbers
1Click Schematic tab ➤ Insert Wires/Wire Numbers panel ➤ Insert Wire
Numbers drop-down ➤ Wire Numbers.
2On the Wire Tagging dialog box, specify:
Wire Tag Mode: Sequential
Start: 100
3Click Drawing-Wide.
The wire numbers are automatically inserted into the drawing starting
with number 100.
4Click Schematic tab ➤ Edit Wires/Wire Numbers panel ➤ Move Wire
Number.
5Respond to the prompts as follows:
Specify new Wire Number location (select on wire):
Select each wire closest to Black Box 1, right-click
Adding wire numbers | 1891
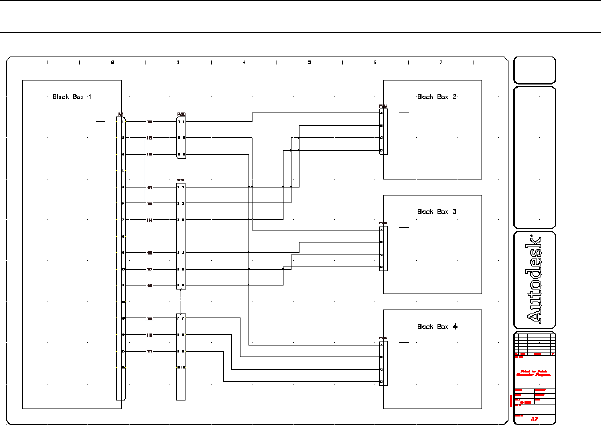
NOTE You can align the wire numbers using the Align tool.
Adding connector descriptors
AutoCAD Electrical supports two lines of description text on each connector:
one for the plug and one for the receptacle side of the connector.
Add descriptions
1Right-click connector PJ1 and select Edit Component.
2On the Insert/Edit Component dialog box, Pins section, click List.
3On the Connector Pin Numbers In Use dialog box, connector pin grid,
click in the Description column for Pin 1.
4On the Pin Descriptions section, enter POWER B2 for the Receptacle.
5On the connector pin grid, click in the Description column for Pin 2.
6On the Pin Descriptions section, enter POWER B3 for the Receptacle.
7On the connector pin grid, click in the Description column for Pin 3.
8On the Pin Descriptions section, enter POWER B4 for the Receptacle.
1892 | Chapter 23 Tutorials
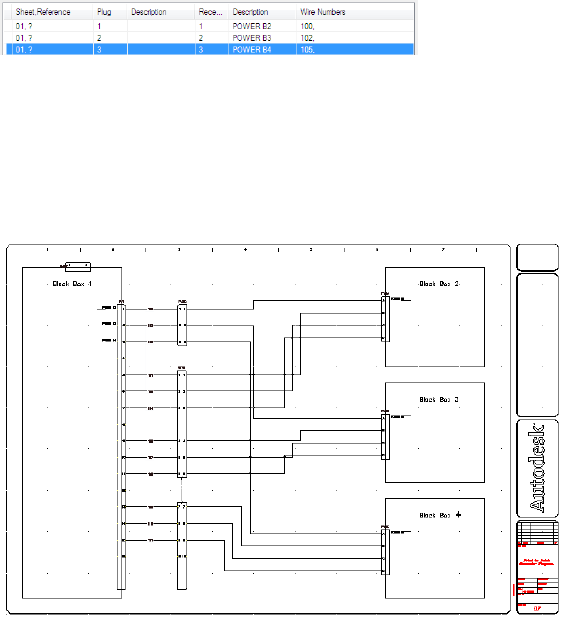
9Click OK.
10 On the Insert/Edit Component dialog box, click OK.
11 Repeat to add the description POWER IN for Pins A on Black Box 2, Black
Box 3 and Black Box 4.
Your finished point-to-point diagram looks like the following image.
Adding connector descriptors | 1893
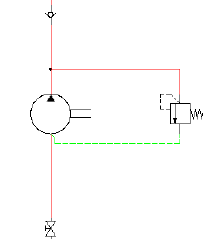
P&ID and Hydraulic diagrams
P&ID and Hydraulic diagrams - Introduction
Create Piping & Instrumentation (P&ID) and Hydraulic drawings. The same
workflow can be applied for Pneumatics. Once your drawing is created, use
the standard tools in the AutoCAD Electrical software to modify your drawing.
65 minutesTime required
Copy all files located inPrerequisites:
Documents and Settings\{username}\My Documents\Acade {version}\Aedata\Tutorial\Ae-
gs\P&ID
Windows XP
to
Documents and Settings\{username}\My Documents\Acade {version}\Aedata\Proj\Aegs
Users\{username}\Documents\Acade {version}\Aedata\Tutorial\Aegs\P&IDWindows Vista,
toWindows 7
Users\{username}\Documents\Acade {version}\Aedata\Proj\Aegs
You learn to:
■Set up hydraulic and P&ID drawings
■Insert hydraulic and P&ID symbols
■Create pipes
1894 | Chapter 23 Tutorials

Setting Up Hydraulic Drawings
Use the Project Manager to manage your hydraulic drawings. From here, you
can create a drawing and modify any drawing properties.
Create a new drawing
1Click Project tab ➤ Project Tools panel ➤ Manager.
2If AEGS is not the active project, activate the AEGS project.
If AEGS is in the list of open projects:
■Select AEGS and right-click.
■Click Activate.
If AEGS is not in the list of open projects:
■Select the project list drop-down.
■Click Open Project.
■On the Select Project File dialog box, navigate to and select the
AEGS.WDP file.
■Click Open.
3In the Project Manager, right-click the project name, and select Properties.
4In the Project Properties ➤ Project Settings dialog box, click Default to
switch on all paths for pneumatic, hydraulic, and P&ID schematic
libraries.
5Click OK.
6In the Project Manager, click the New Drawing tool.
7In the Create New Drawing dialog box, specify:
Name: AEGS12
Template: Mouse over the edit box to verify ACAD_Electrical.dwt is specified
Setting Up Hydraulic Drawings | 1895

If ACAD_Electrical.dwt is not specified, click Browse. Select it from the list
of available templates.
Description 1: Hydraulic Example
Click OK.
NOTE If you want to set the component, wire number, cross-reference, style,
and drawing format settings, click OK-Properties to proceed to Drawing
Properties dialog box.
8Enter DSETTINGS at the command prompt.
9In the Drafting Settings dialog box ➤ Snap and Grid tab, turn on Snap
and Grid and set the size of both to 0.125.
10 Click OK.
11 Click Schematic tab ➤ Other Tools panel ➤ Drawing Properties.
12 In the Drawing Properties dialog box ➤ Drawing Format tab, Scale
section, make sure that the feature scale multiplier is set to 1.0 inch.
13 Click OK.
NOTE For metric unit, the following settings are recommended so that the
wire connection points are placed on the grids for easier drafting. Grid and
Snap Size = 2.5 mm; Feature scale multiplier =20 (scale factor = 20).
Inserting Hydraulic Schematic Symbols
The hydraulic symbol library in AutoCAD Electrical includes filters, valves,
cylinders, pressure switches, motors, pumps, meters, restrictors, quick
disconnects, flow arrows and more. The hydraulic symbol library consists of
all the hydraulic symbols. It is found at \Documents and Settings\All
Users\Documents\Autodesk\Acade {version}\Libs\hyd_iso125 or
\Users\Public\Documents\Autodesk\Acade {version}\Libs\hyd_iso125 on a
Windows Vista or Windows 7 installation.
1896 | Chapter 23 Tutorials
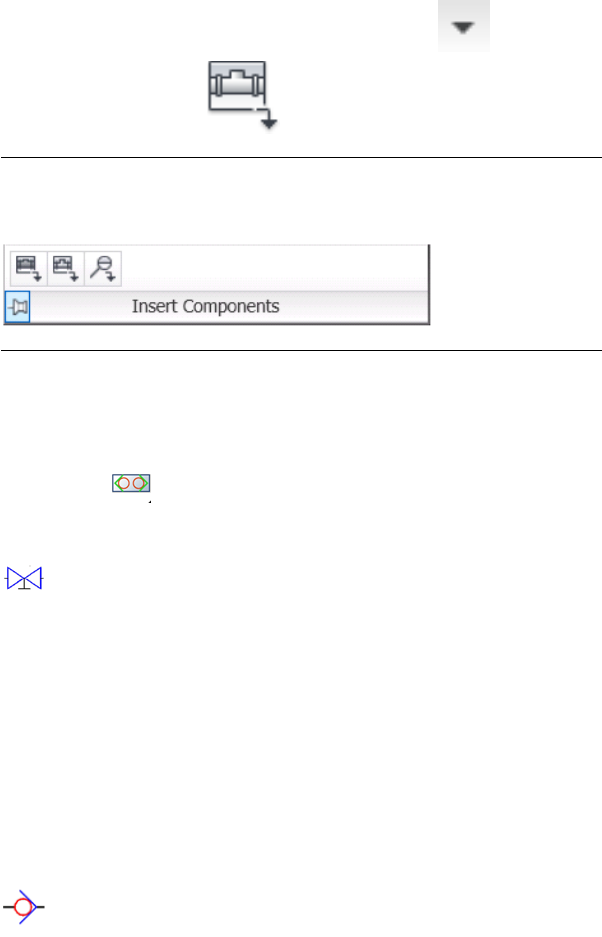
Insert hydraulic symbols
1Click Schematic tab ➤ Insert Components panel ➤ ➤ Insert
Hydraulic Components.
NOTE By default, an expanded panel closes automatically when you click
another panel. To keep a panel expanded, click the push pin icon in the
bottom-left corner of the expanded panel.
2In the Insert Component: Hydraulic Symbol dialog box, select the check
box for Vertical.
3In the Insert Component: Hydraulic Symbol dialog box, click the General
Valves icon.
4In the Hydraulic: General Valves dialog box, click Shut Off Valve Open.
5Respond to the prompts as follows:
Specify insertion point:
Select to place the valve in the upper left corner of your drawing
6In the Insert/Edit Component dialog box, specify:
Component Tag: VAL2
Click OK.
7Repeat steps 1 - 3.
8In the Hydraulic: General Valves dialog box, click Checkvalve Flow Left.
Inserting Hydraulic Schematic Symbols | 1897
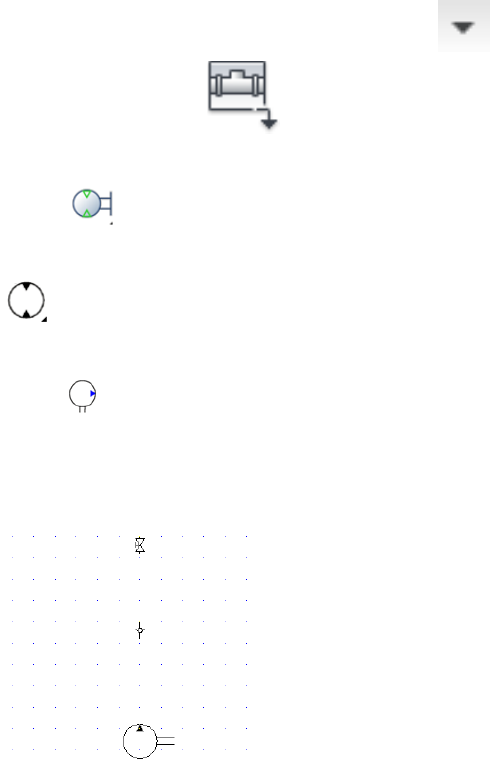
9Respond to the prompts as follows:
Specify insertion point:
Select to place the check valve below the shut off valve
10 In the Insert/Edit Component dialog box, click OK.
11 Click Schematic tab ➤ Insert Components panel ➤ ➤ Insert
Hydraulic Components.
12 In the Insert Component: Hydraulic Symbol dialog box, click Motors &
Pumps.
13 In the Hydraulic: Motors and Pumps dialog box, click Fixed Displacement.
14 In the Hydraulic: Fixed Displacement dialog box, click Uni-Directional
Pump.
15 Respond to the prompts as follows:
Specify insertion point: Select to place the pump below the check valve
16 In the Insert/Edit Component dialog box, specify:
Description: Line 1: Hydraulic Oil Pump
1898 | Chapter 23 Tutorials
Click OK.
17 Insert another Shut Off Valve Open below the Hydraulic Oil Pump.
18 Click Schematic tab ➤ Insert Components panel ➤ ➤ Insert
Hydraulic Components.
19 In the Insert Component: Hydraulic Symbol dialog box, click Filters.
20 In the Hydraulic: Filters dialog box, click Filter.
21 Respond to the prompts as follows:
Specify insertion point: Select to place the filter below the shut off valve
22 In the Insert/Edit Component dialog box, specify:
Component Tag: FI2
Description: Line 1: Filter
Click OK.
23 Click Schematic tab ➤ Insert Components panel ➤ ➤ Insert
Hydraulic Components.
24 In the Insert Component: Hydraulic Symbol dialog box, click
Miscellaneous.
25 In the Hydraulic: Miscellaneous dialog box, click Reservoir.
26 Respond to the prompts as follows:
Specify insertion point: Select to place the reservoir below the filter
Inserting Hydraulic Schematic Symbols | 1899

27 In the Insert/Edit Component dialog box, click OK.
Creating Pipes
In AutoCAD Electrical, different types of wires represent the type of running
pipes that allow water or oil flows from one instrument to another. Start by
setting up the type of wires for pipe runs.
Insert wires as pipes
1Click Schematic tab ➤ Edit Wires/Wire Numbers panel ➤ Create/Edit
Wire Type.
2In the Create/Edit Wire Type dialog box, specify:
Wire Color: RED
Size: 20
The Layer Name is automatically created. The name RED_20 is assigned
to the wire layer you are creating.
1900 | Chapter 23 Tutorials
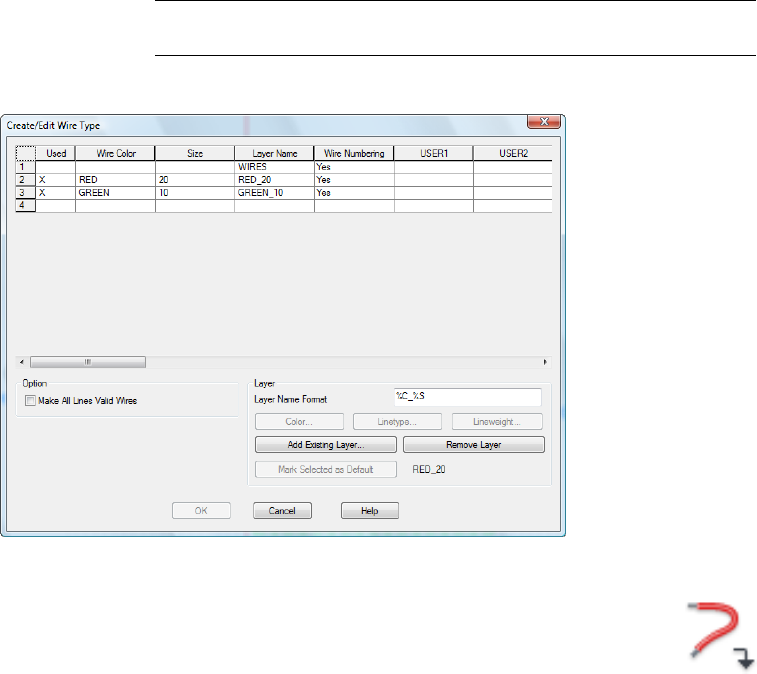
3Click Color.
4In the Select Color dialog box, select red and click OK.
5Click Linetype.
6In the Select Linetype dialog box, select Continuous and click OK.
7In the Create/Edit Wire Type dialog box, specify:
Wire Color: GREEN
Size: 10
Color: Green
Linetype: Hidden2
NOTE If HIDDEN2 is not available, click Load. Select it from the list of line
types on the Load or Reload Linetypes dialog box.
8Select RED_20 in the grid and click Mark Selected as Default.
9Click OK.
10 Click Schematic tab ➤ Insert Wires/Wire Numbers panel ➤ Wire.
Creating Pipes | 1901
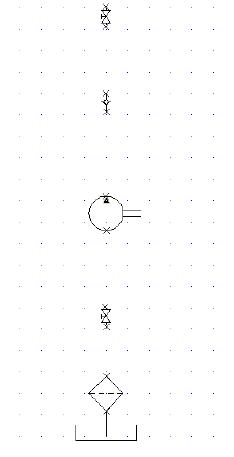
11 Respond to the prompts as follows:
Specify wire start or [wireType/X=show connections]:
Enter Xand press ENTER
Specify wire start or [wireType/X=show connections]:
Select the bottom of the shut off valve
Specify wire end or [Scoot/T=wiretype, X=show connections]:
Select the top of the check valve
12 Continue inserting wires connecting the components together. Right-click
to exit the command.
Your drawing should look like the following:
1902 | Chapter 23 Tutorials
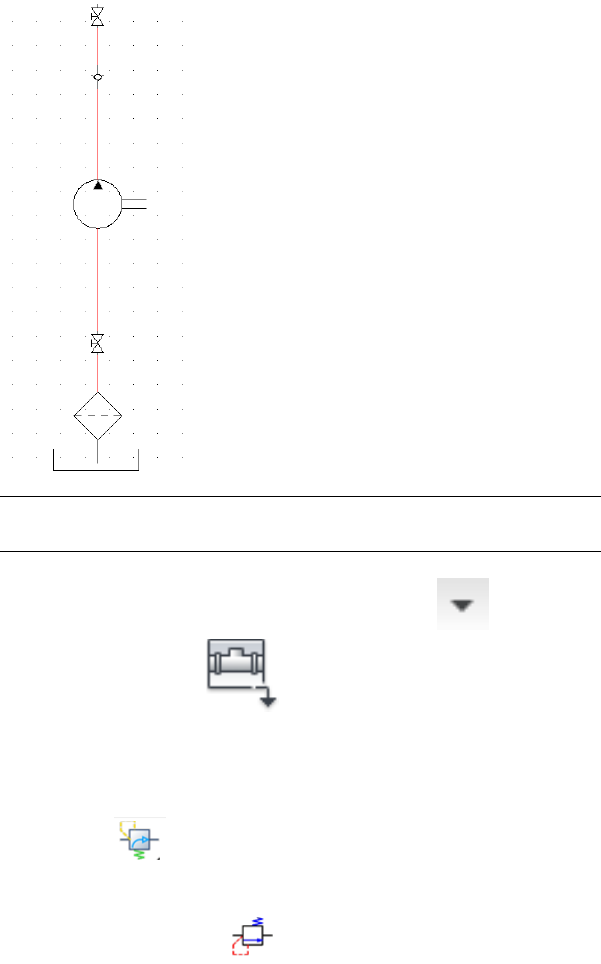
NOTE You can also insert the vertical or horizontal pipes first and then insert
the components onto the pipe, one at a time.
13 Click Schematic tab ➤ Insert Components panel ➤ ➤ Insert
Hydraulic Components.
14 In the Insert Component: Hydraulic Symbol dialog box, select the check
box for Vertical.
15 In the Insert Component: Hydraulic Symbol dialog box, click Pressure
Relief Valves.
16 In the Hydraulic: Pressure Relief Valves dialog box, click N.C. Pressure
Relief Valve with Preset -1.
Creating Pipes | 1903
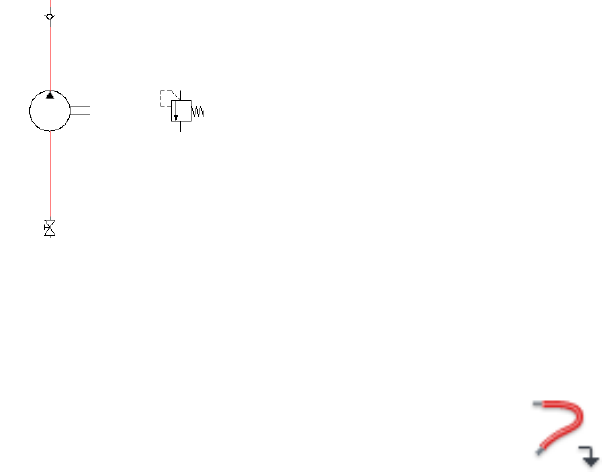
17 Respond to the prompts as follows:
Specify insertion point: Select to place the valve to the right of the pump
18 In the Insert/Edit Component dialog box, specify:
Component Tag: VAL4
Description: Line 1: Pressure Relief
Click OK.
19 Click Schematic tab ➤ Insert Wires/Wire Numbers panel ➤ Wire.
20 Respond to the prompts as follows:
Specify wire start or [wireType/X=show connections]:
Enter X, press ENTER
Specify wire start or [wireType/X=show connections]:
Press SHIFT + right-click and select Midpoint from the menu, then select the
midpoint on the pipe between the pump and the shut off valve above it
Specify wire end or [V=start Vertical/H =start
Horizontal/Continue):
Drag the pipe to the right so that it is directly above the pressure relief valve.
Drag the pipe down and click the top connection point on the pressure relief
valve
You now insert a pipe that connects the end of the valve back to the
pump.
Specify wire start or [wireType/X=show connections]:
Enter T, press ENTER
1904 | Chapter 23 Tutorials
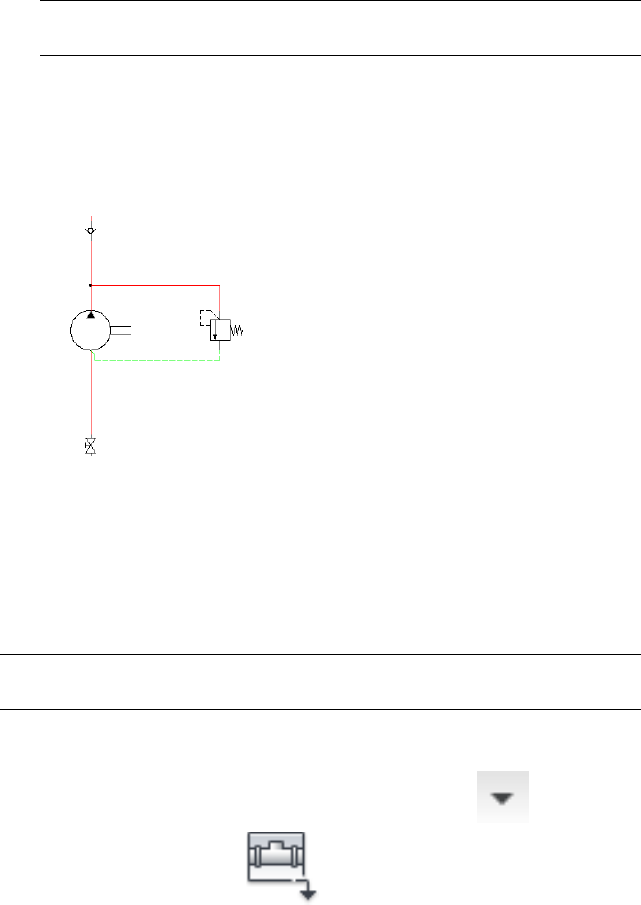
Select the wire layer GREEN_10. Click OK.
TIP Make sure that Snap is turned off and that the Wire Layer is set to
GREEN_10.
Select the bottom connection point on the pump
Specify wire end or [V=start Vertical/H =start
Horizontal/Continue):
Drag the pipe down and to the right, click the connection point at the bottom
of the pressure relief valve, right-click
Completing the Hydraulic Drawing
The rest of the hydraulic drawing consists of inserting a Pressure Gauge and
Check Valve at the left side of the pump and then inserting devices (Cylinder;
Restrictors; Filter; Check valve and 2-ways valve) along the top of the drawing.
NOTE During insertion, clear the Vertical option in the Insert Component: Hydraulic
Symbols dialog box.
Insert components
1Click Schematic tab ➤ Insert Components panel ➤ ➤ Insert
Hydraulic Components.
Completing the Hydraulic Drawing | 1905
2In the Insert Component: Hydraulic Symbol dialog box, click Meters.
3In the Hydraulic: Meters dialog box, click Pressure Gauge.
4Respond to the prompts as follows:
Specify insertion point:
Select to place the pressure gauge to the far left (and slightly above) of the pump
5In the Insert/Edit Component dialog box, specify:
Component Tag: MTR1
Description: Line 1: Pressure Gauge
Click OK.
6Click Schematic tab ➤ Insert Components panel ➤ ➤ Insert
Hydraulic Components.
7In the Insert Component: Hydraulic Symbol dialog box, deselect the
Vertical check box.
8In the Insert Component: Hydraulic Symbol dialog box, click General
Valves.
9In the Hydraulic: General Valves dialog box, click Shut Off Valve Open.
10 Respond to the prompts as follows:
Specify insertion point:
Select to place the valve to the right of the pressure gauge
1906 | Chapter 23 Tutorials
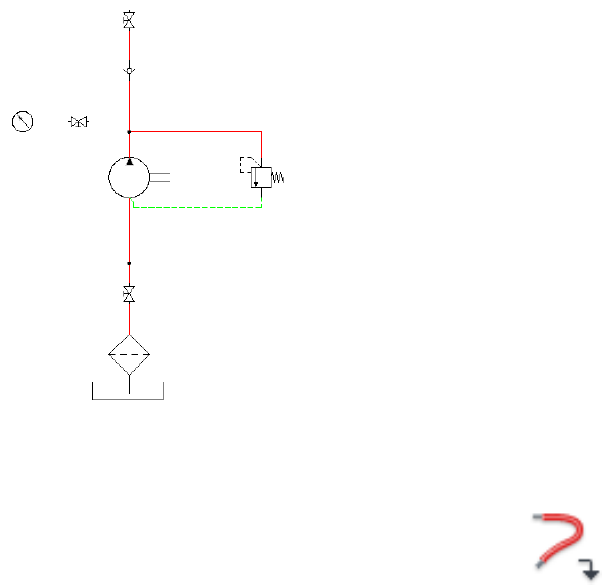
11 In the Insert/Edit Component dialog box, click OK.
12 Set the wire layer to RED_20.
13 Click Schematic tab ➤ Insert Wires/Wire Numbers panel ➤ Wire.
14 Respond to the prompts as follows:
Specify wire start or [wireType/X=show connections]:
Select the right connection point on the pressure gauge
Specify wire end or [Continue]:
Drag the pipe to the right and click the left connection point on the valve
Specify wire start or [Scoot/wireType/X=show connections]:
Select the right connection point on the valve
Specify wire end or [Continue]:
Drag the pipe to the right and click the vertical pipe, right-click
Completing the Hydraulic Drawing | 1907
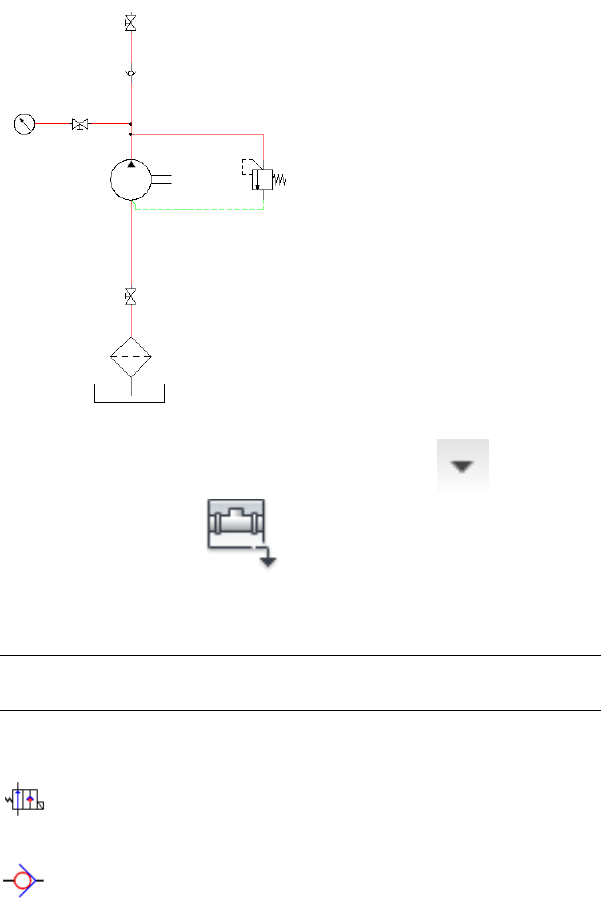
15 Click Schematic tab ➤ Insert Components panel ➤ ➤ Insert
Hydraulic Components.
16 Insert and place the devices listed as shown in the following illustration.
In the Insert/Edit Component dialog box, click OK after each insertion.
NOTE You can also insert the vertical or horizontal pipes first and then insert
the components onto the pipe, one by one.
Symbol to InsertIcon
2 Way Valves ➤ Solenoid Spring Return -1
(insert as Vertical symbol)
General Valves ➤ Checkvalve Flow Left (insert as a Vertical symbol)
1908 | Chapter 23 Tutorials
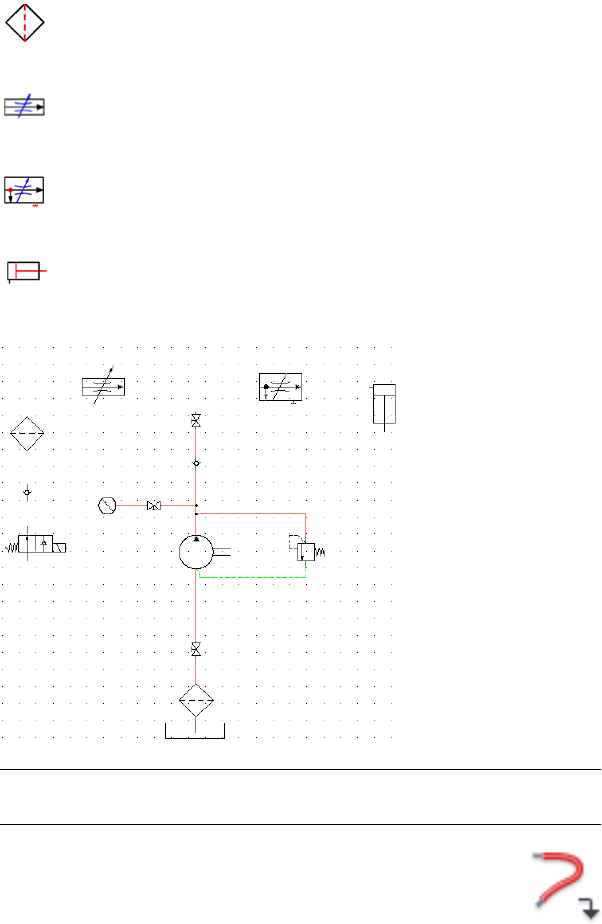
Symbol to InsertIcon
Filters ➤ Filter (insert as a Vertical symbol)
Restrictors ➤ Restrictor with Variable Output Flow
Restrictors ➤ By-Pass Flow Regulator with Variable Output Flow
Cylinders ➤ Single Acting Single Ended Piston Rod
TIP Align the components horizontally and vertically using the Align tool to
make inserting the pipes easier.
17 Click Schematic tab ➤ Insert Wires/Wire Numbers panel ➤ Wire.
Completing the Hydraulic Drawing | 1909
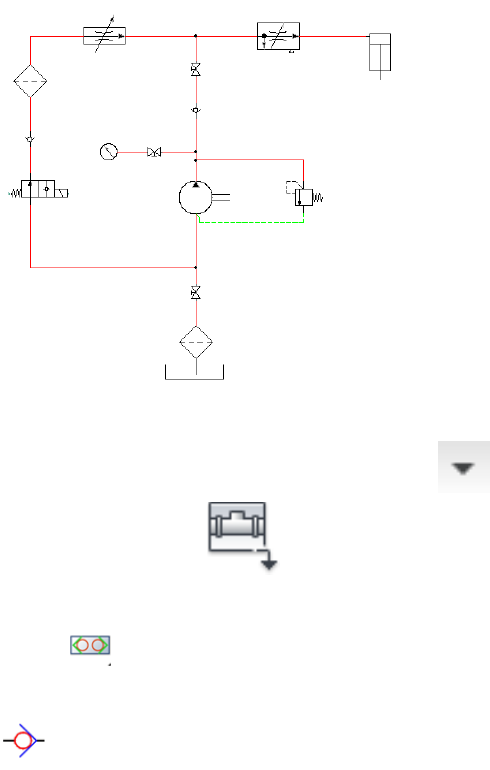
18 Connect the pipes from one control device to another as illustrated.
19 Click Schematic tab ➤ Insert Components panel ➤ ➤ Insert
Hydraulic Components.
20 In the Insert Component: Hydraulic Symbol dialog box, click General
Valves.
21 In the Hydraulic: General Valves dialog box, click Checkvalve Flow Left.
22 Respond to the prompts as follows:
Specify insertion point: Select to place the valve below the restrictor
1910 | Chapter 23 Tutorials
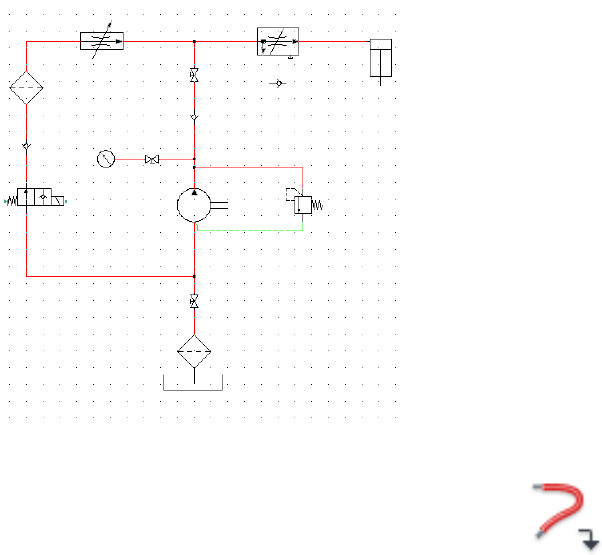
23 In the Insert/Edit Component dialog box, click OK.
24 Click Schematic tab ➤ Insert Wires/Wire Numbers panel ➤ Wire.
25 Connect the pipes as shown.
Completing the Hydraulic Drawing | 1911
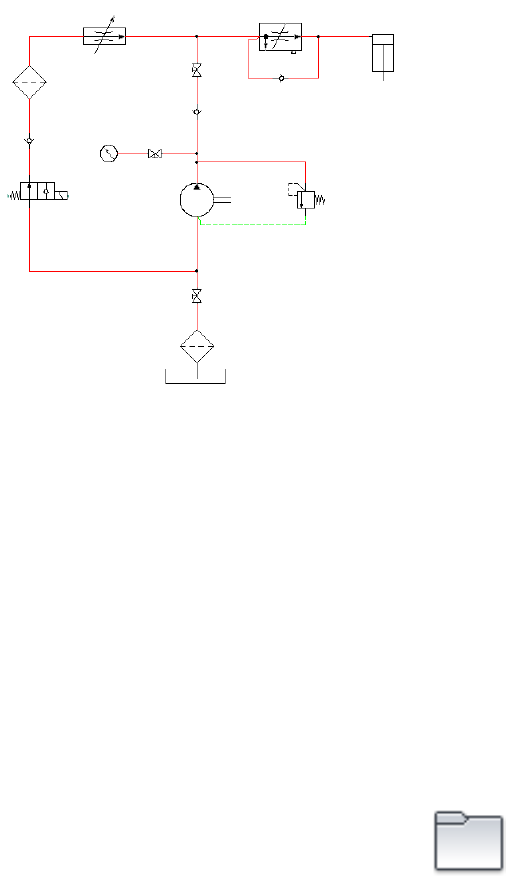
The hydraulic schematic diagram is complete.
If you want to create a pneumatic drawing, use the Insert Pneumatic
Components tool on the Schematic tab ➤ Insert Components panel.
Refer to the pneumatic demo drawing file (Demo03.dwg) in the Extra
Library Demo project.
Setting Up P&ID Drawings
Use the Project Manager to manage your P&ID drawings. From here, you can
create a drawing and modify any pin
.
Create a new drawing
1Click Project tab ➤ Project Tools panel ➤ Manager.
1912 | Chapter 23 Tutorials
2In the Project Manager, click the New Drawing tool.
3In the Create New Drawing dialog box, specify:
Name: AEGS13
Template: Mouse over the edit box to verify ACAD_Electrical.dwt is specified
If ACAD_Electrical.dwt is not specified, click Browse. Select it from the list
of available templates.
Description 1: P&ID Example
Click OK.
NOTE If you want to set the component, wire number, cross-reference, style,
and drawing format settings, click OK-Properties to proceed to Drawing
Properties dialog box.
4Enter DSETTINGS at the command prompt.
5In the Drafting Settings dialog box ➤ Snap and Grid tab, turn on Snap
and Grid and set the size of both to 0.125.
6Click OK.
7Click Schematic tab ➤ Other Tools panel ➤ Drawing Properties.
8In the Drawing Properties dialog box ➤ Drawing Format tab, Scale
section, make sure that the feature scale multiplier is set to 1.0 inch.
9Click OK.
NOTE For metric unit, the following settings are recommended so that the
wire connection points are placed on the grids for easier drafting. Grid and
Snap Size = 2.5 mm; Feature scale multiplier =20 (scale factor = 20).
Setting Up P&ID Drawings | 1913

Set up wire layers
1Click Schematic tab ➤ Edit Wires/Wire Numbers panel ➤ Create/Edit
Wire Type.
2In the Create/Edit Wire Type dialog box, click in the Wire Type #2 row
and specify:
Wire Color: RED
Size: 25
The Layer Name is automatically created. The name RED_25 is assigned
to the wire layer you are creating.
3Click Color.
4In the Select Color dialog box, select red and click OK.
5Click Linetype.
6In the Select Linetype dialog box, select Continuous and click OK.
7Click Lineweight.
8In the Select Lineweight dialog box, select 0.30 and click OK.
For this example, create three more wire types using the Create/Edit Wire
Type dialog box.
9In the Create/Edit Wire Type dialog box, specify:
Wire Type #3
Wire Color: RED
Size: 10
Color: Red
Linetype: Hidden2
Lineweight: default
Wire Type #4
Wire Color: GREEN
Size: 10
Color: Green
1914 | Chapter 23 Tutorials
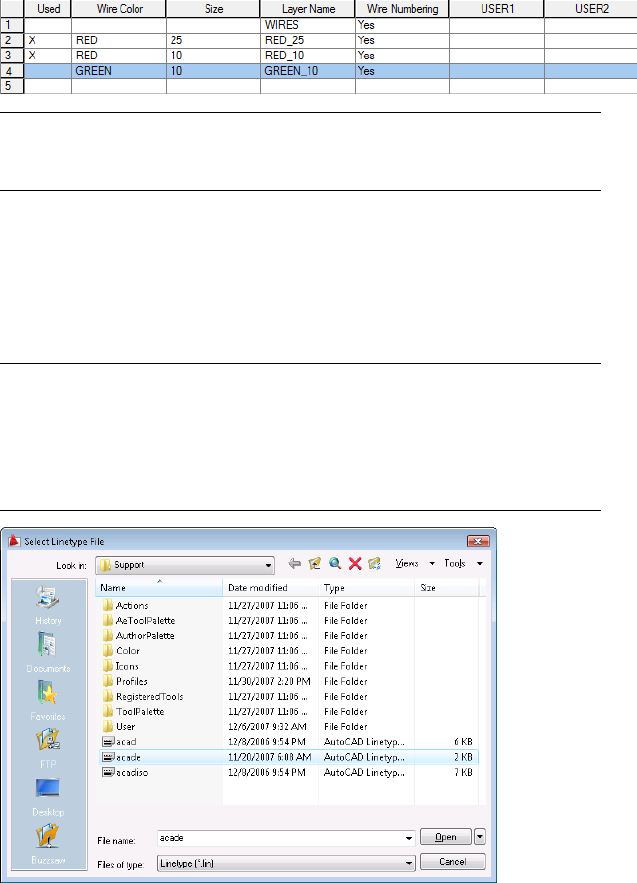
NOTE For pipe runs in P&ID drawings, include the different linetypes from
the acade.lin file. You can set up the wire types for pipes at the beginning of
the drawing or before creating the pipes.
10 To set the Linetype for the GREEN_10 wire layer, click Linetype.
11 In the Select Linetype dialog box, click Load.
12 In the Load or Reload Linetypes dialog box, click File.
13 In the Select Linetype File dialog box, select acade.lin and click Open.
NOTE The default location for the acade.lin file is \Documents and
Settings\{username}\Application Data\Autodesk\AutoCAD Electrical
{version}\{release number}\{country code}\Support or
\Users\{username}\AppData\Roaming\Autodesk\AutoCAD Electrical
{version}\{release number}\{country code}\Support on a Windows Vista or
Windows 7 installation.
14 In the Load or Reload Linetypes dialog box, select Pneumatic Signal and
click OK.
Setting Up P&ID Drawings | 1915
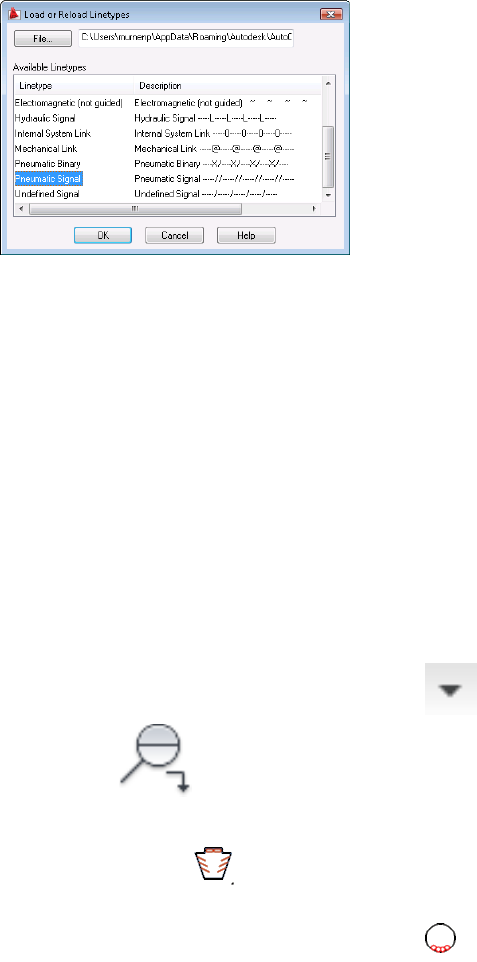
15 In the Select Linetype dialog box, select Pneumatic Signal and click OK.
16 In the Create/Edit Wire Type dialog box, click OK.
Inserting P&ID Schematic Symbols
The P&ID symbol library in AutoCAD electrical includes equipment, tanks,
nozzles, pumps, fittings, valves, actuators, logic functions, instrumentation,
flow, and flow arrows. The P&ID symbol library consists of all the piping and
instrumentation symbols. It is found at \Documents and Settings\All
Users\Documents\Autodesk\Acade {version}\Libs\Pid or
\Users\Public\Documents\Autodesk\Acade {version}\Libs\Pid on a Windows
Vista or Windows 7 installation.
Insert P&ID Symbols
1Click Schematic tab ➤ Insert Components panel ➤ ➤ Insert P&ID
Components.
2In the Insert Component: Piping and Instrumentation Symbols dialog
box, click Equipment.
3In the PID: Equipment dialog box, click Ball Mill.
1916 | Chapter 23 Tutorials
4Respond to the prompts as follows:
Specify insertion point:
Select to place the ball mill in the upper left corner of your drawing
5In the Insert/Edit Component dialog box, specify:
Component Tag: C-100
Description: Line 1: BALL MILL
Click OK.
6Repeat steps 1-2.
7In the PID: Equipment dialog box, click Conveyors.
8In the PID: Conveyors dialog box, click Conveyor 1.
9Respond to the prompts as follows:
Specify insertion point:
Select to place the conveyor to the right and diagonally below the ball mill
10 In the Insert/Edit Component dialog box, specify:
Component Tag: N-100
Description: Line 1: CONVEYOR
Click OK.
11 Repeat steps 1-2.
12 In the PID: Equipment dialog box, click Mixer 2.
13 Respond to the prompts as follows:
Specify insertion point:
Inserting P&ID Schematic Symbols | 1917
Select to place the mixer to the right and diagonally below the conveyor
14 In the Insert/Edit Component dialog box, specify:
Component Tag: A-100
Description: Line 1: MIXER
Click OK.
15 Click Schematic tab ➤ Insert Components panel ➤ ➤ Insert P&ID
Components.
16 Insert and place the devices listed as shown in the following illustration.
In the Insert/Edit Component dialog box, click OK after each insertion.
Symbol to InsertIcon
Valves ➤ Gate Valve
In the Insert/Edit Component dialog box, clear the Component
Tag
Equipment ➤ Dryer
Component Tag = C-200; Description Line 1 = DRYER
Instrumentation ➤ Discrete Instruments ➤ Field Mounted
Component Tag = TE 201
1918 | Chapter 23 Tutorials
TIP Align the components horizontally and vertically using the Align tool to
make inserting the pipes easier.
Creating Pipes
In AutoCAD Electrical, different types of wires represent the type of running
pipes that allow water or oil flows from one instrument to another.
Insert wires as pipes
1Click Schematic tab ➤ Insert Wires/Wire Numbers panel ➤ Wire.
2Change the wire type to RED_25:
Specify wire start or [wireType/X=show connections]:
Enter T, press ENTER
Select the wire layer RED_25. Click OK.
3Connect the pipes as shown. Right-click to exit the command.
Creating Pipes | 1919
4Click Schematic tab ➤ Insert Wires/Wire Numbers panel ➤ Wire.
5Respond to the prompts as follows:
Specify wire start or [wireType/X=show connections]:
Enter T, press ENTER
Select the wire layer RED_10. Click OK.
Select the bottom of the discrete instrument
Specify wire end or [Continue]:
Drag the wire down a few spaces, press ENTER
6Click Schematic tab ➤ Insert Components panel ➤ ➤ Insert P&ID
Components.
1920 | Chapter 23 Tutorials
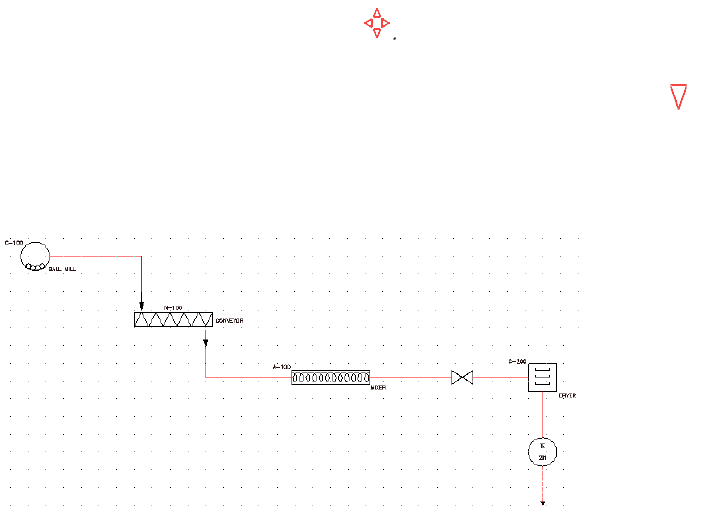
7In the Insert Component: Piping and Instrumentation Symbols dialog
box, click Flow Arrows.
8In the PID: Equipment dialog box, click Flow Arrow Down.
9Respond to the prompts as follows:
Specify insertion point:
Select to place the flow arrow at the bottom of the new wire
The P&ID diagram is complete.
If you want to see how to expand the P&ID drawing, refer to the P&ID demo
drawing file (Demo01.dwg) in the Extra Library Demo project.
Creating Pipes | 1921
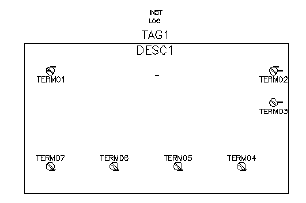
Symbol Builder
Symbol Builder - Introduction
Create custom symbols with Symbol Builder.
30 minutesTime required
Copy all files located inPrerequisites:
Documents and Settings\{username}\My Documents\Acade {version}\Aedata\Tutorial\Ae-
gs\Symbol Builder
Windows XP
to
Documents and Settings\{username}\My Documents\Acade {version}\Aedata\Proj\Aegs
Users\{username}\Documents\Acade {version}\Aedata\Tutorial\Aegs\Symbol BuilderWindows Vista,
toWindows 7
Users\{username}\Documents\Acade {version}\Aedata\Proj\Aegs
You learn to:
■Create a schematic parent
■Add attributes
■Add wire connections
■Save the symbol
1922 | Chapter 23 Tutorials
Creating custom symbols
You can use the Symbol Builder to create an AutoCAD Electrical symbol easily.
This utility builds a smart schematic symbol by either adding AutoCAD
Electrical attributes to the geometry of the symbol, or by converting text
entities to AutoCAD Electrical attributes. You can also use AutoCAD attribute
definition and editing commands to do the same thing. This tool makes the
task easier because you quickly pick and place attributes. It tracks what
attributes are present and checks your work to make sure that any required
attributes are not omitted.
NOTE If you exit out of the Symbol Builder, restart it. On the Select Symbol/Objects
dialog box, click Select objects and select any graphics and attributes you added
so far. You can then start from where you left off.
Create a parent schematic symbol
1If AEGS is not the active project, in the Project Manager, right-click AEGS
and select Activate.
2In the Project Manager, double-click AEGS to expand the drawing list.
3Open AEGS03.dwg.
4Draw a rectangle anywhere on the drawing.
TIP It is easiest to draw it in the white space on the left-hand side of the
drawing.
5Click Schematic tab ➤ Other Tools panel ➤ Symbol Builder
drop-down ➤ Symbol Builder.
6In the Select Symbol/Objects dialog box, Attribute template section,
browse to the Library path C:\Documents and Settings\All
Creating custom symbols | 1923

Users\Documents\Autodesk\Acade {version}\jic125 (or
C:\Users\Public\Documents\Autodesk\Acade {version}\jic125 on a Windows
Vista or Windows 7 installation).
7In the Attribute template section, select Symbol: Horizontal Parent, Type:
Generic.
8In the Select from drawing section, click Select objects, select the rectangle,
and press ENTER.
9Select OK.
Adding attributes
In this example, you add the attributes: TAG1, DESC1, LOC, INST, FAMILY,
MFG, CAT, and ASSYCODE. You are not limited to these attributes and you
can include your own user-defined attributes on the AutoCAD Electrical block
files.
NOTE The TAG1 attribute is the only one required for a parent schematic symbol.
The other attributes in the Required section are expected on a parent schematic
symbol, however the symbol is recognized as a parent symbol without them.
Add attributes
1If the Symbol Builder Attribute Editor is not visible,
Click Symbol Builder tab ➤ Edit panel ➤ Palette Visibility Toggle.
1924 | Chapter 23 Tutorials
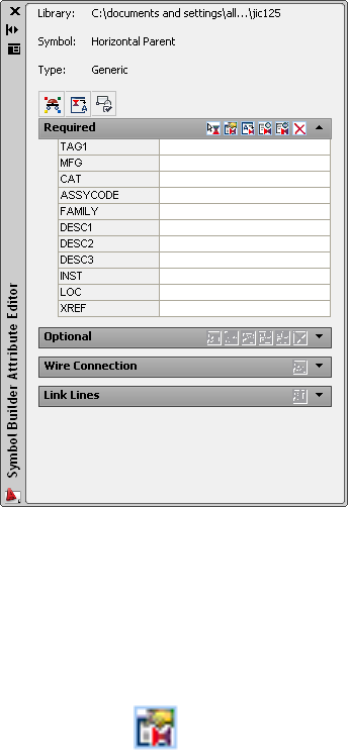
Use this palette to assign attributes to the rectangle as well as set the
height and justification for each attribute. The palette displays the
AutoCAD Electrical attributes that you can insert and define as part of
the symbol. Once an attribute is inserted on the symbol a check mark
displays next to it and you cannot insert it again. AutoCAD Electrical
allows only one insertion of each attribute.
2In the Symbol Builder Attribute Editor, select TAG1 and click the
Properties tool.
Enter:
Value: PS
It is the default code used as the %F value of the tag format (such as “CR”
, “PB”, “LT”)
Height: 0.125
Justify: Center
Click OK.
Adding attributes | 1925

3Click the Insert Attribute tool.
Insert the attribute above the rectangle.
In the Symbol Builder Attribute Editor, notice the check mark next to
the TAG1 attribute. Continue placing the rest of the attributes.
4In the Symbol Builder Attribute Editor select DESC1.
Click the Insert Attribute tool.
5Insert the attribute below TAG1.
6Insert the LOC and INST attributes as indicated.
7Insert the FAMILY attribute near the center of the rectangle.
8With FAMILY still highlighted in the Symbol Builder Attribute Editor,
select the Properties tool.
Enter:
Value: PS
Click OK.
This assigns the %F value to the FAMILY attribute inserted.
1926 | Chapter 23 Tutorials
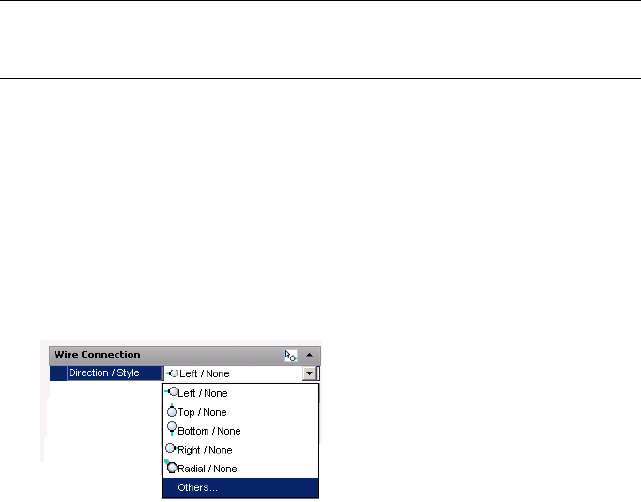
9Select MFG and insert near the center of the rectangle. Repeat for CAT
and ASSYCODE.
Adding wire connections
If an X?TERMxx of the component (for example, "X2TERM01") wire
connection-point attribute lies within the small trap distance of the end of a
wire, then AutoCAD Electrical interprets the component connected to the
wire. The only time the trap distance changes is when you change the Feature
Scale Multiplier in the Drawing (or Project) Properties ➤ Drawing Format
dialog box.
NOTE Components with closely spaced wire connection points may not be
processed properly if the connection points fall within the AutoCAD Electrical trap
distance of one another.
A wire connection attribute can have a related terminal text attribute, TERMxx,
and terminal description attribute, TERMDESCxx. The "xx" is a two-digit
number (starting at 01) that is used to match up with the corresponding
X?TERMxx wire connection attribute.
Insert connection points
1In the Symbol Builder Attribute Editor, expand the Wire Connection
section.
2In the Direction / Style list, select Others.
3On the Insert Wire Connection dialog box select Terminal Style: Screw.
This terminal style inserts both the graphic to represent the screw and
the wire connection points.
4Check Use this configuration as default. It directs Symbol Builder to use
the current Terminal Style and Scale as the default in the Symbol Builder
Attribute Editor.
Adding wire connections | 1927
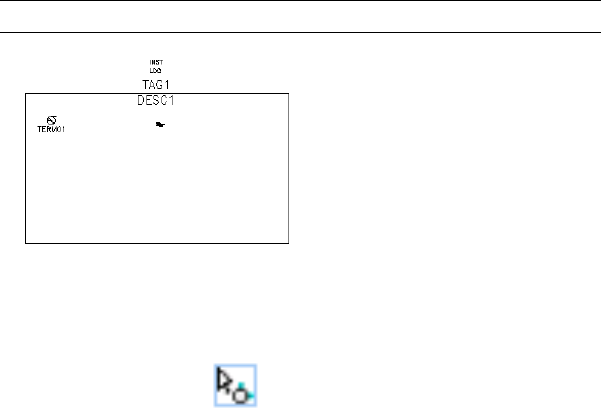
5Select Connection direction: Left & Top.
It determines the direction the wire attaches to the component.
6Enter “L” as the value for TERM01 in Pin Information.
7Select X2TERMDESC01 in Pin Information and click Delete.
8Click Insert.
9Select the Insert Wire Connection tool and insert the terminal in the
upper left-hand corner as shown.
NOTE Always use AutoCAD Snap to insert the wire connection point.
10 Back on the Symbol Builder Attribute Editor, expand the Wire Connection
Direction / Style list and select Right & Top / Screw.
11 Select the Insert Wire Connection tool and insert the terminal in the
upper right-hand corner.
You can continue to insert wire connections until you press ENTER by
entering the characters indicated in the command line prompt followed
by a space. You can also select from the Direction / Style list.
12 Insert the rest of the terminals as follows:
TERM03: Right
Insertion Point: below TERM02
TERM04: Bottom
Insertion Point: in the lower right-hand corner
TERM05: Bottom
Insertion Point: to the left of TERM04
TERM06: Bottom
1928 | Chapter 23 Tutorials
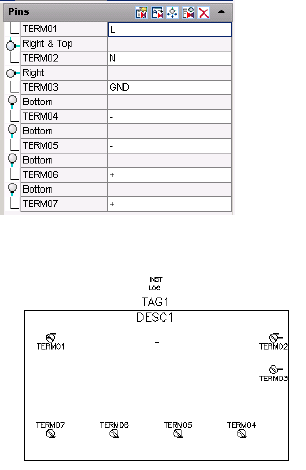
Insertion Point: to the left of TERM05
TERM07: Bottom
Insertion Point: to the left of TERM06
13 Press Enter if necessary to return to the command prompt.
14 On the Symbol Builder Attribute Editor, expand the Pins section. Enter
the Pin values as follows:
TERM02 : N
TERM03 : GND
TERM04 : -
TERM05 : -
TERM06 : +
TERM07 : +
Your drawing looks like the following image:
Adding wire connections | 1929
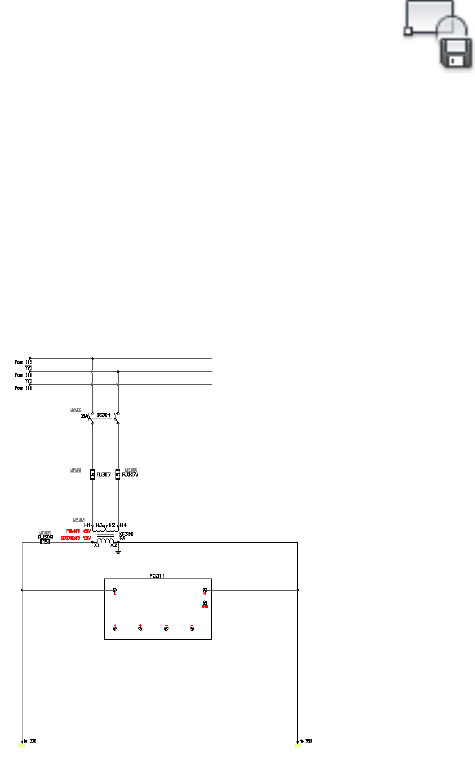
Saving the symbol
You have two options for saving the symbol: WBlock or Block. WBlock creates
the symbol .dwg file while Block creates the symbol for this drawing file only.
Save and insert the symbol onto a drawing
1Click Symbol Builder tab ➤ Edit panel ➤ Done.
2On the Close Block Editor: Save Symbol dialog box, in the Base point
section, click Pick point. Select a point in-line with the top terminals so
that it is easy to place on a wire later.
3Select WBlock.
4Enter a file name or accept the default.
5Click OK.
6When asked to insert the symbol, click Yes.
7Place the symbol on the empty wire on the left-hand side of the drawing.
The wire breaks, the component tag inserts, and the wires connect to the
symbol.
1930 | Chapter 23 Tutorials
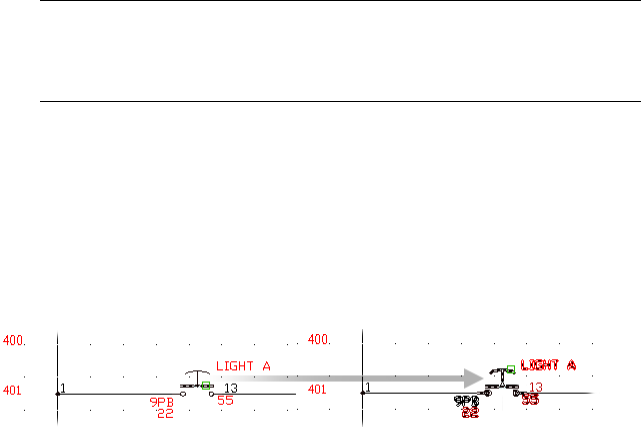
NOTE New symbols you create can also be inserted with the AutoCAD
Electrical Insert Component command. You can add your new symbol to the
icon menu. Or, you can select it from the Type it or Browse dialog box file
selection options in the icon menu.
8In the Insert/Edit Component dialog box, click OK.
Migration of AutoCAD Data
Migration of AutoCAD Data - Introduction
Convert non blocked geometry and text to a fully functional AutoCAD
Electrical block insert.
45 minutesTime required
Copy all files located inPrerequisites:
Documents and Settings\{username}\My Documents\Acade {version}\Aedata\Tutorial\Ae-
gs\Convert
Windows XP
to
Documents and Settings\{username}\My Documents\Acade {version}\Aedata\Proj\Aegs
Users\{username}\Documents\Acade {version}\Aedata\Tutorial\Aegs\ConvertWindows Vista,
toWindows 7
Users\{username}\Documents\Acade {version}\Aedata\Proj\Aegs
You learn to:
■Convert non blocked geometry and text to a schematic component
■Add wire connections
■Add geometry to the block
■Convert non blocked geometry and text to a panel footprint
Migration of AutoCAD Data | 1931
About Tagging and Linking Tools
This chapter describes using the tagging and linking tools in AutoCAD®
Electrical to convert non blocked geometry and text to a fully functional
AutoCAD Electrical-aware block insert.
AutoCAD Electrical has tagging and linking tools that enable non blocked
geometry to be made aware of AutoCAD Electrical. The existing geometry
stays in place and is unblocked. Key text entities are converted to attributes
with user picks and are linked into a generic, non graphical block insert. Wire
connection attributes can also be merged into this generic block insert. The
process to convert it from dumb text, circle, and line entities takes only
moments to complete and the result appears as a fully functional AutoCAD
Electrical-aware block insert.
Exploding Block and Attributes
The Special Explode tool in AutoCAD Electrical explodes attributes and blocks
to geometry and text entities while maintaining the value previously defined
in the attributes. You can take advantage of the tagging tools to modify the
text entities to attributes and the linking tools to make various blocks.
Explode AutoCAD® blocks
1If AEGS is not the active project, activate the AEGS project.
If AEGS is in the list of open projects:
■Select AEGS and right-click.
■Click Activate.
If AEGS is not in the list of open projects:
■Select the project list drop-down.
■Click Open Project.
■On the Select Project File dialog box, navigate to and select the
AEGS.WDP file.
■Click Open.
2In the Project Manager, double-click AEGS to expand the drawing list.
There are four drawings in the project, Convert-01.dwg through
Convert-04.dwg.
1932 | Chapter 23 Tutorials
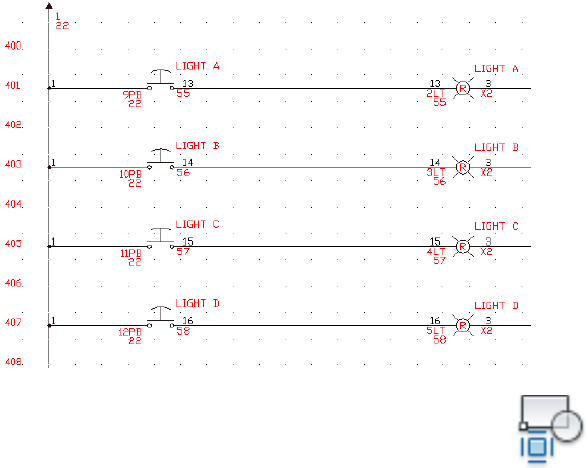
3Open Convert-03.dwg.
4Zoom in on the components in the upper left-hand corner of the drawing.
5Click Conversion Tools tab ➤ Tools panel ➤ Special Explode.
Use the Special Explode tool to explode attributes and blocks to geometry
and text entities while maintaining the value previously defined in the
attributes. You can take advantage of the tagging tools to modify the text
entities to attributes and the linking tools to make various blocks.
6Respond to the prompts as follows:
Select objects:
Select push button lights A - D (including all graphics and text) on lines 401 -
407 (use either single picks or window-select), right-click
Exploding Block and Attributes | 1933

The blocks explode into separate text entities and geometry.
Tagging Schematic Components
Use the AutoCAD Electrical Tagging tools to convert text entities into an
attributed block. Through the insertion of a template block, you have control
over which attributes are inserted and visible. All necessary attribute definitions
are automatically placed. During the tagging process, the text entity is removed
and replaced with a template block file that contains multiple attributes used
in AutoCAD Electrical.
Tagging Results:
■The selected text entities are replaced with a template block file.
■The TAG attribute takes on the value of the converted text.
■The TAG attribute is set to fixed.
■The TAG attribute takes on the same ACAD properties as the tagged text.
Tag schematic components
1Click Conversion Tools tab ➤ Schematic panel ➤ Tag Component.
1934 | Chapter 23 Tutorials
2Respond to the prompts as follows:
Select objects: Select 9PB, 10PB, 11PB, and 12 PB, right-click
NOTE You may have to right-click several times to exit the command.
The text changes color to indicate that it has been tagged. The color of
the TAG attribute is by layer. The attribute is the same layer as defined
on the WD_M block. You can now link the descriptions and wire numbers.
3Click Reports tab ➤ Schematic panel ➤ Reports.
4In the Schematic Report dialog box, specify:
Report Name: Component
Active Drawing
Click OK.
5If asked to save the drawing, click Yes.
In the Report Generator dialog box, notice that 9PB-12PB are listed in
the TAGNAME column of the report
6In the Report Generator dialog box, click Close.
Linking Schematic Attributes
Use the AutoCAD Electrical Linking tools to associate non blocked text to
previously placed template blocks. Through the modification of a template
block, you have control over which attributes are inserted and visible. All
necessary attribute definitions are placed using the properties of the existing
text entities, such as justification, height, and location. If multiple template
block files are selected, the value of the text is added to the previously defined
template block attributes as hidden attributes and the text is not removed.
Linking Results:
■The selected text entities are replaced with an AutoCAD Electrical attribute.
■Colors change to distinguish what has been already converted as defined
in the WD_M block.
■Temporary lines display the link.
Linking Schematic Attributes | 1935

The Link Descriptions tool links simple text as Description 1-3 attributes
on an AutoCAD Electrical block file. You can link them as description
attributes to one or more existing template block definitions. During the
conversion process, the text entity is removed and replaced with the next
available description attribute, up to 3.
Link descriptions
1Click Conversion Tools tab ➤ Attributes panel ➤ Link Descriptions.
2Respond to the prompts as follows:
Select objects: Select 9PB, right-click
Select text to fill in next available DESC attribute:
Select LIGHT A, right-click
Select objects: Select 10PB, right-click
Select text to fill in next available DESC attribute:
Select LIGHT B, right-click
Select objects: Select 11PB, right-click
Select text to fill in next available DESC attribute:
Select LIGHT C, right-click
Select objects: Select 12PB, right-click
Select text to fill in next available DESC attribute:
Select LIGHT D, right-click
NOTE You may have to right-click several times to exit the command.
1936 | Chapter 23 Tutorials
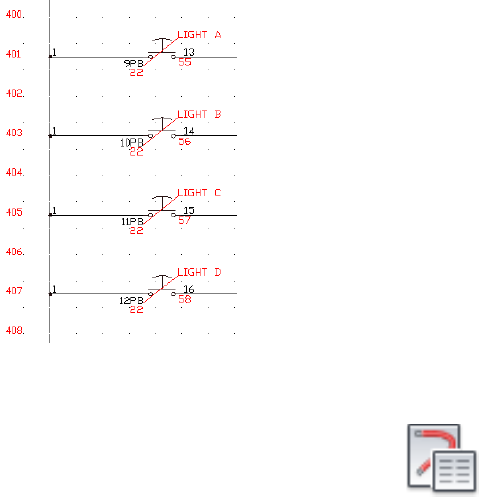
Colors change to distinguish what has been converted and temporary
lines display the link.
3Click Reports tab ➤ Schematic panel ➤ Reports.
4In the Schematic Report dialog box, specify:
Report Name: Component
Active Drawing
Click OK.
5If asked to QSave the drawing, click Yes.
In the Report Generator dialog box, notice that 9PB-12PB are still listed
in the TAGNAME column of the report.
6In the Report Generator dialog box, click Change Report Format.
7In the Component Data Fields to Report dialog box, select Desc1 from
the Available Fields list.
Desc1 moves into the Fields to report list. These are the fields to display
in the Component report.
Linking Schematic Attributes | 1937
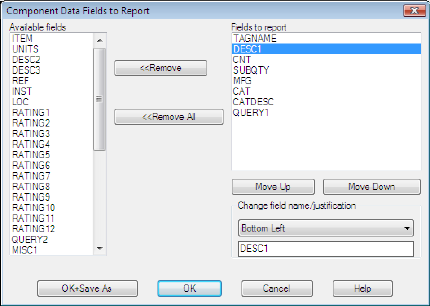
8Click OK.
The Report Generator dialog box now lists the TAGNAME and DESC1
values from the active drawing.
9In the Report Generator dialog box, click Close.
Adding Wire Connections
Wire connection attributes can also be merged into the new generic block
insert. The Add Wire Connections tool in AutoCAD Electrical adds wire
connection attributes to the existing tagged block file. Select line endpoints
or geometry to add the appropriate wire connection attributes to. A new block
definition is created with the newly added wire connections. You can later
create a block file if the block is exploded.
Wire Connection Results:
■Visual indicators (x) appear where the wire connection attributes have
already been applied.
■Wire connection attributes, terminal attributes, and terminal description
attributes are added.
■The block definition is automatically modified during the attribute addition
process.
■Terminal attribute colors change to distinguish what has been already
converted as defined in the WD_M block.
1938 | Chapter 23 Tutorials
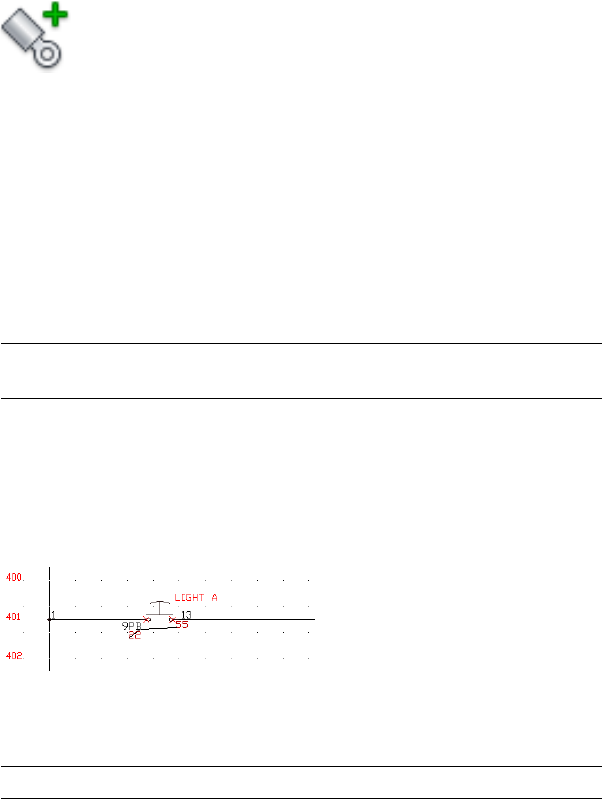
Convert device pins to wire connection attributes
1Click Conversion Tools tab ➤ Tools panel ➤ Add Wire Connections.
2Respond to the prompts as follows:
Select block TAG or PLC Address: Select 9PB
Select end of wire (P=Pick Location): Enter Pand press ENTER
Select location (W=Wire):
Press SHIFT + right-click to select Endpoint from the Snap options, select the
end point of the first wire on line 401
In the Wire Direction dialog box, select from left.
Select TERM01 text object: Select 22 (underneath 9PB TAG)
NOTE Visual indicators (x) appear where the wire connection attributes have
been applied.
Select location (W=Wire):
Press SHIFT + right-click to select Endpoint from the Snap options, select the
end point of the second wire on line 401
In the Wire Direction dialog box, select from right.
Select TERM02 text object: Select 55 (underneath line 401), right-click
You are back at the prompt to Select block TAG or PLC Address.
3Repeat for 10PB - 12PB.
NOTE You may have to right-click several times to exit the command.
Adding Wire Connections | 1939
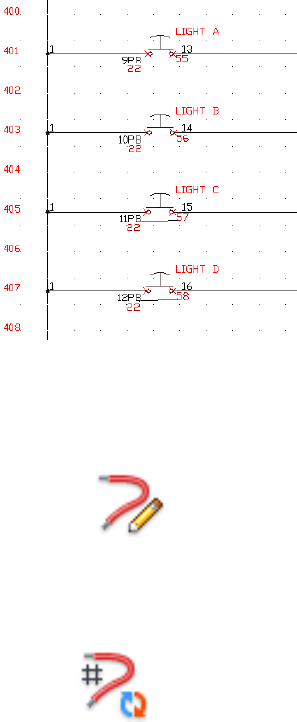
Pause the mouse over 9PB - 12 PB. The text, wire connection attributes,
and description text all highlight. We still must convert the wire number
text and add the geometry to our block.
4Click Schematic tab ➤ Edit Wires/Wire Numbers panel ➤ Create/Edit
Wire Type.
5In the Create/Edit Wire Type dialog box, select Make all Lines Valid Wires
and click OK.
6Click Conversion Tools tab ➤ Tools panel ➤ Convert Text to Wire
Number.
7Respond to the prompts as follows:
Select LINE near wire number text:
Select the left endpoint of the wire with the text 13 above it (line 401)
Select existing wire number text to convert: Select text 13
8While you are still in the command, repeat for text 14 - 16 on lines 403
- 407.
9Right-click to exit the command.
1940 | Chapter 23 Tutorials
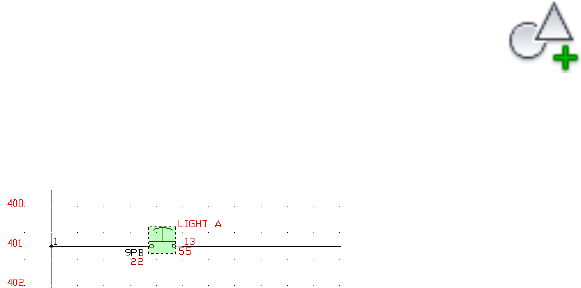
Adding Geometry
The Add Geometry tool in AutoCAD Electrical adds AutoCAD geometry to a
template block file to be created as part of a unique block instance. It creates
a block definition with the newly added geometry. You can later create a block
file if the block is exploded.
Add Geometry Results:
■TAG1, TAG2, PLC TAG, and TAGSTRIP attributes are defined and selected
first.
■The block definition is automatically modified.
■The color of the geometry changes by layer to distinguish what has been
already converted as defined in the WD_M block.
Add geometry to the block
1Click Conversion Tools tab ➤ Tools panel ➤ Add Geometry.
2Respond to the prompts as follows:
Select block for additional geometry: Select 9PB
Select objects: Select the graphics for the push button, right-click
Specify insertion point: Select the middle of the push button
The geometry is associated to the template block files. Check that
everything has been tied to the block by mousing-over 9PB. The text,
wire connection attributes, description text, and geometry highlights.
Adding Geometry | 1941
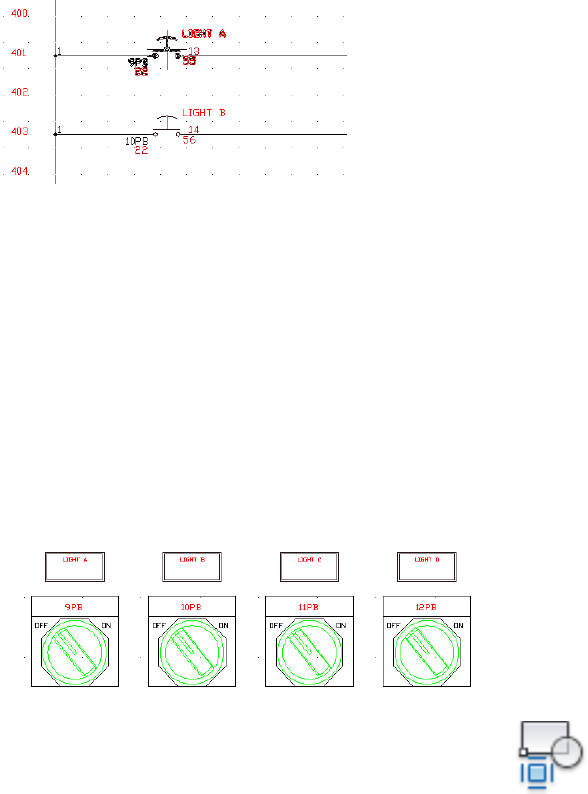
3Repeat steps 1 -2 for 10PB, 11PB, and 12 PB.
Your blocks are now AutoCAD Electrical-smart.
Tagging and Linking Panel Components
The AutoCAD Electrical Tagging and Linking tools work on panel components
the same way they work on schematic components.
Tag and link panel components
1Open Convert-04.dwg.
2Zoom in on the components in the middle of the drawing.
3Click Conversion Tools tab ➤ Tools panel ➤ Special Explode.
4Respond to the prompts as follows:
Select objects:
Select push button lights A - D (including all graphics and text) (use either
single picks or window-select), right-click
1942 | Chapter 23 Tutorials
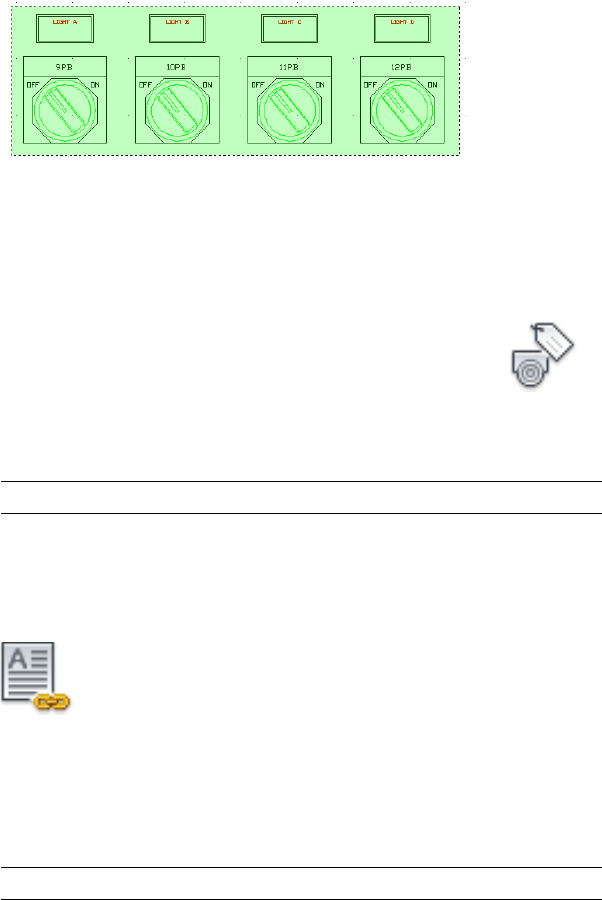
The blocks explode into separate text entities and geometry.
The Tag Panel Component tool makes selected text entities an attributed
block file with the P_TAG1 attribute visible. The template block file
(ACE_P_TAG1_CONVERT.DWG) contains attributes for a panel
component.
5Click Conversion Tools tab ➤ Panel panel ➤ Tag Footprint.
6Respond to the prompts as follows:
Select objects: Select 9PB, 10PB, 11PB, and 12 PB, right-click
NOTE You may have to right-click several times to exit the command.
The text changes color to indicate that it has been tagged. The color of
the PTAG attribute is by layer. The attribute is the same layer as defined
on the WD_M block.
7Click Conversion Tools tab ➤ Attributes panel ➤ Link Descriptions.
8Respond to the prompts as follows:
Select objects: Select 9PB, right-click
Select text to fill in next available DESC attribute:
Select LIGHT A, right-click
NOTE You may have to right-click several times to exit the command.
Tagging and Linking Panel Components | 1943
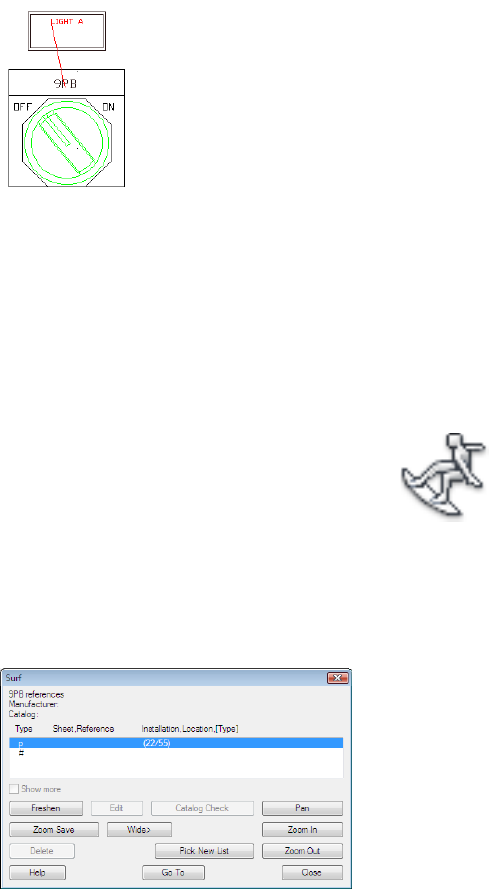
Updating Panel or Schematic Components
Once a panel component has a component tag assigned, it is automatically
linked to the schematic component with the same tag. Updates to either the
schematic or panel component prompt an update to the related component.
Surf to the related schematic component
1Click Project tab ➤ Other Tools panel ➤ Surfer.
2Respond to the prompts as follows:
Select tag for “Surfer” trace (or <Enter> to type it): Select 9PB
3In the Surf dialog box, double-click the component marked with type
“p.”
Surfer goes to the schematic drawing and zooms on the schematic
component.
1944 | Chapter 23 Tutorials
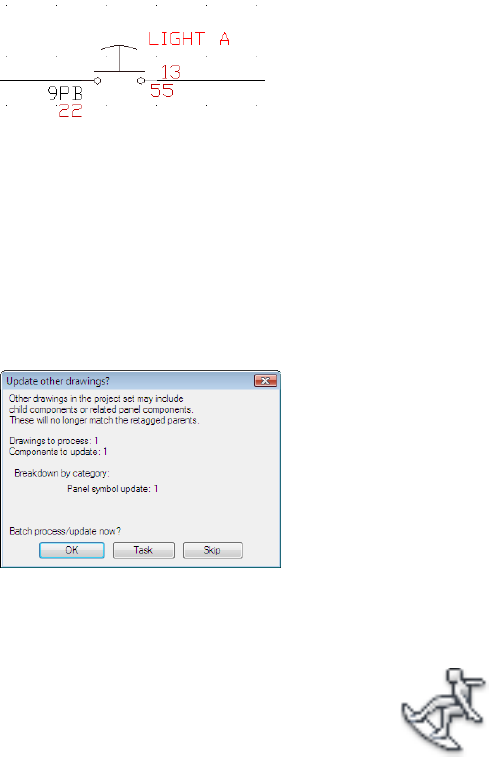
4If asked to save the drawing, click Yes.
5In the Surf dialog box, click Edit.
6In the Component Insert/Edit dialog box, change the description to
LIGHT 1 and click OK.
The Update Other Drawings dialog box displays. This dialog alerts that
other drawings in the project set include child components or related
panel components.
7If asked to save the drawing, click Yes.
8In the Update Other Drawings dialog box, click OK.
9Click Project tab ➤ Other Tools panel ➤ Surfer.
10 Respond to the prompts as follows:
Select tag for “Surfer” trace (or <Enter> to type it): Select 9PB
11 In the Surf dialog box, double-click the component marked with type
“#.”
Surfer goes to the panel layout drawing and zooms on the physical
representation of the push button. Notice that the description for 9PB
updated to reflect the change you made to the schematic component.
Updating Panel or Schematic Components | 1945
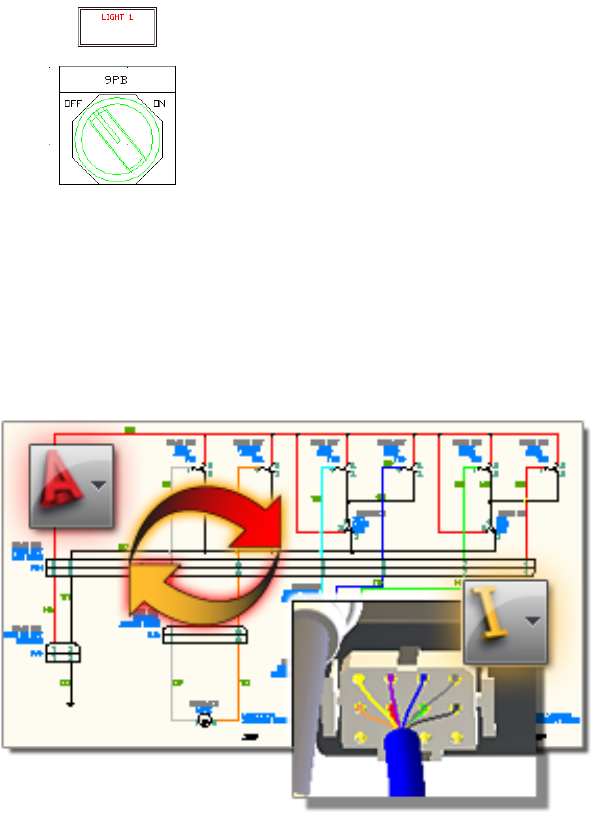
12 In the Surf dialog box, click Close.
Interoperability: Inventor and AutoCAD Electrical
Introduction
Learn to use AutoCAD Electrical and Inventor interoperability to digitally
prototype and document your electrical designs.
35 minutesTime required
1946 | Chapter 23 Tutorials
Prerequisites: ■Familiarity with both AutoCAD Electrical and Inventor is recommended but not
necessary. This tutorial is designed to work whether you have only AutoCAD
Electrical or Inventor, or if you have both programs.
■Know how to navigate the model space with the various view tools.
900501.dwgTutorial file used
Copy all files located in
Documents and Settings\{username}\My Documents\Acade {version}\Aedata\Tutorial\Ae-
gs\Interoperability
Windows XP
to
Documents and Settings\{username}\My Documents\Acade {version}\Aedata\Proj\Aegs
Users\{username}\Documents\Acade {version}\Aedata\Tutorial\Aegs\InteroperabilityWindows Vista,
toWindows 7
Users\{username}\Documents\Acade {version}\Aedata\Proj\Aegs
Introduction (continued)
In this tutorial, you learn how to interchange data between AutoCAD Electrical
and Inventor. In the first half of the tutorial, the data exchange direction is
from AutoCAD Electrical to Inventor.
In the second half, the exchange direction is from Inventor to AutoCAD
Electrical.
Introduction (continued) | 1947
You do not need both programs to derive benefit from this exercise. The two
XML files generated in this workflow are also included in the tutorial sample
files. Therefore, if you have only one program, you can still perform the XML
import operation.
If you have only AutoCAD Electrical, you can review the Inventor portion of
the tutorial. Then you can perform the import steps and subsequent steps on
the Import the Inventor data on page 1973 page. You are directed to perform
this import at the appropriate point.
NOTE This tutorial was created using AutoCAD Electrical 2011 and Inventor 2011
Professional. You need the Professional or Routed Systems versions for the Cable
and Harness functionality.
Part 1: 2D to 3D
In this half of the tutorial, you learn how to export your data from AutoCAD
Electrical to Inventor. The sample DWG file is a wiring diagram used for a seat
assembly. The assembly uses electric motors to provide adjustments to the
seat position.
Open DWG
1Start AutoCAD Electrical.
2Open the Project Manager. If this window is closed:
Click Project tab ➤ Project Tools panel ➤ Manager.
3Select Open Project from the project drop-down menu.
4Select the project ace_inv.wdp and click Open. The project is in the
location described on the introduction page.
5Expand the ACE_INV project, and then double-click 900501.dwg.
1948 | Chapter 23 Tutorials
Ensure that the drawing is in Model Space.
Rename component tags
Before you export this data to Inventor, you update the PASSENGER SEAT
component tags. Assume that this drawing was copied forward and is now
ready to modify and use for the driver seat.
1Click Schematic tab ➤ Edit Components panel ➤ Retag Components
drop-down ➤ Find/Edit/Replace Component Text.
2Select Active drawing (all) in the Find/Edit/Replace Electrical Component Text
dialog box, and click OK.
3Set the following options and take the following actions in the
Find/Edit/Replace - this Drawing (all) dialog box.
■Select Find in the Location Code group.
■Click List, then select PASSENGER SEAT in the Loc values dialog box,
and click OK.
■Select Replace, and then enter DRIVER SEAT in the text box.
Rename component tags | 1949
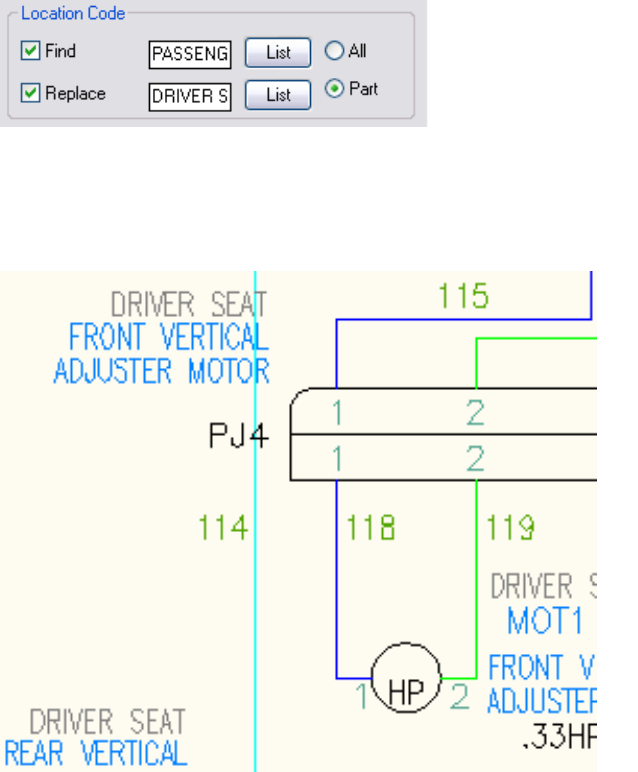
■Click Start Search, and review the results in the Match 1 of 16 dialog
box.
■Click Replace All, and then click Yes, Make Changes. The component
tags are changed to DRIVER SEAT.
■Click Cancel.
4Save the drawing.
1950 | Chapter 23 Tutorials
Export to XML
Next, you export the electrical data contained in your AutoCAD Electrical
digital prototype to an XML file. You use this XML file later to import the
data into Inventor.
1Click Import/Export Data tab ➤ Export panel ➤ Inventor.
2Ensure Active Drawing is selected in the Autodesk Inventor Professional Export
dialog box, and click OK.
3Save to the same directory you copied the tutorial files in the Autodesk
Inventor Professional XML File Export dialog box. Use driverseat_from_ace
for the file name.
4Click Save.
Set the project
1Start Inventor.
2Select Get Started ➤ Launch ➤ Projects.
3Click Browse.
4Browse to Tutorial Files/Automotive folder, and select interop.ipj.
5Click Open.
6Click Done in the Projects editor.
Export to XML | 1951
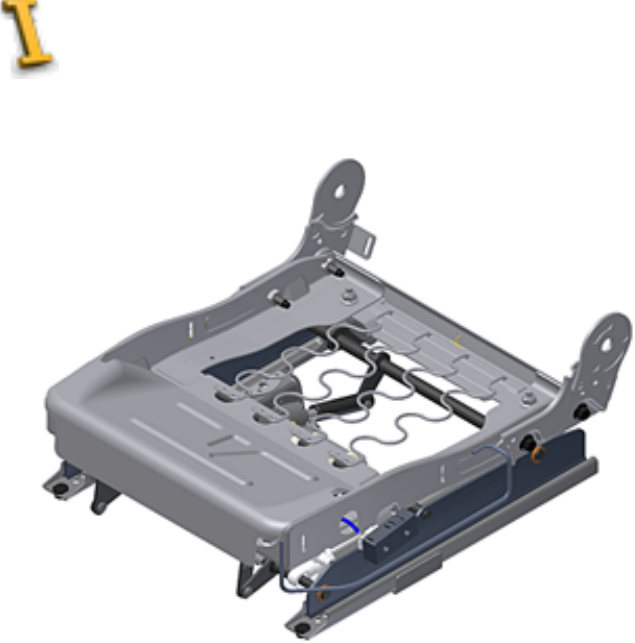
Open the dataset
1Open 100500.iam. The file is contained in the 1000 folder. The model
opens in the Default design view representation.
This sample has been stripped down to reduce data size. The complete
seat looks like the following:
1952 | Chapter 23 Tutorials
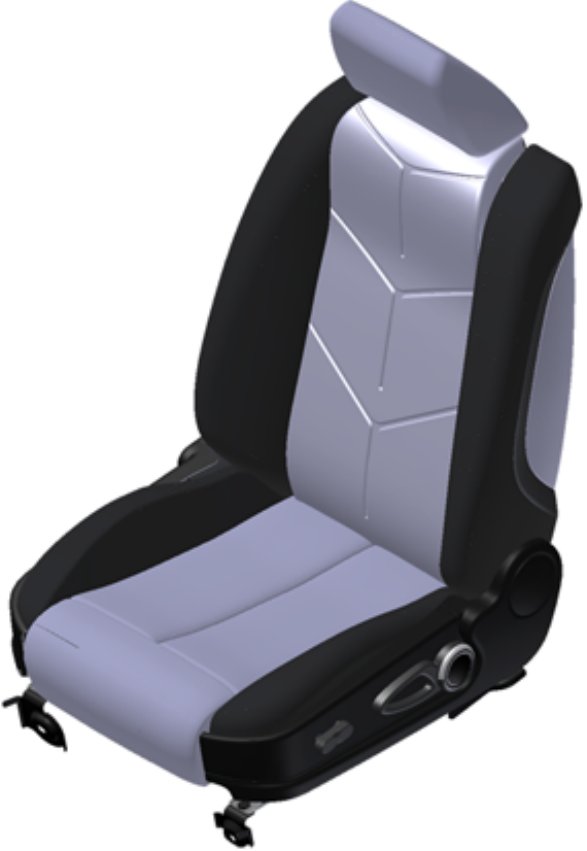
2Switch to the Electrical design view representation.
Open the dataset | 1953
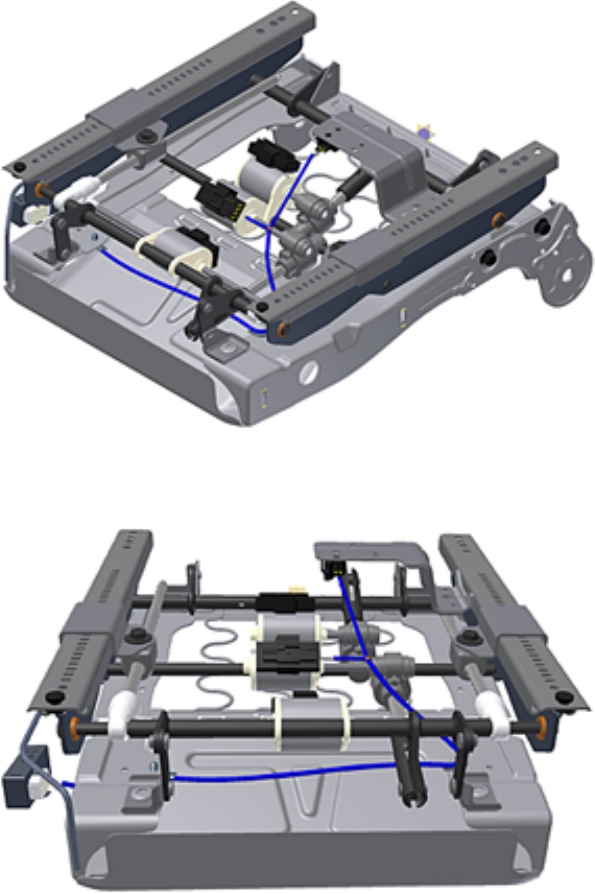
Orbit and zoom your view as you progress through the workflow, as
needed. It can be helpful to approximate the following view as you get
started with the workflow.
1954 | Chapter 23 Tutorials

Add harness segments
Now you add the two harness segments.
1Double-click Harness1 in the browser to edit the harness. Be careful to
edit the harness assembly rather than the harness part.
2Select Cable and Harness ➤ Create ➤ Create Segment.
3Select the existing segment near the front of the seat to place the first
point. The exact selection location is not critical.
Add harness segments | 1955
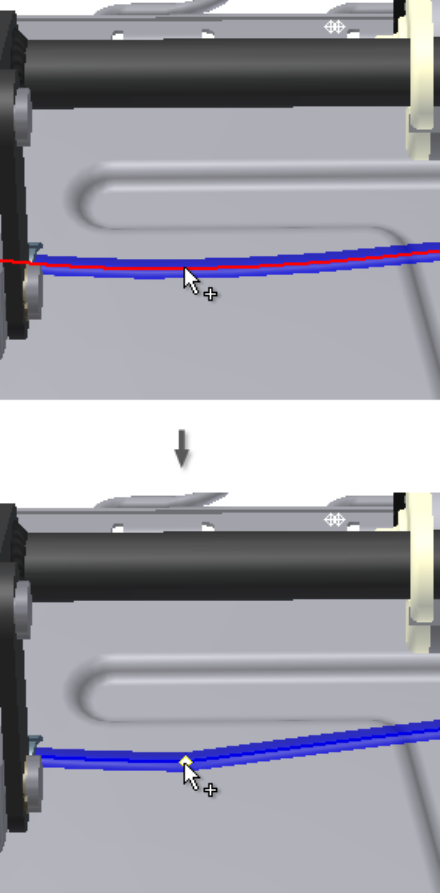
4Select the existing work point to set the next segment point. The two
work points are very close together. You may need to zoom in to see them
clearly.
1956 | Chapter 23 Tutorials
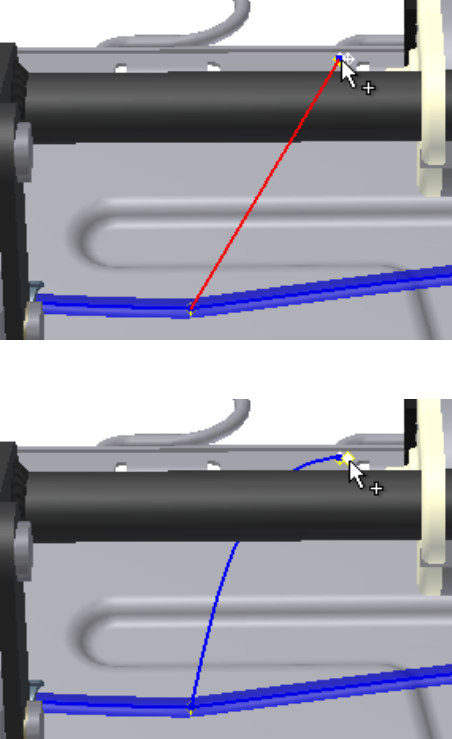
5Select the other work point to set the final point.
6Right-click, and select Continue. The first segment is created.
Add harness segments | 1957
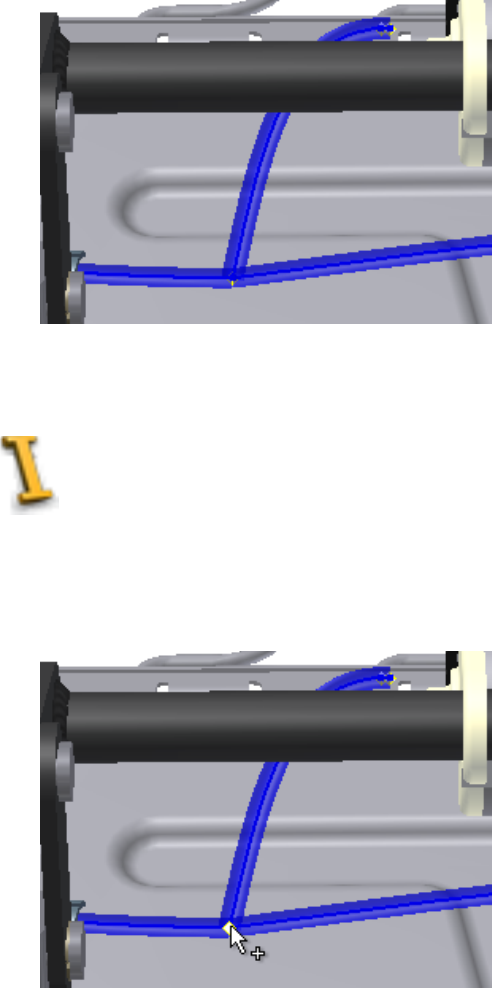
Add harness segments (continued)
Next, you add a second segment. This segment begins in the same location
as the previous segment. Because you selected Continue from the context
menu, Create Segment is still active and ready to create another segment.
1Select the segment point that you added previously.
1958 | Chapter 23 Tutorials
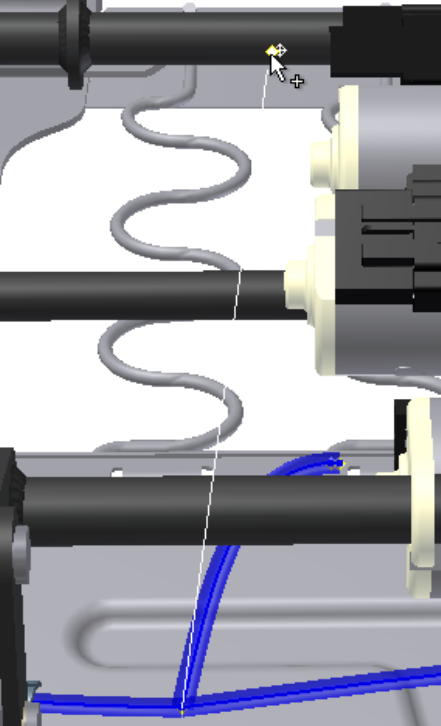
2Select the existing work point.
3Select the other work point.
Add harness segments (continued) | 1959
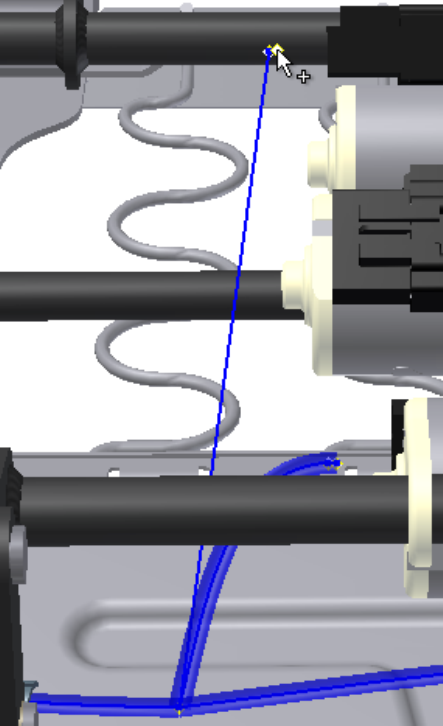
4Right-click, and select Finish. The segment is created.
1960 | Chapter 23 Tutorials
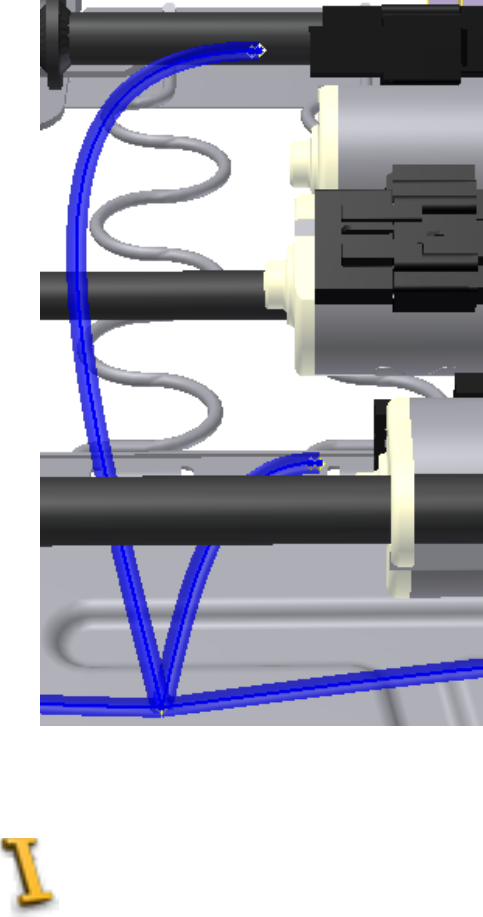
Import the AutoCAD Electrical data
Apply the AutoCAD Electrical data to the Inventor 3D model.
Import the AutoCAD Electrical data | 1961
1Select Cable and Harness ➤ Manage ➤ Import Harness Data.
2Click the Browse button next to the Harness Data File field.Select
driverseat_from_ace.xml you exported from AutoCAD Electrical in the
Select Wire List Data File dialog box. Click Open.
NOTE If you do not have AutoCAD Electrical, you can now use
driverseat_from_ace.xml provided in Tutorial Files\Automotive\XML_delivered.
3Click OK in the Import Harness Data dialog box.
Issues
The browser nodes in the Imported Harness Data dialog box contain the electrical
components and wires imported from AutoCAD Electrical.
➤ Click Filter in the Imported Harness Data dialog box, and then
select Show Issues Only.
Only items with issues display in the dialog box. The items are identified by
the Issue icon. There are many issues, because the Inventor sample
assembly does not contain many of the components contained in the AutoCAD
Electrical drawing as reflected in driverseat_from_ace.xml. Many of the RefDes
in AutoCAD Electrical do not have a matching RefDes in Inventor. The absence
of various components and RefDes also means that connecting wires also have
issues. The missing RefDes do not prevent you from successfully completing
the exercise. This scenario is a reflection of a real-world design process in
which data may be missing or incomplete but is acceptable for a given point
in the workflow.
1962 | Chapter 23 Tutorials
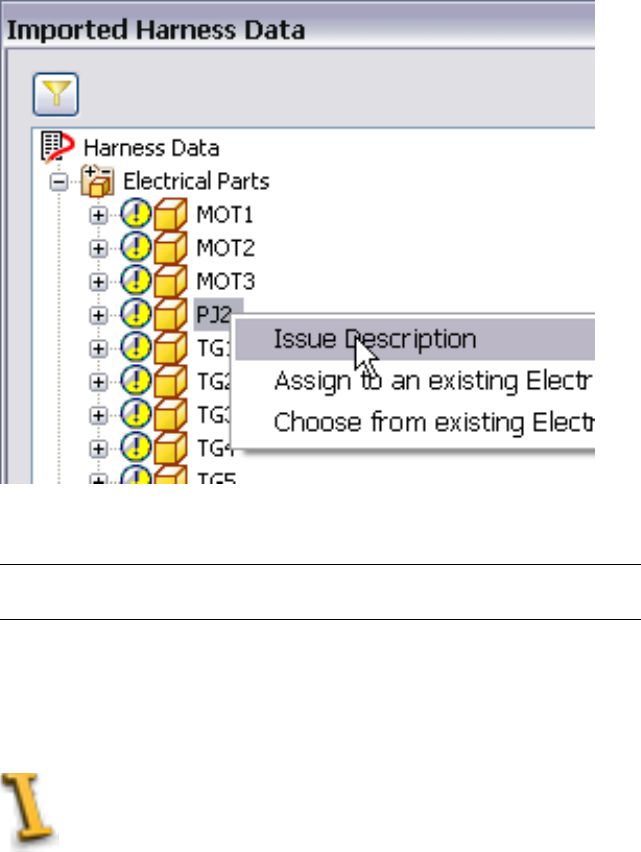
Scroll to the top of the item list, then right-click PJ2, and select Issue
Description.
The issue description describes the problem and offers solutions. Review the
information, and then close the issue description.
TIP Click the Help button in the Imported Harness Data dialog box to open a
reference topic that describes various elements and features in the dialog box.
Next, you use functionality on the same context menu to assign the missing
RefDes.
Assign missing RefDes
1Right-click PJ2 and select Assign to an existing Electrical Part.
Assign missing RefDes | 1963
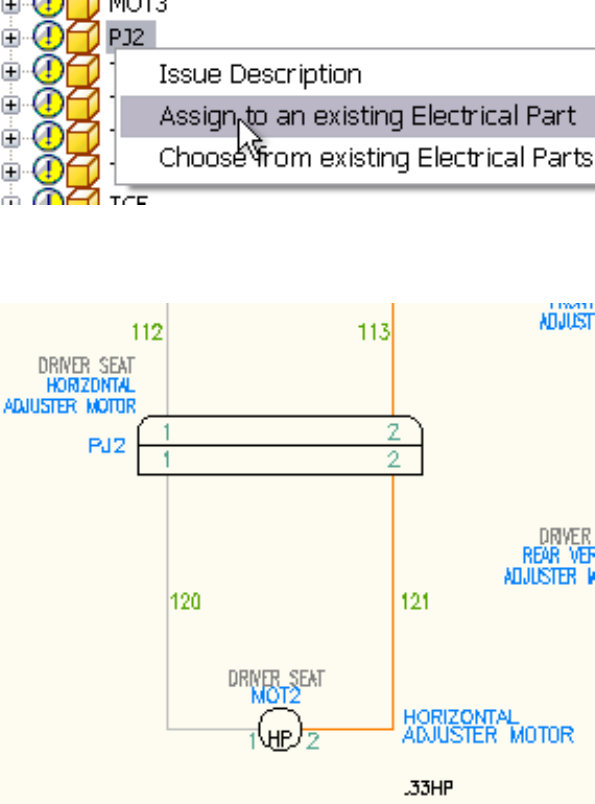
With reference to the AutoCAD Electrical drawing, PJ2 is the RefDes
specified for the connector that connects to the motor MOT2, the motor
for horizontal adjustment.
2Pause the cursor over the connector occurrence 900575:2 in the graphics
window, and note the tooltip.
1964 | Chapter 23 Tutorials
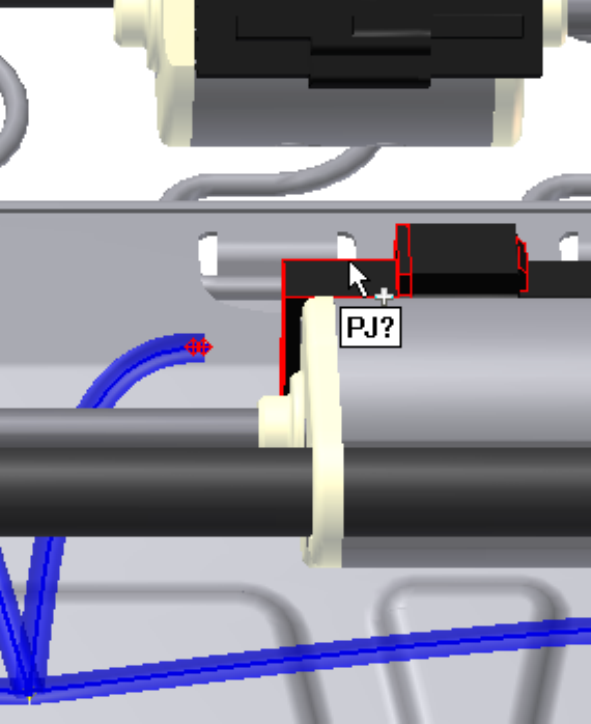
You can select the occurrence in the browser; however, when you use
the graphics window, Inventor displays a tooltip. The tooltip shows the
RefDes for that component. The question mark (?) indicates that the
RefDes is not yet assigned.
3Select the connector.
4Click OK in the Select Electrical Part dialog box.
5The RefDes specified in AutoCAD Electrical is assigned to the Inventor
connector, and the issue associated with PJ2 is removed. Because the
Assign missing RefDes | 1965
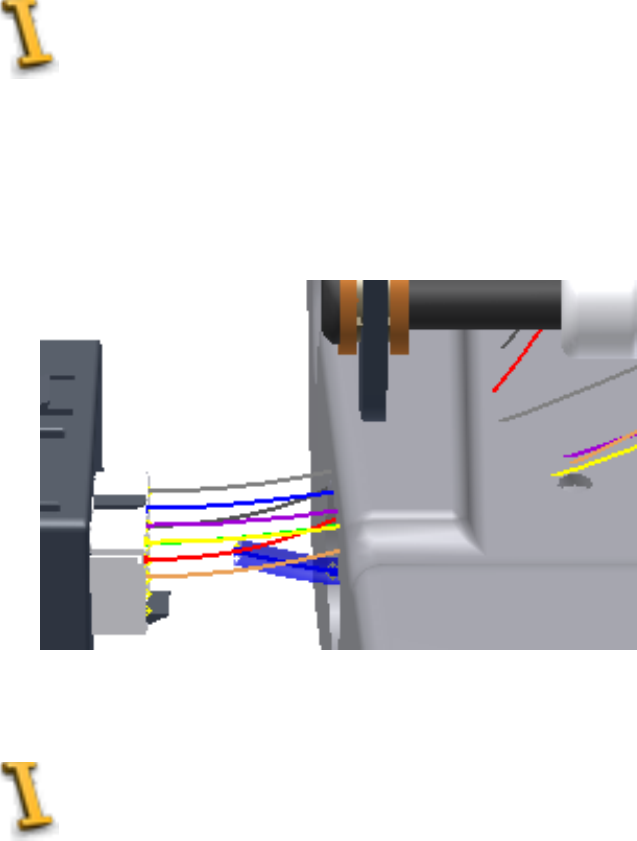
dialog filter is set to show only items with issues, PJ2 is not included in
the list.
Finish the Import
Next, you finish the import operation.
1Click OK in the Imported Harness Data dialog box.
2Close the message dialog box. For this exercise, accept the remaining
issues without making further changes.
The data from AutoCAD Electrical is imported. You should see eight
imported wires in the graphics window and in the browser.
Route the wires into the harness segments
1966 | Chapter 23 Tutorials
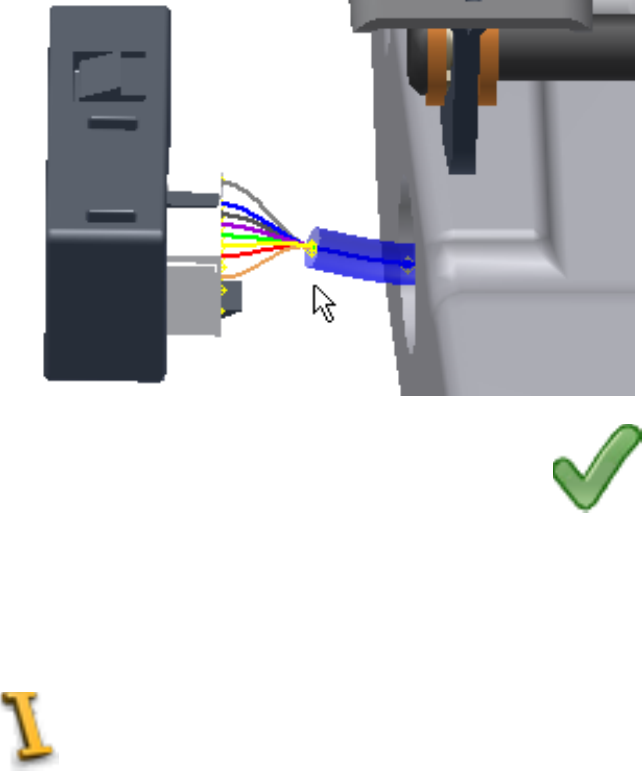
1Select Cable and Harness ➤ Route ➤ Automatic Route.
2Select the All Unrouted Wires option. The Selected field in the dialog box
indicates eight wires are selected.
3Click OK. The wires are routed into the segments.
4Select Cable and Harness ➤ Exit ➤ Finish Cable and Harness.
Save the assembly.
This exercise completes the 2D to 3D portion of the tutorial.
Part 2: 3D to 2D
In this part of the tutorial, you learn how to reverse the workflow and export
electrical data from Inventor to AutoCAD Electrical.
Part 2: 3D to 2D | 1967
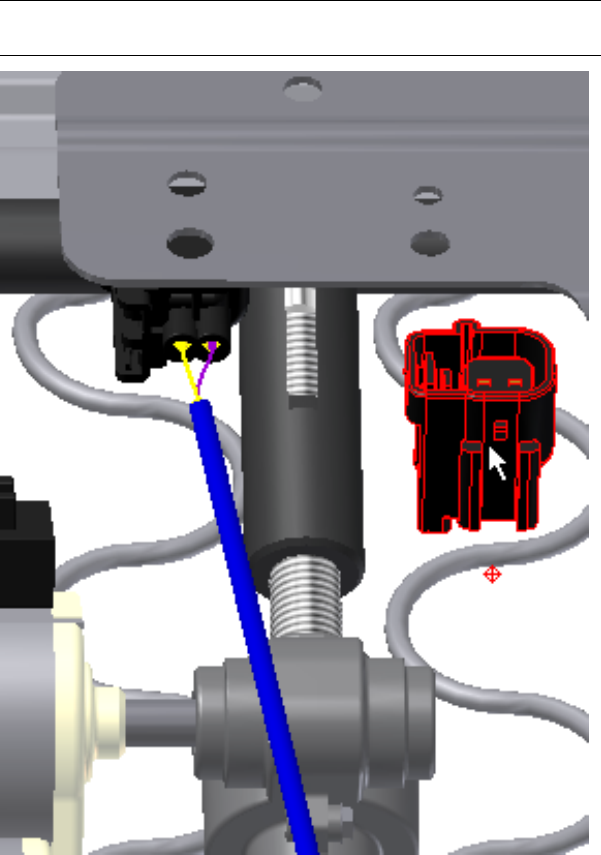
Add a new connector
1Place an occurrence of the connector 900356.ipt. Place the occurrence
as shown.
TIP Drag one of the existing occurrences from the browser into the graphics
window to create another occurrence, instead of using the Place command.
1968 | Chapter 23 Tutorials
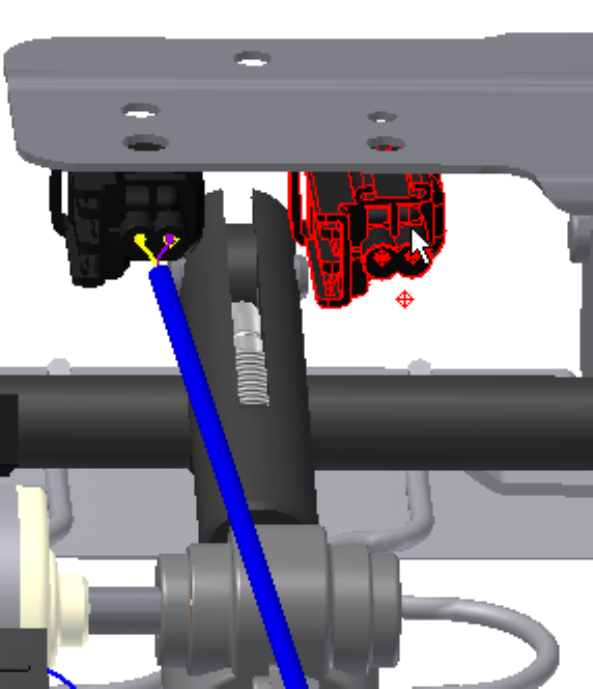
2From the Position panel of the Assemble tab, use Grip Snap or Move and
Rotate to approximate the position of the connector. Face the pins on
the connector toward the front of the seat.
Normally you use assembly constraints to position and constrain the
component, but it is not necessary for this exercise.
Part 2: 3D to 2D | 1969
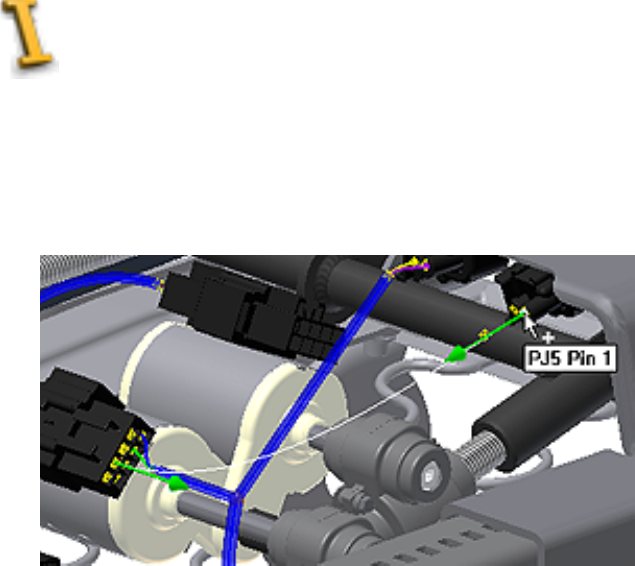
Create wires
1In the browser, double-click Harness1 to edit the harness. Edit the harness
assembly - not the part.
2Select Cable and Harness ➤ Create ➤ Create Wire.
3Select the pins on the connectors, as shown in the following image. The
identification for the first selected pin is PJ4 Pin 7.
Before you apply the selections, use the Create Wire dialog box to specify
Wire ID, Category, Name and other properties for the wire.
4Specify the following settings:
■Wire ID - 125
■Category - Belden
■Name - 9916-RED
5Click Apply to create the first wire.
1970 | Chapter 23 Tutorials
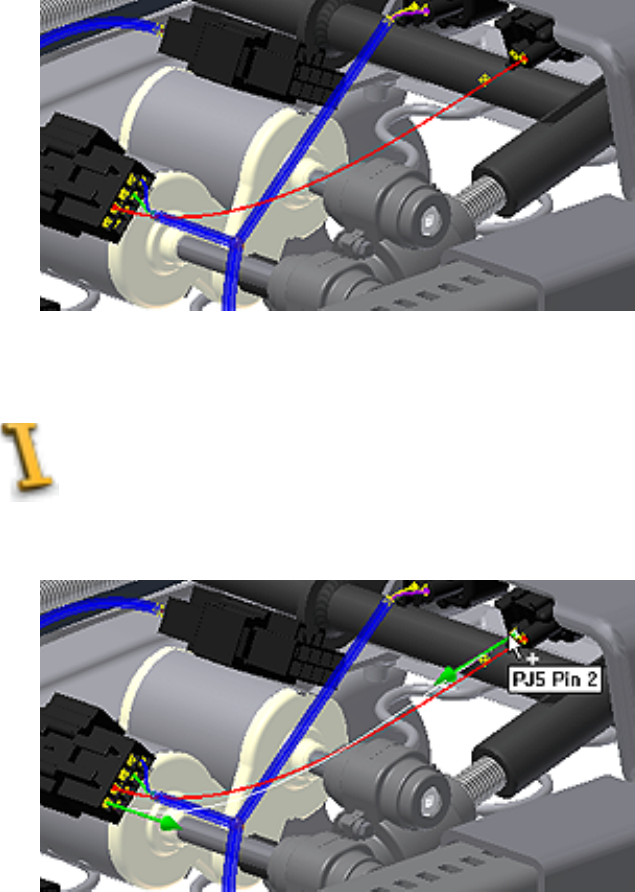
Create Wires (continued)
1Select the pins on the connectors for the second wire. The identification
for the first selected pin is PJ4 Pin 8.
2Specify the following settings in the Create Wire dialog box:
■Wire ID - 126
Create Wires (continued) | 1971
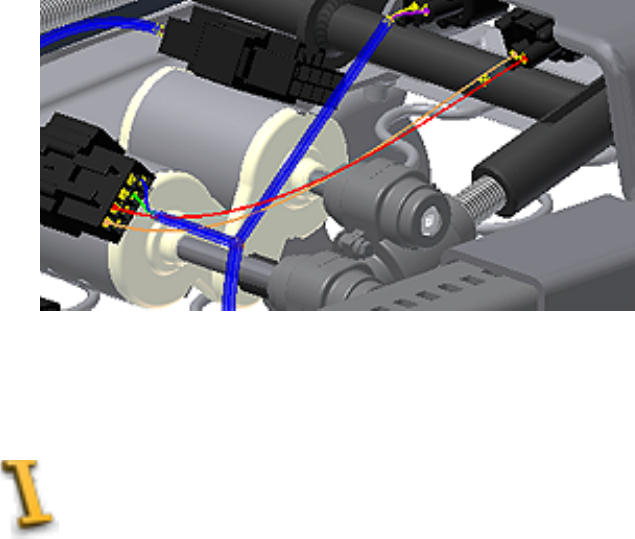
■Category - Belden
■Name - 9916-ORG
3Click Apply. Alternatively, right-click and select Apply.
4Cancel the Create Wire dialog box.
Route wires
➤ Use Automatic Route as you did previously to route the wires into the
segments.
1972 | Chapter 23 Tutorials
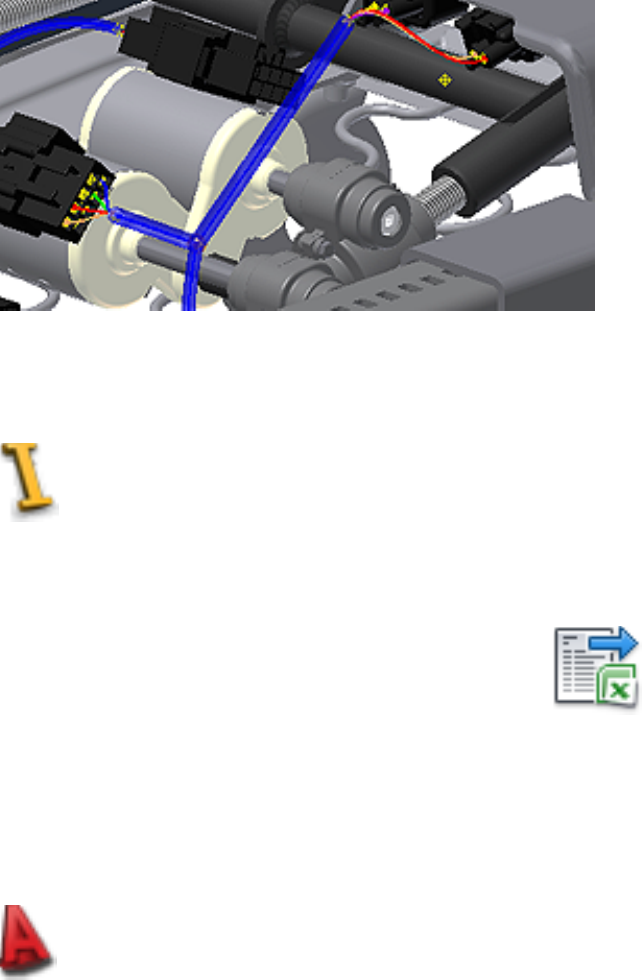
Save the file.
Export to XML
Next, you export the electrical data contained in your Inventor digital
prototype to an XML file. You use this XML file to import the data into
AutoCAD Electrical.
1Select Cable and Harness ➤ Manage ➤ Export Harness Data.
2Name the file driverseat_from_inv.xml, and save to the same directory
you used for the previous XML file. Dismiss the Cable and Harness message
dialog box.
Import the Inventor data
Export to XML | 1973
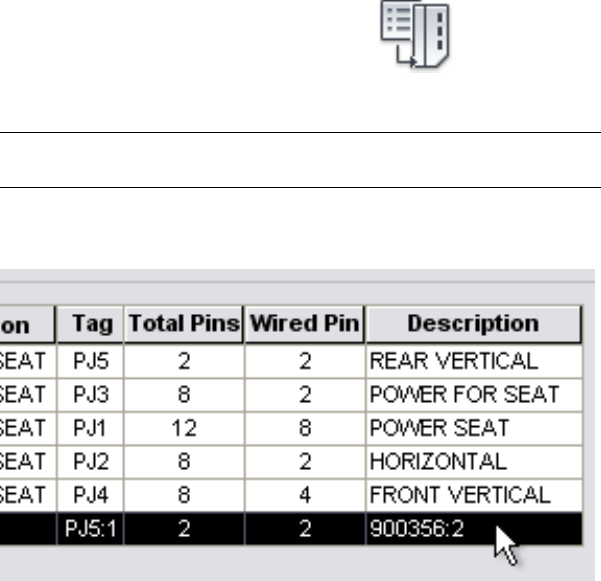
Now, you apply the added connector and wires to the 2D model.
Switch to AutoCAD Electrical.
1Click Schematic tab ➤ Insert Component panel ➤ Insert Connector
drop-down ➤ Insert Connector (From List).
2Select driverseat_from_inv.xml. Click Open.
NOTE If you do not have Inventor, you can now use driverseat_from_inv.xml
provided in the folder specified on the Introduction page.
3The connector you added in Inventor is listed in the Connector Selection
dialog box. Select the row for the connector.
4At the bottom of the dialog box, click Details.
5On the connector display menu, click Horizontal.
The display in the dialog box switches to horizontal.
1974 | Chapter 23 Tutorials
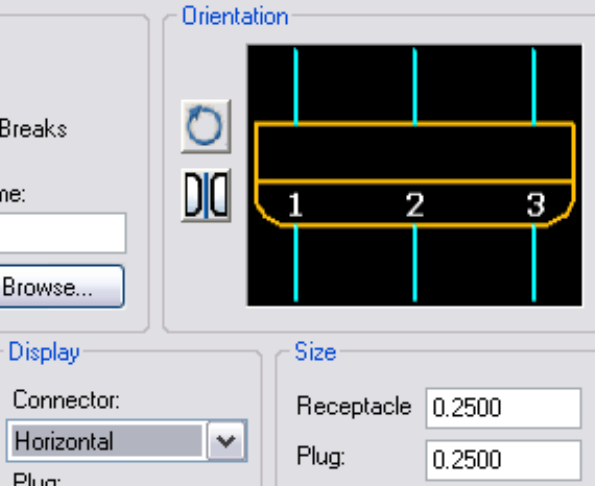
6Click Insert.
7Place the connector to the right of the power seat main switch.
Import the Inventor data | 1975
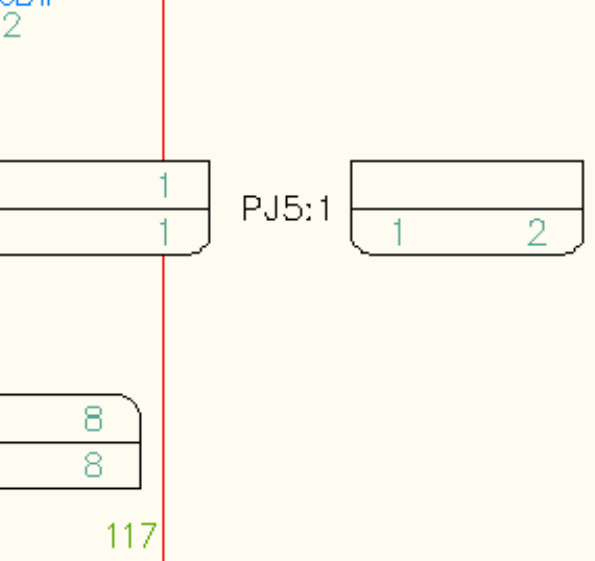
8In the Connector Selection dialog box, click Wire It. AutoCAD Electrical
connects the pins as you specified in Inventor.
1976 | Chapter 23 Tutorials
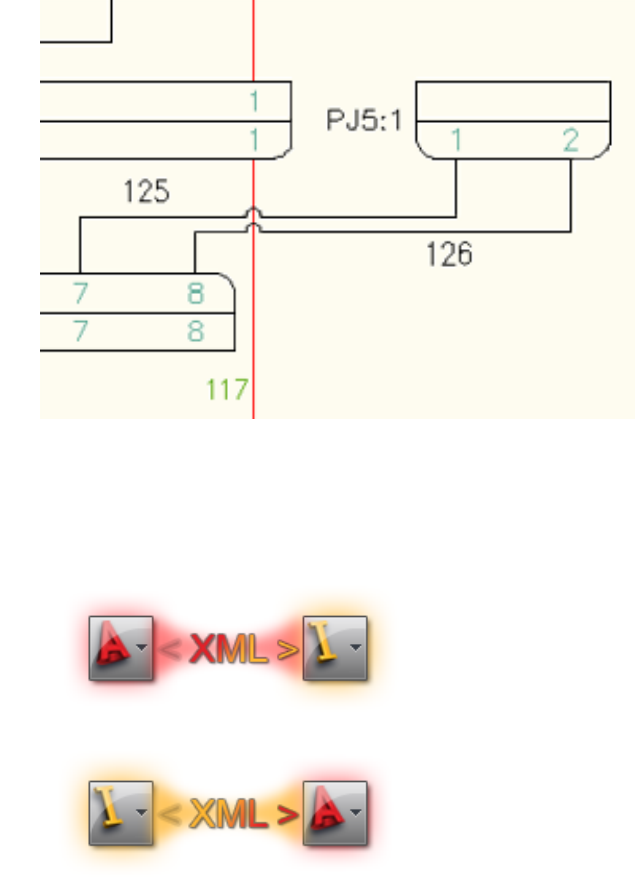
You completed the tutorial.
Summary
Summary | 1977
In this tutorial, you used interoperability between AutoCAD Electrical and
Inventor Professional or Inventor Routed Systems to develop your digital
prototypes. This tutorial showed you how you can:
■Define electrical data in AutoCAD Electrical and then apply that data to
the related Inventor 3D prototype.
■Define electrical data in the Inventor 3D prototype and then apply that
data to the related AutoCAD Electrical drawing.
This tutorial was meant to provide many details but also serve as an overview
of a particular workflow. For further details, information, and options, see the
related Help topics contained in AutoCAD Electrical and Inventor.
1978 | Chapter 23 Tutorials
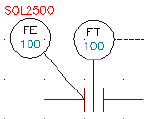
Advanced Productivity
Set up peer-to-peer component relationships
The following example has a valve representation on
an instrument drawing, FE100, and its equivalent on
the electrical schematic, SOL2500. They are the same
physical device, but carry different tags based on the
drawing discipline in which they appear. Though
each device is represented as a parent symbol, you
can set up a peer-to-peer relationship between them
so that the electrical tag name of the schematic
automatically cross-references to the instrument
drawing, and the tag cross-references of the instru-
ment bubble to the tag of the schematic.
The instrument bubble symbol is set up with an op-
tional split tag. Instead of a single TAG1 attribute, it
has two tags: TAG1 PART1 and TAG1 PART2. The
instrument bubble is also set up as a normal AutoCAD
Electrical parent schematic symbol without the wire
connection points. It includes two extra attributes
beyond what a normal parent symbol carries:
■WDTAGALT - carries a copy of the schematic
TAG1 value of the symbol.
■WDTYPE - an invisible attribute with a nonblank
value indicating the component category. Ex-
ample: "PI" for P&ID, "PN" for pneumatic, or "HY"
for hydraulic
24
1979
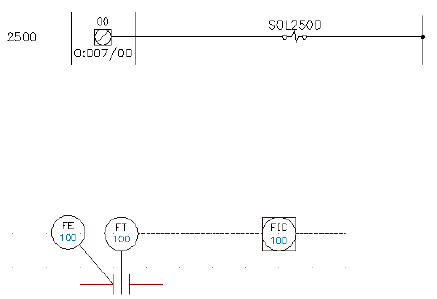
The schematic parent solenoid symbol includes just
one extra attribute: WDTAGALT carries a copy of the
instrument value of the bubble.
Your drawings must be part of the active AutoCAD Electrical project so that
the WDTAGALT value on the instrument drawing is automatically updated
when you edit the schematic parent tag name and vice versa. Using AutoCAD
Electrical SURF on one automatically includes the other in the surf pick
window.
1Open the Project Manager.
2Open the project containing the instrument and schematic drawings.
3On the Project Manager, double-click the schematic drawing to open it.
4Zoom in so that your schematic symbol is visible.
5On the Project Manager, double-click the instrument drawing to open
it.
6Zoom in so that your valve representation is visible.
7On the Project Manager, right-click the project name, and select
Properties.
8On the Project Properties, Cross-references dialog box, Cross-reference
Options section, select Peer-to-Peer.
9Click OK.
10 Right-click the schematic symbol to edit in the drawing (in this case,
SOL2500).
11 Select Edit Component from the context menu.
12 On the Insert/Edit Component dialog box, click Tags Used: Schematic.
1980 | Chapter 24 Advanced Productivity
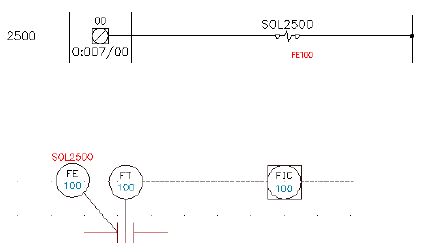
13 Select Show all components for all families.
The tag values from the other symbol appear in the list.
14 Select the valve representation (in this case, FE100) with a family code
of IN (for instrument).
15 Click Copy Tag.
16 On the Copy Tag dialog box, click WDTAGALT.
17 On the Insert/Edit Component dialog box, click Show/Edit Miscellaneous.
18 Verify that the WDTAGALT value lists the TAG1 value of the valve (in
this case, FE100) and click OK.
19 On the Insert/Edit Component dialog box, click OK.
20 On the Update Other Drawings dialog box, click Now to update the
drawing.
The WDTAGALT value of the schematic symbol is automatically updated
and the TAG1 value of the valve (or TAG1 PART1/TAG1 PART2 combined
value) appears next to the symbol in the drawing.
The WDTAGALT value of the valve is automatically updated and the TAG1
value of the schematic symbol appears next to the valve in the drawing.
Create automated pin assignments
AutoCAD Electrical consults a Pin List database when a part number is added
or an existing part number is changed on a parent schematic symbol. If
AutoCAD Electrical finds a match on the part number's MFG, CAT, and
optional ASSYCODE values (which ties to the catalog number to make unique
parts) in this database table, then the associated contact count and pin number
information is retrieved and placed on the parent schematic component.
Create automated pin assignments | 1981
Any device can have pins assigned to it, but common components that carry
pin assignments are relays, motor starters, and connectors. Pins are used for:
■Error checking
■Accurate connection information
■Providing correct connections
You can expand the Pin List database table as needed. Many users have
difficulty creating their own database entries so the following procedures
simplify this procedure for you.
Basic workflow
Pin lists are directly associated to catalog numbers and therefore are not applied
to a component symbol until the catalog number has been assigned. You can
use wildcards inside the Pin List database to find the catalog number to apply
a single pin list to multiple symbols. The basic workflow for pin numbers
being assigned to a symbol is as follows:
■Insert a component.
■On the Insert/Edit Component dialog box, assign a catalog number.
■Pin List database is queried.
■Coil pins are applied to the parent symbol's terminal attributes.
■The Pin List is applied to the parent symbol as xdata or attributes.
If the pin numbers are assigned as xdata, there is not a PINLIST attribute
since the pin assignment comes from the pin list table.
Setting up COILPINS
The COILPINS column in the Pin List database specifies the terminal pin
numbers for a coil or parent symbol of a component. This is generally two
pin numbers separated by a comma (such as K1,K2). When a component calls
for additional pin assignments on the parent, you can continue the list with
each value separated by commas. These values are applied to the TERM01 and
TERM02 attributes respectively on the parent symbol.
If you set COILPINS = "K1,K2;" then pins K1/K2 are assigned to the parent
symbol of a component.
In the example below, TERM01 = K1 and TERM02 = K2.
1982 | Chapter 24 Advanced Productivity

Setting up COILPINS for two wired devices
The automatic pin list look-up and assignment at component insertion time
is not limited to relay devices as shown in the example above. You can encode
two wire devices like pilot lights or proximity switches into the database file.
Insert the Manufacturer and Catalog numbers and fill in the COILPINS filed
with the terminal pin numbers. Leave the PINLIST field blank. Now, when
you insert one of these devices and do a catalog lookup and part number
selection, AutoCAD Electrical quickly looks for a MFG/CAT match in the pin
list database. On a match, AutoCAD Electrical pulls out the device's coil pin
numbers and inserts them in the newly inserted device.
Setting up a PINLIST
The PINLIST column in the Pin List database specifies the contact types and
their respective pin numbers. A two terminal contact has three elements in
this format: contact type, terminal pin, terminal pin. Each PINLIST value can
have up to 256 characters. Use a value 0-5 to specify the contact type, where:
■0 = convertible contact
■1 = N.O.
■2 = N.C.
■3 = Form-C (NO/NC pair)
■4 = multiple-pole terminal strips or undefined type
■5 = multiple-pin or stacked terminals
If you set PINLIST = "0,13,14;0,23,24" then 0= contact type, 13 (or 23)=
TERM01, and 14 (or 24)= TERM02.
If you set PINLIST = "0,13,14,*prompt," "*prompt" adds a description label.
This optional label is always the last element of the list and is preceded by an
asterisk character (if the asterisk is left out, the comment is interpreted as
another pin number).
To view or manually edit the PINLIST values, select Edit Component, and
then click NO/NC Setup on the Insert/Edit Component dialog box.
Create automated pin assignments | 1983

Setting up PEER_COILPINS and PEER_PINLIST
The PEER_ fields in the Pin List database specify pin list assignments for a
single part number with two parent devices. You set up the second coil's coil
pins and pin list data in the PEER_COILPINS and PEER_PINLIST fields for the
common part number. This is commonly used for setting up forward and
reversing starters or latching and unlatching relays. You apply the pins to the
forward (latching) relay, and then apply the peer pins to the reversing
(unlatching) relay.
To split the pin list data between two peer coil symbols:
1Insert the first coil symbol and make the catalog look-up selection.
The COILPINS and PINLIST data is found and applied to the coil symbol.
Any defined peer coil and pinlist data is also saved on the symbol as
invisible xdata.
2Insert the second coil symbol but do not make a catalog assignment.
3In the Insert/Edit Component dialog box, click NO/NC Setup.
4Click Pick.
5Select the first coil symbol.
The saved peer pinlist data is moved from the first symbol over to this
peer symbol. Child contacts can now be auto-annotated with the selected
coil's available pin list information and max NO/NC count tracked on a
per-coil basis.
Set up AutoCAD Electrical for multiple users
You can manually move any shared files to a new central location after
installation by using normal Microsoft Windows operations to cut or copy
and paste from their local location to a central shared location. These shared
files are located by AutoCAD Electrical as long as they are placed in the
AutoCAD Electrical defined path (such as in the project's subdirectory), the
path given by the AutoCAD Electrical environment variable, or AutoCAD
search paths.
NOTE We recommend that you create a backup of your information in another
location and remove the shared data from your local drive to ensure that the data
is being located correctly.
1984 | Chapter 24 Advanced Productivity

Shared files
The following shared files can be pasted from your local machine to a shared
location. The table lists the file names, default location, and any WD.ENV file
lines that must be modified.
The main executables and static support files are located under C:\Program
Files [(x86)]\Autodesk\Acade {version}\. The user-modifiable support files and
database content are found under
Windows XP: C:\Documents and Settings\{username}\Application
Data\Autodesk\AutoCAD Electrical {version}\{release}\{country code}\
Windows Vista, Windows 7:
C:\Users\{username}\AppData\Roaming\Autodesk\AutoCAD Electrical
{version}\{release}\{country code}\
NOTE It is not required that you share these files, but sharing makes it easier for
multiple users to work with projects in AutoCAD Electrical.
default_cat.mdb, footprint_lookup.mdb, schematic_look-
up.mdb, wd_lang1.mdb, wd_picklist.mdb, wddinrl.xls,
ace_electrical_standards.mdb
Databases
Windows XP: C:\Documents and Settings\{username}\My
Documents\Acade {version}\AeData\Catalogs
Windows Vista, Windows 7:C:\Users\{username}\Docu-
ments\Acade {version}\AeData\Catalogs
WD.ENV file edit:
Original path: WD_CAT,%WD_DIR%/catalogs/,AE catalog
file path
Edited path: WD_CAT,N:Electrical/Shared_Files/Catalogs/,AE
catalog file path
NOTE These files must be kept in the same location since
the program locates them according to the same WD.ENV
file entry.
ace_circuit_builder.xlsCircuit Builder Spreadsheet
Windows XP: C:\Documents and Settings\All
Users\Documents\Autodesk\AcadE {version}\Support\
Set up AutoCAD Electrical for multiple users | 1985

Windows Vista, Windows 7: C:\Users\Public\Docu-
ments\Autodesk\AcadE {version}\Support\
WD.ENV file edit:
Original file name: WD_CIRCBUILDER_FNAM,”ace_cir-
cuit_builder.xls”,Circuit Builder spreadsheet file name
Edited name: WD_CIRCBUILDER_FNAM,”my_ace_cir-
cuit_builder.xls”,Circuit Builder spreadsheet file name
jic1, jic125, iec2, iec4, jis2, gb2, panel, pneu_iso125Symbol libraries
Windows XP: C:\Documents and Settings\All
Users\Documents\Autodesk\Acade {version}\Libs
Windows Vista, Windows 7: C:\Users\Public\Docu-
ments\Autodesk\Acade {version}\Libs
NOTE The symbol library path is stored with each project
in its .wdp file and must be modified.
ACE_AS_MENU.DAT, ACE_GB_MENU.DAT,
ACE_HYD_MENU.DAT, ACE_IEC_MENU.DAT,
AutoCAD Electrical icon menu (In-
sert Component menus)
ACE_JIC_MENU.DAT, ACE_JIS_MENU.DAT, ACE_PAN-
EL_MENU.DAT, ACE_PID_MENU.DAT,
ACE_PNEU_MENU.DAT, WD_ABECAD.DAT
Windows XP: C:\Documents and Settings\{username}\Ap-
plication Data\Autodesk\AutoCAD Electrical {version}\{re-
lease}\{country code}\Support
Windows Vista, Windows 7: C:\Users\{username}\App-
Data\Roaming\Autodesk\AutoCAD Electrical {version}\{re-
lease}\{country code}\Support
NOTE The menu path is stored with each project in its
.wdp file and must be modified.
ACE_GB.slb, ACE_GB.dll, ACE_JIS.slb, ACE_JIS.dll, ace_as.slb,
ace_as.dll, ace_hyd.slb, ace_hyd.dll, ace_pid.slb, ace_pid.dll,
Slide images for AutoCAD Electrical
menus
bb.slb, iec1.slb, iec.dll, loc2.slb, pn0.slb, pn0.dll, pn1.slb,
pn1.dll, pn2.slb, pn2.dll, pn3.slb, pn3.dll, pnl2.slb, pnl2.dll,
pnl.slb, pnl.dll, s1.slb, s1.dll, s2.slb, s2.dll, Ww.slb
1986 | Chapter 24 Advanced Productivity

Windows XP:C:\Documents and Settings\{username}\Ap-
plication Data\Autodesk\AutoCAD Electrical {version}\{re-
lease}\{country code}\Support
Windows Vista, Windows 7: C:\Users\{username}\App-
Data\Roaming\Autodesk\AutoCAD Electrical {version}\{re-
lease}\{country code}\Support
S_LDPC.SLB, WD_LOCAL.SLB, WDSIG.SLB, WDSIG_1.SLB,
gepb.slb
C:\Program Files [(x86)]\Autodesk\Acade {version}\Sup-
port
WD.ENV file edit:
Original path: *WD_SLB,x:some path/, to override path
pointing to ".slb" slide lib support files
Edited path: WD_SLB,N:/Electrical/Shared_Files/Slides/, to
override path pointing to ".slb" slide lib support files
NOTE For the path in the .env file to be recognized, the
asterisk (*) in front of the line must be removed. These slide
files may be relocated using this path, or they can just be
placed in the same location as the menu files.
Content of PLC folder (ace_plc.mdb and bitmap files)PLC database/images
Windows XP: C:\Documents and Settings\{username}\My
Documents\Acade {version}\AeData\PLC
Windows Vista, Windows 7: C:\Users\{username}\Docu-
ments\Acade {version}\AeData\PLC
NOTE These files must be in a location that is specified as
an AutoCAD Support path. They can be placed in a location
that is already defined as being a support path, or you can
add a new support path pointing to this location.
wd_desc.wddDescription selections
Windows XP: C:\Documents and Settings\{username}\Ap-
plication Data\Autodesk\AutoCAD Electrical {version}\{re-
lease}\{country code}\Support
Windows Vista, Windows 7: C:\Users\{username}\App-
Data\Roaming\Autodesk\AutoCAD Electrical {version}\{re-
lease}\{country code}\Support
Set up AutoCAD Electrical for multiple users | 1987

NOTE These files must be in a location that is specified as
an AutoCAD Support path. They can be placed in a location
that is already defined as being a support path, or you can
add a new support path pointing to this location.
default.instInstallation code selection list
Optional file, does not exist by default. To create this file
in Notepad, create a file with the project name and an .inst
extension (or use default.inst) and save to an AutoCAD
Support path so the program can find it.
NOTE These files must be in a location that is specified as
an AutoCAD Support path. They can be placed in a location
that is already defined as being a support path, or you can
add a new support path pointing to this location.
default.locLocation code selection list
Optional file, does not exist by default. To create this file
in Notepad, create a file with the project name and a .loc
extension (or use default.loc) and save to an AutoCAD
Support path so the program can find it.
NOTE These files must be in a location that is specified as
an AutoCAD Support path. They can be placed in a location
that is already defined as being a support path, or you can
add a new support path pointing to this location.
Using network deployment
You can alternately install AutoCAD Electrical databases, symbol libraries,
part footprint files, and support files to a shared network location, so all users
can work from a common standard database and simplifying database
management and configuration.
To start network deployment, select Network Deployment in the AutoCAD
Electrical installation program. Install the Network Installation Wizard (NIW)
and run it from the start menu. From the NIW, you can create an image for
client installations.
Use the Symbols Libraries, Catalog Database and Support Files dialog box to
install these files to a shared network location so that multiple users can work
from a common standard symbol library and parts database.
1988 | Chapter 24 Advanced Productivity

NOTE You cannot set up network deployment after installing AutoCAD Electrical
as a stand-alone program on individual machines.
Referencing icon menus from other menu files
You can also share custom symbols to be accessed by multiple users. The
easiest way to do this is to create and link to your own menu file.
You can set up AutoCAD Electrical's icon menuing system so that you can
switch back and forth from the default menu file (such as ACE_JIC_menu.dat)
to your own menu (for example "special_menu.dat").
1Add a line like this to AutoCAD Electrical's ACE_JIC_menu.dat file:
Special menu|special_menu.sld|$C=(c:wd_loadmenu
"special_menu.dat")(c:wd_insym_go2menu 0)
2In your new "special_menu.dat" file, add this line so you can switch back
to AutoCAD Electrical's default menu:
Default Electrical menu|back2wd.sld|$C=(c:wd_loadmenu
"ACE_JIC_menu.dat")(c:wd_insym_go2menu 0)
3In AutoCAD Electrical's default icon menu, select the new entry.
Your menu immediately appears. When you want to go back to AutoCAD
Electrical's default menu, select Default Electrical menu on your own
special menu. AutoCAD Electrical immediately switches back to the
AutoCAD Electrical default icon menus.
Show source and destination markers on cable
wires
There may be times when you want to show the individual wires of a cable
at each end where they connect and yet you want to show the wires coming
together to form a single line cable in between the ends. Showing individual
wires along the entire run of the cable is too messy or not an option.
You can use the Fan-In/Out command set to do this. The Fan-In/Out command
relies on special pairs of source/destination markers plus a special layer for
the single line part of the cable representation. This layer is defined in the
Define Layers dialog box.
Setting up layers
1In a blank AutoCAD Electrical drawing,
Show source and destination markers on cable wires | 1989

Click Schematic tab ➤ Other Tools panel ➤ Drawing Properties
drop-down ➤ Drawing Properties.
2On the Alert dialog box, click OK to add the WD_M block.
3In the Drawing Properties dialog box, click the Style tab.
You can select the default Fan-In/Out marker style here along with
defining the layers for the wires. Notice that the default layer name for
fan in/out single line layers is "_MULTI_WIRE."
4In the Drawing Properties dialog box, click OK.
5Click the AutoCAD Layer Properties Manager tool.
6In the Layer Properties Manager dialog box, change the color of
"_MULTI_WIRE" to red and the color of "WIRES" to blue for this example.
The color difference illustrates how the feature works.
7In the Layer Properties Manager dialog box, click OK.
Inserting components
1Click Schematic tab ➤ Insert Components panel ➤ Insert Components
drop-down ➤ Icon Menu.
2In the Insert Component: JIC Schematic Symbols dialog box, select Push
Buttons.
3In the JIC: Push Buttons dialog box, select Push Button N.O.
4Press F9 to turn on SNAP.
5Insert the push button anywhere on the left-hand side of the drawing.
6In the Insert/Edit Component dialog box, click OK-Repeat to insert two
more push buttons directly below the first one.
7In the Insert/Edit Component dialog box, click OK after the last push
button is inserted on the drawing.
8Repeat to insert three Limit Switches N.O. Insert the limit switches
anywhere on the right-hand side of the drawing (slightly below the push
buttons you inserted).
1990 | Chapter 24 Advanced Productivity
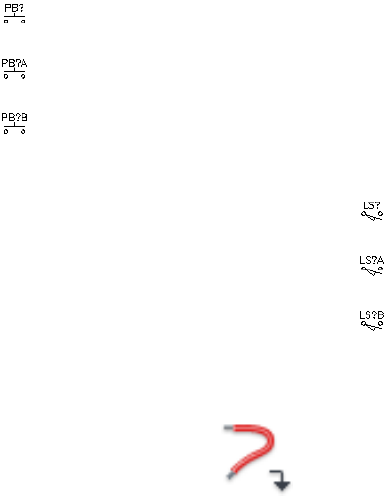
Adding wires
1Click Schematic tab ➤ Insert Wires/Wire Numbers panel ➤ Insert Wires
drop-down ➤ Wire.
2Add a wire to the top push button. Drag the wire to the right.
3Repeat for the other two push buttons.
4Add a wire to each of the limit switches. Drag the wires to the left.
5Press F9 to turn off SNAP.
6Select all of the wires and verify that they were created on the WIRES
layer.
Show source and destination markers on cable wires | 1991
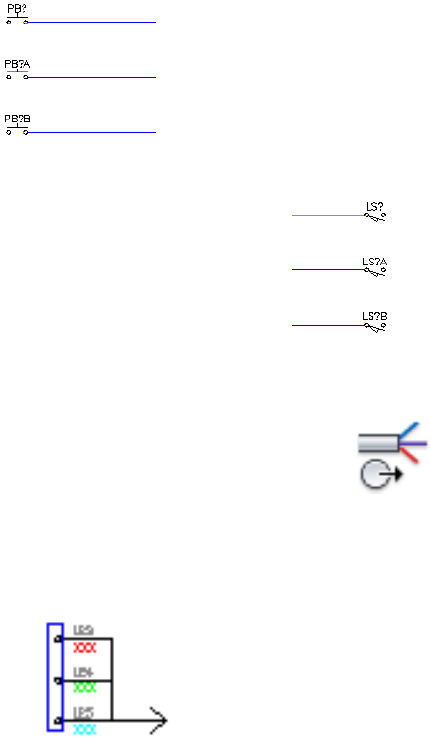
Adding source and destination markers
1Click Schematic tab ➤ Insert Wires/Wire Numbers panel ➤ Signal
Arrows drop-down ➤ Fan In Source.
2In the Fan In/Out Source dialog box, select Solid as the Source marker
style.
4Click the left button to set the wire connection orientation.
5Select in the middle of the wire that is connected to the top push button.
6In the Signal - Source Code dialog box, enter "cbla" as the code and "RED"
as the description.
If you enter the color of the wire in the Description field, AutoCAD
Electrical reports use this information in the Wire Color field.
7Click OK.
8In the Source/Destination Signal markers (for Fan In/Out) dialog box,
click Yes to insert the matching destination marker now.
1992 | Chapter 24 Advanced Productivity
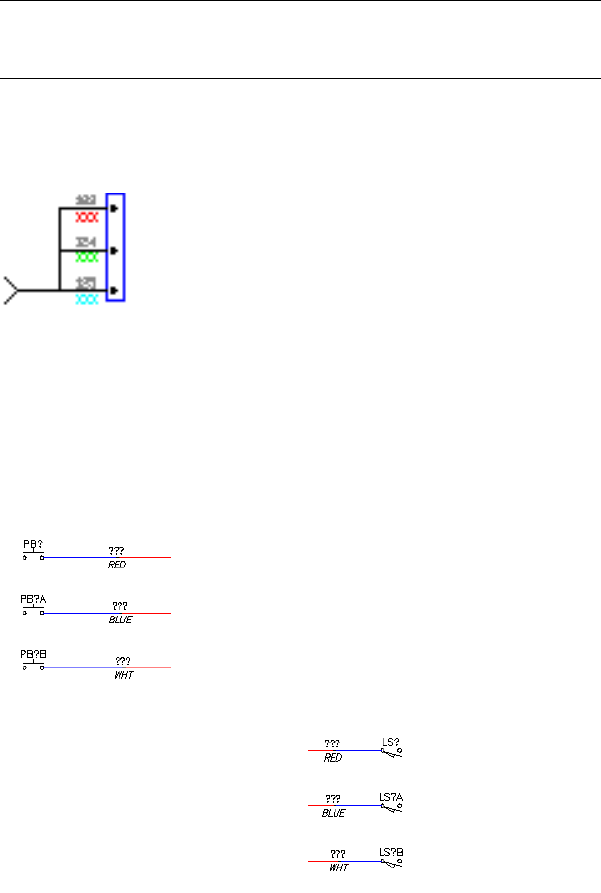
NOTE Because the destination wires are nearby, it is easier to insert them
right away. If the wires were on another drawing you could wait until later
to add the destination markers.
9In the Fan-In/Fan-Out Signal Destination dialog box, select Solid as the
destination marker style.
10 Click the right button to set the wire connection orientation.
11 Select in the middle of the wire connected to the top limit switch.
Notice that the wires for both change from blue to red, and the description
RED appears on both.
AutoCAD Electrical breaks the wire and changes the appropriate wire
piece to the defined layer. When inserting a source marker the wire
coming out of the marker changes; when inserting a destination marker,
the wire going into the marker changes.
You are prompted to define the next source.
12 Repeat for the middle and bottom wires for each group.
Show source and destination markers on cable wires | 1993
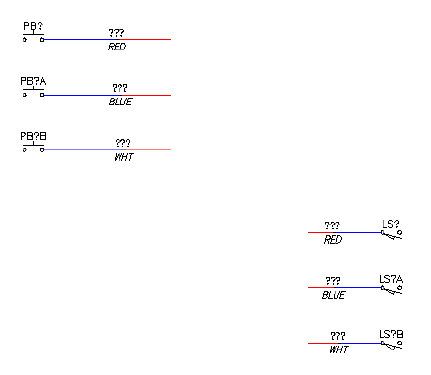
For the middle wire: In the Signal - Source Code dialog box, click Use to
enter "CBLA-01" as the code and enter "BLUE" as the description.
For the bottom wire: In the Signal - Source Code dialog box, click Use to
enter "CBLA-02" as the code and enter "WHT" as the description.
Notice that the wires change from blue to red, and the descriptions BLUE
and WHT display on both sets of wires.
13 Press Esc to exit the command.
14 Select all of the wires and verify that they are on the _MULTI_WIRE layer.
Creating connecting wires
1At the command line, type L and press Enter.
2Click the end of the uppermost wire and drag down across each of the
wires connected to the push buttons. Continue dragging past the push
buttons and click.
3Drag your cursor to the right to create a horizontal line, and click.
4Drag down across the ends of the wires connected to the limit switches,
ending on the bottom wire and click. Press Enter to create the lines.
1994 | Chapter 24 Advanced Productivity
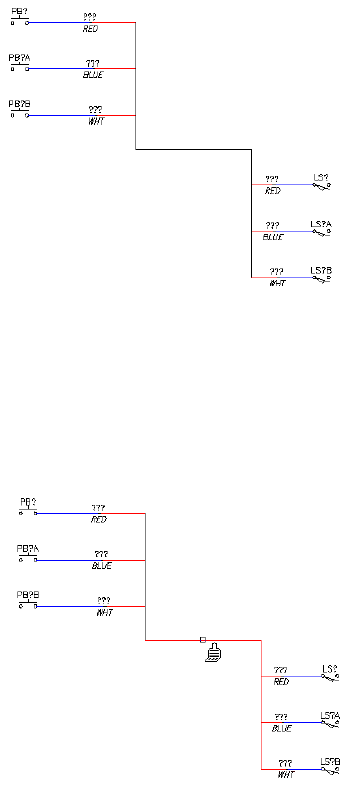
5Type MA at the command prompt to run the AutoCAD MATCHPROP
command.
6Click the wire connected to the top limit switch.
7Click each of the lines you just created. The lines change from black to
red since they are taking on the properties of the wire you selected.
➤ Press Enter to exit the command.
Adding cable markers
At this point, you have established the link between the push buttons and
the limit switches. You can now include a cable marker identifier that is
associated with these wire connections in various wire and cable reports.
Show source and destination markers on cable wires | 1995
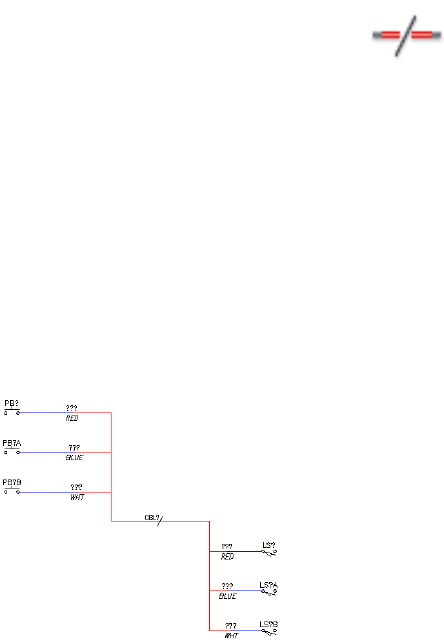
1Click Schematic tab ➤ Insert Wires/Wire Numbers panel ➤ Cable
Markers drop-down ➤ Cable Markers.
2Select to insert a cable marker.
3Insert the cable marker on the horizontal line.
4In the Insert/Edit Cable Marker (Parent wire) dialog box, click Catalog
Data Lookup.
5In the Parts Catalog dialog box, select the 3 conductor (second item in
list) and click OK.
6In the Insert/Edit Cable Marker (Parent wire) dialog box, delete the wire
color/id value (BLK), and click OK.
7In the Insert Some Child Components dialog box, click Close.
Use the PLC Database File Editor
AutoCAD Electrical can generate any of hundreds of different PLC I/O modules
on demand, in a variety of different graphical styles, all without a single,
complete I/O module library symbol resident on the system. Modules
automatically adapt to the underlying ladder rung spacing, whatever that
value might be, and can even be stretched or broken into two or more pieces
at insertion time. This is all possible because AutoCAD Electrical generates
PLC I/O modules via a parametric generation technique driven by a PLC
database (ACE_PLC.MDB).
1996 | Chapter 24 Advanced Productivity
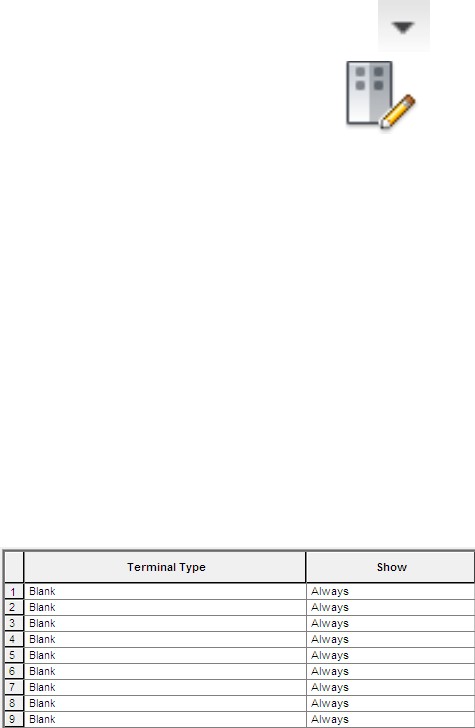
Creating new PLC modules
By default, when creating a PLC module the PLC Database File Editor lists as
many blank field Terminal Types as there are terminals defined in the New
Module dialog box.
1Click Schematic tab ➤ Other Tools panel ➤ ➤ Database Editors
drop-down ➤ PLC Database File Editor.
2Click the PLC Database File Editor tool.
3In the PLC Database File Editor dialog box, highlight PLCs in the PLC
selection list and click New Module.
4In the New Module dialog box, specify the following:
■Manufacturer: Allen-Bradley
■Series: 1746
■Series Type: Discrete Input
■Code (Catalog Number): 1746-IA9
■Terminals: 9
■Addressable Points: 8
5Click OK.
You now have a new blank input module with nine terminals and eight
addressable I/O points. You now need to define some information for
each terminal in the module, the most important being what symbols
AutoCAD Electrical should stack together to build the module. Usually
the top-most symbol for the module is a little different from the rest so
Use the PLC Database File Editor | 1997
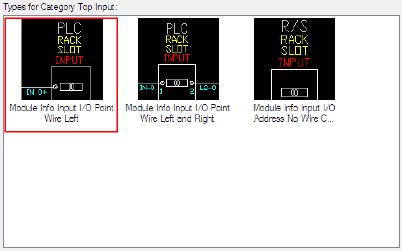
that it can carry some basic information for the module that only needs
to occur once in the final symbol.
Assigning Terminal Types
1In the PLC Database File Editor dialog box, right-click Terminal Type 1
and select Edit Terminal from the context menu.
The Select Terminal Information dialog box appears. There are 3 categories
for top symbols: Top Input, Top Output, and Top Terminal. Top Input
and Top Output are addressable terminals, while the Top Terminal
category consists of non-addressable terminals.
2In the Select Terminal Information dialog box, select Top Input.
The available terminals for that category appear along with any recently
used terminals. Each terminal shown is slightly different. It may have an
input wire connection terminal or have terminals for both input and
output, or it may not have a wire connection.
3Select to use Module Info Input I/O Point Wire Left by selecting the
picture and then click OK.
The selected terminal is assigned to the Terminal Type in the PLC Database
File Editor dialog box. AutoCAD Electrical looks at the block to see what
attributes come in when the block is inserted. Some of the attributes come
in with predefined values that can be overwritten. You will see these
predefined values in the grid below the terminal type list.
4In the PLC Database File Editor dialog box, multiple-select the next seven
terminals, right-click, and select Edit Terminal.
1998 | Chapter 24 Advanced Productivity
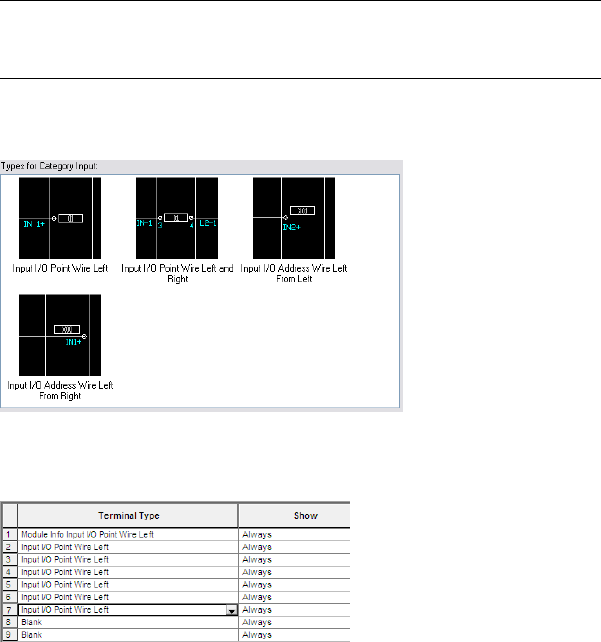
NOTE You can select multiple fields to edit at the same time by dragging
your mouse across contiguous fields or by holding down the Control key
while selecting non-contiguous fields.
5In the Select Terminal Information dialog box, select the Input category
and look at the available terminals.
6Select the Input I/O Point Wire Left terminal and click OK.
All seven terminals are assigned at the same time.
7In the PLC Database File Editor dialog box, right-click on the last terminal
and select Edit Terminal.
8In the Select Terminal Information dialog box, select the Terminal
category.
9Click the Terminal Point Wire Right terminal and click OK.
As an alternative to the Select Terminal Information dialog box, you can use
the drop-down list of predetermined Terminal Types. Click the arrow for the
Terminal Type and select from the list of available terminal types.
Use the PLC Database File Editor | 1999
Setting additional terminal information
Some modules may have terminals that are not used. When you build your
PLC module on an AutoCAD Electrical drawing there is a choice inside the
Module Layout dialog box to include unused/extra connections. When this
toggle is not selected, all terminal entries marked as "Show: When Including
Unused" in the PLC Database File Editor are skipped. When this toggle is
selected, all entries marked with "Show: When Excluding Unused" are skipped.
This gives flexibility to how a module is represented.
1In the PLC Database File Editor dialog box, make sure all of the terminals
are set to Show: Always.
2Make sure all of the terminals are set to Optional Re-prompt: No.
You can trigger AutoCAD Electrical to prompt for a new beginning address
number when the parametric build flips from inputs to outputs or vice
versa. On the line where you want AutoCAD Electrical to re-prompt for
a new output address, select Output. If you want a re-prompt for a new
input address, select Input from the list.
3If you want a prompt for an automatic break in the PLC module, select
the toggle in the Break After column.
4If you want to override the rung spacing for the I/O and wire connection
point spacing, enter a value in the Spacing Factor column.
When AutoCAD Electrical generates a PLC module, it uses the current
rung spacing for I/O and wire connection point spacing. When a Spacing
Factor is specified, AutoCAD Electrical sees this spacing factor value on
any terminal type I/O point or wire connection entry line, it uses a factor
of the rung spacing. For example, a 2 for a given entry inserts this point
down two times the rung spacing instead of a full rung spacing. A value
of 1.5 inserts the point down an extra half rung spacing. A value of 0.0
puts the particular I/O point at the same location as the preceding one.
Modifying the terminal box dimensions
The Style Box Dimensions dialog box defines the module box dimensions
(such as the offset values and line properties) based upon the style number
used when the PLC was created.
1In the PLC Database File Editor dialog box, click Style Box Dimensions.
2Select Style 2 as the graphic style for your plc module. Styles 1-5 are
predefined, styles 6-9 may be user-defined. Select a style number - a sample
portion of a PLC module appears.
2000 | Chapter 24 Advanced Productivity
There are about two dozen symbols (with a file name "HP?*.dwg" where
"?" is the style number) associated with each style in the library folder.
To create a style, copy an existing style's symbols to one of the unused
style numbers (6-9) and edit each library symbol.
Library folder:
Windows XP: C:\Documents and Settings\All
Users\Documents\Autodesk\Acade {version}\Libs\{library}\
Windows Vista, Windows 7: C:\Users\Public\Documents\Autodesk\Acade
{version}\Libs\{library}\
3Specify the module box dimensions for the selected style.
These values set the right, left, top, and bottom offsets for the rectangle
that surrounds the module. The optional Split Top and Split Bottom
specify the offsets for a split module where Split Top specifies the offset
for the top of a split module and Split Bottom specifies the offset for the
bottom of the split module. If left blank, the rectangle Top and Bottom
values are used.
4Specify any properties for the lines that make up the box. You can set
the color and linetype using the properties fields. To predefine the color,
enter "COLOR colorname" into the box. For linetype, enter "LTYPE
linetypename" in the box.
5Click OK.
Modifying the terminal block settings
The Terminal Block Settings dialog box is used to manage the library symbols
in the PLC Database File Editor. You can add a terminal to the list by clicking
in any box in the last entry of the list. A blank entry line is added to the bottom
of the list. You must define the block name, assign it to a terminal category
for selection, give it a description, and assign a bitmap to be used for dialog
box appears.
The list shows the block name, category, unique description, and sample
bitmap file for each terminal type.
As defined when creating the parametric PLC blocks. Block
file names adhere to the naming conventions to identify
Block Name
the PLC style numbering in the third position and the ori-
entation in the first position.
Use the PLC Database File Editor | 2001
Used in the PLC Database File editor to easily find specific
types of terminals.
Category
These descriptions are used during the terminal type selec-
tion process. They need to be maintained as unique
Unique Description
This file is also used by the PLC database File editor to dis-
play a view of the terminal for selection.
Sample Bitmap File
Symbols and BMP files need to be created outside of the
PLC database file editor. Symbols are found in the standard
library search path, while PLC Bitmap images are main-
tained in the same OS folder as the PLC Database itself
Windows XP: C:\Documents and Settings\{username}\My
Documents\Acade {version}\AeData\
Windows Vista, Windows 7: C:\Users\{username}\Docu-
ments\Acade {version}\AeData\
1In the PLC Database File Editor dialog box, click Settings.
The Terminal Block Settings dialog box lists the library symbols for the
terminal blocks that appeared in the Select Terminal Information dialog
box. Notice that row 1 lists the block file name and sample bitmap file
for the terminal we selected for Terminal Type 1.
2Switch between the various graphic styles. Notice that the block name
updates depending on the style and orientation you select. For example,
the block name is "HP1WA-DL" for Style 1, Horizontal. If you select Style
4, Vertical the block name changes to "VP4WA-DL".
Graphical styles are used during the operation of the PLC Parametric
Selection process. These bitmap images appear during normal operation
and selection of PLC entries and are found at C:\Program
Files\Autodesk\Acade {version}\Acade. Use the same file names that are
already there: P_STYLEx.bmp where 'x' is the plc style 1-9.
3Click View DWG or View Bitmap to view the PLC parametric symbols.
4After you are done viewing the various symbols, click Cancel.
Adding terminal attributes
1Select the first terminal in the list of terminals.
The attributes associated to the block, along with any predefined values,
appear below the Tree Structure section of the dialog box.
2002 | Chapter 24 Advanced Productivity

Notice that the value for the LINE1 is RACK %%1 and LINE2 is SLOT
%%2. The prompting values of %%1 and %%2 are populated with what
you type into the text box when prompted. The static text of Rack and
Slot appears in the attribute once the PLC module is created. There are
multiple prompting variables from %%1 through %%9. Prompting strings
can be added to any existing attributes on the terminal block. If you
wanted to add additional prompts with out using the existing attributes
you would have to modify the block file to add additional attributes such
as Line3.
Top terminals are the only symbols which can accept prompts during
the parametric PLC insertion process.
2Edit each attribute value for the TAG attributes to read "IN-%%N."
Besides the Module Prompt variables, AutoCAD Electrical also supports
the use of an address variable. When the module is inserted, the PLC I/O
addresses are calculated based on some AutoCAD Electrical settings and
the module settings. You can trigger AutoCAD Electrical to include a
prefix or suffix to each address value it inserts.
The %%N represents the calculated I/O address and the IN- is the prefix
that gets added to the address value. You can also use the prompt values.
For example, if you want to permanently encode the rack and group
numbers (%%1 and %%2 prompts) into each I/O address value, encode
each I/O address entry in the date file with "TAGA_=%%1%%2%%N."
3If you want to assign a text constant to any attribute value, combine a
text constant with the variables as shown in the module prompts and
addressing examples above.
Inserting the PLC module into the drawing
1Click Save Module to save the module to the PLC database file.
2Click Done/Insert.
The PLC Parametric Selection dialog box appears.
3Click OK to insert the new PLC module onto the drawing.
4Specify the insertion point on the drawing.
5In the Module Layout dialog box, click OK.
Use the PLC Database File Editor | 2003

6In the I/O Address dialog box, specify a beginning I/O address or use the
quick picks to select an address (such as I:/00).
7Click OK.
Your module should look like the following. The Manufacturer, Catalog
Number, and Description attributes also display at the top of the module
(not shown).
2004 | Chapter 24 Advanced Productivity
Customize Circuit Builder
Circuit Builder overview
The Circuit Builder tool comes prepopulated with data to build and annotate
a sampling of motor control circuits and power feed circuits. Circuits include
3-phase, single-phase, and one-line circuit representations. Each circuit is built
dynamically, adjusting the power bus to match the wire bus for the drawing,
adding wiring between components, and annotating the elements with
suggested values based upon the selected load. Each time a circuit is configured,
it is added to a history list of circuits. This list provides for quick reinsertion
at a later time.
Three items control this feature:
■The spreadsheet on page 2006 defines the available circuits, circuit types,
and defaults for each option within a circuit.
■The template on page 2010 (.dwg file) for a selected circuit defines the
placement for the individual components and the wiring.
■The electrical standards database on page 2015 provides the values used to
annotate the circuit, size circuit components, and provide the appropriate
motor wire type.
Workflow
1Circuit Builder opens the spreadsheet and reads in the first sheet named
“ACE_CIRCS”.
2Circuit Builder shows the list of defined circuits in the Circuit Selection
dialog box.
3Select a circuit to insert or configure. The associated line from the
ACE_CIRCS sheet provides the base drawing template name, and the
name of a circuit code sheet. The circuit code sheet is a separate sheet
within the Circuit Builder spreadsheet.
4The base drawing template for the circuit inserts at your selected location.
5Circuit Builder finds and reads the attributes on all the special marker
blocks on the inserted drawing template.
6Circuit Builder matches each marker block to a specific section in the
circuit codes sheet. This section can be a single spreadsheet row or
Customize Circuit Builder | 2005
multiple consecutive rows in the circuit codes sheet. The section identifies
one of the following:
■The action taken at this marker block location in the circuit. For
example, calculate a wire type, insert a wire number, or adjust rung
spacing.
■Provides a list of component insertion options that can be inserted
at this point in the circuit. For example, presents a selection list
containing a fuse, circuit breaker, or disconnect switch symbol.
Each marker block is processed in sequence, controlled by an ORDER
attribute value carried on each marker block
7A marker block can insert a nested template into the main circuit
template. If the nested template carries its own marker blocks, these
marker blocks are added to the overall list to process. When all marker
blocks have been processed, the circuit is complete.
Circuit Builder spreadsheet
The Circuit Builder spreadsheet, ace_circuit_builder.xls, along with the template
drawings that it references, control what is displayed in the Circuit Selection
and Circuit Configuration dialog box options. The first sheet in the
spreadsheet, ACE_CIRCS, contains the main circuit categories, for example
“3ph Motor Circuit”, and types, for example “Horizontal - FVNR - non
reversing”. Along with this first sheet, are one or more circuit code sheets.
These sheets contain the information necessary to insert or configure a specific
circuit selected from the first sheet.
The ace_circuit_builder.xls circuit builder spreadsheet can be relocated into
any of the normal AutoCAD Electrical or AutoCAD support paths.
The default location for the spreadsheet is:
■Windows XP: C:\Documents and Settings\All
Users\Documents\Autodesk\AcadE {version}\Support\
■Windows Vista, Windows 7: C:\Users\Public\Documents\Autodesk\AcadE
{version}\Support\
The default spreadsheet name, “ace_circuit_builder.xls”, can be overridden
by setting the environment variable, WD_CIRCBUILDER_FNAM, in the wd.env
on page 1984 file.
2006 | Chapter 24 Advanced Productivity
ACE_CIRCS sheet
Circuit Builder reads the list of circuit categories and types from the first sheet
in the spreadsheet, ACE_CIRCS. This information appears in a tree-structure
selection window in the Circuit Selection dialog box. The ACE_CIRCS sheet
contains the following columns.
A major circuit category displayed at the highest level of the tree structure
in the Circuit Selection dialog box.
CATEGORY
The specific type of circuit within a major category. The circuit types appear
at the second level of the tree structure.
TYPE
The drawing template that is inserted when this circuit is selected. If a
.dwg extension is not present, it is assumed.
DWG_TEMPLATE
The circuit code sheet name that is referenced for the selected circuit
template. This circuit code sheet carries the definitions for all the marker
blocks in the selected drawing template and any nested templates.
SHEET_NAME
Code maps to the ANNO_CODE table in the spreadsheet. Allows you to
predefine the description, installation, location, and other key information,
ANNO_CODE
for the motor or load and the individual components that might be inserted
into the circuit.
Circuit code sheets
Once a circuit is selected from the Circuit Selection dialog box (the CATEGORY
and TYPE fields from the ACE_CIRC sheet), the associated drawing template
is inserted (the DWG_TEMPLATE field), and a related circuit code sheet is
ready for reference (the SHEET_NAME field).
The inserted drawing template on page 2010 contains special marker blocks.
Each marker block contains a CODE attribute with a value. This CODE value
is used to match up with a section in the circuit code sheet. The matching
section in the circuit code sheet provides the key information on what action
is required at this physical location in the circuit.
Each circuit code sheet contains the following columns.
Value is matched to the CODE attribute value on the marker block. Each
code corresponds to one circuit element in the list or an action/decision
that takes place at the insertion point of the marker block.
CODE
Circuit Builder spreadsheet | 2007

Text displayed in the Circuit Elements list in the Circuit Configuration dialog
box.
COMMENTS
The default option for a circuit element is marked with an “X”. When a
circuit is inserted rather than configured, all elements marked with "X" are
used to build the selected circuit.
UI_DEF
Title for the group of options in the middle Select section of the Circuit
Configuration dialog box. Each circuit element can have one or more
UI_TITLE
groups of options. For example, the main disconnecting means might
have two groups of options, the disconnecting means itself and an optional
auxiliary contact.
This field can also contain a predefined code to bring up a separate dialog
instead of driving the middle Select section of the main Circuit Configura-
tion dialog box. There are two pre-defined codes:
!MCC_CTRL - invokes the Select Motor on page 710 dialog box when
the Browse button on the Motor Setup section of the Circuit Configur-
ation on page 708 dialog box is selected. It must be combined with
the ace_cb_motor_select API call in the LOOKUP_CMD entry.
!PF_CTRL - invokes the Select Load on page 711 dialog box when the
Browse button on the Load Setup section of the Circuit Configuration
on page 708 dialog box is selected. It must be combined with the
ace_cb_power_feed_select API call in the LOOKUP_CMD entry.
NOTE Include the ace_cb_wire_select API call in the LOOK-
UP_CMD entry to invoke the Wire Size Lookup on page 712
dialog box when the Browse button in the Wire Setup section
of the Circuit Configuration dialog box is selected.
The text to display in the middle Select section for each option within this
group.
UI_PROMPT_LIST
A numerical value assigned to the selection from each group. These numer-
ical values are added up and matched to the value in the UI_SEL column.
UI_VAL
NOTE This value must be inserted as a text value in the spreadsheet and
not as a number. An apostrophe character in front of the number forces
the spreadsheet software to interpret it as a text value. You can also format
the cells specifically as text. The text appears left justified in the cell.
2008 | Chapter 24 Advanced Productivity

A numerical value matched to the sum total of the values in the UI_VAL
column for each selection made within a group. The COMMAND_LIST
value from this row is used to insert the selected options.
UI_SEL
NOTE This value must be inserted as a text value in the spreadsheet and
not as a number. An apostrophe character in front of the number forces
the spreadsheet software to interpret it as a text value. You can also format
the cells specifically as text. The text appears left justified in the cell.
The command calls to insert the selected options.COMMAND_LIST
NOTE These calls are generally set up using standard AutoLISP format.
Multiple calls can be concatenated in the same cell or in subsequent rows
of the sheet. If multiple rows are used, the UI_SEL value cell is repeated.
Anything after a semi-colon character is interpreted as a comment
Optional command calls to annotate the circuit element. The ANNOT-
ATE_LIST calls execute after all rows of the COMMAND_LIST calls have
executed.
ANNOTATE_LIST
Optional command calls to perform the electrical standards database or
catalog lookups for the selected circuit element. This field controls the
right-hand side of the Circuit Configuration dialog.
LOOKUP_CMD
Optional catalog lookup table name. If the option contains multiple com-
ponents, such as a disconnect switch and a fuse, there are multiple columns
where “n” increments for each component.
TABLEn
The title for the component within the Setup & Annotation section on the
Configuration dialog box. If the option contains multiple components,
TITLEn
such as a disconnect switch and a fuse, there are multiple columns where
“n” increments for each component.
ANNO_CODE sheet
Allows you to predefine the description, installation, location, and other key
information for the motor or load and the individual components inserted
into the circuit.
Value is matched to the ANNO_CODE value from the ACE_CIRCS sheet.ANNO_CODE
Value is matched to the CODE value of the marker block on the circuit
template.
CODE
Circuit Builder spreadsheet | 2009
Attribute name on the component inserted at the position of the marker
block.
ATTRIBUTE
Text prompt displayed in the Annotation Presets dialog box.PROMPT
The default value for the attribute if annotation presets are listed on page
708 or applied on page 706. This value can be a text value or an AutoLISP
expression that returns a text value.
DEFAULT
FutureOPTIONS
How Annotation Presets work
1Make a selection from the Circuit Selection dialog box, for example
"Horizontal - FVNR - non reversing". This selection has a value in the
ANNO_CODE cell, "ANNO_3M".
2Circuit Builder finds the group of entries that match up with code
"ANNO_3M" in the ANNO_CODE sheet of ace_circuit_builder.xls.
3If any matching entries are found, the Special Annotation: Presets section
of the Circuit Selection dialog box, is enabled.
4If you select Presets and click the Presets List button, the Annotation
Presets dialog box displays. The rows displaying the entries with non-blank
DEFAULT values are initially marked as Selected.
5Edit the attribute values as necessary and click OK.
6Select to Insert or Configure the circuit.
7Circuit Builder processes each marker block on the circuit template. If
the CODE value matches the CODE value from the ANNO_CODE rows,
the attribute values marked as Selected in the Annotation Presets dialog
box are applied to the target attributes of the inserted component. If a
target attribute is not found, the value is inserted as an Xdata value.
Circuit Builder drawing templates
Each circuit starts with a main drawing template. These main circuit template
drawings are named “ace_cb1*.dwg”. Branching or nested circuit drawing
templates are named “ace_cb2*.dwg”. A branching circuit is a circuit inserted
as an option on to the main circuit, for example a control transformer circuit
or a power factor correction circuit.
2010 | Chapter 24 Advanced Productivity

The circuit drawing templates use the following naming convention.
■ace_cb1_*.dwg - primary circuit drawing templates
■ace_cb2_*.dwg - branching or nested circuit drawing templates
The default location for the circuit drawing templates is the schematic library
folder:
■Windows XP: C:\Documents and Settings\All
Users\Documents\Autodesk\AcadE {version}\Libs\{library}\
■Windows Vista, Windows 7: C:\Users\Public\Documents\Autodesk\AcadE
{version}\Libs\{library}\
One-line template drawings have a “1-” suffix. The default location is in a
“1-” folder under the schematic library folder.
■Windows XP: C:\Documents and Settings\All
Users\Documents\Autodesk\AcadE {version}\Libs\{library}\1-
■Windows Vista, Windows 7: C:\Users\Public\Documents\Autodesk\AcadE
{version}\Libs\{library}\1-
NOTE This template drawing naming convention is recommended but is not
required for Circuit Builder to function.
A circuit template contains the wiring framework for the circuit and special
marker blocks. These marker blocks are nothing more than instances of a
standard AutoCAD block, ace_cb_marker_block, carrying three attributes.
These marker blocks tell Circuit Builder that some action or decision is required
at the insertion point of the marker block. The action can be:
■Insert a component.
■Insert a multi-pole component.
■Make a wire type assignment to the underlying wire.
■Insert a wire number on the underlying wire.
■Decide if a branching circuit is needed.
■Decide if an underlying wire stretches and connects to a nearby power
bus.
■Decide if underlying wire bus spacing adjusts.
Circuit Builder drawing templates | 2011

■Decide if an underlying wire is trimmed.
■Set up the circuit annotation.
NOTE If you choose to Insert a circuit, bypassing the Circuit Configuration dialog
box, the default options, as defined in the Spreadsheet on page 655, for each circuit
element are used.
Marker block attributes
This attribute value provides the link between the marker block on the circuit template
drawing and a section in the circuit codes sheet. The value on this attribute matches
with the CODE column value in the circuit codes sheet for the selected template.
CODE
This attribute value controls the sequence of circuit element display and insertion
within the circuit. Marker blocks are processed in order, from low to high. Assigning
ORDER
the same order value to multiple marker blocks links multiple marker blocks together
for processing as a group. For example, to adjust the spacing between multiple wires
of a 3-phase bus there are three marker blocks with a common CODE value and a
common ORDER value. The ORDER value can be an integer or a decimal number
value. Support for decimal number order values makes it easy to add a marker block
between two others without having to reorder everything.
This attribute value contains miscellaneous annotation values, actions, and flags.
Annotation values are in the format <attribute name>=<attribute value>. Actions can
MISC1
include embedded AutoLISP expressions or programs. Flags are key words that include
enabling child contacts to link to parents and overriding multi-pole build directions.
Flag codes include the following
■_TAGFMT=<value> - override the drawing property component tag format or
wire number format setting for this one instance.
■_PRETAG=<value> - predefine a default alias tag for parent child linking. This
option can be used for situations when the child component is inserted before
the parent. For example, the marker block for the child contact has
"_PRETAG=MR". When the parent coil is inserted, its marker block also has
"_PRETAG=MR". As the circuit completes, the actual tag value of the parent an-
notates on to the child contact. This action is based upon the matching "MR"
alias assigned to each.
■_WIRENO=<value> - predefine a fixed wire number.
■WIRENUMBERS=0 - if a required wire type does not exist, create it and mark it
as No Wire Numbering. If a required wire type does not exist and this flag is
missing or has a value of 1, create it and mark it as Wire Numbering.
■_WIRETYPE=<value> - predefine the wire type layer name.
2012 | Chapter 24 Advanced Productivity

■_WIRESKIP=<value> - number of wires to skip over when trying to connect to
another wire.
■_MAXTRAPCOUNT=<value> - maximum search distance to look for a wire
connection, given in wire connection trap units. The wire connection trap value
is fixed and is displayed on the Drawing properties: drawing format tab on page
231 for the active drawing.
■_BASE - indicates a base wire, the one that does not move, when setting up to
adjust multiple bus wire spacing. If not defined, the wire that is co-linear with
the insertion point of the template becomes the default base wire.
■_L =<value>- each sublist, delimited by "|" characters, can predefine attribute
values for individual poles of a multi-pole component, set of terminals, or set of
cable markers.
■_D=<value> - define the build direction override for a multi-pole component.
1=build right, 2=build up, 4=build left, 8=build down. Without an override, the
build direction is down for horizontal inserts, and from left to right for vertical
inserts.
■X=<value or AutoLISP expression> - reposition the marker block in the "X" direc-
tion. For example, "_X=(* 0.5 DIST01)" means adjust the position of this marker
block in the X direction by an amount equal to 0.5 times the bus spacing distance
defined by marker block with a CODE attribute value of "DIST01". This example
can be used to position a marker block for a single phase motor insertion point,
halfway between two power bus wires.
■_Y=<value or AutoLISP expression> - reposition the marker block in the "Y" direc-
tion.
NOTE The flags defined in the circuit drawing marker blocks override any
spreadsheet settings.
Marker block functions
All marker blocks have the same block name, ace_cb_marker_block, but can
have a wide variety of functions. The specific function assigned to a marker
is based on its CODE attribute value and what this code value maps back to
in the circuit code sheet for the circuit template. Here are the categories of
marker block functions:
Blocks that define the circuit properties, such as motor selection.Setup
Blocks that define the wire type layers layer to assign to the wire network under the
block.
Wire Type
Circuit Builder drawing templates | 2013

Blocks that define a wire number to assign to the wire under the block.Wire Number
Blocks that define the placement of a branching or nested circuit such as a control
circuit at the insertion point of the marker block.
Nested Circuit
Blocks that define the placement of a component, connector, terminal, cable marker,
or a multi-pole component at the insertion point of the marker block.
Component
Blocks that control rung spacing adjustment for the wires under these blocks. Blocks
that are processed as a group must carry common CODE and ORDER attribute values.
Bus Spacing
Blocks that control stretching a wire segment to connect to another wire.Wire Connec-
tions
NOTE The name of the marker block cannot be changed. The Circuit Builder
command only processes marker blocks named "ace_cb_marker_block".
One-line circuit templates
One-line circuit templates use the same marker block concept as three-phase
motor and power feed circuit templates. However, there are a few differences.
There is a single line wire that represents a multi-wire bus. Most of the one-line
circuit templates contain a special "bus-tap" symbol.
The bus-tap symbol can have two functions:
■Provide an anchor point for the one-line circuit representation that begins
at this location.
■Break into the one-line bus where the circuit connects.
On a dual circuit one-line template, there are three of bus-tap symbols. One
at the normal point where the circuit ties into the bus. There is another version
of the symbol on each of the two circuit "legs", each marking the point where
that part of the dual circuit starts. These bus-tap symbols allow various reports
to report accurately on a one-line circuit, whether a single circuit or a dual
circuit representation.
The following bus-tap symbols are supplied:
■HDV1_BT_1-.dwg - with “dot” for horizontal one-line circuit
■VDV1_BT_1-.dwg - with “dot” for vertical one-line circuit
■HDV1_BTT_1-.dwg - “tee” connection for dual horizontal circuit
2014 | Chapter 24 Advanced Productivity

■VDV1_BTT_1-.dwg - “tee” connection for dual vertical circuit
■HDV1_BTL_1-.dwg - “corner” connection for dual horizontal circuit
■VDV1_BTL_1-.dwg - “corner” connection for dual vertical circuit
NOTE A WDTYPE attribute with a “1-1” value, identifies a bus-tap symbol.
Circuit Builder database
Circuit Builder uses an electrical standards database to define default values,
define engineering calculations, annotate circuits, and provide wire size
recommendations. The electrical standards database,
ace_electrical_standards.mdb, is located in the catalog folder. The default
location is:
■Windows XP: C:\Documents and Settings\{username}\My
Documents\Acade {version}\AeData\Catalogs\
■Windows Vista, Windows 7: C:\Users\{username}\Documents\Acade
{version}\AeData\Catalogs\
Sizing and wire type values are based on information from the electrical
standards database. Circuit Builder looks for a match on the motor size, supply
voltage, and phase. On a match, Circuit Builder provides the Full Load Amp
value, recommended motor power conductor size, and suggested rating values
for various branch circuit protection elements such as circuit breakers, fuses,
and disconnect switches.
The electrical standards database also allows Circuit Builder to provide
engineering estimates and “green” calculations in the area of power conductor
size versus energy losses. Designing to meet minimum code requirements can
conflict with green design. For example, designing to the minimum conductor
size for a given load can provide short-term savings on material cost but run
up longer-term expense due to higher heating loses in the wiring. Over the
life of the installation, the energy lost in heating up the minimum-sized wiring,
instead of reaching the load to do useful work, could be substantial.
During wiring sizing, Circuit Builder displays not only a list of the valid wire
sizes meeting the ampacity requirements of the load, but also a list of the
estimated maximum energy loss cost for each wire size. This set of calculations
allows you to make better green design decisions. For example, you decide to
oversize the conductors for a motor to reduce conductor heating losses. This
results in a higher initial cost for material and installation labor. However,
Circuit Builder database | 2015

this cost is recovered many times over in reduced energy losses in the wiring
during the life of the installation.
NOTE The ace_electrical_standards.mdb file replaces the mcc.mdb file used in
previous versions of Circuit Builder.
The electrical standards database contains multiple tables used by Circuit
Builder.
Contains the values used to populate the Select Motor on page
710 dialog box.
MOTOR
Contains the values used to populate the Select Load on page
711 dialog box. This table name can have an optional suffix to
relate it to a specific electrical standards code.
FEED
Options tables contain values defining defaults and options lists
specific to an electrical standard. For example, default to copper
wiring, AWG size standard, and feet for conductor length units.
OPT
Wire ampacity tables contain the ampacity ratings for different
conductor sizes and insulation temperature ratings.
AMP_{wire type}_{wire size stand-
ard}
Grounding conductor sizing tables contain the maximum ampa-
city ratings for different grounding conductor sizes. This inform-
AMPG_{wire type}_{wire size stand-
ard}
ation is used to retrieve the minimum grounding conductor size
and provide a selection list of larger sizes.
Wire insulation tables lists the insulation types, the maximum
temperature rating for each, and de-rating factors for each based
on a series of temperatures.
INSUL_{wire type}_{wire size stand-
ard}
Conductor Reactance/AC Resistance tables contain values used
to estimate single-phase and three-phase voltage drop values.
XL&R_{wire type}_{wire size stand-
ard}
Conduit/raceway descriptions list used with the XL&R_{wire
type}_{wire size standard} tables.
XL&R_DESC
Fill tables contain the ampacity de-rating factors used when
there is more than one current carrying conductor (power wiring,
FILL
not ground, neutral, or control wires) in the same conduit, duct,
or raceway.
2016 | Chapter 24 Advanced Productivity

Lists the component type descriptions whose sizing ties directly
into the full load amps value (FLA) of the motor or load. The
MOTOR_I_DESC
CODE value maps to the MOTOR_I_CALC and MOTOR_I_MAP
tables.
Lists the formula to calculate the maximum amp value for various
types of components on a per motor type basis.
MOTOR_I_CALC
Maps the calculated FLA for a component to a specific rating
value and an optional catalog assignment.
MOTOR_I_MAP
NOTE Each table name can have an optional suffix to relate it to a specific electrical
standards code.
Motor table
The data in the Motor table is used to populate the Select Motor on page 710
dialog box. Filter the selection list by type, voltage, and frequency. The load
and FLA values for the selected motor are passed back to the Circuit
Configuration dialog box and are used in wire size calculations. The values
are also used to calculate breaker size, fuse size, and disconnect switch rating,
for the selected motor.
The MOTOR table follows this table naming convention:
■MOTOR - if no specific electrical standards table is found, the default table
name to use.
■_{standard} - optional suffix to relate it to a specific electrical standards
code. For example, an “_NEC” suffix could mean that the data for the table
parallels the National Electrical Code. A suffixed MOTOR table name is
not necessary unless you plan to set up the electrical standards database
to support multiple standards.
Feed table
The data in the Feed table is used to populate the Select Load on page 711
dialog box. Filter the selection list by type, voltage, and frequency. The load
and FLA values for the selected feed are passed back to the Circuit
Configuration dialog box and are used in wire size calculations. The values
are also used to calculate breaker size, fuse size, and disconnect switch rating,
for the selected load.
Circuit Builder database | 2017
The FEED table follows this table naming convention:
■FEED - if no specific electrical standards table is found, the default table
name to use.
■_{standard} - optional suffix to relate it to a specific electrical standards
code. For example, an “_NEC” suffix could mean that the data for the table
parallels the National Electrical Code. A suffixed FEED table name is not
necessary unless you plan to set up the electrical standards database to
support multiple standards.
Options tables
Options tables contain values defining defaults and options lists specific to
an electrical standard. For example, default to copper wiring, AWG size
standard, and feet for conductor length units.
The OPT table follows this table naming convention:
■OPT - if no specific electrical standards table is found, the default table
name to use.
■_{standard} - optional suffix to relate it to a specific electrical standards
code. For example, an “_NEC” suffix could mean that the data for the table
parallels the National Electrical Code. A suffixed OPT table name is not
necessary unless you plan to set up the electrical standards database to
support multiple standards.
DescriptionName
Default full load amps multiplier value used to determine a maximum load. For
example, the full load amps for a motor is rated at 10 amps and the FLA_MULT
FLA_MULT
default is set to 1.25. The minimum wire size calculation for the wiring for the
motor is based upon an ampacity rating of not 10 amps but 12.5 amps (10
amps x 1.25).
The FLA_MULT factor displays in the Select Motor on page 710 and Wire Size
Lookup on page 712 dialog boxes.
Continuous load correction factor for wire size ampacity de-rating. If the elec-
trical load is anticipated to be a continuous load, a default de-rating factor can
be automatically applied to the wire size ampacity calculation.
C_LOAD
For example, a given electrical code defines the Continuous load correction
factor at a value of 0.8. This means that a given wire size that normally has a
maximum rated ampacity value of 20 amps is de-rated to a maximum ampacity
of 16 amps when the wiring is to power a motor that is expected to be a con-
2018 | Chapter 24 Advanced Productivity
DescriptionName
tinuous load. The wire size calculation may need to select the next larger wire
size.
Default wire metal value used to determine appropriate wire ampacity and wire
insulation table names. For example, “CU” to define copper wiring as the default,
“AL” to define aluminum wiring as the default.
W_METAL
Default wire type standard used to determine appropriate wire ampacity and
wire insulation table names. For example, “AWG” or “MM2”.
W_STD
Maximum allowable % voltage drop in power wiring. This value can be used
to help calculate an appropriate wire size when the wire run distance is also
defined.
V_DROP
Default insulation type used to determine the ambient temperature correction
factor.
W_INSUL
Wire run distance values for pick list in the Wire Size Lookup dialog box. The
run distance is used for estimated voltage drop calculations in the motor or load
power wiring.
LEN_LIST
Run distance units for power conductors and values for units pick list in the Wire
Size Lookup dialog box. Run distance is used in the estimated voltage drop
calculation. Units are either "FT" for feet or "M" for meters.
LEN_UNITS
Unit cost per kWh. This value is used for estimating a maximum annual cost of
energy loss in the power wiring for a motor or load, assuming a continuous full
load.
KWH_COST
KWh cost units character used in the Wire Size Lookup dialog box showing the
wire loss estimates. For example, “$” for dollar, “ ” for euro.
KWH_COST_UNITS
The code for the electrical standards name for this table. This code on page 182
is saved in the project .wdp file when the standard is applied to a project.
SHORTNAME
The full name of the electrical standards name for this table. This value, extracted
from all the OPT tables, provides the values for the pick list when setting an
FULLNAME
Electrical Code Standard for a project from the Project properties: project settings
tab on page 204.
Run distance units for power conductors and values for units pick list in the Wire
Size Lookup dialog box. Run distance is used in the voltage drop calculation.
LEN_UNITS
Circuit Builder database | 2019
DescriptionName
Default supply voltage value and values for voltage pick list in the Wire Size
Lookup dialog box.
VOLTS
Default supply phase value and values for phase pick list in the Wire Size Lookup
dialog box. For example, “1” for single-phase, “3” for three-phase.
PHASE
Default value for the minimum wire size when displaying paralleled wire option
in the Wire Size Lookup dialog box. For example, “1-0 AWG”.
PARALLEL_MIN_SIZE
Default value for the maximum number of wire conductors when displaying
paralleled wire option in the Wire Size Lookup dialog box. For example, “4” for
up to four paralleled wires per phase.
PARALLEL_MAX_CNT
Default ambient temperature correction factor. This value is used in wire type
sizing. It must match up with one of the temperature de-rating column labels
found in the INSUL_* tables. For example, “30C”.
T_AMBIENT
Default power factor for a motor. This value is used in estimated voltage drop
calculations. For example, “0.85”.
M_POWERFACTOR
Default power factor for a power feed. This value is used in estimated voltage
drop calculations. For example, “0.85”.
F_POWERFACTOR
Defines the expression to calculate the minimum grounding conductor ampacity
size. The “I” in the expression represents the motor or load full load amps (FLA).
AMPG_MAX
The result of the expression is then applied to the appropriate AMPG table to
determine the minimum grounding conductor size.
2020 | Chapter 24 Advanced Productivity
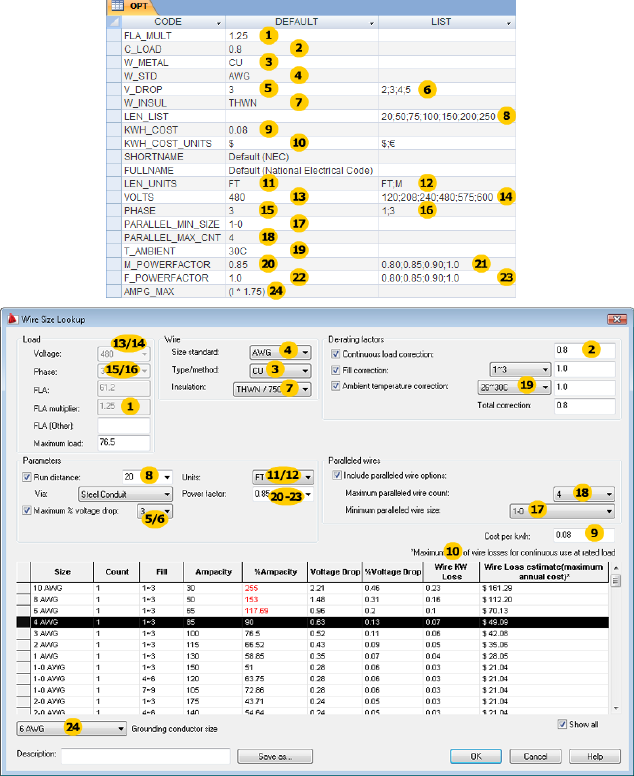
Wire ampacity tables
The wire ampacity tables provide the wire conductor sizes, descriptions, and
maximum FLA ampacity values based on wire size and standard insulation
temperature ratings. This information is used in the following ways:
■Automatically select a default wire size based upon the maximum load
amp value displayed in the Select Motor on page 710 or Select Load on page
711 dialog boxes.
Circuit Builder database | 2021
■Automatically calculate or recalculate suggested wire sizes in the Wire Size
Lookup on page 712 dialog box as various parameters and de-rating factors
are applied.
The wire ampacity tables use the following naming convention:
■AMP - the table name prefix.
■_{type} - the wire metal type such as CU for copper, or AL for aluminum.
■_{size} - wire size standard such as AWG, or MM2 for metric.
■_{standard} - optional suffix to relate it to a specific electrical standards
code. For example, an “_NEC” suffix could mean that the data for the table
parallels the National Electrical Code. A suffixed table name is not necessary
unless you plan to set up the electrical standards database to support
multiple standards.
For example, a table named AMP_CU_AWG_NEC contains the wire ampacity
information for copper, AWG sizes, and parallels what is found in the National
Electrical Code.
DescriptionName
Wire size code. This value can be automatically pushed into a wire type layer
name. For example, “12”, “250KCMIL”.
SIZE
Wire size description shown on the Wire Size Lookup dialog box. For example,
“12 AWG”, “250 KCMIL”.
SIZE_DESC
Imperial cross-section value for the wire conductor size.CIRC_MIL
Maximum ampacity rating values for the wire conductor size for each of these
standard ambient temperature ratings. Additional columns can be added or an
60C, 75C, 90C
existing column can be deleted. For example, if local electrical codes do not
support 90C, this field can be removed from the table and does not show up
as an option in the Wire Size Lookup dialog box.
2022 | Chapter 24 Advanced Productivity

Grounding conductor sizing tables
The grounding conductor sizing tables provide the grounding wire conductor
sizes and maximum FLA ampacity values. This information is used in the
following ways:
■Provide a suggested minimum grounding conductor size based on the amp
value returned by the expression defined in the AMPG_MAX entry in the
OPT table.
Circuit Builder database | 2023
■Provide a selection list on the Wire Size Lookup on page 712 dialog box
giving this minimum suggested size plus all larger grounding conductor
sizes.
The grounding conductor sizing tables use the following naming convention:
■AMPG - the table name prefix
■_{type} - the wire metal type such as CU for copper, or AL for aluminum.
■_{size} - wire size standard such as AWG, or MM2 for metric.
■_{standard} - optional suffix to relate it to a specific electrical standards
code. For example, an “_NEC” suffix could mean that the data for the table
parallels the National Electrical Code. A suffixed table name is not necessary
unless you plan to set up the electrical standards database to support
multiple standards.
For example, a table named AMPG_CU_AWG_NEC contains the grounding
conductor sizing information for copper, AWG sizes, and parallels values
found in the National Electrical Code.
DescriptionName
Wire size code. This value can be automatically pushed into a wire type layer
name for the ground wire. For example, “12”, “250KCMIL”.
SIZE
Wire size description shown on the Wire Size Lookup dialog box. For example,
“12 AWG”, “250 KCMIL”.
SIZE_DESC
Maximum amp value associated to this grounding wire size. The value comes
from the result of the expression held in the AMPG_MAX entry of the OPT table.
MAX
Wire insulation tables
The wire insulation tables provide the option to de-rate wire conductor
ampacity based upon expected maximum ambient temperature.
■Automatically select a default wire size based upon the maximum load
amp value, displayed in the Select Motor on page 710 or Select Load on
page 711 dialog boxes, and the default insulation type and ambient
temperature rating defined in the W_INSUL and T_AMBIENT entries of
the OPT table.
2024 | Chapter 24 Advanced Productivity
■Automatically calculate or recalculate suggested wire sizes in the Wire Size
Lookup on page 712 dialog box as various insulation and temperature
de-rating factors are applied.
The wire insulation tables use the following naming convention:
■INSUL - the table name prefix.
■_{type} - the wire metal type such as CU for copper, or AL for aluminum.
■_{size} - wire size standard such as AWG, or MM2 for metric.
■_{standard} - optional suffix to relate it to a specific electrical standards
code. For example, an “_NEC” suffix could mean that the data for the table
parallels the National Electrical Code. A suffixed table name is not necessary
unless you plan to set up the electrical standards database to support
multiple standards.
For example, a table named INSUL_CU_AWG_NEC contains the wire insulation
information for copper, AWG sizes, and parallels values found in the National
Electrical Code.
DescriptionName
Insulation type code.INSUL
Insulation type description shown on the Wire Size Lookup dialog box.INSUL_DESC
Standard, maximum temperature rating for the insulation type.TEMP
A series of wire conductor ampacity de-rating factor values for maximum ambient
temperature. Columns can be added or deleted. For example, if 30C is the
minimum ambient temperature rating, the 25C column can be removed.
25C-80C
Circuit Builder database | 2025

Conductor Reactance / AC Resistance tables
The optional conductor reactance/AC resistance tables provide the reactance
and resistance values for wire size based on conduit type. These values are
used to calculate the voltage drop percentage in power wiring when a run
distance is supplied.
There are two types of tables for this feature. A conduit type description table
and the reactance/resistance data tables.
Conduit type description table
2026 | Chapter 24 Advanced Productivity

The description table, XL&R_DESC, contains the labels used on the Wire Size
Lookup on page 712 dialog box for the conduit or raceway type selection list.
The labels also map to the columns in the data tables.
Data tables
The conductor reactance/AC resistance data tables use the following naming
convention:
■XL&R - the table name prefix
■_{type} - the wire metal type such as CU for copper, or AL for aluminum.
■_{size} - wire size standard such as AWG, or MM2 for metric.
■_{standard} - optional suffix to relate it to a specific electrical standards
code. For example, an “_NEC” suffix could mean that the data for the table
parallels the National Electrical Code. A suffixed table name is not necessary
unless you plan to set up the electrical standards database to support
multiple standards.
Circuit Builder database | 2027

For example, a table named XL&R_CU_AWG_NEC contains the conductor
reactance/AC resistance information for copper, AWG sizes, and parallels
values found in the National Electrical Code.
DescriptionName
Wire size code.SIZE
A set of reactance and resistance values, semi-colon delimited for the conduit
type. The first element is the estimated reactance and the second element is
the AC resistance.
C1-C3
NOTE see the XL&R_DESC table for the corresponding label for each. Data for
additional conduit/raceway types can be added to this table with a correspond-
ing entry added to the XL&R_DESC table.
NOTE See Wire Size Lookup on page 712 for the voltage drop calculation.
2028 | Chapter 24 Advanced Productivity
Fill tables
When multiple current carrying wire conductors are in the same conduit,
duct, or raceway, the wire ampacity may need to be de-rated. Current carrying
wire conductors are defined as power wiring, not ground, neutral, or control
wires. The Fill table provides the de-rating factor based on the maximum
number of power wire conductors.
The FILL table follows this naming convention:
■FILL - the table name prefix.
■_{standard} - optional suffix to relate it to a specific electrical standards
code. For example, an “_NEC” suffix could mean that the data for the table
parallels the National Electrical Code. A suffixed FILL table name is not
necessary unless you plan to set up the electrical standards database to
support multiple standards.
Circuit Builder database | 2029

MOTOR_I* tables
A set of three tables containing values used for calculating suggested breaker
size, fuse size, and disconnect switch ratings for a given motor or load amp
value. Each table name can have an optional suffix to relate it to a specific
electrical standards code such as “_NEC” for National Electrical Code.
MOTOR_I_DESC
Lists the component type descriptions whose sizing ties directly into the full
load amps value (FLA) of the motor or load. The CODE value maps to the
MOTOR_I_CALC and MOTOR_I_MAP tables.
2030 | Chapter 24 Advanced Productivity
MOTOR_I_CALC
Lists the formula to calculate the maximum amp value for various types of
components on a per motor type basis. Each row gives a motor type followed
by columns marked with the codes given in the MOTOR_I_DESC table. Each
cell contains an expression to calculate a FLA value. The FLA value for the
selected motor corresponds to the symbol "I" in the expression.
Valid operations are +-*/^. The “^” character is the exponential function. For
example, I^2 is I squared, while I^0.5 is the square root of I.
If-then-else statements are supported including one level of nested statements.
For example,
■(if (I > 400) then (I * 8) else (I * 11)) - the calculated amp value is eight
times FLA current for 0-400 amps and 11 times for greater than FLA of 400
amps. One level of nesting is supported.
■(if (I >= 9.0) then (I * 1.25) else if (I < 2.0) then (I * 3.0) else (I * 1.67) - the
calculated value is set to (I * 1.67) if I is less than 9 but greater or equal to
2.0 amps. If I is less than 2.0 amps the calculated value is (I * 3.0), and if
greater than or equal to 9.0 amps, it is (I * 1.25).
Valid Boolean operations are >, <. >=. <=, =.
MOTOR_I_MAP
Maps the calculated FLA for a component to a specific rating value and an
optional catalog assignment. The rating value is annotated to the symbol
using the API call c:ace_cb_anno2 in the circuit builder spreadsheet.
The optional catalog assignment is defined in the Default field. Use the
following format:
MFG={manufacturer};CAT={catalog};ASSYCODE={assembly code}
If the ASSYCODE value is not needed, use the format:
MFG={manufacturer};CAT={catalog}
CATALOGSEL table
Circuit Builder uses the CATALOGSEL table to save the catalog selections made
for the motor and other components. The catalog information is saved based
on the motor size. If this same motor size is used later on another circuit, these
previous catalog selections become the default values when they match up
with the configured selections. For example, if the previous circuit was
configured with a 10HP motor with time-delay fuses, and a 10HP motor with
Circuit Builder database | 2031

time-delay fuses is selected for the new circuit, the previously used catalog
selection appears as the default.
If the circuit is configured using the Reference an existing circuit on page 721
feature, the values are not used from the CATALOGSEL table but from the
referenced circuit. However, if a new motor is then selected from the Select
Motor on page 710 dialog box, the CATALOGSEL tables values are checked for
a match.
Add a new circuit
To add a new circuit to Circuit Builder there are three main tasks:
■Create the circuit drawing template on page 2032 (an AutoCAD .dwg file).
■Add a reference to this new circuit in the ACE_CIRCS on page 2038 sheet in
the ace_circuit_builder.xls spreadsheet.
■Create or modify a circuit codes on page 2039sheet in the
ace_circuit_builder.xls spreadsheet.
NOTE This exercise demonstrates the capabilities of Circuit Builder and the result
may not necessarily be electrically valid.
Create the circuit template
It is recommended that you read the Circuit Builder drawing templates on
page 2010 topic before continuing.
A circuit template drawing is an AutoCAD .dwg file that contains the wiring
framework for the circuit. On this wiring framework are positioned special
marker blocks. These marker blocks are configured, using attribute values, to
tell Circuit Builder that some action or decision is required at the insertion
point of each marker block. One marker block might identify where to place
he power disconnecting means for the circuit. Another marker block might
identify that an underlying wire must be appropriately sized to the motor
inserted at yet another marker block on the wire framework of the circuit
template.
The easiest way to create a circuit template is to copy a similar template to a
new name and modify the marker blocks on this copied template. For this
example you copy the circuit template ace_cb1_FVNR_H.dwg to a new name.
It is the main template for a 3-phase, horizontal, full-voltage, non-reversing
motor circuit. You modify this template to create a custom circuit template.
2032 | Chapter 24 Advanced Productivity

1Locate the existing circuit template drawing file ace_cb1_FVNR_H.dwg.
Copies of the circuit builder templates are installed in each of the
schematic library folders, JIC125, IEC2, and so onto. Copy this file to
ace_cb1_FVNR_H_custom.dwg.
NOTE The circuit template name is not critical and does not affect
functionality of Circuit Builder.
2Open the copied and renamed circuit template,
ace_cb1_FVNR_H_custom.dwg, in AutoCAD. Make sure that you have
write access to the drawing.
This template consists of three wires and some marker blocks.
3Open ace_circuit_builder.xls in a spreadsheet software for reference. See
Circuit Builder spreadsheet overview on page ? for the location of this
file.
Use standard AutoCAD commands to modify the template and not AutoCAD
Electrical commands. It avoids creating a template that contains an extra copy
of the AutoCAD Electrical WD_M block. If you accidentally use a command
that inserts the invisible WD_M block, either UNDO or erase and purge the
WD_M block instance. To erase and purge the invisible block, follow these
steps:
1Enter ATTDISP at the command prompt.
2Enter ON to make all attributes visible.
3Locate the block at 0,0.
4Click Home tab ➤ Modify panel ➤ Erase.
5Select the block and press enter.
6Enter PURGE at the command prompt.
7Select WD_M in the Block s section.
8Click Purge.
9Click Close.
Add a new circuit | 2033
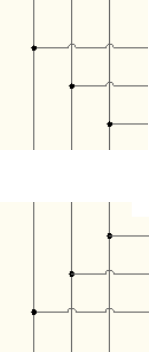
Define wires stretching to connect to bus
The first modification is to change the way the horizontal wires connect to
the vertical bus when inserted. The copied template is defined as follows:
■Top wire skips over two wires and connects to the left-most vertical bus
wire.
■Middle wire skips over one wire and connects to the middle vertical bus
wire.
■Bottom wire connects to the first vertical bus wire it encounters.
The following changes to the marker blocks reverse it.
1Zoom in on the left-hand side of the template.
You should see three marker blocks, each with a CODE value of WCON.
Each one is directly on top of and near the end of one of the wires.
2Enter ATTEDIT and select the top WCON marker block.
You should see the following values:
■CODE = WCON - maps back to a row in the circuit codes sheet with
a function to stretch the end of the underlying wire to try to make a
connection.
■ORDER = 1.02 - indicates the order of processing for the marker block
relative to all the other marker blocks in the template. The order value
can be an integer number or a decimal number. The blocks are
processed low to high starting at 0. Blocks with the same ORDER value
are processed as a group.
2034 | Chapter 24 Advanced Productivity
■MISC1 = _WIRESKIP=2;_MAXTRAPCOUNT=200 - defines any special
handling of the marker block. See the Marker block attributes on page
660 topic for a complete list of supported values.
3Change the MISC1 value to _MAXTRAPCOUNT=200, removing
_WIRESKIP=2.
The _WIRESKIP value defines the number of wires to skip over when
trying to connect to the vertical bus when inserted. Removing this value
directs Circuit Builder to connect to the first vertical wire it finds.
The _MAXTRAPCOUNT limits the relative distance that circuit builder
searches to find a wire to connect to. It is measured in an integer number
of wire connection trap on page 232 distance units. If _MAXTRAPCOUNT
is not defined or is zero, the search is across the whole extents of the
drawing.
4Click OK.
5Enter ATTEDIT and select the bottom WCON marker block.
6Change the MISC1 value to _WIRESKIP=2;_MAXTRAPCOUNT=200, making
sure to enter the semi-colon character between the values.
It tells Circuit Builder to skip over two vertical wires when trying to
connect to the vertical bus and to search up to 200 times the trap distance
for a vertical wire to connect to. If none are found within that distance,
Circuit Builder will not stretch this wire.
7Click OK.
Remove unnecessary marker blocks
The copied circuit has marker blocks for a control transformer and power
factor correction capacitor. For this custom circuit, these options are not
needed and the marker blocks can be removed.
1To verify which marker block is for the control transformer, switch over
to ace_circuit_builder.xls.
2Open the ACE_CIRCS worksheet.
Find which circuit codes sheet is used for the original template you copied
over, ace_cb1_FVNR_H.dwg.
3Locate a row with the name of the original template you copied over,
ace_cb1_FVNR_H.dwg, in the DWG_TEMPLATE field.
4Find the SHEET_NAME value for this row, 3ph_H.
Add a new circuit | 2035

5Open the 3ph_H worksheet.
6Find the entry for Control transformer and circuit - non-reversing in the
COMMENTS column.
7Find the CODE value for this row, XF01.
This CODE value links the marker block to the circuit code sheet.
8Switch back to the drawing and locate the marker block with the CODE
value of XF01.
9Erase the marker block using the AutoCAD ERASE command.
10 Repeat the steps to locate and delete the power factor correction marker
block, CODE=KVAR1.
Add a marker block
You can add a marker block by inserting the library symbol,
ace_cb_marker_block.dwg, or by copying an existing marker block and
modifying the attribute values. In this section, you will insert a marker block
that directs Circuit Builder to display a list of possible components to insert
in the Circuit Configuration dialog box.
NOTE This exercise demonstrates the capabilities of Circuit Builder and the result
may not necessarily be electrically valid.
1Determine exactly where in the template you want this specific
component inserted as the circuit is built.
2Enter INSERT at the command line to launch the AutoCAD block insert
command.
3Browse to ace_cb_marker_block.dwg and insert this block at the desired
location.
A copy of this block is installed in each of the schematic library folders,
JIC125, IEC2, and so on.
NOTE You could also use the AutoCAD COPY command and copy a nearby
marker block into the desired location.
4Enter ATTEDIT and select the marker block.
5Enter a value for the CODE attribute, for example USR001.
2036 | Chapter 24 Advanced Productivity

Use letters or numbers for the value. There is no code naming convention.
Make sure it is unique within the circuit codes spreadsheet. This marker
block code value maps a row or group of rows in to the spreadsheet. The
information in the spreadsheet directs Circuit Builder to perform a specific
action at the XY coordinate of this marker block.
6Enter a value for the ORDER attribute, for example 12.
This value can be an integer or decimal number and defines the order
that the marker blocks are processed. In this example, 12 is the highest
ORDER value on the template. This means that the action defined by
this marker block is the last one processed as the circuit is built.
7Enter an optional value for the MISC1 attribute, such as
LOC=FIELD;DESC1=ADDED COMPONENT.
This value can carry a number of flags on page 2010 as well as predefine
attribute values. When more than one, they are to be semi-colon
delimited.
Modify existing marker block
The template has a marker block with a CODE value of X001. Finding the
matching code in the circuit codes sheet indicates a multi-pole component
insertion. Three terminals are inserted at the location of this marker block. In
this section, you add a MISC1 value to predefine the terminal numbers.
1Enter ATTEDIT and select the marker block with the CODE value of X001.
2Enter _L=|TERM01=T1|TERM01=T2|TERM01=T3|.
This " _L= " prefix marks the beginning of a list of data to annotate on
to a multi-pole insertion triggered by the single marker block. In the
example here, a multi-pole insertion of three terminals into the three
phase bus defined in the template drawing.
The "|" symbol separates the attribute groups for each pole of the
multi-pole insertion. Multiple attributes within a group are separated by
a ";", the second-level delimiter. This example directs Circuit Builder to
assign T1 to the TERM01 attribute on the first terminal inserted, T2 on
the second, and T3 on the third.
NOTE See Assign different attribute values on a multi-pole insert on page
2045 for more information.
3Click OK.
Add a new circuit | 2037

NOTE Save the circuit template drawing after all the modifications are made.
ACE_CIRCS sheet
The ACE_CIRCS sheet in the ace_circuit_builder.xls spreadsheet controls the
circuit options displayed on the Circuit Selection dialog box. In this exercise,
you add entry to this ACE_CIRCS sheet so your new circuit option shows up
in the Circuit Selection dialog box.
1Open ace_circuit_builder.xls for edit using a spreadsheet software. See
Circuit Builder spreadsheet overview on page ? for the location of this
file.
2Open the ACE_CIRCS sheet.
The structure of this sheet controls the tree structure used by Circuit
Builder on the Circuit Selection dialog box. You will add a new category,
“Custom Circuits”, with one custom circuit option, “My 3-ph motor”,
within that category.
3Enter Custom Circuits in the CATEGORY field of the first blank row below
the existing entries.
It adds a new category to the highest level of the tree display.
4Enter My 3-ph motor in the TYPE field for the same row.
It adds an option within this new category.
5Enter ace_cb1_FVNR_H_custom.dwg in the DWG_TEMPLATE field in
this row.
It defines which circuit template drawing to use for this option. This is
the circuit template drawing created in the Create the circuit template
on page 2032 exercise.
6Enter 3ph_H_custom in the SHEET_NAME field in this row.
It defines the circuit codes sheet name. This is created in the Circuit codes
sheet on page 2039 exercise.
7Save the spreadsheet.
NOTE Leave the ANNO_CODE field blank. See Predefine attribute values using
annotation presets on page 2072 to learn how to define annotation.
2038 | Chapter 24 Advanced Productivity
Circuit codes sheet
Once a circuit is selected from the Circuit Selection dialog box (the CATEGORY
and TYPE fields from the ACE_CIRC sheet), the associated circuit template
drawing, with the marker blocks, is inserted (the DWG_TEMPLATE field). A
related circuit code sheet is ready for reference (the SHEET_NAME field). Each
marker block contains a CODE attribute with a value. This CODE value is used
to match up with a section in the circuit code sheet which defines what to do
at the location of this marker block in the template.
You can create a sheet or copy an existing, similar sheet. Since the circuit
template drawing was copied from ace_cb1_FVNR_H.dwg, it is easier to copy
the circuit codes sheet, 3ph_H, and modify it.
1Open ace_circuit_builder.xls for edit using a spreadsheet software. See
Circuit Builder spreadsheet overview on page ? for the location of this
file.
2Copy the 3ph_H sheet and rename it 3ph_H_custom as referenced in the
ACE_CIRCS sheet.
The changes in the circuit codes sheet must correspond to the changes made
to the marker blocks in the circuit template drawing. You can delete the lines
in the sheet that match the code values from the marker blocks you deleted,
XF01 and KVAR1. If you decide not to delete them from this sheet, it is not
a problem. These lines are ignored and not displayed on the Circuit
Configuration dialog box if the corresponding marker blocks are not found.
3Locate the CODE value XF01.
4Delete all the spreadsheet rows to the point where the next non-blank
CODE value begins, such as XF02.
5Repeat for CODE value KVAR1.
Add a section for the new marker block you added with a CODE value of
USR001. Add this new section at the bottom of the sheet after the last
non-blank row.
6Enter USR001 in the CODE field in the blank row.
7Enter Extra Component in the COMMENT field.
It is displayed in the left-hand Circuit Elements section of the Circuit
Configuration dialog box and is used for selection.
8Enter Component in the UI_TITLE field.
Add a new circuit | 2039

It is the label that shows up above the selection list in the middle part of
the Circuit Configuration dialog box.
9Enter Red Light in the UI_PROMPT_LIST field in the same row.
It is the text shown in the selection list for this item, displayed in the
middle part of the dialog box.
10 Enter ‘1 in the UI_VAL field in the same row.
It is a numerical value assigned to the selection from each group. These
numerical values are added up and matched to the value in the UI_SEL
column. This example only has one value.
11 Enter ‘1 in the UI_SEL field in the same row.
NOTE All UI_VAL and UI_SEL values must be inserted as text values in the
spreadsheet and not as numbers. An apostrophe character in front of the
number forces the spreadsheet software to interpret it as a text value. You
can also format the cells specifically as text. The text should appear left justified
in the cell. If any values appear right justified, they must change from numeric
to text values.
It is a numerical value matched to the sum total of the values in the
UI_VAL column for each selection made within a group. The
COMMAND_LIST value from this row is used to insert the selected
options.
12 Enter (c:ace_cb_insym #xyz nil “HLT1R” #scl 8 nil) in the COMMAND_LIST
field.
It is the API call Circuit Builder uses to insert a component. See the API
documentation for more information.
13 Enter Selector Switch in the UI_PROMPT_LIST field in the next row.
It is the second option within the Extra Component option. The CODE,
COMMENTS, and UI_TITLE fields should remain blank.
14 Enter X in the UI_DEF field in this row. It defines the entry as the default
option. The default is used when the circuit is inserted using the Insert
button on the Circuit Selection dialog box. If the Configure button is
selected, the "X" entry is the preselected default in the Circuit
Configuration dialog box when the options for this marker block are
displayed
15 Enter ‘2 in the UI_VAL field in the same row.
16 Enter ‘2 in the UI_SEL field in the same row.
2040 | Chapter 24 Advanced Productivity
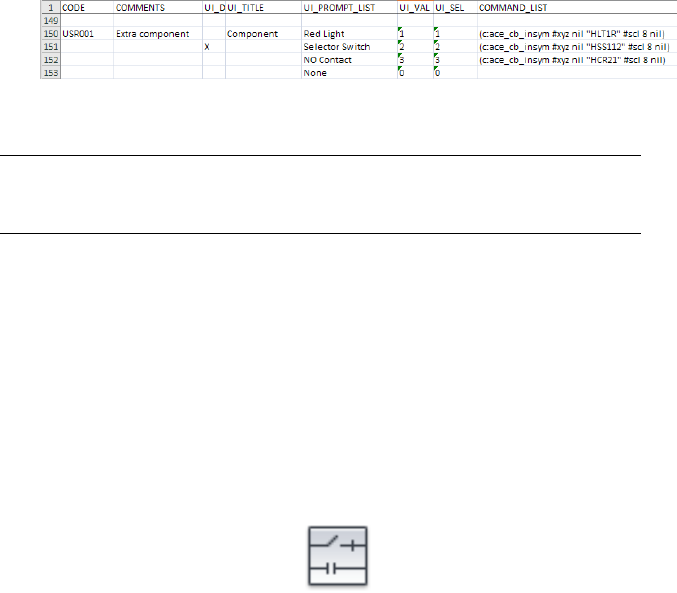
17 Enter (c:ace_cb_insym #xyz nil “HSS112” #scl 8 nil) in the
COMMAND_LIST field.
18 Enter NO Contact in the UI_PROMPT_LIST field in the next row.
19 Enter ‘3 in the UI_VAL field in the same row.
20 Enter ‘3 in the UI_SEL field in the same row.
21 Enter (c:ace_cb_insym #xyz nil “HCR21” #scl 8 nil) in the
COMMAND_LIST field.
22 Enter None in the UI_PROMPT_LIST field in the next row.
23 Enter ‘0 in the UI_VAL field in the same row.
24 Enter ‘0 in the UI_SEL field in the same row.
Leave the COMMAND_LIST field blank, meaning that if this option is
selected no action is needed.
25 Save the spreadsheet.
NOTE A new circuit codes sheet is not always needed. Depending on the circuit
and the circuit options, the information can be added to an existing sheet. In this
example, a new sheet was created to demonstrate the procedure.
Testing the circuit
Once you create the circuit template on page 2032, modified ACE_CIRCS on
page 2038 sheet, and added the circuit codes on page 2039 sheet, you are ready to
test your custom circuit.
1Make sure that you save the spreadsheet changes and close the spreadsheet
file.
2Open a new or existing drawing to insert the circuit. Make sure that the
drawing has a vertical 3-phase bus.
3Click Schematic tab ➤ Insert Components panel ➤ Circuit Builder
drop-down ➤ Circuit Builder.
Add a new circuit | 2041

4Look for the new category you added, Custom Circuits, on the Circuit
Selection dialog box.
If it is not there, or is not in the place you wanted, go back to the
ACE_CIRCS on page 2038 exercise.
5Expand the Custom Circuits category and select the circuit you added,
My 3-ph motor.
If it is not there or is not in the place you wanted, go back to the
ACE_CIRCS on page 2038 exercise.
6Click Configure.
7Select a location on the 3-phase bus.
If the wires do not connect to the bus in the way defined, go back to
Define wires stretching to connect to bus on page 2034.
8Look through the circuit elements on the Circuit Configuration dialog
box. If the circuit element for the new marker block, Extra Component,
is not there, go back to Circuit codes sheet on page 2039.
9Select Extra Component in Circuit Elements.
If the options, Red Light, Selector Switch, NO Contact, and None are not
displayed in the Select section, go back to Circuit codes sheet on page
2039.
If the default value for the Extra Component is not Selector Switch, go
back to Circuit codes sheet on page 2039.
10 Select a component from the list.
11 Select to insert all the circuit elements.
12 If the component selected for the new Extra Component option was not
inserted, go back to Circuit codes sheet on page 2039.
13 If the attribute values for the component are not predefined, LOC=FIELD
and DESC1=ADDED COMPONENT, go back to circuit template on page
2032.
14 If the three terminals are not numbered, T1, T2, and T3, go back to circuit
template on page 2032.
2042 | Chapter 24 Advanced Productivity
Circuit Builder - How to
Overview
Circuit Builder is controlled by a spreadsheet, a set of circuit template drawings,
and the electrical standards database file. The spreadsheet, circuit template
drawings, and the electrical standards database file can be modified to
customize Circuit Builder.
Spreadsheet
The spreadsheet defines the available circuits, circuit types, and defaults for
each option within a circuit. The default name for the Circuit Builder
spreadsheet is ace_circuit_builder.xls. The default location for the spreadsheet
is:
■Windows XP: C:\Documents and Settings\All
Users\Documents\Autodesk\AcadE {version}\Support\
■Windows Vista, Windows 7: C:\Users\Public\Documents\Autodesk\AcadE
{version}\Support\
The ace_circuit_builder.xls spreadsheet can be relocated into any of the normal
AutoCAD Electrical or AutoCAD support paths.
The circuit builder spreadsheet name can be overridden by setting the
environment variable, WD_CIRCBUILDER_FNAM, in the wd.env on page 1984
file.
circuit template drawings
The template for a selected circuit defines the placement for the individual
components and the wiring. The circuit template drawings use the following
naming convention.
■ace_cb1_*.dwg - primary circuit template drawings
■ace_cb2_*.dwg - branching or nested circuit template drawings
The default location for the circuit template drawings is the schematic library
folder:
■Windows XP: C:\Documents and Settings\All
Users\Documents\Autodesk\AcadE {version}\Libs\{library}\
Circuit Builder - How to | 2043

■Windows Vista, Windows 7: C:\Users\Public\Documents\Autodesk\AcadE
{version}\Libs\{library}\
One-line circuit templates have a “1-” and the default location is in a “1-”
folder under the schematic library folder.
■Windows XP: C:\Documents and Settings\All
Users\Documents\Autodesk\AcadE {version}\Libs\{library}\1-
■Windows Vista, Windows 7: C:\Users\Public\Documents\Autodesk\AcadE
{version}\Libs\{library}\1-
NOTE New templates do not have to follow this naming convention.
Electrical Standards database file
Circuit Builder uses an electrical standards database to define default values,
define engineering calculations, annotate circuits, and provide wire type
analysis. The electrical standards database, ace_electrical_standards.mdb, is
located in the catalog folder. The default location is:
■Windows XP: C:\Documents and Settings\{username}\My
Documents\Acade {version}\AeData\Catalogs\
■Windows Vista, Windows 7: C:\Users\{username}\Documents\Acade
{version}\AeData\Catalogs\
See also:
■Circuit Builder spreadsheet on page 2006
■Circuit Builder drawing templates on page 2010
■Circuit Builder database on page 2015
Add a multiple catalog option
Some components need multiple catalog entries. Define them in the Circuit
Builder spreadsheet to add them in the Setup & Annotation section of the
Circuit Configuration dialog box.
1Open the Circuit Builder spreadsheet, ace_circuit_builder.xls.
2Find the circuit CATEGORY and TYPE, for example CATEGORY: 3ph
Motor Circuit and TYPE: Horizontal - FVNR - non reversing.
2044 | Chapter 24 Advanced Productivity

3Open the circuit code sheet with the same name as the SHEET_NAME
value, for example SHEET_NAME: 3ph_H.
4Find the component, for example CODE: PB01, COMMENTS: Stop,
UI_PROMPT_LIST: Stop.
Notice the values in TABLE0: PB and TITLE0: Push Button.
It indicates that the component can have a main catalog value. The
TABLE0 value is the table name for the catalog lookup. The TITLE0 value
is the title for the section in the Setup & Annotation area of the Circuit
Configuration dialog box.
5Add a value in the TABLE1 and TITLE1 cells. For example, if the push
button requires a cover and it is found in the MISC_CAT table of the
catalog lookup database file, enter TABLE1: MISC_CAT and TITLE1: Cover.
6Save the spreadsheet.
The next time Circuit Builder is run using the configure option, an extra
catalog section appears for this component.
Assign different attribute values on a multi-pole insert
There are two ways to predefine attribute values for a multi-pole component.
■On the marker block for the component in the circuit template drawing.
■In the Circuit Builder spreadsheet circuit codes sheet.
NOTE The attribute value defined on the marker block overrides any value defined
in the spreadsheet.
Marker block method
1Open the circuit template drawing that contains the marker block for
the component.
2Find the correct marker block for the component.
3Edit its MISC1 attribute value using the format “_L=|{attribute
name}={attribute value} | {attribute name}={attribute value}”. For example,
to assign different terminal numbers to the multi-pole insertion of three
motor terminals, enter “_L=|TERM01=T1|TERM01=T2|TERM01=T3|”.
Circuit Builder - How to | 2045
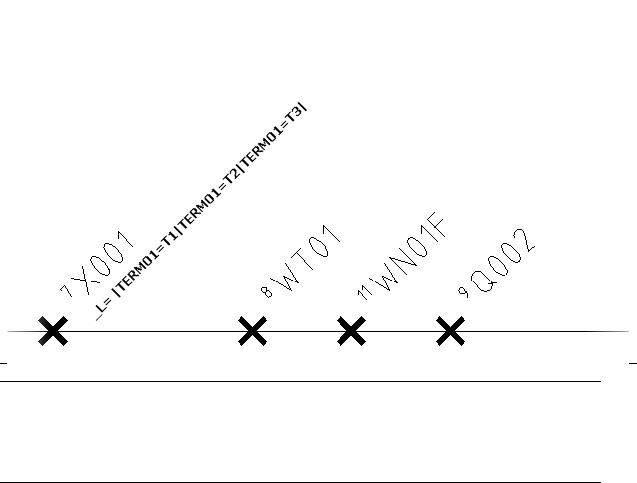
NOTE The MISC1 attribute value can contain multiple special text flags which
direct Circuit Builder to handle the component or underlying wire in a special
way. When you add new values, do not overwrite any other special flag values.
Separate each one with a semicolon.
4Save the circuit template drawing.
Spreadsheet method
1Open the Circuit Builder spreadsheet, ace_circuit_builder.xls.
2Find the circuit CATEGORY and TYPE, for example CATEGORY: 3ph
Motor Circuit and TYPE: Horizontal - FVNR - non reversing.
3Open the circuit code sheet with the same name as the SHEET_NAME
value, for example SHEET_NAME: 3ph_H.
4Find the specific component, for example CODE: X001, COMMENTS:
Motor terminal connections, UI_PROMPT_LIST: Square.
There can be multiple selections within the group. For example, there is
a selection for the type of disconnecting means, and a selection to include
an auxiliary contact. Each selection is assigned a numerical value from
the UI_VAL field. The values are added to determine the appropriate
action for this combination of selections. The sum is matched to a value
in the UI_SEL field. Once this match is made, the COMMAND_LIST value,
ANNOTATE_LIST value, and so on, are used to insert and annotate the
selections.
2046 | Chapter 24 Advanced Productivity

5Edit the API call in the COMMAND_LIST column for this component.
For example, the last argument of this Insert Multi-pole Component API
call is used to predefine MISC1 coded values with nil when nothing extra
is defined.
Before and after are shown:
Before: (c:ace_cb_multipole #xyz nil "HT0001" 3 #scl 4 nil)
After: (c:ace_cb_multipole #xyz nil "HT0001" 3 #scl 4
“_L=|TERM01=T1|TERM01=T2|TERM01=T3|”)
NOTE See the API documentation for more information.
6Save the spreadsheet.
Assign attribute values using AutoLISP
An AutoLISP expression can be used to define a calculated or special value for
an attribute on a component. For example, you can calculate related values
such as Kilowatt (KW) based upon a selected horsepower value.
See Map motor parameters to the motor symbol attributes on page 2063 to map
the entered horsepower.
1Open the circuit template drawing that contains the marker block for
the motor symbol.
2Find the correct marker block for the motor symbol.
3Edit its MISC1 attribute value using the format “{attribute
name}=(AutoLISP expression). For example, convert the HP value to
Kilowatts and push this value out to attribute RATING5 on the motor
symbol. Enter this expression on the MISC1 attribute of the marker block:
RATING5=(rtos (* @1@ 0.746) 2 2)
The "@1@" maps to the second entry (list is zero based) held in the #data
global variable, which is the entered horsepower value. Multiplying by
0.746 converts the horsepower (HP) to Kilowatts (KW).
Circuit Builder - How to | 2047
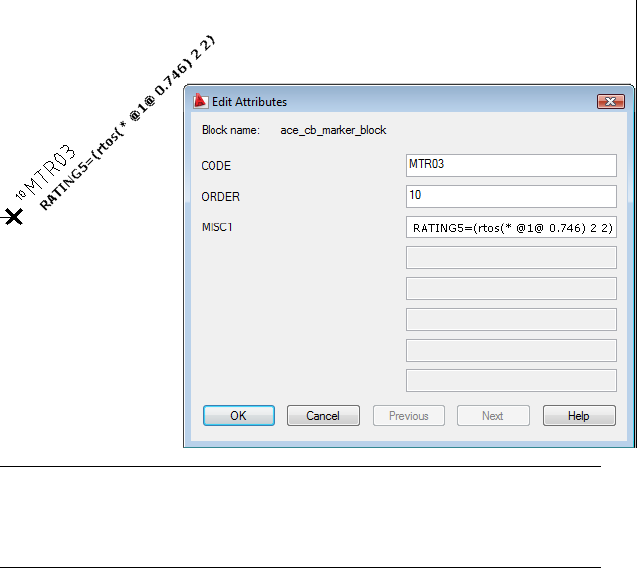
NOTE The MISC1 attribute value can contain multiple special text flags which
direct Circuit Builder to handle the component or underlying wire in a special
way. When you add new values, do not overwrite any other special flag values.
Separate each one with a semicolon.
4Save the circuit template drawing.
Conditionally trim or remove a wire segment
As Circuit Builder dynamically builds the circuit, a circuit element selection
can require that a wire is trimmed back or removed. For example, the circuit
can include an option for an indicator light. If no indicator light is selected,
the wire framework for it must be removed.
1Open the circuit template drawing that contains the marker block for
the optional component. Take note of the value of the ORDER attribute.
2Find the wires to remove or trim if the optional component is not selected.
3Add marker blocks on each wire with the same ORDER attribute value as
the optional marker block for the component.
4Assign the same CODE value to each trim wire marker block, for example
“XY01”.
2048 | Chapter 24 Advanced Productivity
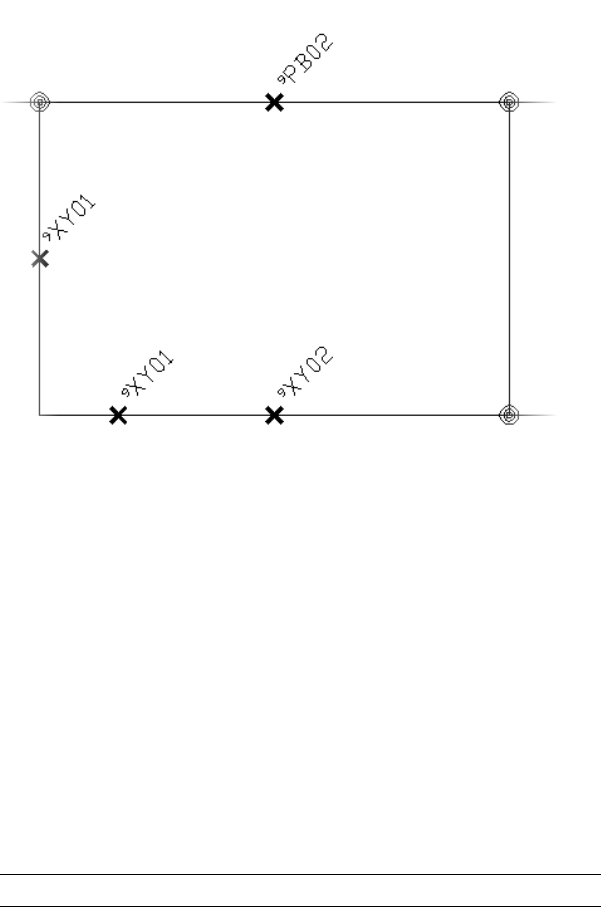
5Save the circuit template drawing.
6Open the Circuit Builder spreadsheet, ace_circuit_builder.xls.
7Find the circuit CATEGORY and TYPE, for example CATEGORY: 3ph
Motor Circuit and TYPE: Horizontal - FVNR - non reversing.
8Open the circuit code sheet with the same name as the SHEET_NAME
value, for example SHEET_NAME: 3ph_H.
9Find the optional component, for example CODE: LT01, COMMENTS:
Light, UI_PROMPT_LIST: Light.
10 Edit the API call in the COMMAND_LIST column for the option that
would require a wire trim or removal. For example, add this command
call for the "No light" option in the spreadsheet:
(c:ace_cb_trim "XY01" nil) where “XY01” is the CODE attribute value
assigned to each wire marker block.
NOTE See the API documentation for more information.
11 Save the spreadsheet.
Circuit Builder - How to | 2049
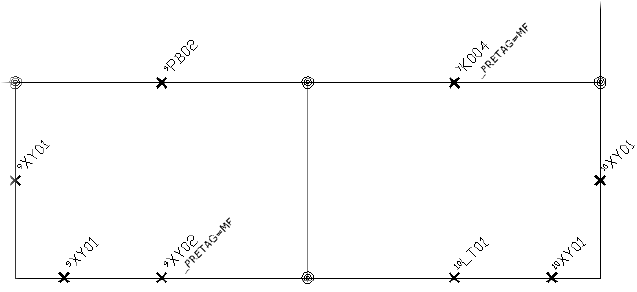
Conditional component insertion
As Circuit Builder dynamically builds the circuit, a circuit element selection
may require a conditional component insertion. For example, there may be
an option to insert either a “start” push button or a N.O. relay contact at the
insertion point of a marker block. If a momentary push button is selected then
a “seal” contact should be inserted around the push button at the location
marked with a separate marker block. However, if the N.O. relay contact option
is selected, then no seal contact is needed and wires must be trimmed or
removed.
1Open the circuit template drawing that contains the marker block for
the selected component, for example the momentary push button. Take
note of the value of its ORDER attribute.
2Find the wire that should receive the conditional component. Add a
marker block with the same ORDER attribute value.
3Assign a unique CODE attribute value to this conditional marker block,
for example “XY02”.
4Find the wires to remove or trim if the conditional component is not
needed.
5Add marker blocks on each of these wire segments. Edit the ORDER
attribute value to match the one on the marker block for the conditional
component.
6Assign the same CODE value to each wire marker block, for example
“XY01”. This CODE value should not be the same as the one assigned to
the conditional component marker block.
7Save the circuit template drawing.
2050 | Chapter 24 Advanced Productivity

8Open the Circuit Builder spreadsheet, ace_circuit_builder.xls.
9Find the circuit CATEGORY and TYPE, for example CATEGORY: 3ph
Motor Circuit and TYPE: Horizontal - FVNR - non reversing.
10 Open the circuit code sheet with the same name as the SHEET_NAME
value, for example SHEET_NAME: 3ph_H.
11 Find the optional component, for example CODE: PB02, COMMENTS:
Start, UI_PROMPT_LIST: Start.
12 Edit the API call in the COMMAND_LIST column for the option that
would require the conditional insert. Multiple API calls can be used to
insert multiple components. For example:
(c:ace_cb_insym #xyz nil "HPB11" #scl 8 nil)(c:ace_cb_insym "XY02" nil
"HMS21" #scl 8 nil)
Note the difference in the second call. Instead of passing the #xyz global
variable name that carries the XY coordinate of the main marker block,
it passes the "XY02" code name. This means that the "HMS21" symbol
will insert wherever marker block "XY02" is located in the inserted
template.
13 Edit the API call in the COMMAND_LIST column for the option that
requires a wire trim or removal. For example:
(c:ace_cb_trim "XY01" nil) where “XY01” is the CODE attribute value
assigned to each wire marker block.
Instead of passing the XY coordinate as the first argument, the "XY01"
code name is passed. It instructs Circuit Builder to find all marker blocks
with CODE attribute value "XY01" and with the target ORDER value and
trim or remove their underlying wires
NOTE See the API documentation for more information.
14 Save the spreadsheet.
Control the multi-pole insertion direction
The default build direction for a multi-pole component is down for horizontal
bus wires, and left to right for vertical bus wires. You can override the default
build direction.
1Open the circuit template drawing that contains the marker block for
the multi-pole component.
2Find the correct marker block for the component.
Circuit Builder - How to | 2051
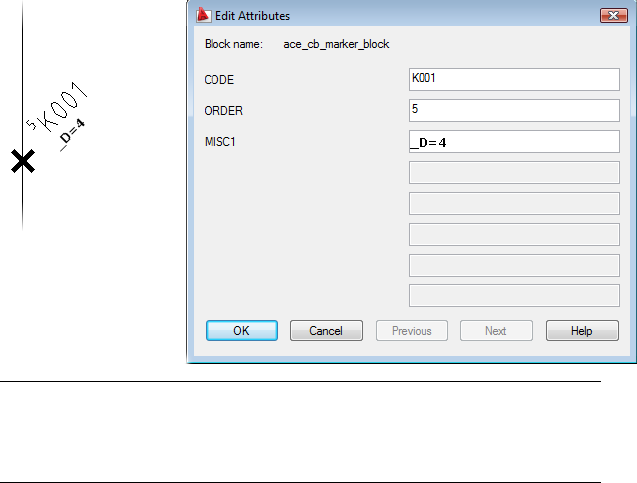
3Edit its MISC1 attribute value using the format “_D={digit}”, where 1=build
left to right, 2=build up, 4=build right to left, and 8=build down.
For example, if the template has a vertical 3-phase bus and the
disconnection means that marker block is located over the right-hand
wire, give its MISC1 attribute a value of "_D=4". It causes the child poles
of the multi-pole insert to move to the left to pick up the remaining two
bus wires.
NOTE The MISC1 attribute value can contain multiple special text flags which
direct Circuit Builder to handle the component or underlying wire in a special
way. When you add new values, do not overwrite any other special flag values.
Separate each one with a semicolon.
4Save the circuit template drawing.
Control the bus wire spacing
You can set up a circuit template so the wire spacing between two or more
parallel bus wires is auto-adjusted. A marker block is positioned on each wire
and its CODE value references the (c:ace_cb_rung_spacing…) API call in the
spreadsheet. The marker blocks with a common ORDER value are processed
as a group. One of the marked wires is designated as the "base" wire, meaning
that it is the one that does not move. The other marked bus wires in the group
are then positioned set distances away from the base wire.
2052 | Chapter 24 Advanced Productivity

The base wire is determined in one of two ways:
■The base wire is the marker block that has a MISC1 attribute with a value
of "_BASE".
■If no MISC1 attribute has a “_BASE” value, the underlying wire that comes
closest to being colinear with the insertion point of the template is the
one that becomes the base wire.
A template can carry multiple groups of marker blocks indicating that the
underlying bus wires should auto-adjust. The CODE value can be the same
for all groups, but each group must have its own ORDER value.
Define the wire type
There are three ways to define the wire type.
■On the marker block for the wire in the circuit template.
■In the Circuit Builder spreadsheet circuit codes sheet.
■Based on motor size selection.
NOTE The attribute value defined on the marker block overrides any value defined
in the spreadsheet.
Marker block method
1Open the circuit template drawing that contains the marker block for
the wire.
2Find the correct marker block for the wire.
3Edit its MISC1 attribute value using the format “_WIRETYPE={layer
name}”, for example, “_WIRETYPE=BRN_10AWG”.
Circuit Builder - How to | 2053
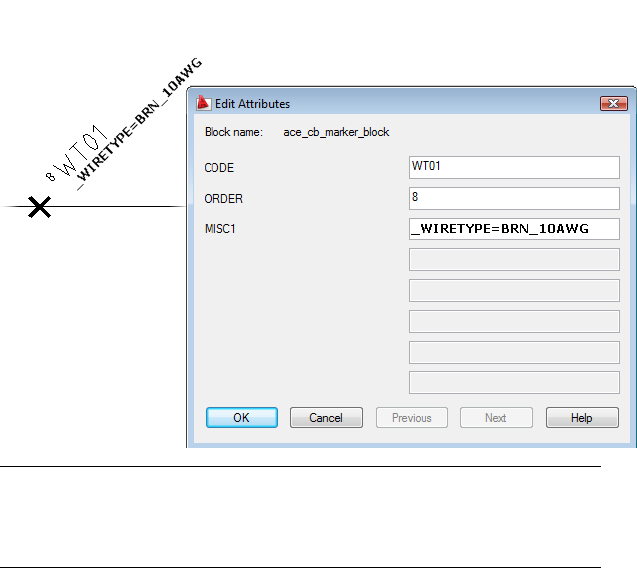
NOTE The MISC1 attribute value can contain multiple special text flags which
direct Circuit Builder to handle the component or underlying wire in a special
way. When you add new values, do not overwrite any other special flag values.
Separate each one with a semicolon.
4Save the circuit template drawing.
Spreadsheet method
1Open the Circuit Builder spreadsheet, ace_circuit_builder.xls.
2Find the circuit CATEGORY and TYPE, for example CATEGORY: 3ph
Motor Circuit and TYPE: Horizontal - FVNR - non reversing.
3Open the circuit code sheet with the same name as the SHEET_NAME
value, for example SHEET_NAME: 3ph_H.
4Find the specific wire, for example CODE: WT01, and COMMENTS: Assign
motor wire type - phase 1.
5Edit the API call in the COMMAND_LIST column for this wire. For
example, the last argument of this Set Wire type API call is used to
predefine MISC1 coded values with nil when nothing extra is defined.
Before and after are shown:
2054 | Chapter 24 Advanced Productivity

Before: (c:ace_cb_set_wiretype #data 1 nil nil)
After:(c:ace_cb_set_wiretype #data 1 nil “_WIRETYPE=BRN_10AWG”)
NOTE See the API documentation for more information.
6Save the spreadsheet.
Based on motor size selection
You can apply the minimum wire size for a selected motor load to the wire
type layer name. The value, which is extracted from the
ace_electrical_standards.mdb database, can be substituted for any “@WSIZE@”
string found in the “_WIRETYPE=” value. Use this variable in the MISC1
attribute on the wire marker block or in the spreadsheet as part of the wire
type API call.
Marker block method
1Open the circuit template drawing that contains the marker block for
the wire.
2Find the correct marker block for the wire.
3Edit its MISC1 attribute value using the format “_WIRETYPE=@WSIZE@”,
for example, “_WIRETYPE=BRN_@WSIZE@”.
NOTE The MISC1 attribute value can contain multiple special text flags which
direct Circuit Builder to handle the component or underlying wire in a special
way. When you add new values, do not overwrite any other special flag values.
Separate each one with a semicolon.
4Save the circuit template drawing.
Spreadsheet method
1Open the Circuit Builder spreadsheet, ace_circuit_builder.xls.
2Find the circuit CATEGORY and TYPE, for example CATEGORY: 3ph
Motor Circuit and TYPE: Horizontal - FVNR - non reversing.
3Open the circuit code sheet with the same name as the SHEET_NAME
value, for example SHEET_NAME: 3ph_H.
4Find the specific wire, for example CODE: WT01, and COMMENTS: Assign
motor wire type - phase 1.
Circuit Builder - How to | 2055

5Edit the API call in the COMMAND_LIST column for this wire. For
example, the last argument of this Set Wire type API call is used to
predefine MISC1 coded values with nil when nothing extra is defined.
Before and after are shown:
Before: (c:ace_cb_set_wiretype #data 1 nil nil)
After:(c:ace_cb_set_wiretype #data 1 nil “_WIRETYPE=BRN_@WSIZE@”)
NOTE See the API documentation for more information.
6Save the spreadsheet.
Define the wire type as no wire numbering
There are two ways to define the wire type and set it to “no wire numbering”.
■On the marker block for the wire in the circuit template.
■In the Circuit Builder spreadsheet circuit codes sheet.
NOTE The attribute value defined on the marker block overrides any value defined
in the spreadsheet.
Marker block method
1Open the circuit template drawing that contains the marker block for
the wire.
2Find the correct marker block for the wire.
3Edit its MISC1 attribute value using the format
“_WIRENUMBERS=0;_WIRETYPE={layer name}”.
■_WIRENUMBERS=0 defines the layer as No Wire Numbering. Any
wire without this flag is created as a normal wire numbering layer by
default.
NOTE This flag applies only if the wire layer does not exist and is created
when the circuit is inserted.
■_WIRETYPE={layer name} defines the layer name.
2056 | Chapter 24 Advanced Productivity

NOTE The MISC1 attribute value can contain multiple special text flags which
direct Circuit Builder to handle the component or underlying wire in a special
way. When you add new values, do not overwrite any other special flag values.
Separate each one with a semicolon.
4Save the circuit template drawing.
Spreadsheet method
1Open the Circuit Builder spreadsheet, ace_circuit_builder.xls.
2Find the circuit CATEGORY and TYPE, for example CATEGORY: 3ph
Motor Circuit and TYPE: Horizontal - FVNR - non reversing.
3Open the circuit code sheet with the same name as the SHEET_NAME
value, for example SHEET_NAME: 3ph_H.
4Find the specific wire, for example CODE: WT01, and COMMENTS: Assign
motor wire type - phase 1.
5Edit the API call in the COMMAND_LIST column for this wire. For
example, the last argument of this Set Wire type API call is used to
predefine MISC1 coded values with nil when nothing extra is defined.
Before and after are shown:
Before: (c:ace_cb_set_wiretype #data 1 nil nil)
After:(c:ace_cb_set_wiretype #data 1 nil
“_WIRENUMBERS=0;_WIRETYPE=BRN_10AWG”)
■_WIRENUMBERS=0 defines the layer as No Wire Numbering. Any
wire without this flag is created as a normal wire numbering layer by
default.
NOTE This flag applies only if the wire layer does not exist and is created
when the circuit is inserted.
■_WIRETYPE=BRN_10AWG defines the layer name.
NOTE See the API documentation for more information.
6Save the spreadsheet.
Circuit Builder - How to | 2057

Format the numeric tag of the motor symbol in a wire
number
You can include the motor symbol tag number assignment in connected wire
number assignments. It requires coordination between the motor symbol
insertion and the wire number insertion. The motor symbol must insert before
the wire number. The order of insertion is controlled by the ORDER attribute
value on the marker blocks within the circuit template drawing. The marker
block ORDER attribute value for the motor symbol must be a lower number
than the ORDER value of the marker block for the wire number in the circuit
template drawing. When the wire number is inserted, the motor tag value can
be incorporated in to the wire number.
1Open the Circuit Builder spreadsheet, ace_circuit_builder.xls.
2Find the circuit CATEGORY and TYPE, for example CATEGORY: 3ph
Motor Circuit and TYPE: Horizontal - FVNR - non reversing.
3Open the circuit code sheet with the same name as the SHEET_NAME
value, for example SHEET_NAME: 3ph_H.
4Find the motor symbol, for example CODE: MTR03, COMMENTS: Motor
symbol, UI_PROMPT_LIST: 3ph motor.
There can be multiple selections within the group. For example, there is
a selection for the type of disconnecting means, and a selection to include
an auxiliary contact. Each selection is assigned a numerical value from
the UI_VAL field. The values are added together to determine the
appropriate action for this combination of selections. The sum is matched
to a value in the UI_SEL field. Once this match is made, the
COMMAND_LIST value, ANNOTATE_LIST value, and so on, are used to
insert and annotate the selections.
5Edit the API call in the ANNOTATE_LIST column for this component.
For example, it might look like this with two API calls concatenated:
(c:ace_cb_anno #data 0)(c:ace_cb_save "@MOTOR_NUM@" "TAG1*" nil
1)
The second one, c:ace_cb_save, saves the TAG1 attribute value on the
motor in to memory under an index tag of “@MOTOR_NUM@”. This
value can be referenced when the subsequent wire number marker blocks
are processed.
NOTE See the API documentation for more information on c:ace_cb_save.
6Save the spreadsheet.
2058 | Chapter 24 Advanced Productivity
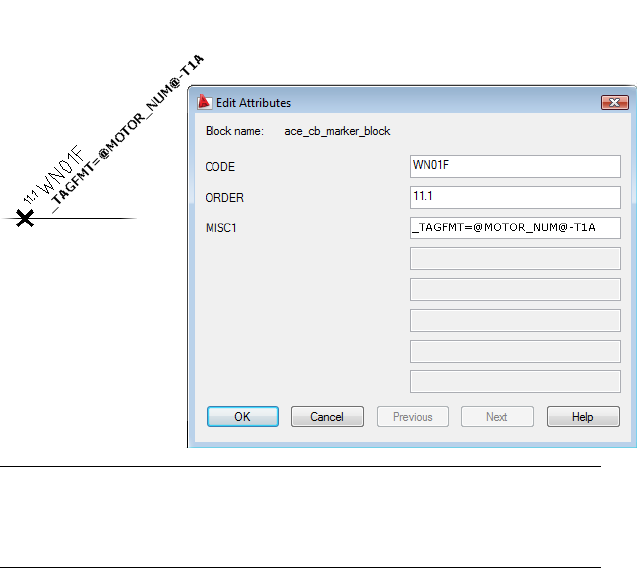
7Find the marker blocks for the wire numbers that are tied to the motor
tag. These could be on the main circuit template or on a nested template
drawing. Open the circuit template drawing.
8Find the correct marker block for the wire number.
9Edit its MISC1 attribute value using the @MOTOR_NUM@ in the format
where you want the motor tag value. For example,
“_TAGFMT=@MOTOR_NUM@-%N” or to predefine a wire number,
“_TAGFMT=@MOTOR_NUM@-T1A”.
NOTE The MISC1 attribute value can contain multiple special text flags which
direct Circuit Builder to handle the component or underlying wire in a special
way. When you add new values, do not overwrite any other special flag values.
Separate each one with a semicolon.
10 Save the circuit template drawings.
Format the numeric tag of the motor symbol into other
component tags
You can include the motor symbol tag number assignment in other
components in the circuit. It requires coordination between the motor symbol
insertion and the insertion of the other components. The motor symbol must
Circuit Builder - How to | 2059

insert before these other components. The order of insertion is controlled by
the ORDER attribute value on the marker blocks within the circuit template
drawing. The marker block ORDER attribute value for the motor symbol must
be a lower number than the ORDER values of the marker blocks for the other
components in the circuit template drawing. When the other components
are inserted, the motor tag value can be incorporated into the subsequent
component tags.
1Open the Circuit Builder spreadsheet, ace_circuit_builder.xls.
2Find the circuit CATEGORY and TYPE, for example CATEGORY: 3ph
Motor Circuit and TYPE: Horizontal - FVNR - non reversing.
3Open the circuit code sheet with the same name as the SHEET_NAME
value, for example SHEET_NAME: 3ph_H.
4Find the motor symbol, for example CODE: MTR03, COMMENTS: Motor
symbol, UI_PROMPT_LIST: 3ph motor.
There can be multiple selections within the group. For example, there is
a selection for the type of disconnecting means, and a selection to include
an auxiliary contact. Each selection is assigned a numerical value from
the UI_VAL field. The values are added together to determine the
appropriate action for this combination of selections. The sum is matched
to a value in the UI_SEL field. Once this match is made, the
COMMAND_LIST value, ANNOTATE_LIST value, and so on, are used to
insert and annotate the selections.
5Edit the API call in the ANNOTATE_LIST column for this component.
For example, it might look like this with two API calls concatenated:
(c:ace_cb_anno #data 0)(c:ace_cb_save "@MOTOR_NUM@" "TAG1*" nil
1)
The second one, c:ace_cb_save, saves the TAG1 attribute value on the
motor in to memory under an index tag of “@MOTOR_NUM@”. This
value can be referenced when the subsequent component marker blocks
are processed.
NOTE See the API documentation for more information on c:ace_cb_save.
6Find the component you want the tag to follow the motor tag, for
example CODE: CAP01, COMMENTS: Power factor correction capacitor.
7Edit the API call in the COMMAND_LIST column for this component.
For example, it might look like this:
(c:ace_cb_insym #xyz nil "VCA113_1-" #scl 8 "%N=@MOTOR_NUM@")
2060 | Chapter 24 Advanced Productivity

The last argument of this API call, “%N=@MOTOR_NUM@”, tells Circuit
Builder to use the TAG1 value from the motor, saved as
“@MOTOR_NUM@”, as the number part of the tag for this component.
For example, if the component tag format is defined on page 222 as
“%S-%F-%N”, the numeric part of the motor tag is used for the “%N”
part of the generated component tag.
You can also define this using a fixed _TAGFMT option. Using this
approach overrides the component tag format defined on page 222 for
the drawing. Some examples:
■"_TAGFMT=%F@MOTOR_NUM@" - used with the component family
code string, %F.
■"_TAGFMT=%S-@MOTOR_NUM@%F" - used with the SHEET_NAME
value of the drawing, %S.
■"_TAGFMT=CA@MOTOR_NUM@" - used with a defined text prefix.
8Repeat for each component that should base the tag value off the motor
tag value.
9Save the spreadsheet.
NOTE It can also be done by defining the MISC1 attribute on the marker blocks
for each component as described in Format the numeric tag of the motor symbol
in a wire number on page 2058.
Link a child contact to the parent
As Circuit Builder dynamically builds the circuit, each component receives a
component tag. A child contact must link to a parent component to receive
the same component tag as the parent.
The parent and child components are automatically linked by Circuit Builder
if they each have the same default tag value. For example, the motor starter
coil and auxiliary contacts both have a default value “M”.
There can be more than one parent/child relationship within the overall circuit
with the same default tag. The overall circuit includes the main circuit template
and any branching or nested circuit templates. For example, a reversing motor
starter has two starter coils, forward and reverse. Each parent coil must link
to the correct child auxiliary contacts and power contacts but they might all
have the same default tag value, “M”. To accomplish the correct parent/child
links follow these steps.
Circuit Builder - How to | 2061
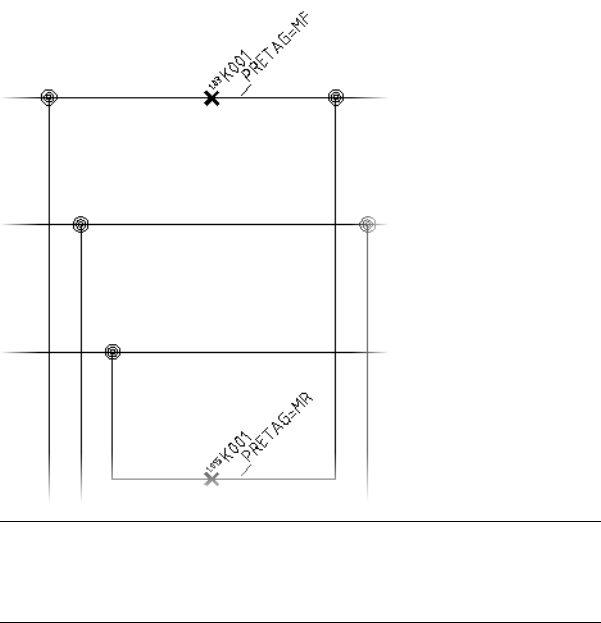
1Open the circuit template drawings that contain the parent and child
marker blocks. There can be more than one circuit template drawing
involved, for example a main template with power contacts and a nested
template with the starter coils and interlocking auxiliary contacts.
2Find the correct marker block for each component that requires a new
default tag link.
3Edit the MISC1 attribute value adding “_PRETAG={new default tag link}”.
For example, add “_PRETAG=MF” for the forward motor coil and contacts,
and “_PRETAG=MR” for the reverse motor coil and contacts.
NOTE The MISC1 attribute value can contain multiple special text flags which
direct Circuit Builder to handle the component or underlying wire in a special
way. When you add new values, do not overwrite any other special flag values.
Separate each one with a semicolon (:).
4Save the circuit template drawings.
When Circuit Builder inserts the nested circuit containing the child
contacts, it matches these predefined tag values with the correct parent
coil.
2062 | Chapter 24 Advanced Productivity
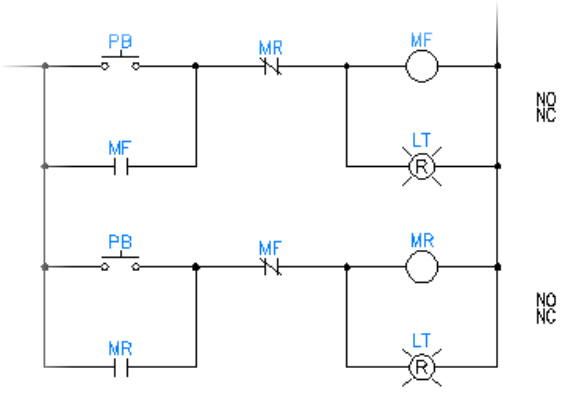
Map motor parameters to the motor symbol attributes
When a motor circuit is selected, a special motor setup/annotation function
is called. This special function is flagged by a marker block on the template
with a CODE value which maps to a line in the circuit codes sheet marked
"!MCC_CTRL" in the UI_TITLE field. This function references the
ace_electrical_standards.mdb file to determine full load current and wire size
values for a selected set of motor input parameters.
The values generated by this motor setup/annotation function are not
automatically written to attributes on the components or wire types on the
circuit. These values are saved as an indexed list in an AutoLISP global variable
called “#data”. Global means that the data is saved in memory and is available
while the Circuit Builder continues to construct the circuit. As Circuit Builder
processes subsequent marker blocks of the circuit, it can be set up to pull one
or more of these saved values from the global and push them out to attributes
on the components or used to format appropriate wiretype layer names
This motor setup/annotation must be flagged to happen early on. It is done
with an ORDER value which is set to a low number or 0. For example, if the
motor full load amps value is used to determine the main disconnect circuit
breaker sizing, this data must be in memory before the main disconnecting
means marker block is processed.
Circuit Builder - How to | 2063

The elements in the first sublist of the "#data" list are held in memory in the
following order. The values related to the motor are held in the first eight
elements. See the API documentation for a complete list of elements.
0Motor Type
1Power
2Units
3Voltage
4Phase
5Hertz (Hz)
6Speed (RPM)
7Full Load Amps (FLA)
NOTE Circuit Builder numbers this indexed list starting at 0 rather than 1.
There are two ways to map these values to the attributes on a component.
■On the marker block for the motor, fuse, or circuit breaker symbol in the
circuit template drawing.
■In the Circuit Builder spreadsheet circuit codes sheet.
NOTE The attribute value defined on the marker block overrides any value defined
in the spreadsheet.
Marker block method
1Open the circuit template drawing that contains the marker block for
the motor, fuse, or circuit breaker symbol.
2Find the correct marker block for the symbol.
3Edit its MISC1 attribute value using the format “{attribute name}=@#@”.
Replace the “#” with the appropriate index digit to map the correct
element. For example, to map the horsepower to the RATING2 attribute,
enter "RATING2=HP: @1@". To also map the full load amp value to the
RATING4 attribute, enter "RATING2=HP: @1@;RATING4=Full load: @7@
amps". Remember, the indexed list of values is zero based.
2064 | Chapter 24 Advanced Productivity
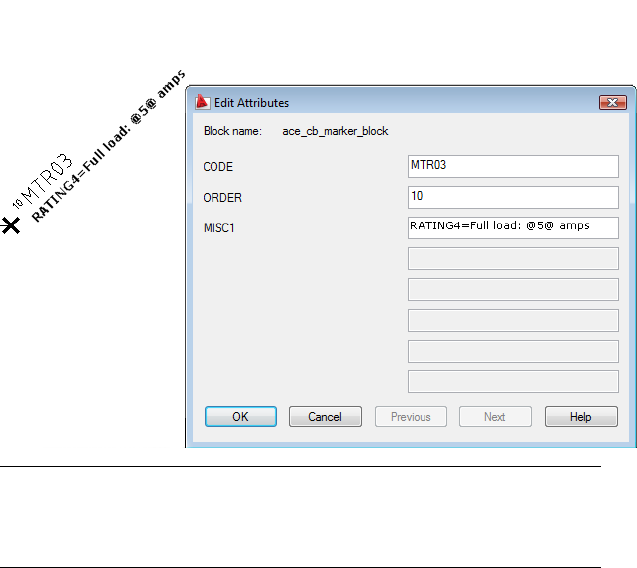
NOTE The MISC1 attribute value can contain multiple special text flags which
direct Circuit Builder to handle the component or underlying wire in a special
way. When you add new values, do not overwrite any other special flag values.
Separate each one with a semicolon.
4Save the circuit template drawing.
Spreadsheet method
1Open the Circuit Builder spreadsheet, ace_circuit_builder.xls.
2Find the circuit CATEGORY and TYPE, for example CATEGORY: 3ph
Motor Circuit and TYPE: Horizontal - FVNR - non reversing.
3Open the circuit code sheet with the same name as the SHEET_NAME
value, for example SHEET_NAME: 3ph_H.
4Find the motor symbol section, for example CODE: MTR03, COMMENTS:
Motor symbol, UI_PROMPT_LIST: 3ph motor.
There can be multiple selections within the group. For example, there is
a selection for the type of disconnecting means, and a selection to include
an auxiliary contact. Each selection is assigned a numerical value from
the UI_VAL field. The values are added to determine the appropriate
Circuit Builder - How to | 2065

action for this combination of selections. The sum is matched to a value
in the UI_SEL field. Once this match is made, the COMMAND_LIST value,
ANNOTATE_LIST value, and so on, are used to insert and annotate the
selections.
5Edit the API call in the COMMAND_LIST column for this motor symbol.
For example, the last argument of this Insert Component API call is used
to predefine MISC1 coded values with nil when nothing extra is defined.
Before and after are shown:
Before:(c:ace_cb_insym #xyz nil "HMO13" #scl 8 nil)
After:(c:ace_cb_insym #xyz nil "HMO13" #scl 8 “RATING2=HP: @1@”)
NOTE See the API documentation for more information.
6Save the spreadsheet.
Override the default tag format
There are two ways to override the drawing tag format for a component.
■On the marker block for the component in the circuit template drawing.
■In the Circuit Builder spreadsheet circuit codes sheet.
NOTE The attribute value defined on the marker block overrides any value defined
in the spreadsheet.
Marker block method
1Open the circuit template drawing that contains the marker block for
the component.
2Find the correct marker block for the component.
3Edit its MISC1 attribute value using the format “_TAGFMT={format}”, for
example, “_TAGFMT=DISC-%N”.
2066 | Chapter 24 Advanced Productivity
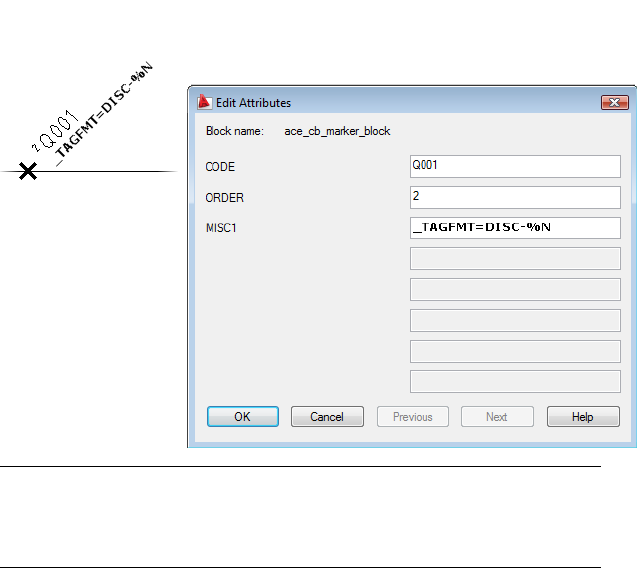
NOTE The MISC1 attribute value can contain multiple special text flags which
direct Circuit Builder to handle the component or underlying wire in a special
way. When you add new values, do not overwrite any other special flag values.
Separate each one with a semicolon.
4Save the circuit template drawing.
Spreadsheet method
1Open the Circuit Builder spreadsheet, ace_circuit_builder.xls.
2Find the circuit CATEGORY and TYPE, for example CATEGORY: 3ph
Motor Circuit and TYPE: Horizontal - FVNR - non reversing.
3Open the circuit code sheet with the same name as the SHEET_NAME
value, for example SHEET_NAME: 3ph_H.
4Find the specific component, for example CODE: Q001, COMMENTS:
Disconnecting means, UI_PROMPT_LIST: Disconnect switch and fuses.
There can be multiple selections within the group. For example, there is
a selection for the type of disconnecting means, and a selection to include
an auxiliary contact. Each selection is assigned a numerical value from
the UI_VAL field. The values are added to determine the appropriate
Circuit Builder - How to | 2067

action for this combination of selections. The sum is matched to a value
in the UI_SEL field. Once this match is made, the COMMAND_LIST value,
ANNOTATE_LIST value, and so on, are used to insert and annotate the
selections.
5Edit the API call in the COMMAND_LIST column for this component.
For example, the last argument of this Insert Multi-pole Component API
call is used to predefine MISC1 coded values with nil when nothing extra
is defined.
Before and after are shown:
Before: (c:ace_cb_multipole #xyz nil "HDS11F" 3 #scl 4 nil)
After: (c:ace_cb_multipole #xyz nil "HDS11F" 3 #scl 4
“_TAGFMT=DISC-%N”)
NOTE See the API documentation for more information.
6Save the spreadsheet.
Override the default wire number format
There are two ways to override the drawing wire number format for a wire
number.
■On the marker block positioned over the wire in the circuit template
drawing.
■In the Circuit Builder spreadsheet circuit codes sheet.
NOTE The attribute value defined on the marker block overrides any value defined
in the spreadsheet.
Marker block method
1Open the circuit template drawing that contains the marker block for
the wire number.
2Find the correct marker block for the wire number.
3Edit its MISC1 attribute value using the format “_TAGFMT={format}”, for
example, “_TAGFMT=%N-T1”.
2068 | Chapter 24 Advanced Productivity
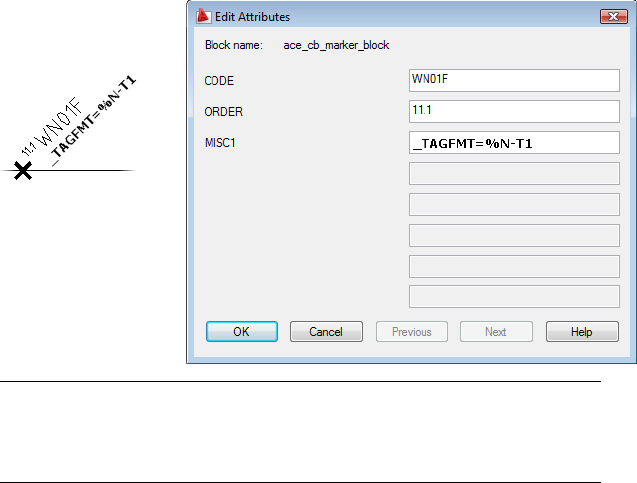
NOTE The MISC1 attribute value can contain multiple special text flags which
direct Circuit Builder to handle the component or underlying wire in a special
way. When you add new values, do not overwrite any other special flag values.
Separate each one with a semicolon.
4Save the circuit template drawing.
Spreadsheet method
1Open the Circuit Builder spreadsheet, ace_circuit_builder.xls.
2Find the circuit CATEGORY and TYPE, for example CATEGORY: 3ph
Motor Circuit and TYPE: Horizontal - FVNR - non reversing.
3Open the circuit code sheet with the same name as the SHEET_NAME
value, for example SHEET_NAME: 3ph_H.
4Find the specific wire number, for example CODE: WN01F, and
COMMENTS: Insert wire number on network, use drawing defaults, mark
it as “fixed”.
5Edit the API call in the COMMAND_LIST column for this component.
For example, the last argument of this Insert Wire Number API call is
used to predefine MISC1 coded values with nil when nothing extra is
defined.
Before and after are shown:
Before: (c:ace_cb_wnum nil nil 1 nil)
Circuit Builder - How to | 2069

After:(c:ace_cb_wnum nil nil 1 “_TAGFMT=%N-T1”)
NOTE See the API documentation for more information.
6Save the spreadsheet.
Predefine attribute values
There are three ways to predefine attribute values for a component.
■On the marker block for the component in the circuit template drawing.
■In the Circuit Builder spreadsheet circuit codes sheet.
■Annotation presets on page 2072 - provides the ability to select which
attribute values to apply when the circuit is inserted.
NOTE An annotation preset value overrides the attribute value defined on the
marker block. The attribute value defined on the marker block overrides any value
defined in the spreadsheet.
Marker block method
1Open the circuit template drawing that contains the marker block for
the component.
2Find the correct marker block for the component.
3Edit its MISC1 attribute value using the format “{attribute name}={attribute
value}”, for example, “DESC1=MOTOR”.
2070 | Chapter 24 Advanced Productivity
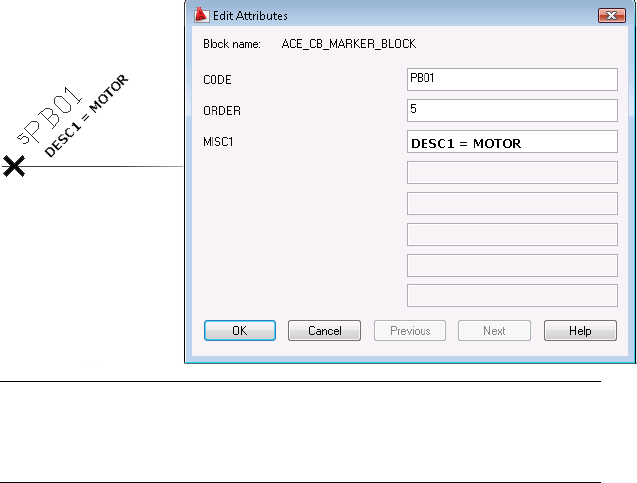
NOTE The MISC1 attribute value can contain multiple special text flags which
direct Circuit Builder to handle the component or underlying wire in a special
way. When you add new values, do not overwrite any other special flag values.
Separate each one with a semicolon.
4Save the circuit template drawing.
Spreadsheet method
1Open the Circuit Builder spreadsheet, ace_circuit_builder.xls.
2Find the circuit CATEGORY and TYPE, for example CATEGORY: 3ph
Motor Circuit and TYPE: Horizontal - FVNR - non reversing.
3Open the circuit code sheet with the same name as the SHEET_NAME
value, for example SHEET_NAME: 3ph_H.
4Find the specific component, for example CODE: PB01, COMMENTS:
STOP, UI_PROMPT_LIST: Push button - Standard.
There can be multiple selections within the group. For example, there is
a selection for the type of disconnecting means, and a selection to include
an auxiliary contact. Each selection is assigned a numerical value from
the UI_VAL field. The values are added to determine the appropriate
action for this combination of selections. The sum is matched to a value
in the UI_SEL field. Once this match is made, the COMMAND_LIST value,
ANNOTATE_LIST value, and so on, are used to insert and annotate the
selections.
Circuit Builder - How to | 2071

5Edit the API call in the COMMAND_LIST column for this component.
For example, the last argument of this Insert Component API call is used
to predefine MISC1 coded values with nil when nothing extra is defined.
Before and after are shown:
Before: (c:ace_cb_insym #xyz nil "HPB12" #scl 8 nil)
After: (c:ace_cb_insym #xyz nil "HPB12" #scl 8
“DESC1=CONVEYOR;DESC2=SYSTEM RESET”)
NOTE See the API documentation for more information.
6Save the spreadsheet.
See also:
■Predefine attribute values using annotation presets on page 2072
Predefine attribute values using annotation presets
Annotation presets allow you to:
■Predefine description text, installation, location values for individual
components in the circuit.
■Select which attribute values to apply to the circuit when it is built.
■Edit the attribute values before the circuit is built.
1Open the Circuit Builder spreadsheet, ace_circuit_builder.xls.
2Open the ACE_CIRCS sheet.
3Find the circuit CATEGORY and TYPE, for example CATEGORY: 3ph
Motor Circuit and TYPE: Horizontal - FVNR - non reversing.
4Assign a code value in the ANNO_CODE field if there isn’t one, for
example ANNO_3M.
5In AutoCAD Electrical, open the circuit template drawing listed in the
DWG_TEMPLATE field, for example ace_cb1_FVNR_H.dwg.
6Open the ANNO_CODE sheet in the spreadsheet.
This sheet provides a link between the circuit you select (identified by
the ANNO_CODE value), a specific marker block (identified by its CODE
value), and a specific attribute on the marker block.
2072 | Chapter 24 Advanced Productivity

7Enter the ANNO_CODE value from earlier in the ANNO_CODE field of
a blank row, ANNO_3M.
For this example, you define some attribute values for the motor symbol.
8In AutoCAD Electrical, find the marker block that defines the insertion
point for the motor symbol. Find the CODE attribute value, for example
MTR03.
9In the spreadsheet, add a new line in the ANNO_CODE table for each
attribute you wish to predefine. For example:
■ANNO_CODE = ANNO_3M. It is the value from the ACE_CIRCS sheet
for this circuit.
■CODE = MTR03. It is the value from the CODE attribute on the marker
block.
■ATTRIBUTE = LOC. It is the attribute name you want to predefine.
■PROMPT = Motor - Location code. This is the text used on the
Annotation Presets on page 708 dialog box. This dialog box is displayed
if you select the Presets - List button when the circuit is inserted.
■Default = FIELD. It is the attribute value to apply to the LOC attribute
when the motor symbol is inserted.
10 Repeat for each attribute value you want to predefine. The ANNO_CODE
and CODE values should be the same for each attribute on this motor
symbol.
11 Save and close the spreadsheet.
You are now ready to test the changes.
12 Click Schematic tab ➤ Insert Components panel ➤ Circuit Builder
drop-down ➤ Circuit Builder.
13 Select the circuit CATEGORY and TYPE, CATEGORY: 3ph Motor Circuit
and TYPE: Horizontal - FVNR - non reversing.
14 Select the Presets button in the Special Annotation section.
15 Select the Lists button next to Presets.
The Annotation Presets dialog box displays. Any attributes with non-blank
values are selected by default and applied to the symbol when it is
Circuit Builder - How to | 2073
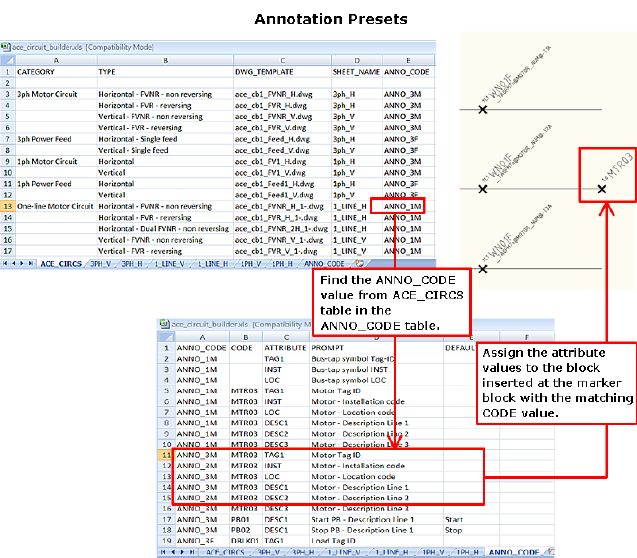
inserted. You can select which attribute values to apply or edit the values
as necessary.
16 Select OK.
17 On the Circuit Selection dialog box, select Insert.
The circuit is built and the attribute values are applied.
Predefine a wire number
Predefine a wire number on the wire number marker block on the circuit
template drawing.
1Open the circuit template drawing that contains the marker block for
the wire number.
2Find the correct marker block for the wire number.
3Edit its MISC1 attribute value using the format “_TAGFMT={wire
number}”, for example, “_TAGFMT=24COM”.
2074 | Chapter 24 Advanced Productivity
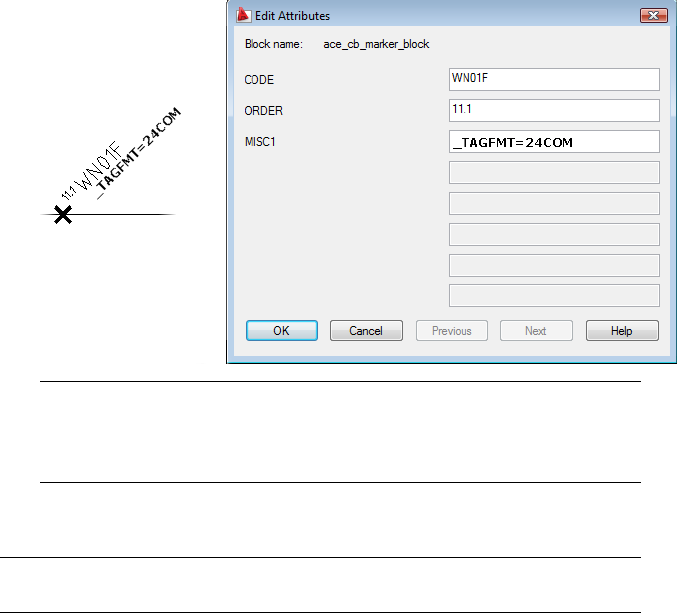
NOTE The MISC1 attribute value can contain multiple special text flags which
direct Circuit Builder to handle the component or underlying wire in a special
way. When you add new values, do not overwrite any other special flag values.
Separate each one with a semicolon.
4Save the circuit template drawing.
NOTE To get a fixed wire number, you must adjust the API call in the spreadsheet
to indicate it. See the API documentation for more information.
Set circuit element defaults
The first sheet of the Circuit Builder spreadsheet, ACE_CIRCS, defines circuit
categories, types, main templates, and associated circuit code sheet names.
These circuit code sheets include a default option for each circuit element.
For example, the circuit template has a marker block that references a main
disconnecting means in the circuit code sheet for the template. The circuit
code sheet lists four options:
■Circuit Breaker
■Fuses
■Fused Disconnect
■Disconnect Switch (non-fused)
Circuit Builder - How to | 2075
When the Circuit Configuration dialog box opens, and you select Main
Disconnecting Means from the Circuit Elements tree structure, the Fused
Disconnect option is selected. If you select Insert, instead of Configure, to
insert the circuit without user prompts, the Fused Disconnect is used for the
main disconnecting means.
If you always want a different option selected or used as the default, this value
can be changed.
1Open the Circuit Builder spreadsheet, ace_circuit_builder.xls.
2Find the circuit category and type in the ACE_CIRCS sheet, for example
Category: 3ph Motor Circuit and Type: Horizontal - FVNR - non reversing.
3Find the value in the SHEET_NAME column, for example 3ph_H. Open
the worksheet by selecting on the 3ph_H tab.
4Find the circuit element by looking at the values in the COMMENTS and
UI_TITLE columns. For example, COMMENTS: Disconnecting Means and
UI_TITLE: Main Disconnect.
Notice there are multiple options for this circuit element as listed in the
UI_PROMPT_LIST column. The current default option is indicated by an
“X” in the UI_DEF column.
5Move the “X” in the UI_DEF column to the row containing the option
you want as the default, for example Circuit Breaker. Make sure that only
one row for the group contains an “X”.
6Save the spreadsheet.
Set up component auto-sizing
Circuit Builder can calculate the rating for components in the circuit based
upon some multiple of the full load amp value of the motor or load. For
example, the electrical code standard might state that a disconnect switch
must be rated not less than 115% of the load amperage. An expected maximum
load of 28 amps would require a disconnect switch rated at not less than 115%
of 28 amps, or 32.2 amps. If standard switch ratings are 30 and 60 amps, a 60
amp switch would be selected.
Such an automatic calculation can be accomplished by creating a relationship
between the call in the ANNOTATE_LIST field value in the circuit codes sheet
on page 2006 of the circuit builder spreadsheet, and the MOTOR_I_* tables in
the electrical standards database on page 2015.
2076 | Chapter 24 Advanced Productivity
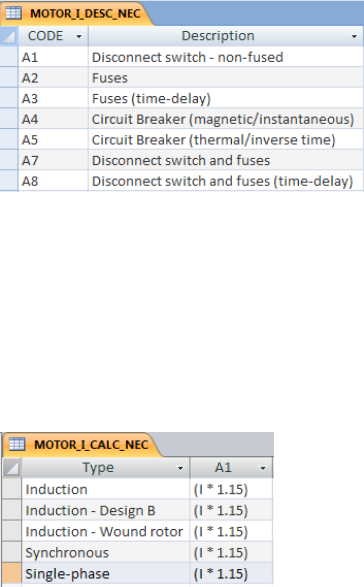
Here is how it is defined:
■The CODE value of the marker block on the inserted circuit template
drawing, points at a group of rows in the circuit codes sheet. These rows
define the types of components that can be inserted at the location of this
marker block.
■The row for the inserted component, either the default component or the
component selected on the Circuit Configuration dialog box, contains an
ANNOTATION_LIST column value.
■The ANNOTATE_LIST column value contains a call to the API function
c:ace_cb_anno2. This function includes a code argument like “A1”.
■The code argument should match a code value in the MOTOR_I_DESC
table of the electrical standards database file.
Here is an example for a disconnect switch entry:
(c:ace_cb_anno2 nil “A1” “RATING1” 0 nil)
In this example, “A1” is the code to match in the MOTOR_I_DESC table
(for “Disconnect switch non-fused”), and “RATING1” is the attribute on
the inserted disconnect switch symbol to receive the final calculated amp
value.
■The MOTOR_I_CALC table also has a column of data with a label that
matches the code used in the C:ace_cb_anno2 call.
Circuit Builder - How to | 2077
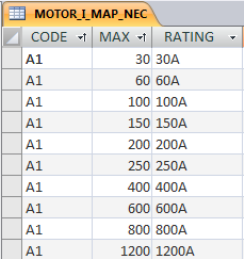
■The cell in the MOTOR_I_CALC table contains an expression using “I” to
represent the full load amps of the motor. This expression is evaluated
using the actual full load amps for the motor. The calculated value is used
to determine the value to assign to the attribute.
Valid operations are +-*/^. The “^” character is the exponential function.
For example, I^2 is I squared, while I^0.5 is the square root of I.
If-then-else statements are supported including one level of nested
statements. For example, “(if (I > 400) then (I * 8) else (I * 11))” means the
calculated amp value is eight times FLA current for 0-400 amps and 11
times for greater than FLA of 400 amps. One level of nesting is supported.
“(if (I >= 9.0) then (I * 1.25) else if (I < 2.0) then (I * 3.0) else (I * 1.67)”
means the calculated value is set to (I * 1.67) if I is less than 9 but greater
or equal to 2.0 amps. If less than 2.0 amps it is (I * 3.0) and if greater than
or equal to 9.0 amps it is (I * 1.25).
Valid Boolean operations are >, <. >=. <=, =.
■The MOTOR_I_MAP table contains a row with a matching code value,
such as “A1”.
■The result of the calculation, made from the expression in the
MOTOR_I_CALC table, is compared to the MAX values in the
MOTOR_I_MAP table to determine the appropriate RATING value. In the
earlier example, the 28 amp motor load multiplied by 1.15 yields 32.2
amps minimum for “A1”. This means that a match is made on the record
with a MAX value of 60 and yields a 60A switch rating.
■The RATING value is assigned to the attribute specified in the
c:ace_cb_anno2 call, for example “RATING1”.
■Define an optional catalog assignment to the component by adding a value
in the DEFAULT field in the MOTOR_I_MAP table. The format is
2078 | Chapter 24 Advanced Productivity
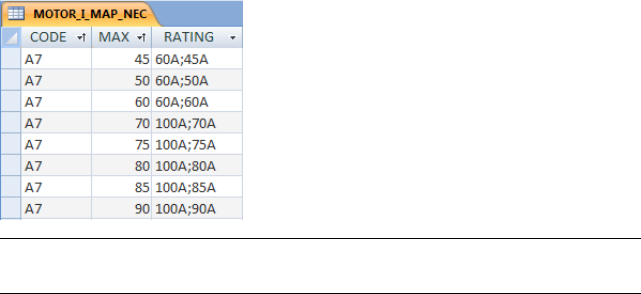
MFG={manufacturer};CAT={catalog}. For example, an “A3” entry for 15A
time-delay fuses might look like the following example:
MFG=BUSSMAN;CAT=KTK-R-15
When a component has multiple calculated values such as a disconnect switch
with fuses, the two RATING attributes for the component are semicolon
delimited, as shown in this example:
(c:ace_cb_anno2 nil “A7” “RATING1;RATING2” nil 0)
The MOTOR_I_MAP table contains corresponding semicolon delimited values
in the RATING column.
NOTE See the API documentation for more information on the Circuit Builder API
calls.
Stretch and connect wiring from a nested template
A marker block is placed at or near the end of a wire on the circuit template
that indicates to Circuit Builder that the wire should try and connect to a
nearby wire. The marker block should be placed at or near the end of the wire
that must stretch.
There are two options that can be used in the MISC1 attribute value.
“n” is the number of wires to skip over before connection is at-
tempted. If the _WIRESKIP flag is missing or set to 0, Circuit
_WIRESKIP=n
Builder stretches and connects to the first wire it encounters. If
the value is 1, it skips over one wire before trying to make a
connection.
“n” is the number of trap distance units to search for a wire
connection. To see the trap distance value for a drawing, look
_MAXTRAPCOUNT=n
on the Drawing Properties dialog box, Drawing format tab. The
Circuit Builder - How to | 2079

trap distance cannot be set. It is calculated from the drawing
scale.
NOTE If this value is not defined on the marker block, Circuit
Builder uses a distance value equal to 200 times the trap distance
value of the drawing.
The CODE value of the marker block must tie in to the
(c:ace_cb_stretch_wire_connect #xyz nil #misc1) API call in the spreadsheet.
The values on the MISC1 attributes are used for the #misc1 argument.
2080 | Chapter 24 Advanced Productivity
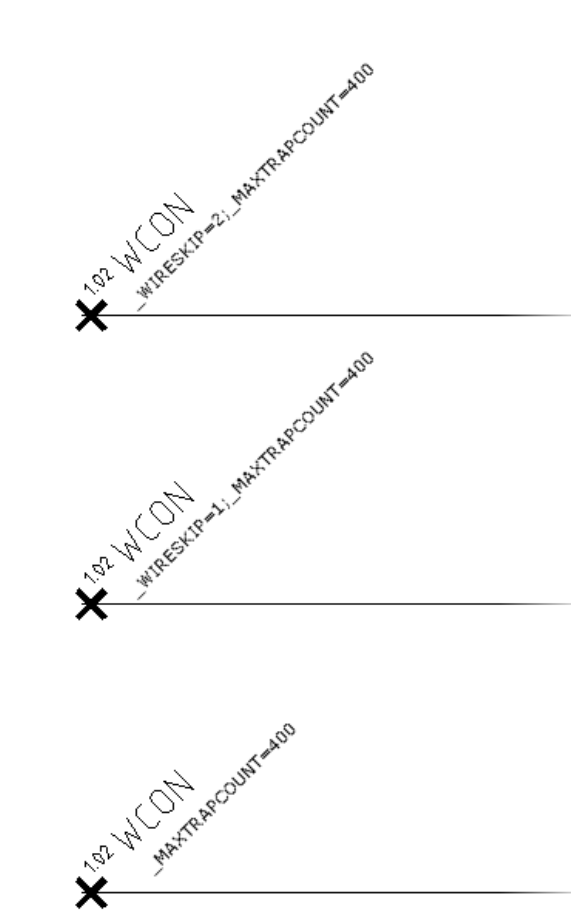
Circuit Builder - How to | 2081
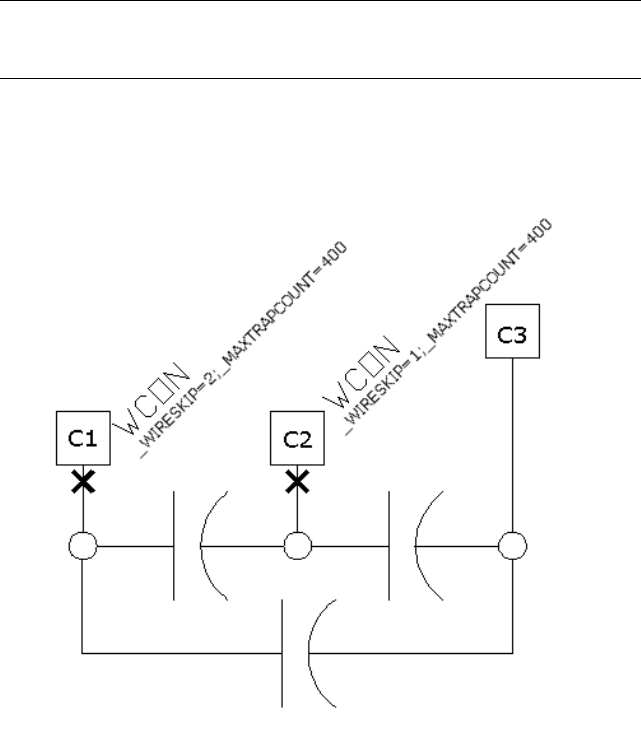
NOTE If the marked wire has a terminal at its end, Circuit Builder stretches the
wire and moves the terminal. It stretches based on the origin of the connected
terminal rather than the end of the wire.
Build your own symbols
Build your own symbols
You can use the Symbol Builder to create an AutoCAD Electrical symbol or to
convert existing non-AutoCAD Electrical symbols. This utility builds an
AutoCAD Electrical symbol by either adding AutoCAD Electrical attributes to
2082 | Chapter 24 Advanced Productivity
the geometry of the symbol or by converting text entities to AutoCAD Electrical
attributes.
You can also use AutoCAD attribute definition and editing commands to do
the same thing. Use this tool to quickly pick and place attributes. It tracks
what attributes are present and checks your work to make sure that any
AutoCAD Electrical required attributes are not omitted. For this exercise, you
create a symbol and add AutoCAD Electrical attributes to the new geometry.
Symbol Builder works in the Block Editor environment. You can add or modify
the geometry of the symbol using standard AutoCAD commands within this
environment.
Create a parent schematic symbol
In this exercise, you create a power supply using the Symbol Builder tool.
NOTE If you exit out of the Symbol Builder, restart it, and on the Select
Symbol/Objects dialog box, click Select objects and select any graphics and
attributes you added so far. You can then resume from where you left off.
1In an AutoCAD drawing, draw a rectangle on the drawing.
NOTE You can also create and modify the graphics for the symbol in the
Block Editor environment.
2Click Schematic tab ➤ Other Tools panel ➤ Symbol Builder drop-down
➤ Symbol Builder.
3In the Select Symbol/Objects dialog box, Attribute template section,
browse to the Library path
Windows XP: C:\Documents and Settings\All
Users\Documents\Autodesk\Acade {version}\jic125
Windows Vista, Windows 7: C:\Users\Public\Documents\Autodesk\Acade
{version}\jic125
4In the Attribute template section, choose Symbol: Horizontal Parent.
Build your own symbols | 2083
5In the Attribute template section, choose Type: Generic.
6In the Select from drawing section, click Select objects and select the
rectangle.
7Select OK.
Add attributes
In this part of the exercise, you insert some AutoCAD Electrical attributes from
the Symbol Builder Attribute Editor. You are not limited to these attributes,
and you can include your own user-defined attributes on the AutoCAD
Electrical block files.
NOTE The TAG1 attribute is the only one required for a parent schematic symbol.
The other attributes in the Required section are expected on a parent schematic
symbol, however the symbol is recognized as a parent symbol without them.
1If the Symbol Builder Attribute Editor is not visible,
Click Symbol Builder tab ➤ Edit panel ➤ Palette Visibility Toggle.
2Select the TAG1 attribute.
3 Select the Properties tool to launch the Insert/Edit Attributes dialog
box.
4Change the height to 0.125 and Justify to Center.
5Enter “PS” as the Value. It is the default code used as the %F value of the
tag format (such as “CR” , “PB”, “LT”)
6Select OK.
7 Click the Insert Attribute tool.
8Select an insertion point for the attribute.
NOTE You can also right-click and select Insert Attribute or drag the attribute
to insert it.
2084 | Chapter 24 Advanced Productivity
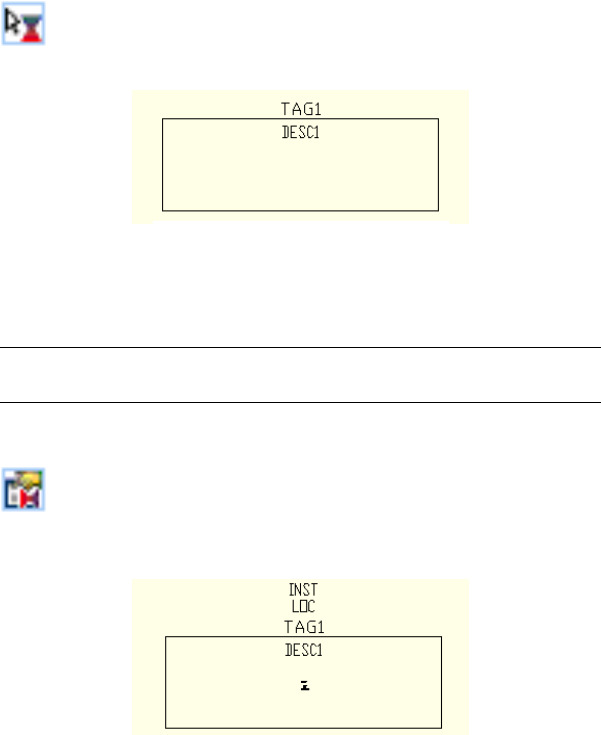
9 Select DESC1, click the Insert Attribute tool, and insert it below
TAG1.
10 Repeat to insert the INST and LOC attributes above TAG1.
11 Select MFG, CAT, and ASSYCODE. Click the Insert Attribute tool, and
insert them near the center of the rectangle.
NOTE If the CAT and ASSYCODE attributes are not listed they are inserted
with MFG as a group.
12 Repeat to insert the FAMILY attribute near the center of the rectangle.
13 With FAMILY still highlighted in the Symbol Builder Attribute
Editor, select the Properties tool. Enter “PS” as the Value and OK. This
assigns the %F value to the FAMILY attribute inserted.
Add wire connection attributes
You can define wire connection points and terminal text for the library symbol.
When you add a wire connection, you select the style, the direction the wire
connects from, and whether to include the optional TERMxx and TERMDESCxx
attributes. In this exercise, wire connection attributes are inserted at the left,
bottom, and right side of the symbol.
1If the Symbol Builder Attribute Editor is not visible,
Build your own symbols | 2085
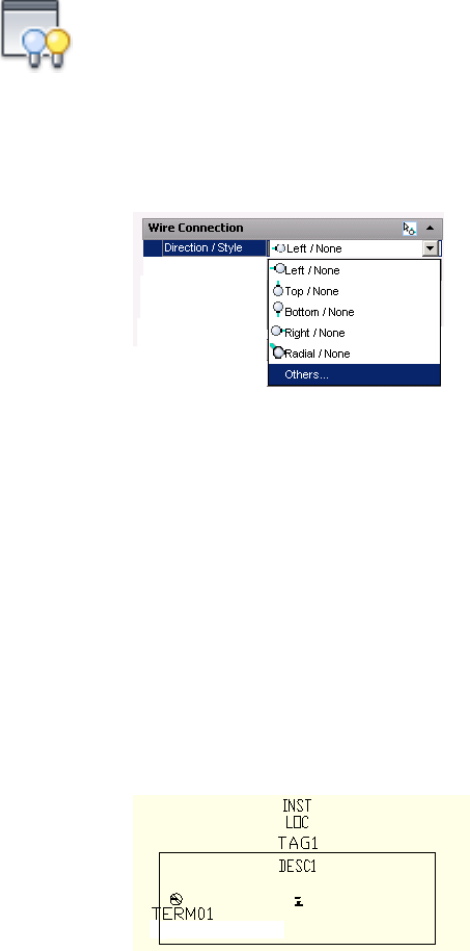
Click Symbol Builder tab ➤ Edit panel ➤ Palette Visibility Toggle.
2Expand the Wire Connection section of the Symbol Builder Attribute
Editor.
3Expand the Direction/Style list and select Others to launch the Insert
Wire Connections dialog box.
4On the Insert Wire Connections dialog box, select Terminal Style: Screw.
5Select Connection Direction: Left.
6Check Use this configuration as default. This directs Symbol Builder to
use the current Terminal Style and Scale as the default in the drop-down
list.
7(Optional) Enter “L1” as the TERM01 value. This sets “L1” as the default
terminal pin number when the symbol is used.
8(Optional) Select TERMDESC01 in the Pin Information section and click
Delete. This directs Symbol Builder not to insert the optional
TERMDESCxx attribute with the wire connection attribute.
9Click Insert and select in the center of the left-hand side of the rectangle
as shown. The wire connection attribute, X4TERM01, and the terminal
pin attribute, TERM01, are inserted.
2086 | Chapter 24 Advanced Productivity
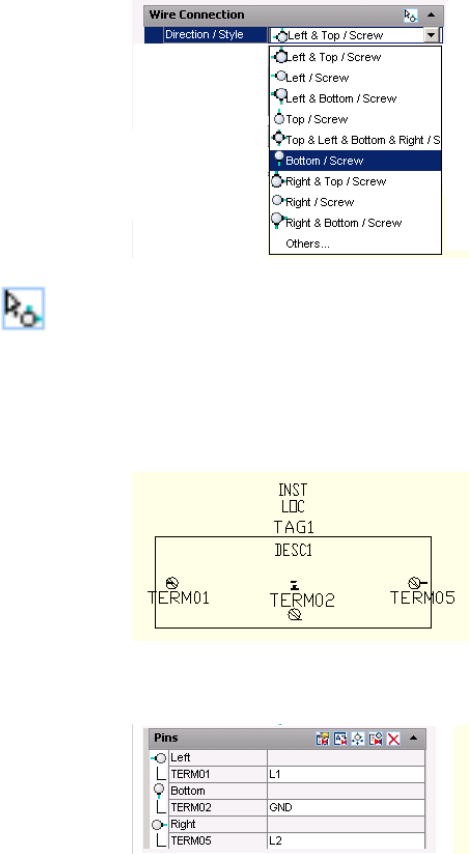
10 Back on the Symbol Builder Attribute Editor, expand the Wire Connection
list and select Bottom/Screw.
11 Select the Insert Wire Connection tool and insert the terminal in
the bottom center of the rectangle.
12 Select Right/Screw from the Wire Connection Direction/Style list.
13 Select the Insert Wire Connection tool and insert the terminal in the
center of the right-hand side of the rectangle.
14 In the Pins section, enter “GND” in the TERM02 value, and “L2” in the
TERM03 value.
Build your own symbols | 2087

Finishing the parent symbol
1Click Symbol Builder tab ➤ Edit panel ➤ Done.
2Click Base Point: Pick point and select the center of the rectangle.
3Select Wblock. Wblock creates the symbol .dwg file, while Block creates
the symbol for this drawing file only.
4Enter the Name and file path or keep the default. AutoCAD Electrical
provides a default name for the new symbol based on the attribute
template selected. Avoid changing the first four letters of the file name
and limit the total length to 32 characters.
5(Optional) If you are going to add the symbol to the icon menu at a later
time using the Icon Menu Wizard on page 1231, check Icon image. Enter
the image name and folder.
6(Optional) Click Details to see the Symbol Audit on page 359 dialog box
listing potential issues with your symbol.
7Select OK.
8Select Close Block Editor from the block editor toolbar.
9(Optional) Select Yes to insert the symbol on the drawing and select a
location. If you place the component on an existing wire, the wire breaks.
The component tag is assigned.
Additional options
The additional options for creating a symbol listed are not used for this
example, but you can use them when creating your own symbol.
■Optional Attributes: The attributes listed in this section are allowed on a
parent symbol. You can also add attributes to the Required or Optional
list using the following steps.
1 Select the Add Attribute tool to launch the Insert/Edit Attributes
dialog box.
2Enter the attribute name as the Tag value.
3Enter all property values.
2088 | Chapter 24 Advanced Productivity

4Click Insert to insert the attribute or OK to add it to the list without
inserting it.
■Link Lines: Inserts Link Line attributes so the program can draw dashed
link lines between a parent symbol and its related child contact. It requires
special attributes at the point where the dashed line connects to the symbol.
1Expand the Link Lines section.
2Select a direction from the Direction list.
3 Select the Insert Link Lines tool.
4Select a location for the Link Line attribute.
■RATING or POS sections: You can add up to 12 Rating and Position
attributes. If the attribute template contains a RATING1 or POS1 attribute,
or you add one, these sections are available on the Symbol Builder Attribute
Editor.
1Expand the RATING or POS section.
2 Select the Add Next tool.
3Pick an insertion point.
■Convert Text to Attribute dialog box: If you selected existing text entities
from the Select Symbol/Objects dialog box, or added text while in the
Block Editor environment, this option converts existing text entities to
AutoCAD Electrical attributes in the same location as the original text.
1 Select the Convert Text to Attribute tool from the Symbol
Builder toolbar to launch the dialog box.
2Select a text entry in the list and click the arrow pointing at the
attribute name.
3Repeat for all text entities.
4Click Done. The text entity is converted to the attribute. The text
value becomes the default value for the attribute.
Build your own symbols | 2089
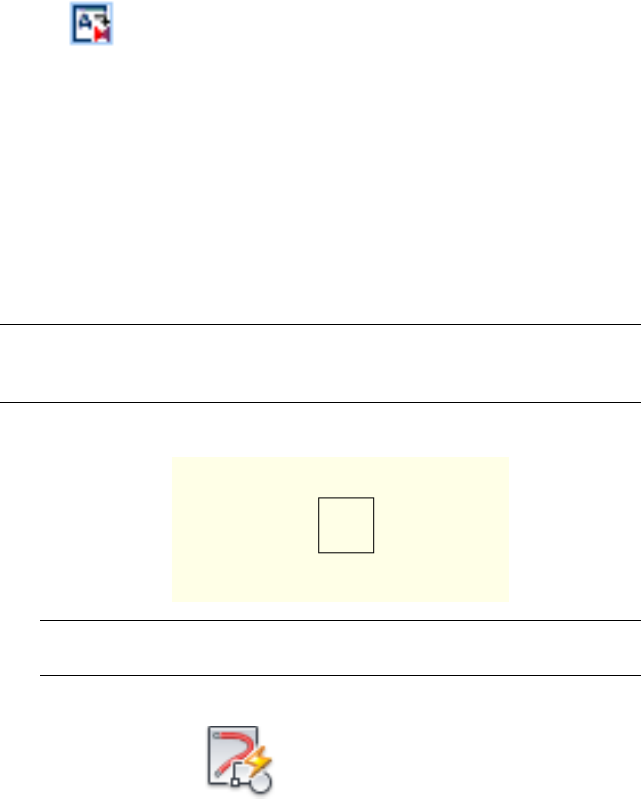
■Convert text: If you selected existing text entities from the Select
Symbol/Objects dialog box, or added text while in the Block Editor
environment, this option converts a single text entity to an AutoCAD
Electrical attribute in the same location as the original text.
1Select an attribute on the Symbol Builder Attribute Editor.
2 Select the Convert Text tool.
3Select the text entity. The text entity is converted to the attribute.
The text value becomes the default value for the attribute.
■Audit Symbol: At any time you can audit on page 359 the symbol to find
any potential issues with your symbol and symbol name.
Create a schematic terminal symbol
In this exercise, you create a schematic terminal using the Symbol Builder
tool.
NOTE If you exit out of the Symbol Builder, restart it, and on the Select
Symbol/Objects dialog box, click Select objects and select any graphics and
attributes you added so far. You can then resume from where you left off.
1In an AutoCAD drawing, draw a rectangle on the drawing.
NOTE You can also create and modify the graphics for the symbol in the
Block Editor environment.
2Click Schematic tab ➤ Other Tools panel ➤ Symbol Builder drop-down
➤ Symbol Builder.
3In the Select Symbol/Objects dialog box, Attribute template section,
browse to the Library path
2090 | Chapter 24 Advanced Productivity
Windows XP: C:\Documents and Settings\All
Users\Documents\Autodesk\Acade {version}\jic125
Windows Vista, Windows 7: C:\Users\Public\Documents\Autodesk\Acade
{version}\jic125
4In the Attribute template section, choose Symbol: Horizontal Terminal.
5In the Attribute template section, choose Type: Terminal with wire
number.
6In the Select from drawing section:, click Select objects and select the
rectangle.
7Select OK.
Add attributes
In this part of the exercise, you insert some AutoCAD Electrical attributes from
the Symbol Builder Attribute Editor. You are not limited to these attributes,
and you can include your own user-defined attributes on the AutoCAD
Electrical block files.
NOTE The TAGSTRIP attribute is the only one required for a schematic terminal.
The other attributes in the Required section are expected on a schematic terminal,
however the symbol is recognized as a schematic terminal without them.
1If the Symbol Builder Attribute Editor is not visible,
Click Symbol Builder tab ➤ Edit panel ➤ Palette Visibility Toggle.
2Select the TAGSTRIP attribute.
3 Select the Properties tool to launch the Insert/Edit Attributes dialog
box.
4Change the height to 0.125 and Justify to Center.
5Select OK.
6 Click the Insert Attribute tool.
Build your own symbols | 2091
7Insert the attribute above the rectangle.
8 Select WIRENO, click the Insert Attribute tool, and insert it above
TAGSTRIP. Use the Properties tool to change it to Justify = Center.
9Select MFG, CAT, and ASSYCODE. Click the Insert Attribute tool, and
insert them near the center of the rectangle.
NOTE If the CAT and ASSYCODE attributes are not listed they are inserted
with MFG as a group.
Add wire connection attributes
You can define wire connection points for the library symbol. When you add
a wire connection, you select the style and the direction the wire connects
from. In this exercise, wire connection attributes are inserted at the left, right,
top, and bottom of the terminal so that it can be inserted in either horizontal
or vertical wires.
1If the Symbol Builder Attribute Editor is not visible,
Click Symbol Builder tab ➤ Edit panel ➤ Palette Visibility Toggle.
2Expand the Wire Connection section of the Symbol Builder Attribute
Editor.
3Select Left/None.
NOTE If the default terminal style is not None, select Others and change the
default style to None. This wire connection style contains attributes only.
2092 | Chapter 24 Advanced Productivity
4 Select the Insert Wire Connection tool and insert the wire
connection in the center of the left-hand side of the rectangle. Use the
Midpoint OSnap to insert the wire connection attribute in the middle of
the line.
5The wire connection insertion remains active until you press Enter. Press
“R{spacebar}” and insert the wire connection in the center of the
right-hand side of the rectangle.
6Press “T{spacebar}” and insert the wire connection in the center of the
top of the rectangle.
7Press “B{spacebar}” and insert the wire connection in the center of the
bottom of the rectangle. Press Enter.
Finishing the terminal symbol
1Click Symbol Builder tab ➤ Edit panel ➤ Done.
2Click Base Point: Pick point and select the center of the rectangle.
3Select Wblock. Wblock creates the symbol .dwg file, while Block creates
the symbol for this drawing file only.
4Enter the Name and file path or keep the default. AutoCAD Electrical
provides a default name for the new symbol based on the attribute
template selected. Avoid changing the first four letters of the file name
and limit the total length to 32 characters.
One-line symbols follow the same naming convention as schematic
parent and child symbols. For convenience the one-line symbols provided
have a “1-” suffix. However, the symbol name does not define the symbol
Build your own symbols | 2093

as a one-line symbol. This is defined by the WDTYPE attribute on page
325 value of “1-” on the symbol, or a “1-1” on a one-line bus-tap symbol.
5(Optional) If you are going to add the symbol to the icon menu at a later
time using the Icon Menu Wizard on page 1231, check Icon image. Enter
the image name and folder.
6(Optional) Click Details to see the Symbol Audit on page 359 dialog box
listing potential issues with your symbol.
7Select OK.
8Select Close Block Editor from the block editor toolbar.
9(Optional) Select Yes to insert the symbol on the drawing and select a
location. If you place the terminal on an existing wire, the wire breaks.
The terminal tag is assigned.
Create a one-line parent symbol
In this exercise, you create a one-line circuit breaker parent using the Symbol
Builder tool.
NOTE If you exit out of the Symbol Builder, restart it, and on the Select
Symbol/Objects dialog box, click Select objects and select any graphics and
attributes you added so far. You can then resume from where you left off.
1In an AutoCAD drawing, draw the symbol graphics.
NOTE You can also create and modify the graphics for the symbol in the
Block Editor environment.
2Click Schematic tab ➤ Other Tools panel ➤ Symbol Builder drop-down
➤ Symbol Builder.
3In the Select Symbol/Objects dialog box, Attribute template section,
browse to the Library path where the one-line symbols are stored:
Windows XP: C:\Documents and Settings\All
Users\Documents\Autodesk\Acade {version}\jic125\1-
Windows Vista, Windows 7: C:\Users\Public\Documents\Autodesk\Acade
{version}\jic125\1-
4In the Attribute template section, choose Symbol: Vertical Parent.
2094 | Chapter 24 Advanced Productivity

5In the Attribute template section, choose Type: (CB) Circuit breakers.
6In the Select from drawing section, click Select objects and select the
graphics.
7Select OK.
Add attributes
In this part of the exercise, you insert some AutoCAD Electrical attributes from
the Symbol Builder Attribute Editor. You are not limited to these attributes,
and you can include your own user-defined attributes on the AutoCAD
Electrical block files.
The TAG1 and WDTYPE attributes are the only required attributes for a one-line
parent symbol. The other attributes in the Required section are expected on
a one-line parent symbol, however the symbol is recognized as a one-line
parent symbol without them.
The WDTYPE on page 325 attribute value must have a value of “1-” for a
one-line symbol or “1-1” for a one-line bus-tap on page 659 symbol.
1If the Symbol Builder Attribute Editor is not visible,
Click Symbol Builder tab ➤ Edit panel ➤ Palette Visibility Toggle.
2Select the TAG1 attribute.
3 Select the Properties tool to launch the Insert/Edit Attributes dialog
box.
4Change the height to 0.125 and Justify to Center.
The value is predefined as “CB” since the Circuit breaker template was
selected. It is the default code used as the %F value of the tag format (such
as “CR” , “PB”, “LT”)
5Select OK.
6 Click the Insert Attribute tool.
7Select an insertion point for the attribute.
Build your own symbols | 2095
NOTE You can also right-click and select Insert Attribute or drag the attribute
to insert it.
8 Select WDTYPE, click the Insert Attribute tool, and insert it.
The WDTYPE attribute has a value of “1-” and is invisible by default. It
is required to identify the symbol as a one-line symbol.
9 Select DESC1, click the Insert Attribute tool, and insert it below
TAG1.
10 Repeat to insert the INST and LOC attributes above TAG1.
11 Select MFG, CAT, and ASSYCODE. Click the Insert Attribute tool, and
insert them near the center of the rectangle.
NOTE If the CAT and ASSYCODE attributes are not listed they are inserted
with MFG as a group.
12 Repeat to insert the FAMILY attribute near the center of the rectangle.
Add wire connection attributes
You can define wire connection points for the library symbol. When you add
a wire connection, you select the style, the direction the wire connects from,
and whether to include the optional TERMxx and TERMDESCxx attributes.
In this exercise, wire connection attributes are inserted at the top and bottom
of the symbol.
1If the Symbol Builder Attribute Editor is not visible,
Click Symbol Builder tab ➤ Edit panel ➤ Palette Visibility Toggle.
2Expand the Wire Connection section of the Symbol Builder Attribute
Editor.
3Expand the Direction/Style list and select Top/None.
2096 | Chapter 24 Advanced Productivity
This style contains just the wire connection attributes with no graphics.
Select Others to display the Insert Wire Connections dialog box for
selecting other styles.
4 Select the Insert Wire Connection tool and insert the wire
connection attributes. The wire connection attribute, X2TERM01, and
the terminal pin attribute, TERM01, are inserted.
5Back on the Symbol Builder Attribute Editor, expand the Wire Connection
list and select Bottom/None.
6 Select the Insert Wire Connection tool and insert the wire
connection attributes. The wire connection attribute, X8TERM02, and
the terminal pin attribute, TERM02, are inserted.
Finishing the one-line parent symbol
1Click Symbol Builder tab ➤ Edit panel ➤ Done.
2Click Base Point: Pick point and select the center of the symbol.
3Select Wblock. Wblock creates the symbol .dwg file, while Block creates
the symbol for this drawing file only.
4Enter the Name and file path or keep the default. AutoCAD Electrical
provides a default name for the new symbol based on the attribute
template selected. Avoid changing the first four letters of the file name
and limit the total length to 32 characters.
NOTE One-line symbols follow the same naming convention as schematic
parent and child symbols. For convenience the one-line symbols provided
have a “1-” suffix. However, the symbol name does not define the symbol
as a one-line symbol.
5(Optional) If you are going to add the symbol to the icon menu at a later
time using the Icon Menu Wizard on page 1231, check Icon image. Enter
the image name and folder.
6(Optional) Click Details to see the Symbol Audit on page 359 dialog box
listing potential issues with your symbol.
Build your own symbols | 2097

7Select OK.
8Select Close Block Editor from the block editor toolbar.
9(Optional) Select Yes to insert the symbol on the drawing and select a
location. If you place the component on an existing wire, the wire breaks.
The component tag is assigned.
See also:
■Create a parent schematic symbol on page 2083
Convert a non-AutoCAD Electrical block
1Click Schematic tab ➤ Other Tools panel ➤ Symbol Builder drop-down
➤ Symbol Builder.
2Browse to the existing block to select the symbol to create or edit.
3In the Select Symbol/Objects dialog box, Attribute template section:
Browse to the Library path for example
Windows XP: C:\Documents and Settings\All
Users\Documents\Autodesk\Acade {version}\jic125
Windows Vista, Windows 7: C:\Users\Public\Documents\Autodesk\Acade
{version}\jic125
4In the Attribute template section: Choose Symbol: Horizontal Parent for
example.
5In the Attribute template section: Choose Type: Generic for example.
6Select OK.
7Convert existing attribute or text objects to AutoCAD Electrical attributes.
8Add wire connections on page 350 as needed.
9Click Symbol Builder tab ➤ Edit panel ➤ Done.
A default symbol name is supplied which you can keep or change as
needed depending on the symbol type and symbol naming conventions
on page 282
2098 | Chapter 24 Advanced Productivity

Converting attribute definition or text objects
If the existing symbol contains attribute or text objects you can convert these
to the expected attributes for the symbol type.
1If the Symbol Builder Attribute Editor is not visible,
Click Symbol Builder tab ➤ Edit panel ➤ Palette Visibility Toggle.
2 Select the Convert Text to Attribute tool to open the dialog box.
All the attributes and text objects contained in your non-AutoCAD
Electrical block are in the left-hand list. The AutoCAD Electrical attribute
names are in the right-hand list.
3Select an existing attribute/text from the left-hand list. Click the arrow
next to the attribute in the right-hand list.
4Repeat for each non-AutoCAD Electrical attribute or text object you want
to convert.
5Select Done.
Create a panel footprint
A panel footprint symbol can be in either of two general forms: a to-scale
physical representation of the device or a generic wiring diagram representation
whose main purpose is to show wire connection annotation information.
The procedure for creating a panel footprint is like that of creating a schematic
symbol with the following differences:
■Panel footprint symbols do not have to carry the wire connection attributes
that schematic symbols almost always carry.
■There are no parent/child versions of a symbol for panel footprint symbols.
■Some of the attribute names are different. A panel symbol must have the
P_TAG1 or P_TAGSTRIP attribute rather than the TAG1 or TAGSTRIP
attribute.
Build your own symbols | 2099

■The symbol block naming for the panel footprint does not follow the
special naming convention. The first four or five characters of the block
name for a panel symbol is not as critical as it is for schematic symbols.
In this example, you take geometry (either geometry you just drew, existing
geometry, or a vendor representation) and convert it to an AutoCAD Electrical
panel footprint using the Symbol Builder.
1Click Schematic tab ➤ Other Tools panel ➤ Symbol Builder drop-down
➤ Symbol Builder.
2In the Select Symbol/Objects dialog box, Attribute template section,
browse to the Library path
Windows XP: C:\Documents and Settings\All
Users\Documents\Autodesk\Acade {version}\jic125
Windows Vista, Windows 7: C:\Users\Public\Documents\Autodesk\Acade
{version}\jic125
3In the Attribute template section, choose Symbol: Panel Footprint.
4In the Attribute template section, choose Type: Generic.
5In the Select from drawing section, click Select objects and select the
existing objects or an existing block.
6Select OK.
2100 | Chapter 24 Advanced Productivity
Add attributes to the symbol
In this part of the exercise, you insert some AutoCAD Electrical attributes from
the Symbol Builder Attribute Editor. You are not limited to these attributes
and you can include your own user-defined attributes on the AutoCAD
Electrical block files.
NOTE The P_TAG1 attribute is the only one required for a panel footprint symbol.
The other attributes in the Required section are expected on a panel footprint,
however the symbol is recognized as a panel footprint without them.
1If the Symbol Builder Attribute Editor is not visible,
Click Symbol Builder tab ➤ Edit panel ➤ Palette Visibility Toggle.
2Select the P_TAG1 attribute.
3 Select the Properties tool to launch the Insert/Edit Attributes dialog
box.
4Change the height to 0.125, Justify to Center, and Visible.
5Select OK.
6 Click the Insert Attribute tool.
7Insert the attribute above the symbol graphics.
NOTE You can also right-click and select Insert Attribute or drag the attribute
to insert it.
8 Select DESC1 and DESC2, click the Insert Attribute tool, and insert
them below the P_TAG1. Use the Properties tool to change them to Height
= 0.125, Justify = Center, and Visible.
Build your own symbols | 2101
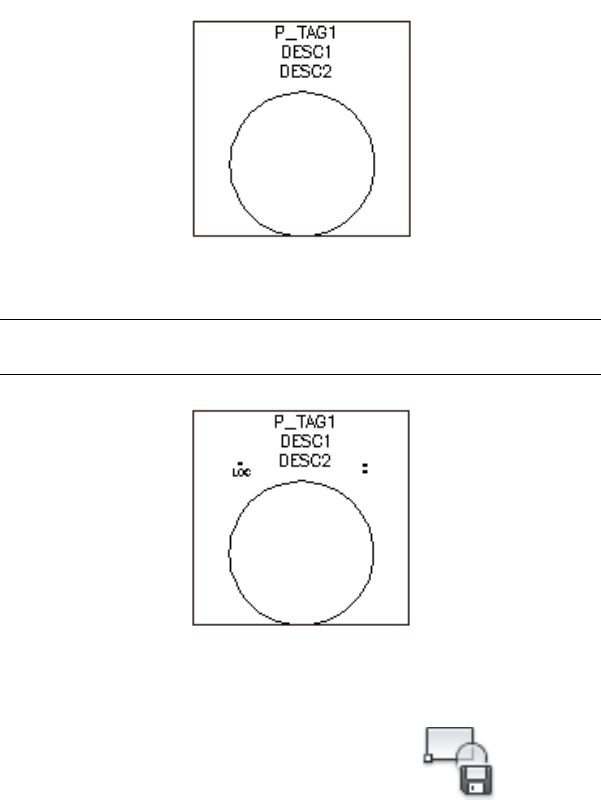
9Insert the LOC, INST, MFG, CAT, and ASSYCODE attributes.
NOTE If the CAT and ASSYCODE attributes are not listed they are inserted
with MFG as a group.
Finishing the panel symbol
1Click Symbol Builder tab ➤ Edit panel ➤ Done.
2Click Base Point: Pick point and select the insertion point for the graphics.
3Select Wblock. Wblock creates the symbol .dwg file, while Block creates
the symbol for this drawing file only.
4Enter the Name and file path or keep the default. AutoCAD Electrical
provides a default name for the new symbol based on the attribute
template selected.
2102 | Chapter 24 Advanced Productivity

5(Optional) If you are going to add the symbol to the icon menu at a later
time using the Icon Menu Wizard on page 1231, check Icon image. Enter
the image name and folder.
6(Optional) Click Details to see the Symbol Audit on page 359 dialog box
listing potential issues with your symbol.
7Select OK.
8Select Close Block Editor from the block editor toolbar.
9(Optional) Select Yes to insert the symbol on the drawing and select a
location.
Additional Options
The additional options for creating a symbol listed are not used for this
example, but you can use them when creating your own symbol.
■Optional Attributes: The attributes listed in this section are allowed on a
panel footprint. You can also add attributes to the Required or Optional
list using the following steps.
1 Select the Add Attribute tool to launch the Insert/Edit Attributes
dialog box.
2Enter the attribute name as the Tag value.
3Enter all property values.
4Click Insert to insert the attribute or OK to add it to the list without
inserting it.
■RATING section: You can add up to 12 Rating attributes. If the attribute
template contains a RATING1 attribute, or you add one, this section is
available on the Symbol Builder Attribute Editor.
1Expand the RATING section.
2 Select the Add Next tool.
3Pick an insertion point.
■Convert Text to Attribute dialog box: If you selected existing text entities
from the Select Symbol/Objects dialog box, or added text while in the
Build your own symbols | 2103

Block Editor environment, this option converts existing text entities to
AutoCAD Electrical attributes in the same location as the original text.
1 Select the Convert Text to Attribute tool from the Symbol
Builder toolbar to launch the dialog box.
2Select a text entry in the list and click the arrow pointing at the
attribute name.
3Repeat for all text entities.
4Click Done. The text entity is converted to the attribute. The text
value becomes the default value for the attribute.
■Convert text: If you selected existing text entities from the Select
Symbol/Objects dialog box, or added text while in the Block Editor
environment, this option converts a single text entity to an AutoCAD
Electrical attribute in the same location as the original text.
1Select an attribute on the Symbol Builder Attribute Editor.
2 Select the Convert Text tool.
3Select the text entity. The text entity is converted to the attribute.
The text value becomes the default value for the attribute.
■Audit Symbol: At any time you can audit on page 359 the symbol to find
any potential issues with your symbol.
Adding attributes using templates
An alternative to using the Symbol Builder to add attributes to the panel
footprint, is to use an attribute template to add attributes automatically. You
can have certain attributes added to any footprint automatically at footprint
insertion time. The templates are located
■Windows XP: C:\Documents and Settings\All
Users\Documents\Autodesk\Acade {version}\Libs\panel\
■Windows Vista, Windows 7: C:\Users\Public\Documents\Autodesk\Acade
{version}\Libs\panel\
2104 | Chapter 24 Advanced Productivity
You can set up to have visible attributes added to any footprint automatically
at footprint insertion time. There are five attribute template drawings:
component footprintswd_ptag_addattr_comp.dwg
terminal with terminal numberwd_ptag_addattr_trm.dwg
terminal with wire number as terminal numberwd_ptag_addattr_wtrm.dwg
balloonswd_ptag_addattr_itemballoon.dwg
terminal footprints (when inserted by Level/Sequen-
cing tools)
Wd_ptag_addattr_pnltermstrip.dwg
When a panel footprint is inserted, the following steps are performed if the
appropriate attribute template exists.
1Find the center of the footprint by collecting and averaging the objects
that make up the footprint.
2Insert the attribute template at the calculated center of the footprint.
3Make sure there are no duplicate attributes. If duplicate attributes are
found, the attribute from the footprint is kept.
4Re-block the added attributes with the inserted footprint.
5Add the schematic data to the footprint. The data is added as attribute
data if the target attribute exists. If the target attribute does not exist, the
data is added as invisible xdata.
Create a Symbol Builder attribute template
Symbol Builder provides some family attribute templates. Each template
contains the required and optional attributes for a certain type of symbol.
Based on the options selected on the Select Symbol/Objects dialog box in
Symbol Builder, an attribute template is used. The attributes on the template
are listed in the Symbol Builder Attribute Editor making it easy to insert them
on your symbol.
AutoCAD Electrical does not provide an attribute template for every type of
symbol. Consider creating your own if you expect to create a number of new
symbols. There are three basic steps to creating a Symbol Builder attribute
template.
Build your own symbols | 2105

NOTE Wire connection attributes are not included in the symbol attribute
templates but are in separate wire connection templates on page 2107.
1Create a drawing file following the naming convention
“AT_{symbol}_{type}.dwg” containing the AutoCAD Electrical attribute
definitions.
2(Optional) Add the xdata and indexed attributes which tell the Symbol
Builder Attribute Editor how to handle each attribute.
3(Optional) Add the symbol type to the “_FAMILY_DESCRIPTION” table
in the catalog database file.
Attribute template naming convention
Attribute templates follow the naming convention, AT_{symbol}_{type}. The
{symbol} and {type} values appear in the lists on the Select Symbol / Objects
on page 342 dialog box. The selections from these lists direct Symbol Builder
to the appropriate attribute template.
The {symbol} value appears in the Symbol list in the Select Symbol/Objects
dialog box. Certain codes are recognized by Symbol Builder, such as “HP” for
“Horizontal Parent”. You can use an existing recognized code or use the full
text, such as “AT_Horizontal Parent_{type}.dwg”.
The {type} value appears in the Type list in the Select Symbol/Objects dialog
box. You can also map abbreviations for the {type} in the
_FAMILY_DESCRIPTION table of the catalog database, default_cat.mdb.
Indexed attributes and xdata
An attribute template can contain an attribute definition that can be indexed.
For example, AutoCAD Electrical allows up to 12 Rating attributes. If the
attribute template contains an attribute “RATING(x)” this attribute can be
indexed in Symbol Builder.
Certain optional xdata directs the attribute display in the Symbol Builder
Attribute Editor. Use the Xdata Editor on page 1694 to add or modify the xdata
on an attribute definition.
Possible values "Required" or "Optional". The default value is “Re-
quired” if the xdata is not present.
VIA_WD_GROUP
The value provides an attribute description inside the Symbol Builder
Attribute Editor.
VIA_WD_TOOLTIP
2106 | Chapter 24 Advanced Productivity

The value defines a group of attributes to insert together. The value
lists all the attributes which are inserted along with the attribute with
VIA_WD_MULTIATT
this xdata. The attributes listed are not displayed in the Symbol
Builder Attribute Editor. For example, if you want DESC2 and DESC3
inserted when you insert DESC1, add this xdata with the value
“DESC2,DESC3” to the DESC1 attribute definition.
NOTE MFG, CAT, and ASSYCODE are a default group. To insert them
separately, add this xdata to the MFG attribute with a blank value.
The value provides the maximum number of times to index an attrib-
ute such as “RATING”. The default value is “12” if the xdata is not
present.
VIA_WD_INDXMAX
The value provides the display order.VIA_WD_SEQ
Symbol type
Edit the “_FAMILY_DESCRIPTION” table in the catalog database,
default_cat.mdb, to map the symbol name type value to a description. This
description is used in the Type list on the Select Symbol / Objects on page 342
dialog box. For example, if the attribute template name is “AT_HP_PS.DWG”
but you want “Power Supply” shown in the list on the dialog box, add an
entry with “PS” in the Family column, and “Power Supply” in the Description.
Creating a custom wire connection style
Symbol Builder inserts a wire connection template drawing when adding a
wire connection to your symbol. The list of wire connection styles is built
dynamically based on the template drawings found in the symbol library path.
The wire connection template name indicates that it is a wire connection
template, the wire connection type, and direction.
AutoCAD Electrical comes with some schematic wire connection styles. If
additional styles are needed, create the wire connection templates for a new
style. To create a complete style, create a wire connection template for each
wire direction. To add a new schematic style, create the following wire
connection template drawings.
■BB?11.dwg
■BB?12.dwg
■BB?13.dwg
Build your own symbols | 2107
■BB?21.dwg
■BB?22.dwg
■BB?23.dwg
■BB?31.dwg
■BB?32.dwg
■BB?33.dwg
The “?” is replaced with the next available digit. AutoCAD Electrical allows
up to ten styles using the digits 0-9. You can create them using new drawings
or by copying a set of existing wire connection template drawings to the
appropriate names and modifying as needed.
Starting a wire connection template from a new drawing
1Start a blank new drawing.
2Draw the graphics for the wire connection.
3Use the AutoCAD ATTDEF command to add the wire connection attribute
definition. The insertion point of the attribute definition is the location
AutoCAD Electrical uses to connect the wire. The wire connection attribute
tag is X?TERM01. The "?" character position is used to identify the
preferred wire connection direction:
■1: wire connects to the attribute from the right
■2: wire connects to the attribute from above
■4: wire connects to the attribute from the left
■8: wire connects to the attribute from below
■0: special for motor connections that radiate from a circle
4(Optional) Add the TERM01 attribute definition.
5(Optional) Add the TERMDESC01 attribute definition.
6(Optional) Add a custom drawing property to define the style description.
This value is the text displayed in the terminal style list in Insert Wire
Connections dialog box.
■Select File ➤ Drawing Properties.
■Select the Custom tab.
2108 | Chapter 24 Advanced Productivity
■Select Add.
■Enter “Terminal style” for the custom property name.
■Enter the style description for the value.
■Select OK to save the drawing property.
7Save the drawing to the appropriate library folder following the wire
connection template naming convention.
Wire connection template naming convention
■First two characters are “BB”.
■Optional characters which indicate the symbol type for this wire
connection.
Parent or child schematic symbolBlank
Panel footprint or nameplatePTWN
Schematic terminal with terminal numberSTTN
Schematic terminal following the wire numberSTWN
Panel terminalPTWN_NOTERM
■One or two characters indicating the terminal style. It is a single number,
0 through 9, for schematic symbols. For a panel symbol, the single number
is followed by an underscore.
■Last two characters are digits that indicate the wire direction.
Radial, wire connects from an angle00
Left and top11
Left12
Left and bottom13
Top21
Top, left, bottom, and right22
Bottom23
Build your own symbols | 2109

Right and top31
Right32
Right and bottom33
Supplied wire connection templates
Attributes in the templateTerminal StyleSymbol TypeTemplate Name
X?TERMn, TERMnNoneSchematic parent or
child
BB012, BB021, BB023,
BB032
X0TERMnNoneSchematic parent or
child
BB000
X?TERMn, TERMnScrewSchematic parent or
child
BB111 to B133
X?TERMn, TERMnSmall ScrewSchematic parent or
child
BB211 to BB233
X?TERMn, TERMnCircle, number
inside
Schematic parent or
child
BB311 to BB333
X?TERMn, TERMnSquare, number
inside
Schematic parent or
child
BB411 to BB433
X?TERMn, TERMn, DESCA01,
DESCB01, TAGA01
Fixed PLCSchematic parent or
child
BB511 to BB533
X?TERM01, TERM01NoneSchematic terminal
with terminal number
BBSTTN012,
BBSTTN021,
BBSTTN023,
BBSTTN032
X?TERM01NoneSchematic terminal
following wire number
BBSTWN012,
BBSTWN021,
BBSTWN023,
BBSTWN032
X?TERMn, TERMn, TERMDESCn,
WIRENOn
One wire numberPanel footprintBBPTWN0_12,
BBPTWN0_21,
2110 | Chapter 24 Advanced Productivity

Attributes in the templateTerminal StyleSymbol TypeTemplate Name
BBPTWN0_23,
BBPTWN0_32
X?TERMn, TERMn, TERMDESCn,
WIRENOn
One wire numberPanel footprintBBPTWN1_12,
BBPTWN1_21,
BBPTWN1_23,
BBPTWN1_32
X?TERMn, TERMn, TERMDESCn,
WIRENOn, WIRENOnA
Two wire num-
bers
Panel footprintBBPTWN2_12,
BBPTWN2_21,
BBPTWN2_23,
BBPTWN2_32
WIRENOL, WIRENOR, TERM,
TERMDESCL, TERMDESCR
No levelsPanel terminal, no
levels
BBPTWN_NOTERM0_12,
BBPTWN_NOTERM0_21,
BBPTWN_NOTERM0_23,
BBPTWN_NOTERM0_32
WIRENOL, WIRENOR, L01PINL,
L01PINR, TERM
One level termin-
al
Panel terminal, one
level
BBPTWN_NOTERM1_12,
BBPTWN_NOTERM1_21,
BBPTWN_NOTERM1_23,
BBPTWN_NOTERM1_32
WIRENOL, WIRENOR, L01PINL,
L01PINR, TERM, L02WIRENOl,
Two level termin-
al
Panel terminal, two
levels
BBPTWN_NOTERM2_12,
BBPTWN_NOTERM2_21,
L02WIRENOR, L02PINL, L02PINR,
L02TERM
BBPTWN_NOTERM2_23,
BBPTWN_NOTERM2_32
WIRENOL, WIRENOR, L01PINL,
L01PINR, TERM, L02WIRENOl,
Three level ter-
minal
Panel terminal, three
levels
BBPTWN_NOTERM3_12,
BBPTWN_NOTERM3_21,
L02WIRENOR, L02PINL, L02PINR,BBPTWN_NOTERM3_23,
BBPTWN_NOTERM3_32 L02TERM, L03WIRENOL,
L03WIRENOR, L03PINL, L03PINR,
L03TERM
The “?” is replaced with the appropriate wire connection direction number
on page 312 and the “n” is replaced with the two digit sequential number. If
your template contains only one wire connection attribute, always use “01”.
The “01” is replaced with the next available value when the wire connection
template is inserted using Symbol Builder.
Build your own symbols | 2111
Add your own symbols, circuits, and commands
to the icon menu
AutoCAD Electrical supplies two default icon menus: one for schematic symbols
and the other for panel symbols. Each menu is driven by a text file. AutoCAD
Electrical defaults to icon menu ACE_<standard>_MENU.DAT (where
<standard> = JIC, IEC, GB, HYD, JIS, PID, or PNEU) for schematic symbols
and ACE_PANEL_MENU.DAT for panel symbols. These menu files are located
in
■Windows XP: C:\Documents and Settings\{username}\Application
Data\Autodesk\AutoCAD Electrical {version}\{release}\{country
code}\Support\
■Windows Vista, Windows 7:
C:\Users\{username}\AppData\Roaming\Autodesk\AutoCAD Electrical
{version}\{release}\{country code}\Support\
You modify or expand the icon menus by editing the underlying icon menu
text file. You can use a generic text editor and edit it manually or you can use
the AutoCAD Electrical Icon Menu Wizard.
Use the Icon Menu Wizard dialog box to select the function to be performed
when the icon is selected from the icon menu.
■Add component: Inserts a symbol
■Add circuit: Inserts a prebuilt circuit. This causes AutoCAD Electrical to
insert and explode the .dwg name supplied.
■Add new submenu: Starts a new submenu.
■Add command: Performs a command. Use Command for inserting
three-phase schematic symbols and panel footprints.
Add components to the icon menu
The Icon Menu Wizard can be used to add or modify icons for both the
schematic and panel symbol libraries.
1Create an AutoCAD Electrical compatible library symbol. For schematic
symbols, follow the guidelines regarding the symbol ".dwg" file naming
convention on page 282 and required attributes on page 306.
2112 | Chapter 24 Advanced Productivity
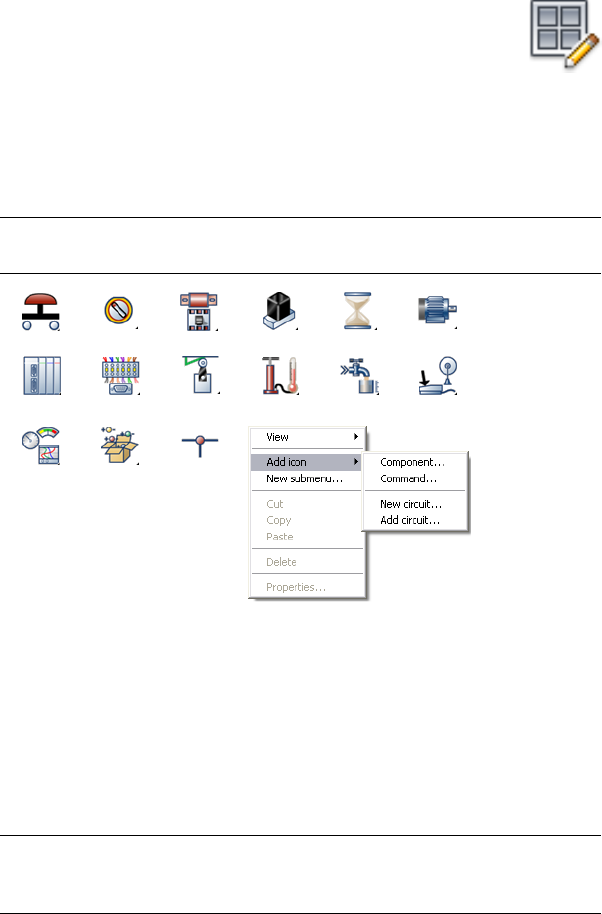
2Click Schematic tab ➤ Other Tools panel ➤ Icon Menu Wizard.
3In the Select Menu File dialog box, select to modify the schematic menu
file, and click OK.
4In the Icon Menu Wizard dialog box, select Add ➤ Component to add
a new icon to the menu.
NOTE You can also right-click in empty space and select Add icon ➤
Component.
Three pieces of information are needed for the new icon button.
5On the Add Icon - Component dialog box, specify the image file name
and graphic to appear in the icon button. The image name can be
manually typed into the edit box. You can browse to an existing .sld or
.png file to assign to the icon, use an image file that matches the active
drawing name, use an image file that matches a picked block on the
drawing, or use an image with the same name as the block name entered
for the block name.
NOTE Browse cannot be used if you are using a slide library (instead of
individual <slide>.sld files). Manually enter these as "library name(slide name)".
For example, "S1(hpb11)."
If you have not created the slide image and want to have it created
automatically from the current screen image, select Create PNG from
current screen image. The Icon Menu Wizard runs the AutoCAD MSLIDE
Add your own symbols, circuits, and commands to the icon menu | 2113
command on your current screen image to create the .png and .sld file.
If the file does not exist, then Create PNG from the current screen image
is selected by default. If you do not want to create the image from the
current drawing's displayed image, switch it off. If you want to redo an
existing image, click this switch on.
6Specify the block name to insert on the icon. The symbol's file name can
be typed into the edit box or you can browse for an existing WBlocked
".dwg" file to assign to the icon, insert the full active drawing as a block,
or select an existing block on the current drawing.
7Click OK.
The new menu button appears in the menu and the text you entered for
the icon label appears in the tooltip or in the list if you set the viewing
option to either Icon with text or List view.
8Select the appropriate Insert Component command and test your new
symbol insert.
Add an icon menu page
You can add new menu pages to the AutoCAD Electrical icon menu, and then
populate them with your own custom symbols. Each new page can have icon
selections that cascade down to other new menu pages. Once you click OK,
your trigger icon and new submenu page are added.
1On the Icon Menu Wizard dialog box, select Add ➤ New submenu to
add a new icon to the menu.
NOTE You can also right-click in empty space and select New Submenu.
2114 | Chapter 24 Advanced Productivity

The Create New Submenu dialog box appears. Here you can select the
function that will be performed when the icon is selected from the icon
menu.
Three pieces of information are needed to trigger the new menu page.
2On the Create New Submenu dialog box, specify the image file name and
.sld or .png graphic to appear in the icon button. The image name can
be manually typed into the edit box. You can browse to an existing .sld
or .png file to assign to the icon, use an image file that matches the active
drawing name, use an image file that matches a picked block on the
drawing, or use an image file with the same name as the block name
entered for the block name.
NOTE Browse cannot be used if you are using a slide library (instead of
individual <slide>.sld files). Manually enter these as "library name(slide name)".
3Specify the submenu's title.
4Click OK.
5Select the appropriate Insert Component command and test your new
symbol insert.
Add an icon to trigger a command
An icon can be configured to trigger an AutoCAD command, trigger an
AutoCAD Electrical command, or run a program. For example, "Rectangle"
can be typed into the edit box so that every time you click the box, it runs
the AutoCAD Rectangle command.
1On the Icon Menu Wizard dialog box, click Add ➤ Command.
NOTE You can also right-click in empty space and select Add icon ➤
Command.
2On the Add Icon - Command dialog box, specify the name to appear on
the icon and the image file to use on the icon button.
3Specify the command to execute when the icon button is selected.
Click List to select from a list of AutoCAD Electrical Commands for Panel
and Schematic multi-pole symbol inserts. This makes it easier for you to
build the appropriate command to insert a multi-pole symbol or a panel
symbol. To see the command line parameters for a specific AutoCAD
Electrical command, select the command in the list and the parameters
Add your own symbols, circuits, and commands to the icon menu | 2115

display at the right. If quotation marks are shown, then enclose the
parameter value within quotation marks.
NOTE If you select an API command that requires parameters you must
manually enter the additional parameters as indicated. Commands that require
parameters should be inside of parenthesis. If you use one of the AutoCAD
commands from the list, no parenthesis are needed. For example, to add an
icon that inserts a black flush push button, Allen-Bradley, catalog number
800T-A2A, with no rotation, select the command WD_INFP from the list.
When you return to the Command dialog box, you must enter in the rest of
the parameters.
■"family" is used for the catalog file lookup table name
■"mfg" is used for the footprint lookup
■"cat" is the actual catalog number
■"assycode" is the catalog number assembly code (often blank)
■"footprint" is the library symbol name
WD_INFP "PB11" "AB" "800T-A2A" "" "AB/ABPB3"
4Click OK.
Add circuits to the icon menu
Add Circuit is the same as Insert Command except that the block file is made
up of more than one AutoCAD Electrical block definitions and related wire
lines.
1On the Icon Menu Wizard dialog box, click Add ➤ Add circuit.
NOTE You can also right-click in empty space and select Add icon ➤ Add
circuit.
Three pieces of information are needed for the new icon button.
2On the Add Existing Circuit dialog box, specify the image file name and
.sld or .png graphic to appear in the icon button. The image name can
be manually typed into the edit box. You can browse to an existing .sld
or .png file to assign to the icon, use an image file that matches the active
drawing name, use an image file that matches a picked block on the
drawing, or use an image file with the same name as the block name
entered for the block name.
2116 | Chapter 24 Advanced Productivity

NOTE Browse cannot be used if you are using a slide library (instead of
individual <slide>.sld files). Manually enter these as "library name(slide name)".
3Specify the circuit name to insert on the icon. The symbol's file name
can be typed into the edit box or you can browse for an existing WBlocked
".dwg" file to assign to the icon or insert the full active drawing as a block.
4Click OK.
The new menu button appears in the menu.
5Select the appropriate Insert Component command and test your new
symbol insert.
Change the icon's image
There are times when you might want to change the image associated with
an icon menu choice. The AutoCAD Electrical Icon Menu Wizard provides a
quick, easy way to reassign or reshoot a slide image. Slides can be saved as
individual files in the AutoCAD Electrical search path or they can be
maintained inside of a library of slide files called the slide library.
NOTE If you make custom slides or slide libraries for the menu, copy them to the
same subdirectory as the menu file since AutoCAD Electrical looks for menu slides
in the active icon menu file's directory.
1On the Icon Menu Wizard dialog box, right-click an icon button to edit
and select Properties.
2On the Properties dialog box, specify the image file name and .sld or .png
graphic to appear in the icon button. The image name can be manually
typed into the edit box. You can browse to an existing .sld or .png file to
assign to the icon, use an image file that matches the active drawing
name, use an image file that matches a picked block on the drawing, or
use an image file with the same name as the block name entered for the
block name.
If you have not created the .png image and want to have it created
automatically from the current screen image, select Create PNG from
current screen image. The Icon Menu Wizard runs the AutoCAD MSLIDE
command on your current screen image to create the .png and .sld file.
If the file does not exist, then Create PNG from current screen image is
selected by default. If you do not want to create the image from the
current drawing's displayed image, switch it off. If you want to redo an
existing image, click this switch on.
Add your own symbols, circuits, and commands to the icon menu | 2117

NOTE Browse cannot be used if you are using a slide library (instead of
individual <slide>.sld files). Manually enter these as "library name(slide name)".
3Click OK.
The new menu button appears in the menu.
4Select the appropriate Insert Component command and test your new
symbol insert.
Edit the DAT file with a text editor
There may be times when you want to bypass the Icon Menu Wizard and edit
the menu DAT file directly. It is important to maintain the menu file structure,
otherwise your menu may not activate properly. An AutoCAD Electrical menu
".dat" file is a text file that can be viewed and edited with any text editor (ex:
WordPad or Notepad). See Overview of the icon menu file on page 1260.
Best practices for icon menu changes
We recommend that you create your own icon menu and leave the AutoCAD
Electrical icon menu intact. This provides you with easier migration when
upgrading to the next version of AutoCAD Electrical. You can set up the
AutoCAD Electrical icon menu system so that you can flip back and forth
between the default ACE_<standard>_MENU.DAT (such as
ACE_JIC_MENU.DAT) and your own "my_menu.dat."
1Copy the standard menu into a new file name instead of creating the file
from scratch. Open the new DAT file with a text editor and remove
everything except for the top portion of the file (shown below).
**M0
D0
JIC: Schematic Symbols
NOTE The line “D0” is only needed if the menu must be compatible with
AutoCAD Electrical versions prior to 2008.
Rename the title line to indicate that this is your very own personal menu
file.
2Add a line like the following in the ACE_<standard>_MENU.DAT file.
My schematic menu|mymenu.sld|$C=(c:wd_loadmenu
"my_menu.dat")(c:wd_insym_go2menu 0)
2118 | Chapter 24 Advanced Productivity

NOTE Make sure this text is all on one line.
3In your new "my_menu.dat" file, add a line like the following one so that
you can jump back to the default AutoCAD Electrical icon menu.
Default AutoCAD Electrical menu|back2wd.sld|$C=(c:wd_loadmenu
"ACE_JIC_MENU.DAT")(c:wd_insym_go2menu 0)
The result should be:
**M0
D0
My Menu: My Companies Symbols
AutoCAD Electrical menu|back2wd.sld|$C=(c:wd_loadmenu
"ACE_JIC_MENU.DAT")(c:wd_insym_go2menu 0)
4In the AutoCAD Electrical default icon menu, click the new "My menu"
entry.
Your menu should immediately appear and remains the default for
subsequent component inserts. If you want to go back to the AutoCAD
Electrical default menu, click the "AutoCAD Electrical menu" button you
added to your custom menu. AutoCAD Electrical flips back to the default
icon menu and it now remains the default for subsequent inserts.
Configure projects for various drawing standards
AutoCAD Electrical has multiple configuration options so that you can
configure your drawings in a manner that fits your needs. You can configure
drawings for IEC standard or automatically override family tag codes.
Configure for IEC standard
Below is a list of configuration options (both project properties and
drawing-specific properties) that are most commonly used when dealing with
the IEC drawing standard and a description of each.
Project Properties
Project Properties are configured by right-clicking on the project name in the
Project Manager and selecting Properties. The options configured here are
project-wide options, such as the paths to symbol libraries, or drawing default
options for new drawings that are created in the selected project. The drawing
Configure projects for various drawing standards | 2119
options defined in the Project Properties dialog box can also be applied to any
drawing in the project if needed.
Project Settings Tab
AutoCAD Electrical contains two specific IEC-type
symbols, IEC2 and IEC4. The main difference
Schematic Libraries
between these libraries is the size of the text associ-
ated with them.
■IEC2 symbols have a text size of 2.5 for the
main text items such as Component Tag, Install-
ation, Location, Component Description, and
so on.
■IEC4 symbols have a text size of 3.5 for the
Component Tag and a text size of 2.7 for Install-
ation, Location, Component Description, and
so on.
AutoCAD Electrical contains one IEC-specific icon
menu file: ACE_IEC_MENU.DAT.
Schematic Icon Menu File
Components Tab
In IEC you may want your components to be
tagged with “Sheet Number, Family Code,” fol-
Component TAG Format
lowed by a number that is either sequential or ref-
erence-based. To do this, in the Tag Format edit
box, enter: “%S%F%N” where %S = the sheet
number, %F = the family code defined for the
component being inserted and %N = the number-
ing scheme for the active drawing (either sequential
or reference-based).
For sequential numbering, you can enter a starting
number to use as a starting component number.
For reference-based numbering, you can use one
of the following numbering formats:
■X-Y Grid
■X Zones
■Reference Number
2120 | Chapter 24 Advanced Productivity

Components Tab
Defines most of the specific tagging options to
conform to the IEC tagging mode. Select the option
that best fits your needs:
Component TAG Options
■Combined Installation/Location Tag Mode:
Uses the combined installation/location tag for
interpreting component tag names. For ex-
ample, 100CR relay contact marked with loca-
tion code PNL1 is interpreted as being associ-
ated with a different relay coil than relay con-
tact -100CR marked with location code PNL2.
If this setting is not selected, both contacts are
associated with the same parent relay coil, -
100CR.
By selecting this option, your compon-
ent tags are automatically prefixed with
the =, +, and - where applicable.
■Suppress dash when first character of tag:
Suppresses any single dash character prefix in
an IEC tag that does not have a leading Install-
ation/Location prefix (for example, "-K101"
dash is suppressed to "K101" but "+LOC1-K101"
remains unchanged).
When switched OFF, it automatically
adds a single dash character to an IEC
tag that does not already have a single
leading dash prefix and does not have
a leading Installation/Location prefix.
For example, tag "K101" becomes "-
K101" but "+LOC1-K101" remains un-
changed.
NOTE This suppression takes place auto-
matically in reports; and takes place
graphically only when a component is in-
serted, edited, or retagged.
■Format Installation/Location into tag: Specifies
to exclude the Installation and Location code
values as part of the tag when displaying. For
example, if this is not on, a tag might show up
Configure projects for various drawing standards | 2121

Components Tab
as K16 in the Surf dialog box. But if selected,
the tag might show up +AAA-K16 (where AAA
is the location).
■Suppress Installation/Location in tag when
match drawing default: Suppresses Location
and Installation values on components if they
match the drawing default values.
■Suppress Installation/Location in tag on reports:
Specifies to exclude Installation and Location
values as part of the tag when displayed in re-
ports.
■Upon insert: automatic fill Installation/Location
with drawing default or last used: Fills the In-
stallation and Location edit boxes on the In-
sert/Edit component dialog box and the attrib-
utes on the block with drawing default or last
used values (if no drawing default).If not selec-
ted, these edit boxes and attributes are not
filled in and are assumed.
Cross-reference Tab
In IEC, you may want to configure your cross-refer-
encing text to display the “Sheet Number - Refer-
Cross-reference Format
ence Number.” To do this, in the Same Drawing
edit box, enter “%S-%N” (or click the %S-%N
button). You can also define the format of the cross-
referencing text that references other drawings in
the Between Drawings edit box.
Select this if you want to suppress IEC prefixes.Suppress Installation/Location codes when
matching the drawing defaults NOTE You must run the Component Cross-refer-
ence command to update any existing cross-refer-
encing text.
In IEC, it is common to display a representation of
the type of child component (Normally Open,
Component Cross-reference Display
Normally Closed or Form-C contact) in either a
graphical or table format. If you select the graphical
2122 | Chapter 24 Advanced Productivity

Cross-reference Tab
(nontable) format, you can define details of the
graphical format by clicking Setup.
Styles Tab
In IEC, it is sometimes preferable to display wire
connections as tee markers instead of connection
Wire Style
dots. To do this, in the Wire Tee section, select the
appropriate angle tee marker from the list.
Drawing Format Tab
In IEC, the most common ladder orientation is Ho-
rizontal. In the Ladder Defaults section, configure
how to display your horizontal ladders.
Ladder Defaults
Defines the type of referencing that is used to re-
place the %N value for component tag and wire
Format Referencing
number formats. In IEC, the most commonly used
format is X Zones.
NOTE If you want AutoCAD Electrical to place the
labels for the X-Y Grid or X Zones referencing style,
use the appropriate command from the Insert
Ladder toolbar.
■X-Y Grid: All referencing is tied to an X-Y grid
system of numbers and letters along the left-
hand side and top of the drawing.Set your
drawing's vertical and horizontal index numbers
and letters, spacing, and origin in the X-Y grid
setup dialog box.
TIP Use negative spacing values for Hori-
zontal or Vertical if you want to change
the X-Y grid system's origin to be other
than the upper left-hand corner of the
drawing
■X Zones: Similar to X-Y Grid, but there is not a
Y-axis. Set your drawing's horizontal labels,
Configure projects for various drawing standards | 2123

Drawing Format Tab
spacing, and origin on the X Zones setup dialog
box.
TIP Use negative zone spacing value if
you want the zone reference origin to be
at the right side of the drawing.
Scale for IEC drawings is normally set to mm full
size.
Scale
Drawing Properties
Drawing Properties are configured by either right-clicking on the drawing
name in the Project Manager and selecting Properties ➤ Drawing Properties,
or by selecting Properties ➤ Drawing Properties. The options configured here
are only applied to the drawing that they were configured on.
NOTE Options that are duplicated on the Drawing Properties and Project Properties
dialog boxes are not described in this section.
Drawing Settings Tab
Defines Installation and Location codes that are
used for drawing defaults when placing compon-
IEC-Style Designators
ents on the drawing and no override Installation or
Location values are given on the specific compon-
ent. These values are used when the Combined In-
stallation/Location tag mode option is selected
(described previously in Project Properties section).
Automatically override family tag codes
A component’s family name can be overridden at insertion time, during a
later edit, or automatically using the wd_fam.dat mapping file. The wd_fam.dat
file overrides the family tag code of library symbols by mapping the codes to
new values. The tag code of a symbol is used in generating the tag-ID of
inserted components, such as the “PB” of tag-ID “PB101.”
AutoCAD Electrical searches for this mapping file in the following order:
1User subdirectory
2124 | Chapter 24 Advanced Productivity
Windows XP: C:\Documents and Settings\{username}\Application
Data\Autodesk\AutoCAD Electrical {version}\{release}\{country
code}\Support\User\
Windows Vista, Windows 7:
C:\Users\{username}\AppData\Roaming\Autodesk\AutoCAD Electrical
{version}\{release}\{country code}\Support\User\
2Active project's .wdp file subdirectory
3All paths defined under AutoCAD Options ➤ Files ➤ Support Files
Search Path
Depending on how you want to override component family names, you can
move the wd_fam.dat file into the various locations mentioned above.
■To always substitute a new family value for all projects you create, place
the file in the User folder. (option 1)
■To use AutoCAD Electrical defaults most of the time but sometimes override
them with project-specific defaults, place the file in the project folders for
the project you want to override. You can have different defaults for each
project. (option 2)
■If you want a default override from the AutoCAD Electrical default values,
but sometimes want a project override to the global override, you will want
to use option 3 and 2. Place the file somewhere in the AutoCAD support
path, like “C:\Program Files\Autodesk\Acade 200x\Acade,” and then
when you want to override these values, place the file in the project folder.
Switch JIC and IEC standards
You can have projects that require working in the JIC standard and other
projects that require the IEC standard. To switch from one standard to another
change:
■Schematic library folders
■Schematic icon menu
■Component tagging options
The library folders and icon menu are project settings. The component tagging
options are on a per-drawing basis and must be applied to each drawing.
Configure projects for various drawing standards | 2125

Project settings
1Click Project tab ➤ Project Tools panel ➤ Manager.
2Right-click on the project name in Project Manager.
3Select Properties.
4Select the Project Settings tab.
5Expand the Schematic Libraries section.
6Remove any folder names you no longer want and add any that you
need. For example, remove the JIC folder and add the IEC library folder.
NOTE AutoCAD Electrical searches for a symbol in the order the folders are
listed.
7Expand the Schematic Icon Menu File section.
8Remove the menu you do not want and add the menu you need. For
example, remove the ACE_JIC_MENU.DAT file and add the
ACE_IEC_MENU.DAT file.
9Click OK.
Drawing settings - change as a project setting
Component tagging options can be changed as a project setting and applied
to a group of drawings.
1Click Project tab ➤ Project Tools panel ➤ Manager.
2Right-click on the project name in Project Manager.
3Select Properties.
4Select the Components tab.
5In the Component TAG Options section, check the Combined
Installation/Location tag mode option for IEC tagging, uncheck it for JIC
tagging.
If using IEC tagging, set any of the other tagging options.
2126 | Chapter 24 Advanced Productivity
6Highlight all the drawings in Project Manager you wish to apply the
project settings to.
7Right-click and select Properties ➤ Apply Project Defaults.
NOTE When the project settings are applied to a drawing, all settings are applied,
not specific ones.
Drawing settings - change a single drawing
Component tagging options can be changed on a per-drawing basis.
1Click Project tab ➤ Project Tools panel ➤ Manager.
2Highlight the drawing in Project Manager that you wish to change.
3Right-click and select Properties ➤ Drawing Properties.
4Select the Components tab.
5In the Component TAG Options section, check the Combined
Installation/Location tag mode option for IEC tagging, uncheck it for JIC
tagging.
If using IEC tagging, set any of the other tagging options.
6Click OK.
NOTE You can change the component tagging options on the active drawing by
selecting Drawing Properties.
See also:
■Configure for IEC standard on page 2119
Use Autodesk Vault with AutoCAD Electrical
Autodesk Vault allows you to keep a history of your design changes. You can
review how your designs have progressed and rollback to a previous version
if necessary. Vault also acts as a central shared secured repository of drawings
Use Autodesk Vault with AutoCAD Electrical | 2127

and data with the ability to search for required information across multiple
drawings and projects.
The AutoCAD Vault add-in works within AutoCAD Electrical, adding data
management tools to the interface. Through the AutoCAD Vault add-in, you
can add files to a vault, and check files in and out. The add-in works with
both DWG and image files. In AutoCAD Electrical, you work on one project
at a time. The project file (.wdp) lists all the drawings that are part of a project.
When you make a change in one drawing, all files related to that drawing
automatically update.
Perform vault tasks with the Project Manager
When working with AutoCAD Electrical and Autodesk Vault, you check out
projects or individual drawings from a vault location to edit. You can perform
all vault tasks within the Project Manager when you are logged into the vault.
You can also manage the relationships between a project file and its dependents
in the vault, while standard project management operations continue to be
available.
NOTE Access to vault folders depends upon the permissions you are granted. You
cannot see files or folders that you do not have permissions for viewing.
AutoCAD Vault ARX adds vault features to the Project Manager once logged
into the Vault. The vault commands are available by right-clicking on a project
or drawing within the AutoCAD Electrical Project Manager. You can use the
Project Manager to:
■Log in and out of the vault
Upon initial start-up of AutoCAD Electrical, you are not logged into the
vault. You must log into Autodesk Vault to work with projects in the vault.
You can also log into the vault using the File ➤ Vault menu
■Check projects in and out of the vault
The most basic requirement of the vault is that you never work directly
on a file in the vault. You must check out the project to the working folder
on your local drive to edit it. When you finish working on the project, you
must check the project back into the vault.
When a project file and its related drawing files are checked out of a vault,
only the files that are not currently checked out are downloaded. If the
working copy of a file is older than the version in the vault, you are
prompted to replace the working copy. If the working copy is currently
checked out, it is not replaced.
2128 | Chapter 24 Advanced Productivity

TIP If you want others to view updates you made to a project and you want
to continue modifying the project, select the Keep Checked Out option on the
Check In dialog box. This checks in the updates you made to the project and
keeps the project checked out to you.
NOTE You must have all references of a project file downloaded to your
working folder to edit the project file.
■View the status of files in a design
The status icons indicate the status of your local files as compared to the
same files in the vault. You can tell when the local copy is in sync with
the vault and when it is not. The tooltip for each status icon describes the
state of the file and suggests the next logical step. The status of a local file
is updated when it is saved to disk.
NOTE The vault status icons are only available in the list view and only appear
when you are logged into the vault.
Setup for single user vs. multiple users
You can perform vault operations on the entire project or individual drawing
files listed within the project in AutoCAD Electrical. However, in a
multiple-user design environment, you can choose to check out and edit
individual files as they are needed rather than checking out the entire project
at once while still maintaining drawing file dependencies and versions. After
you change the files and check them back into the vault, the associated files
simultaneously update.
Use the Project Manager to perform all vaulting operations. In AutoCAD
Electrical, you can select a file (or multiple files) within a project to:
■Check in (all)
■Check out (all)
■Get latest (all)
Workflow overview
1Start AutoCAD Electrical.
2Log into Vault.
Use Autodesk Vault with AutoCAD Electrical | 2129
3In a single user environment, if you did not set a working folder yet, start
Autodesk Vault Explorer and set a working folder on your local computer
and then switch back to AutoCAD Electrical.
In a multiple-user design environment, set the working folder on a shared
network resource for the entire project team. This allows simultaneous
access for all users on the same dataset and maintains the data consistency.
4Open a project you want to add to the vault.
5Add the opened project to the vault using the Check In or Check In Folder
command.
6Use the Open from Vault or Check Out command to open and check out
the file from the vault.
7To work on more files in the project, check out multiple files to the
working folder using the Check Out All command in the Project Manager.
8When you finish modifying the files, check them back into the vault
using the Check In All command in the Project Manager. All related files
update.
Best practices for vault commands
Below are the suggested workflows for using the most common vault
commands with AutoCAD Electrical.
Open from vault
Use Open from the Vault to access files in the vault for viewing or editing. To
modify a file from the vault, the file must be checked out to you and worked
on from your local drive. You must be logged into the Autodesk Data
Management Server to open and check out a file.
1In the Project Manager, select Open Project from Vault from the project
selection menu.
2In the Select file dialog box, navigate to the project definition file, and
then select it. To maintain the relationship between the drawing files
that are defined in the project file, you must check out all files specified
in a project file when opening a project from Vault.
3Click Open.
Get latest version
2130 | Chapter 24 Advanced Productivity
Get Latest Version retrieves a read-only copy of the most recent design data
that is checked in. You cannot modify it until you check it out using Autodesk
Vault Explorer or the Vault add-in for AutoCAD-based products.
1In the Project Manager, select a file.
2Right-click and select:
■Get Latest Version to get the most recent version of the selected project
file.
■Get Latest Version for All to get the most recent version of the selected
project file and all of the related files.
3In the Get Latest Version dialog box, click OK.
The most recent versions of the selected files are downloaded from the
vault. If the working copy of a file is newer than the most recent version
of the file in the vault, you are prompted to chose either losing changes
made to the current working copy or to not get the latest version of that
file.
4Click Settings to get the parents and children of the selected file.
Get previous version
Get Previous Version retrieves a past version of a file or a project and places
a read-only copy in your working folder. Historical versions can never be
modified. You can only create a new version of a file.
1In the Project Manager, right-click a file or project, and then click Get
Previous Version.
2In the Get Previous Version dialog box, select a version of the file or
project to retrieve.
3If the file has parents and children to get, click Settings, and then specify
which related files are retrieved as well.
4Click OK.
A read-only copy of the file is placed in the local working folder. You can
view the file but you cannot modify it. To modify the file, you must check
it out.
Create a project version
Project versions are controlled by project file (.wdp) versions. The project file
acts as the parent for all drawings in the project and each version of the .wdp
Use Autodesk Vault with AutoCAD Electrical | 2131

is associated to the latest versions of the drawing at that instance. You can
edit individual drawings of a project and create versions of the drawings as
needed. When you want to take a project snapshot (create a project version),
check out the .wdp and check it back in.
Even if the .wdp is not modified, if any drawings have newer versions, a newer
version of the .wdp is created, associating all newer drawing versions.
TIP Use Vault Explorer to examine the relationship between versions of the project
file and corresponding drawings.
Roll back to a previous project version
You can roll back to a previous project version using Vault Explorer, restoring
the project file (.wdp) and all associated drawing and project configuration
files to a previous version.
1Close the project and drawings in AutoCAD Electrical.
2Using Vault Explorer, examine the .wdp file and corresponding drawing
versions.
3Select the desired .wdp file.
4Click Get Previous Version.
Automatically check in drawings
Some operations in AutoCAD Electrical (such as project-wide or reporting
tools) cause Vault to automatically check out all affected drawings. These
drawings can be automatically checked in when modifications are complete.
When asked whether to check the file in, click Yes or Yes to All. If you do not
want to be prompted to check in your drawings since you want the check-in
to happen automatically, in the Options dialog box, select Check In dialog
on auto check in.
When files are checked in, comments are automatically added to help identify
and distinguish between the versions of the files that are automatically created.
You can modify the comments as desired during check-in unless you
suppressed the Check In dialog box.
Shared sandbox guidelines
A shared workspace is a working folder located on a shared server for all users
to access. The shared workspace configuration can be used with:
■Autodesk Vault
2132 | Chapter 24 Advanced Productivity

■Autodesk Vault Explorer
■AutoCAD Vault Add-in
■Microsoft Vault Add-in
You can choose to work in a local or shared working folder according to your
design requirements. A shared working folder is highly recommended for the
AutoCAD Electrical environment, especially in a multi-user situation, because
it enables you and your design team to keep all files up-to-date.
To use a shared workspace, the system administrator should preset a consistent
working folder for all project members to use. Assign the working folder
location to the root level ($) of the vault. A shared working folder cannot be
assigned to a subfolder.
NOTE If Inventor add-in clients will access the same vault, do not enforce a shared
working folder. If Inventor and AutoCAD Electrical are sharing the same vault, the
vault administrator cannot enforce the shared working folder. Each AutoCAD
Electrical user must set the working folder individually to point to a common
network drive.
Rules For Using Shared Working Folders
Using a shared workspace means multiple users may be working on the same
files. All your vault operations are protected as long as you log into the vault
before working on the files. The following guidelines will help prevent you
from overwriting the changes made by someone else, and vice versa.
1Remain logged into the vault at all times. You can use the Vault auto
login option so you are automatically logged into the vault when
AutoCAD Electrical starts.
2If a file is currently checked out to another user, you cannot perform the
following operations:
■Get Latest Version
■Get Previous Version
■Check Out
3You cannot check out a file that is currently opened for read-write by
another user.
4You can still check out a file that is opened for read only by another user.
Use Autodesk Vault with AutoCAD Electrical | 2133
5You can open a file in read only when it is currently checked out to
someone else using the same working folder.
6Ensure that the drawings are checked back into the vault after you finish
working on them so they are available to other users who need to modify
them.
2134 | Chapter 24 Advanced Productivity
AutoCAD Electrical
Command
AutoCAD Electrical Commands
Commands
These topics are called from within the command itself. If you do not find all
the information you need, look further in the Help.
3 Phase Wire Numbers on page 975
Add Attribute on page 875
Add Connector Pins on page 1147
Add/Edit Internal Jumper on page 856
Add/Edit Power Source/Load Levels on page 1668
Add Geometry on page 1659
Add Rung on page 965
Add Table to Catalog Database on page 1298
Add Wire Connections on page 1660
Adjust In-Line Wire/Label Gaps on page 1000
Align on page 800
Associate Terminals on page 1055
Autodesk Inventor Professional Export on page 1521
25
2135
Automatic Report Selection on page 1497
Bend Wire on page 921
Block Replacement on page 1664
Break Apart Terminal Associations on page 1057
Cable Markers on page 934
Change Attribute Justification on page 870
Change Attribute Layer on page 862
Change Attribute Size on page 873
Change/Convert Wire Type on page 275
Change Cross-reference to Multiple Line Text on page 879
Check/Repair Gap Pointers on page 1688
Check/Trace Wire on page 1688
Child Location/Description Update on page 882
Circuit Builder on page 706
Clean Drawing Utility on page 1687
Component Cross-reference on page 810
Conduit Marker (From/To List) on page 1627
Conduit Marker (Pick) on page 1627
Conduit Marker Report on page 1634
Continue Surfer on page 1187
Convert Block to Destination Arrow on page 1646
Convert Block to Source Arrow on page 1646
Convert Ladder on page 966
Convert Text to Attribute Definition on page 1645
Convert Text to Wire Number on page 1645
Convert to Schematic Component on page 1642
Copy/Add Component Override on page 817
2136 | Chapter 25 AutoCAD Electrical Command
Copy Assembly on page 1564
Copy Catalog Assignment on page 1299
Copy Circuit on page 724
Copy Component on page 773
Copy Footprint on page 1561
Copy Installation Code on page 1582
Copy Group Code on page 1582
Copy Level Assignments on page 1613
Copy Location Code on page 1582
Copy Mount Code on page 1582
Copy Project on page 156
Copy Terminal Block Properties on page 1057
Copy Wire Number on page 999
Copy Wire Number (In-Line) on page 1000
Create/Edit Wire Type on page 266
Create New Drawing on page 168
Create New Project on page 154
Create a project-specific catalog database on page 1279
Cross-reference Check on page 813
Delete Component on page 798
Delete Connector Pins on page 1148
Delete Footprint on page 798
Delete Project on page 189
Delete Wire Gap on page 956
Delete Wire Numbers on page 1008
Destination Signal Arrow on page 1012
Drawing Audit on page 1692
AutoCAD Electrical Commands | 2137
Drawing Properties: Components on page 222
Drawing Properties: Cross-references on page 228
Drawing Properties: Drawing Format on page 231
Drawing Properties: Drawing Settings on page 220
Drawing Properties: Styles on page 1016
Drawing Properties: Wire Numbers on page 979
Edit Component on page 742
Edit Conduit Marker on page 1627
Edit Footprint on page 1565
Edit Jumper on page 1122
Edit Language Database File on page 1203
Edit Selected Attribute on page 861
Edit Wire Number on page 992
Edit Wire Sequence on page 1034
Edit User Table Data on page 854
Electrical Audit on page 1689
Electrical Standards Database Editor on page 685
Export to Spreadsheet on page 1500
Fan In/Out Destination on page 1024
Fan In/Out - Single Line Layer on page 1025
Fan In/Out Source on page 1023
Find/Edit/Replace Component Text on page 865
Find/Replace Terminal Text on page 866
Find/Replace Wire Numbers on page 986
Fix Wire Numbers on page 990
Fix/UnFix Component Tag on page 877
Flip Wire Gap on page 956
2138 | Chapter 25 AutoCAD Electrical Command
Flip Wire Number on page 1002
Footprint Database File Editor on page 1595
Hide Attribute (Single Picks) on page 868
Hide Attribute (Window/Multiple) on page 868
Hide/Unhide Cross-Referencing on page 812
Hide Wire Numbers on page 1008
Icon Menu Wizard on page 1234
IEC Tag Mode - Update on page 192
In-Line Wire Labels on page 924
Insert 22.5 Degree Wire on page 912
Insert 45 Degree Wire on page 912
Insert 67.5 Degree Wire on page 912
Insert Balloon on page 1601
Insert Component on page 737
Insert Component (Catalog List) on page 776
Insert Component (Equipment List) on page 785
Insert Component (Panel List) on page 790
Insert Connector on page 1152
Insert Connector from List on page 1177
Insert Angled Tee Markers on page 1032
Insert Dot Tee Markers on page 1031
Insert/Edit Boundary Box Assignment on page 1619
Insert/Edit Panel Level Assignment (for components) on page 1620
Insert/Edit Panel Level Assignment (for terminal strips) on page 1615
Insert Footprint (Catalog List) on page 1555
Insert Footprint (Equipment List) on page 1559
Insert Footprint (Icon Menu) on page 1548
AutoCAD Electrical Commands | 2139
Insert Footprint (Manual) on page 1552
Insert Footprint (Manufacturer Menu) on page 1544
Insert Footprint (Schematic List) on page 1537
Insert Hydraulic Components on page 1676
Insert Ladder on page 961
Insert Panel Assembly on page 1563
Insert P&ID Components on page 1681
Insert PLC (Full Units) on page 592
Insert PLC (Parametric) on page 588
Insert Pneumatic Components on page 1671
Insert Reference Arrow - From on page 847
Insert Reference Arrow - To on page 846
Insert Saved Circuit on page 735
Insert Splice on page 1184
Insert Stand Alone Cross-reference on page 843
Insert Terminal (Manual) on page 1552
Insert Terminal (Panel List) on page 794
Insert Terminal (Schematic List) on page 1538
Insert Terminal Strip Representation on page 1614
Insert WBlocked Circuit on page 735
Insert Wire on page 912
Insert Wire Gap on page 956
Insert Wire Numbers on page 971
Interconnect Components on page 918
Language Conversion on page 1202
Link Catalog Number on page 1657
Link Components with Dashed Lines on page 845
2140 | Chapter 25 AutoCAD Electrical Command
Link Description on page 1657
Link Item Number on page 1657
Link Installation Code on page 1657
Link Location Code on page 1657
Link Manufacturer on page 1657
Link PLC Address Description on page 1657
Link Rating on page 1657
Link Split Tag on page 1657
Link Terminal Number on page 1657
Link User on page 1657
List Signal Code on page 848
Location Box on page 889
Location Symbols on page 885
Make Xdata Visible on page 1526
Map Attributes from Old to New on page 1642
Mark/Verify Drawings on page 1200
Mark Component to Pass Power on page 1669
Migration Utility on page 132
Missing Level/Sequence Assignments on page 1435
Modify Symbol Library on page 893
Move Circuit on page 725
Move Component on page 800
Move Connector Pins on page 1150
Move/Show Attribute on page 868
Move Wire Number on page 996
Multiple Cable Markers on page 949
Multiple Insert (Icon Menu) on page 738
AutoCAD Electrical Commands | 2141
Multiple Insert (Pick Master) on page 775
Multiple Wire Bus on page 917
Next Project Drawing on page 1189
Panel Bill of Materials Report on page 1430
Panel Component Report on page 1433
Panel Component Exception Report on page 1432
Panel Configuration on page 1527
Panel Nameplate Report on page 1437
Panel Terminal Exception Report on page 1439
Panel Terminal Strip Report on page 1622
Panel Terminal Strip Swap Wire Text on page 1611
Panel Wire Connection Report on page 1440
Pin List Database Editor on page 1307
PLC Database File Editor on page 603
PLC Database Migration Utility on page 617
PLC I/O Wire Numbers on page 976
Power Load Check Report on page 1670
Previous Project Drawing on page 1189
Project Manager on page 145
Project Properties: Components on page 207
Project Properties: Cross-references on page 215
Project Properties: Drawing Format on page 218
Project Properties: Project Settings on page 204
Project Properties: Styles on page 216
Project Properties: Wire Numbers on page 211
Project-Wide Utilities on page 904
Project-Wide Update/Retag on page 1196
2142 | Chapter 25 AutoCAD Electrical Command
Promis.e Conversion on page 1639
Publish to Web on page 1205
Push Description Down on page 867
Push Description Up on page 867
Rebuild/Freshen Project Database on page 195
Recalculate Wire Size on page 720
Remove Component Override on page 818
Remove Level/Sequencing Assignment on page 1610
Rename Attribute on page 874
Rename Panel Layers on page 261
Rename Schematic Layers on page 261
Renumber Ladder Reference on page 1196
Report Format File Setup - Missing Level/Sequence Assignments on page
1451
Report Format File Setup - Panel Bill of Material on page 1444
Report Format File Setup - Panel Component on page 1448
Report Format File Setup - Panel Component Exception on page 1446
Report Format File Setup - Panel Nameplate on page 1454
Report Format File Setup - Panel Terminal Exception on page 1456
Report Format File Setup - Panel Wire Connection on page 1458
Report Format File Setup - Schematic Bill of Material on page 1461
Report Format File Setup - Schematic Cable From/To on page 1463
Report Format File Setup - Schematic Cable Summary on page 1465
Report Format File Setup - Schematic Component on page 1478
Report Format File Setup - Schematic Component Wire List on page 1469
Report Format File Setup - Schematic Connector Details on page 1471
Report Format File Setup - Schematic Connector Plug on page 1474
Report Format File Setup - Schematic Connector Summary on page 1476
AutoCAD Electrical Commands | 2143
Report Format File Setup - Schematic Missing Bill of Material on page 1480
Report Format File Setup - Schematic PLC/IO Address and Descriptions
on page 1484
Report Format File Setup - Schematic PLC I/O Component Connection
on page 1467
Report Format File Setup - Schematic PLC Modules Used So Far on page
1491
Report Format File Setup - Schematic Terminal Numbers on page 1486
Report Format File Setup - Schematic Terminal Plan on page 1489
Report Format File Setup - Schematic Wire From/To on page 1483
Report Format File Setup - Schematic Wire Label on page 1493
Report Format File Setup - Wire Annotation Exception on page 1452
Resequence Item Numbers on page 1604
Retag Components on page 878
Reverse Connector on page 1143
Reverse/Flip Component on page 805
Revise Ladder on page 966
Rotate Attribute on page 869
Rotate Connector on page 1142
RSLogix 500 Export to Spreadsheet on page 640
Save Circuit to Icon Menu on page 733
Schematic Bill of Material Report on page 1403
Schematic Cable From/to Report on page 1407
Schematic Cable Summary Report on page 1405
Schematic Component Report on page 1415
Schematic Component Wire List Report on page 1409
Schematic Connector Details Report on page 1410
Schematic Connector Plug Report on page 1412
2144 | Chapter 25 AutoCAD Electrical Command
Schematic Connector Summary Report on page 1413
Schematic Database File Editor on page 782
Schematic Missing Bill of Material Report on page 1416
Schematic PLC I/O Address and Descriptions Report on page 1419
Schematic PLC I/O Component Connection Report on page 1407
Schematic PLC Modules Used So Far Report on page 1422
Schematic Terminal Numbers Report on page 1420
Schematic Terminal Plan Report on page 1421
Schematic Wire From/To Report on page 1418
Schematic Wire Label Report on page 1423
Scoot on page 799
Set Wire Type on page 277
Settings Compare on page 240
Show Footprint Sequencing Assignments on page 1611
Show Links on page 1660
Show Missing Catalog Assignments on page 1303
Show Signal Paths on page 849
Show Terminal Associations on page 1057
Show Terminal Strip Sequencing Assignments on page 1611
Show Wire Sequence on page 1029
Show Wires on page 977
Signal Error/List Report on page 1018
Source Signal Arrow on page 1014
Special Explode on page 1653
Split PLC Module on page 802
Split Connector on page 802
Spreadsheet to PLC I/O Utility on page 631
AutoCAD Electrical Commands | 2145
Squeeze Attribute/Text on page 871
Stretch Attribute/Text on page 871
Stretch Connector on page 1144
Stretch PLC Module on page 801
Stretch Wire on page 920
Surfer on page 1187
Swap/Update Block on page 333
Swap Connector Pins on page 1149
Swap Wire Numbers on page 999
Symbol Builder on page 342
Tag Child on page 1654
Tag Child - Form C on page 1654
Tag Child - N.C. on page 1654
Tag Child - N.O. on page 1654
Tag Nameplate on page 1656
Tag Panel Component on page 1656
Tag Panel Terminal - Terminal Number on page 1656
Tag Panel Terminal - Wire Number on page 1656
Tag PLC on page 1654
Tag Schematic Component on page 1654
Tag Schematic Terminal - Terminal Number on page 1654
Tag Schematic Terminal - Wire Number on page 1654
Tag Schematic Terminal - Wire Number Change on page 1654
Terminal: Erase Internal/External Connections on page 1130
Terminal: Mark External Connections on page 1130
Terminal: Mark Internal Connections on page 1130
Terminal: Show Internal/External Connections on page 1130
2146 | Chapter 25 AutoCAD Electrical Command
Terminal List (From File) on page 1127
Terminal List (Manual Picks) on page 1127
Terminal Properties Database Editor on page 1060
Terminal Renumber (Pick Mode) on page 1132
Terminal Renumber (Project-Wide) on page 1133
Terminal Strip Editor on page 1071
Terminal Strip Table Generator on page 1116
Title Block Setup on page 1213
Title Block Update on page 1221
Toggle Angled Tee Markers on page 1033
Toggle NO/NC on page 808
Toggle Wire Number In-Line on page 978
Trim Wire on page 919
Unlink on page 1661
Unhide Attribute (Window/Multiple) on page 869
Unhide Wire Numbers on page 1008
Unity Pro Export on page 652
Unity Pro Export to Spreadsheet on page 646
Update from Project Scratch Database on page 194
Update from Spreadsheet on page 1507
Update Signal References on page 844
Update Stand-alone Cross-reference on page 844
Update Symbol Library WD_M Block on page 255
Update to New WD_M Block, No Changes on page 254
Update to New WD_M Block, Values, Layers on page 254
Update to New WD_PNLM Block, No Changes on page 254
Update to New WD_PNLM Block, Values, Layers on page 254
AutoCAD Electrical Commands | 2147
User Defined Attribute List on page 1510
View/Edit Component Sequence on page 1612
Wire Annotation Exception Report on page 1436
Wire Annotation of Panel Footprint on page 1588
Wire Arrows for Reference Only on page 738
Wire Color/Gauge Labels on page 923
Wire/Conduit Routing Report on page 1635
Wire Number Leader on page 997
Xdata Editor on page 1695
X-Y Grid Setup on page 234
X Zones Setup on page 233
Zip Project on page 188
2148 | Chapter 25 AutoCAD Electrical Command
Index
_LISTBOX_DEF table 1279, 1291
_PINLIST database table 1309
@MOTOR_NUM@ (motor symbol
tags) 2059, 2061
1 pole circuit breaker symbols 454
1-line circuits 27, 700, 703, 706
1-line symbols 329
1-phase ladders 963
1-phase motor symbols 487
2+ pole circuit breaker symbols 458
3 -phase ladders 963
3 Phase Wire Numbering dialog box 976
3-phase buses 975
3-phase motor symbols 489, 655, 2006
3-phase transformer symbols 473
3-phase wires 917–918, 976
3-position selector switches 450
3-voltage-phase switch symbols 545
3D designs 1519
4-position selector switch symbols 452
A
A plug switch symbols 415
Access databases
cable conductor database 954
PLC database format 630
accessories 1104
ace_electrical_standards.mdb file 681,
711
ace_plc.mdb file 2005
active power indicator symbols 551
Add Attribute dialog box 876
Add Catalog Record dialog box 1298
Add Existing Circuit dialog box 1247
Add Footprint Record dialog box 1599
add geometry 1941
Add Geometry tool 1660
Add Icon - Command dialog box 1242
Add Icon - Component dialog box 1239
Add New Table to MDB dialog box 1299
Add Record dialog box 780
Add Spare Wires dialog box 1632
add-on jumpers 1122–1123
Add/Modify Associations dialog
box 1050
addresses
exporting data 1505
I/O component reports 1420, 1486
PLC database information 601
PLC I/O points 624
PLC modules 596
ae_electrical_standards.mdb files 712
AE2LADDER command 968
AE3PHASEWIRENO command 976
AEADDCATALOGTABLE command 1299
AEAIPEXPORT command 1522
AEATTJUSTIFY command 871
AEATTLAYER command 863
AEATTRIBUTE command 876
AEATTSIZE command 874
AEAUDIT command 1692
AEAUDITDWG command 1694
AEAUTOREPORT command 1499
AEBLK2SCH command 1644
AEBLOCKREPLACE dialog box 1665
AEBOUNDARYBOX command 1620
AEC_CIRCS sheet 2039
AECABLEMARKER command 939, 943,
945, 947
AECHILDLOCUPDATE command 883
AECIRCBUILDER command
Circuit Configuration dialog
box 710
Circuit Selection dialog box 708
Select Motor dialog box 711
AECOMPONENT command
Add Record dialog box 1298
Component Annotation from External
File dialog box 760
Component Catalog Lookup dialog
box 1294
Index | 2149
Edit Entry dialog box 1138
Edit Multi-Connection Sequence
Terminal Symbol dialog
box 1135
Edit PLC I/O Point dialog box 624
Edit Record dialog box 1298
Insert Component dialog box 742
Insert/Edit Child Component - IEC
dialog box 773
Insert/Edit Child Component dialog
box 769
Insert/Edit Component dialog
box 748, 753
Insert/Edit Terminal Symbol dialog
box 1046
Option - Tag Format Family Override
dialog box 759
Panel Tag List dialog box 758
Parts Catalog dialog box 1291
Tags in Use dialog box 757
AECOMPONENTCAT command 778,
780
AECOMPONENTPNL command 791,
794
AECOMPONENTQ command 787, 789
AECONDUITMARKER command 1631–
1632
AECONDUITMARKERLIST
command 1631
AECONDUITMARKERRPT
command 1332, 1635
AECONNECTOR command 1157, 1159
AECONNECTORLIST command 1174
AECONVERTWIRETYPE command 277
AECOPY2SYMLIB command 255
AECOPYGROUPCODE command 1584
AECOPYINSTcommand 1584
AECOPYLEVEL command 1614
AECOPYLOC command 1584
AECOPYMOUNTCODE command 1584
AECOPYOVERRIDE command 818
AEDESTINATION command 1014
AEDWGCFG command 241, 243–244
AEECDS2ACADEDWG command 1650
AEEDITATT command 861
AEEDITCOMPONENT command
Add Record dialog box 1298
Add/Modify Associations dialog
box 1050
Component Annotation from External
File dialog box 760
Connector Pin Numbers in Use dialog
box 1161
Edit Record dialog box 1298
Insert/Edit Child Component dialog
box 769, 773
Insert/Edit Component dialog
box 748, 753
Insert/Edit Terminal Symbol dialog
box 1046
Option - Tag Format Family Override
dialog box 759
Panel Tag List dialog box 758
Parts Catalog dialog box 1291
Pin Numbers in Use dialog box 764
Ratings Defaults dialog box 808
Select Description for AutoCAD
Electrical Language Table
dialog box 762
Select Description Text Format dialog
box 763
Tags in Use dialog box 757
Terminal Block Properties dialog
box 1053
AEEDITCONDUITMARKER
command 1631
AEEDITFOOTPRINT command 1569
AEEDITWIRENO command 994
AEEDITWIRESEQUENCE
command 1037
AEEXPLODE command 1654
AEEXPORT2SS command
Component Data Export dialog
box 1502
Export to Spreadsheet dialog
box 1501
General Data Export dialog
box 1503
Panel Layout Data Export dialog
box 1506
2150 | Index
Panel Terminals Data Export dialog
box 1506
PLC I/O Address/Description Export
dialog box 1505
PLC I/O Connection Export dialog
box 1504
PLC I/O Header Information Export
dialog box 1503
Terminal Data Export dialog
box 1507
Update Drawings per Spreadsheet
Data dialog box 1508
AEFANIN command 1026
AEFANINDEST command 1025
AEFANINSRC command 1024
AEFINDCOMPTEXT command 865–866
AEFINDTERMTEXT command 867
AEFINDWIRENO command 987
AEFIXTAG command 878
AEFLIP command 805
AEFOOTPRINT command
Component Catalog Lookup dialog
box 1294
Din Rails dialog box 853
Footprint dialog box 1555
Insert Footprint dialog box 1551
Panel Layout - Component Insert/Edit
dialog box 1569
AEFOOTPRINTCAT command 1557
AEFOOTPRINTDB command 1596, 1599
AEFOOTPRINTEQ command 1559
AEFOOTPRINTMAN command 1555
AEFOOTPRINTMFG command 1545,
1547
AEFOOTPRINTQ command 787
AEFOOTPRINTSCH command 1538,
1542
AEFORMATFILE command
Report Format File Setup - Missing
Level/Sequence Assignments
dialog box 1452
Report Format File Setup - Panel Bill
of Materials dialog
box 1446
Report Format File Setup - Panel
Component dialog
box 1451
Report Format File Setup - Panel
Component Exception dialog
box 1448
Report Format File Setup - Panel
Nameplate dialog box 1456
Report Format File Setup - Panel
Terminal Exception dialog
box 1458
Report Format File Setup - Panel Wire
Connection dialog
box 1461
Report Format File Setup - Schematic
Bill of Material dialog
box 1463
Report Format File Setup - Schematic
Cable From/To dialog
box 1465
Report Format File Setup - Schematic
Cable Summary dialog
box 1467
Report Format File Setup - Schematic
Component dialog
box 1480
Report Format File Setup - Schematic
Component Wire List dialog
box 1471
Report Format File Setup - Schematic
Connector Details dialog
box 1474
Report Format File Setup - Schematic
Connector Plug dialog
box 1476
Report Format File Setup - Schematic
Connector Summary dialog
box 1478
Report Format File Setup - Schematic
Missing Bill of Material
dialog box 1483
Report Format File Setup - Schematic
PLC I/O Address and
Descriptions dialog
box 1486
Index | 2151
Report Format File Setup - Schematic
PLC I/O Component
Connection dialog
box 1469
Report Format File Setup - Schematic
PLC Modules Used So Far
dialog box 1493
Report Format File Setup - Schematic
Terminal Numbers dialog
box 1489
Report Format File Setup - Schematic
Terminal Plan dialog
box 1491
Report Format File Setup - Schematic
Wire From/To dialog
box 1484
Report Format File Setup - Schematic
Wire Label dialog box 1495
Report Format File Setup - Wire
Annotation Exception dialog
box 1454
AEGEOMETRY command 1660
AEIMPORTDB command 195
AEINTERNALJUMPER command 857
AEJUMPER command 1125, 1127
AELADDER command 963
AELANG command 1203
AELANGDB command 1204
AELISTSIG command 849
AELOCATIONSYMBOL command 887
AEMAPATT command 1644
AEMARKVERIFY command 1202
AEMENUWIZ command
Add Existing Circuit dialog
box 1247
Add Icon - Command dialog
box 1242
Add Icon - Component dialog
box 1239
Create Circuit dialog box 1244
Create New Submenu dialog
box 1249
Icon Menu Wizard dialog box 1237
Properties - Circuit dialog box 1257
Properties - Command dialog
box 1254
Properties - Component dialog
box 1252
Properties - Main Menu dialog
box 1250
Properties - Submenu dialog
box 1259
AEMIGRATION command
Migration Review dialog box 136
Migration Utility dialog box 134
AEMTEXT2ATT command 1645
AEMULTI command
Insert Component dialog box 742
Insert/Edit Child Component dialog
box 769, 773
AEMULTIBUS command 918
AEMULTICABLE command 949, 953,
1338
AEP2E command 1639, 1641
AEPANELCONFIG command 264
Format - Schematic Layout Wire
Connection Annotation
dialog box 1531
Panel Balloon Setup dialog
box 1602
Panel Drawing Configuration and
Defaults dialog box 1529
AEPANELLEVEL command 1619, 1622
AEPANELREPORT command
generating reports 1330
Missing Level/Sequence Assignments
dialog box 1436
Panel Bill of Material Data Fields to
Report dialog box 1340
Panel Bill of Materials dialog
box 1432
Panel Component Data Fields to
Report dialog box 1344
Panel Component dialog box 1435
Panel Component Exception Data
Fields to Report dialog
box 1342
Panel Component Exception dialog
box 1433
Panel Missing Level/Sequence
Assignments Data Fields to
Report dialog box 1346
2152 | Index
Panel Nameplate Data Fields to Report
dialog box 1350
Panel Nameplate dialog box 1439
Panel Terminal Exception Data Fields
to Report dialog box 1352
Panel Terminal Exception dialog
box 1440
Panel Wire Annotation Exception
Data Fields to Report dialog
box 1348
Panel Wire Connection Data Fields to
Report dialog box 1354
Panel Wire Connection dialog
box 1441
Wire Annotation Exception dialog
box 1437
AEPANELTERMINAL command 1574
AEPANELTERMINALSCH
command 1540, 1542
AEPASSPWR command 1670
AEPINLISTTABLE command 1307, 1309,
1311
AEPLC command 596
AEPLCDB command
Module Box Dimensions dialog
box 608
Module Specifications dialog
box 616
New Module dialog box 611
PLC Database File Editor 606
PLC Selection dialog box 607
Prompts at Module Insertion Time
dialog box 617
Select Terminal Information dialog
box 610
Style Box Dimensions dialog
box 614
Terminal Block Settings dialog
box 613
AEPLCP command
Module Layout dialog box 591
PLC Parametric Selection dialog
box 590
AEPLCWIRENO command 977
AEPOWERLOADLEVELS command 1669
AEPOWERLOADREPORT
command 1670
AEPROJECT command
about 154
Batch Plotting Options and Order
dialog box 1193
Copy Project dialog box 156
Create New Drawing dialog box 171
Create New Project dialog box 156
Cross-Reference Table Data Fields to
Display dialog box 1397
Drawing List Data Fields to Display
dialog box 1334
Drawing List Display Configuration
dialog box 174
Drawing List Report dialog box 192
Edit Cross-Reference Symbol Mapping
dialog box 832
Graphical Cross-Reference Format
Setup dialog box 824
Properties dialog box 206
Select Drawings to Process dialog
box 196
Table Cross-Reference Format Setup
dialog box 830
Task List dialog box 194
Update Title Block dialog box 1224
Wire Numbers tab 986
AEPROJUPDATE command 1199
AEPROPERTIES command
codes for replaceable
parameters 239
Define Layers dialog box 261
Drawing Settings dialog box 222
Edit Cross-Reference Symbol Mapping
dialog box 832
Wire Numbers tab 982
AEPUBLISH2WEB command 1206–1207
AEREBUILDDB command 196
AERENAMELAYER command 262
AERENAMEPANELLAYER command 262
AERENUMBERLADDER command 969
AERESEQUENCE command 1605
AERETAG command 879
AEREVISELADDER command 968
AERMOVERRIDE command 819
Index | 2153
AEROUTINGREPORT command
Wire Conduit Routing Data Fields to
Report dialog box 1396
Wire/Conduit Routing Report dialog
box 1636
AERSLOGIX command 641–642
AESAVECIRCUIT command 735
AESAVEDCIRCUIT command 736
AESAXREF command 844
AESCHEMATICDB command 784–785
AESCHEMATICREPORT command
Bill of Material Data Fields to Report
dialog box 1356
Cable From/To Data Fields to Report
dialog box 1363
Cable Label Data Fields to Report
dialog box 1364
Cable Summary Data Fields to Report
dialog box 1358
Component Data Fields to Report
dialog box 1378
Component Wire List Data Fields to
Report dialog box 1370
Connector Details Data Fields to
Report dialog box 1372
Connector Plug Data Fields to Report
dialog box 1374
Connector Summary Data Fields to
Report dialog box 1376
generating reports 1330
Location Code Selection for From/To
Reporting dialog box 1427
Missing Bill of Material Data Fields to
Report dialog box 1380
PLC Component Connection Data
Fields to Report dialog
box 1368
PLC I/O Address and Descriptions
Data Fields to Report dialog
box 1386
PLC Modules Used So Far Data Fields
to Report dialog box 1390
Schematic Bill of Material dialog
box 1405
Schematic Cable From/To dialog
box 1407
Schematic Cable Summary dialog
box 1407
Schematic Component dialog
box 1416
Schematic Component Wire List
dialog box 1410
Schematic Connector Details dialog
box 1412
Schematic Connector Plug dialog
box 1413
Schematic Connector Summary dialog
box 1415
Schematic Missing Bill of Material
dialog box 1418
Schematic PLC I/O Address and
Descriptions dialog
box 1420
Schematic PLC I/O Component
Connection dialog
box 1409
Schematic PLC Modules Used So Far
dialog box 1423
Schematic Terminal Numbers dialog
box 1421
Schematic Terminal Plan dialog
box 1422
Schematic Wire From/To dialog
box 1419
Schematic Wire Label dialog
box 1425
Terminal Numbers Data Fields to
Report dialog box 1388
Terminal Plan Data Fields to Report
dialog box 1393
Wire From/To Data Fields to Report
dialog box 1384
Wire Label Data Fields to Report
dialog box 1394
AESHOWLINK command 1661
AESHOWSIG command 849
AESHOWXDATA command 1527
AESHOWXREFTABLE command 1399
AESIGNALERRORREPORT
command 1019
AESOURCE command 1015
AESPLIT command 805
2154 | Index
AESPLITPLC command 805
AESS2PLC command
Spreadsheet to PLC I/O utility 635
Spreadsheet to PLC I/O Utility Setup
dialog box 639
AESURF command 1189
AESWAPBLOCK command 336–338
AESYMBUILDER command
Attribute Editor 349
Convert Text to Attribute dialog
box 356
Insert Wire Connections dialog
box 353
Insert/Edit Attributes dialog box 350
Save Symbol dialog box 359
Select SymbolObjects dialog
box 344
Symbol Audit dialog box 360
Symbol Configuration dialog
box 345
AETERMDBEDITOR command 1061–
1062, 1064
AETERMINALPNL command 795–796
AETERMINALSTRIP command 1615
AETERMINALSTRIPREPORT
command 1623–1624
AETERMLIST command 1129–1130
AETERMLISTFROMFILE command 1129–
1130
AETERMRENUM command 1133
AETRIM command 920
AETSE command
Associate Terminals dialog box 1108
Cable Information tab 1087
Catalog Code Assignment tab 1083
Edit Terminal dialog box 1100
Edit/Delete Jumpers dialog
box 1109
Insert Accessory dialog box 1104
Insert Spare Terminal dialog
box 1103
Layout Preview tab 1093
Reassign Terminal dialog box 1101
Renumber Terminal Strip dialog
box 1102
Select Row Cell Styles dialog
box 1110
Terminal Strip Definition dialog
box 1073
Terminal Strip Selection dialog
box 1072
Terminal Strip tab 1078
Terminal Strip Table dialog
box 1113
Toggle Installation Codes dialog
box 1106
Toggle Location Codes dialog
box 1105
AETSEGENERATOR command
Terminal Strip Table
Generator 1119
Terminal Strip Table Settings dialog
box 1096
AEUDA command 1512
AEUNITYPRO command 652
AEUNITYPROSS command 651
AEUNLINK command 1661
AEUPDATEIECTAG command 193
AEUPDATESIGREF command 845
AEUPDATESYMLIB command 893
AEUSERTABLE command 855
AEUTILITIES command 1195
AEVIEWCOMPSEQ command 1613
AEWBCIRCUIT command 736
AEWIREANNOTATION command 1590,
1592
AEWIRECOLORLABEL command 924
AEWIRECONN command 1660
AEWIRENO command 972–973, 990
AEWIRETYPE command 271, 902
AEXDATA command 1695
AEXREF command 812
AEXREFCHECK command 815
AEXYGRID command 236
AEXZONE command 234
AEZIPPROJECT command 188
Alert dialog box 256
alignment
components 798, 800
justified text 870–871
Allen-Bradley PLCs 640
Index | 2155
alternate environment settings 279
amp meters 421, 551
angled tee connections 1029
angled tee markers 1033–1034
angled wires 913, 922
Annotation Presets dialog box 708
annotations
Circuit Builder circuits 681
circuits 708
converting non-Electrical
blocks 1642, 1644
cross-reference symbols 839
I/O points 622
importing from external files 760
pins 1313
predefined symbol annotations 332
presets 708
ratings 807–808
reports 1428, 1437, 1454
schematic wire information 1590,
1592
swapping terminal strip text 1612
terminal strips 1130
wire annotation exceptions 1348
wire connections 1531
wires 1348, 1437, 1454
annunciation symbols 581
archiving projects 187–188
arrow symbols
converting non-Electrical
symbols 1647
cross-reference arrow symbols 847–
848
destination signal arrows 1011
illustrated 431, 580
inserting 1014–1015
naming conventions 298
project-wide changes 1195
source signal arrows 1011
styles 1012, 1016, 1018
assemblies 1563–1565
ASSEMBLYCODE field 1311
Assign Wire Numbering Formats by Wire
Layers dialog box 990
assigning
catalog information 1283, 1285,
1300
level assignments 1614, 1619, 1622
missing assignment reports 1436,
1452
missing catalog information 1304
missing level/sequence
assignments 1346, 1436,
1452
pins automatically 1984
sequencing assignments 1611, 1613
Associate Terminals dialog box 1108
associations
adding 1055
breaking 1057
editing 1055
terminals 1046, 1050, 1055, 1057,
1078, 1108
Attribute Editor 349
attributes
adding to non-Electrical
entities 1651, 1653, 1656–
1657, 1659
Attribute Editor 349
blocks 875–876
child components 320
child location codes 882–883
circuits 2047–2048, 2066, 2072
converting non-Electrical
blocks 1642, 1644, 2099
converting text to 355–356, 1645
converting Xdata to 1527
copying codes 1582, 1584
COPYTAG attribute 329
cross-references 320
editing 350, 861, 893
fixed component tags 877–878
footprint attributes 329, 1526
hiding 869
hydraulic symbols 329
in-line wire labels 320
inserting 346, 350
justification 870–871
ladders 960
layers 862–863
2156 | Index
link lines 354
link panel descriptions 1943
link schematics 1936
linking to title blocks 1213
location boxes 892
location codes 881, 892
location mark symbols 885, 887
mapping 332, 336, 1663
miscellaneous attributes 331
missing 360
moving 798, 868
moving to other layers 862–863
multi-line text 880
non-AutoCAD Electrical 331
P&ID symbols 329
parametric build connectors 320
parent components 320, 882–883
PLC I/O symbols 320
predefined annotations 332
project-wide changes 1195
ratings 807–808
renaming 875
rotating 870
schematic symbols 320
splices 320
splitting tag names 299
TAG1 attribute 321
TAG2 attribute 321
target attributes for wire
information 1587–1588
templates 342, 1563, 2107
terminal symbols 320, 2005
text size 873–874
text styles 871
title blocks 1213, 1221
updating 882–883
user-defined 1509–1510, 1512
WD_M blocks 253
WDTYPE attribute 329
wire connections 320, 351, 353,
1938
wire signal symbols 320
Xdata 1695
auditing
drawings 28, 1686, 1688–1689,
1692, 1694
symbols 357, 360
AutoCAD
inserting blocks in PLC
modules 611
scripts 1195
AutoCAD Electrical
commands 2148
Migration Utility 129–132
new features 9, 13, 19, 25
online help 3, 6
Vault ARX 158
AutoCAD Electrical Migration Utility
dialog box 134
AutoCAD Electrical Publish to Web -
Banner, Title Text, Options dialog
box 1207
Autodesk Inventor Professional
exporting data for Cable &
Harness 1519, 1521–1522
importing data from 1166–1167,
1174
spreadsheet structure 1175
Autodesk Inventor Professional Export
dialog box 1522
Autodesk Vault
advanced techniques 2134
collaborative design and 158
AutoLISP
circuit attribute assignments 2048
mapping values to title blocks 1227
running routines 611
automatic fill feature 881
automatic pin assignments 1984
Automatic Report Selection dialog
box 1499
automatic reports 1496–1497, 1499
automatic schematic/panel updates 1532
automatic wire numbering 971
B
backing up projects 187–188
ball valves 421
balloons
about 1600
inserting 1601–1602
Index | 2157
resequencing item numbers 1604–
1605
banners (web pages) 1207
batch plotting 1191
Batch Plotting Options and Order dialog
box 1193
batch report generation 1496
battery symbols 423, 551, 570
beacon light symbols 502–503
bell symbols 423, 570
bending wires 922
bi-directional updates 1532
Bill of Material Data Fields to Report dialog
box 1356
Bill of Materials (BOM)
adding part numbers to
components 1283, 1285
copying 1300
equipment lists and 785
fields in reports 1340, 1356
missing catalog assignments 1304
missing data in reports 1380, 1418,
1483
multiple catalogs 1303
multiple part numbers 755–756,
1303
performing checks 1303
reports 1402, 1405, 1418, 1432,
1446, 1463, 1483
Bill of Materials reports
about 1402
formatting 1446, 1463
generating 1405, 1432
blank lines in reports 1330
Block Editor 342
Block Replacement dialog box 1665
blocks
adding geometry to 1660
attributes 329, 875–876
balloons 1600–1602
catalog table data 1271
changing symbol appearance 331
converting arrow symbols 1647
converting non-Electrical
blocks 1642, 1644, 2099
converting Xdata to attributes 1527
creating 339
editing library symbols 893
exploding 1654
footprint attributes 1526
footprint lookup files 1594, 1596
inserting in PLC modules 611
mapping and replacing 1663–1665
marker blocks 2037–2038
nameplates 1609
naming conventions 282, 298
PLC terminal blocks 613
splitting 798, 802, 805
substituting symbols 330
swapping 332–333, 336–338
Symbol Builder 342
terminal blocks 1053, 1065
updating 332–333, 336–338
user-defined attributes 1509
values 875–876
WD_M blocks 253
BOM (Bill of Materials)
adding part numbers to
components 1283, 1285
copying 1300
equipment lists and 785
fields in reports 1340, 1356
missing catalog assignments 1304
missing data in reports 1380, 1418,
1483
multiple catalogs 1303
multiple part numbers 755–756,
1303
performing checks 1303
reports 1402, 1405, 1418, 1432,
1446, 1463, 1483
borders on report tables 1322
boundary boxes
level codes 1620
sequences 1620
branches 1519
break symbols 1159, 1167
BREAK value 630
breakers 454, 458
breaking
connectors 1159, 1167
reports into sections 1318, 1330
2158 | Index
terminal associations 1057
terminal tables 1070
terminals after modules 610
bridge rectifier symbols 575
build direction 2052
Build of Materials (BOM)
adding part numbers to
components 1283, 1285
equipment lists and 785
fields in reports 1340, 1356
missing catalog assignments 1304
missing data in reports 1380, 1418,
1483
multiple catalogs 1303
multiple part numbers 755–756,
1303
performing checks 1303
reports 1402, 1405, 1418, 1432,
1446, 1463, 1483
bus-tap symbols 298, 304
buses
3-phase 917–918
multiple 1163
spacing 918, 2053
buzzer symbols 423, 570
C
Cable & Harness (Inventor) 1519
cable conductor database 954
Cable From/To Data Fields to Report dialog
box 1363
Cable From/To reports
about 1402
formatting 1465
generating 1407
Cable Insert/Edit Data Fields to Display
dialog box 1338
Cable Insert/Edit dialog box 953
Cable Label Data Fields to Report dialog
box 1364
cable markers
about 930
cable conductor database 954
colors 954
database 954
editing 953
inserting 742, 931, 939, 943, 945,
947, 949, 953
multiple 949, 953
naming conventions 298
shields 956
source and destination
markers 1996
symbols 427, 576
updating 953
Cable Summary Data Fields to Report
dialog box 1358
Cable Summary reports
about 1402
formatting 1467
generating 1407
cables
cable conductor database 954
colors 954
exporting data for Cable &
Harness 1519
fanning wire markers 1020–1026
importing occurrences from
Inventor 1166–1167
label data in reports 1364
marker symbols 427, 576, 930
multiple cables 1338
report data fields 1338, 1358, 1363
reports 1402, 1407, 1465, 1467
source and destination
markers 1996
tags 953
terminal information 1087
capacitive switch symbols 526
capacitor symbols 426, 575
Catalog Code Assignment tab (Terminal
Strip Editor) 1083, 1087
catalog information
assigning to components 1283,
1285, 1300
cable markers 939, 943, 945, 947,
953
component data 748, 753
editing footprint lookup files 1596
missing catalog assignments 1304
multi-connection sequences 1138
Index | 2159
multiple BOM part numbers 755–
756
multiple part numbers 1578
part numbers 1303
pin lists 1311
PLC modules 590, 596
terminal catalog codes 1046, 1083
tracking changes to 1200
updating child codes 883
Catalog Lookup File dialog box 207
Catalog Search Results dialog box 1293
catalog tables
creating 1294
families 1294
structure 1277
Catalog Values dialog box 1293
catalogs
adding components 1295
adding records 1298
adding tables 1299
assigning information to
components 1283, 1285,
1300, 1304
catalog lookup files 182, 206–207
copying information from
projects 1283, 1300
create project-specific 1281
database structure 1277
database tables 1279
default MFG values 1279
editing 1291, 1295, 1298
family tables 1271
inserting components from 776
inserting footprints from 1555,
1557
installing manufacturer
content 1274
linking to web pages 1277
LISTBOX_DEF table 1279, 1291
lookup tables 1294
migrating 129
miscellaneous 1283
missing assignments 1304
moving files 1272
multiple catalogs 1273, 1283, 1303,
2045
opening 1291
project-specific 1283
searching 1285, 1293
subcatalog entries 1330
tables 1271
CATEGORY field 135, 620
cblcolor.dat file 954
cells (terminal tables) 1110
Change Attribute Size dialog box 874
Change Attribute/Text Justification dialog
box 871
Change/Convert Wire Type dialog
box 277, 912
checking
attributes 360
Bill of Materials 1303
cross-references 813, 815
projects in or out 2134
wires 978
Child Contact and Panel Update from
Schematic Parent dialog
box 883
child-parent relationships
about 342
attributes 320–321
child cable markers 931
editing child components 769, 773
inserting child components 769,
773
location codes 882–883
CIP (Customer Involvement Program) 6
circuit breakers 378, 454, 458, 462
Circuit Builder
about 688
adding new circuits 2032
AEC_CIRCS sheet 2039
AutoLISP and 2048
build direction 2052
bus wire spacing 2053
child contacts 2063
circuit codes sheet 2041
Circuit Configuration dialog
box 710
Circuit Selection dialog box 708
circuit templates 2037
conditional insertion 2051
2160 | Index
configuring circuits 693
customizing circuits 655, 2006,
2044
defaults 2076
energy savings 26
inserting circuits 690
mapping motor parameters 2066
MCC database 681
mcc.mdb files 681
motor symbol tags in wire
numbers 2059
multi-pole insertion 2052
multiple catalogs 2045
new features 27
power feed circuits 26
predefining attribute values 2047,
2072
Select Motor dialog box 711
spreadsheets 2045
stretching and connecting
wiring 2082
tag format 2068
testing circuits 2043
trimming wires 2050
wire numbers 2070, 2075
wire types 2056
circuit code sheets 2041
Circuit Configuration dialog box 710
Circuit Scale dialog box 736
Circuit Selection dialog box 708
circuit templates 2037, 2044
circuits
about 724
adding 2032
AEC_CIRCS sheet 2039
annotations 708
attributes 2047–2048, 2072
build direction 2052
bus wire spacing 2053
child contacts 2063
Circuit Builder 655, 2006
circuit codes sheet 2041
circuit templates 2044
conditional components 2051
configuring 693, 710
copying 725
defaults 2076
dual one-line circuits 706
icons 1244, 1247, 1257, 2119
inserting 690, 708, 729, 736, 742
mapping motor parameters 2066
marker blocks 2037–2038
motor symbol tags in wire
numbers 2059
moving 726
multi-pole insertion 2052
multiple catalogs 2045
one-line circuits 700, 703
options 2039
power feed circuits 694, 696, 699
referencing existing 724
reusing 735
saving 728, 735
selecting 708
stretching and connecting
wires 2082
tag formats 2068
templates 2037
testing 2043
trimming wires 2050
WBlocked circuits 729, 736
wire numbers 2070, 2075
wire types 2056
cleaning drawings 1688
clients
client-specific libraries 190–191
client-specific title blocks 190–191
project setup 192
subdirectories 190
clocks 551
CODE attribute 2037, 2041
codes
copying values to
components 1582, 1584
drawing parameters 239
family codes 1271
filtering reports 1318
level codes 1620
COILPINS field 1311, 1984
coils
checking 813, 815
pin assignments 1311
Index | 2161
collaboration
collaborative design 158
Vault setup 2134
colors
cable markers 939, 943, 945, 947,
953
cables 954
wires 988, 990
columns (database tables) 685
columns (report tables) 1322
comma-delimited files
exported component data 1502
exported panel layout data 1506
exported PLC data 1503–1505
exported terminal data 1506–1507
exporting 1501, 1503
updating drawings with data 1508
commands
adding icons for 1234, 1242, 1264
adding to submenus 1249
AutoCAD Electrical commands 2148
Conduit Marker commands 116
Conversion commands 115
Extra Libraries commands 117
icon properties 1254
list of 2148
Main Electrical commands 94, 104
Panel Layout commands 108
Power Check commands 117
Ribbon interface 25
submenu properties 1259
triggering with icons 2119
Vault commands 2134
comments 1200
Compare Drawing and Project Settings
dialog box 241
comparing project settings 240–241
Component Annotation dialog box 1644
Component Annotation from External File
dialog box 760
Component Catalog Lookup dialog
box 1294
Component Cross-Reference dialog
box 812
Component Data Export dialog
box 1502
Component Data Fields to Report dialog
box 1378, 1937
Component Exception reports
about 1428
formatting 1448
generating 1433
Component Reference Listing dialog
box 815
Component reports
about 1402, 1428
fields in 1378
formatting 1480
generating 1416, 1427
subcatalog entries 1330
component tables 1271
component tags
settings 211
WD_M block attributes 253
Component Wire List Data Fields to Report
dialog box 1370
Component Wire List reports
about 1402
fields in 1370
formatting 1471
generating 1410
components
adding symbols to icon
menus 1232, 1234, 1237,
1239, 1264, 2119
adding to catalogs 1295
alignment 798, 800
annotations 760
attributes 798, 861, 868–869
balloons 1600–1602
catalog data 748, 753, 1283, 1285,
1300
catalog lookup tables 1294
catalogs of 1291, 1298
checking coils or contacts 813, 815
child components 320, 769, 773
conditional components 2051
copying 774
copying code values to 1582, 1584
cross-references 748, 753, 809–810,
812, 815
data fields for reports 1344, 1378
2162 | Index
deleting 798–799, 1585
descriptions 761, 868
duplicates 1686
editing 748, 753
equipment lists 782, 784–785
exceptions in reports 1342
exporting data 1502
extracting 949, 953
family codes 1271
fence crossing points 775–776
flipping or reversing 805–806
hydraulic 1676
icon properties 1252
importing from Inventor 1166–1167
inserting 738, 742, 774–776
inserting from catalogs 776, 778
inserting from equipment lists 789
inserting from panel lists 790–791,
794
installation codes 748, 753
interconnecting components 919
jumpers 856–857
layers 261
location codes 748, 753, 881, 892
location mark symbols 885, 887
lookup files 782, 784–785
manipulating 798
moving 798, 801
multiple catalogs 1273
naming conventions 298
panel components 1536–1538
parent components 320
part numbers 1283, 1285, 1293
peer-to-peer relationships 1981
pin numbers 764
pins 748, 753
PLC database information 630
ratings 748, 753, 807–808
removing sequencing 1611
reports 1402, 1416, 1428, 1433,
1435, 1448, 1451, 1480
scooting 798, 800
settings 211
signals 848–849
spacing 1544
splitting 798, 802, 805
stretching 798, 802
surfing 1187
swapping contact states 809
switches 748
tables 1271
tags 748, 753, 757–759, 877–879
terminals 1040
text 864–866
updating 332–333, 336–338, 883
Components tab (Drawing Properties
dialog box) 225
Components tab (Properties dialog
box) 211, 2125
conditional components 2051
conditionally trimming wires 2050
Conduit Marker Data Fields to Display
dialog box 1332
Conduit Marker Report dialog box 1635
Conduit Marker Setup dialog box 1631
Conduit Marker toolbar 116
conduit markers
about 1626
data fields for reports 1332
editing 1627, 1631
inserting 1627, 1631
reports 1634–1636
scale 1631
support files 1633
conduits
about 1626
reports 1635–1636
routing data for reports 1396
size 1631
spare wires 1632
support files 1633
tags 1631
configuration
dual one-line circuits 706
naming conventions 298
one-line circuits 703
panel drawings 1527, 1529
power feed circuits 696, 699
settings lists 241
connections
angled tee wiring connections 1029
attribute information 1587–1588
Index | 2163
customizing 2112
direct-to-terminal wire
connections 1029
displaying 1132
erasing connection codes 1132
exporting data 1504
from/to reports 1419, 1484
interconnecting components 919
level/routing wire connections 1029
multi-connection sequences 1134–
1135, 1138
PLC modules 591
reports 1368, 1409, 1428, 1441,
1461, 1469
schematic attributes 320
schematic wire connections 1029
sequencing 1029–1031, 1037, 1134
stretching wires 2082
symbols 339
tee markers 1033–1034
templates 351
wire connections 353
wire tools 349
Connector Details Data Fields to Report
dialog box 1372
Connector Details reports
about 1402
fields in 1372
formatting 1474
generating 1412
plug and jack options 1330
Connector Layout dialog box 1159
Connector List tab (Connector Selection
dialog box) 1174
Connector Pin Numbers in Use dialog
box 1161
Connector Plug Data Fields to Report
dialog box 1374
Connector Plug reports
about 1402
fields in 1374
formatting 1476
generating 1413
pin charts 1330
Connector Selection dialog box 1174
Connector Summary Data Fields to Report
dialog box 1376
Connector Summary reports
about 1402
fields in 1376
formatting 1478
generating 1415
connectors
adding pins to 1148
breaking 1159, 1167
connector lists 1174
data fields in reports 1372
deleting pins 1149
fixed spacing 1142
importing 1174–1175
in-use pin numbers 1161
inserting 1040, 1142, 1157
keyboard shortcuts 1142
layout 1159, 1167
lists 1174
moving pins 1151
multi-connection sequences 1134–
1135, 1138
naming conventions 298
no wirenumber changes
symbols 400, 403, 513
pin numbers 1150, 1152, 1161
plug report data 1374, 1413, 1476
point-to-point tools 1140
reports 1402, 1412–1413, 1415,
1474, 1476, 1478
reversing 1142, 1144
rotating 1142–1143
sequencing 1134
splices 1185
splitting 798, 802, 805, 1147
stretching 1146
summary report data 1376, 1415,
1478
swapping pins 1150
symbols 400, 403–404, 407, 513,
516
types of 1157, 1167
wire crossings 1142
wirenumber changes symbols 404,
407, 516
2164 | Index
constraints 1065
contacts
checking 813, 815
contact states 809
contact switch symbols 545
Form C contacts 827
graphical cross-references 822, 824
pin lists 1305–1307, 1309, 1311
skipping during
cross-referencing 813
symbols 379, 476
table cross-references 827, 830, 832
types of 1313
updating 883
continuing surf sessions 1187
Conversion toolbar 115
Convert promis.e Project dialog
box 1641
Convert Text to Attribute Definition dialog
box 1645
Convert Text to Attribute dialog box 356
convert text to wire numbers 1940
Convert VIA ECDS or Jr. Project to
AutoCAD Electrical dialog
box 1650
convertible contact pin
annotations 1313
converting
geometry to Electrical-aware
blocks 1651, 1653, 1656–
1657, 1659
lines 275
lines to wire connections 1651,
1653, 1656–1657, 1659
mapping non-Electrical
blocks 1642, 1644
non-Electrical arrow symbols 1647
non-Electrical objects 2099
non-intelligent ladders 966, 968
promis.e files 1638–1639, 1641
replacing blocks 1663–1665
text to attributes 355–356, 1645
text to other languages 1202–1203
text to wire numbers 1646
VIA drawings 1648, 1650
wires to other types 275, 277, 912
Copy Active Drawing Settings To dialog
box 255
Copy Installation/Location/Mount/Group
to Components dialog
box 1584
Copy Level Assignments dialog
box 1614
Copy Project Step 1 - Select Existing
Project to Copy dialog box 156
copying
attributes 255, 337
catalog information 1283, 1300
circuits 725
code values to components 1582,
1584
database tables 682
icons 1234
migration options 134
panel assemblies 1565
panel footprints 1562
PLC modules 602
projects 142
properties 1058
sequencing 1614
wire numbers 1000
COPYTAG attribute 329
costs per kwh 720
count (components) 1303
counter relay symbols 481
coupling device symbols 568
Create New Circuit dialog box 1244
Create New Drawing dialog box 171,
1895, 1913
Create New Project dialog box 156
Create New Submenu dialog box 1249
Create Project-Specific Catalog Lookup File
dialog box 1281
Create/Edit Wire Type dialog box 271,
902, 912, 1901, 1914, 1940
CRM tables 1271
Cross-Reference Component Override
dialog box 818
Cross-Reference tab (Properties dialog
box) 2125
Cross-Reference Table Data Fields to
Display dialog box 1397
Index | 2165
cross-references
about 809
advanced techniques 1981
annotations 839
attributes 320
checking coils or contacts 813, 815
child components 769, 773
child location codes 882–883
component data 748, 753
component setup 815
creating 812
dashed lines 846–848
destination symbols 809
displaying 817
drawing properties 812
drawing setup 815
formatting 817
graphical formats 822, 824
hiding 813
inserting 742
multi-line text 880
naming conventions 298
overriding 818
processing 810
project properties 812
project setup 815
project-wide changes 1199
removing overrides 815, 819
reports 809, 1397, 1399
settings 216, 229, 815, 818–819
skipping contacts 813
source symbols 809
stand-alone symbols 430, 838–839,
844–845
surfing on reports 812
symbols 579
tables 827, 830, 832–833
text format 820
visibility 813
WD_M block attributes 253
Cross-References tab (Drawing Properties
dialog box) 229
Cross-References tab (Properties dialog
box) 216
CSV files
component spreadsheet data 1536
external component lists 182
importing 1175
current converter symbols 551
current protection relay symbols 479
current switch symbols 545
current transformer symbols 469
Customer Involvement Program 6
customizing
attribute templates 2107
circuits 655, 2006
icon menus 2119
migrating older customization
files 131–132
panel footprints 2105
symbols 2083
terminals 2094
wire connections 2112
D
dashed lines
attributes 354
cross-references 846–848
point-to-point tools 1140
reference arrows 847–848
DAT files
alternate icon menu files 1260
editing 1237, 1264, 2119
icon menu files 1250
locking 1237
Data Fields to Display dialog box 1399
data imports 1166–1167
databases
cable conductor database 954
catalog databases 755–756, 1271,
1273, 1277, 1279
change-tracking tables 1200
Circuit Builder 681
copying tables 682
deleting tables 683
ECDS conversions 1648, 1650
editing tables 685
electrical standards database 2044
electrical standards database
editor 681, 687
exporting data to 1501–1507
2166 | Index
footprint lookup files 1594
importing catalog information
from 1283, 1300
importing connector data 1175
language translation tables 1202,
1204
merging 129
migrating 129
motor lookup database 712
moving files 1272
opening tables 682
pin lists 1305–1307, 1309, 1311
PLC database 2005
rebuilding 196
scratch databases 195
terminal properties 1060–1062,
1064
user data 854–855
DC motor symbols 490
de-rating factors 720
debugging projects 1686, 1688–1689,
1692, 1694
default libraries 301
default_cat.mdb files 1271
default.grp files 182
default.inst files 182
default.loc files 182
default.mnt files 182
default.wdt files 1213, 1221
Define Layers dialog box 261
deleting
components 798–799, 1585
database tables 683
drawings 144
jumpers 1109
location mark symbols 885
marker blocks 2037
pins from connectors 1149
projects 189
tracking deleted objects 1200
wire gaps 958
wire numbers 1010
deployment 1989
description defaults files 182
descriptions
adding 761
exporting data 1505
formatting 763
language tables 762
moving 868
multiple descriptions 1213, 1221
reports 1420, 1486
symbols 339
tracking changes to 1200
translating 1202–1203
updating 883, 1224
destination arrows 1647
destination markers
adding 1021
advanced techniques 1996
fanning 1020
layers 1022–1023, 1025–1026
styles 1022–1023, 1025
destination signal arrows 1011–1012,
1014, 1647
destination wire signal symbols 298, 320
destinations
cross-reference symbols 809, 844–
845
listing codes 1019
terminals 1078
toggling installation codes 1106
toggling location codes 1105
tracking changes to codes 1200
devices
box symbols 428, 577
operating symbols 557
diac diode symbols 575
dialog boxes
Component Data Fields to
Report 1937
Create New Drawing 1895, 1913
Create/Edit Wire Type 1901
Surf 1944
Din Rail dialog box 853
din rails
about 853
inserting 853
diode symbols 426, 575
direct-to-terminal wire connections 1029
direction
build direction 2052
Index | 2167
symbols 557–558
directories 182
disconnect 1 pole symbols 462
disconnects 378, 461–462
Display tab (Connector Selection dialog
box) 1174
Display tab (Insert Connector dialog
box) 1157
displaying
attributes 869
cross-references 813, 817
drawings 172
missing catalog assignments 1304
sequencing 1031, 1611
terminal associations 1055, 1057
terminal connections 1132
terminal strips 1129
wire numbers 1010
wires 978
dividers 1104, 1157, 1167
dot tee markers 1033
drafting settings 1896, 1913
dragging icons on menus 1234
Drawing Audit dialog box 1694
Drawing Format tab (Drawing Properties
dialog box) 233
Drawing Format tab (Properties dialog
box) 220, 2125
Drawing List Data Fields to Display dialog
box 1334
Drawing List Display Configuration dialog
box 174
Drawing List Report dialog box 192
Drawing Properties dialog box
codes for replaceable
parameters 239
Components tab 225
Cross-References tab 229
Drawing Format tab 233
Drawing Settings tab 222, 2125
Styles tab 231
Wire Numbers tab 228
Drawing Settings tab (Drawing Properties
dialog box) 222, 2125
drawing shapes 1551, 1555
drawing standards 206, 2125, 2127
drawings
adding to projects 140
archiving 187–188
auditing 1686, 1688–1689, 1692,
1694
batch plotting 1191
cleaning 1688
comments in 1200
creating 168
cross-references 815
defaults 202
description 144
displaying 172
generating 630–631, 635, 639
grouping in projects 144
inserting reports into 1318, 1322,
1330
moving to another 1190
previewing 144
processing 196
project-wide changes 1199
properties 202–203
publishing as DWF files 1208
publishing to the Web 1205–1207
removing 144
reordering 144
reports 192, 1334
settings 222, 233
surfing 1187
task list of changes 194
templates 245
title blocks 1213, 1221
tracking changes 1200
unavailable files 198
updating 1224
updating with imported data 1508
WD_M blocks 253
dual one-line circuits 706
dual power feed circuits 699
duplex receptacle symbols 427, 576
duplicate numbers 1686, 1688, 1694
duplicate tags 1686, 1688, 1694
DWF files
exporting 1208
publishing web pages 1205–1206
DXF files 1207
2168 | Index
E
earth symbols 423, 570
ECDS to AutoCAD Electrical
conversions 1648, 1650
Edit Attribute dialog box 861
Edit Catalog Record dialog box 1298
Edit Child Component dialog box 769,
773
Edit Component - IEC dialog box 753
Edit Component dialog box 748
Edit Conduit/Wire Way Label dialog
box 1631
Edit dialog box 784, 1062, 1309
Edit Entry dialog box 1138
Edit Footprint Record dialog box 1599
Edit Language Lookup File dialog
box 1204
Edit Miscellaneous and Non-AutoCAD
Electrical Attributes dialog
box 331
Edit Multi-Connection Sequence Terminal
Symbol dialog box 1135
Edit PLC I/O Point dialog box 624
Edit PLC Module dialog box 596
Edit Record dialog box 780, 785, 1064,
1311
Edit Report dialog box 243, 1323
Edit Terminal dialog box 1100
Edit Terminal Jumpers dialog box 1127
Edit User Table Data dialog box 855
Edit Wire Connection Sequence dialog
box 1037
Edit/Delete Jumpers dialog box 1109
editing
attributes 349–350, 861
cable colors 954
cable conductor database 954
cable markers 939, 943, 945, 947,
953
catalogs 1291, 1295, 1298
child components 769, 773
components 748, 753
conduit markers 1627, 1631
cross-reference symbol mapping
tables 832
database tables 685
footprint lookup files 1595–1596,
1599
footprints 1565, 1569, 1574
icon menu properties 2119
icon menus 1234, 1237, 1264
ladders 963–966, 968–969
language database tables 1204
marker blocks 2038
multi-connection sequences 1135,
1138
multi-line text 880
part numbers 1300
pin lists 1306, 1309, 1311
pin numbers 1140, 1152
PLC database 606
PLC modules 596, 616
records 780
reports 1323
retagging components 879
RSLogix data 642
schematic lookup files 782, 784–785
sequencing 1030, 1037, 1613
signal arrows 1012
spreadsheet data 1500
symbols 331, 893
terminal associations 1055
terminal jumpers 1109, 1123, 1127
terminal strips 1078, 1128
terminals 606, 1046, 1050, 1053,
1062, 1064, 1100, 1565,
1569, 1574
text 864–867
user-defined attributes 1509–1510,
1512
wire jumper assignments 856–857
wire numbers 991–992, 994, 1007
wire types 271, 902
Xdata 1695
effect symbols 560
Electrical Audit dialog box 1692
Electrical Database Builder 1648, 1650
electrical standards database 711, 2044
electrical standards database editor 681,
687
electrolytic symbols 575
Index | 2169
electronic symbols 426, 575
enclosure light symbols 423
end barriers 1104
energy flow 560
energy savings 26
ENV files 279
environment files 138, 279
equipment lists
BOM data and 785
inserting components from 785–
787, 789
inserting footprints from 1557–
1559, 1561
schematic lookup files 782, 784–785
equipotential bond symbols 570
error checking 1686, 1688–1689, 1692,
1694
error reports
component exceptions 1342, 1433,
1448
cross-references 809
exception reports 1428
signal reports 1019
symbol audits 357, 360
terminal exceptions 1352, 1440,
1458
wire annotation exceptions 1348,
1437, 1454
Excel files
din rails 853
exporting component data 1502
exporting panel layout data 1506
exporting PLC data 1503–1505
exporting spreadsheet data 1500–
1501, 1503
exporting terminal data 1506–1507
importing 1175, 1500
mapping to blocks 1663–1665
PLC database content 630
reports 1318
RSLogix data 640–642
structure 1175
updating drawings with data 1508
exception reports
auditing drawings 1692
component exceptions 1342, 1433,
1448
cross-references 809
terminal exceptions 1352, 1440,
1458
types of 1428
wire annotation exceptions 1348,
1437, 1454
excluding contacts 813
expanding catalog tables 1295
exploding blocks 1654
Export to Spreadsheet dialog box 1501
exporting
comma-delimited files 1501–1507
component data 1502
data for Cable & Harness 1519,
1521–1522
database files 1501–1507
DWF files 1208
panel layout data 1506
PLC data 1503–1505
reports 1318
RSLogix data 640–642
spreadsheet data 1500–1507
terminal data 1506–1507
Unity Pro data 645–646, 651–652
web pages 1205–1207
external codes 1330
external component files 182
external connections 1132
external destinations 1105–1106
external jumpers 1122–1123
Extra Libraries toolbars 117
extra wire numbers 970
extracting
components 949, 953
wires 949, 953
F
families
family tables in catalogs 1271, 1294
family tag code map files 182
family type naming
conventions 298
overriding family tags 2125
2170 | Index
overriding tags 759
Fan-In/Fan-Out Signal Destination dialog
box 1025
Fan-In/Fan-Out Signal Source dialog
box 1024
Fan-In/Out Single Line Layer dialog
box 1026
fanning markers in or out
about 1020
advanced techniques 1996
destination markers 1021, 1025
layers 1022–1023, 1026
source markers 1021, 1024
styles 1022–1023
fault symbols 562
fence crossing points 775–776
fields
BOM data in reports 1340, 1356,
1380
cable data in reports 1338, 1358,
1363–1364
catalog tables 1277, 1279
component data in reports 1344,
1378
conduit marker fields in
reports 1332
connector data in reports 1372,
1374, 1376
cross-reference data 1397, 1399
drawing file data in reports 1334
missing level/sequence
assignments 1346
nameplate data in reports 1350
pin lists 1309, 1311
PLC data in reports 1368, 1386,
1390
report format files 1442, 1444
selecting for reports 1330
terminal data in reports 1388, 1393
terminal strip tables 1113
wire data in reports 1354, 1370,
1384, 1394, 1396
file formats
project files 187
web formats 1205–1206
files
copying into projects 142
migrating 129
processing 198
Files Unavailable for Processing dialog
box 198
filtering
catalog records 1277
contact types 1313
report data 1318
Find or Replace Wire Numbers dialog
box 987
Find/Edit/Replace (drawing or project)
dialog box 865
Find/Edit/Replace Component Text dialog
box 866
Find/Replace Terminal Text dialog
box 867
finding
drawings 865
projects 865
terminal property information 1060
text 864–867
wire number text 986–987
fixed component tags 877–878
fixed resistor symbols 426, 575
fixed spacing 1142, 1157, 1159, 1167
fixed wire numbers 970, 991–992, 994
Fixed/Unfix Component Tag dialog
box 878
flashing beacon light symbols 502
flipping
components 805–806
connectors 1144
wire gaps 958
wire numbers 1003
float/level switch symbols 545
flow
energy flow symbols 560
flow switch symbols 411
flow switches 545
symbols 559
folders 129
following signals 848–849
fonts 1195
foot switch symbols 415, 545
Index | 2171
Footprint Database File Editor 1596,
1599
Footprint dialog box 1555
Footprint Lookup dialog box 1596
footprint lookup files 182, 1595–1596,
1599
footprint_lookup.mdb files 1594
footprints
attribute templates 1563
attributes 329, 1526
automatic updates 1532
catalog lookup tables 1294
configuration 1529
copying 1562
copying panel assemblies 1565
creating with Symbol Builder 2105
deleting 1585
din rails 853
displaying sequencing 1611
editing 1565, 1569, 1574
extracting footprint lists 790–791,
794–796
inserting 1538, 1540, 1542, 1552
inserting from catalogs 1555, 1557
inserting from equipment lists 787,
1557–1559, 1561
inserting from icon menus 1544,
1548, 1551
inserting from vendor menus 1545,
1547
inserting manually 1551, 1555
inserting panel assemblies 1564
inserting with spreadsheet
data 1536–1537
layers 258
level assignments 1614, 1619, 1622
lookup database file editor 1596
lookup files 1534, 1594–1596, 1599
mapping 1534
naming conventions 298
reports 1428
sequencing 1613
spacing 1544
types of symbols 342
wire information 1587–1588, 1590,
1592
Xdata 1527
Force Attribute/Text to a Different Layer
dialog box 863
force symbols 557–558
Form C contacts 827
Format - Schematic Layout Wire
Connection Annotation dialog
box 1531
format files
about 1442
defining 1444
missing level/sequence assignments
reports 1452
panel bill of materials reports 1446
panel component exception
reports 1448
panel component reports 1451
panel nameplate reports 1456
panel terminal exception
reports 1458
panel wire annotation exception
reports 1454
panel wire connection reports 1461
schematic bill of material
reports 1463
schematic cable from/to
reports 1465
schematic cable summary
reports 1467, 1469
schematic component reports 1480
schematic component wire list
reports 1471
schematic connector details
reports 1474
schematic connector plug
reports 1476
schematic connector summary
reports 1478
schematic missing bill of material
reports 1483
schematic PLC I/O address and
descriptions reports 1486
schematic PLC I/O component
connection reports 1469
schematic PLC used so far
reports 1493
2172 | Index
schematic terminal numbers
reports 1489
schematic terminal plan
reports 1491
schematic wire from/to reports 1484
schematic wire label reports 1495
formatting
cross-references 817, 820
description text 763
reports 1442, 1444
wire annotations 1531, 1592
wire numbers 988, 990
frequency meter symbols 551
frequency relay symbols 482
from/to reports
cable data 1363, 1407, 1465
controlling sequencing 1029
location codes in 1427
types of 1402
wire data 1384, 1419, 1484
fuse switch symbols 465
fuses 376, 465
fusible disconnect symbols 461
G
gaps
auditing drawings 1689
wire gaps 958
gate valves 421
gauge
gauge label files 182
labels 922–924
wires 988, 990
General Data Export dialog box 1503
generating
automatic reports 1496
reports 1318, 1330, 1402–1403,
1428, 1430, 1497, 1499
terminal strip tables 1113
generator symbols 491
generic device box symbols 428, 577
geometry
adding to blocks 1660
converting to Electrical-aware
blocks 1651, 1653, 1656–
1657, 1659
exploding blocks 1654
footprint lookup files 1594
global search and replace 864–867
globe valves 421
graphic cross-references 822, 824, 827,
830, 832
graphic layers 264
graphic terminal layout 1093
Graphical Cross-Reference Format Setup
dialog box 824
green design 26
grids
I/O variables 651
terminal grid 606
X Zone grid 234
X-Y Grid 236
ground symbols 423, 570
grounding conductors 720
group codes
copying 1584
group code files 182
groups 144
GRP files 182
H
hardware files 651
HCRM values 1271
header information (PLC) 1503
headers in reports 1330
heater element symbols 575
help 3, 6
hiding
cross-references 813
wire numbers 1010
horizontal ribbon 118
horn symbols 423, 570
hour meter symbols 551
HTML files 1205–1206
Hydraulic drawings 1895
hydraulic symbols 1896
attributes 329
by-pass flow regulator 1909
Index | 2173
checkvalve flow left 1897, 1908,
1910
filters 1899, 1909
fixed displacement pump 1898
general valves 1897, 1906, 1910
inserting 742, 1676
insertion 1897–1899, 1903, 1905–
1906, 1908, 1910
libraries 306
meters 1906
motors and pumps 1898
naming conventions 298
pressure gauge 1906
pressure relief valves 1903
reservoir 1899
restrictor with variable output
flow 1909
shut off valve open 1897, 1906
single ended piston rod 1909
solenoid spring return 1908
uni-directional pump 1898
I
I/O modules
address and descriptions
reports 1386, 1420, 1486
advanced techniques 2005
annotating points 622
connection reports 1409, 1469
editing points 620, 624
exporting connection data 1504
exporting data for Unity Pro 652
I/O parametric build symbols 298
importing RSLogix data 640–642
importing Unity Pro data 645–646,
651
inserting points 621
PLC address database
information 601
PLC modules 591
schematic attributes 320
types of reports 1402
I/O variables
exporting 652
Unity Pro data 651
Icon Menu Wizard
about 1232, 1234, 1237
circuit icons 1244, 1247, 1257
command icons 1242, 1254
component icons 1239, 1252
icon properties 1234
menu properties 1250
submenus 1249, 1259
Icon Menu Wizard dialog box 1237,
2119
icon menus
about 1232
adding circuits 728, 1244, 1247,
1257
adding commands 1242, 1254
adding components 1239, 1252
adding icons 1234
advanced techniques 2119
alternate files 1260
best practices 2119
customizing 2119
editing 1264
file structure 1264
footprint display syntax 1599
icon properties 1234
inserting panel footprints
with 1544–1545, 1547–
1548, 1551
locking menus 1237
menu properties 1250
migrating 2119
pages 2119
preferences 206
settings 1237
sharing with multiple users 1989
submenus 1249, 1259
icons
adding to menus 1232, 1234, 1237
changing images 2119
creating 1232, 1234, 1237
IEC mode
cable markers 943, 947
child components 773
component tags 193
configuring projects for 2125, 2127
drawing settings 222
2174 | Index
editing components 753
IEC symbols 441
inserting components 753
IEC Tag Mode Update dialog box 193
IEC tags
new drawings 171
updating 193
illuminated push buttons 442
illuminated selector switches 374
Import Wire Type dialog box 273, 904
importing
catalog information 1283, 1300
connector data 1175
data for I/O drawings 635, 639
RSLogix data 640–642
spreadsheet data 1500, 1508
Unity Pro data 645–646, 651
wire types 904, 907
in-line components
PLC database information 630
PLC-generated drawings 639
wiring 630
in-line wire labels
illustrated 398
inserting 742
schematic attributes 320
symbols 509
in-line wire markers
about 925
naming conventions 298
in-line wire numbers 979, 1002
in-use pin numbers 1161
incrementing wire numbers 1007
inductive switch symbols 524
information lines 1213, 1221
Insert Accessory dialog box 1104
Insert Component dialog box 742
Insert Connector dialog box 1157
Insert Destination Code dialog box 1014
Insert dialog box 789
Insert Footprint dialog box 1551
Insert Ladder dialog box 963
Insert Panel Wiring Diagram Terminal
Strip Representation dialog
box 1615
Insert Pneumatic Component tool 1912
Insert Spare Terminal dialog box 1103
Insert Wire Color/Gauge Labels dialog
box 924
Insert Wire Connection dialog box 353
Insert/Edit Attributes dialog box 350
Insert/Edit Cable Marker (2nd+ wire of
cable) - IEC dialog box 947
Insert/Edit Cable Marker (2nd+ wire of
cable) dialog box 945
Insert/Edit Cable Marker (Parent Wire) -
IEC dialog box 943
Insert/Edit Cable Marker (Parent Wire)
dialog box 939
Insert/Edit Child Component - IEC dialog
box 773
Insert/Edit Child Component dialog
box 769
Insert/Edit Component - IEC dialog
box 753
Insert/Edit Component dialog box 748
Insert/Edit Conduit/Wire Way Label dialog
box 1631
Insert/Edit Panel Level Assignment
Component dialog box 1622
Terminal Strip dialog box 1619
Insert/Edit Terminal Symbol dialog
box 1046
inserting
attributes 346, 350
balloons 1600–1602
break symbols 1159, 1167
cable markers 931, 939, 943, 945,
947, 949, 953
child components 769, 773
circuits 690, 708, 729, 736
components 738, 742, 774, 1538
components from catalog lists 776,
778
components from equipment
lists 785–787, 789
conditional components 2051
conduit markers 1627, 1631
connectors 1040, 1142, 1157
cross-reference arrow symbols 847–
848
destination wire markers 1021
Index | 2175
footprints 1536, 1538, 1540, 1542,
1552, 1562
footprints from catalogs 1555, 1557
footprints from equipment
lists 787, 1557–1559, 1561
footprints from icon menus 1544,
1548, 1551
footprints from vendor
menus 1545, 1547
footprints manually 1551, 1555
footprints with spreadsheet
data 1537
gauge labels 924
hydraulic components 1676
ladder rungs 966
ladders 960–961, 963
link line attributes 354
location boxes 892
location codes 881
multi-connection sequences 1138
multiple components 742
nameplates 1609–1610
one-line circuits 700
P&ID symbols 1681
panel assemblies 1564
part numbers 1300
PLC I/O points 621
PLC modules 590, 592
pneumatic components 1671
power feed circuits 694
prompts during 617
reports into drawings 1318, 1322,
1330
signal arrows 1014–1015
source wire markers 1021
spacers 1159, 1167
spacing inserted items 1544
spare terminals 1103
splices 1185
stand-alone cross-reference
symbols 838, 844
tee markers 1033
terminal accessories 1104
terminal strip tables 1070, 1114
terminal strips 1066, 1615
terminals 1040, 1046, 1540, 1542
WBlocked circuits 729, 736
WD_M blocks 253, 256
WD_PNLM blocks 256
wire connections 351, 353
wire jumpers 856–857
wire labels 922–924
wire numbers 970–971
wire tags 972–973
wire way labels 1631
wires 913, 917–918, 1140
installation
manufacturer content 1274
network deployment 1989
symbol libraries 301
installation codes
cable markers 939, 943, 945, 947,
953
child components 769, 773
component data 748, 753
copying 1584
installation code files 182
location boxes 892
multi-connection sequences 1138
PLC I/O points 624
PLC modules 596
terminal strips 1065
toggling 1106
tracking changes to 1200
updating 883
instrumentation 421, 551
insulating relay symbols 482
interconnecting components 919
internal codes 1330
internal connections 1132
internal destinations 1105–1106
internal jumpers
terminal jumpers 1122–1123
wire jumpers 856–857
Inventor
exporting data for Cable &
Harness 1519, 1521–1522
importing data from 1166–1167
invisible extended entity data
(Xdata) 1526–1527, 1695
item number balloons
about 1600
2176 | Index
inserting 1601–1602
resequencing 1604–1605
Item Numbering Setup dialog box 211
item numbers
balloons 1600–1601, 1604
fixed 1606
per-part numbers 211
settings 211
J
jacks
jack connector pin symbols 298
report options 1330
JIC standard 2127
JIC symbols 366
JPEG files 1205–1206
Jr. Projects 1648, 1650
jumper charts 1071, 1093
jumpers
add-on 1122–1123
charts 1071, 1093
deleting 1109
editing 1109, 1123, 1127
external 1122–1123
internal 1122–1123
terminal jumpers 1078, 1122–1123,
1125, 1127
terminal strip assignments 1070
wire jumpers 856–857
justified text 870–871
K
key switch symbols 545
kwh energy loss 720
L
labels
cable labels 1364
gauge labels 922–924
reports 1402
wire labels 922–924, 1425, 1495
X-Y Grid 236
ladder schematics 1140, 1534
ladders
about 961
attributes 960
converting non-intelligent
ladders 966, 968
defaults 960
format settings 220, 233
inserting 960–961, 963
ladder master line references 298
line reference numbers 966, 968
moving 965
naming conventions 298
phases 963
PLC-generated drawings 635, 639
project-wide changes 1199
renumbering 963, 969
resizing 964
rungs 963, 965–966, 968
spacing 960, 963, 965
tracking changes to reference
numbers 1200
WD_M block attributes 253
Language Conversion dialog box 1203
language tables
descriptions 763, 1202
editing 1204
opening 762
language translation 1202–1203
last-used assignments 1283
latch relay coils 380
latching device symbols 567
layers
about 258
attribute assignment 331, 862–863
component block layers 261
configuring for export 1521
exporting wire data to Cable &
Harness 1519
fanning markers 1022–1026
footprints 258
moving text to other 863
multi-wire layers 1996
nameplate layers 264
non-text graphic layers 264
panel layers 258, 264
Index | 2177
renaming 258, 262
report tables 1322
schematic layers 258
settings 220, 233
WD_M block attributes 253
wire layers 265–266, 271, 902, 923–
924, 988, 990, 1195
wire number layers 261, 970
Layout Preview tab (Terminal Strip
Editor) 1093
Layout tab (Connector Selection dialog
box) 1174
Layout tab (Insert Connector dialog
box) 1157
layouts
about 1523
automatic updates 1532
batch plotting 1191
configuration 1527, 1529
editing 1565, 1569, 1574
exporting data 1506
footprint lookup files 1594
item number balloons 1600–1602
level assignments 1614, 1619, 1622
level/routing wire connections 1029
nameplates 342, 1609
naming conventions 298
relationships to schematic
drawings 1534
reports 1428
resequencing item number
balloons 1605
sequencing assignments 1611, 1613
surfing references 1187
tag lists 758
tagging 1657
templates 1563
tools 1524
wire annotation format 1531
Xdata 1526–1527
leaders
wire leaders 922
wire numbers 998
LED light symbols 500
level assignments
boundary boxes 1620
components 1622
copying 1614
displaying 1611
missing assignments 1346, 1428,
1436, 1452
removing 1611
reports 1428, 1436, 1452
terminal strips 1619
Level Code Edit - Boundary Box dialog
box 1620
level codes 1614
level switches 411
level/routing wire connections 1029
lever switch symbols 545
libraries
changing symbol appearance 331
client-specific 190–191
default 300–301
editing symbols in 893
hydraulic symbols 306
installing 301
multiple 300–301
P&ID symbols 306
paths 300
preferences 206
substituting symbols 330
Library Swap -- All Drawing dialog
box 337
library symbols
attributes 345, 349
auditing 357, 360
changing appearance 331
client-specific 190
converting existing 1642
COPYTAG attribute 329
creating 339, 342, 344
default 301
editing attributes 893
editing text 893
family types 298
hydraulic 306
layers and 331
location 300
multiple 300–301
naming conventions 282, 298
P&ID 306
2178 | Index
predefined annotations 332
saving 357, 359
schematic attributes 320
splitting tag names 299
substituting 330
swapping blocks 332–333, 336–338
Symbol Builder 342
TAG1 attribute 321
TAG2 attribute 321
text size 893
types 342
updating blocks 332–333, 336–338
light dependent electronics symbols 575
limit switches 408, 520
line reference numbers 966, 968
linear direction 557
lines
blank lines in reports 1330
link lines 349, 354
PLC module boxes 608, 614
wire number leader lines 922
LINEx labels 1225
link lines
attributes 354
cross-references 846–848
dashed 846–848
point-to-point tools 1140
tools 349
Link Schematic tools 1659
link symbols 1661
linking
catalogs to web pages 1277
displaying links 1661
replacing text with Electrical-aware
entities 1651, 1653, 1659
title block attributes 1213
title block information 1218, 1220
unlinking symbols 1661
linking tools 1932
list of commands 2148
Load or Reload Linetypes dialog
box 1915
loads 1668–1670
wires 720
Location Box dialog box 892
location boxes 892
Location Code Selection for From/To
Reporting dialog box 1427
location codes
cable markers 939, 943, 945, 947,
953
child components 769, 773
component data 748, 753
copying 1584
from/to reports 1427
inserting 881
location boxes 892
location code files 182
location mark symbols 885, 887
multi-connection sequences 1138
PLC I/O points 624
PLC modules 596
terminal strips 1065
toggling 1105
tracking changes to 1200
updating child codes 882–883
location mark symbols 298, 885, 887
Location Symbols dialog box 887
locations of files 182
locking icon menu files 1237
lookup files
footprint lookup files 1595–1596,
1599
inserting components 789
schematic lookup files 782, 784–785
loudspeaker symbols 581
M
magnetic effect symbols 560
magnetic switch symbols 528
Main Electrical toolbars 94, 104
manufacturers
catalog tables 1271
inserting footprints from vendor
menus 1544–1545, 1547
installing additional content 1274
MFG fields 1279
pin lists 1311
PLC database information 601
PLC modules 590, 596
sorting catalog databases by 1291
Index | 2179
updating 883
mapping
AutoLISP values to title blocks 1227
block replacements 1663–1665
contact mapping
cross-references 822, 824,
827, 830
data for import 639
editing symbol mapping tables 832
imported Inventor data
properties 1166–1167
ladder diagrams to panel
layouts 1534
non-Electrical blocks 1642, 1644
title block attributes 1213
title blocks information 1218, 1220
wire labels 922–924
wire list data to Inventor Cable &
Harness 1519
Mark and Verify dialog box 1202
marker blocks 2037–2038
marking changes 1200
MARKVERIFY table 1200
master test pilot lights 391
MAXNC attribute 1305
MAXNO attribute 1305
MAXNONC attribute 1305
MCC database 681
mcc.mdb files 681
MDB files
exporting 1501–1507
importing 1175
location 182
measurement units 1303
mechanical controls 566–568
mechanical footprints
attributes 1526
Xdata 1527
mechanical resonance relay symbols 482
menus
adding symbols to 885, 887, 1232
alternate icon menus 1260
command properties 1254
icon menus 1232, 1234, 1237,
1548, 1551
main menu properties 1250
renaming 1250
sharing with multiple users 1989
submenus 1249, 1259
vendor icon menus 1544–1545,
1547
Merge Utility 129
Merge/Copy Options dialog box 134
merging databases 129
merging files during migration 129, 134
meters 421, 551
MFG fields 1271
microphone symbols 581
migrating
merge options 134
Migration Utility 129
PLC database 135, 620
settings and customizations 131–
132
Migration Review dialog box 136
Migration Utility
about 129
settings 130–132, 134, 136
minimum active power relay
symbols 482
minimum impedance relay symbols 482
mirroring wire numbers 1003
MISC_CAT tables 1271, 1294
MISC1 attribute 2037
miscellaneous attributes 331
Missing Bill of Material Data Fields to
Report dialog box 1380
Missing Bill of Material reports
fields in 1380
formatting 1483
generating 1418
missing catalog assignments 1304
Missing Level/Sequence Assignments
dialog box 1436
Missing Level/Sequence Assignments
reports
about 1428
fields in 1346
formatting 1452
generating 1436
MNT files 182
2180 | Index
Modify Line Reference Numbers dialog
box 968
Modify/Fix/Unfix dialog box 994
Module Box Dimensions dialog box 608
Module Layout dialog box 591
Module Specifications dialog box 616
modules
specification table 601
terminal information table 601
motion symbols 557–558
motor control circuits
customizing 2006
wire numbers 975
motor control symbols
1-phase 487
3-phase 489
DC motors 490
general 486
generators 491
illustrated 387
starters 492
tags in wire numbers 2059
motor starter symbols 492
motor symbol tags 2061
motors
1-phase 487
3-phase 489
database 711–712
DC motors 490
generators 491
starters 492
mount codes
copying 1584
mount code files 182
moving
attributes 798, 868
attributes to other layers 862–863
catalog files 1272
circuits 726
components 798, 801
descriptions 868
ladders 965
leaders with wire numbers 998
pins 1151
text to other layers 863
wire numbers 996–997, 999, 1003
mtext (multiline text)
editing 880
formatting wire annotations 1592
wire information 1587–1588
Multi-Connection Sequence Terminal
symbols 1134
multi-connection terminals
about 1134
editing 1135, 1138
multi-level terminal strips 1078
multi-level terminals 1055
multi-stack terminals 1055
multi-tier terminals 1055
Multiple Bill of Material Information
dialog box 755, 1303
multiple Bill of Materials 1303
multiple bus wiring 918, 1163
multiple cable markers 949, 1338
Multiple Cable Markers dialog box 949
Multiple Catalog Part Number
Assignments dialog box 756,
1303
multiple catalogs 1273, 1303
multiple clients
about 190
libraries 191
project setup 192
sharing icon menus 1989
title blocks 190–191
Vault setup 2134
multiple connection terminals 320
multiple libraries 300–301
multiple part numbers 1578
Multiple Wire Bus dialog box 918
multipole circuits 2047, 2052
multipole terminal block units 1313
N
Nameplate reports
about 1428
fields in 1350
formatting 1456
generating 1439
nameplates
about 342, 1609
Index | 2181
creating 1610
inserting 1609
layers 264
reports 1350, 1428, 1439, 1456
stretchable 1610
surfing references 1187
naming conventions
attribute templates 2107
catalog tables 1271
circuit templates 2044
menus 1250
panel footprints 2105
schematic lookup files 782
symbols 282, 298, 2119
wire connections 2112
navigating through drawings 1190
NC contact state 809
neon pilot lights 392
network deployment 1989
new circuits 2032
new drawings 168
New Module dialog box 611
NEW_DWG value 630
next drawing command 1190
NO contact state 809
no wire numbering 28
non-AutoCAD Electrical attributes 331
non-intelligent ladders 966, 968
non-text graphic layers 264
normal wire numbers 970
NULL contact values 813
O
OFF-delay timers 384
older versions of files 129
one-line circuits 27, 700, 703, 706
one-line symbols 304, 329
creating 2098
naming conventions 298
online help 3, 6
opening drawings 1190
opening tables 682
operating devices 557
Option - Tag Format Family Override
dialog box 759
Optional ENV File Assignment for Current
Project dialog box 279
Optional Script File Reference dialog
box 1322
orientation
connectors 1157, 1174
pin annotations 1313
terminal strips 1130
Orientation tab (Connector Selection
dialog box) 1174
Orientation tab (Insert Connector dialog
box) 1157
origin points 339
overriding
cross-reference settings 815, 818–
819
tags 759, 2125
wire types 275
P
P&ID drawing 1912
P&ID drawings 1895
p&id symbols 1916
ball mill 1916
conveyor 1917
dryer 1918
equipment 1916
field mounted instruments 1918
flow arrow down 1921
flow arrows 1921
gate valve 1918
mixer2 1917
P&ID symbols
attributes 329
inserting 742, 1681
libraries 306
naming conventions 298
page breaks in reports 1330
Panel Balloon Setup dialog box 1602
Panel Bill of Material Data Fields to Report
dialog box 1340
Panel Bill of Materials dialog box 1432
Panel Component Data Fields to Report
dialog box 1344
Panel Component dialog box 1435
2182 | Index
Panel Component Exception Data Fields
to Report dialog box 1342
Panel Component Exception dialog
box 1433
Panel Component Layers dialog box 264
panel component lists 794
Panel Components dialog box 794
Panel Drawing Configuration and Defaults
dialog box 1529
Panel Equipment In dialog box 1559
Panel Footprint dialog box 1557
Panel Footprint Lookup Database File
Editor dialog box 1596
panel footprints
attribute templates 1563
attributes 329, 1526
automatic updates 1532
catalog lookup tables 1294
configuration 1529
copying 1562
copying panel assemblies 1565
creating with Symbol Builder 2105
din rails 853
editing 1565, 1569, 1574
extracting footprint lists 790–791,
794–796
inserting 1536, 1538, 1540, 1542,
1552
inserting from catalogs 1555, 1557
inserting from equipment
lists 1557–1559, 1561
inserting from icon menus 1544,
1548, 1551
inserting from vendor menus 1545,
1547
inserting manually 1551, 1555
inserting panel assemblies 1564
inserting with spreadsheet
data 1537
layers 258
level assignments 1614, 1619, 1622
lookup files 182, 1534, 1594–1596,
1599
mapping 1534
naming conventions 298
reports 1428
sequencing assignments 1611, 1613
spacing 1544
symbols 342
wire information 1587–1588, 1590,
1592
Xdata 1527
panel layers
renaming 258, 262
settings 258
Panel Layout - Component Insert/Edit
dialog box 1569
Panel Layout - Terminal Insert/Edit dialog
box 1574
Panel Layout Data Export dialog
box 1506
Panel Layout List - Schematic Components
Insert dialog box 791
Panel Layout toolbar 108
panel layouts
about 1523
automatic updates 1532
configuration 1527, 1529
editing 1565, 1569, 1574
exporting data 1506
footprint lookup files 1594
item number balloons 1600–1602
level assignments 1614, 1619, 1622
level/routing wire connections 1029
nameplates 342, 1609
naming conventions 298
relationships to schematic
drawings 1534
reports 1428
resequencing item number
balloons 1605
sequencing assignments 1611, 1613
surfing references 1187
tag lists 758
tagging 1657
templates 1563
tools 1524
wire annotation format 1531
Xdata 1526–1527
panel lists
inserting components from 790–
791, 794
Index | 2183
inserting terminals from 795–796
Panel Missing Level/Sequence Assignments
Data Fields to Report dialog
box 1346
Panel Nameplate Data Fields to Report
dialog box 1350
Panel Nameplate dialog box 1439
panel reports
about 1318, 1428
automatic generation 1496
bill of materials reports 1340, 1432,
1446
component exception reports 1342,
1433, 1448
component reports 1344, 1435,
1451
generating 1330, 1428, 1430
list of 1428
missing level/sequence assignments
reports 1346, 1436, 1452
nameplate reports 1350, 1439, 1456
terminal exception reports 1352,
1440, 1458
types of 1428
wire annotation exception
reports 1348, 1437, 1454
wire connection reports 1354,
1441, 1461
Panel Tag List dialog box 758
Panel Terminal Exception Data Fields to
Report dialog box 1352
Panel Terminal Exception dialog
box 1440
Panel Terminal List - Schematic Terminals
Insert dialog box 795
Panel Terminal Strip Graphical Report
Parameters dialog box 1624
Panel Terminals Data Export dialog
box 1506
Panel Terminals dialog box 796
panel terminals lists 795
Panel Wire Annotation Exception Data
Fields to Report dialog
box 1348
Panel Wire Connection Data Fields to
Report dialog box 1354
Panel Wire Connection dialog box 1441
panels
about 1523
automatic updates 1532
configuration 1527, 1529
editing 1565, 1569, 1574
exporting data 1506
footprint lookup files 1594
item number balloons 1600–1602
level assignments 1614, 1619, 1622
level/routing wire connections 1029
nameplates 342, 1609
naming conventions 298
panel assemblies 1563–1565
relationships to schematic
drawings 1534
reports 1428
resequencing item number
balloons 1605
schematic-to-panel terminal
relationships 1055
sequencing assignments 1611, 1613
surfing references 1187
tag lists 758
tagging 1657
templates 1563
tools 1524
wire annotation format 1531
Xdata 1526–1527
paralleled wires 720
parameters
drawing properties 239
wire annotations 1590, 1592
wire numbers 990
wires 720
parametric connectors 320
parametric PLC modules 588, 590
parametric twisted pair symbols
naming conventions 298
schematic attributes 320
parent attributes 342
parent cable markers 931, 939, 943, 945,
947
parent location codes 882–883
parent symbols
about 342
2184 | Index
creating 2090
schematic attributes 320
TAG1 attribute 321
part catalogs 1271
part numbers
assigning 1283, 1285, 1293
editing 1300
inserting 1300
multiple 755–756, 1578
multiple bill of materials 1303
sorting catalog databases by 1291
terminal catalog codes 1083
updating 883
Parts Catalog dialog box 1291
passing power 1670
pasting database tables 682
paths
file locations 182
libraries 300, 338
project files 187
signal paths 849
PC3 (plotter configuration files) 1193
PDS (Project Database Service) 1509
PEER_COILPINS field 1311, 1984
PEER_PINLIST field 1311, 1984
peer-to-peer relationships 1981
phase meter symbols 551
phases 963
photo eye switch symbols 415
photoelectric emitter switch
symbols 530, 535
photoelectric emitter-receiver switch
symbols 535
photoelectric receiver switch
symbols 533, 535
photosensitive electronic symbols 575
physical representation block
symbols 1534
Pick List for Panel Terminal Strip
Report/Graphical Report dialog
box 1623
pigtails 339
pilot lights
beacon light symbols 502–503
general symbols 493
illustrated 390
LED symbols 500
master test pilot lights 391
neon pilot lights 392
push to test light symbols 497
standard light symbols 494
transformer light symbols 496
pin charts 1330
pin lists
about 1305
advanced techniques 1984
assignments 1313
editing 1306, 1309, 1311
pin numbers in use 1161
selecting 1307
special uses 1313
table structure 1309, 1311
type 4 pin combinations 1313
pin numbers
editing 1152
exporting for Cable & Harness 1519
in-use 764, 1161
point-to-point wiring 1140
schematic attributes 320
swapping 1150
tracking changes to 1200
Pin Numbers in Use dialog box 764
pin tools 349
PINLIST attribute 1305
PINLIST database 1309
PINLIST field 1311, 1984
PINLIST_TYPE attribute 1313
pins
adding to connectors 1148
annotations 1313
child components 769, 773
component data 748, 753
in-use numbers 764
inserting 1157
moving 1151
naming conventions 298
pin assignments 1984
pin charts 1330
pin lists 1161, 1305–1307, 1309,
1311
pin tools 349
PLC I/O points 624
Index | 2185
PLC modules 596
point-to-point wiring 1140
reports 1330
schematic attributes 320
settings 1157
spacing 1159, 1167
swapping numbers 1150
pipes 1900, 1919
piping & instrumentation 1912
Piping and Instrumentation Diagram
symbols
inserting 742, 1681
libraries 306
naming conventions 298
symbol attributes 329
pitch 1130
PLC Component Connection Data Fields
to Report dialog box 1368
PLC database
about 601
advanced techniques 2005
CATEGORY field 135, 620
contents 588, 630
DESCRIPTION field 135, 620
editing 606
generating drawings 630–631, 635,
639
migrating 129
Migration utility 135
PLC Database Migration utility 620
tables in 601
PLC Database File Editor dialog
box 606, 2005
PLC Database Migration utility 620
PLC I/O Address and Descriptions Data
Fields to Report dialog
box 1386
PLC I/O Address and Descriptions
reports
about 1402
fields in 1386, 1505
formatting 1486
generating 1420
PLC I/O Address/Description Export dialog
box 1505
PLC I/O Component Connection
reports
about 1402
fields in 1368
formatting 1469
generating 1409
PLC I/O Connection Export dialog
box 1504
PLC I/O Header Information Export dialog
box 1503
PLC I/O modules
address and descriptions in
reports 1420, 1486
advanced techniques 2005
annotating points 622
AutoLISP routines 611
boxes 608, 614
component data in reports 1368
copying 602
creating 611
data fields in reports 1386
database 601, 630, 2005
editing 596, 616
editing symbols 620, 624
exporting address/description
data 1505
exporting header data 1503
exporting I/O connection data 1504
exporting Unity Pro data 652
full units 588
generating 588
generating drawings 630–631, 635,
639
I/O points 620, 624
importing Unity Pro data 645–646,
651
inserting 592
inserting AutoCAD blocks 611
inserting I/O points 621
line properties 608
migration utility 135, 620
module data 630
naming conventions 298
parametric symbols 588
PLC modules used so far in
reports 1390, 1423, 1493
2186 | Index
prompts 617
reports 1402
RSLogix data 640–642
splitting 798, 802, 805
spreadsheet format 630
stand-alone points 620, 624
stretching 798, 802
styles 626
symbol illustrations 394
symbol schematic attributes 320
symbols 320, 505
terminals 603, 610, 613
tracking changes to 1200
wire numbers 977
PLC I/O Wire Numbers dialog box 977
PLC Modules Used So Far Data Fields to
Report dialog box 1390
PLC Modules Used So Far reports
about 1402
fields in 1390
formatting 1493
generating 1423
PLC Parametric Selection dialog box 590
PLC Selection dialog box 607
PLCIO files 620
plotter configuration files (PC3) 1193
plotting 1191
plug connectors
inserting 1157, 1167
plug/jack connector pin
symbols 298
reports 1330, 1374, 1402, 1413,
1476
plug/receptacle combinations 1157,
1167
pneumatic components 742, 1671
PNG files 1205–1206
point-to-point schematics 1140
point-to-point wiring tools
bending wires 1162
connector tools 1140
importing connector data 1175
importing data 1166–1167
multiple buses 1163
splices 1185
post-processing reports 1330
Power Check tools 117, 1668–1670
power distribution blocks 399, 509
power factor meter symbols 551
power feed circuits 694, 696, 699–700,
703, 706
power receptacles 427, 576
power source symbols 570
Power Source/Load Report dialog
box 1670
power sources
reports 1670
symbols 1668–1670
power switches 459
prefixes on signal arrows 1012
pressure switches 410, 522
pressure/current converter symbols 551
previewing drawings 144
previous drawing command 1190
previous releases
migrating custom settings 131–132
migrating files 129
printing reports 1330
Project Database Service (PDS) 1509
Project Database Table Data - Project
Drawing Files Update dialog
box 195
project files
about 138
contents 187
settings in 202
project label files 182
Project Manager 1714, 1728, 1895, 1912
about 138, 154
Copy Project dialog box 156
creating projects 140
Define Layers dialog box 261
Drawing List Display Configuration
dialog box 171, 174
Drawing List Report dialog box 192
Properties dialog box 206
Select Drawings to Process dialog
box 196
switching projects 145
Task List dialog box 194
Project Settings tab (Properties dialog
box) 206, 2125
Index | 2187
Project Zip dialog box 188
project-related files 182
Project-wide Schematic Terminal
Renumber dialog box 1133
project-wide tools
batch plotting 1191
marking changes 1200
moving between drawings 1190
Project-Wide Utilities dialog
box 1195
publishing to the Web 1205–1207
renumbering ladders 1196
scripts 1195
surfing 1187
title blocks 1213, 1221
translating descriptions 1202–1203
updating and retagging 1199
Project-Wide Update or Retag dialog
box 1199
Project-Wide Utilities dialog box 1195
projects 1714, 1728, 1895, 1912
about 138
adding drawings 140
alternate environment settings 279
archiving 187–188
auditing 1686, 1688–1689, 1692,
1694
client setup 192
collaborative design 158
comparing settings 240–241
configuring for drawing
standards 2125, 2127
converting promis.e projects 1641
copying 142
copying catalog information 1283,
1300
creating 140
cross-references 815
database files 196
database table data 195
deleting 189
deleting drawings 144
descriptions 187, 204
file formats 187
fixed component tags 877–878
icon menu files 1260
managing drawings in 144
master files 158
multiple clients 190–191
previewing 144
project files 187
Project Manager 154
project-related files 182
project-wide utilities 1195
properties 202–203
recently opened 138
related files 182
resizing all text 873
saving settings 240–241
saving to web sites 1205–1207
script files 1195
surfing 1187
switching 145
task lists 194
terminal lists 1046
Vault and 158, 2134
versions of 2134
zipping 187
promis.e conversion 1638–1639, 1641
promis.e Conversion dialog box 1639
prompts
missing 360
PLC modules 617
Prompts at Module Insertion Time dialog
box 617
propagation flow or signal symbols 559
properties
about 202–203
circuit icons 1257
command icons 1254
component icons 1252
copying 1058
din rails 853
drawings 202–203
icons 1234
imported Inventor data 1166–1167
line entities 853
mapping for export to Cable &
Harness 1519
menus 1250
project-wide changes 1199
projects 202–203
2188 | Index
submenus 1259
templates 245
terminals 1046, 1053, 1060–1062,
1064, 1078
wire numbers 979
X zones 234
X-Y grid 236
Properties - Circuit dialog box 1257
Properties - Command dialog box 1254
Properties - Component dialog box 1252
Properties - Main Menu dialog box 1250
Properties - Submenu dialog box 1259
Properties dialog box
Components tab 211
configuring for IEC standard 2125
Cross-References tab 216
Drawing Format tab 220
Project Settings tab 206
Styles tab 218
Wire Numbers tab 215
proximity switches
capacitive switch symbols 526
illustrated 415
inductive switch symbols 524
magnetic switch symbols 528
photoelectric emitter switch
symbols 530, 535
photoelectric emitter-receiver switch
symbols 535
photoelectric receiver switch
symbols 533, 535
touch switch symbols 539
ultrasonic switch symbols 537
Publish to Web - Temporary Folder for
Build dialog box 1206
publishing
drawing files as HTML 1205–1206
options 1207
pull cord switch symbols 415, 545
purging unused items 1688
push buttons 366, 441–442
push to test light symbols 497
pyrometer symbols 551
Q
qualifying symbols
effect symbols 560
energy flow symbols 560
fault symbols 562
linear direction of force or
motion 557
mechanical controls symbols 566–
568
operating devices 557
propagation flow or signal
symbols 559
radiation symbols 561
rotative direction of force or
motion 558
winding symbols 565
quick relay coil symbols 482
R
radiation symbols 561
RATING field 1279
ratings
child components 769, 773
component data 748, 753
entering values 807–808
PLC I/O points 624
ratings defaults files 182
terminals 1046
tools 349
updating 883
Ratings Defaults dialog box 808
RC network symbols 575
reactors 463
real time error checking files 182
Reassign Terminal dialog box 1101
reassigning terminals 1101
Rebuild Database File dialog box 196
rebuilding databases 196
rebuilding terminal strips 1093, 1119
receptacle connectors 1157, 1167
recording wattmeter symbols 551
records
adding 685, 780
catalog structure 1277
Index | 2189
editing 685, 780, 782
editing footprint lookup files 1596,
1599
editing in catalogs 1298
schematic lookup files 782, 785
terminal properties 1060, 1064
user data 854–855
Ref Des (tags) 748
referencing
arrow symbols 431, 580
existing circuits 724
format settings 220, 233
WD_M block attributes 253
refreshing terminal strips 1093, 1119
relationships 1055, 1057
relays
counter relay symbols 481
current protection relay
symbols 479
general symbols 476, 482
illustrated 379, 382
relays with suppression symbols 477
sensing lack of phase 482
time delay relay symbols 485
voltage protection relay
symbols 480
relays with suppression symbols 477
Remove Component Override dialog
box 819
removing
components 798–799, 1585
database tables 683
drawings 144
footprints 1585
jumpers 1109
location mark symbols 885
marker blocks 2037
pins from connectors 1149
projects 189
sequencing 1611
tracking deleted objects 1200
wire gaps 958
wire numbers 1010
Rename Panel Layers dialog box 262
Rename Schematic Layers dialog
box 262
renaming
attributes 875
layers 258, 262
menus 1250
Renumber Ladders dialog box 969
Renumber Terminal Strip dialog
box 1102
renumbering
ladders 963, 969
terminal strips 1102
terminals 1133
reordering drawings 144
repairing wire gaps 1689
replaceable parameters 239
replacing
blocks using spreadsheet data 1663–
1665
text 864–867
WD_M blocks 255
wire number text 986–987
Report Format File Setup - Missing
Level/Sequence Assignments
dialog box 1452
Report Format File Setup - Panel Bill of
Material dialog box 1446
Report Format File Setup - Panel
Component dialog box 1451
Report Format File Setup - Panel
Component Exception dialog
box 1448
Report Format File Setup - Panel
Nameplate dialog box 1456
Report Format File Setup - Panel Terminal
Exception dialog box 1458
Report Format File Setup - Panel Wire
Connection dialog box 1461
Report Format File Setup - Schematic Bill
of Material dialog box 1463
Report Format File Setup - Schematic Cable
From/To dialog box 1465
Report Format File Setup - Schematic Cable
Summary dialog box 1467
Report Format File Setup - Schematic
Component dialog box 1480
2190 | Index
Report Format File Setup - Schematic
Component Wire List dialog
box 1471
Report Format File Setup - Schematic
Connector Details dialog
box 1474
Report Format File Setup - Schematic
Connector Plug dialog
box 1476
Report Format File Setup - Schematic
Connector Summary dialog
box 1478
Report Format File Setup - Schematic
Missing Bill of Material dialog
box 1483
Report Format File Setup - Schematic PLC
I/O Address and Descriptions
dialog box 1486
Report Format File Setup - Schematic PLC
I/O Component Connection
dialog box 1469
Report Format File Setup - Schematic PLC
Modules Used So Far dialog
box 1493
Report Format File Setup - Schematic
Terminal Numbers dialog
box 1489
Report Format File Setup - Schematic
Terminal Plan dialog box 1491
Report Format File Setup - Schematic Wire
From/To dialog box 1484
Report Format File Setup - Schematic Wire
Label dialog box 1495
Report Format File Setup - Wire
Annotation Exception dialog
box 1454
report format files 1442, 1444
reports
about 1318
automatic 1496–1497, 1499
change-tracking reports 1202
conduit markers 1634–1635
conduit routing reports 1636
cross-references 809
drawing lists 192
editing 1323
exception/error reports 809
exporting for Cable &
Harness 1519, 1521–1522
filtering 1318
format files 1442, 1444
from/to reports 1029
generating 1330, 1403
grouping 1496
inserting in drawings 1330
missing catalog assignments 1304
panel reports 1428, 1430
power check reports 1670
printing 1330
resizing 1330
running 1496–1497, 1499
saving 1330
saving to script files 1322
schematic reports 1402–1403
settings 1330
settings lists 241, 243
sorting 1330
stand-alone reference code
reports 1019
surfing 812
table setup 1322
terminal pick lists 1623
terminal strip tables 1070, 1624
types of 1402
updating configurations 244
wildcard characters 1318
wire signal reports 1019
Resequence Panel Item Numbers dialog
box 1605
resequencing
item number balloons 1604–1605
terminal numbers 1133
resistors 426, 575
resizing
ladders 964
reports 1330
text 873–874, 893
wire numbers 1008
wires 921
Retag Components dialog box 879
retagging
components 879
Index | 2191
project-wide changes 1199
reusing circuits 735
Reverse/Flip Component dialog box 806
reversing
components 805–806
connectors 1142, 1144
reviewing drawing sets 1200
RGF files 1496
ribbon
about 25, 117
Conduit Marker tools 116
Conversion tools 115
displaying and organizing 118
Extra Library tools 117
Main Electrical tools 94, 104
Panel Layout tools 108
Power Check tools 117
right angle bends 922
rolling back projects 2134
rotating
attributes 870
connectors 1142–1143
terminal strips 1130
wire numbers 997, 1008
rotating beacon light symbols 503
rotative direction symbols 558
routing
copying 1614
displaying 1611
editing 1613
removing 1611
wire conduit routing data in
reports 1396
routing reports 1396, 1636
rows
report tables 1322
row styles 1110
RSLogix
exporting PLC spreadsheets 640–
642
importing files 182
RSLogix 500 Import Change Module dialog
box 642
RSLogix 500 Import dialog box 641
ruling (terminal strips) 1130
rungs
inserting 966
spacing 963, 965, 968
running
automatic reports 1496
reports 1318, 1497, 1499
scripts 1195
S
sandbox guidelines 2134
Save Circuit to Icon Menu dialog
box 735
Save Symbol dialog box 359
saving
circuits 728, 735
custom settings 132
DWF files 1208
project settings 240–241
reports 1330
symbols 357, 359
web formats 1205–1207
scale
conduit markers 1631
format settings 220, 233
PLC modules 590
text 893
Schematic Bill of Material dialog
box 1405
Schematic Cable From/To dialog
box 1407
Schematic Cable Summary dialog
box 1407
Schematic Component dialog box 778,
1416
Schematic Component Wire List dialog
box 1410
Schematic Components List Panel Layout
Insert dialog box 1538
Schematic Components or Terminals
dialog box 1542
Schematic Connector Details dialog
box 1412
Schematic Connector Plug dialog
box 1413
2192 | Index
Schematic Connector Summary dialog
box 1415
Schematic Database File Editor 784–785
schematic diagrams
attributes 320
auditing 1686, 1688–1689, 1692,
1694
automatic updates 1532
generating from PLC I/O
modules 630–631, 635, 639
inserting panel footprints 1538,
1542
inserting terminals 1540, 1542
ladder diagrams 1140, 1534
layers 258
panel component spreadsheet
data 1536–1537
point-to-point 1140
relationship to panel layouts 1534
reports 1428
showing links 1661
tagging 1656
wire connections 1029
Schematic Equipment In dialog box 789
schematic layers
renaming 258, 262
settings 258
Schematic Layout Wire Connection
Annotation dialog box 1592
schematic lookup files
about 782
editing 782, 784–785
inserting components 789
location 182
Schematic Missing Bill of Material dialog
box 1418
Schematic PLC I/O Address and
Descriptions dialog box 1420
Schematic PLC I/O Component
Connection dialog box 1409
Schematic PLC Modules Used So Far dialog
box 1423
Schematic Report dialog box 1935, 1937
schematic reports
about 1318, 1402
automatic generation 1496
bill of materials reports 1356, 1405,
1463
cable from/to reports 1363, 1407,
1465
cable label reports 1364
cable summary reports 1358, 1407,
1467
component reports 1378, 1416,
1480
connection sequencing reports 1029
connector data 1372
connector details reports 1412, 1474
connector plug reports 1374, 1413,
1476
connector summary reports 1376,
1415, 1478
cross-reference data 1397, 1399
generating 1330, 1402
list of 1402
location codes in from/to
reports 1427
missing bill of material
reports 1380, 1418, 1483
PLC connection reports 1368, 1386,
1409, 1469
PLC I/O address and descriptions
reports 1420, 1486
PLC modules used so far
reports 1390, 1423, 1493
terminal numbers reports 1388,
1421, 1489
terminal plan reports 1393, 1422,
1491
types of 1402
wire conduit routing data 1396
wire from/to reports 1384, 1419,
1484
wire label reports 1394, 1425, 1495
wire list reports 1370, 1410, 1471
schematic symbols
attributes 320
child symbols 342
inserting 742
parent symbols 342
terminal symbols 342
Index | 2193
Schematic Terminal Numbers dialog
box 1421
Schematic Terminal Plan dialog
box 1422
Schematic Terminals List Panel Layout
Insert dialog box 1540
Schematic Wire From/To dialog
box 1419
Schematic Wire Label dialog box 1425
Schematic Wire Numbers Panel Wiring
Diagram dialog box 1590
schematic-to-panel terminal
relationships 1055
schematic-to-schematic terminal
relationships 1055
schematics
attributes 320
auditing 1686, 1688–1689, 1692,
1694
automatic updates 1532
generating from PLC I/O
modules 630–631, 635, 639
inserting panel footprints
with 1538, 1542
inserting terminals with 1540, 1542
ladder diagrams 1140, 1534
layers 258
panel component spreadsheet
data 1536–1537
point-to-point 1140
relationship to panel layouts 1534
reports 1428
showing links 1661
tagging 1656
wire connections 1029
scooting
components 798, 800
connectors 1140
wire numbers 996
wires 798, 800, 1140
SCR symbols 575
scratch databases 195
Script File Options Reference dialog
box 1322
scripts
adding icons for 1242
batch plotting 1193
project-wide scripts 1195
saving reports to script files 1322
search paths
file locations 182
libraries 300
searching
finding wire number text 986–987
terminal properties database 1060
text 864–867
sections in report tables 1322
Select Circuit dialog box 710, 712
Select Color dialog box 1901, 1914
Select Description from AutoCAD Electrical
Language Table dialog box 762–
763
Select Description Text Format dialog
box 763
Select Drawings to Process dialog
box 196
Select Linetype dialog box 1901, 1914
Select Linetypes File dialog box 1915
Select Lineweight dialog box 1914
Select Load dialog box 712
Select Motor dialog box 711
Select Pin List Table dialog box 1307
Select Row Cell Styles dialog box 1110
Select Symbol/Objects dialog box 344
Select Terminal Information dialog
box 610
Select Terminal Properties Table dialog
box 1061
Select Terminals to Jumper dialog
box 1125
Select Xdata to Change to a Block Attribute
dialog box 1527
selector switches 370, 374, 445, 450, 452
sensors 551
sequence assignments
missing 1346, 1428, 1436, 1452
reports 1428, 1436, 1452
sequencing
about 1029
displaying 1031, 1611
editing 1030, 1037, 1613
removing 1611
2194 | Index
resequencing item numbers 1605
tee markers 1033–1034
sequential codes 1303
SET files
about 1442
defining 1444
missing level/sequence assignments
reports 1452
panel bill of materials reports 1446
panel component exception
reports 1448
panel component reports 1451
panel nameplate reports 1456
panel terminal exception
reports 1458
panel wire annotation exception
reports 1454
panel wire connection reports 1461
schematic bill of material
reports 1463
schematic cable from/to
reports 1465
schematic cable summary
reports 1467
schematic component reports 1480
schematic component wire list
reports 1471
schematic connector details
reports 1474
schematic connector plug
reports 1476
schematic connector summary
reports 1478
schematic missing bill of material
reports 1483
schematic PLC I/O address and
descriptions reports 1486
schematic PLC I/O component
connection reports 1469
schematic PLC used so far
reports 1493
schematic terminal numbers
reports 1489
schematic terminal plan
reports 1491
schematic wire from/to reports 1484
schematic wire label reports 1495
Set Pass Power dialog box 1670
Set Power Source/Load Value dialog
box 1669
Set Wire Type dialog box 278
Settings dialog box 787, 1561
Settings List Utility
about 241
configuration updates 244
editing reports 243
shapes 1551
sharing
files 1989
Vault guidelines 2134
sheets
project-wide changes 1199
settings 222
shields (cable) 956
Show Link tool 1661
shunt symbols 575
Signal - Source Code dialog box 1015
signal arrow symbols
about 1011
inserting 1014–1015
naming conventions 298
prefixes 1012
project-wide changes 1195
styles 1012, 1016, 1018
Signal Code dialog box 849
signals
arrows 298, 1011
destination 848–849
fanning markers 1024–1026
following 848–849
project-wide changes 1199
schematic symbol attributes 320
source 848–849
symbol naming conventions 298
symbols 559
updating 845
single pole double throw switches 418
single receptacle symbols 427, 576
single side connectors 403, 407
siren symbols 570
size
connectors 1157, 1167
Index | 2195
text size 873–874, 893
wires 720–721
Size tab (Connector Selection dialog
box) 1174
Size tab (Insert Connector dialog
box) 1157
SKIP value 630
solenoids 419, 547
sorting
database tables 685
sorting reports 1330
source arrows 1647
source codes
source code lists 1019
tracking changes to 1200
source cross-reference symbols 809, 844–
845
source markers
adding 1021
advanced techniques 1996
fanning 1020
layers 1022–1024, 1026
styles 1022–1024
source wire signal symbols 298, 320,
1011–1012, 1015, 1647
SPACER value 630
spacers 1159, 1167
spacing
buses 918, 2053
fixed spacing 1142
inserted items 1544
ladders 960, 963
pins 1159, 1167
PLC database information 601
PLC modules 591, 606, 610
rungs 965, 968
Spacing for Component or Footprint
Insertion dialog box 1544
spare connectors 403, 407
spare terminal strips 1103
spare terminals 1078, 1103
spare wires 1632
Special Explode dialog box 1654
special wire numbers 975
splice symbols
exporting data for Cable &
Harness 1519
illustrated 423, 580
importing occurrences from
Inventor 1166–1167
inserting 1185
naming conventions 298
schematic attributes 320
Split Block dialog box 805
Split Connector dialog box 805
splitting
blocks 798, 802, 805
components 798, 802, 805
connectors 798, 802, 805, 1147
tag names 299
terminal tables 1070
Spreadsheet to PLC I/O utility 135, 182,
620, 635
Spreadsheet to PLC I/O Utility Setup dialog
box 639
spreadsheets
din rails 853
exporting component data 1502
exporting data to 1500–1501, 1503
exporting panel layout data 1506
exporting PLC data 1503–1505
exporting terminal data 1506–1507
importing connector data 1175
importing data from 1500
mapping to blocks 1663–1665
PLC database content 630
reports 1318
RSLogix data 640–642
structure 1175
updating drawings with data 1508
squeezing
reports 1330
text 873
Stand-Alone Destination Cross-Reference
Symbol dialog box 844
stand-alone I/O points 620
Stand-Alone Source Cross-Reference
Symbol dialog box 844
2196 | Index
stand-alone symbols
cross-reference symbols 430, 579,
838–839, 844–845
inserting 742
naming conventions 298
PLC 620
schematic attributes 320
TAG1 attribute 321
standard light symbols 494
standards 681, 687, 2044, 2125, 2127
stretching
components 798, 802
connectors 1146
nameplates 1610
text 873
wires 921, 2082
Style Box Dimensions dialog box 614
styles
attribute text 871
drawing properties 202
fanning markers 1022–1025
PLC database information 601
PLC modules 590, 614, 626
project properties 202
project-wide changes 1195
settings 218, 231
signal arrows 1012
sorting catalog databases by 1291
table row styles 1110
WD_M block attributes 253
Styles tab (Drawing Properties dialog
box) 231
Styles tab (Properties dialog box) 218,
2125
subcatalog entries 1330
submenus
creating 1249
editing 1264
properties 1259
support files 1989
suppressor symbols 423
Surf dialog box 1189, 1944
surfing
codes 1189
continuing surf sessions 1187
cross-reference reports 812
references in drawing sets 1187
web pages 1207
Swap Block/Update Block/Library Swap
dialog box 336
swapping
blocks 332–333, 336–338
libraries 337
NO/NC state 809
pin numbers 1150
terminal strip text 1612
wire numbers 999
switches
component data 748
symbols 415, 545
switching
blocks 332–333, 336–338
contact states 809
drawing standards 2127
pin numbers 1150
terminal strip text 1612
wire numbers 999
wire types 275, 277
Symbol Audit dialog box 360
Symbol Builder
about 342, 2083
attributes 346, 349, 2107
auditing symbols 360
configuring symbols 345
converting non-Electrical
objects 2099
converting text to attributes 355–
356
creating footprints 2105
creating symbols 342, 344
editing symbols 350
inserting symbols 350
link line attributes 354
one-line symbols 2098
parent symbols 2090
saving symbols 357, 359
templates 2107
terminal symbols 2094
wire connections 351, 353, 2112
Symbol Builder Attribute Editor 349
Symbol Configuration dialog box 345
symbol libraries 300
Index | 2197
Symbol Library Attribute Text/Scale Resize
dialog box 893
symbol mapping
cross-references 827, 830
editing tables 832
Symbol Preview window 1237
symbols
adding to icon menus 1232, 2119
advanced techniques 2083
attributes 345, 349
auditing 357, 360
changing appearance 331
converting non-Electrical
blocks 1642, 1644, 2099
COPYTAG attribute 329
creating 339, 342, 344
cross-references 809, 838–839, 844–
845
customizing icon menus 1232,
1234, 1237
default libraries 300–301
editing attributes 349, 893
family types 298
layers and 331
location mark symbols 885, 887
multiple libraries 300–301
naming conventions 282, 298
one line symbols 329
one-line symbols 2098
parent symbols 2090
predefined annotations 332
saving 357, 359
schematic attributes 320, 342
splitting tag names 299
substituting 330
surfing 1187
swapping blocks 332–333, 336–338
Symbol Builder 342, 2083
TAG1 attribute 321
TAG2 attribute 321
types 342
updating blocks 332–333, 336–338
WD_M blocks 253
synchronizing files during
migration 131
synchronoscope symbols 551
T
Table Cross-Reference Format Setup dialog
box 830
Table Generation Setup dialog box 1322
tables (cross-references)
cross-reference data 817
editing 832
graphical formats 822, 824, 827
report fields 1399
table formats 830
updating 833
tables (database)
catalog tables 1271, 1295
copying 682
deleting 683
editing 685
footprint lookup files 1594
opening 682
pin lists 1306–1307, 1309, 1311
PLC database tables 601
schematic lookup files 784–785
scratch databases 195
terminal properties database 1060–
1062, 1064
user data 854–855
tables (reports)
breaking into sections 1318
setup 1322
tables (terminal strips)
fields in 1113
generating 1113, 1119
inserting 1070, 1114
layout 1093
row styles 1110
settings 1096
tabular terminal layout 1093
tachometer symbols 551
tachometric dynamo symbols 551
tag panel components 1942
Tag Panel tools 1657
Tag Schematic tools 1656
tag strips 1065
TAG1 attribute 321
TAG1_PARTX 299
TAG2 attribute 321
2198 | Index
TAG2_PARTX 299
tagging non-Electrical-aware
objects 1651, 1653, 1656–
1657, 1659
tagging tools 1932
tags
cable markers 939, 943, 945, 947
cables 953
child components 769, 773
circuits 2068
codes for replaceable
parameters 239
components 748, 753
conduits 1626, 1631
copying attributes 329
cross-references and 809
duplicate 1686, 1688, 1692, 1694
exporting for Cable & Harness 1519
fixed component tags 877–878
in-use 757–758
motor symbol tags 2061
motor symbols 2059
multi-connection sequences 1138
order settings 220, 233
overriding 759, 2125
panel drawings 758
parameters 990
PLC database information 630
PLC I/O points 624
PLC modules 596
project-wide changes 1195, 1199
retagging components 866, 879
splitting names 299
terminals 1046
tracking changes to 1200
WD_M block attributes 253
wire tags 970, 972–973
Tags in Use dialog box 757
target attributes 1587–1588
Task List dialog box 194
tees
connection symbols 1033–1034
export mapping 1519
temperature switches 410, 522
templates
attribute templates 342, 2107
creating 245
ladders and 960
panel layouts 1563
PLC-generated drawings 639
reports 1318
Symbol Builder 2107
wire connection templates 351
Terminal Block Properties dialog
box 1053
Terminal Block Settings dialog box 613
terminal blocks 1053, 1542
terminal boxes 2005
Terminal Data Export dialog box 1507
Terminal Exception reports
about 1428
formatting 1458
generating 1440
terminal numbers
renumbering 1133
reports 1388, 1402, 1421, 1489
Terminal Numbers Data Fields to Report
dialog box 1388
Terminal Numbers reports
about 1402
fields in 1388
formatting 1489
generating 1421
Terminal Plan Data Fields to Report dialog
box 1393
Terminal Plan reports
about 1402
fields in 1393
formatting 1491
generating 1422
internal and external codes 1330
Terminal Properties Database Editor
about 1060
Edit dialog box 1062
Edit Record dialog box 1064
editing properties 1060
Select Terminal Properties Table dialog
box 1061
terminal row styles 1110
Terminal Strip Definition dialog
box 1073
Index | 2199
Terminal Strip Editor
about 1065
accessories 1104
Cable Information tab 1087
Catalog Code Assignment tab 1083
columns and rows 1093
Edit Terminal dialog box 1100
inserting terminal strip tables 1070
inserting terminal strips 1066
installation codes 1106
jumper charts 1071
Layout Preview tab dialog box 1093
location codes 1105
previewing terminal strips 1093
selecting terminal strips 1068
spare terminals 1103
Terminal Strip Definition dialog
box 1073
Terminal Strip Selection dialog
box 1072
Terminal Strip tab 1078
Terminal Strip Table dialog
box 1113
wire constraints 1078
Terminal Strip Representation - Setup
dialog box 1130
Terminal Strip Representation dialog
box 1129
Terminal Strip Selection dialog box 1072
Terminal Strip tab (Terminal Strip
Editor) 1078
Terminal Strip Table Data Fields to Include
dialog box 1113
Terminal Strip Table dialog box 1113
Terminal Strip Table Generator
generating tables 1113
inserting terminal strip tables 1070
settings 1119
Terminal Strip Table Settings dialog
box 1096
Terminal Strip Table Settings dialog
box 1096
terminal strips
about 1128
accessories 1104
annotations 1130
associating 1108
catalog codes 1083
defining 1073
displaying 1129
drawing shapes 1551
editing 1078, 1100, 1128
graphical layout 1093
inserting 1066, 1615
inserting reports as 1330
inserting tables 1114
installation codes 1106
jumper assignments 1070
jumper charts 1071, 1093
level assignments 1614, 1619, 1622
location codes 1105
multi-level 1078
parameters 1624
pick lists 1623
previewing layout 1093
reassigning terminals 1101
renumbering 1102
reports 1623–1624
row styles 1110
selecting 1068, 1072
sequencing assignments 1611,
1613–1614
settings 1130
spare terminals 1103
swapping text 1612
table fields 1113
table rows 1110
tables 1070, 1093, 1096, 1113–
1114, 1119
terminal associations 1108
Terminal Strip Editor 1065
terminals
about 342
accessories 1104
annotations 1130
assigning types 2005
associations 1046, 1050, 1055,
1057, 1078, 1108
attributes 320, 329, 2005
breaking associations 1055, 1057
cable information 1087
connections 1132
2200 | Index
copying properties 1058
customized symbols 2094
device box symbols 428, 577
direct-to-terminal wire
connections 1029
displaying associations 1055
editing 606, 1046, 1053, 1100,
1565, 1569, 1574
editing blocks 2005
editing database 1060
exceptions in reports 1352
exporting data 1506–1507
inserting 1040, 1046, 1542
inserting from panel lists 790, 795–
796
inserting terminal reports as
strips 1330
jumper charts 1071
jumpers 1078, 1122–1123, 1125,
1127
level assignments 1614
listing 1078
marking 1132
multi-connection 1134–1135, 1138
multi-level terminals 1055
multi-stack terminals 1055
multi-tier terminals 1055
multipole terminal block units 1313
naming conventions 298
panel footprint spreadsheet
data 1536–1537
panel terminal spreadsheet
lists 1540
parameters 1624
pick lists 1623
pin lists 1305–1307, 1309, 1311
PLC database information 601
PLC modules 603, 610, 613
previewing layout 1093
project lists 1046
properties 1046, 1053, 1078
properties database 1060–1062,
1064
reassigning 1101
relationships 1055
reports 1402, 1422, 1428, 1440,
1458, 1491, 1623–1624
sequencing assignments 1611, 1613
spacing 1544
spare 1078, 1103
surfing 1187
symbols 339, 397, 508, 1040
tags 1046
terminal grid 606
terminal numbers 1133, 1388,
1421, 1489
terminal plan reports 1393, 1422,
1491
Terminal Strip Editor 1065
terminal strip tables 1070
terminal strips 1128–1130, 1615,
1619
text 866–867
tracking changes to pin
numbers 1200
types of 342, 1040, 1046
Unity Pro data 651
TERMPROPS tables 1060
testing
circuits 2043
text
annotation files 760
converting non-Electrical
objects 2099
converting to attributes 355–356,
1645
converting to entities 1651, 1653,
1656–1657, 1659
converting to wire numbers 1646
cross-references 820
descriptions 763, 868
editing 864–867
finding 864–867, 986–987
justification 870–871
layers 863
library symbols 893
multi-line 880
project-wide changes 1195
replacing 864–867, 986–987
report tables 1322
resizing 893
Index | 2201
size 873–874
styles 871
swapping wire text 1612
terminal strips 1130
terminals 866–867
title blocks 1224
tracking changes to 1200
translating descriptions 1202–1203
wire annotations 1531, 1587–1588
wire numbers 986–987
Text Cross-Reference Format Setup dialog
box 820
text files
external component lists 182
importing annotations from 760
text styles 871
TEXTVALUES 1277
thermal effect symbols 560
thermocouple symbols 421, 551
thermometer symbols 551
time delay relays 382, 485
timers 382, 384
title blocks
about 1213, 1221
attributes 1213, 1221
client-specific 190–191
embedded information in 1213
labels 191
linking information to 1213, 1708
mapping 1218, 1220
mapping AutoLISP values to 1227
multiple title blocks 1213, 1221
project-wide updates 1199, 1221
settings 1213, 1221
updating 1221, 1224
wildcard characters 1213, 1221
titles
report tables 1322
web pages 1207
Toggle Installation Codes dialog
box 1106
Toggle Location Codes dialog box 1105
toggle switch symbols 415
toggling
installation codes 1106
location codes 1105
tee markers 1034
wire numbers 1003
toolbars
Conduit Marker 116
Conversion 115
Extra Libraries 117
Main Electrical 94, 104
Panel Layout 108
Power Check 117
Ribbon interface 25
touch switch symbols 539
trace mode
auditing drawings 1688
repairing drawings 1689
tracking changes 1200
transformer light symbols 496
transformers 376, 467, 469, 473
translating descriptions 1202–1203
Trim Wire dialog box 920
trimming wires 919–920, 2050
troubleshooting
auditing drawings 1686, 1688–
1689, 1692, 1694
real-time error checking 1686,
1688–1689, 1692, 1694
wire numbers 978
zooming extents 919
turns 922
twisted pair symbols
naming conventions 298
schematic attributes 320
twisted pair cable symbols 427, 576
TXT files
external component lists 182
importing annotations from 760
TYPE field 1279
Type tab (Connector Selection dialog
box) 1174
Type tab (Insert Connector dialog
box) 1157
U
ultrasonic switch symbols 537
unavailable files 198
unfixed component tags 878
2202 | Index
unfixed wire numbers 994
units of measurement 1303
Unity Pro
exporting PLC data 645–646, 651
importing PLC data 652
Unity Pro Export dialog box 652
Unity Pro Import dialog box 651
unlinking symbols 1661
Update Block - Path/Filename dialog
box 338
Update Configuration Changes
dialog 244
Update Drawings per Spreadsheet Data
dialog box 1508
Update Title Block dialog box 1224
Update Wire Signal and Stand-Alone
Cross-Reference dialog box 845
updating
annotations 839
blocks 332–333, 336–338
cable markers 953
child location codes 882–883
cross-reference tables 833
drawings 196
drawings with imported data 1500
IEC tags 193
older versions of files 129
project-wide changes 1199
stand-alone cross-reference
symbols 845
task lists 194
terminal strips 1093
title blocks 1221, 1224
WD_M blocks 255
wire signals 845
User-Defined Attribute List dialog
box 1512
user-defined attributes 1509–1510, 1512
user-defined symbols 298
users
multiple users 1989
user data in project databases 854–
855
Vault capabilities 2134
utilities
Setting List Utility 241, 243–244
zip utility 187–188
V
valves 421
variable resistors 426, 575
varistor symbols 575
varmeter symbols 551
Vault
advanced techniques 2134
collaborative design and 158
vendor icon menus 1544–1545, 1547
Vendor Menu Selection dialog box 1545
Vendor Panel Footprint dialog box 1547
verifying changes 1200
versions of projects 2134
vertical ribbon 118
vertical wire numbers 1008
VIA drawings 1648, 1650
View/Edit Panel Component Connection
Sequence dialog box 1613
volt meters 421
voltage drops 720
voltage protection relay symbols 480
voltmetric commutator switch
symbols 545
VPJ files 1650
W
WBlocked circuits 729, 736
wd_fam.dat files 182
wd_lang1.mdb files 1204
WD_M blocks
about 253
codes for replaceable
parameters 239
copying attributes to 255
default blocks 254
defaults in 253
inserting 256
missing attributes 255
new drawings 168
overrides 815
replacing 254–255
saving project settings 240–241
Index | 2203
updating 255
WD_PNLM blocks
configuration information 1527
copying attributes to 255
inserting 256
WD_SLB code 1232
WD_TB attribute 1213, 1708
WD_TB attributes 1218
WD_ZIP utility 187
wd.env files 129, 182, 187, 279
WDA files 1509
WDBLKNAM attribute 1271, 1277
WDD files 182, 761
wddinrl.xls file 853
WDF files 182
WDI files 182, 635
WDL files 182, 1225, 1708
WDN files 182, 1686
WDP files
about 138
contents 187
settings in 202
WDR files 182, 807–808
WDT files 182, 1220, 1708
WDTYPE attribute 329
WDW files 182, 922, 1633
WDX files 182
WDXX blocks 887
web pages
linking catalogs to 1277
options 1207
saving projects as 1205–1207
WEBLINK assignments 1277
whistle symbols 570
width
ladders 963
symbols 339
terminal strips 1130
wildcard characters
reports 1318
title blocks 1213, 1221
winding symbols 565
Wire Annotation Exception dialog
box 1437
Wire Annotation Exception reports
about 1428
formatting 1454
generating 1437
wire arrow symbols 298, 320, 431, 580
wire colors
encoding 988, 990
wire color files 182
Wire Conduit Routing Data Fields to
Report dialog box 1396
Wire Connection reports
about 1428
formatting 1461
generating 1441
wire connection styles 2112
wire connections
add 1939
annotations 1587–1588
converting lines to 1660
customizing 2112
inserting 351, 353
limits on 895
styles 2112
tools 349
wire crossings 1142, 1157, 1159, 1167
wire dot symbols 298
Wire From/To Data Fields to Report dialog
box 1384
Wire From/To reports
about 1402
fields in 1384
formatting 1484
generating 1419
wire gaps
about 958
repairing 1689
wire grids 720
Wire It tab (Connector Selection dialog
box) 1174
wire jumpers 856–857
Wire Jumpers dialog box 857
Wire Label Data Fields to Report dialog
box 1394
Wire Label reports
about 1402
display settings 1330
fields in 1394
formatting 1495
2204 | Index
generating 1425
wire label symbols
in-line wire label symbols 509
reports 1394, 1402, 1425, 1495
schematic attributes 320
wire layers 275, 1195
color and gauge information 988,
990
valid layers 271, 902
wire lists
exporting for Cable & Harness 1519
importing 1167
reports 1370, 1410, 1471
wire loss 720
wire markers 925
wire networks
about 895
connection reports 1029
wire number layers 261
wire numbers
3-phase 975–976
about 970
adding to footprints 1587
automatically inserting 971
codes for replaceable
parameters 239
colors 988, 990
configuring for export 1521
convert text 1940
converting text to 1646
copying 1000
displaying 970, 1010
displaying wires 978
drawing properties 979, 1003
duplicate 1686, 1688, 1692, 1694
editing 991–992, 994
erasing 1010
extra copies of 1000
finding 986–987
fixed 991–992, 994
flipping 1003
formats 2070
gauge and 988, 990
hiding 1010
in-line 1002
incrementing 1007
inserting 979
layers 261, 970
leaders 922, 998
mirroring 1003
motor circuits 975
motor symbol tags in 2059
moving 996–997, 999
naming conventions 298
no wire numbering 28
order settings 220, 233
parameters 990
PLC tags 977
position 979
predefined 2075
project-wide 992
project-wide properties 1195
replacing text 986–987
repositioning leader text 998
resizing 1008
rotating 997, 1008
schematic attributes 320
schematic wire information 1590,
1592
settings 228
surfing 1187
swapping 999
tags 970
toggling position 1003
tracking changes to 1200
troubleshooting 978
types of 970
unfixed 994
WD_M block attributes 253
wire tags 972–973
Wire Numbers tab (Drawing properties
dialog box) 228
Wire Numbers tab (Properties dialog
box) 215
wire shields 956
Wire Signal or Stand-Alone Reference
Report dialog box 1019
wire signal symbols
arrows 1011–1012, 1015
attributes 320
naming conventions 298
project-wide changes 1195, 1199
Index | 2205
Wire Size Lookup dialog box 720–721
Wire Tagging (project-wide) dialog
box 973
Wire Tagging dialog box 972
wire tags
formats 970
inserting 972–973
wire tees 919–920, 1033
wire types
changing 275, 277
defining 2056
grid 271, 902
importing 271–272, 902–904, 907
setting default 278
wire ways
generating spreadsheet records 853
inserting labels 1631
Wire/Conduit Routing Report dialog
box 1636
wires
3-phase wires 917–918
about 895
angled 913
annotations 1348, 1428, 1437,
1454, 1531, 1587–1588,
1590, 1592
arrow symbols 431, 1011
bending 922
cable markers 930
colors 922–924, 988, 990
conduit information 1631
conduit routing data in reports 1396
connection report data fields 1354
connection templates 351
connection tools 349
constraints 1065
converting lines to 1651, 1653,
1656–1657, 1659
creating 271, 902
de-rating factors 720
displaying 978
displaying connections 1132
editing 271, 902
exporting connection data 1504
extracting 949, 953
fanning markers 1020–1026
from/to reports 1029, 1384
gaps 958, 1689
gauge 922, 988, 990
importing occurrences from
Inventor 1166–1167
in-line components 630
in-line markers 925
in-line wire label symbols 509
in-line wire numbers 1002
inserting 913, 917–919, 1140
interconnecting components 919
labels 922–924
ladders 961, 963
layers 265–266, 275, 923–924, 988,
990, 1195
loads 720
multi-connection sequencing 1134–
1135, 1138
multiple buses 1163
multiple wire buses 917–918
numbering 215
paralleled 720
pigtails 339
point-to-point tools 1140
replacing 1689
reports 1402, 1410, 1419, 1428,
1441, 1461, 1471, 1484
resizing 720–721
routing reports 1636
schematic attributes 320
scooting 798, 800
sequencing 1029–1031, 1037
signal reports 1019
spacing 2053
spare wires 1632
splices 1185
stand-alone reference reports 1019
stretching 921, 2082
switching types 275, 912
tags 972–973
tee markers 1033–1034
terminals 1132
tracing 1689
trimming 919–920, 2050
troubleshooting 978
unique IDs 1521
2206 | Index
wire crossings 1142, 1157, 1159,
1167
wire grids 720
wire labels 1394, 1425, 1495
wire lists 1167, 1370, 1519
wire loss 720
wire numbers 970
wire types 271, 275, 277–278, 902,
2056
zooming extents and 919
WO_CBLWIRES table 954
workflows
Circuit Builder 655, 2006
one-line symbols 2098
parent symbols 2090
pin lists 1984
PLC modules 2005
source and destination
markers 1996
terminal jumpers 1123
terminal symbols 2094
workgroups
collaborative design 158
Vault setup 2134
workspaces 26, 2134
WW1 files 1633
X
X Zone grid 234
X Zone Setup dialog box 234
X-Y grid 236
X-Y Grid Setup dialog box 236
Xdata
about 1526
converting to attributes 1527
editing 1695
power checks and 1668
Symbol Builder attribute
templates 2107
Xdata Editor dialog box 1695
XHW files 645, 651
XLS files
din rails 853
exporting component data 1502
exporting panel layout data 1506
exporting PLC data 1503–1505
exporting spreadsheet data 1500–
1501, 1503
exporting terminal data 1506–1507
importing connector data 1175
importing spreadsheet data 1500
mapping to blocks 1663–1665
PLC database content 630
reports 1318
RSLogix data 640–642
structure 1175
updating drawings with data 1508
XML files
importing connector data 1175
importing data from Inventor 1166–
1167
Unity Pro data 645, 651–652
XSY files 645, 651–652
Z
zener diode symbols 426, 575
zip utility 187–188
zooming in or out 919
Index | 2207
2208