Autodesk Auto CAD Mechanical Desktop 6.0 Instruction Manual Autocad 6 En
User Manual: autodesk AutoCAD Mechanical Desktop - 6.0 - Instruction Manual Free User Guide for Autodesk AutoCAD Software, Manual
Open the PDF directly: View PDF ![]() .
.
Page Count: 770 [warning: Documents this large are best viewed by clicking the View PDF Link!]
- Getting Started with Autodesk® Mechanical Desktop®
- Autodesk® Mechanical Desktop® Tutorials
- Using the Tutorials
- Creating Parametric Sketches
- Constraining Sketches
- Creating Sketched Features
- Key Terms
- Basic Concepts of Sketched Features
- Creating Extruded Features
- Editing Extruded Features
- Creating Loft Features
- Editing Loft Features
- Creating Revolved Features
- Editing Revolved Features
- Creating Face Splits
- Editing Face Splits
- Creating Sweep Features
- Editing Sweep Features
- Creating Bend Features
- Editing Bend Features
- Creating Work Features
- Creating Placed Features
- Key Terms
- Basic Concepts of Placed Features
- Creating Hole Features
- Creating Thread Features
- Editing Hole Features
- Editing Thread Features
- Creating Face Drafts
- Editing Face Drafts
- Creating Fillet Features
- Editing Fillet Features
- Creating Chamfer Features
- Editing Chamfer Features
- Creating Shell Features
- Editing Shell Features
- Creating Surface Cut Features
- Editing Surface Cut Features
- Creating Pattern Features
- Editing Pattern Features
- Editing Array Features
- Creating Copied Features
- Editing Copied Features
- Creating Combined Features
- Editing Combined Features
- Creating Part Splits
- Editing Part Splits
- Using Design Variables
- Creating Parts
- Creating Drawing Views
- Creating Shells
- Creating Table Driven Parts
- Assembling Parts
- Combining Parts
- Assembling Complex Models
- Key Terms
- Basic Concepts of Complex Assemblies
- Starting the Assembly Process
- Creating Local and External Parts
- Applying Assembly Constraints
- Creating New Parts
- Creating Subassemblies
- Completing Assemblies
- Editing Mechanical Desktop Parts
- Reloading External References
- Reviewing Assembly Models
- Creating Bills of Material
- Finishing Drawings for Plotting
- Creating and Editing Surfaces
- Combining Parts and Surfaces
- Surfacing Wireframe Models
- Key Terms
- Basic Concepts of Surfacing Wireframe Models
- Surfacing Wireframe Models
- Creating Trimmed Planar Surfaces
- Joining Surfaces on Complex Shapes
- Creating Swept and Projected Surfaces
- Creating Complex Swept Surfaces
- Using Projection to Create Surfaces
- Using Advanced Surfacing Techniques
- Viewing Completed Surfaced Models
- Working with Standard Parts
- Creating Shafts
- Calculating Stress on 3D Parts
- Toolbar Icons
- Desktop Tools
- Part Modeling
- Part Modeling ‰ New Part
- Part Modeling ‰ New Sketch Plane
- Part Modeling ‰ 2D Sketching
- Part Modeling ‰ 2D Constraints
- Part Modeling ‰ Profile a Sketch
- Part Modeling ‰ Sketched Features
- Part Modeling ‰ Placed Features
- Part Modeling ‰ Work Features
- Part Modeling ‰ Power Dimensioning
- Part Modeling ‰ Edit Feature
- Part Modeling ‰ Update Part
- Part Modeling ‰ Part Visibility
- Part Modeling ‰ Options
- Toolbody Modeling
- Assembly Modeling
- Surface Modeling
- Surface Modeling ‰ AutoSurf Options
- Surface Modeling ‰ Swept Surface
- Surface Modeling ‰ Loft U Surface
- Surface Modeling ‰ Blended Surface
- Surface Modeling ‰ Flow Wires
- Surface Modeling ‰ Object Visibility
- Surface Modeling ‰ Surface Display
- Surface Modeling ‰ Stitches Surfaces
- Surface Modeling ‰ Grip Point Placement
- Surface Modeling ‰ Lengthen Surface
- Surface Modeling ‰ Extract Surface Loop
- Surface Modeling ‰ Edit Augmented Line
- Surface Modeling ‰ Wire Direction
- Scene
- Drawing Layout
- Mechanical View
- Index
Autodesk® Mechanical Desktop®
6
User’s Guide
20507-010000-5020A May 3, 2001

12345678910
Copyright © 2001 Autodesk, Inc.
All Rights Reserved
This publication, or parts thereof, may not be reproduced in any form, by any method, for any purpose.
AUTODESK, INC. MAKES NO WARRANTY, EITHER EXPRESSED OR IMPLIED, INCLUDING BUT NOT LIMITED TO ANY IMPLIED
WARRANTIES OF MERCHANTABILITY OR FITNESS FOR A PARTICULAR PURPOSE, REGARDING THESE MATERIALS AND MAKES
SUCH MATERIALS AVAILABLE SOLELY ON AN “AS-IS” BASIS.
IN NO EVENT SHALL AUTODESK, INC. BE LIABLE TO ANYONE FOR SPECIAL, COLLATERAL, INCIDENTAL, OR CONSEQUENTIAL
DAMAGES IN CONNECTION WITH OR ARISING OUT OF PURCHASE OR USE OF THESE MATERIALS. THE SOLE AND EXCLUSIVE
LIABILITY TO AUTODESK, INC., REGARDLESS OF THE FORM OF ACTION, SHALL NOT EXCEED THE PURCHASE PRICE OF THE
MATERIALS DESCRIBED HEREIN.
Autodesk, Inc. reserves the right to revise and improve its products as it sees fit. This publication describes the state of this product at the time of its publication,
and may not reflect the product at all times in the future.
Autodesk Trademarks
The following are registered trademarks of Autodesk, Inc., in the USA and/or other countries: 3D Plan, 3D Props, 3D Studio, 3D Studio MAX, 3D
Studio VIZ, 3DSurfer, ActiveShapes, ActiveShapes (logo), Actrix, ADE, ADI, Advanced Modeling Extension, AEC Authority (logo), AEC-X, AME,
Animator Pro, Animator Studio, ATC, AUGI, AutoCAD, AutoCAD Data Extension, AutoCAD Development System, AutoCAD LT, AutoCAD Map,
Autodesk, Autodesk Animator, Autodesk (logo), Autodesk MapGuide, Autodesk University, Autodesk View, Autodesk WalkThrough, Autodesk World,
AutoLISP, AutoShade, AutoSketch, AutoSurf, AutoVision, Biped, bringing information down to earth, CAD Overlay, Character Studio, Design
Companion, Design Your World, Design Your World (logo), Drafix, Education by Design, Generic, Generic 3D Drafting, Generic CADD, Generic
Software, Geodyssey, Heidi, HOOPS, Hyperwire, Inside Track, Kinetix, MaterialSpec, Mechanical Desktop, Multimedia Explorer, NAAUG, ObjectARX,
Office Series, Opus, PeopleTracker, Physique, Planix, Powered with Autodesk Technology, Powered with Autodesk Technology (logo), RadioRay,
Rastation, Softdesk, Softdesk (logo), Solution 3000, Tech Talk, Texture Universe, The AEC Authority, The Auto Architect, TinkerTech, VISION*, WHIP!,
WHIP! (logo), Woodbourne, WorkCenter, and World-Creating Toolkit.
The following are trademarks of Autodesk, Inc., in the USA and/or other countries: 3D on the PC, 3ds max, ACAD, Advanced User Interface, AEC
Office, AME Link, Animation Partner, Animation Player, Animation Pro Player, A Studio in Every Computer, ATLAST, Auto-Architect, AutoCAD
Architectural Desktop, AutoCAD Architectural Desktop Learning Assistance, AutoCAD Learning Assistance, AutoCAD LT Learning Assistance, AutoCAD
Simulator, AutoCAD SQL Extension, AutoCAD SQL Interface, Autodesk Animator Clips, Autodesk Animator Theatre, Autodesk Device Interface,
Autodesk Inventor, Autodesk PhotoEDIT, Autodesk Software Developer’s Kit, Autodesk Streamline, Autodesk View DwgX, AutoFlix, AutoPAD,
AutoSnap, AutoTrack, Built with ObjectARX (logo), ClearScale, Colour Warper, Combustion, Concept Studio, Content Explorer, cornerStone Toolkit,
Dancing Baby (image), Design 2000 (logo), DesignCenter, Design Doctor, Designer’s Toolkit, DesignProf, DesignServer, DWG Linking, DWG
Unplugged, DXF, Extending the Design Team, FLI, FLIC, GDX Driver, Generic 3D, gmax, Heads-up Design, Home Series, i-drop, Kinetix (logo),
Lightscape, ObjectDBX, onscreen onair online, Ooga-Chaka, Photo Landscape, Photoscape, Plasma, Plugs and Sockets, PolarSnap, Pro Landscape,
QuickCAD, Reactor, Real-Time Roto, Render Queue, SchoolBox, Simply Smarter Diagramming, SketchTools, Sparks, Suddenly Everything Clicks,
Supportdesk, The Dancing Baby, Transform Ideas Into Reality, Visual LISP, Visual Syllabus, VIZable, Volo, and Where Design Connects.
Third Party Trademarks
All other brand names, product names or trademarks belong to their respective holders.
Third Party Software Program Credits
ACIS Copyright © 1989-2001 Spatial Corp.
Anderson, et. al. LAPACK Users’ Guide, Third Edition. Society for Industrial and Applied Mathematics, 1999.
Portions Copyright © 1991-1996 Arthur D. Applegate. All rights reserved.
Typefaces from the Bitstream ® typeface library copyright 1992.
Cypress Enable™, Cypress Software, Inc.
dBASE is a registered trademark of Ksoft, Inc.
Portions licensed from D-Cubed Ltd. DCM-2D and CDM are a trademark of D-Cubed Ltd. DCM-2D Copyright D-Cubed Ltd. 1989-2001.
CDM Copyright D-Cubed Ltd. 1998-2001.
SPEC is a registered trademark of Associated Spring/Barnes Group, Inc.
Portions of this software are based on the work of the Independent JPEG Group.
InstallShield™3.0. Copyright © 1997 InstallShield Software Corporation. All rights reserved.
Licensing Technology Copyright © C-Dilla Ltd. UK 1996, 1997, 1998, 1999, 2000, 2001.
MD5C.C - RSA Data Security, Inc., MD5 message-digest algorithm Copyright © 1991-1992, RSA Data Security, Inc. Created 1991. All
rights reserved.
International CorrectSpell™ Spelling Correction System © 1995 by Lernout & Hauspie Speech Products, N.V. All rights reserved.
LUCA TCP/IP Package, Portions Copyright © 1997 Langener GmbH. All rights reserved.
Copyright © 1997 Microsoft Corporation. All rights reserved.
Microsoft® HTML Help Copyright © Microsoft Corporation 2001.
Microsoft® Internet Explorer 5 Copyright © Microsoft Corporation 2001. All rights reserved
Microsoft® Windows NetMeeting Copyright © Microsoft Corporation 2001. All rights reserved
Objective Grid ©, Stingray Software a division of Rogue Wave Software, Inc.
Typefaces from Payne Loving Trust © 1996. All rights reserved.
PKWARE Data Compression Library ©, PKWARE, Inc.
SMLib © 1998-2000, IntegrityWare, Inc., GeomWare, Inc., and Solid Modeling Solutions, Inc.
GOVERNMENT USE
Use, duplication, or disclosure by the U. S. Government is subject to restrictions as set forth in FAR 12.212 (Commercial Computer
Software-Restricted Rights) and DFAR 227.7202 (Rights in Technical Data and Computer Software), as applicable.
iii
Contents
Part I Getting Started with Autodesk® Mechanical Desktop® .1
Chapter 1 Welcome . . . . . . . . . . . . . . . . . . . . . . . . . . . . . . . . . . . . . . . . . . . . . . 3
What is Autodesk Mechanical Desktop?. . . . . . . . . . . . . . . . . . . . . . . . . . . . 4
Making the Transition from AutoCAD . . . . . . . . . . . . . . . . . . . . . . . . . . . . . 5
Migrating Files from Previous Releases . . . . . . . . . . . . . . . . . . . . . . . . . . . . . 5
Data Exchange. . . . . . . . . . . . . . . . . . . . . . . . . . . . . . . . . . . . . . . . . . . . . . . . 6
Chapter 2 Modeling with Autodesk® Mechanical Desktop®. . . . . . . . . . . . . . . 7
Mechanical Desktop Basics . . . . . . . . . . . . . . . . . . . . . . . . . . . . . . . . . . . . . . 8
Chapter 3 The User Interface . . . . . . . . . . . . . . . . . . . . . . . . . . . . . . . . . . . . . 13
Mechanical Desktop Today. . . . . . . . . . . . . . . . . . . . . . . . . . . . . . . . . . . . . 14
Mechanical Desktop Environments . . . . . . . . . . . . . . . . . . . . . . . . . . . . . . 15
Assembly Modeling Environment . . . . . . . . . . . . . . . . . . . . . . . . . . . 15
Part Modeling Environment . . . . . . . . . . . . . . . . . . . . . . . . . . . . . . . 16
Mechanical Desktop Interface. . . . . . . . . . . . . . . . . . . . . . . . . . . . . . . . . . . 17
Desktop Browser. . . . . . . . . . . . . . . . . . . . . . . . . . . . . . . . . . . . . . . . . 18
Issuing Commands . . . . . . . . . . . . . . . . . . . . . . . . . . . . . . . . . . . . . . 24
Chapter 4 Documentation and Support . . . . . . . . . . . . . . . . . . . . . . . . . . . . . 27
Printed and Online Manuals. . . . . . . . . . . . . . . . . . . . . . . . . . . . . . . . . . . . 28
Mechanical Desktop Printed Manual . . . . . . . . . . . . . . . . . . . . . . . . 28
AutoCAD Printed Manual . . . . . . . . . . . . . . . . . . . . . . . . . . . . . . . . . 28
Online Installation Guide . . . . . . . . . . . . . . . . . . . . . . . . . . . . . . . . . 28
AutoCAD 2002 Documentation . . . . . . . . . . . . . . . . . . . . . . . . . . . . 29

iv |Contents
Mechanical Desktop Help . . . . . . . . . . . . . . . . . . . . . . . . . . . . . . . . . . . . . .30
Updating Help Files. . . . . . . . . . . . . . . . . . . . . . . . . . . . . . . . . . . . . . .30
Product Support Assistance in Help. . . . . . . . . . . . . . . . . . . . . . . . . . . . . . .31
Updating the Support Assistance Knowledge Base. . . . . . . . . . . . . . .31
Learning and Training Resources. . . . . . . . . . . . . . . . . . . . . . . . . . . . . . . . .31
Internet Resources . . . . . . . . . . . . . . . . . . . . . . . . . . . . . . . . . . . . . . . . . . . .32
Part I Autodesk®
Mechanical Desktop®
Tutorials. . . . . . . . . . 33
Chapter 5 Using the Tutorials . . . . . . . . . . . . . . . . . . . . . . . . . . . . . . . . . . . . . 35
How the Tutorials are Organized . . . . . . . . . . . . . . . . . . . . . . . . . . . . . . . . .36
Accessing Mechanical Desktop Commands. . . . . . . . . . . . . . . . . . . . . . . . .37
Positioning the Desktop Browser . . . . . . . . . . . . . . . . . . . . . . . . . . . . . . . . .38
Backing up Tutorial Drawing Files . . . . . . . . . . . . . . . . . . . . . . . . . . . . . . . .40
Chapter 6 Creating Parametric Sketches. . . . . . . . . . . . . . . . . . . . . . . . . . . . . 41
Key Terms . . . . . . . . . . . . . . . . . . . . . . . . . . . . . . . . . . . . . . . . . . . . . . . . . . .42
Basic Concepts of Parametric Sketching . . . . . . . . . . . . . . . . . . . . . . . . . . .43
Sketching Tips . . . . . . . . . . . . . . . . . . . . . . . . . . . . . . . . . . . . . . . . . . . . . . .44
Creating Profile Sketches . . . . . . . . . . . . . . . . . . . . . . . . . . . . . . . . . . . . . . .45
Creating Text Sketch Profiles . . . . . . . . . . . . . . . . . . . . . . . . . . . . . . .45
Creating Open Profile Sketches . . . . . . . . . . . . . . . . . . . . . . . . . . . . .46
Creating Closed Profile Sketches . . . . . . . . . . . . . . . . . . . . . . . . . . . .46
Using Default Sketch Rules . . . . . . . . . . . . . . . . . . . . . . . . . . . . . . . . .47
Using Custom Sketch Rules . . . . . . . . . . . . . . . . . . . . . . . . . . . . . . . .51
Using Nested Loops. . . . . . . . . . . . . . . . . . . . . . . . . . . . . . . . . . . . . . .56
Creating Path Sketches. . . . . . . . . . . . . . . . . . . . . . . . . . . . . . . . . . . . . . . . .58
Creating 2D Path Sketches . . . . . . . . . . . . . . . . . . . . . . . . . . . . . . . . .58
Creating 3D Path Sketches . . . . . . . . . . . . . . . . . . . . . . . . . . . . . . . . .62
Creating Cut Line Sketches . . . . . . . . . . . . . . . . . . . . . . . . . . . . . . . . . . . . .72
Creating Split Line Sketches. . . . . . . . . . . . . . . . . . . . . . . . . . . . . . . . . . . . .77
Creating Break Line Sketches . . . . . . . . . . . . . . . . . . . . . . . . . . . . . . . . . . . .80
Chapter 7 Constraining Sketches . . . . . . . . . . . . . . . . . . . . . . . . . . . . . . . . . . 83
Key Terms . . . . . . . . . . . . . . . . . . . . . . . . . . . . . . . . . . . . . . . . . . . . . . . . . . .84
Basic Concepts of Creating Constraints. . . . . . . . . . . . . . . . . . . . . . . . . . . .85
Constraining Tips. . . . . . . . . . . . . . . . . . . . . . . . . . . . . . . . . . . . . . . . . . . . .86
Constraining Sketches . . . . . . . . . . . . . . . . . . . . . . . . . . . . . . . . . . . . . . . . .86
Contents |v
Applying Geometric Constraints . . . . . . . . . . . . . . . . . . . . . . . . . . . . . . . . 88
Showing Constraint Symbols. . . . . . . . . . . . . . . . . . . . . . . . . . . . . . . 90
Replacing Constraints . . . . . . . . . . . . . . . . . . . . . . . . . . . . . . . . . . . . 91
Applying Dimension Constraints . . . . . . . . . . . . . . . . . . . . . . . . . . . . . . . . 94
Creating Profile Sketches . . . . . . . . . . . . . . . . . . . . . . . . . . . . . . . . . . 96
Adding Dimensions . . . . . . . . . . . . . . . . . . . . . . . . . . . . . . . . . . . . . . 97
Appending Sketches. . . . . . . . . . . . . . . . . . . . . . . . . . . . . . . . . . . . . 100
Modifying Dimensions . . . . . . . . . . . . . . . . . . . . . . . . . . . . . . . . . . 104
Using Construction Geometry . . . . . . . . . . . . . . . . . . . . . . . . . . . . . . . . . 105
Creating Profile Sketches . . . . . . . . . . . . . . . . . . . . . . . . . . . . . . . . . 105
Adding Project Constraints . . . . . . . . . . . . . . . . . . . . . . . . . . . . . . . 107
Adding Parametric Dimensions . . . . . . . . . . . . . . . . . . . . . . . . . . . . 109
Constraining Path Sketches . . . . . . . . . . . . . . . . . . . . . . . . . . . . . . . 111
Controlling Tangency . . . . . . . . . . . . . . . . . . . . . . . . . . . . . . . . . . . 115
Chapter 8 Creating Sketched Features . . . . . . . . . . . . . . . . . . . . . . . . . . . . . 121
Key Terms . . . . . . . . . . . . . . . . . . . . . . . . . . . . . . . . . . . . . . . . . . . . . . . . . 122
Basic Concepts of Sketched Features. . . . . . . . . . . . . . . . . . . . . . . . . . . . . 123
Creating Extruded Features . . . . . . . . . . . . . . . . . . . . . . . . . . . . . . . . . . . . 124
Extruding Closed Profiles. . . . . . . . . . . . . . . . . . . . . . . . . . . . . . . . . 124
Editing Extruded Features . . . . . . . . . . . . . . . . . . . . . . . . . . . . . . . . . . . . . 130
Extruding Open Profiles. . . . . . . . . . . . . . . . . . . . . . . . . . . . . . . . . . 133
Creating Rib Features . . . . . . . . . . . . . . . . . . . . . . . . . . . . . . . . . . . . 133
Creating Thin Features. . . . . . . . . . . . . . . . . . . . . . . . . . . . . . . . . . . 136
Creating Emboss Features . . . . . . . . . . . . . . . . . . . . . . . . . . . . . . . . 140
Editing Emboss Features. . . . . . . . . . . . . . . . . . . . . . . . . . . . . . . . . . 143
Creating Loft Features . . . . . . . . . . . . . . . . . . . . . . . . . . . . . . . . . . . . . . . . 143
Creating Linear Lofts . . . . . . . . . . . . . . . . . . . . . . . . . . . . . . . . . . . . 143
Creating Cubic Lofts . . . . . . . . . . . . . . . . . . . . . . . . . . . . . . . . . . . . 145
Editing Loft Features . . . . . . . . . . . . . . . . . . . . . . . . . . . . . . . . . . . . . . . . . 149
Creating Revolved Features . . . . . . . . . . . . . . . . . . . . . . . . . . . . . . . . . . . . 150
Editing Revolved Features . . . . . . . . . . . . . . . . . . . . . . . . . . . . . . . . . . . . . 151
Creating Face Splits . . . . . . . . . . . . . . . . . . . . . . . . . . . . . . . . . . . . . . . . . . 152
Editing Face Splits . . . . . . . . . . . . . . . . . . . . . . . . . . . . . . . . . . . . . . . . . . . 155
Creating Sweep Features . . . . . . . . . . . . . . . . . . . . . . . . . . . . . . . . . . . . . . 155
Creating 2D Sweep Features. . . . . . . . . . . . . . . . . . . . . . . . . . . . . . . 156
Creating 3D Sweep Features. . . . . . . . . . . . . . . . . . . . . . . . . . . . . . . 157
Editing Sweep Features . . . . . . . . . . . . . . . . . . . . . . . . . . . . . . . . . . . . . . . 163
Creating Bend Features . . . . . . . . . . . . . . . . . . . . . . . . . . . . . . . . . . . . . . . 163
Editing Bend Features . . . . . . . . . . . . . . . . . . . . . . . . . . . . . . . . . . . . . . . . 165

vi |Contents
Chapter 9 Creating Work Features . . . . . . . . . . . . . . . . . . . . . . . . . . . . . . . . 167
Key Terms . . . . . . . . . . . . . . . . . . . . . . . . . . . . . . . . . . . . . . . . . . . . . . . . . .168
Basic Concepts of Work Features . . . . . . . . . . . . . . . . . . . . . . . . . . . . . . . .169
Creating Work Planes. . . . . . . . . . . . . . . . . . . . . . . . . . . . . . . . . . . . . . . . .170
Editing Work Planes. . . . . . . . . . . . . . . . . . . . . . . . . . . . . . . . . . . . . . . . . .173
Creating Work Axes . . . . . . . . . . . . . . . . . . . . . . . . . . . . . . . . . . . . . . . . . .174
Editing Work Axes . . . . . . . . . . . . . . . . . . . . . . . . . . . . . . . . . . . . . . . . . . .177
Creating Work Points. . . . . . . . . . . . . . . . . . . . . . . . . . . . . . . . . . . . . . . . .179
Editing Work Points . . . . . . . . . . . . . . . . . . . . . . . . . . . . . . . . . . . . . . . . . .182
Chapter 10 Creating Placed Features . . . . . . . . . . . . . . . . . . . . . . . . . . . . . . . 185
Key Terms . . . . . . . . . . . . . . . . . . . . . . . . . . . . . . . . . . . . . . . . . . . . . . . . . .186
Basic Concepts of Placed Features . . . . . . . . . . . . . . . . . . . . . . . . . . . . . . .187
Creating Hole Features . . . . . . . . . . . . . . . . . . . . . . . . . . . . . . . . . . . . . . . .188
Creating Thread Features . . . . . . . . . . . . . . . . . . . . . . . . . . . . . . . . . . . . . .190
Editing Hole Features . . . . . . . . . . . . . . . . . . . . . . . . . . . . . . . . . . . . . . . . .192
Editing Thread Features . . . . . . . . . . . . . . . . . . . . . . . . . . . . . . . . . . . . . . .193
Creating Face Drafts . . . . . . . . . . . . . . . . . . . . . . . . . . . . . . . . . . . . . . . . . .194
Editing Face Drafts . . . . . . . . . . . . . . . . . . . . . . . . . . . . . . . . . . . . . . . . . . .198
Creating Fillet Features. . . . . . . . . . . . . . . . . . . . . . . . . . . . . . . . . . . . . . . .199
Editing Fillet Features. . . . . . . . . . . . . . . . . . . . . . . . . . . . . . . . . . . . . . . . .202
Creating Chamfer Features. . . . . . . . . . . . . . . . . . . . . . . . . . . . . . . . . . . . .204
Editing Chamfer Features. . . . . . . . . . . . . . . . . . . . . . . . . . . . . . . . . . . . . .208
Creating Shell Features. . . . . . . . . . . . . . . . . . . . . . . . . . . . . . . . . . . . . . . .209
Editing Shell Features . . . . . . . . . . . . . . . . . . . . . . . . . . . . . . . . . . . . . . . . .210
Creating Surface Cut Features . . . . . . . . . . . . . . . . . . . . . . . . . . . . . . . . . .212
Editing Surface Cut Features . . . . . . . . . . . . . . . . . . . . . . . . . . . . . . . . . . .213
Creating Pattern Features . . . . . . . . . . . . . . . . . . . . . . . . . . . . . . . . . . . . . .214
Editing Pattern Features . . . . . . . . . . . . . . . . . . . . . . . . . . . . . . . . . . . . . . .223
Editing Array Features . . . . . . . . . . . . . . . . . . . . . . . . . . . . . . . . . . . . . . . .223
Creating Copied Features . . . . . . . . . . . . . . . . . . . . . . . . . . . . . . . . . . . . . .224
Editing Copied Features . . . . . . . . . . . . . . . . . . . . . . . . . . . . . . . . . . . . . . .227
Creating Combined Features . . . . . . . . . . . . . . . . . . . . . . . . . . . . . . . . . . .227
Editing Combined Features . . . . . . . . . . . . . . . . . . . . . . . . . . . . . . . . . . . .228
Creating Part Splits. . . . . . . . . . . . . . . . . . . . . . . . . . . . . . . . . . . . . . . . . . .229
Editing Part Splits . . . . . . . . . . . . . . . . . . . . . . . . . . . . . . . . . . . . . . . . . . . .231
Chapter 11 Using Design Variables . . . . . . . . . . . . . . . . . . . . . . . . . . . . . . . . . 233
Key Terms . . . . . . . . . . . . . . . . . . . . . . . . . . . . . . . . . . . . . . . . . . . . . . . . . .234
Basic Concepts of Design Variables . . . . . . . . . . . . . . . . . . . . . . . . . . . . . .235
Preparing The Drawing File . . . . . . . . . . . . . . . . . . . . . . . . . . . . . . . . . . . .236
Contents |vii
Using Design Variables . . . . . . . . . . . . . . . . . . . . . . . . . . . . . . . . . . . . . . . 239
Active Part Design Variables . . . . . . . . . . . . . . . . . . . . . . . . . . . . . . 239
Global Design Variables. . . . . . . . . . . . . . . . . . . . . . . . . . . . . . . . . . 239
Creating Active Part Design Variables. . . . . . . . . . . . . . . . . . . . . . . . . . . . 239
Assigning Design Variables to Active Parts . . . . . . . . . . . . . . . . . . . . . . . . 242
Modifying Design Variables . . . . . . . . . . . . . . . . . . . . . . . . . . . . . . . . . . . 244
Working with Global Design Variables. . . . . . . . . . . . . . . . . . . . . . . . . . . 246
Chapter 12 Creating Parts . . . . . . . . . . . . . . . . . . . . . . . . . . . . . . . . . . . . . . . . 253
Key Terms . . . . . . . . . . . . . . . . . . . . . . . . . . . . . . . . . . . . . . . . . . . . . . . . . 254
Basic Concepts of Creating Parts. . . . . . . . . . . . . . . . . . . . . . . . . . . . . . . . 255
Creating Base Features. . . . . . . . . . . . . . . . . . . . . . . . . . . . . . . . . . . . . . . . 257
Sketching Base Features . . . . . . . . . . . . . . . . . . . . . . . . . . . . . . . . . . 258
Creating Work Features . . . . . . . . . . . . . . . . . . . . . . . . . . . . . . . . . . 264
Defining Sketch Planes . . . . . . . . . . . . . . . . . . . . . . . . . . . . . . . . . . 267
Creating Extruded Features . . . . . . . . . . . . . . . . . . . . . . . . . . . . . . . . . . . . 270
Constraining Sketches . . . . . . . . . . . . . . . . . . . . . . . . . . . . . . . . . . . 271
Dimensioning Sketches . . . . . . . . . . . . . . . . . . . . . . . . . . . . . . . . . . 274
Creating Constraints Between Features. . . . . . . . . . . . . . . . . . . . . . 276
Editing Sketches . . . . . . . . . . . . . . . . . . . . . . . . . . . . . . . . . . . . . . . . 280
Extruding Profiles. . . . . . . . . . . . . . . . . . . . . . . . . . . . . . . . . . . . . . . 282
Creating Revolved Features . . . . . . . . . . . . . . . . . . . . . . . . . . . . . . . . . . . . 284
Creating Symmetrical Features . . . . . . . . . . . . . . . . . . . . . . . . . . . . . . . . . 290
Constraining Sketches . . . . . . . . . . . . . . . . . . . . . . . . . . . . . . . . . . . 291
Refining Parts . . . . . . . . . . . . . . . . . . . . . . . . . . . . . . . . . . . . . . . . . . . . . . 297
Shading and Lighting Models . . . . . . . . . . . . . . . . . . . . . . . . . . . . . . . . . . 304
Chapter 13 Creating Drawing Views. . . . . . . . . . . . . . . . . . . . . . . . . . . . . . . . 307
Key Terms . . . . . . . . . . . . . . . . . . . . . . . . . . . . . . . . . . . . . . . . . . . . . . . . . 308
Basic Concepts of Creating Drawing Views . . . . . . . . . . . . . . . . . . . . . . . 309
Planning and Setting Up Drawings. . . . . . . . . . . . . . . . . . . . . . . . . . . . . . 309
Creating Drawing Views . . . . . . . . . . . . . . . . . . . . . . . . . . . . . . . . . . . . . . 310
Cleaning Up Drawings . . . . . . . . . . . . . . . . . . . . . . . . . . . . . . . . . . . . . . . 322
Hiding Extraneous Dimensions . . . . . . . . . . . . . . . . . . . . . . . . . . . . 322
Moving Dimensions. . . . . . . . . . . . . . . . . . . . . . . . . . . . . . . . . . . . . 325
Hiding Extraneous Lines . . . . . . . . . . . . . . . . . . . . . . . . . . . . . . . . . 328
Enhancing Drawings . . . . . . . . . . . . . . . . . . . . . . . . . . . . . . . . . . . . . . . . . 330
Changing Dimension Attributes . . . . . . . . . . . . . . . . . . . . . . . . . . . 330
Creating Reference Dimensions. . . . . . . . . . . . . . . . . . . . . . . . . . . . 332
Creating Hole Notes. . . . . . . . . . . . . . . . . . . . . . . . . . . . . . . . . . . . . 333
Creating Centerlines . . . . . . . . . . . . . . . . . . . . . . . . . . . . . . . . . . . . 336
Creating Other Annotation Items . . . . . . . . . . . . . . . . . . . . . . . . . . 337
Modifying Drawing Views . . . . . . . . . . . . . . . . . . . . . . . . . . . . . . . . 340
Exporting Drawing Views . . . . . . . . . . . . . . . . . . . . . . . . . . . . . . . . . . . . . 343

viii |Contents
Chapter 14 Creating Shells . . . . . . . . . . . . . . . . . . . . . . . . . . . . . . . . . . . . . . . 345
Key Terms . . . . . . . . . . . . . . . . . . . . . . . . . . . . . . . . . . . . . . . . . . . . . . . . . .346
Basic Concepts of Creating Shells . . . . . . . . . . . . . . . . . . . . . . . . . . . . . . .347
Adding Shell Features to Models . . . . . . . . . . . . . . . . . . . . . . . . . . . . . . . .347
Using Replay to Examine Designs . . . . . . . . . . . . . . . . . . . . . . . . . .348
Cutting Models to Create Shells . . . . . . . . . . . . . . . . . . . . . . . . . . . .350
Editing Shell Features . . . . . . . . . . . . . . . . . . . . . . . . . . . . . . . . . . . .352
Adding Multiple Wall Thicknesses . . . . . . . . . . . . . . . . . . . . . . . . . .354
Managing Multiple Thickness Overrides . . . . . . . . . . . . . . . . . . . . .358
Chapter 15 Creating Table Driven Parts . . . . . . . . . . . . . . . . . . . . . . . . . . . . . 361
Key Terms . . . . . . . . . . . . . . . . . . . . . . . . . . . . . . . . . . . . . . . . . . . . . . . . . .362
Basic Concepts of Table Driven Parts. . . . . . . . . . . . . . . . . . . . . . . . . . . . .363
Setting Up Tables . . . . . . . . . . . . . . . . . . . . . . . . . . . . . . . . . . . . . . . . . . . .364
Displaying Part Versions . . . . . . . . . . . . . . . . . . . . . . . . . . . . . . . . . . . . . .366
Editing Tables . . . . . . . . . . . . . . . . . . . . . . . . . . . . . . . . . . . . . . . . . . . . . . .367
Resolving Common Table Errors . . . . . . . . . . . . . . . . . . . . . . . . . . . . . . . .369
Suppressing Features. . . . . . . . . . . . . . . . . . . . . . . . . . . . . . . . . . . . . . . . . .371
Working with Two Part Versions . . . . . . . . . . . . . . . . . . . . . . . . . . . . . . . .377
Creating Drawing Views. . . . . . . . . . . . . . . . . . . . . . . . . . . . . . . . . . . . . . .379
Cleaning Up the Drawing . . . . . . . . . . . . . . . . . . . . . . . . . . . . . . . . . . . . .384
Displaying Dimensions as Parameters . . . . . . . . . . . . . . . . . . . . . . .384
Hiding Extraneous Dimensions . . . . . . . . . . . . . . . . . . . . . . . . . . . .385
Moving Dimensions . . . . . . . . . . . . . . . . . . . . . . . . . . . . . . . . . . . . .387
Enhancing Drawings . . . . . . . . . . . . . . . . . . . . . . . . . . . . . . . . . . . . . . . . .390
Creating Power Dimensions . . . . . . . . . . . . . . . . . . . . . . . . . . . . . . .390
Creating Hole Notes . . . . . . . . . . . . . . . . . . . . . . . . . . . . . . . . . . . . .393
Pasting Linked Spreadsheets . . . . . . . . . . . . . . . . . . . . . . . . . . . . . . . . . . .396
Chapter 16 Assembling Parts. . . . . . . . . . . . . . . . . . . . . . . . . . . . . . . . . . . . . . 399
Key Terms . . . . . . . . . . . . . . . . . . . . . . . . . . . . . . . . . . . . . . . . . . . . . . . . . .400
Basic Concepts of Assembling Parts. . . . . . . . . . . . . . . . . . . . . . . . . . . . . .401
Starting Assembly Designs . . . . . . . . . . . . . . . . . . . . . . . . . . . . . . . . . . . . .402
Using External Parts in Assemblies . . . . . . . . . . . . . . . . . . . . . . . . . . . . . .403
Assembling Parts. . . . . . . . . . . . . . . . . . . . . . . . . . . . . . . . . . . . . . . . . . . . .406
Constraining Parts . . . . . . . . . . . . . . . . . . . . . . . . . . . . . . . . . . . . . .407
Using the Desktop Browser. . . . . . . . . . . . . . . . . . . . . . . . . . . . . . . .414
Getting Information from Assemblies . . . . . . . . . . . . . . . . . . . . . . . . . . . .417
Checking for Interference . . . . . . . . . . . . . . . . . . . . . . . . . . . . . . . . .417
Calculating Mass Properties . . . . . . . . . . . . . . . . . . . . . . . . . . . . . . .418
Creating Assembly Scenes . . . . . . . . . . . . . . . . . . . . . . . . . . . . . . . . . . . . .420
Contents |ix
Creating Assembly Drawing Views . . . . . . . . . . . . . . . . . . . . . . . . . . . . . . 425
Editing Assemblies. . . . . . . . . . . . . . . . . . . . . . . . . . . . . . . . . . . . . . . . . . . 433
Editing External Subassemblies . . . . . . . . . . . . . . . . . . . . . . . . . . . . 433
Editing External Parts. . . . . . . . . . . . . . . . . . . . . . . . . . . . . . . . . . . . 434
Editing Assembly Constraints . . . . . . . . . . . . . . . . . . . . . . . . . . . . . 438
Chapter 17 Combining Parts . . . . . . . . . . . . . . . . . . . . . . . . . . . . . . . . . . . . . . 443
Key Terms . . . . . . . . . . . . . . . . . . . . . . . . . . . . . . . . . . . . . . . . . . . . . . . . . 444
Basic Concepts of Combining Parts . . . . . . . . . . . . . . . . . . . . . . . . . . . . . 445
Working in Single Part Mode . . . . . . . . . . . . . . . . . . . . . . . . . . . . . . . . . . 446
Creating Parts . . . . . . . . . . . . . . . . . . . . . . . . . . . . . . . . . . . . . . . . . . . . . . 447
Creating Toolbody Part Definitions . . . . . . . . . . . . . . . . . . . . . . . . . . . . . 449
Working with Combine Features . . . . . . . . . . . . . . . . . . . . . . . . . . . . . . . 458
Creating Relief Toolbodies . . . . . . . . . . . . . . . . . . . . . . . . . . . . . . . . . . . . 461
Combining Toolbodies with Spacers . . . . . . . . . . . . . . . . . . . . . . . . . . . . 463
Adding Weight Reduction Holes. . . . . . . . . . . . . . . . . . . . . . . . . . . . . . . . 465
Adding Weight Reduction Extrusions. . . . . . . . . . . . . . . . . . . . . . . . . . . . 471
Adding Mounting Holes . . . . . . . . . . . . . . . . . . . . . . . . . . . . . . . . . . . . . . 474
Chapter 18 Assembling Complex Models . . . . . . . . . . . . . . . . . . . . . . . . . . . . 477
Key Terms . . . . . . . . . . . . . . . . . . . . . . . . . . . . . . . . . . . . . . . . . . . . . . . . . 478
Basic Concepts of Complex Assemblies . . . . . . . . . . . . . . . . . . . . . . . . . . 479
Starting the Assembly Process . . . . . . . . . . . . . . . . . . . . . . . . . . . . . . . . . . 479
Creating Local and External Parts. . . . . . . . . . . . . . . . . . . . . . . . . . . . . . . 481
Applying Assembly Constraints . . . . . . . . . . . . . . . . . . . . . . . . . . . . . . . . 483
Creating New Parts . . . . . . . . . . . . . . . . . . . . . . . . . . . . . . . . . . . . . . . . . . 491
Creating Subassemblies . . . . . . . . . . . . . . . . . . . . . . . . . . . . . . . . . . . . . . . 494
Defining and Activating Subassemblies. . . . . . . . . . . . . . . . . . . . . . 494
Using External Parts. . . . . . . . . . . . . . . . . . . . . . . . . . . . . . . . . . . . . 495
Instancing Parts . . . . . . . . . . . . . . . . . . . . . . . . . . . . . . . . . . . . . . . . 496
Completing Assemblies. . . . . . . . . . . . . . . . . . . . . . . . . . . . . . . . . . . . . . . 497
Applying Assembly Constraints. . . . . . . . . . . . . . . . . . . . . . . . . . . . 497
Restructuring Assemblies . . . . . . . . . . . . . . . . . . . . . . . . . . . . . . . . . 504
Analyzing Assemblies. . . . . . . . . . . . . . . . . . . . . . . . . . . . . . . . . . . . 506
Editing Mechanical Desktop Parts . . . . . . . . . . . . . . . . . . . . . . . . . . . . . . 508
Reloading External References . . . . . . . . . . . . . . . . . . . . . . . . . . . . . . . . . 509
Assigning Mass Properties . . . . . . . . . . . . . . . . . . . . . . . . . . . . . . . . 510
Calculating Mass Properties. . . . . . . . . . . . . . . . . . . . . . . . . . . . . . . 511
Reviewing Assembly Models . . . . . . . . . . . . . . . . . . . . . . . . . . . . . . . . . . . 513
Creating Exploded Assembly Scenes . . . . . . . . . . . . . . . . . . . . . . . . 513
Using Tweaks and Trails in Scenes. . . . . . . . . . . . . . . . . . . . . . . . . . 515
Creating Assembly Drawing Views . . . . . . . . . . . . . . . . . . . . . . . . . 518

x|Contents
Creating Bills of Material . . . . . . . . . . . . . . . . . . . . . . . . . . . . . . . . . . . . . .522
Customizing BOM Databases . . . . . . . . . . . . . . . . . . . . . . . . . . . . . .523
Working with Part References. . . . . . . . . . . . . . . . . . . . . . . . . . . . . .525
Adding Balloons . . . . . . . . . . . . . . . . . . . . . . . . . . . . . . . . . . . . . . . .527
Placing Parts Lists . . . . . . . . . . . . . . . . . . . . . . . . . . . . . . . . . . . . . . .529
Finishing Drawings for Plotting. . . . . . . . . . . . . . . . . . . . . . . . . . . . . . . . .531
Chapter 19 Creating and Editing Surfaces . . . . . . . . . . . . . . . . . . . . . . . . . . . 533
Key Terms . . . . . . . . . . . . . . . . . . . . . . . . . . . . . . . . . . . . . . . . . . . . . . . . . .534
Basic Concepts of Creating Surfaces . . . . . . . . . . . . . . . . . . . . . . . . . . . . .535
Working with Surfaces . . . . . . . . . . . . . . . . . . . . . . . . . . . . . . . . . . . . . . . .536
Creating Motion-Based Surfaces. . . . . . . . . . . . . . . . . . . . . . . . . . . . . . . . .538
Revolved Surfaces . . . . . . . . . . . . . . . . . . . . . . . . . . . . . . . . . . . . . . .538
Extruded Surfaces . . . . . . . . . . . . . . . . . . . . . . . . . . . . . . . . . . . . . . .539
Swept Surfaces. . . . . . . . . . . . . . . . . . . . . . . . . . . . . . . . . . . . . . . . . .540
Creating Skin Surfaces . . . . . . . . . . . . . . . . . . . . . . . . . . . . . . . . . . . . . . . .546
Ruled Surfaces . . . . . . . . . . . . . . . . . . . . . . . . . . . . . . . . . . . . . . . . . .546
Trimmed Planar Surfaces . . . . . . . . . . . . . . . . . . . . . . . . . . . . . . . . .554
Lofted Surfaces . . . . . . . . . . . . . . . . . . . . . . . . . . . . . . . . . . . . . . . . .555
Creating Derived Surfaces . . . . . . . . . . . . . . . . . . . . . . . . . . . . . . . . . . . . .559
Blended Surfaces . . . . . . . . . . . . . . . . . . . . . . . . . . . . . . . . . . . . . . . .559
Offset Surfaces. . . . . . . . . . . . . . . . . . . . . . . . . . . . . . . . . . . . . . . . . .563
Fillet and Corner Surfaces . . . . . . . . . . . . . . . . . . . . . . . . . . . . . . . . .565
Editing Surfaces . . . . . . . . . . . . . . . . . . . . . . . . . . . . . . . . . . . . . . . . . . . . .569
Adjusting Adjacent Surfaces . . . . . . . . . . . . . . . . . . . . . . . . . . . . . . .569
Joining Surfaces. . . . . . . . . . . . . . . . . . . . . . . . . . . . . . . . . . . . . . . . .570
Trimming Intersecting Surfaces . . . . . . . . . . . . . . . . . . . . . . . . . . . .571
Trimming Surfaces by Projection . . . . . . . . . . . . . . . . . . . . . . . . . . .573
Chapter 20 Combining Parts and Surfaces . . . . . . . . . . . . . . . . . . . . . . . . . . . 575
Key Terms . . . . . . . . . . . . . . . . . . . . . . . . . . . . . . . . . . . . . . . . . . . . . . . . . .576
Basic Concepts of Combining Parts and Surfaces . . . . . . . . . . . . . . . . . . .577
Using Surface Features . . . . . . . . . . . . . . . . . . . . . . . . . . . . . . . . . . . . . . . .577
Creating Surface Features . . . . . . . . . . . . . . . . . . . . . . . . . . . . . . . . . . . . . .579
Attaching Surfaces Parametrically . . . . . . . . . . . . . . . . . . . . . . . . . . . . . . .582
Cutting Parts with Surfaces . . . . . . . . . . . . . . . . . . . . . . . . . . . . . . . . . . . .584
Creating Extruded Features . . . . . . . . . . . . . . . . . . . . . . . . . . . . . . . . . . . .586
Creating Holes . . . . . . . . . . . . . . . . . . . . . . . . . . . . . . . . . . . . . . . . . . . . . .598
Creating Features on a Work Plane . . . . . . . . . . . . . . . . . . . . . . . . . . . . . .601
Modifying Designs . . . . . . . . . . . . . . . . . . . . . . . . . . . . . . . . . . . . . . . . . . .609
Finishing Touches on Models . . . . . . . . . . . . . . . . . . . . . . . . . . . . . . . . . .611
Contents |xi
Chapter 21 Surfacing Wireframe Models . . . . . . . . . . . . . . . . . . . . . . . . . . . . 613
Key Terms . . . . . . . . . . . . . . . . . . . . . . . . . . . . . . . . . . . . . . . . . . . . . . . . . 614
Basic Concepts of Surfacing Wireframe Models . . . . . . . . . . . . . . . . . . . . 615
Discerning Design Intent. . . . . . . . . . . . . . . . . . . . . . . . . . . . . . . . . 615
Identifying Logical Surface Areas. . . . . . . . . . . . . . . . . . . . . . . . . . . 616
Identifying Base Surface Areas . . . . . . . . . . . . . . . . . . . . . . . . . . . . . 617
Using Trimmed Planar Surfaces . . . . . . . . . . . . . . . . . . . . . . . . . . . . 619
Choosing a Surfacing Method . . . . . . . . . . . . . . . . . . . . . . . . . . . . . 620
Verifying Surfacing Results . . . . . . . . . . . . . . . . . . . . . . . . . . . . . . . 623
Surfacing Wireframe Models. . . . . . . . . . . . . . . . . . . . . . . . . . . . . . . . . . . 624
Creating Trimmed Planar Surfaces . . . . . . . . . . . . . . . . . . . . . . . . . . . . . . 626
Joining Surfaces on Complex Shapes . . . . . . . . . . . . . . . . . . . . . . . . . . . . 634
Creating Swept and Projected Surfaces . . . . . . . . . . . . . . . . . . . . . . . . . . . 645
Creating Complex Swept Surfaces. . . . . . . . . . . . . . . . . . . . . . . . . . . . . . . 655
Using Projection to Create Surfaces . . . . . . . . . . . . . . . . . . . . . . . . . . . . . 661
Using Advanced Surfacing Techniques. . . . . . . . . . . . . . . . . . . . . . . . . . . 665
Viewing Completed Surfaced Models . . . . . . . . . . . . . . . . . . . . . . . . . . . . 669
Chapter 22 Working with Standard Parts. . . . . . . . . . . . . . . . . . . . . . . . . . . . 671
Key Terms . . . . . . . . . . . . . . . . . . . . . . . . . . . . . . . . . . . . . . . . . . . . . . . . . 672
Tutorial at a Glance. . . . . . . . . . . . . . . . . . . . . . . . . . . . . . . . . . . . . . . . . . 673
Basic Concepts of Standard Parts . . . . . . . . . . . . . . . . . . . . . . . . . . . . . . . 673
Inserting Through Holes . . . . . . . . . . . . . . . . . . . . . . . . . . . . . . . . . . . . . . 674
Using Cylinder Axial Placement . . . . . . . . . . . . . . . . . . . . . . . . . . . 674
Using Cylinder Radial Placement . . . . . . . . . . . . . . . . . . . . . . . . . . 677
Inserting Screw Connections . . . . . . . . . . . . . . . . . . . . . . . . . . . . . . . . . . 681
Chapter 23 Creating Shafts . . . . . . . . . . . . . . . . . . . . . . . . . . . . . . . . . . . . . . . 689
Key Terms . . . . . . . . . . . . . . . . . . . . . . . . . . . . . . . . . . . . . . . . . . . . . . . . . 690
Tutorial at a Glance. . . . . . . . . . . . . . . . . . . . . . . . . . . . . . . . . . . . . . . . . . 691
Basic Concepts of the Shaft Generator . . . . . . . . . . . . . . . . . . . . . . . . . . . 691
Using the Shaft Generator. . . . . . . . . . . . . . . . . . . . . . . . . . . . . . . . . . . . . 692
Getting Started . . . . . . . . . . . . . . . . . . . . . . . . . . . . . . . . . . . . . . . . . 692
Creating Shaft Geometry . . . . . . . . . . . . . . . . . . . . . . . . . . . . . . . . . 693
Adding Threads to Shafts. . . . . . . . . . . . . . . . . . . . . . . . . . . . . . . . . 695
Adding Profile Information to Shafts . . . . . . . . . . . . . . . . . . . . . . . 697
Editing Shafts . . . . . . . . . . . . . . . . . . . . . . . . . . . . . . . . . . . . . . . . . . 698
Adding Standard Parts to Shafts. . . . . . . . . . . . . . . . . . . . . . . . . . . . 701
Displaying and Shading 3D Views. . . . . . . . . . . . . . . . . . . . . . . . . . 705

xii |Contents
Chapter 24 Calculating Stress on 3D Parts . . . . . . . . . . . . . . . . . . . . . . . . . . . 707
Key Terms . . . . . . . . . . . . . . . . . . . . . . . . . . . . . . . . . . . . . . . . . . . . . . . . . .708
Tutorial at a Glance . . . . . . . . . . . . . . . . . . . . . . . . . . . . . . . . . . . . . . . . . .709
Basic Concepts of 3D FEA . . . . . . . . . . . . . . . . . . . . . . . . . . . . . . . . . . . . .709
Using 3D FEA Calculations . . . . . . . . . . . . . . . . . . . . . . . . . . . . . . . . . . . .710
Performing Finite Element Analyses. . . . . . . . . . . . . . . . . . . . . . . . .710
Defining Supports and Forces. . . . . . . . . . . . . . . . . . . . . . . . . . . . . .711
Calculating and Displaying the Result . . . . . . . . . . . . . . . . . . . . . . .715
Desktop Tools. . . . . . . . . . . . . . . . . . . . . . . . . . . . . . . . . . . . . . . . . . . . . . .720
Part Modeling. . . . . . . . . . . . . . . . . . . . . . . . . . . . . . . . . . . . . . . . . . . . . . .721
Part Modeling ➤ New Part . . . . . . . . . . . . . . . . . . . . . . . . . . . . . . . .721
Part Modeling ➤ New Sketch Plane . . . . . . . . . . . . . . . . . . . . . . . . .722
Part Modeling ➤ 2D Sketching. . . . . . . . . . . . . . . . . . . . . . . . . . . . .722
Part Modeling ➤ 2D Constraints . . . . . . . . . . . . . . . . . . . . . . . . . . .725
Part Modeling ➤ Profile a Sketch . . . . . . . . . . . . . . . . . . . . . . . . . . .726
Part Modeling ➤ Sketched Features . . . . . . . . . . . . . . . . . . . . . . . . .727
Part Modeling ➤ Placed Features . . . . . . . . . . . . . . . . . . . . . . . . . . .727
Part Modeling ➤ Work Features . . . . . . . . . . . . . . . . . . . . . . . . . . . .727
Part Modeling ➤ Power Dimensioning . . . . . . . . . . . . . . . . . . . . . .728
Part Modeling ➤ Edit Feature . . . . . . . . . . . . . . . . . . . . . . . . . . . . . .728
Part Modeling ➤ Update Part . . . . . . . . . . . . . . . . . . . . . . . . . . . . . .728
Part Modeling ➤ Part Visibility . . . . . . . . . . . . . . . . . . . . . . . . . . . .729
Part Modeling ➤ Options . . . . . . . . . . . . . . . . . . . . . . . . . . . . . . . . .729
Toolbody Modeling . . . . . . . . . . . . . . . . . . . . . . . . . . . . . . . . . . . . . . . . . .730
Toolbody Modeling ➤ New Toolbody . . . . . . . . . . . . . . . . . . . . . . .730
Toolbody Modeling ➤ Part Catalog . . . . . . . . . . . . . . . . . . . . . . . . .730
Toolbody Modeling ➤ 3D Toolbody Constraints . . . . . . . . . . . . . .731
Toolbody Modeling ➤ Power Manipulator . . . . . . . . . . . . . . . . . . .731
Toolbody Modeling ➤ Check Interference. . . . . . . . . . . . . . . . . . . .731
Toolbody Modeling ➤ Toolbody Visibility . . . . . . . . . . . . . . . . . . .732
Assembly Modeling . . . . . . . . . . . . . . . . . . . . . . . . . . . . . . . . . . . . . . . . . .732
Assembly Modeling ➤ New Subassembly. . . . . . . . . . . . . . . . . . . . .733
Assembly Modeling ➤ Assembly Catalog. . . . . . . . . . . . . . . . . . . . .733
Assembly Modeling ➤ 3D Assembly Constraints. . . . . . . . . . . . . . .733
Assembly Modeling ➤ Assign Attributes . . . . . . . . . . . . . . . . . . . . .734
Assembly Modeling ➤ Power Manipulator . . . . . . . . . . . . . . . . . . .734
Assembly Modeling ➤ Mass Properties. . . . . . . . . . . . . . . . . . . . . . .734
Assembly Modeling ➤ Assembly Visibility. . . . . . . . . . . . . . . . . . . .734
Contents |xiii
Surface Modeling. . . . . . . . . . . . . . . . . . . . . . . . . . . . . . . . . . . . . . . . . . . . 735
Surface Modeling ➤ AutoSurf Options . . . . . . . . . . . . . . . . . . . . . . 735
Surface Modeling ➤ Swept Surface . . . . . . . . . . . . . . . . . . . . . . . . . 736
Surface Modeling ➤ Loft U Surface . . . . . . . . . . . . . . . . . . . . . . . . . 736
Surface Modeling ➤ Blended Surface. . . . . . . . . . . . . . . . . . . . . . . . 736
Surface Modeling ➤ Flow Wires . . . . . . . . . . . . . . . . . . . . . . . . . . . 737
Surface Modeling ➤ Object Visibility . . . . . . . . . . . . . . . . . . . . . . . 737
Surface Modeling ➤ Surface Display . . . . . . . . . . . . . . . . . . . . . . . . 737
Surface Modeling ➤ Stitches Surfaces . . . . . . . . . . . . . . . . . . . . . . . 738
Surface Modeling ➤ Grip Point Placement . . . . . . . . . . . . . . . . . . . 738
Surface Modeling ➤ Lengthen Surface . . . . . . . . . . . . . . . . . . . . . . 738
Surface Modeling ➤ Extract Surface Loop . . . . . . . . . . . . . . . . . . . . 739
Surface Modeling ➤ Edit Augmented Line . . . . . . . . . . . . . . . . . . . 739
Surface Modeling ➤ Wire Direction . . . . . . . . . . . . . . . . . . . . . . . . 739
Scene . . . . . . . . . . . . . . . . . . . . . . . . . . . . . . . . . . . . . . . . . . . . . . . . . . . . . 740
Scene ➤ New Scene . . . . . . . . . . . . . . . . . . . . . . . . . . . . . . . . . . . . . 740
Scene ➤ Scene Visibility. . . . . . . . . . . . . . . . . . . . . . . . . . . . . . . . . . 741
Drawing Layout. . . . . . . . . . . . . . . . . . . . . . . . . . . . . . . . . . . . . . . . . . . . . 741
Drawing Layout ➤ Power Dimensioning . . . . . . . . . . . . . . . . . . . . 742
Drawing Layout ➤ Drawing Visibility. . . . . . . . . . . . . . . . . . . . . . . 744
Mechanical View . . . . . . . . . . . . . . . . . . . . . . . . . . . . . . . . . . . . . . . . . . . . 744
Mechanical View ➤ Zoom Realtime . . . . . . . . . . . . . . . . . . . . . . . . 745
Mechanical View ➤ 3D Orbit . . . . . . . . . . . . . . . . . . . . . . . . . . . . . 745
Mechanical View ➤ Sketch View. . . . . . . . . . . . . . . . . . . . . . . . . . . 746
Mechanical View ➤ Restore View #1. . . . . . . . . . . . . . . . . . . . . . . . 746
Mechanical View ➤ Toggle Shading/Wireframe . . . . . . . . . . . . . . . 747
Index . . . . . . . . . . . . . . . . . . . . . . . . . . . . . . . . . . . . . . . . . . . . . . . 749

xiv

1
Part I
Getting Started
with Autodesk®
Mechanical Desktop®
Part I provides information for getting started with your Mechanical Desktop 6 software. It
includes information to help in the transition from AutoCAD® and the migration of files
from previous releases. It explains the user interface and the basics of modeling in the
different work environments in Mechanical Desktop.
In addition, Part I provides a guide to both the print and online documentation that you
received with your Mechanical Desktop software. Information about training courseware
and Internet resources are also included.

2|

3
In This Chapter 1
Welcome
This chapter provides an overview of the capabilities of
Autodesk® Mechanical Desktop® 6 software. You learn
about the transition from AutoCAD®, data exchange,
and the migration of files from previous releases with the
Mechanical Desktop Migration Assistance.
■About Mechanical Desktop
■Making the transition from
AutoCAD
■Migrating files from previous
releases

4|Chapter 1 Welcome
What is Autodesk Mechanical Desktop?
Mechanical Desktop is a powerful and easy-to-use 3D parametric modeler
used in mechanical design. Built on AutoCAD 2002, the Mechanical Desktop
6 design software package includes:
■AutoCAD Mechanical 6 with the power pack (2D Parts and Calculations)
■Mechanical Desktop 6 with the power pack (Mechanical Desktop 6, 3D
Parts and Calculations)
■AutoCAD 2002
When you start Mechanical Desktop 6, you have the option to run it with or
without the power pack.
The Mechanical Desktop software provides design tools to
■Create parts from sketched and placed features
■Combine parts and toolbodies
■Build assemblies and subassemblies
■Define scenes for drawing views
■Set up drawing sheets and views
■Annotate drawings for final documentation
■Manage and reuse design data
■Migrate and edit legacy solids data
Productivity and collaboration tools in Mechanical Desktop enable you to
improve workflows and comply with company practices.
Web tools are provided in a design portal called the Today page. From the
Today page, you can
■Start a new drawing or open an existing drawing
■Access symbol libraries
■Communicate to design team members through a Web page you create
from a template provided
■Link directly to design information on the Web
■Link directly to Autodesk Web pages
For more information about the Today page, see “Mechanical Desktop
Today” on page 14.
Making the Transition from AutoCAD |5
Making the Transition from AutoCAD
Mechanical Desktop 6 is built on AutoCAD 2002 and uses many of the tools
you may already be familiar with. Because Mechanical Desktop is a parametric
modeling program, exercise care in using standard AutoCAD commands.
In the sketching stage, you can use any AutoCAD command to create the
geometry for your sketch. You can use AutoCAD drawing and editing tools
to edit sketch geometry after it has been consumed by a feature.
In general, follow these rules:
■Use Mechanical Desktop dimensions. AutoCAD dimensions are not
parametric and cannot control the size, shape, or position of Mechanical
Desktop parts and features.
■Use sketch planes and work planes to control the UCS orientation. Using
the AutoCAD UCS command does not associate the current plane with
your part.
■Do not use the command EXPLODE. Exploding a part deletes the part
definition from a Mechanical Desktop drawing.
■Use the Assembly Catalog or the Browser to insert external part files into
drawings and externalize part files. Using the AutoCAD INSERT, WBLOCK,
XREF, and XBIND commands could corrupt Mechanical Desktop data.
■Use the Mechanical Desktop drawing view commands to create drawing
views. The AutoCAD MVIEW command does not create associative views
of your parts.
Migrating Files from Previous Releases
In Mechanical Desktop 6, you can add more than one part to a part file for
creating combined parts. The first part becomes the part definition, while all
other parts become unconsumed toolbodies. You combine toolbodies with
each other and the first part to create a complex part.
To migrate parts from a part file that contains more than one part and was
created before Mechanical Desktop Release 2, you need to follow specific
procedures. See "Running the Desktop File Migration Utility" in the Autodesk
Mechanical Products Installation Guide on the product CD.
The File Migration Tool (FMT) is a component of Mechanical Desktop
Migration Assistance, an independent Visual Basic (not VBA) application
located on your product CD. The FMT migrates multiple files from previous
releases of Mechanical Desktop to the current format. You can install
Mechanical Desktop Migration Assistance during or after the installation of
your Autodesk mechanical product.

6|Chapter 1 Welcome
To install the Mechanical Desktop Migration Assistance from your product CD
1Hold down the SHIFT key while you insert the product CD into the CD-ROM
drive. This prevents Setup from starting automatically.
2In the file tree of the CD-ROM drive, navigate to the Migrate folder and click
setup.exe.
3Respond to the directions in the Mechanical Desktop Migration Assistance
installation dialog boxes.
NOTE For more information about installing the Migration Assistance and
running the FMT, see "Mechanical Desktop Migration Assistance" in the
Autodesk Mechanical Products Installation Guide on your product CD.
Data Exchange
During your design process, you may want to complement Mechanical
Desktop with other computer-aided design (CAD) software. Mechanical
Desktop 6 includes the STEP translator and the IGES Translator. The Standard
for the Exchange of Product Model Data (STEP) is International Standards
Organization (ISO) 10303. The Initial Graphics Exchange Specification
(IGES) is the ANSI standard for data exchange between CAD systems and is
supported by many CAD vendors.
The IGES Translator is compliant with the most recent version of IGES and
related standards. It supports both the United States Department of Defense
Continuous Acquisition and Life-cycle Support initiative (CALS) and the Japa-
nese Automotive Manufacturers Association subset of IGES (JAMA).
Besides creating and maintaining a flexible CAD tool environment, the
Translator preserves the investment you have made in previous designs
developed with other CAD systems.
The Translator supports the following types of design objects:
■2D and 3D wireframe geometry
■Ruled, parametric, and NURBS surfaces
■Mechanical Desktop and AutoCAD native solids, and IGES boundary
representation solids (B-rep).
For more information, see STEP and IGES in the Mechanical Desktop Help.

7
In This Chapter 2
Modeling with Autodesk®
Mechanical Desktop®
This chapter describes the basic concepts of mechanical
design with Autodesk Mechanical Desktop software,
including fundamentals of parametric design.
If you understand the underlying concepts in this chap-
ter, you can become proficient in using the Mechanical
Desktop software.
■Mechanical Desktop basics
■Mechanical Desktop work
environments
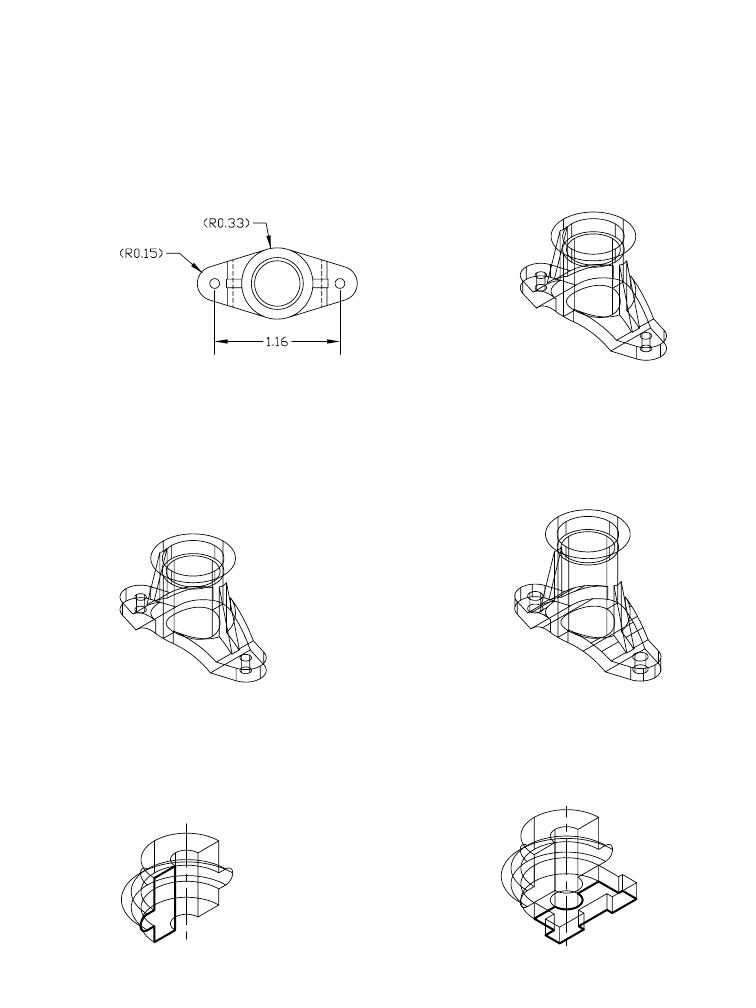
8|Chapter 2 Modeling with Autodesk Mechanical Desktop
Mechanical Desktop Basics
Mechanical Desktop is an integrated package of advanced 3D modeling tools
and 2D drafting and drawing capabilities that helps you conceptualize,
design, and document your mechanical products.
You create models of 3D parts, not just 2D drawings.
You use these 3D parts to create 2D drawings and 3D assemblies.
Mechanical Desktop, a dimension-driven system, creates parametric models.
Your model is defined in terms of the size, shape, and position of its features.
You can modify the size and shape of your model, while preserving your
design intent.
You build parts from features—the basic shapes of your part.
Building blocks like extrusions, lofts, sweeps, bends, holes, fillets, and cham-
fers are parametrically combined to create your part.
2D drawin
g
3D
p
art
original part revised part
extruded feature
revolved feature
Mechanical Desktop Basics |9
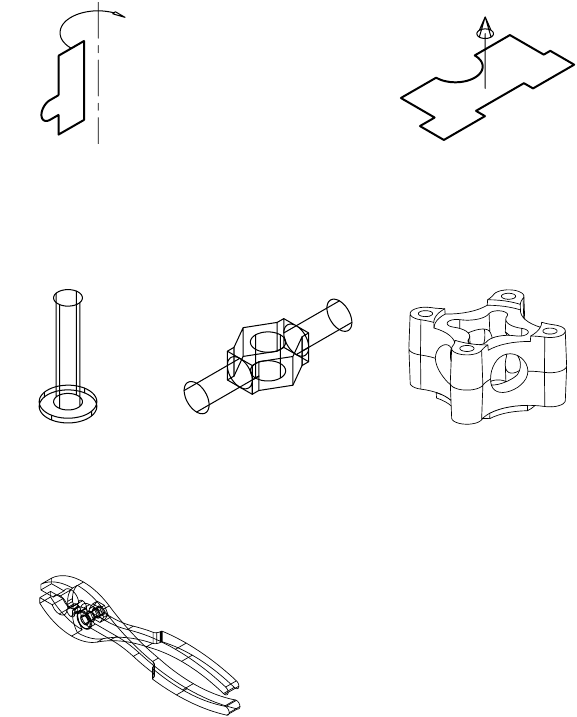
You create most features from sketches.
Sketches can be extruded, revolved, lofted, or swept along a path to create
features.
You work in the Part Modeling environment to create single parts.
In this environment, only one part can exist in a drawing. Additional parts
become unconsumed toolbodies for the purpose of creating a combined part.
Use part files to build a library of standardized parts.
You work in Assembly Modeling to create multiple parts and assemblies.
In this environment, any number of parts can exist in one drawing. Parts can
be externally referenced from part and assembly files, or localized in the
assembly drawing.
sketch for revolved feature sketch for extruded feature
examples of single part files
assembly file containing four external part files
10 |Chapter 2 Modeling with Autodesk Mechanical Desktop
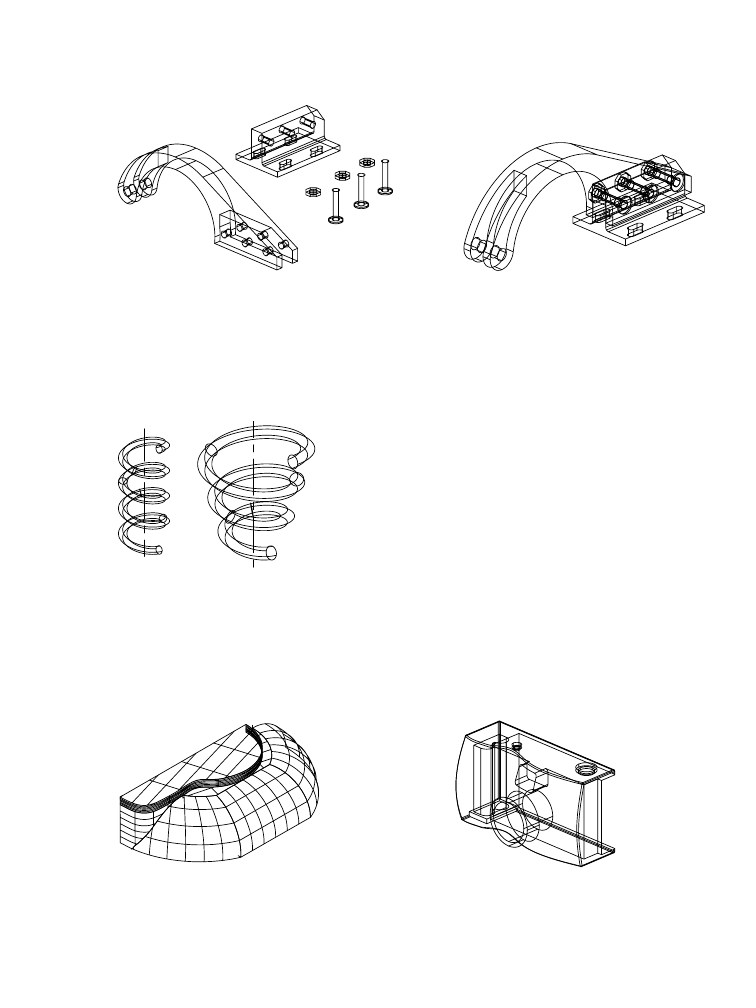
Individual parts can be fit together to create subassemblies and assemblies.
Assembly files contain more than one part. Parts are fit together using assem-
bly constraints to define the positions of the individual parts that make up
your final product.
For standard parts, you can define different versions using a spreadsheet.
Instead of a large library of parts that differ only in size, like springs, bolts,
nuts, washers, and clamps, you can create one part and define different ver-
sions of that part in a spreadsheet that is linked to your drawing.
You can also create 3D surface models.
Surface modeling is useful in the design of stamping dies, castings, or injec-
tion molds. You can also use surfaces to add to or cut material from a solid
part to create hybrid shapes.
individual parts in an assembly file completed assembly
table driven part versions
surfaces used to create a part surface cut applied to a part

Mechanical Desktop Basics |11
You can create scenes to define how your design fits together.
To better conceptualize the position of the parts in your assembly, you define
scenes using explosion factors, tweaks, and trails that illustrate how your
design is assembled.
You can create base, orthogonal, isometric, section, and detail views.
To document your design, drawing views can be created from scenes, parts,
or groups of selected objects. Any design changes are automatically updated
in these drawing views.
Add annotations and additional dimensions to finalize your documentation.
After you have created drawing views, finalize your design by adding bal-
loons, bills of material, notes, reference dimensions, and mechanical
symbols.
exploded scene
parametric drawing views
annotations added to drawing

12
13
In This Chapter 3
The User Interface
When you start the Autodesk® Mechanical Desktop® 6
software, a page called the Today window is displayed.
This chapter provides an overview of the options on the
Today window to help manage your work, collaborate
with others, and link to information on the Web.
Information about the work environments and the user
interface are included to help you get started using the
Mechanical Desktop software.
■The Today window
■Work environments
■Mechanical Desktop interface
■Working in the Browser
■Methods for issuing commands

14 |Chapter 3 The User Interface
Mechanical Desktop Today
The first time you open the Mechanical Desktop 6 program, the Today window
is displayed on top of the program interface, along with instructions about how
to use it. The Today feature is a powerful tool that makes it easy to manage draw-
ings, communicate with design teams, and link directly to design information.
In the Today Window, you can expand the following options for access to the
the services you require.
My Workplace Connect directly to files on your computer and your local
network.
My Drawings Open existing drawings, create new ones, or access
symbol libraries.
Bulletin Board Post your own Web page with links to block libraries, CAD
standards, or other folders and directories on your
company network. CAD managers can use the Bulletin
Board to communicate with their design teams. An HTML
bulletin board template is provided.
The Web Connect directly to the Internet.
Autodesk
Point A
Link directly to design information and tools such as
Buzzsaw.com on the Web. Use the units converter, link to
Autodesk Web sites, and much more.
Login and create your free account. Customize the
information in Autodesk Point A for your specific needs.
You can close the Today Window and use the File menu to create new draw-
ings or open existing drawings.
To reopen Today, in the Assist menu choose Mechanical Desktop Today.
If you prefer not to see the Today Window when you start Mechanical
Desktop, you can turn it off in Assist ➤ Options ➤ System ➤ Startup.
Mechanical Desktop Environments |15
Mechanical Desktop Environments
Mechanical Desktop has two working environments: Assembly Modeling
and Part Modeling.
Assembly Modeling Environment
This is the environment Mechanical Desktop uses when you start the
program or create a new file by using File ➤ New. Any number of parts and
subassemblies can coexist in the same drawing.
The advantages of the Assembly Modeling environment are
■More than one part can be created in the same drawing.
■Individual part files, and other assemblies or subassemblies, can be exter-
nally referenced or localized and used to build a complex assembly.
■Different versions of a part can be displayed in the same file.
■Scenes containing explosion factors, tweaks, and trails can be created.
There are three modes in the Assembly Modeling environment: Model,
Scene, and Drawing.
Model Mode
In Model mode, you create as many parts as you need. Parts may be local or
externally referenced. Create subassemblies and save them for use in larger
assemblies. Build assemblies from any number of single part files, subassem-
blies, and assemblies. You can also generate a BOM (Bill of Material) database
so a list of parts can be placed in your final drawing.
Scene Mode
In Scene mode, you set explosion factors for your assembled parts and create
tweaks and trails. These settings govern how your drawing views represent
your assemblies.
Drawing Mode
In an assembly file, you can place balloons to reference the parts in your
assembly. You can create a parts list with as much information as you need
to define your parts. To illustrate how parts in an assembly fit together, you
can create base views on exploded scenes.

16 |Chapter 3 The User Interface
Part Modeling Environment
To begin a new drawing in the Part Modeling environment, choose File ➤
New Part File. Only one part may exist in the drawing. If you add more parts,
they automatically become unconsumed toolbodies. You use toolbodies to
create complex combined parts.
The advantages of the Part Modeling environment are
■A library of standard parts can be created for use in assembly files.
■The interface is streamlined to allow only those commands available in a
part file.
■File sizes are minimized because the database doesn’t need additional
assembly information.
There are two modes in the Part Modeling environment: Model and Drawing.
Model Mode
In Model mode, you build and modify your design to create a single paramet-
ric part. The part takes the name of the drawing file.
Drawing Mode
In Drawing mode, you define views of your part and place annotations for
documentation. You can also create a parts list and balloons to reference a
combined part and its toolbodies.
Mechanical Desktop Interface |17
Mechanical Desktop Interface
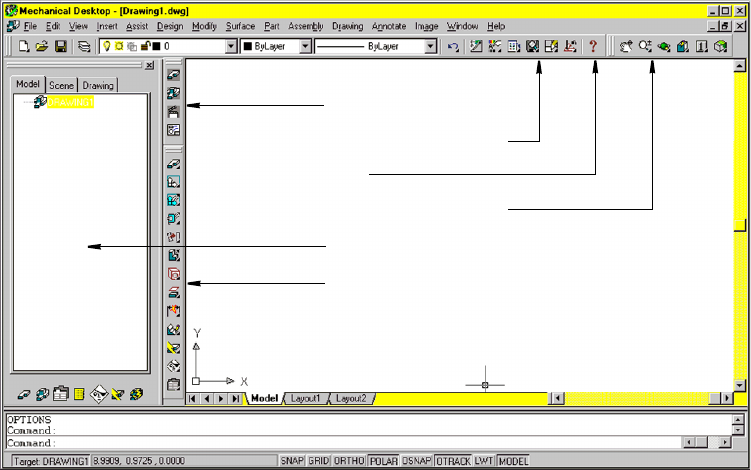
When you open a new or existing drawing in Mechanical Desktop 6, four
toolbars and the Desktop Browser are displayed.
■The Mechanical Main toolbar provides quick access to select commands
from the AutoCAD Standard and the Object Properties toolbars, some
Mechanical Desktop commands, and the Web. Icons are available for
direct links to Mechanical Desktop Today window and Web tools such as,
Point A, Streamline, RedSpark, MeetNow, Publish to Web, and eTransmit.
■The Desktop Tools toolbar acts as a toggle, giving you quick access to Part
Modeling, Assembly Modeling, Scenes, and Drawing Layout.
■The Part Modeling toolbar is the default, but, when you use the Desktop
Tools toolbar or the Desktop Browser to switch modes, the toolbar repre-
senting the mode you have chosen is displayed.
■The Mechanical View toolbar is designed to give you full control over how
you view your models, including real-time pan, zoom, dynamic 3D
rotation, and shading commands.
■The Desktop Browser is docked at the left side of the screen.
Desktop Tools toolbar
Desktop Browser
Part Modeling toolbar
Mechanical Main toolbar
Mechanical View toolbar
Help
18 |Chapter 3 The User Interface
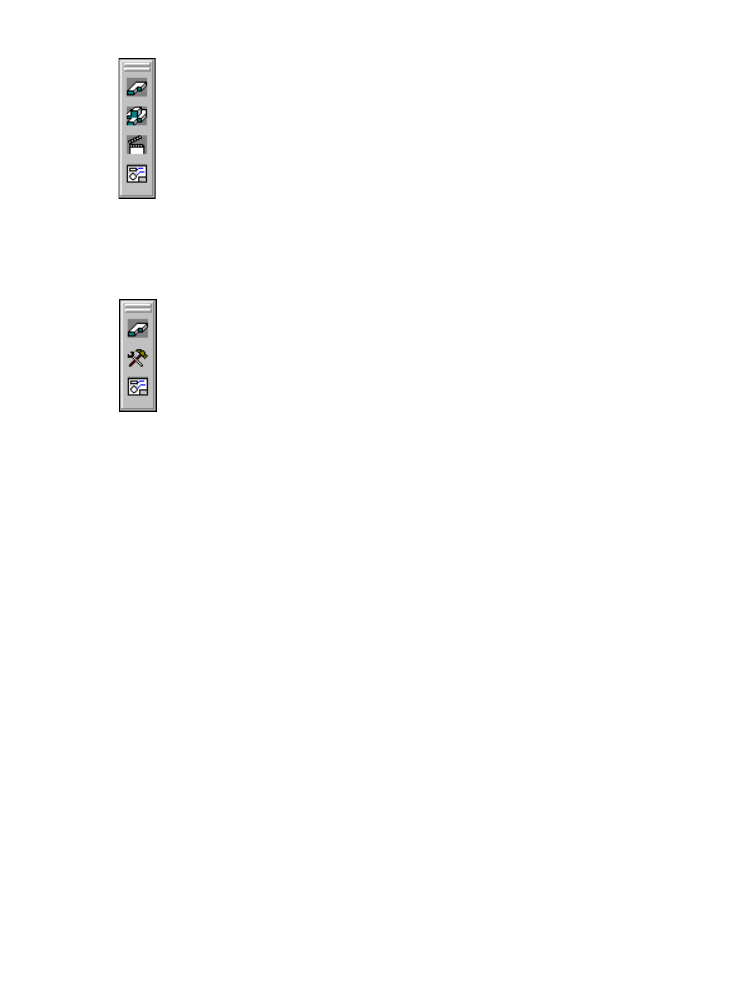
There are four main toolbars controlled by the Desktop Tools toolbar: Part
Modeling, Assembly Modeling, Scene, and Drawing Layout.
If you begin a drawing in the Part Modeling environment, the Desktop Tools
toolbar changes to display three buttons that control the Part Modeling,
Toolbody Modeling, and Drawing Layout toolbars.
In addition to controlling the Mechanical Desktop toolbars, the Desktop
Tools toolbar switches between Part, Toolbody/Assembly, Scene, and
Drawing modes.
For a complete description of Mechanical Desktop toolbars, see appendix A,
“Toolbar Icons.”
Desktop Browser
When you start Mechanical Desktop 6, the Desktop Browser is displayed in
the default position at the left of your screen.
Docking the Desktop Browser
Right-click the gray area at the top of the Browser for a context menu of docking
controls. You can turn the following Browser docking options on and off.
Allow Docking With Docking on, you can drag a corner of the Browser to
change its shape and size, and you can drag the Browser
to a new location on your screen.
To return the Browser to its default position, turn on
Allow Docking, and double-click the Browser title bar.
Part Modeling
Assembly Modeling
Scene
Drawing Layout
Drawing Layout
Toolbody Modeling
Part Modeling
Mechanical Desktop Interface |19
AutoHide With AutoHide on, choose Collapse to minimize the
Browser. When you move the cursor over and off of the
Browser, it expands and collapses.
Choose Right or Left to hide the Browser off a side of the
screen. When you move your cursor to the corresponding
edge of the screen, the Browser is displayed. Move the
cursor off the Browser, and it is hidden again.
To turn AutoHide off, in the Browser docking menu
choose AutoHide ➤ Off.
Hide Hides the Browser entirely. To restore it, in the Desktop
menu choose View ➤ Display ➤ Desktop Browser.
Working with the Desktop Browser
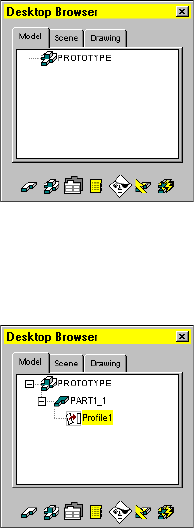
When you begin, Mechanical Desktop starts a new drawing in the Assembly
Modeling environment. The assembly is named for the current file.
When you create the first sketch, a part is automatically named, numbered,
and represented in the Browser. Because the first thing you create is a sketch,
it is nested under the part. As these objects are created, they are displayed
automatically in a hierarchy.
In the Browser, you can show as much or as little detail as you wish. When
there is more information, a plus sign is shown beside an object. You click
the plus sign to reveal more levels.

20 |Chapter 3 The User Interface
You collapse levels by clicking the minus sign beside an object, or collapse
the entire hierarchy by right-clicking the assembly name and choosing
Collapse from the menu.
When you start a new drawing in the Part Modeling environment, or open
an existing part file, the Desktop Browser contains two tabs: Model and
Drawing. In the Assembly Modeling environment, the Browser contains
three tabs: Model, Scene, and Drawing. You can choose the tabs at the top of
the Browser window to navigate from one mode to another.
Icons at the bottom of the Browser provide quick access to frequently-used
commands.
Using the Browser in Part Modeling
When you are working in the Part Modeling environment, the Browser
contains two tabs: Model and Drawing.
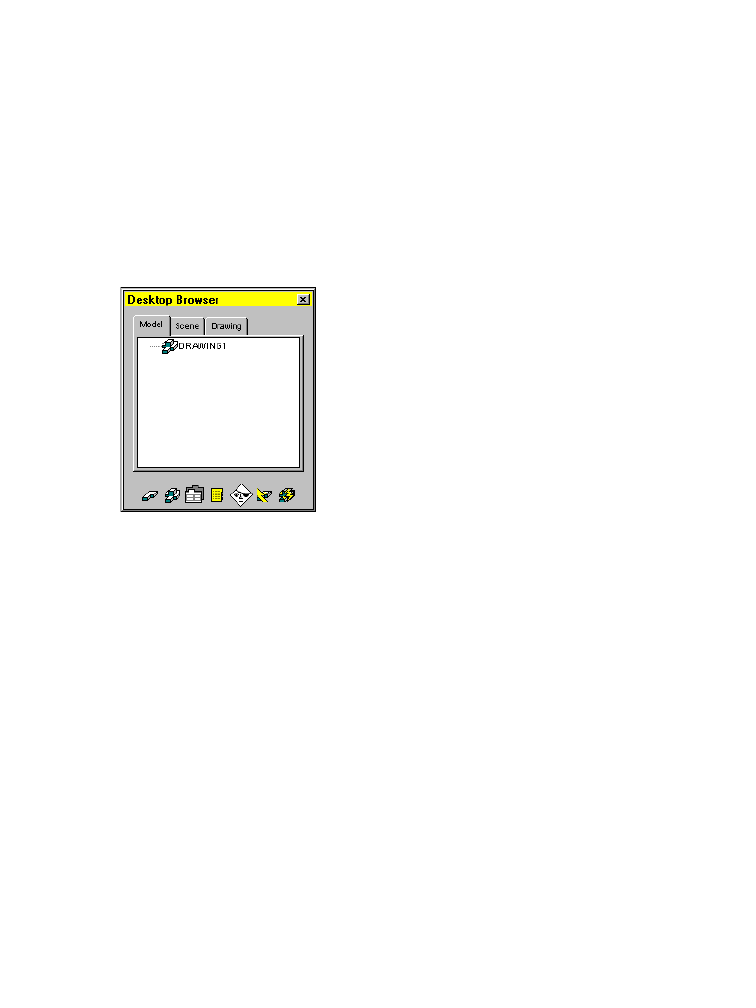
Model Mode in Part Modeling
In Model mode, seven icons are displayed at the bottom of the Browser.
The two at the left are quick filters. These filters are available so that you can
control the visibility of features and assembly constraints in the Browser
when you are creating combined parts.
Part Modeling environment Assembly Modeling environment
Mechanical Desktop Interface |21
The first icon, the Part filter, controls the display of assembly constraints
attached to a part and its toolbodies. If the Part filter is selected, only the
features of your part and its toolbodies are visible in the Browser. If it is not
selected, assembly constraints are also visible.
The second icon is the Assembly filter. If you select this filter, only assembly
constraints that are attached to your part and its toolbodies are visible.
The third icon accesses the Desktop Options dialog box where you control
the settings for your part, surfaces, drawing views, and miscellaneous desktop
preferences.
The middle icon provides immediate access to the Part Catalog. You use the
Part Catalog to attach and localize external part files, and instance external
and local parts in your current file for the purpose of creating combined parts.
The fifth icon opens the Desktop Visibility dialog box where you control the
visibility of your part, toolbodies, and drawing objects. The sixth icon
updates your part after you have made changes to it, and the last icon
updates assembly constraints if you are working with a combined part.
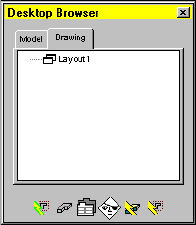
Drawing Mode in Part Modeling
In Drawing mode, six icons are displayed at the bottom of the Browser.
The first two icons on the left are toggles to control automatic updating of
your drawing views or part. The last four icons access desktop options,
control visibility, and manually update your drawing views or part.
22 |Chapter 3 The User Interface
Using the Browser in Assembly Modeling
In the Assembly Modeling environment, the Browser displays three tabs:
Model, Scene, and Drawing. With these tabs, you can create multiple parts,
assemblies, scenes, BOMs, and documents, and you can reorder assemblies.
You can localize and externalize parts in the Browser without opening the
Assembly Catalog.
Model Mode in Assembly Modeling
Model mode in the Assembly Modeling environment has the same icons at
the bottom of the Browser as Model mode in the Part Modeling environment.
Because you are working in the Assembly environment, these icons provide
more functionality.
The first icon is the Part filter which you use to control the display of the
features that make up your parts. If the Part filter is selected, only part
features are visible in the Browser. If it is not selected, assembly constraints
are also visible.
The second icon is the Assembly filter. When you select this filter, only the
assembly constraints attached to your parts are visible.
The third icon opens the Mechanical Options dialog box. From this dialog
box you can manage your settings and standards for parts, assemblies,
surfaces, drawings, shaft generators, calculations, standard parts, and various
desktop preferences.
The middle icon provides access to the Assembly Catalog, a powerful inter-
face for attaching and localizing external part and assembly files as well as
instancing both external and local parts in your current assembly.
The fifth icon controls the visibility of parts, assemblies, drawing entities, layers,
and linetypes. The sixth icon updates the active part after you have made
changes to it, and the last icon updates the active assembly or subassembly.

Mechanical Desktop Interface |23
Scene Mode in Assembly Modeling
In Scene mode, three icons are displayed at the bottom of the Browser.
The first icon accesses Desktop Options, where you can control the settings
for scenes. The second icon accesses Desktop Visibility, where you can
control the visibility of your parts, assemblies, and individual drawing
objects. The last icon updates the active scene.
Drawing Mode in Assembly Modeling
In Drawing mode, six icons perform the same functions as those in Drawing
mode in the Part Modeling environment.
24 |Chapter 3 The User Interface
Issuing Commands
You can issue commands in several ways:
■Select an option from a right-click menu in the Desktop Browser.
■Select an option from a right-click menu in the active screen area of your
drawing.
■Select a toolbar icon.
■Select an option from a pull-down menu.
■Enter the command name on the command line.
■Use an abbreviation of the command, called an accelerator key, on the
command line.
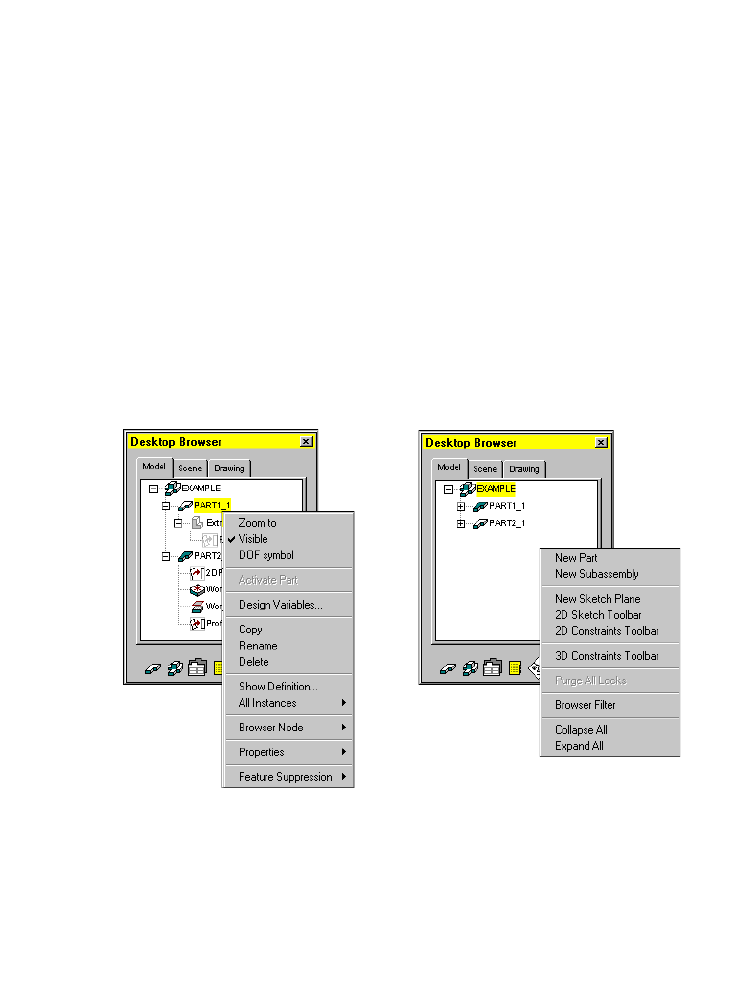
Using Command Menus in the Desktop Browser
Many of the commands in Mechanical Desktop can be accessed using the
Browser menus. The Browser has two types of menus. One you activate by
right-clicking an existing object in the Browser. The other you activate by
right-clicking the Browser background. Options that are not available are gray.
The type of object you select with a right-click determines the menu displayed.
The mode you are in, Model, Scene, or Drawing, when you right-click the
Browser background determines the menu displayed.
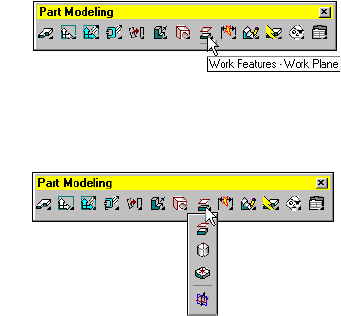
Mechanical Desktop Interface |25
Using Context Menus in the Graphics Area
In addition to the Browser menus, context-sensitive menus are available in
the graphics area during the modeling process. When you start Mechanical
Desktop, the Part menu is available in the graphics area. You can toggle
between the Part and Assembly menus as you build your models. When you
are in Scene mode, the Scene menu is available. In Drawing mode, you can
toggle between the Drawing and Annotate menus.
Using Toolbars
Toolbars have icons to represent frequently-used commands, settings, and
environments. You can choose an icon instead of selecting a command from
a menu or entering its name on the command line. When you pause with
the mouse selection arrow on an icon, the command action is shown at the
bottom of the screen. A tooltip also appears under the cursor. Click the left
mouse button to select the command.
Some icons have a subtoolbar (flyout) with related icons. If the icon has a
small arrow in the lower right corner, drag the mouse to reveal the additional
icons, and then select one.
To hide a toolbar, click the button in its upper right corner. To unhide it,
right-click any toolbar. In the pop-up menu, select the toolbar to redisplay.
The toolbar is automatically redisplayed.
To reorient the Mechanical Desktop toolbars to their default positions,
choose View ➤ Toolbars ➤ Desktop Express (Left). If you prefer the toolbars
at the right of your screen, choose Desktop Express (Right).
You may want to view larger toolbar icons. To do so, right-click any toolbar
and choose Customize. Select Large Buttons at the bottom left of the Toolbars
dialog box.
If you choose Large Buttons and then dock the toolbars in the screen header
area above the command line or at either side of the screen, some icons may
not be visible. In that case, you can drag the toolbar onto the screen.

26 |Chapter 3 The User Interface
Using Pull-down Menus
To select a menu option, or access a submenu, hold down the left mouse
button while you navigate through the menu. When you find the command
you want to use, release the mouse button.
You can also access menu commands by using the keyboard. Hold down ALT
while selecting the underlined letter of the menu option. For example, to
select AMPROFILE from the keyboard, press ALT, then P, S, P.
Selecting Command Options from Dialog Boxes
Many commands have options within dialog boxes. As the term dialog box
suggests, you interact by selecting options to make a particular setting active,
display a list from which to choose an option, or enter a specific value. If a
command has a dialog box, it is displayed when you access the command,
regardless of whether you did so on the command line or from a menu or
toolbar icon.
When you need information about a dialog box you are working with, click
the Help button located in the dialog box.
NOTE If the Mechanical Desktop dialog boxes do not display, on the
command line enter CMDDIA, and change the system variable to 1.
Using the Command Line
You can access a command or system variable directly by entering its name
on the command line. Many experienced users prefer this method because it
is faster than using menus. Some experienced users are familiar with specify-
ing command options from the command line and prefer to turn off the
display of dialog boxes.
However, because many Mechanical Desktop commands require input
through their dialog boxes, it is recommended that you use the dialog boxes
instead of the command line to ensure that you have access to the full
functionality of each feature.
All the commands and system variables for Mechanical Desktop and
AutoCAD are documented in Help.
Using Accelerator Keys
Many commands also have shortcuts called accelerator keys. To issue a
command using an accelerator key, simply enter the command alias on the
command line.
For a complete list of Mechanical Desktop accelerator keys, see “Accelerator
Keys” in the Command Reference in Help.

27
In This Chapter 4
Documentation and
Support
This chapter provides an overview of the printed and
online documentation provided with Autodesk®
Mechanical Desktop® 6. It guides you to resources for
product learning, training, and support.
Read this section so that any time you need product
information, you will know where to locate it.
■Mechanical Desktop print
documentation
■Mechanical Desktop online
documentation
■Product Support Assistance in
Help
■Mechanical Desktop learning
and training
■Your Internet resources

28 |Chapter 4 Documentation and Support
Printed and Online Manuals
The extensive set of printed and online documentation provided with your
purchase of Mechanical Desktop 6 software includes the printed Autodesk
Mechanical Desktop 6 User’s Guide, AutoCAD Mechanical 6 User’s Guide, and the
AutoCAD 2002 User’s Guide.
The online AutoCAD Mechanical 6 and Mechanical Desktop 6 Installation Guide
is provided on the product CD.
All of the Mechanical Desktop 6 manuals are available in PDF format on the
product CD, and on the Mechanical Desktop product page of the Autodesk
Web site at http://www.autodesk.com/mechdesktop ➤ Product Information ➤
Online and Print Manuals.
Mechanical Desktop Printed Manual
The printed Autodesk Mechanical Desktop 6 User’s Guide is divided into two
parts.
Part I An introduction to the product and information you need
to get started using the software.
Part II A set of tutorials to expand your skills in using Mechanical
Desktop and understanding mechanical design.
Chapters 5 through 21 focus on Mechanical Desktop,
while chapters 22 through 24 focus on Mechanical
Desktop with the power pack.
AutoCAD Printed Manual
The printed AutoCAD User’s Guide contains comprehensive information and
instructions for using AutoCAD. This manual is also available online in the
AutoCAD Help.
Online Installation Guide
The AutoCAD Mechanical 6 and Mechanical Desktop 6 Installation Guide is
available on the product CD. It provides the following information:
Introduction What’s in the software.
Chapter 1 System requirements and recommendations for installing
and running the software.
Printed and Online Manuals |29
Chapter 2 Procedures to install, upgrade, authorize, and maintain
the software for a single user, and information you need
to know before you begin your installation.
Chapter 3 Information for network administrators. Instructions for
installing and configuring for a network environment.
Chapter 4 Technical information about environment variables and
performance enhancements to optimize performance of
the software.
Chapter 5 Information about cabling and option settings, plus other
information necessary to link and configure plotters and
printers with AutoCAD Mechanical/Mechanical Desktop.
Chapter 6 Instructions to uninstall the software, maintain your hard
disk, and recover data in case of a system failure.
AutoCAD 2002 Documentation
You should be familiar with AutoCAD before you use Mechanical Desktop.
The complete set of AutoCAD 2002 documentation is available in the
AutoCAD Help. It includes:
■User’s Guide*
■Command Reference*
■Customization Guide*
■ActiveX® and VBA Developer’s Guide*
■ActiveX® and VBA Reference
■AutoLISP® Reference
■Visual LISPTM Developer’s Guide*
■Visual LISPTM Tutorial*
■DXFTM Reference
■Driver Peripheral Guide
■Connectivity Automation Reference
■Network Administrator’s Guide
AutoCAD 2002 manuals marked with an asterisk can be ordered in print from
your local reseller.
The AutoCAD 2002 Learning Assistance CD that is included in your package
is a multimedia learning tool for intermediate to experienced AutoCAD users.
If you currently own a valid license for an Autodesk product and require
replacement media or documentation, please call the Customer Service
Center at 1-800-538-6401 to order.

30 |Chapter 4 Documentation and Support
Mechanical Desktop Help
The Help in Mechanical Desktop provides integrated information about
AutoCAD Mechanical and Mechanical Desktop.
The Help is formatted for easy navigation, and includes:
■Content organized by the major functional areas of Mechanical Desktop,
with How To, Reference, and Learn About pages for each functional area
■Specific information about each of the features in the program
■Concepts and procedures for the new features in this release
■A keyword index, search function, and Favorites tab
■Printable Command Reference
■Guides to system variables and accelerator keys
■Access to Support Assistance with integrated links to solutions
For access to Help, you can choose from the following methods:
■From the Help menu, select Mechanical Help Topics.
■Select the Help button in the standard toolbar.
■Press F1. This opens the topic for an active button or command.
■Click the Help button within a dialog box.
Updating Help Files
If you have access to the Internet, you can download updated Help files from
the Autodesk Web site.
To update your Help files
1In Mechanical Desktop Today, choose Autodesk Point A. In Useful Autodesk
Links, choose Autodesk Product Support Index.
2Follow the links to Mechanical Desktop 6 product support and updates.
Product Support Assistance in Help |31
Product Support Assistance in Help
When you need product support, refer to Support Assistance in the Help
menu. Support Assistance ensures quick access to technical support informa-
tion through an easy-to-use issue/solution format with self-help tools and a
knowledge base.
Product Support Assistance provides information about support options
available from resellers, Autodesk System Centers (ASCs), user groups in your
area, and those available directly from the Autodesk Web pages, including
the Autodesk Product Support Index.
Updating the Support Assistance Knowledge Base
You can update your Support Assistance knowledge base with the latest
support information about Mechanical Desktop by using the
Documentation Update utility in the Support Assistance Welcome.
To update your Support Assistance Knowledge Base
1From the Help menu, choose Support Assistance, then choose Download.
2Follow the prompts to update your knowledge base.
Learning and Training Resources
Many sources for learning and training are listed on the Mechanical Desktop
Learning and Training Web page. From the Mechanical Desktop Web site at
http://www.autodesk.com/mechdesktop, navigate to Learning and Training. You
can link directly to sources for
■Online courses and tutorials
■The Autodesk Official Training Courseware (AOTC)
■A list of Autodesk authorized resellers and trainers
Autodesk Official Training Courseware (AOTC) is the Autodesk-endorsed
courseware for instructor-led training. To register for a training course,
contact an Authorized Autodesk Training Center, Authorized Autodesk
Reseller, or Autodesk System Center.

32 |Chapter 4 Documentation and Support
Internet Resources
Following are resources for information about Autodesk products and assis-
tance with your Mechanical Desktop questions.
■Autodesk Web site: http://www.autodesk.com
■Mechanical Desktop home page at the Autodesk Web site:
http://www.autodesk.com/mechdesktop
■AutoCAD Mechanical home page at the Autodesk Web site
http://www.autodesk.com/autocadmech
■Mechanical Desktop discussion groups:
http://www.autodesk.com/mechdesktop-discussion
■AutoCAD Mechanical discussion groups:
http://www.autodesk.com/autocadmech-discussion
■To locate an authorized reseller in your area, go to:
http://www.autodesk.com/support.

33
Part II
Autodesk® Mechanical
Desktop® Tutorials
The tutorials in this section teach you how to use Mechanical Desktop 6, and provide a
comprehensive overview of mechanical design. The lessons range from basic to advanced,
and include step-by-step instructions and helpful illustrations.
You learn how to create parts, surfaces, assemblies, table driven parts, and bills of material.
You will also learn how to prepare your designs for final documentation. Specific drawing
files for each lesson are included with the program. These drawing files provide design
elements that help you understand and learn mechanical design concepts.
There are lessons designed for learning to model with Mechanical Desktop, and others
designed specifically for learning to use Mechanical Desktop with the power pack.

34 |

35
In This Chapter 5
Using the Tutorials
This Introduction presents information that is useful to
know before you start performing the tutorials for
Autodesk® Mechanical Desktop®. It provides a summary
of how the tutorials are structured, and the methods
you can use to issue commands. You learn how to
manipulate the position of the Browser to best suit your
work space.
As you work through the tutorials, you use a set of
drawing files that are included with your software. In
this section, you learn how to locate, back up, and
maintain these drawings.
■Finding the right tutorial
■Accessing commands
■Controlling the appearance of
the Desktop Browser
■Backing up tutorial files

36 |Chapter 5 Using the Tutorials
How the Tutorials are Organized
Read the Key Terms and Basic Concepts sections at the beginning of each
tutorial before you begin the step-by-step instructions. Understanding this
information before you begin will help you learn.
Key Terms Lists pertinent mechanical design terms and definitions
for the lesson.
Basic Concepts Gives you an overview of the design concepts you learn in
the lesson.
The tutorials begin with basic concepts and move toward more advanced
design techniques. They are presented in three design categories: part mod-
eling, assembly modeling, and surface modeling.
For best results, run Mechanical Desktop 6 to perform the tutorials in chap-
ters 1 through 16, and Mechanical Desktop 6 with the power pack to perform
chapters 17 through 19.
Chapters 6 Through 15 Part Modeling
These tutorials guide you through the basics of part modeling. Starting with
a basic sketch, you learn how to create fully parametric feature-based models
and generate drawing views.
Chapters 16 Through 18 Assembly Modeling
The assembly modeling tutorials show you how to create, manage, and doc-
ument complete assemblies and subassemblies, and create exploded views of
your assembly design. You also learn how to use assembly techniques to
build a combined part in the Part Modeling environment.
Chapters 19 Through 21 Surface Modeling
These tutorials cover the techniques of surface modeling. You start by learn-
ing how to create and edit different types of surfaces. Then you create a sur-
face and use it to cut material from a parametric part. You also learn how to
surface a wireframe model from the ground up.
Chapters 22 Through 24 2D and 3D Parts and Calculations
These tutorials focus on features in the Mechanical Desktop 6 with the power
pack. Included are tutorials working with standard parts and the shaft
generator and 3D finite element analysis (FEA) features. The exercises in
these tutorial chapters are designed to help you understand and use the
power pack features to simplify your work.
Accessing Mechanical Desktop Commands |37
Accessing Mechanical Desktop Commands
Mechanical Desktop provides several methods to access commands and
manage your design process.
The following are samples of the access methods available to you:
Browser Right-click the window background and choose New Part.
Context Menu In the graphics area, right-click and choose Part ➤ New
Part.
Toolbutton New Part
Desktop Menu Part ➤ Part ➤ New Part
Command AMNEW
The step-by-step procedures in the tutorials indicate the command name in
the opening procedural text. The appropriate toolbutton is displayed in the
margin next to the preferred access method. In the tutorials, the context
menu method is used when the menus are sensitive to what you are doing.
The Browser method is used when you can save time and steps. You can use
any of the alternate methods as well.
If you are in Model mode, you can toggle between the Part and Assembly
context menus. If you are in Scene mode, the Scene menu is available. When
you are working in Drawing mode, you can toggle between the Drawing and
Annotate context menus.
Here is an example of how methods are used in the tutorials:
3Use AMNEW to create a new part.
Context Menu In the graphics area, right-click and choose Part ➤ New
Part.
NOTE To find the location of a particular toolbutton, refer to Appendix A.
38 |Chapter 5 Using the Tutorials
Positioning the Desktop Browser
The Desktop Browser is a graphical interface that is useful in both creating
and modifying your designs. You can do much of your work in the Browser
as you proceed through the lessons in the tutorials.
By default, the Browser is located on the left side of your screen. You may
want to move, resize, or hide the Browser to suit your working conditions.
This section provides instructions to control the size, shape, and location of
the Browser, and to return it quickly to the default location.
The Browser behaves differently when it is in the Auto Hide state. The follow-
ing are procedures for positioning the Browser both in and out of the Auto
Hide state.
To minimize and expand the Desktop Browser
To minimize the Browser double-click the gray area above the tabs.
To expand the Browser, double-click the gray area again.
To minimize the Browser in the Auto Hide state, right-click the gray area and
choose Auto Hide ➤ Collapse.
After you minimize the Browser in Auto Hide, you control the expand and
collapse function by moving your cursor onto and off of the Browser.
To turn off Auto Hide, right-click the gray area and choose Auto Hide ➤ Off.
With Auto Hide off, the Browser remains expanded when you move your cur-
sor away from it.
To move the Browser out of the default position
To move the Browser to another location on the screen, right-click the title
bar and choose Move. Click the title bar and drag the Browser to a location
on your screen.
To return the Browser to the default position
To return the Browser to the default position, double-click the title bar. The
Browser is docked in the default position along the left side of the graphics
screen.
To return to the previous location, right-click the gray area and turn off Allow
Docking.
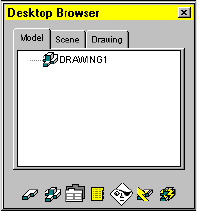
Positioning the Desktop Browser |39
To hide and unhide the Browser
To hide the Browser, right-click the gray area above the tabs and choose Hide.
To unhide the Browser, choose View ➤ Display ➤ Desktop Browser.
To move the Browser off the screen with Auto Hide, right-click the gray bar
above the tabs and choose Auto Hide ➤ Left (or Right).
After you move the Browser off the left or right side of the screen with Auto
Hide, if you move your mouse to the corresponding edge of the screen, the
Browser is displayed along that edge. Move your mouse off the Browser, and
the Browser returns to the location off the screen.
To turn off Auto Hide, right-click the gray area and choose Auto Hide ➤ Off.
The Browser remains positioned on the screen when you move your cursor
away from it.
To move the Browser directly from Auto Hide to another location on your
screen, choose Auto Hide ➤ Allow Docking. Click the title bar and drag the
Browser to a new location. The Browser is docked in the new location.
To resize the Browser
Right-click the title bar and choose Size. Then drag a corner to resize the
Browser.
To return the Browser to its previous size, double-click the title bar.
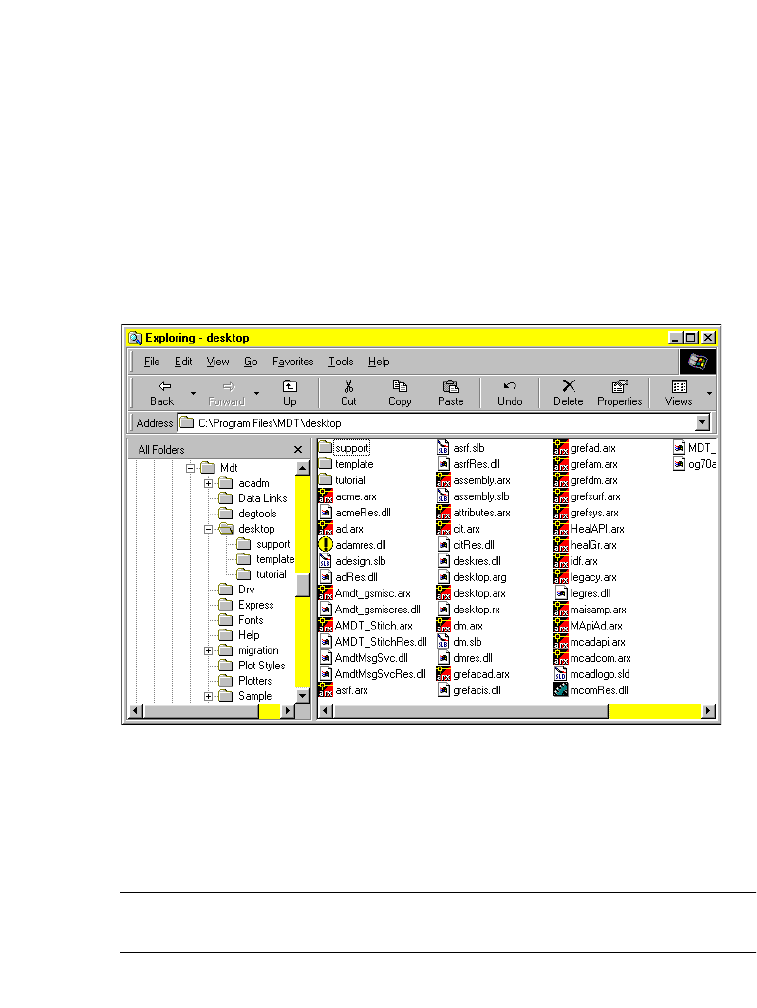
40 |Chapter 5 Using the Tutorials
Backing up Tutorial Drawing Files
For each tutorial, you use one or more of the master drawing files that con-
tain the settings, example geometry, or parts for the lesson. These files are
included with Mechanical Desktop. Before you begin the tutorials, back up
these drawing files so you always have the originals available. Any mistakes
you make while you are learning will not affect the master files.
To back up tutorial drawing files
1From the Windows Start menu, choose Programs ➤ Windows Explorer.
2In the folder where Mechanical Desktop is installed (by default this is Program
Files\Mdt\desktop), choose File ➤ New ➤ Folder.
3Create a new folder called tutorial backup.
4Open the desktop\tutorial folder that contains all the tutorial drawing files
and copy them into your new folder.
Now you can use the tutorial drawings in the desktop\tutorial folder as you
work through the tutorials in this book.
NOTE Keep your working tutorial files in the desktop\tutorial folder so that
external references in the assembly tutorials can update correctly.

41
In This Chapter 6
Creating Parametric
Sketches
Autodesk® Mechanical Desktop® automates your design
and revision process using parametric geometry.
Parametric geometry controls relationships among
design elements and automatically updates models and
drawings as they are refined.
The sketch is the basic design element that defines the
approximate size and shape of features in your part. As
the name implies, a sketch is a loose approximation of
the shape that will become a feature. After a sketch is
solved, you apply parametric constraints to control its
shape.
After you learn to create sketches, move on to chapter 2
to learn how to add constraints to sketches.
■Analyzing a design and creating a
strategy for sketching
■Text sketch profiles
■Open profile sketches
■Closed profile sketches
■Path sketches
■Cut line sketches
■Split line sketches
■Break line sketches

42 |Chapter 6 Creating Parametric Sketches
Key Terms
Te r m Definition
2D constraint Defines how a sketch can change shape or size. Geometric constraints control the
shape and relationships among sketch lines and arcs. Dimensional constraints
control the size of sketch geometry.
closed loop A polyline entity, or group of lines and arcs that form a closed shape. Closed loops
are used to create profile sketches.
closed profile A constrained sketch that is a cross section or boundary of a shape, such as an
extrusion, a revolved feature, or a swept feature.
construction geometry Any line or arc created with a noncontinuous linetype. Using construction
geometry in paths and profiles may mean fewer constraints and dimensions are
needed to control size and shape of symmetrical or geometrically consistent
sketches.
cut line Used to specify the path of a cross-section drawing view. Unlike a profile sketch,
the cut line sketch is not a closed loop. There are two types of cut line sketches—
offset and aligned.
feature An element of a parametric part model. You can create extruded features,
revolved features, loft features, and swept features using profiles and paths. You
can also create placed features like holes, chamfers, and fillets. You combine
features to create complete parametric part models.
nested loop A closed loop that lies within the boundary of another closed loop. Nested loops
are used to create more complex profile sketches.
open profile A profile created from one or more line segments sketched to form an open
shape. Open profiles are used in bend, rib, and thin wall features.
path sketch A constrained sketch that is a trajectory for a swept feature.
sketch A planar collection of points, lines, arcs, and polylines used to form a profile, path,
split line, break line, or cutting line. An unconstrained sketch contains geometry
and occasionally dimensions. A constrained sketch, such as a profile, path, split
line, cut line, or break line that contains “real” and construction geometry, and is
controlled by dimensions and geometric constraints.
sketch tolerance Tolerance setting that closes gaps smaller than the pickbox and snaps lines to
horizontal, vertical, parallel, or perpendicular.
split line A sketch, either open or closed, used to split a part into two distinct parts. Also
known as a parting line.
text sketch profile A profile created from a single line of text in a selected font and style. Text-based
profiles are used to emboss parts with text.
Basic Concepts of Parametric Sketching |43
Basic Concepts of Parametric Sketching
You create, constrain, and edit sketches to define a
■Profile that governs the shape of your part or feature
■Location for a bend feature in a part design
■Path for your profile to follow
■Cut line to define section views
■Split line to split a face or part
■Break line to define breakout section views
After you create a rough sketch with lines, polylines, arcs, circles, and ellipses
to represent a feature, you solve the sketch. Solving a sketch creates a para-
metric profile, path, cut line, split line, or break line from your sketched
geometry.
When you solve a sketch, Mechanical Desktop converts it to a parametric
sketch by applying two-dimensional constraints to it, according to internal
rules. This reduces the number of dimensions and constraints you need to
fully constrain it. In general, a sketch should be fully constrained before it is
used to create a feature.
You can control the shape and size of the parametric sketch throughout mul-
tiple design revisions.
In this tutorial, you learn to create and solve sketches. Chapter 7, “Constrain-
ing Sketches,” introduces you to creating, modifying, and deleting the con-
straints and parametric dimensions that control a sketch.

44 |Chapter 6 Creating Parametric Sketches
Sketching Tips
Some of these tips do not apply to this chapter, but you will see their useful-
ness when you use sketches to create complex parts.
Tip Explanation
Keep sketches simple It is easier to work with a single object than a multiple-object
sketch. Combine simple sketches for complex shapes.
Repeat simple shapes If a design has repeating elements, sketch one and then copy or
array as needed.
Define a sketching
layer Specify a separate layer and color for sketching. Your sketch is
visible with other part geometry but easy to identify when you
need to modify it.
Preset sketch
tolerances Define characteristics, such as sketch precision and angular
tolerance of sketch lines, if the default values are not sufficient.
Draw sketches to size When your sketches are roughly correct in size and shape, your
design is less likely to become distorted as dimensions or
constraints are added. Sketch a rectangle to serve as a boundary
for the base feature to set relative size. Sketch the feature, but
delete the rectangle before you create a profile.
Use PLINE Whenever possible, use the PLINE command to create your
sketches. With PLINE, you can easily draw tangent lines and arcs.

Creating Profile Sketches |45
Creating Profile Sketches
In Mechanical Desktop, there are three types of profile sketches:
■Text-based profiles, used to create parametric 3D text-based shapes
■Open profile sketches, used to define features on parts
■Closed profile sketches, used to outline parts and features
You can solve and apply parametric constraints and dimensions to all three
of these profile sketch types.
Creating Text Sketch Profiles
A text sketch profile is a line of text displayed in a rectangular boundary. You
extrude a text sketch profile to create the emboss feature on part models.
To create a text sketch profile, you use the command AMTEXTSK. A dialog box
opens where you can enter text and choose a font style and size, or you can
enter the information on the command line.
You define an anchor point for the rectangle on your part and a point to
define the height of the text. You have the option to define a rotation value
on the command line to position the text at an angle. As you move your cur-
sor to define the anchor and height points, the rectangular boundary scales
appropriately to accommodate the size of the text.
You can change the size of the text by changing the value of the height
dimension. You can apply typical parametric dimensions and constraints
between the rectangular boundary and other part edges or features.
When the text sketch profile is sized correctly and in the right position on
your part, you extrude it to create the emboss feature.
To learn more about using text sketch profiles in the emboss feature, see
“Creating Emboss Features” on page 140.
text sketch text sketch with rotation defined
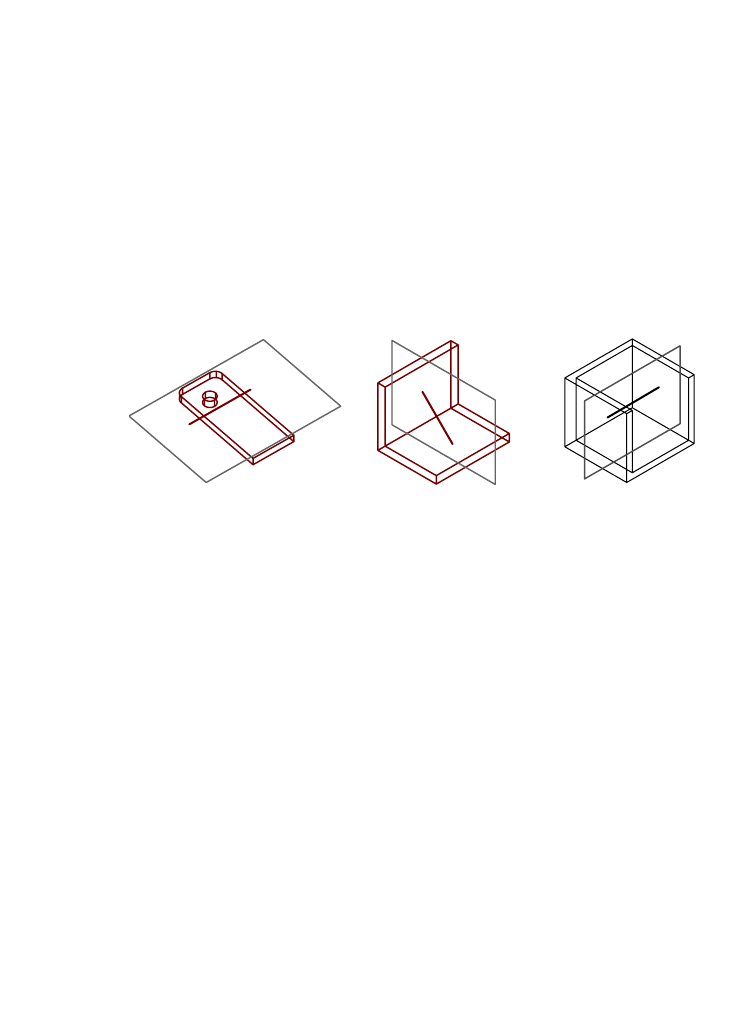
46 |Chapter 6 Creating Parametric Sketches
Creating Open Profile Sketches
You can create an open profile from single or multiple line segments, and
solve it in the same way as you solve a closed profile.
An open profile constructed with one line segment is used to define the loca-
tion of a bend feature on a flat or cylindrical part model. To bend an entire
part, you sketch the open profile over the entire part. If you sketch the open
profile over a portion of a part, only that portion of the part bends.
Open profiles constructed with one or multiple line segments are extruded
to form rib features and thin features. For a rib feature, the open profile
defines the outline of the rib, and is sketched from the side view. For a thin
feature, the open profile defines the shape of a wall and is extruded normal
to the work plane.
To learn more about open profiles in features, see “Creating Bend Features”
on page 163, “Creating Rib Features” on page 133, and “Creating Thin Fea-
tures” on page 136.
Creating Closed Profile Sketches
A profile sketch is a two-dimensional outline of a feature. Closed profile
sketches are continuous shapes, called loops, that you construct from lines,
arcs, and polylines. You use closed profile sketches to create features with cus-
tom shapes (unlike standard mechanical features such as holes, chamfers,
and fillets).
Profile sketches can be created from a set of objects, or a single polyline, that
defines one or more closed loops. You can use more than one closed loop to
create a profile sketch if the loops are nested within each other.
You cannot create profile sketches with loops that are
■Self-intersecting
■Intersecting
■Tangential
■Nested more than one level deep
profile for rib featureprofile for bend feature profile for thin feature

Creating Profile Sketches |47
In this section, you create three profile sketches.
Open the file sketch1.dwg in the desktop\tutorial folder. This drawing file is
blank but it contains the settings you need to create these profiles.
NOTE Back up the tutorial drawing files so you still have the original files if you
make a mistake. See “Backing up Tutorial Drawing Files” on page 40.
Using Default Sketch Rules
Mechanical Desktop analyzes individual geometric elements, and operates
on a set of assumptions about how they should be oriented and joined.
Before you begin, look at the Desktop Browser. It contains an icon with the
drawing file name. There are no other icons in the Browser, which indicates
that your file contains no parts.
You can move the Browser on your desktop and resize it to give yourself more
drawing area. See “Positioning the Desktop Browser” on page 38.
rough sketch profile sketch

48 |Chapter 6 Creating Parametric Sketches
To create a profile sketch from multiple objects
1Use LINE to draw this shape, entering the points in the order shown.
Context Menu In the graphics area, right-click and choose 2D Sketching
➤ Line.
Specify first point: Specify a point (1)
Specify next point or [Undo]: Specify a second point (2)
Specify next point or [Undo]: Specify a third point (3)
Specify next point or [Close/Undo]: Specify a fourth point (4)
Specify next point or [Close/Undo]: Specify a fifth point (5)
Specify next point or [Close/Undo]: Specify a sixth point (6)
Specify next point or [Close/Undo]: Specify a seventh point (7)
Specify next point or [Close/Undo]: Specify an eighth point (8)
Specify next point or [Close/Undo]: Press ENTER
You do not need to make the lines absolutely vertical or horizontal. The
objective is to approximate the size and shape of the illustration.
2Using ARC, sketch the top of the shape, following the prompts on the
command line.
Context Menu In the graphics area, right-click and choose 2D Sketching
➤ Arc.
Specify start point of arc or [CEnter]: Specify the start point (9)
Specify second point of arc or [CEnter/ENd]: Specify the second point (10)
Specify end point of arc: Specify the endpoint (11)
You do not need to use OSNAP to connect the arc to the endpoints of the
lines.
8
7
1
23
45
6
911
10
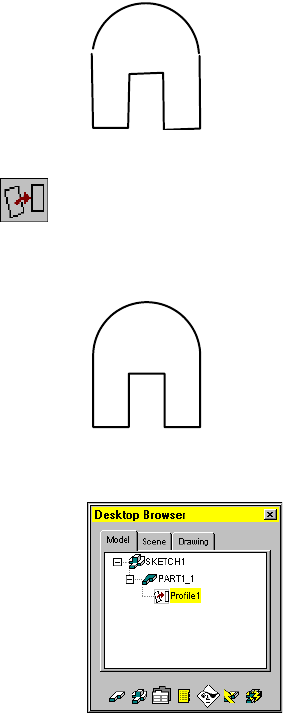
Creating Profile Sketches |49
Your sketch should look like this.
3Create a profile sketch from the rough sketch, responding to the prompts.
Context Menu In the graphics area, right-click and choose Sketch Solving
➤ Profile.
Select objects for sketch: Select the arc and the lines
Select objects for sketch: Press ENTER
As soon as the sketch is profiled, a part is created. The Browser contains a new
icon labelled PART1_1. A profile icon is nested under the part icon.
According to internal sketching rules, Mechanical Desktop determines
whether to interpret the sketch geometry as rough or precise and whether to
apply constraints.
By default, Mechanical Desktop interprets the sketch as rough and applies
constraints, redrawing the sketch. You can customize these default settings
with Mechanical Options.
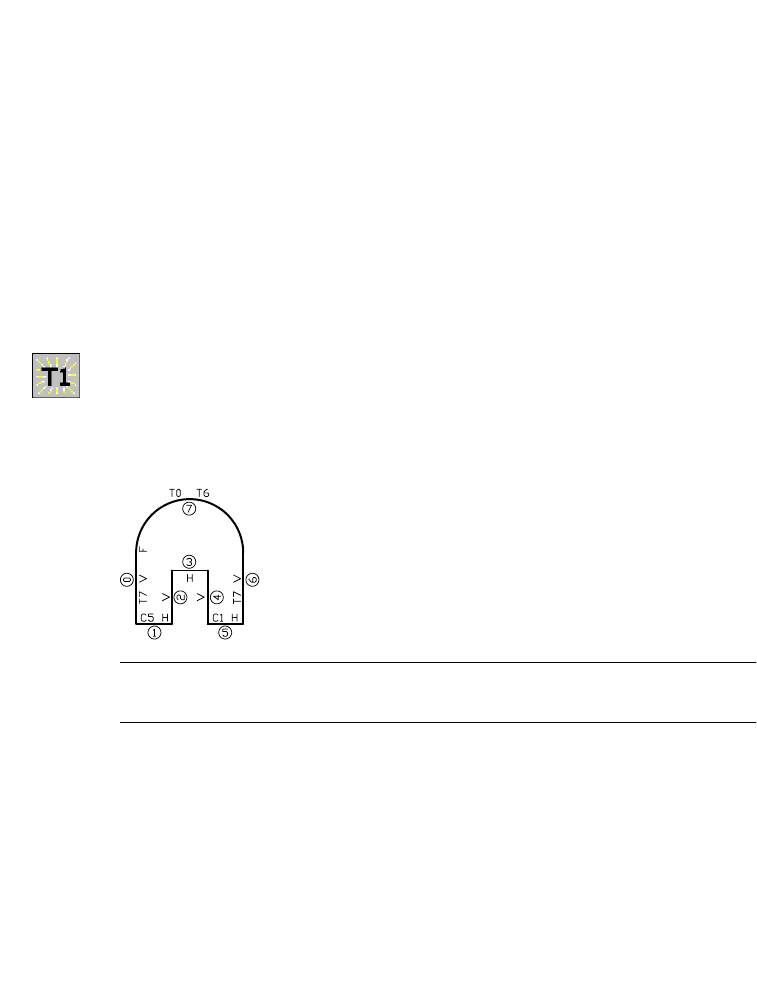
50 |Chapter 6 Creating Parametric Sketches
When redrawing, Mechanical Desktop uses assumed constraints in the
sketch. For example, lines that are nearly vertical are redrawn as vertical, and
lines that are nearly horizontal are redrawn as horizontal.
After the sketch is redrawn, a message on the command line tells you that
Mechanical Desktop needs additional information:
Solved under constrained sketch requiring 5 dimensions or constraints.
Depending on how you drew your sketch, the number of dimensions
required to fully constrain your sketch may differ from that in this exercise.
This message tells you that the sketch is not fully defined. When you add the
missing dimensions or constraints, you determine how the sketch can
change throughout design modifications. Before you add the final con-
straints, you need to show the assumed constraints.
4Use AMSHOWCON to show the existing constraints, following the prompt.
Context Menu In the graphics area, right-click and choose 2D
Constraints ➤ Show Constraints.
Enter an option [All/Select/Next/eXit] <eXit>: Enter a
The constraint symbols are displayed.
NOTE The numbers in your sketch might differ, depending on the order in
which you created the geometric elements.
The sketch has eight geometric elements, seven lines and an arc, each iden-
tified by a number in a circle. Four lines have a V symbol (vertical) and three
lines have an H symbol (horizontal). Two of the horizontal lines have con-
straints denoted by symbols that begin with the letter C (collinear), and three
of the elements have constraints denoted by symbols that begin with the
letter T (tangent).

Creating Profile Sketches |51
If your sketch does not contain the same constraints, redraw it to more
closely resemble the illustrations in steps 1 and 2.
Notice the letter F, located at the start point of line 0. It indicates that a fix
constraint has been applied to that point. When Mechanical Desktop solves
a sketch, it applies a fix constraint to the start point of the first segment of
your sketch. This point serves as an anchor for the sketch as you make
changes. It remains fixed in space, while other points and geometry move
relative to it.
You may delete this constraint if you wish, and apply one or more fix con-
straints to the endpoints of sketch segments, or to the segments themselves,
in order to make your sketch more rigid.
5To hide the constraints, respond to the prompt as follows:
Enter an option [All/Select/Next/eXit] <eXit>: Press ENTER
Save your file.
You have successfully created a profile sketch. In chapter 7, “Constraining
Sketches,” you learn to create, modify, and delete constraints and parametric
dimensions.
Using Custom Sketch Rules
Custom settings affect how Mechanical Desktop analyzes rough sketches. In
this exercise, you sketch with PLINE and convert your drawing to a profile
sketch. You will modify one of the Mechanical Options sketch rule settings
and see its effect on the sketch.
Before you begin the next exercise, create a new part definition.
rough sketch profile sketch
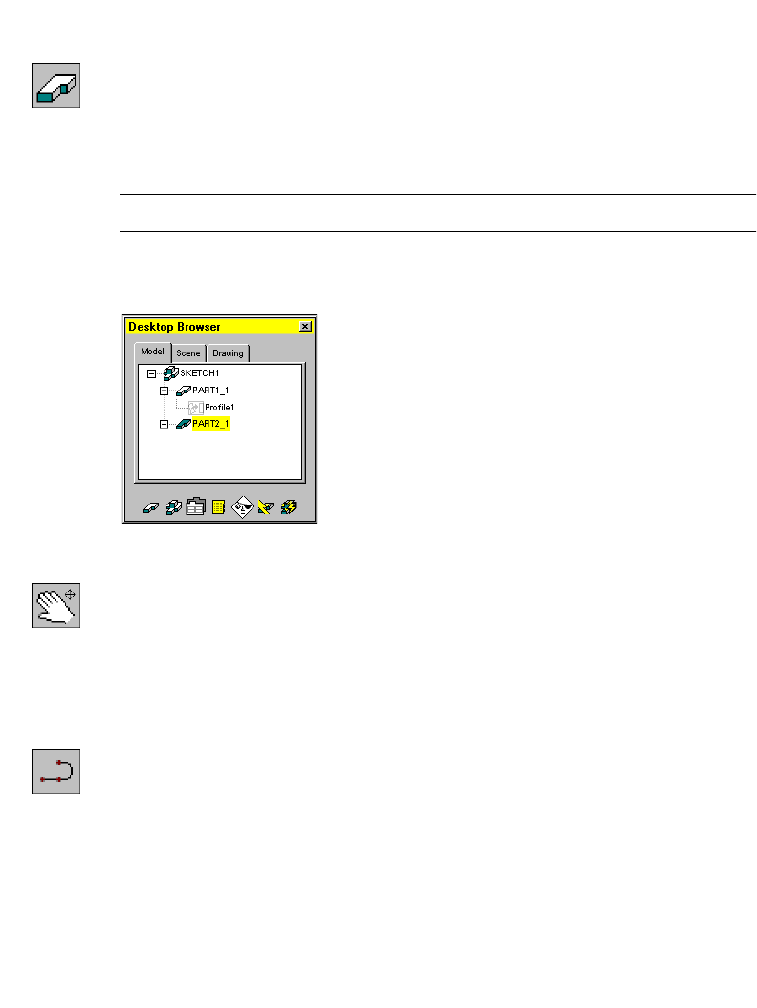
52 |Chapter 6 Creating Parametric Sketches
To create a new part definition
1Use the context menu to initiate a new part definition.
Context Menu In the graphics area, right-click and choose Part ➤ New
Part.
2Respond to the prompts as follows:
Select an object or enter new part name <PART2>: Press ENTER
NOTE The command method you use determines which prompts appear.
A new part definition is created in the drawing and displayed in the Browser.
The new part automatically becomes the active part.
3Pan the drawing so you have room to create the next sketch.
Context Menu In the graphics area, right-click and choose Pan.
You are ready for the next exercise.
To create a profile sketch from a single polyline
1Use PLINE to draw this rough sketch as a continuous shape, following the
prompts for the first four points.
Context Menu In the graphics area, right-click and choose 2D Sketching
➤ Polyline.
Specify start point: Specify a point (1)
Current line-width is 0.0000
Specify next point or [Arc/Close/Halfwidth/Length/Undo/Width]:
Specify a second point (2)
Specify next point or [Arc/Close/Halfwidth/Length/Undo/Width]:
Specify a third point (3)
Specify next point or [Arc/Close/Halfwidth/Length/Undo/Width]:
Specify a fourth point (4)

Creating Profile Sketches |53
2Following the prompts, switch to Arc to create the arc segment, then switch
back to Line. Switch to Close to finish the sketch.
Specify next point or [Arc/Close/Halfwidth/Length/Undo/Width]: Enter a
Specify endpoint of arc or
[Angle/CEnter/CLose/Direction/Halfwidth/Line/Radius/Second pt/Undo/Width]:
Specify a fifth point (5)
Specify endpoint of arc or
[Angle/CEnter/CLose/Direction/Halfwidth/Line/Radius/Second pt/Undo/Width]:
Enter l
Specify next point or [Arc/Close/Halfwidth/Length/Undo/Width]:
Specify a sixth point (6)
Specify next point or [Arc/Close/Halfwidth/Length/Undo/Width]: Enter c
3Use AMPROFILE to create a profile sketch from the rough sketch.
Context Menu In the graphics area, right-click and choose Sketch Solving
➤ Single Profile.
NOTE If you used line segments and an arc to draw your sketch you cannot
use Single Profile. This command profiles single object sketches only. For
sketches containing more than one object, use Profile.
When you use Single Profile, you are not prompted to select the sketch geom-
etry. Mechanical Desktop looks for the last entity you created. If it is a valid
closed loop, Mechanical Desktop analyzes the sketch, redraws it, and displays
the following message:
Solved under constrained sketch requiring 5 dimensions or constraints.
1
4
3
5
6
2
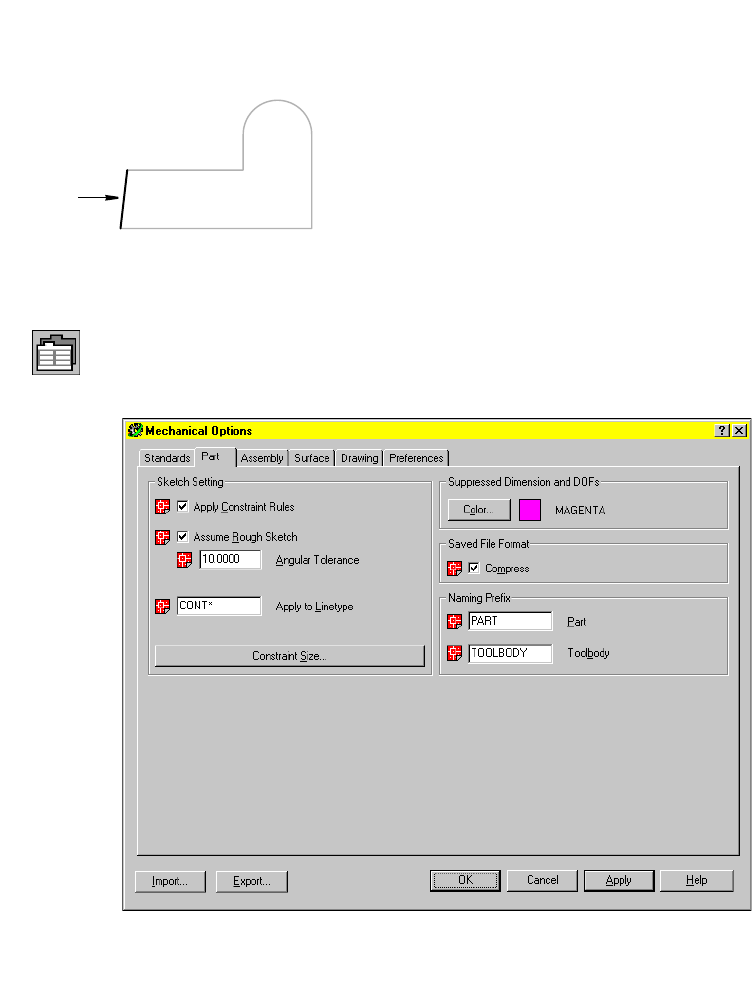
54 |Chapter 6 Creating Parametric Sketches
All lines were redrawn as horizontal or vertical except one. L1 remains angled
because the angle of the line exceeds the setting for angular tolerance. By
default, this rule makes a line horizontal or vertical if the angle is within 4
degrees of horizontal or vertical.
You can modify this and other sketch tolerance settings to adjust the preci-
sion of your sketch analysis.
4Change the angular tolerance setting.
Browser Click the Options button below the window.
5In the Mechanical Options dialog box, choose the Part tab and change the
angular tolerance from 4 degrees to 10 degrees, the maximum value.
Choose OK.
L1
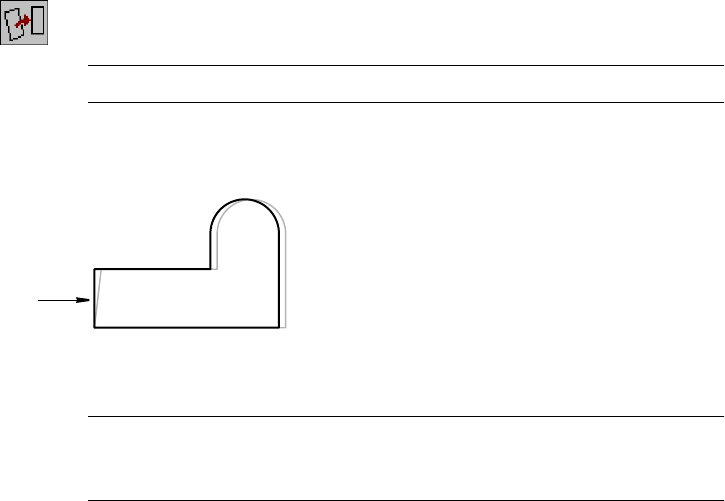
Creating Profile Sketches |55
6Reprofile the sketch, responding to the prompts.
Context Menu In the graphics area, right-click and choose Sketch Solving
➤ Profile.
NOTE You cannot use Single Profile to reprofile a sketch.
Select objects for sketch: Use a crossing window to specify the sketch
Select objects for sketch: Press ENTER
If your sketch shows line L1 unchanged, the angle was greater than 10
degrees. You need to edit or redraw the shape and append the sketch.
NOTE When adding geometry or changing a sketch, you must append the
new geometry so that the sketch is reanalyzed and constraints are reapplied. See
chapter 7, “Constraining Sketches,” to append geometry to a sketch.
When L1 was made vertical, it required one less dimension or constraint to
fully solve the sketch. The following message is displayed on the command
line.
Solved underconstrained sketch requiring 4 dimensions or constraints.
Save your file.
You can adjust sketch rules that determine how precisely you need to draw.
For most sketching, you should use the default settings. However, you can
change the default settings as needed.
L1
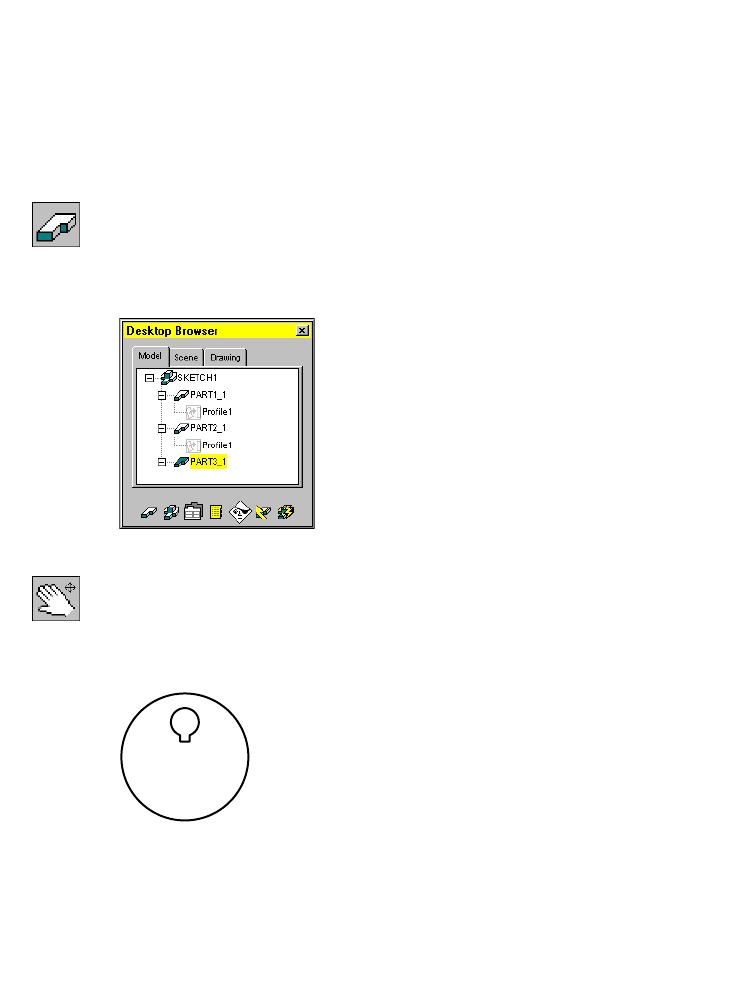
56 |Chapter 6 Creating Parametric Sketches
Using Nested Loops
You can select more than one closed loop to create a profile sketch. A closed
loop must encompass the nested loops. They cannot overlap, intersect, or
touch. With nested loops you can easily create complex profile sketches.
To create a profile sketch using nested loops
1Use AMNEW to create a new part definition.
Context Menu In the graphics area, right-click and choose Part ➤ New
Part.
2Accept the default part name on the command line.
The Browser now contains a third part.
3Pan the drawing so you have room to create the next sketch.
Context Menu In the graphics area, right-click and choose Pan.
4Create the following sketch using lines or polylines, and circles. Then, in the
graphics area, right-click and choose 2D Sketching ➤ Trim and follow the
prompts on the command line to remove the section from the smaller circle.
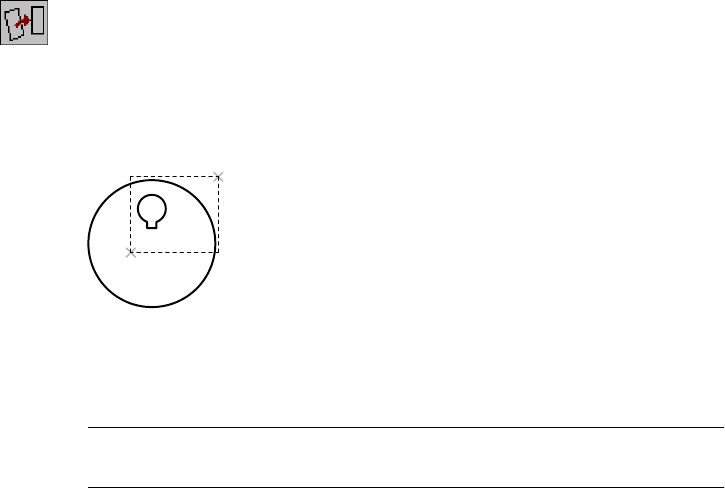
Creating Profile Sketches |57
5Profile the sketch, following the prompts to select the objects with a crossing
window.
Context Menu In the graphics area, right-click and choose Sketch Solving
➤ Profile.
Select objects for sketch: Specify a point to the right of the sketch (1)
Specify opposite corner: Specify a second point (2)
5 found
Select objects for sketch: Press ENTER
Mechanical Desktop calculates the number of dimensions or constraints
required to fully constrain the profile.
Solved underconstrained sketch requiring 7 dimensions or constraints.
NOTE You may need more dimensions or constraints, depending on how you
created your sketch.
Save your file.
This simple cam illustrates how you can easily create complex shapes to
define parts and features. Experiment on your own to create profiles from
nested loops.
1
2
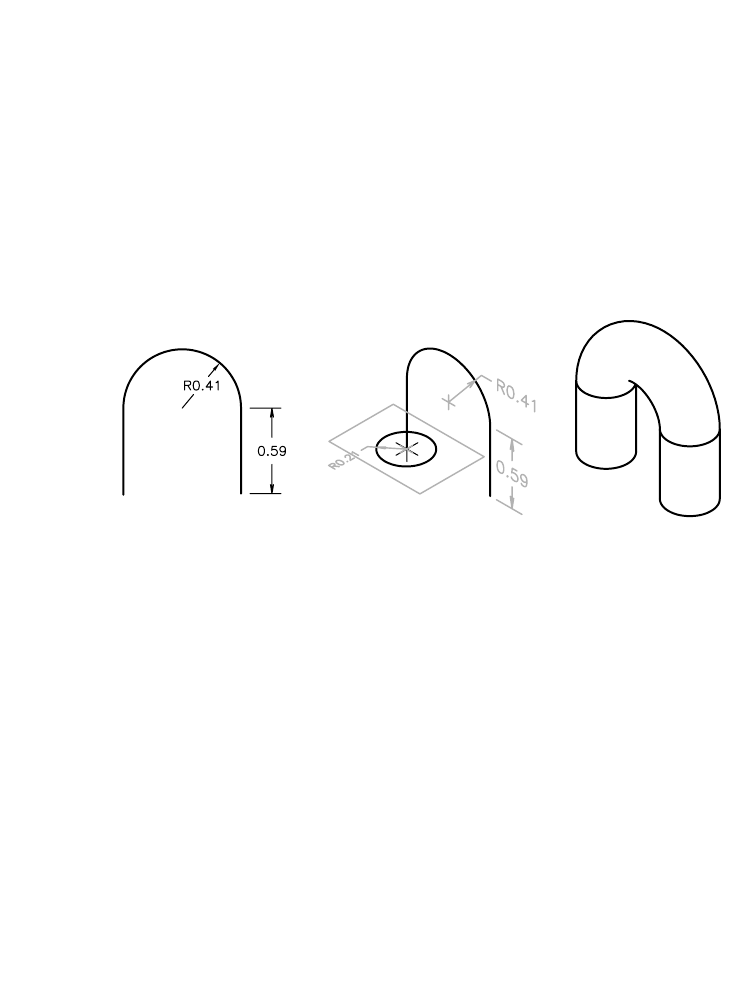
58 |Chapter 6 Creating Parametric Sketches
Creating Path Sketches
Path sketches can be both two dimensional and three dimensional. Like
open profile sketches, they can be open shapes. In this exercise, you create
only the path sketches, but not the profiles that would sweep along the
paths.
Creating 2D Path Sketches
A 2D path sketch serves as a trajectory for a swept feature. You create a swept
feature by defining a path and then a profile sketch of a cross section. Then,
you sweep the profile along the path.
The geometry for the 2D path must be created on the same plane.
Valid geometry that can be used to create a 2D path includes
■Lines
■Arcs
■Polylines
■Ellipse segments
■2D splines
When you solve a 2D path sketch, you can automatically create a work plane
normal to the start point of the path. You use this work plane to create a pro-
file sketch for the swept feature, and then constrain the profile sketch to the
start point of the path.
swept featurepath sketch profile sketch

Creating Path Sketches |59
To create a 2D path sketch
1Create a new part definition.
Context Menu In the graphics area, right-click and choose Part ➤ New
Part.
2Press ENTER on the command line to accept the default part name.
3Pan the drawing so you have room to create the next sketch.
Context Menu In the graphics area, right-click and choose Pan.
4Use PLINE to draw the rough sketch as a continuous shape, responding to the
prompts to specify the points in the following illustration.
Context Menu In the graphics area, right-click and choose 2D Sketching
➤ Polyline.
Specify start point: Specify a point (1)
Current line-width is 0.0000
Specify next point or [Arc/Close/Halfwidth/Length/Undo/Width]:
Specify a second point (2)
Specify next point or [Arc/Close/Halfwidth/Length/Undo/Width]:
Enter a to create an arc segment
Specify endpoint of arc or
[Angle/CEnter/CLose/Direction/Halfwidth/Line/Radius/Second pt/Undo/Width]:
Specify a third point (3)
Specify endpoint of arc or
[Angle/CEnter/CLose/Direction/Halfwidth/Line/Radius/Second pt/Undo/Width]:
Enter l to create a line segment
Specify next point or [Arc/Close/Halfwidth/Length/Undo/Width]:
Specify a fourth point (4)
Specify next point or [Arc/Close/Halfwidth/Length/Undo/Width]: Press ENTER
Make sure to switch between drawing lines and arcs at points (2) and (3).
1
23
4

60 |Chapter 6 Creating Parametric Sketches
5Use AM2DPATH to convert the rough sketch to a path sketch, following the
prompts.
Context Menu In the graphics area, right-click and choose Sketch Solving
➤ 2D Path.
Select objects: Specify the polyline shape
Select objects: Press ENTER
At the prompt for the start point of the path, you select the point where the
path begins. This determines the direction to sweep the profile of the cross
section.
Select start point of the path: Specify the start point (1)
You can also specify whether a work plane is created perpendicular to the
path. In this example, a work plane is not required.
Create a profile plane perpendicular to the path? [Yes/No] <Yes>: Enter n
NOTE If you choose to create a sketch to sweep along the path, Mechanical
Desktop can automatically place a work plane perpendicular to the path.
Press the F2 function key to activate the AutoCAD Text window. Examine the
prompts for the AM2DPATH command. The following line is displayed:
Solved underconstrained sketch requiring 3 dimensions or constraints.
The sketch analysis rules indicate that the path sketch needs three more
dimensions or constraints to fully define the sketch.
1
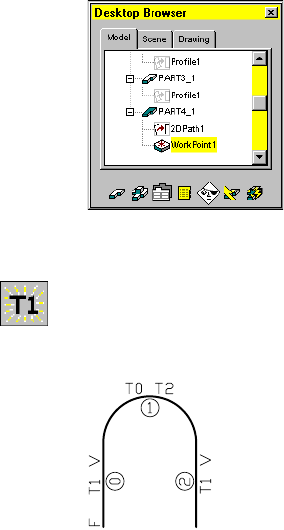
Creating Path Sketches |61
A work point is automatically placed at the start point of the path. The
Browser displays both a 2DPath icon and a work point icon nested below the
part definition.
6Use AMSHOWCON to display the existing constraints, responding to the
prompt.
Context Menu In the graphics area, right-click and choose 2D
Constraints ➤ Show Constraints.
Enter an option [All/Select/Next/eXit] <eXit>: Enter a
The start point of the path is fixed. Both lines are vertical and are tangent to
the endpoints of the arc. The missing information is the length of each line and
the radius of the arc. Given these values, the sketch would be fully constrained.
Enter an option [All/Select/Next/eXit] <eXit>: Press ENTER
Save your file.
Next, you create a three-dimensional path.
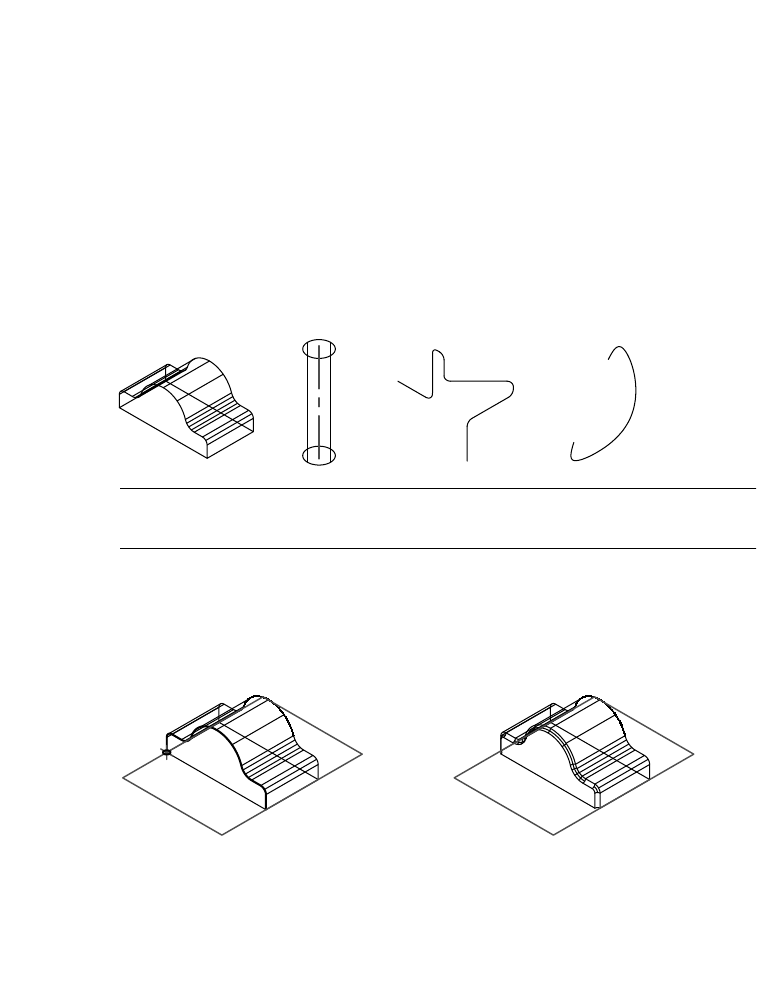
62 |Chapter 6 Creating Parametric Sketches
Creating 3D Path Sketches
3D path sketches are used to create
■A 3D path from existing part edges
■A helical path
■The centerline of a 3D pipe
■A 3D spline path
3D paths are used to create swept features that are not limited to one plane.
See chapter 8, “Creating Sketched Features,” to learn more about sweeping
features along a 3D path.
Open the file sketch2.dwg in the desktop\tutorial folder. The drawing contains
four part definitions and the geometry you need to create the 3D paths.
NOTE Back up the tutorial drawing files so you still have the original files if you
make a mistake. See “Backing up Tutorial Drawing Files” on page 40.
Creating a 3D Edge Path
A 3D edge path is used to create a path from existing part edges. After you
create the path, you can sweep a profile and use a Boolean operation to com-
bine the feature with the existing part.
3D edge path and profile sketch 3D sweep along edge path
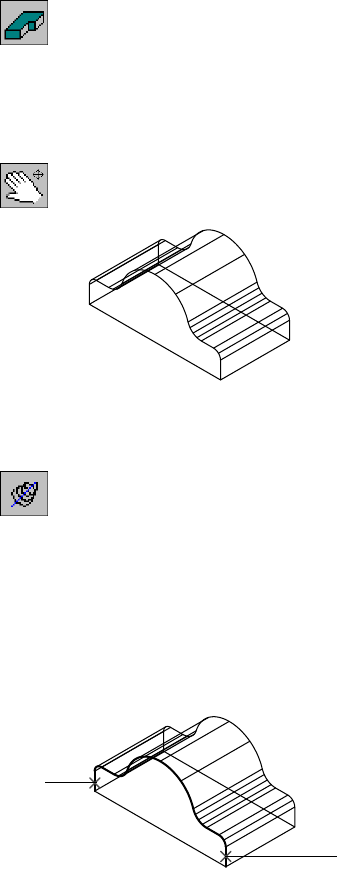
Creating Path Sketches |63
Before you can work on a part, it must be active. Activate PART1_1, respond-
ing to the prompts.
Context Menu In the graphics area, right-click and choose Part ➤
Activate Part.
Select part to activate or [?] <PART1_1>: Enter PART1_1
PART1_1 is activated, and highlighted in the Browser.
Use Pan to center PART1_1 on your screen.
Context Menu In the graphics area, right-click and choose Pan.
PART1_1 contains an extruded part.
To create a 3D edge path
1Use AM3DPATH to define the 3D edge path, following the prompts.
Context Menu In the graphics area, right-click and choose Sketch Solving
➤ 3D Edge Path.
Select model edges (to add): Specify the first part edge (1)
Select model edges (to add): Specify the next edges in a clockwise sequence
Select model edges (to add): Specify the last edge (9)
Select model edges (to add): Press ENTER
Specify start point: Specify start point (1)
Create workplane? [Yes/No] <Yes>: Press ENTER
The command method you use determines the prompts that are displayed.
9
1
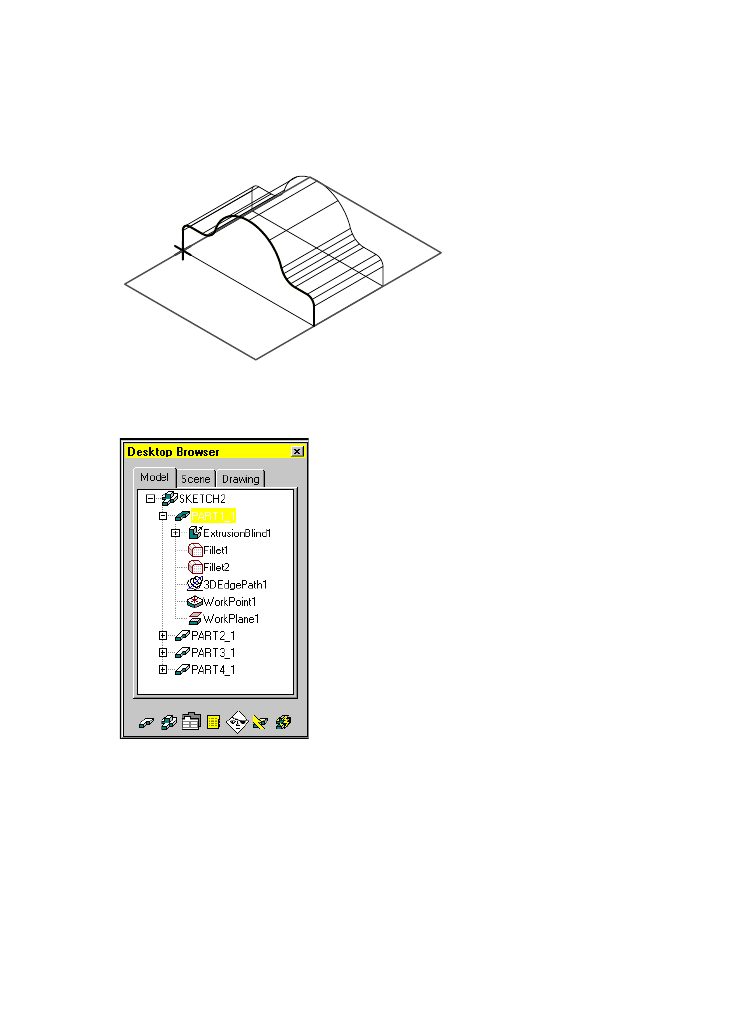
64 |Chapter 6 Creating Parametric Sketches
2Continue on the command line to place the work plane.
Plane=Parametric
Select edge to align X axis or [Flip/Rotate/Origin] <accept>: Press ENTER
The path is created, and a work point is located at the start point. A work
plane is placed normal to the start of the path so you can sketch the profile
for the sweep feature.
In the Browser, the new geometry is nested below the extrusion and fillets in
PART1_1.
Save your file.
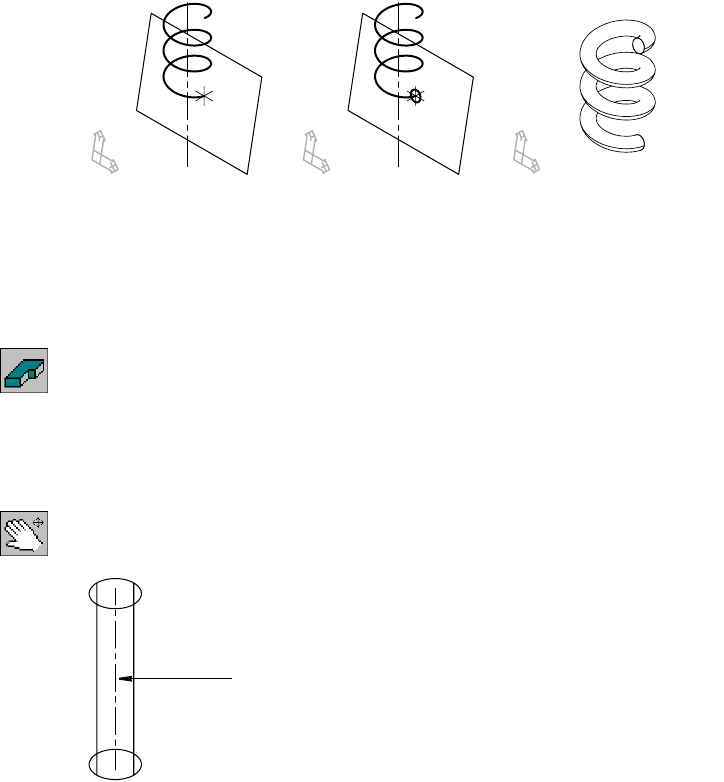
Creating Path Sketches |65
Creating a 3D Helical Path
A 3D helical path is used for a special type of swept feature. Helical sweeps
are used to create threads, springs, and coils. You create a 3D helical path
from an existing work axis, cylindrical face, or cylindrical edge.
When you create a 3D helical path, you can specify whether a work plane is
also created. The work plane can be normal to the path, at the center of the
path, or along the work axis. You use this work plane to draw the profile
sketch for the helical sweep.
Before you begin, activate PART2_1, responding to the prompts.
Context Menu In the graphics area, right-click and choose Part ➤
Activate Part.
Select part to activate or [?] <PART1_1>: Enter PART2_1
PART2_1 is highlighted in the Browser and on your screen.
Use Pan to center PART2_1 on your screen.
Context Menu In the graphics area, right-click and choose Pan.
PART2_1 contains a cylinder and a work axis.
3D
p
ath
p
rofile sketch 3D helical swee
p
work axis
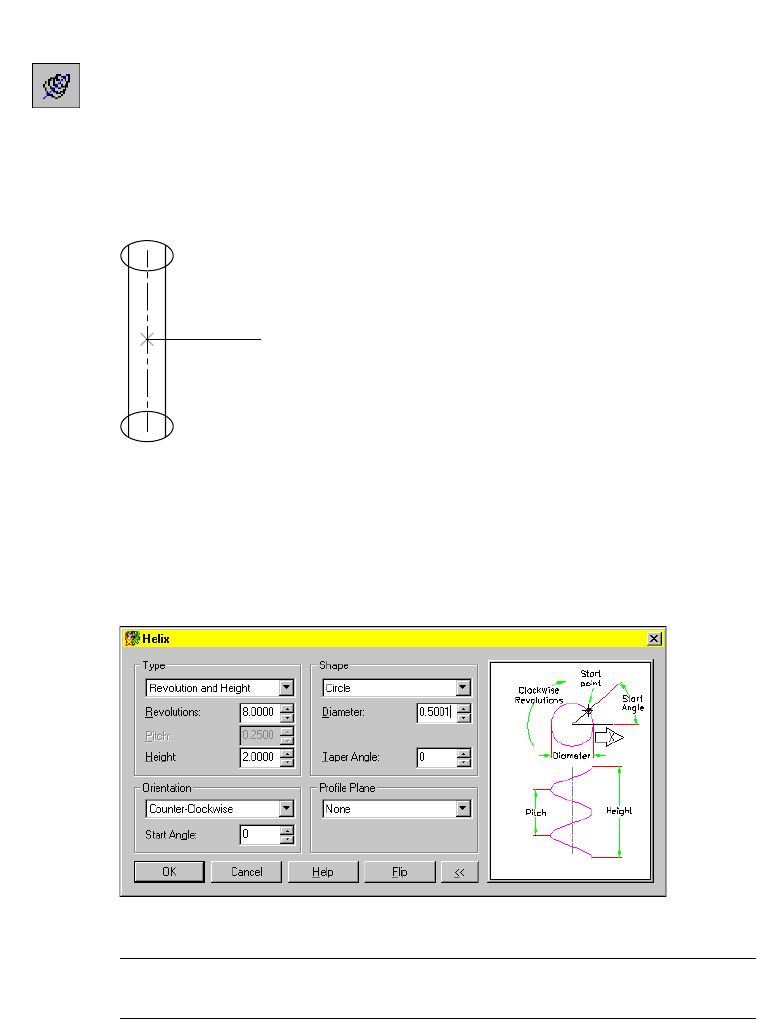
66 |Chapter 6 Creating Parametric Sketches
To create a 3D helical path
3Use AM3DPATH to define the 3D helical path, responding to the prompts.
Context Menu In the graphics area, right-click and choose Sketch Solving
➤ 3D Helix Path.
Enter path type [Helical/Spline/Edge/Pipe] <Edge>: Enter h
Select work axis, circular edge, or circular face for helical center:
Select the work axis (1)
The command method you use determines the prompts that are displayed.
4In the Helix dialog box, specify the following:
Type: Revolution and Height
Revolutions: Enter 8
Height: Enter 2
Diameter: Enter .5
Orientation: Counter-Clockwise
Choose OK.
NOTE The path is automatically constrained with the parameters defined in
the Helix dialog box. You can edit the path at any time with AMEDITFEAT.
1
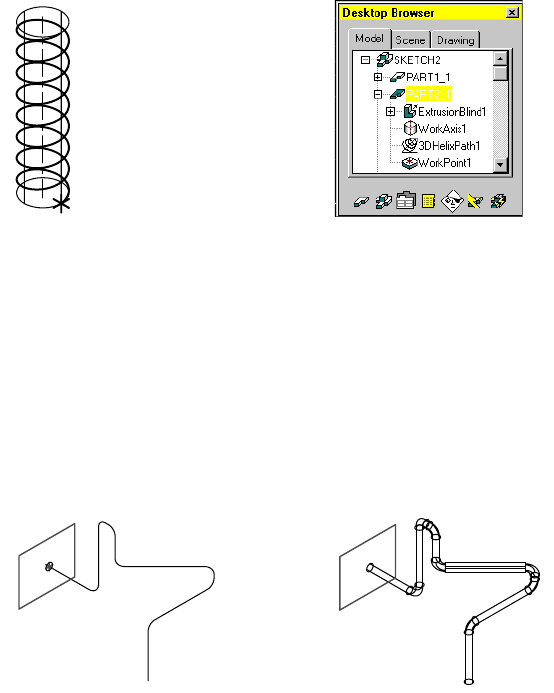
Creating Path Sketches |67
The 3D helix path is created. A work point is placed at the beginning of the path.
You can also specify that a work plane is placed normal to the start point of
the 3D path, at the center of the path, or along the work axis. This option
makes it easier for you to create the sketch geometry for the profile you sweep
along the path.
Save your file.
Creating a 3D Pipe Path
A 3D pipe path is used to sweep a feature along a three-dimensional path
containing line and arc segments or filleted polylines. You can modify each
of the control points and the angle of the segments in the 3D Pipe Path
dialog box.
Before you begin, activate PART3_1. This time use the Browser method to
activate the part.
Browser In the graphics area, double-click PART3_1.
PART3_1 is activated, and highlighted in the Browser.
3D pipe path and profile sketch 3D sweep along pipe path
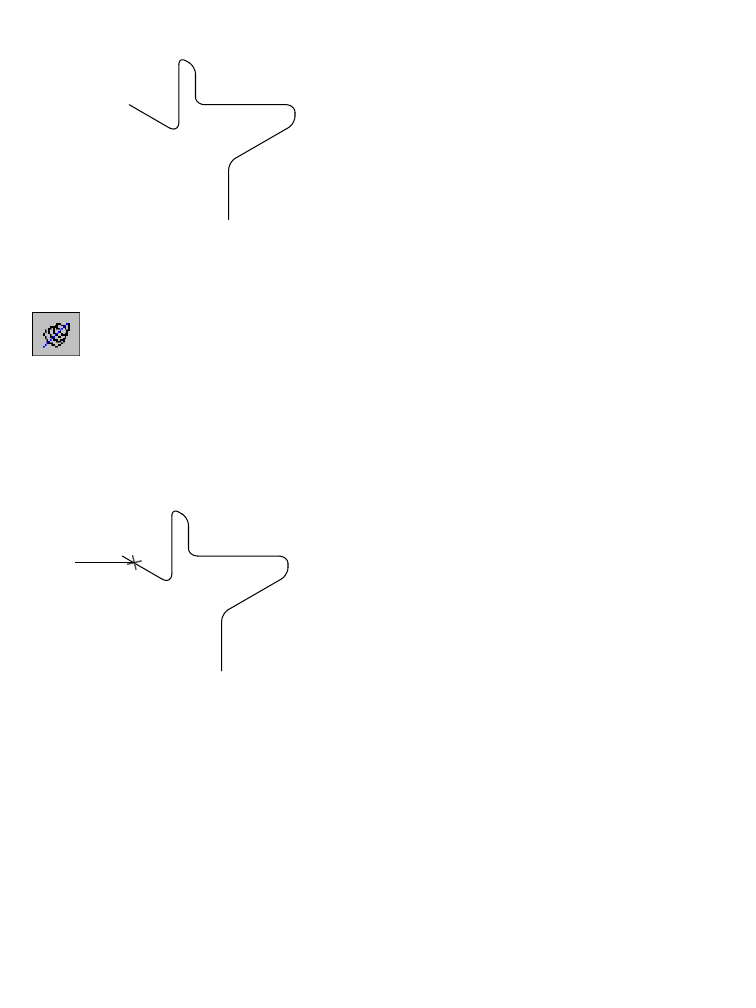
68 |Chapter 6 Creating Parametric Sketches
Use Pan to center PART3_1 on your screen.
PART3_1 contains an unsolved sketch of line segments and arcs.
To create a 3D pipe path
1Use AM3DPATH to define the 3D pipe path, responding to the prompts.
Context Menu In the graphics area, right-click and choose Sketch Solving
➤ 3D Pipe Path.
Select polyline path source: Select the first line (1)
Select polyline path source: Select the remaining arcs and lines in sequence
Select polyline path source: Press ENTER
Specify start point: Specify a point near the start of the first line (1)
The command method you use determines the prompts that are displayed.
1

Creating Path Sketches |69
2In the 3D Pipe Path dialog box, examine the vertices and angles of the path.
Verify that Create Work Plane is selected.
NOTE Your numbers might not match the illustration above.
Choose OK to exit the dialog box.
3Place the work plane, following the prompts.
Plane=Parametric
Select edge to align X axis or [Flip/Rotate/Origin] <accept>: Press ENTER
The Desktop Browser now contains a 3D Pipe icon, a work plane, and a work
point nested below the PART3_1 definition.
Save your file.
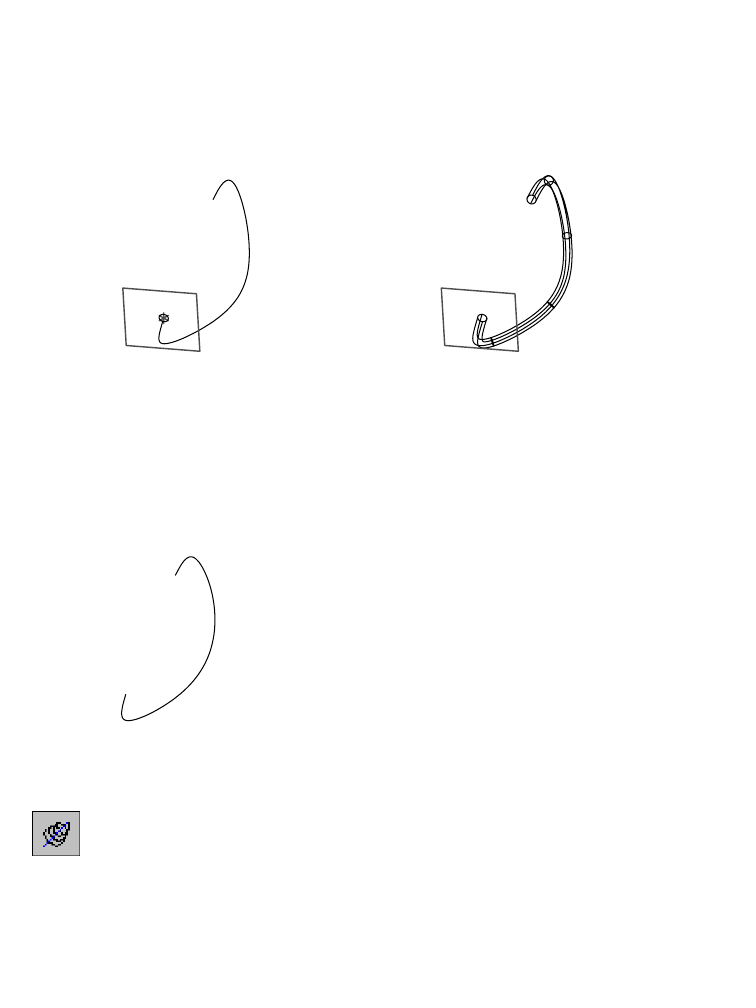
70 |Chapter 6 Creating Parametric Sketches
Creating a 3D Spline Path
In this type of path, you sweep a feature along a 3D spline created with fit
points or control points. Working in one integrated dialog box, you can mod-
ify any fit point or control point in a 3D spline path, and you can convert fit
points to control points, and control points to fit points.
In this exercise, you work with a fit point spline.
Before you begin, activate PART4_1 from the Browser.
Browser In the graphics area, double-click PART4_1.
PART4_1 is highlighted in the Browser and on your screen.
Use Pan to center PART4_1 on your screen.
PART4_1 contains an unsolved spline sketch.
To create a 3D spline path
1Use AM3DPATH to define the 3D spline path, responding to the prompts.
Context Menu In the graphics area, right-click and choose Sketch Solving
➤ 3D Spline Path.
Select 3D spline path source: Specify the spline
Specify start point: Specify the start point
The command method you use determines the prompts that are displayed.
3D spline path and profile sketch 3D sweep along spline path
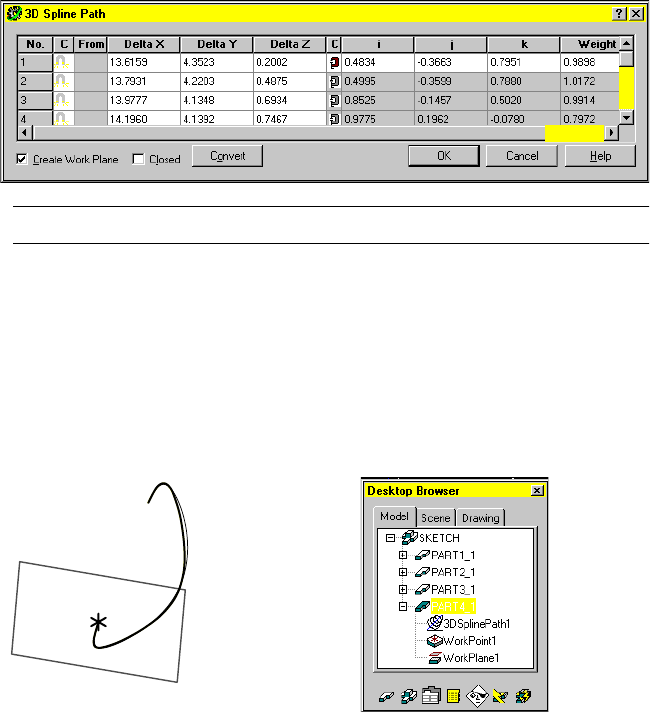
Creating Path Sketches |71
2In the 3D Spline Path dialog box, examine the vertices of the spline, and ver-
ify that Create Work Plane is selected.
NOTE Your numbers might not match the illustration above.
Choose OK to exit the dialog box.
3Create the work plane, responding to the prompts.
Plane=Parametric
Select edge to align X axis or [Flip/Rotate/Origin] <accept>: Press ENTER
The path is created, and a work point is located at the start point. A work
plane is placed normal to the start of the path so you can begin to sketch the
profile for the sweep feature.
Save your file.
Creating a path sketch is similar to creating a profile sketch. The difference
between the two sketch types is their purpose.
■Profile sketches provide a general way to create a variety of features.
■Path sketches are used exclusively for creating trajectory paths for 2D and
3D swept features.
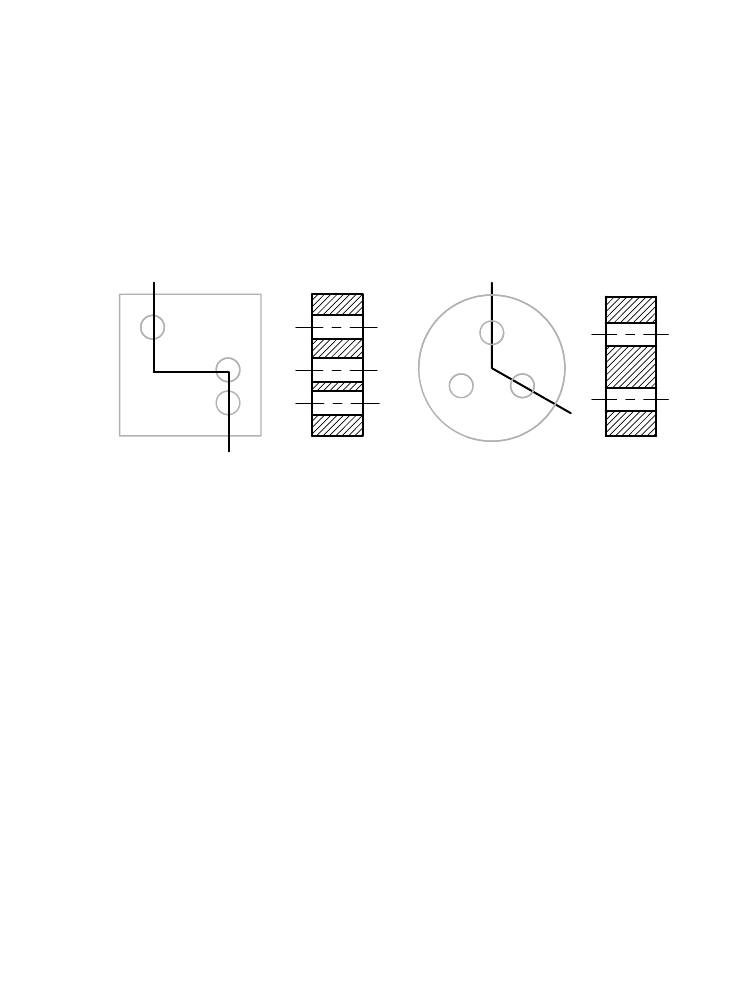
72 |Chapter 6 Creating Parametric Sketches
Creating Cut Line Sketches
When you create drawing views, you might want to depict a cut path across
a part for offset, cross-section views. After you have extruded or revolved a
profile sketch to create a feature, you can return to an original sketch and
draw the cut line across the features you want to include in the cross section.
There are two types of cut line sketches: offset and aligned. An offset cut line
sketch is a two-dimensional line constructed from orthogonal segments. An
aligned cut line sketch is a two-dimensional line constructed from non-
orthogonal segments.
Two general rules govern cut line sketches:
■Only line and polyline segments are allowed.
■The start and end points of the cut line must be outside the part.
These additional rules apply to cut line sketches:
■The first and last line segments of an offset cut line must be parallel.
■Offset cut line segments can change direction in 90-degree increments
only.
■Only two line segments are allowed in an aligned cut line.
■Line segments of aligned cut lines can change direction at any angle.
section viewoffset cut line section viewali
g
ned cut line
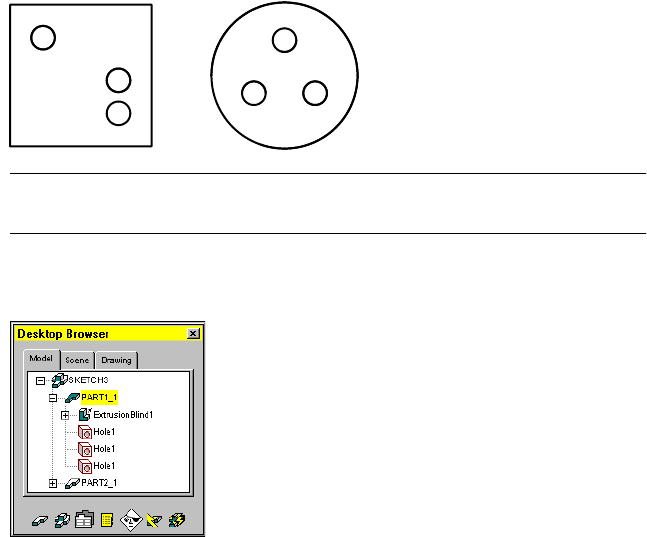
Creating Cut Line Sketches |73
In the following exercise, after you create a cut line sketch on these models,
the resulting cross-section drawing views can be generated in Drawing mode.
A cut line sketch is needed when you want to define a custom cross-section
view only, but not for a half or full cross-section view.
Open the file sketch3.dwg in the desktop\tutorial folder. The drawing contains
two parts.
NOTE Back up the tutorial drawing files so you still have the original files if you
make a mistake. See “Backing up Tutorial Drawing Files” on page 40.
Before you begin, click the plus signs in front of SKETCH3 and PART1_1 to
expand the Browser hierarchy.
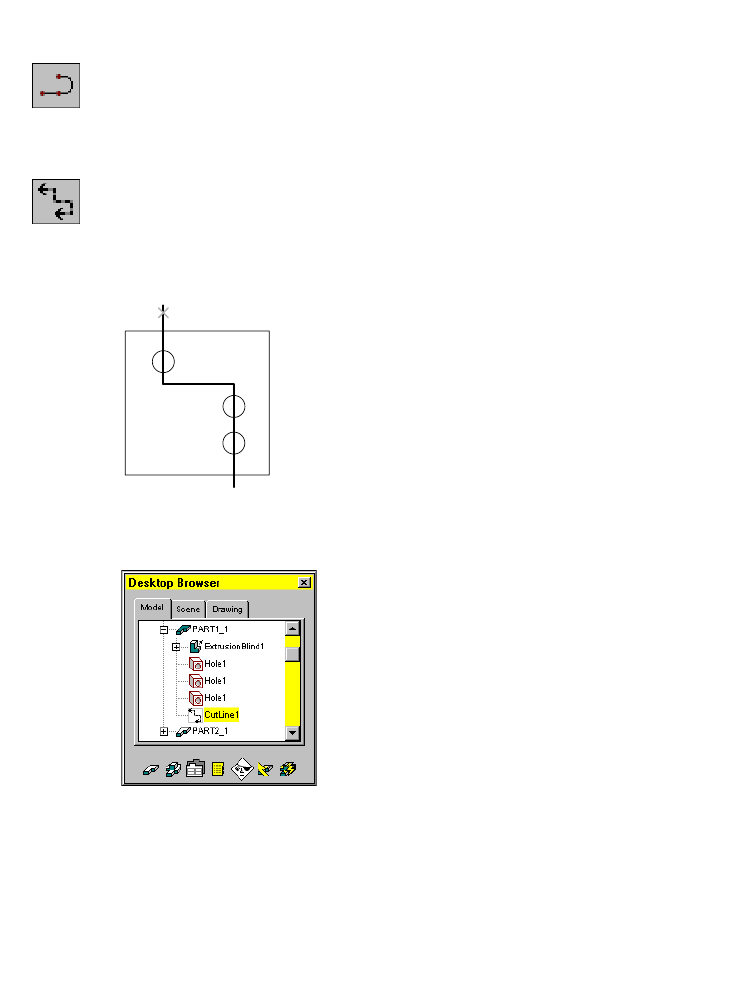
74 |Chapter 6 Creating Parametric Sketches
To create an offset cut line sketch
1Use PLINE to sketch through the center of the holes on the square part.
Context Menu In the graphics area, right-click and choose 2D Sketching
➤ Polyline.
Next, analyze the cut line sketch according to internal sketching rules.
2Use AMCUTLINE to solve the cut line, responding to the prompts.
Context Menu In the graphics area, right-click and choose Sketch Solving
➤ Cut Line.
Select objects to define the section cutting line: Select the polyline (1)
Select objects to define the section cutting line: Press ENTER
A new icon called CutLine1 is added to the PART1_1 hierarchy in the
Browser.
Save your file.
1
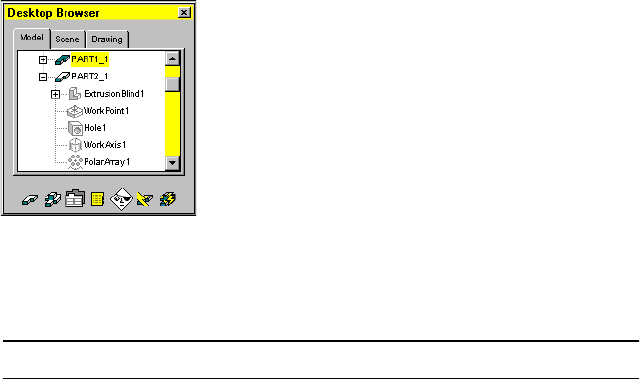
Creating Cut Line Sketches |75
As with the other sketches you created, a message tells you how many dimen-
sions and constraints are needed to fully solve the sketch. In this case, you
need five dimensions or constraints to complete the definition of the sketch:
three to define the shape of the sketch, and two to constrain it to the part.
When you create a cross-section drawing view, this sketch defines the path
of the cut plane. If you change the size of the part or holes, or their place-
ment, the cut line is updated to reflect the new values.
For the next exercise, you use the circular part. In the Browser, click the
minus sign in from of PART1_1 to collapse the part hierarchy. Then click the
plus sign in front of PART2_1 to expand the circular part hierarchy.
Before you begin, you need to activate the circular part.
Browser Double-click PART2_1.
PART2_1 is activated, and highlighted in the Browser and on your screen.
NOTE Before you can work on a part, it must be active.
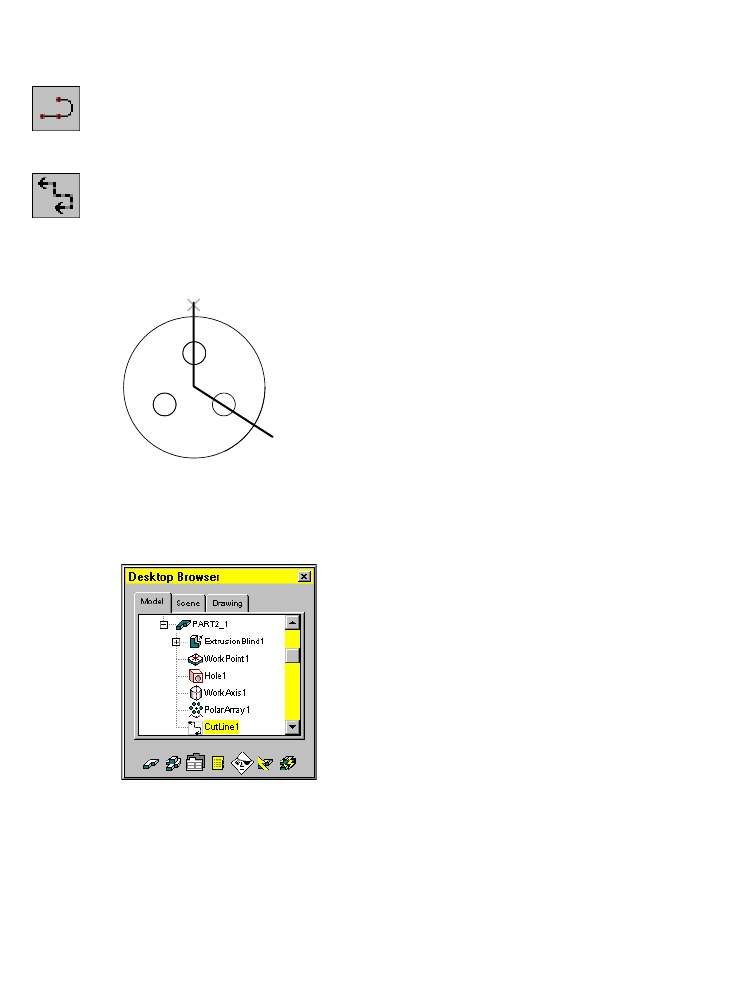
76 |Chapter 6 Creating Parametric Sketches
To create an aligned cut line sketch
1Use PLINE to sketch through the centers of two of the holes on the circular
part.
Context Menu In the graphics area, right-click and choose 2D Sketching
➤ Polyline.
2Define a cut line on your sketch, responding to the prompts.
Context Menu In the graphics area, right-click and choose Sketch Solving
➤ Cut Line.
Select objects to define the section cutting line: Select the polyline (2)
Select objects to define the section cutting line: Press ENTER
A message states that you need five dimensions or constraints to fully solve
this sketch.
3In the Browser, the new CutLine1 icon is part of the PART2_1 hierarchy.
Save your file.
2
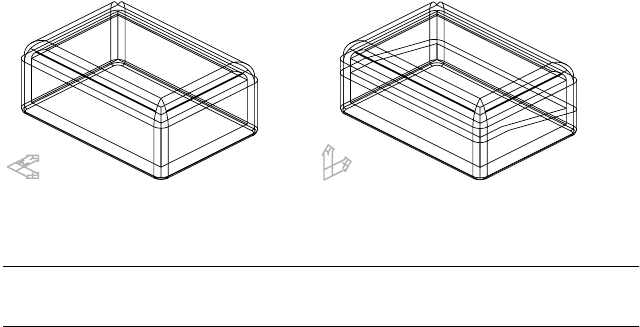
Creating Split Line Sketches |77
Creating Split Line Sketches
A molded part or casting usually requires two or more shapes to define the
part. To make a mold or a cast, you create the shape of your part and then
apply a split line to split the part into two or more pieces. You may also need
to apply a small draft angle to the faces of your part so that your part can be
easily removed from the mold.
Split lines can be as simple as a planar intersection with your part, or as com-
plex as a 3D polyline, or spline, along planar or curved faces.
You can also split parts using either
■A selected planar face or a work plane
■A sketch projected onto a selected set of faces
In this exercise, you create a split line to split a shelled part into two separate
parts.
Open the file sketch4.dwg in the desktop\tutorial folder.
NOTE Back up the tutorial drawing files so you still have the original files if you
make a mistake. See “Backing up Tutorial Drawing Files” on page 40.
The drawing file contains a simple shelled box. Two viewports have been
defined: the right side of the part, and an isometric view. You’ll define a new
sketch plane in the right viewport and sketch a split line in the left viewport.
shelled part split part
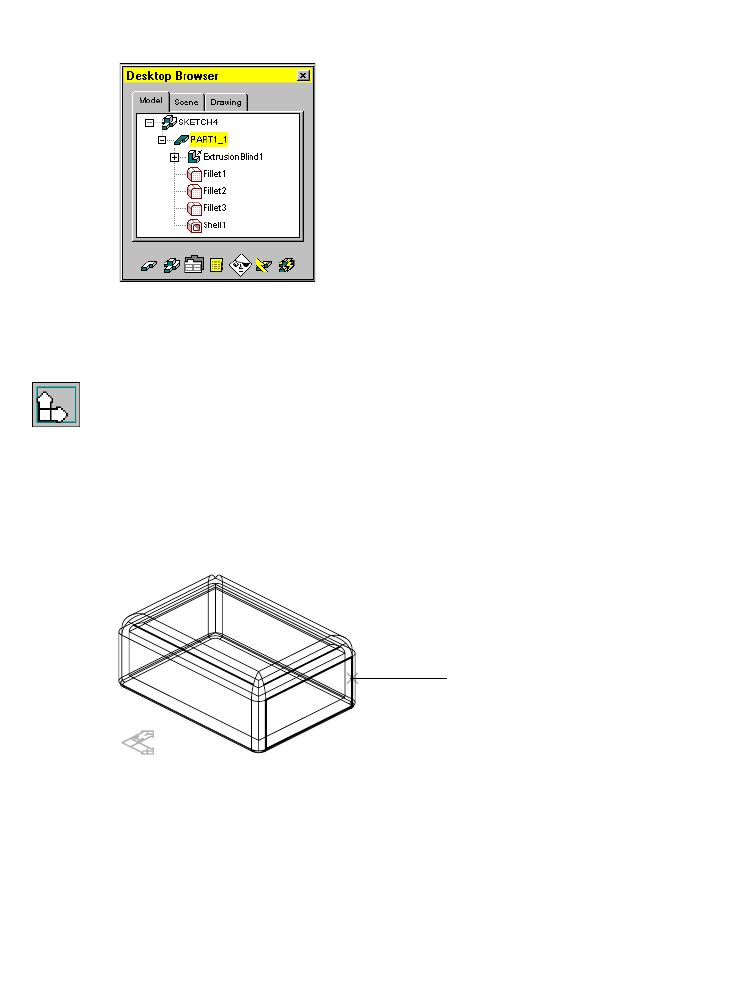
78 |Chapter 6 Creating Parametric Sketches
To create a split line
1Expand the Browser hierarchy of SKETCH4 and PART1_1.
The part consists of an extrusion, three fillets, and a shell feature. Next, you
create a sketch plane on the outside right face of the part.
2In the right viewport, define a new sketch plane, responding to the prompts.
Context Menu In the graphics area, right-click and choose New Sketch
Plane.
Select work plane, planar face or [worldXy/worldYz/worldZx/Ucs]:
Specify the outside right face of the part (1)
Enter an option [Accept/Next] <Accept>: Press ENTER
Plane = Parametric
Select edge to align X axis [Flip/Rotate/Origin] <accept>: Press ENTER
Next, create a sketch and convert it to a split line.
1
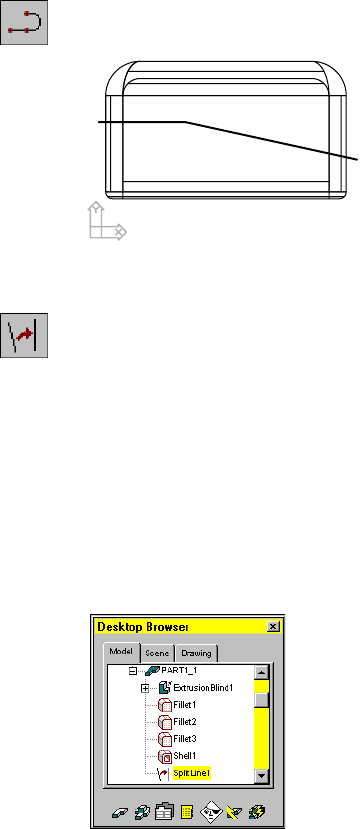
Creating Split Line Sketches |79
3In the left viewport, use PLINE to sketch the split line.
Context Menu In the graphics area, right-click and choose 2D Sketching
➤ Polyline.
4Use AMSPLITLINE to create a split line from your sketch, responding to the
prompts.
Context Menu In the graphics area, right-click and choose Sketch Solving
➤ Split Line.
Select objects for sketch: Select the polyline
Select objects for sketch: 1 found
Select objects for sketch: Press ENTER
Select edge to include in split line or press <ENTER> to accept: Press ENTER
Mechanical Desktop solves the sketch and displays the number of constraints
required to fully constrain it.
Solved underconstrained sketch requiring 5 dimensions or constraints.
5Look at the Browser. SplitLine1 is now nested under the part definition.
Save your file.
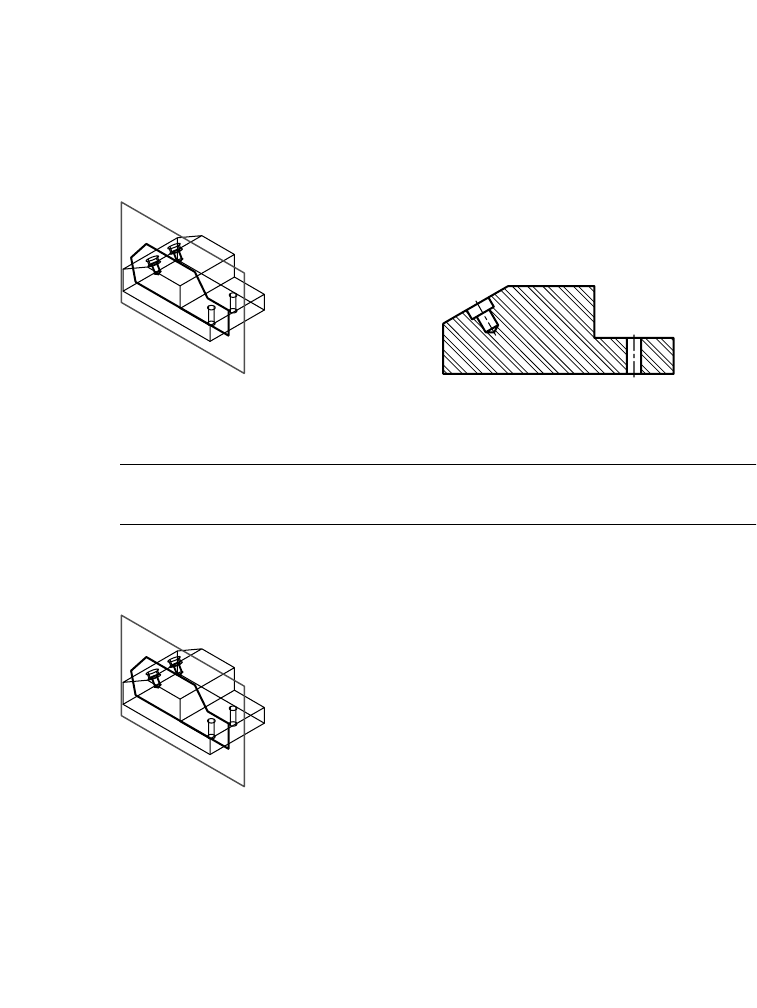
80 |Chapter 6 Creating Parametric Sketches
Creating Break Line Sketches
When you want to document complex assemblies, it is not always easy to dis-
play parts and subassemblies that are hidden by other parts in your drawing
views. By creating a break line sketch, you can specify what part of your
model will be cut away in a breakout drawing view so that you can illustrate
the parts behind it.
Open the file sketch4a.dwg in the desktop\tutorial folder.
NOTE Back up the tutorial drawing files so you still have the original files if you
make a mistake. See “Backing up Tutorial Drawing Files” on page 40.
The drawing file contains a simple part. An unsolved sketch lies on a work
plane. You create a break line from this sketch.
break line path breakout drawing view
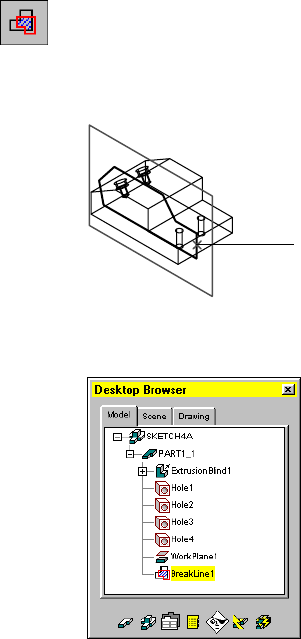
Creating Break Line Sketches |81
To create a break line
1Use AMBREAKLINE to define the break line sketch, following the prompts.
Context Menu In the graphics area, right-click and choose Sketch Solving
➤ Break Line.
Select objects for sketch: Specify the sketch (1)
Select objects for sketch: Press ENTER
The break line is created. The Browser contains a break line icon nested below
the work plane.
Save your file.
Now that you have learned the basics of creating sketches, you are ready to
constrain them by adding geometric and parametric dimension constraints.
1

82

83
In This Chapter 7
Constraining Sketches
When you solve a sketch in Autodesk® Mechanical
Desktop®, geometric constraints are applied in
accordance with internal rules. To fully constrain the
sketch, you apply the remaining parametric dimensions
and geometric constraints that are necessary to meet
your design goals.
Any time you modify a sketch, the parametric geometry
retains the relationships among design elements.
To reduce the number of constraints required to fully
constrain a sketch, you can use construction geometry.
Construction geometry becomes part of the sketch, but
is ignored when the sketch is used to create a feature.
In the next chapter, you learn to add sketched features
to your constrained sketches.
■Creating a strategy for
constraining and dimensioning
■Defining sketch shape and size
with dimensions and geometric
constraints
■Using construction lines, arcs,
and circles to create and control
sketches
■Modifying a design
■Re-creating a constrained sketch

84 |Chapter 7 Constraining Sketches
Key Terms
Te r m Definition
2D constraint Defines how a sketch can change shape or size. Geometric constraints control the
shape and relationships among sketch lines and arcs. Dimensional constraints
control the size of sketch geometry.
degree of freedom In part modeling, determines how a geometric object such as a line, arc, or circle
can change shape or size. For example, a circle has two degrees of freedom,
center and radius. When these values are known, degrees of freedom are said to
be eliminated.
dimensional constraint Parametric dimension that controls the size of a sketch. When changed, the
sketch resizes. May be expressed as a constant value, a variable in an equation, a
variable in a table, or in global parameter files.
geometric constraint Controls the shape and relationships among geometric elements in a sketch.
parametrics A solution method that uses the values of part parameters to determine the
geometric configuration of the part.
Basic Concepts of Creating Constraints |85
Basic Concepts of Creating Constraints
A sketch needs geometric and dimensional constraints to define its shape and
size. These constraints reduce the degrees of freedom among the elements of
a sketch and control every aspect of its final shape.
When you solve a sketch, Mechanical Desktop applies some geometric
constraints. In general, use the automatically applied constraints to stabilize
the sketch shape.
Depending upon how accurately you sketch, you may need to add one or
more constraints to fully solve a sketch. You can also add construction
geometry to your sketch to reduce the number of additional constraints
required. After you add further constraints, you might need to delete some
of the applied constraints.
In most cases, you need to fully constrain sketches before you use them to
create the features that define a part. As you gain experience, you will be able
to determine which constraints control the sketch shape according to your
design requirements.

86 |Chapter 7 Constraining Sketches
Constraining Tips
Constraining Sketches
Constraining a sketch defines how a sketch can change shape or size. In addi-
tion to the inferences by the software, you often need additional dimensions
or constraints.
Constraints may be fixed or variable, but they always prevent unwanted
changes to a feature as you make modifications.
Tip Explanation
Determine sketch
dependencies Analyze the design to determine how sketch elements
interrelate; then decide which geometric constraints are
needed.
Analyze automatically
applied constraints Determine the degrees of freedom not resolved by automatic
constraints. Decide if any automatic constraints need to be
deleted in order to constrain elements as you require.
Use only needed
constraints Replace constraints as needed to define shape. Because
constraints often solve more than one degree of freedom, use
fewer constraints than degrees of freedom.
Stabilize shape
before size If you apply geometric constraints before dimensions, your
sketch shape is less likely to become distorted.
Dimension large
before small To minimize distortion, define larger elements that have an
overall bearing on the sketch size. Dimensioning small elements
first may restrict overall size. Delete or undo a dimension if the
sketch shape is distorted.
Use both geometric
constraints and
dimensions
Some constraint combinations may distort unconstrained
portions of the sketch. If so, delete the last constraint and
consider using a dimension or a different constraint
combination.
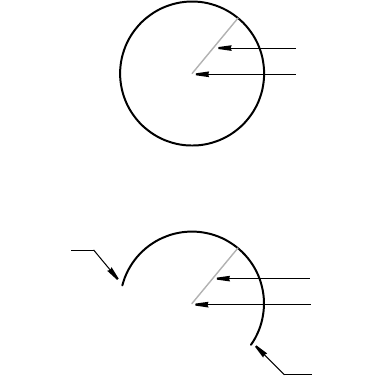
Constraining Sketches |87
The ways a sketch can change size or shape are called degrees of freedom. For
example, a circle has two degrees of freedom—the location of its center and
its radius. If the center and radius are defined, the circle is fully constrained
and those values can be maintained.
Similarly, an arc has four degrees of freedom—center, radius, and the end-
points of the arc segment.
The degrees of freedom you define correspond to how fully the sketch is con-
strained. If you define all degrees of freedom, the arc is fully constrained. If you
do not define all degrees of freedom, the sketch is underconstrained.
Mechanical Desktop does not allow you to define a degree of freedom in
more than one way and thus prevents you from overconstraining a sketch.
Before you add constraints, study your sketch, and then decide how to con-
strain it. Usually, you need both geometric constraints and dimensions. See
“Constraining Tips” on page 86.
You should fully constrain sketches so that they update predictably as you
make changes. As you gain experience, you may want to underconstrain a
sketch while you work out fine points of a design, but doing so may allow
that feature to become distorted as you modify dimensions or constraints.
radius
center
end
p
oint
radius
center
endpoint
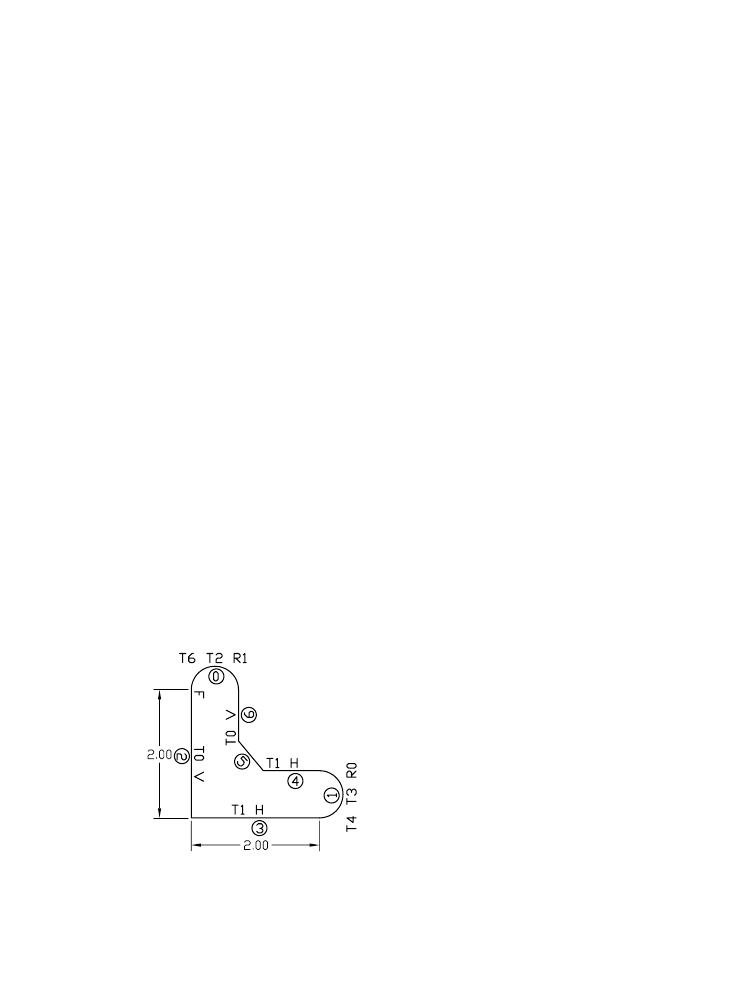
88 |Chapter 7 Constraining Sketches
Applying Geometric Constraints
When constraining a sketch, begin by defining its overall shape before defining
its size. Geometric constraints specify the orientation and relationship of the
geometric elements. For example
■Constraints that specify orientation indicate whether an element is hori-
zontal or vertical.
■Constraints that determine relationships specify whether two elements
are perpendicular, parallel, tangent, collinear, concentric, projected,
joined, have the same X or Y coordinate location, or have the same radius.
Mechanical Desktop displays geometric constraints as letter symbols. If the
constraint specifies a relationship between two elements, the letter symbol is
followed by the number of the sketch element to which the constraint is
related. In the example below,
■The start point of the arc (0) has a fix constraint. This point is anchored
and will not move when changes are made to the sketch constraints.
■The lines (2, 3, 4, and 6) have constraint symbols of either H (horizontal)
or V (vertical).
■All lines except one are tangent to at least one of the arcs (0 and 1). Each
symbol T (tangent) is followed by the number of the arc to which it is
tangent.
■Each arc is tangent to its connecting lines, as shown by T constraint
symbols, and the arcs have the same radius, as indicated by the R
constraint symbols.
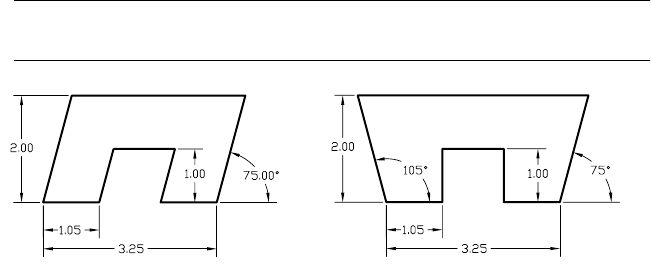
Applying Geometric Constraints |89
As you apply geometric constraints, you should continue to analyze your
sketch, reviewing and replacing constraints.
In the next exercise, you gain experience with constraining techniques by
analyzing and then modifying geometric constraints to reshape the sketch.
Open the file sketch5.dwg in the desktop\tutorial folder. Use the before-and-
after sketches below to determine what changes you must make. Then
change the constraints and see the results of your analysis.
NOTE Back up the tutorial drawing files so you still have the original files if you
make a mistake. See “Backing up Tutorial Drawing Files” on page 40.
In the before-and-after sketches, you can see that the constraints and dimen-
sions differ, but you cannot discern which geometric constraints Mechanical
Desktop has assumed. You will notice that
■The linear dimensions are the same for both sketches.
■The angular relationships of the vertical lines differ.
before geometric constraints after geometric constraints
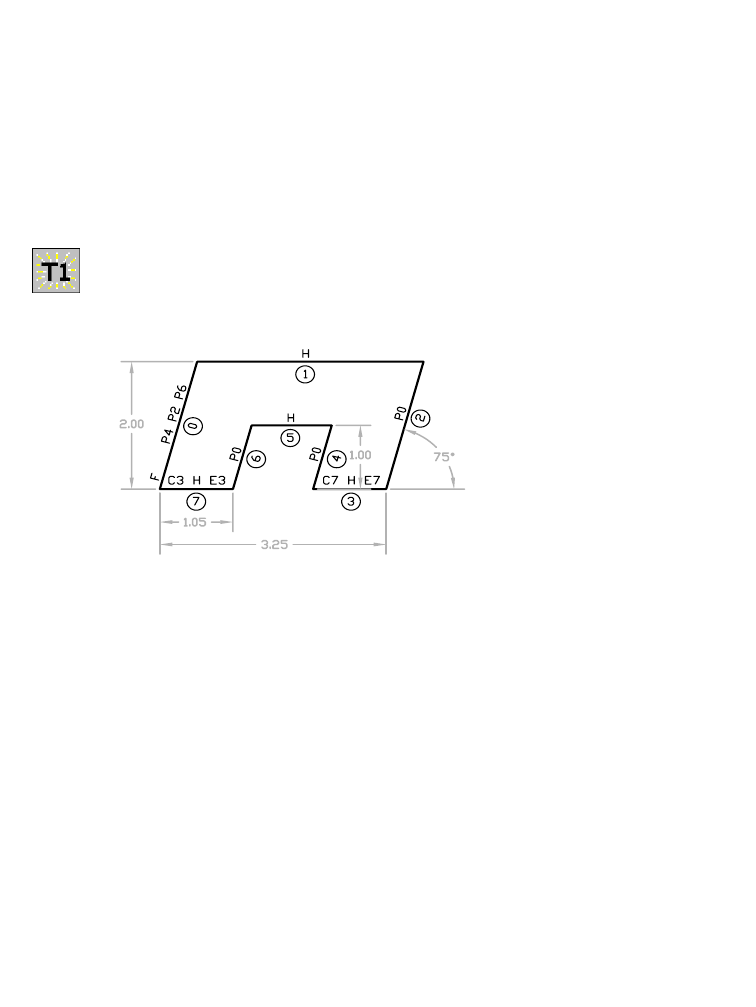
90 |Chapter 7 Constraining Sketches
Showing Constraint Symbols
You can change the parametric relationships of the lines by modifying
geometric or dimensional constraints. Because geometric constraints control
the overall shape of the sketch, you cannot safely make any changes until
you know the current geometric constraints. Therefore, the next step is to
show the symbols.
To show constraint symbols
1Use AMSHOWCON to display constraint symbols, responding to the prompt.
Context Menu In the graphics area, right-click and choose 2D
Constraints ➤ Show Constraints.
Enter an option [All/Select/Next/eXit] <eXit>: Enter a
Parallel constraints exist between lines 0, 2, 4 and 6. Lines 1, 3, 5, and 7 have
horizontal constraints. Lines 3 and 7 are also collinear and equal in length.
You begin reshaping your sketch by removing the parallel constraints.
To understand the constraints, look at symbol P0 (on line 2). This symbol
indicates that line 2 is parallel to line 0.
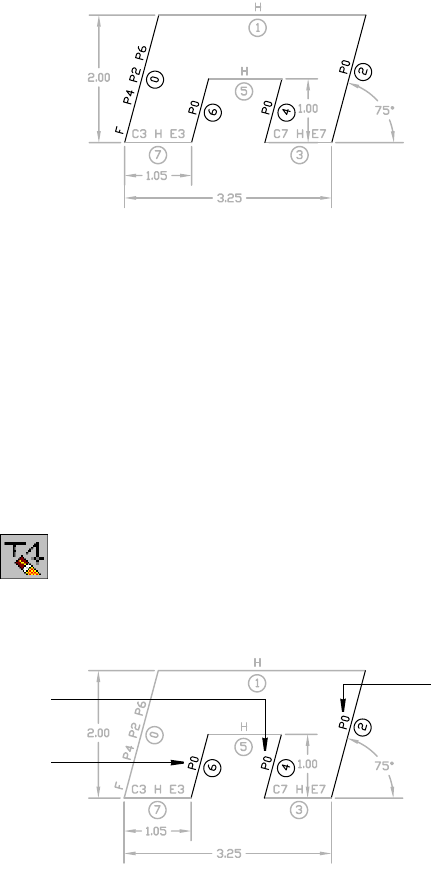
Applying Geometric Constraints |91
Similarly, the constraint symbols (P2, P4, and P6) show that line 0 is parallel
to lines 2, 4 and 6.
2Hide the constraint symbols.
Enter an option [All/Select/Next/eXit] <eXit>: Press ENTER
Replacing Constraints
After you delete the unwanted constraints, you can add constraints to
reshape the sketch. In this exercise, you delete the parallel constraints that
control the inner and outer angled lines in the sketch and replace them with
vertical constraints.
To replace a constraint
1Use AMDELCON to replace the constraints, responding to the prompts.
Context Menu In the graphics area, right-click and choose 2D
Constraints ➤ Delete Constraints.
Select or [Size/All]: Select the parallel constraint symbols (1), (2), and (3)
Select or [Size/All]: Press ENTER
The parallel constraints are deleted. The sketch shape looks the same until
you add constraints or change dimensions.
3
21
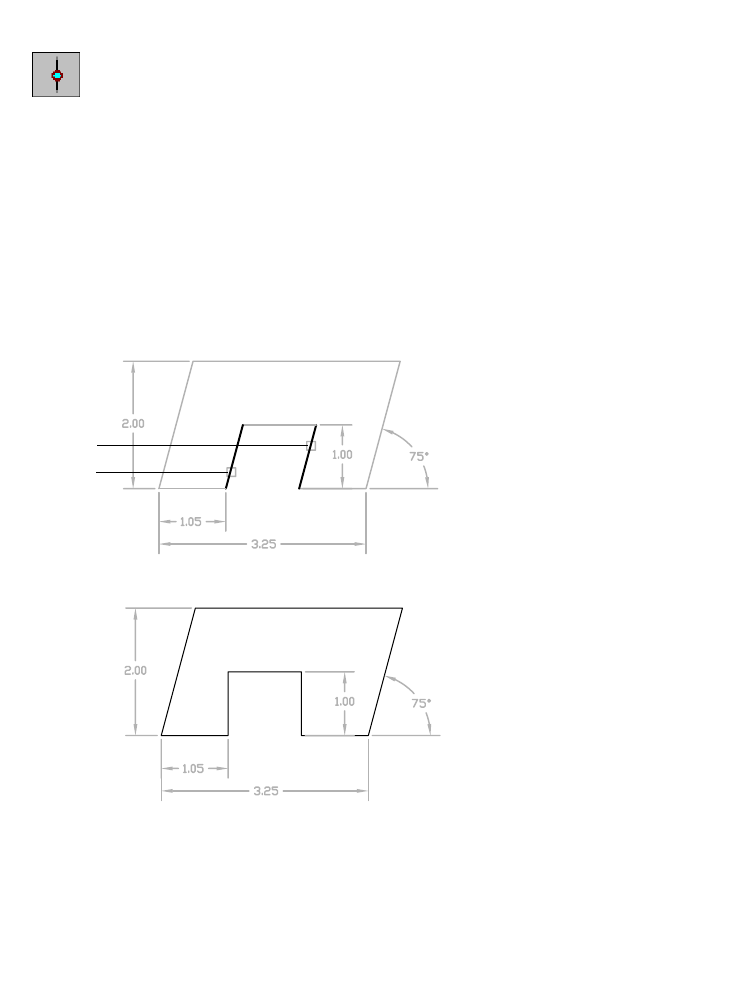
92 |Chapter 7 Constraining Sketches
2Use AMADDCON to add vertical constraints to the two inner angled lines,
responding to the prompts.
Context Menu In the graphics area, right-click and choose 2D
Constraints ➤ Vertical.
Valid selection(s): line, ellipse or spline segment
Select object to be reoriented: Specify line (3)
Solved under constrained sketch requiring 2 dimensions or constraints.
Valid selection(s): line, ellipse or spline segment
Select object to be reoriented: Specify line (4)
Solved under constrained sketch requiring 1 dimensions or constraints.
Valid selection(s): line, ellipse or spline segment
Select object to be reoriented: Press ENTER
[Hor/Ver/PErp/PAr/Tan/CL/CN/PRoj/Join/XValue/YValue/Radius/Length/Mir/Fix]
<eXit>: Press ENTER
The vertical constraints are applied, and your sketch should look like this.
You removed the constraints that forced these lines to be parallel to one
another. In order to force the outer lines to be complementary angles to one
another, you need to add an angular dimension to the leftmost line.
3
4
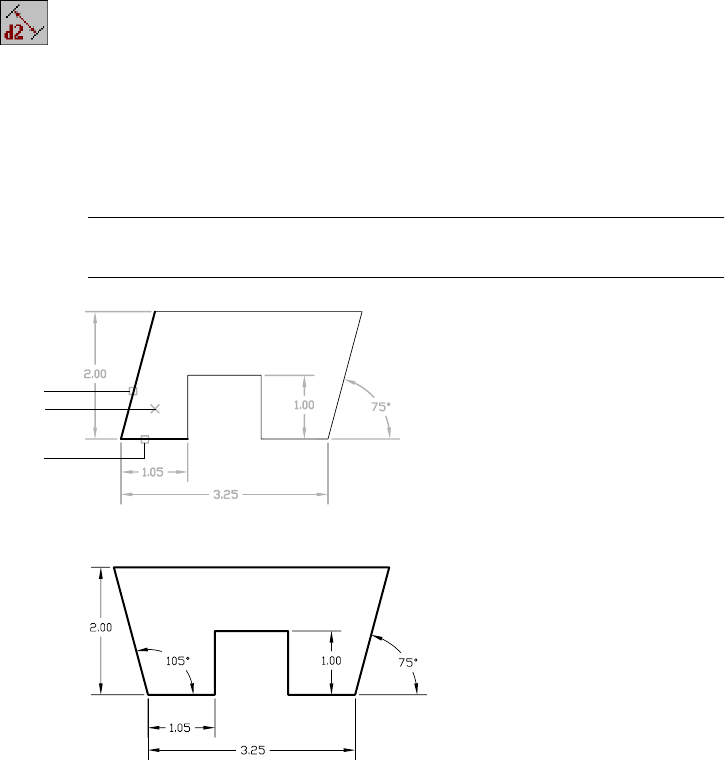
Applying Geometric Constraints |93
3Use AMPARDIM to add an angular dimension, responding to the prompts.
Context Menu In the graphics area, right-click and choose Dimensioning
➤ New Dimension.
Select first object: Select near the middle of line (1)
Select second object or place dimension: Select near the middle of line (2)
Specify dimension placement: Place the dimension (3)
Enter dimension value or [Undo/Placement point] <75>: Enter 105
Solved fully constrained sketch.
Select first object: Press ENTER
NOTE If you do not select the lines near their midpoints, you may be
prompted to specify the type of dimension to create. Choose Angular.
You have modified the geometric constraint scheme to reshape the sketch.
Save your file.
Next, you learn to use parametric dimensions to constrain the shape of a
sketch.
1
3
2
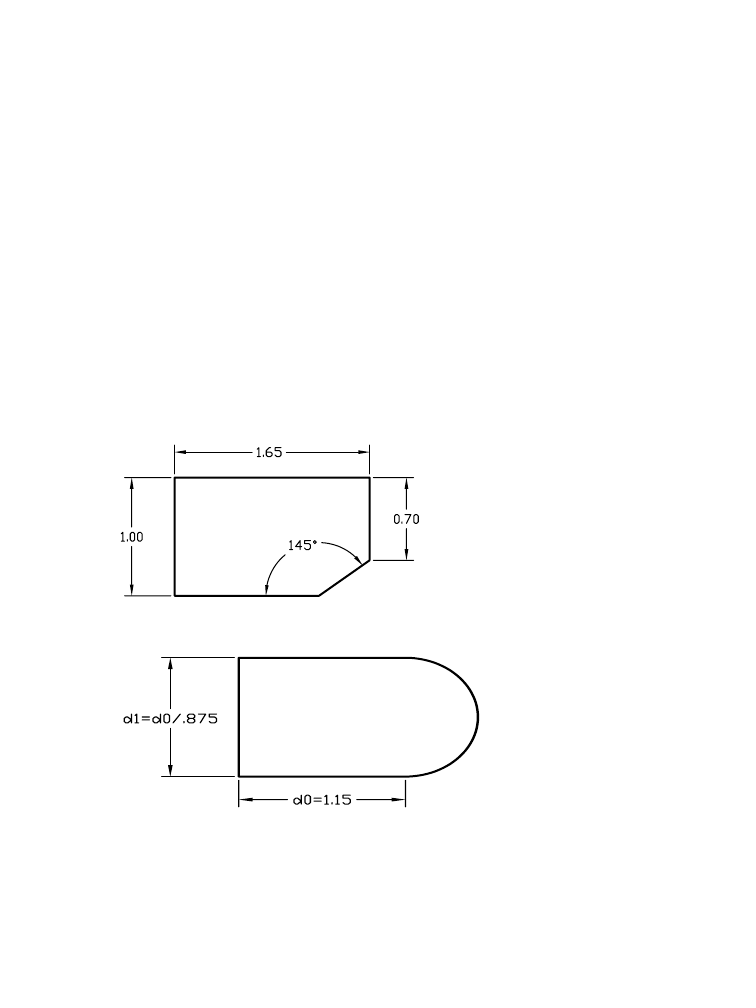
94 |Chapter 7 Constraining Sketches
Applying Dimension Constraints
It is good practice to stabilize the shape of a sketch with geometric constraints
before you specify size with dimensional constraints.
Dimensions specify the length, radius, or rotation angle of geometric elements
in the sketch. Unlike geometric constraints, dimensions are parametric;
changing their values causes the geometry to change.
Dimensions can be shown as numeric constants or as equations. Although
you can use them interchangeably, they each have specific uses.
■Numeric constants are useful when a geometric element has a static size
and is not related to any other geometric element.
■Equations are useful when the size of a geometric element is proportional
to the size of another element.
In the following illustration, all of the lines and the angles are constant, and
stated as numeric values.
In the next illustration, the dimensions are expressed as equations.
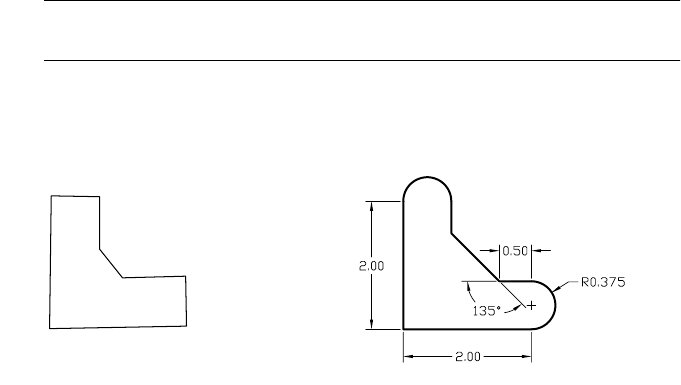
Applying Dimension Constraints |95
In this case, the height of the sketch must maintain the same proportion to
the length, even if you change dimensions later. In an equation, you can
state the height relative to the length. The dimension for the vertical line is
defined as an equation of d1 = d0/.875 where d1 is the parameter name for
the vertical line and d0 is the parameter name for one of the horizontal lines.
The d variables in the equations are parameter names assigned by Mechanical
Desktop when you define the parameters. The letter d indicates that the
parameter is a dimension. The number signifies the dimension number rela-
tive to the beginning of the dimensioning sequence.
Open the file sketch6.dwg in the desktop\tutorial folder. Add and modify
dimensions to complete the definition of the following sketch.
NOTE Back up the tutorial drawing files so you still have the original files if you
make a mistake. See “Backing up Tutorial Drawing Files” on page 40.
The before-and-after sketches reveal where dimensions are needed and in
what order you should place them. The dimensions needed here have
already been identified and are expressed as numeric constants.
To keep the sketch shape from becoming distorted as the dimensions resize
it, define larger dimensions first: the left vertical line (dim 1) and the bottom
horizontal line (dim 2).
By adding geometric constraints, you can reduce the number of dimensions
you need. Later, you can modify the sketch with fewer changes.
After the basic shape has been defined, you replace the rightmost vertical line
and the top horizontal line with fillets, and add geometric constraints and
dimensions to finish the profile.
dim 1
dim 2
dim 5
dim 4
original sketch profiled sketch
dim 3

96 |Chapter 7 Constraining Sketches
Creating Profile Sketches
First, convert the unconstrained sketch to a profile sketch before you add
dimensions. Then examine the default geometric constraints.
To create a profile from a sketch and examine constraints
1Use AMPROFILE to create a profile from the sketch.
Context Menu In the graphics area, right-click and choose Sketch Solving
➤ Single Profile.
Mechanical Desktop redraws the sketch and reports that it still needs six
dimensions or constraints to solve the sketch:
Solved under constrained sketch requiring 6 dimensions or constraints.
Examine the inferred geometric constraints and determine if the default con-
straints are correct or whether they inhibit the dimensions you want to add.
2Use AMSHOWCON to display the constraints, responding to the prompt.
Context Menu In the graphics area, right-click and choose 2D
Constraints ➤ Show Constraints.
Enter an option [All/Select/Next/eXit] <eXit>: Enter a
Applying Dimension Constraints |97
Mechanical Desktop recalculates the sketch and displays the constraints.
■A fix constraint is added to the start point of the first line of the sketch.
This point is anchored and will not move when changes are made to the
sketch constraints.
■Nearly horizontal and vertical lines have been assigned horizontal (H) and
vertical (V) constraints.
■Nearly vertical lines are assumed to be parallel (P) to one another.
For this exercise, all of the assumed geometric constraints are correct and
none of them restrict the dimensioning scheme shown earlier.
Exit from Show Constraints, responding to the prompt as follows:
Enter an option [All/Select/Next/eXit] <eXit>: Press ENTER
Adding Dimensions
The rough sketch is converted to a profile sketch, and default geometric
constraints are applied. Now you need to fully constrain the sketch by adding
four dimensions and two geometric constraints. Parts are resized as you
change parametric dimensions to refine your design, while all geometric
relationships are maintained.
Keep the following points in mind as you are adding dimensions:
■Select the elements to dimension and choose where to place the dimension.
■Dimension type depends on the element you choose and where you place
the dimension. The current size of the selected element is shown.
■You can accept the calculated size or specify a new value.
■The sketch element is resized according to the dimension value and the
dimension is placed at the location you chose.
It is good practice to accept the automatically calculated dimensions to
stabilize the sketch shape, particularly large outer dimensions. When you
later modify dimensions to exact sizes, the sketch shape is less likely to
become distorted.
In this exercise, you create horizontal and vertical dimensions. Then you
modify the sketch by appending geometry, and applying angular and radial
dimensions.
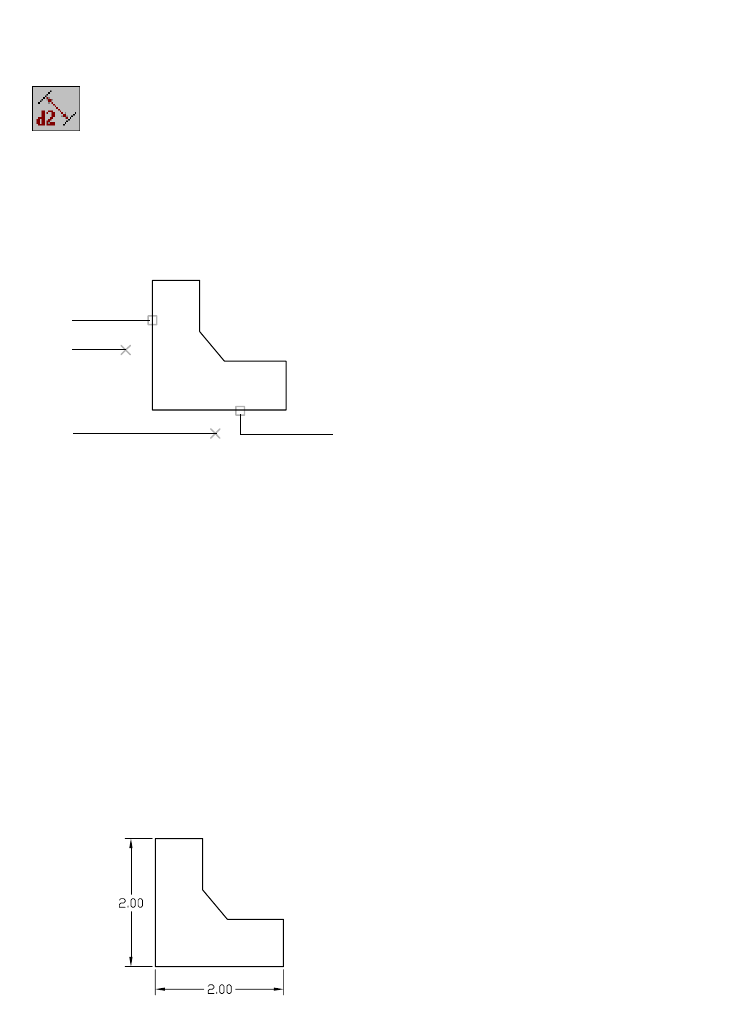
98 |Chapter 7 Constraining Sketches
To add a dimension to a profile
1Use AMPARDIM to add dimensions to your profile, responding to the
prompts.
Context Menu In the graphics area, right-click and choose Dimensioning
➤ New Dimension.
Select first object: Specify the line (1)
Select second object or place dimension: Place the dimension (2)
Enter dimension value or [Undo/Hor/Ver/Align/Par/aNgle/Ord/Diameter/pLace]
<1.9606>: Enter 2
Solved under constrained sketch requiring 5 dimensions or constraints.
The sketch is updated with the new dimension value.
The command line lists several options. These options and the number of
elements you select determine the type and placement of dimensions.
In this example, you choose a line and the placement of the dimension. If
you selected two elements and specified a location, Mechanical Desktop
would place a dimension that gives the distance between the two elements.
2Continue dimensioning the sketch by choosing the bottom horizontal line.
Select first object: Specify the line (3)
Select second object or place dimension: Place the dimension (4)
Enter dimension value or [Undo/Hor/Ver/Align/Par/aNgle/Ord/Diameter/pLace]
<2.1123>: Enter 2
Solved under constrained sketch requiring 4 dimensions or constraints.
Select first object: Press ENTER
Mechanical Desktop redraws the sketch according to the new dimension value.
1
3
2
4
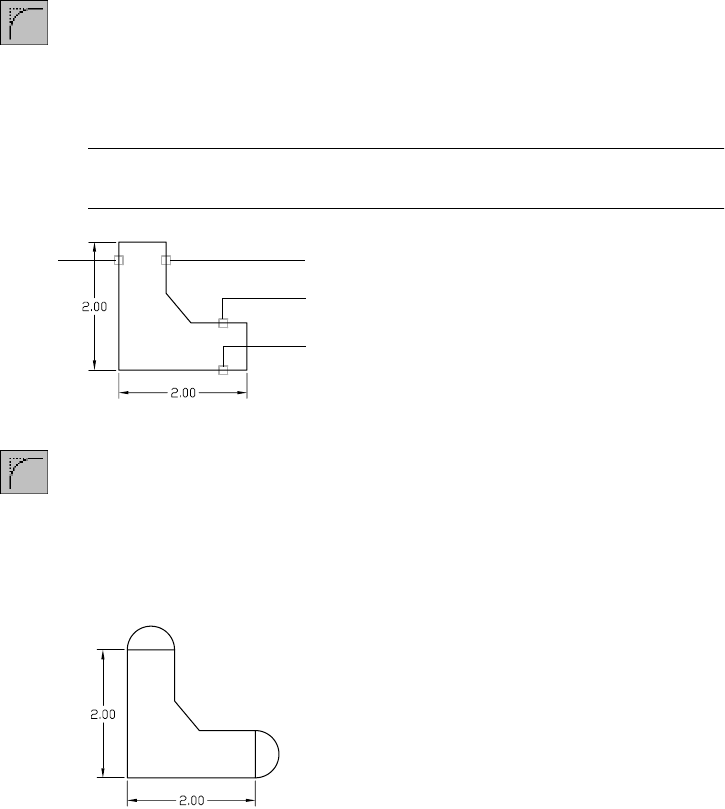
Applying Dimension Constraints |99
Now that the default constraints and larger dimensions have stabilized the
sketch shape and size, you can begin to make changes to the sketch. To
practice changing and updating the sketch, you add fillets to the two legs of
the sketch.
To add a fillet to a sketch
1Use AMFILLET to apply a fillet, entering the points in the order shown.
Context Menu In the graphics area, right-click and choose 2D Sketching
➤ Fillet.
Current settings: Mode = TRIM, Radius = 0.1250
Select first object or [Polyline/Radius/Trim]: Specify the line (1)
Select second object: Specify the line (2)
NOTE Because you selected parallel lines, FILLET ignores the radius value and
joins the endpoints of the selected lines with a continuous arc.
2Apply a fillet to the other leg of the sketch.
Context Menu In the graphics area, right-click and choose 2D Sketching
➤ Fillet.
Current settings: Mode = TRIM, Radius = 0.1250
Select first object or [Polyline/Radius/Trim]: Specify the line (3)
Select second object: Specify the line (4)
Your sketch should now look like this.
12
3
4

100 |Chapter 7 Constraining Sketches
Before you continue defining your sketch, erase the horizontal line and the
vertical line joining the endpoints of the new arcs.
3Erase the two lines.
Context Menu In the graphics area, right-click and choose 2D Sketching
➤ Erase.
Your drawing should look like this.
Because you have changed the sketch, you must re-solve it before you can use
it to create a feature.
Appending Sketches
By adding the fillets and removing the lines, you have changed the sketch
geometry. Whenever you add, modify, or remove geometry you must append
the changed geometry to the profile sketch. You will be prompted to select
any new geometry you have created. Mechanical Desktop appends the new
geometry and recalculates the sketch, assigning new geometric constraints.
After appending the sketch, re-examine the geometric constraints to see if
they affect your dimensioning scheme.
Applying Dimension Constraints |101
To append a profile sketch and re-examine geometric constraints
1Expand the hierarchy of PART1_1.
2Use AMRSOLVESK to append the existing fillets, responding to the prompts.
Context Menu In the graphics area, right-click and choose Append
Sketch.
Select geometry to append to sketch: Specify the first arc
Select geometry to append to sketch: Specify the second arc
Select geometry to append to sketch: Press ENTER
Redefining existing sketch.
Solved under constrained sketch requiring 4 dimensions or constraints.
Mechanical Desktop analyzes and redraws the profile in accordance with its
sketch analysis rules. Four additional constraints are needed to fully
constrain the sketch.
3Use AMSHOWCON to display the constraint symbols.
Context Menu In the graphics area, right-click and choose 2D
Constraints ➤ Show Constraints.
Press ENTER to exit the command.
4Display all of the symbols. Several tangent (T) constraints are added to the
original geometric constraints.
The tangent constraints join the arcs to their adjoining lines. Notice that
although the sketch segment numbers have changed because of the new
geometry, the fix constraint remains in the same location.
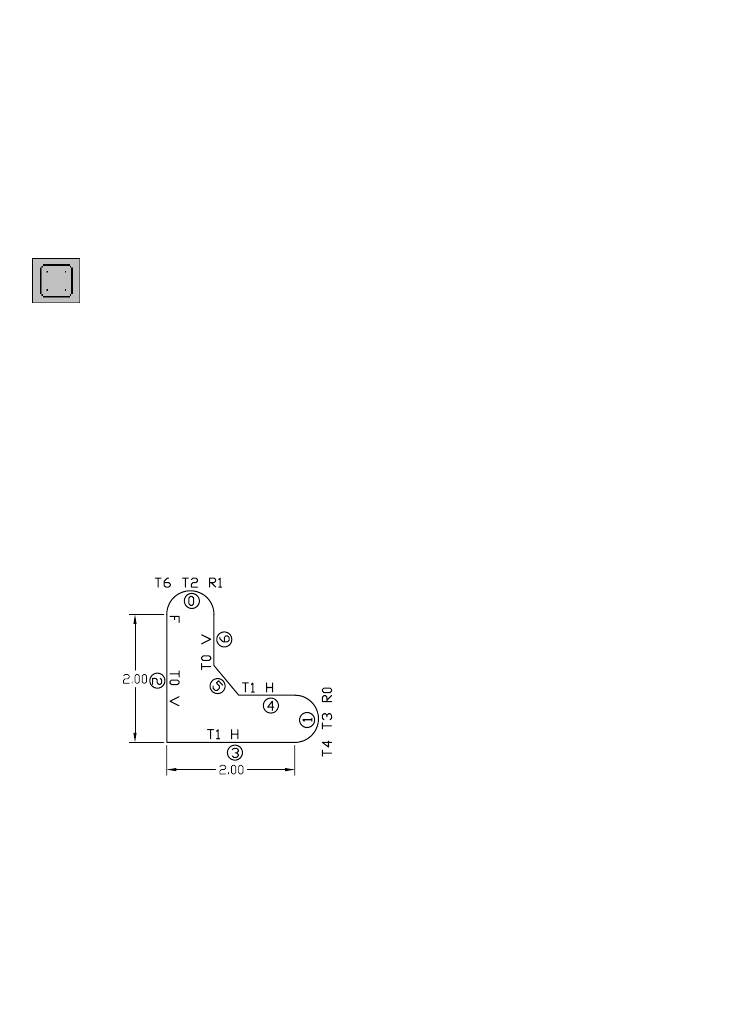
102 |Chapter 7 Constraining Sketches
For this exercise, do not delete any constraints because the tangent constraints
do not adversely affect the dimensioning scheme. Now that you have
recreated the profile sketch, you can continue to add geometric constraints
and dimensions to the sketch, starting with a radial constraint to the two arcs.
Depending on how you drew your sketch, your default dimension values
may differ from those in this exercise.
To add constraints to a re-created profile sketch
1Use AMADDCON to add a radial constraint to the two arcs, responding to the
prompts.
Context Menu In the graphics area, right-click and choose 2D
Constraints ➤ Radius.
Valid selections: arc or circle
Select object to be resized: Specify an arc
Valid selections: arc or circle
Select object radius is based on: Specify the other arc
Solved under constrained sketch requiring 3 dimensions or constraints.
Valid selections: arc or circle
Select object to be resized: Press ENTER
[Hor/Ver/PErp/PAr/Tan/CL/CN/PRoj/Join/XValue/YValue/Radius/Length/Mir/Fix]
<eXit>: Press ENTER
Mechanical Desktop adds radius constraints to the two arcs.
Finish constraining the sketch by adding three dimension constraints.
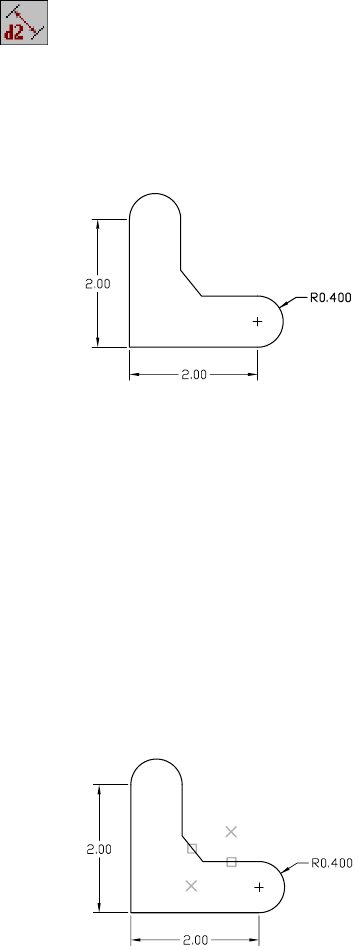
Applying Dimension Constraints |103
2Use AMPARDIM to dimension the leftmost arc, responding to the prompts.
Context Menu In the graphics area, right-click and choose Dimensioning
➤ New Dimension.
Select first object: Specify the lower arc
Select second object or place dimension: Place the dimension
Enter dimension value or [Undo/Diameter/Ordinate/Placement point]
<0.3687>: Enter .4
Solved under constrained sketch requiring 2 dimensions or constraints.
After you enter the new radius value, the arcs are updated because the radius
constraint makes both arcs equal.
3Add the final two dimensions by responding to the prompts as follows:
Select first object: Specify the line (1)
Select second object or place dimension: Place the dimension (2)
Enter dimension value or [Undo/Hor/Ver/Align/Par/aNgle/Ord/Diameter/pLace]
<0.8753>: Enter .75
Solved under constrained sketch requiring 2 dimensions or constraints.
Select first object: Specify near the middle of line (1)
Select second object or place dimension: Specify near the middle of line (3)
Specify dimension placement: Place the dimension (4)
Enter dimension value or [Undo/Placement point] <138>: Enter 135
Solved fully constrained sketch.
Select first object: Press ENTER
2
3
1
4
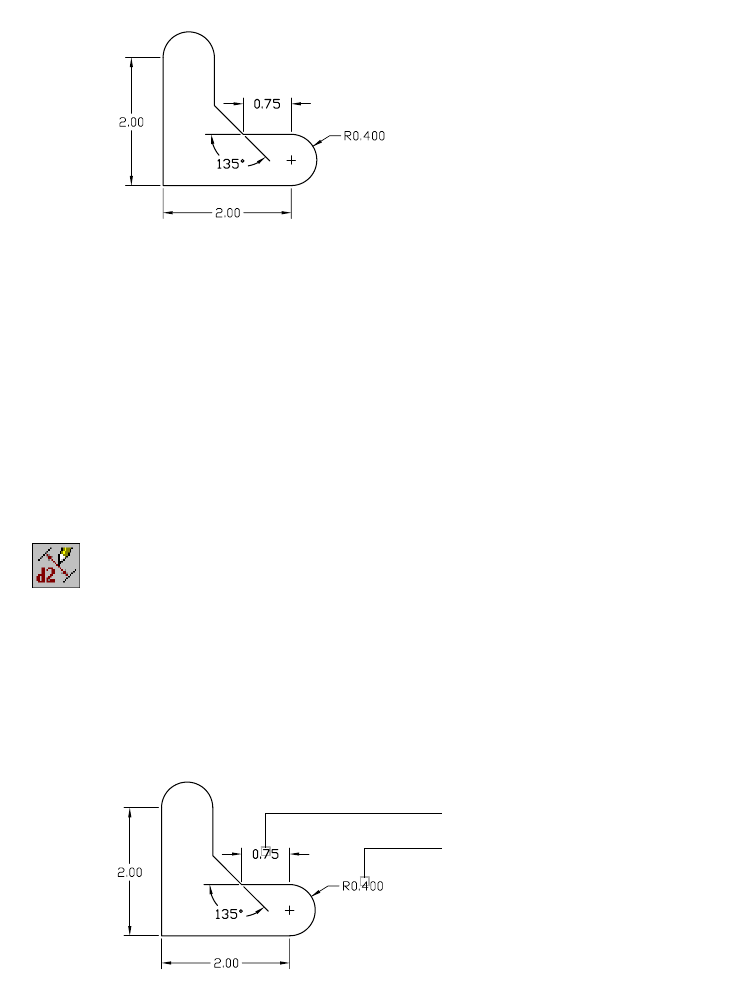
104 |Chapter 7 Constraining Sketches
The dimensions are placed. Your sketch should be fully constrained..
Save your file.
Modifying Dimensions
Because your design changes during development, you must be able to delete
or modify dimension values. Mechanical Desktop parametric commands
ensure that relationships among geometric elements remain intact.
To finish the sketch, change the dimension of the top horizontal line and the
angular dimension.
To change a dimension
1Use AMMODDIM to modify the dimensions, responding to the prompts.
Context Menu In the graphics area, right-click and choose Dimensioning
➤ Edit Dimension.
Select dimension to change: Specify the dimension (1)
New value for dimension <.4>: Enter .375
Solved fully constrained sketch.
Select dimension to change: Specify the dimension (2)
New value for dimension <.75>: Enter .5
Solved fully constrained sketch.
Select dimension to change: Press ENTER
1
2

Using Construction Geometry |105
Your finished sketch should now look like this.
Save your file.
Using Construction Geometry
Construction geometry can minimize the number of constraints and dimen-
sions needed in a sketch and offers more ways to control sketch features.
Construction geometry works well for sketches that are symmetrical or have
geometric consistencies. Some examples are sketches that have geometry
lying on a radius, a straight line, or at an angle to other geometry.
Construction geometry is any line, arc, or circle in the sketch profile or path
that is a different linetype from the sketch linetype. By default, construction
geometry is placed on the AM_CON layer. To make construction geometry
easier to see, you can change its color, linetype, or linetype scale.
Construction geometry can be used to constrain only the sketch it is
associated with. When you create a feature from a sketch, you also select the
construction geometry with the path or profile sketch. After the feature is
created, the construction geometry is no longer visible.
Creating Profile Sketches
In this exercise, you follow a typical sequence. As always, study the sketch to
determine what constraints and dimensions you need and decide where to
place construction geometry to make solving the sketch easier.
Open the file sketch7.dwg in the desktop\tutorial folder.
NOTE Back up the tutorial drawing files so you still have the original files if you
make a mistake. See “Backing up Tutorial Drawing Files” on page 40.
106 |Chapter 7 Constraining Sketches
To create a single profile sketch
1Use PLINE to draw the rough sketch.
Context Menu In the graphics area, right-click and choose 2D Sketching
➤ Polyline.
2Use AMSOLVE to solve the sketch.
Context Menu In the graphics area, right-click and choose Sketch Solving
➤ Single Profile.
The polyline is automatically selected.
Mechanical Desktop applies constraints according to how you sketch and
then reports that the sketch needs six or more additional constraints. A fix
constraint is automatically applied to the point where you started your sketch.
3Use AMSHOWCON to display the existing constraints.
Context Menu In the graphics area, right-click and choose 2D
Constraints ➤ Show Constraints.
4Display all of the assumed constraint symbols. Each of the eight lines should
have a vertical or horizontal constraint.
Next, create a construction line to assist in constraining the sketch.
NOTE If necessary, remove the fix constraint using AMDELCON. This constraint
prevents you from projecting the sketch to the construction line.
Using Construction Geometry |107
To create a construction line
1Create a construction line.
Context Menu In the graphics area, right-click and choose 2D Sketching
➤ Construction Line.
2Draw the line diagonally across the sketch.
Mechanical Desktop draws the line on a new layer called AM_CON. The line
is yellow and drawn with the HIDDEN linetype. Because the linetype is
different from the one used to draw the sketch, the line is considered
construction geometry. It is used only in this sketch.
3Use AMRSOLVESK to append the profile.
Context Menu In the graphics area, right-click and choose Sketch Solving
➤ Append.
4Select the construction line.
5Re-examine the assumed constraints.
Adding Project Constraints
Mechanical Desktop recognizes nine lines in the sketch. The sketch requires
two more constraints because you added a construction line.
Next, project the construction line to each vertex that serves as an inner
corner of a stair.
To place a project constraint, specify a vertex and then select the construc-
tion line. Depending on how closely you drew the construction line to the
vertices, some constraints may have already been applied.

108 |Chapter 7 Constraining Sketches
To add a project constraint
1Use AMADDCON to add the project constraints, responding to the prompts.
Context Menu In the graphics area, right-click and choose 2D
Constraints ➤ Project.
Valid selections: line, circle, arc, ellipse or spline segment
Specify a point to project: Enter end
of: Specify point (1)
Valid selections: line, circle, arc, ellipse, work point or spline segment
Select object to be projected to: Specify the construction line (5)
Valid selections: line, circle, arc, ellipse or spline segment
Specify a point to project:
Repeat this process for points (2) through (4), then press ENTER
NOTE If you do not use the endpoint object snap, you will not be able to
correctly constrain the sketch.
By defining the slope of the stairs with the construction line, you have
reduced the number of required constraints and dimensions to four.
2Use REDRAW to clean up the screen display.
Desktop Menu View ➤ Redraw
1
2
3
4
5
Using Construction Geometry |109
Adding Parametric Dimensions
To fully define the sketch, dimension one of the risers and apply a slope angle
for the construction line. Each step is equal in height, so you can add equal
length constraints to the remaining steps later.
To add a parametric dimension
1Use AMPARDIM to dimension the slope angle, responding to the prompts.
Context Menu In the graphics area, right-click and choose Dimensioning
➤ New Dimension.
Select first object: Specify near the middle of the construction line (1)
Select second object or place dimension:
Specify near the middle of the bottom horizontal line (2)
Specify dimension placement: Specify a point to right (3)
Enter dimension value or [Undo/Placement point] <31>: Enter 30
Solved under constrained sketch requiring 3 dimensions or constraints.
2Continue, adding dimensions to the first vertical riser.
Select first object: Specify a point near the center of the lower left vertical line (4)
Select second object or place dimension: Specify a point to left of first point (5)
Enter dimension value or [Undo/Hor/Ver/Align/Par/aNgle/Ord/Diameter/pLace]
<0.9463>: Enter 1
Solved under constrained sketch requiring 2 dimensions or constraints.
Select first object: Press ENTER
To finish constraining the sketch, add equal length dimensions to the
remaining two risers.
3
1
2
45
110 |Chapter 7 Constraining Sketches
To add an equal length constraint
1Use AMADDCON to add an equal length constraint, responding to the
prompts.
Context Menu In the graphics area, right-click and choose 2D
Constraints ➤ Equal Length.
Valid selections: line or spline segment
Select object to be resized: Specify the second riser (2)
Valid selections: line or spline segment
Select object to base size on: Specify the dimensioned riser (1)
Solved under constrained sketch requiring 1 dimensions or constraints.
2Continue on the command line to place the last constraint.
Valid selections: line or spline segment
Select object to be resized: Specify the third riser (3)
Valid selections: line or spline segment
Select object to base size on: Specify the dimensioned riser (1)
Solved fully constrained sketch.
You should now have a fully constrained sketch. Exit the command by
pressing ENTER twice.
3Use AMMODDIM to change the angular dimension, responding to the
prompts.
Context Menu In the graphics area, right-click and choose Dimensioning
➤ Edit Dimension.
Select dimension to change: Specify the angular dimension
New value for dimension <30>: Enter 25
Select dimension to change: Press ENTER
Save your file.
12
3
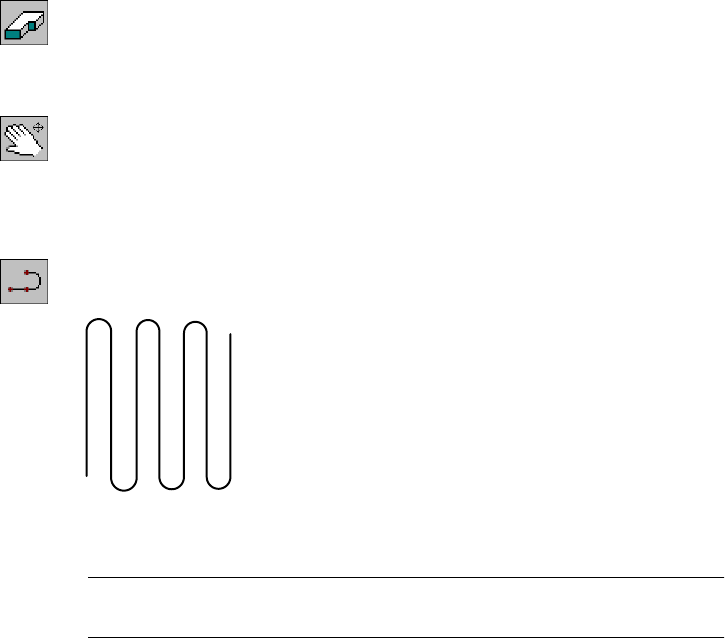
Using Construction Geometry |111
Constraining Path Sketches
Construction geometry helps you constrain sketches that may be difficult to
constrain with only the geometry of the sketch shape. In this exercise, you
create a path sketch, add a construction line, and constrain the sketch to the
line.
Before you begin this exercise, create a new part definition for the sketch.
To create a new part definition
1Use AMNEW to create a new part definition.
Context Menu In the graphics area, right-click and choose Part ➤ New
Part.
2Press ENTER on the command line to accept the default part name.
3Pan the drawing so you have room to create the next sketch.
Context Menu In the graphics area, right-click and choose Pan.
You are ready for the next exercise.
To use construction geometry in a swept path
1Use PLINE to draw the following sketch.
Context Menu In the graphics area, right-click and choose 2D Sketching
➤ Polyline.
Use the arc/direction option of PLINE to draw the arcs. You can also use your
cursor crosshairs to visually align the endpoints of each arc as you sketch.
NOTE To enlarge the crosshairs, choose Assist ➤ Options. Under Crosshair
Size, set the size to 15 or larger.
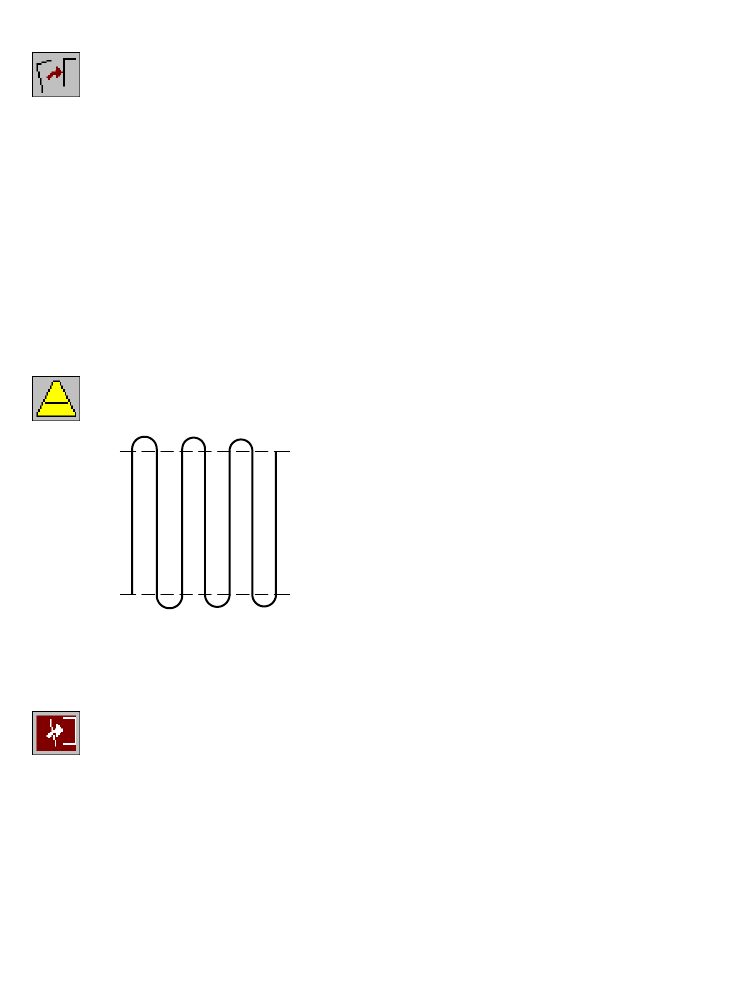
112 |Chapter 7 Constraining Sketches
2Use AM2DPATH to create a 2D path from your sketch, responding to the
prompts.
Context Menu In the graphics area, right-click and choose Sketch Solving
➤ 2D Path.
Select objects: Specify the polyline
Select objects: Press ENTER
Specify the start point of the path: Specify one of the ends of the path
Solved under constrained sketch requiring 10 dimensions or constraints.
Create a profile plane perpendicular to the path? [Yes/No] <Yes>: Enter n
You can use either end for the start point.
Mechanical Desktop reports that the sketch needs ten or more additional
constraints, depending on how you drew the sketch.
3Draw two construction lines. The goal is to have each of the ends of the arcs
meet the construction lines.
Context Menu In the graphics area, right-click and choose 2D Sketching
➤ Construction Line.
4In the Desktop Browser, expand the PART2_1 hierarchy.
5Use AMRSOLVESK to append the construction lines to your sketch, following
the prompts.
Context Menu In the graphics area, right-click and choose Sketch Solving
➤ Append.
Select geometry to append to sketch: Specify a construction line
Select geometry to append to sketch: Specify the other construction line
Select geometry to append to sketch: Press ENTER
Redefining existing sketch.
Specify start point of path: Specify one of the ends of the path
Solved under constrained sketch requiring 6 dimensions or constraints.
The construction lines have reduced the number of constraints or dimen-
sions needed by constraining the arc endpoints and centers to the line. The
construction lines have been made horizontal as well.

Using Construction Geometry |113
To check for and add missing constraints
1Use AMSHOWCON to check for constraints that are still needed.
Context Menu In the graphics area, right-click and choose 2D
Constraints ➤ Show Constraints.
2Display all the constraints and press ENTER to exit the command.
3Use AMADDCON to add constraints and dimensions to the sketch, following
the prompts.
Context Menu In the graphics area, right-click and choose Dimensioning
➤ New Dimension.
Select first object: Specify the upper left arc (1)
Select second object or place dimension:
Specify the vertical line on the left below its midpoint (2)
Specify dimension placement: Specify a point to the left of the sketch (3)
Enter dimension value or [Undo/Hor/Ver/Align/Par/aNgle/Ord/Diameter/pLace]
<3.1069>: Enter 3
Solved under constrained sketch requiring 5 dimensions or constraints.
4Add a second dimension.
Select first object: Specify the upper left arc (1)
Select second object or place dimension:
Specify a point above and left of sketch (4)
Enter dimension value or [Undo/Diameter/Ordinate/Placement point]
<0.2788>: Enter .25
Solved under constrained sketch requiring 4 dimensions or constraints.
Select first object: Press ENTER
Next, you fully solve the path by adding 2D constraints.
2
1
4
3

114 |Chapter 7 Constraining Sketches
5Constrain all the arcs with the same radius as the one you just dimensioned,
responding to the prompts.
Context Menu In the graphics area, right-click and choose 2D
Constraints ➤ Radius.
Valid selections: arc or circle
Select object to be resized: Specify the lower left arc
Valid selections: arc or circle
Select object radius is based on: Specify the arc with the radial dimension
Solved under constrained sketch requiring 3 dimensions or constraints.
Valid selections: arc or circle
Select object to be resized: Specify the upper arc that is second from the left
Valid selections: arc or circle
Select object radius is based on: Specify the arc with the radial dimension
Solved under constrained sketch requiring 2 dimensions or constraints.
Valid selections: arc or circle
Select object to be resized: Specify the lower arc that is second from the left
Valid selections: arc or circle
Select object radius is based on: Specify the arc with the radial dimension
Solved under constrained sketch requiring 1 dimensions or constraints.
Valid selections: arc or circle
Select object to be resized: Specify the upper right arc
Valid selections: arc or circle
Select object radius is based on: Specify the arc with the radial dimension
Solved fully constrained sketch.
Valid selections: arc or circle
Select object to be resized: Press ENTER
[Hor/Ver/PErp/PAr/Tan/CL/CN/PRoj/Join/XValue/YValue/Radius/Length/Mir/Fix]
<eXit>: Press ENTER
Your sketch should now be fully constrained. You may need to use the Equal
Length constraint for the beginning and end vertical line segments of your
sketch. Experiment with this sketch by changing the values of the two
dimensions.
If arc centers do not lie on the construction line, use the project constraint.
Add project constraints until the sketch is fully constrained.
NOTE Depending on how accurately you sketched the path, you may need to
add other constraints. Experiment until your sketch is fully constrained. If you
have difficulty, delete the sketch and try again.
Save your file.
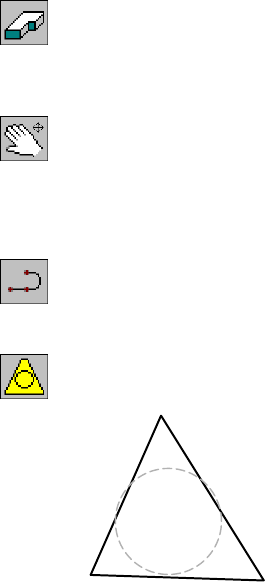
Using Construction Geometry |115
Controlling Tangency
A single piece of construction geometry can manage the size and shape of
entire sketches. Circles and arcs are particularly useful for constraining the
perimeter shapes of nuts, knobs, multisided profiles, and common polygons.
In this exercise, you create a triangular sketch and then constrain the sides of
the triangle and the internal angles to remain equal. In this manner, you
could form the basis for a family of parts in which the only variable is a single
diameter dimension.
Create a new part definition for the next sketch.
To create a new part definition
1Use AMNEW to create a new part definition.
Context Menu In the graphics area, right-click and choose Part ➤ New
Part.
2Accept the default part name.
3Pan the drawing so you have room to create the next sketch.
Context Menu In the graphics area, right-click and choose Pan.
You are ready to create the next sketch.
To control tangency with construction geometry
1Use PLINE to create the triangular shape.
Context Menu In the graphics area, right-click and choose 2D Sketching
➤ Polyline.
2Draw a circle inside the triangle.
Context Menu In the graphics area, right-click and choose 2D Sketching
➤ Construction Circle.
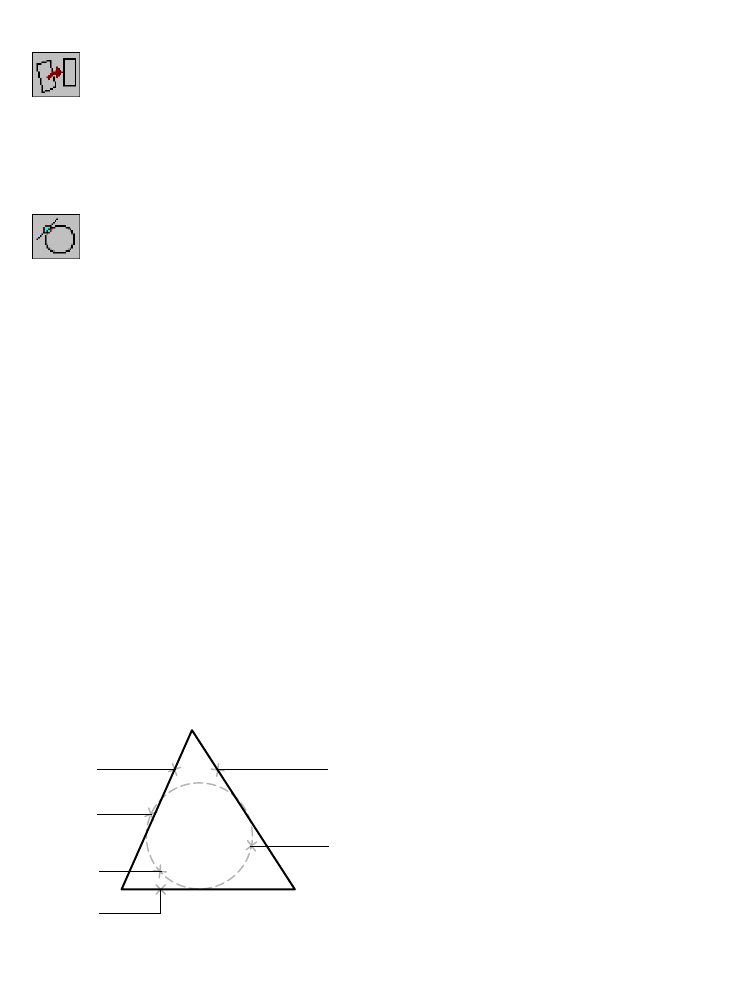
116 |Chapter 7 Constraining Sketches
3Use AMPROFILE to turn the sketch into a profile sketch, making sure to select
both the polyline and the circle.
Context Menu In the graphics area, right-click and choose Sketch Solving
➤ Profile.
At this point, the circle may be tangent to some or all of the sides of the
triangle.
4Use AMADDCON to add Tangent constraints to the sketch, following the
prompts.
Context Menu In the graphics area, right-click and choose 2D
Constraints ➤ Tangent.
Valid selections: line, circle, arc, ellipse or spline segment
Select object to be reoriented: Specify the line (1)
Valid selections: line, circle, arc, ellipse or spline segment
Select object to be made tangent to: Specify the circle (2)
Solved under constrained sketch requiring 5 dimensions or constraints.
Valid selections: line, circle, arc, ellipse or spline segment
Select object to be reoriented: Specify the line (3)
Valid selections: line, circle, arc, ellipse or spline segment
Select object to be made tangent to: Specify the circle (4)
Solved under constrained sketch requiring 4 dimensions or constraints.
Valid selections: line, circle, arc, ellipse or spline segment
Select object to be reoriented: Specify the line (5)
Valid selections: line, circle, arc, ellipse or spline segment
Select object to be made tangent to: Specify the circle (6)
Solved under constrained sketch requiring 3 dimensions or constraints.
Valid selections: line, circle, arc, ellipse or spline segment
Select object to be reoriented: Press ENTER
[Hor/Ver/PErp/PAr/Tan/CL/CN/PRoj/Join/XValue/YValue/Radius/Length/Mir/Fix]
<eXit>: Press ENTER
Mechanical Desktop now needs three or more dimensions or constraints to
fully solve the sketch.
1
3
2
6
4
5
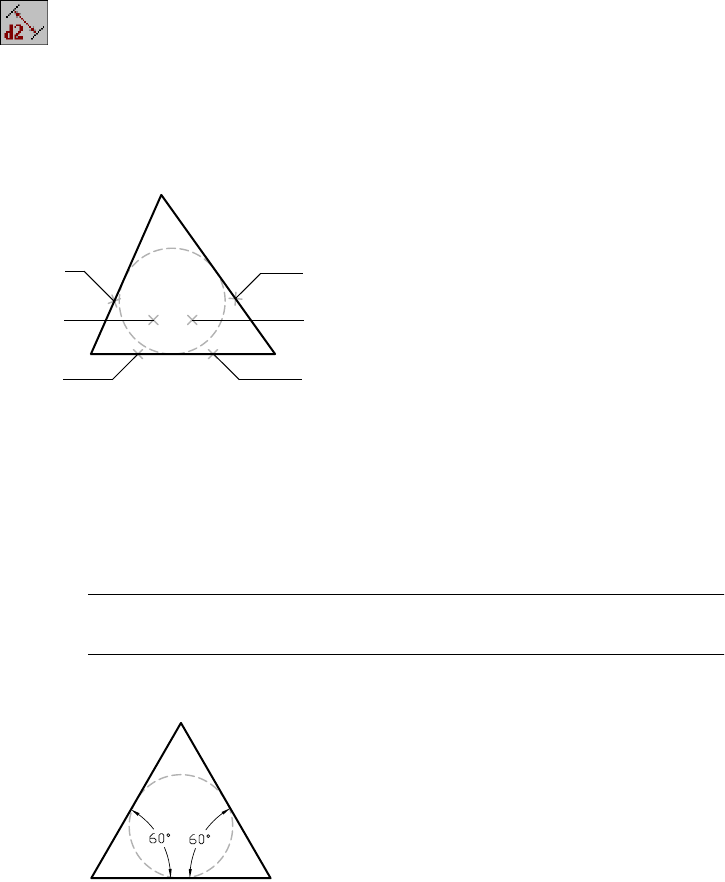
Using Construction Geometry |117
To add a dimension to an angle
1Use AMPARDIM to apply angular dimensions to the triangle, following the
prompts.
Context Menu In the graphics area, right-click and choose Dimensioning
➤ New Dimension.
Select first object: Specify near the middle of the line (1)
Select second object or place dimension: Specify near the middle of the line (2)
Specify dimension placement: Place the dimension (3)
Enter dimension value or [Undo/Placement point] <67>: Enter 60
Solved under constrained sketch requiring 2 dimensions or constraints.
2Continue on the command line.
Select first object: Specify near the middle of the line (4)
Select second object or place dimension: Specify near the middle of the line (5)
Specify dimension placement: Place the dimension (6)
Enter dimension value or [Undo/Placement point] <78>: Enter 60
Solved under constrained sketch requiring 1 dimensions or constraints.
Select first object: Press ENTER
NOTE If you do not select the lines near their midpoints, you may be
prompted to specify the type of dimension to create. Choose Angular.
The angular dimensions should look like these.
3
1
2
6
4
5
3
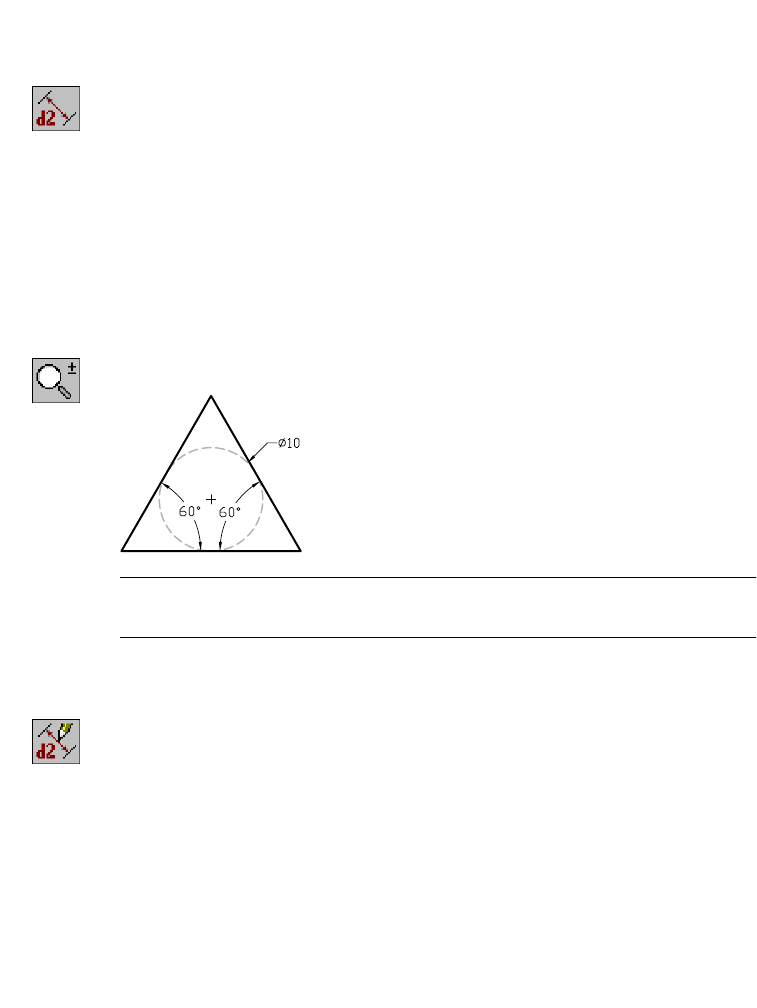
118 |Chapter 7 Constraining Sketches
To add a dimension to a circle
1Add a dimension to the diameter of the construction circle, following the
prompts.
Context Menu In the graphics area, right-click and choose Dimensioning
➤ New Dimension.
Select first object: Specify a point on the circle
Select second object or place dimension: Specify a point outside of the triangle
Enter dimension value or [Undo/Radius/Ordinate/Placement point]
<3.1541>: Enter 10
Solved fully constrained sketch.
Select first object: Press ENTER
The sketch should now be fully constrained.
2Zoom out to view the entire sketch.
Context Menu In the graphics area, right-click and choose Zoom.
NOTE If the bottom segment of your triangle is still not horizontal, you will
need to add a Horizontal constraint to fully constrain the sketch.
3Experiment with the size of the sketch. Use AMMODDIM to change the
diameter dimension of the circle, following the prompts.
Context Menu In the graphics area, right-click and choose Dimensioning
➤ Edit Dimension.
Select dimension to change: Specify the diameter dimension
New value for dimension <10>: Enter 5
Solved fully constrained sketch.
Select dimension to change: Press ENTER
Save your file.
Using Construction Geometry |119
All sides remain equal in length and tangent to the circle, and the bottom of
the triangle remains horizontal. If you used this sketch as a base feature of a
part, you could change the overall size of the part simply by changing the
diameter of the construction circle.
This technique could be applied to more complex geometry such as
pentagons, octagons, and odd-shaped polygons. These shapes can form the
base feature for a family of nuts, bolts, fittings, and so on. Try these types of
sketches on your own.

120

121
In This Chapter 8
Creating Sketched Features
Features are the parametric building blocks of parts. By
creating and adding features you define the shape of
your part. Because features are parametric, any changes
to them are automatically reflected when the part is
updated.
In Autodesk® Mechanical Desktop®, there are three
types of features—sketched, work and placed.
In this tutorial, you learn to create and modify sketched
features. In chapter 4, you learn about work features.
■Extruded features
■Loft features
■Revolved features
■Face splits
■Sweep features

122 |Chapter 8 Creating Sketched Features
Key Terms
Te r m Definition
base feature The first feature you create. As the basic element of your part, it represents its
simplest shape. All geometry you create for a part depends on the base feature.
Boolean modeling A solid modeling technique in which two solids are combined to form one
resulting solid. Boolean operations include cut, join, and intersect. Cut subtracts
the volume of one solid from the other. Join unites two solid volumes. Intersect
leaves only the volume shared by the two solids.
consumed sketch A sketch used in a feature, for example, an extruded profile sketch. The sketch is
consumed when the feature is created.
cubic loft A feature created by a gradual blending between two or more planar sections.
draft angle An angle applied parallel to the path of extruded, revolved, or swept surfaces or
parts. A draft angle is used to allow easy withdrawal from a mold or easy insertion
into a mated part.
extrude In part modeling, to create a geometric sketch defined by a planar profile
extended along a linear distance perpendicular to the profile plane.
feature An element of a parametric part model. You can create extruded features,
revolved features, loft features, and swept features using profiles and paths. You
can also create placed features like holes, chamfers, and fillets. You combine
features to create complete parametric part models.
helical sweep A geometric feature defined by the volume from moving a profile along a 3D
path about a work axis.
linear loft A feature created by a linear transition between two planar sections.
lofted feature A parametric shape created from a series of sketches defining the cross-sectional
shape of the feature at each section.
revolve In part modeling, to create a feature by revolving a profile about an axis of
revolution.
sketch plane A temporary drawing surface that corresponds to a real plane on a feature. It is an
infinite plane with both X and Y axes on which you sketch or place a feature.
sketched feature A three-dimensional solid whose shape is defined by constrained sketches and
located parametrically on a part. Sketched features are extrudes, lofts, revolves,
sweeps, or face splits.
sweep A geometric sketch feature defined by the volume from moving a profile along a
path.
swept profile A special parametric sketch used to create a swept feature from the cross section
of a profile.

Basic Concepts of Sketched Features |123
Basic Concepts of Sketched Features
Features are the building blocks you use to create and shape a part. Because
they are fully parametric, they can easily be modified at any time.
The first feature in a part is called the base feature. As you add more features,
they can be combined with the base feature or each other to create your part.
Boolean operations, such as cut, join, and intersect, can be used to combine
features after a base feature has been created.
You create a sketched feature from a profile, which is an open or closed
parametric sketch that has been solved. You can also create a feature from
a text-based sketch. In most cases, you fully constrain the profile before
you create a feature. Because a sketch is parametric, you can easily modify
it to change the shape of the feature. When you update your part, the
changes you made are displayed automatically.
Sketched features include extrusions, lofts, revolutions, sweeps, and emboss-
ing. Face splits are also considered sketched features, but they are created by
splitting a part face using an existing face, a work plane, or a split line. If you
choose the split line method, you are using a sketched feature to split the
face.
In this tutorial you learn how to create and edit sketched features. Later you
learn how to create and edit work features and placed features.
Open the file s_feat.dwg in the desktop\tutorial folder.
NOTE Back up the tutorial drawing files so you still have the original files if you
make a mistake. See “Backing up Tutorial Drawing Files” on page 40.
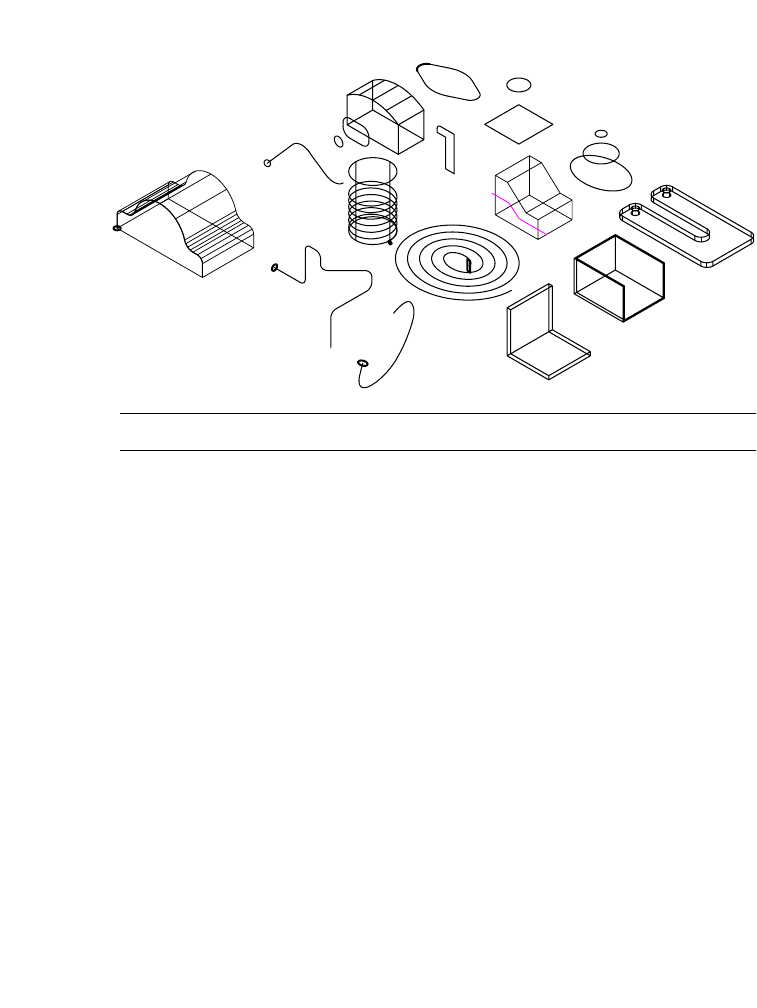
124 |Chapter 8 Creating Sketched Features
The drawing file includes fifteen parts which contain the geometry you need
to create the sketched features in this section.
NOTE For clarity, the work features are not shown.
First, you create an extruded feature.
Creating Extruded Features
Extrusions are the most common sketched features. An extruded feature can
be created from a closed profile, an open profile, or a text-based profile.
Extruding Closed Profiles
A closed profile is used to create a base feature, or in Boolean modeling to cut,
intersect, and join with other features.
In the first exercise, you use the part EXTRUDE_1. Activate the part, and
expand the hierarchy of EXTRUDE_1.
To activate a part
Browser Double-click EXTRUDE_1.
Click the plus sign in front of EXTRUDE_1 to expand the
hierarchy.
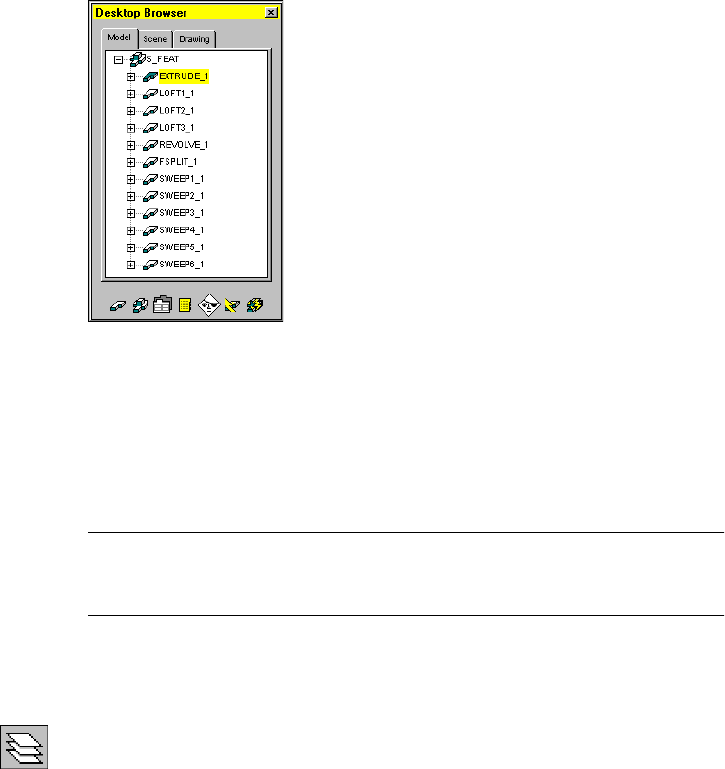
Creating Extruded Features |125
Clear the visibility of the other parts, and display the dimensions and work
features of the active part.
To turn off the visibility of multiple parts
Browser Select EXTRUDERIB_1, then hold down SHIFT as you
select BEND_1. Right-click the selected block and choose
Visible.
NOTE Because most of the parts do not contain features yet, you cannot use
the toolbutton, menu, or command methods to make the part instances
invisible.
Click the plus sign in front of EXTRUDE_1 to expand the hierarchy.
To thaw dimension and work layers
Desktop Menu Assist ➤ Format ➤ Layer
The Layer Properties Manager dialog box is displayed.
In the AM_PARDIM layer, select the On icon and the Freeze icon to unthaw
the layer. Repeat for the AM_WORK layer.
Choose OK to exit the dialog box.
The parametric dimensions and work features for each part are now visible.
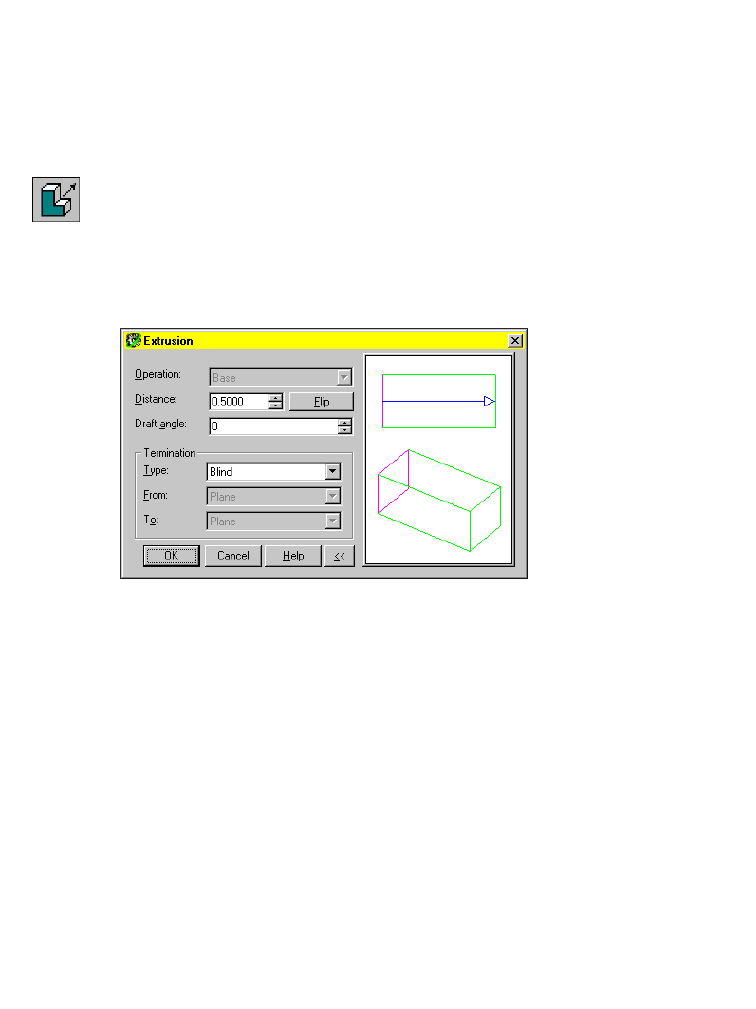
126 |Chapter 8 Creating Sketched Features
To zoom in to a part
Browser Right-click EXTRUDE_1, and choose Zoom to.
The EXTRUDE_1 part is positioned on your screen.
To create an extruded feature
1Use AMEXTRUDE to create an extruded feature from Profile1.
Context Menu In the graphics area, right-click and choose Sketched &
Work Features ➤ Extrude.
In the Extrusion dialog box, specify:
Distance: Enter 0.5
Termination: Type: Blind
The image tile indicates the direction of the extrusion.
Choose OK.
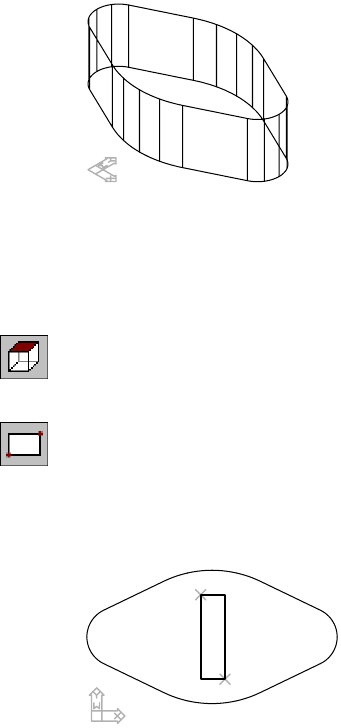
Creating Extruded Features |127
The profile is extruded perpendicular to the plane of the profile.
Next, you create and constrain another profile, and extrude it to cut material
from the base feature.
To create a profile sketch
1Change to the top view of your part.
Desktop Menu View ➤ 3D Views ➤ Top
2Use RECTANGLE to sketch a rectangle as shown in the following illustration,
responding to the prompts.
Context Menu In the graphics area, right-click and choose 2D Sketching
➤ Rectangle.
Specify first corner point or [Chamfer/Elevation/Fillet/Thickness/Width]:
Specify a point (1)
Specify other corner point: Specify a second point (2)
1
2
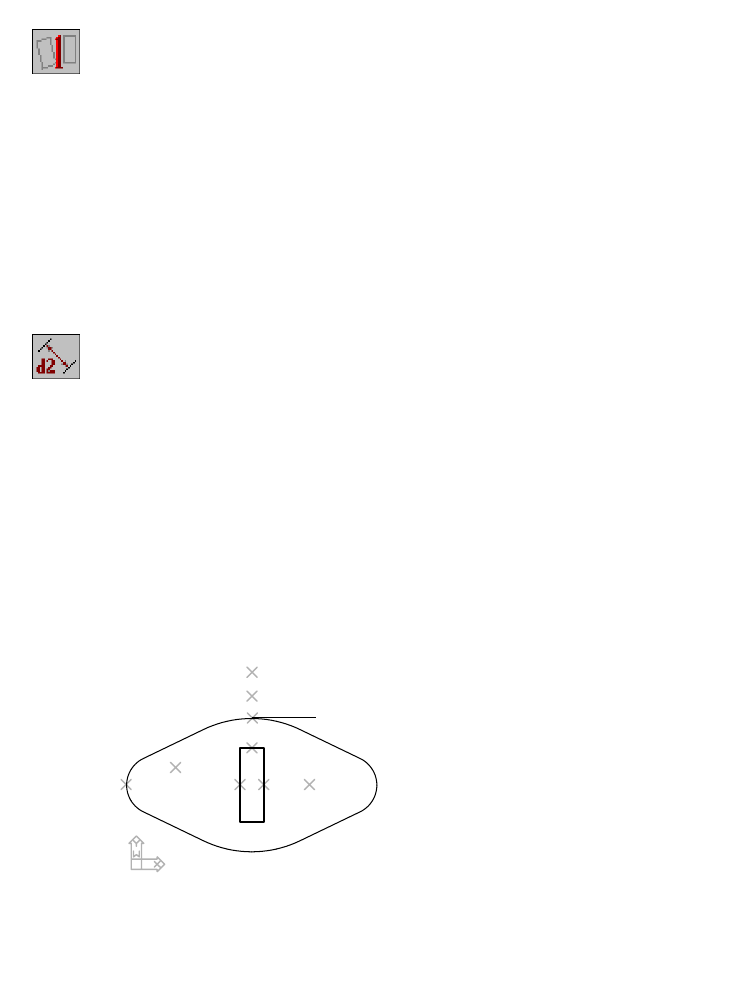
128 |Chapter 8 Creating Sketched Features
3Use AMRSOLVESK to solve the sketch.
Context Menu In the graphics area, right-click and choose Sketch Solving
➤ Single Profile.
The command line indicates the number of constraints required to fully con-
strain the profile.
Solved underconstrained sketch requiring 4 dimensions or constraints.
Before you extrude the profile, fully constrain it by adding four dimensional
constraints.
To constrain a sketch
1Use AMPARDIM to add parametric dimensions to fully constrain the sketch,
responding to the prompts.
Context Menu In the graphics area, right-click and choose Dimensioning
➤ New Dimension.
Select first object: Specify the top edge (1)
Select second object or place dimension: Place the dimension (2)
Enter dimension value or [Undo/Hor/Ver/Align/Par/aNgle/Ord/Diameter/pLace]
<0.1574>: Enter .16
Solved underconstrained sketch requiring 3 dimensions or constraints.
Select first object: Specify the top edge again (1)
Select second object or place dimension: Specify the top arc (3)
Specify dimension placement: Place the dimension (4)
Enter dimension value or [Undo/Hor/Ver/Align/Par/aNgle/Ord/Diameter/pLace]
<0.0730>: Enter .08
Solved underconstrained sketch requiring 2 dimensions or constraints.
56
2
4
3
1
7
9
8
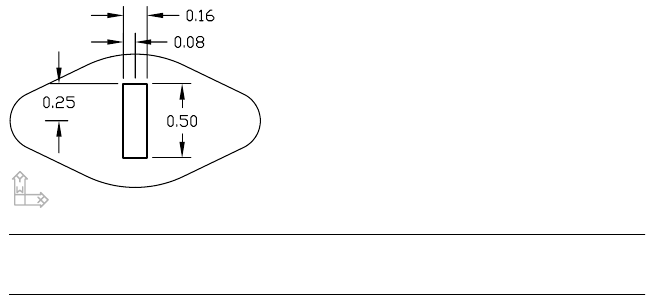
Creating Extruded Features |129
2Continue creating the parametric dimensions.
Select first object: Specify the right edge (5)
Select second object or place dimension: Place the dimension (6)
Enter dimension value or [Undo/Hor/Ver/Align/Par/aNgle/Ord/Diameter/pLace]
<0.4500>: Enter .5
Solved underconstrained sketch requiring 1 dimensions or constraints.
Select first object: Specify the left edge (7)
Select second object or place dimension: Specify the left arc (8)
Specify dimension placement: Place the dimension (9)
Enter dimension value or [Undo/Hor/Ver/Align/Par/aNgle/Ord/Diameter/pLace]
<0.2430>: Enter v
Enter dimension value or [Undo/Hor/Ver/Align/Par/aNgle/Ord/Diameter/pLace]
<0.2430>: Enter .25
After you finish dimensioning, the following message is displayed on the
command line:
Solved fully constrained sketch.
Select first object: Press ENTER
Your sketch should look like this.
NOTE For clarity, the parametric dimensions controlling Profile1 are not
shown.
Now that the profile is fully constrained, you extrude it into the base feature
to cut material from your part.
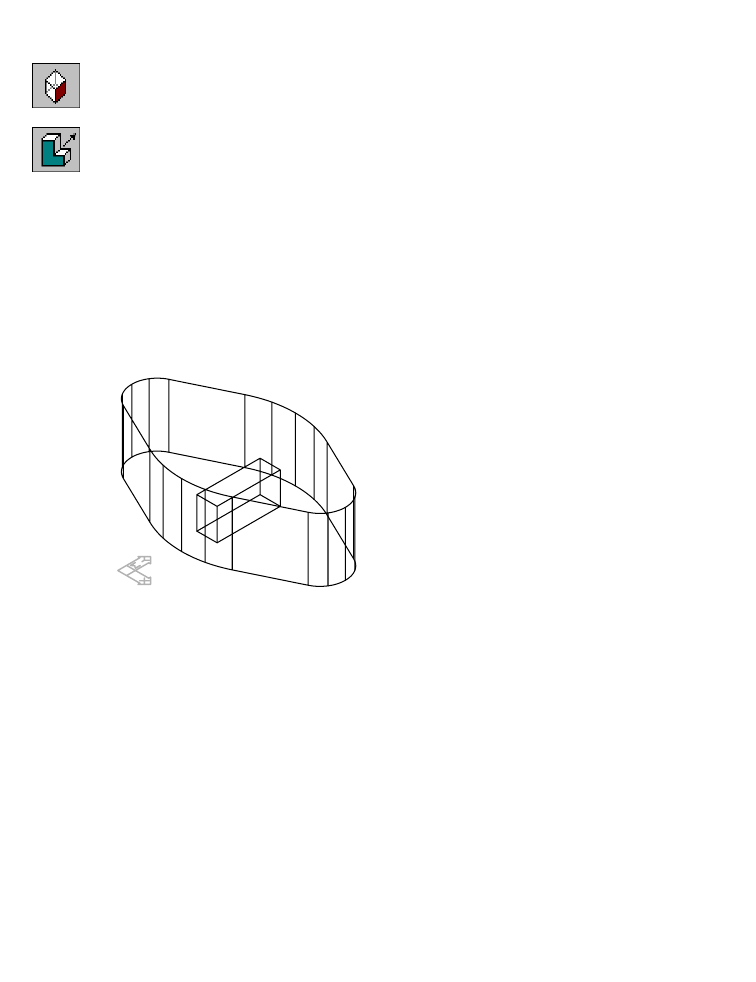
130 |Chapter 8 Creating Sketched Features
To add an extruded feature to a part
1Change to an isometric view.
Desktop Menu View ➤ 3D Views ➤ Front Right Isometric
2Extrude the profile.
Context Menu In the graphics area, right-click and choose Sketched &
Work Features ➤ Extrude.
3In the Extrusion dialog box, specify the following:
Operation: Cut
Distance: Enter 0.25
Termination: Blind
4Choose OK to exit the dialog box.
Your part should look like this.
Save your file.
Editing Extruded Features
Because an extruded feature is controlled by parametric dimensions, you can
easily make changes to it by modifying the values of the profiled sketch, or
the extruded feature itself.
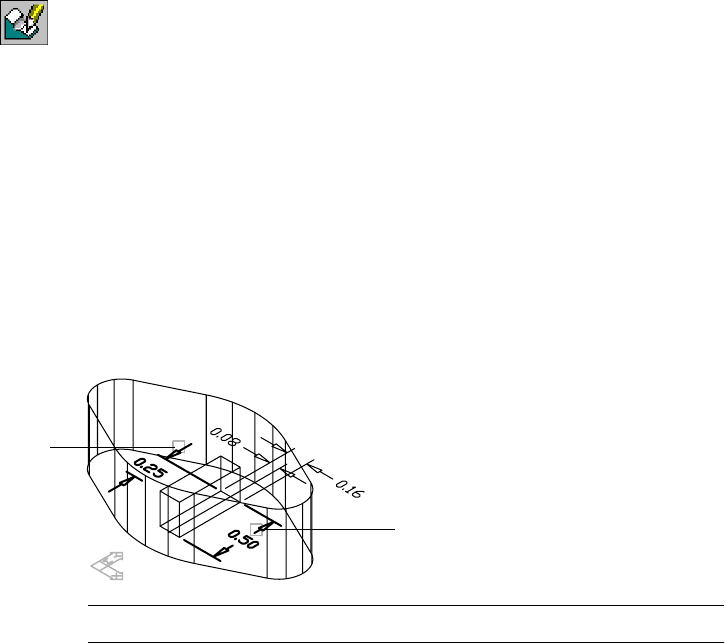
Editing Extruded Features |131
To modify a consumed profile
1Expand ExtrusionBlind2 in the Browser.
2Edit the dimensions of the profile used to define the shape of the extrusion,
responding to the prompts.
Context Menu In the graphics area, right-click and choose Edit Features
➤ Edit.
Enter an option [Sketch/surfCut/Toolbody/select Feature] <select Feature>:
Select the cut extrusion
Enter an option [Next/Accept] <Accept>: ExtrusionBlind2: Press ENTER
3Choose OK to exit the Extrusion dialog box, then continue on the command
line.
Select object: Select the 0.5 dimension (1)
Enter new value for dimension <.5>: Enter 1
Solved fully constrained sketch.
Select object: Select the 0.25 dimension (2)
Enter new value for dimension <.25>: Enter .5
Solved fully constrained sketch.
Select object: Press ENTER
NOTE For clarity, the taper and depth dimensions are not illustrated.
1
2
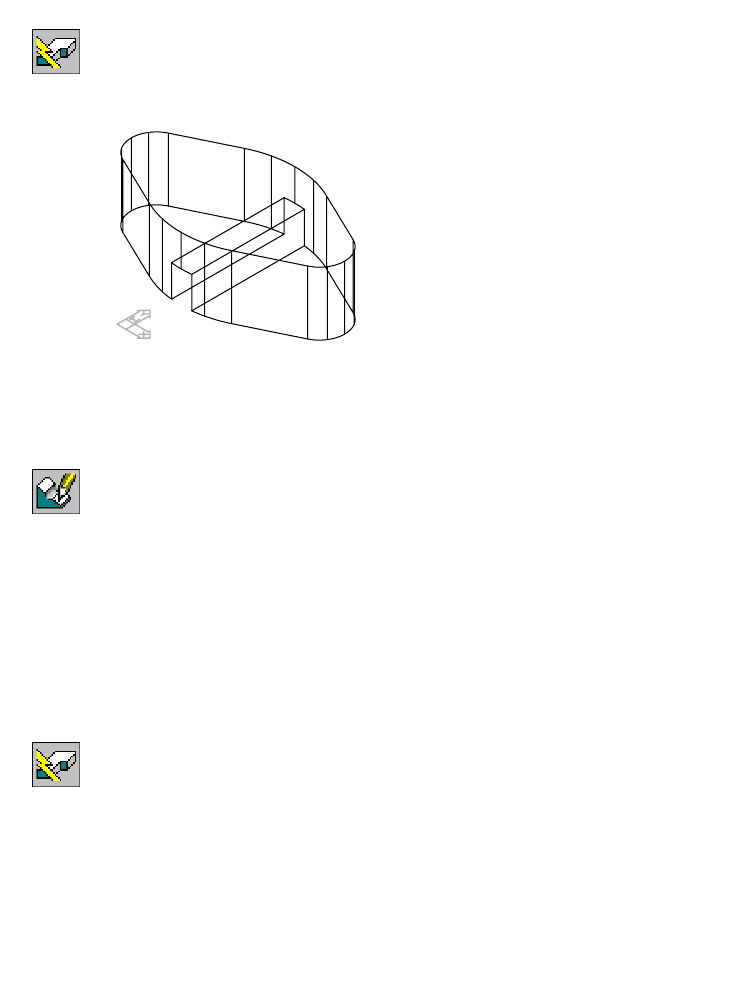
132 |Chapter 8 Creating Sketched Features
4Use AMUPDATE to update your part.
Context Menu In the graphics area, right-click and choose Update Part.
The part now reflects the changes to the profile that controls the shape of the
extrusion you used to cut material from the part.
Next, modify the extrusion feature to change the depth of the cut.
To modify a feature
1Select the cut extrusion to modify, responding to the prompt.
Context Menu In the graphics area, right-click and choose Edit Features
➤ Edit.
Enter an option [Sketch/surfCut/Toolbody/select Feature] <select Feature>:
Press ENTER, and select the cut extrusion
Enter an option [Next/Accept] <Accept>: Press ENTER
2In the Extrusion dialog box, specify a distance of .15 and Choose OK.
3Continue on the command line.
Select object: Press ENTER
4Use AMUPDATE to update the part.
Context Menu In the graphics area, right-click and choose Update Part.
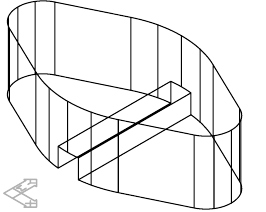
Editing Extruded Features |133
Your part should look like this.
Save your file.
Extruding Open Profiles
You extrude open profiles to create rib features and thin features.
For more information about sketching open profiles, see “Creating Open Pro-
file Sketches” on page 46.
Creating Rib Features
To create a rib feature on a part model, you sketch an open profile to shape
the rib, define the thickness of the rib, and extrude it to part surfaces.
Observe these rules when you sketch open profiles for ribs:
■Sketch the side view of the rib.
■The sketch can have any number of segments.
■The ends of the sketch need not touch surfaces the rib will attach to, but
when extended must meet valid active part surfaces, without holes in the
extrusion path.
You solve the sketch to create an open profile, and apply parametric con-
straints and dimensions as with any other profile sketch.
Like other features, the rib feature can be edited and it has dependencies. If
you delete something in your model that a rib feature depends upon, such as
a face that a profile plane is based on, you delete the rib feature as well.
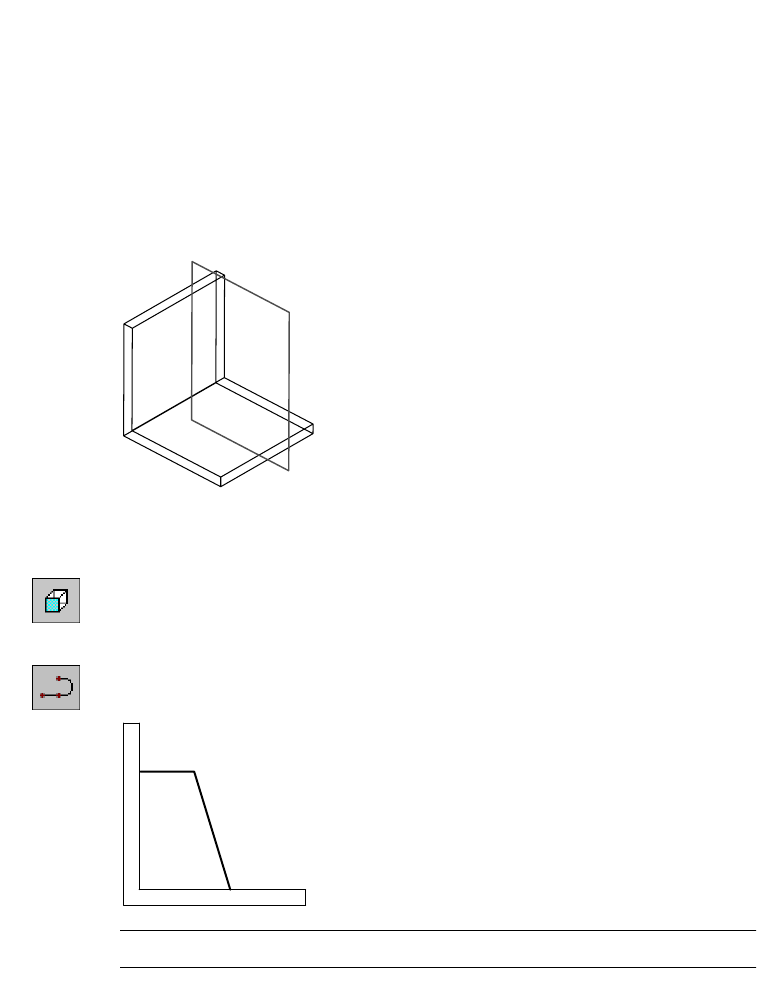
134 |Chapter 8 Creating Sketched Features
In this exercise, you extrude a rib feature to two perpendicular walls of a part.
Turn off visibility for EXTRUDE_1, and make EXTRUDERIB_1 visible.
Browser Right-click EXTRUDE_1 and choose Visible. Then right-
click EXTRUDERIB_1 and choose Visible.
Activate EXTRUDERIB_1 and position it on your screen.
Browser Double-click EXTRUDERIB_1. Then right-click
EXTRUDERIB_1 and choose Zoom to.
In the previous exercise, you made the work feature layer visible.
To create a rib feature
1Change to the front view so you can sketch the rib from its side.
Desktop Menu View ➤ 3D Views ➤ Front
2Use PLINE to sketch a rough outline of the rib, as shown in the following illus-
tration. The sketch doesn’t have to be touching the surfaces.
Context Menu In the graphics area, right-click and choose 2D Sketching
➤ Polyline.
NOTE For clarity, the work plane is not shown.
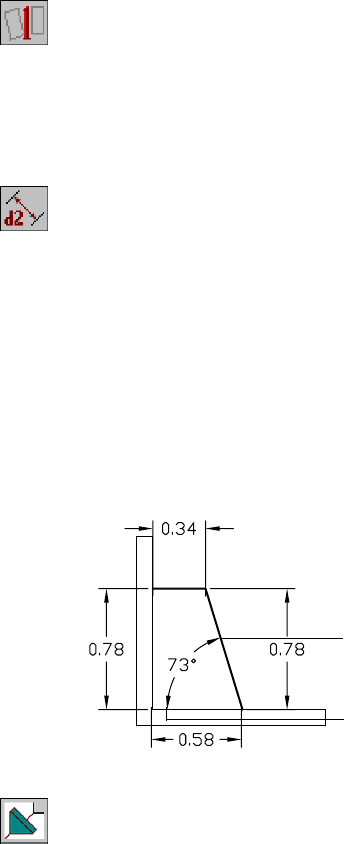
Editing Extruded Features |135
3Use AMPROFILE to solve the sketch, responding to the prompt.
Context Menu In the graphics area, right-click and choose Sketch Solving
➤ Single Profile.
Select part edge to close the profile <open profile>: Press ENTER
An icon for the open profile is displayed in the Browser.
4Use AMPARDIM to add an angular dimension between the lower wall and the
lower section of the rib, responding to the prompts.
Context Menu In the graphics area, right-click and choose Dimensioning
➤ New Dimension.
Select first object: Specify a point on the rib (1)
Select second object or place dimension: Specify a point on the lower wall (2)
Specify dimension placement: Specify a point to place the dimension
Enter dimension value or [Undo/Hor/Ver/Align/Par/aNgle/Ord/Diameter/pLace]
<71>: Enter a value of 73
Select first object: Specify the next dimension to add
Continue adding dimensions, as shown in the illustration, to fully constrain
the open profile sketch.
Solved fully constrained sketch.
Select first object: Press ENTER
5Use AMRIB to create the rib.
Browser In the Browser, right-click the open profile icon, and
choose Rib.
1
2
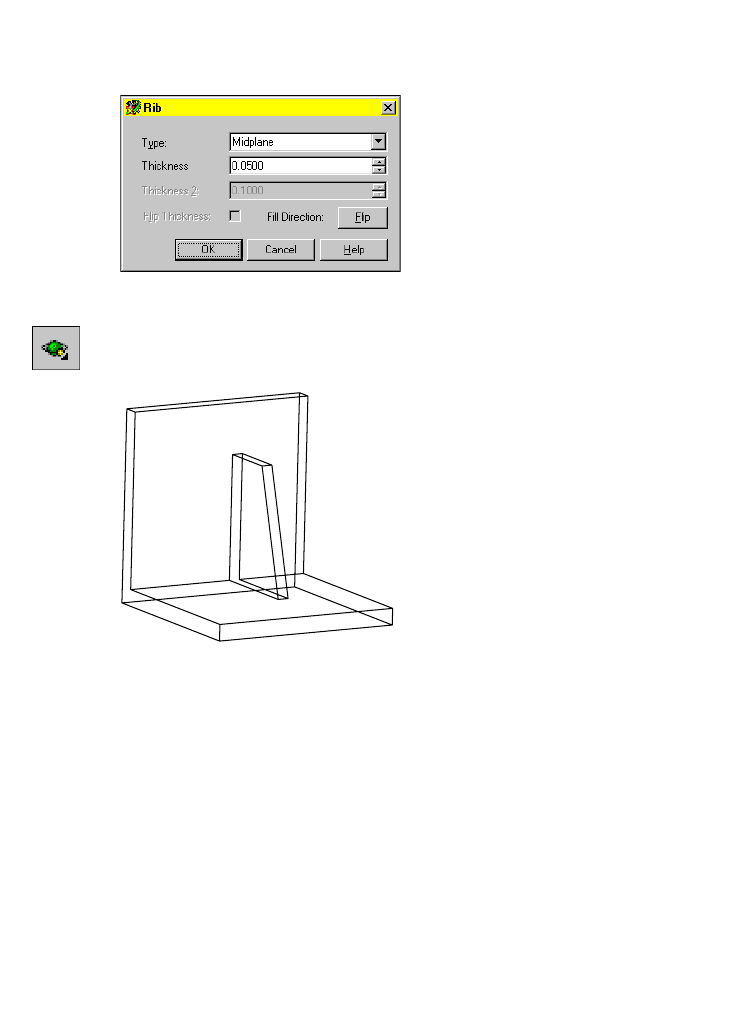
136 |Chapter 8 Creating Sketched Features
In the Rib dialog box, specify:
Type: Midplane
Thickness: .05
Choose OK.
6Use 3DORBIT to rotate your part so you can see the rib feature.
Your part should look like this.
Creating Thin Features
To create a thin feature, you sketch an open profile and extrude it to part sur-
faces. When you extrude an open profile, the Extrusion dialog box includes
the options for defining a thin wall feature. When you sketch open profiles
for thin features
■Sketch must be an open profile from the front view
■Sketch is extruded normal to the sketch plane
■Ends of the open profile need not touch surfaces, but when extended must
meet valid active part surfaces, without holes in the extrusion path
For more information about sketching open profiles, see “Creating Open Profile
Sketches” on page 46.
Editing Extruded Features |137
In this exercise, you create a thin wall in a shell. In the Browser, turn off
visibility for EXTRUDERIB_1, and make EXTRUDETHIN_1 visible.
Browser Right-click EXTRUDERIB_1 and choose Visible. Then
right-click EXTRUDETHIN_1 and choose Visible.
Activate EXTRUDETHIN_1 and position it on your screen.
Browser Double-click EXTRUDETHIN_1. Then right-click
EXTRUDETHIN_1 and choose Zoom to.
To create a thin feature
1Use AMWORKPLN to create a work plane for the profile sketch.
Context Menu In the graphics area, right-click and choose Sketched &
Work Features ➤ Work Plane.
In the Work Plane dialog box, specify:
1st Modifier: Planar Parallel
2nd Modifier: Offset
Offset: Enter .75
Choose OK.
Select work plane, planar face or [worldXy/worldYz/worldZx/Ucs]:
Select the back face of the shell
Enter an option [Next/Accept] <Accept>: Press ENTER
Enter an option [Flip/Accept] <Accept>:
Flip to point arrow to back face, or press ENTER
Select edge to align X axis or [Flip/Rotate/Origin] <Accept>: Press ENTER
2Change to the Right view to sketch the thin feature.
Desktop Menu View ➤ 3D Views ➤ Right
138 |Chapter 8 Creating Sketched Features
3Use LINE to sketch the thin feature.
Context Menu In the graphics area, right-click and choose 2D Sketching
➤ Line
Specify first point: Specify the start point of the line (1)
Specify next point or [Undo]: Specify the end point of the line (2) and press ENTER
NOTE Turn OSNAP off so that you will not snap to the back face when you pick.
4Use AMRSOLVESK to solve the sketch, responding to the prompt.
Context Menu In the graphics area, right-click and choose Sketch Solving
➤ Single Profile.
Select part edge to close the profile <open profile>: Press ENTER
In the Browser, an open profile icon is displayed.
5Change to the front right isometric view to extrude the profile.
Desktop Menu View ➤ 3D Views ➤ Front Right Isometric
6USE AMEXTRUDE to extrude the open profile.
Context Menu In the graphics area, right-click and choose Sketched &
Work Features ➤ Extrude.
In the Extrusion dialog box, specify
Operation: Join
Termination: Type: Face
Thickness: Type: Midplane
Thickness: Enter .05
12
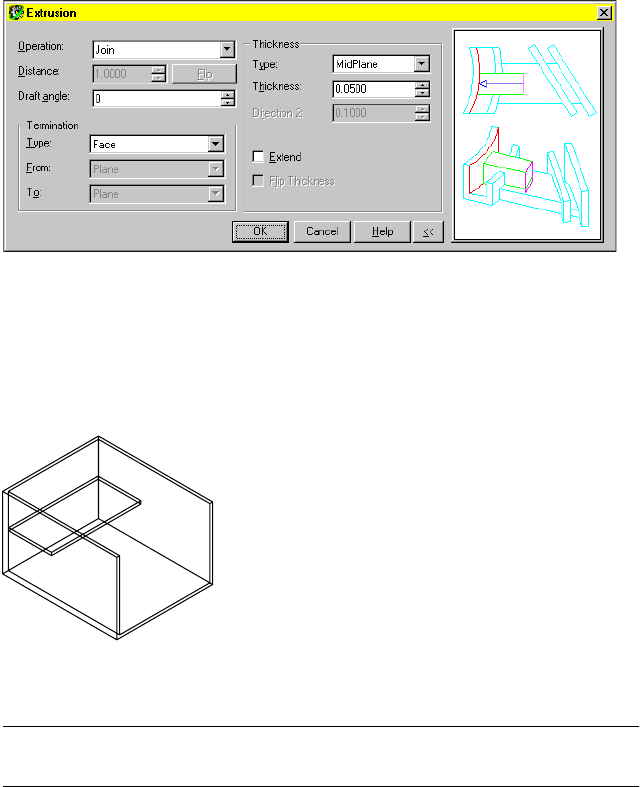
Editing Extruded Features |139
Choose OK.
7Respond to the prompt:
Select Face: Select the back face of the shell and press ENTER
Enter an option [Next/Accept] <Accept>: Press ENTER
Your part should look like this.
A thin wall is created with equal thickness on each side of the profile. In the
Browser, an icon is displayed for the thin extrusion.
NOTE When you extrude an open profile, the Extrusion dialog box contains
options for defining a thin feature.
Save your file with a new name so you can use the same shell part for the next
exercise.
140 |Chapter 8 Creating Sketched Features
Creating Emboss Features
Emboss features are text sketch profiles extruded on part models. A text
sketch profile is one line of text displayed in a rectangular boundary.
To create a text sketch profile, you define a font and a style, and enter one
line of text. Then you place the text on an active sketch plane on your part,
and extrude it to emboss the surface of your part with the text.
Delete the thin extrusion from your shell part.
Browser Right-Click ThinExtrusionToFace1 and choose Delete.
Highlighted features will be deleted. Continue? [Yes/No] <Yes>: Press ENTER
Change to the Front view to create the emboss feature.
Desktop Menu View ➤ 3D Views ➤ Front
To create an emboss feature
1Use AMWORKPLN to create a work plane for the text sketch.
Context Menu In the graphics area, right-click and choose Sketched &
Work Features ➤ Work Plane.
In the Work Plane dialog box, specify:
1st Modifier: On Edge/Axis
2nd Modifier: Planar Parallel
Choose OK.
2Respond to the prompts:
Select work axis, straight edge or [worldX/worldY/worldZ]:
Select the top edge of the shell
Select work plane, planar face or [worldXy/worldYz/worldZx/Ucs]:
Select the front face of the shell and press ENTER
Select edge to align X axis or [Flip/Rotate/Origin] <Accept>: Press ENTER
NOTE Verify that CMDDIA is set to 1 so that the Text Sketch dialog box will be
displayed. On the command line, enter CMDDIA, then enter 1.
3Use AMTEXTSK to create a text sketch profile.
Command AMTEXTSK
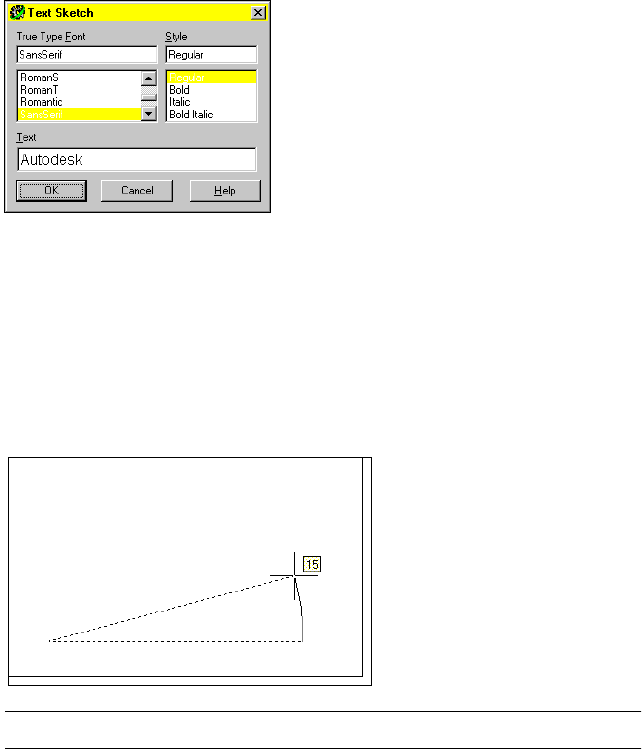
Editing Extruded Features |141
In the Text Sketch dialog box, specify:
True Type Font: Sans Serif
Style: Regular
Text: Enter Autodesk
Choose OK.
4Define a location for the text sketch with a rotation angle of 15, responding
to the prompts.
Specify first corner: Specify a point in the lower left corner of the shell
Specify opposite corner or [Height/Rotation]: Enter r and press ENTER
Specify second angle endpoint or [Direction] <0>:
Move the cursor to the right and specify a rotation angle of 15
Hold the cursor in one location momentarily to display the angle dimension.
NOTE For clarity, the work plane is not shown.
Continue on the command line.
Specify opposite corner or [Height/Rotation]: Specify a point for the height
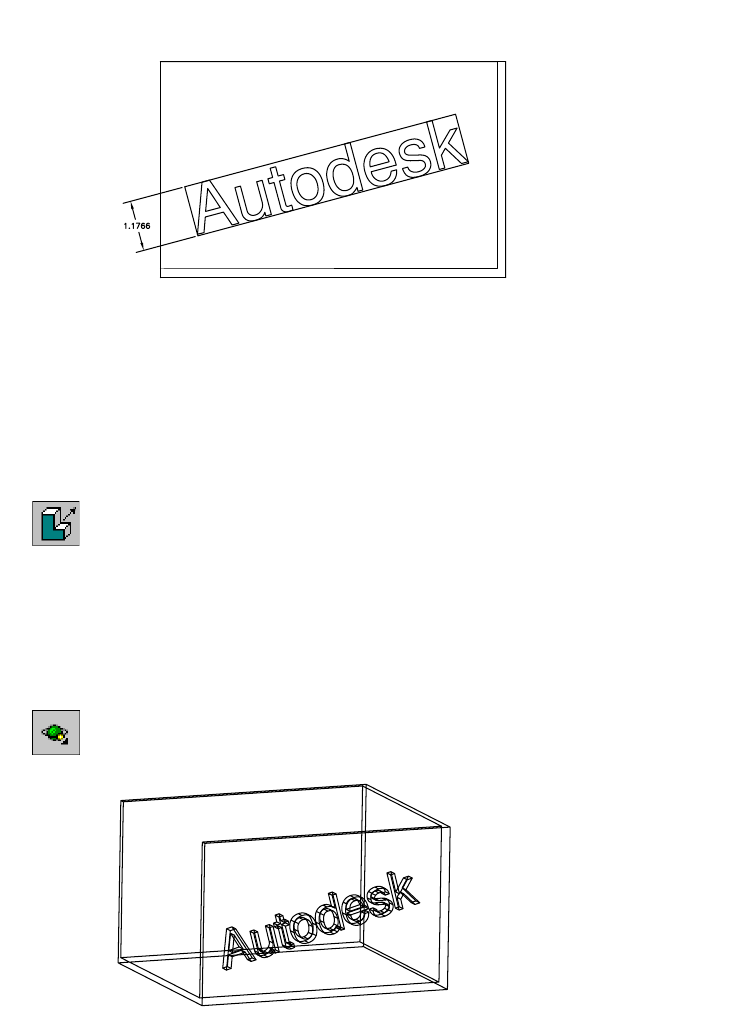
142 |Chapter 8 Creating Sketched Features
As you move the cursor, the rectangular border adjusts to accommodate the
size of the text.
In the Browser, an icon is displayed for the text sketch.
You can change the parametric dimension for the height, and you can control
the placement of the text object with typical 2D constraints and parametric
dimensions between the rectangular boundary and other edges or features on
your part.
After the text sketch is positioned on the part, you can extrude it.
5Use AMEXTRUDE to extrude the text sketch.
Browser Right-click the text sketch icon and choose Extrude.
In the Extrusion dialog box, specify:
Operation: Join
Distance: Enter .5
Termination: Type: Blind
Choose OK.
6Use 3DORBIT to rotate your part so you can see the emboss feature.
Toolbutton
Your part should look like this.

Creating Loft Features |143
Editing Emboss Features
You can edit the text in an emboss feature using the Text Sketch dialog box
before the text sketch is consumed. After a text sketch is consumed by a fea-
ture, you can edit the feature dimensions or the sketch font and style.
Creating Loft Features
You create loft features by defining a series of cross sections through which
the feature is blended. Lofts may be linear or cubic. Both types can be created
with existing part faces as the start and end sections.
Creating Linear Lofts
A linear loft is a feature created by a linear transition between two planar
sections.
First, activate the next part in your drawing.
To activate a part
1Make LOFT1_1 visible.
Browser Right-click LOFT1_1 and choose Visible.
NOTE Because LOFT1_1 does not contain any features, you cannot use the
toolbutton, menu, or command methods to make it visible.
2Activate LOFT1_1.
Browser Right-click LOFT1_1 and choose Activate Part
3Make EXTRUDE_1 invisible.
Browser Right-click EXTRUDE_1 and choose Visible.
4In the Desktop Visibility dialog box, select the Assembly tab.
5Choose Select and continue on the command line.
Select assembly objects to hide: Select EXTRUDE_1
Select assembly objects to hide: Press ENTER
6Choose OK to exit the dialog box.
If you choose the Browser method, the dialog box is not displayed.
Next, create the lofted feature.
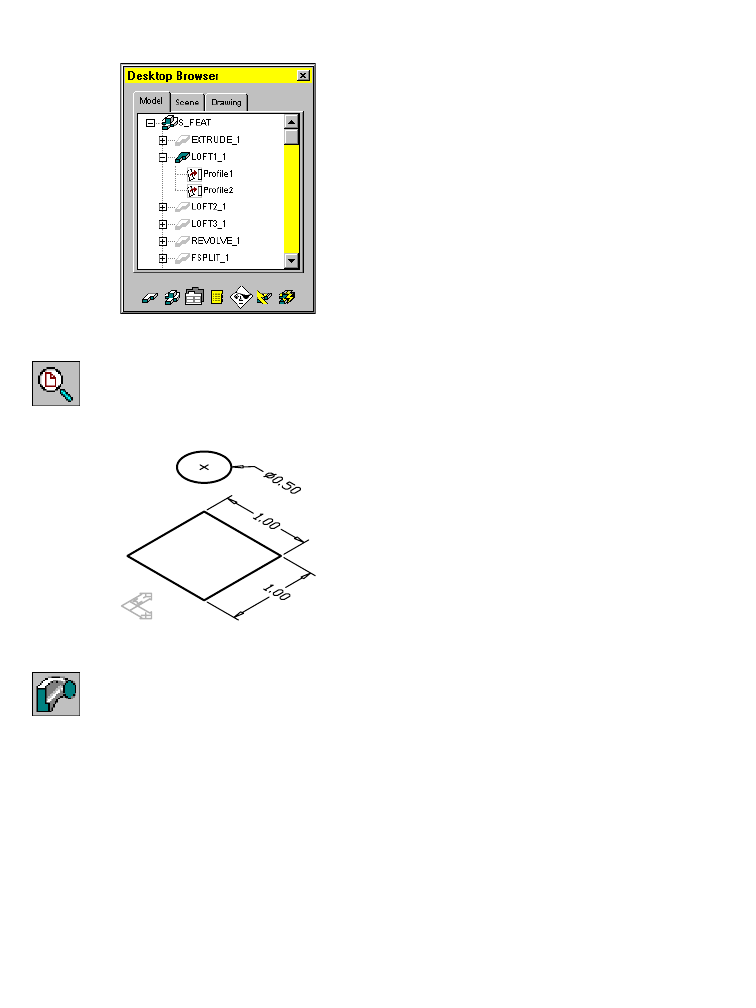
144 |Chapter 8 Creating Sketched Features
To create a linear loft
1Expand LOFT1_1 in the Browser. Minimize EXTRUDE_1.
2Zoom in to LOFT1_1.
Desktop Menu View ➤ Zoom ➤ All
The LOFT1 part contains two planar sections you use to create a linear lofted
feature.
3Create the loft feature, responding to the prompts.
Context Menu In the graphics area, right-click and choose Sketched &
Work Features ➤ Loft.
Select profiles or planar faces to loft: Specify the bottom profile
Select profiles or planar faces to loft: Specify the top profile
Select profiles or planar faces to loft or [Redefine sections]: Press ENTER
4In the Loft dialog box, specify:
Type: Linear
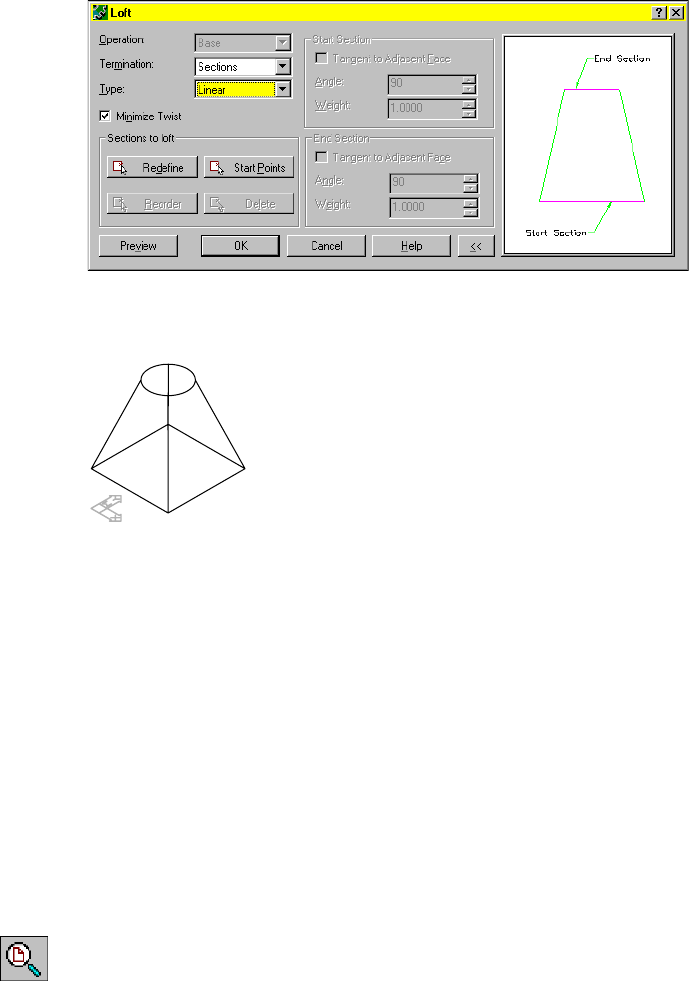
Creating Loft Features |145
5Choose OK to exit the Loft dialog box.
Mechanical Desktop® calculates and displays the loft feature.
Save your file.
Next, you create a cubic loft blended through three planar sections.
Creating Cubic Lofts
A cubic loft is created by a gradual blend between two or more planar sec-
tions. Before the loft begins blending with the next section, you can control
the tangency and the take-off angle at the start and end sections, and the dis-
tance the loft follows the tangent or angle options.
To create a cubic loft
1Make LOFT2_1 visible.
2Activate LOFT2_1.
3Make LOFT1_1 invisible.
4Zoom in to LOFT2_1.
Browser Right-click LOFT2_1, and choose Zoom to.
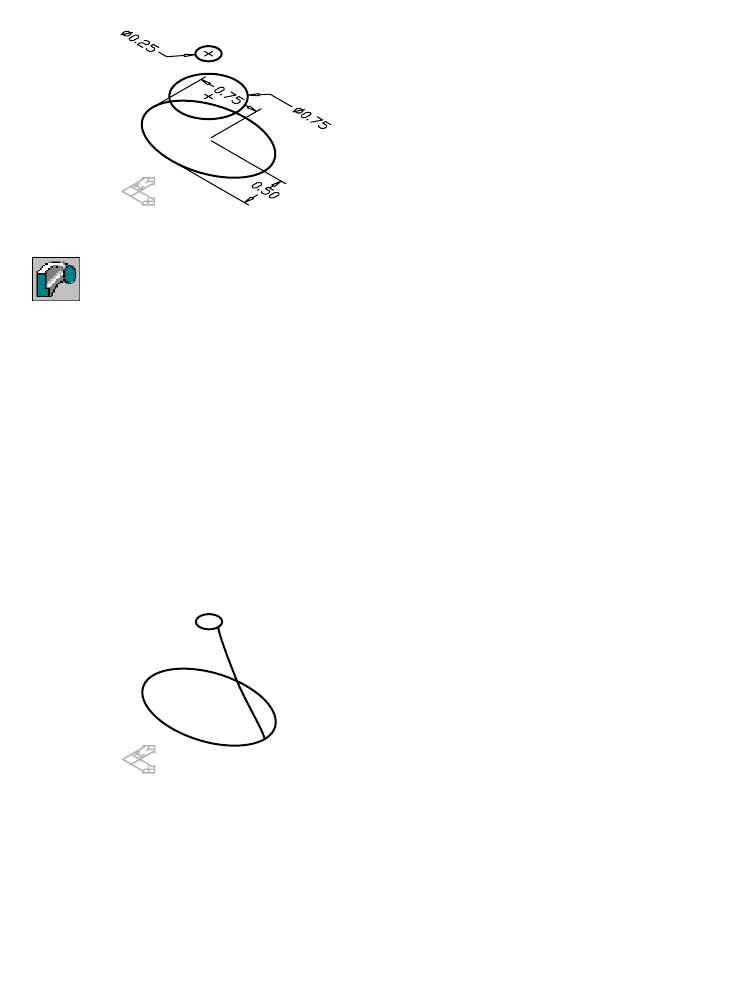
146 |Chapter 8 Creating Sketched Features
LOFT2 contains three profiles defining the sections you use for the loft feature.
5Create the loft, responding to the prompts.
Context Menu In the graphics area, right-click and choose Sketched &
Work Features ➤ Loft.
Select profiles or planar faces to loft: Select the bottom profile
Select profiles or planar faces to loft: Select the middle profile
Select profiles or planar faces to loft or [Redefine sections]: Select the top profile
Select profiles or planar faces to loft or [Redefine sections]: Press ENTER
6In the Loft dialog box specify:
Type: Cubic
7Choose OK to exit the Loft dialog box.
The loft is displayed with isolines because it is created from elliptical and cir-
cular sections. The default isoline setting displays the loft as in the following
illustration.
For a better view of the loft, increase the number of isolines defining the
feature.
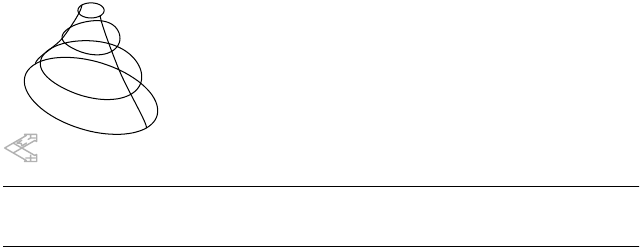
Creating Loft Features |147
To change the number of isolines
1Modify the ISOLINES system variable.
Command ISOLINES
New value for ISOLINES <4>: Enter 6
2Regenerate your drawing.
Desktop Menu View ➤ Regen
Mechanical Desktop regenerates the drawing and displays the loft using
more isolines.
NOTE A higher value for ISOLINES increases the time it takes to recalculate a
part. In general, keep ISOLINES at its default value (4).
3Reset the value of ISOLINES to its default setting.
Command ISOLINES
New value for ISOLINES <6>: Enter 4
4Regenerate your drawing.
Desktop Menu View ➤ Regen
Save your file.
In the next exercise you create a cubic loft using an existing part face as the
start section of the loft.
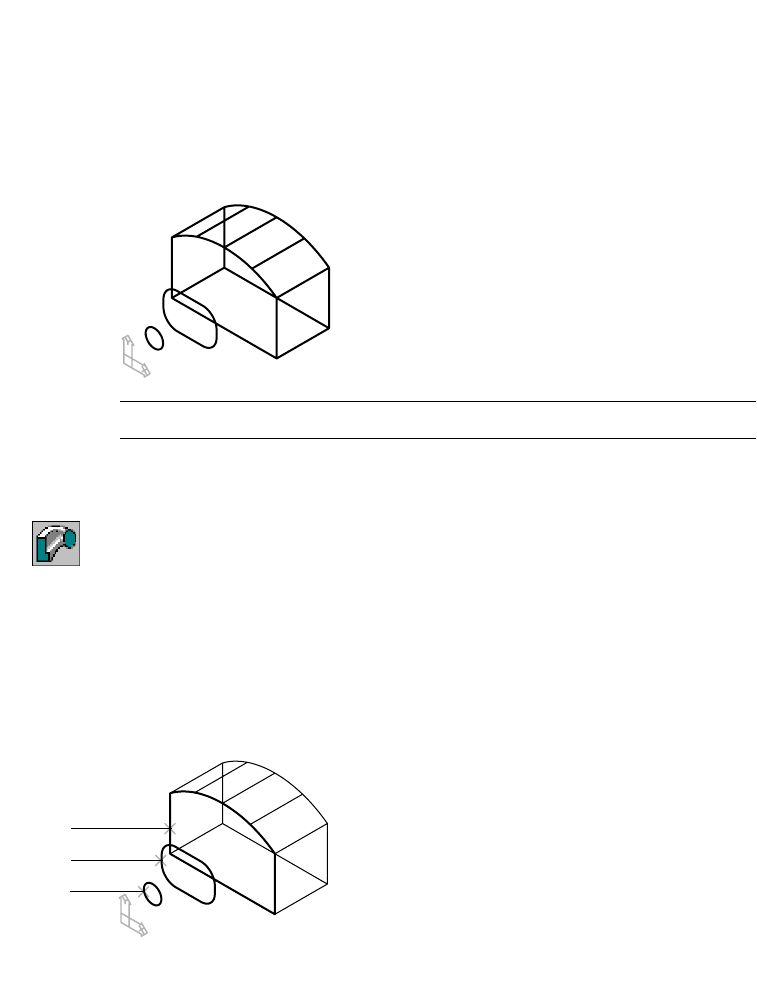
148 |Chapter 8 Creating Sketched Features
To create a cubic loft from an existing face
1Make LOFT3_1 visible.
2Activate LOFT3_1.
3Make LOFT2_1 invisible.
4Zoom in to LOFT3_1.
LOFT3 contains an existing extrusion and two profiles parametrically con-
strained to it.
NOTE For clarity, the parametric dimensions are not shown.
5Select the profiles to use for the cubic loft, following the prompts, and join
the loft to the existing extrusion.
Context Menu In the graphics area, right-click and choose Sketched &
Work Features ➤ Loft.
Select profiles or planar faces to loft: Select the front planar face (1)
Enter an option [Accept/Next] <Accept>:
Highlight the front face and press ENTER
Select profiles or planar faces to loft: Select the first profile (2)
Select profiles or planar faces to loft or [Redefine sections]:
Select the second profile (3)
Select profiles or planar faces to loft or [Redefine sections]: Press ENTER
1
2
3
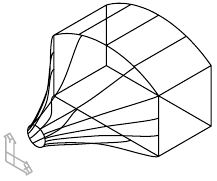
Editing Loft Features |149
6In the Loft dialog box, specify:
Operation: Join
Type: Cubic
Choose OK to exit the Loft dialog box.
Your drawing should look like this.
Save your file.
Editing Loft Features
You edit loft features the same way extruded features are edited—change the
profiles or modify the loft feature itself.
Try editing the loft features you created in this section.
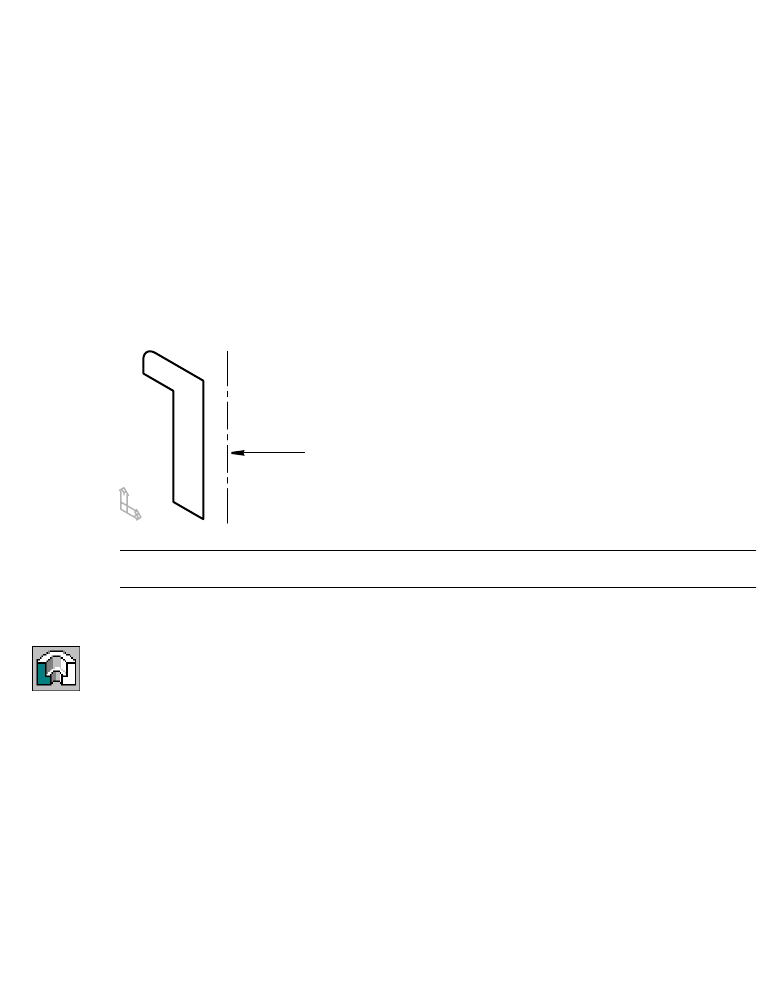
150 |Chapter 8 Creating Sketched Features
Creating Revolved Features
You create revolved features by revolving a closed profile about an axis. The
axis may be a work axis or a part edge.
To create a revolved feature about a work axis
1Make REVOLVE_1 visible.
2Activate REVOLVE_1.
3Expand REVOLVE_1 and make Work Axis1 visible.
4Make LOFT3_1 invisible.
5Zoom in to REVOLVE_1.
REVOLVE_1 contains a profile parametrically constrained to a work axis.
NOTE For clarity, the parametric dimensions are not shown.
6Create a revolved feature.
Context Menu In the graphics area, right-click and choose Sketched &
Work Features ➤ Revolve.
7Respond to the prompt as follows:
Select revolution axis: Specify the work axis
8In the Revolution dialog box, specify:
Angle: Enter 360
Termination: By Angle
work axis
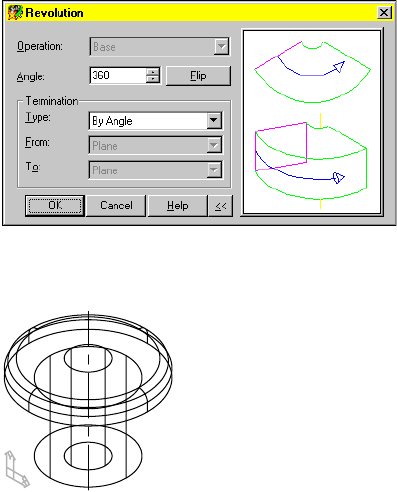
Editing Revolved Features |151
Choose OK.
Mechanical Desktop calculates and displays the feature.
Save your file.
Editing Revolved Features
Edit a revolved feature by making changes to the profile, or by modifying the
feature itself (like editing extruded and lofted features).
Try editing your revolved feature following the procedures for editing
extruded features you learned earlier in this tutorial.
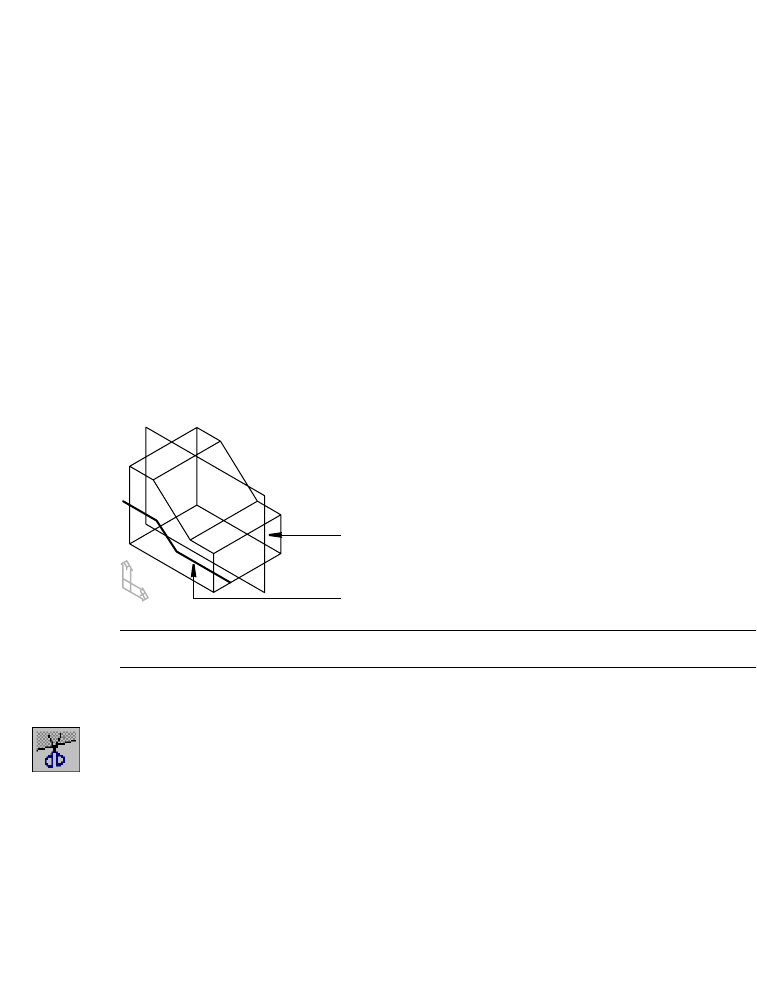
152 |Chapter 8 Creating Sketched Features
Creating Face Splits
Use face splits to split existing part faces. They can be created with
■An existing part face
■A work plane
■A split line
First, use one of the part’s existing faces to split a face.
To split a face using an existing part face
1Make FSPLIT_1 visible.
2Activate FSPLIT_1.
3Make REVOLVE_1 invisible.
4Zoom in to FSPLIT_1.
FSPLIT_1 contains a part, a work plane, and a split line.
NOTE For clarity, the parametric dimensions are not shown.
5Create the face split, responding to the prompts.
Context Menu In the graphics area, right-click and choose Sketched &
Work Features ➤ Face Split.
Enter facesplit type [Planar/pRoject] <pRoject>: Enter p
Select faces to split or [All]: Specify the left back face (1)
Enter an option [Accept/Next] <Accept>:
Enter n to flip to the back face or press ENTER to continue
Select faces to split or [All/Remove]: Press ENTER
Select planar face or work plane for split: Specify the top right face (2)
Enter an option [Accept/Next] <Accept>:
Enter n to flip to the top face or press ENTER
work plane
split line

Creating Face Splits |153
Mechanical Desktop splits the back face into two faces.
Next, split a face using a work plane.
To split a face using a work plane
1Create the face split, responding to the prompts.
Context Menu In the graphics area, right-click and choose Sketched &
Work Features ➤ Face Split.
Enter facesplit type [Planar/pRoject] <pRoject>: Enter p
Select faces to split or [All]: Specify the top right face (1)
Enter an option [Accept/Next] <Accept>:
Enter n to flip to the top face or press ENTER to continue
Select faces to split or [All/Remove]: Specify the right front face (2)
Enter an option [Accept/Next] <Accept>:
Enter n to flip to the front face or press ENTER to continue
Select faces to split [All/Remove]: Press ENTER
Select planar face or work plane for split: Specify the work plane (3)
1
2
3
1
2
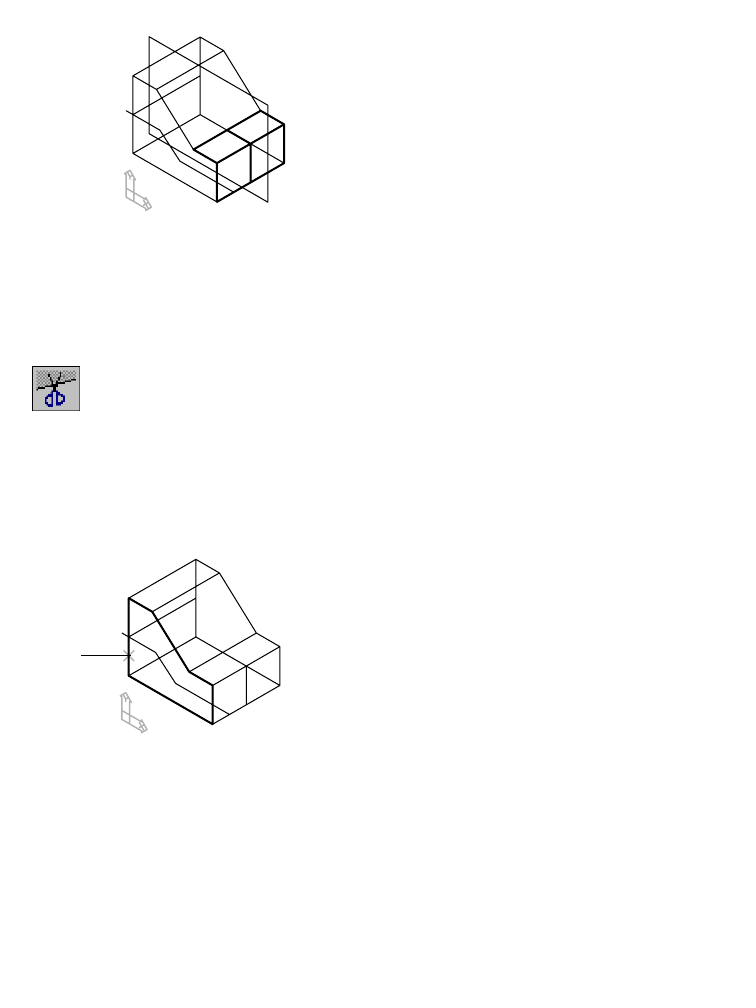
154 |Chapter 8 Creating Sketched Features
Your drawing should look like this.
Now split the front face using the split line sketch.
To split a face using a split line
1Make Work Plane2 invisible.
2Create the face split, responding to the prompts.
Context Menu In the graphics area, right-click and choose Sketched &
Work Features ➤ Face Split.
Enter facesplit type [Planar/pRoject] <pRoject>: Press ENTER
Select faces to split or [All]: Specify the left front face (1)
Enter an option [Accept/Next] <Accept>:
Enter n to flip to the front face or press ENTER to continue
Select faces to split or [All/Remove]: Press ENTER
If you use the Browser method, the prompts are not displayed.
1
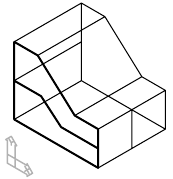
Editing Face Splits |155
When you choose the Project option, Mechanical Desktop automatically
looks for an unconsumed split line. If more than one split line exists, you are
prompted to select the split line for the face split.
Mechanical Desktop displays the new face split.
The Browser contains three face split features.
Save your file.
Editing Face Splits
Face splits created from an existing planar face can be edited by modifying
the position of the face on the part. Face splits created from a work plane can
be edited by modifying the dimensions controlling the location of the work
plane. Face splits created from a split line can be modified by editing the
parametric dimensions that control the split line.
Try editing the face splits you just completed in this exercise.
Creating Sweep Features
Sweep features can be either 2D or 3D. Both are created by sweeping a closed
profile along a path.

156 |Chapter 8 Creating Sketched Features
Creating 2D Sweep Features
You create a 2D sweep feature by sweeping a profile along a path that lies on
a 2D plane. The feature may be the base feature of your part, or you can use
Boolean operations to cut, intersect, split, or join the feature to your part.
To create a 2D sweep
1Make SWEEP1_1 visible.
2Activate SWEEP1_1.
3Make FSPLIT_1 invisible.
4Zoom in to SWEEP1_1.
SWEEP1_1 contains a solved profile constrained to the start of a 2D path.
NOTE For clarity, the parametric dimensions and the work point are not shown.
5Create the 2D sweep.
Context Menu In the graphics area, right-click and choose Sketched &
Work Features ➤ Sweep.
6In the Sweep dialog box, choose OK to accept the settings.
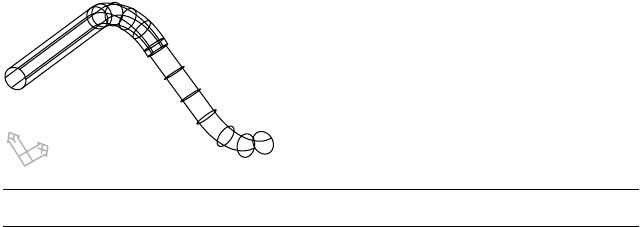
Creating Sweep Features |157
Your drawing should look like this.
NOTE Increase the value of ISOLINES for a more accurate display of the sweep.
Save your file.
Creating 3D Sweep Features
With Mechanical Desktop, you can also sweep profiles along a variety of 3D
paths. Use these paths to create a feature swept along
■A helical path
■A spiral path
■A path defined by a 3D spline
■A path created from filleted 3D polylines and lines
■A path created from existing part edges
For more information about creating 3D paths, see chapter 6, “Creating Para-
metric Sketches.”
First, create a 3D helical sweep.
To create a 3D helical sweep
1Make SWEEP2_1 visible.
2Activate SWEEP2_1.
3Make SWEEP1_1 invisible.
4Zoom in to SWEEP2_1.

158 |Chapter 8 Creating Sketched Features
SWEEP2_1 contains a cylinder and a helical path. A solved profile is constrained
to the start of the path.
5Create the 3D helical sweep.
Context Menu In the graphics area, right-click and choose Sketched &
Work Features ➤ Sweep.
6In the Sweep Feature dialog box, choose OK to accept the settings.
You can create a cut, join, intersection, or split feature. These options are
available because there is a base feature in the part definition.
Choose OK to exit the dialog box.
Mechanical Desktop calculates the sweep and displays your part.
Save your file.
Next, create a spiral 3D sweep.
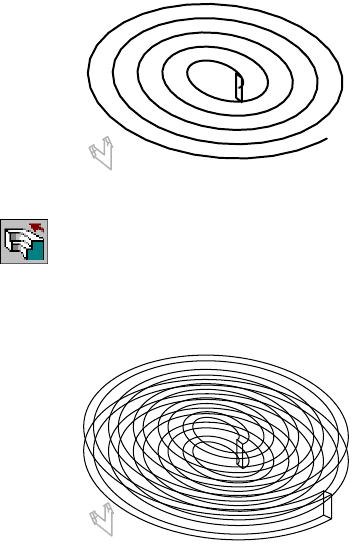
Creating Sweep Features |159
To create a spiral 3D sweep
1Make SWEEP3_1 visible.
2Activate SWEEP3_1.
3Make SWEEP2_1 invisible.
4Zoom in to SWEEP3_1.
SWEEP3_1 contains a spiral helical path and a solved profile constrained to
the start of the path. The spiral path is elliptical.
5Create the 3D sweep.
Context Menu In the graphics area, right-click and choose Sketched &
Work Features ➤ Sweep.
6In the Sweep Feature dialog box, choose OK to accept the settings.
Your drawing should look like this.
Save your file.
Next, create a sweep using a 3D edge path.
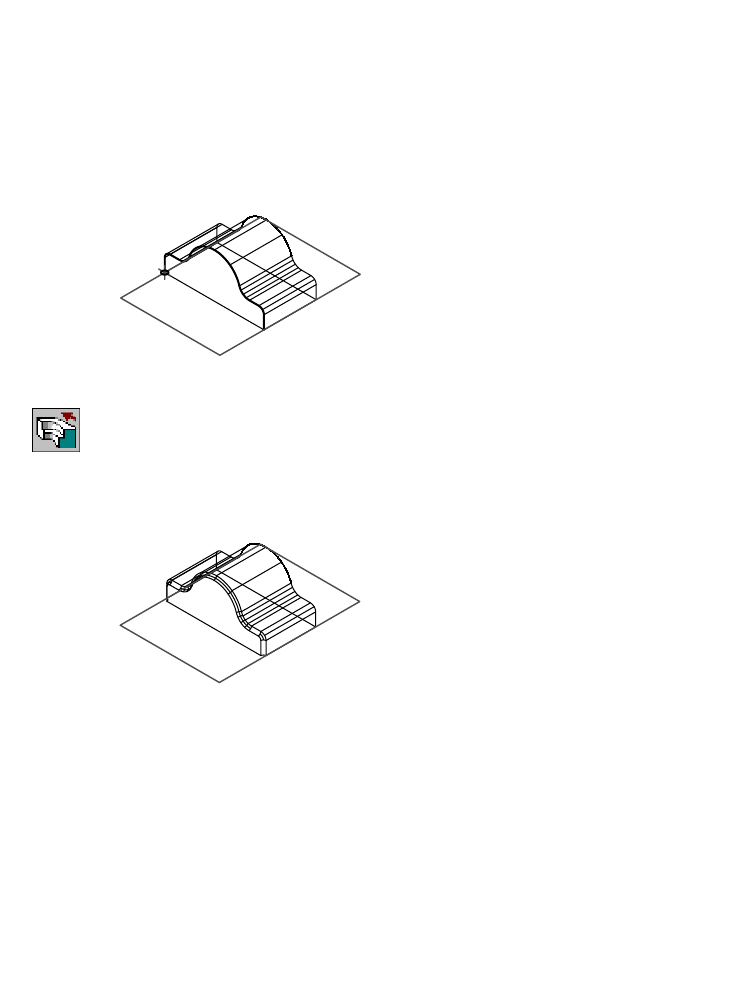
160 |Chapter 8 Creating Sketched Features
To create a sweep from a 3D edge path
1Make SWEEP4_1 visible.
2Activate SWEEP4_1.
3Make SWEEP3_1 invisible.
4Zoom in to SWEEP4_1.
SWEEP4_1 contains a 3D edge path and a solved profile constrained to the
start of the path.
5Create the sweep.
Context Menu In the graphics area, right-click and choose Sketched &
Work Features ➤ Sweep.
6In the Sweep Feature dialog box, choose OK to accept the settings.
Your drawing should look like this.
Save your file.
Next, sweep a feature along a path created from non-planar lines and arcs.
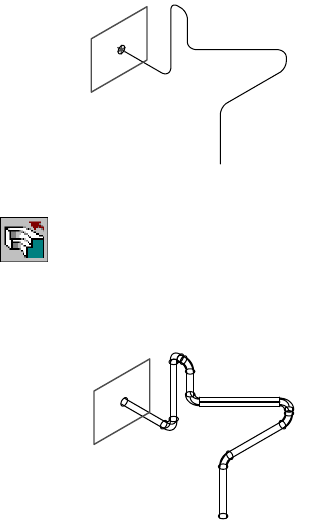
Creating Sweep Features |161
To create a sweep from a 3D pipe path
1Make SWEEP5_1 visible.
2Activate SWEEP5_1.
3Make SWEEP4_1 invisible.
4Zoom in to SWEEP5_1.
SWEEP5_1 contains a 3D pipe path and a solved profile constrained to the
start of the path.
5Create the sweep.
Context Menu In the graphics area, right-click and choose Sketched &
Work Features ➤ Sweep.
6In the Sweep dialog box, choose OK to accept the settings.
Your drawing should look like this.
Save your file.
Finally, create a swept feature using a path created from a 3D spline.
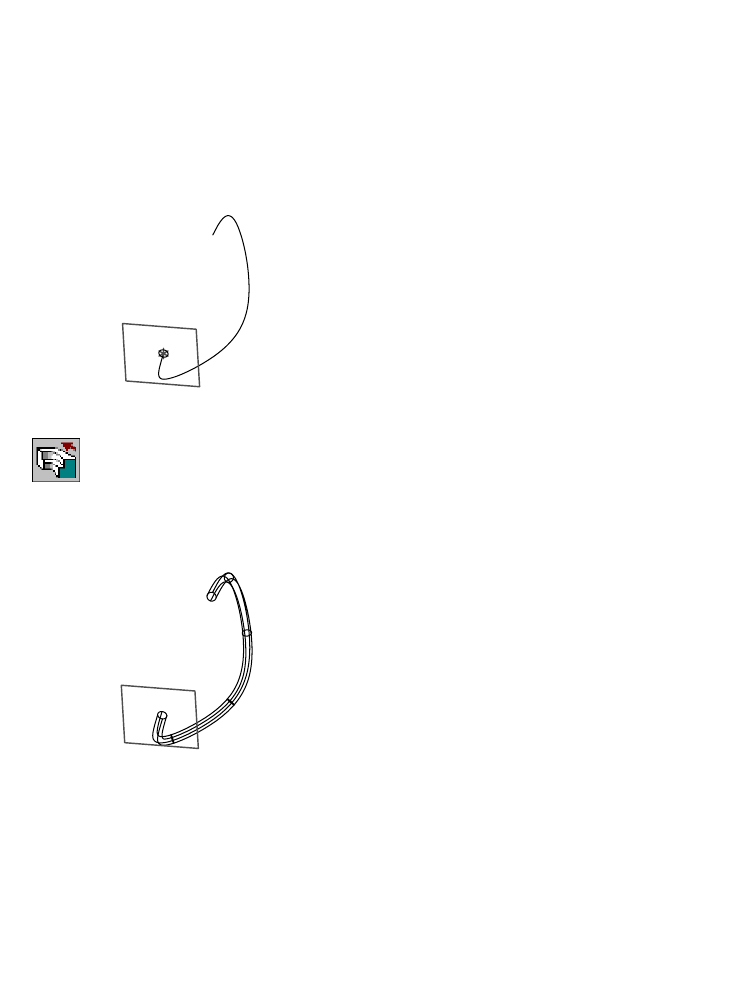
162 |Chapter 8 Creating Sketched Features
To create a sweep from a 3D spline path
1Make SWEEP6_1 visible.
2Activate SWEEP6_1.
3Make SWEEP5_1 invisible.
4Zoom in to SWEEP6_1.
SWEEP6_1 contains a 3D spline path and a solved profile constrained to the
start of the path.
5Create the sweep.
Context Menu In the graphics area, right-click and choose Sketched &
Work Features ➤ Sweep.
6In the Sweep Feature dialog box, choose OK to accept the settings.
Your drawing should look like this.
Save your file.
Editing Sweep Features |163
Editing Sweep Features
As with all sketched features, sweep features can be edited by modifying the
profile, the path, or the feature itself.
Try modifying the sweep features you just created.
Creating Bend Features
The bend feature is for bending flat or cylindrical parts.
To create a bend feature, you sketch a single line segment on your part and
create an open profile to define the tangency location where the part transi-
tions from its current shape to the final bent shape.
To bend an entire flat part, sketch the open profile to extend over the entire
part. To bend only a portion of a flat part, sketch the open profile over only
the portion you want to bend.
By choosing options and entering values in the Bend dialog box, you design
a theoretical cylinder tangent to the open profile, about which the part
bends. The bend feature is placed automatically in one operation.
In the next exercise, you create a bend feature on a portion of a flat part.
Make the BEND_1 part visible. Then activate it and use ZOOM to position the
part on your screen.
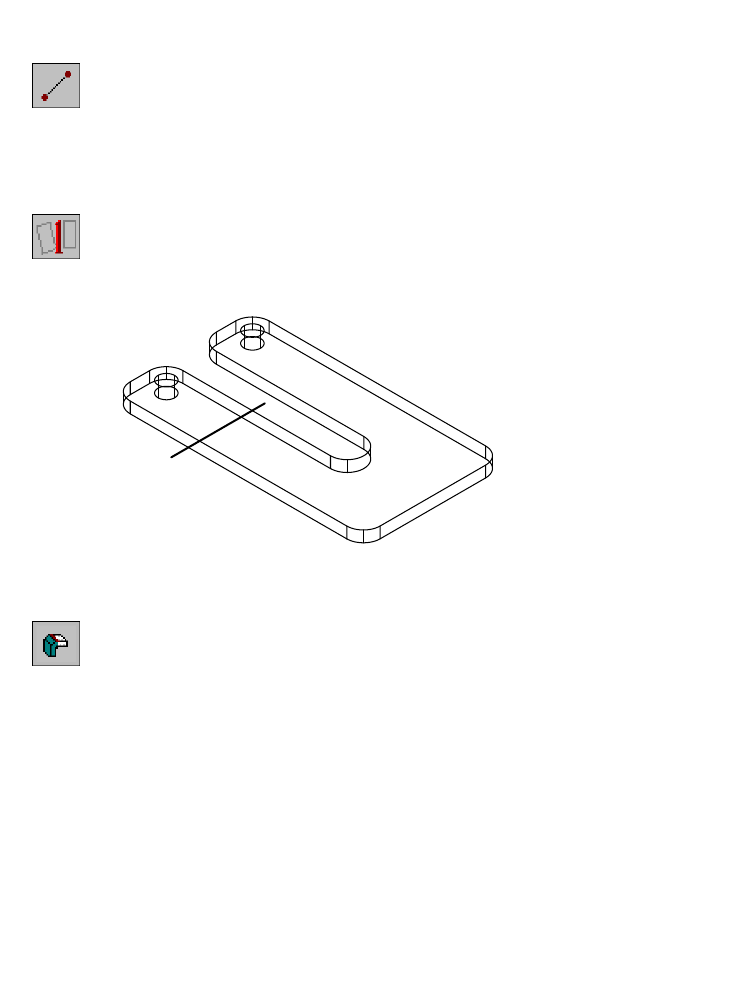
164 |Chapter 8 Creating Sketched Features
To create a bend feature on a flat part
1Use LINE to sketch a line on one side of the plate, responding to the prompts.
Context Menu In the graphics area, right click and choose 2D Sketching ➤
Line.
Specify first point: Select the start point of the line
Specify next point [or Undo]: Select the end point of the line, and press ENTER
2Use AMPROFILE to create an open profile, responding to the prompt.
Context Menu In the graphics area, right-click and choose Sketch Solving
➤ Single Profile.
Select part edge to close the profile <open profile>: Press ENTER
In the Browser, an icon for the open profile is displayed.
3Use AMBEND to create the bend feature.
Context Menu In the graphics area, right-click and choose Sketched
Work Features ➤ Bend.
4In the Bend dialog box specify:
Combination: Angle+Radius
Radius: 1.0
Angle: 90
Flip Bend Side: Verify that the direction arrow points toward the hole
Flip Direction: Verify that the arrow points up
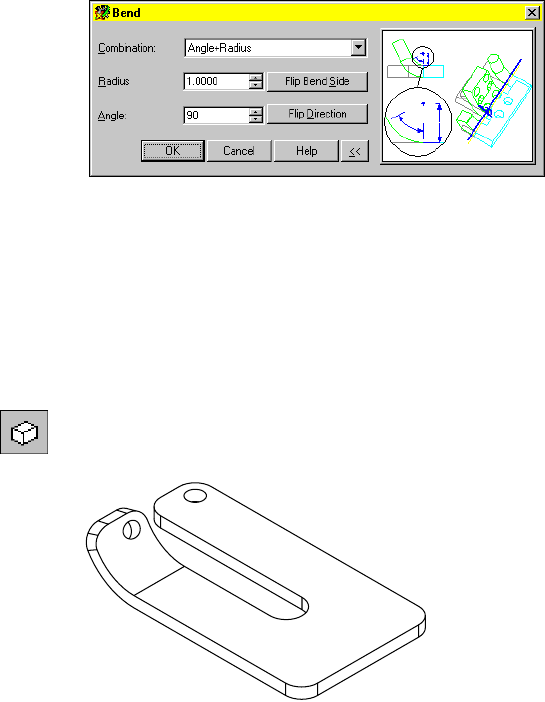
Editing Bend Features |165
Choose OK.
Hide the hidden lines to see your part better. To display silhouette edges, you
set the DISPSILH system variable to 1 first.
5Change the setting for DISPSILH.
Command DISPSILH
New value for DISPSILH <0>: Enter 1
6Use HIDE to hide the hidden lines.
Desktop Menu View ➤ Hide
Your part should look like this.
The bend is completed, and an icon for the bend feature is displayed in the
Browser. Save your file.
Editing Bend Features
Use typical editing methods to edit a profile for a bend feature or to redefine
the bend.
Try redefining the bend feature you just created.

166

167
In This Chapter 9
Creating Work Features
In Autodesk® Mechanical Desktop®, work features are
special construction features that you use to place
geometry that would otherwise be very difficult to
position parametrically.
By constraining sketched and placed features to a work
feature, that is in turn constrained to your part, you can
easily control their location by changing the position of
the work feature.
This tutorial teaches you how to use work features to
control the position of sketched features. You learn
about each of these features as you work through the
tutorial.
■Work planes
■Work axes
■Work points

168 |Chapter 9 Creating Work Features
Key Terms
Te r m Definition
nonparametric work
plane A work plane fixed in location with respect to a part. If the part geometry is
parametrically changed, the work plane is unaffected.
parametrics A solution method that uses the values of part parameters to determine the
geometric configuration of the part.
parametric work plane A work plane associated with and dependent on the edges, faces, planes, vertices,
and axes of a part.
sketch plane A temporary drawing surface that corresponds to a real plane on a feature. It is an
infinite plane with both X and Y axes on which you sketch or place a feature.
work axis A parametric construction line created along the centerline of a cylindrical feature,
or sketched on the current sketch plane. A work axis can be used as the axis of
revolution for a revolved or swept feature, an array of features, to place a work
plane, and to locate new sketch geometry. It can be included in dimensions.
work feature Planes, axes, and points used to place geometric features on an active part.
work plane An infinite plane attached to a part. A work plane can be designated as a sketch
plane and can be included in a constraint or dimension scheme. Work planes can
be either parametric, or nonparametric.
work point A parametric work feature used to position a hole, the center of an array, or any
other point for which there is no other geometric reference.
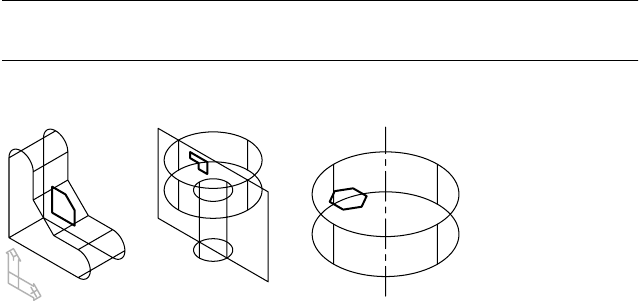
Basic Concepts of Work Features |169
Basic Concepts of Work Features
When you build a parametric part, you define how the part’s features are
associated. Changing one feature directly affects all the features related to it.
Work features are special construction features that help you define the rela-
tionships between the features on your part. They provide control when
placing sketches and features. Any changes to the position of a work feature
directly affect the placement of the sketches and features constrained to it.
You use work features to define
■A plane to place sketches and features
■A plane or edge to place parametric dimensions and constraints
■An axis or point of rotation for revolved, swept, and array features
There are three types of work features: work planes, work axes, and work
points. In this tutorial, you learn the basics of creating and modifying each
of these work features.
Open the file w_feat.dwg in the desktop\tutorial folder.
NOTE Back up the tutorial drawing files so you still have the original files if you
make a mistake. See “Backing up Tutorial Drawing Files” on page 40.
The drawing contains three simple parts.
Each part has a profile sketch associated with it. You create work features to
control the behavior of each of the sketches.
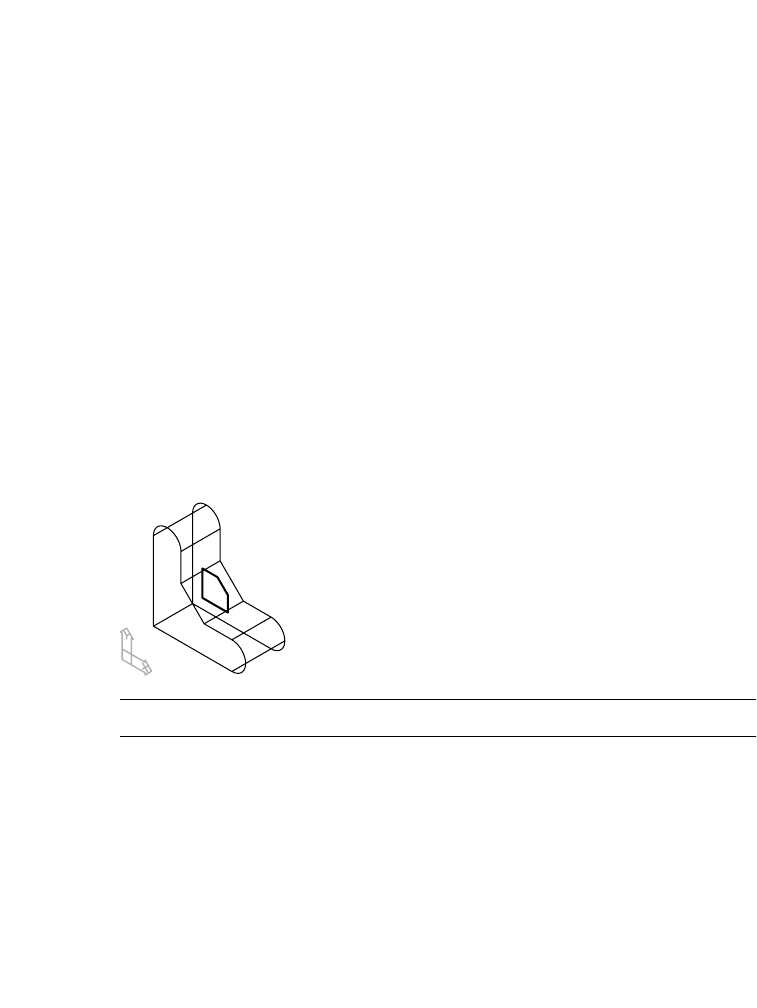
170 |Chapter 9 Creating Work Features
Creating Work Planes
A work plane is an infinite plane that you attach to your part. It can be either
parametric or nonparametric. A work plane can also be used to define a sketch
plane for new geometry. To position a feature that does not lie on the same
plane as your base feature, you define a new plane and then create the feature.
If the plane is parametric, any changes to it affect the position of the feature.
Work planes are defined using two modifiers. The modifiers determine how
the plane will be oriented. By selecting the right modifiers, you can create a
work plane wherever you need a plane to place geometry.
Parametric work planes can be created by specifying edges, axes, or vertices,
and defining whether the plane is normal, parallel, or tangent to selected
geometry. Nonparametric work planes can be created on the current coordi-
nate system (UCS), or on any of the three planes of the World Coordinate
System (WCS).
For more information about creating work planes, see AMWORKPLN in the
online Command Reference.
PART1_1 contains an extrusion with a profile constrained to its back face.
NOTE For clarity, the parametric dimensions are not shown.
In this tutorial, you use this profile to cut material from the part. By extrud-
ing the profile to a work plane, you can easily control the depth of the extru-
sion by changing the position of the plane.
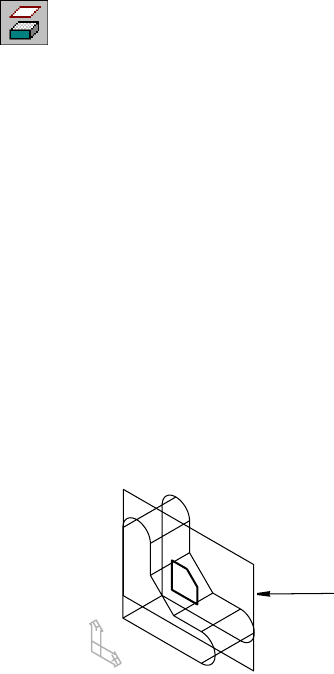
Creating Work Planes |171
First, you create a work plane through the midplane of the part and extrude
the profile to it. Later, you edit the position of the work plane to modify the
depth of the new extrusion.
Activate PART1_1 and use ZOOM to position it on your screen.
Browser Double-click PART1_1. Now right-click PART1_1 and
choose Zoom to.
To create a work plane
1Use AMWORKPLN to create a work plane through the midplane of PART1_1.
Context Menu In the graphics area, right-click and choose Sketched &
Work Features ➤ Work Plane.
2In the Work Plane dialog box, specify:
1st Modifier: Planar Parallel
2nd Modifier: Offset
Offset: Enter .5
Choose OK.
3Continue on the command line.
Select work plane, planar face or [worldXy/worldYz/worldZx/Ucs]:
Specify the front face
Enter an option [Next/Accept] <Accept>:
Enter n to cycle to the front face or press ENTER
Enter an option [Flip/Accept] <Accept>:
Enter f to point direction arrows into the part
Enter an option [Flip/Accept] <Accept>: Press ENTER
Plane = Parametric
Select edge to align X axis or [Flip/Rotate/Origin] <accept>: Press ENTER
A work plane now bisects the part.
Next, extrude the profile to the work plane.
work plane
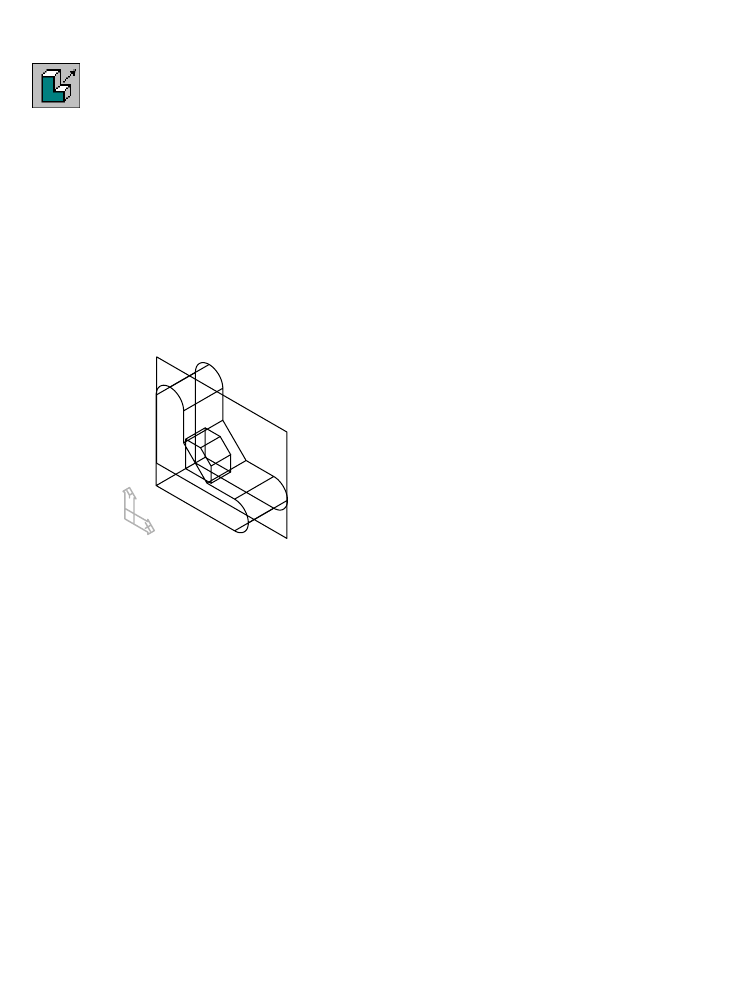
172 |Chapter 9 Creating Work Features
To extrude a profile to a plane
1Use AMEXTRUDE to extrude the profile.
Context Menu In the graphics area, right-click and choose Sketched &
Work Features ➤ Extrude.
2In the Extrusion dialog box, specify the following:
Operation: Cut
Termination: Plane
Choose OK to exit the dialog box.
3Continue on the command line.
Select face or work plane: Specify the work plane
The profile is extruded to the work plane.
Now edit the location of the work plane to control the depth of the extrusion
you just created.
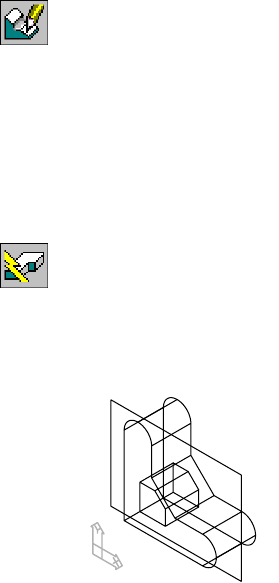
Editing Work Planes |173
Editing Work Planes
Because a nonparametric work plane is static, any features constrained to it
are restricted to the original plane. If you change the position or orientation
of your part, the features remain associated with the work plane and your
part could fail to update.
Whenever possible, locate your features on parametric work planes. When
you change the location of a parametric work plane, you change the position
of any features created on it or constrained to it.
To modify the position of a work plane
1Use AMEDITFEAT to reposition the work plane, responding to the prompts.
Context Menu In the graphics area, right-click and choose Edit Features
➤ Edit.
Enter an option [Sketch/surfCut/Toolbody/select Feature]
<selectFeature>: Press ENTER
Select feature: Specify the work plane
Select object: Specify the 0.5 dimension
Enter dimension value <.5>: Enter .15
Select object: Press ENTER
2Use AMUPDATE to update the part, responding to the prompt.
Context Menu In the graphics area, right-click and choose Update Part.
Enter an option [active Part/aLl parts] <active Part>: Press ENTER
If you use the Browser, the prompt is not displayed.
Your part should look like this.
Save your file.
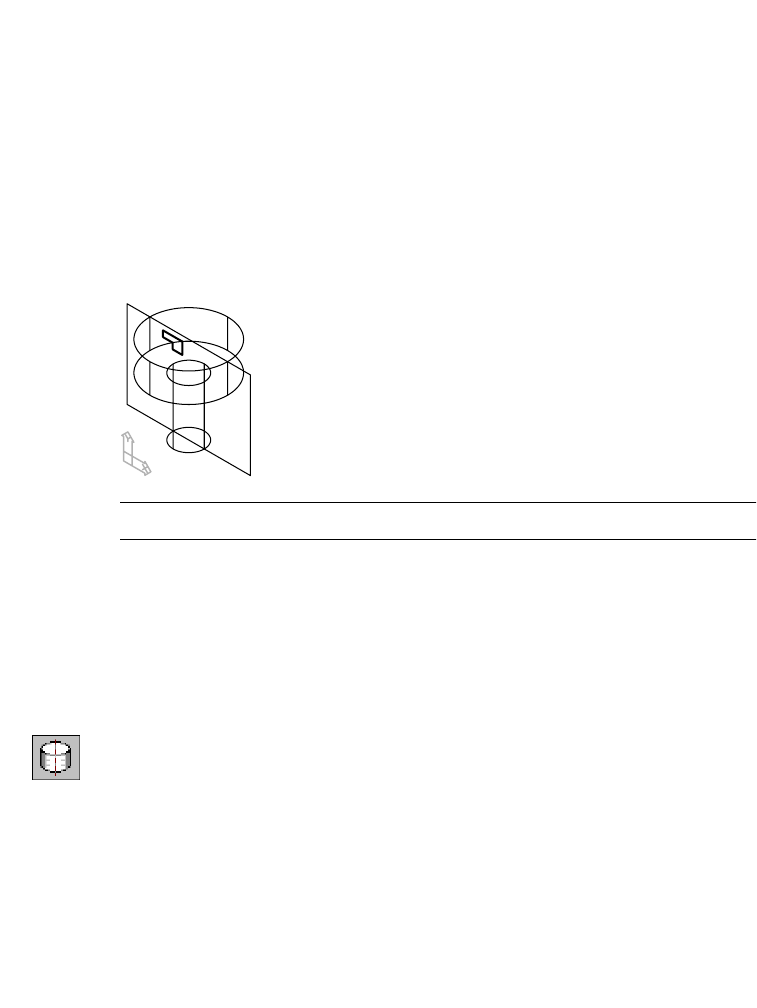
174 |Chapter 9 Creating Work Features
Creating Work Axes
A work axis is a parametric construction line used as the axis of revolution
for a revolved or swept feature, or an array of features; it is also used to place
a work plane, and to locate new sketch geometry. You can create a work axis
through the center of a cylindrical edge, or draw it on the current sketch
plane by specifying any two points.
PART2 contains a simple revolved feature, a work plane, and a partially con-
strained profile. You create a work axis through the center of the part. Then
you constrain the profile to the work axis so you can cut material from the
base feature.
NOTE For clarity, the parametric dimensions are not shown.
Activate PART2 and use ZOOM to position it on your screen.
Browser Double-click PART2_1. Now right-click PART2_1 and
choose Zoom to.
To create a work axis
1Use AMWORKAXIS to create a work axis, responding to the prompt.
Context Menu In the graphics area, right-click and choose Sketched &
Work Features ➤ Work Axis.
Select cylinder, cone or torus [Sketch]: Select a cylindrical edge
Because the work axis is created through the center of the part, no constraints
are necessary.

Creating Work Axes |175
Next, constrain the profile to the new work axis and create a revolved feature
from it.
Depending on your drawing, your default dimension values may differ from
those in this exercise.
To constrain and revolve a profile
1Use AMPARDIM to constrain the profile to the work axis. Add two dimensions,
responding to the prompts.
Context Menu In the graphics area, right-click and choose Dimensioning
➤ New Dimension.
Select first object: Specify the right edge of the profile (1)
Select second object or place dimension: Specify the work axis (2)
Specify dimension placement: Place the dimension (3)
Enter dimension value or [Undo/Hor/Ver/Align/Par/aNgle/Ord/Diameter/pLace]
<0.8324>: Enter h to force a horizontal dimension
Enter dimension value or [Undo/Hor/Ver/Align/Par/aNgle/Ord/Diameter/pLace]
<0.1671>: Enter 0
Solved underconstrained sketch requiring 1 dimensions or constraints.
Select first object: Specify the top edge of the profile (4)
Select second object or place dimension: Specify the top edge of the part (5)
Specify dimension placement: Place the vertical dimension (6)
Enter dimension value or [Undo/Hor/Ver/Align/Par/aNgle/Ord/Diameter/pLace]
<0.1333>: Enter 0
Solved fully constrained sketch.
Select first object: Press ENTER
work axis
3
2
1
5
6
4
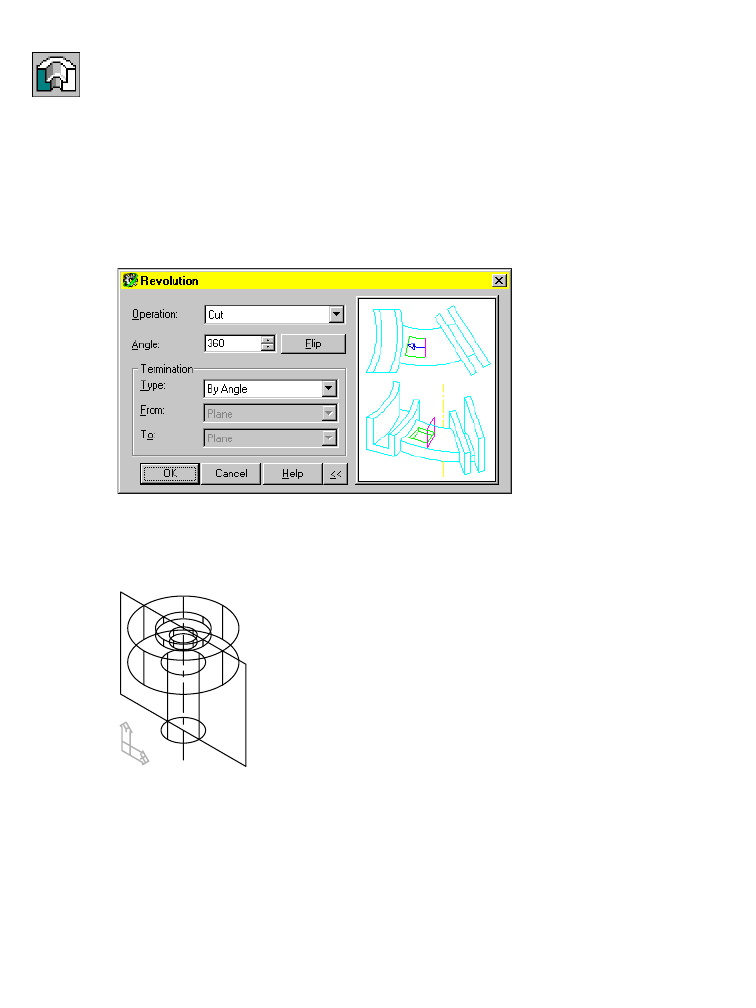
176 |Chapter 9 Creating Work Features
2Use AMREVOLVE to revolve a feature from the profile, responding to the
prompt.
Context Menu In the graphics area, right-click and choose Sketched &
Work Features ➤ Revolve.
Select revolution axis: Select the work axis
3In the Revolution dialog box, specify:
Operation: Cut
Angle: Enter 360
Termination: By Angle
Choose OK to exit the dialog box.
Your drawing should look like this.
Save your file.

Editing Work Axes |177
Editing Work Axes
Work axes are parametric, so any changes to the parameters controlling a
work axis affect the location of features constrained to it.
In this exercise, the work axis was created through the center of a cylindrical
object and cannot be repositioned. But by changing one of the dimensions
that constrains the profile to the axis, the revolved feature changes.
To modify the revolved feature, you change the horizontal dimension con-
straining the profile to the work axis. In this exercise, because the value of
the dimension is 0, modifying it forces the profile in the wrong direction. To
relocate the profile correctly, erase the dimension, move the profile slightly,
and then add a new horizontal dimension.
To reposition a profile constrained to a work axis
1Edit the revolved feature with the Browser.
Browser Right-click Revolution Angle1 and choose Edit Sketch.
2Use ERASE to erase the 0.00 dimension constraining the profile to the work
axis.
Context Menu In the graphics area, right-click and choose 2D Sketching
➤ Erase.
3Use MOVE to move the profile and its dimensions, following the prompts.
Context Menu In the graphics area, right-click and choose 2D Sketching
➤ Move.
Select objects: Enter w
Specify first corner: Specify a point above and left of the 0.15 dimension
Specify opposite corner: Specify a point below and right of the 0.30 dimension
11 found
Select objects: Press ENTER
Specify base point or displacement: Specify any point
Specify second point of displacement or <use first point as displacement>:
Specify a point to the left of the base point
NOTE Press F8 to turn on orthographic mode before you specify the base and
second points.
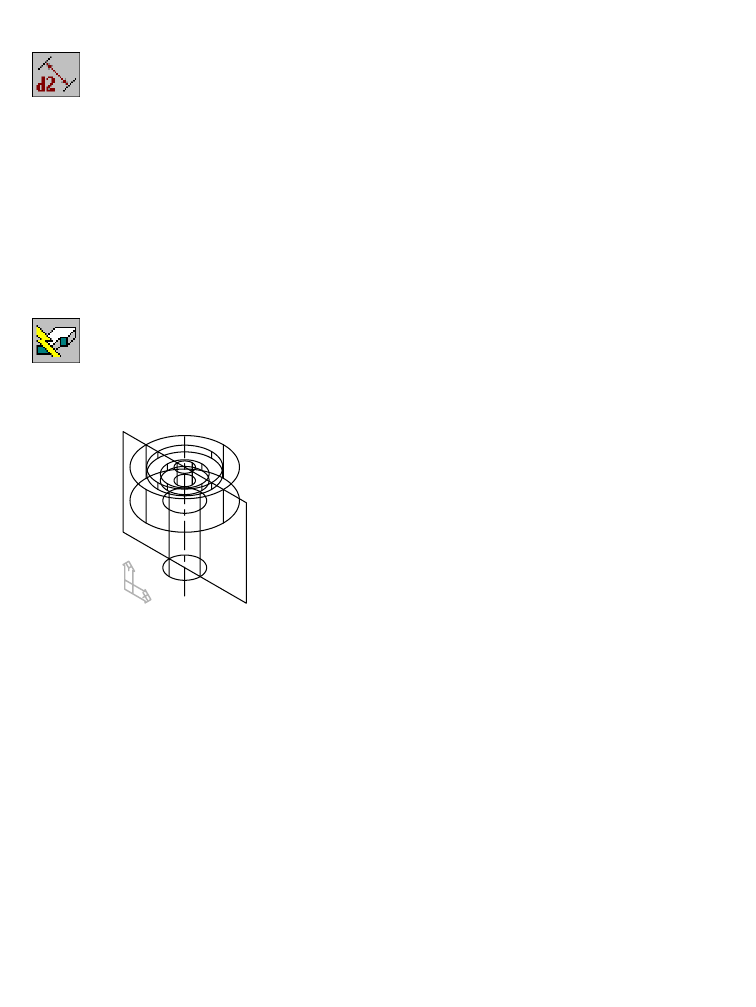
178 |Chapter 9 Creating Work Features
4Use AMPARDIM to create a new parametric dimension, following the
prompts.
Context Menu In the graphics area, right-click and choose Dimensioning
➤ New Dimension.
Select first object: Specify the right edge of the profile
Select second object or place dimension: Specify the work axis
Specify dimension placement: Place the dimension
Enter dimension value or [Undo/Hor/Ver/Align/Par/aNgle/Ord/Diameter/pLace]
<0.4347>: Verify that the dimension is horizontal, then enter .15
Solved fully constrained sketch.
Select first object: Press ENTER
5Use AMUPDATE to update the part, responding to the prompt.
Context Menu In the graphics area, right-click and choose Update Part.
Enter an option [active Part/aLl parts] <active Part>: Press ENTER
Your drawing should look like this.
Save your file.
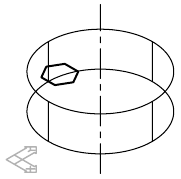
Creating Work Points |179
Creating Work Points
A work point is a parametric point for positioning features that cannot easily
be located on a part. By constraining a feature to a work point and then con-
straining the work point to the part, you control the position of the feature.
Use work points to
■Position sketched features
■Create centers for polar arrays
■Place surface cut features
■Place holes when concentric cylindrical edges, or two planar edges, are not
available
PART3 contains a simple cylindrical extrusion with a work axis at its center,
and a sketch on its top face.
You place a work point on the sketch plane and profile the sketch. Then, you
constrain the profile to the work point, and the work point to the work axis.
Activate PART3, and use ZOOM to position it on your screen.
Browser Double-click PART3_1. Then right-click PART3_1 and
choose Zoom to.
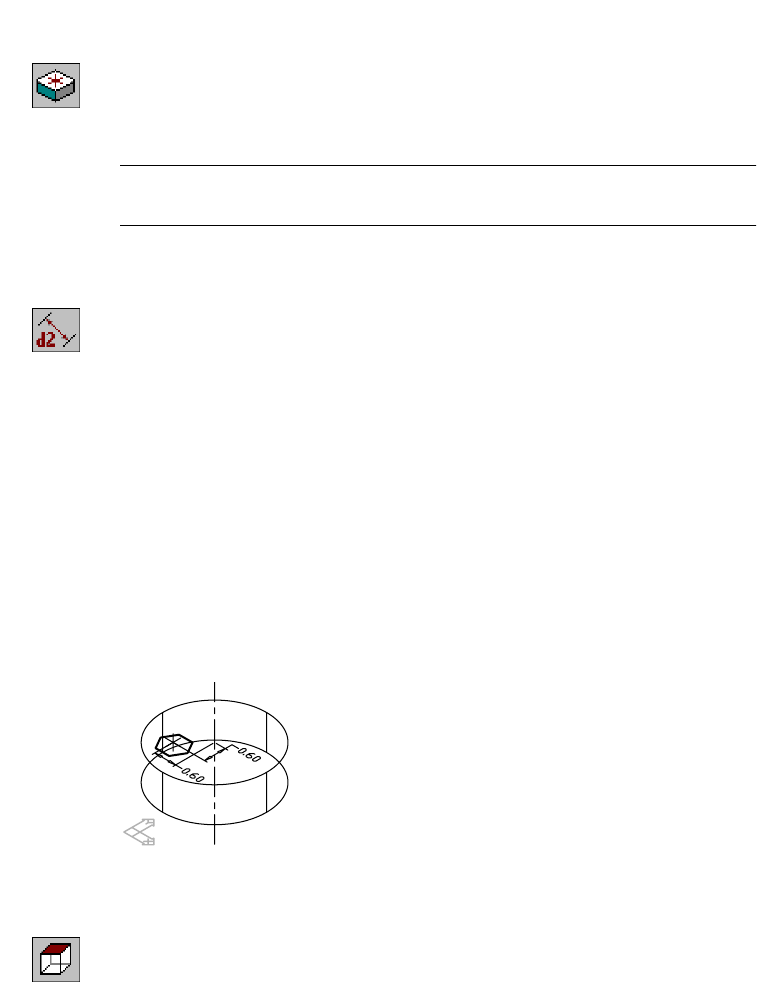
180 |Chapter 9 Creating Work Features
To create and constrain a work point
1Use AMWORKPT to create a work point, responding to the prompt.
Context Menu In the graphics area, right-click and choose Sketched &
Work Features ➤ Work Point.
Specify the location of the workpoint: Specify a point near the center of the sketch
NOTE You may prefer to turn OSNAP off before you create and constrain the
work point. Click the OSNAP button at the bottom of your screen.
2Use AMPARDIM to constrain the work point to the work axis, following the
prompts.
Context Menu In the graphics area, right-click and choose Dimensioning
➤ New Dimension.
Select first object: Specify the work point
Select second object or place dimension: Specify the work axis
Specify dimension placement: Place the dimension
Enter dimension value or [Undo/Hor/Ver/Align/Par/aNgle/Ord/Diameter/pLace]
<0.5890>: Verify the dimension is horizontal and enter .6
Solved underconstrained sketch requiring 1 dimensions or constraints.
Select first object: Specify the work point
Select second object or place dimension: Specify the work axis
Specify dimension placement: Place the dimension
Enter dimension value or [Undo/Hor/Ver/Align/Par/aNgle/Ord/Diameter/pLace]
<0.6130>: Verify the dimension is vertical and enter .6
Solved fully constrained sketch.
Select first object: Press ENTER
Solve the sketch and constrain it to a work point.
Change to a top view of your part.
Desktop Menu View ➤ 3D Views ➤ Top
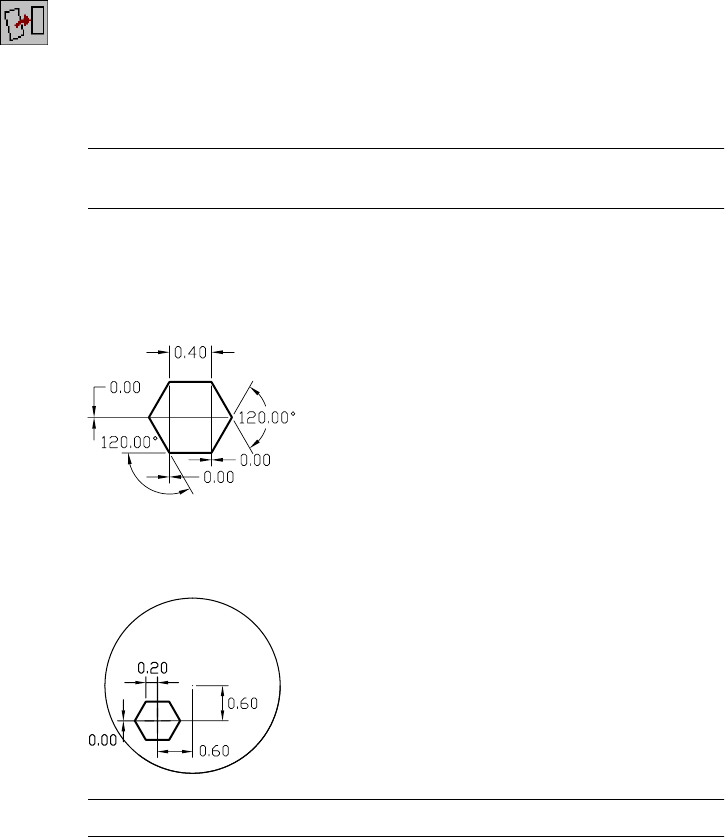
Creating Work Points |181
To solve a sketch and constrain it to a work point
1Use AMPROFILE to solve the sketch, responding to the prompts.
Context Menu In the graphics area, right-click and choose Sketch Solving
➤ Profile.
Select objects for sketch: Specify the polygon sketch
Select objects for sketch: Press ENTER
Solved underconstrained sketch requiring 8 dimensions or constraints.
NOTE Although the polygon is a single object, you cannot use Single Profile
to solve it because it was not the last object created.
The profile requires eight constraints: six to solve it, and two to constrain it
to the work point.
2Zoom in to the profile and constrain it using the dimensions in the following
illustration.
You could also use Equal Length constraints on the line segments to reduce
the number of dimensions required.
3Constrain the profile to the work point as in the following illustration.
NOTE For clarity, the dimensions of the profile are not shown.
The profile is now fully constrained. Next, you create an extrusion to cut
material from the base feature.
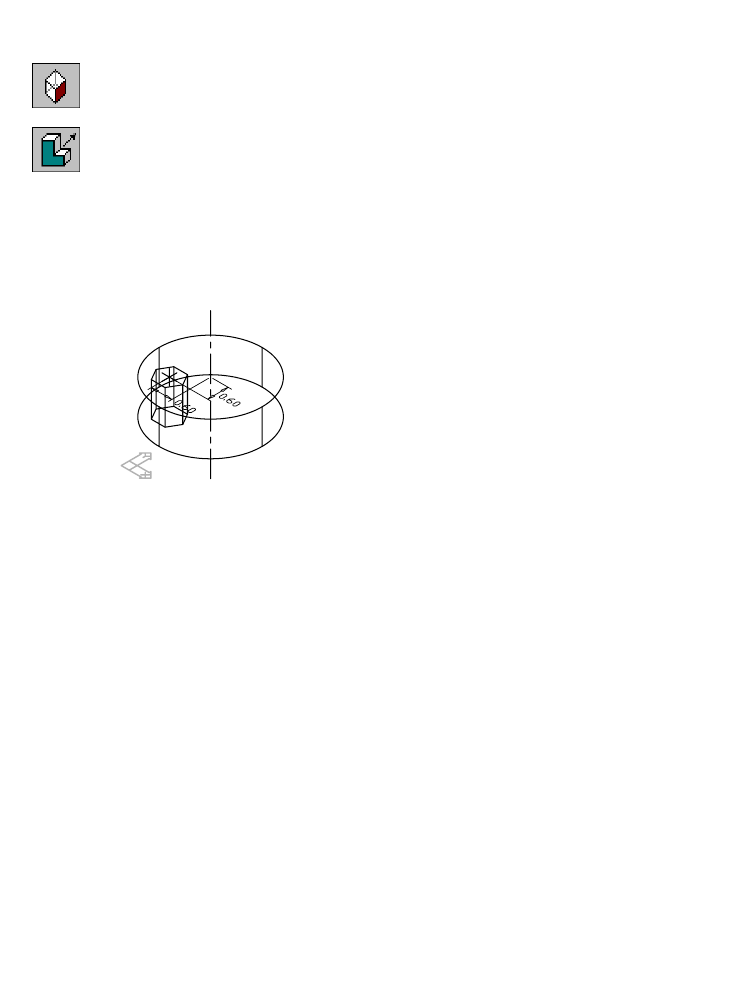
182 |Chapter 9 Creating Work Features
To extrude a feature through a part
1Change to an isometric view.
Desktop Menu View ➤ 3D Views ➤ Front Right Isometric
2Use AMEXTRUDE to extrude the profile through the part.
Context Menu In the graphics area, right-click and choose Sketched &
Work Features ➤ Extrude.
In the Extrusion dialog box, specify:
Operation: Cut
Termination: Through
Choose OK.
The dimensions controlling the work point are still visible because the work
point has not been consumed by a feature.
Save your file.
Editing Work Points
Next, to relocate the extrusion you change the dimensions constraining the
work point to the work axis. The extrusion and the work point are paramet-
rically associated; any change to the position of the work point causes the
extrusion to move.
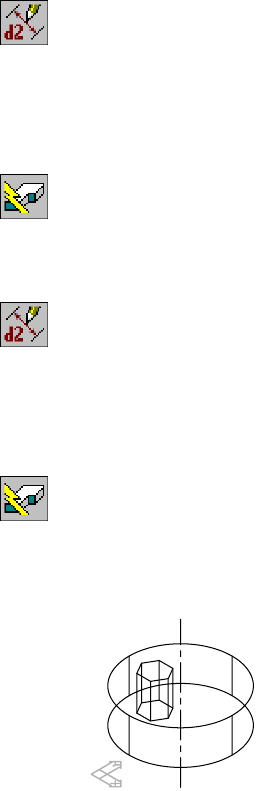
Editing Work Points |183
To edit a work point
1Use AMMODDIM to modify the vertical sketch dimension controlling the
work point, responding to the prompts.
Context Menu In the graphics area, right-click and choose Dimensioning
➤ Edit Dimension.
Select dimension to change: Specify the vertical dimension
New value for dimension <0.6000>: Enter 0
Solved fully constrained sketch.
2Use AMUPDATE to update the part, responding to the prompt.
Context Menu In the graphics area, right-click and choose Update Part.
Enter an option [active Part/aLl parts] <active Part>: Press ENTER
3Use AMMODDIM to modify the horizontal sketch dimension controlling the
work point, responding to the prompts.
Context Menu In the graphics area, right-click and choose Dimensioning
➤ Edit Dimension.
Select dimension to change: Specify the horizontal dimension
New value for dimension <0.6000>: Enter .75
Solved fully constrained sketch.
4Update the part, responding to the prompt.
Context Menu In the graphics area, right-click and choose Update Part.
Enter an option [active Part/aLl parts] <active Part>: Press ENTER
5Turn off the visibility of the work point and its dimensions.
Browser Right-click WorkPoint1 and choose Visible.
Save your file.
You learn more about creating work features as you go through the rest of the
tutorials in this book.

184

185
In This Chapter 10
Creating Placed Features
This tutorial introduces you to placed features, and
builds on what you learned in previous tutorials. A
placed feature is a well-defined common shape, such as
a hole or a fillet. To create a placed feature, you only
need to supply its dimensions. Autodesk® Mechanical
Desktop® creates the feature for you.
In this lesson, you learn how to create and modify
placed features.
■Holes
■Face drafts
■Fillets
■Chamfers
■Shells
■Surface cuts
■Patterns
■Copied features
■Combined features
■Part splits

186 |Chapter 10 Creating Placed Features
Key Terms
Te r m Definition
chamfer A beveled surface between two faces.
combine feature A parametric feature resulting from the union, subtraction, or intersection of a
base part with a toolbody part.
draft angle An angle applied parallel to the path of extruded, revolved, or swept surfaces or
parts. A draft angle is used to allow easy withdrawal from a mold or easy insertion
into a mated part.
face draft A part face that has a draft angle applied to it. Used to create an angle on a face
that will be needed when pulling a part out of a mold.
fillet A curved transition from one part face or surface to another. The transition cuts
off the outside edge or fills in the inside edge. The fillet can have a constant or
variable radius.
hole A geometric feature with a predefined shape: drilled, counterbore, or countersink.
pattern feature A parameter-driven collection of duplicate features. You can create rectangular,
polar, and axial patterns. If you change the original patterned feature, all the
elements in the pattern change.
placed feature A well-defined mechanical shape that does not require sketches, such as a hole,
chamfer, or fillet. Placed features are constrained to the feature on which they are
placed, and they are geometrically dependent.
shell A Mechanical Desktop feature that cuts portions of the active part by offsetting its
faces.
surface cut A feature on a part created when a surface is joined to the solid. Where the
surface cuts the part or protrudes, the part face assumes the curved shape of the
surface. The surface, like other features, is parametric; both the surface and the
part retain their parametric relationship whenever either is modified.
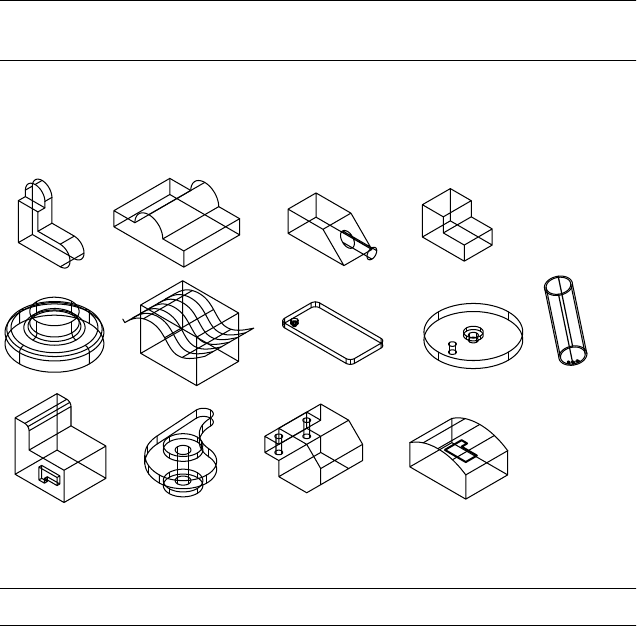
Basic Concepts of Placed Features |187
Basic Concepts of Placed Features
Placed features are well defined features that you don’t need to sketch, such
as fillets, holes, chamfers, face drafts, shells, surface cuts, patterns, combined
features, and part splits.
You specify values for their parameters and then you position them on your part.
To modify placed features, you simply change the parameters controlling them.
Open the file p_feat.dwg in the desktop\tutorial folder.
NOTE Back up the tutorial drawing files so you still have the original files if you
make a mistake. See “Backing up Tutorial Drawing Files” on page 40.
The drawing includes thirteen parts which contain the geometry you need to
create the features in this tutorial. If you are interested in how the parts in
this drawing were created, activate a part and use AMREPLAY.
Before you begin, expand the Browser hierarchy by clicking the plus sign in
front of P_FEAT. Expand the hierarchy of the active part HOLE_1.
NOTE For clarity, the work features are not shown.
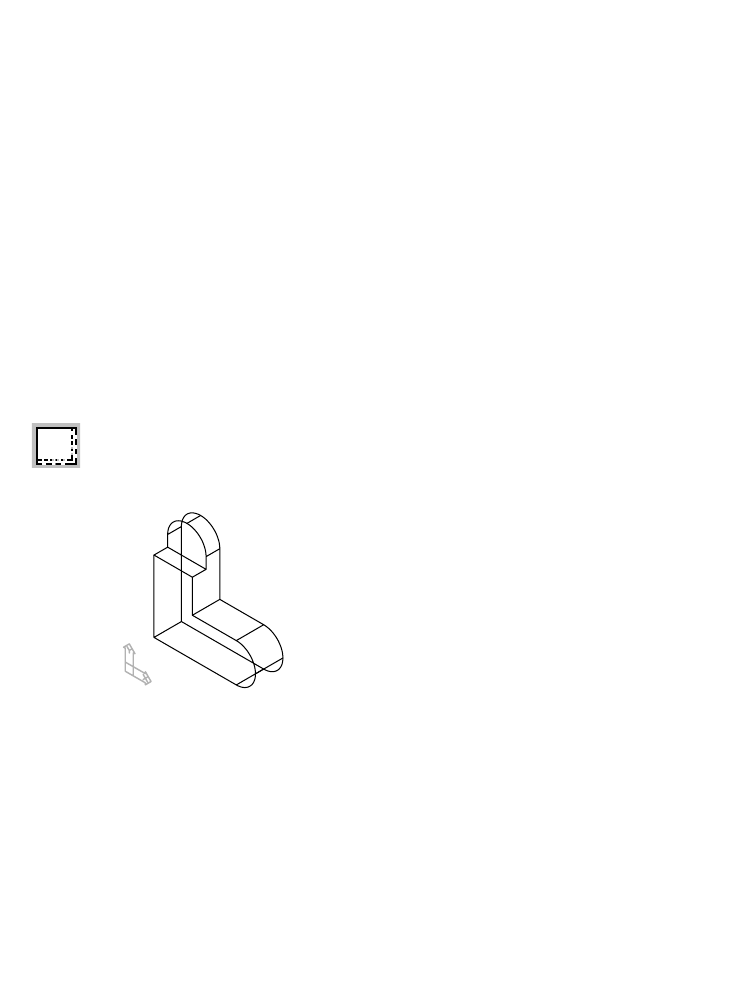
188 |Chapter 10 Creating Placed Features
Creating Hole Features
You can create drilled, counterbore, and countersink hole features. Each may
be assigned tapped hole information. Holes can extend through the part,
stop at a defined plane, or stop at a defined depth. You can change a hole
from one type to another at any time.
When you create a hole, you can use the Thread tab in the Hole dialog box
to include threads. Threads can also be added to existing holes.
Instead of creating a custom hole, you can specify a standard hole from an
external file. Standard holes can be tapped or untapped.
In this exercise, you create hole features first. Then you add thread data to
the hole you created.
To create a hole feature
1Activate HOLE_1 part, and zoom in to it.
Browser In the Browser, double-click HOLE_1. Now right-click
HOLE_1 and choose Zoom to.
HOLE_1 is created from two extrusions.
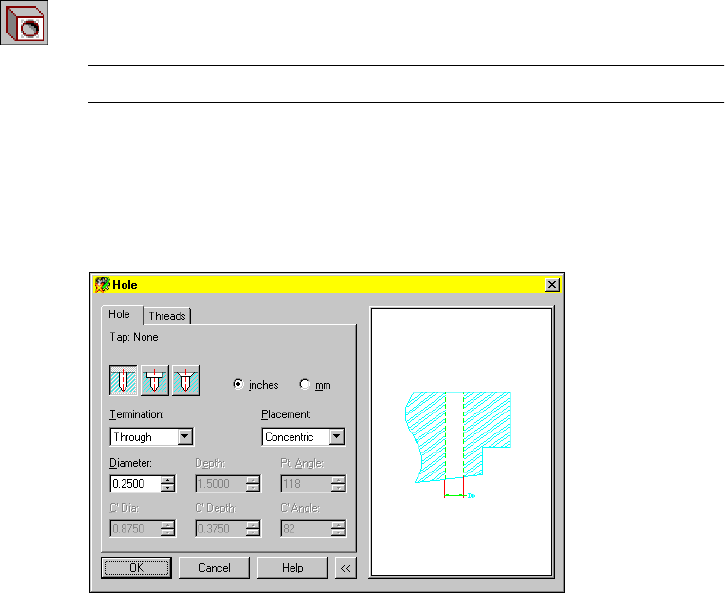
Creating Hole Features |189
2Use AMHOLE to create two drilled holes.
Context Menu In the graphics area, right-click and choose Placed
Features ➤ Hole.
NOTE Hold your cursor over an icon to see a tooltip that identifies the icon.
In the Hole dialog box, on the Hole tab, select the Drilled hole type icon, and
specify:
Termination: Through
Placement: Concentric
Diameter: Enter .25
Choose OK to exit the dialog box.

190 |Chapter 10 Creating Placed Features
3Define the locations for the holes, responding to the prompts.
Select work plane or planar face [worldXy/worldYz/worldZx/Ucs]:
Specify a face (1)
Select concentric edge: Specify an edge (1)
Select work plane or planar face [worldXy/worldYz/worldZx/Ucs]:
Specify a face (2)
Select concentric edge: Specify an edge (2)
Select work plane or planar face [worldXy/worldYz/worldZx/Ucs]:
Press ENTER
Your drawing should look like this.
Next, add internal threads to the HOLE_1.
Creating Thread Features
You can create internal or external threads on cylindrical, conical, and ellip-
tical shapes. You edit existing threads from within the Thread dialog box. As
with holes, you can specify standard threads from an external file.
In the following exercise, you add an external thread to one of the cylindrical
holes you created.
1
2
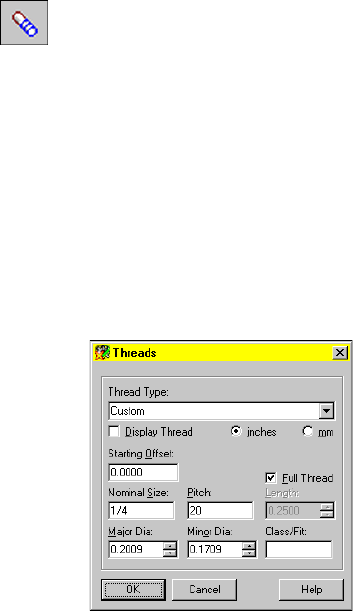
Creating Thread Features |191
To create a thread feature
1In the Browser, select the hole to add threads.
Browser Select Hole1.
2Define the thread for Hole1
Context Menu In the graphics area, right-click and choose Placed
Features ➤ Thread
Respond to the prompts:
Select cylindrical/conical edge or face: Select the circular edge of Hole1
Enter an option [Next/Accept] <Accept>: Press ENTER
In the Threads dialog box, specify:
Thread Type: Custom
Full Thread: Select the check box
Major Dia: 0.2009
Minor Dia: 0.1709
Choose OK.
The thread feature is placed on Hole1 and an icon representing the external
thread is added to the Browser hierarchy.
Next, you change one of the drilled holes to a counterbore hole, and change
the minor diameter of the thread feature.
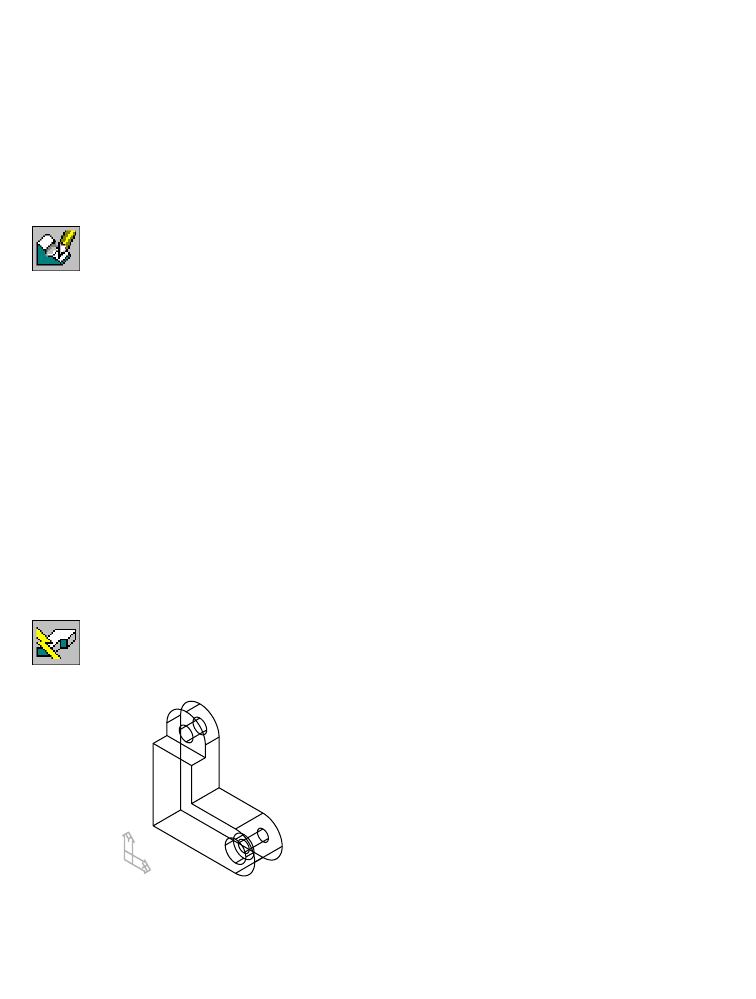
192 |Chapter 10 Creating Placed Features
Editing Hole Features
You can change a hole feature from one type of hole to another by modifying
the parameters defining the hole.
To edit a hole feature
1Use AMEDITFEAT to change the second hole to a counterbore hole, respond-
ing to the prompts.
Context Menu In the graphics area, right-click and choose Edit Features
➤ Edit.
Enter an option [Sketch/surfCut/Toolbody/select Feature] <select Feature>:
Specify Hole2
Enter an option [Next/Accept] <Accept>: Press ENTER
2In the Hole dialog box, select the Counterbore icon, and specify:
Termination: Through
Dia: Enter .2
C’Dia: Enter .375
C’Depth: Enter .15
Choose OK to exit the dialog box.
3Continue on the command line.
Select object: Press ENTER
4Use AMUPDATE to update the part, responding to the prompt.
Context Menu In the graphics area, right-click and choose Update Part.
Your part should look like this.
Save your file.

Editing Thread Features |193
Editing Thread Features
You can redefine the size of an existing thread. If you need to change the
thread type, it is necessary to delete the existing thread and create a new one.
To edit a thread feature
1Use AMEDITFEAT to change and display the thread feature, responding to the
prompts.
Context Menu In the graphics area, right-click and choose Edit Features
➤ Edit.
Enter an option [Sketch/surfCut/Toolbody/select Feature] <select Feature>:
Press ENTER
Select feature: Select the ExternalThread1 feature
2In the Threads dialog box, specify:
Thread Type: Custom
Display Thread: Select the check box.
Minor Diameter: 0.1805
Choose OK.
3Continue on the command line.
Select object: Press ENTER
The thread feature is displayed, and reflects the new minor diameter value.
Next, you learn how to create and edit face drafts.
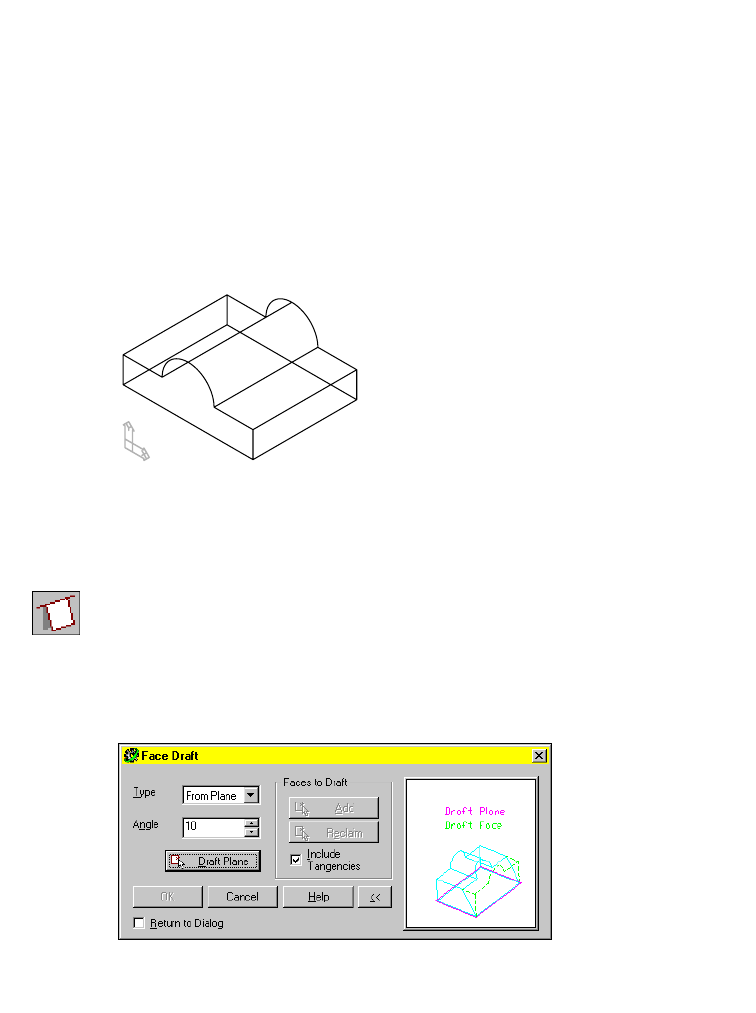
194 |Chapter 10 Creating Placed Features
Creating Face Drafts
Face drafts are used to add a small angle to one or more faces of a part; then
the part can be easily extracted from a mold after it is manufactured.
Face drafts can be applied from a specified plane, an existing part face, or a
part edge. You can also create a shadow draft from a circular face. If you are
creating a face draft from a plane, the plane can be either an existing face, or
a work plane offset from the part.
First, activate F-DRAFT_1 and zoom in on the part. Turn off the visibility of
HOLE_1.
The part contains a simple extrusion.
To create a face draft from a plane
1Use AMFACEDRAFT to create a face draft.
Context Menu In the graphics area, right-click and choose Placed
Features ➤ Face Draft.
In the Face Draft dialog box, specify:
Type: From Plane
Angle: Enter 10
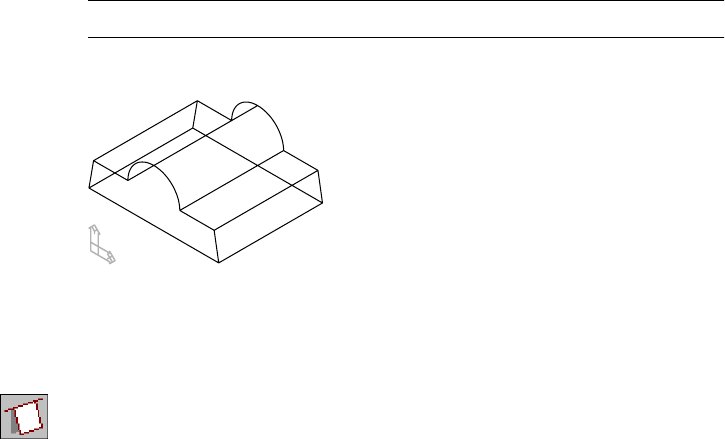
Creating Face Drafts |195
2Choose Draft Plane and continue on the command line.
Select draft plane (planar face or work plane): Specify the bottom face
Draft direction [Accept/Flip] <Accept>: Enter f to flip the direction arrow up
Draft direction [Accept/Flip] <Accept>: Press ENTER
3In the Face Draft dialog box, in Faces to Draft, press Add.
4Continue on the command line.
Select faces to draft (ruled faces only): Specify the left side face
Select faces to draft (ruled faces only): Specify the right side face
Select faces to draft (ruled faces only): Press ENTER
NOTE Refer to the UCS icon to orient yourself when selecting faces.
5Choose OK to exit the Face Draft dialog box. Draft is applied to the two faces.
A face draft can also be applied from an existing edge.
To create a face draft from a fixed edge
1Create a face draft.
Context Menu In the graphics area, right-click and choose Placed
Features ➤ Face Draft.
In the Face Draft dialog box, specify:
Type: From Edge
Angle: Enter 10
Choose Draft Plane.
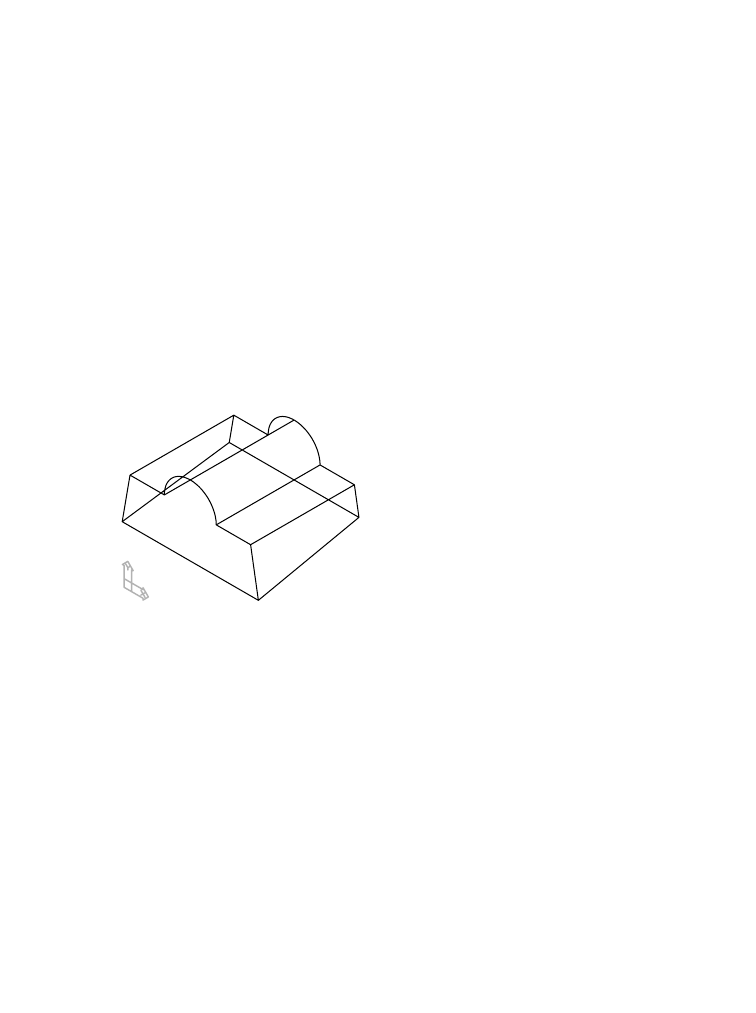
196 |Chapter 10 Creating Placed Features
2Respond to the prompts as follows:
Select draft plane (planar face or work plane): Specify the back face
Enter an option [Next/Accept] <Accept>:
Enter n to cycle to the back face, or press ENTER
Draft direction [Flip/Next] <Accept>:
Enter f to flip the arrow away from the part, or press ENTER
3In the Face Draft dialog box, specify:
Faces to Draft: Add
4Continue on the command line.
Select faces to draft (ruled faces only): Specify the bottom face
Select faces to draft (ruled faces only): Press ENTER
Select fixed edge: Specify the bottom edge of the back face
Select fixed edge: Press ENTER
5In the Face Draft dialog box, choose OK to exit.
Draft is applied to the bottom face.
Next, create a shadow draft along the circular face of the part.
Creating Face Drafts |197
To create a shadow draft
1Create the shadow draft.
Context Menu In the graphics area, right-click and choose Placed
Features ➤ Face Draft.
In the Face Draft dialog box, specify:
Type: Shadow
Angle: Enter 45
Choose Draft Plane.
2Respond to the prompts as follows:
Select draft plane (planar face or work plane): Specify the top right face
Enter an option [Next/Accept] <Accept>:
Enter n to cycle to the top right face or press ENTER
Draft direction [Flip/Accept] <Accept>:
Enter f to flip the arrow away from the part or press ENTER
3In the Face Draft dialog box, specify:
Faces to Draft: Add
4Continue on the command line.
Select faces to draft (ruled faces only): Specify the cylindrical face
Enter an option [Next/Accept] <Accept>:
Enter n to cycle to the cylindrical face or press ENTER
Select faces to draft (ruled faces only): Press ENTER
5In the Face Draft dialog box, choose OK to exit.
Your part should look like this.
The Browser contains three face draft icons nested below the FDRAFT_1 part
definition.
Save your file.
Next, you modify one of the face drafts you just created.
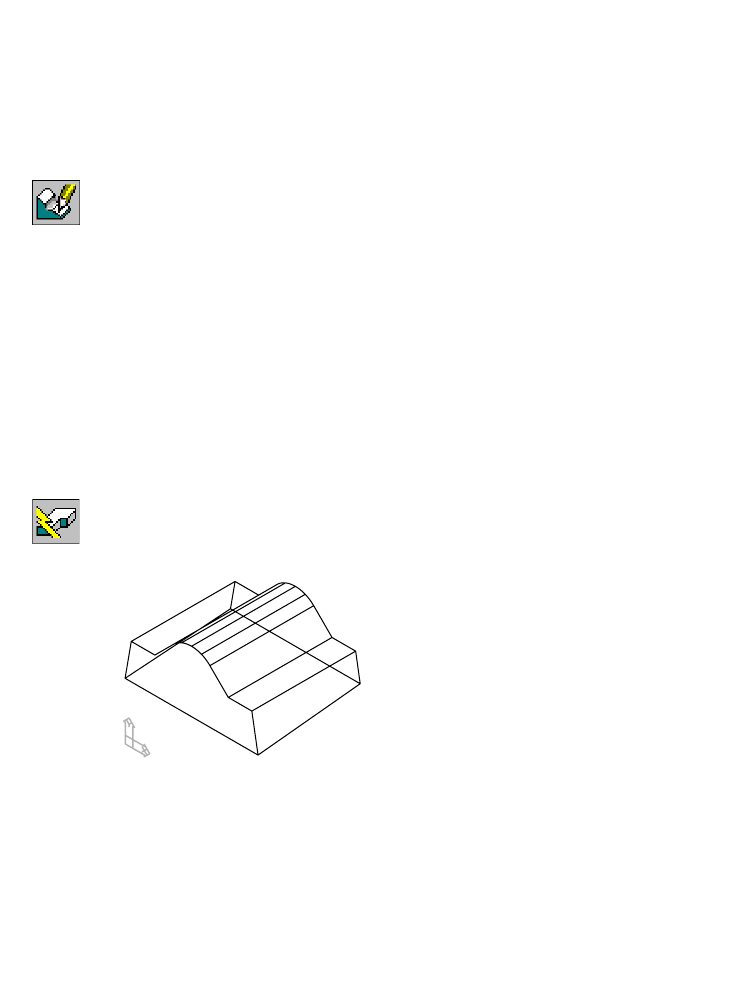
198 |Chapter 10 Creating Placed Features
Editing Face Drafts
To modify a face draft, you change the parameters that control it.
To edit a face draft
1Use AMEDITFEAT to change FaceDraft2, responding to the prompts.
Context Menu In the graphics area, right-click and choose Edit Features
➤ Edit.
Enter an option [Sketch/surfCut/Toolbody/select Feature] <select Feature>:
Specify the part
Enter an option [Next/Accept] <Accept>: ExtrusionBlind1: Enter n
Enter an option [Next/Accept] <Accept>: FaceDraft1: Enter n
Enter an option [Next/Accept] <Accept>: FaceDraft2: Press ENTER
2In the Face Draft dialog box, change the Angle to 5. Choose OK.
3Continue on the command line.
Select object: Press ENTER
4Use AMUPDATE to update the part, responding to the prompt.
Context Menu In the graphics area, right-click and choose Update Part.
Your part should look like this.
Save your file.

Creating Fillet Features |199
Creating Fillet Features
Fillet features can range from simple constant fillets to complex cubic fillets.
Mechanical Desktop creates the following fillet types:
■Constant
■Fixed width
■Linear
■Cubic
A constant fillet has one radius defining it. A fixed width fillet is controlled
by a chord length. Linear and cubic fillets have a radius at each vertex of the
selected edges that you are filleting. A linear fillet has a straight transition
from one vertex to the next. A cubic fillet has a continually changing radius
from one vertex to the next.
Activate FILLET_1, and zoom to it. Turn off the visibility of F-DRAFT_1.
To create a constant radius fillet
1Use AMFILLET to create a constant radius fillet.
Context Menu In the graphics area, right-click and choose Placed
Features ➤ Fillet.
In the Fillet dialog box, choose Constant and specify a radius of .15.
Choose OK.
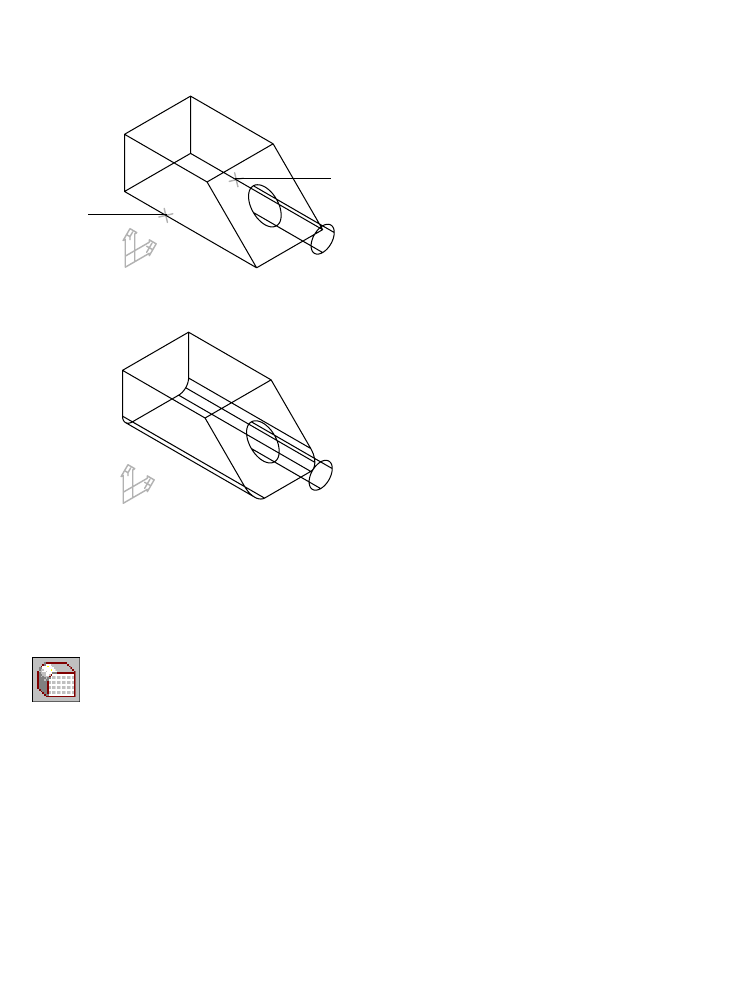
200 |Chapter 10 Creating Placed Features
2Continue on the command line.
Select edges or faces to fillet: Specify an edge (1)
Select edges or faces to fillet: Specify an edge (2), and press ENTER
The fillets are applied to your part.
Next, create a fixed width fillet where the cylindrical extrusion meets the
angled face.
To create a fixed width fillet
1Use AMFILLET to create a fixed width fillet.
Context Menu In the graphics area, right-click and choose Placed
Features ➤ Fillet.
In the Fillet dialog box, choose Fixed Width and specify a chord length of .1.
Then choose OK.
2Continue on the command line.
Select edges: Specify the circular edge on the angled face
1
2
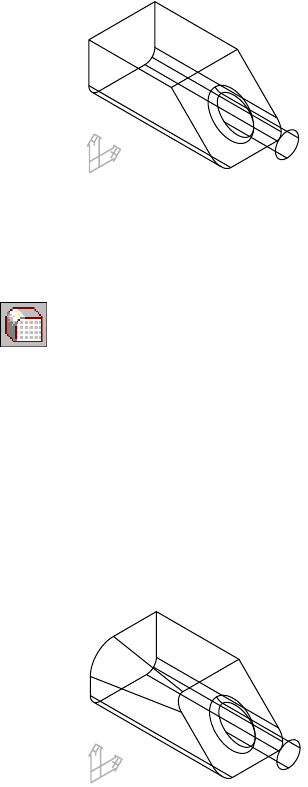
Creating Fillet Features |201
Your part should look like this.
Create a linear fillet along the top left edge.
To create a linear fillet
1Create a linear fillet.
Context Menu In the graphics area, right-click and choose Placed
Features ➤ Fillet.
In the Fillet dialog box, choose Linear, then choose OK.
2Continue on the command line.
Select edge: Specify the top left edge
Select radius: Specify the back radius symbol
Enter radius <0.5000>: Enter .35 and press ENTER
Select radius: Specify the front radius symbol
Enter radius <0.0000>: Enter .15 and press ENTER
Select radius: Press ENTER
Your part should look like this.
You create a cubic fillet in the same way you create a linear fillet. Cubic and
linear fillets differ because a cubic fillet is a blend on constantly changing
radii from one vertex to the next.
202 |Chapter 10 Creating Placed Features
To create a cubic fillet
1Create a cubic fillet.
Context Menu In the graphics area, right-click and choose Placed
Features ➤ Fillet.
In the Fillet dialog box, choose Cubic, then choose OK.
2Continue on the command line.
Select edge: Specify the top right edge at the back of the part
Select radius or [Add vertex/Clear/Delete vertex]: Specify the back radius symbol
Enter radius <0.5000>: Enter .5 and press ENTER
Select radius or [Add vertex/Clear/Delete vertex]: Specify the front radius symbol
Enter radius <0.0000>: Enter .1 and press ENTER
Select radius or [Add vertex/Clear/Delete vertex]: Press ENTER
Your part should look like this.
The Desktop Browser contains four fillet icons nested under FILLET_1.
Save your file.
Editing Fillet Features
Like all placed features, fillets are modified by changing the parameters that
control them.
Editing Fillet Features |203
To edit a fillet
1Use AMEDITFEAT to modify the cubic fillet, responding to the prompts.
Context Menu In the graphics area, right-click and choose Edit Features
➤ Edit.
Enter an option [Sketch/surfCut/Toolbody/select Feature] <select Feature>:
Specify Fillet4
Enter an option [Next/Accept] <Accept>:
Enter n to cycle to Fillet4 or press ENTER
Select object: Specify the .1 radius
Enter Radius <0.100000000>: Enter .5 and press ENTER
Select object: Specify the original .5 radius
Enter Radius <0.500000000>: Enter .1 and press ENTER
Select object: Press ENTER
2Use AMUPDATE to update the part, responding to the prompt.
Context Menu In the graphics area, right-click and choose Update Part.
Your part should look like this.
Save your file.
Delete some or all of the fillets you created in these procedures, and replace
them with your own fillets to change the shape of your part.

204 |Chapter 10 Creating Placed Features
Creating Chamfer Features
A chamfer feature is a bevelled face created between two existing faces on a
part. Chamfers can be created with an equal distance, two different distances,
or a distance and an angle. You can select an edge or a face to place a chamfer.
If one or more of the edges of a face you want to chamfer have been altered,
you need to use the edge selection method to place chamfers around that face.
First, activate CHAMFER_1 and zoom in on the part. Turn off the visibility of
FILLET_1.
The part contains a simple extrusion.
To create a chamfer defined by an equal distance
1Use AMCHAMFER to create the chamfer.
Context Menu In the graphics area, right-click and choose Placed
Features ➤ Chamfer.
In the Chamfer dialog box, specify:
Operation: Equal Distance
Distance1: Enter .5
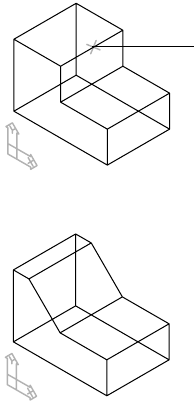
Creating Chamfer Features |205
2Choose OK and respond to the prompts as follows:
Select edges or faces to chamfer: Specify an edge (1)
Select edges or faces to chamfer <continue>: Press ENTER
Mechanical Desktop creates the chamfer along the edge you selected.
You can also create chamfers by specifying two different distances. After you
select the edge, you specify a face for Distance 1, called the base distance. Dis-
tance 2 is applied to the other face.
1
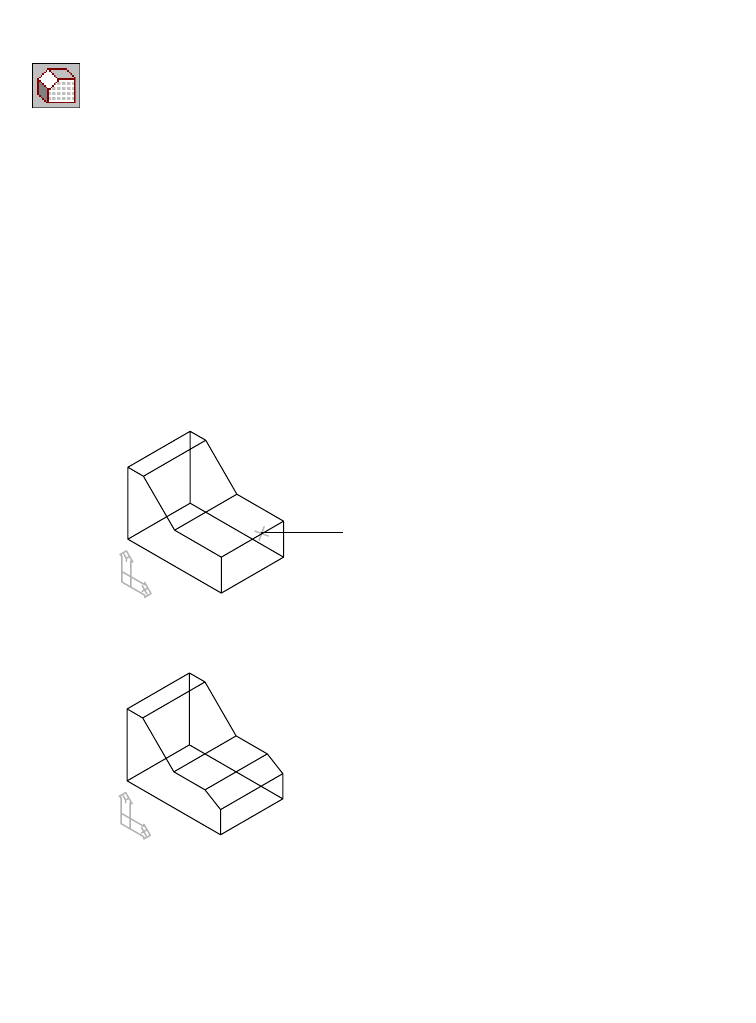
206 |Chapter 10 Creating Placed Features
To create a chamfer defined by two distances
1Use AMCHAMFER to create the chamfer.
Context Menu In the graphics area, right-click and choose Placed
Features ➤ Chamfer.
In the Chamfer dialog box, specify:
Operation: Two Distances
Distance1: Enter .25
Distance2: Enter .15
Choose OK.
2Respond to the prompts as follows:
Select an edge or face to chamfer: Specify the edge (2)
Press <ENTER> to continue: Press ENTER
The specified face will be used for base distance.
Specify face for first chamfer distance (base) [Next/Accept] <Accept>:
Press ENTER
Mechanical Desktop calculates and displays the chamfer. Your drawing
should look like this.
You can create a chamfer defined by a distance and an angle. You select an
edge, and then specify the face for the angle. The distance is applied to the
other face.
2
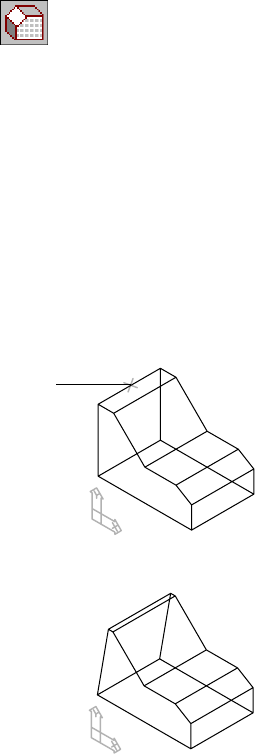
Creating Chamfer Features |207
To create a chamfer defined by a distance and angle
1Define the chamfer.
Context Menu In the graphics area, right-click and choose Placed
Features ➤ Chamfer.
In the Chamfer dialog box, specify:
Operation: Distance and Angle
Distance1: Enter 1
Angle: Enter 10
Choose OK.
2Continue on the command line.
Select an edge or face to chamfer: Specify the edge (3)
Press <ENTER> to continue: Press ENTER
The specified face will be used for base distance.
Specify face for chamfer distance (base) [Next/Accept] <Accept>:
Press ENTER
Mechanical Desktop calculates and displays the chamfer.
If you need to place a chamfer on all sides of a face, you can select the face
and place a chamfer on all of the edges in one operation. This works on faces
where none of the edges to be chamfered have been altered.
3
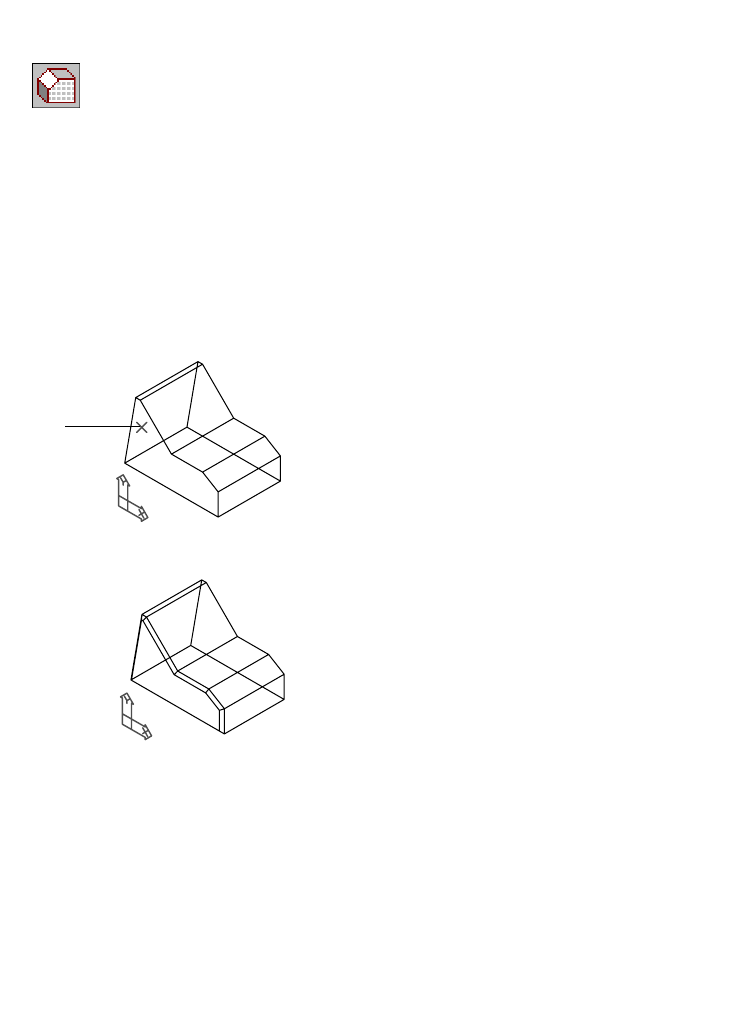
208 |Chapter 10 Creating Placed Features
To create a chamfer on all edges of a face
1Define the chamfer.
Context Menu In the graphics area, right-click and choose Placed
Features ➤ Chamfer.
In the Chamfer dialog box, specify:
Operation: Equal Distance
Distance1: Enter .04
Choose OK.
2Continue on the command line.
Select edges or faces to chamfer: Select the face (4)
Enter an option [Next/Accept] <Accept>: Press ENTER
Select edges or faces to chamfer <continue>: Press ENTER
A chamfer is placed on all edges of the face you selected.
Four chamfer icons are nested below the CHAMFER_1 part definition in the
Browser.
Save your file.
Editing Chamfer Features
As with all placed features, chamfers can be edited by selecting the feature,
changing parameters, and updating the part. Try editing some of the chamfer
features you created in this section.
4
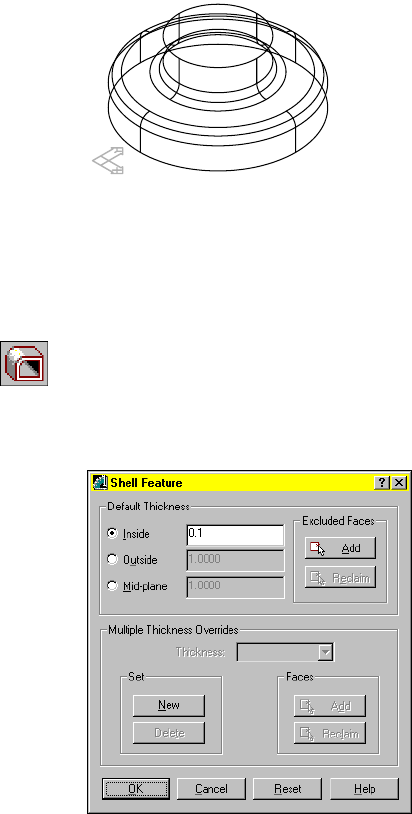
Creating Shell Features |209
Creating Shell Features
You use shell features to hollow parts that are used in a variety of industrial
applications. For example, you shell parts to create molds, castings, contain-
ers, bottles, and cans.
Activate SHELL_1 and zoom in on it. Turn off the visibility of CHAMFER_1.
The part is constructed from two extrusions and one fillet feature.
Next, you shell the part, and then modify it to exclude the top and bottom faces.
To create a shell feature
1Use AMSHELL to create a shell.
Context Menu In the graphics area, right-click and choose Placed
Features ➤ Shell.
In the Shell Feature dialog box, specify:
Default Thickness: Inside:Enter .1
Choose OK to exit the dialog box.

210 |Chapter 10 Creating Placed Features
Mechanical Desktop offsets all faces by the thickness you specified in the
Shell Feature dialog box.
2Change to a front view for a better view of the feature.
Desktop Menu View ➤ 3D Views ➤ Front
Save your file.
Next, you edit the feature to exclude the top and bottom faces from the shell.
Editing Shell Features
You modify shell features by changing the parameters that control them.
Shells can also have multiple thickness overrides applied to individual faces.
You learn to use multiple thickness overrides in chapter 14, “Creating Shells.”
To edit a shell feature
1Return to an isometric view.
Desktop Menu View ➤ 3D Views ➤ Front Right Isometric
2Use AMEDITFEAT to modify the shell feature, responding to the prompt.
Context Menu In the graphics area, right-click and choose Edit Features
➤ Edit.
Enter an option [Sketch/surfCut/Toolbody/select Feature] <select Feature>:
Specify the shell feature
3In the Shell Feature dialog box under Excluded Faces, choose Add.
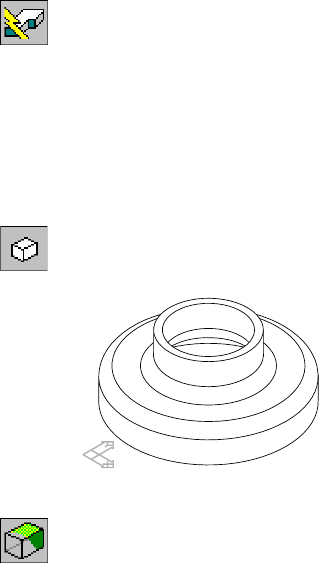
Editing Shell Features |211
4Continue on the command line.
Select faces to exclude: Specify the bottom face
Enter an option [Accept/Next] <Accept>: Enter n to cycle to the bottom face
Enter an option [Accept/Next] <Accept>: Press ENTER
Select faces to exclude: Specify the top face
Enter an option [Accept/Next] <Accept>: Enter n to cycle to the top face
Enter an option [Accept/Next] <Accept>: Press ENTER
Select faces to exclude: Press ENTER
Choose OK to exit the Shell Feature dialog box.
5Use AMUPDATE to update your part, responding to the prompt.
Context Menu In the graphics area, right-click and choose Update Part.
Hide the hidden lines to see your part better. Because the part is cylindrical,
to display silhouette edges, you set the DISPSILH system variable to 1 first.
6Change the setting for DISPSILH.
Command DISPSILH
New value for DISPSILH <0>: Enter 1
7Use HIDE to hide the hidden lines.
Desktop Menu View ➤ Hide
Your part should look like this.
8Return to wireframe display.
Desktop Menu View ➤ Shade ➤ 3D Wireframe
Save your file.
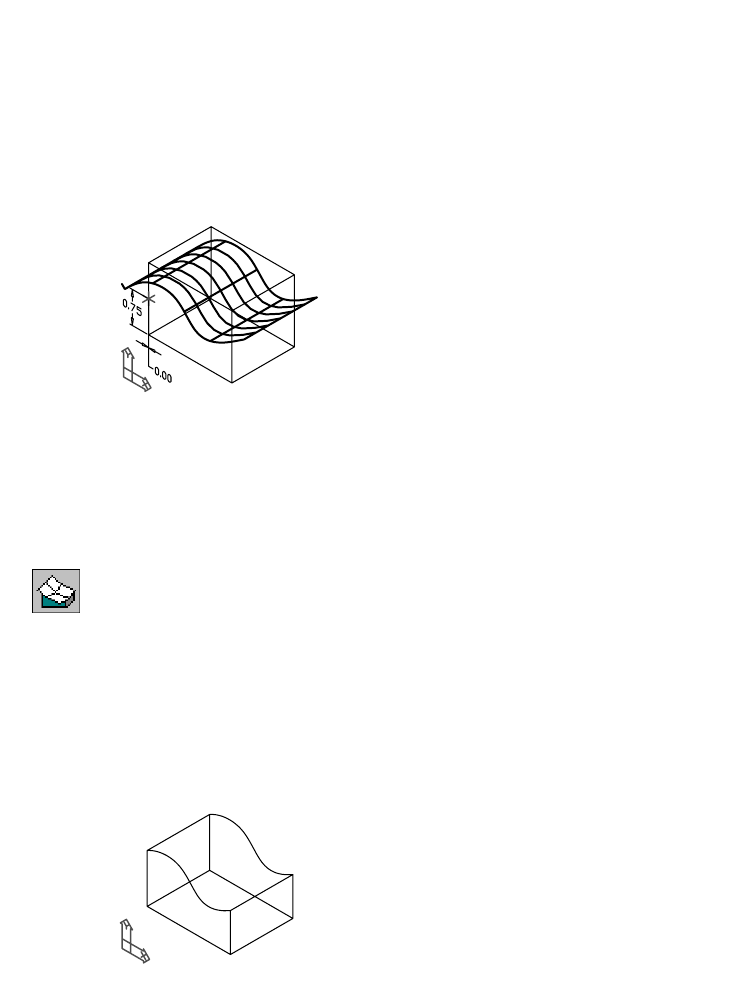
212 |Chapter 10 Creating Placed Features
Creating Surface Cut Features
Surface cut features give you the flexibility of combining a parametric part
and a surface. While the surface is not parametric, its position on the part is
controlled by a work point which you can move parametrically.
Surface cut features may be used to add and remove material from a part.
Activate SURFCUT_1 and zoom in to it. Turn off the visibility of SHELL_1.
SURFCUT contains a simple rectangular extrusion, a work point, and a sur-
face. The work point is constrained to the part. You use the work point to
control the position of the surface cut.
To create a surface cut
1Use AMSURFCUT to create a surface cut, responding to the prompts.
Context Menu In the graphics area, right-click and choose Placed
Features ➤ Surface Cut.
Type=Cut
Select surface or [Type]: Specify the surface
Select work point: Specify the work point
Specify portion to remove: [Flip/Accept] <Accept>:
Enter f to flip the arrow away from the part, or press ENTER
The portion of the part above the surface is cut away, leaving the curved face
of the surface.
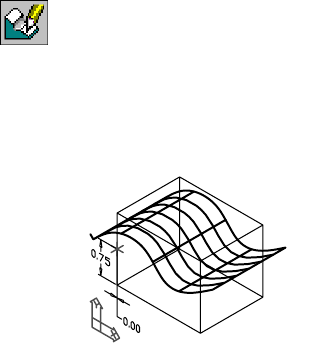
Editing Surface Cut Features |213
The Browser contains a surface cut icon at the bottom of the feature hierarchy
for SURFCUT_1.
Save your file.
Next, you edit the position of the surface to modify the surface cut feature.
Editing Surface Cut Features
You can modify surface cut features in one of two ways:
■Parametrically change its position.
■Manually change the shape of the surface.
In this section, you change the position of the feature by modifying the para-
metric dimensions controlling the work point associated with the surface.
To reposition a surface cut feature
1Use AMEDITFEAT to edit the feature, responding to the prompts.
Context Menu In the graphics area, right-click and choose Edit Features
➤ Edit.
Enter an option [Sketch/surfCut/Toolbody/select Feature] <select Feature>:
Enter c
Select surfcut feature: Specify the surface
The surface is recovered.
In this state, you can modify the actual shape of the surface by editing its
grips, or change the location of the work point that controls the position of
the surface on the part.
214 |Chapter 10 Creating Placed Features
2Use AMMODDIM to change the vertical dimension controlling the work
point, responding to the prompts.
Context Menu In the graphics area, right-click and choose Dimensioning
➤ Edit Dimension.
Select dimension to change: Specify .75
New value for dimension <.75>: Enter .5
Select dimension to change: Press ENTER
3Use AMUPDATE to update the part, responding to the prompt.
Context Menu In the graphics area, right-click and choose Update Part.
The part is updated to reflect the new location for the surface cut feature.
4Save your file.
Experiment with the surface by editing its control points. Use AMEDITFEAT to
recover the surface. Then select a grip to activate it. When you move the grip
to another location you will see the surface deform. Update your part to
examine the effect of your changes.
Creating Pattern Features
A pattern is a collection of duplicate features. You can create patterns with
rectangular, nonorthogonal rectangular, polar, and axial configurations, and
patterns of other pattern features.
By default, a pattern feature uses the active sketch plane as the distribution
plane for pattern instances.
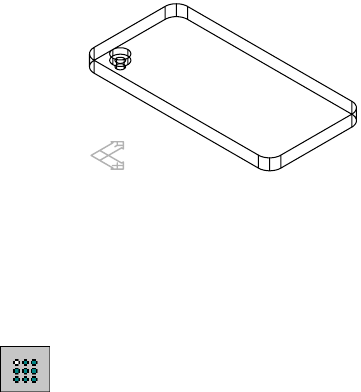
Creating Pattern Features |215
While selecting a feature set for a pattern, you select each graphically depen-
dent feature individually. You can select multiple independent features.
Single instances in a pattern can be made independent of an existing pattern
feature. Once a feature is independent, it can be altered while its position
remains intact.
In this tutorial, you create several different types of patterns, using both
incremental and included spacing. In the polar pattern exercise, you make
one instance independent and alter it.
Activate R-PATTERN_1, and zoom to it. Turn off the visibility of SURFCUT_1.
R-PATTERN contains a filleted plate and one counterbore hole. You create a
rectangular pattern of the hole with incremental spacing and alignment to
an edge.
To create a rectangular pattern
1Use AMPATTERN to create a rectangular pattern, responding to the prompts.
Context Menu In the graphics area, right-click and choose Placed
Features ➤ Rectangle Pattern.
Select features to pattern: Specify the hole
Select features to pattern or [liSt/Remove] <Accept>: Press ENTER
If you use multiple features to create a pattern, you select each one individu-
ally, regardless of feature dependencies.
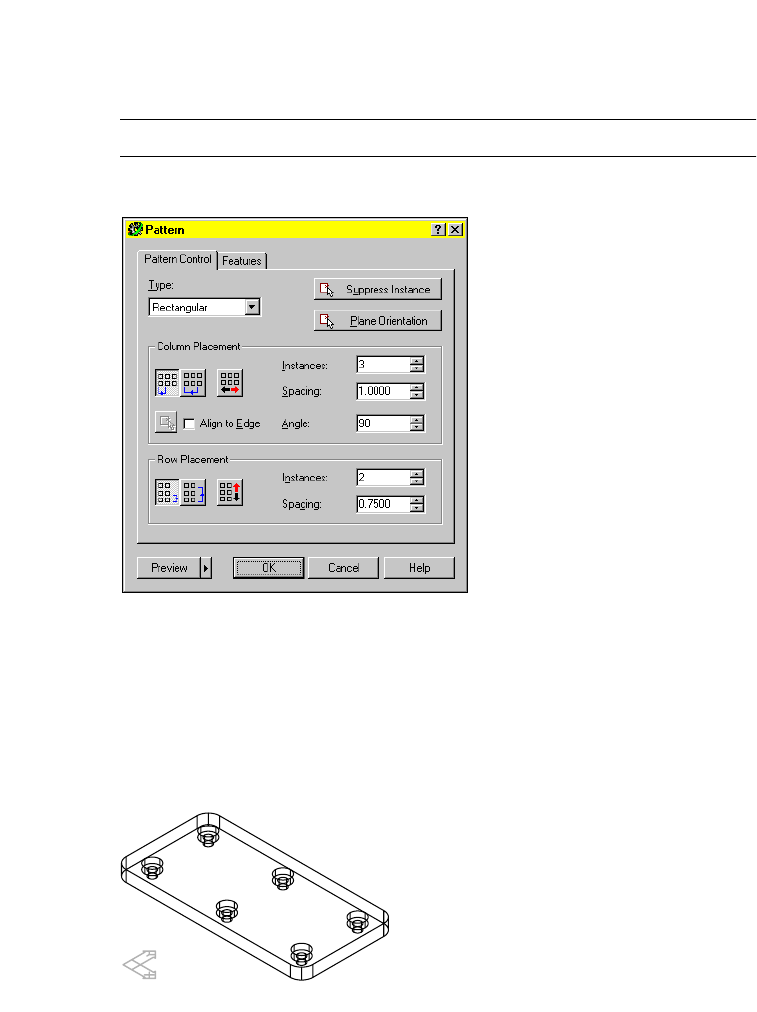
216 |Chapter 10 Creating Placed Features
2In the Pattern dialog box, specify:
Type: Rectangular
Column Placement: Choose Incremental Spacing, the leftmost button
Row Placement: Choose Incremental Spacing, the leftmost button
NOTE Hold the cursor over an icon for a tooltip to identify the icon.
Enter the values shown for column and row instances and spacing.
3Choose Preview, and view your pattern on the screen.
At this point, you can redefine the pattern by changing your selections in the
Pattern dialog box, and then preview the changes. Preview becomes unavail-
able once the parameters in the dialog box match the display on the screen.
Using the preview image, you can suppress instances of features in patterns.
4Choose OK to create the pattern and exit the dialog box.
Your drawing should look like this.

Creating Pattern Features |217
Use R-PATTERN again to create a nonorthogonal rectangular pattern with
included spacing and a value entered for the angle.
In the Browser, right-click the icon for the pattern you just created, and
choose delete. Verify that the R-PATTERN part is activated.
To create a nonorthogonal rectangular pattern
1Use AMPATTERN to create a nonorthogonal rectangular pattern, responding
to the prompts.
Context Menu In the graphics area, right-click and choose Placed
Features ➤ Rectangular Pattern.
Select features to pattern: Specify the hole
Select features to pattern or [liSt/Remove] <Accept>: Press ENTER
2In the Pattern dialog box, in Column Placement, select Included, the second
button from the left. Specify:
Instances: Enter 3
Angle: Enter 60
Spacing: Angle: Enter 1
In Row Placement, select Included, and specify:
Instances: Enter 2
Spacing: Enter .75
Choose OK.
The hole pattern is created at a 60-degree angle from the side of the part.
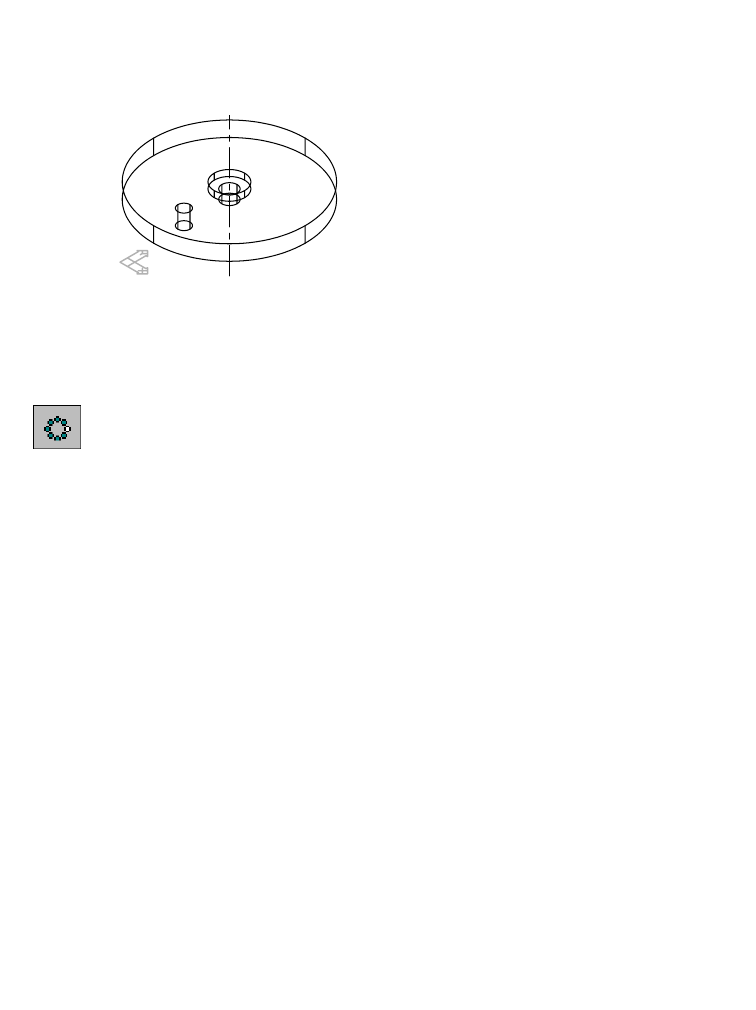
218 |Chapter 10 Creating Placed Features
Next, create a full circle polar pattern using a work axis as the center and a
specified number of instances. When you choose a different pattern type, the
appropriate options are displayed in the Pattern dialog box.
Activate P-PATTERN_1 and zoom to the part.
The part is constructed with a circular plate and two holes.
To create a polar pattern
1Use AMPATTERN create a polar pattern, responding to the prompts.
Context Menu In the graphics area, right-click and choose Placed
Features ➤ Polar Pattern.
Select features to pattern: Specify Hole2
Enter an option [Next/Accept] <Accept>: Press ENTER
Select features to pattern or [liSt/Remove] <Accept>: Press ENTER
Valid selections: work point, work axis, linear edge, cylindrical edge/face
Select rotational center: Specify the work axis
2In the Pattern dialog box, specify:
Polar Placement: Choose Full Circle
Instances: Enter 5

Creating Pattern Features |219
Choose Preview and view the pattern. Then choose OK.
Next, make one instance of the pattern independent and then alter it.
To make a pattern instance independent
1Select the pattern instance to make independent.
Browser Right-click PolarPattern, and choose Independent
Instance.
Respond to the prompts.
Select feature pattern or array instance: Select hole instance #4
An independent hole based on a work point is copied from the selected hole
instance. Dependent features are maintained and copied with the pattern
instance.
Icons for the work point and independent Hole3 are displayed in the
Browser.
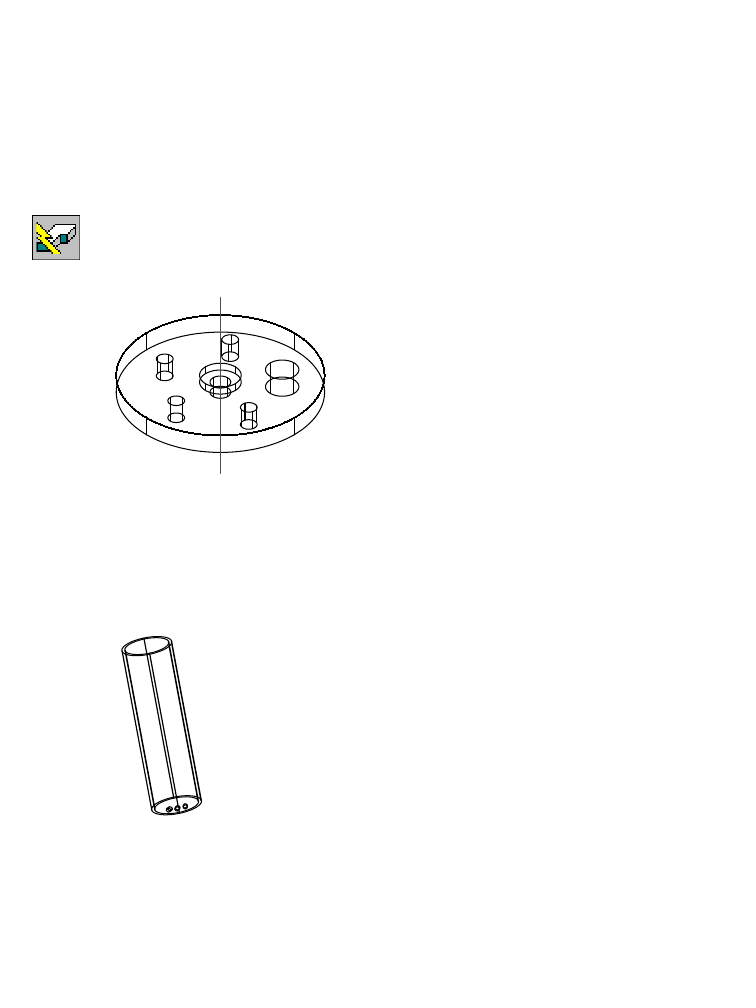
220 |Chapter 10 Creating Placed Features
The previous hole instance is suppressed. It can be reclaimed using the
Pattern dialog box.
2Use AMEDITFEAT to resize the independent pattern instance.
Browser Right-click the independent Hole4, and choose Edit.
The Hole dialog box is displayed.
3In the Hole dialog box, change the diameter to .4, and choose OK.
4Use AMUPDATE to update the part, responding to the prompt.
Context Menu In the graphics area, right-click and choose Update Part.
The Hole3 is resized, while it maintains its position in the pattern.
You can create axial patterns, and you can create a pattern from another
pattern.
In the Browser, right-click A-PATTERN_1 and choose Activate Part. Right-
click A-PATTERN_1 again, and choose Zoom to. Turn off the visibility of
P-PATTERN_1.
A-PATTERN_1 contains a cylinder with a polar pattern of three holes. In this
exercise, you use this polar pattern to create an axial pattern, specifying a
work axis as the rotation center. You specify the number of instances, and
incremental column and row placement.
After you create the axial pattern, you use it to create another polar pattern.
In the Browser, expand A-PATTERN_1.

Creating Pattern Features |221
To create an axial pattern
1In the Browser, under A-PATTERN_1, right-click WorkAxis1 and choose
Visible.
2Use AMPATTERN to create an axial pattern, responding to the prompts.
Browser In the Browser, right-click Polar Pattern1 and choose
Pattern ➤ Axial.
Valid selections: work point, work axis, linear edge, cylindrical edge/face
Select rotational center: Specify the work axis
In the Pattern dialog box, in Axial Placement, specify:
Instances: Enter 12
Column Placement: Select Incremental Angle, the button on the left
Spacing Angle: Enter 30
Row Placement: Select Incremental Offset, the button on the left
Offset Height: Enter .2
3In the Pattern Dialog box, press Preview to view the pattern, then press OK.
The axial pattern is created on the surface of the cylinder. Hide the hidden
lines to see your part better. Because the part is cylindrical, to display silhouette
edges, you set the DISPSILH system variable to 1 first.
4Change the setting for DISPSILH.
Command DISPSILH
New value for DISPSILH <0>: Enter 1

222 |Chapter 10 Creating Placed Features
5Use HIDE to hide the hidden lines.
Desktop Menu View ➤ Hide
Your part should look like this.
6Finish the part by using the new axial pattern to create another polar pattern.
Browser In the Browser, right-click Axial Pattern1 and choose
Pattern ➤ Polar.
Select Rotational Center: Select the work axis
7In the Pattern dialog box, specify:
Polar Placement: Select Incremental Angle
Instances: Enter 2
Spacing Angle: Enter 180
Choose OK.
8Use HIDE to hide the hidden lines.
Desktop Menu View ➤ Hide
Your finished part should look like this.

Editing Pattern Features |223
Editing Pattern Features
You edit pattern features in the Pattern dialog box. In the Pattern Control
tab, you modify the instancing controls. In the Features tab, you redefine the
features in the pattern. Once a pattern is created, you cannot change the pat-
tern type.
When you delete a feature from a pattern set, you also remove other graphi-
cally dependent features that are children of that feature, such as fillets. If
you want to add a feature to the set, a feature rollback is required.
A pattern is associative to the original feature that was patterned. When you
modify the sketch of a patterned feature, you also modify the entire pattern.
Use the Pattern dialog box to preview and redefine the orientation of the dis-
tribution plane at any time. If you want to change the distribution plane to
a different plane, a feature rollback is required.
Try editing the rectangular and polar patterns you created in this section.
Editing Array Features
Although you cannot create a new array, you can edit a previously-created
array by editing the dimensions and instance constraints of the array using
command line prompts. There is no dialog box available for editing arrays.
Pre-existing array features cannot be migrated to pattern features.
The following procedure is available only when you open a drawing file that
contains a previously-created array.
To edit a previously-created array
9Use AMEDITFEAT to edit a previously created array, responding to the
prompts.
Context Menu Right-click the graphics area and choose Edit Features ➤
Edit.
Enter an option [Independent array instance/Sketch/surfCut/Toolbody/select
Feature] <select Feature>: Enter I
Follow the command line prompts to edit the dimensions and instance con-
straints for your particular array.
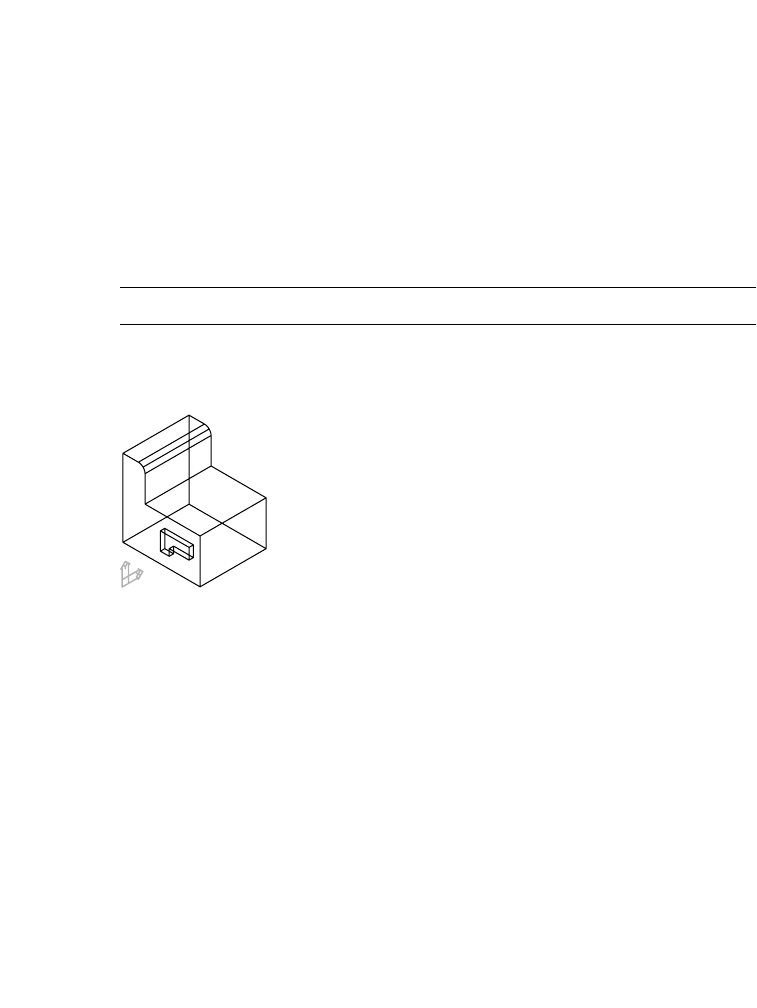
224 |Chapter 10 Creating Placed Features
Creating Copied Features
You can copy a feature from any part, and place it on your active part on the
current sketch plane. If the feature you select is on the active part, you can
specify that the copy is independent. That way, you can modify either feature
without affecting the other. If you do not specify that the copy is indepen-
dent, or you copy a feature from an inactive part, any changes made to either
the feature or the copy are reflected in both features.
Once copied, you can constrain the copied feature to the part by editing the
sketch.
NOTE You cannot copy base features.
Activate CFEAT_1 and zoom in on the part. Turn off the visibility of
P-PATTERN_1.
The part has a blind slot on the left front face. The current sketch plane lies
on the right front face. You copy the feature to the current sketch plane and
then constrain it to the part.
Creating Copied Features |225
To copy a feature
1Use AMCOPYFEAT to create a copy of the slot, responding to the prompts.
Context Menu In the graphics area, right-click and choose Edit Features
➤ Copy.
Select feature to be copied (from any part): Specify the blind extrusion
Parameters=Independent
Specify location on the active part [Parameters]:
Specify a location on the current sketch plane
Parameters=Independent
Specify location on the active part [Parameters/Rotate/Flip]: Enter f
Parameters=Independent
Specify location on the active part [Parameters/Rotate/Flip]: Enter r
Parameters=Independent
Specify location on the active part [Parameters/Rotate/Flip]: Enter r
Parameters=Independent
Specify location on the active part [Parameters/Rotate/Flip]:
Respecify the location or press ENTER
Your drawing should look like this.
Next, you constrain the copied feature to the part by editing the feature’s
sketch. Three dimensions constrain the original feature to the part. You
create three identical dimensions to constrain the new feature to the part.
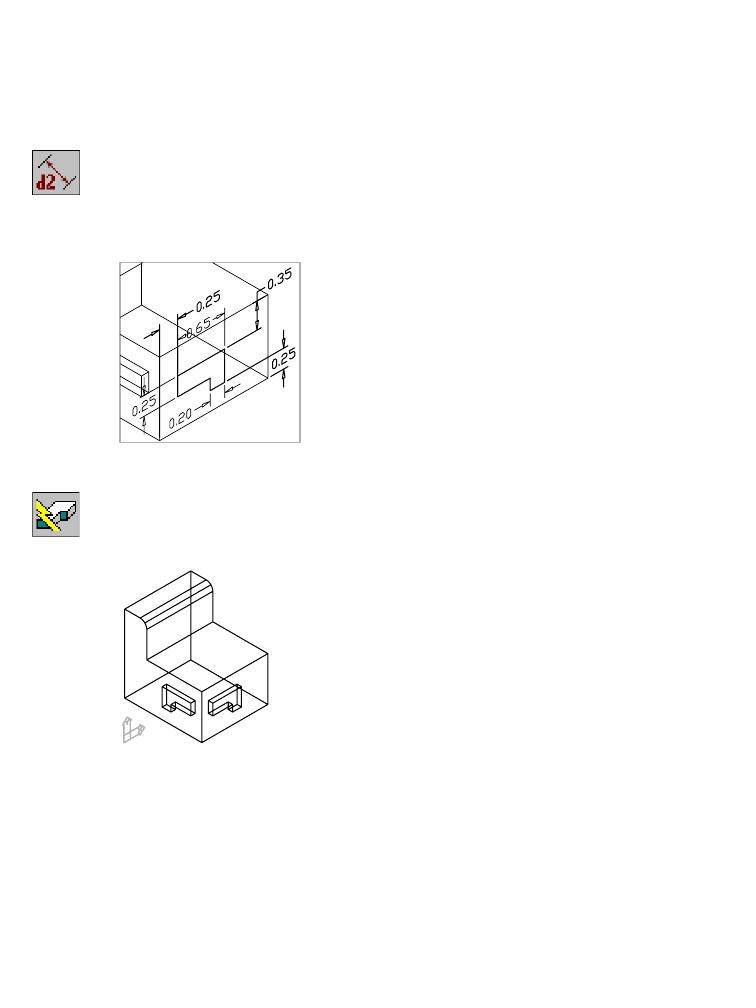
226 |Chapter 10 Creating Placed Features
To constrain a copied feature
1Use the Browser to edit the sketch.
Browser Right-click ExtrusionBlind3 and choose Edit Sketch.
2Use AMPARDIM to add three parametric dimensions to constrain the sketch
to the part.
Context Menu In the graphics area, right-click and choose Dimensioning
➤ New Dimension.
3Place a 0.25 horizontal dimension, a 0.35 vertical dimension, and a 0.25 ver-
tical dimension as illustrated below.
4Use AMUPDATE to update your part, responding to the prompt.
Context Menu In the graphics area, right-click and choose Update Part.
Enter an option [active Part/aLl parts] <active Part>: Press ENTER
Save your file.
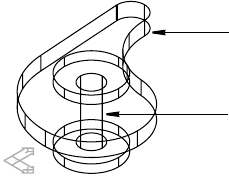
Editing Copied Features |227
Editing Copied Features
You can edit a copied feature by modifying the feature itself, or by modifying
its location on the part. If the copy is dependent on the original feature, or if
it was created from a feature on an inactive part, any changes to either feature
are reflected in both features.
The copied feature you created is independent from the original feature. Try
modifying the shape of the copied feature, using what you learned earlier in
this tutorial about editing extrusions.
Creating Combined Features
You create combined features by combining two parts, using Boolean opera-
tions. The part that is combined is called the toolbody. You position the tool-
body on the base part using assembly constraints, and then combine the parts.
Activate COMBINEFEAT_1 and zoom in so you can see it and TOOLBODY_1.
Turn off the visibility of CFEAT_1.
The parts have already been constrained with assembly constraints. You
learn to use assembly constraints in chapter 16, “Assembling Parts.”
COMBINEFEAT_1
TOOLBODY_1
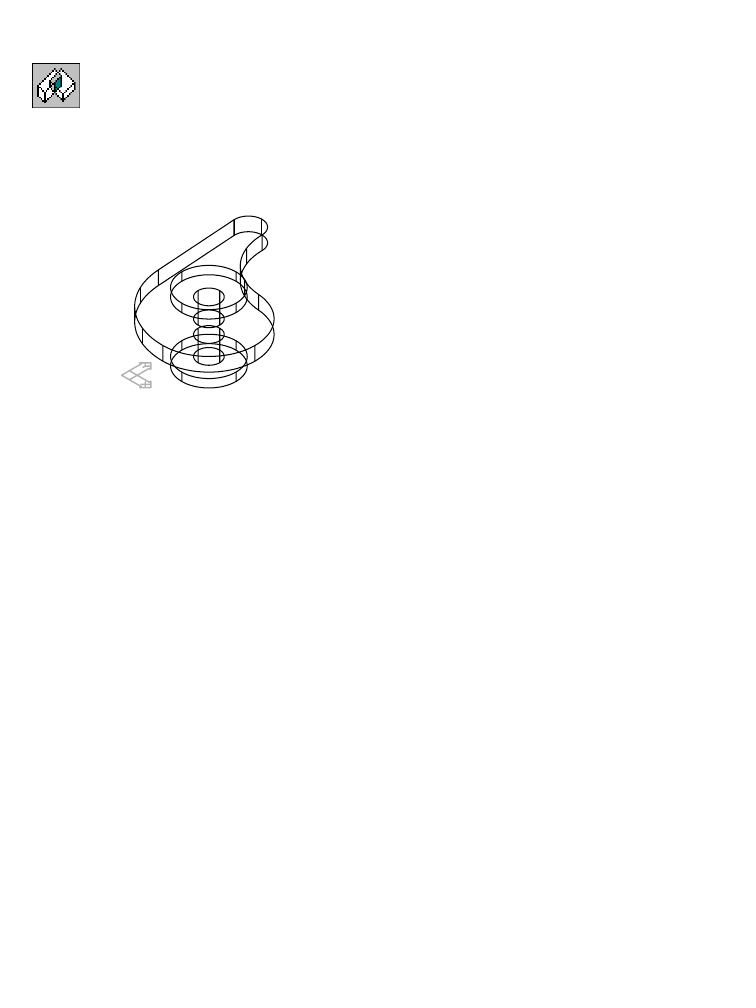
228 |Chapter 10 Creating Placed Features
To create a combined feature
1Use AMCOMBINE to create a combined feature, responding to the prompts.
Context Menu In the graphics area, right-click and choose Placed
Features ➤ Combine.
Enter a parametric Boolean operation [Cut/Intersect/Join] <Cut>: Enter j
Select a part (toolbody) to be joined: Specify TOOLBODY_1
The parts are combined into one part.
2Look at the Browser. Expand the Combine1 icon nested under
COMBINEFEAT_1. TOOLBODY_1 has become a combined feature and is
no longer a separate part definition.
Save your file.
Editing Combined Features
Combined features can be modified by changing the assembly constraints
controlling the base part and the toolbody, by editing the base part, or by
making changes to the toolbody. You’ll learn more about combining parts
and editing toolbodies in chapter 17, “Combining Parts.”
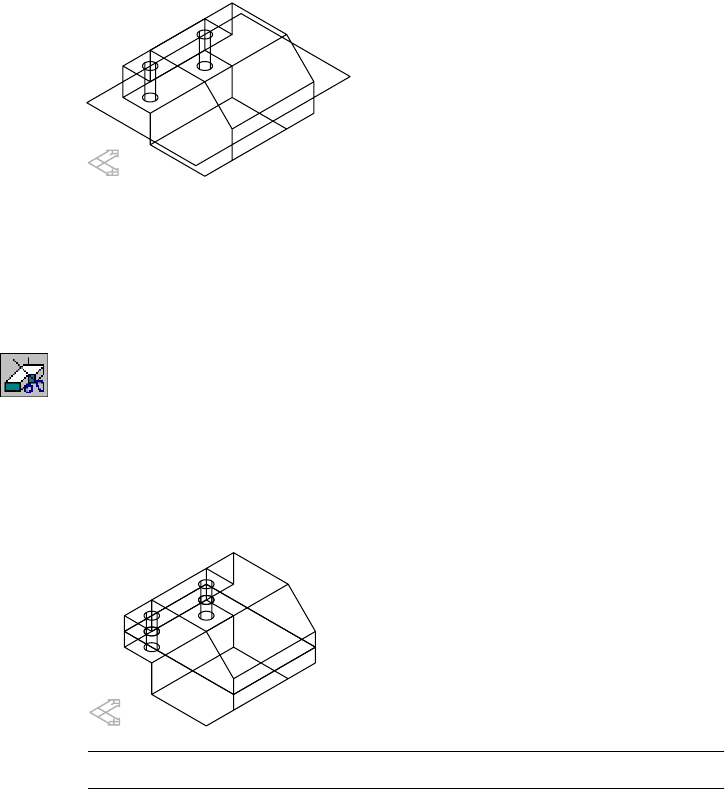
Creating Part Splits |229
Creating Part Splits
You can split parts by creating a planar or a nonplanar split feature. A planar
split uses a work plane, existing part face, or a split line. A nonplanar split
uses a constrained sketch and a Boolean operation.
Activate P-SPLIT_1 and zoom in on the part. Turn off the visibility of
COMBINEFEAT_1.
The part is a simple extrusion with two holes and a work plane located at the
midplane of the part. You split the part into two distinct part definitions with
the work plane.
To create a part split
1Use AMPARTSPLIT to split the part, responding to the prompts.
Context Menu In the graphics area, right-click and choose Placed
Features ➤ Part Split.
Select planar face, work plane, surface, or split line for split:
Specify the work plane
Define side for new part: [Accept/Flip] <Accept>: Press ENTER
Enter name of the new part <PART2>: Press ENTER
The part is split along the work plane and a new part definition is created.
NOTE For clarity, the work plane is not shown.

230 |Chapter 10 Creating Placed Features
2Expand PART2_1 in the Browser and compare its features with P-SPLIT_1.
Both parts contain a Part Split feature, two holes, and a work plane.
Save your file.
You can also create planar splits with an existing part face, or a split line con-
strained to the part. Next, create a nonplanar split.
Activate N-SPLIT_1 and zoom in on the part. Turn off the visibility of
P-SPLIT_1 and PART2_1.
NOTE For clarity, the profile’s dimensions are not shown.
You create a nonplanar split by extruding the profile into the part. A new part
definition is created from the volume shared by the part and the extrusion.
To create a non-planar part split
1Use AMEXTRUDE to create the part split.
Context Menu In the graphics area, right-click and choose Sketched &
Work Features ➤ Extrude.
In the Extrusion Feature dialog box, specify:
Operation: Split
Termination: Blind
Distance: Enter .7
Flip: Make sure the direction arrow is flipped into the part
Choose OK to exit the dialog box.

Editing Part Splits |231
2Continue on the command line.
Enter name of the new part <PART3>: Press ENTER
The part is split and a new part definition is created.
Save your file.
Editing Part Splits
Parts created by a part split can be edited in the same way as the parts they
were created from. The new parts contain identical work geometry, and if any
feature was split, each part contains a version of that feature.
Nonplanar splits are used to create parts that fit together. Face drafts can be
applied to the faces of both parts to make them fit together easier.
Try editing the sketched and placed features that make up the parts you have
split in this section.
You are now ready to create a complex part.

232

233
In This Chapter 11
Using Design Variables
You can assign variables to the parametric dimensions
that control a part. Variables can be assigned to the
active part, or they can be global.
Active part design variables control only the features of
the part they are assigned to. Global design variables
control the features of any number of parts.
Autodesk® Mechanical Desktop® automatically
reevaluates parts, and updates them when design
variables have been modified.
■Creating active part design
variables
■Assigning variables to an active
part
■Modifying design variables
■Creating global design variables

234 |Chapter 11 Using Design Variables
Key Terms
Te r m Definition
active part variable A parametric variable used in the dimensions that control features of the active
part.
global variable A parametric variable that can be used by any number of parametric features and
parts. Also used for single parts and to constrain parts.
helical sweep A geometric feature defined by the volume from moving a profile along a 3D
path about a work axis.
pitch The measured distance parallel to the axis of a helical path, from one point on the
path to the corresponding point on the adjacent revolution.
profile plane A work plane at the start point of a helical path, placed normal to the start of the
path or at the center of the axis/path.
start angle The angle at which a helical path begins from the X axis of the active sketch
plane.
table driven variable A global or active part design variable controlled by values in a linked external
spreadsheet.
taper angle The angle where a helical sweep is tapered as it is created.
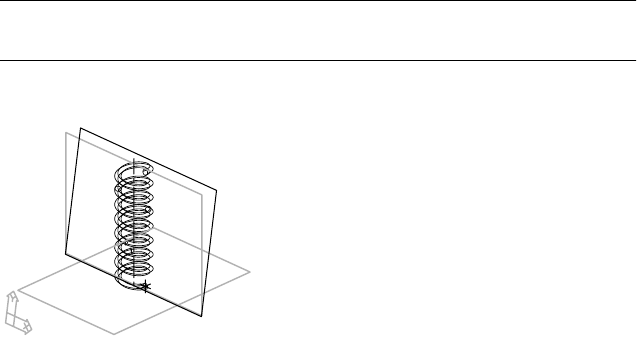
Basic Concepts of Design Variables |235
Basic Concepts of Design Variables
Parts and features are controlled by dimensions and other parameters that
define their shapes. By creating design variables and assigning them to these
parameters, you gain greater control over these values. There are two types of
design variables:
■Global
■Active part
You use global design variables when you want to control parameters that
belong to more than one part. When you want to control only a specific part,
you use active part design variables.
You can create design variables using the Design Variables dialog box, or you
can use the Equation Assistant dialog box to create design variables on the
fly as you are creating a part.
Design variables are also used in tables to control versions of a part. You learn
to create these tables in chapter 15, “Creating Table Driven Parts.”
This tutorial introduces design variables for controlling features. The tutorial
drawing file contains a helical sweep. For clarity, the sweep is represented by
four wires. The work features used to create the sweep are visible to help you
understand how it was created. Before you begin the tutorial, turn off the vis-
ibility of the work features, and set the number of wires to a lower value; this
increases the speed of recalculation and regeneration of the part.
Open the file helix1.dwg in the desktop\tutorial folder.
NOTE Back up the tutorial drawing files so you still have the original files if you
make a mistake. See “Backing up Tutorial Drawing Files” on page 40.
The drawing file contains a spring created from a helical sweep.
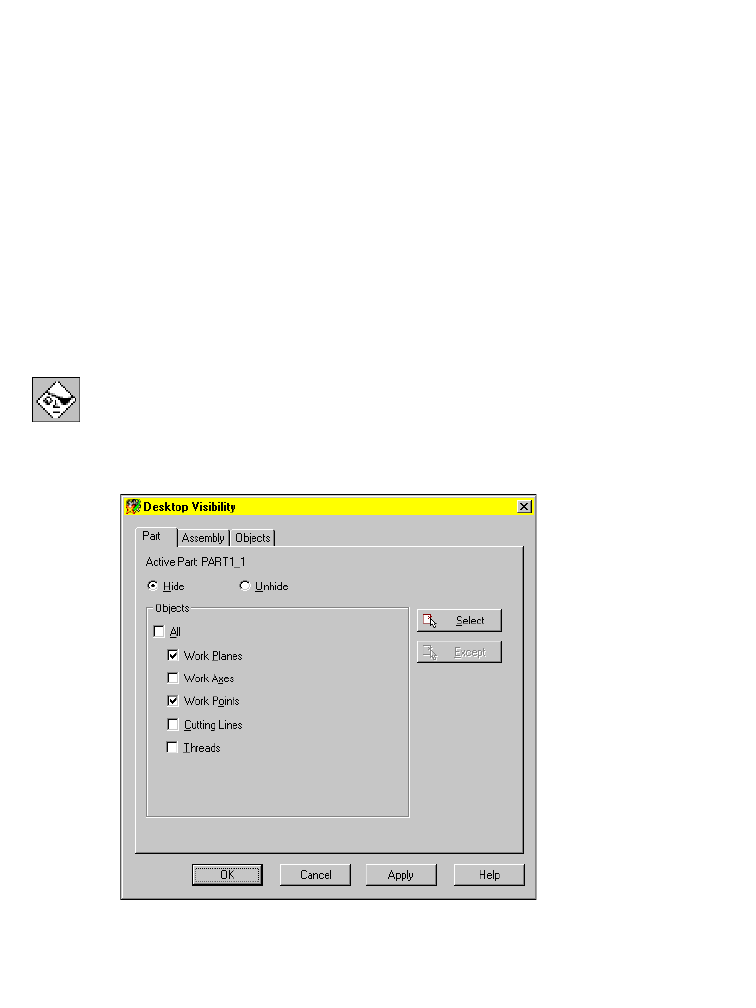
236 |Chapter 11 Using Design Variables
Three work planes are associated with the part. Two were used to create the
sketched work axis for the sweep. The third, also called a profile plane, was
created normal to the start of the path when it was defined. It was used to
sketch the profile for the sweep. The profile is constrained to a work point at
the beginning of the path.
Preparing The Drawing File
Before you begin, turn off the visibility of the work features. Leave the work
axis visible because it will be helpful in keeping you oriented when you
change the variables that control the 3D path.
To hide a work feature
1Use AMVISIBLE to turn off the visibility of the first work plane.
Desktop Menu Part ➤ Part Visibility
2In the Desktop Visibility dialog box, with Hide turned on, choose Work
Planes and Work Points.
Choose Apply.
Choose OK to exit the dialog box.
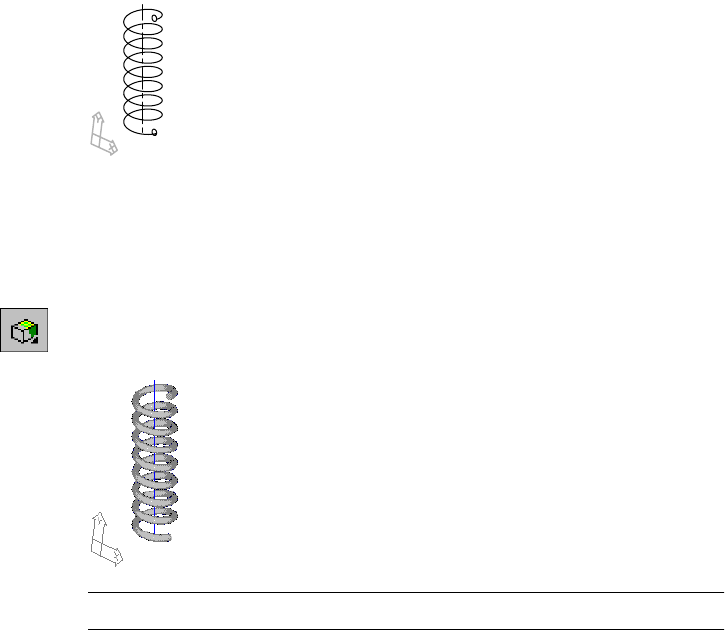
Preparing The Drawing File |237
To speed up recalculations and regenerations of the helical sweep, set the
ISOLINES variable to its default value. This will display the sweep using only
one wire. Currently it is set to display the sweep as a helical tube.
To set isolines
1Change the setting for ISOLINES, responding to the prompt.
Command ISOLINES
New value for ISOLINES <8>: Enter 4
2Use REGEN to regenerate your drawing.
Desktop Menu View ➤ Regen
The helix should look like this.
To see your model better, use the shade button on the Desktop View toolbar
to toggle shading on and off. If you prefer, leave the shade option on.
To toggle shading of a part
1Use SHADE to shade your part.
Desktop Menu View ➤ Shade ➤ Gouraud Shaded
Your part should now look like this.
NOTE Shading is turned off throughout this tutorial.
The Desktop View toolbar also contains commands to dynamically rotate
your design and control views.
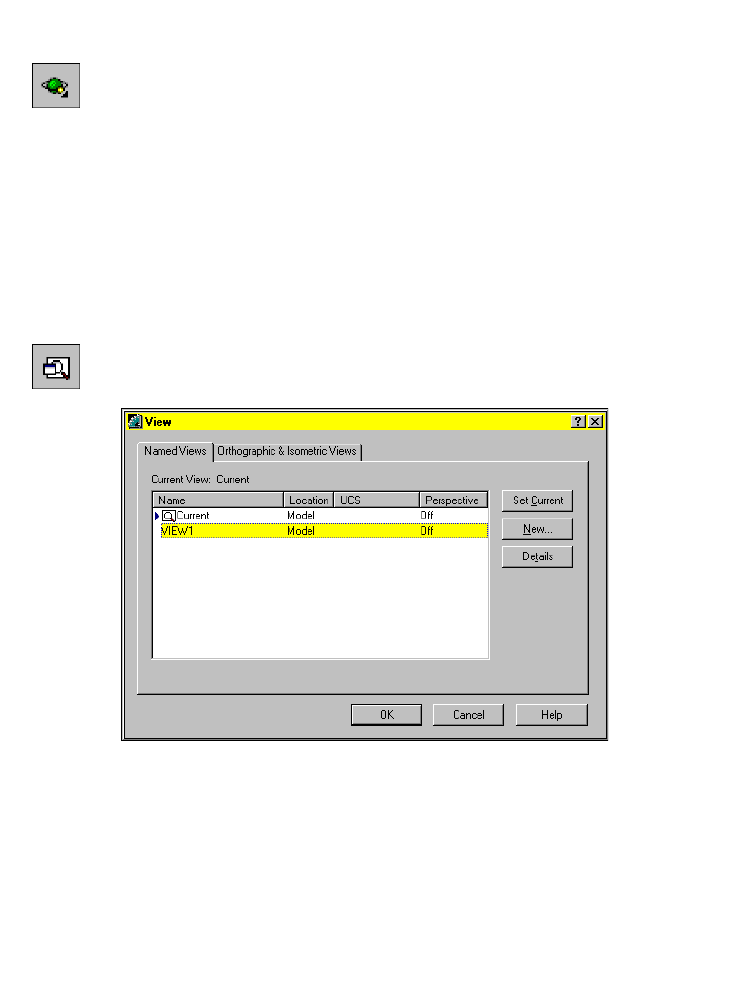
238 |Chapter 11 Using Design Variables
To dynamically rotate a part
1Use 3DORBIT to rotate the view of your part.
Context Menu In the graphics area, right-click and choose 3D Orbit.
2Select a point near the center of the part. This point acts as the central point
for the rotation. Press the mouse button as you move your cursor around the
screen. The part dynamically rotates as the cursor moves.
3Release the mouse button when the display is to your liking.
In the next procedure, you restore the view to its original display. The
helix1.dwg file has one saved view, View1.
To restore a saved view
1Use VIEW to restore the original drawing view.
Desktop Menu View ➤ Named Views
2In the View dialog box, highlight View1, and choose Set Current.
Choose OK.
Your drawing is returned to the original view.
Next, you define active part design variables and then assign them to the
existing helical part.
Using Design Variables |239
Using Design Variables
Design variables provide a tool for controlling dimensions, and using equations
and relationships between dimensions. Changing one or more variables affects
the entire part.
Design variables can be either active or global.
Active Part Design Variables
Active part design variables control only the part they are assigned to.
Global Design Variables
Global design variables allow you to use the same variables for multiple fea-
tures across multiple parts. If you are designing multiple parts in the same
file, you may use global design variables to control some or all of the parts
with the same variables.
Creating Active Part Design Variables
The helical sweep is governed by the following parameters:
■Type of sweep
■Number of revolutions
■Pitch
■Height
■Shape
■Diameter of the sweep
■Taper angle
■Orientation
■Start angle
■Radius of the swept profile
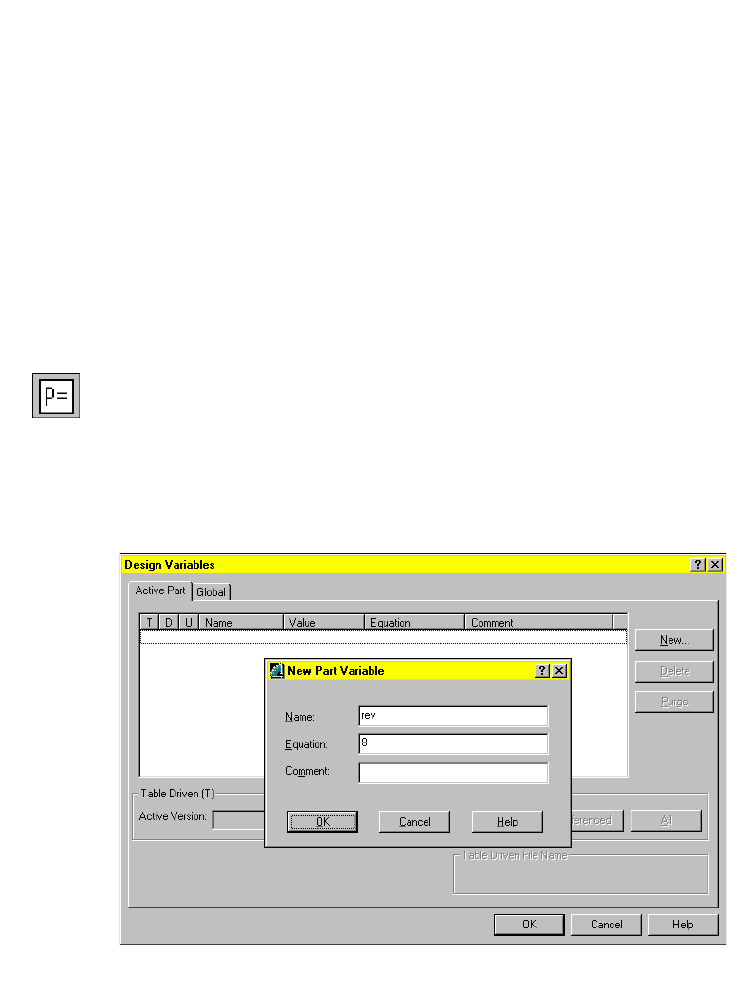
240 |Chapter 11 Using Design Variables
In addition to the method used in the following exercises, you can create
design variables in the Equation Assistant dialog box while you are in the
modeling process. In the Equation Assistant dialog box, you right-click in the
variables list area and choose New. A space for the new variable is provided
at the end of the list, and your cursor is positioned in the Name column.
There you enter a name for the new variable, and then you define it in the
Equation column.
In this lesson, you create variables and parametric equations to control the
number of revolutions, height, and diameter of the sweep. You also assign a
variable to control the radius of the profile that is swept along the helical
path. Because you are working with a single part, you create these variables
as active part design variables.
To create an active part design variable
1Use AMVARS to create a design variable.
Desktop Menu Part ➤ Design Variables
2In the Design Variables dialog box, make sure the Active Part tab is selected
and choose New.
3In the New Part Variable dialog box, specify:
Name: Enter rev
Equation: Enter 8
Press ENTER.
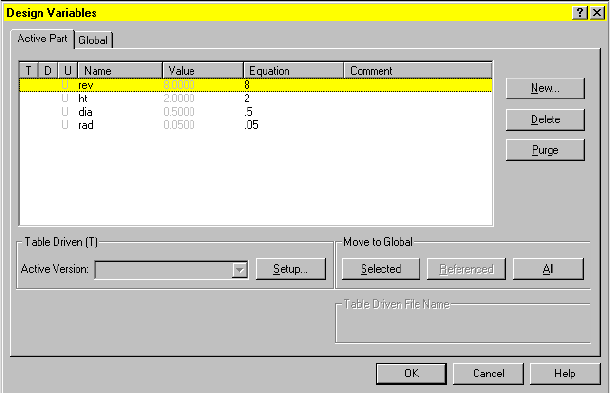
Creating Active Part Design Variables |241
4Repeat step 3 to enter the following variables:
Ht 2
Dia .5
Rad .05
Choose OK.
The next step is to edit the existing part by replacing its dimensions with the
design variables you have just created.
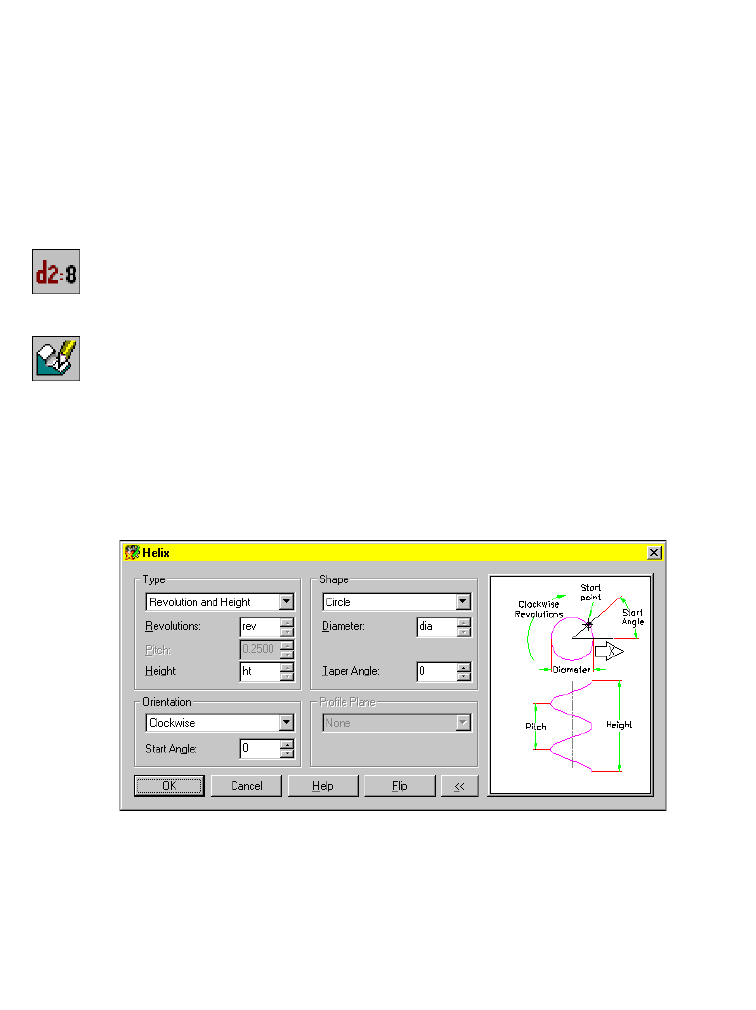
242 |Chapter 11 Using Design Variables
Assigning Design Variables to Active Parts
Before the spring can be table driven, you need to assign the design variables
you have defined. You edit the sweep feature and the profile used to create
the sweep. You change the values controlling the feature with the design
variables you have just created.
To edit a sweep feature
1Use AMDIMDSP to set dimensions to display as equations.
Context Menu In the graphics area, right-click and choose Dimensioning
➤ Dimensions as Equations.
2Use AMEDITFEAT to define the sweep feature to edit.
Context Menu In the graphics area, right-click and choose Edit Features
➤ Edit.
Highlight the helical sweep.
3In the Helix dialog box, enter the following:
Revolutions: rev
Height: ht
Diameter: dia
Choose OK. Then choose OK to exit the Sweep dialog box.
You have assigned design variables to the parameters controlling the sweep.
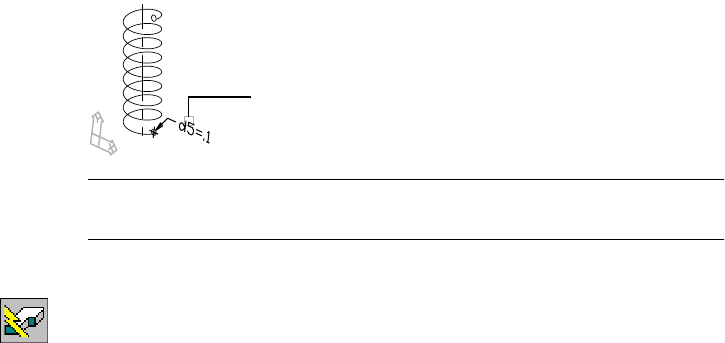
Assigning Design Variables to Active Parts |243
4Assign the last variable to the radius of the profile, responding to the prompts
as follows:
Select object: Select the dimension (1)
Enter dimension value <.1>: Enter rad
Select object: Press ENTER
NOTE For clarity, shading has been turned off in these illustrations. You may
prefer to keep it on throughout the tutorial.
5Use AMUPDATE to update the part, responding to the prompt.
Context Menu In the graphics area, right-click and choose Update Part.
The spring is updated. The part changes because the value for the rad design
variable you assigned is not the same as the original value used to create the
sweep.
1
244 |Chapter 11 Using Design Variables
Modifying Design Variables
Design variables can be added and modified anytime during the design process.
When the part is updated, changes to the design variables are automatically
applied.
In this exercise, you add a design variable for a taper angle on the active part.
To add a design variable to an active part
1Use AMVARS to add a design variable.
Desktop Menu Part ➤ Design Variables
2In the Design Variables dialog box, with the Active Part tab selected, choose New.
3In the New Part Variable dialog box, specify:
Name: taper
Equation: Enter 0
Choose OK.
4Choose OK to exit the Design Variables dialog box.
Next, you edit the sweep feature by adding the new variable to its design
parameters.
To edit a sweep feature
1Use AMEDITFEAT to add the new design variable to the sweep feature.
Context Menu In the graphics area, right-click and choose Edit Features
➤ Edit.
2Highlight the helical sweep.
3In the Helix dialog box, specify the following:
Taper Angle: taper
Choose OK. Then choose OK to exit the Sweep dialog box.
4Press ENTER to end the command.
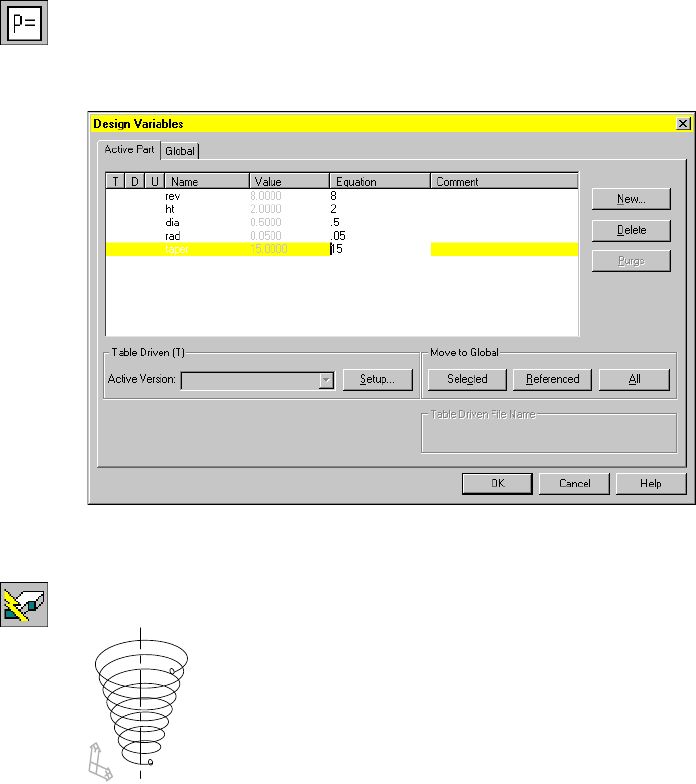
Modifying Design Variables |245
To modify a design variable
1Use AMVARS to modify the design variable.
Desktop Menu Part ➤ Design Variables
2In the Design Variables dialog box, with the Active Part tab selected, high-
light the taper variable. In the highlighted line, double-click the Equation
field and enter 15.
Choose OK to exit the Design Variables dialog box.
3Use AMUPDATE to update the part.
Context Menu In the graphics area, right-click and choose Update Part.
Save your file.
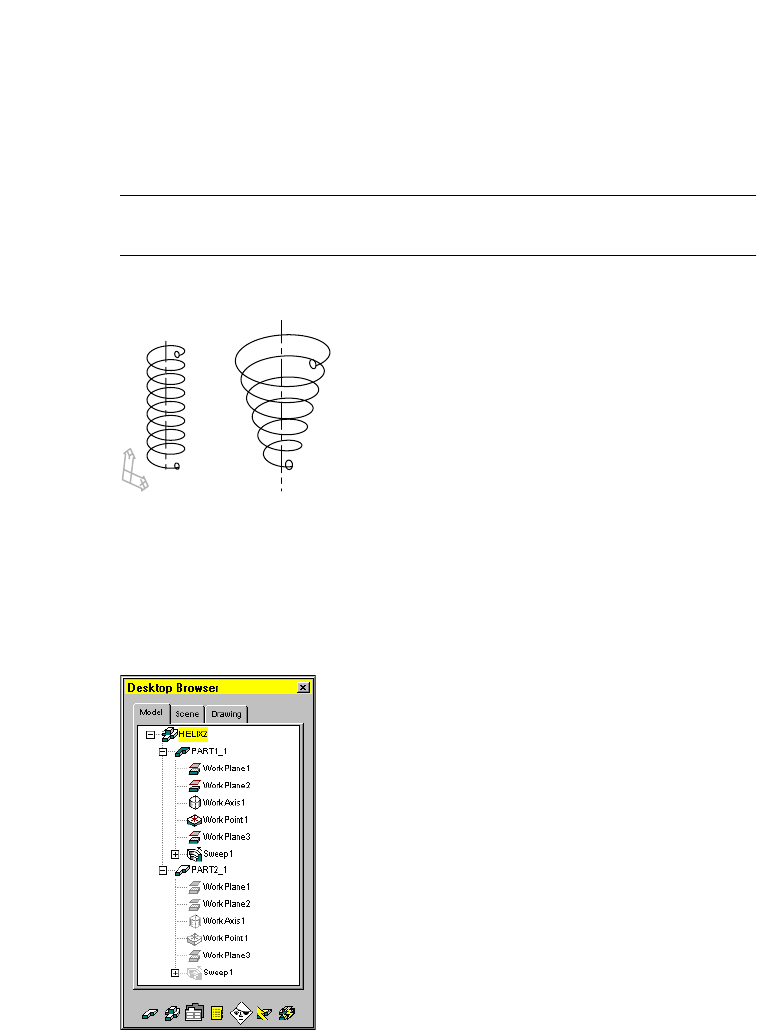
246 |Chapter 11 Using Design Variables
Working with Global Design Variables
You can assign global variables to more than one part to control similar fea-
tures. In this lesson, you move some of the active part design variables to glo-
bal variables and assign them to two parts.
Open the file helix2.dwg in the desktop\tutorial folder.
NOTE Back up the tutorial drawing files so you still have the original files if you
make a mistake. See “Backing up Tutorial Drawing Files” on page 40.
The drawing contains two springs created from helical sweeps.
Both helical sweeps have active part design variables already assigned to
them. In this lesson, you create global design variables to control identical
features of each helix.
First, expand the Browser hierarchy by clicking the plus sign in front of
HELIX2. Then click the plus sign in front of PART1_1 and PART2_1. The
Browser should look like this. Notice PART1_1 is the active part.

Working with Global Design Variables |247
Next, examine the active part design variables for both parts.
To examine a design variable for an active part
1Use AMVARS to open the Design Variables dialog box.
Desktop Menu Part ➤ Design Variables
2In the Design Variables dialog box, with the Active Part tab selected, examine
the values for the design variables assigned to PART1_1.
You should see four variables controlling the number of revolutions, height,
radius of the swept profile, and the taper angle of the active part. There is no
variable defined for the diameter of the helical sweep.
Choose OK to exit the dialog box.
3Use AMACTIVATE to activate PART2_1.
Browser In the Browser, right-click PART2_1 and choose Activate
Part.
4Examine the design variables assigned to PART2_1.
Desktop Menu Part ➤ Design Variables
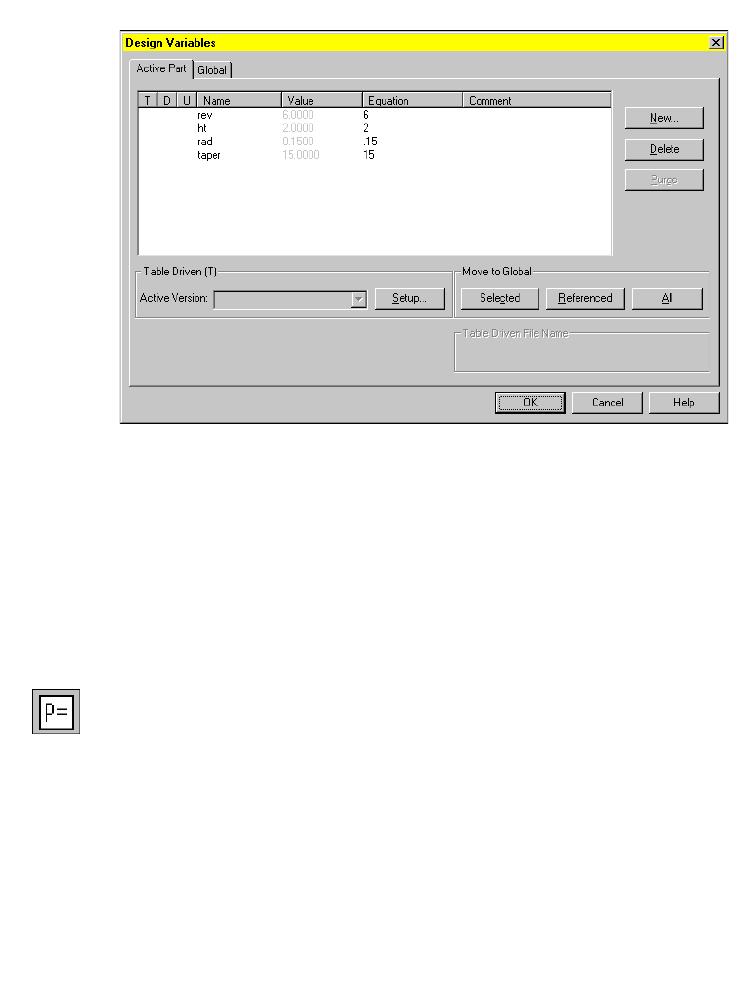
248 |Chapter 11 Using Design Variables
5In the Design Variables dialog box, make sure the Active Part tab is selected.
Choose OK.
Both parts have active part design variables controlling the same features.
The variable controlling the height of both helical sweeps contains the same
value.
Next, you move this active part design variable to a global design variable so
that one variable controls both parts.
To move an active part variable to a global design variable
1Open the Design Variables dialog box.
Desktop Menu Part ➤ Design Variables
2In the Design Variables dialog box, with the Active Part tab selected, high-
light the ht variable. Under Move to Global, choose Selected.
The variable is removed from the list of active part design variables.
3Click the Global tab and examine the list of global variables.
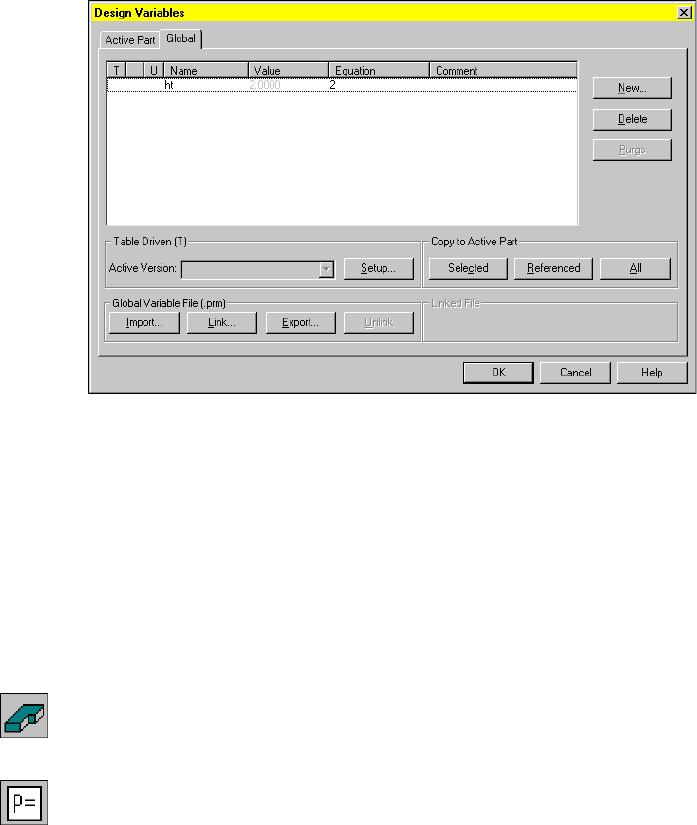
Working with Global Design Variables |249
Choose OK to exit the dialog box.
Mechanical Desktop re-evaluates the features of the part and updates the
part. Because the value of the variable has not changed, the part does not
change.
Although the ht variable for PART2_1 has been moved to global, the same
variable for PART1_1 is still an active part design variable. Because one global
variable will drive both parts, you remove the ht variable from the PART1_1
list of active part design variables.
To delete an active part design variable
1Use AMACTIVATE to activate PART1_1.
Browser In the Browser, right-click PART1_1 and choose Activate
Part.
2Open the Design Variables dialog box.
Desktop Menu Part ➤ Design Variables
3In the Design Variables dialog box, with the Active Part tab selected, high-
light the ht variable and choose Delete.
The variable is removed from the list of active part design variables.
Choose OK to exit the dialog box.
PART1_1 is re-evaluated and updated. The global design variable is now con-
trolling the height of both helical sweeps.
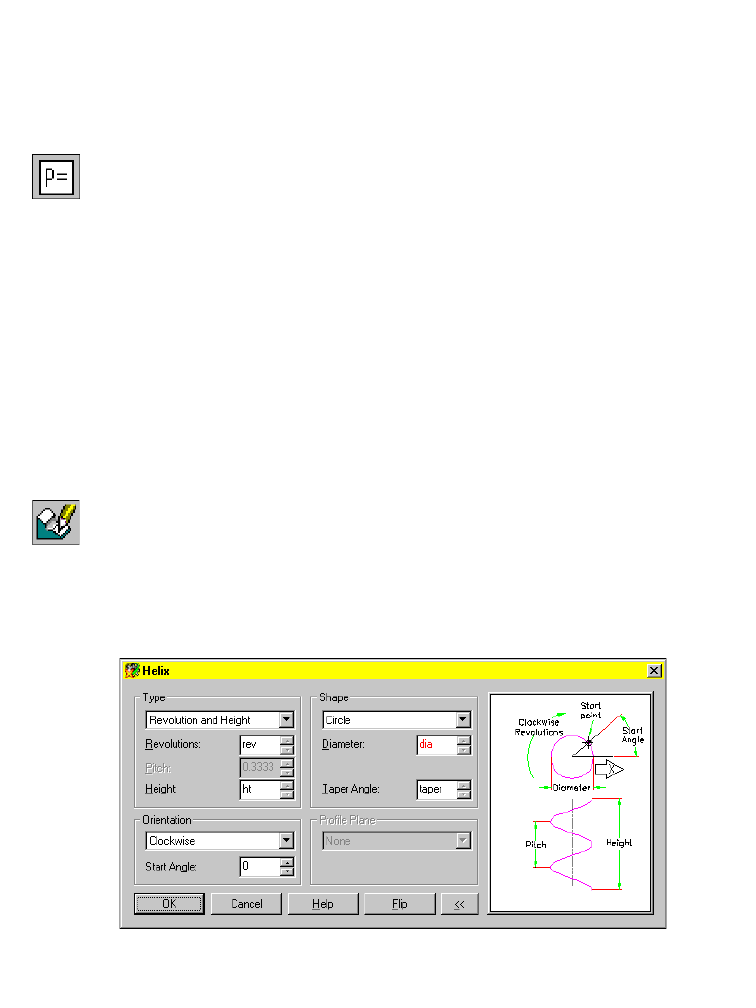
250 |Chapter 11 Using Design Variables
Next, you create a new global design variable to control the diameter of the
springs and assign it to both parts. Then you modify the value of the global
design variable controlling their height.
To create a global design variable
1Open the Design Variables dialog box.
Desktop Menu Part ➤ Design Variables
2In the Design Variables dialog box, select the Global tab and choose New.
3In the New Part Variable dialog box, specify:
Name: Enter dia
Equation: Enter .75
Choose OK. The Global tab now contains two variables, ht and dia.
Choose OK to exit the dialog box.
The parts do not change because the variable has not yet been assigned to
them.
To assign a global design variable to a part
1Edit the sweep feature for PART1_1:
Context Menu In the graphics area, right-click and choose Edit Features
➤ Edit.
2Highlight the helical sweep.
3In the Helix dialog box, specify the following:
Diameter: dia
Choose OK. Then choose OK to exit the Sweep dialog box.
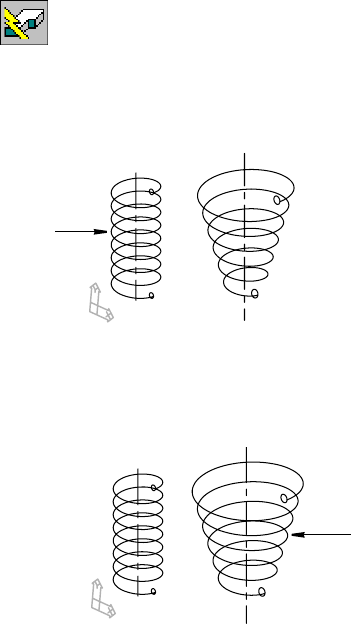
Working with Global Design Variables |251
4Continue on the command line.
Select object: Press ENTER
5Update the part.
Context Menu In the graphics area, right-click and choose Update Part.
Enter an option [active Part/Assembly/aLl parts/linKs] <active Part>:
Press ENTER
Mechanical Desktop updates PART1_1 using the new global design variable
to control the diameter of the sweep.
6Activate PART2_1.
7Repeat steps 1 through 5 for PART2_1.
Your drawing should look like this.
Next, you modify the global design variable controlling the height of the
parts.
PART1_1
PART2_1
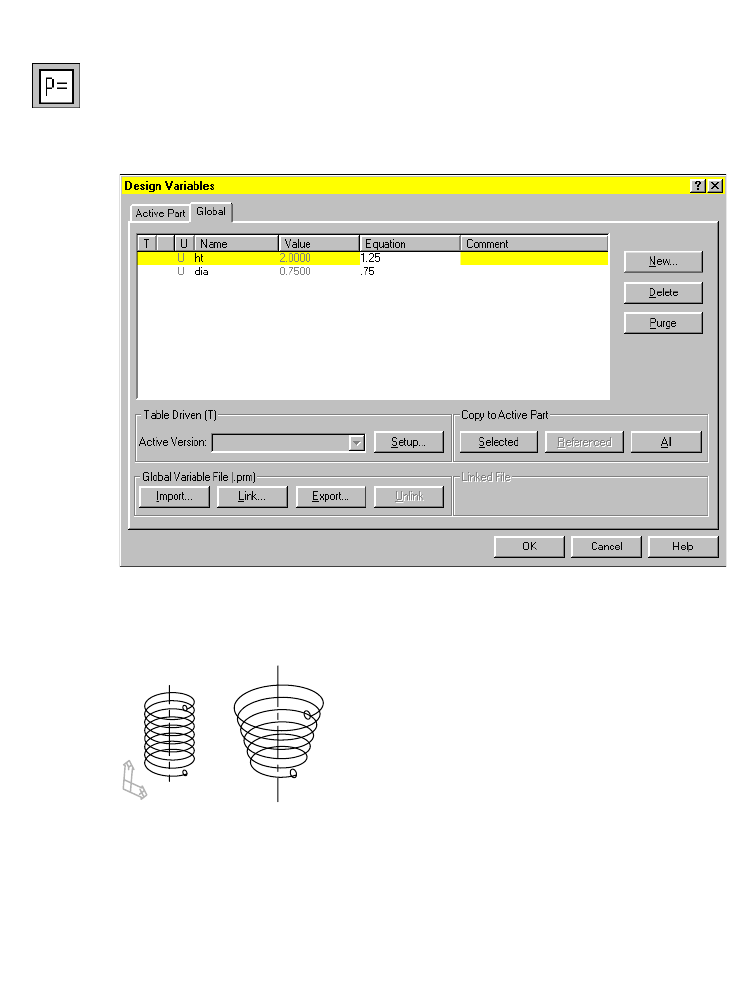
252 |Chapter 11 Using Design Variables
To modify a global design variable
1Open the Design Variables dialog box.
Desktop Menu Part ➤ Design Variables
2In the Design Variables dialog box, with the Global tab selected, highlight
the ht variable. In the highlighted line, double-click the Equation field and
enter 1.25.
Choose OK to exit the dialog box.
Mechanical Desktop re-evaluates the features and updates both parts.
Design variables are a powerful way to control the features of a part. Both
active part and global design variables may be table driven. To create a table
driven part, you use Microsoft® Excel software to create a spreadsheet con-
taining values for different versions of a part. You learn more about table
driven parts in chapter 15, “Creating Table Driven Parts.”

253
In This Chapter 12
Creating Parts
This tutorial continues with techniques you learned in
previous lessons. You use sketches to create features.
You position standard features, such as holes, and then
combine them to create a part. You analyze your design
and build a model so that you can easily incorporate
changes. This is a problem-solving process that you
can apply to any parts you create using Autodesk®
Mechanical Desktop®.
In this tutorial, you create a saddle bracket in two
phases. First, you create all the features of the part in
rough form. Then, you refine those features to complete
the part.
■Analyzing design ideas to simplify
sketching
■Selecting the base feature
■Planning the order in which to
add features
■Stabilizing features with
constraints and dimensions
■Creating features that remain
fixed relative to work planes and
work axes
■Refining features
■Adjusting features according to
design changes

254 |Chapter 12 Creating Parts
Key Terms
Te r m Definition
base feature The first feature you create. As the basic element of your part, it represents its
simplest shape. All geometry you create for a part depends on the base feature.
consumed sketch A sketch used in a feature, for example, an extruded profile sketch. The sketch is
consumed when the feature is created.
Desktop Browser A graphical representation of the features that make up your model. You can work
in the Browser to create and restructure parts and assemblies, define scenes,
create drawing views, and control overall preferences.
placed feature A mechanical shape that does not require sketches, such as a hole, chamfer, or
fillet. Placed features are constrained to the feature on which they are placed and
are geometrically dependent.
sketch plane A temporary drawing surface that corresponds to a real plane on a feature. It is an
infinite plane with both X and Y axes, where you sketch or place a feature.
sketched feature A three-dimensional solid whose shape is defined by constrained sketches and
located parametrically on a part. Sketched features are extrudes, lofts, revolves,
sweeps or face splits.
work axis A parametric construction line created along the centerline of a cylindrical feature,
or sketched on the current sketch plane. A work axis can be used as the axis of
revolution for a revolved or swept feature, an array of features, to place a work
plane, and to locate new sketch geometry. It can be included in dimensions.
work feature A work axis, work point, or work plane used to construct and position a feature
where there is no face on which to sketch or place the feature. You constrain or
dimension work features to maintain symmetry throughout updates.
work plane An infinite plane attached to a part. Can be designated as a sketch plane and can
be included in a constraint or dimension scheme. Work planes can be either
parametric, or non-parametric.
work point A parametric work feature used to position a hole, the center of an array, or any
other point for which there is no other geometric reference.

Basic Concepts of Creating Parts |255
Basic Concepts of Creating Parts
You construct a model bit by bit, fashioning shapes to add to it and using
tools to cut away the portions of the shapes you do not need. In Mechanical
Desktop®, these shapes are the features of the part you are creating.
Analyzing Rough Sketches
You may be accustomed to jotting down design ideas on paper, starting with
a rough outline for a part and adding details as you go. Working with
Mechanical Desktop is similar: you put some thought into your idea, plan-
ning the best way to implement your concept.
In general, you follow this process to develop a part design:
■Look at the whole part and decide how to break it down into simple shapes.
■Identify the simplest element to use as your base feature.
■Decide the order for creating additional features.
■Determine the methods for creating the features.
■As you build individual features, review and adjust your ideas about how
the features work together.
■As you adjust your design strategy, you can revise the features you created
earlier.
With early planning, you can express your design in modular, simple terms.
When changes occur, as they often do in design work, you can easily accom-
modate them because of the parametric capabilities in Mechanical Desktop.
Any changes you make to your design are quickly recalculated.
As you study the part to determine the features you need and the order in
which to create them, also notice the relationships and patterns of the
shapes. Some features may be symmetrical, but others may be built most eas-
ily from simple shapes combined to form compound shapes.
The saddle bracket in this rough sketch has four distinct features: the saddle,
the mounting lugs, a boss, and strengthening ribs.
lug
boss
saddle
rib
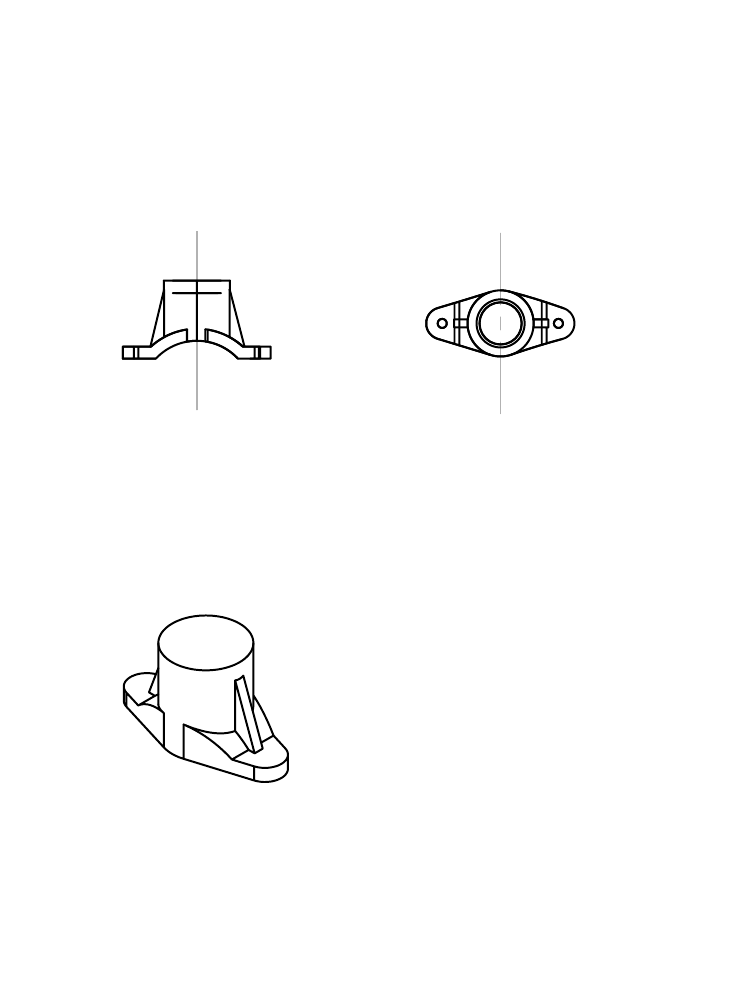
256 |Chapter 12 Creating Parts
The part is symmetrical. Visualize two perpendicular centerlines—one along
the axis of the boss and another intersecting both lugs. As you create this
part, consider this symmetry as you constrain features.
As you build the saddle bracket, you learn to create features according to
the relationships among them. In this case, the base feature of the part is
the saddle and lugs. Because the remaining features attach to the saddle and
lugs, you create the main shape first. The next feature you create is the boss
because it rests directly on the saddle. Finally, you create the ribs because
they attach to both the saddle and the boss.
Creating Rough Parts
In the saddle bracket, features are present but lack details such as the arch of
the saddle, the mounting holes for the lugs, and the pipe hole for the boss.
Despite the missing details, the shape of the part and the placement of fea-
tures are symmetrical. Working from this basic part, you will add those
details.
Dimensioning and Constraining Parts
You apply dimensions and constraints to control the size and shape of a part,
and the position of part features. Dimensions can be expressed as numbers,
parameters, or equations.
You can use the Design Variables dialog box to create equations and control
the relationships between the dimensions on your model. Then you apply
the variables to your model and the model is updated to reflect the changes.
front view to
p
view

Creating Base Features |257
If you want to assign design variables as you are defining part sketches and
creating features, use the Equation Assistant. You can activate the Equation
Assistant in two ways:
■When you are prompted for a dimension value, right-click the graphics
area.
■While you are creating sketched and placed features, in the feature dialog
box, right-click a value field.
For more information about working with design variables, see “Using
Design Variables” on page 239.
To begin this lesson, open the file saddle.dwg in the desktop\tutorial folder.
The drawing is blank but contains the settings you need for this tutorial.
NOTE Back up the tutorial drawing files so you still have the original files if you
make a mistake. See “Backing up Tutorial Drawing Files” on page 40.
Creating Base Features
The overall shape of the saddle bracket is simple. First, you sketch a shape to
represent the saddle and lugs.
Next, you convert the sketch to a base feature and modify its shape by inter-
secting it with a second feature. Intersecting the base feature is like cutting
away material you don’t need.
saddle arch
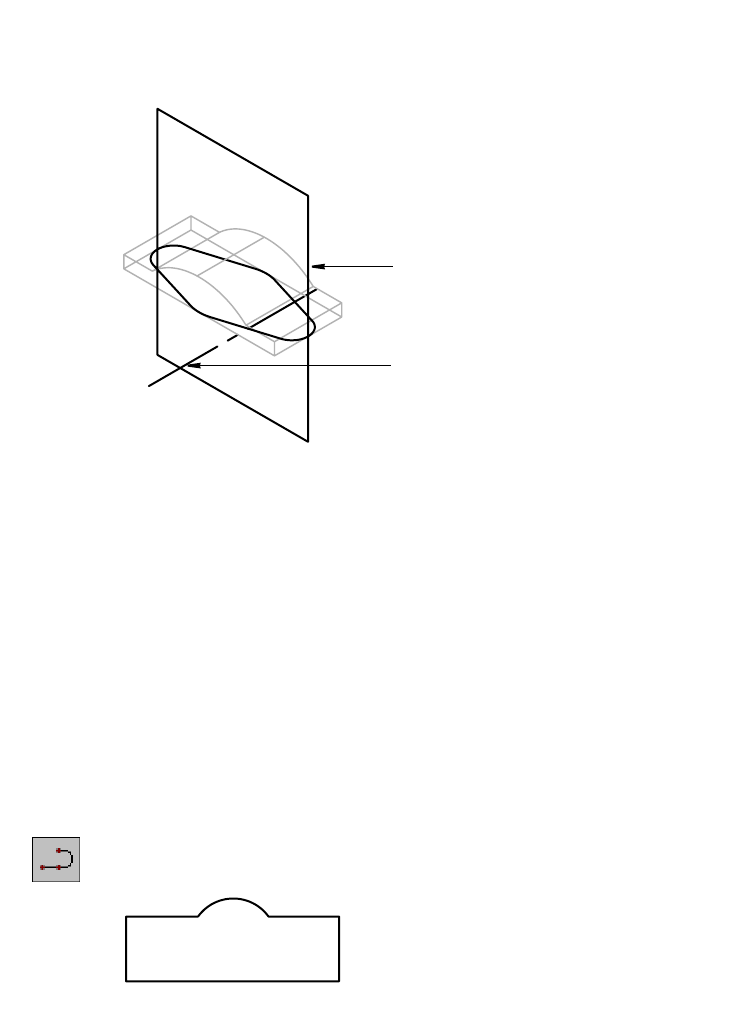
258 |Chapter 12 Creating Parts
When you create these features, you position them symmetrically using a
work axis and a work plane. Like other features, you include work features in
your constraint scheme to maintain symmetry throughout future updates to
the part.
Sketching Base Features
After you have a strategy, you are ready to sketch, constrain, and extrude the
base feature of the part. Begin by creating a sketch of the block and then con-
verting it to a profile sketch.
To make it easier to sketch the shape, turn off Polar, Osnap, and Otrack at the
bottom of your screen.
To create a profile sketch
1Use PLINE to sketch this shape. Draw the shape starting at the lower left of
the sketch.
You can use the cursor crosshairs to align the top horizontal lines (that is,
make them collinear). Use the Direction option of PLINE to control the direc-
tion of the arc.
Context Menu In the graphics area, right-click and choose 2D Sketching
➤ Polyline.
work plane
work axis
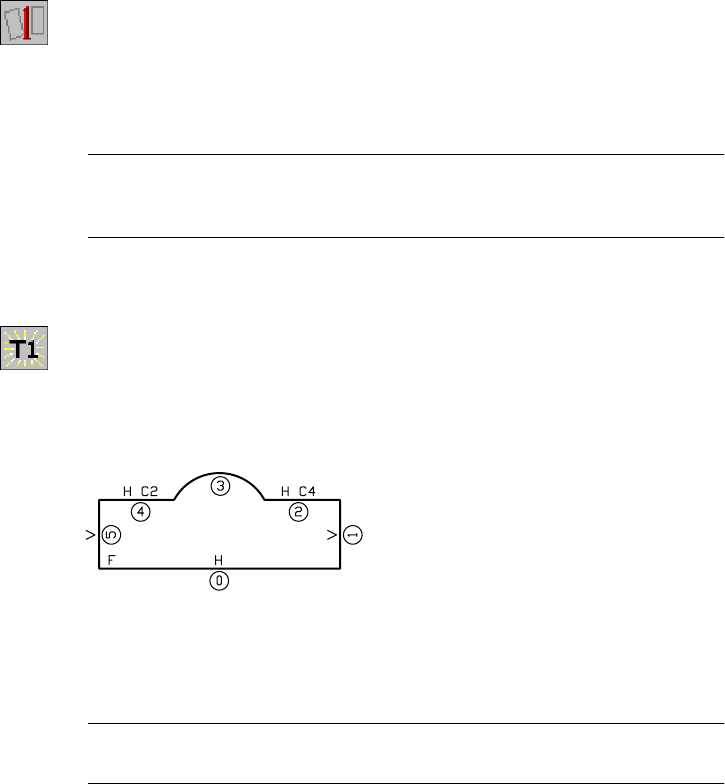
Creating Base Features |259
2Use AMPROFILE to profile your sketch.
Context Menu In the graphics area, right-click and choose Sketch Solving
➤ Single Profile.
Mechanical Desktop analyzes the sketch and displays a message on the com-
mand line:
Solved underconstrained sketch requiring 5 dimensions or constraints.
NOTE Throughout this tutorial, the number of constraints your sketch needs
may differ from the example, depending on how precisely you draw the sketch.
You learn how to modify constraints so that your sketch solves correctly.
Look at the assumed constraints and determine which constraints you need.
3Use AMSHOWCON to display all of the existing constraints.
Context Menu In the graphics area, right-click and choose 2D
Constraints ➤ Show Constraints.
Respond to the prompt to show all constraints.
Your sketch should look like this. However, the constraint numbering may
differ, depending on the order in which you drew the geometry.
In the example, all sketch elements have constraints except the arc. The lines
show vertical (V) or horizontal (H) constraints and the top two horizontal
lines show a collinear (C) constraint. A fix constraint is located at the start
point of line 0.
NOTE If the fix constraint in your sketch does not appear in the same location
as the illustration above, redraw the sketch starting at the lower left.
Now that the basic sketch shape is defined, you need to add dimensions to
stabilize its size. Start with its longest lengths to minimize the risk of distort-
ing the shape as it is resized.
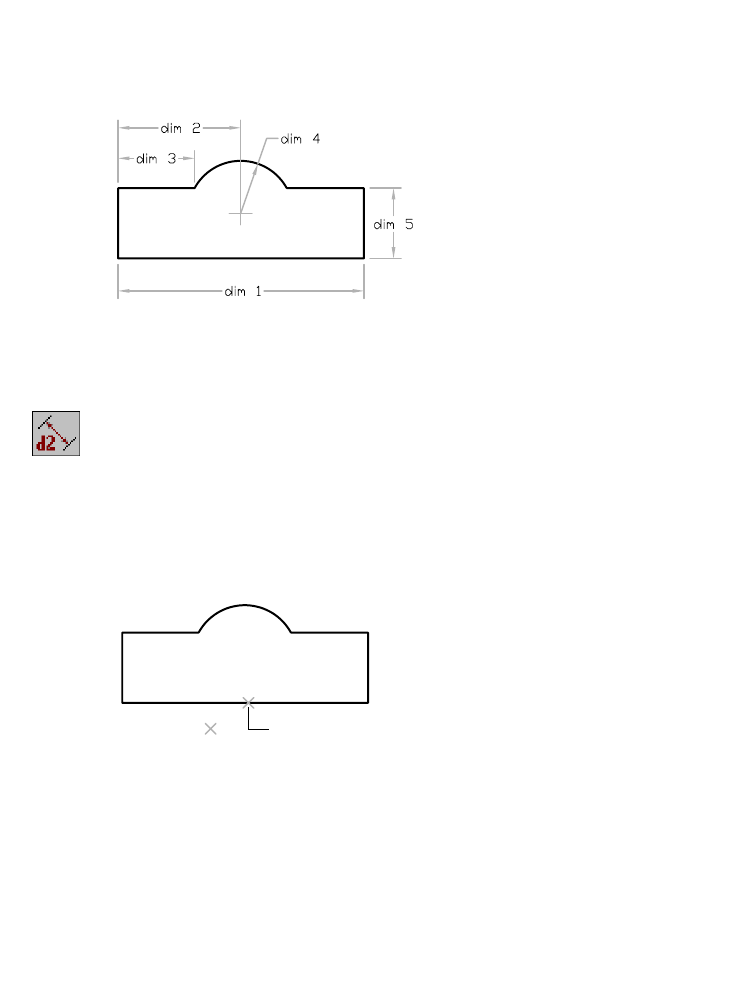
260 |Chapter 12 Creating Parts
For this exercise, add dimensions in the order shown, starting with the
dimension for the bottom line.
Depending on your sketch, your default dimension values may differ from
those in this exercise.
To constrain a sketch
1Use AMPARDIM to add parametric dimensions to fully constrain the sketch,
following the prompts.
Context Menu In the graphics area, right-click and choose Dimensioning
➤ New Dimension.
Select first object: Specify the line (1)
Select second object or place dimension: Place the dimension (2)
Enter dimension value or [Undo/Hor/Ver/Align/Par/aNgle/Ord/Diameter/pLace]
<1.2297>: Enter 1.48
Solved underconstrained sketch requiring 4 dimensions or constraints.
2To center the arc, create a horizontal dimension from the center of the arc to
the left edge of the sketch.
Select first object: Specify the left edge (1)
Select second object or place dimension: Specify the arc (2)
Specify dimension placement: Place the dimension (3)
Enter dimension value or [Undo/Hor/Ver/Align/Par/aNgle/Ord/Diameter/pLace]
<0.5944>: Enter .74
Solved underconstrained sketch requiring 3 dimensions or constraints.
1
2
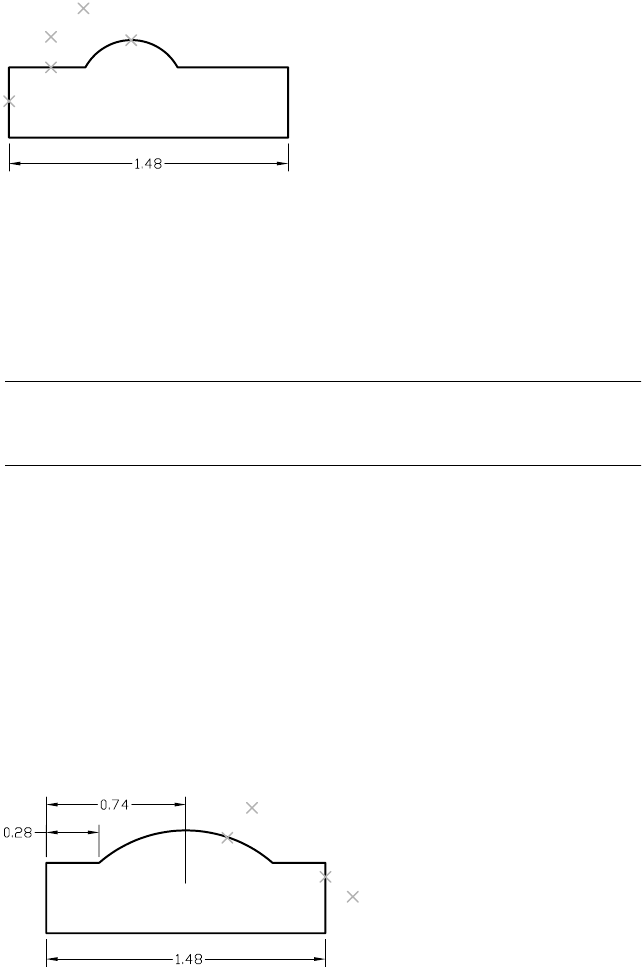
Creating Base Features |261
3Create the dimension for the top left horizontal line. Continue to follow the
selection points.
Select first object: Specify the left horizontal line (4)
Select second object or place dimension: Place the dimension (5)
Enter dimension value or [Undo/Hor/Ver/Align/Par/aNgle/Ord/Diameter/pLace]
<0.3951>: Enter .28
Solved underconstrained sketch requiring 2 dimensions or constraints.
NOTE You may get a message stating that adding a dimension will overcon-
strain the sketch. This can occur if your sketch does not closely resemble this
exercise. Try adding the dimensions in a different order, or re-create your sketch.
4Finish dimensioning the sketch.
Select first object: Specify the arc (1)
Select second object or place dimension: Place the dimension (2)
Enter dimension value or [Undo/Diameter/Ordinate/Placement point]
<0.4600>: Enter .68
Solved underconstrained sketch requiring 1 dimensions or constraints.
Select first object: Specify the line on the right (3)
Select second object or place dimension: Place the dimension (4)
Enter dimension value or [Undo/Hor/Ver/Align/Par/aNgle/Ord/Diameter/pLace]
<0.2176>: Enter .20
Solved fully constrained sketch.
Select first object: Press ENTER
Now that your profile sketch is fully constrained, create a solid feature.
2
4
3
5
1
3
4
12
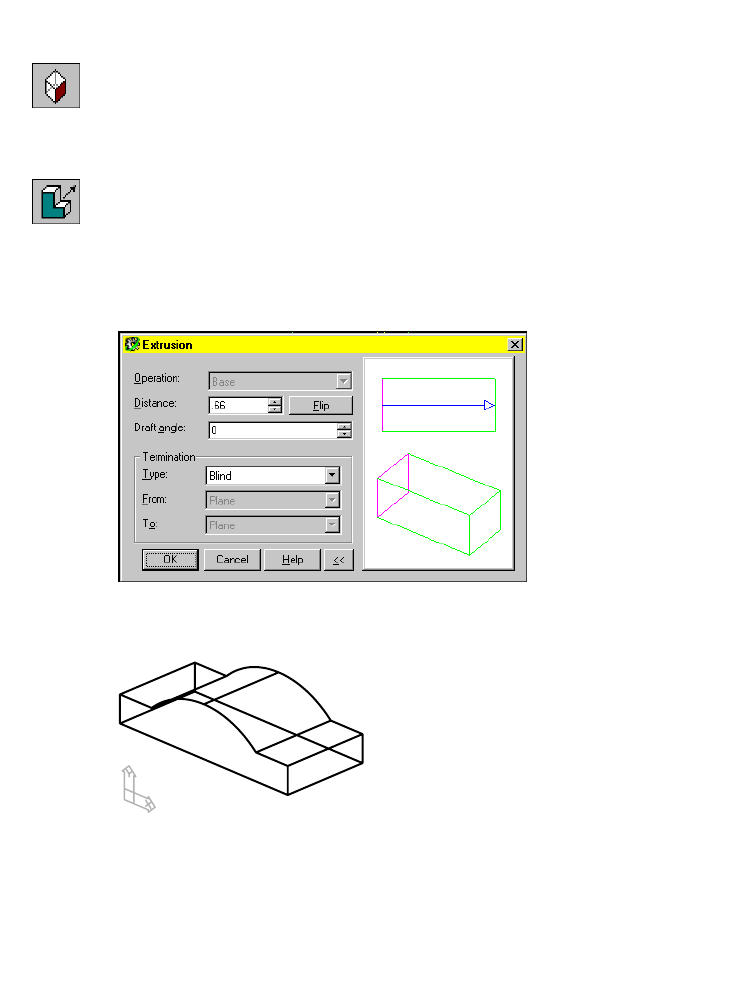
262 |Chapter 12 Creating Parts
To extrude a feature
1Change to an isometric view of your part.
Desktop Menu View ➤ 3D Views ➤ Front Right Isometric
You need to specify the type of extrusion operation, how to terminate the
extrusion, and its size.
2Use AMEXTRUDE to extrude the profile.
Context Menu In the graphics area, right-click and choose Sketched &
Work Features ➤ Extrude.
3In the Extrusion dialog box, specify:
Distance: .66
Termination: Blind
Choose OK to create the feature.
The base feature should look like this.
4Refer to the Desktop Browser, which shows that you have added an extrusion
feature to the base feature and that the extrusion was blind (a specific depth).
Click the plus sign beside the extrusion feature to display a profile icon. This
display tells you that the extrusion feature originated with the profiled
sketch. If you complete a feature and then need to change its size or shape,
you can edit it and update the part to reflect the change.
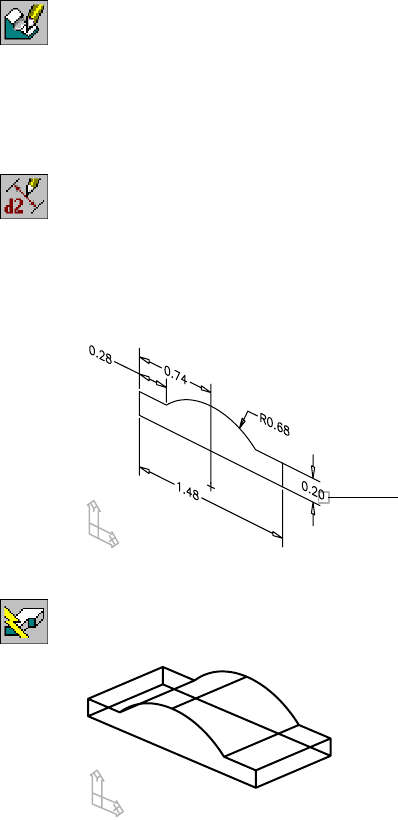
Creating Base Features |263
To edit a consumed sketch in the Browser, double-click the profile icon to dis-
play the original sketch, or right-click to show the menu, and choose Edit
Sketch. Make any changes and choose Part ➤ Update to resize the part with
the changed values.
To edit a base feature
1Select the sketch to edit, responding to the prompts.
Context Menu In the graphics area, right-click and choose Edit Features
➤ Edit.
Enter an option [Independent array instance/Sketch/surfCut/Toolbody/select
Feature] <select Feature>: Enter s
Select sketched feature: Specify the extrusion
2Modify the height of the sketch, responding to the prompts.
Context Menu In the graphics area, right-click and choose Dimensioning
➤ Edit Dimension.
Select dimension to change: Select the 0.20 dimension (1)
New value for dimension <.20>: Enter .12
Solved fully constrained sketch.
Select dimension to change: Press ENTER
3Use AMUPDATE to update the model, responding to the prompt.
Context Menu In the graphics area, right-click and choose Update Part.
Your part is updated according to the changed dimension and looks like this.
Save your file.
1
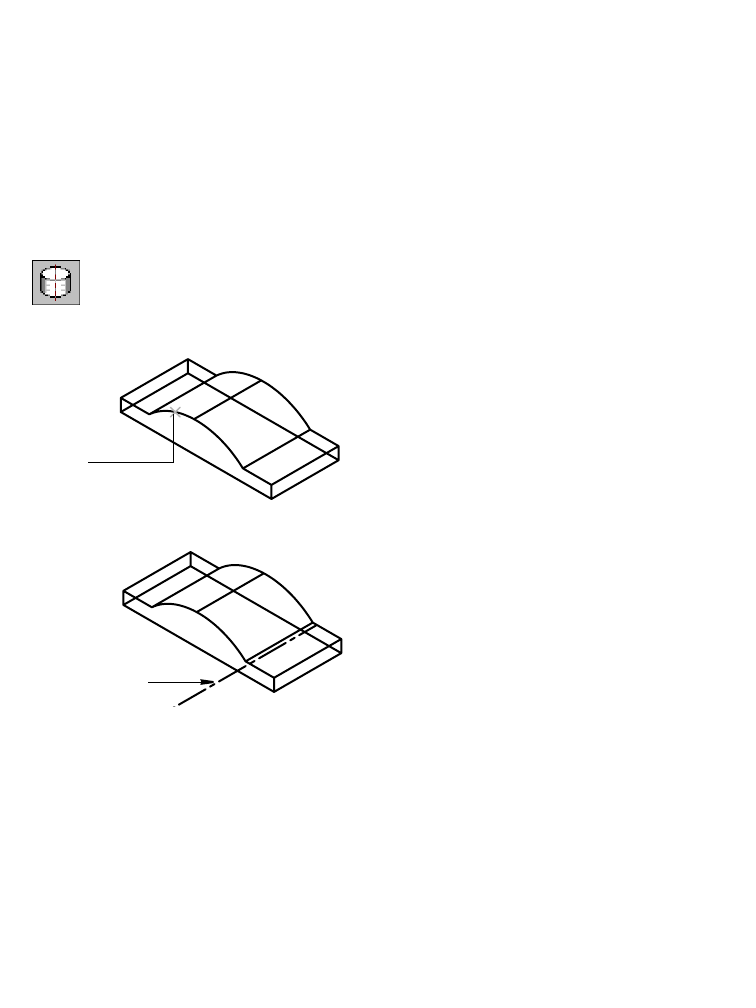
264 |Chapter 12 Creating Parts
Creating Work Features
Now that you have created the base feature, add the feature that defines the
rough shape of the bracket. First, create work features to maintain symmetry.
Then, use them to draw, constrain, and extrude the sketch.
The first work feature is a work axis along the centerline of the arc on the base
feature. This work axis anchors your next sketch to the base feature.
To create a work axis
1Use AMWORKAXIS to create the work axis, responding to the prompt.
Context Menu In the graphics area, right-click and choose Sketched &
Work Features ➤ Work Axis.
Select cylinder, cone or torus [Sketch]: Specify the cylindrical face (1)
The work axis is displayed as a line along the center of the arc.
If the work axis is not visible, the work axis display is probably turned off.
2To turn on the display, in the Browser right-click Work Axis1. Choose Visible.
The next work feature, the work plane, forms the second axis of symmetry.
This plane is parallel to the front face and intersects both lugs. You specify
the work plane position as parallel to the selected face and offset one-half the
depth of the part.
1
work axis
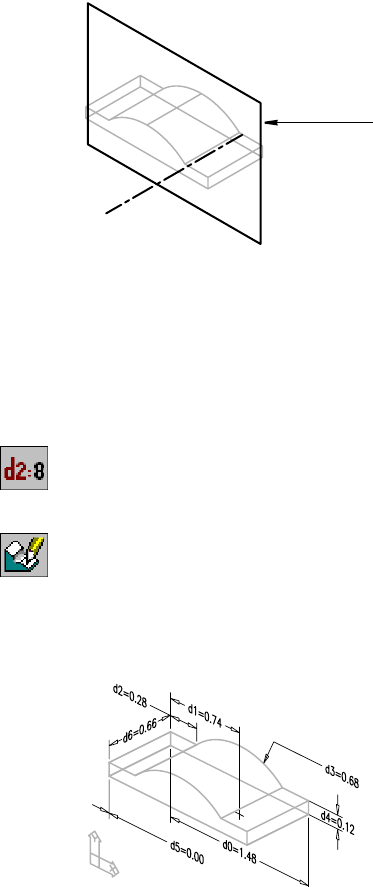
Creating Base Features |265
To locate the work plane parametrically, specify the offset depth as an equa-
tion. By using an equation, the work plane tracks changes in the bracket
width and always remains centered. To use an equation, you must determine
the dimension parameter before you define the work plane.
To create a work plane
1Use AMDIMDSP to set dimensions as equations.
Context Menu In the graphics area, right-click and choose Dimensioning
➤ Dimensions as Equations.
2Redisplay the sketch dimensions, following the prompt.
Context Menu In the graphics area, right-click and choose Edit Features
➤ Edit.
Enter an option [Sketch/surfCut/Toolbody/select Feature] <select Feature>:
Specify any point on the part
3Choose OK to exit the Extrusion dialog box.
Parameter d6 is the dimension that specifies the width of the feature. Because
the dimension parameters for your sketch may differ, make note of the
parameter for your part.
work plane
266 |Chapter 12 Creating Parts
4Press ENTER to exit the command.
5Create a parametric work plane in the center of the part, parallel to the front
surface, and offset one-half the width of the part.
Context Menu In the graphics area, right-click and choose Sketched &
Work Features ➤ Work Plane.
6In the Work Plane Feature dialog box, specify:
1st Modifier: Planar Parallel
2nd Modifier: Offset
Offset: d6/2 (substitute your parameter value for d6)
Create Sketch Plane: Clear the check box
NOTE By default, the Create Sketch Plane option in the Work Plane Feature
dialog box is selected. This setting automatically places the sketch plane (the
location on which the next feature will be sketched or placed) on the work plane.
For this exercise, you specify a sketch plane on a surface of the feature, not on
the work plane.
Choose OK.
7Identify the part face to which the work plane is parallel, responding to the
prompts.
Select work plane, planar face or [worldXy/worldYz/worldZx/Ucs]:
Select the curved edge on the front face (1)
Enter an option [Next/Accept] <Accept>: Press ENTER
Enter an option [Flip/Accept] <Accept>: Enter f to flip the direction into the part
Enter an option [Flip/Accept] <Accept>: Press ENTER
1
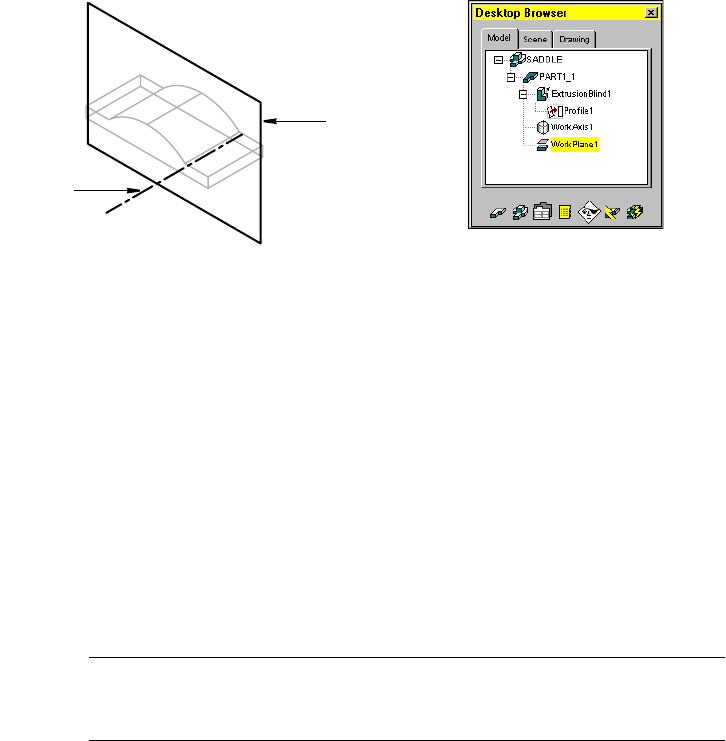
Creating Base Features |267
The work plane is displayed as a planar rectangle. The Desktop Browser dis-
plays both a work axis and a work plane icon.
Save your file.
Defining Sketch Planes
Before you can sketch the next feature, you must define a new sketch plane,
an infinite XY plane that locates a 2D sketching surface in 3D space.
When you create sketched features, you determine the placement and orien-
tation of the sketch plane on a 2D plane. A 2D plane is
■A flat part surface
■The XY, YZ, or ZX axes of the World Coordinate System (WCS)
■A previously defined work plane
■The XY plane of the current user coordinate system (UCS)
Unlike a work feature, a sketch plane is a temporary object. Only one sketch
plane can exist at the same time.
NOTE Except for base features, you must specify a sketch plane before you can
draw a sketch. With base features, the sketch plane is automatically placed on
the current UCS.
work plane
work axis

268 |Chapter 12 Creating Parts
As you move your mouse over a part, Mechanical Desktop highlights the
faces that can be used to define a new sketch plane. Faces that cannot be used
are not highlighted. When you select a face, a temporary sketch plane
appears on that face.
You can choose the Z direction and orientation of the XY axes for the new
sketch plane.
After you have selected the options, the temporary sketch plane disappears
from the screen. You are ready to create the sketch geometry.
In the next exercise, the bottom face of the base feature is the sketch plane.
On this face, you sketch a profile to extrude through the part. Once placed,
the sketch and subsequent features remain attached to the base feature,
regardless of changes you make later.
To create a sketch plane
1Use MCAD2 to change your display to two viewports.
Desktop Menu View ➤ Viewports ➤ 2Viewports
The left viewport is a top view of the part; the right viewport is an isometric
view.
Before you create the sketch plane, check the system variable that controls
the UCS settings for your viewports. By default, each viewport has its own
UCS.
2If necessary, change the UCS setting so that each viewport uses the same
UCS, responding to the prompt.
Command UCSVP
Enter new value for UCSVP <1>: Enter 0
temporary sketch plane
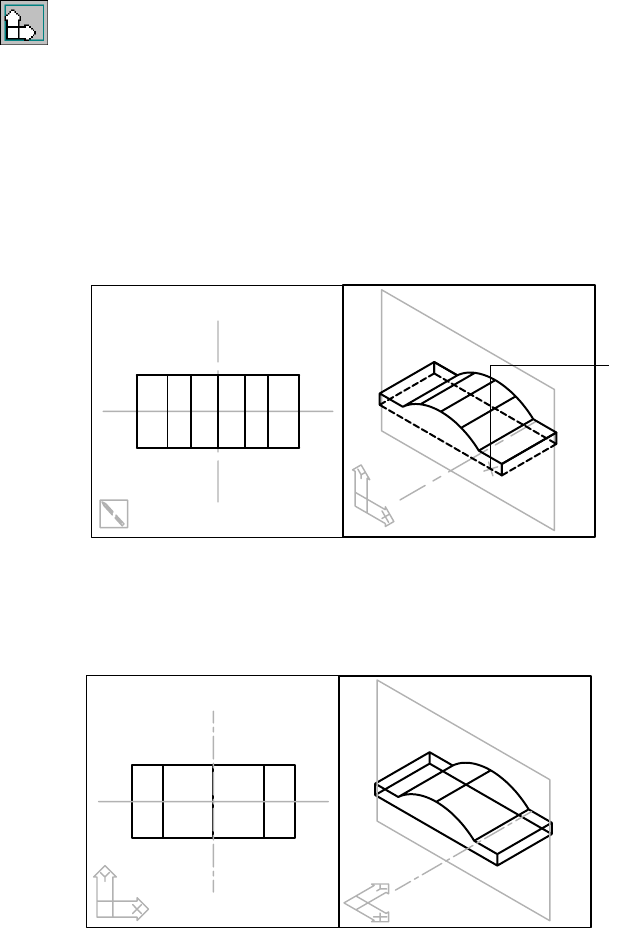
Creating Base Features |269
3Use AMSKPLN to create a new sketch plane for the profile to be extruded,
responding to the prompts.
Context Menu In the graphics area, right-click and choose New Sketch
Plane.
Select work plane, planar face or [worldXy/worldYz/worldZx/Ucs]:
Select the bottom face when it is highlighted (1)
Enter an option [Accept/Next] <Accept>:
Choose n to cycle to the bottom face, or press ENTER
Select edge to align X axis or [Z-flip/Rotate]:
Enter z to flip the Z axis up through the part
Plane = Parametric
Select edge to align X axis or [Z-flip/Rotate] <accept>:
Verify that the X axis is pointing to the right, and press ENTER
You can pick the Z axis arrow to flip the Z axis orientation. You can also pick
part and work feature edges to orient the XY plane.
The UCS icon in the viewports is updated to reflect changes in the sketch plane
orientation. The sketch plane is always coincident with the UCS XY plane.
1
270 |Chapter 12 Creating Parts
Creating Extruded Features
To define the rough shape of the saddle bracket, you sketch a diamond shape
with filleted corners and add constraints to stabilize its shape. When the fea-
ture is stabilized with geometric constraints, you add dimensions to fully
define its size. Finally, you extrude the sketch, creating a solid feature from
the combined volume of the original base feature and the extruded feature.
To create a profile sketch
1Use PLINE to sketch this shape in the left viewport. With PLINE, you may need
to use the Direction option to control the direction of arcs.
Context Menu In the graphics area, right-click and choose 2D Sketching
➤ Polyline.
NOTE To make it easier to sketch the shape, make sure POLAR, OSNAP, and
OTRACK are turned off at the bottom of your screen.
Creating Extruded Features |271
2Use AMPROFILE to create a profile from the sketch.
Context Menu In the graphics area, right-click and choose Sketch Solving
➤ Single Profile.
Mechanical Desktop analyzes the sketch, redraws it, and displays this
message:
Solved underconstrained sketch requiring 10 dimensions or constraints.
NOTE If your sketch needs more than 10 dimensions or constraints to solve
the sketch, you probably need some tangency and constraints. Look for sharp
discontinuities between the fillets and the lines they join. You make these correc-
tions when you constrain the sketch to the base feature.
3Look at the Desktop Browser. The profile you just created is represented as
Profile2.
Because you have not extruded the profile, it is not consumed by a feature.
Therefore, the Browser shows that Profile2 is aligned at the same level in the
hierarchy as ExtrusionBlind1.
Because you added this feature to the base feature, you need to constrain its
shape and size and then constrain it to the existing part.
Constraining Sketches
To constrain a sketch, first you add and change geometric constraints to
create the shape of the bracket and to define its symmetry about the two
centerlines formed by the work plane and the work axis. Then you dimen-
sion the sketch to maintain the proper length and width.
NOTE Don’t be concerned if your sketch appears to be misshapen compared
to the illustrations. Constraining the sketch to the base feature will correct its
shape.
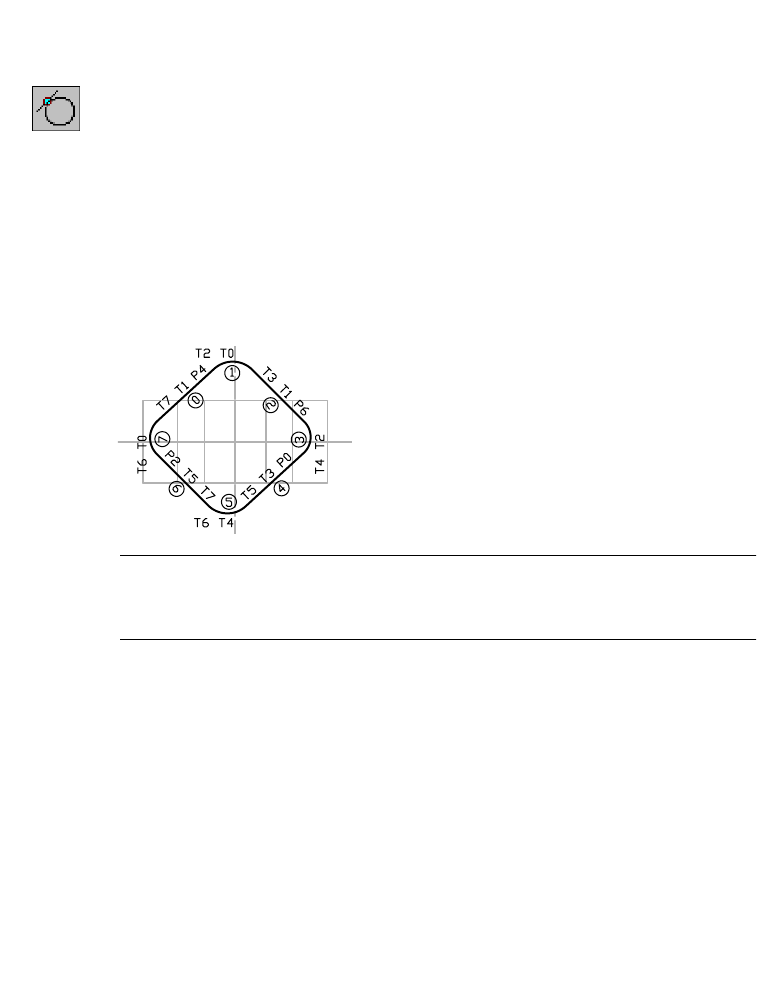
272 |Chapter 12 Creating Parts
To geometrically constrain a sketch
1Use AMADDCON to add tangent constraints to the arcs and lines, following
the prompts.
Context Menu In the graphics area, right-click and choose 2D
Constraints ➤ Tangent.
Valid selection(s): line, circle, arc, ellipse or spline segment
Select object to be reoriented: Specify an arc segment
Valid selection(s): line, circle, arc, ellipse or spline segment
Select object to be made tangent to: Specify an adjoining line segment
Solved underconstrained sketch requiring n dimensions or constraints.
Valid selection(s): line, circle, arc, ellipse or spline segment
Select object to be reoriented:
Continue adding constraints, or press ENTER twice to end the command
NOTE If the constraint display is too small, choose Part ➤ Part Options and
adjust the constraint size in the Desktop Options dialog box. Redisplay the
constraints.
You need to add radial constraints so that opposing arcs have equal radii.
Radial constraints make the arcs the same size and maintain the symmetry
needed between the sides of the bracket.
Fewer dimensions are needed because one parametric dimension solves 2
degrees of freedom by specifying the size of 2 arcs.
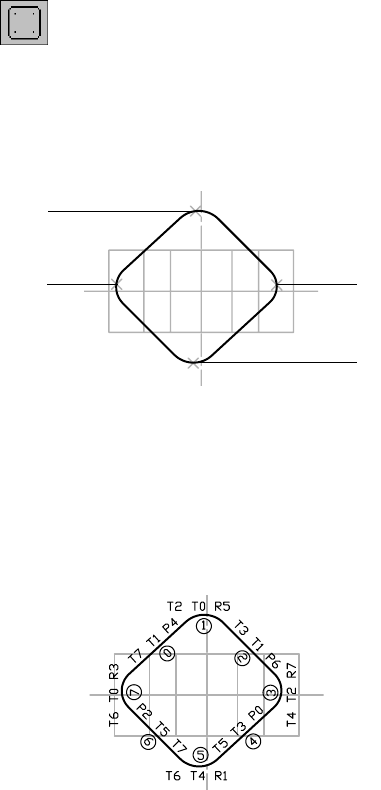
Creating Extruded Features |273
2Select the arcs to constrain, following the prompts.
Context Menu In the graphics area, right-click and choose 2D
Constraints ➤ Radius.
Valid selection(s): arc or circle
Select object to be resized: Select the arc at the top of the sketch (1)
Valid selection(s): arc or circle
Select object radius is based on: Select the arc at the bottom of the sketch (2)
Solved underconstrained sketch requiring 9 dimensions or constraints.
3Add radial constraints to the left and right arcs to make them equal in size.
Valid selection(s): arc or circle
Select object to be resized: Select the arc at the right of the sketch (3)
Valid selection(s): arc or circle
Select object radius is based on: Select the arc at the left of the sketch (4)
Solved underconstrained sketch requiring 8 dimensions or constraints.
Your left viewport should look like this.
If you sketched in a different order, your arcs and lines may be numbered
differently.
Valid selection(s): arc or circle
Select object to be resized: Press ENTER
Enter an option
[Hor/Ver/PErp/PAr/Tan/CL/CN/PRoj/Join/XValue/YValue/Radius/Length/Mir/Fix/
eXit] <eXit>: Press ENTER
1
3
4
2

274 |Chapter 12 Creating Parts
4Delete any parallel constraints, responding to the prompts
If your sketch doesn’t contain parallel constraints, skip this procedure.
Context Menu In the graphics area, right-click and choose 2D
Constraints ➤ Delete Constraints.
Select or [Size/All]: Specify the constraint with the P symbol (1)
Select or [Size/All]: Specify the constraint with the P symbol (2)
Select or [Size/All]: Press ENTER
These parallel constraints, although valid, conflict with adding dimensions
between arc centers. You need to remove the parallel constraints to prevent
overconstraining the sketch.
Save your file.
Dimensioning Sketches
Now that the feature is stabilized with geometric constraints, you can dimen-
sion the distance between the arc centers and specify the arc radius. You need
four dimensions: a radius dimension for each arc, a dimension between the
left and right arc centers, and a dimension between the center of the sketch
and the center of either the left or right arc.
12
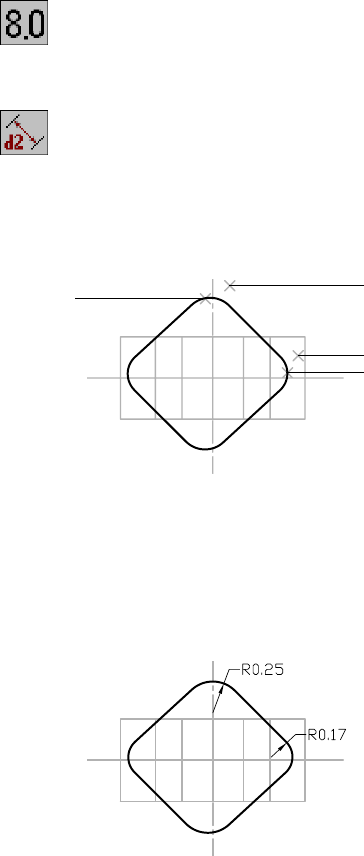
Creating Extruded Features |275
To dimension a sketch
1Use AMDIMDSP to change the dimension display back to numbers.
Context Menu In the graphics area, right-click and choose Dimensioning
➤ Dimensions as Numbers.
2Use AMPARDIM to dimension the radius for the top and right arcs, responding
to the prompts.
Context Menu In the graphics area, right-click and choose Dimensioning
➤ New Dimension.
Select first object: Specify the arc (1)
Select second object or place dimension: Place the dimension (2)
Enter dimension value or [Undo/Diameter/Ordinate/Placement point]
<0.1986>: Enter .25
3Continue on the command line.
Select first object: Specify the arc (3)
Select second object or place dimension: Place the dimension (4)
Enter dimension value or [Undo/Diameter/Ordinate/Placement point]
<0.1676>: Enter .17
Your sketch should look like this.
12
4
3
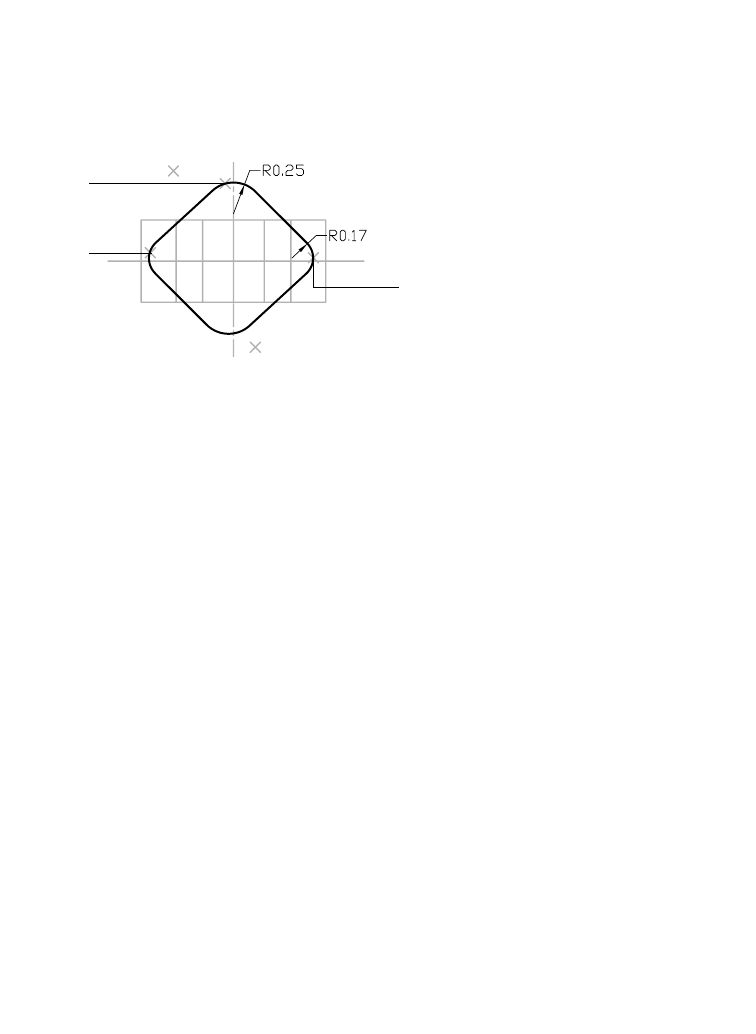
276 |Chapter 12 Creating Parts
4Create a horizontal dimension between the centers of the left and right arcs.
Select first object: Specify the left arc center (1)
Select second object or place dimension: Specify the right arc center (2)
Specify dimension placement: Place the dimension (3)
Enter dimension value or [Undo/Hor/Ver/Align/Par/aNgle/Ord/Diameter/pLace]
<0.9797>: Press ENTER
5Dimension the distance between the centers of the top and left arcs.
Select first object: Specify the left arc center (1)
Select second object or place dimension: Specify the top arc center (4)
Specify dimension placement: Create a horizontal dimension (5)
Enter dimension value or [Undo/Hor/Ver/Align/Par/aNgle/Ord/Diameter/pLace]
<0.5135>: Press ENTER
6Press ENTER to exit the command.
In this case, you do not change the values while you create the dimensions.
While a sketch is underconstrained, dimension changes can cause it to dis-
tort, and you may not be able to recover its correct shape.
Creating Constraints Between Features
The sketch geometry is now completely defined. However, to position the
sketch symmetrically on the base feature, you need to constrain the sketch to
the work plane and the work axis because they serve as centerlines for the part.
You use the project (PR) constraint to project points onto objects (similar to the
NEA object snap) and the concentric (C) constraint to force two arc or circle
centers to be coincident.
As you determined when you first analyzed the part,
■The left and right arcs of the sketch form the lugs for the saddle bracket.
The arc centers must lie on the work plane.
■The top and bottom arcs of the sketch form the base for the boss, in the
exact center of the part. The centers of both top and bottom arcs are coin-
cident with the intersection of the work plane and the work axis.
2
3
1
45
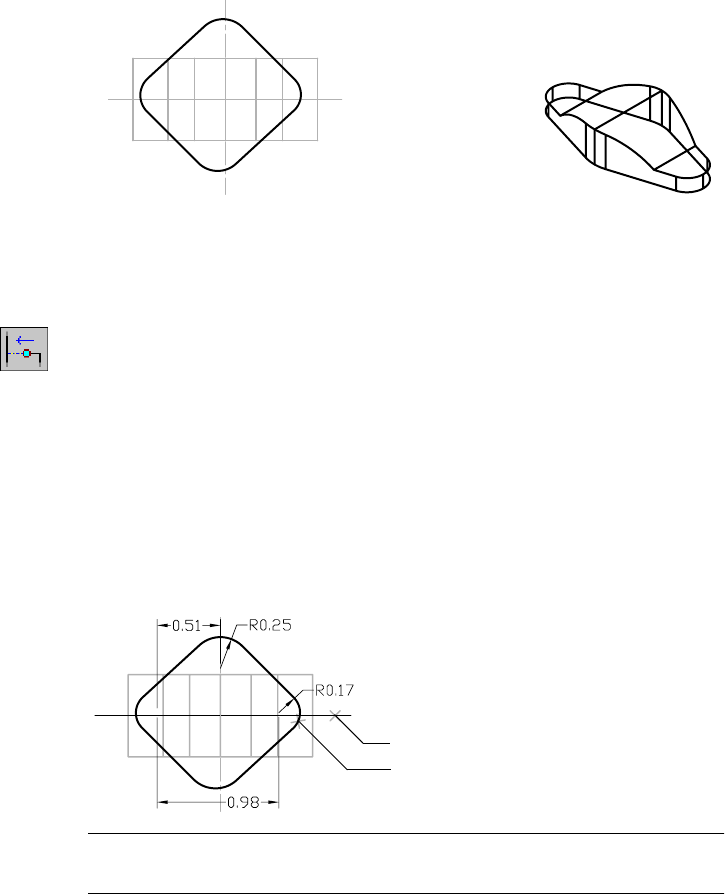
Creating Extruded Features |277
To constrain a sketch to a base feature
1Use AMADDCON to make the center of the right arc lie on the work plane,
responding to the prompts.
Context Menu In the graphics area, right-click and choose 2D
Constraints ➤ Project.
Valid selection(s): line, circle, arc, ellipse or spline segment
Specify a point to project: Enter cen
of: Specify the arc (1)
Valid selection(s): line, circle, arc, ellipse, work point or spline segment
Select object to be projected to: Specify the work plane (2)
To make selecting lines and arcs easier, use transparent ZOOM. You can zoom
in or out while using an active command. At the Command prompt, enter
‘z, and select the area of the sketch you want to magnify. Then continue with
the active command.
NOTE If you do not use the cen object snap to specify the arc centers, you will
not be able to create the project constraints.
rough shape rough shape as a part
1
2
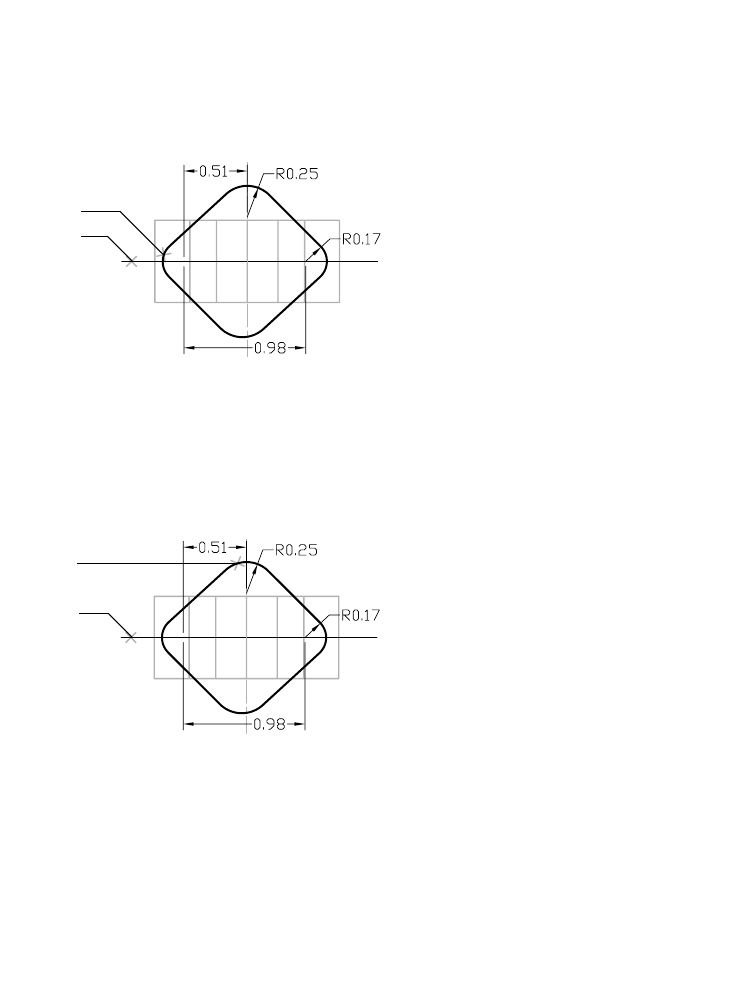
278 |Chapter 12 Creating Parts
2Make the center of the left arc lie on the work plane.
Valid selection(s): line, circle, arc, ellipse or spline segment
Specify a point to project: Enter cen
of: Specify the arc (1)
Valid selection(s): line, circle, arc, ellipse, work point or spline segment
Select object to be projected to: Specify the work plane (2)
3Position the center of the top arc on the work plane.
Valid selection(s): line, circle, arc, ellipse or spline segment
Specify a point to project: Enter cen
of: Specify the arc (1)
Valid selection(s): line, circle, arc, ellipse, work point or spline segment
Select object to be projected to: Specify the work plane (2)
2
1
1
2
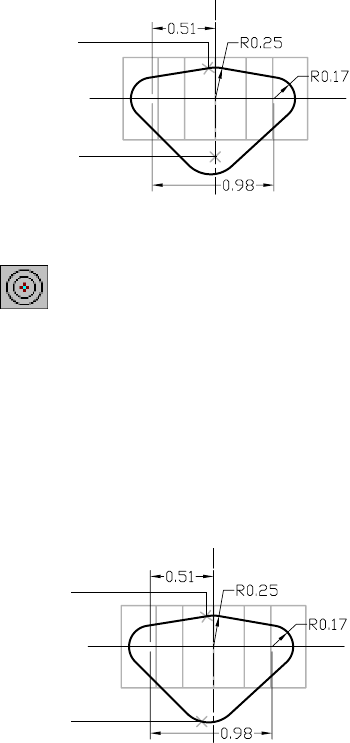
Creating Extruded Features |279
4Position the center of the top arc on the work axis.
Valid selection(s): line, circle, arc, ellipse or spline segment
Specify a point to project: Enter cen
of: Specify the arc (1)
Valid selection(s): line, circle, arc, ellipse, work point or spline segment
Select object to be projected to: Specify the work axis (2)
5Use AMADDCON to make the center of the bottom arc concentric with the
center of the top arc, responding to the prompts.
Context Menu In the graphics area, right-click and choose 2D
Constraints ➤ Concentric.
Valid selection(s): arc, circle, or ellipse
Select object to be reoriented: Specify the bottom arc (1)
Valid selection(s): arc, circle, ellipse, or work point
Select object to be made concentric to: Specify the top arc (2)
Valid selection(s): arc, circle, or ellipse
Select object to be reoriented: Press ENTER
Enter an option
[Hor/Ver/PErp/PAr/Tan/CL/CN/PRoj/Join/XValue/YValue/Radius/Length/Mir/Fix/
eXit] <eXit>: Press ENTER
1
2
1
2
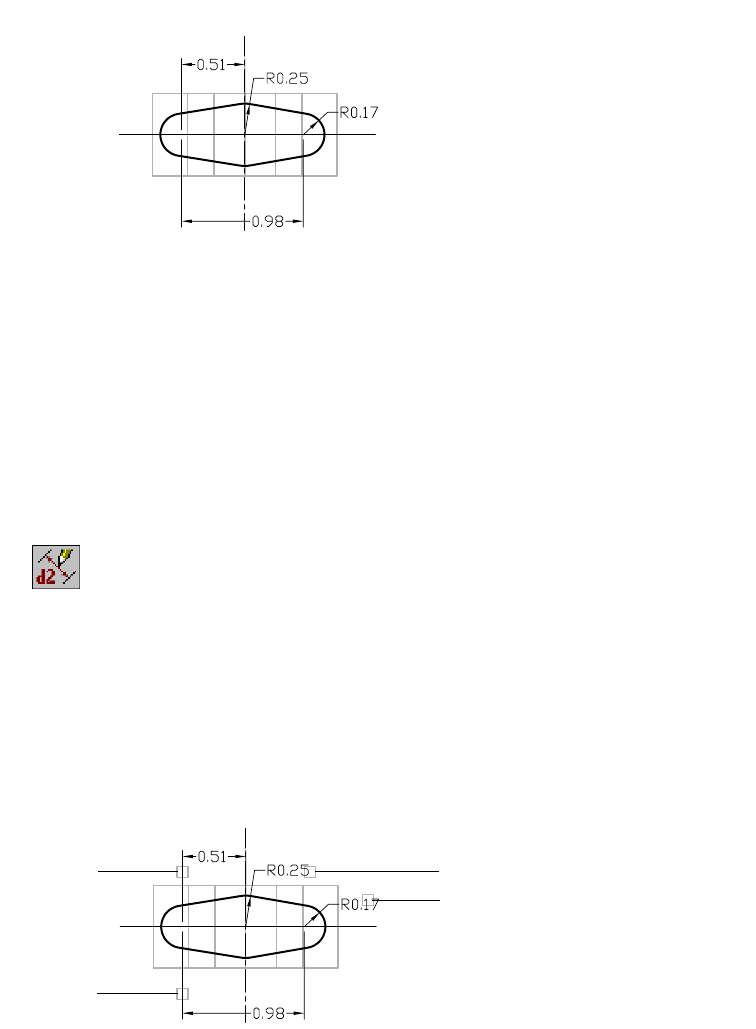
280 |Chapter 12 Creating Parts
Your sketch should be fully solved and look like this.
Save your file.
Editing Sketches
Now that the sketch is fully constrained, you can change the sketch dimen-
sions to position the sketch on your part. Modify the distances between the
center of the left arc and the center of the sketch and between the centers of
the left and right arcs.
To change a sketch dimension
1Use AMMODDIM to modify the values of the dimensions, following the
prompts.
Context Menu In the graphics area, right-click and choose Dimensioning
➤ Edit Dimension.
Select dimension to change: Specify the dimension (1)
New value for dimension: <0.25>: Enter .33
Select dimension to change: Specify the dimension (2)
New value for dimension: <0.17>: Enter .16
Select dimension to change: Specify the dimension (3)
New value for dimension: <0.98>: Enter 1.16
Select dimension to change: Specify the dimension (4)
New value for dimension: <0.51>: Enter .56
Select dimension to change: Press ENTER
2
14
3
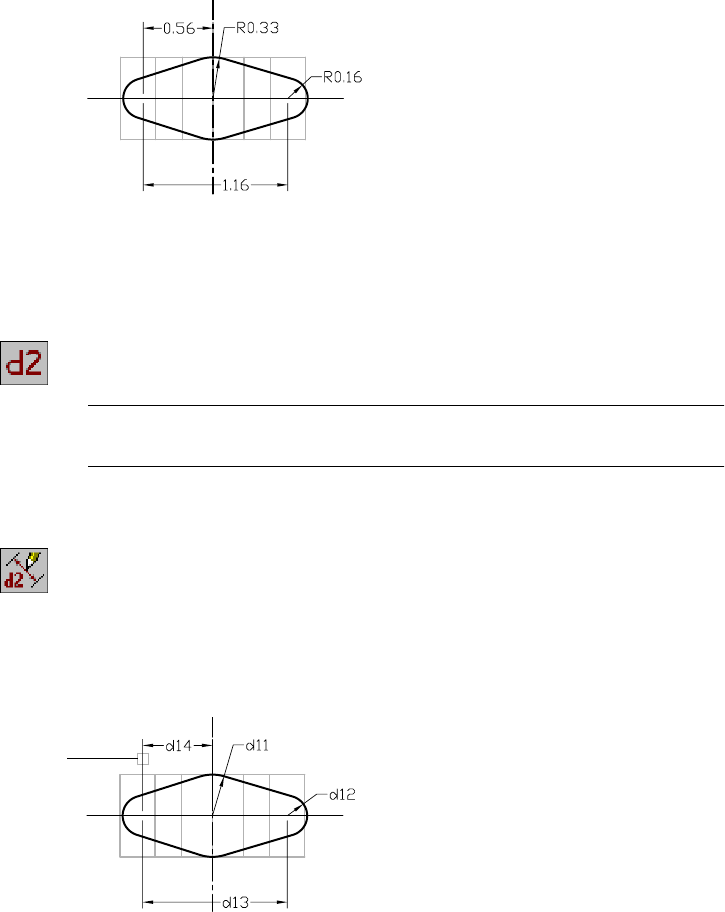
Creating Extruded Features |281
Your part should look like this.
Now, you need to create an equation between the overall dimension and the
dimension that centers the feature on the part and maintains symmetry
relative to the work axis. Display the dimensions as parameters, and then use
them as variables in the parametric equation.
2Use AMDIMDSP to display the dimensions as parameters.
Context Menu In the graphics area, right-click and choose Dimensioning
➤ Dimensions As Parameters.
NOTE Your dimension parameter numbers may differ from those shown in the
illustration.
3Make the dimension between the top and left arcs one-half the horizontal
distance between the left and right arcs, following the prompts.
Context Menu In the graphics area, right-click and choose Dimensioning
➤ Edit Dimension.
Select dimension to change: Specify the dimension (1)
Enter new value for dimension <.56>:
Enter =dx/2, where x is the dimension that corresponds to d13 in the illustration
Select dimension to change: Press ENTER
1
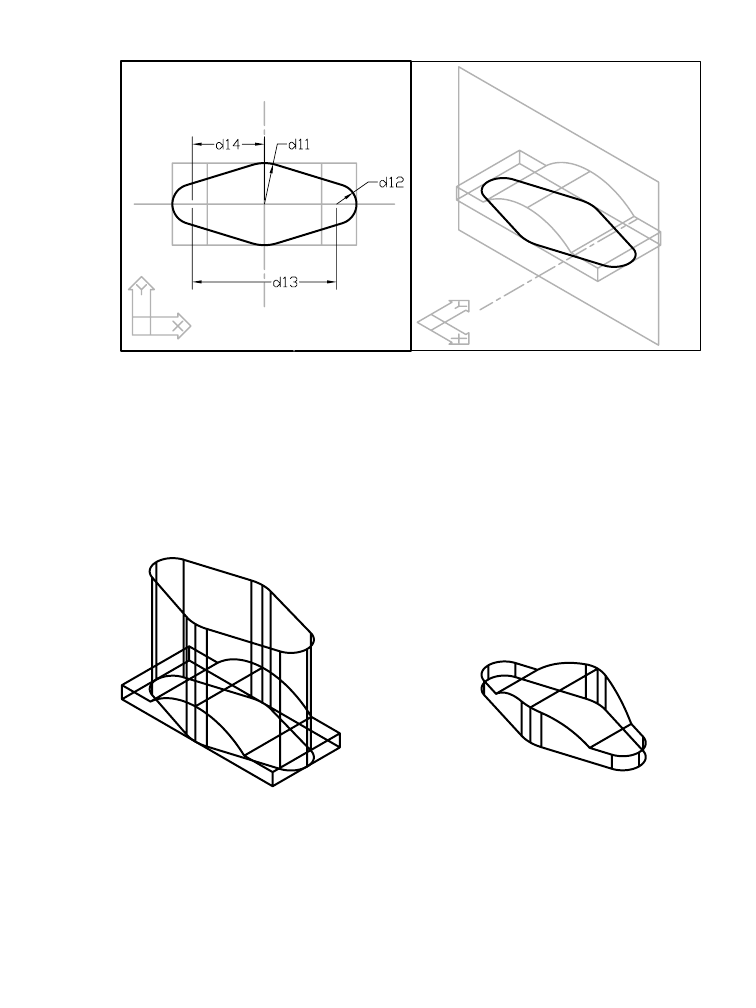
282 |Chapter 12 Creating Parts
Now that the profile sketch is completely constrained and dimensioned, you
can use it to change the shape of the base feature.
Extruding Profiles
You create a solid feature by extruding the profile through to the boundary
of the base feature, retaining the common volume. To create the rough shape
of the saddle bracket, you extrude the profile sketch up and completely
through the base feature. Because the sketch you extrude changes the shape
of the base feature, the intersection shares the volume of both.
base features resulting intersection
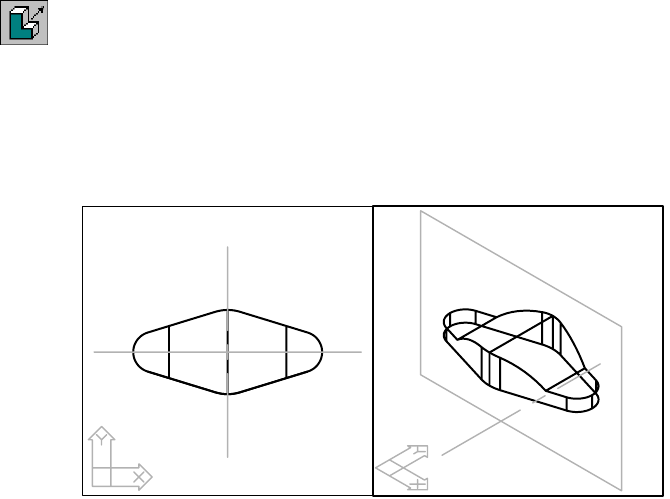
Creating Extruded Features |283
To extrude a profile through a base feature
1Use AMEXTRUDE to create the extrusion.
Context Menu In the graphics area, right-click and choose Sketched &
Work Features ➤ Extrude.
In the Extrusion dialog box, accept the default size and specify:
Operation: Intersect
Flip: Verify that the direction arrow is pointed up through the part
Termination: Through
Choose OK to exit the dialog box and create the extrusion.
Save your file.
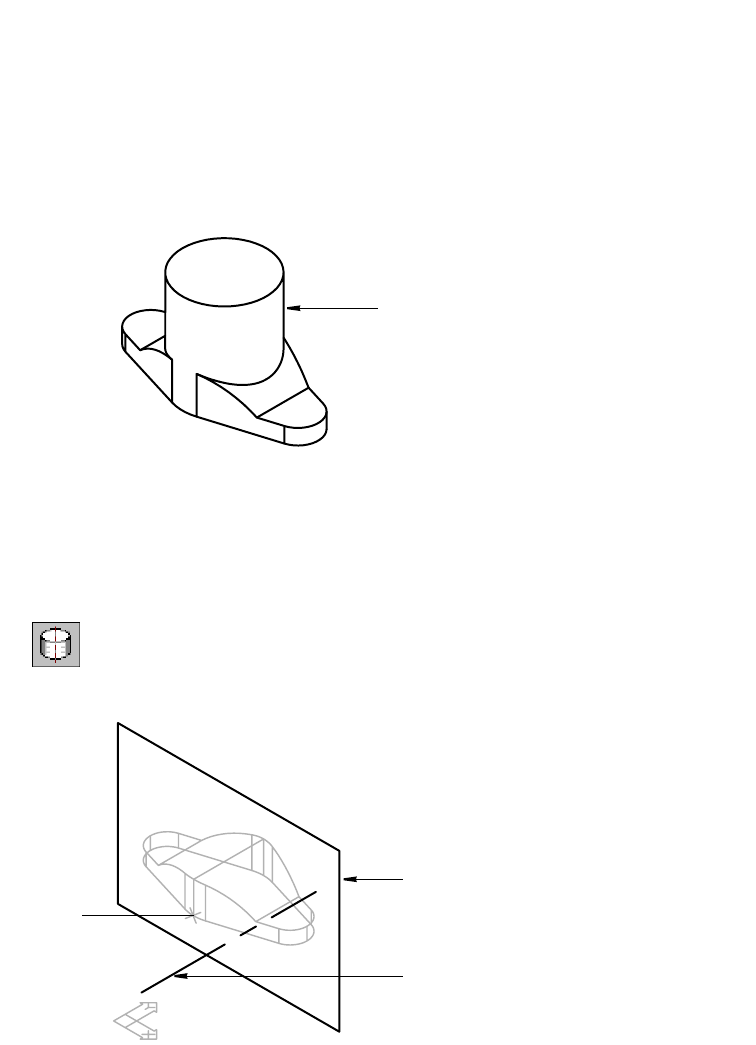
284 |Chapter 12 Creating Parts
Creating Revolved Features
With the rough shape of the saddle bracket defined, you can create the next
dependent feature, the boss, which is a cylinder. The fastest and most effi-
cient method to model the cylindrical boss is to extrude a circle. Alterna-
tively, you can revolve a rectangle about a central axis. This method is used
here to teach you the revolving method.
When you finish the exercise, your model will look like this.
Before you can sketch the profile for the revolved feature, you need to create
a work axis to serve as the centerline for the revolved feature. Work in the
right viewport, the isometric view.
To sketch a profile for a revolved feature
1Use AMWORKAXIS to create a work axis, responding to the prompt.
Context Menu In the graphics area, right-click and choose Sketched &
Work Features ➤ Work Axis.
Select cylinder, cone or torus [Sketch]: Specify the face (1)
boss
1
work plane
work axis
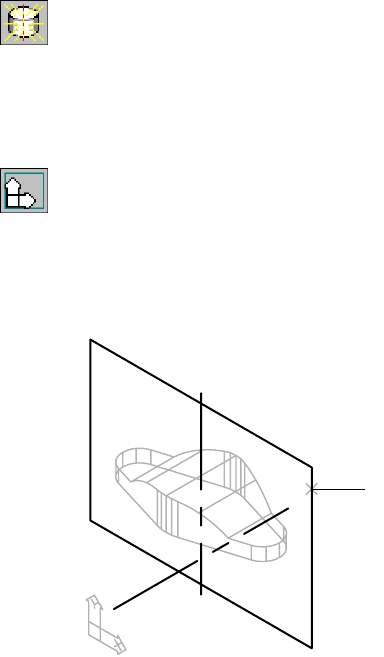
Creating Revolved Features |285
2A work axis passes vertically through the part. If the work axis is not dis-
played, use AMVISIBLE to display it.
Desktop Menu Part ➤ Part Visibility
In the Desktop Visibility dialog box, choose the Part tab and check Work
Axes. Select Unhide and choose OK.
Next, you need to create a new sketch plane. Because the cylinder is vertical,
you place the sketch plane on the previously defined work plane.
3Create a new sketch plane, responding to the prompts.
Context Menu In the graphics area, right-click and choose New Sketch
Plane.
Select work plane, planar face or [worldXy/worldYz/worldZx/Ucs]:
Specify the work plane (1)
Plane = Parametric
Select edge to align X axis or [Flip/Rotate/Origin] <Accept>: Press ENTER
The sketch plane assumes the Z direction and XY orientation of the work
plane.
4Hide the work plane. This time use the Browser method.
Browser Right-click WorkPlane1 and choose Visible
The work plane is no longer visible.
1

286 |Chapter 12 Creating Parts
5Make the left viewport active and change the view so that you see a front
view of the part as you look at the sketch plane.
Desktop Menu View ➤ 3D Views ➤ Front
6Sketch a rectangular outline of the cylinder, following the prompts.
Context Menu In the graphics area, right-click and choose 2D Sketching
➤ Rectangle.
Specify first corner point or [Chamfer/Elevation/Fillet/Thickness/Width]:
Specify a point
Specify other corner point: Specify a second point
7Use AMPROFILE to convert the sketch to a profile for the feature.
Context Menu In the graphics area, right-click and choose Sketch Solving
➤ Single Profile.
Mechanical Desktop selects the sketch you just drew, and converts it to a pro-
file. The sketch still needs four dimensions or constraints.
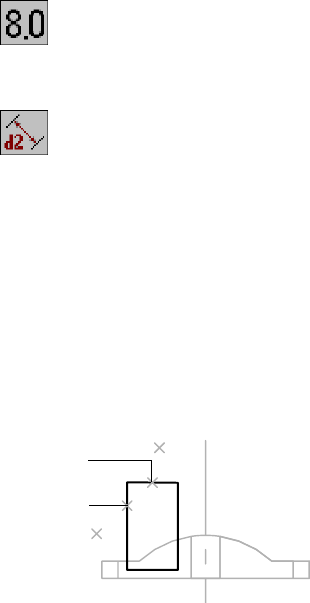
Creating Revolved Features |287
To constrain a profile sketch to revolve
1Use AMDIMDSP to change the dimension display to numbers.
Context Menu In the graphics area, right-click and choose Dimensioning
➤ Dimensions as Numbers.
2Use AMPARDIM to dimension the length and width of the sketch, following
the prompts.
Context Menu In the graphics area, right-click and choose Dimensioning
➤ New Dimension.
Select first object: Specify the line (1)
Select second object or place dimension: Place the dimension (2)
Enter dimension value or [Undo/Hor/Ver/Align/Par/aNgle/Ord/Diameter/pLace]
<0.3629>: Enter .33
Solved underconstrained sketch requiring 3 dimensions or constraints.
Select first object: Specify the line (3)
Select second object or place dimension: Place the dimension (4)
Enter dimension value or [Undo/Hor/Ver/Align/Par/aNgle/Ord/Diameter/pLace]
<0.6687>: Enter .78
Solved underconstrained sketch requiring 2 dimensions or constraints.
Select first object: Press ENTER
In the right viewport, constrain the sketch to the part as follows:
■Make the bottom line of the sketch collinear with the bottom of the part.
■Make the right side of the rectangle collinear with the vertical work axis
so that it serves as the axis of revolution of the feature.
1
3
2
4
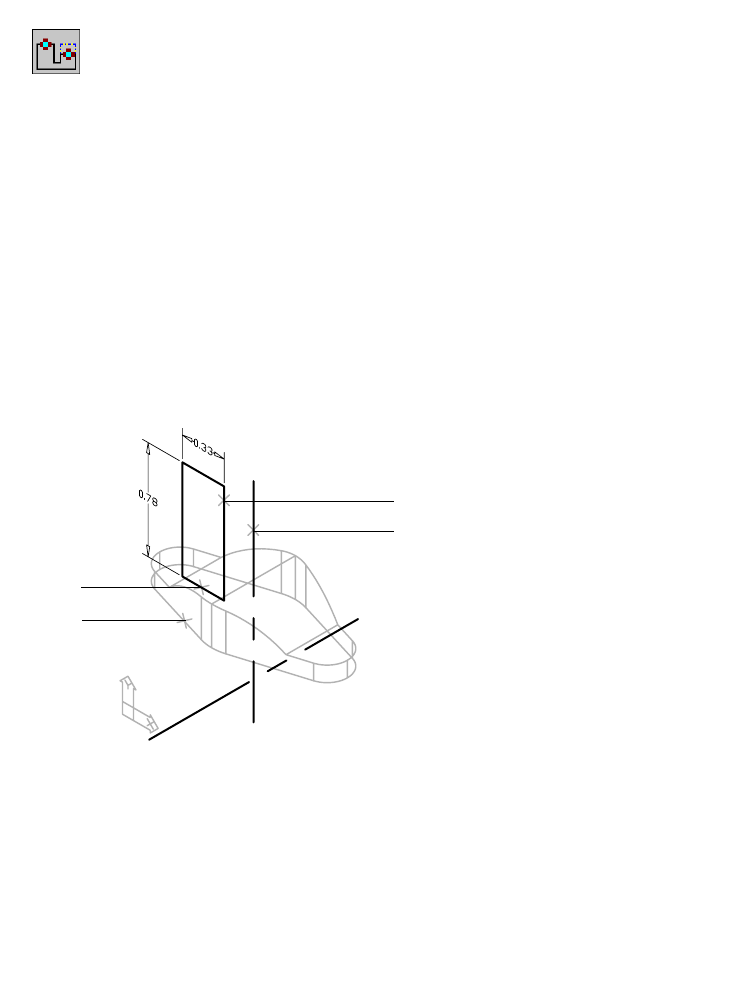
288 |Chapter 12 Creating Parts
3Use AMADDCON to add collinear constraints, following the prompts.
Context Menu In the graphics area, right-click and choose 2D
Constraints ➤ Collinear.
Valid selections: line or spline segment
Select object to be reoriented: Specify the line (1)
Valid selections: line or spline segment
Select object to be made collinear to: Specify the vertical work axis (2)
Solved underconstrained sketch requiring 1 dimensions or constraints.
Valid selections: line or spline segment
Select object to be reoriented: Specify the line (3)
Valid selections: line or spline segment
Select object to be made clinger to: Specify the part edge (4)
Solved fully constrained sketch.
Valid selections: line or spline segment
Select object to be reoriented: Press ENTER
Enter an option [Hor/Ver/PErp/PAr/Tan/CL/CN/PRoj/Join/XValue/YValue/Radius/
Length/Mir/Fix/eXit] <eXit>: Press ENTER
In the next procedure, you create the cylinder by revolving the sketch about
the work axis. You can also revolve a sketch about a part edge or about a line
in the profile sketch.
3
4
1
2
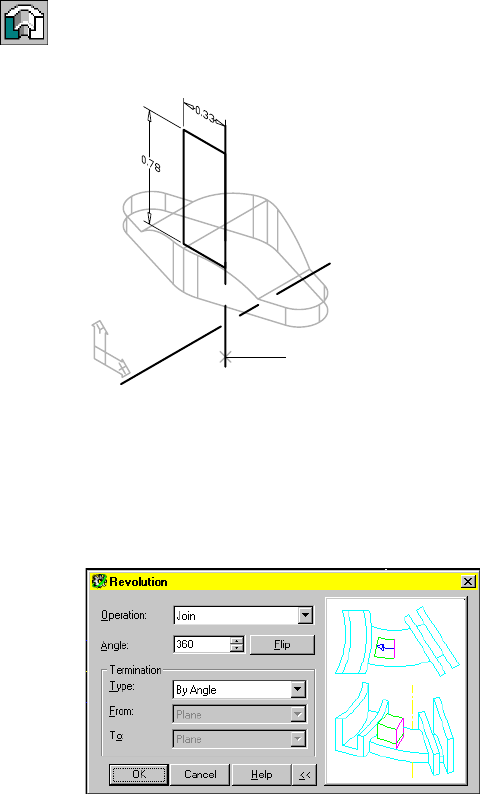
Creating Revolved Features |289
To revolve a feature about a work axis
1Use AMREVOLVE to revolve the sketch about the work axis, responding to the
prompt.
Context Menu In the graphics area, right-click and choose Sketched &
Work Features ➤ Revolve.
Select revolution axis: Specify the axis (1)
2In the Revolution dialog box, specify the operation, termination, and angle
of revolution. Because the cylinder attaches to the part, define the revolution
to be a full (360 degrees) termination that joins to the part.
Operation: Join
Angle: Enter 360
Termination: By Angle
Choose OK.
1
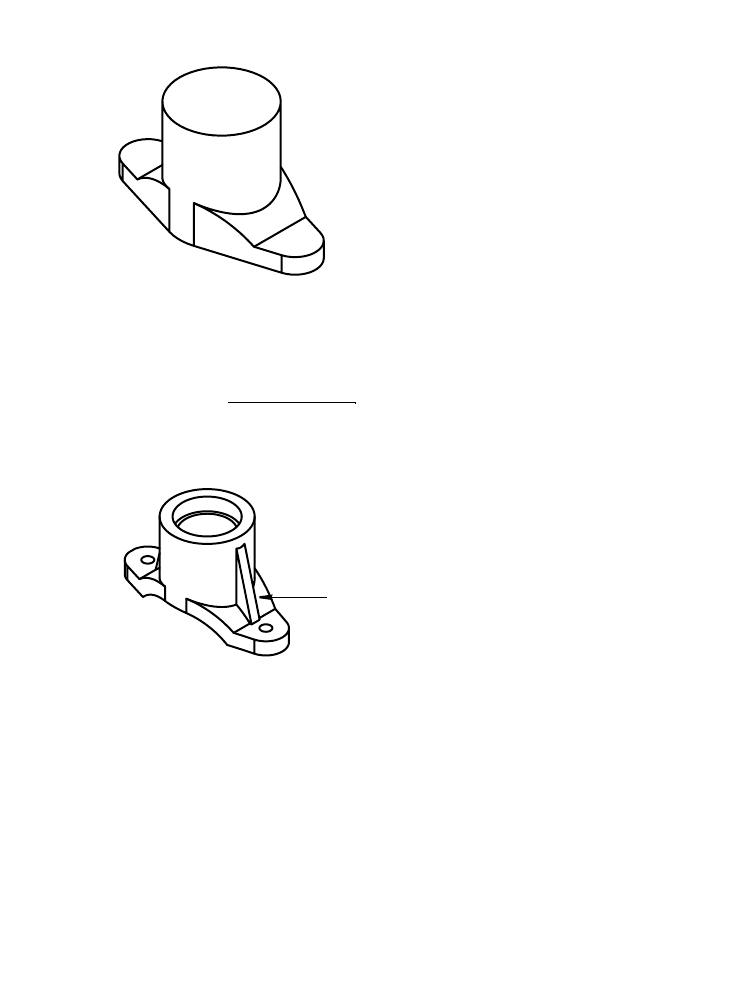
290 |Chapter 12 Creating Parts
After specifying the type of revolution and the axis of rotation, the cylinder
is created on your model.
Save your file.
Creating Symmetrical Features
The final features are the strengthening ribs, located on each side of the saddle
just above the lugs.
The ribs can be created simultaneously from a single open profile sketch. You
sketch an outline of the ribs, and add dimensions and constraints to make
the ribs symmetrical. Then you extrude the ribs automatically with the Rib
feature.
The sketch you create lies on the same plane as the revolution feature, so it
is not necessary to create a new sketch plane.
Before you begin, change to the front view, and one viewport.
strengthening rib
Creating Symmetrical Features |291
To sketch a feature on a part
1Use PLINE to sketch the ribs.
Context Menu In the graphics area, right-click and choose 2D Sketching
➤ Polyline.
Sketch a three-segment polyline in the approximate outline of the ribs. The
lines don’t have to touch the saddle.
2Use AMPROFILE to create an open profile from the sketch.
Context Menu In the graphics area, right-click and choose Sketch Solving
➤ Single Profile.
Respond to the prompt.
Select part edge to close the profile <open profile>: Press ENTER
Next, constrain the sketch.
Constraining Sketches
When you solved the sketch, a parallel constraint was applied between the
top horizontal line of the part and the horizontal segment of the sketch. Six
additional dimension or constraints are needed to fully constrain the sketch.
Use dimensions to adjust the size of the ribs and to center them on the part.
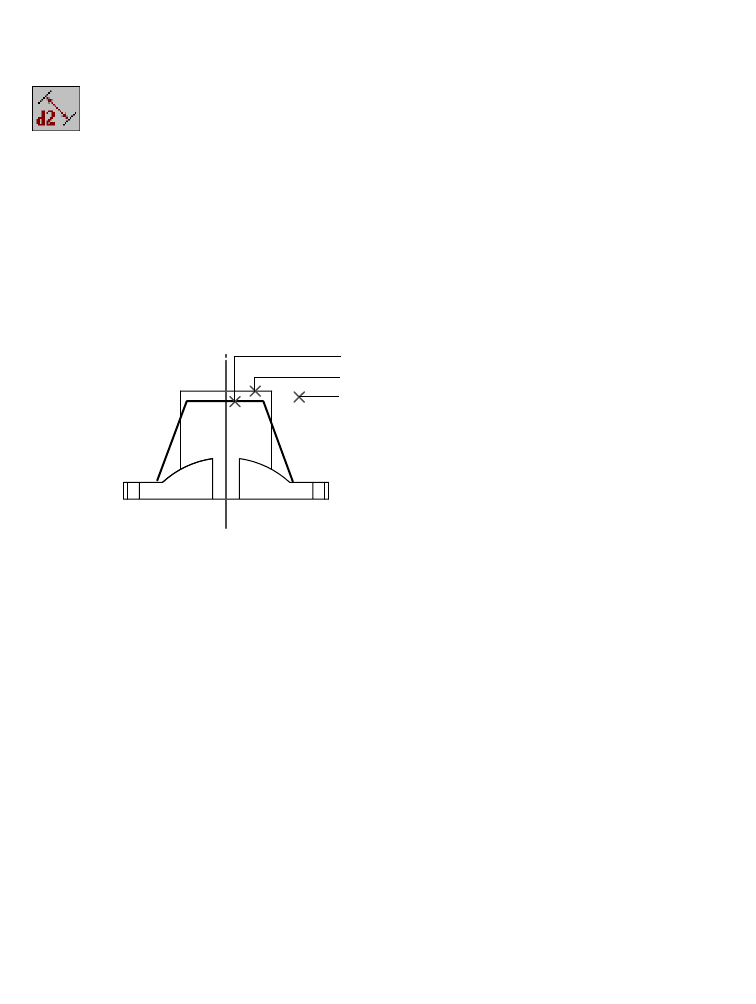
292 |Chapter 12 Creating Parts
To constrain a sketch
1Use AMPARDIM to dimension the distance between the top of the sketch and
the top of the part.
Context Menu In the graphics area, right-click and choose Dimensioning
➤ New Dimension.
Respond to the prompts as follows:
Select first object: Specify the line (1)
Select second object or place dimension: Specify the line (2)
Specify dimension placement: Place the vertical dimension (3)
Enter dimension value or [Undo/Hor/Ver/Align/Par/aNgle/Ord/Diameter/pLace]
<0.1683>: Enter .08
Solved under constrained sketch requiring 6 dimensions or constraints.
2Add dimensions for the angle between the two ribs, and the angle between
the work axis and one rib.
Select first object: Specify the line (1)
Select second object or place dimension: Specify the line (2)
Enter dimension value or [Undo/Hor/Ver/Align/Par/aNgle/Ord/Diameter/pLace]
<0.1683>: Enter n
Specify dimension placement: Place the dimension (3)
Enter dimension value or [Undo/Placement point] <47>: Enter 40
Select first object: Specify the vertical work axis (4)
Select second object or place dimension: Specify the line (1)
Specify dimension placement: Place the angular dimension (5)
Enter dimension value or [Undo/Placement point] <20>: Press ENTER
2
1
3
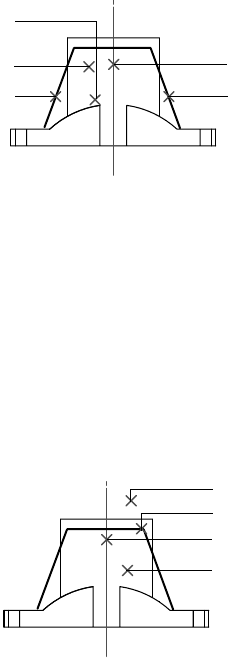
Creating Symmetrical Features |293
3Add horizontal dimensions for the top line of the sketch, and from the work
axis to the outer edge of the top line.
Select first object: Specify the line (1)
Select second object or place dimension: Place the horizontal dimension (2)
Enter dimension value or [Undo/Hor/Ver/Align/Par/aNgle/Ord/Diameter/pLace]
<0.9806>: Enter .58
Select first object: Specify the outer end of line (1)
Select second object or place dimension: Specify the work axis(3)
Specify dimension placement: Place the horizontal dimension (4)
Enter dimension value or [Undo/Hor/Ver/Align/Par/aNgle/Ord/Diameter/pLace]
<0.9806>: Enter .29
4Repeat step three to add a horizontal dimension of .98 between the two lower
endpoints of the sketch, and .49 between the work axis and one lower end-
point of the sketch.
Solved fully constrained sketch.
To verify that the ribs are symmetrical, express the dimensions as equations.
Set the distance and the angle between the axis and the rib to one-half the
distance and angle between both ribs.
4
2
3
5
1
2
1
3
4
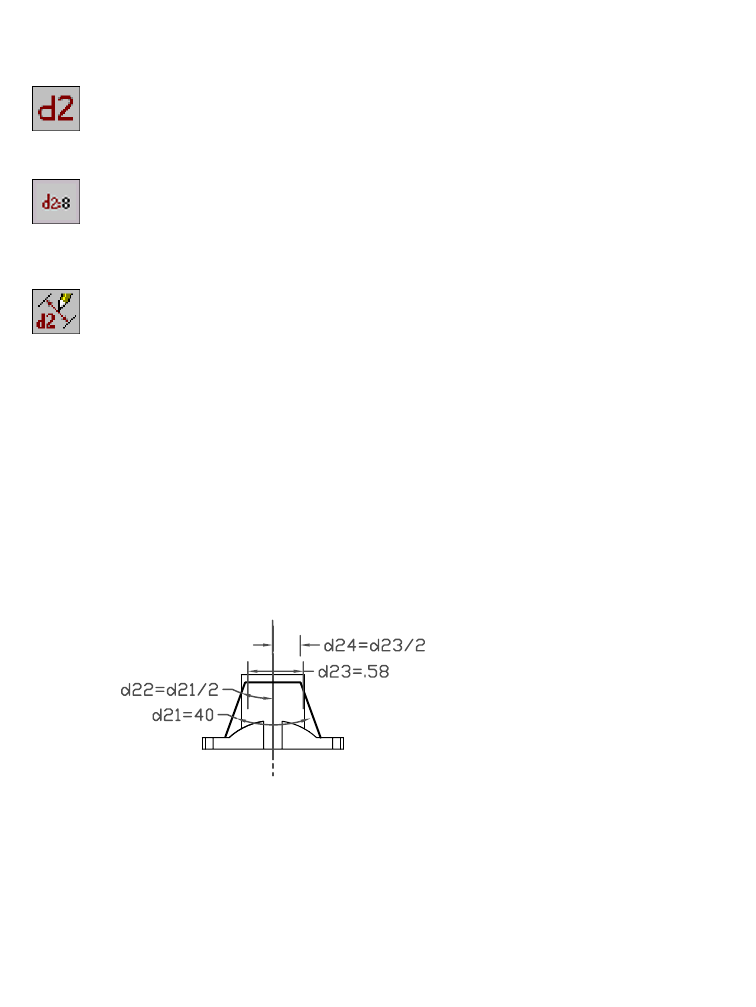
294 |Chapter 12 Creating Parts
To display the dimensions as parameters
1Use AMDIMDSP to change the display of the dimensions from numeric to
parametric.
Context Menu In the graphics area, right-click and choose Dimensioning
➤ Dimensions As Parameters.
Display the dimensions as equations.
Context Menu In the graphics area, right-click and choose Dimensioning
➤ Dimensions As Equations.
2Use AMMODDIM to edit the dimensions. Use the work axis as the centerline
of the part.
Context Menu In the graphics area, right-click and choose Dimensioning
➤ Edit Dimension.
Select dimension to change: Specify the horizontal dimension from the work axis
to either endpoint of the top line of the sketch
New value for dimension <current>:
Enter dx/2, where x is the horizontal dimension for the top line of the sketch
Solved fully constrained sketch.
Select dimension to change:
Specify the dimension for the angle between the work axis and a side of the sketch
New value for dimension <current>:
Enter dy/2, where y is the dimension for the angle between the sides of the sketch
Solved fully constrained sketch.
Select dimension to change: Press ENTER
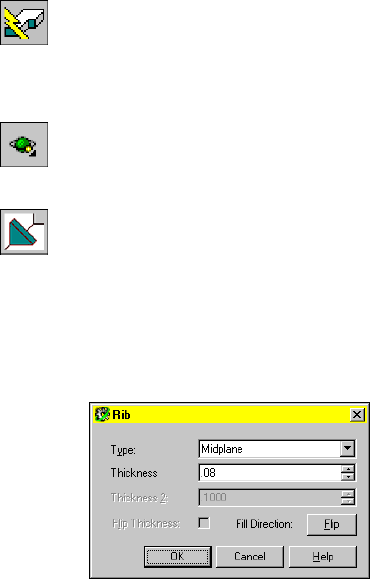
Creating Symmetrical Features |295
3Use AMUPDATE to apply any changes to the rib sketch.
Context Menu Right-click the graphics area and choose Update Part.
You are ready to extrude the sketch to form symmetrical ribs.
4Use 3DOrbit to adjust the view so you can see the rib feature preview before
you create the ribs.
Desktop Menu Choose View ➤ 3D Orbit. Rotate the view slightly to the
left, and tilt it slightly downward.
5Use AMRIB to extrude the ribs.
Browser In the Browser, right-click the open profile icon, and
choose Rib.
In the Rib dialog box, specify:
Type: Midplane
Thickness: Enter .08
Verify the direction arrow points into the part, and choose OK.
The two symmetrical ribs are extruded to the face of the cylinder.
Next, suppress the hidden lines so that you can see your model more clearly.
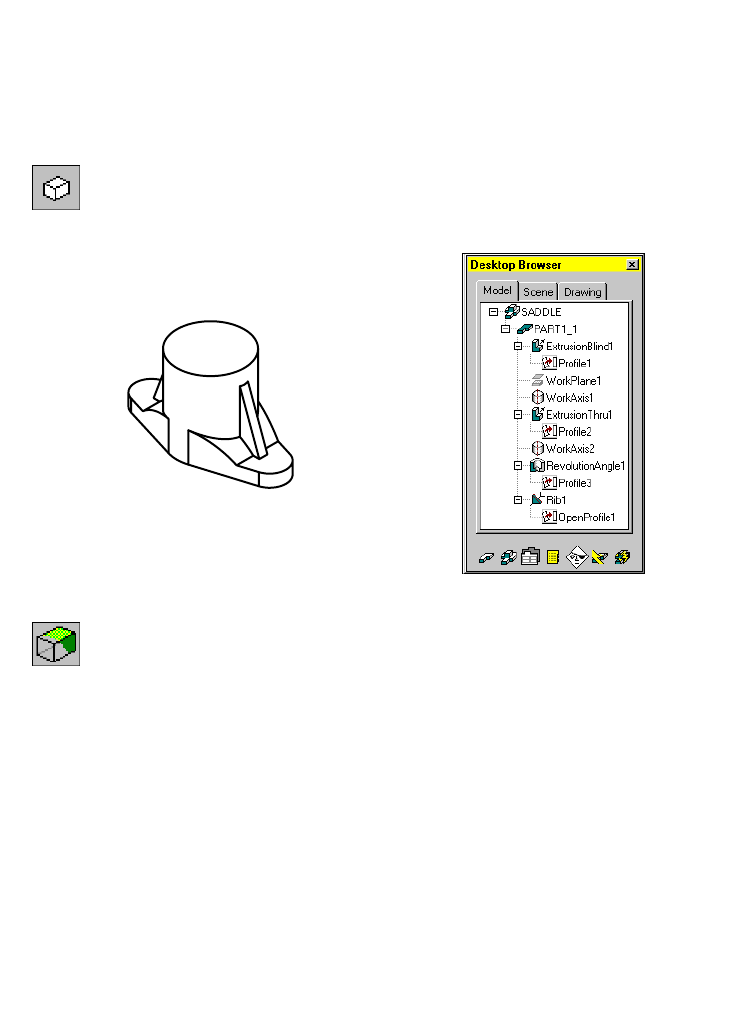
296 |Chapter 12 Creating Parts
To suppress silhouette edges from Mechanical Desktop parts
1Set the DISPSILH system variable to 1, responding to the prompts.
Command DISPSILH
Enter new value for DISPSILH <0>: Enter 1
2Use HIDE to remove the hidden lines from your display.
Desktop Menu View ➤ Hide
Your part should now look like this. The Desktop Browser shows the hierar-
chy of the part features.
3Return to wireframe display.
Desktop Menu View ➤ Shade ➤ 3D Wireframe
Save your file.
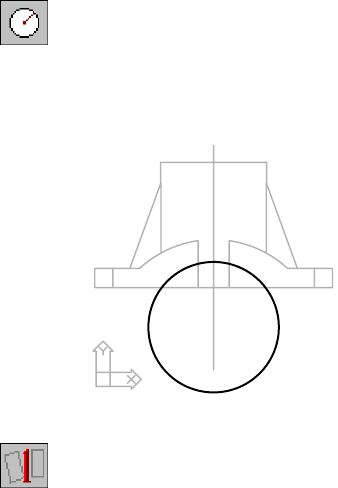
Refining Parts |297
Refining Parts
Now, you complete the part by modifying its features in the same order as
you created them: the saddle and lugs, the boss, and the ribs.
To finish the body of the saddle bracket, you need to cut the pipe saddle,
adjust the length of the lugs, and create mounting holes. To create the saddle,
you cut an arc through the front of the saddle body. To cut the arc, you create
a circle and extrude it through the part, along the horizontal work axis. For
this feature, you use the previously defined sketch plane.
To sketch and constrain the circle to be extruded
1Use CIRCLE to draw the circle to extrude, following the prompts. Work in the
left viewport.
Context Menu In the graphics area, right-click and choose 2D Sketching
➤ Circle.
Specify center point for circle or [3P/2P/Ttr (tan tan radius)]:
Specify a center point
Specify radius of circle or [Diameter]: Specify a point to define the radius
2Use AMPROFILE to solve the sketch to convert it to a profile sketch.
Context Menu In the graphics area, right-click and choose Sketch Solving
➤ Single Profile.
You need to constrain the circle to the part. The sketch also needs two more
dimensions: the location of the center and the diameter of the circle.
The work axis is the center of the saddle arcs on the front and back of the
bracket. By making the circle concentric with the arcs, you satisfy two con-
straints, the location of the center and the relationship of the circle to the part.
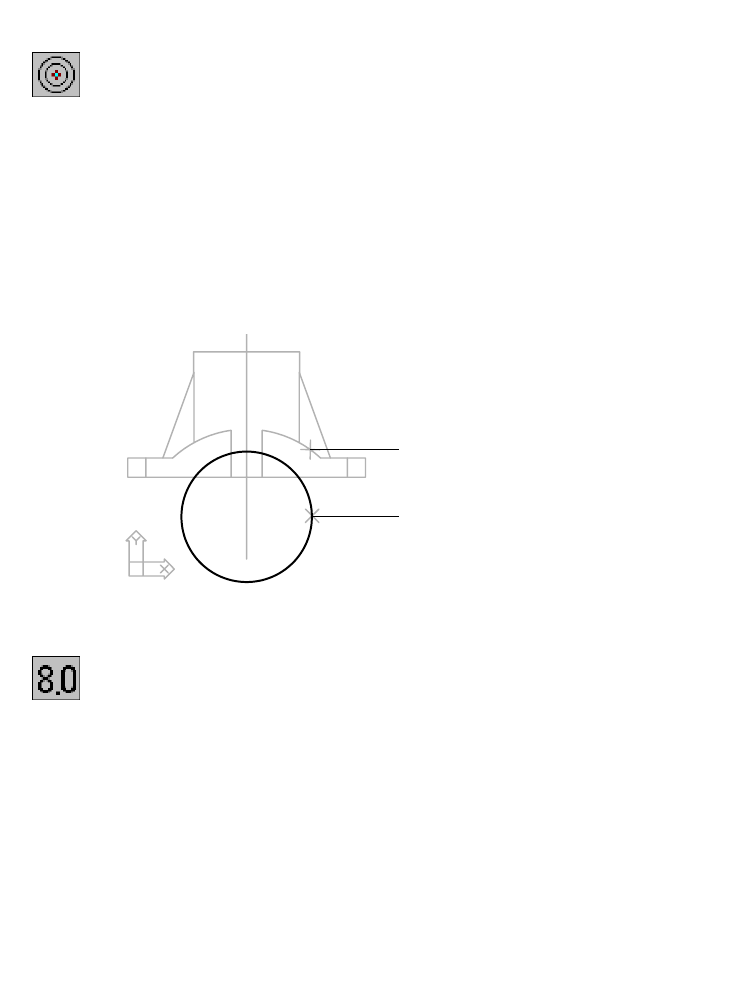
298 |Chapter 12 Creating Parts
3Use AMADDCON to constrain the circle to be concentric with the saddle arcs,
responding to the prompts.
Context Menu In the graphics area, right-click and choose 2D
Constraints ➤ Concentric.
Valid selection(s): arc, circle, or ellipse
Select object to be reoriented: Specify the circle (1)
Valid selection(s): arc, circle, ellipse, or work point
Select object to be made concentric to: Specify the arc (2)
Valid selection(s): arc, circle, or ellipse
Select object to be reoriented: Press ENTER
Enter an option
[Hor/Ver/PErp/PAr/Tan/CL/CN/PRoj/Join/XValue/YValue/Radius/Length/Mir/Fix/
eXit] <eXit>: Press ENTER
4Use AMDIMDSP to return the dimension display to numeric, responding to
the prompt.
Context Menu In the graphics area, right-click and choose Dimensioning
➤ Dimensions As Numbers.
1
2
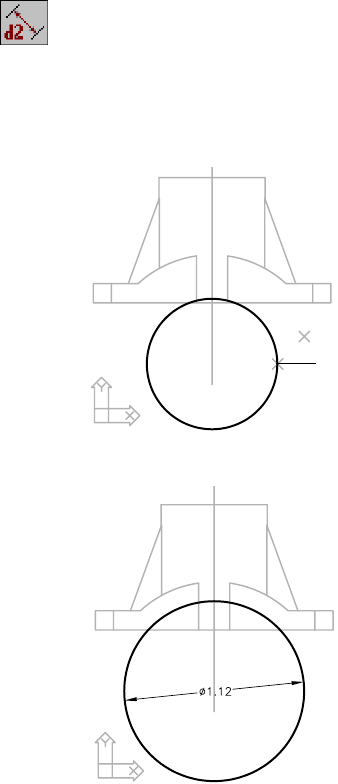
Refining Parts |299
5Use AMPARDIM to dimension the diameter of the circle, following the
prompts.
Context Menu In the graphics area, right-click and choose Dimensioning
➤ New Dimension.
Select first object: Specify the circle (1)
Select second object or place dimension: Place the dimension (2)
Enter dimension value or [Undo/Placement point] <1.0976>: Enter 1.12
Select first object: Press ENTER
The sketch is now fully constrained and looks like this.
1
2
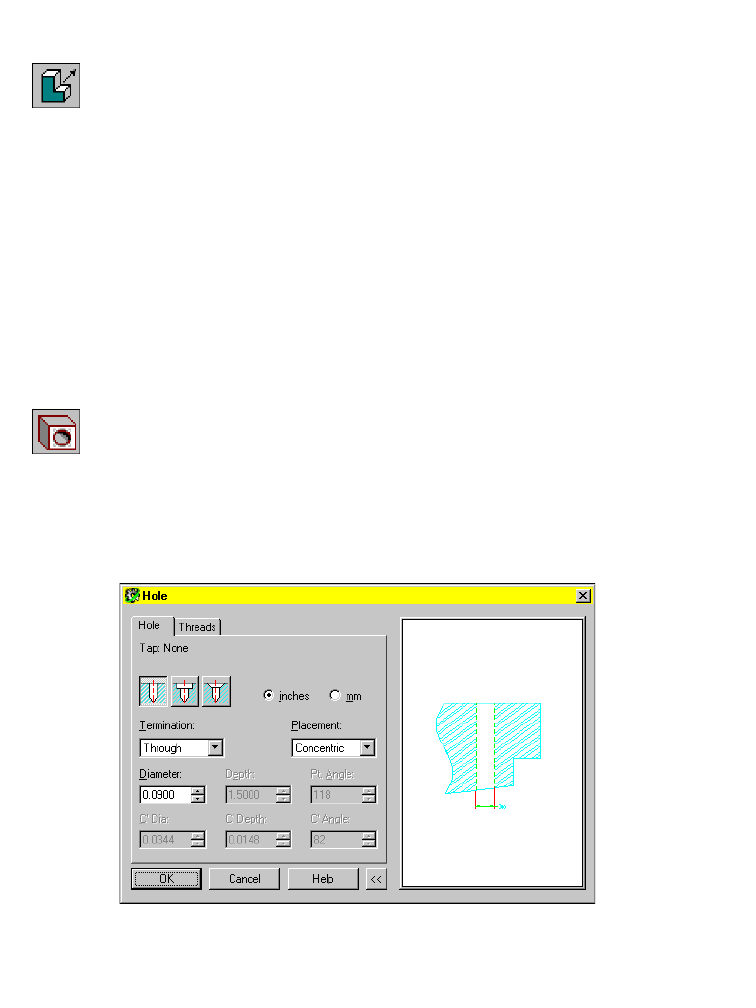
300 |Chapter 12 Creating Parts
To extrude a feature
1Extrude the feature, specifying a cut operation with a midplane termination.
Context Menu In the graphics area, right-click and choose Sketched &
Work Features ➤ Extrude.
2In the Extrusion dialog box, specify:
Operation: Cut
Distance: Enter .66
Termination: Type: Mid Plane
Choose OK. The arc shape cuts through the saddle bracket.
To complete the body of the bracket, you need a placed feature on each of
the lugs for mounting holes.
To create a drilled hole
1Use AMHOLE to place the mounting holes. Work in the isometric view.
Context Menu In the graphics area, right-click and choose Placed
Features ➤ Hole.
2In the Hole dialog box, select the Drilled hole type icon and specify:
Termination: Through
Placement: Concentric
Diameter: Enter .09
Choose OK.
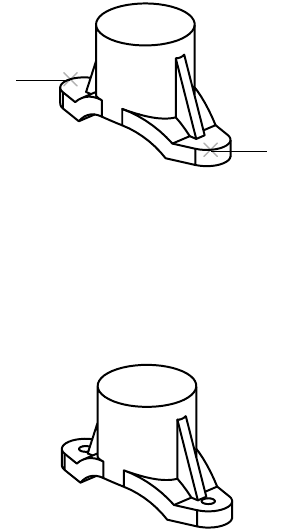
Refining Parts |301
3Respond to the prompts as follows:
Select work plane, planar face or [worldXy/worldYz/worldZx/Ucs]:
Specify face (1)
Enter an option [Next/Accept]<Accept>: Press ENTER
Select the concentric edge: Specify edges (1) for the first hole
4Continue on the command line to place the second hole.
Select work plane, planar face or [worldXy/worldYz/worldZx/Ucs]:
Specify face (2)
Select the concentric edge: Specify edges (2) for the second hole
Select work plane, planar face or [worldXy/worldYz/worldZx/Ucs]: Press ENTER
Your part should look like this.
To complete the boss, you create a counterbored hole through the cylinder.
You create the hole as a placed feature on the same vertical work axis as the
cylinder.
Keep the right viewport active, and specify a counterbored hole drilled
through the part, concentric with the cylinder.
1
2
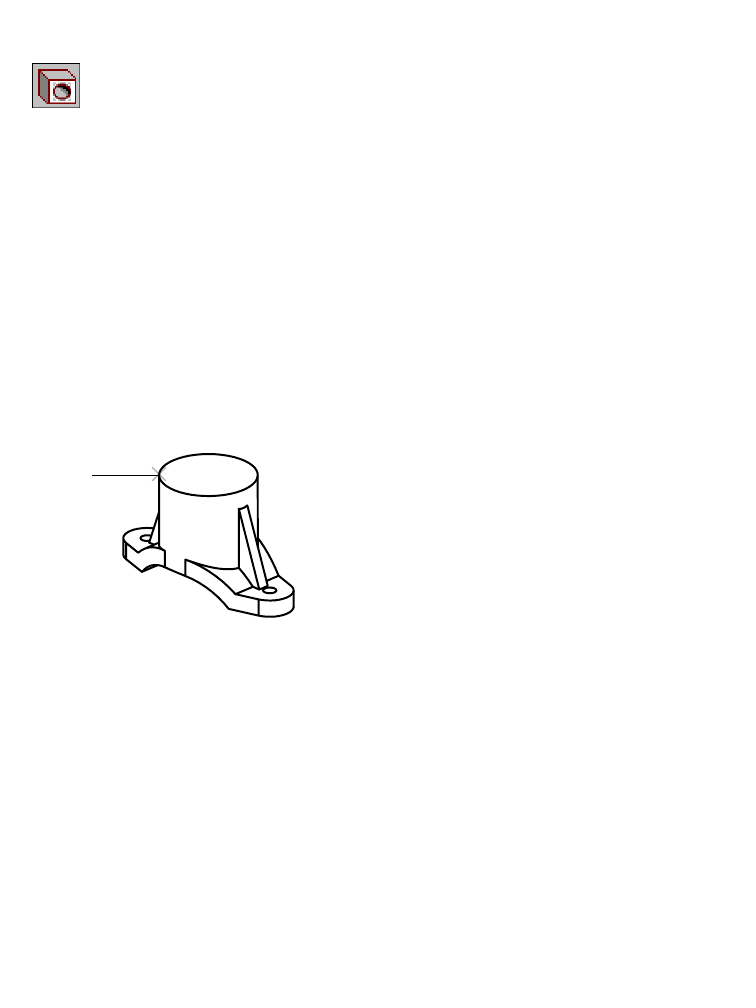
302 |Chapter 12 Creating Parts
To create a counterbored hole
1Use AMHOLE to place the counterbored hole.
Context Menu In the graphics area, right-click and choose Placed
Features ➤ Hole.
In the Hole dialog box, select the Counterbore hole type icon and specify:
Termination: Through
Placement: Concentric
Hole Parameters: Size: Enter .42
C’Bore/Sunk Size: C’ Dia: Enter .48
C’Bore/Sunk Size: C’ Depth: Enter .125
Choose OK.
2Respond to the prompts as follows:
Select work plane, planar face or [worldXy/worldYz/worldZx/Ucs]:
Specify face (1)
Select the concentric edge: Specify edge (1)
Select work plane, planar face or [worldXy/worldYz/worldZx/Ucs]: Press ENTER
The ribs currently extend too far onto the lug area, leaving little room for the
mounting holes. To adjust the design, you need to reduce the width and
angle of the ribs.
Work in the left viewport. Modify the ribs by changing a few sketch
dimensions. The previously-defined equations keep the ribs symmetrical.
Use the Browser to select the rib feature and redisplay its sketch dimensions.
After you change the dimension values, use the Update icon in the Browser
to incorporate the changes.
1

Refining Parts |303
To edit a feature
1Use AMEDITFEAT to edit the rib sketch.
Browser Right-click OpenProfile1 and choose Edit Sketch.
The rib sketch and its dimensions become visible on the screen.
2Change two of the dimensions in the sketch, following the prompts.
Context Menu In the graphics area, right-click and choose Dimensioning
➤ Edit Dimension.
Select object: Specify the dimension (1)
Enter new value for dimension <40>: Enter 28
Select object: Specify the dimension (2)
Enter new value for dimension <.o8>: Enter .06
Select object: Press ENTER
3Update the part to reflect the new dimension values in the sketch.
Context Menu In the graphics area, right-click and choose Update Part.
The ribs are updated to reflect your dimensional changes.
In the Browser, each feature is placed in the order it was created.
2
1
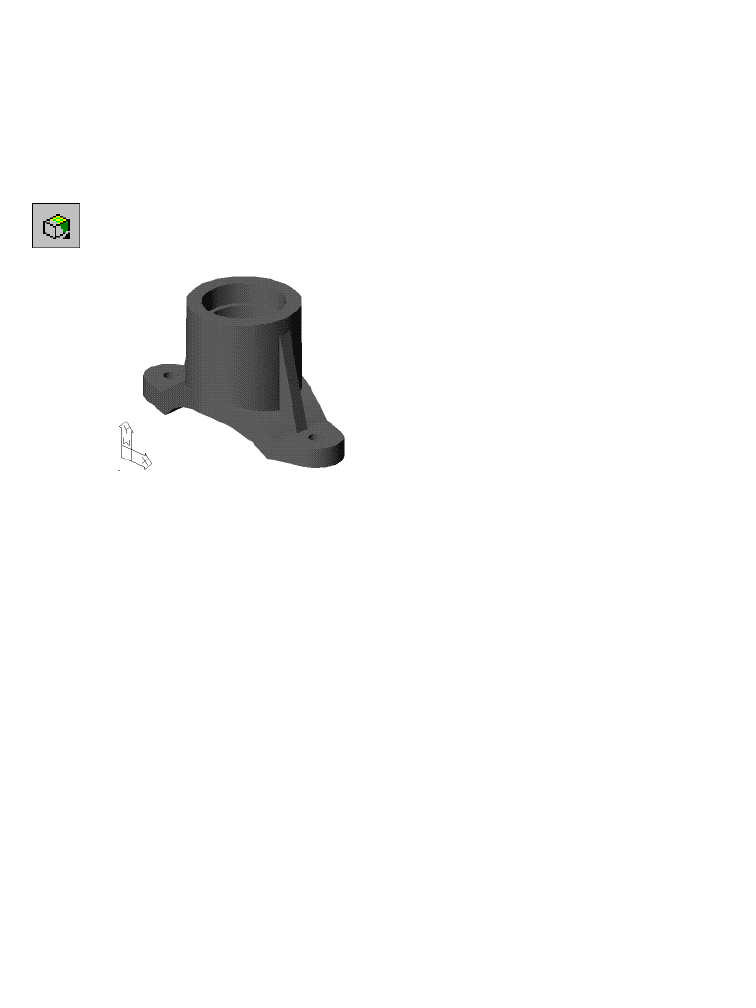
304 |Chapter 12 Creating Parts
Shading and Lighting Models
To see your model better, use the shade button on the Desktop View toolbar
to toggle shading on. Then adjust the lighting of your shaded model.
To toggle shading of a part
1Use SHADE to shade your part.
Desktop Menu View ➤ Shade ➤ Gouraud Shaded
Your part should now look like this.
The Desktop View toolbar also contains commands to dynamically rotate
your design and control views.
Now adjust the ambient and direct lighting of your shaded part.
Ambient light provides constant illumination in the drawing environment.
It has no particular source or direction. You can adjust the intensity of ambi-
ent light. Keep ambient light low to prevent washing out your image.
Direct light illuminates your image from a specified direction. You can adjust
the intensity and direction of direct light.
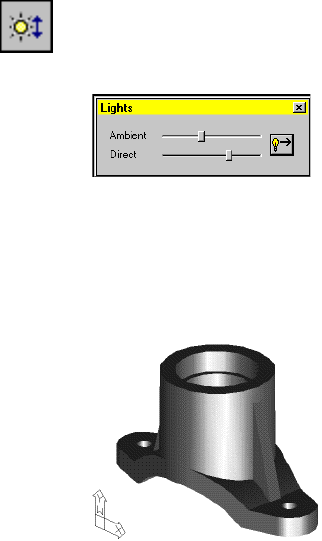
Shading and Lighting Models |305
To control the lighting of a shaded part
1Use AMLIGHT to adjust the intensity of ambient and direct light.
Toolbutton Lighting Control
In the Lights dialog box, use the slider bars to adjust the intensity of the
ambient light and the direct light as follows.
2Use AMLIGHTDIR to specify a direction for direct light.
In the Lights dialog box, click the Light Direction button. Respond to the
prompt as follows:
Select a point that will be used with the current target point for light direction:
Specify a point in the upper left of the graphics area
The light adjustments are reflected in your drawing. Experiment with other
light settings.
Save your file.

306

307
In This Chapter 13
Creating Drawing Views
Autodesk® Mechanical Desktop® simplifies both the
drawing and the documentation of your design.
Drawing views are associated with a part and with one
another. You lay out drawing views in any position on a
screen. You can move them and make changes easily.
Most dimensions are automatically placed on the views
when you create them, but you can easily add missing
reference dimensions and other annotations. In this
tutorial, you will learn to use the Drawing tab in the
Desktop Browser to manage and edit drawing views.
■Planning and setting up your
drawing
■Multiple document layouts
■Creating drawing views
■Hiding extraneous dimensions
■Moving dimensions to a different
view
■Customizing annotations
■Relocating and editing views

308 |Chapter 13 Creating Drawing Views
Key Terms
Te r m Definition
balloon A circular annotation tag that ties components in an assembly into a bill of
material.
base view The first view you create. Other views are derived from this view.
Desktop Browser A graphical representation of the features that make up your model. You can
work in the Browser to create and restructure parts and assemblies, define
scenes, create drawing views, and control overall preferences.
Drawing mode Establishes the settings for paper space so that you can create a drawing of your
model. When Drawing mode is off, you are in model space.
hidden line A line that is not visible in a specified view. For example, in a front view, lines
behind the front plane are not visible.
Model mode Creates 3D models on which drawing views are based.
parametric dimension A dimension created during the sketch phase of feature creation. Parametric
dimensions control size and update a part when you change its values.
parent view A view on which to base another drawing view. For example, the base view is
the parent view for auxiliary and orthographic views. Any view can be the parent
view for a detail view.
reference dimension An annotation dimension placed on a Mechanical Desktop drawing. These
measurements do not control the size of the object. Instead, reference
dimensions are required for manufacturing. They are updated when the
geometry changes.
view scale The scale of a base drawing relative to the model scale. Also the scale of
dependent views relative to the base view.

Basic Concepts of Creating Drawing Views |309
Basic Concepts of Creating Drawing Views
Drawings and documentation are often the true products of design because
they guide the manufacture of a mechanical device.
Mechanical Desktop adds an important dimension to drawing creation by
doing most of the work for you. Traditional 2D orthographic, isometric, aux-
iliary, section, and detail views of parts and assemblies can be automatically
created.
Mechanical Desktop creates these views complete with dimensions derived
from the models. You can then add annotations or more dimensions.
Because the views are derived from the models, they are updated as you make
changes to your design.
In Mechanical Desktop, you can set up multiple layouts for complex models
that require more than one drawing sheet to document.
Planning and Setting Up Drawings
Before you create drawing views, plan the views you need. Set up dimension-
ing and text styles and the drafting standard for your dimensions and other
annotations.
To customize your drawing, use system parameters to specify drawing char-
acteristics. You can define parameters in a prototype drawing so that they are
automatically set before you begin a new project.
For this exercise, open the file partview.dwg in the desktop\tutorial folder. The
file contains the saddle bracket model from the previous tutorial. It has been
created in a prototype drawing that contains a predefined drawing style and
title block.
NOTE Back up the tutorial drawing files so you still have the original files if you
make a mistake. See “Backing up Tutorial Drawing Files” on page 40.
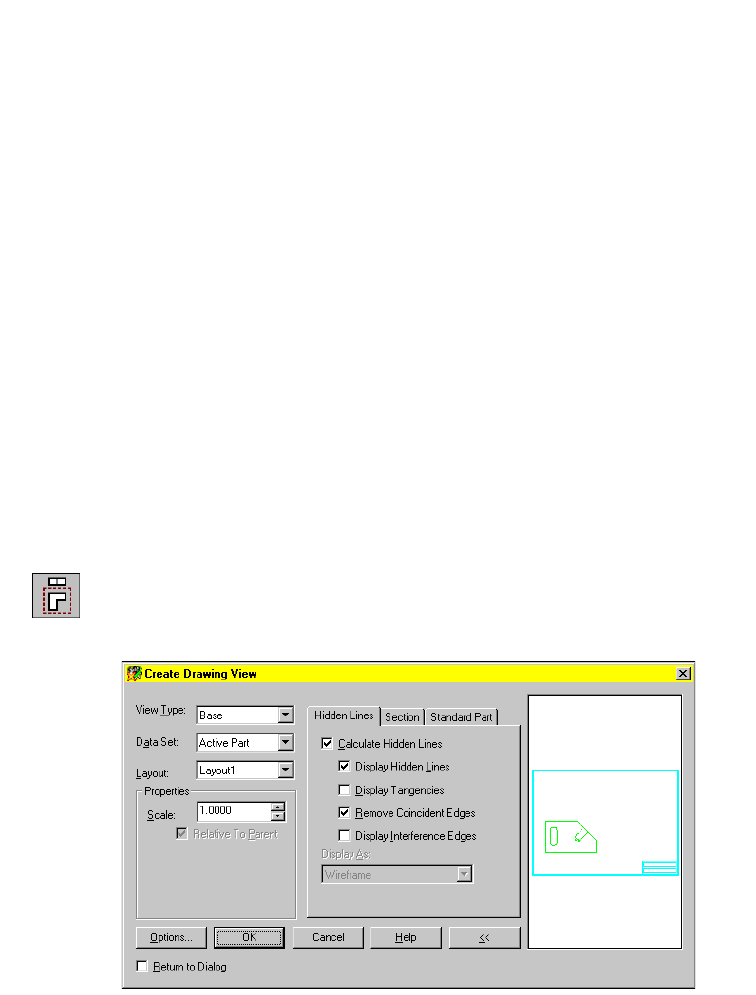
310 |Chapter 13 Creating Drawing Views
Creating Drawing Views
The first view you create is a base view. In Model mode, you specify the orien-
tation of the view, and then change to Drawing mode to position it on the
page. A title block and drawing border have been placed on the TITLE_BLK layer.
When you place the base view, hidden lines are removed. Parametric dimen-
sions are shown according to the currently-defined dimension style.
By default, a dimension is shown in one view only—the first view you create
displays the object that the dimension references. You can specify that para-
metric dimensions be displayed in other views as they are created, or you can
move a dimension, if you prefer to show it on a different view.
When drawing views are created, by default their size is determined by the
size of the data set. However, you can manually grip edit a viewport border if
Parametric Border Sizing is turned off in the Edit Drawing View dialog box.
If you turn Parametric Border Sizing back on, parametric sizing is restored.
First, define a front view as a base view for the drawing. Before you begin this
exercise, select the Drawing tab to change to Drawing mode.
To create a base view
1Use AMDWGVIEW to define the base view. Verify that the Drawing tab is
selected in the Browser.
Context Menu In the graphics area, right-click and choose New View.
In the Create Drawing View dialog box, choose OK to accept the default
options.
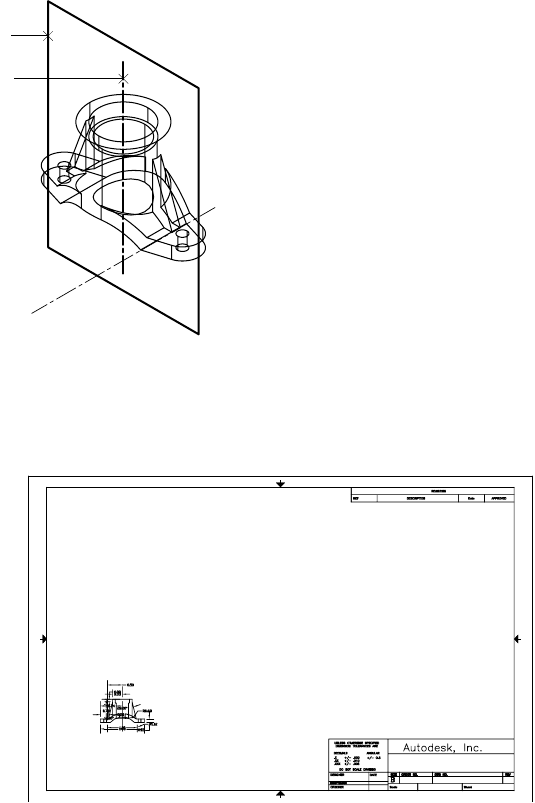
Creating Drawing Views |311
2Respond to the prompts as follows:
Select a planar face, work plane, or [Ucs/View/worldXy/worldYz/worldZx]:
Specify the work plane (1)
Define X axis direction:
Select work axis, straight edge or [worldX/worldY/worldZ]:
Specify the axis of revolution (2)
Adjust orientation [Flip/Rotate] <Accept>:
Enter r until the UCS icon is upright, or press ENTER
3On the command line, define a location on the drawing for the base view.
Specify location of base view:
Specify a point in the lower-left corner, inside the drawing border
Specify location of base view: Press ENTER
1
2
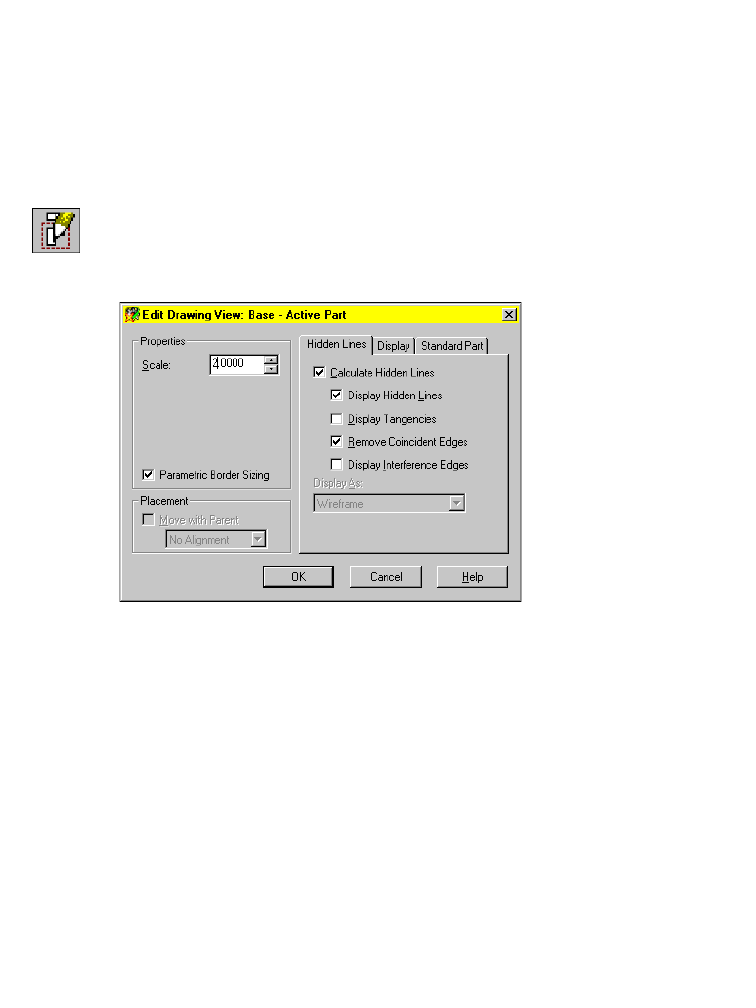
312 |Chapter 13 Creating Drawing Views
The base view is placed at the location you selected.
The Desktop Browser displays a hierarchy of the views you create. Because
you have only the base view, it is listed below the part. As you create views
from the base view, they are nested beneath the base view in the Browser.
Because the base view is too small to be easily read, enlarge it by changing
the view scale. Subsequent views will use the enlarged view scale until you
specify a different one.
4Use AMEDITVIEW to edit the scale of the base view.
Context Menu In the graphics area, right-click and choose Edit View.
Select the view you created.
In the Edit Drawing View dialog box, specify a scale of 2, and choose OK.
Next, create an orthographic top view for the part.
When projected orthographically from the front view, the top view is aligned
horizontally or vertically with the base view and maintains the same scale.
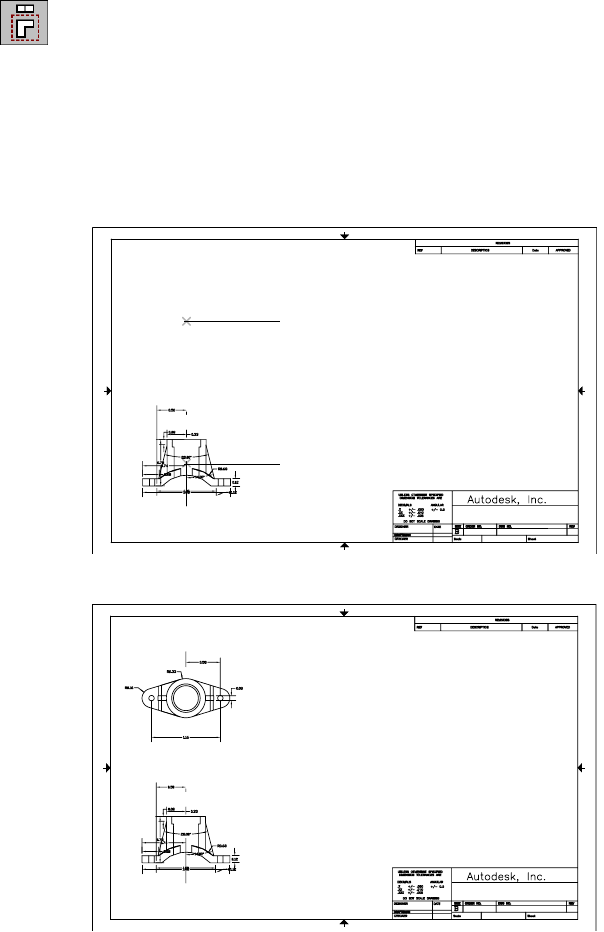
Creating Drawing Views |313
To create a top and detail view
1Create the orthographic view.
Context Menu In the graphics area, right-click and choose New View.
In the Create Drawing View dialog box, specify the Ortho view type and
Choose OK.
2Define a location for the orthographic view, responding to the prompts.
Select parent view: Specify the front view (1)
Specify location for orthogonal view:
Specify any location above the front view, within the drawing border (2)
Specify location for orthogonal view: Press ENTER
Your drawing should now look like this.
2
1
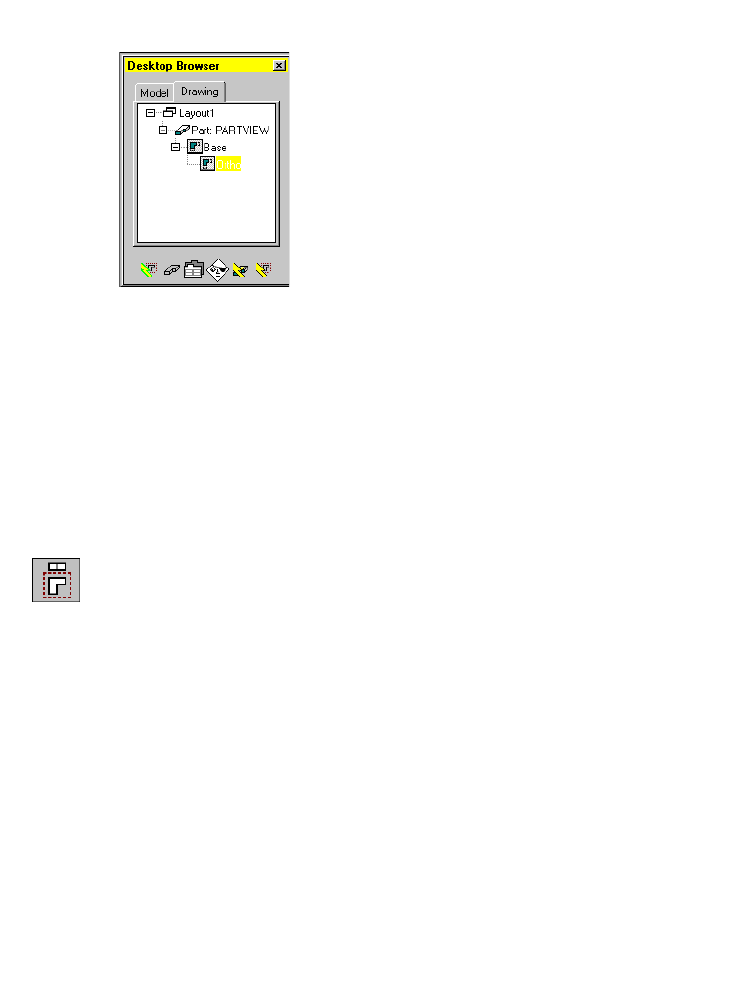
314 |Chapter 13 Creating Drawing Views
Because the orthogonal view is created from the base view, it is nested below
the Base icon in the Desktop Browser.
Next, create an independent detail view of one of the lugs. Properties of inde-
pendent detail views can be changed without affecting the properties of the
parent view.
To create a detail view, choose the parent view and the area in the parent to
show in detail. In this case, create a detail view of the rightmost mounting
lug. For detail views, you always define the viewport border. The border is not
controlled parametrically by the size of the part or geometry.
To create an independent detail view
1Use AMDWGVIEW to create the detail view.
Context Menu In the graphics area, right-click and choose New View.
In the Create Drawing View dialog box, specify:
View Type: Detail
Scale: Enter 1.75
Relative to Parent: Select the check box
Detail Symbol: Enter A
Label Pattern: Enter VIEW
Independent View Display: Select the check box
Choose OK.
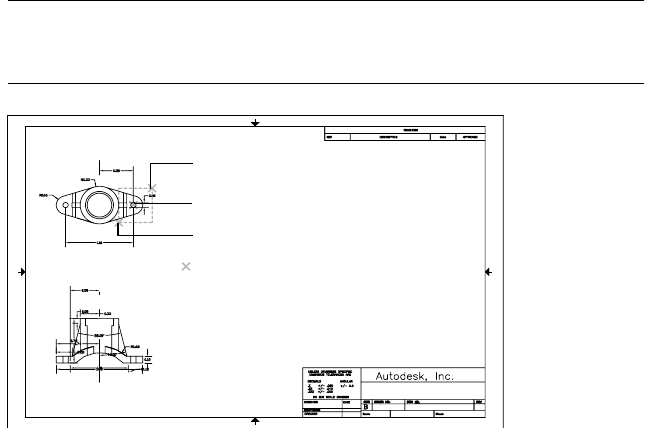
Creating Drawing Views |315
2Define the detail view, responding to the prompts.
Select vertex in parent view to attach detail:
Specify the center of the rightmost lug (1)
Specify center point for circular area or [Ellipse/Polygon/Rect/Select]: Enter r
Specify first corner of rectangular area:
Specify the first point of the selection rectangle (2)
Specify opposite corner: Specify the second point of the selection rectangle (3)
Specify location for detail view:
Specify a point to the lower right of the top view (4)
Specify location for detail view: Press ENTER
NOTE To facilitate selection, turn off Object Tracking and Object Snaps by
clicking the buttons at the bottom of your screen. You may need to zoom in to
select the circle.
1
3
2
4
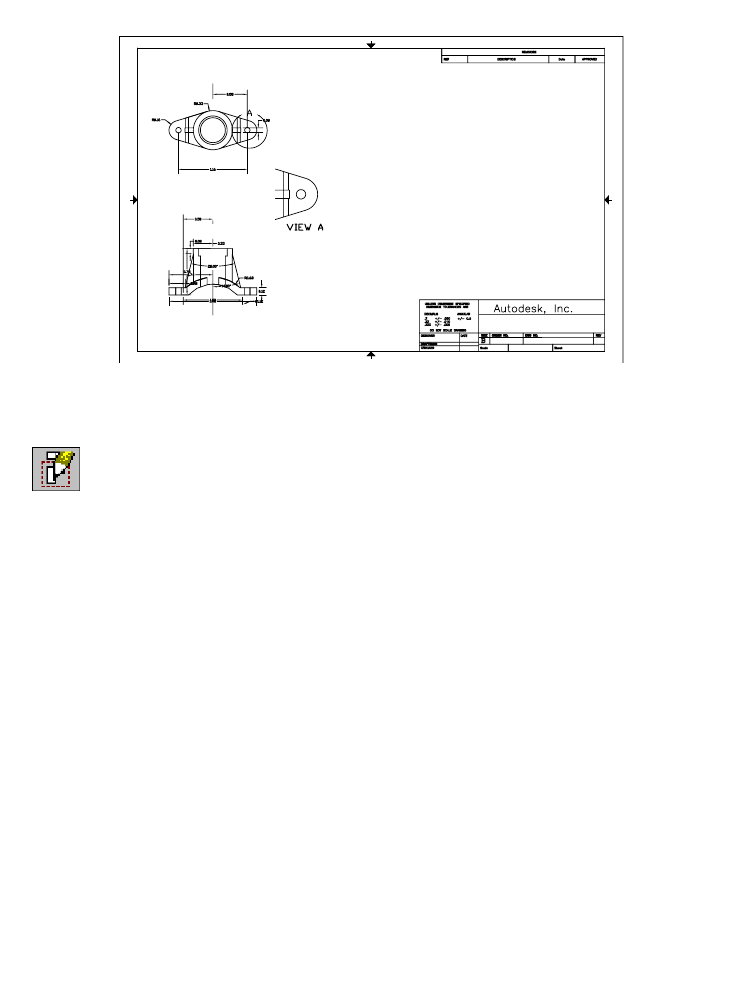
316 |Chapter 13 Creating Drawing Views
Your drawing should look like this.
The Browser displays a Detail icon nested below the Ortho icon.
3Use AMEDITVIEW to edit the edge properties of the detail view.
Context Menu In the graphics area, right-click and choose Edit View.
Select the detail view you created.
In the Edit Drawing View dialog box, select the Display tab, and select Edge
properties.
4Edit the detail view edge properties, responding to the prompts.
Enter an option (edge properties) [Remove all/Select/Unhide all] <Select>:
Press ENTER
Select Edges: Specify the circular lug
Select Edges: Press ENTER
In the Edge Properties dialog box, choose Color.
In the Select Color dialog box, select red, and press ENTER.
Choose OK to close the Edge Properties dialog box.
Choose OK to close the Edit Drawing View dialog box.

Creating Drawing Views |317
The lug color in the detail view changes to red. However, the lug color
remains unchanged in the parent view.
For practice, create the same detail view using a circle for selection. Notice
how the command line prompts change according to the selection type you
use.
Next, you create a cross section—a view that cuts through a point on the part
along a work plane, or if the part is an offset section, through a sketch. Work
planes are often easier to visualize and select than cutting planes.
If you choose not to create a work plane, you will find it easier to select only
the endpoints of edges and the centers of circles or arcs to specify a cutting
plane.
In this tutorial, you will create a work plane for the cross-section view, using
an axis and an existing work plane.
To create a cross-section and isometric view
1Return to Model mode.
Browser Select the Model tab.
2Use AMWORKPLN to create a work plane for the cross-section view.
Context Menu In the graphics area, right-click and choose Sketched &
Work Features ➤ Work Plane.
In the Work Plane dialog box, specify:
1st Modifier: On Edge/Axis
2nd Modifier: Planar Normal
Create Sketch Plane: Clear the check box
Choose OK.
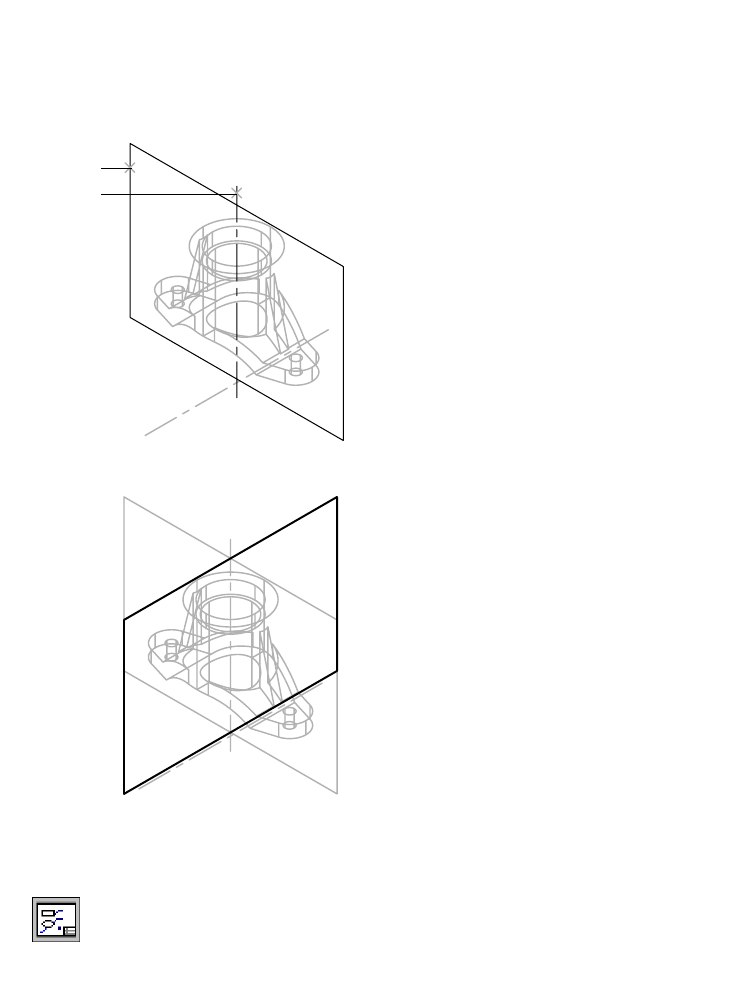
318 |Chapter 13 Creating Drawing Views
3On the command line, respond to the prompts as follows.
Select work axis, straight edge or [worldX/worldY/worldZ]:
Specify the work axis (1)
Select work plane, planar face or [worldXy/worldYz/worldZx/Ucs]:
Specify the work plane (2)
Your model should now look like this.
Next, you create a full cross-section view of the part that is an orthographic
projection of the front view.
4Return to Drawing mode.
Browser Select the Drawing tab.
2
1
Creating Drawing Views |319
5Create a new drawing view.
Context Menu In the graphics area, right-click and choose New View.
In the Create Drawing View dialog box, specify:
View Type: Ortho
Choose the Section tab and specify:
Type: Full
Label: Enter A
Label Pattern: Section A-A
Hatch: Select the check box, and press Pattern
Use the Hatch Pattern dialog box to define the hatch pattern, and choose OK.
Choose OK to close the Create Drawing View dialog box.
6Define the orthogonal view, responding to the prompts.
Select parent view: Specify a point anywhere inside the front view
Specify location for orthogonal view:
Specify a point to the right of the front view (3)
Specify location for orthogonal view: Press ENTER
Enter section through type [Point/Work plane] <Work plane>:
Press ENTER
Select work plane in parent view for the section:
Select the edge of the second work plane at a point inside the view box (4)
4
3

320 |Chapter 13 Creating Drawing Views
Your display should now look like this.
7Create an isometric view, using the base view as the parent view.
Context Menu In the graphics area, right-click and choose New View.
In the Create Drawing View dialog box, specify:
View Type: Iso
Scale: Enter 1
Relative to Parent: Select the check box
Choose OK.
8Define the isometric view, responding to the prompts.
Select parent view: Specify the base view (1)
Location for isometric view: Specify a point to the right of the top view (2)
Location for isometric view: Press ENTER
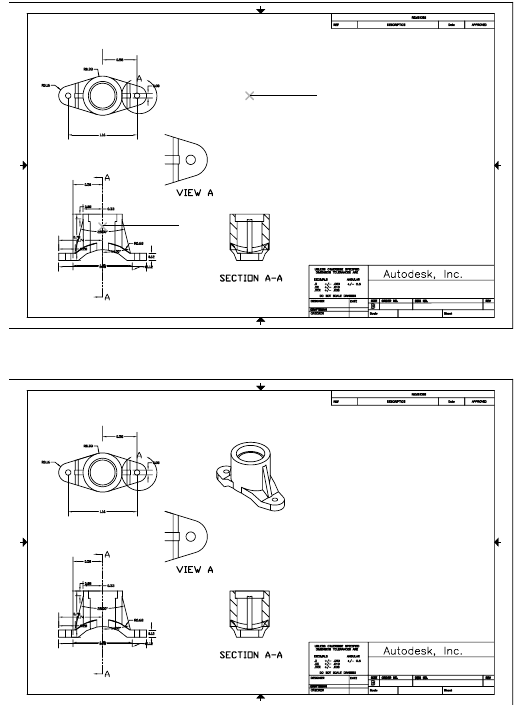
Creating Drawing Views |321
Your drawing should look like this.
1
2

322 |Chapter 13 Creating Drawing Views
Each drawing view is represented as it relates to other views. For example, the
ortho, section, and iso views are derived from the base view. Also, it is clear
that the detail view is based on the ortho view. Detail and section views are
named according to the labels you specified.
Save your file.
Cleaning Up Drawings
After creating the drawing views, you need to clean up the parametric dimen-
sions and some extraneous lines.
Parametric dimensions are automatically placed on the AM_PARDIM layer.
Hiding Extraneous Dimensions
Because dimensions originate on the model, some might be redundant or
conflict with others. For example, because the saddle bracket is symmetrical,
one dimension states the overall length of a feature while another states the
length of one side. Only one of these dimensions is necessary because the
other can be derived. Decide which dimensions to show, and then selectively
hide the others. Hiding dimensions does not delete them. They can be redis-
played from the Desktop Visibility dialog box.
Other dimensions may be redundant because you created the model by
constructing individual features. For example, when you sketched the arc
that represents the rough saddle form, you specified a radius of .33. This
dimension appears in the top view of the drawing. When you created the
boss, you specified a dimension of .33 to revolve the boss. This dimension
appears in the front view of the saddle bracket. Only one of the .33 dimen-
sions is needed.
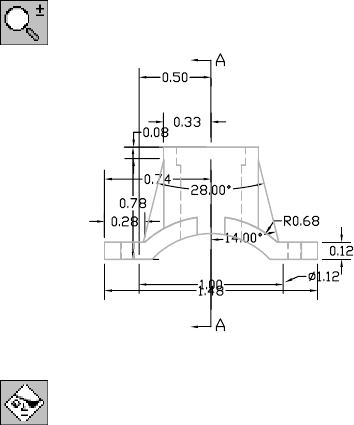
Cleaning Up Drawings |323
To hide extraneous dimensions in a front view
1Zoom to the base view.
Context Menu In the graphics area, right-click and choose Zoom.
2Activate the Desktop Visibility dialog box.
Desktop Menu Drawing ➤ Drawing Visibility
In the Desktop Visibility dialog box, verify that the Hide option is selected.
Then choose Select.
3On the command line, respond to the prompts to select the redundant .33
and .74 dimensions to hide.
Select drawing objects to hide: Specify the 0.33 dimension
Select drawing objects to hide: 1 found
Select drawing objects to hide: Specify the 0.74 dimension
Select drawing objects to hide: 1 found, 2 total
The view also contains a number of dimensions associated with the rib
sketch. The ribs were created from a trapezoid shape, where only two of the
sides are used by the part. The other sides are not visible, so their dimensions
should not appear in the drawing.
Select drawing objects to hide: Specify the 1.00 dimension
Select drawing objects to hide: 1 found, 3 total
Select drawing objects to hide: Specify the 0.50 dimension
Select drawing objects to hide: 1 found, 4 total
Select drawing objects to hide: Specify the 14° dimension
Select drawing objects to hide: 1 found, 5 total
Select drawing objects to hide: Press ENTER
Choose OK to exit the dialog box.
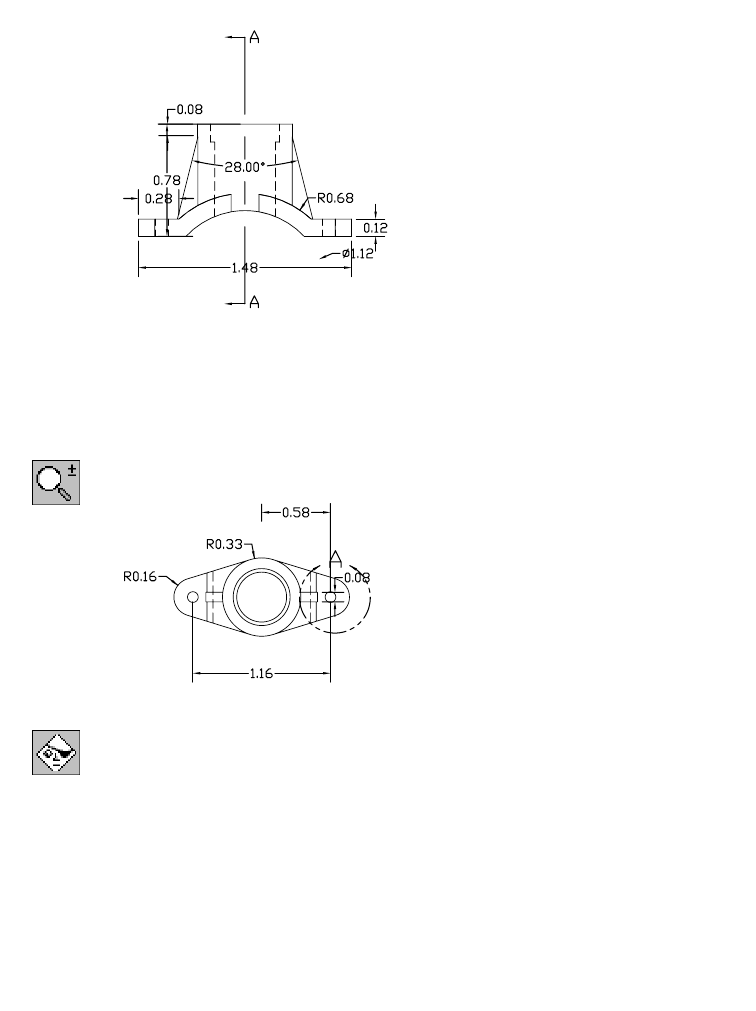
324 |Chapter 13 Creating Drawing Views
4Your display should look like this.
In the top view, the 1.16 dimension specifies the distance between arc cen-
ters. You can hide the extraneous .58 and 0.08 dimensions.
To hide extraneous dimensions in a top view
1Zoom to the top view.
Browser Right-click Ortho and choose Zoom to.
2Activate the Desktop Visibility dialog box.
Desktop Menu Drawing ➤ Drawing Visibility
3In the Desktop Visibility dialog box, verify that the Hide check box is selected
and choose Select.
4Respond to the prompts as follows.
Select drawing objects to hide: Specify the 0.58 dimension
Select drawing objects to hide: Specify the 0.08 dimension
Select drawing objects to hide: Press ENTER
Choose OK to exit the dialog box.
The dimensions should be hidden on the view.
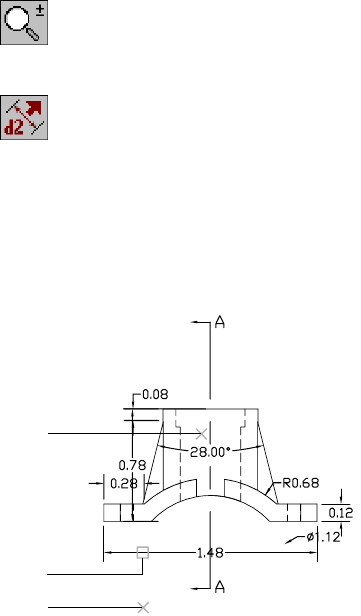
Cleaning Up Drawings |325
Moving Dimensions
Mechanical Desktop places dimensions on the drawing according to the way
they were created during sketching. Usually, some cleanup is required, to
comply with drafting standards.
In the following exercises, you will move dimensions within and between views
until all the dimensions needed to define the part are visible on the drawing.
All the dimensions for the drawing currently exist in the front and top views.
Originally these views were cluttered with extraneous dimensions. Now that
those dimensions are gone, it is much easier to move the remaining dimen-
sions to other views.
To move a dimension within a view
1Zoom to the base view.
Browser Right-click Base and choose Zoom to.
.2Use AMMOVEDIM to move some dimensions to clean up your view, following
the prompts.
Context Menu In the graphics area, right-click and choose Annotate
Menu ➤ Edit Dimensions ➤ Move Dimension.
Enter an option [Flip/Move/move mUltiple/Reattach] <Move>: Press ENTER
Select dimension to move: Specify the 1.48 dimension (1)
Select destination view: Specify a point near the center of the front view (2)
Select location: Specify a point slightly below the A for the section cut (3)
Select location: Press ENTER
Press ENTER to repeat the command.
1
3
2
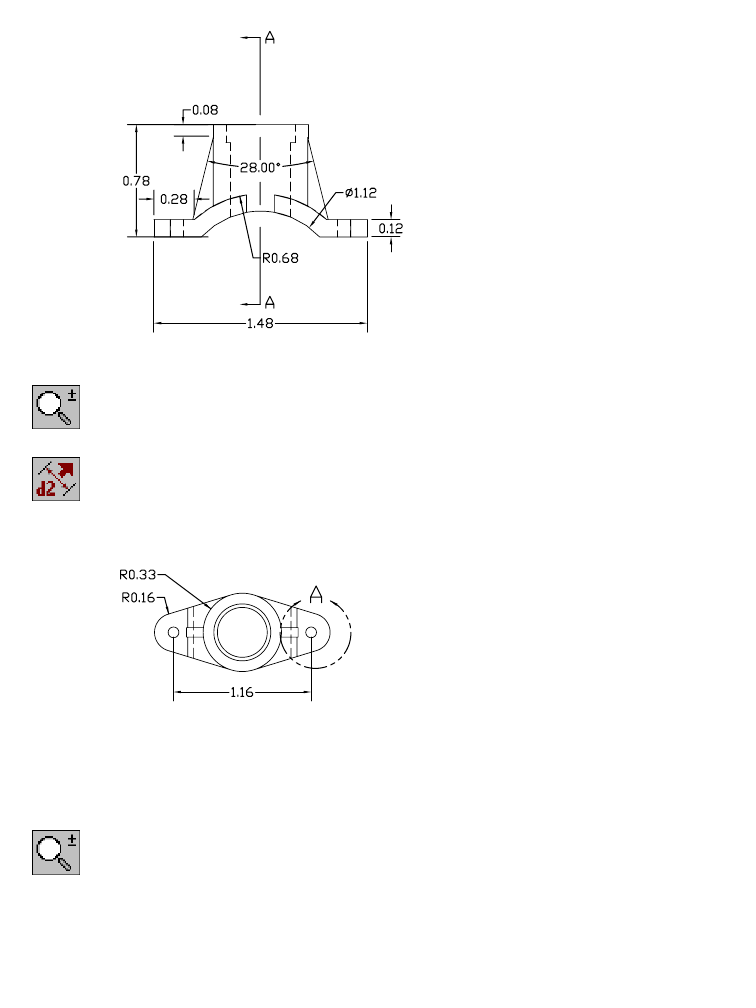
326 |Chapter 13 Creating Drawing Views
3Continue moving dimensions until the front view looks like this.
4Zoom to the top view.
Browser Right-click Ortho and choose Zoom to.
5Use AMMOVEDIM to move some of the dimensions in the top view.
Context Menu In the graphics area, right-click and choose Annotate
Menu ➤ Edit Dimensions ➤ Move Dimension.
Follow the command line prompts to move dimensions until your view
looks like this.
Because dimensions are placed on the first true-size view of the part, most
dimensions clutter the first few views you create. In this exercise, you move
a dimension from the front view to its cross-section view.
6Zoom to return to the drawing layout.
Context Menu In the graphics area, right-click and choose Zoom. Right-
click again, and choose Zoom Extents. Right-click again
and choose Exit to close the command.
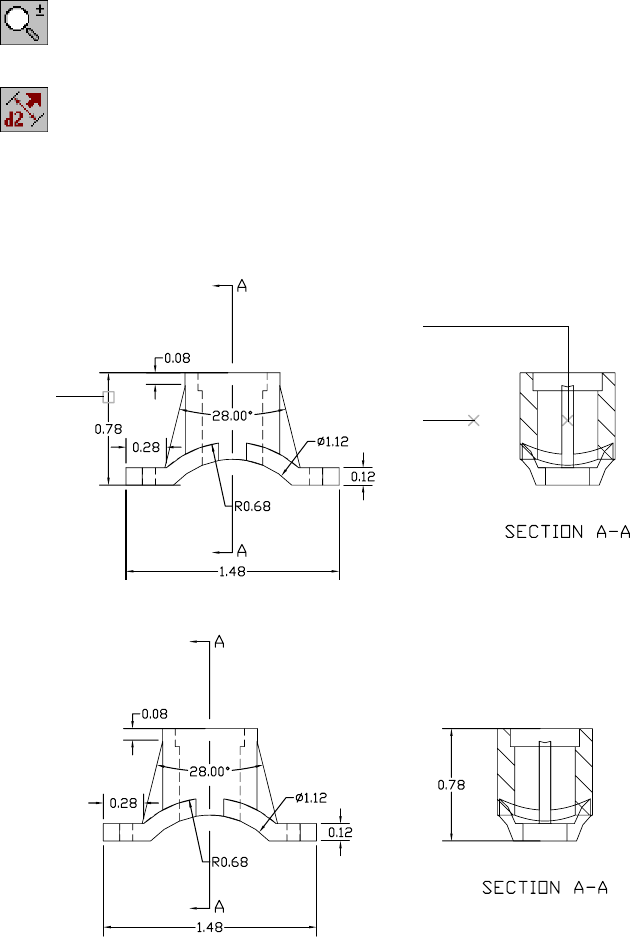
Cleaning Up Drawings |327
To move a dimension to a different view
1Zoom in to view the front and cross-section views.
Context Menu In the graphics area, right-click and choose Zoom.
2Use AMMOVEDIM to move a dimension from the front view to the cross-
section view, following the prompts.
Context Menu In the graphics area, right-click and choose Annotate
Menu ➤ Edit Dimensions ➤ Move Dimension.
Enter an option [Flip/Move/move mUltiple/Reattach] <Move>: Press ENTER
Select dimension to move: Specify the 0.78 dimension (1)
Select destination view: Specify the cross-section view (2)
Select location: Place the dimension to the left of the cross-section view (3)
Select location: Press ENTER
Your drawing views should look like this.
2
3
1
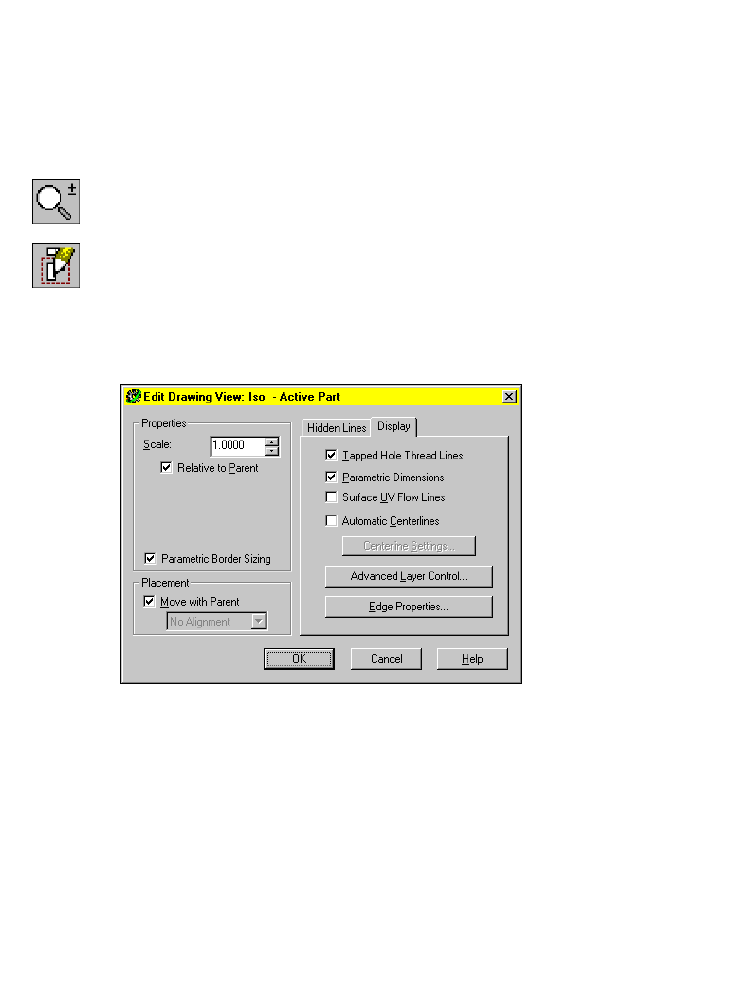
328 |Chapter 13 Creating Drawing Views
Hiding Extraneous Lines
Although Mechanical Desktop eliminates lines when it creates views, you
may want to edit the views to remove additional, unwanted lines.
To hide an extraneous line
1Zoom to the isometric view.
Browser Right-click Iso and choose Zoom to.
2Use AMEDITVIEW to edit the Iso view.
Context Menu In the graphics area, right-click and choose Drawing
Menu ➤ Edit View.
3Specify the isometric view.
4In the Edit Drawing View dialog box, choose the Display tab and then choose
Edge Properties.
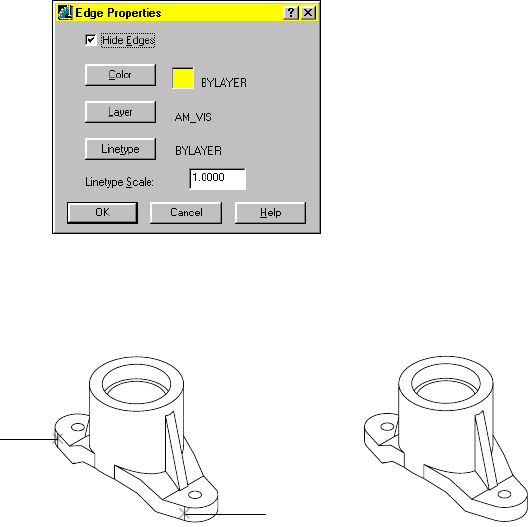
Cleaning Up Drawings |329
5On the command line, respond to the prompts as follows:
Enter an option (edge properties) [Remove all/Select/Unhide all] <Select>:
Press ENTER
Select Edges: Specify the vertical line on the lug (1)
Select Edges: Specify the vertical line on the lug (2)
Select Edges: Press ENTER
6In the Edge Properties dialog box, specify:
Hide Edges: Select the check box
Choose OK.
7Choose OK to exit the Edit Drawing View dialog box.
The selected lines are removed from the view.
lines selected lines hidden
1
2

330 |Chapter 13 Creating Drawing Views
Enhancing Drawings
When you are satisfied with the drawing views, you can modify and enhance
them. Enhancements include:
■Adding more dimensions
■Adding annotations such as callouts, hole notes, and centerlines
■Relocating views
■Modifying the part from the drawing view
Changing Dimension Attributes
Even though you set up the dimension style before creating the dimensions,
some dimensions may need to be displayed in a particular way.
To edit a dimension attribute
1Zoom to the front and cross-section views.
Context Menu In the graphics area, right-click and choose Zoom.
2Use AMPOWEREDIT to edit a dimension on the front view to show a tolerance
range, responding to the prompts.
Context Menu In the graphics area, right-click and choose Annotate
Menu ➤ Edit Dimensions ➤ Power Edit.
Select object: Specify the .12 dimension in the front view
3In the Power Dimensioning dialog box, choose the Units tab and specify:
Units: Decimal
Round Off: Enter 3
Select the Add Tolerance button in the upper right of the dialog box and
specify:
Upper: Enter +0.001
Lower: Enter -0.001

Enhancing Drawings |331
4Choose the General tab.
The .12 dimension should now be expressed as 0.120 +/- .001. Now that the
dimension is longer, it may overlap the drawing view.
Choose OK.
5Move the dimension so that it does not overlap any geometry.
Context Menu In the graphics area, right-click and choose Edit
Dimensions ➤ Move Dimension.
Move the dimension so that it looks like this.
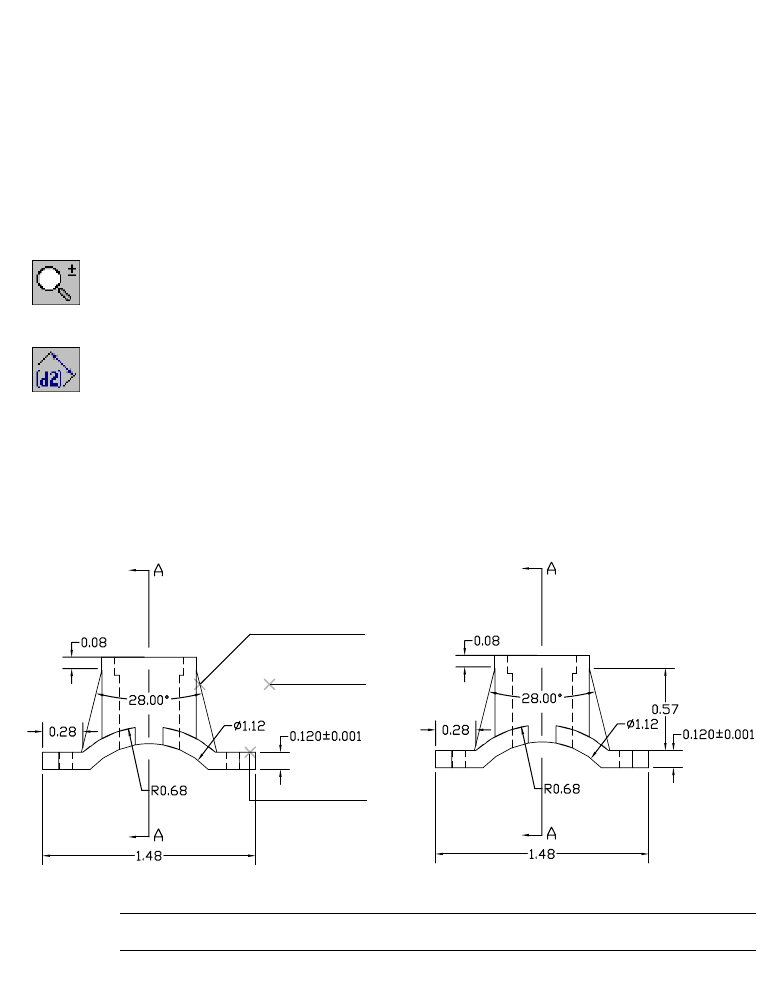
332 |Chapter 13 Creating Drawing Views
Creating Reference Dimensions
You can supplement parametric dimensions with reference dimensions. The
reference dimensions do not control the size of the model; however, if you
change the model, the reference dimensions are updated to reflect the new
size. Reference dimensions reside on the AM_REFDIM layer.
In the next exercise, you add a reference dimension to the front view.
To add a reference dimension
1Zoom to the front view.
Browser Right-click Base and choose Zoom to.
2Use AMREFDIM to dimension the vertical distance from the top of the right-
most rib to the top of the rightmost lug, responding to the prompts.
Context Menu In the graphics area, right-click and choose Annotate
Menu ➤ Reference Dimension.
Select first object: Specify a point at the top of rib (1)
Select second object or place dimension: Specify a point at the top of lug (2)
Specify dimension placement: Specify a point to place the dimension (3)
Specify placement point or [Undo/Hor/Ver/Align/Par/aNgle/Ord/reF/Basic]:
Enter v to force a vertical dimension, or press ENTER
Select first object: Press ENTER
NOTE You can move some of the dimensions to avoid a cluttered view.
1
3
2
reference dimension addedpoints selected
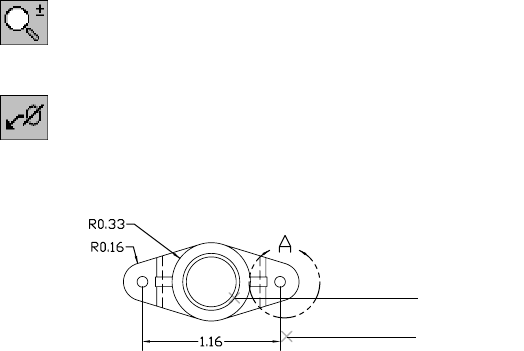
Enhancing Drawings |333
Creating Hole Notes
Mechanical Desktop does not automatically display hole dimensions on the
drawing, but you can add this information.
First, you add a hole note to the boss in the top view, and tapped hole infor-
mation to the mounting hole in the detail view.
To create a hole note
1Zoom to the top view.
Browser Right-click Ortho and choose Zoom to.
2Use AMNOTE to create a hole note for the hole through the boss, responding
to the prompts.
Context Menu In the graphics area, right-click and choose Annotate
Menu ➤ Annotation ➤ Hole Note.
Select object to attach [rEorganize]: Specify one of the two inner circles (1)
Next Point <Symbol>: Specify the location (2), and press ENTER
2
1
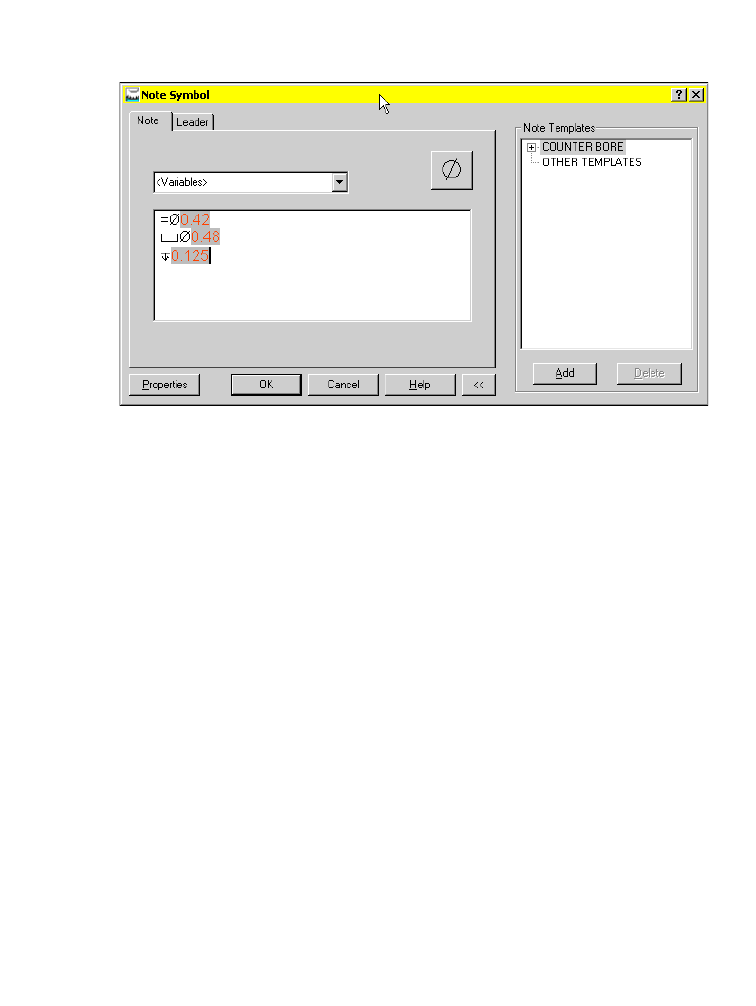
334 |Chapter 13 Creating Drawing Views
3In the Note Symbol dialog box, choose the more button to display the Note
Templates section.
In Note Templates, choose the COUNTER BORE template.
4Select the Leader tab, and set the leader justification to Middle of All Text.
Choose OK.
A hole note with the hole diameter, the counterbore diameter, and the hole
depth is displayed on your drawing.
Next, add hole information to the mounting hole in the detail view. This
procedure is similar to adding standard hole note information, except that
you include additional information when you create the hole. You edit the
text in the hole note template, but it applies to that hole note only and does
not alter the template.
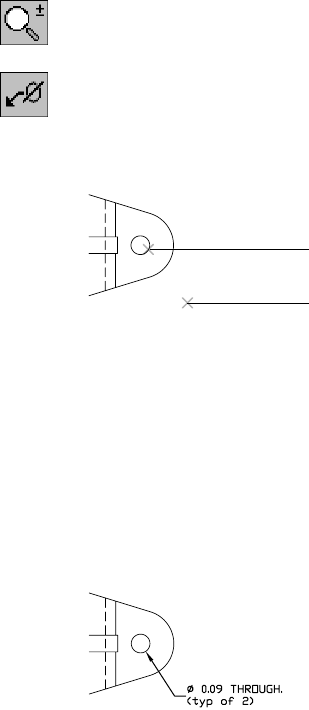
Enhancing Drawings |335
To create a modified hole note
1Zoom to the detail view.
Browser Right-click Detail and choose Zoom to.
2Create the hole note, responding to the prompts.
Context Menu In the graphics area, right-click and choose Annotation ➤
Hole Note.
Select object to attach [rEorganize]: Specify the hole in detail view (1)
Next Point <Symbol>: Specify the location (2), and press ENTER.
3In the Note Symbol dialog box, choose the more button to display the Note
Templates section.
In Note Templates, choose the THRU HOLE template.
The Multiline Text Editor is displayed.
4In the Multiline Text Editor, place the cursor at the end of the existing text
and press ENTER. Add (typ of 2) on the second line.
Select the Leader tab, and set the leader justification to Middle of All Text.
Choose OK.
Your drawing should look like this.
1
2
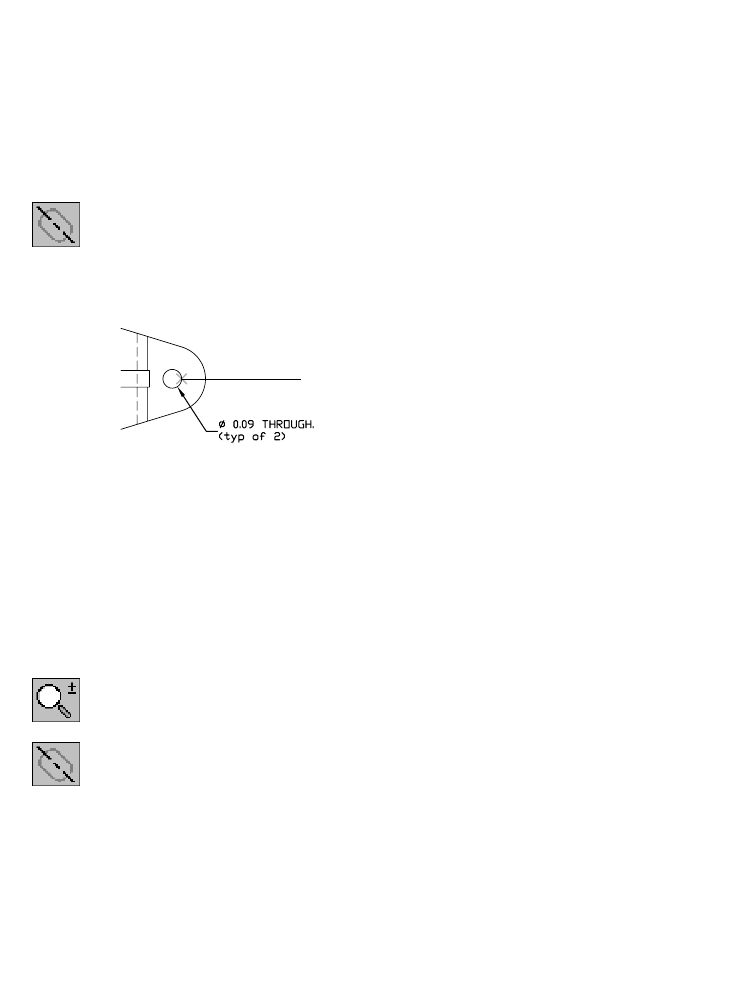
336 |Chapter 13 Creating Drawing Views
Creating Centerlines
In this exercise, you create a parametric centerline for the top view and a cen-
ter mark for the detail view. Centerlines and center marks are attached to the
view and move with the view as the model changes.
To create a centerline
1Add a center mark, responding to the prompts.
Context Menu In the graphics area, right-click and choose Annotation ➤
Centerline.
Select Edge: Specify the hole in the detail view (1)
Select mirrored edge or <ENTER>: Press ENTER
The size and characteristics of the center mark are defined by settings in the
Centerline Properties dialog box. To change the settings, choose Drawing ➤
Drawing Options. On the Annotation tab, choose Centerline Settings, and
choose the Center Line Properties button.
In the Center Line Properties dialog box, you can choose to use standard set-
tings, or you can enter new values for overshoot and center mark size that
will apply to this drawing only.
2Zoom to the top view.
Browser Right-click Ortho and choose Zoom to.
3Create another centerline, responding to the prompts.
Context Menu In the graphics area, right-click and choose Annotation ➤
Centerline.
Select Edge: Specify the top edge of the left lug (1)
Select mirrored edge or <RETURN>: Specify the lower edge of the left lug (2)
1
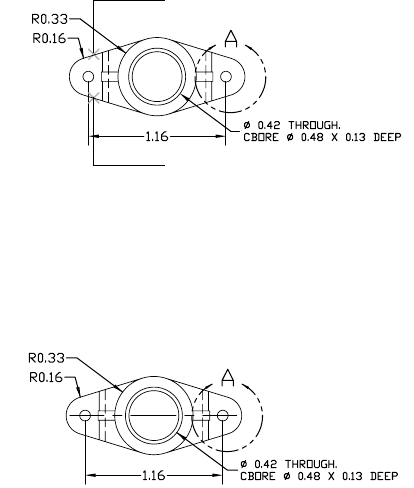
Enhancing Drawings |337
A centerline is placed through the view. Now, specify where to trim the cen-
terline endpoints.
Select first trim point: Specify a point to the right of the part
Select second trim point: Specify a point to the left of the part
Your display should look like this.
Creating Other Annotation Items
When you make changes to a model, the geometry and dimensions are
updated automatically. Special commands create drawing annotations such
as reference dimensions, hole notes, and centerlines.
You can create other annotations such as callout bubbles, surface finish sym-
bols, and Geometric Distancing and Tolerancing (GD&T) symbols. The anno-
tation items do not change when you make changes to the model. To make
these annotation objects parametric, you convert them after you create
them.
In the next exercise, you convert a callout bubble into a Mechanical Desktop
annotation item. The callout bubble is already created and placed on the
AM_ANNOTE layer of your drawing.
1
2
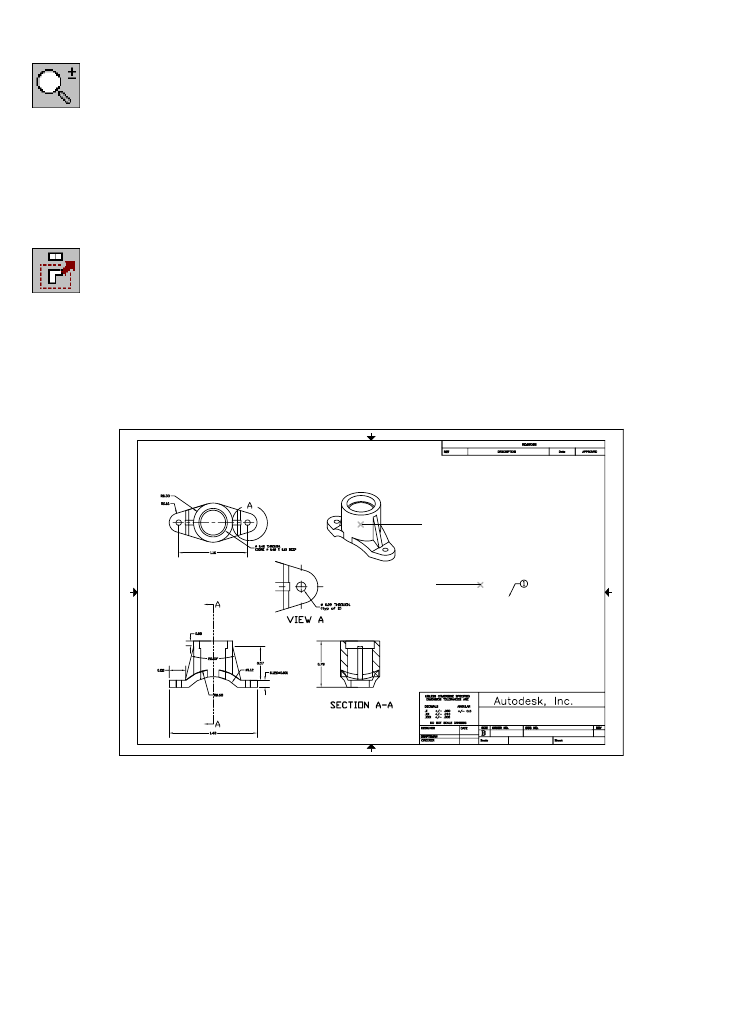
338 |Chapter 13 Creating Drawing Views
To convert a callout bubble
1Zoom out to view the entire drawing.
Context Menu In the graphics area, right-click and choose Zoom. Right-
click again and choose Zoom Extents. Right-click again
and choose Exit.
2Use LAYER to turn on the AM_ANNOTE layer. You should see a callout bubble
containing the number 1 and a leader.
3Use AMMOVEVIEW to position the isometric view near the callout, respond-
ing to the prompts.
Context Menu In the graphics area, right-click and choose Drawing
Menu ➤ Move View.
Select view to move: Select the isometric view (1)
Specify new view location: Specify a point (2)
Specify new view location: Press ENTER
If you use the Browser to move a view, you will not be asked to select it.
The callout does not move. Convert it to an annotation so that it is associ-
ated with the isometric view.
1
2

Enhancing Drawings |339
4Convert the callout bubble to an annotation, responding to the prompts.
Context Menu In the graphics area, right-click and choose Annotation
Menu ➤ Annotation ➤ Create Annotation.
Select objects to associate with view:
Draw a selection rectangle around the callout bubble, numeral, and leader (1, 2)
Select objects: Press ENTER
Select point in view to attach annotation: Specify a point (2)
Your drawing should look like this.
1
2
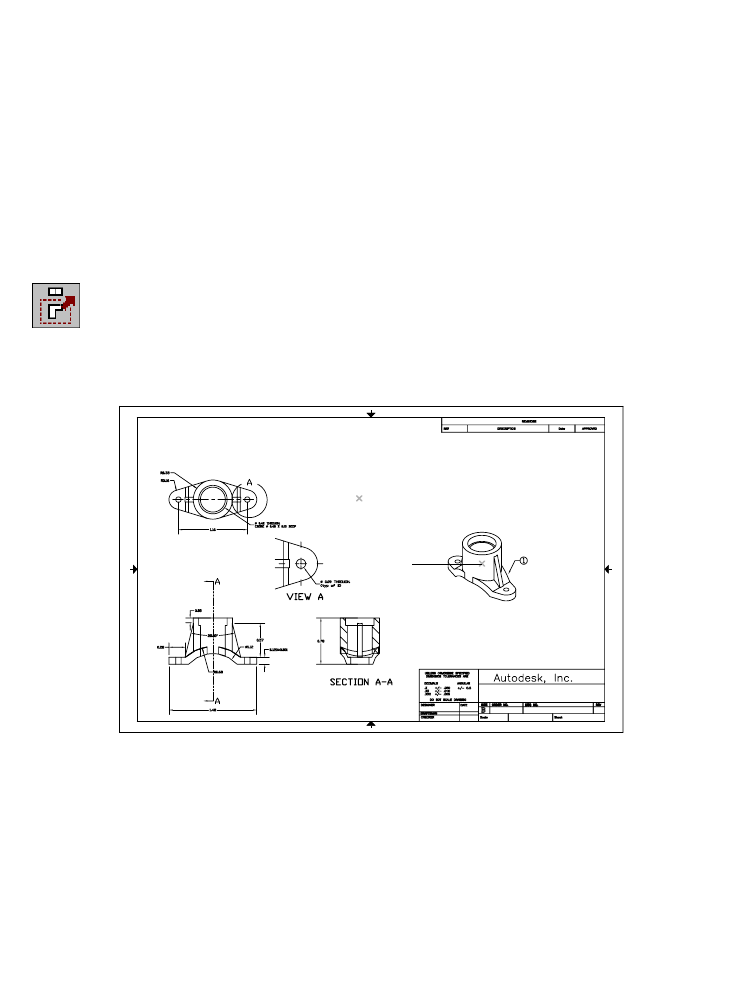
340 |Chapter 13 Creating Drawing Views
Modifying Drawing Views
You can relocate views or change the model from a drawing view. The draw-
ing and, if appropriate, the model, are updated to reflect the changes you
made.
Move the isometric view. The callout bubble moves with the view because it
is associated with the part. Then, relocate the isometric and detail views, and
change the detail view. The model and all drawing views are updated.
To relocate a drawing view
1Move the Iso view back to its former location, responding to the prompts.
Context Menu In the graphics area, right-click and choose Move View.
Select view to move: Specify center of isometric view (1)
Specify new view location: Specify new location (2) and press ENTER
Specify new view location: Press ENTER
The callout bubble moves with the view.
1
2

Enhancing Drawings |341
2Relocate the detail view to the right of and below the isometric view,
responding to the prompts.
Context Menu In the graphics area, right-click and choose Move View.
Select view to move: Specify center of the detail view (1)
Specify new view location: Specify new location (2) and press ENTER
Specify new view location: Press ENTER
All annotations associated with the view move with it and keep their posi-
tions relative to the view. You can move views from layer to layer.
Now, change one of the parametric dimensions within a view and watch the
resulting changes.
12
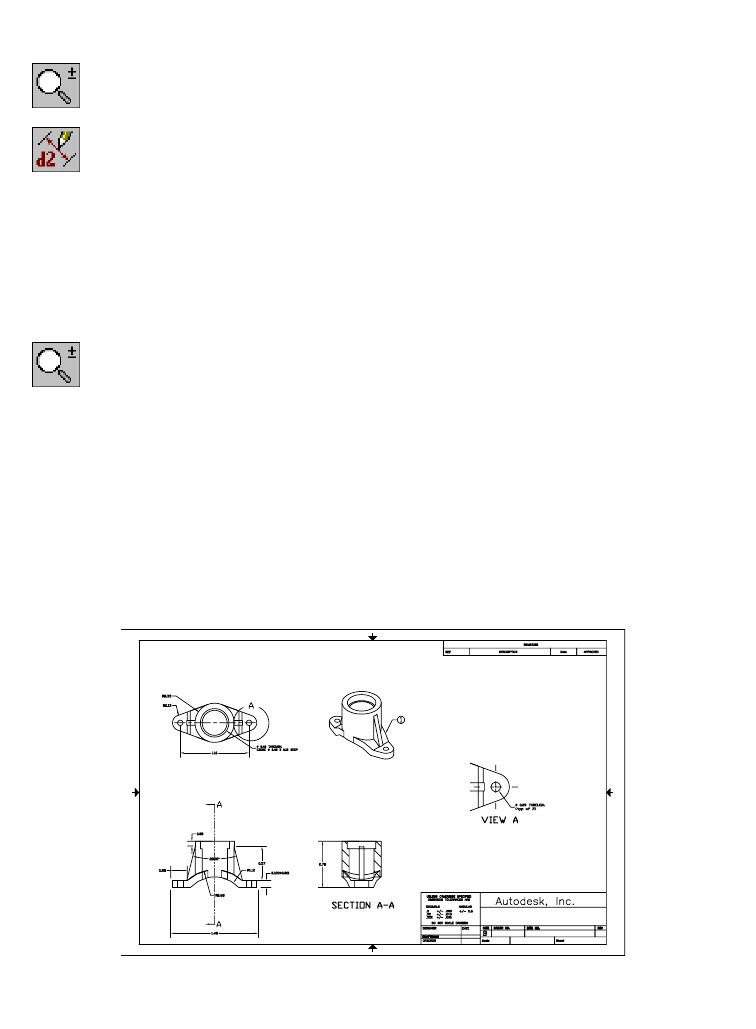
342
To modify a drawing view
1Zoom to the top view.
Context Menu In the graphics area, right-click and choose Zoom.
2Use AMMODDIM to change the radius of the lug, responding to the prompts.
Context Menu In the graphics area, right-click and choose Edit
Dimensions ➤ Edit Dimension.
Select dimension to change: Select the .16 value of the lug radius
New value for dimension <.16>: Enter .13
Select dimension to change: Press ENTER
You must update the part to show the changes.
3Zoom out to display all the drawing views.
Context Menu In the graphics area, right-click and choose Zoom. Right-
click again, and choose Zoom Extents. Right-click again
and choose Exit.
4Use AMUPDATE to update your part.
Context Menu In the graphics area, right-click and choose Update Part.
Update part now? [Yes/No]: Press ENTER
In the Update Dependent Part dialog box, choose Yes.
Mechanical Desktop updates the part, it also updates each drawing view.
After it completes the updating, your drawing should look like this.
Save your file.
Exporting Drawing Views |343
Exporting Drawing Views
You can save your 2D drawing views directly to Mechanical Desktop versions
other than Release 6 as DWG, DWT, or DXF files. You can export the entire
current layout, including all views and geometry, or you can select views and
entities to export.
The Export Drawing Views dialog box provides options to:
■Convert views at true scale (1:1)
■Convert circular and linear splines that project to 2D arcs, circles and lines
■Flatten all source data, including any 3D autoCAD entities, or flatten only
MDT objects
The export options in the Export Drawing Views dialog box enable you to
export drawing views to:
■A new layout in the current file
■An external file in either model space or in layout
■Past and present versions of AutoCAD and DXF
Usually, only one base view is shown in a drawing view. With the True Scale
option turned on, a warning is displayed if two or more base views are shown
with different scales. You export base views separately, whether or not they are
scaled by the same factor. In the exporting process, isometric and detail views
are scaled by the same factor as the base view.
In this exercise, you save your drawing file to AutoCAD 2000.

344 |Chapter 13 Creating Drawing Views
To export Mechanical Desktop drawing views
1Use AMVIEWOUT to save your drawing view file to AutoCAD 2000.
Browser In the Browser, right-click Base and choose Export View.
2In the Export Drawing Views dialog box, specify the following:
Source: Specify Current Layout
Data Handling:
Export Views True Scale (1:1): Select the check box
Flatten All Selected Objects: Select the check box
Convert Circular/Linear Splines to Circles/Lines: Select the check box
Generate Preview Image: Select the check box
File Name: Enter or browse to a file name for the new version
Press the More button (<<), and in Export Options, specify:
To New External File: Select the check box, and select In Layout
Save as type: Specify AutoCAD 2000 Drawing (*.dwg)
Choose OK.
The drawing view is saved into the first layout in the new external file.

345
In This Chapter 14
Creating Shells
This tutorial teaches you how to create and edit a
shelled part in Autodesk® Mechanical Desktop®. With
the shell feature, you can create complex parts with
walls of varying thickness. In the tutorial, you add a
shell feature to an existing die cast engine part, and then
edit the shell. The procedures you learn here can be
applied to a variety of shelled parts.
■Adding a shell feature to an
existing part
■Modifying wall thickness
■Adding multiple thickness
overrides
■Managing thickness overrides
346 |Chapter 14 Creating Shells
Key Terms
Te r m Definition
converging radial
shapes A sharp corner where cylindrical faces, such as fillets, are offset and converge to
form a zero radius. Parts with more complex shapes, such as variable radius
fillets and surfcuts, need a shell thickness large enough so that the offset face
does not converge.
default thickness The offset value initially applied to all faces of your part.
excluded face Face on a shelled part you select that will not be offset.
reclaimed face Face on a shelled part that was previously excluded can be selected, or
reclaimed. Reclaimed faces are offset by the default thickness.
shell A Mechanical Desktop® feature that cuts portions of the active part by offsetting
its faces.
thickness override An offset value that takes precedence over the default thickness of a shell
feature. You can define a list of thickness override values and apply them to any
face on the part.

Basic Concepts of Creating Shells |347
Basic Concepts of Creating Shells
Unlike other sketched or placed features, a shell feature is initially applied to
all the faces of your active part, instead of only those you select. It doesn’t
need parametric dimensions to control placement. A part can have only one
shell feature.
When you add a shell feature to a part, Mechanical Desktop creates new faces
by offsetting existing ones inside or outside of their original positions. You
can also choose the midplane option, which offsets faces by half the entered
value to one side and half to the other side.
Mechanical Desktop treats continuously tangent faces as a single face when
offsetting. This illustration shows the progression for adding a shell feature
to a part and then a thickness override to the cylindrical face. The faces tan-
gent to the cylindrical face are also offset in the operation.
You can change a shell feature in different ways. You can change the offset
type and offset values in the Shell Feature dialog box. If you choose to
exclude or reclaim faces, or change thickness overrides, you select faces on
your part. In both cases, to apply your modifications you must update the
part.
Adding Shell Features to Models
In this tutorial, you add a shell feature to the existing model of a clutch hous-
ing for a 250cc two-stroke engine. The shell feature requires an excluded face
and multiple thickness overrides.
You apply what you’ve learned in previous chapters about constrained
sketches and features to examine an existing part. You then add a shell fea-
ture to the part, later modifying it to suit your design requirements.
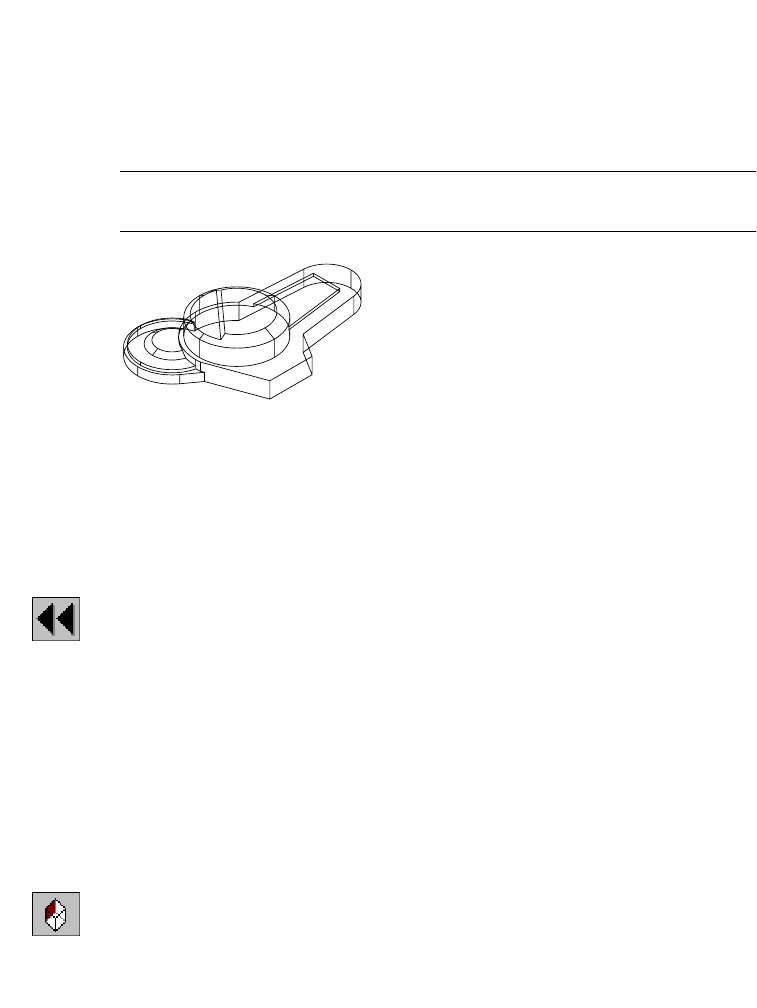
348 |Chapter 14 Creating Shells
Using Replay to Examine Designs
First, review the clutch housing design.
Open the file clutch.dwg in the desktop\tutorial folder. The clutch housing has
been modeled to a point in the design where it is ready for you to add the
shell feature. It contains six extruded features.
NOTE Back up the tutorial drawing files so you still have the original files if you
make a mistake. See “Backing up Tutorial Drawing Files” on page 40.
For the constraint system in this model, construction lines were used to align
its cylindrical features. You can change the angle of the features with respect
to one another to alter the design to fit engines of different sizes.
To replay the design of a part
1Use AMREPLAY to review the process used to build this model, responding to
the prompts.
Context Menu In the graphics area, right-click and choose Part ➤ Replay.
Closed profile
Enter an option [Display/Exit/Next/Size/Truncate] <Next>:
Press ENTER to review each design step
Enter an option [Exit/Next/suPpress/Truncate] <Next>:
Continue to press ENTER until you see the following message
Part replay complete
The construction of the model is also displayed in the Desktop Browser. Each
feature is located in the order it was created. Expand the browser and exam-
ine the feature hierarchy.
2Change your view to Back Right Isometric.
Desktop Menu View ➤ 3D Views ➤ Back Right Isometric
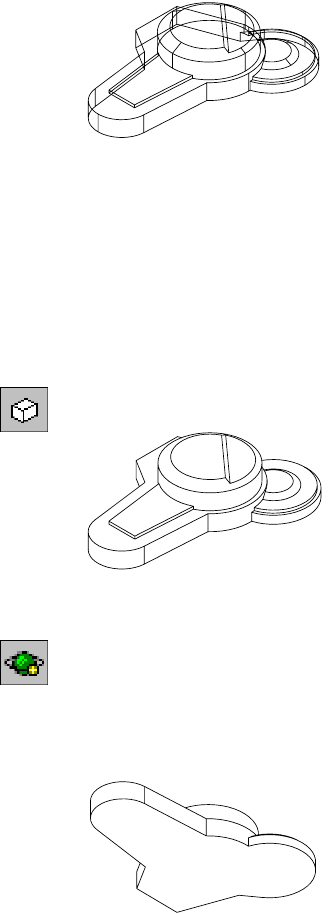
Adding Shell Features to Models |349
This displays the model in another isometric view.
Next, you remove the silhouette edges from your model so you can visualize
it better. Silhouette edges are similar to hidden lines, but to remove them you
need to modify a system variable.
3Change the system variable controlling the visibility of silhouette edges.
Command DISPSILH
New value for DISPSILH <0>: Enter 1
4Use HIDE to remove hidden lines from your display. This improves your view
of the features of the housing.
Desktop Menu View ➤ Hide
5Use 3DORBIT to dynamically rotate the model, and view the underside of the
housing.
Context Menu In the graphics area, right-click and choose 3D Orbit.
Click the bottom control point on the 3D orbit icon in the graphics area, and
rotate the part upward.
6Remove the hidden lines again. Your drawing should resemble the following
illustration.

350 |Chapter 14 Creating Shells
Cutting Models to Create Shells
Now that you have examined the model, the next step is to cut it, removing
the interior area, so that all that remains is a shell of the part. This part is a
magnesium alloy casting which requires a wall thickness of about 4 mm in
most areas, but some walls must be thicker to withstand forces applied to
them.
To cut a model
1Return to the back right isometric view.
Desktop Menu View ➤ 3D Views ➤ Back Right Isometric
2Return to a wireframe display of your model.
Desktop Menu View ➤ Shade ➤ 3D Wireframe
3Use AMSHELL to create a shell feature.
Context Menu In the graphics area, right-click and choose Placed
Features ➤ Shell.
4In the Shell Feature dialog box, specify:
Default Thickness: Inside: Enter 4
Choose OK.
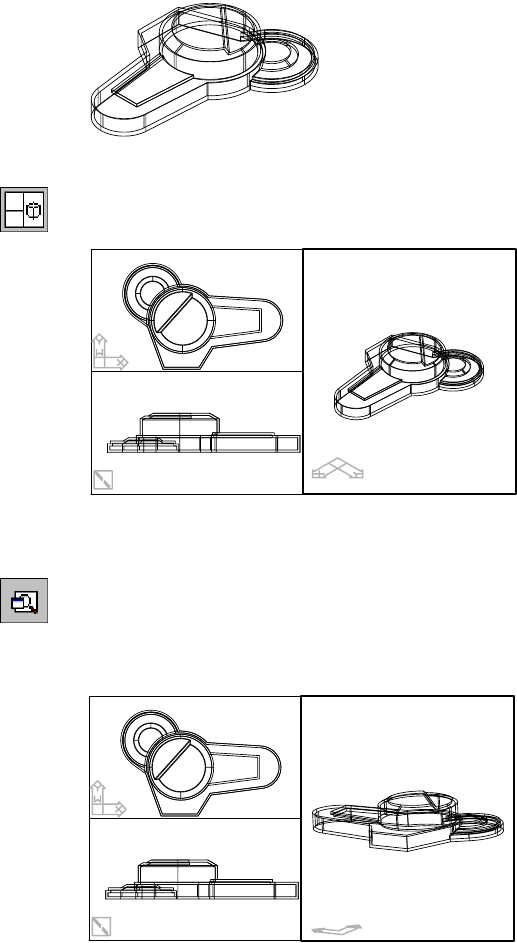
Adding Shell Features to Models |351
The shell feature is calculated and the model is updated.
5Change your display to three viewports.
Command 3
This gives you a better view of the thickness of the walls in the model.
An isometric view of the bottom of the housing has been previously saved.
6Click in the right viewport to make it current, and restore the saved view.
Desktop Menu View ➤ Named Views
7In the View dialog box, highlight BOTTOM_ISOMETRIC and choose Set
Current.
Choose OK. The right viewport changes to display the selected view.
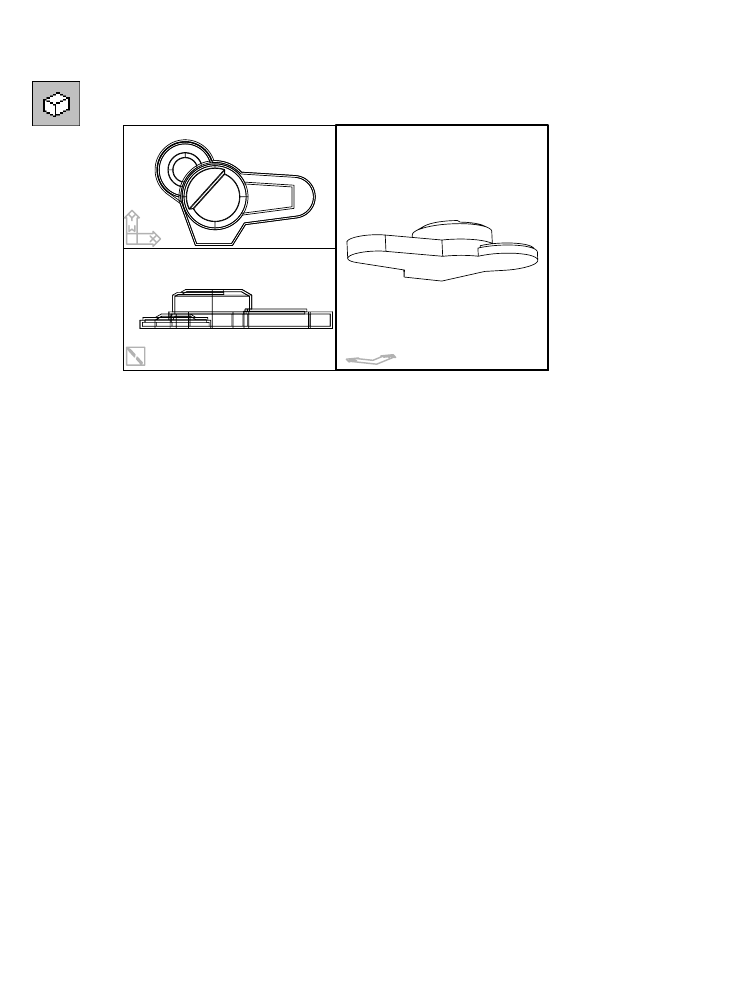
352 |Chapter 14 Creating Shells
When the shell feature was added, all the faces in the model were offset. The
result is a hollow model. For a better view, suppress the hidden lines.
8Use HIDE to remove the hidden lines.
Desktop Menu View ➤ Hide
Save your file.
Editing Shell Features
When you create a shell, your wireframe display becomes more complex
because Mechanical Desktop offsets each face in your model, doubling the
number of faces. One way to edit a shell feature is to use AMEDITFEAT and
select an offset face edge. However, choosing the shell feature icon from the
Desktop Browser is easier.
To remove the bottom face from the part, you need to edit the shell feature
and exclude the bottom face.
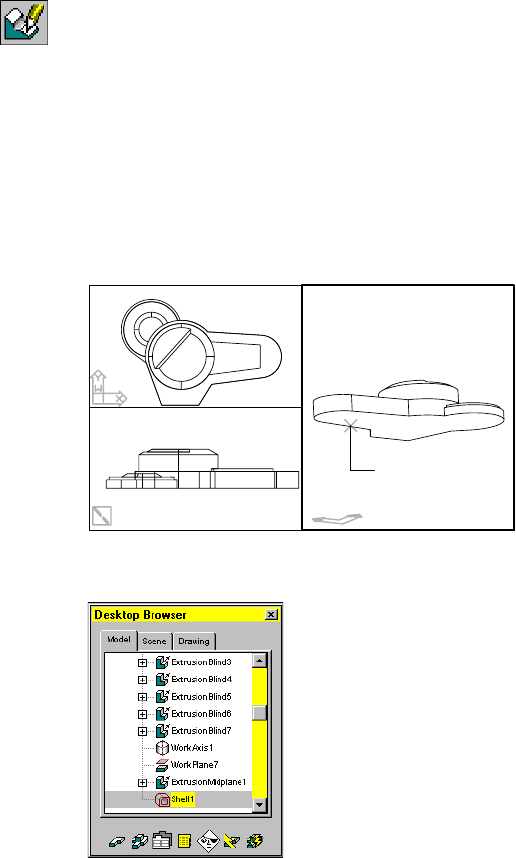
Adding Shell Features to Models |353
To exclude a face on a shell feature
1Use AMEDITFEAT to edit the shell feature.
Browser In the Browser, right-click Shell1 and choose Edit.
If you choose a method other than the Browser, you must select the shell fea-
ture first. The Shell Feature dialog box is displayed.
2In the Shell Feature dialog box, choose Add and then respond to the prompts
as follows:
Select faces to exclude: Specify a point (1)
Enter an option [Accept/Next] <Accept>:
Enter n until the bottom face is selected or press ENTER
Select faces to exclude: Press ENTER
Choose OK to exit the dialog box.
In the Browser, the shell icon has a yellow background indicating that it
needs to be updated.
1
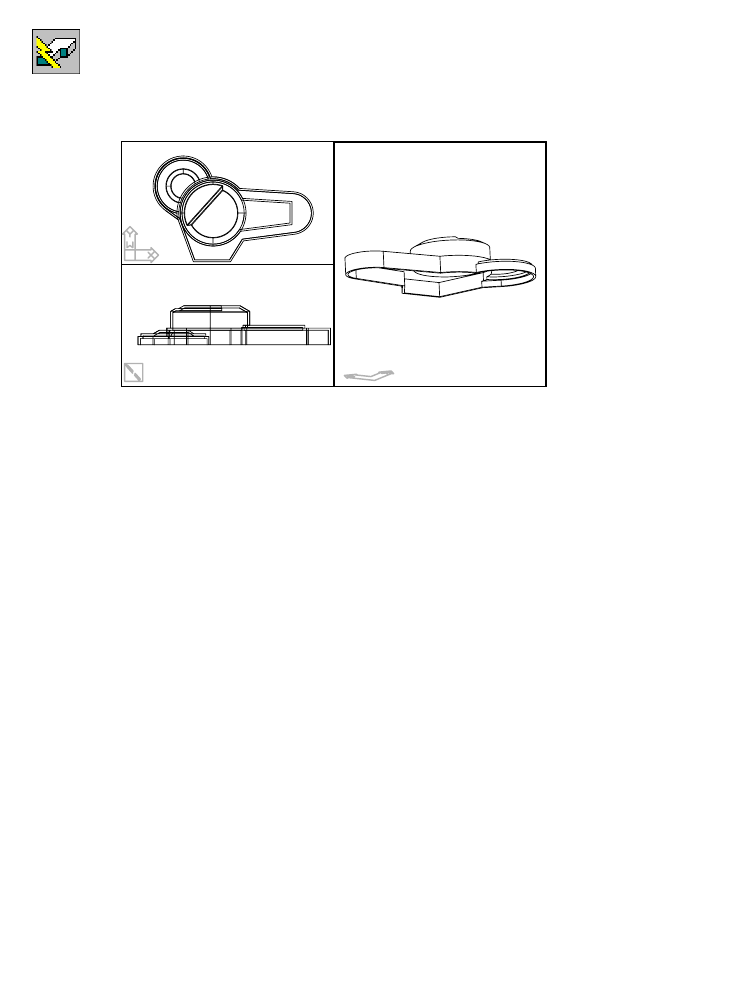
354 |Chapter 14 Creating Shells
3Use AMUPDATE to update the part, responding to the prompt.
Context Menu In the graphics area, right-click and choose Update Part.
Enter an option [active Part/aLl parts] <active Part>: Press ENTER
The model is updated to reflect the modified shell feature.
Save your file.
Adding Multiple Wall Thicknesses
When the clutch housing is attached to an operating engine, the stresses are
higher on some casting walls than on others. The walls surrounding the
water pump shaft and the clutch support the most force. You need to thicken
these walls to conform to design requirements.
Wall thickness overrides are applied to only those faces you select. A chain of
tangent faces is treated as a single face.
You can have as many wall thickness overrides as you like in a shell feature,
but most applications require only a few. Mechanical Desktop keeps track of
which faces have thickness overrides.
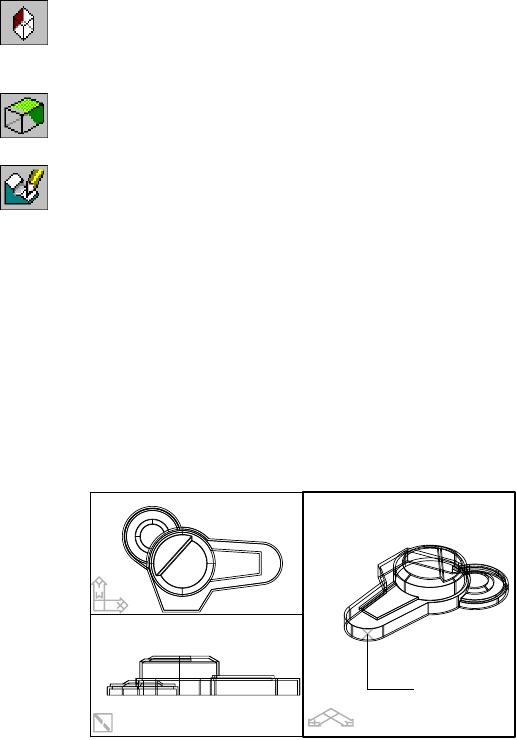
Adding Shell Features to Models |355
To edit a shell through the Browser
1Return to the back right isometric view.
Desktop Menu View ➤ 3D Views ➤ Back Right Isometric
The face surrounding the water pump can now be selected easily.
2Return to a wireframe display of your model.
Desktop Menu View ➤ Shade ➤ 3D Wireframe
3Edit the shell feature again.
Context Menu In the graphics area, right-click and choose Edit Features
➤ Edit.
Select the shell feature. The Shell Feature dialog box is displayed.
4In the Shell Feature dialog box, in Multiple Thickness Overrides, specify:
Set: New
Thickness: Enter 8
Faces: Add
On the command line, respond to the prompts as follows:
Select faces to add: Specify a point (1)
Select faces to add: Press ENTER
Choose OK to exit the dialog box.
1
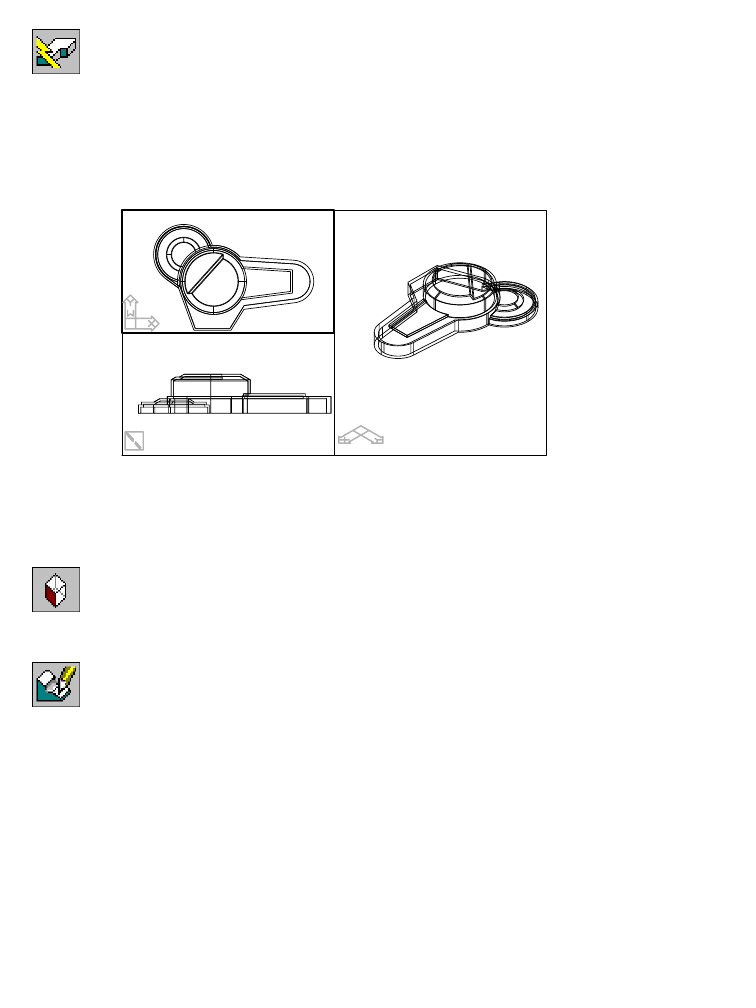
356 |Chapter 14 Creating Shells
5Update the part, responding to the prompt.
Context Menu In the graphics area, right-click and choose Update Part.
Enter an option [active Part/aLl parts] <active Part>: Press ENTER
Refer to the top view in the upper left viewport to see the results. When you
selected the cylindrical face, tangent faces were automatically selected. The
wall thickness surrounding the water pump should look twice as thick as the
rest of the walls.
To create a multiple thickness override
1In the right viewport, change to the left isometric view of the model so that
the faces surrounding the clutch can be easily selected.
Desktop Menu View ➤ 3D Views ➤ Front Left Isometric
2Use AMEDITFEAT to create a multiple thickness override for the walls surround-
ing the water pump.
Context Menu In the graphics area, right-click and choose Edit Features
➤ Edit.
Select any one of the edges of the inside shell walls. The Shell Feature dialog
box is displayed.
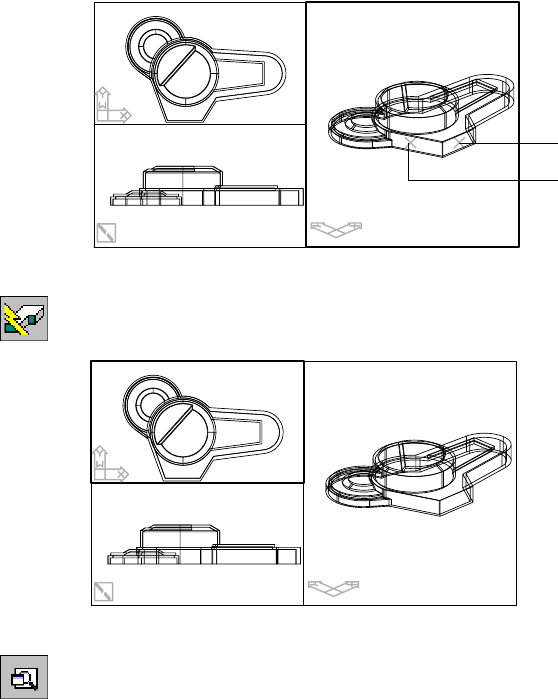
Adding Shell Features to Models |357
3In the Shell Feature dialog box, specify:
Multiple Thickness Overrides: New
Thickness: Enter 6
Choose Add, and respond to the prompts as follows:
Select faces to add: Specify a point on the model (1)
Select faces to add: Specify a second point (2)
Select faces to add: Press ENTER
Choose OK to exit the dialog box.
4Update the part.
Context Menu In the graphics area, right-click and choose Update Part.
In the top view, the two faces you selected are thicker.
5Make the right viewport active and restore another saved view.
Desktop Menu View ➤ Named Views
1
2
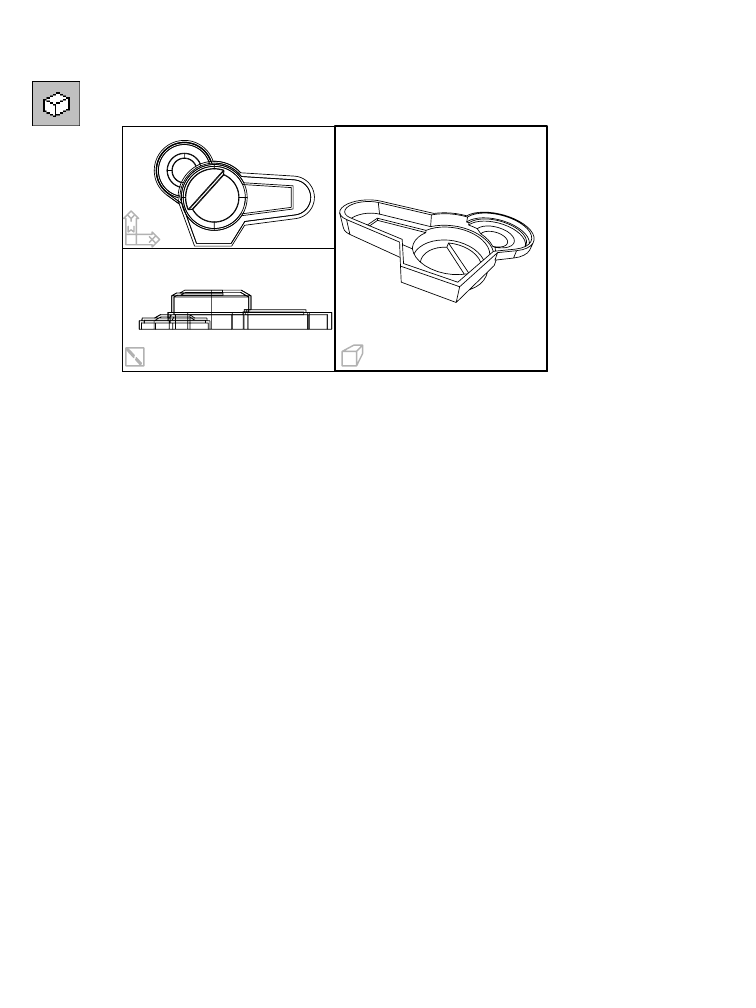
358 |Chapter 14 Creating Shells
6In the View dialog box, highlight BOTTOM_PERSPECTIVE, choose Set Cur-
rent, and then choose OK.
7Use HIDE to remove the hidden lines.
Desktop Menu View ➤ Hide
Save your file.
Managing Multiple Thickness Overrides
Occasionally, you may create complex parts that require more thickness
override values. As you apply the override values to faces on your part, it is
easy to lose track of which faces are using different overrides, especially if you
are viewing a part that was designed by someone else.
However, Mechanical Desktop makes it easy to manage overrides and iden-
tify the faces with specific override values. You may have noticed that when
you chose an override from the list in the Shell Feature dialog box, all faces
with that override were highlighted.
Mechanical Desktop also audits the override list each time you edit the shell
feature. Override values that are no longer used are removed from the list.
This eliminates the need to manually delete obsolete overrides, which
ensures that the list always reflects the wall thicknesses of your current part.
Design changes are also easy to implement. When you change an override
thickness value in the Shell Feature dialog box, you change the wall thick-
nesses of all the faces that reference that override value.
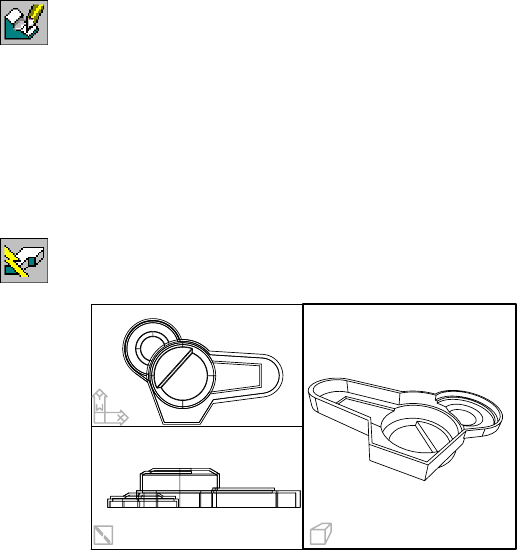
Adding Shell Features to Models |359
For the clutch assembly, the wall thickness around the water pump can be
reduced from 6 to 4. Because the default wall thickness of the shell is 4, you
remove the override of 6 from the list. When you delete an override value
from the list, faces that once referenced that value revert to the default
thickness.
To change a wall thickness
1Use AMEDITFEAT to edit the shell feature again to change the wall thickness
around the water pump.
Context Menu In the graphics area, right-click and choose Edit Features
➤ Edit.
Select the shell feature. The Shell Feature dialog box is displayed.
2In the Shell Feature dialog box, specify:
Thickness: Enter 6
Set: Delete
Choose OK and then press ENTER on the command line.
3Use AMUPDATE to update the part.
Context Menu In the graphics area, right-click and choose Update Part.
The model is updated to reflect the modified shell feature.
Save your file.

360

361
In This Chapter 15
Creating Table Driven Parts
You can assign variables to the parametric dimensions
that control a generic part and then use a table (an
external spreadsheet) to control the size and shape of
the part. The spreadsheet can contain several versions of
the part. Each version uses different values for the
variables you define. Autodesk® Mechanical Desktop®
redraws the part using the variables linked to that
version.
Documentation for all versions can be simplified by
plotting one drawing representing the generic part. You
can paste the spreadsheet into your drawing to list the
values for each version.
For this tutorial, you need Microsoft® Excel on your
system.
■Creating a table
■Displaying part versions
■Editing a table
■Solving common problems with
table driven parts
■Suppressing features in table
driven parts
■Setting up a generic drawing to
define the table driven part

362 |Chapter 15 Creating Table Driven Parts
Key Terms
Te r m Definition
active part variable A parametric variable used in the dimensions that control features of the active
part.
feature suppression Temporarily removing features from the calculation of a part. Features can be
suppressed manually through the Desktop Browser, or through a linked external
table.
global variable A parametric variable that can be used by any number of parametric features and
parts. Also used for single parts and to constrain parts.
linked spreadsheet An external spreadsheet linked to the current drawing file. This spreadsheet can
be used to change parts in the drawing file, if the variables in the spreadsheet are
used in the drawing file.
manual suppression Suppressing features through the browser or command line. These features will
remain suppressed unless manually unsuppressed or a version of a linked table
that unsuppresses it becomes active.
part version The version of variables that the active part is currently using from the external
table. Part versions can be changed through the Desktop Browser or the Design
Variables dialog box.
table An external spreadsheet that drives versions of a part.
table driven
suppression Features suppressed in an external spreadsheet. A table driven suppressed feature
is suppressed only in the part version specified in the spreadsheet.
table driven variable A global or active part design variable controlled by values in a linked external
spreadsheet.
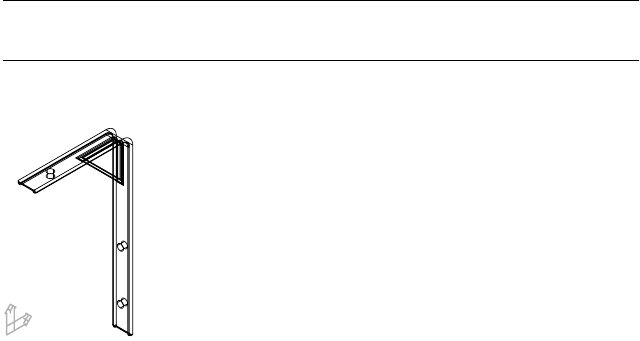
Basic Concepts of Table Driven Parts |363
Basic Concepts of Table Driven Parts
In the manufacturing industry, you often have parts that are similar to each
other except for size or a particular feature. Some examples are springs, brackets,
plates, nuts, and bolts. By driving part versions from an external spreadsheet,
you can document a number of similar parts using one drawing.
The external spreadsheet, or table, is where you make modifications to your
design specifications once your drawing is set up. By controlling a part from
a table, you avoid errors due to design changes that have not been imple-
mented across a number of drawings. All design data is contained in the
table, with one drawing representing many parts.
Open the file tdpart1.dwg in the desktop\tutorial folder.
NOTE Back up the tutorial drawing files so you still have the original files if you
make a mistake. See “Backing up Tutorial Drawing Files” on page 40.
The drawing is a simple bracket that you link to a spreadsheet.
The part is controlled by its relationships to nine active part design variables.
Changing the value of one variable affects every dimension that has a rela-
tionship to it. For information on creating and modifying design variables,
see chapter 11, “Using Design Variables.”
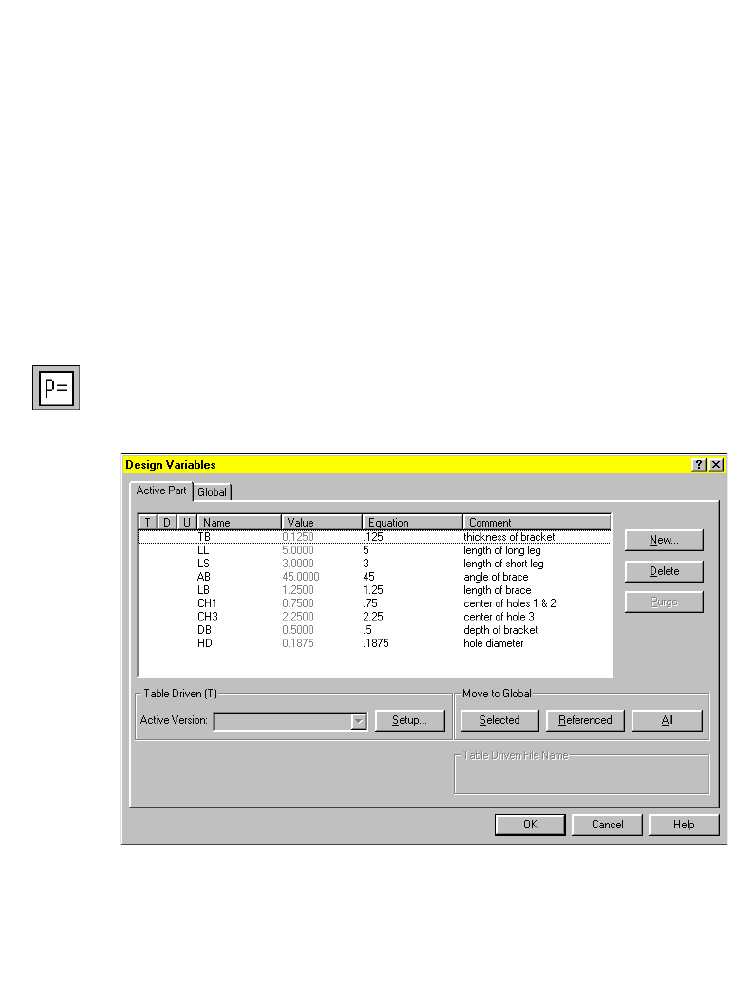
364 |Chapter 15 Creating Table Driven Parts
Setting Up Tables
A table is a spreadsheet that contains the various part versions and the values
of the design variables for each version. You use Microsoft Excel to create
table driven parts.
First, examine the part, using the Desktop Browser. Expand the Browser by
clicking the plus sign in front of TDPART1 and PART1_1. The bracket is con-
structed from three extrusions, three holes, and five fillets.
Each feature is controlled by a design variable. In this exercise, you create a
table containing the design variables, and define four different part versions.
To set up a table
1Use AMVARS to open the Design Variables dialog box and set up a table.
Desktop Menu Part ➤ Design Variables
2In the Design Variables dialog box, verify that the Active Part tab is selected.
Examine the active part design variables.
3Under Table Driven, choose Setup.
4In the Table Driven Setup dialog box, verify that the Active Part tab is
selected. Under Layout, specify:
Version Names: Across
Choose Create.

Setting Up Tables |365
5In the Create Table dialog box, select the desktop\tutorial folder and specify
tdpart1.xls as the name of your table.
Choose Save to exit the dialog box.
Microsoft Excel opens a new spreadsheet containing a generic part and a
value for each design variable assigned to it.
Next, change the name of the generic part to 35 and add three more part
versions.
To define additional part versions
1Fill in the value of the design variable for each new part definition, as shown
in the following illustration:
2Save the file and exit Microsoft Excel.
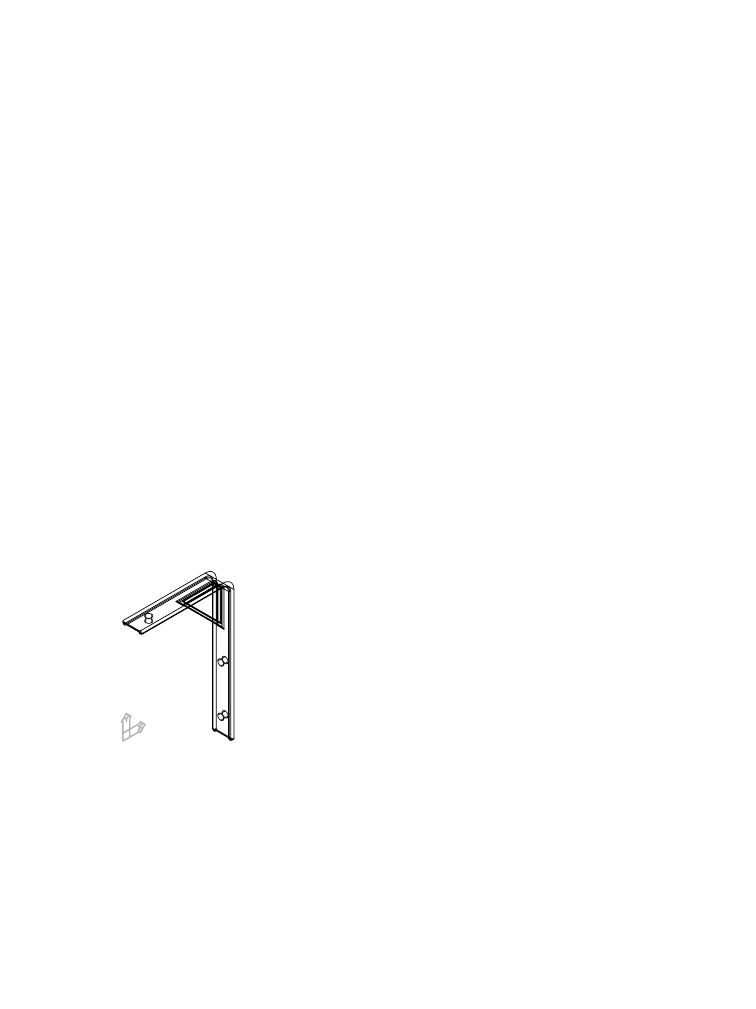
366 |Chapter 15 Creating Table Driven Parts
3In the Table Driven Setup dialog box, select Update Link and choose OK.
Choose OK to exit the Design Variables dialog box.
The Desktop Browser now contains a Table icon nested below PART1_1. The
four part versions you created in the spreadsheet are listed below the Table
icon.
The PART1_1 (35) icon displays the active version in parentheses. The Table
(tdpart1.xls) icon indicates the name of the spreadsheet that is linked to your
drawing.
Next, display each version of the table driven part. When you select a ver-
sion, Mechanical Desktop recalculates the part, using the values for the vari-
ables that correspond to the selected version.
Displaying Part Versions
You display part versions by selecting them from the Desktop Browser.
To display a part version
1Display the 46 part version.
Browser Double-click the 4x6 icon.
The 4x6 version is calculated and displayed.
2Repeat step 1 for the other two versions.
The part versions do not differ, except in size. In the next lesson, you add
another part version by editing the spreadsheet.
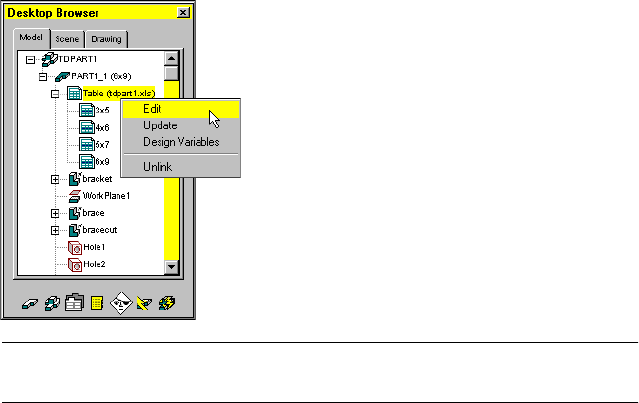
Editing Tables |367
Editing Tables
Using a table to drive multiple versions of a part gives you flexibility in
designing the part. You can quickly create variations of the part, and easily
edit the design parameters by changing values in the cells of the spreadsheet.
To add a part version to an existing table
1Open the spreadsheet to edit.
Browser Right-click Table (tdpart1.xls) and choose Edit.
NOTE The part definition in the Browser displays the current version of the
part for easy reference.
Microsoft Excel opens, displaying your spreadsheet.
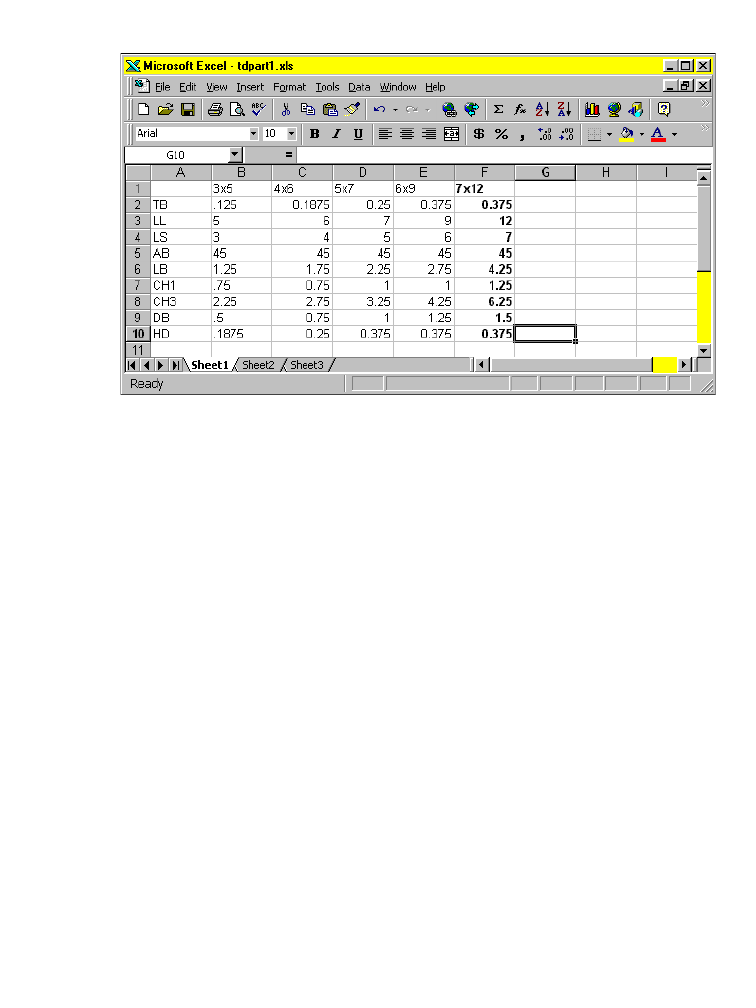
368 |Chapter 15 Creating Table Driven Parts
2Add a new part version in the spreadsheet, using the values in the following
illustration:
3Save the spreadsheet and exit Microsoft Excel.
4Update the link to the spreadsheet.
Browser Right-click Table (tdpart1.xls) and choose Update.
Examine the Browser. It now displays five part versions under the Table
(tdpart1.xls) icon.
Occasionally, errors occur when you link a spreadsheet to Mechanical
Desktop. In the next section, you learn how to fix errors such as
■Spreadsheets that cannot be found
■Spreadsheets that have been modified since the drawing was saved
■Incorrect or missing data in a spreadsheet
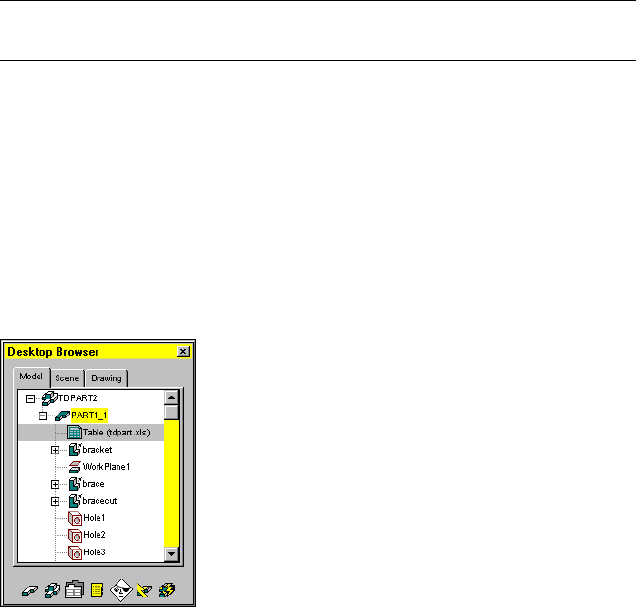
Resolving Common Table Errors |369
Resolving Common Table Errors
Open the file tdpart2.dwg in the desktop\tutorial folder.
NOTE Back up the tutorial drawing files so you still have the original files if you
make a mistake. See “Backing up Tutorial Drawing Files” on page 40.
The drawing contains a version of the simple bracket used in the previous
example, but it is linked to a different spreadsheet.
Before you can look for errors in the link between the drawing and the
spreadsheet, you need to expand the part hierarchy.
To expand a part hierarchy
1Expand the part hierarchy.
Browser Click the plus sign in front of TDPART2 and then click
PART1_1.
Notice the red background behind the Table icon. This indicates that the
spreadsheet cannot be found, it has been modified since the drawing was last
saved, or it contains incorrect data in one or more cells. Before the spread-
sheet can be used to drive the part, you must resolve the conflict.
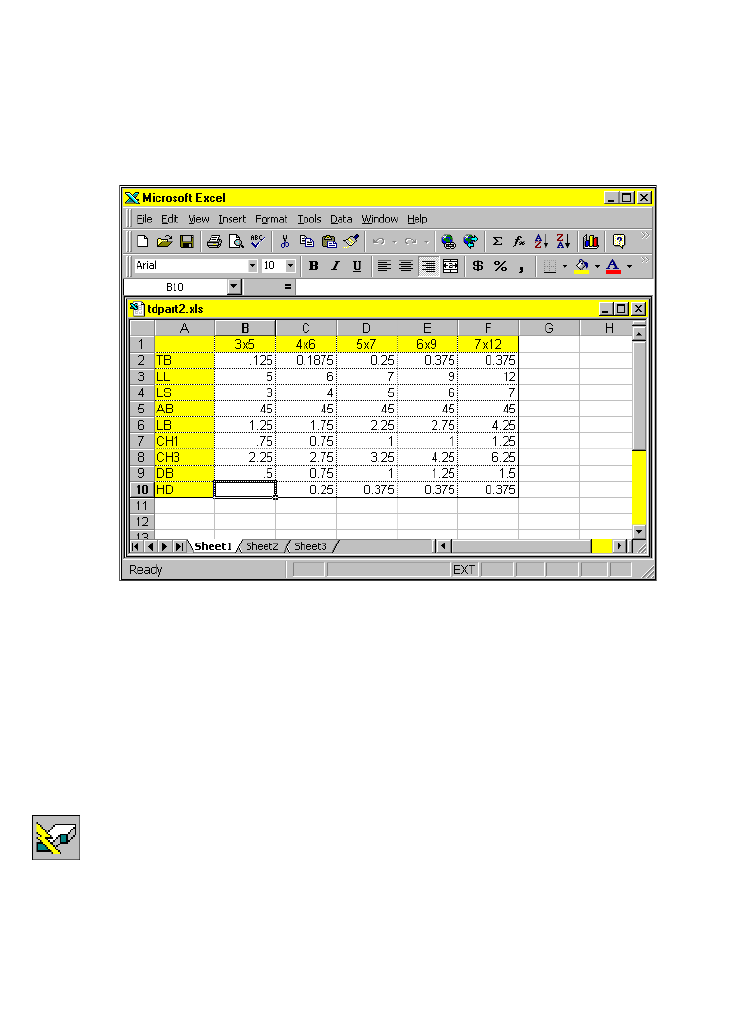
370 |Chapter 15 Creating Table Driven Parts
To resolve a conflict with a linked spreadsheet
1Resolve the conflict between the drawing and the linked spreadsheet.
Browser Right-click Table (tdpart.xls) and choose Resolve Conflict.
An AutoCAD message dialog box is displayed asking if you would like to
update the table.
2In the message dialog box, choose Yes.
The HD variable controls the diameters of the holes for the bracket. The first
part version is missing an entry in cell B10.
3In cell B10, enter .1875. Then save the spreadsheet and exit Microsoft Excel.
4Update the link to the table.
Browser Right-click Table (tdpart2.xls) and choose Update.
Mechanical Desktop updates the link.
5Use AMUPDATE to update the part.
Context Menu In the graphics area, right-click and choose Update Part.
Next, display the part versions.
Suppressing Features |371
To display the first part version
1Display the first part version.
Browser Double-click the 35 icon nested under PART1_1.
The 35 angle bracket is recalculated from the values in the table and then
displayed.
2Repeat step 1 for the remaining four part versions.
Save your file.
Next, you suppress features for some of the part versions in your table. The
smaller brackets do not require the brace, so you will suppress the features
associated with it for those versions.
Suppressing Features
Suppressing features can be done in the Browser, in a linked table, or in the
Suppress By Type dialog box. Suppressing a feature manually in the Browser
affects all part versions. Suppressing a table driven feature gives you control
over each version.
Use the Suppress By Type dialog box to suppress and unsuppress features by
specific type.
With an existing table, you append the features you want suppressed to the
table. First, you manually suppress the brace feature and the bracecut feature
in the Browser. It is not important which version of the part is active when
the features are suppressed.

372 |Chapter 15 Creating Table Driven Parts
To suppress a feature
1Display the first part version.
Browser Double-click the 35 icon nested under PART1_1.
2Use AMSUPPRESSFEAT to suppress the brace feature, responding to the
prompt.
Browser Right-click Brace and choose Suppress.
The highlighted features will be suppressed.
Continue? [Yes/No] <Yes>: Press ENTER
The brace feature is suppressed and is no longer visible on your screen. The
bracecut feature and four fillets are dependent on the brace feature, so they
are also suppressed.
Manually suppressed features are represented in the Browser by a circle and
a dashed line preceding the grayed-out feature name. These features can be
unsuppressed at any time.
Next, append the suppressed features to the table.
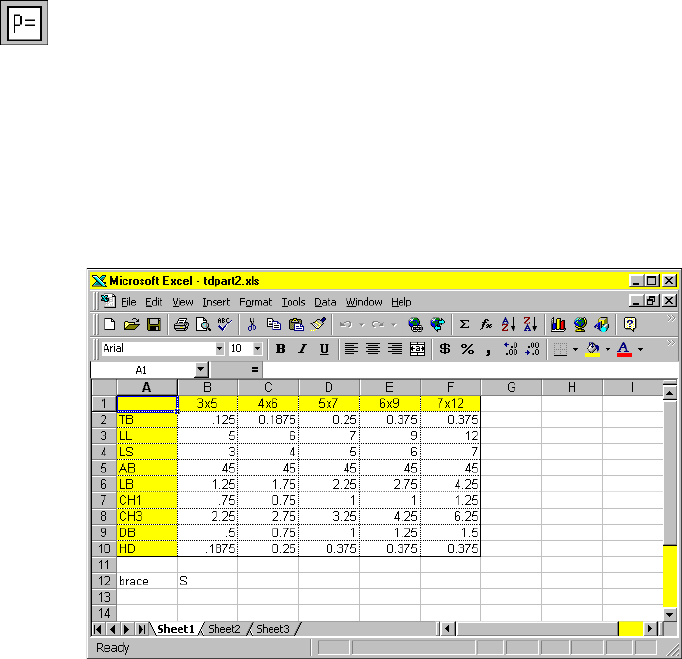
Suppressing Features |373
To append a suppressed feature to a table
1Use AMVARS to append the suppressed features to the spreadsheet.
Desktop Menu Part ➤ Design Variables
2In the Design Variables dialog box, under Table Driven, choose Setup.
3In the Table Driven Setup dialog box, specify:
Type: Both
Format: Concatenate Tables
Choose Append.
Microsoft Excel spreadsheet tdpart2.xls is displayed. A new entry, brace, has
been added under the existing design variables. The letter “S” in the 35 col-
umn indicates that this feature is suppressed.
Next, suppress the brace and its dependent features for the 46 version.
4In the spreadsheet, enter S in cell C12.
For the largest bracket, you suppress the bracecut feature while retaining the
brace feature for strength.
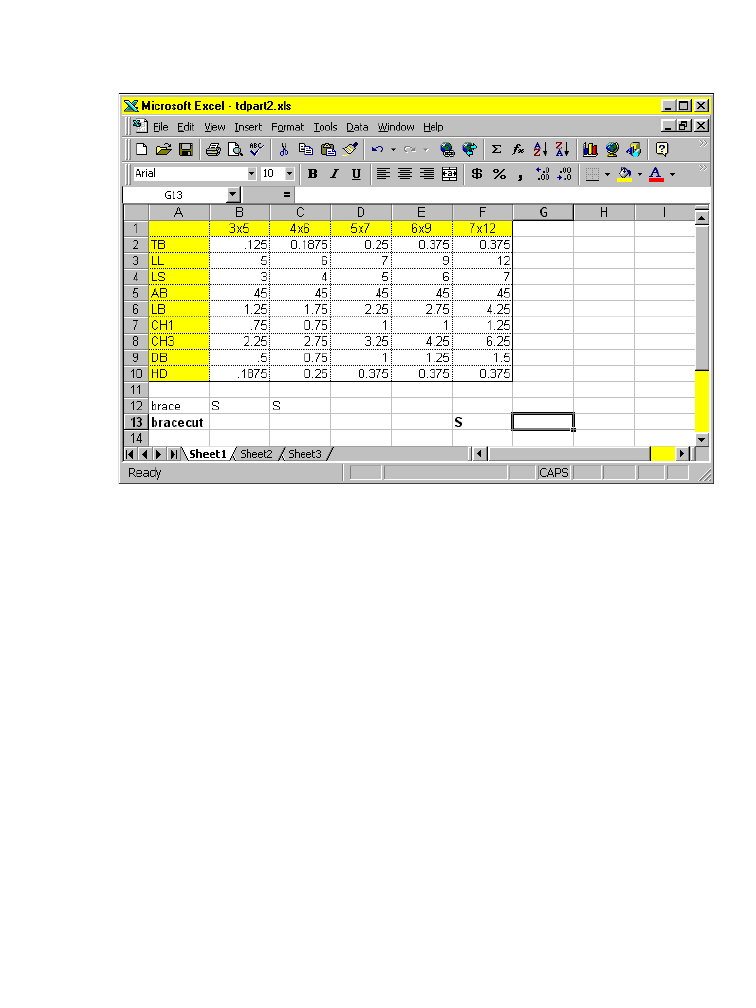
374 |Chapter 15 Creating Table Driven Parts
To create a suppressed feature in a table
1In the spreadsheet, in cell A13 enter bracecut.
2In cell F13 enter S.
3Save the spreadsheet and exit Microsoft Excel.
4Choose OK to exit the Table Driven Setup dialog box without updating the
link.
5Choose OK to exit the Design Variables dialog box.
You have created two table driven suppressed features. To activate the table
driven suppression of these features, you update the link to the table. After
the table has been linked to the drawing, these features cannot be manually
unsuppressed. To unsuppress these features, you edit the spreadsheet.
Manually suppressed features affect all part versions so you must manually
unsuppress the features in the Browser before you update the link to the
table.
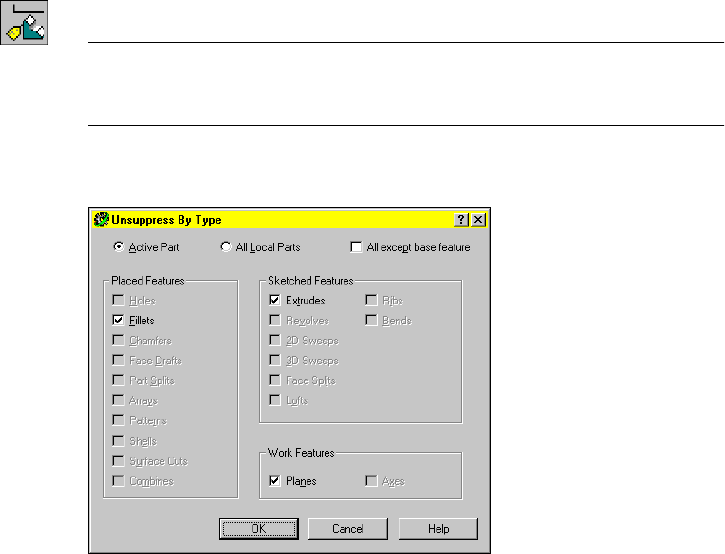
Suppressing Features |375
To manually unsuppress a feature
1Use AMUNSUPPRESSFEAT to unsuppress the brace feature.
Browser Right-click Brace and choose Unsuppress+.
NOTE By using Unsuppress+ in the Browser, you unsuppress the feature you
select and all dependent features. If you use the Browser, the dialog box is not
displayed.
2If you use the Unsuppress By Type dialog box, verify that Fillets, which are
the dependent features, and Extrudes are selected.
Choose OK.
The brace and its dependent features are unsuppressed. Look at the Browser.
There should be no suppressed features visible.
3Update the link to the table.
Browser Right-click Table (tdpart2.xls) and choose Update.
The suppressed features for the active version are now represented in the
Browser by a different symbol. A circle with a diagonal line through it indi-
cates that the feature is suppressed by the table and can be unsuppressed only
by editing the table.
Next, display the 35 version of the bracket.
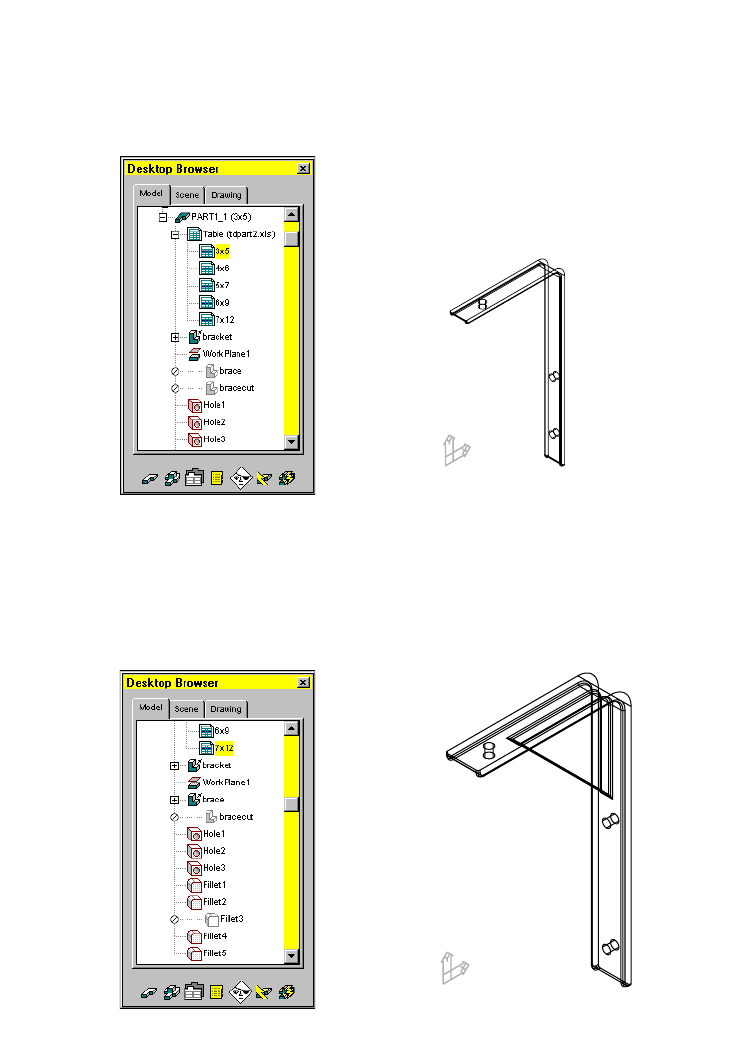
376 |Chapter 15 Creating Table Driven Parts
To display a part version
1Display the part.
Browser Double-click the 35 icon nested below Table (tdpart2.xls).
The part is recalculated using the values for the 35 version in the linked
table. In the Browser, the suppressed features are grayed out.
2Repeat step 1 for the 46 version. The brace and its dependent features in this
version are suppressed.
3Repeat step 1 for the 57 and 69 versions. Note that the features are not sup-
pressed in these versions.
4Repeat step 1 for the 712 version. The brace feature remains in this version,
but the bracecut and its dependent features are suppressed.
Save your file.
35 version
712 version

Working with Two Part Versions |377
Working with Two Part Versions
You can create copies of a part and work with different versions to create
assemblies. In this lesson, you copy a part and display two versions
simultaneously.
To copy a part definition
1Display the 35 version of the bracket.
Browser Double-click the 35 icon nested below Table (tdpart2.xls).
2Use UCS to return to the World Coordinate System so that the copy of the
part is oriented the same as the original.
Desktop Menu Assist ➤ New UCS ➤ World
3Use AMCATALOG to make a copy of PART1_1.
Context Menu In the graphics area, right-click and choose Catalog.
4In the Assembly Catalog, clear the Return to Dialog check box and select the
All tab.
5In Local Assembly Definitions, right-click PART1_1 and choose Copy
Definition.
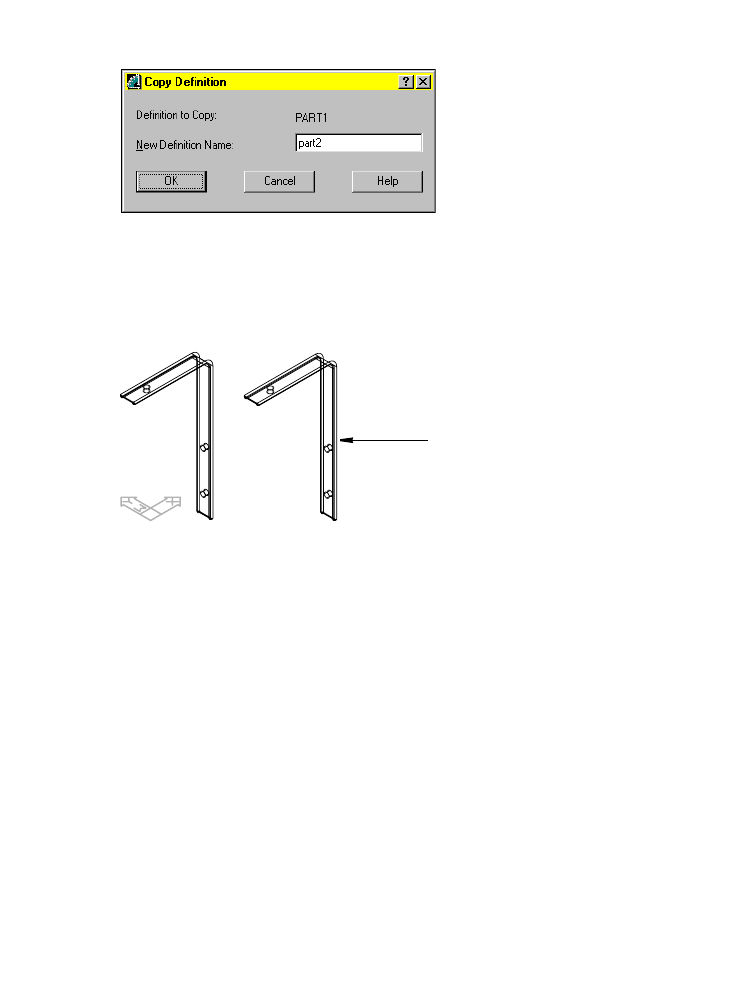
378 |Chapter 15 Creating Table Driven Parts
6In the Copy Definition dialog box, specify:
New Definition Name: Enter part2
Choose OK.
7Continue on the command line.
Specify new insertion point: Specify a point to the right of the existing part
Specify insertion point for another instance or <continue>: Press ENTER
Choose OK to close the Assembly Catalog dialog box.
The Browser now contains a PART2_1 definition. Because you copied the orig-
inal part definition, its relationship to the spreadsheet, tdpart2.xls, has been
duplicated in the new part.
Next, change the version of the copied part in your drawing.
copied part definition
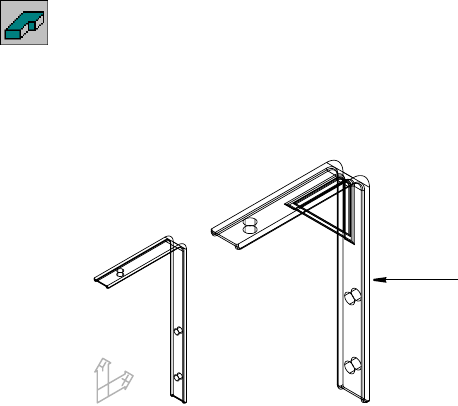
Creating Drawing Views |379
To display a different version
1Use AMACTIVATE to activate PART2_1.
Browser In the Browser, right-click PART2_1 and choose Activate
Part.
2Display the 57 version for PART2_1.
Browser Double-click the 57 icon nested under PART2_1.
The 57 version of PART2_1 is displayed.
Save your file.
Next, you set up the drawing for plotting. Instead of using numeric dimen-
sions to annotate five separate parts, you define views for one part and
annotate the drawing, using active part design variables and equations.
You paste into the drawing a copy of your spreadsheet that lists the values
of those variables for each part version.
First, create drawing views to display the part.
Creating Drawing Views
The first view you create is the base view. You define the plane to orient your
view using a part face or work feature, and then position the view in Drawing
mode.
Because you are creating a generic view to represent all versions of the part,
you use the 57 version, which contains the brace. When you import the
table, it will indicate the versions for which the brace is suppressed.
PART2_1
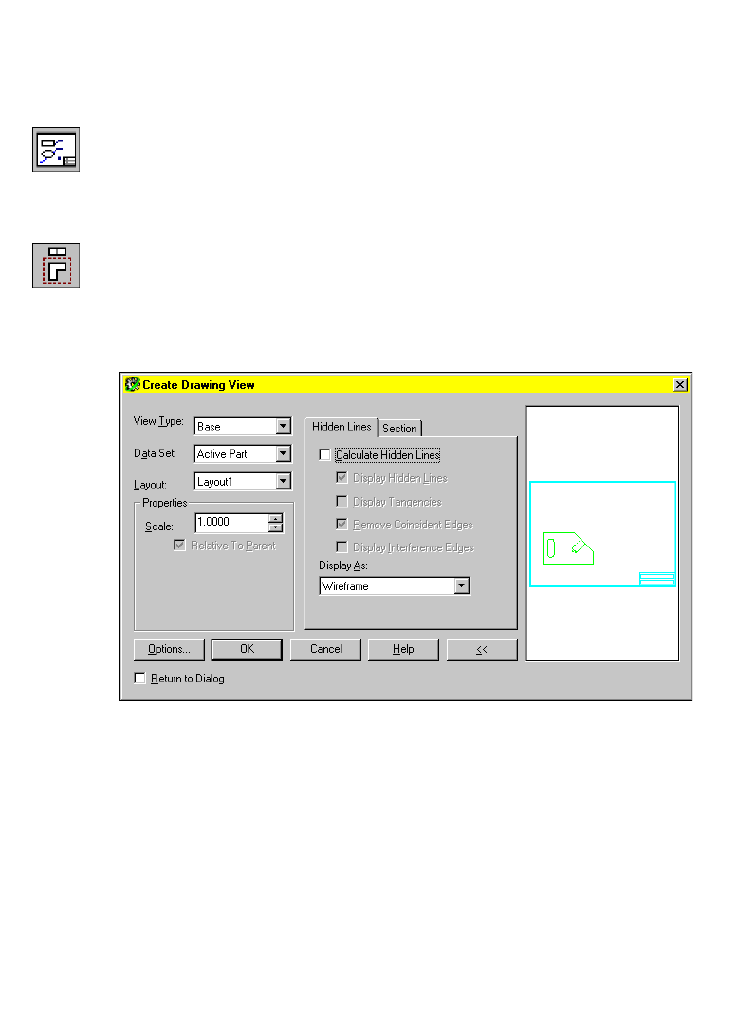
380 |Chapter 15 Creating Table Driven Parts
To create a base view
1Use the Browser to turn off the visibility of PART1_1.
Browser Right-click PART1_1 and choose Visible.
2Use AMMODE to switch to Drawing mode.
Browser Select the Drawing tab.
Mechanical Desktop switches to Drawing mode. A title block has been
inserted into the drawing.
3Use AMDWGVIEW to create the base view.
Context Menu In the graphics area, right-click and choose New View.
In the Create Drawing View dialog box, select the Hidden Lines tab and specify:
Calculate Hidden Lines: Clear the check box
Display As: Wireframe
Choose OK, and continue on the command line.
Select planar face, work plane or [Ucs/View/worldXy/worldYz/worldZx]:
Specify the front edge (1)
Enter an option [Accept/Next] <Accept>:
Enter n to highlight the front face, or press ENTER
Select work axis, straight edge or [worldX/worldY/worldZ]:
Specify the top edge (2)
Adjust orientation [Flip/Rotate] <Accept>:
Verify that the UCS is upright, and press ENTER
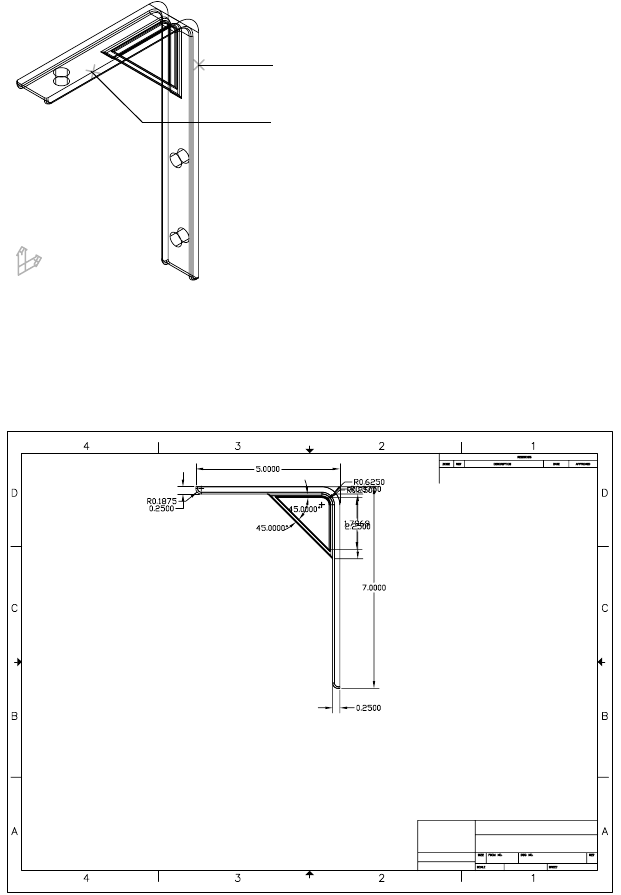
Creating Drawing Views |381
4Continue on the command line to place the base view.
Specify location of base view: Specify a point in the top center of the title block
Specify location of base view: Press ENTER
Your drawing should look like this.
Next, create side and bottom orthographic views of the part.
1
2
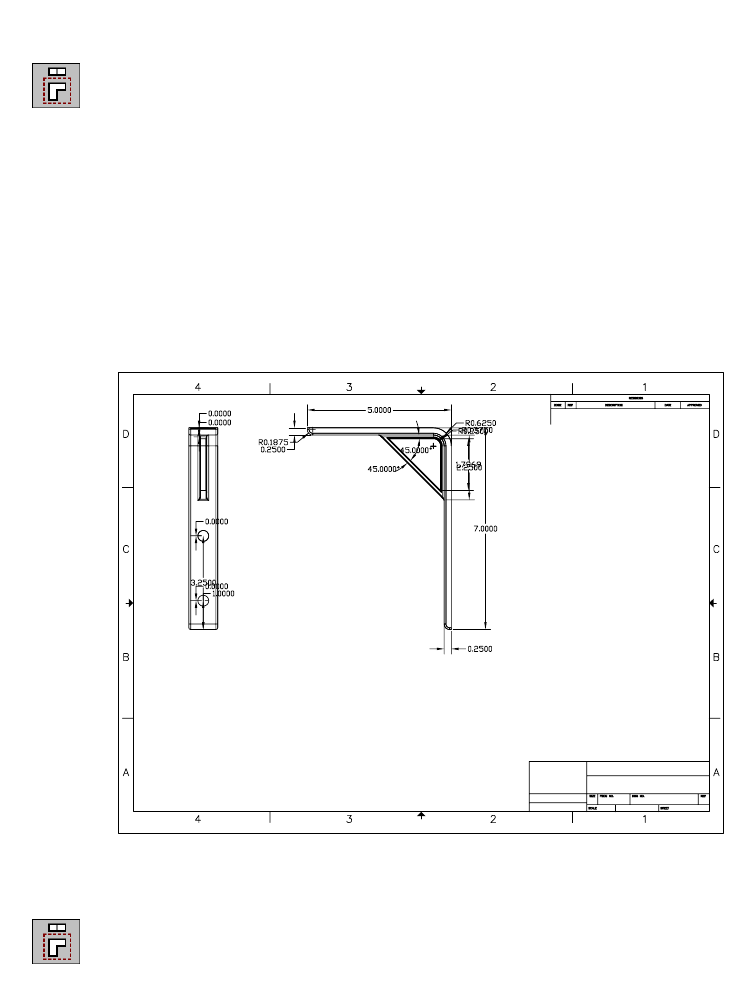
382 |Chapter 15 Creating Table Driven Parts
To create an orthographic view
1Create the orthographic view.
Context Menu In the graphics area, right-click and choose New View.
2In the Create Drawing View dialog box, select the view type Ortho. On the
Hidden Lines tab, specify:
Display As: Wireframe
Choose OK.
3On the command line, respond to the prompts as follows:
Select parent view: Pick a point inside the base view
Specify location for orthogonal view: Specify a point to the left of the base view
Specify location for orthogonal view: Press ENTER
Your drawing should look like this.
Next, create a bottom ortho view.
4Create the orthographic view.
Context Menu In the graphics area, right-click and choose New View.
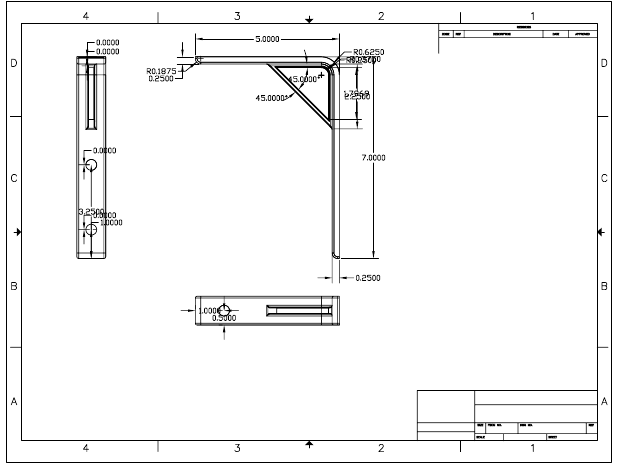
Creating Drawing Views |383
5In the Create Drawing View dialog box, select the view type Ortho. On the
Hidden Lines tab, specify:
Display As: Wireframe
Choose OK.
6On the command line, respond to the prompts as follows:
Select parent view: Pick a point inside the base view
Specify location for orthogonal view: Specify a point below the base view
Specify location for orthogonal view: Press ENTER
Your drawing should look like this.
Save your file.
Look at the Browser. There are two ortho views and a base view. Because the
ortho views are dependent on the base view, they are nested below the Base
icon.
The parametric dimensions that define the part are displayed in each view.
Because Mechanical Desktop displays the parametric dimensions in the order
in which they were created, dimensions may conflict with each other, over-
lap, or be redundant in a drawing view.
Next, clean up the display of parametric dimensions in each of the views.

384 |Chapter 15 Creating Table Driven Parts
Cleaning Up the Drawing
To clean up the drawing, you change the parametric dimensions to be dis-
played as parameters, hide extraneous dimensions, and move dimensions for
clarity.
NOTE For detailed cleanup instructions see “Cleaning Up Drawings” on page
322 in chapter 13.
Displaying Dimensions as Parameters
The parametric dimensions used to define a part are displayed with the val-
ues for the active version of the part. Because you are creating a drawing of
the generic part and linking a table to describe the values for the parameters
controlling each part version, you change dimensions to be displayed as
parameters.
To change a dimension to be displayed as a parameter
1Display the dimensions as parameters, responding to the prompt.
Desktop Menu Drawing ➤ Parametric Dim Display ➤ Dimensions as
Parameters
Select dimension or [All/View/Select dimensions] <Select dimensions>: Enter a

Cleaning Up the Drawing |385
Your drawing should look like this.
Next, hide the extraneous dimensions.
Hiding Extraneous Dimensions
When drawing views are created, Mechanical Desktop displays all the para-
metric dimensions that are related to the part display in each view. Usually,
some cleanup is required because of overlapping or redundant dimensions.
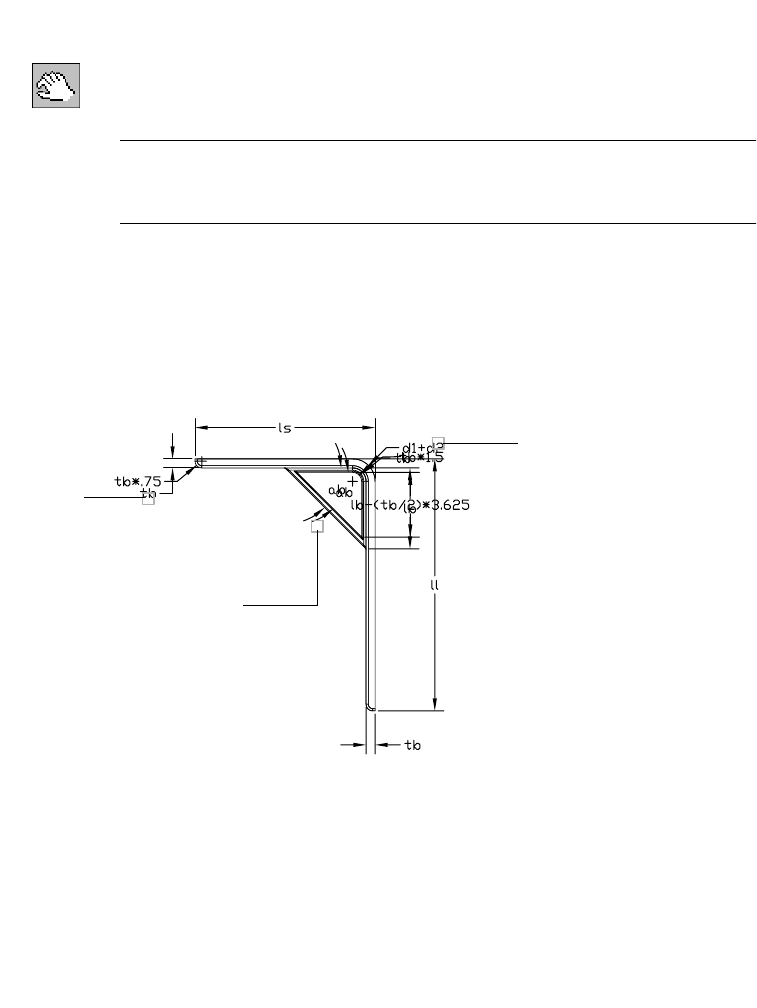
386 |Chapter 15 Creating Table Driven Parts
To hide an extraneous dimension in a base view
1Use AMVISIBLE to hide extraneous dimensions.
Desktop Menu Drawing ➤ Drawing Visibility
In the Desktop Visibility dialog box, choose Select.
NOTE If you choose the toolbutton method to hide the dimensions, the
Desktop Visibility dialog box is not displayed. Select the dimensions to hide. Use
Zoom Realtime while selecting the dimensions.
2Respond to the prompts as follows:
Select drawing objects to hide: Specify the d1+d2 dimension (1)
Select drawing objects to hide: Specify the ab dimension (2)
Select drawing objects to hide: Specify the tb dimension (3)
Select drawing objects to hide: Specify the tb dimension (4)
Select drawing objects to hide: Press ENTER
In the Desktop Visibility dialog box, choose OK.
3
2
1,4
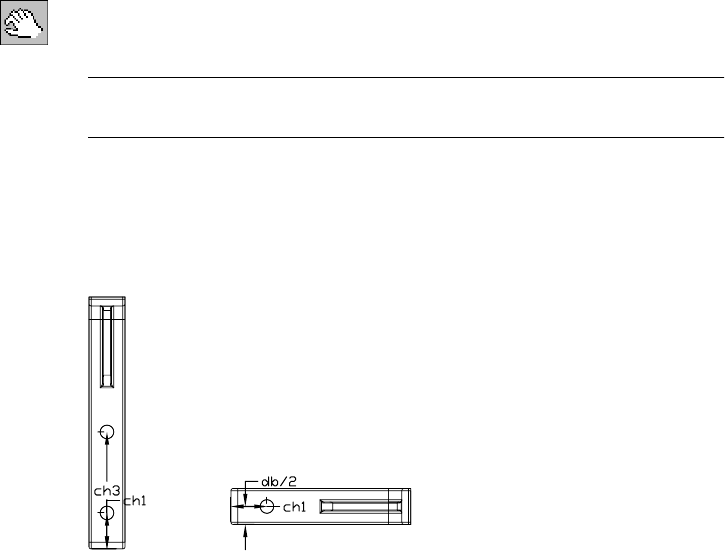
Cleaning Up the Drawing |387
To hide a dimension in an orthographic view
1Use AMVISIBLE to hide dimensions.
Desktop Menu Drawing ➤ Drawing Visibility
2In the Desktop Visibility dialog box, choose Select.
NOTE If you choose the toolbutton method to hide the dimensions, the
Desktop Visibility dialog box is not displayed. Select the dimensions to hide.
3In the side ortho view, hide the db dimension, the two db/2 dimensions, and
the db/4 dimension.
You do not need to hide dimensions in the bottom ortho view.
The ortho views should look like this.
Now that the extraneous dimensions are hidden, it is easier to move the
remaining dimensions for clarity.
Moving Dimensions
Because several of the remaining dimensions overlap, you need to rearrange
them so that they are easy to view.
side view bottom view

388 |Chapter 15 Creating Table Driven Parts
To move a dimension
1Use AMMOVEDIM to move the parametric dimensions in the base view,
responding to the prompts.
Context Menu In the graphics area, right-click and choose Edit
Dimensions ➤ Move Dimension.
Enter an option [Flip/Move/move mUltiple/Reattach] <Move>: Press ENTER
Select dimension to move: Select the dimension for the long leg of the bracket (1)
Select destination view: Specify a point in the base view (2)
Select location: Specify a point to the right (3)
Select location: Press ENTER
1
23
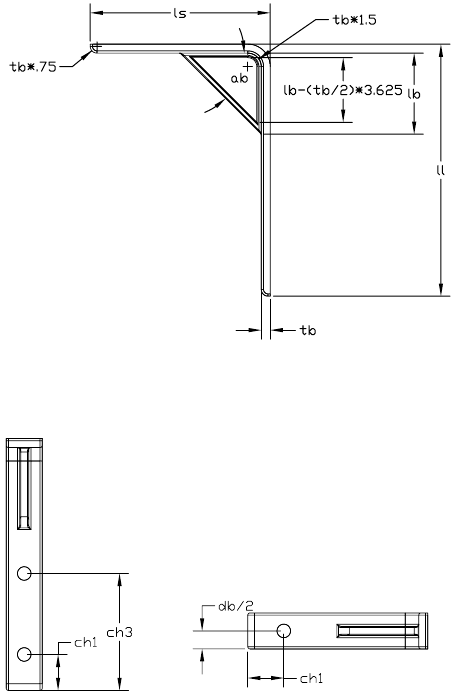
Cleaning Up the Drawing |389
2Continue moving dimensions until your base view looks like this.
3Move the dimensions in the ortho views.
The ortho views should look like this.
Next, add reference dimensions, to fully define the part.
side view bottom view

390 |Chapter 15 Creating Table Driven Parts
Enhancing Drawings
To finalize the presentation of the drawing, you add power dimensions, dis-
played as parameters and create a hole note to describe the three holes in the
bracket.
Creating Power Dimensions
The drawing views are intended to display the generic part. When you dis-
play parametric dimensions using design variables, and you power dimen-
sion your drawing views, the views represent the generic part.
Because reference dimensions are not displayed as parameters, you use power
dimensioning to create dimensions represented as parameters. Power dimen-
sioning allows you to specify tolerance and fit information for your parts as
you dimension and to modify the default value of a dimension as you create it.
Later, when you paste the spreadsheet into the drawing, you will have a list
of values for the variables in each version that cross-references the dimen-
sions in each view.
To add a reference dimension
Before you begin this procedure, enable Osnaps. If Osnaps are set to off, you
will be unable to create the dimension. Work in the base view.
1Use AMPOWERDIM to create power dimensions, responding to the prompts.
Context Menu In the graphics area, right-click and choose Power
Dimensioning.
(Single) Specify first extension line origin or [Angular/Options/Baseline/Chain/
Update] <Select>: Specify a point at the bottom of the short leg (1)
Specify second extension line origin:
Specify a point at the inside top of the bracecut (2)
Place dimension line [Options/Pickobj] <Options>: Specify a location (3)
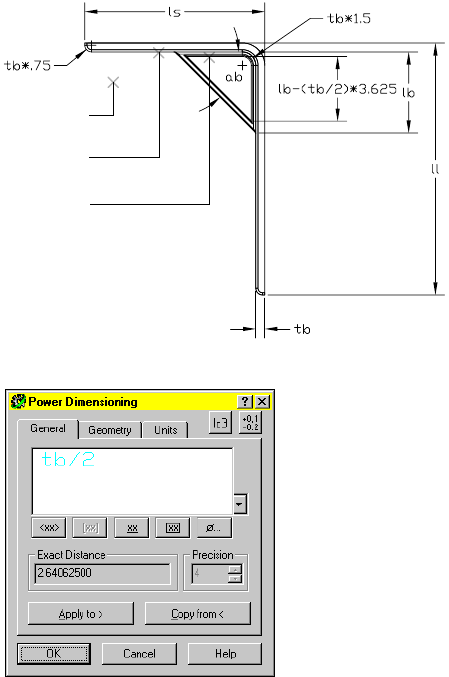
Enhancing Drawings |391
2In the Power Dimensioning dialog box, change the default text to tb/2.
Choose OK.
3
1
2
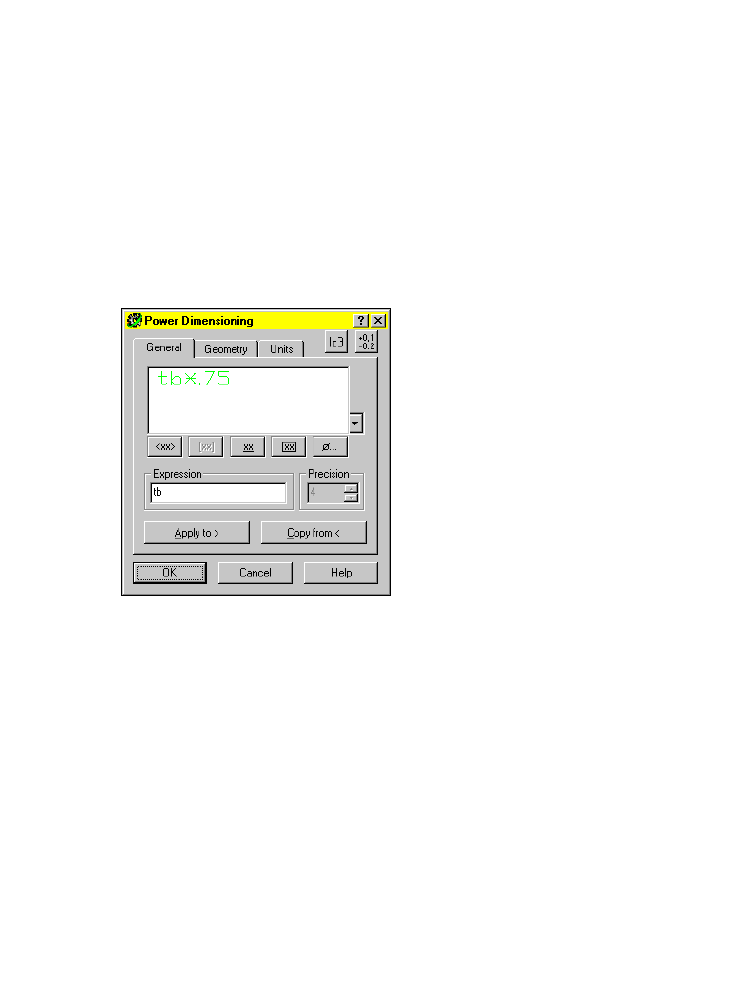
392 |Chapter 15 Creating Table Driven Parts
3Continue on the command line to add a power dimension to the fillet at the
bottom of the long leg:
(Single) Specify first extension line origin or [Angular/Options/Baseline/Chain/
Update] <Select>: Press ENTER
Select arc, line, circle, or dimension: Specify the arc
Enter an option [Next/Accept} <Accept>: Press ENTER
Specify dimension line location or [Linear/Diameter/Options]:
Specify a location for the dimension
(Single) Specify first extension line origin or [Angular/Options/Baseline/Chain/
Update] <Select>: Press ENTER
Select arc, line, circle, or dimension <Exit>: Specify the dimension
4In the Power Dimensioning dialog box, specify tb*.75 for the dimension text.
Choose OK.
5Continue on the command line.
Select arc, line, circle, or dimension <Exit>: Press ENTER
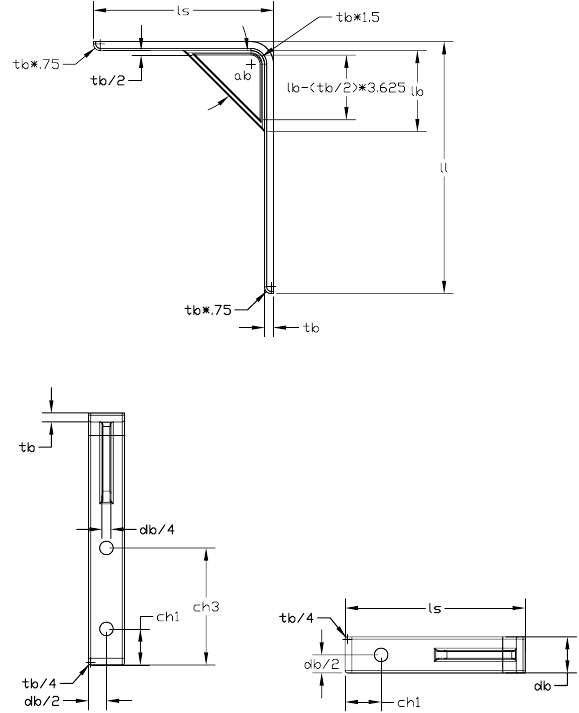
Enhancing Drawings |393
Your drawing should resemble the following illustration.
6Place power dimensions so that the orthographic views look like this.
Next, create a hole note that describes the three holes in the bracket.
Creating Hole Notes
Mechanical Desktop provides a tool for creating hole notes, which saves you
time when annotating your drawing.
In the side view, create a hole note for one of the holes in the long leg of the
bracket.
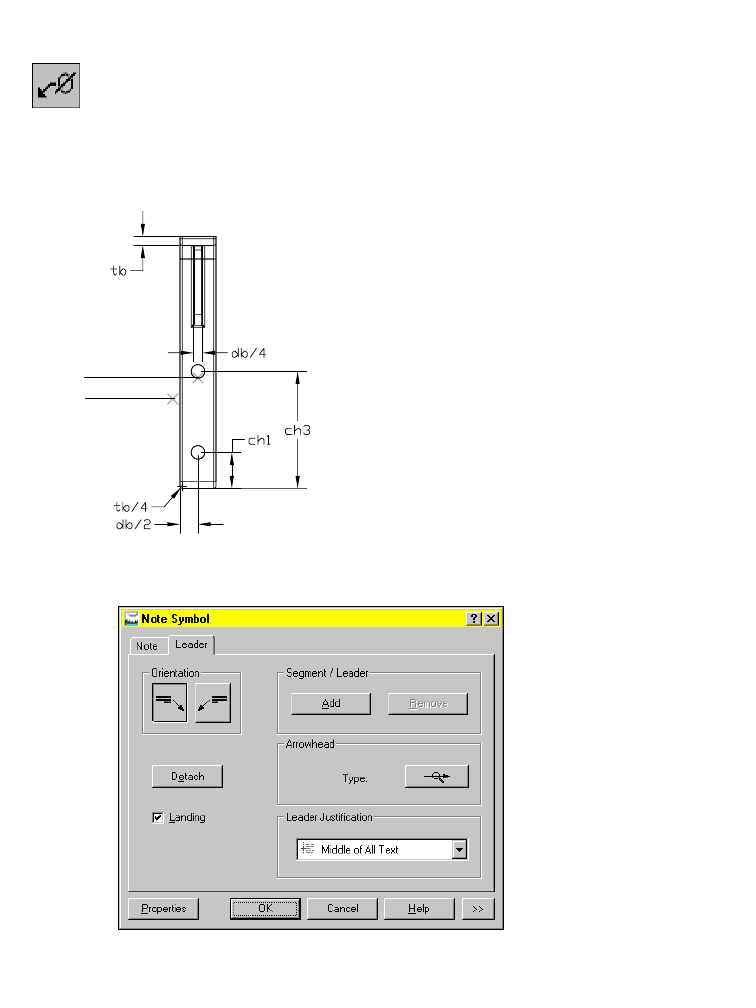
394 |Chapter 15 Creating Table Driven Parts
To create a hole note
1Use AMNOTE to create the hole note, responding to the prompts.
Context Menu In the graphics area, right-click and choose Annotation ➤
Hole Note.
Select object to attach [rEorganize]:
Specify the upper hole in the long leg of the bracket (1)
Next Point <Symbol>: Specify the location (2) and press ENTER.
2In the Note Symbol dialog box, select the Leader tab. In Leader Justification,
specify Middle of All Text.
Choose OK.
The hole note is displayed in your drawing.
1
2
Enhancing Drawings |395
Edit the hole note so that it is typical for all three holes.
3Use AMPOWEREDIT to edit the hole note, responding to the prompt.
Context Menu Select the hole note, then right-click the note and choose
Edit.
4In the Note Symbol dialog box, select the Note tab, and change the text to
read as follows:
%%c hd THRU
(typ of 3)
Choose OK.
The side view should now look like this.
Save your file.
Now that the power dimensions and annotations are in place, paste the
linked spreadsheet into the drawing.

396 |Chapter 15 Creating Table Driven Parts
Pasting Linked Spreadsheets
Pasting a linked spreadsheet into a drawing provides more flexibility for
working with the table that defines the values for the part versions. The
external spreadsheet can be opened and modified while you are working, and
the results are reflected in the drawing.
To paste a linked spreadsheet into a drawing
1Use AMMODE to return to the Part/Assembly environment.
Browser Select the Model tab.
2Open the spreadsheet.
Browser Right-click Table (tdpart2.xls) and choose Edit.
The Microsoft Excel spreadsheet is displayed.
3Select the cells to be copied.
4In Microsoft Excel, choose Edit ➤ Copy.
5In the drawing, return to Drawing mode.
Browser Select the Drawing tab.
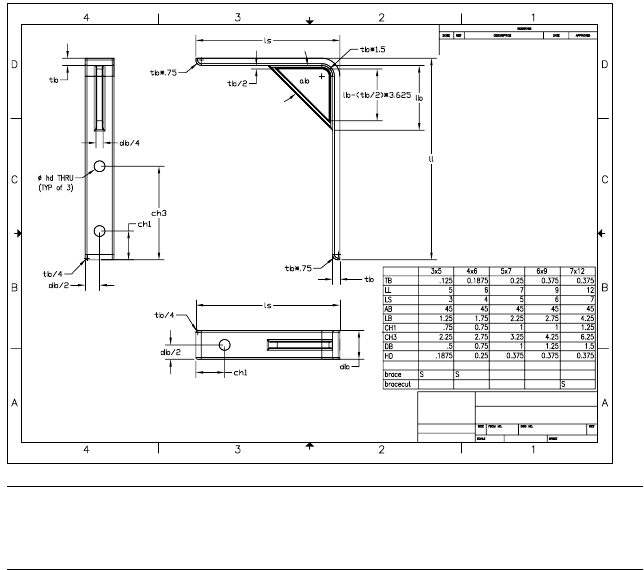
Pasting Linked Spreadsheets |397
6Paste the selected area of the spreadsheet into the drawing.
Desktop Menu Edit ➤ Paste Special
7In the Paste Special dialog box, choose Paste Link.
8Place the selected cells in the drawing. Your drawing should look like this.
NOTE Depending on the zoom factor of your display at the time you paste the
image, you may have to resize it. Select the image, and use a corner grip to resize
it to fit in the drawing.
Save your file.
Now that the linked spreadsheet has been pasted into the drawing, any
changes made in the spreadsheet will automatically be reflected in the draw-
ing. Experiment with modifications to the spreadsheet to see how your part
and the table are automatically updated.

398

399
In This Chapter 16
Assembling Parts
You can build part assembly models from two or more
parts, or parts grouped in subassemblies. Like part
features, parts and subassemblies act as building blocks.
Autodesk® Mechanical Desktop® builds individual parts
and subassemblies into an assembly.
In this tutorial, you create an assembly model of a pair
of slip pliers from four parts. Three of the parts originate
in files that are externally referenced to the assembly
file.
Using externally referenced parts creates a truly parametric
assembly design. Changes to an external reference can be
made from within the assembly or in the original file.
■Using external parts in an
assembly
■Using assembly constraints
■Analyzing the assembly
■Creating assembly scenes
■Using assembly tweaks and trails
■Creating assembly drawing
views
■Editing an external reference
and updating an assembly

400 |Chapter 16 Assembling Parts
Key Terms
Te r m Definition
3D constraint In assembly modeling, an associative link between two or more parts that controls their
locations relative to each other and to their placement within the assembly.
Assembly Catalog The means of attaching and cataloging local and external parts and subassemblies in
the Assembly Modeling environment. Use the All and External tabs to specify contents,
which can be instanced, copied, renamed, replaced, externalized, removed, localized,
sorted, unloaded, and reloaded.
assembly tree A graphical hierarchy that illustrates the order in which parts and subassemblies are
combined in the current assembly. The assembly tree is managed in the Desktop
Browser.
attach The act of connecting a reference file to the current assembly file. The attachment
remains with the current file after the file is saved.
definition All information about a part or subassembly, including its name, location, and
attributes.
detach Permanently removing a file as an external reference in an assembly.
external reference A part or assembly that resides in a file other than the current part or assembly file.
insert constraint Aligns center points and planes of two circles in a specified direction. Solves translation
degrees of freedom. Used to constrain a bolt in a hole, for example.
localized part Changes the definition of a part from external to local, severing the link to the external
file. Changes made to a localized part affect only the current part or assembly file; other
part or assembly files that reference the part are not affected.
mate constraint Causes a plane or axis on one part to be coincident with a plane, point, or axis on
another part in a specified direction. Removes a translational degree of freedom.
rename definition In the Part or Assembly Catalog, an attached external part or subassembly may be
renamed. The alias name is displayed beside the drawing name in parentheses.
scene A 3D orientation of an assembly that you can use to create a 2D view in Drawing
mode. You use scenes to provide exploded or assembled views of your assembly
without destroying the constraints.
trail In an exploded view, a line that shows how parts in an assembly are assembled.
tweak Adjusts the position of parts in an assembly scene to avoid overlap in some views or to
make some parts more visible.
Basic Concepts of Assembling Parts |401
Basic Concepts of Assembling Parts
You create assemblies from parts, either combined individually or grouped
in subassemblies. Mechanical Desktop builds these individual parts and
subassemblies into an assembly in a hierarchical manner according to rela-
tionships defined by constraints. Using the Desktop Browser, you can
restructure the hierarchy of an assembly as needed, while retaining the
design constraints. See “Using the Desktop Browser” on page 414.
As in part modeling, the parametric relationships allow you to quickly
update an entire assembly based on a change in one of its parts.
You can build 3D solid assembly models from two or more parts or subassem-
blies. Like part features, parts and subassemblies act as building blocks.
The following process for building assemblies and subassemblies is similar to
that for building parts:
■Lay out the assembly.
■Create the base part.
■Create the remaining parts.
■Create the assembly and subassemblies.
■Analyze the assembly.
■Modify the assembly as necessary.
When you create an assembly file, you can create your parts in the assembly
drawing, or you can reference external files.
Using externally referenced parts gives you more flexibility over the control
of your assembly. If you need to make modifications to any of your parts, you
can open the individual part file and make changes to it. Because more than
one drawing can be open in the same Mechanical Desktop session, you can
immediately see the effects of your changes in the assembly file. You can also
edit external references from within the assembly file. This is particularly use-
ful in smaller assemblies. Depending on your system resources, you can edit
external files individually if they are part of a large assembly.
After you have assembled your parts, you need to check the assembly for
interferences. You may also want to perform mass property calculations on
your parts to ensure that they are structurally sound.
Finally, you need to document your design. To make it easier to visualize your
design, you may want to adjust, or tweak, your assembly and add trails to
indicate how your parts fit together. Then, you set up your drawing views
and add information, such as reference dimensions and annotations, before
finalizing the drawing for plotting.
402 |Chapter 16 Assembling Parts
Starting Assembly Designs
An assembly design might begin as an overall conceptual design. You may
know how the parts are assembled but you may not know all the details
about each part.
Before you begin, decide how you want to lay out your assembly.
■Start with a design idea.
■Decide whether you need to create new parts, or if you can use existing
parts.
■Start drawing the parts.
Although you can begin designing immediately and reorganize the hierarchy
of your assembly later, for this lesson you assemble parts in a logical order,
starting at the top level in the assembly tree. One part has already been cre-
ated in the tutorial file for this lesson. The other three parts reside in separate
files. You attach the files and then instance the parts into the assembly.
To begin, open the file s_plier.dwg in the desktop\tutorial folder.
NOTE Back up the tutorial drawing files so you still have the original files if you
make a mistake. See “Backing up Tutorial Drawing Files” on page 40.
In the Browser, the PLIERB part is nested under the assembly icon.
Next, you reference three other parts to create the assembly.
Using External Parts in Assemblies |403
Using External Parts in Assemblies
The parts that make up the assembly model can be created and maintained
in other files. These parts are called externally referenced parts. When a part
changes, all instances of that part in other files are automatically updated.
Using parts from other files as external references is similar to external refer-
encing (xref) in AutoCAD. Because they are external, you can reuse referenced
parts in future assemblies. You can start a library of commonly used parts in a
directory where you can easily locate them. Externally referenced parts can be
instanced in the current file at any time.
To attach and instance an external part
1Use AMCATALOG to attach the external parts.
Context Menu In the graphics area, right-click and choose Assembly
Menu ➤ Catalog.
2In the Assembly Catalog, verify that the External tab is selected and Return
to Dialog is checked.
In the Directories window, right-click and choose Add Directory.
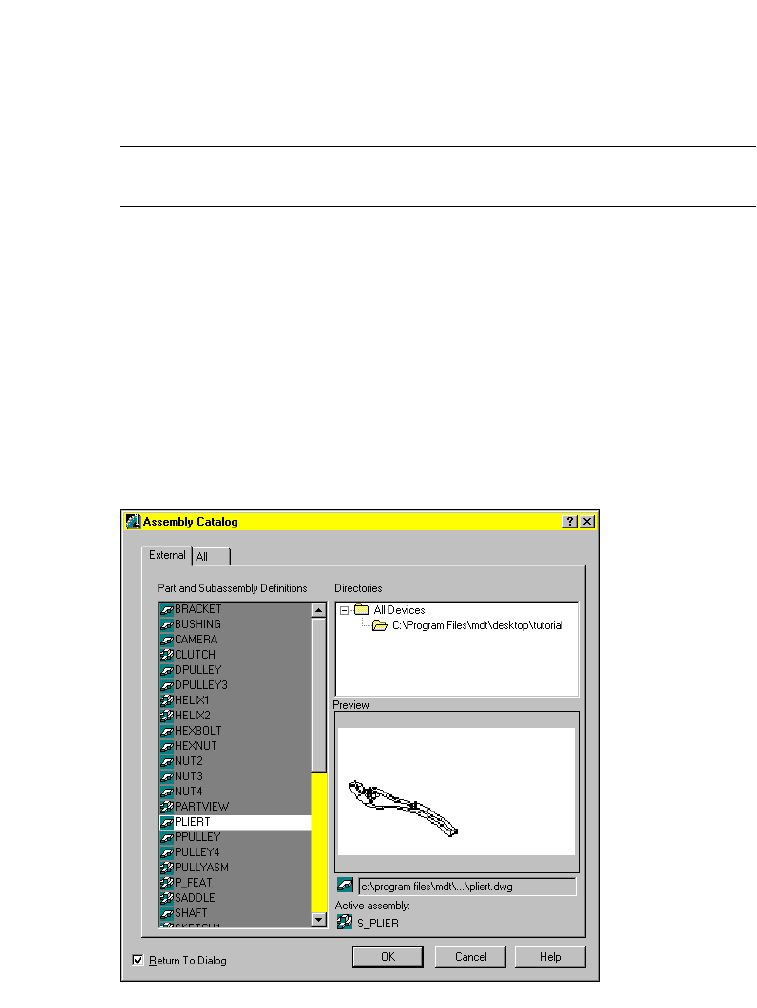
404 |Chapter 16 Assembling Parts
A Browse for Folder dialog box lists your network connections and
directories.
3In the Browse for Folder dialog box, specify the desktop\tutorial folder to be
your working directory.
Choose OK.
NOTE If you have installed Mechanical Desktop in a different location, browse
through your directories to locate the correct folder.
All drawing files in the desktop\tutorial folder are listed under Part and Subas-
sembly Definitions on the External tab.
4In the desktop\tutorial folder, double-click the PLIERT definition to insert an
instance into the drawing, responding to the prompts.
Specify new insertion point: Specify a point below PLIERB
Specify insertion point for another instance or <continue>: Press ENTER
You can also right-click the definition in the Catalog and choose Attach.
The pliert.dwg file is attached to the current assembly, and an instance is
inserted into the current assembly. In the Assembly Catalog, PLIERT is dis-
played on a white background.

Using External Parts in Assemblies |405
Notice that each of the external files is preceded by an icon, indicating
whether it is a part or assembly file.
5Attach and instance the HEXNUT and HEXBOLT parts to the current
assembly.
As you instance each part, you return to the Assembly Catalog. In the Part
and Subassembly Definitions list, each attached part is displayed on a white
background. When all parts are instanced into the assembly, choose OK.
Examine the Browser. Four parts are nested under the assembly definition.
Each part is followed by a number. As you create instances of a part, each
instance is numbered to indicate the order in which you added them to the
assembly.
Notice that PLIERT, HEXBOLT, and HEXNUT have teal colored icons. This
indicates that the parts are externally referenced.
6Change to an isometric view of your drawing.
Desktop Menu View ➤ 3D Views ➤ Front Right Isometric
Now you are ready to start the assembly process.
NOTE For information about using the shortcut method in the Desktop
Browser to localize and externalize assembly component definitions, see “To
localize an external part with the Browser” on page 417.
hexbolt
plierb
pliert
hexnut
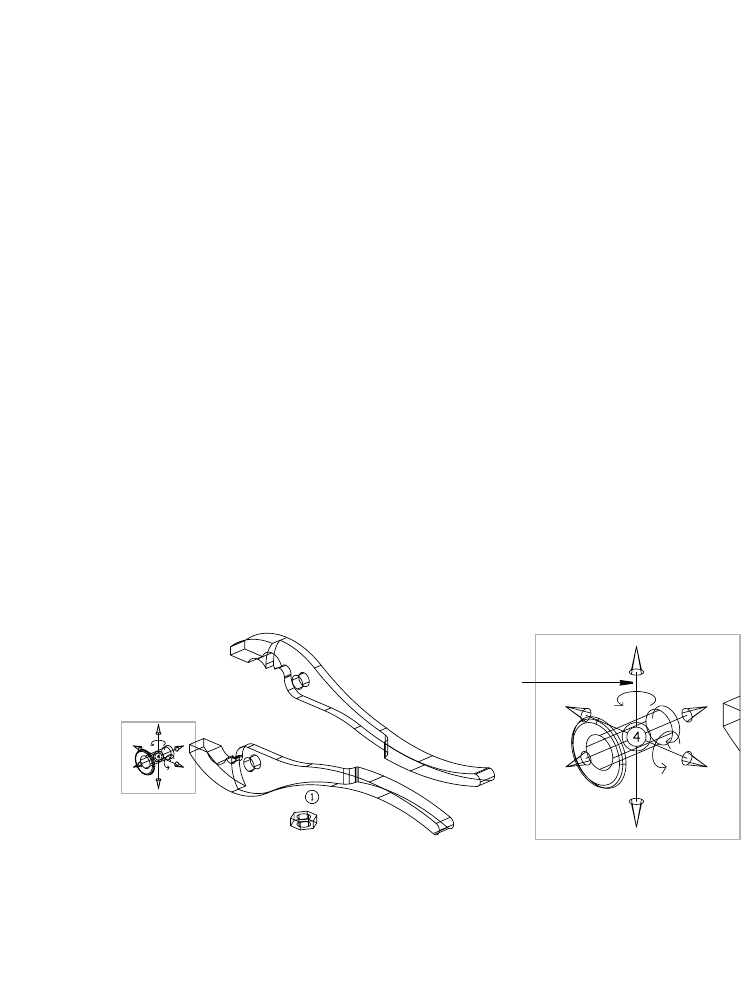
406 |Chapter 16 Assembling Parts
Assembling Parts
After parts or subassemblies have been created, you apply constraints to
position them relative to one another. Each time you apply a constraint to a
part, you eliminate some degrees of freedom (DOF). The number of degrees
of freedom determines the movement of a part in any direction; the more
constraints applied, the less the part can move.
A degrees of freedom symbol illustrates the instance order of the parts and
how the parts can move. The DOF symbol shows how many degrees of free-
dom are not solved and help you visualize and apply constraints to parts.
Apply multiple assembly constraints on two parts to fully position them rel-
ative to each other. A bolt might still turn (rotational degree of freedom is not
solved), but as long as the bolt and hole are aligned on their axes, and the
bolt face is flush with the hole, no other constraints are needed.
Because the parts and their assembly constraints are parametric, they can be
edited. The assembly constraints applied on each part are permanently
stored with the assembly to allow parametric updating if the parts change.
To display a DOF symbol
1Use the Browser to display the DOF symbol for HEXBOLT_1.
Browser Right-click HEXBOLT_1, and choose DOF Symbol.
The DOF symbol is displayed in the center of HEXBOLT. It indicates that the
bolt can move in any direction.
DOF symbol

Assembling Parts |407
Constraining Parts
Use a mate constraint to join the PLIERT and HEXBOLT parts. Zoom in as
needed to make the selection easier.
To add a mate constraint between parts
1Use AMMATE to select the first set of geometry, responding to the prompts.
Context Menu In the graphics area, right-click and choose 3D
Constraints ➤ Mate.
Select first set of geometry: Select HEXBOLT (1)
First set = Axis, (arc)
Select first set or [Clear/fAce/Point/cYcle] <accEpt>: Enter a
First set = Plane
Enter an option [Clear/aXis/Point/Flip/cYcle] <accEpt>:
Enter y to cycle to face, or press ENTER
2Select the second set of geometry to complete the mate constraint.
Select second set of geometry: Select PLIERT (2)
Second set = Axis, (arc)
Select second set or [Clear/fAce/Point/cYcle] <accEpt>:
Enter a to highlight the corresponding face of PLIERT
Second set = Plane
Enter an option [Clear/aXis/Point/Next/Flip/cYcle] <accEpt>:
Enter y to cycle to the next face, or press ENTER
Enter offset <0.0000>: Press ENTER
To select geometry, enter responses on the command line, or use the animated
cursor to cycle through options. Click the left (red) mouse button to cycle.
Then, press the right (green) mouse button to accept. You may also use the
animated cursor to select a face by picking in the area defined by the face, then
cycling to other logical faces before accepting.
12
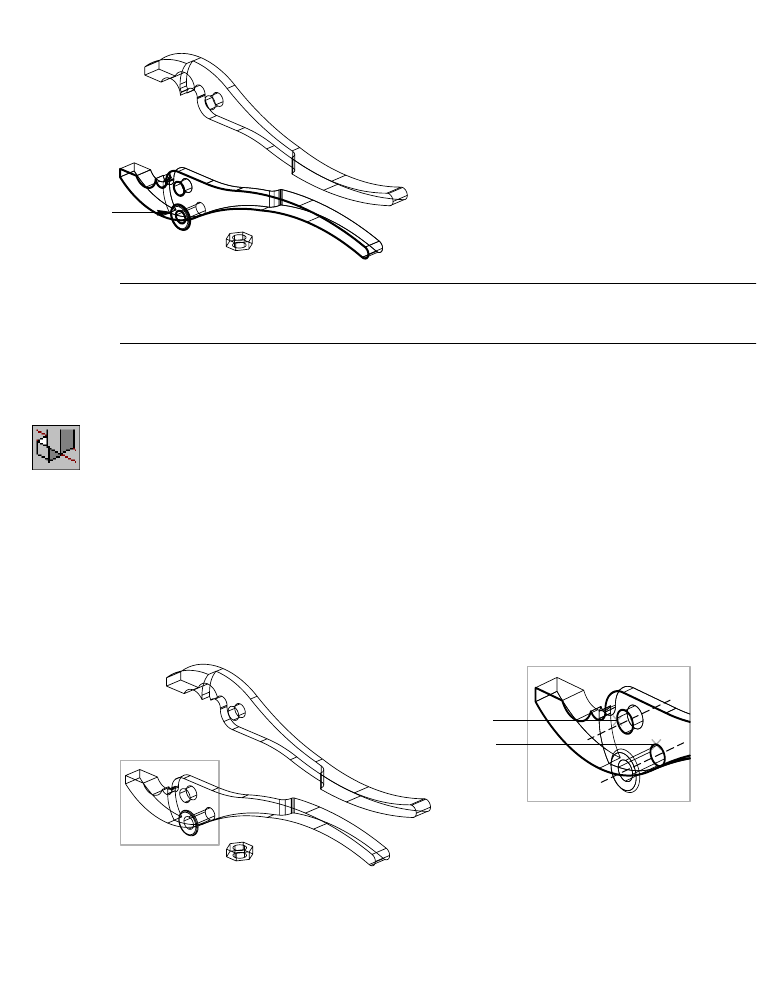
408 |Chapter 16 Assembling Parts
The corresponding faces of the HEXBOLT and PLIERT parts are mate
constrained.
NOTE The DOF symbol is useful during constraining but has been turned off
for clarity in the illustrations.
3Use AMMATE to constrain HEXBOLT to the bolt hole on PLIERT along their
axes, following the prompts.
Context Menu In the graphics area, right-click and choose 3D
Constraints ➤ Mate.
Select first set of geometry: Select the end of the HEXBOLT (3)
First set = Axis, (arc)
Select first set or [Clear/fAce/Point/cYcle] <accEpt>: Press ENTER
Select second set of geometry: Select the bolt hole of PLIERT (4)
Second set = Axis, (arc)
Select second set or [Clear/fAce/Point/cYcle] <accEpt>: Press ENTER
Enter offset <0.0000>: Press ENTER
mated planes
4
3
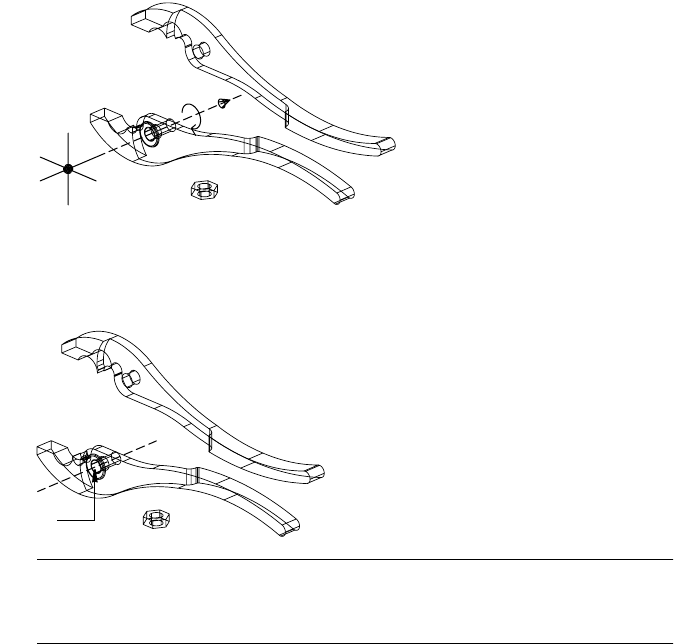
Assembling Parts |409
In addition to a mate constraint on the faces of the bolt head and pliers, the
HEXBOLT and the PLIERT bolt hole are constrained along their axes.
4Examine the DOF symbol.
It should show that only the rotational degree of freedom remains unsolved.
In this case, it does not need to be solved.
You could use the insert constraint to solve the same degrees of freedom as
the two mate constraints. By choosing the faces of HEXBOLT and PLIERT, the
parts would be aligned on their axes and mate constrained on their corre-
sponding faces.
NOTE To make part selections easier, use MOVE to reposition a constrained
part. The part will automatically move back to its constrained position once you
have added a new assembly constraint.
mated lines
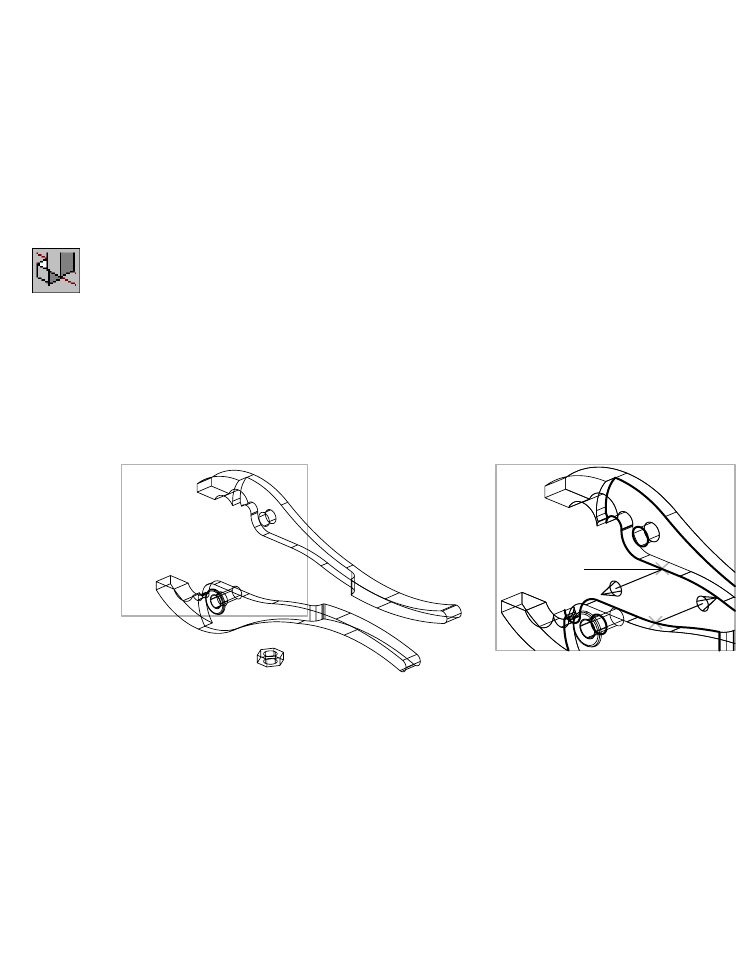
410 |Chapter 16 Assembling Parts
To mate to a grounded part
1Turn on the DOF symbol for PLIERB.
Browser Right-click PLIERB_1 and choose DOF Symbol.
The DOF symbol is represented by a number within a circle, indicating that
it has no degrees of freedom. Because it is the first part created in the assem-
bly drawing, PLIERB becomes the grounded part. As you apply assembly con-
straints, the grounded part remains stationary. If you move the grounded
part, all parts constrained to it also move.
2Mate the PLIERB and PLIERT parts, responding to the prompts.
Context Menu In the graphics area, right-click and choose 3D
Constraints ➤ Mate.
Select first set of geometry: Select the inside face of PLIERB (5)
First set = Axis, (arc)
Select first set or [Clear/fAce/Point/cYcle] <accEpt>: Enter a to highlight the face
First set = Plane
Enter an option [Clear/aXis/Point/Flip/cYcle] <accEpt>:
Enter y to cycle to the next face, or press ENTER
3Select the second set of geometry to complete the mate constraint.
Select second set of geometry: Select the inside face of PLIERT (6)
Second set = Axis, (arc)
Select second set or [Clear/fAce/Point/cYcle] <accEpt>:
Enter a to highlight the face
Second set = Plane
Enter an option [Clear/aXis/Point/Next/Flip/cYcle] <accEpt>:
Enter y to cycle to the inside face, or press ENTER
Enter offset <0.0000>: Press ENTER
6
5
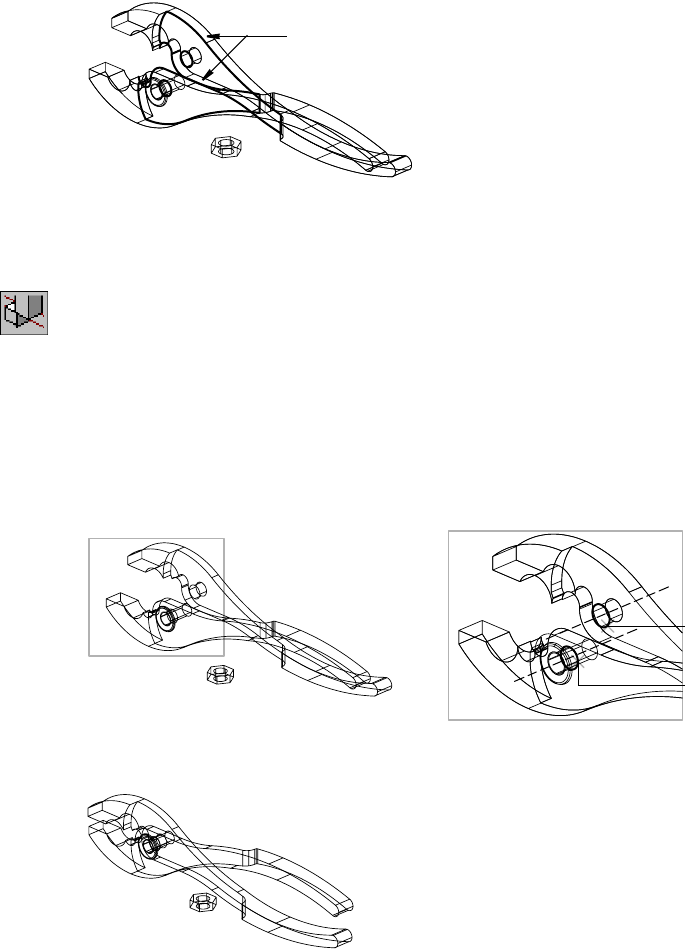
Assembling Parts |411
The two parts of the pliers body are now plane mated on corresponding faces.
To mate parts on their axes
1Mate the HEXBOLT part to the PLIERB part along their axes, responding to
the prompts.
Context Menu In the graphics area, right-click and choose 3D
Constraints ➤ Mate.
Select first set of geometry: Select the bolt hole of PLIERT (7)
First set = Axis, (arc)
Select first set or [Clear/fAce/Point/cYcle] <accEpt>: Press ENTER
Select second set of geometry: Select the bolt hole of PLIERB (8)
Second set = Axis, (arc)
Select second set or [Clear/fAce/Point/cYcle] <accEpt>: Press ENTER
Enter offset <0.0000>: Press ENTER
The PLIERB and PLIERT parts are line mated along the axes of the holes, and
the bolt passes through both parts.
mated planes
8
7

412 |Chapter 16 Assembling Parts
2Mate the HEXNUT to the face of the pliers, responding to the prompts.
Context Menu In the graphics area, right-click and choose 3D
Constraints ➤ Mate.
Select first set of geometry: Select the top face of HEXNUT (9)
First set = Axis, (arc)
Select first set or [Clear/fAce/Point/cYcle] <accEpt>: Enter a to highlight the face
First set = Plane
Enter an option [Clear/aXis/Point/Next/Flip/cYcle] <accEpt>:
Enter n to highlight the top face, if necessary, and then press ENTER
3Select the second set of geometry to complete the mate constraint.
Select second set of geometry: Select the outside face of PLIERB (10)
Second set = Axis, (arc)
Select second set or [Clear/fAce/Point/cYcle] <accEpt>:
Enter a to highlight the face
Second set = Plane
Enter an option [Clear/aXis/Point/Next/Flip/cYcle] <accEpt>:
Enter f to flip the direction arrow away from PLIERB, and then press ENTER
Enter offset <0.0000>: Press ENTER
HEXNUT is plane mated to the face of PLIERB.
9
10
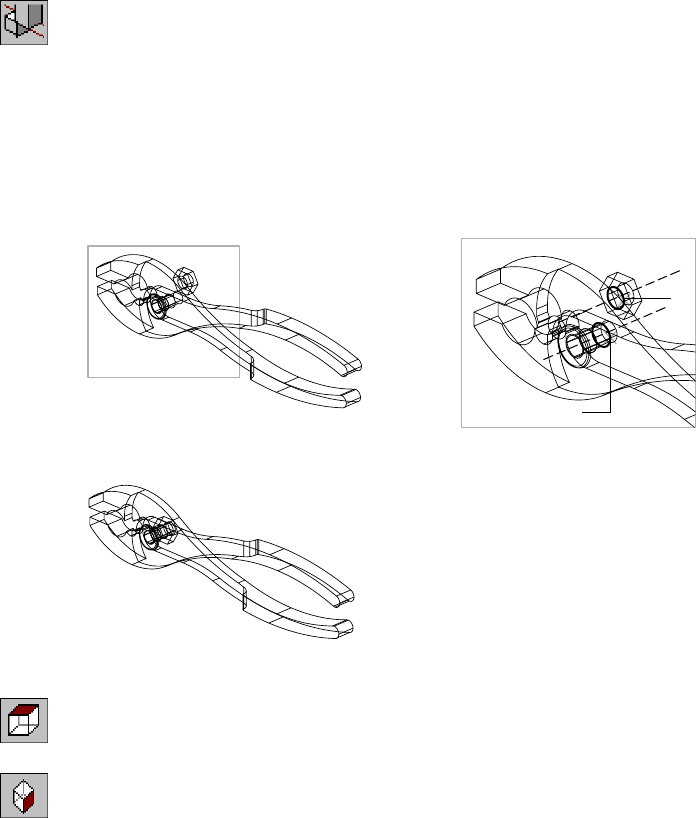
Assembling Parts |413
4Mate the nut to the bolt along their axes to pass the bolt through the hole.
Context Menu In the graphics area, right-click and choose 3D
Constraints ➤ Mate.
Select first set of geometry: Select the bolt hole on HEXNUT (11)
First set = Axis, (arc)
Select first set or [Clear/fAce/Point/cYcle] <accEpt>: Press ENTER
Select second set of geometry: Select the bolt hole on PLIERB (12)
Second set = Axis, (arc)
Select second set or [Clear/fAce/Point/cYcle] <accEpt>: Press ENTER
Enter offset <0.0000>: Press ENTER
The parts are now assembled.
5Check that the parts are assembled correctly.
Desktop Menu View ➤ 3D Views ➤ Top
6Return to the isometric view.
Desktop Menu View ➤ 3D Views ➤ Front Right Isometric
Save your file.
11
12

414 |Chapter 16 Assembling Parts
Using the Desktop Browser
As you assemble parts, a graphical hierarchy of the assembly is illustrated in
the Desktop Browser. Each 3D constraint applied to an assembly component
is listed below the component. You can tell at a glance which constraints
exist between which components, because the other component to which
the constraint applies is shown in the hierarchy. When you hold the cursor
over a constraint, feature, or tweak in the Browser, a tooltip displays perti-
nent data. For instance, the offset value is displayed for a mate constraint,
type and size data is displayed for a hole feature, and a distance value is dis-
played for a tweak. In scenes, explosion factors are displayed in a tooltip.
Using the Browser, you can both edit the hierarchy of an assembly and move
components into an empty assembly file. To restructure the hierarchy, you
either drag components, or use the cut and paste options in cases where the
Browser display is long and detailed. The design constraints for restructured
assemblies remain unchanged.
For more information about using in the Browser to restructure assemblies,
see “Restructuring Assemblies” on page 504 in chapter 18.
You can use the Browser to add, change, delete, and copy, and to localize and
externalize component definitions. To see how this works, edit the mate con-
straint on the hexbolt. Then change the color of a part, make copies, and
externalize a component definition.
To edit an assembly constraint with the Browser
1Change your display to two viewports.
Command 2
2Zoom to enlarge the hexbolt.
Context Menu In the graphics area, right-click and choose Zoom.
3In the Browser, right-click the Mate pl/pl constraint under HEXBOLT_1, and
choose Edit.

Assembling Parts |415
4In the Edit 3D Constraint dialog box, change the offset to 0.05. Click the
Update icon.
You can see the hexbolt offset the new distance. Experiment with changing
the offset again, using the Update icon to see the change.
Choose Cancel. The original offset distance of 0.00 remains in effect.
You can easily edit values and see them take effect without permanently
changing your assembly. Use the Update icon in the Edit 3D Constraint dia-
log box to see the change, and then choose Cancel to return to the original
values.
To copy a part with the Browser
1Collapse the assembly tree to better visualize the changes you make.
Browser Right-click S_PLIER and choose Browser Node ➤ Collapse.
2Make a copy of HEXBOLT_1.
Browser Right-click HEXBOLT_1 and choose Copy.
3Place one or more copies near the pliers, and then press ENTER.
You can see the new hexbolts listed in the Browser hierarchy, each numbered
in the sequence you added them.

416 |Chapter 16 Assembling Parts
To change the color of a part with the Browser
1Activate HEXBOLT_1.
Browser Right-click HEXBOLT_1 and choose Activate Part.
2Open the Select Color dialog box to change the color of HEXBOLT_1.
Browser Right-click HEXBOLT_1 and choose Properties ➤ Color.
3In the Select Color dialog box, select Red, and then choose OK.
This color applies to all instances of HEXBOLT.
4Activate the assembly to view the changed color
Browser Right-click S_PLIER and choose Activate Assembly.
Next, change the bolt color to the original and remove the experimental copies.
5Activate HEXBOLT_1
Browser Right-click HEXBOLT_1 and choose Activate Part.
6Open the Select Color dialog box to change the color of HEXBOLT_1 back to
white.
Browser Right-click HEXBOLT_1 and choose Properties ➤ Color.
7In the Select Color dialog box, select White, and then choose OK.
8Activate PLIERB_1 to return the bolts back to their original color.
Browser Right-click PLIERB_1 and choose Activate Part.
To delete part copies with the Browser
1Delete the HEXBOLT copy.
Browser Right-click HEXBOLT_2 and choose Delete.
2Repeat for the other copies if needed.
Your experimental copies are no longer visible in the Browser assembly
hierarchy.
Getting Information from Assemblies |417
To localize an external part with the Browser
1Localize the external parts HEXBOLT_1 and HEXBOLT_3.
Browser Press CTRL and select HEXBOLT_1 and HEXBOLT_3.
Right-click the selected parts and choose All Instances ➤
Localize.
This shortcut method enables you to localize and externalize parts without
opening the Assembly Catalog. When you select a local part in the Browser,
the externalize option is available.
For more information about local and external assembly components, see
“Creating Local and External Parts” on page 481.
You are now ready to check the assembly for mass properties and interference.
Getting Information from Assemblies
Now that all the parts are constrained, you can check for interference and
obtain mass property information for some of the parts or the entire assembly.
Checking for interference between two or more parts in the assembly can detect
design problems before manufacturing starts. Mass property information can
tell you whether the dimensions or materials of a part need to be changed to
achieve the desired results. This analysis is critical for making decisions early in
the design phase that can prevent manufacturing problems later.
Checking for Interference
An interference analysis detects interference between two parts or all parts.
You can move up or down the assembly tree, selecting parts as you proceed.
Next, you will perform an interference analysis on the entire pliers assembly.
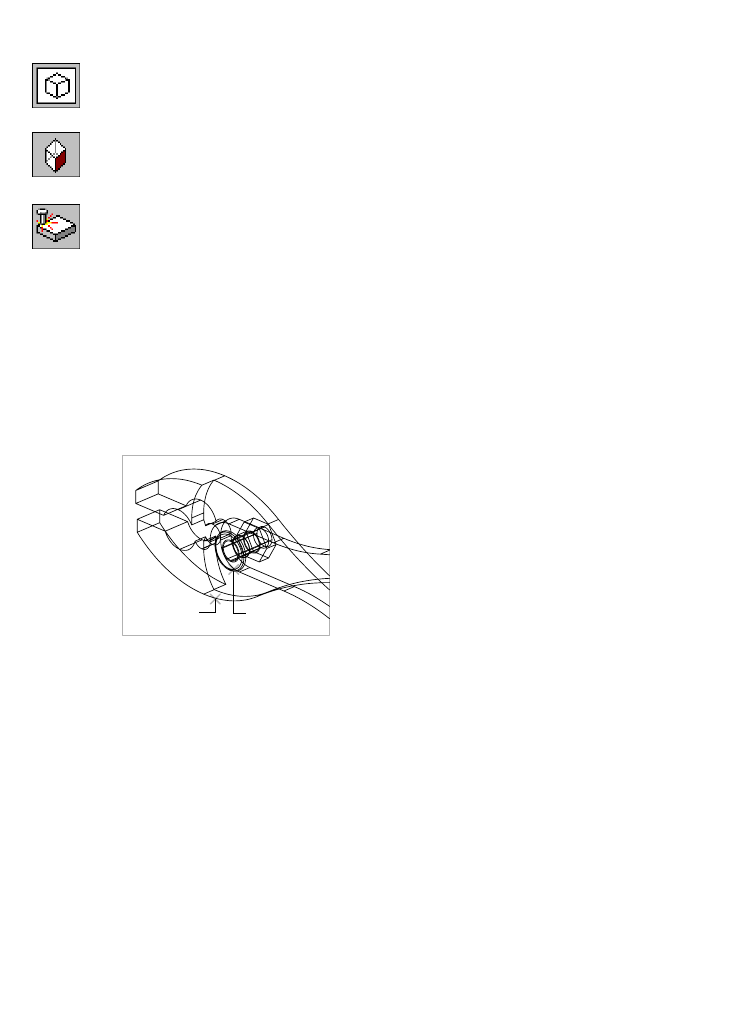
418 |Chapter 16 Assembling Parts
To check for interference
1Change to one viewport.
Command 1
2Change to the right isometric view.
Desktop Menu View ➤ 3D Views ➤ Front Right Isometric
3Use AMINTERFERE to check for interference, responding to the prompts.
Context Menu In the graphics area, right-click and choose Analysis ➤
Check Interference.
Nested part or subassembly selection? [Yes/No] <No>: Press ENTER
Select first set of parts or subassemblies: Select the PLIERT part (1)
Select first set of parts or subassemblies: Press ENTER
Select second set of parts or subassemblies: Select the HEXBOLT part (2)
Select second set of parts or subassemblies: Press ENTER
Parts/subassemblies do not interfere.
If you have trouble selecting a part, use the Browser to change its color.
4Check for interference between the PLIERB and HEXBOLT parts.
The parts should show no interference.
Next, you will calculate the mass properties for the assembly.
Calculating Mass Properties
Once an assembly is completed, you can calculate its mass properties. Toler-
ance values control the accuracy of the mass property information. The
material types can be different for each part, resulting in accurate mass prop-
erty values no matter how complex the assembly.
2
1

Getting Information from Assemblies |419
To calculate mass properties
1Use AMASSMPROP to select the parts for the mass properties calculation, fol-
lowing the prompts, and open the Assembly Mass Properties dialog box.
Context Menu In the graphics area, right-click and choose Analysis ➤
Mass Properties.
Enter an option (parts/subassemblies) [Name/Select] <Select>: Press ENTER
Select part and subassembly instances: Select PLIERB
Select part and subassembly instances: Press ENTER
2In the Assembly Mass Properties dialog box, select the Setup tab and specify:
Input units: US Customary (in, lbm)
Output units: US Customary (in, lbm)
Coordinate system: User coordinate system (UCS)
Display Precision: Enter 2.0
Part List: Select PLIERB
Materials available: Select Mild_Steel.
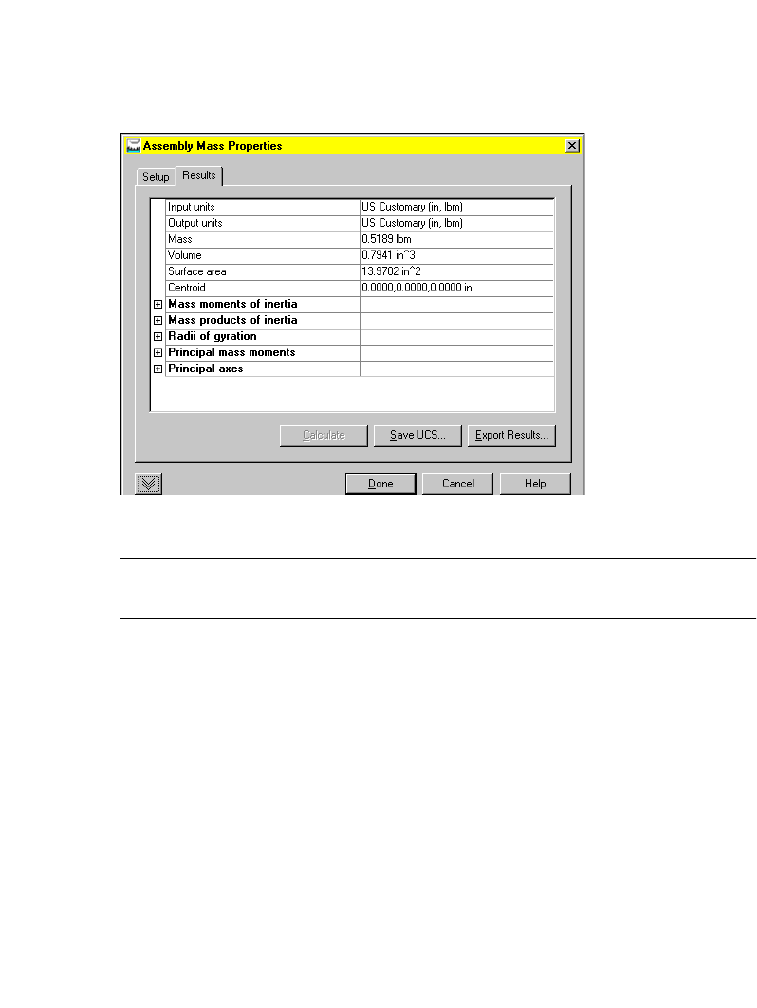
420 |Chapter 16 Assembling Parts
3Select the Results tab. The results window for PLIERB remains empty until
you calculate the results.
4Choose Calculate. Message dialogs appear warning that density is not speci-
fied for the other parts in the assembly. Choose OK to proceed.
Mass properties are calculated according to the values you set.
Choose Done.
NOTE You can save mass properties calculations to a file to use in design analysis,
and you can export the results.
Next, you create scenes of the assembly.
Creating Assembly Scenes
Now that you have instanced the parts and applied the assembly constraints,
you can create and lay out assembly scenes. A scene is an exploded view that
separates the parts of an assembly or subassembly to show how they fit
together. You can create a scene quickly; it updates automatically every time
you change the assembly. The separation of the parts is based on an explo-
sion factor you set and the assembly constraints you used to position the
parts. You can create multiple exploded scenes of the same assembly and save
them for later use.
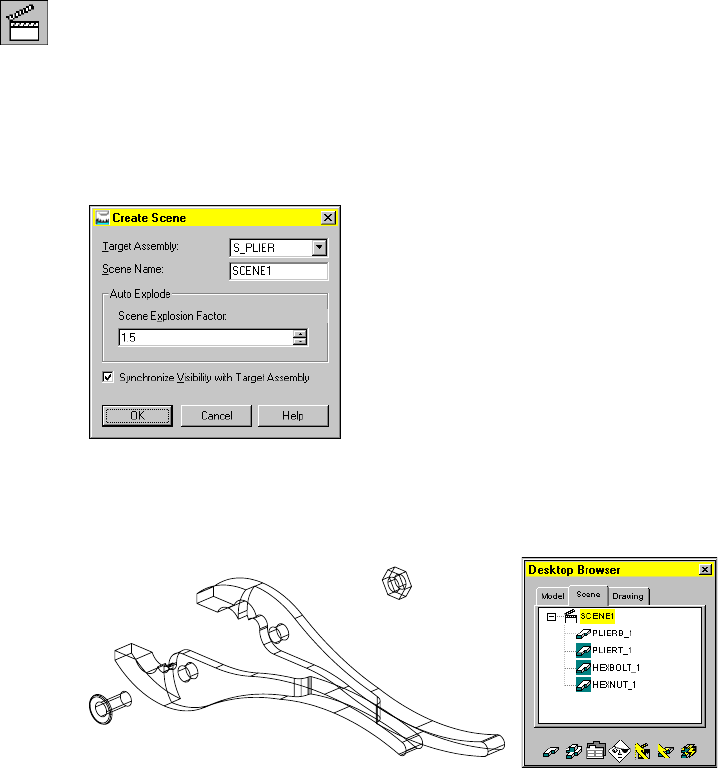
Creating Assembly Scenes |421
Assembly trails indicate the path of the assembly explosion. With the excep-
tion of the grounded part, assembly trails can be created for all parts. When
you create assembly trails, a new layer is automatically created for them. You
can automatically create trails when you create tweaks.
First, you set an explosion factor and then create an exploded assembly
scene. Then you add trails to show how parts are assembled. From a scene,
you create drawing views.
To create an exploded view
1Use AMNEW to create a new scene.
Context Menu In the graphics area, right-click and choose New Scene.
The Create Scene dialog box is displayed.
2In the Create Scene dialog box, specify:
Target Assembly: S_PLIER
Scene Name: SCENE1
Auto Explode: Scene Explosion Factor: 1.5
Synchronize Visibility with Target Assembly: Select the check box
Choose OK.
The exploded assembly scene is displayed. Its name is shown below the com-
mand line. The Browser shows all parts in the scene.
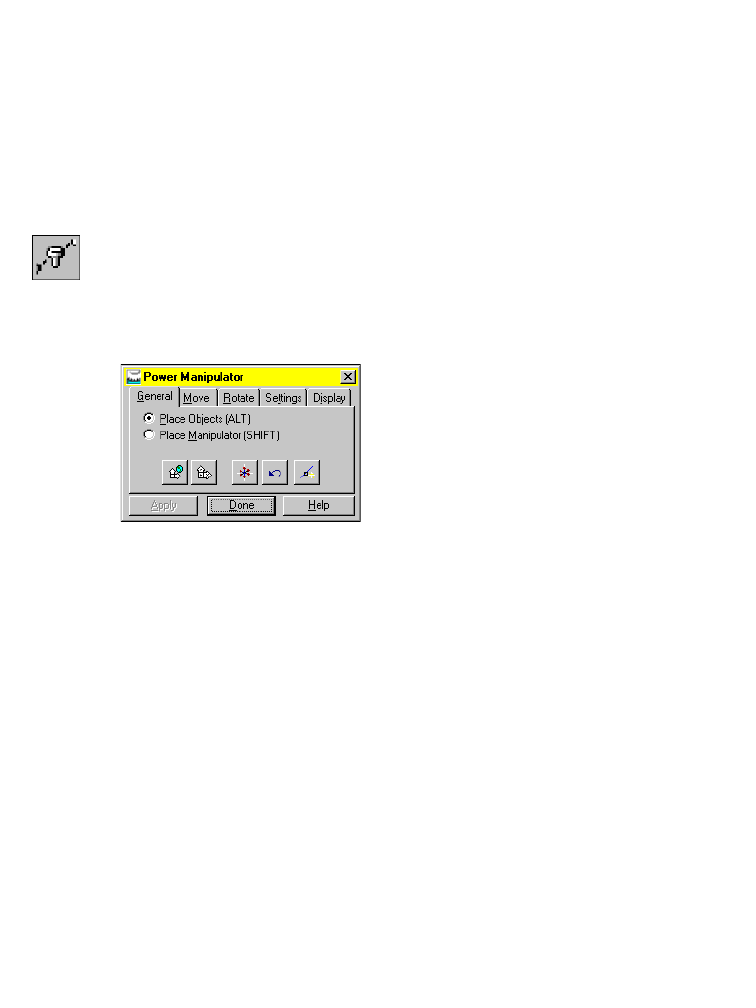
422 |Chapter 16 Assembling Parts
Next, align the exploded parts in the assembly scene. You can tweak the posi-
tion and orientation of individual parts or rotate them for better visibility.
In the Browser, verify that the Scene tab is selected. Unless the scene is acti-
vated, you cannot tweak parts to adjust their position or add trails to show
how they are assembled.
To align scene parts
1Use AMTWEAK to move the HEXNUT part closer to the other parts, respond-
ing to the prompt.
Context Menu In the graphics area, right-click and choose New Tweak.
Select part or subassembly to tweak: Select HEXNUT (1)
2In the Power Manipulator dialog box, on the General tab, verify that Place
Objects (ALT) is selected.
Choose Done.
The Power Manipulator dialog box is displayed automatically only the first
time you create a new tweak. After that, to access the Power Manipulator
dialog box, right-click the Power Manipulator symbol on your screen, and
select Options.
3Continue on the command line.
Select handle or Geometry
[undo/UCS/WCS/Select/Options/Pancenter/Type/tRails/X/Y/Z] <Accept>:
Enter z
Enter tweak distance [Rotate]<1.0000>: Enter .25
Select handle or Geometry
[undo/UCS/WCS/Select/Options/Pancenter/Type/tRails/X/Y/Z] <Accept>:
Press ENTER.
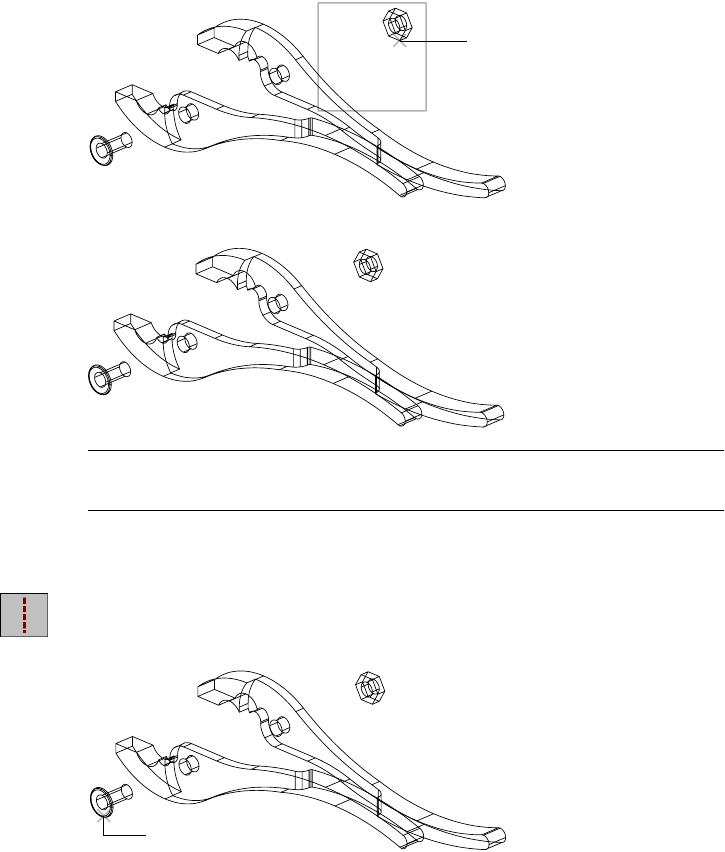
Creating Assembly Scenes |423
The HEXNUT position is tweaked by the specified distance.
NOTE The grounded part of an assembly or subassembly cannot be tweaked.
Its position is fixed.
4Use AMTRAIL to show the direction of the explosion and tweak paths,
responding to the prompt.
Context Menu In the graphics area, right-click and choose New Trail.
Select reference point on part or subassembly: Select the end of HEXBOLT (1)
1
1

424 |Chapter 16 Assembling Parts
5In the Trail Offsets dialog box, specify:
Offset at Current Position: Distance: Enter 1
Over Shoot: Select the option
Offset at Assembled Position: Distance: Enter 1
Over Shoot: Select the option
Choose OK.
The assembly trail for HEXBOLT is displayed.
6Apply assembly trails to the PLIERB and HEXNUT parts, responding to the
prompt.
Context Menu In the graphics area, right-click and choose New Trail.
Select reference point on part or subassembly:
Select the outside hole of HEXNUT (2)
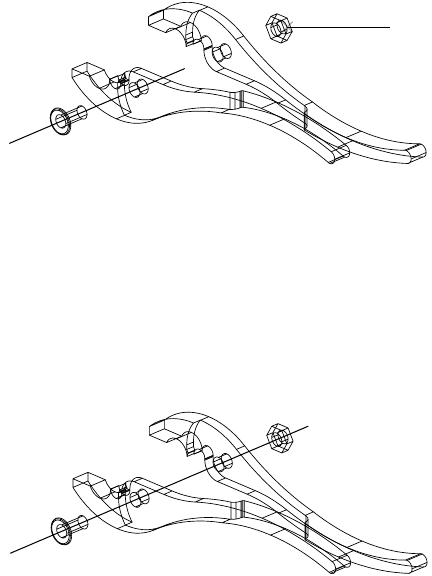
Creating Assembly Drawing Views |425
7In the Trail Offsets dialog box, specify:
Offset at Current Position: Distance: Enter 1
Over Shoot: Select the option
Offset at Assembled Position: Distance: Enter 1
Over Shoot: Select the option
Choose OK.
The assembly drawing automatically updates the current scene to reflect the
tweaks and assembly trails.
Save your file. Choose OK in the External Part Save dialog box to bring all
parts up to date.
Next, you create drawing views of the assembly scene.
Creating Assembly Drawing Views
After you complete the assembly model and the scene, you can create 2D
orthogonal views or 3D isometric and exploded views of the entire assembly.
Then you add reference dimensions.
You can set up as many drawing layouts as you need to document your
design. Because this assembly is small, you create only one layout.
Before creating the base view of the pliers assembly, modify a plotter setup to
include a custom paper size. Then set up the drawing layout to arrange the
drawing views on paper.
2
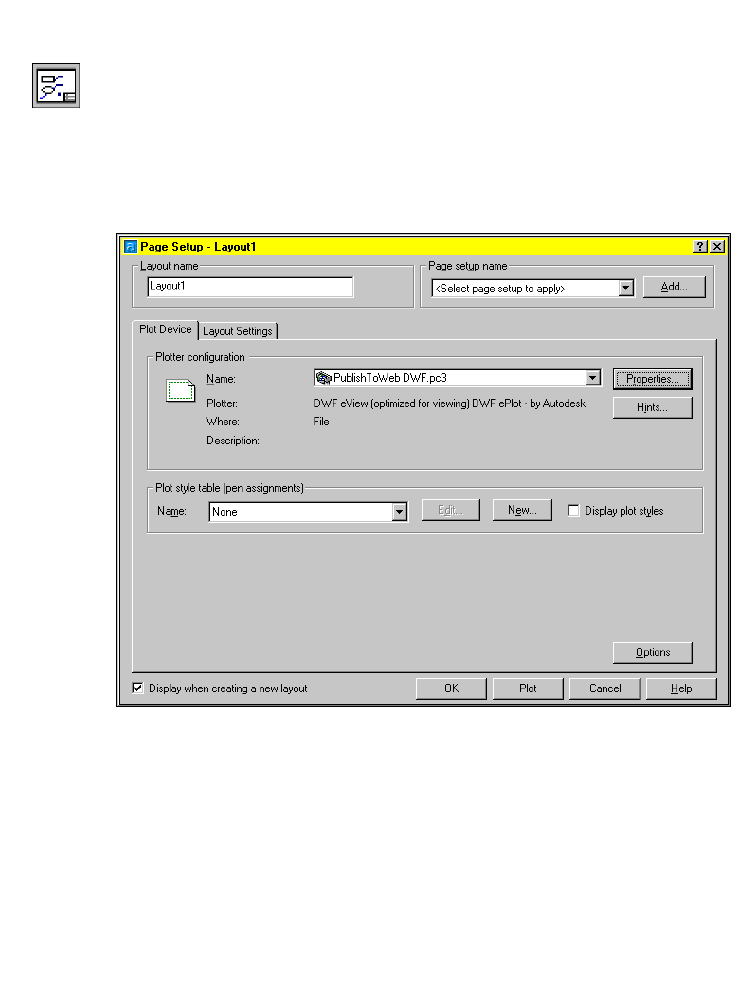
426 |Chapter 16 Assembling Parts
To add a custom paper size to a plotter setup
1Use AMMODE to switch to Drawing mode.
Browser Choose the Drawing tab.
2Add a custom paper size to an existing plotter.
Browser Right-click Layout1 and choose Page Setup.
3In the Page Setup dialog box, select the Plot Device tab and specify:
Name: DWF Classic.pc3

Creating Assembly Drawing Views |427
4Choose Properties.
5In the Plotter Configuration Editor dialog box, expand User-Defined Paper
Sizes and Calibration. Select Custom Paper Sizes and choose Add.
6Use the Custom Paper Size Wizard to define a paper size of 18 x 12 inches
with no indents. Choose Next until the setup is finished.
7Save your changes to the DWF Classic.pc3 file.
Next, you set up the drawing layout and insert a title block.
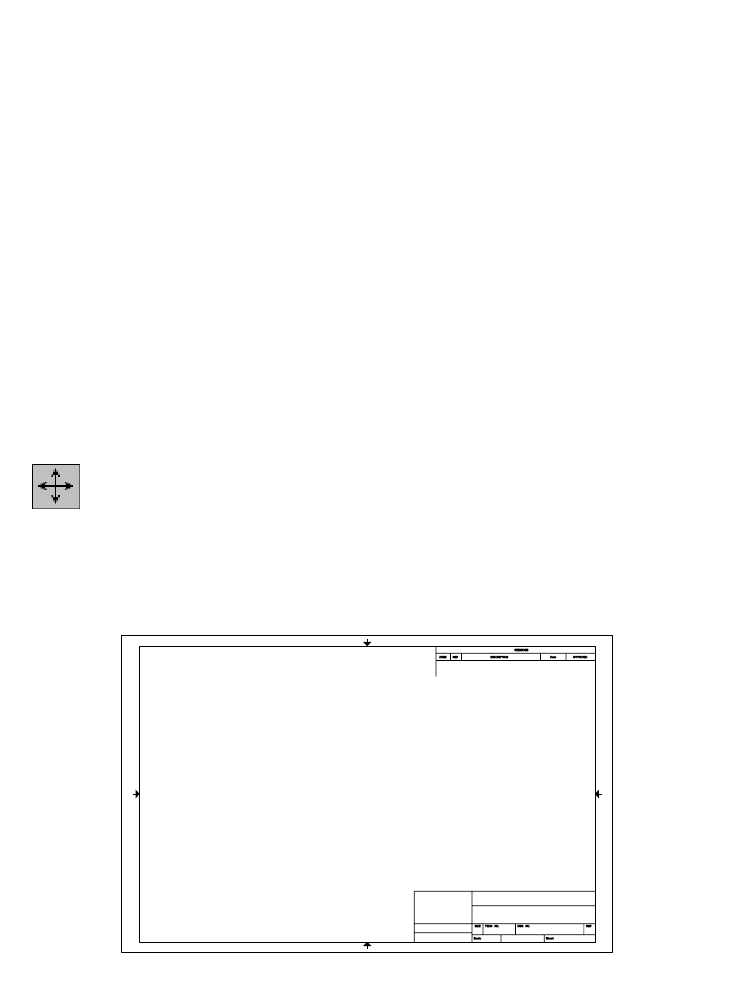
428 |Chapter 16 Assembling Parts
To set up a drawing layout
1In the Page Setup dialog box, select the Layout Settings tab and specify:
Paper Size: User 1 (18.00 x 12.00 inches)
Plot Scale: 1:1
Choose OK.
2Use MVSETUP to insert a title block.
Browser Right-click Layout1 and choose Insert Title Block.
In the AutoCAD text window, respond to the prompt as follows:
Enter number of title block to load or [Add/Delete/Redisplay]: Enter 8
3Continue on the command line.
Create a drawing named ansi_b.dwg? <Y>: Enter n
Enter an option [Align/Create/Scale viewports/Options/Title block/Undo]:
Press ENTER
The title block is inserted into the drawing.
4Use MOVE to center the title block in the layout, responding to the prompts.
Desktop Menu Modify ➤ Move
Select objects: Select the title block
Select objects: Press ENTER
Specify base point or displacement: Specify a point
Specify second point of displacement or <use first point as displacement>:
Specify another point
Next, define drawing views to display the assembly.

Creating Assembly Drawing Views |429
To create a base assembly drawing view
1Use AMDWGVIEW to create a base view.
Context Menu In the graphics area, right-click and choose New View.
In the Create Drawing View dialog box, specify:
Type: Base
Data Set: Scene: SCENE1
Choose OK.
2Respond to the prompts as follows:
Select a planar face, work plane, or [Ucs/View/worldXy/worldYz/worldZx]:
Enter z
Select work axis or straight edge [worldX/worldY/worldZ]: Enter x
Adjust orientation [Flip/Rotate] <accEpt>: Press ENTER
Specify location of base view: Specify a point
Specify location of base view: Specify another point or press ENTER
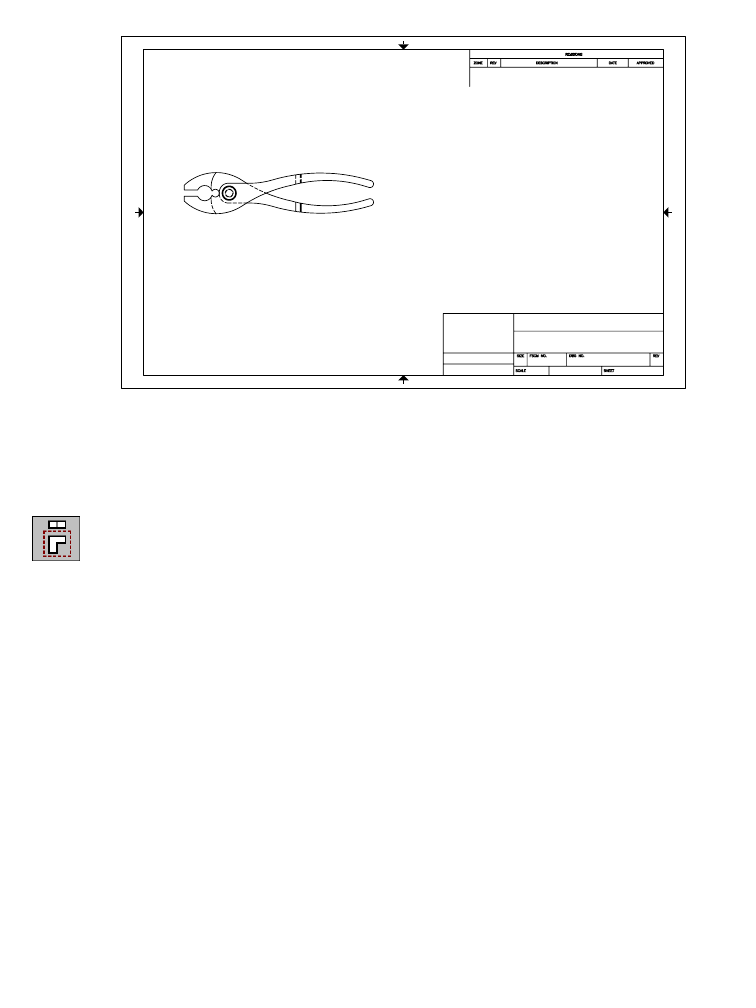
430 |Chapter 16 Assembling Parts
The base drawing view is displayed.
Next, create an isometric view of the assembly.
To create an isometric assembly drawing view
1Create an isometric view.
Context Menu In the graphics area, right-click and choose New View.
In the Create Drawing View dialog box, specify:
View Type: Iso
In the Hidden Lines tab, specify:
Calculate Hidden Lines: Clear the check box
Choose OK.
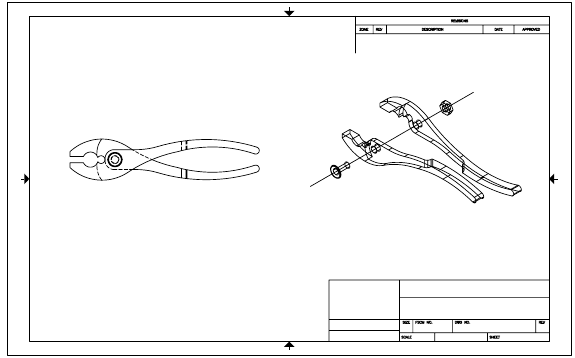
Creating Assembly Drawing Views |431
2Respond to the prompts as follows:
Select parent view: Specify the base view
Specify location for isometric view: Specify a point to place the isometric view
Specify location for isometric view: Specify another point or press ENTER
Examine the Browser. The views are nested under a Scene icon which is
nested under Layout1.
Save your file.
Now you can add reference dimensions, which can be moved, frozen, and
thawed in each drawing view. Reference dimensions are not parametric, but
they update when the model changes.
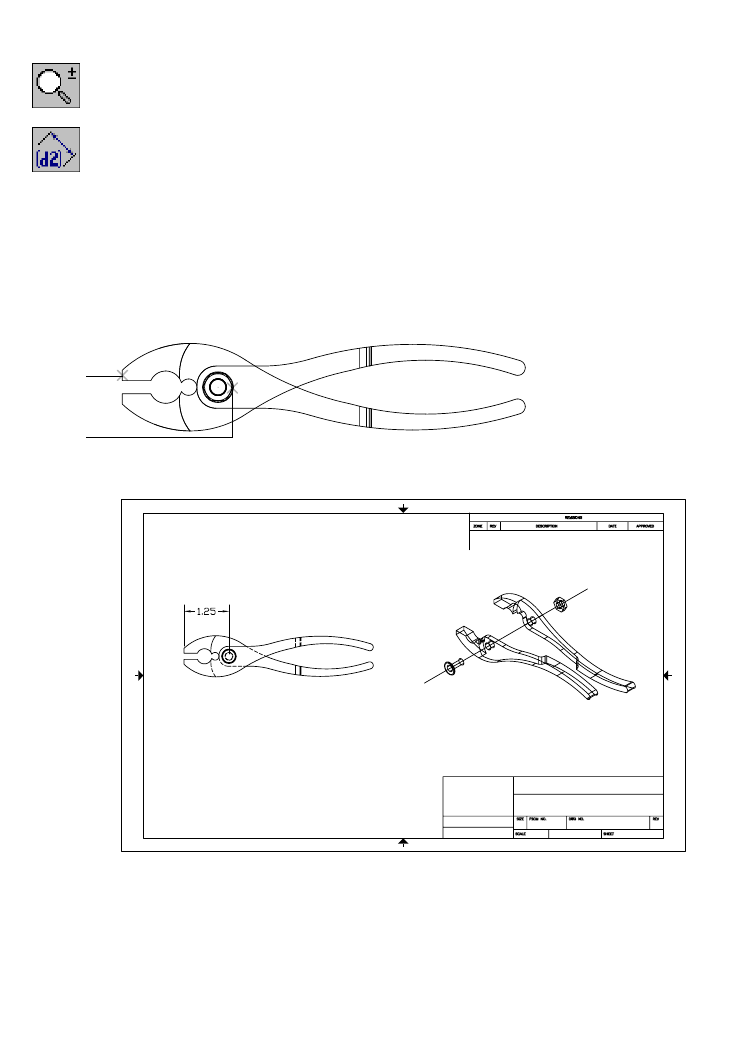
432 |Chapter 16 Assembling Parts
To add a reference dimension
1Zoom in to enlarge the area you want to dimension.
Context Menu In the graphics area, right-click and choose Zoom.
2Use AMREFDIM to add a reference dimension, following the prompts.
Context Menu In the graphics area, right-click and choose Reference
Dimension.
Select first object: Select the endpoint of the pliers (1)
Select second object or place dimension: Select the bolt (2)
Specify dimension placement: Specify a point above the pliers
Specify placement point or [Undo/Hor/Ver/Align/Par/aNgle/Ord/reF/Basic]:
Press ENTER
Select first object: Press ENTER
The reference dimension is added to the current view.
Save your file.
Now that you have created drawing views, you edit a part and automatically
update the drawing views.
1
2
Editing Assemblies |433
Editing Assemblies
Design or specification changes require most assembly designs to be docu-
mented and edited frequently. You modify parts, rearrange parts and features
in the hierarchy of the assembly tree, and change or delete constraints.
Because the parts and assembly are parametric, changes are fast and updates
are immediate.
Editing an external part definition automatically changes the assembly
model wherever the part is instanced.
Editing External Subassemblies
The process for editing external subassemblies and combined parts is much
like the one for editing external parts. To begin, you activate the subassembly
by double-clicking it in the Browser or entering information on the com-
mand line. When external files are active in the ref-edit state, they are not
available for simultaneous use by others.
The active subassembly retains its color on the screen, while other geometry
is dimmed. Non-active instances of the active subassembly dim one-half as
much. This indicates which instance is active and reflects all of the instances
that will be updated as a result of the change.
When active, you can edit the subassembly. The editing operations take place
as if the active subassembly was an open document. You alter subassemblies
by adding or removing components, changing constraints, adding new fea-
tures, or restructuring the assembly. Newly created non-part based geometry
such as surfaces and wires are created in the master assembly until made part
of a component.
You can save your changes to an external subassembly file in several ways.
■Use an option in AMUPDATE to commit the changes to the external file.
■Activate a part or subassembly that is contained in another file and, in the
resulting dialog box, commit to changes.
■Activate another subassembly that is external to the active subassembly.
■Save the assembly and choose either to not save changes or to save the
pending changes to any external files.
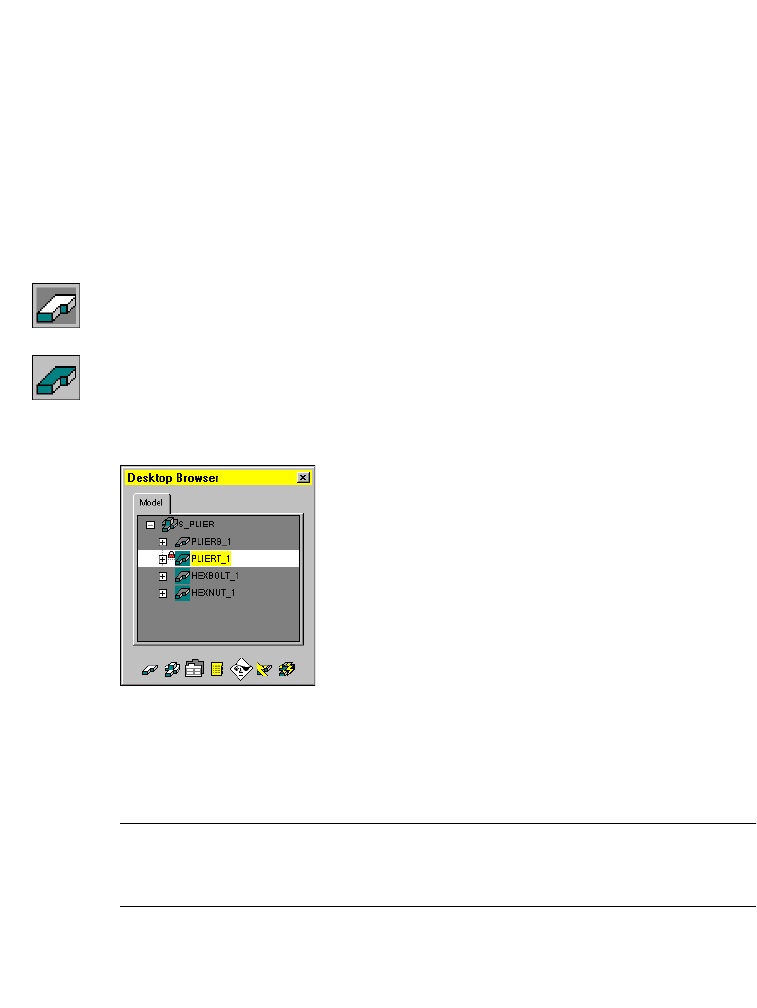
434 |Chapter 16 Assembling Parts
Editing External Parts
To update all instances of a part in assemblies, you need to edit the original
part. You alter part features by changing dimensions, changing the
constraints, or adding new features. The changes take effect in the assembly.
In this tutorial, you edit the external PLIERT part from within your assembly
drawing. This is called editing in place. In the following steps, you add another
hole to the PLIERT part, and modify assembly constraints.
To edit an external part in place
1Use AMMODE to return to Model mode.
Browser Select the Model tab.
2Use AMACTIVATE to activate the PLIERT part.
Context Menu In the graphics area, right-click and choose Part ➤
Activate Part.
The inactive parts are grayed out in the Desktop Browser, and dimmed on
screen.
By dimming the inactive parts, it is easier for you to work on the active exter-
nal part without moving other parts.
3Notice the red lock preceding the PLIERT icon in the browser. This indicates
that the file has been locked and cannot be modified by another user.
NOTE For clarity, the visibility of the other parts has been turned off in this sec-
tion. If you prefer, turn off the visibility of PLIERB, HEXBOLT, and HEXNUT before
you activate PLIERT.
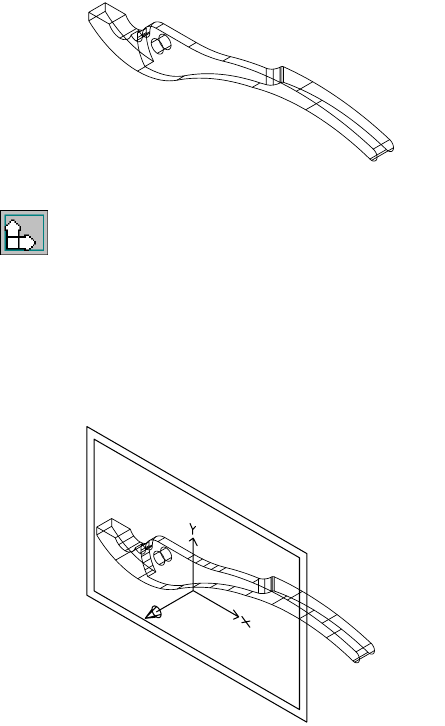
Editing Assemblies |435
4Zoom in on PLIERT.
5Use AMSKPLN to create a new sketch plane, responding to the prompts.
Context Menu In the graphics area, right-click and choose New Sketch
Plane.
Select work plane, planar face or [worldXy/worldYz/worldZx/Ucs]:
Make sure the front face of the part is highlighted, and press ENTER
Plane=Parametric
Select edge to align X axis or [Z-flip/Rotate] <accept>:
Make sure the UCS icon is upright and the Z axis points away from the part,
and then press ENTER
The sketch plane is defined on the front face of the pliers. Now, create the
new slip hole to increase movement of the slip pliers.
436 |Chapter 16 Assembling Parts
To create a new feature on an external part
1Use CIRCLE to place a new hole, responding to the prompts.
Context Menu In the graphics area, right-click and choose 2D Sketching
➤ Circle.
CIRCLE Specify center point for circle or [3P/2P/Ttr (tan tan radius)]:
Select a point near the existing hole
Specify radius of circle or [Diameter]:
Draw a circle approximately the same size as the other hole
2Use AMPROFILE to solve the sketch.
Context Menu In the graphics area, right-click and choose Sketch Solving ➤
Single Profile.
Mechanical Desktop indicates that three dimensions are required to fully
constrain the sketch.
3Use AMPARDIM to add the parametric dimensions, responding to the
prompts. Zoom in as needed to magnify the holes.
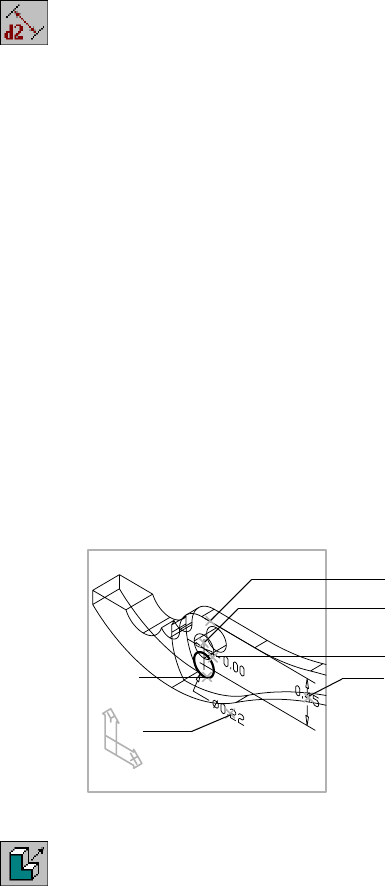
Editing Assemblies |437
Context Menu In the graphics area, right-click and choose Dimensioning ➤
New Dimension.
Select first object: Select the circle (1)
Select second object or place dimension:
Specify a point for the location of the dimension (2)
Enter dimension value or [Undo/Radius/Ordinate/Placement point]
<0.2003>: Enter .22
Solved underconstrained sketch requiring 2 dimensions or constraints.
Select first object: Select the circle (1)
Select second object or place dimension: Select the existing extruded hole (3)
Specify dimension placement: Specify a point for the location of dimension (4)
Enter dimension value or [Undo/Hor/Ver/Align/Par/aNgle/Ord/Diameter/pLace]
<0.0454>: Enter 0
Solved underconstrained sketch requiring 1 dimensions or constraints.
Select first object: Select the circle (1)
Select second object or place dimension: Select the top line on PLIERT (5)
Specify dimension placement: Specify a point for the location of dimension (6)
Enter dimension value or [Undo/Hor/Ver/Align/Par/aNgle/Ord/Diameter/pLace]
<0.5093>: Enter .45
Solved fully constrained sketch.
Select first object: Press ENTER
The circle is now constrained.
4Use AMEXTRUDE to extrude the new hole through the pliers.
Context Menu In the graphics area, right-click and choose Sketched &
Work Features ➤ Extrude.
In the Extrusion dialog box, specify:
Termination: Through
Operation: Cut
5
4
3
6
3
1
2
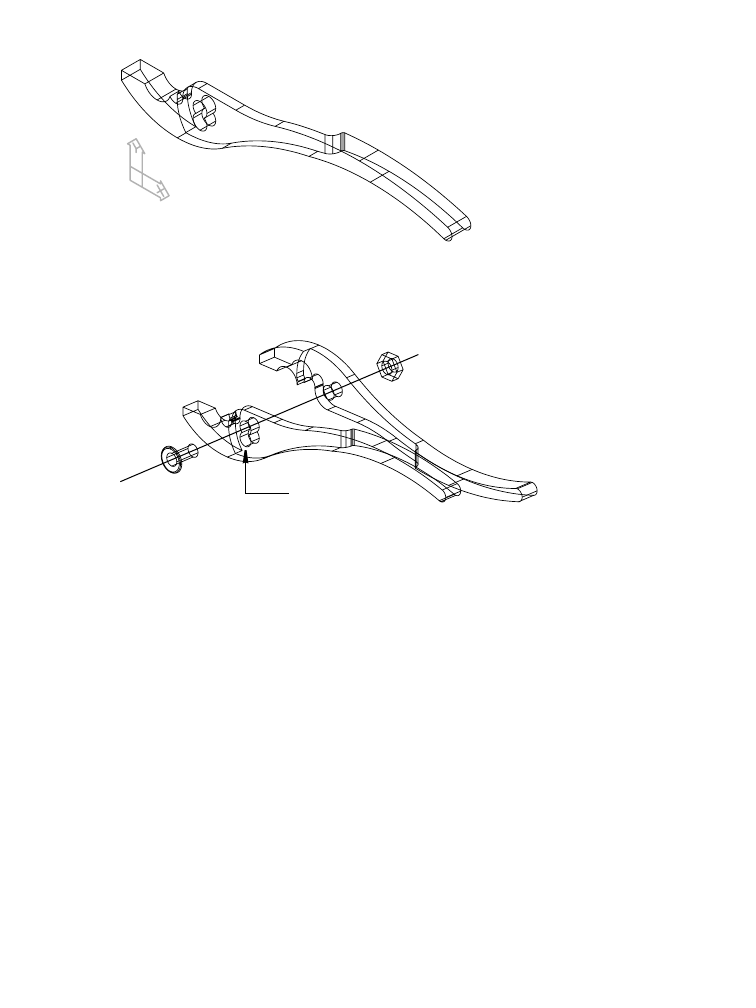
438 |Chapter 16 Assembling Parts
Choose OK to exit the dialog box.
The new hole is extruded, and its position is constrained to the original hole.
Save your file.
5The External Part Save dialog box indicates a change in the PLIERT drawing.
Choose OK to save the changes you have made.
The Browser returns to normal. The inactive parts are no longer dimmed, and
the assembly reflects the new PLIERT part.
Editing Assembly Constraints
Using the Browser, you can selectively delete, edit, and add constraints to
realign or change relationships of parts.
Use MOVE to reposition the parts as you edit and add constraints. If you do
not want the parts to reassemble throughout editing, set AMAUTOASSEMBLE
to 0 (off). To reassemble parts after you add a constraint, select the Update
icon on the Desktop Browser.
new bolt hole
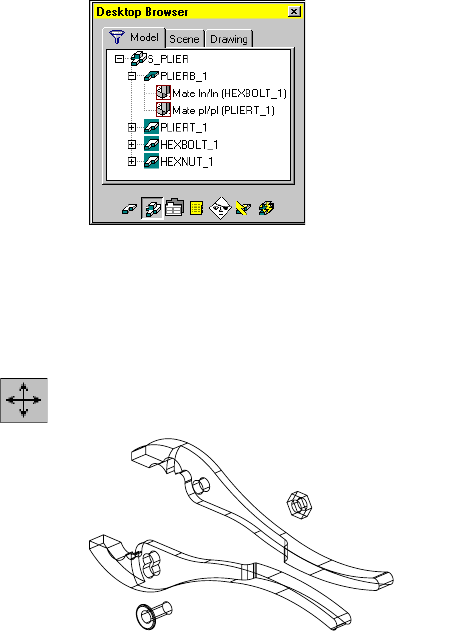
Editing Assemblies |439
To delete an assembly constraint
1In the Desktop Browser, click the plus sign on PLIERB_1 to expand the hier-
archy. Select the Assembly filter at the bottom of the Browser to filter out all
information except the assembly constraints.
2In the Browser, click the plus sign on HEXBOLT_1 to expand the hierarchy.
Right-click the Mate ln/ln constraint of HEXBOLT_1, and choose Delete.
3Delete the Mate pl/pl constraints of HEXBOLT_1.
4Delete constraints for PLIERB, PLIERT, and HEXNUT.
5Use MOVE to separate the parts to apply the new constraints.
Context Menu In the graphics area, right-click and choose 2D Sketching ➤
Move.
Next, you apply new assembly constraints. You use an insert constraint to
align HEXBOLT to the new hole along their axes while mating the face of
PLIERT and the corresponding face of the bolt head.
Use the DOF symbol to illustrate how many rigid body degrees of freedom
are eliminated for each part.

440 |Chapter 16 Assembling Parts
To apply an assembly constraint
1Use AMINSERT to constrain PLIERT_1 and HEXBOLT_1, responding to the
prompts.
Context Menu In the graphics area, right-click and choose 3D
Constraints ➤ Insert.
Select first circular edge: Select the new bolt hole of PLIERT (1)
First set = Plane/Axis
Enter an option [Clear/Flip] <accept>:
Flip the direction arrow toward HEXBOLT, and press ENTER
Select second circular edge: Select the bolt shaft near the head (2)
Second set = Plane/Axis
Enter an option [Clear/Flip] <accept>:
Flip the direction arrow toward PLIERT, and press ENTER
Enter offset <0.0000>: Press ENTER
The bolt is now inserted through the new hole.
Now you can align the new hole in PLIERT and the corresponding hole in
PLIERB along their axes.
2
1
Editing Assemblies |441
2Use AMINSERT to constrain PLIERB and PLIERT, responding to the prompts.
Context Menu In the graphics area, right-click and choose 3D
Constraints ➤ Insert.
Select first circular edge: Select the new bolt hole of PLIERT (3)
First set = Plane/Axis
Enter an option [Clear/Flip] <accept>:
Flip the direction arrow toward PLIERB and press ENTER
Select second circular edge: Select the hole on the inner face of PLIERB (4)
Second set = Plane/Axis
Enter an option [Clear/Flip] <accept>:
Flip the direction arrow toward PLIERT and press ENTER
Enter offset <0.0000>: Press ENTER
The PLIERB and PLIERT parts are constrained to each other on the inside face
and along the axes of the lower hole of PLIERT and the single hole of PLIERB.
Transactional degrees of freedom are solved. In this case, you want to allow
the pliers and hexbolt to rotate on the axes, so you leave the rotational
degree of freedom unsolved.
3Use AMINSERT to constrain the facing planes of HEXNUT and PLIERB at the
bolt holes, responding to the prompts.
Context Menu In the graphics area, right-click and choose 3D
Constraints ➤ Insert.
4
3
442 |Chapter 16 Assembling Parts
Move parts so you can easily see selection points.
Select first circular edge: Select the bolt hole on PLIERB (5)
First set = Plane/Axis
Enter an option [Clear/Flip] <accept>:
Flip the direction arrow toward HEXNUT and press ENTER
Select second circular edge: Select the hole on HEXNUT (6)
Second set = Plane/Axis
Enter an option [Clear/Flip] <accept>:
Flip the direction arrow toward PLIERB and press ENTER
Enter offset <0.0000>: Press ENTER
The PLIERB and PLIERT parts are constrained on their facing planes. The bolt
passes through both parts, and the holes and bolt shaft are aligned along
their axes.
4Check that the parts are assembled correctly.
Desktop Menu View ➤ 3D Views ➤ Top
5Return to the isometric view.
Desktop Menu View ➤ 3DViews ➤ Front Right Isometric
Save your file.
6
5

443
In This Chapter 17
Combining Parts
This Autodesk® Mechanical Desktop® tutorial builds on
the part and assembly modeling techniques that you
learned in previous chapters. In this chapter, you create
a part and combine toolbodies with it, using parametric
Boolean operations such as cut, join, and intersect, to
construct a single part. You also learn how the display of
complex parts is organized in the Desktop Browser.
In this tutorial, you work in Single Part mode to create a
complex part to be used as a component for an off-road
vehicle. You build the part by combining several
toolbodies with a base part.
■Working in Single Part mode
■Changing part definitions
■Combining and intersecting
parts
■Creating toolbody and nested
toolbody parts
■Reducing weight parametrically

444 |Chapter 17 Combining Parts
Key Terms
Te r m Definition
base part The active part where toolbody parts are aligned and subsequently combined.
Boolean modeling A solid modeling technique in which two solids are combined to form one
resulting solid. Boolean operations include cut, join, and intersect. Cut subtracts
the volume of one solid from the other. Join unites two solid volumes. Intersect
leaves only the volume shared by the two solids.
combine feature A parametric feature resulting from the union, subtraction, or intersection of a
base part with a toolbody part.
complex part A parametric part containing one or more parametric parts as features.
Part Catalog The means of attaching and cataloging local and external parts in the Part
Modeling environment. Use the All and External tabs to specify contents, which
can be instanced, copied, renamed, replaced, externalized, removed, localized
and sorted.
part definition Contains information about a part, including its name, geometric data,
specifications, and parameters. If you instance a part multiple times, the
assembly contains only one definition of the part.
part instance A copy of the part definition. The part instance is inserted into the drawing and
is visible as a solid object on the graphics screen. When a part definition is
changed, so are all of its instances. Part instance names are displayed in the
Desktop Browser.
toolbody A part that is aligned with the base part and then used to join, intersect, or cut
volume from the base part. In the Part Modeling environment, a part created
after a base part, that automatically becomes an unconsumed toolbody.
toolbody consumption When a toolbody part is combined with a base part, the toolbody part instance
disappears from the graphics screen and appears as a new combine feature of
the base part in the Desktop Browser.
toolbody rollback A special option of the AMEDITFEAT command that enables you to change a
toolbody part after it has been consumed as a combine feature.
Basic Concepts of Combining Parts |445
Basic Concepts of Combining Parts
In Mechanical Desktop® the parametric Boolean capabilities for combining
parts provide a combination of modeling flexibility and convenience. To
combine two parts, you identify which part you want to use as the base part
and make it active. Then, you position the toolbody part on the base part,
using the MOVE or ROTATE command or assembly constraints. You use
AMCOMBINE to cut, join, or intersect the toolbody part with the base part.
You can combine as many toolbodies with a base part as you like, but the
base part and the toolbody must be instances of different parts. In other
words, you cannot combine a part with an instance of itself.
Because the end result is a single part, you can create combined parts in Single
Part mode. If you place more than one part in a part file, the additional parts
automatically become unconsumed toolbodies.
To combine a toolbody with a base part in an Assembly file, both parts must
exist in the same active assembly.
When you create a complex part, the complete definitions of the toolbodies
are stored in the assembly model file. To avoid creating files that are unnec-
essarily complex, use simple parts as toolbodies. In the following illustration,
the highlighted parts are used to cut a slot. The resultant parts look identical,
but the one created with the complex toolbody part consumes more disk
space. Feature editing operations, such as cutting a slot, take longer.
With Mechanical Desktop, you can create toolbody parts that contain other
toolbody parts. These are called nested toolbodies. However, you may be able
to achieve the same result without nesting toolbodies.
simple toolbody partcomplex toolbody part
446 |Chapter 17 Combining Parts
In the following illustration, the appearance of the part is the same, whether
or not you nest the toolbodies, but the part displayed in the Desktop Browser
on the left is easier to manage and has a less cumbersome display than the
one in the Browser on the right.
To edit CAM_1, on the left, you need to expose only one toolbody. Nested
toolbody parts, like those in the example on the right, usually have more com-
plex constraint systems and require multiple part updates after modification.
Working in Single Part Mode
If you are creating combined parts, you can work in Single Part mode. In a
single part file, you can only have one part definition, but you can work with
more than one part. If you create or externally reference more than one part,
the additional parts become unconsumed toolbodies that you can use to
combine with the first part created in the drawing.
In the Browser above, TOOLBODY1 and TOOLBODY3 are unconsumed.
TOOLBODY2 is consumed, since it has been combined with TOOLBODY1.
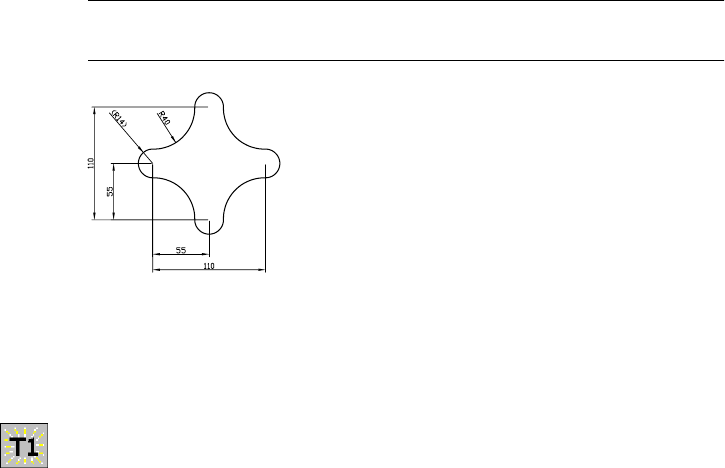
Creating Parts |447
Creating Parts
In this tutorial, you create a chassis suspension component for an off-road
recreational vehicle. The part is an axle spacer. You create most of the features
of this part by first creating the basic shape. Then, you create separate parts
that you use as tools to add additional features to the basic shape.
Open the file spacer.dwg in the desktop\tutorial folder. This drawing contains
a fully constrained profile sketch of the basic shape of the axle spacer.
NOTE Back up the tutorial drawing files so you still have the original files if you
make a mistake. See “Backing up Tutorial Drawing Files” on page 40.
To create an axle spacer, you begin by extruding the part. First, review the
constraint system for this sketch.
To extrude a part
1Use AMSHOWCON to check the existing constraints.
Context Menu In the graphics area, right-click and choose 2D
Constraints ➤ Show Constraints.
2Choose All.
Each arc uses the geometric constraints tangent and radius. The upper and
lower outside arcs are aligned using the X Value constraint, and the left and
right outside arcs use the Y Value constraint.
3Press ENTER.
Because this part is cast aluminum, you must extrude it with a draft angle.
Expand the part hierarchy by clicking the plus icon next to the part name in
the Desktop Browser. The Browser shows an existing part, SPACER, that con-
tains an unconsumed profile.
4In the Desktop Browser, expand SPACER. Under SPACER, select the Profile1
icon. The sketch is highlighted.
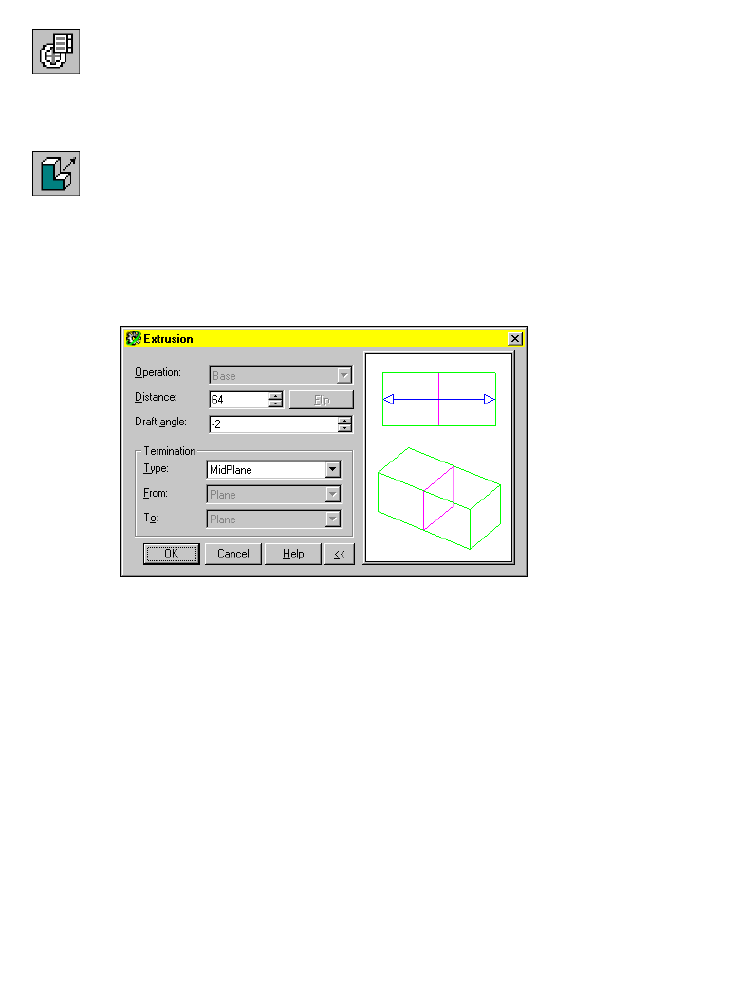
448 |Chapter 17 Combining Parts
5Use VIEW to change your viewpoint to a previously saved view.
Desktop Menu View ➤ Named Views
In the View dialog box, select SPACER_VIEW, and choose Set Current.
Choose OK.
6Use AMEXTRUDE to extrude the profile.
Context Menu In the graphics area, right-click and choose Sketched &
Work Features ➤ Extrude.
In the Extrusion dialog box, specify:
Distance: Enter 64
Draft Angle: Enter -2
Termination: Type: MidPlane
Choose OK.
Next, adjust the system settings so that you can hide the silhouette edges of
your part.
To hide silhouette edges
1Set the AutoCAD system variable that controls the display of silhouette
edges, responding to the prompt.
Command DISPSILH
Enter new value for DISPSILH <0>: Enter 1
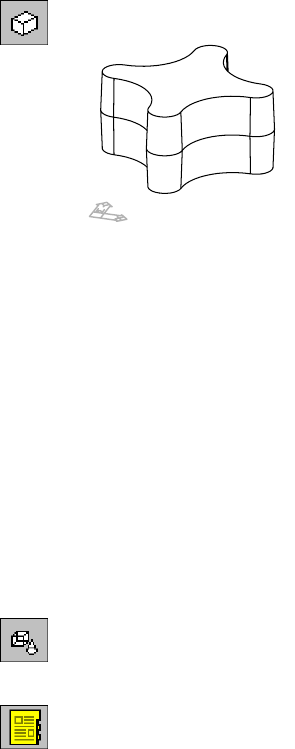
Creating Toolbody Part Definitions |449
2Use HIDE to hide the silhouette edges.
Desktop Menu View ➤ Hide
The spacer has a boss at the bottom and a relief at the top. Next, you use two
part definitions to construct the toolbody parts. You combine those toolbody
parts with the spacer to create the boss and relief.
Creating Toolbody Part Definitions
The shapes of the new toolbody parts are similar to the shape of the spacer
profile. The easiest way to create the toolbodies is to use copies of the spacer
to construct the new toolbody parts. Because you cannot copy a base part
definition in the Part Modeling environment, you use the Part Catalog to
attach a copy of the part to the current drawing as a toolbody definition.
To externally reference a toolbody definition
1Change the display back to wireframe.
Desktop Menu View ➤ Shade ➤ 2D Wireframe, and then View ➤ Regen
2Use AMCATALOG to attach the boss.dwg file as a toolbody. This drawing is a
duplicate of the spacer.
Context Menu In the graphics area, right-click and choose Toolbody
Menu ➤ Catalog.
In the Part Catalog, choose the External tab and select Return to Dialog.
Right-click in Directories, and choose Add Directory.
3In the Browse for Folder dialog box, select the folder containing your tutorial
drawings. Choose OK.
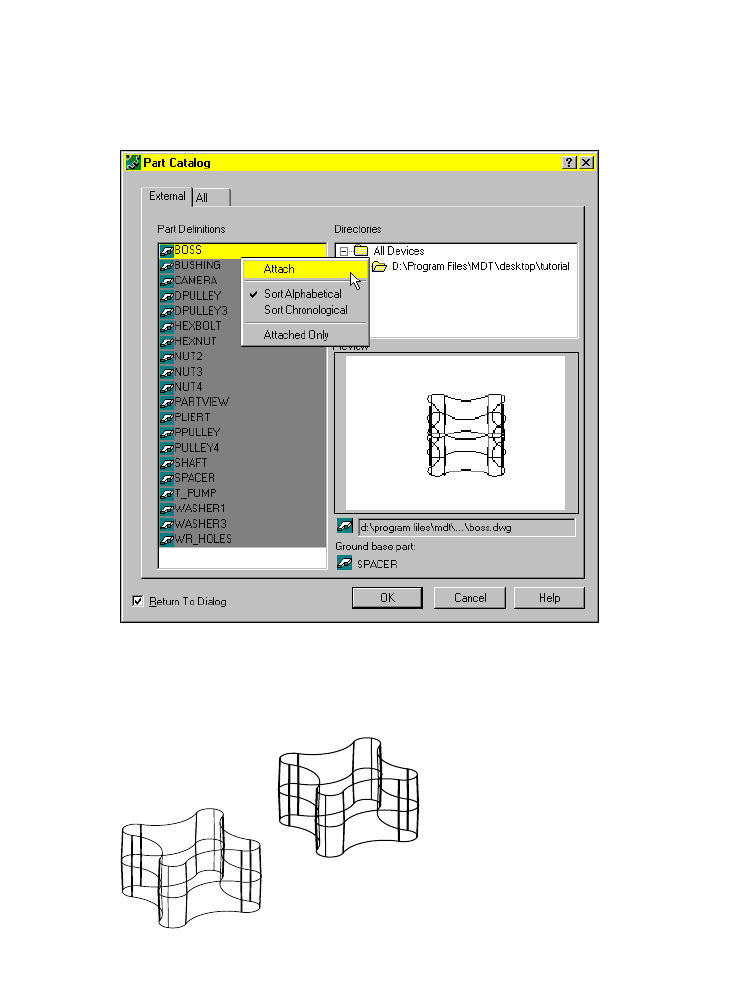
450 |Chapter 17 Combining Parts
Because you are working in the Part Modeling environment, Mechanical
Desktop filters the part and assembly drawings in your working directory and
lists only the part files. A thumbnail preview of the part icon precedes the
drawing name. If a part file does not contain features, it is preceded by a red
AutoCAD icon.
4In the Part Catalog, right-click BOSS and choose Attach.
5Respond to the prompts as follows:
Specify new insertion point: Specify a point above and to the right of the spacer
Specify insertion point for another instance or <continue>: Press ENTER
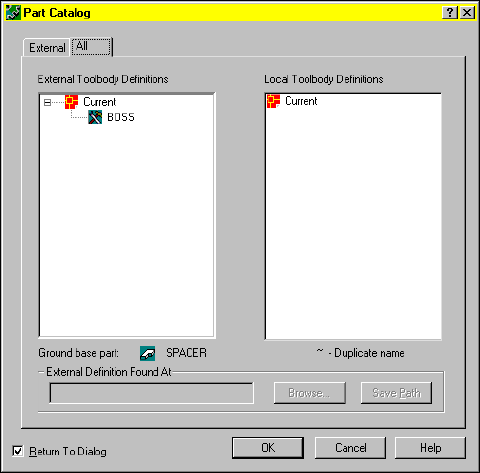
Creating Toolbody Part Definitions |451
The Part Catalog is displayed.
6Choose the All tab. The boss toolbody is listed in External Toolbody Definitions.
Choose OK.
Next, localize and make a copy of the boss toolbody, to create a definition for
the relief toolbody using the Browser shortcut methods.
To localize an external toolbody and copy its definition
1Localize external toolbody BOSS_1.
Browser Right-click BOSS_1, and choose All Instances ➤ Localize.
The boss toolbody is localized.
Next, copy the boss toolbody definition to create a relief toolbody.
2Copy the boss toolbody
Browser Right-click BOSS_1, and choose Show Definition.
3In the Part Catalog, choose the All tab. The boss toolbody is listed in Local Tool-
body Definitions.
Right-click BOSS, and choose Copy Definition.

452 |Chapter 17 Combining Parts
4The Copy Definition dialog box is displayed. In New Definition Name , enter
relief.
Choose OK.
5Position the instance of the relief toolbody definition to the right of the boss
toolbody, and press ENTER.
The new relief toolbody definition is listed under Local Toolbody Definitions
in the Part Catalog. Choose OK.
Examine the Browser. It contains one part and two unconsumed toolbodies.
Save your file.
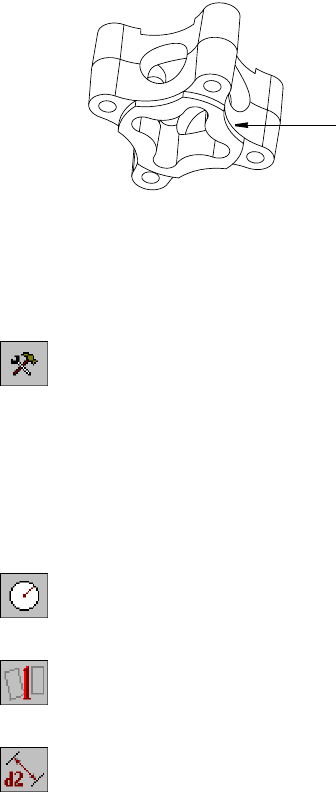
Creating Toolbody Part Definitions |453
The boss toolbody on the completed spacer follows the profile of the spacer,
but its corners are rounded. The next step is to combine a cylinder with the
boss toolbody.
In the Browser, right-click BOSS_1 and choose Activate Toolbody. Right-click
BOSS_1 again, and choose Zoom To.
To create a cylinder toolbody to combine with the boss toolbody
1Use AMNEW to create a new toolbody definition, responding to the prompts.
Context Menu In the graphics area, right-click and choose Toolbody ➤
New Toolbody.
Enter an option [Instance/Part} <Part>: Press ENTER
Select an object or enter a new part name <TOOLBODY1>:
Enter boss_cylinder and press ENTER
The new toolbody is created, and the toolbody name is added to the Browser.
In the graphics area, right-click and choose Part Menu.
2Use CIRCLE to create a circle close to the boss toolbody.
Context Menu In the graphics area, right-click and choose Part Menu ➤
2D Sketching ➤ Circle.
3Use AMPROFILE to create a profile from the sketch.
Context Menu In the graphics area, right-click and choose Sketch Solving ➤
Single Profile.
4Use AMPARDIM to constrain the profile.
Context Menu In the graphics area, right-click and choose Dimensioning ➤
New Dimension.
boss
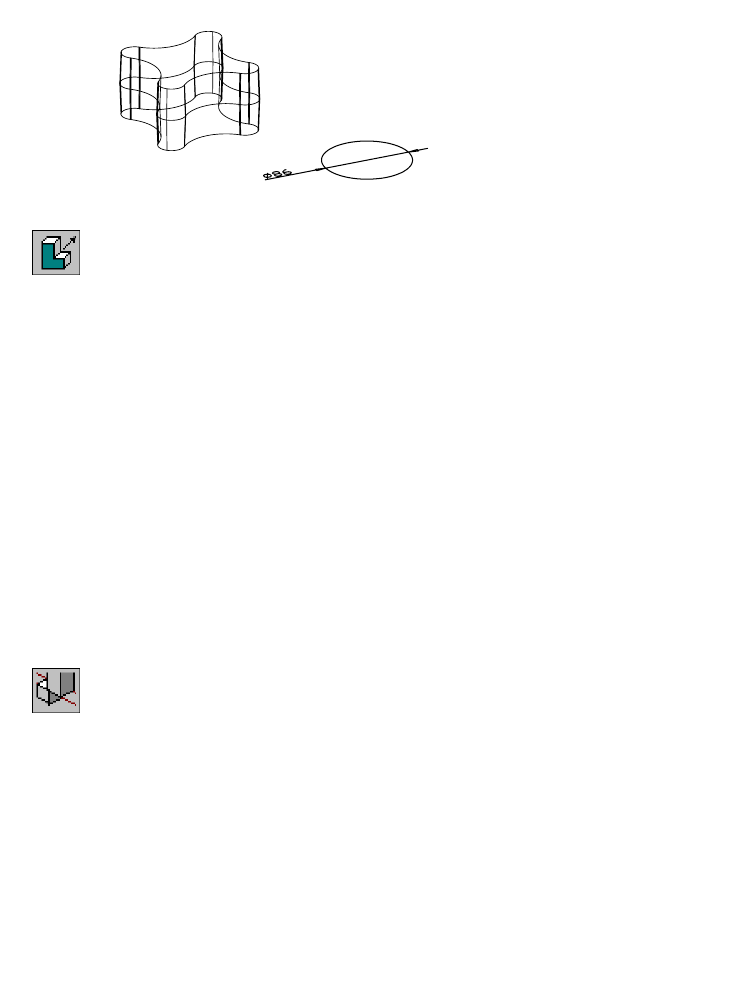
454 |Chapter 17 Combining Parts
5Select the circle, and enter a dimension of 86.
6Use AMEXTRUDE to extrude the profile.
Context Menu In the graphics area, right-click and choose Sketched &
Work Features ➤ Extrude.
In the Extrusion dialog box, specify:
Distance: Enter 5
Draft Angle: Enter 2
Termination: Type: Blind
Choose OK.
Next, you use assembly constraints to position the cylinder at the bottom of
the BOSS_1 toolbody. Then you use a Boolean intersect operation to combine
the two parts.
To align the cylinder with the boss toolbody, you create two mate-line con-
straints. Follow the prompts carefully, using the illustrations as your guide to
selecting the correct part edges.
To align a part with a relief toolbody
1Use AMMATE to create a mate constraint, responding to the prompts.
Context Menu In the graphics area, right-click and choose Toolbody
Menu ➤ 3D Constraints ➤ Mate.
Select first set of geometry: Select the bottom edge of the cylinder (1)
First set = Axis, (arc)
Select first set or [Clear/Face/Point/cYcle] <accEpt>: Enter p
First set = Point, (arc)
Select first set or [Clear/aXis/fAce/cYcle] <accEpt>: Press ENTER

Creating Toolbody Part Definitions |455
Select second set of geometry: Select the arc (2)
Second set = Axis, (arc)
Select second set or [Clear/fAce/Point/cYcle] <accEpt>: Enter p
Second set = Point, (arc)
Select second set or [Clear/aXis/fAce/cYcle] <accEpt>: Select the arc (3)
Second set = Plane, (arc)
Enter an option [Clear/aXis/Flip/cYcle] <accEpt>: Enter x
Second set = Axis, (arc)
Select first set or [Clear/fAce/Midpoint/cYcle] <accEpt>: Enter m
Second set = Axis, (arc)
Select first set or [Clear/fAce/Midpoint/cYcle] <accEpt>: Press ENTER
Enter offset <0>: Press ENTER
The center of the cylinder is aligned with the line between the two spacer arc
centers.
1
3
2
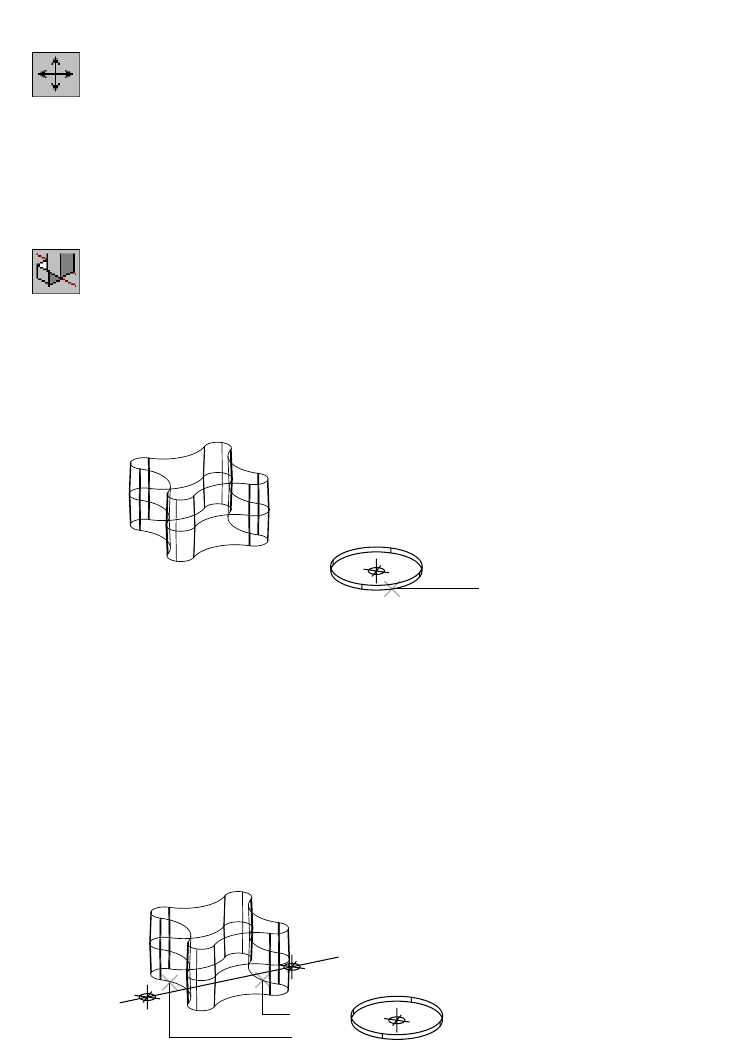
456 |Chapter 17 Combining Parts
2Use MOVE to move the cylinder for easier selection, responding to the
prompts.
Context Menu In the graphics area, right-click and choose Part Menu ➤
2D Sketching ➤ Move.
Select objects: Specify the cylinder
Select objects: Press ENTER
Base point or displacement: Specify a point
Second point of displacement: Specify a second point and press ENTER
3Create the second mate-line constraint, responding to the prompts.
Context Menu In the graphics area, right-click and choose Toolbody
Menu ➤ 3D Constraints ➤ Mate.
Select first set of geometry: Select the bottom edge of the cylinder (4)
First set = Axis, (arc)
Select first set or [Clear/fAce/Point/cYcle] <accEpt>: Enter p
First set = Point, (arc)
Select first set or [Clear/aXis/fAce/cYcle] <accEpt>: Press ENTER
Select second set of geometry: Select the arc (5)
Second set = Axis, (arc)
Select second set or [Clear/fAce/Point/cYcle] <accEpt>: Enter p
Second set = Point, (arc)
Select second set or [Clear/aXis/fAce/cYcle] <accEpt>: Select the arc (6)
Second set = Plane, (arc)
Enter an option [Clear/aXis/Flip/cYcle] <accEpt>: Enter x
Second set = Axis, (arc)
Select first set or [Clear/fAce/Midpoint/cYcle] <accEpt>: Press ENTER
Enter offset <0>: Press ENTER
4
6
5
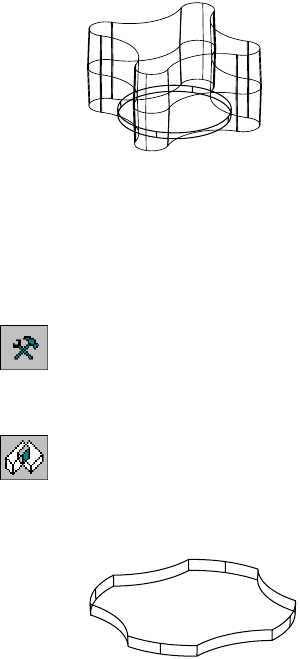
Creating Toolbody Part Definitions |457
The center of the cylinder is aligned with the line between the two boss arc
centers. Together, the two mate constraints position the cylinder at the bot-
tom of the boss. The center of the cylinder is coincident with the center of
the boss.
Now, you are ready to combine the boss toolbody with the cylinder. Because
the boss toolbody will be the base part in the Boolean operation, you need to
make it active.
To create a combine feature
1Use AMACTIVATE to activate BOSS_1.
Browser In the Browser, right-click BOSS_1 and choose Activate
Toolbody.
2Use AMCOMBINE to combine the toolbody and the cylinder, responding to
the prompts.
Context Menu In the graphics area, right-click and choose Part Menu ➤
Placed Features ➤ Combine.
Enter parametric boolean operation [Cut/Intersect/Join] <Cut>: Enter i
Select part (toolbody) to use for intersecting: Select the cylinder
Save your file.
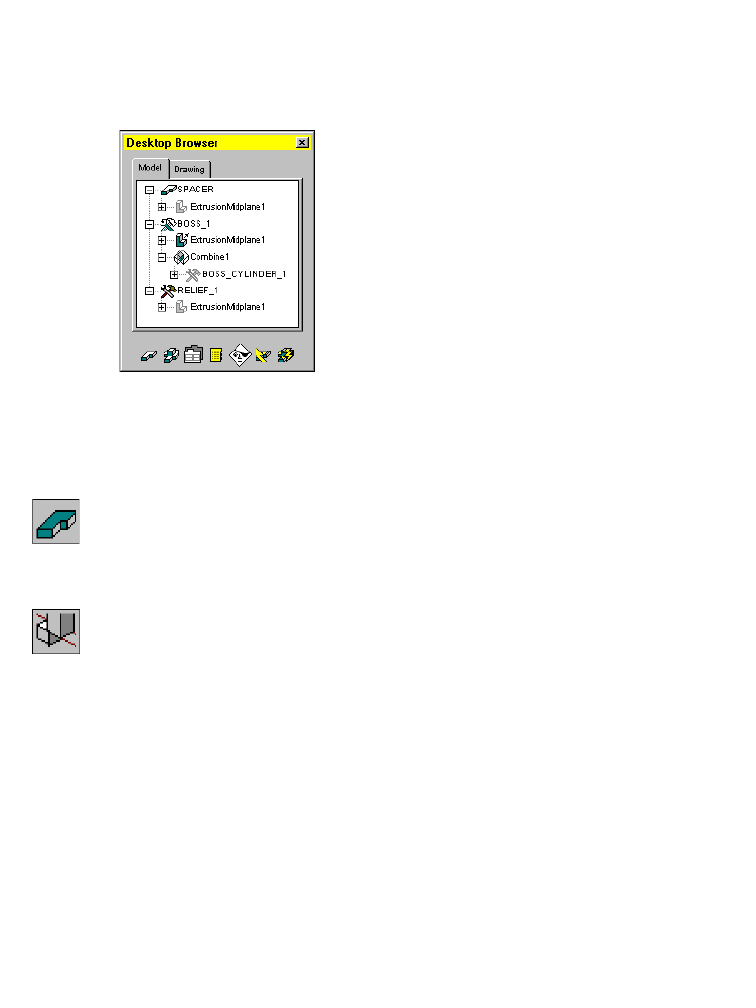
458 |Chapter 17 Combining Parts
Working with Combine Features
The Desktop Browser now shows that the boss toolbody has a combine fea-
ture. The boss cylinder is a toolbody in the combine feature.
The next step is to constrain and combine the boss toolbody with the spacer.
To constrain and combine a toolbody to the base part
1Use AMACTIVATE to activate the SPACER.
Browser In the Browser, right-click SPACER and choose Activate
Part.
2Use AMMATE to apply a mate constraint to the boss toolbody and the spacer,
responding to the prompts.
Desktop Menu Toolbody ➤ 3D Constraints ➤ Mate.
Select first set of geometry: Select the top edge of the boss toolbody (1)
First set = Axis, (arc)
Select first set or [Clear/fAce/Point/cYcle] <accEpt>: Enter p
First set = Point, (arc)
Select first set or [Clear/aXis/fAce/cYcle] <accEpt>:
Select the opposite edge of the boss toolbody (2)
First set = Plane, (arc)
Enter an option [Clear/aXis/Flip/cYcle] <accEpt>: Enter x
First set = Axis, (arc)
Select first set or [Clear/fAce/Midpoint/cYcle] <accEpt>: Press ENTER

Working with Combine Features |459
Select second set of geometry: Select the bottom right edge of the spacer (3)
Second set = Axis, (arc)
Select second set or [Clear/fAce/Point/cYcle] <accEpt>: Enter p
Second set = Point, (arc)
Select second set or [Clear/aXis/fAce/cYcle] <accEpt>:
Select the opposite edge of the spacer (4)
Second set = Plane, (arc)
Enter an option [Clear/aXis/Flip/cYcle] <accEpt>: Enter x
Second set = Axis, (arc)
Select second set or [Clear/fAce/Midpoint/cYcle] <accEpt>: Press ENTER
Enter offset <0>: Press ENTER
3Move the boss toolbody, and repeat step 2 for the second constraint. Be sure
to select the top edges of the boss toolbody.
1
2
3
4
1
4
3
2
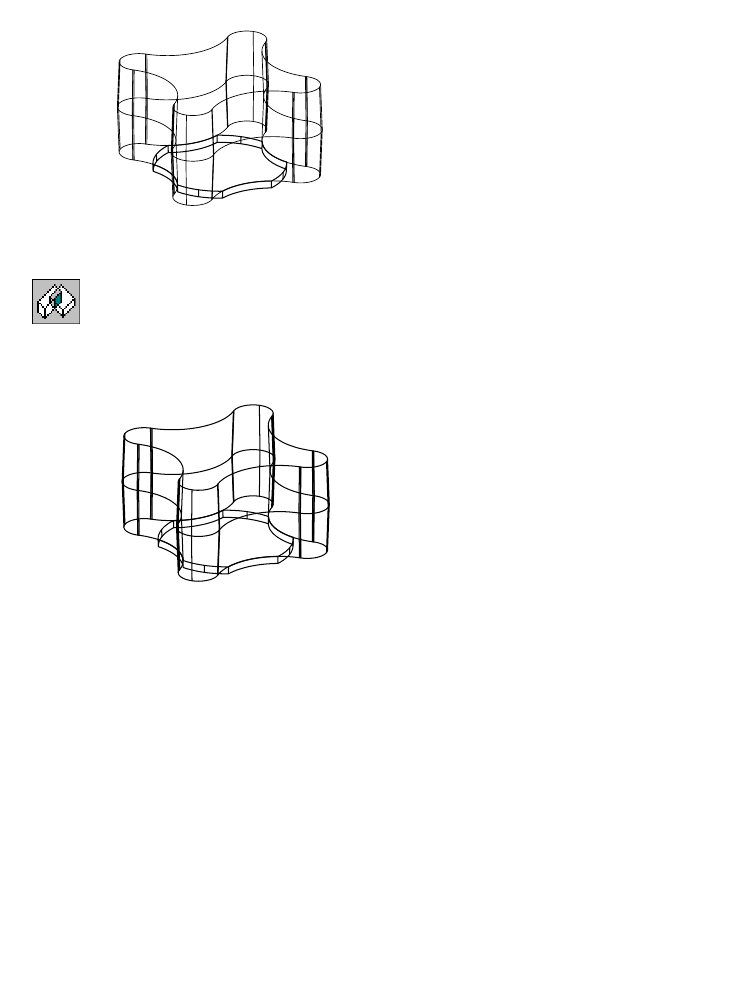
460 |Chapter 17 Combining Parts
The boss toolbody is now aligned with the spacer.
4Use AMCOMBINE to combine the spacer and the boss toolbody, responding to
the prompts.
Context Menu In the graphics area, right-click and choose Part Menu ➤
Placed Features ➤ Combine.
Enter parametric boolean operation [Cut/Intersect/Join] <Cut>: Enter j
Select part (toolbody) to be joined: Select the boss toolbody
Save your file.
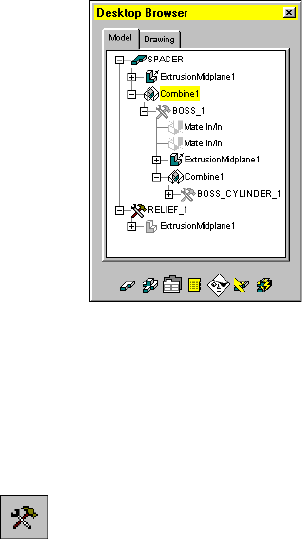
Creating Relief Toolbodies |461
Creating Relief Toolbodies
The Desktop Browser now shows a nested toolbody construction. The boss
cylinder toolbody is a combine feature of the boss toolbody, and the boss
toolbody is a combine feature of the spacer.
Next, you create the relief toolbody, to cut material from the spacer.
In the Browser, right-click RELIEF_1 and choose Zoom To.
To add a new toolbody name in the Browser
1Use AMNEW to create a new toolbody called RELIEF_CYLINDER, responding
to the prompts.
Context Menu In the graphics area, right-click and choose Toolbody
Menu ➤ Toolbody ➤ New Toolbody.
Enter an option [Instance/Part} <Part>: Press ENTER
Select an object or enter new part name <TOOLBODY1>:
Enter relief_cylinder and press ENTER
The new part name is added to the Desktop Browser.
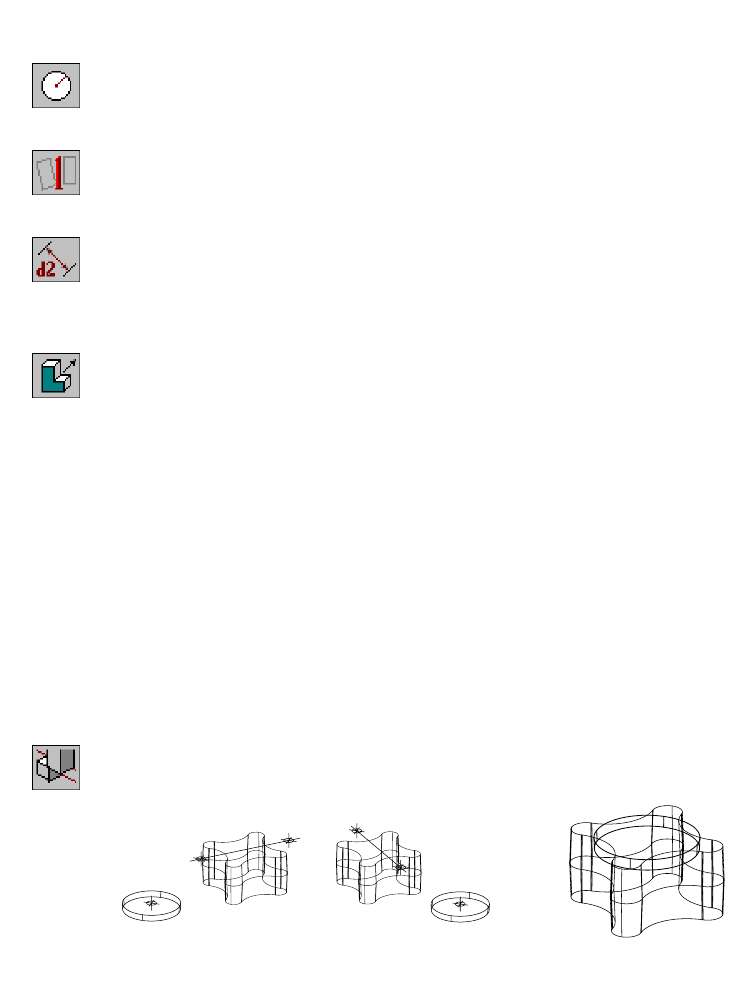
462 |Chapter 17 Combining Parts
To create a new part
1Use CIRCLE to draw a circle near RELIEF_1.
Context Menu In the graphics area, right-click and choose Part Menu ➤
2D Sketching ➤ Circle.
2Use AMPROFILE to create a profile from the sketch.
Context Menu In the graphics area, right-click and choose Sketch Solving ➤
Single Profile.
3Use AMPARDIM to constrain the profile.
Context Menu In the graphics area, right-click and choose Dimensioning ➤
New Dimension.
Select the circle, and enter a dimension of 90.
4Use AMEXTRUDE to extrude the profile.
Context Menu In the graphics area, right-click and choose Sketched &
Work Features ➤ Extrude.
In the Extrusion Feature dialog box specify:
Termination: Blind
Distance: Enter 10
Draft Angle: Enter 2
Choose OK.
Next, you position the cylinder at the top of RELIEF_1, using assembly con-
straints just as you did for the boss cylinder. As you select geometry for the
constraints, be sure to select the top edges of both the relief cylinder and the
relief toolbody.
To constrain the toolbodies
1Use AMMATE for two mate constraints to align the toolbodies.
Desktop Menu In the Desktop Menu, choose Toolbody Menu ➤ Toolbody
➤3D Constraints ➤ Mate.
first mate constraint second mate constraint result
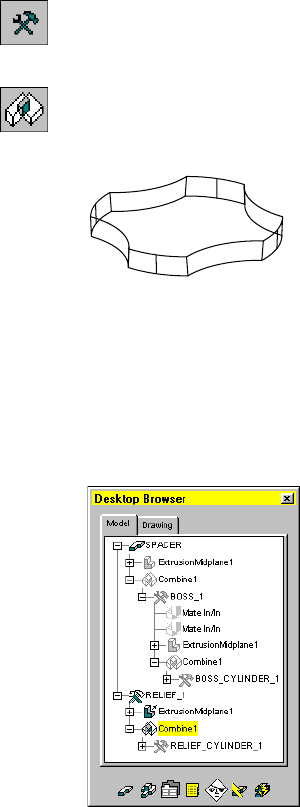
Combining Toolbodies with Spacers |463
2After adding the constraints, use AMACTIVATE to activate RELIEF_1.
Browser In the Browser, right-click RELIEF_1 and choose Activate
Toolbody.
3Combine the relief cylinder and the relief toolbody.
Context Menu In the graphics area, right-click and choose Part Menu ➤
Placed Features ➤ Combine.
4Choose Intersect, and select the relief cylinder as the toolbody.
Save your file.
Combining Toolbodies with Spacers
In the Desktop Browser, make sure that the relief toolbody has a combine fea-
ture and that it contains the relief cylinder toolbody.
In the Browser, right-click SPACER and choose Activate Part.
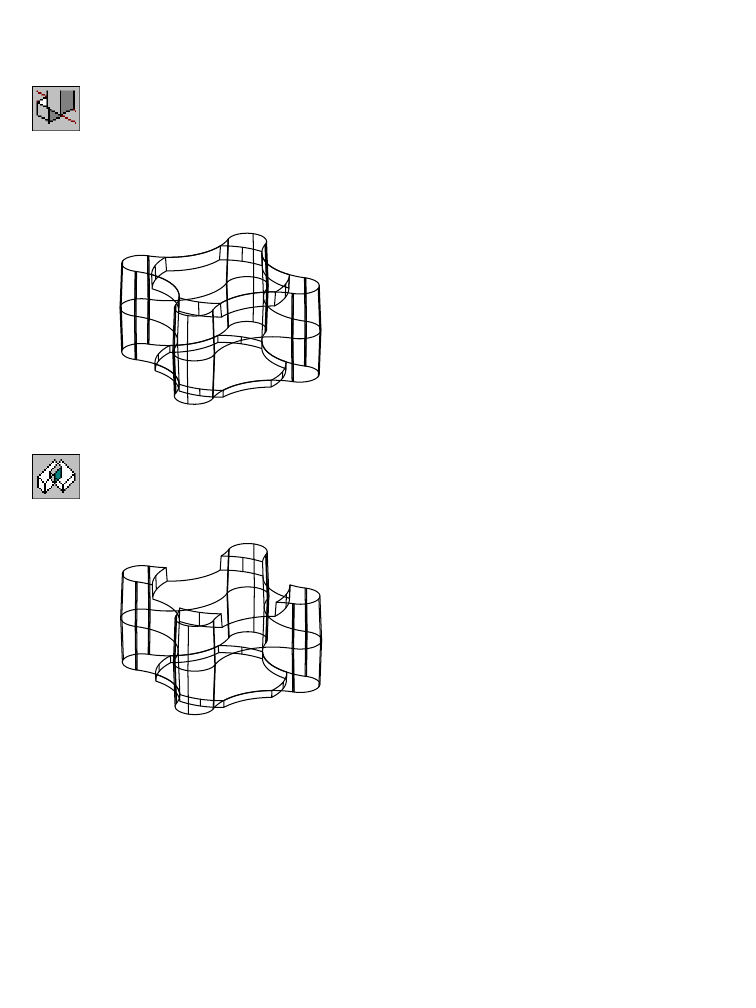
464 |Chapter 17 Combining Parts
To combine a relief toolbody with a spacer
1Use AMMATE for assembly constraints just as you did to align the relief tool-
body with the spacer.
Desktop Menu Toolbody ➤ 3D Constraints ➤ Mate.
When you combine the spacer and the relief toolbody in step 3, you will cut
the spacer with the toolbody. Therefore, be sure to align the top of the tool-
body with the top of the spacer.
After you constrain the relief toolbody, your model should look like this:
2Use AMCOMBINE to combine the spacer and the relief toolbody.
Context Menu In the graphics area, right-click and choose Placed
Features ➤ Combine.
3Choose Cut, and select the relief toolbody.
Save your file.
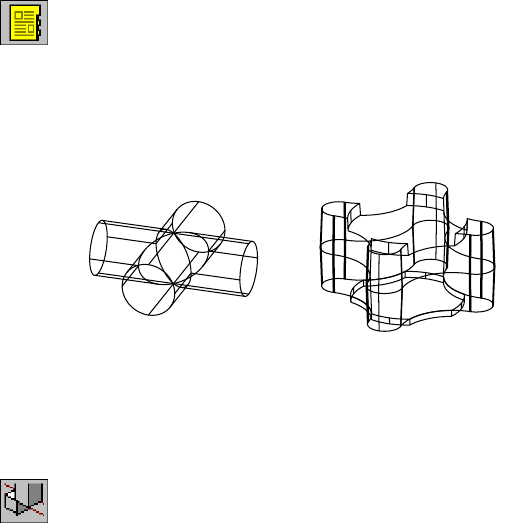
Adding Weight Reduction Holes |465
Adding Weight Reduction Holes
The axle spacer is a high-performance chassis component, so its weight must
be kept to a minimum. To achieve this, you cut weight reduction holes into
the part. The manufacturer of the part offers several size spacers with differ-
ent size weight reduction holes. The use of parametric Boolean operations is
an ideal way to model the part, because it is easy to replace one combine fea-
ture with another.
The file spacer.dwg already contains the geometry you need to create a weight
reduction extrusion that cuts material from the middle of the spacer. An
external file contains the part that you will use to remove material from each
of the spacer’s four sides.
First, you attach the external file.
To minimize the weight of a part, using an external toolbody
1Use AMCATALOG to attach the weight reduction holes toolbody.
Context Menu In the graphics area, right-click and choose Catalog.
In the Part Catalog, choose the External tab. Clear the Return to Dialog check
box. Right-click WR_HOLES, and choose Attach.
2Respond to the prompts as follows:
Specify new insertion point: Specify a point to the left of the spacer
Specify insertion point for another instance or <continue> Press ENTER
The spacer is created as a midplane extrusion. Therefore, the parting line
appears as a profile that encircles the part at its midsection. When you con-
strain the weight reduction extrusion to the spacer, you select the parting-
line geometry.
3Use AMMATE to constrain the two parts.
Context Menu In the graphics area, right-click and choose 3D
Constraints ➤ Mate.
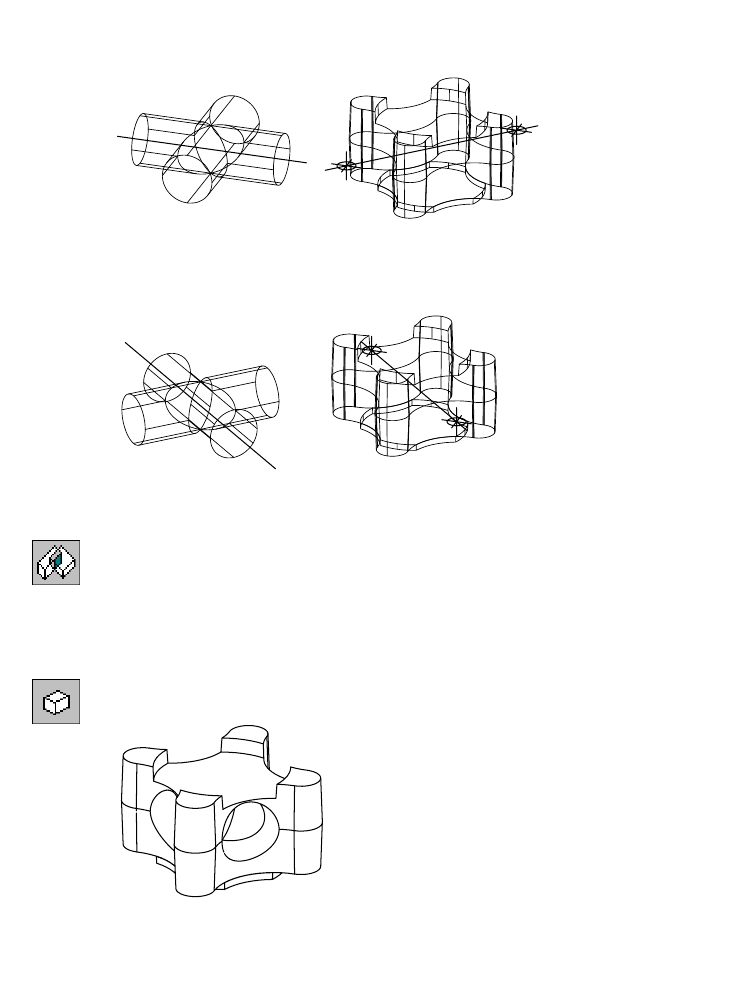
466 |Chapter 17 Combining Parts
4Align the axis of one of the reduction extrusion cylinders with a line that
runs through the center points of the spacer arcs. Use the point option when
you define the axis, as you did with previous mate constraints.
5Use another mate constraint to align the axis of the adjacent weight reduc-
tion extrusion cylinder with a line that runs through the center points of the
spacer arcs.
6Make sure that the spacer is the active part, and use AMCOMBINE to com-
bine the two parts.
Context Menu In the graphics area, right-click and choose Placed
Features ➤ Combine.
7To cut the weight reduction extrusion from the spacer, choose Cut, and select
the weight reduction extrusion as the toolbody.
8Remove the hidden lines.
Desktop Menu View ➤ Hide
Save your file.
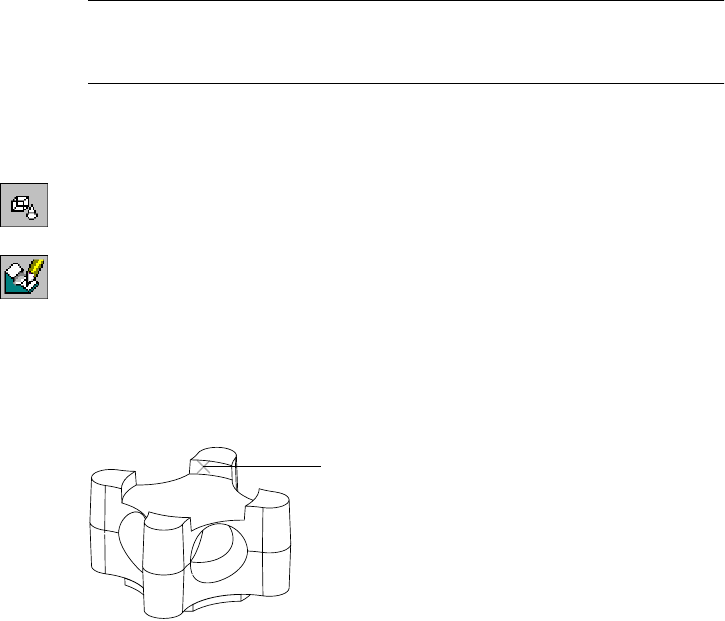
Adding Weight Reduction Holes |467
The weight reduction holes are very close to the relief cut. For balance, the
holes must remain centered in the spacer. To provide enough material
between the holes and the relief, you need to reduce the depth of the relief
and the diameter of the holes.
To make the change, you edit the nested relief cylinder toolbody and reduce
its extrusion distance.
NOTE When you edit more complex parts, it is sometimes easier to select
commands from menus or toolbars instead of searching for the feature in the
Browser and using the Browser menus.
To center the weight reduction holes
1Return to wireframe display.
Desktop Menu View ➤ Shade ➤ 2D Wireframe, and then View ➤ Regen
2Use AMEDITFEAT to recover the relief toolbody, responding to the prompts.
Context Menu In the graphics area, right-click and choose Edit Features ➤
Edit.
Enter an option [Independent array instance/Sketch/surfCut/Toolbody/select
Feature] <select Feature>: Enter t
Select parametric boolean to edit: Select the edge of the relief toolbody (1)
Enter an option [Accept/Next] <Accept>:
When the relief toolbody is highlighted, press ENTER
1
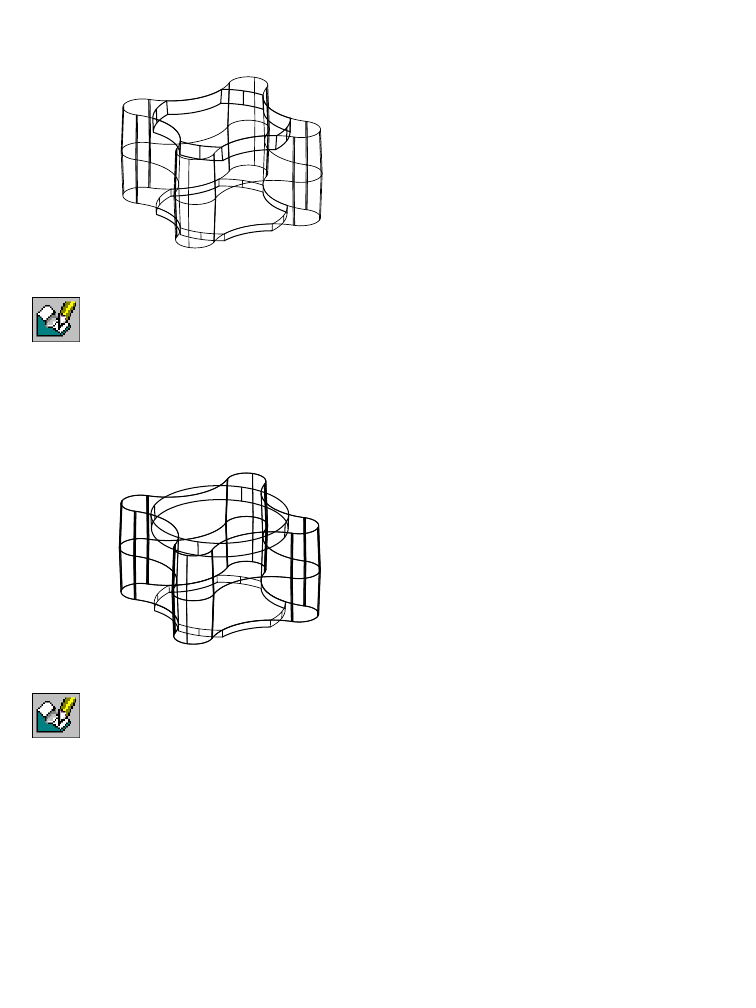
468 |Chapter 17 Combining Parts
Mechanical Desktop recovers the toolbody and displays it in its constrained
position on the spacer. The relief toolbody is active, and it contains the relief
cylinder toolbody.
3Use AMEDITFEAT to recover the relief cylinder, responding to the prompt.
Context Menu In the graphics area, right-click and choose Edit Features
➤ Edit.
Enter an option [Independent array instance/Sketch/surfCut/Toolbody/select
Feature] <select Feature>: Enter t
Mechanical Desktop recovers the relief cylinder toolbody and displays it in
its constrained position on the relief toolbody.
4Change the thickness of the relief cylinder, responding to the prompt.
Context Menu In the graphics area, right-click and choose Edit Features
➤ Edit.
Enter an option [Independent array instance/Sketch/surfCut/Toolbody/select
Feature] <select Feature>: Select the cylinder (1)
5In the Extrusion dialog box, change the distance to 5. Then choose OK.
6Continue on the command line.
Select object: Press ENTER
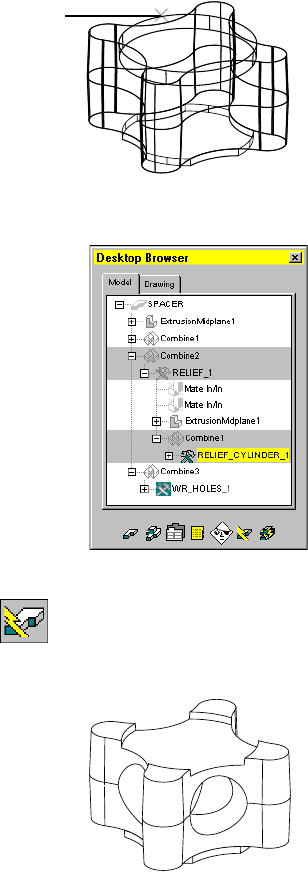
Adding Weight Reduction Holes |469
In the Browser, note that the relief toolbody and the relief cylinder toolbody
have yellow backgrounds. This indicates that they need to be updated.
7Use AMUPDATE to update the parts, responding to the prompts.
Context Menu In the graphics area, right-click and choose Update Full.
Toolbody Updates Pending: 2
Enter an option [Full/stEp/posiTioning] <Full>: Press ENTER to update both parts
Next, you change the diameter of the weight reduction holes. Because the
toolbody is an external reference, you activate it first. Then you change the
diameters of the cylinders.
1
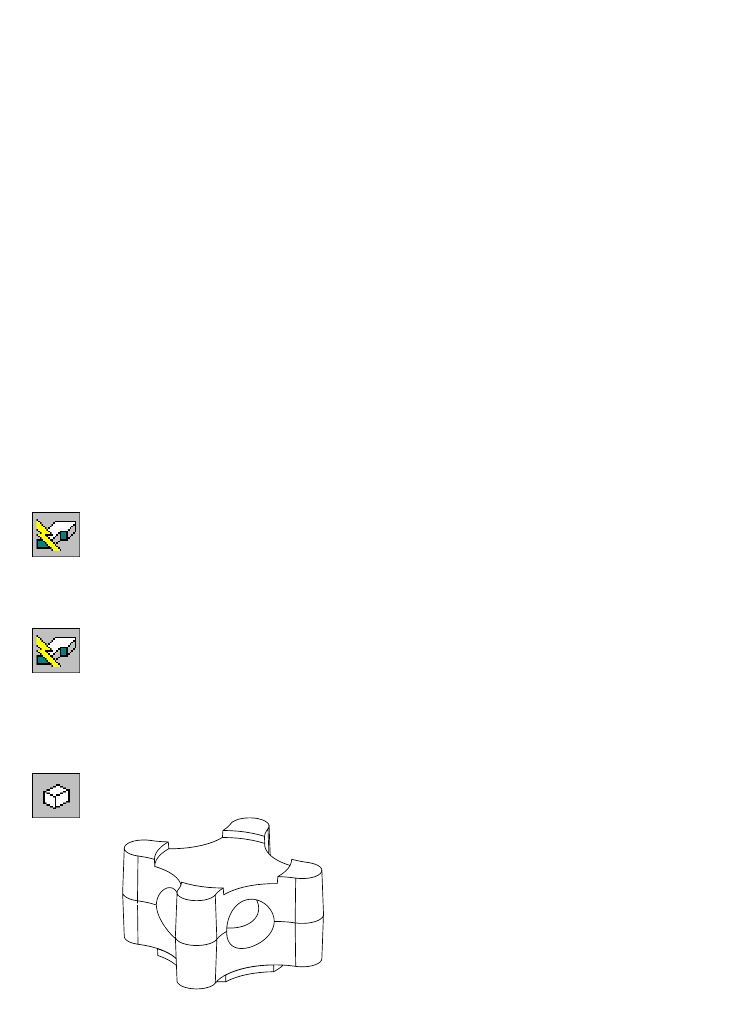
470 |Chapter 17 Combining Parts
To edit the weight reduction cylinders
1In the Browser, right-click WR_HOLES_1 and choose Open to Edit.
Mechanical Desktop opens the external file containing the weight reduction
holes.
2Expand WR_HOLES in the Browser.
3Right-click ExtrusionMidplane1 and choose Edit.
4Choose OK to exit the Extrusion dialog box.
5Continue on the command line.
Select object: Specify the diameter dimension
Enter dimension value <42>: Enter 35
Solved fully constrained sketch.
Select object: Press ENTER
6Repeat steps 3 through 5 for the adjacent cylinder.
Next, commit your changes to the external file, and then update your com-
bined part.
To commit changes to an external file
1Use AMUPDATE to update the external part, responding to the prompts.
Context Menu In the graphics area, right-click and choose Part ➤ Update
Part.
2Save and close wr_holes.dwg.
3Reload the external file.
Browser Right-click and choose Show Definition.
4In the Part Catalog, under the All tab right-click WR_HOLES, and choose
Reload.
5Choose OK to exit the Part Catalog.
6Use HIDE to remove the hidden lines to verify the design changes.
Desktop Menu View ➤ Hide
Save your file.

Adding Weight Reduction Extrusions |471
Adding Weight Reduction Extrusions
One more weight reduction extrusion remains. The geometry for the sketch
is stored on the WEIGHT_REDUCTION_EXTRUSION layer.
To copy a sketch to create a new sketch
1Return to wireframe display.
Desktop Menu View ➤ Shade ➤ 2D Wireframe, and then View ➤ Regen
2Use LAYER to turn on the WEIGHT_REDUCTION_EXTRUSION layer and make it
current.
Desktop Menu Assist ➤ Format ➤ Layers
This sketch was easily constructed by creating a copy of the spacer profile
sketch before it was consumed. Its scale was then reduced by 50 percent,
using a base point at the center of the sketch.
3Switch to a top view of your part.
Desktop Menu View ➤ 3D Views ➤ Top
4Use AMNEW to create a new toolbody.
Context Menu In the graphics area, right-click and choose Toolbody
Menu ➤ Toolbody ➤ New Toolbody.
5Enter the name wt_reduction_extrusion.
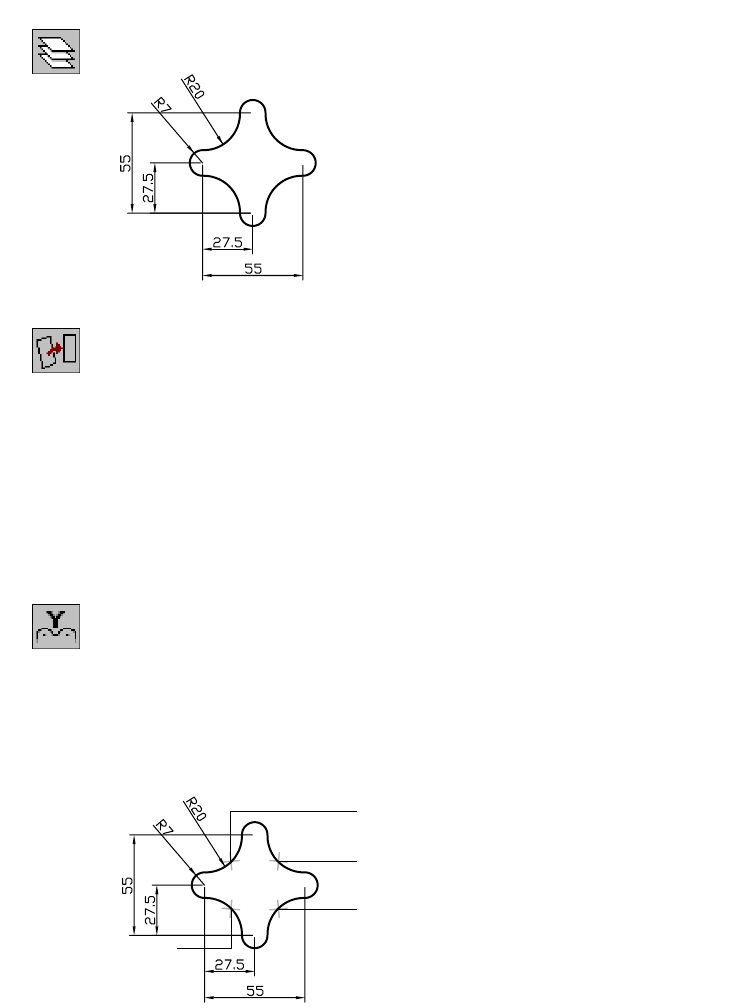
472 |Chapter 17 Combining Parts
6Turn off LAYER 0, which contains the spacer.
Desktop Menu Assist ➤ Format ➤ Layer
7Use AMPROFILE to profile the sketch.
Context Menu In the graphics area, right-click and choose Part Menu ➤
Sketch Solving ➤ Profile.
8Select the sketch and all of its existing dimensions.
Mechanical Desktop converts the standard dimensions to parametric dimen-
sions and solves the sketch.
Solved underconstrained sketch requiring 2 dimensions or constraints.
To constrain and extrude sketches
1Use AMADDCON to add two X Value constraints to the profile, responding to
the prompts to fully constrain the sketch.
Context Menu In the graphics area, right-click and choose 2D
Constraints ➤ X Value.
Valid selections: line, arc, circle or spline segment
Select object to be reoriented: Select the arc (1)
Valid selections: line, arc, circle or spline segment
Select object x value is based on: Select the arc (2)
Solved underconstrained sketch requiring 1 dimensions or constraints.
1
3
4
2
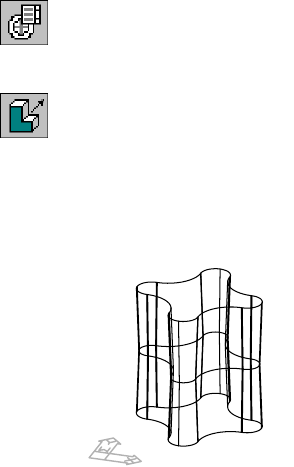
Adding Weight Reduction Extrusions |473
Valid selections: line, arc, circle or spline segment
Select object to be reoriented: Select the arc (3)
Valid selections: line, arc, circle or spline segment
Select object x value is based on: Select the arc (4)
Solved fully constrained sketch.
Valid selections: line, arc, circle or spline segment
Select object to be reoriented: Press ENTER
Enter an option
[Hor/Ver/PErp/PAr/Tan/CL/CN/PRoj/Join/XValue/YValue/Radius/Length/Mir/Fix/
eXit] <eXit>: Press ENTER
2Use VIEW to restore the saved view.
Desktop Menu View ➤ Named Views
In the View dialog box, make SPACER_VIEW current, and choose OK.
3Use AMEXTRUDE to extrude the profile.
Context Menu In the graphics area, right-click and choose Sketched &
Work Features ➤ Extrude.
In the Extrusion Feature dialog box, specify:
Termination: MidPlane
Distance: Enter 75
Draft Angle: Enter 2
Choose OK.
Next, combine the new toolbody with SPACER_1.
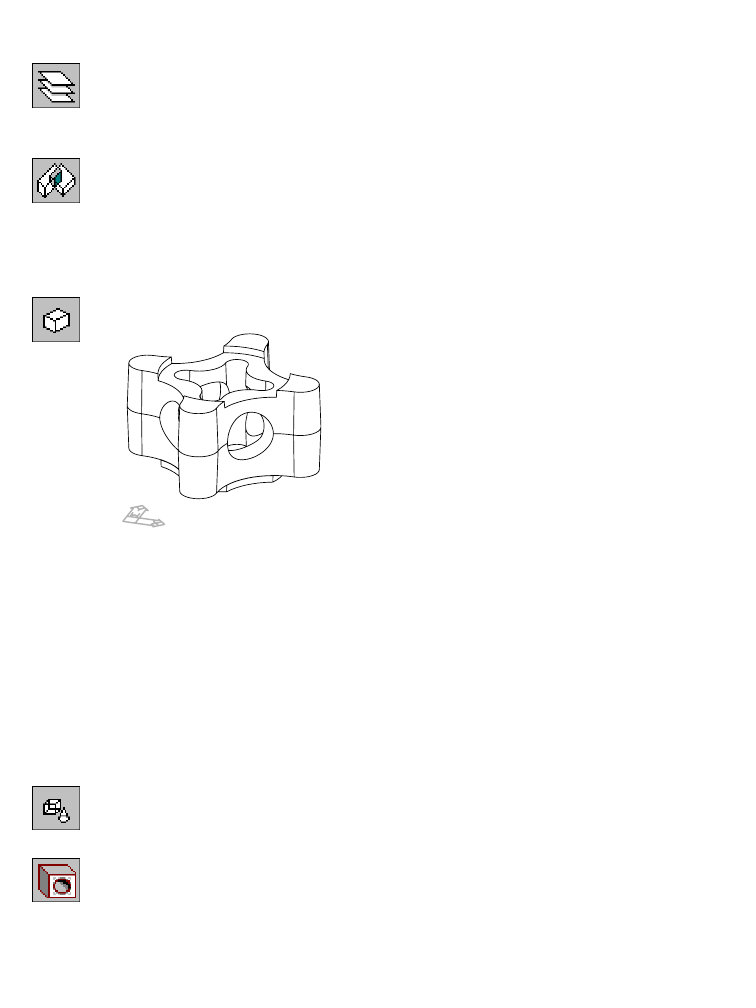
474 |Chapter 17 Combining Parts
To combine a weight reduction extrusion with a spacer
1Turn on LAYER 0, and make it current.
Desktop Menu Assist ➤ Format ➤ Layer
2Activate the spacer, and then combine the weight reduction extrusion and
the spacer.
Context Menu In the graphics area, right-click and choose Placed
Features ➤ Combine.
3Choose Cut, to cut the weight reduction extrusion from the spacer, and then
select the weight reduction extrusion as the toolbody.
4Remove the hidden lines.
Desktop Menu View ➤ Hide
Save your file.
Adding Mounting Holes
The final step in your model is to add the mounting holes.
To add a mounting hole
1Return to wireframe display.
Desktop Menu View ➤ Shade ➤ 2D Wireframe
2Use AMHOLE to create the mounting holes.
Context Menu In the graphics area, right-click and choose Placed
Features ➤ Hole.
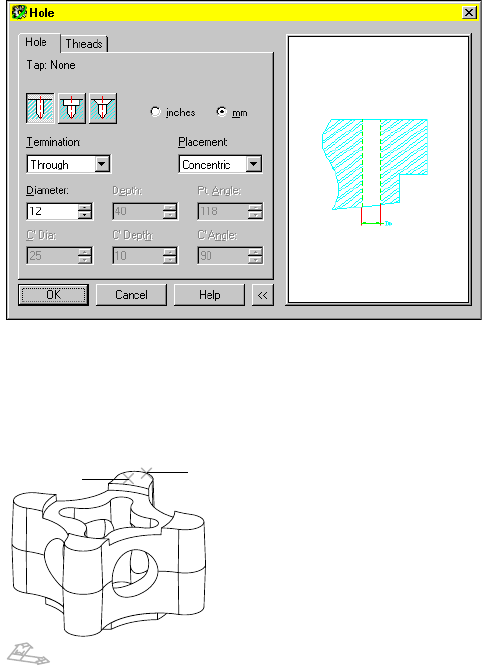
Adding Mounting Holes |475
In the Hole dialog box, specify:
Operation: Drilled
Termination: Through
Placement: Concentric
Hole Parameter: Size: 12
3Respond to the prompts as follows:
Select work plane, planar face, or [worldXy/worldYz/worldZx/Ucs]:
Select the top face (1)
Select concentric edge: Select the cylindrical edge (2)
4Repeat steps 2 and 3 to create three more holes, and then press ENTER.
2
1

476 |Chapter 17 Combining Parts
5Use HIDE to remove the hidden lines.
Desktop Menu View ➤ Hide
The spacer contains one extrusion, four combine features, and four holes.
Save your file.
You have now created and edited a combined part in the Part Modeling
environment.

477
In This Chapter 18
Assembling Complex
Models
In a previous Autodesk® Mechanical Desktop® tutorial,
you created a simple assembly. In this tutorial, you
create a more complex assembly that includes a
subassembly. You work with contraints, external parts,
and part instances. Then you examine your model for
interference and edit an external part.
When the model is complete, you create assembly
scenes with tweaks, drawing views, and annotations in
preparation for plotting.
■Creating local and external parts
■Constraining parts to create an
assembly
■Creating a new part
■Creating a subassembly and
constraining it to the base
assembly
■Creating and annotating
assembly scenes
■Editing a part in a completed
assembly
■Adding annotations
■Checking for interference
■Updating an assembly and its
scenes
■Finishing a drawing for plotting

478 |Chapter 18 Assembling Complex Models
Key Terms
Te r m Definition
base view The first drawing view you create. Other drawing views are derived from this view.
bill of material
database A dynamic database containing a list of all the parts in an assembly. Used to generate
parts lists that contain associated attributes such as part number, manufacturer, and
quantity.
exploded view Separates parts and subassemblies to show how they fit together. Automatically
updated if the assembly or one of its parts changes.
explosion factor Defines separation of parts in an assembly exploded view by a set value, plus offset, if
applicable. Value is based on model units.
external part A part reference that resides in a file other than the current part or assembly file.
flush constraint Makes two planes coplanar, with their faces aligned in the same direction.
local part A part created in the current assembly file.
parent view A drawing view on which other views are based. For example, the base view is the
parent view for an isometric or orthographic view.
part reference An attributed object associated with a part. Used to provide information about the
part when generating a parts list.
parts list A dynamic list of parts and associated attributes generated from a bill of material
database and placed in the drawing. The parts list automatically reflects additions
and subtractions of parts from an assembly.
structure The hierarchical tree of component to component relationships that define the
assembly model. Assembly models can be restructured in the Browser.
subassembly A group of parts constrained together. Can be used as a single object in a larger
assembly. A subassembly may be created in the current assembly or referenced from
an external file.
trail In an exploded view in a scene, a line that shows how parts in an assembly are
assembled.
tweak Adjusts the position of parts in an assembly scene to avoid overlap in some views or
to make some parts more visible.
zero explosion
factor Allows individually specified movements of parts in an exploded view.
Basic Concepts of Complex Assemblies |479
Basic Concepts of Complex Assemblies
Assemblies can consist of any number of externally referenced and local parts.
You can also have any number of subassemblies, both local and externally
referenced. The advantage to having externally referenced parts and subas-
semblies is that you can use the files in any number of assembly files.
In complex assemblies, the same part is often used in multiple locations. Each
part definition defines a unique part. By instancing a part definition, you can
create multiple copies of a part while maintaining only one definition in your
drawing. Any change to the part definition affects all instances of the part.
After building the assembly, you check for interference between the parts, and
perform mass properties calculations to ensure that the parts are designed cor-
rectly. If a design change affects a part used in more than one assembly, make
the change in the external file.
In a previous tutorial, you made changes to an external part from within an
assembly file by editing in place. In this tutorial, you open an external file and
modify it directly. Then you update the assembly file to reflect the changes,
set up scenes to illustrate the assembly, in both exploded and non-exploded
views, create a parts list, and finalize the drawing for plotting.
Starting the Assembly Process
There are two ways to approach the design process; start by thinking about
how the assembly is organized and decide the order in which to instance the
local and external parts into the assembly, or start designing immediately
and then reorganize the hierarchy of the assembly as needed, using assembly
restructure. Constraints are maintained with parts and subassemblies that are
moved in the restructure process.
The assembly restructure feature provides more flexibility in the design pro-
cess. You can place or create an assembly of components at a single level and
subsequently adjust the assembly structure, grouping components into sub-
assemblies for manufacturing, inventory, and other uses.
For more information about using assembly restructure, see “Restructuring
Assemblies” on page 504.
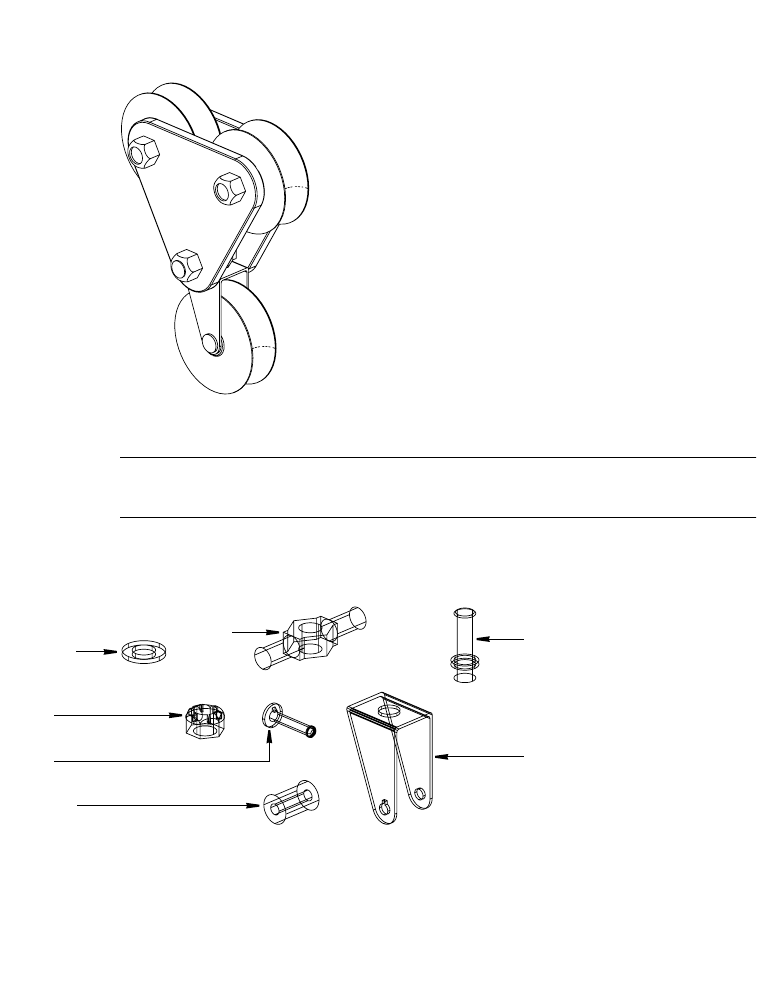
480 |Chapter 18 Assembling Complex Models
In this lesson, the model is organized and assembled in a particular order.
The assembly contains existing parts and referenced external files. A new
plate design is also referenced into the current file as part of a subassembly.
Open the file pullyasm.dwg in the desktop\tutorial folder.
NOTE Back up the tutorial drawing files so you still have the original files if you
make a mistake. See “Backing up Tutorial Drawing Files” on page 40.
This drawing contains one local part, a bracket, and six external parts—a pul-
ley, a washer, a shaft, a bushing, and two nuts.
pulley4
bracket
nut2
washer1
nut4
shaft
bushing
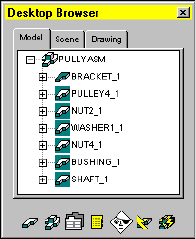
Creating Local and External Parts |481
In the Desktop Browser, click the plus sign next to PULLYASM. The assembly
tree expands to reveal the part files in the order in which they were added,
or referenced, into the file pullyasm.dwg.
In the Browser, each part is followed by a number that indicates the order in
which it was instanced. In this case, each part has only one instance. As you
add more instances, each one will be numbered incrementally. Icons with a
teal background are externally referenced parts.
Creating Local and External Parts
An assembly consists of a combination of existing or new parts and local and
external parts. You create local parts in the current assembly file.
You use the Assembly Catalog to manage existing local parts and to create
new external part references and new local parts. You can use the Browser for
quick access to the localize and externalize functions without opening the
Assembly Catalog.
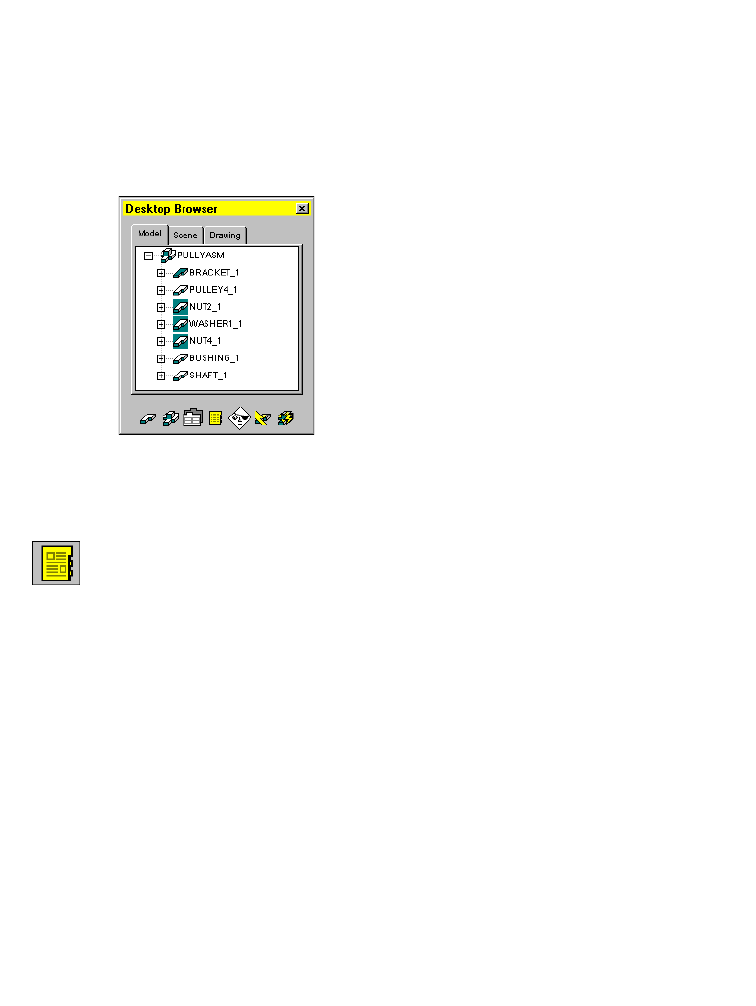
482 |Chapter 18 Assembling Complex Models
To localize a part
1Localize the PULLEY4, BUSHING, and SHAFT parts.
Browser Press CRTL and select PULLEY4, BUSHING, and SHAFT.
Right-click PULLEY4 and choose All Instances ➤ Localize.
In the Browser, note that the PULLEY4, BUSHING, and SHAFT icons no
longer have a teal background, which indicates that the externally referenced
Mechanical Desktop® parts are now local parts.
Links to the external files are severed. Any changes made to these parts affect
only the instances in the current assembly.
2Check the Assembly Catalog to see how the localized parts are displayed.
Context Menu In the graphics area, right-click and choose Catalog.
Choose the All tab. The PULLEY4, BUSHING, SHAFT and BRACKET are listed
under Local Assembly Definitions.
Choose OK.
When you have a library of existing parts, bring the files containing those
parts into the assembly drawing, and localize them. Parts that may change
should be externally referenced so that if the original part is changed, the
change will be reflected in the assembly drawing.
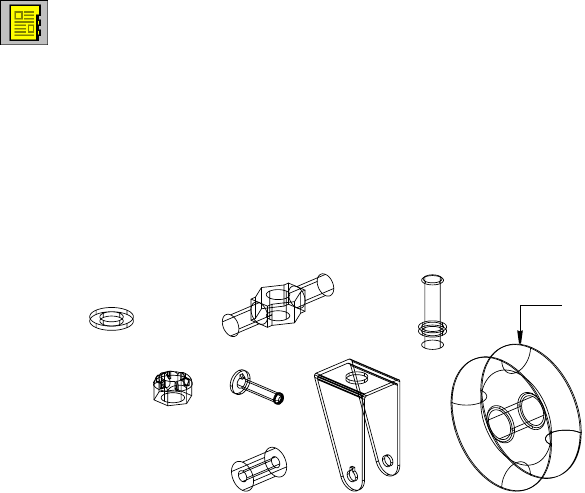
Applying Assembly Constraints |483
To reference an external part
1Use AMCATALOG to reference an external part.
Context Menu In the graphics area, right-click and choose Catalog.
In the Assembly Catalog, choose the External tab.
2In Directories, right-click and choose Add Directory.
Select the desktop\tutorial folder, and choose OK.
All the part and assembly files in the folder are displayed; the icon in front of
each file indicates whether it is a part file or an assembly file.
3Clear the Return to Dialog check box.
4In Part and Subassembly Definitions, right-click DPULLEY and choose Attach.
5In the graphics area on your screen, specify an insertion point and press ENTER.
DPULLEY is now externally referenced and instanced into your copy of the
pullyasm.dwg file.
Applying Assembly Constraints
Now that the parts are referenced or localized into the assembly drawing, you
build the assembly by applying assembly constraints. You apply them to one
part at a time, removing degrees of freedom. The more constraints a part has,
the less freedom of movement it has.
You link the parts, one by one, like a chain, by constraining each part to
another part. Use the DOF symbol to illustrate how many degrees of freedom
are removed. Usually, you need to solve at least 2 degrees of freedom to suf-
ficiently constrain a part.
Zoom in as needed to make selection points easier to see. First, you constrain
the pulley to the bracket along the common axes. Then, you add another
constraint, to mate the planes of the two parts.
dpulley
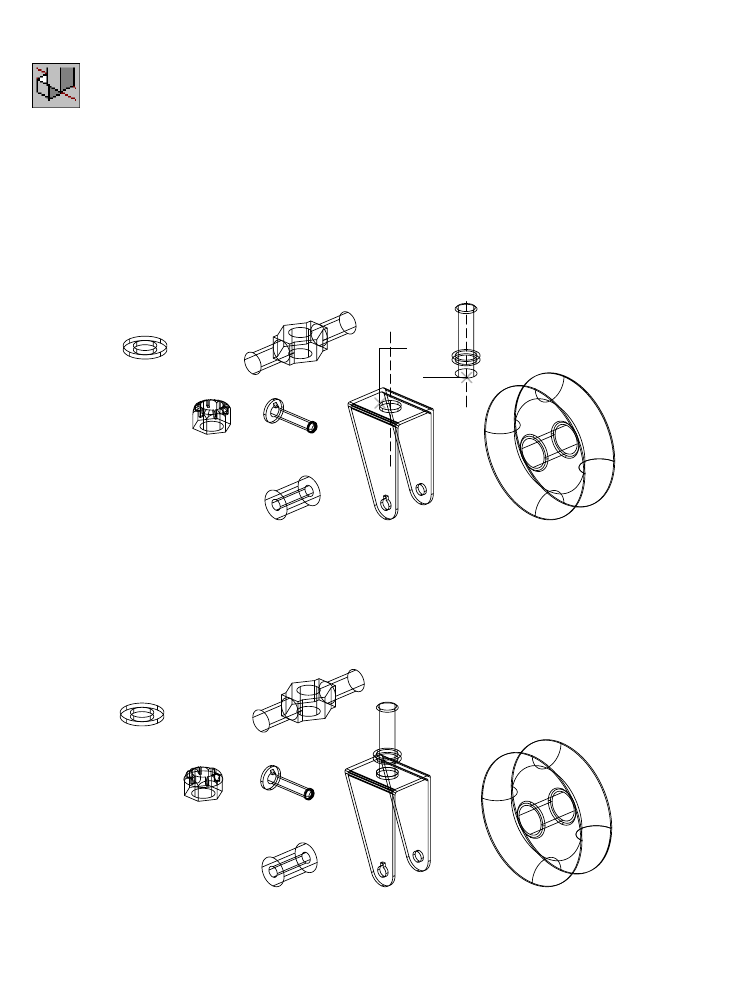
484 |Chapter 18 Assembling Complex Models
To constrain part faces along their axes using mate
1Use AMMATE to constrain the part faces, responding to the prompts.
Context Menu In the graphics area, right-click and choose 3D
Constraints ➤ Mate.
Select first set of geometry: Select a cylindrical face on BRACKET (1)
First set = Axis, (arc)
Select first set or [Clear/fAce/Point/cYcle] <accEpt>: Press ENTER
Select second set of geometry: Select a cylindrical face on PULLEY4 (2)
Second set = Axis, (arc)
Select second set or [Clear/fAce/Point/cYcle] <accEpt>: Press ENTER
Enter offset <0.0000>: Press ENTER
To select the geometry to be constrained, enter responses on the command
line, or use the animated mouse. Click the left (red) mouse button to cycle
through the options. Click the right (green) mouse button to select an option.
The PULLEY4 part is partially constrained to the BRACKET part along the
common axes.
2
1
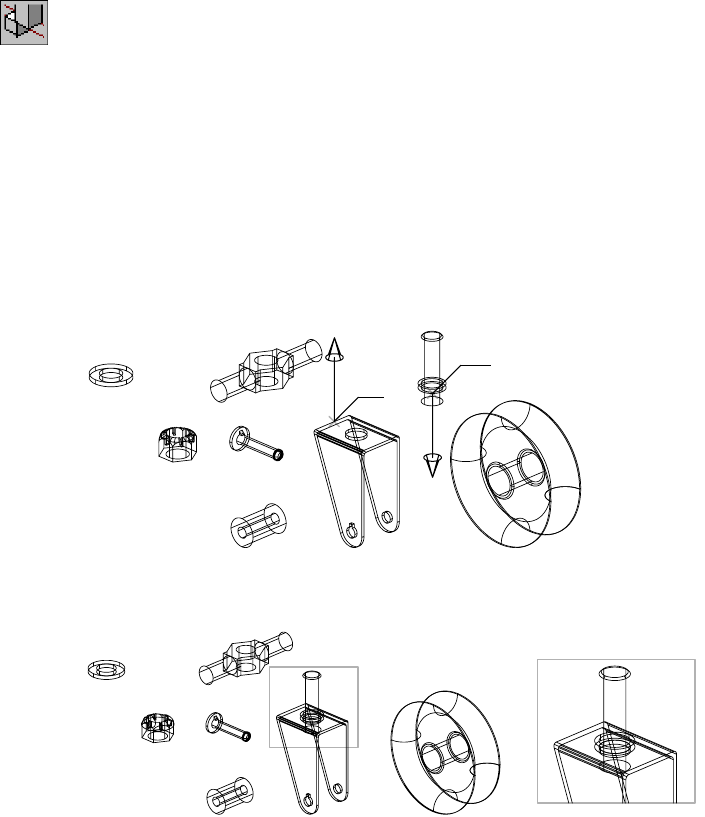
Applying Assembly Constraints |485
You can move parts to make selection easier. The parts are automatically
reassembled when you add a constraint. Or, to manually reassemble parts,
set AMAUTOASSEMBLE to 0 (off). Use the Assembly Update icon in the
Browser to reassemble the parts after you finish adding constraints.
2Mate the parts on facing planes, responding to the prompts.
Context Menu In the graphics area, right-click and choose 3D
Constraints ➤ Mate.
Select first set of geometry: Specify the top plane on BRACKET (3)
Select first set or [Clear/aXis/fAce/Next/cYcle] <accEpt>: Enter a
First set = Plane
Enter an option [Clear/Next/Flip/cYcle] <accEpt>:
Cycle to point arrow away from the part, then press ENTER
Select second set of geometry: Specify the flange on PULLEY4 (4)
Second set = Axis, (arc)
Select second set or [Clear/fAce/Point/cYcle] <accEpt>: Enter a
Second set = Plane
Enter an option [Clear/aXis/Point/Next/Flip/cYcle] <accEpt>: Press ENTER
Enter offset <0.0000>: Press ENTER
You have constrained BRACKET and PULLEY4 along the common axes and
mating planes.
The constraints are illustrated in the Desktop Browser as you create them,
showing the other part the constraint is applied to.
4
3
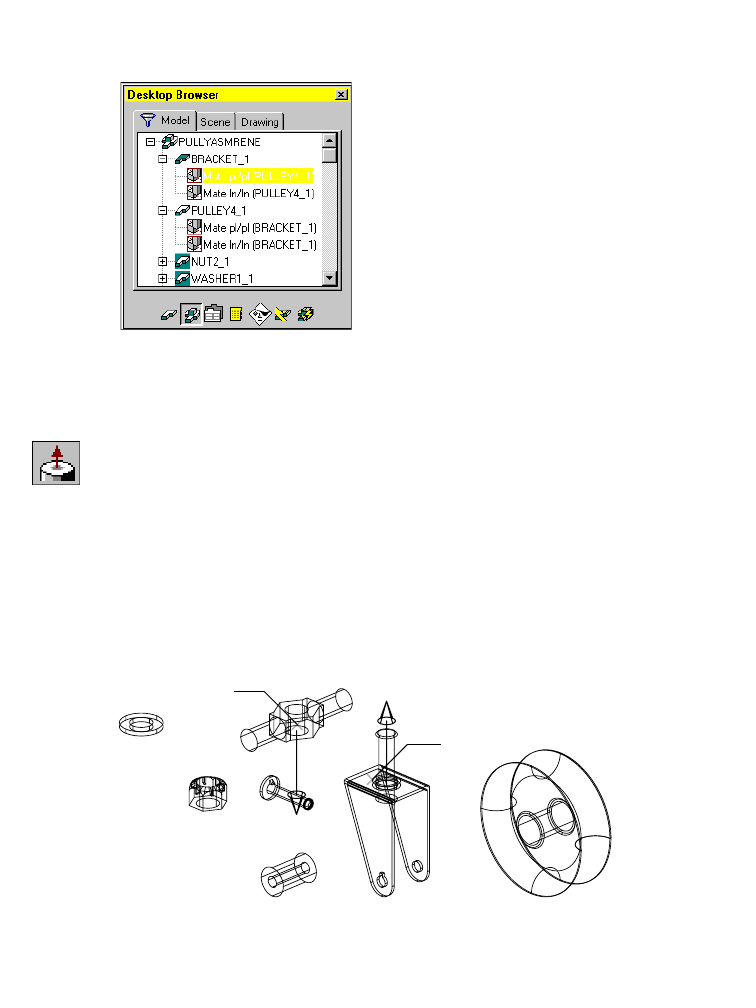
486 |Chapter 18 Assembling Complex Models
To make it easier to see the constraints you have applied, select the Assembly
filter in the Browser. Then, the features are hidden, and only the assembly
constraints are displayed.
To constrain part faces along their axes using Insert
1Use AMINSERT to constrain the part faces along the common axes and corre-
sponding planes, responding to the prompts.
Context Menu In the graphics area, right-click and choose 3D
Constraints ➤ Insert.
Select first circular edge: Specify the hole on NUT2 (5)
First set = Plane/Axis
Enter an option [Clear/Flip] <accEpt>: Press ENTER
Select second circular edge: Specify the hole on the top flange of PULLEY4 (6)
Second set = Plane/Axis
Enter an option [Clear/Flip] <accEpt>: Press ENTER
Enter offset <0.0000>: Press ENTER
6
5
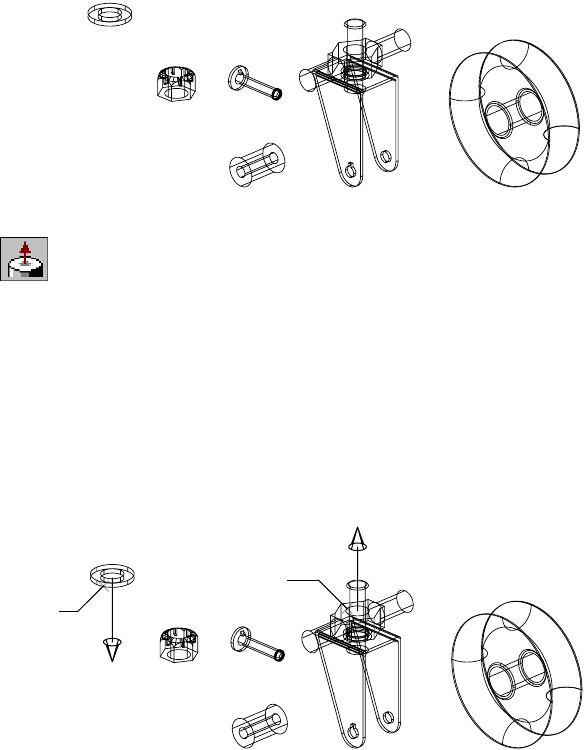
Applying Assembly Constraints |487
Using the insert constraint removes the same degrees of freedom as
constraining planes and axes separately. This is particularly useful for bolt-in-
hole type constraints.
The NUT2 part is constrained to BRACKET and PULLEY4 along the common
axes and mating planes.
2Constrain WASHER1 to NUT2, responding to the prompts.
Context Menu In the graphics area, right-click and choose 3D
Constraints ➤ Insert.
Zoom in as needed to see the arrows that indicate the direction of insertion.
Select first circular edge: Specify a point on WASHER1 (7)
First set = Plane/Axis
Enter an option [Clear/Flip] <accept>: Press ENTER
Select second circular edge: Specify the hole on NUT2 (8)
Second set = Plane/Axis
Enter an option [Clear/Flip] <accept>:
Flip the direction arrow as needed, and press ENTER
Enter offset <0.0000>: Press ENTER
WASHER1 is constrained to NUT2. Next, constrain NUT4 to WASHER1 along
the common axes and mating planes.
7
8
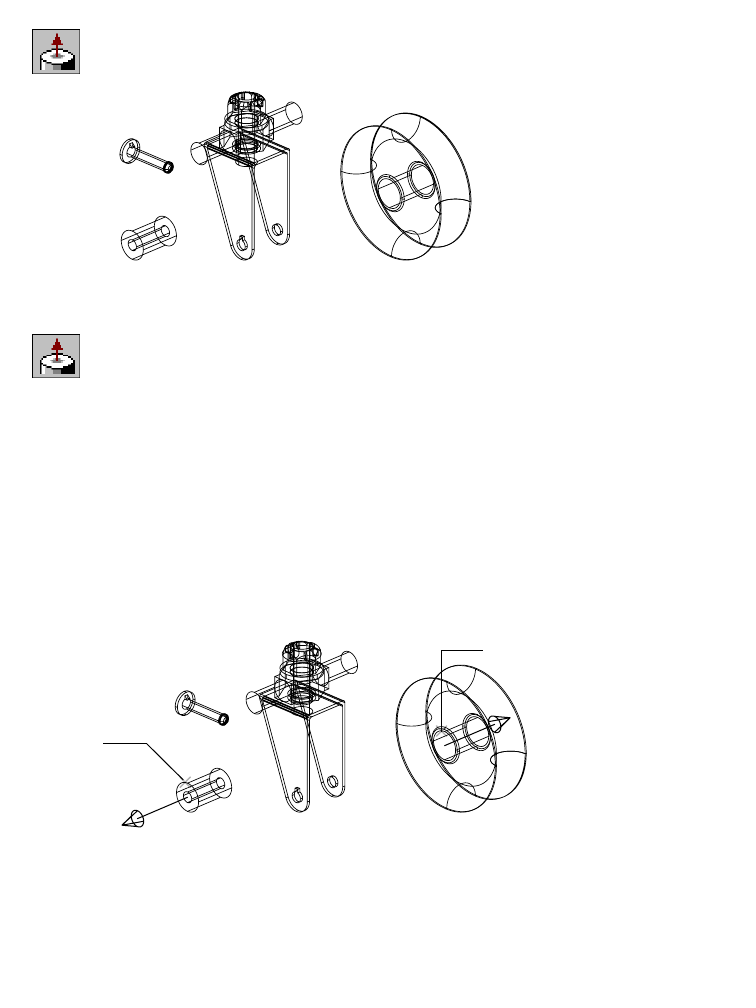
488 |Chapter 18 Assembling Complex Models
3Constrain NUT4 to WASHER1.
Context Menu In the graphics area, right-click and choose 3D
Constraints ➤ Insert.
4Constrain BUSHING and DPULLEY along the common axes, responding to
the prompts.
Context Menu In the graphics area, right-click and choose 3D
Constraints ➤ Insert.
Select first circular edge: Specify a point on BUSHING (9)
First set = Plane/Axis
Enter an option [Clear/Flip] <accept>: Press ENTER
Select second circular edge: Specify the hole on DPULLEY (10)
Second set = Plane/Axis
Enter an option [Clear/Flip] <accept>:
Enter f to flip the direction arrow away from BUSHING
Second set = Plane/Axis
Enter an option [Clear/Flip] <accept>: Press ENTER
Enter offset <0.0000>: Press ENTER
9
10
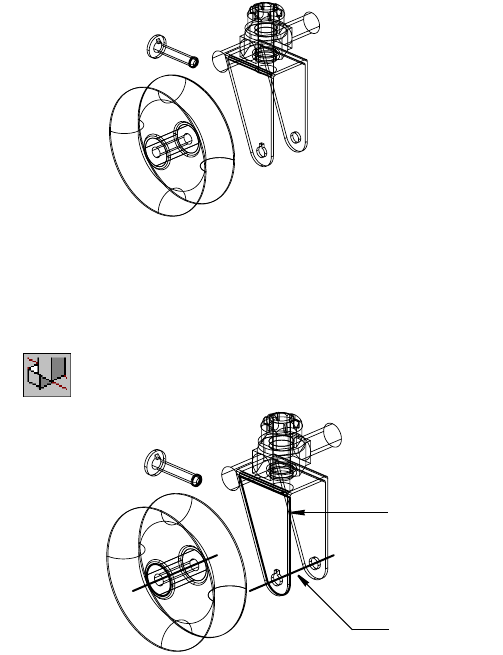
Applying Assembly Constraints |489
DPULLEY is constrained to BUSHING.
To apply final mate constraints
1Use AMMATE to constrain DPULLEY and BUSHING to BRACKET with two
constraints: one to mate planes and one to mate along their axes. If you need
to, refer to “To constrain part faces along their axes using mate” on page 484.
Context Menu In the graphics area, right-click and choose 3D
Constraints ➤ Mate.
mating plane
mating line
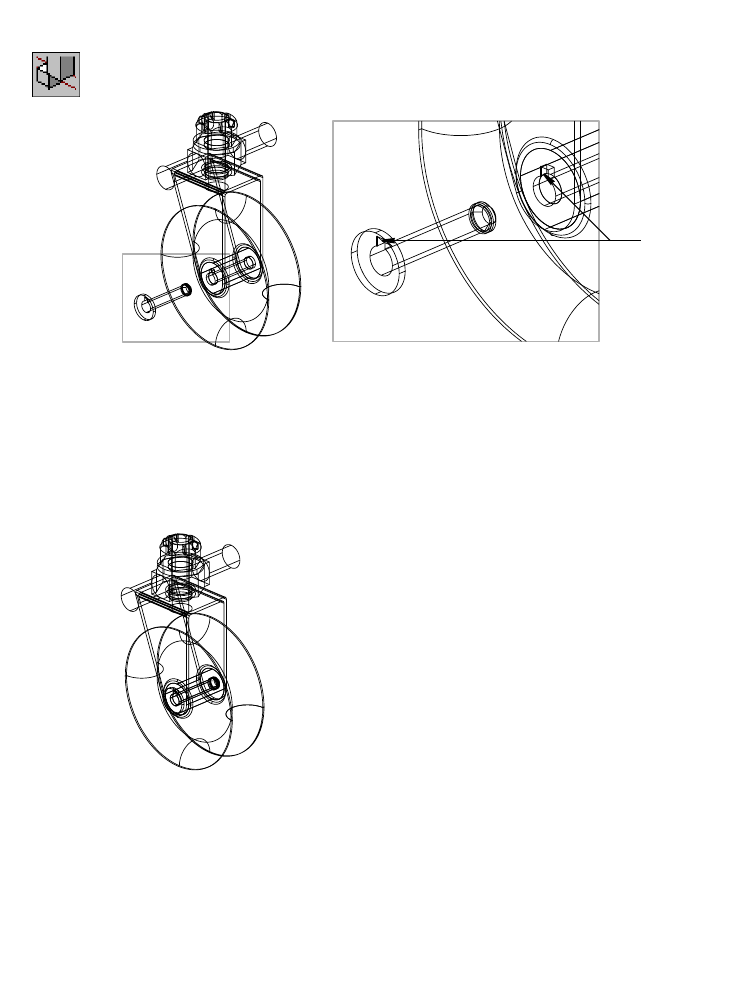
490 |Chapter 18 Assembling Complex Models
2Use AMMATE to constrain SHAFT to BRACKET along the left vertical line of
the notch.
Context Menu In the graphics area, right-click and choose 3D
Constraints ➤ Mate.
The rotational degree of freedom is removed.
Save your file.
The parts are assembled, and all required degrees of freedom are solved by the
constraints.
3Change to a top view and then to a right view, to verify that the parts are
positioned correctly.
Use the Browser to delete unwanted assembly constraints. Right-click the
Constraint icon, and choose Delete. You can then apply new constraints.
Next, create a new part to use as part of a subassembly.
mating lines
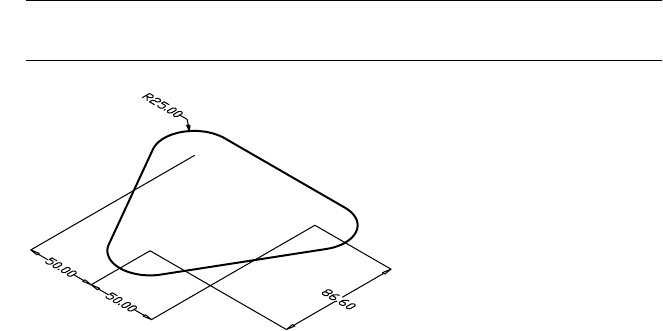
Creating New Parts |491
Creating New Parts
Before you build the subassembly, you create a pulley plate part. First, you
open a part file containing a constrained profile. Because you can have more
than one drawing open at a time in Mechanical Desktop, you do not need to
close your assembly file. In the part file, you add thickness to the profile and
create additional features so that you can use it as a subassembly in your
assembly.
Open the file ppulley.dwg.
NOTE Back up the tutorial drawing files so you still have the original files if you
make a mistake. See “Backing up Tutorial Drawing Files” on page 40.
The sketch of the pulley plate has already been profiled and constrained, so
you only need to extrude it. Extrusion adds thickness to a constrained profile.
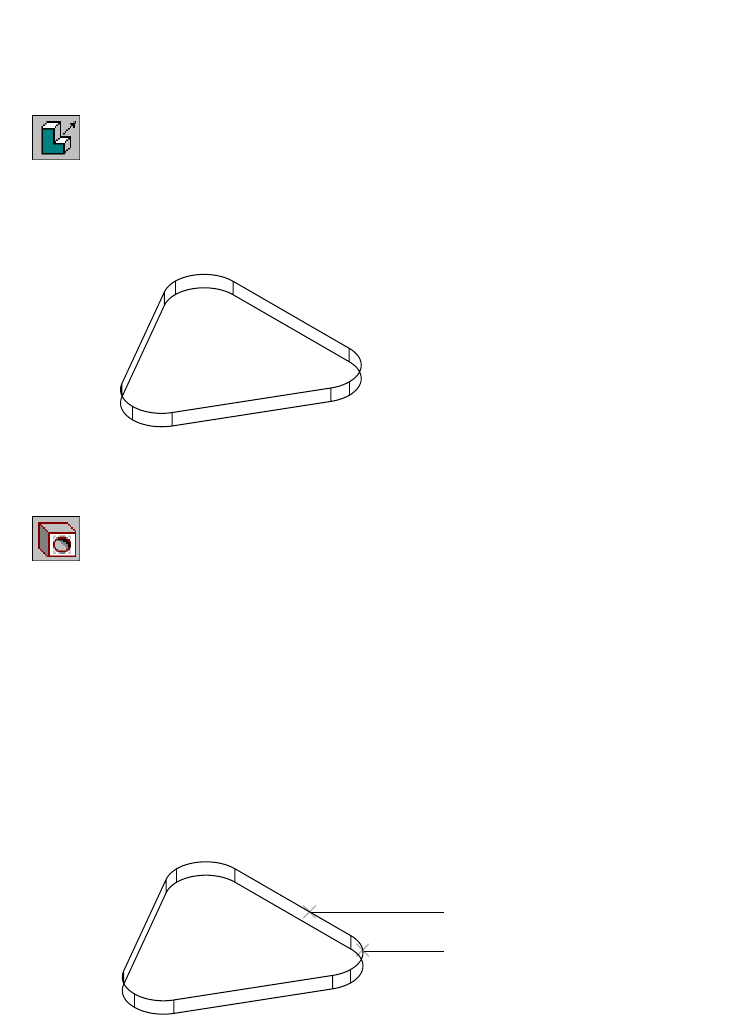
492 |Chapter 18 Assembling Complex Models
To extrude a sketch
1Expand the feature hierarchy in the Browser by clicking the plus sign in front
of PPULLEY_1.
2Use AMEXTRUDE to extrude the profile.
Context Menu In the graphics area, right-click and choose Sketched &
Work Features ➤ Extrude.
3In the Extrusion dialog box, specify:
Distance: Enter 10
Choose OK to create the extrusion.
To add a placed feature to a part
1Use AMHOLE to add three drilled bolt holes to the pulley plate.
Context Menu In the graphics area, right-click and choose Placed
Features ➤ Hole.
In the Hole dialog box, select the Drilled hole type icon, and specify:
Termination: Through
Placement: Concentric
Diameter: Enter 10
Choose OK.
2Continue on the command line.
Select work plane, planar face or [worldXy/worldYz/worldZx/Ucs]:
Select the pulley plate edge (1)
Enter an option (Next/accEpt) <accEpt>: Press ENTER
Select concentric edge: Select the arc (2)
1
2
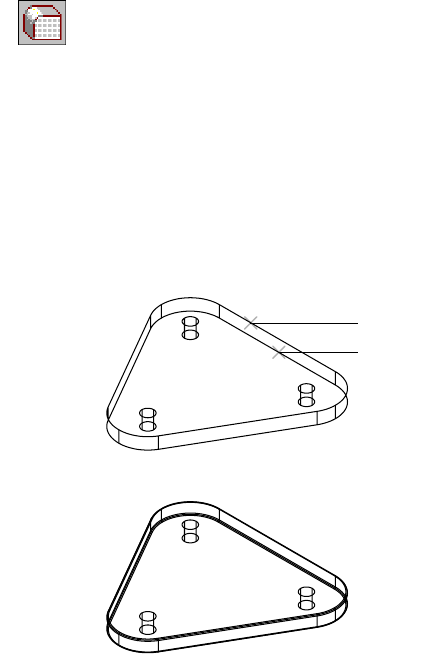
Creating New Parts |493
3Continue placing two more holes concentric to the remaining arcs. Then
press ENTER.
The drilled holes are added and cut through the pulley plate. Later, you check
for interference and modify the diameter of the holes.
4Use AMFILLET to fillet the pulley plate edges.
Context Menu In the graphics area, right-click and choose Placed
Features ➤ Fillet.
In the Fillet dialog box, select the Constant check box and specify:
Radius: Enter 1
Return to dialog: Clear the check box
Choose OK.
5Respond to the prompts as follows:
Select edges or faces to fillet: Select the pulley plate top edge (1)
Select edges or faces to fillet: Select the pulley plate bottom edge (2)
Select edges or faces to fillet: Press ENTER
The pulley plate edges are filleted.
Now that the pulley plate is complete, you have all the parts you need to
build the subassembly.
Save your file, but do not close it. You will make some changes to it later.
1
2
494 |Chapter 18 Assembling Complex Models
Creating Subassemblies
You created an assembly. Now, you will create a subassembly. Each subassem-
bly contains one or more parts or subassemblies. In the Browser, subassem-
blies and parts are nested under the assembly.
You create, instance, and constrain parts into a subassembly just as you do
into an assembly. Once the subassembly is created, it is constrained to the
assembly, completing the assembly model.
Defining and Activating Subassemblies
Before you can instance any parts into the subassembly, you must create and
activate a subassembly definition and then load and instance external part
drawings as the parts for the subassembly.
To create and activate a new subassembly
1Switch to the window containing your assembly.
2Activate the assembly, PULLYASM.
Browser Right-click PULLYASM and choose Activate.
3In the Browser, collapse the feature hierarchy.
Browser Right-click PULLYASM and ➤ Collapse. Then click the
plus sign in front of PULLYASM.
4Create a new subassembly definition, responding to the prompt.
Context Menu In the graphics area, right-click and choose Assembly ➤
New Subassembly.
Enter new subassembly name <SUB1>: Enter subpully
The Desktop Browser adds a subassembly called SUBPULLY_1 to the assembly
tree. Because there are no parts instanced or files attached, the subassembly
location is empty.
5Activate the new subassembly, responding to the prompt.
Context Menu In the graphics area, right-click and choose Assembly ➤
Activate Assembly.
Enter assembly name to activate or [?] <PULLYASM>: Enter subpully_1
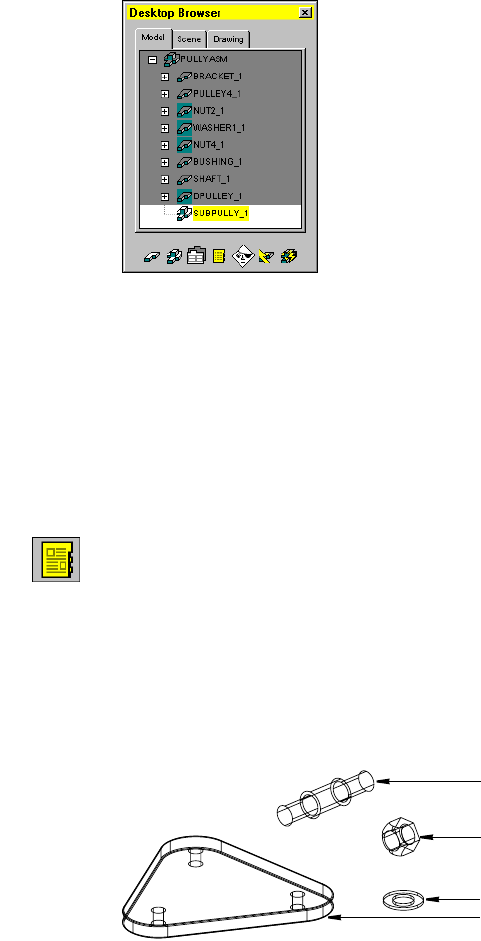
Creating Subassemblies |495
The inactive PULLYASM assembly is shaded in the Desktop Browser, and the
SUBPULLY subassembly is active.
The active subassembly name is displayed below the command line (Target:
SUBPULLY).
Using External Parts
Now that you have activated the new subassembly, you use external parts to
create the subassembly.
To attach an external part drawing as an external part
1Use AMCATALOG to attach an external part.
Context Menu In the graphics area, right-click and choose Catalog.
In the Assembly Catalog, choose the External tab. Verify that tutorial is listed
in Directories and that Return to Dialog is selected.
2Double-click the file ppulley.dwg.
3Position the pulley plate on the screen, and press ENTER.
The pulley plate is attached to the SUBPULLY subassembly.
4In the Assembly Catalog, right-click DPULLEY3 and choose Attach.
5Attach WASHER3 and NUT3.
dpulley3
nut3
washer3
ppulley

496 |Chapter 18 Assembling Complex Models
Notice that an attached part is indicated by a white background in the
Assembly Catalog.
Choose OK.
Examine the Browser. The referenced parts are nested under the new sub-
assembly hierarchy.
Instancing Parts
You have already attached parts to the subassembly. Each part definition is
listed in the Assembly Catalog. When you instance a part in the current
assembly, it refers to its part definition in the Catalog. Once a part is
instanced into the subassembly, you can copy it from the Browser.
To instance a part
1Use AMCATALOG to instance a part.
Context Menu In the graphics area, right-click and choose Catalog.
In the Assembly Catalog, choose the All tab. In External Assembly Definitions,
select DPULLEY and verify that Return to Dialog is selected.
2Insert a copy of DPULLEY, and choose OK to exit the Assembly Catalog.
3Use the Browser to create another instance of DPULLEY.
Browser Right-click DPULLEY and choose Copy. In the graphics
area, click a location for the copy and press ENTER.
4Make one copy each of DPULLEY3, WASHER3, and NUT3.
The Browser is updated to include the new instances.
Save your file.
Next, apply assembly constraints to build the subassembly.

Completing Assemblies |497
Completing Assemblies
Now that the parts are instanced into the subassembly, you can complete the
subassembly and constrain it to the base assembly. When the entire assembly
is complete, check it for interference among parts, and obtain mass property
information.
NOTE The Desktop Browser shows the order in which parts and subassemblies
are assembled. You can drag a part or subassembly to a different position in the
Desktop Browser. Always save your file before you reorder the hierarchy.
Reordering may affect offsets for explosion factors in scenes.
Applying Assembly Constraints
First, constrain parts in the subassembly, and then constrain the subassembly
to the base assembly.
The instructions specify responses on the command line for constraint appli-
cation, but if you prefer, you can use the animated cursor. After you select the
object to constrain, click the left mouse button (red) to cycle through the
options. When the object you want is highlighted, click the right mouse
button (green) to accept the selection.
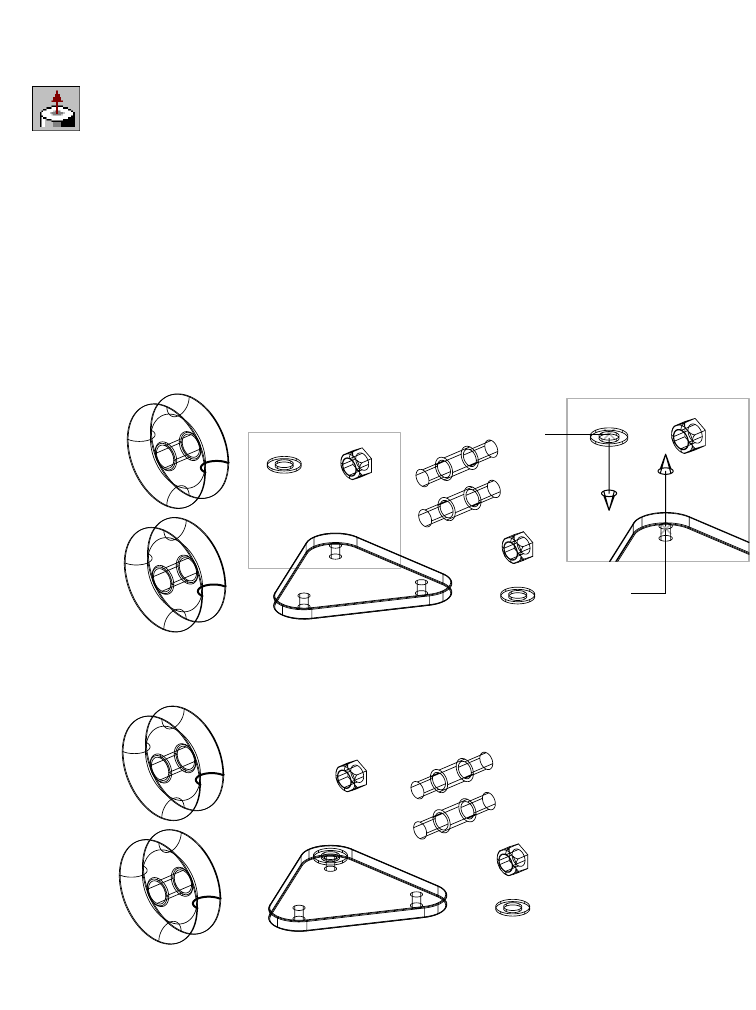
498 |Chapter 18 Assembling Complex Models
To constrain a subassembly part
1Use AMINSERT to constrain WASHER3 to PPULLEY, responding to the
prompts.
Context Menu In the graphics area, right-click and choose 3D
Constraints ➤ Insert.
Select first circular edge: Specify the hole on the bottom of WASHER3 (1)
First set = Plane/Axis
Enter an option [Clear/Flip] <accept>: Enter f, if needed
First set = Plane/Axis
Enter an option [Clear/Flip] <accept>: Press ENTER
Select second circular edge:
Specify the top cylindrical edge of the hole in PPULLEY (2)
Second set = Plane/Axis
Enter an option [Clear/Flip] <accept>: Press ENTER
Offset <0.0000>: Press ENTER
WASHER3 is constrained to PPULLEY along common axes and mating
planes.
1
2

Completing Assemblies |499
2Constrain DPULLEY to WASHER3, responding to the prompts.
Context Menu In the graphics area, right-click and choose 3D
Constraints ➤ Insert.
Select first circular edge: Specify inner edge of hole on DPULLEY (1)
First set = Plane/Axis
Enter an option [Clear/Flip] <accept>: Enter f
First set = Plane/Axis
Enter an option [Clear/Flip] <accept>: Press ENTER
Select second circular edge: Specify the top cylindrical edge of WASHER3 (2)
Second set = Plane/Axis
Enter an option [Clear/Flip] <accept>: Press ENTER
Offset <0.0000>: Press ENTER
The DPULLEY part is constrained to WASHER3 along the common axes and
mating planes.
1
2
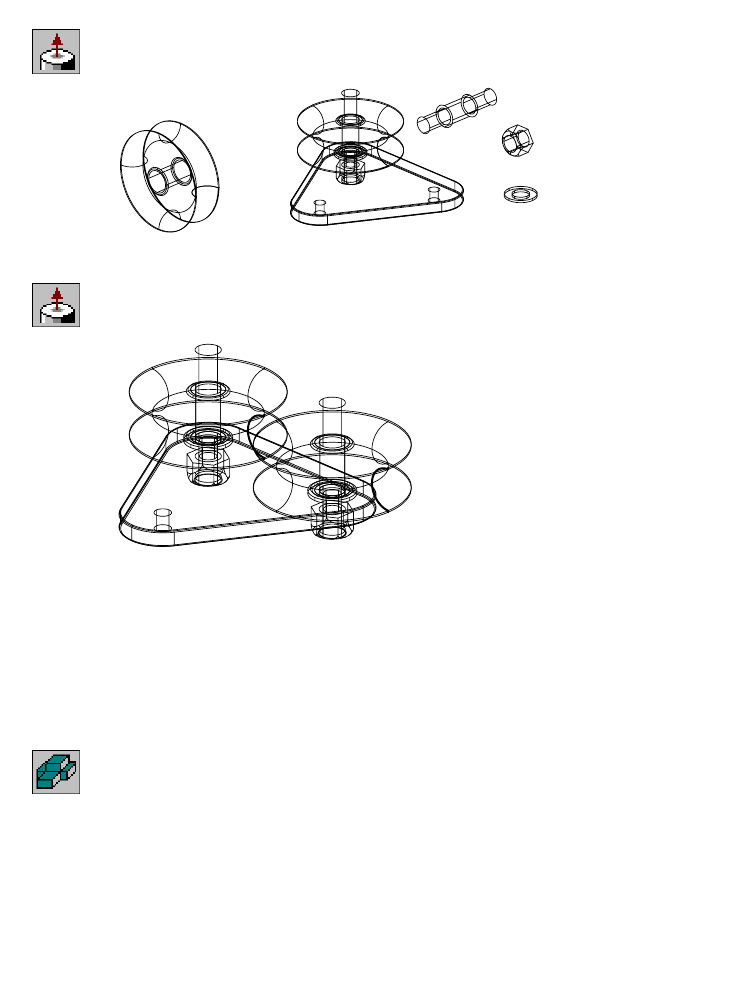
500 |Chapter 18 Assembling Complex Models
3Constrain DPULLEY3 and NUT3 to the subassembly.
Context Menu In the graphics area, right-click and choose 3D
Constraints ➤ Insert.
4Constrain the remaining parts to finish the subassembly.
Context Menu In the graphics area, right-click and choose 3D
Constraints ➤ Insert.
Save your file.
Next, activate the top level of the assembly and constrain the subassembly to
the top assembly.
To constrain a subassembly to a top-level assembly
1Use AMACTIVATE to activate the PULLYASM assembly, responding to the
prompt.
Context Menu In the graphics area, right-click and choose Assembly ➤
Activate Assembly.
Enter assembly name to activate or [?] <PULLYASM>: Press ENTER
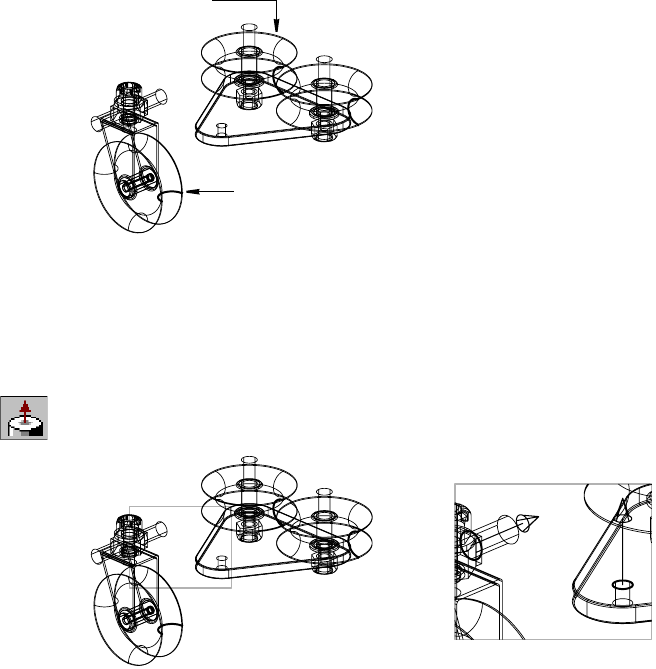
Completing Assemblies |501
In the Desktop Browser, the top-level assembly is no longer shaded.
The active assembly name is displayed below the command line (Target:
PULLYASM).
2Move the subassembly, to make viewing easier. Then zoom in as needed to
magnify selection points.
Next, constrain the pulley plate subassembly to the root assembly.
3Choose Insert to constrain the shaft of NUT2 to the pulley plate hole on the
mating planes and along the common axes.
Context Menu In the graphics area, right-click and choose 3D
Constraints ➤ Insert.
completed subassembly
completed root assembly
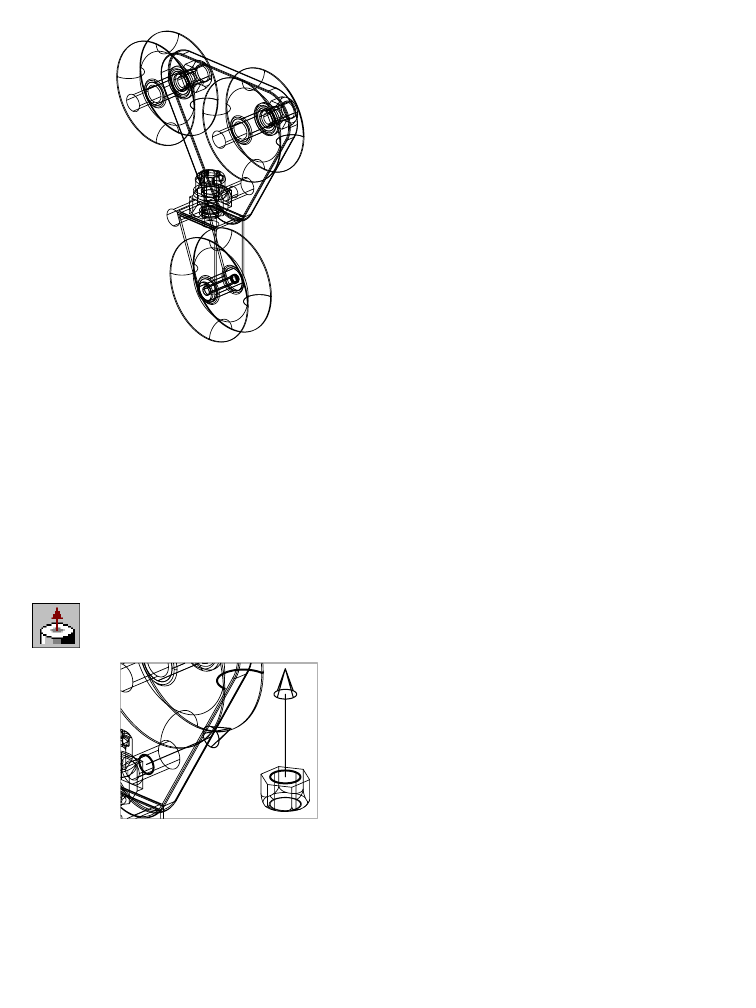
502 |Chapter 18 Assembling Complex Models
The subassembly is now constrained to the root assembly.
Copy another instance of NUT3 in your drawing and constrain it to the shaft
of NUT2.
To add and constrain a part instance
1Use the Browser to copy another instance of the NUT3 external part into the
assembly.
Browser Right-click NUT3, and choose Copy. In the graphics area,
click a location for the copy, and press ENTER.
2Constrain NUT3 to the pulley plate and the shaft of NUT2.
Context Menu In the graphics area, right-click and choose 3D
Constraints ➤ Insert.
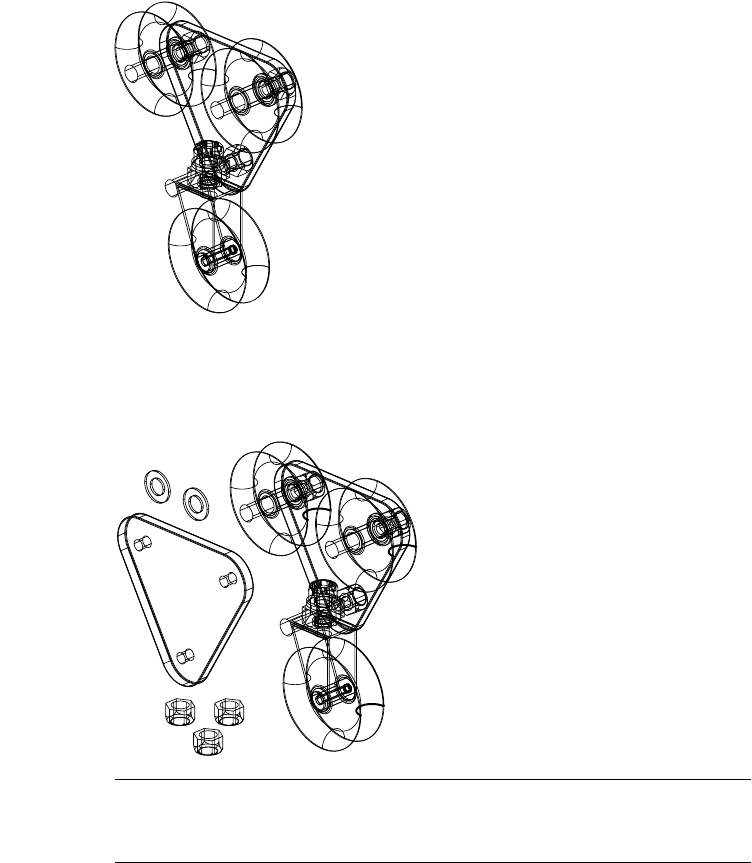
Completing Assemblies |503
It is a good idea to check the position of a constrained part in another view. If
the part is constrained incorrectly, use the Browser to delete the constraint.
Right-click to display the menu, and choose Delete. Then move the parts as
needed, and reapply the constraints.
One side of the pulley assembly is complete.
3Repeat steps 1 and 2 to copy and apply assembly constraints to WASHER3,
PPULLEY, and NUT3, to complete the pulley assembly.
4Add one instance of your copy of the PPULLEY external part, two copies of
WASHER3, and three copies of NUT3 into the assembly drawing.
NOTE Depending on the current UCS of your drawing, the parts may not be
oriented the same as they are in the above illustration. This does not affect your
ability to place the constraints.

504 |Chapter 18 Assembling Complex Models
5Constrain both WASHER3 parts to the DPULLEY3 parts on the pulley plate.
Context Menu In the graphics area, right-click and choose 3D
Constraints ➤ Insert.
6Use Insert to constrain PPULLEY_2 to the WASHER3 parts.
Constrain PPULLEY to any two instances of WASHER3, to remove the rota-
tional degree of freedom from the pulley plate.
7Use Insert again to constrain the NUT3 parts to the pulley plate.
Save your file. The pulley assembly is complete.
Restructuring Assemblies
The pulley assembly model in the previous exercise was planned, and then
assembled in a particular order. In Mechanical Desktop, you can use another
design process called assembly restructure. You can design and constrain parts
and create assemblies in any order, and subsequently adjust the assembly
structure within the Desktop Browser.
Using the assembly restructure feature in the Browser, you can
■Use either the drag or cut and paste method to move components
■Move components from the master assembly into a local or external sub-
assembly
■Select multiple parts and subassemblies and move them within the
Browser to restructure the assembly
■Move components while in the context of an active external subassembly

Completing Assemblies |505
In most cases, constraints are maintained with the parts and subassemblies
that you move. In the event that a constraint cannot be maintained, a warn-
ing message is displayed.
NOTE Instances can be lost if you restructure them up the assembly hierarchy
where multiple instances of the same definition exist.
Open the assembly file pullyasm.dwg from the desktop\tutorial folder, and
practice using assembly restructure.
To restructure an assembly hierarchy
1Expand the hierarchy in the Browser so you can see all of the components.
Browser Right-click PULLYASM and choose Expand.
2Select a part name to activate the part.
To select more than one part, hold down CTRL as you select.
To select all parts within a range, hold down SHIFT as you select the first and
last part in the range. All components in between are automatically selected.
3Drag the selected parts up or down in the assembly structure.
Use a left-click to drag your selection to a location and release the mouse.
Use a right-click to drag your selection to a location and release the mouse to
display a context menu with options Move Here, Copy Here, Create Subas-
sembly Here, and Cancel.
If the assembly tree is too long to scroll conveniently, right-click the compo-
nent and choose Cut, scroll to the new location, and Choose paste.
If a part cannot be moved logically, an error icon is displayed.
When restructure is activated, the cursor changes to look like a shadow of the
original part name.
4Drop the part in a valid destination.
Valid destinations are highlighted as you move the cursor over them.
The part is restructured within the assembly, and the assembly is updated.

506 |Chapter 18 Assembling Complex Models
Analyzing Assemblies
Next, check for interference between parts. This analysis is useful for detect-
ing problems that may arise during the final design stages. Check each part
for interference. If any interference is detected between parts, interference
solids can be created to illustrate where the interference occurs.
To check for interference
1Use AMINTERFERE to check for interference.
Context Menu In the graphics area, right-click and choose Analysis ➤
Check Interference.
Respond to the prompts.
Nested part or subassembly selection? [Yes/No] <No>: Enter y
Specify first set of parts or subassemblies or [?]: Select PPULLEY (1)
Instance = PPULLEY_2
Enter an option [Down/Next/Accept] <Accept>: Press ENTER
Specify first set of parts or subassemblies: Press ENTER
Specify second set of parts or subassemblies: Select DPULLEY3 (2)
Instance = SUBPULLY_1
Enter an option [Down/Next/Accept] <Accept>: Enter d
Instance = DPULLEY3_1
Enter an option [Up/Down/Next/Accept] <Accept>: Press ENTER
Specify second set of parts or subassemblies: Press ENTER
Comparing 1 parts/subassemblies against 1 parts/subassemblies.
Interference 1:
PPULLEY_2
SUBPULLY_1
DPULLEY3_1
Create interference solids? [Yes/No] <No>: Enter n
Highlight pairs of interfering part/subassemblies?[Yes/No] <No>: Enter y
Enter an option [eXit/Next pair] <Next pair>: Enter x
NOTE Resize the text window above the command line to read the results of
interference checking.
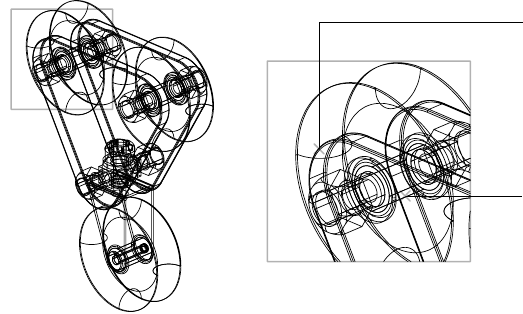
Completing Assemblies |507
You should detect two examples of interference. Both DPULLEY and
WASHER3 parts interfere with the holes on PPULLEY. The drilled holes in the
pulley plate are too small.
The pulley plate is an external part, but it can be edited from within the
assembly file. If you are working in a very large assembly, it may be easier to
open the external file and make changes.
1
2
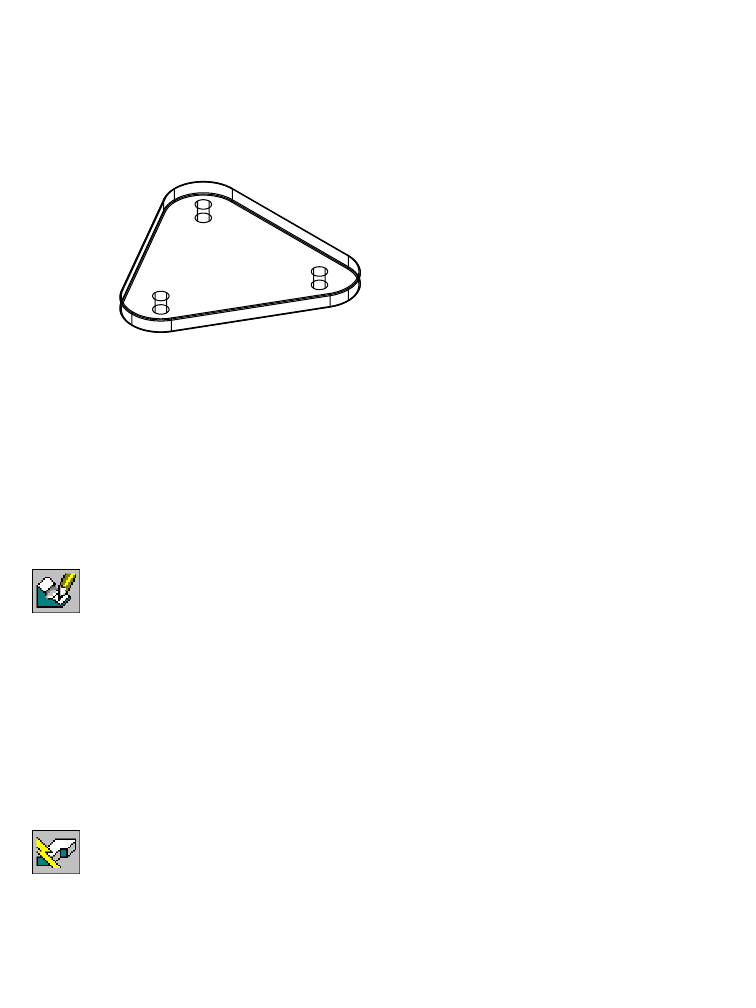
508 |Chapter 18 Assembling Complex Models
Editing Mechanical Desktop Parts
Because interference was detected between the pulley plate and the
DPULLEY3 parts, you need to enlarge the drilled holes on the pulley plate.
Editing an external part updates all instances of the parts in the assembly
drawing. The modified part retains the applied assembly constraints.
In this tutorial, you return to the open ppulley.dwg file and make the holes
larger, to remove the interference.
To edit an external part
1Switch to the window containing the PPULLEY part you created earlier.
2In the Browser, click the plus sign in front of PPULLEY to display the part
features.
3Use AMEDITFEAT to edit the holes, responding to the prompts.
Context Menu In the graphics area, right-click and choose Edit Features
➤ Edit.
Enter an option [Independent array instance/Sketch/surfCut/Toolbody/select
Feature] <select Feature>: Select one of the drilled holes
Enter an option [Accept/Next] <Accept>: Enter n or press ENTER
The Hole dialog box is displayed.
4In the Hole dialog box, enter 15 in the Drill Size field. Then choose OK.
5Repeat steps 3 and 4 for Hole2 and Hole3.
6Use AMUPDATE to update the edited part.
Context Menu In the graphics area, right-click and choose Update Part.
The pulley plate reflects the new design.
Save your file.
Reloading External References |509
Reloading External References
To update the assembly to reflect the changes you made to the external part,
reload the external definition.
To reload an external definition
1Switch to the window containing the assembly.
2Use AMCATALOG to reload the PPULLEY definition.
Context Menu In the graphics area, right-click and choose Catalog.
In the Assembly Catalog, in External Assembly Definitions, right-click
PPULLEY and choose Reload.
Choose OK.
The pulley plate reflects the new design.
If the assembly looks incorrect, choose Assembly ➤ Assembly Update to
update the assembly constraints.
Save your file.
Check the assembly again for interference.
redesigned part
510 |Chapter 18 Assembling Complex Models
To check for interference
1Use AMACTIVATE to activate the SUBPULLY subassembly.
Context Menu In the graphics area, right-click and choose Assembly ➤
Activate Assembly.
Specify the SUBPULLY subassembly.
2Use AMINTERFERE to check for interference.
Context Menu In the graphics area, right-click and choose Analysis ➤
Check Interference.
3Specify DPULLEY3. No interference should be detected.
Assigning Mass Properties
Next, calculate mass property information. You can analyze parts and assem-
blies during the course of designing. You may need to optimize weight, max-
imize stiffness, balance loads, ease assembly, or meet particular requirements.
One mass properties dialog box contains both Setup and Results tabs that
function the same for both parts and assemblies. In this case, the parts list in
the dialog box displays all parts and part properties in the activated assembly
to be analyzed. Item numbers are also displayed if a BOM exists. When you
select an item in the parts list, it is graphically highlighted on the screen.
In these steps, you analyze the bracket and change tolerance values and
material types.
To set up mass properties
1Activate the PULLYASM assembly.
Context Menu In the graphics area, right-click and choose Assembly ➤
Activate Assembly.
2Use AMMASSPROP to analyze the mass properties of the assembly, responding
to the prompt.
Context Menu In the graphics area, right-click and choose Analysis ➤
Mass Properties.
Select parts or subassemblies: Select the bracket, and press ENTER
The Assembly Mass Properties dialog box is displayed with the Setup tab
active. In the Materials Available window, the materials listed are all of those
defined in the active assembly.
Reloading External References |511
3In the Assembly Mass Properties dialog box Setup tab, specify:
Output Units: Metric (mm, g)
Coordinate System: User coordinate system (UCS)
Display Precision: Select 0.00000
Part Name: Select BRACKET
Materials Available: Material: Select Stainless_Steel
Choose Assign Material.
The material information is transferred to the part material attribute and
BOM, and is updated in the part name list.
Next, change the material definition for a part in the assembly.
4In the Part Name list, select BRACKET, and then select Edit Materials.
5In the Physical Materials List dialog box Material List, select Stainless_Steel.
In the Properties Window, specify
Density: 8.5
Choose OK.
The new material definition information is transferred to the part, BOM, and
is updated in the Assembly Mass Properties dialog box Part List view.
Choose Done to exit the Assembly Mass Properties dialog box.
You are ready to calculate the mass properties based on the new information
you entered.
Calculating Mass Properties
In the Mass Properties dialog box the Results tab is blank until you use the
Calculate button to retrieve the results of your input in the Setup tab.
512 |Chapter 18 Assembling Complex Models
To calculate mass properties
1In the Mass Properties Dialog Box, select the Results tab. Then select the
Calculate button.
The results are calculated and displayed.
The Calculate button is no longer available because the Setup and Results
fields are in sync. If you change an item on the Setup tab, the results are
cleared and the Calculate button becomes available.
You can use the Insert UCS button to create and insert a user coordinate sys-
tem (UCS) based on a parts or assemblies center of gravity (CG).
2Choose Export Results.
In the File dialog box, define a file name and save the file.
This report file can be imported by many external programs.
3Choose Done to close the Assembly Mass Properties dialog box.
Save your file.
Now, you create an exploded view of the assembly.
Reviewing Assembly Models |513
Reviewing Assembly Models
Assembly scenes and drawing views are essential for reviewing the assembly
model. For this lesson, you first create an exploded assembly scene, and then
tweak the positions of parts and add assembly trails and annotations.
Creating Exploded Assembly Scenes
After assembly constraints have been applied to each part, you can create a
scene (an exploded view of the entire assembly). Multiple scenes can be
created and named. You set an explosion factor to determine the separation
of parts in the scene. If you do not want an exploded view in a scene, set the
explosion factor to 0.
Before you begin, select the Scene tab to switch to Scene mode.
To create an exploded assembly scene
1Use AMNEW to create a new scene, responding to the prompts.
Context Menu In the graphics area, right-click and choose New Scene.
In the Create Scene dialog box, specify:
Target Assembly: PULLYASM
Scene Name: Enter design1
Scene explosion factor <.0000>: Specify 0.0000
Synchronize Visibility with Target Assembly: Select the check box
Choose OK.
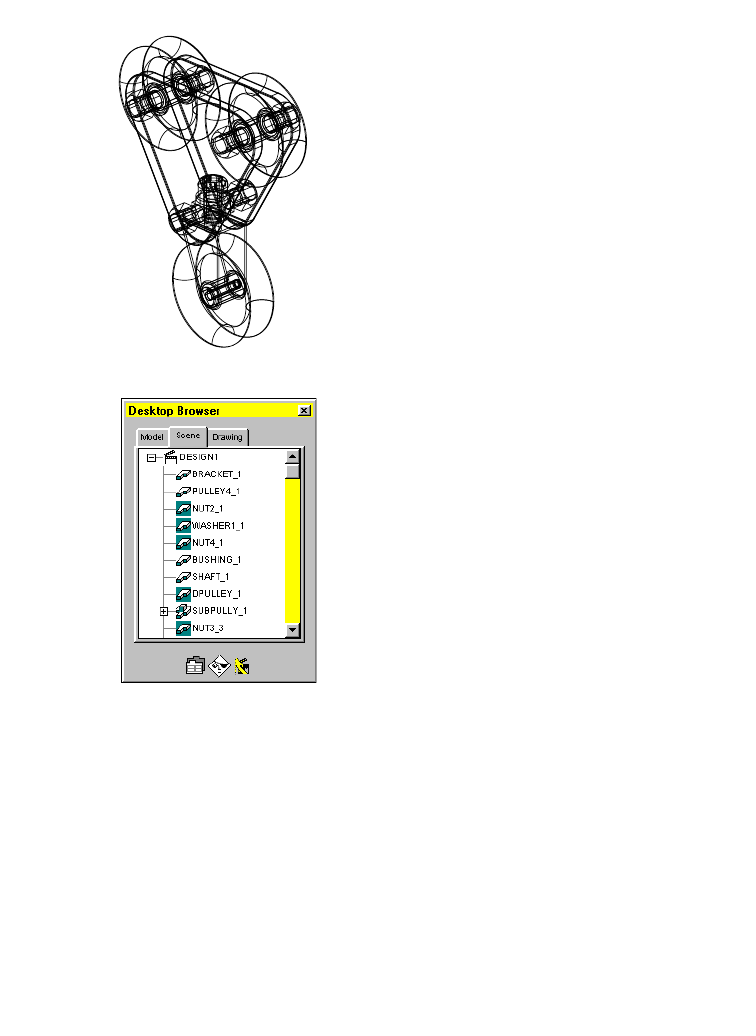
514 |Chapter 18 Assembling Complex Models
The scene, design1, is displayed.
2Look at the Browser. The names of all parts in the design1 scene are listed.
Next, align the exploded parts in the assembly scene.
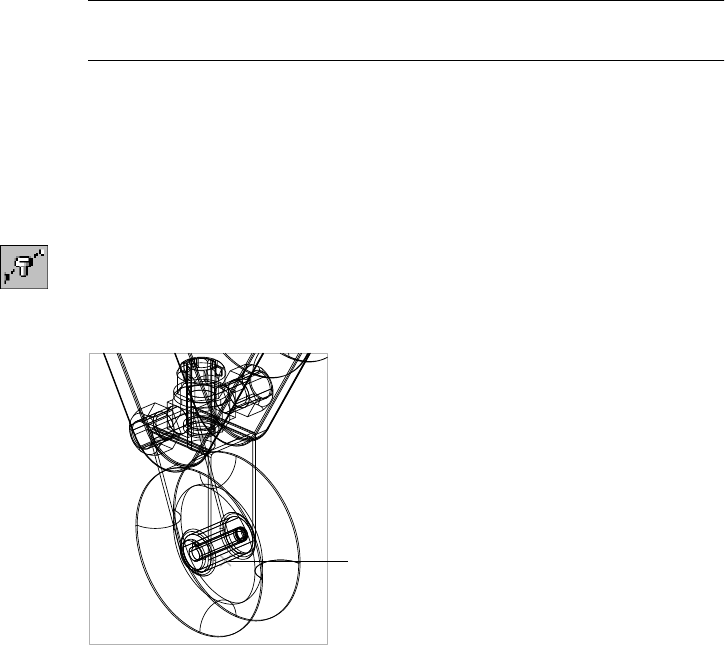
Reviewing Assembly Models |515
Using Tweaks and Trails in Scenes
In an exploded scene, sometimes parts obscure other parts. You can use tweaks
to change the positions of individual parts and then adjust the positions of the
parts in the design1 scene. Zoom in to magnify the parts to be tweaked.
In the Browser, tweaks are nested under the respective parts. You can select and
multi-select tweaks in the Browser to delete them. When you pause the cursor
over a tweak in the Browser, a tooltip displays the distance factor for the tweak.
NOTE The grounded part of an assembly or a subassembly cannot be
tweaked. Its position is fixed.
Assembly trails use a continuous or other defined linetype to indicate the
path of the explosion. These trails use assembly constraint information to
visually demonstrate how the assembly design fits together.
To tweak an exploded assembly scene
1Use AMTWEAK to open the Power Manipulator dialog box.
Context Menu In the graphics area, right-click and choose New Tweak.
Select part/subassembly to tweak: Specify a point on BUSHING_1 (1)
Enter an option [Next/Accept] <Accept>: Press ENTER
The Power Manipulator dialog box is displayed only the first time you create
a new tweak.
1
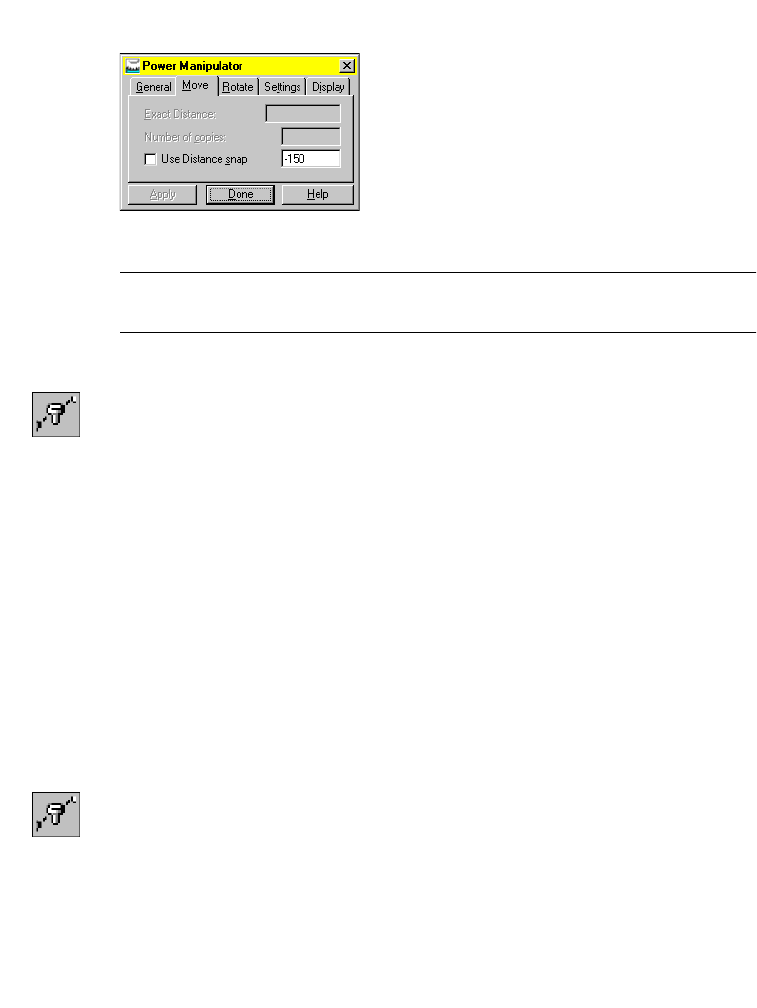
516 |Chapter 18 Assembling Complex Models
In the Power Manipulator dialog box, on the Move tab, verify that Place
Objects (ALT) is selected.
Choose Done.
NOTE To access the Power Manipulator dialog box later, right-click the Power
Manipulator symbol on your screen, and select Options.
2Use AMTWEAK to tweak the BUSHING part, responding to the prompts.
Context Menu In the graphics area, right-click and choose New Tweak.
Select part/subassembly to tweak: Specify a point on DPULLEY_1 (1)
Enter an option [Next/Accept] <Accept>: Press ENTER
This time, the Power Manipulator symbol is displayed on the BUSHING part
you selected.
3Click the -Z axis on the Power Manipulator symbol, drag away from the
assembly, and click at a distance of -150.
4Continue on the command line.
Select handle or Geometry
[Undo/UCS/WCS/Select/Options/Pancenter/Type/tRails/X/Y/Z] <Accept>:
Press ENTER
The BUSHING is moved away from the assembly. In the Browser, a Tweak
icon is displayed.
1Use AMTWEAK to tweak the DPULLEY part, responding to the prompts.
Context Menu In the graphics area, right-click and choose New Tweak.
Select part/subassembly to tweak: Specify a point on DPULLEY_1 (1)
Enter an option [Next/Accept] <Accept>: Press ENTER
2Click the -Z axis on the Power Manipulator symbol, drag away from the
assembly, and click at a distance of -70.
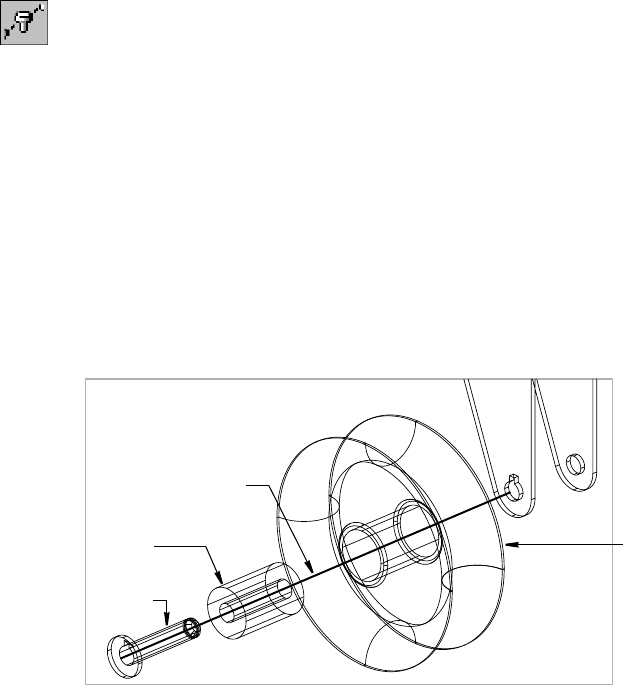
Reviewing Assembly Models |517
3Continue on the command line.
Select handle or Geometry
[Undo/UCS/WCS/Select/Options/Pancenter/Type/tRails/X/Y/Z] <Accept>:
Press ENTER.
4Use AMTWEAK to tweak the SHAFT part, responding to the prompts.
Context Menu In the graphics area, right-click and choose New Tweak.
Select part/subassembly to tweak: Specify a point on SHAFT_1 (1)
Enter an option [Next/Accept] <Accept>: Press ENTER
The Power Manipulator symbol is displayed on the SHAFT part.
5Click the -Z axis on the Power Manipulator symbol, drag away from the
assembly, and click at a distance of -200.
6Continue on the command line.
Select handle or Geometry
[Undo/UCS/WCS/Select/Options/Pancenter/Type/tRails/X/Y/Z] <Accept>: Enter r
Create Trails? [Yes/No] <No>: Enter y
[Undo/UCS/WCS/Select/Options/Pancenter/Type/tRails/X/Y/Z] <Accept>:
Press ENTER
The BUSHING, DPULLEY, and SHAFT part tweaks are displayed with trails.
You can adjust assembly trails.
tweaked
dpulley
tweaked
bushing
tweaked
shaft
assembly trail added

518 |Chapter 18 Assembling Complex Models
To adjust assembly trails
1Use AMTRAIL to adjust your assembly trails, responding to the prompt.
Command AMTRAIL
The Trail Offsets dialog box is displayed.
2Use the options in the Trail Offsets dialog box, to adjust over shoots and
undershoots for your trails.
Choose OK to apply your selections.
Next, create an assembly drawing view.
Creating Assembly Drawing Views
An assembly drawing view shows a 2D representation of the 3D assembly.
You use the base part for a base view. Then you create an isometric view of
the entire assembly model. Drawing views are automatically updated when
you change a part or subassembly.
Before you begin, select the Drawing tab to switch to Drawing mode.
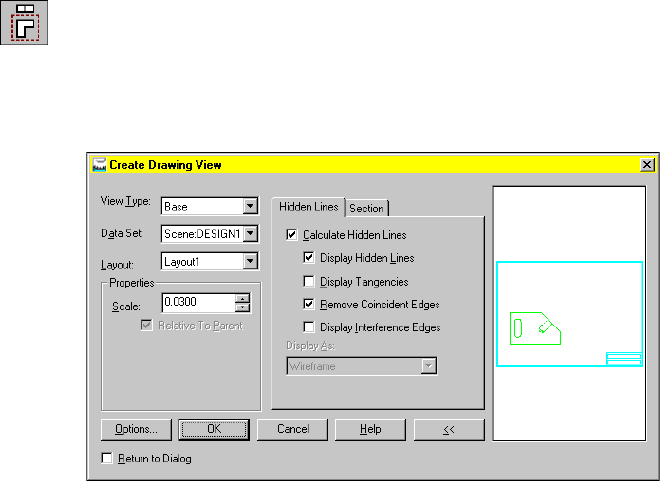
Reviewing Assembly Models |519
To create a drawing view
1Use AMDWGVIEW to create a new drawing view.
Context Menu In the graphics area, right-click and choose New View.
2In the Create Drawing View dialog box, specify:
Type: Base
Data Set: Scene: DESIGN1
Scale: Enter .03 (or .75 mm)
Choose OK.
3Respond to the prompts as follows:
Select planar face, work plane or [Ucs/View/worldXy/worldYz/worldZx]:
Enter z
Select work axis, straight edge or [worldX/worldY/worldZ]:
Enter x
Adjust orientation [Flip/Rotate] <accept>
Enter r until the UCS icon is upright
Adjust orientation [Flip/Rotate] <accept>: Press ENTER
Specify location of base view: Specify a point in the left of the title block
Specify location of base view: Press ENTER
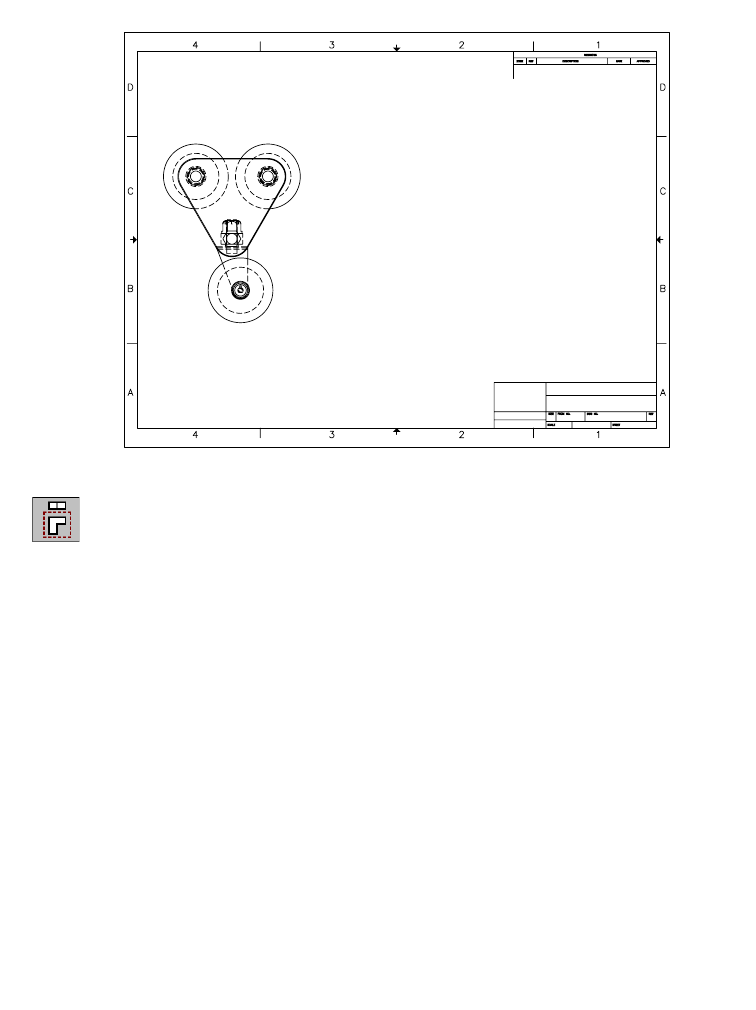
520 |Chapter 18 Assembling Complex Models
The base assembly drawing view is displayed.
4Create an isometric view of the assembly.
Context Menu In the graphics area, right-click and choose New View.
In the Create Drawing View dialog box, specify:
View Type: Iso
Scale: Enter 1
Relative to Parent: Select the check box
Choose OK.
5Respond to the prompts as follows:
Select parent view: Select the base view
Specify location for isometric view: Specify a point to the right of the base view
Specify location for isometric view: Press ENTER
An isometric view of the assembly is displayed.
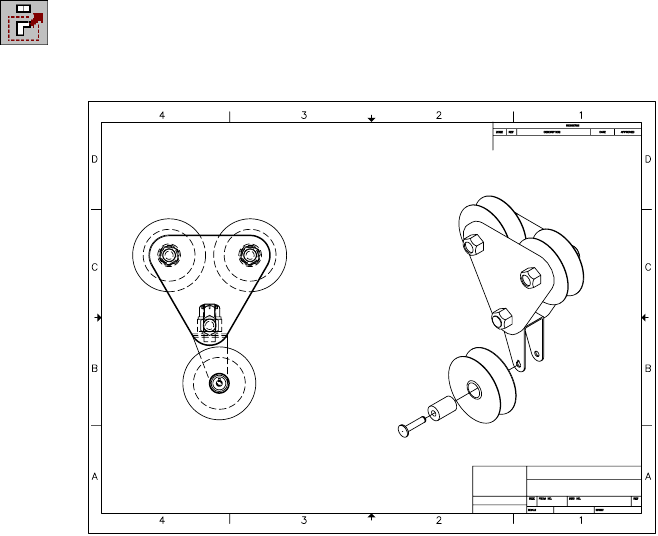
Reviewing Assembly Models |521
6Use AMMOVEVIEW to align the views, responding to the prompts.
Context Menu In the graphics area, right-click and choose Move View.
Select view to move: Select the isometric view
Specify new view location or [Layout]: Align the views and press ENTER
Examine the Browser. The isometric view is listed under the base view.
Now, create a BOM database, and add a parts list and associative balloon callouts.

522 |Chapter 18 Assembling Complex Models
Creating Bills of Material
After you have assembled your parts, you can create a bill of material (BOM)
database. This database contains a list of attributes assigned to each part. The
attributes store information such as manufacturer, description, and vendor
part number.
The attributes are contained in part references that are assigned to each part.
Part references can also be created to reference other geometry in your draw-
ing, such as surfaces. The geometry can then be included in a parts list.
The BOM database counts the number of instances in an assembly and tallies
instances for each part. In the BOM table, defined columns can be edited,
added, deleted, moved, and sorted.
By accessing the information in the BOM database, you can add balloons and
insert parts lists into your drawing. You can edit part references, balloons,
and parts lists. The BOM database is automatically updated.
Because the BOM database is fully parametric, any changes to it update the
information stored in balloons, part references, and parts lists.
To create a BOM database
1Use AMBOM to create the BOM database.
Command AMBOM
In the BOM dialog box, review the parts in the database.
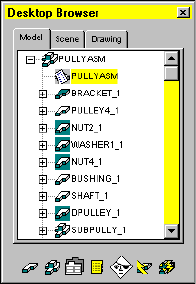
Creating Bills of Material |523
Notice the SUBPULLY definition in the list of parts. The plus sign in front of
it indicates that it is a subassembly.
2Click the plus sign in front of SUBPULLY.
The BOM database now lists all the parts in the assembly, including those in
the subassembly.
Choose OK to exit the BOM dialog box.
3Select the Model tab in the browser. A BOM icon is located under PULLYASM.
By default, the BOM takes the same name as the assembly file. You can
change this setting by editing the name of the BOM directly in the Browser.
To edit the name of a BOM
1Using the Browser, rename the BOM database.
Browser Right-click the BOM icon and choose Rename.
2Change the name to BOM_1.
Customizing BOM Databases
Mechanical Desktop provides symbol standards for major drafting conven-
tions, including ANSI, BSI, CSN, DIN, GB, ISO, and JIS. By modifying the
symbol standards, you can control the way symbols, balloons, and parts lists
are displayed in the drawing, when you create them.
Next, modify the symbol standards to control the number of columns used
in the parts list and the name of one of the columns.
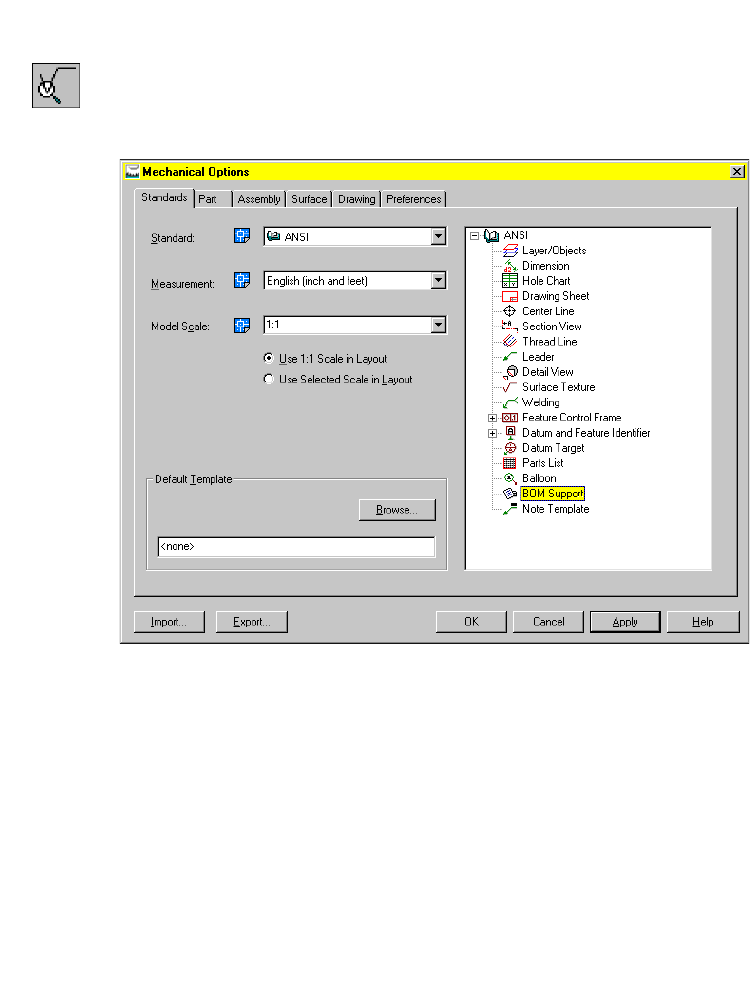
524 |Chapter 18 Assembling Complex Models
To modify symbol standards
1Use AMOPTIONS to access the Mechanical Desktop symbol standards.
Command AMOPTIONS
In the Mechanical Options dialog box, expand the hierarchy of ANSI, and
double-click the icon in front of BOM Support.
2In the BOM Properties for ANSI dialog box, in Columns select Material and
specify:
Caption Alignment: Select the Center Align Text icon
Data Alignment: Select the Center Align Text icon
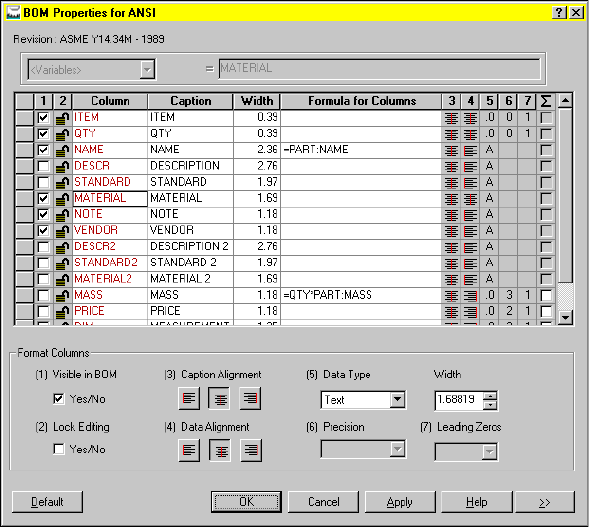
Creating Bills of Material |525
Choose Apply, then OK.
The Mechanical Options dialog box is still open.
3Choose OK to close the Symbol Standards dialog box.
Save your file.
Working with Part References
When you create a BOM database, each part in the assembly is assigned a part
reference. A part reference is an attributed block that can be modified to
include any information you want to attach to the part. That information is
used by the BOM database and included in the parts lists you generate.
Before you begin, in the Browser, select the Drawing tab to switch to Drawing
mode.
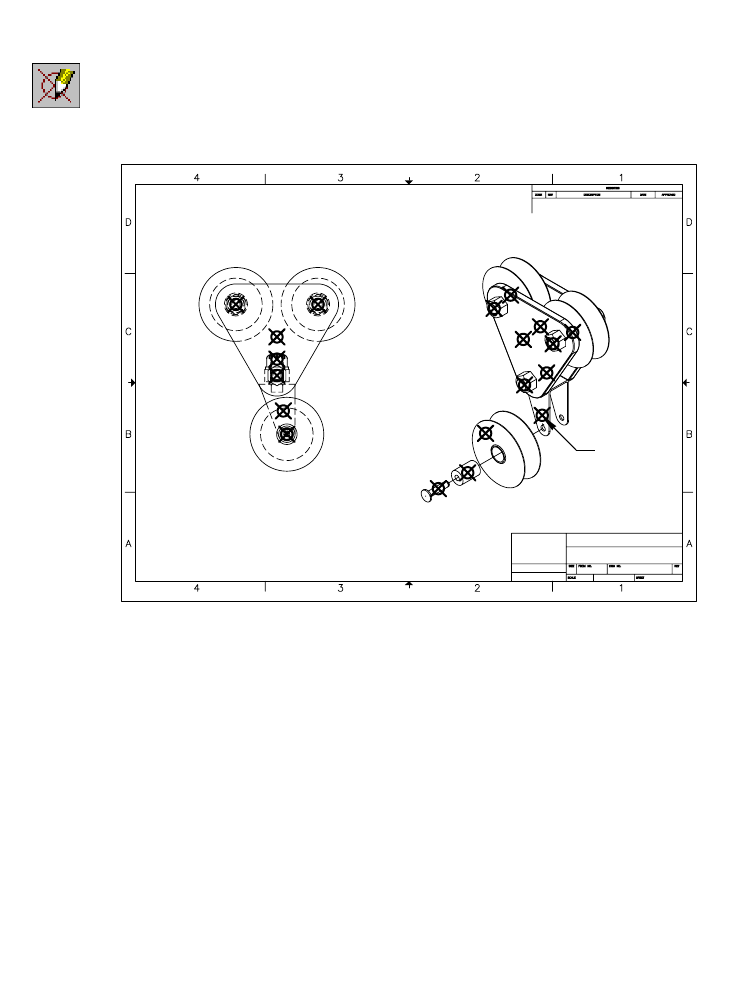
526 |Chapter 18 Assembling Complex Models
To edit a part reference
1Use AMPARTREFEDIT to edit a part reference, responding to the prompt.
Context Menu In the graphics area, right-click and choose Annotate
Menu ➤ Parts List ➤ Part Reference Edit.
Select pick object: Select the part reference for BRACKET (1)
2In the Part Ref Attributes dialog box, double-click in the Name field and enter
Pulley Bracket.
Choose OK.
1
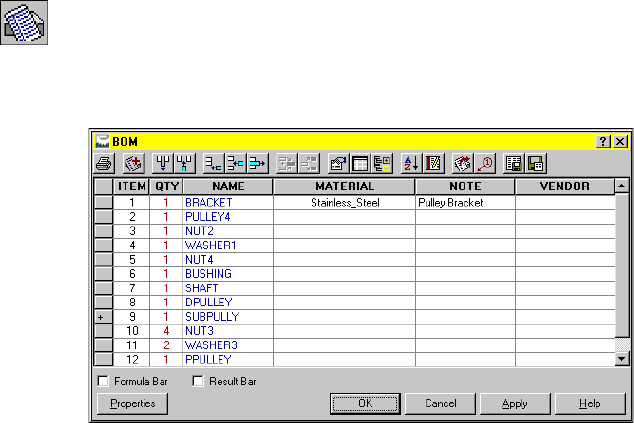
Creating Bills of Material |527
3Use AMBOM to display the BOM database.
Context Menu In the graphics area, right-click and choose Parts List ➤
BOM Database.
Bom table [Delete/Edit] <Edit>: Press ENTER
Notice that Pulley Bracket is now listed under Note for BRACKET.
Choose OK to exit the BOM dialog box.
Next, add balloon callouts to the isometric view.
Adding Balloons
Balloons are used to reference parts in your drawing to a parts list. They con-
tain the same information as the part reference they are attached to. You can
edit that data by selecting balloons. Changes made to the data associated
with a balloon are reflected in the BOM database and the parts list.
You can control the size and appearance of balloons, using the Symbol Stan-
dards dialog box.
528
To place a balloon callout
1Use AMBALLOON to create balloon callouts for BRACKET, DPULLEY, BUSH-
ING, SHAFT, and NUT3, responding to the prompts.
Desktop Menu Choose Annotate ➤ Parts List ➤ Balloon.
Select part/assembly or [auTo/autoAll/Collect/Manual/One/ Renumber/
rEorganize]: Enter T
Align [Angle/Standalone/Horizontal/Vertical] <Vertical>: Press ENTER
Select pick object: Select the part reference for BRACKET (1)
Select pick object: Select the part reference for DPULLEY (2)
Select pick object: Select the part reference for BUSHING (3)
Select pick object: Select the part reference for SHAFT (4)
Select pick object: Select the part reference for NUT3 (5)
The objects are aligned after you pick them.
2
3
41
5

Creating Bills of Material |529
Continue on the command line:
Select pick object: Press ENTER
Align Standalone/Horizontal/<Vertical>:
Specify a point between the two drawing views
Next, place the parts list in the drawing.
Placing Parts Lists
A parts list is an associative block of information about your assembly. It dis-
plays information about the parts, according to the settings specified in the
BOM database. Because it is parametric, any changes you make to the BOM
database or symbol standards are automatically reflected in the parts list.
530 |Chapter 18 Assembling Complex Models
To place a parts list
1Use AMPARTLIST to place the parts list under the base view of your assembly,
responding to the prompts.
Context Menu In the graphics area, right-click and choose Parts List ➤
Part List.
The Parts List dialog box is displayed.
2In the Parts List dialog box, in Title, enter the new name Pulley Parts List.
3Choose Apply, then choose OK.
Specify location: Specify a point under the base view
The parts list is placed in the drawing.
NOTE You may need to move the drawing views to make room for the parts
list. Place the parts list first, and then move the views as needed. Because the bal-
loons are associated with the views, they will also move.
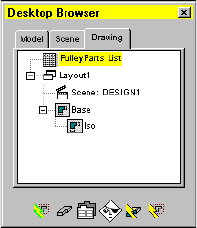
Finishing Drawings for Plotting |531
When the parts list is created, a parts list icon is displayed in the Browser.
Save your file.
Finishing Drawings for Plotting
Now that the assembly has been documented, plot the drawing.
Paper drawings are useful for reviewing the entire assembly to make sure that
the design is feasible and can be manufactured. The Parts List on the assem-
bly drawing provides information about the parts needed to manufacture the
assembly. If you wish, add more reference dimensions, fill in the title block,
and add some notes to your drawing before you plot.
This tutorial has demonstrated the flexibility of using subassemblies to create
complex models. Even a complex assembly can be easily modified and doc-
umented, if it is truly a parametric assembly.

532

533
In This Chapter 19
Creating and Editing
Surfaces
This Autodesk® Mechanical Desktop®tutorial
introduces surfaces grouped by function, and provides
instructions for creating the different types of surfaces.
You learn surface types, practice surface modeling, and
work with modeling some typical surfaces.
Once you have completed this lesson, you will
understand the techniques required to surface a more
complex part.
■Creating surfaces—motion
based, skin, and derived
■Joining and trimming surfaces
■Editing surfaces

534 |Chapter 19 Creating and Editing Surfaces
Key Terms
Te r m Definition
augmented line A 3D polyline with vector information at each vertex. An augmented line is a
surface creation tool that allows you to control the curvature and the tangency
of a surface.
base surface A basic underlying surface that carries a shape across a larger area. Can be
trimmed to precise shapes as needed, but the base surface remains intact and
may be displayed.
derived surface A surface that gets some or all of its attributes from one or more base surfaces.
motion-based surface A surface created by moving wires through space.
rail One or more curved lines along which a surface is swept. Rails form the
curvature of a swept surface.
skin surface The surface draped over a wireframe.
surface normal A short line perpendicular to a surface that shows where the surface starts and
which direction is out.
surface primitive Surface created by values you specify. It does not require a wireframe model.
U or V display lines Lines that correspond to rails and wires.
wire Generic term for lines, arcs, circles, ellipses, 2D and 3D polylines, augmented
lines, and splines.
wireframe modeling Wires and surface parts intermixed to construct the basic framework of a 3D
model. The initial step in creating a surfaced model.
wireframe surfacing Covering a wireframe model with surfaces.
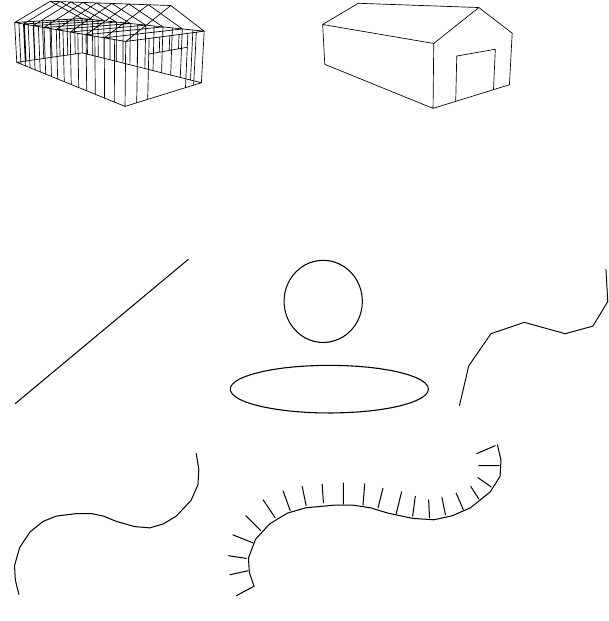
Basic Concepts of Creating Surfaces |535
Basic Concepts of Creating Surfaces
Three-dimensional surface modeling can be compared to constructing a
building. You start by establishing the initial shape. Then you cover the
rough framing with siding and roofing.
One approach to surface modeling is to create a 3D framework of wires. Wire
is a generic term for lines, arcs, circles, ellipses, 2D and 3D polylines, aug-
mented lines, and splines, including splines created from existing part edges.
This framework is called a wireframe.
Wires and surface parts can be intermixed to construct the framework of your
3D model. This initial step in creating a surfaced model is called wireframe
modeling.
Once the 3D wireframe model is created, the next step is to cover the frame-
work with a surface. This task is called wireframe surfacing. This technique is
one approach to creating surfaces.
rough frame siding applied
line ellipse polyline
spline augmented line
circle
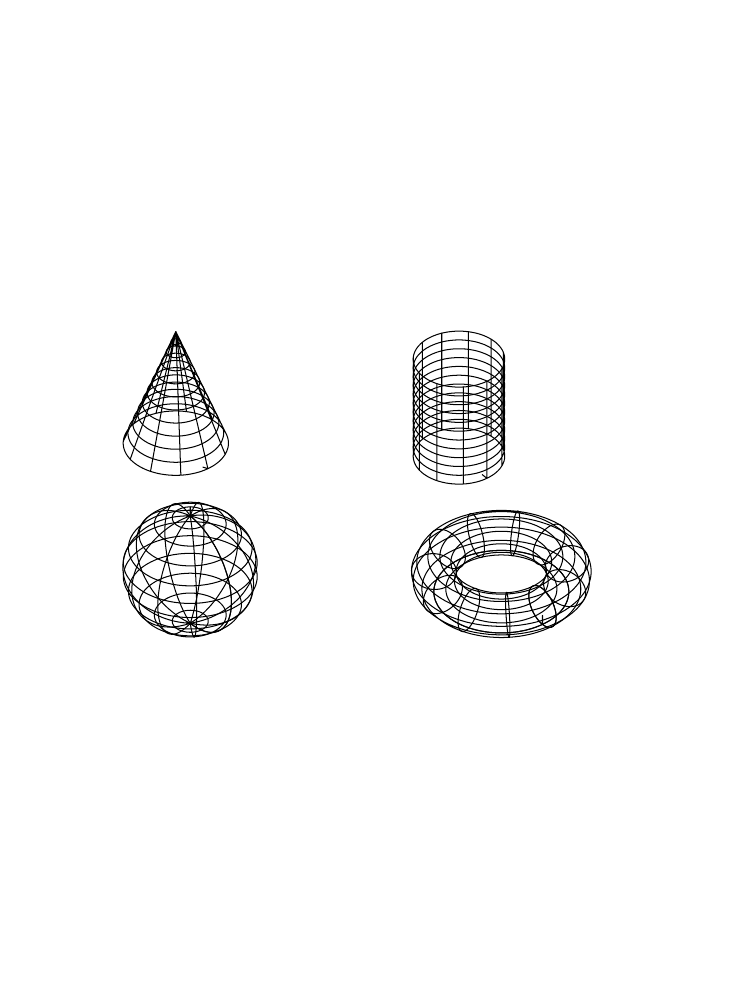
536 |Chapter 19 Creating and Editing Surfaces
Working with Surfaces
In this tutorial you’ll learn about these types of surfaces:
■Primitive, created by specifying values
■Motion-based, created by moving wires through space
■Skin, applied over a wireframe
■Derived, generated from existing surfaces
Primitive surfaces (cone, cylinder, sphere, and torus) do not require wire-
frames for their construction. To create a sphere surface, for example, you
determine the center of the sphere and then enter a value for its radius. Prim-
itive surfaces are most often used for conceptual design.
You can practice creating primitive surfaces on your own by choosing Surface
➤ Create Primitives.
In this tutorial, you’ll practice working with motion-based, skin, and derived
surfaces you create from wireframes. You’ll also work with simple wireframe
geometry to learn surfacing techniques.
After you create each surface, use the Extents option of the ZOOM command
to redisplay all of the wireframes provided in the drawing file. Then zoom to
enlarge the object you need for the next exercise.
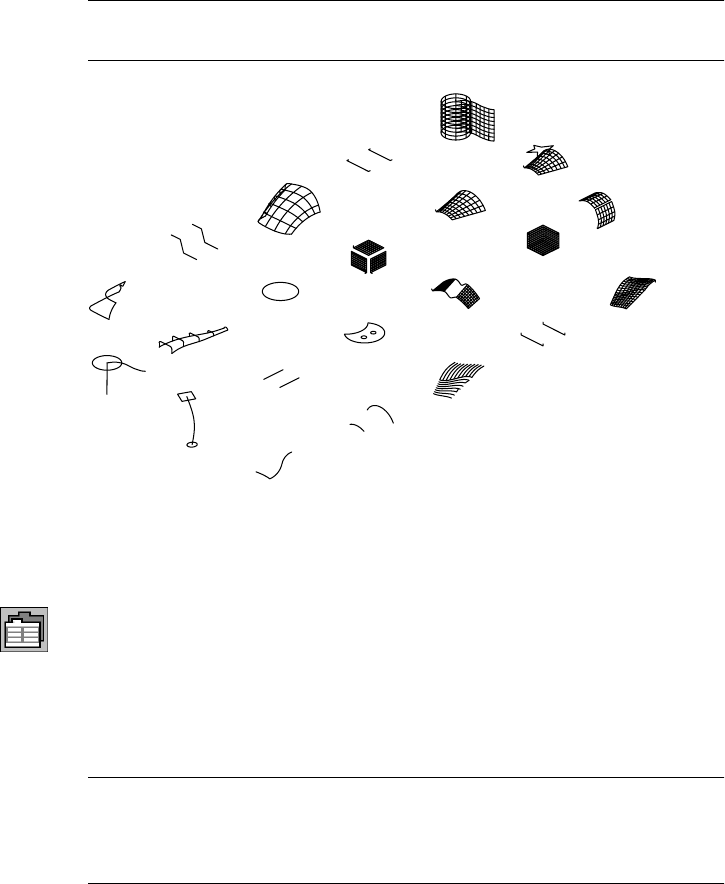
Working with Surfaces |537
To set up your file
1Open the file t_surfs.dwg in the desktop\tutorial folder. The wireframe objects
you need for this lesson are included in this file.
NOTE Back up the tutorial drawing files so you still have the original files if you
make a mistake. See “Backing up Tutorial Drawing Files” on page 40.
Surface lines, called U and V lines, indicate the direction of the surface.
Increasing the number of lines increases the density of the surface image.
2Use the Mechanical Options dialog box to change the number of surface
lines used to display surfaces.
Desktop Menu Surface ➤ Surface Options
Choose the Surface tab, and in Surface Properties specify:
U Display Wires: Enter 7
V Display Wires: Enter 7
Choose OK.
NOTE If you shade the surfaces you create to better view them, adjust the
AutoCAD setting that controls back faces. Go to Assist ➤ Options and select the
System tab. Choose Properties, then clear the check box for Discard Back Faces.
Choose Apply & Close, then OK.
You are ready to create your first surfaces.
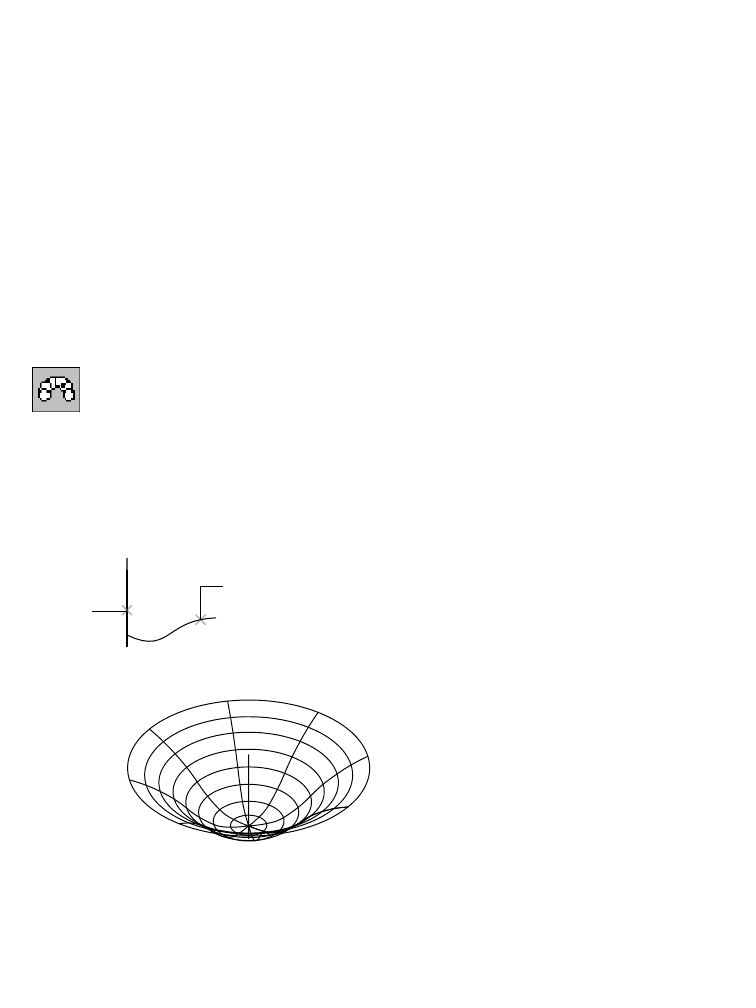
538 |Chapter 19 Creating and Editing Surfaces
Creating Motion-Based Surfaces
Some surfaces are created by “moving” wires through space. These motion-
based surfaces are revolved, extruded, and swept.
Revolved Surfaces
A revolved surface uses two wires: one establishes the constant shape of the
surface, and the other is the axis about which to spin the shape. The revolved
surface is created by the motion of a wire shape through space.
To revolve a surface
1Use AMREVOLVESF to revolve a spline curve about an axis, responding to the
prompts.
Desktop Menu Surface ➤ Create Surface ➤ Revolve
Select path curves to revolve: Select spline (1)
Select path curves to revolve: Press ENTER
Specify axis start point or [Wire]: Enter w
Select wire to define axis: Select line (2)
Enter start angle <0>: Press ENTER
Enter included angle (+=ccw, -=cw) <Full circle>: Press ENTER
The curve revolves about the vertical line.
2Use the Zoom Extents option of ZOOM to redisplay all the wireframes and
select the object for the next exercise.
1
2
Creating Motion-Based Surfaces |539
Extruded Surfaces
An extruded surface is created by a 3D wire shape moved along a straight line.
You select a line, polyline, arc, or spline to extrude, and you specify the direc-
tion and magnitude of the extrusion.
To extrude a surface
1Use AMEXTRUDESF to extrude a circle into a cylinder, responding to the
prompts.
Desktop Menu Surface ➤ Create Surface ➤ Extrude
Select wires to extrude: Select circle (1)
Select wires to extrude: Press ENTER
Define direction and length.
Specify start point or [Viewdir/Wire/X/Y/Z]: Enter w
Select wire to define direction: Select line (2) above its midpoint
Enter an option [Accept/Flip] <Accept>:
Press ENTER to accept the extrude direction
Enter taper angle <0>: Press ENTER to accept the default
The extrusion direction is determined by your selection point on the wire.
You selected the upper half of the line to extrude the circle along the length
of the line. To extrude the circle in the opposite direction, select a location
below the midpoint of the line.
1
2

540 |Chapter 19 Creating and Editing Surfaces
The extruded surface should look like this.
2For more practice, choose Extrude again. Select the spline and then a location
on the line to determine the length and direction.
Because the line is obscured by the first surface you created, you may have
difficulty selecting it. Press CTRL as you select, to cycle through the objects.
Press ENTER when the line is highlighted.
3Use the Zoom Extents option of ZOOM to redisplay all the wireframes and
select the object for the next exercise.
Swept Surfaces
A swept surface is a wire cross section moved along a curved line called a rail.
You can use multiple cross sections and one or two rails. The lines on the
swept surface in the illustration are U and V display lines. Cross sections can
be dissimilar but you need to select them in order.
In this exercise, you use different combinations of cross sections and rails to
create four swept surfaces.
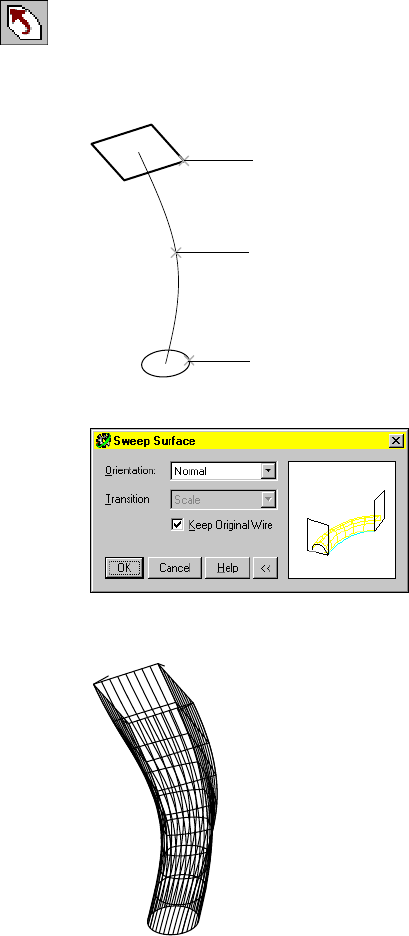
Creating Motion-Based Surfaces |541
To create a swept surface
1Use AMSWEEPSF to sweep two cross sections along a rail, responding to the
prompts.
Desktop Menu Surface ➤ Create Surface ➤ Sweep
Select cross sections: Select the first cross section (1)
Select cross sections: Select the second cross section (2) and press ENTER
Select rails: Select line (3) and press ENTER
2In the Sweep Surface dialog box, choose OK to accept default settings.
A message tells you that four surfaces will be created. Choose Continue. The
surfaces should look like this.
2
3
1
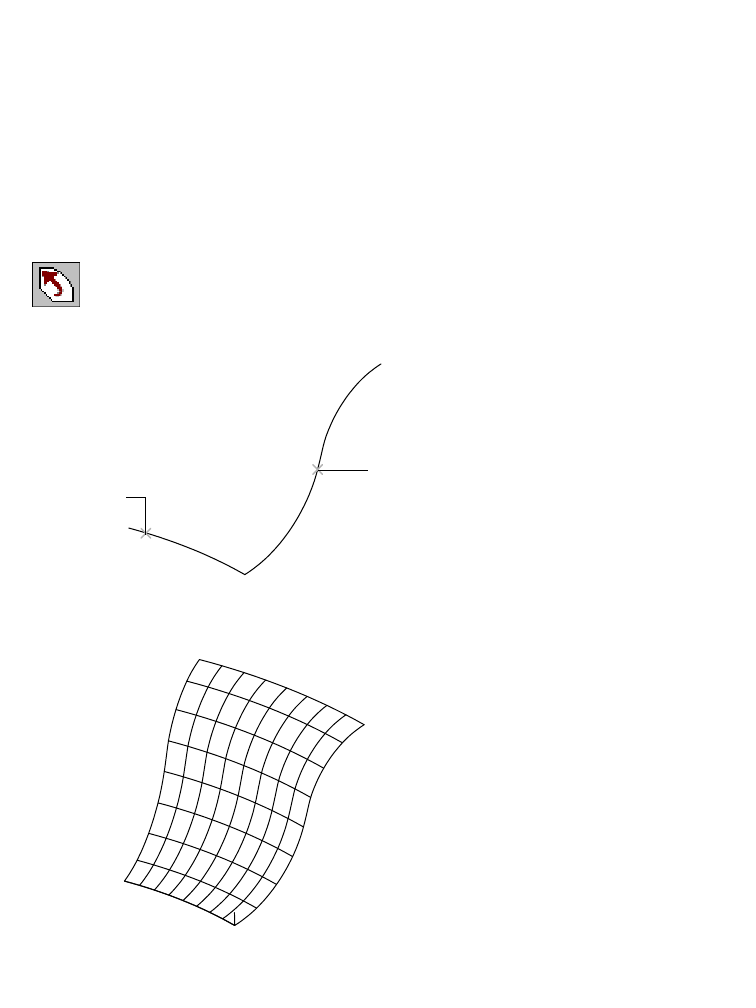
542 |Chapter 19 Creating and Editing Surfaces
You can select the individual surfaces to see the shape of each one.
Because one of the cross sections has sharp corners, a single surface cannot
be created. Instead, four separate surfaces are created, each corresponding to
one side of the rectangular cross section. For more information, see “To sur-
face polylines with sharp corners” on page 550.
3Use the Extents option of ZOOM to redisplay all the wireframes and select the
object for the next exercise.
To sweep a spline along a rail
1Sweep one spline along a rail, responding to the prompts.
Desktop Menu Surface ➤ Create Surface ➤ Sweep
Select cross sections: Select spline (1) and press ENTER
Select rails: Select line (2) and press ENTER
2In the Sweep Surface dialog box, choose OK to accept the default settings.
Your surface should look like this.
1
2
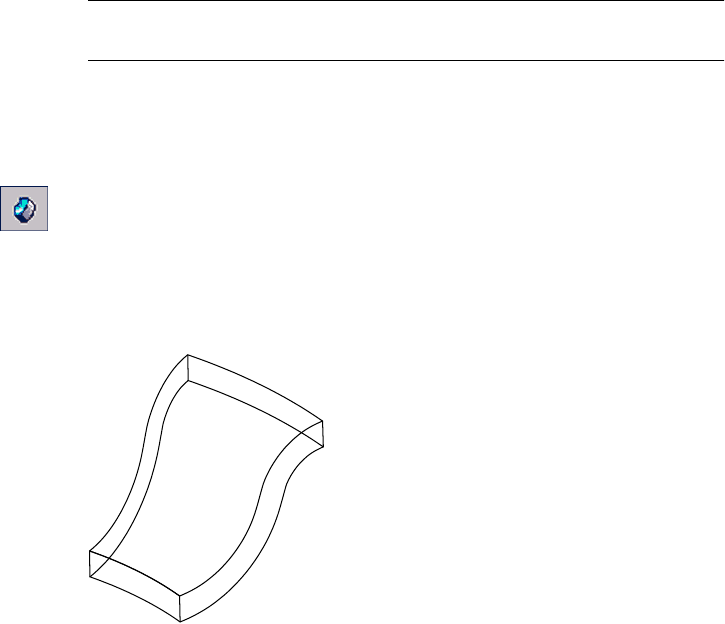
Creating Motion-Based Surfaces |543
You created a nonuniform rational B-spline (NURBS) surface from a spline.
You can convert a NURBS surface into a part by adding thickness.
NOTE Save a copy of your NURBS surface if you will need it later. When you
thicken a surface, the original surface is consumed and disappears.
To convert a NURBS surface to a solid
1Use AMTHICKEN to convert a NURBS surface to a thin solid, responding to the
prompts.
Desktop Menu Surface ➤ Surface Thicken
Select surfaces to thicken: Select the surface
Select surfaces to thicken: Press ENTER
Select direction to thicken [Flip/Accept] <Accept>:
Flip to point the direction arrow down, and press ENTER
Thickness <1.0000>: Press ENTER
A solid is created, and a new part icon is displayed in the Browser.
2Use the Extents option of ZOOM to redisplay all the wireframes and select the
object for the next exercise.
A swept surface is useful when your design has different shapes at either end.
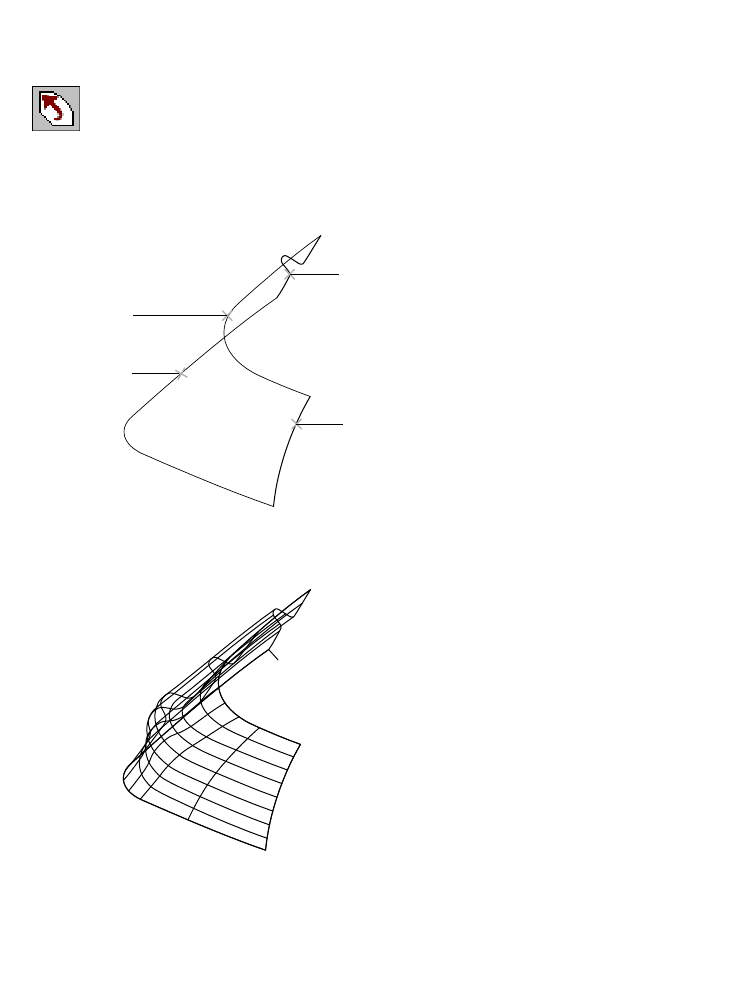
544 |Chapter 19 Creating and Editing Surfaces
To sweep dissimilar shapes
1Sweep two dissimilar shapes along two nonparallel rails, responding to the
prompts.
Desktop Menu Surface ➤ Create Surface ➤ Sweep
Select cross sections: Select first shape (1)
Select cross sections: Select second shape (2) and press ENTER
Select rails: Select first rail (3)
Select rails: Select second rail (4)
2In the Sweep Surface dialog box, choose OK to accept the default settings.
The swept surface should look like this.
3Use the Extents option of ZOOM to redisplay all the wireframes and select the
object for the next exercise.
3
2
1
4
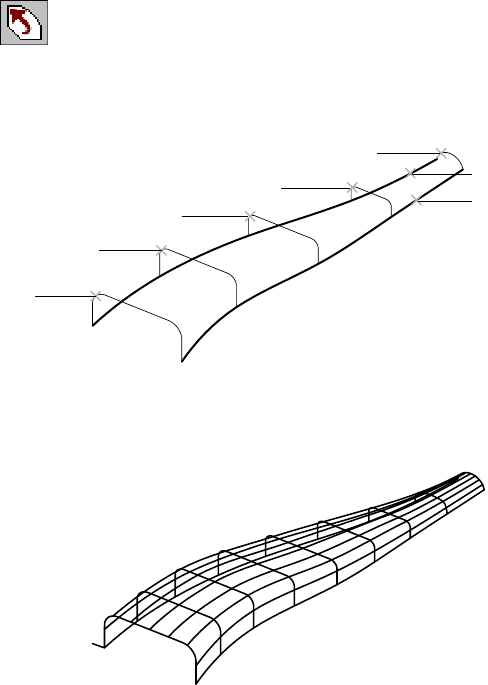
Creating Motion-Based Surfaces |545
To sweep multiple cross sections along two rails
1Sweep multiple cross sections along two rails, responding to the prompts.
Desktop Menu Surface ➤ Create Surface ➤ Sweep
Select cross sections:
Select cross sections (1) through (5) in consecutive order and press ENTER
Select rails: Select first rail (6)
Select rails: Select second rail (7)
2In the Sweep Surface dialog box, choose OK to accept the default scale.
Because the cross sections have rounded corners, a single surface results. If
the cross section had square corners, three surfaces would have been created.
3Use the Extents option of ZOOM to redisplay all the wireframes and select the
object for the next exercise.
6
7
5
4
3
2
1
546 |Chapter 19 Creating and Editing Surfaces
Creating Skin Surfaces
A skin surface drapes over a wireframe model. After the wireframe is
removed, the surface retains the shape of the wireframe. Skin surfaces are
ruled, planar, lofted U, and lofted UV.
Ruled Surfaces
A ruled surface is a straight, flat shape stretched between two wires of any 3D
shape. You can create a ruled surface between any two nonintersecting wires
that can represent the top and the bottom. The top and bottom can be open
or closed wires. You can create a ruled surface from two augmented lines as
well, and from a single augmented line by adding thickness to it.
To surface two wires
1Use AMRULE to create the ruled surface, responding to the prompts.
Desktop Menu Surface ➤ Create Surface ➤ Rule
Select first wire: Select line (1)
Select second wire: Select line (2)
1
2
Creating Skin Surfaces |547
The ruled surface shows the surface normal, a short vertical line in one corner.
A surface normal shows where the surface starts and which direction is out.
If surface normal indicators are too small, use the DISPSF system variable to
change the size. In the Individual Surface Display dialog box, change the
value in the Normal Length field. Adjust the setting as needed.
You can create a ruled surface from two augment lines, or by adding width to
a single augmented line. Besides using the command method, you can access
AMAUGMENT in the Desktop menu by choosing Surface ➤ Create Wireframe
➤ Augmented Lines.
To create an augmented line on a surface
1Use AMAUGMENT to create an augmented line on the surface.
Command AMAUGMENT
Select surface wire or [Angle/Distance/Spacing]:
Select the leftmost wire of the surface
Select surface wire or [Angle/Distance/Spacing]: Press ENTER
When you use an augmented wire to create a surface, the vectors are ignored.
You specify a value for the width of the surface.
548 |Chapter 19 Creating and Editing Surfaces
To surface an augmented line
1Use AMRULE to create a surface from the augmented wire, responding to the
prompts.
Desktop Menu Surface ➤ Create Surface ➤ Rule
Select first wire: Select the augmented line
Enter an option [Next/Accept] <Accept>: Press ENTER
Enter width (or) [Select second wire] <1.0000>: Press ENTER
The surface extends beyond the vectors to the specified width.
You can use this technique to create a ruled surface normal to any existing
ruled surface. First you create a parting line on the surface and project it to get
an augmented line, and then create the ruled surface from the augmented line.
2Undo the surfaces you created so that you can use the two original aug-
mented lines in subsequent exercises.
Desktop Menu Edit ➤ Undo
3Use the Extents option of ZOOM to redisplay all of the wireframes and select
the object for the next exercise.
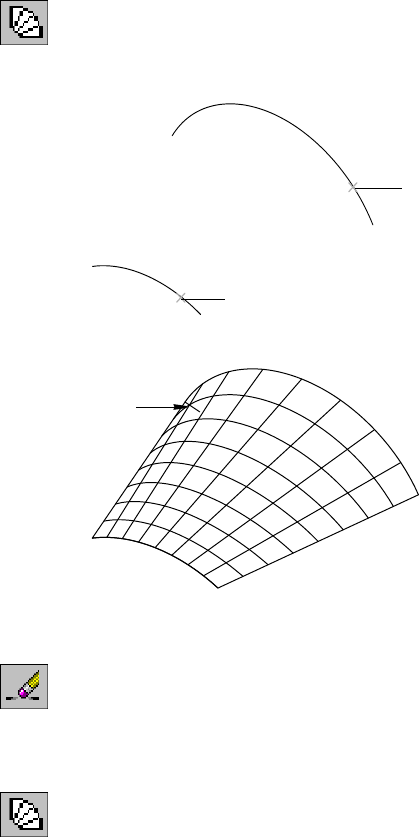
Creating Skin Surfaces |549
To surface two arcs with different radii
1Create a surface from two arcs of different radii, responding to the prompts.
Desktop Menu Surface ➤ Create Surface ➤ Rule
Select first wire: Select arc (1)
Select second wire: Select arc (2)
The ruled surface should look like this.
2To experiment, use the previous example and select the arcs in a different order.
3Erase the surface you just created.
Desktop Menu Modify ➤ Erase
Select the surface and press ENTER.
If creating the surface was the last command, you can use UNDO.
4Create a surface again, selecting the arcs in reverse order.
Desktop Menu Surface ➤ Create Surface ➤ Rule
Select first wire: Select arc (2)
Select second wire: Select arc (1)
1
2
surface normal
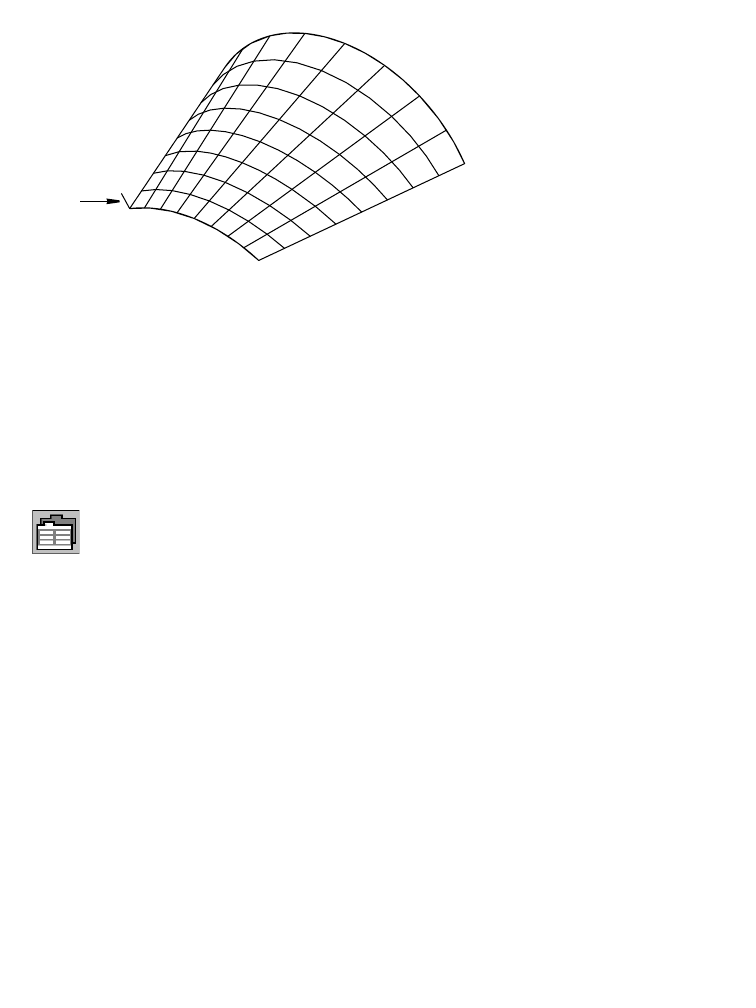
550 |Chapter 19 Creating and Editing Surfaces
Selecting the arcs in different order changes the surface normal.
5Use the Extents option of ZOOM to redisplay all of the wireframes and select
the object for the next exercise.
In the next exercise, you surface polylines. A surface follows a spline exactly
but approximates the polyline by a curve. The Polyline Fit default setting of
150 maintains all corners less than 150 degrees as sharp corners. In such
cases, multiple surfaces are created.
To surface polylines with sharp corners
1Use the Mechanical Options dialog box to adjust the Polyline Fit settings:
Desktop Menu Surface ➤ Surface Options
Choose the Surfaces tab and then choose Polyline Fit.
2In the Polyline Fit dialog box, change the angle setting to 0 and change the
length setting to inf (infinity) or a specific length longer than the longest line
segment.
surface
normal
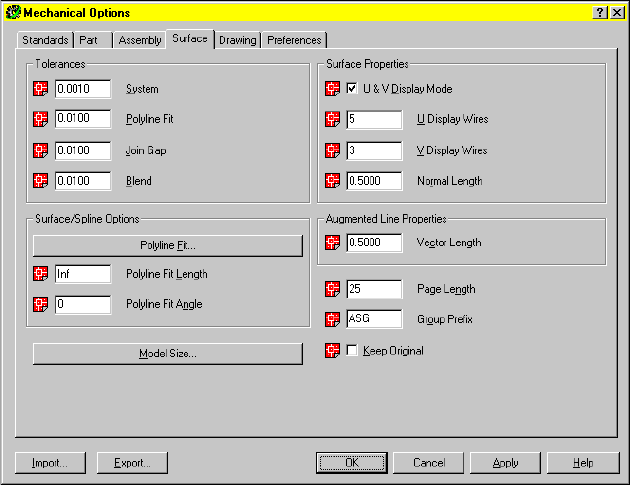
Creating Skin Surfaces |551
Choose OK.
These settings force sharp corners to convert to a smooth curved surface.
3Choose OK to exit the Mechanical Options dialog box.
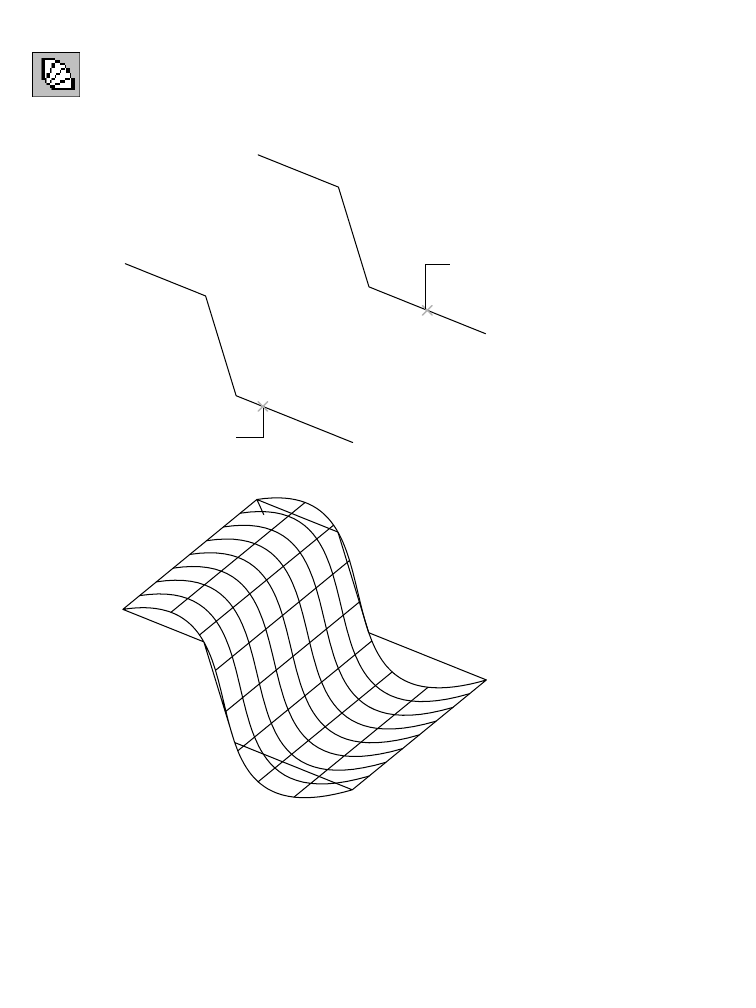
552 |Chapter 19 Creating and Editing Surfaces
4Use AMRULE to create a curved surface from polylines drawn with sharp cor-
ners, responding to the prompts.
Desktop Menu Surface ➤ Create Surface ➤ Rule
Select first wire: Select polyline (1)
Select second wire: Select polyline (2)
A continuous smooth curved surface is created.
5Use the Extents option of ZOOM to redisplay all of the wireframes and select
the object for the next exercise.
Now use the same polylines, but choose a fit angle to recognize sharp corners.
Use the Polyline Fit dialog box to change the angle setting until the image
tile resembles the angles you want to recognize as corners. Choose a setting
between 150 and 165 to recognize most corners.
2
1
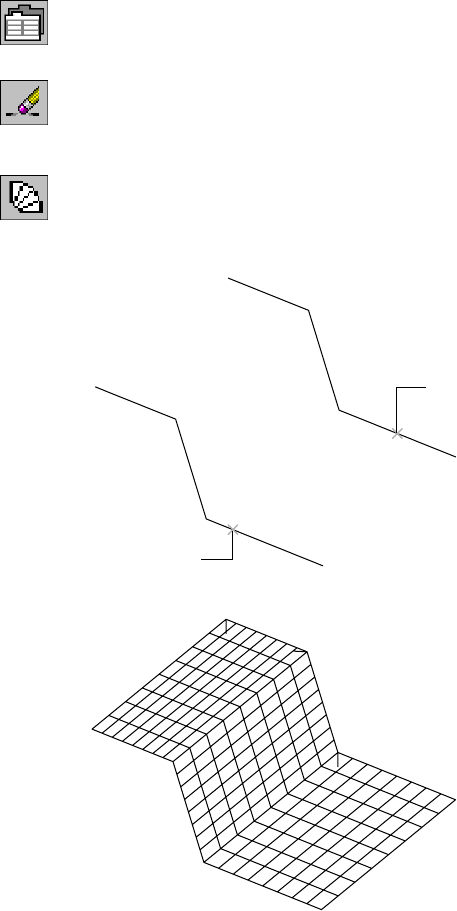
Creating Skin Surfaces |553
To create surfaces with sharp angles
1Use AMOPTIONS to reset the fit angle to 150 and re-create the ruled surface.
Desktop Menu Surface ➤ Surface Options
2Erase the surface you just created.
Desktop Menu Modify ➤ Erase
3Use AMRULE to create three ruled surfaces from polylines drawn with sharp
corners, responding to the prompts.
Desktop Menu Surface ➤ Create Surface ➤ Rule
Select first wire: Select polyline (1)
Select second wire: Select polyline (2)
4A message tells you that three surfaces will be created. Choose Continue.
The three surfaces follow the sharp corners of the polylines.
2
1
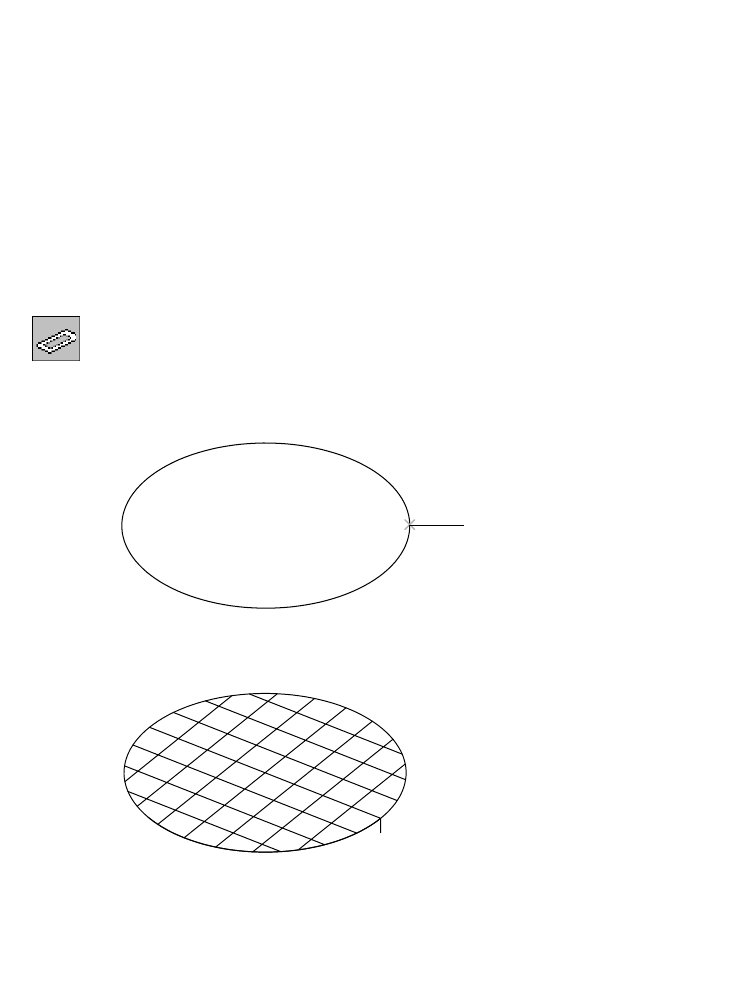
554 |Chapter 19 Creating and Editing Surfaces
5Use the Extents option of ZOOM to redisplay all of the wireframes and select
the object for the next exercise.
Trimmed Planar Surfaces
A planar surface may be constructed from lines, arcs, splines, polylines, or
simply two locations, if the selected objects are closed and on the same plane.
The exterior shape of the 2D wire shape becomes the trimmed edge of the
surface. In this exercise, you create trimmed planar surfaces.
To create a planar trimmed surface using a closed polyline
1Use AMPLANE to create a planar trim surface from a closed polyline, respond-
ing to the prompts.
Desktop Menu Surface ➤ Create Surface ➤ Planar Trim
Specify first corner or [Plane/Wires]: _wire
Select wires: Select object (1)
Select wires: Press ENTER
The planar surface is trimmed, using the closed polyline as the border. The U
and V lines appear inside the border.
2Use the Extents option of ZOOM to redisplay all of the wireframes, and select
the object for the next exercise.
The closed polyline for the next exercise contains two interior circles that are
coplanar. You create a trimmed surface using the polyline and circles.
1

Creating Skin Surfaces |555
To create a trimmed planar surface using three closed polylines
1Create a planar trim surface from three polylines, responding to the prompts.
Desktop Menu Surface ➤ Create Surface ➤ Planar Trim
Specify first corner or [Plane/Wires]: _wire
Select wires: Select object (1)
Select wires: Select interior circle (2)
Select wires: Select circle (3)
Select wires: Press ENTER
Instead of selecting the objects individually, you could also drag a crossing
window around all of them and press ENTER.
A trimmed planar surface is automatically trimmed to the largest boundary
created by the wire. As in this example, when closed areas exist inside the
boundary, these holes are trimmed out.
2Use the Extents option of ZOOM to redisplay all of the wireframes, and select
the object for the next exercise.
Lofted Surfaces
You can create a lofted surface from one or two sets of wires, each with similar
attributes, such as having approximately the same direction. You must select
the wires in consecutive order.
1
2
33
1

556 |Chapter 19 Creating and Editing Surfaces
A lofted U surface is stretched between any number of wires that share similar
characteristics. The example contains two sets of wires from which you create
two surfaces. The light blue polylines are approximately horizontal, and the
green lines are approximately vertical. First, you create a surface from the
horizontal polylines.
To create a lofted surface using a set of wires
1Use AMLOFTU to surface a set of vertical wires, responding to the prompts.
Desktop Menu Surface ➤ Create Surface ➤ LoftU
Select U wires: Select lines (1) through (8) in consecutive order and press ENTER
2In the Loft Surface dialog box, choose OK to accept the default settings.
9
18
1
8
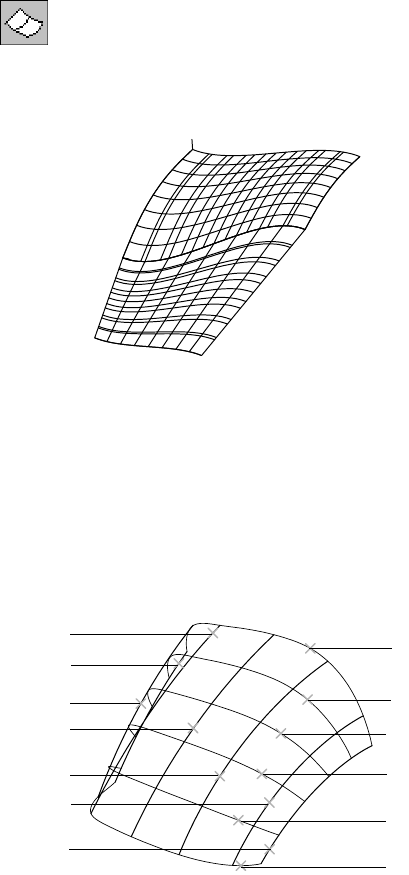
Creating Skin Surfaces |557
3Surface a set of horizontal wires, responding to the prompts.
Desktop Menu Surface ➤ Create Surface ➤ LoftU
Select U wires: Select lines (9) through (18) in consecutive order and press ENTER
4In the Loft Surface dialog box, choose OK to accept the default settings.
The two surfaces, one horizontal and one vertical, should look like these.
5Use the Extents option of ZOOM to redisplay all the wireframes and select the
object for the next exercise.
A lofted UV surface is stretched over two sets of wires. Each wire in one set
crosses every wire in the other set. Two sets of wires can accurately describe
a complex surface.
You can select wires directly, as you did in the previous exercise, or you can
select two groups of wires. In this exercise, you create two groups of wires and
then create a lofted surface from the two groups. The wires in the U direction
are magenta (purple), and those in the V direction are cyan (light blue).
3
1
2
4
5
6
8
9
10
11
12
13
7
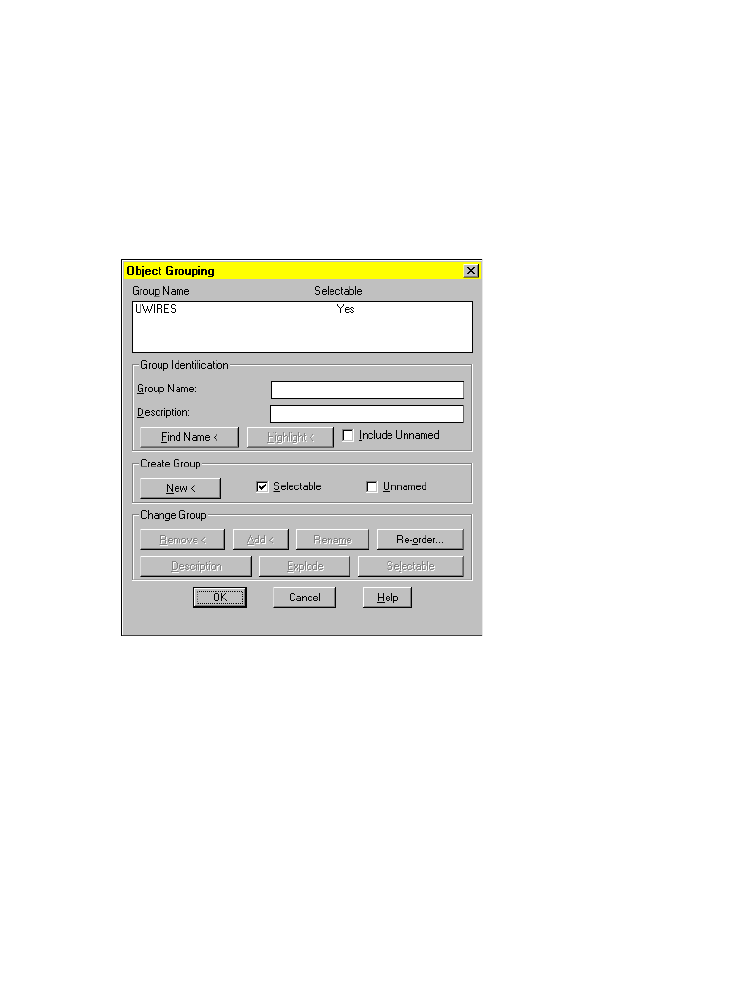
558 |Chapter 19 Creating and Editing Surfaces
To create a single lofted surface from two groups of wires
1Group the magenta U lines.
Command GROUP
In the Object Grouping dialog box specify:
Group Name: Enter uwires
Create Group: Choose New to close the dialog box
Respond to the prompt as follows:
Select objects: Select lines (1) through (7) in consecutive order and press ENTER
In the Object Grouping dialog box, choose OK.
2Press ENTER to repeat the GROUP command.
In the Object Grouping dialog box specify:
Group name: Enter vwires
Create Group: Choose New to close the dialog box
Respond to the prompt as follows:
Select objects: Select lines (8) through (13) in consecutive order and press ENTER
In the dialog box, choose OK.

Creating Derived Surfaces |559
3Use AMLOFTU to loft a surface from two groups of wires, responding to the
prompts.
Desktop Menu Surface ➤ Create Surface ➤ LoftUV
Select U wires: Enter g
Enter group name: Enter uwires
7 found
Select U wires: Press ENTER
Select V wires: Enter g
Enter group name: Enter vwires
6 found
Select V wires: Press ENTER
Enter an option [eXit/Loft/Node check] <Loft>: Press ENTER
You have created a surface from the two groups of wires.
4Use the Extents option of ZOOM to redisplay all of the wireframes and select
the object for the next exercise.
Creating Derived Surfaces
Derived surfaces are generated from existing surfaces: blended, offset, fillet,
and corner fillet. Derived surfaces can be trimmed.
Blended Surfaces
You can create a blended surface between two, three, or four wires or surfaces.
The blended surface is tangent to the surfaces or wires from which it is created.
NOTE To create surfaces correctly, select lines at points shown in the illustrations.
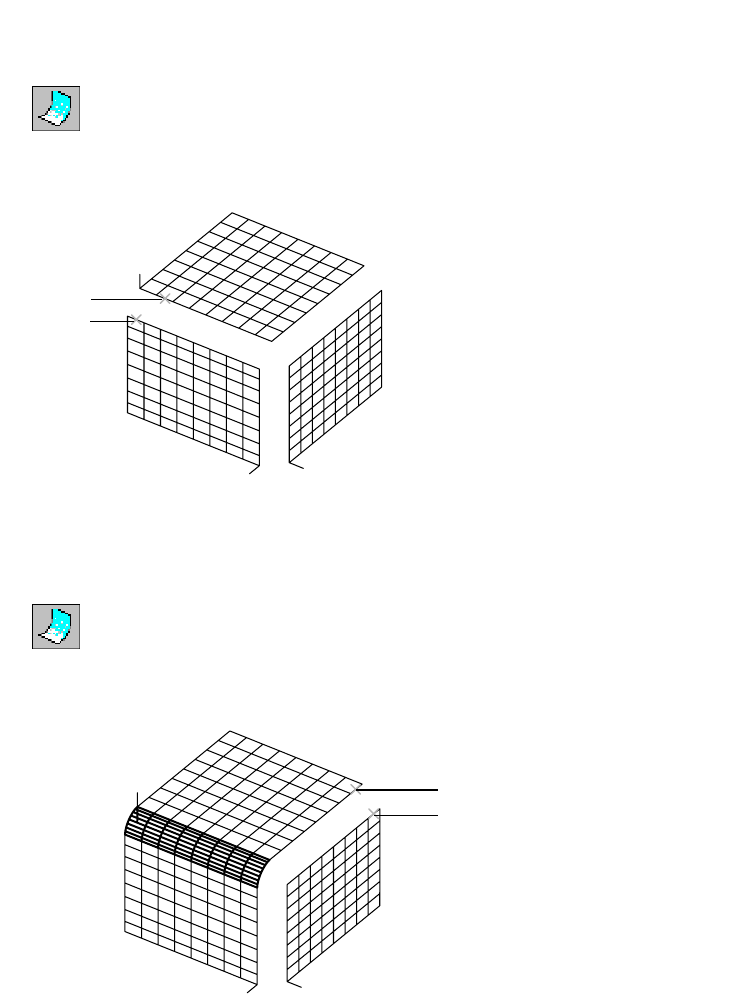
560 |Chapter 19 Creating and Editing Surfaces
To create a blended surface
1Use AMBLEND to create a blended surface from two wires, responding to the
prompts.
Desktop Menu Surface ➤ Create Surface ➤ Blend
Select first wire: Select surface (1)
Select second wire: Select surface (2)
Select third wire [Weights]: Press ENTER
You have created the first blended surface.
The type of object you select affects the blended surface. When you select sur-
faces or augmented lines, you are prompted for the weight of the surface edge.
2Create the second blended surface, responding to the prompts.
Desktop Menu Surface ➤ Create Surface ➤ Blend
Select first wire: Select surface (3)
Select second wire: Select surface (4)
Select third wire [Weights]: Press ENTER
1
2
3
4
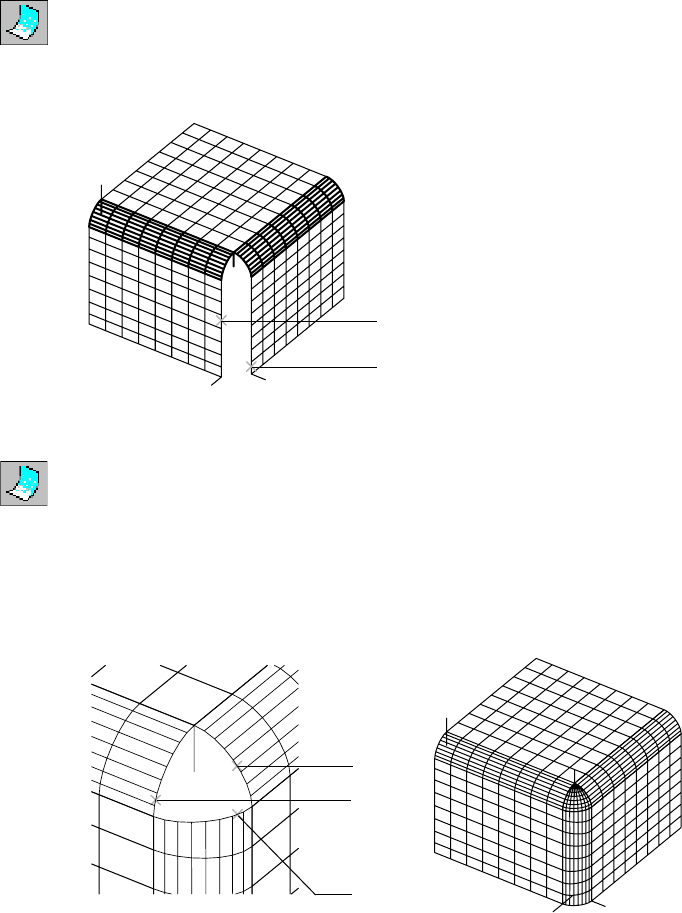
Creating Derived Surfaces |561
3Create the third blended surface, responding to the prompts.
Desktop Menu Surface ➤ Create Surface ➤ Blend
Select first wire: Select surface (5)
Select second wire: Select surface (6)
Select third wire [Weights]: Press ENTER
4Use ZOOM to enlarge the corner area created by the blended surfaces.
5Use AMBLEND to create a corner blended surface, responding to the prompts.
Desktop Menu Surface ➤ Create Surface ➤ Blend.
Select first wire: Select surface (7)
Enter an option [next/Accept] <Accept>: Press ENTER
Select second wire: Select surface (8)
Enter an option [next/Accept] <Accept>: Press ENTER
Select third wire [Weights]: Select surface (9)
Select fourth wire: Press ENTER
The order in which you select the objects to blend determines the orientation
of the corner created by the blend.
5
6
7
8
9

562 |Chapter 19 Creating and Editing Surfaces
Use the Extents option of ZOOM to redisplay all of the wireframes and select
the object for the next exercise.
Next, you create a blended surface from two surfaces and lines. To create a
blended surface from four objects, make the selections in the order shown;
the objects cannot be selected in consecutive order.
To blend surfaces and lines
1Use AMBLEND to create a surface from two surfaces and two lines, responding
to the prompts.
Desktop Menu Surface ➤ Create Surface ➤ Blend
Select first wire: Select surface (1)
Select second wire: Select surface (2)
Enter an option [Next/Accept] <Accept>: Press ENTER
Select third wire [Weights]: Select wire (3)
Select fourth wire: Select wire (4)
The new surface is created between the original surfaces and lines.
2Use the Extents option of ZOOM to redisplay all of the wireframes and select
the object for the next exercise.
Next, you create two surfaces, each blended from two augmented lines.
1
4
3
2
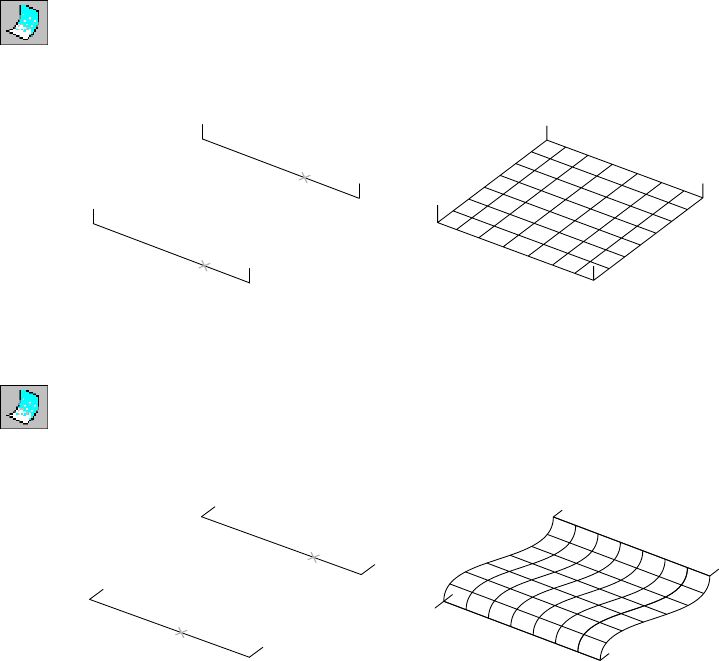
Creating Derived Surfaces |563
To blend augmented lines
1Use AMBLEND to create a surface from two augmented lines, responding to
the prompts.
Desktop Menu Surface ➤ Create Surface ➤ Blend
Select first wire: Select line (1)
Select second wire: Select line (2)
Select third wire [Weights]: Press ENTER
2Use ZOOM to redisplay wireframes. Then select the second set of lines.
3Create a surface from the second set of augmented lines, responding to the
prompts.
Desktop Menu Surface ➤ Create Surface ➤ Blend
Select first wire: Select augmented line (1)
Select second wire: Select augmented line (2)
Select third wire [Weights]: Press ENTER
Compare these two surfaces to see how the direction of the augmented line
vectors affects the resulting surface.
4Use the Extents option of ZOOM to redisplay all of the wireframes and select
the object for the next exercise.
Offset Surfaces
An offset surface is a duplicate of an existing surface, offset by a specific dis-
tance. When you create an offset surface, you can keep the original or remove
it, as needed.
1
2
1
2
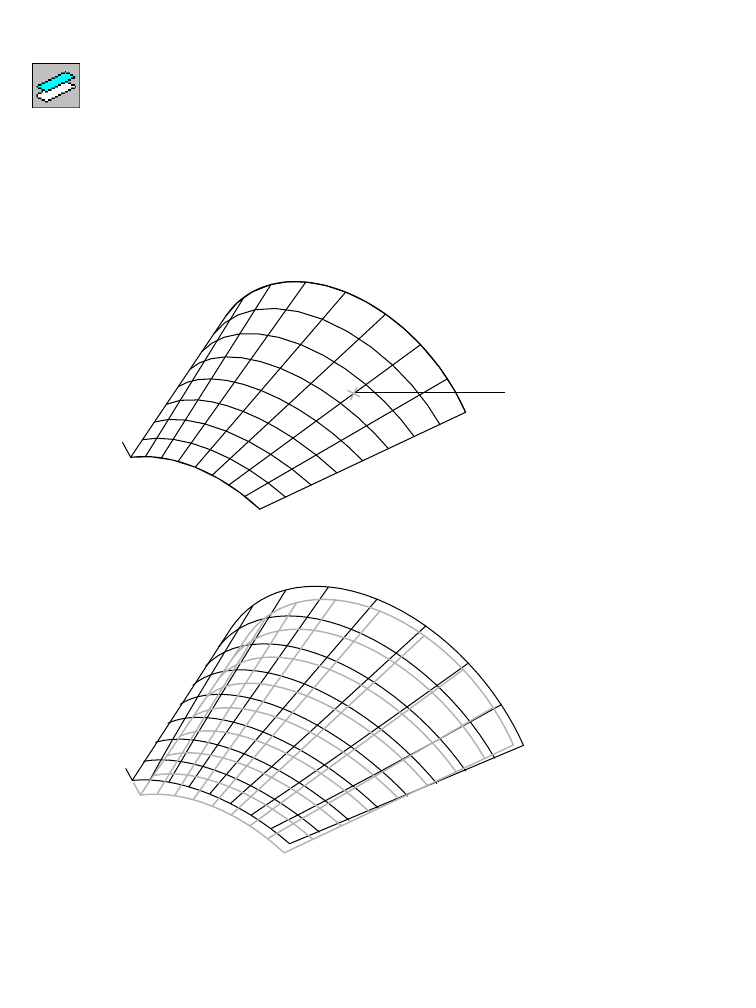
564 |Chapter 19 Creating and Editing Surfaces
To create an offset surface
1Use AMOFFSETSF to create an offset surface, responding to the prompts.
Desktop Menu Surface ➤ Create Surface ➤ Offset
Select surfaces to offset: Select surface (1)
Select surfaces to offset: Press ENTER
Distance=1.0000 Keep=Yes
Enter offset distance or [Keep] <1.0000>: Enter k
Keep original surface(s) [Yes/No] <No>: Enter y
Distance=1.0000 Keep=Yes
Enter offset distance or [Keep] <1.0000>: Enter 0.5
The new surface is offset from the original surface, which is normal at all
locations.
2Use the Extents option of ZOOM to redisplay all of the wireframes and select
the object for the next exercise.
1
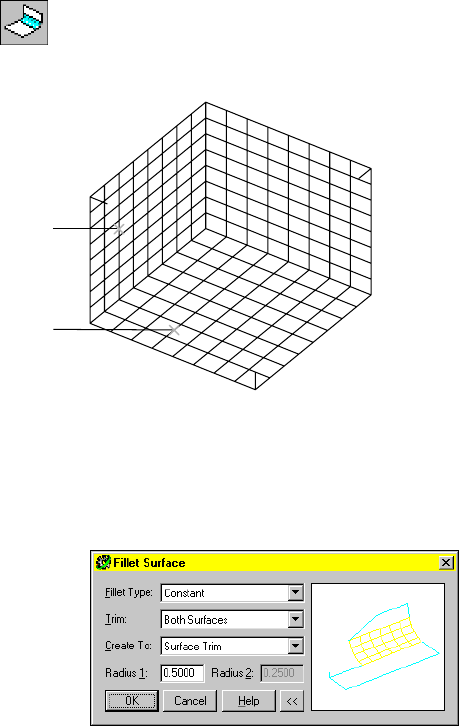
Creating Derived Surfaces |565
Fillet and Corner Surfaces
In this exercise, you create fillet surfaces between two selected surfaces, and
a corner fillet where three fillet surfaces intersect. You trim the original sur-
faces back to the fillet surfaces.
To create fillet and corner surfaces
1Use AMFILLETSF to create a fillet between two surfaces, responding to the
prompts.
Desktop Menu Surface ➤ Create Surface ➤ Fillet
Select first surface or quilt interior edge: Select surface (1)
Select second surface: Select surface (2)
2In the Fillet Surface dialog box, specify:
Fillet Type: Constant
Trim: Both Surfaces
Create To: Surface Trim
Radius: Enter 0.5
Choose OK.
1
2
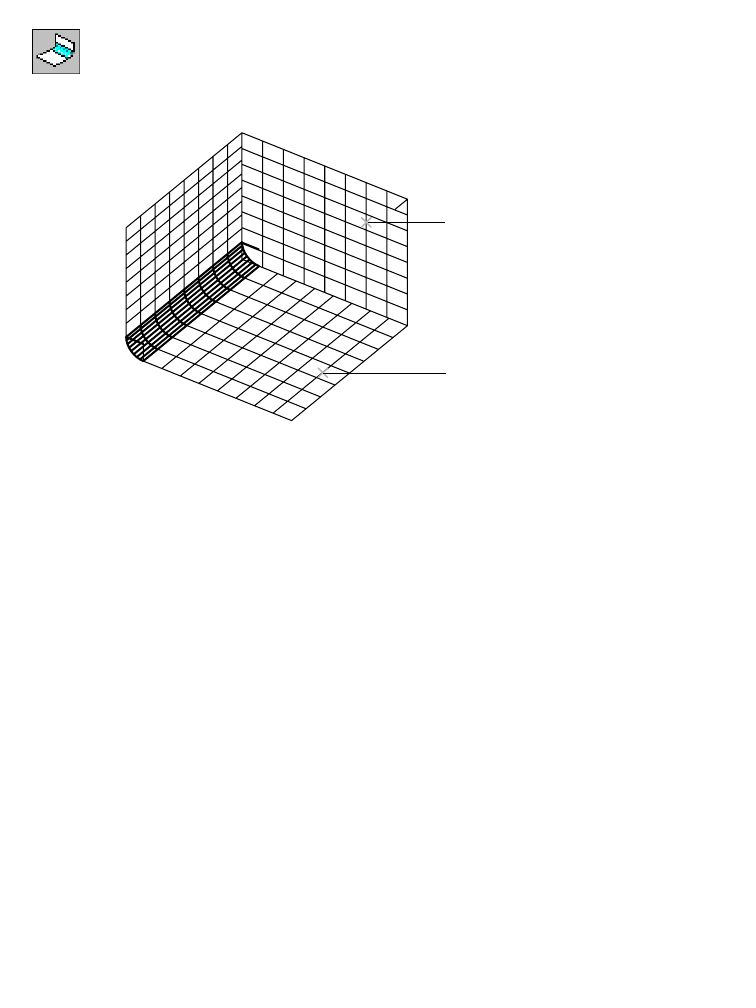
566 |Chapter 19 Creating and Editing Surfaces
3Create a fillet between another two surfaces, responding to the prompts.
Desktop Menu Surface ➤ Create Surface ➤ Fillet
Select first surface or quilt interior edge: Select surface (3)
Select second surface: Select surface (4)
4In the Fillet Surface dialog box, specify:
Fillet Type: Constant
Trim: Both Surfaces
Create To: Base Surface
Radius: Enter 0.75
Choose OK.
The Base Surface option was not available when you created the first fillet
surface. It is available now because the first surface was trimmed and now
differs from the base surface. Next, trim to the base surface, not the trimmed
surface.
3
4
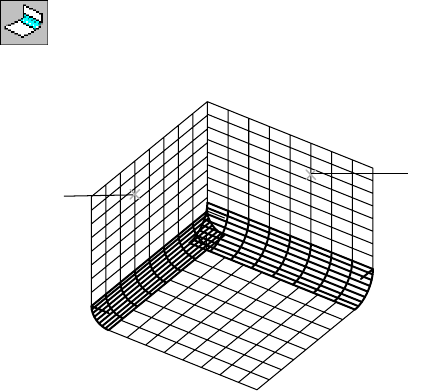
Creating Derived Surfaces |567
The next illustration shows both fillets, which you will trim later.
5Create a fillet between another two surfaces, responding to the prompts.
Desktop Menu Surface ➤ Create Surface ➤ Fillet
Select first surface or quilt interior edge: Select surface (5)
Select second surface: Select surface (6)
6In the Fillet Surface dialog box, specify:
Fillet Type: Constant
Trim: Both Surfaces
Create To: Base Surface
Radius: Enter 0.6
Choose OK.
The fillets overlap at the corner. You need to trim the overlap with a corner
fillet.
6
5
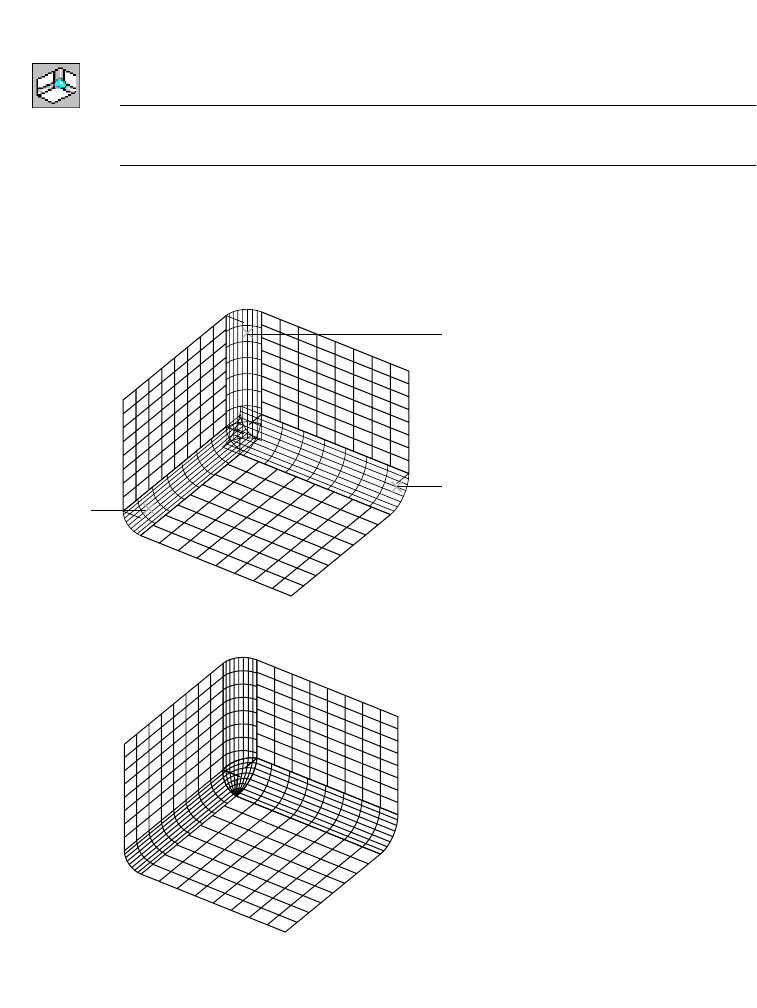
568 |Chapter 19 Creating and Editing Surfaces
To create a corner fillet
1Use AMCORNER to trim the overlapping fillets, responding to the prompts.
Desktop Menu Surface ➤ Create Surface ➤ Corner Fillet
NOTE The default is set to trim the corner fillet to the three fillet surfaces. If you
do not want to trim, enter T at the first prompt and change the setting to No.
Trim=Yes
Select first fillet surface or [Trim]: Select surface (7)
Select first fillet surface or [Trim]: Select surface (8)
Select first fillet surface or [Trim]: Select surface (9)
The trimmed corner fillet looks like this.
2Use the Extents option of ZOOM and select the object for the next exercise.
7
8
9
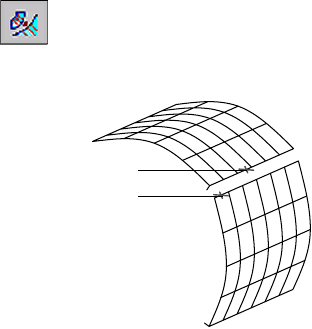
Editing Surfaces |569
Editing Surfaces
As you create models, you need to combine surfaces and trim them where
they overlap. You will learn four surface editing techniques: adjusting sur-
faces, joining surfaces, trimming surfaces at intersections, and trimming
surfaces by projection.
Adjusting Adjacent Surfaces
You can control the tangency of two adjacent surfaces by adjusting them to
create one continuous surface. When you select the edges of two adjacent
surfaces to adjust, the first edge you select is the control surface. You can use
a quilt for the control surface. By default, 20 per cent of the total area of each
surface is adjusted. You can change the percentage for either or both of the
the adjustment areas, depending on which surface shape you need to retain.
To adjust adjacent surfaces
1Use AMADJUST to convert two surfaces into one surface, responding to the
prompts.
Desktop Menu Surface ➤ Edit Surface ➤ Adjust
Select surface edge to adjust: Select the control surface edge (1)
Select surface edge to adjust: Select the adjacent surface edge (2)
1
2
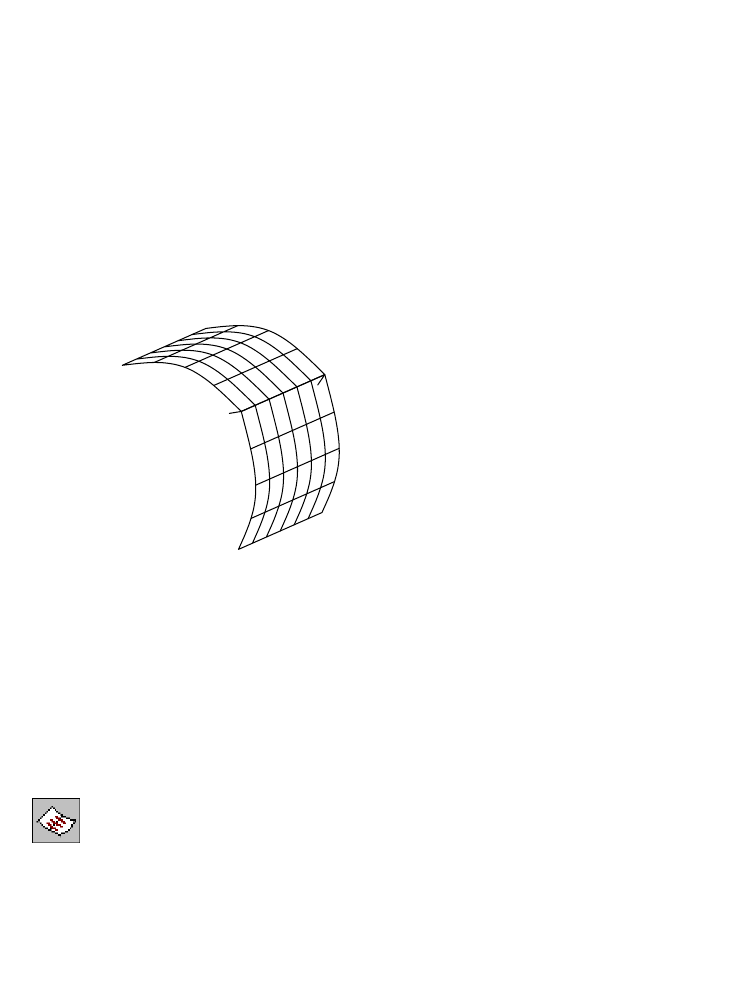
570 |Chapter 19 Creating and Editing Surfaces
First surface=20.0000% Second surface=20.0000% cOntinuity=Smooth
Keep=No
Enter an option [First surface/Second surface/cOntinuity/Keep] <Continue>:
Enter s
Enter adjustment for the second surface <20.0000%>: Enter 40
First surface=20.0000% Second surface=40.0000% cOntinuity=Smooth
Keep=No
Enter an option [First surface/Second surface/cOntinuity/Keep] <Continue>:
Enter o
Continuity [Coincident/Smooth] <Coincident>: Press ENTER
First surface=20.0000% Second surface=40.0000% cOntinuity=Coincident
Keep=No
Enter an option [First surface/Second surface/cOntinuity/Keep] <Continue>:
Press ENTER
The two surfaces are adjusted to meet.
Joining Surfaces
You can join multiple surfaces into a single surface. Each surface is indicated
by two surface normal indicators.
To join surfaces
1Use AMJOINSF to join the surfaces you select, responding to the prompts.
Desktop Menu Surface ➤ Edit Surface ➤ Join
Select surfaces to join: Select surface (1)
Select surfaces to join: Select surface (2)
Select surfaces to join: Press ENTER
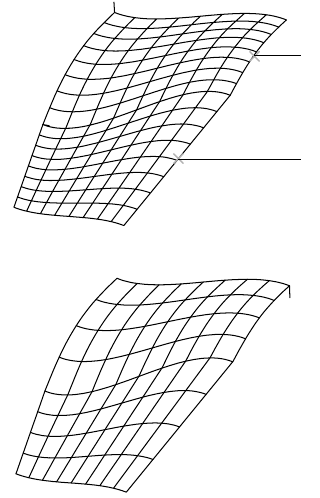
Editing Surfaces |571
The two surfaces are joined. Only one surface normal indicator is shown.
To force two surfaces to join, choose Surface ➤ Surface Options. In the
Mechanical Options dialog box, choose the Surface tab and adjust the Join
Gap Tolerance. Two untrimmed surfaces are joined automatically if they are
within twice the gap tolerance.
2Use the Extents option of ZOOM to redisplay all of the wireframes and select
the object for the next exercise.
Trimming Intersecting Surfaces
You can trim intersecting surfaces, including quilted surfaces, and create a 3D
polyline at the intersection. The 3D polyline can then be used to create
another surface.
A 3D point is created at the intersection of a wire curve and a surface or quilt.
If the wire curve intersects the surface or quilt more than once, points are cre-
ated everywhere an intersection takes place.
When you trim, always make your selections on the portion of the surface
you want to keep.
1
2
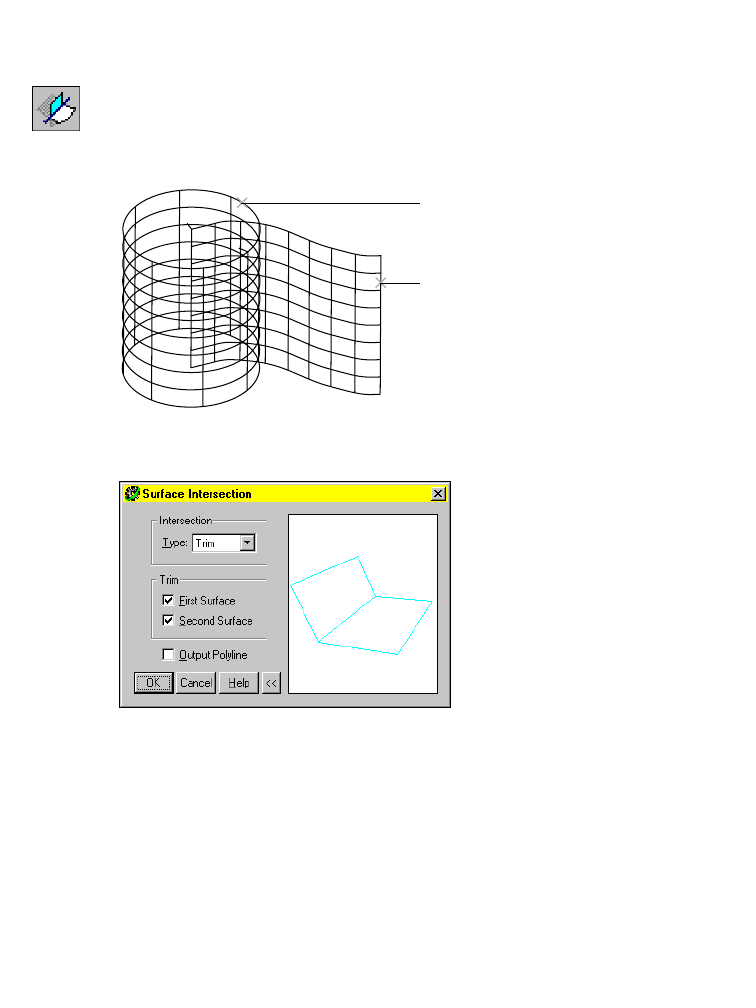
572 |Chapter 19 Creating and Editing Surfaces
To trim intersecting surfaces
1Use AMINTERSF to trim the surface you want to keep, responding to the
prompts.
Desktop Menu Surface ➤ Edit Surface ➤ Intersect Trim
Select first surface/quilt or wire: Select surface (1)
Select second surface: Select surface (2)
2In the Surface Intersection dialog box, check the options indicated in the fol-
lowing illustration and choose OK.
The first surface you selected is trimmed at its intersection with the second
surface.
Using the Trim options, you can trim neither, one, or both surfaces at their
intersection. As you change these options, the dynamic image in the dialog
box displays the results.
1
2
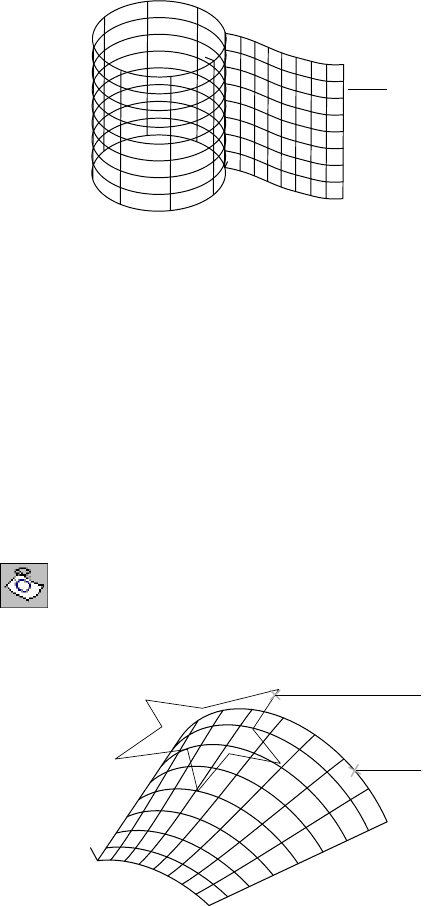
Editing Surfaces |573
3Use UNDO to erase the trim. Then try selecting surfaces at different locations.
4Use the Extents option of ZOOM to redisplay all of the wireframes and select
the object for the next exercise.
Trimming Surfaces by Projection
You can project a wire onto a surface to trim a shape that corresponds to the
wire shape. You select the portion of the surface you want to keep.
In this exercise, you trim a curved surface with a star-shaped polyline.
To trim a surface by a projected wire
1Use AMPROJECT to project the wire to trim the surface, responding to the
prompts.
Desktop Menu Surface ➤ Edit Surface ➤ Project Trim
Select wires to project: Select polyline (1) and press ENTER
Select target surfaces/quilts: Select surface (2) on the side you want to keep
Select target surfaces/quilts: Press ENTER
1
1
22
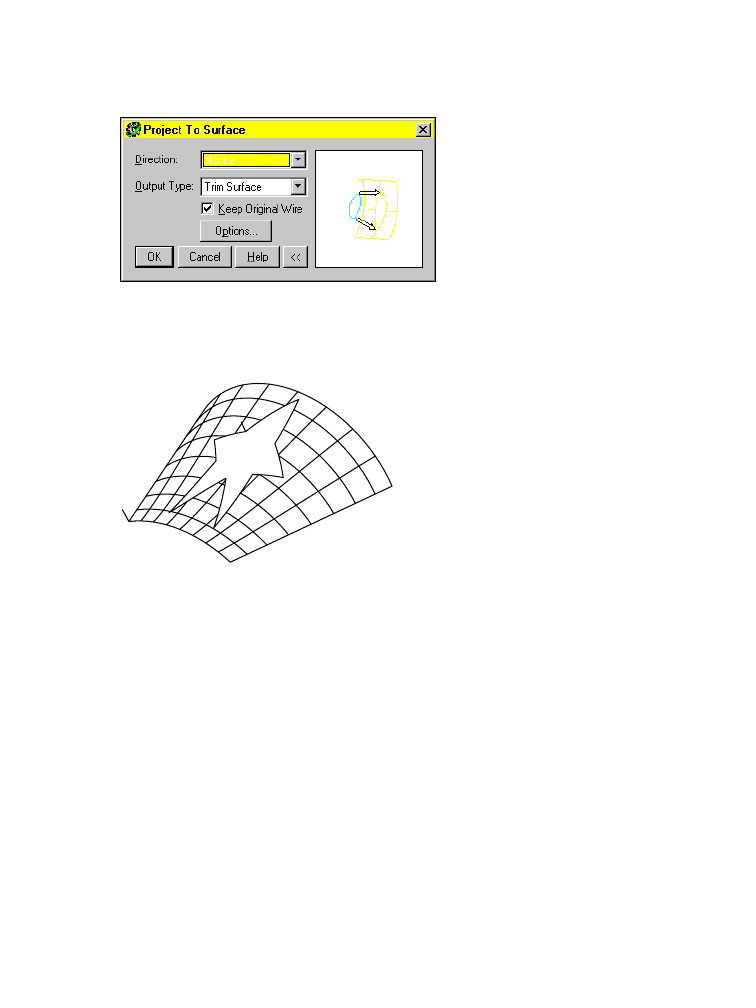
574 |Chapter 19 Creating and Editing Surfaces
2In the Project to Surface dialog box, specify:
Direction: Choose Normal
Output Type: Choose Trim Surface
Keep Original Wire: Check the check box
Choose OK.
The polyline is projected onto the curved surface, trimming out the surface
inside the polyline.
3Use UNDO and try different selection points and output types for the
projection.

575
In This Chapter 20
Combining Parts and
Surfaces
In Autodesk® Mechanical Desktop®, surfaces are
valuable features because they can represent complex
curved shapes. When joined to a parametric part, they
cut away an angular surface and replace it with a
sculpted face. A surface may also add material to a part
as a protrusion. In this tutorial, you combine parametric
and surface modeling by creating a camera body with a
sculpted face.
■Creating a part with multiple
features
■Creating a simple surface
■Attaching a surface
parametrically to a part
■Cutting out features
■Creating mounting holes
■Sketching on work planes
■Revising and finishing a design

576 |Chapter 20 Combining Parts and Surfaces
Key Terms
Te r m Definition
base surface A basic underlying surface that carries a shape across a larger area. Can be trimmed
to precise shapes as needed, but the base surface remains intact and may be
displayed.
model view Changes orientation of the viewer so that the object is viewed from a different
position. Individual views can be displayed in multiple viewports. For example, enter
3 at the Command prompt to create three viewports with default views: top, front,
and right isometric.
NURBS Acronym for nonuniform rational B-spline. The SPLINE command creates a true
NURBS curve and can be used to create a surface.
rail One or more curved lines along which surfaces are swept. They form the curvature of
a swept surface.
spline A curved line defined by specified control points that assumes a unique shape. Used
to create curved surfaces. The radius of a spline curve is constantly changing. Splines
are used as the basis of free-form surfaces.
surface cut A feature created when a surface is joined to a part. Where the surface cuts the part
or protrudes, the part face assumes the curved shape of the surface. The surface, like
other features, is parametric; both the surface and the part retain their parametric
relationship whenever either is modified.
wire A generic term referring to lines, arcs, circles, ellipses, 2D and 3D polylines,
augmented lines, and splines.
work plane An infinite plane attached to a part. Can be designated as a sketch plane and can be
included in a constraint or dimension scheme. Work planes can be either parametric,
or non-parametric.
work point A parametric work feature used to position a hole, the center of a pattern, or any
other point for which there is no other geometric reference.

Basic Concepts of Combining Parts and Surfaces |577
Basic Concepts of Combining Parts and
Surfaces
You can use Mechanical Desktop® to create angular-shaped parts. You can
apply 3D surfaces to those parts to create hybrid parts consisting of a mixture
of angular and curved shapes. With Mechanical Desktop you can create
model designs with shapes of varying types.
You can apply surfaces to Mechanical Desktop parts and use those surfaces to
cut material from a parametric part, to create any hybrid shapes that your
design requires.
You can also use surfaces to add material to angular parts.
Using Surface Features
A feature created from surfaces has the shape of a contoured surface. You
either cut away material or add material as a protrusion to join it to a part.
In this tutorial, you cut away an angular face and replace it with a sculpted
surface.
Surfaces must have these characteristics to be used as features on models:
■A contoured surface must have four logical boundaries.
■The curved shape must be a single surface. If you need multiple surfaces
to represent the shape, you must join them into a single surface.
■The surface must be a nontrimmed base surface. Join only base surfaces,
not interior trim edges of trimmed surfaces.
■The surface must extend past the part on all four sides.
■A surface cannot contain sharp corners.
■Surfaces should have a minimum number of internal patches. These sur-
faces work better and faster than complex ones.
before surface cut after surface cut

578 |Chapter 20 Combining Parts and Surfaces
First, sketch the camera from all sides (top, side, front, and isometric views).
With a complete idea, you can decide where to place features on the camera
body.
The camera body, which is common to all other features, is the base feature.
The camera design has many other features, some of which are cutaways
from the body: battery and film compartments and cutouts for their doors;
mounting holes for the film advance and shutter release; and compartments
for the viewfinder and the flash. The lens sheath feature, a sculpted surface,
is joined to the camera face.
battery compartment
shutter release mount film advance mount
film compartment
viewfinder
compartment
flash compartment
lens sheath
door cutout
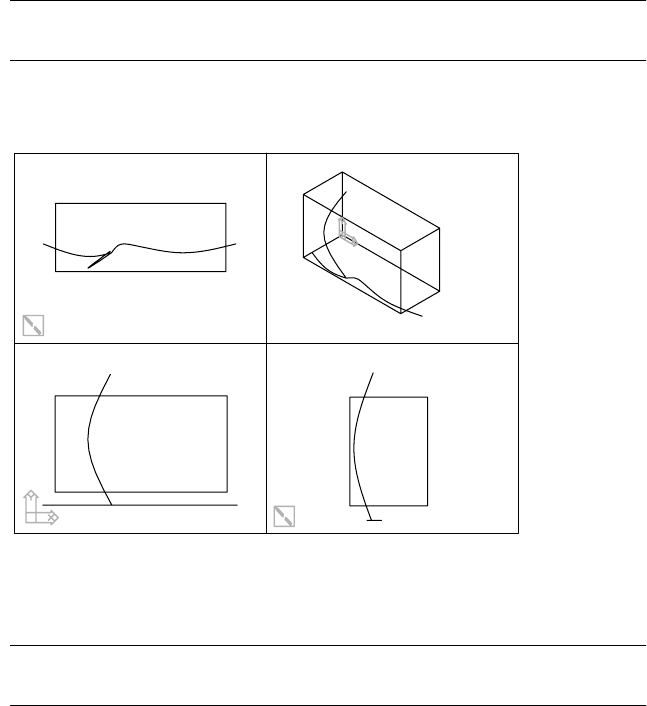
Creating Surface Features |579
Creating Surface Features
Open the file camera.dwg in the desktop\tutorial folder. The file contains the
settings you need, and the geometry to create the camera body—an extruded
feature and some NURBS curves. You use NURBS to create the surface for the
sculpted camera face.
NOTE Back up the tutorial drawing files so you still have the original files if you
make a mistake. See “Backing up Tutorial Drawing Files” on page 40.
You can work on your model in any viewport, moving among views as you
create features.
First, you create two surfaces by sweeping wires along a rail. Then, you join
them into a single surface and extend the surface so that it covers the camera
body.
NOTE If you prefer to use toolbuttons to access commands, choose Surface ➤
Launch Toolbar.
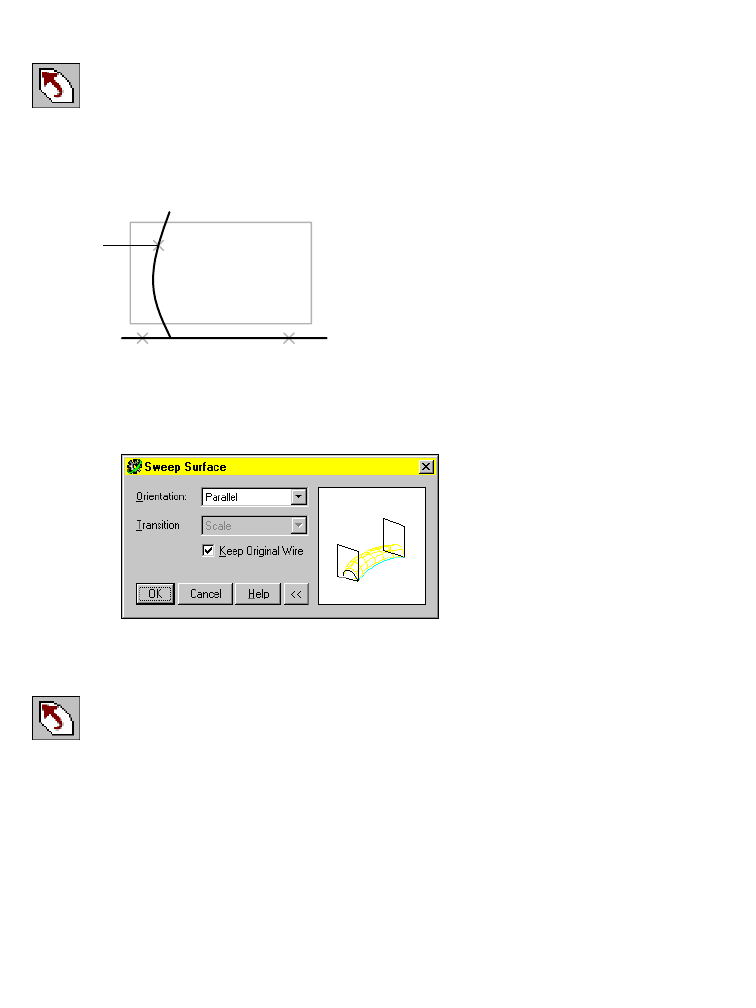
580 |Chapter 20 Combining Parts and Surfaces
To create a swept surface
1Use AMSWEEPSF to sweep a spline along a rail, responding to the prompts.
Desktop Menu Surface ➤ Create Surface ➤ Sweep
Select cross sections: In the front view, choose the right horizontal spline (1)
Select cross sections: Press ENTER
Select rails: Select the vertical spline (2)
Select rails: Press ENTER
2In the Sweep Surface dialog box, specify:
Orientation: Parallel
Choose OK. The first half of the swept surface is created.
3Create the second half of the swept surface, responding to the prompts.
Desktop Menu Surface ➤ Create Surface ➤ Sweep
Select cross sections: Select the left horizontal spline (3)
Select cross sections: Press ENTER
Select rails: Select the vertical spline (2)
Enter an option [Next/Accept] <Accept>: Press ENTER
Select rails: Press ENTER
In the Sweep Surface dialog box, specify:
Orientation: Parallel
Choose OK.
2
3 1
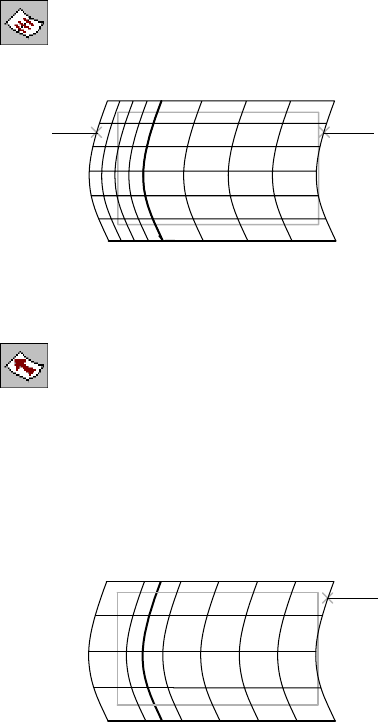
Creating Surface Features |581
4Use AMJOINSF to join the two surfaces, responding to the prompts.
Desktop Menu Surface ➤ Edit Surface ➤ Join
Select surfaces to join: Select the right surface (1)
Select surfaces to join: Select the left surface (2) and press ENTER
The two surfaces create a single surface. The resulting surface probably does
not extend beyond the part on all sides, so you need to lengthen the surface.
5Use AMLENGTHEN to lengthen the surface, responding to the prompts.
Desktop Menu Surface ➤ Edit Surface ➤ Lengthen
Base edge=Single Extension=Percent Method=Parabolic Value=110.0000%
Select surface edge or spline [eDge/Extend/Keep/Mode/Value]: Enter v
Enter percent <110.0000%>: Enter 105
Base edge=Single Extension=Percent Method=Parabolic Value=105.0000%
Select surface edge or spline [eDge/Extend/Keep/Mode/Value]:
Select the rightmost vertical edge of the surface (1)
Base edge=Single Extension=Percent Method=Parabolic Value=105.0000%
Select surface edge or spline [eDge/Extend/Keep/Mode/Value]: Press ENTER
The surface now extends past the cube representing the camera body.
1
2
1
582 |Chapter 20 Combining Parts and Surfaces
Attaching Surfaces Parametrically
Next, you create a work plane and work point and then dimension the work
point to the part. This dimension establishes a parametric relationship
between the surface and the part. The position of the surface is controlled by
the work point, and its orientation is controlled by the work plane associated
with the work point. Later, if you modify the position of the work point, the
surface location moves accordingly.
To position the work plane and work point easily, work in the isometric view.
To attach a surface to a part
1Use AMWORKPLN to create a work plane.
Context Menu In the graphics area, right-click and choose Sketched &
Work Features ➤ Work Plane.
In the Work Plane Feature dialog box, specify:
1st Modifier: Planar Parallel
2nd Modifier: Offset
Offset: Enter 1
Create Sketch Plane: Select the check box
Choose OK.
2Position the offset work plane on the part, responding to the prompts.
Select work plane, planar face or [worldXy/worldYz/worldZx/Ucs]:
Select the front face of the camera (1)
Enter an option [Next/Accept] <Accept>:
Choose n to cycle to the front face, or press ENTER
Enter an option [Flip/Accept] <Accept>:
Choose f to flip the direction arrow away from the camera body, or press ENTER
Plane = Parametric
Select edge to align X axis or [Flip/Rotate/Origin] <Accept>:
Verify that the UCS icon is upright and press ENTER
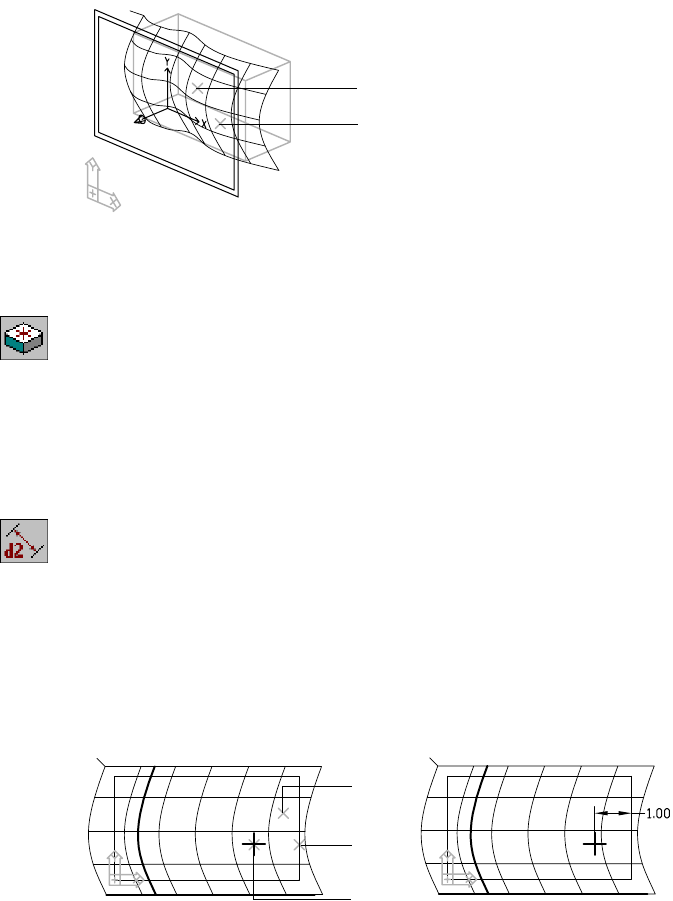
Attaching Surfaces Parametrically |583
You have created a parallel work plane offset from the front face of the part.
3Use AMWORKPT to place a work point on the work plane, responding to the
prompts.
Context Menu In the graphics area, right-click and choose Sketched &
Work Features ➤ Work Point.
Workpoint will be placed on the current sketch plane.
Specify the location of the workpoint: Specify a location (2)
You have created a work point on the sketch plane.
4Use AMPARDIM to constrain the work point to the camera body, responding
to the prompts.
Context Menu In the graphics area, right-click and choose Dimensioning
➤ New Dimension.
Select first object: Select the work point (3)
Select second object or place dimension:
Select the right edge of the camera body (4)
Specify dimension placement: Place the horizontal dimension (5)
Enter dimension value or [Undo/Hor/Ver/Align/Par/aNgle/Ord/Diameter/pLace]
<1.3316>: Enter 1
Solved underconstrained sketch requiring 1 dimensions or constraints.
1
2
3
4
5

584 |Chapter 20 Combining Parts and Surfaces
5Continue on the command line.
Select first object: Select the work point
Select second object or place dimension:
Select the bottom edge of the camera body
Specify dimension placement: Place the vertical dimension
Enter dimension value or [Undo/Hor/Ver/Align/Par/aNgle/Ord/Diameter/pLace]
<0.8898>: Enter 1
Solved fully constrained sketch.
Select first object: Press ENTER
The work point is fully constrained.
Save your file.
Cutting Parts with Surfaces
Now that the surface is positioned relative to the camera body, you can use
it to cut away material from the planar camera face.
To cut away from a part
1Use AMSURFCUT to create a surface cut, responding to the prompts.
Context Menu In the graphics area, right-click and choose Placed
Features ➤ Surface Cut.
(Type: Cut)
Select surface or [Type]: Select the surface
Select work point: Select the work point
Specify portion to remove: [Flip/Accept] <Accept>:
Verify the direction arrow points away from the camera body and press ENTER
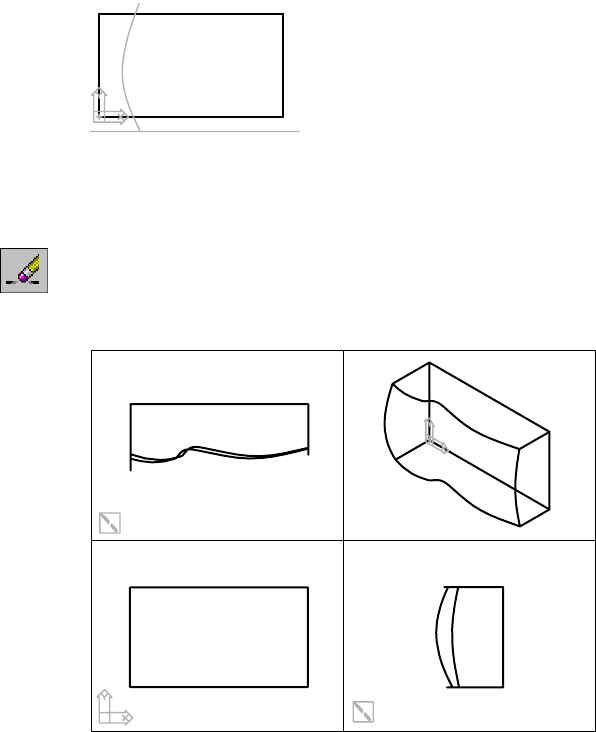
Cutting Parts with Surfaces |585
One side of the part is cut away, leaving the curved face of the surface. Your
model shows the modified block and the splines used to create the surface.
2Use REGENALL to regenerate the drawing views.
Desktop Menu View ➤ Regen All
3Remove the three splines used to create the surface.
Context Menu In the graphics area, right-click and choose 2D Sketching
➤ Erase.
4Select the three splines and press ENTER.
Save your file.
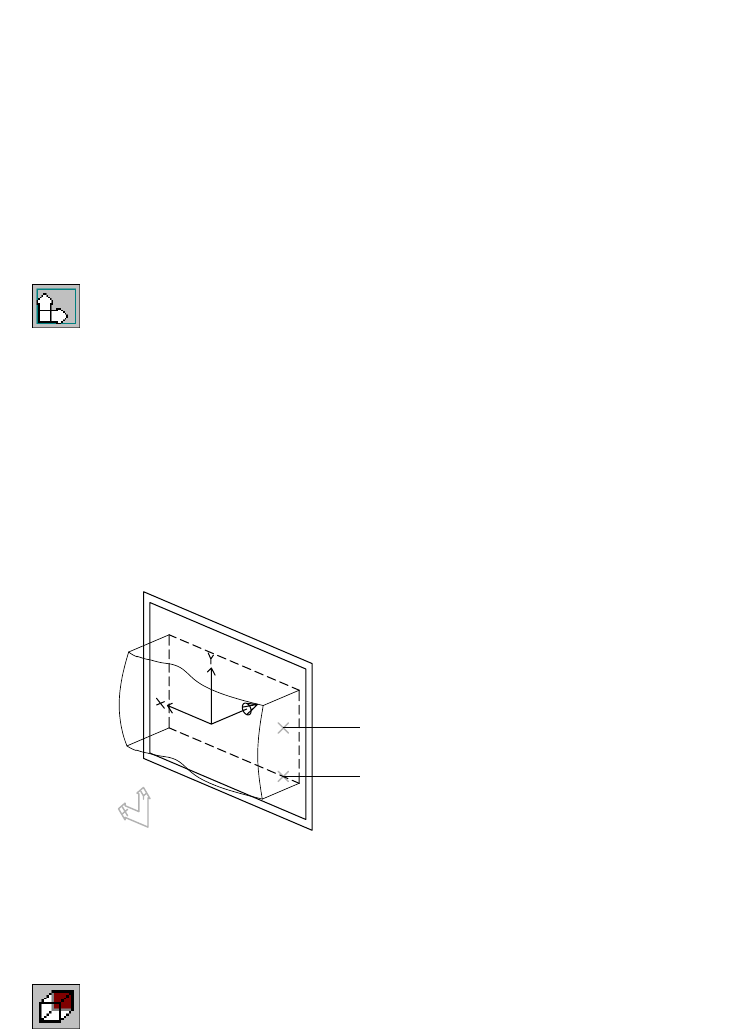
586 |Chapter 20 Combining Parts and Surfaces
Creating Extruded Features
The film compartment at the back of the base feature has two features—the
compartment and the door.
The camera back is a flat plane. You specify it as the sketch plane, sketch the
profile, and extrude it directly into the camera body.
To sketch the film compartment
1Use AMSKPLN to create a new sketch plane, responding to the prompts. Work
in the isometric view.
Context Menu In the graphics area, right-click and choose New Sketch
Plane.
Select work plane, planar face or [worldXy/worldYz/worldZx/Ucs]:
Select the back face of the camera (1)
Enter an option [Accept/Next] <Accept>:
Choose n to cycle to the back face, or press ENTER
Plane = Parametric
Select edge to align X axis or [Flip/Rotate/Origin] <Accept>:
Select the bottom edge of the camera (2)
Plane = Parametric
Select edge to align X axis or [Flip/Rotate/Origin] <Accept>:
Verify that the X axis is pointing to the left and press ENTER
The back of the camera has been specified as the sketch plane. In the isomet-
ric view, the UCS icon is displayed with the X axis pointing left.
Next, change the view to see the back of the camera. If needed, zoom out to
see the entire back of the camera.
2Change the front view to a back view.
Desktop Menu View ➤ 3D Views ➤ Back
1
2

Creating Extruded Features |587
3Use RECTANG to sketch a rectangle to the left on the camera back.
Context Menu In the graphics area, right-click and choose 2D Sketching
➤ Rectangle.
4Use AMPROFILE to create a profile from the sketch.
Context Menu In the graphics area, right-click and choose Sketch Solving
➤ Single Profile.
You need to place four dimensions or constraints: two to define the sketch
size and two to specify the sketch location on the camera body.
To add dimensions and constraints to the film compartment sketch
1Use AMPARDIM to dimension the width of the rectangle, responding to the
prompts.
Context Menu In the graphics area, right-click and choose Dimensioning
➤ New Dimension.
Select first object: Select the bottom horizontal line of the sketch (1)
Select second object or place dimension: Specify a location (2)
Enter dimension value or [Undo/Hor/Ver/Align/Par/aNgle/Ord/Diameter/pLace]
<3.7546>: Enter 4
Solved underconstrained sketch requiring 3 dimensions or constraints.
2Define the height of the rectangle.
Select first object: Select the left vertical line of the sketch (3)
Select second object or place dimension: Specify a location (4)
Enter dimension value or [Undo/Hor/Ver/Align/Par/aNgle/Ord/Diameter/pLace]
<2.6011>: Enter 2.5
Solved underconstrained sketch requiring 2 dimensions or constraints.
Select first object: Press ENTER
3
4
2
1

588 |Chapter 20 Combining Parts and Surfaces
3Make the isometric view active.
To see the dimensions and the profile sketch more clearly, rotate the isomet-
ric view until the back of the camera faces you.
Desktop Menu View ➤ 3D Views ➤ Back Left Isometric
Define the distance between the top of the sketch and the top of the camera
back.
4Use AMPARDIM to constrain the rectangle to the camera body, responding to
the prompts.
Context Menu In the graphics area, right-click and choose Dimensioning
➤ New Dimension.
Select first object: Select line (1)
Select second object or place dimension: Select line (2)
Specify dimension placement: Specify a location (3)
Enter dimension value or [Undo/Hor/Ver/Align/Par/aNgle/Ord/Diameter/pLace]
<0.2355>: Enter .1626
Solved underconstrained sketch requiring 1 dimensions or constraints.
5Define the distance between the right side of the sketch and the right edge
of the camera back.
Select first object: Select line (4)
Select second object or place dimension: Select line (5)
Specify dimension placement: Specify a location (6)
Enter dimension value or [Undo/Hor/Ver/Align/Par/aNgle/Ord/Diameter/pLace]
<0.8583>: Enter .8426
Solved fully constrained sketch.
Select first object: Press ENTER
Next, cut the film compartment from the camera body.
5
4
6
3 2 1
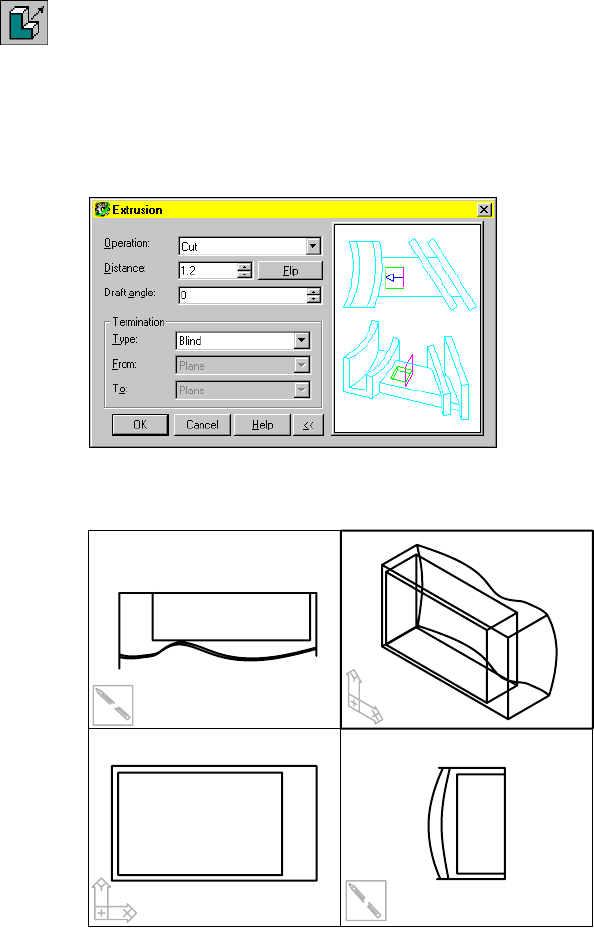
Creating Extruded Features |589
To cut the film compartment
1Use AMEXTRUDE to cut the film compartment from the camera body.
Context Menu In the graphics area, right-click and choose Sketched &
Work Features ➤ Extrude.
In the Extrusion dialog box, specify:
Operation: Cut
Termination: Blind
Distance: Enter 1.2
Flip: Point the direction arrow into the camera body
Choose OK.
The cut-out compartment is displayed in all four views.
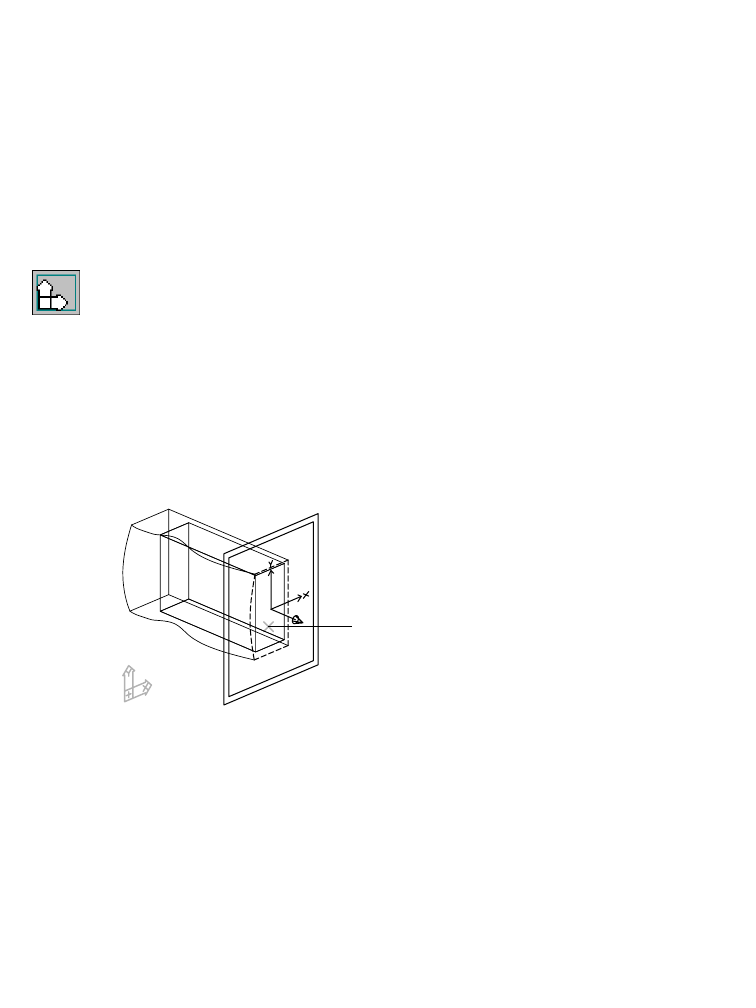
590 |Chapter 20 Combining Parts and Surfaces
2Activate and then restore the viewports to the original orientation.
Upper right viewport: Front Right Isometric View
Lower left viewport: Front View
Cutting the door is similar to cutting the film compartment. You sketch a
rectangle on the right side of the camera and blindly extrude it as a cut into
the camera body.
To sketch the film compartment door
1Use AMSKPLN to create a new sketch plane, responding to the prompts. Work
in the isometric view.
Context Menu In the graphics area, right-click and choose New Sketch
Plane.
Select work plane, planar face or [worldXy/worldYz/worldZx/Ucs]:
Select the side face of the camera (1)
Enter an option [Accept/Next] <Accept>:
Verify that the side face is highlighted and press ENTER
Plane = Parametric
Select edge to align X axis or [Flip/Rotate/Origin] <Accept>:
Verify that the Z axis points away from the camera and press ENTER
1
Creating Extruded Features |591
2Set the UCS origin to the lower-left corner of the right side of the camera,
responding to the prompts.
Desktop Menu Assist ➤ New UCS ➤ Origin
Specify new origin point <0,0,0>: Enter end
of: Specify a point near the lower-left corner of the side view
NOTE If the UCS icon does not snap to the lower-left corner of the camera,
set the AutoCAD system variable UCSICON to On.
3In the side view, zoom in on the camera face.
Context Menu In the graphics area, right-click and choose Zoom.
4Hold down the left mouse button to size the view, and then press ENTER to
end the command.
5Sketch a rectangular shape for the door cutout.
Context Menu In the graphics area, right-click and choose 2D Sketching
➤ Rectangle.
6Create the profile sketch.
Context Menu In the graphics area, right-click and choose Sketch Solving
➤ Single Profile.
You need four dimensions or constraints to solve the sketch. Add constraints
that define the location of the profile on the camera side.

592 |Chapter 20 Combining Parts and Surfaces
To constrain the film compartment door
1Use AMADDCON to make the bottom edge of the profile sketch collinear with
the bottom line of the film compartment, responding to the prompts.
Context Menu In the graphics area, right-click and choose 2D
Constraints ➤ Collinear.
Valid selection(s): line or spline segment
Select object to be reoriented: Select line (1)
Valid selection(s): line or spline segment
Select object to be made collinear to: Select line (2)
Solved underconstrained sketch requiring 3 dimensions or constraints.
2Make the right side of the profile sketch collinear with the right edge of the
camera body.
Valid selection(s): line or spline segment
Select object to be reoriented: Select line (3)
Valid selection(s): line or spline segment
Select object to be made collinear to: Select line (4)
Solved underconstrained sketch requiring 2 dimensions or constraints.
Valid selection(s): line or spline segment
Select object to be reoriented: Press ENTER
Enter an option
[Hor/Ver/PErp/PAr/Tan/CL/CN/PRoj/Join/XValue/YValue/Radius/Length/Mir/Fix]
<eXit>: Press ENTER
3
1
2
4

Creating Extruded Features |593
3Use AMPARDIM to dimension the width and height of the profile sketch,
responding to the prompts.
Context Menu In the graphics area, right-click and choose Dimensioning
➤ New Dimension.
Select first object: Select a horizontal profile edge
Select second object or place dimension: Place the horizontal dimension
Enter dimension value or [Undo/Hor/Ver/Align/Par/aNgle/Ord/Diameter/pLace]
<0.6840>: Enter .6
Solved underconstrained sketch requiring 1 dimensions or constraints.
Select first object: Select a vertical profile edge
Select second object or place dimension: Place the vertical dimension
Enter dimension value or [Undo/Hor/Ver/Align/Par/aNgle/Ord/Diameter/pLace]
<2.3218>: Enter 2.5
Solved fully constrained sketch.
Select first object: Press ENTER
The horizontal dimension makes the width of the profile equal to half the
depth of the film compartment and the height of the profile equal to the
height of the compartment.
For practice, express the width and height of the profile as equations.
To cut the film compartment door
1Use AMEXTRUDE to cut the profile from the camera body.
Context Menu In the graphics area, right-click and choose Sketched &
Work Features ➤ Extrude.
In the Extrusion dialog box, specify:
Operation: Cut
Termination: Blind
Distance: Enter .1574
Flip: Point the direction arrow into the camera
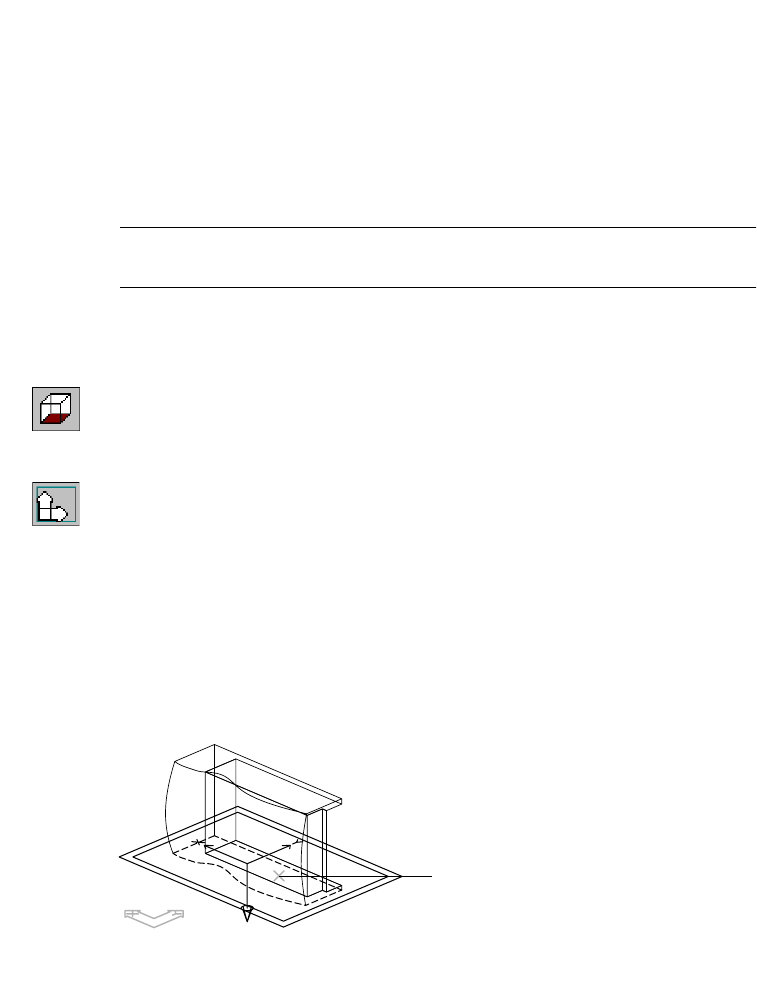
594 |Chapter 20 Combining Parts and Surfaces
2Choose OK to create the extrusion.
Save your file.
The battery compartment also has a cutout for a door. The order in which
you create these features does not matter, but the natural order would be to
create the film compartment first.
The cutout for the battery compartment is more complicated because of its
shape. The key to creating this feature is to locate the sketch plane properly
on the bottom left side of the camera body.
NOTE Watch the UCS icon in the isometric view and make sure it is positioned
on the bottom of the camera.
To sketch the battery compartment
1Change the top view to a bottom view.
Desktop Menu View ➤ 3D Views ➤ Bottom
2Use AMSKPLN to create a new sketch plane, responding to the prompts. Work
in the isometric view.
Context Menu In the graphics area, right-click and choose New Sketch
Plane.
Select work plane, planar face or [worldXy/worldYz/worldZx/Ucs]:
Select the bottom face of the camera (1)
Plane = Parametric
Select edge to align X axis or [Flip/Rotate/Origin] <Accept>:
Verify that the Z axis arrow points down, away from the camera body
Plane = Parametric
Select edge to align X axis or [Flip/Rotate/Origin] <Accept>:
Verify that the X axis points to the left and press ENTER
1
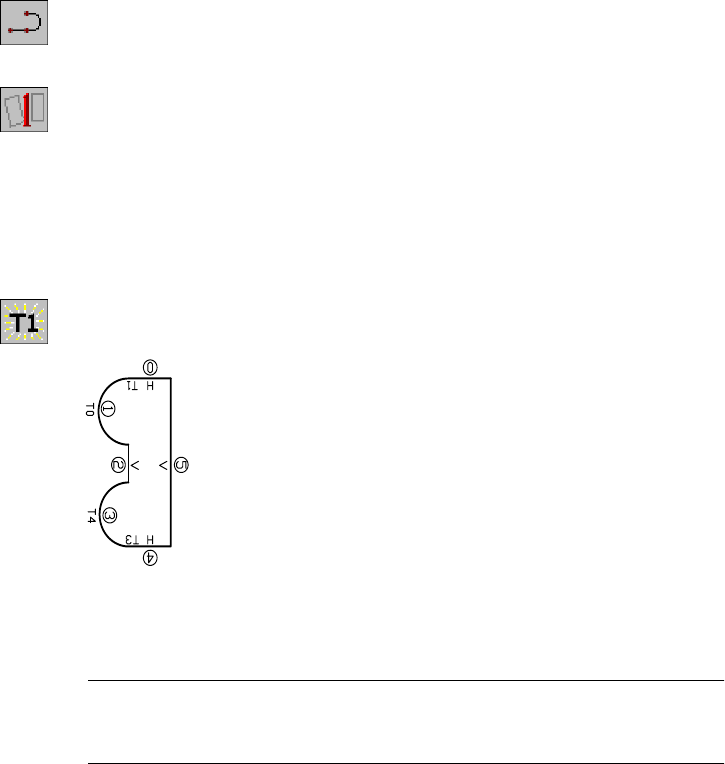
Creating Extruded Features |595
3Use PLINE to sketch the profile of the battery compartment on the bottom of
the camera body. Work in the bottom view.
Context Menu In the graphics area, right-click and choose 2D Sketching
➤ Polyline.
4Use AMPROFILE to create the profile sketch.
Context Menu In the graphics area, right-click and choose Sketch Solving
➤ Single Profile.
The sketch needs seven to nine dimensions or constraints, depending on
how precisely you drew the sketch. If you need more than seven constraints,
you need to add some missing geometric constraints.
To constrain the battery compartment
1Use AMSHOWCON to view the current geometric constraints.
Context Menu In the graphics area, right-click and choose 2D
Constraints ➤ Show Constraints.
2Add any missing geometric constraints.
Typically, the radial (R) constraints and one of the tangent (T) constraints are
missing from the arcs.
NOTE When you add constraints, the sketch shape might become distorted,
but you can restore it when you complete the dimensions. Dimension the largest
vertical dimension and the arcs before you dimension smaller objects.
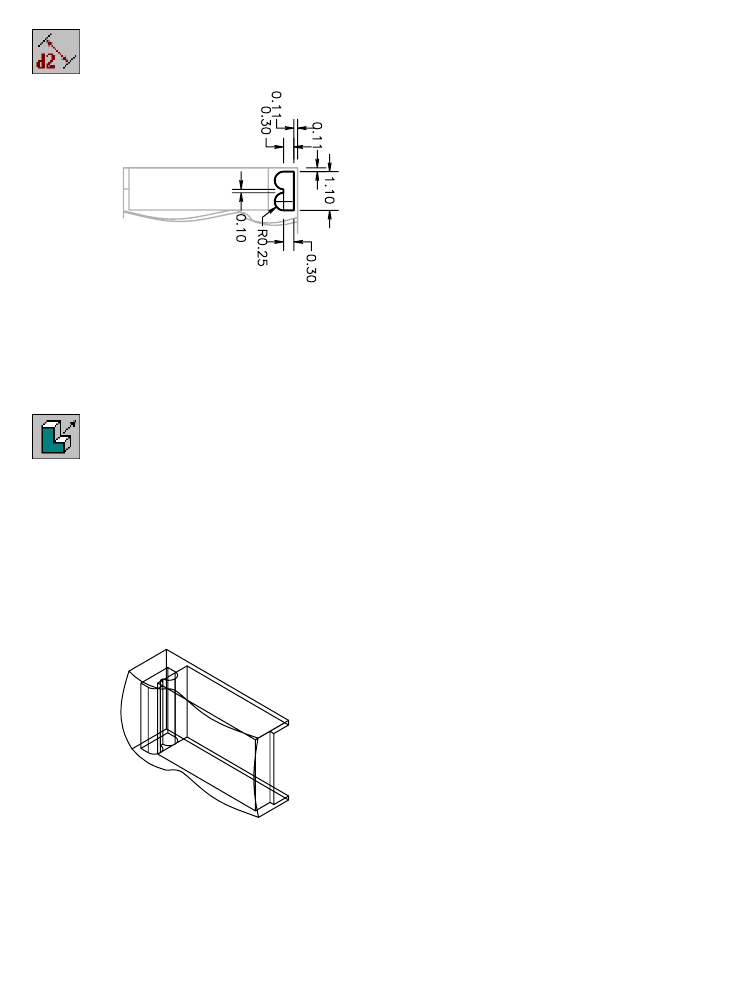
596 |Chapter 20 Combining Parts and Surfaces
3Use AMPARDIM to add the following dimensions.
Context Menu In the graphics area, right-click and choose Dimensioning
➤ New Dimension.
The sketch is fully constrained.
To cut the battery compartment
1Use AMEXTRUDE to cut the profile from the camera body.
Context Menu In the graphics area, right-click and choose Sketched &
Work Features ➤ Extrude.
In the Extrusion dialog box, specify:
Operation: Cut
Termination: Blind
Distance: Enter 2.4
Flip: Point the direction arrow into the camera body
Choose OK.
The door opening of the battery compartment is located on the same plane
as the battery compartment. Therefore, you need only to sketch and con-
strain a rectangle, cutting it into the camera body to the proper depth.
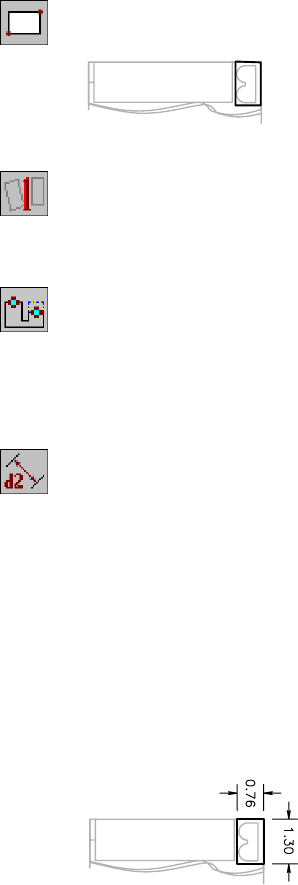
Creating Extruded Features |597
To sketch and constrain the battery compartment door
1Use RECTANG to sketch the profile of the cutout. Work in the bottom view.
Context Menu In the graphics area, right-click and choose 2D Sketching
➤ Rectangle.
2Use AMPROFILE to create the profile sketch.
Context Menu In the graphics area, right-click and choose Sketch Solving
➤ Single Profile.
The sketch requires four dimensions or constraints.
3Use AMADDCON to constrain the sketch to the bottom of the camera body.
Context Menu In the graphics area, right-click and choose 2D
Constraints ➤ Collinear.
Select lines that make the outside edges of the sketch collinear with the out-
side edges of the camera body.
4Use AMPARDIM to dimension the length and width of the profile sketch,
responding to the prompts.
Context Menu In the graphics area, right-click and choose Dimensioning
➤ New Dimension.
Select first object: Select the narrow side of the rectangle
Select second object or place dimension: Place the horizontal dimension
Enter dimension value or [Undo/Hor/Ver/Align/Par/aNgle/Ord/Diameter/pLace]
<0.7463>: Enter .76
Solved underconstrained sketch requiring 1 dimensions or constraints.
Select first object: Select the long side of the rectangle
Select second object or place dimension: Place the vertical dimension
Enter dimension value or [Undo/Hor/Ver/Align/Par/aNgle/Ord/Diameter/pLace]
<1.1274>: Enter 1.3
Solved fully constrained sketch.
Select first object: Press ENTER
The sketch is fully constrained.
598 |Chapter 20 Combining Parts and Surfaces
To cut the battery compartment door
1Use Extrude to cut the door opening from the camera body. Make sure the
direction of the cut is into the camera body.
Context Menu In the graphics area, right-click and choose Sketched &
Work Features ➤ Extrude.
In the Extrusion dialog box, specify:
Operation: Cut
Termination: Blind
Distance: Enter .1574
Flip: Point the direction arrow into the camera body
Choose OK.
Save your file.
Creating Holes
Both the shutter release and the film advance mounts are counterbored holes
that you can create as placed features.
To create shutter release and film advance mount holes
1Change the upper-left viewport to a top view.
Desktop Menu View ➤ 3D Views ➤ Top
2Zoom in to enlarge the view as needed, and then activate the isometric view.
3Use AMHOLE to place the holes for the shutter release and the film advance.
Context Menu In the graphics area, right-click and choose Placed
Features ➤ Hole.
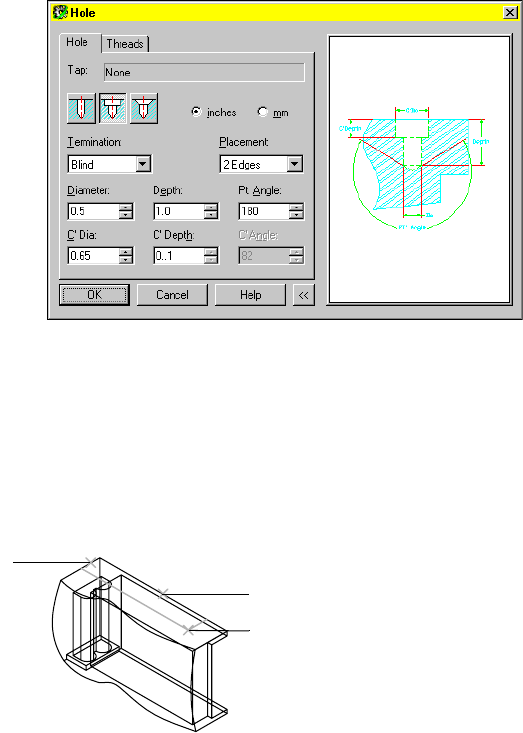
Creating Holes |599
In the Hole dialog box, select the Counterbore hole type icon and specify:
Termination: Blind
Placement: 2 Edges
Dia: Enter .5
Depth: 1.0
Pt. Angle: Enter 180
C’Dia: Enter .65
C’Depth: Enter 1
Choose OK.
4Respond to the prompts as follows:
Select the first edge: Select the top, back edge in the isometric view (1)
Select the second edge: Select the top, left edge in the isometric view (2)
Specify the hole location: Specify a location (3)
Enter the distance from first edge (highlighted) <0.4146>: Enter .5
Enter the distance from second edge (highlighted) <4.3456>: Enter 4.25
Select the first edge: Press ENTER
1
2
3
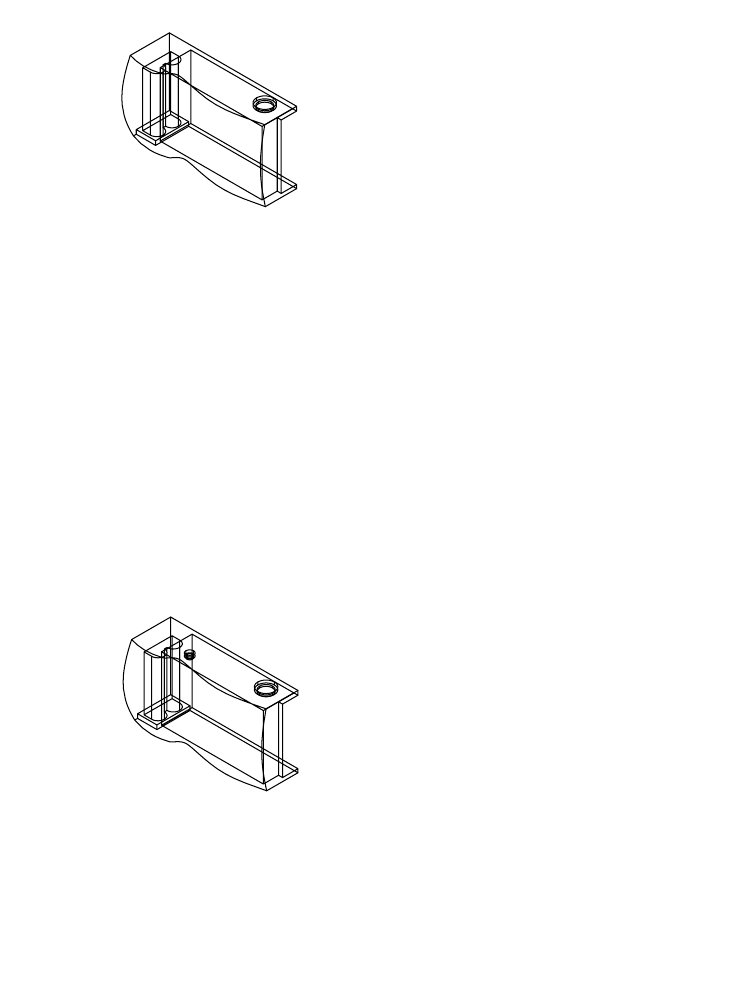
600 |Chapter 20 Combining Parts and Surfaces
A hole is created for the film advance component.
5Press ENTER to redisplay the Hole Feature dialog box. Specify:
Operation: C’Bore
Termination: Blind
Placement 2 Edges
Drill Size: Custom, enter .2 diameter, 1.0 depth, and 180 degrees point angle
C’bore/Sunk Size: Enter .3 diameter and .1 depth and choose OK
6Respond to the prompts as follows:
Select the first edge: Select the top, back edge in the isometric view
Select the second edge: Select the top, left edge in the isometric view
Specify the hole location: Specify a location
Enter the distance from first edge (highlighted) <0.6946>: Enter .85
Enter the distance from second edge (highlighted) <1.7487>: Enter 1.6
Select the first edge: Press ENTER
A hole is created for the shutter release mount.
Save your file.

Creating Features on a Work Plane |601
Creating Features on a Work Plane
The camera body is complete except for features on the camera face. Unlike
the previous features, you sketch these features on a work plane parallel to
the front of the camera. You extrude the features from the work plane and
into the camera body to the correct depth.
You sketch on the work plane because 2D sketches cannot be drawn and pro-
filed on a NURBS surface.
The lens sheath, a hollow cylinder joined to the face of the camera, has two
features: a solid cylinder and a circle used to cut out the center of the
cylinder.
To extrude the lens sheath on a work plane
1Use AMWORKPLN to create a new work plane on which to locate the sketch
plane.
Context Menu In the graphics area, right-click and choose Sketched &
Work Features ➤ Work Plane.
In the Work Plane Feature dialog box, specify:
1st Modifier: Planar Parallel
2nd Modifier: Offset
Offset: Enter 1.25
Create Sketch Plane: Select the check box
Choose OK.
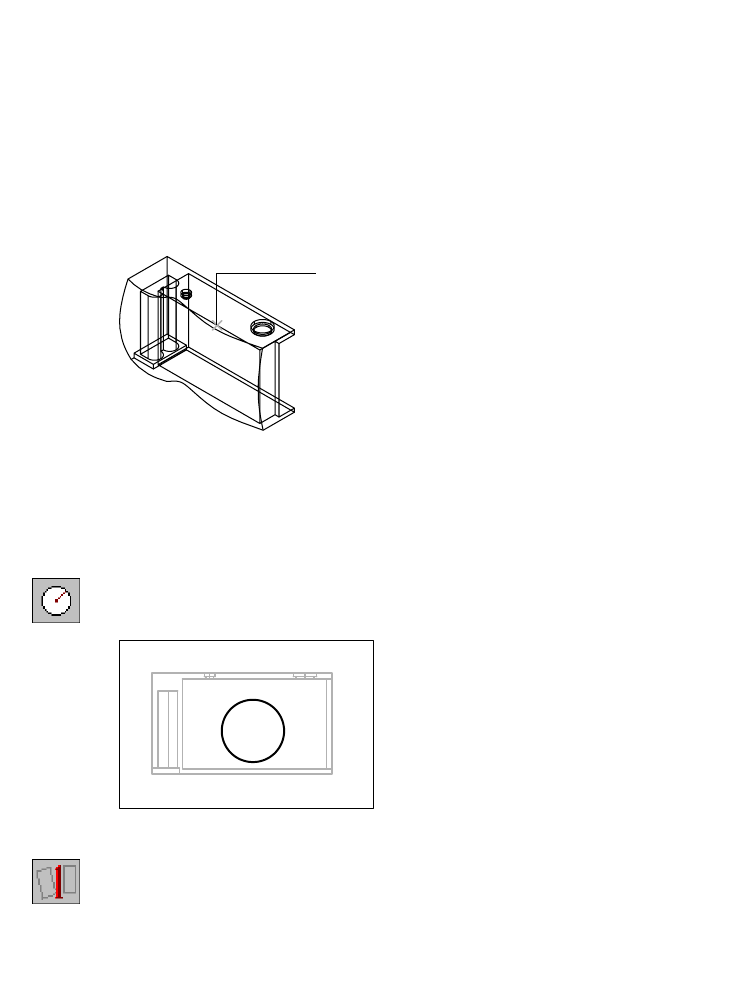
602 |Chapter 20 Combining Parts and Surfaces
2Respond to the prompts as follows:
Select work plane, planar face or [worldXy/worldYz/worldZx/Ucs]:
Specify a point (1)
Enter an option [Next/Accept] <Accept>:
Press ENTER when the front of the camera is selected
Enter an option [Flip/Accept] <Accept>:
Verify that the work plane is offset from the camera front and press ENTER
Plane = Parametric
Select edge to align X axis or [Flip/Rotate/Origin] <Accept>:
Point the Z axis away from the camera front and press ENTER
The work plane is created in front of the camera face. Because the sketch
plane is specified on the work plane, the UCS icon is also displayed on the
work plane.
3Use CIRCLE to sketch a circle in front of the camera face. Work in the front
view.
Context Menu In the graphics area, right-click and choose 2D Sketching
➤ Circle.
4Use AMPROFILE to create the profile sketch.
Context Menu In the graphics area, right-click and choose Sketch Solving
➤ Single Profile.
1
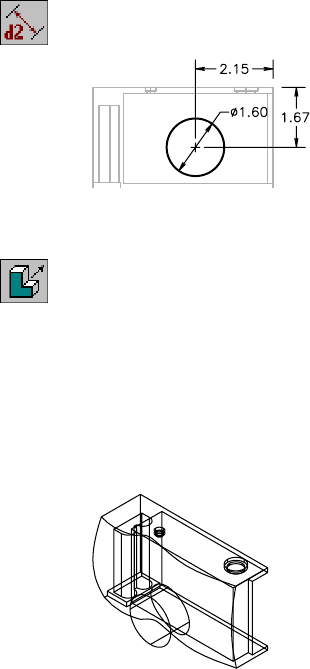
Creating Features on a Work Plane |603
To position the circle, you need three dimensions or constraints: a diameter
and two dimensions to locate the circle on the sketch plane relative to the
camera body.
5Use AMPARDIM to dimension the sketch with the following values.
Context Menu In the graphics area, right-click and choose Dimensioning
➤ New Dimension.
6Use EXTRUDE to extrude the profile to create the outer cover of the lens
sheath. Work in the isometric view.
Context Menu In the graphics area, right-click and choose Sketched &
Work Features ➤ Extrude.
In the Extrusion dialog box, specify:
Operation: Join
Termination: Blind
Distance: Enter 1.25
Flip: Point the direction arrow into the camera body
Choose OK.
The lens sheath is complete. Now, cut a smaller cylinder to hollow out the
sheath.
604 |Chapter 20 Combining Parts and Surfaces
To hollow out the lens sheath
1Activate the front view, and sketch a circle on the work plane.
Context Menu In the graphics area, right-click and choose 2D Sketching
➤ Circle.
2Profile the sketch.
Context Menu In the graphics area, right-click and choose Sketch Solving
➤ Single Profile.
Three dimensions or constraints are needed to solve the sketch.
3Use AMADDCON to constrain the sketch to be concentric with the lens
sheath, responding to the prompts.
Context Menu In the graphics area, right-click and choose 2D
Constraints ➤ Concentric.
Valid selection(s): arc, circle, or ellipse
Select object to be reoriented: Select the small circle
Valid selection(s): arc, circle, ellipse, or work point
Select object to be made concentric to: Select the large circle
Solved underconstrained sketch requiring 1 dimensions or constraints.
Valid selection(s): arc, circle, or ellipse
Select object to be reoriented: Press ENTER
Enter an option
[Hor/Ver/PErp/PAr/Tan/CL/CN/PRoj/Join/XValue/YValue/Radius/Length/Mir/Fix]
<eXit>: Press ENTER
4Use AMPARDIM to dimension the sketch to the value shown.
Context Menu In the graphics area, right-click and choose Dimensioning
➤ New Dimension.
5Make the isometric view active and use AMEXTRUDE to extrude the sketch to
hollow out the lens sheath.
Context Menu In the graphics area, right-click and choose Sketched &
Work Features ➤ Extrude.
Creating Features on a Work Plane |605
In the Extrusion dialog box, specify:
Operation: Cut
Termination: Through
Flip: Point the direction arrow into the camera body
Choose OK.
Save your file.
Next, you create the viewfinder compartment, a filleted rectangle that is cut
from the camera face.
To cut the viewfinder compartment
1Use RECTANG to sketch a rectangle on the sketch plane above the lens sheath.
Work in the isometric view.
Context Menu In the graphics area, right-click and choose 2D Sketching
➤ Rectangle.
2Use FILLET to define the fillet for the corners of the rectangle, responding to
the prompts.
Context Menu In the graphics area, right-click and choose 2D Sketching
➤ Fillet.
Current settings: Mode = TRIM, Radius = 0.5000
Select first object or [Polyline/Radius/Trim]: Enter r
Specify fillet radius <0.5000>: Enter .1, and choose OK.
3Press ENTER to restart FILLET. Apply the fillet, responding to the prompts.
Current settings: Mode = TRIM, Radius = 0.1000
Select first object or [Polyline/Radius/Trim]: Enter p
Select 2D polyline: Specify the rectangle

606 |Chapter 20 Combining Parts and Surfaces
4Use AMPROFILE to create the profile sketch.
Context Menu In the graphics area, right-click and choose Sketch Solving
➤ Single Profile.
You need five or more dimensions or constraints to solve the sketch. Add the
dimensions for the length and width of the shape, one dimension for the fil-
lets, and two dimensions to locate the sketch in relationship to the camera
body.
5In the front view, zoom in to enlarge the model as needed.
6Use AMPARDIM to add the following dimensions.
Context Menu In the graphics area, right-click and choose Dimensioning
➤ New Dimension.
7Use AMEXTRUDE to cut the sketch through the camera body.
Context Menu In the graphics area, right-click and choose Sketched &
Work Features ➤ Extrude.
In the Extrusion dialog box, specify:
Operation: Cut
Termination: Through
Flip: Point the direction arrow into the camera body
Choose OK.
The last feature is the flash compartment. It has a shape similar to the view-
finder but is larger and located in the upper-right corner of the camera face.
Creating Features on a Work Plane |607
To cut the flash compartment
1Sketch a rectangle to the right of the viewfinder.
Context Menu In the graphics area, right-click and choose 2D Sketching
➤ Rectangle.
2Define a fillet for the corners of the rectangle, responding to the prompts.
Context Menu In the graphics area, right-click and choose 2D Sketching
➤ Fillet.
Current settings: Mode = TRIM, Radius = 0.5000
Select first object or [Polyline/Radius/Trim]: Enter r
Specify fillet radius <0.5000>: Enter .1
3Press ENTER to restart FILLET. Apply the fillet, responding to the prompts.
Current settings: Mode = TRIM, Radius = 0.1000
Select first object or [Polyline/Radius/Trim]: Enter p
Select 2D polyline: Specify the rectangle
4Create the profile sketch.
Context Menu In the graphics area, right-click and choose Sketch Solving
➤ Single Profile.
You need five or more dimensions or constraints to solve the sketch, just as
you did when you sketched the viewfinder. Dimension the length, width,
and the fillets, and locate the sketch in relationship to the camera body.
Zoom in on the front view as needed.
5Use AMADDCON to make the top and right edges of the sketch collinear with
the upper-right corner of the film compartment.
Context Menu In the graphics area, right-click and choose 2D
Constraints ➤ Collinear.
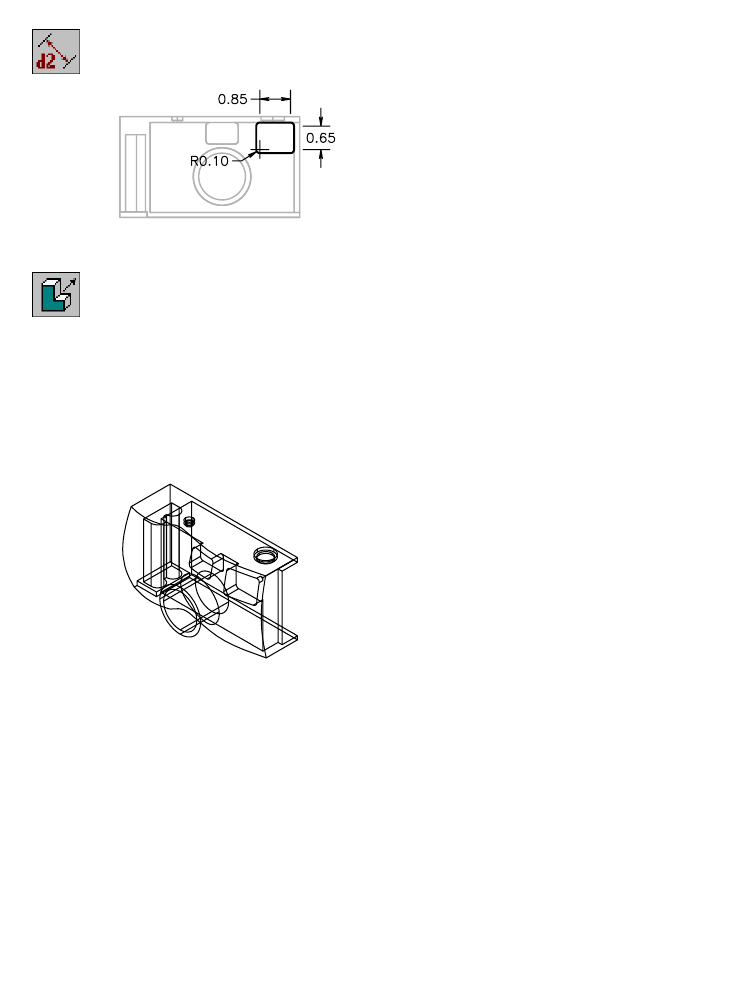
608 |Chapter 20 Combining Parts and Surfaces
6Add the following dimensions.
Context Menu In the graphics area, right-click and choose Dimensioning
➤ New Dimension.
7Extrude the sketch to cut it through the camera body.
Context Menu In the graphics area, right-click and choose Sketched &
Work Features ➤ Extrude.
In the Extrusion dialog box, specify:
Operation: Cut
Termination: Through
Flip: Point the direction arrow into the camera body
Choose OK.
Save your file.
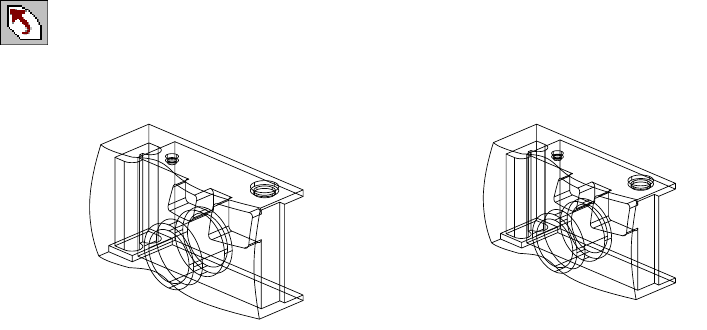
Modifying Designs |609
Modifying Designs
As with all projects, designs change during the development process. For
example, you might want to scale the camera to a smaller size and change
the dimension that positions the camera face on the solid model. Because
you want both the surface and the camera body at the same scale, you first
resize them.
In this exercise, you specify a percentage of the camera’s current size. Then,
to position the surface on the camera proportionately, you modify the para-
metric dimension.
To scale the camera body and face
1Zoom in to magnify the isometric view.
2Use SCALE to reduce the scale of the part, responding to the prompts.
Desktop Menu Modify ➤ Scale
Select objects: Select the camera and press ENTER
Specify base point: Select the rear corner of the camera
Specify scale factor or [Reference] <1.0000>: Enter .9 and press ENTER
The camera and surface are resized to 90 percent of their original size. The
surface and other features retain their original geometric relationships.
full-scale camera body scaled camera body
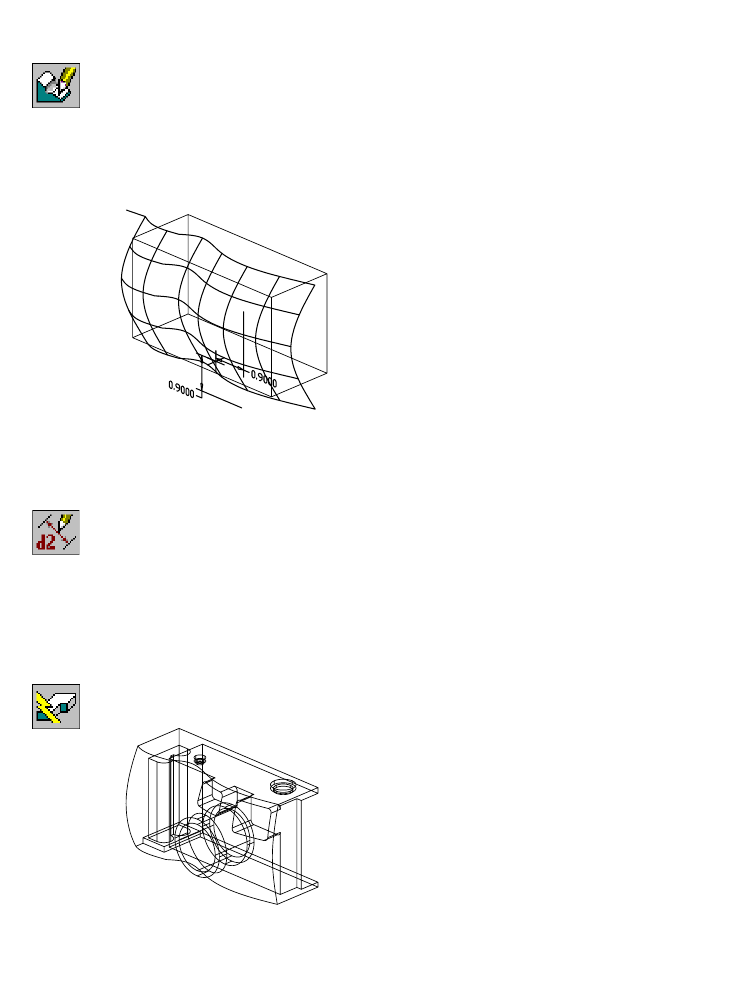
610 |Chapter 20 Combining Parts and Surfaces
To reposition the camera face
1Use AMEDITFEAT to edit the surfcut feature, responding to the prompts.
Context Menu In the graphics area, right-click and choose Edit Features
➤ Edit.
Enter an option [Sketch/surfCut/Toolbody/select Feature] <select Feature>:
Enter c
Select surfcut feature: Select a curved edge of the surface
The original sketch, work plane, and work point are displayed.
2Use AMMODDIM to modify the dimension that positions the surface to the
work point, responding to the prompts.
Context Menu In the graphics area, right-click and choose Dimensioning
➤ Edit Dimension.
Select dimension to change: Select the horizontal dimension
New value for dimension <0.9>: Enter .75
Select dimension to change: Press ENTER
3Use AMUPDATE to update the part.
Context Menu In the graphics area, right-click and choose Update Part.
The surface is repositioned on the camera with the new value.
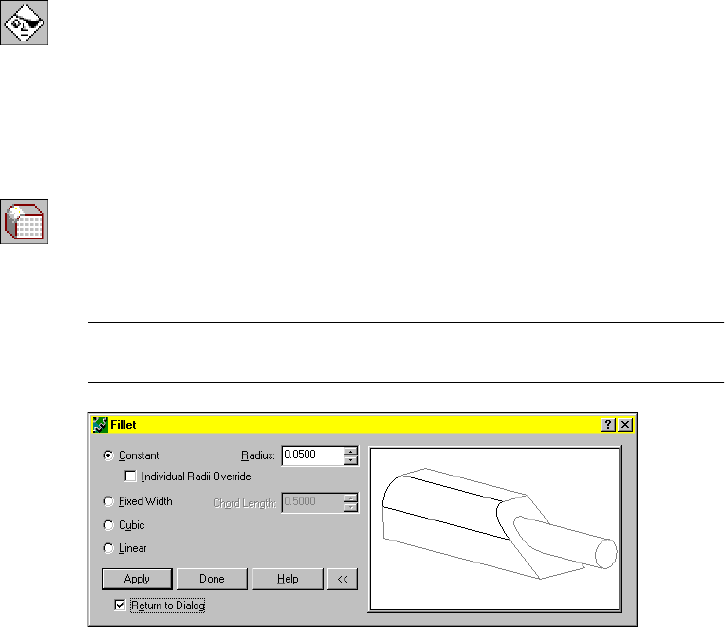
Finishing Touches on Models |611
Finishing Touches on Models
The finishing touch for the camera body is to fillet the corners where the dif-
ferent sides meet.
To finish the camera body
1Use AMVISIBLE to hide the work plane from your display.
Desktop Menu Part ➤ Part Visibility
2In the Desktop Visibility dialog box, select the Part tab and choose Work
Planes and Hide. Choose OK.
3Use ISOLINES to increase the number of isolines. Change the value to 8 to
show more detail on the model. The display will change when you edit your
model.
4Use AMFILLET to fillet the camera body.
Context Menu In the graphics area, right-click and choose Placed
Features ➤ Fillet.
5In the Fillet dialog box, specify Constant using a fillet radius of .05. Select
Return to Dialog and choose Apply.
NOTE To speed up filleting a complex model, select only a few lines at a time.
Repeat the command with more lines until the filleting is finished.
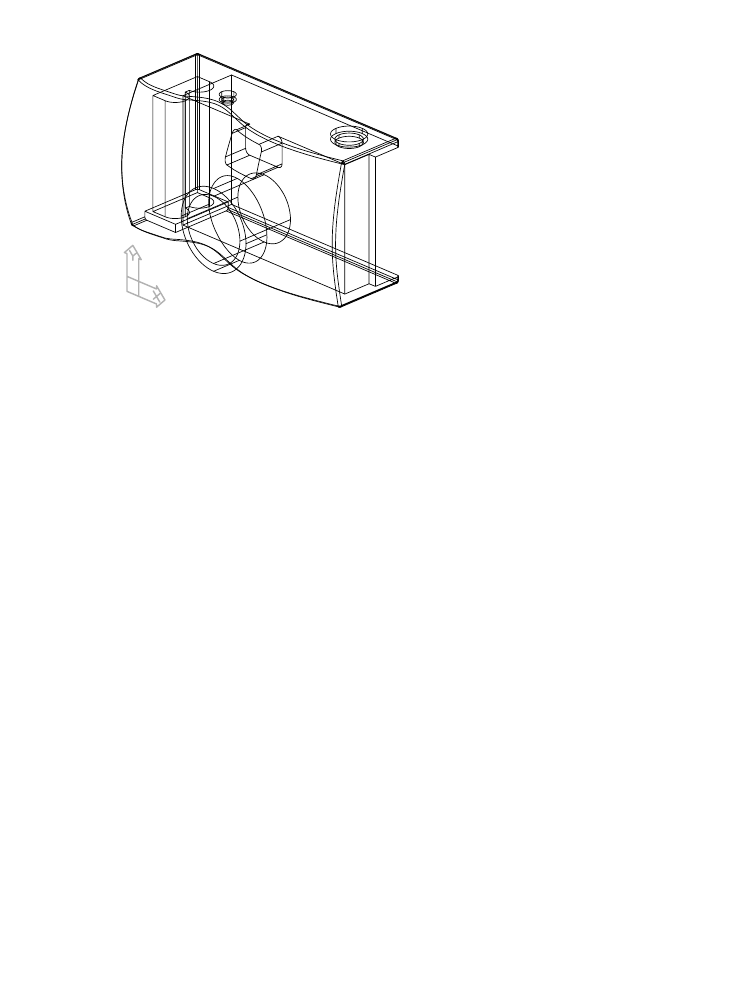
612 |Chapter 20 Combining Parts and Surfaces
6Fillet the outside corners and edges of the camera body. When you are
finished, choose Done.
The camera body is finished.

613
In This Chapter 21
Surfacing Wireframe
Models
This Autodesk® Mechanical Desktop® tutorial introduces
wireframe surface modeling, one of the key uses for
surface modeling. You learn how to develop a strategy for
a surfacing project, and how to achieve the design intent.
The tutorial provides instructions for surfacing a
wireframe model of a pump housing. The wireframe is
the outline of a pump housing, and the only data you
have to work with.
You should already know how to create surfaces before
you begin this tutorial. If you do not, complete the
exercises in chapter 19, “Creating and Editing Surfaces.”
■Studying the design intent and
developing a strategy
■Identifying logical surface areas
■Identifying base surface areas
■Using creative techniques to
surface a wireframe model
■Verifying surfacing results

614 |Chapter 21 Surfacing Wireframe Models
Key Terms
Te r m Definition
base surface A basic underlying surface that carries a shape across a larger area. Can be trimmed
to precise shapes as needed, but the base surface remains intact and may be
displayed.
logical surface area An area that can be described by a single surface.
projected wire A 2D line that represents an opening on a surface and trims a hole in the surface.
Can also be a 3D polyline that represents the extents of the opening in the
wireframe.
watertight Surfaces conform to the wireframe model; gaps between surfaces are within
allowable tolerances.
Basic Concepts of Surfacing Wireframe Models |615
Basic Concepts of Surfacing Wireframe
Models
A completely surfaced model is a single electronic master suitable for engi-
neering and manufacturing activities, such as:
■Generating accurate sections for engineering and packaging studies.
■Providing input for finite element modeling and analysis.
■Producing shaded renderings for marketing.
■Providing input for rapid prototyping equipment.
■Supplying rotated surfaces for tool, mold, and die design.
■Supplying surfaces for numerical control machining of models and tools.
In this tutorial, building on your knowledge of surface types, you examine
the wireframe to be surfaced and determine which surface will produce the
best results.
Discerning Design Intent
Because wireframe models have complex shapes, they are usually made up of
many surfaces joined together. For a model like the pump housing, you will
use many different individual surfaces to completely define it. When you sur-
face a wireframe model, you complete its design.
Before you begin, analyze the design and then plan how you can achieve
your design goals. This process of planning before you begin modeling can
help you avoid errors. For example, you usually follow these steps for wire-
frame modeling:
■Study the data to understand the design intent.
■Identify the location and extent of each surface area.
■Identify the base surface area(s) that can be trimmed later to adjacent sur-
faces and wires.
■Determine where you can use trimmed planar (flat) surfaces.
■Decide on the best surface types and approach for combining them.
■Create additional geometry as needed to resolve problem areas.
■Verify your surfacing results.
■Add the finishing touches to a watertight model.
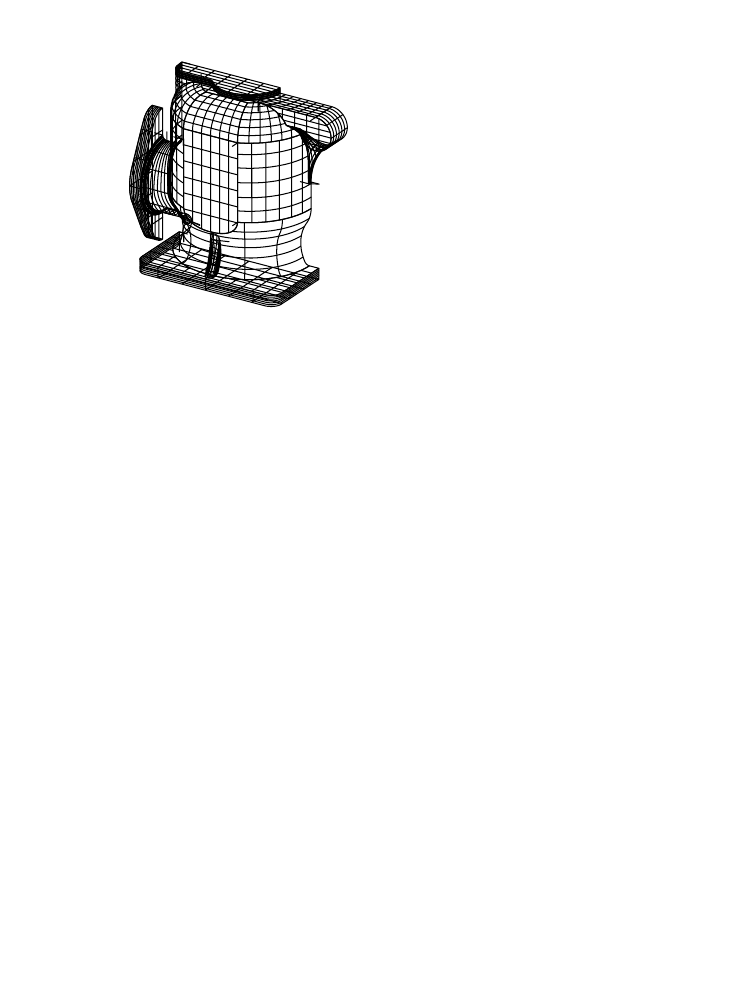
616 |Chapter 21 Surfacing Wireframe Models
Review the wireframe in detail, to determine where you will have design
challenges.
Consider the following:
■The complexity of the surfaces you need to create. For example, what
curvature is required of surfaces? Is it sufficient to have surfaces with no
curvature (such as ruled surfaces), or do you need surfaces with multiple
curvatures?
■How you can simplify shapes. Surfaces created from polylines or splines
with a large number of points are complex and greatly increase computa-
tion time.
■Which surfaces are continuous. Continuous surfaces are smoother and
take less time to compute. You can set preferences so that lines with breaks
or changes in curvature aren’t converted to splines.
■Are default preference settings appropriate for the model. Allow as much
tolerance as is practical to avoid converting polylines to splines. Splines
take longer to compute than polylines—a factor that becomes more
important with complex models.
Identifying Logical Surface Areas
Once you determine the intent of the pump design, you get an idea of the
requirements for creating its shape and for constructing it. Identify the loca-
tion and extent of each logical surface area—an area that can be described by
a single surface.
A surface must be smooth and free of sharp breaks. Often, an individual sur-
face area is clearly-defined because it is surrounded by sharp break lines on
all sides. The pump top is a surface because it is surrounded by sharp edges
on three sides. The fourth edge is the end of the part.
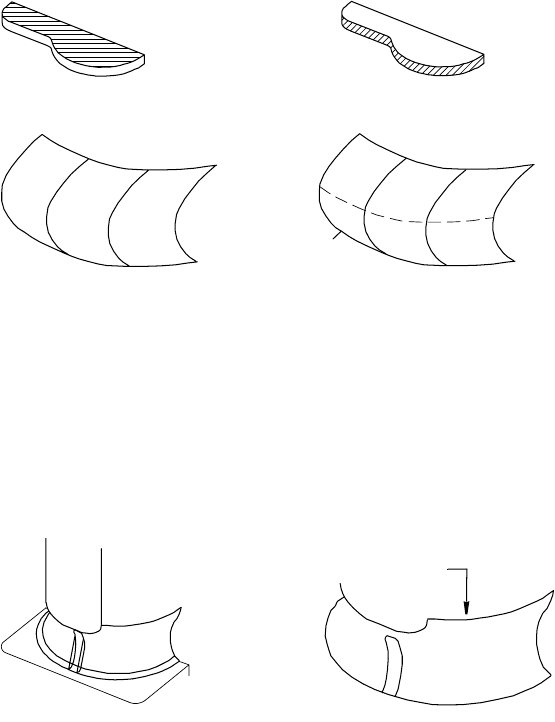
Basic Concepts of Surfacing Wireframe Models |617
Likewise, the side of the top part of the pump constitutes a single surface.
Each of these two surface areas requires a surface because no single surface
could cover both.
Surfaces can contain multiple wires.
All lines inside the four boundaries share the same smooth curvature as the
boundary edges. There are no abrupt curvature changes, so the goal is to sur-
face the entire area with a single surface, using the additional wires to con-
strain the surface shape.
Identifying Base Surface Areas
The bottom of the pump housing appears to be a smoothly-curved area.
However, at the top edge, there is an almost 90-degree bend. Also, a flanged
area is formed by a slot opening in the otherwise smooth area.
The primary guideline in wireframe surfacing is to create an acceptable sur-
face first. Later, add a hole by trimming the surface with the shape of the
hole.
wireframe surface
pump housing close-up
top edge
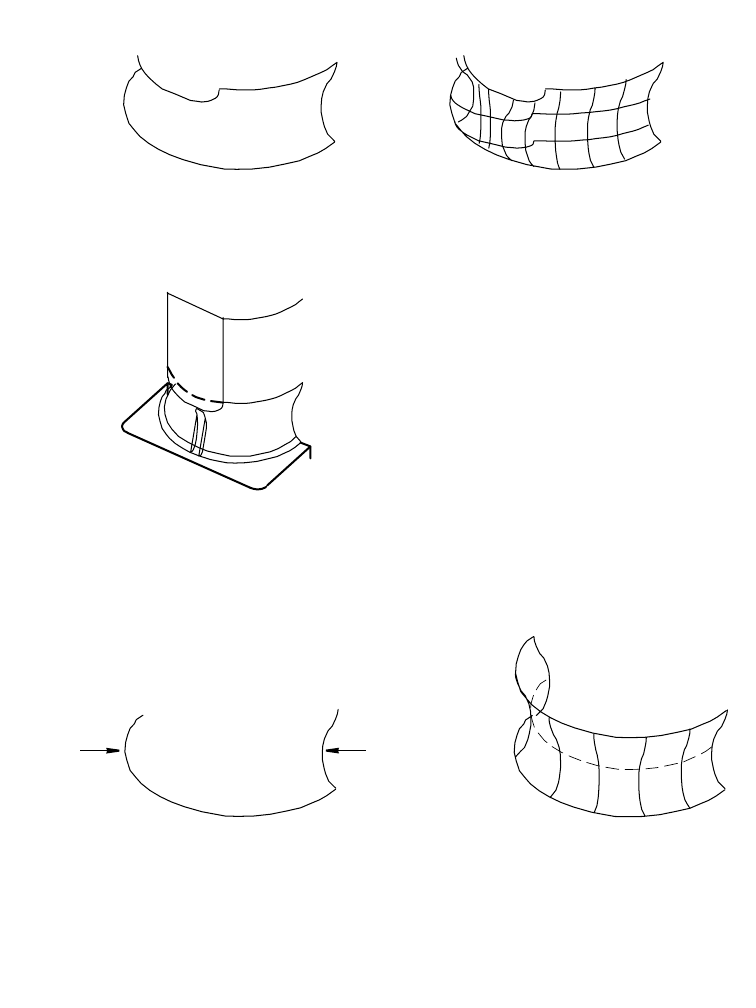
618 |Chapter 21 Surfacing Wireframe Models
In general, use only smooth wires to create surfaces. When you use a wire
with sharp corners, those sharp areas do not produce an acceptable surface.
You need to find some other way to surface the area. Consider the design
intent again. A second look at the area reveals a flat surface on the front of
the pump housing that intersects a smoothly curved surface at the bottom.
How do you know that the front surface is flat? One way to check is to look
at the top line in another view. The approach to surfacing that area is to cre-
ate the smooth bottom surface and the flat surface. Then intersect one with
the other and create a wire at their intersection. If the new wire is the same
as the existing wire, you confirm your observation and surfacing approach.
Next, consider the bottom surface. You already know that you cannot use the
top wire because it has an abrupt corner. A good approach is to use only the
bottom wire as a rail, and the far edge as a cross section.
wireframe unacceptable surface
rail section
surface

Basic Concepts of Surfacing Wireframe Models |619
A surface like this one is a basic surface that carries a shape across larger areas.
This surface is referred to as a base surface. Even after many areas of the sur-
face are trimmed away, the underlying base surface remains intact and may
be displayed at any time with the Surface Display dialog box.
Identifying base surfaces is an important part of wireframe surfacing.
Another approach is to categorize surfaces by type and eliminate those you
won’t need.
To get shapes you can use for creating surfaces, you may need to break poly-
lines into segments. Then combine selected segments to form boundaries for
individual surfaces.
Using Trimmed Planar Surfaces
Use a trimmed planar surface for an area that you know is a flat plane. By
glancing at the pump model, you can see areas that appear to be flat and can
be surfaced with trimmed flat planes.
base surface trimmed surface
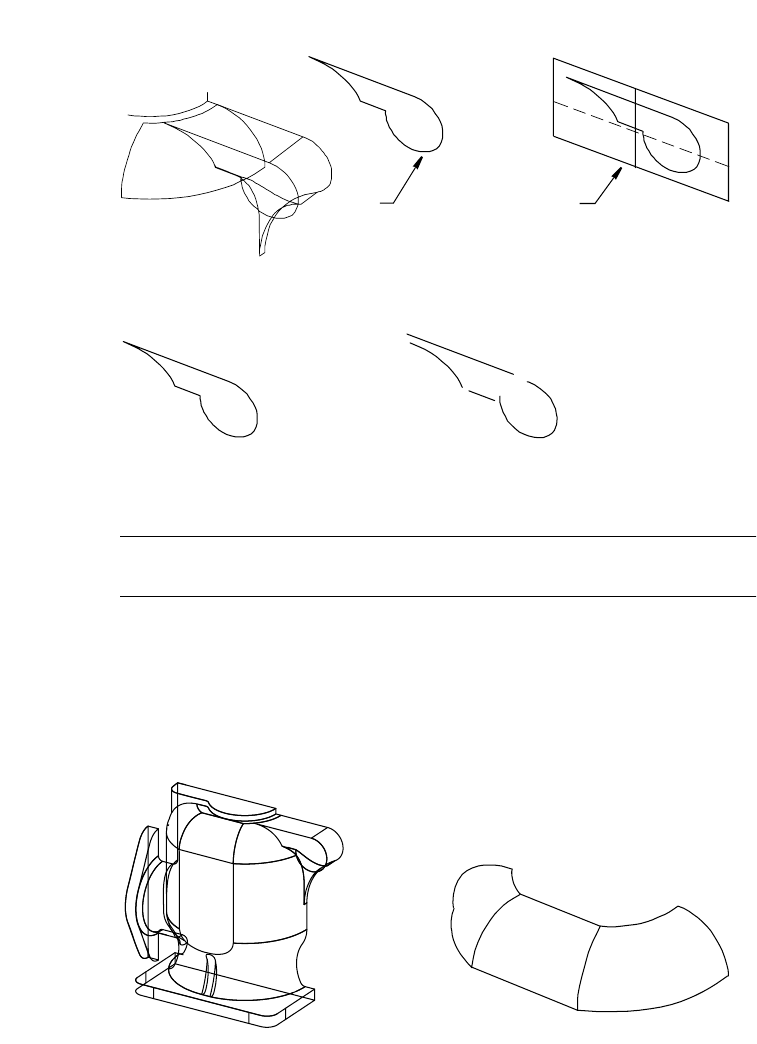
620 |Chapter 21 Surfacing Wireframe Models
If you are in doubt about whether a given area is flat, try to make a planar
surface. A planar surface requires a single closed wire as its boundary.
If the wire is not a closed single loop, you can see the breaks in the wire when
you select it.
You can join line segments into a closed wire that forms the boundary of a
planar surface. The surface is trimmed to the boundary shape.
NOTE When joining line segments, set tolerances to compensate for imper-
fect wireframe data that would otherwise cause the surface to fail.
Determine if an area is meant to be flat. If it is flat within the tolerance, create
a flat surface and adjust the edges.
Choosing a Surfacing Method
Which type of surface is best suited for a given area may not be clear.
wire planar surface
closed wire multi
p
le wires
top area
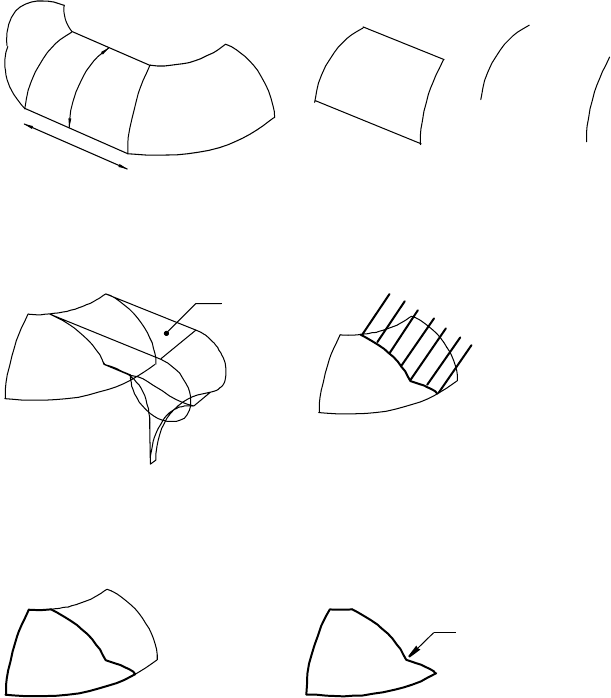
Basic Concepts of Surfacing Wireframe Models |621
In this example, the top area of the pump is not suitable for a single surface
because there are abrupt changes in its smoothness. The center area is curved
in one direction but straight in the other. When you have a surface area that
can be defined by a straight line between two curves, you can create a ruled
surface between the two curves.
Look beyond the obvious visible surface to find a workable solution. Because
the inlet at the right top area of the pump extends from the surface, consider
making the base surface first and then trimming it to the correct shape.
With the inlet shape removed, you can see possibilities for surfaces. The
shape created by the four wires contains a sharp corner. Avoid creating a
surface from these four wires because they might produce a surface that is
not smooth.
possible surface wire
inlet
abrupt corner

622 |Chapter 21 Surfacing Wireframe Models
You can see that each end of the area beneath the inlet is described by lines
with curvatures in both directions. This offers you a choice of surfacing
methods, such as a swept surface or a lofted UV surface.
In most cases, there is more than one way to surface an area. Try both methods
here, compare the results, and choose the one that produces the best result.
■Swept surfaces give you more control over the shape of the mid portion of
the surface.
■Lofted UV surfaces have fewer controls but risk is minimized.
Once you create a base surface to cover an area, trim the surface back to the
wire with the abrupt edge.
Use trimmed surfaces to create smooth underlying base surfaces that remain
a permanent part of a surface definition. Trim to constrain the edges and you
achieve smoothness in a base surface that contains no abrupt corners in its
boundary wires, yet creates a logical surface bounded by different edges. The
logical surface can contain any number of sharp corners, which have no
effect on the smoothness of the base surface.
The opposite side of the pump top area may also be surfaced several ways.
Again, the surface is really a larger surface cut short by an intersecting area of
the pump. This time, the wire that terminates the surface has no abrupt cor-
ners, so it could be used as one of four sides of a swept or lofted UV surface.
swept surface lofted UV surface
base surface trimmed surface
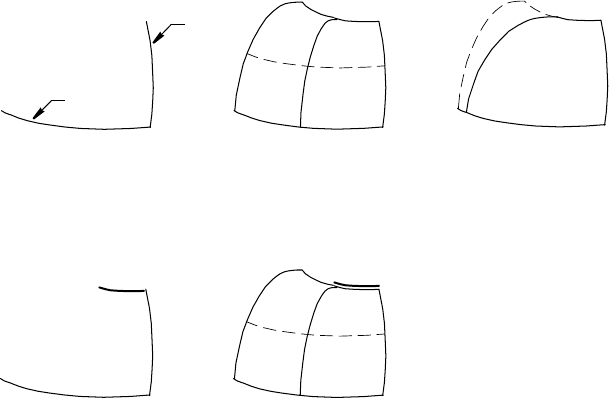
Basic Concepts of Surfacing Wireframe Models |623
The easiest method is to use a single rail and a single section to surface the
entire area, then trim the base surface to the intersecting part of the pump.
This choice might not always be correct. As you gain experience, you can pre-
dict which approach yields the most accurate results. In the previous exam-
ple, verify that the surface created without the top line matches the top line
within a reasonable tolerance.
Always check the fit between a newly created surface and existing wires to be
sure that you are not deviating too far from the wireframe data. If the new
surface is not within tolerance to the existing top line, the surface does not
accurately reflect the wireframe. You can re-create it using all four wire edges.
Verifying Surfacing Results
As you gain experience, you will see the importance of learned skill and judg-
ment. Your challenge is to produce smooth surfaces that fit the wireframe
closely; the surfaces should be as simple as possible.
You can judge the smoothness of surfaces several ways:
■Analyze a surface and view its color-shaded display to detect small devia-
tions in surface smoothness.
■Create and review flow lines in different rotated views.
■Cut sections through a complete set of surfaces, and then examine the
ends to see how closely they match at the edges.
■On the surface create augmented flow lines with long vectors and examine
the smoothness of the vector ends. The ends of the vectors exaggerate the
smoothness of the surface; areas where it is not smooth become apparent.
rail
section
surface trimmed surface
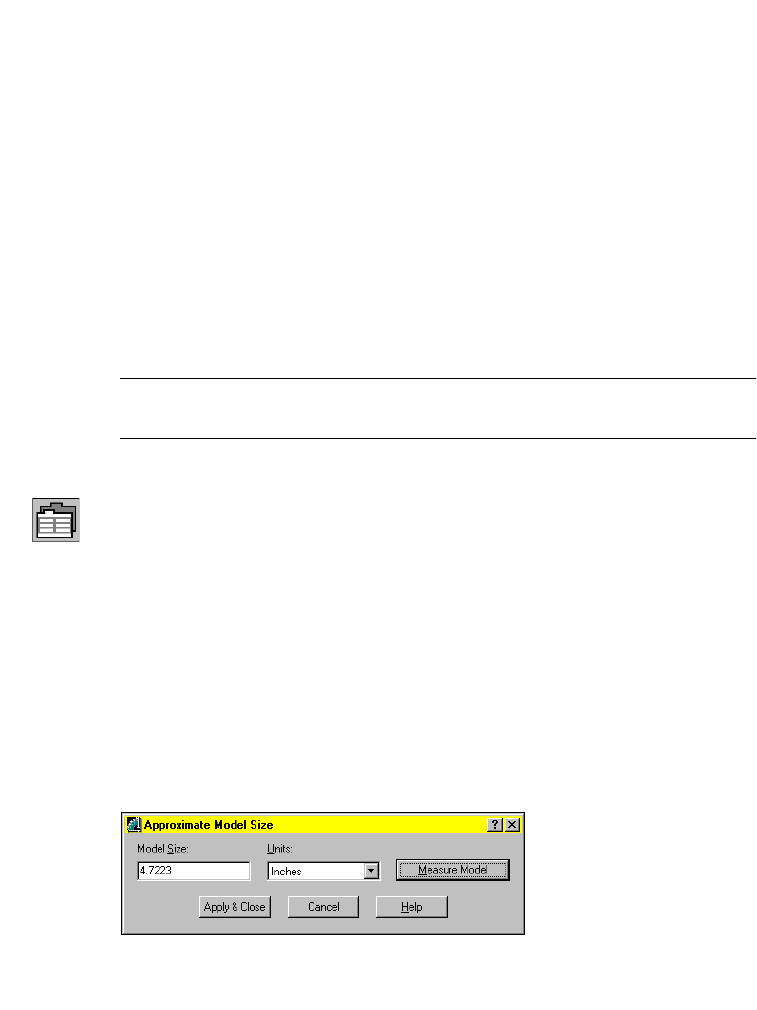
624 |Chapter 21 Surfacing Wireframe Models
Surfacing Wireframe Models
Now that you have analyzed approaches to surfacing the pump housing and
practiced surfacing techniques, you are ready to surface the pump.
A surface modeling project may begin with a wireframe, whether it is a DXF
or an IGES file from a client, or a 2D or 3D CAD design you created yourself.
In order to describe the 3D object, most designers begin with a 2D drawing.
In this lesson, you create surfaces for an actual part, a wireframe model of a
hydraulic pump. The surfaced model provides the manufacturer with infor-
mation to create prototypes or to NC-machine patterns, molds, and tooling.
To set up a drawing file
1Open the file t_pump.dwg in the desktop\tutorial folder.
NOTE Back up the tutorial drawing files so you still have the original files if you
make a mistake. See “Backing up Tutorial Drawing Files” on page 40.
2Use AMOPTIONS to set the surfacing options.
Desktop Menu Surface ➤ Surface Options
In the Mechanical Options dialog box, select the Surfaces tab. In Surface
Properties specify:
U Display Wires: Enter 5
V Display Wires: Enter 5
In Surface/Spline Options, specify:
Polyline Fit Length: Enter 1
Polyline Fit Angle: Enter 150
Choose Model Size.
3In the Approximate Model Size dialog box, choose Measure Model.
The Model Size is 4.7223. Choose Apply & Close.
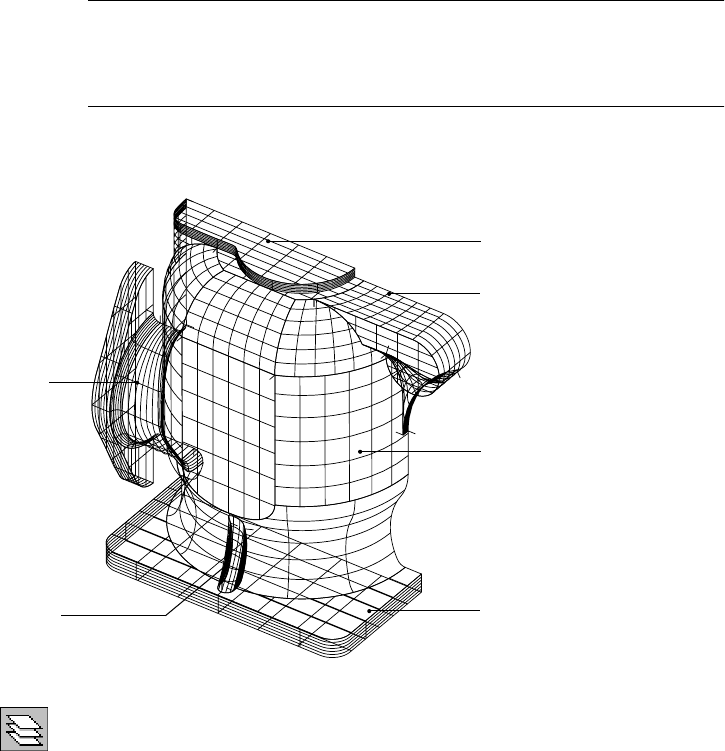
Surfacing Wireframe Models |625
Notice that the values have changed in the Mechanical Options dialog box.
These settings affect the visual representation of the surfaces and the size of
the surface normal. Choose OK to exit.
NOTE If you shade the surfaces you create to better view them, adjust the
AutoCAD® setting that controls back faces. Go to Assist ➤ Options and select the
System tab. Choose Properties and clear the check box beside Discard back
faces. Choose Apply & Close, then OK.
The labeled parts of the pump are on separate layers. As you work on a part,
you make its layer current and freeze the other layers to make them inactive.
4Use LAYER to set up your current layer.
Desktop Menu Assist ➤ Format ➤ Layer
5In the Layer Properties Manager dialog box, highlight layer 10 and click Make
Current.
6Select layer 20, then press SHIFT and select the last layer. In the second col-
umn, click the sun icon under Freeze to freeze all selected layers. Then freeze
layer 0.
All layers except Layer 10 should be frozen (snowflake icon). Only Layer 10 is
thawed (sun icon). Choose OK.
outlet
body
inlet
top
base
support
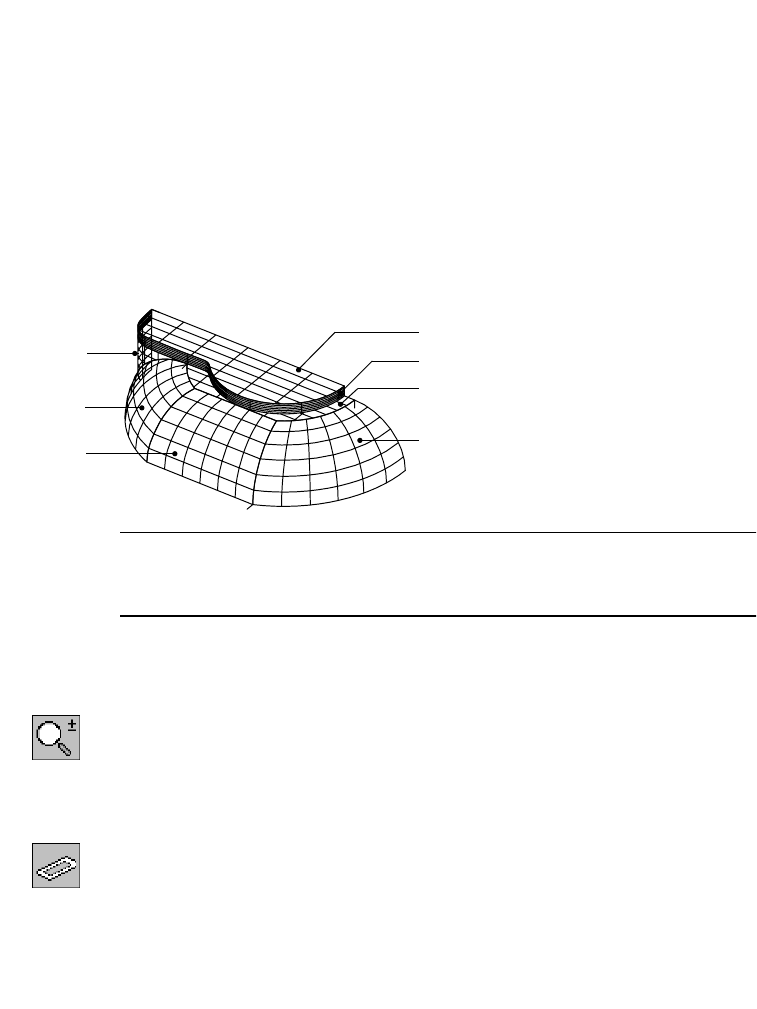
626 |Chapter 21 Surfacing Wireframe Models
Creating Trimmed Planar Surfaces
Begin by surfacing the top section of the pump model, creating the individ-
ual surfaces. Top A is a planar surface because it is flat with sharp edges. Tops
B and C are swept surfaces, bounded by curved wires. Top B uses two curves
and two rails, and top C uses one curve and one rail. You trim the top C sur-
face where it extends beyond the wireframe boundary.
As you gain experience using the menu selections that correspond to com-
mands, you may want to use shortcuts. For a list of shortcuts that automate
the selection of menu options and commands, see “Accelerator Keys” in the
online Command Reference.
NOTE For a trimmed planar surface, the surface must be a single polyline that
lies in a single plane. If the wireframe is composed of multiple polylines, join
them into a single polyline before you create the surface.
To create a trimmed planar surface
1Use ZOOM to enlarge the view, responding to the prompt.
Context Menu In the graphics area, right-click and choose Zoom.
[All/Center/Dynamic/Extents/Previous/Scale/Window] <real time>:
Press ENTER
2Use AMPLANE to create the top A surface, responding to the prompt.
Desktop Menu Surface ➤ Create Surface ➤ Planar Trim
If you use the command line method, enter w at the prompt before continu-
ing to the following prompt.
top G
top C
top D
top A
top E
top F
top B
top A
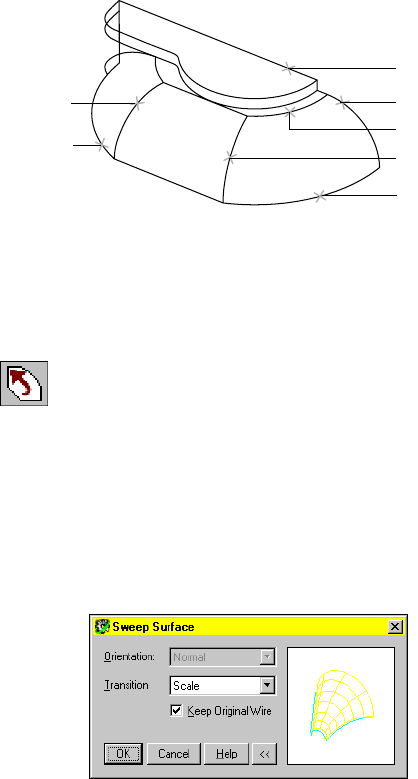
Creating Trimmed Planar Surfaces |627
Select wires: Select wire (1) and press ENTER
A planar surface, trimmed to the boundary of wire (1), is created on the top
of the model.
To sweep a surface on two wires and two rails
1Use AMSWEEPSF to create the top B surface, responding to the prompts.
Desktop Menu Surface ➤ Create Surface ➤ Sweep
Select cross sections: Select wire (2)
Select cross sections: Select wire (3) and press ENTER
Select rails: Select wire (4)
Select rails: Select wire (5)
In the Sweep Surface dialog box, specify:
Transition: Scale
Keep Original Wire: Check the check box
Choose OK.
1
2
4
3
5
6
7
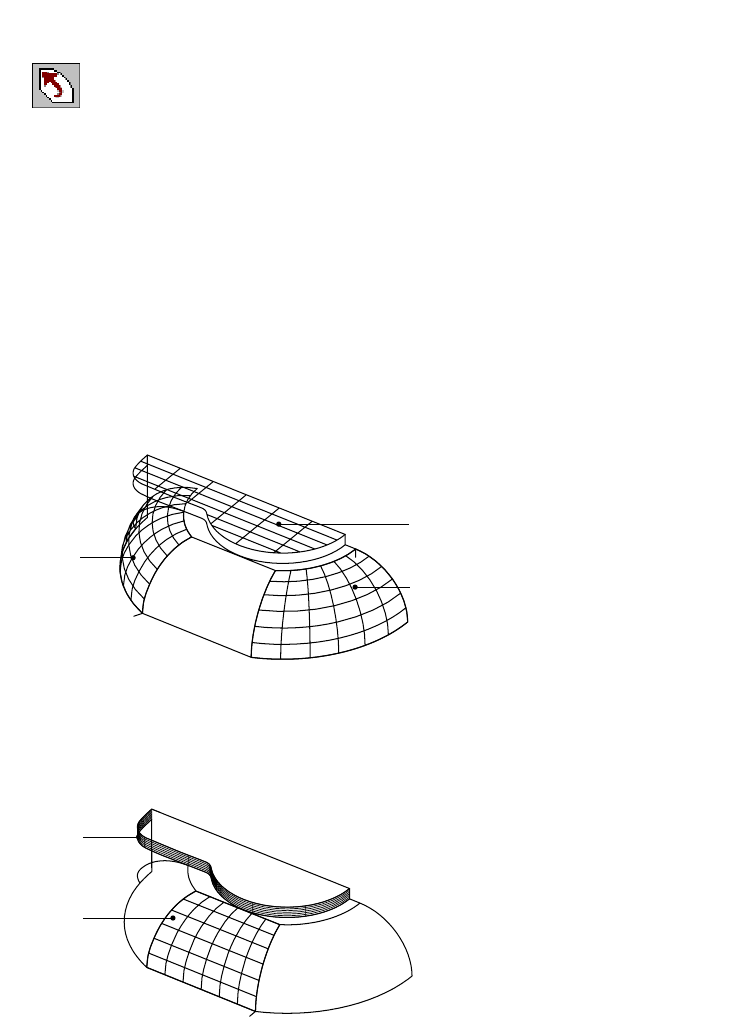
628 |Chapter 21 Surfacing Wireframe Models
To sweep a surface on one wire and one rail
1Use AMSWEEPSF to create the top C surface, responding to the prompts.
Desktop Menu Surface ➤ Create Surface ➤ Sweep
Select cross sections: Select wire (6) and press ENTER
Select rails: Select wire (7) and press ENTER
In the Sweep Surface dialog box, in Orientation select Normal. Choose OK.
The surface extends beyond the far side of the top. You will trim it later.
2Move surfaces A, B, and C to the TOP layer, responding to the prompts.
Command CHPROP
Select objects: Select surfaces (A), (B), and (C) and press ENTER
Enter property to change [Color/LAyer/LType/ltScale/LWeight/Thickness]:
Enter La
Enter new layer name <10>: Enter top
Enter property to change [Color/LAyer/LType/ltScale/LWeight/Thickness]:
Press ENTER
The surfaces are now on the TOP layer. Because the TOP layer is frozen, you
cannot see the surfaces, although the wireframe is still visible.
Save the file.
The D and E surfaces are ruled surfaces.
C
A
B
E
D
Creating Trimmed Planar Surfaces |629
To create a ruled surface between wires
1Use AMRULE to create the top D surface, responding to the prompts.
Desktop Menu Surface ➤ Create Surface ➤ Rule
Select first wire: Select wire (1)
Select second wire: Select wire (2)
2Use BREAK to separate line segment (4) from polyline (3), responding to the
prompts.
Desktop Menu Modify ➤ Break
Select object: Enter end
of: Select polyline (3)
Specify second break point or [First point]: Enter @
Unless you enter @, the adjoining portion of the polyline is deleted. The @ sym-
bol breaks the polyline at the specified location and retains both segments.
3Use AMRULE to create the top E surface, responding to the prompts.
Desktop Menu Surface ➤ Create Surface ➤ Rule
Select first wire: Select wire (4)
Select second wire: Select wire (5)
4Move the top D and top E surfaces to the TOP layer, responding to the
prompts.
Command CHPROP
Select objects: Select surface (D)
Select objects: Select surface (E) and press ENTER
Enter property to change [Color/LAyer/LType/ltScale/LWeight/Thickness]:
Enter La
Enter new layer name <10>: Enter top
Enter property to change [Color/LAyer/LType/ltScale/LWeight/Thickness]:
Press ENTER
Save the file.
3
4
5
2
1
630 |Chapter 21 Surfacing Wireframe Models
Next, break and join lines that are needed to create the top F planar surface.
To create a planar surface with a joined polyline boundary
1Use BREAK to break polyline (1) where it intersects polyline (2), responding
to the prompts.
Desktop Menu Modify ➤ Break
Select object: Select polyline (1)
Specify second break point or [First point]: Enter f
Specify first break point: Enter int
of: Select polyline (2) at the intersection
Specify second break point: Enter @
To check that the polyline has broken correctly, select it. Grip points should
appear only for the line segment you select. Press ESC to exit Grip mode.
The break creates a line segment you use as part of the boundary for the next
surface.
2Use AMJOIN3D to join the polylines that form the boundary of top F.
Desktop Menu Surface ➤ Edit Wireframe ➤ Join
trimmed planar surface
1
2
Creating Trimmed Planar Surfaces |631
3In the Join3D dialog box, specify:
Mode: Automatic
Output: Polyline
Gap Tolerance: Enter .004
Choose OK.
4Respond to the prompts as follows:
Select start wire or: Select polyline (1)
Select wires to join: Select polylines (2) through (5)
Select wires to join: Press ENTER
Reverse direction? [Yes/No] <No>:
Press ENTER to accept the direction of the new wire
To confirm that the segments are joined, select the polyline and check the
grip points.
1
24
3
5

632 |Chapter 21 Surfacing Wireframe Models
5Use AMPLANE to create the top F surface from the joined polyline, responding
to the prompt.
Desktop Menu Surface ➤ Create Surface ➤ Planar Trim
If you use the command line method, enter w at the prompt before continu-
ing to the following prompt.
Select wires: Select the joined polyline and press ENTER
You have created the trimmed planar surface. Save the file.
For the top G surface, extrude a polyline along a straight line, and then trim
the surface to the desired shape.
To create a surface with an extruded polyline
1Change to a front left isometric view.
Desktop Menu View ➤ 3D Views ➤ Front Left Isometric
2Us AMEXTRUDESF to extrude the polyline (1) down the wire (2), responding
to the prompts.
Desktop Menu Surface ➤ Create Surface ➤ Extrude
Select wires to extrude: Select polyline (1) and press ENTER
Define direction and length.
Specify start point or [Viewdir/Wire/X/Y/Z]: Enter w
Select wire to define direction: Select polyline (2)
Enter an option [Accept/Flip] <Accept>:
Enter f to flip the direction arrow down, or press ENTER
Enter taper angle <0>: Press ENTER to accept the default
2
1
Creating Trimmed Planar Surfaces |633
Your selection point determines the extrusion direction. Select a point on
polyline (2) close to polyline (1). If you select a point beyond the midpoint of
polyline (2), the direction of the extrusion is reversed.
Your drawing should look like this.
3Move top F and top G to the TOP layer, responding to the prompts.
Command CHPROP
Select objects: Select surface (F)
Select objects: Select surface (G) and press ENTER
Enter property to change [Color/LAyer/LType/ltScale/LWeight/Thickness]:
Enter La
Enter new layer name <10>: Enter top
Enter property to change [Color/LAyer/LType/ltScale/LWeight/Thickness]:
Press ENTER
4Choose Assist ➤ Format ➤ Layer.
Thaw the TOP layer to see all the surfaces you have created.
5Use AMINTERSF to trim top G and top C at their intersection, responding to
the prompts.
Desktop Menu Surface ➤ Edit Surface ➤ Intersect Trim
Select first surface/quilt or wire: Select surface (1)
Select second surface: Select surface (2)
1
2
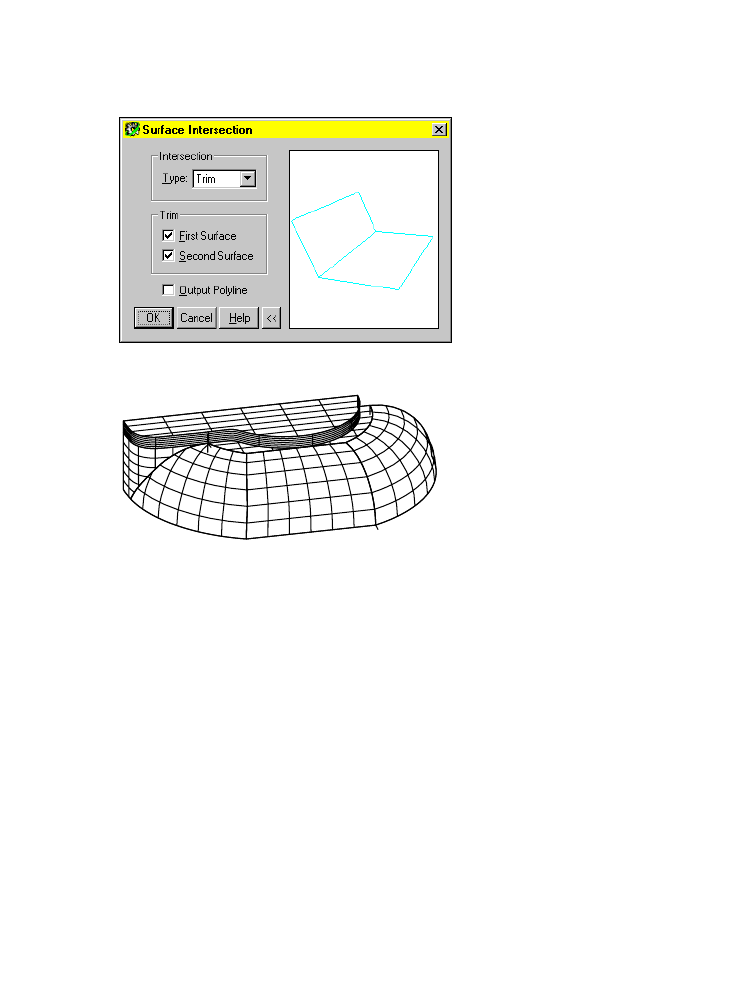
634 |Chapter 21 Surfacing Wireframe Models
6In the Surface Intersection dialog box, specify:
Type: Trim
Trim: Select both First Surface and Second Surface
Clear the checkbox for Output Polyline
Choose OK. The surfaces are trimmed where they intersect.
Save the file.
Joining Surfaces on Complex Shapes
Next, you surface the inlet portion of the pump. Because the inlet has a com-
plex shape, you will need five surfaces to represent its shape.
■Inlets A and C are ruled surfaces because they follow two polylines.
■Inlet B is an extruded surface that is trimmed to its final shape.
■Inlet D is surface blended to surfaces B, C, and E.
■Inlet E is a trimmed planar surface created from joined lines that form its
boundary.
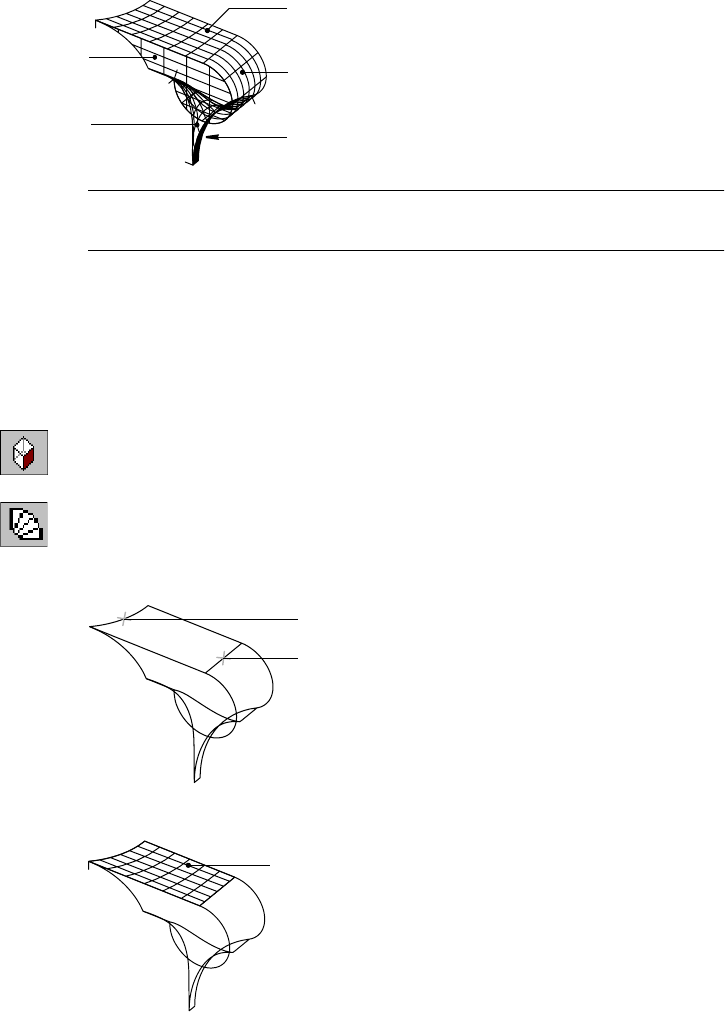
Joining Surfaces on Complex Shapes |635
NOTE Be sure to select surfaces and lines where indicated on the illustrations.
To select precisely, zoom in as needed.
To create the inlet A ruled surface
1From the Desktop menu, choose Assist ➤ Format ➤ Layer.
In the Layer Properties Manager dialog box, thaw layer 20 and make it cur-
rent. Then freeze layer 10 and TOP.
2Change to a right isometric view.
Desktop Menu View ➤ 3D Views ➤ Front Right Isometric
3Use AMRULE to create the inlet A surface, responding to the prompts.
Desktop Menu Surface ➤ Create Surface ➤ Rule
Select first wire: Select wire (1)
Select second wire: Select wire (2)
The ruled surface is created on the top of the inlet.
inlet E
inlet D
inlet A
inlet B
inlet C
2
1
inlet A
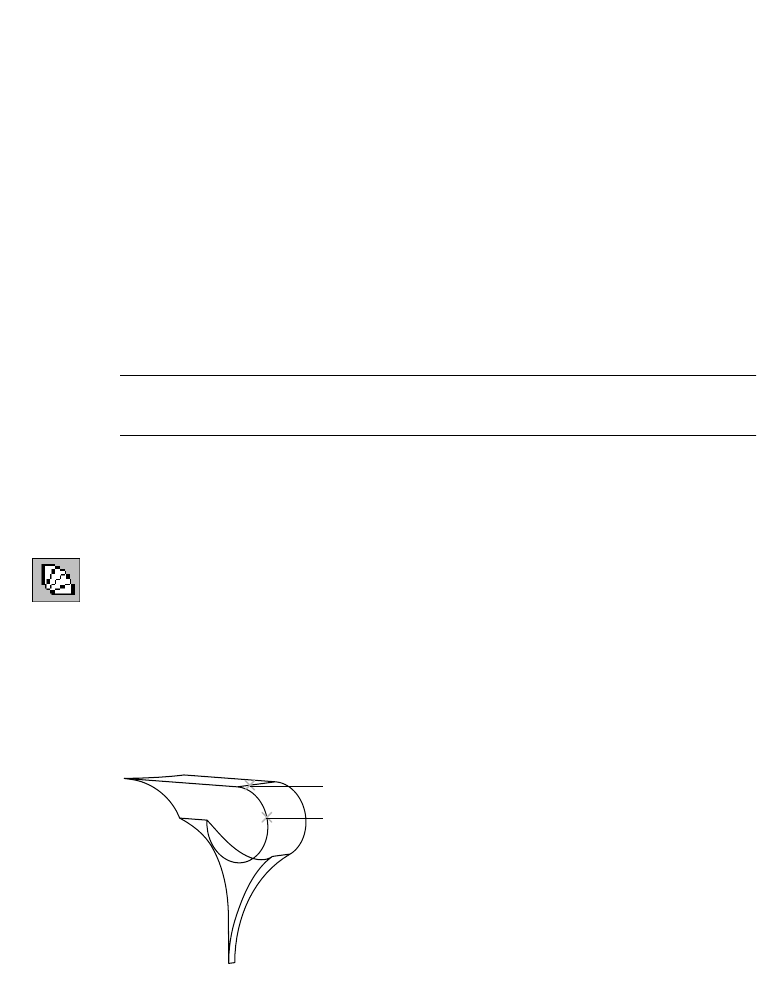
636 |Chapter 21 Surfacing Wireframe Models
4Move the inlet A surface to the INLET layer, responding to the prompts.
Command CHPROP
Select objects: Select inlet A surface and press ENTER
Enter property to change [Color/LAyer/LType/ltScale/LWeight/Thickness]:
Enter La
Enter new layer name <20>: Enter inlet
Enter property to change [Color/LAyer/LType/ltScale/LWeight/Thickness]:
Press ENTER
Inlet B is an extruded partial cylinder, trimmed to its final shape by a closed
wire. The surface is extruded across the inlet wireframe.
The direction of the extrusion is determined by where you select the wire.
You can flip the direction of the extrusion.
Next, you create a ruled surface for inlet B.
NOTE To select the wires, you might need to reorient the view. Use icons on
the Mechanical View toolbar, or options from the View ➤ 3D Views menu.
To create the inlet B extruded surface
1Use AMEXTRUDESF to extrude polyline (1) along line (2), responding to the
prompts.
Desktop Menu Surface ➤ Create Surface ➤ Extrude
Select wires to extrude: Select polyline (1) and press ENTER
Define direction and length.
Specify start point or [Viewdir/Wire/X/Y/Z] Enter w
Select wire to define direction: Select polyline (2) near (1)
Enter an option [Accept/Flip] <Accept>:
Enter f to flip direction arrow into part or press ENTER
Enter taper angle <0>: Press ENTER
2
1
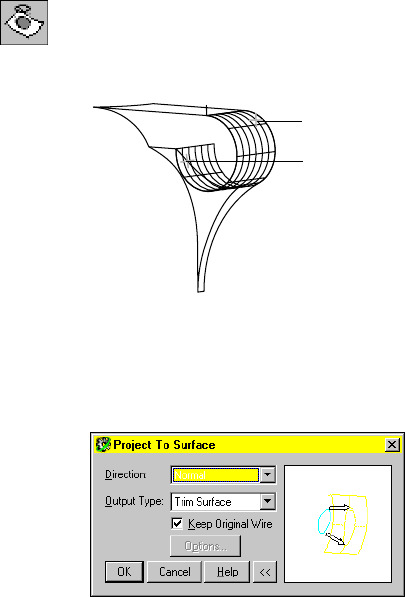
Joining Surfaces on Complex Shapes |637
A close look at the inlet reveals that the extruded surface extends beyond the
wireframe. You trim the inlet B surface to the boundary of surface D.
2Use AMPROJECT to project the edge of inlet D to trim the inlet A surface,
responding to the prompts.
Desktop Menu Surface ➤ Edit Surface ➤ Project Trim
Select wires to project: Select line (1) and press ENTER
Select target surfaces/quilts: Select surface (2) and press ENTER
3In the Project to Surface dialog box, specify:
Direction: Normal
Output type: Trim surface
Keep Original Wire: Check the check box
Choose OK.
You have trimmed inlet B by projection, keeping the wire you used to trim
the inlet surface.
Next you create inlet C, a ruled surface between two wires.
1
2
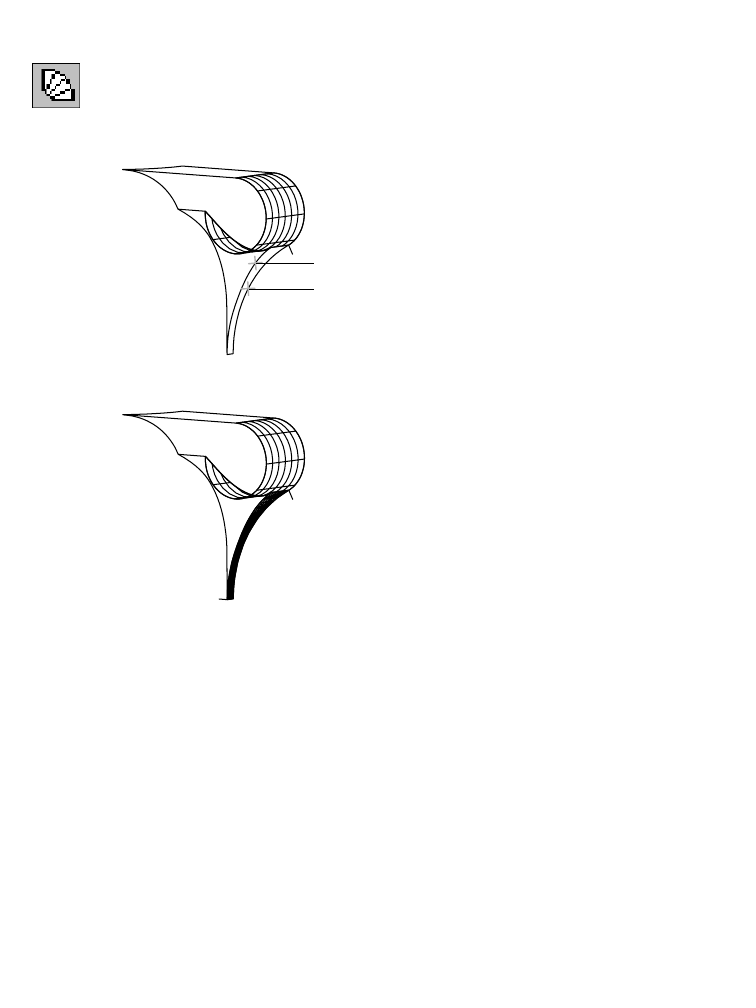
638 |Chapter 21 Surfacing Wireframe Models
To create the inlet C ruled surface
1Use AMRULE to create the inlet C surface, responding to the prompts.
Desktop Menu Surface ➤ Create Surface ➤ Rule
Select first wire: Select wire (1)
Select second wire: Select wire (2)
Your model should look like this.
2Use CHPROP to move inlet B and C surfaces to the INLET layer.
Save the file.
Next, you create inlet D, a surface blended from the edges of inlet B and C
surfaces and the polyline that defines the edge of inlet E. You may need to
rotate the model to show the intersection clearly.
1
2
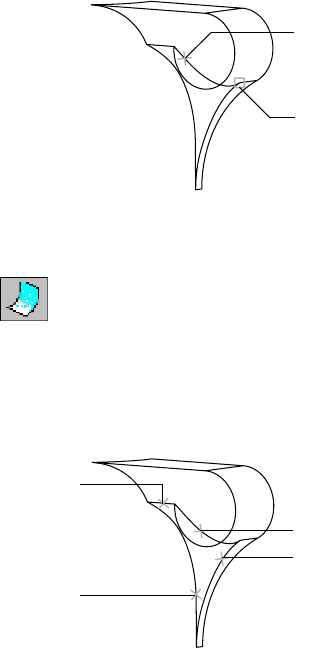
Joining Surfaces on Complex Shapes |639
To create the inlet D blended surface
1Use BREAK to break the polyline into two line segments, responding to the
prompts.
Desktop Menu Modify ➤ Break
Select object: Select polyline (1)
Specify second break point or [First point]: Enter f
Specify first break point: Enter int
of: Select polyline (2)
Specify second break point: Enter @
Check the grip points of the line segments after you break the polyline.
2Use AMBLEND to create the inlet D surface, responding to the prompts.
Desktop Menu Surface ➤ Create Surface ➤ Blend
Select first wire: Select wire (1)
Select second wire: Select wire (2)
Select third wire: Select wire (3)
Select fourth wire: Select wire (4)
Make selections in order, selecting opposite wires in pairs.
1
2
2
4
1
3
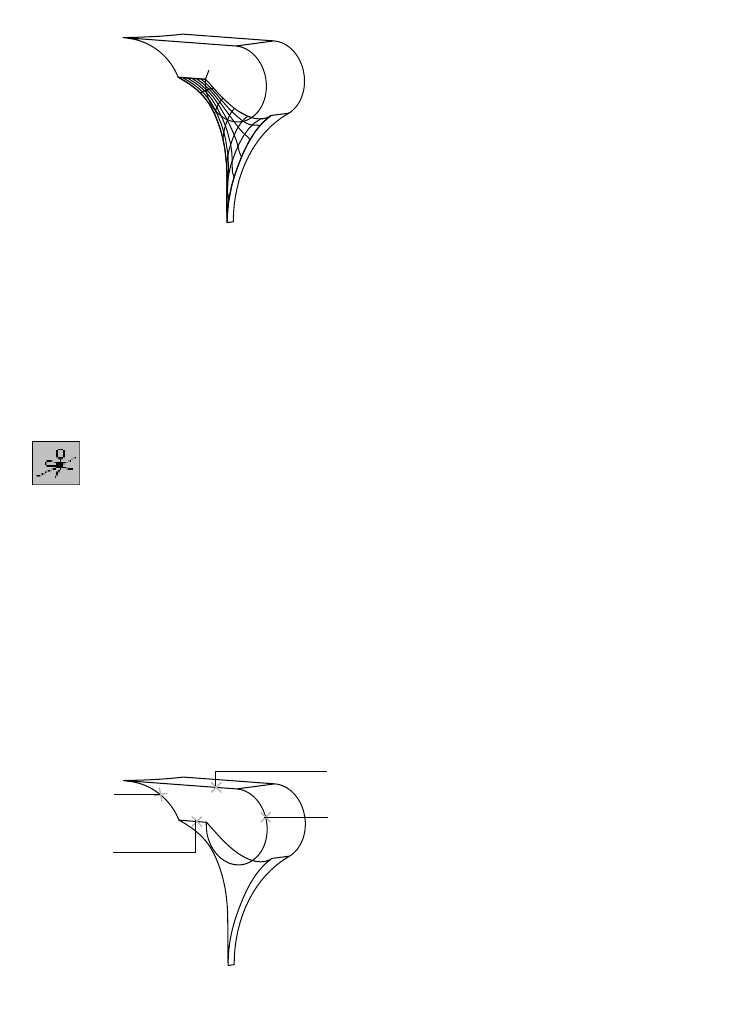
640 |Chapter 21 Surfacing Wireframe Models
The blended surface should look like this.
3Use CHPROP to move the surface to the INLET layer.
Join the lines to form the boundary of inlet E, and then create a trimmed planar
surface from the joined lines. Zoom in as needed to make line selection easier.
To create the inlet E trimmed planar surface
1Use AMJOIN3D to join selected lines to form the boundary for the inlet E sur-
face.
Desktop Menu Surface ➤ Edit Wireframe ➤ Join
In the Join3D dialog box, specify:
Mode: Automatic
Output: Polyline
Gap Tolerance: Enter .01
Choose OK.
2Respond to the prompts as follows:
Select start wire or: Select polyline (1)
Select wires to join: Select wires (2) through (4)
Select wires to join: Press ENTER
Reverse direction? [Yes/No] <No>: Press ENTER
1
2
3
4
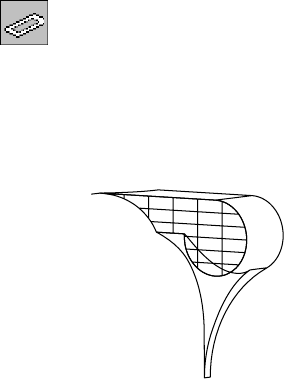
Joining Surfaces on Complex Shapes |641
This procedure joins lines regardless of their original direction and converts
arcs and splines into polylines. You may need to reset the gap tolerance to
correctly join the polylines.
3Use AMPLANE to create a trimmed planar surface from the joined lines,
responding to the prompts.
Desktop Menu Surface ➤ Create Surface ➤ Planar Trim
If you choose the command line method, enter w at the prompt before con-
tinuing to the following prompts.
Select wires: Select polyline (1)
Select wires: Press ENTER
Your surface should look like this.
4Use CHPROP to move inlet E to the INLET layer.
Now you can trim top D by projecting the edge of the inlet. First, thaw layers
to show the inlet and top sections of the pump. Then, break a polyline into
segments and join one segment with other polylines. The joined polylines
form the shape of the projection that cuts material where the two surfaces
intersect.
To make selection easier, zoom and rotate the view as needed.
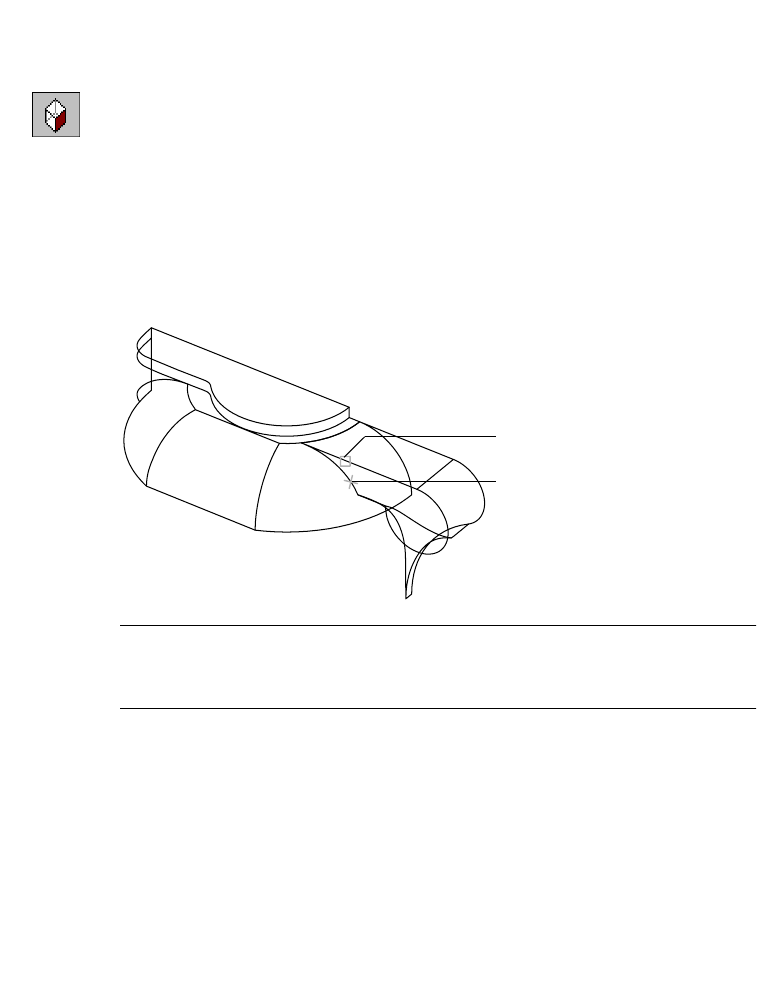
642 |Chapter 21 Surfacing Wireframe Models
To create a shape on a surface using joined wires
1Thaw layers 10 and 20.
2Change to the front right isometric view.
Desktop Menu View ➤ 3D Views ➤ Front Right Isometric
3Use BREAK to break the polyline, responding to the prompts.
Desktop Menu Modify ➤ Break
Select object: Select polyline (1)
Specify second break point or [First point]: Enter f
Specify first break point: Enter end
of: Select polyline (2)
Specify second break point: Enter @
NOTE Use 3D Orbit and Zoom Realtime to rotate the view and zoom in to
show the lines clearly. If you prefer, use VPOINT to set a precise viewpoint. In this
case, set the coordinates 4,-6,1 to show the lines you need for the next step.
4Break the upper part of the polyline into segments, responding to the
prompts.
Desktop Menu Modify ➤ Break
Select object: Select polyline (1)
Specify second break point or [First point]: Enter f
Specify first break point: Enter int
of: Select polyline (2)
Specify second break point: Enter @
2
1

Joining Surfaces on Complex Shapes |643
5Use AMJOIN3D to combine three polyline segments.
Desktop Menu Surface ➤ Edit Wireframe ➤ Join
In the Join3D dialog box, specify:
Mode: Automatic
Output: Polyline
Gap Tolerance: Enter .004
Choose OK.
6Respond to the prompts as follows:
Select start wire or: Select polyline (1)
Select wires to join: Select wire (2)
Select wires to join: Select wire (3) and press ENTER
Reverse direction? [Yes/No] <No>: Press ENTER
The segments are joined together. Later, you will project the joined line onto
the top surface.
1
2
3
2
1
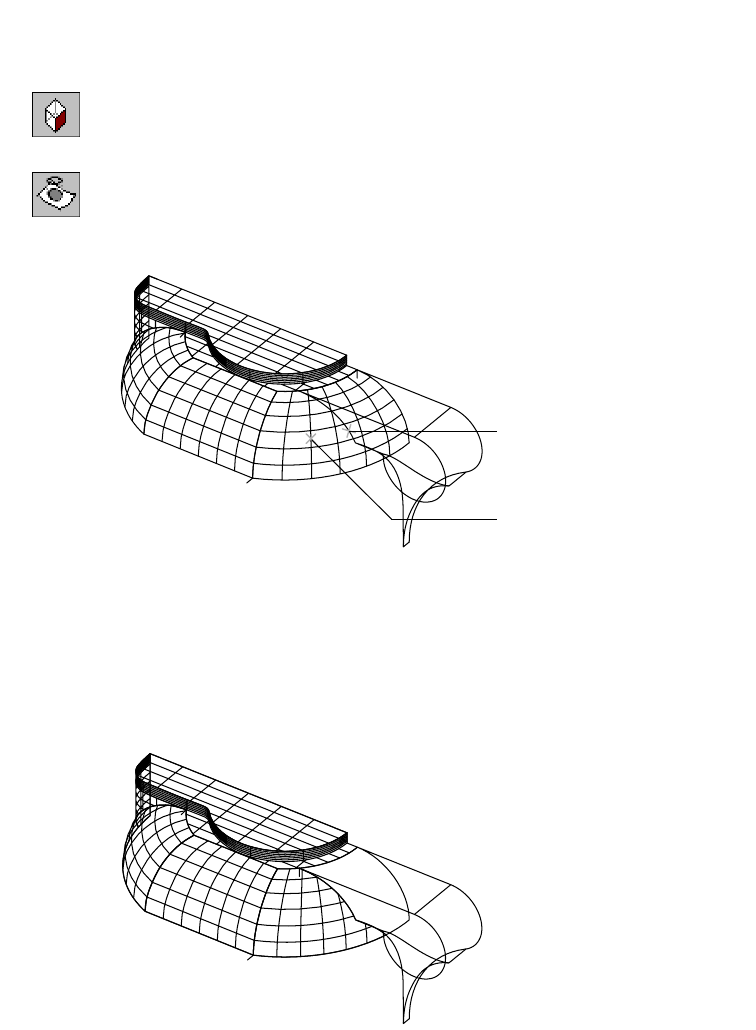
644 |Chapter 21 Surfacing Wireframe Models
To trim a surface using a projected wire shape
1Freeze layer 10 and thaw the TOP layer.
2Return to the front right isometric view.
Desktop Menu View ➤ 3D Views ➤ Front Right Isometric
3Use AMPROJECT to cut top B where the inlet fits, responding to the prompts.
Desktop Menu Surface ➤ Edit Surface ➤ Project Trim
Select wires to project: Select wire (1) and press ENTER
Select target surfaces/quilts: Select surface (2) and press ENTER
4In the Project to Surface dialog box, specify:
Direction: Normal
Output Type: Trim Surface
Keep Original Wires: Remove the check from the check box
Choose OK.
Top B is cut open for the inlet. The top and inlet are complete. Save the file.
1
2
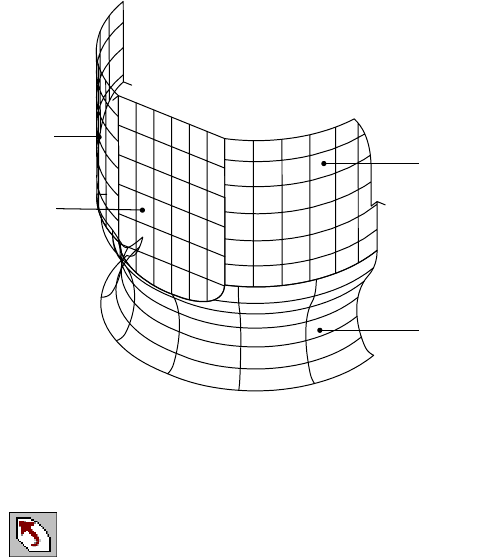
Creating Swept and Projected Surfaces |645
Creating Swept and Projected Surfaces
For the main body of the pump, you continue building and trimming sur-
faces to their correct shapes.
■Body A, B, and C are swept surfaces created from curves and rails.
■Body D is a surface created from the boundaries of Body A, B, and C
surfaces.
To create the body A, B, and C swept surfaces
1Thaw layer 30 and make it current. Freeze layers 10, 20, and TOP.
2Use AMSWEEPSF to create the body A surface on the right side of the model.
Desktop Menu Surface ➤ Create Surface ➤ Sweep
body A
body C
body B
body D
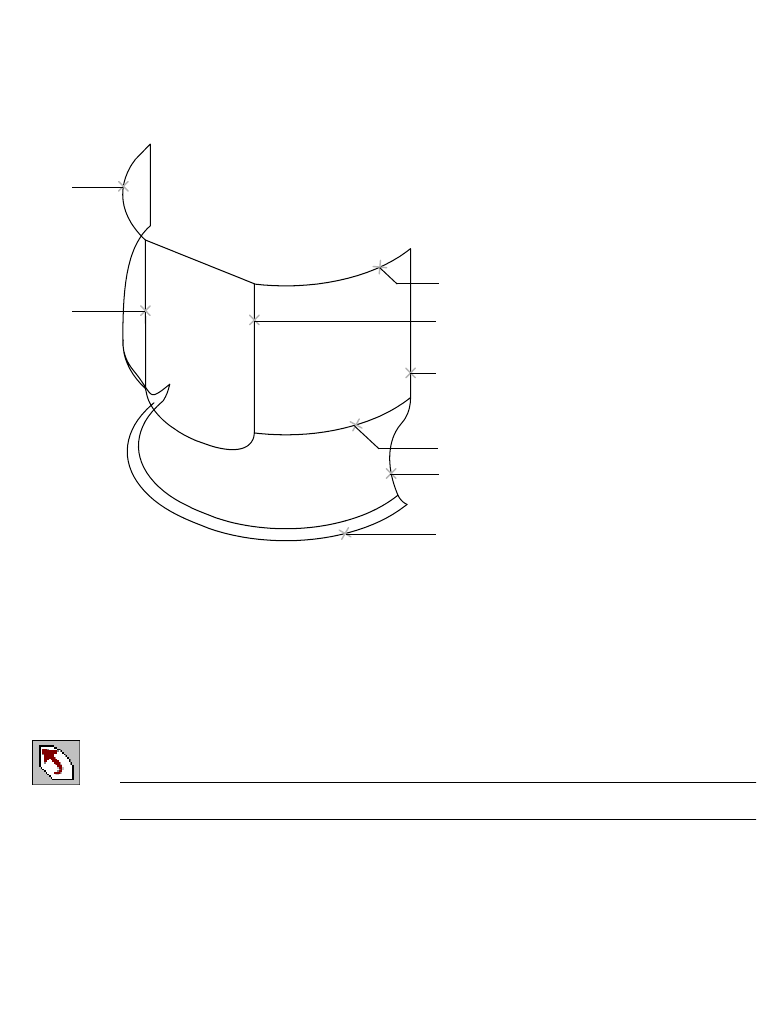
646 |Chapter 21 Surfacing Wireframe Models
Respond to the prompts:
Select cross sections: Select wire (1)
Select cross sections: Select wire (2) and press ENTER
Select rails: Select wire (3)
Select rails: Select wire (4)
3In the Sweep Surface dialog box, specify:
Transition: Scale
Keep Original Wires: Check the check box
Choose OK
4Use AMSWEEPSF to create the body B surface on the left side of the model,
responding to the prompts.
Desktop Menu Surface ➤ Create Surface ➤ Sweep
NOTE To repeat the previous command, press ENTER or the SPACEBAR.
Select cross sections: Select wire (5) and press ENTER
Select rails: Select wire (6) and press ENTER
1
3
4
2
8
5
6
7
Creating Swept and Projected Surfaces |647
5In the Sweep Surface dialog box, under Orientation, specify Normal. Leave
Keep Original Wires checked, and choose OK.
6Create the body C surface near the bottom of the model, responding to the
prompts.
Desktop Menu Surface ➤ Create Surface ➤ Sweep
Select cross sections: Select wire (7) and press ENTER
Select rails: Select the wire (8) and press ENTER
7In the Sweep Surface dialog box, under Orientation, specify Normal. Verify
that Keep Original Wires is checked, and choose OK.
Your model should look like this.
8Thaw layer 20 to reveal the inlet wires.
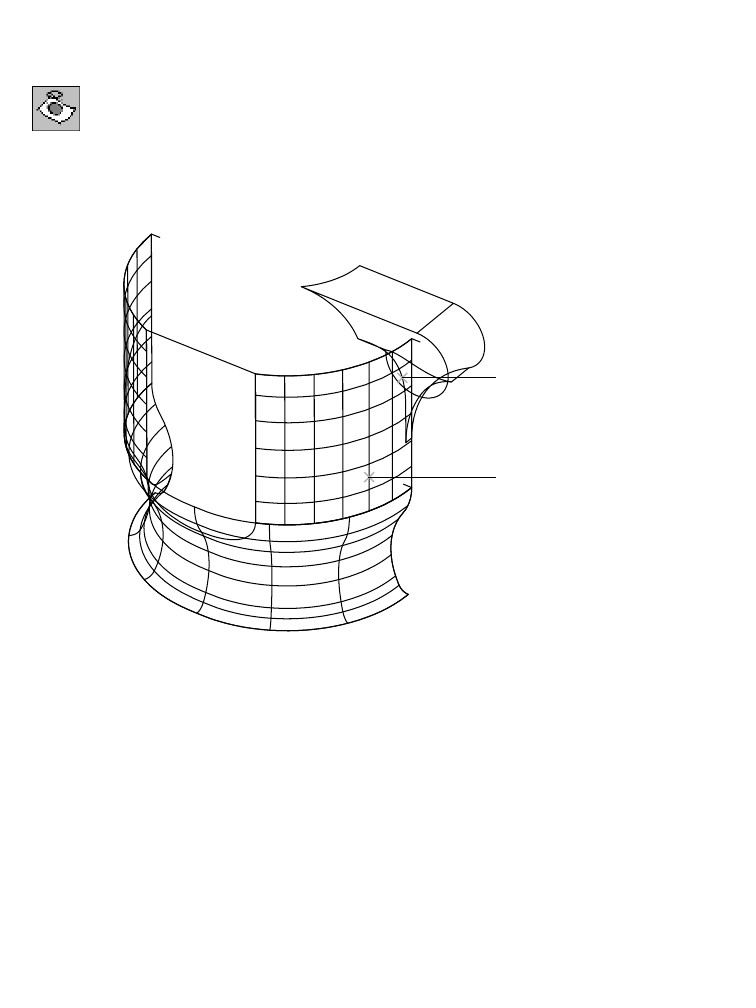
648 |Chapter 21 Surfacing Wireframe Models
To trim a surface with a projection wire
1Use AMPROJECT to trim the body surface with the inlet edge, responding to
the prompts.
Desktop Menu Surface ➤ Edit Surface ➤ Project Trim
Select wires to project: Select wire (1)
Select wires to project: Press ENTER
Select target surfaces/quilts: Select surface (2)
Select target surfaces/quilts: Press ENTER
2In the Project to Surface dialog box, specify:
Direction: Normal
Output Type: Trim Surface
Verify that Keep Original Wires is checked, and choose OK.
The projected wire cut away a portion of body A surface, but the wire was not
deleted.
1
2
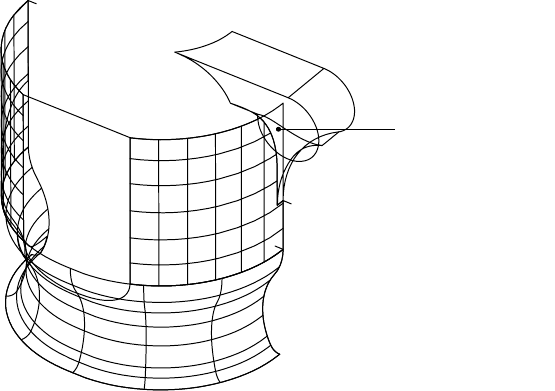
Creating Swept and Projected Surfaces |649
3Freeze layer 20.
Cut out the surface areas on body C where body D and the outlet (to be sur-
faced later) extend onto body C.
body surface removed
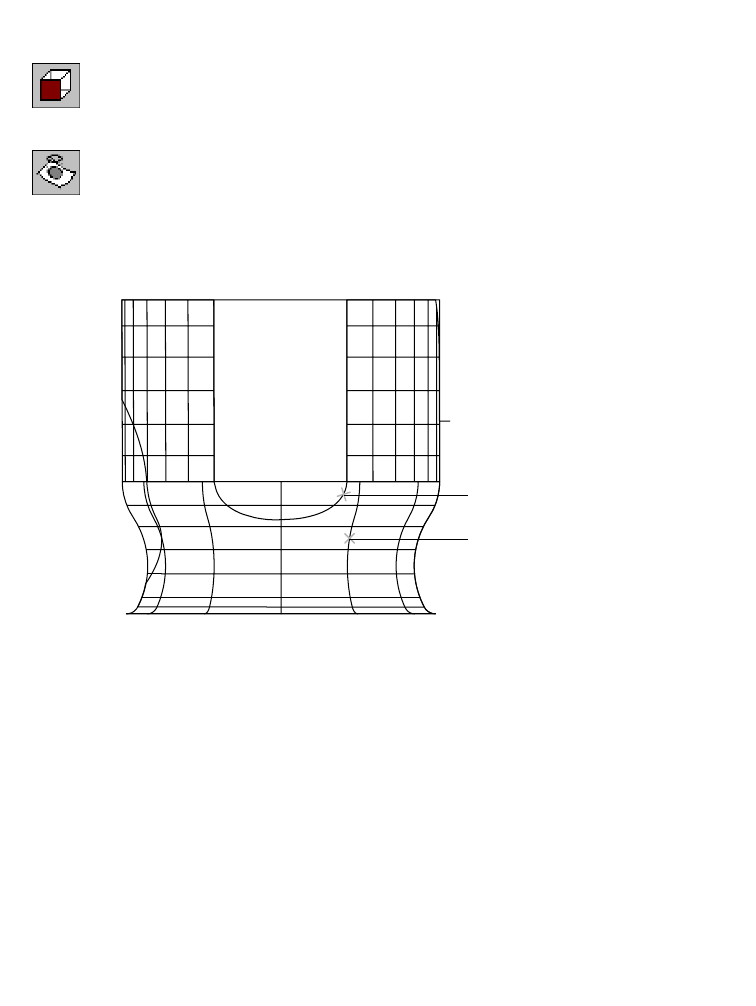
650 |Chapter 21 Surfacing Wireframe Models
To trim the body C surface with projection wires
1Change to the front view of your model.
Desktop Menu View ➤ 3D Views ➤ Front
2Trim Body C with the lower curve of the flat surface (1), responding to the
prompts.
Desktop Menu Surface ➤ Edit Surface ➤ Project Trim
Select wires to project: Select wire (1)
Select wires to project: Press ENTER
Select target surfaces/quilts: Select surface (2)
Select target surfaces/quilts: Press ENTER
3In the Project to Surface dialog box, specify:
Direction: Normal
Output Type: Trim Surface
Verify that Keep Original Wires is checked, and choose OK.
1
2
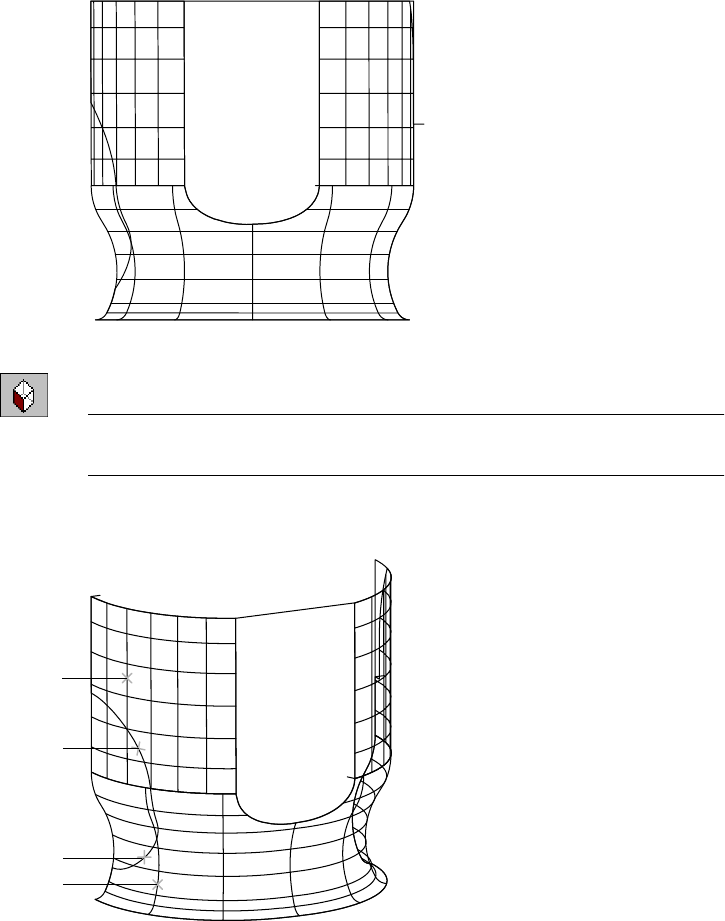
Creating Swept and Projected Surfaces |651
Your model should look like this.
4Change to the front left isometric view.
Desktop Menu View ➤ 3D Views ➤ Front Left Isometric
NOTE To set the viewpoint precisely, use VPOINT to specify coordinates. For
example, this viewpoint is -5,-10,3.
5Trim the body B surface with the curve that defines the upper edge of the out-
let. Repeating steps 2 and 3, project wire 3 onto surface 4.
4
3
5
6
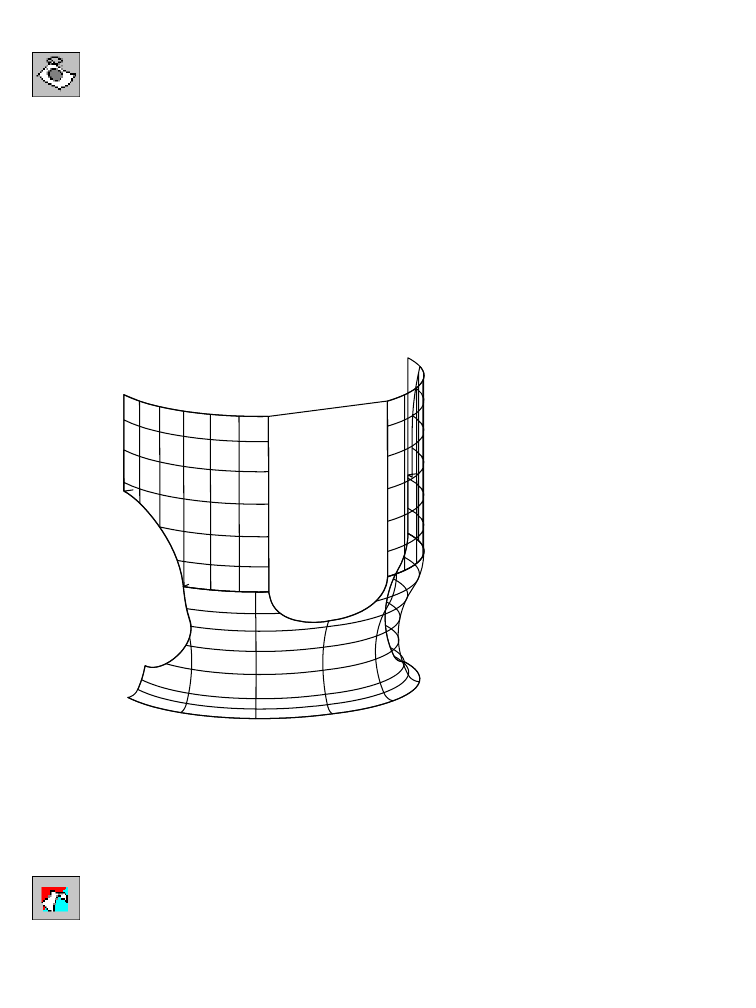
652 |Chapter 21 Surfacing Wireframe Models
6Trim body C with the curve that defines the lower edge of the outlet,
responding to the prompts.
Desktop Menu Surface ➤ Edit Surface ➤ Project Trim
Select wires to project: Select wire
Select wires to project: Press ENTER
Select target surfaces/quilts: Select surface (6)
Select target surfaces/quilts: Press ENTER
7In the Project to Surface dialog box, specify:
Direction: Normal
Output Type: Trim Surface
Verify that Keep Original Wires is checked, and choose OK.
Your model should look like this.
8Use CHPROP to move surfaces A, B, and C to the BODY layer.
Next, you edit the wireframe to join the lines that form the boundary of body
D. You use the polyline to create a planar surface.
Before you begin, set DELOBJ to delete original objects.
Toolbutton On the Surfacing toolbar, use the DELOBJ toolbutton to set
delete original objects.
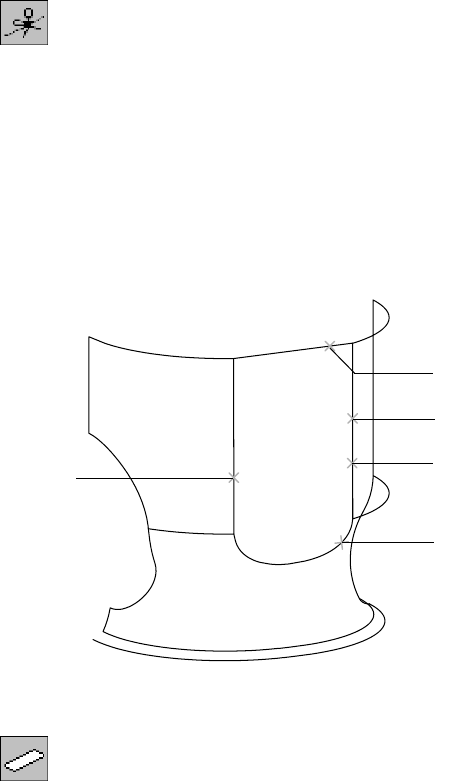
Creating Swept and Projected Surfaces |653
To create the body D planar surface
1Use AMJOIN3D to join the polylines that define the boundary of body D.
Desktop Menu Surface ➤ Edit Wireframe ➤ Join
In the Join 3D dialog box, specify:
Mode: Automatic
Output: Polyline
Choose OK.
2Respond to the prompts as follows:
Select start wire or: Select the wire (1)
Select wires to join: Select wires (2), (3), and (4)
Select wires to join: Press ENTER
Reverse direction? [Yes/No] <No>: Press ENTER
3Use AMPLANE to create a planar surface from the joined line, responding to
the prompts.
Desktop Menu Surface ➤ Create Surface ➤ Planar
Specify first corner or [Plane/Wires]: Enter w
Select wires: Select wire (5) and press ENTER
1
2
3
45
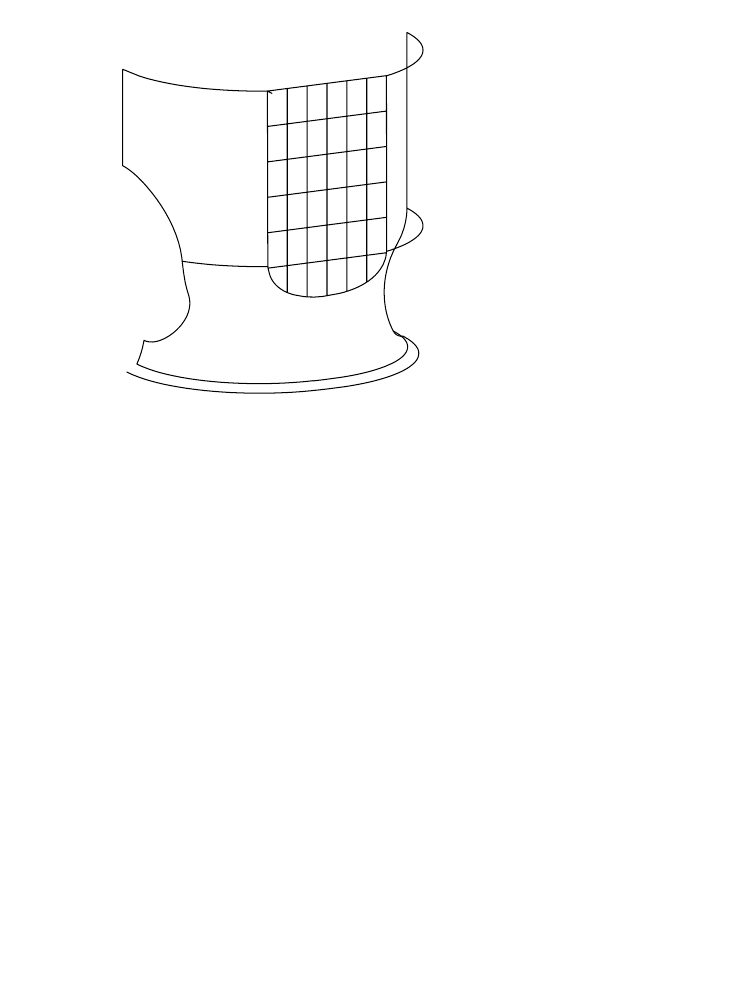
654 |Chapter 21 Surfacing Wireframe Models
Your model should look like this.
4Use CHPROP to move body D to the BODY layer. Save the file.
The pump body surfaces are complete.

Creating Complex Swept Surfaces |655
Creating Complex Swept Surfaces
Next, you create the surfaces for the outlet on the side of the pump.
Outlet A is a swept surface that blends dissimilar cross sections.
To create the outlet A swept surface
1Thaw layer 40 and make it current, and then freeze all other layers.
2Change to the left isometric view to make lines easier to select.
Desktop Menu View ➤ 3D Views ➤ Front Left Isometric
3Use AMSWEEPSF to Sweep three cross sections along two rails, responding to
the prompts.
Desktop Menu Surface ➤ Create Surface ➤ Sweep
Select cross sections: Select wires (1), (2), and (3)
Select rails: Select wires (4) and (5)
outlet F
(back side) outlet E
outlet C
outlet A
outlet B
outlet D
1
2
3
4
5
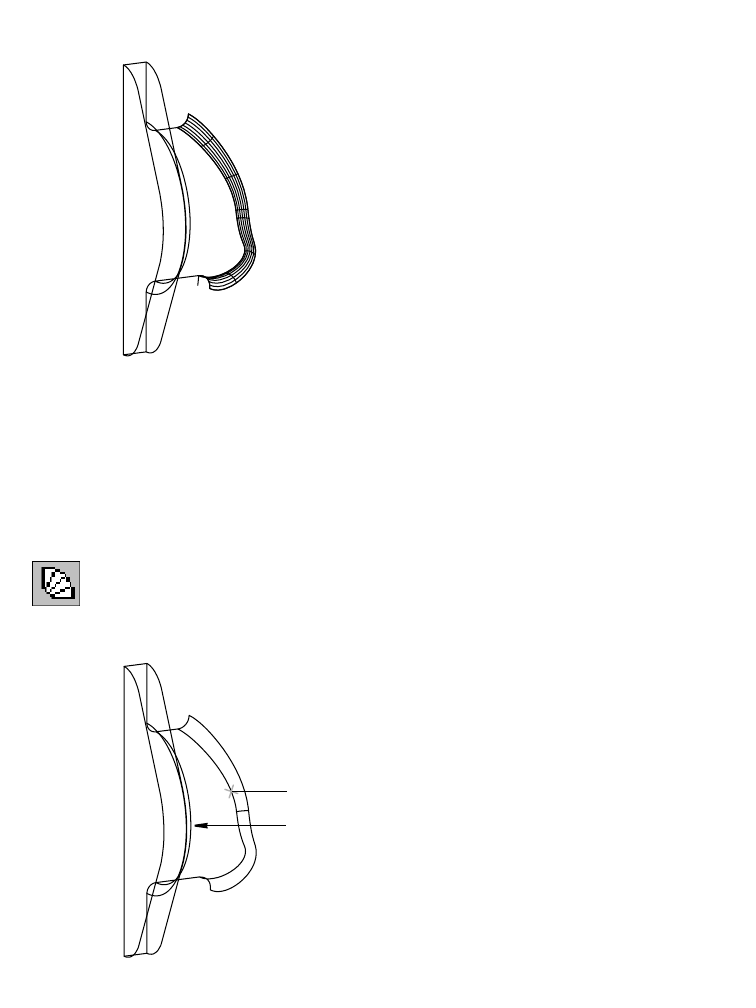
656 |Chapter 21 Surfacing Wireframe Models
4In the Sweep Surface dialog box, in Transition, specify Scale. Choose OK.
Outlet A should look like this.
5Use CHPROP to move outlet A to the OUTLET layer.
Next create a ruled surface for outlet B. The difference between this surface
and the one you just completed is that outlet A is curved in two directions,
and outlet B is curved in one direction and flat in the other.
To create the outlet B ruled surface
1Use AMRULE to create the outlet B surface, responding to the prompts.
Desktop Menu Surface ➤ Create Surface ➤ Rule
Select first wire: Select wire (1)
Select second wire: Select wire (2)
1
2

Creating Complex Swept Surfaces |657
Outlet B should look like this.
2Use CHPROP to move outlet B to the OUTLET layer.
Next, you create another swept surface and another ruled surface.
To create the outlet C and outlet D surfaces
1To make selections easier, rotate the model to the left with the Desktop View
icons, or set specific coordinates (6,-8,1) with VPOINT, responding to the
prompts.
Desktop Menu View ➤ 3D Views ➤ VPOINT
Current view direction: VIEWDIR=-1.0000,-1.0000,1.0000
Specify a view point or [Rotate] <display compass and tripod>: Enter 6,-8,1
2Use AMSWEEPSF to create outlet C swept surface.
Desktop Menu Surface ➤ Create Surface ➤ Sweep
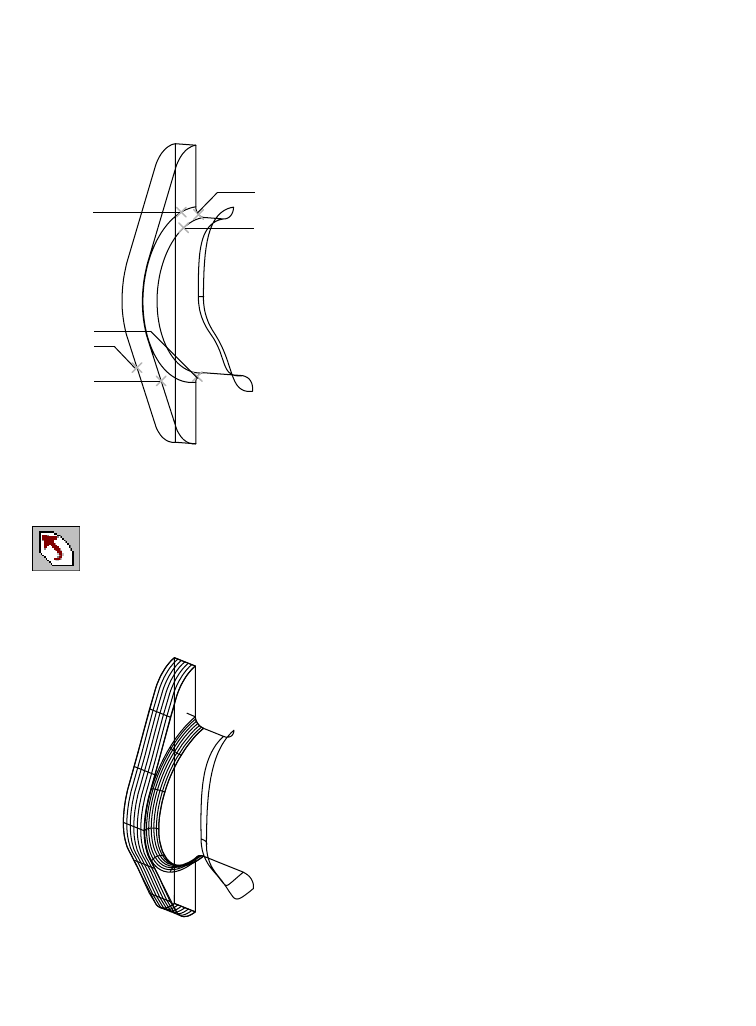
658 |Chapter 21 Surfacing Wireframe Models
Respond to the prompts:
Select cross sections: Select wire (1)
Select cross sections: Select wire (2) and press ENTER
Select rails: Select wire (3)
Select rails: Select wire (4)
3In the Sweep Surface dialog box, under Transition, specify Scale. Choose OK.
4Use AMRULE to create outlet D ruled surface, responding to the prompts.
Desktop Menu Surface ➤ Create Surface ➤ Rule
Select first wire: Select wire (5)
Select second wire: Select wire (6)
Your model should look like this.
5Use CHPROP to move both of the surfaces to the OUTLET layer.
Next, you join lines to form the boundaries of outlet E and outlet F. From the
newly created polyline, you create planar surfaces for the outlet.
4
2
3
5
6
1
3

Creating Complex Swept Surfaces |659
To create the outlet E planar surface
1Use AMJOIN3D to join the polylines.
Desktop Menu Surface ➤ Edit Wireframe ➤ Join
In the Join3D dialog box, specify:
Mode: Automatic
Output: Polyline
Choose OK.
2Select the polylines, responding to the prompts.
Select start wire or: Select wire (1)
Select wires to join: Select wires (2), (3), and (4), and press ENTER
Reverse direction? [Yes/No] <No>: Press ENTER to accept the join direction
3Use AMPLANE to create the outlet E surface from the joined polyline, respond-
ing to the prompts.
Desktop Menu Surface ➤ Create Surface ➤ Planar
Specify first corner or [Plane/Wires]: Enter w
Select wires: Select wire (1) and press ENTER
To create the outlet F planar surface
1Use AMJOIN3D to combine lines that form the boundary for outlet F.
Desktop Menu Surface ➤ Edit Wireframe ➤ Join
In the Join 3D dialog box, specify:
Mode: Manual
Output type: Polyline
Choose OK.
3
2
1
4
6
5
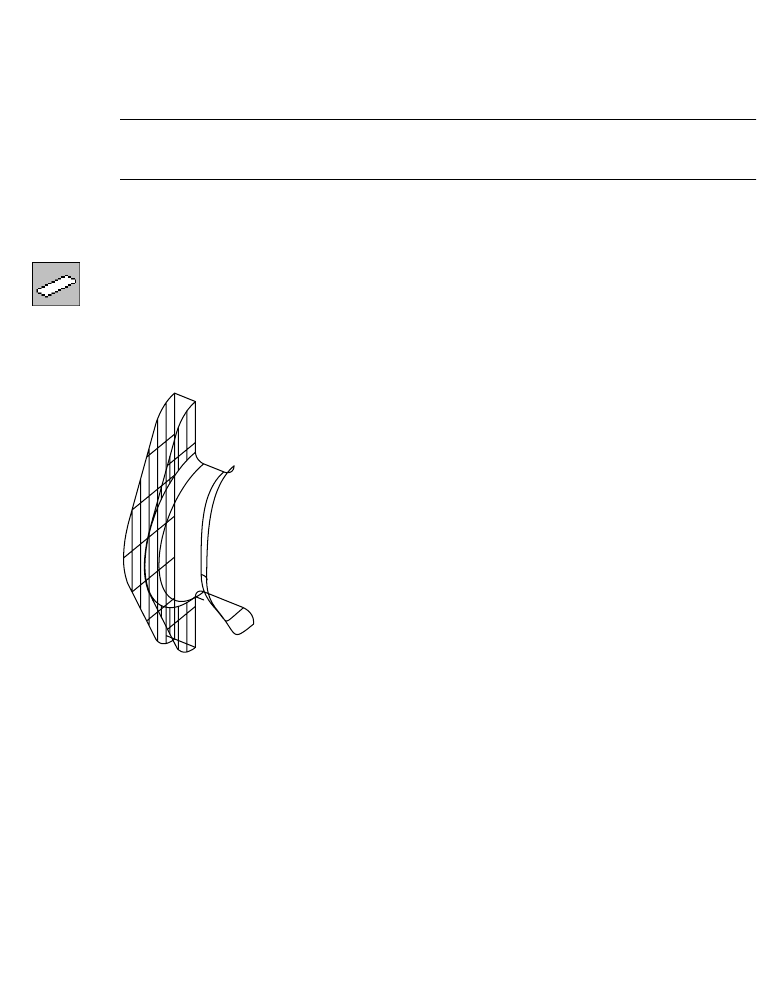
660 |Chapter 21 Surfacing Wireframe Models
2Select the polylines to join, responding to the prompts.
Select start wire or: Select wire (5)
Select wires to join: Select wire (6) and press ENTER
Reverse direction? [Yes/No] <No>: Press ENTER to accept the join direction
NOTE Use the Manual mode to join lines even if they are far apart. It joins all
the lines you select in the order you choose them.
3Use AMPLANE to create outlet F from the lines you just joined, responding to
the prompts.
Desktop Menu Surface ➤ Create Surface ➤ Planar
Specify first corner or [Plane/Wires]: Enter w
Select wires: Select wire (6) and press ENTER
Your model should look like this.
4Use CHPROP to move the surfaces to the OUTLET layer.
Save the file.
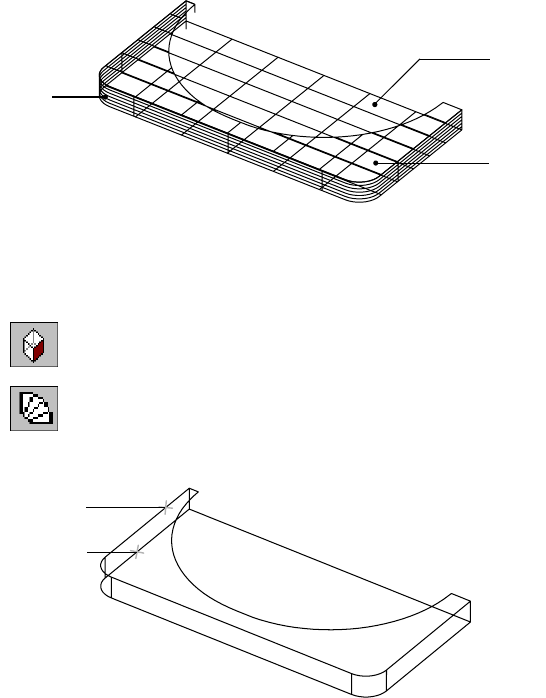
Using Projection to Create Surfaces |661
Using Projection to Create Surfaces
Next, you use projection to create ruled and planar surfaces for the base of
the pump.
To create the base A surface
1Thaw layer 50 and make it current. Then freeze all other layers.
2Change to the left front isometric view.
Desktop Menu View ➤ 3D Views ➤ Front Right Isometric
3Use AMRULE to create the base A surface, responding to the prompts.
Desktop Menu Surface ➤ Create Surface ➤ Rule
Select first wire: Select wire (1)
Select second wire: Select wire (2)
base A
base B
base C
1
2
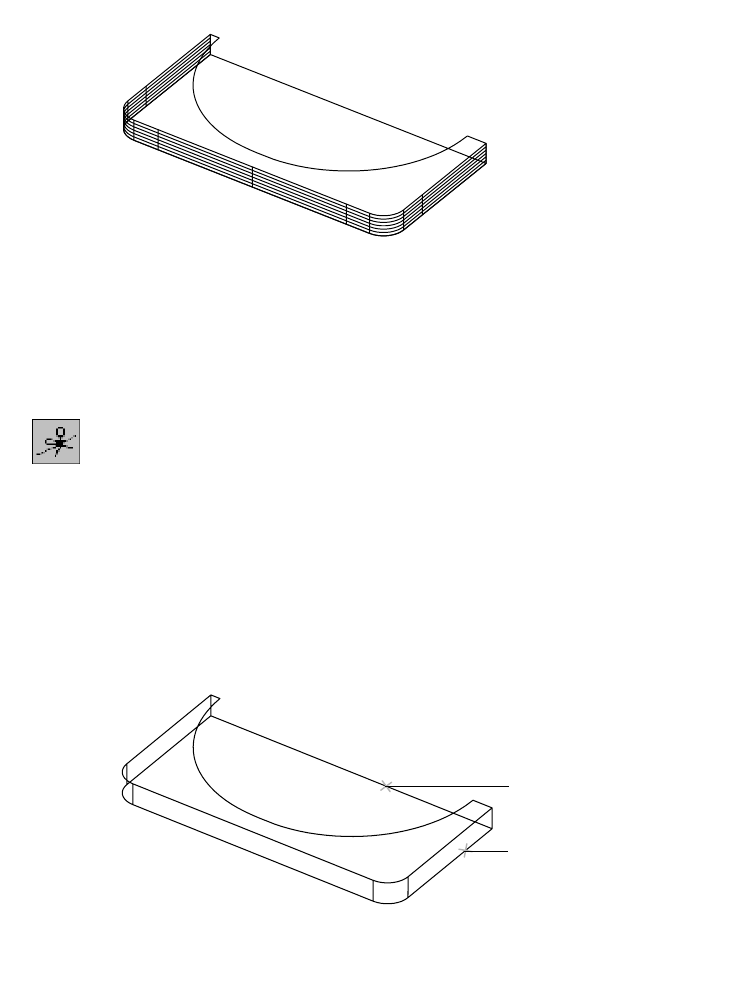
662 |Chapter 21 Surfacing Wireframe Models
The illustration shows the ruled surface fit to the flat areas and corner curves.
4Use CHPROP to move base A to the BASE layer.
Next, you join the lines needed to create a planar surface on the bottom of
the pump. Then you copy the surface and trim it.
To create the base B and C surfaces
1Use AMJOIN3D to create a polyline from two wires.
Desktop Menu Surface ➤ Edit Wireframe ➤ Join
In the Join3D dialog box, specify:
Mode: Automatic
Output: Polyline
Choose OK.
2Select the wires, responding to the prompts:
Select start wire or: Select wire (1)
Select wires to join: Select wire (2) and press ENTER
Reverse direction? [Yes/No] <No>: Press ENTER
1
2
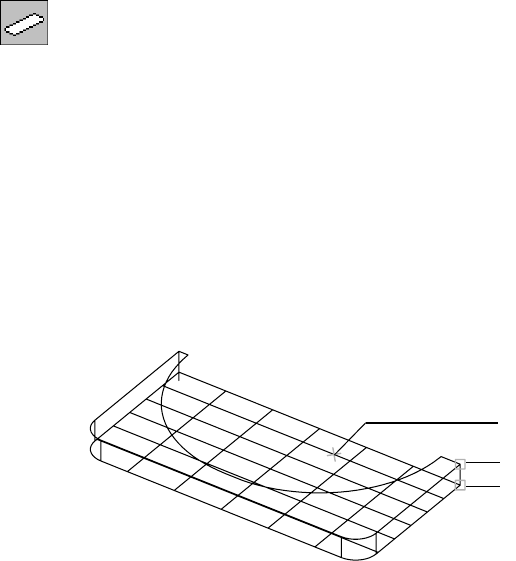
Using Projection to Create Surfaces |663
3Create a planar surface on the bottom of the base, responding to the
prompts.
Desktop Menu Surface ➤ Create Surface ➤ Planar
Specify first corner or [Plane/Wires]: Enter w
Select wires: Select wire (1) and press ENTER
The planar surface is created.
4Use COPY to copy the last surface, responding to the prompts.
Desktop Menu Modify ➤ Copy
Select objects: Select surface (1) and press ENTER
Specify base point or displacement, or [Multiple]: Enter end
of: Select point (2)
Specify second point of displacement or <use first point as displacement>:
Enter end
of: Select point (3)
Next, project a wire onto the base C surface to trim it.
1
3
2
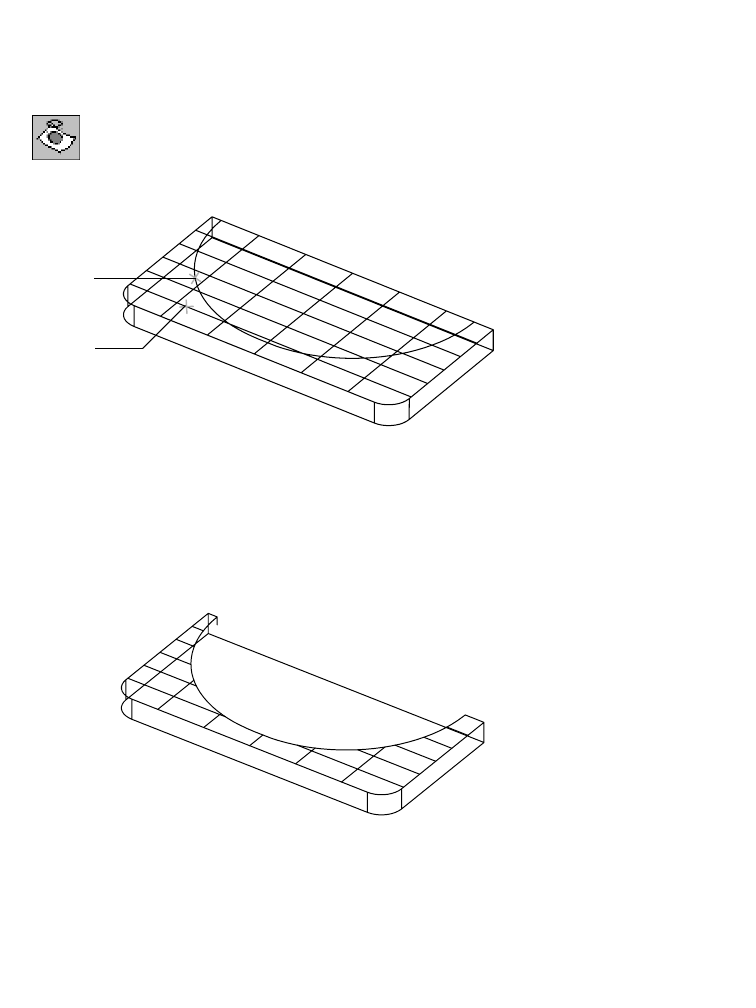
664 |Chapter 21 Surfacing Wireframe Models
To trim the base C surface
1Use CHPROP to move the bottom surface to the BASE layer.
2Project the curve of the body onto the top surface of the base, responding to
the prompts.
Desktop Menu Surface ➤ Edit Surface ➤ Project Trim
Select wires to project: Select polyline (1) and press ENTER
Select target surfaces/quilts: Select surface (2) and press ENTER
3In the Project to Surface dialog box, specify:
Direction: Normal
Output type: Trim Surface
Choose OK.
Your model should look like this.
4Use CHPROP to move the surfaces to the BASE layer.
Save the file.
1
2
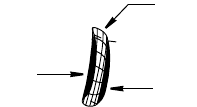
Using Advanced Surfacing Techniques |665
Using Advanced Surfacing Techniques
Next, you create the support rib from the surfaces. Using the techniques you
have already learned, surface the support rib from these general instructions.
Save a copy of your drawing before you begin working on your own.
To create the support rib
1Thaw layer 60.
2Create a ruled surface on the left side of the support rib (rib A).
3Create a ruled surface on the right side of the support rib (rib B).
4Move the surfaces to the SUPPORT_RIB layer.
5Create a swept surface for rib C.
6Move the surface to the SUPPORT_RIB layer.
7Add the support rib to the body and base surfaces.
If you need to, follow these specific instructions to create the support rib.
rib C
rib B
rib A
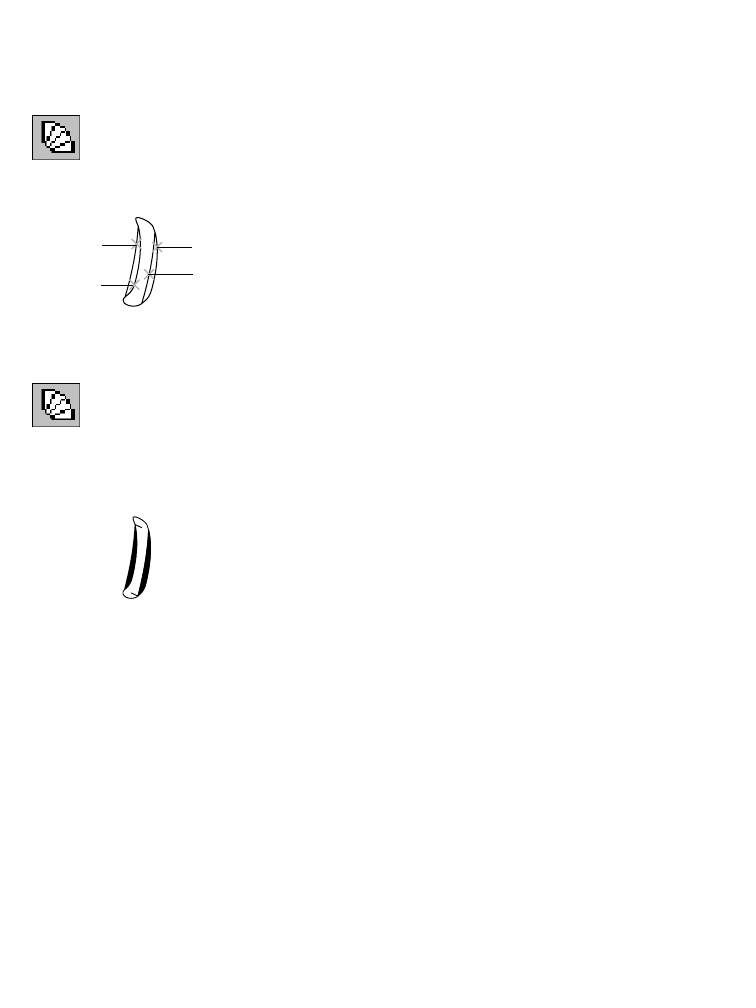
666 |Chapter 21 Surfacing Wireframe Models
To create the rib A and rib B surfaces
1Thaw layer 60 and make it current. Then freeze all other layers.
2Use AMRULE to create a ruled surface on the left side of the support rib,
responding to the prompts.
Desktop Menu Surface ➤ Create Surface ➤ Rule
Select first wire: Select wire (1)
Select second wire: Select wire (2)
3Create a ruled surface on the right side of the support rib, responding to the
prompts.
Desktop Menu Surface ➤ Create Surface ➤ Rule
Select first wire: Select wire (3)
Select second wire: Select wire (4)
The surfaces should look like this.
4Use CHPROP to move the surfaces to the SUPPORT_RIB layer.
1
2
3
4

Using Advanced Surfacing Techniques |667
To create the rib C surface
1Use AMSWEEPSF to create the rib C surface, responding to the prompts.
Desktop Menu Surface ➤ Create Surface ➤ Sweep
Select cross sections: Select wire (1) and (2)
Select cross sections: Press ENTER
Select rails: Select wires (3) and (4)
2In the Sweep Surface dialog box, under Transition, specify Scale. Choose OK.
Your surface should look like this.
3Move the surface to the SUPPORT_RIB layer.
4Use AMJOIN3D to join the lines defining the boundary of the support rib.
Desktop Menu Surface ➤ Edit Wireframe ➤ Join
5In the Join3D dialog box, specify:
Mode: Automatic
Output: Polyline
Choose OK.
6Select the lines.
Select start wire or: Select wire (1)
Select wires to join: Select wires (2), (3), and (4), and then press ENTER
Reverse direction? [Yes/No] <No>: Press ENTER
The support rib wires are joined and ready to project onto the pump.
1
4
2
3
1
4
2
3
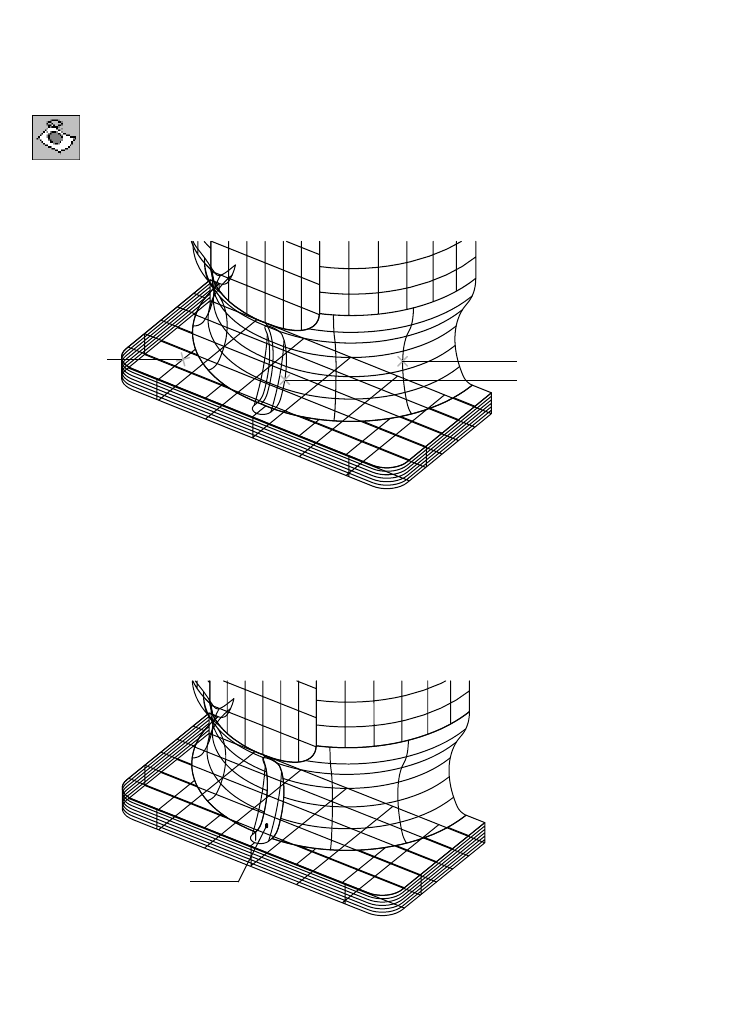
668 |Chapter 21 Surfacing Wireframe Models
To add the support rib
1Thaw the BODY and BASE layers.
2Use AMPROJECT to project the support rib onto the pump, responding to the
prompts.
Desktop Menu Surface ➤ Edit Surface ➤ Project Trim
Select wires to project: Select wire (1) and press ENTER
Select target surfaces/quilts: Select surface (2)
Select target surfaces/quilts: Select surface (3) and press ENTER
3In the Project to Surface dialog box, specify:
Direction: Normal
Output: Trim Surface
Choose OK.
The support rib is projected onto the body and the base.
Save your file.
32
1
body surface removed
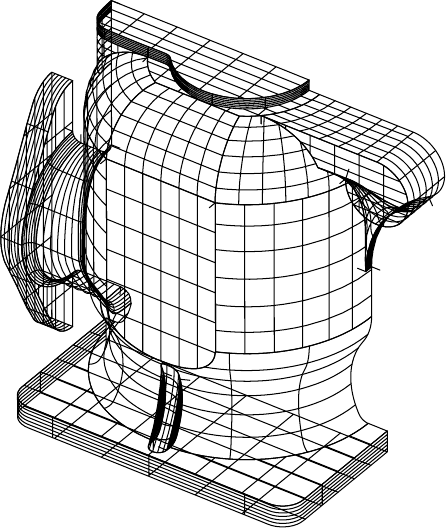
Viewing Completed Surfaced Models |669
Viewing Completed Surfaced Models
To view the completed model, freeze all layers except BASE, BODY, INLET,
OUTLET, SUPPORT_RIB, and TOP.
Use the Zoom Extents option of ZOOM to view the entire wireframe model.
One half of the pump housing is complete. You can mirror the surfaces to cre-
ate a complete model.

670

671
In This Chapter 22
Working with Standard
Parts
Standard parts is the term used for the vast selection of
real-world reusable 2D and 3D parts, holes, features, and
structural steel profiles that are available to you in
Autodesk® Mechanical Desktop® 6 with the power pack.
These standard parts are provided in many different
base standards.
In this tutorial you select standard parts to insert
through holes on a 3D part, using two different
positioning methods. You also add a screw connection
to a 3D assembly model using standard parts.
Run Mechanical Desktop with the power pack to
perform this tutorial.
■Selecting standard parts
■Inserting holes using the cylinder
axial placement method
■Inserting holes using the cylinder
radial placement method
■Inserting a screw connection
■Creating a drawing view with 2D
standard parts

672 |Chapter 22 Working with Standard Parts
Key Terms
Te r m Definition
base standard Predefined drafting standard that conforms to International Drafting Standards
ANSI, BSI, CSN, DIN, GB, ISO, and JIS.
cylinder axial Option for placement when you insert a standard part or hole parallel to a
cylinder axis.
cylinder radial Option for placement when you insert a standard part or hole radial into a
cylinder.
hole Geometric feature with a predefined shape: drilled, counterbore, or countersink.
parallel Being an equal distance apart at every point.
standard part Reusable 2D and 3D parts, holes, features, and structural steel profiles available in
Mechanical Desktop 6.
tangent Touching at a single point or along a line, but not intersecting.
through Termination method by which a feature extends from its sketch plane through the
part.
Tutorial at a Glance |673
Tutorial at a Glance
This tutorial is an introduction to the standard parts and calculations func-
tionality in Mechanical Desktop 6. You will become familiar with some of the
intelligence and automation built into this functionality as you perform
exercises to insert
■A through hole using the cylinder axial placement method.
■Through holes using the cylinder radial placement method.
■A screw connection using the automated screw connection feature.
■A standard related 2D-Representation of standard parts.
Basic Concepts of Standard Parts
A large selection of standard parts are made available to you in Mechanical
Desktop 6. These standard parts are provided in many different base stan-
dards. You make your selections from lists of standard parts as you work. For
example, when you select a screw, you can choose from different types of
screws and from different configurations of threads. Using the standard parts
and calculations functionality, you can insert complete screw connections
including screws, holes, and nuts in one automated process.
The software is intelligent, and prevents you from assembling parts that do
not fit. For example, if you select a screw with a metric thread, only metric
threads are added with any additional parts or features, such as threaded
holes or nuts. If you select screws, holes, and nuts from varying standards,
the software determines if those parts will work together.
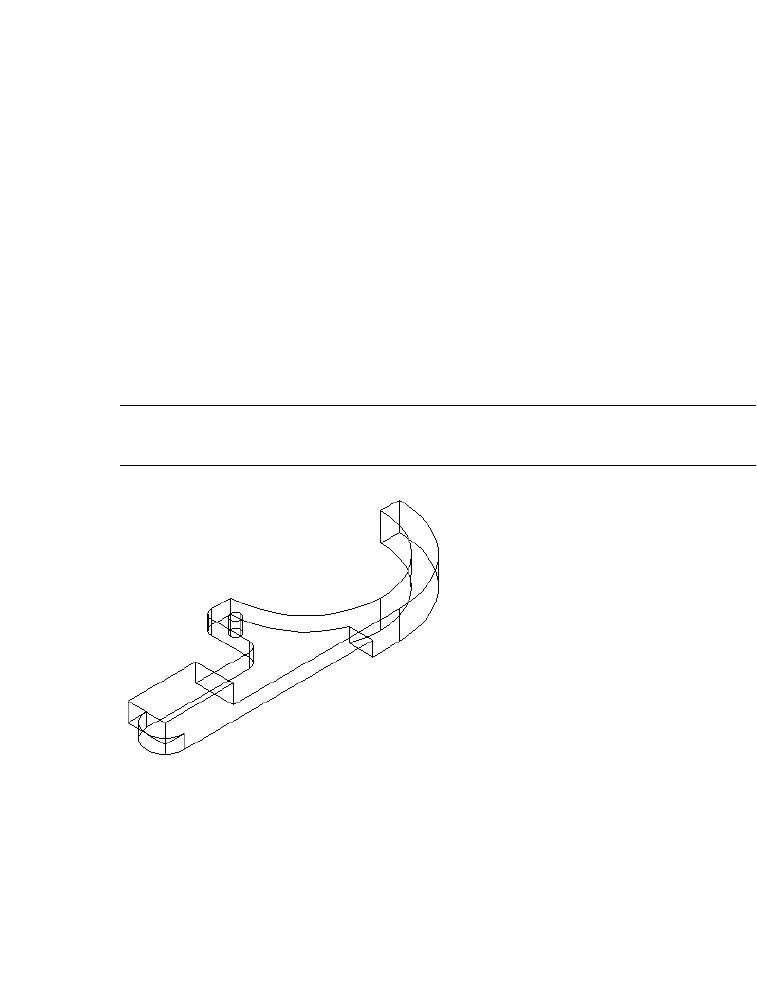
674 |Chapter 22 Working with Standard Parts
Inserting Through Holes
It is no longer necessary to insert a workpoint on the cylinder face,
dimension it, and insert a hole on the workpoint. Instead, the standard hole
function automatically defines a workpoint at the location you select,
dimensions it, and places the hole you specify. You can also define the inser-
tion point dynamically.
Using Cylinder Axial Placement
In this exercise, you insert a standard through hole using the cylinder axial
placement method. Use this method to insert holes parallel to the axis of a
cylinder. You enter specifications and select a size from a list of standard
holes, and the hole is inserted automatically.
Open the file md_ex01.dwg in the desktop\tutorial folder.
NOTE Back up the tutorial drawing files so you still have the original files if you
make a mistake. See “Backing up Tutorial Drawing Files” on page 40.
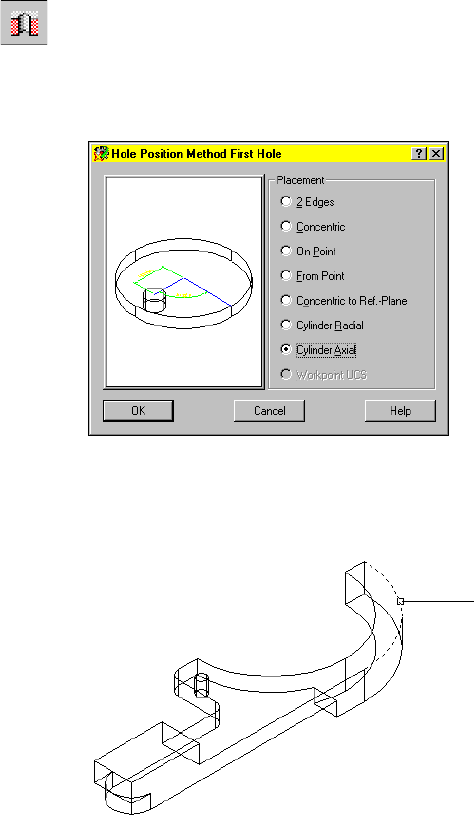
Inserting Through Holes |675
To insert a hole using cylinder axial placement
1Use AMTHOLE3D to define the hole to insert.
Menu Content 3D ➤ Holes ➤ Through Holes
In the Select a Through Hole dialog box, select ISO 273 normal.
2In the Hole Position Method First Hole dialog box, specify:
Placement: Cylinder Axial
Choose OK.
3On the command line, respond to the prompts as follows:
Select circular edge: Select the upper circular edge (1)
1
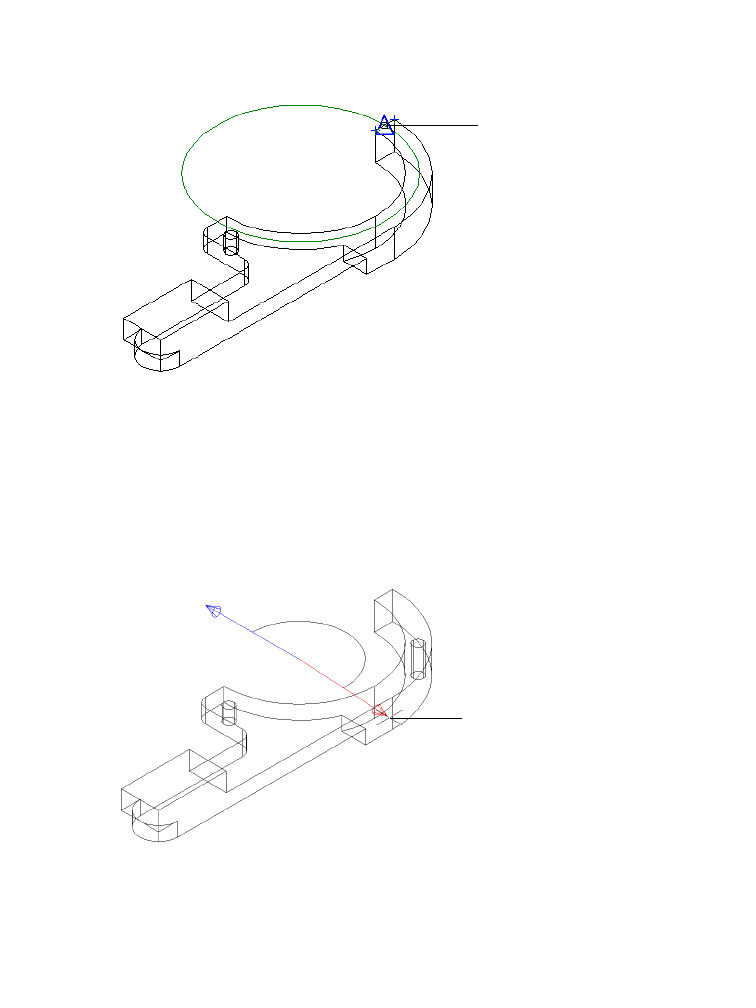
676 |Chapter 22 Working with Standard Parts
4Continue on the command line.
Select radius: Press SHIFT and in the graphics area, right-click and choose Midpoint
5Select the midpoint of the upper horizontal edge (2).
6Continue on the command line.
Select insertion method
[Angle to plane or edge/parallel to Line/plane Normal/plane Parallel] <plane
Parallel>: Enter A
Select straight edge, work plane or planar face to add angular constraint
to: Press ENTER
Select angle: Select an angle of approximately 135° (3)
Enter angle [Associate to/Equation assistant] <145>: Enter 135
Radius [Associate to/Equation assistant] <90>: Press ENTER
Hole termination [toPlane/Thru] <Thru>: Press ENTER
2
3
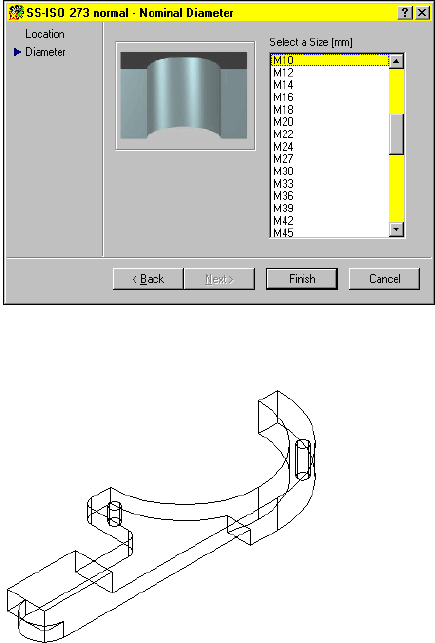
Inserting Through Holes |677
7In the ISO 273 normal - Nominal Diameter dialog box, specify:
Select a size: M10
Choose Finish.
The through hole is inserted in the size and location you selected.
Save the file as md2_ex01a.dwg.
Using Cylinder Radial Placement
In this exercise, you insert a through hole using the cylinder radial method.
Use this method to insert holes radial to a cylinder face.
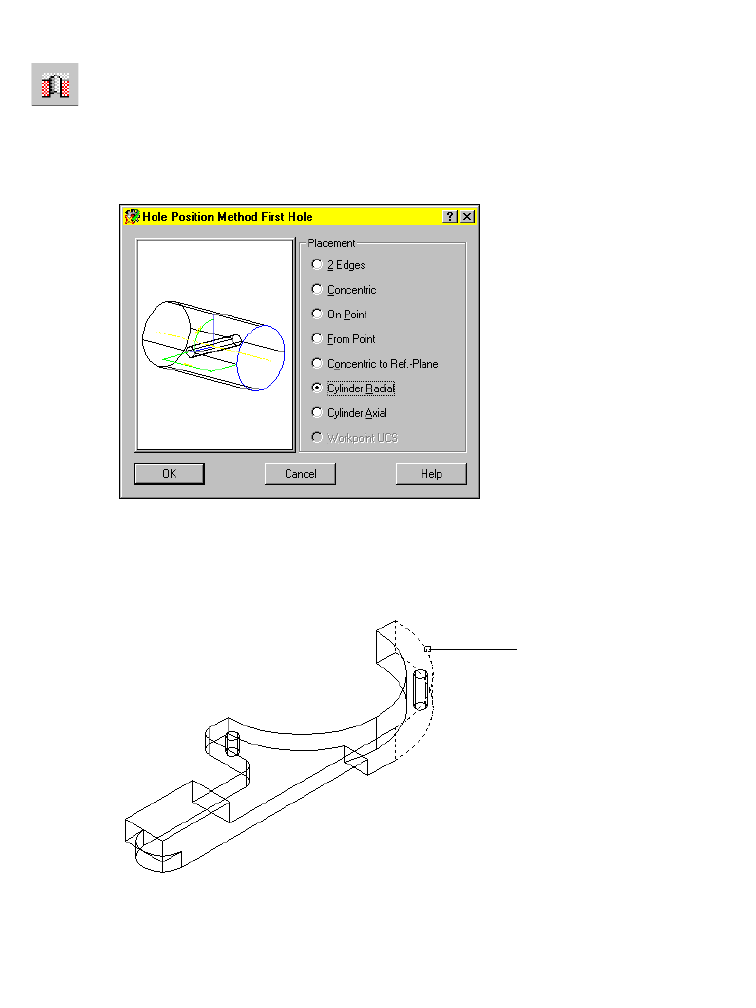
678 |Chapter 22 Working with Standard Parts
To insert a hole using cylinder radial placement
1Use AMTHOLE3D to define the hole to insert.
Menu Content 3D ➤ Holes ➤ Through Holes
In the Select a Through Hole dialog box, select ISO 273 normal.
2In the Hole Position Method First Hole dialog box, specify:
Placement: Cylinder Radial
Choose OK.
3On the command line, respond to the prompts as follows:
Select cylindrical face: Select the upper cylindrical face (1)
Continue on the command line.
Specify hole location [Line/Plane]:
Press SHIFT and in the graphics area, right-click and choose Midpoint
1
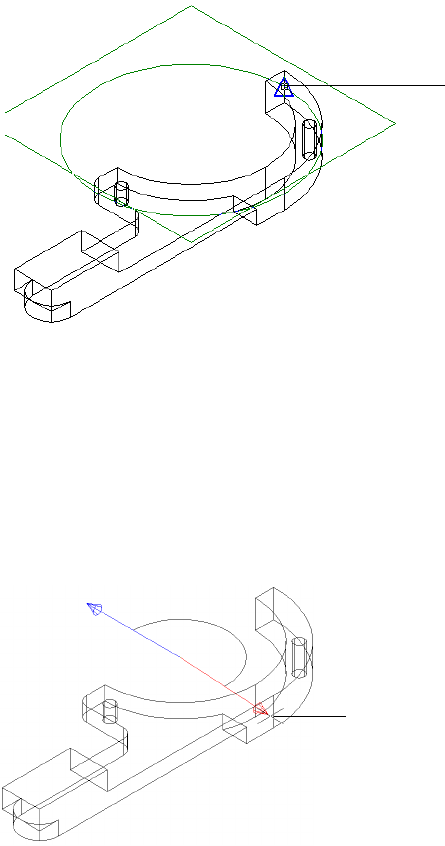
Inserting Through Holes |679
4Select the midpoint of the upper vertical edge (2).
5Respond to the prompts as follows:
Enter distance from base plane [Associate to/Equation assistant] <15>:
Press ENTER
Select drill direction
[Angle to plane or edge/parallel to Line/plane Normal/plane Parallel]
<plane Parallel>: Enter A
Select straight edge, work plane or planar face to add angular constraint to:
Press ENTER
Select angle: Select an angle of approximately 180° (3)
Continue on the command line:
Enter angle [Associate to/Equation assistant] <181>: Enter 180
Hole termination [toPlane/Thru] <Thru>: Press ENTER
2
3
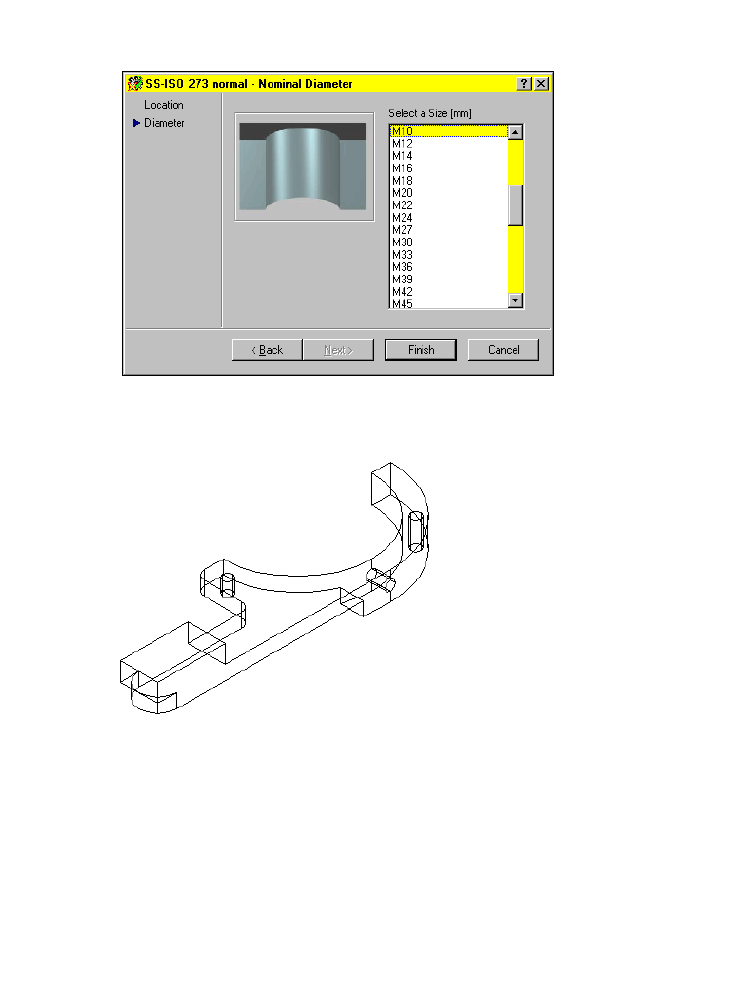
680 |Chapter 22 Working with Standard Parts
6In the ISO 273 normal - Nominal Diameter dialog box, specify:
Select a size: M10
Choose Finish.
The through hole is inserted. Your drawing should look like this:
Save the file as md2_ex01b.dwg.
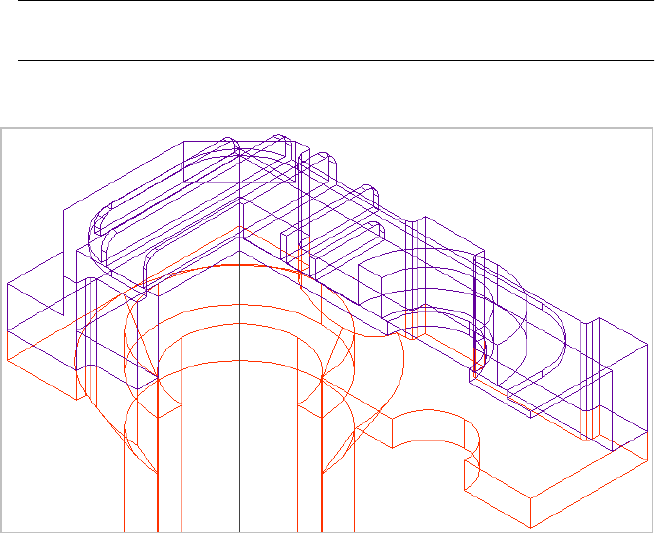
Inserting Screw Connections |681
Inserting Screw Connections
In this exercise, you begin with a drawing of two parts that need a screw con-
nection. Using the screw connection feature, you select the screw, holes, and
nut that you want to use.
You define the size of the screw in a dialog box. Then you insert the screw
connection in the assembly. With this method, there is no need to create two
separate holes before you insert the screw with the nut. The screw connec-
tion function does this for you automatically.
Open the file md_ex02 in the desktop\tutorial folder.
NOTE Back up the tutorial drawing files so you still have the original files if you
make a mistake. See “Backing up Tutorial Drawing Files” on page 40.
The drawing contains two parts of a housing.
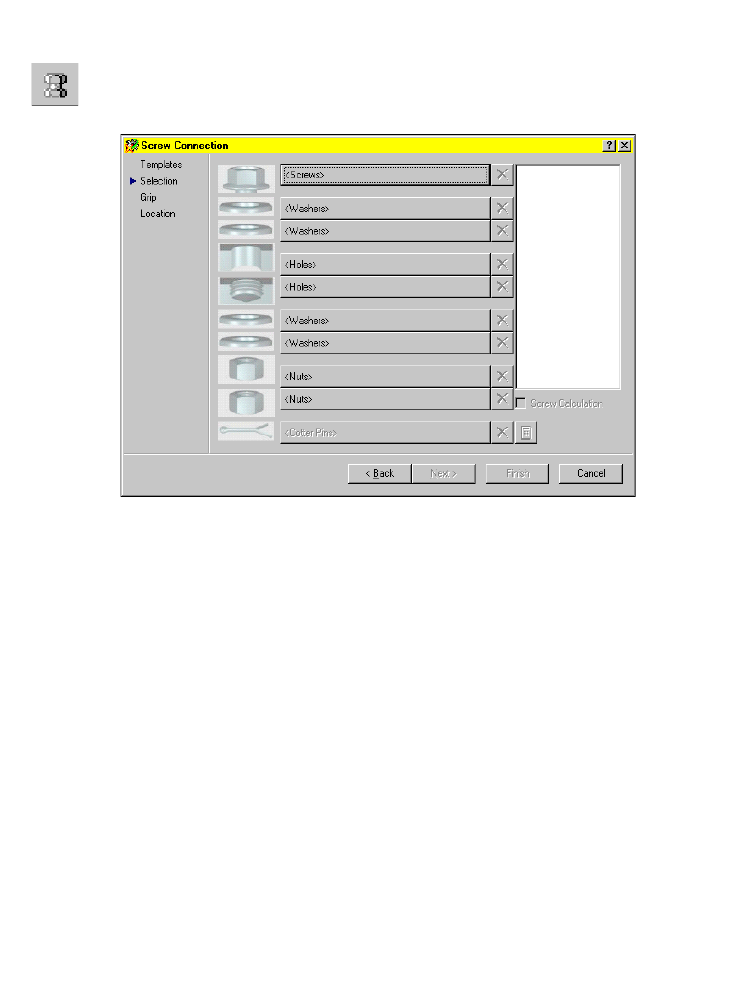
682 |Chapter 22 Working with Standard Parts
To insert a screw connection
1Use AMSCREWCON3D to choose and define the screw to insert.
Menu Content 3D ➤ Screw Connection
In the Screw Connection dialog box, select Screws.
Next, define the type of screw.

Inserting Screw Connections |683
2In the Please select a Screw dialog box, select Socket Head Types.
Select the screw IS2401.
The Screw Connection dialog box is displayed again.
3Repeat steps 1 and 2 to select and define each of the following parts:
Hole ➤ Through Cylindrical ➤ IS1602 normal
Hole ➤ Through Cylindrical ➤ IS1602 normal
Nut ➤ Hex Nuts ➤ ISO842
After you select and define the parts for the screw connection, select a size for
the diameter.
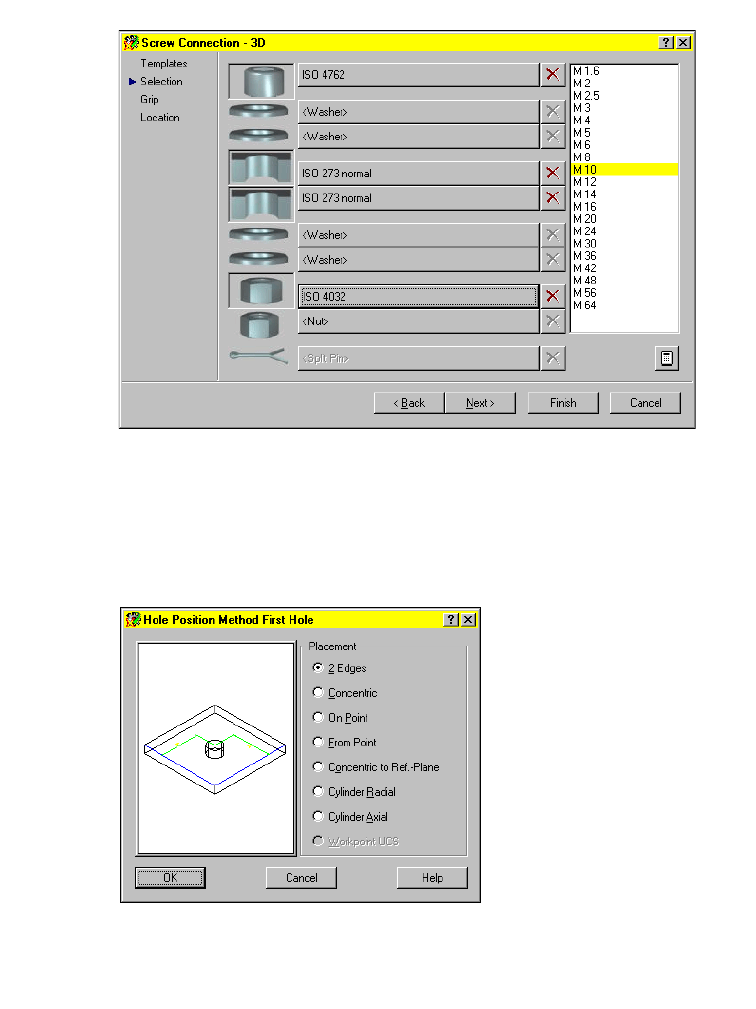
684 |Chapter 22 Working with Standard Parts
4Select M10 for the diameter.
Choose Finish.
The Hole Position Method First Hole dialog box is displayed.
5In the Hole Position Method First Hole dialog box, specify the hole position-
ing method as follows:
Placement: 2 Edges
Choose OK.

Inserting Screw Connections |685
6On the command line, respond to the prompts as follows:
Select first edge or planar face: Specify the first edge (1)
Select second edge or planar face: Specify the second edge (2)
Continue on the command line.
Specify the hole location: Specify a point on the face, offset from the two edges
Enter distance from first geometry (highlighted) [Associate to/Equation assistant]
<15.06>: Enter 20
Enter distance from second geometry (highlighted) [Associate to/Equation
assistant] <23.05>: Enter 20
Hole termination [toPlane/Thru] <Thru>: Press ENTER
1
2

686 |Chapter 22 Working with Standard Parts
7In the Hole Position Method Next Hole dialog box, specify:
Placement: Workpoint UCS
Choose OK.
8Respond to the prompt as follows:
Select next part to drill through: Select the lower part (3)
Continue on the command line:
Hole termination [toPlane/Thru] <Thru>: Press ENTER
3
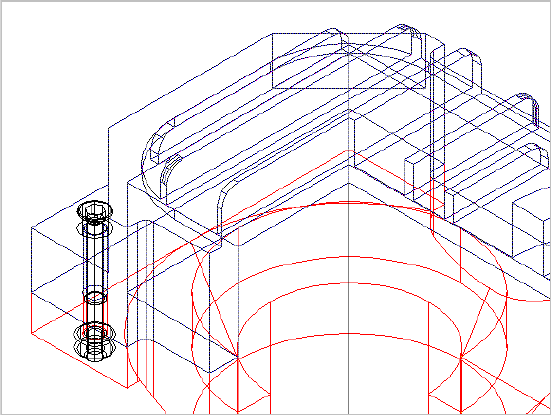
Inserting Screw Connections |687
The screw connection is inserted. Your drawing should look like this:
You have completed this tutorial.
Save the file as md6_ex17b.dwg.

688

689
In This Chapter 23
Creating Shafts
The shaft generator in Autodesk® Mechanical Desktop® 6
is an automated feature that eliminates the need for
many of the manual steps previously required to create
shafts.
In this tutorial, you learn how to design shafts using the
shaft generator. You create a shaft with segments of
different shapes, and add threads and a profile. Then
you edit the shaft and add standard parts to it. Finally,
you check your design in front and isometric views with
wireframe and shaded displays.
Run Mechanical Desktop with the power pack to
perform this tutorial.
■New in this tutorial
■Using the Shaft Generator
■Creating shaft geometry
■Adding thread and profile
information to a shaft
■Editing a shaft
■Adding standard parts to a shaft
■Shading and displaying 3D views

690 |Chapter 23 Creating Shafts
Key Terms
Te r m Definition
bearing calculation Calculates limiting value, dynamic and static load rating, dynamic and static
equivalent load, and fatigue life of bearing in revolutions and hours.
centerline Line in the center of a symmetrical object. When you create centerlines, you
specify the start and end points.
chamfer A beveled surface between two faces or surfaces.
dynamic calculation Calculation required for a revolving bearing. The result is the Adjusted Rating Life.
This is the life of the bearing associated with 90% reliability with contemporary,
commonly used material, and under conventional operating conditions. With the
number of revolutions you get the life in working hours.
dynamic dragging The act of determining the size of a standard part with the cursor while inserting
it into a side view. The standard part is displayed dynamically on the screen and
can be dragged to the next possible size and length. The values (sizes) are taken
from the Standard parts database.
shaft generator Tool to draw rotationally symmetric parts.
UCS User coordinate system. Designated by arrows that signify the XY coordinates.
Establishes a construction plane and simplifies location of 3D points. Provides
visual reference for positioning a surface.
Tutorial at a Glance |691
Tutorial at a Glance
It is no longer necessary to create a cylinder manually and define new sketch
planes and work planes in order to create a shaft. Instead, you make selec-
tions in the 3D Shaft Generator dialog box, and enter values to further define
your selections.
In this tutorial you use this automated feature to
■Create a shaft with cylindrical and conical sections.
■Add threads and a profile to the shaft.
■Edit the shaft.
■Add standard parts to the shaft.
■Shade and display 3D views of the shaft.
Basic Concepts of the Shaft Generator
The shaft generator is an automated feature for creating shafts of many con-
figurations, including outer and inner shaft contours for hollow shafts, You
define the different segments of a shaft using the options in the 3D Shaft
Generator dialog box.
As you select and define each segment, it is generated automatically and
added to the shaft. Usually, you work from left to right as you add different
types of segments, such as cylinders, cones, thread, profiles, and grooves.
Shaft segments can be inserted, deleted, or edited.
Each element of a shaft is generated from the segment preceding it. When
you delete a shaft element, you also delete the shaft elements that follow.
As you create shaft segments, corresponding icons for the work features and
shaft contours are displayed in the Desktop Browser.
While you are creating the shaft, it is helpful to display front and isometric
views using two viewports. Toggling between wireframe and shaded displays
also makes it easier to visualize your design.
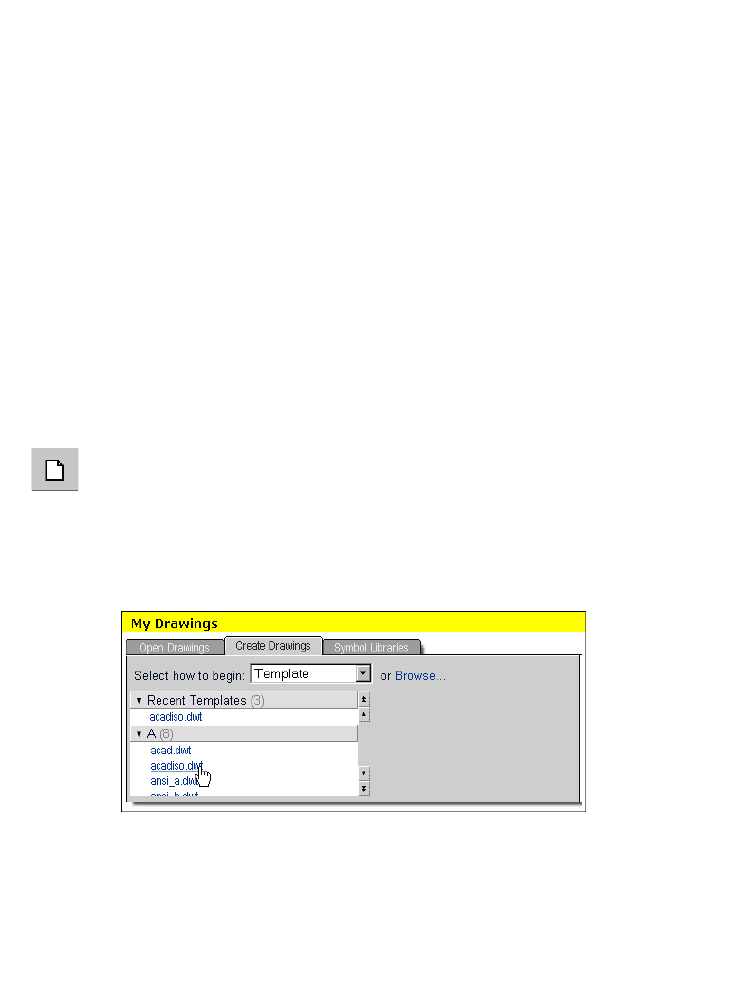
692 |Chapter 23 Creating Shafts
Using the Shaft Generator
You use the 3D Shaft Generator dialog box to select a type of shaft segment,
such as a cylinder or a cone, and then you define that segment. The shaft
generator creates the segment automatically and adds it to the previous
segment.
Getting Started
In order to work through this tutorial chapter, the ISO standard system has
to be installed at your system.
Moreover, you need to set your measurement units to metric. This can easily
be done by selecting an appropriate drawing template. Open the drawing
template acadiso.dwt.
To open a drawing template
1Open a new template.
Menu File ➤ New
Command NEW
The AutoCAD Mechanical Today window is displayed.
2In the AutoCAD Mechanical Today window, in the section My Drawings,
change to the tab Create Drawings, and select the template acadiso.dwt.
Now, you are working with the selected template.
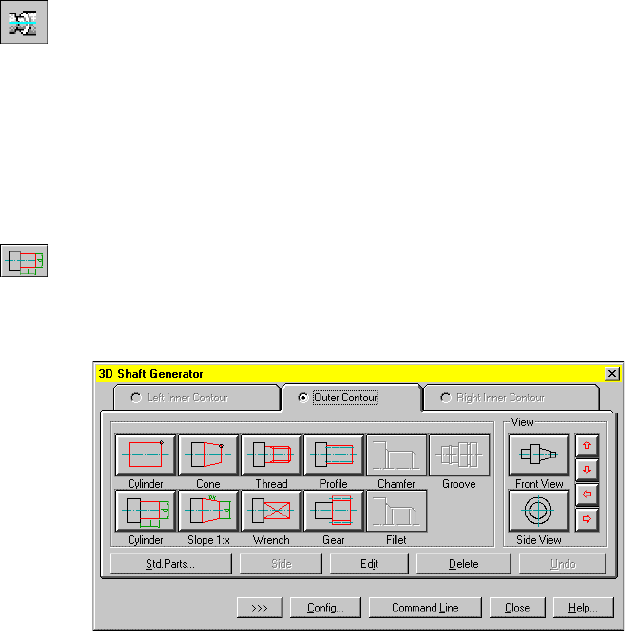
Using the Shaft Generator |693
Creating Shaft Geometry
You start creating the shaft by defining the segments that govern its shape.
In the 3D Shaft Generator dialog box, you select the first segment type and
then you define that segment. You continue adding segments until the con-
tour of the shaft is complete.
To create a shaft using the shaft generator
1Use AMSHAFT3D to define the shaft.
Menu Content 3D ➤ Shaft Generator
Respond to the prompts as follows:
Specify start point or [Existing shaft]: Select a point in the drawing
Specify centerline endpoint: Drag a line to the right, and select a point
Specify point for new plane <parallel to UCS>: Press ENTER
The 3D Shaft Generator dialog box is displayed.
Define the shaft contour, starting with the segment at the left, and working
to the right.
2Verify the Outer Contour tab is selected, then choose the lower Cylinder icon.
Respond to the prompts as follows:
Specify length or [Associate to/Equation assistant] <50>: Enter 10
Specify diameter or [Associate to/Equation assistant] <40>: Enter 74
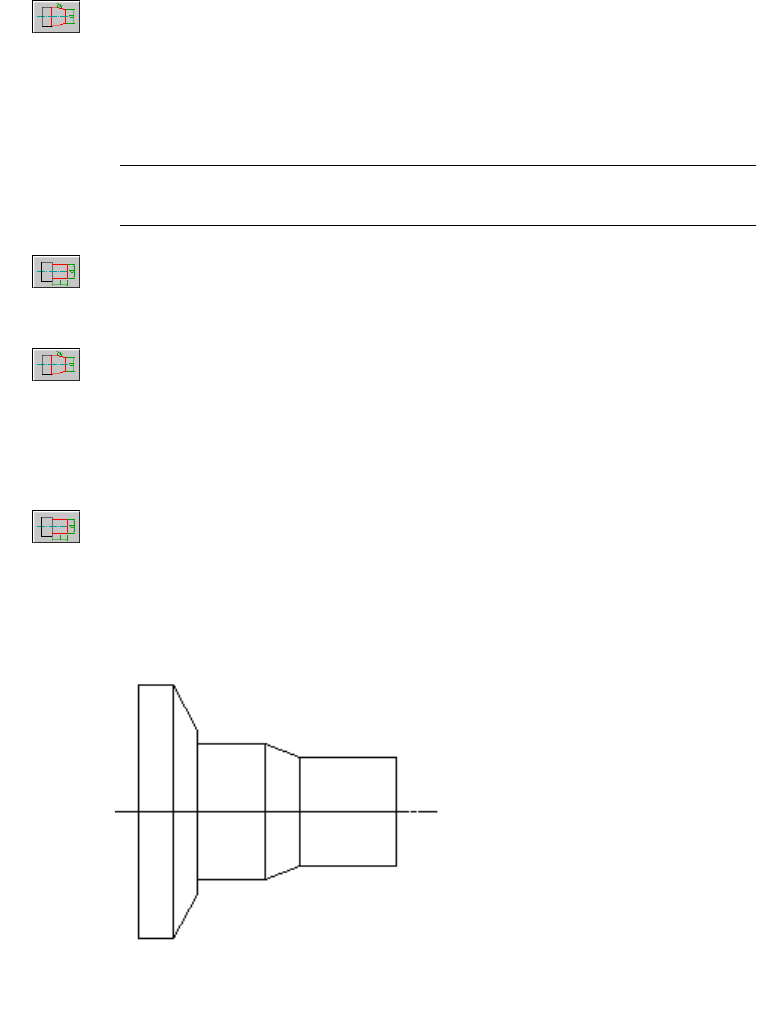
694 |Chapter 23 Creating Shafts
3Choose the Slope icon, and respond to the prompts as follows:
Specify length or [Dialog/Associate to/Equation assistant] <10>: Enter 7
Specify diameter at start point or [Associate to/Equation assistant] <74>:
Press ENTER
Specify diameter at end point or [Slope/aNgle/Associate to/Equation assistant]
<72>: Enter 48
NOTE If the 3D Shaft Generator dialog box hides your shaft, move the dialog
box to another position on the screen.
4Choose the lower Cylinder icon again, and respond to the prompts as follows:
Specify length or [Associate to/Equation assistant] <7>: Enter 20
Specify diameter or [Associate to/Equation assistant] <48>: Enter 40
5Choose the Slope icon again, and respond to the prompts as follows:
Specify length or [Dialog box/Associate to/Equation assistant] <20>: Enter 10
Specify diameter at start point or [Associate to/Equation assistant] <40>:
Press ENTER
Specify diameter at end point or [Slope/aNgle/Associate to/Equation assistant]
<36>: Enter 32
6Choose the lower Cylinder icon once more, and respond to the prompts as
follows:
Specify length or [Associate to/Equation assistant] <10>: Enter 28
Specify diameter or [Associate to/Equation assistant] <32>: Press ENTER
You have created a shaft consisting of three cylindrical and two conical seg-
ments. Your drawing should look like this.
Next, you add thread information to the shaft.
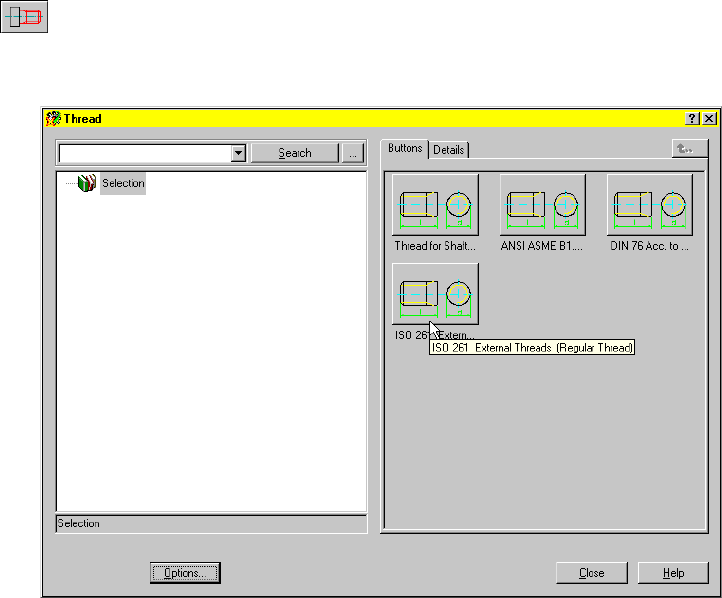
Using the Shaft Generator |695
Adding Threads to Shafts
The 3D Shaft Generator dialog box provides the option to add threads to a
shaft. You define the thread information in the Thread dialog box, and the
thread is added to the shaft automatically.
To add threads to a shaft
1In the 3D Shaft Generator dialog box, select the Outer Contour tab and
choose the Thread icon.
2The Thread dialog box is displayed. Select ISO 261 from the available thread
types.
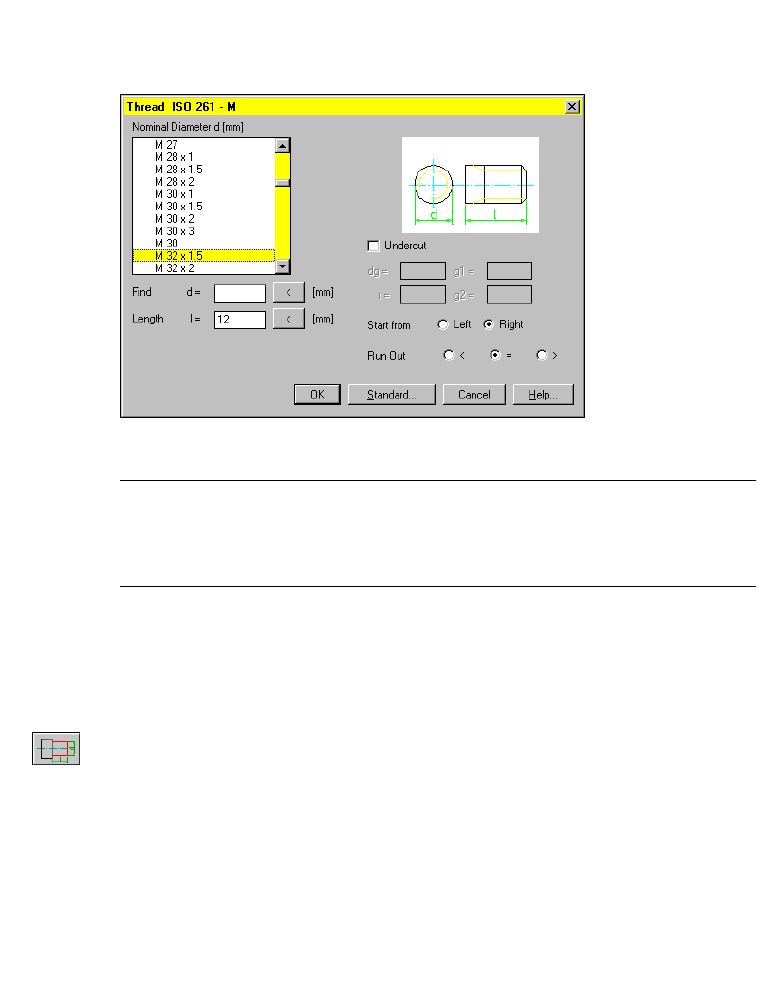
696 |Chapter 23 Creating Shafts
3The Thread ISO 261 dialog box is displayed. Specify:
Nominal Diameter d [mm]: M 32 x 1.5
Length l=: Enter 12
4Choose OK.
NOTE If you have previously chosen a thread standard, the Thread dialog box
opens directly to the Nominal Diameter selection screen (illustrated above).
There is no need to choose the same standard again. To return to the standard
selection list in the Thread dialog box, choose Standard.
Mechanical Desktop Power Pack calculates the thread and adds it to the
shaft, then returns you to the 3D Shaft Generator dialog box.
Following the thread segment, you need to add another cylindrical segment
with a diameter smaller than the threaded section.
5Choose the lower Cylinder icon, and respond to the prompts as follows:
Specify length or [Associate to/Equation assistant] <28>: Enter 2
Specify diameter or [Associate to/Equation assistant] <32>: Enter 25
The new segment is added, and you are ready to add a profile to your shaft.

Using the Shaft Generator |697
Adding Profile Information to Shafts
The 3D Shaft Generator dialog box provides the option to add a profile to a
shaft. You further define the profile information in the Shaft dialog box.
Add a profile segment to connect a drive to the shaft.
To add a profile to a shaft
1In the 3D Shaft Generator dialog box, choose the Profile icon.
2In the Profile dialog box, select ISO 14.
3In the Splined Shaft dialog box, specify:
Nominal Size n x d x D [mm]: 6 x 26 x 30
Length l=: Enter 30
Choose OK.
The profile is added to the shaft.
Add another small cylindrical segment to the end of the shaft.
4In the 3D Shaft Generator dialog box, choose the lower Cylinder icon again,
and respond to the prompts as follows:
Specify length or [Associate to/Equation assistant] <30>: Enter 5
Specify diameter or [Associate to/Equation assistant] <30>: Enter 25

698 |Chapter 23 Creating Shafts
5Close the 3D Shaft Generator dialog box.
The shaft contour is complete. Your drawing should look like this.
Save your drawing as shaft.dwg.
Next, you edit the shaft.
Editing Shafts
You can make changes to simple shaft segments such as cylinders and cones.
It is recommended that you delete a more complex segment, such as a gear,
and create a new one. In this exercise, you add a chamfer to a segment and
you add a groove to another segment.
First, add a chamfer to the end segment of your shaft.
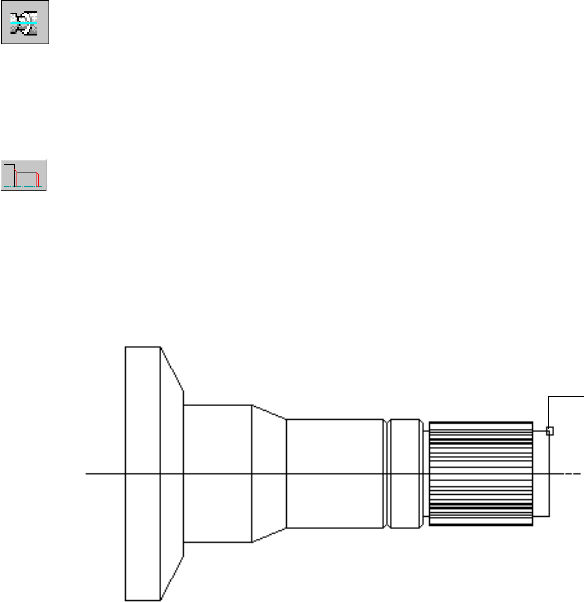
Using the Shaft Generator |699
To add a chamfer to a shaft segment
1Activate the shaft generator.
Menu Content 3D ➤ Shaft Generator
Command AMSHAFT3D
2On the command line, respond to the prompts as follows:
Specify start point or [Existing shaft]: Enter E
Select shaft: Select the shaft
3In the 3D Shaft Generator dialog box, select the Outer Contour tab. Choose
the chamfer icon, and respond to the prompts as follows:
Select edge for chamfer: Select the edge (1)
Specify length (max. 5) or [Associate to/Equation assistant] <2.5>: Enter 2.5
Specify angle (min 0.0001, max 78.69) [Distance/Associate to/Equation
assistant] <45>: Enter 45
Enter an option [Revolve/Chamfer] <Revolve>: Press ENTER
The chamfer is created on the shaft end.
In the next step, you use the 3D Shaft Generator dialog box to insert a groove
for a retaining ring on a section of the shaft. This groove will be used for posi-
tioning a bearing.
1
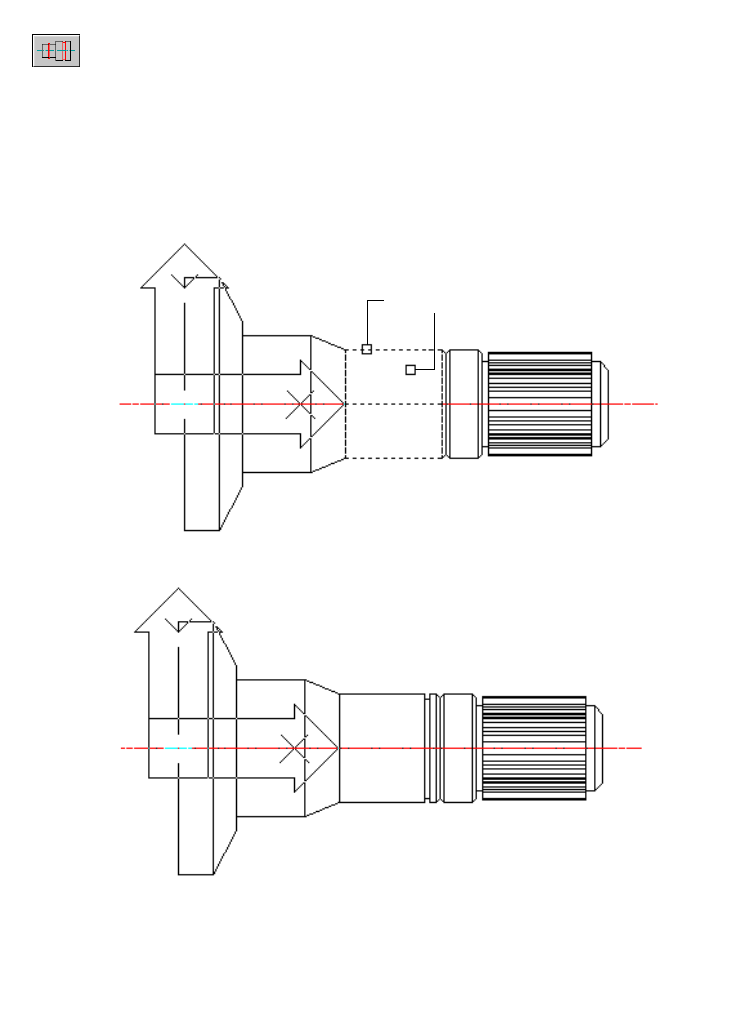
700 |Chapter 23 Creating Shafts
To insert a groove on a shaft segment
1Choose the Groove icon, and respond to the prompts as follows:
Select cylinder or cone: Select the third cylindrical section (1)
Select position on cylinder or cone [Line/Plane]: Specify the point (2)
Specify direction or [Flip/Accept] <Accept>: Press ENTER
Enter distance from base plane [Associate to/Equation assistant] <11.4>:
Enter 25
Specify length or [Associate to/Equation assistant] <5>: Enter 1.5
Specify diameter <50>: Enter 29
The groove is inserted and displayed on the shaft.
The edits to the shaft are complete.
2Close the 3D Shaft Generator dialog box.
Save your file.
Now that you have finished the shaft, you add standard parts to it.
12
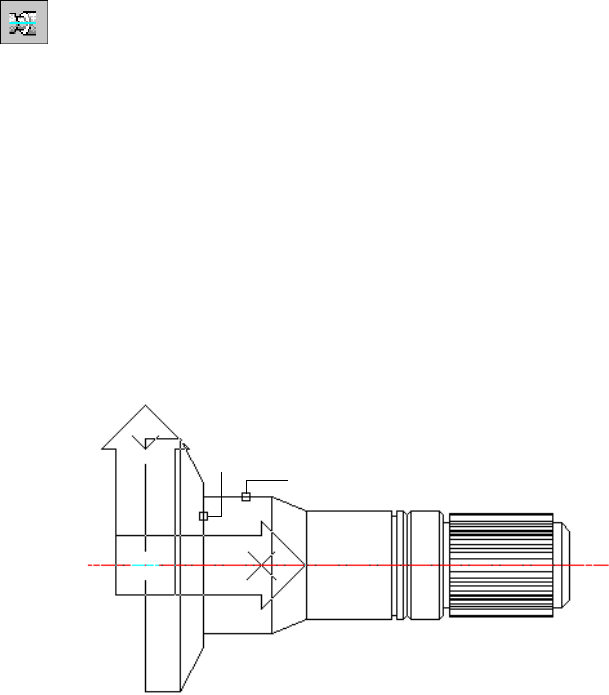
Using the Shaft Generator |701
Adding Standard Parts to Shafts
In Mechanical Desktop Power Pack, standard parts such as bearings, seals,
circlips, keys, adjusting rings, and undercuts are available. You can select and
insert these standard parts using the shaft generator.
When you insert a standard part on a shaft, the standard part is not con-
sumed by the shaft. You are actually building an assembly. An icon for each
new part is displayed in the Browser under the assembly icon.
To add a bearing to a shaft
1Use AMSHAFT3D TO add a standard part to the shaft.
Menu Content 3D ➤ Shaft Generator
Command AMSHAFT3D
2On the command line, respond to the prompts as follows:
Specify start point or [Existing shaft]: Enter E
Select shaft: Select the shaft
3The 3D Shaft Generator dialog box is displayed. Choose Std. Parts.
4In the Select a Part dialog box, choose Roller Bearings ➤ Radial ➤ ISO 355.
Respond to the prompts as follows:
Select cylindrical face: Select a point on the third shaft segment (1)
Specify location on cylindrical face [Line/Plane]:
Select the left plane of the third shaft segment (2)
Enter distance from base plane [Associate to/Equation assistant] <0>:
Press ENTER
Choose insertion direction [Flip/Accept] <Accept>: Press ENTER
1
2
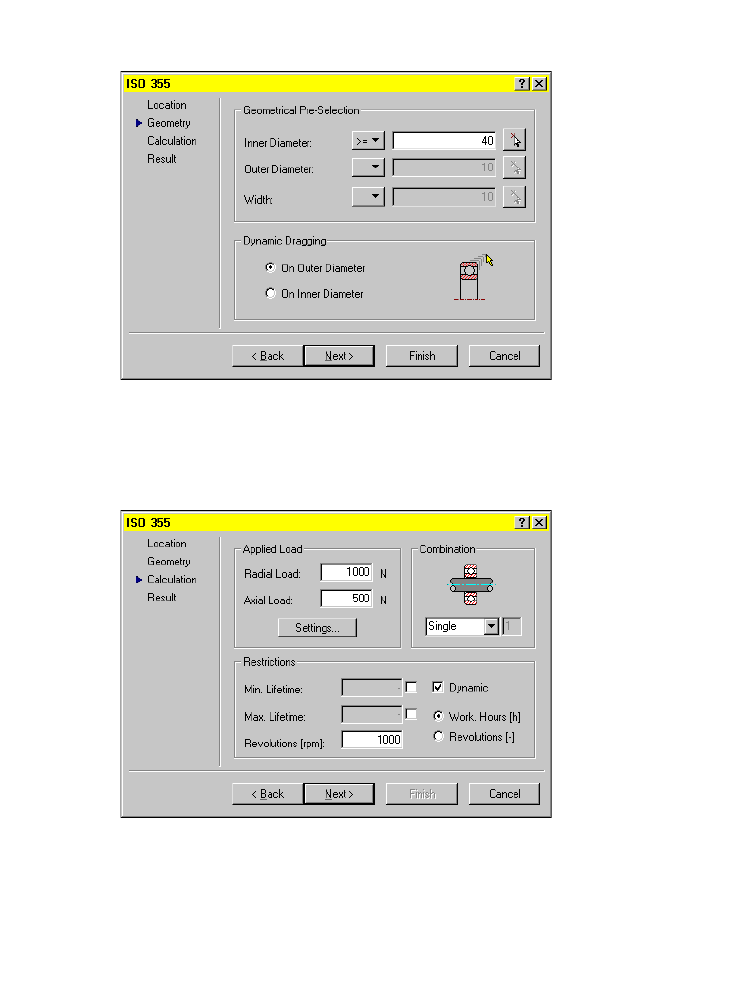
702 |Chapter 23 Creating Shafts
5In the ISO 355 dialog box, verify Geometry is selected and specify:
Inner Diameter: 40
Choose Next to continue.
You use the ISO 355 dialog box for the bearing calculation.
6In the ISO 355 dialog box, verify Calculation is selected and specify the val-
ues as shown below.
By choosing dynamic calculation, Mechanical Desktop is calculating the
adjusted rating life of the bearing.
Choose Next.
The possible bearings are calculated and the results are displayed in the ISO
355 dialog box in Result. Two tabs are provided so you can check both your
input and results.
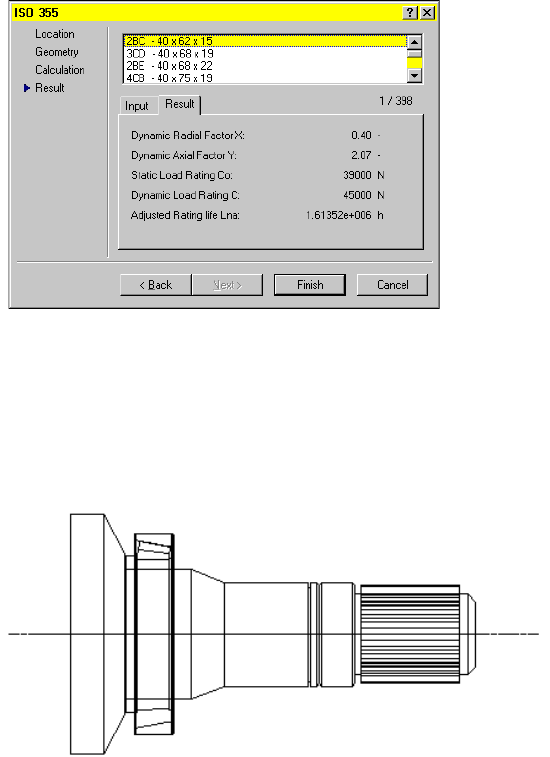
Using the Shaft Generator |703
7In the ISO 355 dialog box, select the Result tab, and then select 2BC - 40 x 62
x 15.
Choose Finish.
Use dynamic dragging to size the bearing on the screen.
8Respond to the prompt as follows:
Drag size [Dialog] <10>:
Drag the bearing, and click when 2BC - 40 x 62 x 15 is displayed in the status bar
The bearing is inserted and your drawing should look like this.
Insert a second bearing, starting from the groove at the left of the fifth
segment of the shaft.
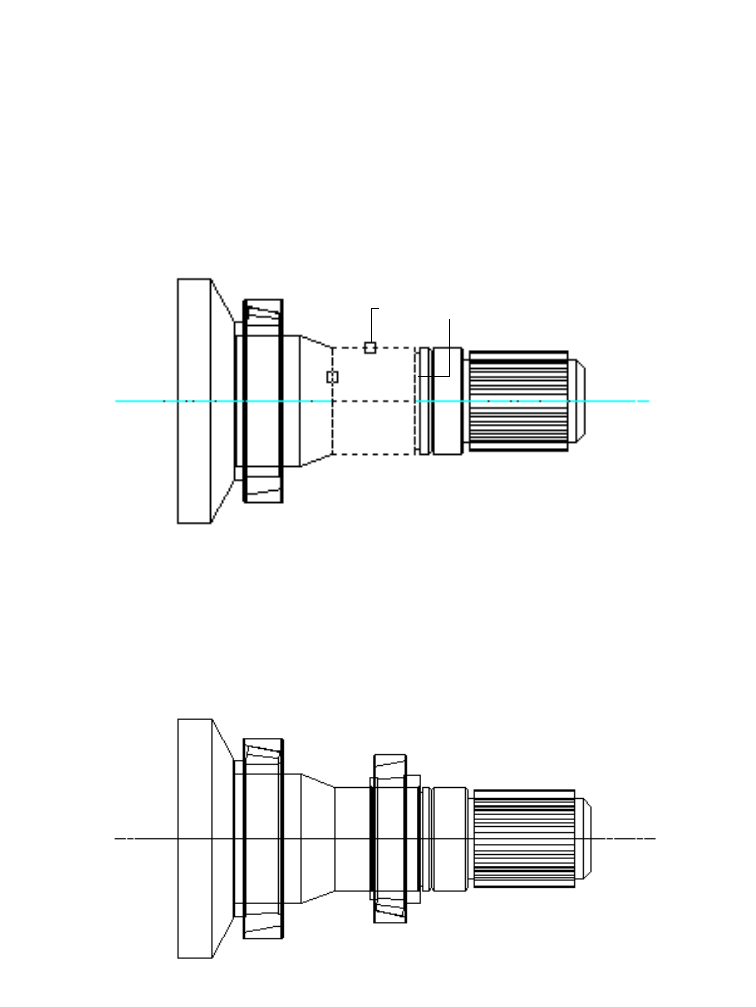
704 |Chapter 23 Creating Shafts
To add the second bearing
1In the 3D Shaft Generator dialog box, choose Std. Parts.
2In the Select a Part dialog box, choose Roller Bearings ➤ Radial ➤ ISO 355.
3Respond to the prompts as follows:
Select cylindrical face: Select a point on the fifth shaft segment (1)
Specify location on cylindrical face [Line/Plane]:
Select the right plane of the fifth shaft segment (2)
Enter distance from base plane [Associate to/Equation assistant] <25>:
Press ENTER
Choose insertion direction [Flip/Accept]: Enter f
4Use the default values for the calculation, and select the bearing ISO 355 2BD
- 32 x 52 x 14.
5Place the bearing by responding to the prompt as follows:
Drag size [Dialog] <10>:
Drag the bearing, and click when 2BC - 32 x 52 x 14 is displayed in the status bar
Close the 3D Shaft Generator dialog box. Your drawing should look like this.
Save your file.
12
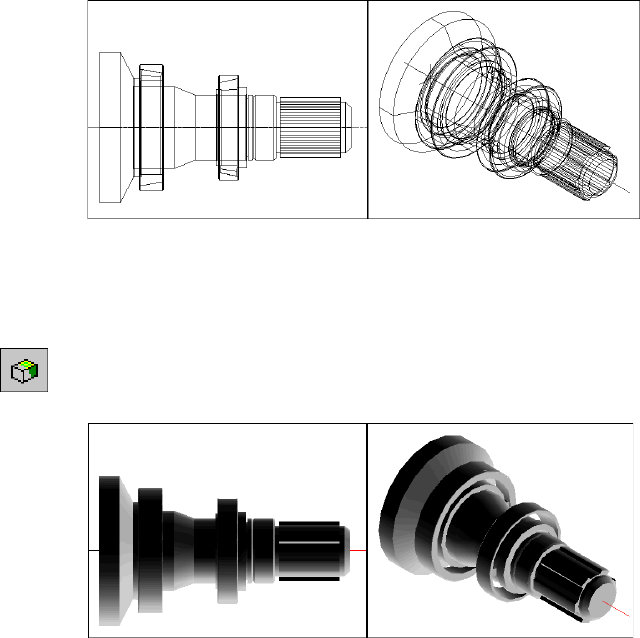
Using the Shaft Generator |705
Displaying and Shading 3D Views
You can split your screen to display the front and isometric views of the shaft
in separate viewports. You can activate a viewport by clicking inside its
border.
To display front and isometric views in a split screen
1On the command line, enter 2, and press ENTER.
Your drawing area is split to display front and isometric views in separate
viewports.
2Click a viewport to activate it.
3Use AMDT_TOGGLE_SHADWIREF to add shading to the shaft.
Menu View ➤ Shade ➤ Gouraud Shaded
4Activate the second viewport and toggle to shading.
For better visualization, you can change the color properties of a single part,
such as the bearing.

706 |Chapter 23 Creating Shafts
To change the color of a single part on a shaft
1In the Desktop Browser, right-click a bearing and choose Properties ➤ Color.
2Select a different color.
The bearing is displayed in a different color on the shaft. Try changing the
colors of the other parts on the shaft.
Save your file.

707
In This Chapter 24
Calculating Stress on 3D
Parts
Autodesk® Mechanical Desktop® 6 Power Pack includes
a feature called 3D finite element analysis (FEA). FEA is
used to calculate deformation and stress conditions on
3D parts. The 3D FEA calculations feature is a reliable
tool that helps you meet the demands of today’s
sophisticated mechanical engineering.
In this tutorial, you calculate stress on a 3D part using
3D FEA. You create the mesh required to display the
results of the calculations, and then you define the loads
and make the calculations. When you finish, the
calculations are displayed in tables.
Run Mechanical Desktop with the power pack to
perform this tutorial.
■New in this tutorial
■Using 3D FEA calculations
■Defining loads
■Calculating and displaying the
result

708 |Chapter 24 Calculating Stress on 3D Parts
Key Terms
Te r m Definition
distributed force A force that is spread over an area.
FEA Finite element analysis. A calculation routine, or method. Calculates stress and
deformation in a plane for plates with a given thickness, or in a cross section with
individual forces, stretching loads, and fixed and/or moveable supports. The FEA
routine uses its own layer group for input and output.
fixed support A support that is fixed to a part and cannot be moved.
load Forces and moments that act on a part.
mesh Graphical representation of a mesh pattern on a model, required for FEA
calculation and display of the result.
result Results of FEA calculations. Result is displayed in a table, and as surface isoareas on
a model.
stress Force or pressure on a part. Stress is force per area.
surface isoarea Graphic representation of a stress calculation result displayed on the surface of a
model.
Tutorial at a Glance |709
Tutorial at a Glance
The 3D FEA calculations feature is a simple tool that eliminates the need for
the complex programs and calculations previously required to perform stress
and deformation calculations. In this tutorial, you learn to use 3D FEA for
calculations as you
■Start a finite element analysis.
■Define stress loads.
■Generate a mesh.
■Calculate and display the result.
Basic Concepts of 3D FEA
In Mechanical Desktop Power Pack, you use the FEA Calculation 3D dialog
box options to choose the
■Material of your part
■Revolution direction
■Type and quantity of supports and loads
The FEA calculations are dependent upon the definitions you enter for loads
and boundary conditions.
You consider how to reproduce the reality in your model, and how to define
the boundary conditions to achieve the best result. The more precise your
model is, the more useful the results are.
The FEA procedure uses a separate layer group for input and output.

710 |Chapter 24 Calculating Stress on 3D Parts
Using 3D FEA Calculations
To begin calculating the stress conditions on your model, you open the FEA
Calculation 3D dialog box. You work in this dialog box to choose the types
and quantity of loads and supports, and to define the loads and boundary
conditions.
Before you perform the calculation, you create a mesh on your 3D part. This
mesh is required to display the results of the calculation. The calculation is
displayed on your model using isoareas that define the limits of the stresses
and deformations. Tables are automatically created to define the calculations
for each isoarea.
Performing Finite Element Analyses
In the following exercise, you work with a lever that is loaded with a mass
and bolted at two faces. You reproduce these two points on the model as two
face supports, and define the mass as a face load at the front rectangular face.
Open the file md_ex03.dwg in the desktop\tutorial folder.
NOTE Back up the tutorial drawing files so you still have the original files if you
make a mistake. See “Backing up Tutorial Drawing Files” on page 40.
The drawing contains a 3D part, which is the basis for your calculations.
The first step is to open the FEA Calculations 3D dialog box.
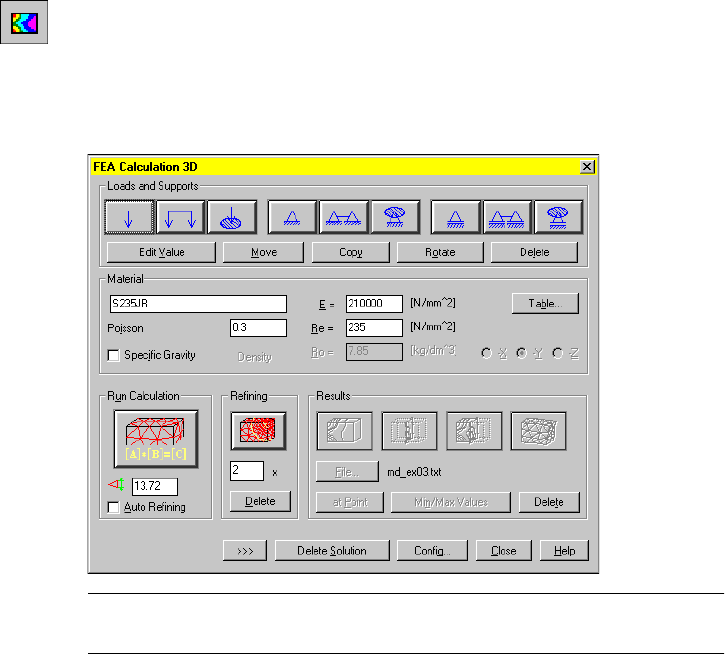
Using 3D FEA Calculations |711
To start a finite element analysis
1Use AMFEA3D to perform the FEA calculation.
Menu Content 3D ➤ Calculations ➤ FEA
Respond to the prompt as follows:
Select 3D-Body: Select the 3D part
The FEA Calculation 3D dialog box is displayed.
NOTE If the FEA Calculation 3D dialog box hides your drawing, move the
dialog box to another position on the screen.
Defining Supports and Forces
Next, you define the supports and forces that act on your part. These defini-
tions are used for the FEA calculations.
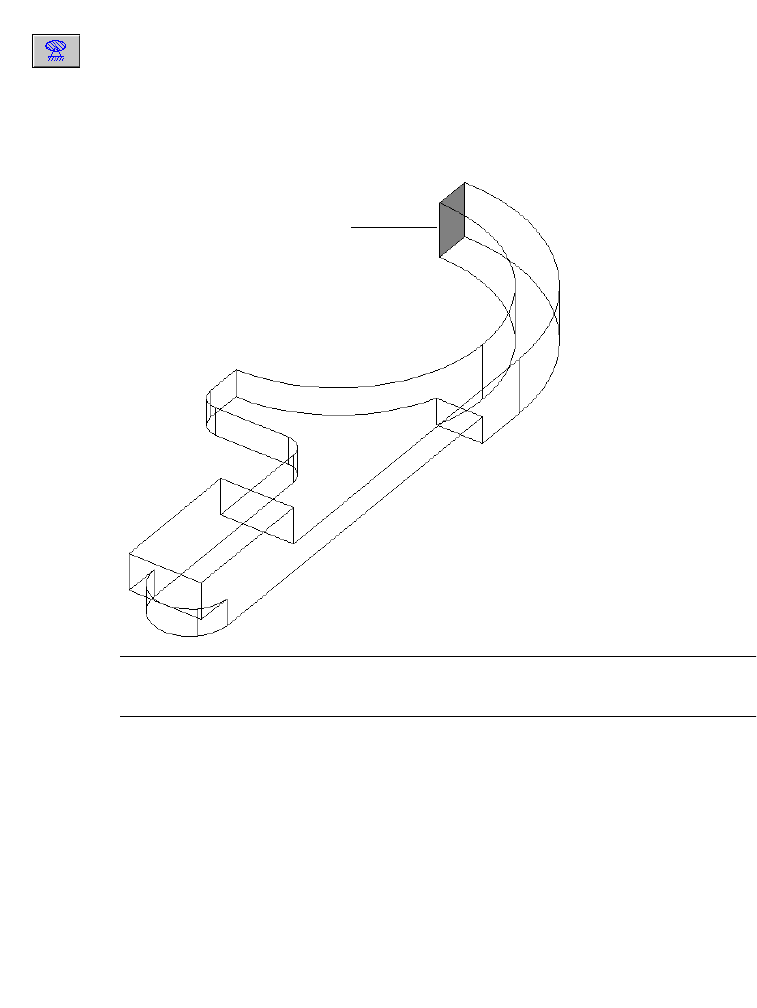
712 |Chapter 24 Calculating Stress on 3D Parts
To define supports and forces on a part
1In the FEA Calculation 3D dialog box, choose the Face Support icon and
respond to the prompts as follows:
Select a surface: Click the edge (1) of the surface
Specify face [Accept/Next] <Accept>:
Press N to cycle to the surface you selected, then press ENTER
NOTE You may prefer to turn OSNAP off before you create and constrain the
work point. Click the OSNAP button at the bottom of your screen.
The Define Border for Load, Support dialog box is displayed.
1
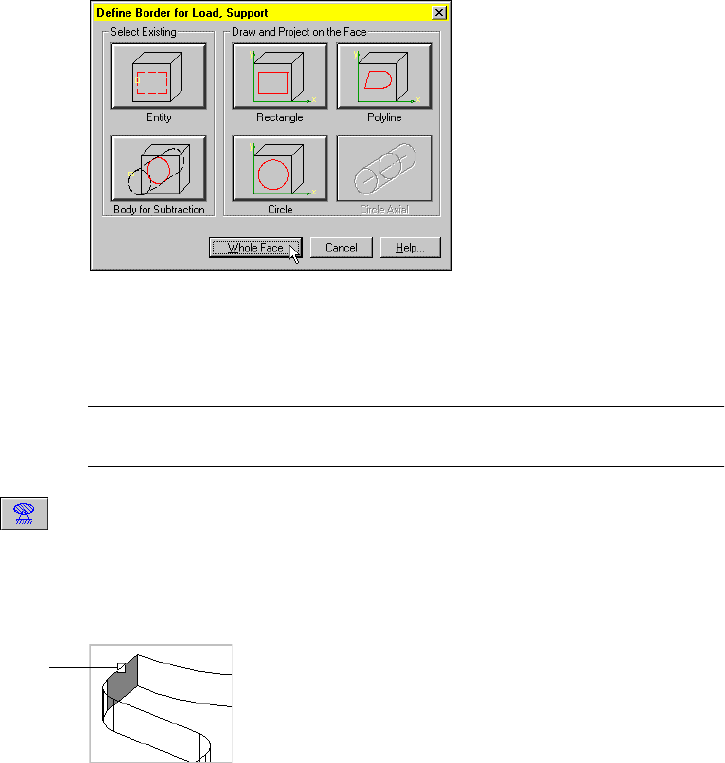
Using 3D FEA Calculations |713
2In the Define Border for Load, Support dialog box, choose Whole Face.
Respond to the prompts as follows:
Define insertion point for main symbol:
Specify point or [Dialog]:
Specify a point, other than an edge, on the selected face
NOTE If the support does not act on the whole face, you can define an area
using the different options. See the Help for more information.
3In the FEA Calculation dialog box, choose the Face Support icon again, and
respond to the prompts as follows:
Select a surface: Click the edge (2) of the surface
Specify face [Accept/Next] <Accept>:
Press N to cycle to the surface you selected, then press ENTER
The Define Border for Load, Support dialog box is displayed.
2
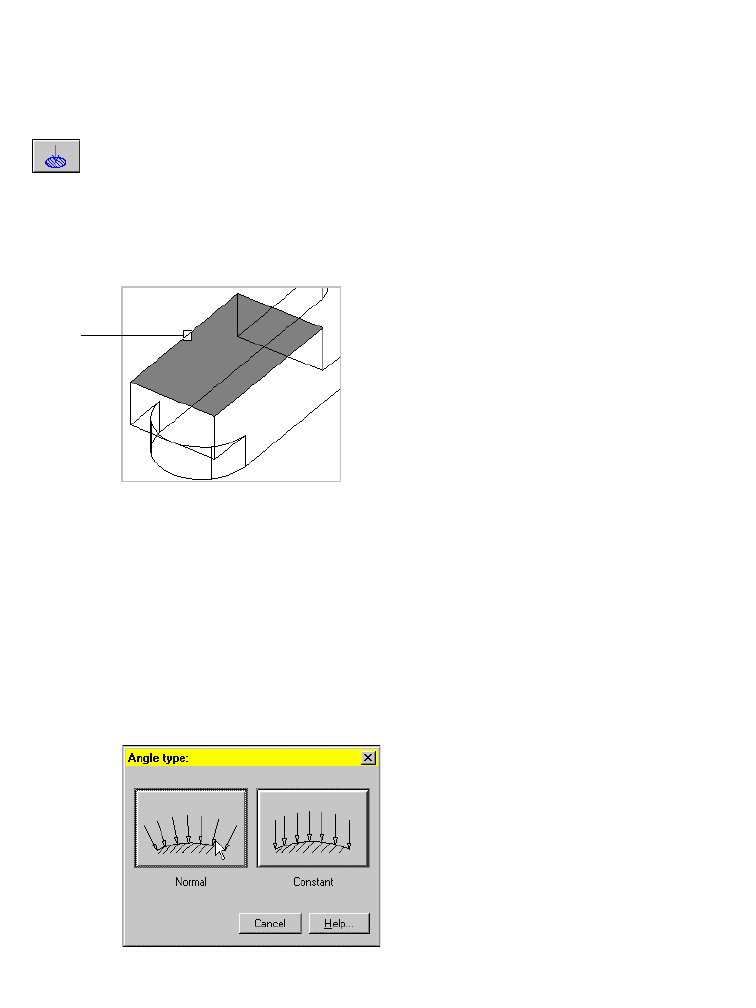
714 |Chapter 24 Calculating Stress on 3D Parts
4In the Define Border for Load, Support dialog box, choose Whole Face, and
respond to the prompts as follows:
Define insertion point for main symbol:
Specify point or [Dialog]:
Specify a point, other than an edge, on the selected face
5In the FEA Calculation dialog box, choose the Face Force icon and respond
to the prompts as follows:
Select a surface: Click the edge (3) of the surface
Specify face [Accept/Next] <Accept>:
Press N to cycle to the surface you selected, then press ENTER
The Define Border for Load, Support dialog box is displayed.
6In the Define Border for Load, Support dialog box, choose Whole Face, and
respond to the prompts as follows:
Define insertion point for main symbol:
Specify point or [Dialog]: Specify a point, other than edge, on the selected face
The Angle type dialog box is displayed. Choose Normal, and respond to the
prompt as follows:
Specify value of load <10 (N/mm^2)>: Enter 2
3
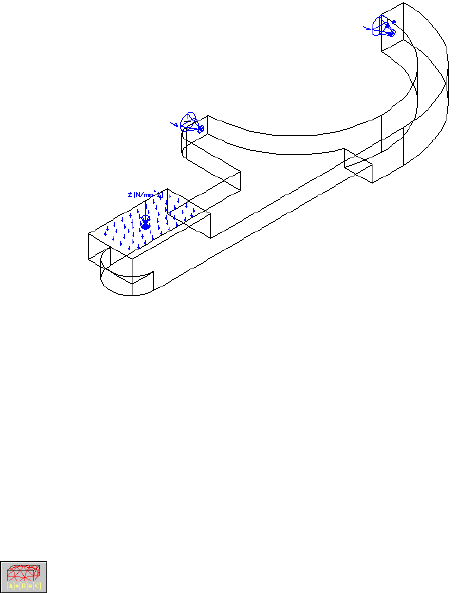
Using 3D FEA Calculations |715
You have the defined the border conditions for two supports and one force.
Your drawing should look like this:
Calculating and Displaying the Result
Continue in the FEA Calculation 3D dialog box to perform the calculations
and display the results.
Before you can calculate and display the result, you need to generate a mesh.
To generate a mesh
1In the FEA Calculation 3D dialog box, under Run Calculation, turn on Auto
Refining.
2Choose the Run Calculation icon.
The Working dialog box is displayed during the automatic calculation of the
mesh. When the calculation is finished, a mesh is displayed on your model.
Next, define the placement of the mesh.
3Respond to the prompt as follows:
Specify base point or displacement <in boundary>: Press ENTER
This completes the mesh.

716 |Chapter 24 Calculating Stress on 3D Parts
Continue in the FEA Calculation 3D dialog box to calculate surface isoareas
and deformation.
4Under Results, choose the Isolines (Isoareas) icon.
5In the Surface Isolines (Isoareas) dialog box, choose the Isoareas button, and
choose OK.
Your model with isoareas is displayed on the screen beside the model with
mesh.
Respond to the prompts as follows:
Specify base point or displacement <in boundary>: Press ENTER
Specify insertion point or [Paper space]:
Specify a location for the table to the left of the isoareas display
NOTE If necessary, zoom to fit the entire display to your screen before you
place the second table.
6In the Surface Isolines (Isoareas) dialog box, choose the Deformed Mesh icon.
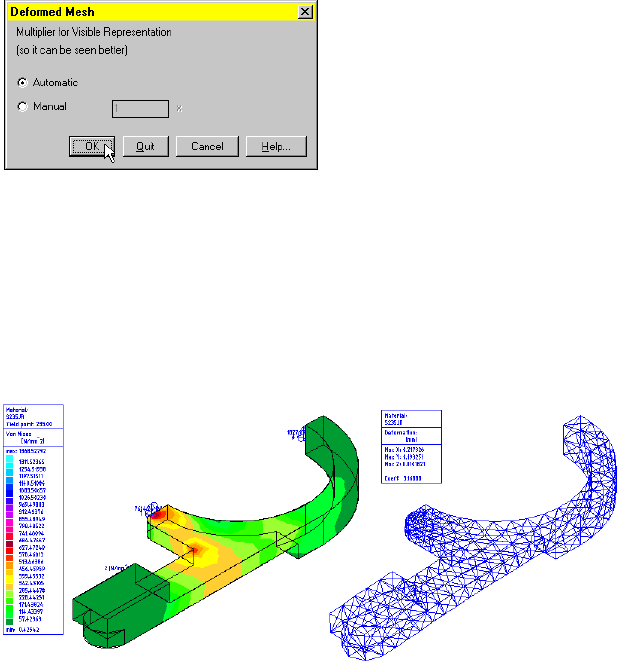
Using 3D FEA Calculations |717
7In the Deformed Mesh dialog box, turn on Automatic, and choose OK.
Respond to the prompts as follows:
Specify base point or displacement <in boundary>: Enter 150,150
Specify second point of displacement: Press ENTER
Specify insertion point or [Paper space]:
Specify a suitable location for the table near the mesh display
8Close the FEA Calculation 3D dialog box.
The calculations are finished, and the results are displayed.

718

In This Appendix
719
A
Toolbar Icons
Use this appendix as a guide to using the Autodesk®
Mechanical Desktop® toolbar icons. For an overview of
the toolbars and the Mechanical Desktop interface, refer
to “Mechanical Desktop Interface” on page 17 in
chapter 3.
■Desktop Tools toolbar icons
■Part Modeling toolbar icons
■Toolbody Modeling toolbar
icons
■Assembly Modeling toolbar
icons
■Surface Modeling toolbar icons
■Scene toolbar icons
■Drawing Layout toolbar icons
■Mechanical View toolbar icons

720 |Appendix A Toolbar Icons
Desktop Tools
If you are working in the Part Modeling environment, the Desktop Tools
toolbar contains three icons that activate the Part Modeling, Toolbody
Modeling, and Drawing Layout toolbars.
If you are working in the Assembly Modeling environment, the Desktop
Tools toolbar contains four icons that activate the Part Modeling, Assembly
Modeling, Scene, and Drawing Layout toolbars.
Part Modeling
Toolbody Modeling
Drawing Layout
Part Modeling
Assembly Modeling
Scene
Drawing Layout
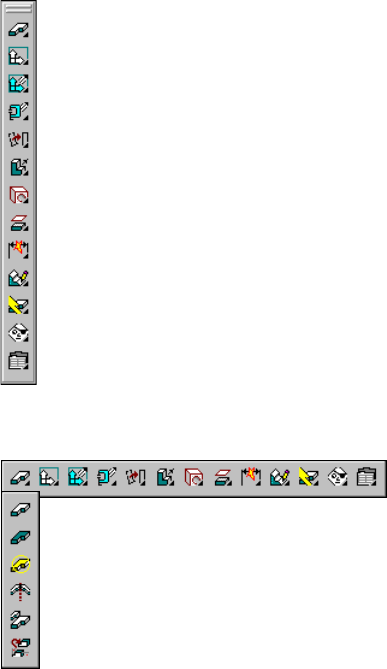
Part Modeling |721
Part Modeling
The Part Modeling toolbar provides the tools you need for creating and
modifying parts.
Part Modeling ➤ New Part
New Part Flyout
New Sketch Plane Flyout
Launches 2D Sketch Toolbar
Launches 2D Constraints Toolbar
Profile a Sketch Flyout
Sketched Features Flyout
Placed Features Flyout
Work Features Flyout
Power Dimensioning Flyout
Edit Feature Flyout
Update Part Flyout
Part Visibility Flyout
Options Flyout
New Part
Mirror Part
Scale Part
Activate Part
Show Active
Make Base Feature
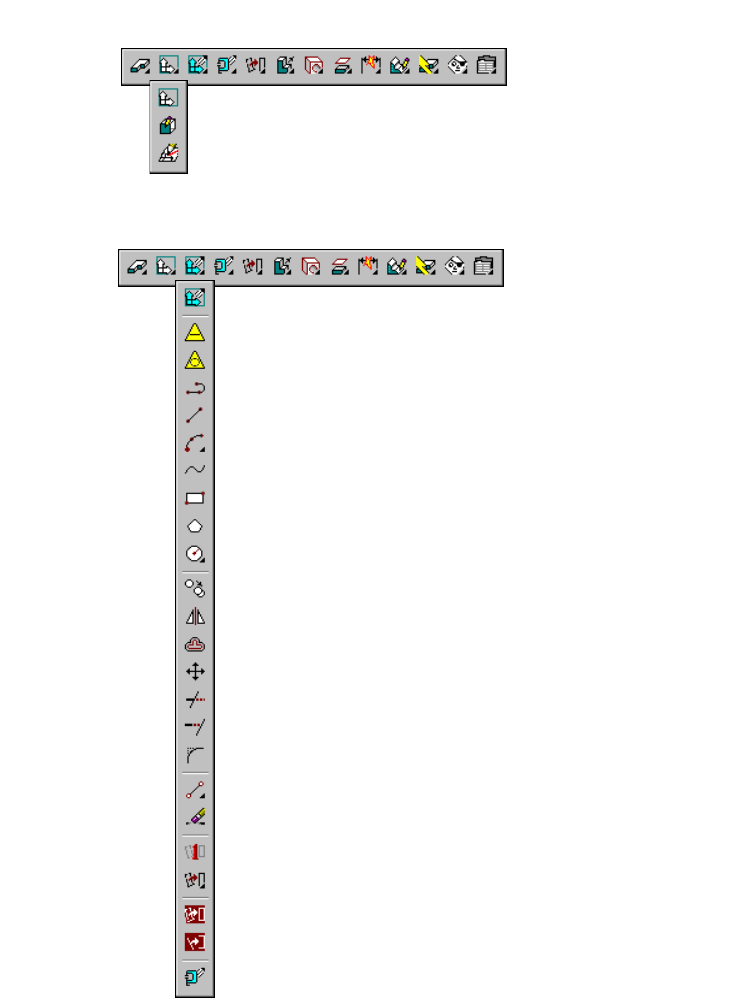
722 |Appendix A Toolbar Icons
Part Modeling ➤ New Sketch Plane
Part Modeling ➤ 2D Sketching
New Sketch Plane
Sketch View
Highlights Sketch Data
Launches 2D Sketch Toolbar
Construction Circle
Arc 3 Points Flyout
Rectangle
Construction Line
Circle Flyout
Copy Object
Mirror
Offset
Move
Trim
Extend
Fillet
Object Snaps Flyout
Erase
Re-Solve Sketch
Append to Sketch
Launches 2D Constraints Toolbar
Spline
Single Profile
Sketch Flyout
Polygon
Polyline
Line
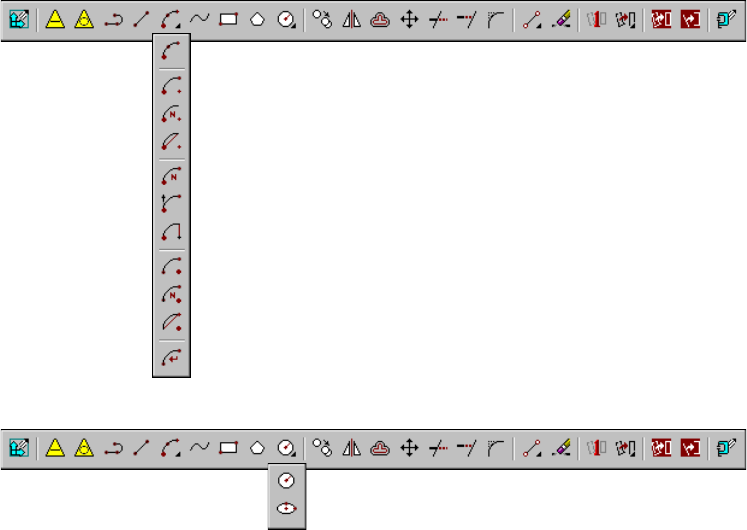
Part Modeling |723
Part Modeling ➤ 2D Sketching ➤ Arc 3 Points
Part Modeling ➤ 2D Sketching ➤ Circle
Arc Start Center End
Arc 3 Points
Arc Start Center Angle
Arc Start Center Length
Arc Start End Angle
Arc Start End Direction
Arc Start End Radius
Arc Center Start End
Arc Center Start Angle
Arc Center Start Length
Arc Continue
Circle Center Radius
Ellipse Center
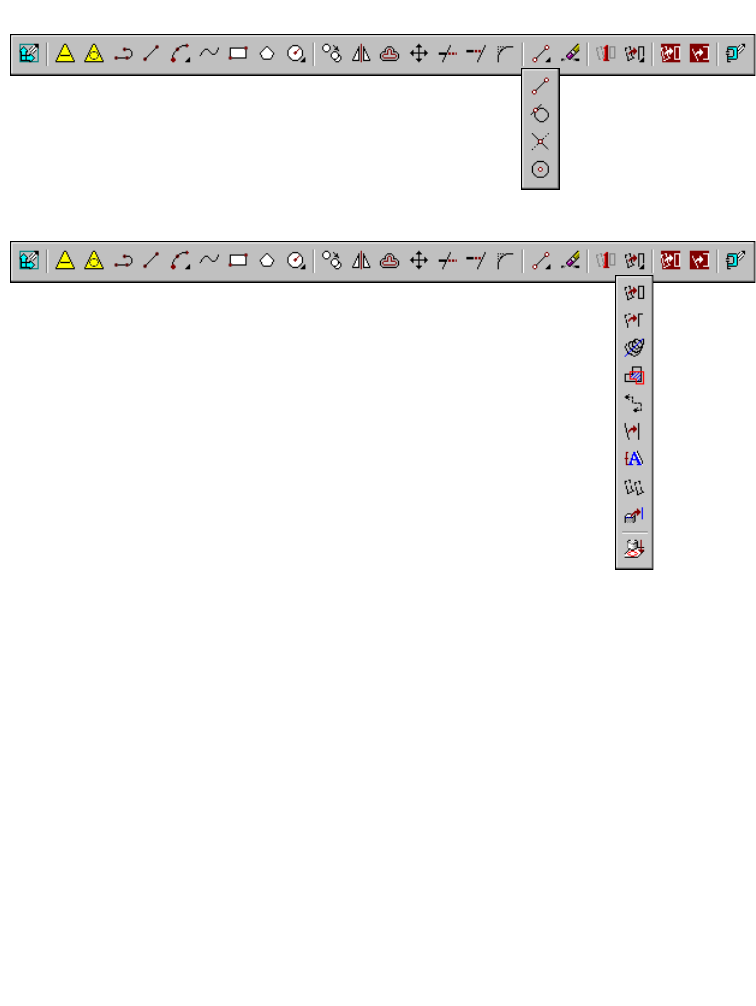
724 |Appendix A Toolbar Icons
Part Modeling ➤ 2D Sketching ➤ Object Snaps
Part Modeling ➤ 2D Sketching ➤ Sketch
Snap to Endpoint
Snap to Tangent
Snap to Apparent Intersect
Snap to Center
Profile
2D Path
3D Path
Cut Line
Split Line
Copy Sketch
Copy Edge
Break Line
Project to Plane
Text Sketch
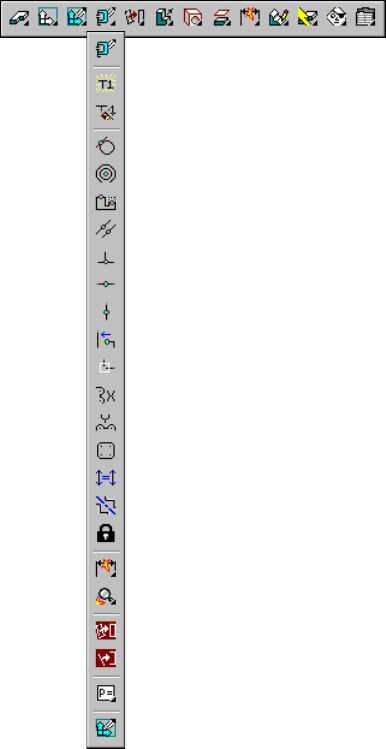
Part Modeling |725
Part Modeling ➤ 2D Constraints
Launches 2D Constraints Toolbar
Tangent
Concentric
Collinear
Show Constraints
Delete Constraint
Parallel
Perpendicular
Horizontal
Vertical
Project
Join
X Value
Y Value
Radius
Equal Length
Power Dimensioning Flyout
Power Edit Flyout
Append to Sketch
Design Variables
Launches 2D Sketch Toolbar
Mirror
Fixed
Re-Solve Sketch
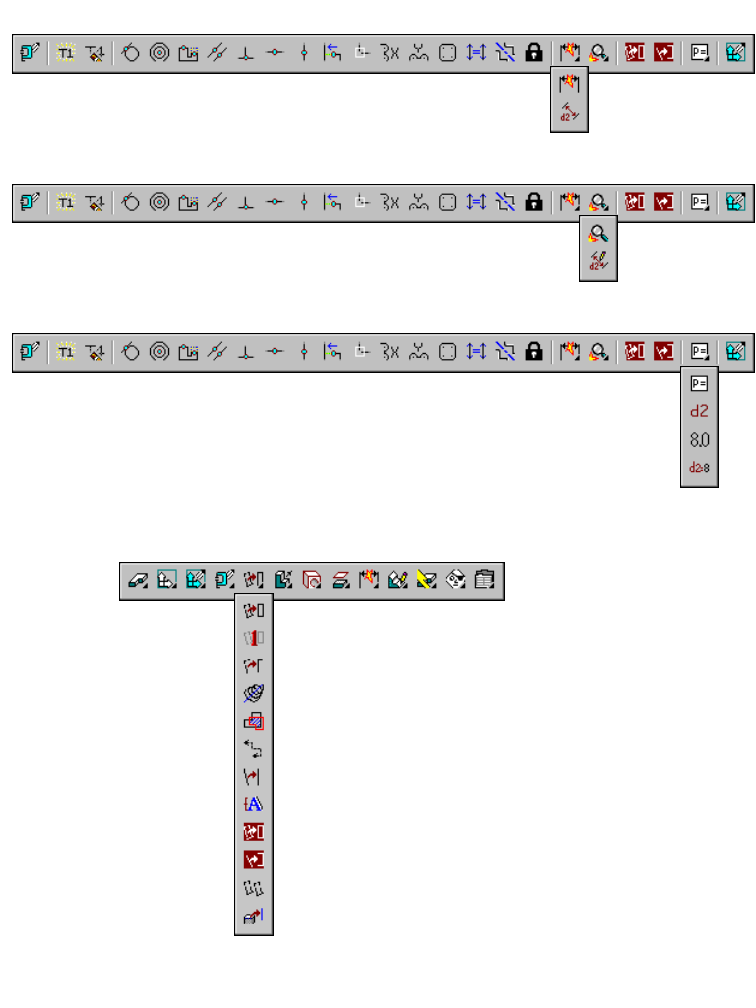
726 |Appendix A Toolbar Icons
Part Modeling ➤ 2D Constraints ➤ Power Dimensioning
Part Modeling ➤ 2D Constraints ➤ Power Edit
Part Modeling ➤ 2D Constraints ➤ Design Variables
Part Modeling ➤ Profile a Sketch
Power Dimensioning
New Dimension
Power Edit
Edit Dimension
Design Variables
Display as Numbers
Display as Equations
Display as Variables
Profile
3D Path
Cut Line
Split Line
Single Profile
2D Path
Re-Solve Sketch
Append to Sketch
Copy Sketch
Copy Edge
Break Line
Text Sketch
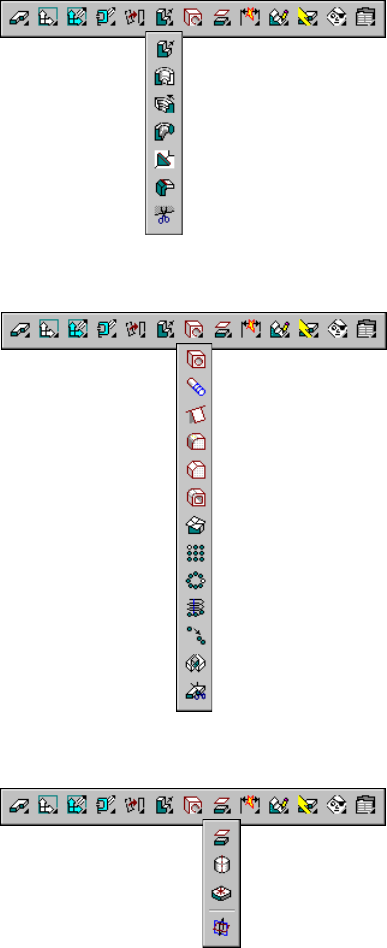
Part Modeling |727
Part Modeling ➤ Sketched Features
Part Modeling ➤ Placed Features
Part Modeling ➤ Work Features
Extrude
Face Split
Sweep
Loft
Revolve
Rib
Bend
Hole
Chamfer
Face Draft
Fillet
Rectangular Pattern
Copy Feature
Combine
Part Split
Surface Cut
Polar Pattern
Axial Pattern
Shell
Thread
Work Plane
Work Axis
Work Point
Create Basic Work Planes
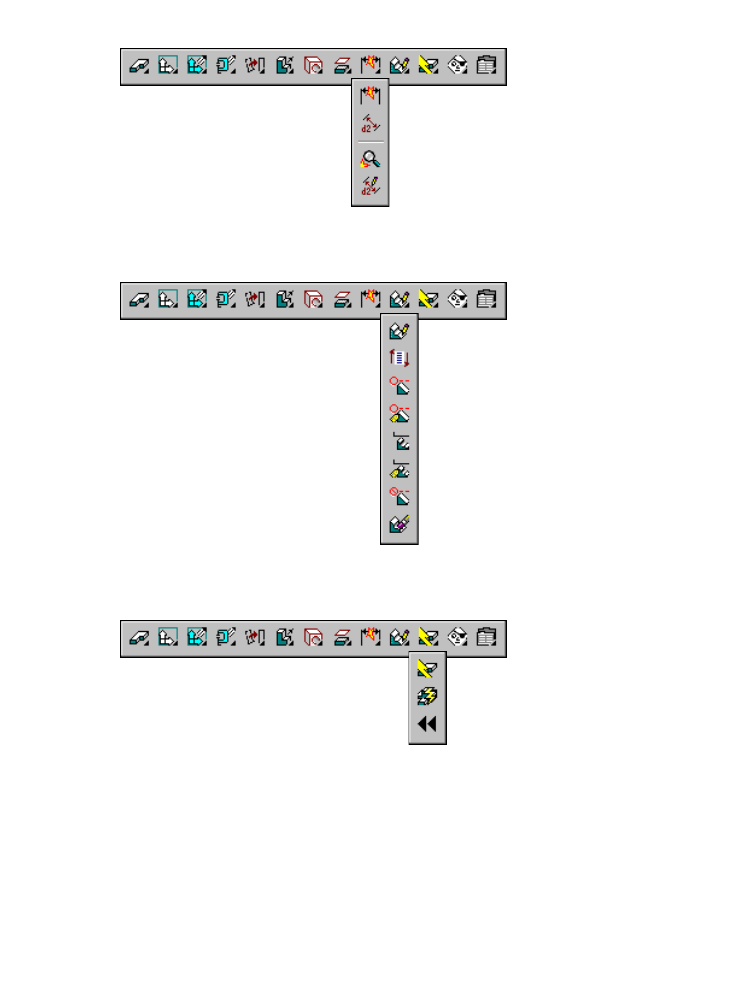
728 |Appendix A Toolbar Icons
Part Modeling ➤ Power Dimensioning
Part Modeling ➤ Edit Feature
Part Modeling ➤ Update Part
New Dimension
Power Dimensioning
Edit Dimension
Power Edit
Edit Feature
Suppress by Type
Unsuppress Features
Reorder Feature
Suppress Features
Unsuppress Features by Type
Table Driven Suppression Access
Delete Feature
Update Part
Feature Replay
Update Assembly
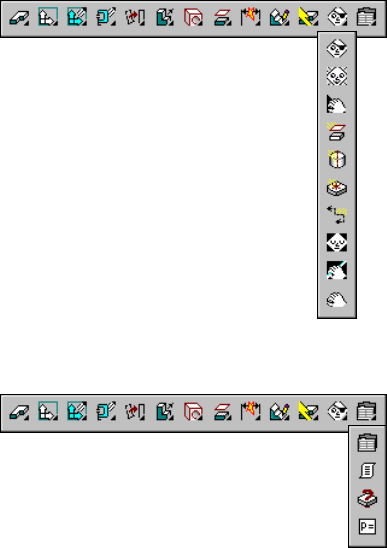
Part Modeling |729
Part Modeling ➤ Part Visibility
Part Modeling ➤ Options
Part Visibility
Display All Work Planes
Display All Work Axes
Unhide All
Unhide Pick
Display All Work Points
Display All Cut Lines
Hide All
Hide All Except
Hide Pick
Part Options
Design Variables
List Part
Mass Properties
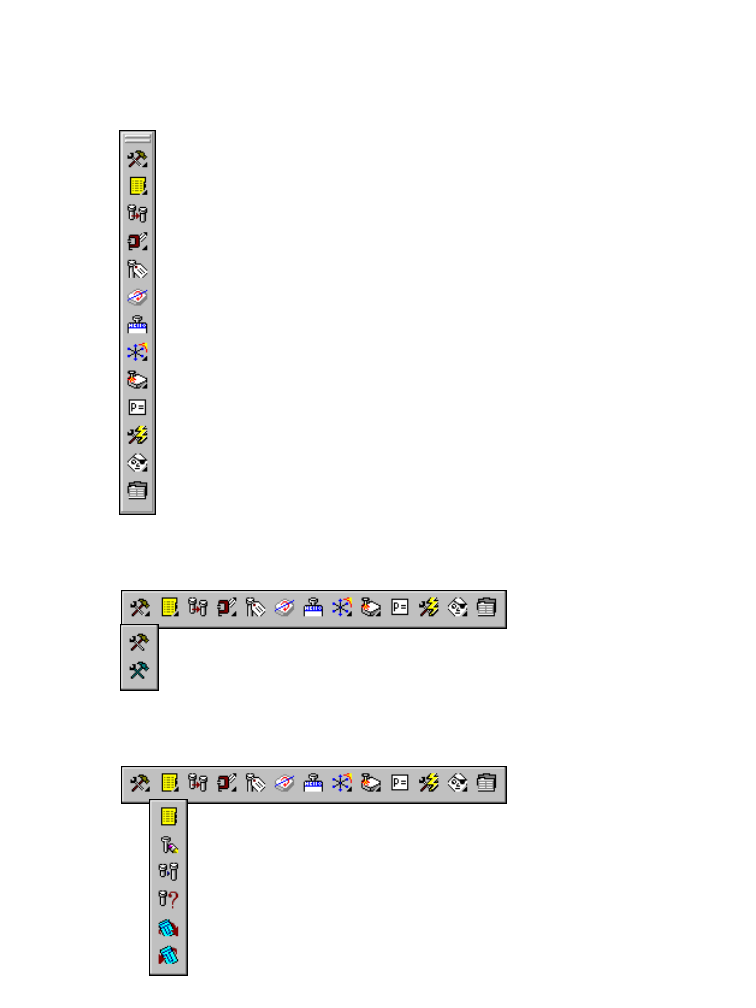
730 |Appendix A Toolbar Icons
Toolbody Modeling
In the Part Modeling environment, the Toolbody Modeling toolbar contains
the tools you need to create combined parts.
Toolbody Modeling ➤ New Toolbody
Toolbody Modeling ➤ Part Catalog
New Toolbody Flyout
Part Catalog Flyout
Instance
3D Toolbody Constraints Flyout
Assign Attributes
DOF Visibility
Rename Part
3D Manipulator Flyout
Check Interference Flyout
Design Variables
Update Positioning
Toolbody Visibility Flyout
Toolbody Options
New Toolbody
Activate Toolbody
Part Catalog
Detach Toolbody
Replace Toolbody
Where Used?
Input Part Definition
Output Part Definition
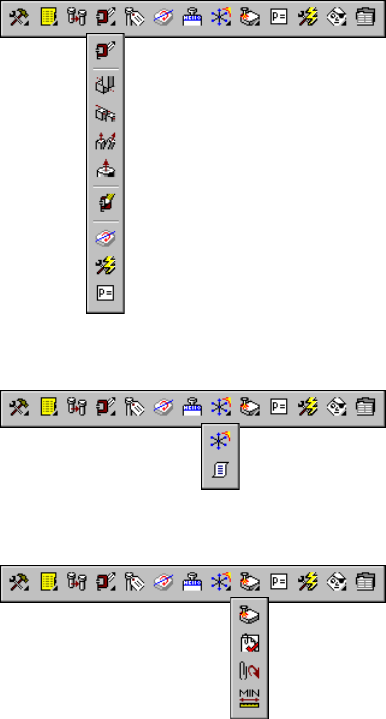
Toolbody Modeling |731
Toolbody Modeling ➤ 3D Toolbody Constraints
Toolbody Modeling ➤ Power Manipulator
Toolbody Modeling ➤ Check Interference
Launch 3D Constraints Toolbar
Mate
Flush
Angle
Insert
Edit Constraints
DOF Visibility
Update Positioning
Design Variables
Power Manipulator
List Part Data
Check 3D Interference
Audit External Refs
Update External Refs
Minimum 3D Distance
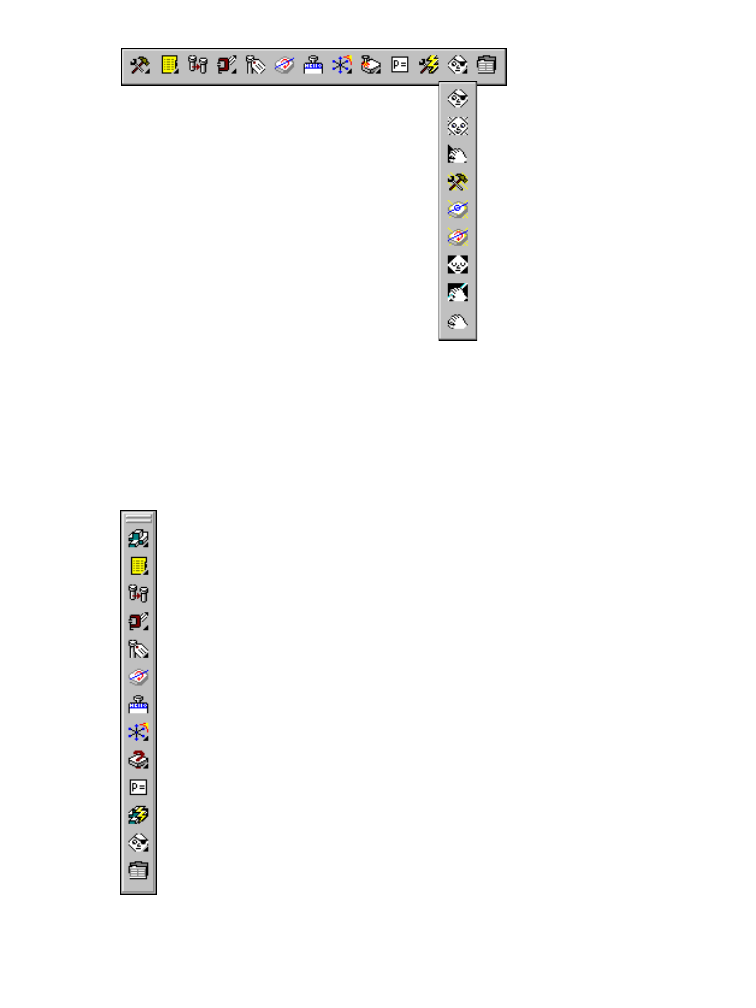
732 |Appendix A Toolbar Icons
Toolbody Modeling ➤ Toolbody Visibility
Assembly Modeling
In the Assembly Modeling environment, the Assembly Modeling toolbar
provides the tools you need to create and modify assemblies and subassemblies.
Toolbody Visibility
Unhide All
Unhide Pick
Display All Toolbodies
Display All CGs
Display All DOFs
Hide All Toolbody Objects
Hide All Except
Hide Picked Toolbody Objects
New Subassembly Flyout
Assembly Catalog Flyout
Instance
3D Assembly Constraints Flyout
Assign Attributes Flyout
DOF Visibility
Rename Part
3D Manipulator Flyout
Mass Properties Flyout
Design Variables
Update Assembly
Assembly Visibility Flyout
Assembly Options
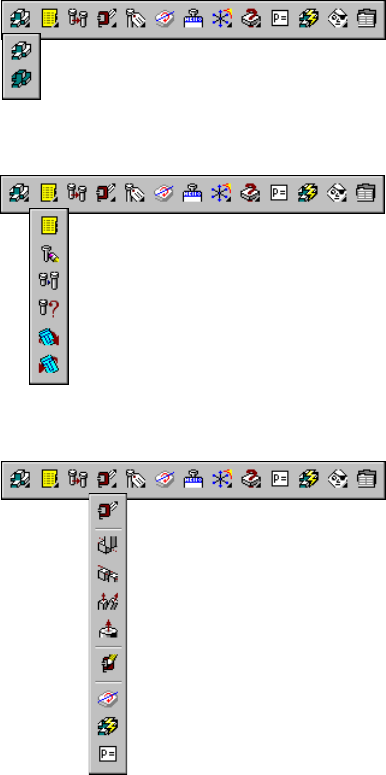
Assembly Modeling |733
Assembly Modeling ➤ New Subassembly
Assembly Modeling ➤ Assembly Catalog
Assembly Modeling ➤ 3D Assembly Constraints
New Subassembly
Activate Assembly
Replace Part
Detach Part/Assembly
Assembly Catalog
Where Used?
Input Part Definition
Output Part Definition
Launch 3D Constraints Toolbar
Mate
Flush
Angle
Insert
Edit Constraints
DOF Visibility
Update Assembly
Design Variables
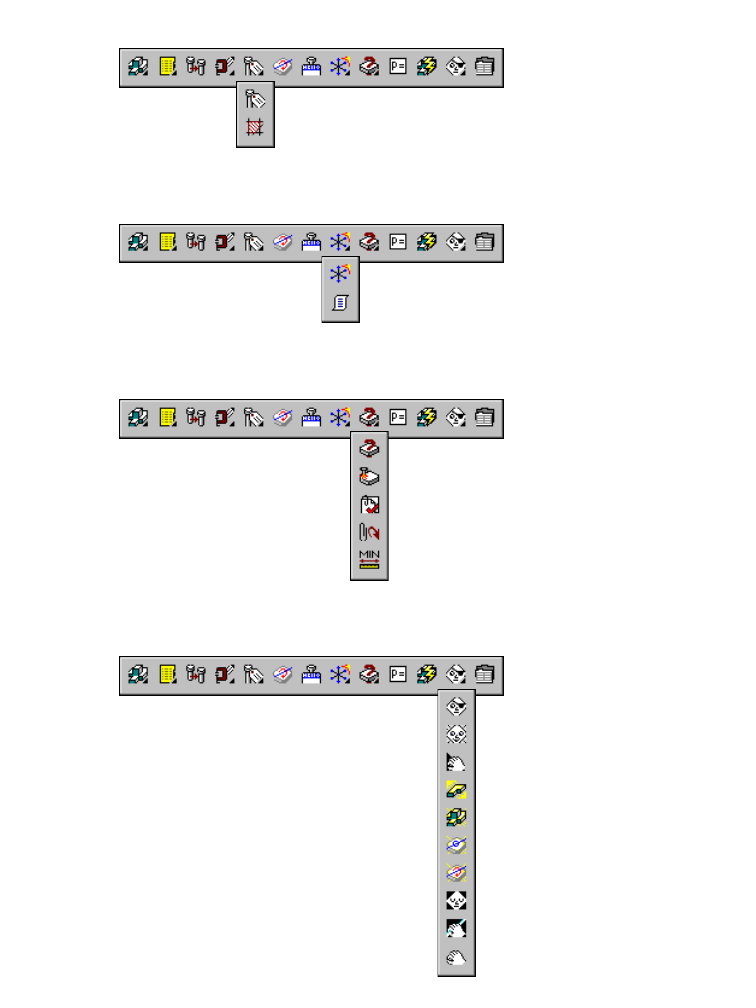
734 |Appendix A Toolbar Icons
Assembly Modeling ➤ Assign Attributes
Assembly Modeling ➤ Power Manipulator
Assembly Modeling ➤ Mass Properties
Assembly Modeling ➤ Assembly Visibility
Assign Attributes
Hatch Patterns
Power Manipulator
List Part Data
Mass Properties
Check 3D Interference
Minimum 3D Distance
Audit External Refs
Update External Refs
Assembly Visibility
Unhide All
Unhide Pick
Display All Parts
Display All Assemblies
Display All CGs
Display All DOFs
Hide All Assembly Objects
Hide All Except
Hide Picked Assembly Objects
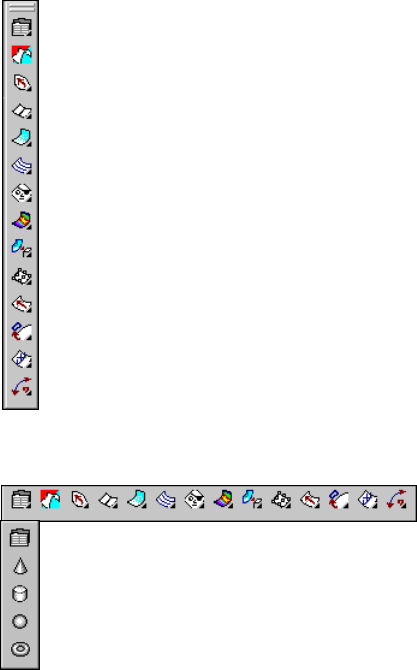
Surface Modeling |735
Surface Modeling
The Surface Modeling toolbar provides the tools you need to create and mod-
ify 3D wireframe surfaces. To activate the Surface Modeling toolbar, choose
Surface ➤ Launch Toolbar.
Surface Modeling ➤ AutoSurf Options
AutoSurf Options Flyout
Toggles Keep Original
Loft U Surface Flyout
Blended Surface Flyout
Flow Wires Flyout
Object Visibility Flyout
Surface Analysis Flyout
Stitches Surfaces Flyout
Grip Point Placement Flyout
Lengthen Surface Flyout
Extract Surface Loop Flyout
Edit Augmented Line Flyout
Wire Direction Flyout
Swept Surface Flyout
AutoSurf Options
Cylinder Surface
Sphere Surface
Torus Surface
Cone Surface
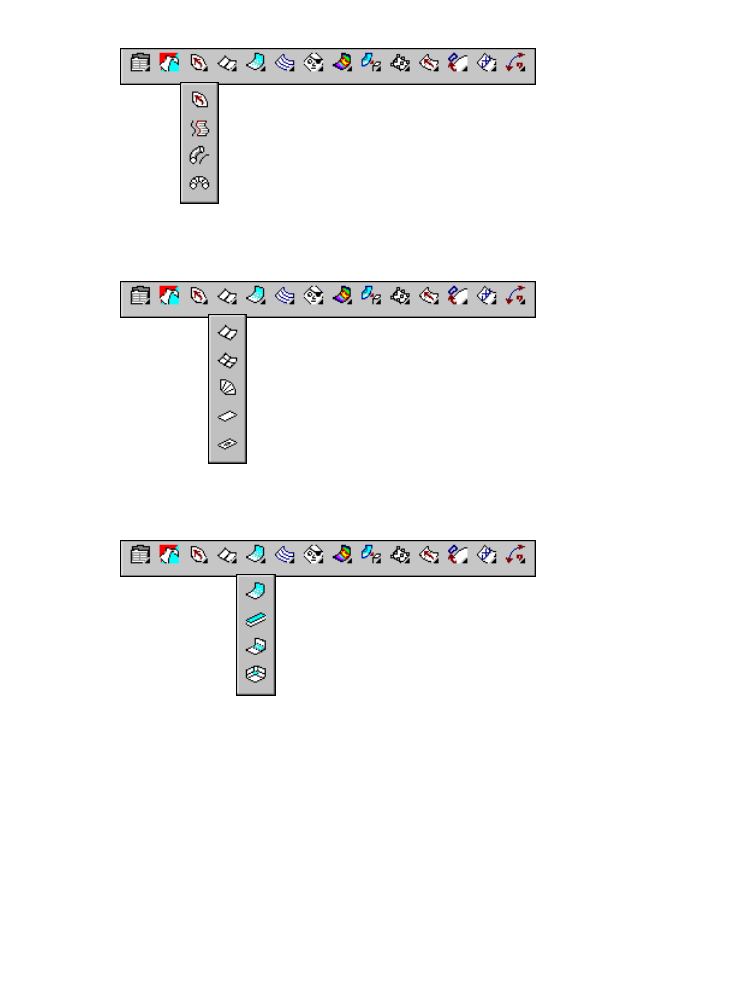
736 |Appendix A Toolbar Icons
Surface Modeling ➤ Swept Surface
Surface Modeling ➤ Loft U Surface
Surface Modeling ➤ Blended Surface
Swept Surface
Extruded Surface
Tubular Surface
Revolved Surface
Loft U Surface
Loft UV Surface
Ruled Surface
Planar Surface
Planar Trimmed Surface
Blended Surface
Offset Surface
Fillet Surface
Corner Fillet Surface
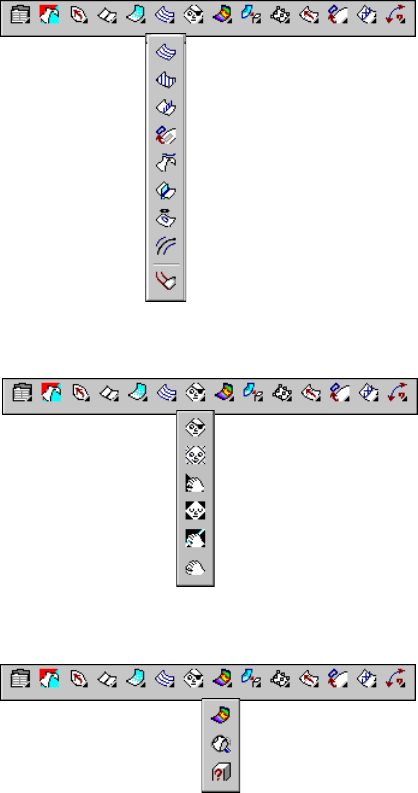
Surface Modeling |737
Surface Modeling ➤ Flow Wires
Surface Modeling ➤ Object Visibility
Surface Modeling ➤ Surface Display
Flow Wires
Section Cuts
Augmented Line
Copy Surface Edge
Parting Line
Intersection Wire
Projection Wire
Offset Wire
Create Tangent Spline
Object Visibility
Unhide All
Unhide Pick
Hide All
Hide All Except
Hide Pick
Surface Display
Surface Mass Properties
Surface Analysis
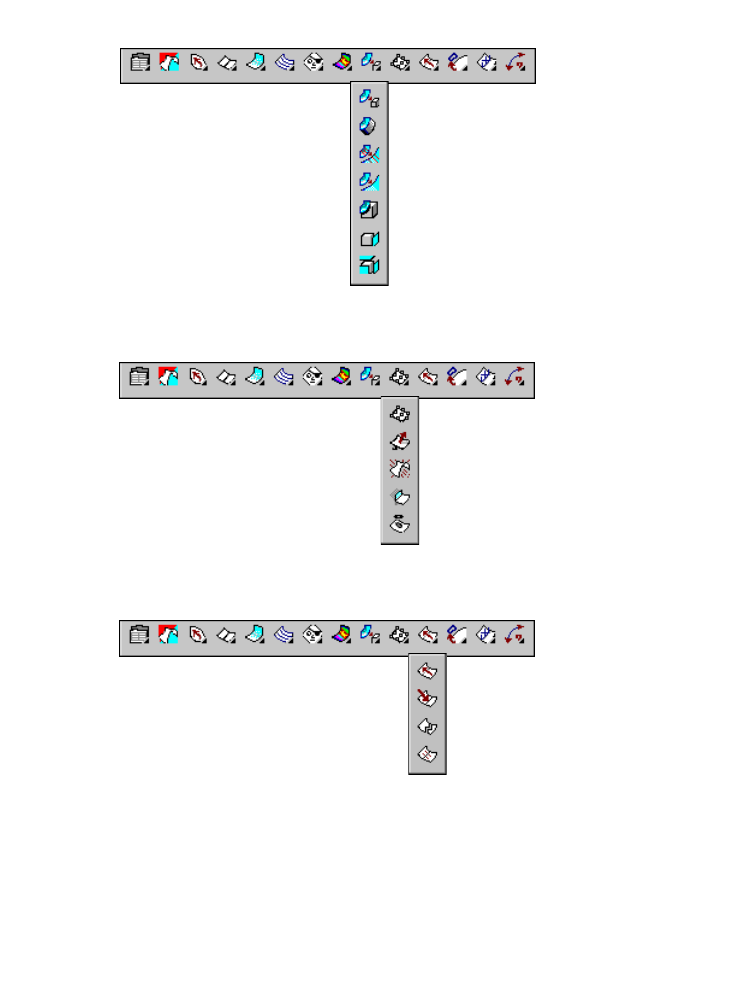
738 |Appendix A Toolbar Icons
Surface Modeling ➤ Stitches Surfaces
Surface Modeling ➤ Grip Point Placement
Surface Modeling ➤ Lengthen Surface
Solid Cut
Convert Face
Convert All
Stitches Surfaces
Replace Surface Edge
Adjust
Surface Thicken
Grip Point Placement
Flip Surface Normal
Refine Surface
Intersect and Trim
Project and Trim
Lengthen Surface
Truncate Surface
Break Surface
Join Surfaces
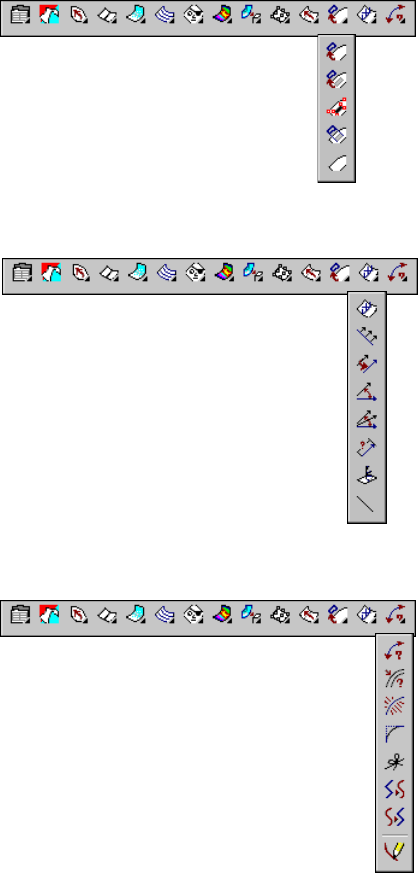
Surface Modeling |739
Surface Modeling ➤ Extract Surface Loop
Surface Modeling ➤ Edit Augmented Line
Surface Modeling ➤ Wire Direction
Extract Surface Loop
Copy Surface Edge
Show Edge Nodes
Project and Trim
Delete All Trim
Edit Augmented Line
Add Vectors
Copy Vectors
Rotate Vectors
Blend Vectors
Vector Length
Twist Vectors
Delete Vectors
Wire Direction
Check Fit
Refine Wire
Fillet Wire
Join Wire
Create Fitted Spline
Unspline
Spline Edit

740 |Appendix A Toolbar Icons
Scene
In the Assembly Modeling environment, the Scene toolbar provides the tools
you need to create, modify, and manage scenes.
Scene ➤ New Scene
New Scene Flyout
Part or Subassembly Explosion Factor
New Trail
Edit Trail
Delete Tweak
New Tweak
Edit Tweak
Suppress Sectioning
Lock Scene Position
Update Scene
Scene Visibility Flyout
Scene Options
Scene Explosion Factor
Delete Trail
New Scene
Activate Scene
Edit Scene
Copy Scene
Delete Scene
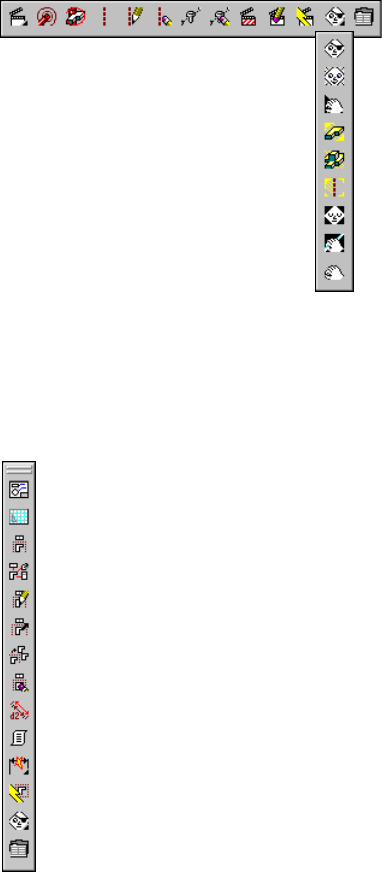
Drawing Layout |741
Scene ➤ Scene Visibility
Drawing Layout
The Drawing Layout toolbar provides the tools you need to create, modify,
and annotate drawing views and layouts.
Scene Visibility
Unhide All
Unhide Pick
Display All Parts
Display All Assemblies
Display All Trails
Hide All Scene Objects
Hide All Except
Hide Picked Scene Objects
Mode
New Layout
New View
Multi-Views
Edit View
Move View
Delete View
Tolerance Modeling
List Drawing
Power Dimensioning
Update Drawing View
Drawing Visibility Flyout
Drawing Options
Copy View
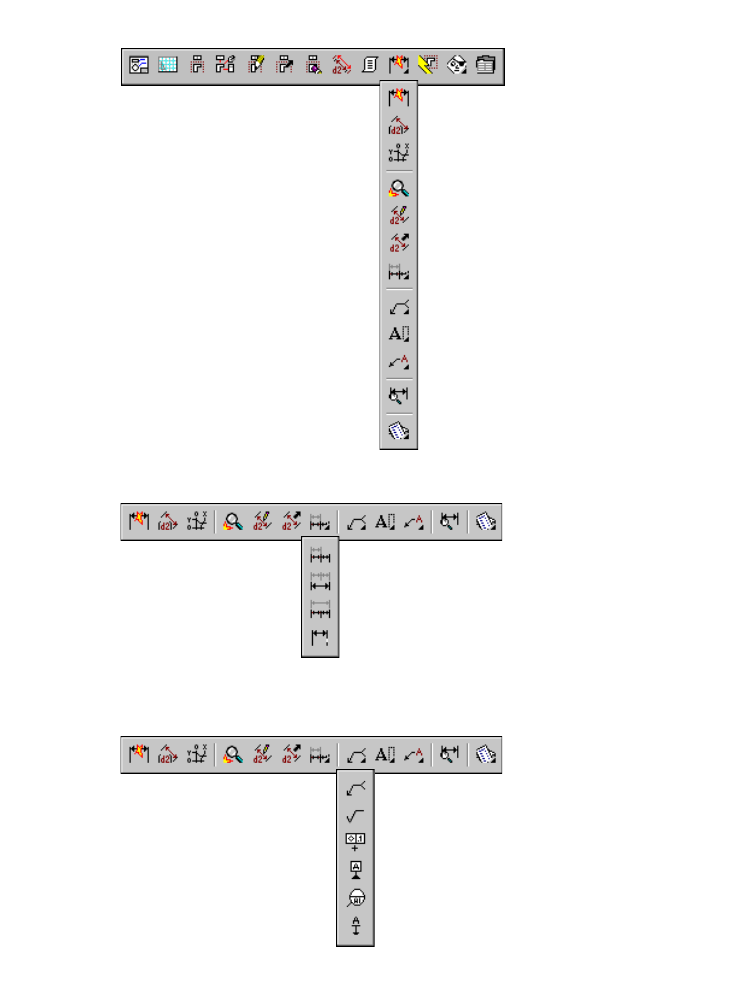
742 |Appendix A Toolbar Icons
Drawing Layout ➤ Power Dimensioning
Drawing Layout ➤ Power Dimensioning ➤ Edit Format
Drawing Layout ➤ Power Dimensioning ➤ Welding Symbol
Power Dimensioning
Reference Dimension
Automatic Dimension
Power Edit
Edit Dimension
Move Dimension
Align Dimension Flyout
Welding Symbol Flyout
Line Text Flyout
Annotation Flyout
Dimension Style Flyout
Edit BOM Database
Align Dimension
Join Dimension
Insert Dimension
Break Dimension
Welding Symbol
Surface Texture
Feature Control Frame
Datum Identifier
Datum Target
Feature Identifier

Drawing Layout |743
Drawing Layout ➤ Power Dimensioning ➤ Line Text
Drawing Layout ➤ Power Dimensioning ➤ Annotation
Drawing Layout ➤ Power Dimensioning ➤ Edit BOM Database
Line Text
Multiline Text
Edit Text
Annotation
Leader
Hole Note Flyout
Centerline
Edit BOM Database
Place Balloon
Place Reference
Place Parts List
Part Reference Edit
Edit Part List/Balloon
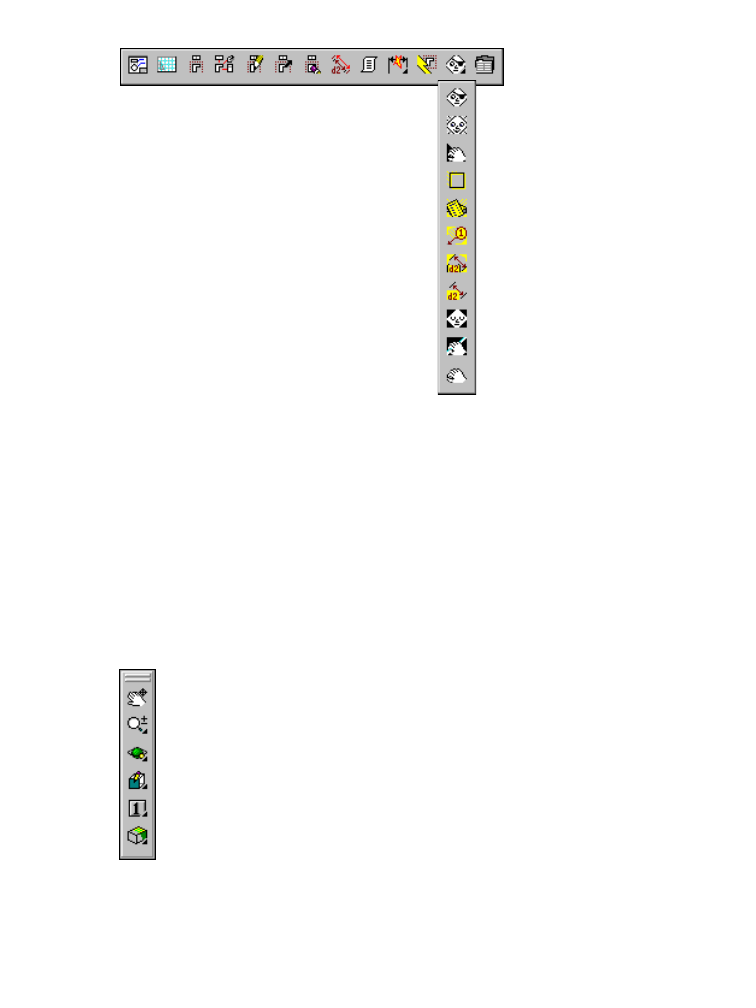
744 |Appendix A Toolbar Icons
Drawing Layout ➤ Drawing Visibility
Mechanical View
The Mechanical View toolbar provides the tools you need to manage the
view of your design, control 3D viewports, and create rendered views of your
parts and assemblies.
If the Mechanical View toolbar is not visible on your desktop, choose View
➤ Toolbars ➤ Mechanical View. You can also right-click any toolbar, and
choose Mechanical View from the list.
Drawing Visibility
Unhide All
Unhide Pick
Display All Viewports
Display All Parts Lists
Display All Balloons
Display All Reference Dims
Display All Parametric Dims
Hide All Drawing Objects
Hide All Except
Hide Picked Drawing Objects
Zoom Realtime Flyout
Sketch View Flyout
Restore View #1 Flyout
Pan Realtime
3D Orbit Flyout
Toggle Shading/Wireframe Flyout

Mechanical View |745
Mechanical View ➤ Zoom Realtime
Mechanical View ➤ 3D Orbit
Zoom Realtime
Zoom All
Zoom In
Zoom Out
Zoom Previous
Zoom Window
3D Orbit
3D Continuous Orbit
3D Swivel
3D Adjust Distance
3D Adjust Clip Planes
Front Clip On/Off
Back Clip On/Off
New Rotation Center
Select Rotation Center
Lighting Control
3D Pan
3D Zoom
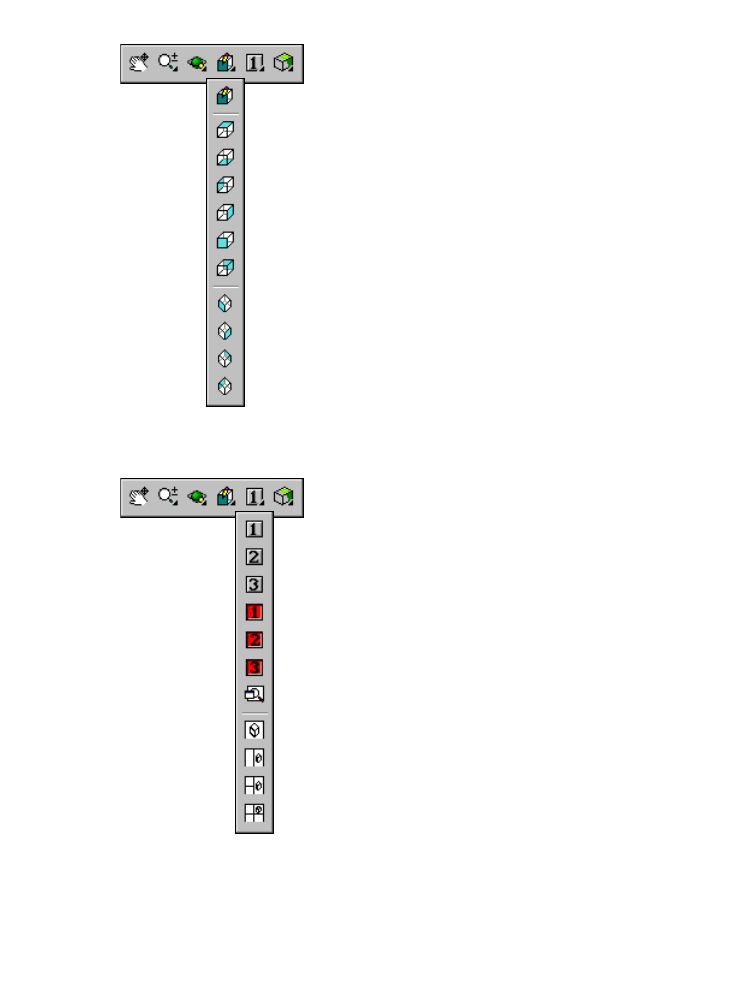
746 |Appendix A Toolbar Icons
Mechanical View ➤ Sketch View
Mechanical View ➤ Restore View #1
Sketch View
Top View
Bottom View
Left View
Right View
Front View
Back View
Left Front Isometric View
Right Front Isometric View
Left Back Isometric View
Right Back Isometric View
Restore View #1
Restore View #2
Restore View #3
Save View #1
Save View #2
Save View #3
Named Views
Single Viewport
Two Viewports
Three Viewports
Four Viewports
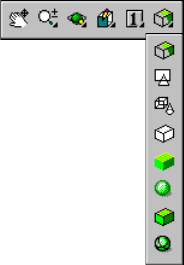
Mechanical View |747
Mechanical View ➤ Toggle Shading/Wireframe
Toggle Shading/Wireframe
2D Wireframe
3D Wireframe
Hidden
Flat Shaded
Gouraud Shaded
Flat Shaded, Edges On
Gouraud Shaded, Edges On

748
749
Index
A
active part variables,362
adjusting surfaces,569
ambient light on images,304
Angle type dialog box,714
angular dimensions,92
annotations,337
Approximate Model Size dialog box,624
array features, editing,223
assemblies
analyzing,506
completing,497
restructuring,479, 504
thumbnail previews,483
updating,509
Assembly Catalog,377, 400, 403, 482
Assembly Mass Properties dialog box,419, 510
assembly modeling
checking interference,418, 506, 510
concepts,401, 479
constraints,407, 414, 438, 486, 497
creating instances,502
drawing layouts,309, 428
files,400
mass properties,419
scenes,400, 421, 513
structures,478, 504
trails,400, 423
trees,400
assumed constraints,50, 97
attaching reference files,400
augmented lines,534, 548, 623
axial patterns,221
B
balloons,308, 338, 527
base features,122, 123, 254, 257, 578
base parts,444
base standards,672
base surfaces,534, 566, 576, 614, 617, 619
base views,308, 310, 380, 386, 478
bearing calculations,690
Bend dialog box,164
bend features,46, 163
bills of material (BOM),522
blended surfaces,559, 638
BOM databases,478, 522, 523
BOM dialog box,522
Boolean modeling,122, 444
border conditions, load,713
break lines, creating,80
breaking polylines,642
Browser command access,37
C
calculation result,708, 715, 717
callouts,338, 527
centerlines,336, 690
centermarks,336
Chamfer dialog box,204
chamfers,186, 204, 690
closed loop sketches,42
closed loop wires,620
closed profiles,42
collinear profile sketches,592
combine features,444, 457, 458
combining features,186, 227
combining parts, concepts,445
command access methods,37
complex parts,444
constraint symbols,50, 90
constraints
adding,591
assembly,438, 440, 497
assumed,50, 97
between features,276
concepts and tips,85
copied features,226

750 |Index
constraints (continued)
dimension,94
displaying,96
displaying symbols,90
equal length,110
fix,51, 88, 97
flush,478
geometric,84, 88, 94, 272
hiding,51
insert,400
mate,400, 407
missing,113
modifying,91, 414, 438
path sketch,111
project,107, 276
radial,102
sketch,42, 49, 86, 128, 175, 260
techniques,119
toolbody parts,454
construction geometry,42, 105
controlling tangency,115
dimensioning circles,118
in path sketches,111
lines,107
consumed sketches,122, 254
Context Menu command access,37
converged radial shapes,346
Copy Definition dialog box,378, 452
corners
fillets, blending,561
surfaces, filleting,565
counterbored holes, placing,598
Create Drawing View dialog box,310, 380, 429,
519
Create Scene dialog box,421
cross-section views,72, 317
cubic loft,122
cut lines, creating,42, 72, 74
cutting
features,350, 586, 605
planes,317
solids with surfaces,576, 584
cylinder axial placement,675
D
data exchange,6
default thicknesses,346
Define Border for Load, Support dialog box,713
definitions
assembly,509
copying,449
part,400, 444
renaming,400
degrees of freedom (DOF),84, 87, 406
derived surfaces,534, 559
design variables,362
active part,234, 239, 242
concepts,235
deleting,249
examining,247
global,234, 239, 246, 250
modifying,244
moving,248
table driven,234
Design Variables dialog box,240, 364
designs
changing,609
planning,615
reviewing,348
Desktop Browser,47, 254
changing part colors,416
copying parts,415
hierarchy,369
positioning,38
Desktop Menu command access,37
Desktop Visibility dialog box,143, 236, 323
detaching assembly files,400
detail views,314
dialog boxes
3D Pipe Path,69
3D Shaft Generator,693
3D Spline Path,71
Angle type,714
Appropriate Model Size,624
Assembly Catalog,377, 403, 482
Assembly Mass Properties,419, 510
Bend,164
BOM,522
Chamfer,204
Copy Definition,378, 452
Create Drawing View,310, 380, 429, 519
Create Scene,421
Define Border for Load, Support,713
Design Variables,240, 364
Desktop Visibility,143, 236, 323
Edge Properties,316, 329
Edit Drawing View,312, 316, 328
External Part Save,438
Extrusion,126, 262, 448, 492, 589
Extrusion, for thin features,138
Face Draft,194
FEA Calculation 3D,709, 711
Fillet,199
Fillet Surface,565
Helix,66, 242
Hole,189, 300, 475, 599
Hole Position Method,675
Join3D,631
Layer Properties Manager,125, 625
Lights,305
Loft,144
Index |751
Loft Surface,556
Mechanical Options,49, 524, 624
Mechanical Options, Part,54
Nominal Diameter,677
Note Symbol,334, 335, 394, 395
Object Grouping,558
Page Setup,426
Part Catalog,444, 449
Part Ref Attributes,526
Paste Special,397
Pattern,216
Please select a Screw,683
Plotter Configuration Editorial,427
Polyline Fit,550
Power Dimensioning,330
Power Manipulator,422, 516
Project to Surface,574, 637
Properties for ANSI,524
Revolution,150, 176, 289
Rib,136
Screw Connection,682
Select a Part,701
Select a Through Hole,675
Shaft,697
Shell Feature,209, 350
Splined Shaft,697
Surface Intersection,572
Surface Isolines (Isoareas),716
Sweep,156
Sweep Surface,541, 580
Table Driven Setup,364
Text Sketch,141
Trail Offsets,424, 518
Unsuppress by Type,375
View,238, 351, 448
Work Plane,171
dimensional constraints,84
dimensions
adding,97, 118, 275, 292
angular,92
as constraints,94
as equations,94
as parameters,384
attributes, changing,330
displaying,294
formatting,275
hiding,322, 324, 385
modifying,104, 280, 303
moving,325, 387
parameters,294
parametric,109, 260, 308
power,390
power editing,330
reference,308, 390, 432
direct light on images,304
distributed forces,708
DOF (degrees of freedom),84, 87, 406
draft angles,122, 186
drawing layouts
assembly,428
multiple,309
Drawing mode,308
drawing views
cleaning up,322, 384
concepts,309
creating,379, 425, 518
cross-section,317
detail,314
enhancing,330
isometric,320, 430
modifying,312, 340, 342
orthographic,313, 314, 318, 382
planning,309
plotting,426, 531
relocating,340
dynamic calculation,690, 702
dynamic dragging,690, 703
dynamic rotation,238
E
Edge Properties dialog box,316, 329
Edit Drawing View dialog box,312, 316, 328
emboss features,140
equal length constraints,110
equations for dimenions,94
excluded faces on shells,346, 353
exploded views,478, 513
External Part Save dialog box,438
external parts
attaching,403, 495
creating features,436
editing,434, 469, 508, 525
referencing,400, 403, 478, 483
reloading,509
extraneous dimensions, hiding,322, 324
extraneous lines in views, hiding,328
extruding
blindly, features,590
features,124, 138, 262, 270, 586, 605
parts,297
profiles,172, 282, 447, 492, 604
ribs,133
sketches,122, 589
surfaces,539, 636
text on parts,140
thin walls,136
weight reduction,465
Extrusion dialog box,126, 138, 262, 448, 492,
589
extrusion direction,539, 633
extrusions, weight reduction,471, 474

752 |Index
F
Face Draft dialog box,194
face drafts,186, 194
faces on shells,346
excluding,353
faces, splitting,152
FEA Calculation 3D dialog box,709, 711
features,42, 122
appending to tables,373
arrays, editing,223
base,122, 123, 254, 257, 258, 578
bend,46, 163
chamfering,204
combine,444, 457, 458
combining,186, 227
controlling shapes of,235
copying,224
creating from surfaces,577
cutting,350, 605
embossing,140
extruding,124, 130, 182, 262, 586
filleting,186
hole,188, 598
lofting,122, 143, 145
modifying,130, 149, 151, 155, 263, 303
patterns, creating,186, 214
placed,186, 254, 492, 598
positioning,179, 610
revolved,122, 150, 175, 284
rib,46
scaling,609
shelling,186, 209, 346, 347
sketching,121, 122, 123, 254, 601
suppressing,362, 371
surface cuts,212
swept,58, 122, 155, 244
symmetrical,290
thin,46
unsuppressing,375
files assembly, detaching,400
reference, attaching,400
tutorial, copying,40
Fillet dialog box,199
Fillet Surface dialog box,565
filleting
corners,99, 561
features,186, 199, 605
modifying,202
surfaces,565
finishing details,611
finite element analysis (FEA),708, 710
fix constraints,51, 88, 97
fixed support,708
flow lines, augmented,623
flush constraints,478
forces, distributed,708
G
generating shafts,690, 693
geometric constraints,84, 88, 94
global variables,362
graphics exchange,6
H
helical sweeps,122, 157, 234
Helix dialog box,66, 242
hidden lines,308
Hole dialog box,189, 300, 475, 599
hole notes,333, 335, 393
Hole Positon Method dialog box,675
hole, positioning,684
holes,186, 672
counterbored,302
creating,188, 598
drilled,300
modifying types,192
positioning,467, 474, 677
standard through,674
weight reduction,465
I
insert constraints,400
instancing parts,403, 444, 496
interference, checking,418, 506, 510
intersecting surfaces, trimming,572, 633
isoareas, surface,708
isolines, setting,146, 237
isometric views,320, 430
J
Join 3D dialog box,631
joining
lines,653, 660
surfaces,570, 579
wires,660
L
Layer Properties Manager dialog box,125, 625
layers,625, 628
layouts, multiple,309
lighting and shading images,304
Lights dialog box,305
linear loft,122
linesaugmented,534
joining,653, 660
Index |753
loads on parts,708
local parts,400, 478, 481
Loft dialog box,144
Loft Surface dialog box,556
lofted features,122, 143
lofted surfaces,555
lofting
cubic,145
linear,143
logical surface areas,614, 616
M
Manual mode vs. automatic,660
mass properties, calculating,419, 510
mate constraints,400, 407
Mechanical Options dialog box,49, 54, 524,
624
mesh, calculation,708
missing constraints,113
Model mode,308
model views,576
modeling, wireframe,534
motion-based surfaces,534, 538
multiple drawing layouts,309
N
nested loop sketches,42, 56
Nominal Diameter dialog box,677
nonorthogonal rectangular patterns,217
Note Symbol dialog box,334, 335, 394, 395
NURBS,576
O
Object Grouping dialog box,558
offset surfaces,563
open profiles,42, 46
orthographic views,313, 314, 318, 382
overriding wall thicknesses,346, 354, 356, 359
P
Page Setup dialog box,426
parallel,672
parametric dimensions,109, 308
parametric surfaces,582
parametrics,84, 168
parent views,308, 478
part definitions,52, 111, 115, 377, 400, 444,
449
design variables,362
faces, default thicknesses,346
faces, splitting,152
files,445
instances,444, 502
part (continued)
references,478, 525
supports and forces,711
toolbody,444
versions, displaying,366, 371, 375, 379
Part Catalog,444, 449
Part Ref Attributes dialog box,526
partsaligning,454
assembling,406
attaching,403, 495
base,444
calculating stress,708
combining with surfaces,577
combining, concepts,445
complex,444
copying,377, 415
creating,45, 255, 447, 491
cutting with surfaces,584
editing,434, 508
externally referencing,400, 403, 478, 483,
495
extruding,447
grounded,410
instancing,403, 496
local,400, 478, 481
rotating,238
shading,237
shading and lighting,304
splitting,229
standard, using,672
table driven,361, 367
thumbnail previews,450, 483
tweaking,400, 422, 515
versions,362
visibility of,611
parts lists,478, 529
Paste Special dialog box,397
path sketches,42, 58, 71, 111
Pattern dialog box,216
pattern features,186, 214
axial,221
polar,218
rectangular,215
rectangular, nonorthogonal,217
spacing,215, 217
pitches for paths,234
placed features,186, 254, 492, 598
concepts,187
planar surfaces,658
trimmed,554, 619, 627, 640
Please select a Screw dialog box,683
Plotter Configuration Editorial dialog box,427
plotting, drawing views,426, 531

754 |Index
polar patterns,218
Polyline Fit dialog box,550, 552
polylines,619, 629, 642, 643
power dimensioning,330, 390
Power Dimensioning dialog box,330
Power Manipulator dialog box,422, 516
preferences, surface,624
profile planes,234
profile sketches,71, 127, 258, 270, 282, 586,
588
closed,46
collinear,592
constraining to work points,181
construction geometry,105
examining,96
extruding to plane,172
open,46
revolving,175
single,597
text-based,45
profiles, adding to shafts,697
project constraints,107, 276
Project to Surface dialog box,574, 637
Project Trim,642, 644, 648, 650, 652, 664, 668
projected wires,614, 648
Properties for ANSI dialog box,524
R
radial constraints,102
rails,534, 540, 576
reclaimed faces on shells,346
rectangular patterns,215
reference dimensions,308, 332, 432
reference files, attaching,400
referencing parts externally,403, 478, 508
relief toolbodies,451, 461
reloading external references,509
replaying designs,348
restoring saved views,238
restructuring assemblies,504
result, calculation,708, 715, 717
Revolution dialog box,150, 176, 289
revolved features,122, 150, 284
revolved surfaces,538
Rib dialog box,136
rib features,46, 133
rotating parts,238
rough sketches,49, 51
ruled surfaces,546, 628, 635, 638, 656, 662
S
scaling features and surfaces,609
scenes,400, 420, 513, 515
Screw Connection dialog box,682
screw connections, inserting,681
Select a Part dialog box,701
Select a Through Hole dialog box,675
shading and lighting images,304
shading parts,237
Shaft dialog box,697
Shaft Generator, 3D, dialog box,693
shafts
contours, defining,693
editing segments,699
generating,690, 693
parts, changing colors,706
profiles, adding,697
standard parts, adding,701
thread, adding,695
views and shading,705
shapes
custom,46
dissimilar,544
distorted,595
sharp corners, surfacing,542, 550
Shell Feature dialog box,209, 350
shell features,186, 209, 346
concepts,347
cutting,350
editing,352, 355
multiple thicknesses,356
overriding wall thicknesses,346, 354, 359
Single Part mode,445, 446
sketch planes,122, 168, 254, 267, 590, 594
sketches,42
appending,100
consumed,122, 254
copying,471
extruding,589, 604
solving,49, 53, 58
using PLINE,44, 52
sketching
analyzing,47, 51, 255
break line,80
closed loop,42
closed profile,46
concepts,43, 123
constraints,86, 260, 272, 472
cut line,42, 72, 74, 76
dependencies,86
dimensions,275
dissimilar shapes,544
editing,54, 263, 280
features,121, 122, 123, 254, 258, 590, 604
geometry, interpreting,49
helical,65
nested loop,42, 56
open profiles,46
open shape,58
parametric,41
path,42, 58, 111
pipe path,67
Index |755
sketching (continued)
on planes,594, 601
process,255
profile,42, 96, 105, 127, 270, 586, 588,
592
restoring shapes of,595
rough,49
rules,47, 55
single profiles,106, 597
spline path,70
split line,42, 77
text sketch profiles,42, 45
tips,44
tolerances,42, 54
skin surfaces,534, 546
Splined Shaft dialog box,697
splines,576
split lines,42, 77, 154, 229
spreadsheets
linking,362
pasting into drawings,396
standard parts,672
adding to shafts,701
holes, through,674
standards, base,672
start angles for paths,234
stress on parts,708
analyzing,710
calculating and displaying,715
defining,711
structures of assemblies,478
subassemblies,478
constraining,498
creating,494
renaming,400
supports and forces, part,711
supports, fixed,708
suppressing features,362, 371
surface cuts,186, 212, 576
Surface Intersection dialog box,572
surface isoareas,708
Surface Isolines (Isoareas) dialog box,716
surface modeling,613
areas, logical,616
complex,616
concepts,535
corners,542
creating features,579
methods,620
polylines with sharp corners,550
primitives,534
wireframe,534
surface normals,534
surfaces
adjusting tangency,569
attaching parametrically,582
base,534, 566, 576, 614, 617, 619
surfaces (continued)
blended,559, 638
changing layers,628
complex,655
continuous,616
creating features from,577
derived,534, 559
editing,569, 581, 610
extruding,539, 633, 636
filleting corners,565
intersecting, trimming,572
joining,186, 570, 579
lofted,555
motion-based,534, 538
offset,563
planar,658
planar, trimmed,554, 619, 627, 640
planning designs,615
preferences for,624
projected wire trimmed,573
projection,661
resizing to scale,609
revolved,538
ruled,546, 628, 635, 638, 656, 662
scaling,609
skin,534, 546
smoothness,623
swept,540, 545, 576, 580, 645, 657, 667
trimming,622, 642, 644, 648, 650, 652,
664, 668
trimming intersecting,633
wireframe,613
Sweep dialog box,156
Sweep Surface dialog box,541, 580
sweeps, helical,122, 234
swept
dissimilar shapes,544
features,58, 122, 244
multiple cross sections,545
paths, construction geometry in,111
profiles,122
splines,542
surfaces,540, 645, 655, 657, 667
wires,540
symbols, constraint,50, 90
symmetry in features,290
T
table driven parts,361
concepts,363
Table Driven Setup dialog box,364
table driven variables,234
tables
conflicts, resolving,369
editing,367, 373
part versions,362
tangency, controlling,115, 672

756 |Index
taper angles for sweeps,234
Text Sketch dialog box,141
text sketch profiles,42, 45
thickness overrides,346, 356
thin features,46, 136
thread, defining,695
three-dimensional
edge paths,160
helical paths,65, 157
path sketches,62, 71
pipe paths,67, 161
spline paths,70, 162
through termination,672
tips constraining,86
sketching,44
title blocks, inserting,428
toolbodies,444
attaching,449
combining,453, 458, 463
constraining,462
consumption of,444
copying definitions,451
localizing external,451
nested,461
rollbacks,444
Toolbutton command access,37
Trail Offsets dialog box,424, 518
trails,400, 423, 478
trimming surfaces,622, 644, 648, 650, 652,
664, 668
tutorial drawing files,40
tweaking parts,400, 422, 478, 515
two-dimensional path sketches,59
U
U and V display lines,534, 540
Unsuppress by Type dialog box,375
user coordinate system (UCS),591, 690
V
variables, design,234
View dialog box,238, 351, 448
view scales,308, 312
views
base,308, 310, 380, 478
creating,518
cross-section,72
drawing,379
exploded,421, 478, 513
isometric,430
model,576
parent,308, 478
restoring,238
visibility
features,448
parts,611
work features,236
W
wall thickness overrides,354, 356, 359
watertight,614
weight reduction,465, 471, 474
wireframe modeling,534, 613
concepts,615
wires,534, 535, 576
closed loops,620
joining,653, 660
projecting,573, 614
sharp corners,617
work axes,168, 174, 254, 264
work features,254, 264
hiding,236
Work Plane dialog box,171
work planes,168, 254, 265, 576, 582
creating,58, 170
modifying,173
parametric, nonparametric,168
sketching,601
work points,168, 254, 576, 582
creating,179
modifying,182