b mobile 30-009 Mobile phone User Manual AX600
b mobile HK Limited Mobile phone AX600
UserManual.wiki
>
b mobile
>
30 009 User Manual
Manual
Navigation menu
Upload a User Manual
Namespaces
Wiki Guide
HTML
PDF
Info
Views
User Manual
Discussion / Help
Navigation
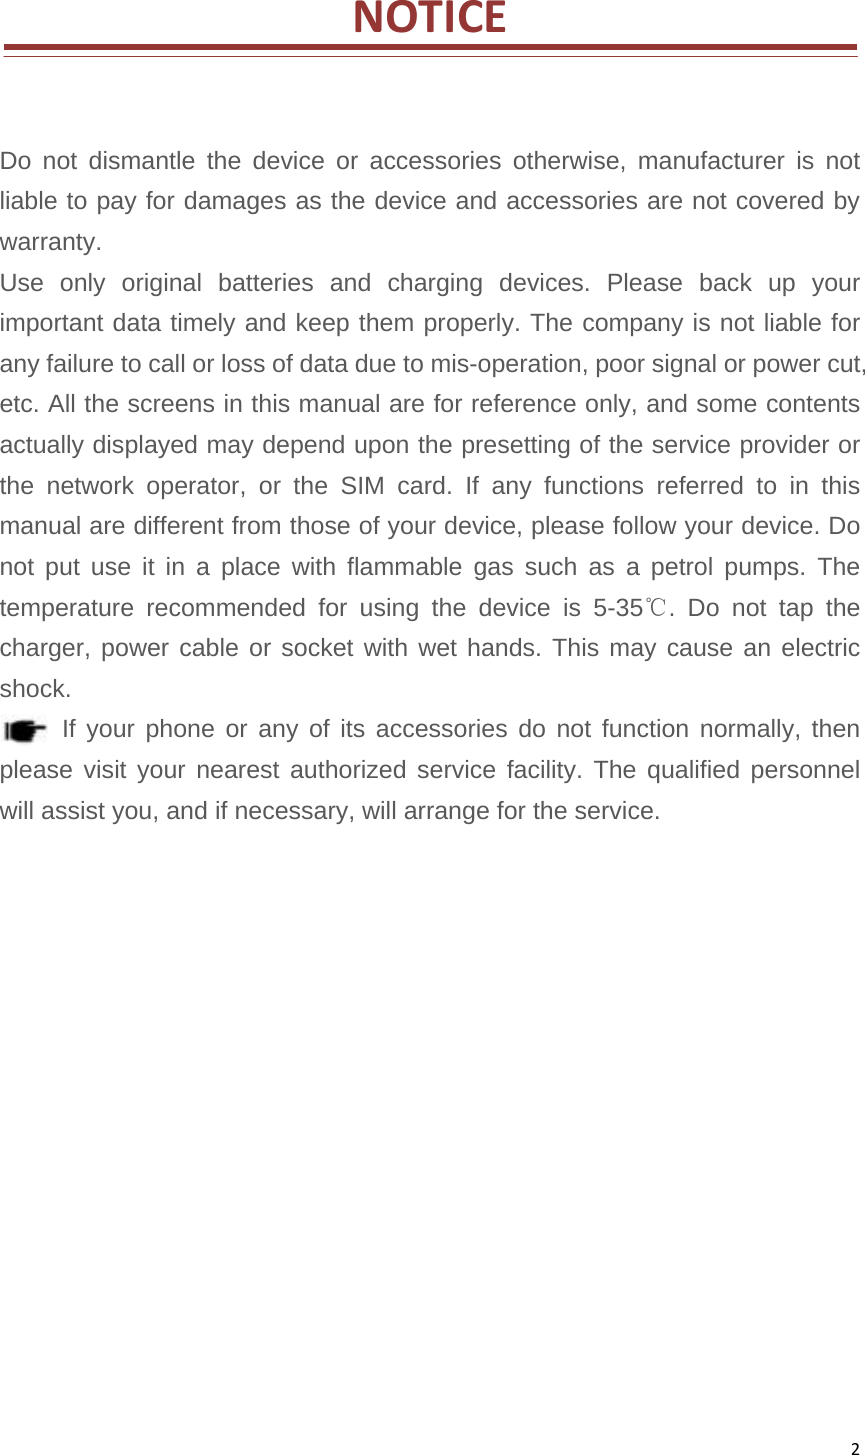
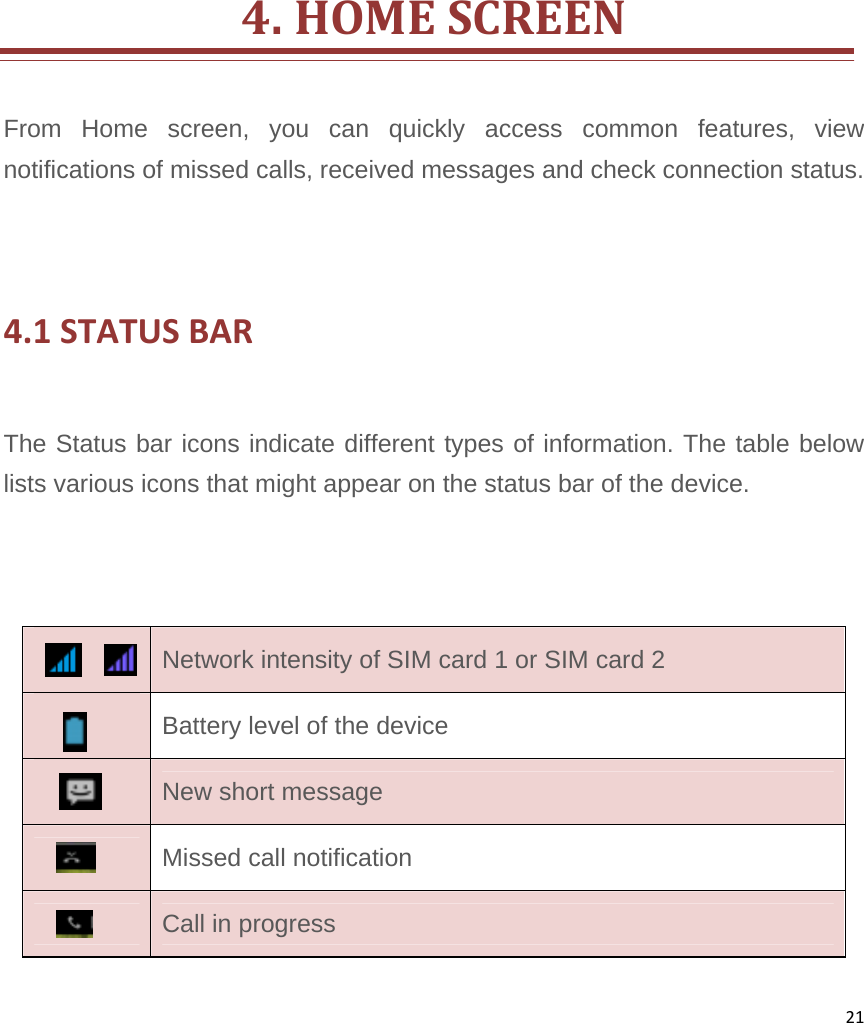
![71.2DEVICEOVERVIEW LCD: 3.5 inches, TFT LCD, 320*480, Buttons: [Home], [Menu], [Back] Keys: [Power], [Volume]. Right Ports: Earphone port. Left port: USB port. PowerReceiverVolume+/‐FrontcameraBackcameraSpeakerUSBportFlashlightEarphoneHomeMenuBack](https://usermanual.wiki/b-mobile/30-009/User-Guide-2679500-Page-7.png)
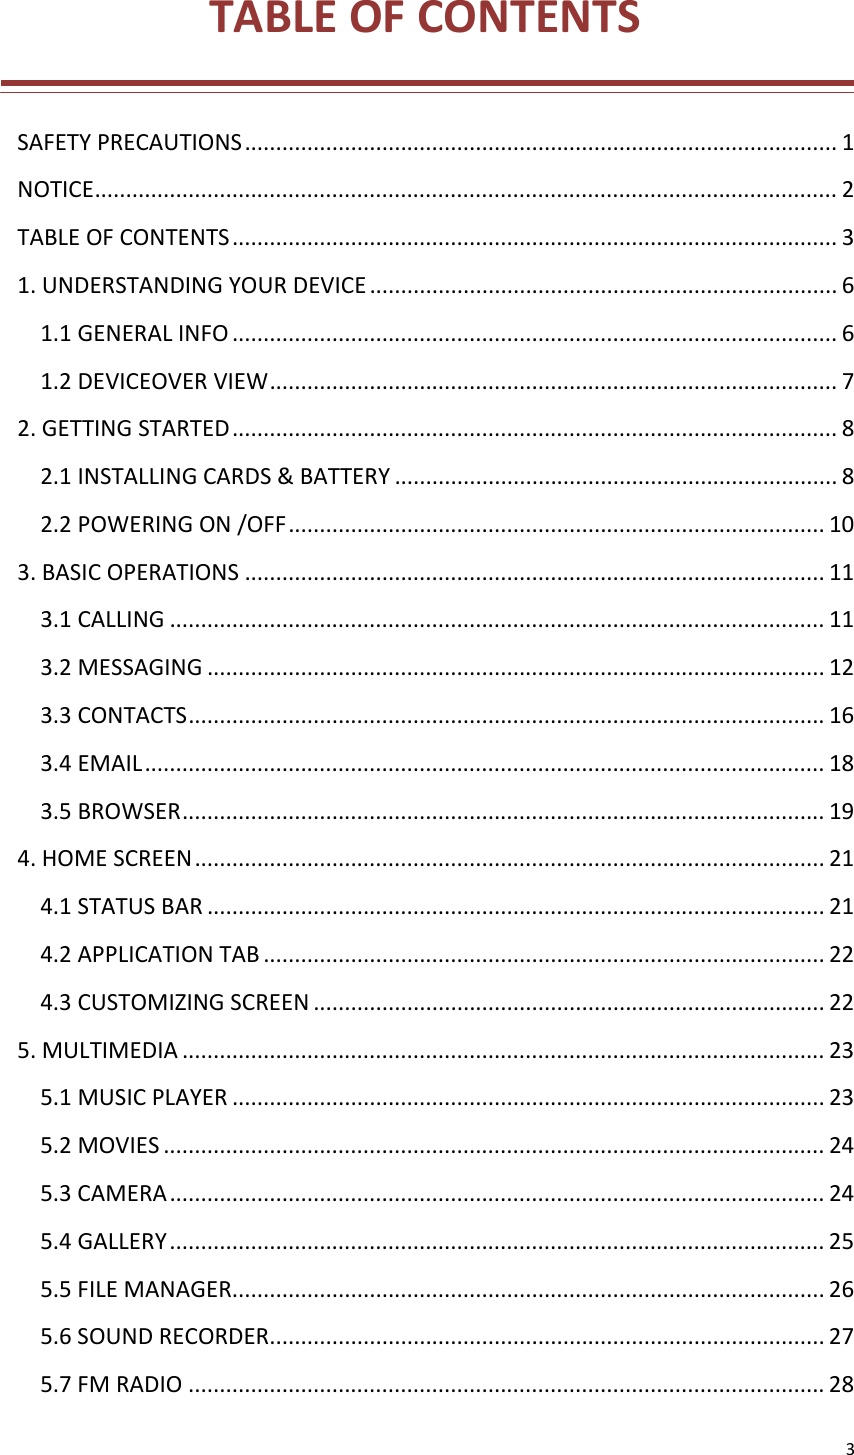
![102.2POWERINGON/OFFPower OnAfter installing the SIM cards and charging the battery, you are now ready to turn on your device. In power-off state, long press [Power] Key to turn on the device. After playing the power-on Logo and the ring, the system goes into the idle state. Drag the lock button rightwards to unlock the screen. If the screen turns off, then tap the [Power] Key to lighten LCD. Power Off In power-on state, long press and hold the [Power] Key for 5 seconds. A pop-up window appears, select Power off. Select OK to confirm. Automatic Customer Registration After 4 hours of usage a SMS from the device will be sent automatically for the customer registration. Standard SMS charges apply.](https://usermanual.wiki/b-mobile/30-009/User-Guide-2679500-Page-10.png)
![14Type message to enter your message. Tap to reply this SMS recipient. Forward a text message Go to SMS view; long tap a message thread to display Message options. Tap Forward to enter a message edit. In the “To” field, enter the recipient’s phone number. Tap to forward this SMS to the recipient. Delete all text messages On messaging list, tap [Menu], select Delete threads. Tap delete to delete.](https://usermanual.wiki/b-mobile/30-009/User-Guide-2679500-Page-14.png)
![163.3CONTACTSThis function could help you View, Edit, Store or Delete contacts records in the phone and SIM card. In contacts list, tap “Phone” or “Contacts” or “Call log”, it switches among Dial-pad & Contacts & Call log. On contacts interface, tap [Menu], you can operate the following: Add Contact Tap new contact to create a new contact. Select the storage, e.g. Phone or MASTER SIM or SLAVE SIM. Enter contact information such as name, phone number, email address etc, if you select storage as “Phone”. Tap to save the contact. View contact Tap a contact photo on contacts list, go to its view.](https://usermanual.wiki/b-mobile/30-009/User-Guide-2679500-Page-16.png)
![17 Tap to edit and send message to this contact. Share visible contacts On a contact view, tap [Menu] to display its options. Tap Share visible contacts its sub-menu, including: Bluetooth, Email, Gmail MMS, SD Card, and SMS. Select Bluetooth, you can share this contact by Bluetooth. Select Email, you can share this contact by Email. Select Gmail, you can share this contact by Gmail. Select MSM, you can share this contact by MMS. Select SD Card, you can share this contact by SD Card. Select SMS, you can share this contact by SMS.](https://usermanual.wiki/b-mobile/30-009/User-Guide-2679500-Page-17.png)

![19On account edit interface, input Email address & password & the relevant parameters of POP3 & SMTP Server, go through POP3 and SMTP server detection, Email account can be created. Accounts list On accounts list, tap [Menu] to display options menu, you can operate: Refresh, Compose, Add Account. Long tap an account, display options menu, you can operate: Open, Compose, Refresh, Account Settings, Remove account. Inbox On accounts list, tap an account, and enter its inbox. On inbox interface, tap [Menu] to display options menu, you can operate: Refresh, Compose, Folders, Accounts, Account Settings. In the inbox list, long tap an email, display options menu, you can operate: Open, Delete, Forward, Reply all, Reply, Mark as unread. View Email On mail view interface, slide the screen up and down to view its content. Tap [Open] button to play the attachment, tap [Save] button to save the attachment. Tap [Reply] button to reply to the sender; tap [Reply all] button to reply to all the recipients; tap [Delete] button to delete the mail. On mail view interface, tap [Menu] to display options menu, you can operate: Delete, Forward, Reply, Reply all, Mark as unread. Compose Email On mail edit interface, tap [Menu], display options menu, you can operate: Add Cc/Bcc, Send, Save as draft, Discard, Add attachment. Tips: The capacity of attachment should be less than 5M. 3.5BROWSERBrowser is a tool which enables you to access the Internet. In main menu, you can tap to enter and run Browser, and access to the websites.](https://usermanual.wiki/b-mobile/30-009/User-Guide-2679500-Page-19.png)
![22USB connected Headset is plugged in Bluetooth is activated 4.2APPLICATIONTABTap Application Drawer to access applications and settings of the device. The Application tab enables you to access the Main Menu and choose among the various utilities/ features available in the device. 4.3CUSTOMIZINGSCREENThe device features a tap screen with idle displays and access to utilities at just one-tap. So swipe right or left navigations to navigate through various screens accessing your favorite features without entering the main menu. Each screen can be customized by adding various widgets, shortcuts and folders. WIDGETS On WIDGETS interface, choose and long tap an icon, such as “Contacts” or “Settings”. You can add the application shortcut on the current desktop. Wallpaper You can customize the wallpaper of your Home screen with default wallpaper or with pictures taken from your device. On the idle, long tap home screen or tap [Menu] key to select "Wallpaper", set up static or dynamic wallpapers from](https://usermanual.wiki/b-mobile/30-009/User-Guide-2679500-Page-22.png)
![24 to pause; drag the slider from left to right to fast-forward or rewind. tap to play the previous or the next song; tap to repeat playing all songs; tap to repeat playing the current song; tap to set shuffle on or off; tap to access to playlist; press [Volume] key to adjust the volume. 5.2VideoPlayerYou can view/play your videos stored on your SD Card through the Video Player. In the movies list, Touch and play a movie file. On play interface, touch to play; touch to pause. Press [Volume] to adjust the volume. 5.3CAMERAYour device is equipped with camera and camcorder, which enables you to capture photos and videos. The rear camera is 5.0 megapixels and front camera is 0.3 megapixels. Capturing an Image Select Camera. The screen will automatically switch to landscape view. Aim the phone at the subject, and then tap to take the shot.](https://usermanual.wiki/b-mobile/30-009/User-Guide-2679500-Page-24.png)
![25 Capturing a Video Select Camera. Switch to video mode. Aim the phone at the subject. To start recording, select . To stop recording, select . 5.4GALLERYIn main menu, you can tap to enter Gallery. Tap to switch into Camera interface. The picture folders and video folders will be displayed. The images or videos will be displayed in thumbnails. Share pictures In the pictures list, tap [Menu], select “Share”, you can share the chosen pictures by Bluetooth or Gmail or Email. TaptocaptureanimageTaptoaccesstogalleyTaptocaptureavideoTaptoperformsettings](https://usermanual.wiki/b-mobile/30-009/User-Guide-2679500-Page-25.png)
![26Rotate a picture In picture view, tap [Menu] ,select “Rotate Left” or “ Rotate Right”, you can rotate this picture left or right by 90°. Crop a picture In picture view, tap [Menu] ,select “Crop”, move the scope to crop by finger gesture, then tap [Save] . Set picture as In picture view, tap [Menu] ,select “Set picture as ”, select “Contact icon” or “Wallpaper”, you can set picture as contact icon or wallpaper. Slide-show pictures On picture view, tap [Menu], select “Slideshow”, you can slideshow the pictures in the current folder. 5.5FILEMANAGERIn main menu, touch to enter File manager. Open / Play a file If there are some pictures & audio & video & other file formats in a folder. Choose and touch one of them, perform the following operations: Picture file: View the picture. Audio file: Play the audio file. Video file: Play the video file. Apk file: Install or replace this * .apk file.](https://usermanual.wiki/b-mobile/30-009/User-Guide-2679500-Page-26.png)