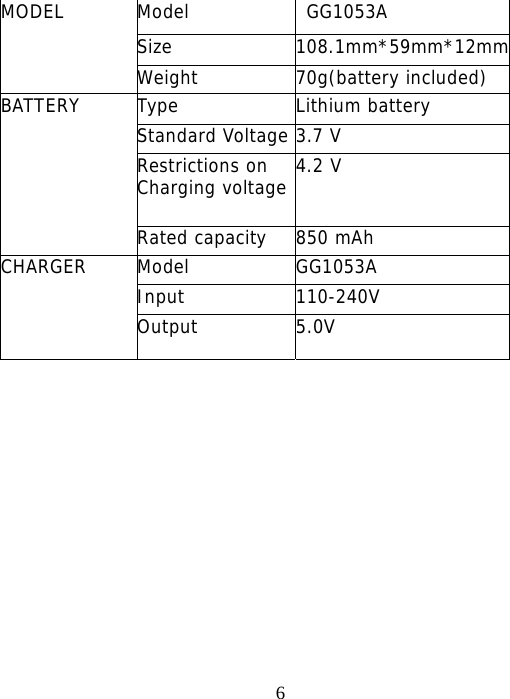
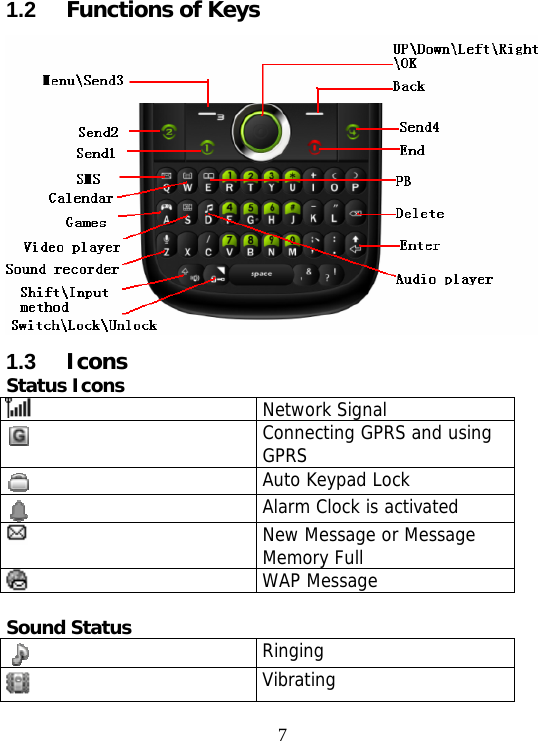
b mobile QS830-CARISMA GSM Mobile Phone User Manual 7 Carisma ok
b mobile HK Limited GSM Mobile Phone 7 Carisma ok
UserManual.wiki
>
b mobile
>
QS830-CARISMA User Manual
>
Users Manual
Contents
1.
Users Manual
2.
User Manual
Users Manual
Navigation menu
Upload a User Manual
Namespaces
Wiki Guide
HTML
PDF
Info
Views
User Manual
Discussion / Help
Navigation
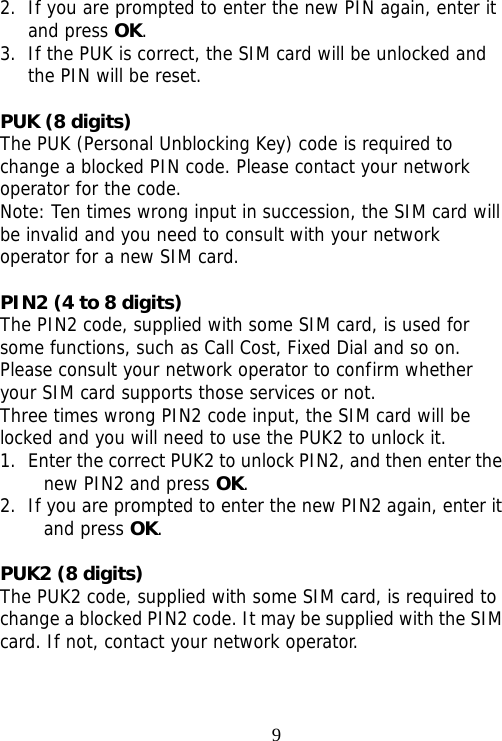


![24providers. Use Cell Broadcast service, you can receive information on various subjects from network provider. For more available information, please contact your local network providers. 4.2 Multimedia 4.2.1 Mobile TV Area Setting:You can choose the correct country to search for the television. Channel Setting:when you choose the correct country, Use the ”Search” Option to search the channel automatically. REC Setting:User this, user can record the TV program Storage:You can storage the TV program in T-FLASH cards. 4.2.2 Audio Player Select Multimedia/audio player item in main menu to enter audio player interface. - Press the track pad to play or pause Mp3 - Slide the track pad to left/right to switch to the previous/next song - Slide the track pad up or down to adjust the volume. - Press “#” key to mute the music. - press “*” key to view the information of the song. 4.2.3 Camera From the main menu select [Multimedia] / cameras, according to the "OK" to enter. In the preview, you can be left soft key "options" are as follows: photos, camera settings, image setting, white balance, scene mode, storage, restore default, to restore the default values in order to carry out a more detailed set of parameters.](https://usermanual.wiki/b-mobile/QS830-CARISMA.Users-Manual/User-Guide-1875636-Page-24.png)