Corel CorelDRAW Graphics Suite X6 Guidebook Draw Operating Instructions CDRAW UG EN
User Manual: corel Corel Draw Graphics Suite - X6 - Operating Instructions Free User Guide for Corel Draw Software, Manual
Open the PDF directly: View PDF ![]() .
.
Page Count: 317 [warning: Documents this large are best viewed by clicking the View PDF Link!]
- Contents
- Chapter 1: Welcome
- Chapter 2: Installation and Support
- Chapter 3: What’s New
- Chapter 4: CorelDRAW Basics
- Chapter 5: Corel PHOTO-PAINT Basics
- Chapter 6: Color Basics
- Chapter 7: Color Management
- Understanding color management
- Color management settings in CorelDRAW Graphics Suite X6
- Working with color profiles
- Soft proofing
- Working with color management policies
- Managing colors when opening documents
- Managing colors when importing and pasting files
- Managing colors for print
- Using a safe CMYK workflow
- Managing colors for online viewing
- Chapter 8: Working with Text
- Chapter 9: Styles and Style Sets
- Chapter 10: Finding and Managing Content
- Chapter 11: Content Types
- Chapter 12: Templates
- Chapter 13: Sign Making
- Chapter 14: Illustration
- Chapter 15: Page Layout
- Chapter 16: Design of a Soccer Club Logo
- Chapter 17: The Story of a Reader Chair
- Chapter 18: Concept Art
- Gallery
- Index
GUIDEBOOK
Copyright © 2012 Corel Corporation. All rights reserved.
CorelDRAW® Graphics Suite X6 Guidebook
Product specifications, pricing, packaging, technical support and information (“specifications”)
refer to the retail English version only. The specifications for all other versions (including other
language versions) may vary.
Information is provided by Corel on an "as is" basis, without any other warranties or conditions,
express or implied, including, but not limited to, warranties of merchantable quality, satisfactory
quality, merchantability or fitness for a particular purpose, or those arising by law, statute, usage
of trade, course of dealing or otherwise. The entire risk as to the results of the information provided
or its use is assumed by you. Corel shall have no liability to you or any other person or entity for
any indirect, incidental, special, or consequential damages whatsoever, including, but not limited
to, loss of revenue or profit, lost or damaged data or other commercial or economic loss, even if
Corel has been advised of the possibility of such damages, or they are foreseeable. Corel is also not
liable for any claims made by any third party. Corel's maximum aggregate liability to you shall not
exceed the costs paid by you to purchase the materials. Some states/countries do not allow
exclusions or limitations of liability for consequential or incidental damages, so the above
limitations may not apply to you.
Corel, the Corel logo, the Corel balloon, Corel CAPTURE, Corel CONNECT, Corel DESIGNER, Corel
Digital Studio, CorelDRAW, Corel PHOTO-PAINT, Corel VideoStudio, Corel WinDVD, Painter,
PaintShop Pro, PowerClip, PowerTRACE, Smart Carver, WinZip, and WordPerfect are trademarks or
registered trademarks of Corel Corporation and/or its subsidiaries in Canada, the U.S., and/or other
countries. Other product, font, and company names and logos may be trademarks or registered
trademarks of their respective companies.
All images included in this publication are attributed to the artists who created them. Some images
may have been cropped and/or resized, backgrounds may have been added, and images may have
been combined with other images on the same page. In the Gallery section, the artists' names have
been added to the images, and image elements that contain brand names and logos have been
removed.
116011
Contents | i
Contents
Part One: Introduction
Chapter 1: Welcome . . . . . . . . . . . . . . . . . . . . . . . . . . . . . . . . . . . . . . . . . . . . . . . . . . . . . . . . 3
Chapter 2: Installation and Support . . . . . . . . . . . . . . . . . . . . . . . . . . . . . . . . . . . . . . . . . . . . 11
Chapter 3: What’s New . . . . . . . . . . . . . . . . . . . . . . . . . . . . . . . . . . . . . . . . . . . . . . . . . . . . . 15
Part Two: Getting Started
Chapter 4: CorelDRAW Basics . . . . . . . . . . . . . . . . . . . . . . . . . . . . . . . . . . . . . . . . . . . . . . . . 27
Chapter 5: Corel PHOTO-PAINT Basics . . . . . . . . . . . . . . . . . . . . . . . . . . . . . . . . . . . . . . . . . . 47
Part Three: Color, Type, and Styles
Chapter 6: Color Basics . . . . . . . . . . . . . . . . . . . . . . . . . . . . . . . . . . . . . . . . . . . . . . . . . . . . . 71
Chapter 7: Color Management . . . . . . . . . . . . . . . . . . . . . . . . . . . . . . . . . . . . . . . . . . . . . . . 89
Chapter 8: Working with Text . . . . . . . . . . . . . . . . . . . . . . . . . . . . . . . . . . . . . . . . . . . . . . . 105
Chapter 9: Styles and Style Sets . . . . . . . . . . . . . . . . . . . . . . . . . . . . . . . . . . . . . . . . . . . . . . 117
Part Four: Guide to Digital Content
Chapter 10: Finding and Managing Content . . . . . . . . . . . . . . . . . . . . . . . . . . . . . . . . . . . . 129
Chapter 11: Content Types . . . . . . . . . . . . . . . . . . . . . . . . . . . . . . . . . . . . . . . . . . . . . . . . . 135
Chapter 12: Templates . . . . . . . . . . . . . . . . . . . . . . . . . . . . . . . . . . . . . . . . . . . . . . . . . . . . 157
Part Five: Tips and Techniques
Chapter 13: Sign Making . . . . . . . . . . . . . . . . . . . . . . . . . . . . . . . . . . . . . . . . . . . . . . . . . . 167
Chapter 14: Illustration . . . . . . . . . . . . . . . . . . . . . . . . . . . . . . . . . . . . . . . . . . . . . . . . . . . . 181
Chapter 15: Page Layout . . . . . . . . . . . . . . . . . . . . . . . . . . . . . . . . . . . . . . . . . . . . . . . . . . . 199
Part Six: Insights from the Experts
Chapter 16: Design of a Soccer Club Logo . . . . . . . . . . . . . . . . . . . . . . . . . . . . . . . . . . . . . . 221
Chapter 17: The Story of a Reader Chair . . . . . . . . . . . . . . . . . . . . . . . . . . . . . . . . . . . . . . . 235
Chapter 18: Concept Art . . . . . . . . . . . . . . . . . . . . . . . . . . . . . . . . . . . . . . . . . . . . . . . . . . . 251

Part One
Introduction
Image created by
Joseph Diaz
USA

4 | CorelDRAW Graphics Suite X6 Guidebook
Chapter 1: Welcome
Welcome to CorelDRAW® Graphics Suite X6, a
comprehensive software solution for graphic
design, page layout, and photo editing.
What’s included in
CorelDRAW Graphics Suite X6
CorelDRAW Graphics Suite X6 includes the
following applications:
•CorelDRAW®
•Corel® PHOTO-PAINT™
•Corel CAPTURE™
• Corel® CONNECT™
• Bitstream® Font Navigator®
CorelDRAW
CorelDRAW is an intuitive and versatile
graphics application for creating high-quality
vector illustrations, logo designs, and page
layouts.
Corel PHOTO-PAINT
Corel PHOTO-PAINT is a complete image-
editing application that lets you retouch and
enhance photos as well as create original
bitmap illustrations and paintings. You can
easily correct red-eye or exposure problems,
retouch RAW camera files, and prepare images
for the Web.
Corel CAPTURE
Corel CAPTURE is an easy-to-use application
for capturing images from your computer
screen.
Corel CONNECT
Corel CONNECT is an application that provides
easy access to content such as clipart, photos,
fonts, and more.
Bitstream Font Navigator
Bitstream Font Navigator is an application for
browsing, organizing, and managing fonts.
About this guidebook
This guidebook is designed to enrich your
experience of working with CorelDRAW and
Corel PHOTO-PAINT and to inspire you to do
more than you ever thought possible.
Individual chapters introduce you to the
workspace of each application and provide tips
and techniques that can help you, regardless of
your skill level.
This guidebook is divided into seven parts.
Chapters 1 through 3 describe the new
features of CorelDRAW Graphics Suite X6 as
well as the learning resources that are available
online and within each application.
Chapters 4 and 5 present basic information
about CorelDRAW and Corel PHOTO-PAINT,
Part One: Introduction
Part Two: Getting Started

Chapter 1: Welcome | 5
including workspace tours that describe the
main tools in each application.
Chapters 6 through 9 provide a review of
fundamental color concepts and show you
how to work with color and text as well as
format objects by using styles and style sets.
Chapters 10 through 12 provide information
about working with Corel CONNECT and
introduce the available content, such as clipart,
photos, and fonts.
Chapters 13 through 15 give you useful tips
about the specific workflows for sign making,
illustration, and page layout.
Chapters 16 through 18 present tutorials by
graphic design professionals from diverse
industries who use CorelDRAW Graphics Suite
in their everyday work. In these chapters, the
authors share how the software helps them
express their creativity and artistic freedom as
they create a sports team logo, furniture
design, and concept painting.
To access the tutorials as individual PDFs,
click Help ` Insights from the experts.
A stunning collection of artwork, created in
CorelDRAW Graphics Suite by professional
designers and illustrators, is included in this
last part of the guidebook.
To access this guidebook in PDF format,
click Help ` Guidebook.
Guidebook conventions
The following conventions make it easy to
locate information in the guidebook.
References to the application interface
References to elements of the application
interface, such as menu commands, are
indicated by bold formatting. For example,
“Click File ` Open” refers to clicking File on
the menu bar and then clicking the Open
command.
Tips
The guidebook contains brief tips, which may
highlight portions of your workflow, offer
creative ideas that you can try out, or provide
information about performing a task. These
tips are indented and marked by a special icon
for easy reference.
Color-coded pages
Each part of the guidebook is coded for easy
reference with a distinctive band of color in the
upper-left or upper-right area of the page.
Cross-references
If you want to learn more about a specific
subject, you can use the cross-references. Two
types of cross-references are used in this
guidebook:
• cross-references to the Help in an
application
• cross-references to a specific page in the
Guidebook
If a cross-reference points to the Help, you can
access the information by starting the specific
Part Three: Color, Type, and Styles
Part Four: Guide to Digital Content
Part Five: Tips and Techniques
Part Six: Insights from the Experts
Part Seven: Gallery

6 | CorelDRAW Graphics Suite X6 Guidebook
application, clicking Help ` Help topics, and
then browsing or searching for the relevant
topic.
Other learning resources
In addition to this guidebook, various other
learning resources can help you get started
with CorelDRAW Graphics Suite X6. For
example, you can use the Help to learn about
basic tools and techniques, visit the
CorelDRAW.com community to ask questions
and receive help and suggestions from other
users, or watch video tutorials to see graphic
design in action.
Help
The Help is accessible from within the
application and provides comprehensive
information about product features. You can
browse through a list of topics, look up tools
and topics in the index, or search for specific
words.
To access the Help, click Help ` Help
topics. The application displays the Web-
based Help if an Internet connection is
available, or local Help if there is no
Internet connection.
Tooltips
Tooltips provide helpful information about
application controls when you position the
pointer over icons, buttons, and other interface
elements.
Example of a tooltip
Hints
Hints provide instant information about tools
in the toolbox. When you click a tool, a hint
appears, telling you how to use the tool. Hints
are displayed by default in the Hints docker on
the right side of the application window, but
you can hide them when you no longer need
them.
Hints docker in CorelDRAW
Chapter 1: Welcome | 7
To display or hide Hints, click Help ` Hints.
To find additional information about a
tool, you can access a relevant Help topic
by clicking the Help button in the
upper-right corner of the Hints docker.
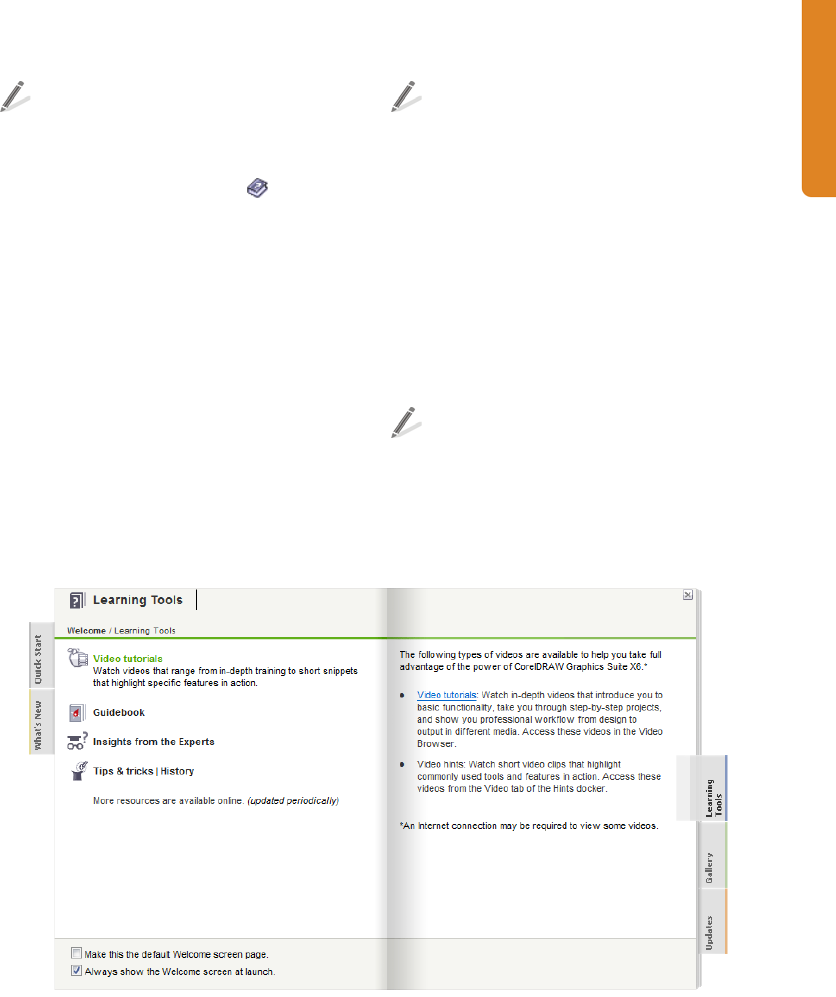
Welcome screen
The Welcome screen gives you easy access to
resources in the applications and lets you
quickly complete common tasks, such as
opening files and starting files from templates.
You can also find out about the new features
in CorelDRAW Graphics Suite X6 and get
inspired by graphic designs that are featured
on the Gallery pages. In addition, you can find
tutorials and tips, and get the latest product
updates.
You can access the Welcome screen by
clicking Help ` Welcome screen.
Videos
Short videos are available to show you how to
complete basic tasks such as drawing, shaping,
and coloring objects in CorelDRAW, or masking
and cropping in Corel PHOTO-PAINT. In
addition, longer video tutorials introduce you
to the working environment of CorelDRAW
and Corel PHOTO-PAINT and guide you
through specific tasks and techniques.
To access the short videos, click the Videos
tab in the Hints docker.
To access the video tutorials, click Help `
Video tutorials.
Welcome screen in CorelDRAW

8 | CorelDRAW Graphics Suite X6 Guidebook
Web-based resources
The following resources are available on the
Corel Web site (www.corel.com) to help you
get the most out of CorelDRAW Graphics Suite
X6:
•Corel Knowledge Base — The articles in
this searchable database were written by
members of the Corel Technical Support
team in response to questions by users of
CorelDRAW Graphics Suite.
•CorelDRAW.com community — In this
online environment, you can share your
experience with the product, ask
questions, and receive help and
suggestions from other users.
•Tips and tricks — This valuable
information is provided by the Corel
Documentation team to help you take full
advantage of product features.
•Tutorials — In-depth tutorials let you
share the knowledge and techniques of
CorelDRAW Graphics Suite experts.
•Third-party resources — For additional
information about the tools in the suite,
you can access third-party print and online
resources that cover various areas of
graphic design.
Macro programming guide
The CorelDRAW Graphics Suite X6 Macro
Programming Guide provides a streamlined
instructional approach to programming
macros for CorelDRAW Graphics Suite X6. By
creating macros with CorelDRAW and
Corel PHOTO-PAINT, you can automate tasks
and provide customized solutions. You can use
either Microsoft® Visual Basic for Applications
(VBA) or Microsoft® Visual Studio® Tools for
Applications (VSTA) to create macros.
If your installation of CorelDRAW Graphics
Suite X6 includes VBA or VSTA, you can
access the macro programming guide by
clicking Start ` All programs `
CorelDRAW Graphics Suite X6 `
Documentation.
Network deployment guide
The CorelDRAW Graphics Suite X6 Deployment
Guide is a step-by-step resource for deploying
CorelDRAW Graphics Suite X6 to a network.
This guide is provided to customers who
purchase a volume (“multi-seat”) license of
CorelDRAW Graphics Suite X6 for their
organizations.
To purchase a volume license of
CorelDRAW Graphics Suite X6 and obtain
the CorelDRAW Graphics Suite X6
Deployment Guide, contact Corel Support
Services (www.corel.com/support).
Customized training and integration
resources
Corel Corporation has training partnerships
with other firms and provides resources for
developers and consultants.
Corel customized training
Corel Training Specialists can provide you with
customized training, tailored to your work
environment, to help you get the most out of
the Corel software that you have installed.
These experts can help you develop a
curriculum that is practical and relevant to the
needs of your organization. For more
information, visit www.corel.com/
customizedtraining.

Chapter 1: Welcome | 9
Corel Training Partners
A Corel Training Partner (CTP) is an
independent, officially accredited local
organization that provides training and
training resources for Corel products. CTPs are
located worldwide for your convenience. To
find a partner near you, visit www.corel.com.
Corel Technology Partners
Corel Technology Partners are businesses that
embed Corel technology within their products,
develop plug-in applications for Corel
software, or integrate standalone applications
into Corel technology solutions. This
comprehensive program is designed especially
for developers and consultants, and it includes
the necessary components for designing,
developing, testing, and marketing custom
solutions that are related to Corel products.
For more information about Corel Technology
Partners, please e-mail Corel Corporation at
techpartner@corel.com.

12 | CorelDRAW Graphics Suite X6 Guidebook
Chapter 2: Installation and Support
CorelDRAW Graphics Suite X6 is easy to install,
register, and customize.
Installing CorelDRAW Graphics
Suite applications
The installation wizard makes it easy to install
CorelDRAW Graphics Suite applications and
components. You can install the applications
with the default settings, or you can customize
the installation by choosing different options.
When you insert the installation disc in the
DVD drive, the installation wizard starts
automatically. Follow the instructions on the
screen to complete the installation.
(Windows® 7 and Windows Vista®) If the
installation wizard does not start
automatically, click Start on the Windows
taskbar, and type X:\autorun.exe in the
search box, where X is the letter that
corresponds to the DVD drive.
(Windows® XP) If the installation wizard
does not start automatically, click Start on
the Windows taskbar, and click Run. Type
X:\autorun.exe, where X is the letter that
corresponds to the DVD drive.
After you install the applications, you can also
use the installation wizard to do the following:
• add and delete components in the current
installation
• repair the current installation by
reinstalling all application features
• uninstall CorelDRAW Graphics Suite
Before repairing an installation, try
resetting the current workspace to the
default settings by holding down F8 while
starting the application.
For more information, see “Installing
CorelDRAW Graphics Suite applications” in the
Help.
Changing languages
If an application has been installed in more
than one language, you can change the
language of the user interface and Help at any
time.
To change the language of the application,
click To o l s ` Options. In the list of
categories, click Global, and choose a
language from the Select the language
for the user interface list box. Restart the
application to apply the new language
settings.
If you did not install a specific language when
you first installed the product, you can do so
later. For more information, see “Changing
languages” in the Help.
Updating Corel products
During product installation, you can choose
the option to download product updates.
To check for product updates at any time,
click Help ` Updates.

Chapter 2: Installation and Support | 13
Corel Support Services
Corel Support Services can provide you with
prompt and accurate information about
product features, specifications, pricing,
availability, services, and technical support.
For the most current information on support
services available for your Corel product, visit
www.corel.com/support.
About Corel Corporation
Corel is one of the world's top software
companies, with more than 100 million active
users in over 75 countries. We develop
software that helps people express their ideas
and share their stories in more exciting,
creative, and persuasive ways. Through the
years, we've built a reputation for delivering
innovative, trusted products that are easy to
learn and use, helping people achieve new
levels of productivity. The industry has
responded with hundreds of awards for
software innovation, design, and value.
Our award-winning product portfolio includes
some of the world's most widely recognized
and popular software brands, including
CorelDRAW® Graphics Suite, Corel® Painter™,
Corel DESIGNER® Technical Suite, Corel®
PaintShop™ Pro, Corel® VideoStudio®,
Corel® WinDVD®, Corel® WordPerfect®
Office, and WinZip®. Our global headquarters
are in Ottawa, Canada, with major offices in
the United States, United Kingdom, Germany,
China, Taiwan, and Japan.
16 | CorelDRAW Graphics Suite X6 Guidebook
Chapter 3: What’s New
The new and enhanced features of CorelDRAW
Graphics Suite can help you express your
creative ideas compellingly.
To access the list of new features from the
application, click Help ` What’s new.
To learn what was new in previous versions
of CorelDRAW Graphics Suite, click Help `
Highlight what’s new, and choose a
version. Menu commands and tools for
features introduced or improved in that
version are highlighted.
Work faster and more efficiently
From organizing project assets and accessing
the suite’s vast collection of content, to quickly
identifying available formatting options and
removing unwanted areas in photos,
CorelDRAW Graphics Suite X6 offers several
workflow innovations that help you be more
efficient and productive.
Multiple trays in Corel CONNECT (New!)
Corel CONNECT now lets you work with several
trays at the same time, which gives you
increased flexibility in organizing assets for
multiple projects. Trays help you gather
content from various folders or online sources,
and are shared among CorelDRAW,
Corel PHOTO-PAINT, and Corel CONNECT.
You can use and maintain separate trays for
different types of content. For example, you
might be working on a project that requires
photos, vector graphics, and bitmap icons.
Keeping these types of content in separate
trays provides a way to find assets quickly and
easily. As an added convenience, you can open
files from the tray to get a full-size preview. You
can also rename trays or change the default
folder to which trays are saved.
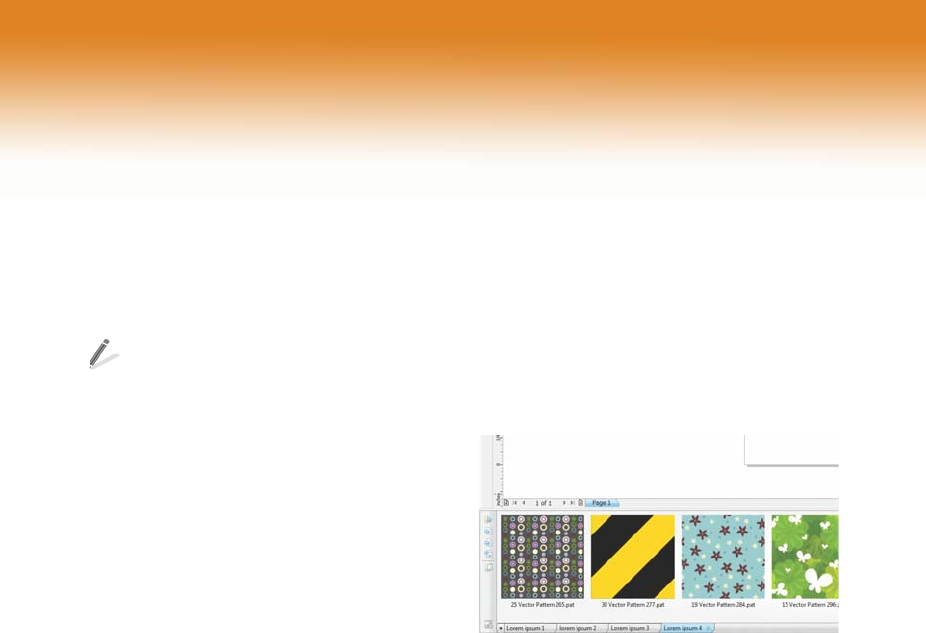
Multiple trays help you find assets quickly and easily.
Search capability in Corel CONNECT
(New!)
The new Corel CONNECT search toolbar lets
you instantly extract images from a web site.
Simply type a web address in the Search and
address box, and Corel CONNECT
immediately gathers all images defined with an
HTML <img> tag from the Web site, making
it quick and easy to leverage content assets
from online sources. You can also type search
terms or a folder path to have Corel CONNECT
search your computer, network, or other online
resources for content.
Content (New and enhanced!)
The improved Corel CONNECT provides quick
access to all CorelDRAW Graphics Suite X6

Chapter 3: What’s New | 17
content, while also helping you acquire
additional content from online vendors.
Corel CONNECT lets you access a wealth of content.
The suite’s content library includes:
• 10,000 high quality clipart and digital
images
• 1,000 professional, high-resolution digital
photos
• 1,000 OpenType® fonts, including
premium fonts such as Helvetica®
• 350 professionally designed templates
• 2,000 vehicle templates
• 800 frames and patterns, and more.
Object Properties docker (New!)
In CorelDRAW X6, the redesigned Object
properties docker now presents only object-
dependent formatting options and properties.
By grouping all object settings in one location,
this docker helps you fine-tune your designs
faster than ever before.
For example, if you create a rectangle, the
Object properties docker automatically
presents outline, fill, and corner formatting
options, as well as the rectangle’s properties. If
you create a text frame, the docker instantly
displays character, paragraph, and frame
formatting options, as well as the text frame’s
properties.
The redesigned Object properties docker groups all
object settings in one location.
Smart Carver (New!)
In Corel PHOTO-PAINT X6, the new
Smart Carver™ tool makes it easy to remove
unwanted areas from a photo and
simultaneously adjust the photo’s aspect ratio.
For example, you might want to define an area
of a photo that you would like to keep or
remove, such as a person in the photo. The
versatile Object removal brush lets you
choose to paint either the area of the photo
that you want to preserve or the area that you
want to remove.
18 | CorelDRAW Graphics Suite X6 Guidebook
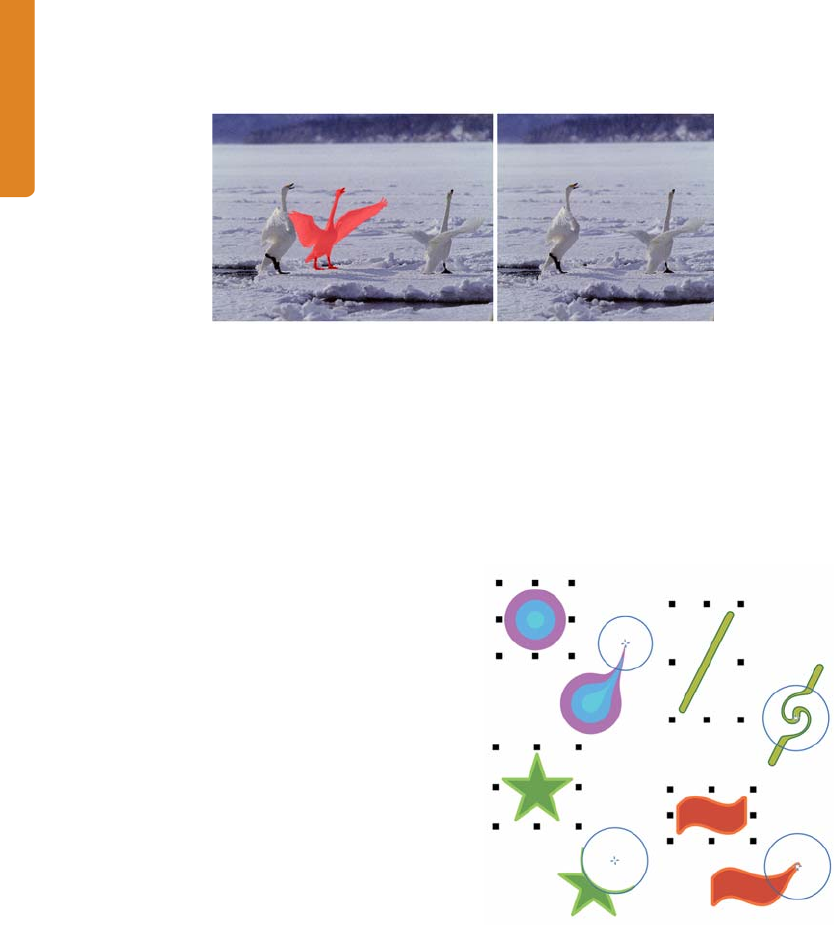
The Smart Carver makes it easy to remove unwanted areas and adjust the photo’s aspect ratio.
You can also use the Smart Carver to change a
photo’s aspect ratio without distorting
anything in the photo. For example, if you
want to resize a photo to print at a certain size,
you can paint the photo’s subjects and then
use the Smart Carver presets to contract or
expand the photo’s background vertically and
horizontally.
Shape tools (New!)
CorelDRAW X6 introduces four additional
shaping tools that provide new creative
options for refining vector objects. The new
Smear tool lets you shape an object by pulling
extensions or making indents along its outline.
The size of the brush nib and the Pressure
setting let you control the intensity of the
effect, and you can choose between smooth
curves or curves with sharp corners.
Alternatively, you can use the pressure of your
digital pen to determine the intensity of the
smear effect.
The new Twi r l tool lets you apply twirl effects
to objects. The size of the brush nib lets you
determine the size of the twirls, and the Rate
setting lets you control the speed of the effect.
You can also choose either a counterclockwise
or a clockwise twirl.
In addition, you can use the new Attract and
Repel tools to shape curves by attracting
nodes or by pushing nodes away from other
nodes in close proximity. To control the shaping
effect, you can vary the size of the brush nib
and the speed at which the nodes are attracted
or repelled.
The new shaping tools provide creative options for
refining vector objects.
Clip masks for groups of objects (New!)
With Corel PHOTO-PAINT X6, you can now
apply a clip mask to a group of objects without
modifying the individual objects within the
Chapter 3: What’s New | 19
group. For example, you can adjust
transparency levels for the whole group
without altering the pixels of the individual
objects.
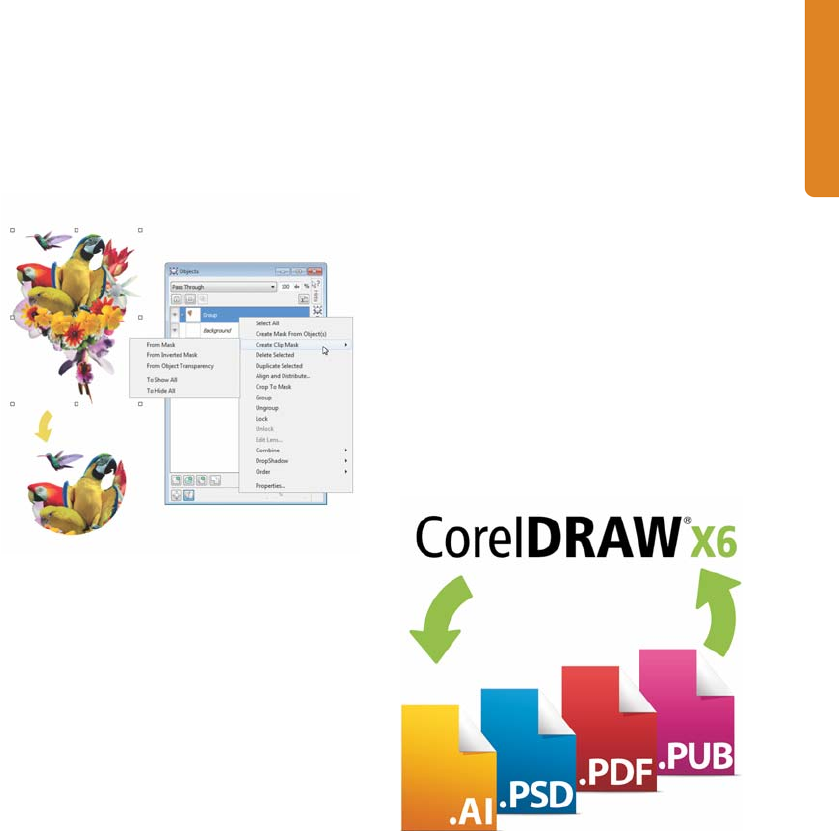
You can apply a clip mask to a group of objects.
Pass Through merge mode (New!)
Corel PHOTO-PAINT X6 introduces a new Pass
Through merge mode that you can apply to
groups, which gives you more control when
applying a lens or special effect. If you choose
Pass Through, the lens or effect will apply to all
objects, including those layered below the
group.
Multi-core processor support (New!)
CorelDRAW Graphics Suite X6 has been
optimized for the latest multi-core processors.
The increased support lets you continue
working while the suite performs resource-
intensive tasks in the background. The result is
fast and responsive performance, which means
less waiting when you export files, print
multiple documents, or copy and paste large
objects.
Native 64-bit support (New!)
CorelDRAW Graphics Suite X6 provides
support for 64-bit processors, which allows
you to work faster than ever before with large
files in CorelDRAW and large images in
Corel PHOTO-PAINT.
Adobe CS5 and Microsoft Publisher
2010 support (Enhanced!)
The enhanced import and export support for
Adobe® Illustrator® CS5 and Adobe®
Photoshop® CS5, as well as import support for
Adobe® Acrobat® X and Microsoft®
Publisher 2010, ensures that you can exchange
files with colleagues and clients.
Enhanced support for Adobe CS5, Adobe Acrobat, and
Microsoft Publisher files facilitates file exchange with
colleagues and clients.
Create layouts with ease
With new and improved master layer
functionality, new temporary alignment
guides, new advanced OpenType support, and
enhanced complex script support for working
with foreign language text, CorelDRAW
Graphics Suite X6 makes it easier than ever
before to lay out your project.
20 | CorelDRAW Graphics Suite X6 Guidebook
Master layers (New and enhanced!)
With CorelDRAW X6, the new and improved
odd-page, even-page, and all-page master
layers make it easier to create page-specific
designs for multipage documents. If you are
laying out multipage documents, such as
brochures and flyers, it’s now easy to
incorporate page-specific headers, footers,
and page numbers. For example, you might
want to have different headers on even and
odd pages.
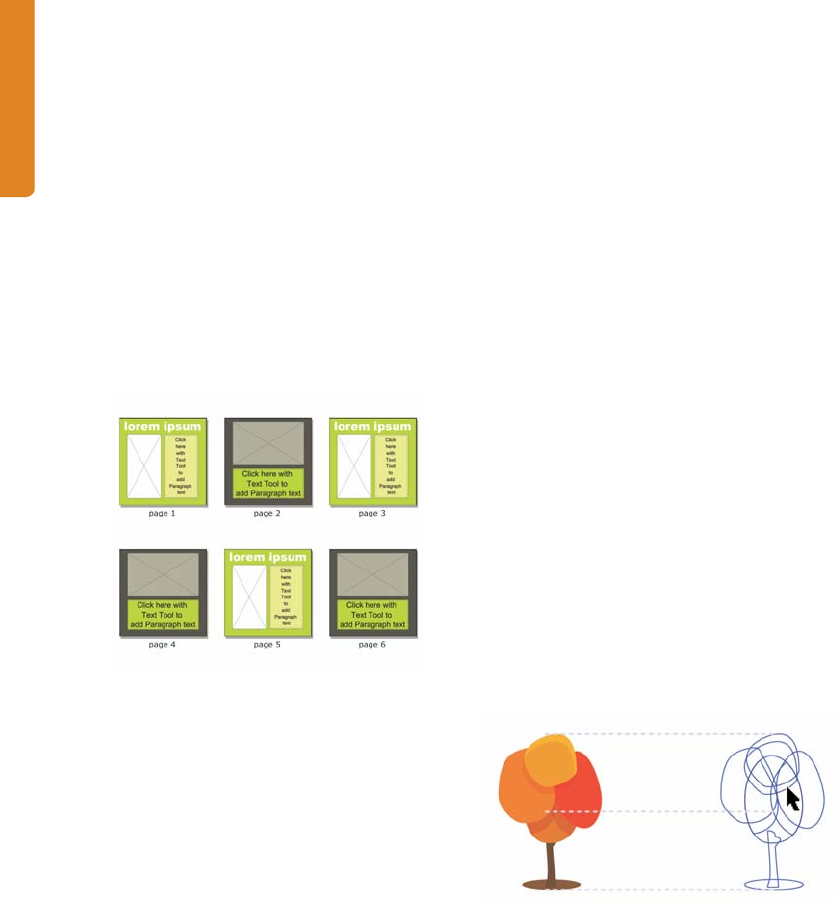
Examples of CorelDRAW X6 page layouts with different
odd-page and even-page master layers
Page numbering (New!)
With CorelDRAW X6, the new Insert page
number command helps you instantly add
page numbers on all pages of a document,
starting on a specific page, or at a particular
number. This flexibility is ideal for working with
multiple CorelDRAW files that will eventually
become a single publication.
You can choose from alphabetic, numeric, or
roman formats, and you can display page
numbers in lower-case or upper-case letters. In
addition, page numbers are automatically
updated when you add or delete pages in your
document. You can also insert a page number
inside existing artistic or paragraph text.
Alignment guides (New!)
The new alignment guides help you position
objects more quickly, appearing on the fly with
suggested alignment to existing objects on the
page. These temporary guidelines appear
when you create, resize, or move objects in
relation to other nearby objects. Alignment
guides interactively connect the centers and
the edges of objects, and you also can choose
to display alignment guides from the edges of
one object to the center of another object.
You can modify the default settings for
alignment guides to suit your needs. For
example, if you are working with a group of
objects, you can display alignment guides for
individual objects within the group, or for the
bounding box of the group as a whole. In
addition, you can specify margins for
alignment guides to help you align objects at a
set distance from the edge of another object.
You can also specify whether the alignment
guides follow only the margins or the actual
edges of the object as well.
Using alignment guides to position objects quickly
Interactive frames (New!)
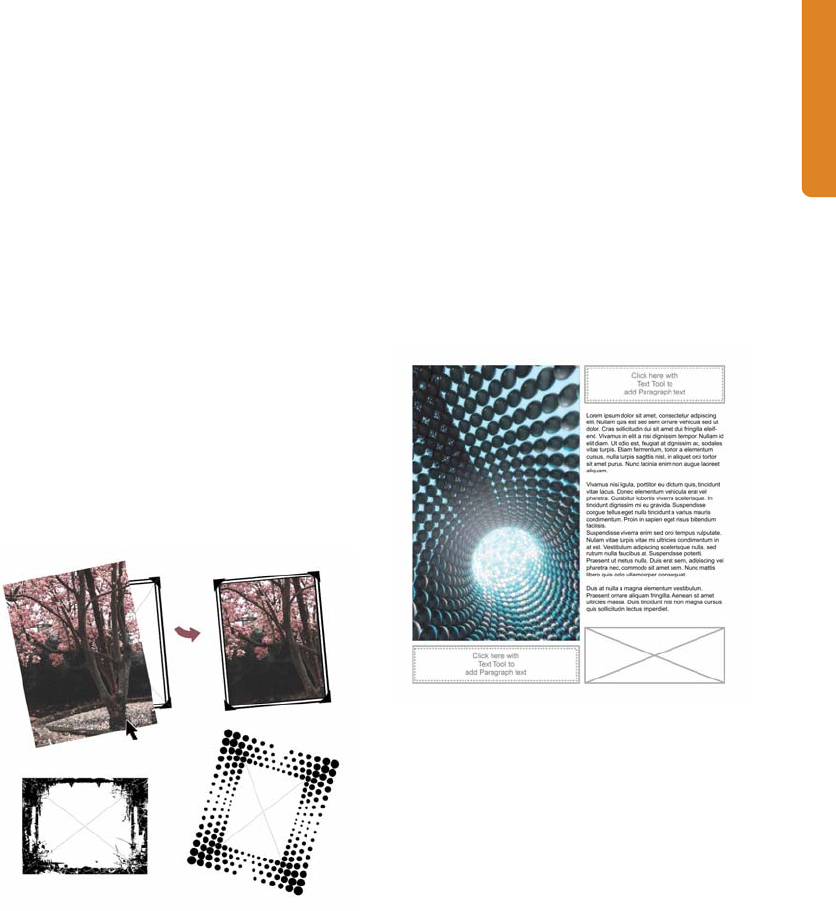
CorelDRAW X6 provides interactive frames that
help you efficiently generate mock-ups of
design ideas. The new empty PowerClip™ and
text frame functionality lets you populate your
designs with placeholder PowerClip and text
frames, which makes it easier to preview a
Chapter 3: What’s New | 21
layout before finalizing its individual content
components.
You can now drag content over a PowerClip
frame, and then choose either to add the
content to the frame or to replace any existing
frame content. PowerClip frames also now give
you the option of centering content within the
frame or scaling content to fit proportionally
within the frame. In addition, you can easily
create text frames from any closed curve
object, and then edit the frames to take on any
shape imaginable.
The interactive frame functionality has also
been implemented in a collection of pre-
designed picture frames included with the
suite, giving you stylish, content-ready design
assets that you can customize with ease.
Choose from a collection of pre-designed interactive
frames to frame your image.
Placeholder text (New!)
With CorelDRAW X6, the new Insert
placeholder text command lets you right-
click any text frame and immediately populate
it with placeholder text. This makes it easier to
assess the appearance of your document prior
to finalizing its content.
For convenience and flexibility, you can also use
custom placeholder text in any language
supported by CorelDRAW. You simply create an
RTF file containing the text that you want to
use, save it to the default placeholder text
folder, and CorelDRAW X6 will use that text
whenever you invoke the Insert placeholder
text command. For more information about
creating a custom placeholder text file,
“Placeholder text” on page 210.
You can create custom placeholder text for your
documents.
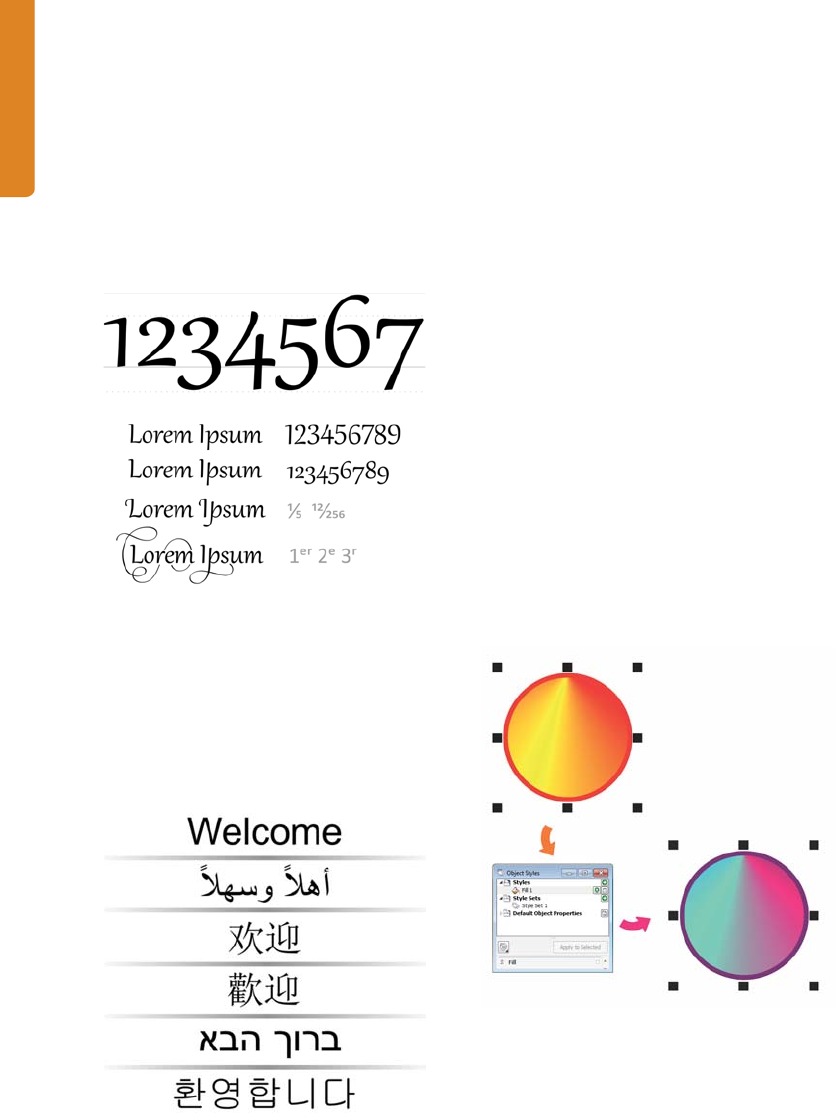
Advanced OpenType support (New!)
The reengineered text engine lets you take
greater advantage of advanced OpenType
typography features, such as contextual and
stylistic alternates, fractions, ligatures, ordinals,
ornaments, small caps, swashes, and more.
OpenType fonts are based on Unicode, which
makes them ideal for cross-platform design
work. In addition, the extended character sets
offer outstanding language support.
Accessible from the Object properties
docker, the OpenType features let you choose
alternative appearances for individual
characters, or glyphs, to suit your stylistic
22 | CorelDRAW Graphics Suite X6 Guidebook
preference, provided that the font supports
advanced OpenType. For example, you can
apply a different number, fraction, or ligature
glyph to achieve a certain look for your text. In
addition, you can let CorelDRAW prompt you
when an OpenType feature is available for the
selected text by enabling the Interactive
OpenType option.
OpenType fonts let you choose alternate appearances
for selected characters.
Complex script support (Enhanced!)
With CorelDRAW X6, the complex script
support built into the overhauled text engine
ensures proper typesetting for glyphs used by
Asian and Middle Eastern languages.
Text engine improvements ensure that multilingual
glyphs display correctly in your documents.
Design with style and creativity
With its rebuilt styles engine, new Object
styles docker, new color styles
implementation, new color harmony
functionality, and content-ready picture
frames, CorelDRAW Graphics Suite X6 helps
you focus on bringing your unique sense of
style and creativity to your designs.
Styles engine and docker (New!)
In CorelDRAW X6, the revamped styles engine
introduces a new Object styles docker that
simplifies the creation, application, and
management of styles. A style is a set of
properties that governs the appearance of
objects. CorelDRAW X6 also introduces new
style sets, which are groups of styles that make
it easier to have consistent formatting across
multiple objects, produce iterative versions,
and apply formatting with speed and
consistency.
You can quickly change the look of an object by
applying a style set.
You can create and apply styles and style sets to
graphic objects, artistic and paragraph text,
callout and dimension objects, and objects
Chapter 3: What’s New | 23
created with the Artistic media tool. For
example, you can define an outline style by
specifying attributes such as outline width,
color, and line type. For text objects, you can
define a character style by specifying font type,
font style and size, text color, background
color, character position, caps and more.
With style sets, you can group multiple styles,
which lets you combine properties from
different types of styles. For example, you can
use a style set to define fill and outline
properties for a graphic object, or you can
define character and paragraph styles to set
the appearance of paragraph text. This makes
it faster and easier to later adjust those
properties, which is especially convenient for
creating iterative designs. You can also create
child styles or style sets that retain some but
not all properties of the parent style or style set.
This is particularly useful when working with
long documents. For example, you can assign
a parent character style for headings and a
child character style for subheadings.
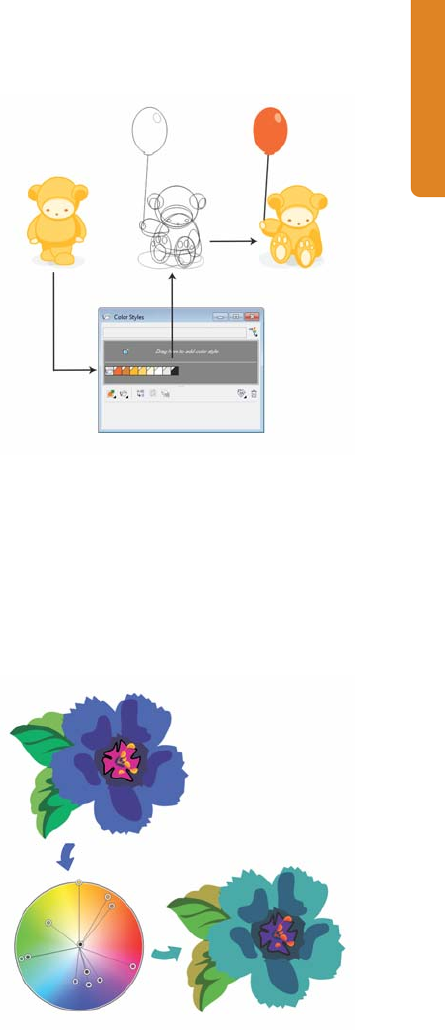
Color styles (New!)
The new Color styles docker lets you add the
colors used in a document as color styles,
which makes it easier than ever before to
implement a color change throughout a
project. To create a color style from an object,
simply drag the object to the Color styles
docker. If you apply that color style to other
objects, you can quickly change the color style
and all objects that have this style are instantly
updated.
In addition, you can break the link between an
object and a color style at any time, so you can
edit the object independently. You can also
convert color styles to different color modes or
to spot colors to prepare your document for
production printing.
Managing document colors by using the Color styles
docker
Color harmonies (New!)
The new color harmony functionality lets you
group color styles so you can quickly and easily
produce iterative designs with varying color
schemes.
Color harmonies let you change combinations of colors
easily.
By combining two or more color styles into a
harmony, you are linking the colors into a hue-
24 | CorelDRAW Graphics Suite X6 Guidebook
based relationship. This lets you modify all
colors simultaneously, altering the color
composition of your artwork in one step, and
quickly prepare a variety of alternate color
schemes. You can also edit the individual color
styles in a harmony.
In addition, you can create a special type of
color harmony called a gradient, which
consists of one master color style and a
number of varying shades of that color. When
you alter the master color, the gradient colors
automatically adjust to the same degree that
the master color was altered. This is especially
useful when outputting multiple color
variations of the same design.
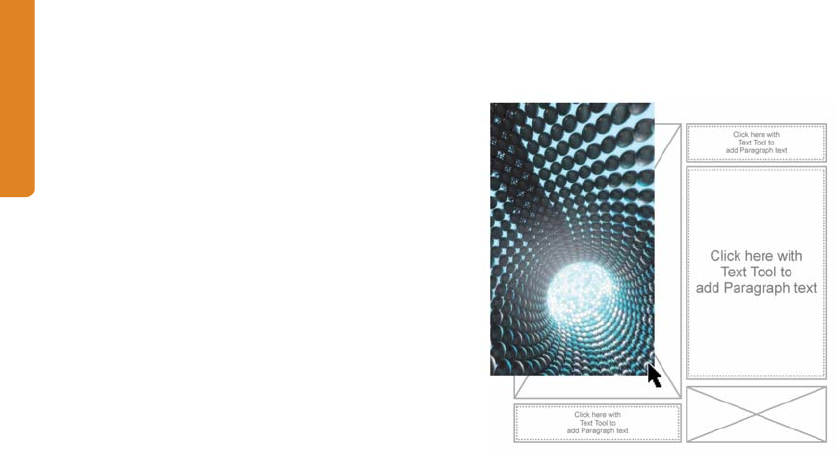
Content-ready pre-designed frames
(New!)
With CorelDRAW Graphics Suite X6, the
collection of frames included in the content
library has been enhanced to support the new
empty PowerClip functionality. This lets you
instantly populate the frames with photos or
graphics, saving you time and effort. In
addition, some of the included frames are text-
ready, so you can immediately add your own
custom text message.
Adding an image to an empty PowerClip frame

Part Two
Getting Started
Image created by
Gabriel González Díaz
Mexico

Chapter 4: CorelDRAW Basics | 27
Chapter 4: CorelDRAW Basics
Workspace overview 28
Starting a document 33
Zooming, panning, and scrolling 34
Creating objects 34
Working with bitmaps 36
Selecting, sizing, and transforming objects 37
Coloring and styling objects 38
Positioning objects 42
Grouping and combining objects 43
Organizing objects 43
Working with pages 44
Sharing your work 44
Setting preferences 46
28 | CorelDRAW Graphics Suite X6 Guidebook
Chapter 4: CorelDRAW Basics
This chapter introduces you to the CorelDRAW workspace and provides an overview of basic tasks,
such as starting and viewing documents, modifying and organizing objects, and creating page
layouts. Additional topics include sharing work and setting preferences. As you learn to use
CorelDRAW, this chapter can help identify tasks and features that you may want to explore further
in the Help.
Workspace overview
The CorelDRAW workspace provides a wide range of tools and commands for creating unique
graphic designs. This section describes the application window and the toolbox.
Application window
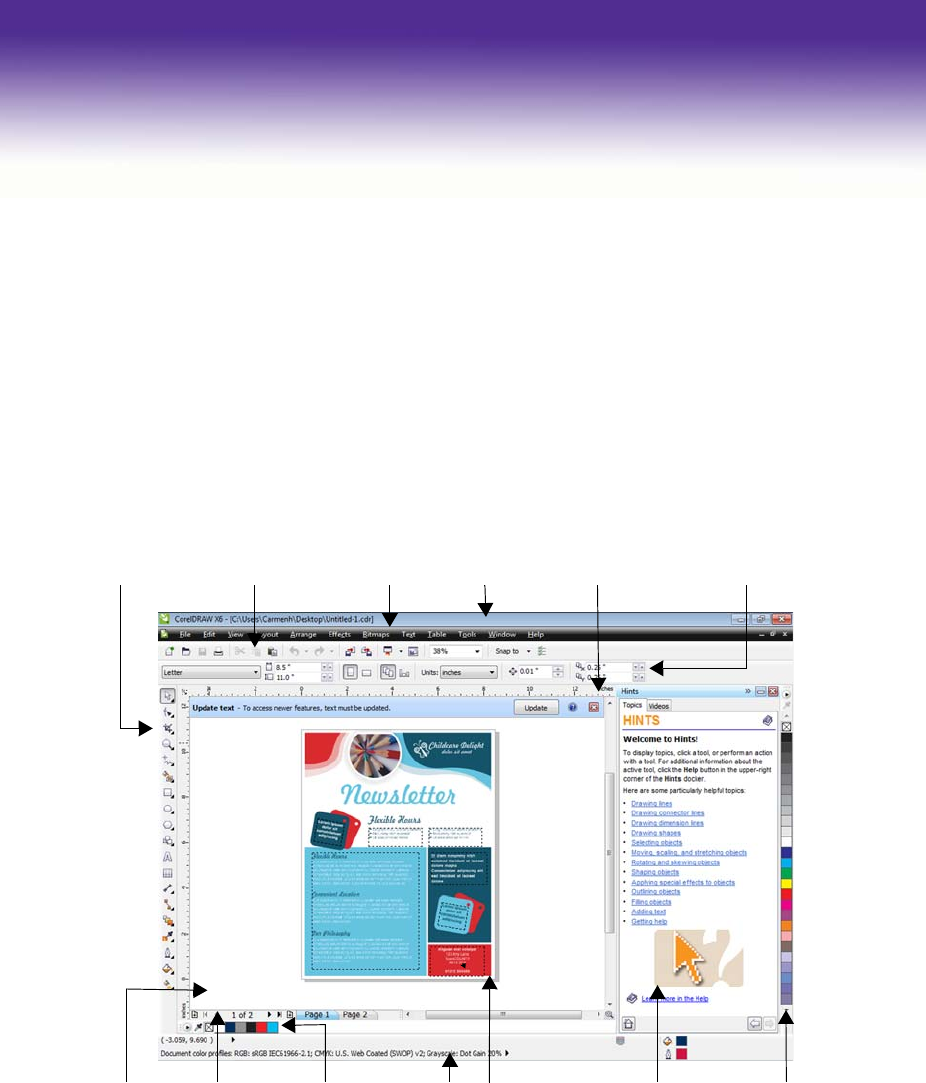
Standard toolbar Property bar
Document
navigator
DockerDocument
palette
Document
window
Color palette
Menu bar Title bar
Drawing page
RulersToolbox
Status bar
Chapter 4: CorelDRAW Basics | 29
The following list describes the main
components of the CorelDRAW application
window.
•The toolbox contains tools for creating,
filling, and modifying objects in a
document.
•The standard toolbar contains shortcuts
to basic menus and commands, such as
opening, saving, and printing documents.
Additional toolbars contain shortcuts for
more specific tasks.
•The menu bar contains drop-down
menus of related commands.
•The title bar displays the title of the
current document.
•The property bar contains controls that
change according to the active tool. For
example, when you use the Te x t tool, the
property bar changes to display controls
for creating and editing text.
•A docker lets you access commands and
settings that are associated with a specific
tool or task.
• The horizontal and vertical rulers let you
determine the size and position of objects
in a document.
•The document navigator lets you add
pages to a document, or move from page
to page within a document.
•The document window is the workspace
area that is bordered by scroll bars and
other controls. It includes the drawing
page and surrounding area.
•The drawing page is the rectangle that
represents the printable section of the
document window.
•The Document palette lets you keep
track of the colors that are used in a
document.
•The color palette is a dockable bar that
contains color swatches.
•The status bar displays information about
the properties of an object, such as type,
size, color, and fill. Color proofing status,
color profiles, and other information
about document colors are also displayed.
Toolbox
The toolbox contains a range of tools that you
can use for specific drawing and editing tasks.
Some tools let you draw shapes, and other
tools let you apply colors, patterns, or other
types of fills to objects.
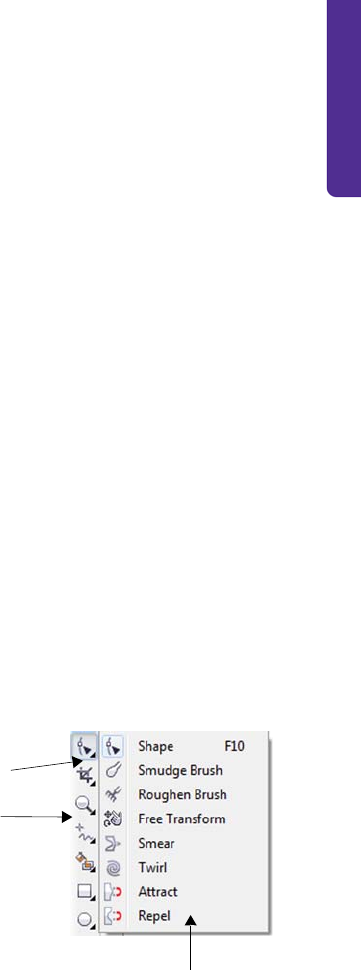
Some tools belong to flyouts, which are groups
of related tools. A small arrow in the lower-
right corner of a toolbox button indicates that
the tool belongs to a flyout. The last-used tool
in the flyout appears on the button. You can
access the tools in a flyout by clicking the flyout
arrow.
In the default workspace, clicking the flyout arrow on
the Shape tool opens a flyout of related tools.
The following section summarizes the main
categories of tools that are available in the
toolbox. For more information about specific
tools, see “Workspace tools” in the Help.
Flyout arrow
Toolbox
Flyout
30 | CorelDRAW Graphics Suite X6 Guidebook
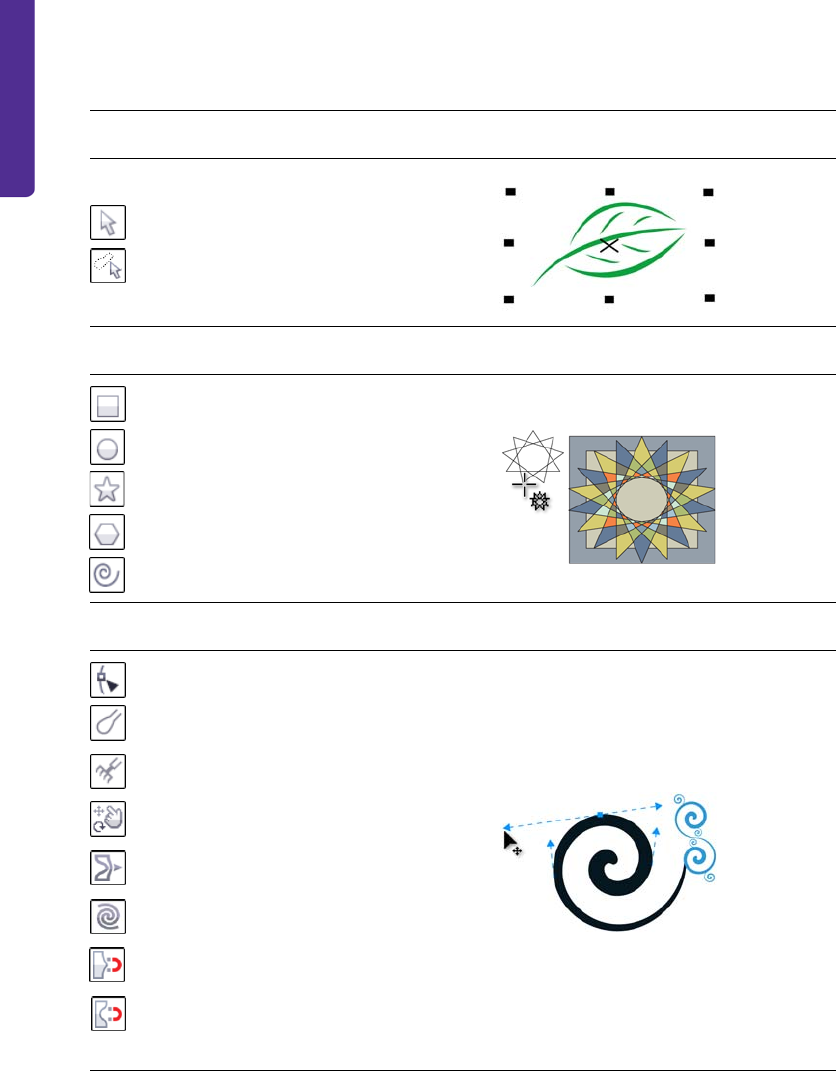
Pick tool
The Pick tool and the Freehand
pick tool let you select, size, skew,
and rotate objects.
Shape tools
Shape tools let you draw many
different shapes, including
rectangles, ellipses, stars, polygons,
and spirals. Additional tools in this
category (not shown here) let you
draw shapes such as smileys,
arrows, banners, and flowcharts.
Shape editing tools
Shape editing tools let you change
the shape of an existing object.
Chapter 4: CorelDRAW Basics | 31
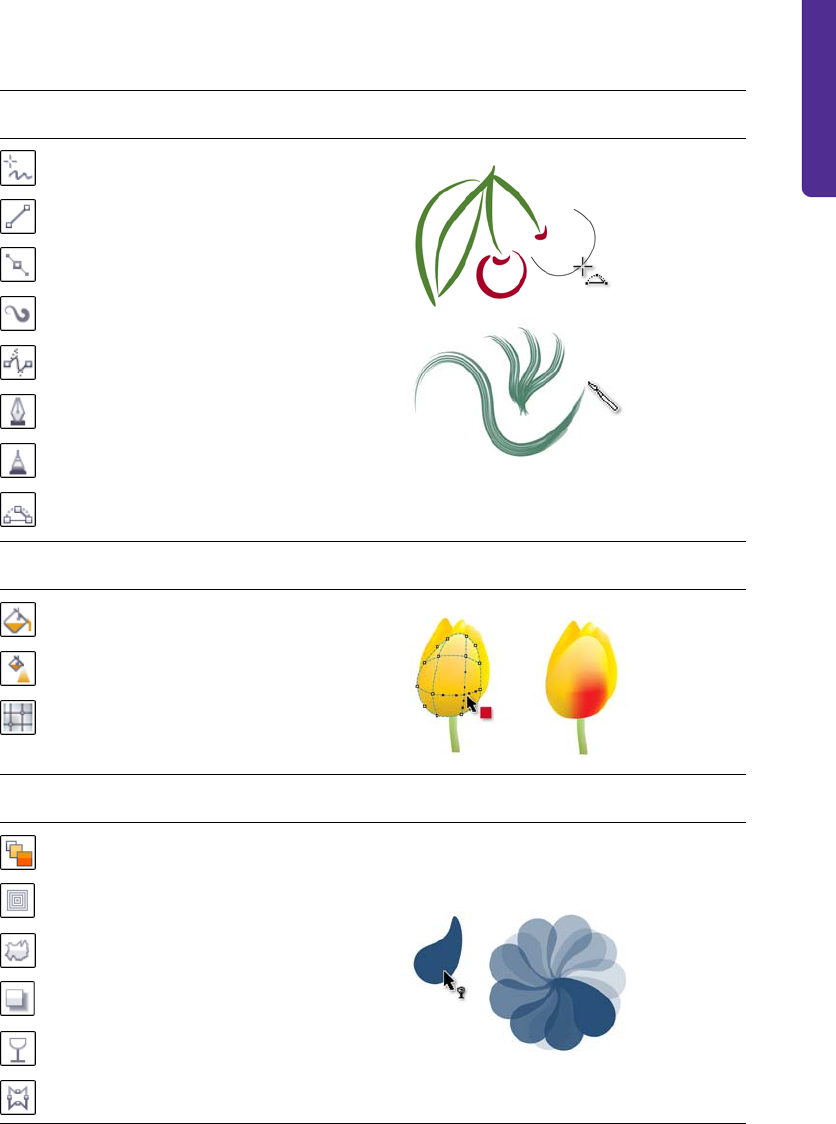
Curve tools
Curve tools let you draw lines and
curves, such as freehand lines,
straight lines, and Bézier curves. You
can also use the Artistic media
tool to spray images, draw
calligraphic lines, or add
brushstrokes.
Fill tools
Fill tools let you apply various fills to
objects, such as uniform, fountain,
and mesh fills.
Interactive tools
Interactive tools let you apply special
effects to objects, such as blends,
contours, drop shadows, extrusions,
and transparencies.
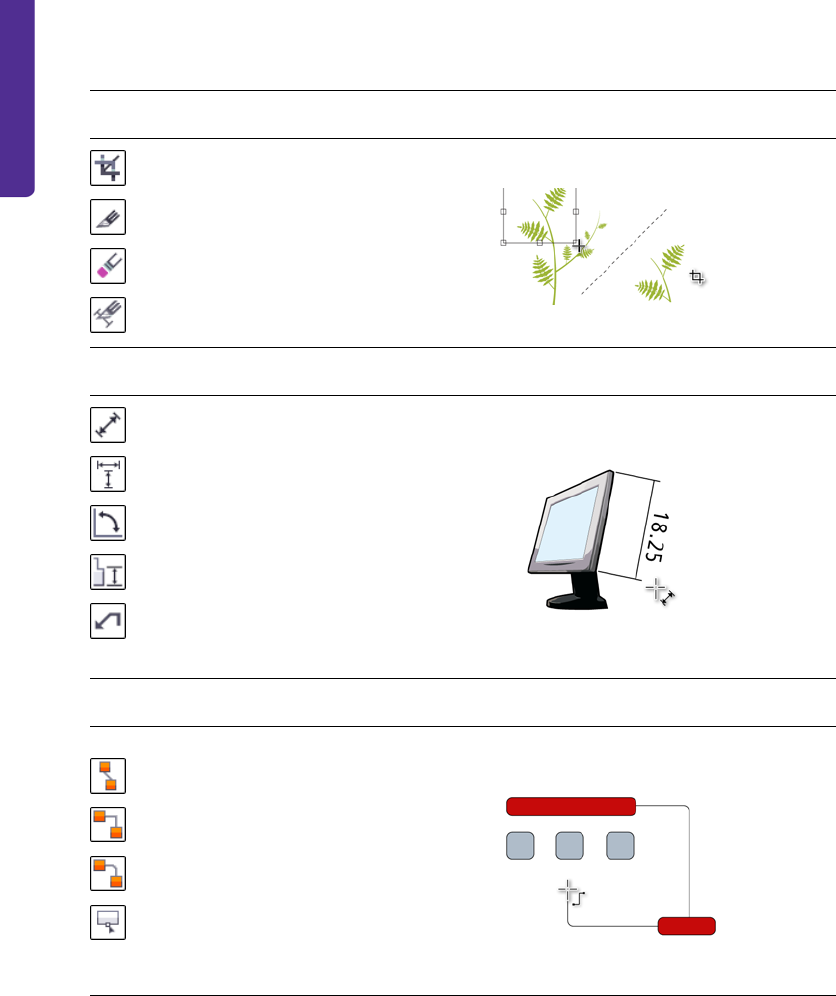
32 | CorelDRAW Graphics Suite X6 Guidebook
Cropping and erasing tools
Cropping and erasing tools let you
remove parts of a document.
Dimension tools
Dimension tools let you draw
slanted, straight, and angular
dimension lines to measure parts of
objects in a document.
Connector tools
Connector tools let you draw lines
that connect objects in diagrams
and flowcharts.
Chapter 4: CorelDRAW Basics | 33
For more information about workspace
components, see “CorelDRAW workspace
tour” in the Help.
Starting a document
When you start a new document (File ` New),
you can set various document properties in the
Create a new document dialog box.
You can name the document, set the page size,
select a color mode, such as CMYK or RGB, and
set color profiles.
The Create a new document dialog box lets you
specify a wide range of document properties.
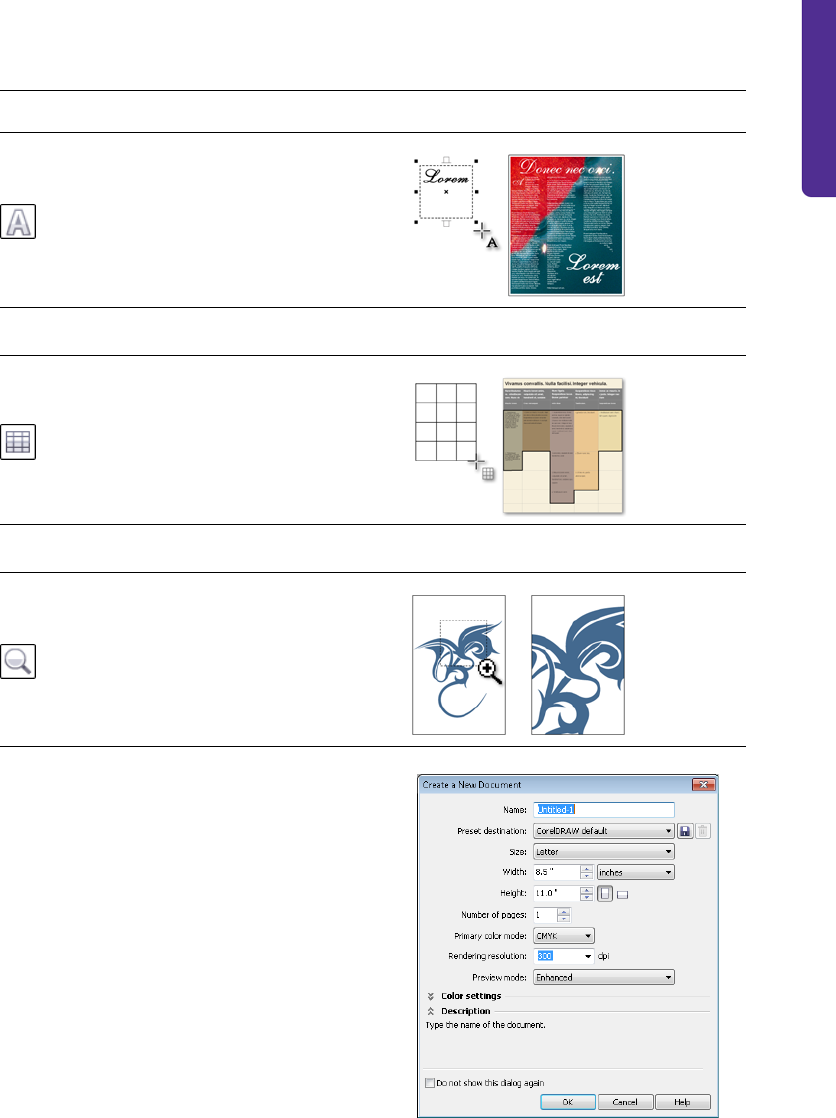
Text tool
The Te x t tool lets you type words
directly on-screen as artistic or
paragraph text.
Table tool
The Ta b le tool lets you draw and
edit tables.
Zoom tool
The Zoom tool lets you change the
magnification level in the document
window.
34 | CorelDRAW Graphics Suite X6 Guidebook
Zooming, panning, and scrolling
You can change the view of a document by
zooming in to get a closer look or by zooming
out to see a larger area. You can experiment
with a variety of zoom options to determine
the amount of detail that you want.
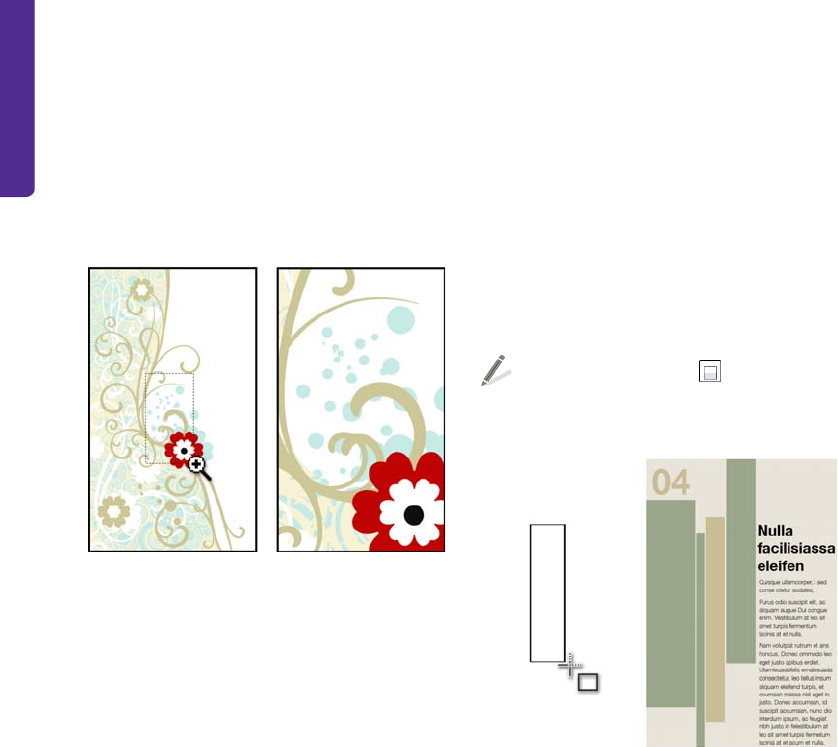
Left: The Zoom tool is used to select an area to magnify.
Right: The area is magnified.
Panning and scrolling are two additional ways
to view specific areas of a document. When
you work at high magnification levels or with
large documents, you may not be able to see
all the content at the same time. Panning lets
you “grab” the document and move it around
in the document window to focus on a desired
area. Scrolling lets you move the document up,
down, or sideways in the document window so
that you can view the areas that are currently
hidden.
Creating objects
Objects are the building blocks of a document.
By using the tools in the toolbox, you can
create different types of objects: shapes, lines
and curves, text, and tables.
Drawing common shapes
CorelDRAW provides many tools that let you
draw common shapes, such as rectangles,
circles, stars, and arrows. After you create a
shape, you can modify it by stretching it,
applying a pattern fill, or adding a drop
shadow.
One of the simplest shapes that you can create
is a rectangle.
Click the Rectangle tool in the toolbox.
On the drawing page, drag to draw the
rectangle.
The Rectangle tool is used to draw a single rectangle
(left), which can be used as a graphic element in a
finished project (right).
You can create objects of different shapes by
using the following tools:
•The Ellipse tool lets you draw circles and
ellipses.
•The Polygon tool lets you draw polygons.
•The Graph paper tool lets you draw a
grid.
•The Spiral tool lets you draw symmetrical
and logarithmic spirals.

Chapter 4: CorelDRAW Basics | 35
•The Basic shapes tool lets you draw a full
set of shapes, such as hexagrams, smileys,
and right-angle triangles.
•The Arrow shapes tool lets you draw
arrows with a specified shape, direction,
and number of arrowheads.
•The Flowchart shapes tool lets you draw
flowchart symbols.
Creating lines and curves
If you want to create your own unique shapes,
you can use one of the curve tools that let you
draw an almost unlimited variety of shapes.
Before you get started, however, it's a good
idea to get familiar with the following basic
concepts.
After drawing a line, you can convert it to a
curve. This is helpful when you want to make
detailed changes to the basic shape of a line.
When you convert a line to a curve, you are
essentially reducing the line to a series of
points, called nodes. By moving the nodes, you
change the line’s shape.
Top: Straight line. Middle: The line has been converted
to curves and now contains curve nodes. Bottom: The
curve is shaped by manipulating the nodes.
A line in which the starting point and endpoint
do not meet is called an open path. You can
join the points to make a closed path. This is
useful for adding a fill to the area enclosed by
the line.
Left: Open path. Right: Closed path with a fill added.
CorelDRAW provides many tools for drawing
lines and curves, including the following:
•The Freehand tool lets you draw line
segments and curves by using a mouse or
pen tablet.
•The Artistic media tool provides access to
four additional tools:
•The Brush tool lets you draw lines that
look like brushstrokes.
•The Sprayer tool lets you spray
objects, such as snowflakes or bubbles,
along a path.
•The Calligraphic tool lets you draw
lines that resemble strokes drawn with
a calligraphy pen.
•The Pressure tool lets you draw lines
that resemble strokes drawn with a
pressure-sensitive pen.
•The Pen tool lets you draw curves and
straight lines one segment at a time.
36 | CorelDRAW Graphics Suite X6 Guidebook
Creating text
You may need to include text in your
documents. CorelDRAW lets you create two
types of text:
•Paragraph text is contained within a text
frame. You can change many common
formatting properties of paragraph text,
such as font type and size, text color, and
font style. Paragraph text is ideal for larger
blocks of text.
•Artistic text is not contained within a text
frame, and you can add special effects to it
such as contouring and drop shadows.
Artistic text is ideal for logos, banners, and
headlines.
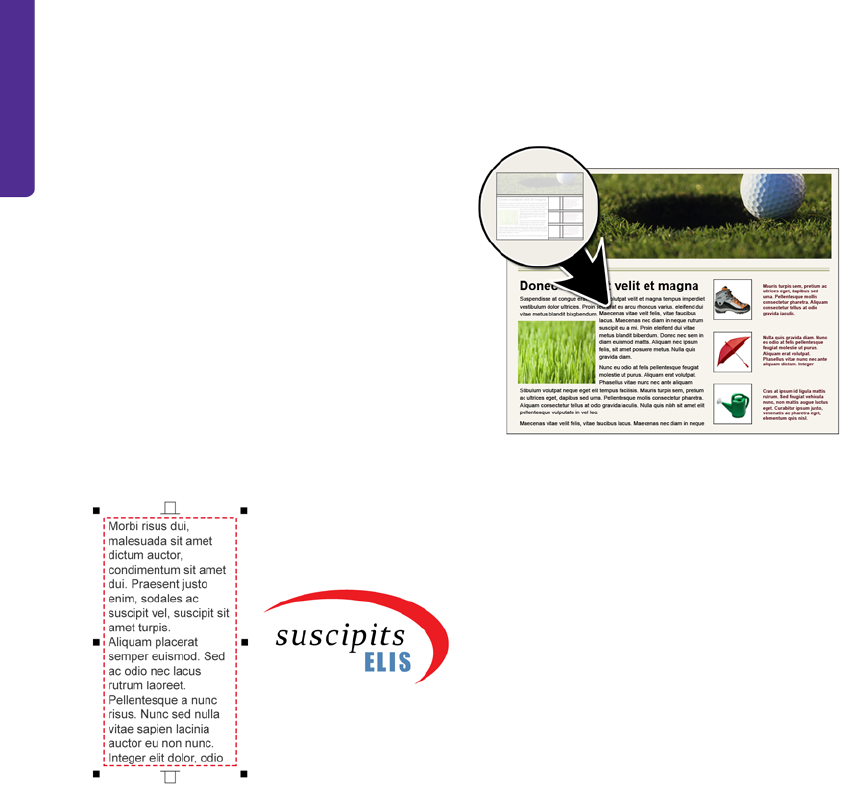
Left: Paragraph text. Right: Artistic text, formatted as a
logo.
You can create both paragraph and artistic text
by using the Te x t tool. For more information,
see “Working with Text” on page 105.
Creating tables
One way to organize graphic and text objects
in a document is by creating a table and
inserting the objects into the table cells. Tables
offer a quick way to create a pleasing layout for
your documents.
The Ta b l e tool was used to design this Web page.
You can create tables by using the Tabl e tool.
When you click the Ta b l e tool, controls for the
tool become available on the property bar.
After specifying the number of rows and
columns, you can simply drag diagonally on
the drawing page to create the table.
Working with bitmaps
The document that you create with
CorelDRAW is a vector graphic. Vector graphics
are resolution-independent, which means that
the graphic is not compromised when you
scale or distort it. Vector graphics are based on
mathematical equations, which remain the
same regardless of the changes you make.
When you import a photograph into
CorelDRAW, the photograph is imported as a
bitmap image. Bitmap images are based on
pixels, which are tiny units of color. You can
think of a vector graphic as composed of lines
and fills, and a bitmap image as composed of
a mosaic of colors.
Chapter 4: CorelDRAW Basics | 37
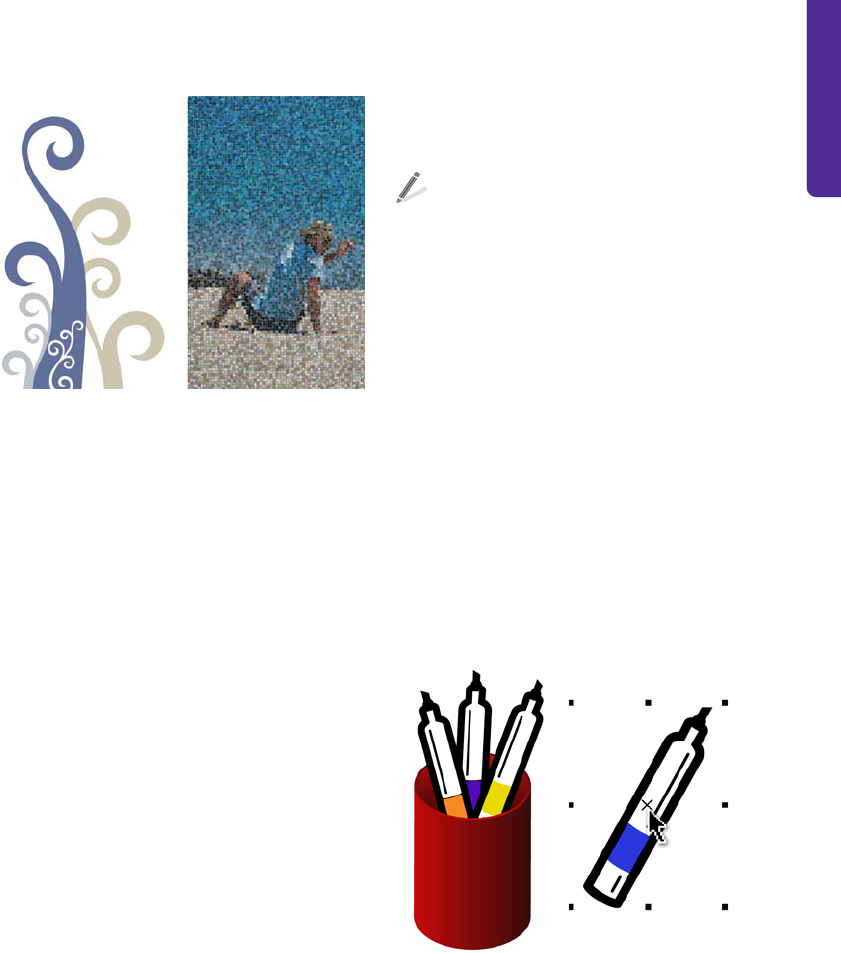
Left: Vector image with smooth lines. Right: Pixelated
bitmap image that demonstrates the “mosaic” nature of
bitmap files.
There are two ways in which you can work with
bitmap images in CorelDRAW: You can insert a
bitmap into your document, and you can open
Corel PHOTO-PAINT from within CorelDRAW
to edit a bitmap.
Inserting bitmaps
When you import a bitmap image into
CorelDRAW, you can either embed it or link it
to an external file. When you link to an external
file, any edits that you make to the external file
are automatically applied to the imported file
in CorelDRAW. After you import a bitmap, the
status bar provides information about the color
mode, size, and resolution of the bitmap.
When you import the bitmap into the
document, you can make changes to the
bitmap by using the Edit bitmap feature in
CorelDRAW.
Editing bitmaps
You can access Corel PHOTO-PAINT, a
complete bitmap-editing program, from
within CorelDRAW. When you finish editing a
bitmap, you can quickly resume your work with
CorelDRAW.
To open a bitmap in Corel PHOTO-PAINT,
click the Edit bitmap button on the
property bar.
Selecting, sizing, and
transforming objects
After adding an object to your document, you
may want to modify the object. CorelDRAW
provides several tools that let you select, resize,
or transform objects.
To modify an object, you must first select it.
You can select an object by using the Pick tool.
After you select an object with the Pick tool, a
bounding box with an “X” at the center
appears around the object. The bounding box
contains control handles that allow you to
transform the object.
The object on the right has been selected, which is
indicated by a bounding box with an “X” in the center.
You can change an object by sizing, skewing,
stretching, rotating, or mirroring it.
38 | CorelDRAW Graphics Suite X6 Guidebook
•Sizing lets you change the width and
height of an object.
•Skewing lets you slant an object to one
side.
•Stretching lets you change the height
and width of an object nonproportionally.
•Rotating lets you turn an object around
its center axis or a point relative to its
position.
•Mirroring lets you create a horizontal or
vertical mirror image of an object.
Coloring and styling objects
In addition to transforming objects, you can
style your objects artistically. For example, you
can apply a unique outline or fill, or add a drop
shadow to create the illusion of depth. You can
also make objects transparent.
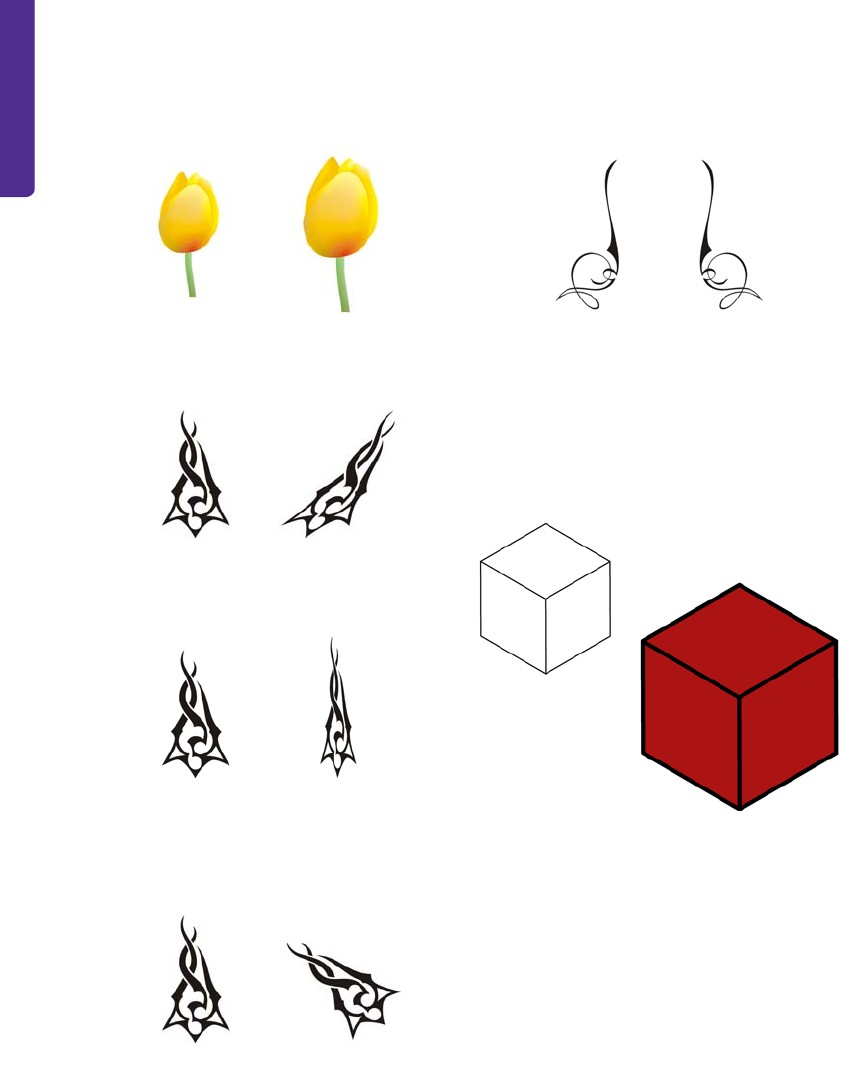
A solid red fill has been added to the bottom cube.
Chapter 4: CorelDRAW Basics | 39
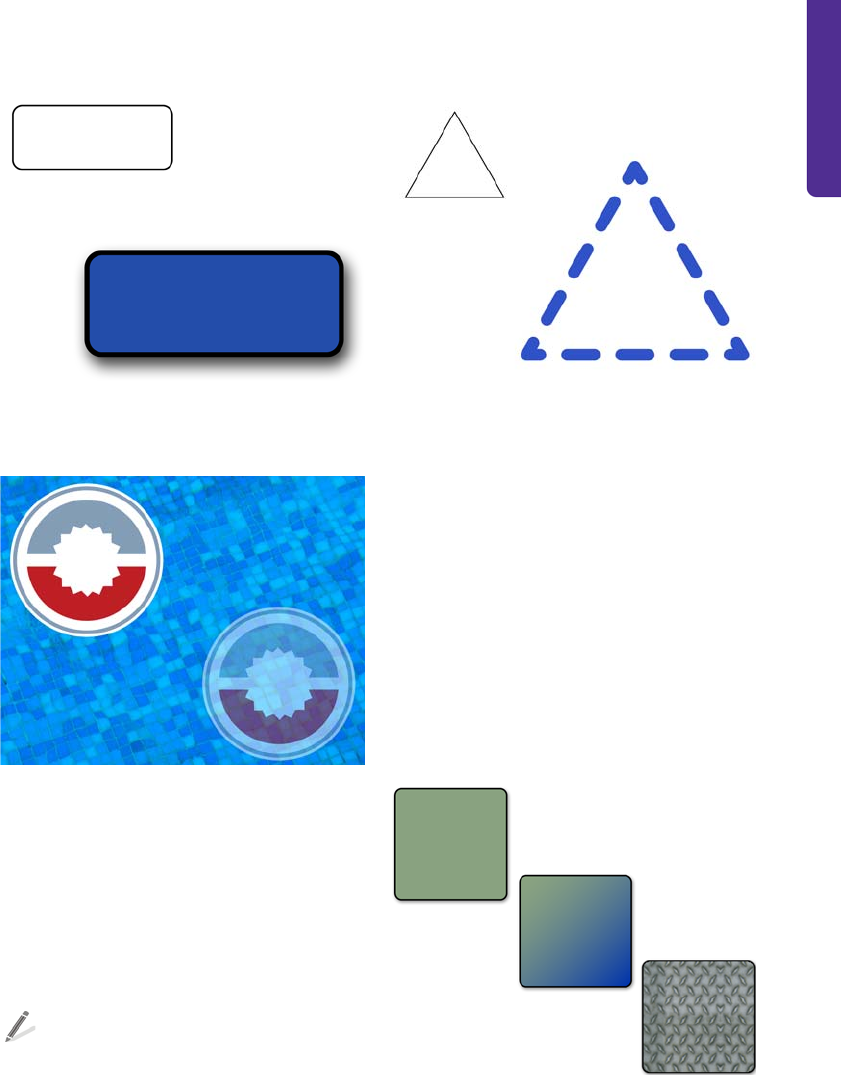
A blue fill and a drop shadow have been applied to the
bottom rectangle, giving it a three-dimensional
appearance.
A transparency effect has been applied to the bottom
circle, so that it appears to be under water.
Formatting outlines
You can change the outline of an object in
various ways. Depending on your design
needs, you can choose a different outline color,
thickness, or style (such as a dashed or dotted
line).
To change the appearance of outlines, you
can use controls in the Outline pen dialog
box, the Outline page of the Object
properties docker, or the property bar.
Upper left: Triangle outline with no formatting applied.
Lower right: Triangle outline formatted with color and a
dashed-line pattern.
A list of preset arrowheads is also available. To
add arrowheads to the starting point or
endpoint of a line, you can choose a preset
from the list or create a custom arrowhead.
Choosing fills
CorelDRAW provides a wide range of fills to
help you add patterns and texture to your
objects. You can fill an object with one color, or
with a blend of two or more colors. Or you can
select a more complex fill, such as a texture or
pattern, or create your own fill.
Top to bottom: Uniform fill, fountain fill, and pattern fill
applied to objects.

40 | CorelDRAW Graphics Suite X6 Guidebook
To add a fill to an object, click either the Fill
tool or the Interactive fill tool.
The Fill tool lets you choose one of five fill
types, each with a wide range of options. The
Interactive fill tool lets you apply a fill
dynamically by using property bar controls
while drawing in the document window. The
following list describes the types of fills that are
available for each tool.
Fill tool
•The Uniform fill is a single-color fill.
•The Fountain fill is a blended fill of two
or more colors.
•The Pattern fill is a patterned design,
such as a floral wallpaper design.
•The Te x t u r e f i l l has a textured effect that
mimics various surfaces, such as marble,
ocean surface, and moon terrain.
•The PostScript fill supports transparency
in a range of patterns.
Interactive fill tool
•The Interactive fill lets you create a
fountain fill and apply changes to it in real
time.
•The Mesh fill lets you manipulate a mesh
grid to control the colors and blends in a
custom fountain fill.
For more information, see “Filling objects” in
the Help.
Adding transparency
You can apply transparency to create a realistic
rendering of objects such as water and glass.
When you add transparency to an object,
anything behind the object shows through.
Transparency was added to the object on the left to
create the illusion of water, and to the object on the
right to create the illusion of glass. The Drop shadow
tool was used to intensify the effect in both objects.
You can adjust the measure of transparency to
determine how opaque the object is. A fully
opaque object completely blocks anything
behind it, whereas a fully transparent object is
invisible.
To apply transparency to an object, you have
several choices. You can use the Interactive
transparency tool to apply a transparency fill,
or you can use a transparency lens effect. In
addition, you can control the way the
transparency is blended in the object, and you
can copy transparencies from one object to
another. You can also specify whether to apply
the transparency to the fill or to the object
outline, or to both.
Adding effects
CorelDRAW offers a range of tools that you can
use to add three-dimensional effects to
objects.
Chapter 4: CorelDRAW Basics | 41
• Extrusions
•Drop shadows
• Contours
• PowerClips
•Bevels
•Chamfers
Reusing color and objects
To save time and maintain a uniform look in
your document, you can reuse colors and
objects.
You can sample color from anywhere in your
document and then copy that color to another
object.
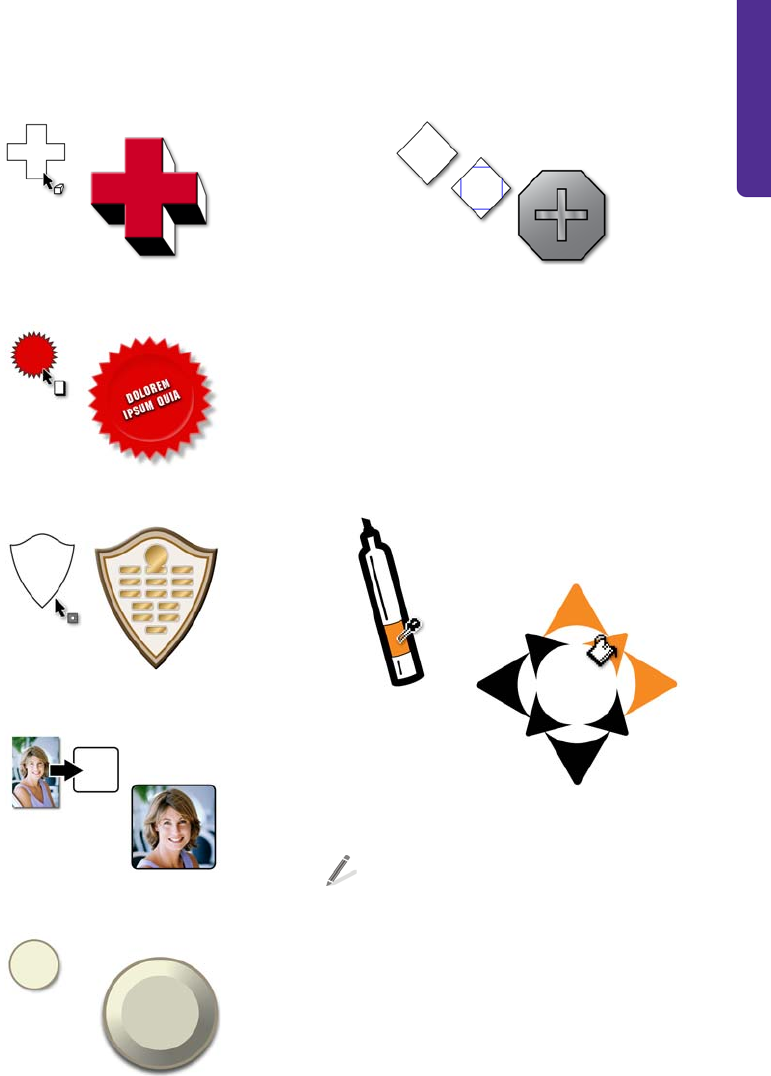
The orange color is sampled from the graphic on the left
and applied to the graphic on the right.
To sample color, click the Color
eyedropper tool, and click the color. The
Color eyedropper tool automatically
switches to the Apply color mode. To
apply the color, point to an object, and
click.
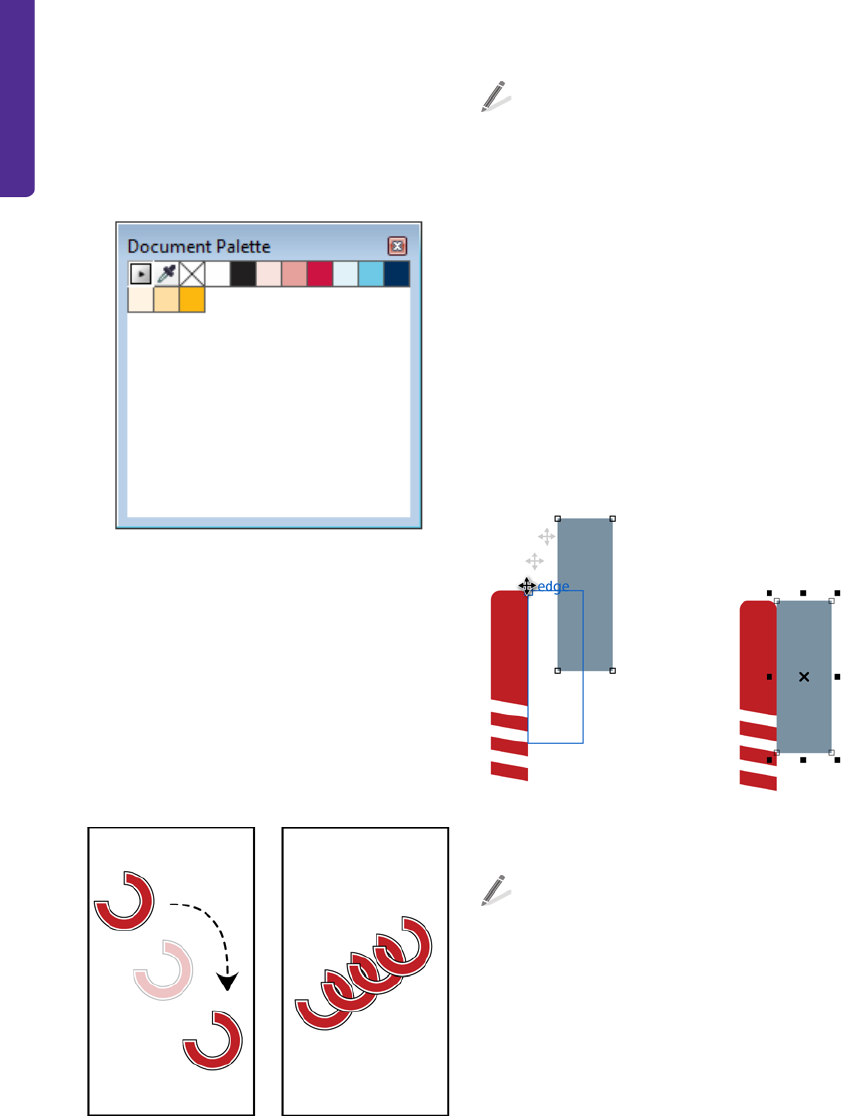
When you use a color in your document, the
color is added to the Document palette,
which is docked at the bottom of the
application window when you start a new
document or open an existing document.
42 | CorelDRAW Graphics Suite X6 Guidebook
Colors are added to the Document palette
when you add a color from one of the color
libraries, when you sample a color from
another document or another application, and
when you apply fills to objects.
The Document palette is automatically updated as you
add colors to your document. You can use this palette
to create a color scheme for your project.
To reuse objects in your documents, you can
either copy and paste the objects, or you can
duplicate them. Using the first method, you
can copy an object to the Clipboard and then
paste the object in your document. Using the
second method, you can quickly create
multiple duplicates of the object and place
them in your document.
Left: The object has been copied and pasted. Right: The
object has been duplicated.
To create one copy of an object, click Edit
` Copy. To create a series of duplicates,
click Edit ` Step and repeat.
Positioning objects
CorelDRAW provides several tools to help you
position and align objects on the page. You
can use these tools to avoid small gaps or
misalignments that are not apparent on-screen
but become noticeable after printing.
You can use snapping to align an object with
another object in a document. When snapping
is turned on, snap points appear in various
locations around an object, such as the corner,
center, or edge.
Left: The blue rectangle is dragged down to snap to the
red rectangle. Right: The two objects are snapped
together.
To turn on object snapping, click View `
Snap to ` Snap to objects.
If you want to align an object with another
object but do not want to snap directly to the
object, you can use dynamic guides. Dynamic
guides are temporary guidelines that are based
on one of the following snap points of an
object: center, node, quadrant, or text
baseline. You can drag the object along the
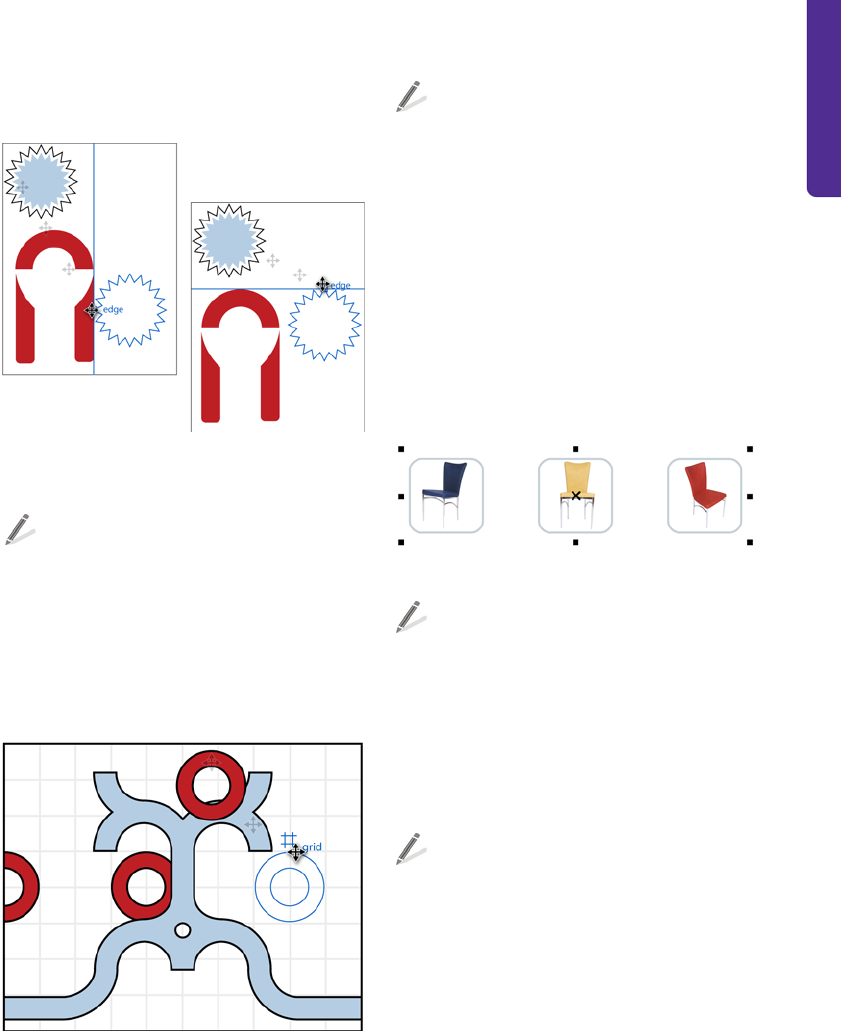
Chapter 4: CorelDRAW Basics | 43
dynamic guide. The distance from the base
object is measured as you move the object.
Left: A vertical dynamic guide is used to align objects.
Right: A horizontal dynamic guide is used to align
objects.
To turn on dynamic guides, click View `
Dynamic guides.
You can also use the document grid to align
objects within the document window. The
document grid is a series of intersecting lines in
which each small square acts as a snapping
point. You can reduce the size of these squares
for more precise alignment in your document.
Objects can be placed on the drawing page by aligning
them with a grid.
To display the document grid, click View `
Grid ` Document grid.
Grouping and combining objects
You may want to make changes to a group of
objects or move them without changing their
position in relation to each other. CorelDRAW
lets you group objects to manage them more
easily. When you group objects, each object
retains its own properties. When you finish
working with the objects as a group, you can
ungroup them and work on each one
individually.
The three chair images are selected as a group.
To group objects, marquee select the
objects, and click Arrange ` Group.
By combining two or more objects, you can
create a single curve object that has the fill and
outline attributes of the last selected object.
You can edit this curve object whenever
necessary. In addition, you can combine
objects as a way of creating objects with holes.
To combine objects, click Arrange `
Combine.
For more information, see “Combining
objects” in the Help.
Organizing objects
The more objects you add to your document,
the more difficult it is to find and select specific
objects. To organize objects, you can add layers
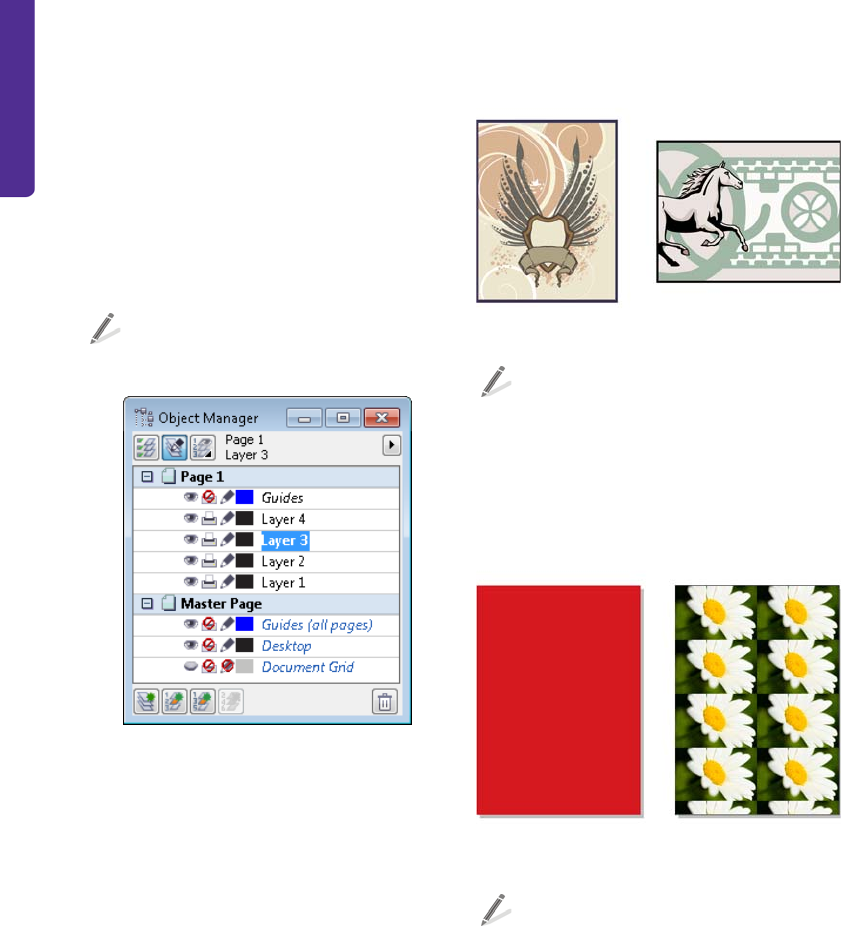
44 | CorelDRAW Graphics Suite X6 Guidebook
to your document. Layers make it easier to view
and work with multiple objects simultaneously.
The Object manager docker lets you add,
move, and delete layers in a document. You
can set up layers before you begin working on
your document, or you can add them as
needed and then move existing objects to the
the newly added layers.
To open the Object manager docker, click
To o l s ` Object manager.
The Object manager docker lets you select and modify
page layers.
For more information about layers, see
“Working with layers” in the Help.
Working with pages
Depending on your desired output, you can
customize the look of your pages by specifying
different page layouts, such as a booklet, tent
card, or brochure. You can also toggle the
page orientation between landscape and
portrait, and you can create a custom page
size.
Left: Portrait orientation. Right: Landscape orientation.
To set the page size, click Layout ` Page
setup. You can select from a long list of
common paper sizes, including legal,
business card, and various envelope sizes.
You can specify a background for your pages.
A background consists of a single color or a
bitmap, which is tiled to fit the page.
Left: Page with a solid red background. Right: Page with
a tiled bitmap background.
To add a background to your page, click
Layout ` Page background.
Sharing your work
To share your finished document with others,
you can print a copy on a personal printer. Or
for high-quality output, such as signs or vehicle
wraps, you can send your document to a
commercial printer. You can also export your
Chapter 4: CorelDRAW Basics | 45
work to a different file format, such as Adobe®
Portable Document Format (PDF) or Adobe
Illustrator (AI).
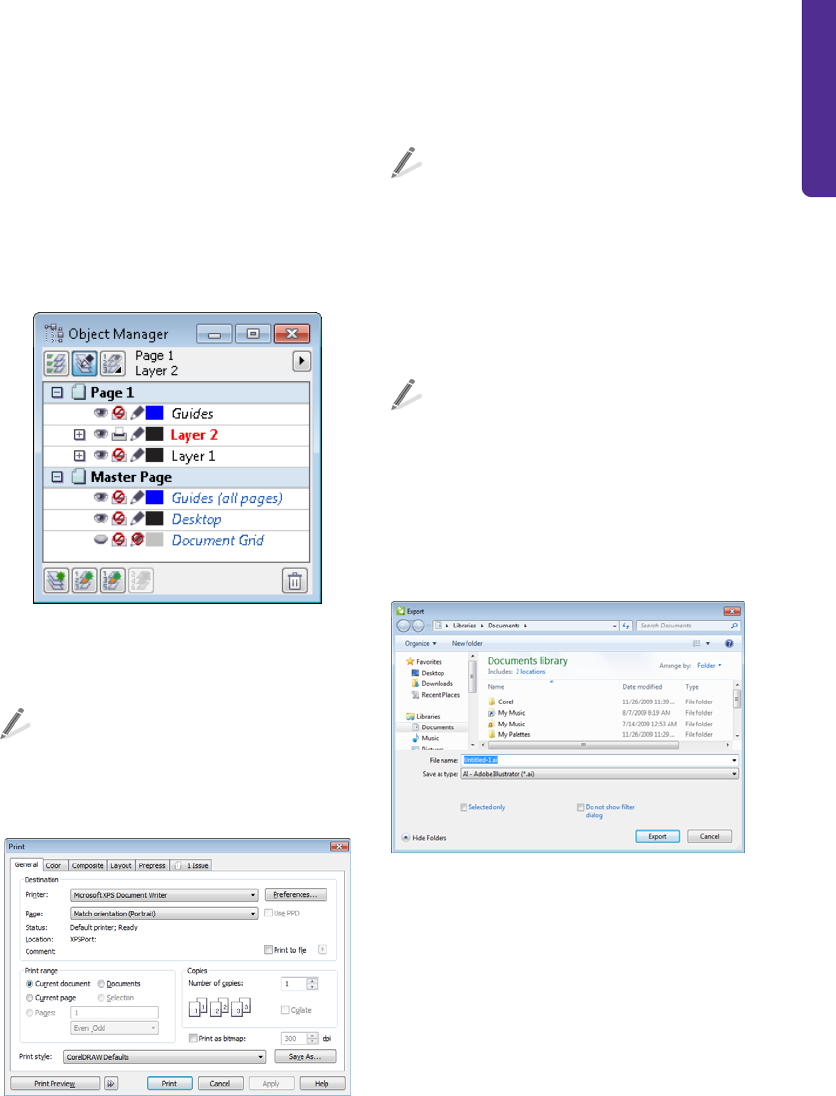
If your document has multiple layers, and you
do not want to print them all, you can specify
which ones to print. Make sure that the layers
to be printed are visible and enabled for
printing in the Object manager docker.
In this example, the objects on Layer 2 are visible in the
document window and are enabled for printing. The
objects on Layer 1 are visible, but will not appear in the
printed copy of the document.
To print to a personal printer, click File `
Print. In the Print dialog box, choose a
printer from the Printer list box, and
choose a print range option.
The Print dialog box lets you set printing preferences for
your document.
You can preview your work before printing to
ensure that everything will appear as it should.
To preview a print job, click File ` Print
preview.
If you are using a print service provider, you
must ensure that your document meets the
provider’s criteria. Consult with the print
service provider if you do not have this
information, so that you know which options
to enable in the document.
To prepare a print job for a print service
provider, click File ` Collect for output.
Follow the instructions in the Collect for
output wizard.
To export your work to another file format,
click File ` Export, and choose a file
format.
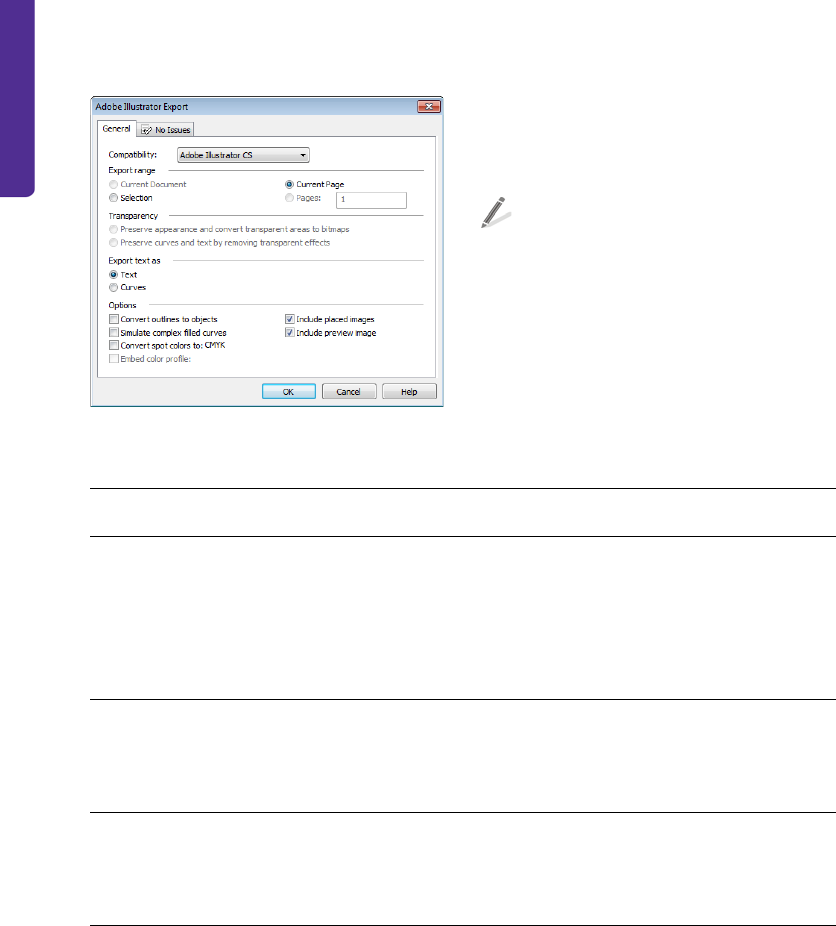
Export dialog box
Depending on which file format you choose
when exporting a file, you can set additional
options. For example, with the Adobe
Illustrator (AI) file format, you can choose a
specific version of Adobe Illustrator in the
Export dialog box.
46 | CorelDRAW Graphics Suite X6 Guidebook
You can set export options for Adobe Illustrator files.
When you save your work as a PDF file, you can
use PDF presets, which optimize the file for
various types of output, such as document
distribution, prepress, and the Web.
To save your work as a PDF file, click File `
Export. From the Save as type list box,
choose PDF - Adobe Portable
Document Format.
Setting preferences
You can set many different preferences in
CorelDRAW to customize various features. The
following table lists and describes three
examples of these preferences.
Preference Description How to set
Unit of measure The selected unit of measure
for the horizontal and vertical
rulers, such as inches, pixels
or points
Click View ` Setup ` Grid
and ruler setup, and click
Rulers. In the Units area,
choose a unit of measure for
the horizontal and vertical
rulers.
Backup files The folder location to save
backup files, and any auto-
backup settings
Click Tools ` Options. In the
Workspace list of categories,
click Save to access the
backup file settings.
Nudge distance The increment by which you
move an object when you
press an arrow key
Click View ` Setup ` Grid
and ruler setup, and click
Rulers. Type a value in the
Nudge box.

Chapter 5: Corel PHOTO-PAINT Basics | 47
Chapter 5: Corel PHOTO-PAINT Basics
Workspace overview 48
Acquiring images 57
Cropping and rotating 57
Changing image size and resolution 58
Changing color modes 60
Retouching 60
Adjusting color and tone 62
Working with masks 64
Working with objects and lenses 65
Sharing your work 66
Setting preferences 67
48 | CorelDRAW Graphics Suite X6 Guidebook
Chapter 5: Corel PHOTO-PAINT Basics
This chapter introduces you to the Corel PHOTO-PAINT workspace and provides an overview of
basic tasks, such as bringing in images from your scanner or digital camera, adjusting image size
and resolution, and retouching photos to fix common problems. Additional topics include using
masks, objects, and lenses in image editing, and sharing work by exporting to different file formats
or by using ConceptShare™. As you learn to use Corel PHOTO-PAINT, this chapter can help identify
tasks and features that you may want to explore further in the Help.
Workspace overview
The Corel PHOTO-PAINT workspace provides a wide range of tools and commands for viewing and
editing images. This section describes the application window and the toolbox.
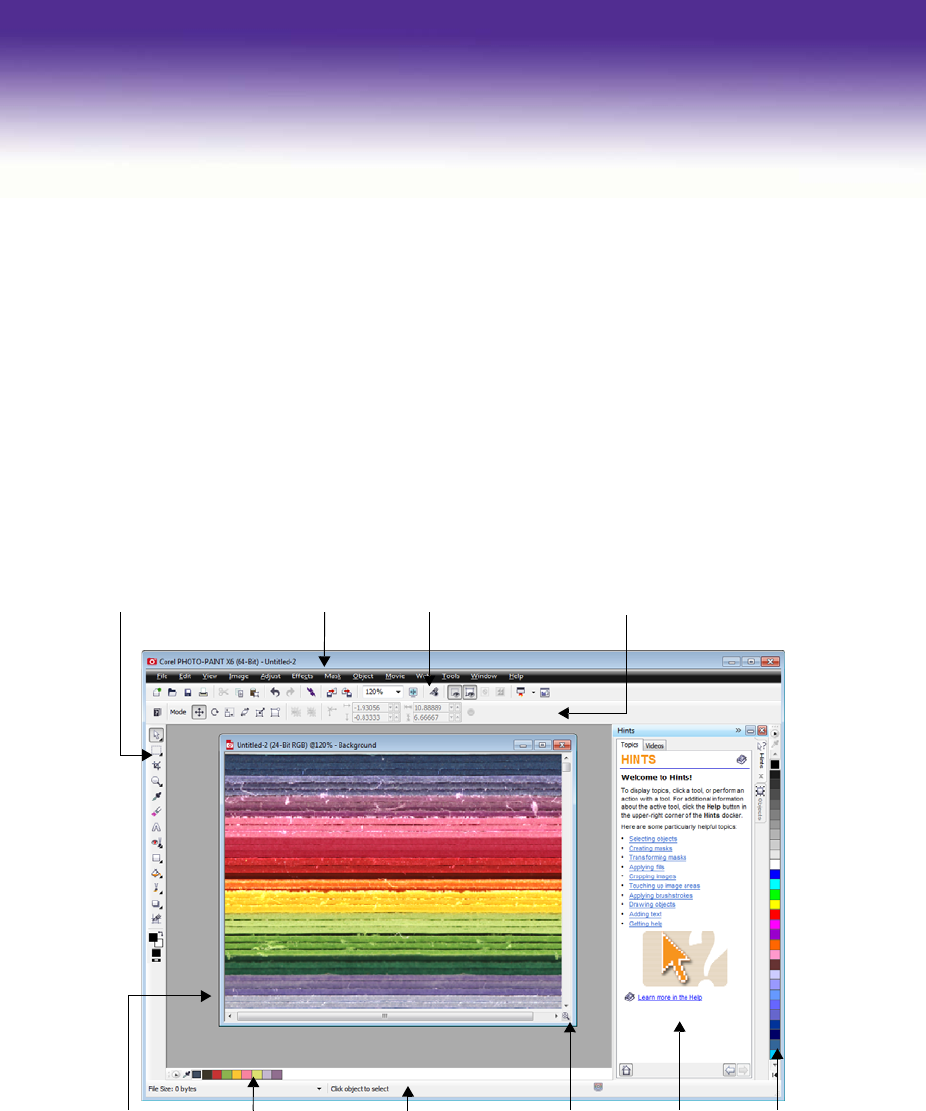
Application window
Toolbox Standard toolbar Property bar
Navigator pop-up DockerImage paletteImage window Color palette
Menu bar
Status bar

Chapter 5: Corel PHOTO-PAINT Basics | 49
The following list describes the main
components of the Corel PHOTO-PAINT
application window.
•The toolbox contains tools for editing,
creating, and viewing images, as well as
the color control area, which lets you
choose colors and fills.
•The menu bar contains drop-down
menus of related commands.
•The standard toolbar contains shortcuts
to basic menu commands, such as
opening, saving, and printing. Additional
toolbars contain shortcuts for more
specific tasks.
To access a toolbar, click Window `
Toolbars, and click a toolbar name.
•The property bar contains controls that
change according to the active tool. For
example, when you use the Zoom tool,
the property bar changes to display
controls for zooming.
•The image window is the area where the
active image appears.
•The Image palette lets you keep track of
the colors that are used in an image.
•The status bar displays information about
the active image, the active tool, the
available memory on your computer, and
the color proofing status. The status bar
also displays tips related to the active tool.
•The Navigator pop-up button lets you
find and focus on a specific area of the
image. This feature is available only when
the entire image is too large to be viewed
all at once.
•A docker lets you access additional
commands and image information.
Dockers can be kept open while you work
on an image. They can also be attached
(docked) to either side of the application
window, or floated (undocked) and moved
to wherever you need them as you work.
Dockers can also be minimized to save
valuable screen space.
To open a docker, click Window `
Dockers, and click a docker.
•A color palette is a collection of color
swatches. You can change the foreground
and fill colors by using the default color
palette, which appears on the right side of
the application window.
To access additional color palettes, click
Window ` Color palettes, and click a
color palette.
Toolbox
The toolbox contains tools for editing,
creating, and viewing images. Some tools
belong to flyouts, which are groups of related
tools. A small arrow in the lower-right corner
of a toolbox button indicates that the tool
belongs to a flyout. The last-used tool in the
flyout appears on the button. You can access
the tools in a flyout by clicking the flyout arrow.
Example of a flyout
The following section briefly describes the tools
that are located in the toolbox.
50 | CorelDRAW Graphics Suite X6 Guidebook
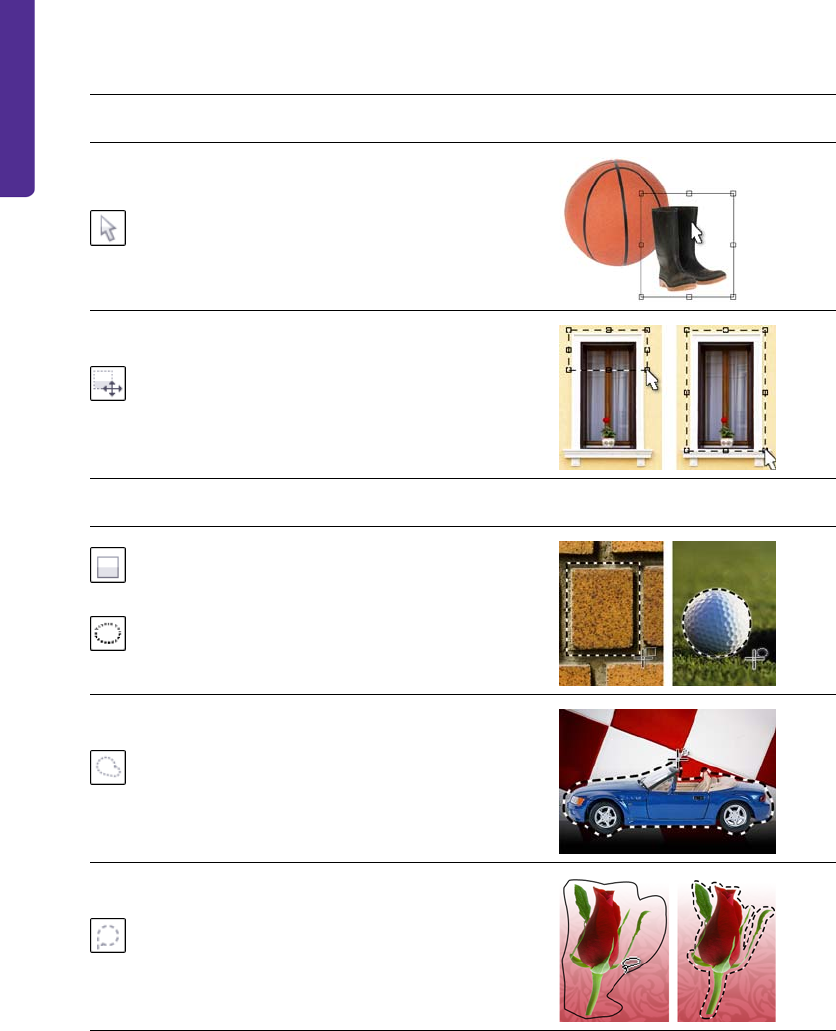
Pick tools
The Object pick tool lets you select,
position, and transform objects.
The Mask transform tool lets you
position, size, and rotate editable
areas.
Mask tools
The Rectangle mask tool and the
Ellipse mask tool let you define
rectangular and elliptical editable
areas.
The Freehand mask tool lets you
define irregularly shaped or
polygonal editable areas.
The Lasso mask tool lets you define
editable areas that are irregular in
shape and surrounded by pixels of
similar colors.
Chapter 5: Corel PHOTO-PAINT Basics | 51
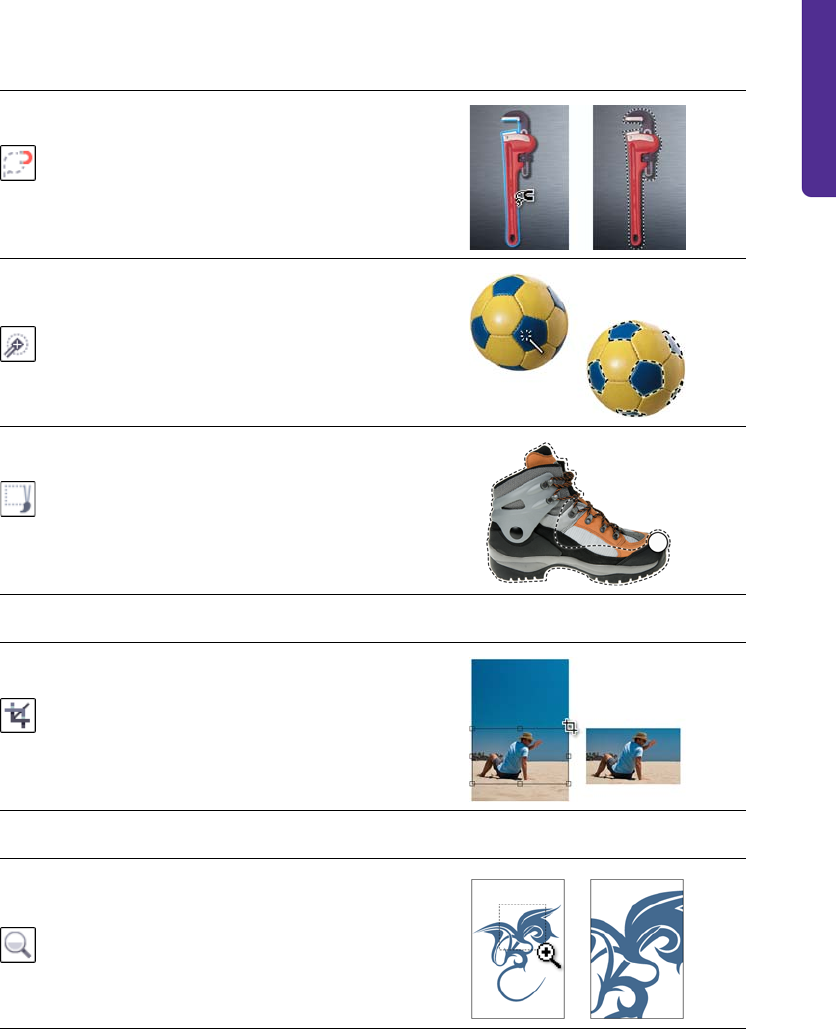
The Magnetic mask tool lets you
position a mask marquee along the
edge of an image element. An edge
is indicated by an outline that is
colored in contrast to the
surrounding area.
The Magic wand mask tool lets
you define editable areas of irregular
shape. Pixels that are adjacent to,
and similar in color to, the first pixel
that you click are included in the
editable area.
The Brush mask tool lets you
define an editable area by painting
it with a brush.
Crop tool
The Crop tool lets you remove
unwanted areas and straighten
crooked images.
Zoom tools
The Zoom tool lets you change the
magnification level in the image
window.
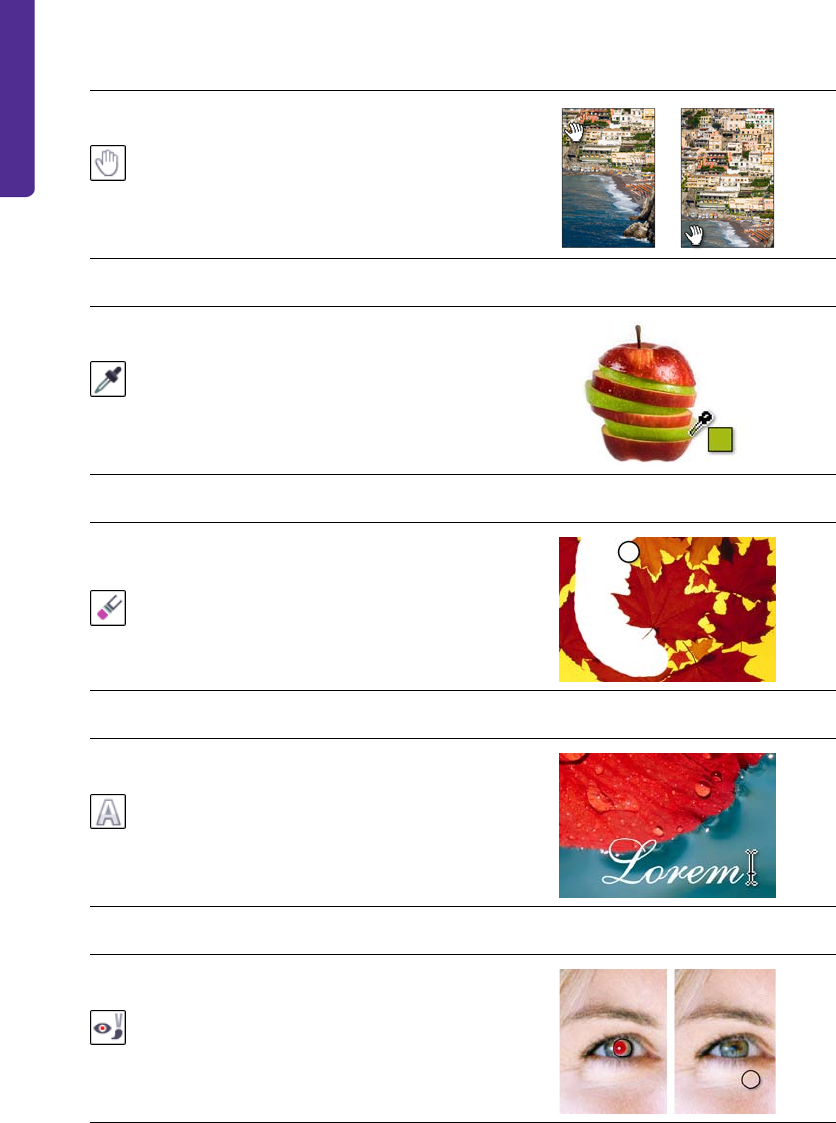
52 | CorelDRAW Graphics Suite X6 Guidebook
The Pan tool lets you drag areas of
an image into view when the image
is larger than the image window.
Eyedropper tool
The Eyedropper tool lets you
sample colors from an image.
Eraser tool
The Eraser tool lets you erase areas
of an object or image to reveal the
underlying object or background.
Te x t to ol
The Te x t tool lets you add text to
your image and edit existing text
objects.
Touch-up tools
The Red-eye removal tool lets you
remove the red-eye effect from the
eyes of photo subjects.
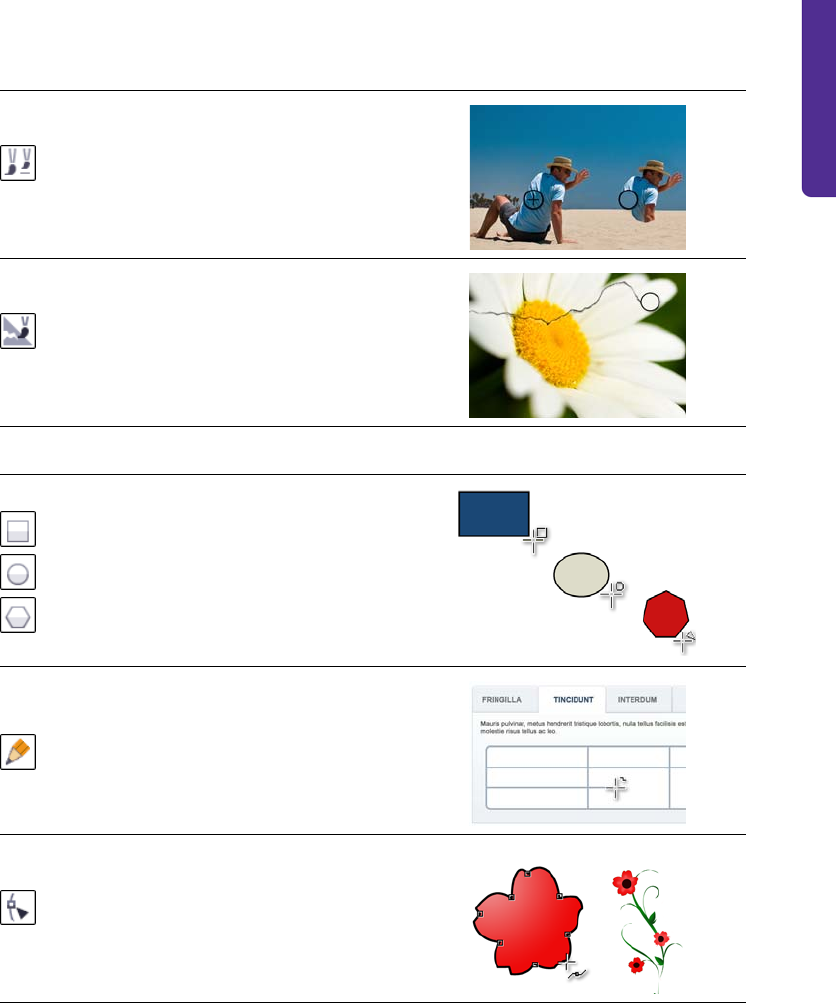
Chapter 5: Corel PHOTO-PAINT Basics | 53
The Clone tool lets you duplicate
part of an image and apply it to
another part of the same image or
to another image.
The Touch-up brush tool lets you
remove image imperfections, such
as tears, scratch marks, and
wrinkles, by blending textures and
colors.
Shape tools
The Rectangle tool, Ellipse tool,
and Polygon tool let you draw
rectangles, squares, ellipses, circles,
and polygons.
The Line tool lets you draw single or
joined straight-line segments by
using the foreground color.
The Path tool lets you create and
edit paths.
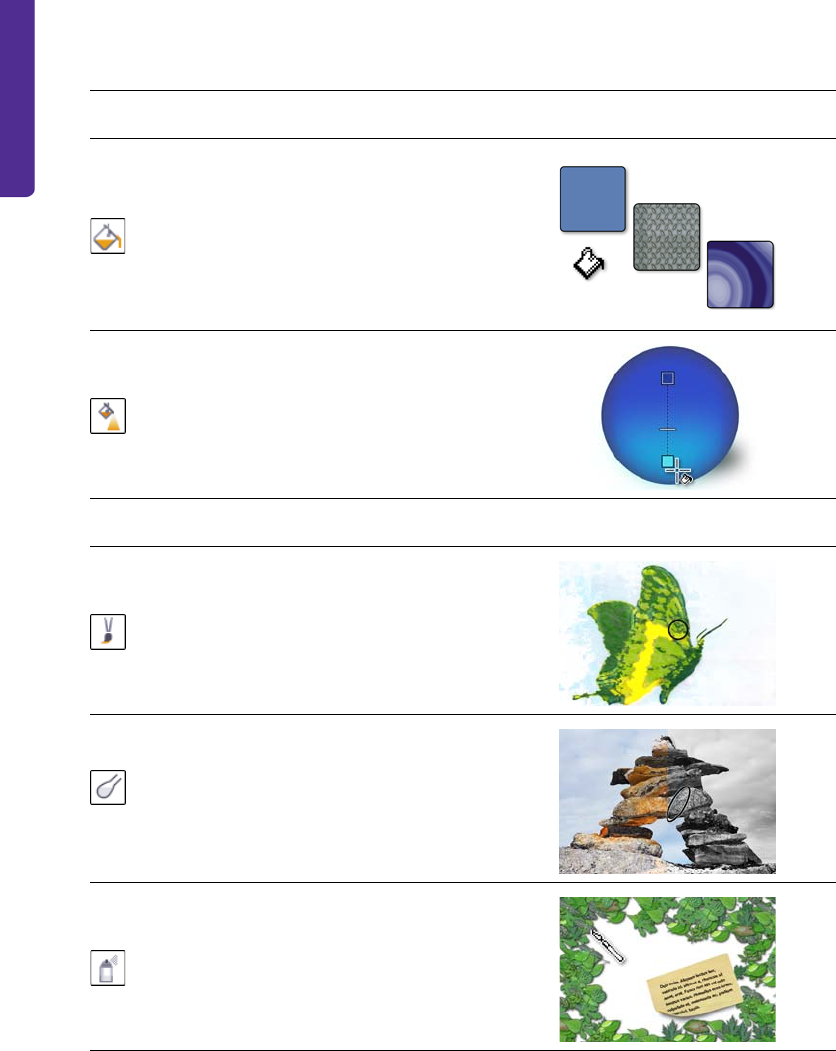
54 | CorelDRAW Graphics Suite X6 Guidebook
Fill tools
The Fill tool lets you fill areas with
one of four fill types: uniform,
fountain, bitmap, or texture.
The Interactive fill tool lets you
apply a fill to an entire image,
object, or selection and then adjust
the fill directly in the image window.
Brush tools
The Paint tool lets you paint on an
image by using the foreground
color.
The Effect tool lets you correct
color and tone.
The Image sprayer tool lets you
load one or more images and apply
them in a repeating sequence as you
paint.
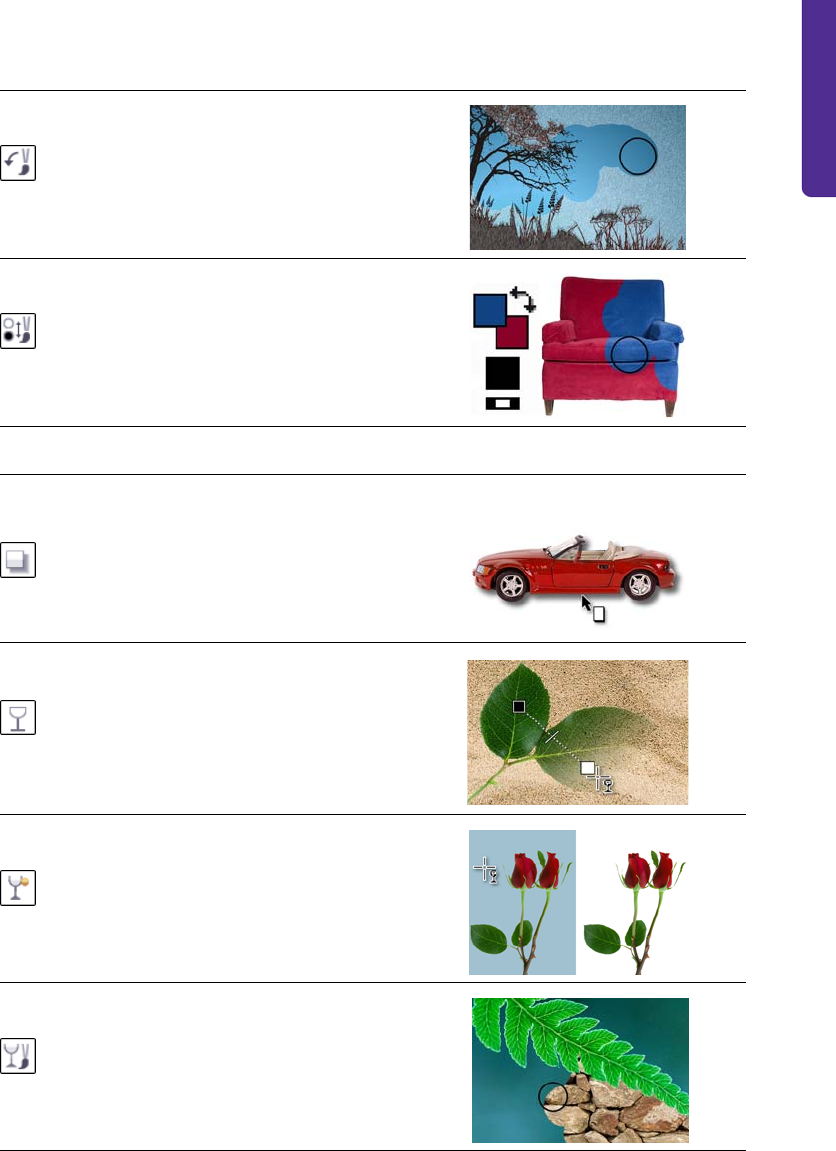
Chapter 5: Corel PHOTO-PAINT Basics | 55
The Undo brush tool lets you
restore image areas to their
appearance before your last
brushstroke.
The Replace color brush tool lets
you replace the foreground color in
your image with the background
color.
Interactive/Transparency tools
The Drop shadow tool lets you add
shadows to objects.
The Object transparency tool lets
you make the colors of an object
fade gradually toward the image
background color.
The Color transparency tool lets
you make specific pixels in an object
transparent, based on their color
value.
The Object transparency brush
tool lets you brush areas on an
object to make them more
transparent.
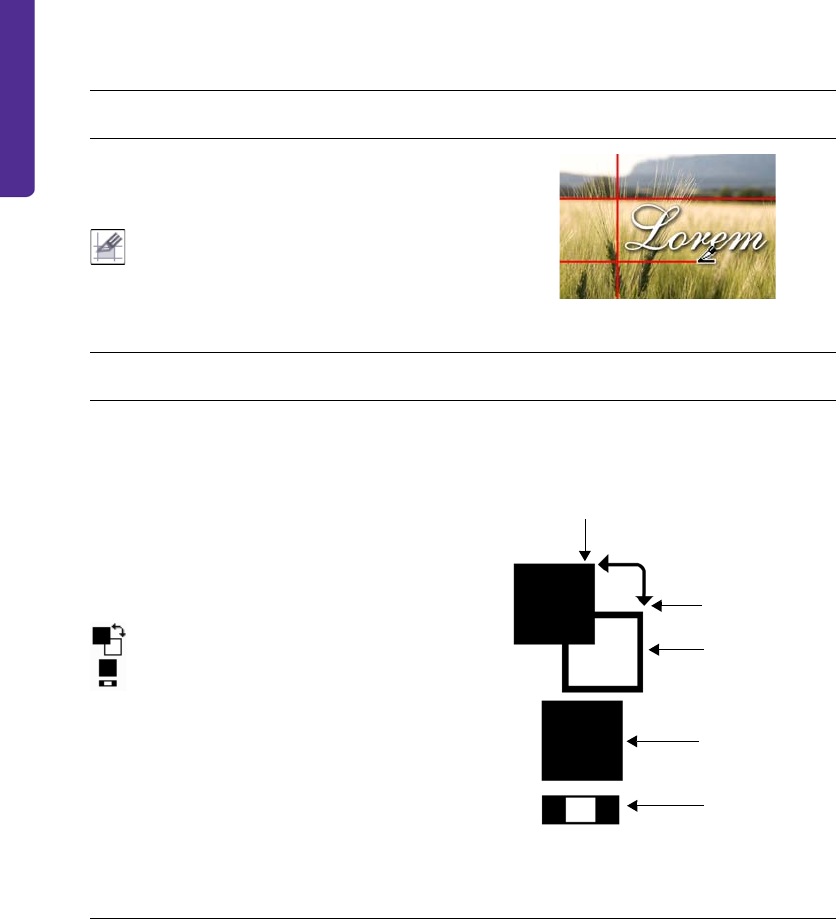
56 | CorelDRAW Graphics Suite X6 Guidebook
For more information about workspace components, see “Corel PHOTO-PAINT workspace tour” in
the Help.
Image slicing tool
The Image slicing tool lets you cut
a large image into smaller sections
for use on the Web.
Color control area
The foreground color is the color
that you apply to an image or text
by using the brush tools. The
background color is the color that
appears when you erase portions of
the background or increase the
paper size. The fill color is the color
that you apply by using the shape
and fill tools.
The Swap color arrow lets you
switch the foreground and
background colors.
You can change the foreground,
background, or fill color by double-
clicking the respective color swatch.
The Reset color icon lets you return
to the default colors: black as the
foreground and fill color, and white
as the background color.
Foreground color
Swap color
Background color
Reset color
Fill color
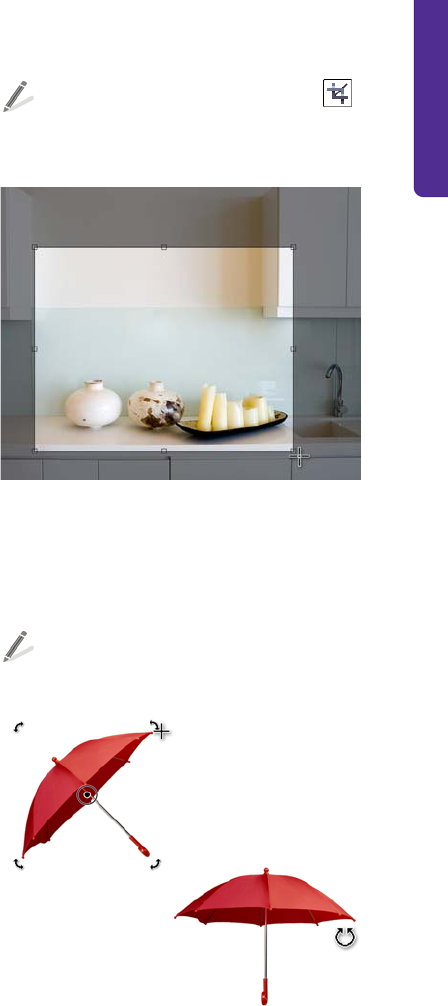
Chapter 5: Corel PHOTO-PAINT Basics | 57
Acquiring images
You can acquire photos from your digital
camera by connecting your camera or a media
card reader to your computer and using one of
the following methods:
• If your digital camera or card reader
appears as a drive on your computer, you
can copy images directly to a folder on
your hard disk, and then open them in
Corel PHOTO-PAINT.
• You can load images directly into
Corel PHOTO-PAINT by using Windows
Image Acquisition (WIA) or the TWAIN
driver of your digital camera. WIA is a
standard interface and driver for loading
images from peripheral devices, such as
scanners and digital cameras.
• You can use the software provided with
your digital camera to save the images to
your computer, and then open the images
in Corel PHOTO-PAINT. For more
information, see the documentation that
was provided with your digital camera.
You can scan images and pages into
Corel PHOTO-PAINT by using WIA, the TWAIN
driver, or your scanner software. Sometimes,
scanned images contain lines, moiré (a wave
pattern), or noise (speckled effect). You can
remove these defects by using special effects
filters. For more information, see “Retouching”
on page 60.
For more information, see “Acquiring images
from scanners and digital cameras” in the
Help.
Cropping and rotating
Cropping lets you remove unwanted areas
from images to improve their composition.
To crop an image, click the Crop tool
in the toolbox, and drag in the image
window.
The selected area indicates the portion of the image that
will remain. The area outside the selection will be
cropped.
Often, you may need to rotate an image to
change its orientation to portrait or landscape.
To rotate an image, click Image ` Rotate,
and click a menu command.
Top: The image has been selected for rotation.
Bottom: The image has been rotated.
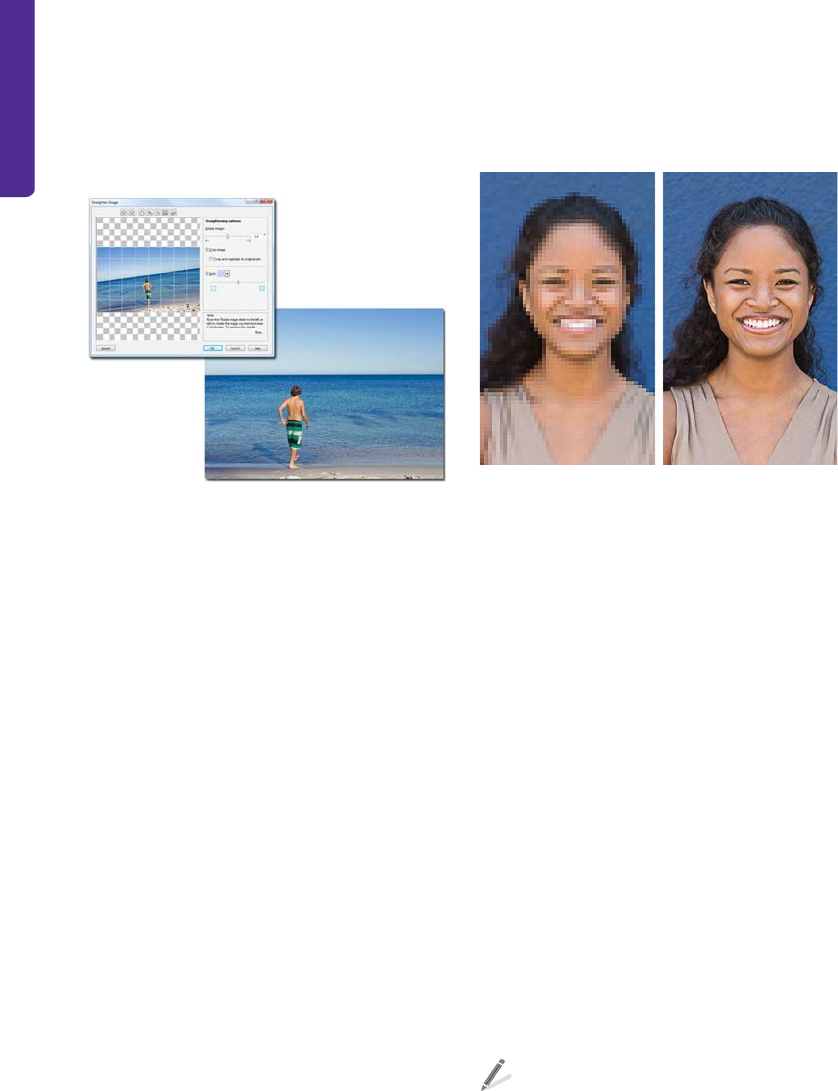
58 | CorelDRAW Graphics Suite X6 Guidebook
If you need to straighten photos that were
taken or scanned at an angle, you can use the
Straighten image dialog box (Adjust `
Straighten image).
Top: The Straighten image dialog box displays a
crooked image. Bottom: The image has been
straightened.
Changing image size and
resolution
The term “image size” often refers to the pixel
dimensions — that is, to the image’s height
and width expressed in pixels. Image resolution
refers to the number of pixels per inch (ppi)
within an image. The pixels-per-inch
measurement corresponds to dots per inch
(dpi) in discussions of printing or scanning.
Note that the image size in pixels differs from
file size, which is measured in kilobytes (KB),
megabytes (MB), or gigabytes (GB).
Image resolution determines how sharp and
detailed an image is when it is displayed on a
monitor or printed. The resolution you choose
depends on how the image is output. Typically,
images that are created for display on
computer monitors or for the Web are 96 or
72 dpi. Images that are intended to be printed
on desktop printers are usually 150 dpi,
whereas professionally printed images are
usually 300 dpi or higher.
Resolution of 72 dpi (left) and 300 dpi (right)
The image size (pixel dimensions) and
resolution determine the amount of image
data in a file. The more pixels an image
contains, the higher its quality. However, a
larger image produces a larger file. Often, you
must adjust the image size or resolution to
optimize image quality while keeping the file
size manageable.
Increasing image resolution for print
Images that are intended for print need to have
a high image resolution. To prepare a photo
taken with a digital camera for print, you need
to maintain the original file size (the number of
pixels) and increase the resolution (the number
of pixels per inch) to at least 300 dpi. This
method decreases the width and height of the
image and creates a better printed result.
Alternatively, you can specify a smaller width
and height, which automatically increases the
resolution values.
You can increase the image resolution in
the Resample dialog box (Image `
Resample).
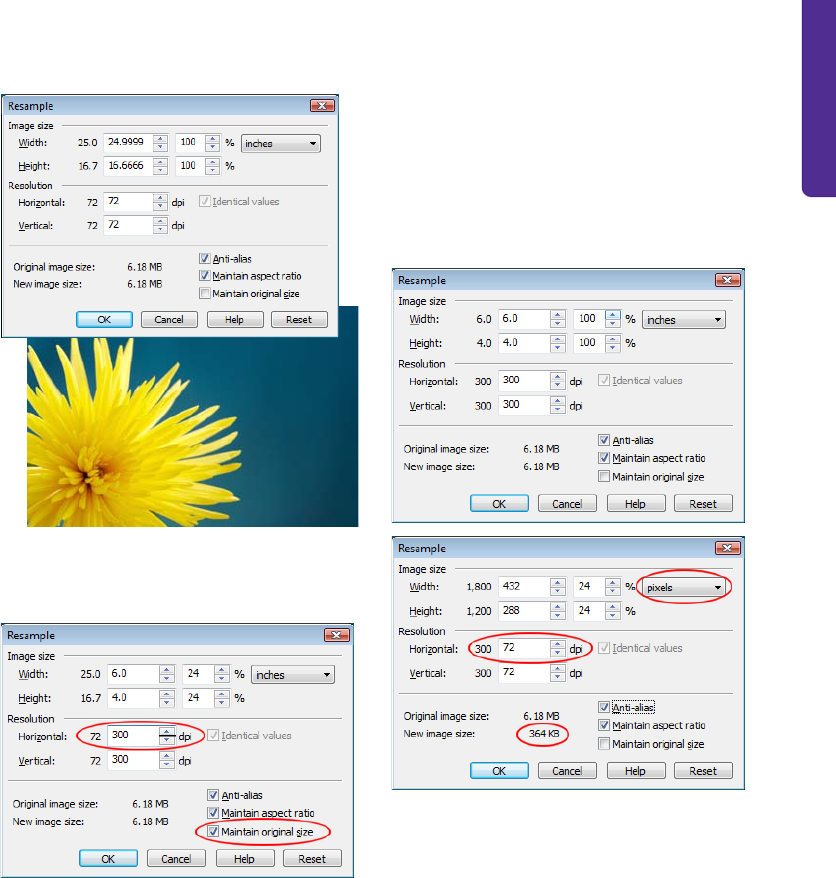
Chapter 5: Corel PHOTO-PAINT Basics | 59
The Resample dialog box (top) shows that the photo
(bottom) has a resolution of 72 dpi, which is too low for
print.
To increase the image resolution for print, the Maintain
original size check box is enabled first. Next, the
resolution is increased to 300 dpi, and the width and
height of the image are automatically adjusted.
Reducing file size and image
dimensions
If you want to use an image on a Web page,
you need to reduce its file size. You can
accomplish this by resampling, a process that
changes the image resolution. Resampling
(also called downsampling or upsampling)
often causes blurring, but you can counteract
this effect by applying the Unsharp mask
filter (Effects ` Sharpen ` Unsharp mask) to
the resampled image.
Top: The Resample dialog box shows that a photo is
not suitable for Web use. Bottom: To prepare the photo
for the Web, the unit of measure is changed to pixels.
Then, the image resolution is decreased to 72 dpi, which
automatically decreases the width and height of the
image, along with the file size.
The photo that you are preparing for the Web
may require specific width or height in pixels.
You can specify the exact dimensions you need
in the Resample dialog box. When you specify
these settings, the image resolution and the
file size are automatically adjusted.
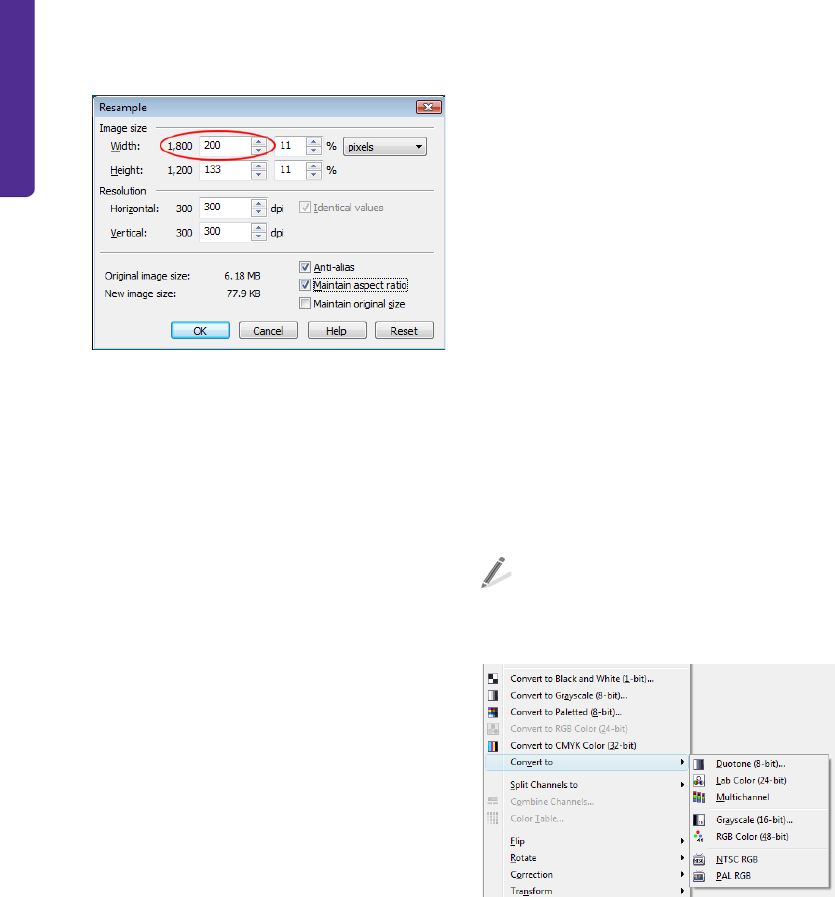
60 | CorelDRAW Graphics Suite X6 Guidebook
In this example, the width of a photo is decreased from
1,800 pixels to 200. The height of the photo is
automatically decreased in proportion to the width
because the Maintain aspect ratio check box is
enabled.
Tips on resizing images
• Avoid increasing the image size by more
than 125%. Otherwise, images may
appear stretched and pixelated.
• Resize an image after you have retouched
and corrected it.
• Resize an image after you have cropped
unwanted areas. Decreasing the image
size after cropping ensures that the image
has as much useful information as
possible.
• The size of the image on your screen
depends on the pixel height and width of
the image, on the zoom level, and on your
monitor settings. As a result, an image
that is displayed on your monitor may
differ in size from a printed version.
For more information about changing the
image size and resolution, see “Changing
image dimensions, resolution, and paper size”
in the Help.
Changing color modes
A color mode defines the number and kind of
colors that make up an image. Black and white,
grayscale, RGB, CMYK, and paletted are
examples of color modes. You can convert
images to different color modes, depending on
their intended use. For example, the CMYK
color mode is recommended for images to be
sent for commercial printing. The RGB color
mode is best for Web photos, and the paletted
color mode is best for GIF images.
Whenever you convert an image, you may lose
color information. For this reason, you should
finish editing and then save a copy of the
image before converting the image to a new
color mode. For more information, see
“Changing color modes” in the Help.
To convert an image to a different color
mode, click Image, and then click a
Convert to command.
Available Convert to commands
Retouching
With Corel PHOTO-PAINT, you can fix common
problems in digital photos and scanned images
by using tools and special effect filters.
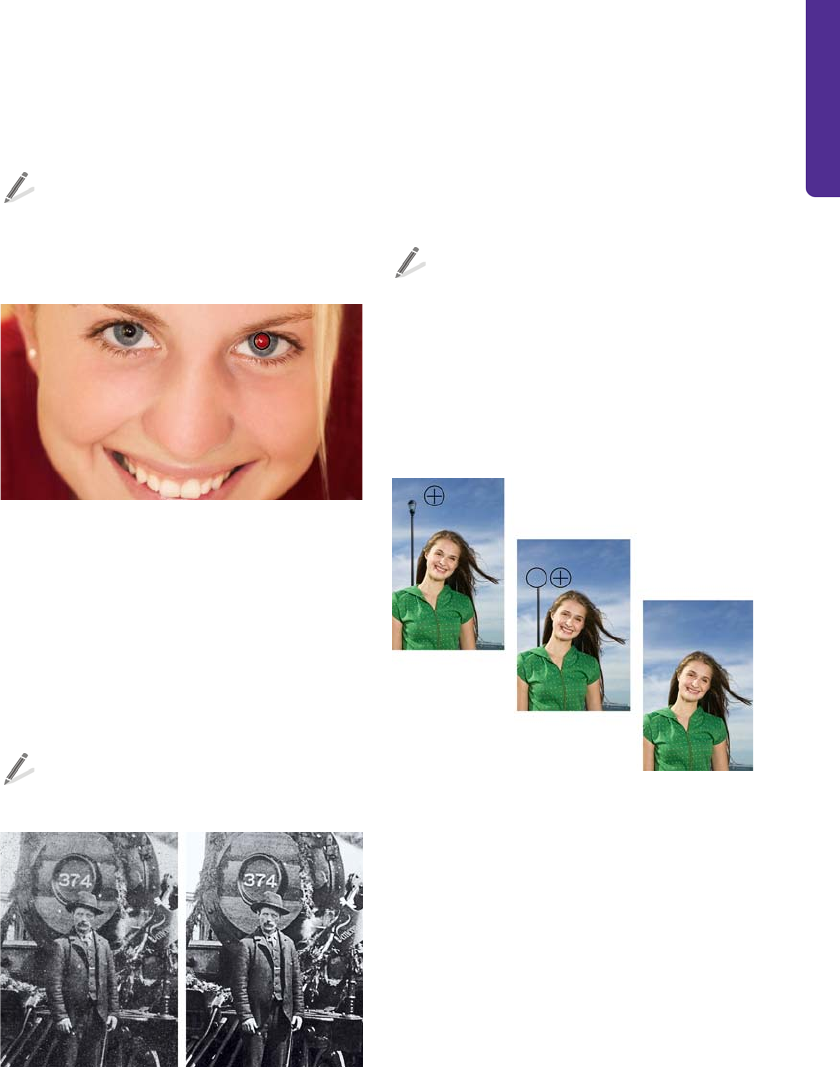
Chapter 5: Corel PHOTO-PAINT Basics | 61
One common problem in photos is red-eye,
which occurs when light from a flash reflects
off the back of a person’s eye.
To remove red-eye, start by zooming in on
the eye. Then, click the Red-eye removal
tool, adjust the brush size to match the size
of the eye, and click the eye.
The Red-eye removal tool has been used on the photo
subject to correct the right eye and select the left eye.
Dust and scratch marks are another common
problem in images. You can remove dust and
scratch marks by applying a filter to the entire
image. If an image has one or more scratches
in a specific area, you can create a mask
around the scratches and apply the filter to the
editable area.
To remove dust and scratch marks, click
Image ` Correction ` Dust and scratch.
Left: The dust marks reduce image quality. Right: Dust
marks have been removed in the retouched image.
If a scratch or blemish is fairly large or is located
in an area with varied color and texture (such
as leaves on a tree), you can achieve better
results by cloning image areas. When you
clone, you copy pixels from one image area to
another.
To clone image areas, click the Clone tool,
and choose Clone from the Brush
category: Clone picker on the property
bar. Next, click to set the source point, and
drag where you want to apply the pixels
from the source point. To reset the source
point, right-click the area that you want to
clone.
Left: The source point is set to clone areas of the sky.
Middle: Cloned sky areas are copied on top of the post.
Right: Retouched image.
If you use a soft-edge brush and a greater
transparency value, the cloned areas blend
seamlessly in the image.
Photos from digital cameras may often contain
specks of random colors, which are collectively
referred to as “noise.” These specks are caused
by poor lighting conditions or limitations of the
camera sensor. You can remove noise from
digital photos or scanned images by clicking
Effects ` Noise ` Remove noise.
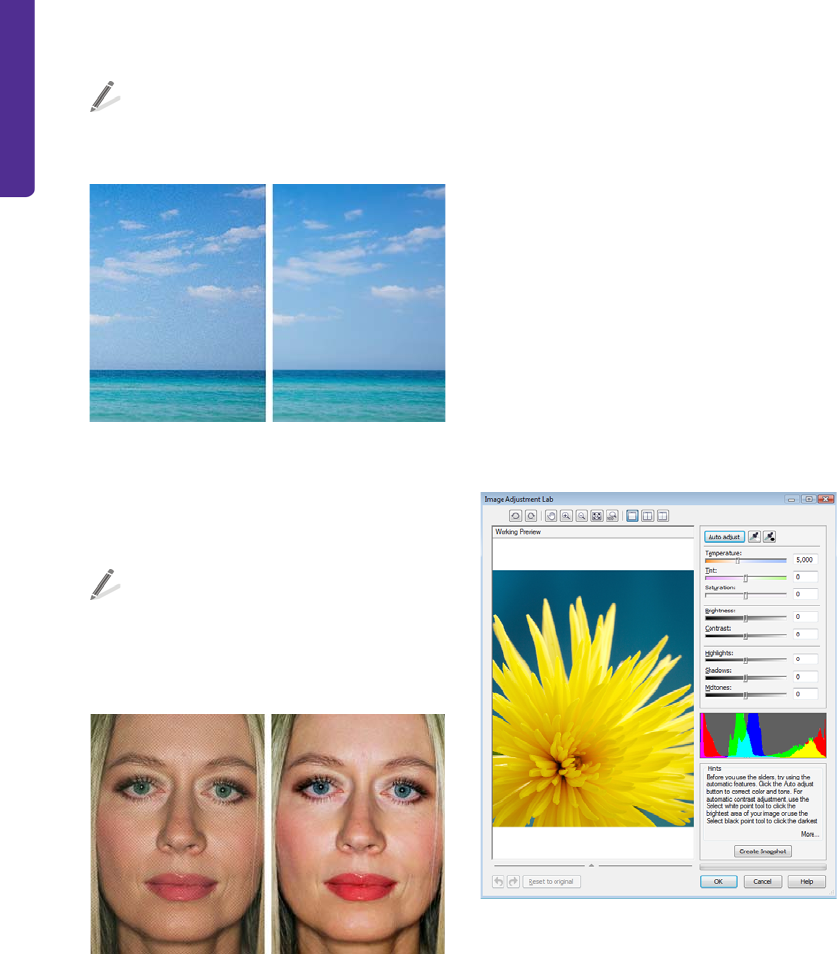
62 | CorelDRAW Graphics Suite X6 Guidebook
To remove noise and artifacts from photos
in the JPEG format, click Effects ` Blur `
Smart blur.
Left: Noise appears as mottled colors and interferes with
the photo's clarity. Right: The noise has been removed
to reveal a clearer picture.
In addition to noise, scanned images may
contain lines or moiré (a wave pattern).
To remove lines from a scanned image,
click Image ` Transform ` Deinterlace.
To remove moiré, click Effects ` Noise `
Remove moiré.
Left: The image contains moiré, which appears as a
wavy grid of discolored lines. Right: The moiré has been
removed.
For more information, see “Retouching” in the
Help.
Adjusting color and tone
When you need to adjust the color and tone of
photos, the Image Adjustment Lab (Adjust `
Image Adjustment Lab) should be your first
stop. It lets you brighten or darken a photo,
improve the contrast, reveal image detail, and
correct washed-out colors. You can experiment
with different settings and capture them in
snapshots, so that you can compare different
versions and choose the best result. For more
information, see “Adjusting color and tone” in
the Help.
Image Adjustment Lab
Some common color corrections are described
and illustrated in the following table.
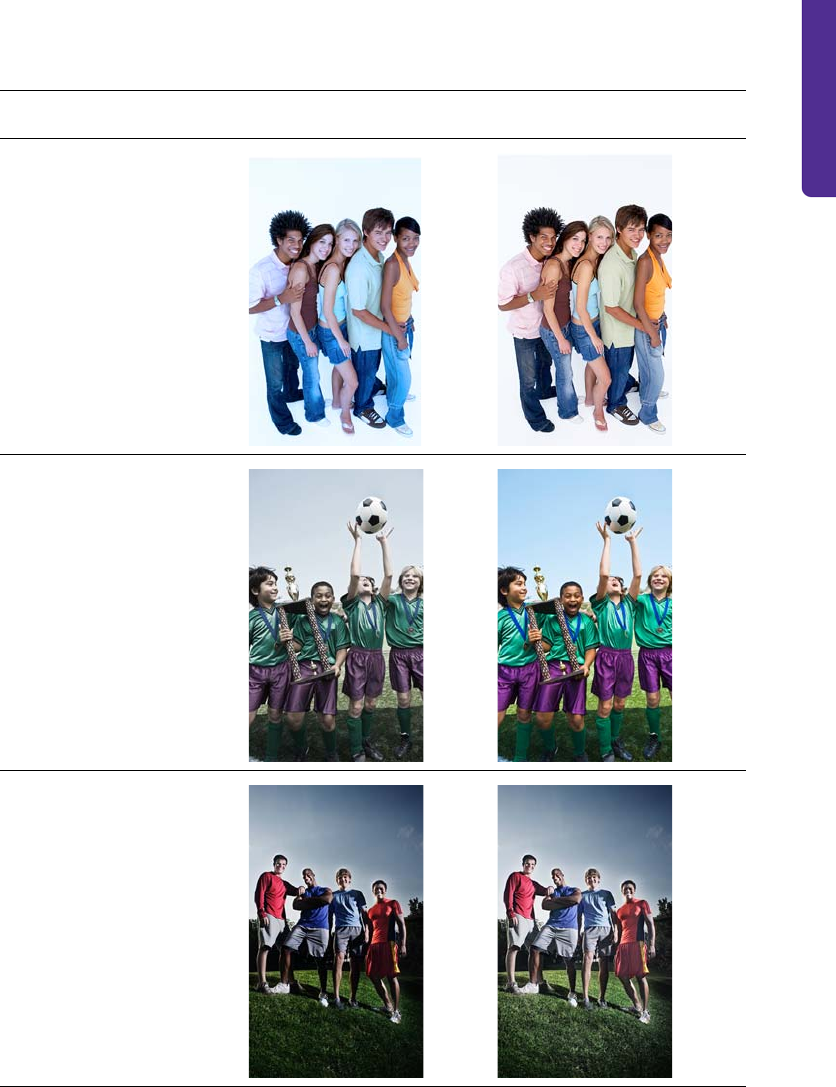
Chapter 5: Corel PHOTO-PAINT Basics | 63
Color correction Before After
You can correct photos that
have an overall color cast, in
which the photo appears to
be tinted with one color. Note
the blue color cast in the
Before photo. The blue cast
has been corrected in the
After photo.
You can increase the color
saturation for photos that
contain dull colors. In the
Before photo, the colors are
muted. In the After photo,
the color saturation has been
increased to create more vivid
colors.
If a photo contains dark
shadows that obscure the
photo subjects, you can
brighten the photo by
lightening the shadows. In
the Before photo, shadows
darken both the grass and
photo subjects. In the After
photo, the shadows have
been lightened to make the
subjects more visible.
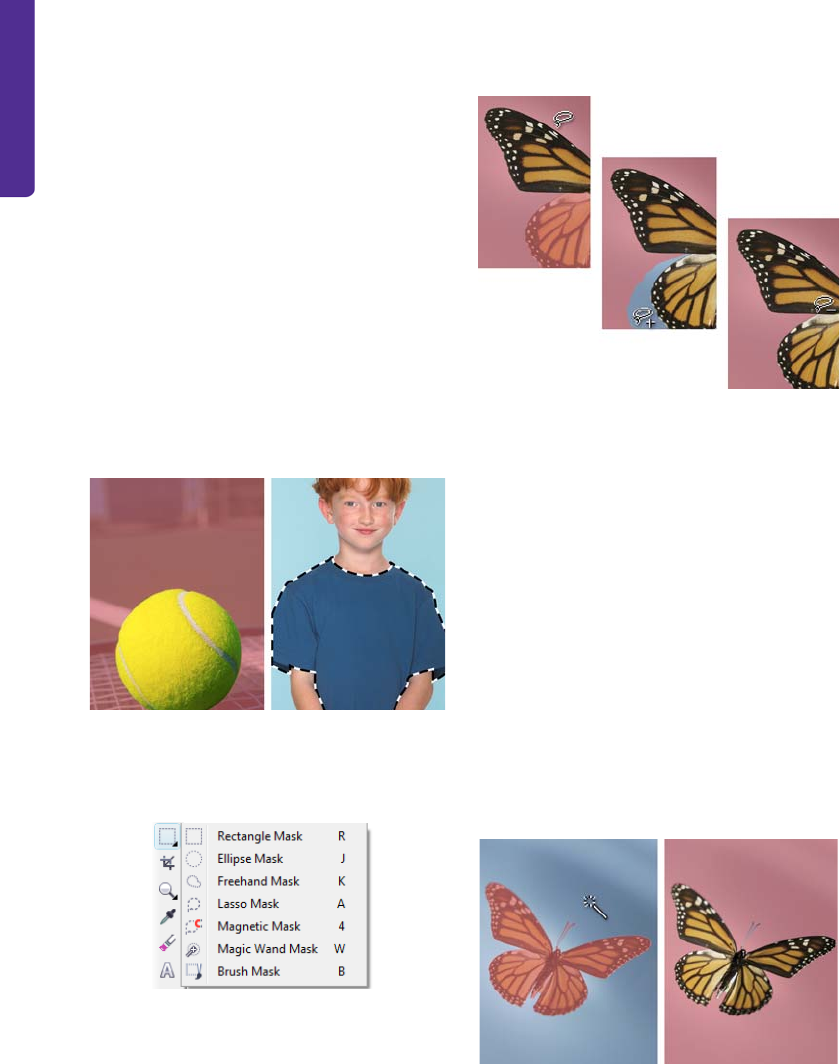
64 | CorelDRAW Graphics Suite X6 Guidebook
Working with masks
A mask is used in image editing to isolate a
particular area (the editable area) without
affecting the remaining part (the protected
area). Editable areas are sometimes called
“selections” in other applications.
You can display a mask overlay that appears
only over protected areas to make it easy to
differentiate between protected and editable
areas. The border separating an editable area
and its corresponding protected area is
indicated by a dashed outline, called the mask
marquee. You can display the mask marquee
only when the mask overlay is hidden.
Left: Mask overlay. Right: Mask marquee.
You can define editable areas by using the
mask tools in the toolbox.
Mask tools
After defining an editable area, you may want
to adjust the area’s shape and position. If you
want to subtract from or add to an editable
area, you can access mask modes from the
property bar when a mask tool is active.
Left: The editable area includes a part of the wing.
Middle: The remaining part of the wing is added to the
editable area, along with some blue background.
Right: The blue background is removed from the
editable area.
In addition, you can adjust the edges of an
editable area so that it blends smoothly into
the protected areas. For more information, see
“Adjusting the edges of editable areas” in the
Help.
You can invert a mask so that the protected
area becomes editable and the editable area
becomes protected. For example, if you want
to edit a photo subject that is set against a
plain background, the easiest method is to
select the background and then invert the
mask, as shown in the following illustration.
Left: The Magic wand mask tool is used to select the
background. Right: The mask is inverted to select the
butterfly.
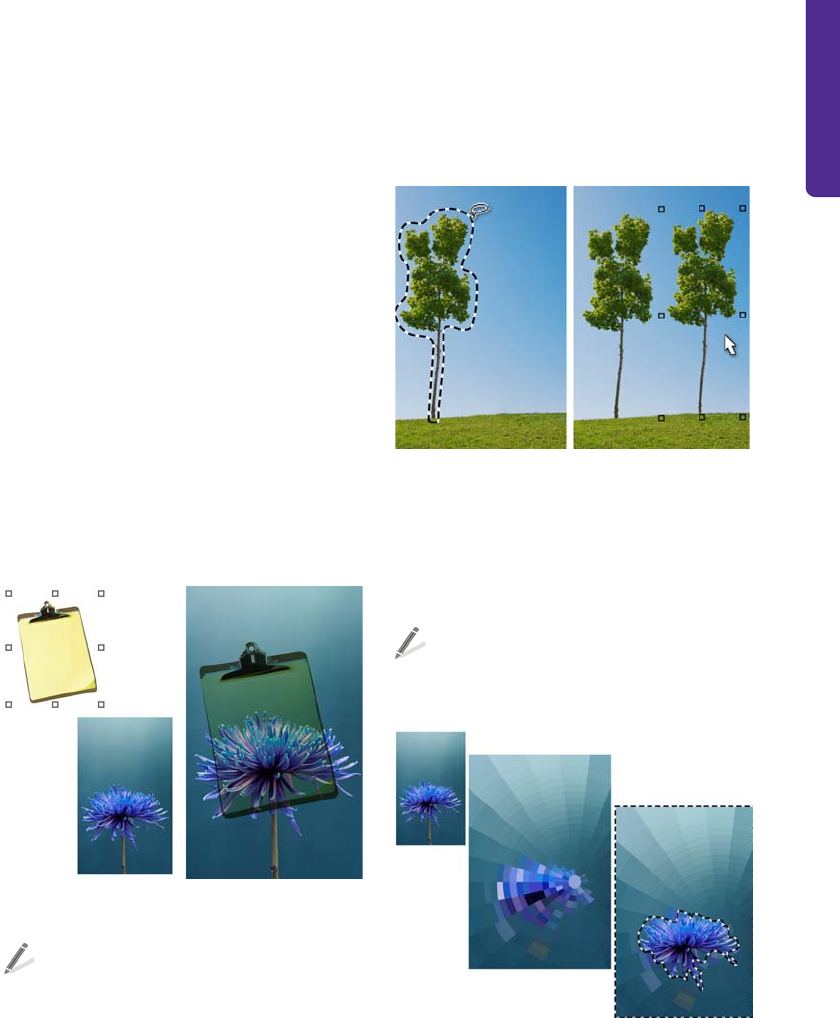
Chapter 5: Corel PHOTO-PAINT Basics | 65
For more information about masks, see
“Working with masks” in the Help.
Working with objects and lenses
Objects are transparent layers that float above
the background and stack on top of one
another. For example, when you open a photo,
it becomes the background. Any new objects
are stacked above the background as they are
created.
Using objects offers many advantages. Objects
can be repositioned, resized, rotated, and
edited without affecting other objects or the
background. In addition, you can place an
object behind or in front of other objects, and
you can use merge modes to control how an
object blends with the underlying objects or
background.
Left: The Multiply merge mode is used to blend two
objects. Right: Blended image.
To create objects from brushstrokes and
shapes, click Object ` Create ` New
object, and paint or draw in the image
window.
To create an object from an editable area,
click Object ` Create ` Object: copy
selection.
To create an object from the background,
click Object ` Create ` Create from
background.
An editable area is selected and copied (left) to create a
new object (right).
Lenses, which are also known as “adjustment
layers,” are special objects that let you preview
special effects and image adjustments without
permanently altering the image pixels.
To create a lens that covers an entire image
or the editable area of a mask, click Object
` Create ` New lens.
Left: Original image. Middle: A lens is applied to the
entire image. Right: A lens is applied to an editable area.
You can apply multiple lenses to view the effect
of applying multiple image adjustments.
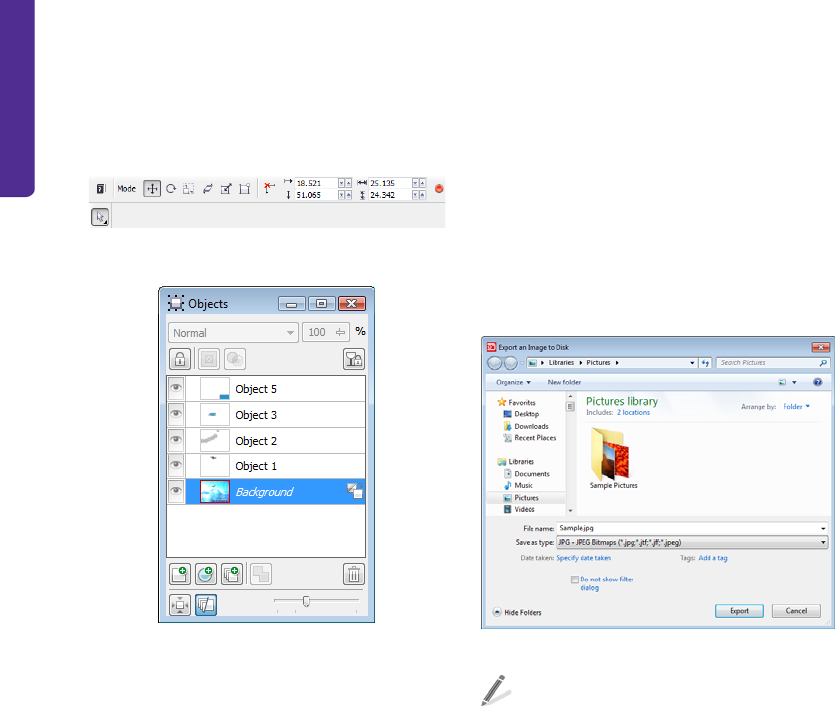
66 | CorelDRAW Graphics Suite X6 Guidebook
The Object pick tool and the Objects docker
can help you select, transform, and organize
objects and lenses in an image.
Object pick tool and property bar controls
Objects docker
Sharing your work
To share your images with others, you can save
or export them to other file formats (such as
TIFF, JPEG, or PDF), print them, or upload them
to ConceptShare. Regardless of how you
intend to use an image, it is a good idea to
keep a copy of the file in the Corel PHOTO-
PAINT (CPT) file format. Saving to the CPT file
format retains all image properties: objects,
the most recently created mask, alpha
channels, grids, guidelines, and color
information.
To change the file format of an image, you can
save it (File ` Save as) or export it (File `
Export) to a different file format. When you
use the Save as command, the image appears
in the image window in the new file format.
When you export an image, the image remains
open in the image window in the original file
format.
To prepare an image for printing, you can save
or export to the TIFF file format. To prepare an
image for the Web, you can export it to JPEG,
PNG, or GIF. The JPEG and PNG file formats are
ideal for photos, which usually contain color
gradations. The GIF file format is suitable for
images that contain solid colors.
Export dialog box
You can also quickly save an image to a PDF
file by clicking File ` Publish to PDF. The
Publish to PDF dialog box lets you access
PDF presets that optimize the PDF file for its
intended use — for example, Document
distribution, Prepress, or Web.
Corel PHOTO-PAINT provides extensive options
for printing your work. The Print dialog box
(File ` Print) lets you specify the layout and
scale of a print job, preview print jobs, and set
various prepress options, such as whether to
print crop marks and registration marks. In
addition, you can view a summary of issues
and problems, along with suggestions for
resolving them. For more information, see the
“Printing” section of the Help.
With ConceptShare (File ` Publish image to
ConceptShare), you can publish an image to
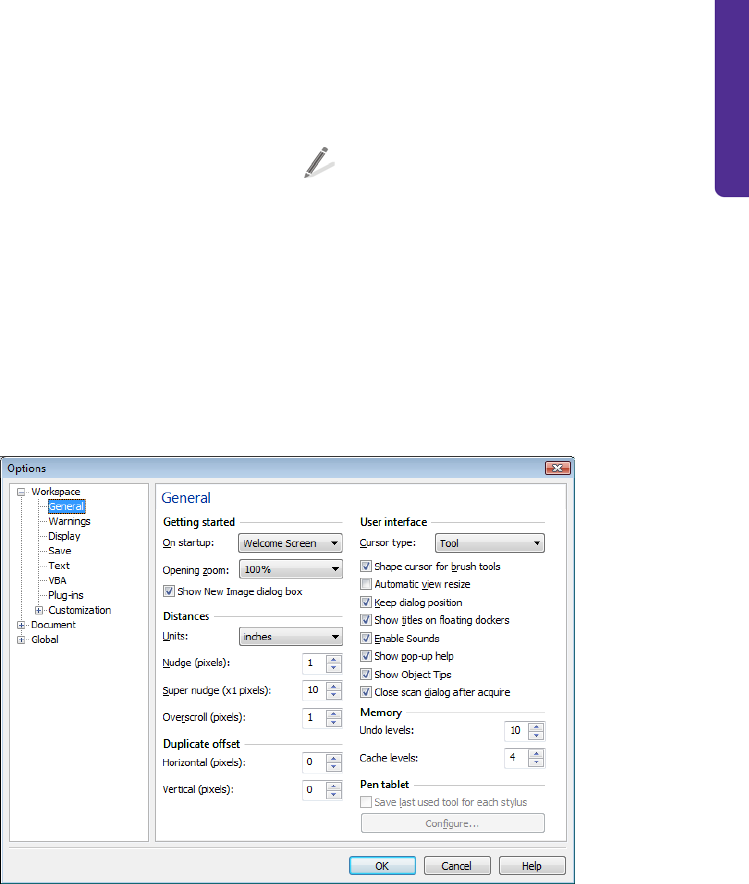
Chapter 5: Corel PHOTO-PAINT Basics | 67
a Web-based environment to share designs
and ideas with clients and co-workers. For
more information, see “Collaborating” in the
Help.
Setting preferences
In Corel PHOTO-PAINT, you can change the
default workspace settings and other options
according to your preferences. You can specify
settings such as unit of measure, type of
pointer, and default zoom level. In addition,
you can specify auto-save settings or set
display options to choose the color of paths,
mask tints, guidelines, and transparency grid
patterns.
To set preferences, click Tools ` Options.
To restore the default workspace settings
and options at any time, restart
Corel PHOTO-PAINT while holding down
F8.
For more information about setting
preferences, see “Setting options” in the Help.
General page of the Options dialog box
Image created by
Om Prakash Thapa
India
Part Three
Color, Type, and
Styles

Chapter 6: Color Basics | 71
Chapter 6: Color Basics
How are colors defined? 72
Choosing a color mode 75
Using process and spot colors 76
Choosing colors 77
Working with color styles and harmonies 81
Using the Document palette, Color Styles palette,
and Image palette
84
Displaying and organizing color palettes 86
Creating custom palettes 88
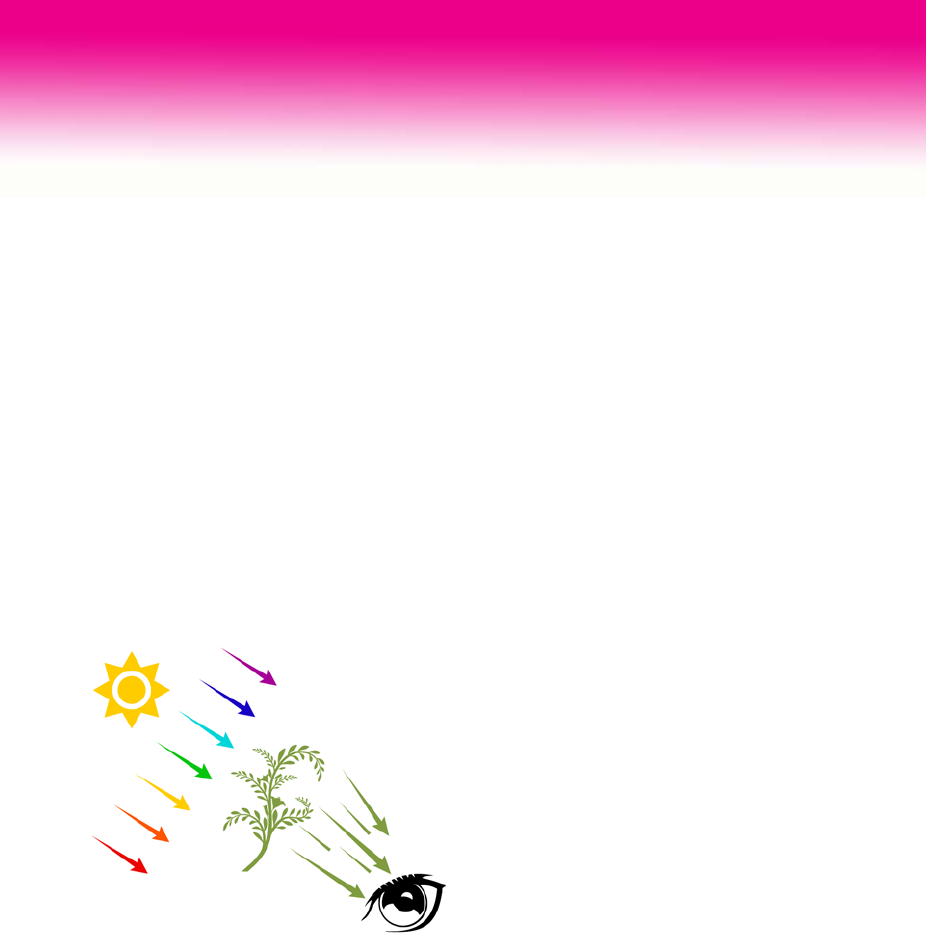
72 | CorelDRAW Graphics Suite X6 Guidebook
Chapter 6: Color Basics
In CorelDRAW or Corel PHOTO-PAINT,
choosing color is a critical part of your
workflow. Color is an important design
element because it helps you set a tone or
convey a specific meaning.
This chapter introduces you to the different
methods of choosing and using color in
CorelDRAW and Corel PHOTO-PAINT.
How are colors defined?
Color is literally in the eye of the beholder. The
sensation of color is a result of the human eye’s
response to light and the nervous system’s
interpretation of that response.
Color perception depends on the eye’s response to light.
Through the use of color models, this complex
process has been defined mathematically. The
color models allow software applications (such
as CorelDRAW and Corel PHOTO-PAINT) and
digital devices (such as computers, monitors,
digital cameras, and printers) to store,
manipulate, and accurately reproduce color.
Color models, such as Lab, RGB, CMYK, and
HSB, provide a systematic way of organizing
and reproducing a broad range of colors from
a small set of primary colors. Each color is
defined numerically. The numeric values allow
the colors to be interpreted, communicated,
and reproduced by a wide range of devices and
applications.
Each color model has a unique way of defining
colors numerically.
Lab color model
The Lab color model was developed by the
Commission Internationale de l’Eclairage (CIE).
Unlike the RGB and CMYK color models, the
Lab color model is based on how the human
eye perceives color, rather than on how
monitors, printers, digital cameras, and other
devices reproduce color. For this reason, Lab is
known as a device-independent color model.
RGB and CMYK are considered device-
dependent color models, because the same
colors appear different when they are printed
or displayed on different devices.
In the Lab color model, the range (or gamut) of
all visible colors is represented as a horseshoe-
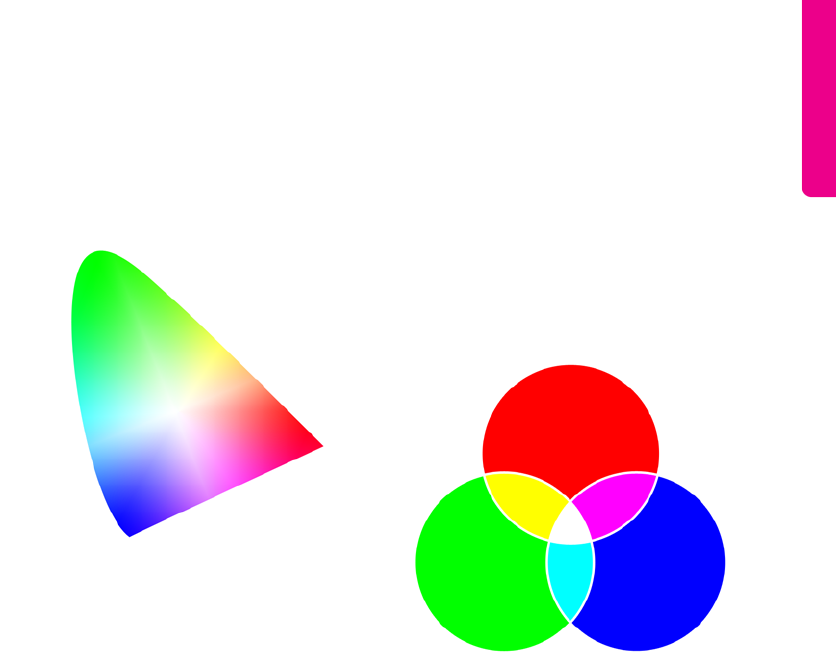
Chapter 6: Color Basics | 73
shaped figure. This figure is often used as a
reference for comparing the range of colors
that other color models can produce. Lab is
also used in color management as a reference
for converting colors from one color space to
another.
Lab color model
RGB color model
The RGB color model uses the components
red (R), green (G), and blue (B) to define the
amounts of red, green, and blue light in a
given color. In a 24-bit image, each component
is expressed as a number from 0 to 255. In an
image with a higher bit rate, such as a 48-bit
image, the value range is greater. The
combination of these components defines a
single color.
In additive color models, such as RGB, color is
produced from transmitted light. RGB is
therefore used on monitors, where red, blue,
and green lights are blended in various ways to
reproduce a wide range of colors. When red,
blue, and green lights are combined at their
maximum intensities, the eye perceives the
resulting color as white. In theory, the colors
are still red, green and blue, but the pixels on a
monitor are too close together for the eye to
differentiate the three colors. When the value
of each component is 0, which signifies an
absence of light, the eye perceives the color as
black.
RGB is the most commonly used color model,
because it allows a broad range of colors to be
stored and displayed.
RGB color model. White is the result of combining the
three RGB colors at their maximum intensities.
CMYK color model
The CMYK color model, which is used in
printing, uses the components cyan (C),
magenta (M), yellow (Y), and black (K) to
define color. Values for these components
range from 0 to 100 and represent
percentages.
In subtractive color models, such as CMYK,
color (that is, ink) is added to a surface, such as
white paper. The color then “subtracts”
brightness from the surface. When the value of
each color component (C,M,Y) is 100, the

74 | CorelDRAW Graphics Suite X6 Guidebook
resulting color is black. When the value of each
component is 0, no color is added to the
surface, so the surface itself is revealed — in
this case, the white paper. Black (K) is included
in the color model for printing purposes
because black ink is more neutral and darker
than blending equal amounts of C, M, and Y.
Black ink produces sharper results, especially
for printed text. In addition, black ink is usually
less expensive than using colored ink.
CMYK color model. Black is the result of combining the
three CMY colors at their maximum intensities.
HSB color model
The HSB color model uses hue (H), saturation
(S), and brightness (B) as components for
defining color. HSB is also known as HSV (with
the components hue, saturation, and value).
Hue describes the pigment of a color and is
expressed in degrees to represent the location
on the standard color wheel. For example, red
is 0 degrees, yellow is 60 degrees, green is 120
degrees, cyan is 180 degrees, blue is 240
degrees, and magenta is 300 degrees.
Saturation describes the vividness or dullness
of a color. Values of saturation range from 0 to
100 and represent percentages (the higher the
value, the more vivid the color). Brightness
describes the amount of white in the color. Like
saturation values, brightness values range from
0 to 100 and represent percentages (the higher
the value, the brighter the color).
HSB color model
Grayscale color model
The grayscale color model defines color by
using only one component, lightness, which is
expressed in values that range from 0 to 255 in
8-bit images. The value range varies,
depending on the bit rate of the image. Each
grayscale color has equal values of the red,
green, and blue components of the RGB color
model.
Grayscale color model
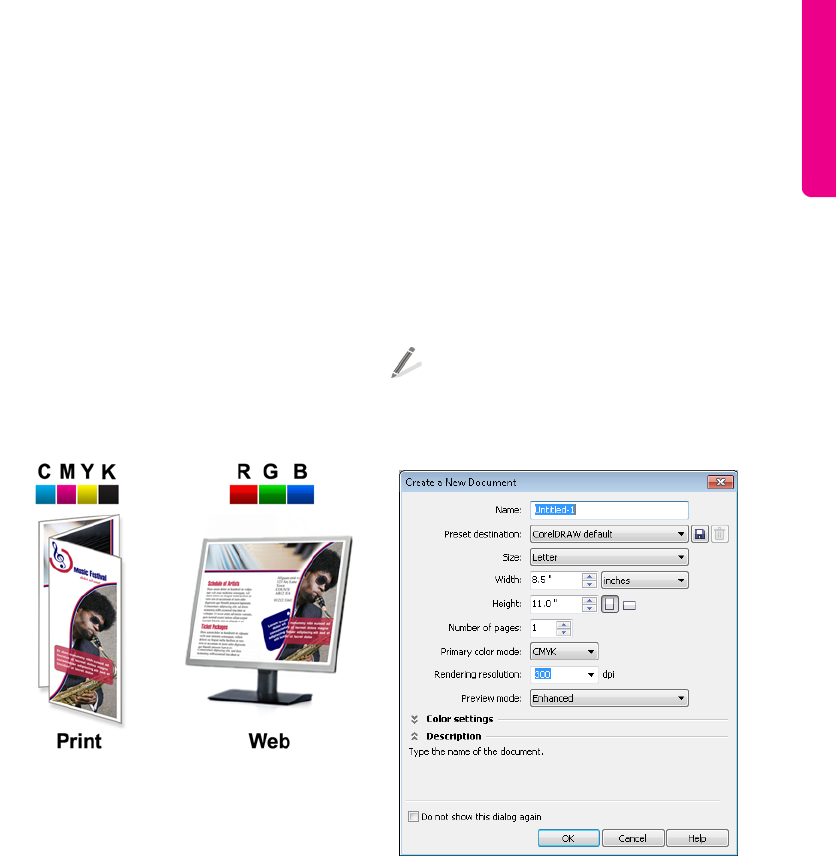
Chapter 6: Color Basics | 75
Choosing a color mode
When you create a new CorelDRAW document
or Corel PHOTO-PAINT image, you must
choose a color mode, preferably based on the
color model that corresponds to the project’s
destination. The color mode determines the
colors to be used in the application. For
example, if you know that the intended
destination for your project is the Web, you can
choose the RGB color mode. By choosing the
correct color mode when you start a project,
you can take some of the guesswork out of
choosing colors. As a result, the colors in your
projects will be reproduced more accurately.
The CMYK color mode is recommended for printed
material, while the RGB color mode is recommended for
material that will be viewed online.
If you don’t know your project’s ultimate
destination, or if your project will be both
printed and viewed online, you should choose
the RGB color mode. This color mode lets you
store a broad range of colors and can be easily
converted to CMYK for printing.
Choosing a color mode for a
CorelDRAW document
In CorelDRAW, the primary color mode
determines the colors in the default color
palette, which lets you find suitable colors
more easily. The primary color mode is used as
the default color mode when you export a
document as a bitmap or in the
Adobe Illustrator (AI) file format. For example,
if you set the RGB color mode as your primary
color mode and export a document as a JPEG,
the color mode is automatically set to RGB.
To specify the color mode for a new
CorelDRAW document, choose an item
from the Primary color mode list box in
the Create a new document dialog box.
The primary color mode is set to CMYK for a new
CorelDRAW document.
The CorelDRAW primary color mode does not
restrict the type of colors that you can apply to
a drawing. For example, if you set the color
mode to RGB, you can still apply, and
accurately display, colors from a CMYK color
palette in the document.
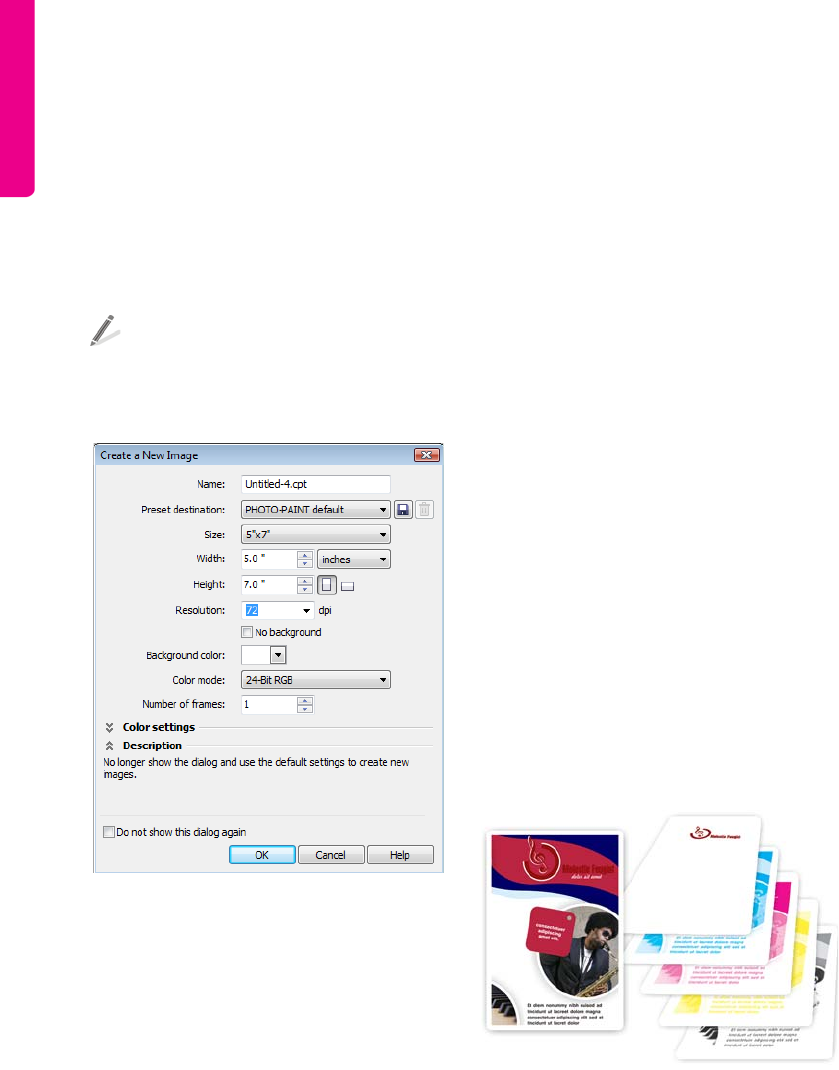
76 | CorelDRAW Graphics Suite X6 Guidebook
Choosing a color mode for a
Corel PHOTO-PAINT image
In Corel PHOTO-PAINT, the color mode that
you choose for a new image determines the
default color palette. For example, if you
choose the RGB color mode, the default color
palette displays only RGB colors, which makes
it easy to choose and apply the correct colors.
To specify the color mode for a new
Corel PHOTO-PAINT image, choose an item
from the Color mode list box in the
Create a new image dialog box.
The color mode is set to 24-Bit RGB for a new
Corel PHOTO-PAINT image.
Unlike the primary color mode in CorelDRAW,
the color mode in Corel PHOTO-PAINT
determines and limits the colors that you can
apply to an image. For example, if you choose
the RGB color mode, you can apply only RGB
colors to the image. When you choose a color
from another palette, such as CMYK, the color
is converted to RGB when it is applied to the
image. If you tag a specific channel with a spot
color, you can apply the spot color to the
channel. However, if you apply a spot color to
the image background, the color is converted
to the RGB color mode.
Using process and spot colors
When you send a document to a print service
provider, you can specify either process color or
spot color as the method of color printing. The
primary difference between these two
methods is the number of inks, or separations,
that are required to reproduce colors.
Process colors
A typical project may contain hundreds of
colors, but you do not need hundreds of color
separations when you print it. Only four inks
(cyan, magenta, yellow, and black) are needed
to print full-color documents. The colors that
are produced by mixing these four standard
printing inks are known as process colors. By
choosing colors from any of the color palettes
in CorelDRAW Graphics Suite X6, you can use
process colors in your projects.
Cyan (C), magenta (M), yellow (Y), and black (K) color
separations are used to reproduce full-color images.
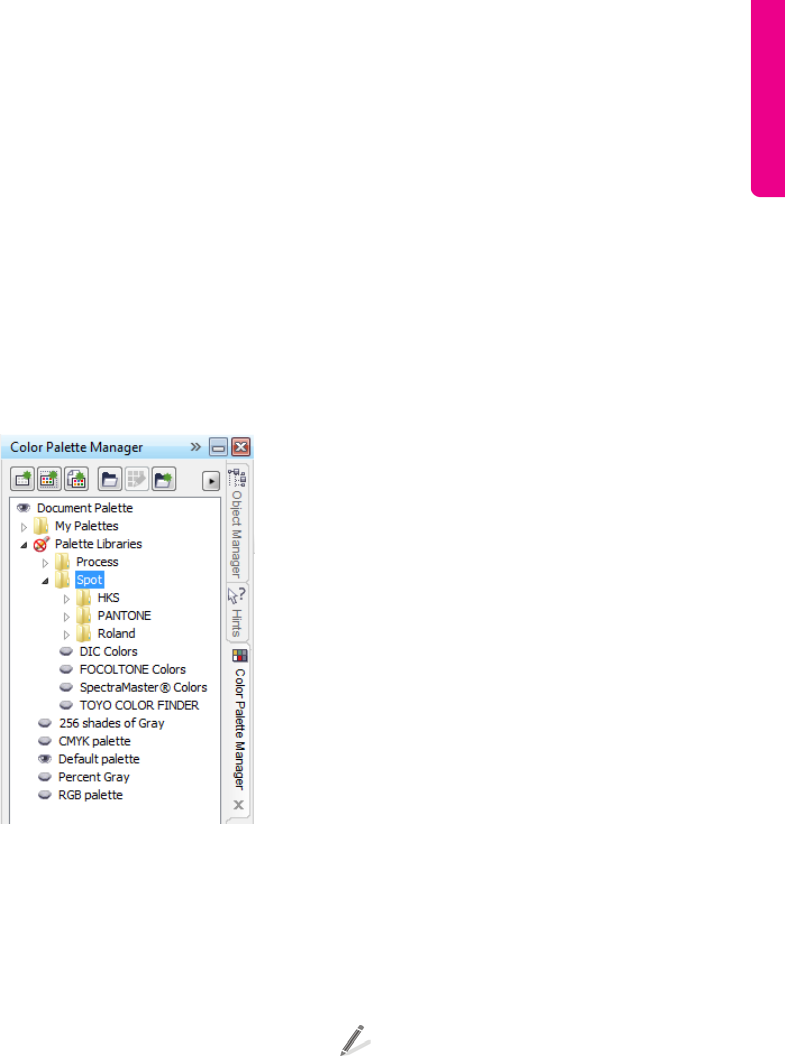
Chapter 6: Color Basics | 77
Spot colors
Often, spot colors are custom premixed inks
that require separate printing plates. Spot
colors are often used in addition to process
colors. For example, you can add a spot color
to a CMYK project if that color cannot be
reproduced by using CMYK values.
You can choose a spot color from any of the
spot-color palettes that appear in the Palette
libraries folder of the Color palette
manager docker. Examples of these spot-color
palettes are PANTONE®, HKS®, and TOYO.
The spot-color palettes are stored in the Spot folder of
the Color palette manager docker.
Tips on using process and spot colors
If you need help in deciding how to use spot
colors and process colors in your project,
consider the following:
• To minimize printing costs, use process
colors for projects that contain multiple
colors, and spot colors for projects that
contain very few colors.
•If you need to print a specific color
accurately (for example, the color of a
corporate logo in a brochure), use a spot
color instead of a process color.
• Remember that although you can define
process colors by using RGB values, the
printed output will use CMYK inks.
Because the colors are converted from RGB
to CMYK before ink is applied to the paper,
a shift in color may result.
Choosing colors
CorelDRAW and Corel PHOTO-PAINT provide
various tools and features to help you choose
the best colors for your projects. You can
choose colors from any of the palettes,
viewers, harmonies, and eyedropper tools that
are available with the following workspace
components:
• color palettes
•Object properties docker (CorelDRAW)
•Color styles docker (CorelDRAW)
•Uniform fill dialog box
•Color docker
•Color eyedropper tool (CorelDRAW)
•Eyedropper tool (Corel PHOTO-PAINT)
Color palettes
The default color palette in CorelDRAW or
Corel PHOTO-PAINT provides 99 color
swatches that are based on the color mode of
your document or image. Each color swatch in
turn provides numerous shades and tones
from which to choose.
To fill an object with color in CorelDRAW,
select the object, and click a color on the
color palette.
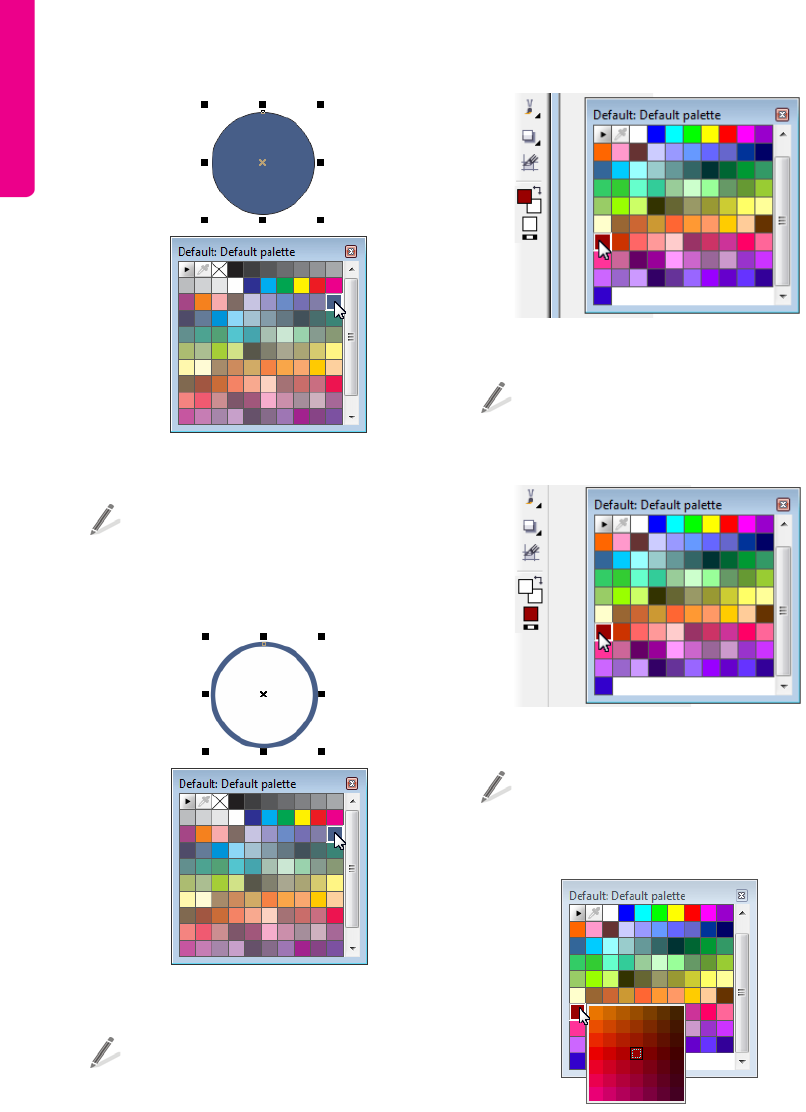
78 | CorelDRAW Graphics Suite X6 Guidebook
Clicking the blue color swatch on the color palette fills
the circle with blue.
To change the outline color of an object in
CorelDRAW, right-click any color on the
color palette.
Right-clicking the blue color swatch on the color palette
changes the circle’s outline color to blue.
To change the foreground color in
Corel PHOTO-PAINT, click a color on the
color palette.
Clicking the red color swatch on the color palette
changes the Foreground color swatch to red.
To change the fill color in
Corel PHOTO-PAINT, right-click a color on
the color palette.
Right-clicking the red color swatch on the color palette
changes the Fill color swatch to red.
To access different shades of a color, hold
down a color swatch until a pop-up color
palette appears.
Holding down the red color swatch displays various
shades of red in a pop-up color palette.
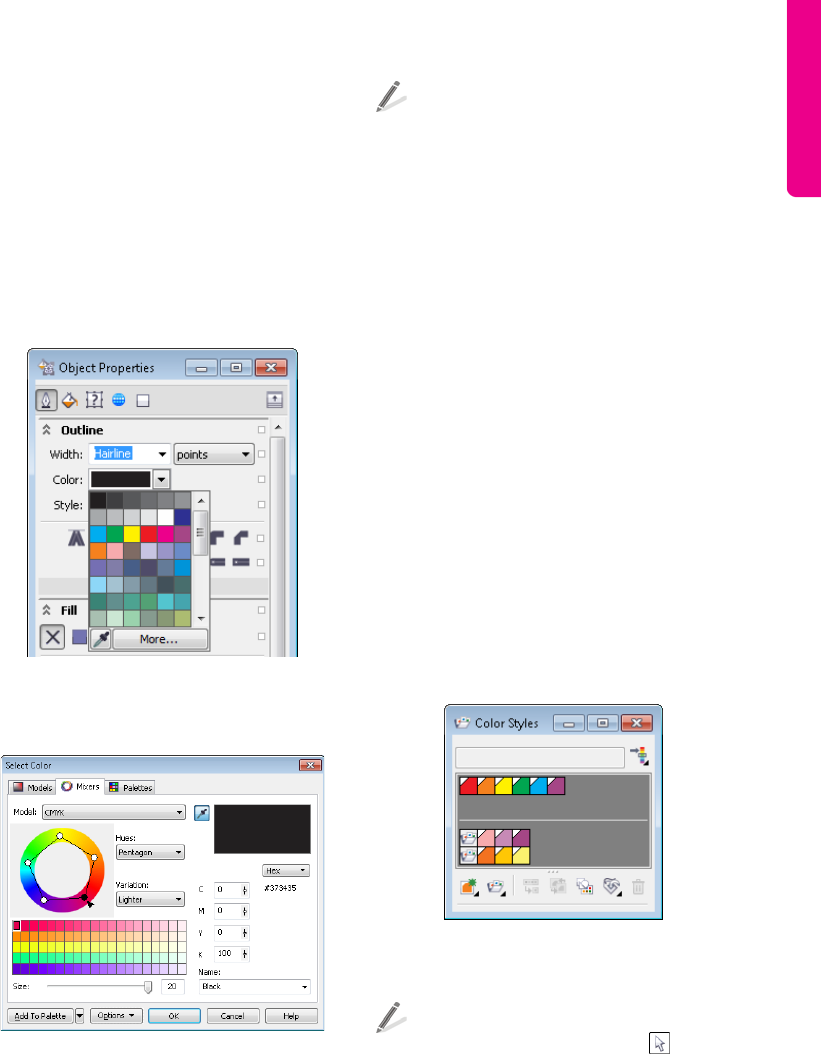
Chapter 6: Color Basics | 79
Object Properties docker
The Object properties docker (Window `
Dockers ` Object properties) in CorelDRAW
allows you to define object properties,
including outlines and fills. It lets you pick an
outline or fill color from the standard color
picker, or create a custom color using color
models, mixers, and additional palettes
available in the Select color dialog box.
The color pickers in the Object properties docker
allow you to choose a color or create a custom color for
an object fill and outline.
Mixers page of the Select color dialog box
To display the Select color dialog box in
CorelDRAW, open the color picker in the
Outline, Fill, or Character section of the
Object properties docker, and click
More.
Color Styles docker
The Color styles docker lets you create, apply,
and edit color styles. When you apply a color
style to multiple objects, you can
simultaneously update all the objects by
modifying the color style. The Color styles
docker also lets you organize color styles in
groups called harmonies. A harmony allows
you to link color styles in a specific relationship,
so that when you edit one style in the
harmony, the other styles get updated without
changing the color relationship. Use this
feature to preview a drawing in different color
schemes or modify the entire color
composition in one step. For more information
about using color styles and harmonies, see
“Working with color styles and harmonies” on
page 81.
The top section of the styles list includes individual color
styles, while the bottom section contains color harmony
folders.
To apply a color style in CorelDRAW, select
an object by using the Pick tool , and in
the Color styles docker, double-click a
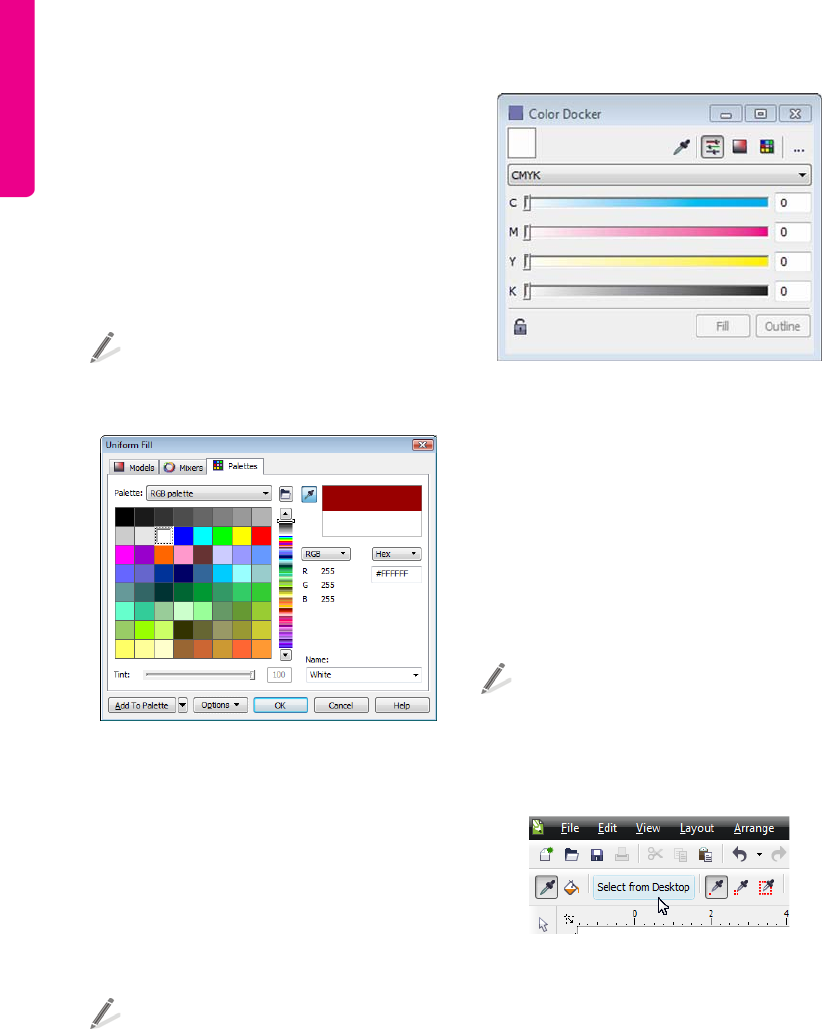
80 | CorelDRAW Graphics Suite X6 Guidebook
color style to apply a fill, or right-click a
color style to apply an outline.
Uniform Fill dialog box
The Uniform fill dialog box gives you access
to additional color palettes and lets you use
various methods for choosing and editing
colors. For example, you can use color viewers
or color mixers to specify the color you want.
To display the Uniform fill dialog box in
CorelDRAW, click the Fill tool in the
toolbox, and click Uniform fill.
Uniform fill dialog box
Color docker
The Color docker provides the same variety of
color mixers, viewers, and palettes that are
already available in the Uniform fill dialog box
as well as some additional controls, such as
color sliders. It also has one advantage over the
Uniform fill dialog box: You can keep it open
at all times.
To display the Color docker, click Window
` Dockers ` Color.
Color docker
Eyedropper tools
Eyedropper tools let you quickly choose a color
from one area of your document or image and
apply it to another area. These tools are useful
when you want to ensure an exact match with
an existing color in your project. You can also
use eyedropper tools to match colors from
images outside the image or document,
outside the application, or on the desktop.
To choose a color from an item on your
desktop, click the Color eyedropper tool
in the CorelDRAW toolbox, and click
Select from desktop on the property bar.
Then, click a color on your desktop.
Clicking Select from desktop on the property bar lets
you select a color outside CorelDRAW.
Eyedropper tools are also available for adding
colors to color palettes, dockers, and dialog
boxes.
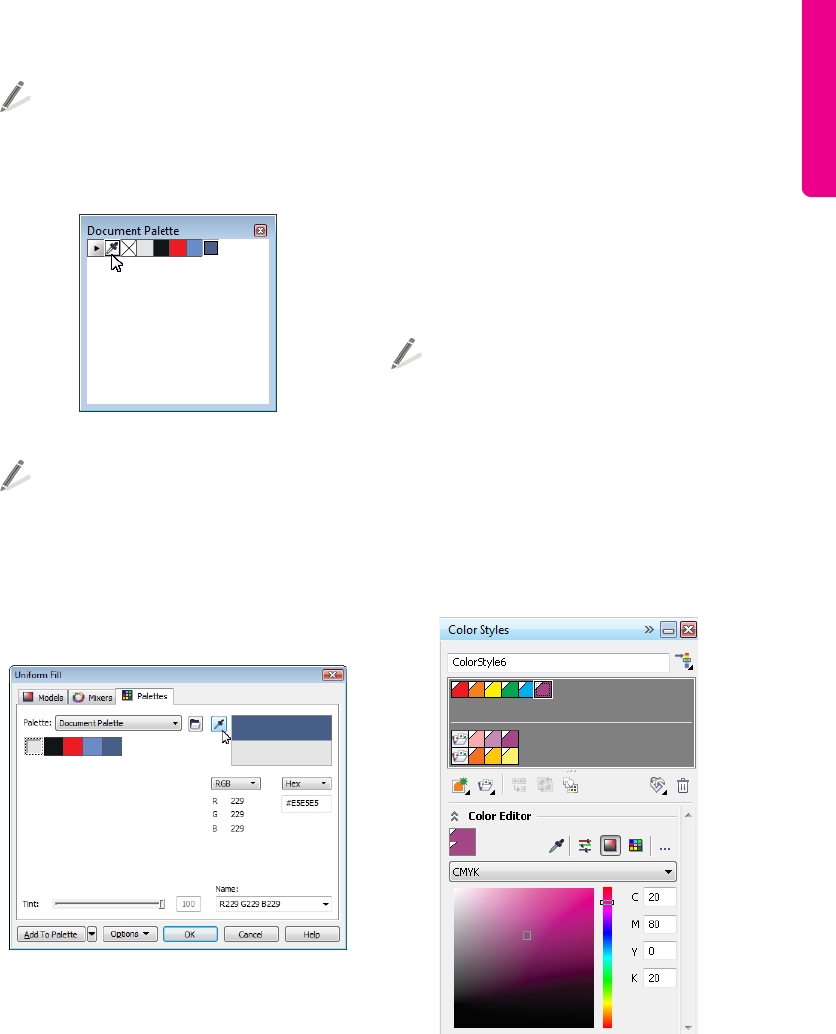
Chapter 6: Color Basics | 81
To add a color to the Document palette in
CorelDRAW, click the eyedropper button
on the palette, and click a color in the
document window.
The eyedropper button on the Document palette
To add a color to the Uniform fill dialog
box in Corel PHOTO-PAINT, click the Fill
tool. On the property bar, click the
Uniform button for the Fill control, and
click the Edit fill button. Then, click the
Eyedropper button in the dialog box, and
click a color in the image window.
The eyedropper button in the Uniform fill dialog box
Working with color styles and
harmonies
A color style is a color that you save and apply
to objects in your CorelDRAW document. A
color style is reusable, and any time you update
it, all objects that use this style are
automatically updated. Because an infinite
number of colors are available in CorelDRAW,
color styles can make it easier to apply the
exact color you want.
You can create a color style from an existing
object or from scratch. When you create a
color style, it is saved to the active drawing and
to the Color styles palette.
To create a color style, drag a swatch from
any open palette, or drag an object from
the document window, to the top gray
area of the Color styles docker.
When you create a color style, you can edit it in
the Color editor by using a variety of controls,
such as color sliders, mixers, and custom
palettes. Most of these controls are also
available in the Select color and Uniform fill
dialog boxes, and the Color docker.
Select a color style in the color styles list, and edit its
properties in the Color editor. You can distinguish a
color style from a regular color by the white triangle in
the upper-left corner of the color swatch.
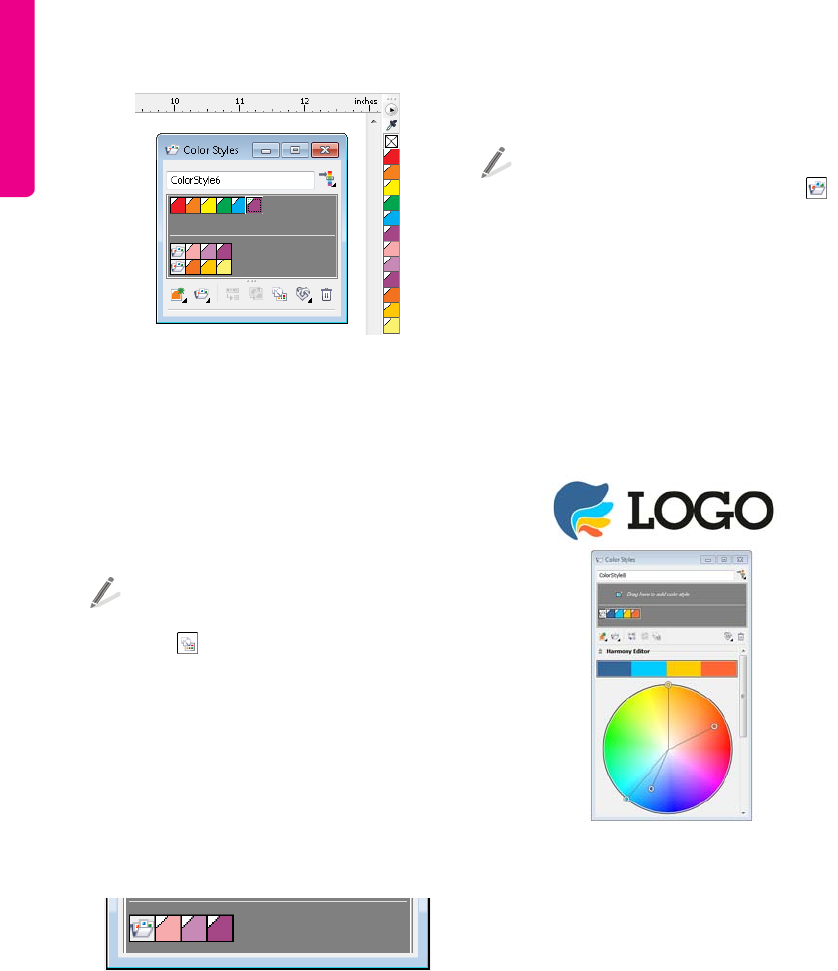
82 | CorelDRAW Graphics Suite X6 Guidebook
When you create a color style in the Color styles docker
(left), it is automatically added to the Color styles
palette (right). The Color styles palette is not open by
default.
You can select all color styles that are not used
in a document. You can also convert color
styles to different color modes or to spot colors
to prepare your document for production
printing.
To select all color styles that are not used in
a document, click the Select unused
button in the Color styles docker.
Color styles can be combined into groups
called harmonies. A harmony allows you to link
color styles into hue-based relationships and
modify them together as a set. By editing color
styles in a harmony, you can quickly create a
variety of alternate color schemes by shifting
the colors together, or you can alter the color
composition of your artwork in one step.
Color styles grouped in a harmony
You can create a color harmony from scratch or
from the colors of an existing object.
To create a color harmony from scratch,
click the New color harmony button ,
and choose New color harmony. Then,
drag color swatches from any open palette
to the harmony folder in the Color styles
docker.
To create a color harmony from an existing
object, drag the object to the bottom part
of the gray area in the Color styles docker,
and specify options in the Create color
styles dialog box.
The color harmony was created by dragging the clipart
from the document window to the lower section of the
color styles list in the Color styles docker.
When you edit a harmony, you can change all
color styles simultaneously by preserving the
relationship between them, or you can modify
individual color styles within the harmony.
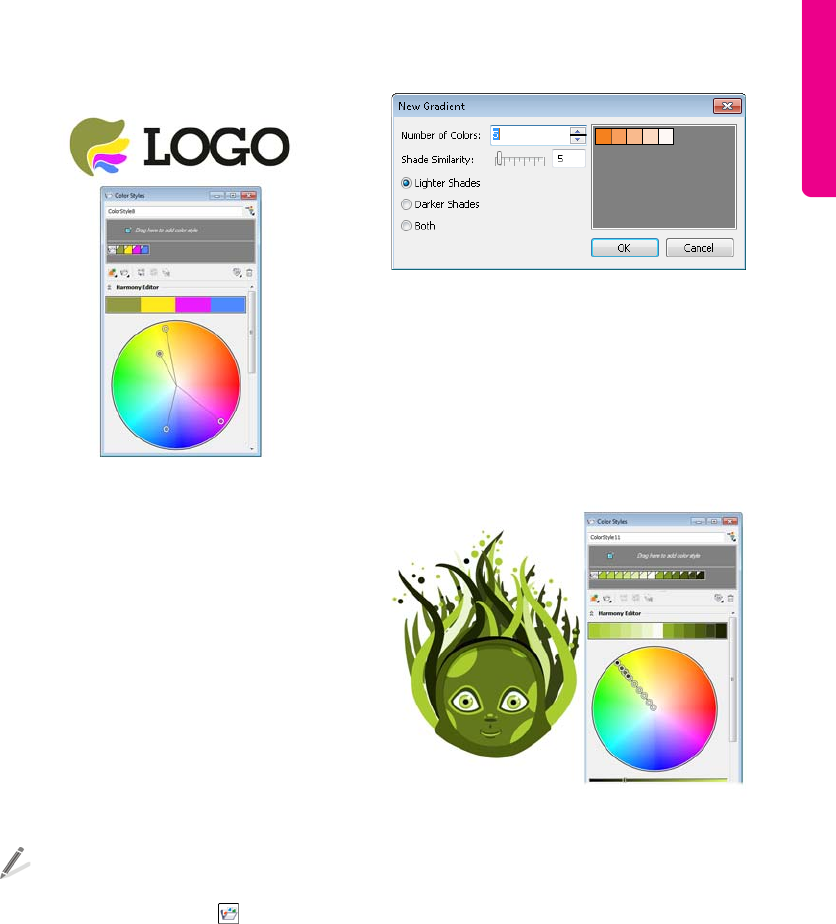
Chapter 6: Color Basics | 83
Using the Harmony editor, you can experiment with
different color schemes. By changing one color, you can
also find other colors that go well with that color.
CorelDRAW allows you to create a special type
of color harmony called a gradient. A gradient
consists of a master color style and a number
of shades of that color. In most of the available
color models and palettes, the derivative styles
share the same hue as the master style but
have different saturation and brightness levels.
In the PANTONE MATCHING SYSTEM® and
custom spot color palettes, the master style
and the derivative styles are linked to one
another but have different tint levels.
To create a gradient, select a color style in
the Color styles docker, click the New
color harmony button , and choose
New gradient. Specify the settings you
want in the New gradient dialog box.
The New gradient dialog box allows you to specify the
number and type of shades that you want to create from
the selected master style.
When you change the hue of the master style
in a gradient, you automatically update the
related color styles, based on the new hue and
the original saturation and brightness values.
After you create a gradient, you can apply it to the
design elements in your document.
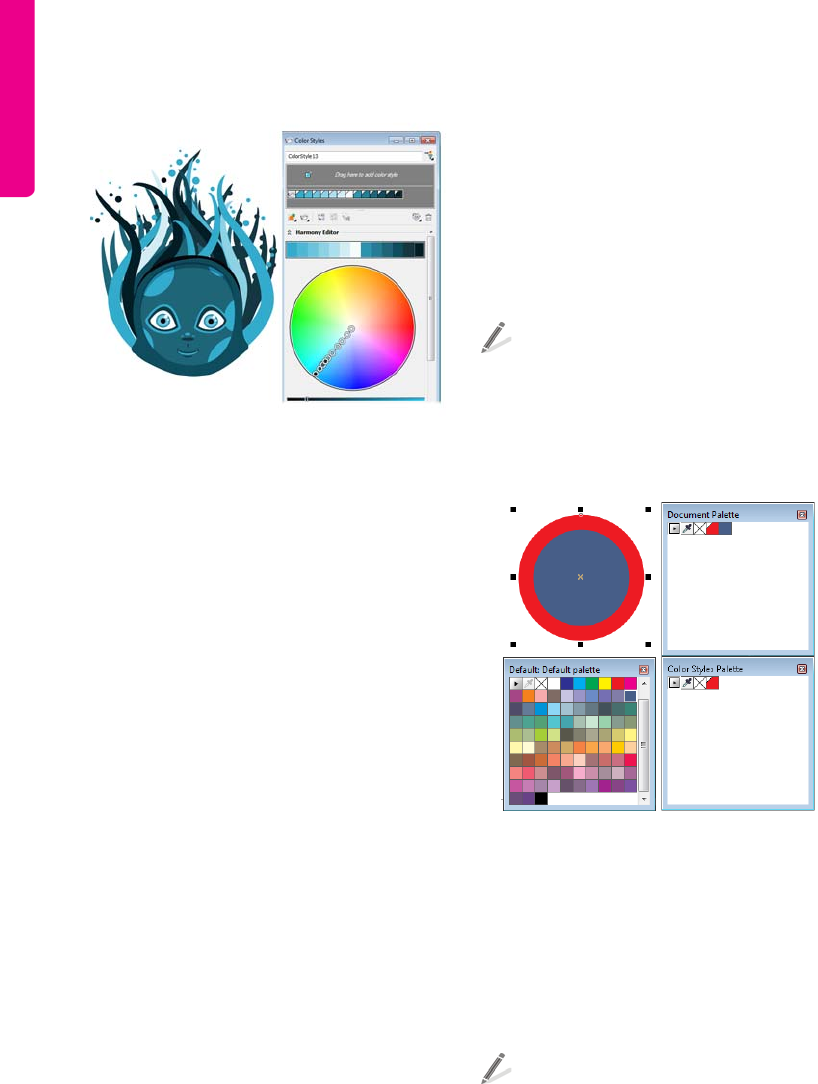
84 | CorelDRAW Graphics Suite X6 Guidebook
By selecting the gradient folder and dragging any of the
selector rings in the Harmony editor color wheel, you
can see a real-time preview of your drawing in different
colors.
Using the Document palette, Color
Styles palette, and Image palette
When you start a new document in
CorelDRAW, the Document palette appears.
When you start a new image in
Corel PHOTO-PAINT, the Image palette
appears. These palettes are empty palettes that
let you keep track of the colors that you use. By
default, they appear docked at the bottom of
the application window. The Color styles
palette is another palette that is created
automatically in CorelDRAW when you start a
new document, but it is not open by default. It
helps you keep track of the color styles that you
create.
Adding colors to the Document, Color
Styles, or Image palette
Whenever you add a color to your document,
the color is automatically added to the
Document palette or Image palette.
Whenever you create a color style in your
document, it is added to the Color styles
palette, but it does not automatically appear in
the Document palette. You can add the color
style to the Document palette by applying it
to an object in your document, or by manually
dragging it from the Color styles docker or
the Color styles palette to the Document
palette.
To add a color or color style to the
Document palette in CorelDRAW, select
an object, and click a color on the default
color palette or double-click a color style
on the Color styles palette.
The blue color that was applied to the circle was
automatically added to the Document palette. The red
color style was added to the Document palette only
after it was applied to the circle outline.
If an image contains a color or a color style that
you want to use in the future, you can add it to
the Document, Color styles, or Image
palette by using the eyedropper button.
To add multiple colors to the Image
palette in Corel PHOTO-PAINT, click the
eyedropper button on the palette, and
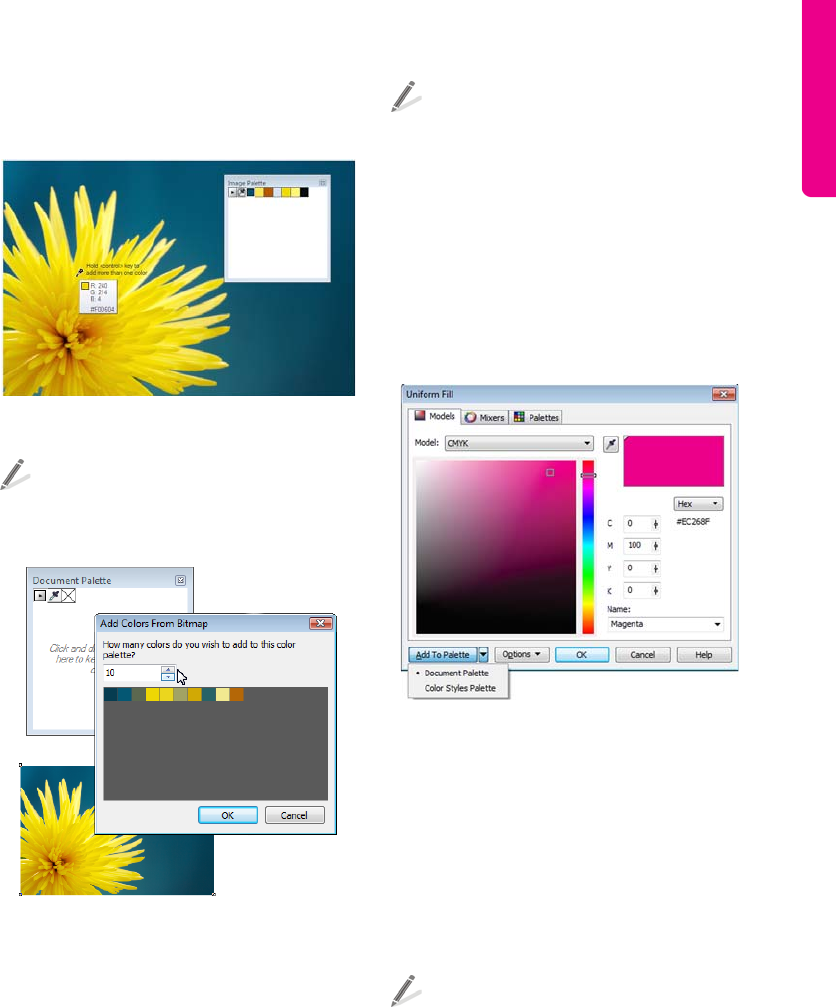
Chapter 6: Color Basics | 85
while holding down Ctrl, click the colors in
the image window.
You can quickly add multiple colors to the Image
palette by using the eyedropper.
To quickly add colors from a bitmap to the
Document palette in CorelDRAW, drag
the bitmap to the Document palette.
When dragging an image to the Document palette,
you can choose how many colors are added.
You can also add colors to the Document,
Color styles, or Image palette from a color-
related dialog box, such as the Uniform fill
dialog box or the Select color dialog box. By
moving the colors or color styles to the palette,
you can save them for future use.
To add a color or color style to the
Document or Color styles palette in
CorelDRAW from the Uniform fill dialog
box, select an object, and double-click the
Fill color icon on the status bar. In the
Uniform fill dialog box, choose a color,
click the arrow next to the Add to palette
button, and choose a palette. Then, click
Add to palette. The Color styles palette
is available in the drop-down list after you
display it.
You can add a color to the Document or Color styles
palette from the Uniform fill dialog box.
In CorelDRAW, when you open a document
that was created with a previous version of the
software, only custom spot colors are added to
the Document palette.
In Corel PHOTO-PAINT, when you open an
existing image, such as a photo, no colors are
displayed on the Image palette.
To add the colors in a photo to the Image
palette in Corel PHOTO-PAINT, open the
file that contains the photo, click the arrow
button on the Image palette, and click
Add colors from image.
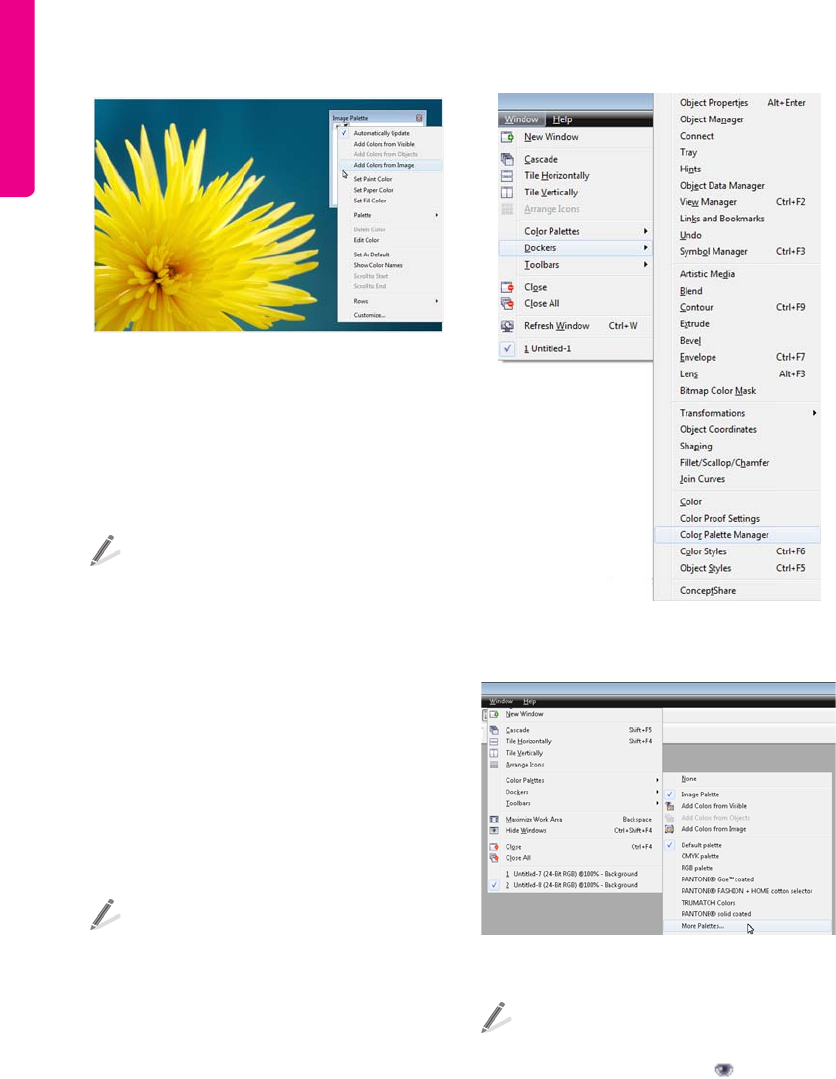
86 | CorelDRAW Graphics Suite X6 Guidebook
You can quickly add the most dominant colors from an
image to the Image palette by clicking Add colors
from image.
In CorelDRAW, you can reset the Document
or Color styles palette so that it does not
display colors or color styles that are not used
in the document.
To clear the Document or Color styles
palette of colors and color styles that are
not used in the current document, click the
arrow button, choose Palette, and click
Reset palette.
Displaying and organizing color
palettes
The Color palette manager docker lets you
quickly access and display all the available color
palettes, including the Document and Color
styles palettes in CorelDRAW or the Image
palette in Corel PHOTO-PAINT.
To open the Color palette manager
docker in CorelDRAW, click Window `
Dockers ` Color palette manager.
To open the Color palette manager
docker in Corel PHOTO-PAINT, click
Window ` Color palettes ` More
palettes.
Opening the Color palette manager docker in
CorelDRAW
Opening the Color palette manager docker in
Corel PHOTO-PAINT
To display or hide a color palette in the
Color palette manager docker in
CorelDRAW, click the icon next to the
name of the color palette.
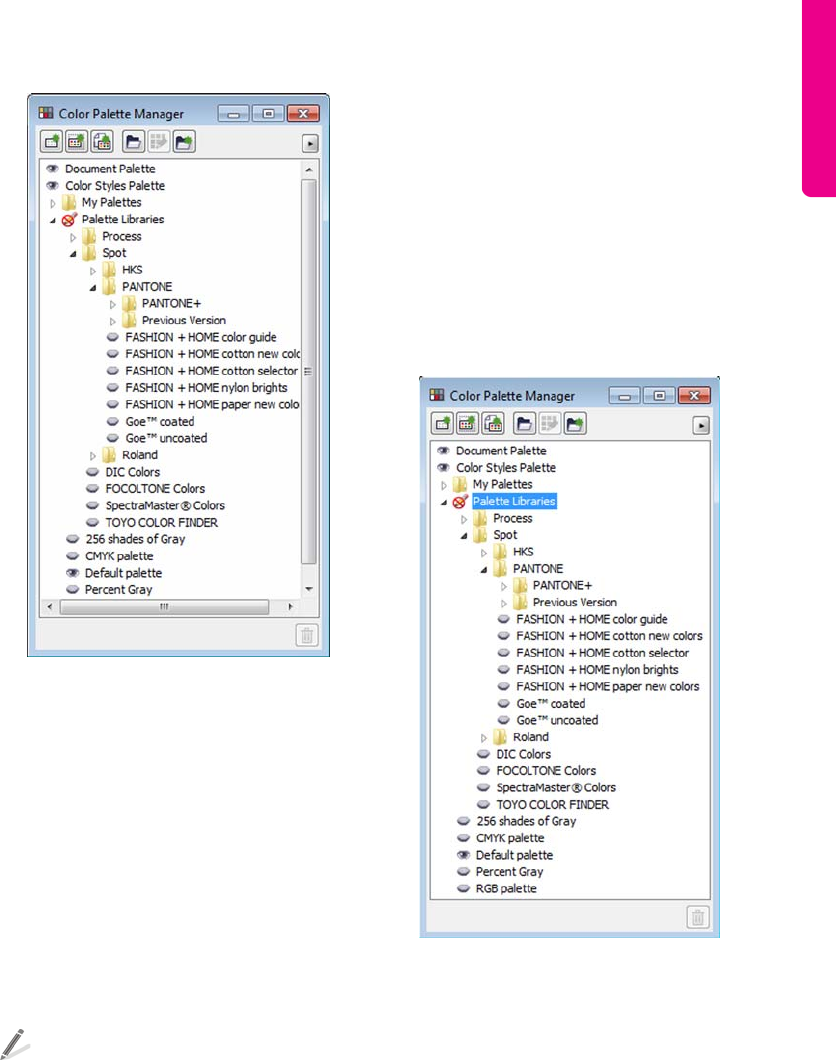
Chapter 6: Color Basics | 87
Color palette manager docker
The color palettes in the Color palette
manager docker are divided into two main
folders: My palettes and Palette libraries.
My Palettes folder
You can use the My palettes folder to store all
the custom color palettes or color styles
palettes that you create. You can add folders to
store and organize the palettes for different
projects. You can also copy a color palette or a
color style palette or move the palette to a
different folder.
To quickly move a palette from one folder
to another, drag the palette to the new
folder.
Palette Libraries folder
The Palette libraries folder of the Color
palette manager docker contains collections
of preset color palettes.
The two main libraries of color palettes are
Process and Spot. The color palette libraries
are locked, which means that they cannot be
edited. (The individual palettes can be copied
as custom palettes, however, as explained in
the next section.)
The Palette libraries folder contains spot and process
color palettes.
The Process library contains the default RGB,
CMYK, and Grayscale color palettes. In
addition, you can find preset color palettes
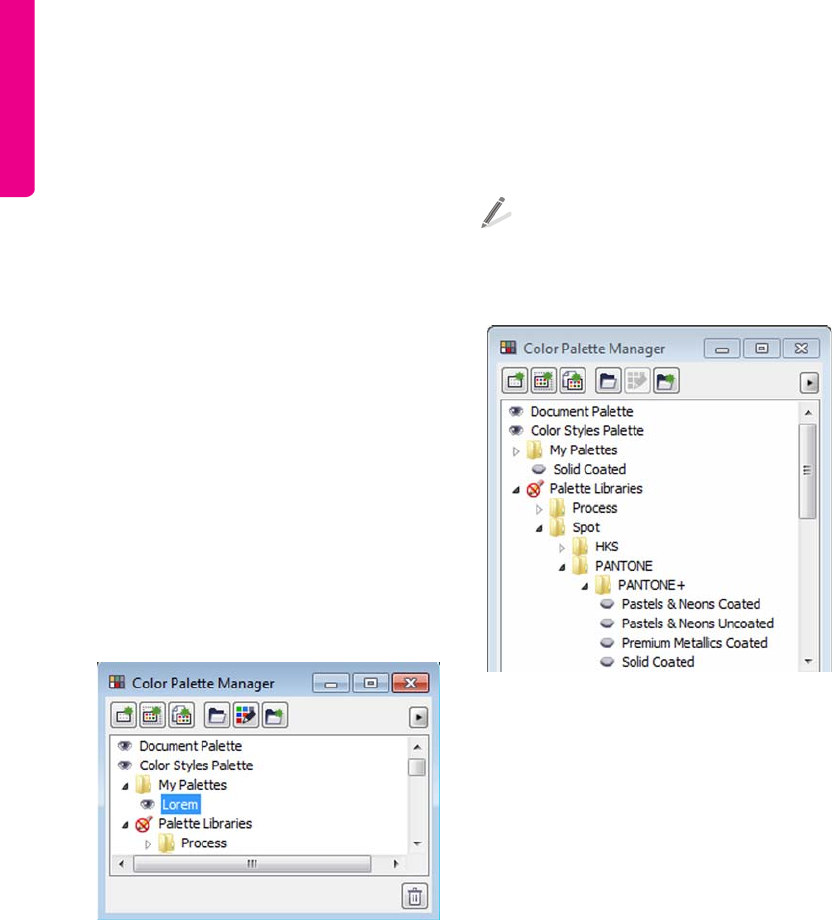
88 | CorelDRAW Graphics Suite X6 Guidebook
that are based on particular themes and
grouped in folders such as Nature and People.
The Spot library contains color palettes that
are provided by third-party manufacturers,
including HKS Colors, PANTONE, Focoltone®,
and TOYO. You can use these color palettes
when you need specific company-approved
colors for your printed projects.
Creating custom palettes
You can create a custom palette to store all the
colors or color styles that you need for a
current or future project. By creating custom
palettes, you can easily share a collection of
colors or color styles with other people. You
can access custom palettes from the My
palettes folder of the Color palette
manager docker. Custom palettes can include
colors or color styles from any color model,
including spot colors, or from any color palette
in the Palette libraries folder.
A custom color palette was added to the My palettes
folder.
You cannot edit a palette in the Palette
libraries folder. However, you can copy the
palette to create a custom palette, which can
then be edited.
To copy a color palette from the Palette
libraries folder of the Color palette
manager docker, drag the palette to the
My palettes folder.
A copy of the PANTONE Solid coated spot color palette
was created by dragging it from the Palette libraries to
the My palettes folder.

Chapter 7: Color Management | 89
Chapter 7: Color Management
Understanding color management 90
Color management settings in
CorelDRAW Graphics Suite X6 94
Working with color profiles 97
Soft proofing 98
Working with color management policies 100
Managing colors when opening documents
101
Managing colors when importing and pasting
files 102
Managing colors for print 102
Using a safe CMYK workflow 103
Managing colors for online viewing 103
90 | CorelDRAW Graphics Suite X6 Guidebook
Chapter 7: Color Management
This chapter answers some basic questions
about color management and introduces you
to the color management features of
CorelDRAW Graphics Suite X6.
Understanding color management
This section provides answers to the following
commonly asked questions about color
management:
• Why don’t colors match?
• What is color management?
• Why do I need color management?
• How do I get started with color
management?
• Is my monitor displaying the correct
colors?
• Should I assign a color profile or convert
colors to a color profile?
• What is a rendering intent?
Why don’t colors match?
Different tools can be used during the creation
and sharing of a document. For example, you
can start with a file that was created in another
application, or you can import an image that
was captured by a digital camera or acquired
from a scanner. After finishing the document,
you can share it with a colleague by either
printing or e-mailing it.
Each tool in your workflow has its own method
of interpreting color. In addition, each tool has
its own range of available colors, called a color
space, which is a set of numbers that define
how colors are represented.
In other words, when defining and interpreting
color, each tool speaks a unique language.
Consider a color in the color space of your
digital camera: a vivid blue RGB color with the
values Red = 0, Green = 0, and Blue =255.
This color may appear as a different color in the
color space of your monitor. In addition, the
color space of your printer may not contain a
match for this color. As a result, when your
document moves through the workflow, this
vivid blue color gets lost in the translation and
is not accurately reproduced. A color
management system is designed to improve
the communication of color in the workflow so
that the color of the output matches your
intended color.
Example of a document workflow
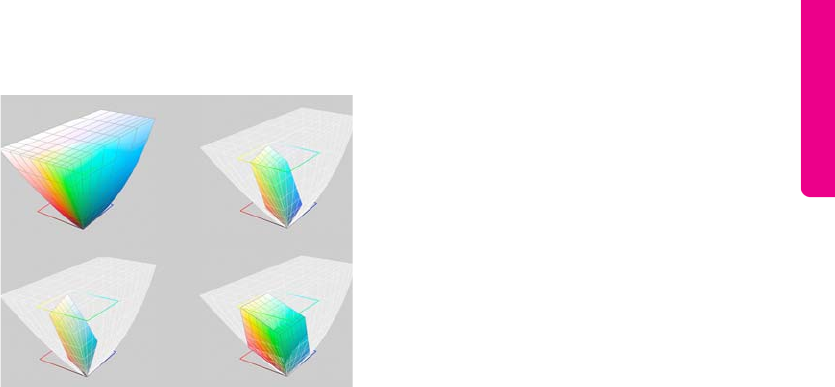
Chapter 7: Color Management | 91
Colors are defined by their color space. 1. Lab color
space. 2. sRGB color space, displayed against the Lab
color space. 3. U.S. Web Coated (SWOP®) v2 color
space. 4. ProPhotoRGB color space.
What is color management?
Color management is a process that lets you
predict and control color reproduction,
regardless of the source or destination of the
document. It ensures a more accurate color
representation when a document is viewed,
modified, shared, exported to another file
format, or printed.
A color management system, also known as a
color engine, uses color profiles to translate the
color values from one source to another. For
example, it translates the colors that are
displayed on the monitor into the colors that a
printer can reproduce. Color profiles define the
color space of monitors, scanners, digital
cameras, printers, and the applications that
you use to create or edit documents.
Why do I need color management?
If your document requires accurate color
representation, you may want to learn more
about color management. The complexity of
your workflow and the ultimate destination of
your documents are also important
considerations. If your documents are destined
only for online viewing, color management
may not be as important. However, if you plan
to open documents in another application or if
you are creating documents for print or
multiple types of output, then proper color
management is essential.
Color management lets you do the following:
• reproduce colors consistently across your
workflow, especially when opening
documents that were created in other
applications
• reproduce colors consistently when
sharing files with others
• preview (or “soft-proof”) colors before
they are sent to their final destination,
such as a printing press, a desktop printer,
or the Web
• reduce the need to adjust and correct
documents when sending them to
different destinations
A color management system does not offer
identical color matching, but it greatly
improves color accuracy.
How do I get started with color
management?
Here are some suggestions for adding color
management to your workflow:
• Make sure that your monitor is displaying
the correct colors. For more information,
see “Is my monitor displaying the correct
colors?” on page 92.
• Install color profiles for any input or
output devices that you are planning to
use. For more information, see “Installing
and loading color profiles” on page 97.
• Become familiar with the color
management features of CorelDRAW and
Corel PHOTO-PAINT. The default settings
for color management produce good color
1
4
3
2

92 | CorelDRAW Graphics Suite X6 Guidebook
results, but you can change these default
settings so that they suit your specific
workflow. For more information, see
“Color management settings in
CorelDRAW Graphics Suite X6” on
page 94.
• Soft-proof documents to preview final
results on-screen. For more information,
see “Soft proofing” on page 98.
• Embed color profiles when saving or
exporting files. In this way, you help ensure
color consistency when the files are
viewed, modified, or reproduced. For more
information, see “Embedding color
profiles” on page 98.
Is my monitor displaying the correct
colors?
Calibrating and profiling the monitor are
essential steps for ensuring color accuracy.
When you calibrate a monitor, you set it to
display colors according to an established
standard of accuracy. After calibration, you can
create a color profile of the monitor, which
describes how the monitor interprets colors.
This custom color profile is usually installed in
your operating system by the profiling
software, so it can be shared with other devices
and applications. Calibration and profiling
work together to achieve color accuracy: If a
monitor is incorrectly calibrated, its color
profile is not useful.
Calibration and profiling are complex and
usually require third-party calibration devices,
such as colorimeters and specialized software.
Furthermore, improper calibration may do
more harm than good. You can learn more
about monitor calibration and custom color
profiles by researching color management
techniques and products. You can also refer to
the documentation that was provided with
your operating system or monitor.
How you perceive the color that your monitor
displays is also important for managing color
consistency. Your perception is influenced by
the environment in which you are viewing the
documents. Here are some ways to create a
suitable viewing environment:
• Ensure that your room has a consistent
flow of light. For example, if the room is
filled with sunlight, use a shade, or if
possible, work in a room without
windows.
• Set the monitor background to a neutral
color, such as gray, or apply a grayscale
image. Avoid using colorful wallpapers
and screensavers.
• Don’t wear bright clothing that can clash
with the display of colors on the monitor.
For example, wearing a white shirt reflects
onto the monitor and alters your
perception of color.
Should I assign a color profile or
convert colors to a color profile?
When you assign a color profile, the color
values, or numbers, in the document do not
change. Instead, the application uses the color
profile to interpret the document colors.
However, when you convert colors to another
color profile, the color values in the document
change.
The best practice is to choose a suitable color
space when you create a document and to use
the same color profile throughout your
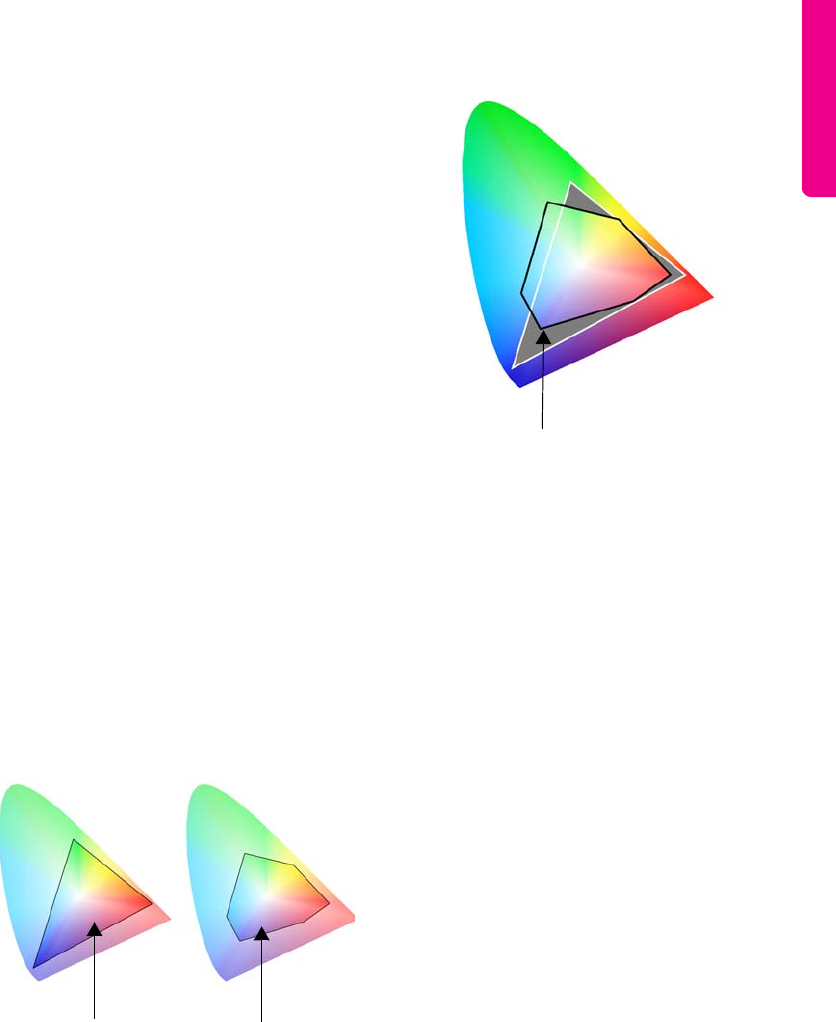
Chapter 7: Color Management | 93
workflow. You should avoid assigning color
profiles and converting colors to other color
profiles while working on a document.
What is a rendering intent?
A color management system can perform
effective translation of document colors to
multiple devices. However, when converting
colors from one color space to another, a color
management system may be unable to match
certain colors. This translation failure occurs
because some colors in the source may not fit
within the range (or gamut) of the destination
color space. For example, the bright red and
blue colors that you see on your monitor are
often outside the gamut of colors that your
printer can produce. These “out-of-gamut”
colors can dramatically change the look of the
document, depending on how they are
interpreted by the color management system.
Each color management system has four
methods of interpreting out-of-gamut colors
and mapping them into the gamut of the
destination color space. These methods are
known as “rendering intents.” The choice of a
rendering intent depends on the graphical
content of the document.
Many colors in an sRGB document may be out of gamut
for the U.S. Web Coated (SWOP) v2 color space. The
out-of-gamut colors are mapped into gamut according
to the rendering intent.
The following rendering intents are available:
•The Relative colorimetric rendering
intent is suitable for logos or other
graphics that contain only a few out-of-
gamut colors. It matches the out-of-gamut
source colors with the closest in-gamut
colors at the destination. This rendering
intent causes the white point to shift. If
you print on white paper, the whiteness of
the paper is used to reproduce the white
areas of the document. Therefore, this
rendering intent is a good option if your
document will be printed.
•The Absolute colorimetric rendering
intent is suitable for logos or other
graphics that require very precise colors. If
no match is found for the source colors,
then the closest possible match is used.
The Absolute colorimetric and Relative
colorimetric rendering intents are similar,
sRGB color space U.S. Web Coated (SWOP)
v2 color space
Out-of-gamut colors

94 | CorelDRAW Graphics Suite X6 Guidebook
but the Absolute colorimetric rendering
intent preserves the white point through
the conversion and does not adjust for the
whiteness of the paper. This rendering
intent is used mainly for proofing.
•The Perceptual rendering intent is
suitable for photographs and bitmaps that
contain many out-of-gamut colors. The
overall color appearance is preserved by
changing all the colors, including the in-
gamut colors, to fit within the range of
colors at the destination. This rendering
intent maintains the relationships between
colors to produce the best results.
•The Saturation rendering intent produces
more concentrated solid colors in business
graphics, such as charts and graphs.
Colors may be less accurate than those
produced by other rendering intents.
The number of out-of-gamut colors (indicated by the
green overlay) may influence your choice of a rendering
intent. Left: The Relative colorimetric rendering
intent is suitable for this photo, which contains only a
few out-of-gamut colors. Right: The Perceptual
rendering intent is a good choice for this photo, which
contains many out-of-gamut colors.
Color management settings in
CorelDRAW Graphics Suite X6
CorelDRAW Graphics Suite X6 has two types
of color management settings: default settings
for color management and document color
settings. The default settings for color
management control the colors of new
documents and any documents that do not
contain color profiles (also known as
“untagged documents”). Documents that
were created in earlier versions of
CorelDRAW Graphics Suite are treated as
untagged. Document color settings affect only
the colors of the active document.
Default settings for color management
The default settings for color management are
essential for producing consistent colors.
To access the default settings, click Tools `
Color management ` Default settings.
Point to a control to view its description, or
click the Help button in the dialog box to
find a relevant Help topic.
You can modify the default settings to suit your
particular needs for color management.
•Presets can help ensure that your color
settings are correct for the geographic
region where the documents are created
or for the location of their final output.
Examples are the North America
Prepress preset, which is suitable for
projects to be printed by North American
print service providers, and the Europe
Web preset, which is suitable for Web
projects that are created in Europe. For
more information, see “Working with
color management presets” in the Help.
•The default color profiles define the
RGB, CMYK, and grayscale colors in new
and untagged documents. You can
change these settings so that all new
documents use the color profiles that you
specify. In some applications, default color
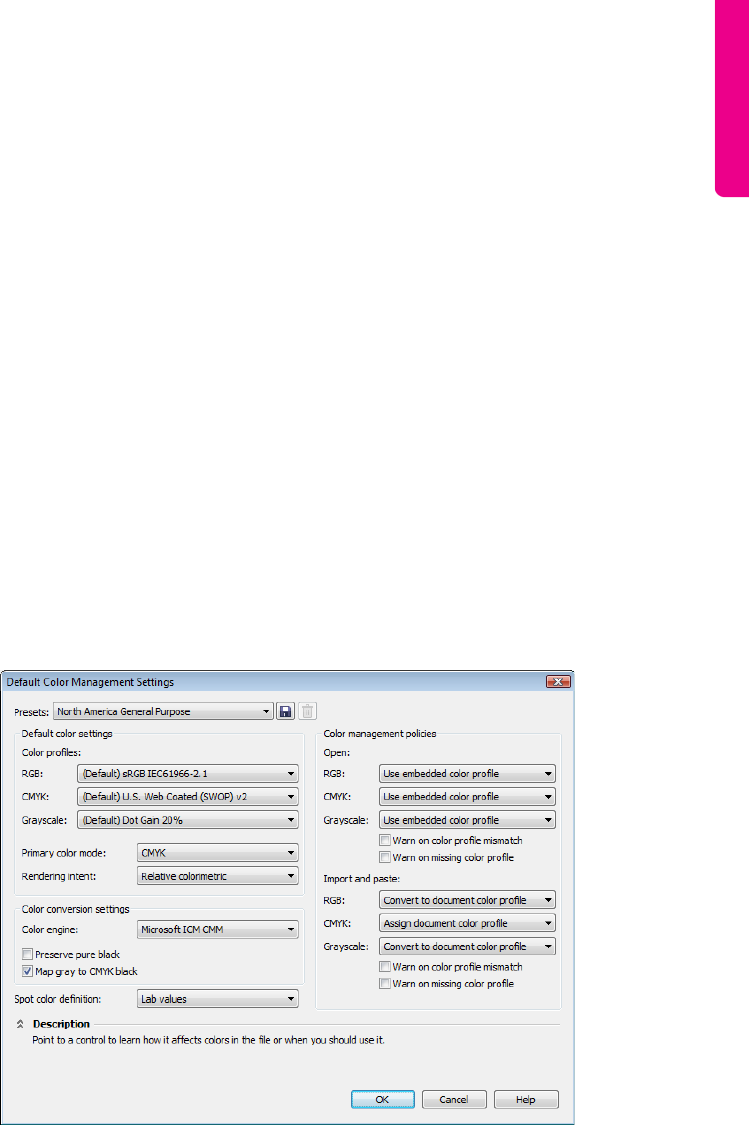
Chapter 7: Color Management | 95
profiles are called “working space
profiles.”
•The primary color mode determines the
document color palette that is displayed
when you open or start a document as
well as the default color mode of a
document that is exported as a bitmap.
The primary color mode is set for all new
and untagged documents, but you can
change this setting for the active
document in the Document color
settings dialog box. Note that the primary
color mode does not limit colors in a
CorelDRAW document to a single color
mode. The Primary color mode control
is not available in Corel PHOTO-PAINT,
where images always contain colors in a
single color mode.
•The rendering intent lets you choose a
method for mapping out-of-gamut colors
in new and untagged documents. If the
default rendering intent is not suitable for
the active document, you can change it in
the Document color settings dialog
box.
•The color-conversion settings
determine how colors are matched when
you are converting colors from one color
profile to another. For example, you can
change the color engine or specify options
for converting pure black colors in RGB,
CMYK, Lab, or grayscale documents.
•The Spot color definition control lets
you display spot colors by using their Lab,
CMYK, or RGB color values. These
alternative color values are also used when
spot colors are converted to process
colors.
•Color management policies manage
colors in files that you open, or in files that
you import or paste into an active
document.
The Default color management settings dialog box in CorelDRAW lets you specify a wide range of settings.
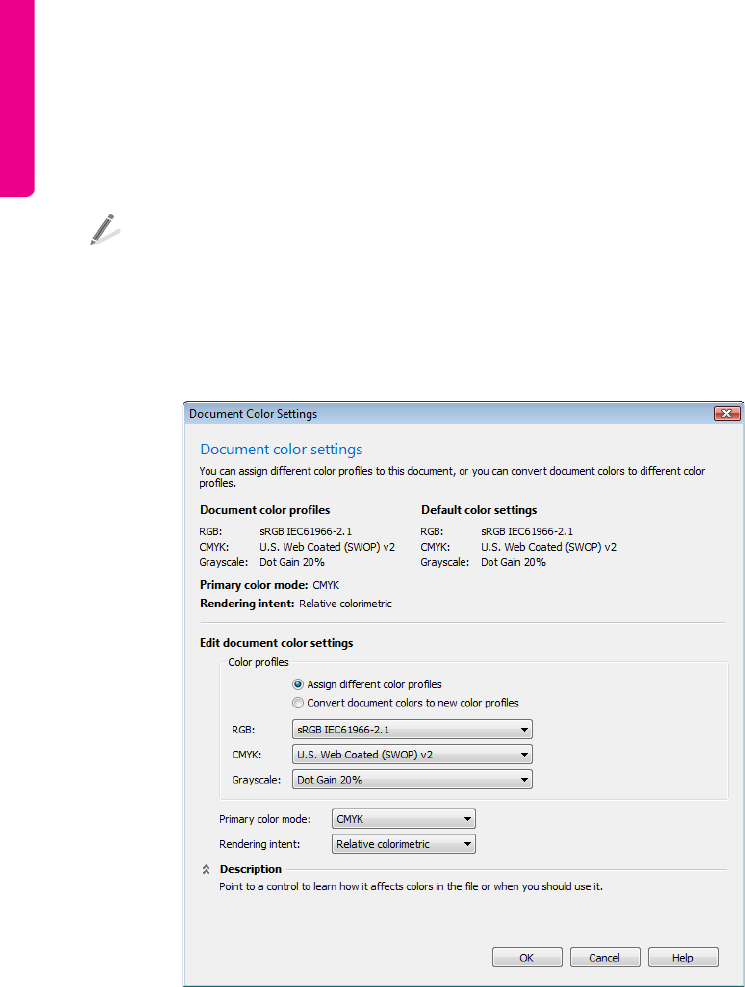
96 | CorelDRAW Graphics Suite X6 Guidebook
Document color settings
You can view and change the color settings of
the active document, without affecting new
and untagged documents.
To access document color settings, click
To o l s ` Color management `
Document settings.
The upper part of the Document color
settings dialog box lists both the profiles that
are assigned to the active document and the
default color profiles of the application. The
color profiles that are assigned to an active
document determine the document color
space for RGB, CMYK, and grayscale colors.
The controls in the Edit document color
settings area let you assign other color
profiles to a document or convert colors to
other color profiles.
The Document color settings dialog box in CorelDRAW lets you view and modify the color settings in the active
document without changing the default settings for color management.
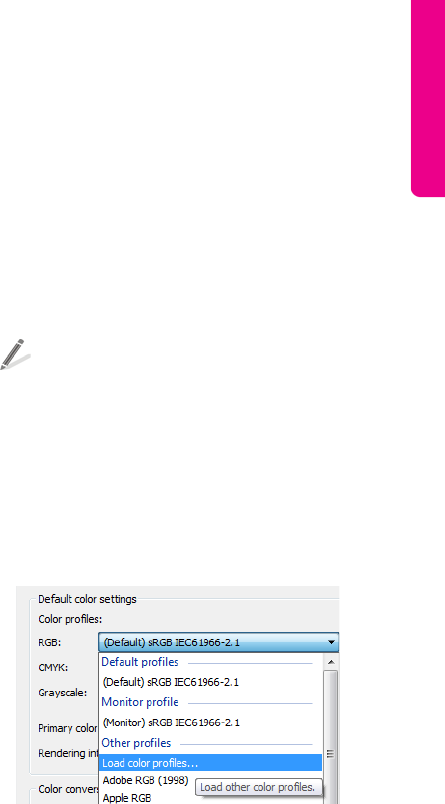
Chapter 7: Color Management | 97
Working with color profiles
To ensure color accuracy, a color management
system needs ICC-compliant profiles for
monitors, input devices, external monitors,
output devices, and documents.
•Monitor color profiles define the color
space that your monitor uses to display
document colors. CorelDRAW and
Corel PHOTO-PAINT use the primary
monitor profile that is assigned by the
operating system.
•Input device color profiles are used by
input devices such as scanners and digital
cameras. These color profiles define which
colors can be captured by specific input
devices.
•Display color profiles include monitor
profiles that are not associated with your
monitor in the operating system. These
color profiles are especially useful for soft-
proofing documents for monitors that are
not connected to your computer.
•Output device color profiles define the
color space of output devices such as
desktop printers and printing presses. The
color management system uses these
profiles to map document colors to the
colors of the output device.
•Document color profiles define the
RGB, CMYK, and grayscale colors of a
document. Documents that contain color
profiles are known as “tagged
documents.”
Many color profiles are installed with
CorelDRAW Graphics Suite or can be
generated with profiling software.
Manufacturers of monitors, scanners, digital
cameras, and printers also provide color
profiles.
Installing and loading color profiles
If you don’t have the necessary color profile,
you can install it, or you can load it within the
application. Installing a color profile adds it to
the Color folder of the operating system;
loading a color profile adds it to the Color
folder of the application. CorelDRAW Graphics
Suite can access color profiles from both Color
folders.
To install a color profile from Windows®
Explorer, right-click a color profile, and click
Install profile.
To load a color profile from the Default
color management settings dialog box,
choose Load color profiles from the
RGB, CMYK, or Grayscale list box in the
Default color settings area.
Loading a color profile
Assigning color profiles
If the document has a color profile that is not
suitable for the required destination, you can
assign a different color profile to the
document. For example, if the document is
intended to be displayed on the Web or to
beprinted on a desktop printer, you should
make sure that sRGB is the document RGB
profile. If the document is destined for print
production, the Adobe® RGB (1998) profile is
a better choice, because it has a larger gamut
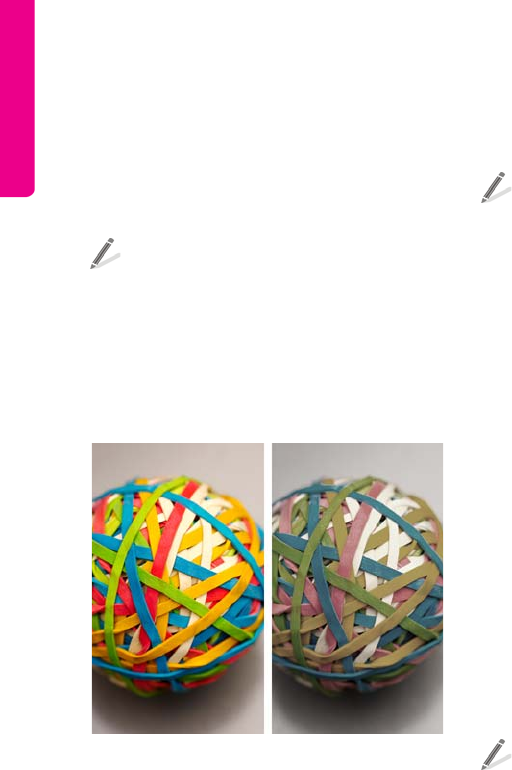
98 | CorelDRAW Graphics Suite X6 Guidebook
and produces good results when RGB colors
are converted to a CMYK color space.
When you assign a different color profile to a
document, the colors may appear different,
although the color values do not change.
To change the assigned color profiles for
the active document in CorelDRAW, click
To o ls ` Color management `
Document settings. Next, enable the
Assign different color profiles option,
and choose color profiles from the RGB,
CMYK, and Grayscale list boxes.
Left: The SWOP 2006_Coated3v2.icc color profile is
assigned to the active document. Right: When the
Japan Color 2002 Newspaper color profile is assigned to
the document, the colors appear much less saturated.
Converting colors to other color profiles
When you convert document colors from one
color profile to another, the color values in the
document are changed according to the
rendering intent, but the appearance of colors
is preserved. The main purpose of converting
colors is to match the appearance of colors in
the source color space as closely as possible to
colors in the destination color space. Because
multiple color conversions deteriorate
accuracy, it is recommended that you convert
colors only once. Wait until the document is
ready and you are sure of the color profile that
will be used for the final output.
To convert document colors to those of
other color profiles, click Tools ` Color
management ` Document settings.
Next, enable the Convert document
colors to new color profiles option, and
choose color profiles from the RGB,
CMYK, and Grayscale list boxes.
You can also choose a color engine and choose
how to handle black and grayscale colors
during conversion. For more information, see
“Choosing color-conversion settings” in the
Help.
Embedding color profiles
When you save or export a document to a file
format that supports color profiles, the color
profiles are embedded in the file by default.
Embedding a color profile attaches the color
profile to the document to ensure that the
same colors you used are shared with anyone
who views or prints the document.
To embed a color profile when saving or
exporting a document, be sure that the
Embed color profiles check box is
enabled in the Save as or Export dialog
box.
Soft proofing
Soft proofing provides an on-screen preview of
a document as it will appear when it is
reproduced by a specific printer or displayed on
a specific monitor. Unlike the “hard-proofing”
technique that is used in a traditional printing
workflow, soft proofing lets you look at the
final result without committing ink to paper.
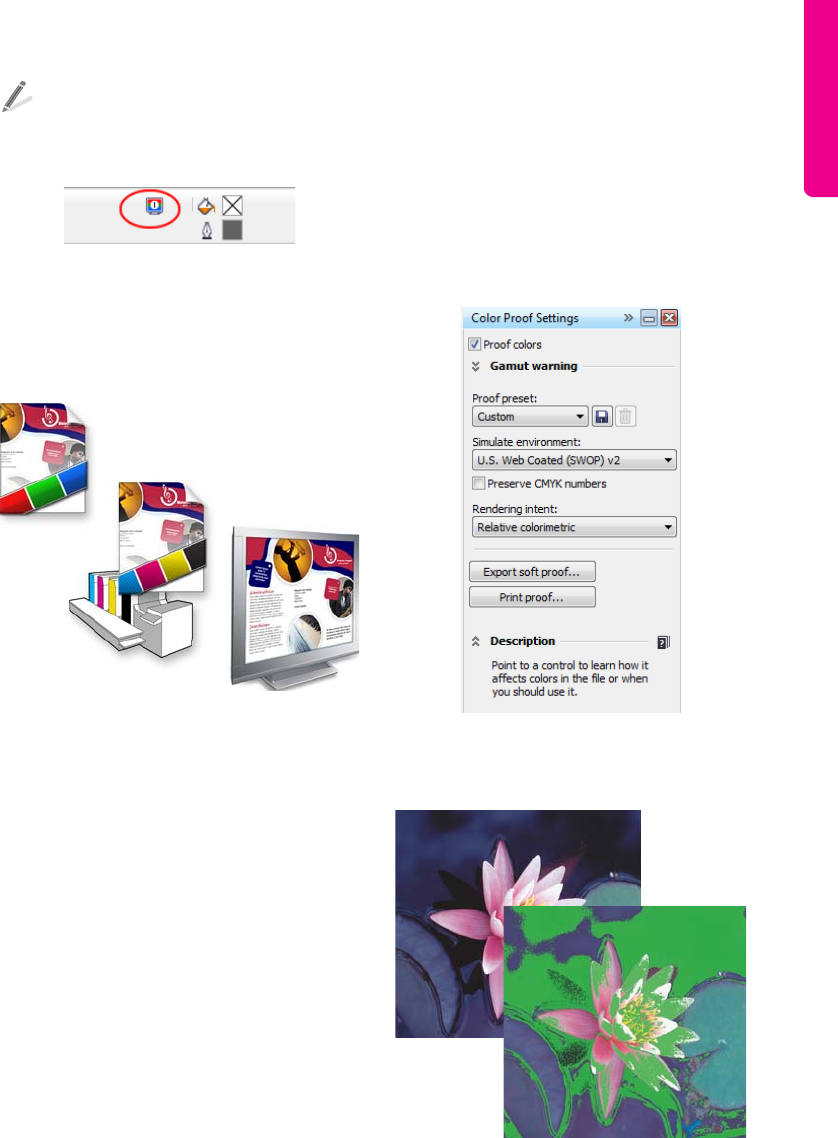
Chapter 7: Color Management | 99
To turn soft proofing on, click To o ls `
Proof colors. The status bar indicates that
soft proofing has been turned on.
Soft proofing is turned on.
When you soft-proof a document, CorelDRAW
and Corel PHOTO-PAINT use color profiles to
simulate the environment of particular output
devices.
Top left: An RGB color profile is assigned to the
document. Middle and right: Assigning a specific CMYK
profile allows an on-screen simulation of the printed
output.
To simulate the environment of a specific
device, you must choose the color profile of the
device in the Color proof settings docker
(To o l s ` Color proof settings).
Because the color spaces of the document and
device are different, some document colors
may not have a match in the gamut of the
device color space. You can enable the gamut
warning, which lets you preview the on-screen
colors that cannot be reproduced accurately by
the device. When the gamut warning is
enabled, an overlay highlights all out-of-gamut
colors for the device that you are simulating.
In addition to previewing colors on-screen, you
can save a soft proof to popular file formats,
such as JPG and PDF, to share with clients or
colleagues. You can also print a hard proof that
is based on the active soft-proof settings. If you
often need to proof colors for a specific
output, you can save the color-proof settings
as a preset.
The Color proof settings docker lets you soft-proof
projects by simulating the environment of various
output devices.
Highlighting out-of-gamut colors
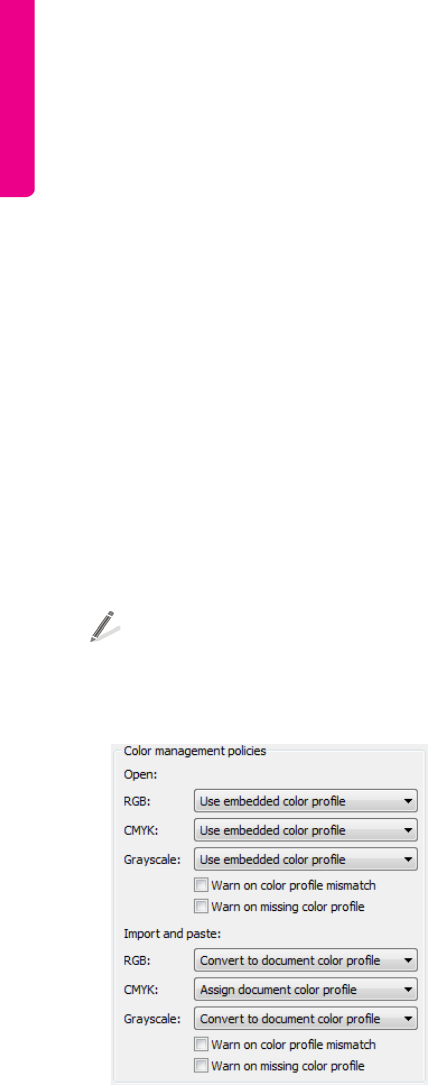
100 | CorelDRAW Graphics Suite X6 Guidebook
For more information about soft proofing, see
“Soft proofing” in the Help.
Working with color management
policies
Color management policies determine how
colors are managed in documents that you
open and work with in an application. In
CorelDRAW and Corel PHOTO-PAINT, you can
set one color-management policy for opening
documents and another for importing and
pasting files and objects in the active
document.
The default policies for color management in
CorelDRAW Graphics Suite can help you
produce consistent colors in your documents.
If you are familiar with color management, you
can modify the default color policies to suit
your specific workflow.
To change a color management policy, click
To o l s ` Color management ` Default
settings, and set options in the Color
management policies area.
Color management policies area of the Default
color management settings dialog box
In the Default color management settings
dialog box, you can choose one of three color-
management options for opening documents.
•The Use embedded color profile option
assigns the color profiles that are
embedded in the document. This option is
recommended, because it preserves the
original color appearance and color values
of the document.
•The Assign default color profile option
uses the default color profiles to define
document colors. Color values are
preserved, but the appearance of colors
may change.
•The Convert to default color profile
converts document colors to the default
color profiles. The appearance of
document colors is preserved, but the
color values may change.
In the same dialog box, you can choose one of
three color-management options for importing
and pasting files.
•The Convert to document color profile
option converts the colors of the imported
or pasted file to the color profile of the
active document. This option is used when
the imported file contains a color profile
that does not match the color profile of
the document.
•The Assign document color profile
option assigns the color profile of the
document to the imported or pasted file.
The color values of the file are preserved,
but the color appearance may change.
•The Use embedded color profile option
uses the color profile that is embedded in
the file. This option preserves the color
values and color appearance of the
imported or pasted file. This option
converts document colors to the color
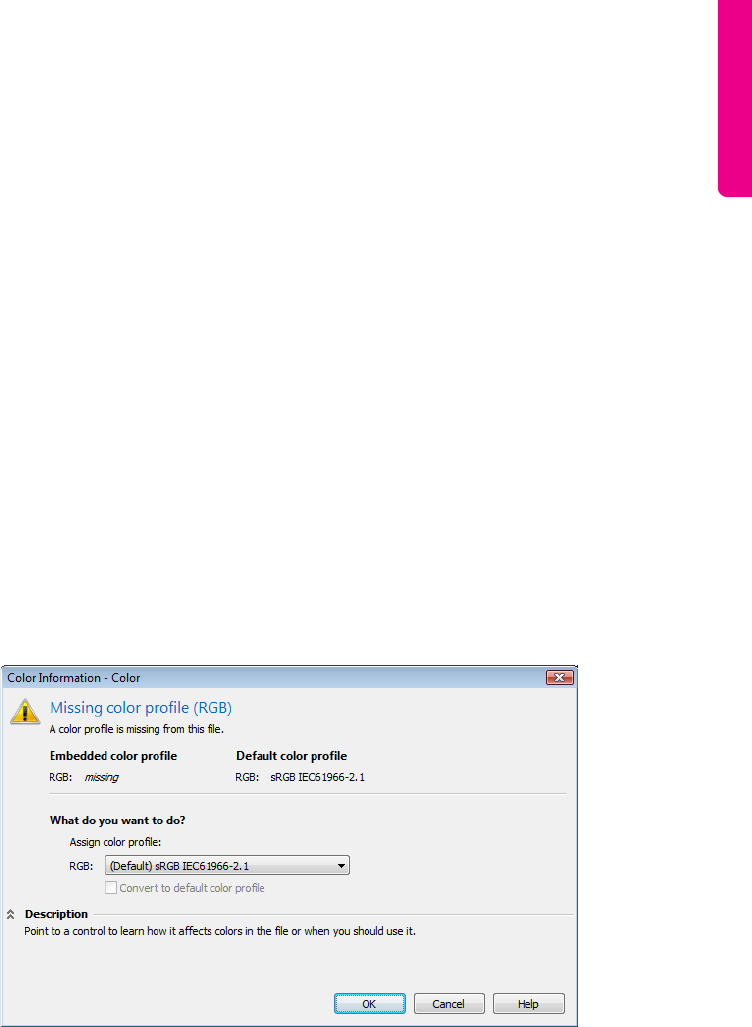
Chapter 7: Color Management | 101
profile that is embedded in the imported
or pasted file.
The files that you are opening or importing
may be missing color profiles, or may contain
color profiles that do not match the default
color profiles. By default, the applications do
not warn you about missing or mismatched
color profiles but make color management
choices that produce good results. However,
you can activate warning messages in the
Color management policies area of the
Default color management settings dialog
box if you want to have full control over the
colors in your documents.
Managing colors when opening
documents
The default color-management policy for
opening documents preserves colors in all
tagged documents that you open and assigns
the default color profiles to untagged
documents.
If you activate warning messages for missing
and mismatched color profiles, you can choose
additional color management options. For
example, if a color profile is missing from a file,
you can assign a color profile that is different
from the default color profile of the
application. This option is recommended only
if you know the original color space of the
document and have the associated color
profile installed. In addition to assigning a
specific color profile, you can convert
document colors from the assigned color
profile to the default color profile. Colors will
appear as they would in the assigned color
space, but the color values may change.
For more information, see “Managing colors
when opening documents” in the Help.
CorelDRAW displays this warning dialog box for a document that is missing an RGB color profile.
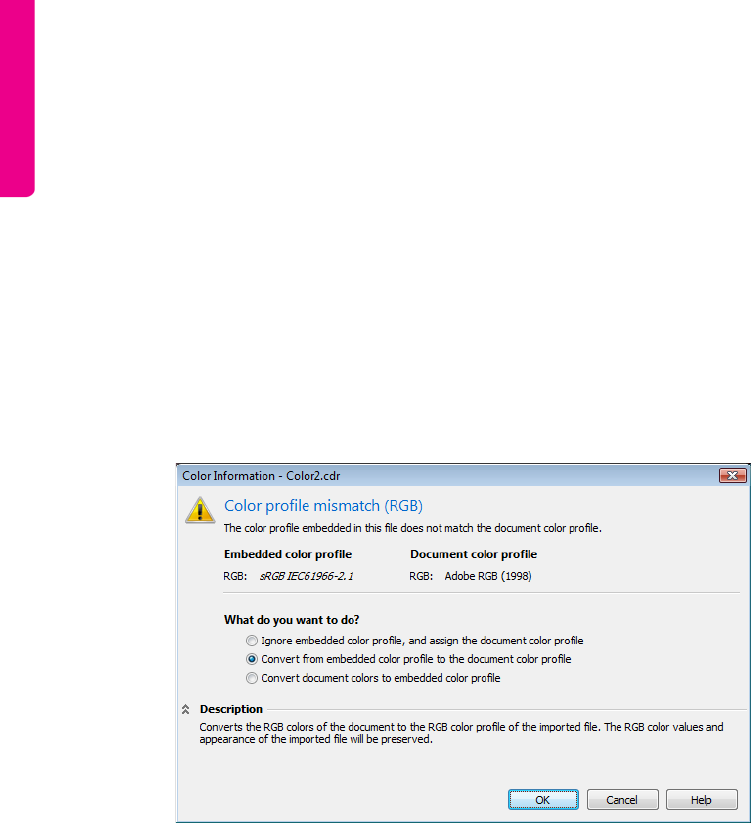
102 | CorelDRAW Graphics Suite X6 Guidebook
Managing colors when importing
and pasting files
If you use the default color policy for importing
and pasting files, the colors in files that you
import or paste are converted to the color
profile of the active document. If the color
profile of the imported or pasted file matches
the color profile of the active document, no
color conversion is performed.
By activating warning messages for missing
and mismatched profiles, you can access
additional options. For example, if a file
contains a mismatched color profile, you can
choose to ignore the embedded color profile
and assign the document color profile to
preserve color values. Alternatively, you can
convert document colors to the embedded
color profile of the imported or pasted file.
Note that this option preserves the appearance
and color values of the imported or pasted file
but changes the color values of the active
document.
For more information, see “Managing colors
when importing and pasting files” in the Help.
Corel PHOTO-PAINT displays this warning dialog box for a file that contains a mismatched color profile.
Managing colors for print
By default, CorelDRAW Graphics Suite does
not perform color conversions when a
document is sent to the printer. The printer
receives the color values and interprets the
colors. However, if the operating system
includes a color profile that is associated with
the printer, this color profile is detected by
CorelDRAW Graphics Suite and used to
convert document colors to the color space of
the printer.
If you have a PostScript® printer, any necessary
color conversion can be managed by either
CorelDRAW or this printer. When the
application manages the color conversion,
document colors are converted from the
assigned color space to the color space of the
PostScript printer. If you use this method, you
must disable color management in the printer

Chapter 7: Color Management | 103
driver. Otherwise, both the application and the
printer manage colors during printing, and
document colors are corrected twice, which
causes unwanted color shifts.
When the PostScript printer converts
document colors, the color management
feature must be enabled in the printer driver.
Only PostScript printers and RIP engines that
support printer color conversions can be used
in this advanced method. Although it increases
the file size, this method has the advantage of
ensuring consistent colors when you send the
same print job to different print service
providers.
For more information about reproducing
colors for print, see “Printing colors accurately”
in the Help.
You can also manage colors in PDF files that
you create for commercial printing. For more
information, see “Specifying color
management options for exporting PDF files”
in the Help.
Using a safe CMYK workflow
Often, you may use specific CMYK color values
in your projects. To ensure reliable color
reproduction, you may obtain these CMYK
color values from a color swatch book. By
preserving these CMYK color values
throughout the printing process, you can help
prevent unwanted color conversions and
ensure that colors are reproduced as they
appear in the original design. A workflow that
preserves the CMYK color values is known as a
“safe“ CMYK workflow.
CorelDRAW Graphics Suite supports a safe
CMYK workflow. By default, CMYK color values
are preserved in any document that you open,
import, or paste. Also, CMYK color values are
preserved by default when you print
documents.
In some cases, you may want to bypass the safe
CMYK workflow and preserve the appearance
of CMYK colors when you open, import, or
paste documents. This option is useful when
you want to see the original colors of a design
on-screen, or view a copy that is printed to a
desktop printer. To preserve the appearance of
CMYK colors, you can set color management
policies that convert CMYK colors in
documents that you open, import, or paste. In
addition, when printing to a PostScript printer,
you can convert CMYK colors to the printer
color profile by disabling the Preserve CMYK
numbers check box on the Color page of the
Print dialog box.
Managing colors for online
viewing
Managing colors for online viewing can be
even more complex than managing colors for
print. Documents and images on the Web are
displayed on a wide variety of monitors, which
are often uncalibrated. In addition, most Web
browsers do not support color management
and ignore the color profiles that are
embedded in files.
When you design documents for exclusive Web
use, it is recommended that you use the sRGB
color profile as your document RGB color
profile and choose RGB colors. If a document
contains a different color profile, you should
convert document colors to sRGB before saving
the document for use on the Web.
When you create a PDF file for online viewing,
you can embed color profiles in the file to
reproduce colors consistently in Adobe®
Reader® and Adobe Acrobat. For more
information, see “To specify color

104 | CorelDRAW Graphics Suite X6 Guidebook
management options for exporting PDF files”
in the Help.
When you start a new document that is
destined for online viewing, you can choose a
preset that can help you achieve good color
results. In addition, both CorelDRAW and
Corel PHOTO-PAINT offer color management
presets for Web documents. For more
information, see “Working with color
management presets” in the Help.

Chapter 8: Working with Text | 105
Chapter 8: Working with Text
Adding artistic and paragraph text in
CorelDRAW 106
Adding text in Corel PHOTO-PAINT 107
Formatting characters 107
Working with OpenType fonts 108
Spacing text 110
Aligning text 112
Additional text effects 113
Working with text frames 114
Working with text from an older version of
CorelDRAW Graphics Suite 116
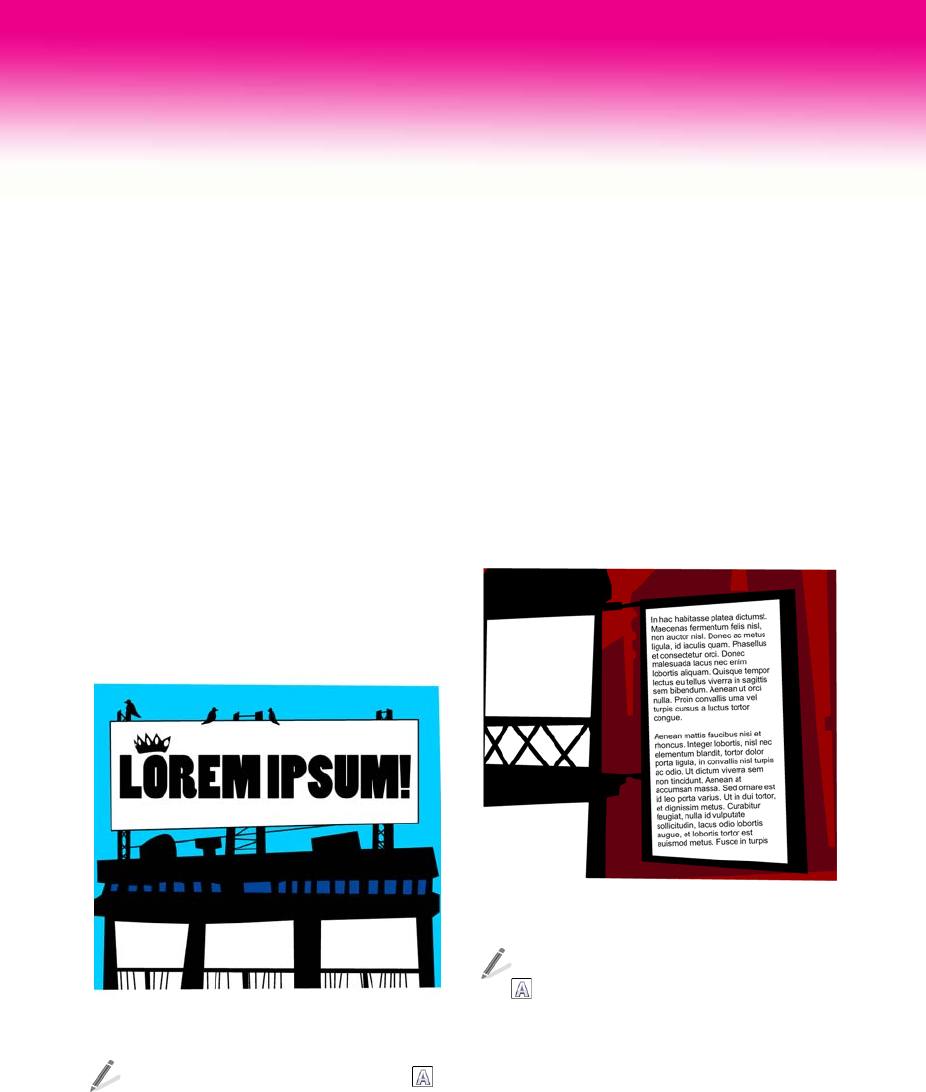
106 | CorelDRAW Graphics Suite X6 Guidebook
Chapter 8: Working with Text
Text is an important element in the structure and layout of documents; it not only communicates
a specific message to the readers, but also serves as a design element. CorelDRAW and
Corel PHOTO-PAINT provide a wide variety of tools that let you manipulate and fine-tune the
appearance of text. This chapter introduces you to some of the options for adding and formatting
text.
Adding artistic and paragraph text
in CorelDRAW
In CorelDRAW, you can create two types of text
objects — artistic text and paragraph text. The
option that you choose depends on your needs
and requirements.
Artistic text allows you to quickly add a single
word or a short line of text. It is perfect for
inserting headings or adding text to a path.
You can quickly add text to a document by using artistic
text.
To add artistic text, click the Te x t tool ,
click in the document window, and type.
Paragraph text is useful for adding large
amounts of text that have more complex
formatting requirements. Paragraph text is
contained in a text frame, and it is suitable for
creating documents such as brochures,
newsletters, or catalogues.
You can add large amounts of text to a document by
using paragraph text.
To add paragraph text, click the Te x t tool
, drag in the document window until
the frame is the size you want, and type
text in the text frame.
You can place text inside a graphic object,
which increases the number of different shapes
that you can use as text frames.
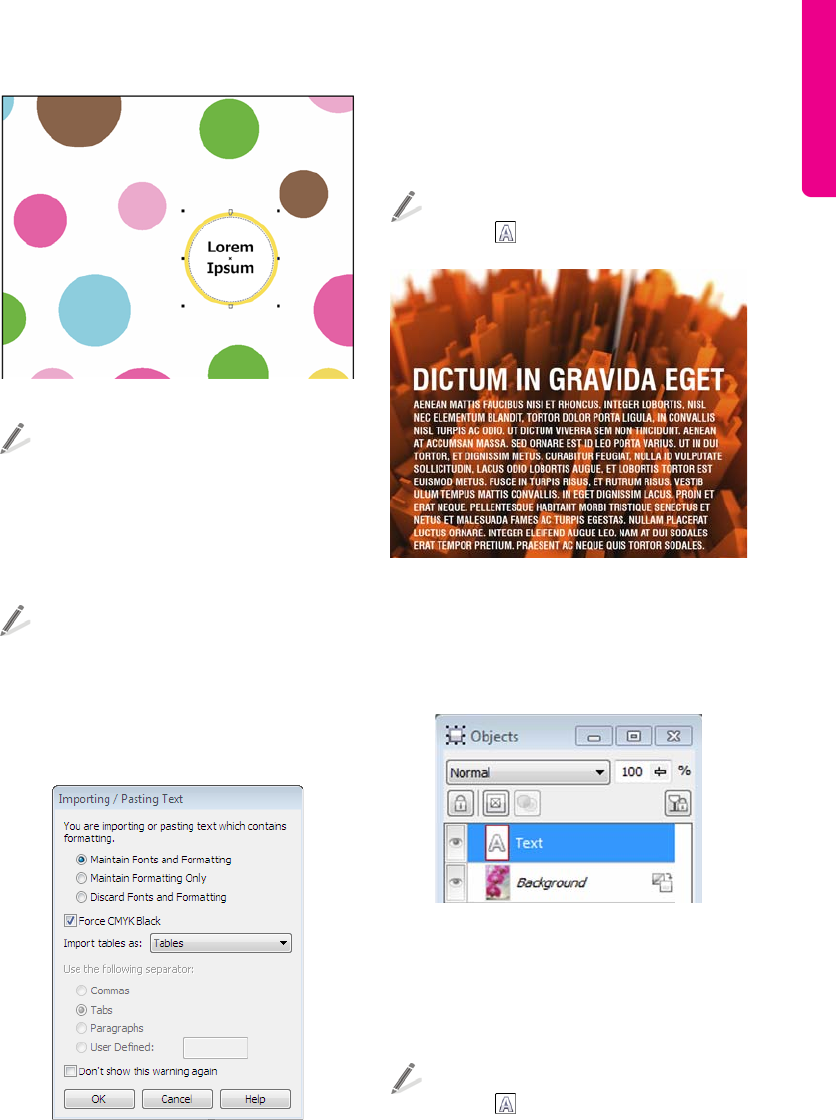
Chapter 8: Working with Text | 107
You can convert a graphic object into a text frame.
To convert an object into a text frame,
right-click the object, choose Frame type,
and click Create empty text frame.
You can type text directly in a frame or, if you
want to use existing content, you can import or
paste text from a file.
To import text, click File ` Import. Choose
a text file, and click Import. Specify any
formatting options in the Importing/
Pasting text dialog box. Position the
import cursor in the document window,
and click.
The Importing/Pasting text dialog box lets you specify
formatting options for importing text.
Adding text in Corel PHOTO-PAINT
You can add lines of text, such as titles or
captions, to enhance your images.
To add text to an image, click the
Te x t tool , click in the image, and type.
Text added to an image in Corel PHOTO-PAINT
You can manipulate text as you would any
other type of object. For example, you can
select, move, size, scale, rotate, flip, and skew
a text object.
Text is displayed as a text object in the Objects docker.
Formatting characters
You can enhance the appearance of text by
selecting and formatting characters.
To select text for editing, click the
Te x t tool , and drag across the text.
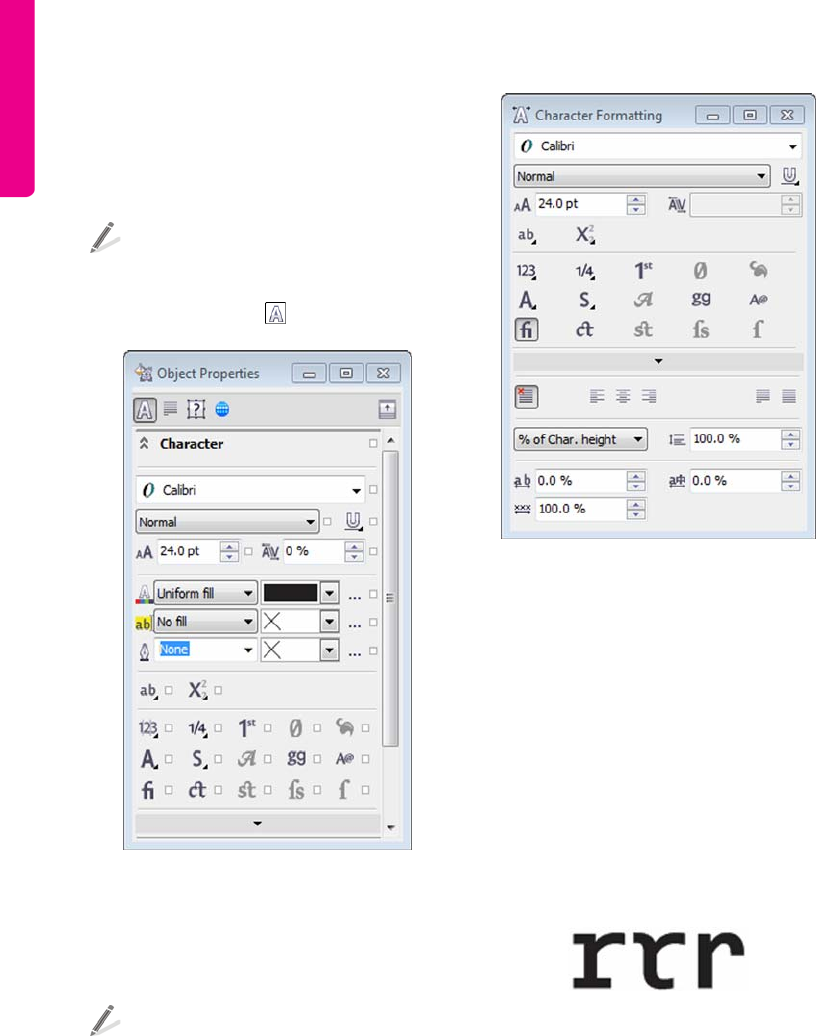
108 | CorelDRAW Graphics Suite X6 Guidebook
In CorelDRAW, you can use the Object
properties docker to modify character
properties, such as font type or text color. You
can also access most paragraph formatting
options and text frame settings.
To access character formatting options in
CorelDRAW, click Window ` Dockers `
Object properties, and click the
Character button .
The Object properties docker in CorelDRAW X6 lets
you set character attributes.
In Corel PHOTO-PAINT X6, you can use the
updated Character formatting docker to
specify text formatting settings.
To access character formatting options in
Corel PHOTO-PAINT, click Object ` Te x t `
Character formatting.
The Character formatting docker in
Corel PHOTO-PAINT lets you modify character
properties.
Working with OpenType fonts
CorelDRAW Graphics Suite X6 allows you to
use the advanced typographic features of
OpenType fonts.
The OpenType font specification was created
jointly by Adobe and Microsoft. OpenType
fonts extend the capabilities of TrueType®
fonts and other older font technologies. Unlike
older fonts, an OpenType font can store a vast
array of typographic features.
Some OpenType fonts include stylistic alternates that let
you choose an alternative appearance for a selected
character.
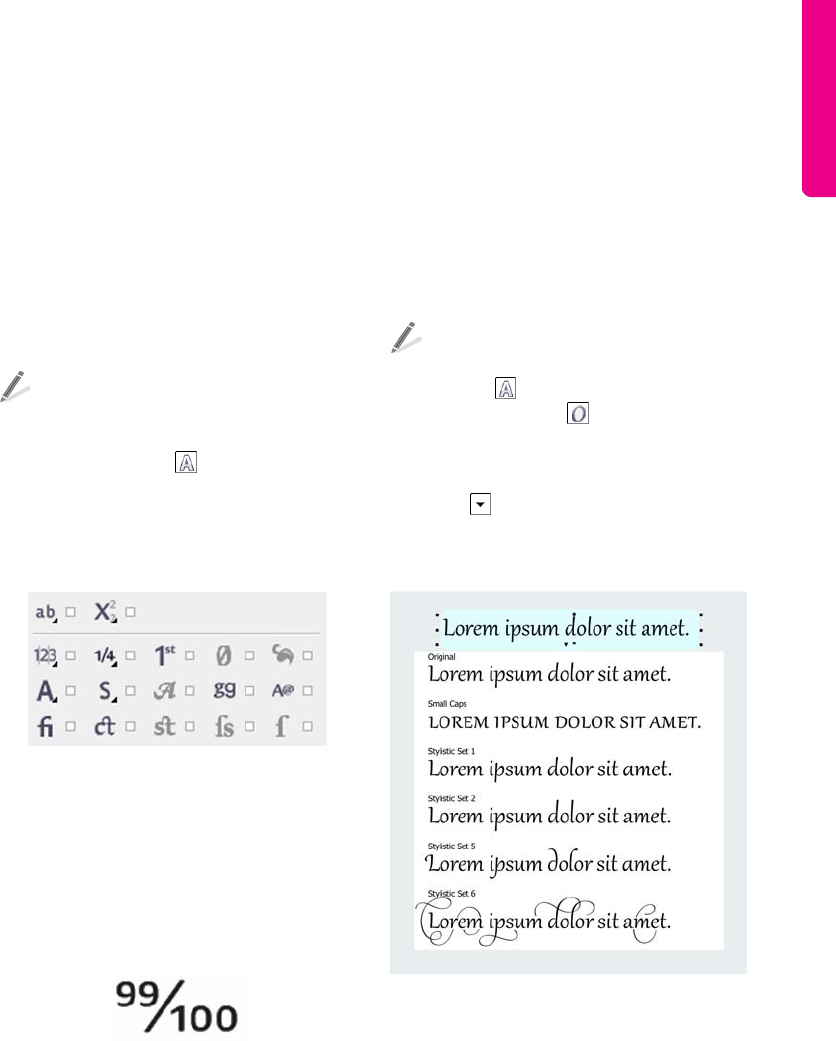
Chapter 8: Working with Text | 109
The most notable advantages of OpenType
fonts are
• cross-platform support (Windows and
Mac®)
• extended character sets that offer better
language support and advanced
typographic features
• coexistence with Type 1 (PostScript) and
TrueType fonts
• support for a larger glyph limit (64k)
To access OpenType features in
CorelDRAW, click Window ` Dockers `
Object properties, and click the
Character button .
To access OpenType features in
Corel PHOTO-PAINT, click Object ` Te x t `
Character formatting.
The OpenType features let you apply alternate
appearances to selected characters.
OpenType fonts let you choose an alternative
appearance for an individual character (also
referred to as a glyph) or a sequence of
characters. For example, you can choose
alternative glyphs for numbers, fractions, or
ligature sets.
Applying an OpenType fraction feature to text
It’s important to note that the features
supported by each OpenType font can vary. For
example, a font may include ordinals, but not
ligatures. CorelDRAW Graphics Suite X6
supports only the features that are available in
a font. To quickly discover what OpenType
features you can apply to selected text, enable
the Interactive OpenType option. An
indicator arrow appears below the text. Click
the indicator to access a list of the most
popular OpenType features that are available
for the selected text.
To enable the Interactive OpenType
feature, select text by using the
Te x t tool , and enable the Interactive
OpenType button on the property bar.
To display a list of the most popular
OpenType features, click the indicator
arrow below the text. To quickly apply a
feature, hover over an option in the list and
click the option.
The Interactive OpenType indicator appears in the
document window when an OpenType feature is
available for the selected text.
If you use an OpenType font that does not
support a feature or a non-OpenType font,
CorelDRAW Graphics Suite X6 provides
synthesized versions of superscript, subscript,
110 | CorelDRAW Graphics Suite X6 Guidebook
and small caps. The synthesized characters are
produced by altering the characteristics of the
default character.
The red characters have a synthesized version of small
caps applied.
Spacing text
Fine-tuning or copyfitting text often involves
changing the spacing between characters and
paragraphs. You adjust spacing to improve
readability and achieve visual balance. When
letters, words, or lines are too close together or
too far apart, text becomes difficult to read.
There are different ways of adjusting spacing:
•Kerning refers to the repositioning of two
characters to balance the optical space
between them. For example, kerning is
often used to decrease the space in
character pairs such as AW, WA, VA, or
TA. Kerning makes letters appear balanced
and proportional, especially at larger font
sizes.
To kern text in CorelDRAW, click the Te x t
tool , and select the characters that you
want to kern. Click the Character button
in the Object properties docker. Type a
value in the Range kerning box.
To kern text in Corel PHOTO-PAINT, click
the Te x t tool , and select the characters
that you want to kern. Click Object ` Te x t
` Character formatting. In the
Character formatting docker, type a
value in Range kerning box.
Text without and with kerning
•Character spacing, which is also known
as letter spacing, allows you to control the
spacing between characters in a block of
artistic or paragraph text.
To adjust character spacing in CorelDRAW,
click the Te x t tool , and select the text
that you want to modify. Click the
Paragraph button in the Object
properties docker. Type a value in the
Character spacing box.
To adjust character spacing in
Corel PHOTO-PAINT, click the Tex t tool ,
and select the characters that you want to
modify. Click Object ` Te x t ` Character
formatting. In the Character
formatting docker, type a value in the
Character spacing box.
A block of text without and with character spacing
•Word spacing lets you change the
spacing between words. It's quite useful
for decreasing the extra spacing that’s
inserted between words in fully justified
text.
Chapter 8: Working with Text | 111
To adjust word spacing in CorelDRAW,
click the Te x t tool , and select a text
object. Click the Paragraph button in
the Object properties docker. Type a
value in the Word spacing box.
To adjust word spacing in
Corel PHOTO-PAINT, click the Te x t tool ,
and select the text object. Click Object `
Te x t ` Character formatting. In the
Character formatting docker, type a
value in the Word spacing box.
You can change the spacing between words to improve
the readability and layout.
•Line spacing, also known as leading or
interline spacing, lets you adjust the
distance between lines of text. For text
objects in Corel PHOTO-PAINT and artistic
text in CorelDRAW, changes to the line
spacing affect only lines separated by a
hard return. For paragraph text in
CorelDRAW, changes affect the lines
within the same paragraph.
To adjust line spacing in CorelDRAW, click
the Te x t tool , and select a text object or
a block of text. Click the Paragraph
button in the Object properties
docker. Type a value in the Line spacing
box.
To adjust line spacing in
Corel PHOTO-PAINT, click the Te x t tool ,
and select a text object. Click Object ` Te x t
` Character formatting. In the
Character formatting docker, type a
value in the Line spacing box.
A block of text without and with line spacing
•Paragraph spacing is an option that is
available in CorelDRAW. It allows you to
adjust the spacing between paragraphs in
a text frame. It’s quite useful for
copyfitting text. It can help you fit text in a
page or a frame with a fixed size.
To adjust paragraph spacing in
CorelDRAW, click the Tex t tool , and
select a paragraph. Click the Paragraph
button in the Object properties
docker. Type values in the Before
paragraph spacing and After
paragraph spacing boxes.
Paragraph spacing is useful for adjusting the spacing
between bulleted items in a bulleted list.
•Language spacing lets you control the
spacing between words in different
languages, such as Latin-based, Asian, or
Middle Eastern languages, that coexist in a
text object. For example, you can specify
the spacing between a word in Japanese
and a word in English that appear in a text
object.
To adjust language spacing in CorelDRAW,
click the Te x t tool , and select a
112 | CorelDRAW Graphics Suite X6 Guidebook
paragraph. Click the Paragraph button
in the Object properties docker. Modify
the value in the Language spacing box.
You can change the spacing between words in different
languages in the Paragraph area of the CorelDRAW
Object properties docker.
To adjust language spacing in
Corel PHOTO-PAINT, click the Te x t tool ,
and select text. Click Object ` Tex t `
Character formatting. In the Character
formatting docker, specify a value in the
Language spacing box.
Aligning text
CorelDRAW Graphics Suite X6 provides various
options for aligning text. You can align text in
relation to its frame or bounding box, or in
relation to other objects.
In CorelDRAW, you can align both paragraph
and artistic text. You can align paragraph text
horizontally and vertically in relation to its text
frame. You can align artistic text only
horizontally. If you haven’t shifted the
characters horizontally, applying no alignment
produces the same result as applying left
alignment.
In Corel PHOTO-PAINT, you can align a text
object only horizontally.
To align text horizontally in CorelDRAW,
select the text by using the Te x t tool ,
click the Horizontal alignment button
on the property bar, and choose an
option from the list.
To align text horizontally in
Corel PHOTO-PAINT, select the text by
using the Tex t tool , click the Te x t
alignment button on the property bar,
and choose an option from the list.
To align paragraph text vertically in
CorelDRAW, click the Pick tool , and
select a text frame. Click the Frame button
in the Object properties docker. In the
Frame area of the Object properties
docker, click the Vertical alignment
button, and choose an option from the list.
The title is centered in the text frame. The body text is
left-aligned in the text frame. The content of the text
frame is centered vertically.
In CorelDRAW, you can align text within a
frame or in different frames by using the
baseline grid. This is useful, for example, when
you want to align two or more text frames that
contain different fonts, font sizes, and spacing.
When you align paragraph text to the baseline
Chapter 8: Working with Text | 113
grid, the line spacing is adjusted automatically
so that the lines of text sit on the baseline grid.
When text is aligned to the baseline grid, the
line spacing is controlled by the grid rather
than by the text properties that have been
previously set. You can adjust the spacing of
the baseline grid.
To align paragraph text to the baseline grid
in CorelDRAW, click the Te x t tool , and
select the text. Click the Frame button
in the Object properties docker. In the
Frame area of the Object properties
docker, click the Align to baseline grid
button.
Paragraph text aligned to the baseline grid
You can also align text to another object.
To align text to an object in CorelDRAW,
click the Pick tool , hold down Shift,
click a text object, and then click the object
with which you want to align the text. Click
Arrange ` Align and distribute ` Align
and distribute, and choose an option
from the list.
To align text to an object in
Corel PHOTO-PAINT, click the Object pick
tool , hold down Shift, click a text
object, and then click the object with
which you want to align the text. Click
Object ` Arrange ` Align and
distribute, and choose an option in the
Align and distribute dialog box.
The artistic text object is aligned with the selected
object.
Additional text effects
CorelDRAW also includes additional options
that let you enhance text in different ways.
You can insert a drop cap, also known as an
initial cap, at the beginning of a paragraph to
draw the attention of the reader and add a
unique style to your document. When you
apply a drop cap, the first letter of the
paragraph is displayed in a larger font and is
inset into the body of the paragraph text.
To quickly add a drop cap to paragraph
text in CorelDRAW, select a text frame by
using the Te x t tool . Click the
Paragraph button in the Object
properties docker. Click the down arrow
located at the bottom of the Paragraph
area to display additional options. Enable
the Drop caps check box.
To modify a drop cap, click the Drop cap
settings button to the right of the Drop
caps check box in the Paragraph area of
the Object properties docker.
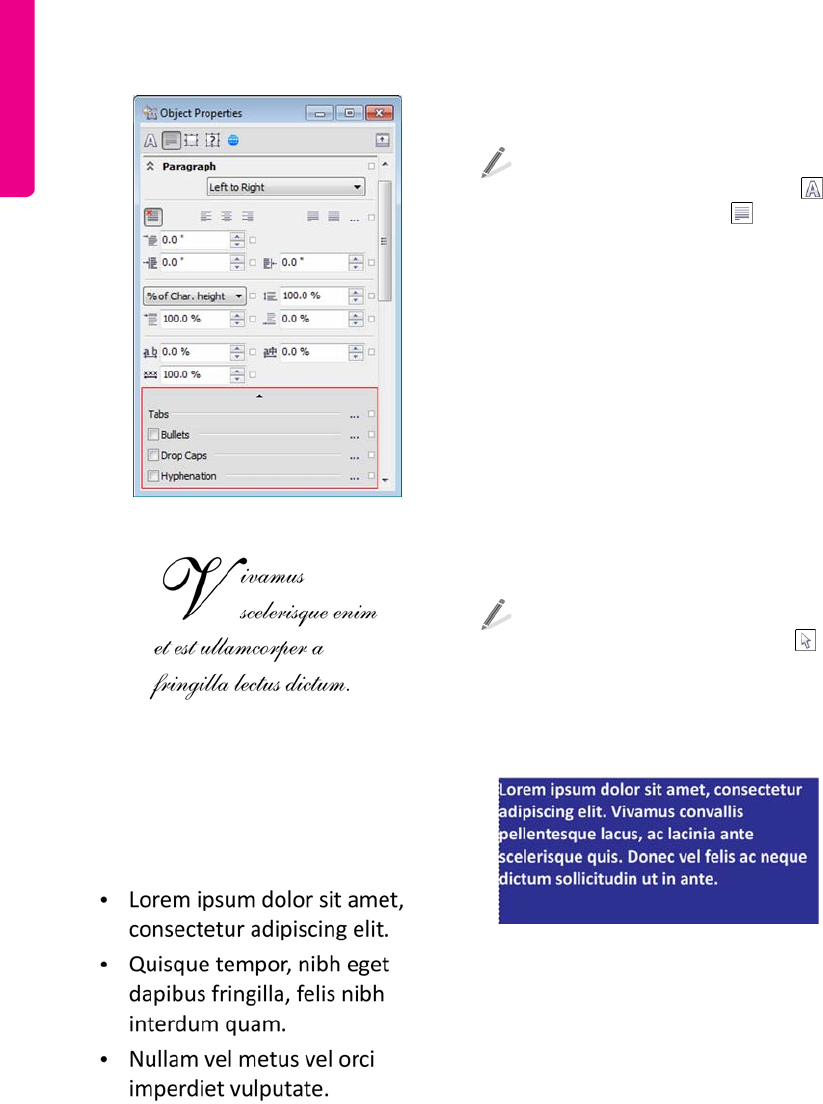
114 | CorelDRAW Graphics Suite X6 Guidebook
Displaying additional paragraph formatting options
A drop cap applied to the initial letter of a paragraph
If you want to visually set paragraphs apart and
help readers scan your document quickly, you
can organize information with bulleted lists. A
bullet is a text symbol that precedes each item
in a list.
You can apply bullets to existing paragraph text.
In CorelDRAW, you can quickly convert text to
a bulleted list.
To convert text to a bulleted list, select
paragraph text by using the Tex t tool .
Click the Paragraph button in the
Object properties docker. In the
Paragraph area of the Object properties
docker, click the down arrow located at the
bottom of the area to display additional
options. Enable the Bullets check box.
To modify a bullet, click the Bullet
settings button to the right of the Bullets
check box in the Paragraph area of the
Object properties docker.
Working with text frames
In CorelDRAW, you can customize a text frame
by modifying its size, position, and settings.
To add a background color to a frame,
select a frame by using the Pick tool .
Click the Frame button in the Object
properties docker. In the Frame area of
the Object properties docker, click the
Background color button.
Adding a background color to a text frame
When you type in a frame, the size of the frame
does not automatically adjust to accommodate
the text. Therefore, if you add more text than
the frame allows, the text continues past the
lower-right border of the text frame, but
remains hidden. The color of the frame turns
red to alert you that there is additional text.
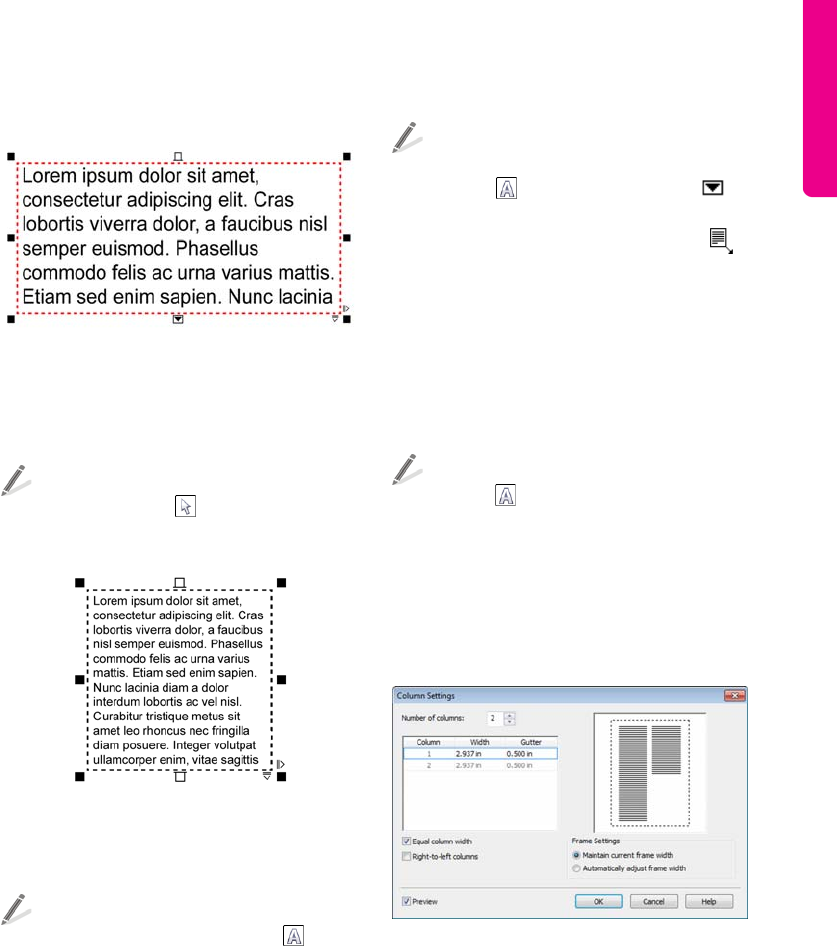
Chapter 8: Working with Text | 115
The icon of the text flow tab at the bottom of
the frame also changes.
The red color of the frame and the icon of the text flow
tab indicate text overflow.
You have a few options for fixing text overflow:
• Resize the text frame.
To resize a text frame, select the frame by
using the Pick tool , and drag one of the
selection handles.
Using a selection handle to change the width of a text
frame.
• Adjust the text size.
To adjust the size of text, select the text in
the frame by using the Te xt tool , click
the Font size list box on the property bar,
and choose a size from the list.
• Link the frame to another text frame.
To direct overflow text to another frame,
select the starting frame by using the
Te x t tool , click the Tex t f l o w tab at
the bottom of the frame, and when the
pointer changes to a Link to pointer ,
click the frame into which you want to
continue the text flow.
You can lay out text in columns, which are
useful for designing text-intensive projects,
such as newsletters, magazines, and
newspapers. You can create columns of equal
or varying widths and gutters.
To add columns to a text frame, click the
Te x t tool , and select a text frame. Click
the Frame button in the Object
properties docker. In the Frame area of
the Object properties docker, click the
Column settings button, and specify
column settings in the Column settings
dialog box.
The Column settings dialog box
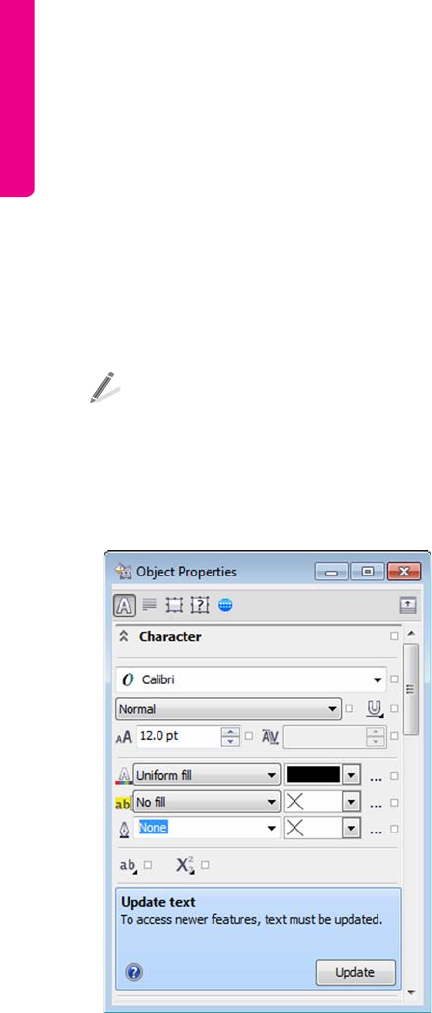
116 | CorelDRAW Graphics Suite X6 Guidebook
Working with text from an older
version of
CorelDRAW Graphics Suite
If you open a document with text that was
created in a previous version of
CorelDRAW Graphics Suite, such as
CorelDRAW Graphics Suite X5, you need to
update the legacy text before you can use the
new CorelDRAW X6 text features, such as
OpenType features and the baseline grid.
To use the latest text features in a
document that contains legacy text, open
the document, and click Update on the
Update toolbar that appears at the top of
the document window, or click Update in
the Object properties docker.
The control for updating text appears in the Object
properties docker.

Chapter 9: Styles and Style Sets | 117
Chapter 9: Styles and Style Sets
Understanding styles and style sets 118
Creating styles and style sets 120
Applying styles and style sets 121
Editing styles and style sets 122
Exporting and importing style sheets
123
Finding objects that use a specific style or style
set 124
Breaking the link between an object and a style
or style set 124

118 | CorelDRAW Graphics Suite X6 Guidebook
Chapter 9: Styles and Style Sets
CorelDRAW provides advanced style
capabilities that allow you to format your
documents with speed, ease, and consistency.
You can create and apply styles and style sets to
a variety of graphic and text objects in your
documents. This chapter introduces you to
different methods of creating and using object
styles in CorelDRAW.
Understanding styles and style sets
If you have worked with desktop-publishing or
word-processing applications, you are most
probably familiar with the concept of styles.
Styles are an indispensable tool for formatting
documents quickly and efficiently. They allow
you to reduce set-up and production time and
create documents with a consistent look.
Imagine that you need to format a multipage
document that contains different objects, such
as paragraph text, artistic text, and graphic
elements. If you have to format the document
without styles, you need to select each
individual object and manually set a number of
attributes. For example, you have to select
every single paragraph and define attributes
such as text alignment, line spacing, and
indentation, in addition to character attributes
such as font type, size, color, font style, and so
on. This process is time-consuming and error-
prone because with so many attributes, it is
easy to miss a setting.
By contrast, if you use styles and style sets, you
can achieve your goal quickly and efficiently.
Styles and style sets are groups of attributes
that determine the appearance of objects in
your documents: graphic objects, artistic and
paragraph text objects, callout and dimension
objects, and any objects created with the
Artistic media tool.
While styles define a particular object property,
such as an outline or a fill, style sets, which are
collections of styles, control the overall
appearance of an object.
An outline style, for example, defines attributes
such as outline width, color, and type of line; a
character style specifies attributes such as font
type, font style and size, text color and
background color, character position, caps,
and more.
A style set, for example, can consist of a fill
style and an outline style that you can apply to
graphic objects such as rectangles, ellipses,
and curves.
Start by creating styles and style sets that
define the appearance of each object in your
document. First, create a text style set,
consisting of a paragraph style and a character
style, to control the appearance of body text.
Next, design separate paragraph styles for
headings, or character styles for specific words
that you want to highlight. For example, you
can define a character style for your company
name, so it stands out from the body text.
Then, add outline and fill styles to define the
appearance of graphic elements, or if you want
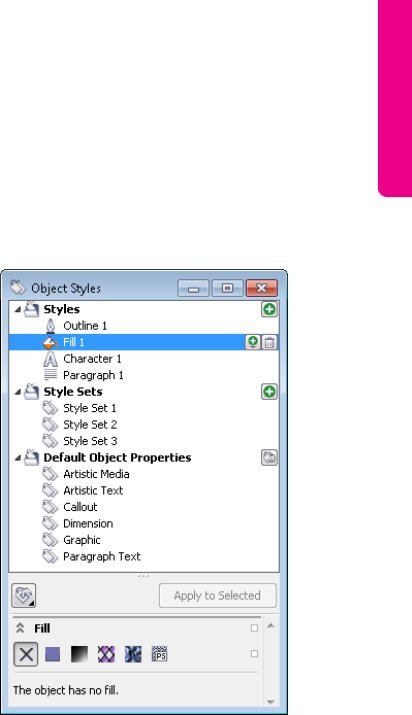
Chapter 9: Styles and Style Sets | 119
your graphics to share the same fill and outline,
create a style set that consists of a fill style and
an outline style.
After you create the styles you want, all you
need to do is select the objects and apply the
respective styles or style sets to format all
objects at the same time. This takes a fraction
of the time you would otherwise need to
format the document manually and also
ensures perfect consistency.
There are different ways of working with styles.
One option (described above) is to define a
style first and then apply it to objects in your
drawings; another option it to create an
object, format it manually, save it as a style,
and then apply the style to other objects. For
example, you can add a heading to your
drawing and experiment with different settings
for font, color, size, and type. When you are
happy with the formatting, you can save the
character attributes as styles or style sets. Then,
you can apply them to all headings in your
document. CorelDRAW offers great flexibility
and different ways of accomplishing tasks so
you can choose the method that best suits your
personality and workflow.
In addition to reducing the time for layout and
formatting, styles help you quickly make
multiple changes to your documents. For
example, if you want to increase the font size
of all subheadings and make them bold, you
don’t need to change every single subheading.
You simply edit the subheading style. Whether
your document contains one page or dozens
of pages, all paragraphs with that style will
change automatically when you change the
style. You can freely and effortlessly try out new
designs.
In CorelDRAW, you can create and apply
outline, fill, paragraph, character, and frame
styles by using the Object styles docker. You
can also modify the default properties of the
following object types: artistic media, artistic
text, callout, dimension, graphic, and
paragraph text. You can customize the defaults
for your current document, or for all new
documents.
You create and manage styles and style sets by using the
Object styles docker.
Last but not least, styles allow you to achieve
consistent formatting not only in one
document but across multiple documents. Any
styles or style sets that you create are saved
with the current document and can also be
exported to a style sheet for use in other
documents. You can design different style
sheets for different projects. As with other
features in CorelDRAW, you control how styles
work for you. You can easily implement
changes across many documents by simply
changing the style sheet applied to these
documents.
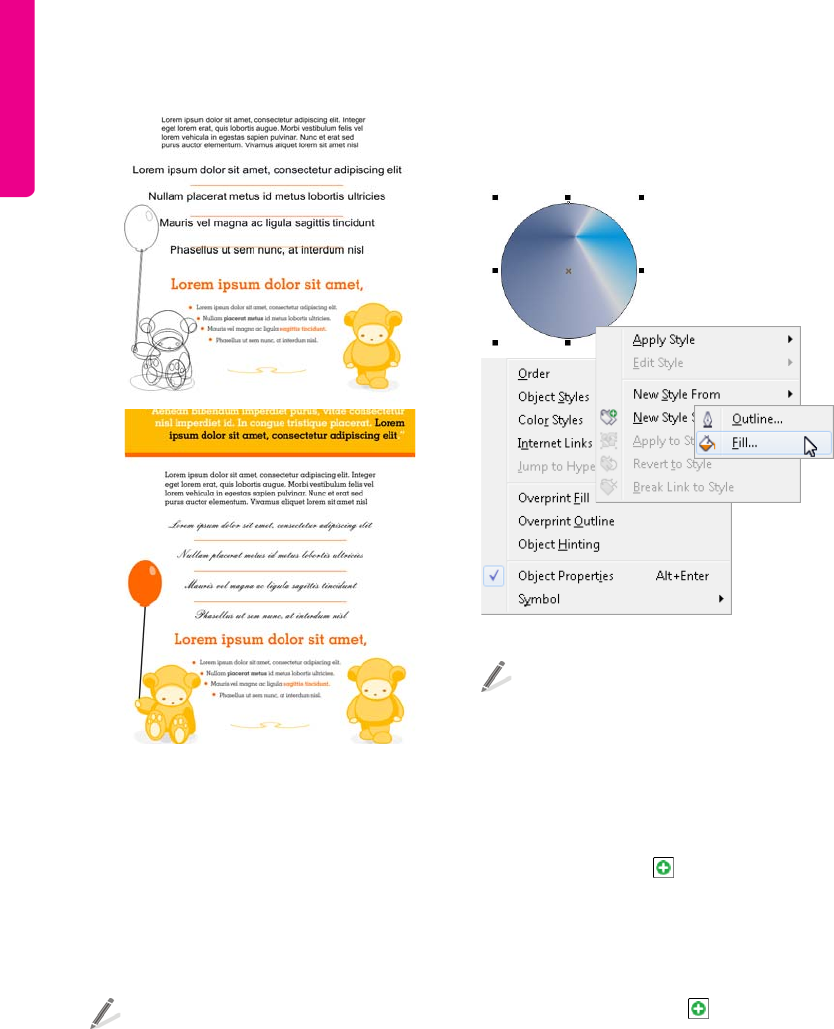
120 | CorelDRAW Graphics Suite X6 Guidebook
You can quickly change the look of a document by
updating the style sheet associated with that document.
Creating styles and style sets
You can create a style or style set based on the
formatting of an existing object that you like,
or you can create a style or style set from
scratch by setting attributes in the Object
styles docker.
To create a style based on the attributes of
an object, right-click the object by using
the Pick tool, choose Object styles from
the context menu, choose New style
from, click the type of style you want, and
type a name.
You can save an object fill as a custom fill style.
To create a style set based on the attributes
of an object, drag the object from the
document window to the Style sets folder
in the Object styles docker, or right-click
the object, choose Object styles, click
New style set from, and type a name.
To create a style from scratch, click the
New style button in the Object styles
docker, and click a style type. Specify the
settings you want in the style properties
area of the Object styles docker.
To create a style set from scratch, click the
New style set button in the Object
styles docker to create an empty style set.
Drag styles from the Styles folder to the
new style set.
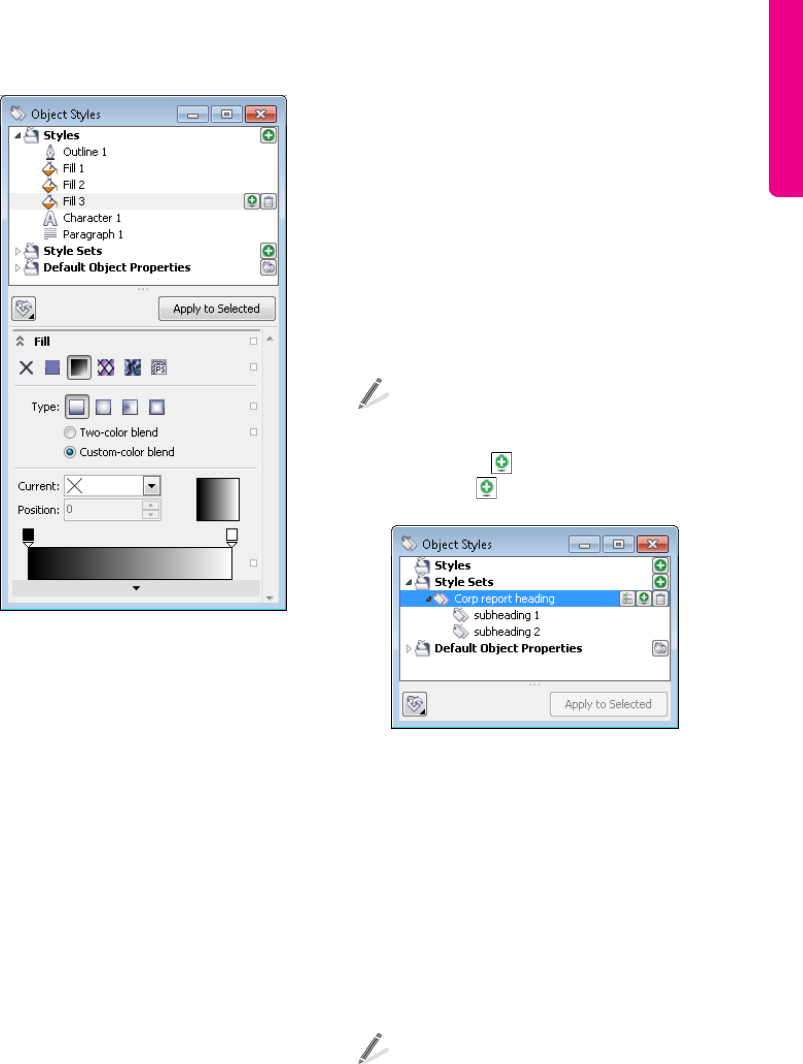
Chapter 9: Styles and Style Sets | 121
d
To define a fill style, set the fill attributes in the Object
styles docker.
In CorelDRAW, styles can contain other styles.
A style that contains another style is called a
parent; a style that is contained within another
style is called a child. Properties are
automatically inherited from the parent;
however, you can override inherited properties
for a child and set its own specific properties.
When you modify the parent style, the child
style is updated automatically. If you set child-
specific attributes, the attributes are no longer
related to the parent, so if you modify the
parent, the child-specific attributes will not be
modified. The parent-child relationship applies
to style sets as well.
You can use child and parent styles in
documents where you want objects to share
some, but not all, attributes, and you need to
make global changes on a regular basis. For
example, if you are working on a long
document, and you want to have headings
and subheadings with similar formatting, you
can create a parent character style for the
headings and a child character style for the
subheadings. The parent and the child styles
can share the same color and font type but
differ in size. If you choose a different color or
font type for the parent, both the headings
and the subheadings will be updated
automatically. The subheadings, however, will
still appear smaller than the headings.
To create a child style or style set, select the
parent style or style set in the Object
styles docker, and click the New child
style button or the New child style
set button .
Style sets “subheading 1 and “subheading 2” are
created as child style sets from the parent “Corp report
heading” style set.
Applying styles and style sets
When you apply a style or a style set to an
object, the object takes on only those
attributes that are defined in the style or style
set. For example, if you apply an outline style,
the object outline changes while its other
attributes stay the same.
To apply a style or style set to an object,
select the object by using the Pick tool,
and double-click the style or style set in the
Object styles docker.
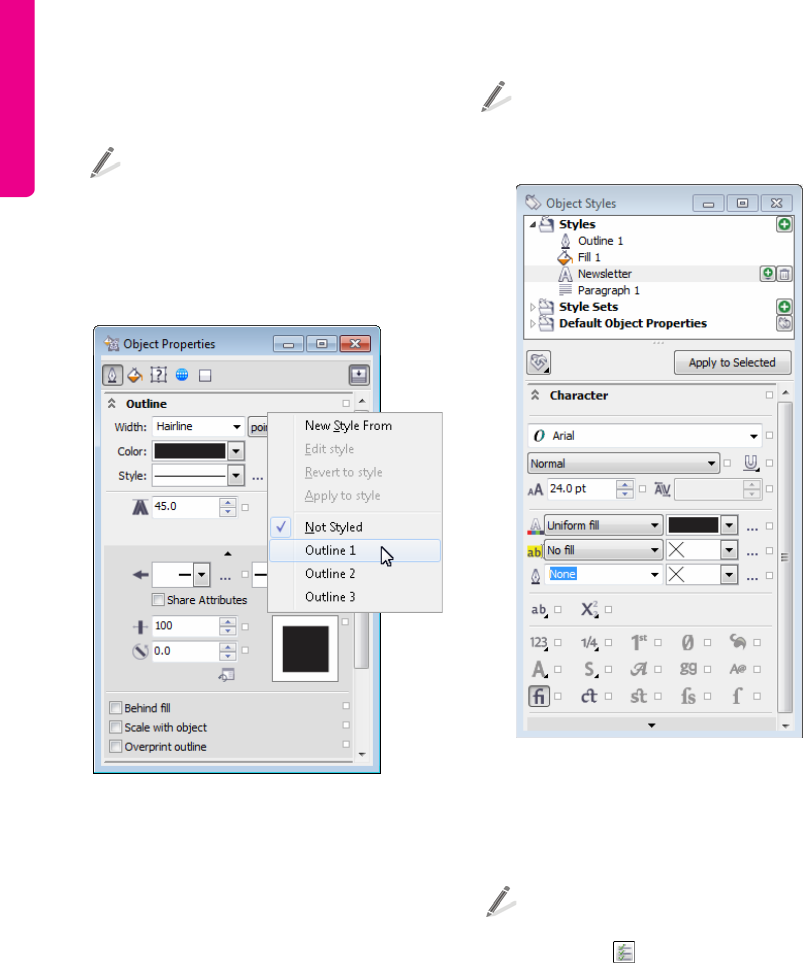
122 | CorelDRAW Graphics Suite X6 Guidebook
You can also apply styles by using the Object
properties docker.
To apply a style by using the Object
properties docker, click the source
indicator next to an object property
(outline, fill, character, paragraph, or
frame), and choose a style from the list of
available styles.
You can apply an outline style by choosing an outline
from the list of available styles in the Objects
properties docker.
Editing styles and style sets
You can edit a style or style set either by
modifying its attributes in the Object styles
docker, or by changing the attributes of an
object linked to the style or style set, and then
applying these changes to the style or style set.
You can also edit a style or style set by copying
attributes from an object to the style or style
set.
To edit a style, select it in the Object styles
docker, and modify its attributes in the
style properties area.
The “Newsletter” character style is selected, and
attributes such as font type, color, and size can be
modified in the Character area.
You can edit a style set by adding or removing
styles.
To edit a style set, select it in the Object
styles docker. Click the Add or remove
style button next to the style set, and
select a style type. In the style properties
area, edit the attributes of the individual
style.
To edit a style or style set based on an
object, modify the object in the document
window, right-click it, choose Object
styles, and click Apply to style.
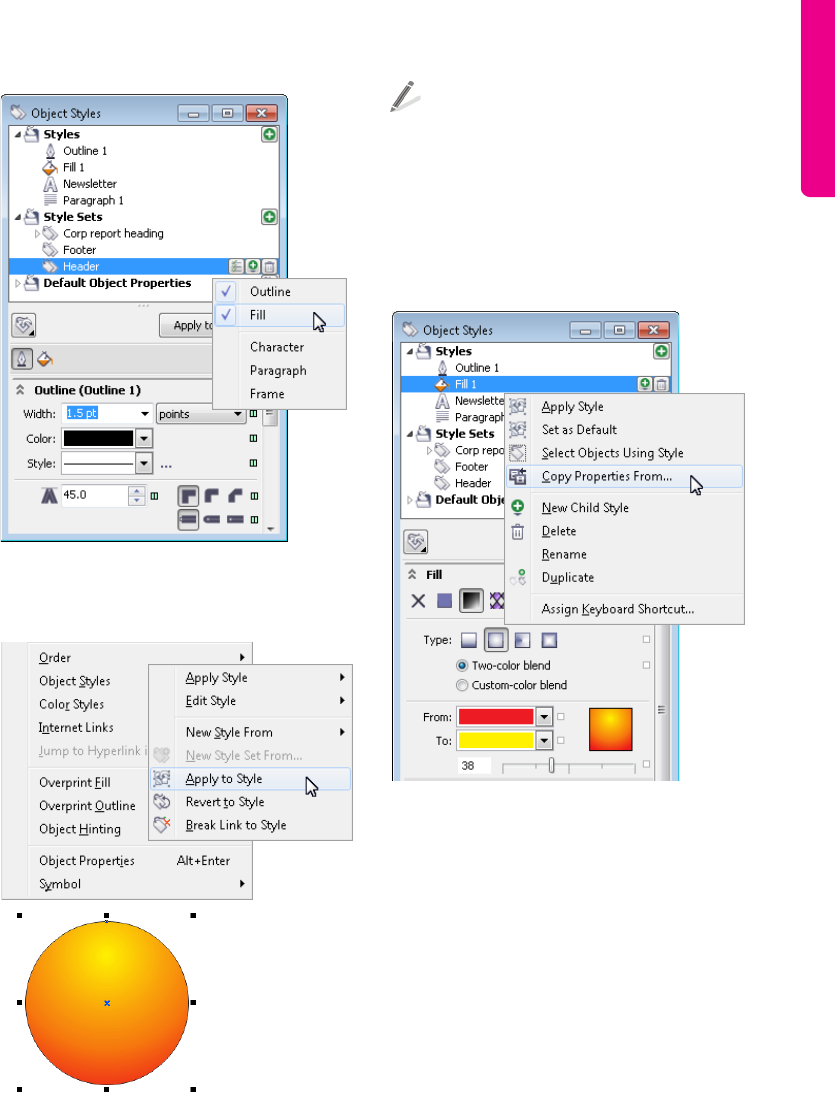
Chapter 9: Styles and Style Sets | 123
The “Header” style set consists of an outline style and a
fill style. You can delete any of the styles or add more
styles by clicking a style type.
t
Changing a fill style by modifying an object fill
To edit a style or style set by copying the
properties from an object, drag the object
from the document window to a style or
style set in the Object styles docker.
Alternatively, you can right-click the style or
style set in the Object styles docker,
choose Copy properties from, and click
an object in the document window.
t
Editing a style by copying properties from an object in
the document window
Exporting and importing style
sheets
You can make styles and style sets available for
use in other documents by exporting them to a
style sheet. A style sheet contains all current
styles, style sets, and default object properties
from the Object styles docker and all color
styles from the Color styles docker. For
information about color styles, see “Working
with color styles and harmonies” on page 81.
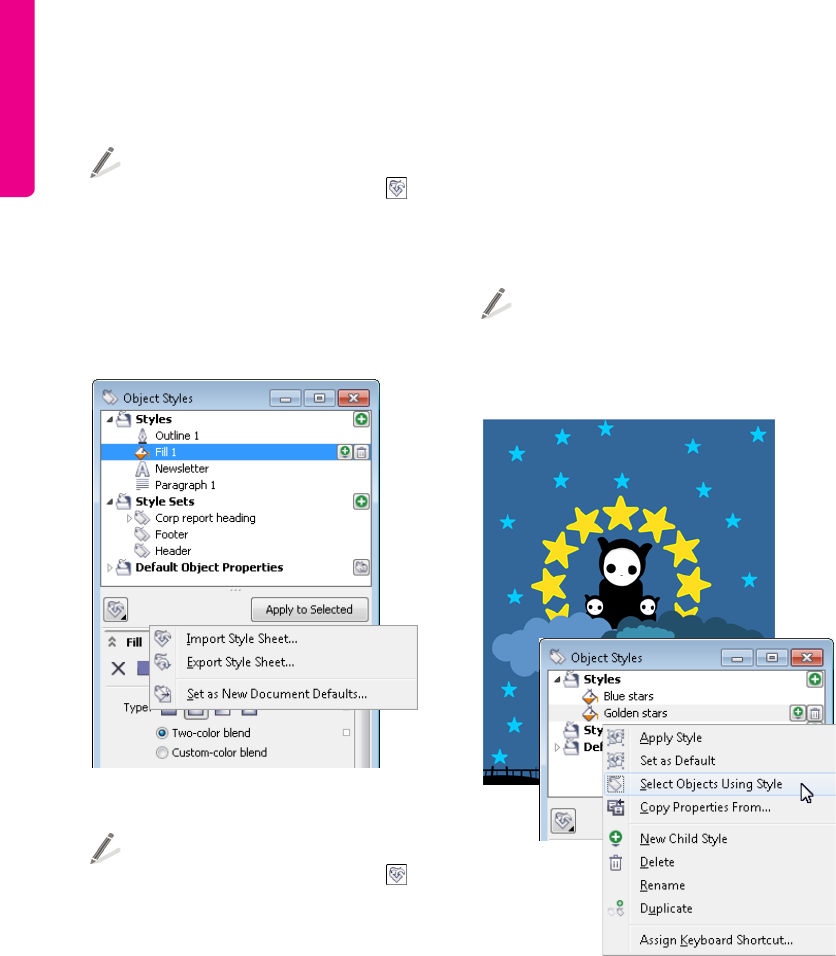
124 | CorelDRAW Graphics Suite X6 Guidebook
You can also import style sheets from other
documents.
To export a style sheet, click the Import,
export, or save defaults button in
the Object styles docker, and click Export
style sheet. In the Export style sheet
dialog box, type a name and choose a
location for the style sheet. Then, choose
the settings that you’d like to export from
the document.
You can export or import style sheets by using the
Object styles docker.
To import a style sheet, click the Import,
export, or save defaults button in
the Object styles docker, and click
Import style sheet. Navigate to a style
sheet in the Import style sheet dialog
box, click Import, and choose the settings
that you want to import.
Finding objects that use a specific
style or style set
CorelDRAW allows you to find objects with a
specific style or style set in the active
document. For example, you can find all text
objects that use a specific heading style.
This is helpful when your drawings contain
objects that you often need to modify or
redesign. By assigning a style or style set to
objects, you can easily select them in one step
and modify their properties simultaneously.
To select all objects that use a specific style
or style set, right-click the style or style set
in the Object styles docker, and choose
Select objects using style.
You can quickly locate all objects that are assigned a
particular style or style set.
Breaking the link between an
object and a style or style set
You can break the link between an object and
the style or style set applied to it. When you
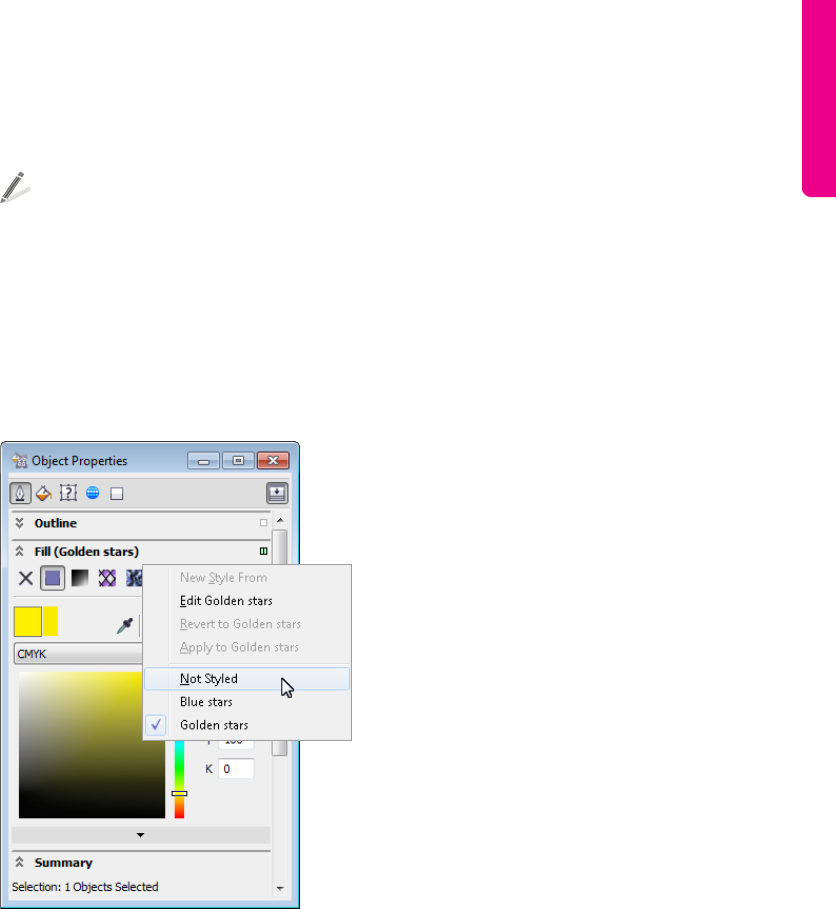
Chapter 9: Styles and Style Sets | 125
break the link, the object retains its current
appearance. Subsequent changes to the style
or style set will not affect the object.
To break the link between an object and a
style or style set, right-click the object by
using the Pick tool, choose Object styles
from the context menu, and click Break
link to style.
To break the link between a graphic object
and the fill style applied to it, click the Fill
source indicator in the Object properties
docker, and choose Not styled.
Breaking the link between a graphic object and the fill
style applied to it

Part Four
Guide to Digital
Content
Image created by
Dhananjay Garg
India
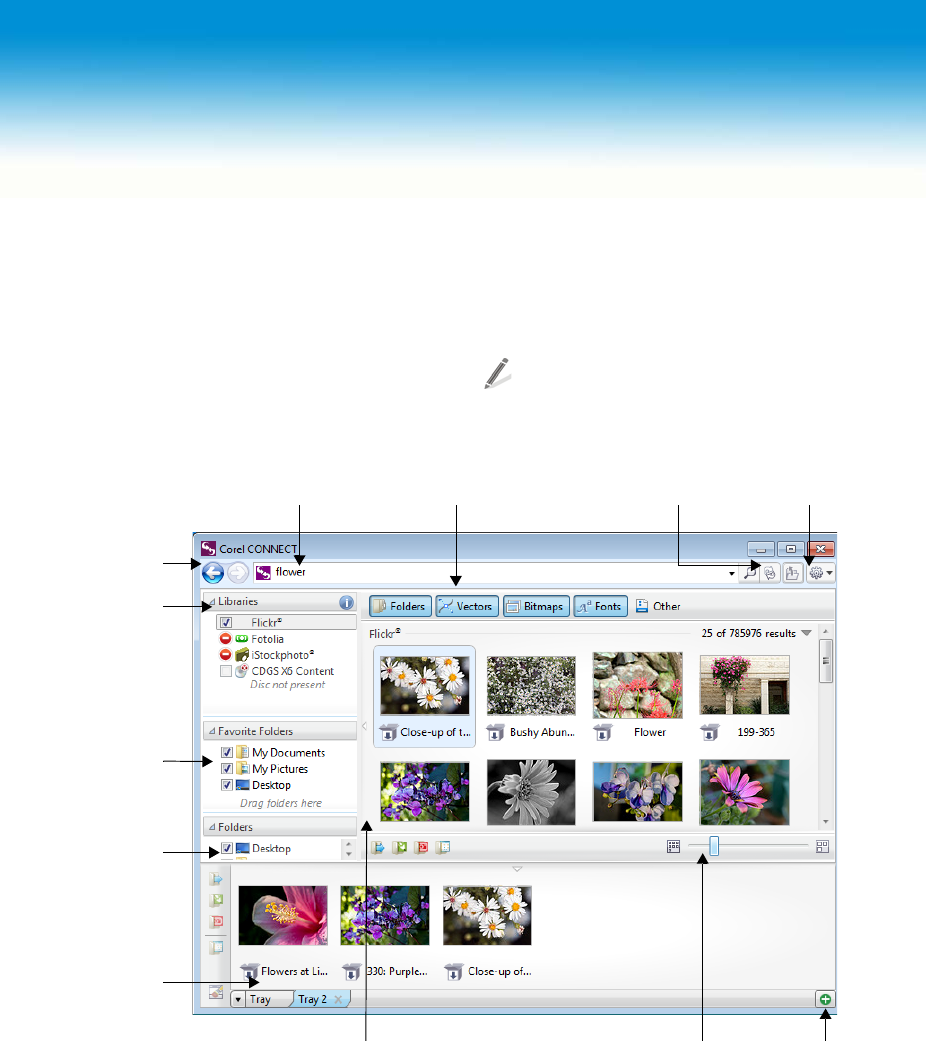
130 | CorelDRAW Graphics Suite X6 Guidebook
Chapter 10: Finding and Managing Content
CorelDRAW Graphics Suite provides an easy
way of finding content, such as clipart, photo
images, fonts, pattern fills, and frames. When
you find the content you need, you can
incorporate it into your projects or collect it in
a tray for future reference.
Exploring Corel CONNECT
You can browse and search for content by
using Corel CONNECT.
To start Corel CONNECT, click Start ` All
programs ` CorelDRAW Graphics Suite
X6 ` Corel CONNECT.
Navigation
buttons
Search and address box
Tray pane
Thumbnail zoom in/out slider
Favorite
folders pane
Libraries
pane
Folders
pane
Filter toolbar Refresh button
Viewing pane
Help and options
button
Add new tray
button
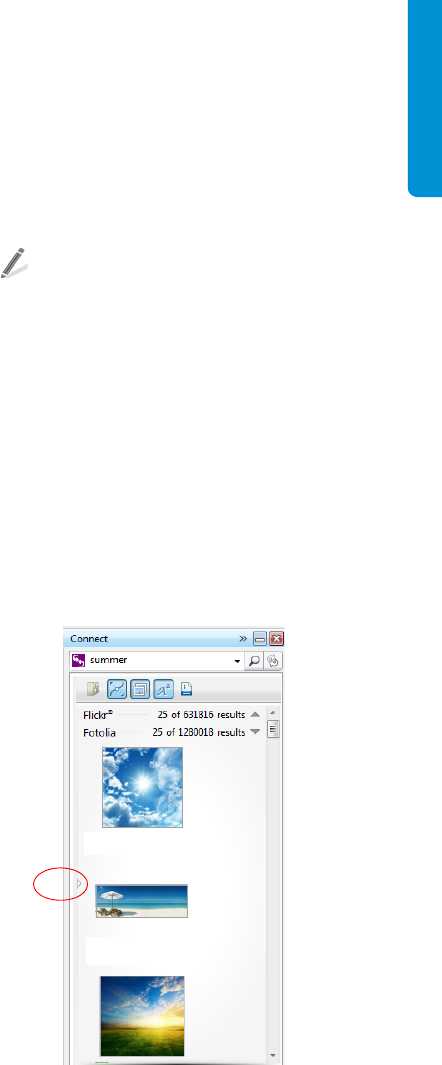
Chapter 10: Finding and Managing Content | 131
The main components of Corel CONNECT are
•Libraries pane — lets you access
online and local content provided by Corel
and Corel partners
•Favorite folders pane — provides quick
access to frequently used folders
•Folders pane — displays the file structure
available on your computer
•Tray pane — lets you collect files from one
or more folders
•Viewing pane — lets you view thumbnails
of content files. By positioning your
pointer over a selected thumbnail, you can
display file information such as filename,
file size, resolution, and color mode.
•Thumbnail zoom in/out slider — lets
you adjust the size of thumbnails in the
viewing pane
•Add new tray button — lets you create
additional trays to organize your content
•Help and options button — lets you
open a menu of commands that allow you
to access Help, configure content libraries,
set preferences, and view version and
license information
•Filter toolbar — lets you choose which
type of content to display in the viewing
pane: folders, vector images, bitmap
images, fonts, or files saved to file
formats that are not supported by
CorelDRAW Graphics Suite
•Search and address box — lets you
search for files by using search terms,
typing a folder path, or specifying a Web
address
•Navigate back button — takes you to the
previous page of content
•Navigate forward button — takes you to
the next page of content
Corel CONNECT is available both as a docker
and as a standalone application. You can
choose whichever mode better suits your
workflow. In docker mode, the search utility
has two components: Connect docker and
Tray docker.
To access the Connect docker, in
CorelDRAW or Corel PHOTO-PAINT, click
Window ` Dockers ` Connect.
To access the Tray docker, in CorelDRAW or
Corel PHOTO-PAINT, click Window `
Dockers ` Tray.
The Connect docker has two viewing modes:
single pane and full view. In full view, all panes
are displayed. In single-pane view, either the
viewing pane or the Libraries, Favorite
folders, and Folders panes are displayed. You
can resize the docker to display all panes or
toggle between single pane and full view.
The Connect docker with the viewing pane displayed.
Click the toggle arrow to display the navigation pane.
Resize the docker to display both panes.
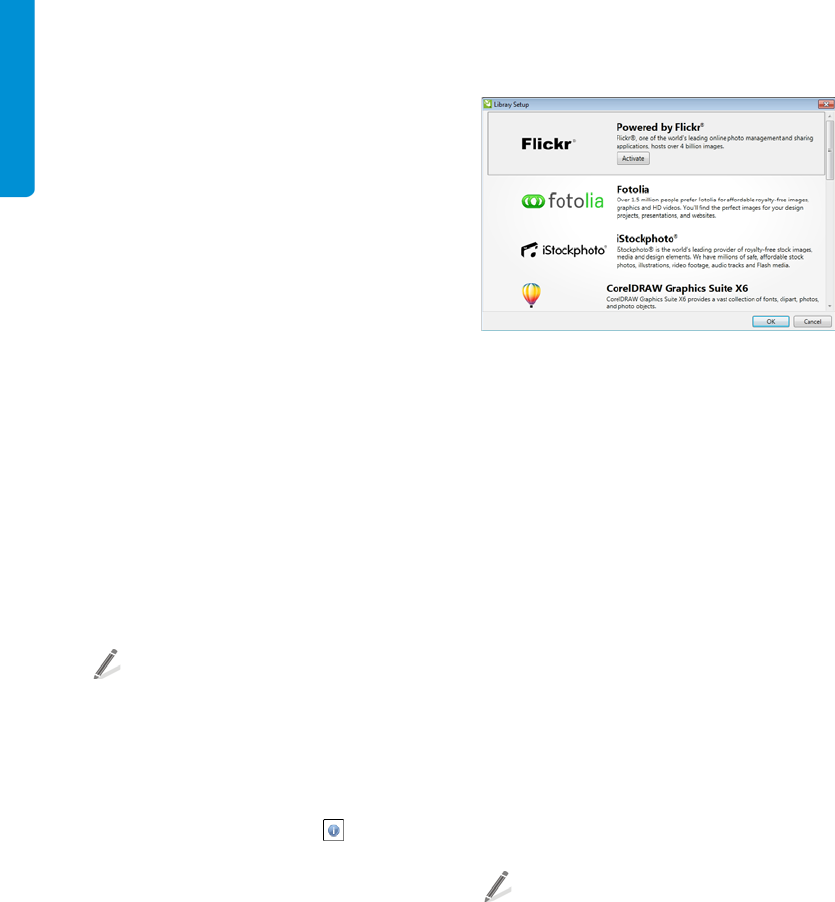
132 | CorelDRAW Graphics Suite X6 Guidebook
Accessing content
CorelDRAW Graphics Suite X6 provides a
content library that contains clipart, fonts,
photos, frames, pattern fills, and more. You
can add the library to your computer during
product installation to ensure fast and easy
access to content from Corel CONNECT,
CorelDRAW, and Corel PHOTO-PAINT. The
library is copied to the Public\Public
Documents\Corel\Content X6 folder.
Alternatively, you can access the version X6
library from the product DVD.
To access clipart and other content included on
a CD or DVD from a previous version of the
software, you need to insert the CD or DVD, or
browse to the folder where you store the
content.
You can also find content on the Web sites of
online content providers such as Flickr, Fotolia,
and iStockphoto.
To access a content library provided by
Corel on a CD or DVD, insert the CD or
DVD. The library appears in the Libraries
pane.
To activate access to local and online
content libraries, click the Configure
content libraries button in the
Libraries pane, and follow the instructions
in the Library setup dialog box.
Library setup dialog box
Browsing and searching for
content
You can search by the name, category (for
example, clipart, photo images, or fonts), or
reference information (for example, tags or
notes) associated with a file. When you type a
term in the search box and start a search, all
matching files are displayed as thumbnail
images in the viewing pane. For example, if you
type “flower” in the search box, the application
filters out all files that do not match the search
term, and you see only the files that have the
word “flower” in the filename, category, or
tags assigned to the file. For information about
adding tags and reference information, see “To
add drawing information” in the CorelDRAW
Help and “To edit document properties” in the
Corel PHOTO-PAINT Help.
To browse for content, click a location in
the Libraries, Favorite folders, or
Folders pane. You can browse only one
location at a time.
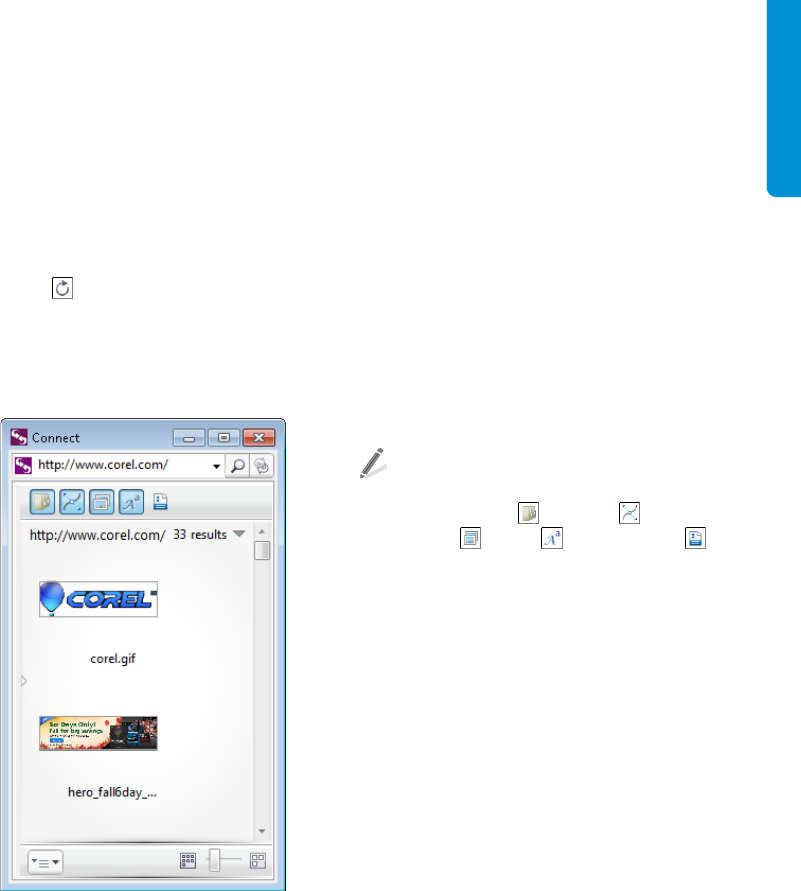
Chapter 10: Finding and Managing Content | 133
To search for content, click a location in the
Libraries, Favorite folders, or Folders
pane. Next, type a word in the Search and
address box, and press Enter.
To search for content in multiple locations,
enable the check boxes for the folders that
you want to search, and click the Refresh
button .
You can also find all images used on a Web
site by typing the Web address in the
Search and address box.
You can find all images used on a Web site by typing the
Web address.
You can narrow the search results by using
different criteria, such as graphics type,
category, or file format. For example, if you are
looking for a vector graphic, you can display
only vector formats that are supported by
CorelDRAW Graphics Suite. If you are
searching for bitmap graphics, you can display
only bitmap formats that are supported by
CorelDRAW Graphics Suite. If you want to
choose a font for the text in your project, you
can display TrueType (TTF), OpenType (OTF),
and PostScript (PFB and PFM) fonts. You can
also search for file formats that are not
supported by CorelDRAW Graphics Suite.
To narrow the search results, click one of
the following buttons on the Filter
toolbar: Folders , Vectors ,
Bitmaps , Fonts , or Other files .
CorelDRAW Graphics Suite is fully integrated
with the search capabilities that are offered by
Windows 7 and Windows Vista. Note that to
use Corel CONNECT on Microsoft Windows XP,
you must have Windows Search installed and
running. Windows Search is available as a free
download from the Microsoft® Download
Center. If you are using another third-party
computer indexing and search tool (for
example, Google Desktop™), or you don’t have
Windows Search installed, the application has
limited search capabilities and lets you search
only by filename.
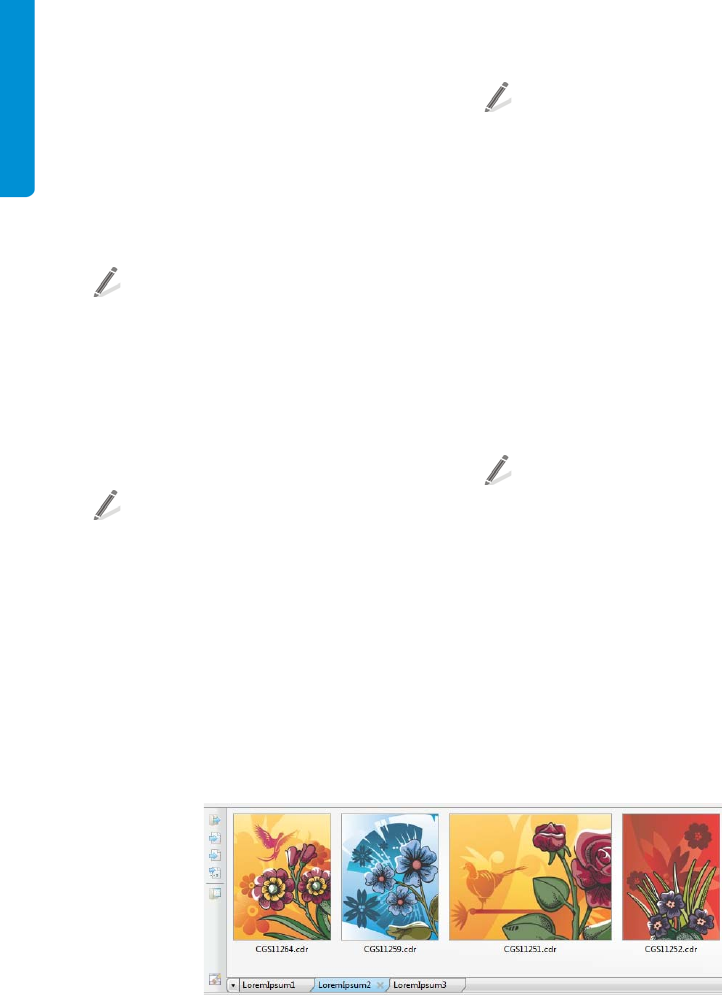
134 | CorelDRAW Graphics Suite X6 Guidebook
Using and managing content
If you want to view a larger version of a file or
edit a file before you incorporate it into your
project, you can open it in CorelDRAW,
Corel PHOTO-PAINT, or its associated
application.
To open a file, right-click a thumbnail in the
viewing pane, and choose the option you
want.
For more information about opening files, see
“Using content” in the Help.
You can also insert content into your
document.
To insert a file into an active document,
drag the file from the viewing pane to the
active document.
For more information about inserting content
into your documents, see “To insert a file into
an active document” in the Help.
The bitmaps and vector graphics (clipart) that
you find can be installed as pattern fills for
future use.
To install a pattern fill, right-click the
thumbnail of a bitmap or vector graphic in
the viewing pane, and click Install as
bitmap pattern or Install as vector
pattern.
You can gather content from various folders in
the tray. While the files are referenced in the
tray, they remain in their original location. You
can add and remove content from the tray.
You can create trays to organize your content
more efficiently and share it with others. The
trays are shared between CorelDRAW,
Corel PHOTO-PAINT, and Corel CONNECT.
To add content to a tray, select one or more
thumbnails in the viewing pane, and drag
them to the tray.
To create a tray, click the Add new tray
button in the Tray docker. By default, a tray
is saved to the Users\[UserName]\My
Documents\Corel\
Corel Content\Trays folder.
To rename a tray, right-click the tray tab,
click Rename, and type a new name.
You can organize your content in trays.
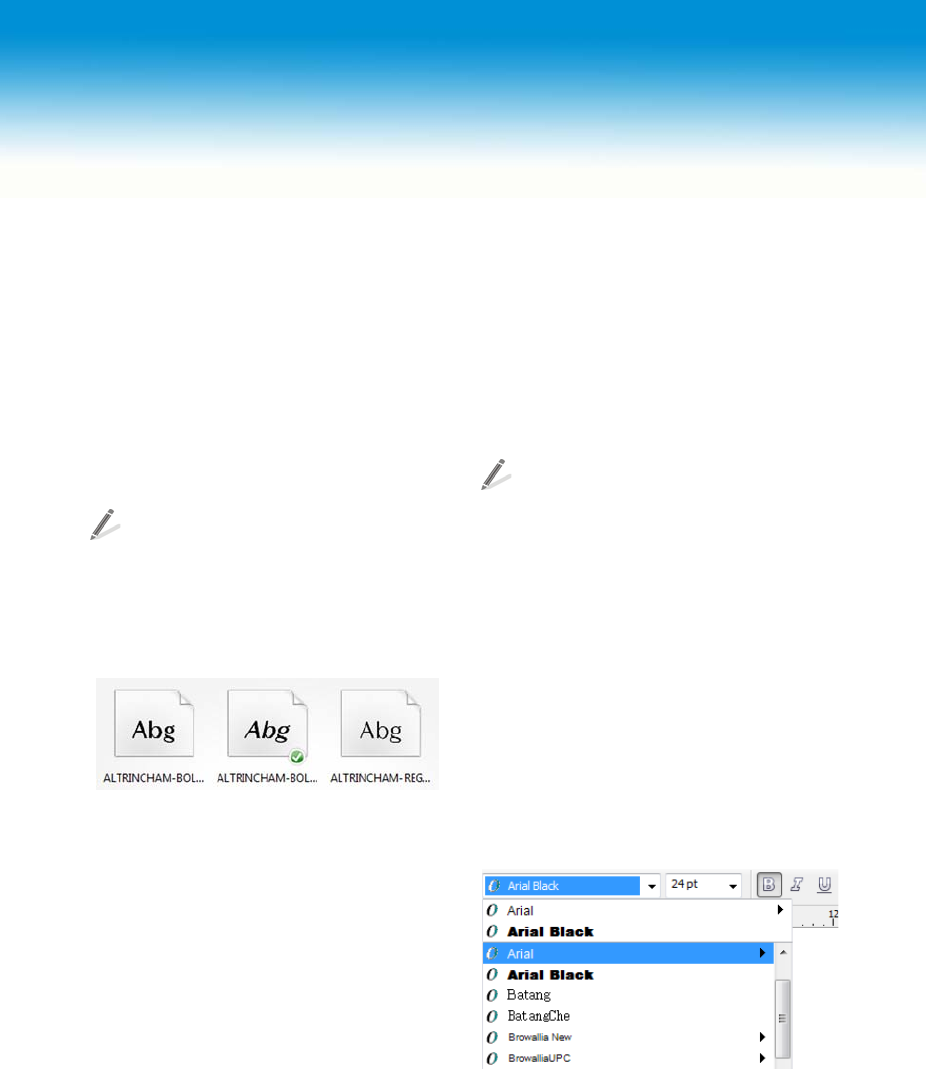
136 | CorelDRAW Graphics Suite X6 Guidebook
Chapter 11: Content Types
CorelDRAW Graphics Suite X6 lets you access Corel Content, a vast collection of fonts, symbol
fonts, photos, photo objects, interactive frames, patterns, artistic media, brushes, photo frames,
and image lists.
Fonts
You can choose from a comprehensive
selection of fonts, including premium
OpenType fonts. When you find a font that you
want to use, you can install it.
For more information about finding fonts,
see “Accessing content” on page 132.
To install a font, right-click a font
thumbnail in Corel CONNECT or the
Connect docker, and click Install.
The check mark shows that the font in the middle has
been installed.
You can preview fonts that are installed on
your computer directly in CorelDRAW or
Corel PHOTO-PAINT, or you can browse and
organize the available local fonts in the
Bitstream Font Navigator.
You can quickly identify the font in a client’s
artwork by capturing a sample and sending it
to the WhatTheFont™ Web site. For more
information, see “WhatTheFont?!” on
page 172.
To preview available fonts in CorelDRAW or
Corel PHOTO-PAINT, click the Te x t tool in
the toolbox, and click the Font list box on
the property bar. The font name appears in
the given font.
To display only the fonts used in the
document, click the Te x t tool in the
toolbox, right-click the Font list box on the
property bar, and enable the Show
document fonts option.
To start the Bitstream Font Navigator, from
the Windows taskbar click Start ` All
programs ` CorelDRAW Graphics Suite
X6 ` Bitstream Font Navigator.
Previewing fonts in the application
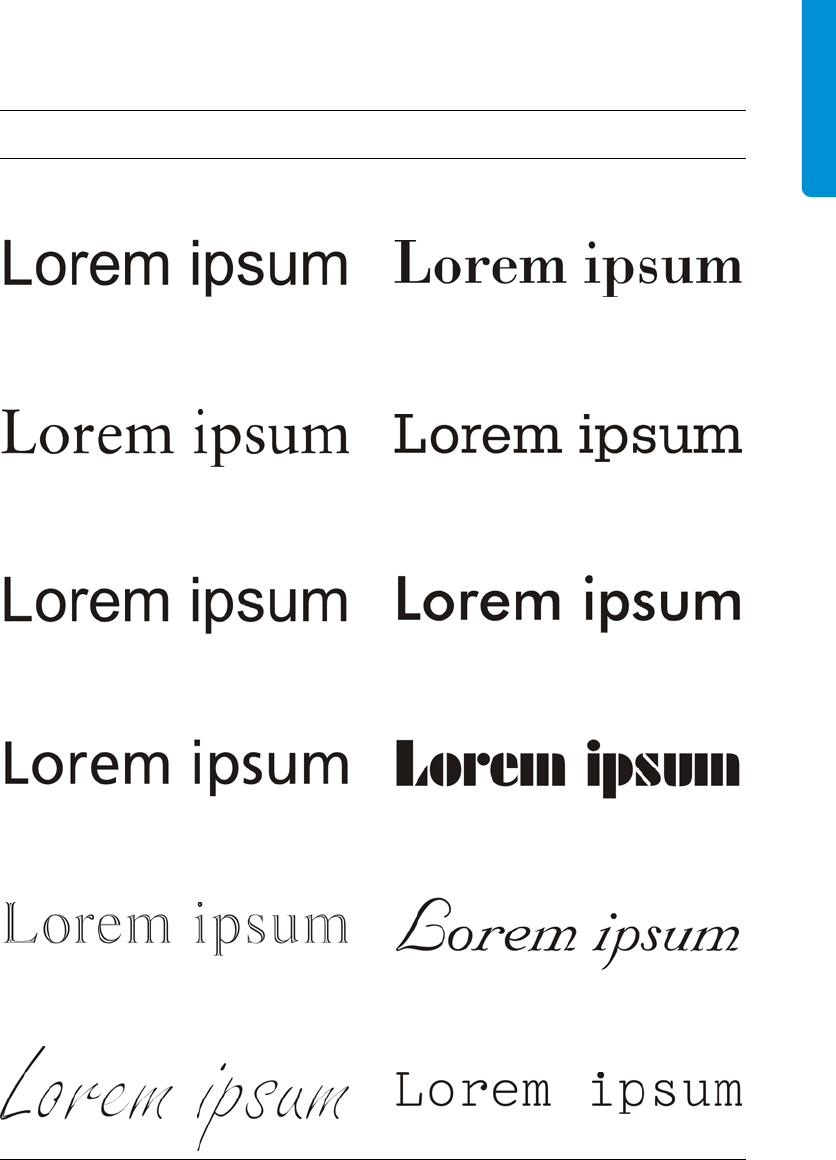
Chapter 11: Content Types | 137
Sample fonts
URW Baskerville™ WGL4 BT Bauer Bodoni™ BT
ClassGarmnd BT Serifa® BT
Helvetica™ Futura MD BT
Frutiger™ 55 Roman FuturaBlack WGL4 BT
G4L A03 Nimbus Roman Nuptial BT
G1L SC02 Script American Pica10 BT
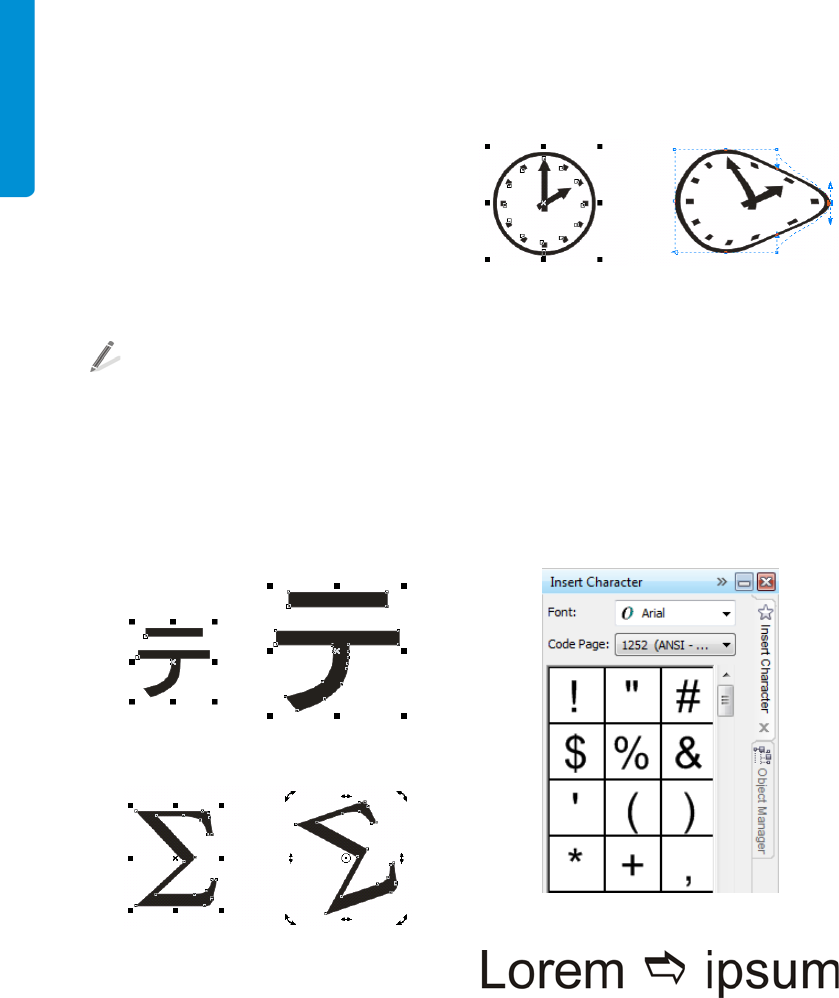
138 | CorelDRAW Graphics Suite X6 Guidebook
Symbol fonts
Symbol fonts contain special characters that
you can insert in your document either as
graphic objects or as text objects. You can
access a variety of symbols, including
international characters, mathematical
symbols, currency symbols, calligraphic
ornaments, shapes, stars, arrows, and other
symbols organized by theme.
To insert a symbol as a graphic object, click
Te x t ` Insert symbol character. In the
Insert character docker, choose a font
from the Font list box, choose a symbol,
and click Insert. After inserting the symbol
in your document, you can resize, rotate,
or reshape it as you would any other
graphic object.
Resizing a symbol
Rotating a symbol
Distorting a symbol by using the Envelope tool
To insert a symbol as a text object, click the
Tex t tool, and click where you want to
insert the symbol. Click Te x t ` Insert
symbol character. In the Insert
character docker, choose a font from the
Font list box, choose a symbol, and click
Insert. The symbol matches the font size
of the text and can be edited as a text
character.
Insert character docker
Inserting a symbol as a text object
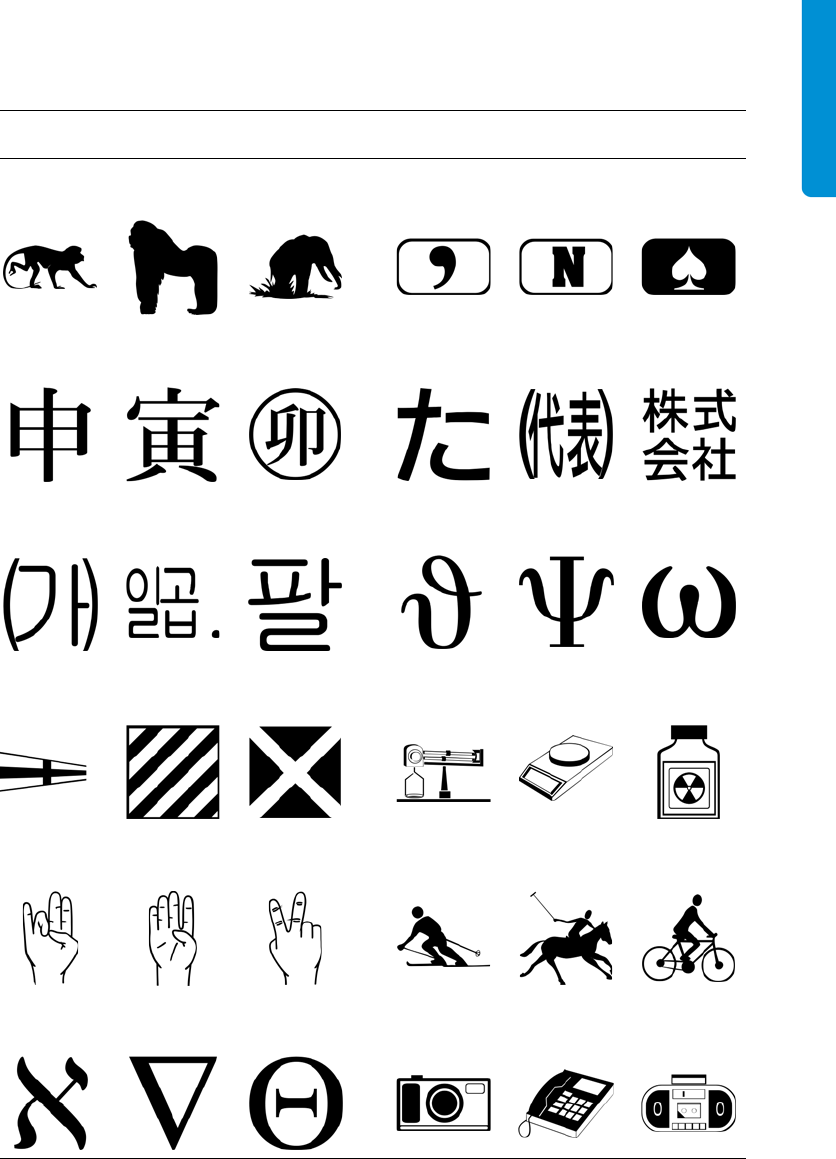
Chapter 11: Content Types | 139
Sample symbol fonts
Animals Bullets
Chinese Generic I Japanese Generic I
Korean Generic I Math with Greek
Nautical Flags Science
Sign Language Sports Figures
Symbol Pro BT Technology
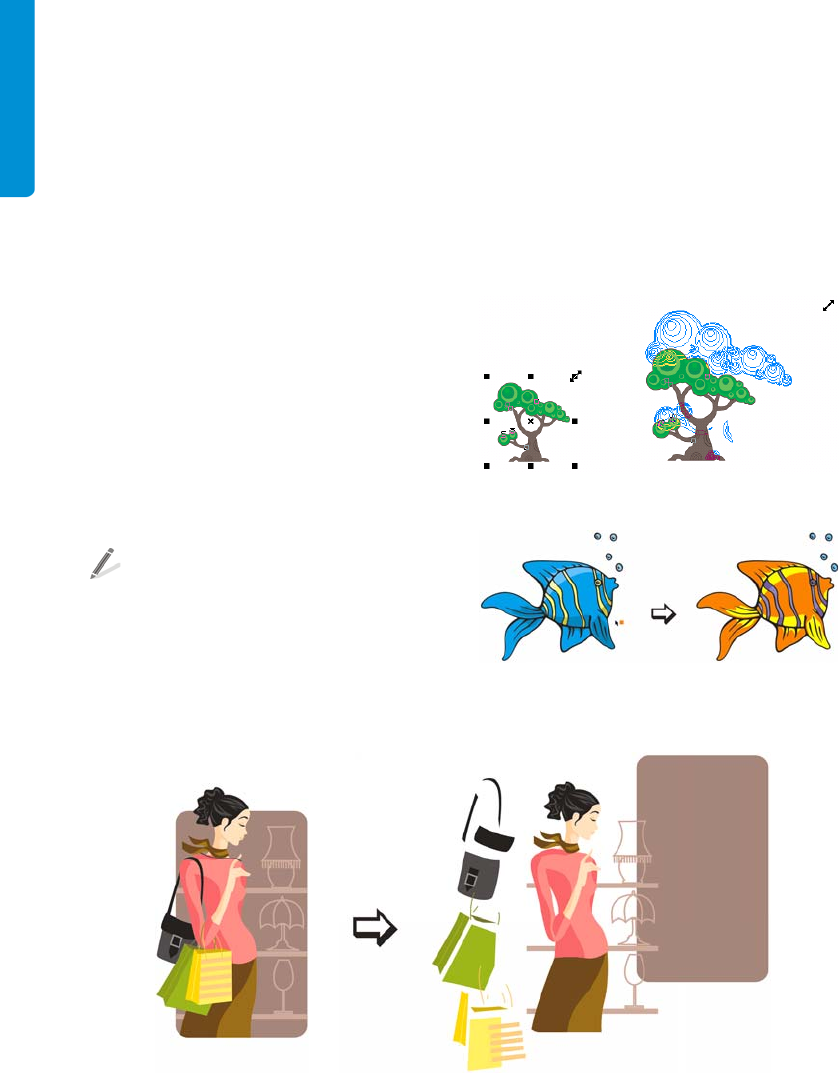
140 | CorelDRAW Graphics Suite X6 Guidebook
Clipart
CorelDRAW Graphics Suite X6 lets you access a
content library that contains thousands of
clipart images organized in various categories,
such as fashion, ornaments, and vehicle
templates. These high-quality vector graphics
in CorelDRAW format can be easily searched
and adapted for use in your designs.
You can search or browse the various
categories of clipart by using Corel CONNECT.
For more information, see “Finding and
Managing Content” on page 130.
Unlike photos, clipart images are vector
graphics. This means that you can freely
transform and resize clipart images in
CorelDRAW without losing image quality.
To resize a clipart image, select the image,
and drag a selection handle.
To change the colors of a clipart image,
select the image, and drag a color swatch
from the color palette to the part of the
image that you want to modify.
To break down a clipart image into
individual editable objects, select the
image, and click Arrange ` Ungroup all.
Resizing a clipart image by dragging a selection handle
Changing the color of a clipart image
.
Breaking down a clipart image into individual objects
Chapter 11: Content Types | 141
Sample clipart
Animals Backgrounds
Birds Brush Art
Buildings Business
Design Elements Education
Fashion Flames
Food Ornaments
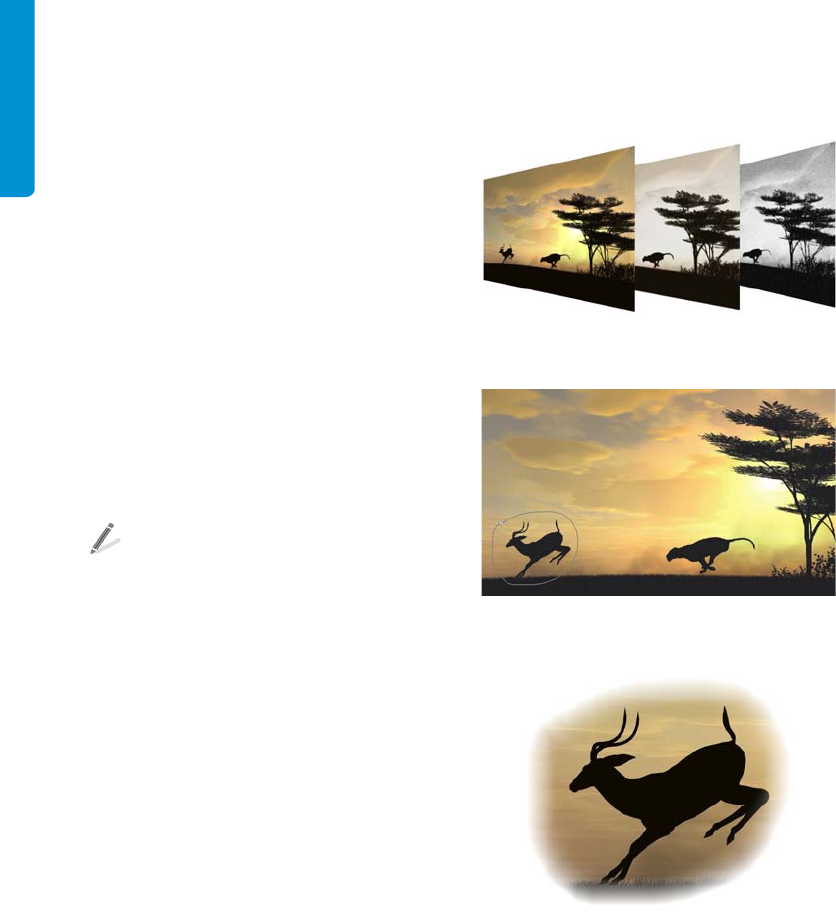
142 | CorelDRAW Graphics Suite X6 Guidebook
Photos
CorelDRAW Graphics Suite X6 lets you access a
selection of high-quality photos on various
subjects, such as architecture, landscapes, and
travel. The high-resolution images can be easily
searched and are suitable for printing.
You can search or browse the various
categories of photos by using Corel CONNECT.
For more information, see “Finding and
Managing Content” on page 130.
Corel PHOTO-PAINT offers comprehensive
photo-editing tools that let you crop and stitch
images, retouch photos, and adjust color and
tone. For more information, see “Editing
images” in the Help.
To change the resolution of a photo that
you have imported in CorelDRAW, select
the photo, and drag a corner selection
handle to resize it. Reducing the size of the
photo increases the resolution. The current
resolution is displayed on the status bar.
To change the resolution of a photo in
Corel PHOTO-PAINT, click Image `
Resample, and choose the settings you
want in the Resample dialog box. For
more information, see “Changing image
resolution” in the Help.
To cut out an area of the image in
Corel PHOTO-PAINT, you can use the mask
tools. For more information, see “Working
with masks” in the Help.
You can make various adjustments to the color and tone
of a photo.
An area of the image is selected with the Freehand
mask tool.
The selected image area is cut out from the photo, and
feathering is applied to the edges.
Chapter 11: Content Types | 143
Sample photos
Animals Insects
Landscapes Nature
Sports Toys
Transportation Travel
Food and Drinks
People
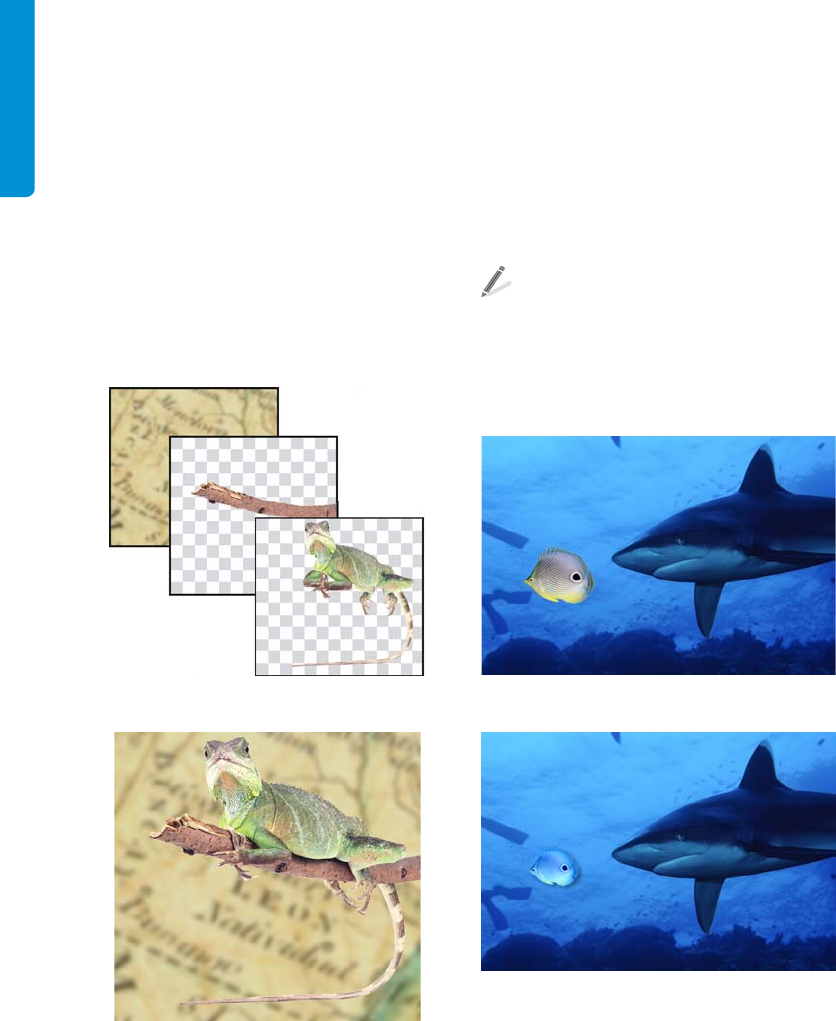
144 | CorelDRAW Graphics Suite X6 Guidebook
Photo objects
Photo objects are bitmap images without a
background. They are also referred to as
floating objects or cutout images. Unlike
photos, photo objects can have various shapes,
and you can place them on top of another
image without covering up the underlying
image. You can select, move, and edit photo
objects the way you would any other object.
For more information, see “Working with
objects” in the Help.
You can stack objects on top of one another.
This image consists of a background and two objects.
You can search or browse the various
categories of photo objects by using
Corel CONNECT. For more information, see
“Finding and Managing Content” on
page 130.
To make a photo object fit into the overall
image, you can resize it or change its color.
You can create your own photo objects in
Corel PHOTO-PAINT. For more information,
see “Creating objects” in the Help.
The photo object stands out from the rest of the image.
The object has been resized, and its color has been
changed to create a uniform look and feel for the image.
Chapter 11: Content Types | 145
Sample photo objects
Animal Kingdom Architecture
Business Education
Food Household Objects
Industry Miscellaneous
Plants Sports
Toys Transportation
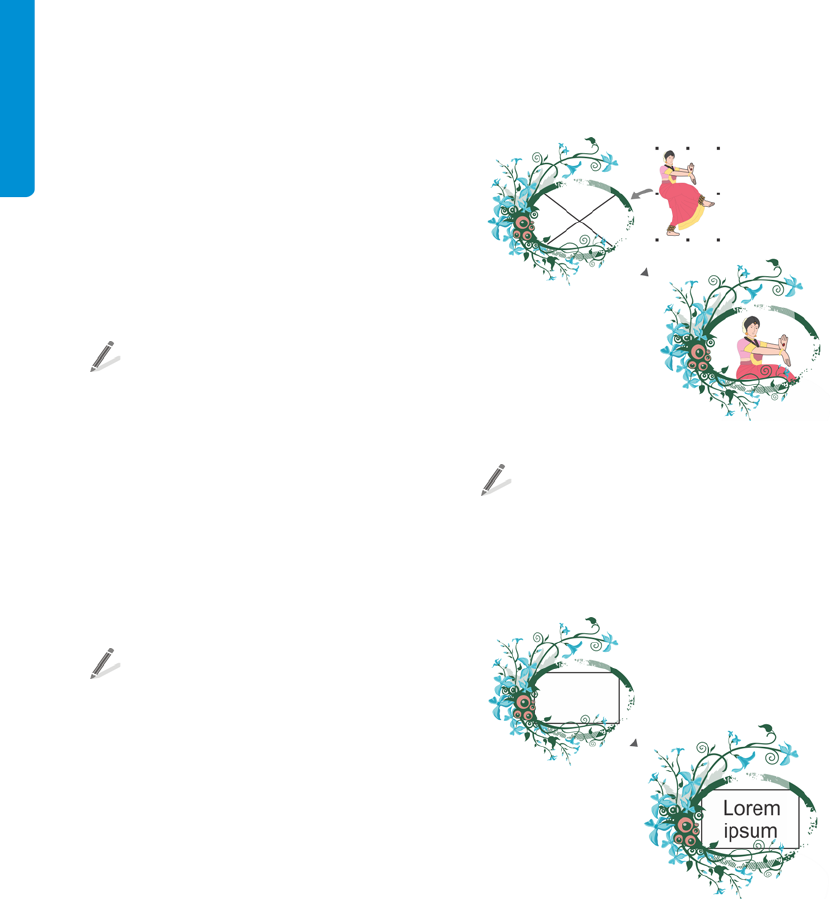
146 | CorelDRAW Graphics Suite X6 Guidebook
Interactive frames
CorelDRAW Graphics Suite X6 Content offers
interactive frames that you can use for framing
graphics and text with CorelDRAW. Interactive
frames include PowerClip frames, which are
used for graphics content, as well as text
frames. You can search or browse the available
interactive frames by using Corel CONNECT or
the Connect docker.
To add an interactive frame to a document
in CorelDRAW, click Window ` Dockers `
Connect to open the Connect docker. In
the Libraries pane, open the Corel
content\ Interactive frames folder, and
then open the PowerClip frames or Tex t
frames folder. Drag a thumbnail to the
drawing window.
For more information about using Corel
content, see “Finding and Managing
Content” on page 130.
To add content to a PowerClip frame, drag
an object into the frame.
You can also drag content directly into a
PowerClip frame from Corel CONNECT or
the Connect docker.
For more information about PowerClip
frames, see “PowerClip frames” on
page 206.
An image was added to the PowerClip frame.
To add text to a text frame, click the Te x t
tool, click in the frame, and type the text.
For more information about text frames,
see “Text frames” on page 208.
Text was added to the text frame.
Chapter 11: Content Types | 147
Interactive frames
148 | CorelDRAW Graphics Suite X6 Guidebook
Patterns
CorelDRAW Graphics Suite X6 offers a
collection of pattern fills. In CorelDRAW, you
can fill objects with two-color, full-color
(vector), and bitmap pattern fills.
To apply a pattern fill to an object in
CorelDRAW, select the object, click the Fill
tool in the toolbox, and then click the
Pattern fill button on the flyout. In the
Pattern fill dialog box, choose 2-color,
Full-color or Bitmap, and choose a
pattern fill from the fill picker.
The fill picker lets you choose a pattern fill.
To apply a bitmap fill to an object in
Corel PHOTO-PAINT, select the object, and
click the Fill tool in the toolbox. On the
property bar, click the Bitmap button, and
then click the Edit fill button. In the
Bitmap fill dialog box, choose a bitmap
fill from the fill picker.
You can apply transparencies by using the
same pattern fills that you apply to objects.
When you apply a pattern transparency to an
object, underlying objects become partially
visible.
To apply a pattern transparency to an
object in CorelDRAW, select the object, and
click the Transparency tool in the toolbox.
From the Transparency type list box on
the property bar, choose Two- c olor
pattern, Full-color pattern, or Bitmap
pattern. Choose a pattern from the
Transparency pattern picker on the
property bar.
To apply a pattern transparency to an
object in Corel PHOTO-PAINT, select the
object, click the Object transparency
tool in the toolbox, and choose Bitmap
from the Fill type list box on the property
bar.
Pattern transparency is applied to the object. The
underlying white background is partially visible through
the pattern fill.
For more information about pattern fills,
see the Help.
Chapter 11: Content Types | 149
Sample patterns
Full-color patterns
Bitmap patterns
150 | CorelDRAW Graphics Suite X6 Guidebook
Artistic media
CorelDRAW lets you apply a variety of preset
brushstrokes by using the different modes of
the Artistic media tool. For example, the
Brush mode lets you draw brushstrokes, and
the Sprayer mode lets you spray images along
a curve. You can also create custom
brushstrokes from objects.
Different brushstrokes were used to create this image.
To browse the available brush presets, click
the Artistic media tool in the toolbox,
and click the Brush button on the property
bar. Choose a brush category from the
Category list box, and browse the
brushstrokes in the Brushstrokes list box.
To adjust the width of the brushstroke,
type a value in the Stroke width box on
the property bar.
To spray images along a curve, click the
Artistic media tool in the toolbox, and
click the Sprayer button on the property
bar. Choose a category from the Category
list box, choose a spray pattern from the
Spray pattern list box, and drag in the
drawing window.
To create a custom brushstroke from an
object, click the Artistic media tool in the
toolbox, and click the Brush button on the
property bar. Click the object, and click the
Save artistic media stroke button on the
property bar. Type a name for the custom
brushstroke, and click Save. The new
brushstroke appears in the Custom brush
category.
Images sprayed along a curve
A basic shape is used to create a custom brushstroke.
Chapter 11: Content Types | 151
Sample artistic media
Brush presets
Sprayer presets
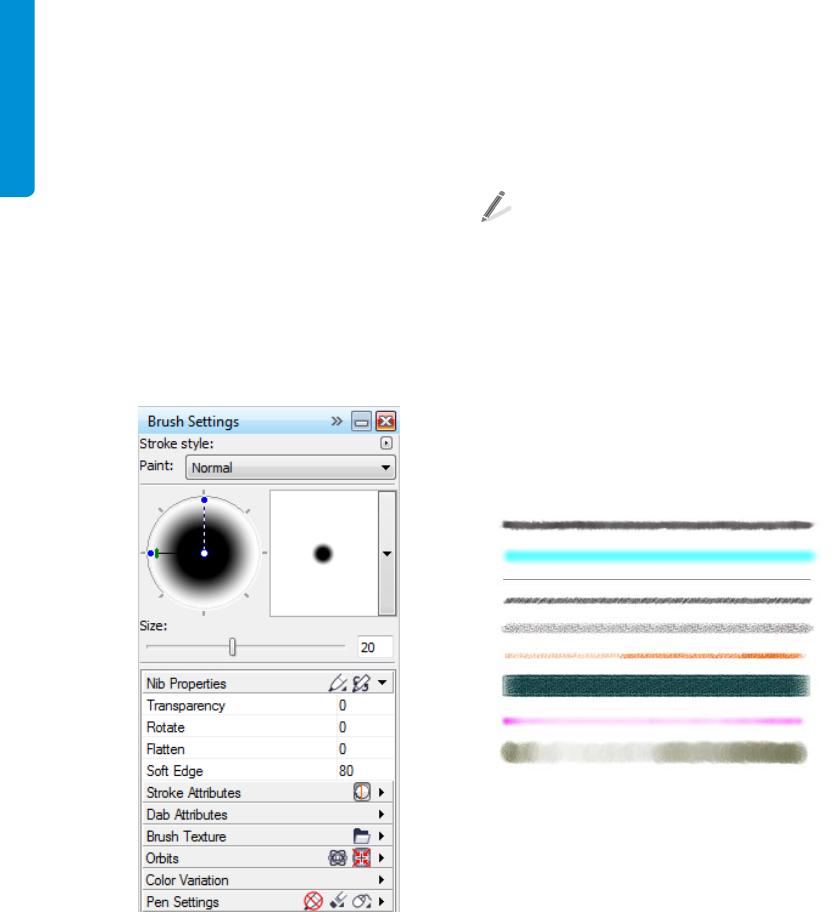
152 | CorelDRAW Graphics Suite X6 Guidebook
Brushes
Corel PHOTO-PAINT lets you apply a variety of
preset brushstrokes by using the Paint tool.
You can paint with art brushes, airbrushes,
pens, pencils, crayons, charcoal, pastels,
watercolor, and other brushes. For more
information, see “Applying brushstrokes” in
the Help.
You can also customize the nib properties and
stroke attributes of your brushstrokes by using
the Brush settings docker.
You can customize the nib properties and other brush
attributes in the Brush settings docker.
For more information, see “Creating custom
brushes” in the Help.
To browse the preset brushes, click the
Paint tool in the toolbox, choose a brush
category from the Brush category picker
on the property bar, and browse the
brushes in the Brush type list box.
To change the brush shape, size, or
transparency, use the controls on the
property bar.
To open the Brush settings docker, click
Window ` Dockers ` Brush settings.
Corel PHOTO-PAINT offers a variety of brushes,
including pencils, crayons, charcoals, pastels, and
watercolor.
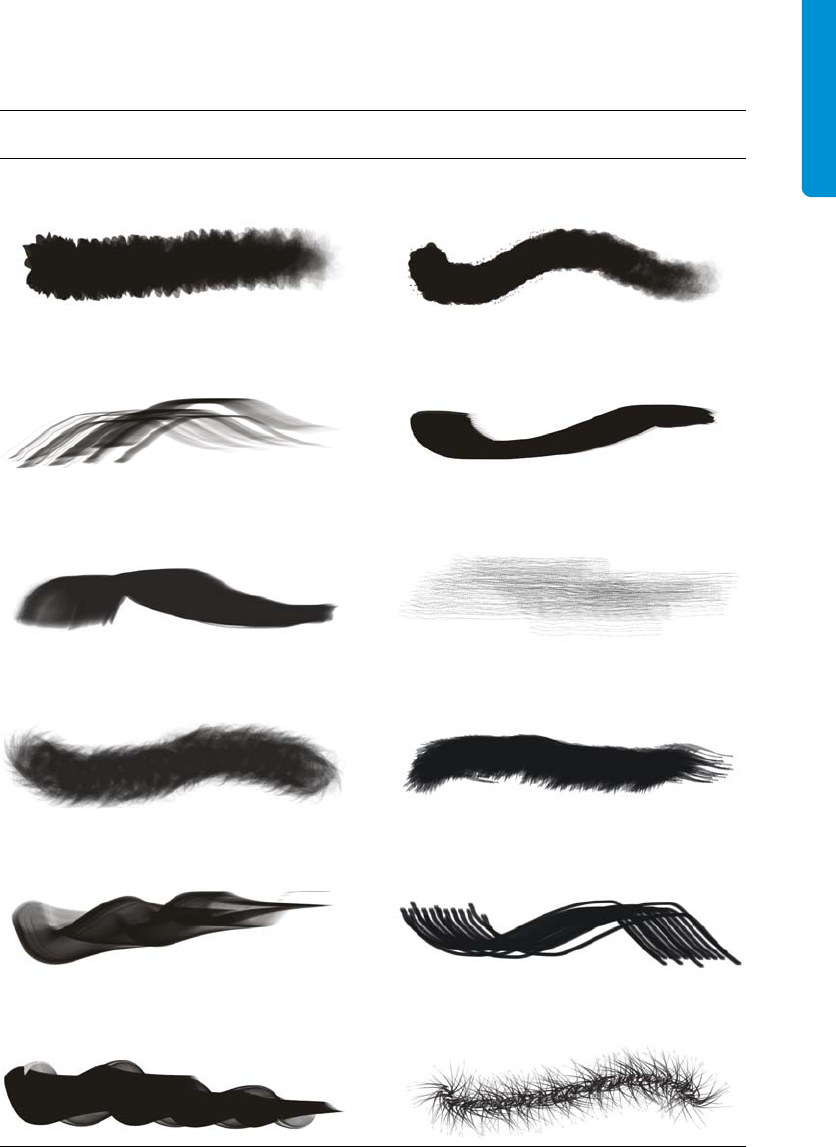
Chapter 11: Content Types | 153
Sample brushes
Meteor Ash
Angel Hair Wet Mop
Wet Fan Brush Emery Cloth
Fox Tail Feather Duster
Smoke Ribbon Stix
Tidal Wave Centipede
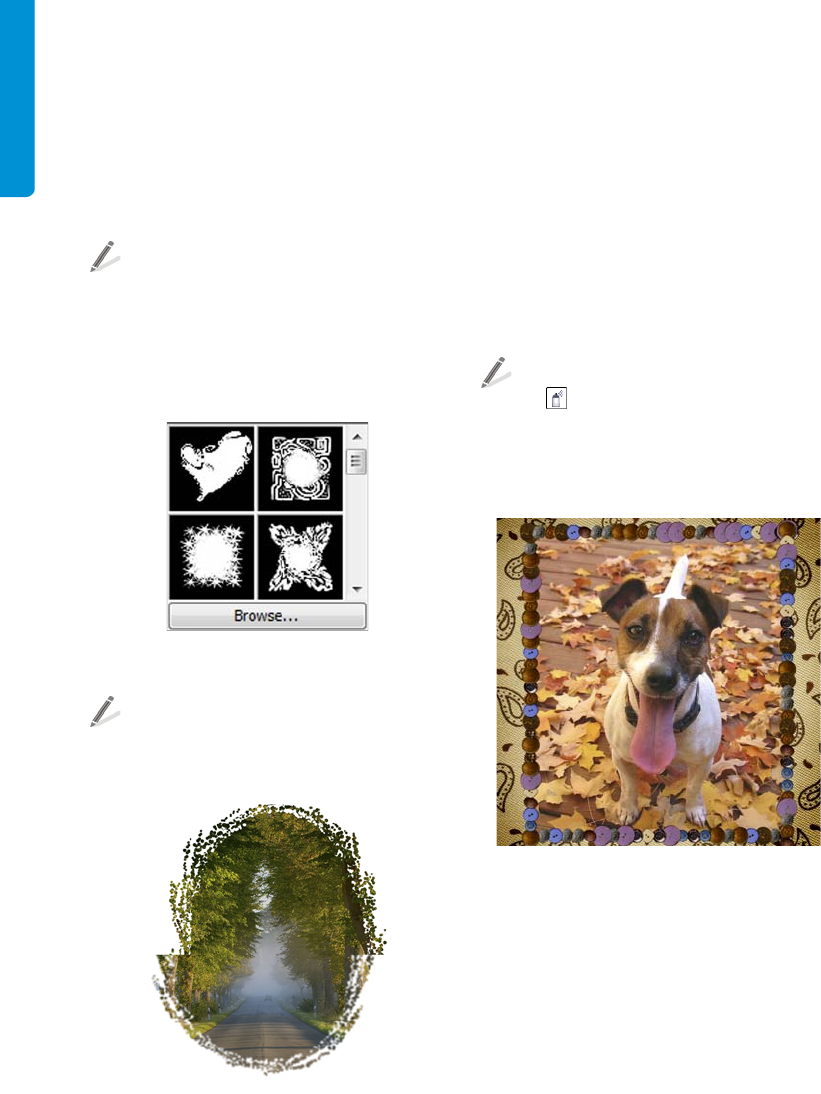
154 | CorelDRAW Graphics Suite X6 Guidebook
Photo frames
CorelDRAW Graphics Suite X6 Content
includes a collection of photo frames that you
can access from Corel PHOTO-PAINT,
CorelDRAW, and Corel CONNECT.
To frame a photo or another bitmap, click
Effects ` Creative ` Frame
(Corel PHOTO-PAINT) or Bitmaps `
Creative ` Frame (CorelDRAW). In the
Frame dialog box, open the frame picker,
and choose a frame.
You can choose a frame from the Frames picker in the
Frames dialog box.
To change the frame color, opacity, edges,
and alignment, click the Modify tab, and
choose the settings you want.
You can customize a preset frame to create an artistic
effect.
Image lists
You can paint with small-scale, full-color
bitmaps organized in image lists, instead of a
brush. For example, you can enhance
landscapes by spraying clouds across the sky or
foliage across the ground.
CorelDRAW Graphics Suite X6 Content
includes a collection of image lists that you can
spray with in Corel PHOTO-PAINT.
To spray images, click the Image sprayer
tool in the toolbox, choose a preset
image list from the Brush type list box on
the property bar, and drag in the image
window.
Button images were sprayed to decorate the frame.
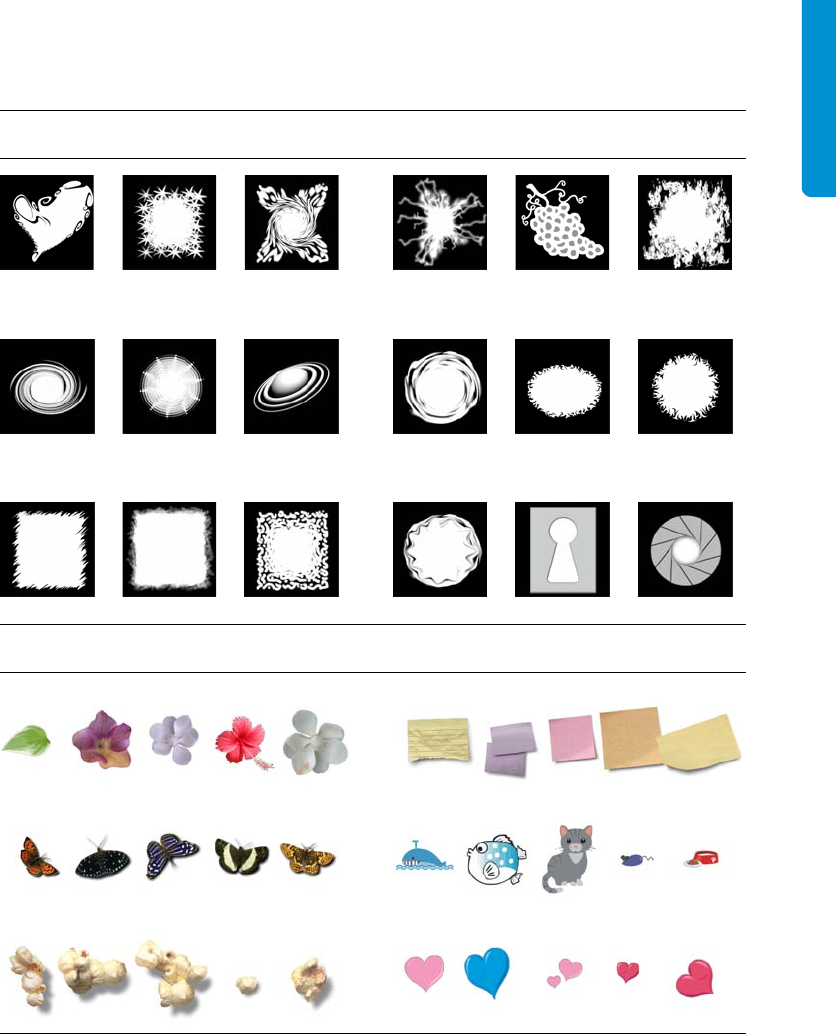
Chapter 11: Content Types | 155
Sample photo frames
Sample image lists
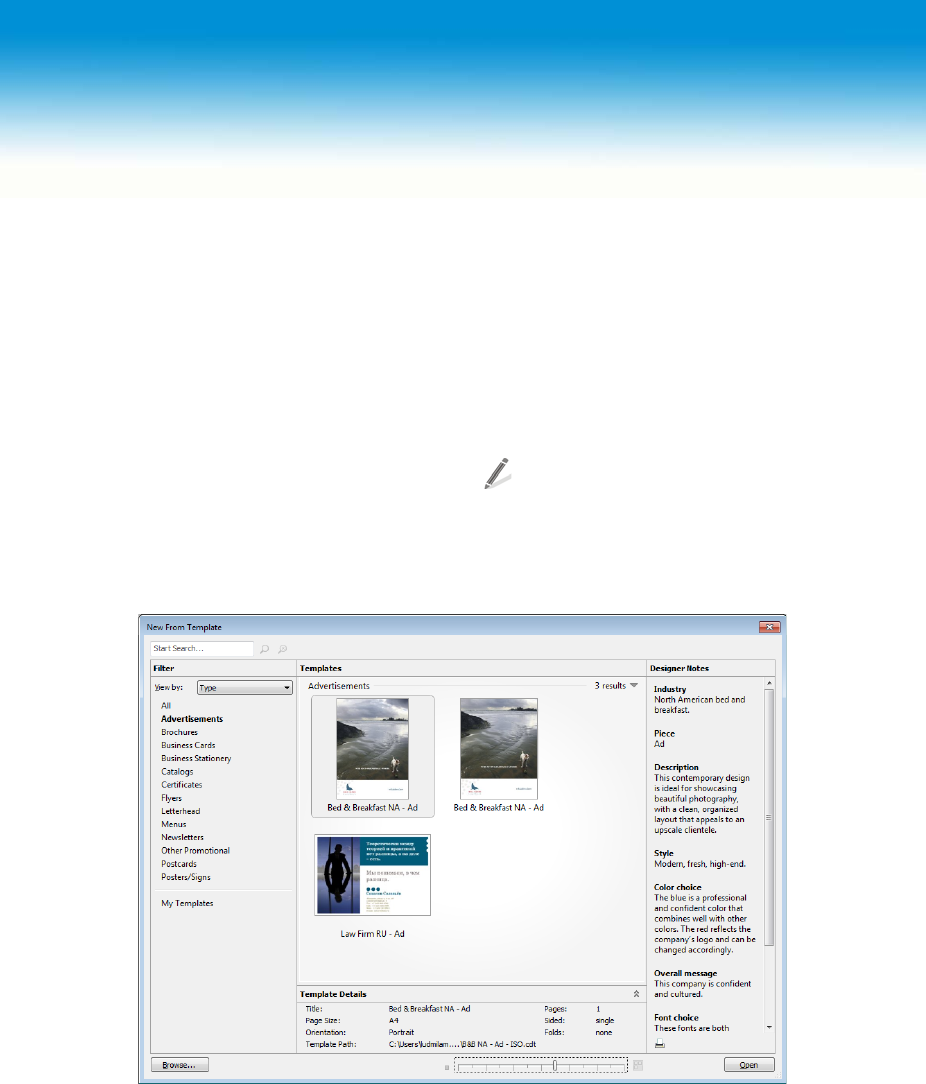
158 | CorelDRAW Graphics Suite X6 Guidebook
Chapter 12: Templates
A template is a collection of styles and page
layout settings that control the layout and
appearance of a document.
CorelDRAW provides templates that are
organized in categories, such as brochures,
business cards, and newsletters. You can
choose a preset template, modify documents
based on preset templates, or create your own
templates.
Using preset templates
You can search the available templates by the
name, category, designer notes, or other
reference information associated with a
template. You can also browse local templates.
For more information, see “Working with
templates” in the Help.
To create a document from a preset
template, click File ` New from
template. In the New from template
dialog box, search or browse the available
templates.
You can browse or search preset templates.

Chapter 12: Templates | 159
Preset templates represent a variety of industries, products, and design styles.
Template categories include T-shirts, coasters, menus, and gift bags.
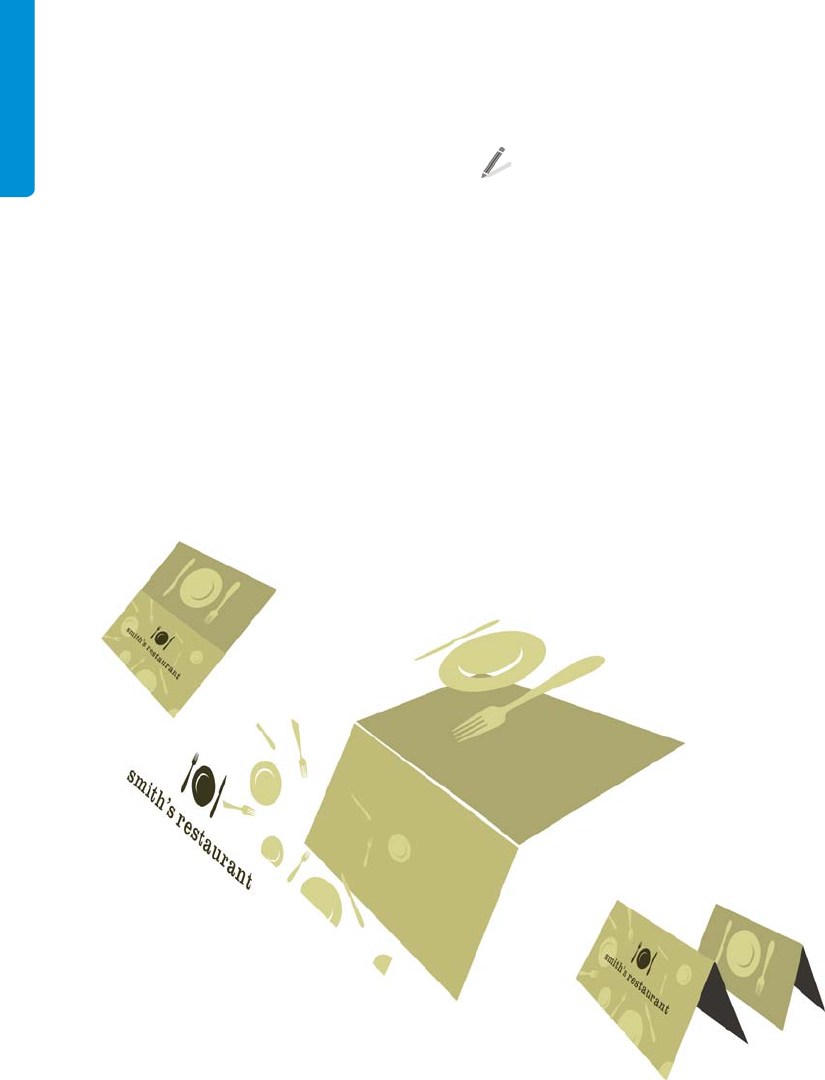
160 | CorelDRAW Graphics Suite X6 Guidebook
Modifying template-based
documents
You can create a document based on a preset
template and then modify the document
without affecting the original template.
By making changes to the graphics, text, and
layout, you can create a new design to suit
your needs. The text and graphics consist of
individual objects or groups of objects, which
appear in the Object manager docker.
You can select, move, edit, or delete any of the
objects in your document. For more
information, see “Selecting, sizing, and
transforming objects” on page 37 and
“Coloring and styling objects” on page 38.
In addition, you can easily edit existing text or
replace it with your own.
To edit paragraph text, use the Te x t tool.
After selecting the text, you can type new
text or change the font, size, color, and
other properties of the existing text.
You can also change the page layout of your
document, add a background, or insert
additional pages. For more information, see
“Working with pages” on page 44.
In the following examples, documents created
from preset templates are modified to create
two unique brochure designs.
The graphics and text in a template can be edited as individual objects.
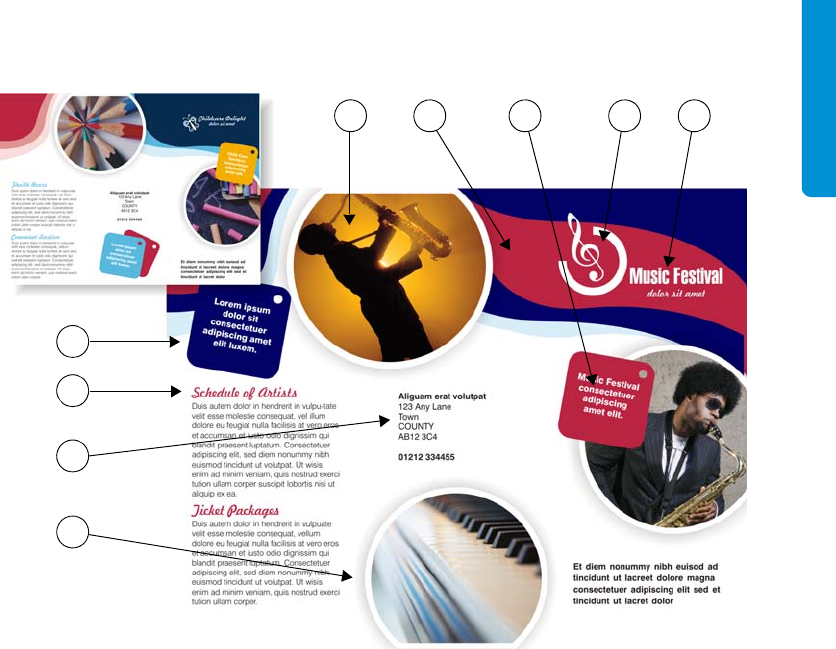
Chapter 12: Templates | 161
.
Customizing a brochure from a preset template
Example 1
The following changes are made to the
document to create the new brochure:
1 — The photos are replaced to reflect the
new theme.
2 — The color theme of the background is
changed to dark blue, red, and light blue,
and a new dark blue vector shape is added
in the upper-right corner.
3 — The square shape on the right is
moved, and its color is changed from
orange to red.
4 — The logo in the upper-right corner is
changed.
5 — The main title is updated, and the
font is changed to Swiss™ 911 XCM BT.
6 — The blue square shape in the lower
middle is moved to the upper-left corner,
and the color is changed from light blue to
dark blue. The red square shape from the
original brochure is deleted.
7 — The secondary headings are updated,
and the font color is changed from light
blue to red.
8 — The address text is aligned to the left.
9 — A photo frame element is added.
12 4
5
6
8
9
7
3
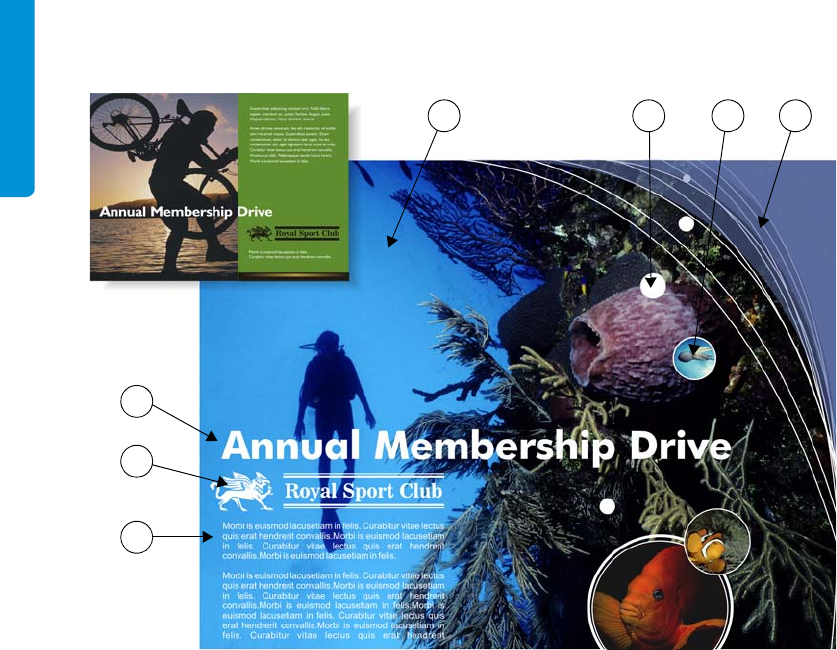
162 | CorelDRAW Graphics Suite X6 Guidebook
.
Customizing a brochure from a preset template
Example 2
The following changes are made to the
document to create the new brochure:
1 — The photo is replaced.
2 — White bubbles are created to reflect
the theme of the brochure while making
the overall composition more whimsical.
3 — Additional photos are imported, and
PowerClip™ objects are created to make
the photos fit within the white vector
bubbles.
4 — The green backdrop (rectangle) is
removed. Purple shapes with subtle white
curves are added in the upper-right corner
to create balance in the design.
5 — The main title is enlarged to span
approximately 80% of the page width,
which makes it easier to read the text
from afar.
6 — The logo color is replaced with white,
and the double horizontal lines are
reduced in stroke width.
7 — The body text is relocated under the
logo, and the alignment is fully justified,
so that the text flows seamlessly.
Creating templates
If you want to reuse the design elements in a
document, you can save it as a template.
When you save a template, CorelDRAW lets
you add reference information, such as
pagination, category, industry, and other
notes. This reference information makes it easy
to organize and search for templates later.
23
7
6
41
5

Chapter 12: Templates | 163
To save a document as a template, click
File ` Save as template. Type a name in
the File name list box, and locate the
folder where you want to save the
template. Click Save. In the Te m p l a t e
properties dialog box, add any reference
information you want.
Part Five
Tips and
Techniques
Image created by
Prem Kumar
India

168 | CorelDRAW Graphics Suite X6 Guidebook
Chapter 13: Sign Making
CorelDRAW® Graphics Suite offers tools and features that let you quickly create effective business
signs, banners, vehicle wraps, posters, and more. This chapter introduces you to the most common
tasks in the sign-making industry and provides procedures that let you try out the recommended
features for each task. The tips and techniques in this chapter were provided by Doug Downey, an
experienced sign maker and trainer.
Task Recommended features
Scanning a hand-drawn concept Acquire image command
Setting the dimensions or scale Create a new document dialog box
Ruler settings
Drawing scale
Creating a border Rectangle tool
Boundary command
Envelope tool
Incorporating and creating content WhatTheFont?!™
PowerClip™
Align and distribute dialog box
Contour tool
Bevel effect
Drop shadow tool
Interactive fill tool
Eraser tool
Objects docker
Image Adjustment Lab
Getting client approval Color proof settings docker
PDF export

Chapter 13: Sign Making | 169
Scanning a hand-drawn concept
The level of direction that you receive from
your client or manager may vary. You may be
given a logo or template to work from, or you
may have complete creative control. Either
way, you should decide on the style of the sign
before you begin designing. If you are creating
a sign from scratch, you may want to
determine the main design elements
beforehand. These elements may include font
style, border type, color palette, and the use of
graphics or photos. You can discuss these
design elements with your client or manager to
ensure that you share a common vision.
Acquire Image command
CorelDRAW and Corel PHOTO-PAINT
Hand-drawn concepts can be scanned into
CorelDRAW or Corel PHOTO-PAINT and used as
a reference for your final design. The scanned
image can be locked on its own layer so that it
is not accidentally moved or edited.
Give it a try
1Click File ` Acquire image ` Select
source, and choose a scanner from the list.
2Click File ` Acquire image ` Acquire,
and scan the image.
3Do one of the following:
•In CorelDRAW, select the scanned
image in the Object manager docker,
and click the Lock or unlock icon.
• In Corel PHOTO-PAINT, select the
scanned image in the Objects docker,
and click Object ` Lock.
The scanned image is locked to prevent
editing.
Setting the dimensions or scale
One of the first things you must do is set the
drawing scale to reflect the real-world
dimensions of the sign that you are creating.
Setting the correct drawing scale prevents any
sizing or scaling problems when you fabricate
the sign later on.
Create a New Document dialog box
CorelDRAW
Before you set a drawing scale, you must
choose a unit of measure other than pixels (for
example, inches or centimeters). When you
create a new document, you can specify the
unit of measure in the Create a new
document dialog box.
Give it a try
1Click File ` New.
2In the Create a new document dialog
box, choose a unit of measure other than
pixels.
Ruler settings
CorelDRAW
If you have already started a document with
pixels set as the unit of measure, you can easily
change this preference by using the ruler
settings.
Fabricating the sign Print dialog box
Task Recommended features
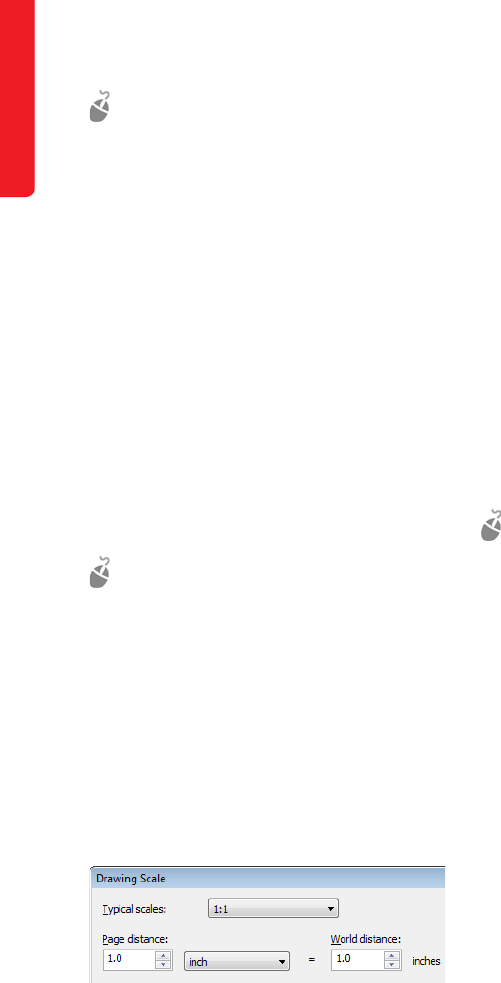
170 | CorelDRAW Graphics Suite X6 Guidebook
Give it a try
1Click Tools ` Options.
2In the Options dialog box, expand the
Document category, and click Rulers.
3In the Units area, choose a unit of measure
other than pixels.
Drawing scale
CorelDRAW
Depending on your own work preferences, you
can either choose a preset drawing scale or
create a custom drawing scale. Custom
drawing scales are useful when your client has
provided exact dimensions for the sign and you
cannot re-create these dimensions with any of
the preset drawing scales.
Give it a try
1Click View ` Setup ` Grid and ruler
setup.
2In the Document list of categories, click
Rulers.
3Click Edit scale.
4In the Drawing scale dialog box, choose a
preset drawing scale from the Typical
scales list, or create a custom scale by
typing values in the text boxes.
The Drawing scale dialog box lets you choose a preset
drawing scale or create a custom scale.
Creating a border
When you have set the sign dimensions, you
can create a border around your sign.
Depending on the look you want, there are
various shapes that you can use to create
borders.
Rectangle tool
CorelDRAW and Corel PHOTO-PAINT
One of the basic shape tools, such as the
Rectangle tool, can be used to create a
border. The Rectangle tool lets you easily
modify the look of the corners to create round,
scalloped, and chamfered corners, which are
often used on signs.
Give it a try
1Click the Rectangle tool in the toolbox.
2Do one of the following:
• In CorelDRAW, type a value greater
than 0 in the Corner radius boxes on
the property bar.
• In Corel PHOTO-PAINT, click the
Disable fill button, and type a value
greater than 0 in the Corner size box
on the property bar.
3Use the controls on the property bar to do
one of the following:
• To set round corners for the rectangle,
click the Round corner button.
• To set curved notches for the rectangle
corners, click the Scalloped corner
button.
• To set flat edges for the rectangle
corners, click the Chamfered corner
button.
4Drag to create a rectangular border for the
sign.

Chapter 13: Sign Making | 171
In CorelDRAW, double-click the Rectangle
tool to create a rectangle that matches the
size of the page, or click Layout ` Page
setup to add a page frame.
You can create rounded corners, scalloped corners, or
chamfered corners.
Boundary command
CorelDRAW
You can use a combination of simple shapes to
create a more complex border for your sign.
The Boundary command in CorelDRAW
creates a new object that surrounds the
selected objects.
Give it a try
1Using the Rectangle tool, drag to draw a
rectangle.
2In the toolbox, click the Ellipse tool.
3Drag to draw a circle so that it overlaps
with the rectangle.
4Using the Pick tool, select the circle, hold
down Shift, and select the rectangle.
5Click Arrange ` Shaping ` Boundary, or
click the Create boundary button on the
property bar, to create a new object from
the two selected objects.
You can use the Boundary command to create a
complex border from simple shapes.
Envelope tool
CorelDRAW
You can easily add visual effects to your border
with the Envelope tool in CorelDRAW. The
Envelope tool lets you interactively warp the
sides of an object and create interesting border
effects.
Give it a try
1Using the Rectangle tool, drag to create a
rectangle.
2In the toolbox, click the Envelope tool.
3On the property bar, click the Single-arc
mode button.
4Click the center-top node, hold down
Shift, and drag the center-bottom node to
expand the envelope on both sides.
To apply the effect to one side only, drag a
node without holding down Shift.
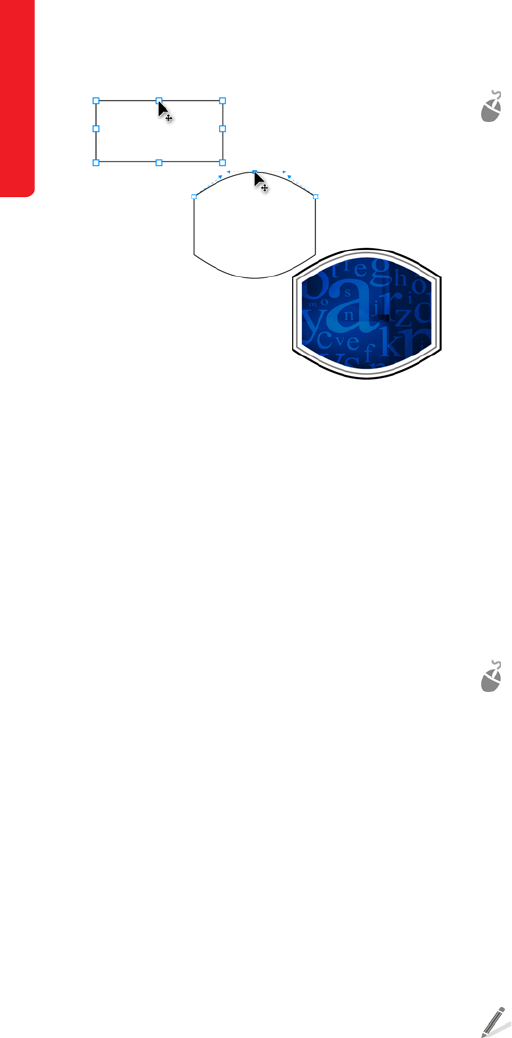
172 | CorelDRAW Graphics Suite X6 Guidebook
The Envelope tool lets you create interesting border
effects.
Incorporating and creating content
After designing the border, you can add
content to the sign. In some cases, you may
have received content from your client, such as
a business logo or a tagline. In other cases, you
may need to design the content from scratch,
beginning with a scanned concept drawing.
Here are some useful tools and features to help
you quickly and effectively add content to your
sign.
WhatTheFont?!
CorelDRAW and Corel PHOTO-PAINT
Your client may send you a font preference for
the sign. The client’s business brand may
require a certain font, or the client may submit
several fonts and ask you to create a few
samples.
If the file that you receive from your client
contains a font that you cannot identify, you
can use CorelDRAW or Corel PHOTO-PAINT to
access the WhatTheFont?! Web site.
WhatTheFont?! lets you capture and submit a
font sample for quick and easy identification.
(The Web site is available in English only.)
Give it a try
1Do one of the following:
• In CorelDRAW, click Te x t `
WhatTheFont?!.
• In Corel PHOTO-PAINT, click Object `
Te x t ` WhatTheFont?!.
2Drag to create a marquee around the font
that you want to identify.
3Click inside the capture area, or press Enter
to complete the capture.
The WhatTheFont?! Web site appears and
offers suggestions to help you identify the
font.
PowerClip
CorelDRAW
The PowerClip feature in CorelDRAW makes it
easy to trim a bitmap image so that it fits
within the border of your sign or another
vector object.
Give it a try
1Select a bitmap, and position it underneath
the vector object.
You can use the Object manager docker
to make sure that the bitmap is below the
vector object in the stacking order, so that
the vector object is visible.
2Click Effects ` PowerClip ` Place inside
frame.
3Move the arrow pointer to the object in
which you want to place the bitmap image,
and click to apply the PowerClip effect.
Right-click the PowerClip object, and
choose Edit PowerClip to extract the
bitmap from the PowerClip container. You
can then modify the bitmap or change its
position within the container. When you’re
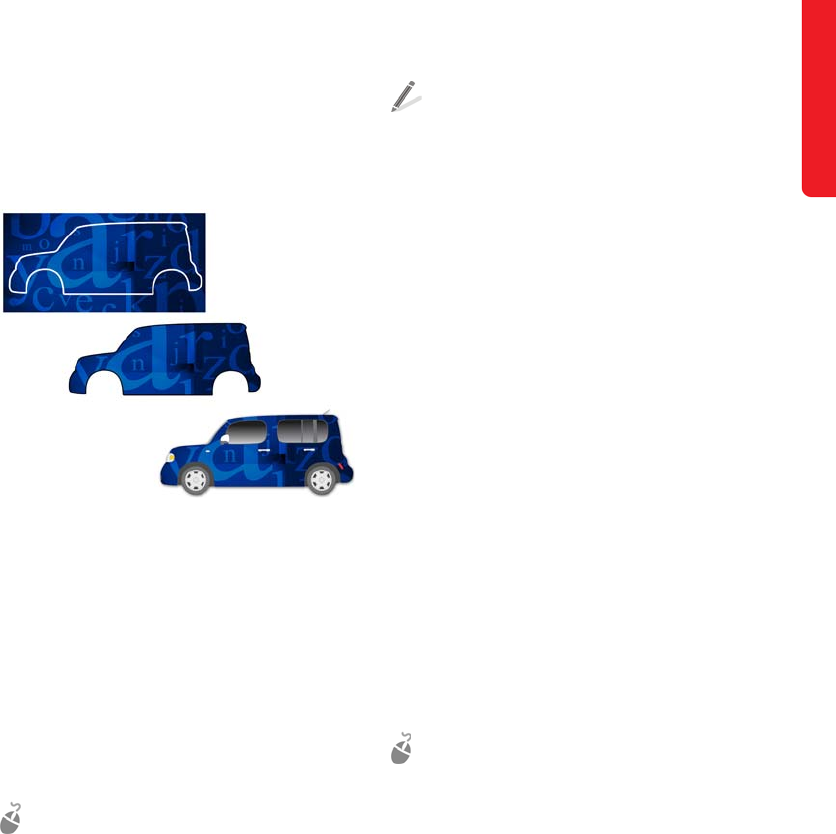
Chapter 13: Sign Making | 173
done, click the Stop editing contents
button on the screen or right-click the
bitmap, and choose Finish editing this
level.
The PowerClip effect lets you trim a bitmap so that it fits
within the border of your sign.
Align and Distribute dialog box
CorelDRAW and Corel PHOTO-PAINT
Proper alignment of text and graphic elements
is key to the design of any sign, billboard, or car
wrap. The Align and distribute dialog box
can help you align objects to a page, align
objects to other objects, or distribute multiple
objects evenly at a fixed distance.
Give it a try
1Select two or more objects to align.
2Do one of the following:
• In CorelDRAW, click Arrange ` Align
and distribute ` Align and
distribute.
• In Corel PHOTO-PAINT, click Object `
Arrange ` Align and distribute.
3In the Arrange and distribute dialog
box, click the Align tab.
4Choose options for aligning the objects.
In CorelDRAW, you can use the following
keyboard shortcuts to align the selected
objects:
•C to align the centers vertically
•E to align the centers horizontally
•T to align the top of the objects
•B to align the bottom of the objects
•L to align the left edge of the objects
•R to align the right edge of the objects
•P to center the objects on the page
Contour tool
CorelDRAW
It is common to apply special effects to text
characters or objects in a sign to make them
stand out from the background or from other
objects.
You can add a contour to text or objects in your
design by using the Contour tool. The
Contour tool creates a three-dimensional (3D)
effect by creating a series of concentric curves
that progress to the inside or outside of an
object or text.
Give it a try
1Select an object or text.
2In the toolbox, click the Contour tool.
3On the property bar, adjust the size and
color of the contour to be applied.
4In the Contour offset box, type a value for
the distance between contour lines.
At first, try setting a very small offset
distance (for example, 0.01").
5On the property bar, click one of the
following buttons to specify how you
would like the contour to be applied to the
object: To c e n te r, Inside contour, or
Outside contour.
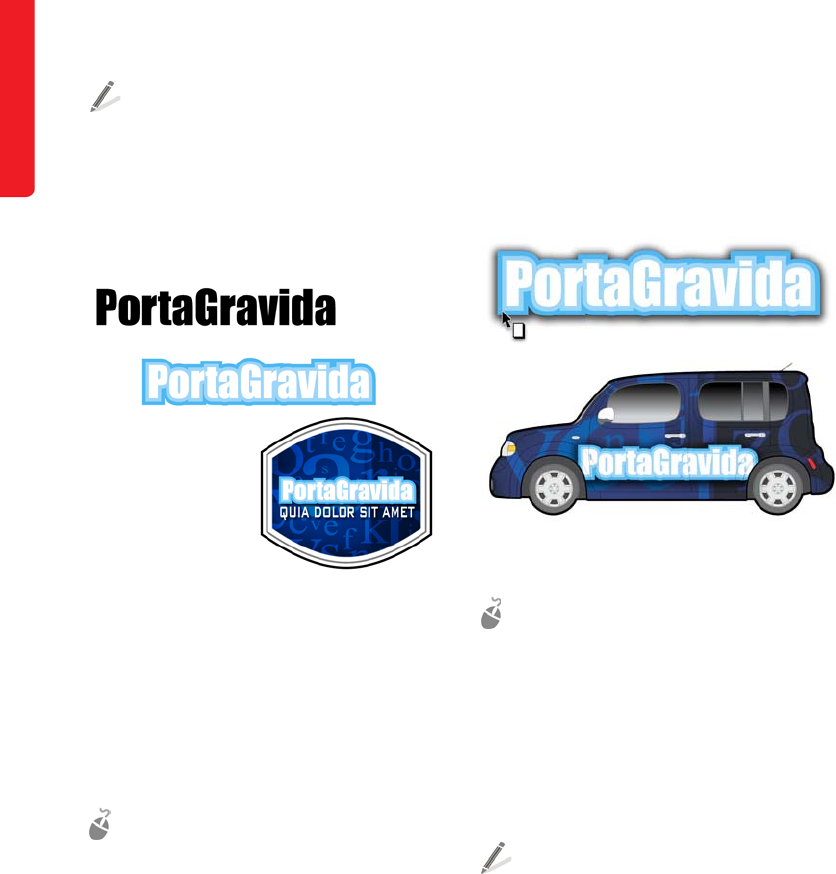
174 | CorelDRAW Graphics Suite X6 Guidebook
Before you apply additional effects, such as
the Bevel effect, to the object, click the
Pick tool, click the contoured object, and
click Arrange ` Break contour group
apart. The contour effect must be
separated from the object before another
effect can be applied.
You can use the Contour tool to create a 3D effect.
Bevel effect
CorelDRAW
You can use the Bevel effect to apply another
3D effect to an object or text. The Bevel effect
makes your text stand out on the sign and
helps draw attention to it.
Give it a try
1Select an object or text.
2Click Effects ` Bevel.
3Experiment with the different bevel effect
settings in the Bevel docker.
Drop Shadow tool
CorelDRAW and Corel PHOTO-PAINT
The Drop shadow tool produces one of the
most powerful effects in CorelDRAW Graphics
Suite and is widely used in the sign-making
industry.
This tool lets you add a realistic shadow effect
to a selected object, creating the illusion that
the object is floating above the sign.
The Drop shadow tool creates a realistic shadow
effect.
Give it a try
1Select an object or text.
2In the toolbox, click the Drop shadow
tool.
3On the property bar, choose a preset, and
experiment with the settings to adjust the
size, color, and other properties of the drop
shadow.
To adjust the drop shadow interactively,
drag one of the square interactive handles.
To change the color of the drop shadow,
drag a color from the default or custom
color palette to one of the interactive
handles. This approach is particularly
useful when you want to match a color in
your design.
If you have a light-colored drop shadow on
a dark background, choose Normal from
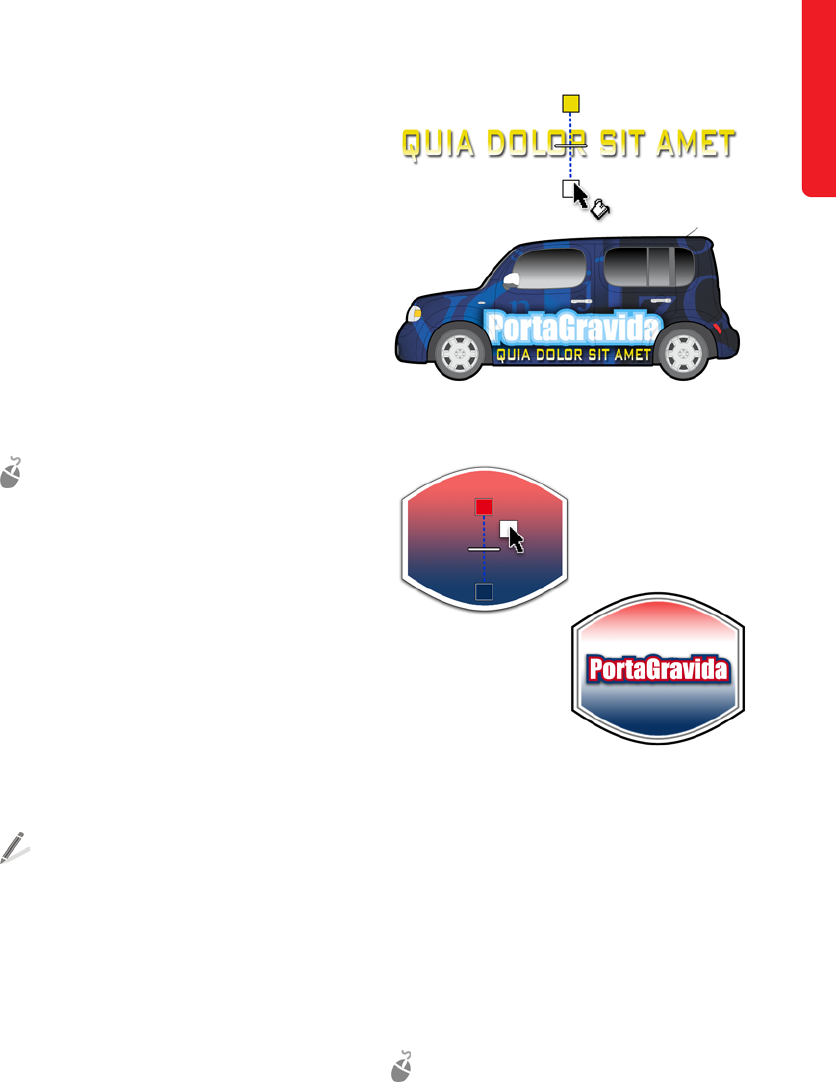
Chapter 13: Sign Making | 175
the Transparency operation list box on
the property bar to make the shadow stand
out more.
To separate the drop shadow from the
object or text, select the drop shadow, and
click Arrange ` Break drop shadow
group apart.
Interactive Fill tool
CorelDRAW and Corel PHOTO-PAINT
Using the Interactive fill tool is a convenient
way to create color transitions across an object
or text.
Give it a try
1Select an object or text.
In Corel PHOTO-PAINT, click the Lock
transparency button in the Objects
docker to constrain the gradient fill to the
selected object.
2In the toolbox, click the Interactive fill
tool.
3Drag across the text or object to apply a
color gradient.
4Experiment with the options on the
property bar to change the gradient type,
color, size, or direction.
To constrain the gradient direction to 15-
degree angles, hold down Ctrl while
dragging.
To change the start and end colors of the
gradient, drag colors from the color palette
to the square interactive handles. To add
transition colors, drag colors from the color
palette anywhere on the dotted line
between the interactive handles.
The Interactive fill tool creates color transitions across
an object.
You can add transition colors by dragging colors from
the color palette to the dotted line.
Eraser tool
CorelDRAW and Corel PHOTO-PAINT
The Eraser tool is great for erasing areas of a
design when you don’t need to be very precise.
For example, you can create various effects by
duplicating text and partially erasing the
duplicate to reveal the original text
underneath.
Give it a try
1Create a text object by using a thick font
such as Impact.
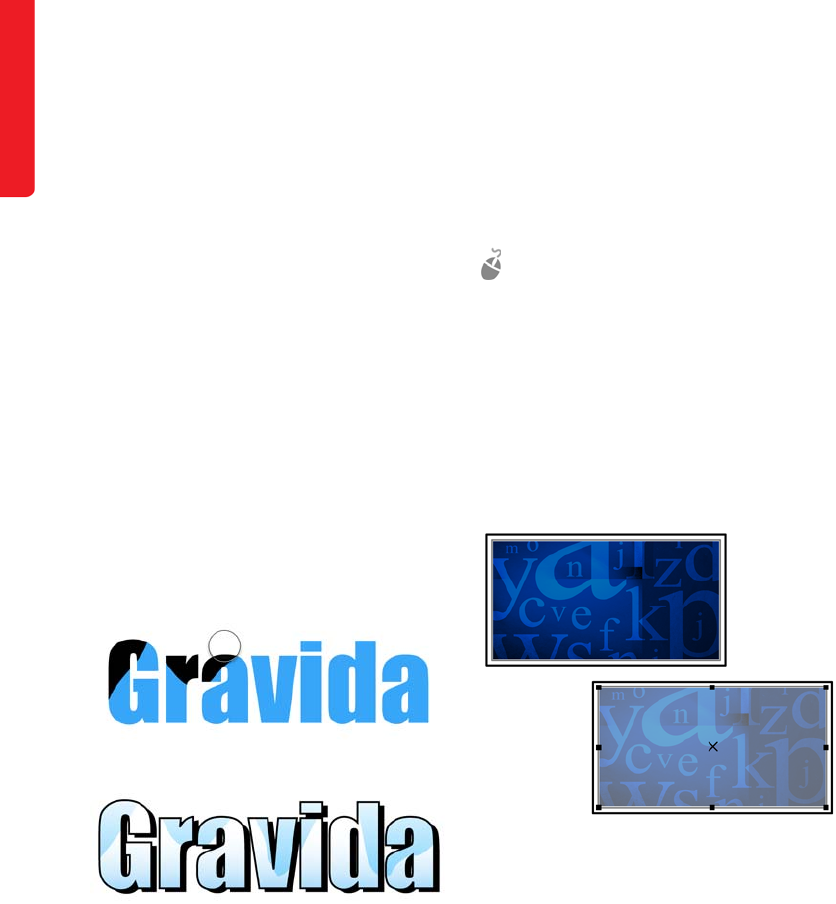
176 | CorelDRAW Graphics Suite X6 Guidebook
2Press Ctrl + D to duplicate the text, and
make sure that the duplicate completely
overlaps with the original object.
3With the duplicate selected, do one of the
following:
• In CorelDRAW, click a color on the
color palette to change the fill color of
the duplicate.
• In Corel PHOTO-PAINT, right-click a
color on the color palette, click the Fill
tool in the toolbox, and click the letters
of the text to change their color.
Changing the color makes it easy to
differentiate the top object from the
underlying object when you start erasing.
4Make sure that the top object is selected,
and click the Eraser tool in the toolbox.
Erase areas of the top object to partially
reveal the underlying text and create
various effects.
The Eraser tool lets you create a mountain effect by
erasing areas of the top object to reveal the underlying
text.
Objects docker
Corel PHOTO-PAINT
You can create interesting layered effects with
objects that are on top of your background
image in Corel PHOTO-PAINT. The Opacity
setting in the Objects docker lets you adjust
the opacity of the selected object so that
elements of the underlying background can
become visible. This setting is especially useful
when you want to create variation and interest
in your sign without making the background
too strong.
Give it a try
1Open a bitmap in Corel PHOTO-PAINT.
2In the toolbox, click the Rectangle tool.
3Drag to create a rectangle.
The default fill color is black.
4In the Objects docker, select the rectangle
object.
5Experiment with the Opacity setting.
The opacity of the rectangle is adjusted to reveal the
underlying background.
Image Adjustment Lab
CorelDRAW and Corel PHOTO-PAINT
The Image Adjustment Lab is an excellent tool
that lets you lighten, darken, or make color
adjustments to your bitmap images in
CorelDRAW or Corel PHOTO-PAINT. You can
view the adjustments in the preview window
and use the Create snapshot feature to
experiment with different settings until you are
satisfied with the results.
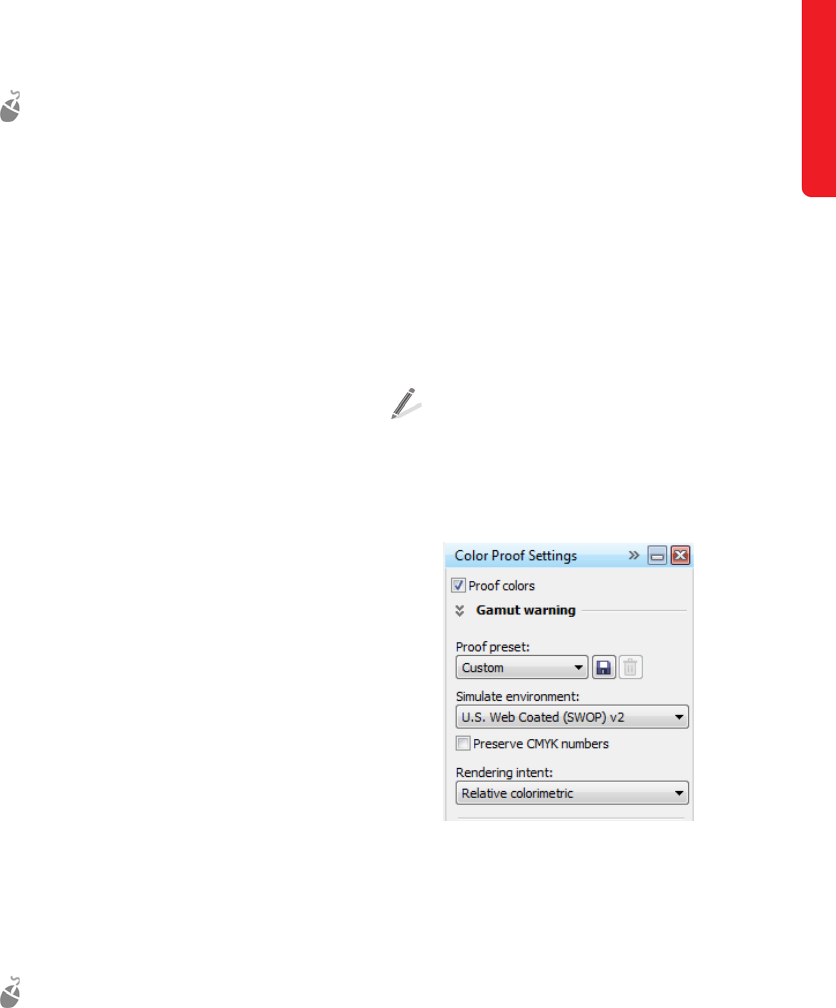
Chapter 13: Sign Making | 177
Give it a try
1Select a bitmap image.
2Do one of the following:
• In CorelDRAW, click Bitmaps ` Image
adjustment lab.
• In Corel PHOTO-PAINT, click Adjust `
Image adjustment lab.
3Experiment with the temperature, tint,
brightness, contrast, and other settings.
4Click the Create snapshot button to save
a temporary copy of the image.
Snapshots appear as thumbnails below the
image. You can use these thumbnails to
compare different settings.
Getting client approval
Before sending your completed sign project for
fabrication, you can send a soft proof (usually
a PDF) to your client for final approval. By using
the color proofing features in CorelDRAW, you
can provide your clients or colleagues with a
file that is an accurate representation of the
colors that will appear on the fabricated sign.
Color Proof Settings docker
CorelDRAW
You can create an accurate proof by exporting
a file that contains the color profile of the
output device. In addition, you can enable
color proofing for your document, which lets
you preview how different color profiles will
affect the colors in your document.
Give it a try
1Click Tools ` Color proof settings.
The Color proof settings docker appears.
2In the Color proof settings docker,
enable the Proof colors check box.
An icon on the right side of the status bar
indicates whether proof colors are turned
on or off.
3From the Simulate environment list box
in the Color proof settings docker,
choose the color profile for your output.
The display of the document colors on your
monitor changes dynamically to let you
preview the colors of the final output.
4Click the Export soft proof button to save
a file with the proof colors.
For more information about color settings
and soft proofing, see “Color management
settings in CorelDRAW Graphics Suite X6”
on page 94 and “Soft proofing” on
page 98.
The Color proof settings docker lets you choose an
output color profile and preview the results.
PDF export
CorelDRAW and Corel PHOTO-PAINT
When you are ready to send your work for
approval, you can export your CorelDRAW
document to a PDF file, and then e-mail the
PDF file to your client. When you export a file,
your original CorelDRAW document is
unaffected, and a separate copy of your project
is created in the selected file format.
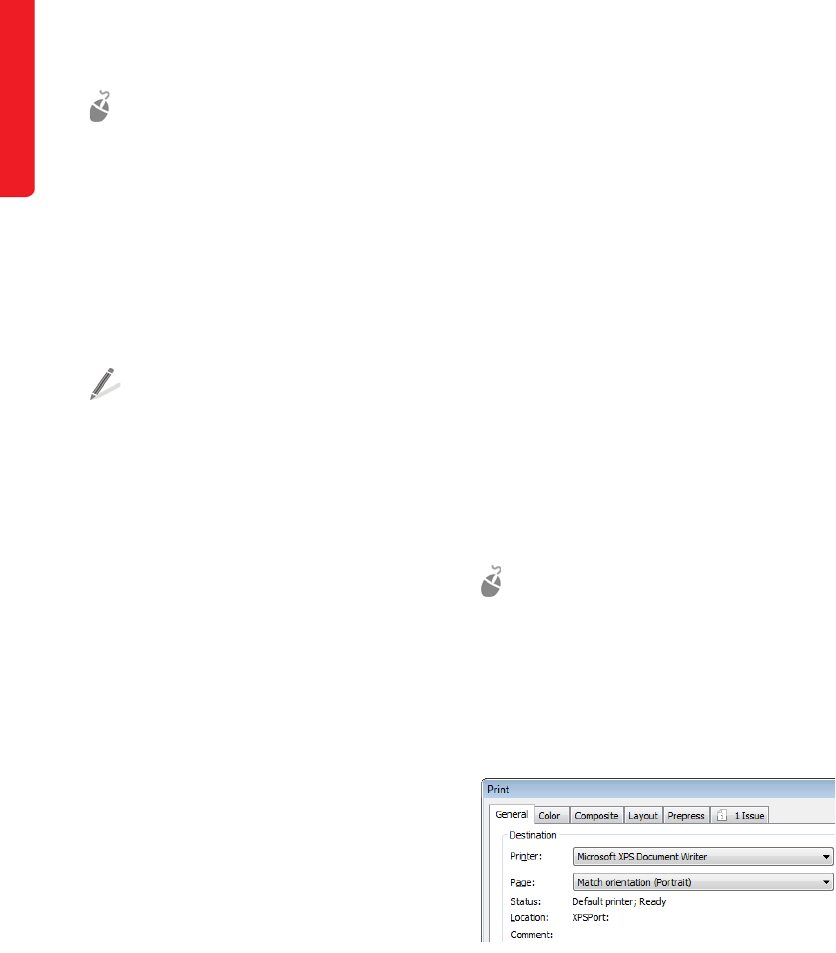
178 | CorelDRAW Graphics Suite X6 Guidebook
Give it a try
1Click File ` Export.
2Choose PDF - Adobe portable
document format from the Save as
type list box.
3Click Export.
The PDF settings dialog box appears. You
can click the Color tab to choose specific
color settings for the PDF file.
For more information about PDF color
settings, see “Specifying color
management options for exporting PDF
files” in the Help.
Fabricating the sign
When your sign is ready to be fabricated, you
can choose from a variety of printers or print
service providers. A popular choice in the sign-
making industry is a Roland® printer. These
printers offer a one-stop printing and cutting
experience, eliminating the need to print the
sign before sending it to a cutter. Roland
printers do all the printing, aligning, and
cutting internally, which has made them a top
choice among sign makers.
If you have direct access to a Roland printer,
you can install the printer driver and print your
work directly from your computer. Roland
printers come equipped with software that
calibrates your image for color and
positioning. You can also use the software to
position and print multiple copies on the same
page, which can reduce the waste of expensive
sign material.
If you are sending your work to a print service
provider that uses a Roland printer, you can still
take advantage of the printer’s one-stop
functionality. Roland printers accept multiple
file formats, including PDF, EPS, and JPG files.
Ask your print service provider whether any
specific file formats are preferred.
Print dialog box
CorelDRAW and Corel PHOTO-PAINT
If you are printing directly to a Roland printer,
you can set the printer page size and
orientation to automatically match the
page settings of your CorelDRAW or
Corel PHOTO-PAINT file, which eliminates
the need to set up the page size and
orientation manually. For more information
about printing, see “Printing” in the Help.
Give it a try
1Click File ` Print.
2In the Print dialog box, click the General
tab.
3In the Page list box, choose Match
orientation.
The Print dialog box lets you choose page orientation
settings.
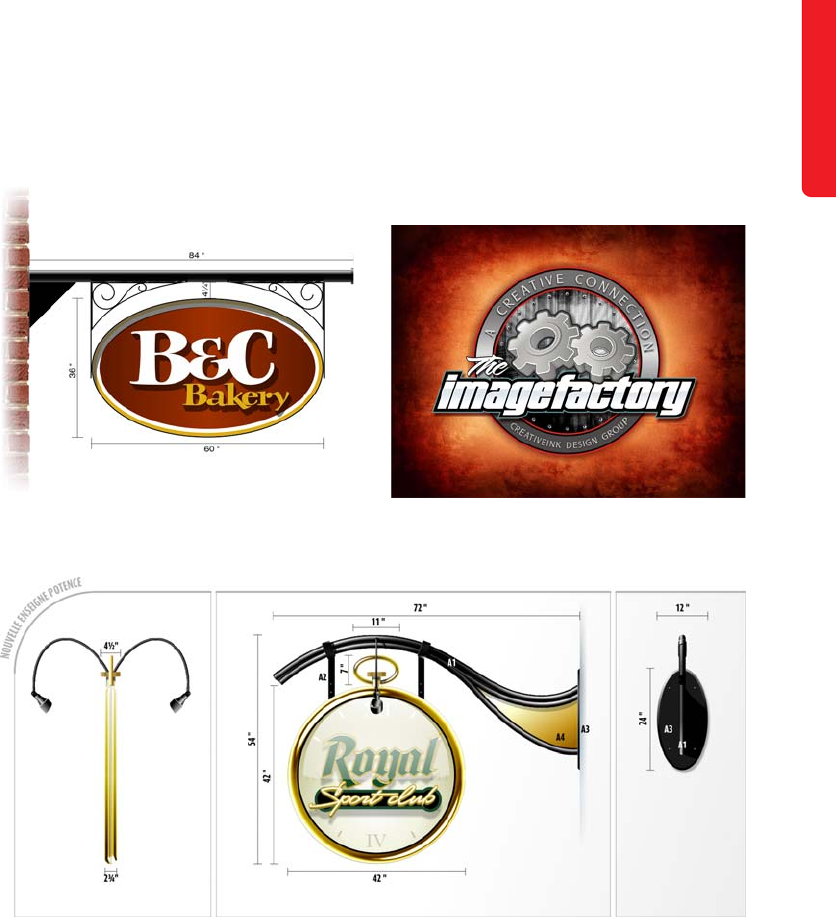
Chapter 13: Sign Making | 179
Examples
The images in this section show business signs that were created by using the features and
techniques recommended in this chapter.
Image by Stephan Tetreault Image by Doug Downey
Image by Stephan Tetreault

182 | CorelDRAW Graphics Suite X6 Guidebook
Chapter 14: Illustration
CorelDRAW and Corel PHOTO-PAINT let you unleash your artistic vision to produce stunning
illustrations. This chapter introduces you to the most common illustration tasks and recommends
features that you can use in your creative workflow. The tips and techniques in this chapter were
provided by Igor Tkac, a professional illustrator. Igor’s work is featured in the Gallery in Part Seven
of this guidebook.
Task Recommended features
Setting up the document Create a new document dialog box and
Create a new image dialog box
Setting up a pen tablet Pen tablet settings
Sketching by hand Paint tool
Drawing brushstrokes Artistic media tool: Preset mode
Artistic media tool: Brush mode
Artistic media tool: Sprayer mode
Artistic media tool: Calligraphic mode
Artistic media tool: Pressure mode
Brush settings docker
Drawing objects Corel® PowerTRACE™
Rectangle tool and Ellipse tool
Freehand tool
Bézier tool and Pen tool
Shape tool
Duplicate, Scale, Rotate, and Mirror
commands
Applying color Document palette and Image palette
Mesh fill tool

Chapter 14: Illustration | 183
You can choose from a wide range of drawing
tools and special effects to create realistic,
photo-quality illustrations, all by hand.
CorelDRAW and Corel PHOTO-PAINT both
support pen tablet technology, which makes
the experience of drawing by hand smooth
and intuitive. Even if you do not use a pen
tablet, you can create stunning illustrations by
using tools such as the Mesh fill tool and the
Artistic media tool.
An illustration can be a bitmap, a vector
graphic, or a combination of both. Being able
to move smoothly between working with
bitmaps and working with vector graphics is
key to the successful rendering of the artwork.
Setting up the document
When you start a new file, you must choose
settings for the project.
Create a New Document dialog box and
Create a New Image dialog box
CorelDRAW and Corel PHOTO-PAINT
The settings that you choose at the start of the
project include the dimensions, resolution,
color profile, and portrait or landscape
orientation. You can change the size and
orientation of the project as you work. The
resolution and color settings that you choose
are based on the intended use of the project.
For example, Web designs and print designs
require different settings. For information
about setting up your document for different
types of output, see “Color Management” on
page 90 and “Printing” in the Help.
Give it a try
1Click File ` New.
2Do one of the following:
• In CorelDRAW, choose settings in the
Create a new document dialog box.
• In Corel PHOTO-PAINT, choose settings
in the Create a new image dialog
box.
Setting up a pen tablet
CorelDRAW and Corel PHOTO-PAINT both
support the use of pen tablet technology. Pen
tablet hardware consists of a pen and drawing
tablet that let you sketch by hand. While you
sketch, the software transforms your strokes to
look like they were made by various types of
pens and brushes. Whether you are drawing
complex artwork or simple doodles, the use of
a pen tablet is the most intuitive way to
transfer the natural hand movements of
drawing to the computer screen.
Pen tablet settings
CorelDRAW and Corel PHOTO-PAINT
Both CorelDRAW and Corel PHOTO-PAINT let
you customize how your pen tablet strokes are
Applying effects Transparency tool and Object
transparency tool
Perspective effect
Envelope tool
Special effects
Task Recommended features

184 | CorelDRAW Graphics Suite X6 Guidebook
rendered in your illustration. As you draw with
the pen, your unique method of applying tilt
and pressure may affect the appearance of the
strokes on the screen. To optimize the results
produced by your own drawing style, you can
automatically adjust the settings according to
the pressure that you typically apply to the pen
when you draw.
Give it a try
1Click Tools ` Options.
2Do one of the following:
• In CorelDRAW, expand the
Workspace list of categories, and click
Display.
• In Corel PHOTO-PAINT, click General
in the Workspace list of categories.
3Click the Configure button.
4Using a pen tablet, draw a few strokes that
represent the pressure that you typically
apply.
CorelDRAW and Corel PHOTO-PAINT
automatically adjust the pen tablet settings
to accommodate your pressure style.
The pen tablet settings automatically adjust the stroke
according to the pressure that you apply.
Sketching by hand
Before you begin working with CorelDRAW or
Corel PHOTO-PAINT, you may want to sketch
your illustration by hand with a pencil and
paper. Sketching by hand can help you
visualize the illustration and explore aspects
such as perspective, shading, and dimensions.
The sketch can then be scanned into
CorelDRAW or Corel PHOTO-PAINT and used as
a reference when you start drawing and
refining your ideas. For more information
about scanning the sketch, see “Acquire Image
command” on page 169.
Many artists start out by sketching an idea
directly in Corel PHOTO-PAINT with a digital
pen and tablet. If you use CorelDRAW to
finalize the design, creating a sketch with
Corel PHOTO-PAINT is a good way to refine the
concept before you commit to the vector
rendering. The image can then be imported
into CorelDRAW at a high resolution (300 dpi
or higher).
Paint tool
Corel PHOTO-PAINT
Many artists begin by using the Paint tool in
Corel PHOTO-PAINT to create a sketch that will
be used as a reference throughout their
creative process.
Give it a try
1In the toolbox, click the Paint tool.
2On the property bar, choose a brush
category and a brush type.
3Draw the sketch that you want to use as a
reference.
4Click File ` Save to save your file.
Drawing brushstrokes
CorelDRAW and Corel PHOTO-PAINT include a
variety of preset brush styles that are inspired

Chapter 14: Illustration | 185
by the textures and brushstrokes in paintings,
sketches, and calligraphy. The drawing tools
work particularly well with a pen and tablet.
The Artistic media tool in CorelDRAW lets
you choose from a wide variety of
sophisticated preset brush styles. You can draw
preset vector shapes, brushstrokes, sprayed
images, calligraphic strokes, and pressure-
sensitive strokes. For each stroke type that is
available with the Artistic media tool, you
can set preferences for the level of smoothing,
the stroke width, and other stroke properties.
With Corel PHOTO-PAINT, you can choose from
a variety of preset brushes, or you can use the
Brush settings docker to modify the brush
attributes and create custom brushes.
Artistic Media tool: Preset mode
CorelDRAW
Using the Preset mode of the Artistic media
tool is perfect when you want to create a basic
stroke that can be edited. Preset strokes vary in
width and shape, and you can edit them by
applying a different preset stroke shape, by
stretching and moving the stroke on the page,
and by applying a fill and outline to the stroke.
Give it a try
1In the toolbox, click the Artistic media
tool.
2On the property bar, click the Preset
button.
3Choose a preset from the Preset stroke
list box on the property bar.
4Draw in the document window.
The Artistic media tool presets let you draw basic
strokes.
Artistic Media tool: Brush mode
CorelDRAW
In CorelDRAW, you can choose a brushstroke
style from a wide selection of colors, textures,
and patterns. You can use brushstrokes to
create various painting effects, such as paint
splatters, watercolor washes, and oil or acrylic
strokes, and you can create other artistic stroke
effects that resemble drops of water, a
scattering of stars, or a rainbow streak.
You can create painting effects by using the Brush
mode of the Artistic media tool.
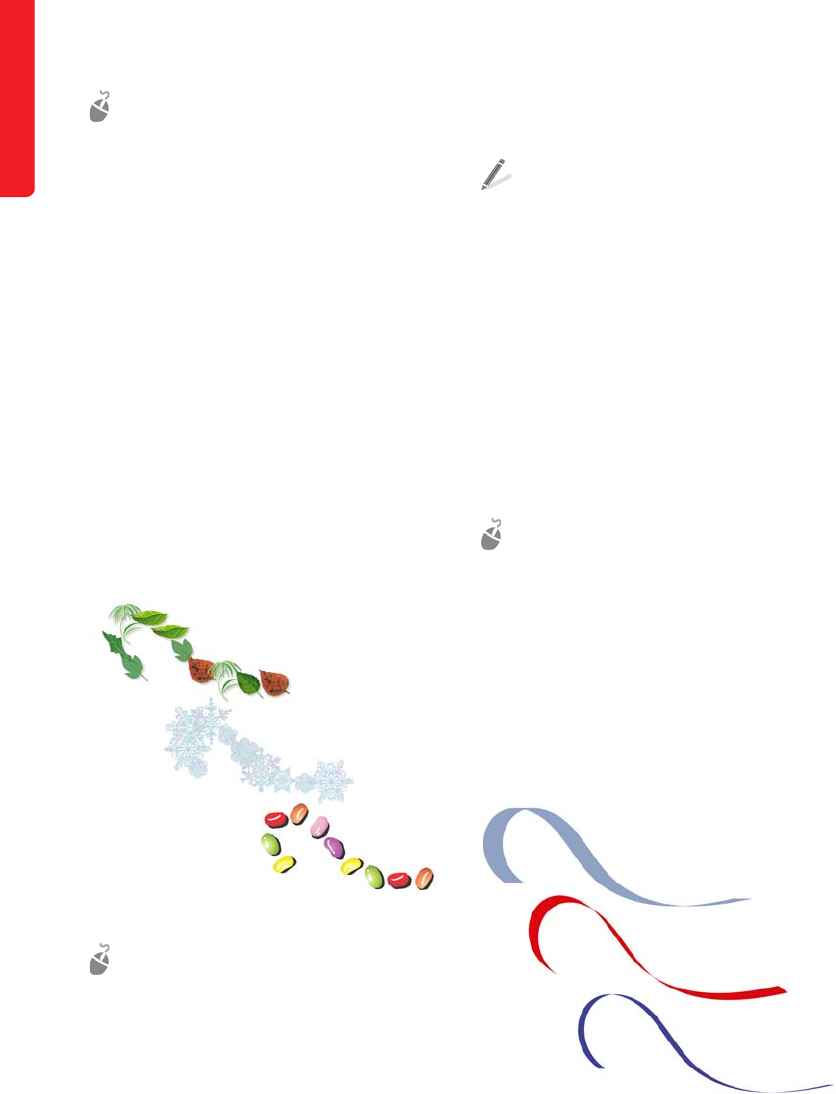
186 | CorelDRAW Graphics Suite X6 Guidebook
Give it a try
1In the toolbox, click the Artistic media
tool.
2On the property bar, click the Brush
button.
3Choose a brush category from the
Category list box, and then choose a
brushstroke from the Brushstroke list box.
4Draw in the document window.
Artistic Media tool: Sprayer mode
CorelDRAW
In CorelDRAW, you can use the Sprayer mode
of the Artistic media tool to add creative
elements to your illustration. The tool “sprays”
a series of vector images on the page. You can
choose from various image types, including fall
leaves, beach grass, balloons, and snowflakes.
You can spray vector images along a line.
Give it a try
1In the toolbox, click the Artistic media
tool.
2On the property bar, click the Sprayer
button.
3Choose a sprayer category from the
Category list box, and then choose images
from the Spray pattern list box.
4Drag in the document window to spray
images along a line.
In Corel PHOTO-PAINT, use the Image
sprayer tool to spray images. For more
information, see “Spraying images” in the
Help.
Artistic Media tool: Calligraphic mode
CorelDRAW
In CorelDRAW, you can use the Calligraphic
mode of the Artistic media tool to create
calligraphy-style strokes on the page. After you
draw the calligraphic stroke, you can widen it
to create a ribbon effect, or you can stretch,
reshape, and fill the stroke.
Give it a try
1In the toolbox, click the Artistic media
tool.
2On the property bar, click the Calligraphic
button.
3Adjust the smoothing, width, and angle of
the calligraphic stroke by typing values in
the boxes on the property bar.
4Draw in the document window.
You can create calligraphic strokes by using the Artistic
media tool.

Chapter 14: Illustration | 187
Artistic Media tool: Pressure mode
CorelDRAW
In CorelDRAW, the pressure stroke works
especially well with a pen and tablet. The
stroke thickens as you apply more pressure
with the pen and narrows as you release
pressure. Try the pressure stroke if you want to
re-create the experience of sketching by hand,
with the satisfaction of using pen pressure to
change the look of the stroke.
Give it a try
1In the toolbox, click the Artistic media
tool.
2On the property bar, click the Pressure
button.
3Adjust the smoothing and width of the
stroke by typing values in the boxes on the
property bar.
4Draw in the document window.
You can use pen pressure to control the look of the
stroke.
Brush Settings docker
Corel PHOTO-PAINT
In addition to providing various preset brushes,
Corel PHOTO-PAINT lets you create custom
brushes by modifying the brush attributes in
the Brush settings docker.
Give it a try
1In the toolbox, click the Paint tool.
2On the property bar, choose a brush
category and a brush type.
3Click Window ` Dockers ` Brush
settings.
4In the Brush settings docker, adjust the
nib, size, texture, or other brush attributes.
5Draw in the image window.
Drawing objects
CorelDRAW provides a variety of drawing tools
that you can use to create and modify shapes.
Often, drawing lines is the most time-
consuming task in illustration. Many
illustrators use CorelDRAW to trace the sketch
that they have previously created with
Corel PHOTO-PAINT. Various methods can be
used to trace the sketch in CorelDRAW. If the
original sketch is detailed enough, you can
effectively trace it by using Corel PowerTRACE.
Alternatively, you can trace the sketch manually
— or start an illustration from scratch — by
using the Rectangle and Ellipse tools to
create simple shapes, or by using the
Freehand, Bézier, and Pen tools to draw lines
and curves. After drawing the curves, you can
edit and fine-tune their shape by using the
Shape tool. You can also modify entire objects
by scaling, rotating, and mirroring them.
Corel PowerTRACE
CorelDRAW
You can trace a bitmap in one step by using the
Quick trace command. Or you can choose a
suitable tracing method and use the
PowerTRACE controls to preview and adjust
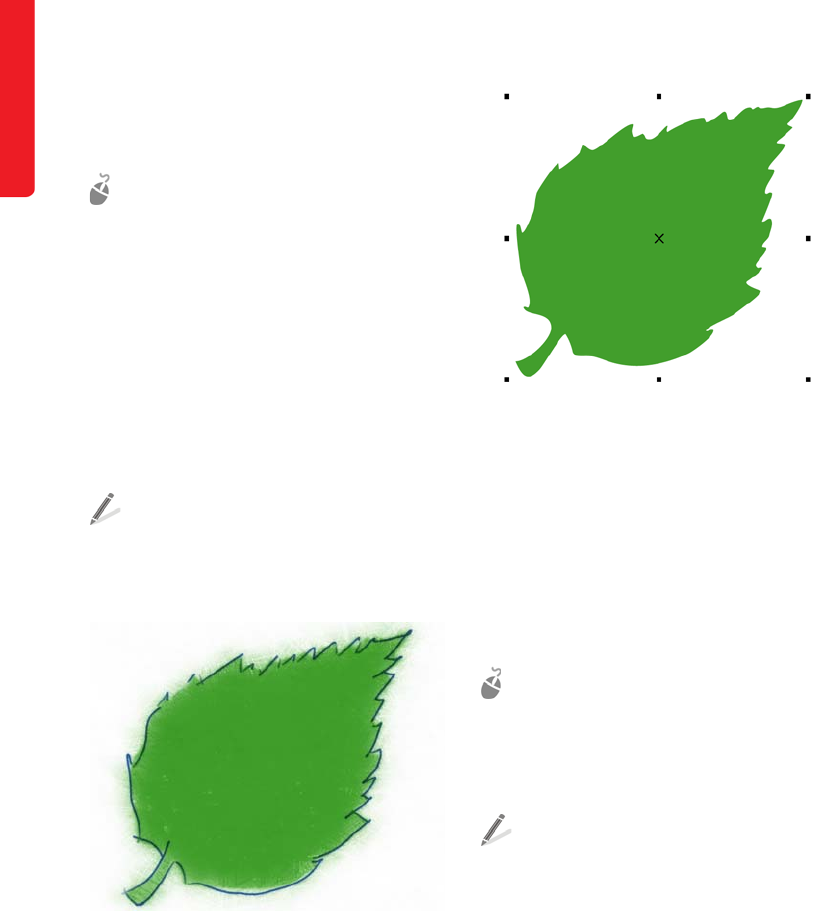
188 | CorelDRAW Graphics Suite X6 Guidebook
the traced results. For more information, see
“Tracing bitmaps and editing traced results” in
the Help.
Give it a try
1In CorelDRAW, click File ` New to start a
new document.
2Click File ` Import, locate the sketch file
that you created with Corel PHOTO-PAINT,
and click Import.
3Click in the document window to position
the image on the page.
4With the image selected, click Trace
bitmap on the property bar, and then
choose Quick trace.
To quickly access the Quick trace
command, right-click the image, and
choose Quick trace from the context
menu.
.
The bitmap sketch, which was created with
Corel PHOTO-PAINT, is imported into CorelDRAW.
The leaf is traced by using the Quick trace command.
Rectangle tool and Ellipse tool
CorelDRAW and Corel PHOTO-PAINT
You can draw basic shapes by using the
Rectangle and Ellipse tools, and then modify
the shapes to create more complex objects.
With CorelDRAW, you can convert the basic
shapes to curves and then edit the curves with
more precision.
Give it a try
1In the toolbox, click the Rectangle tool or
the Ellipse tool.
2Drag to draw a rectangle or an ellipse.
To draw a square, hold down Ctrl as you
drag with the Rectangle tool.
To draw a circle, hold down Ctrl as you
drag with the Ellipse tool.
To convert a basic shape to curves with
CorelDRAW, select the shape, and click the
Convert to curves button on the
property bar. After the object is converted
to curves, you can use the Shape tool to
edit and reshape the object.

Chapter 14: Illustration | 189
Freehand tool
CorelDRAW
With CorelDRAW, you can use the Freehand
tool to trace simple shapes manually. You can
control the smoothness of the curves and the
number of nodes that are created along the
curve.
Give it a try
1In the toolbox, click the Freehand tool.
2Drag to draw a curve.
To adjust the smoothness of the curves,
and the number of nodes along the curve,
click Tools ` Options. In the Workspace
list of categories, click Toolbox, and then
click Freehand/Bézier tool. Move the
Freehand smoothing slider to set the
smoothness for curved lines. Higher values
produce smoother curves.
You can use the Freehand tool to trace simple shapes.
Bézier tool and Pen tool
CorelDRAW
The Bézier tool and the Pen tool let you draw
lines one segment at a time by placing each
node with precision and controlling the shape
of each curved segment. The Bézier tool is
excellent for creating smooth transitions
between curves, and the Pen tool lets you
alternate easily between straight and curved
segments. When using the Pen tool, you can
preview the line segments before you create
them.
Give it a try
1In the toolbox, click the Bézier tool or the
Pen tool.
2Click where you want to place the first
node of the segment.
3Do one of the following:
• To draw a straight segment, click
where you want to place the next
node.
• To draw a curved segment, click where
you want to place the next node, and
without releasing the mouse button or
pen, drag to move the control handle
and shape the curve. Release the
mouse button or pen to finish the
segment.
To close the curve, place the last node on
the first node of the curve. You must close
the curve on an object if you want to fill the
object with color.
To end the line of segments when you use
the Pen tool, just double-click.
To preview the curve before placing the
next node when you use the Pen tool,
enable the Preview mode button on the
property bar.
To add a node when you use the Pen tool,
click the curve where you want to place the
node. You can delete a node by clicking it.
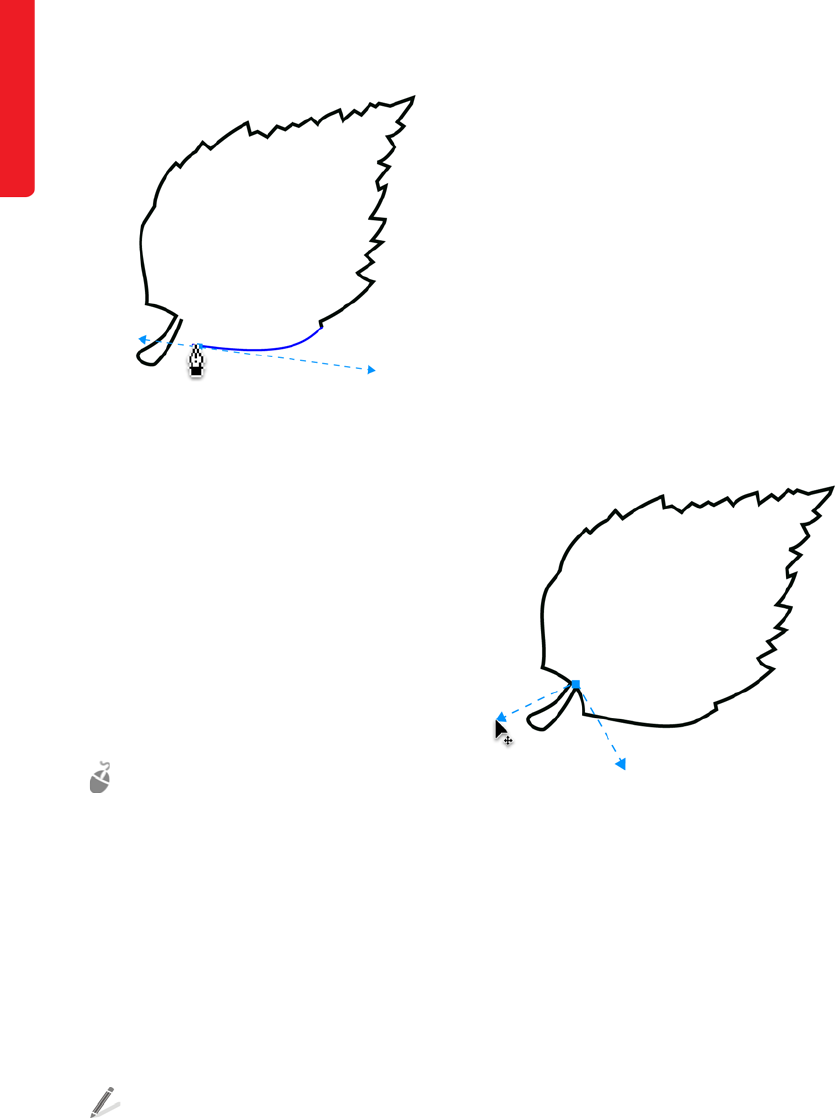
190 | CorelDRAW Graphics Suite X6 Guidebook
The leaf is drawn by using the Pen tool and alternating
between straight and curved segments.
Shape tool
CorelDRAW
The Shape tool is one of the most important
tools in CorelDRAW for creating illustrations.
The tool lets you edit the shape of curves by
moving a line segment, moving a node, or
dragging the control handles to shape a curve
segment. The Shape tool can be used to
modify basic shapes and create more complex
objects. It also lets you join nodes and create a
closed curve.
Give it a try
1Do one of the following:
• Draw a curve by using the Freehand
tool, the Bézier tool, or the Pen tool.
• Draw a basic shape by using the
Rectangle tool or the Ellipse tool,
and click the Convert to curves
button on the property bar.
2In the toolbox, click the Shape tool.
3Drag a segment, node, or control handle to
fine-tune the shape of the curve.
To convert a straight line segment to a
curve, select the node by using the Shape
tool, and click the Convert to curve
button on the property bar.
To add a node, double-click the curve
where you want to place the node. To
delete a node, double-click it.
To close an open curve, select the curve by
using the Shape tool, and click the Auto-
close curve button on the property bar.
You must close the curve on an object if
you want to fill the object with color.
For information about the different types
of nodes, see “Using node types” in the
Help.
The Shape tool is used to close and reshape a curve
before the curve is filled with color.
Duplicate, Scale, Rotate, and Mirror
commands
CorelDRAW and Corel PHOTO-PAINT
By duplicating, scaling, or mirroring an object,
you can quickly produce multiple copies of the
object at different scales. These features let you
create subtle differences between multiple
objects, which is helpful when rendering items
such as hair, leaves, or textures.

Chapter 14: Illustration | 191
Give it a try
1Select the object that you want to
duplicate.
2Press Ctrl + D to duplicate the object.
When you duplicate an object for the first
time, the Duplicate offset dialog box
appears. You can set the default distance
from the original to the duplicate object.
3With the duplicate selected, drag a corner
handle inward to reduce the size of the
object by 10%.
The percentage of scaling is displayed on
the property bar.
4Click the object again to display the
rotation handles. Drag a rotation handle to
rotate the object by 45 degrees.
The angle of rotation is displayed on the
property bar.
5Click Ctrl + D to duplicate the rotated
object.
6With the duplicate selected, click the
Mirror horizontally button on the
property bar to flip the duplicate from left
to right.
To create a copy of the object while you are
moving, resizing, or rotating it, press the
Spacebar.
To create a duplicate object right on top of
the original one, press the + key on the
numeric keypad.
You can repeat transformations that are
applied to a duplicate of an object and
automatically apply them to subsequent
duplicates. Select the first duplicate, and
apply any transformations to it. Without
deselecting the duplicate, press Ctrl + D
to create subsequent duplicates with the
same transformations automatically
applied. For example, if the first duplicate
was scaled down 10% from the original
object, each subsequent duplicate will be
scaled down 10% from the previous
duplicate.
The parts of the leaf are created by duplicating, scaling,
rotating, and mirroring duplicate objects.
Applying color
After tracing or drawing your objects, you can
apply color to them by using various tools. You
can also create effective color blends and
transitions to achieve realistic surface and
volume.
Document palette and Image palette
CorelDRAW and Corel PHOTO-PAINT
The Document palette in CorelDRAW and the
Image palette in Corel PHOTO-PAINT give you
immediate access to the exact colors that are
used in your project. The palette is saved with
the design, which lets you quickly locate these
colors in the future. For more information, see
“Using the Document palette, Color Styles
palette, and Image palette” on page 84.
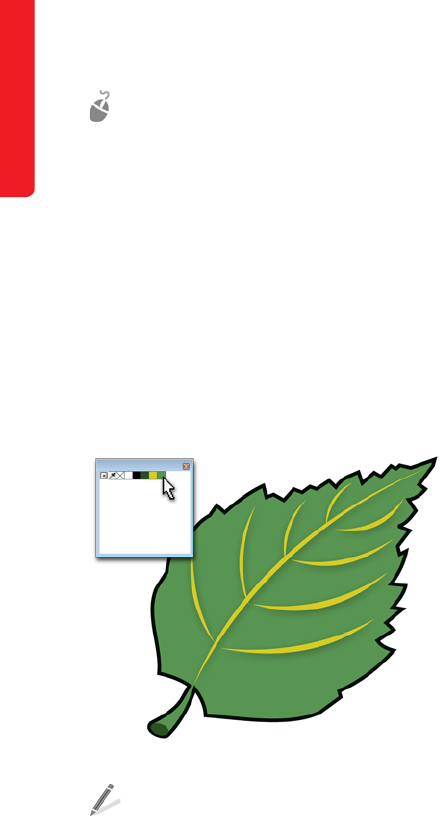
192 | CorelDRAW Graphics Suite X6 Guidebook
Give it a try
1If the Document palette or Image palette
is not displayed, do one of the following:
• In CorelDRAW, click Window ` Color
palettes ` Document palette.
• In Corel PHOTO-PAINT, click Window
` Color palettes ` Image palette.
All colors used in the document or image
are automatically added to the palette.
2Click the arrow button in the upper-left
corner of the palette to access other
options.
The leaf is filled with green from the Document palette.
To prevent colors from being automatically
added to the palette, disable the
Automatically update option.
Click and hold a color on the Document
palette or Image palette to see 49
different shades of that color.
To add a color from an object directly to
the Document palette or Image palette,
drag the object to the palette.
To add a color from another color palette
within the application, drag the color to
the Document palette or Image palette.
To add colors from anywhere in the
window, click the eyedropper button on
the Document palette or Image palette,
and click a color.
Mesh Fill tool
CorelDRAW
When creating illustrations, you may find the
Mesh fill tool particularly useful. The Mesh
fill tool lets you apply a grid to an object and
add colors to the grid to achieve precise color
transitions. By adding rows and columns to
your mesh grid, you can customize the color
transitions from cell to cell within the grid. The
more rows and columns you add, the more
color transitions you can create. The tighter the
individual quadrants are, the more control you
have over the blends between the colors. You
can also modify the shape of your mesh fill grid
by dragging the grid nodes.
The Mesh fill tool provides an easy way of
creating unique textures and color gradients in
your objects without applying multiple blends
and contours. By choosing colors close to each
other on the color wheel and with similar color
values, you can achieve more realistic effects,
such as flesh tone or surfaces that require
smooth, subtle color transitions. Alternatively,
colors farther apart on the color wheel, with
radically different values, produce harsher
color transitions. Harsh color transitions can be
useful for simulating complicated reflections,
abstract graphic elements, or materials with
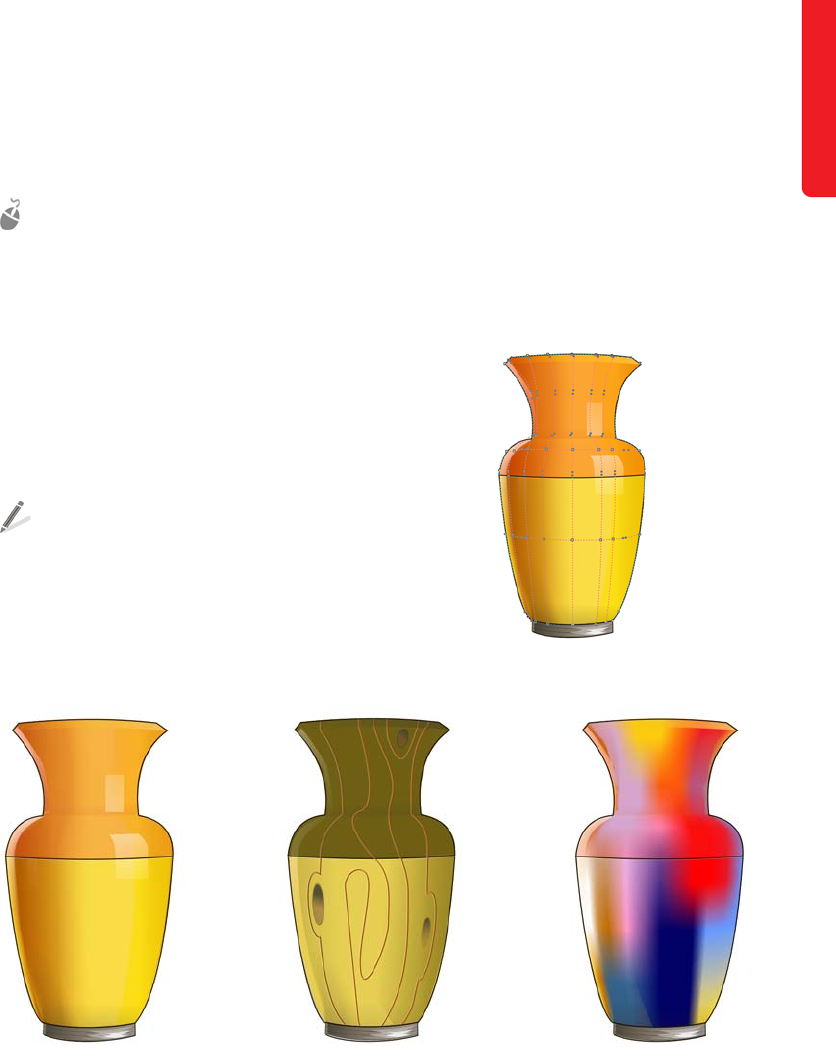
Chapter 14: Illustration | 193
drastic highlights, such as glass or plastics.
Layering multiple simple objects with a mesh
fill applied to each object can result in more
complex and realistic illustrations.
Give it a try
1Select an object.
2In the toolbox, click the Mesh fill tool.
3On the property bar, type the number of
columns and rows in the Grid size boxes.
4Drag the grid nodes on the object to adjust
the grid.
5Select a node, and click a color on the color
palette to apply the color to the selected
section of the grid.
To add just a tint of color, select a node,
hold down Ctrl, and click a color on the
color palette.
To add a node, click anywhere within the
grid, and click the Add intersection
button on the property bar. To delete a
node, select the node, and click the Delete
nodes button on the property bar.
A mesh fill can be applied only to an object
with a single path. To apply a mesh fill to
more complex objects, create the mesh fill
on a larger object, and use the PowerClip™
command to position the mesh fill object
within the complex shape. For more
information, see “PowerClip” on page 172.
A mesh fill is applied to the vase.
The Mesh fill tool can be used to create smooth color transitions.
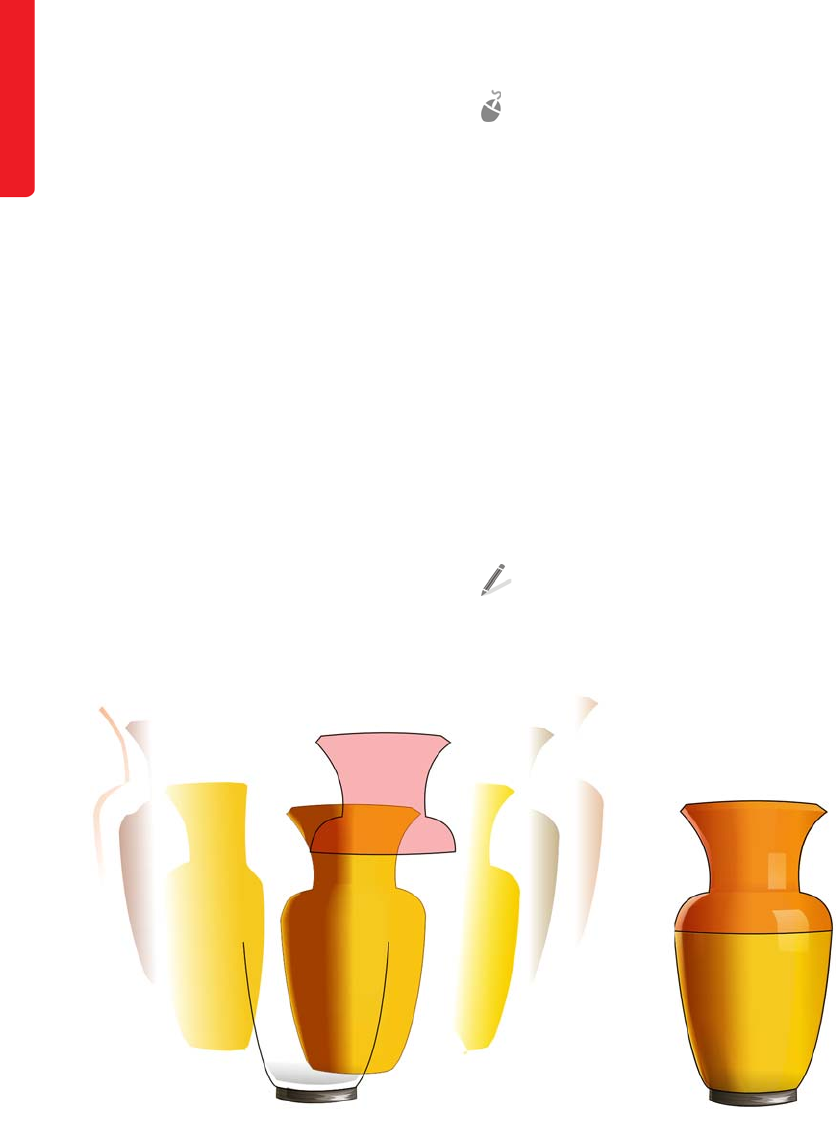
194 | CorelDRAW Graphics Suite X6 Guidebook
Applying effects
When it’s time to apply the finishing touches to
your illustration, you can perfect the look and
feel of your work by adding special effects with
CorelDRAW and Corel PHOTO-PAINT.
Transparency tool and
Object Transparency tool
CorelDRAW and Corel PHOTO-PAINT
To add depth to an illustration, you can use the
Transparency tool if you are working with
CorelDRAW, or the Object transparency tool
if you are working with Corel PHOTO-PAINT.
For example, you can apply a gradient
transparency to an object that is filled with
black and then layer this object on top of a
mesh fill in CorelDRAW. This technique adds
realistic depth, shading, and highlights to the
mesh fill.
Give it a try
1Select an object that is filled with color.
2Do one of the following:
• In CorelDRAW, click the Transparency
tool in the toolbox.
• In Corel PHOTO-PAINT, click the
Object transparency tool in the
toolbox.
3Do one of the following:
• In CorelDRAW, choose a transparency
type from the Transparency type list
box on the property bar.
• In Corel PHOTO-PAINT, choose a
transparency type from the Fill type
list box on the property bar.
4Use the controls on the property bar to
modify the transparency.
To make the entire object fade, choose the
Uniform transparency type in CorelDRAW,
or the Flat transparency type in
Corel PHOTO-PAINT.
Transparency is layered on top of the mesh fill to create depth and highlights.
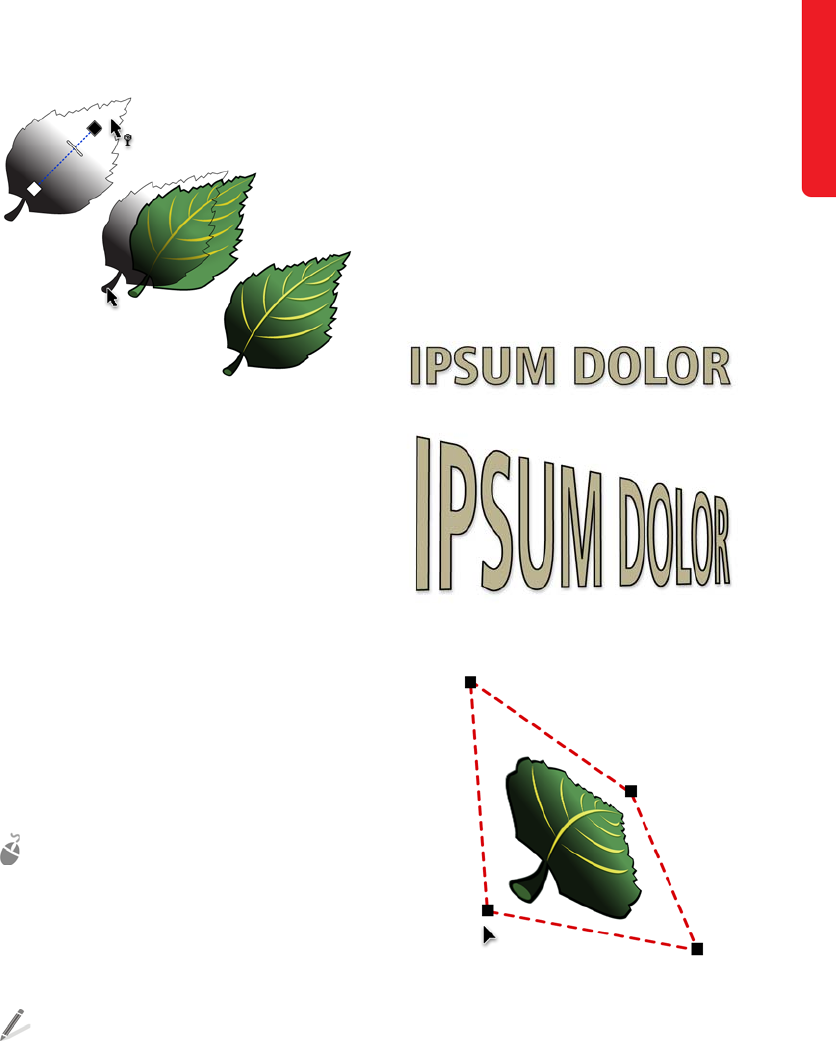
Chapter 14: Illustration | 195
A gradient transparency is applied to the leaf.
Perspective effect
CorelDRAW
You can create a perspective effect by
shortening one or two sides of an object. This
effect gives the object the appearance of
receding in one or two directions, thereby
creating a one-point perspective or a two-
point perspective.
Perspective effects can be added to individual
or grouped objects. You can also add a
perspective effect to linked groups, such as
contours, blends, and extrusions. Perspective
effects cannot be added to paragraph text,
bitmaps, or symbols.
Give it a try
1Select an object.
2Click Effects ` Add perspective.
3Drag the nodes on the outside of the grid
to change the perspective of the object.
To move opposing nodes the same
distance in opposite directions, press
Ctrl + Shift as you drag.
To create a one-point perspective effect,
press Ctrl to constrain the node’s
movement to the horizontal or vertical axis.
To copy perspective effects to other
objects, click the Attributes eyedropper
tool in the toolbox, click Effects on the
property bar, and enable the Perspective
check box.
The Perspective effect is applied to text.
The Perspective effect is applied to an object.
Envelope tool
CorelDRAW
CorelDRAW lets you shape objects, including
lines, artistic text, and paragraph text frames,
by applying envelopes to them. Using the
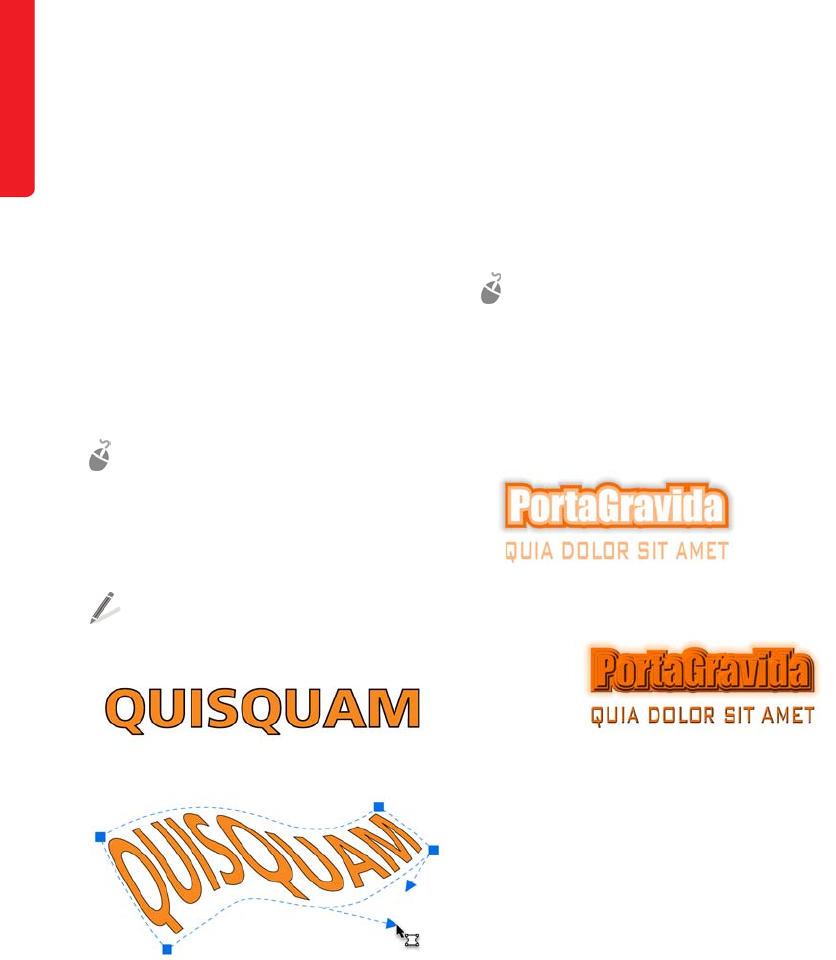
196 | CorelDRAW Graphics Suite X6 Guidebook
Envelope tool is a quick and effective way to
distort text or shapes and to help define
volume. You can use this tool to create objects
such as flags, clothes with logos, or complex
organic shapes that require lettering or
patterns.
Envelopes are made of multiple nodes. You can
move these nodes to shape the envelope and
the object inside. You can edit an envelope by
adding, deleting, and repositioning the nodes.
Adding nodes gives you more control over the
shape of the object that is contained in the
envelope.
Give it a try
1Select an object.
2In the toolbox, click the Envelope tool.
3Drag any of the nodes of the envelope.
Double-click the envelope to add a node,
or double-click a node to delete it.
The Envelope tool is used to shape text.
Special effects
Corel PHOTO-PAINT
Corel PHOTO-PAINT offers many different
effects for bitmap images, including three-
dimensional effects, art strokes, lighting
effects, and textures.
Give it a try
1Select an object.
2Click the Effects menu, and choose a
category and an effect to apply to the
object.
You can apply various special effects to objects.
Examples
The images in this section were created by
using the features and techniques
recommended in this chapter.
More examples of illustrations appear in Part
Five, “Insights from the Experts,” and on the
Gallery pages in Part Seven.
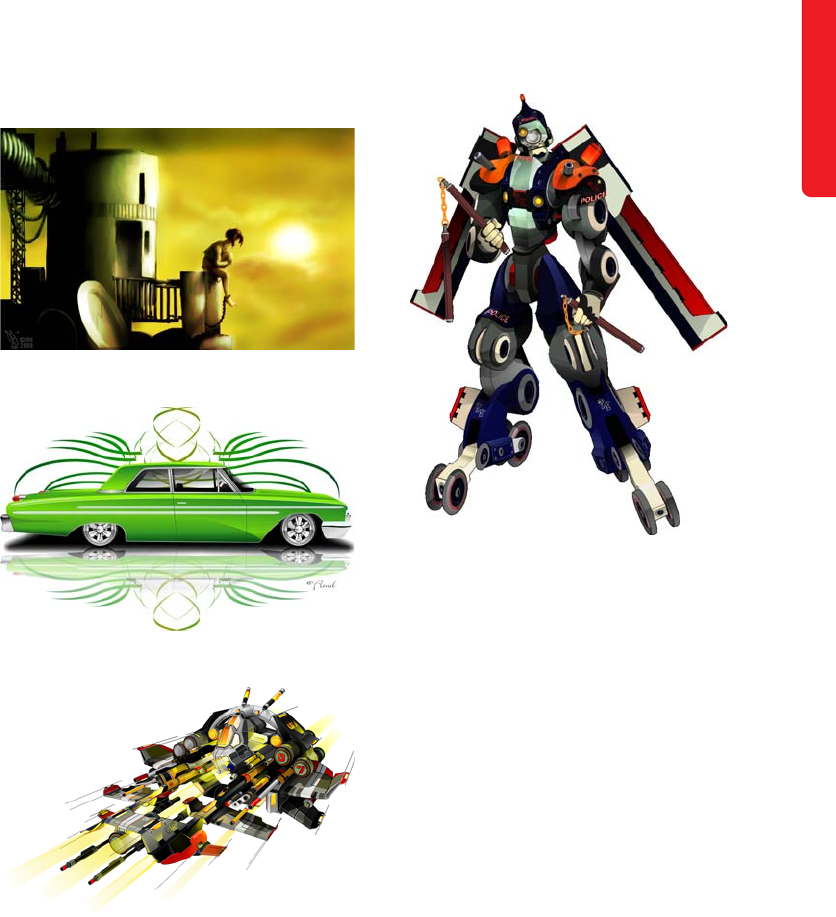
Chapter 14: Illustration | 197
Image by Maurice Beumers (Mo)
Image by Richard Reilly
Image by Igor Tkac
Image by Igor Tkac

200 | CorelDRAW Graphics Suite X6 Guidebook
Chapter 15: Page Layout
CorelDRAW and Corel PHOTO-PAINT offer all the tools you need to create compelling page layouts
for brochures, newsletters, and other multipage documents. This chapter introduces you to the
most common page-layout tasks and recommends features that you can use in your creative
workflow. The tips and techniques in this chapter were provided by Rudolfo Bligé, a professional
graphic designer.
Task Recommended features
Setting up the document Master page
Odd-page and even-page master layers
Page numbers
Guidelines
Guideline presets
Alignment guides
PowerClip frames
Layout toolbar
Adding text Artistic text
Text frames
Text frames from objects
Linked text frames
Placeholder text
Baseline grid
Text on a path
Adding images File import
Shape tool
Perfect shapes
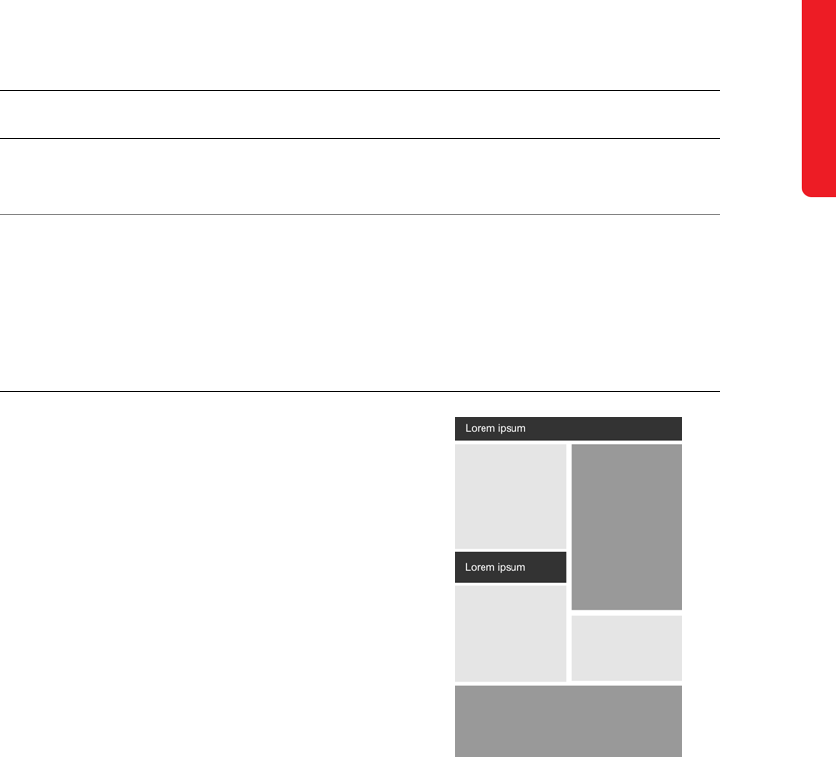
Chapter 15: Page Layout | 201
When you design a document for print, such as
a company brochure, your client may provide
you with some text copy, a bitmap of a logo,
and a general idea of how the elements should
be arranged. After you determine the focus of
the page design and the main message that
the document must communicate, you can
make decisions about the arrangement of the
design elements, such as the number of
columns. If the page layout contains many
graphics, you may decide to start with one or
two columns. If the page consists mostly of
text, a two- or three-column page layout may
be more effective.
You can begin by creating a rough mockup.
The mockup can consist of basic rectangular
blocks that represent the different elements of
the design, such as light gray boxes for text,
darker gray boxes for images, and black boxes
for headlines. Blocking out the content in this
way helps you visualize and balance the various
elements so that you achieve the proper focus.
You can use this mockup to discuss the
structure of the design with your client. When
you and your client agree on a basic vision for
the design, you can get started on the layout.
Before you start the design, you can create a rough
mockup of your layout and review it with your client.
Setting up the document
After establishing the basic layout structure,
you must think about how you will position the
design elements. For a multipage layout, you
must also consider the elements that will be
repeated throughout the document. You can
use master layers to set up these repeated
elements, and use guidelines to ensure that all
elements are consistently aligned.
Blend tool
Interactive fill tool
Preparing the file for output Replace wizard
Publish to PDF, Export, and Save as
commands
Collect for output wizard
ConceptShare
Task Recommended features
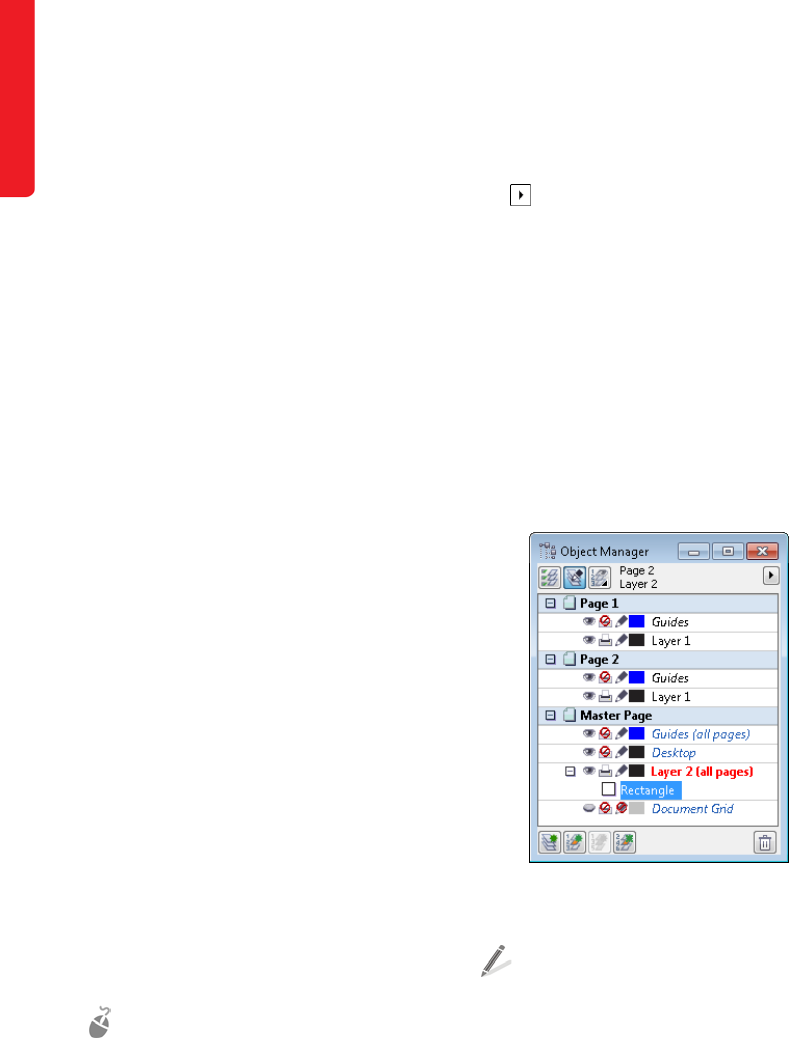
202 | CorelDRAW Graphics Suite X6 Guidebook
Master page
CorelDRAW
You can access the master page in the Object
manager docker. This docker lets you organize
the layers of graphics and text in your
document.
The master page is a virtual page that contains
the information that applies to all pages in a
document. You can add one or more layers to
the master page (master layers) to hold
content such as headers, footers, or a static
background. You can also make any layer a
master layer.
By default, the master page contains three
layers.
•The Guides (all pages) layer contains the
guidelines that are used for all pages of
the document.
•The Desktop layer contains objects that
are outside the borders of the drawing
page. This layer lets you store objects that
you may want to include in the drawing at
a later time.
•The Document grid layer contains the
grid that is used for all pages of the
document. The grid is always the bottom
layer.
The default layers on the master page cannot
be deleted or copied.
If you add objects or guidelines to the master
page, they will appear on every page that you
create.
Give it a try
1Click File ` New, and choose the settings
for the document.
2If the Object manager docker is not open,
click Tools ` Object manager.
3In the upper-right corner of the Object
manager docker, click the flyout button
, and choose New master layer (all
pages).
When the default layer name appears, you
can rename the layer.
4Make sure that the new master layer is
selected, and add objects or guidelines to
the layer.
5Click Layout ` Insert page, and choose
settings in the Insert page dialog box.
The objects and guidelines that you added
on the master page appear on the new
page.
The Object manager docker displays all pages and
layers. Objects placed on an all-page master layer appear
on all pages of the document.
To add content to a layer, you must first
select the layer so that it becomes the
active layer.
To make a layer a master layer, right-click
the layer, and click Master (all pages).
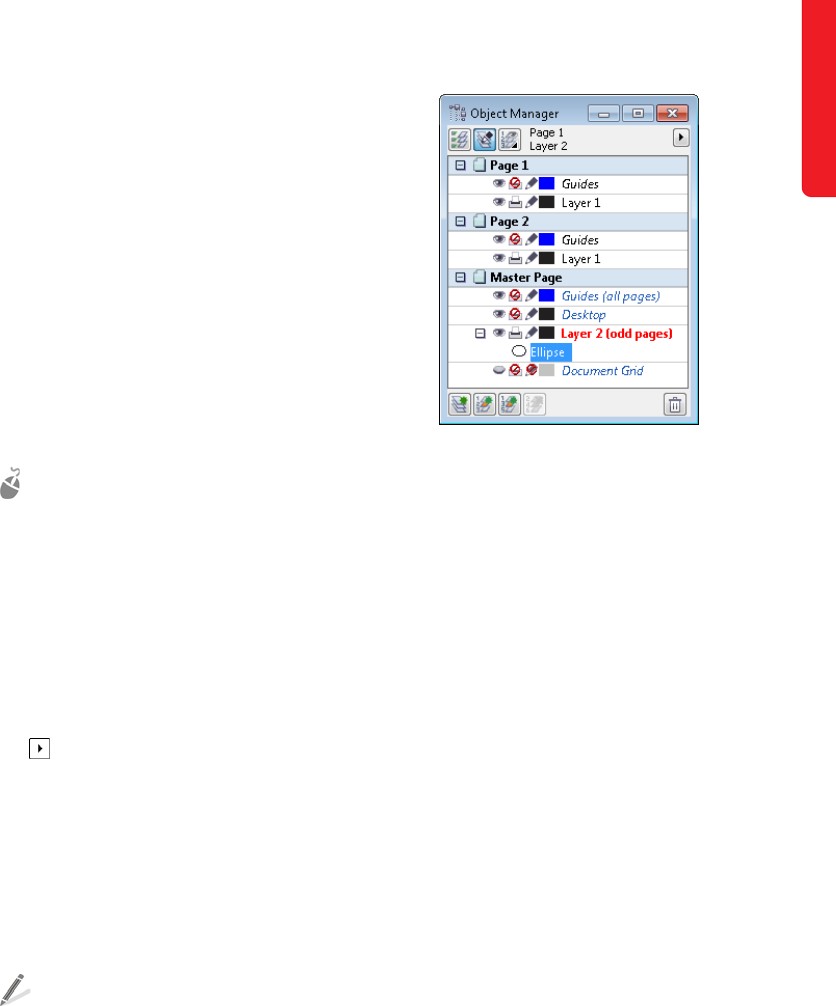
Chapter 15: Page Layout | 203
To change the stacking order of layers on
the page, click the Layer manager view
button in the Object manager docker,
choose Current page, layers only, and
drag the layers to reorder them.
Odd-page and even-page master layers
CorelDRAW
In a multipage document, you can create
master layers for all pages, for odd pages, or
for even pages. For example, placing content
on an odd-page master layer means that the
content will appear on all odd pages but not
on even pages.
Give it a try
1Create a multipage document by clicking
Layout ` Insert page and specifying the
number of pages you want.
2If the Object manager docker is not open,
click Tools ` Object manager.
3In the Object manager docker, click an
odd page (for example, Page 1 or Page 3).
4In the upper-right corner of the Object
manager docker, click the flyout button
, and click New master layer (odd
pages).
When the default layer name appears, you
can rename the layer.
5With the odd-page master layer selected,
create an object on the drawing page.
The object appears on all odd pages in the
document.
To create an odd-page master layer, make
sure that the active page is an odd page.
Objects placed on an odd-page master layer (such as the
ellipse in this example) appear on all odd pages of the
document.
Page numbers
CorelDRAW
You can insert page numbers on the current
page, all pages, all odd pages, or all even
pages. When you insert page numbers on
multiple pages, a new master layer is
automatically created, and the page number is
placed on it. The master layer can be an all-
page master layer, an odd-page master layer, or
an even-page master layer.
The following options are available for
inserting a page number:
•On active layer — lets you insert a page
number on the layer that is currently
selected in the Object manager docker. If
the active layer is a master layer, page
numbers are inserted on all pages of the
document where the master layer is visible.
If the active layer is a local layer, the page
number is inserted on the current page
only.

204 | CorelDRAW Graphics Suite X6 Guidebook
•On all pages — lets you insert page
numbers on all pages. The page number is
inserted on a new all-page master layer,
and this layer becomes the active layer.
•On all odd pages — lets you insert page
numbers on all odd pages. The page
number is inserted on a new odd-page
master layer, and this layer becomes the
active layer. This option is available only if
the active page is an odd page.
•On all even pages — lets you insert page
numbers on all even pages. The page
number is inserted on a new even-page
master layer, and this layer becomes the
active layer. This option is available only if
the active page is an even page.
You can change the default page number
settings before or after you insert page
numbers in your document. For example, you
can start the page count at a specific number
other than 1. This is particularly useful if you
want to create multiple CorelDRAW files that
will be put together as one publication.
You can also specify whether to start page
numbering on the first page or on another
page. For example, if you choose to start page
numbering on page 3, page 3 displays the
number 1. If you insert a new page between 1
and 2, it becomes the new page 2, whereas the
old page 2 becomes page 3 — the page where
the first page number is displayed.
You can manipulate page numbers like any
other text object. For example, you can move
or resize a page number and change its font or
color.
Give it a try
1Click Layout ` Insert page number ` On
all pages.
The page number is centered at the bottom
of the page.
2Click Layout ` Insert page, and add a
page to your document.
The new page displays the correct page
number.
3Click Layout ` Page number settings,
and choose one of the following options:
•Start at number — lets you start the
page count at a specific number
•Start on page — lets you specify the
page on which to start page
numbering
•Style — lets you choose from
commonly used page number styles
To hide the page number on a single page,
click the Layer manager view button in
the Object manager docker, choose
Current page, layers only, and click the
Show or hide icon beside the master
layer where the page number object is
located.
To change the font, font size, and other
text attributes, select the page number
with the Pick tool, and choose the options
you want on the property bar.
To move a page number, drag it to a new
location by using the Pick tool.
To resize a page number, select it with the
Pick tool, and drag a corner selection
handle.
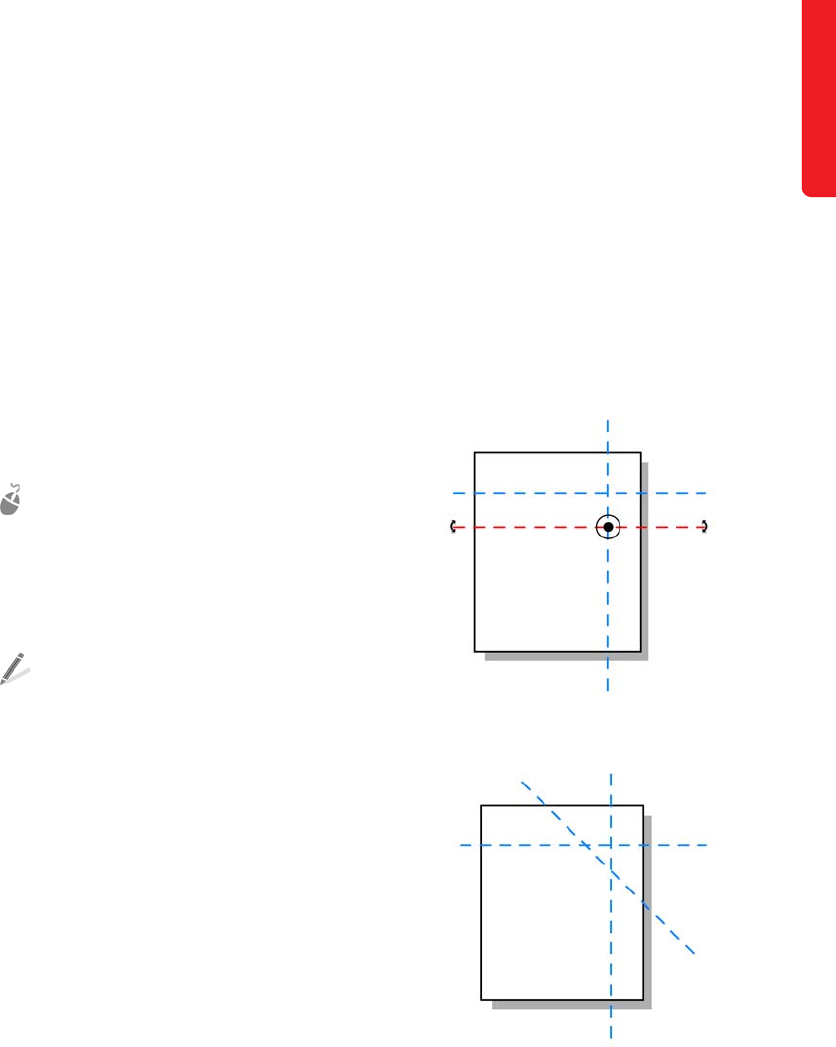
Chapter 15: Page Layout | 205
To change the color of a page number, click
a color swatch on the color palette.
Guidelines
CorelDRAW and Corel PHOTO-PAINT
Guidelines are lines that can be placed
anywhere in the document window to aid in
object placement and alignment.
In CorelDRAW, you can add guidelines to
individual pages, or you can add guidelines to
the master page if you want to apply them to
the entire document. After you add a
guideline, you can select it, move it, rotate it,
lock it in place, or delete it.
Give it a try
1If the rulers are not displayed, click View `
Rulers.
2Drag from the horizontal or vertical ruler to
the drawing page.
To select a guideline, click the guideline by
using the Pick tool in CorelDRAW or the
Object pick tool in Corel PHOTO-PAINT.
To move a guideline, drag it to a new
position. To delete a guideline, select the
guideline, and press Delete.
To rotate a guideline in CorelDRAW, type a
value in the Angle of rotation box on the
property bar.
To rotate a guideline interactively in
CorelDRAW, select the guideline, and then
click it once more. Rotation handles and a
pivot appear on the guideline. Drag a
rotation handle to rotate the guideline, or
drag the pivot to change the center of
rotation. To constrain the angle of rotation
to 15-degree increments, hold down Ctrl
while rotating the guideline.
To lock a guideline in CorelDRAW, select
the guideline, and click Arrange ` Lock
object.
To make a guideline appear on all pages of
a multipage document in CorelDRAW, drag
the guideline to the Guides (all pages)
layer on the master page in the Object
manager docker.
In CorelDRAW, you can display rotation handles by
clicking a guideline twice.
The guideline is rotated by dragging one of the rotation
handles.
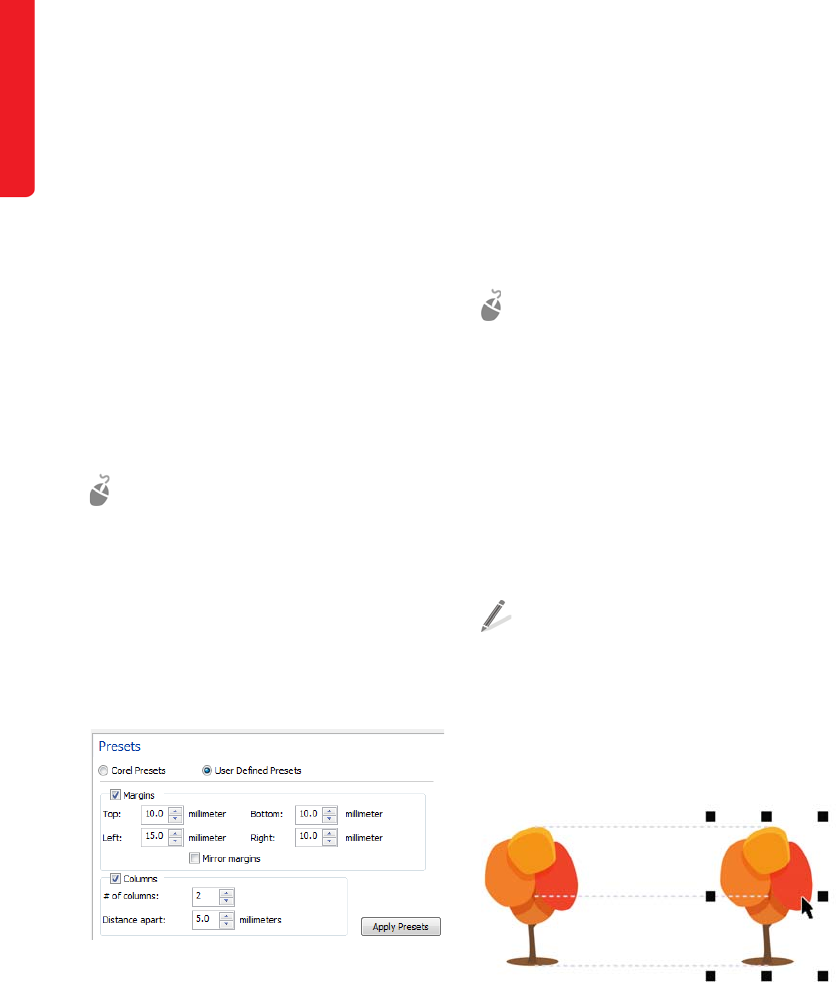
206 | CorelDRAW Graphics Suite X6 Guidebook
Guideline presets
CorelDRAW
Although you can drag a guideline from a ruler
wherever you need one, you can also use
preset guidelines. There are two types of
guideline presets: Corel® presets and user-
defined presets. Examples of Corel presets
include guidelines that appear at 1-inch
margins and guidelines that appear at the
borders of newsletter columns. User-defined
presets are guidelines for which you specify a
location. For example, you can add preset
guidelines that display margins at a specified
distance or that define a column layout or grid.
Give it a try
1Click Tools ` Options.
2In the list of categories, expand
Document, expand Guidelines, and click
Presets.
3Choose a Corel preset, or click User-
defined presets, and set values for the
margins, columns, or grid.
4Click Apply presets.
The Options dialog box lets you create preset
guidelines.
Alignment guides
CorelDRAW
You can align objects interactively on the
drawing page by using alignment guides.
Alignment guides are temporary guidelines
that appear when you create, resize, or move
objects in relation to other nearby objects.
You can easily enable or disable alignment
guides, or modify their default settings. For
example, you can change the color or add
margins. Margins let you align an object at a
set distance from the edge of another object.
Give it a try
1Click View ` Alignment guides.
A check mark beside the Alignment
guides command indicates that alignment
guides are enabled.
2Move an object toward another object.
Alignment guides appear, connecting the
center and edges of the objects.
3Click View ` Setup ` Alignment guides
setup, and choose the options you want.
To change the color of the alignment
guides, choose a color from the Color
picker.
To add margins to the alignment guides,
enable the Use margins for alignment
guides check box, and type a value in the
Margin box.
Alignment guides appear when an object is moved.
PowerClip frames
CorelDRAW
CorelDRAW lets you place vector objects and
bitmaps, such as photos, inside other objects,
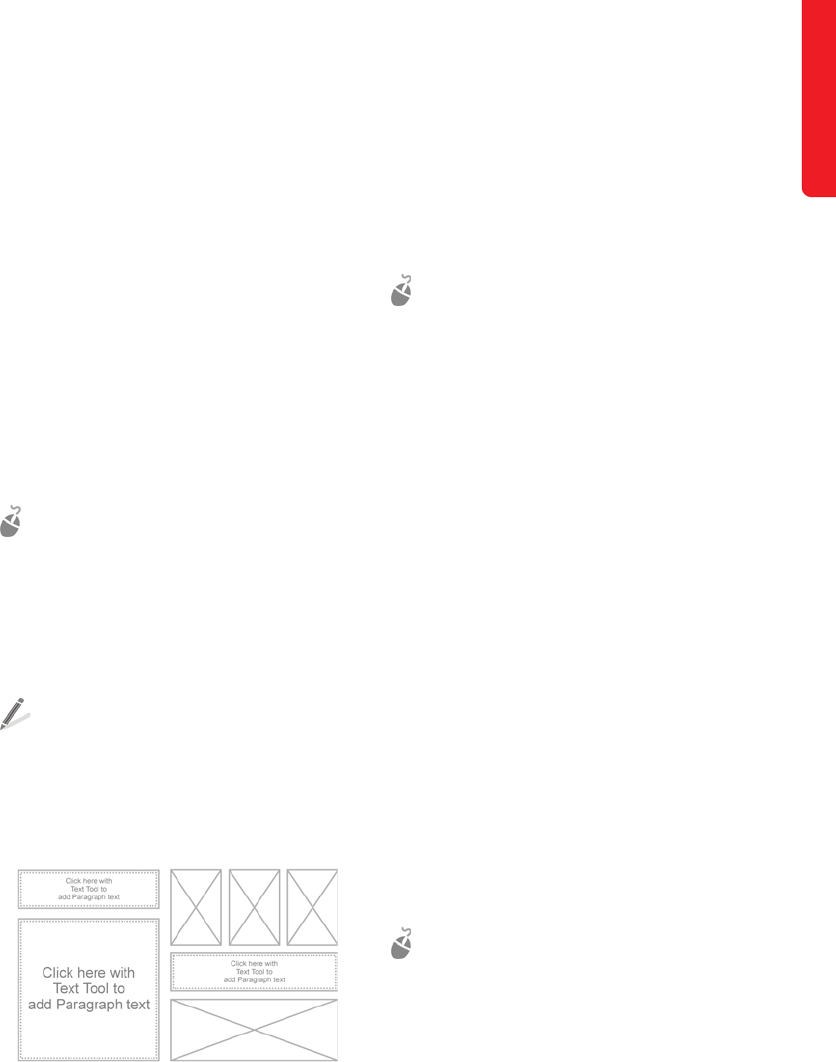
Chapter 15: Page Layout | 207
or frames. Any closed object can be used as a
frame. When the content is larger than the
frame, it is cropped to fit the form of the
frame. This creates a PowerClip object (see also
“PowerClip” on page 172).
Before you add content to your document, you
can define the general structure and
composition of the page by creating empty
PowerClip frames and text frames to specify
the placement of text and graphics. For more
information about creating empty text frames,
see “Text frames from objects” on page 209.
After you lay out the text and graphics, you can
add content to the frames. You can also
convert a PowerClip frame back to an object.
Give it a try
1Select the object that you want to use as a
frame.
2Right-click the object, choose Frame type,
and click Create empty PowerClip
frame.
To add content, drag an object to the
frame.
To convert the frame back to an object,
right-click the PowerClip frame, choose
Frame type, and click None.
You can use empty frames to lay out text and graphic
elements before adding content.
Layout toolbar
CorelDRAW
The Layout toolbar gives you quick access to
some of the main page layout features, such as
text frames, columns, alignment guides, and
PowerClip frames.
Give it a try
• Click Layout ` Layout toolbar.
Adding text
With CorelDRAW, you can add two types of
text to your layout: artistic text and paragraph
text. With Corel PHOTO-PAINT, you can add
artistic text only. Artistic text is typically used for
short lines of text to which you can apply a
wide range of effects, such as drop shadows or
contours. Paragraph text, also known as block
text, can be used for larger bodies of text that
have greater formatting requirements. For
example, you can use paragraph text when
creating brochures, newsletters, catalogues, or
other text-intensive documents.
Artistic text
CorelDRAW and Corel PHOTO-PAINT
You can add artistic text by using the Tex t tool.
After creating the text, you can select and
modify the entire text object, or only individual
characters.
Give it a try
1In the toolbox, click the Te x t tool.
2Click where you want to add text.
3On the property bar, choose a font from
the Font list box, and choose a font size
from the Font size list box.
4Type some text.
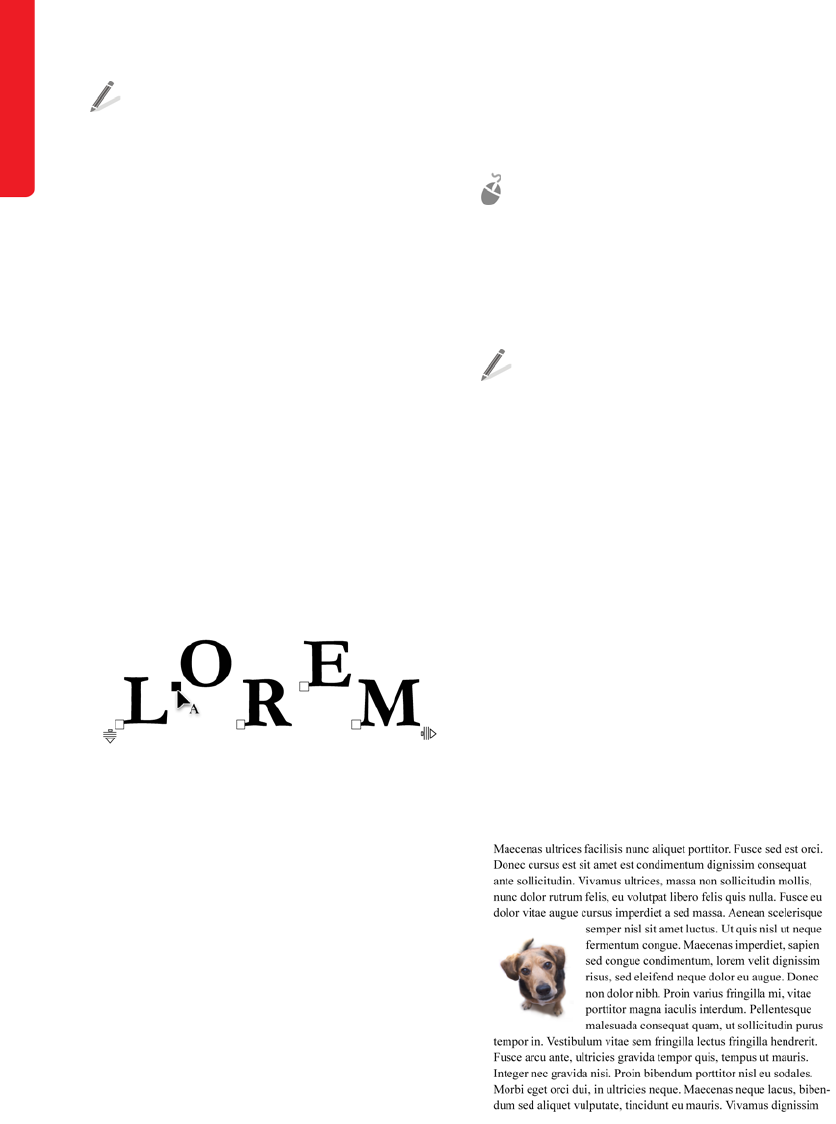
208 | CorelDRAW Graphics Suite X6 Guidebook
To select an entire text object, click the Pick
tool in CorelDRAW or the Object pick tool
in Corel PHOTO-PAINT, and click the text
object. To select individual text characters,
click the Te x t tool, and drag across the
text.
To change the default font, click the Te x t
tool, and choose a new font from the Font
list box on the property bar.
To change the position of individual
characters in CorelDRAW, click the Shape
tool in the toolbox, and drag the character
nodes to reposition the characters.
To change the properties of artistic text in
CorelDRAW, such as kerning or character
rotation, select the text with the Te x t tool,
click Te x t ` Tex t p r o p e r t i e s , and choose
the settings you want in the Tex t
properties docker.
In CorelDRAW, you can use the Shape tool to change
the position of characters in artistic text.
Text frames
CorelDRAW
To add paragraph text, you must first create a
text frame. You can create a text frame by using
the Te x t tool. By default, text frames have a
fixed size, regardless of how much text you add
to them. Therefore, any text that continues
past the border of the text frame is hidden until
you resize the frame. If you want new text
frames to adjust automatically to fit the text,
you can change the default setting and enable
this option.
When designing a page layout that contains
both text and graphics, you can wrap text
around a graphic within the text frame.
Give it a try
1In the toolbox, click the Te x t tool.
2Drag in the document window to create a
text frame.
3Type text inside the frame.
To resize a text frame, select the frame by
using the Pick tool, and drag a selection
handle.
To set new text frames to adjust
automatically to fit the text, click Tools `
Options. In the Workspace list of
categories, expand Te x t , and click
Paragraph text frame. Enable the
Expand and shrink paragraph text
frames to fit text check box.
To wrap text around a graphic, right-click
the graphic, and choose Wrap paragraph
text. Using the Te xt tool, drag to create a
text frame around the graphic, and type
text in the frame. To see more options for
wrapping text, select the graphic, and click
the Wrap text button on the property bar.
Text is wrapped around a graphic.
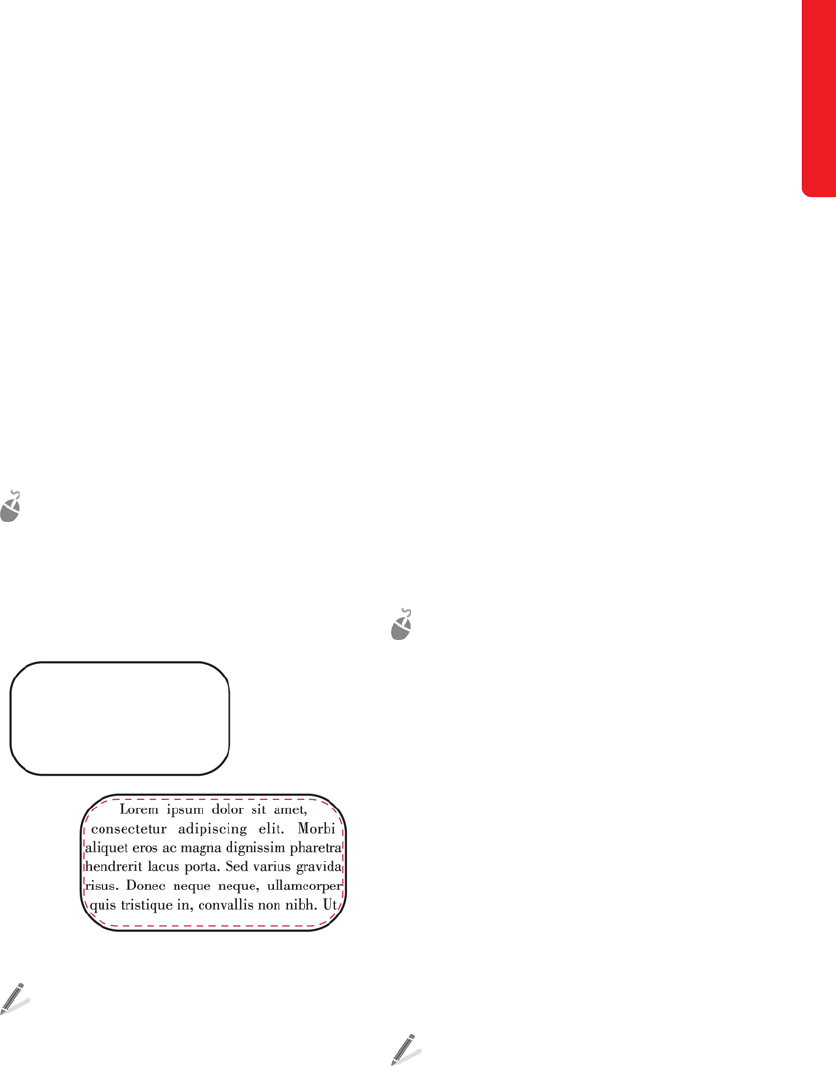
Chapter 15: Page Layout | 209
Text frames from objects
CorelDRAW
You can create text frames from objects, which
increases the number of different shapes that
you can use as text frames. In addition, text
frames of various shapes and sizes can help
you visualize the page layout before you add
content to your document.
When you create a text frame from an object,
the frame is empty. You can add text to the
frame, or you can convert the text frame back
to an object. In addition, you can separate the
text frame from the object, so that they can be
moved or modified independently.
Give it a try
1Draw a closed shape.
2Right-click the object, choose Frame type,
and click Create empty text frame.
The object is converted to a text frame.
An object converted to a text frame
To add text to the text frame, click the Te x t
tool, and type inside the frame.
To convert the text frame back to an object,
right-click the text frame, choose Frame
type, and click None. If the frame
contains text, a warning that the contents
of the frame will be lost is displayed.
To separate the text frame from the object,
select the object by using the Pick tool,
and click Arrange ` Break paragraph
text inside a path apart.
Linked text frames
CorelDRAW
When creating a page layout, you may want to
link multiple text frames so that the text flows
between them continuously as you make
adjustments to the page layout. The advantage
of linking text frames is that you do not have to
worry about accidentally cutting off the text as
you resize the text frames. Linked text frames
can be especially useful if your layout contains
columns.
Give it a try
1Select the starting text frame by using the
Te x t tool.
2Click the Te x t f l o w tab at the bottom of
the text frame.
If the frame cannot hold all the text, the tab
contains an arrow, and the outline of the
text frame is red instead of black.
3Move the pointer to the frame or object
into which you want to continue the text
flow. When the pointer changes to a black
arrow, click to link the two frames.
If the frame or object is on a different page,
first click the corresponding Page tab on
the document navigator.
To link text frames by using the Te x t menu,
select the frames, and click Te x t `
Paragraph text frame ` Link.
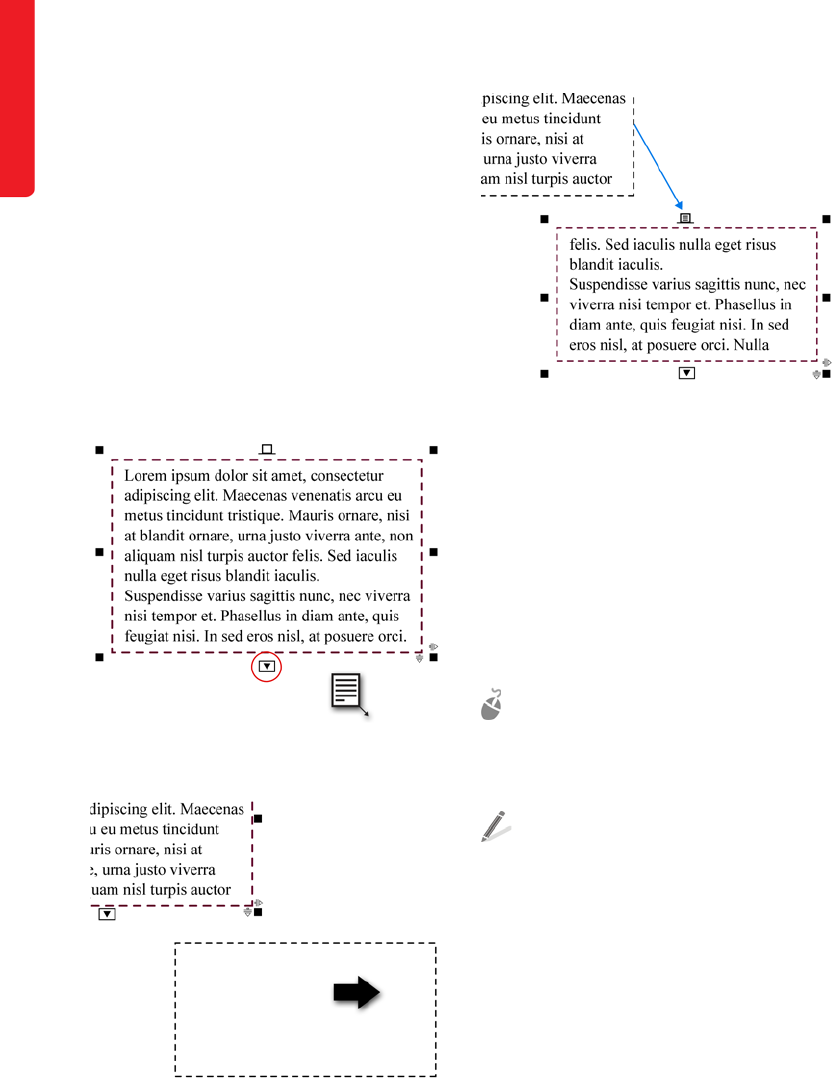
210 | CorelDRAW Graphics Suite X6 Guidebook
To break the link between text frames,
select the frames, and click Te x t `
Paragraph text frame ` Unlink.
To create a linked frame on another page
with the same size and position as an
existing frame, click the Tex t f l o w tab at
the bottom of the first frame, click the
corresponding Page tab on the document
navigator, and hover over the area of the
drawing page that corresponds to the
position of the first frame. When a preview
of the frame appears, click to create the
linked frame.
When you click the Text fl ow tab at the bottom of the
text frame, the pointer changes.
When you point to another text frame or object, the
pointer changes to a black arrow.
The blue arrow shows that the two text frames are
linked and indicates the direction of the text flow.
Placeholder text
CorelDRAW
If you want to see the general layout of your
document before you add the final content,
you can fill the text frames with temporary
placeholder text. You can format placeholder
text just like any other text, or create custom
placeholder text.
Give it a try
• Right-click an empty text frame, and click
Insert placeholder text.
To create custom placeholder text, save
your text in a word-processing application
as placeholder.rtf, and place the file in the
following folder:
My Documents\Corel\Corel Content.
Baseline grid
CorelDRAW
You can align text within a frame or in different
text frames by using the baseline grid. This is

Chapter 15: Page Layout | 211
useful, for example, when you want to align
two or more text frames that contain different
fonts, font sizes, or spacing.
The guides of the baseline grid run across the
drawing page and follow the pattern of a ruled
notebook. You can change the grid color and
line spacing. By default, the line spacing is
14 pt.
You can set one or more text frames to align to
the baseline grid.
Give it a try
1Click View ` Grid ` Baseline grid.
A check mark beside the Baseline grid
command indicates that the baseline grid is
displayed.
2Select a text frame, and click Te x t ` Align
to baseline grid.
3Move the text frame away from and then
toward the drawing page.
As long as part or all of the text frame
overlaps with the drawing page, the text is
aligned with the baseline grid. When the
text frame is moved completely outside the
drawing page, the text returns to its
original alignment.
To change the color and line spacing of the
baseline grid, click View ` Setup ` Grid
and ruler setup. In the Baseline grid
area, type a value in the Spacing box, and
choose a color from the Color picker.
Text on a path
CorelDRAW and Corel PHOTO-PAINT
You can fit artistic text to the path of an open
object (for example, a line) or a closed object
(for example, a square). In CorelDRAW, you can
also fit paragraph text from a text frame to an
open path. If the text frame is inside an object,
it must be separated from the object before the
text can be fitted to a path.
After you fit text to a path, you can adjust the
orientation or position of the text in relation to
the path, as well as other text properties. With
CorelDRAW, you can mirror the text
horizontally or vertically, or both. You can also
specify spacing increments for snapping text to
the path, which is called tick spacing. With
Corel PHOTO-PAINT, you can mirror text by
placing it on the inside or outside of the path.
CorelDRAW treats text fitted to a path as one
object; however, you can separate the text
from the path. When you separate text from a
path, the text retains the shape of the path.
You can straighten the text so that it reverts to
its original appearance.
Give it a try
1Create a path by doing one of the
following:
• In CorelDRAW, create an object by
using the Rectangle tool or Ellipse
tool, or draw a curve by using the
Freehand tool, Bézier tool, or Pen
tool.
• In Corel PHOTO-PAINT, create a path
by using the Path tool, or create a
mask by using the Rectangle mask
tool or the Ellipse mask tool, and
then click Mask ` Create ` Path
from mask.
2Do one of the following:
• In CorelDRAW, select a text object or a
text frame by using the Pick tool.
• In Corel PHOTO-PAINT, select a text
object by using the Object pick tool.
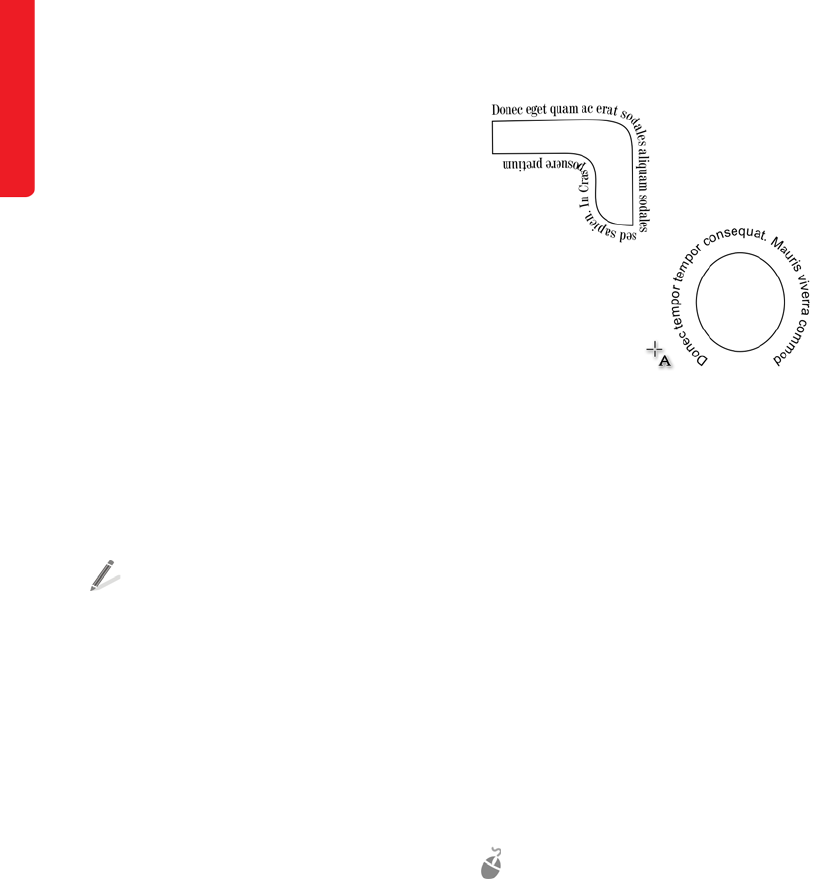
212 | CorelDRAW Graphics Suite X6 Guidebook
3Do one of the following:
• In CorelDRAW, click Te x t ` Fit text to
path.
• In Corel PHOTO-PAINT, click Object `
Te x t ` Fit text to path.
The pointer changes.
4Move the pointer over the path.
In CorelDRAW, you can preview where the
text will be fitted.
5Click where you want to place the text.
If the text is fitted to a closed path, the text
is centered on the path. If the text is fitted
to an open path, the text flows from the
point of insertion.
6Adjust the text’s orientation, distance from
path, mirroring, and other properties by
using the controls on the property bar.
To separate text from a path in CorelDRAW,
select the text, and click Arrange ` Break
text apart. To straighten the text, make
sure that the text is selected, and click Te x t
` Straighten text.
To specify tick spacing in CorelDRAW, select
the text by using the Pick tool, click Tick
snapping on the property bar, enable tick
snapping, and type a value in the Tick
spacing box.
To type artistic text directly on a path in
CorelDRAW, select the path by using the
Pick tool, and click Te x t ` Fit text to
path. A text cursor is inserted directly on
the path. To type text on a path in
Corel PHOTO-PAINT, click the Te x t tool,
and move the pointer over a path. When
the pointer changes, click where you want
the text to begin.
You can fit text to a path so that the text follows the
outline of an object.
Adding images
By using graphic elements, you can add
interest and draw attention to the main
message of your design.
File import
CorelDRAW and Corel PHOTO-PAINT
You can import files that were created in other
applications. For example, you can import TIFF,
JPEG, PNG, and Adobe® Illustrator® (AI) files.
When you import a file, it is placed in the active
application window as an object. You can
resize or center a file as you import it.
Give it a try
1Click File ` Import.
2Navigate to the folder that contains the file
to be imported.
3Select the file, and click Import.
4Click where you want to place the file.
If you want to resize the image as you
import it, drag in the document window.
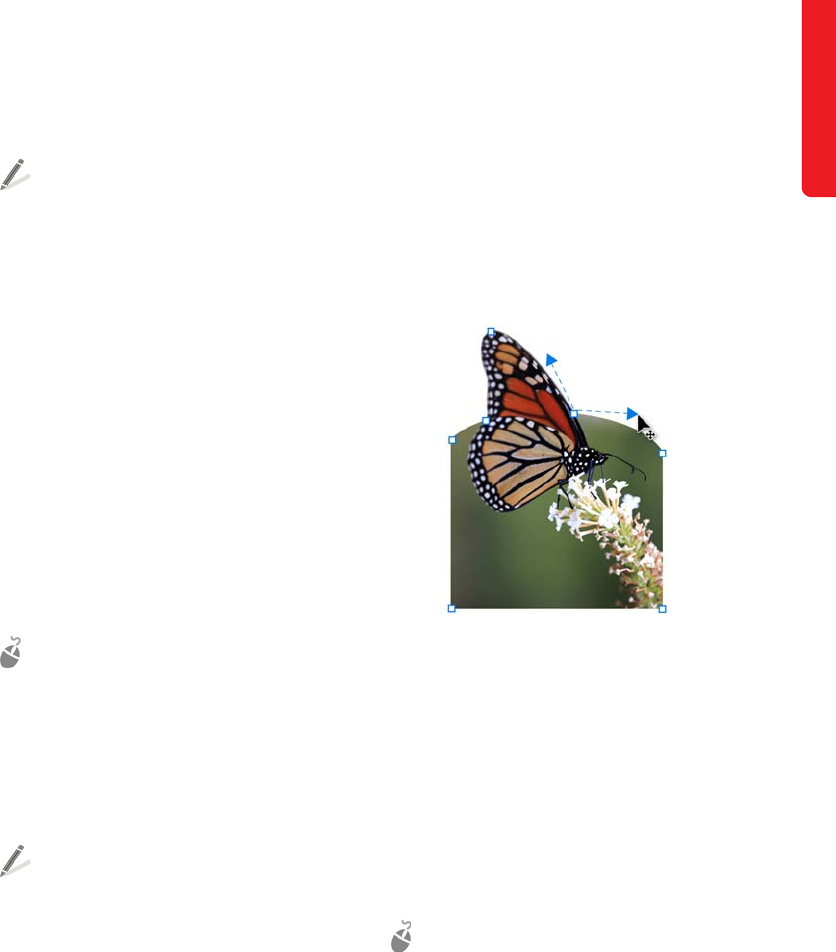
Chapter 15: Page Layout | 213
If you want to center the image on the
page, press Enter.
To import multiple consecutive files, hold
down Shift, and click the first and last files.
To import multiple nonconsecutive files,
hold down Ctrl, and click the files
individually to select them.
Shape tool
CorelDRAW
With CorelDRAW, you can remove the
background from a bitmap image by using the
Shape tool. The Shape tool lets you reshape
the boundary of the bitmap to exclude areas
without deleting them.
Cutting out the background from an image
makes the foreground subject stand out and
can help integrate the graphic more effectively
within your page layout.
Give it a try
1In the toolbox, click the Shape tool.
2Select the bitmap.
3Drag a corner node inward to reshape the
bitmap boundary.
The area outside the boundary is removed.
To add a node, double-click the bitmap
boundary. Having more nodes lets you
shape the image with greater precision.
Double-click a node to delete it.
To convert a straight line segment to a
curve, click the node, and click the
Convert to curve button on the property
bar. Drag the control handles to reshape
the curve around the bitmap image.
To restore the image area that was
removed, simply drag the nodes outward
to their original position.
To cut out parts of the image permanently
and reduce the file size of the bitmap, use
the Crop tool. For more information, see
“Cropping, splitting, and erasing objects”
in the Help.
The image background is removed by using the Shape
tool.
Perfect shapes
CorelDRAW
Using the Perfect Shapes collection, you can
draw predefined shapes, such as arrows,
banners, and callouts. Some shapes contain
diamond-shaped handles that are called
glyphs. You can use the glyphs to modify the
appearance of a shape.
Give it a try
1In the toolbox, click one of the following
tools:
•Basic shapes
•Arrow shapes
•Flowchart shapes
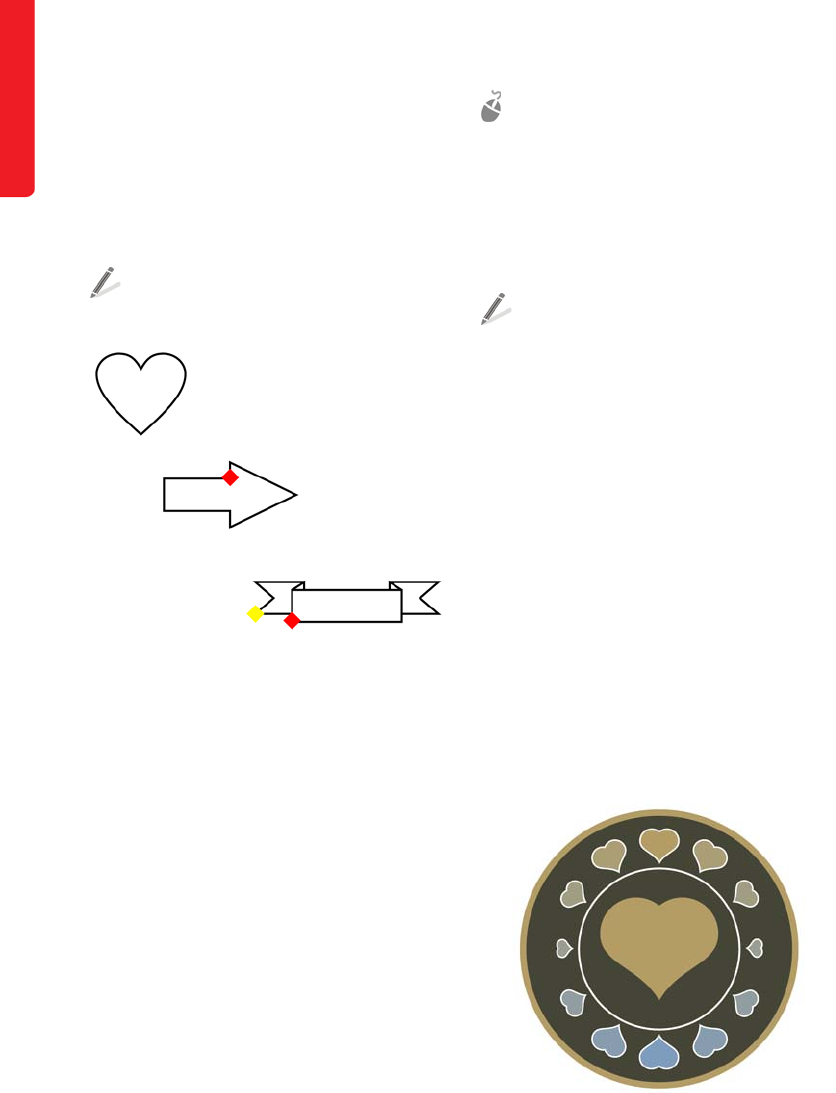
214 | CorelDRAW Graphics Suite X6 Guidebook
• Banner shapes
•Callout shapes
2On the property bar, choose a shape from
the Perfect shapes picker.
3Drag to draw a shape in the document
window.
To modify a shape that has a glyph, drag
the glyph by using the Shape tool.
You can create various perfect shapes. Some shapes
have diamond-shaped handles called glyphs, which let
you modify the shape.
Blend tool
CorelDRAW
CorelDRAW lets you create blends between
objects, such as straight-line blends, blends
along a path, and compound blends. A blend
follows a progression in shape, size, and color
from one object to another through a series of
intermediate objects.
After you create a blend, you can fit the objects
from the blend along a new path, or you can
add one or more objects to a blend to create a
compound blend.
Give it a try
1In the toolbox, click the Blend tool.
2Select the first object, and drag from this
object to the second object.
If you want to reset the blend, press Esc as
you drag.
To create a freehand blend path between
two objects, hold down Alt, and drag to
draw a freehand path from the first to the
second object.
To fit a blend to a new path, click the blend
by using the Blend tool, click the Path
properties button on the property bar,
and choose New path. Using the curved
arrow, click the path to which you want to
fit the blend.
To stretch the blend over an entire path,
select a blend that is already fitted on a
path, click the More blend options
button on the property bar, and enable the
Blend along full path check box.
To create a compound blend, use the
Blend tool to drag from an object to the
starting or ending object of a blend.
The heart shape is blended along the path of the circle.
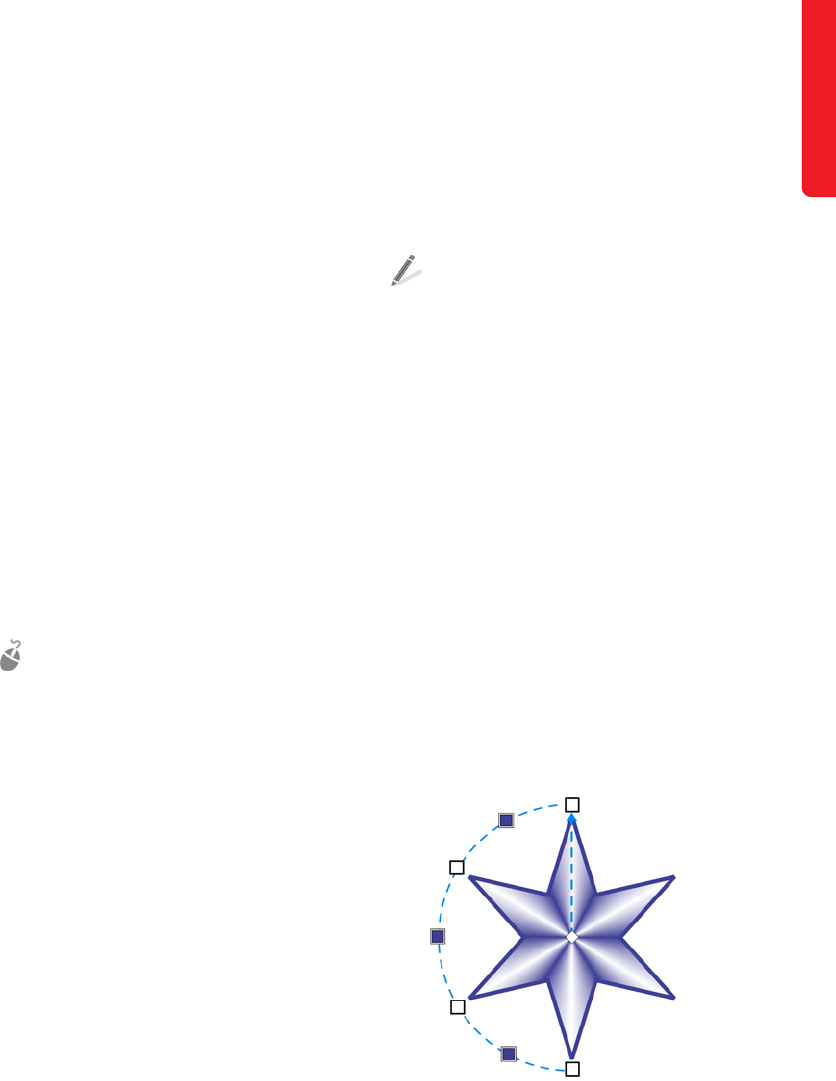
Chapter 15: Page Layout | 215
Interactive Fill tool
CorelDRAW and Corel PHOTO-PAINT
You can use the Interactive fill tool to add
fountain fills to objects. A fountain fill, also
known as a gradient fill, is a smooth
progression of two or more colors that adds
depth to objects. You can add intermediate
colors anywhere in the fill’s progression.
You can apply different types of fountain fills,
such as linear, radial, conical, and square.
•A linear fountain fill flows in a straight
line across the object.
•A radial fountain fill radiates from the
center of the object.
•A conical fountain fill creates the illusion
of light hitting a cone.
•A square fountain fill is dispersed in
concentric squares from the center of the
object.
Give it a try
1Select the object that you want to fill.
In Corel PHOTO-PAINT, click the Lock
transparency button in the Objects
docker to constrain the gradient fill to the
selected object.
2In the toolbox, click the Interactive fill
tool.
3On the property bar, choose one of the
following from the Fill type list box:
•Linear
•Radial
•Conical
•Square
4Do one of the following:
• In CorelDRAW, choose the starting and
ending colors for the gradient fill from
the First fill color and Last fill color
pickers on the property bar.
• In Corel PHOTO-PAINT, choose the
starting and ending colors for the
gradient fill from the Fill style list box
on the property bar.
To change a color in the gradient, drag a
new color from the color palette to one of
the color nodes. In CorelDRAW, you can
also select the color node and choose a
color from the Fountain fill node color
picker on the property bar. In
Corel PHOTO-PAINT, double-click a color
node to open the Node color dialog box,
and choose a color.
To add an intermediate color, drag a color
from the color palette to the dotted line
between two colors.
To adjust the color transitions, drag the
midpoint marker or any of the color nodes.
To delete an intermediate color in
CorelDRAW, double-click the color node.
To delete an intermediate color in
Corel PHOTO-PAINT, right-click the color
node, and click Delete.
A conical fountain fill that is applied to a star creates the
illusion of a three-dimensional object.

216 | CorelDRAW Graphics Suite X6 Guidebook
Preparing the file for output
When your page layout design is finished, you
must prepare the file for output.
Replace wizard
CorelDRAW
The Replace wizard guides you through the
process of finding objects that contain the
properties you specify and then replacing those
properties with others. You can replace such
properties as fill colors, outline properties, and
text attributes, such as font and font size. You
can also replace color models and palettes —
for example, you can replace all RGB colors
with CMYK colors. For more information about
color models and color palettes, see “Color
Basics” on page 72.
Give it a try
1Click Edit ` Find and replace ` Replace
objects.
2Follow the steps in the wizard.
To replace RGB colors with CMYK colors,
choose the Replace a color model or
palette option, and click Next. On the
next page of the wizard, enable the Find a
color model option, and choose RGB
from the list. Make sure that the Replace
with the color model option is set to
CMYK. Choose any other options you
want, and click Finish.
Publish to PDF, Export, and Save As
commands
CorelDRAW and Corel PHOTO-PAINT
CorelDRAW and Corel PHOTO-PAINT let you
export documents as PDF files. A PDF file can
be viewed, shared, and printed on any
platform provided that the person viewing the
PDF has Adobe Acrobat, Adobe Reader, or
another PDF-compatible reader installed. With
CorelDRAW, you can export either the entire
document, or only selected objects.
CorelDRAW and Corel PHOTO-PAINT offer
several different ways of creating PDF files. You
can use any of the following commands:
Publish to PDF, Export, and Save as. The
Publish to PDF option lets you quickly publish
a file to PDF without specifying any options or
making decisions about the output. You can
choose from several PDF presets, which
automatically apply specific settings for you.
For example, with the Web preset, the
resolution of the images in the PDF file is
optimized for the Web. You can also create
your own PDF presets or edit existing presets.
The Export and Save as commands let you
fine-tune your output by using the options in
the PDF settings dialog box.
For more information about PDF export, see
“Exporting to PDF” in the Help.
Give it a try
• Do one of the following:
• For quick PDF export, click File `
Publish to PDF, and choose a preset
from the PDF preset list. Browse to
the folder where you want to save the
file, type a filename in the File name
box, and click Save.
• For advanced PDF settings and options,
click File ` Export or File ` Save as.
From the Save as type list, choose
PDF - Adobe portable document
format, and click Export or Save.
Fine-tune your output by choosing
options in the PDF settings dialog
box.
Chapter 15: Page Layout | 217
To access the advanced PDF options from
the Publish to PDF dialog box, click
Settings.
To create a PDF preset, choose settings in
the PDF settings dialog box, click the
General tab, and click the Add PDF
preset button next to the PDF preset list
box. Type a name for the preset in the Save
PDF preset as list box.
To export only selected objects in
CorelDRAW, enable the Selected only
check box in the Export dialog box or in
the Save as dialog box.
Collect for Output wizard
CorelDRAW
If your print service provider needs to make any
changes to your file, you can use the Collect
for output feature to create a ZIP folder that
can be sent to the print service provider. The
folder contains the CorelDRAW file, a PDF
version of the CorelDRAW file, and the fonts
and color profiles that were used in creating
the document.
Give it a try
• Click File ` Collect for output, and
follow the instructions in the wizard.
ConceptShare
CorelDRAW and Corel PHOTO-PAINT
If you want to share your design with your
client in a virtual workspace, you can use
ConceptShare. This Web-based service lets you
post your design and make it available
exclusively to your client, who can then review
the design and post comments.
Give it a try
1Click Window ` Dockers `
ConceptShare.
The ConceptShare docker appears.
2Do one of the following:
• If you have a ConceptShare account,
type your user name and password,
and click Submit to sign in.
• If you don’t have a ConceptShare
account, click Sign up now, create an
account, and sign in.
3After signing in, do one of the following:
• In CorelDRAW, click Publish page in
the ConceptShare docker.
• In Corel PHOTO-PAINT, click Publish
image in the ConceptShare docker.
4Follow the instructions on the
ConceptShare Web site to share your
design with your clients.
Examples
The images in this section show page layouts
that were created in CorelDRAW and
Corel PHOTO-PAINT by using the features and
techniques recommended in this chapter.
More examples of page layout design appear
on the Gallery pages in Part Seven.
Image by Patrick Fraser

218 | CorelDRAW Graphics Suite X6 Guidebook
Image by Michaela Maginot

Part Six
Insights from
the Experts
Image created by
Alexandra Malysheva
Ukraine
Chapter 16: Design of a Soccer Club Logo | 221
Chapter 16: Design of a Soccer Club Logo
Daniel Paiz
About the author
Daniel Paiz lives in Tuxtla Gutiérrez, Chiapas,
Mexico. He graduated from the Gestalt School
of Art and Design in Tuxtla. As a graphic
designer with experience in multiple areas of
design and print, he has worked for several
advertising agencies in Mexico and the United
States. In the past few years he has been
working in the sports industry, designing logos
and identities for soccer clubs. Currently, he
works from his own online studio for several
brands, creating graphic projects and
demonstrating the power of CorelDRAW to
create professional designs. Daniel has been
using CorelDRAW as his principal design tool
since 2000 and has shared his expertise as a
Beta-tester of CorelDRAW Graphics Suite since
version X4. Visit his Web site at
www.danielpaiz.mx.

222 | CorelDRAW Graphics Suite X6 Guidebook
Chapter 16: Design of a Soccer Club Logo
The logo of a professional soccer team must be
related to the local social, cultural, and
economic scene. The imagery must inspire
pride in loyal followers and communicate the
essence of the team’s vision and values to the
general public. In this case, the Chiapas soccer
club was looking for a new logo that could
better convey the team’s spirit, identity, and
values (Figure 1).
Before I start working on the concept of the
new logo, I analyze the old logo in order to
understand the reasons why it was not
successful. I notice that there is no relationship
between the imagery and the team’s history,
identity, or environment. The image reflects the
soccer club’s name, but the jaguar’s head is
turned to the left, which can be interpreted to
mean retreat or escape from rivals.
Figure 1: New logo (left) and old logo (right)
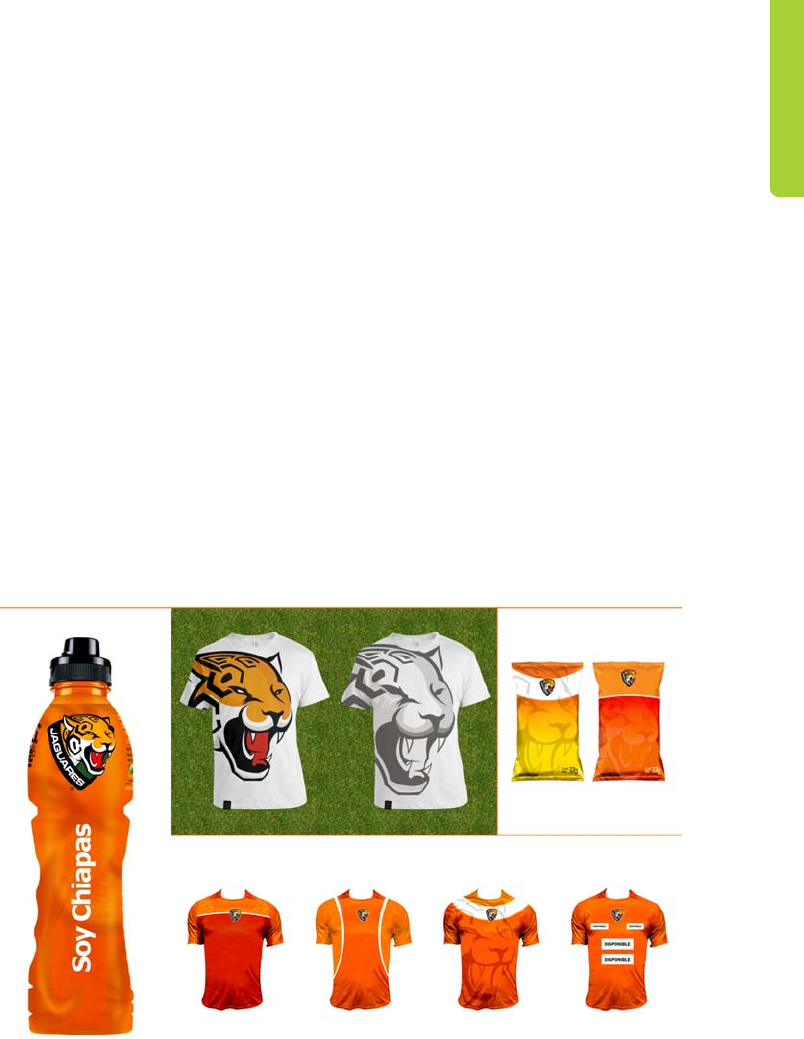
Chapter 16: Design of a Soccer Club Logo | 223
Establishing the client’s needs
Before I begin, I must establish the general
requirements and goals of the project and
formulate a strategy to achieve them.
1. The logo does not have a regional identity.
• Solution: Highlight local features.
• Result: Fans will support the team as an
expression of their culture and identity.
2. The imagery does not have the right graphic
style.
• Solution: Improve the style of the vector
trace. It needs to be clean, well-defined,
and easy to recognize.
• Result: Improving the trace will have a
direct impact on the aesthetics of the
design and will create more possibilities
for production.
3. The current concept does not adequately
convey the team’s spirit and values.
• Solution: Create a well-defined concept
that includes better management of
graphic elements.
• Result: The image will project the right
message and will be easier to understand.
Having a sound concept and a solid technical
implementation can prevent many problems,
from lack of visual appeal to difficulties in
production when using the logo across
different media and applications (Figure 2).
The tools in CorelDRAW allow me to cover all
of these areas by optimizing my files from the
beginning.
Figure 2: Examples of different applications and printed media

224 | CorelDRAW Graphics Suite X6 Guidebook
Researching the logo elements
When you work for a soccer club, you meet
people who have dedicated their lives to the
success of the team. They share common
values and work passionately towards a
common goal — to ensure that the club runs
smoothly and to promote the team to the
highest level of professional soccer.
There are a few guidelines to keep in mind
when you design a sports logo:
• Talk to the players and the people in the
club. Listen to their suggestions and ideas,
get to know their needs and expectations.
• Get to know the competition. Research of
the logos of other national teams gave me
a broader idea of the soccer market and
the strategies that each team uses to
strengthen its graphic message. Do not
copy or use elements of other logos. In
this business, people always keep an eye
on the competition.
• Do not design from memory. For example,
whenever you want to draw an animal,
observe the real animal. In this case,
visiting the zoo helped me study the
jaguar to find the right angle for the
animal in the logo. The soccer ball is
another example. I used a real soccer ball
as a reference. I tore apart a couple of
soccer balls and studied the way the pieces
were attached to each other.
First, I have to identify the right elements to
include in the logo — elements that will
resonate with the team and the fans — and
then I must document every element that I am
planning to use and the rationale behind it.
Soccer — The soccer ball, and more
specifically the Telstar model that was used in
Mexico in the 1970 World Cup, has become a
world-wide symbol of soccer. I want to use a
partial image of the soccer ball and integrate it
into the jaguar head, so I make 3D renderings
of the ball to find the right angle (Figure 3).
Had I simply used a full soccer ball, I would
have ended up with the single most common
element across all soccer logos.
Figure 3: Creating a 3D rendering of the soccer ball
Jaguar — The image of the jaguar is deeply
ingrained in local culture and tradition. The
animal, revered for its power and courage, is
considered one of the iconic animals in the
Chiapas state. The jaguar is the basic element
in the design, as its shape, color, and
expression define the logo (Figure 4).
Geometric shapes from Mayan
architecture — The Mayan culture is native to
this region of the country and has a huge
influence across the entire Chiapas state. The
Mayans are recognized and admired for their
architectural achievements (Figure 5). I decide
to merge the geometric shapes used by our
ancestors with the spots of the jaguar to
represent both elements in an abstract manner.
The beauty and color of the rainforests are also
represented by the mystic green in the final
logo.
Coat of arms — In our culture, soccer players
are considered the new warriors and are a
source of pride for the fans. Currently, eleven
soccer teams in Mexico use a coat of arms in
their logo. The coat of arms is a symbol of the
commitment to protect the honor of and
represent the Chiapas state, as well as an
important symbol of soccer culture throughout
the world (Figure 6).
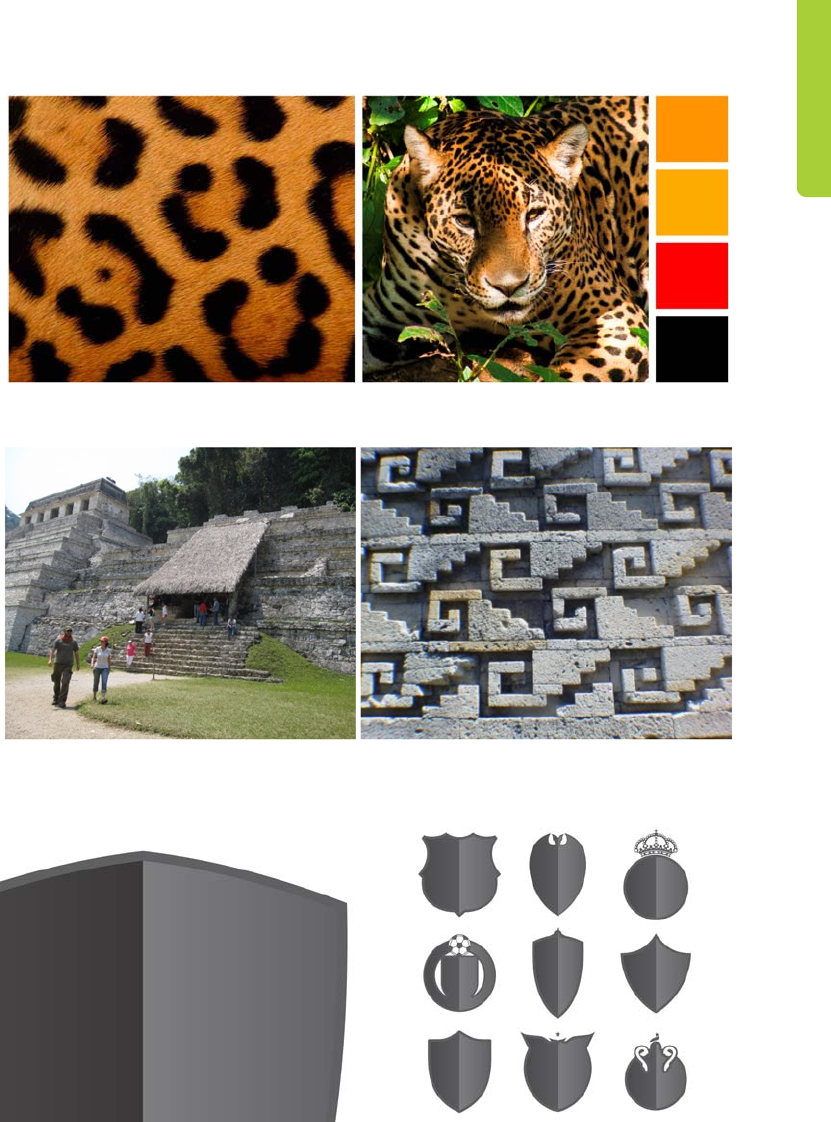
Chapter 16: Design of a Soccer Club Logo | 225
Figure 4: Studying the shape, color, and expression of the jaguar (photo by Arturo Arias López)
Figure 5: Elements of Mayan architecture help ground the logo in the history of the region
(photo by Arturo Arias López).
Figure 6: The coat of arms is an important part of soccer culture across the world.
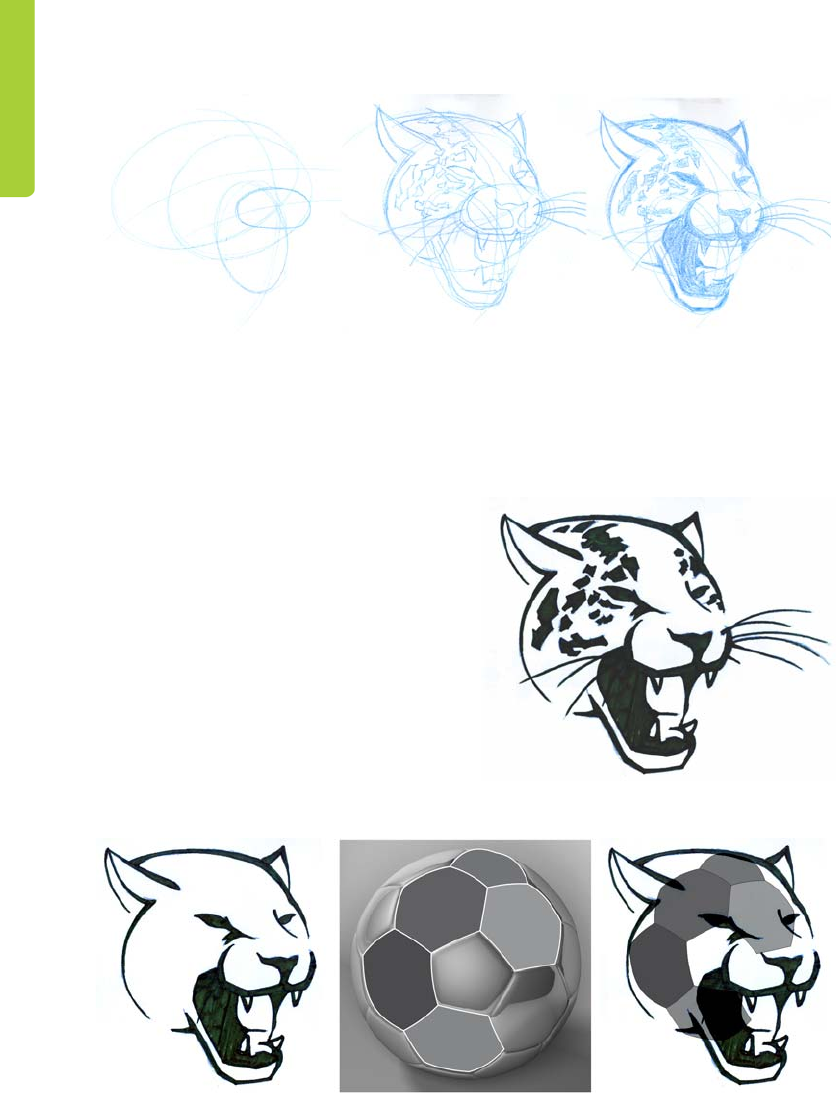
226 | CorelDRAW Graphics Suite X6 Guidebook
Figure 7: Sketching process to define the jaguar head
Time to design
The first step is to create a sketch. In this case,
I start with the jaguar. At this stage, it’s a good
idea to use a blue pencil (Figure 7), so that
when I have a well-defined image, I can use
black ink to identify the master trace (Figure 8).
As the design evolves, I make decisions on the
fly with regards to the sketch.
My plan is to partially integrate the soccer ball
into the head of the jaguar, so that the jaguar’s
fur spots take the shape of the hexagons of the
traditional soccer ball (Figure 9). The decision
to replace the natural spots of the jaguar with
the soccer ball may sound like a crazy idea, but
after I found the right angle, it suited the
composition perfectly. I also remove the
whiskers because they make the head take up
too much space. In this way, the logo becomes
more compact.
Figure 8: The complete sketch
Figure 9: The soccer ball is partially integrated into the jaguar head.
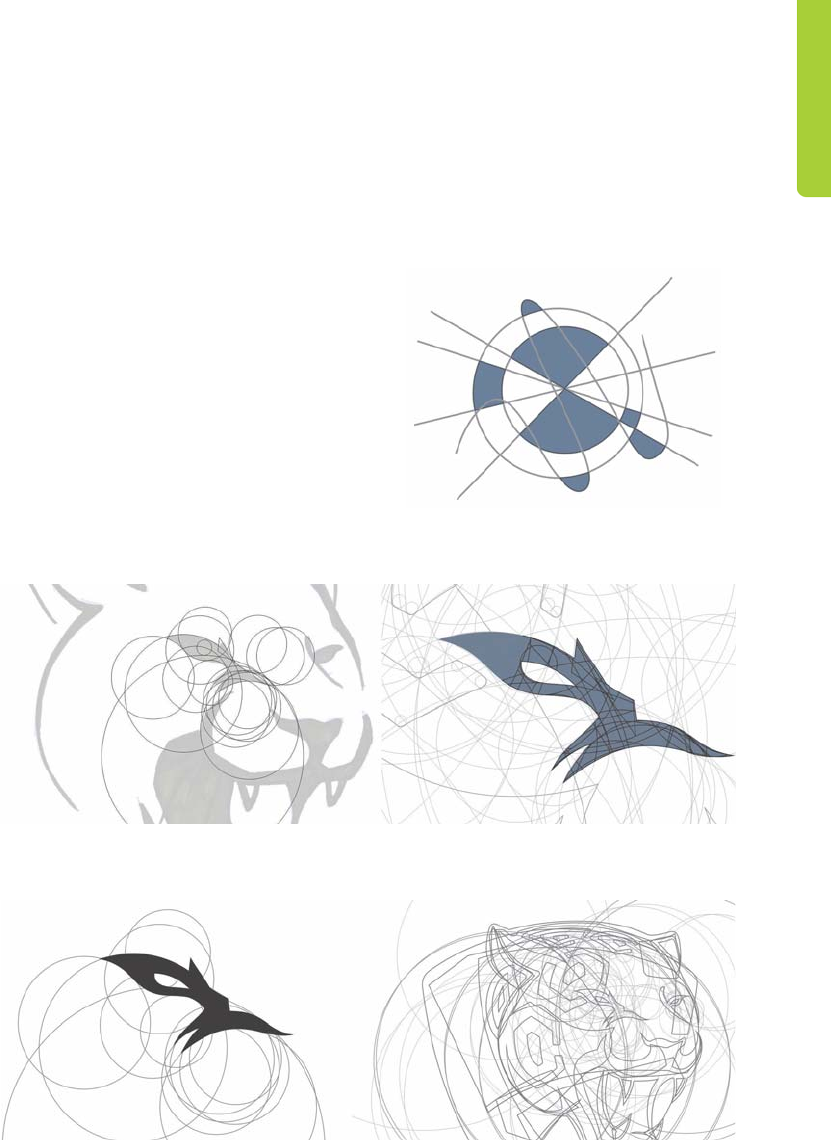
Chapter 16: Design of a Soccer Club Logo | 227
Image digitalization
The first step of the design process is complete.
It’s worth mentioning that at this stage there
isn’t a single straight line in the image, which
makes digitalization very challenging. Using
geometric shapes, I can find the most perfect
possible trace, which involves finding the
center of each curve used in the sketch. This
can take a while depending on the skill of the
designer. I use two tools: the Ellipse tool and
the Smart fill tool.
The Smart fill tool allows you to create objects
from the intersection of two lines (Figure 10).
It doesn’t matter how complex the lines are;
this tool is very useful for creating shapes from
the filled areas. As a visual guide, I can use
different outline colors for each object that
I am digitalizing, so that I have better control.
I start by creating intersecting circles using the
Ellipse tool. Whenever I have a fully defined
segment, I fill it using the Smart fill tool, and
then I combine all segments into a single curve
object (Figure 11 and Figure 12). This process
is not difficult but it requires some patience.
Figure 10: The blue objects are created from the space
between the intersecting lines.
Figure 11: Geometric details from the digitalized sketch. The Ellipse tool is used to create intersecting circles, and the
Smart fill tool is used to fill the overlapping areas and convert them to objects.
Figure 12: The jaguar head is gradually defined.
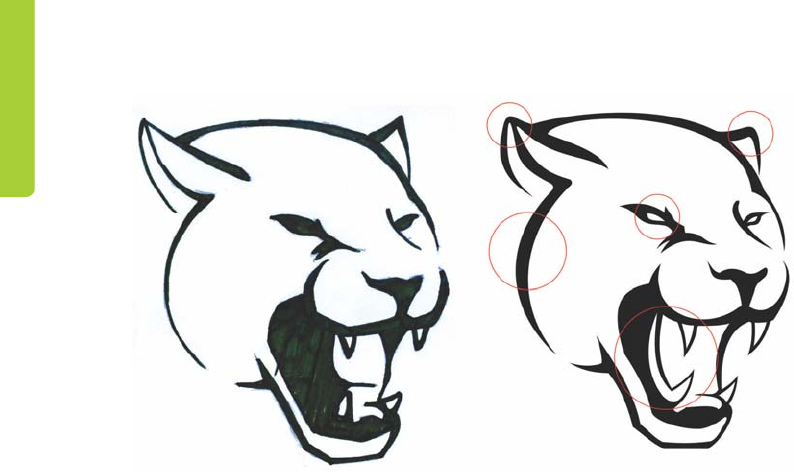
228 | CorelDRAW Graphics Suite X6 Guidebook
Figure 13: Hand-drawn sketch and digital drawing
The digitalized drawing has some minor
differences from the hand-drawn sketch, but
the traces look better defined — clearly
outlined eyes, rounded ears, longer teeth and
tongue, thicker outlines (Figure 13).
Using the jaguar’s natural spots as a guide, I
identify a pattern with six sides, which can be
naturally incorporated into the hexagons of the
soccer ball (Figure 14). Using the Contour tool
(Ctrl + F9), I add two inside contours to each
hexagon. First, I create a one-step contour
(cyan) and separate the objects of the contour
group (Ctrl + K). Then, I select the cyan object
and apply the second one-step contour
(magenta). Next, I separate the objects of the
second contour group. I delete the middle step
by selecting the original hexagon and the cyan
object and clicking the Back minus front
button on the property bar. I remove the
colors, and I have the final result.
When I start incorporating the hexagons into
the head, I run into a problem: the hexagons
overlap with the eyes and mouth of the jaguar
(Figure 15). However, I don’t need to use all
hexagons to achieve the soccer ball effect,
because the 3D rendering produces a sphere
effect on the jaguar’s head, suggestive of a
soccer ball. I delete a couple of hexagons and
I am left with the three main jaguar spots.
I erase some parts of the hexagon objects to
give them a more authentic look, similar to the
jaguar’s natural spots, as well as to achieve
harmony with the other elements, such as the
jaguar’s eyes and ears.
Another technique that can help with the
visual recognition of the shapes is to increase
the spacing between the hexagons. Other
adjustments include rounding of all corners
and traces.
The next step is adding the team name to the
logo (Figure 16). Finally, I add color and some
shadows to make the image look less flat
(Figure 17).
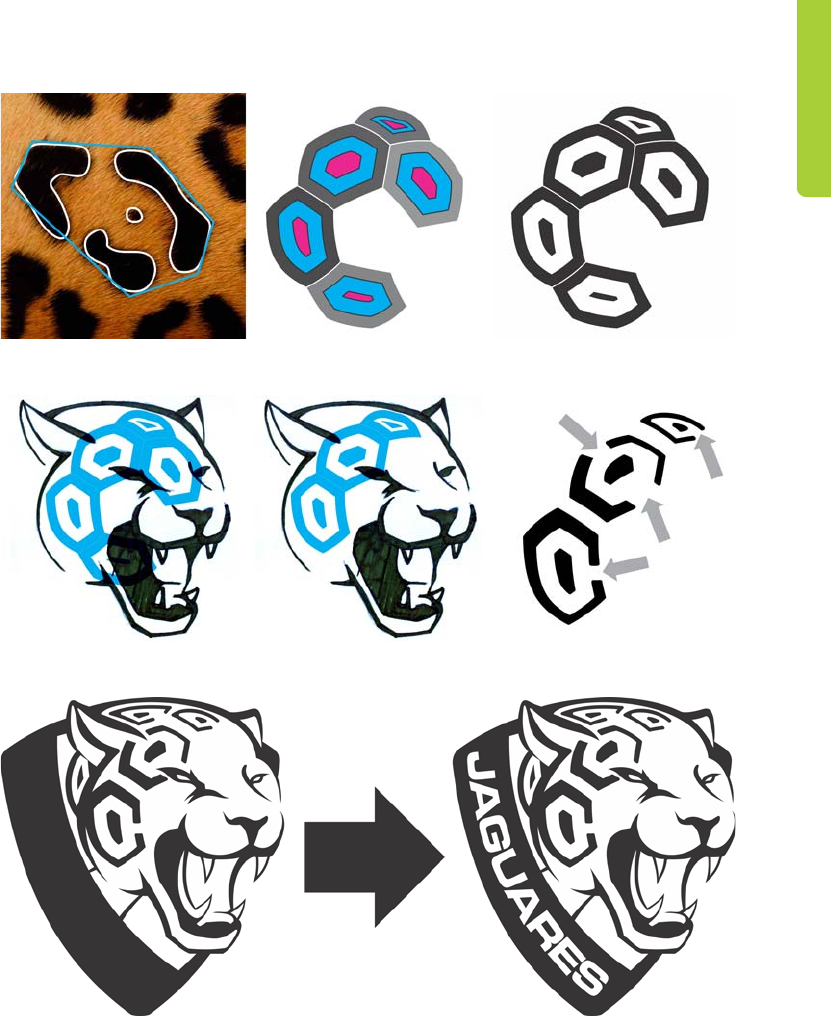
Chapter 16: Design of a Soccer Club Logo | 229
Figure 14: Creating hexagons based on the jaguar spots
Figure 15: Modifying and positioning the hexagons
Figure 16: Adding the team name
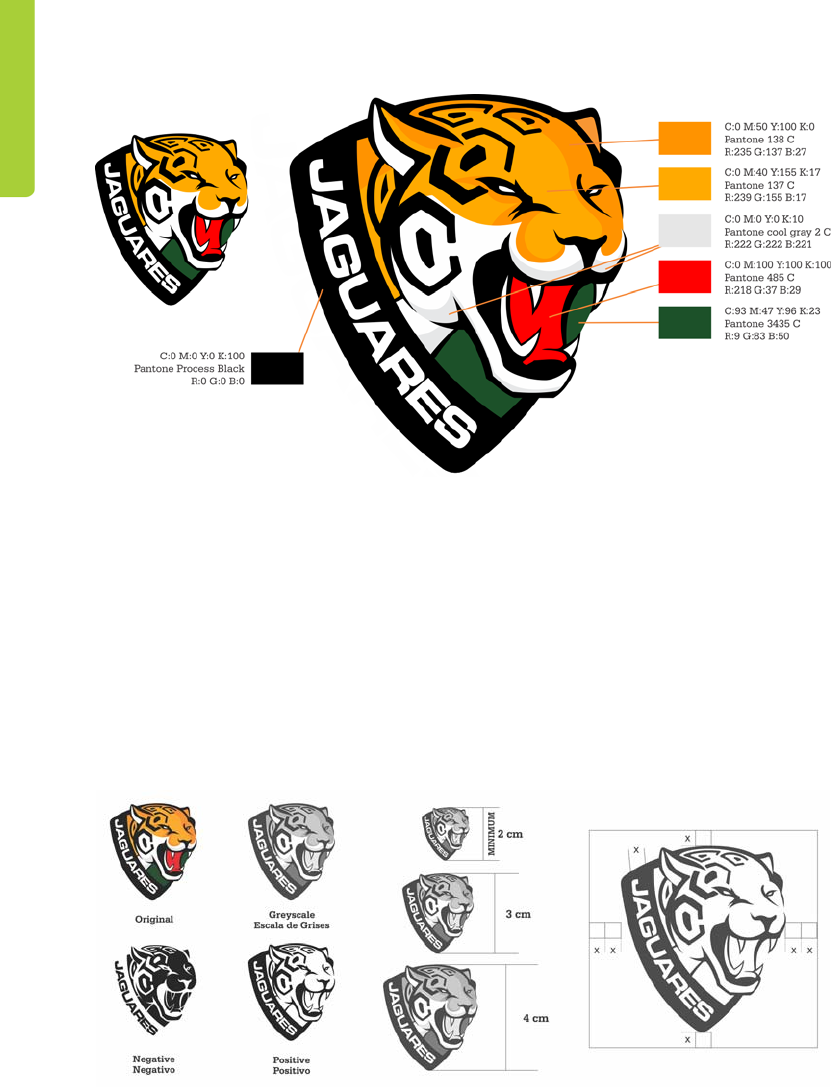
230 | CorelDRAW Graphics Suite X6 Guidebook
Figure 17: Adding color and shadows
Final steps
The final steps in the logo design process
include creating color variations, producing
grayscale and monochromatic versions of the
artwork, establishing minimum and maximum
reproduction size to avoid distortions, and
defining the safe area around the logo that is
necessary to keep the image apart from other
elements in visual materials (Figure 18).
Topics for the logo style guide
The style guide is a document that defines the
requirements of the logo usage, so that
anyone can use the design and understand the
basic principles of its reproduction. The
guidelines ensure accurate and consistent
representation of the logo and guarantee that
the logo delivers a strong and positive
message.
Figure 18: Variations in color and scale

Chapter 16: Design of a Soccer Club Logo | 231
Even though the purpose of this document is
to provide instructions to the people
responsible for the reproduction and
distribution of the logo, it’s important that
anybody — even people without any
background in design — can understand it. For
this reason, clarity is essential.
Some basic topics that I cover in the guide
include background and purpose, size and
color chart, typography, and guidelines for the
use of corporate identity. With this
information, I can ensure that all logo
reproductions communicate the values that
the brand represents.
Designing the style guide
Grids and margins are important elements in
document design. A grid is a non-printable
guide that helps the designer lay out text and
images by dividing the text into columns to
make it easier to read.
Personally, I use CorelDRAW like a blank
canvas; I don’t like to limit my workspace, so I
typically disable the page border (click Layout
` Page setup, and disable the Show page
border check box). In this case, however, a
page border gives me better control over the
text columns.
A square page layout represents some extra
challenges, as it is not a conventional format. I
decide to divide the page into three sections to
create a visually balanced and well-defined
composition (Figure 19). The top, left, and
right margins are 1 cm, and the bottom one is
1.618 cm. These proportions are also known as
the “golden ratio.” Many artists use the golden
ratio in their artwork to produce aesthetically
pleasing compositions.
The three-column layout simply provides the
basic design framework; it does not limit my
ability to position objects as I like. A quick way
to create columns with equal dimensions is to
make a paragraph text frame (by dragging
with the Te x t tool) and then divide it into
columns of equal width. To calculate the
dimensions of the text frame, I subtract the
margins from the page size. With the current
margins, for example, if the document is 25.4
x 25.4 cm, the text frame should be 23.4 x
22.7 cm, so I type these values in the Object
size boxes on the property bar.
After I create the text frame, I open the Layout
toolbar (Layout ` Layout toolbar) and click
the Columns button. In the Column settings
dialog box, I increase the number of columns
to three, with a gutter of 0.5 cm. The spacing
between the columns is adjusted automatically
so that they are evenly spaced across the
frame. Alternatively, you can calculate the
width of each column yourself. CorelDRAW
offers you the flexibility to accomplish the same
task by using different features depending on
your workflow.
Next, I press Ctrl + K (or click Arrange `
Break paragraph text apart) to split the
columns and work with them independently
while keeping the layout flexible. When I break
the columns apart, they become three separate
paragraph text objects, which are no longer
connected. This is an easy way to get several
paragraph frames that are evenly spaced on
the page. Since the style guide will contain text
in two different languages, I don’t want the
columns to be linked.

232 | CorelDRAW Graphics Suite X6 Guidebook
Figure 19: The page is divided into three columns, which
can simply serve as guidelines without limiting the
possibilities for layout of the content.
When I design a multipage document
containing text, I try to optimize my workflow.
For example, creating text styles provides a
quick way to ensure consistent formatting
across multiple pages without imposing limits
on the content or composition (Figure 20). A
style can include more than one text property,
such as color and font size. For example, if I
want all titles to use a large font size, I don’t
have to format them all one by one. Instead, I
format one title, open the Object styles
docker (Tools ` Object styles or Ctrl + F5),
and drag and drop the formatted title in the
Style sets folder to automatically create a text
style based on this formatting. After this, I can
apply the style to any text by selecting the text
and double-clicking the style set in the docker.
Placeholder text (right-click a blank column,
and click Insert placeholder text) can help a
lot with the design and layout of text and
graphics. The traditional “Lorem ipsum”
placeholder text has a structure that is similar
not only to English writing, but to many other
languages as well, so it can give me a good
reference point for the visual flow of body text.
It’s also very useful when a client must review
only the graphics in a project. The placeholder
text helps the client focus on the graphics,
saving him the time and effort of providing
unnecessary feedback on text that may still be
work in progress.
Figure 20: Using styles to format the text
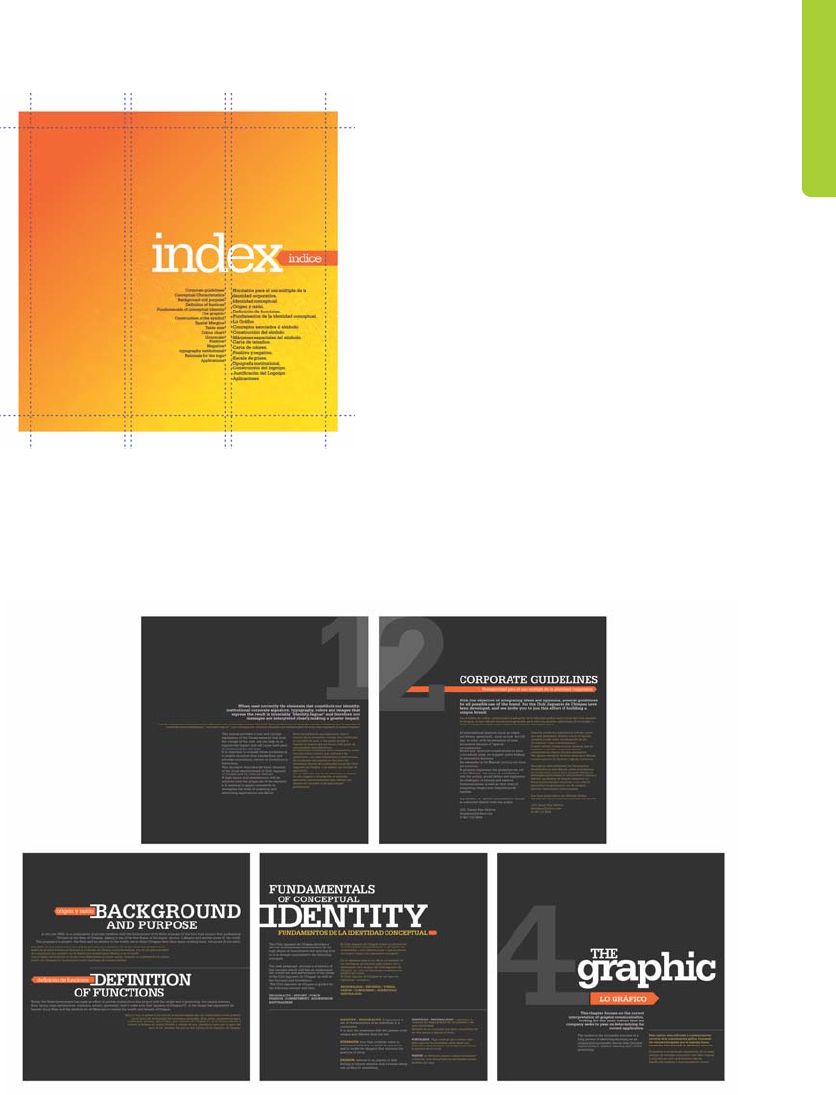
Chapter 16: Design of a Soccer Club Logo | 233
Figure 21: Empty space helps create a better
composition.
Don’t be afraid of white space. The so-called
negative space isn’t really so negative. It helps
to create a balanced and harmonious
composition (Figure 21). Remember the rule of
thirds: 1/3 text, 1/3 image, 1/3 white space.
Use less content on each page for greater
visual impact. This project is a bilingual style
guide, so all information is repeated in two
languages, but if I had used a single language,
I could have easily kept the same layout, with
only half the text per page. To compensate for
the unequal column length, I use a slightly
smaller font for one of the languages
(Figure 22).
Keep in mind that the image on screen may
look different when printed, and you can avoid
unpleasant surprises by soft proofing (click the
Proof colors button on the status bar). It’s
important to turn on color proofing every now
and then to see a preview of the printed
document (Figure 23 and Figure 24). For more
information, see “Soft proofing” on page 98.
Figure 22: A few pages of the logo style guide
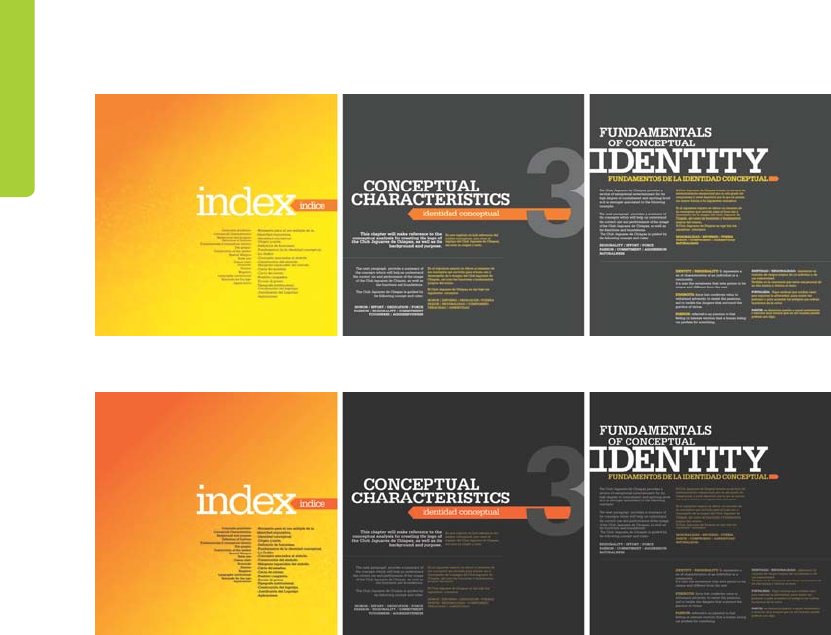
234 | CorelDRAW Graphics Suite X6 Guidebook
Figure 23: The document as it appears on screen (color proofing off)
Figure 24: A preview of the document in print (color proofing on)
When you are ready to send the project to the
client or printer, I recommend publishing it as
a PDF to prevent accidental changes to the
content prior to printing. Generally speaking,
the client is likely to request additional
changes, so unless the client asks for it, you
don’t need to submit the original .cdr file.
In conclusion, if you have an idea, no matter
how complex, CorelDRAW provides the tools
you need to make it happen, with the most
professional results and high-quality imagery in
both printed and digital media.

Chapter 17: The Story of a Reader Chair | 235
Chapter 17: The Story of a Reader Chair
Michal Polák
About the author
Michal Polák lives in the Czech Republic, in the
town of Újezd u Brna, South Moravia. He
graduated in 2001 from the advertising and
graphics program of the College of Applied
Arts and Graphics in Jihlava. In 2009, he
completed a design program at the Academy
of Arts, Architecture and Design in Prague. He
now works at Francisdrake, his own graphics
studio, with his colleague Zdenek Pudil. For
many years, Michal has worked with
CorelDRAW as a primary tool for creating all
types of designs, including stationery, catalogs,
logotypes, corporate identity materials,
business cards, posters, Web designs, and
technical drawings. The chair design featured
in this article received an award at the Mobitex
2006 international trade fair. Visit Michal’s
Web site at www.francis-drake.eu.

236 | CorelDRAW Graphics Suite X6 Guidebook
Chapter 17: The Story of a Reader Chair
A café is a place where you go for good coffee,
chocolate, and desserts; a place where you
meet friends, relax, and read books; a place
where you spend your free time. Cafés are filled
with readers of classic books and modern
notebook users. What do people carry with
them into the café? Jackets, scarves, hats,
books, magazines, newspapers, and so on. The
question is, where to put all these items? The
tables in coffee shops are usually very small and
often covered with advertising leaflets. There is
place only for a cup of coffee or dessert, not for
big books and magazines. The main idea for
this project was to design an original chair for
a café. The challenge was to create a chair that
was comfortable, compact, and equipped with
convenient and versatile storage space, which
could be used for books, magazines, or coats.
By creating a pocket on the backrest of the
chair, I solved the problem (Figure 1).
Figure 1: Final design
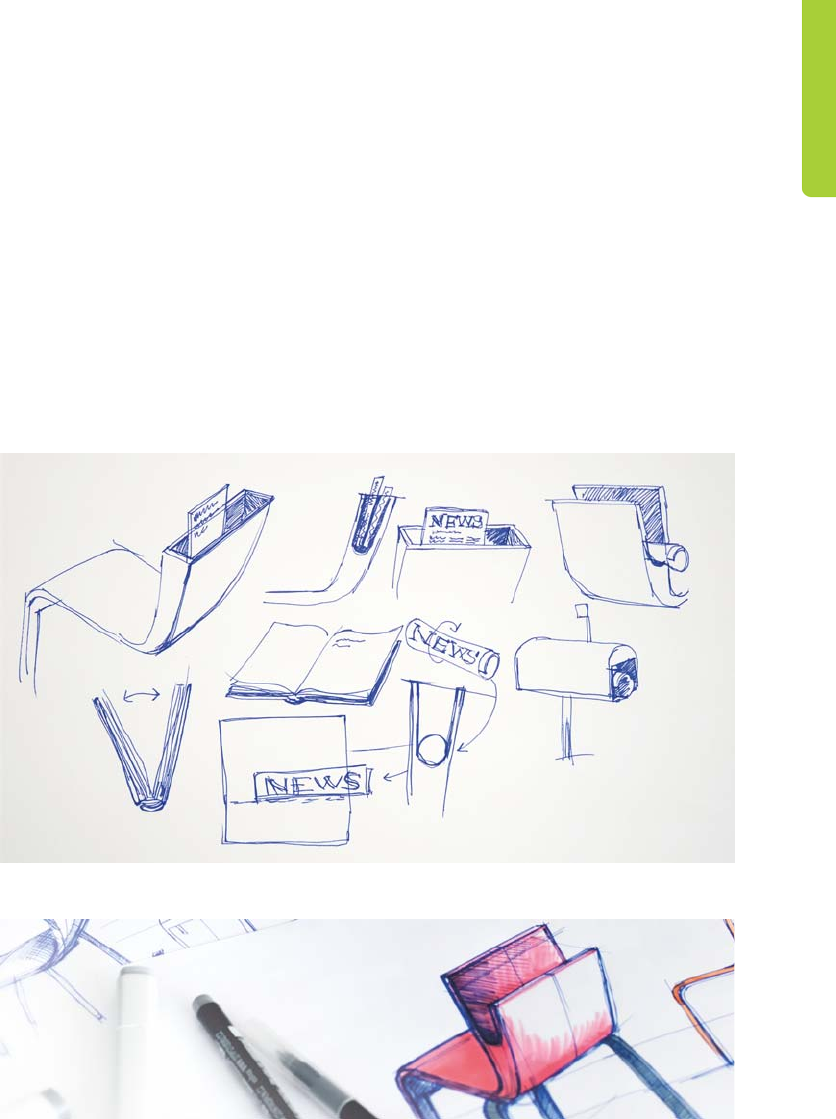
Chapter 17: The Story of a Reader Chair | 237
Ideas and sketches
The shape of the pocket was inspired by the
notion of an open book. The backrest was
envisioned as a double-layer surface gradually
splitting up into two separate planes and
opening up a space for the placement of books
or papers.
My initial sketches (Figure 2) depict the march
of ideas when I brainstormed about the various
ways to store newspapers, books, or
magazines. Newspapers can be rolled up or
stacked up flat, and books can be opened up
or kept sealed in hard cover.
At first I wanted to create a closed pocket, but
then I realized that it is much better to leave it
open on the sides, so people can use it to store
different kinds of reading materials regardless
of their shape. Rolled-up newspapers, for
example, can fit comfortably in the cylindrical
bottom.
First, I put my idea on paper (Figure 3). Then I
developed several sketches, from which I chose
the final version. I scanned the sketch into the
computer so I could use it as a starting point
for the design.
Figure 2: Sketching out ideas
Figure 3: Initial sketch of the chair
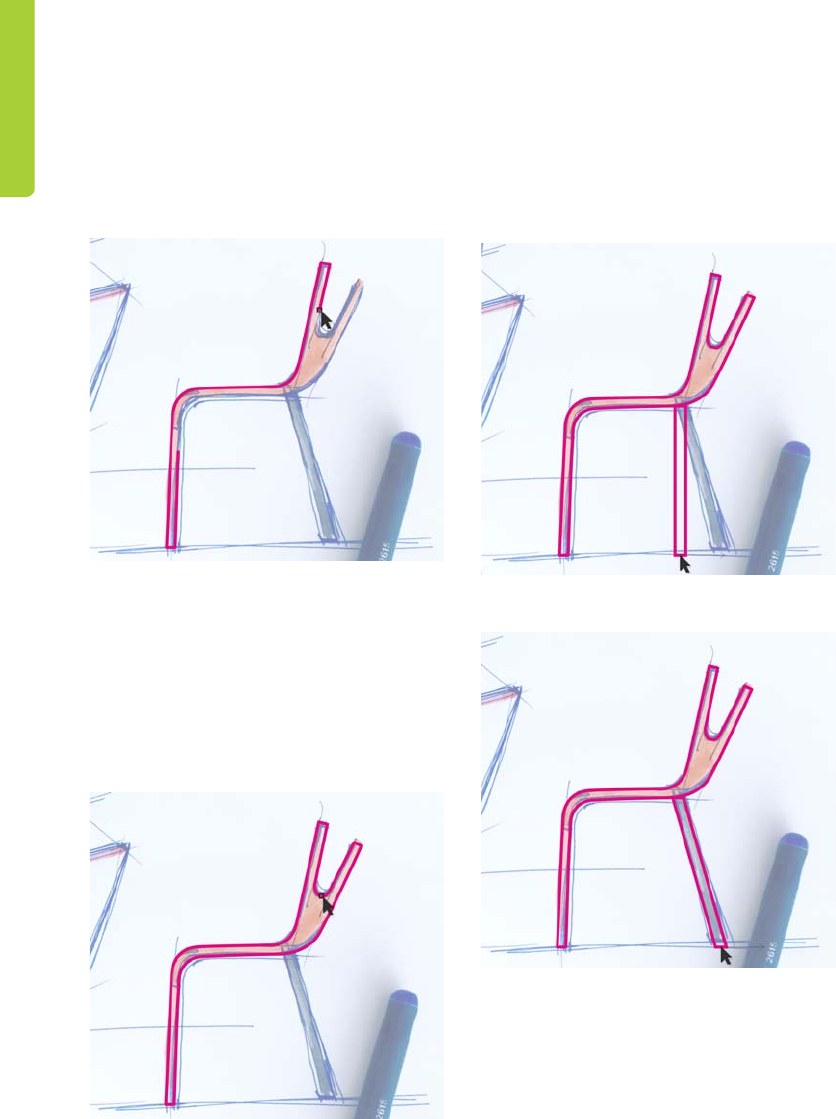
238 | CorelDRAW Graphics Suite X6 Guidebook
Tracing the basic shape
After I scanned and imported the sketch into
CorelDRAW, I used the Bézier tool to trace the
basic shape of the chair as seen from the side
(Figure 4).
Figure 4: Outlining the main shape
While drawing with the Bézier tool, I could
switch to Quick Pan mode by holding down
the middle mouse button and dragging. The
pan mode for drawing tools allows smooth
panning without having to scroll down the
page or change tools. I created one continuous
curve for the top part of the chair (Figure 5).
Figure 5: Outline of the top of the chair
For the back chair leg, I created a rectangle
with the Rectangle tool (Figure 6) and then
skewed the rectangle (Figure 7) by using the
Transformations docker (Window `
Dockers ` Transformations ` Skew). Now
the basic outline was complete.
Figure 6: Drawing a rectangle for the leg
Figure 7: Skewing the rectangle
Ergonomics
When designing furniture, I always use a
digital human model to ensure that the final
product follows basic ergonomic principles. I
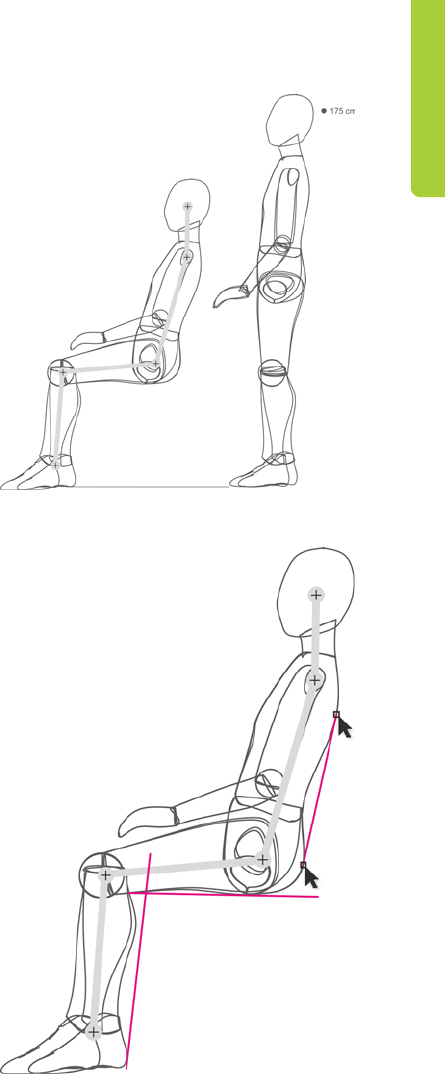
Chapter 17: The Story of a Reader Chair | 239
use the same figure in different sizes,
depending on the project. For example,
projects such as designing car seats for
children or chairs for people of different ages
require human models of various sizes.
In this case, I used a ready-made human figure
with a height of 175 cm set in a proper sitting
position (Figure 8). The virtual model came
from a 3D program, Rhinoceros 3D, which is
easy to use with CorelDRAW.
Digital human models are an essential tool in
industrial design. Designers should always use
digital models to check the proportions of their
products. If you design chairs, car seats, beds,
bathtubs, cars, homes, and so on, you have to
use human figures to guarantee compliance
with safety and ergonomic standards. To make
sure that the chair was ergonomic and
comfortable for sitting, I had to use either a
digital model, or a real human sitting on a
prototype of the chair.
After importing the seated figure into
CorelDRAW, I used the Freehand tool to
create curves around it and outline the basic
surfaces of a chair (Figure 9). Holding down
Shift while drawing with the Freehand tool
creates a straight line. For the backrest, I drew
a curve along the back of the figure, and then
scaled the curve to make it longer (Figure 10).
Then, I drew a horizontal line to mark the
height of the backrest (Figure 11). I estimated
that this height would be comfortable for a
chair of this design, taking into account the
figure’s center of gravity.
Based on the digital model, I had found the
right proportions for a chair that supports
proper sitting posture.
Figure 8: A human figure is imported into CorelDRAW.
Figure 9: Drawing a chair outline around the figure
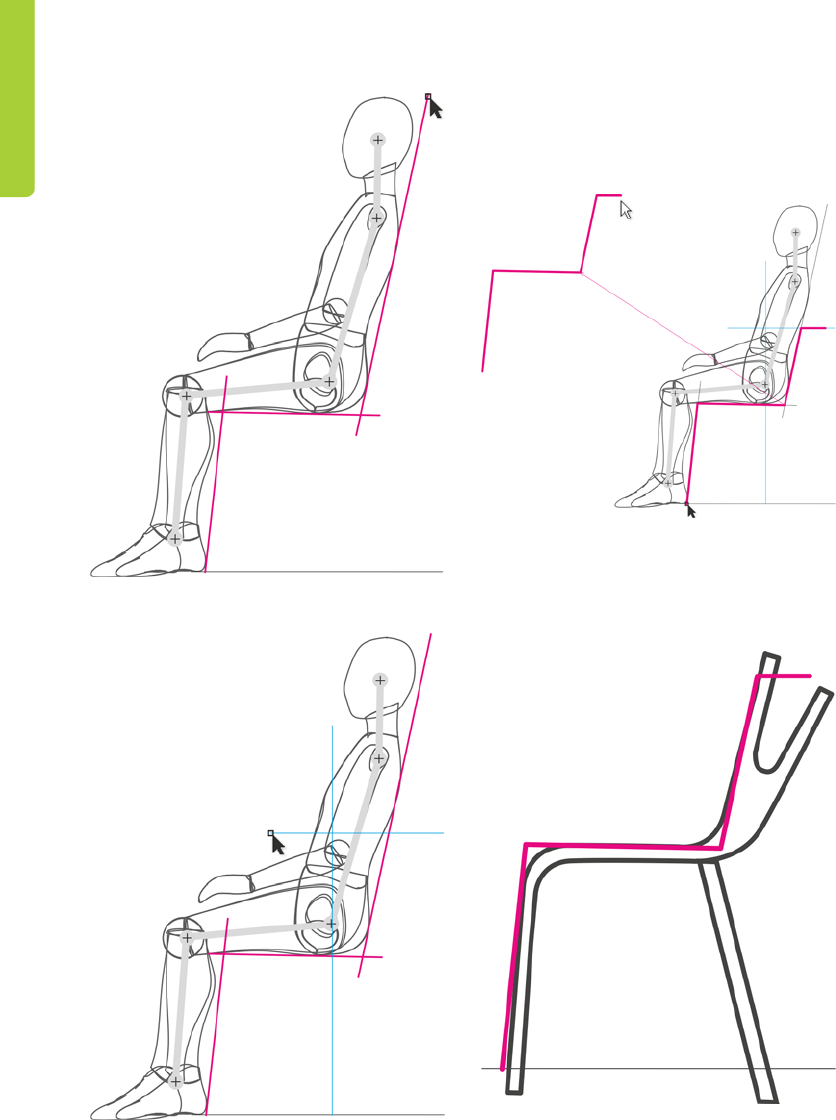
240 | CorelDRAW Graphics Suite X6 Guidebook
Figure 10: Extending the curve for the backrest
Figure 11: Drawing a horizontal line to mark the height
of the backrest
When the outline was complete, I separated it
from the human figure (Figure 12). I now had
a basic outline representing a chair constructed
according to ergonomic principles.
Figure 12: Separating the outline
I put the original traced shape on one layer,
and then I placed the ergonomic outline on
another layer on top of it (Figure 13).
Figure 13: The ergonomic outline is superimposed on
top of the original traced shape.
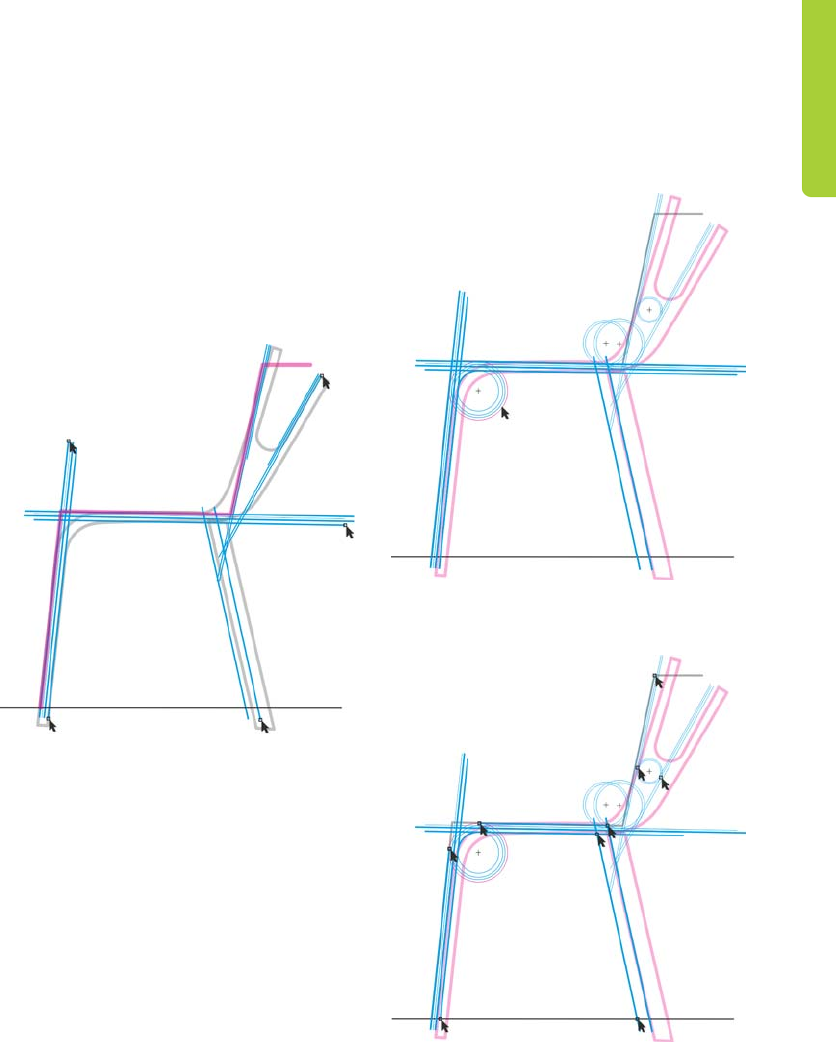
Chapter 17: The Story of a Reader Chair | 241
I drew a new outline with the Bézier tool,
using as guidelines the ergonomic outline and
the original traced sketch. The resulting shape
represented a chair outline adapted to
ergonomic principles. Then I duplicated every
line and placed the copy at a distance from the
original to account for the thickness of the
material (plywood). I measured the real
thickness of the plywood and applied the same
proportions in the drawing (Figure 14).
Figure 14: The blue lines are duplicated and spaced out
according to the thickness of the material.
Next, I created circles of different sizes and
snapped them to the intersections where I
wanted to create rounded corners (Figure 15).
I shortened the straight lines to the points
where they intersected with the circles
(Figure 16).
To create rounded corners, I broke up the
circles into arcs by clicking the Arc button on
the property bar, and then I moved the end
points of each arc so that the arc was 1/4 of the
circle (Figure 17).
You can move the nodes of the arc manually
with the Shape tool or type values in the
Starting and ending angles boxes on the
property bar for greater precision.
Figure 15: Circles are added at intersections of straight
lines.
Figure 16: The straight lines are shortened so that they
end at the intersections with the circles.
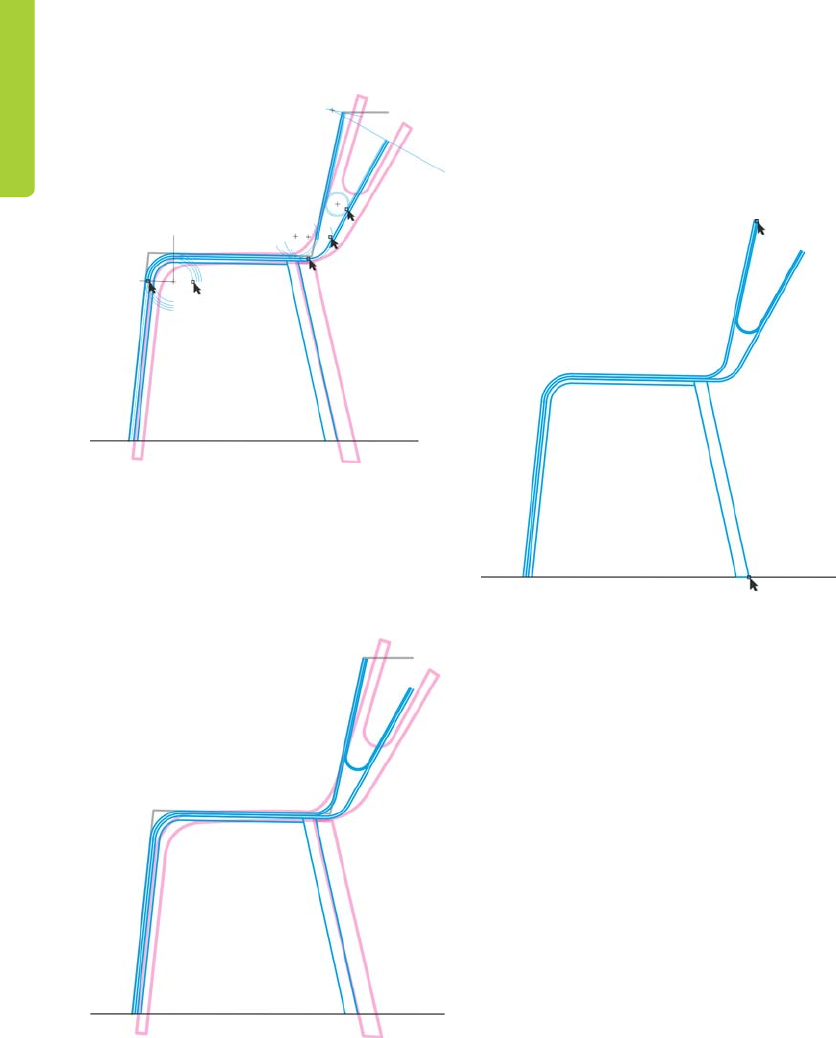
242 | CorelDRAW Graphics Suite X6 Guidebook
Figure 17: Turning the circles into arcs to create rounded
corners
The outline was now complete. The design
captured the original idea from the traced
sketch, while also incorporating basic
ergonomic principles (Figure 18).
Figure 18: The final outline (blue) is based on the
original traced sketch (purple) and the ergonomic
outline (black).
Finally, I closed all open lines of the object
(Figure 19). I used the Shape tool to select
each two end nodes that I wanted to join, and
then clicked the Join two nodes button on
the property bar.
Figure 19: All open curves are closed.
When the side view of the chair was ready, I
created the back view based on it (Figure 20).
Finally, I verified the design by adding the
seated human figure to the chair (Figure 21).
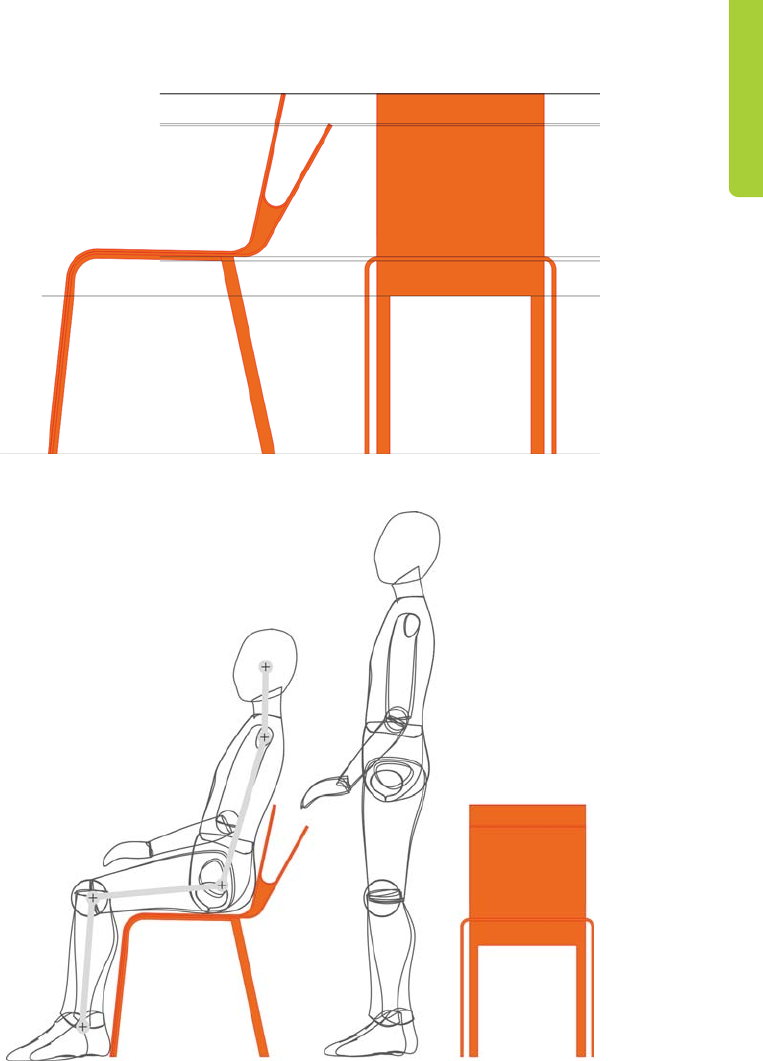
Chapter 17: The Story of a Reader Chair | 243
Figure 20: Side and back view of the chair
Figure 21: Verifying the final design

244 | CorelDRAW Graphics Suite X6 Guidebook
Adding colors
With the rich color-mixing capabilities of
CorelDRAW, I could fine-tune the color of the
chair as needed.
CorelDRAW provides a fast and easy way to mix
colors. First, I chose a color swatch from my
printed RAL color chart, and then I recreated
the color in CorelDRAW on my calibrated Eizo
monitor. I usually use the CMYK and PANTONE
color palettes.
When my color palette was ready, I simply
dragged a color swatch to the object to apply
the color (Figure 22). I used the Interactive
fill tool to create transition effects from darker
to lighter shades of the same color.
I chose different colors that would make the
chair look good (Figure 23).
Figure 22: Applying color to the chair
Figure 23: The chair in different colors
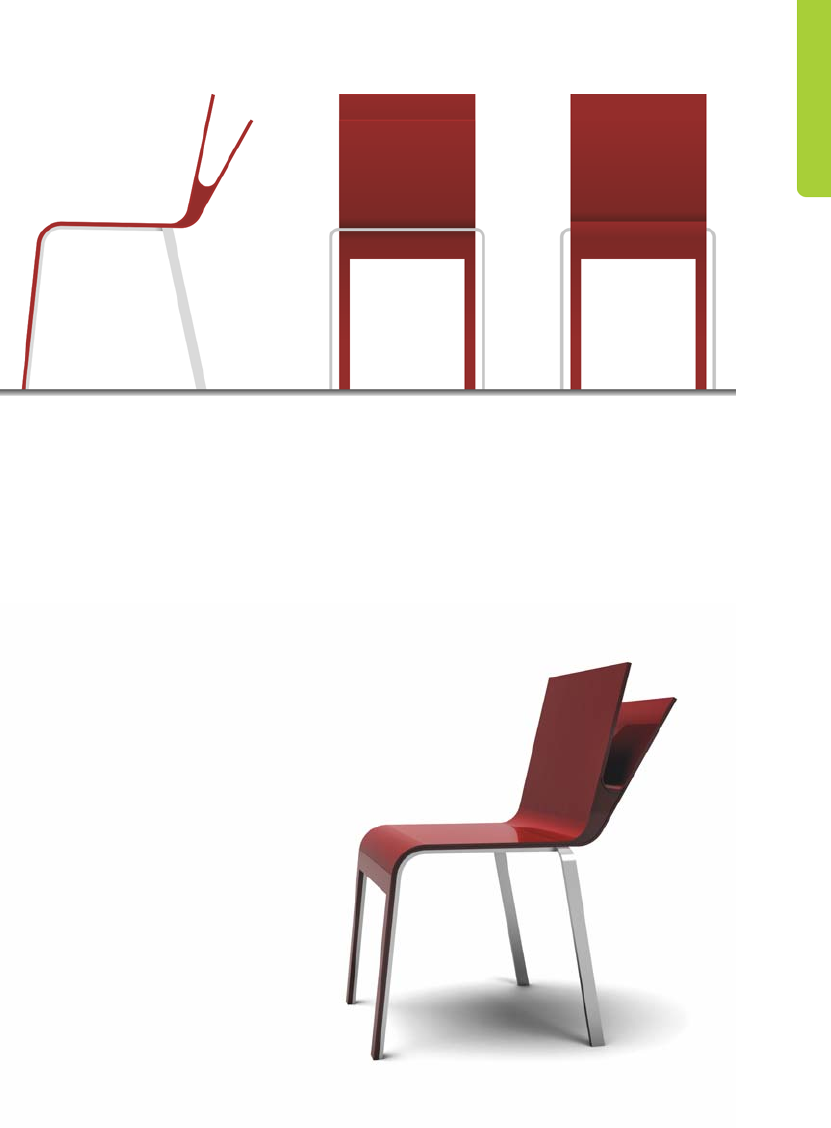
Chapter 17: The Story of a Reader Chair | 245
Figure 24: Side, back, and front view of the chair
Creating a 3D visualization
The chair was done in 2D views (Figure 24). Now was the time to convert it to 3D. I exported the
basic outline of the chair as a DWG file, which I opened in the Autodesk® 3ds Max® Design
software. The resulting visualization showed what the chair would look like in real space
(Figure 25).
Figure 25: 3D view of the chair
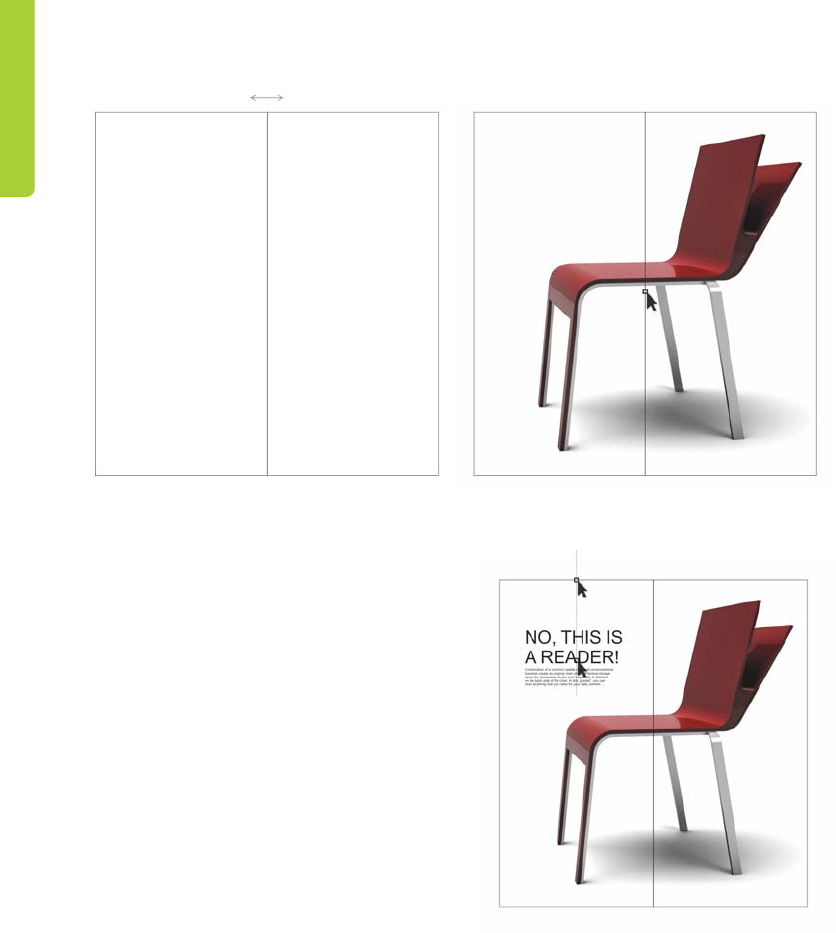
246 | CorelDRAW Graphics Suite X6 Guidebook
Figure 26: Mirroring the rectangle and importing the chair
Creating a presentation booklet
When the 3D visualization was done, I opened
CorelDRAW again to create a presentation
booklet for the chair.
I wanted to create a single-fold 4-page
brochure. First, I created the inside pages. I
drew a rectangle and mirrored it to create a
two-page spread (Figure 26). Then I imported
the image of the chair and placed it in the
middle of the two pages by snapping the
center of the chair to the center of the page
spread. The ability to snap objects to other
objects, edges, or the center of the page is one
of the great advantages of CorelDRAW. Thanks
to this feature, I save a lot of time and I am
100% sure that the result will be accurate.
Next, I added text by using the Te x t tool and
aligned it on the page by using alignment
guides (Figure 27). The two inside pages of the
booklet were done.
Figure 27: Adding text
On the back cover of the booklet, I wanted to
create a visual presentation of the available
colors for the chair. For each color, I created a
small circle with a uniform fill, duplicated the
circle (with the duplicate right on top of the

Chapter 17: The Story of a Reader Chair | 247
original), and then created a larger circle
overlapping half of the duplicate circle
(Figure 28). Then I selected the duplicate circle
and the large circle, and clicked the Intersect
button on the property bar to create an object
from the intersection of the two objects. I
discarded the two objects, leaving only the
object created from their intersection. Then I
filled this object with white and applied
transparency to it, so that the underlying
original small circle was partially visible. The
transparency created a smooth transition
between the light and dark shades of the color,
producing a glow effect.
When I was done with the first circle, I dragged
it to the right and pressed the right mouse
button to duplicate it. I created multiple copies
in different colors and spaced them evenly on
the page, so that the distance between the
circles was equal to their radius.
Figure 28: Creating color circles
On the back cover of the booklet, I placed the
color samples and added text, and on the front
cover I placed the image of the chair, which I
cut and aligned with the page (Figure 29).
To crop the image of the chair to the page, I
used a long and narrow rectangle. I selected
both objects and clicked Arrange ` Shaping
` Back minus front (the chair being the back
object and the rectangle the front).
Figure 29: Trimming the end of the chair with a
rectangle
All the objects were now aligned on the page
in a harmonious and visually pleasing
composition.
Next, I cut the image to the size needed for
printing. Offset printers require adding a
margin (also known as bleed) to allow for
trimming the paper after printing. The final
trim size of the brochure was 210 x 198 mm,
so I added a 3.175 mm bleed on each side. This
is a standard bleed size for offset printers.
Finally, I exported the booklet to the PDF
format with printer’s marks, which CorelDRAW
added automatically.
After that, the booklet was done and ready for
print and production (Figure 30 and
Figure 31).
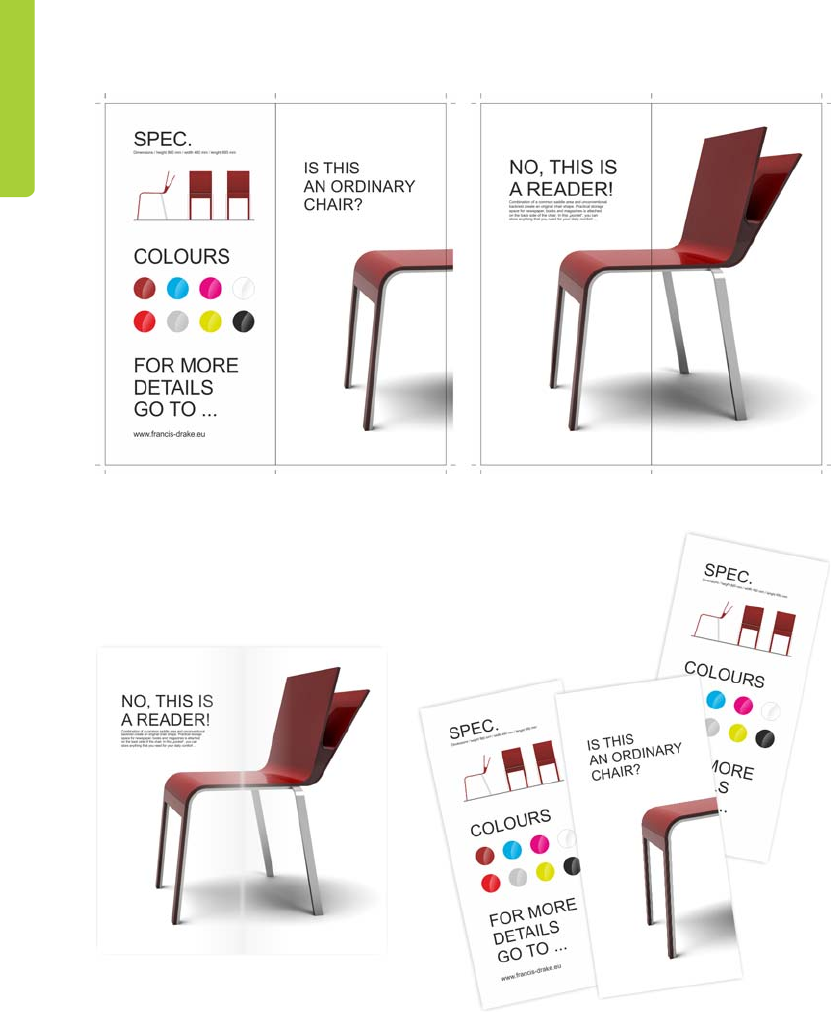
248 | CorelDRAW Graphics Suite X6 Guidebook
Figure 30: The finished booklet design
Figure 31: Final printed booklet
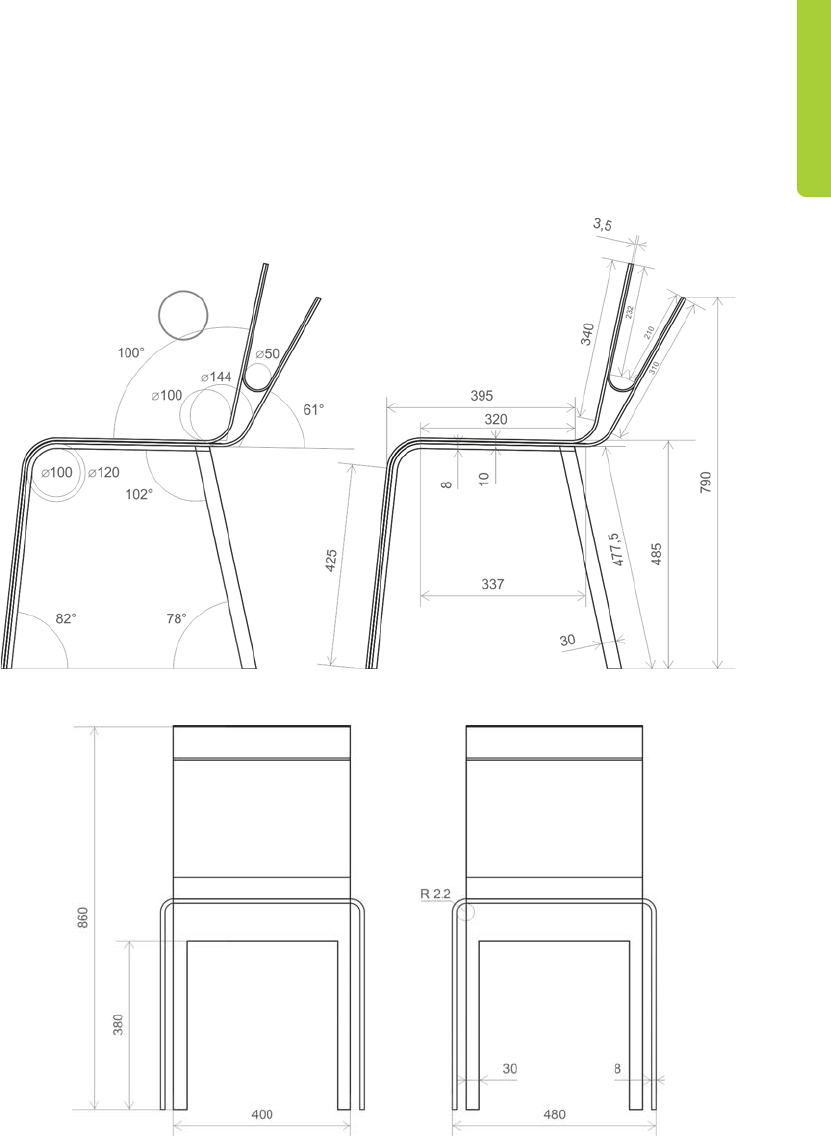
Chapter 17: The Story of a Reader Chair | 249
Production drawings
The final task was to create production
drawings for the chair manufacturer (Figure 32
and Figure 33). Using the Dimension tools in
CorelDRAW, I simply dimensioned all chair
parts. When the production drawings were
complete, I printed them and handed them
over to the manufacturer, who made the chair
(Figure 34).
Figure 32: Production drawings (side view)
Figure 33: Production drawings (rear view)
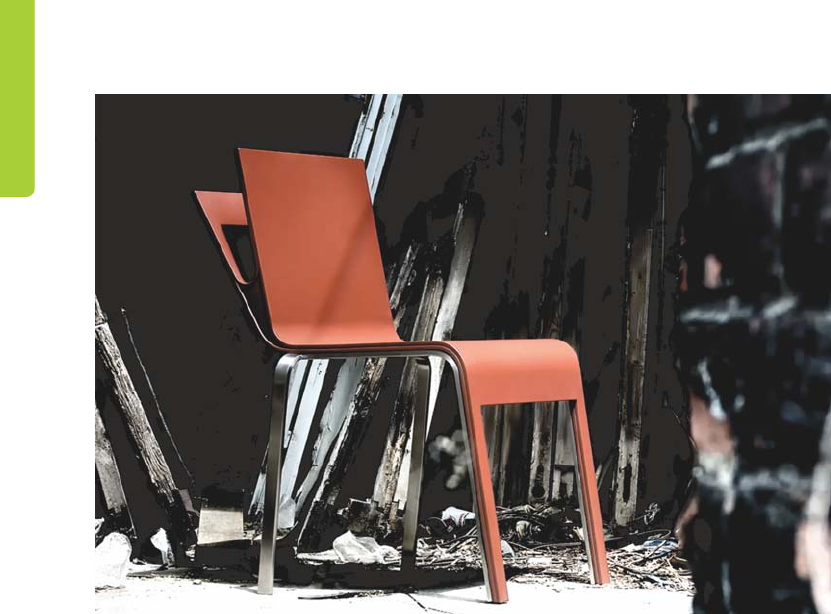
250 | CorelDRAW Graphics Suite X6 Guidebook
Figure 34: Manufactured product
I use CorelDRAW as the main application for
creating graphic materials. It’s the perfect tool
for developing the concept and basic shapes of
the product design, which I subsequently
export as curves to a 3D software to render
photorealistic visualizations of the product.
CorelDRAW also provides an easy way to make
production drawings, which I send directly to
the manufacturer.
CorelDRAW is a unique software that allows
me to transfer my ideas from paper to reality. I
use this tool for all my projects, including the
creation of visual identities, Web sites, logos,
catalogs, and product designs.
Chapter 18: Concept Art | 251
Chapter 18: Concept Art
Maurice Beumers (Mo)
About the author
Born and based in Germany, Maurice Beumers
(Mo) learned to draw as a young child. An
autodidactic study of numerous scientific
subjects, including anatomy and optics, helped
him develop his knowledge of shape,
perspective, and figurative representation — all
of which contribute to good illustration. After
an apprenticeship in advertising, Mo began
doing airbrush artwork on commission. He is
now a corporate publisher for a European IT
supplies enterprise as well as a passionate artist
and illustrator. Mo has used CorelDRAW since
version 6 and now takes full advantage of
CorelDRAW Graphics Suite in his work with
marketing materials and digital illustrations.

252 | CorelDRAW Graphics Suite X6 Guidebook
Chapter 18: Concept Art
Figure 1: Concept painting
Quiet and desolate, the houses lay in the
shadow of the massive town gate. Single spots
of golden light lent a gleaming fur to the ruins
of timbered houses, decorated by vegetation
which fetched back piece by piece the once so
picturesque scenery. A lonesome traveler
wrapped in a dark cape rose from his horse and
looked around. But the forsaken and idyllic
mood was only skin deep. Something
oppressive and lurking lay in the shadows...
This scene could be taken from the plot of a
fantasy role-playing game. My job as the
concept illustrator is to provide a visual image
that gives shape to this description (Figure 1).
On the following pages, I cover the basic
workflow for creating concept art, and I
provide details on the advantages of using
Corel PHOTO-PAINT. The easy-to-understand
tools, customizable workspace, and limitless
creative possibilities make this graphic
application a powerful tool for digital artists
and illustrators.
Sketching the first ideas
After establishing the picture in my mind, I use
Corel PHOTO-PAINT to make some rough
sketches. These sketches will later serve as a
basis for elaboration of the image.
To produce each rough sketch, I click File `
New and choose my settings in the Create a
new image dialog box. I specify a ratio of
1000 to 500 pixels and choose a light gray
background. Next, I add a new object by
clicking Object ` Create ` New object.
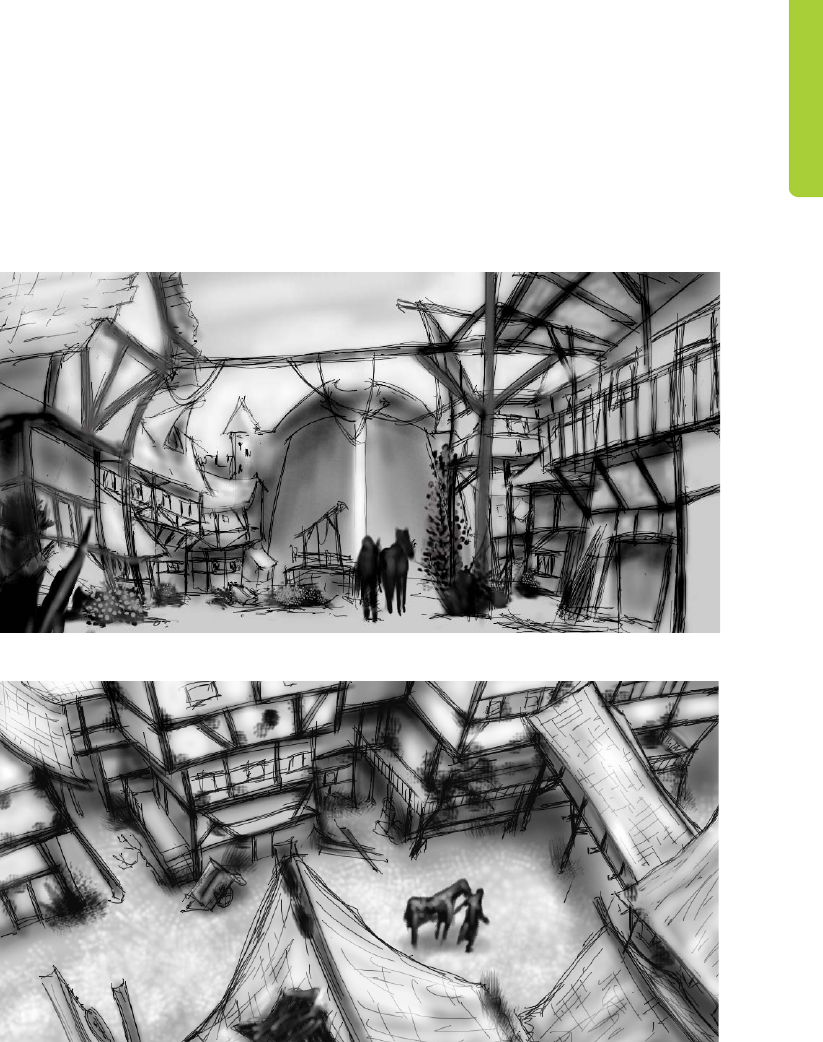
Chapter 18: Concept Art | 253
I can draw my sketch on this object as I would
on an acetate sheet.
I use the Paint tool for sketching, usually with
one of the preset brush types in the Pencil
category.
I make the sketches very quickly and save them
as CPT files. My intention is to capture an
interesting viewpoint and expression of the
entire scene (Figure 2). It is not important if the
sketches are a bit clumsy and rough.
Figure 2: Rough sketches
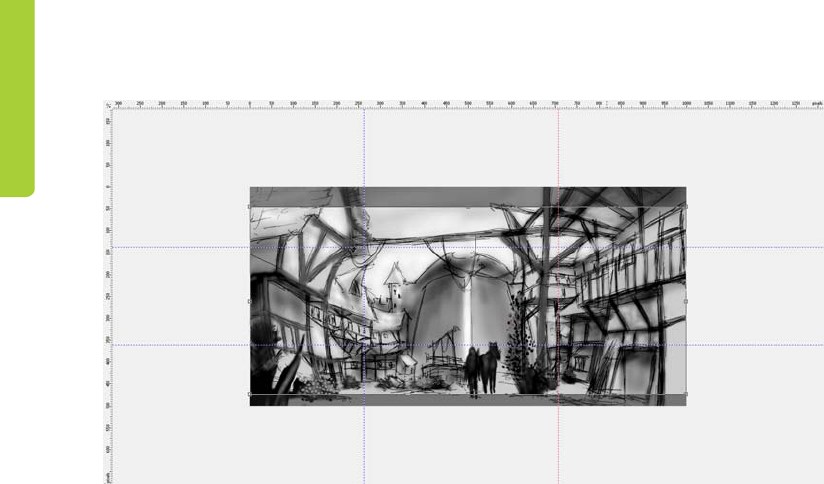
254 | CorelDRAW Graphics Suite X6 Guidebook
Figure 3: Guidelines are dragged from the rulers.
Defining composition, dimensions,
and point of view
When I find a satisfying idea to represent the
subject, I need to make decisions about
composition, cropping, and point of view.
I decide to use a chiaroscuro with a dark
foreground, bright center, and dark
background. A crop in panoramic format —
for example 21:9 — would fit well with the
entire composition.
To fit the image to the desired dimensions, I
use the Crop tool. The cutoff area appears as
a dark gray shade, so I can see the resulting
ratio before I actually crop the image.
I use the golden ratio to arrange the main areas
of focus in the image. In addition, I use
guidelines to set up the main elements of the
composition. To use the guidelines, I must first
activate the rulers by pressing Ctrl + Shift +
R. Now that the rulers frame my active
workspace, I can pull down guidelines by
dragging them from the rulers (Figure 3).
Setting up texture brushes
Next, I prepare custom brushes with textured
nibs, which will add texture to the image as I
paint. I refer to these custom brushes as
“texture brushes.” In one stroke, a texture
brush can generate complicated objects (such
as leaves) or simulate natural textures (such as
rock or bark).
I set up a brush from the Art brush category
and apply a nib from a customized nib library.
I customize my nib libraries and save them
separately to load only the nibs that I use
(Figure 4). For example, one library contains
nibs with bark textures, and another library
contains nibs with stone and rock textures. I
can preview the nibs of the current nib library
in the Brush settings docker (Figure 5).
Although you can use the same nib on
different brushes, I prefer to set up the same
brush with different nibs and then save each
combination of brush and nib as a separate
preset. This method saves me time later when
I elaborate on the image details.
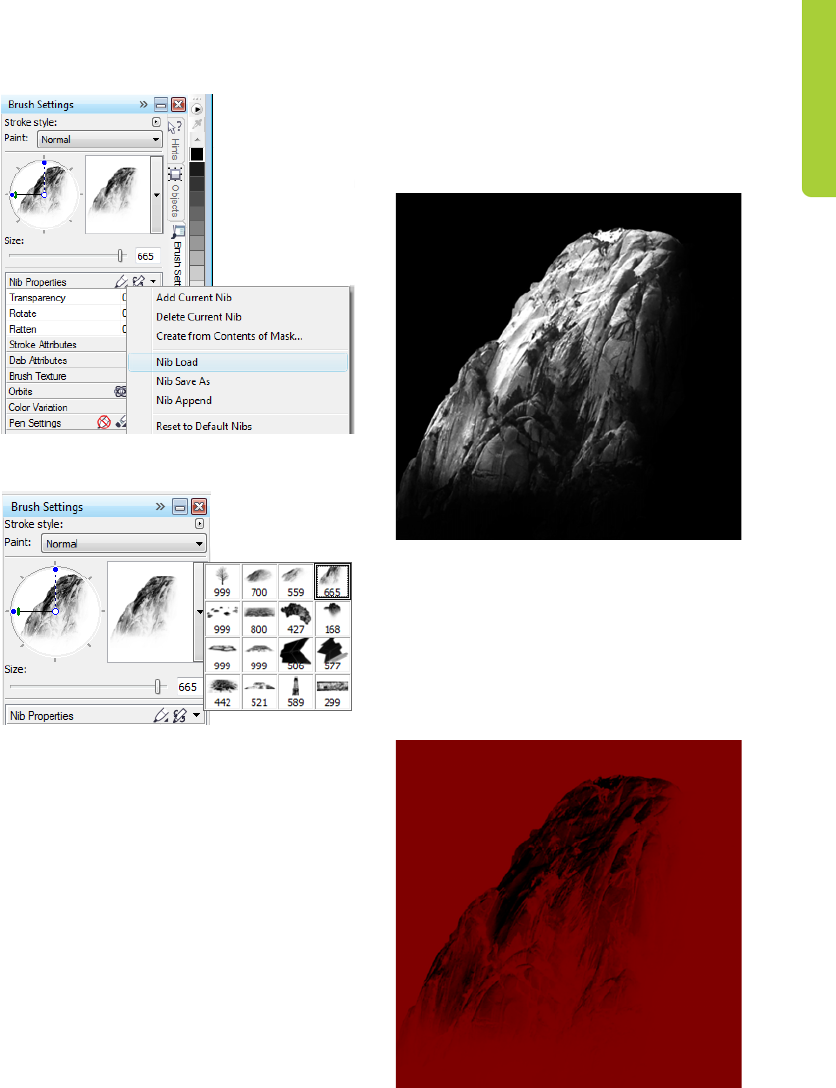
Chapter 18: Concept Art | 255
Figure 4: Loading a nib library
Figure 5: Previewing nibs in the current nib library
Creating brush nibs from mask
content
Corel PHOTO-PAINT offers a convenient way to
create nibs from any image you like. You can
simply use the image as a mask on a black
background and create a nib from the mask
content. I choose the image of a rock, which I
will use for a stone texture nib. First, I apply a
black background to bring out the necessary
texture for the nib, and then I add a vignette
effect to the edges (Figure 6). The mask will be
loaded as a grayscale image with values
between black (masked areas) and white
(editable areas).
I create a new document with a black
background, and with width and height set at
999 pixels. These dimensions are the largest at
which a brush nib can be saved.
Figure 6: The image of a rock will be used as mask. A
black background and a vignette effect are added.
I then load the image of the rock as a mask
(Mask ` Load ` Load from disk). The mask
overlay must be turned on to make the mask
visible and to set the mask content as a nib
(Figure 7).
Figure 7: The image of the rock is loaded as a mask. The
mask overlay covers the protected areas.
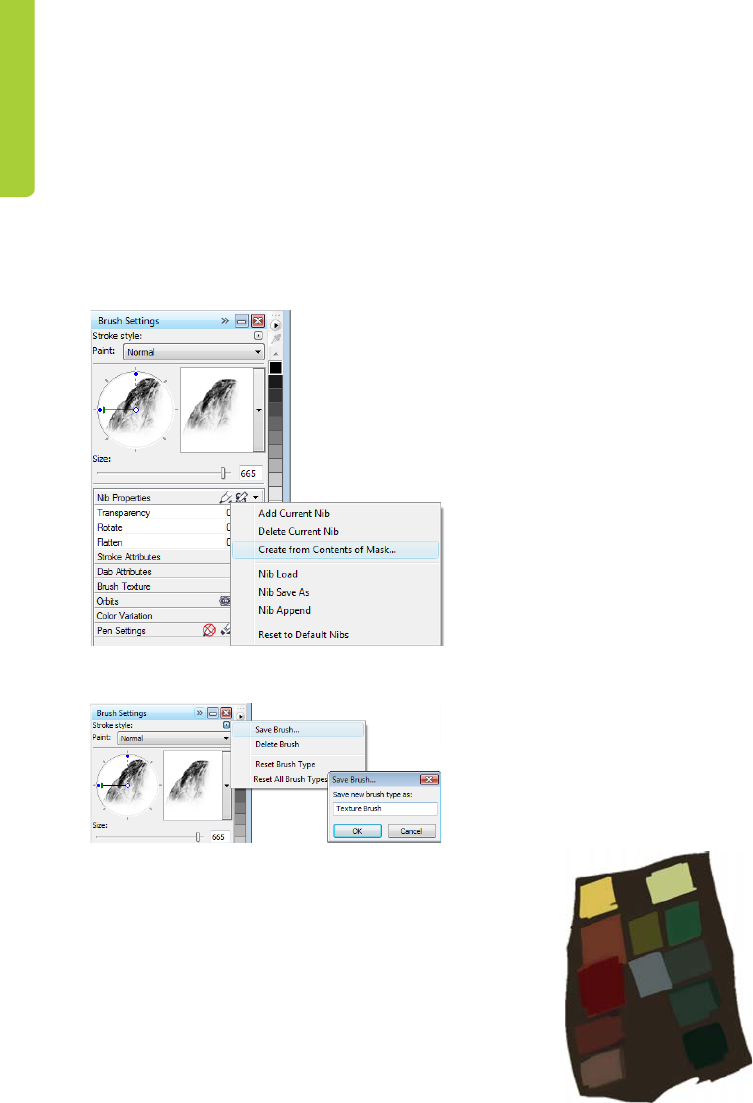
256 | CorelDRAW Graphics Suite X6 Guidebook
Now the dark areas are masked, and the bright
areas appear dark. The unmasked areas will
later act as a “stamp” in the texture brush,
when the nib is created from the mask content.
In the Brush settings docker, I click the Nib
options icon and choose Create from
contents of mask (Figure 8). Finally, I save the
brush as a preset (Figure 9).
Figure 8: Creating a brush nib from the mask
Figure 9: Saving the brush as a new preset
The nib is ready. For my composition, I will
create more nibs so that I have a choice of
textures.
Adding colors
Now it’s time to start painting. I create a new
document with a width of 2100 pixels and a
height of 900 pixels. For the background, I
choose a neutral earthy color, such as ocher.
One of my sketches will be used as an overlay,
so I import it as a new object and resize it to
match the document size. I set the merge
mode in the Objects docker to Multiply so
that I can see only the dark values of the pencil
strokes. In Normal mode, the sketch would
not be transparent at all.
Before I begin painting, I create a palette with
sample color patches. Later, I’ll extract colors
from this palette and add them to the Image
palette, which provides a single location for
storing all the custom colors that are used in an
image. The Image palette is displayed by
default, but if hidden, it can be accessed by
clicking Window ` Color palettes ` Image
palette. First, I click the flyout arrow on the
Image palette and disable the Automatically
update option to prevent new colors in the
image from being automatically added to the
Image palette. By disabling this option, I can
control which colors are added to the palette.
Next, I create a new object named Palette.
With a brush from the Art brush category, I
paint some patches in different color variations
on a muddy light-brown background
(Figure 10). The palette consists of some cold
and warm colors with different hue and
saturation values. It is essential to balance and
harmonize the colors.
Figure 10: Sample colors are painted on a separate
object.
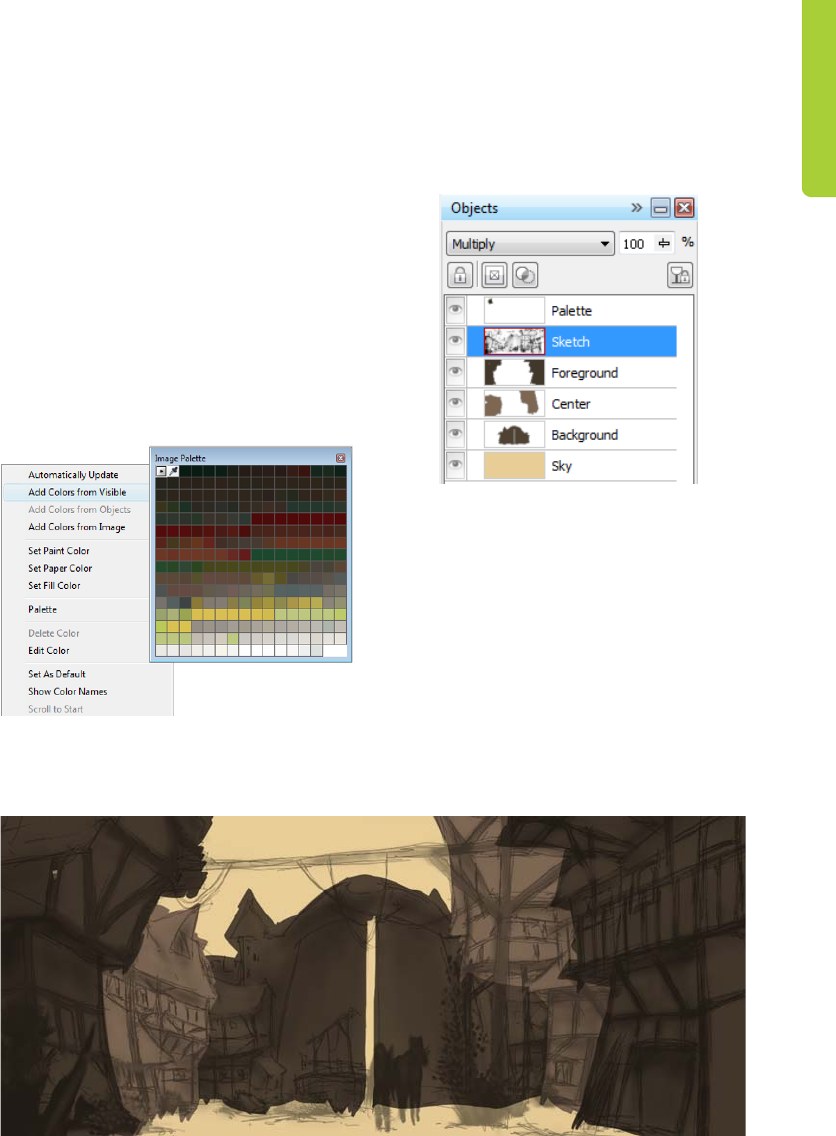
Chapter 18: Concept Art | 257
Then, I hide all other objects in the Objects
docker so that my Palette object is the only
visible object. I click the flyout arrow on the
Image palette, and I choose Add colors from
visible to add the colors of my painted sample
to the Image palette (Figure 11). Next, I make
the other objects visible again and hide the
Palette object. When I paint, I use colors from
the Image palette because it contains only the
colors I want for this image. To change a color
slightly while painting, I point to the color on
the Image palette and hold down the mouse
button until a pop-up color palette appears.
Then, I choose a slightly different color.
Figure 11: Adding colors to the Image palette
I paint at three separate levels: foreground,
center, and background. Each level is a
separate object (Figure 12), and I create rough
and clumsy shapes (Figure 13).
Figure 12: The foreground, center, and background are
separate objects.
I erase some parts of the sketch to produce a
cleaner impression of shapes. At this time, I
focus only on the composition and relevant
forms. When I am satisfied with the
composition, I will correct the tone and
brightness of the foreground, center, and
background separately, to adjust the overall
impression. Using a brush from the Airbrush
category, I add initial value differences in
lighting.
Figure 13: The main shapes are blocked out.
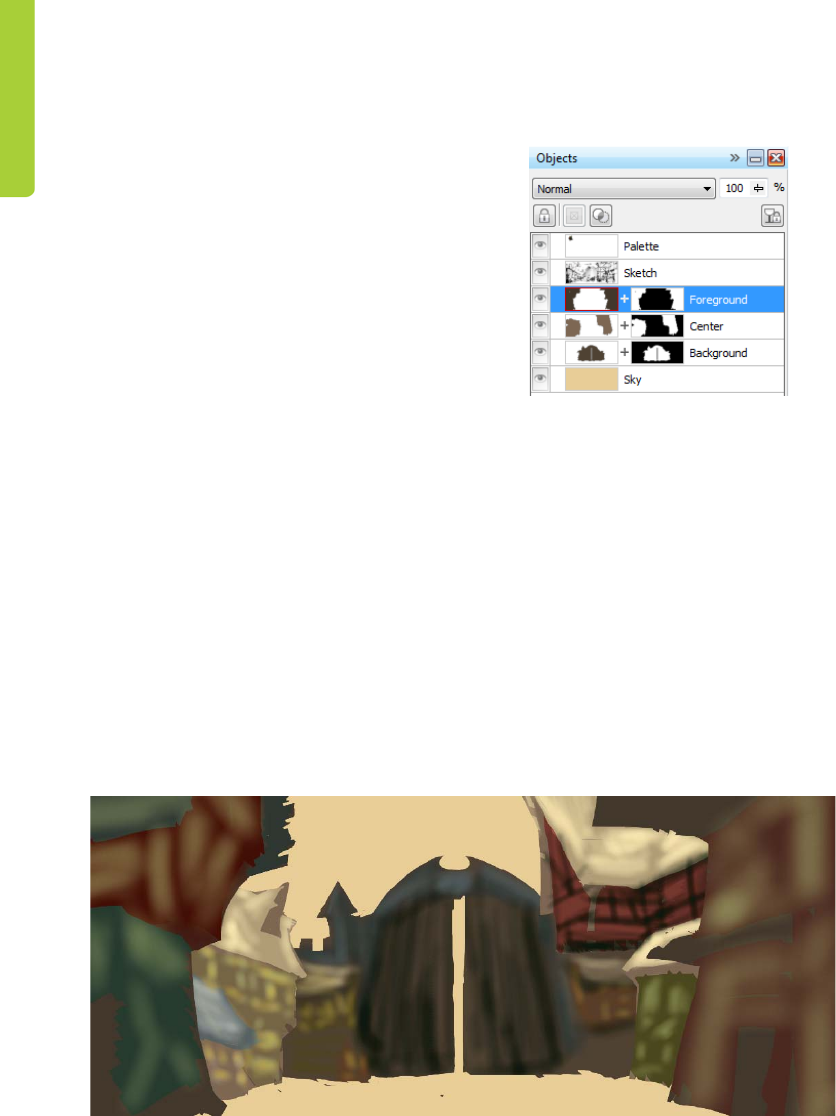
258 | CorelDRAW Graphics Suite X6 Guidebook
Defining the shapes
Some forms are too rough and require more
definition, so I need to subtract detail in some
areas. For this task, I avoid using an eraser,
because whatever is erased is lost permanently.
Instead, I fall back on another mighty feature
of Corel PHOTO-PAINT, the clip mask. Instead
of erasing parts of objects, you can “paint”
them into invisibility by using clip masks.
To generate a new channel on which I can
paint the transparency, I select the object and
click Object ` Clip mask ` Create ` From
object transparency. I use black to paint
transparent areas, and white to paint opaque
areas.
The original object is preserved. Later, I can
bring out the invisible parts of the object by
painting over the clip mask again without
losing the original object. Another advantage
of using clip masks is that I can create a
separate clip mask for each object (Figure 14).
I work out the shapes with a flat brush. To
create this brush, I assign a high Flatten value
to a custom brush from the Art brush
category. I use this flat brush for blocking out
the main shapes (Figure 15).
Figure 14: Clip masks are listed in the Objects docker.
A red outline indicates the active clip mask.
Adding texture and details
It’s time to add the first textures. At this point,
I merge all objects with the background
(Ctrl + Shift + Down arrow) so that I can
blend the colors. Different texture brushes help
me further define the structure of the houses
and the vegetation.
I work strictly from dark to bright, because
areas in the shadows need fewer details than
the more visible, brighter areas. I always follow
the rule to paint only what is visible.
Figure 15: A flat brush is used to define the main shapes.
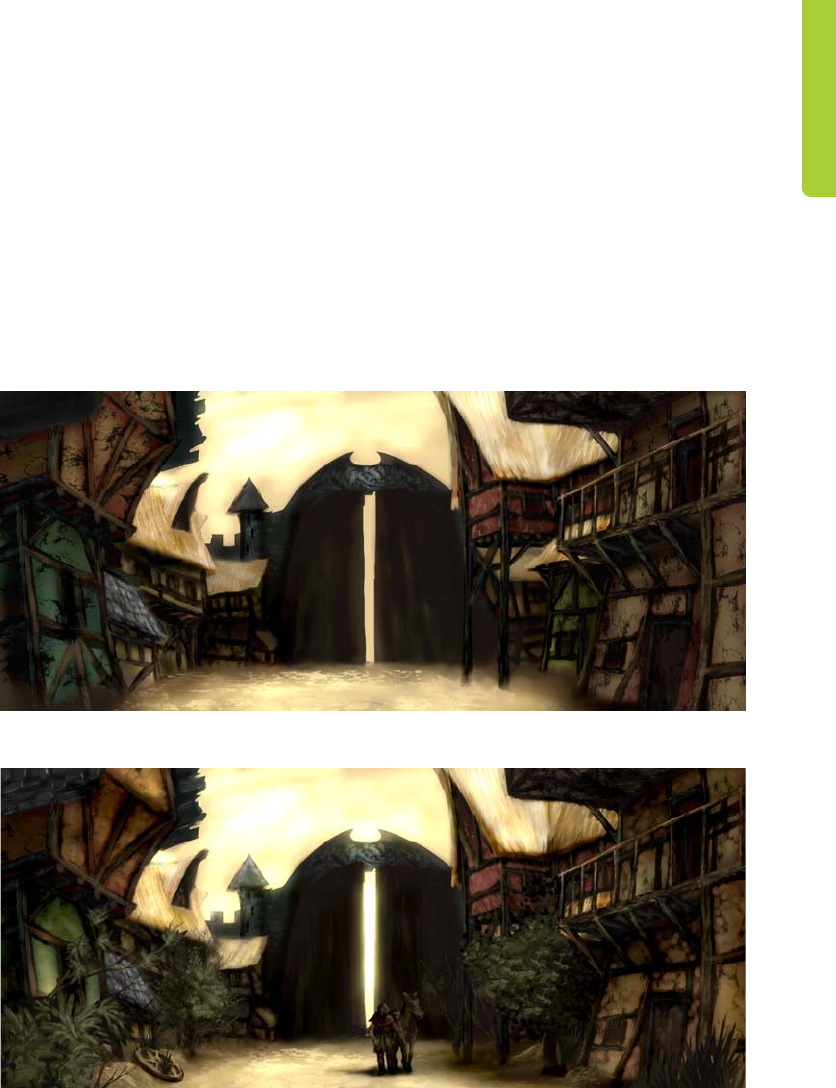
Chapter 18: Concept Art | 259
In the Brush settings docker, I have set the
Fade out, Edge texture, and Bleed values of
my brush between 30 and 40. I use this custom
brush as a kind of oil brush to “mold” the
plasticity of the forms. With the Pencil brush,
I define the highlights and textures a bit more
(Figure 16).
To define the distance effect, depth, and
distance blur, I gently brighten more distant
areas with a custom brush from the Airbrush
category. This brush helps me generate an
atmospheric haze. You might notice that the
more distant areas have less detail than the
areas in the foreground. This arrangement of
detail lets me pull the visual focus to the center.
Areas in the shadows are similarly treated and
have less detail as well.
At this point, I add some more details and
props to the center (Figure 17).
Figure 16: Highlights and textures are defined.
Figure 17: More details are added to the image.
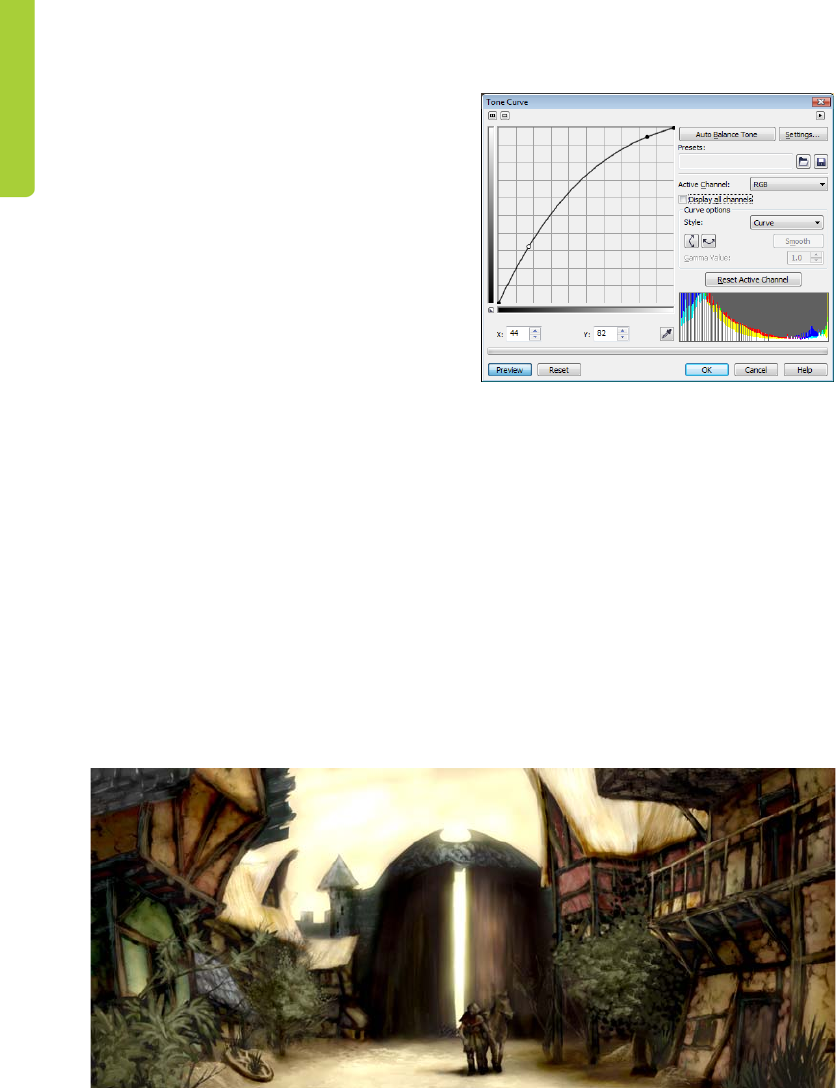
260 | CorelDRAW Graphics Suite X6 Guidebook
Making color corrections
When unsaturated colors are used, faded
colors always shift on the color wheel. If you try
to lighten red by adding white or a bright gray,
the color moves on the color wheel toward the
cooler colors. Also, the brightness and contrast
change when you apply pale colors to
underlying tones. To gain control of these color
shifts, I first use my custom brush from the
Airbrush category in Color or Overlay merge
mode. These merge modes help me fit colors
to each other by balancing color and
brightness values.
The last step is to adjust the global color by
using the tone curve (Ctrl + T). I reemphasize
contrasting colors and fit harmonizing colors
to each other. I correct the color and tone by
adjusting a single channel, called the
composite channel, in which all channels of the
image are combined (Figure 18). The graph
represents the balance between shadows
(bottom of graph), midtones (middle of
graph), and highlights (top of graph).
Figure 18: The tone curve allows adjustment of color
and tone.
The slightly warped houses bring out the droll
charm of the town, while the peeling paint of
the storefronts underlines aging and
desolation. An earthy color palette with pale
colors, and props such as the lost wheel and
sprawling vegetation, convey an abandoned
but welcoming atmosphere (Figure 19). My
intention was to avoid cold colors, which
would have lent a hostile flavor to the image.
Figure 19: The color and tone are adjusted to convey the right atmosphere.
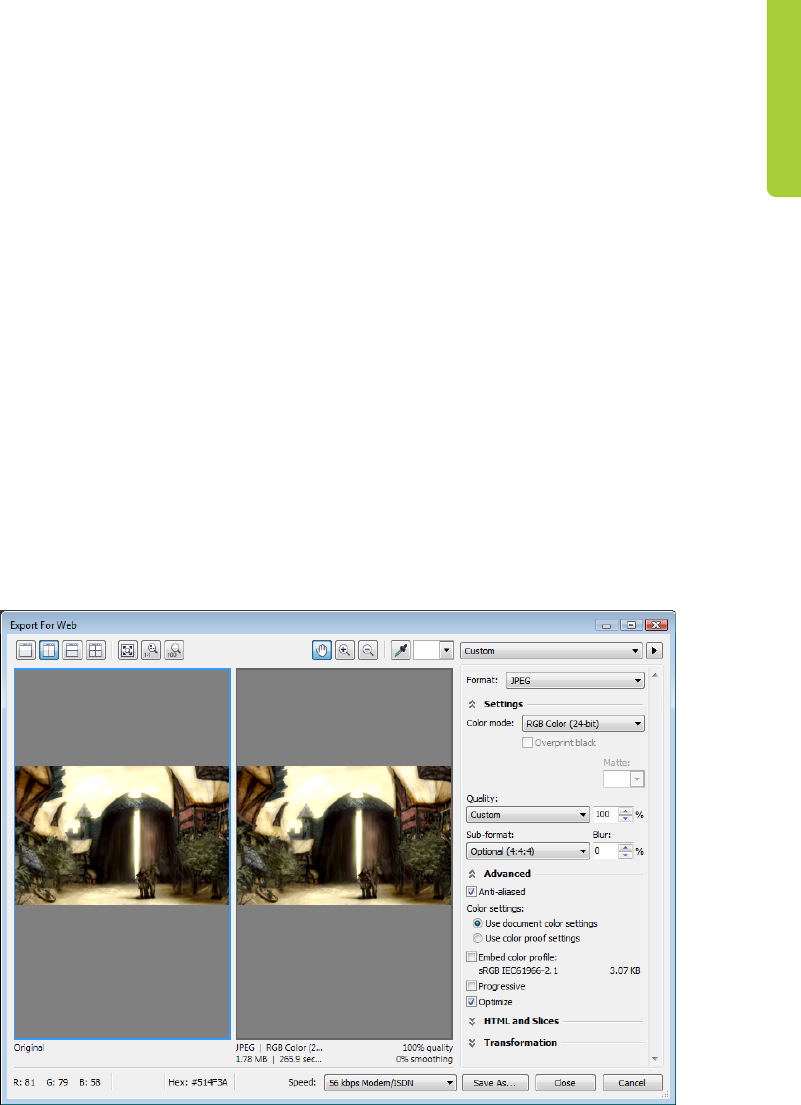
Chapter 18: Concept Art | 261
Preparing the image for the Web
I intend to send the finished artwork to the
client by e-mail, so I need a high-quality image
with a small file size. To optimize the image for
the Web, I click File ` Export for Web
(Figure 20). I choose JPEG from the Format
list box and adjust the JPEG settings. I keep the
color mode as RGB Color (24-bit), because
the artwork will be displayed on-screen. Next, I
set the Quality control to 100 to prevent JPEG
artifacts, which appear at high compression
rates. I set the Sub-format control to
Optional (4:4:4), which improves the
sampling rate of colors and prevents more
saturated colors from bleeding. I also set the
Blur control to 0 so that the image maintains
its original sharpness.
In the Advanced area, I make sure that the
Anti-aliased box is checked for a clean look,
and I use the document color settings instead
of the color proof settings. I do not embed the
color profile, but I check the Optimize box for
best compression. I do not pay much attention
to the Transformation area, because I want
to maintain the original image size and
resolution. When I am satisfied with the
settings, I save the image.
I send the final concept image to my client, the
art director. Usually, I create three or four
different concept images and then elaborate
on the one chosen by the art director so that it
matches the visual style of the game. Detailed
drawings of the architecture and arrangement
of the houses will follow. The final concepts
will be modeled by 3D artists in 3D applications
to create a virtual-adventure game world.
There, behind a picturesque facade, you’ll
discover hazards that lurk among the shadows
of an old and abandoned town.
Figure 20: The Export for Web dialog box allows a side-by-side comparison of the Corel PHOTO-PAINT file and a
preview of the output.
Part Seven
Gallery
Image created by
Katarzyna Kobylkiewicz
Poland






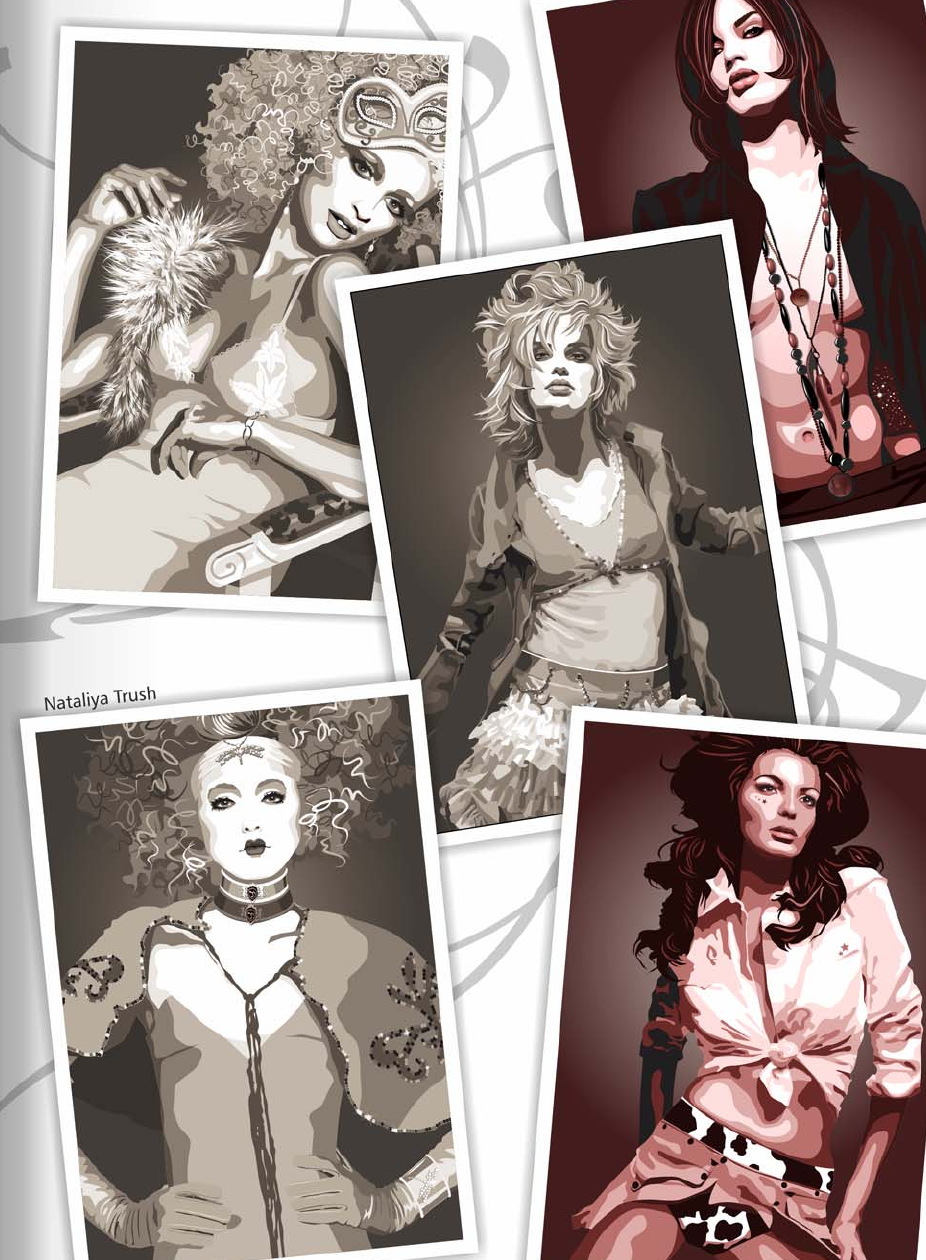
Index | 299
Index
Numerics
64-bit support 19
A
Absolute Colorimetric rendering intent 93
acquiring images 57
hand-drawn concepts 169
aligning
objects 173
text 112
alignment guides 206
application window
Corel PHOTO-PAINT 48
CorelDRAW 28
applications
changing languages 12
included 4
installing 12
technical support 13
updating 12
Arrow Shapes tool 35
using 213
arrow shapes, drawing 213
artistic media included 150
samples of 151, 155
Artistic Media tool 35
Brush mode 185
Calligraphic mode 186
Preset mode 185
presets included for 150
Pressure mode 187
Sprayer mode 186
artistic text 36
adding 106, 207
Asian text spacing 111
B
Background Color swatch 56
backgrounds, page 44
backing up documents 46
Banner Shapes tool
using 213
banner shapes, drawing 213
baseline grid 210
baseline grid, aligning text to 112
Basic Shapes tool 34
using 213
basic shapes, drawing 213
Bevel effect, using 174
bevels 41
adding 174
Bézier tool, using 189
bitmap fills, applying 148
300 | CorelDRAW Graphics Suite X6 Guidebook
bitmaps, in documents 36
editing 37
inserting 37
tracing 187
using Shape tool on 213
Bitstream Font Navigator 4
starting 136
bleed 247
Blend tool, using 214
blending objects 214
booklet design 231, 246
borders 170
Boundary command, creating borders 171
brochures (examples) 160
browsing content 132
Brush Mask tool 51
Brush Settings docker 187
Brush tool 35
using 185
Brush tools (category) 54
brushes
creating nibs from masks 255
customizing 187
customizing texture nibs 254
brushes included 152
samples of 153
brushstrokes
creating objects from 65
drawing with 184
bulleted lists, inserting 114
C
calibrating monitors 92
Calligraphic tool 35
using 186
Callout Shapes tool
using 213
callout shapes, drawing 213
chamfers 41
character spacing 110
characters, formatting 107
circles, drawing 188
clip masks 18, 258
clipart included 140
browsing and searching 132
samples of 141
Clone tool 53
cloning image areas 61
CMYK color model 73
best practices for 103
Collect for Output wizard
using 217
Color Control area 56
color editor, using 81
Color Eyedropper tool 41
using 80
color harmonies
creating 82
editing 82
working with 81
Index | 301
color management 89
best practices for CMYK 103
best practices for Web 103
getting started 91
importing and pasting with 102
opening documents with 101
policies for 100
printing with 102
settings for 94
understanding 90
color models 72
color modes 60
choosing 75
Color Palette Manager docker
using 86
color palettes
Corel PHOTO-PAINT 49
CorelDRAW 29
customizing 88
displaying 86
organizing 86
using 77
color profiles
assigning 97
best practices for 92
converting colors 98
embedding 98
installing and loading 97
working with 97
Color Proof Settings docker 98
using 177
color proofing, understanding 98
color styles
working with 79, 81
Color styles docker, using 79
Color styles palette, using 84
Color Transparency tool 55
colors 71
adding to images 256
adding to palettes 84
adjusting in images 62
applying with palettes 191
choosing 77
converting 98
correcting 260
creating transitions 175
matching 89
proofing 98
proofing, for signs 177
reproducing 89
reusing 41
understanding 72
columns
in booklet design 231
columns, inserting 115
combining objects 43
concept art (tutorial) 251
concepts, hand-drawn
scanning 169
ConceptShare 66
using 217
connector lines 32
Connector tools (category) 32
content 16
finding and managing 129
types of 135
302 | CorelDRAW Graphics Suite X6 Guidebook
using 134
using in signs 172
Contour tool, using 173
contours 41
adding 173
creating for logos 228
converting images 60
converting shapes to curves 188
Corel CONNECT, using 129
Corel Content 17
Corel Corporation 13
Corel PHOTO-PAINT basics 47
Corel PowerTRACE, using 187
Corel Support Services 13
Corel Technology Partners 9
Corel Training Partners 9
CorelDRAW basics 27
correcting colors 260
Crop tool 51
cropping images 57
Cropping tools (category) 32
Curve tools (category) 31
curves 35
closing 190
converting shapes to 188
drawing 189
shaping 190
custom palettes, creating 88
D
deployment guide 8
dimension lines 32
in production drawings 249
Dimension tools (category) 32
distorting objects 195
distributing objects 173
dockers
Corel PHOTO-PAINT 49
CorelDRAW 29
document navigator 29
document pages 29
backgrounds 44
sizing 44
using 44
Document palette
adding colors to 84
applying colors with 191
using 84
document window 29
documents, CorelDRAW
backing up 46
choosing color modes 75
color settings for 96
creating from templates 158
displaying fonts used 136
exporting 45
laying out pages 199
modifying template-based 160
navigating 34
opening with color management 101
printing 45
saving as templates 162
Index | 303
scaling, for signs 169
setting up 33
setting up, for illustrations 183
setting up, for page layouts 201
setting up, for signs 169
sharing 44
drawing
basic shapes 213
brushstrokes 184
curves 35
lines 35
objects 187
shapes, in documents 34
drop caps, inserting 113
Drop Shadow tool 55
using 174
drop shadows 41
adding 174
duplicating objects 42
dust, removing 61
dynamic guides 43
E
editable areas, creating objects from 65
Effect tool 54
effects, object 40
applying 194
Ellipse Mask tool 50
Ellipse tool
Corel PHOTO-PAINT 53
CorelDRAW 34
using 188
ellipses, drawing 188
embedding color profiles 98
Envelope tool
modifying borders with 171
using 195
Eraser tool 52
using 175
erasing text 175
Erasing tools (category) 32
ergonomic principles 238
examples, project
brochures 160
illustrations 196
page layouts 217
signs 179
exporting
documents 45
images 66
PDF files 216
PDF files, signs 177
extra content 135
extrusions 41
Eyedropper tool 52
using 80
F
fabricating signs 178
fading objects 194
features, new 15
file formats, for images 66
files
304 | CorelDRAW Graphics Suite X6 Guidebook
color management of 102
exporting to PDF 216
importing 212
preparing for output 215
saving as PDF 216
Fill Color swatch 56
Fill tool 54
Fill tools (category)
Corel PHOTO-PAINT 54
CorelDRAW 31
fills
creating shapes from 227
fills, object 39
fills, uniform fill 80
finding content 129
fitting text to paths 211
flow lines 32
Flowchart Shapes tool 35
using 213
flowchart shapes, drawing 213
flyouts
Corel PHOTO-PAINT 49
CorelDRAW 29
fonts 136
browsing and searching 132
identifying 172
previewing available 136
fonts included
samples of 137
Foreground Color swatch 56
formatting text 107
Fountain Fill tool 40
fountain fills
adding with Interactive Fill tool 214
frames, text
creating 208
linking 209
Freehand Mask tool 50
Freehand tool 35
using 189
furniture design (tutorial) 235
G
getting started
Corel PHOTO-PAINT 47
CorelDRAW 27
GIF file format 66
gradients, creating 83
Graph Paper tool 34
graphics, for page layouts 212
grayscale color model 74
grid 43
grouping objects 43
guidebook 4
conventions of 5
guidelines
using 204
using presets 205
guides, dynamic 43
Index | 305
H
hand-drawn concepts
scanning 169
harmonies
color 81
creating 82
editing 82
Help feature 6
Hints feature 6
HSB color model 74
I
illustrations 181
examples of 196
Image Adjustment Lab
using 176
image areas
cloning 61
masking 64
Image palette
adding colors to 84
adding colors with 256
applying colors with 191
using 84
Image Slicing tool 56
Image Sprayer tool 54
image window 49
images, Corel PHOTO-PAINT
adding texture and detail 258
adjusting 176
adjusting color and tone 62
applying special effects 196
choosing color modes 76
correcting colors 260
cropping 57
defining composition 254
masking in 64
preparing for Web 261
printing 66
publishing to ConceptShare 66
publishing to PDF 66
reducing size 59
rotating 57
setting up, for illustrations 183
sharing 66
sizing and resampling 58
importing
files 212
files, managing colors when 102
photos 57
text 107
installing
color profiles 97
software 12
Interactive Fill tool
adding fountain fills with 214
Corel PHOTO-PAINT 54
CorelDRAW 40
creating color transitions with 175
using 175
interactive frames, samples of 147
Interactive OpenType 109
Interactive tools (category)
Corel PHOTO-PAINT 55
CorelDRAW 31
306 | CorelDRAW Graphics Suite X6 Guidebook
J
JPEG file format 66
K
kerning text 110
L
Lab color model 72
language spacing 111
languages, changing 12
Lasso Mask tool 50
Latin text spacing 111
layers
even-page master layers 203
master layers 202
odd-page master layers 203
laying out pages 199
layout
in booklet design 231, 246
Layout toolbar 207
learning resources 6
legacy text, updating 116
lenses 65
line spacing 111
Line tool 53
lines 35
drawing 189
shaping 190
loading color profiles 97
logos
creating 221
creating style guide 230
digitalizing 227
establishing client needs 223
researching 224
sketching 226
M
macro programming guide 8
Magic Wand Mask tool 51
Magnetic Mask tool 51
Mask tools (category) 50
Mask Transform tool 50
masks 64
creating brushes from 255
master page 202
matching colors 89
measurement units, setting 46
menu bar
Corel PHOTO-PAINT 49
CorelDRAW 29
Mesh Fill tool 40
using 192
Middle Eastern text spacing 111
mirroring objects 38
moiré, removing 62
monitors, calibrating 92
My Palettes folder, using 87
Index | 307
N
navigating documents 34
Navigator pop-up 49
network deployment guide 8
new features 15
nodes
adding and deleting 189
shaping 190
noise, removing 61
nudging objects 46
O
Object Manager docker 43
managing master pages with 202
Object Pick tool 50
Object Properties docker 17
Object properties docker, using 79
Object Styles docker 119
Object Transparency Brush tool 55
Object Transparency tool 55
using 194
objects
breaking link to styles and style sets 124
finding objects using a specific style 124
using styles and style sets 118
Objects docker
using 176
objects, document 34
adding bevels 174
adding contours 173
adding drop shadows 174
adding effects 40
adding perspective 195
adding transparencies 40
aligning and distributing 173
blending 214
color transitions 175
coloring and styling 38
converting to text frames 106
distorting 195
drawing 187
duplicating 42
filling 39
formatting outlines 39
grouping and combining 43
manipulating 37
mirroring 38
nudging 46
organizing 43
positioning 42
reusing properties 41
rotating 38
sizing 38
skewing 38
snapping 42
stretching 38
transforming 190
objects, image 65
adding drop shadows 174
adjusting opacity 176
aligning and distributing 173
color transitions 175
drawing 187
transforming 190
online content 17
opacity, object 176
308 | CorelDRAW Graphics Suite X6 Guidebook
OpenType
accessing features 109
fonts 108
Interactive OpenType 109
organizing objects 43
outlines, object 39
out-of-gamut colors, handling 93
outputting files 215
P
page layout
in booklet design 231, 246
page layouts 199
examples of 217
page numbers 203
pages, document 29
backgrounds 44
laying out 199
sizing 44
using 44
Paint tool 54
presets included for 152
sketching with 184
Palette Libraries folder, using 87
palettes, color
Corel PHOTO-PAINT 49
CorelDRAW 29
Pan tool 52
panning, in documents 34
paragraph spacing 111
paragraph text 36
adding 106
adding frames 208
drop caps 113
in text frames 114
linking frames 209
Pass Through merge mode 19
pasting files, managing colors when 102
Path tool 53
paths, fitting text to 211
Pattern Fill tool 40
pattern fills, applying 148
pattern transparencies, applying 148
patterns included 148
samples of 149
PDF
exporting proofs to 177
publishing images to 66
publishing to 216
pen tablets, setting up 183
Pen tool 35
using 189
Perceptual rendering intent 94
perfect shapes 213
Perspective effect 195
photo frames, samples of 155
photo objects included 144
browsing and searching 132
samples of 145
photos included 142
browsing and searching 132
Index | 309
samples of 143
Pick tool 30
using 37
Pick tools (category) 50
placeholder text 210
in booklet design 232
PNG file format 66
policies, color-management 100
Polygon tool
Corel PHOTO-PAINT 53
CorelDRAW 34
positioning objects 42
PostScript Fill tool 40
PowerClip frames 206
PowerClip objects 41
trimming bitmaps with 172
preset templates 158
Pressure tool 35
using 187
previewing print jobs 45
print jobs
managing colors 102
preparing, for commercial printer 45
previewing 45
print service providers 45
printing
documents 45
images 66
images, file formats for 66
setting bleed 247
signs 178
process colors, using 76
production drawings 249
profiles, color
best practices for 92
working with 97
proofs
for colors 98
for signs 177
properties, object 41
property bar
Corel PHOTO-PAINT 49
CorelDRAW 29
publishing images
to ConceptShare 66
to PDF 66
publishing to PDF 216
R
Rectangle Mask tool 50
Rectangle tool
Corel PHOTO-PAINT 53
CorelDRAW 34
creating borders with 170
using 188
rectangles, drawing 188
Red-Eye Removal tool 52
red-eye, removing 61
Relative Colorimetric rendering intent 93
rendering intents, using 93
Replace Color Brush tool 55
310 | CorelDRAW Graphics Suite X6 Guidebook
Replace wizard, using 215
reproducing colors 89
resampling images 58
Reset Color icon 56
resolution, photo
changing 136, 142
resources, learning 6
retouching photos 60
RGB color model 73
rotating
images 57
objects 38
rounded corners 241
rulers 29
measurement settings 46
S
samples
brochures 160
illustrations 196
included artistic media 151, 155
included brushes 153
included clipart 141
included fonts 137
included frames 147
included patterns 149
included photo frames 155
included photo objects 145
included photos 143
included symbol fonts 139
page layouts 217
signs 179
Saturation rendering intent 94
saving files as PDF 216
scaling documents, for signs 169
scanning, hand-drawn concepts 169
scratches, removing 61
scrolling, in documents 34
searching for content 16, 132
segments
drawing 189
shaping 190
setting up
Corel PHOTO-PAINT 67
CorelDRAW 46
documents 33
documents, signs 169
illustrations 183
page layouts 201
software 12
Shape Editing tools (category) 18, 30
Shape tool 190
editing bitmaps with 213
Shape tools (category)
Corel PHOTO-PAINT 53
CorelDRAW 30
shapes
basic 213
converting to curves 188
creating from fills 227
drawing, in documents 34
sharing
documents 44
images 66
signs 167
Index | 311
examples of 179
sizing
document pages 44
images 58
objects 38
sketches 184
for chair design 237
for concept art 252
for logo design 226
tracing 238
skewing objects 38
Smart Blur filter 62
Smart Carver 17
snapping objects 42
soccer club logo (tutorial) 221
soft proofing, understanding 98
software
content included 135
deploying 8
setting up 12
technical support 13
updating 12
spacing
characters 110
lines 111
multilingual text 111
paragraphs 111
words 110
special effects, applying 196
Spiral tool 34
spot colors, using 76, 77
Sprayer tool 35
using 186
squares, drawing 188
standard toolbar
Corel PHOTO-PAINT 49
CorelDRAW 29
status bar
Corel PHOTO-PAINT 49
CorelDRAW 29
straightening images 58
stretching objects 38
styles
color 81
styles and style sets 117
applying 121
breaking link to objects 124
creating 120
editing 122
exporting 123
importing 123
in booklet design 232
selecting objects using a specific style 124
support services 13
symbol fonts included 138
browsing and searching 132
samples of 139
symbols, inserting 138
T
Table tool 33
tables 36
312 | CorelDRAW Graphics Suite X6 Guidebook
tablets, pen
setting up 183
technical support 13
templates 157
creating 162
modifying 160
using preset 158
text
adding 207
adding bevels 174
adding contours 173
adding drop shadows 174
adding perspective 195
aligning 112
aligning to baseline grid 112
color transitions 175
creating frames 208
creating frames from objects 208
creating in documents 36
erasing 175
fitting to paths 211
formatting 107
importing 107
in Corel PHOTO-PAINT 107
in CorelDRAW 106
inserting placeholder text 210
kerning 110
linking frames 209
spacing 110
text overflow, fixing 115
updating legacy 116
using styles and style sets 118
text frames
converting objects to 106
creating 208
creating from objects 208
inserting columns 115
inserting placeholder text 210
linking 209
modifying 114
Text tool
Corel PHOTO-PAINT 52
CorelDRAW 33
using 207
texture
adding to images 258
creating with brushes 254
Texture Fill tool 40
TIFF file format 66
title bar 29
tone curve 260
tone, image 62
toolbar, standard
Corel PHOTO-PAINT 49
CorelDRAW 29
toolbox
Corel PHOTO-PAINT 49
CorelDRAW 29
tools
Corel PHOTO-PAINT 49
CorelDRAW 29
tooltips 6
Touch-Up Brush tool 53
Touch-Up tools (category) 52
tracing bitmaps 187
training resources 8
Index | 313
transforming objects 190
transitions, color 175
transparencies, object 40
applying 194
Transparency tool
using 194
Transparency tools (category) 55
trays 16
tutorials
concept art 251
furniture design 235
soccer club logo 221
video 7
U
Undo Brush tool 55
uniform fill 80
Uniform Fill tool 40
updating software 12
V
video tutorials 7
W
Web
color management for 103
file formats for images 66
preparing images for 261
Web-based resources 8
Welcome screen 7
WhatTheFont?! 172
word spacing 110
workspace
Corel CONNECT 130
Corel PHOTO-PAINT 48
Corel PHOTO-PAINT, resetting 67
CorelDRAW 28
resetting 12
Z
Zoom tool 51
Zoom tools (category)
Corel PHOTO-PAINT 51
CorelDRAW 33
zooming, in documents 34


