Corel PDF Fusion 1.1 Instruction Manual PDFFusion UG EN
User Manual: corel PDF Fusion 1.1 - Instruction Manual Free User Guide for Corel PDF Fusion Software, Manual
Open the PDF directly: View PDF ![]() .
.
Page Count: 162 [warning: Documents this large are best viewed by clicking the View PDF Link!]
- What is in this document?
- What other information is available?
- Font conventions
- Chapter 1 Introduction
- Chapter 2 How to install Corel PDF Fusion
- Chapter 3 Getting to know Corel PDF Fusion
- Chapter 4 The Corel PDF Fusion work area
- Chapter 5 The Corel PDF Batch Converter work area
- Chapter 6 How do I...?
- 6.1 Convert files
- 6.2 Create a new document from existing files
- 6.3 Add empty pages to an existing document
- 6.4 Add existing pages to an existing document
- 6.5 Remove pages from an existing document
- 6.6 Prepare a document for distribution
- 6.7 Print a document
- 6.8 Find and Redact text—one or more instances
- 6.9 Redact text or area—single instance
- 6.10 Find and replace text—one or more instances
- 6.11 Add comments/notes
- 6.12 Add notes containing selected text
- 6.13 Add text annotations
- 6.14 Add bookmarks
- 6.15 Add free text annotations
- 6.16 Add hyperlinks
- 6.17 Change the destination of the output file
- 6.18 Produce more compact PDF files
- 6.19 Produce PDF files that can be sent by e-mail
- 6.20 Produce files for fast web viewing
- 6.21 Launch application to view the file when complete
- 6.22 Share setups
- 6.23 E-mail documents
- 6.24 E-mail comments
- 6.25 Find the version number of Corel PDF Fusion
- 6.26 Remove tooltips or tool labels from Corel PDF Fusion
- 6.27 Add security to a document
- 6.28 Add a watermark to a document
- Chapter 7 Document settings and security
- Chapter 8 Working with annotations
- Chapter 9 Setups
- Chapter 10 Add-ins for Microsoft Office
- Keyboard shortcut reference
- Supported document formats
- COPYRIGHT AND TRADEMARKS

Version 1.14
September 2014

INDEX CONTENTS 2
Contents
Preface . . . . . . . . . . . . . . . . . . . . . . . . . . . . . . . . . . . . . . . . . . . . . . . . . . . . . . . . . . . . . . . . . . . . . . . . . . . 5
What is in this document?
. . . . . . . . . . . . . . . . . . . . . . . . . . . . . . . . . . . . . . . . . . . . . . 5
What other information is available?
. . . . . . . . . . . . . . . . . . . . . . . . . . . . . . . . . . . . . 6
Font conventions
. . . . . . . . . . . . . . . . . . . . . . . . . . . . . . . . . . . . . . . . . . . . . . . . . . . . . 6
Chapter 1: Introduction . . . . . . . . . . . . . . . . . . . . . . . . . . . . . . . . . . . . . . . . . . . . . . . . . . . . . . . . 7
1.1 What is Corel PDF Fusion?
. . . . . . . . . . . . . . . . . . . . . . . . . . . . . . . . . . . . . . . . . 7
1.2 How to use this manual
. . . . . . . . . . . . . . . . . . . . . . . . . . . . . . . . . . . . . . . . . . . . 7
Chapter 2: How to install Corel PDF Fusion . . . . . . . . . . . . . . . . . . . . . . . . . . . . . . . . . 9
2.1 What are the installer options?
. . . . . . . . . . . . . . . . . . . . . . . . . . . . . . . . . . . . . . 9
2.2 What you need
. . . . . . . . . . . . . . . . . . . . . . . . . . . . . . . . . . . . . . . . . . . . . . . . . .10
2.3 Installing Corel PDF Fusion
. . . . . . . . . . . . . . . . . . . . . . . . . . . . . . . . . . . . . . . .11
2.4 Removing Corel PDF Fusion
. . . . . . . . . . . . . . . . . . . . . . . . . . . . . . . . . . . . . . .12
2.5 Entering your serial number
. . . . . . . . . . . . . . . . . . . . . . . . . . . . . . . . . . . . . . .13
2.6 Associating XPS and PDF files with Corel PDF Fusion
. . . . . . . . . . . . . . . .13
2.7 The file system
. . . . . . . . . . . . . . . . . . . . . . . . . . . . . . . . . . . . . . . . . . . . . . . . . . .14
2.8 Open Corel PDF Fusion
. . . . . . . . . . . . . . . . . . . . . . . . . . . . . . . . . . . . . . . . . .14
2.9 Open Corel PDF Converter
. . . . . . . . . . . . . . . . . . . . . . . . . . . . . . . . . . . . . . .14
2.10 Product update
. . . . . . . . . . . . . . . . . . . . . . . . . . . . . . . . . . . . . . . . . . . . . . . . .14
Chapter 3: Getting to know Corel PDF Fusion . . . . . . . . . . . . . . . . . . . . . . . . . . . . .15
3.1 What can you do with Corel PDF Fusion?
. . . . . . . . . . . . . . . . . . . . . . . . . . .15
3.2 How do you use Corel PDF Fusion?
. . . . . . . . . . . . . . . . . . . . . . . . . . . . . . . .16
3.3 What is a document format or PDL?
. . . . . . . . . . . . . . . . . . . . . . . . . . . . . . .17
3.4 What are the features of Corel PDF Fusion?
. . . . . . . . . . . . . . . . . . . . . . . . .18
3.5 What next?
. . . . . . . . . . . . . . . . . . . . . . . . . . . . . . . . . . . . . . . . . . . . . . . . . . . . . .25
Chapter 4: The Corel PDF Fusion work area . . . . . . . . . . . . . . . . . . . . . . . . . . . . . . .26
4.1 Open Corel PDF Fusion
. . . . . . . . . . . . . . . . . . . . . . . . . . . . . . . . . . . . . . . . . .27
4.2 The Page, Assembly, Flick and Presentation View
. . . . . . . . . . . . . . . . . . . .29
4.3 The Navigation pane
. . . . . . . . . . . . . . . . . . . . . . . . . . . . . . . . . . . . . . . . . . . . .44
4.4 Customize your work area
. . . . . . . . . . . . . . . . . . . . . . . . . . . . . . . . . . . . . . . .48
Chapter 5: The Corel PDF Batch Converter work area . . . . . . . . . . . . . . . . . . .56
5.1 Open Corel PDF Batch Converter
. . . . . . . . . . . . . . . . . . . . . . . . . . . . . . . . .56

C
OREL
PDF F
USION
U
SER
G
UIDE
CONTENTS INDEX CONTENTS 3
INDEX CONTENTS 3
Chapter 6: How do I...? . . . . . . . . . . . . . . . . . . . . . . . . . . . . . . . . . . . . . . . . . . . . . . . . . . . . . . .60
6.1 Convert files
. . . . . . . . . . . . . . . . . . . . . . . . . . . . . . . . . . . . . . . . . . . . . . . . . . . . .61
6.2 Create a new document from existing files
. . . . . . . . . . . . . . . . . . . . . . . . . .65
6.3 Add empty pages to an existing document
. . . . . . . . . . . . . . . . . . . . . . . . . .70
6.4 Add existing pages to an existing document
. . . . . . . . . . . . . . . . . . . . . . . . .70
6.5 Remove pages from an existing document
. . . . . . . . . . . . . . . . . . . . . . . . . .71
6.6 Prepare a document for distribution
. . . . . . . . . . . . . . . . . . . . . . . . . . . . . . . .71
6.7 Print a document
. . . . . . . . . . . . . . . . . . . . . . . . . . . . . . . . . . . . . . . . . . . . . . . .72
6.8 Find and Redact text—one or more instances
. . . . . . . . . . . . . . . . . . . . . . .73
6.9 Redact text or area—single instance
. . . . . . . . . . . . . . . . . . . . . . . . . . . . . . . .74
6.10 Find and replace text—one or more instances
. . . . . . . . . . . . . . . . . . . . .74
6.11 Add comments/notes
. . . . . . . . . . . . . . . . . . . . . . . . . . . . . . . . . . . . . . . . . . .74
6.12 Add notes containing selected text
. . . . . . . . . . . . . . . . . . . . . . . . . . . . . . . .75
6.13 Add text annotations
. . . . . . . . . . . . . . . . . . . . . . . . . . . . . . . . . . . . . . . . . . . .76
6.14 Add bookmarks
. . . . . . . . . . . . . . . . . . . . . . . . . . . . . . . . . . . . . . . . . . . . . . . .76
6.15 Add free text annotations
. . . . . . . . . . . . . . . . . . . . . . . . . . . . . . . . . . . . . . . .77
6.16 Add hyperlinks
. . . . . . . . . . . . . . . . . . . . . . . . . . . . . . . . . . . . . . . . . . . . . . . . .78
6.17 Change the destination of the output file
. . . . . . . . . . . . . . . . . . . . . . . . . .79
6.18 Produce more compact PDF files
. . . . . . . . . . . . . . . . . . . . . . . . . . . . . . . . .80
6.19 Produce PDF files that can be sent by e-mail
. . . . . . . . . . . . . . . . . . . . . . .81
6.20 Produce files for fast web viewing
. . . . . . . . . . . . . . . . . . . . . . . . . . . . . . . . .82
6.21 Launch application to view the file when complete
. . . . . . . . . . . . . . . . . .82
6.22 Share setups
. . . . . . . . . . . . . . . . . . . . . . . . . . . . . . . . . . . . . . . . . . . . . . . . . . .83
6.23 E-mail documents
. . . . . . . . . . . . . . . . . . . . . . . . . . . . . . . . . . . . . . . . . . . . . . .84
6.24 E-mail comments
. . . . . . . . . . . . . . . . . . . . . . . . . . . . . . . . . . . . . . . . . . . . . . .85
6.25 Find the version number of Corel PDF Fusion
. . . . . . . . . . . . . . . . . . . . . .85
6.26 Remove tooltips or tool labels from Corel PDF Fusion
. . . . . . . . . . . . . .85
6.27 Add security to a document
. . . . . . . . . . . . . . . . . . . . . . . . . . . . . . . . . . . . . .85
6.28 Add a watermark to a document
. . . . . . . . . . . . . . . . . . . . . . . . . . . . . . . . .86
Chapter 7: Document settings and security . . . . . . . . . . . . . . . . . . . . . . . . . . . . . . . . .88
7.1 Document Settings
. . . . . . . . . . . . . . . . . . . . . . . . . . . . . . . . . . . . . . . . . . . . . . .88
7.2 Security Settings
. . . . . . . . . . . . . . . . . . . . . . . . . . . . . . . . . . . . . . . . . . . . . . . . .90
Chapter 8: Working with annotations . . . . . . . . . . . . . . . . . . . . . . . . . . . . . . . . . . . . . . .93
8.1 Working with bookmarks
. . . . . . . . . . . . . . . . . . . . . . . . . . . . . . . . . . . . . . . . .93
8.2 Working with comments and annotations
. . . . . . . . . . . . . . . . . . . . . . . . . . .98
8.3 Free text annotations
. . . . . . . . . . . . . . . . . . . . . . . . . . . . . . . . . . . . . . . . . . . .102
8.4 Adding hyperlinks
. . . . . . . . . . . . . . . . . . . . . . . . . . . . . . . . . . . . . . . . . . . . . . .104
8.5 Spell check comments and free text
. . . . . . . . . . . . . . . . . . . . . . . . . . . . . . .106
Chapter 9: Setups . . . . . . . . . . . . . . . . . . . . . . . . . . . . . . . . . . . . . . . . . . . . . . . . . . . . . . . . . . . . .108
9.1 What is a setup?
. . . . . . . . . . . . . . . . . . . . . . . . . . . . . . . . . . . . . . . . . . . . . . . .108
9.2 Managing setups
. . . . . . . . . . . . . . . . . . . . . . . . . . . . . . . . . . . . . . . . . . . . . . . .108
9.3 Setup manager reference
. . . . . . . . . . . . . . . . . . . . . . . . . . . . . . . . . . . . . . . .113

C
OREL
PDF F
USION
U
SER
G
UIDE
CONTENTS INDEX CONTENTS 4
INDEX CONTENTS 4
9.4 PDF document setup
. . . . . . . . . . . . . . . . . . . . . . . . . . . . . . . . . . . . . . . . . . . .113
9.5 XPS document setup
. . . . . . . . . . . . . . . . . . . . . . . . . . . . . . . . . . . . . . . . . . . .123
9.6 Word document setup
. . . . . . . . . . . . . . . . . . . . . . . . . . . . . . . . . . . . . . . . . .125
Chapter 10: Add-ins for Microsoft Office . . . . . . . . . . . . . . . . . . . . . . . . . . . . . . . . . .128
10.1 Using Add-ins for Microsoft Office
. . . . . . . . . . . . . . . . . . . . . . . . . . . . . . .128
10.2 Add-in settings for Microsoft Word
. . . . . . . . . . . . . . . . . . . . . . . . . . . . . .130
10.3 Add-in settings for Microsoft PowerPoint
. . . . . . . . . . . . . . . . . . . . . . . . .133
10.4 Add-in settings for Microsoft Excel
. . . . . . . . . . . . . . . . . . . . . . . . . . . . . . .137
Appendix A: Keyboard shortcut reference . . . . . . . . . . . . . . . . . . . . . . . . . . . . . . . . .141
How to use shortcut keys
. . . . . . . . . . . . . . . . . . . . . . . . . . . . . . . . . . . . . . . . . . . .141
File menu
. . . . . . . . . . . . . . . . . . . . . . . . . . . . . . . . . . . . . . . . . . . . . . . . . . . . . . . . . .142
Edit menu
. . . . . . . . . . . . . . . . . . . . . . . . . . . . . . . . . . . . . . . . . . . . . . . . . . . . . . . . . .143
View menu
. . . . . . . . . . . . . . . . . . . . . . . . . . . . . . . . . . . . . . . . . . . . . . . . . . . . . . . . .144
Document menu
. . . . . . . . . . . . . . . . . . . . . . . . . . . . . . . . . . . . . . . . . . . . . . . . . . .145
Advanced menu
. . . . . . . . . . . . . . . . . . . . . . . . . . . . . . . . . . . . . . . . . . . . . . . . . . . .146
Windows menu
. . . . . . . . . . . . . . . . . . . . . . . . . . . . . . . . . . . . . . . . . . . . . . . . . . . .146
Help menu
. . . . . . . . . . . . . . . . . . . . . . . . . . . . . . . . . . . . . . . . . . . . . . . . . . . . . . . . .146
Appendix B: Supported document formats . . . . . . . . . . . . . . . . . . . . . . . . . . . . . . . . .147
Vector image
. . . . . . . . . . . . . . . . . . . . . . . . . . . . . . . . . . . . . . . . . . . . . . . . . . . . . . .147
Presentation
. . . . . . . . . . . . . . . . . . . . . . . . . . . . . . . . . . . . . . . . . . . . . . . . . . . . . . . .148
E-mail
. . . . . . . . . . . . . . . . . . . . . . . . . . . . . . . . . . . . . . . . . . . . . . . . . . . . . . . . . . . . .148
Projects
. . . . . . . . . . . . . . . . . . . . . . . . . . . . . . . . . . . . . . . . . . . . . . . . . . . . . . . . . . . .148
Spreadsheet
. . . . . . . . . . . . . . . . . . . . . . . . . . . . . . . . . . . . . . . . . . . . . . . . . . . . . . . .149
Word processing
. . . . . . . . . . . . . . . . . . . . . . . . . . . . . . . . . . . . . . . . . . . . . . . . . . .149
Text and markup
. . . . . . . . . . . . . . . . . . . . . . . . . . . . . . . . . . . . . . . . . . . . . . . . . . .149
Notetaking
. . . . . . . . . . . . . . . . . . . . . . . . . . . . . . . . . . . . . . . . . . . . . . . . . . . . . . . . .149
eBook
. . . . . . . . . . . . . . . . . . . . . . . . . . . . . . . . . . . . . . . . . . . . . . . . . . . . . . . . . . . . .150
Raw image
. . . . . . . . . . . . . . . . . . . . . . . . . . . . . . . . . . . . . . . . . . . . . . . . . . . . . . . . .150
Raster image
. . . . . . . . . . . . . . . . . . . . . . . . . . . . . . . . . . . . . . . . . . . . . . . . . . . . . . .151

WHAT IS IN THIS DOCUMENT? INDEX CONTENTS 5
Preface
This document provides all the information you need to install and use Corel® PDF
Fusion™.
NOTE: Not all components are available in all versions of PDF Fusion.
What is in this document?
This document provides the following information:
•Chapter 1, “Introduction” describes what Corel PDF Fusion is, what is supplied, and
what you require.
•Chapter 2, “How to install Corel PDF Fusion” tells you how to install and uninstall Corel
PDF Fusion.
•Chapter 3, “Getting to know Corel PDF Fusion” describes what Corel PDF Fusion can
do, how to use it and provides information on the various features.
•Chapter 4, “The Corel PDF Fusion work area” describes the various views available
along with the Navigation pane.
•Chapter 5, “The Corel PDF Batch Converter work area” tells you about the Corel PDF
Converter work area.
•Chapter 6, “How do I...?” answers all your “How do I...?” questions.
•Chapter 7, “Document settings and security” describes the various document settings
and security options.
•Chapter 8, “Working with annotations” describes all you need to know about
bookmarks and comments (annotations).
•Chapter 9, “Setups” provides all the information you need to create, configure and
manage your output setups.
•Chapter 10, “Add-ins for Microsoft Office” describes how to use Corel Fusion from
Microsoft® Office applications.
•Appendix A, “Keyboard shortcut reference” provides various tables listing the Corel
PDF Fusion keyboard shortcuts.
•Appendix B, “Supported document formats” provides various tables listing the input
document formats supported by Corel PDF Fusion.

C
OREL
PDF F
USION
U
SER
G
UIDE
INDEX CONTENTS 6
WHAT OTHER INFORMATION IS AVAILABLE? INDEX CONTENTS 6
What other information is available?
For further information you should consult the following documents:
Release notes
The Release notes cover technical aspects of Corel PDF Fusion, including
installation and any late breaking technical news. As such, it should be
considered the first point of reference with respect to any technical
issues. The information in the release notes is always the most up to date
source.
For the latest version of the release note go to: http://www.corel.com
Font conventions
The following fonts and styles are used throughout this documentation.
1 Paragraphs that are numbered and use this font contain instructions that you should
follow in the order shown.
• Paragraphs that are bulleted contain either a series of points or a list of available options.
Text written in this sans-serif bold face represents a menu title, a menu item, key press,
or a control item in a dialog box. Text including an angle bracket ( >) indicates both a
menu and the option in that menu. For example: “choose the File > Open... option” is
a shorthand method of referring to the Open... menu option in the File menu.
Text written in smaller sans-serif-bold face is a file name or path.
Text written in this
typewriter
face represents a piece of code, or text displayed by the
application.
When a term is written in
italic
, it is the first mention of an important concept. This
concept is explained in the text immediately following, in the glossary, or both.
This format
Is used to describe the various menu options. It allows you to quickly
scan the list for the required information.
NOTE: Text indicated by starting with the word “NOTE” in the left margin is important and should be read
carefully. A Note, like this one, is often a suggestion that may save you work, improve performance,
or improve the quality of output.

WHAT IS COREL PDF FUSION? INDEX CONTENTS 7
Chapter 1 Introduction
WELCOME to Corel® PDF Fusion™—the application that lets you convert, view and
make corrections to documents.
1.1 What is Corel PDF Fusion?
Corel PDF Fusion is a ground-breaking tool that lets you create, correct, assemble and
merge different types of document. Corel PDF Fusion is easy to use. You can complete
everyday tasks in seconds, such as pulling together reports or documents from existing
material currently in different formats. You can also create industry-standard PDF, XPS
and DOC files to share, collaborate, archive and print.
In the Trial period, Corel PDF Fusion is fully featured for 30 days. After this period Corel
PDF Fusion remains fully featured and lets you view and print documents. However,
saved documents and changed documents you print or attach to an e-mail are
watermarked.
NOTE: Upon purchasing a serial number, files that were previously saved with a watermark will still have
a watermark.
When you purchase a Serial number, you have access to all the features of Corel PDF
Fusion and Corel PDF Converter and your files are not watermarked.
1.2 How to use this manual
When Corel PDF Fusion is installed, see Chapter 2, “How to install Corel PDF Fusion”,
or go to Chapter 3, “Getting to know Corel PDF Fusion”. This chapter tells you what
you can do with Corel PDF Fusion and provides basic instructions on how it is used. Also
provided in this section is a detailed description of the Corel PDF Fusion features.
For more detailed information on the features available in the various views go to
Chapter 4, “The Corel PDF Fusion work area”.
For more information on Corel PDF Converter see Chapter 5, “The Corel PDF Batch
Converter work area”.
Chapter 6, “How do I...?” provides step-by-step guides on how to use the various Corel
PDF Fusion features and functions.
For more information on Document Security and using annotations (bookmarks and
comments) see Chapter 7, “Document settings and security” and Chapter 8, “Working
with annotations”.

C
OREL
PDF F
USION
U
SER
G
UIDE
INTRODUCTION INDEX CONTENTS 8
HOW TO USE THIS MANUAL INDEX CONTENTS 8
Chapter 9, “Setups” describes how to create, configure and manage your output setups.
This is mainly for Corel PDF Converter but you can access these setups from Corel
Fusion.
When Corel PDF Fusion is installed you install the Add-ins for Microsoft Office which
allow one-click document conversion from Word, Excel® and PowerPoint® applications.
See Chapter 10, “Add-ins for Microsoft Office”.
Appendix A, “Keyboard shortcut reference” has lists of all the shortcut and accelerator
keys you can use.
Use Appendix B, “Supported document formats” to find out which document formats
you can use with Corel PDF Fusion.

WHAT ARE THE INSTALLER OPTIONS? INDEX CONTENTS 9
Chapter 2 How to install Corel
PDF Fusion
This chapter describes the system requirements and how to install Corel PDF Fusion.
•“What are the installer options?” on page 9
•“What you need” on page 10
•“Installing Corel PDF Fusion” on page 11
•“Removing Corel PDF Fusion” on page 12
•“Entering your serial number” on page 13
•“Associating XPS and PDF files with Corel PDF Fusion” on page 13
•“The file system” on page 14
•“Open Corel PDF Fusion” on page 14
•“Product update” on page 14
NOTE: Before installing you should check the system requirements. For more information see
“What you
need” on page 10
.
2.1 What are the installer options?
An easy to use installer is provided for Corel PDF Fusion. During the installation you are
provided with various options:
• You can install a Corel PDF Fusion for a trial period of 30 days, and enter a serial number
at a later time without the need to re-install.
• You can associate one or more file types with Corel PDF Fusion making it their default
application.
• You can fully uninstall the Corel PDF Fusion.
The following licensing options are available:
Viewer, conversion, 30 day advanced feature trial period—no serial number
Corel PDF Fusion is installed and fully featured for a trial period of 30
days. After this period, Corel PDF Fusion changes to “viewer mode”. It
remains fully featured, in that you can convert, view and print
documents, However, saved documents and changed documents you
print or attach to an e-mail are watermarked. There is no time limit to
the viewer mode period.

C
OREL
PDF F
USION
U
SER
G
UIDE
HOW TO INSTALL COREL PDF FUSION INDEX CONTENTS 10
WHAT YOU NEED INDEX CONTENTS 10
Advanced features—full mode
Corel PDF Fusion is installed and fully featured with no watermarks on
any saved output.
NOTE: Upon purchasing a serial number, files that were previously saved with a watermark will still have
a watermark.
2.1.1 Detecting previous installs
The installer detects any previously installed version of a Corel PDF Fusion and, if found,
displays a prompt for you to remove or repair the previous install before continuing the
installation.
The previously installed version must be uninstalled before you can continue with a new
installation. For more information see “Removing Corel PDF Fusion” on page 12.
2.2 What you need
Corel PDF Fusion can be run on the following operating systems:
•Microsoft
® Windows XP Home or Professional with Service Pack 3 (32-bit or 64-bit)
with .NET 3.5. If .NET 3.5 is not installed you cannot use the Add-ins for Microsoft Office
2003.
•Microsoft
® Windows Vista® Home Basic, Home Premium, Business, Ultimate, or
Enterprise with Service Pack 1 or 2 (32-bit or 64-bit).
•Microsoft
® Windows Server® 2003 with Service Pack 2 (32-bit or 64-bit).
•Microsoft
® Windows Server® 2008 (32-bit or 64-bit).
•Microsoft
® Windows 7 Starter, Home Premium, Professional and Ultimate (32-bit or 64-
bit).
The following system specifications are required:
• 1.3 GHz or faster processor.
• A minimum of 512 MB of RAM.
• A minimum of 250 MB of available hard-disk space.
• A minimum of 1024 x 768 screen resolution.
The following are recommendations:
• Dual-core processor.
• 1 GB or more of RAM.
Optional items:
•Microsoft
® Office 2003, Office 2007, or Office 2010.

C
OREL
PDF F
USION
U
SER
G
UIDE
HOW TO INSTALL COREL PDF FUSION INDEX CONTENTS 11
INSTALLING COREL PDF FUSION INDEX CONTENTS 11
2.3 Installing Corel PDF Fusion
This section describes how to install the Corel PDF Fusion.
Before installing Corel PDF Fusion make sure that it and any Microsoft Office applications
are not running.
1Double-click CorelPDFFusionInstaller_x86_EN.exe to start the installer wizard.
NOTE: On Windows 7 the User Access Control message “Do you want to allow the following program to
make changes to this computer” appears. Check that the program is the Corel PDF Fusion Installer
and click Yes.
NOTE: An error message is displayed if you attempt to run a 32-bit installer on a 64-bit platform or a 64-
bit installer on a 32-bit platform.
2 Select Next > to continue, < Back to return to a previous screen or Cancel to abort
the install.
NOTE: If you have a previously installed version of Corel PDF Fusion on your computer, a Modify, Repair
or Remove prompt appears. Select the Remove option to remove the previously installed version,
or Cancel to abort. See
“Removing Corel PDF Fusion” on page 12
for more details. When this is
done you must restart the installer.
3 Read the Software License Agreement and if you agree to it select I accept the terms
in the license agreement and then click Next >. If you do not, select I do not accept
the terms in the license agreement to abort the install.
4 To use the default location for the application click Next > in the Destination Folder
screen. To change the default location for the application select Change... and navigate
to or enter a new location in the Change Current Destination Folder dialog followed by
selecting OK and then Next >.
5 In the Setup Type screen choose Complete to install all required components and then
select Next >. To remove items from the install select Custom followed by Next >. You
are presented with the Custom Setup screen. For each component click the down-
arrow and select the required option. When the options are selected click Next >.
6 In the Installation Options screen the option to Associate .pdf and .xps file extensions
with this application is selected by default. If you do not want this association, remove
the selections. If you choose to associate PDF and XPS file extensions with Corel PDF
Fusion, all PDF and XPS files are opened by default in Corel PDF Fusion and have Corel
PDF Fusion icons. If you wish, this can be changed later. See “Associating XPS and PDF
files with Corel PDF Fusion” on page 13.
7 If you have a serial number choose I have a serial number for Corel PDF Fusion
advanced features and enter the serial number into the field below. Use copy and paste
for accuracy. If you do not have a serial number select the install free and 30 day trial
option. Click Next > to continue.
8 In the Ready to Install the Program screen click Next > to continue.

C
OREL
PDF F
USION
U
SER
G
UIDE
HOW TO INSTALL COREL PDF FUSION INDEX CONTENTS 12
REMOVING COREL PDF FUSION INDEX CONTENTS 12
9 If a Windows Security message appears prompting you to allow the installation of the
device software, in particular the Corel Printer, click Always trust software from “Corel
Corporation” followed by Install. If you do not install this printer you will not be able to
print to Corel PDF Fusion from a desktop application.
NOTE: If you are installing on Windows XP and a Windows Security message appears prompting you to
allow the installation of the printer driver software, click
Install
to continue. If you do not install this
printer you will not be able to print to Corel PDF Fusion from a desktop application.
NOTE: If you have Microsoft Office 2003 and the message “you must close all Office applications before
installing” appears, click OK and Finish. Now close any Office applications and re-start the installer.
10 When the Installation Wizard Completed screen appears click Finish to complete the
installation. Corel PDF Fusion is installed and ready for use. To view the installation log
select that option before selecting Finish.
2.4 Removing Corel PDF Fusion
This section describes how to remove Corel PDF Fusion from your computer. Use the
Add or Remove Programs method as described below. Alternatively, you can use the
method described in “Modify, repair or remove the program” on page 12.
1 Make sure that Corel PDF Fusion is not running.
2 Select Control Panel.
3 Select Add or Remove Programs (XP), Programs (Vista) or Programs and Features
(Windows 7).
4 Select Corel PDF Fusion followed by the Remove (XP) or Uninstall (Vista and Windows
7).
5Click Finish and choose whether you want to restart your computer now or later (if
those options appear).
2.4.1 Modify, repair or remove the program
The modify, repair or remove options appear if you run the installer
(CorelPDFFusionInstaller_x86_EN.exe) when Corel PDF Fusion is already installed.
The Modify option allows you to install or remove parts of the application such as the
Microsoft Add-ins. The Repair option re-installs the application. This is useful if, for
example, you have accidentally removed an essential part of the application. The
Remove option removes the application.
If you choose Modify you can select a Custom install and then use the drop-down
options in the Custom Setup screen to choose the items to install. To install an option
select This feature, and all subfeatures, will be installed on the local hard drive. To
remove an option select This feature will not be available. Continue the installation as
previously described in “Installing Corel PDF Fusion” on page 11.
The Repair option re-installs the complete application.

C
OREL
PDF F
USION
U
SER
G
UIDE
HOW TO INSTALL COREL PDF FUSION INDEX CONTENTS 13
ENTERING YOUR SERIAL NUMBER INDEX CONTENTS 13
Use the Remove option to remove the application from your computer. If a File in use
screen appears select Automatically close and attempt to restart applications followed
by OK.
2.5 Entering your serial number
During the installation procedure you are given the opportunity to enter a serial number
to enable Corel PDF Fusion. Use the following procedure if you did not do enter your
serial number or if you want to upgrade from viewer mode to a full version:
1 Double-click the Corel PDF Fusion icon or select All Programs > Corel PDF Fusion >
Corel PDF Fusion to open the application.
2 Select Help > Enter Serial Number.... This displays the serial number dialog.
3 Enter your serial number, using copy and paste for accuracy, and click OK. If the serial
number is correct and accepted a message appears. If “VIEWER” is displayed on the
Welcome screen it is removed. If the serial number is invalid you are given another
opportunity to enter the correct key.
4 After entering your serial number you must re-start Corel PDF Fusion so that the
watermarks are disabled.
NOTE: To purchase a serial number select Help > Buy or Help > About and the click the Buy button on
the About Corel PDF Fusion dialog.
2.6 Associating XPS and PDF files with Corel PDF Fusion
During the installation procedure you are given the opportunity to associate .pdf and .xps
files with Corel PDF Fusion. This means that all PDF and XPS files are opened, by default,
in Corel PDF Fusion and have Corel PDF Fusion icons. If you decided not to do this and
want to do it now, or, if you want to remove the association between these file types
and Corel PDF Fusion, use the following procedure:
NOTE: Do this procedure once for PDF files and once for XPS document files.
1 Find either a PDF or XPS document file.
2 Right-click the file and select Properties from the pop-up menu.
3 Under the General tab in the “Type of file” “Opens with” section click the Change
button. An “Opens with” dialog appears.
4 If Corel PDF Fusion is displayed select it. Otherwise, use the Browse option and go to
C:\Program Files\Corel\Corel PDF Fusion\ and select CorelFusion.exe and click Open.
5Click OK in the Open with dialog and OK in the Properties dialog to close it. Notice
that all documents of the selected file type now display the chosen application icon.

C
OREL
PDF F
USION
U
SER
G
UIDE
HOW TO INSTALL COREL PDF FUSION INDEX CONTENTS 14
THE FILE SYSTEM INDEX CONTENTS 14
2.7 The file system
Corel PDF Fusion, by default, is installed at the following location:
C:\Program Files\Corel\Corel PDF Fusion\
In addition, the Corel PDF Creator printer is installed which can viewed by selecting:
Printer and Faxes (XP), Printer (Vista) or Device and Printers (Windows 7).
2.8 Open Corel PDF Fusion
To open Corel PDF Fusion, perform one of the following actions:
•Double-click the Corel PDF Fusion desktop icon.
• Select All Programs > Corel PDF Fusion > Corel PDF Fusion.
To find out more about Corel PDF Fusion see “Getting to know Corel PDF Fusion” on
page 15.
2.9 Open Corel PDF Converter
To open Corel PDF Converter:
• Select All Programs > Corel PDF Fusion > Corel PDF Batch Converter.
To get started with Corel PDF Batch Converter see “Getting to know Corel PDF Fusion”
on page 15.
2.10 Product update
To check for product updates select Help > Check for Updates.
If no update is available a message appears. If an update is available a dialog with a
Download button appears. Select Download to launch your default browser allowing
the latest installer to be downloaded.
NOTE: The product update requires a connection to the internet and your default browser is used. An
attempt is made to automatically determine the proxy settings. However, in some circumstances
they made need to be modified manually. See
“Web tab” on page 54
.

WHAT CAN YOU DO WITH COREL PDF FUSION? INDEX CONTENTS 15
Chapter 3 Getting to know Corel
PDF Fusion
This chapter provides you with the following information:
•“What can you do with Corel PDF Fusion?” on page 15
•“How do you use Corel PDF Fusion?” on page 16
•“What is a document format or PDL?” on page 17
•“What are the features of Corel PDF Fusion?” on page 18
•“What next?” on page 25
3.1 What can you do with Corel PDF Fusion?
Corel PDF Fusion lets you open and display various common document file types. When
these files are open you can add, remove or edit bookmarks and comments/annotations;
search for text items and correct them. In addition to this, you can mark page areas or
text for
redaction.
This is the process of “blacking” out the page content to censor,
obliterate or hide the contents. You have full control over the security of your
documents.
One of the best features of Corel PDF Fusion is the ability to drag-and-drop one or more
pages from one document into another. This lets you combine documents, which may
exist in various document formats, into a single coherent document. You can save this
new document in one of the various common file formats. Corel PDF Fusion is used to
convert documents from one document format into another.
You don’t need to convert files to modify them. The output document format is decided
when you save.
Corel PDF Converter lets you create PDF, XPS and Word files from a variety of desktop
document formats. This is done by dragging-and-dropping files onto the application. You
can print to the Corel PDF printer from your desktop applications and create PDF files.
In addition to this, you have a one-click facility that provides direct PDF creation from
your Microsoft Office Word, Excel® and PowerPoint® applications. You have complete
control over the format of your created documents.
NOTE: Not all components are available in all versions of PDF Fusion.

C
OREL
PDF F
USION
U
SER
G
UIDE
GETTING TO KNOW COREL PDF FUSION INDEX CONTENTS 16
HOW DO YOU USE COREL PDF FUSION? INDEX CONTENTS 16
3.2 How do you use Corel PDF Fusion?
This section gives you an overview of how to use Corel PDF Fusion.
3.2.1 Using Corel PDF Fusion
Corel PDF Fusion is easy to use. You can create a new document or open one or more
existing documents to modify. You can drag and drop pages from one document into
another to combine these documents. For example, you can open PDF or XPS
documents and combine pages from these documents in any way you choose.
When you have finished building your document you can save it in PDF, XPS or Word
formats.
Corel PDF Fusion has four ways of viewing your documents:
•Page View is where you view a single document, correct text, and add bookmarks and
annotations. See “Page View” on page 30.
•Assembly View presents all open documents simultaneously, and provides the ability to
change, combine and assemble pages. See “Assembly View” on page 36.
•Flick View is a specialized view for a single document, is designed for ease of page turning
and lets you view the layout of a whole document. See “Flick View” on page 41.
•
Presentation View
is a full-screen reading mode. See “Presentation View” on page 42.
NOTE: Multiple documents can be opened, each one identified by its own tab. Use drag-and drop to re-
order these tabs.
3.2.1.1 Notes on converting Microsoft Office Word, Excel or PowerPoint documents
If you attempt to open a Microsoft Office document (Word, Excel or PowerPoint) using
drag and drop, but the document is already open in the Microsoft application, a warning
dialog is displayed. To continue, close the document in the Microsoft Office application
and select Retry. This converts the document using the Corel PDF Converter printer
driver. Select Ignore to import the document using Corel Fusion’s own import facility.
3.2.2 Using Corel PDF Converter
With Corel PDF Converter you start the program, choose your desired output format
and then drag and drop files for conversion onto the application. Alternatively, print to
the Corel PDF printer from your Desktop or Office applications.

C
OREL
PDF F
USION
U
SER
G
UIDE
GETTING TO KNOW COREL PDF FUSION INDEX CONTENTS 17
WHAT IS A DOCUMENT FORMAT OR PDL? INDEX CONTENTS 17
3.3 What is a document format or PDL?
Corel PDF Fusion supports several document formats sometimes called PDLs (Page
Description Languages). PDLs are the different ways that applications internally describe
the content of documents. Corel PDF Fusion can use the following document formats:
PDF
(Portable Document Format.) A file format created by Adobe Systems
for document exchange. Several versions of PDF are used including v1.3,
v1.4, v1.5, v1.6, and v1.7. PDF files have a file extension of .pdf.
PDF files can be selected for input to and output from Corel PDF Fusion.
NOTE: Corel PDF Fusion opens documents that are PDF compatible, but not named with a *.pdf
extension. When documents of this type are subsequently saved a .pdf extension is added to the
file name.
PDF/A-1b
A file format designed for the long-term archiving of documents. PDF/A-
1b is a subset of PDF, omitting those PDF features which are not suited
to archiving.
PS
(PostScript language.) A dynamically typed programming language.
PostScript language files are often created in the background when you
“Print to file”. These files have a .ps file extension. PostScript language files
can be input to Corel PDF Fusion.
Note that .prn PostScript language files are treated in much the same
way as PostScript language files.
Microsoft Office
These are the formats you create when using Microsoft Office Word,
PowerPoint and Excel applications and have .doc, .docx, .ppt, .pptx, .xls
and .xlsx. file extensions. Microsoft Office files are read by Corel PDF
Fusion. Microsoft Word files can be output from Corel PDF Fusion by
using the Save as or Export option.
XPS v1.0
A fixed-layout document format designed to preserve document fidelity,
based on XML. XPS documents have a .xps file extension. XPS
documents can be selected for input to and output from Corel PDF
Fusion.
PNG
Portable Network Graphics (PNG) is a bitmapped image format using
lossless data compression. PNG files usually have the extension .PNG or
.png. PNG files can only be created from Corel PDF Fusion using the
Export option. See “Convert (Export) a document to PNG” on
page 64.

C
OREL
PDF F
USION
U
SER
G
UIDE
GETTING TO KNOW COREL PDF FUSION INDEX CONTENTS 18
WHAT ARE THE FEATURES OF COREL PDF FUSION? INDEX CONTENTS 18
3.4 What are the features of Corel PDF Fusion?
Corel PDF Fusion supports the following features and file formats:
3.4.1 File format support
This section describes the supported document file formats, sometimes called PDLs
(Page Description Languages):
For more information see:
•“Input format support” on page 18
•“Output format support” on page 18
3.4.1.1 Input format support
You can input these file formats to Corel PDF Fusion:
• PDF v1.3, v1.4, v1.5, v1.6, v1.7.
•PDF/A-1b.
• PostScript Language Level 2 and 3.
• Microsoft Office Word, Excel, PowerPoint.
•XPS v1.0.
See Appendix B, “Supported document formats” for various tables listing the input
formats supported by Corel PDF Fusion.
Drag and drop files of these types onto the Corel PDF Fusion Welcome screen and they
appear as PDF files in the selected view.
3.4.1.2 Output format support
You can save or export the following file formats from Corel PDF Fusion:
• PDF v1.3, v1.4, v1.5, v1.6.
• PDF/A-1b (only available when using the Corel PDF Converter).
NOTE: PDF files can be saved as linearized PDF for web viewing and interleaving mode for XPS. These file
types are especially suitable for fast web viewing or for more efficient streaming of the XPS data
to an output device. In addition, PDF files can be optimized for efficiency.
• Microsoft Office Word.
•XPS v1.0.
• PNG (only available using the Export option).
When printing to the Corel PDF printer only PDF or XPS documents are created.
When using the Add-ins for Microsoft Office only PDF and XPS documents are created.

C
OREL
PDF F
USION
U
SER
G
UIDE
GETTING TO KNOW COREL PDF FUSION INDEX CONTENTS 19
WHAT ARE THE FEATURES OF COREL PDF FUSION? INDEX CONTENTS 19
3.4.2 Customizable workarea
The Corel PDF Fusion work area can be customized to suit your own personal
preferences. Once you have chosen how you like your work area to be configured—
window size and position, visibility of toolbars, and visibility of the Navigation pane—it
remains until you decide to change it or choose to reset the application back to its
factory settings.
3.4.3 Printing
With Corel PDF Fusion you can print the current document, the current page, or a range
of pages.
For PDF documents, permission to print is always subject to the document’s security
settings.
3.4.4 Multiple Undo/Redo
Multiple Undo and Redo options are provided so you can easily retrace your steps and
return to an earlier iteration of your document. Note that when you save your
document all the undo/redo levels are reset and as such become unavailable.
3.4.5 Text selection
You can select text items (from a single character to all of the document). Text selection
can cross page boundaries and the selected text can be copied to, and pasted from, the
clipboard.
For PDF documents, text extraction is subject to the document's security settings.
3.4.6 Text searching
You can search open documents for specific text or phrases. Search options include case
sensitive search, forward or backward directions, search for whole words only.
3.4.7 Text correction
When text is selected small modifications can be made to that text. The style of any new
text is the same as the selected text and no text reflow (word wrapping) is performed.
If the text you type goes over the edge of the page it is clipped. Adding new lines and
correction of more than a single line is not possible.
Correction of non-horizontal text is not supported.
If you attempt to correct a character that does not exist in the current font, a font
substitution mechanism is used to try and find the best match.

C
OREL
PDF F
USION
U
SER
G
UIDE
GETTING TO KNOW COREL PDF FUSION INDEX CONTENTS 20
WHAT ARE THE FEATURES OF COREL PDF FUSION? INDEX CONTENTS 20
3.4.8 Redact text
Corel PDF Fusion allows the redaction (obliteration) of text found during a search
operation. You can specify whether you want the text redacting on the first occurrence
only or all the text within a document. This action can, when required, be performed on
all open documents.
The redaction function can redact arbitrary areas of the page. This allows, for example,
all or parts of images to be blacked out.
A “redact all” function is available that is used to redact all instances of a name (for
example). Any redactions applied in this manner cannot be undone.
Once a redaction action has been performed on a page, any object that intersects with
the redacted area is “flattened” into an image with the original objects removed. This
means that any such objects are replaced by images. Therefore, they cannot
subsequently be selected or manipulated. For example, if such an object is text, it will no
longer be available for selection for highlighting or correction.
When an area is selected for redaction any text which is intersected by that area is also
redacted.
NOTE: The search does not find any words which are part of an image such as a photograph or scanned
image.
3.4.9 Page manipulations
The following page manipulations can be performed on documents:
• Insert pages.
Any page can be dragged-and-dropped from any source document to any point within
any target document.
• Extract pages.
You can create a new document from a selection of one or more pages in an existing
document.
• Delete pages.
You can delete pages from any open document.
•Rotate pages.
You can rotate pages by 90, 180 or 270 degrees clockwise or anti-clockwise.
• Create blank pages.
You can add an empty page to the current document or create a new document
containing an empty page.
• Moving and reordering pages.
Pages can be moved and re-ordered through thumbnails. Pages reordered in the
Navigation pane's thumbnail view are immediately reordered in the Assembly View.

C
OREL
PDF F
USION
U
SER
G
UIDE
GETTING TO KNOW COREL PDF FUSION INDEX CONTENTS 21
WHAT ARE THE FEATURES OF COREL PDF FUSION? INDEX CONTENTS 21
• Add watermarks.
Watermarks can be added to a document in a variety of styles, colors, angles, and
opacity.
3.4.10 Bookmark control
The following bookmark controls are possible:
•Add bookmarks.
• Delete bookmarks.
• Edit bookmark properties.
You can change the bookmark properties, either individually or for a whole group of
bookmarks, one property at a time or all of them simultaneously.
• Change bookmark destination.
• Change position and level.
The bookmark’s position and level within a bookmark tree can be changed.
• Expand and collapse by level.
For more information about bookmarks see “Working with annotations” on page 93.
3.4.11 PDF comments/annotations
The following PDF annotation controls are available:
• Add and modify.
Display, add and modify PDF markup annotations.
• Add free text annotations.
Add, format and “flatten” free text annotations.
• Spell check comments.
You can spell check any comments you add to a document.
• Change comment and annotation properties.
• Import comments.
Comments can be imported from FDF documents.
• Export comments.
Annotations can be exported to an FDF document.
• E-mail.
Annotations can be e-mailed as a file attachment (FDF).
For more information on comments and annotations see “Working with annotations”
on page 93.

C
OREL
PDF F
USION
U
SER
G
UIDE
GETTING TO KNOW COREL PDF FUSION INDEX CONTENTS 22
WHAT ARE THE FEATURES OF COREL PDF FUSION? INDEX CONTENTS 22
3.4.12 Hyperlinks
The following hyperlink controls are available:
• Add a link to a page.
When the hyperlink is selected the defined page is displayed.
• Add a link to a web page.
When the hyperlink is selected the defined web page is opened.
• Add a link to a file.
When the hyperlink is selected the chosen file is opened.
For more information on hyperlinks see “Adding hyperlinks” on page 104.
3.4.13 Document settings and properties (PDF)
•Open settings.
You can add or change the PDF open settings.
•General information.
You can read and modify general document information.
•Security settings.
You can view or modify file security.
3.4.14 Page properties and markup manipulation
• Page cropping.
You have the ability to change various pieces of page level information. For example, the
page size.
• Font substitution.
Some documents (with the exception of XPS documents) refer to external fonts, which
might not always be available on the system where Corel PDF Fusion is running. Corel
PDF Fusion can recover from this situation by applying a font substitution from the fonts
stored on the computer.
When font substitutions are performed, they are only applied to render the open
document to the screen. Font substitutions are not written to the file when the
document is saved.
NOTE: The XPS document format requires that all fonts are embedded. In this case Corel PDF Fusion
embeds in the XPS an emulated font that corresponds to the missing font.
3.4.15 Document security
• Open and save encrypted PDF files.

C
OREL
PDF F
USION
U
SER
G
UIDE
GETTING TO KNOW COREL PDF FUSION INDEX CONTENTS 23
WHAT ARE THE FEATURES OF COREL PDF FUSION? INDEX CONTENTS 23
Corel PDF Fusion contains a standard security handler and supports the following
encryption standards:
40-bit RSA
128-bit RSA
128-bit AES (read-only)
3.4.16 Restrict opening, print, copying, commenting functions
Every PDF document operation is subject to a security restriction and could fail due to
the security settings.
3.4.17 Saving options
The following Save options are available:
•Save and Save As.
Save
Overwrites the original input document with the new version in the
same format.
Save As
Lets you save the document under a new name. In addition to this you
can save the document with a new format.
NOTE: Use the cancel icon in the Status bar to abort the save process.
NOTE: If you are using Corel PDF Fusion in viewer mode (after the 30 day trial period), and take an action
that changes the current document, a message appears informing you that you can continue to
view this document but saving, printing or attaching it to an e-mail adds a watermark. Purchase
the full version to remove this restriction.
Save prompts
If you attempt to close a modified document, that has not been saved,
you are presented with a prompt to save the changes before the
document is closed. Select Ye s to save or No. Use Cancel to abort the
close.
If you attempt to close the Corel PDF Fusion application, a “save”
prompt is presented for every open document that has unsaved
changes. Use the Apply to all files check box to apply your Ye s , No or
Cancel choice to all documents. If this is not selected, a save prompt is
presented for each individual modified document.
NOTE: A new document using pages from an existing document must be saved before you can re-save
the existing document to its current name. You can, however, use the Save as option.

C
OREL
PDF F
USION
U
SER
G
UIDE
GETTING TO KNOW COREL PDF FUSION INDEX CONTENTS 24
WHAT ARE THE FEATURES OF COREL PDF FUSION? INDEX CONTENTS 24
3.4.18 Feature transfer and document compatibility
Corel PDF Fusion supports the conversion of documents between various formats.
While all document formats naturally support a broad spectrum of common features, it
is inevitable that some features that are specific to one format are not available in
another. Annotations, for example, are supported in PDF, but not currently in the XPS
document format. Furthermore, some formats—most importantly PDF—exist in
multiple versions, where new versions have introduced features that are not available in
older versions.
Corel PDF Fusion allows conversion between document formats (and differing versions
of formats). It also allows for the transfer of pages between documents in its workspace,
without requiring those documents to be in the same version of a format, or even in the
same format at all.
The end result is that Corel PDF Fusion needs to deal with various cases where a
document (or page) contains features that cannot be accommodated by the target
document. The following provides some information on how Corel PDF Fusion handles
specific conversions:
PDF to PDF of the same version
All features of the input document are preserved in the output
document.
PDF to PDF of a newer version
All features of the input document are preserved in the output
document.
The destination document dictates the version number of the combined
result. For instance, when a page is dragged from a PDF 1.5 document
into a PDF 1.6 document, the latter stays as a PDF 1.6, rather than being
downgraded to 1.5.
PDF to PDF of an older version
All features of the input document are preserved in the output
document.
When moving pages to a PDF document of an older version, Corel PDF
Fusion performs a check on the page content to determine whether any
features are used that are unavailable in the older version. If such features
are found, a warning is displayed indicating that these features are lost.
PDF to XPS
All features that are common to XPS and PDF are preserved.
Features that are specific to PDF (such as annotations) are dropped.
All non-normal blend modes and complex shading are rendered when
converting from PDF to XPS.

C
OREL
PDF F
USION
U
SER
G
UIDE
GETTING TO KNOW COREL PDF FUSION INDEX CONTENTS 25
WHAT NEXT? INDEX CONTENTS 25
The XPS document format requires that all fonts are embedded, and
they must be in OpenType format. For fonts not embedded in the PDF,
additional font directories can be specified and fonts can optionally be
accessed from those installed on the Windows system. Otherwise, a
substitute is embedded in the XPS.
XPS to PDF
All features common to XPS and PDF are preserved.
Features that are specific to XPS and cannot be converted are dropped.
HDR images are rendered down to sRGB.
All fonts used by XPS documents are embedded in the package. On
conversion they remain embedded in the PDF.
XPS to XPS
All features of the input document are preserved in the output
document.
All resources used by an XPS page are transferred to the destination
document.
•Security.
Any security applied to a PDF document is honored.
3.4.19 Finish document wizard
The Finish Document Wizard prepares the document for publishing or printing.
For more information see “Prepare a document for distribution” on page 71.
3.5 What next?
To find out more about Corel PDF Converter go to Chapter 5, “The Corel PDF Batch
Converter work area”. Alternatively, to start using Corel PDF Converter to convert
documents go to “Convert files” on page 61.
To f i n d o u t m o r e a b o u t Corel PDF Fusion go to Chapter 4, “The Corel PDF Fusion work
area”.

INDEX CONTENTS 26
Chapter 4 The Corel PDF Fusion
work area
This chapter describes the Corel PDF Fusion work area, the various views and how you
can use and customize it.
The information provided in the section includes:
•“Open Corel PDF Fusion” on page 27
•“The Page, Assembly, Flick and Presentation View” on page 29
•“The Navigation pane” on page 44
•“Customize your work area” on page 48
NOTE: Not all components are available in all versions of PDF Fusion.
C
OREL
PDF F
USION
U
SER
G
UIDE
THE COREL PDF FUSION WORK AREA INDEX CONTENTS 27
OPEN COREL PDF FUSION INDEX CONTENTS 27
4.1 Open Corel PDF Fusion
To open Corel PDF Fusion:
•Double-click the Corel PDF Fusion icon.
• Select All Programs > Corel PDF Fusion > Corel PDF Fusion.
• Drag and drop a file onto the Corel PDF Fusion icon to open Corel PDF Fusion in the
default view.
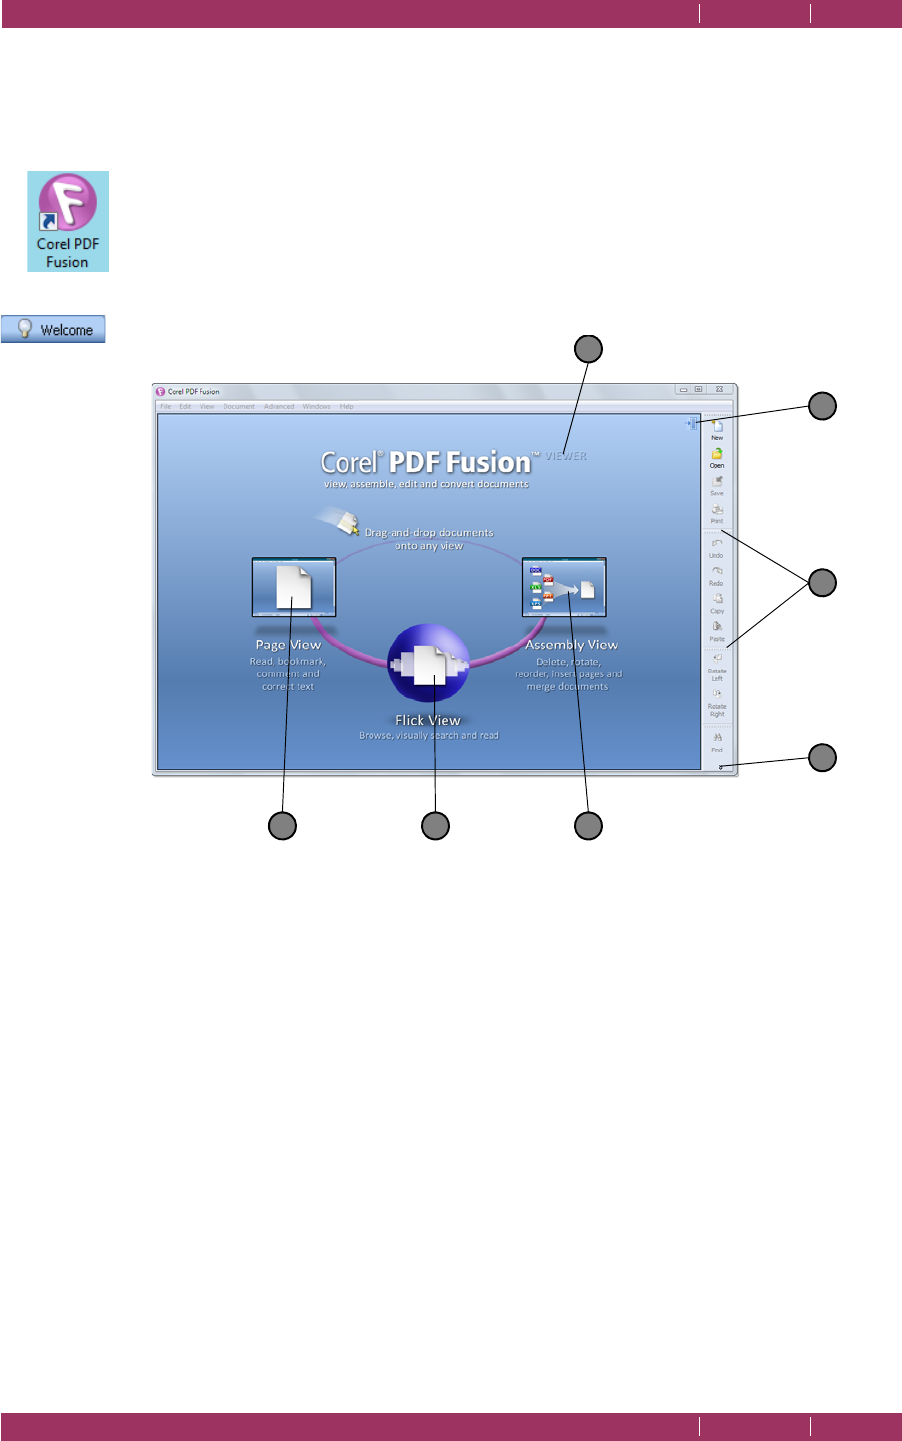
• Select the Welcome screen tab.
Figure 4.1 The Welcome screen
1 Drop documents here to display them in Page View.
2 Drop documents here to display them in Flick View.
3 Drop documents here to display them in Assembly View.
4 Click the down-arrow to display more options.
5 Click-and-drag the dimpled area to move the menu.
6 Go to Launch pad mode. See “The Launch pad” on page 28.
7 This appears after the 30 day trial period when the application changes to viewer mode.
This is removed when a serial number is entered.
123
5
4
7
6
C
OREL
PDF F
USION
U
SER
G
UIDE
THE COREL PDF FUSION WORK AREA INDEX CONTENTS 28
OPEN COREL PDF FUSION INDEX CONTENTS 28
4.1.1 The Launch pad
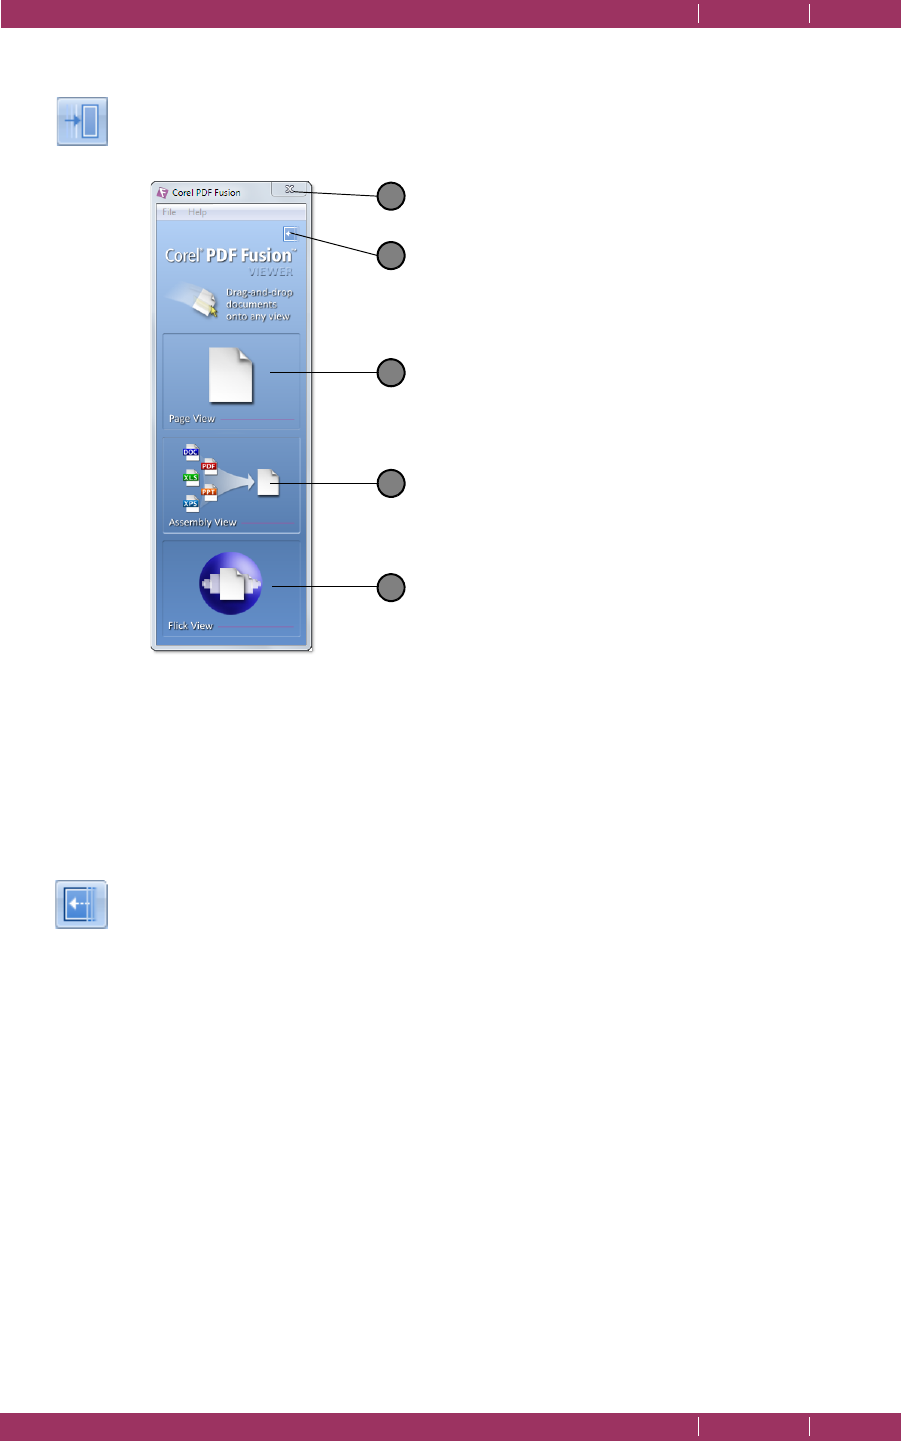
Click the Launch pad icon to reduce the Welcome screen:
Figure 4.2 The Launch pad
NOTE: If you close Corel PDF Fusion from the Launch pad, it is displayed when you re-start.
1 Click to close the Corel PDF Fusion application. A save prompt appears for any open
modified documents. Select Ye s to save or No. Select Cancel to abort the close. Use
the Apply to all files check box to apply your Ye s , No or Cancel choice to all documents.
If this is not selected, a save prompt is presented for each individual modified document.
2 Click to restore the Welcome screen view.
3 Drop documents here to display them in Page View.
4 Drop documents here to display them in Assembly View.
5 Drop documents here to display them in Flick View.
NOTE: When multiple documents are opened only one is displayed. Click another tab in Page View or use
Assembly View to see all the documents.
File
Click New to open a new document. Use Open and Open Recent to
select a document or recently opened document.
Click Exit to close the application.
Help
Click Contents to display the online help. Click To o l t i p s to display or
remove text tips which appear when the cursor moves over an option.
Click About... to display information about Corel PDF Fusion.
3
4
5
2
1
C
OREL
PDF F
USION
U
SER
G
UIDE
THE COREL PDF FUSION WORK AREA INDEX CONTENTS 29
THE PAGE, ASSEMBLY, FLICK AND PRESENTATION VIEW INDEX CONTENTS 29
Click Buy... to purchase Corel PDF Fusion.
Click Enter Serial Number... once you have purchased Corel PDF Fusion
and want to enter your serial number. For more information see
“Entering your serial number” on page 13.
Click Check for Updates... to check for the latest updates. For more
information see “Product update” on page 14.
4.2 The Page, Assembly, Flick and Presentation View
There are four ways you can view your documents:
•Page View is where you can read or modify a single document. See “Page View” on
page 30.
•Assembly View presents all open documents simultaneously, and provides the ability to
build new ones. See “Assembly View” on page 36.
•Flick View is a specialized view for a single document, designed for ease of page turning
and for examining the layout of a whole document. See “Flick View” on page 41.
•
Presentation View
is a full-screen view. See “Presentation View” on page 42.
4.2.1 Common controls
The Page, Assembly and Flick Views share a group of controls allowing you to navigate
from one view to another. For example, Page View has controls to navigate to Flick View
and Assembly View.
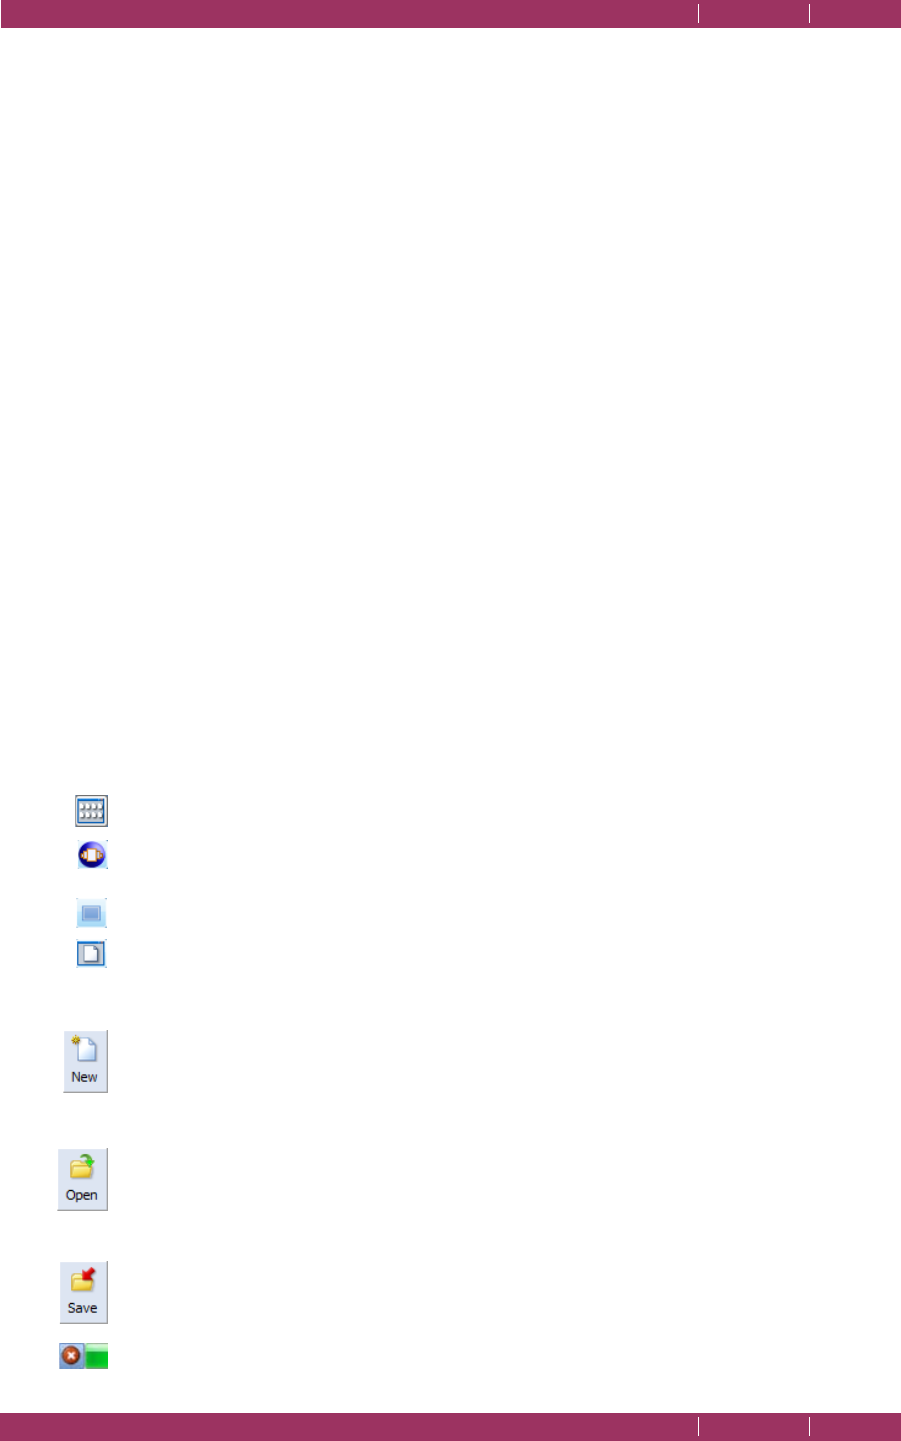
• Select to display the current document in Assembly View.
• Select to display the current document in Flick View.
• Select to display the Welcome screen.
• Select to display the current document in Page View.
The following icons are common to the Page and Assembly Views:
New
Click New or use File > New to open a new blank document. The new
document appears as “Untitled” and is a PDF unless you have changed
the Edit > Preferences > New file type option.
Open
Click Open or use File > Open to select a document when you are
already in Page View.
Save
Click Save or use File > Save to save your modified document using its
current name.
Use the cancel icon in the Status bar to abort a save.
C
OREL
PDF F
USION
U
SER
G
UIDE
THE COREL PDF FUSION WORK AREA INDEX CONTENTS 30
THE PAGE, ASSEMBLY, FLICK AND PRESENTATION VIEW INDEX CONTENTS 30
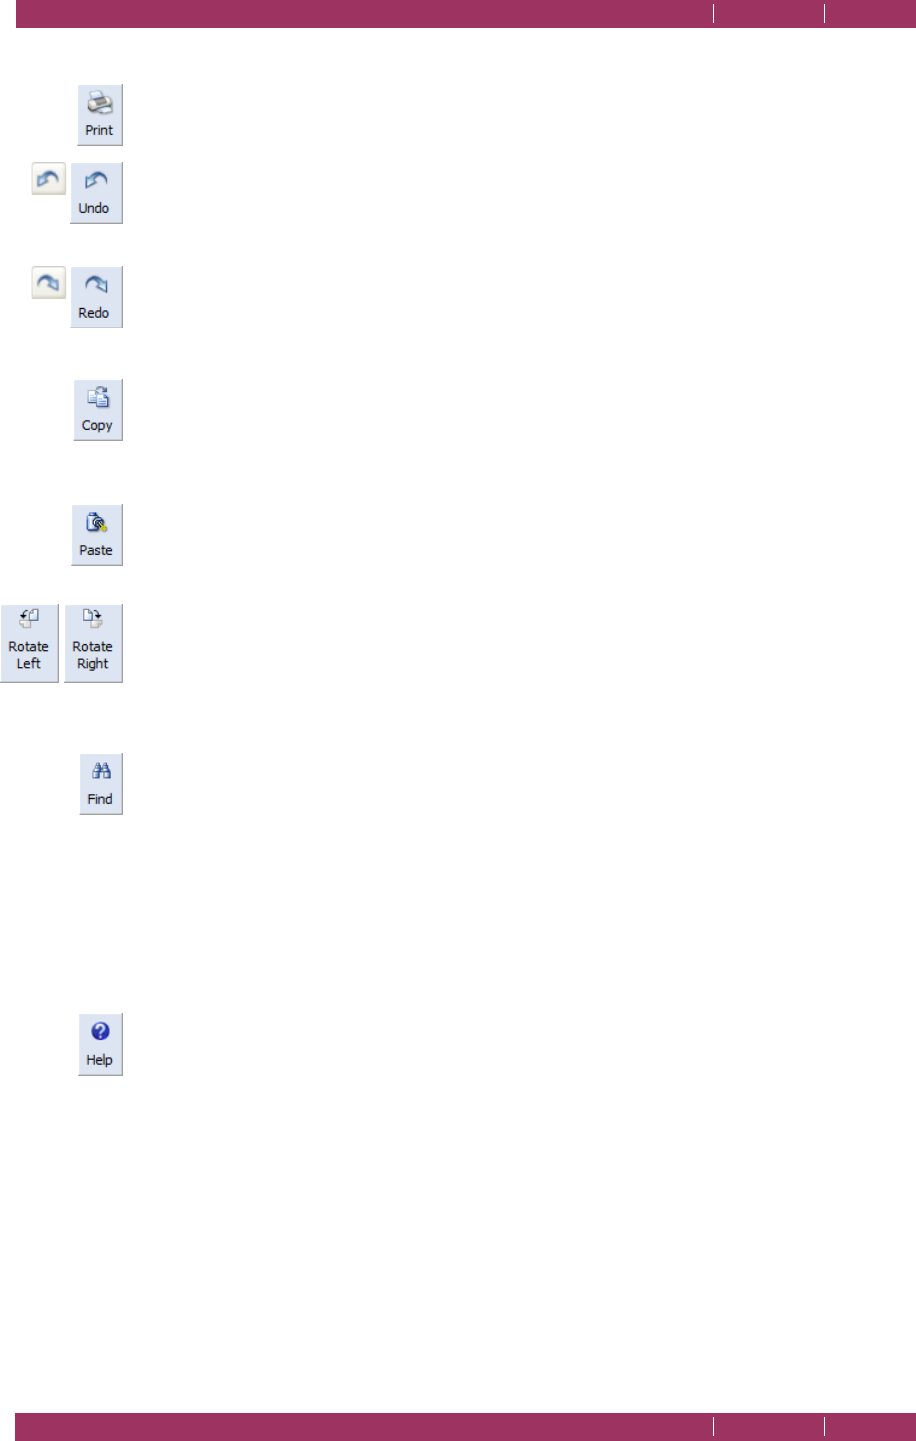
Print
Click Print or use File > Print to print your document. This displays a
standard Print dialog.
Undo
Click Undo or use Edit > Undo to undo your last action. Click again to
undo your previous actions. All undo steps are retained until you save
the file. Once saved, all levels of undo are discarded.
Redo
Click Redo or use Edit > Redo to redo your last action. Click again to
redo next steps. All redo steps are retained until you save the file. Once
saved, all levels of redo are discarded.
Copy
Click Copy or use Edit > Copy to copy the selected page or pages onto
the clipboard (Assembly View and Navigation pane).
Paste
Click Paste or use Edit > Paste to paste the selected page or pages from
the clipboard to the current location (Assembly View and Navigation
pane).
Rotate Left / Rotate Right
Click Rotate Left or Rotate Right to rotate the selected page or pages
(Assembly View and Navigation pane).
Find
Click Find or select Edit > Find to search through the document for a
word or phrase. Click Edit > Find Next to search for the next
occurrence. Refine your search by selecting Match case and Whole
words options. If required, click the Search backward option. If you have
previously performed a search select the Find what down-arrow to re-
select it.
NOTE: Occurrences of a word or phrase that form part of an image, such as a photograph or scanned
image, are not found.
Help
Click Help or use Help > Contents to display the online help file.
For more information on the shortcut and accelerator keys see “Keyboard shortcut
reference” on page 141.
4.2.2 Page View
In this view you can view, bookmark, comment or correct a single document. The
Navigation pane is available in Page View. See “The Navigation pane” on page 44 for
more information.
C
OREL
PDF F
USION
U
SER
G
UIDE
THE COREL PDF FUSION WORK AREA INDEX CONTENTS 31
THE PAGE, ASSEMBLY, FLICK AND PRESENTATION VIEW INDEX CONTENTS 31
Use the following methods to open a document in Page View:
• Drag and drop one or more documents onto the Page View area displayed on the
Welcome screen or Launch pad. See “The Launch pad” on page 28.
• Drag and drop one or more documents onto the Page View window.
New
Click New or use File > New to open a new blank document. The new
document appears as “Untitled” and is a PDF unless you have changed
the Edit > Preferences > New file type option.
Open
Click Open or use File > Open when you are already in Page View to
display an Open File(s) dialog. Use the Open File(s) dialog to select one
or more documents.
•Click the Page View icon when you are viewing a document displayed in Assembly or
Flick View.
NOTE: When multiple documents are opened only one is displayed. Click another tab or use Assembly
view to see all the documents.
4.2.2.1 Viewing documents and pages
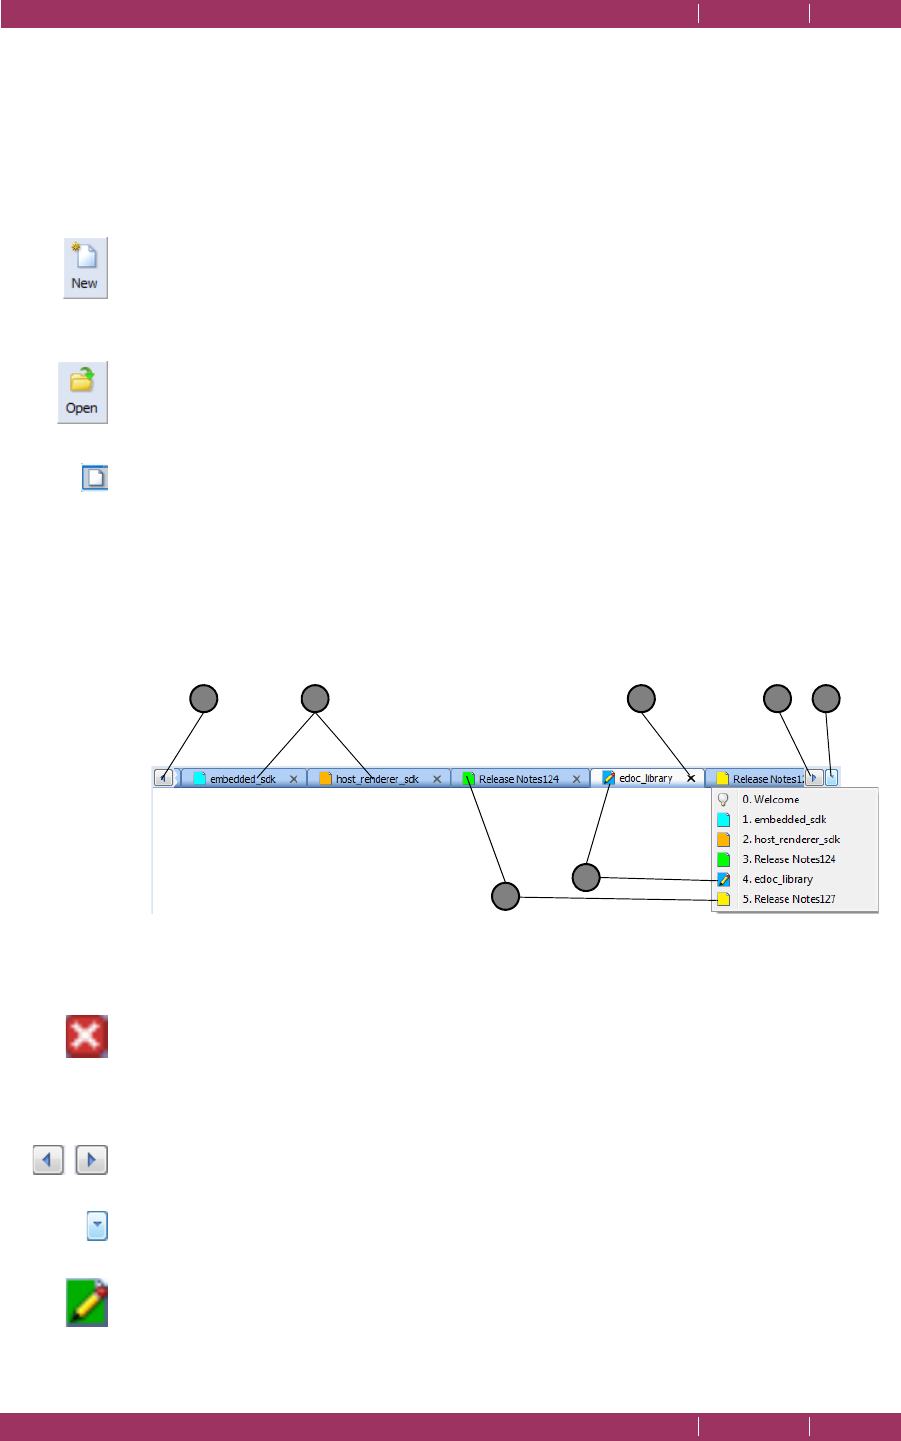
Figure 4.3 Document selection tabs
1 Click the tab of the document you want to view.
2 Click to close the document. If you have made a change but not saved, a save prompt
appears. Otherwise, the document is removed from the display. Hold Ctrl and click the
close icon to close the document without a confirmation message. That is, the document
is closed and any unsaved changes are lost.
3 Use the left/right scroll arrows when you have more documents open than can be
displayed in the tab window.
4 Click the down-arrow to display a menu with all open documents.
5 A pencil indicates that the page is modified and can be saved. Use Save As to save it
under a new name.
1 42 3
5
6
3
C
OREL
PDF F
USION
U
SER
G
UIDE
THE COREL PDF FUSION WORK AREA INDEX CONTENTS 32
THE PAGE, ASSEMBLY, FLICK AND PRESENTATION VIEW INDEX CONTENTS 32
6 An empty page icon indicates that the page is not modified and cannot be saved. It can
be Saved As a new name.
NOTE: If you are using Corel
PDF Fusion in viewer mode and take an action that changes the current
document, a message appears indicating that you can continue to view this document but saving,
printing or attaching it to an e-mail adds a watermark. Purchasing the full version removes this
restriction.
NOTE: All the tabs are color coded for ease of identification.
When you are in Page View and the hand cursor is displayed you can drag and drop
pages within the same document or to another document.
With the hand cursor displayed click the document in the main window and use your
mouse scroll wheel to scroll to the top or bottom of the page (in Single page mode), or
document (in Continuous page mode).
Click-and-drag the horizontal scroll bar to reveal more of the width of document. Click-
and-drag the vertical scroll bar to display more of the current page (in Single page mode)
or more of the document (in Continuous page mode).
The following tools are also available:
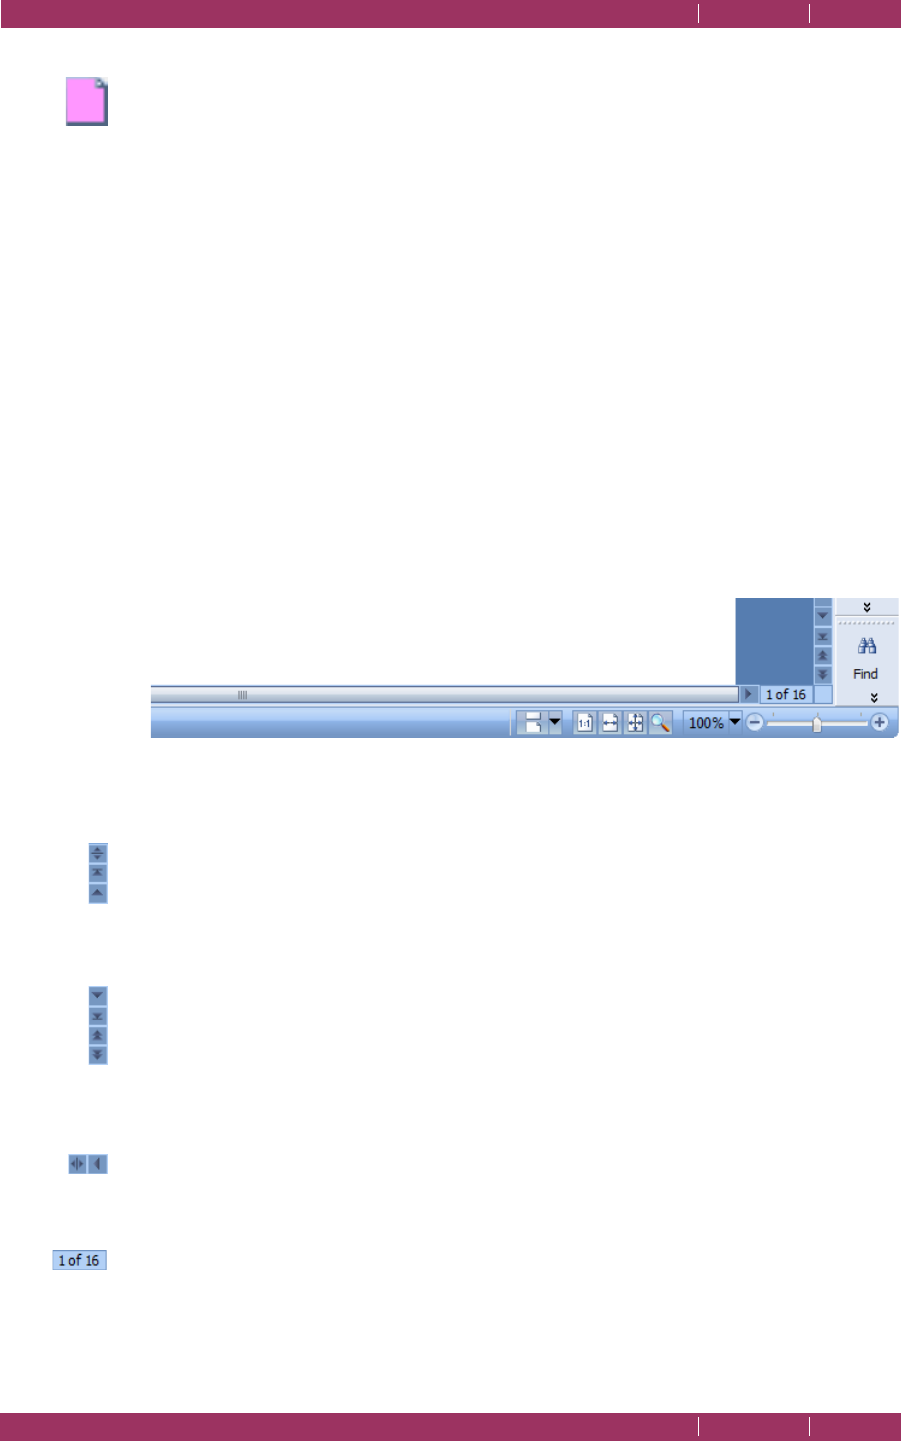
Figure 4.4 The Page View display options
Scroll icons (upper)
Click the top-most icon to show or remove the Tool icons. Click the
middle icon to display the first page in the document. Click the lowest
icon to scroll to the top of the page or document depending on whether
you are in Single or Continuous page mode.
Scroll icons (lower)
Click the top-most icon to scroll to the bottom of the page or document
depending on whether you are in Single or Continuous page mode. Click
the next icon to display the last page in the document.
Click the last two icons to page up or down through the document.
Scroll icons (left)
Click the left most icon to show or remove the Navigation pane. Click
the next icon to scroll the page to the left.
Go to page
When you click this icon a dialog appears allowing you to enter the page
number you want to display.

C
OREL
PDF F
USION
U
SER
G
UIDE
THE COREL PDF FUSION WORK AREA INDEX CONTENTS 33
THE PAGE, ASSEMBLY, FLICK AND PRESENTATION VIEW INDEX CONTENTS 33
Scroll icons (right)
Click this icon situated at the lower right of the window to scroll the page
to the right.
Continuous page mode
In this mode, click the page and then use the hand icon to scroll the
document. Alternatively, click-and-drag the ver tical scroll bars or use the
mouse wheel to scroll through the document.
Single page mode
In this mode, click the page and use the hand icon to scroll around the
page. Alternatively, click-and-drag the vertical scroll bars or use the
mouse wheel to scroll to the top or bottom of the page.
Actual Size
The document is viewed at actual size.
Fit to Width
The document is zoomed to fit the width of the main document
window.
Fit to Page
The document is zoomed so that a single page fits into the document
window.
Magnification
The cursor is changed to a magnifying glass icon and, when clicked on
the page, is used to increase the magnification. Hold Ctrl and click to
reduce the magnification. A marquee zoom option is provided which lets
you choose an area of the page to zoom. Select the Magnifying glass icon
and click-and-drag the area of the page you want to zoom. Holding Ctrl
with click-and-drag reduces the zoom level.
Click the magnifying glass icon again to turn off the zoom option.
Alternatively, use Ctrl + and Ctrl - to change the magnification.
Zoom levels
Select from a number of pre-defined magnification options.
Page Zoom
Use the slider to increase or reduce the magnification factor of the
whole document (in Continuous page mode), or the current page (in
Single page mode).
Go to
Click View > Go to and select First Page, Previous Page, Next Page or
Last Page. Click View > Go to > Page and enter a page number to view.
C
OREL
PDF F
USION
U
SER
G
UIDE
THE COREL PDF FUSION WORK AREA INDEX CONTENTS 34
THE PAGE, ASSEMBLY, FLICK AND PRESENTATION VIEW INDEX CONTENTS 34
4.2.2.2 Page View selection options
In Page View the cursor dynamically changes according to the selection context. When
hovering over text it appears as an I-beam (allowing you to make text selections). When
hovering over an empty part of the page it changes to a “hand” icon (allowing you to
click-and-drag the page). Press and hold Shift and left-click to display the cursor as a
crosshair allowing area selections.
• When the hand cursor is displayed you can drag-and drop the page to the limits of the
scroll bars. This depends on the “Continuous page mode” or “Single page mode”
selection.
• When you move the cursor over text on the page it changes to an I-beam which you
can use to click-and-drag to select various amounts of text. On release of the mouse
button the following menu appears:
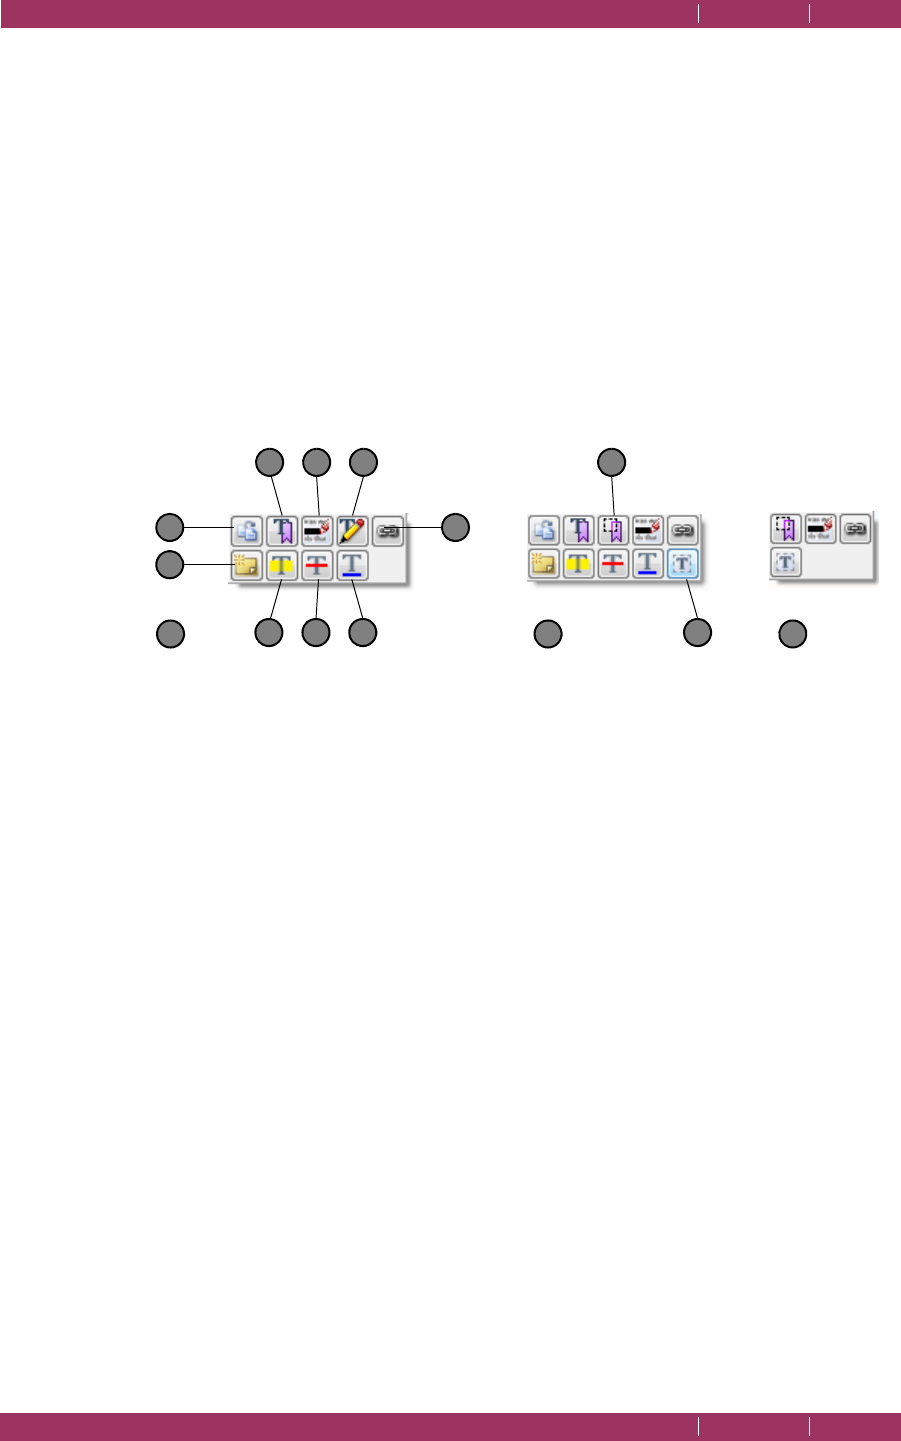
Figure 4.5 The text and area selection context menus
NOTE: If you prefer you can decide not to show the context sensitive menu bar by changing an option
under Preferences. For more information see
“Set up your preferences” on page 52
.
Menu A appears when text is selected. Menu B appears when an area of text is selected
(press and hold Shift and left-click). Menu B appears when a blank page area is selected
(press and hold Shift and left-click).
1 Copies the selected text onto the clipboard. This text can subsequently be pasted into
the Text Correction dialog (for example).
2 Lets you create a bookmark for the selected text or area. When the button is released
the Bookmark Properties dialog appears. See “Bookmark properties” on page 96 for
more information.
3 Redacts the selected text or area.
4 Displays a Text Correction dialog into which you can enter the text to replace the
selected text. Generally, the new text keeps the same format (font, size and so on) as
the selected text. Some characters may not be available.
Text re-flow is restricted to single lines of text. That is, no “word wrap” is provided. Also,
text shifted off the side of the page will be clipped.
NOTE: Text correction is only possible when the document security allows text editing.
5 Add a hyperlink to the selected text or area. For more information see “Add hyperlinks”
on page 78.
1
5
9
32 4
78 6 11
A B C
10
C
OREL
PDF F
USION
U
SER
G
UIDE
THE COREL PDF FUSION WORK AREA INDEX CONTENTS 35
THE PAGE, ASSEMBLY, FLICK AND PRESENTATION VIEW INDEX CONTENTS 35
6 Adds an underline to the selected text. Double-click the underlined text to add a text
comment
. Click the close icon in the top right corner to close the comment box.
7 Adds a strike-out to the selected text. Double-click the strike-out text to add a text
comment
. Click the close icon in the top right corner to close the comment box.
8 Highlights the selected text. Double-click the highlighted text to add a text comment.
Click the close icon in the top right corner to close the comment box.
9 Lets you create a new note for the selected text. When the button is released a note
appears containing the previously selected text. For more information see “Working
with comments and annotations” on page 98.
10 Lets you create a bookmark for an area. When the button is released the Bookmark
Properties dialog appears. See “Bookmark properties” on page 96 for more
information.
11 Allows you to add free text annotations to the selected area. For more information see
“Add free text annotations” on page 77.
4.2.2.3 Page View right-click menu options
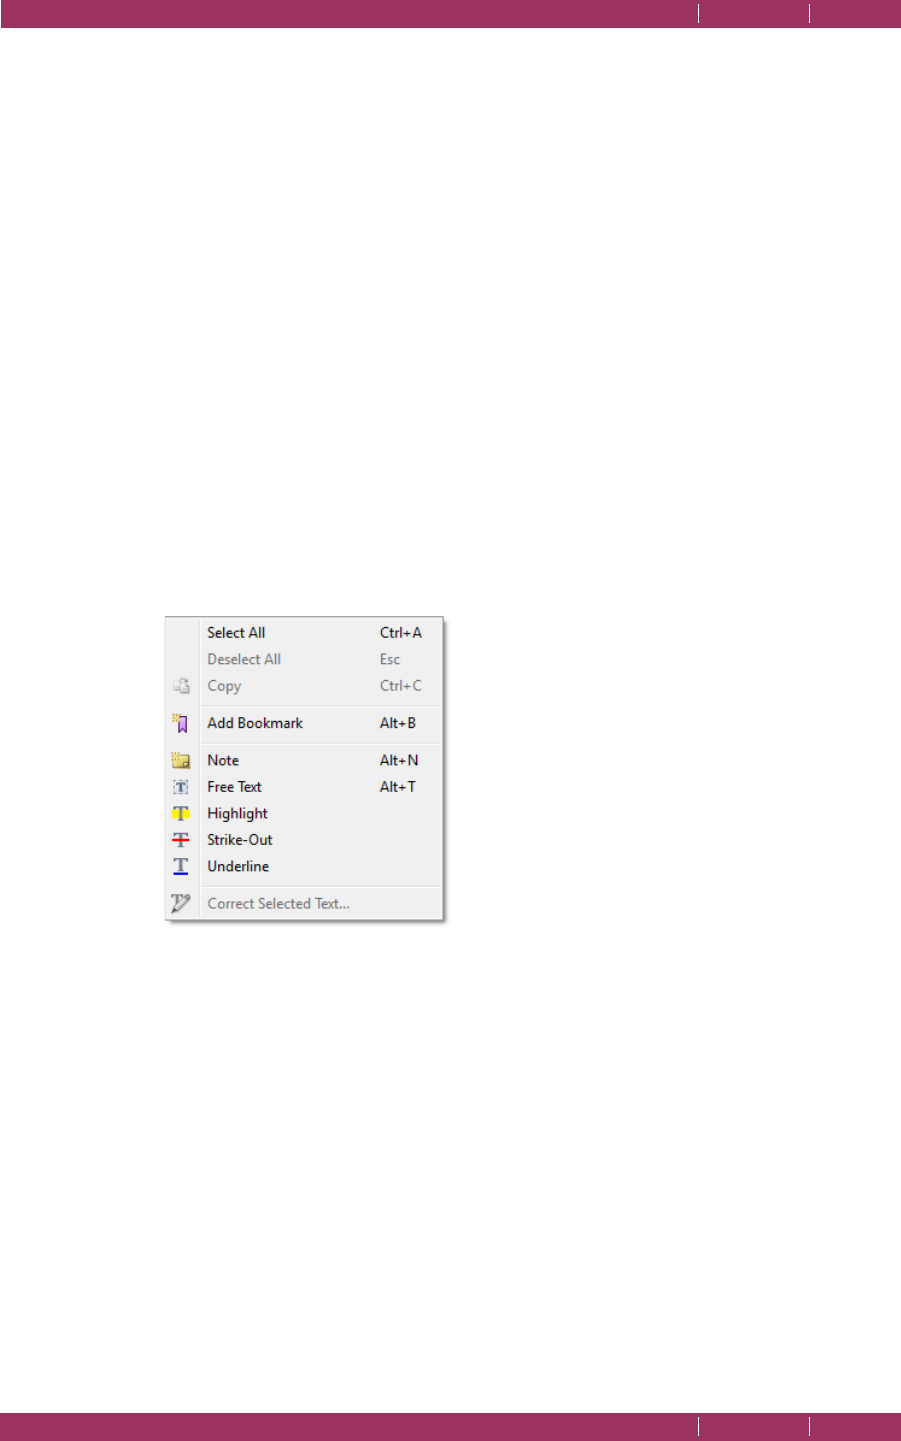
Select a page in Page View and right-click to display the following menu:
Figure 4.6 Page View right-click menu
Select All
Selects all items in the document.
Deselect All
Deselects all selected items.
Copy
Copies onto the clipboard text items selected on the page. The copied
text can be pasted into another application such as Notepad.
Add Bookmark / Add Text Bookmark
Lets you apply Bookmark properties to the selected area or selected
text. For more information see “Bookmark properties” on page 96.

C
OREL
PDF F
USION
U
SER
G
UIDE
THE COREL PDF FUSION WORK AREA INDEX CONTENTS 36
THE PAGE, ASSEMBLY, FLICK AND PRESENTATION VIEW INDEX CONTENTS 36
Note
Lets you create a new note on the page. When the button is released a
note appears. For more information see “Working with comments and
annotations” on page 98.
Free Text
Lets you add new text anywhere on the page. This text can remain as
an annotation or can be “flattened” to become part of the page. For
more information see “Free text annotations” on page 102.
Highlight
Applies a highlight to the selected text.
Strike-Out
Applies a strike-out to the selected text.
Underline
Applies an underline to the selected text.
Correct selected text...
This is only available when text is selected. It displays a Text Correction
dialog into which you can enter the text to replace the selected text.
Generally, the new text keeps the same format (font, size and so on) as
the selected text. Some characters may not be available.
Text re-flow is restricted to single lines of text. That is, no “word wrap”
is provided. Also, text shifted off the side of the page will be clipped.
NOTE: Text correction is only possible when the document security allows text editing.
4.2.2.4 Page View menu options
The Crop page option is available from the Document > Pages menu:
Figure 4.7 Document menu options available in Page View
For more information about cropping see “Crop Pages” on page 46.
4.2.3 Assembly View
Assembly View displays your open documents as rows of page thumbnails. One
document is designated the “target” document and occupies a fixed position at the top
of the screen. The “source” documents occupy a scrollable region below the target.
Pages can be freely copied between any of the source documents and the target
C
OREL
PDF F
USION
U
SER
G
UIDE
THE COREL PDF FUSION WORK AREA INDEX CONTENTS 37
THE PAGE, ASSEMBLY, FLICK AND PRESENTATION VIEW INDEX CONTENTS 37
document. It is important to note, however, that pages can be copied in any direction
between any of the visible documents, but the usual requirement is to build the target
document from pages found in the source documents.
In this view you can delete, rotate, reorder, insert pages and merge documents.
If you decide to move another document to the top of the screen, designating it as the
target, a message appears. You can check Don't show me this again so that this message
is not displayed again.
When you first open Assembly View a help screen is displayed containing useful
information on how to use this view. Once you have read this screen click Close to
remove it. To prevent this help screen from appearing again select Do not show me this
again.
Use the following options to display a document in Assembly View:
• Drag and drop one or more documents onto the Assembly View area displayed on the
Welcome screen or Launch pad. See “The Launch pad” on page 28.
• Drag and drop one or more documents onto the Assembly View window.
• Drag and drop pages or page stacks onto the Assembly View window.
New
Click New or use the File > New to open a new blank document. The
new document is “Untitled” and is a PDF unless you have changed the
Edit > Preferences > View > New File Type option.
Open
Click Open or use File > Open when you are already in Assembly View
to display an Open File(s) dialog to select one or more documents.
• When viewing a document displayed in Page or Flick View click the Assembly View icon.
Drag-and drop pages in Assembly View to re-order them within a single document or
add pages from other documents.
If you attempt to drag-and-drop pages in a document containing more pages than can
be displayed, the document automatically scrolls when you reach the left or right side of
the Assembly View window.
When several documents are open, click on the tab of the document you want to view.
4.2.3.1 Viewing documents and pages
In Assembly View click the title bar containing the name of the document you want to
view:
Figure 4.8 Assembly View title bars
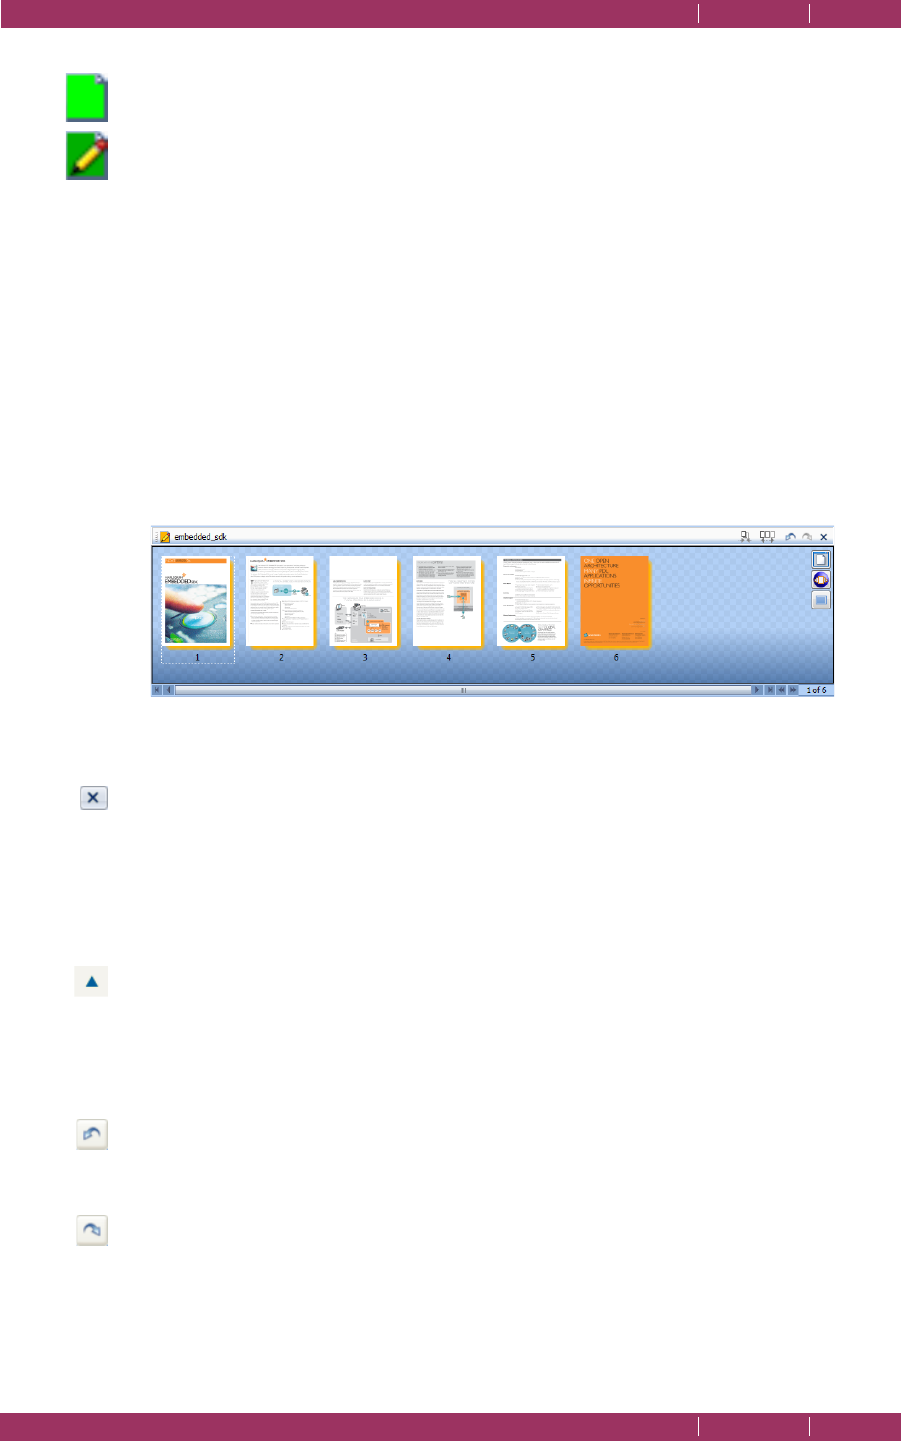
C
OREL
PDF F
USION
U
SER
G
UIDE
THE COREL PDF FUSION WORK AREA INDEX CONTENTS 38
THE PAGE, ASSEMBLY, FLICK AND PRESENTATION VIEW INDEX CONTENTS 38
• When a title bar contains an empty page icon it has not been modified and cannot be
saved. You can, however, use Save As to save it under a new name.
• When a title bar contains a pencil it has been modified and can be saved. You can also
use Save As to save it under a new name.
NOTE: All the title bars are color coded for ease of identification.
In Assembly View drag and drop one or move pages to a new position in the current
document or from one document to another.
If you attempt to drag-and-drop pages in a large document, the document automatically
scrolls when you reach the left or right side of the Assembly View window.
Double-click a page within a document to display a magnified preview of the page. Click
again and the preview is removed.
Click-and-drag the horizontal scroll bar to reveal more pages of the document.
The following tools are also available:
Figure 4.9 The Assembly View display options
Close document
Click or select File > Close to close the document. If you have made a
change but not saved, a save prompt appears. Otherwise, the document
is removed from the display. Hold Ctrl and click the close icon to close
the document without a confirmation message. That is, the document is
closed and any unsaved changes are lost.
Title bar
Click to reduce the displayed document to its title bar. Click again to re-
display the document. This tool only appears for source documents. The
target document, displayed at the top of the Assembly View window,
cannot be reduced to only its title bar.
Undo
Click to undo your last action. All undo steps are retained until you save
the file. Once saved, all levels of undo are discarded.
Redo
Click to redo your last action. All redo steps are retained until you save
the file. Once saved, all levels of redo are discarded.
C
OREL
PDF F
USION
U
SER
G
UIDE
THE COREL PDF FUSION WORK AREA INDEX CONTENTS 39
THE PAGE, ASSEMBLY, FLICK AND PRESENTATION VIEW INDEX CONTENTS 39
Stack / Unstack
Click to stack the currently selected pages and unstack the currently
selected stacks or use Ctrl < and Ctrl >. When pages are already
stacked you can select them and add them to another stack. You can
drag and drop, insert, extract, move, delete, rotate and copy and paste
page stacks in exactly the same way as pages.
NOTE: You cannot undo/redo page stacking. Therefore, when a stack is merged into another stack, the
original stack is lost and cannot be recovered, and when a stack is deleted, the stack cannot be
recovered by undo. The pages are recovered but they will be unstacked.
NOTE: Page stacks do not affect the saved file at all. They persist only for the current session, that is, stacks
disappear when the document is saved, reopened or the application is restarted. Page stacks are
maintained when changing views.
Scroll icons
Click to scroll page-by-page, move to the end of the document, scroll 10
pages at a time to the left, and scroll 10 pages at time to the right.
Scroll icons
Click to scroll to the start of the document, and to scroll page-by-page
to the left.
Page number
Click and enter the page number you want to view.
Go to
Click View > Go to and select First Page or Last Page. Click View > Go
to > Page... and enter a page number to view.
4.2.3.2 Assembly View page selection options
In Assembly View you can:
• Click a page to select it.
•Use Ctrl click to select more pages.
•Use Shift click to select a series of pages.
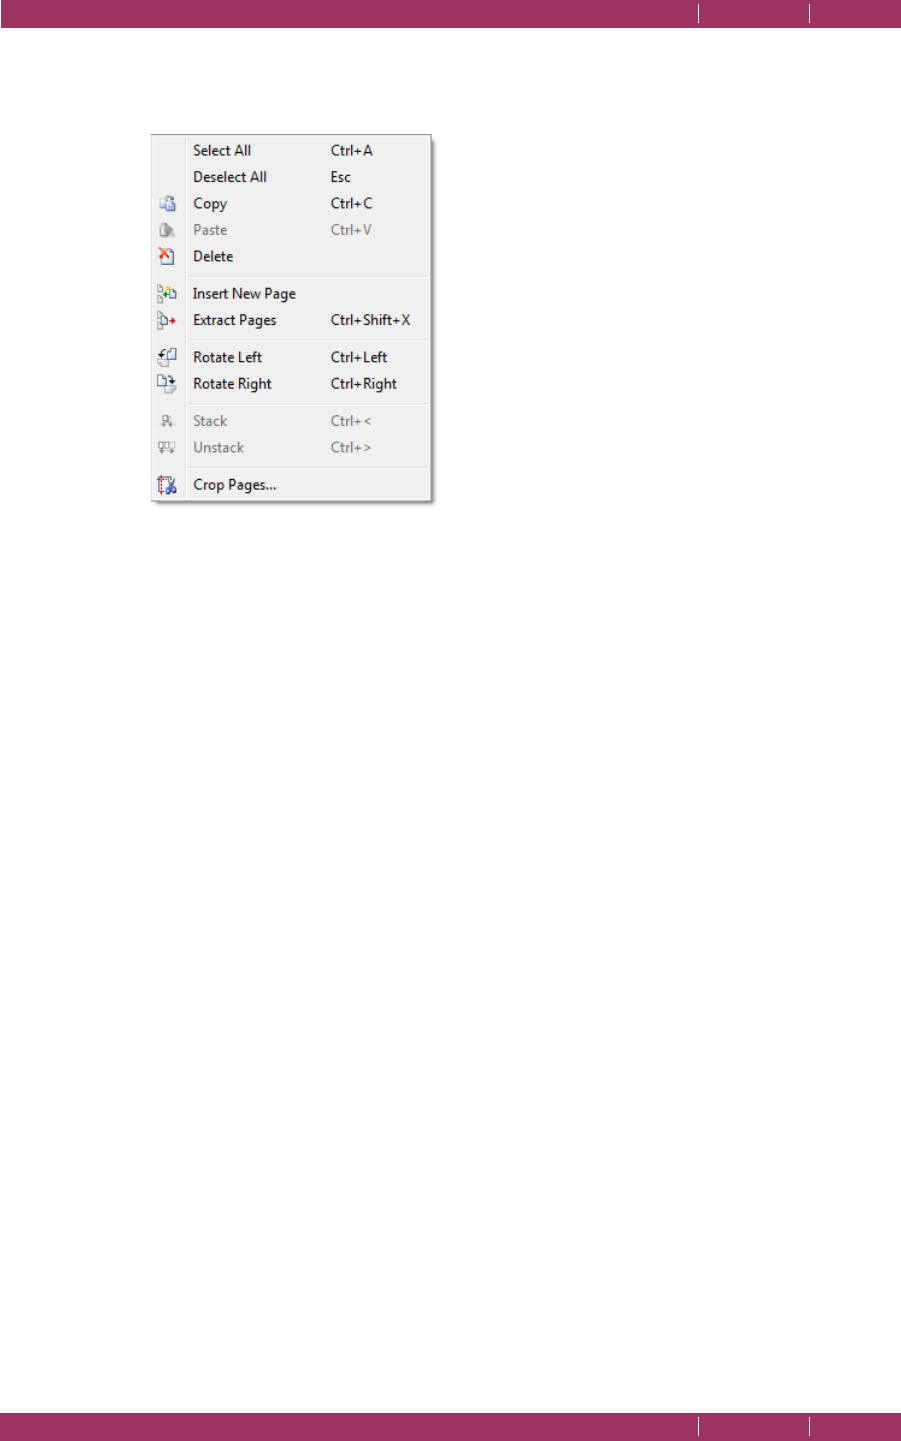
C
OREL
PDF F
USION
U
SER
G
UIDE
THE COREL PDF FUSION WORK AREA INDEX CONTENTS 40
THE PAGE, ASSEMBLY, FLICK AND PRESENTATION VIEW INDEX CONTENTS 40
4.2.3.3 Assembly View right-click menu options
Select one or more pages in Assembly View and right-click to display the following menu:
Figure 4.10 Assembly View right-click menu
Select All
Select all pages in the current document.
Deselect All
Deselect all pages in the current document.
Copy
Copy the currently selected pages onto the clipboard.
Paste
Paste the currently selected pages.
Delete
Delete the currently selected pages.
Insert New Page
Insert a new empty page to the left of the currently selected page.
Extract Pages
Create a new document containing the extracted pages.
Rotate Left / Rotate Right
Rotate the currently selected pages left or right by 90 degrees.
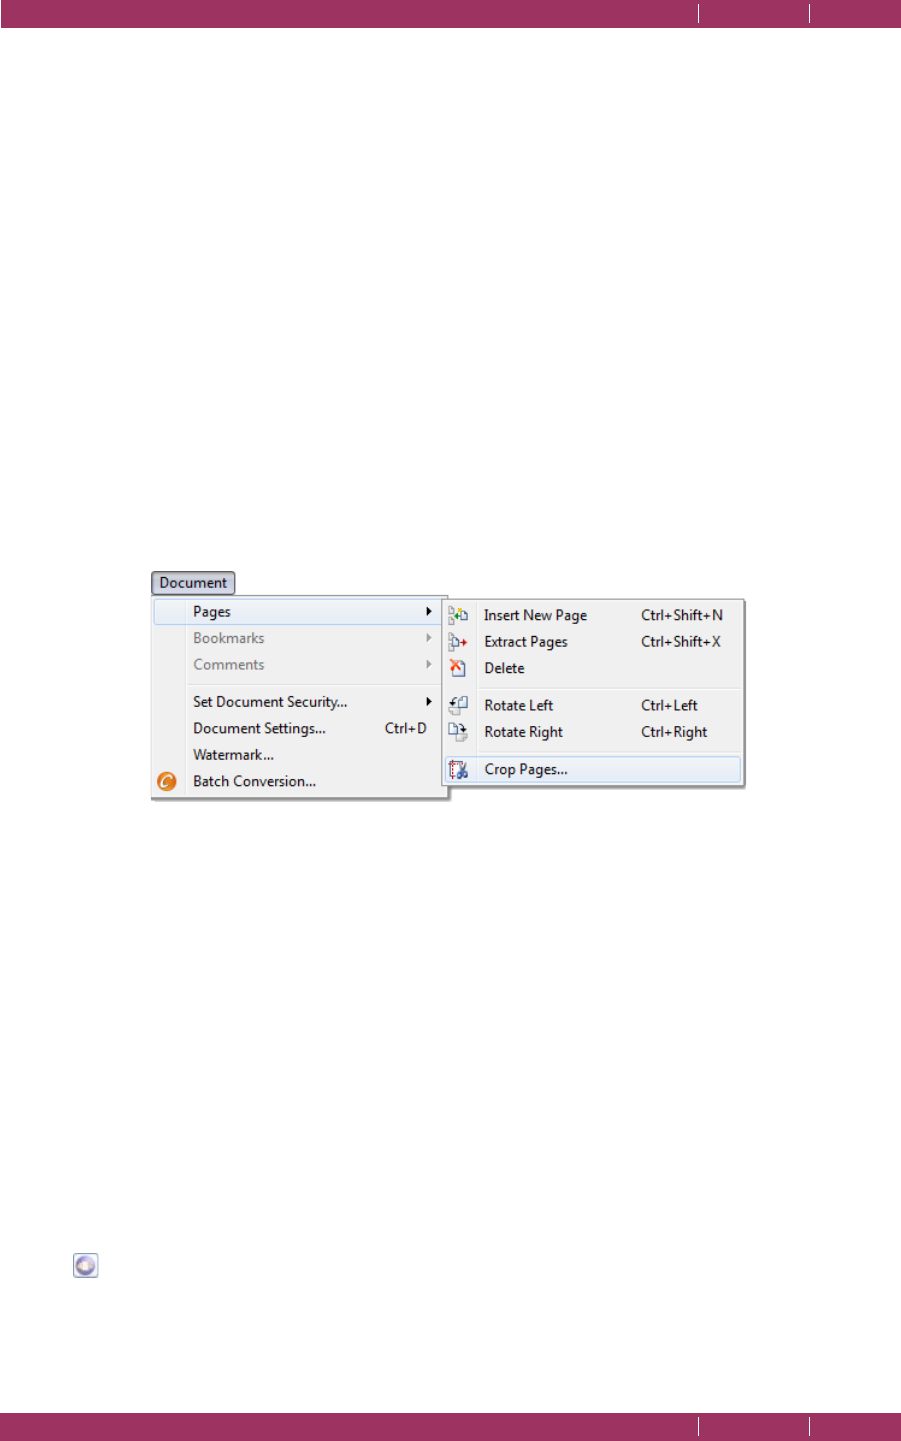
C
OREL
PDF F
USION
U
SER
G
UIDE
THE COREL PDF FUSION WORK AREA INDEX CONTENTS 41
THE PAGE, ASSEMBLY, FLICK AND PRESENTATION VIEW INDEX CONTENTS 41
Stack / Unstack
Stack the currently selected pages and unstack the currently selected
stacks or use Ctrl < and Ctrl >. When pages are already stacked you
can select them and add them to another stack. You can drag and drop,
insert, extract, move, delete, rotate and copy and paste page stacks in
exactly the same way as pages.
NOTE: You cannot undo/redo page stacking. Therefore, when a stack is merged into another stack, the
original stack is lost and cannot be recovered, and when a stack is deleted, the stack cannot be
recovered by undo. The pages are recovered but they will be unstacked.
NOTE: Page stacks do not affect the saved file at all. They persist only for the current session, that is, stacks
disappear when the document is saved, reopened or the application is restarted. Page stacks are
maintained when changing views.
Crop Pages
For more information see “Crop Pages” on page 46.
4.2.3.4 Assembly View menu options
The following options are available from the Document > Pages menu:
Figure 4.11 Document menu options available in Assembly View
For more information about cropping see “Crop Pages” on page 46.
4.2.4 Flick View
Flick View allows you to explore a single document.
Use the following methods to view a document in Flick View:
• Drag and drop one or more documents onto the Flick View area displayed on the
Welcome screen or Launch pad.
• Drag and drop one or more documents onto the Flick View window.
• When you are already in Flick View use File > Open to display an Open File(s) dialog to
select one or more documents.
•
Click the
Flick view
icon
when viewing a document displayed in Page or Assembly View.
NOTE: When multiple documents are opened only one is displayed. Use Assembly view to see all the
documents.
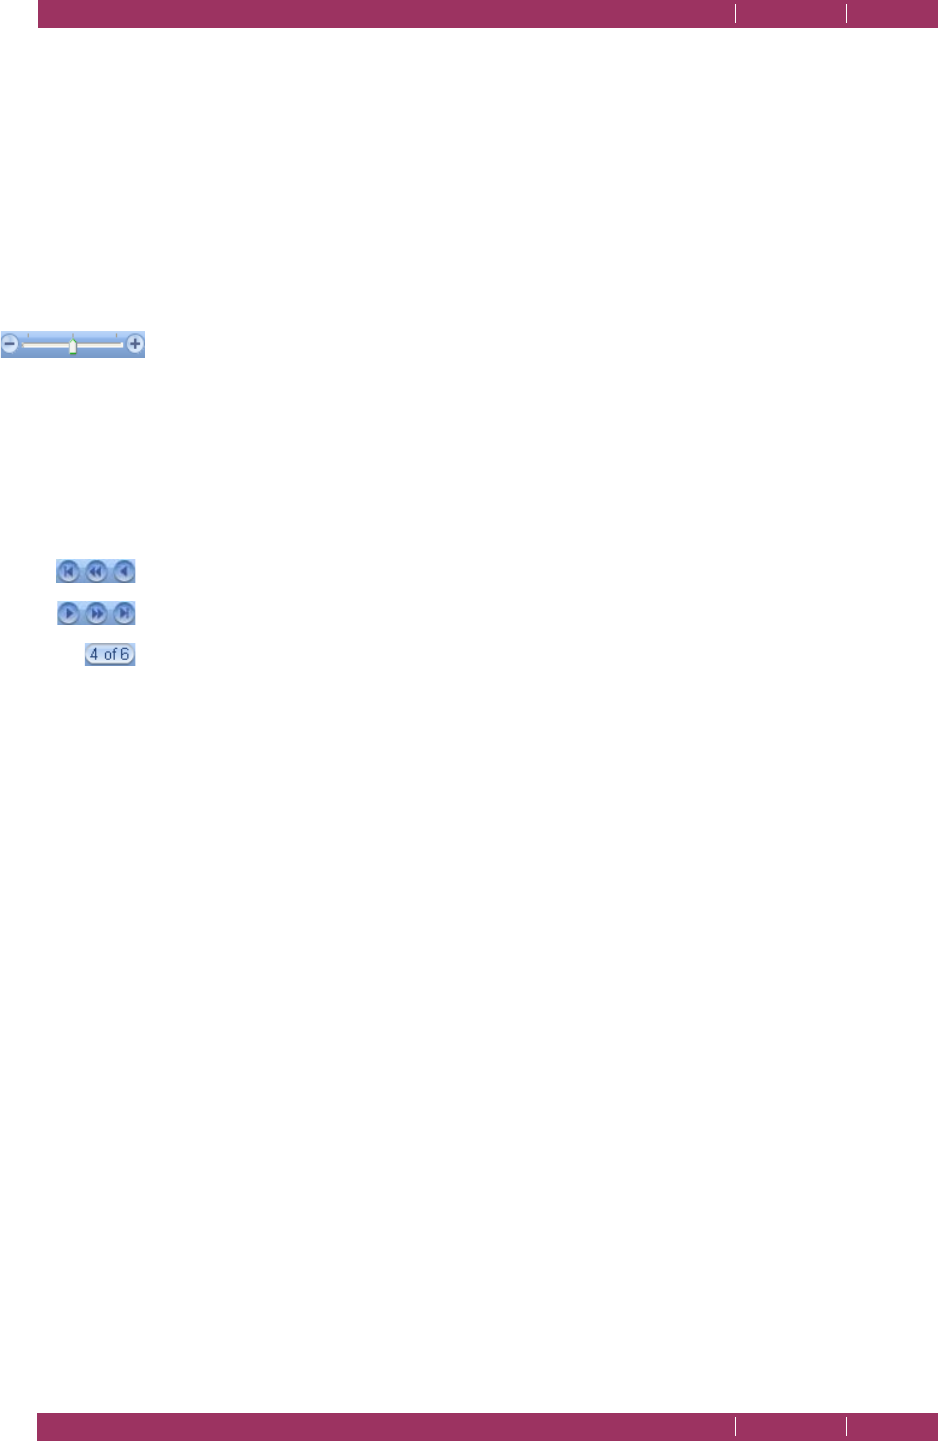
C
OREL
PDF F
USION
U
SER
G
UIDE
THE COREL PDF FUSION WORK AREA INDEX CONTENTS 42
THE PAGE, ASSEMBLY, FLICK AND PRESENTATION VIEW INDEX CONTENTS 42
4.2.4.1 Flick View controls
The control of the document in Flick View is interactive, that is, when you click-and-drag
a page, the distance you drag determines the speed at which the pages rotate. A small
distance and the pages rotate slowly; a larger distance and the pages rotate more quickly.
When you get to the page you want to view, click to stop.
NOTE: The resources available to the computer determine the amount of interactivity available. A more
powerful computer reacts better than a lower specification computer.
When a document is displayed in Flick View the following controls are available:
• Use the mouse wheel to increase or decrease the magnification. This is the same as using
the Zoom Tool.
• Click-and-drag left or right to flick the document in either direction. The distance you
click-and-drag determines the speed of rotation.
•Click to stop.
• Double-click any page to display it in full screen view. Click it again to return to Flick View.
• Use the icon controls to; display the first page, flick quickly left or flick slowly left.
• Use the icon controls to; flick slowly right, flick quickly right or to display the last page.
• Click to display a dialog allowing you to enter the page number you want to view.
4.2.5 Presentation View
Presentation view allows you to view each page of a single document in full screen mode.
Use the following methods to view a document in Presentation View:
• Select View > Presentation.
• Press F7.
4.2.5.1 Presentation View controls
When a document is displayed in Presentation View the following controls are available:
• Press Esc to return to your previous view.
• Use the mouse wheel to scroll through the document.
•Use Page Up and Page Down to page through the document.
•Use Home and End to go to the first and last page.
•Use Ctrl + and Ctrl - to change the magnification.
NOTE: Comments and annotations are displayed in Presentation View. They cannot, however, be moved
or changed, and Notes cannot be opened.
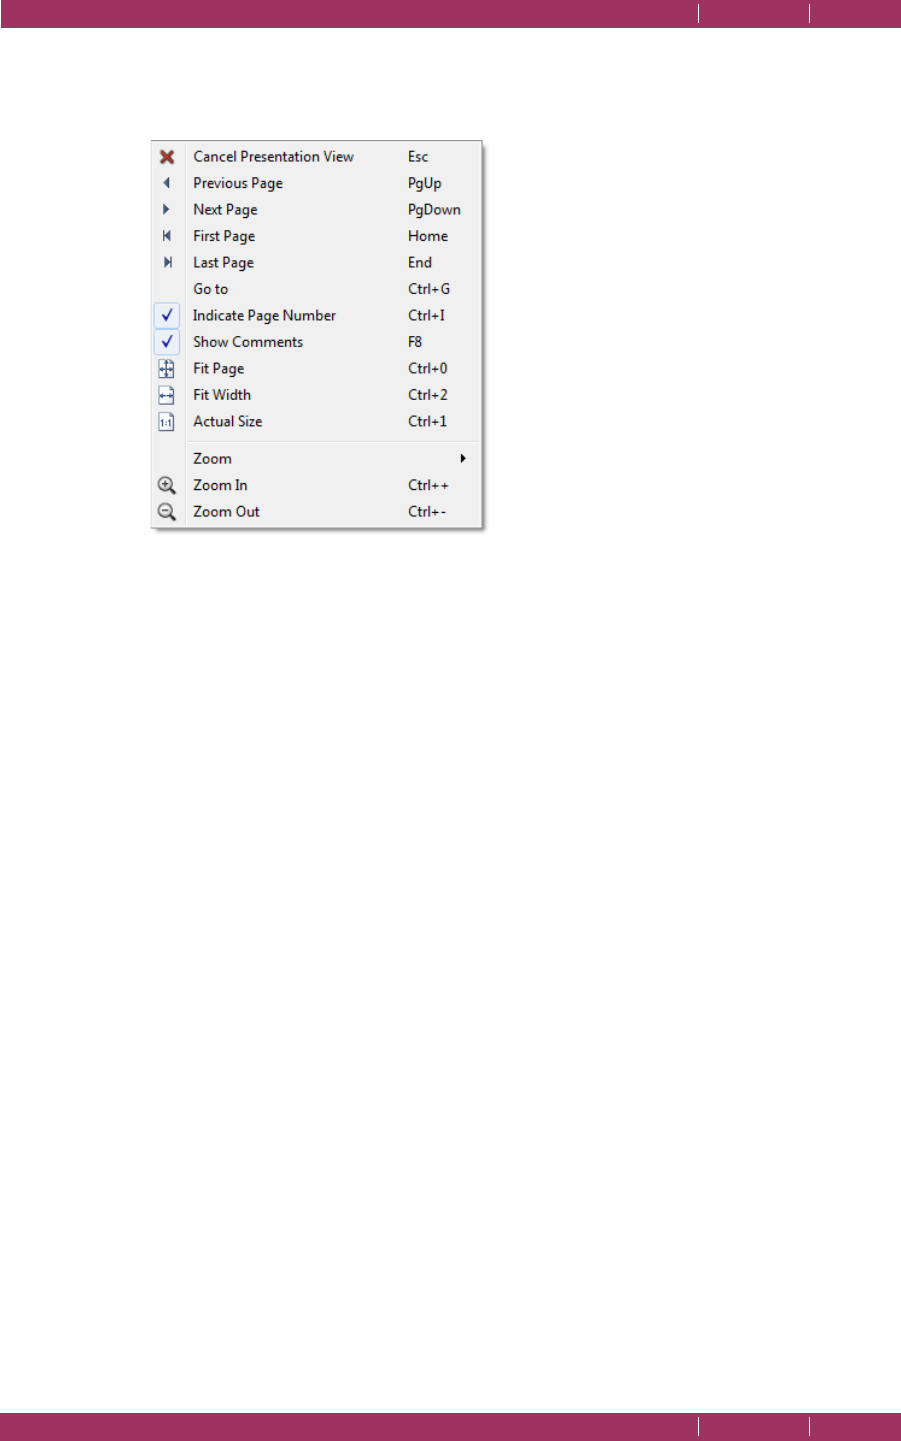
C
OREL
PDF F
USION
U
SER
G
UIDE
THE COREL PDF FUSION WORK AREA INDEX CONTENTS 43
THE PAGE, ASSEMBLY, FLICK AND PRESENTATION VIEW INDEX CONTENTS 43
4.2.5.2 Presentation View right-click menu options
In Presentation View use right-click to display the following menu:
Figure 4.12 Presentation View right-click menu
Cancel Presentation View
Use this to cancel Presentation View.
Previous / Next / First / Last Page
These options provide navigation through the document.
Go to
When selected, enter the number of the page you want to view.
Indicate Page Number
Use this to remove the page number displayed in the top left corner of
the screen.
Show Comments
Use this to hide or show comments. Redacted text remains obliterated.
Fit Page / Fit Width / Actual Size
You can choose to fit the page to the screen, fit the width of the page to
the screen, or view the page at actual size.
Zoom / Zoom In / Zoom Out
Use these options to magnify the page.

C
OREL
PDF F
USION
U
SER
G
UIDE
THE COREL PDF FUSION WORK AREA INDEX CONTENTS 44
THE NAVIGATION PANE INDEX CONTENTS 44
4.3 The Navigation pane
The Navigation pane is visible only when Page View is selected (see “Page View” on
page 30). Pages, Comments and Bookmarks are viewed in the Navigation pane.
Use the following actions:
• Press F9, select Windows > Show Navigation or click the Navigation pane icon at the
lower left of the Page view window to show or hide the Navigation pane.
• Click the Pages, Bookmarks or Comments tab to view those items. For more information
see “Pages” on page 44, “Bookmarks” on page 48 and “Comments” on page 48.
4.3.1 Common controls
The following options are available when either the Pages, Comments and Bookmarks
tab is selected.
• Drag and drop the Pages, Comments or Bookmarks title bar to re-position the pane.
• Click the icon in the top right corner of the title bar to move the pane to its last
undocked position.
• Use the vertical scroll bar to move to the start or the end of the document.
4.3.2 Pages
When pages are displayed in the Navigation pane you can:
• Click any page to display it in the Page View window.
• Click any page and use your scroll wheel to scroll through the document.
•Use Page Up and Page Dn to page through the document.
•Use Home and End to move to the first or last page.
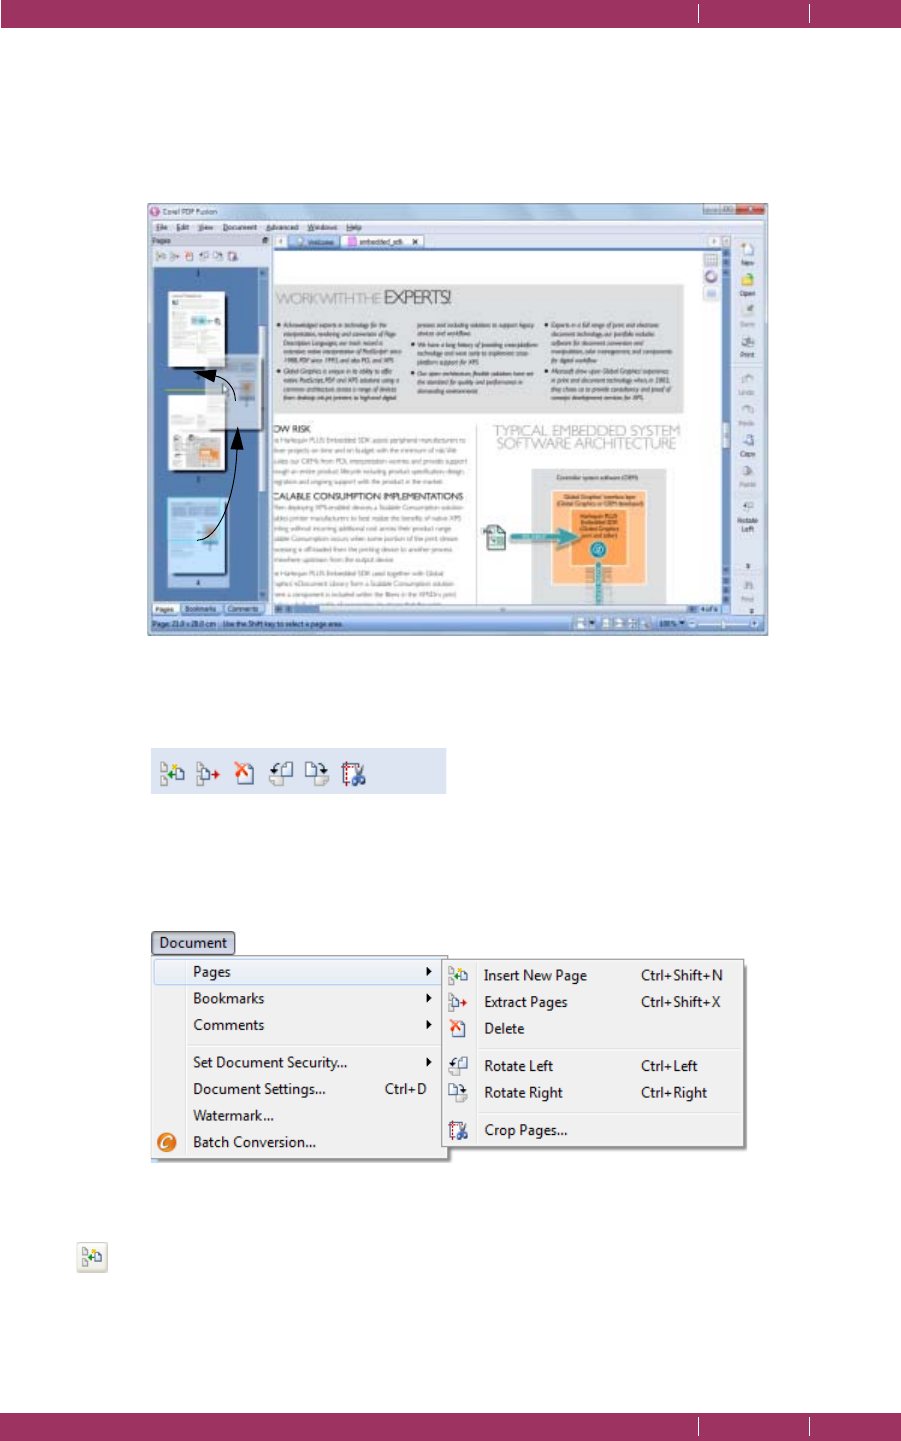
C
OREL
PDF F
USION
U
SER
G
UIDE
THE COREL PDF FUSION WORK AREA INDEX CONTENTS 45
THE NAVIGATION PANE INDEX CONTENTS 45
• Drag and drop any page to a new position in the document as shown below. Note the
yellow indicator identifying the location of the inserted page.
NOTE: If you attempt to drag-and-drop pages in a document containing more pages than can be
displayed, the document scrolls when you reach the top or bottom of the Navigation pane.
Figure 4.13 Drag and drop pages in the navigation pane
When a page is selected the following tools are also available:
Figure 4.14 Tool options available in Navigation pane Pages tab
When a page is selected the following options are also available from the Document >
Pages menu:
Figure 4.15 Document menu option available in the Navigation pane Pages tab
Insert New Page
Select the Insert New Page icon or Document > Pages > Insert New
Page to insert a blank page above the currently selected page.
C
OREL
PDF F
USION
U
SER
G
UIDE
THE COREL PDF FUSION WORK AREA INDEX CONTENTS 46
THE NAVIGATION PANE INDEX CONTENTS 46
Extract Pages
Select the Extract Pages icon or Document > Pages > Extract Pages to
extract the selected pages and create a new untitled document
containing those pages.
Rotate Left
Select the Rotate Left icon or Document > Pages > Rotate Left to
rotate the selected pages 90 degrees to the left.
Rotate Right
Select the Rotate Right icon or Document > Pages > Rotate Right to
rotate the selected pages 90 degrees to the right.
Crop Pages
Select the Crop Pages icon or Document > Pages > Crop Pages to
display a Crop page(s) dialog. You specify the size of your crop and the
range of pages to which it is applied in this dialog. A fixed size such as
Letter, A4 can be selected. Alternatively, choose a custom crop size. Your
selected crop is applied to the current page, selected pages or all pages.
In the Size panel the following options are available:
Crop to fixed size lets you select a predefined crop size such as A4, A5,
Letter. The crop is normally measured from the top and left side of the
page. Select Centered to apply the crop centrally.
The thumbnail view of the page on the Crop Pages dialog displays the
areas to be cropped as shaded.
Select Static values to apply a custom crop size. Select your preferred
units from the drop-down menu. Constrain values makes all values the
same. Uncheck this to insert different values for the Top, Bottom, Left
and Right.
The values around the thumbnail image define the size of the crop. You
can either directly enter a number or use the up and down arrows.
The Apply To panel determines the pages to be cropped. Select the
Entire document, Selected Pages or a Range of pages. If you have
selected an area on a page you can select the Current page option. You
enter a Range of pages such as 2-4 to only crop pages numbered 2, 3
and 4.
The Crop drop-down menu allows you to apply the crop to All pages
in range, Odd-numbered pages in range and Even-numbered pages in
range. Therefore, if you have selected the whole document or a range
of pages you can apply the crop to the whole range or just the odd or
even numbered pages.
Select OK to accept your crop values or Cancel to abort them.
NOTE: If cropping values that exceed the page size are entered, the values are ignored and no cropping
is performed.
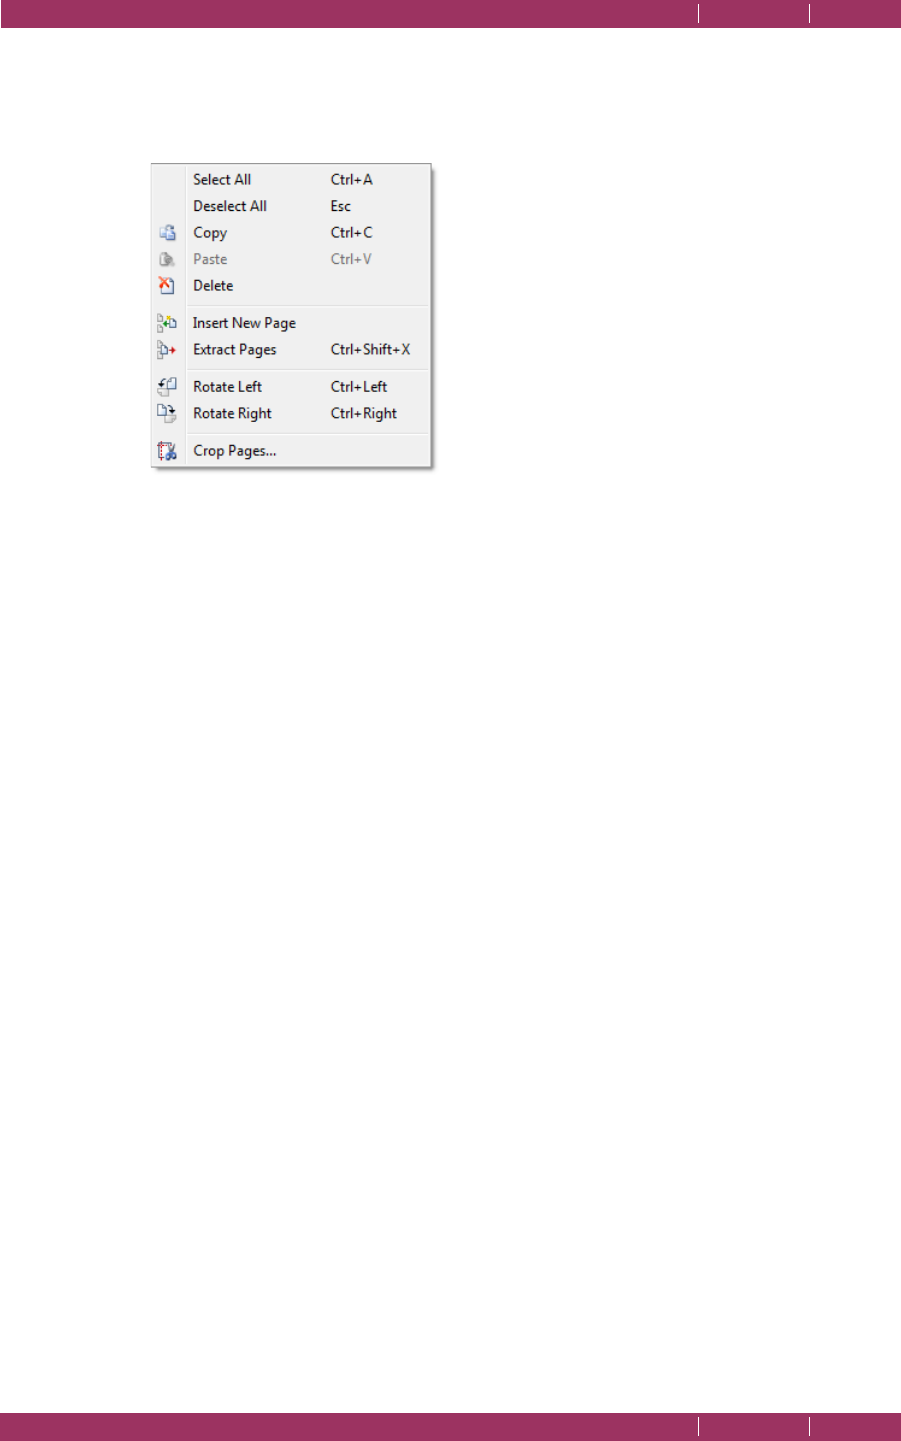
C
OREL
PDF F
USION
U
SER
G
UIDE
THE COREL PDF FUSION WORK AREA INDEX CONTENTS 47
THE NAVIGATION PANE INDEX CONTENTS 47
4.3.2.1 Navigation pane right-click menu options
When you select a page in the navigation pane you can display a right-click menu. The
following options are available:
Figure 4.16 Navigation pane right-click menu
Select All
Select all items on the page.
Deselect All
Deselect any selected items on the page.
Copy
Copy onto the clipboard the selected pages.
Paste
Paste the pages previously copied to the clipboard above the currently
selected page.
Delete
Select the pages to be deleted and click Delete to remove the pages.
Insert New Page
Insert a new blank page into your document. The new page is placed
above the currently selected page.
Extract Pages
Extract the selected pages and create a new untitled document
containing those pages.
Rotate Left
Rotate the selected pages 90 degrees to the left.
Rotate Right
Rotate the selected pages 90 degrees to the right.
Crop Pages
For more information see “Crop Pages” on page 46.

C
OREL
PDF F
USION
U
SER
G
UIDE
THE COREL PDF FUSION WORK AREA INDEX CONTENTS 48
CUSTOMIZE YOUR WORK AREA INDEX CONTENTS 48
4.3.3 Bookmarks
For all the information related to bookmarks see “Working with bookmarks” on
page 93.
4.3.4 Comments
For the all the information related to comments and annotations see “Working with
comments and annotations” on page 98.
4.4 Customize your work area
You can customize the work area to suit your own personal preferences.
There are three main aspects to customizing your work area:
•“Customize the Navigation pane” on page 49
•“Drag and drop a pane on top of another pane” on page 51
•“Set up your preferences” on page 52
You don’t have to customize anything—many users are happy with the way the tools and
windows of Corel PDF Fusion are laid out. However, you can use the following methods
to change Corel PDF Fusion to suit your personal preferences.
If you change the size or location of the Welcome screen and re-star t the application, it
reappears in your last selected state.
4.4.1 The Windows menu
You can chose to show or hide various menus and toolbars. A tick in the menu indicates
an item is shown. The following options are available:
Show Navigation (F9)
Display or hide the Navigation pane.
Show Menu (F10)
Display of hide the menu toolbar.
Show Toolbars (F11)
Display or hide the icon toolbars.
Show Statusbar (F12)
Display or hide the message window.
4.4.2 The Help menu
This provides various options to show or hide menus and toolbars. A tick in the menu
indicates an item is shown. The following options are available:
To o l t i p s
Show or hide text tips that appear when the cursor moves over an
option.
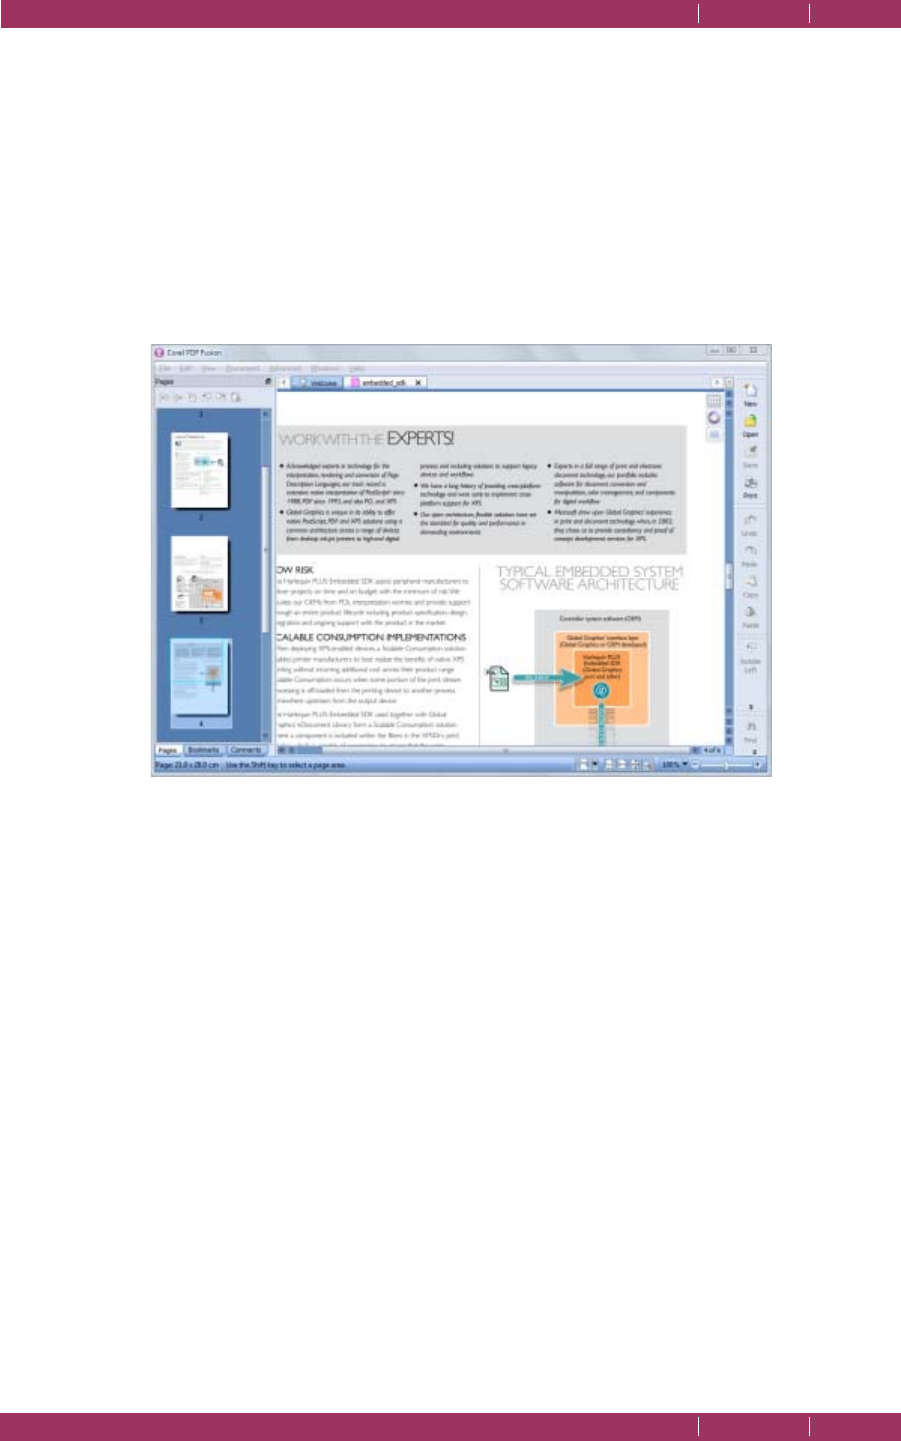
C
OREL
PDF F
USION
U
SER
G
UIDE
THE COREL PDF FUSION WORK AREA INDEX CONTENTS 49
CUSTOMIZE YOUR WORK AREA INDEX CONTENTS 49
To o l L a b e l s
Show or hide text associated with icons.
4.4.3 Customize the Navigation pane
You can customize how you want the items in the Navigation pane to be displayed. To
do this:
1 Open a document and click on a single page to view the document in the Page View.
2 The Navigation pane is displayed in its default view:
Figure 4.17 Navigation pane default view
3 Click the tabs to view either the Bookmarks, Comments or Pages panes.
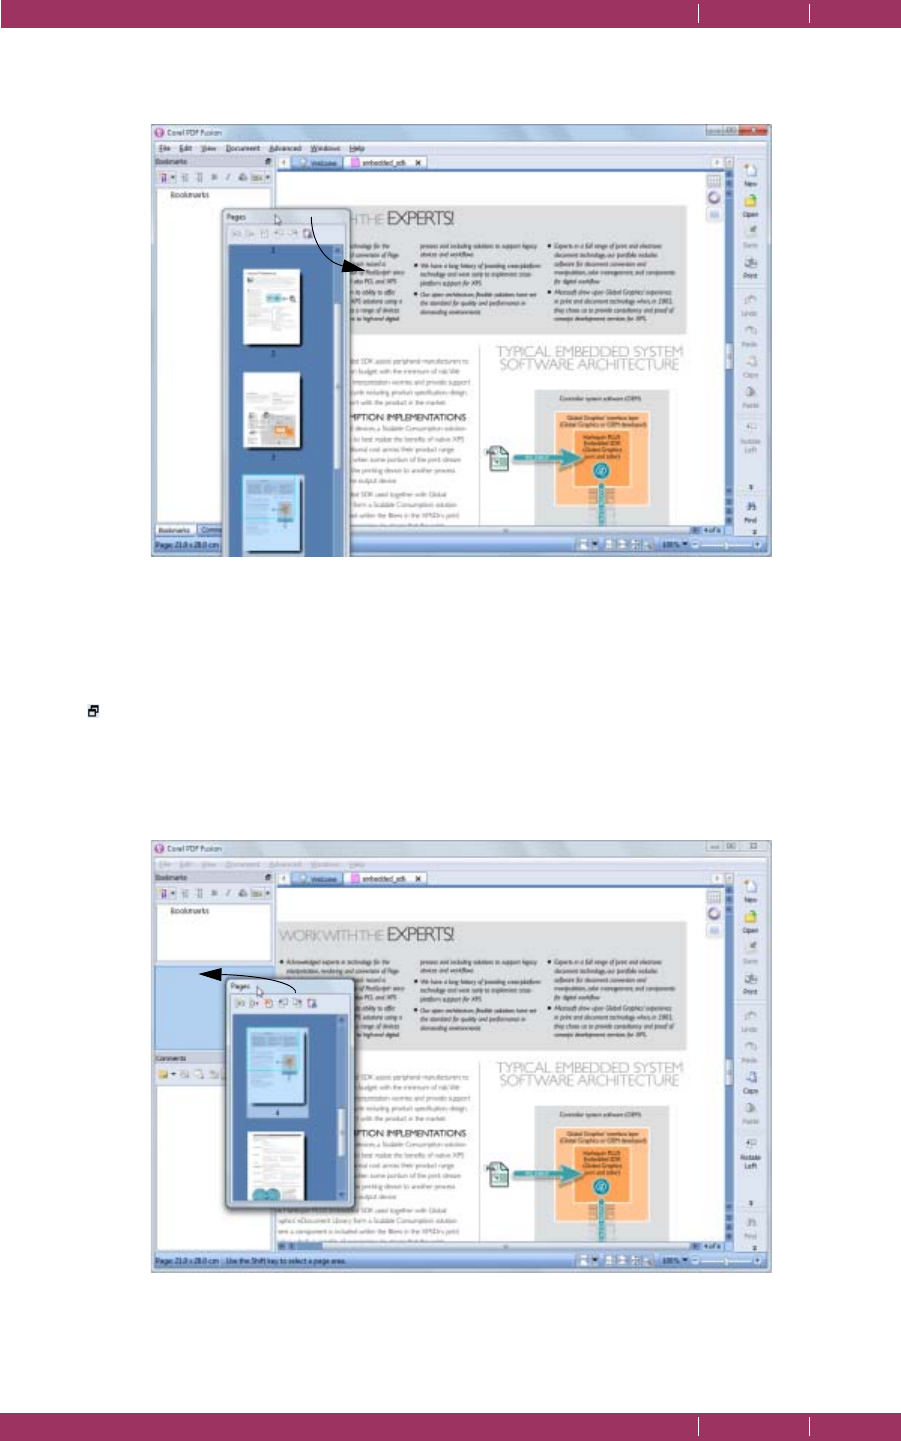
C
OREL
PDF F
USION
U
SER
G
UIDE
THE COREL PDF FUSION WORK AREA INDEX CONTENTS 50
CUSTOMIZE YOUR WORK AREA INDEX CONTENTS 50
4 Select the title bar of a pane to move it. The pane can be moved anywhere; even outside
the application window.
Figure 4.18 Moving a pane
Once you have moved a pane outside of the window another pane takes its place.
NOTE: Notice the icon that appears in the top right-hand corner of the Bookmarks, Comments and Page
panes. Click this icon and the pane detaches itself. If you have previously placed the pane
elsewhere, the pane moves to that position.
5 Drag and drop other panes onto the title bars to arrange the panes within the window.
As you do this the panes shrink allowing space for the new pane.
Figure 4.19 Drag and drop a pane onto a title bar
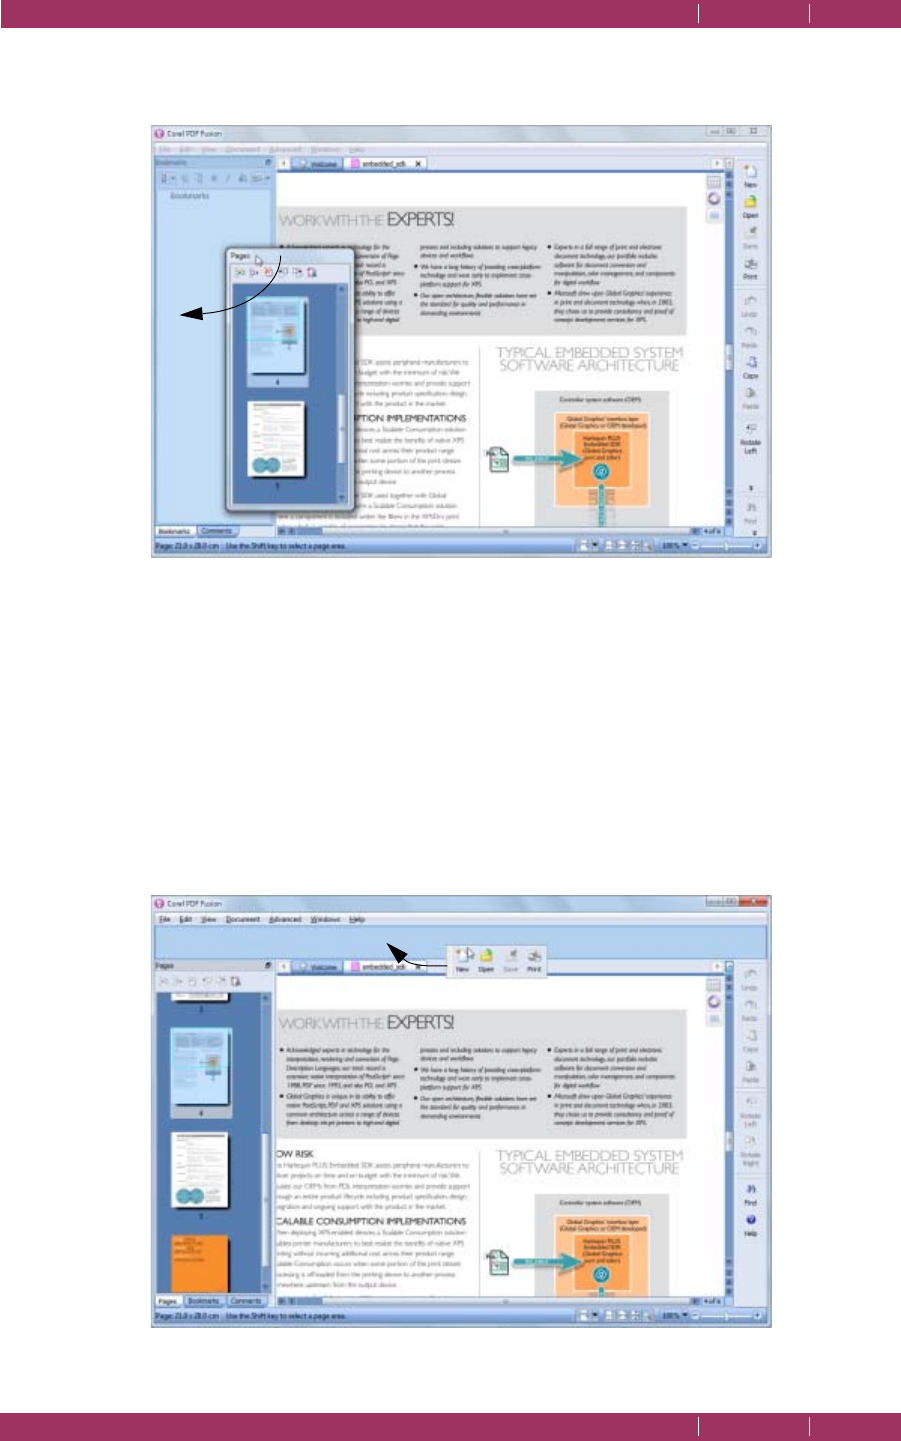
C
OREL
PDF F
USION
U
SER
G
UIDE
THE COREL PDF FUSION WORK AREA INDEX CONTENTS 51
CUSTOMIZE YOUR WORK AREA INDEX CONTENTS 51
6 Move a pane into the contents of another pane to place the pane on top. The pane upon
which you are moving highlights and your selected pane “clicks” into place.
Figure 4.20 Drag and drop a pane on top of another pane
4.4.4 Position your tools
You can re-position the Corel PDF Fusion tools:
1 Move the cursor over the dimpled area one of the detachable menus. When in the
correct position the cursor changes to a cross-hair.
2 Drag and drop the tool bar into its new position.
Notice how when you move the tool bar near to the top or side of the work area it
opens ready to accept it and it “clicks” into place.
Figure 4.21 Moving toolbars

C
OREL
PDF F
USION
U
SER
G
UIDE
THE COREL PDF FUSION WORK AREA INDEX CONTENTS 52
CUSTOMIZE YOUR WORK AREA INDEX CONTENTS 52
4.4.5 Set up your preferences
To configure the preferences:
1 Select Edit > Preferences... to display the Preferences dialog. There are four tabs to
select: General, View, Flick View, Import, Web, Save and Spelling.
2 Make the relevant changes.
3 Select OK to accept the changes or Cancel to return to your previous settings.
Restore defaults
This button restores all dialog options to their default factory settings.
Reset message dialogs
Some message dialogs appear with a “Don’t show me this message
again” tick box, which, when selected, means the message is never again
displayed. Click the Reset message dialogs option to re-enable all
message dialogs so that they are displayed.
4.4.5.1 General tab
The options in the General panel are:
New file type
This determines the document type (PDL) of any new file you create.
The options are PDF or XPS. PDF is the default setting.
New page size
This determines the default page size of any new page you create.
Page orientation
Choose whether the default page orientation is Portrait or Landscape.
Number of files displayed in Recent files list
Select the number of files you want listed in the File > Open Recent
menu.
The option in the Product Update panel is:
Automatically check for updates
When selected, Corel PDF Fusion automatically checks for updates
every 28 days. For more information see “Product update” on page 14.
4.4.5.2 View tab
The option in the User Interface panel are:
Show file extensions
This shows and hides the extensions of file names in the Page and
Assembly views. When checked, imported files have the initial output
name in a form <basename><n>(ext).pdf. Where <basename> is the
name of the file and <n> is an arbitrary unique number. For example,
when opening a Word file called testmanual.doc the file, for example,
appears in Corel PDF Fusion with the name testmanual18(doc).pdf.
When this is unchecked, the document is displayed as testmanual in the
Page and Assembly Views.

C
OREL
PDF F
USION
U
SER
G
UIDE
THE COREL PDF FUSION WORK AREA INDEX CONTENTS 53
CUSTOMIZE YOUR WORK AREA INDEX CONTENTS 53
Animate status bar messages
Status bar messages “pulse” in color to attract your attention. For
example, open a document in Page View and shift-click on the page.
Figure 4.22 Status bar messages
Automatically show selection-sensitive button menus
Uncheck this when you do not want to display the context-sensitive
menu bar when you select text or an area.
Preferred display units
Select your preferred units from the drop-down menu.
Thumbnail size
You can choose to have
Normal
or
Large
thumbnails.
The options in the Rendering panel are:
Anti-alias text / Anti-alias lines
The anti-aliasing options govern how the page is displayed. Enabling
these options produces better screen displayed output, at the expense
of performance.
4.4.5.3 Flick View tab
The options in the Flick View panel are:
Spin pages when zooming
Check to spin pages when you select them for full screen display in Flick
View.
Show page reflections
When checked each page has a reflection generated in Flick View.
Thumbnail quality
Select Normal or High quality thumbnails in Flick View. When changed,
you must exit and re-enter Flick View for it to take effect.
4.4.5.4 Import tab
The options in this tab allow you to configure how office documents, such as
spreadsheets, are imported into Corel PDF Fusion. By default, the page settings in the
document being imported are used. If these settings don’t produce the required results
you can try your own configuration settings. Select the Configure import options button
to open the Import Options dialog.
Use Document Page Settings
When this option is checked (the default) the page settings in the
imported document are used. Click this option to activate and use all the
options in this dialog.
The items in the Spreadsheet Options panel are designed specifically for importing
spreadsheet documents.

C
OREL
PDF F
USION
U
SER
G
UIDE
THE COREL PDF FUSION WORK AREA INDEX CONTENTS 54
CUSTOMIZE YOUR WORK AREA INDEX CONTENTS 54
Show Grid Lines
When checked, grid lines are generated and displayed in the output
document between cells in the spreadsheet.
Show Headings
When checked, the row and column headings in the spreadsheet are
displayed in the output document along with the data.
Fit to Page
Select one of the options in the drop-down menu.
No Scaling means that the spreadsheet is displayed in its original size
onto as many pages as are required to fit the data.
Fit to page automatically scales the document to fit either the page, the
page width (no larger than one page wide), or page height (no larger
than one page high).
Scale to Percent activates the Scale Percent field (below) and allows you
to enter a percentage by which you want to scale the document.
Scale to Pages Specified activates the Scale to X wide by X tall options.
These options scale the spreadsheet to fit the number of pages specified
in the wide and tall fields. Because the aspect ratio of the spreadsheet is
maintained, the lesser of the two dimensions (width or height)
determines the scale factor.
Note that if either value is set to 0, the value in the other option is
ignored.
Printing Direction
These options control the pattern in which the pages are printed, either
across first and then down, or down first and then across. With Across
and Down selected the pages are printed across first and then down.
With Down and Across selected the pages are printed down first and
then across.
The Default Page Margins panel allows you to specify the margins on your document.
These options allow you to specify the top, left, bottom and right
margins (in cm) from the edge of the page. Page margins are applied
when formatting word processing, database and spreadsheet files and
are applied before any scaling.
4.4.5.5 Web tab
When performing updates you need a connection to the internet. Under most
circumstances the default system browser is used along with the proxy settings. If,
however, you are part of a network (in an office for example) and the internet
connection is restricted or requires further configuration, you should contact your
system administrator.

C
OREL
PDF F
USION
U
SER
G
UIDE
THE COREL PDF FUSION WORK AREA INDEX CONTENTS 55
CUSTOMIZE YOUR WORK AREA INDEX CONTENTS 55
The following options are available in the Connection Settings panel:
No proxy
Use this if you don’t want to use a proxy.
Auto-detect proxy settings
This is the default option and should be used when you want Corel PDF
Fusion to automatically detect the proxy settings for your network.
Manual proxy configuration
Use this when you have a list of one or more proxy servers. Ask your
system administrator for the configuration information. Each proxy
requires a hostname and a port number.
The username and password options are optional, but they may be
required by your network.
4.4.5.6 Save tab
By default, backup files are not created. However, you have the option to create a backup
file whenever a document is saved. This file is the same size as the original file.
The following options are available in the Save Options panel:
Always create a backup copy
This is not checked by default. Check this option to create backups of
your saved files. The backups are created in the same location as the
original file. Checking this option makes Corel PDF Fusion use more disk
space.
4.4.5.7 Spelling tab
When comments or notes are added to a document you have the option to spell check
those notes. For more information see “Spell check comments and free text” on
page 106.
The following options are available in the Spelling Options panel:
Allow spell checking
This option is checked by default, and when selected spell checking is
activated for comments.
Active dictionary
Use the drop-down menu to select your preferred language for the spell
checking dictionary.

OPEN COREL PDF BATCH CONVERTER INDEX CONTENTS 56
Chapter 5 The Corel PDF Batch
Converter work area
This chapter describes the Corel PDF Converter work area and how you use it.
The information provided in the section includes:
•“Open Corel PDF Batch Converter” on page 56
•“The Convert format panel” on page 57
•“The Details panel” on page 58
•“Corel PDF Converter preferences” on page 58
NOTE: Not all components are available in all versions of PDF Fusion.
5.1 Open Corel PDF Batch Converter
To open Corel PDF Converter:
• Select All Programs > Corel PDF Fusion > Corel PDF Batch Converter.
• With Corel PDF Fusion open select Document > Batch Conversion.
The Corel PDF Batch Converter work area opens:
Figure 5.1 Corel PDF Converter work area
1 Drop one or more files onto this area to convert them using the currently selected setup.
2 Displays the Corel PDF Converter preferences dialog. For more information see “Corel
PDF Converter preferences” on page 58.
1
2 4567
6
12
11
10
9
83

C
OREL
PDF F
USION
U
SER
G
UIDE
THE COREL PDF BATCH CONVERTER WORK AREA INDEX CONTENTS 57
OPEN COREL PDF BATCH CONVERTER INDEX CONTENTS 57
3Click Open... or use Ctrl + O to display an Open File(s) dialog allowing you to select
one or more files for conversion.
4 Displays the progress of your conversion.
5 Click the cross icon or press Esc to cancel conversion of the current files. A message
appears indicating that conversion of all queued files is cancelled. You can select to
continue or abort.
6 Click to close this window.
7Click View or use Ctrl + i to display the current file in Corel PDF Fusion.
8 Click the down-arrow or use Alt + 1 (one) or Ctrl +1 (one) to open or close the
Convert format panel. This displays more details about the files you are converting. For
more information see “The Details panel” on page 58.
9 Click the down-arrow or use Alt + 2 or Ctrl + 2 to open or close the Details panel.
This allows you to change the output format or setup. For more information see “The
Convert format panel” on page 57.
10 Click to view online help information.
11 Choose your preferred Corel PDF Fusion view.
12 Displays the currently selected output format.
5.1.1 The Convert format panel
This panel lets you choose your preferred output format and setup.
The Convert format panel provides the following options:
Document type
Select the down arrow to choose your preferred document output
format. The options are PDF, XPS or Microsoft Word. The selection you
make here determines which setup names are displayed in the Setup
name option (below). For example, when PDF is selected, only the PDF
setups can be viewed and selected. Similarly, when XPS is selected only
XPS setups can be viewed and selected.
Setup name
Select the down-arrow to display the setups associated with the
currently selected Document type.
Edit...
Click this to edit a setup. The currently selected setup is displayed ready
for editing but you can change that if you wish. You cannot edit any of
the standard setups, but you can make a copy and edit the copy. For
more information on managing and creating setups see Chapter‚
9"Setups".
Description
Displays a brief description of the currently selected setup.

C
OREL
PDF F
USION
U
SER
G
UIDE
THE COREL PDF BATCH CONVERTER WORK AREA INDEX CONTENTS 58
OPEN COREL PDF BATCH CONVERTER INDEX CONTENTS 58
5.1.2 The Details panel
The Details panel provides information about the files being converted with messages
like “Started” and “Completed”. Files which have been previously converted are also
displayed.
Figure 5.2 The Details panel
5.1.3 Corel PDF Converter preferences
The Preferences dialog lets you decide the location for your converted files and whether
you view them in Corel PDF Fusion.
To open the Preferences dialog see item “2” on page 56 or use Ctrl + K.
Click Restore Defaults to return the dialog to its default settings. Click OK or Cancel to
close the information dialog.
5.1.3.1 General tab
Allow “Output options” in Setups to override these settings
When checked most options within this dialog are disabled. This makes
Corel PDF Converter use the choices selected within the setup. For
more information see “Setups” on page 108. If the Setup Output
options are not configured, Corel PDF Converter reverts to its default
behavior of writing the output document to the source folder.
The following options are available in the Save converted documents panel:
Save in same directory as source documents (default)
Click to save your converted files in the same directory as the source
(input) file.
Save in
Lets you choose a different location for your converted files.
Either, type (or copy and paste) a location, for example: C:\Documents
and Settings\User\My Documents; or click the Browse button to choose
the location. If required, use the Make New Folder option.
Always prompt for destination directory
Check this to ensure that each time a file is converted a browser dialog
appears allowing you to select an output location.
NOTE: The options in the Save converted documents panel override the Output options panel in the PDF,
XPS and Word setup dialog. See (for example)
“Always output files to” on page 115
.

C
OREL
PDF F
USION
U
SER
G
UIDE
THE COREL PDF BATCH CONVERTER WORK AREA INDEX CONTENTS 59
OPEN COREL PDF BATCH CONVERTER INDEX CONTENTS 59
The following options are available in the View converted documents panel:
Automatically view documents once converted (default)
Click to view your converted documents in Corel PDF Fusion.
Default view
If you have chosen to view your converted documents in Corel PDF
Fusion, select the default view in which you would like them displayed.
When converting several documents at the same time, and you have
selected Assembly View, all the documents are displayed under separate
tabs. If, however, you have selected Flick or Page View, the last document
converted is displayed. Click the other document tabs to display them.
For more information about the various views see
“The Page, Assembly,
Flick and Presentation View” on page 29
.
When a file is successfully converted the system registered sound is used as an audible
indication. Uncheck the Use sound to indicate conversion is complete option to turn
off this notification.
5.1.3.2 Support tab
The Support tab provides a link to the Corel web site. In addition, a debug option is
provided. This should only be used under the direction of Technical Support.

INDEX CONTENTS 60
Chapter 6 How do I...?
This chapter contains a number of “How do I...” topics:
To find out how to do any particular task, scan the list below and click on the topic that
you think contains the required information.
The information provided in the section describes how to:
•“Convert files” on page 61
•“Create a new document from existing files” on page 65
•“Add empty pages to an existing document” on page 70
•“Add existing pages to an existing document” on page 70
•“Remove pages from an existing document” on page 71
•“Prepare a document for distribution” on page 71
•“Print a document” on page 72
•“Find and Redact text—one or more instances” on page 73
•“Redact text or area—single instance” on page 74
•“Find and replace text—one or more instances” on page 74
•“Add comments/notes” on page 74
•“Add notes containing selected text” on page 75
•“Add text annotations” on page 76
•“Add bookmarks” on page 76
•“Add free text annotations” on page 77
•“Add hyperlinks” on page 78
•“Change the destination of the output file” on page 79
•“Produce more compact PDF files” on page 80
•“Produce PDF files that can be sent by e-mail” on page 81
•“Produce files for fast web viewing” on page 82
•“Launch application to view the file when complete” on page 82
•“Share setups” on page 83
•“E-mail documents” on page 84

C
OREL
PDF F
USION
U
SER
G
UIDE
HOW DO I...? INDEX CONTENTS 61
CONVERT FILES INDEX CONTENTS 61
•“E-mail comments” on page 85
•“Find the version number of Corel PDF Fusion” on page 85
•“Remove tooltips or tool labels from Corel PDF Fusion” on page 85
•“Add security to a document” on page 85
•“Add a watermark to a document” on page 86
6.1 Convert files
Corel PDF Fusion can take various input files (see “Supported document formats” on
page 147), and convert them into either PDF, PDF/A-1b, XPS document and Microsoft
Office Word output files.
NOTE: To guarantee the fidelity of PDF/A-1b files use the Corel PDF Converter or print to the Corel PDF
printer.
To perform a conversion use one of the following options:
•“Drag and drop” on page 61
•“Printing from a desktop application” on page 62
•“Using Add-ins for Microsoft Office applications” on page 62
•“Save a document in a different format” on page 63
•“Convert (Export) a document to Microsoft Word” on page 63
•“Convert (Export) a document to PNG” on page 64
6.1.1 Drag and drop
You can use Corel PDF Converter as a drag-and-drop target.
1 Drag and drop the file to be converted onto the Corel PDF Converter application.
NOTE: The last used setup is the default.
Corel PDF Converter opens and converts the file. A progress bar appears and a sound
prompts you when the file has completed. When the “Automatically view documents
once converted (default)” on page 59 option is selected, which it is by default, your
converted document opens in Corel PDF Fusion. You can disable the sound. See “Corel
PDF Converter preferences” on page 58.
To change the output format before converting:
1 From Corel PDF Fusion select Document > Batch Conversion or select All Programs
> Corel PDF Fusion > Corel PDF Batch Converter to open Corel PDF Converter.
2 Select the output Document type (XPS, PDF or Microsoft Word).

C
OREL
PDF F
USION
U
SER
G
UIDE
HOW DO I...? INDEX CONTENTS 62
CONVERT FILES INDEX CONTENTS 62
3 Select the required Setup name.
NOTE: Select one of the PDF/A-1b options as the setup name if you want to create files to that
specification.
4 If required, edit your setup.
5 Drag and drop the file to be converted onto the Corel PDF Converter application.
6.1.2 Printing from a desktop application
When you print to the Corel PDF printer from a desktop application you can create PDF
files:
1 Save the document and select the Print option in your desktop application.
2 Select Corel PDF Converter followed by Print in the Printer name field. The Create
document dialog appears.
3 Select a location for the document using the Create Document dialog.
4 Enter a name for the converted document in the File name field.
5 Select PDF using the Save as type down-arrow.
NOTE: When you print again, the last used location and Save as type option is remembered.
6 If required, use the Setup down-arrow to select a new setup. For more information see
“Setups” on page 108.
7Click Save to complete the process. Click Cancel to abort the printing.
NOTE: When creating a PDF by printing to the Corel PDF printer you are always prompted for a name
and location for the output file. Therefore, the Always output files to and Overwrite an existing
document options in the setup are ignored.
NOTE: If, when printing from Microsoft Office Word, you find that the output print size is either A4 or Letter
even though the page is set to another size, uncheck Tools > Options > Print tab > Allow A4/Letter
paper resizing option in Word and try printing again.
6.1.3 Using Add-ins for Microsoft Office applications
When using Microsoft Office applications you can create PDF documents.
NOTE: PDF/A-1b files cannot be created using this method.
• To create PDF documents from a Microsoft Office 2003 document, click on the Add-in
toolbar icon and select Create > PDF. Alternatively, select Corel PDF Converter >
Create file > PDF from the File menu.
• To create PDF documents from a Microsoft Office 2007 document, click on the Corel
PDF Fusion Ribbon Menu and select the Create PDF from the PDF panels.
A Corel PDF Converter “working” message appears followed by a Create PDF
Document dialog that allows selection of the various security options that can be applied
to a PDF file. These security options are the same as the options provided within the

C
OREL
PDF F
USION
U
SER
G
UIDE
HOW DO I...? INDEX CONTENTS 63
CONVERT FILES INDEX CONTENTS 63
Corel PDF Fusion Setup manager. For more information see “Security tab (PDF)” on
page 120 and “Add-ins for Microsoft Office” on page 128.
NOTE: If you have not previously saved your Microsoft Word or Excel document before attempting to
create a PDF document, a Save As dialog appears prompting you to save it. Once saved, the
conversion continues. If you have not saved your Microsoft PowerPoint document before conversion,
a “Please save your document before printing it” message appears. You must save the document
before conversion using the Add-ins.
6.1.4 Save a document in a different format
Corel PDF Fusion can be used to convert a document from one document format
(PDL) into another. For example, when you have a document in the XPS, PDF or DOC
format you can easily convert it to another format.
NOTE: PDF/A-1b files cannot be created using this method.
NOTE: For more information see
“File format support” on page 18
.
1Use File > Open or drop a file onto the Assembly or Page View to open the document
you wish to convert.
2 Make any changes to the document.
3Click File > Save As.... This displays the Save As dialog.
4 Enter a new name for the document in the File name option (unless you want to
overwrite the existing document name).
5 Select the new PDL format you want to save the document as (XPS, PDF or DOC) in
the Document type option.
6 Choose the setup, in the Setup name option, that you want to apply to the document
you are about to save.
NOTE: The Edit button provides all the setup options available. For more information see
Chapter 9,
“Setups”
7Click Save to complete the conversion. Select Cancel to abort the process.
See also
“Convert (Export) a document to Microsoft Word” on page 63
.
6.1.5 Convert (Export) a document to Microsoft Word
You can export an open document to the Microsoft Word format.
1 Open the document you wish to convert to Microsoft Word.
2 Make any changes to the document.
3Click File > Export to display the Export Document... dialog.
4 Use the Export Document options to choose the location for your Microsoft Word
document.
5Use the down-arrow in Files of type to select your preferred option.

C
OREL
PDF F
USION
U
SER
G
UIDE
HOW DO I...? INDEX CONTENTS 64
CONVERT FILES INDEX CONTENTS 64
Microsoft Word [retain page layout] (*.doc)
The text content and the original formatting is retained as much as
possible. Use this option for general purpose conversion of source
documents for reuse in Word.
Microsoft Word [retain text editability] (*.doc)
The layout is retained but text frames are used to make text blocks more
easily editable. Use this option when significant text editing in Word is
required.
Microsoft Word [retain text flow] (*.doc)
The text content is retained, but the original formatting is not retained.
This option produces much smaller file sizes for Microsoft Word
documents, and is ideal for when the text content of the source
document is to be used for another purpose.
6The File name option contains the current document name with a .doc extension. You
can change the name.
7Click Save to complete the conversion. Select Cancel to abort the process. The process
starts and a progress bar appears. A message is displayed when the conversion is
complete. (You can choose to not display the “Success” message for future conversions.)
6.1.6 Convert (Export) a document to PNG
You can export an open document to the PNG image format.
The generated PNG files use the resolution and color management settings of the
source document.
NOTE: Multiple page documents are exported as single PNG files for every page.
1 Open the document you wish to convert to PNG.
2 Make any changes to the document.
3Click File > Export to display the Export Document... dialog.
4 Use the Export Document options to choose the location for your PNG files.
5 Use the down-arrow to select PNG image format (*.png) in Files of type.
6The File name option contains the current document name with a .png extension. You
can change the name.
7 Choose the page range to convert from All pages or Selection. The selected range of
pages should be in the form “1-3”, (but not “1-3,5,10”).
8Click Save to complete the conversion. Select Cancel to abort the process. The process
starts and a progress bar appears. A message is displayed when the conversion is
complete. (You can choose to not display the “Success” message for future conversions.)
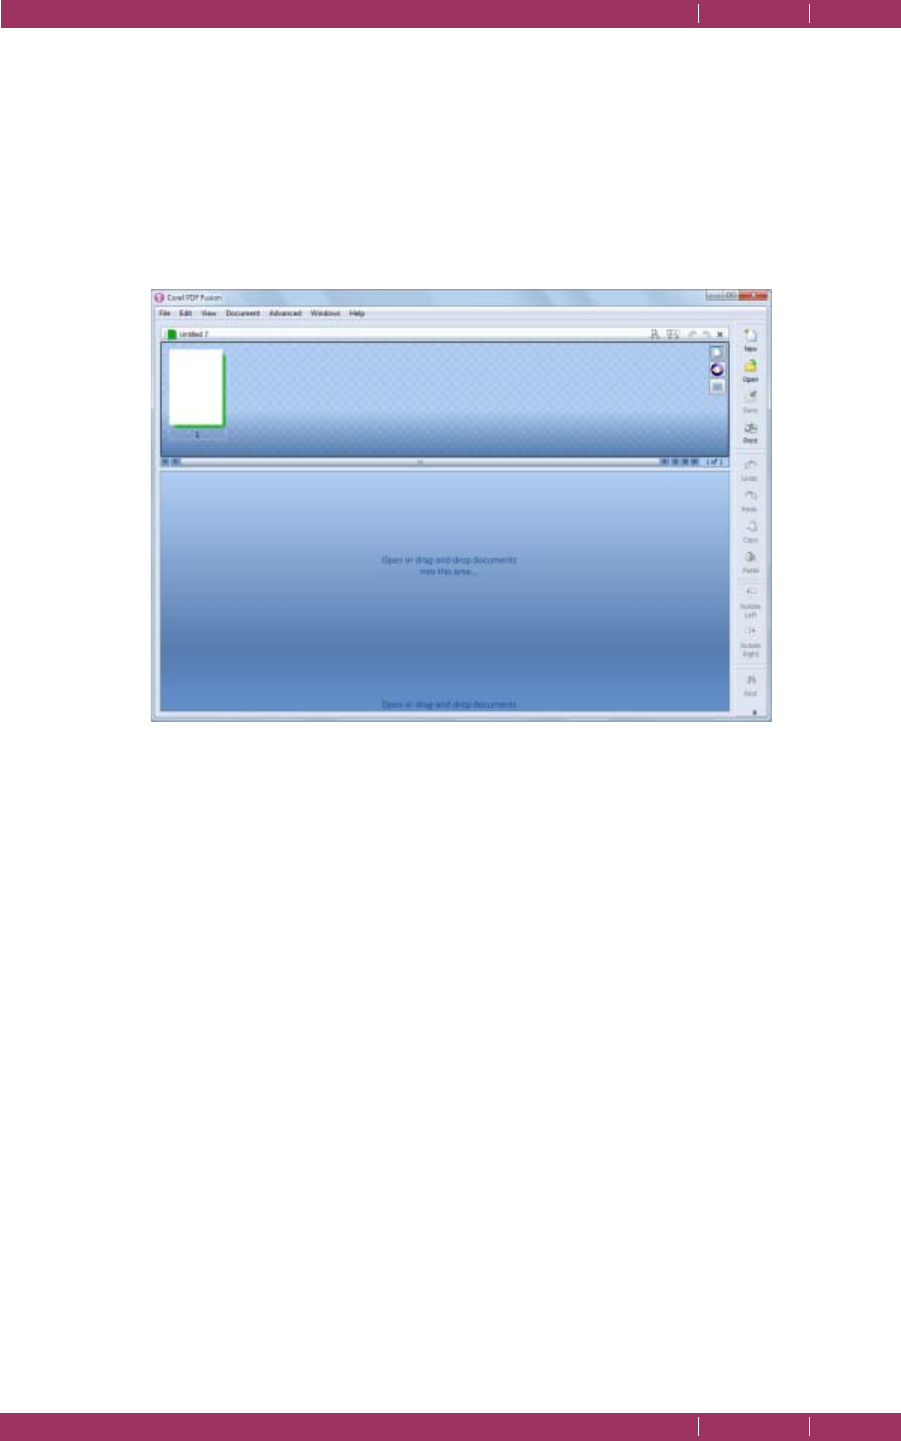
C
OREL
PDF F
USION
U
SER
G
UIDE
HOW DO I...? INDEX CONTENTS 65
CREATE A NEW DOCUMENT FROM EXISTING FILES INDEX CONTENTS 65
6.2 Create a new document from existing files
Use the following procedure to create a new document from existing files:
1 Select File > New or click the New icon to open a new target document. A new
“untitled” document appears with the default file type. This file type can be changed see
“New file type” on page 52.
2 Display the new document in Assembly View.
Figure 6.1 New document in Assembly View
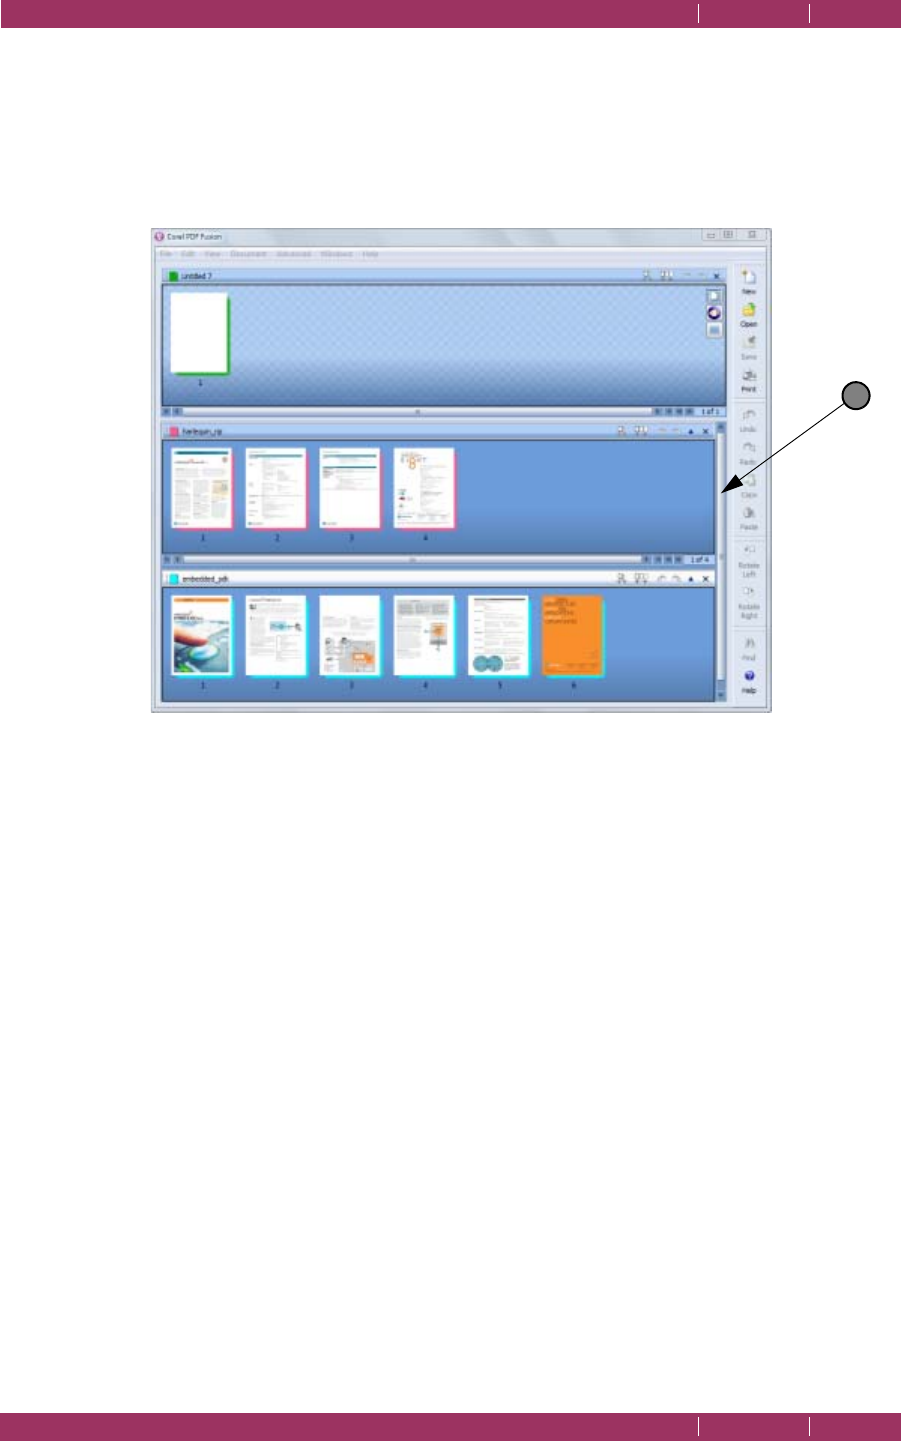
C
OREL
PDF F
USION
U
SER
G
UIDE
HOW DO I...? INDEX CONTENTS 66
CREATE A NEW DOCUMENT FROM EXISTING FILES INDEX CONTENTS 66
3 Drag and drop, onto the Assembly View, the source files from which you want to create
your new document. Alternatively, select File > Open or click the Open icon and then
navigate to the source document and select it. Repeat this for each source document.
NOTE: If you are using more source documents than can be displayed, use the scroll bar (1) at the right
side of the source document window to display those documents.
Figure 6.2 Multiple documents displayed
1
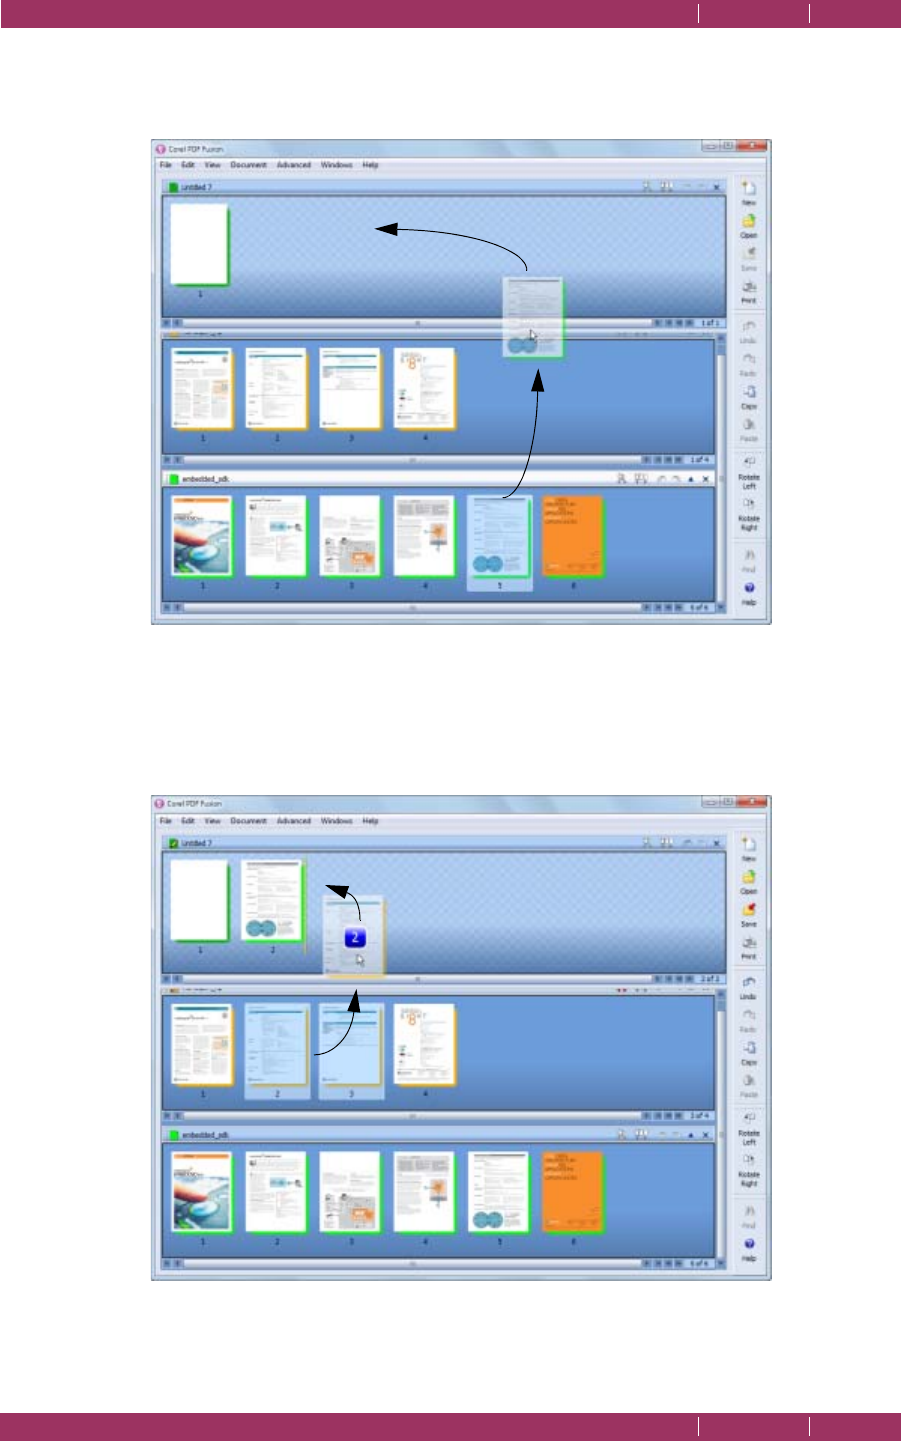
C
OREL
PDF F
USION
U
SER
G
UIDE
HOW DO I...? INDEX CONTENTS 67
CREATE A NEW DOCUMENT FROM EXISTING FILES INDEX CONTENTS 67
4 Drag and drop the required pages from the source documents onto the new target
document.
Figure 6.3 Drag and drop single pages
5 You can select more than one page at a time. The number of pages you are moving is
displayed and the yellow bar (next to page 2) indicates where the pages are going to be
dropped.
Figure 6.4 Drag and drop multiple pages

C
OREL
PDF F
USION
U
SER
G
UIDE
HOW DO I...? INDEX CONTENTS 68
CREATE A NEW DOCUMENT FROM EXISTING FILES INDEX CONTENTS 68
6 You can place pages in between other pages in the target document.
Figure 6.5 Placing pages between other pages
NOTE: When you drag and drop pages from one document to another a yellow bar appears indicating
exactly where the pages are dropped.
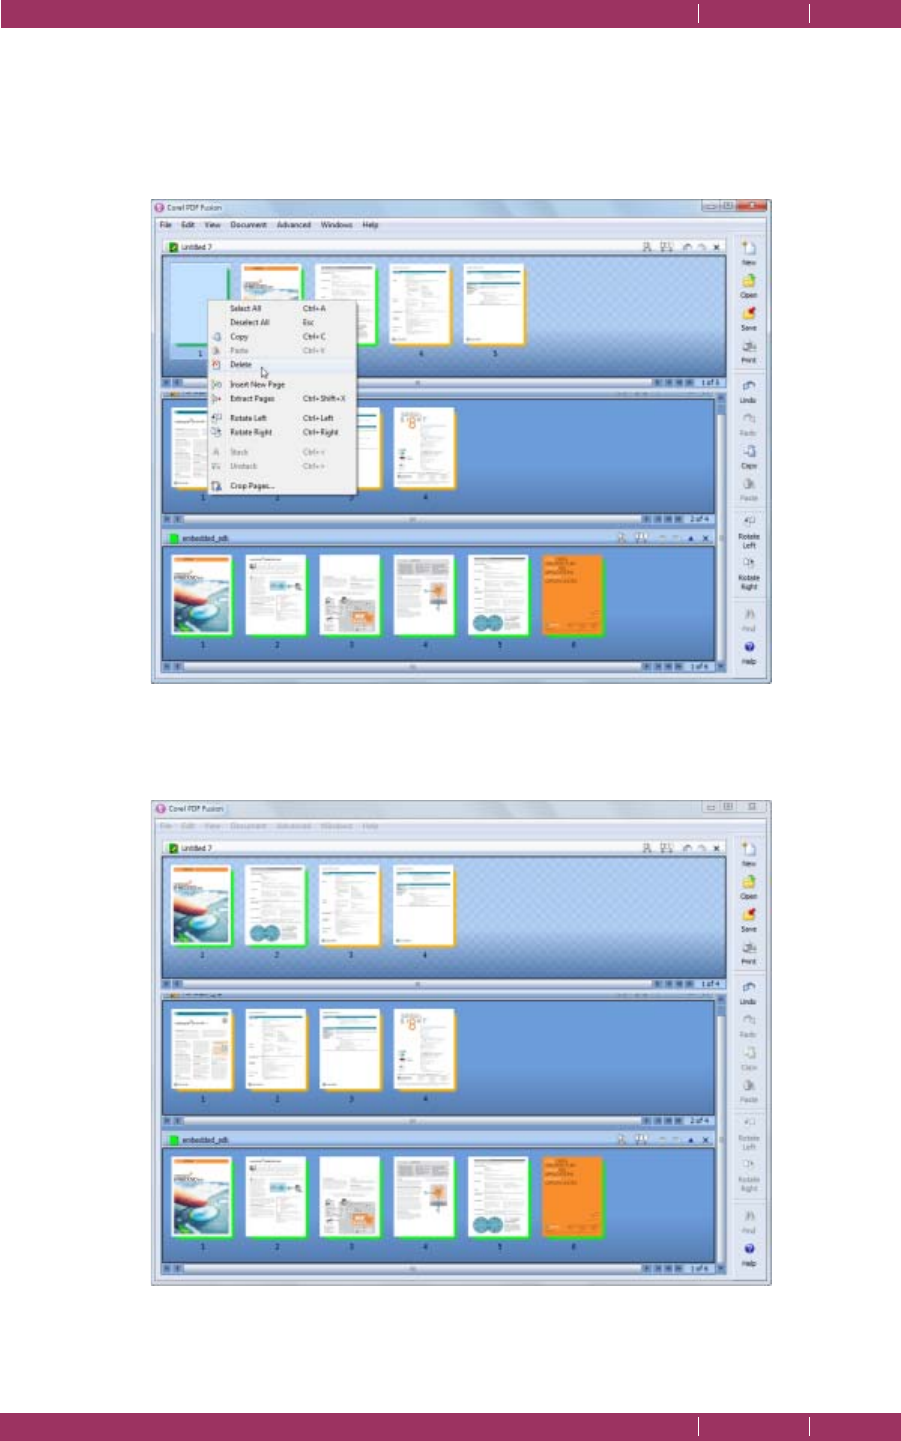
C
OREL
PDF F
USION
U
SER
G
UIDE
HOW DO I...? INDEX CONTENTS 69
CREATE A NEW DOCUMENT FROM EXISTING FILES INDEX CONTENTS 69
7 Right-click on the page and select Delete from the pop-up menu to remove the blank
page.
NOTE: Any document must contain at least one page. Therefore, you can delete the pages of a document
only until the last pages remains.
Figure 6.6 Delete a page
8 Here’s the completed new document.
Figure 6.7 The completed document

C
OREL
PDF F
USION
U
SER
G
UIDE
HOW DO I...? INDEX CONTENTS 70
ADD EMPTY PAGES TO AN EXISTING DOCUMENT INDEX CONTENTS 70
9 Select File > Save when you are happy with the new document. This displays the Save
dialog.
NOTE: If you have created a new document using the pages of an existing document, the new document
must be saved before you can re-save the existing document to its current name. You can, however,
use the Save as option.
10 Enter a name for the document in the File name option.
11 Select the output format for your document in the Files of type option.
12 Click Save to complete the process. Select Cancel to abort the save.
6.3 Add empty pages to an existing document
You may want to add additional blank pages to a document, for example to force a
chapter to start on a right-hand page when printing double-sided.
Use the following procedure to add empty pages to an existing document:
1 Select File > Open or click the Open icon to open the document to which you want to
add the pages.
2 Display the document in Assembly View.
3 Point the cursor to the location in the document where you want the new page to
appear, right-click and select Insert New Page from the pop-up menu.
NOTE: Any folios (page numbers) printed on the existing document are not changed.
NOTE: Before saving the new document consider whether you want to overwrite the existing version or
save the new version under a new name.
4Click Save to overwrite or File > Save As to save the file under a new name.
6.4 Add existing pages to an existing document
Use the following procedure to add pages to an existing document:
1 Select File > Open or click the Open icon to open the document to which you want to
add the pages.
2 Display the document in Assembly View.
3 Drag and drop, onto the Assembly View, the source files from which you want to create
your new document. Alternately, select File > Open or click the Open icon and then
navigate to the source document to open it. Repeat this for each source document.
4 Drag and drop pages from the source documents onto the target document (in exactly
the same way as described under “Create a new document from existing files” on
page 65.

C
OREL
PDF F
USION
U
SER
G
UIDE
HOW DO I...? INDEX CONTENTS 71
REMOVE PAGES FROM AN EXISTING DOCUMENT INDEX CONTENTS 71
5Click Save to overwrite the file or use File > Save As to save the file under a new name
when your new document is complete,.
NOTE: Any folios (pages numbers) printed on the existing document are not changed.
NOTE: Before saving the new document consider whether you want to overwrite the existing version or
save the new version under a new name.
6.5 Remove pages from an existing document
Use the following procedure to remove pages from an existing document:
1 Open the document from which you want to remove pages.
2 Right-click one or more pages to be removed and select Delete from the pop-up menu.
NOTE: Any folios (page numbers) printed on the existing document are not changed.
NOTE: Before saving the new document consider whether you want to overwrite the existing version or
save the new version under a new name.
3Click Save to overwrite or File > Save As to save the file under a new name.
6.6 Prepare a document for distribution
The Finish Document Wizard is used to prepare a document for distribution. The choice
of file format determines all subsequent options.
When you have completed your document manipulations:
1 Select File > Finish Document Wizard. The Finish Wizard dialog appears.
2 Select the Document type you want your document to be saved in. The options are
PDF and XPS.
3 Select the setup name you want to use to create your document.
These options are the
same as those listed in the
Save As...
dialog and the Convert format panel in Corel PDF
Converter. See
“The Convert format panel” on page 57
for more information.
4 Select the document options you want to open in the wizard. The available options are:
Enter Document Summary Information
These options allow you set the Title, Subject, Author and Keywords.
See “Summary—Enter Document Summary Information” on page 88
for details about these options. When you have selected XPS as the
document type, this is the only option available.
Set Document Open Actions
Select this check box to access the options for file opening actions. See
“Open Settings—Set Document Open Actions” on page 89 for more
information on the options that are available. This is only available when
PDF is selected as the document type.

C
OREL
PDF F
USION
U
SER
G
UIDE
HOW DO I...? INDEX CONTENTS 72
PRINT A DOCUMENT INDEX CONTENTS 72
Set Permissions Options
Select this check box to access the Set Security Permissions Options. See
“Set File Security—Set Security Permission Options” on page 90 for
more information on the options that are available. This is only available
when PDF is selected as the document type.
Set Document Passwords
Select this check box to access the password options that allow you to
enter a password to open the document and to change the security
setting. See “Set Document Passwords” on page 91 for more
information on available options. This is only available when PDF is
selected as the document type.
5 Choose Next > to advance to the next screen in the wizard, and enter the information
as required in the dialog that opens. Repeat this process until you have completed all the
information required by the wizard.
6 In the Save As dialog, choose a location, enter a name and if you wish, change the
document type and setup. Click Save to complete the process when you have made your
choices.
6.7 Print a document
There are several ways to print a document from Corel PDF Fusion.
Before you print you can use the Print Setup options:
• Select File > Print Setup or Ctrl + Shift + P the following options are available:
Print what
Two options are provided:
Document
and
Document and comments
.
When
Document
is selected the document is printed including any page
markups and annotations (excluding text markups, such as highlights,
strikeouts, underlines and so on). When
Document and comments
is
selected the document is printed including any page markups,
annotations and text markups.
Print
Choose all the pages in the range or just the odd or even pages.
Normal Print
This is the default option and offers the fastest printing. See also “Print
to file” on page 73.
Print as Image
If normal printing does not produce the desired results, select this
option. You can set the resolution to 300 or 600 dpi or choose to use
the resolution set on the printer. See also “Print to file” on page 73.
NOTE: When the security of the document allows “low res only” printing, (see
“Printing” on page 122
),
the output resolution is restricted to 150 dpi and the document is printed as an image. A message
stating this is displayed.

C
OREL
PDF F
USION
U
SER
G
UIDE
HOW DO I...? INDEX CONTENTS 73
FIND AND REDACT TEXT—ONE OR MORE INSTANCES INDEX CONTENTS 73
Fit to paper size
Scales the output to fit onto the selected paper.
Center on paper
Positions the output centrally on the output media.
Auto-Rotate
When selected, rotation is applied when the orientation of the source
page does not match the orientation of the media.
Make sure the document or pages you want to print is selected then either:
• Choose File > Print... and select the appropriate options for your printer, page range,
number of copies, and so on.
•Click the Print icon.
• Use the keyboard shortcut Ctrl + P and select the appropriate options for printer, page
range, number of copies, and so on. The Selection option becomes available when one
or more pages are selected in Assembly View or the Navigation pane.
NOTE: The selected range of pages should be in the form “1-3”, (but not “1-3,5,10”).
Print to file
This is available when both Normal Print and Print as Image are selected.
When Normal Print is selected you are prompted for a file name in the
default location. When Print as Image is selected you are prompted to
enter a fully qualified path and name. For example: C:\myfolder\myfile.prn.
For more information about
.prn
files see the “PS” listing in “What is a
document format or PDL?” on page 17.
NOTE: If, when printing from Microsoft Office Word, you find that the output print size is either A4 or Letter
even though the page is set to another size, uncheck Tools > Options > Print tab > Allow A4/Letter
paper resizing option in Word and try printing again.
6.8 Find and Redact text—one or more instances
Options to search through the text in a document and redact one or all occurrences of
a word or phrase are available.
1 Display in Page View the document you want to redact.
2Click Advanced > Find and Redact... This displays the Find and Redact dialog:
3 Enter the word or phrase you want to search for.
4Use Match case, Whole words and Search backward options to refine your search.
5 The first occurrence found is highlighted. Click Redact to obliterate just that occurrence
or click Redact All to obliterate all occurrences within the document.
NOTE: If you have previously performed a search you can select the down-arrow to re-select it.
Occurrences of a word or phrase that form part of an image, such as a photograph or scanned
image, are not found.
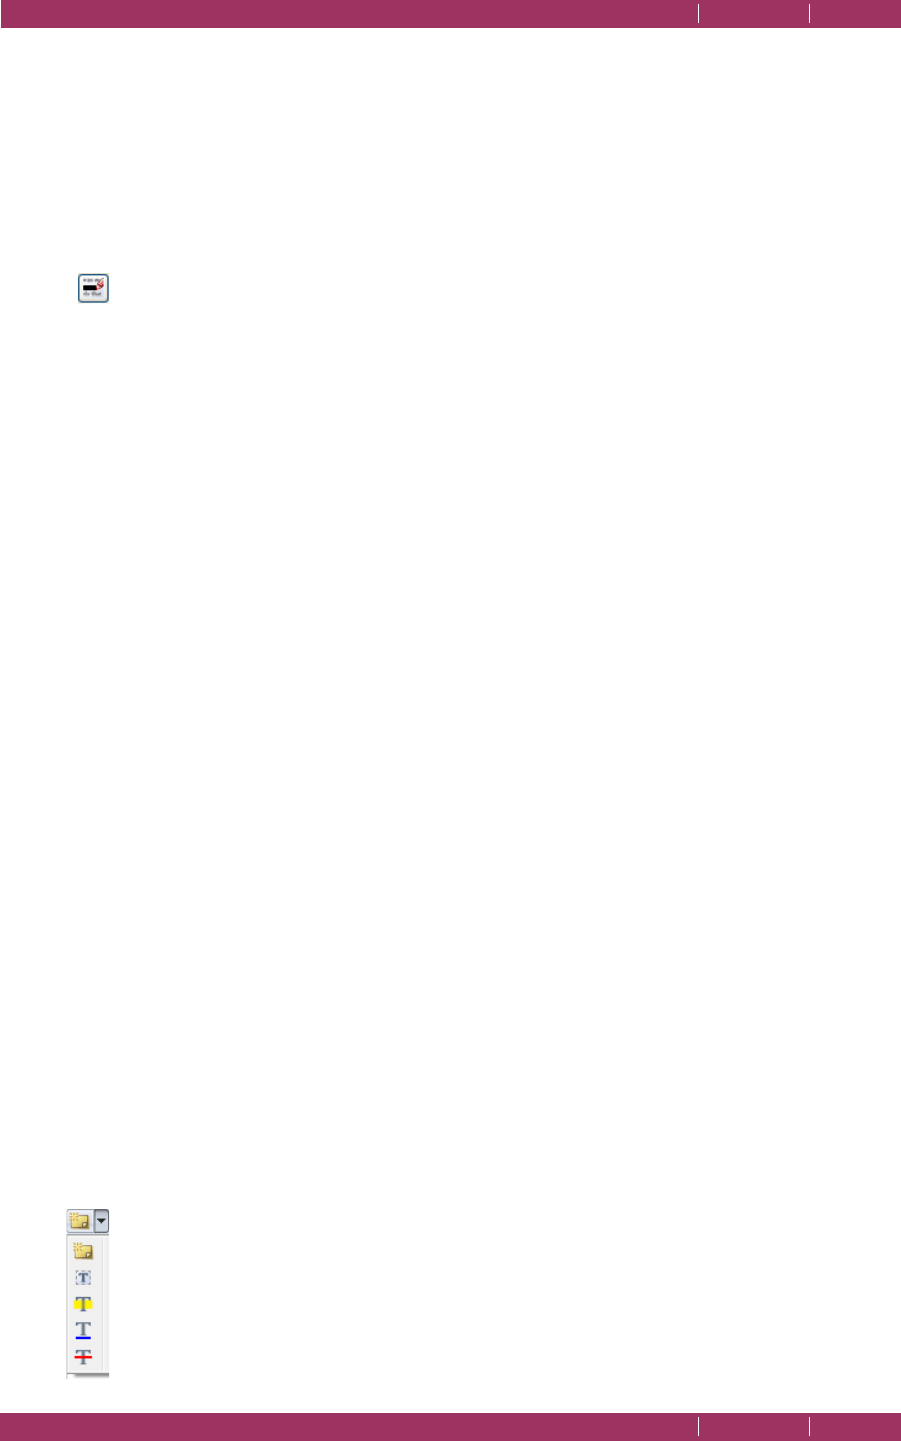
C
OREL
PDF F
USION
U
SER
G
UIDE
HOW DO I...? INDEX CONTENTS 74
REDACT TEXT OR AREA—SINGLE INSTANCE INDEX CONTENTS 74
6.9 Redact text or area—single instance
You can redact a single text instance or area.
1 Display in Page View the document you want to redact.
2 Either select the text to be obliterated using the I-beam tool or press Shift and left-click
to display the crosshair and select the area.
3 On release of the mouse button the context sensitive menu appears from which you
can select the Redact option. Alternatively, with the text or area select choose the
Advanced > Redact Selection menu option.
6.10 Find and replace text—one or more instances
Options to search through the text in a document and replace one or all occurrences
of a word or phrase is provided.
NOTE: Text correction text is only possible when the document security allows text editing.
1 Display in Page View the document you want to find and replace text.
2Click Edit > Replace.... This displays the Find and Replace dialog:
3 Enter the word or phrase you want to find in the Find what field.
4Use the Match case, Whole words and Search backward options to refine your search.
5 Enter the word or phrase you want to use in the Replace with field.
6 The first occurrence found is highlighted. Click Replace to replace just the currently
selected instance or click Replace All to replace all instances within the document.
7Use the Find option to search for the next occurrence of the word or phrase (if you
have chosen to replace only a single instance). If you don’t want to replace an instance,
click Find again to go to the next instance.
8 Click the close icon at the top right hand corner of the dialog to close it.
NOTE: If you have previously performed a search or replace, select the down-arrows to re-select your
earlier options. Occurrences of a word or phrase that form part of an image, such as a photograph
or scanned image, are not found. Also, when replacing text you should consider the text flow.
6.11 Add comments/notes
Select the tool followed by the location (or vice-versa) to add notes to a document.
To add a comment/note to a document:
1 Display the document in Page View.
2Click the Comments tab in the Navigation pane.
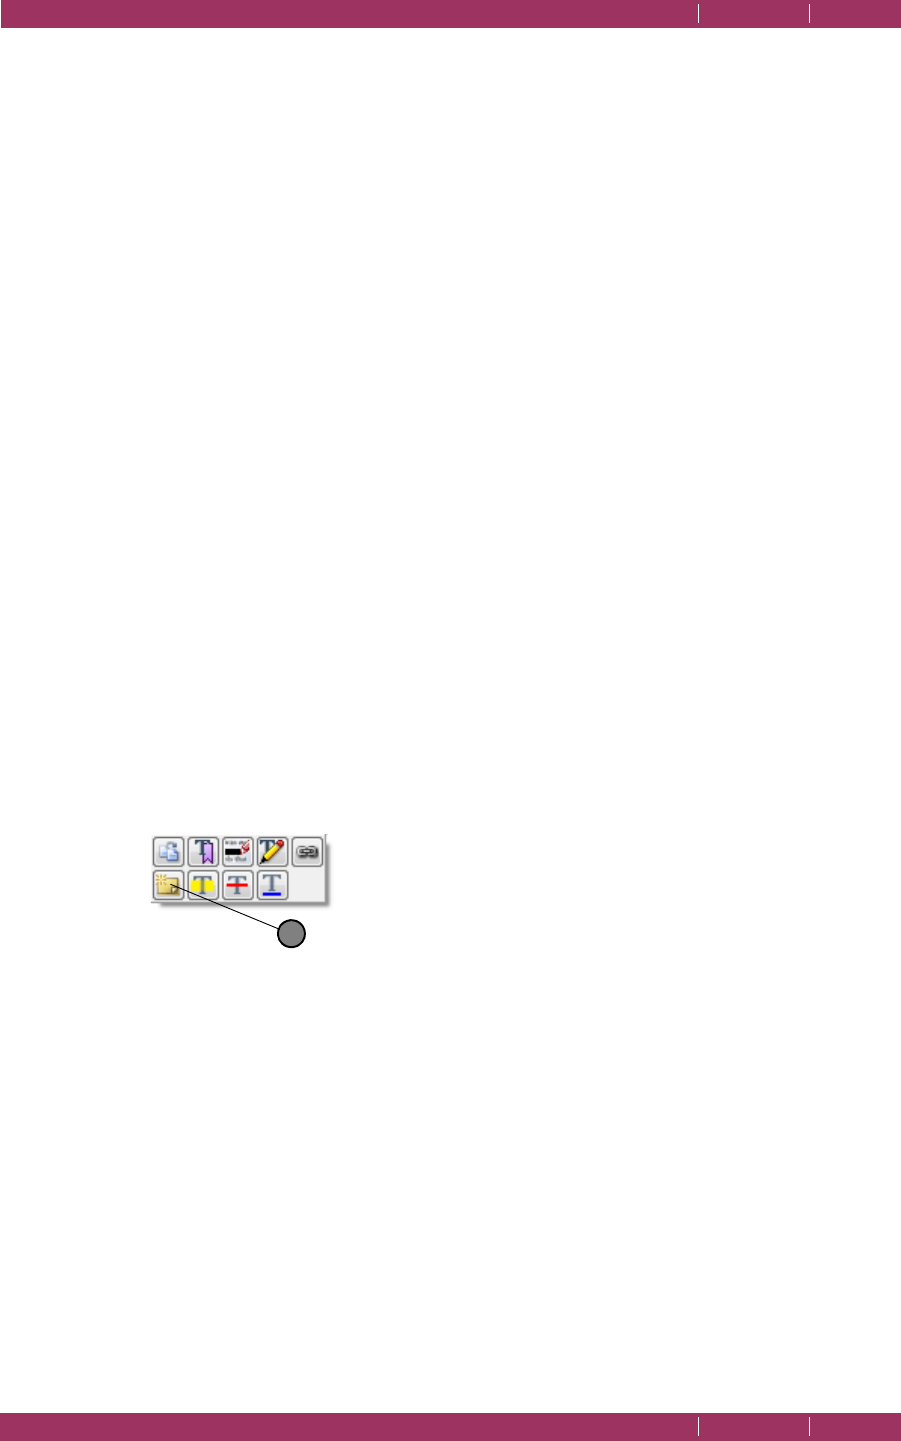
C
OREL
PDF F
USION
U
SER
G
UIDE
HOW DO I...? INDEX CONTENTS 75
ADD NOTES CONTAINING SELECTED TEXT INDEX CONTENTS 75
3 Select Document > Comments > Note or the Note icon in the Navigation pane toolbar
followed by the location for the note. Alternatively, right-click the location for the note
and select Note from the pop-up menu.
4 Enter the text for your note.
5 Click the close icon when you have entered the text. The new comment appears in the
Navigation pane.
6 Right-click the note on the page or in the Navigation pane and select Properties to
change the properties of the note.
7 In the Properties dialog you can change the title and color of the note. For more
information see “Annotation properties” on page 101.
NOTE: If you change the title of the Note in the Properties dialog this remains for any other notes you may
create. This is useful when you are marking up a document and want the document’s author to
see who added the note.
8Click OK when you are happy with the note.
6.12 Add notes containing selected text
You can add Notes containing text selected on the page to a document:
1 Select, in Page View, the page onto which you want to place the note.
2 Select the text you want to appear in the note using the I-beam tool or press Shift and
left-click to display the crosshair and select an area.
3 On release of the button the context sensitive menu appears.
Figure 6.8 Context-sensitive text menu
4Click the Note icon (1) in the menu. On release of the button a note is opened
containing the text you previously selected.
5 In the Properties dialog change the title and color of the note. For more information see
“Annotation properties” on page 101.
NOTE: If you change the title of the Note in the Properties dialog this remains for any other notes you may
create. This is useful if you are marking up a document and want the document’s author to see
who added the note.
6 Click OK when you are happy with the note.
1

C
OREL
PDF F
USION
U
SER
G
UIDE
HOW DO I...? INDEX CONTENTS 76
ADD TEXT ANNOTATIONS INDEX CONTENTS 76
6.13 Add text annotations
Highlights, underlines or strike-out text annotations are added to a document using two
methods. Select the text followed by the tool or vice-versa:
1 Select, in Page View, the page onto which you want to place the annotation.
2 Select the text you want to affect using the I-beam tool or press Shift and left-click to
display the crosshair and select an area.
3 On release of the button the context sensitive menu appears.
Figure 6.9 Context-sensitive menu
4 Click the icon in the menu to add the required highlight (1), strike-out (2) or underline
(3).
Or:
1 Select Document > Comments > then the tool you want to use. Or right-click the page
and select the tool from the pop-up menu.
2 Move the cursor over the text to annotate and select it using the I-beam or press Shift
and left-click to display the crosshair and select an area. The new text annotation appears
in the Navigation pane.
3 Right-click the annotation on the page or in the Navigation pane and select Properties
to change the annotation properties.
4 Change the title and color of the annotation in the Properties dialog. For more
information see “Annotation properties” on page 101.
NOTE: If you change the title of the Note in the Properties dialog this remains for any other notes you
create. This is useful when you are marking up a document and want the document’s author to
see who added the note.
5Click OK when you are happy with the note.
6.14 Add bookmarks
Bookmarks are added to a document using two methods: select the text or area
followed by the tool or vice-versa.
1 Select, in Page View, the page onto which you want to place the bookmark.
2 Select the text using the I-beam tool or hold Shift and select the area you want to
bookmark.
12 3
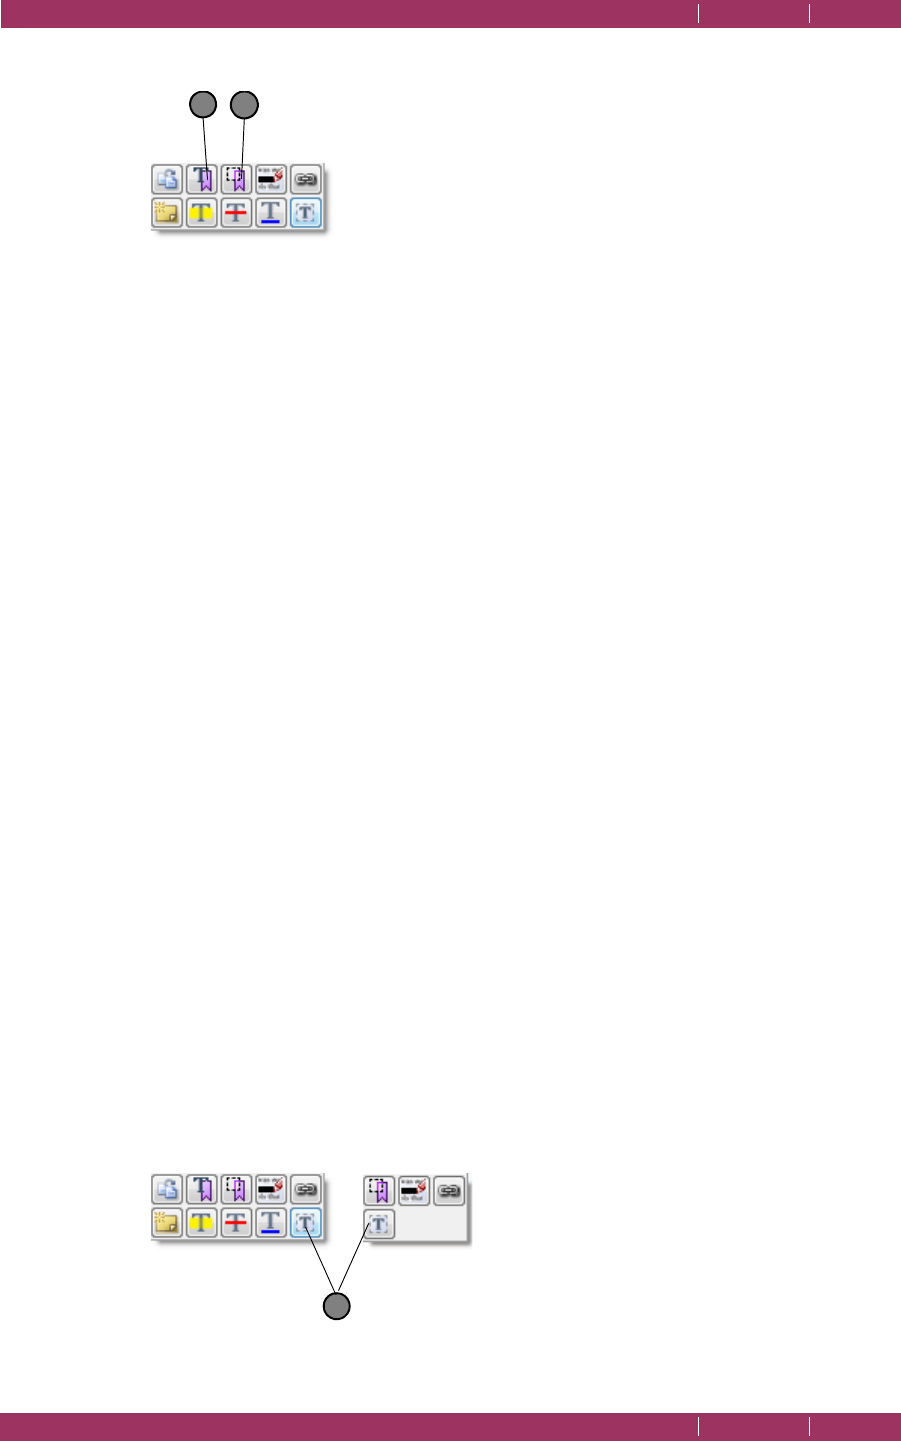
C
OREL
PDF F
USION
U
SER
G
UIDE
HOW DO I...? INDEX CONTENTS 77
ADD FREE TEXT ANNOTATIONS INDEX CONTENTS 77
3 On release of the button the context sensitive menu appears.
Figure 6.10 Context-sensitive text and area icons
4Click the Text Bookmark (1) or Area Bookmark (2) icon to display the Bookmark
Properties dialog.
5 Select the required style of the bookmark. For more information see “Bookmark
properties” on page 96.
6Click OK when you are happy with the bookmark.
Or:
1 Select Document > Comments > then either Add Bookmark, Add Text Bookmark or
Add Area Bookmark.
2 Select the page, text, or select the area (depending on your selection in 2), to display
Bookmark Properties dialog.
3 Change the title and color of the bookmark. For more information see “Bookmark
properties” on page 96.
4Click OK when you are happy with the bookmark.
6.15 Add free text annotations
Text can be added to a page as a free annotation. The font, style, justification and color
of the text can be changed to your preference. You can choose to change the properties
of free text annotations. When the text is created you can choose to flatten the text
onto the page so that it is treated in the same way as any other text.
Free text annotations are added to a document using two methods. Select the text
followed by the tool or vice-versa:
1 Select, in Page View, the page onto which you want to place the annotation.
2 Press Shift and left-click to display the crosshair and select an area.
3 On release of the button one of the context sensitive menus appears.
Figure 6.11 Context-sensitive menus
12
1

C
OREL
PDF F
USION
U
SER
G
UIDE
HOW DO I...? INDEX CONTENTS 78
ADD HYPERLINKS INDEX CONTENTS 78
4 Click the free text icon (1) or select Document > Comments > Free Text or press Alt
+ T.
5 Click within the selected area and then type in your text.
6 When the text is typed you can select the new text and apply formatting by selecting
the from the options available. For more information see “Free text annotations” on
page 102.
Or:
1 Select, in Page View, the page onto which you want to place the free text.
2 Select Document > Comments > Free Text or press Alt + T. The crosshair appears
ready for you to select an area on the page.
3 Select an area on the page.
4 Click within the selected area and then type in your text.
5 When the text is typed you can select the new text and apply formatting by selecting
from the options available. For more information see “Free text annotations” on
page 102.
NOTE: To flatten the free text annotation so that the text becomes part of the underlying page see
“Flatten annotation” on page 104
.
6.16 Add hyperlinks
You can create and edit hyperlinks to other pages within the document, web pages or
another file.
You can add three types of hyperlinks to a document: a link to a page, a link to a web
page and a link to a file. Once a link is added to a document selecting that link will
automatically display the linked page, web page or file.
1 Select, in Page View, the page onto which you want to place the link.
2 Select some text or press Shift and left-click to display the crosshair and select an area.
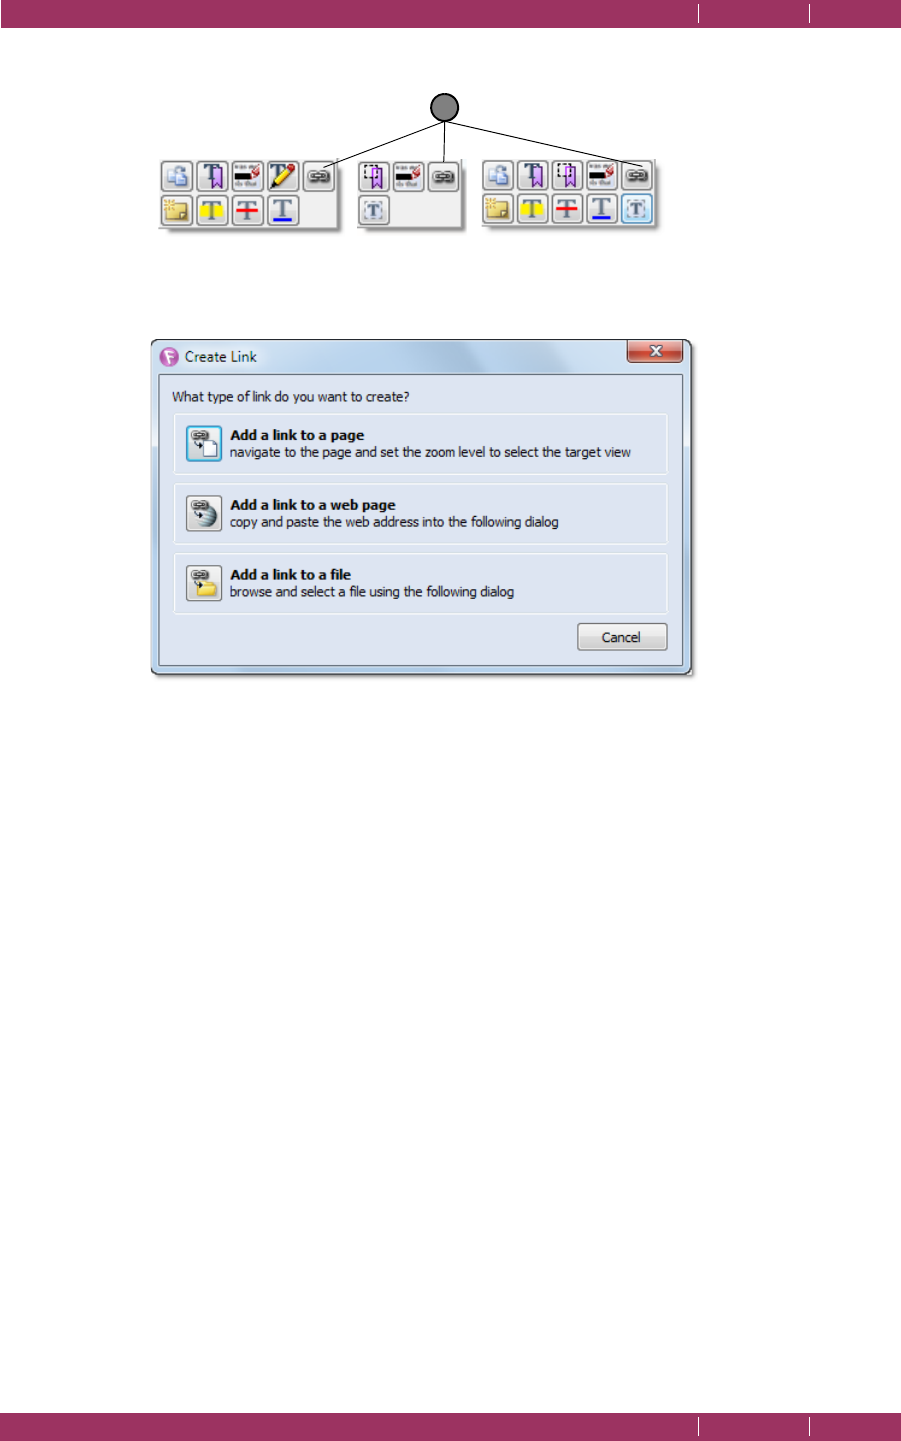
C
OREL
PDF F
USION
U
SER
G
UIDE
HOW DO I...? INDEX CONTENTS 79
CHANGE THE DESTINATION OF THE OUTPUT FILE INDEX CONTENTS 79
3 On release of the button one of the context sensitive menus appears:
Figure 6.12 Context-sensitive menus
NOTE:
Click the hyperlink icon (1) to display the Create Link dialog:
Figure 6.13 Create Link dialog
Add a link to a page
Select this option followed by clicking the page to which you want to
display when the link is selected.
Add a link to a web page
Select this option and enter the URL of the web page you want to
display when the link is selected. You can omit the
http://
part as that
is automatically added.
Add a link to a file
Select this option and use the displayed browser to select the file you
want to open when the link is selected.
NOTE: If you add a link to a PDF which is moved onto another machine, the file and associated application
must exist in the same location on that machine for the link to work.
For more information see “Hyperlink properties, delete and edit” on page 105.
6.17 Change the destination of the output file
By default, output files are created in the same folder as the input file. You can change
the output destination:
1Use File > Open or drop a file onto the Assembly or Page View to open a document.
1

C
OREL
PDF F
USION
U
SER
G
UIDE
HOW DO I...? INDEX CONTENTS 80
PRODUCE MORE COMPACT PDF FILES INDEX CONTENTS 80
2 Make any changes to the document.
3Click File > Save As.... This displays the Save As dialog.
4 Select the output Document type (XPS, PDF or DOC).
5 Select the required Setup name.
6 Make sure the General tab is selected.
7Check the Always output files to option.
8Either, select the Browse... option to display a Browse For Folder dialog that lets you
select the required location.
9Click OK to accept the change. Click Cancel to abort the change.
6.18 Produce more compact PDF files
The following options have an effect on the size of the output PDF file:
•“Compression” on page 80
•“Subset fonts” on page 81
The default settings after installation are designed to give the maximum lossless
compression for general use.
6.18.1 Compression
The compression options reduce the size of your file by varying amounts. For full details
see “Compression tab (PDF)” on page 117.
1Use File > Open or drop a file onto the Assembly or Page View to open a document.
2 Make any changes to the document.
3Click File > Save As.... This displays the Save As dialog.
4 Select the output Document type as PDF.
5 Select the Setup name you want to edit.
6Click Edit....
NOTE: If you have one of the standard setups selected you cannot edit it.
7 Make sure the Compression tab is selected.
8Check Compress text and line art option to apply zip compression to the PDF
commands in the page descriptions.
9 Make a selection in each of the Compression options:
Zip compression is usually the best overall compromise setting for images as it is efficient
and lossless. If you can tolerate lossy compression, that is, compression that throws some
of the data away never to be retrieved, use JPEG compression.

C
OREL
PDF F
USION
U
SER
G
UIDE
HOW DO I...? INDEX CONTENTS 81
PRODUCE PDF FILES THAT CAN BE SENT BY E-MAIL INDEX CONTENTS 81
You may find that Zip with Predictor compression sometimes improves the performance
on images where there are lots of similarly colored pixels. Note that the terms Zip and
Flate are interchangeable; they both refer to the same kind of compression.
10 Make a selection in each of the Downsampling options and choose a target resolution.
These options allow you to control whether and how Corel PDF Fusion reduces the
resolution of images in the file input. Remember, when you halve the resolution you
quarter the amount of data.
11 Click OK to accept the changes. Select Cancel to abort the changes.
6.18.2 Subset fonts
The Subset fonts options reduce the size of the output. When you are working in a
controlled environment where you know which fonts are loaded on the destination
computer, choosing not to embed some or all fonts can further reduce the size.
This option is selected by default. Therefore it may not need setting.
1Use File > Open or drop a file onto the Assembly or Page View to open a document.
2 Make any changes to the document.
3Click File > Save As.... This displays the Save As dialog.
4 Select the output Document type as PDF.
5 Select the Setup name you want to edit.
6Click Edit....
7 Make sure the Fonts Embedding tab is selected.
8Check Subset fonts option.
9Click OK to accept the changes. Select Cancel to abort any changes.
6.19 Produce PDF files that can be sent by e-mail
To produce PDF files that can more easily be sent by e-mail:
1Use File > Open or drop a file onto the Assembly or Page View to open a document.
2 Make any changes to the document.
3Click File > Save As.... This displays the Save As dialog.
4 Select the output Document type as PDF.
5 Select the Setup name you want to edit.
6Click Edit....
7 Make sure the General tab is selected.

C
OREL
PDF F
USION
U
SER
G
UIDE
HOW DO I...? INDEX CONTENTS 82
PRODUCE FILES FOR FAST WEB VIEWING INDEX CONTENTS 82
If you want to automatically open the default e-mail application when the PDF is created:
8Check Send the PDF as an e-mail attachment in the Output options.
9Click OK to accept the changes. Select Cancel to abort any changes.
To find out how to e-mail documents and comments see “E-mail documents” on
page 84 and “E-mail comments” on page 85.
NOTE: In the Trial period, Corel PDF Fusion is fully featured for 30 days. After this period Corel PDF Fusion
remains fully featured and lets you view and print documents. However, saved documents and
changed documents you print or attach to an e-mail are watermarked.
6.20 Produce files for fast web viewing
If you intend to distribute your PDF files via the web and want to produce a document
that is displayed faster, using page-at-a-time downloading, use the Optimize for fast web
viewing option. When a document is optimized for page-at-a-time downloading, the
web server sends individual pages of information requested by the user, rather than the
whole PDF document:
1Use File > Open or drop a file onto the Assembly or Page View to open a document.
2 Make any changes to the document.
3Click File > Save As.... This displays the Save As dialog.
4 Select the output Document type as PDF.
5 Select the Setup name you want to edit.
6Click Edit....
7 Make sure the General tab is selected.
8Check Optimize for fast web viewing in the File options section.
9Click OK to accept the changes. Select Cancel to abort any changes.
NOTE: Fast web viewing depends on the configuration of the web server and also the capabilities of the
PDF client. This option ensures that the file meets the requirements for Linearized PDF and, under
the right circumstances, it could be delivered and displayed progressively.
6.21 Launch application to view the file when complete
You can configure Corel PDF Fusion to automatically open the default viewing
application on your computer when you create an output file:
1Use File > Open or drop a file onto the Assembly or Page View to open a document.
2 Make any changes to the document.
3Click File > Save As.... This displays the Save As dialog.
4 Select the output Document type (PDF or XPS).

C
OREL
PDF F
USION
U
SER
G
UIDE
HOW DO I...? INDEX CONTENTS 83
SHARE SETUPS INDEX CONTENTS 83
5 Select the Setup name you want to edit.
6Click Edit....
7 Make sure the General tab is selected.
8 Check either, View the PDF document after creation or View the XPS document after
creation in the Output options section (depending on whether you are editing a PDF
or XPS setup).
9Click OK to accept the changes. Select Cancel to abort any changes.
6.22 Share setups
All your Setups can be exported and then subsequently imported for use on other
installs of Corel PDF Fusion.
•“Export setups” on page 83
•“Import setups” on page 84
6.22.1 Export setups
Use the Export option to expor t an XML file containing the details of your setup for use
on another computer or by another person. This XML file can be transferred between
versions of Corel PDF Fusion. Use the Import option to import such an XML file,
described in “Importing setups” on page 112. This option is used to ensure that all users
within an organization have the same setups and, therefore, create output documents of
the same type.
NOTE: An XML file is a text file which can be opened and hand edited. However, doing this may cause
your version of Corel PDF Fusion to produce unexpected results or fail.
When a setup file is exported, all setups, default and custom, are saved to the XML file.
When an XML file is subsequently imported you are presented with the option to accept
or reject each individual setup.
To create an XML setup file for distribution to other users of Corel PDF Fusion:
1 Ensure all your setups are correct in all details.
2Use File > Open or drop a file onto the Assembly or Page View to open a document.
3 Make any changes to the document.
4Click File > Save As.... This displays the Save As dialog.
5 Select the output Document type (PDF or XPS).
6 Select the Setup name you want to edit.
7Click the Export option.
8 Use the displayed Export Setup dialog to choose a location and name for your XML file.
Ensure the file has a
.xml
extension.

C
OREL
PDF F
USION
U
SER
G
UIDE
HOW DO I...? INDEX CONTENTS 84
E-MAIL DOCUMENTS INDEX CONTENTS 84
9Click Save to save the file.
NOTE: When an XML file is exported and subsequently imported the Always output files to and Launch
on job completion locations are not transferred. This is because these locations are system specific
and may not be appropriate on your system.
6.22.2 Import setups
Use the Import option to import an XML file containing the setup from another
computer or user. Use the Export setups option to create an import file, as described
in “Exporting setups” on page 112. This option is used to ensure all users within an
organization have the same setups and, therefore, create output documents of the same
type.
To import an XML setup file:
1Use File > Open or drop a file onto the Assembly or Page View to open a document.
2 Make any changes to the document.
3Click File > Save As.... This displays the Save As dialog.
4Click Edit....
5Click the Import option on the XPS, PDF or DOC setups dialog.
6 Use the displayed Import Setup dialog to choose the XML file to be imported. The file
has a
.xml
extension.
7Click Open to import the file.
8 For each individual setup a confirmation prompt appears.
9Click Ye s to import the setup. Click No to cancel the import of the setup.
NOTE: When an XML file is imported, the Always output files to and Launch on job completion locations
are not transferred. This is because these locations are system specific and may not be appropriate
on your system.
6.23 E-mail documents
To add an open document as an attachment to an e-mail as a PDF or XPS file:
1 Make sure the document you want to e-mail is selected.
2 Select File > Email > Document as PDF or Document as XPS.
Your document is converted to the selected format, an e-mail is opened with your
system registered e-mail application, and the document is added as an attachment.

C
OREL
PDF F
USION
U
SER
G
UIDE
HOW DO I...? INDEX CONTENTS 85
E-MAIL COMMENTS INDEX CONTENTS 85
To find out how to prepare documents so that they can more easily be sent by e-mail
see “Produce PDF files that can be sent by e-mail” on page 81.
NOTE: In the Trial period, Corel PDF Fusion is fully featured for 30 days. After this period Corel PDF Fusion
remains fully featured and lets you view and print documents. However, saved documents and
changed documents you print or attach to an e-mail are watermarked.
6.24 E-mail comments
When comments are added to a document they can be saved as an FDF file. FDF files
are used when you want to send the comments you have made in a document to
someone who you know has the original PDF file. FDF files are much smaller in size and,
therefore, much more portable.
To add the comments in document as a .fdf attachment to an e-mail:
1 Make sure the document containing the comments you want to e-mail is selected.
2 Select File > Email > Comments.
The comments are exported to an FDF file, an e-mail is opened with your system
registered e-mail application with the FDF file as an attachment.
See also “Import / Export / Email Comments” on page 101.
6.25 Find the version number of Corel PDF Fusion
To report and issue it is useful if you can find the version number of Corel PDF Fusion:
1 Select Help > About.
The version number and build date is in the lower left corner of the dialog.
6.26 Remove tooltips or tool labels from Corel PDF Fusion
To show or hide the tooltips or tool labels (text below the icon):
1 Select Help > Tooltips or Help > Tool Labels.
Repeat the selection to turn them back on.
6.27 Add security to a document
To add security to a document:
1 Select the document to which you want to add security.
2 Select Document > Set Document Security > Standard.
3 Select the desired Encryption level. For more information see “Encryption level” on
page 90.

C
OREL
PDF F
USION
U
SER
G
UIDE
HOW DO I...? INDEX CONTENTS 86
ADD A WATERMARK TO A DOCUMENT INDEX CONTENTS 86
4 Select the options you want to protect such as Printing, Copying of text and graphics,
General editing and so on.
5Click Next >.
6Under Requires a password to change security settings enter a password to prevent
unauthorized users from changing the security settings in force in the document.
7Under Requires a password to open document enter a password to prevent
unauthorized users from opening the document.
NOTE: If you forget or do not have the password you are not able to access the document.
8Click Finish to apply the new security settings to your document.
9 Once the document is saved the passwords must be used to open the document as well
as perform any of the restricted options.
6.28 Add a watermark to a document
This section describes how to add a watermark to every page of a document.
NOTE: The watermark added by this procedure is different to the system generated watermark displayed
when Corel PDF Fusion is used in “viewer mode”.
To add a watermark to a document:
1 Open and select the document to which you want to add the watermark.
2 Select Document > Watermark... to display the Watermarking options.
3 Enter the text for your watermark in the Text field.
4In the Font and Style panel you can select the following options:
Font
Make a selection from the three available fonts.
Style
Select either bold or outline text.
Color
Select the color icon to display a color picker. Choose a color from the
set of basic colors, select a color in the picker, or enter specific values.
Click Add to Custom Colors to save it when you have found a color
you like.
Size
Either select a specific point size from the drop-down menu or select
Auto fit. Auto fit automatically expands the text so that it fits the
currently selected paper size.

C
OREL
PDF F
USION
U
SER
G
UIDE
HOW DO I...? INDEX CONTENTS 87
ADD A WATERMARK TO A DOCUMENT INDEX CONTENTS 87
Opacity
Use the slider to choose an opaque value. A low value means that the
text is less opaque, (more transparent). Whereas a high value means
that the text is more opaque (less transparent).
NOTE: The character “A” graphic at the lower right side of the Font and Style panel displays the currently
selected opacity and color values.
In the Position panel you can select the following options:
Offset from center
If you want to move the watermark from the center of the page use the
drop-down menus and value fields to determine its new position.
Rotation
The rotation dial allows you to choose the angle at which the text is
displayed. Alternatively, you can enter a specific value into the field or use
the up/down arrows to make a selection.
5 When you are happy with your watermark selections click Apply. Selecting Cancel
aborts the creation of the watermark.
6 When you apply a watermark, a copy of your document containing the watermark is
opened leaving the original document unaffected. You can then choose to save or
abandon the new document.
NOTE: If you are using the Corel PDF Fusion in “viewer mode” a watermark is applied to saved documents.
This is a system generated watermark and cannot be removed or changed without a serial number.

DOCUMENT SETTINGS INDEX CONTENTS 88
Chapter 7 Document settings and
security
This chapter contains information on how to view and change the document settings
and security.
The information provided in the section includes:
•“Document Settings” on page 88
•“Security Settings” on page 90
7.1 Document Settings
Details for the current document are viewed in the Document Settings dialog.
NOTE: The Document Settings options can be viewed and changed at any time from the Document >
Document Settings menu. These options are also set when completing a document for publication
using the Finish Document Wizard.
1 Select the document for which you want to view and edit the settings.
2 Select Document > Document Settings. The details contained in the associated tabs are
the current security settings, as well as general information about the file, such as title
and subject.
For more information about security see “Security Settings” on page 90.
From the Document Settings dialog you can access the following options:
•“Summary—Enter Document Summary Information” on page 88
•“Open Settings—Set Document Open Actions” on page 89
•“Security Settings” on page 90
•“Set File Security—Set Security Permission Options” on page 90
•“Set Document Passwords” on page 91
•“Removing document security settings” on page 92
7.1.1 Summary—Enter Document Summary Information
This is available for XPS and PDF documents.
NOTE: The Summary options are accessed from the Document > Document Settings menu, or from the
File > Finish Document Wizard > Enter Document Summary Information option.

C
OREL
PDF F
USION
U
SER
G
UIDE
DOCUMENT SETTINGS AND SECURITY INDEX CONTENTS 89
DOCUMENT SETTINGS INDEX CONTENTS 89
The Summary tab provides information about the current document, including the file
generating program, the date when the file was created and the last time it was modified.
It also allows you to enter a title, subject, author, and keywords for the document.
7.1.2 Open Settings—Set Document Open Actions
This is available for PDF documents only.
NOTE: The Open Settings options are accessed from the Document > Document Settings menu, or from
the File > Finish Document Wizard > Set Document Open Actions option.
The options in the Document > Document Settings > Open Settings tab determine
how the file is displayed when it is opened.
The following options are available in the Open Settings tab:
Open to page
Enter the page number you want the document to open at. Keep in
mind that document page numbers are not necessarily the same as the
page numbers printed on your document, which are known as
folios
. For
instance, your folios may not include the title page, contents list and
copyright page. Document page numbering includes every page in a
document, starting at the first page (
1
).
View
Select the default page view to use when the document is opened. The
View options are as follows:
Default
: Displays a default page mode setting for the application;
Continuous
: Allows pages to be scrolled;
Single page
: Pages are displayed one at a time.
Zoom level
Select the default zoom level to use when the document is opened.
Navigation
Choose how you want the Navigation pane to appear when the
document is opened. Select from,
Closed
,
Open to Bookmarks
or
Open
to Thumbnails
.
Open in presentation mode
Select to open the document in full screen mode.
Hide menus
Select to conceal program menus when the document is opened.
Hide toolbar
Select to hide these toolbars when the document is opened.

C
OREL
PDF F
USION
U
SER
G
UIDE
DOCUMENT SETTINGS AND SECURITY INDEX CONTENTS 90
SECURITY SETTINGS INDEX CONTENTS 90
7.2 Security Settings
This is available for PDF documents only.
Select Document > Document Settings > Security Settings to open the Security
Settings tab to see what security measures are currently in force,
This tab displays the security settings for the currently selected document.
Remove File Security
Use this to remove file security. The owner-level password is required to
do this.
Set File Security
Use this to set file security. This opens the Set File Security tab.
For more information see:
•“Set File Security—Set Security Permission Options” on page 90
•“Set Document Passwords” on page 91
•“Removing document security settings” on page 92
7.2.1 Set File Security—Set Security Permission Options
This is available for PDF documents only.
NOTE: The Set File Security options are accessed from the Set File Security button on the Document >
Document Settings menu, or from the File > Finish Document Wizard > Set Permissions Options.
To change the security settings that are currently in force in a document:
1Click the Set File Security button on the Security Settings tab. Alternatively, select
Document > Set Document Security > Standard.
2 If the file is protected by a “Change Security” password, enter it in the tab.
3 Set your required security settings from the following options:
Encryption level
Select either
40-bit
or
128-bit encryption
. 40-bit encryption
complies with the PDF 1.3 standard and provides basic PDF file security.
128-bit encryption complies with the PDF 1.4 standard and provides
more advanced security.
Printing
Choose whether to allow or disallow document printing.
Copying of text and graphics
Choose whether to allow the copying of text and graphics in the
document.
Content access for visually impaired
(128-bit encryption only). Choose the security setting for making text
available to screen readers for the visually impaired and for indexing.

C
OREL
PDF F
USION
U
SER
G
UIDE
DOCUMENT SETTINGS AND SECURITY INDEX CONTENTS 91
SECURITY SETTINGS INDEX CONTENTS 91
General editing
Choose the security setting for general editing. General editing includes
working with pages, bookmarks and document opening properties. See
also Document assembly, below.
Document assembly
Choose the security setting for document assembly (deleting, rotating,
inserting and extracting pages), when general editing is
not
allowed. This
option is not available when 40-bit encryption is selected.
Comment authoring
Choose the security setting for adding and changing comments and form
fields. See also, Form Field Fill-in and Signing.
Form field fill-in and signing
Choose the security setting for form fields and digital signatures when
Comment authoring is
not
allowed. Form fields and digital signatures are
not available in Corel PDF Fusion. This option is not available when 40-
bit encryption is selected.
Encrypt metadata
When selected, the document metadata (title, subject, author and so
on) are encrypted along with the document content. Uncheck this
option if you want to encrypt the contents of a document but still allow
search engines access to the document metadata.
This option is available only when you select 128-bit security.
7.2.2 Set Document Passwords
This is available for PDF documents only.
NOTE: The Set Document Passwords options are accessed by pressing Next on the Set File Security menu
on the Document > Document Settings menu, or from the File > Finish Document Wizard > Set
Document Passwords options.
To change the document passwords that are currently in force in a document:
1 In the Document Settings dialog (which is opened in “Set File Security—Set Security
Permission Options”) click Next > to advance. The Security Password and Open
password options appear.
NOTE: For the Next > option to appear you must have an encryption level set. See
“Encryption level”
.
2 Set the following options:
Requires a password to change security settings
Select to enter a password to prevent unauthorized users from changing
the security settings in force in the document.

C
OREL
PDF F
USION
U
SER
G
UIDE
DOCUMENT SETTINGS AND SECURITY INDEX CONTENTS 92
SECURITY SETTINGS INDEX CONTENTS 92
Requires a password to open document
Select this check box and enter a password to prevent unauthorized
users from opening the document.
NOTE: If you forget, or do not have the password you are not able to access the document.
3Click Finish to apply the new security settings to your document.
7.2.3 Removing document security settings
This is available for PDF documents only.
To remove all security settings:
1 Select Document > Set Document Security > None, or click Remove File Security in
the Security Settings tab.
2 Enter the correct password if prompted and click OK.
3Click OK to apply the changes.

WORKING WITH BOOKMARKS INDEX CONTENTS 93
Chapter 8 Working with
annotations
This chapter provides information on how to use bookmarks, comments, free text and
hyperlinks.
The information provided in the section includes:
•“Working with bookmarks” on page 93
•“Working with comments and annotations” on page 98
•“Free text annotations” on page 102
•“Adding hyperlinks” on page 104
•“Spell check comments and free text” on page 106
8.1 Working with bookmarks
This section provides all the information you might need on bookmarks.
Bookmarks allow you to tag and identify locations, selected text and areas. They are
added in the Page View and displayed on the page and in the Navigation pane when the
Bookmarks tab is selected. If your document does not have any bookmarks see “Add
bookmarks” on page 76 for more information.
The available options are:
•“Bookmarks in the Navigation pane” on page 94
•“Bookmark properties” on page 96
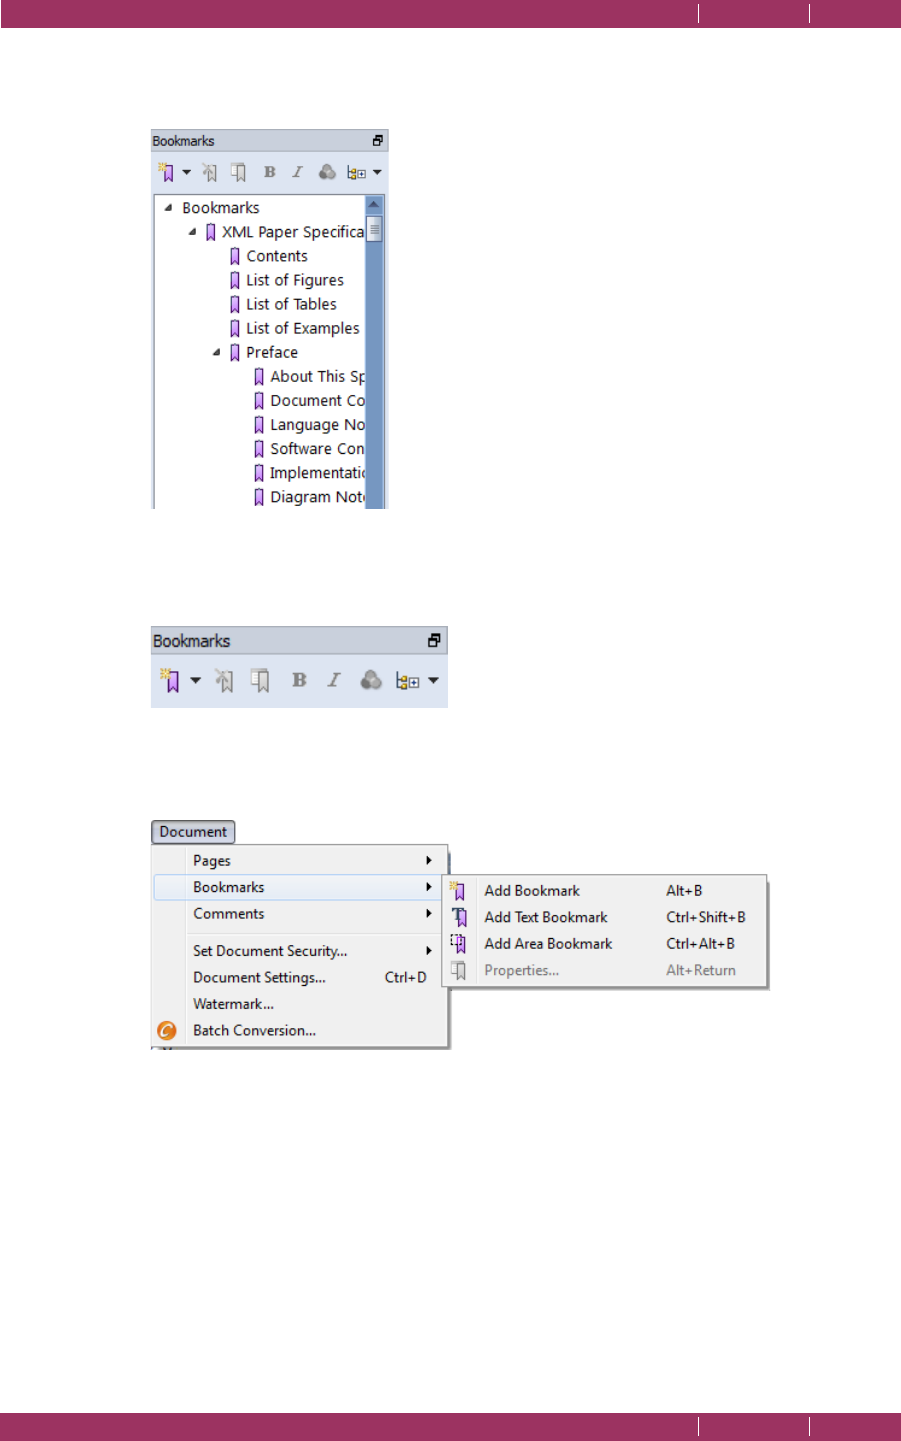
C
OREL
PDF F
USION
U
SER
G
UIDE
WORKING WITH ANNOTATIONS INDEX CONTENTS 94
WORKING WITH BOOKMARKS INDEX CONTENTS 94
8.1.1 Bookmarks in the Navigation pane
Bookmarks are listed in the Navigation pane under the Bookmarks tab.
Figure 8.1 Bookmarks in the Navigation pane
The tools for working with bookmarks are in the Bookmarks toolbar which, by default,
is located in the Bookmarks tab of the Navigation pane.
Figure 8.2 Bookmark tools
You can also select the options from the Document > Bookmarks menu:
Figure 8.3 Document menu bookmark options
When Bookmarks are displayed in the Navigation pane you can:
• Drag and drop bookmarks into a new position in the list.
• Click the bookmarks pane and use your mouse scroll wheel to move to the top or
bottom of the bookmarks list.
• Double-click a bookmark and change its name. After double-clicking you can right-click
and select Cut, Copy, Paste, Delete and Select All. When you have used one of these
options you can also use Undo and Redo. All undo/redo steps are retained until you save
the file. Once saved, all levels of undo/redo are discarded.

C
OREL
PDF F
USION
U
SER
G
UIDE
WORKING WITH ANNOTATIONS INDEX CONTENTS 95
WORKING WITH BOOKMARKS INDEX CONTENTS 95
• Use Shift-click to select multiple consecutive bookmarks.
• Use Ctrl-click to select multiple non-consecutive bookmarks.
• Right-click on a bookmark to display the following pop-up menu:
Figure 8.4 Right-click bookmark menu options
Select All
Select all the bookmarks.
Deselect All
Deselect all bookmarks.
Select Level
Select all bookmarks at the current level.
Delete
Delete the selected bookmarks.
Edit Bookmark Destination
Select to edit the destination of the bookmark. When you click this
option the bookmark highlights. Your next action must be to click
somewhere within the document and specify the location to be
associated with the bookmark.
Properties
Display the Bookmark properties dialog. For more information see
“Bookmark properties” on page 96.
The following tools are available:
Add Bookmark / Add Text Bookmark / Add Area Bookmark
Click the down-arrow to select the Add Bookmark options.
Click Add Bookmark and then click onto the page to specify the location
for the bookmark. The Bookmark Properties dialog appears. See
“Bookmark properties” on page 96.
Click Add Text Bookmark to change cursor to an I-beam selector. Select
the text to be bookmarked. The Bookmark Properties dialog appears.
See “Bookmark properties” on page 96.
Click Add Area Bookmark to change the cursor to a crosshair allowing
you to select an area of the page to be bookmarked. The Bookmark
Properties dialog appears. See “Bookmark properties” on page 96.
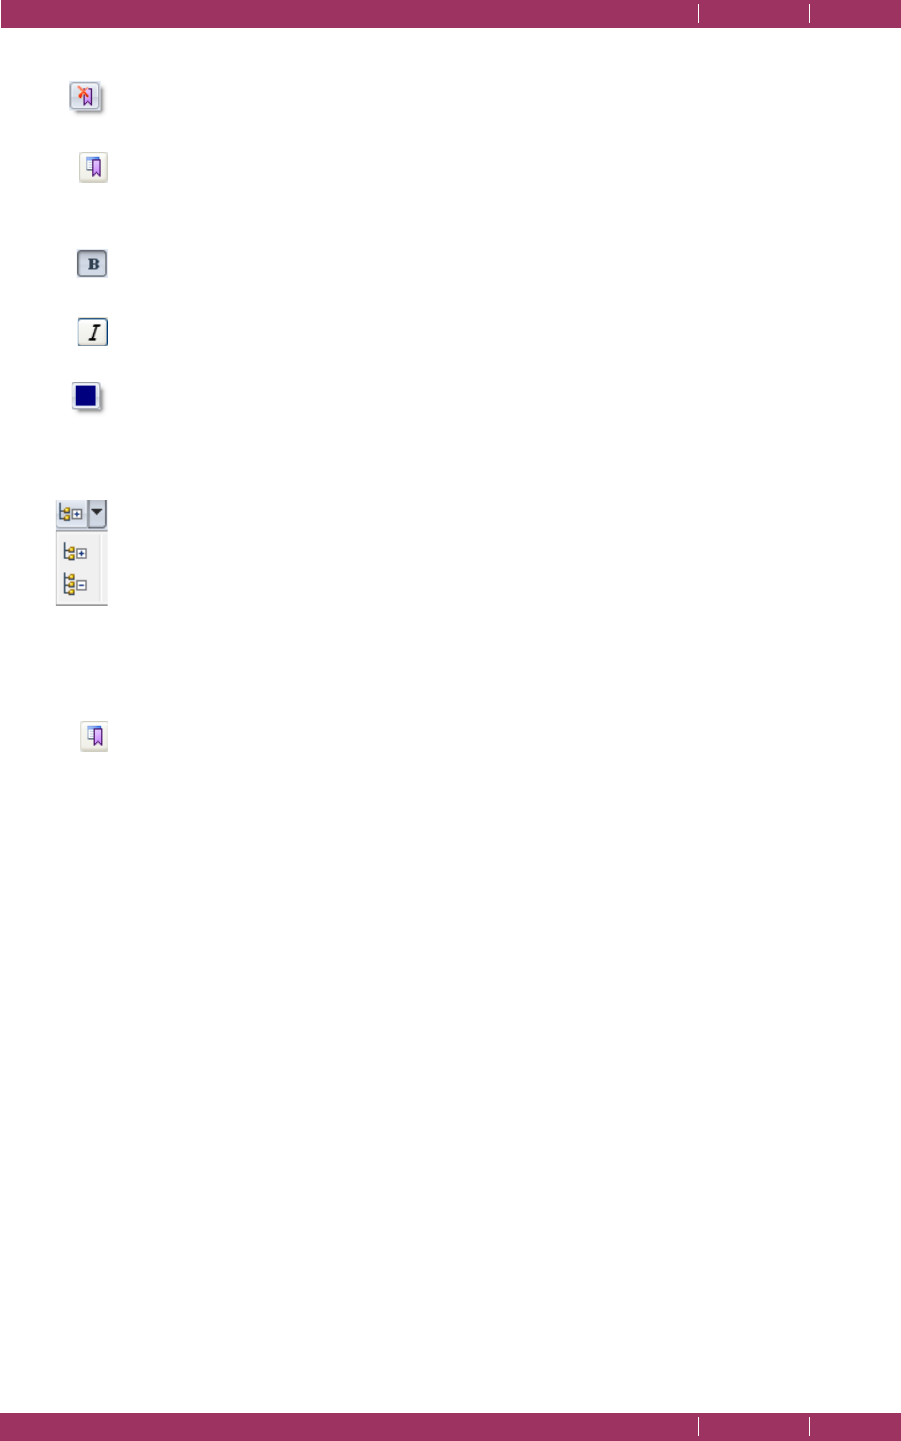
C
OREL
PDF F
USION
U
SER
G
UIDE
WORKING WITH ANNOTATIONS INDEX CONTENTS 96
WORKING WITH BOOKMARKS INDEX CONTENTS 96
Delete Selected Bookmark(s)
Click to delete a bookmark from the list.
View / Edit Properties of Selected Bookmarks
Click to edit the bookmark properties. See “Bookmark properties” on
page 96.
Bold
Select a bookmark and click this icon to make it bold.
Italic
Select a bookmark and click this icon to make it italic.
Choose the color of the Bookmark text
Select a bookmark and click this icon to display the color picker. Choose
from the set of basic colors, select a color in the picker or enter specific
values. Click Add to Custom Colors to save the color.
Expand All / Collapse All
Click the down-arrow and select to expand or collapse all bookmark
entries.
8.1.2 Bookmark properties
To display the bookmark properties:
• Right-click a bookmark and select Properties... from the pop-up menu.
• Select a bookmark and click the View/Edit Properties of Selected Bookmarks icon to
display the Bookmark Properties dialog.
Name
This displays the current bookmark name. You can enter a new name.
Style
These options change the font style of the bookmark.
Bold / Italic
Click to make the bookmark bold or italic.
Color
Click to display a color picker. Choose colors from the set of basic colors,
select a color in the picker, or enter specific values. Click Add to Custom
Colors to save it when you have found a color you like.
The Destination Zoom panel contains the following options that decide the zoom value
of the page to use when the bookmark is selected.
Actual Size (100%)
Display the page associated with the bookmark at actual size.
Fit Width
Display the page associated with the bookmark so that it fits into the
available width of the display window.

C
OREL
PDF F
USION
U
SER
G
UIDE
WORKING WITH ANNOTATIONS INDEX CONTENTS 97
WORKING WITH BOOKMARKS INDEX CONTENTS 97
Fit Page
Display the page associated with the bookmark so that a whole page fits
into the display width.
Fit Selected Area
This only appears when a bookmark is associated with an area using the
Add Area Bookmark option. In this case the page is opened so that the
selected area of the bookmark fits into the display.
No Specific Zoom
With this selected the page is opened with the current zoom option.
Custom (%)
Display the page associated with the bookmark at the zoom value
entered into the Custom field.
NOTE: When you select a bookmark with a specified zoom value the whole document is zoomed to that
value. The document zoom remains in force even if you delete the bookmark that specified the
zoom. You can of course reduce the magnification of the document using
“Magnification”
,
“Zoom
levels”
and
“Page Zoom” on page 33
.
Select OK when you have completed the bookmark properties.
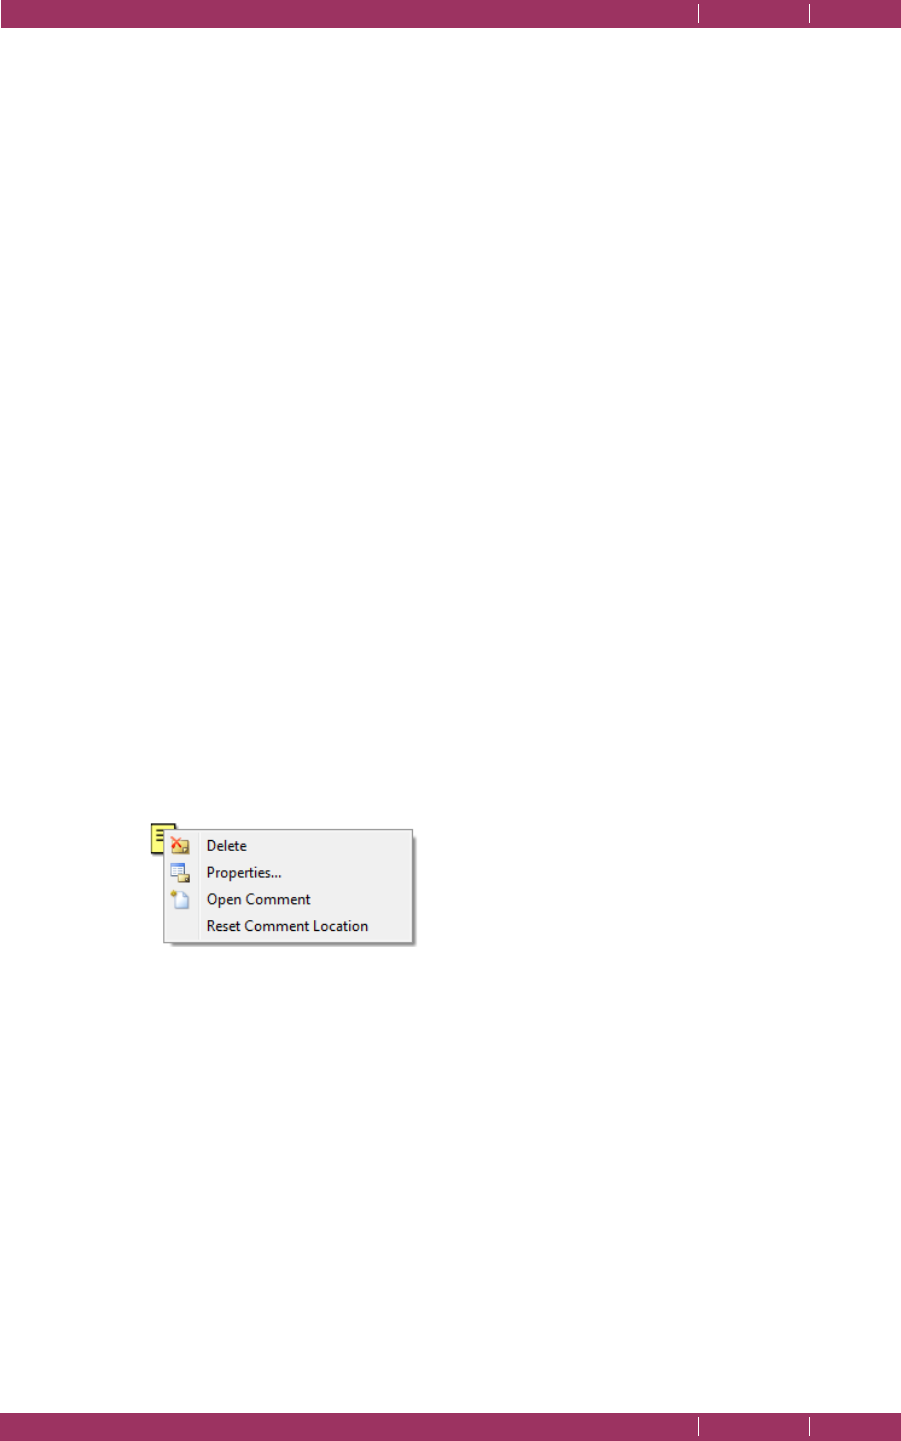
C
OREL
PDF F
USION
U
SER
G
UIDE
WORKING WITH ANNOTATIONS INDEX CONTENTS 98
WORKING WITH COMMENTS AND ANNOTATIONS INDEX CONTENTS 98
8.2 Working with comments and annotations
This section provides information on comments and annotations.
Comments, sometimes called Notes, allow you to add various comments to a
document. Any notes you create can be spell checked. Annotations allow you to mark
text with highlights, underlines or strike-outs. Both comments and annotations are added
in the Page View and displayed on the page and in the Navigation pane when the
Comments tab is selected. If your document does not have any comments or
annotations see “Add comments/notes” on page 74 and “Add text annotations” on
page 76 for more information.
The available options are:
•“Comments in the Page View” on page 98
•“Comments in the Navigation pane” on page 99
•“Annotation properties” on page 101
8.2.1 Comments in the Page View
When the document is displayed in the Page View, comments that have been added to
a PDF document are displayed in their correct location.
When comments are displayed on the page in Page View you can:
• Drag and drop a comment to a new location on the page.
• Double-click a comment to open it.
• Right-click a comment to display the following menu:
Figure 8.5 Right-click comment menu options
Delete
Deletes the selected comment from the document.
Properties
Displays the Annotation properties dialog. For more information see
“Annotation properties” on page 101.
Open Comment
Opens the comment and displays its contents which you can edit. Click
the cross in the top right-hand corner to close the comment.
Reset Comment Location
Resets the comment to its original location.
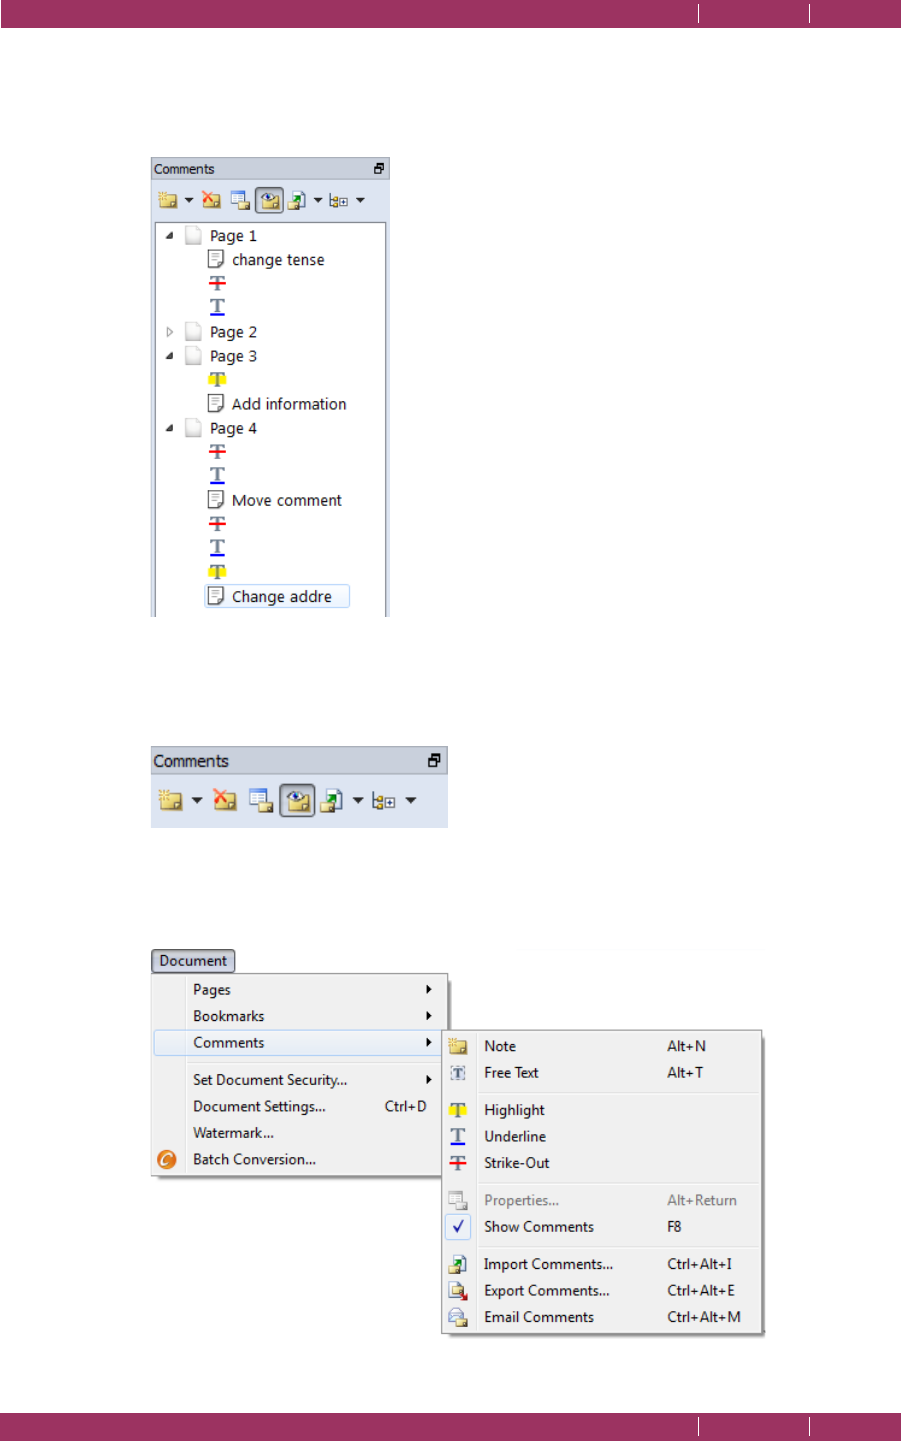
C
OREL
PDF F
USION
U
SER
G
UIDE
WORKING WITH ANNOTATIONS INDEX CONTENTS 99
WORKING WITH COMMENTS AND ANNOTATIONS INDEX CONTENTS 99
8.2.2 Comments in the Navigation pane
Comments that have been added to a document are listed in the Navigation pane under
the Comments tab.
Figure 8.6 Comment pane
The tools for working with comments are found in the Comments toolbar which, by
default, is located in the Comment tab of the Navigation pane.
Figure 8.7 Comment tools
Select these options from the Document > Comments menu:
Figure 8.8 Document menu comment options
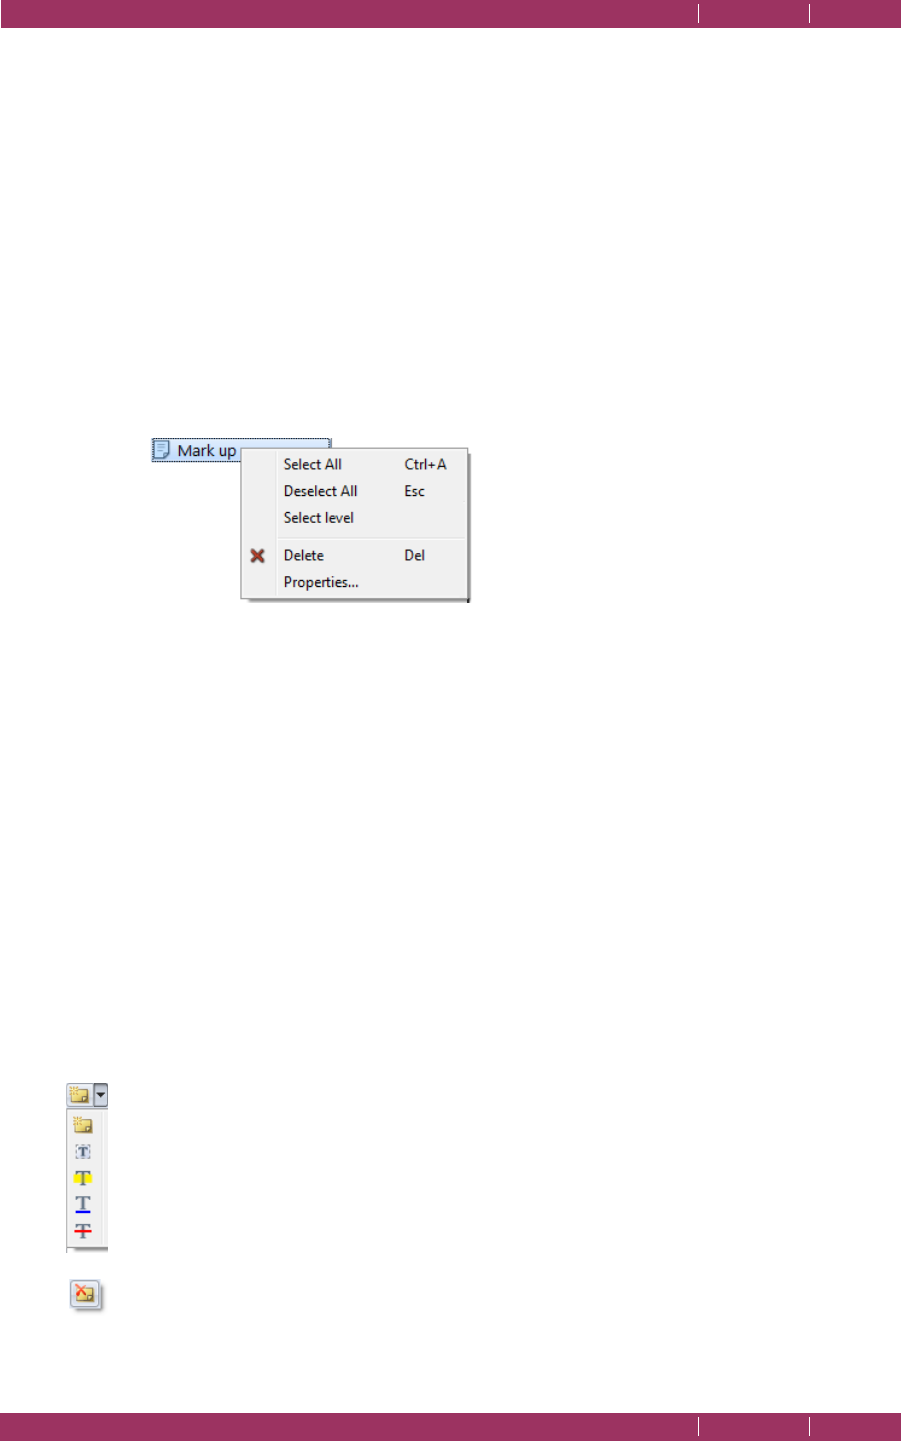
C
OREL
PDF F
USION
U
SER
G
UIDE
WORKING WITH ANNOTATIONS INDEX CONTENTS 100
WORKING WITH COMMENTS AND ANNOTATIONS INDEX CONTENTS 100
When Comments are displayed in the Navigation pane you can:
• Click in the Comments pane and use the mouse scroll wheel to scroll to the top or
bottom of the comments list.
• Double-click a comment and change its name. After double-clicking you can right-click
and select Cut, Copy, Paste, Delete and Select All. When you have used one of these
options you can also use Undo and Redo. All undo/redo steps are retained until you save
the file. Once saved, all levels of undo/redo are discarded.
• Use Shift-click to select multiple consecutive comments.
• Use Ctrl-click to select multiple non-consecutive comments.
• Right-click on a comment to display the following pop-up menu:
Figure 8.9 Right-click comment menu options
Select All
Selects all the comments in the document.
Deselect All
Deselects all comments.
Select Level
Selects all the comments at the current level.
Delete
Deletes the selected comment from the document.
Properties
Displays the Annotation properties dialog. For more information see
“Annotation properties” on page 101.
The following tools are available:
Comment type
Select a comment followed by this icon to display the options to create
a Note, Highlight, Underline or Strikeout annotation. When you select
a Note click the desired location on the page and then enter some text.
For Highlights, Underlines and Strike-outs the cursor changes to an I-
beam allowing you to select the text you want to annotate.
Delete Selected Comments
Select a comment and click this icon to delete it.
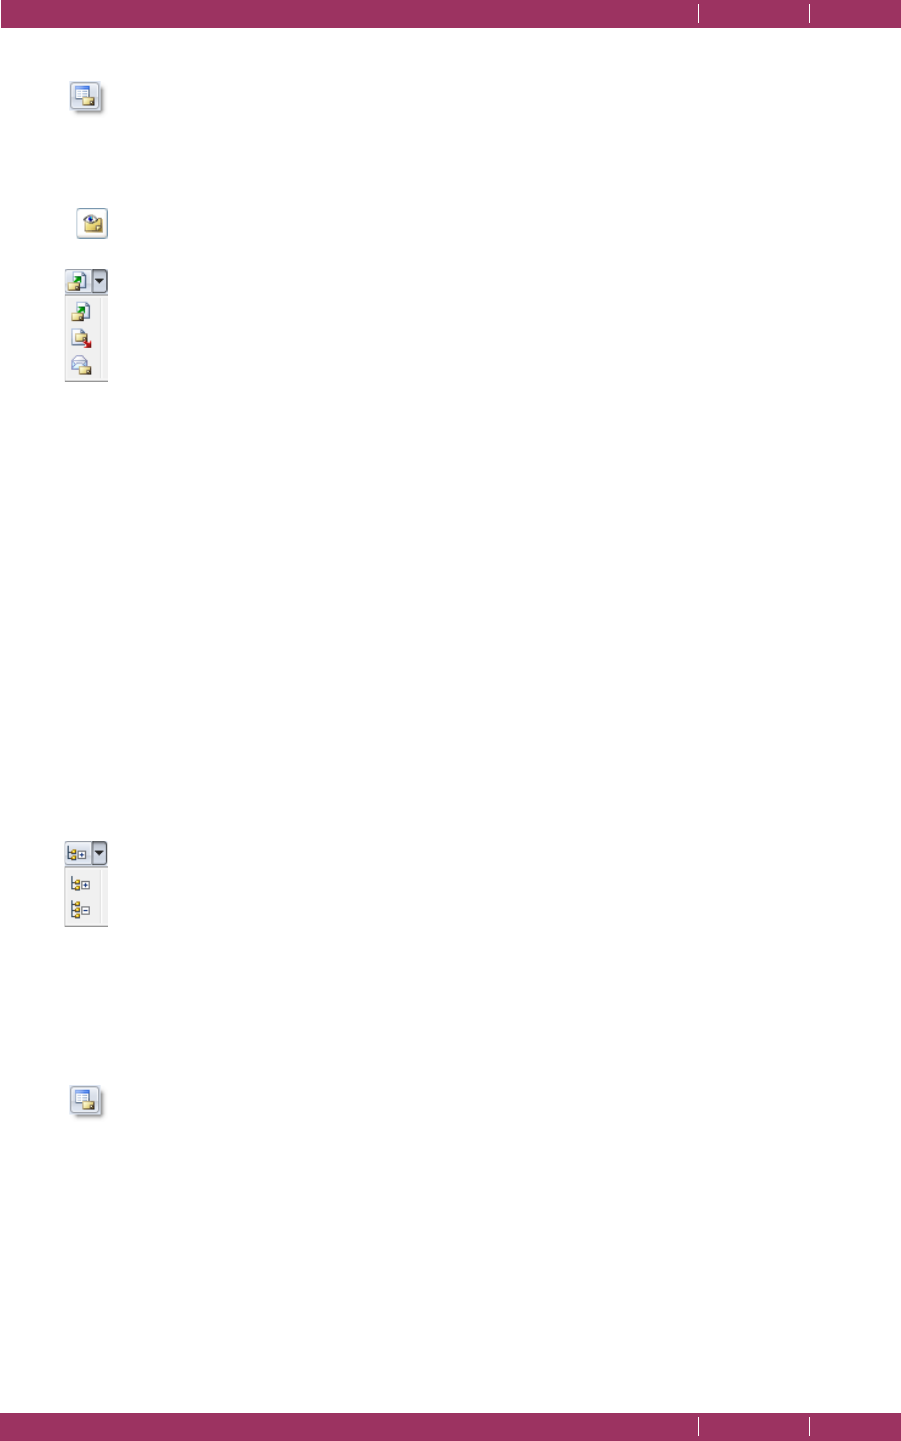
C
OREL
PDF F
USION
U
SER
G
UIDE
WORKING WITH ANNOTATIONS INDEX CONTENTS 101
WORKING WITH COMMENTS AND ANNOTATIONS INDEX CONTENTS 101
View / Edit Properties of Selected Comment
Select a comment and click this icon to display the Annotation
properties dialog. For more information see “Annotation properties” on
page 101.
Show / Hide Comments
Click this icon to show or hide all comments on the page.
Import / Export / Email Comments
Click the down-arrow and select to view the comment options.
You can import or export comments. When comments are exported
they are saved as an FDF file which can later be imported. Use an FDF
file to send your comments when you know that the recipient of your
comments has the original PDF file. FDF files are much smaller in size
and, therefore, much more por table. If you have the original PDF file you
can import the FDF file and all the comments will appear in the correct
locations.
Use the Email Comments option to create an FDF file and open an e-
mail in the system-default e-mailing application containing FDF file as an
attachment.
See also “E-mail comments” on page 85.
NOTE: With Lotus Notes as the default mailer occasional crashes have been observed when using the
Email Comments feature. This appears to be a weakness of the Lotus Notes mail protocol
implementation. To avoid this problem, Lotus Notes users are advised to Export comments to an
FDF file, then to create the mail message and attach the exported FDF file using the Lotus Notes
client.
Expand All / Collapse All
Click the down-arrow and select to expand or collapse all comments in
the document.
8.2.3 Annotation properties
Display the Annotation Properties dialog when you:
• Right-click a comment in either the Navigation pane or in the Page View, and select
Properties... from the pop-up menu.
• Select a comment, in either the Navigation pane or in the Page View, and click the
Comment properties icon to display the Annotation Properties dialog. If the items in the
dialog cannot be changed uncheck Locked.
Title
Your user name is the default title. This is useful when you are marking
up a document and want the document’s author to see who added the
annotation. You can, however, change the title. When you change the
title of an annotation it remains for any other annotations you create.
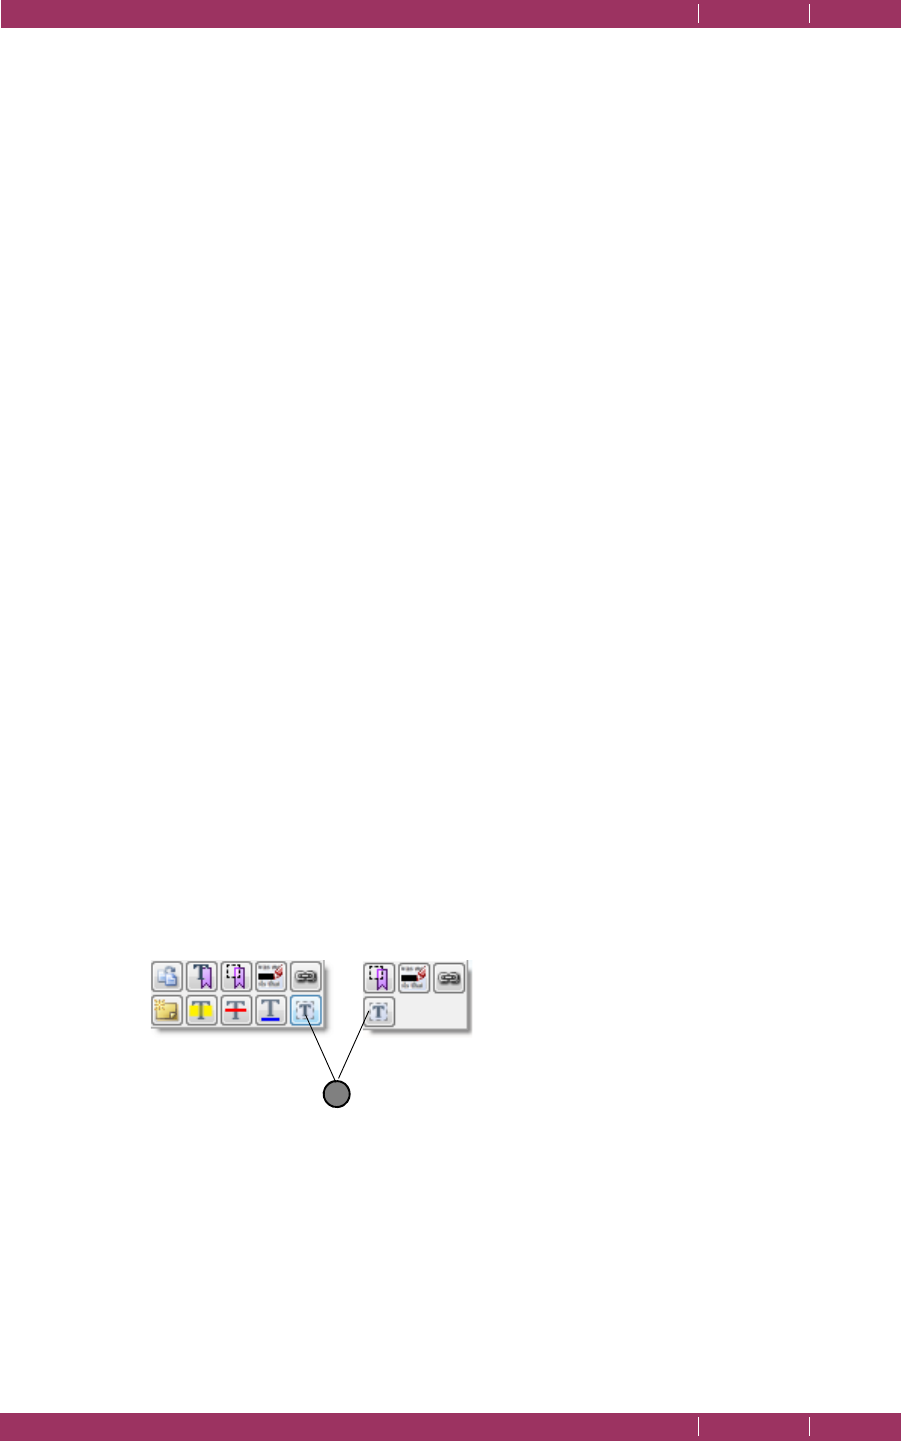
C
OREL
PDF F
USION
U
SER
G
UIDE
WORKING WITH ANNOTATIONS INDEX CONTENTS 102
FREE TEXT ANNOTATIONS INDEX CONTENTS 102
Style
This changes the color style of the comment. Click Color... to display a
color picker. Choose a color from the set of basic colors, click a color in
the picker or by enter specific values. Click Add to Custom Colors to
save it when you have found a color you like.
Property / Value
These are the properties of the selected annotation including: the date
it was created, whether the comment has replies or is a reply, when it
was last modified, its name, its subject and type. These properties cannot
be edited.
Locked
Check Locked to prevent the annotation properties from being
changed.
8.3 Free text annotations
Free text annotations can be added to pages in a various fonts, styles, justifications and
colors. Once you are happy with the text and its style you can “flatten” it onto the page.
You can copy and paste text from and to free text annotations, and the properties of
the free text can be changed.
Once added to a document free text annotations can be moved and re-sized by clicking
and dragging on the frame. In addition, when a page is rotated the free text annotation
is also rotated in the same way as the page, but the toolbar is not.
Free text annotations can be added to a document using two methods. Select the free
text tool followed by selecting an area on the page or vice-versa:
1 Select, in Page View, the page onto which you want to place the annotation.
2 Press Shift and left-click to display the crosshair and select an area.
3 On release of the button one of the context sensitive menus appears.
Figure 8.10 Context-sensitive menus
4 Click the free text icon (1) or select Document > Comments > Free Text or press Alt
+ T.
5 Click within the selected area and then type in your text.
6 When the text is typed you can select the new text and apply formatting by selecting
the from the options available. For more information see “Free text annotations” on
page 102.
1
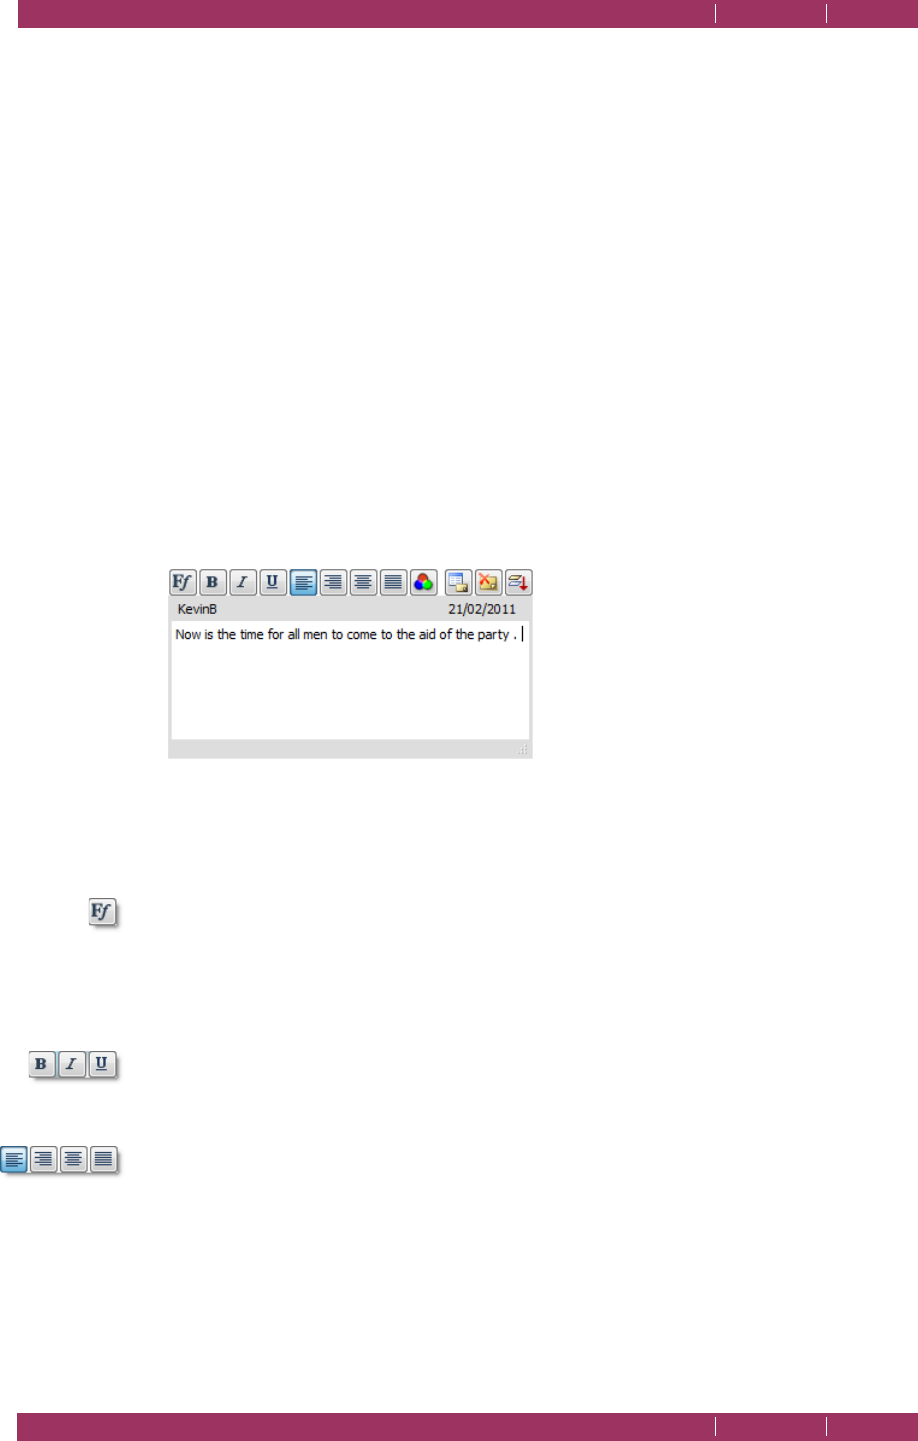
C
OREL
PDF F
USION
U
SER
G
UIDE
WORKING WITH ANNOTATIONS INDEX CONTENTS 103
FREE TEXT ANNOTATIONS INDEX CONTENTS 103
Or:
1 Select, in Page View, the page onto which you want to place the free text.
2 Select Document > Comments > Free Text or press Alt + T. The crosshair appears
ready for you to select an area on the page.
3 Select an area on the page.
4 Click within the selected area and then type in your text.
5 When the text is typed you can select the new text and apply formatting by selecting
the from the options available. For more information see “Free text annotation styles”
on page 103.
NOTE: To flatten the free text annotation so that the text becomes part of the underlying page see
“Flatten annotation” on page 104
.
8.3.1 Free text annotation styles
When you have created some free text you have several formatting options available:
Figure 8.11 The free text icons
To apply text formatting select the text to be changed followed by the relevant icon. The
following options are available:
Font
Use this option to change the displayed font, the font style and the point
size. In addition, you can make the text display with an underline or
strikeout. Use the Writing System drop down menu to select your
preferred language system.
Bold / Italic / Underline
Use these options to change the style of the text. Click once (or select
Ctrl + B, Ctrl + I or Ctrl + U) to apply and style and again to remove it.
Justification Left, Right, Center and Justified
Use these options to change the justification of the text. Click once (or
select Ctrl + L, Ctrl + R, Ctrl + C or Ctrl + J) to apply the style and
again to remove it.

C
OREL
PDF F
USION
U
SER
G
UIDE
WORKING WITH ANNOTATIONS INDEX CONTENTS 104
ADDING HYPERLINKS INDEX CONTENTS 104
Te x t c o l o r
Select the color icon to display a color picker. Choose a color from the
set of basic colors, select a color in the picker, or enter specific values.
Click Add to Custom Colors to save it when you have found a color
you like.
Annotation properties
For more information see “Free text annotation properties” on
page 104.
Delete selected comments
Click this option to delete the current instance of a free text annotation.
Flatten annotation
Click this option to mark the free text annotation for “flattening”. When
the document is subsequently saved, free text marked for “flattening” is
rendered onto the page so it becomes part of the underlying page and
is treated in exactly the same way as any other text. Once free text is
flattened the style and properties of the text cannot be changed.
8.3.2 Free text annotation properties
Title
Your user name is the default title. This is useful when you are marking
up a document and want the document’s author to see who added the
annotation. You can, however, change the title. When you change the
title of an annotation it remains for any other annotations you create.
Style
This changes the color style of the comment. Click Color... to display a
color picker. Choose a color from the set of basic colors, click a color in
the picker or by enter specific values. Click Add to Custom Colors to
save it when you have found a color you like.
Property / Value
These are the properties of the selected annotation including: the date
it was created, whether the comment has replies or is a reply, when it
was last modified, its name, its subject and type. These properties cannot
be edited.
Locked
Check Locked to prevent the annotation properties from being
changed.
8.4 Adding hyperlinks
You can add three types of hyperlinks to a document: a link to a page, a link to a web
page and a link to a file. Once a link is added to a document selecting that link will
automatically display the linked page, web page or file.
1 Select, in Page View, the page onto which you want to place the link.
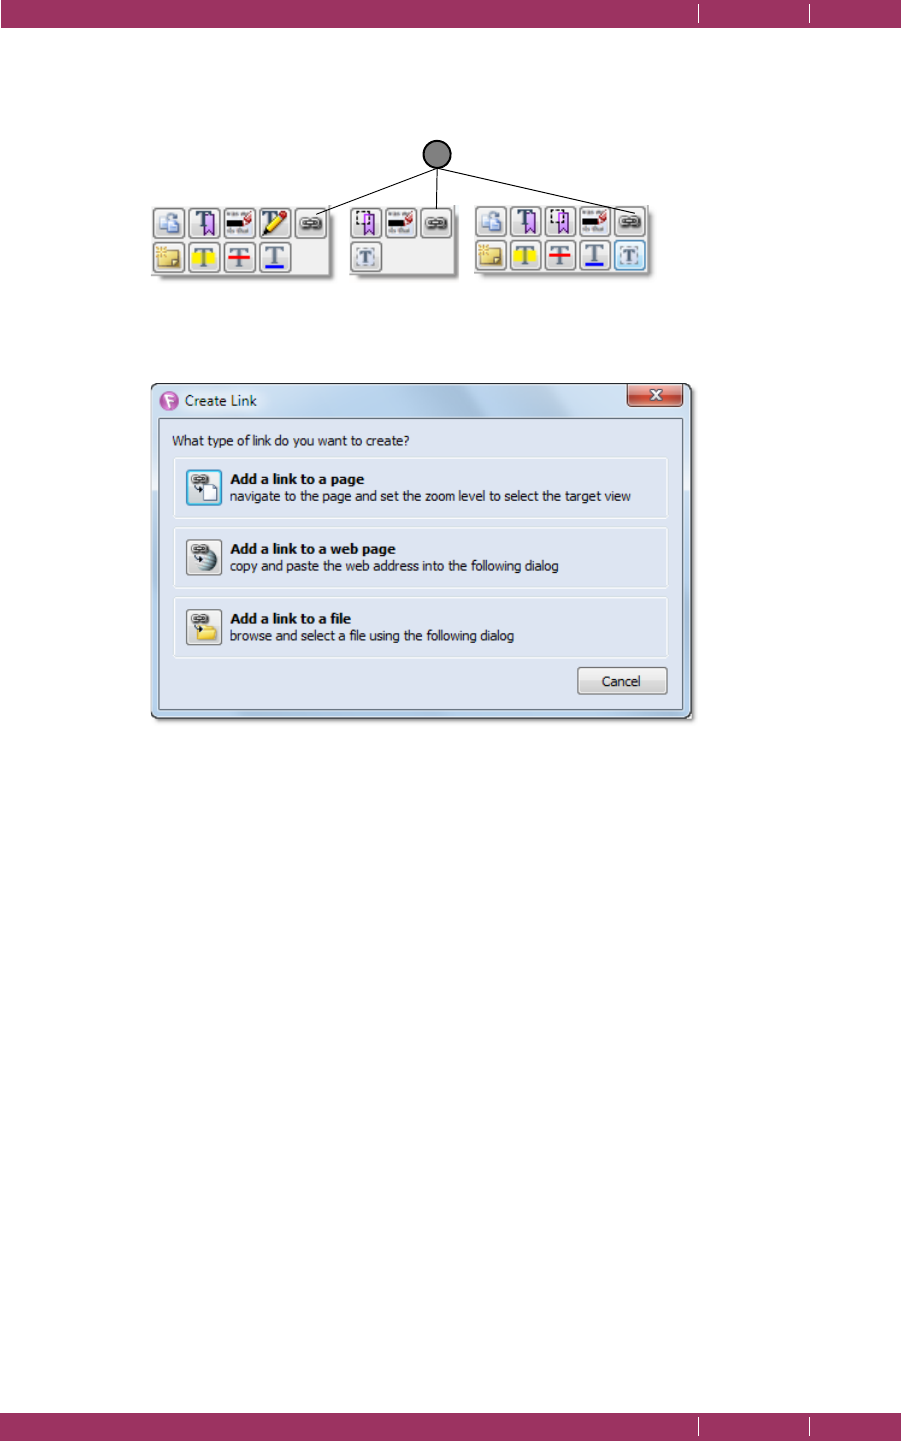
C
OREL
PDF F
USION
U
SER
G
UIDE
WORKING WITH ANNOTATIONS INDEX CONTENTS 105
ADDING HYPERLINKS INDEX CONTENTS 105
2 Select some text or press Shift and left-click to display the crosshair and select an area.
3 On release of the button one of the context sensitive menus appears:
Figure 8.12 Context-sensitive menus
NOTE:
Click the hyperlink icon (1) to display the Create Link dialog:
Figure 8.13 Create Link dialog
Add a link to a page
Select this option followed by clicking the page to which you want to
display when the link is selected.
Add a link to a web page
Select this option and enter the full URL of the web page you want to
display when the link is selected. You can omit the
http://
part as that
is automatically added.
Add a link to a file
Select this option and use the displayed browser to select the file you
want to open when the link is selected.
8.4.1 Hyperlink properties, delete and edit
You can edit the properties of a hyperlink, delete the hyperlink or change the linked
destination.
For information on annotation properties see “Annotation properties” on page 101.
To delete the hyperlink:
1 Right-click the hyperlink on the page.
1
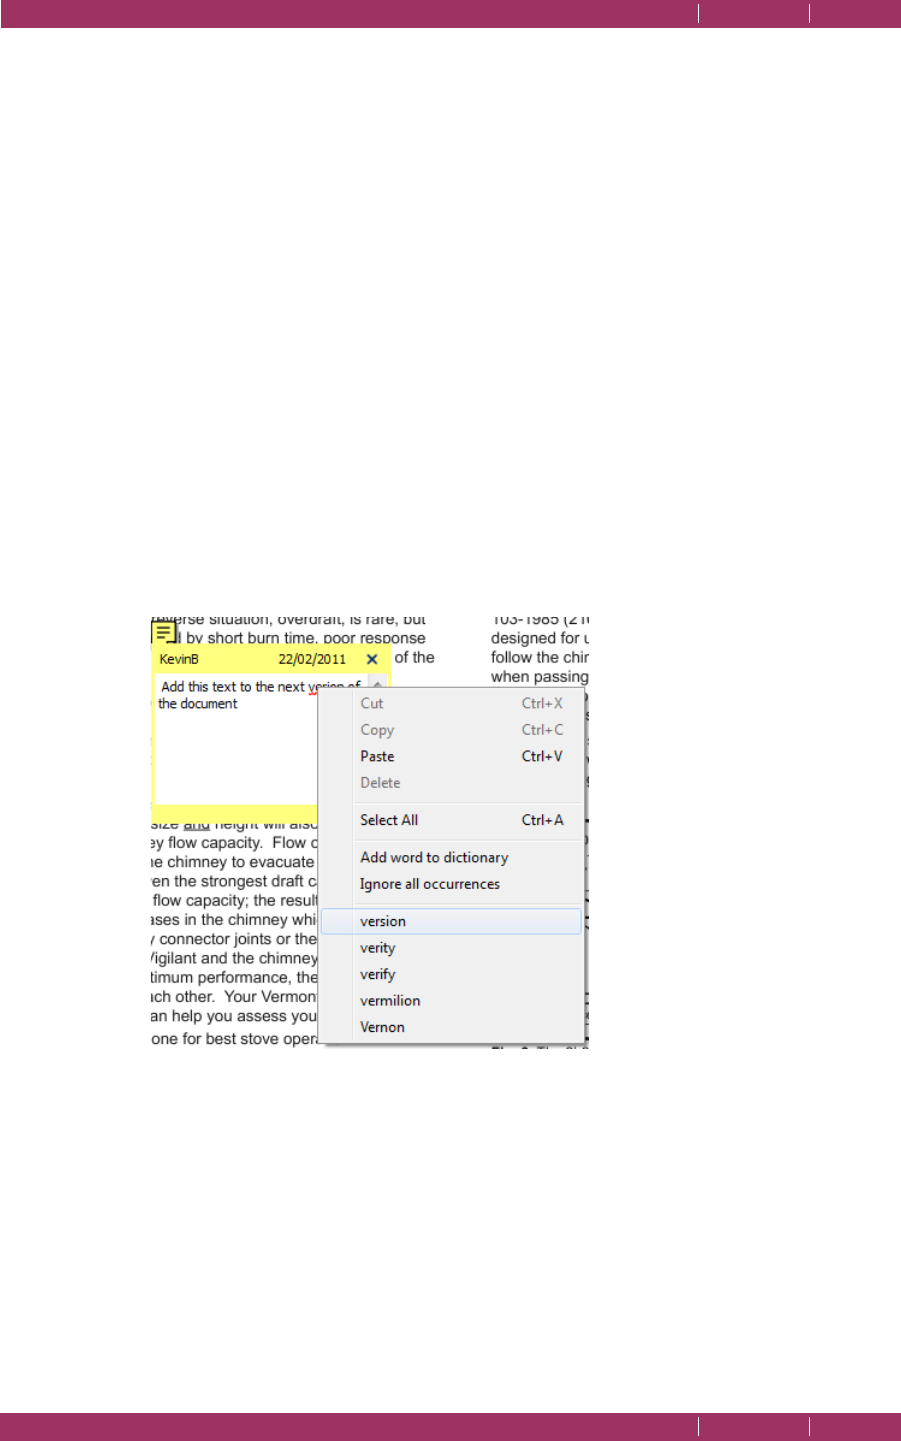
C
OREL
PDF F
USION
U
SER
G
UIDE
WORKING WITH ANNOTATIONS INDEX CONTENTS 106
SPELL CHECK COMMENTS AND FREE TEXT INDEX CONTENTS 106
2 Select Delete from the pop-up menu.
You can edit the destination of any hyperlink, but the type of hyperlink cannot be
changed. That is, a you can change the URL location of a web link but you cannot convert
a web link into a page link.
To edit a hyperlink destination:
1 Right-click the hyperlink on the page.
2 Select Edit Link Destination. Depending on the type of hyperlink either, select a new
page, enter a new web URL or select a new file.
8.5 Spell check comments and free text
When you add a Note, comment or free text annotation to a document the text you
enter is spell checked. You can if you prefer disable spell checking as well as change the
language. For more information see “Spelling tab” on page 55.
• Any text identified as incorrect is underlined in red. Right-click the underlined text to
display a menu of options:
Figure 8.14 Spell check options
Add word to dictionary
If the spell checker has identified a word as incorrectly spelled but you
know that is it correct you can use this option to add it to the dictionary.
This may occur with a technical term or an acronym. Once a word is
added to the dictionary it is subsequently recognized as a correctly
spelled word. For the word to be added to the dictionary the document
must be saved.

C
OREL
PDF F
USION
U
SER
G
UIDE
WORKING WITH ANNOTATIONS INDEX CONTENTS 107
SPELL CHECK COMMENTS AND FREE TEXT INDEX CONTENTS 107
Ignore all occurrences
If the spell checker has identified a word as incorrectly spelled but you
know that is it correct you can use this option to ignore all occurrences
of the word for the current session of Corel PDF Fusion. All other
occurrences of the word are identified as correctly spelled. When Corel
PDF Fusion is re-started, the word is again identified as incorrectly
spelled.
Spelling options
When you right-click on an incorrectly spelled word you are provided
with a number of correctly spelled options. Select the word you
intended.

WHAT IS A SETUP? INDEX CONTENTS 108
Chapter 9 Setups
This chapter contains information on how to create and manage your setups.
The information provided in the section includes:
•“What is a setup?” on page 108
•“Managing setups” on page 108
•“Setup manager reference” on page 113
•“PDF document setup” on page 113
•“XPS document setup” on page 123
•“Word document setup” on page 125
9.1 What is a setup?
A setup is the configuration parameters used to create your converted file. For example,
you may want to produce some files for high-quality printing or for distribution on the
Web. A PDF output file created for high-quality printing may use a high output resolution
and no compression on the images. Whereas a PDF file created for Web distribution
would probably use image compression and be optimized for fast web viewing. You can
produce as many setups as you need and save them for later use. Setups can be
exported and imported for other users.
9.2 Managing setups
Corel PDF Fusion is supplied with a number of standard setups suitable for most uses.
You can, however, create and save as many different setups as you need. Setups can be
edited, created, renamed, removed, exported and imported. For more information see:
•“Standard setups” on page 109
•“Edit an existing setup” on page 110
•“Create a new setup” on page 110
•“Rename a setup” on page 111
•“Remove a setup” on page 111
•“Importing setups” on page 112
•“Exporting setups” on page 112

C
OREL
PDF F
USION
U
SER
G
UIDE
SETUPS INDEX CONTENTS 109
MANAGING SETUPS INDEX CONTENTS 109
The standard setups that are delivered with Corel PDF Fusion may not be renamed or
removed. Therefore, the Rename and Remove buttons are disabled when a standard
setup is selected from the menu. If you do attempt to make changes to a standard setup,
you are prompted to save the modified setup with a new name.
A setup name can contain any characters you wish except for backslash (\). Leading and
trailing spaces are removed from the name (apart from shared setups, which are
identified by a leading space). Setup names must be unique and are not case sensitive
(that is,
ConfigName
and
configNAME
are considered to be the same).
9.2.1 Standard setups
This section lists the standard setups provided with Corel PDF Fusion:
For PDF files:
General
Optimized for general business use creating PDF v1.5 files converted to
RGB and with graphics subjected to JPEG—medium compression.
Press Ready
Optimized for sending jobs to a commercial printer creating PDF v1.4
files with graphics subjected to JPEG—low compression and with all
fonts embedded.
Print Quality
Optimized for printing to office type laser printers creating PDF v1.4 files
optimized for fast web viewing and with graphics subjected to Bicubic —
low compression.
Web
Optimized for screen viewing creating PDF v1.5 files converted to RGB
and optimized for fast web viewing. Graphics are subjected to JPEG—
high compression.
PDF/A-1b(CMYK)
The PDF file conform to the ISO standard PDF/A-1b, used for the
archiving of electronic documents. When this is selected the Create
PDF/A-1b compliant files and Convert All Colors To CMYK options are
set. See “Creates a PDF/A-1b compliant file” on page 114 and “Color
conversion” on page 116.
PDF/A-1b(RGB)
The PDF file conforms to the ISO standard PDF/A-1b, used for the
archiving of electronic documents in RGB. When this is selected the
Create PDF/A-1b compliant files and Convert All Colors To RGB
options are set. See “Creates a PDF/A-1b compliant file” on page 114
and “Color conversion” on page 116.
NOTE: To guarantee the fidelity of PDF/A-1b files use the Corel PDF Converter or print to the Corel PDF
printer.

C
OREL
PDF F
USION
U
SER
G
UIDE
SETUPS INDEX CONTENTS 110
MANAGING SETUPS INDEX CONTENTS 110
For XPS files:
XPS Print
Optimized for printing to office type laser printers.
For Word files:
Microsoft Word [retain page layout] (*.doc)
The text content and the original formatting is retained as much as
possible. Use this option for general purpose conversion of source
documents for reuse in Word.
Microsoft Word [retain text editability] (*.doc)
The layout is retained but text frames are used to make text blocks more
easily editable. Use this option when significant text editing in Word is
required.
Microsoft Word [retain text flow] (*.doc)
The text content is retained, but the original formatting is not retained.
This option produces Microsoft Word documents which are much
smaller in size and is ideal for when the text content of the source
document is to be used for another purpose.
NOTE: You cannot change the standard setups, though you can copy and then save them under a new
name. When a setup is selected, the window below contains a brief description of that option.
9.2.2 Edit an existing setup
This section describes how to edit an existing setup. The standard setups supplied with
Corel PDF Fusion cannot be edited, but a copy can be created under a new name.
1 Open a document and select Save as.
2 Select the required Document type and choose whether you want to edit an XPS, PDF
or Word setup.
3 Select the Setup name you want to change.
4 Select Edit to open the Setup manager. You can, if you wish, change the setup to edit by
selecting a different Setup name.
5 Edit the selected setup by changing the options in the various tabs. See “Setup manager
reference” on page 113 for more details.
6Click OK to apply the changed settings to the setup. Select Cancel to close the Setup
manager without changing the options.
9.2.3 Create a new setup
This section describes how to create a new setup.
1 Open a document and select Save as.
2 Select the required Document type and choose whether you want to edit an XPS, PDF
or Word setup.

C
OREL
PDF F
USION
U
SER
G
UIDE
SETUPS INDEX CONTENTS 111
MANAGING SETUPS INDEX CONTENTS 111
3 Choose the setup in the Setup name field that most closely matches the setup you want
to create.
4 Select Edit to open the Setup manager.
5Click Create to open a Setup details dialog with a copy of your selected setup.
6 Choose a new Name and change the Description. Enter a description that allows you
and others to easily understand the purpose of the setup. You can choose to make this
new setup available to all other users. Click OK to close the dialog.
7 Change the settings of your new setup by modifying the options in the various tabs. See
“Setup manager reference” on page 113 for more details.
8Click OK to apply the changed settings to the setup. Select Cancel to close the Setup
manager without changing the options.
9.2.4 Rename a setup
This section describes how to rename a setup and/or change the description associated
with it.
NOTE: The standard setups that are shipped with Corel PDF Fusion may not be renamed or removed,
NOTE: Setups can only be renamed once a serial number for Corel PDF Fusion is entered. In evaluation
mode you can use the standard setups.
1 Open a document and select Save as.
2 Select the required Document type and choose whether you want to edit an XPS, PDF
or Word setup.
3 Choose the setup in the Setup name field that you want to rename.
4 Select Edit to open the Setup manager. You can, if you wish, change the setup to rename
by selecting a different Setup name.
5Click Rename... to open a Setup details dialog.
6 Enter a new Name and, if required, change the Description. Enter a description that
allows you and others to easily understand the purpose of the setup. You can choose to
make this new setup available to all other users. Click OK to close the dialog.
9.2.5 Remove a setup
This section describes how to remove a setup
NOTE: The standard setups that are shipped with Corel PDF Fusion may not be renamed or removed.
1 Open a document and select Save as.
2 Select the required Document type and choose whether you want to edit an XPS, PDF
or Word setup.
3 Choose the setup that you want to remove in the Setup name field.

C
OREL
PDF F
USION
U
SER
G
UIDE
SETUPS INDEX CONTENTS 112
MANAGING SETUPS INDEX CONTENTS 112
4 Select Edit to open the Setup manager. You can, if you wish, change the setup to remove
by selecting a different Setup name.
5Click Remove to open a Remove Setup dialog.
6Click Ye s if you are sure that you want to permanently delete the setup click Ye s . Click
No to cancel the operation.
9.2.6 Importing setups
The Import option is used to import an XML file containing a previously saved setup
from another computer or user. To create such an import file, you must use the Export
option, described in “Exporting setups” on page 112. For example, this option is used
to ensure that all users within an organization have the same setup settings and,
therefore, create output documents of the same type.
To import an XML setup file:
1Click the Import option on the XPS, PDF or Word setup dialog.
2 Use the Import Setup dialog to choose the XML file to be imported. The file will have
a
.xml
extension.
3Click Open to import the file.
4 For each individual setup a confirmation prompt appears.
5Click Ye s to import the setup. Click No to abort import.
If you have an existing setup of the same name as a setup being imported, a prompt to
override or rename the existing setup appears.
NOTE: When an XML file is exported and subsequently imported, the Always output files to and Launch
on job completion locations are not transferred. This is because these locations are system specific
and may not be appropriate on your system.
9.2.7 Exporting setups
Use the Export option to expor t an XML file containing details of your setup for use on
another computer or by another person. This XML file can be transferred between
different versions of Corel PDF Fusion. To import such an XML file, you must use the
Import option, described in “Importing setups” on page 112. For example, this option
is used to ensure all users within an organization have the same setup settings and,
therefore, create output documents of the same type.
NOTE: An XML file is a text file that you can open and edit with a text editor. However, doing this may
cause your version of Corel PDF Fusion to produce unexpected results or fail.
NOTE: Setups can only be exported once a serial number for Corel PDF Fusion is entered. In evaluation
mode you can use the standard setups.
When a setup file is exported all setups, default and custom, are saved to the XML file.
When an XML file is subsequently imported you are presented with the option to accept
or reject each individual setup.

C
OREL
PDF F
USION
U
SER
G
UIDE
SETUPS INDEX CONTENTS 113
SETUP MANAGER REFERENCE INDEX CONTENTS 113
To create an XML setup file for distribution to other users of Corel PDF Fusion:
1 Ensure all your setups are correct in all details.
2Click the Export option on the XPS, PDF or Word setup dialog.
3 Use the displayed Export Setup dialog to choose a location and name for your XML file.
Ensure the file has a
.xml
extension.
4Click Save to save the file. Select Cancel to abort the save.
NOTE: When an XML file is exported and subsequently imported the Always output files to and Launch
on job completion locations are not transferred. This is because these locations are system specific
and may not be appropriate on your system.
9.3 Setup manager reference
The “PDF document setup” on page 113, “XPS document setup” on page 123 and
“Word document setup” on page 125 sections describe all the options available to the
Setup manager.
The Corel PDF Fusion Setup manager has a number of tabs for different tasks. Click the
various tabs to access and change the information contained under that heading.
The XPS and PDF setup managers have different settings with the exception of the
Reporting tab which is the same.
NOTE: Some of the options in the Setup manager can be accessed using keyboard accelerators. Such
options use an underscore character (_) to highlight the accelerator. For example, you can press i
on the keyboard to choose the Import setups option.
9.4 PDF document setup
This section describes all the PDF output options available to Corel PDF Fusion.
The Corel PDF Fusion PDF setup presents a number of tabs for different tasks. Click the
various tabs to access and change the information contained under that heading.
The options within each tab are described in the following sections:
•“General tab (PDF)” on page 114
•“Advanced tab (PDF)” on page 116
•“Compression tab (PDF)” on page 117
•“Font embedding tab (PDF)” on page 118
•“Security tab (PDF)” on page 120
•“Reporting tab (PDF)” on page 122

C
OREL
PDF F
USION
U
SER
G
UIDE
SETUPS INDEX CONTENTS 114
PDF DOCUMENT SETUP INDEX CONTENTS 114
9.4.1 General tab (PDF)
The General tab provides options to configure the format of the PDF file, the location
for the file and the actions to perform when a PDF is created.
The items in the File options panel allow you to control the format of the output file:
PDF file format
Select the version of PDF you want to create: 1.3, 1.4, 1.5 or 1.6.
Creates a PDF/A-1b compliant file
This appears when you have chosen to create PDF/A-1b compliant files
in either CMYK or RGB color formats from the standard setups. See
“Standard setups” on page 109Standard setups.
When selected a number of things happen. All setup options are
disabled, the PDF file format field changes to 1.4, and the Color
conversion options are restricted to Convert All Colors To CMYK and
Convert All Colors To RGB. For more information see “PDF file format”
on page 114PDF file format and “Color conversion” on page 116Color
conversion.
If you have chosen to create a copy of a PDF/A-1b CMYK or RGB setup
the icon changes to red to indicate that you are creating a copy. When
you create a copy only those options that do not affect PDF/A-1b
compliancy can be changed and all other options are disabled. This
ensures that your copy of the setup remains PDF/A-1b compliant.
NOTE: To guarantee the fidelity of PDF/A-1b files use the Corel PDF Converter or print to the Corel PDF
printer.
Thumbnail generation
Corel PDF Fusion optionally generates thumbnail images of each page
(either monochrome or color), which can be used as a navigation aid in
your PDF viewing application. Some PDF viewers automatically create
thumbnails so leaving this option set to off can reduce the size of the
generated PDF.
Resolution
Use this to change the effective resolution at which the PDF file is
created. Set the resolution to be the same as the resolution of the
intended output device if the PDF file is intended for printing. Three
standard options are available,
Low
(300 dpi),
Medium
(600 dpi) and
High
(1200 dpi). A
Custom
option is also available that lets you set the
resolution to any value.
Auto-rotate pages
Corel PDF Fusion always honors requests for landscape output.
However, some Windows applications produce landscape output by
rotating the output onto a portrait page. When printed, this is not a
problem, as the page can easily be rotated. However, when producing a
PDF this leads to text lines being vertical rather than horizontal.

C
OREL
PDF F
USION
U
SER
G
UIDE
SETUPS INDEX CONTENTS 115
PDF DOCUMENT SETUP INDEX CONTENTS 115
Use this option to automatically rotate the pages so that the output PDF
is produced at its optimum viewing orientation.
Optimize for fast web viewing
Before you distribute PDF files via the web make sure they are created
with this option selected. This prepares the document for page-at-a-time
downloading, sometimes called
byte-serving
.
When a document is optimized for page-at-a-time downloading, the
web server sends each individual page of information requested by the
user, rather than the whole PDF document. When working with large
documents, which can take a long time to download, it is important to
use the Optimize for fast web viewing option.
NOTE: Fast web viewing depends on the configuration of the web server and also the capabilities of the
PDF client. This option ensures that the file meets the requirements for Linearized PDF and, under
the right circumstances, it could be delivered and displayed progressively.
The items in the Output options panel of the General tab, allow you to control what
happens to the output document once it is created:
Always output files to
When this is not checked, or checked without a location specified, the
output PDF file is always located in the same directory as the input file.
When this option is checked Corel PDF Fusion outputs all PDF files to
the specified destination The destination is selected by using the
Browse... option.
The file name is composed of the document name (with a numerical
suffix, if necessary to avoid duplicate file names). Use this feature when
you are generating all output files in a single location.
Use the Overwrite an existing PDF document option to disable the
numeric suffix generation. For more information see “Overwrite an
existing PDF document” on page 116.
NOTE: You are always prompted for a location for the output file when creating a PDF by printing to the
Corel PDF Fusion printer.
NOTE: The location specified in this option can be overridden by the options selected in the Save converted
documents panel of the Corel PDF Fusion Preferences dialog. See
“Corel PDF Converter
preferences” on page 58
.
Launch on job completion
Use this to choose an application that Corel PDF Fusion launches each
time a job is successfully converted to PDF.
Select the check box and click Browse.... to select the application
(myapp.exe for example), which you want to launch when each job has
completed.

C
OREL
PDF F
USION
U
SER
G
UIDE
SETUPS INDEX CONTENTS 116
PDF DOCUMENT SETUP INDEX CONTENTS 116
View the PDF document after creation
Check this to launch the default system-registered PDF viewing
application and display the output PDF. If no such application is
registered nothing will happen.
Overwrite an existing PDF document
Check this to overwrite PDF files with the same name as an existing file
rather than create a file name with a numerical increment.
Send the PDF file as an e-mail attachment
Use this to open the default system-registered e-mail application and
open an e-mail with the generated PDF already included as an
attachment.
9.4.2 Advanced tab (PDF)
The Advanced tab lets you apply different processing to full color, grayscale, or
monochrome (bitmap) images.
The items in the Color options panel allow you to control the output color:
Transfer functions
Preserve, apply or remove transfer functions from the input file. When
you select the
Apply
option, the document is displayed the same on-
screen as it is when printed.
Color conversion
The options available are:
Convert all colors to CMYK
,
Convert all
colors to RGB
,
Convert device independent colors to device
dependent colors
and
Leave colors unchanged
.
Convert all colors to CMYK applies to color images, and all color
information is converted to a CMYK color space. A CMYK profile is
stored in the PDF as its Output Intent.
Convert all colors to RGB applies to color images, and any images in
the input file are converted to an sRGB color space in the PDF output.
An sRGB profile is stored in the PDF as its Output Intent. You should
enable this when your documents are intended for on-screen viewing,
and disable it when they are intended for printing. Enabling this option
can cause an apparent color shift in the images to which it is applied. The
conversion that Corel PDF Fusion uses is better suited to photographic
images than to CMYK approximations of spot colors. You may find that
on-screen reproduction of some graduated fills and tinted images is
better with this option disabled than with it enabled.
Convert device independent colors to device dependent colors
converts colors specified in device-independent CIE-based color spaces
into device-dependent RGB. This produces PDF files which display more
quickly. Otherwise, these colors are converted into a device-

C
OREL
PDF F
USION
U
SER
G
UIDE
SETUPS INDEX CONTENTS 117
PDF DOCUMENT SETUP INDEX CONTENTS 117
independent calibrated RGB color space. This produces PDF files which
render more slowly, but whose colors are more constant across
properly set up output devices.
Preserve overprint
When selected, any changes to the PostScript language graphics state
overprint parameter requested by the job are passed though to the PDF
file. This feature, along with Preserve OPI comments, and Under color
removal and black generation information is intended primarily for use
within a pre-press environment.
Preserve under color removal and black generation information
Preserve or remove under-color removal and black generation
information from the PostScript language file. This is normally only used
in pre-press environments.
The following options are available in the Document structuring conventions (DSC)
panel.
Use BoundingBox for
As well as the conventional page size request embedded in the
PostScript language file, many files also contain comments describing the
actual extent of marks on the page. This option lets you: ignore these
comments—by selecting
Nothing
; use the bounding box for the PDF
page size—by selecting
Page Size
; or use the bounding box for the
optional page cropping box—by selecting
Crop box
.
Most PDF viewers display pages as if they were the size specified for the
page cropping box. Some applications may generate their own cropping
box information using
pdfmark
, which overrides any cropping box set in
this way.
Preserve OPI comments
OPI (Open Prepress Interface) is used to reduce network traffic by
substituting high-resolution images with low-resolution screen images for
the purpose of screen display and page make-up. With this option
selected, OPI comments in the PostScript language input file are
reproduced as OPI dictionaries in the PDF output.
It is not necessary for the high-resolution image data to be available to
Corel PDF Fusion—it passes the file name through to the output. Corel
PDF Fusion produces only an OPI 1.3 dictionary, only an OPI 2.0
dictionary, or both, depending on whether the PostScript language file
input uses one or both versions of the OPI comments.
9.4.3 Compression tab (PDF)
The sections in the Compression tab allow different compression techniques to be
applied to different types of images.

C
OREL
PDF F
USION
U
SER
G
UIDE
SETUPS INDEX CONTENTS 118
PDF DOCUMENT SETUP INDEX CONTENTS 118
Downsample
Use these options to control whether and how Corel PDF Fusion
reduces the resolution of images in the file input.
Set this to
Don’t downsample
when your documents are intended for
high-quality printing.
Average
reduces the size by averaging neighboring pixels and produces
good quality results. You cannot average a monochrome image because
Corel PDF Fusion does not “promote” such images to grayscale.
Subsample
reduces the resolution of the image by dropping pixels.
Bicubic
reduces the resolution by performing bicubic interpolation to
generate new pixel values. This option can generate more pleasing
results though the PDF is slower to generate. Bicubic is not available with
monochrome images.
Compression
The three compression filters are available for dealing with images. The
Zip
filter uses a lossless compression technique and normally produces
good compression ratios. It can optionally apply a predictor algorithm
which can further improve the compression for some classes of image.
The JPEG filter uses a lossy algorithm (which irretrievably discards data),
but it produces excellent compression ratios on photographic images.
You can select from three compression levels with
high
being the most
lossy and most compressed and
low
being the least lossy and least
compressed.
The CCITT filter uses standard fax compression, and is only applicable
to monochrome bitmap images.
Resolution
If you have enabled downsampling, this option lets you specify the target
resolution of the reduced images actually embedded in the PDF file.
Compress text and line art
When selected, Corel PDF Fusion compresses textual information, such
as page descriptions, using ZIP compression.
9.4.4 Font embedding tab (PDF)
The Font embedding tab lets you control how fonts are handled in your PDF files.
NOTE: The Font embedding tab is not available when a PDF/A-1b setup is selected.
Always embed window
Fonts listed in this window are always embedded in the output PDF file.
Use the Add and Remove buttons to manage this list. You should check
the terms of your font license agreement before embedding any fonts.
Named fonts are embedded when they are referenced in the original

C
OREL
PDF F
USION
U
SER
G
UIDE
SETUPS INDEX CONTENTS 119
PDF DOCUMENT SETUP INDEX CONTENTS 119
input file and are available to Corel PDF Fusion. Base 14 fonts in this list
are always embedded. This option lets you include individual base 14
fonts in a document, rather than all base 14 fonts.
Never embed window
Fonts listed in this box are never embedded in the output PDF file. Use
the Add and Remove buttons to manage this list.
NOTE: Fonts are controlled by the “Always embed” and “Never embed” options when they have the same
names as those listed. However, in many cases the fonts do not have the same names and cannot,
therefore, be controlled.
NOTE: For XPS to XPS and XPS to PDF conversions the “Always embed” and “Never embed” options
may not always work as desired. Fonts from XPS jobs must be embedded in the output, and many
fonts cannot be substituted. In this case, Corel PDF Fusion will embedded a font possibly contrary
to your selections in these options.
Embed all fonts (except base 14)
When selected, all fonts present in the document (except base 14 fonts)
are embedded in the output PDF file, and all fonts that were embedded
in the input file (by the printer driver or generating application) are also
embedded. When a font is referenced by the incoming file and is
available to Corel PDF Fusion, it is embedded in the generated PDF file.
When this option is not selected, the font is only be embedded when it
appears in the Always embed list.
Any candidate for embedding is rejected if it is one of the base 14 fonts
(unless it appears in the Always embed list), or it appears in the Never
embed list.
Subset fonts
With selected, only subsets of the original fonts are embedded in the
PDF file. This is the preferred setting, as it leads to smaller files. However,
selecting Subset fonts prevents you from subsequently using PDF plug-
ins or other tools that allow text correction within a PDF file, as not all
characters from the embedded fonts are available for use.
9.4.4.1 Font management
To manage fonts, click the Font management... button in the Font embedding tab.
The Font management dialog lets you control which fonts are installed. These fonts are
installed on your disk, but you can control whether or not they can be loaded by the
PostScript language
findfont
operator.
This dialog manages Type 1 fonts (also known as ATM fonts or PFB format fonts) and
TrueType fonts. Each kind of font is distinguished by an icon in the margin. This option
makes no distinction between PFB format, PFA format (an ASCII format for Type 1 fonts
typically used on UNIX platforms), or raw PostScript language files containing Type 3
fonts. All of these fonts are displayed as PostScript language fonts in this dialog.

C
OREL
PDF F
USION
U
SER
G
UIDE
SETUPS INDEX CONTENTS 120
PDF DOCUMENT SETUP INDEX CONTENTS 120
The core fonts that are installed are listed in red and may not be removed. The core font
set includes clones of the 35 standard PostScript language printer fonts, as well as stub
files which refer to them. For example, “Helvetica” is one of the standard fonts, but the
font file for Helvetica is just a stub that substitutes the clone font “Helsinki” instead.
The principal reason for installing Type 1 fonts is when you convert files that do not
contain embedded fonts, perhaps because the files were created on a different
computer. When you try to convert such files without making the fonts available, the
documents are converted with incorrect text metrics. By making the fonts available, the
documents are converted with all the correct fonts and spacing.
When you add a Type 1 font because it is used, but not embedded in a PostScript
language file, remember that it is not embedded in the PDF output files unless you also
add it to the Always Embed list in the Font embedding tab. See “Font embedding tab
(PDF)” on page 118 for more information.
The main reason for installing TrueType fonts is so they can be used for TrueType
substitution. For any bitmap or outline font to be a candidate for TrueType substitution,
the original TrueType font must be installed. By default, Corel PDF Fusion searches for
and installs all TrueType fonts within your Windows directory when it is first installed.
However, if you subsequently add any new TrueType fonts to your system, you must
manually make them available using the Font management options.
Click Select folder to display a browser dialog, allowing you to select the folder where
Corel PDF Fusion can find the fonts you want to add. The System fonts button is a
shortcut, equivalent to opening the fonts folder.
Use the << Add option to add the fonts. To remove a font select it and click Remove.
9.4.5 Security tab (PDF)
The options under the Security tab provide various levels of protection for your PDF
documents.
NOTE: The Security tab is not available when a PDF/A-1b setup is selected.
The Encryption level depends on the PDF file format option selected. See “PDF file
format” on page 114. The following options are provided:
Encrypt PDF files
Select to encrypt the PDF files created by Corel PDF Fusion.
When selected the security options within this tab become available and
thus restrictions are placed upon the use of the PDF document.
Apply security to PDF files by entering passwords in the Password
protection panel of the Security tab. Restrict selected features, such as
editing and printing in the Security options and Changes allowed panels.

C
OREL
PDF F
USION
U
SER
G
UIDE
SETUPS INDEX CONTENTS 121
PDF DOCUMENT SETUP INDEX CONTENTS 121
Open document / Change security
A PDF file can have both an
Open document
password and a
Change
security
password. When both passwords are applied, the document can
be opened using either one.
NOTE: When adding passwords the Open document and Change security passwords are not allowed to
be the same.
When the correct Open document password is provided, the document
is opened and decrypted. However, use of the document is limited by
whatever restrictions have been specified in the Security options and
Changes allowed panels.
The Change security password allows the recipient of the PDF file to
open the PDF and modify the security settings. When a file is opened
with a Change security password, unrestricted access to the document
is allowed. In effect, the security restrictions are temporarily disabled. If
you wish to limit access to your file, you should apply a Change security
password, otherwise anyone who opens the file is able to remove the
restrictions.
It is important to note that the PDF viewing application does not prompt
for a password if no Open document password is entered when creating
a secured PDF.
This means that when only a Change security password is used, the
document is opened without the user having to provide a password, and
use of the file is limited by whatever security restrictions have been
imposed.
With Encrypt PDF files selected, you can choose various options to
define the level of user actions allowed.
The Security options panel contains the following options:
Allow copying of text and graphics
When selected, the PDF user is able to copy and paste text and graphics
from the file.
Allow content access for accessibility
When selected, the PDF content is made available to assistive
technology such as screen readers even when the Allow copying of text
and graphics option is set to prevent copying content from the
document.
The Changes allowed panel lets you to define the level of changes you allow users to
make on the PDF document.
No options selected
With no options selected users are unable to do anything to the PDF
document, including filling in signature and form fields.

C
OREL
PDF F
USION
U
SER
G
UIDE
SETUPS INDEX CONTENTS 122
PDF DOCUMENT SETUP INDEX CONTENTS 122
Document assembly
When selected, PDF users can insert, delete, and rotate pages, and
create bookmarks and thumbnails.
General editing
When selected, the PDF user can perform document assembly and
general editing, but cannot extract the contents of the PDF.
Fill in forms and signing
Allows PDF users to sign and fill in forms, but not create them.
Comment authoring
Allows the addition and editing of PDF (sticky note) comments and use
of the highlight pen, but not general editing.
Printing
Select either
Enabled
to allow printing,
Enabled (low resolution
only)
to allow low resolution printing or
Disabled
, to disallow any
printing of the PDF file.
9.4.6 Reporting tab (PDF)
The Reporting tab lets you control what happens to messages generated by the Corel
PDF Fusion internal interpreter.
Discard messages
When selected, all messages from the interpreter are discarded. This is
useful when batch processing many files. When enabled, this also causes
all error messages to be discarded, so you should use it with caution.
Create individual log files for each job
When selected, Corel PDF Fusion creates an individual log file for each
job, and writes messages generated by that job to its log file. The log file
is created in the same folder as the output file, and with the same name,
but with a .log extension. It may be viewed with a text editor. If the
messages are merely informative, the log file is created in addition to the
output file. If an error occurs, the output file is not created, and the log
file contains the relevant error messages.
Delete log file for successful jobs
This is selected as a default and removes the log files for those jobs that
have successfully completed.
Log all messages to
When selected, the messages generated by all jobs are collected in a
single log file. Use the Browse... option to choose the location of the log
file.

C
OREL
PDF F
USION
U
SER
G
UIDE
SETUPS INDEX CONTENTS 123
XPS DOCUMENT SETUP INDEX CONTENTS 123
9.5 XPS document setup
This section describes the XPS document setup options available to Corel PDF Fusion.
The Corel PDF Fusion XPS setup presents two tabs for different tasks. Click the tabs to
access and change the information contained under that heading.
•“General tab (XPS)” on page 123
•“Reporting tab (XPS)” on page 125
9.5.1 General tab (XPS)
Force font obfuscation
Font obfuscation is a means of preventing casual misappropriation of
embedded fonts. Specifically, embedded font obfuscation prevents end-
users from using standard ZIP utilities to extract fonts from XPS
document files and install them on their systems.
The items in the Interleaving panel of the General tab decide how resource parts of an
XPS document are physically organized in the XPS container alongside the document
parts.
Rather like optimizing a PDF file for fast web viewing, you might want to use these
options to prepare an XPS file for streaming, such as from a web server.
Interleaving
When the Interleaving option is unchecked the output XPS document
is created with
simple ordering
, This means that the parts of the document
package are arranged contiguously. That is, when the output document
is read by a consumer of XPS it is delivered sequentially, all of the bytes
for the first part arrive first, followed by all of the bytes for the second
part, and so on. With simple ordering of a page containing text and
images, all of the bytes of the page part are delivered before the bytes
of the image part, and the consumer of the XPS document is unable to
display the image until it has received all of the page part and the image
part. With small documents on a high-speed network this method may
be acceptable. However, when creating large documents with lots of
images (for example), having to read through all of the markup/page.xml
to get to the image results could result in unacceptable performance and
place unreasonable memory demands on the consumer’s system.
When the Interleaving option is checked, the XPS document is created
using
interleaved ordering
, that is, the data stream of a part is broken into
pieces, which can be interleaved with pieces of other parts or with
whole parts. For example, with interleaved ordering, a page containing
text and images can be split into pieces, so that the image resource parts
can be inserted immediately following the references to them on the
page. After each image part, the next piece of the page is inserted. This

C
OREL
PDF F
USION
U
SER
G
UIDE
SETUPS INDEX CONTENTS 124
XPS DOCUMENT SETUP INDEX CONTENTS 124
kind of XPS document organization allows a streaming XPS consumer
to begin processing the image as soon as it encounters the reference for
it, which can help performance.
Resource first
When this is not checked, the individual resource parts and fixed page
document parts are written to the output file with the resource parts
last.
When checked, the individual resource parts and fixed page document
parts are streamed with the resource parts first.
Discard image
When this is checked, additional XPS discard control directives are
placed into the output file. These directives allow the immediate
discarding of images after the XPS consumer has read the image data,
reducing the memory demands on the consumer’s system.
Discard control
The
DiscardControl
document part can contain a list of the resources
that an XPS document consumer can safely discard to save computer
resources.
The Discard control option allows the creation of XPS documents that
have discard control parts that are safe for the resource constrained XPS
consumer to discard.
Maximum piece size
Enter the maximum allowable interleaved XPS piece size.
The items in the Output options panel of the General tab allow you to control what
happens to the output document once it is created:
Always output files to
When not checked, or checked without a specified location, the output
XPS document is always located in the same directory as the input file.
When checked, Corel PDF Fusion outputs all files to the specified
destination. Use the Browse... option to choose a location.
The file name is composed of the document name (with a numerical
suffix, if necessary to avoid duplicate file names). This is advantageous
when using Corel PDF Fusion to generate all output files in a single
location. In this case, you should also make sure that you do not have
Display messages enabled in the Reporting tab, described on page 125.
Use the Overwrite an existing XPS document option to disable the
generation of the numeric suffix. For more information see “Overwrite
an existing XPS document” on page 125.
NOTE: The location specified in this option can be overridden by the options selected in the Save converted
documents panel of the Corel PDF Fusion Preferences dialog. See
“Corel PDF Converter
preferences” on page 58
.

C
OREL
PDF F
USION
U
SER
G
UIDE
SETUPS INDEX CONTENTS 125
WORD DOCUMENT SETUP INDEX CONTENTS 125
Launch on job completion
You can select an application that Corel PDF Fusion launches each time
a job is successfully converted to XPS.
Select the check box and click Browse.... Select the application
(myapp.exe for example), that you want to launch when each job has
completed.
View the XPS document after creation
When checked, the default system-registered XPS viewing application
launches and displays the output XPS document. If no such application
is registered nothing will happen.
Overwrite an existing XPS document
When selected, XPS files with the same name as an existing file
overwrite the existing file rather than creating a file name with a
numerical increment.
Send the XPS file as an e-mail attachment
This causes the default system-registered e-mail application to display a
Send mail dialog with the generated XPS document already included as
an attachment.
9.5.2 Reporting tab (XPS)
The options in the XPS Reporting tab are the same as PDF Reporting tab. See
“Reporting tab (PDF)” on page 122 for more information.
NOTE: Some of the options in the Setup manager can be accessed using keyboard accelerators. Such
options use an underscore character (_) to highlight the accelerator. For example, you can press i
on the keyboard to choose the Import setups option.
9.6 Word document setup
This section describes all the Word output options available to Corel PDF Fusion.
The Corel PDF Fusion Word setup presents two tabs. Click the tab to access and change
the information contained under that heading.
The options within each tab are described in the following sections:
•“General tab (DOC)” on page 125
•“Reporting tab (DOC)” on page 127
9.6.1 General tab (DOC)
The General tab provides options to configure the format, the location, and the actions
to perform when the output Word file is created.

C
OREL
PDF F
USION
U
SER
G
UIDE
SETUPS INDEX CONTENTS 126
WORD DOCUMENT SETUP INDEX CONTENTS 126
Microsoft Word [retain page layout] (*.doc)
The text content and the original formatting is retained as much as
possible. Use this option for general purpose conversion of source
documents for reuse in Word.
Microsoft Word [retain text editability] (*.doc)
The layout is retained but text frames are used to make text blocks more
easily editable. Use this option when significant text editing in Word is
required.
Microsoft Word [retain text flow] (*.doc)
The text content is retained, but the original formatting is not retained.
This option produces Microsoft Word documents that are much smaller
in size and is ideal for when the text content of the source document is
to be used for another purpose.
The items in the Output options panel of the General tab allow you to control what
happens to the output document once it is created:
Always output files to
When not checked or checked without a location specified, the output
Word file is always located in the same directory as the input file.
When checked Corel PDF Fusion outputs all Word files to the specified
destination. Use the Browse... option to choose a location.
The file name is composed of the document name with a numerical
suffix, if required, to avoid duplicate file names). This is useful when Corel
PDF Fusion generates all output files in a single location.
Use the Overwrite an existing Word document option to disable the
numeric suffix generation. For more information see “Overwrite an
existing Word document” on page 127.
NOTE: The location specified in this option can be overridden by the options selected in the Save converted
documents panel of the Corel PDF Converter Preferences dialog. See
“Corel PDF Converter
preferences” on page 58
.
Launch on job completion
You can select an application that Corel PDF Fusion launches each time
a job is successfully converted to Word.
Select the check box and click Browse.... Select the application
(myapp.exe for example) that you want to launch when each job has
completed.
View the Word document after creation
When checked, the default system-registered Word viewing application
launches and displays the converted output file. If no such application is
registered nothing will happen.

C
OREL
PDF F
USION
U
SER
G
UIDE
SETUPS INDEX CONTENTS 127
WORD DOCUMENT SETUP INDEX CONTENTS 127
Overwrite an existing Word document
When selected, Word files with the same name as an existing file
overwrite the existing file rather than creating a file name with a
numerical increment.
Send the Word file as an e-mail attachment
This causes the default system-registered e-mail application to display a
Send mail dialog with the generated Word file already included as an
attachment.
9.6.2 Reporting tab (DOC)
The options in the Word Reporting tab are the same as PDF Reporting tab. See
“Reporting tab (PDF)” on page 122 for more information.

USING ADD-INS FOR MICROSOFT OFFICE INDEX CONTENTS 128
Chapter 10 Add-ins for Microsoft
Office
Corel PDF Fusion treats Microsoft Word, PowerPoint and Excel software as special
applications. When Corel PDF Fusion is installed it creates an Add-in for supported
versions of these applications. These Add-ins allow Microsoft Word, PowerPoint and
Excel application users to print directly to Corel PDF Fusion and create PDF documents.
Capabilities are provided to generate PDF bookmarks from headings, and so on.
NOTE: Not all components are available in all versions of PDF Fusion.
NOTE: In Microsoft Word, PowerPoint and Excel software the Corel PDF Fusion icon appears in the tool
bar allowing fast access to PDF creation.
NOTE: If you uninstall Corel PDF Fusion the Add-ins are automatically uninstalled.
When printing using the Add-ins for Microsoft Office you can create PDF documents.
The Add-ins are supported with Microsoft Office 2003, Office 2007 and Office 2010.
For information on how to print from the Microsoft Office applications using the Add-
ins see:
•“Using Add-ins for Microsoft Office” on page 128
The configuration setups for each of the Microsoft Office applications are slightly
different. For more information see:
•“Add-in settings for Microsoft Word” on page 130
•“Add-in settings for Microsoft PowerPoint” on page 133
•“Add-in settings for Microsoft Excel” on page 137
10.1 Using Add-ins for Microsoft Office
The way you use an Add-in is exactly the same for each of the Microsoft Office
applications:
• To create PDF documents from a Microsoft Office 2003 document, click on the Add-in
toolbar icon and select Create > PDF. Alternatively, select, from the File menu, Corel
PDF Fusion > Create file > PDF.
To create PDF documents from a Microsoft Office 2007 or Microsoft Office 2010
document, click on the Corel PDF Fusion Ribbon Menu and select the Create PDF icon
from the PDF panel.

C
OREL
PDF F
USION
U
SER
G
UIDE
ADD-INS FOR MICROSOFT OFFICE INDEX CONTENTS 129
USING ADD-INS FOR MICROSOFT OFFICE INDEX CONTENTS 129
• To create a PDF document from a Microsoft Office 2003 document and send it as an
attachment using the system-registered e-mail application, click on the Add-in toolbar
icon and select Send > PDF. Alternatively, select from the File menu, Corel PDF Fusion
> Send e-mail attachment > PDF.
To create a PDF document from a Microsoft Office 2007 or Microsoft Office 2010
document and send it as an attachment using the system-registered e-mail application
click on the Corel PDF Fusion Ribbon Menu and select the Create and Email icon from
the PDF panel.
NOTE: If you have not previously saved your Microsoft Word or Excel document before attempting to
create a PDF document, a Save As dialog appears prompting you to save it. Once saved the
conversion continues. If you have not saved your Microsoft PowerPoint document before conversion
a “Please save your document before printing it” message appears. You must save the document
before conversion using the Add-ins.
A Corel PDF Fusion “working” message appears followed by a Create Document dialog
that allows selection of the various options:
File name
Change the output file name.
Save as type
Once you have chosen to output to PDF you cannot change the output
file type.
Setup
Choose a different setup to apply to your output file.
Security
These security options are only available when outputting PDF files and
are the same as the options provided within the Corel PDF Fusion Setup
manager. See “Security tab (PDF)” on page 120 for more information.
The following Append Options are available:
Append to
This lets you add the document you are creating to the end of an existing
document. Enter a path to the document or use the Browse option to
find the document to which you want to add the new output file. It must
be of the same type.
Append blank pages to the end of this document
Click this to add between 1 and 9 blank pages to the end of the created
document. Select the number of pages you want to append from the
drop-down menu.
NOTE: If the Create Document dialog is hidden by other windows, use Alt + tab to re-select it.

C
OREL
PDF F
USION
U
SER
G
UIDE
ADD-INS FOR MICROSOFT OFFICE INDEX CONTENTS 130
ADD-IN SETTINGS FOR MICROSOFT WORD INDEX CONTENTS 130
10.2 Add-in settings for Microsoft Word
You can change the settings for Corel PDF Fusion from within the Word application.
• In Microsoft Word 2003 click on the Add-in toolbar icon and select Settings > PDF.
Alternatively, select from the File menu Corel PDF Fusion > Edit Settings > PDF.
In Microsoft Word 2007, click on the Add-ins tab and select Settings from the PDF panel.
Alternatively, select Corel PDF Fusion > Edit Settings > PDF from the Menu commands.
Click the Restore Defaults button to return all tabs settings in the Corel PDF Fusion
configuration dialog to their default settings.
Microsoft Word has a PDF file import facility. For more information see “Word Import”
on page 130.
10.2.1 Word Import
The Microsoft Word Add-in allows you to import PDF and XPS files into Word.
1 In Microsoft Word 2003, click on the Add-in toolbar icon and select Import > PDF or
Import > XPS. Alternatively, select Corel PDF Fusion > Import > PDF or Corel PDF
Fusion > Import > XPS from the File menu.
In Microsoft Word 2007 and Microsoft Word 2010, click on the Add-ins tab and select
Import PDF or Import XPS in the To Word panel.
2 Use the Select a PDF file or Select a XPS file dialog to locate the file.
3Click Open to import. Click Cancel to abort the import.
10.2.2 PDF settings
The following tabs are available for the PDF settings:
•“General tab (Word PDF)” on page 130
•“Document tab (Word PDF)” on page 131
•“Links tab (Word PDF)” on page 131
•“Bookmarks tab (Word PDF)” on page 132
•“Cropping tab (Word PDF)” on page 132
•“Watermark tab (Word PDF)” on page 132
•“Comments tab (Word PDF)” on page 133
•“About tab (Word PDF)” on page 133
10.2.2.1 General tab (Word PDF)
All the Create PDF... options are selected as a default and should generally be left
selected. If required, deselect to remove the option.

C
OREL
PDF F
USION
U
SER
G
UIDE
ADD-INS FOR MICROSOFT OFFICE INDEX CONTENTS 131
ADD-IN SETTINGS FOR MICROSOFT WORD INDEX CONTENTS 131
Select Automatically open the generated .PDF file to automatically open, in your default
PDF viewing application, every PDF file created from the Word Add-in. The setting of
this option overrides the setting of View the PDF document after creation in the
General tab of the Corel PDF Fusion Setup manager. For more information see “General
tab (PDF)” on page 114.
Select Prompt for the location of the output .PDF file to display a dialog allowing you
to change the location and name of every PDF file generated from the Word Add-in.
Select Minimize Office application during processing to minimize Word when the
conversion starts. Selecting this option can improve the speed of processing.
10.2.2.2 Document tab (Word PDF)
The options in the Open Options panel allow you to configure how you would like your
PDF viewer to display the generated PDF. There are various view options you can specify
including the magnification and the document page number at which the converted
document is opened. All these options can be changed once the PDF is viewed within
your PDF viewer.
Select Allow editing of document information prior to converting each document to
display a Document Information dialog every time a file is converted to PDF.
Enter information relating to the document in each text box of the dialog and click OK.
Select Convert document bookmarks into .PDF named destinations to convert Word
bookmarks into named destinations within the generated PDF. This provides direct
access to those topics using Bookmarks options within your PDF viewer.
Select Include hidden text to create a PDF that includes any text designated as “hidden”
within a Word document. Normally, hidden text does not appear in the output PDF file.
This option is not selected by default.
Click the Save the document before generating .PDF file to ensure that Microsoft Word
automatically saves the document before the PDF is generated.
10.2.2.3 Links tab (Word PDF)
The options in the Hyperlinks to Process panel control which hyperlinks within your
Word document are turned into links within the generated PDF file. With Create PDF
links from hyperlinks in the General tab
not
selected these options are disabled.
Select Look for hyperlinks in document header/footer areas to convert hyperlinks in
the header and footer areas of the document into links in the generated PDF.
Select Use Internet-type hyperlinks, to convert internet addresses into links in the
output PDF. Clicking a link in the output document opens the default web browser to
the specified location.
Select Use cross-document hyperlinks so that links to other documents are made
available in the PDF.
Use the options in the PDF Link Appearance panel to configure how the links appear in
the generated PDF file.

C
OREL
PDF F
USION
U
SER
G
UIDE
ADD-INS FOR MICROSOFT OFFICE INDEX CONTENTS 132
ADD-IN SETTINGS FOR MICROSOFT WORD INDEX CONTENTS 132
10.2.2.4 Bookmarks tab (Word PDF)
The Automatically open bookmarks in the .PDF document to depth setting in this tab
collapses or expands the document headings when the PDF is opened.
NOTE: Ensure your headings are correctly formed in the Word document so that they create correct
bookmarks.
Bookmarks are created from the heading styles in the Word document. If you want
bookmarks to appear correctly in the generated PDF, you must use headings properly
in the Word document. For example, if you use a style with
Heading3
in the Word
document and then set the Automatically open bookmarks... option to only convert
headings with a level of up to 2 into bookmarks, your bookmarks may not appear
correctly.
Use Destination magnification to set the zoom value when the PDF file is opened. A
number of Fit page... options are provided. Inherit zoom opens the PDF with the zoom
value currently selected in the PDF viewer.
PDF bookmarks are, by default, created using the font and color from the Word
document.
Click Use text color to change the color of the bookmark text, which is blue by default.
Click Color to display a color picker so you can select a new color.
Click Use text formatting to change the text to Italic, Bold or Bold-italic.
10.2.2.5 Cropping tab (Word PDF)
Select Use Cropping to enable all the other options on this dialog.
Select Crop if current document format is smaller than destination format, which
enables the Centered option, to crop the document to fit the generated page size.
Select Centered to center the generated page before being cropped.
Click Static values to enter specific cropping values. On selection, use the Units menu to
choose your preferred units (point, mm, inch).
The following three options are available:
Set individual values
Individually set the top/bottom/left and right values.
Constrain all values to be the same
Make the top/bottom/left and right values all the same.
Constrain Top and Bottom values to be the same
Make the top and bottom values the same.
NOTE: If the entered cropping values exceed the page size, the values are ignored and no cropping is
performed.
10.2.2.6 Watermark tab (Word PDF)
Click Watermark Document to enable the following options:
Use the Te x t option to enter the text you want to become your watermark.

C
OREL
PDF F
USION
U
SER
G
UIDE
ADD-INS FOR MICROSOFT OFFICE INDEX CONTENTS 133
ADD-IN SETTINGS FOR MICROSOFT POWERPOINT INDEX CONTENTS 133
The Font & Style panel provides the following controls:
Font
Lists the fonts you can use for the watermark.
Size
Click Fit to make the watermark fit the page size or select a text point
size from the drop-down list.
Style
Select either the bold or outline style for the watermark.
Color
Click to display a color picker allowing you to select the required color
for the watermark.
Opacity
Use the slider to choose an opacity level.
The Position panel allows you to choose the location of the watermark:
Offset from center
Select either above or below and enter a value to move the watermark
from center of the document.
Select either left or right and enter a value to move the watermark from
center of the document.
Units
Select your preferred units (point, mm, inch).
Rotate
Select one of the fixed watermark rotations or choose a specific angle
by entering a value or using the up/down arrows.
10.2.2.7 Comments tab (Word PDF)
If your Word document contains comments, you can convert those comments into
“sticky notes” type comments in the created PDF file.
Use the Reviewer menu to select the name of each reviewer. For each reviewer
selected, choose whether to automatically include the comments by that reviewer,
whether to display those comments as “open” in the generated PDF file and to select a
color for any included comments.
10.2.2.8 About tab (Word PDF)
This tab provides useful contact and version information.
10.3 Add-in settings for Microsoft PowerPoint
You can change the settings for Corel PDF Fusion from within PowerPoint software.
• In PowerPoint software 2003 click on the Add-in toolbar icon and select Settings > PDF.
Alternatively, select, from the File menu Corel PDF Fusion > Edit Settings > PDF.

C
OREL
PDF F
USION
U
SER
G
UIDE
ADD-INS FOR MICROSOFT OFFICE INDEX CONTENTS 134
ADD-IN SETTINGS FOR MICROSOFT POWERPOINT INDEX CONTENTS 134
In PowerPoint software 2007, click on the Add-ins tab and select Settings from the PDF
panel. Alternatively, select Corel PDF Fusion > Edit Settings > PDF from Menu
commands.
Click the Restore Defaults button to return all tabs settings in the Corel PDF Fusion
configuration dialog to their default settings.
10.3.1 PDF settings
The following tabs are available for the PDF settings:
•“General tab (PowerPoint PDF)” on page 134
•“Document tab (PowerPoint PDF)” on page 134
•“Links tab (PowerPoint PDF)” on page 135
•“Bookmarks tab (PowerPoint PDF)” on page 135
•“Cropping tab (PowerPoint PDF)” on page 135
•“Watermark tab (PowerPoint PDF)” on page 135
•“About tab (PowerPoint PDF)” on page 136
10.3.1.1 General tab (PowerPoint PDF)
The Create PDF Bookmarks and Create PDF links from hyperlinks options are
selected as a default and should generally be left selected. If required, you can deselect
either of these options.
Select Automatically open the generated .PDF file to automatically open in your PDF
viewer every PDF file created from the PowerPoint Add-in. The setting of this option
overrides the setting of View the PDF document after creation option in the General
tab of the Corel PDF Fusion Setup manager. For more information see “General tab
(PDF)” on page 114.
Select Prompt for the location of the output .PDF file to display a dialog allowing you
to change the location and name of every PDF file generated from the PowerPoint Add-
in.
Click Print in Black and White to convert any color elements in the PowerPoint
presentation to monochrome output.
Click Save the document before generating .PDF file to ensure that Microsoft
PowerPoint automatically saves the document before the PDF is generated.
10.3.1.2 Document tab (PowerPoint PDF)
The options in the Open Options panel let you configure how you would like your PDF
viewer to display the generated PDF. There are various view options, magnifications and
document page number selections. You can change the options once the PDF is viewed
within your PDF viewer.
Select Allow editing of document information prior to converting each document to
display a Document Information dialog every time a file is converted to PDF.

C
OREL
PDF F
USION
U
SER
G
UIDE
ADD-INS FOR MICROSOFT OFFICE INDEX CONTENTS 135
ADD-IN SETTINGS FOR MICROSOFT POWERPOINT INDEX CONTENTS 135
Enter information in each text box of the dialog and click OK.
Select Include hidden slides to create a PDF which includes any slide designated as
hidden within PowerPoint.
10.3.1.3 Links tab (PowerPoint PDF)
Use Hyperlinks to Process panel to control which hyperlinks within your PowerPoint
document are turned into links within the generated PDF file.
Select Use Internet-type hyperlinks to convert internet addresses into links in the PDF.
Clicking the link in the PDF opens the default web browser at the specified location.
Use the options in the PDF link appearance panel to configure how the links appear in
the generated PDF file.
10.3.1.4 Bookmarks tab (PowerPoint PDF)
Use the Automatically open bookmarks in the .PDF document to depth setting to
collapse or expand the document headings when the PDF is opened.
The Destination magnification option decides the zoom value when the PDF file is
opened. A number of Fit page to... options are provided. The Inherit zoom option
opens the PDF with the zoom value currently selected in the user’s PDF viewer.
10.3.1.5 Cropping tab (PowerPoint PDF)
The Use Cropping option is enabled by default and is used to enable all the other
options on this dialog.
The Crop if current document format is smaller than destination format is enabled by
default, and enables the Centered option, to crop the document to fit the generated
page size. Centered is enabled by default and centers the generated page before being
cropped.
Click Static values to enter specific cropping values. On selection, use the Units menu to
choose your preferred units (point, mm, inch).
The following three options are available:
Set individual values
Individually set the top/bottom/left and right values.
Constrain all values to be the same
Make the top/bottom/left and right values all the same.
Constrain Top and Bottom values to be the same
Make the top and bottom values the same.
NOTE: If the entered cropping values exceed the page size, the values are ignored and no cropping is
performed.
10.3.1.6 Watermark tab (PowerPoint PDF)
Click Watermark Document to enable the following options:
Use the Te x t option to enter the text you want to become your watermark.

C
OREL
PDF F
USION
U
SER
G
UIDE
ADD-INS FOR MICROSOFT OFFICE INDEX CONTENTS 136
ADD-IN SETTINGS FOR MICROSOFT POWERPOINT INDEX CONTENTS 136
The Font & Style panel provides the following controls:
Font
Lists the fonts you can use for the watermark.
Size
Click Fit to make the watermark fit the page size or select a text point
size from the drop-down list.
Style
Select either the bold or outline style for the watermark.
Color
Click to display a color picker allowing you to select the required color
for the watermark.
Opacity
Use the slider to choose an opacity level.
The Position panel allows you to choose the location of the watermark:
Offset from center
Select either above or below and enter a value to move the watermark
from center of the document.
Select either left or right and enter a value to move the watermark from
center of the document.
Units
Select your preferred units (point, mm, inch).
Rotate
Select one of the fixed watermark rotations or choose a specific angle
by entering a value or using the up/down arrows.
10.3.1.7 About tab (PowerPoint PDF)
This tab provides useful contact and version information.

C
OREL
PDF F
USION
U
SER
G
UIDE
ADD-INS FOR MICROSOFT OFFICE INDEX CONTENTS 137
ADD-IN SETTINGS FOR MICROSOFT EXCEL INDEX CONTENTS 137
10.4 Add-in settings for Microsoft Excel
You can change the settings for Corel PDF Fusion from within Excel software.
• In Excel software 2003 click on the Add-in toolbar icon and select Settings > PDF.
Alternatively, select, from the File menu, Corel PDF Fusion > Edit Settings > PDF.
In Excel software 2007, click on the Add-ins tab and select Settings from the PDF panel.
Alternatively, Corel PDF Fusion > Edit Settings > PDF from Menu commands.
Click the Restore Defaults button to return all tabs settings in the Corel PDF Fusion
configuration dialog to their default settings.
10.4.1 PDF settings
The following tabs are available for the PDF settings:
•“General tab (Excel PDF)” on page 137
•“Document tab (Excel PDF)” on page 138
•“Links tab (Excel PDF)” on page 138
•“Bookmarks tab (Excel PDF)” on page 139
•“Cropping tab (Excel PDF)” on page 139
•“Watermark tab (Excel PDF)” on page 139
•“About tab (Excel PDF)” on page 140
10.4.1.1 General tab (Excel PDF)
Select the Create PDF links from worksheet links to create links in the PDF where links
occur in the current document. Select the Create PDF links from cell links option to
create links in the PDF where these links occur in the Excel document, including: links to
a cell in the current worksheet of the document (workbook), and links to a cell in a
different worksheet in the current document.
Select Create PDF links from named destinations to create links in the PDF where links
exist for a named cell or cells (the Named Destination) in the Excel document.
These options are selected as a default and should generally be left selected. If required,
you can deselect either of these options.
Select Automatically open the generated .PDF file to automatically open, in your PDF
viewer, every PDF file created from the Excel Add-in. The setting of this option overrides
the setting of View the PDF document after creation option in the General tab of the
Corel PDF Fusion Setup manager. For more information see “General tab (PDF)” on
page 114.
Select Prompt for the location of the output .PDF file to display a Save as dialog
allowing you to change the location and name of every PDF file generated from the Excel
Add-in.

C
OREL
PDF F
USION
U
SER
G
UIDE
ADD-INS FOR MICROSOFT OFFICE INDEX CONTENTS 138
ADD-IN SETTINGS FOR MICROSOFT EXCEL INDEX CONTENTS 138
Click Save the document before generating .PDF file to ensure that Microsoft Excel
automatically saves the document before the PDF is generated.
10.4.1.2 Document tab (Excel PDF)
The options in the Open options panel let you configure how you would like your PDF
viewer to display the generated PDF.
The Initial View options decide how the created PDF is first displayed, Pages only, Pages
and Bookmarks and so on.
Select Magnification option to choose the zoom value when the PDF file is opened. A
number of Fit page... selections are provided. Use Inherit zoom to open the PDF with
the zoom value currently selected in the PDF viewer.
NOTE: The Adjust to % zoom option in the Scaling panel of the Excel > File > Page Setup > Page tab is
inherited as the zoom percentage when opening a PDF created by the Excel Add-in.
Use the Open at Page option to choose the first page of the PDF to be displayed.
Select either Create one PDF file for each worksheet in the document, or Create one
PDF file for the entire document.
Choose one of Create PDF file from the current worksheet, Create PDF file from the
current (active) worksheets, or Create PDF file from all worksheets.
Select Allow editing of document information prior to converting each document to
display a Document Information dialog every time a file is converted to PDF.
Enter information in each text box of the dialog and click OK.
Select Convert document bookmarks into .PDF named destinations to convert Excel
bookmarks into named destinations within the generated PDF. This provides direct
access to those topics using Bookmarks options within your PDF viewer.
10.4.1.3 Links tab (Excel PDF)
Select Create PDF links from hyperlinks to convert hyperlinks in the Excel document
to links within the generated PDF.
The Hyperlinks to Process panel controls which hyperlinks within your Excel document
are turned into links within the generated PDF file.
Select Use Internet-type hyperlinks to convert internet addresses into links in the PDF,
Clicking the link opens the default web browser to the specified URL.
Select Use cross-document hyperlinks to convert links to other documents to links in
the PDF.

C
OREL
PDF F
USION
U
SER
G
UIDE
ADD-INS FOR MICROSOFT OFFICE INDEX CONTENTS 139
ADD-IN SETTINGS FOR MICROSOFT EXCEL INDEX CONTENTS 139
Use the PDF link appearance panel to configure how links appear in the generated PDF
file.
NOTE: The hyperlink box in the converted file is not always correctly aligned with the hyperlink text. This
occurs because in Excel the row height is dependent on the font style, size and cell padding. In the
Excel Add-in implementation, the hyperlink box calculation is based on various items including the
cell position, the font height and width. This calculation works for some rows and columns, but not
all.
10.4.1.4 Bookmarks tab (Excel PDF)
Select the Create PDF bookmarks to create PDF bookmarks from the Excel document.
Use Destination magnification to choose the zoom value when the PDF file is opened.
A number of Fit page to... options are provided. Select Inherit Zoom option to open
the PDF with the zoom value currently selected in the user’s PDF viewer.
PDF bookmarks are, by default, created using the font and color from the Excel
document.
The Bookmark appearance panel allows you to change the appearance of the generated
bookmarks:
Click Use text color to change the color of the bookmark text, which is blue by default.
Click Color to display a color picker so you can select a new color.
Click Use text formatting to change the text to Italic, Bold or Bold-italic.
10.4.1.5 Cropping tab (Excel PDF)
Select Use Cropping to enable all the other options on this dialog.
Select Crop if current document format is smaller than destination format, which
enables the Centered option, to crop the document to fit the generated page size.
Select Centered to center the generated page before being cropped.
Click Static values to enter specific cropping values. On selection, use the Units menu to
choose your preferred units (point, mm, inch).
The following three options are available:
Set individual values
Individually set the top/bottom/left and right values.
Constrain all values to be the same
Make the top/bottom/left and right values all the same.
Constrain Top and Bottom values to be the same
Make the top and bottom values the same.
NOTE: If the entered cropping values exceed the page size, the values are ignored and no cropping is
performed.
10.4.1.6 Watermark tab (Excel PDF)
Click Watermark Document to enable the following options:
Use the Te x t option to enter the text you want to become your watermark.

C
OREL
PDF F
USION
U
SER
G
UIDE
ADD-INS FOR MICROSOFT OFFICE INDEX CONTENTS 140
ADD-IN SETTINGS FOR MICROSOFT EXCEL INDEX CONTENTS 140
The Font & Style panel provides the following controls:
Font
Lists the fonts you can use for the watermark.
Size
Click Fit to make the watermark fit the page size or select a text point
size from the drop-down list.
Style
Select either the bold or outline style for the watermark.
Color
Click to display a color picker allowing you to select the required color
for the watermark.
Opacity
Use the slider to choose an opacity level.
The Position panel allows you to choose the location of the watermark:
Offset from center
Select either above or below and enter a value to move the watermark
from center of the document.
Select either left or right and enter a value to move the watermark from
center of the document.
Units
Select your preferred units (point, mm, inch).
Rotate
Select one of the fixed watermark rotations or choose a specific angle
by entering a value or using the up/down arrows.
10.4.1.7 About tab (Excel PDF)
This tab provides useful contact and version information.

HOW TO USE SHORTCUT KEYS INDEX CONTENTS 141
Appendix A
Keyboard shortcut reference
This appendix contains a list of all the keyboard shortcuts and accelerator (or access)
keys for Corel PDF Fusion.
•“How to use shortcut keys” on page 141
•“File menu” on page 142
•“Edit menu” on page 143
•“View menu” on page 144
•“Document menu” on page 145
•“Advanced menu” on page 146
•“Windows menu” on page 146
•“Help menu” on page 146
A.1 How to use shortcut keys
Press the Ctrl key followed by the designated letter or number. For example, use Ctrl
+ O to display the Open dialog.
By pressing the Alt key you will see the accelerator keys underlined in the drop-down
menus.
Press the Alt key followed by the underlined letter to display the option. For example,
Alt + F to display the File menu. Once the Alt key is pressed the menu items show an
underline. When this underline is displayed you can select the next underlined letter for
the required option. For example, F for File.
In summary, the commands Ctrl + O and Alt + F + O both display the Open dialog.
When a menu is displayed, use the left, right, up and down arrow keys to display sub
options. The Enter or Return key makes the selection.
When two menu items have the same letter such as Find Next and Preferences in the
Edit menu, pressing the character (in this case N) switches between the two. Select your
required option and press Enter or Return to select.

C
OREL
PDF F
USION
U
SER
G
UIDE
KEYBOARD SHORTCUT REFERENCE INDEX CONTENTS 142
FILE MENU INDEX CONTENTS 142
A.2 File menu
File menu Alt + F
Command Ctrl key shortcuts Accelerator keys Other keys
New Ctrl + N Alt + F + N
Open Ctrl + O Alt + F + O
Open Recent 1, 2, 3.... 9 Alt + F + T
Close Ctrl + W Alt + F + C Ctrl + F4
Close All Alt + F + L
Finish Document Wizard Alt + F + Z
Save Ctrl + S Alt + F + S
Save AsCtrl + Shift + S Alt + F + A
Save All Alt + F + V
Export Alt + F + E
Email Alt + F + M
Email > Document as PDF Alt + F + M + P
Email > Document as XPS Alt + F + M + X
Email > Comments Alt + F + M + C
Print Setup... Ctrl + Shift + P Alt + F + U
Print... Ctrl + P Alt + F + P
Exit Alt + F + X

C
OREL
PDF F
USION
U
SER
G
UIDE
KEYBOARD SHORTCUT REFERENCE INDEX CONTENTS 143
EDIT MENU INDEX CONTENTS 143
A.3 Edit menu
Edit menu Alt + E
Command Ctrl key shortcuts Accelerator keys Other keys
Undo Ctrl + Z Alt + E + U
Redo Ctrl + Y Alt + E + R
Cut Ctrl + X Alt + E + T
Copy Ctrl + C Alt + E + C
Paste Ctrl + V Alt + E + P
Delete Alt + E + D Del
Select All Ctrl + A Alt + E + A
Deselect All Alt + E + E Esc
Find... Ctrl + F Alt + E + F
Find NextCtrl + Shift + F Alt + E + X
Replace... Ctrl + H Alt + E + L
Preferences Ctrl + K Alt + E + N

C
OREL
PDF F
USION
U
SER
G
UIDE
KEYBOARD SHORTCUT REFERENCE INDEX CONTENTS 144
VIEW MENU INDEX CONTENTS 144
A.4 View menu
View menu Alt + V
Command Ctrl key shortcuts Accelerator keys Other keys
Page View Alt + V + P F3
Assembly View Alt + V + S F4
Flick View Alt + V + F F5
Go to Alt + V + G
Go to > First Page Ctrl + Home Alt + V + G + F Home
Go to > Previous Page Ctrl + PgUp Alt + V + G + P
Go to > Next Page Ctrl + PgDn Alt + V + G + N
Go to > Last Page Ctrl + End Alt + V + G + L End
Go to > Page... Ctrl + G Alt + V + G
Fit Page Ctrl + 0 Alt + V + T
Fit Width Ctrl + 2 Alt + V + W
Actual Size Ctrl + 1 Alt + V + A
Presentation Alt + V + R F7
Zoom InCtrl + + Alt + V + I
Zoom Out Ctrl + - Alt + V + O
Zoom To o l Alt + V + M
Zoom to Alt + V + Z
Zoom to > 1600% Alt + V + Z + 9
Zoom to > 800% Alt + V + Z + 8
Zoom to > 400% Alt + V + Z + 7
Zoom to > 200% Alt + V + Z + 6
Zoom to > 150% Alt + V + Z + 5
Zoom to > 100% Alt + V + Z + 4
Zoom to > 75% Alt + V + Z + 3
Zoom to > 50% Alt + V + Z + 2
Zoom to > 25% Alt + V + Z + 1
Single Page Mode Alt + V + N
Continuous Page Mode Alt + V + C

C
OREL
PDF F
USION
U
SER
G
UIDE
KEYBOARD SHORTCUT REFERENCE INDEX CONTENTS 145
DOCUMENT MENU INDEX CONTENTS 145
A.5 Document menu
Document menu Alt + D
Command Ctrl key shortcuts Accelerator keys Other keys
Pages Alt + D + P
Pages > Insert New Page Ctrl + Shift + N Alt + D + P + I
Pages > Extract Pages Ctrl + Shift + X Alt + D + P + X
Pages > Delete Alt + D + P + D
Pages > Rotate Left Ctrl + Left Alt + D + P + L
Pages > Rotate Right Ctrl + Right Alt + D + P + R
Pages > Crop Pages Alt + D + P + C
Bookmarks Alt + D + B
Bookmarks > Add Bookmark Alt + D + B + B Alt + B
Bookmarks > Add Text Bookmark Ctrl + Shift + B Alt + D + B + T
Bookmarks > Add Area Bookmark Ctrl + Alt + B Alt + D + B + A
Bookmarks > Properties Alt + D + B + P Alt + Enter
Comments Alt + D + C
Comments > Note Alt + D + C + N Alt + N
Comments > Free Text Alt + D + C + F
Comments > Highlight Alt + D + C + H
Comments > Underline Alt + D + C + U
Comments > Strikeout Alt + D + C + S
Comments > Properties Alt + D + C + P Alt + Enter
Comments > Show Comments Alt + D + C + W F8
Comments > Import Comments Ctrl + Alt + I Alt + D + C + I
Comments > Export Comments Ctrl + Alt + E Alt + D + C + E
Comments > Email Comments Ctrl + Alt + M Alt + D + C + M
Set Document Security Alt + D + S
Set Document Security > None Alt + D + S + N
Set Document Security > Standard Alt + D + S + S
Document Settings Ctrl + D Alt + D + D
Watermark Alt + D + W
Batch Conversion Alt + D + A
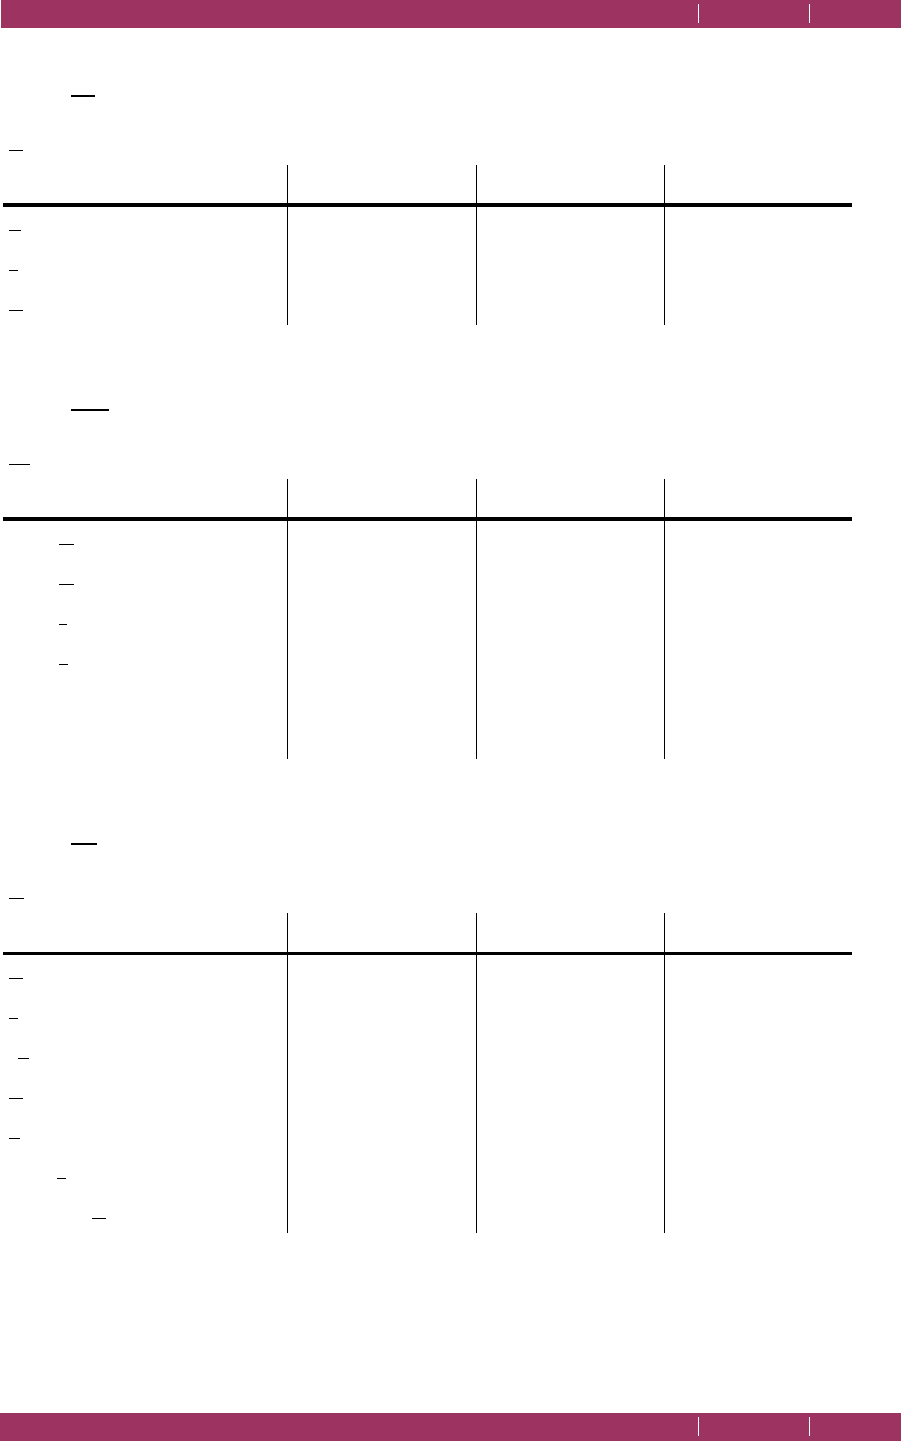
C
OREL
PDF F
USION
U
SER
G
UIDE
KEYBOARD SHORTCUT REFERENCE INDEX CONTENTS 146
ADVANCED MENU INDEX CONTENTS 146
A.6 Advanced menu
A.7 Windows menu
A.8 Help menu
Advanced menu Alt + A
Command Ctrl key shortcuts Accelerator keys Other keys
Redact Selection Ctrl + R Alt + A + R
Find and Redact... Ctrl + Shift + R Alt + A + F
Correct selected text... Alt + A + E
Windows menu Alt + W
Command Ctrl key shortcuts Accelerator keys Other keys
Show Navigation Alt + W + N F9
Show Menu Alt + W + M F10
Show T
oolbar Alt + W + T F11
Show Statusbar Alt + W + S F12
Welcome Alt + W + 0
Open file name
Alt + W + 1
Help menu Alt + H
Command Ctrl key shortcuts Accelerator keys Other keys
Contents Alt + H + C F1
T
ooltips Alt + H + T
To ol Labels Alt + H + O
About... Alt + H + A
Buy... Alt + H + B
Enter Serial Number... Alt + H + S
Check for Updates... Alt + H + U

VEC TOR IMAG E INDEX CONTENTS 147
Appendix B
Supported document formats
This appendix contains a list of all the document formats supported for input to Corel
PDF Fusion.
The generating applications are divided into the following categories:
•“Vector image” on page 147
•“Presentation” on page 148
•“E-mail” on page 148
•“Projects” on page 148
•“Spreadsheet” on page 149
•Word processing
•“Text and markup” on page 149
•“Notetaking” on page 149
•“eBook” on page 150
•“Raw image” on page 150
•“Raster image” on page 151.
B.1 Vector image
Application
Adobe PDF
Enhanced Metafile (EMF)
Microsoft XPS
Visio (Page Preview mode WMF/EMF)
Visio (VDW)
Visio (VSD)
Visio (VSDX)
Visio (VSS)
Visio (VST)
Table B.1 Supported vector image formats
C
OREL
PDF F
USION
U
SER
G
UIDE
SUPPORTED DOCUMENT FORMATS INDEX CONTENTS 148
PRESENTATION INDEX CONTENTS 148
B.2 Presentation
B.3 E-mail
B.4 Projects
Visio (VSX)
Visio (VTX)
Visio XML VSX (File ID only)
Windows Metafile
Application
Microsoft PowerPoint for Windows (POT)
Microsoft PowerPoint for Windows (POTX)
Microsoft PowerPoint for Windows (PPS)
Microsoft PowerPoint for Windows (PPSX)
Microsoft PowerPoint for Windows (PPT)
Microsoft PowerPoint for Windows (PPTX)
OpenOffice Impress
Table B.2 Supported presentation formats
Application
Apple e-mail (EMLX)
E-mail File (MBOX)
Microsoft Outlook Express (EML)
Microsoft Outlook Message (MSG)
Transport Neutral Encapsulation Format (TNEF)
Table B.3 Supported e-mail formats
Application
Microsoft Project (MPP)
Microsoft Project Template (MPT)
Table B.4 Supported project formats
Table B.1 Supported vector image formats
C
OREL
PDF F
USION
U
SER
G
UIDE
SUPPORTED DOCUMENT FORMATS INDEX CONTENTS 149
SPREADSHEET INDEX CONTENTS 149
B.5 Spreadsheet
B.6 Word processing
B.7 Text and markup
B.8 Notetaking
Application
Microsoft Excel for Windows (File ID only) (XLS)
Microsoft Excel for Windows (XLSX)
OpenOffice Spreadsheet
Table B.5 Supported spreadsheet formats
Application
HTML/XHTML
MHTML (MIMI HTML))
Microsoft Word for Windows (Doc)
Microsoft Word for Windows (DocX)
Microsoft WordPad
OpenOffice Writer
Table B.6 Supported word processing formats
Application
ANSI Text 7 and 8-bit
ASCII Text 7 and 8-bit
Unicode Text 3.0, 4.0
Text Format (RTF)
Table B.7 Supported text and mark-up formats
Application
One Note
Table B.8 Note t aking for mats

C
OREL
PDF F
USION
U
SER
G
UIDE
SUPPORTED DOCUMENT FORMATS INDEX CONTENTS 150
EBOOK INDEX CONTENTS 150
B.9 eBook
B.10 Raw image
Application
ePUB
Table B.9 eBook formats
Application
Adobe Digital Negative: DNG
Apple Quicktake 100/150 Digital Camera Raw Image Format
Canon Digital Camera RAW Image Format version 1.0
Canon Digital Camera RAW Image Format version 2.0
Capture Shop Raw Image File
Casio Digital Camera Raw File Format
Digital Foto Maker Raw Image File
Epson Digital Camera Raw Image Format
Fuji Digital Camera Raw Image Format
Hasselblad Digital Camera Raw Image Format
Imacon Digital Camera Raw Image Format
Kodak DC25 Digital Camera File
Kodak DC25 Digital Camera Raw Image Format
Kodak DCS200 Digital Camera Raw Image Format
Kodak Digital Camera Raw Image Format for these models: Kodak DSC Pro SLR/c, Kodak DSC
Pro SLR/n, Kodak DSC Pro 14N, Kodak DSC PRO 14nx
Kodak Digital Camera Raw Image Format
Kodak Digital Camera Raw Image Format
Leaf Raw Image File
Leica Camera Raw Image Format
Logitech Digital Camera Raw Image Format
Mamiya Digital Camera Raw Image Format
Minolta Dimage Digital Camera Raw Image Format
Minolta RD175 Digital Camera Raw Image Format
Table B.10 Supported raw image formats
C
OREL
PDF F
USION
U
SER
G
UIDE
SUPPORTED DOCUMENT FORMATS INDEX CONTENTS 151
RASTER IMAGE INDEX CONTENTS 151
B.11 Raster image
Nikon Digital Camera Raw Image Format
NuCore Raw Image File
Olympus Digital Camera Raw Image Format
Panasonic Digital Camera Image Format
Panasonic LX3 Digital Camera Raw Image Format
Pentax Digital Camera Raw Image Format
Phantom Software Raw Image File
Phase One Digital Camera Raw Image Format
Phase One Digital Camera Raw Image Format
Rawzor Digital Camera Raw Image Format
Samsung Raw Image Format
Sinar Capture Shop Raw Image File
Sinar Raw Image File
Sony Digital Camera Raw Image Format for Alpha devices
Sony Digital Camera Raw Image Format for DSC-F828 8 megapixel digital camera or Sony
DSC-R1
Sony Digital Camera Raw Image Format
Application
Graphics Interchange Format (GIF).
High Dynamic Range Format (HDR)
Icone Format (ICO)
Interchange Format (IFF)
JBIG2
JFIF (JPEG not in TIFF format)
JPEG 2000
KOALA Format (KOA)
Kodak Photo CD (PCD)
Macintosh PICT BMP only
Microsoft DirectDraw Surface Format (DDS)
Table B.11 Supported raster image formats
Table B.10 Supported raw image formats

C
OREL
PDF F
USION
U
SER
G
UIDE
SUPPORTED DOCUMENT FORMATS INDEX CONTENTS 152
RASTER IMAGE INDEX CONTENTS 152
Microsoft Windows Bitmap (BMP)
OpenEXR (EXR)
PC Paintbrush (PCX)
Photoshop File (PSD)
Por table Any Map
Portable Float Map (PFM)
Portable Graymap PGM
Portable Network Graphics (PNG)
Portable Pixmap (PPM)
Progressive JPEG
Silicon Graphics Image Format (SGI)
Standard Windows Bitmap Format (DIB)
Sun Raster (RAS)
TIFF
TruVision TGA (Targa)
Wireless graphics format (WBMP)
X-Windows Bitmap
X-Windows Pixmap
Table B.11 Supported raster image formats

INDEX CONTENTS 153
A
Active dictionary 55
Add Area Bookmark 95
Add Bookmark 95
Add hyperlinks 78
Add Text Bookmark 95
Adding a note 74
Adding free text annotations 77
Adding text annotations 76
Add-ins for Microsoft Office applications, Using 62
Allow content access for accessibility 121
Allow copying of text and graphics 121
Allow spell checking 55
Always create backup copy 55
Always embed window 118
Always output files to 115, 124, 126
Animate status bar messages 53
Annotation properties 101
Assembly View 36
Associating XPS and PDF files with Corel PDF
Fusion 13
Auto-rotate 73
Auto-rotate pages 114
B
Bookmark
Add 95
Add Area 95
Add Text 95
Delete selected 96
Edit properties 96
properties 96
Bookmarks
Destination Zoom 96
Working with 93
Bookmarks in the Navigation pane 94
C
Center on paper 73
Comment
Delete 100
Highlight 35
Import/Export/Email 101
New Strike-Out 35
New Underline 35
properties 101
Show/Hide all 101
type 100
Comment authoring 122
Comments
Working with 98
Comments in the Navigation pane 99
Comments in the Page View 98
Common controls 29
Compress text and line art 118
Compression 118
Connection Settings 55
Continuous page mode 33
Conventions
fonts 6
instructions in text 6
Convert device independent colors to device
dependent colors 116
Convert format panel 57
Convert to RGB 116
Converting files 61
Corel PDF Converter
preferences 58
Corel PDF Fusion
full mode 10
Create a new setup 110
Create individual log files for each job 122
Creates a PDF/A-1b compliant file 114
Crop Pages 46
Crop to fixed size 46
Customize the Navigation pane 49
Customize your work area 48
D
Delete log file for successful jobs 122
Delete selected bookmark 96
destination of the output file, Change the 79
Index

C
OREL
PDF F
USION
U
SER
G
UIDE
INDEX CONTENTS 154
INDEX INDEX CONTENTS 154
Details panel 58
Discard control 124
Discard image 124
Discard messages 122
Document assembly 122
Document Settings 88
File Security 90
Open Settings 89
Removing document security settings 92
Security Settings 90
Set Document Passwords 91
Summary 89
Downsample 118
E
Edit an existing setup 110
Edit bookmark properties 96
Email PDF documents 84
Email XPS documents 84
Embed all fonts (except base 14) 119
Encrypt PDF files 120
Excel Add-in settings
About tab 140
Bookmarks tab 139
Crop tab 139
Document tab 138
General tab 137
Links tab 138
Watermark tab 139
Export to PNG 64
Export to Word 63
Exporting setups 112
Extract Pages 40, 47
F
Features
Bookmark control 21
Customizable workarea 19
Document security 22
Document settings and properties (PDF) 22
Feature transfer and document compatibility 24
File format support 18
Finish document wizard 25
Hyperlinks 22
Multiple Undo/Redo 19
Page manipulations 20
Page properties and markup manipulation 22
PDF comments/annotations 21
Printing 19
Redact text 20
Restrict opening, print, copying, commenting
functions 23
Saving options 23
Text correction 19
Text searching 19
Text selection 19
File association 13
File format support 18
File system 14
Fill in forms and signing 122
Find and Redact 73
Find and Replace 74
Fit to paper size 73
Flick View 41
Flick View settings 53
Font conventions 6
instructions in text 6
Force font obfuscation 123
G
General editing 122
Getting to know Corel PDF Fusion 15
H
How do I...
Add bookmarks 75, 76
Add comments/notes 74
Add empty pages to an existing document 70
Add existing pages to an existing document 70
Add hyperlinks 78
Add text annotations 76, 77
Change the compression options 80
Change the destination of an output file 79
Change the destination of the output file 79
Convert files (Corel PDF Fusion) 61
Create a new document from existing files 65
Export setups 83
Find and Redact text—one or more instances
73
Find and replace text—one or more instances
74
Import setups 84
Launch application to view the file when com-
plete 82
Prepare a document for distribution 71
Print a document 72
Produce files for fast web viewing 82

C
OREL
PDF F
USION
U
SER
G
UIDE
INDEX CONTENTS 155
INDEX INDEX CONTENTS 155
Produce more compact PDF files 80
Produce PDF files that can be sent by e-mail 81
Redact text or area—single instance 74
Remove pages from an existing document 71
Save a document in a different format 63
Share setups 83
Subset fonts 81
How to install Corel PDF Fusion? 9
How to use this help 7
How to use this manual 7
I
Importing Microsoft Office Word, Excel or Power-
Point documents, Notes 16
Importing setups 112
Input format support 18
Insert New Page 40
Install Corel PDF Fusion 9
Installer options 9
installs
Detecting previous 10
Instructions in text 6
Interleaving 123
L
Launch on job completion 115, 125, 126
Location of Corel PDF Fusion 14
Log all messages to 122
M
Magnification 33
Magnified preview 38
Managing setups 108
Marquee zoom 33
Maximum piece size 124
Microsoft Excel Add-in 137
Microsoft PowerPoint Add-in 133
Microsoft Word
retain page layout 64, 110, 126
retain text editability 64, 110, 126
retain text flow 64, 110, 126
Microsoft Word Add-in 130
N
Navigation pane 44
Bookmarks 48
Comments 48
Customize 49
Pages 44
Never embed window 119
No options selected (Security tab) 121
Normal Print 72
O
Open Corel PDF Batch Converter 56
Open Corel PDF Fusion 14, 27
Open document/Change security 121
Optimize for fast web viewing 115
Output format support 18
Overwrite an existing PDF document 116
Overwrite an existing Word document 127
Overwrite an existing XPS document 125
P
Page View 30
Page View selection options 34
Page, Insert New 40
Pages, Extract 40, 46
Pages, Insert New 45
PDF file format 114
PDF setup 113
Advanced tab 116
Compression tab 117
Font embedding tab 118
General tab 114
Reporting tab 122
Security tab 120
PDF/A-1b 17, 62, 63
PDF/A-1b, creating 62
PDF/A-1b(CMYK) 109
PDF/A-1b(RGB) 109
PDL?, what is a... 17
Position your tools 51
PowerPoint Add-in settings
About tab 136
Bookmarks tab 135
Crop tab 135
Document tab 134
General tab 134
Links tab 135
Watermark tab 135
Preferences
set up Corel PDF Fusion 52
Presentation View 42
Presentation View controls 42

C
OREL
PDF F
USION
U
SER
G
UIDE
INDEX CONTENTS 156
INDEX INDEX CONTENTS 156
Preserve OPI comments 117
Preserve overprint 117
Preserve under color removal and black genera-
tion information 117
previous installs, detecting... 10
Print as Image 72
Print Setup 72
Print to file 73
Printing 122
R
Remove a setup 111
Removing Corel PDF Fusion 12
Rename a setup 111
Resolution 114, 118
Resource first 124
Restore Defaults, Microsoft Add-ins 130, 134, 137
Rotate Left/RIght 40, 46, 47
S
Scroll icons 39
Scroll icons (left) 32
Scroll icons (right) 33
Send the PDF file as an e-mail attachment 116
Send the Word file as an e-mail attachment 127
Send the XPS file as an e-mail attachment 125
Serial number, Entering 13
Setup manager reference 113
Shortcut keys 141
Advanced menu 146
Document menu 145
Edit menu 143
Help menu 146
View menu 144
Window menu 146
Single page mode 33
Sound to indicate conversion 59
Spell check comments 106
Stack/Unstack 39, 41
Standard setups
PDF 109
Word 110
XPS 110
Strike-out text 76
Subset fonts 119
Supported document formats 147
T
Text Correction 34
Thumbnail generation 114
Transfer functions 116
U
Underline text 76
Unstack/stack 39, 41
Upgrade 13
Use BoundingBox for 117
Use sound to indicate conversion is complete 59
V
View the PDF document after creation 116
View the Word document after creation 126
View the XPS document after creation 125
W
What are the features of Corel PDF Fusion? 18
What can you do with Corel PDF Fusion? 15
What is a document format or PDL? 17
What is a setup? 108
What is Corel PDF Fusion? 7
Word Add-in settings
About tab 133
Bookmarks tab 132
Comments tab 133
Crop tab 132
Document tab 131
General tab 130
Links tab 131
Watermark tab 132
Word document setup 125
General tab 125
Reporting tab 127
Work area 26
Customize your 48
X
XPS document setup 123
General tab 123
Reporting tab 125
Z
Zoom levels 33
Zoom Tool 42

C
OREL
PDF F
USION
U
SER
G
UIDE
INDEX CONTENTS 157
INDEX CONTENTS 157
COPYRIGHT AND TRADEMARKS
Corel® PDF Fusion™ User Guide
Version 1.14
September 2014
Document issue: 116
© 2014 Corel Corporation. All rights reserved. Corel, the Corel logo, the Corel Balloon logo and PDF Fusion are trademarks or regis-
tered trademarks of Corel Corporation in Canada, the United States and/or other countries.
This product is provided under an enclosed license agreement that defines what you may do with this product and contains limitations on
warranties and your remedies.
Copyright © 2014 Global Graphics Software Ltd. All rights reserved. gDoc, gDoc Creator, the gDoc Logo, gDoc Complexity Made
Simple, the smarter alternative are trademarks of Global Graphics Software Ltd, which may be registered in certain jurisdictions. Global
Graphics is a trademark of Global Graphics SA, which may be registered in certain jurisdictions.
Microsoft, Windows, Microsoft Vista, Visio, Excel and PowerPoint are either registered trademarks or trademarks of Microsoft Corpora-
tion in the United States and/or other countries.
Adobe, Illustrator, Photoshop and PostScript are either registered trademarks or trademarks of Adobe Systems Incorporated in
the United States and/or other countries.
RSA® BSAFE® is a registered trademark of RSA Security Inc in the United States and/or other countries.
RSA Secured and the RSA Secured logo are trademarks of RSA Security Inc in the United States and/or other countries.
Fonts copyright (c) 2000-2004 Timo Lehtinen. All Rights Reserved. http://www.timolehtinen.com/type/
Aspose .Net Products. Copyright © 2004-2014 Aspose Pty Ltd.
Copyright ©2000-2009 Investintech.com Inc. All rights reserved.
JPEG library and FreeType:
This software is based in part on the work of the Independent JPEG Group and FreeType Team.
Little cms:
Copyright(C) 1998-2006 Marti Maria
THE SOFTWARE IS PROVIDED “AS IS”, WITHOUT WARRANTY OF ANY KIND, EXPRESS OR IMPLIED, INCLUDING BUT NOT LIM-
ITED TO THE WARRANTIES OF MERCHANTABILITY, FITNESS FOR A PARTICULAR PURPOSE AND NONINFRINGEMENT. IN NO
EVENT SHALL THE AUTHORS OR COPYRIGHT HOLDERS BE LIABLE FOR ANY CLAIM, DAMAGES OR OTHER LIABILITY,
WHETHER IN AN ACTION OF CONTRACT, TORT OR OTHERWISE, ARISING FROM, OUT OF OR IN CONNECTION WITH THE
SOFTWARE OR THE USE OR OTHER DEALINGS IN THE SOFTWARE.
libtiff:
Copyright(c) 1988-1997 Sam Leffler
Copyright(c) 1991-1997 Silicon Graphics, Inc.
THE SOFTWARE IS PROVIDED “AS-IS” AND WITHOUT WARRANTY OF ANY KIND EXPRESS, IMPLIED OR OTHERWISE, INCLUD-
ING WITHOUT LIMITATION, ANY WARRANTY OF MERCHANTABILITY OR FITNESS FOR A PARTICULAR PURPOSE. IN NO
EVENT SHALL SAM LEFFLER OR SILICON GRAPHICS BE LIABLE FOR ANY SPECIAL, INCIDENTAL, INDIRECT OR CONSEQUEN-
TIAL DAMAGES OF ANY KIND, OR ANY DAMAGES WHATSOEVER RESULTING FROM LOSS OF USE, DATA OR PROFITS,
WHETHER OR NOT ADVISED OF THE POSSIBILITY OF DAMAGE, AND ON ANY THEORY OF LIABILITY, ARISING OUT OF OR IN
CONNECTION WITH THE USE OR PERFORMANCE OF THIS SOFTWARE.
Notice to U.S. government end users. This Software is a commercial computer software program developed at private expense and is sub-
ject to the following Restricted Rights Legend: “Use, duplication, or disclosure by the United States Government is subject to restrictions
as set forth in (i) FAR 52.227-14 Alt III, (ii) FAR 52.227-19; as applicable. Use by agencies of the Department of Defense (DOD) is subject
to Global Graphics customary commercial license as contained in the accompanying license agreement, in accordance with DFAR
227.7202-1(a). For purposes of the FAR, the Software shall be deemed ‘unpublished’ and licensed with disclosure prohibitions, rights
reserved under the copyright laws of the United States.
All other trademarks are the property of their respective owners.
End-user License Agreement
IMPORTANT NOTICE: PLEASE READ THIS END-USER LICENSE AGREEMENT (EULA) CAREFULLY.
BY DOWNLOADING, ACCESSING, INSTALLING OR USING THE SOFTWARE AND DOCUMENTATION ("SOFT-
WARE"), YOU AGREE TO THE TERMS OF THIS EULA. IF YOU DO NOT AGREE TO THE TERMS OF THIS EULA,
DO NOT DOWNLOAD, INSTALL, ACCESS OR USE THE SOFTWARE. THIS EULA CONTAINS DISCLAIMERS OF
WARRANTIES AND LIMITATIONS OF LIABILITY AND EXCLUSIVE REMEDIES. THE PROVISIONS BELOW FORM
THE ESSENTIAL BASIS OF OUR AGREEMENT.
This EULA is a legal agreement between You and Corel Corporation, including its subsidiaries, affiliates and contractors acting on Our
behalf (collectively "Corel", "Us", "We", or "Our") regarding Your use of the Corel, or one of its subsidiary's Software. Corel includes Win-
Zip Computing S.L. that is owned separately by Corel. Unless You have another written agreement with Corel regarding this Software,

C
OREL
PDF F
USION
U
SER
G
UIDE
INDEX CONTENTS 158
INDEX CONTENTS 158
then Your use of this Software is governed by this EULA. From time to time, We may in Our sole discretion update or modify the EULA.
The most recent version of the EULA is located at: http://www.corel.com/eula
IF YOU AGREE TO THIS EULA, YOU ARE GRANTED A LIMITED, PERSONAL, WORLDWIDE, ROYALTY-FREE, NON-ASSIGNABLE,
NON-SUBLICENSEABLE, NON-TRANSFERABLE AND NON-EXCLUSIVE LICENSE TO USE THE SOFTWARE. YOU ARE PERMITTED
TO USE ONE (1) COPY OF THE SOFTWARE FOR YOUR (A) PRIVATE, NON-COMMERCIAL PURPOSES AS A PRIVATE USER,
AND/OR (B) COMMERCIAL PURPOSES AS A SERVICE PROVIDER IN A COMMERCIAL BUSINESS (“BUSINESS USER”). THIS SOFT-
WARE IS LICENSED PER HOUSEHOLD OR PER SINGLE ADDRESS (“HOUSEHOLD”). EXCEPT FOR THE COREL PRODUCTS LISTED
BELOW, YOU MAY ONLY DOWNLOAD AND INSTALL THE SOFTWARE ON ONE COMPUTING DEVICE. YOU MAY NOT RE-
INSTALL THE SOFTWARE ON A SECOND COMPUTING DEVICE UNLESS THE ORIGINAL COMPUTING DEVICE FAILS, YOU
CONTACT CUSTOMER SERVICE AND REQUEST APPROVAL TO RE-INSTALL THE SOFTWARE ON A NEW COMPUTING DEVICE,
AND YOU CERTIFY TO COREL THAT YOU DEINSTALLED THE SOFTWARE FROM THE FAILED COMPUTING DEVICE. PRIVATE
AND BUSINESS USERS OF COREL CAPTURE, CORELDRAW, COREL DESIGNER, CORELCAD, COREL PAINTER, PAINTSHOP PRO,
PAINTSHOP PHOTO PRO, PARADOX, COREL PHOTO-PAINT, PRESENTATIONS, QUATTRO PRO AND WORDPERFECT THAT
HAVE MULTIPLE COMPUTING DEVICES (E.G., STAND-ALONE COMPUTER, LAP-TOP AND MINI/PORTABLE PC), MAY DOWN-
LOAD ANY OF THESE SOFTWARE PRODUCTS ON UP TO THREE (3) SYSTEMS IN A SINGLE HOUSEHOLD, HOWEVER IT CAN
ONLY BE USED BY YOU ON ONE (1) SYSTEM AT A TIME. IF YOU HAVE PURCHASED MULTIPLE LICENSES FOR THE SOFTWARE,
AT ANY TIME YOU MAY HAVE AS MANY COPIES OF THE SOFTWARE IN USE AS YOU HAVE LICENSES.
LICENSE TO USE THE SOFTWARE. The Software is licensed to You, not sold to You. You must lawfully acquire the Software from
Us, or Our authorized resellers otherwise You don't have a right to use the Software. You may only purchase and/or download the Soft-
ware from Corel's or its authorized reseller's store, eStore, or website that is located in the country where You currently live. This EULA
does not apply to any Software installed on a hardware partition, blade, or terminal server, or in any other virtualization environment (col-
lectively "Virtualization Environment"). You may not allow the Software to be accessed, operated, or viewed from, or installed or uploaded
to, other computers through a network connection. A separate license agreement must be entered into with Corel to obtain the right to
use the Software for a Virtualization Environment, network connections or volume purchases. You agree that if the Software requires man-
datory activation, You will complete the activation process providing Corel with accurate information. Your use of the Software is sus-
pended until You complete the activation and/or registration process. The Software may include digital images, stock photographs, clip art,
fonts, sounds or other artistic works ("Stock Files"). The responsibilities and restrictions relating to the Software apply to the Stock Files.
Corel reserves all rights not expressly granted to You in this EULA. BUSINESS USERS: If You are a business, You agree to maintain systems
and/or procedures that accurately record of the number of copies of the Software that have been installed on Your Computers and will
keep the records for two (2) years from the date Your license to use the Software ends. Corel may conduct an audit (remotely or at Your
facility) of records and systems from Your business, to verify that Your installation of the Software conforms with a valid license from
Corel. Corel will not conduct more than one (1) audit per year. If the audit results find that Your use does not conform to a valid license,
then You will immediately obtain a valid license for the Software.
YOUR RESPONSIBILITIES WHILE USING THE SOFTWARE. With regard to Your Use of the Software under this EULA, You
have certain responsibilities. The Software may include product activation and other technology designed to prevent unauthorized use and
copying. You may not sell, rent, lease, re-sell, or loan the Software. If You purchase the Software as a gift to a third person, the third person
must accept the terms of this EULA before using the Software. You may not reverse engineer, decompile or disassemble the Software.
While We own Our Software, You own and are responsible for the content (“Content”) that You create or have created for You resulting
from the use of Our Software (including any add-ons or plug-ins to Our Software that You create or have created for You). You agree that,
in connection with Your use of the Software, You are responsible for the direct and/or indirect consequences of any of the (a) Content You
create and (b) third party photos or images that You use or modify in creating Your Content, especially in situations where You share Your
Content with family, friends, clients and/or third parties such as members of social networking sites (e.g., Facebook, Flickr, LinkedIn, etc.).
Corel can neither monitor nor control what third party social networking sites or the members or users of such sites do with Your con-
tent You share. You are responsible for independently verifying the accuracy and completeness of Your content (e.g. any technical illustra-
tions or diagrams for operation guides, parts catalogs, schematics, writing diagrams, assembly instructions, maintenance manuals,
architectural presentations or other materials You create and/or modify using Our Software). You may not modify or create derivative
works based upon the Software. You represent and warrant to Us that You will comply with all applicable laws and regulations impacting
Your use of the Software including data protection and privacy laws. You agree that You will not use the Software in a way that is unlawful
or that violates the rights of a third party. If We get sued or a claim is brought against Us by a third party due to (a) Your actions, (b) Your
failure to act when required, or (c) Your content, then You agree to defend, indemnify and hold Corel harmless. You may receive updates,
bug fixes, feature enhancements or improvements, or other data relating to the Software (collectively “Updates”) downloaded to Yo u r
computer with a notice describing what is included in the Update and the purpose of the Update. You will have to choose either to install
the Update on Your computer device or opt out and not install the Update. If You do not install the Updates the Software may not per-
form properly.
OUR INTELLECTUAL PROPERTY RIGHTS. The Software is protected by United States and Canadian Intellectual Property laws
and international treaty provisions. Therefore, You may not distribute the Software without Our permission. If You purchase or download
the Software in China, India, Indonesia or Vietnam, You may not copy the Software or printed materials accompanying the Software for any
purpose. If You purchase or download the Software in a country not specifically prohibited under this EULA, You may only make one (1)
copy of the Software or You may keep one (1) copy the Software on a single hard drive for backup or archival purposes. For backup or
archival purposes only, You may either make only one (1) copy of the Software and the Printed Materials or print one copy of any user doc-
umentation if You downloaded the Software or You may keep one (1) copy the Software and printed materials (or User Documentation)
on a single hard drive. Otherwise, You may not copy the Software or the printed materials accompanying the Software (or print copies of
any user documentation if You downloaded the Software). You agree that Corel, the Corel logos, and other Corel trademarks, service
marks, graphics are trademarks of Corel (some in the United States and/or other countries) or are trademarks of Corel's partners
("Marks"). You are not granted a right to use Marks without the owner's permission. You will not remove, obscure or alter any proprietary
notices affixed to or contained within the Software. You understand and agree that We have the right to stop selling, distributing, servicing
or updating the Software (any part of it), and services or offerings at any time.
USAGE AUDITING, PIRACY AND OUR PRIVACY POLICY. Our audit and collection of any of Your data and Your use of the
Software is subject to Corel's Privacy Policy (http://www.corel.com/privacy). We may audit Your software usage for anti-piracy purposes,
to verify a valid registration, and identify if new Updates are available for Your Computer prior to sending You a notice to install a new Soft-
ware Update, and to assess Your use of the Software. You consent to the Software sending anonymous usage data (e.g., the number of
instances the Software is launched, the device IP address, and/or the version of the Software), for registration authentication, and use and
anti-piracy auditing purposes.
PRE-COMMERCIAL RELEASE OR BETA SOFTWARE. If the Software You have received with this EULA is a pre-commercial
release or a beta version, then You understand that the Software is pre-release, non-commercial version and does not represent a final
product of Corel. The Software may contain bugs, errors and other problems that could cause computer system failures and data loss.
THEREFORE, ALL PRE-RELEASE OR BETA SOFTWARE IS PROVIDED ON AN "AS-IS" BASIS AND COREL DISCLAIMS ANY AND ALL
WARRANTIES OR LIABILITY TO YOU OF ANY KIND.

C
OREL
PDF F
USION
U
SER
G
UIDE
INDEX CONTENTS 159
INDEX CONTENTS 159
ACADEMIC SOFTWARE. If the Software is identified as an academic or education edition version in the user documentation, on the
packaging of the Software or on the purchase or download page of the website, and You qualify as an academic end user, You may install
and access one (1) copy of the Software on up to the permitted number of computers, as agreed to by You and Corel, but only for educa-
tional purposes and for no other purpose. Academic versions of the Software may not be used for commercial, professional, or other for-
profit purposes. Notwithstanding the foregoing, You are not entitled to use the Software unless You qualify in Your jurisdiction as an aca-
demic end user (e.g., student or personal learning versions of the Software may only be used by faculty, staff members and degree, diploma
or certificate-seeking students at qualified educational institutions). Contact Corel via Our Academic Software web page
(http://www.corel.com/academic) or Your local Corel authorized reseller to determine whether You qualify as an academic end user and to
learn more about Our academic programs and products. Work product and other data created with academic or education edition ver-
sions of the Software contain certain notices and limitations that make the data unusable outside the educational use area. If Yo u com b i n e
or link data created with educational institutional versions, student versions, or personal learning editions of the Software with data other-
wise created, then that data may also be affected by these notices and limitations. Corel shall have no responsibility or liability whatsoever
if You combine or link data created with educational institutional versions, student versions, or personal learning editions of the Software.
Student and Teacher, Home and Student, Home Edition Addendum. If this Software is clearly labeled a Student and Teacher,
Home and Student or Home Edition, Your Use of this Software is governed by the terms of this EULA as modified by the paragraph below.
In the event of any conflict between the terms of this EULA and the paragraph below, the paragraph below shall govern.
You may install and USE, at the same time, this Student and Teacher, Home and Student or Home Edition Software on up to three (3) com-
puters in Your Household. Notwithstanding anything to the contrary in the EULA, You may not (a) transfer or assign this Software to a
third party; or (b) use this Software for any commercial purpose or in any commercial enterprise or business. This Software may only be
used for personal purposes in a non-commercial environment.
EVALUATION SOFTWARE. If the Software is identified as a demonstration, evaluation, trial, "not for sale" ("NFS") or "not for resale"
("NFR") version ("Evaluation Version") in the applicable user documentation You may install and access one (1) copy of the Software only
for the purpose of evaluation and/or demonstration. Unless You are authorized by Corel, You may not use Our Software for competitive
analysis, or commercial, professional, or other for-profit purposes. You understand that at the end of the evaluation period, You must
either stop using the Software or pay for the Software to continue using it. If You fail to pay for it, then Your license terminates. Notwith-
standing the foregoing, additional and differing terms apply to Corel shareware products (including WinZip products), as set forth below in
the Additional License Terms section of this EULA.
OEM EDITION PRODUCT. If the Software is identified as an OEM Edition product, You may only use the Software with the original
computer or electronic equipment (the "Original Equipment") with which the Software was first bundled. If the Original Equipment in
which the Software was installed is lost, stolen, sold or rendered inoperable, You may install Your original, unmodified, OEM Edition Soft-
ware onto such Original Equipment replacement.
LIMITED AND RESTRICTED WARRANTY. If You purchased the Software on a computer disc, then Corel warrants that the media
on which Software is furnished will be free of defects in materials and workmanship under normal use for a period of ninety (90) days from
the date You purchased the Software. The Software when properly installed and under normal use will substantially conform to the fea-
tures and functionality as set forth in the documentation accompanying the Software, however, the Software may contain normal bugs and
errors. Therefore, the Software is provided on an “AS IS” basis with the understanding that bug fixes and Updates will be provided from
time to time. This warranty is valid only for the original purchaser of the Software. IF THE DISC IS DEFECTIVE, THEN COREL'S
ENTIRE LIABILITY AND YOUR EXCLUSIVE REMEDY UNDER THIS WARRANTY WILL BE REPLACEMENT OF THE
DEFECTIVE COMPUTER DISC IF YOU RETURN THE DEFECTIVE DISC TO US WITH A COPY OF YOUR RECEIPT.
Your right to a replacement of the Software is void if the damage to the disc is a result of accident, abuse or misapplication. Any replace-
ment Software will be warranted for the remainder of the original warranty period. YOU ASSUME ALL RESPONSIBILITIES FOR
CHOOSING, INSTALLING, AND USING THE SOFTWARE. TO THE MAXIMUM EXTENT PERMITTED BY APPLI-
CABLE LAW, COREL DISCLAIMS ALL OTHER WARRANTIES, EITHER EXPRESS OR IMPLIED, INCLUDING BUT
NOT LIMITED TO IMPLIED WARRANTIES OF MERCHANTABILITY, FITNESS FOR A PARTICULAR PURPOSE AND
NON-INFRINGEMENT WITH RESPECT TO THE SOFTWARE AND THE ACCOMPANYING WRITTEN MATERIALS.
SOME STATES OR COUNTRIES DO NOT ALLOW THE WARRANTY EXCLUSION OR LIMITATIONS; THE ABOVE
LIMITATION MAY NOT APPLY TO YOU. In such instances and as long as You obtained the Software from Corel, or a Corel autho-
rized reseller, Corel may remedy substantial defects of the Software at its reasonable discretion by (a) providing a patch, Update or replace-
ment of the Software, or (b) asking for return of the Software and cancelling the EULA. You are entitled to a reduction of the purchase
price or a rescission of the EULA only if Corel has repeatedly failed to remedy the defect after a reasonable period of time. If You are a
consumer, Your claims under this clause are time-barred in twenty-four (24) months; if You are a business, Your claims under this clause are
time-barred in twelve (12) months. If You alter the Software in any way without being authorized by Corel, Corel will not remedy defects
caused by such alteration and You are liable for any damages incurred by Corel due to Your unauthorized alteration. IF YOU INSTALL
PRE-RELEASE VERSION PRODUCTS MARKED AS SUCH, YOU DO SO AT YOUR OWN RISK. Pre-release version prod-
ucts are to be used only for test purposes in testing environments and must not be used for production purposes. To make a warranty
claim You must provide a detailed error description to Corel Customer Service or, at Corel's request, return the Software along with any
return materials authorization information provided to You by Corel, at Corel's expense, to Corel Corporation, 1600 Carling Avenue,
Ottawa, Ontario, K1Z 8R7, Canada. For further warranty information, please contact Corel Customer Service at www.corel.com.
NO LIABILITY FOR OPEN SOURCE MATERIALS. THE SOFTWARE MAY CONTAIN "OPEN SOURCE" MATERIALS (E.G., ANY
SOFTWARE SUBJECT TO OPEN SOURCE, COPYLEFT, GNU GENERAL PUBLIC LICENSE, LIBRARY GENERAL PUBLIC LICENSE,
LESSER GENERAL PUBLIC LICENSE, MOZILLA LICENSE, BERKELEY SOFTWARE DISTRIBUTION LICENSE, OPEN SOURCE INITIA-
TIVE LICENSE, MIT, APACHE OR PUBLIC DOMAIN LICENSES, OR SIMILAR LICENSE). COREL MAKES NO WARRANTIES,
AND SHALL HAVE NO LIABILITY, DIRECT OR INDIRECT, WHATSOEVER WITH RESPECT TO OPEN SOURCE
MATERIALS CONTAINED IN THE SOFTWARE.
NO LIABILITY FOR INDIRECT OR CONSEQUENTIAL DAMAGES. YOU ASSUME THE ENTIRE COST OF ANY
DAMAGE RESULTING FROM THE INFORMATION CONTAINED IN OR COMPILED BY THE SOFTWARE. TO THE
MAXIMUM EXTENT PERMITTED BY APPLICABLE LAW, IN NO EVENT WILL COREL OR ITS SUPPLIERS OR
LICENSORS BE LIABLE FOR ANY DAMAGES WHATSOEVER (INCLUDING, WITHOUT LIMITATION, DAMAGES
FOR LOSS OF BUSINESS PROFITS, BUSINESS INTERRUPTION, LOSS OF BUSINESS INFORMATION, OR OTHER
PECUNIARY LOSS) ARISING OUT OF THE USE OR INABILITY TO USE THE SOFTWARE, EVEN IF SUCH PARTY
HAS BEEN ADVISED OF THE POSSIBILITY OF SUCH DAMAGES. IN NO EVENT WILL COREL'S TOTAL LIABILITY
TO YOU FOR ALL DAMAGES IN ANY ONE OR MORE CAUSE OF ACTION EXCEED THE AMOUNT PAID BY YOU
FOR THE SOFTWARE. THIS LIMITATION WILL APPLY REGARDLESS OF THE FAILURE OF THE ESSENTIAL PUR-
POSE OF ANY LIMITED REMEDY.

C
OREL
PDF F
USION
U
SER
G
UIDE
INDEX CONTENTS 160
INDEX CONTENTS 160
SOME STATES OR COUNTRIES DO NOT ALLOW THE EXCLUSION OR LIMITATION OF LIABILITY FOR CONSE-
QUENTIAL OR INCIDENTAL DAMAGES; THE ABOVE LIMITATION MAY NOT APPLY TO YOU. In such instances and as
long as You obtained the Software from Corel, or a Corel authorized reseller, Corel may be liable to You (a) without limitation for damages
You have incurred under or in connection with this EULA only if the damage has been caused by the willful or grossly negligent act of
Corel; and (b) for those typical damages that were reasonably foreseeable and which have been caused by any other negligent breach of an
essential contractual duty by Corel. Any further liability of Corel is excluded. These aforementioned limitations apply irrespective of their
legal basis, in particular with regard to any pre-contractual or auxiliary contractual claims. These limitations shall not apply, however, to any
mandatory liability under the applicable product liability laws, nor to any damage which is caused due to the breach of an express warranty
to the extent that such express warranty was intended to protect consumers against the specific damage incurred, nor to damages due to
loss of life, injury or prejudice to health
U.S. GOVERNMENT-RESTRICTED RIGHTS. The Software and any accompanying documentation are "commercial computer soft-
ware" and "commercial computer software documentation," under DFAR Section 227.7202 and FAR Section 12.212. Any use, modification,
reproduction release, performance, display or disclosure of the Software and accompanying documentation by the U.S. government will be
governed solely by the terms of this EULA and will be prohibited except to the extent expressly permitted by the terms of this EULA.
EXPORT RESTRICTIONS. You may not download, distribute, export, re-export, or redistribute the Software, including any Corel
shareware product, (a) into, or to a national or resident of any country to which the United States has embargoed goods, or (b) to anyone
on the United States Treasury Department's list of 'Specially Designated' nationals or the United States Commerce Department's 'Table of
Deny Orders'. By downloading or using the Software, You are representing and warranting that You are not located in, under the control
of, or a national or resident of any such country or on any such list. Except pursuant to an express, written, fully-executed agreement with
Corel, You may not purchase a license to use the Software for the purpose of exporting it to a country other than the original country of
sale, nor may You retain the services of a third party to purchase a license to use the Software if in doing so You will require such third
party to send (via any means, electronic or otherwise) the Software to You in a country other than the original country of sale.
GENERAL. If You purchased or downloaded the Software in the United States then this EULA is governed by the laws of the United
States and the State of California, without reference to conflict of laws principles. Any dispute between You and Corel regarding this EULA
will be subject to the exclusive venue of the state and federal courts in the State of California. This EULA specifically excludes the United
Nations Convention on Contracts for the International Sale of Goods and any legislation implementing such 'Convention', if otherwise
applicable. Except as expressly set forth herein to the extent permitted by applicable law, this EULA shall not prejudice the non-excludable,
statutory rights of any party dealing as a consumer. If You acquired the Software in Canada, unless expressly prohibited by local law, this
EULA is governed by the laws in force in the Province of Ontario, Canada; and, any dispute between You and Corel regarding this EULA
will be subject to the exclusive jurisdiction of the federal and provincial courts sitting in Toronto, Ontario. If You acquired the Software in
the European Union, Iceland, Norway, or Switzerland, then local law applies. If You acquired the Software in any other country, then local
law may apply. This EULA is the entire agreement between You and Corel and supersedes any other communications or advertisements
with respect to the Software and documentation. The Software, or any feature or part thereof, may not be available in all languages or in all
countries. If Corel has provided You with a translation of the English language version of this EULA, You agree that such translation is pro-
vided for Your convenience only and that the English language version, not the translation, of this EULA will be legally binding on You. The
English language version of this EULA and not its translation(s) will govern in the event of a conflict between the English language version
and a translation.
If and to the extent any provision of this EULA is held illegal, invalid, or unenforceable in whole or in part under applicable law, such provi-
sion or such portion thereof shall be ineffective as to the jurisdiction in which it is illegal, invalid, or unenforceable but only to the extent of
its illegality, invalidity, or unenforceability and shall be deemed modified to the extent necessary to conform to applicable law so as to give
the maximum effect to the intent of the parties. No term or provision in the EULA will be considered waived, and no breach excused,
unless such waiver is in writing signed on behalf of the party against whom the waiver is asserted. No waiver (whether express or implied)
will constitute consent to, waiver of, or excuse of any other, different, or subsequent breach. No modifications or amendments to this
EULA will be binding upon Corel unless made in writing and duly executed by You and an authorized representative of Corel.
ADDITIONAL EULA TERMS
Additional Terms Applicable to Users of Animation Shop
Some Corel Animation Shop versions may not be compatible with the Windows Vista computer operating system and Corel will not
release further Updates of Animation Shop. Your copy of Animation Shop may not be compatible with computer operating systems that
You may purchase now or in the future. You acknowledge and agree that any objects or film footage You use in connection with Your use
of the Software is original to You or used by You pursuant to permission granted by the owner and creator of such objects or film footage.
Additional Terms Applicable to Users of CorelDRAW, Corel PHOTO-PAINT or Corel DESIGNER
You understand and agree that some versions of Corel DESIGNER may be incorporated into, and may incorporate itself into, software and
other technology owned and controlled by third parties. Any third party software or technology that is incorporated in Corel DESIGNER
falls under the scope of this EULA. Any and all other third party software or technology that may be distributed together with the Corel
DESIGNER (as bundled third party software) will be subject to You explicitly accepting a license agreement with that third party. Where
such bundled third party software includes software from Right Hemisphere, Inc., use of that bundled software product is subject to the
end user license available at http://www.righthemisphere.com/eula, and Your use of that software constitutes acceptance of such terms.
Additional Terms Applicable to Users of Corel’s MP3 & DVD Xpack
With respect to Corel’s MP3 & DVD Xpack, You agree that You will not use Corel products in those jurisdictions where use of decoder
software is unlawful.
Additional Terms Applicable to Users of WinDVD
YOU ACKNOWLEDGE THAT USE OF THE SOFTWARE IN ANY MANNER THAT COMPLIES WITH THE MPEG-2 OR MPEG-4 STAN-
DARD IS EXPRESSLY PROHIBITED WITHOUT A LICENSE UNDER APPLICABLE PATENTS IN THE MPEG-2 PATENT PORTFOLIO OR
MPEG-4 PATENT PORTFOLIO, AS APPLICABLE, WHICH LICENSE IS AVAILABLE FROM MPEG LA, L.L.C.
(HTTP://WWW.MPEGLA.COM/MAIN/DEFAULT.ASPX), 6312 S. FIDDLERS GREEN CIRCLE, SUITE 400E, GREENWOOD VILLAGE,
COLORADO, 80111, USA.
YOU ACKNOWLEDGE THAT THE SOFTWARE MAY BE LICENSED UNDER THE VC-1 PATENT PORTFOLIO LICENSE FOR THE PER-
SONAL AND NON-COMMERCIAL USE OF A CONSUMER TO (a) ENCODE VIDEO IN COMPLIANCE WITH THE VC-1 STANDARD
("VC-1 VIDEO") AND/OR (b) DECODE VC-1 VIDEO THAT WAS ENCODED BY A CONSUMER ENGAGED IN A PERSONAL AND
NON-COMMERCIAL ACTIVITY AND/OR WAS OBTAINED FROM A VIDEO PROVIDER LICENSED TO PROVIDE VC-1 VIDEO. NO
LICENSE IS GRANTED OR SHALL BE IMPLIED FOR ANY OTHER USE. ADDITIONAL INFORMATION MAY BE OBTAINED FROM
MPEG LA, L.L.C. (HTTP://WWW.MPEGLA.COM/MAIN/DEFAULT.ASPX).

C
OREL
PDF F
USION
U
SER
G
UIDE
INDEX CONTENTS 161
INDEX CONTENTS 161
YOU ACKNOWLEDGE THAT THE SOFTWARE MAY BE LICENSED UNDER THE AVC PATENT PORTFOLIO LICENSE FOR THE PER-
SONAL AND NON-COMMERCIAL USE OF A CONSUMER TO (a) ENCODE VIDEO IN COMPLIANCE WITH THE AVC STANDARD
("AVC VIDEO") AND/OR (b) DECODE AVC VIDEO THAT WAS ENCODED BY A CONSUMER ENGAGED IN A PERSONAL AND
NON-COMMERCIAL ACTIVITY AND/OR WAS OBTAINED FROM A VIDEO PROVIDER LICENSED TO PROVIDE AVC VIDEO. NO
LICENSE IS GRANTED OR SHALL BE IMPLIED FOR ANY OTHER USE. ADDITIONAL INFORMATION MAY BE OBTAINED FROM
MPEG LA, L.L.C. (HTTP://WWW.MPEGLA.COM/MAIN/DEFAULT.ASPX).
YOU AGREE THAT THE SOFTWARE MAY BE LICENSED UNDER THE MP3 LICENSE. SUPPLY OF THE SOFTWARE DOES NOT CON-
VEY A LICENSE OR IMPLY ANY RIGHT TO DISTRIBUTE MP3-ENCODED OR MP3PRO-ENCODED DATA IN REVENUE-GENERAT-
ING BROADCAST SYSTEMS, STREAMING APPLICATIONS, OTHER CONTENT DISTRIBUTION SYSTEMS, OR ON PHYSICAL
MEDIA. AN INDEPENDENT LICENSE FOR SUCH USE IS REQUIRED. ADDITIONAL INFORMATION MAY BE OBTAINED FROM THE
MP3 LICENSING WEBSITE (HTTP://MP3LICENSING.COM).
Additional Terms Applicable to Users of WinZip Software
You agree that Corel cannot guarantee that the encryption technology contained in Corel WinZip products is completely secure from
decoding by third parties. Accordingly, Corel will not be responsible for any losses whatsoever resulting from third party decoding of, or
access to, Your files.
WinZip Software is shareware, and was acquired without charge and can be used for a limited period of time for evaluation purposes. Your
use of WinZip Software is subject to the following additional terms: (a) You may make as many exact copies of the WinZip Software as You
wish for evaluation purposes using tangible physical media (e.g., compact discs); (b) You may distribute individual exact copies of the Win-
Zip Software for evaluation purposes only, without charge to You or the recipient; (c) You may not distribute the WinZip Software with
any other product; (d) If You distribute the WinZip Software You may do so by electronic download or email, but not through the use of
bulk mail, spam or unsolicited emails. For purposes of the foregoing, "exact copy" means a file that is, for example, identical to the WinZip
distribution file available at www.winzip.com.
You may download and install evaluation versions of the WinZip Software (e.g., WinZip Courier) for a forty-five (45) day period. During
such evaluation period You may install one (1) copy of the WinZip Software only for evaluation or demonstration purposes. Upon expira-
tion of the forty-five (45) day evaluation period You will immediately discontinue use of the WinZip Software and delete all electronic cop-
ies of the WinZip Software including, but not limited to, all user documentation that may have been provided as part of the evaluation from
Your computer and any other computer devices on which You have installed the WinZip Software. Any attempt to circumvent any expira-
tion date technology or time bomb mechanism is in violation of this EULA and will automatically and immediately terminate Your license to
use the WinZip Software.
Self-extracting Zip files created by WinZip's 'Self-Extractor Personal Edition' may contain extractor software ("Extraction Software"). You
may not alter or modify the Extraction Software, nor give anyone permission to do so. Under no circumstances are You licensed to distrib-
ute Extraction Software. If You create self-extracting Zip files using an evaluation version of WinZip Self-Extractor Personal Edition You
may not transmit Your Zip files to a third party. However, the fully licensed WinZip Self-Extractor Personal Edition may be used to create
an unlimited number of freely distributable, royalty-free, self-extracting Zip files.
Additional Terms Applicable to Users of Software Bundled with Third Party Hardware Products
If You received the Software as part of a bundle with a third party computer hardware products You may not transfer such Software to
other computer hardware systems and You understand and agree that Your license to use such Software remains attached to and ends
along with the computer hardware product with which it was originally bundled.
Additional Terms Applicable to Users of Software Located in Germany or Austria
If You obtained the Software from Corel or a Corel authorized reseller in Germany or Austria and such country is Your usual domicile,
then the Germany and Austrian product liability and other consumer protection laws concerning remedies for defective goods shall apply
and govern any inconsistencies between such laws and the provisions of this EULA set forth above.
Additional Terms Applicable to Users of Software Located in the United Kingdom
If (a) You are acting as a consumer and the United Kingdom is where you You usually live; (b) You entered into this EULA in the United
Kingdom; and (c) You have obtained the Software from Corel or a Corel authorized reseller in the United Kingdom (a "Consumer"), then
the limitation of liability and warranty provisions set forth in applicable consumer protection and warranty laws of the United Kingdom
shall apply and govern any inconsistencies between such laws and the provisions of this EULA set forth above.
Additional Terms Applicable to users of Software containing Shareware:
Certain Software are shareware and as such are acquired without charge and can be used for a limited period of time for evaluation pur-
poses and are subject to the particular end user license for such shareware.
Additional Terms Applicable to users of CLIPART, STOCK PHOTO IMAGES, VIDEO CONTENT, AUDIO CLIPS, FONTS AND SAMPLE
CONTENT: Our Software may contain clipart, photo images, video content, audio clips (collectively referred to as the "Images or Clips"),
fonts ("Fonts") and sample content such as forms, templates, "tubes" or similar items (collectively referred to as the "Sample Content") that
are either owned by Us or licensed from a third-party. Except as required in the paragraph below, as a user of Our Software You are free
to use, modify and publish the Images or Clips, Fonts, or Sample Content as follows: You may (i) incorporate any Images or Clips, Fonts,
or Sample Content into Your own original work and publish, display and distribute Your work in any media, provided You include a copy-
right notice in Your work reflecting on the copyright ownership of both You and Corel as follows: "Copyright (c) 201__ [Your name], Corel
Corporation and its licensors. All rights reserved."; and (ii) make one (1) copy of the Images or Clips, Fonts, or Sample Content for backup
or archival purposes. YOU MAY NOT (i) resell, sublicense or otherwise make available the Images or Clips or Fonts for use or distribution
separately or detached from a product or web page. For example, the Images or Clips or Fonts may be used by You as part of a web page
design, but not be made available for downloading separately or in a format designed or intended for permanent storage or re-use by oth-
ers; (ii) provide the Images or Clips or Fonts to third parties or permit the use of the Images or Clips or Fonts by third parties separately
or as part of any other product, however, third parties may be provided with copies of the Images or Clips or Fonts (including digital files)
as part of a work product; (iii) create scandalous, obscene, defamatory or immoral works using the Images or Clips, Fonts or Sample Con-
tent nor use the Images or Clips, Fonts, or Sample Content for any other purpose which is prohibited by law; (iv) or permit the use of the
Images or Clips, Fonts, or Sample Content or any part thereof as a trademark or service mark, or claim any proprietary rights of any sort
in the Images or Clips, Fonts, or Sample Content or any part thereof; (v) use any of the Images or Clips which contain identifiable individu-
als or entities for any commercial purpose including, without limitation, in a manner which suggests their association with or endorsement
of any product or service; (vi) use the Images or Clips in electronic format, on-line or in multimedia applications unless the Images or Clips
are incorporated for viewing purposes only and no permission is given to download and/or save the Images or Clips for any reason; (vii)
rent, lease, sublicense or lend the Images or Clips or Fonts, or any copies thereof, to another person or legal entity. You may, however,

C
OREL
PDF F
USION
U
SER
G
UIDE
INDEX CONTENTS 162
INDEX CONTENTS 162
transfer all Your EULA to use the Images or Clips or Fonts to another person or legal entity, provided that (i) You transfer the Software,
including the Images or Clips or Fonts, and this EULA, including all copies (except copies incorporated into Your work product as permit-
ted under this EULA), to such person or entity, (ii) that You retain no copies, including copies stored on a computer or other storage
device, and (iii) the receiving party agrees to be bound by the terms and conditions of this EULA; (iv) use any Images or Clips presented in
any Software splashscreens, welcome screens, product packaging and/or marketing collateral; or (v) use any Images or Clips, Fonts or Sam-
ple Content except as expressly permitted by this EULA.
January 2011 (1.3)
