Corel Painter 8 User Guide Instruction Manual UG EN
User Manual: corel Painter - 8 - Instruction Manual Free User Guide for Corel Painter Software, Manual
Open the PDF directly: View PDF ![]() .
.
Page Count: 493 [warning: Documents this large are best viewed by clicking the View PDF Link!]
- Contents
- Welcome to Corel Painter 8
- The Workspace
- Basics
- Using Textures, Patterns, and Weaves
- Color
- Painting
- Using Water Color
- Using Liquid Ink
- Impasto
- The Brush Creator
- Customizing Brushes
- Using the Brush Creator
- The Main Window
- Using the Randomizer
- Using the Transposer
- Using the Stroke Designer
- Setting Size Controls
- Setting Spacing Controls
- Setting Angle Controls
- Setting Bristle Controls
- Expression Settings
- Setting Well Controls
- Setting Rake Controls
- Setting Random Controls
- Setting Mouse Controls
- Setting Cloning Controls
- Setting Impasto Controls
- Setting Image Hose Controls
- Setting Airbrush Controls
- Setting Water Controls
- Setting Liquid Ink Controls
- Setting Digital Water Color Controls
- Managing Brushes
- Cloning and Tracing
- Using Selections
- Using Alpha Channels
- Using Layers and Layer Masks
- Using Image Effects
- Using Dynamic Plug-ins
- The Image Hose
- Mosaics
- Using Shapes
- Working with Text
- The Web
- Scripting
- Animation and Video
- Printing
- Keyboard Shortcuts
- Index
USER MANUAL
The ultimate digital sketching and painting tool™
Corel Corporation
1600 Carling Ave.
Ottawa, ON
Canada K1Z 8R7
Tel.: 1-613-728-8200
Fax: 1-613-728-9790
Corel UK Limited
Sapphire Court
Bell Street
Maidenhead
Berkshire SL6 1BU
United Kingdom
Tel.: +44(0) 1628 589800
Fax: +44(0) 1628 589801
Corel Inc.
8144 Walnut Hill Ln.
Suite 1050
Dallas, TX
U.S.A. 75231
Tel.: 1-469-232-1000
Fax: 1-469-232-1194
www.corel.com
137PTRPCMENG80 JB#2749-11 02/03 Printed in U.S.A.
70
35163 09758
USER MANUAL
Copyright 1991–2003 Corel Corporation. All rights reserved.
Corel® Painter™ 8 User Guide
The contents of this user guide and the associated Corel Painter software are the property of Corel Corporation and its respective licensors,
and are protected by copyright. For more complete copyright information about Corel Painter, please refer to the About Corel Painter section
in the Help menu of the software.
Corel, the Corel logo, Corel Painter, CorelDRAW, and Natural-Media are trademarks or registered trademarks of Corel Corporation and/or its
subsidiaries in Canada, the U.S. and/or other countries. Adobe, Illustrator, Photoshop, Premiere, and PostScript are trademarks of Adobe
Systems Incorporated in the United States and/or other countries. Canon is a registered trademark of Canon Inc. Cinepak is a registered
trademark of Radius, Inc. EPSON Stylus is a registered trademark of Seiko Epson Corporation. Hewlett-Packard and DeskJet are registered
trademarks of Hewlett Packard. Indeo is a registered trademark of Intel Corporation. JavaScript is a trademark of Sun Microsystems, Inc. Kodak
is a registered trademark of Eastman Kodak Company. Mac OS, Quick Draw, and Finder are registered trademarks of Apple Computer, Inc.,
registered in the United States and other countries. QuickTime is a trademark used under license. QuickTime is a registered trademark of
Apple Computer, Inc. in the United States and other countries. Microsoft and Windows are registered trademarks of Microsoft Corporation in
the United States and/or other countries. Minolta QMS is a trademark of Minolta Co., Ltd. Netscape Navigator is a registered trademark of
Netscape Communications Corporation. PANTONE® and other Pantone, Inc. trademarks are the property of Pantone, Inc. PowerPC is a
registered trademark of IBM Corporation. TARGA is a registered trademark of Pinnacle Systems, Inc., registered in the U.S. and other countries.
Tektronix is a registered trademark of Tektronix, Inc. Wacom, Intuos, and ToolID are trademarks or registered trademarks of Wacom Company,
Ltd. Other product, font, and company names and logos may be trademarks or registered trademarks of their respective companies.

Contents Welcome to Corel Painter 8
What’s New in Corel Painter 8? . . . . . . . 1
Redesigned User Interface . . . . . . . . . . . 1
About Your User Guide . . . . . . . . . . . . . 4
Corel Support Services . . . . . . . . . . . . . 5
The Workspace
Using the Menus and Document
Window . . . . . . . . . . . . . . . . . . . . . . . . 7
Workspace Tour . . . . . . . . . . . . . . . . . . 8
Using the Toolbox . . . . . . . . . . . . . . . . 9
Using Selectors . . . . . . . . . . . . . . . . . . 13
Using the Property Bar . . . . . . . . . . . . 14
Using the Brush Selector Bar . . . . . . . . 15
The Brush Creator . . . . . . . . . . . . . . . . 16
Working with Palettes . . . . . . . . . . . . . 16
Exploring the Palettes . . . . . . . . . . . . . 17
Setting Palette Layout . . . . . . . . . . . . . 21
Libraries and Movers . . . . . . . . . . . . . . 23
Modifying a Library . . . . . . . . . . . . . . . 26
Customizing Palettes . . . . . . . . . . . . . . 27
Creating Custom Palettes . . . . . . . . . .28
Basics
Opening Documents . . . . . . . . . . . . . . 33
Working with Documents . . . . . . . . . . 37
Saving Files . . . . . . . . . . . . . . . . . . . . . 46
Closing Documents and Quitting
the Application . . . . . . . . . . . . . . . . . .50
Setting Preferences . . . . . . . . . . . . . . . 50
Using Plug-ins . . . . . . . . . . . . . . . . . . .57
Wacom Intuos Support . . . . . . . . . . . .59
Using Textures, Patterns, and
Weaves
Using Paper Texture . . . . . . . . . . . . . . 61
Using Patterns . . . . . . . . . . . . . . . . . .66
Using Weaves . . . . . . . . . . . . . . . . . . .72
Color
Working with Color . . . . . . . . . . . . . . 77
Changing Paper Color . . . . . . . . . . . . . 77
The Mixer Palette . . . . . . . . . . . . . . . .82
Using Color Sets . . . . . . . . . . . . . . . . .85
Color Information . . . . . . . . . . . . . . . .89
Color Variability . . . . . . . . . . . . . . . . .89
Color Expression . . . . . . . . . . . . . . . . .91
Annotating Colors . . . . . . . . . . . . . . . 91
Using Gradients . . . . . . . . . . . . . . . . .93
Painting
Exploring Painting . . . . . . . . . . . . . . . .99
Understanding Brushes . . . . . . . . . . . 100

Table of contentsii
Using a Stylus or Mouse . . . . . . . . . 102
Selecting a Brush . . . . . . . . . . . . . . . 103
Brush Settings . . . . . . . . . . . . . . . . . 104
Where You Can Paint . . . . . . . . . . . . 106
Marking the Canvas . . . . . . . . . . . . . 106
Painting with Color . . . . . . . . . . . . . 108
Painting with Gradients and Patterns 112
Painting with Airbrushes . . . . . . . . . 114
Recording and Playing Back Strokes . 117
Filling Techniques . . . . . . . . . . . . . . 118
Using Water Color
The Water Color Layer . . . . . . . . . . . 125
Working with Water Color Variants . 126
Water Controls . . . . . . . . . . . . . . . . 126
Digital Water Color . . . . . . . . . . . . . 127
Using Liquid Ink
The Liquid Ink Layer . . . . . . . . . . . . . 131
Impasto
The Impasto Layer . . . . . . . . . . . . . . 135
Creating an Impasto Effect . . . . . . . . 136
Adjusting Impasto Depth . . . . . . . . . 136
Adjusting Surface Lighting . . . . . . . . 137
Creating Custom Impasto Brushes . . 138
Blending Impasto with Other Layers . 141
The Brush Creator
Customizing Brushes . . . . . . . . . . . . 143
Using the Brush Creator . . . . . . . . . . 143
The Main Window . . . . . . . . . . . . . . 144
Using the Randomizer . . . . . . . . . . . 146
Using the Transposer . . . . . . . . . . . . 147
Using the Stroke Designer . . . . . . . . 147
Setting Size Controls . . . . . . . . . . . . 155
Setting Spacing Controls . . . . . . . . . 158
Setting Angle Controls . . . . . . . . . . . 160
Setting Bristle Controls . . . . . . . . . . . 162
Expression Settings . . . . . . . . . . . . . 164
Setting Well Controls . . . . . . . . . . . . 165
Setting Rake Controls . . . . . . . . . . . . 167
Setting Random Controls . . . . . . . . . 169
Setting Mouse Controls . . . . . . . . . . 172
Setting Cloning Controls . . . . . . . . . 172
Setting Impasto Controls . . . . . . . . . 173
Setting Image Hose Controls . . . . . . 175
Setting Airbrush Controls . . . . . . . . . 175
Setting Water Controls . . . . . . . . . . 176
Setting Liquid Ink Controls . . . . . . . . 179
Setting Digital Water Color Controls . 182
Managing Brushes . . . . . . . . . . . . . . 183
Cloning and Tracing
Cloning Imagery . . . . . . . . . . . . . . . 187
Cloning a Document . . . . . . . . . . . . 188
Using Tracing Paper . . . . . . . . . . . . . 188
Changing Clone Source . . . . . . . . . . 190
Painting in the Clone . . . . . . . . . . . . 190
Using Auto Clone . . . . . . . . . . . . . . 191
Using Auto Van Gogh . . . . . . . . . . . 192
Point-to-Point Cloning . . . . . . . . . . . 192
Multi-Point Cloning . . . . . . . . . . . . . 193
Turning Other Brushes into Cloners . 197
Using a Selection while Cloning . . . . 199
Repeating Source Imagery . . . . . . . . 201
Filling with Transformed Cloning . . . 201
Using Selections
Working with Selections . . . . . . . . . 203
Creating Selections . . . . . . . . . . . . . 206
Converting Selections to and from
Shapes . . . . . . . . . . . . . . . . . . . . . . 210
Saving Selections . . . . . . . . . . . . . . . 210
Loading Selections . . . . . . . . . . . . . . 211
Combining Selections Using
Boolean Operations . . . . . . . . . . . . . 212
Transforming Selections . . . . . . . . . . 214
Editing Path-Based Selections . . . . . . 214
Using the Selection Portfolio . . . . . . 217
Using Alpha Channels
Understanding Alpha Channels . . . . 219
Creating Channels . . . . . . . . . . . . . . 220
Managing Channels . . . . . . . . . . . . . 222
Editing Channels . . . . . . . . . . . . . . . 225
Using Layers and Layer Masks
Layer Basics . . . . . . . . . . . . . . . . . . . 230
Working with Layers . . . . . . . . . . . . 231
Creating Layers . . . . . . . . . . . . . . . . 232
Saving Files Containing Layers . . . . . 234
Deleting Layers . . . . . . . . . . . . . . . . 235
Managing Layers . . . . . . . . . . . . . . . 235
Editing Layers . . . . . . . . . . . . . . . . . 240

iii Corel Painter
Changing Layer Characteristics . . . . . 248
Using the Image Portfolio . . . . . . . . . 254
Working with Layer Masks . . . . . . . . 255
Using Image Effects
Basics of Applying Effects . . . . . . . . . 259
Third-party Plug-ins . . . . . . . . . . . . . 261
Orientation Effects . . . . . . . . . . . . . . 262
Correct Colors . . . . . . . . . . . . . . . . . 264
Other Tonal Control Effects . . . . . . . 268
Apply Lighting . . . . . . . . . . . . . . . . . 274
Apply Surface Texture . . . . . . . . . . . . 277
Other Surface Control Effects . . . . . . 286
Focus Effects . . . . . . . . . . . . . . . . . . 294
Esoterica Effects . . . . . . . . . . . . . . . . 299
Objects Effects . . . . . . . . . . . . . . . . . 312
Using Dynamic Plug-ins
Dynamic Plug-in Basics . . . . . . . . . . . 313
Brightness/Contrast . . . . . . . . . . . . . 315
Burn . . . . . . . . . . . . . . . . . . . . . . . . . 316
Tear . . . . . . . . . . . . . . . . . . . . . . . . . 317
Bevel World . . . . . . . . . . . . . . . . . . . 317
Equalize . . . . . . . . . . . . . . . . . . . . . . 319
Glass Distortion . . . . . . . . . . . . . . . . 320
Kaleidoscope . . . . . . . . . . . . . . . . . . 321
Liquid Lens . . . . . . . . . . . . . . . . . . . . 322
Liquid Metal . . . . . . . . . . . . . . . . . . . 326
Posterize . . . . . . . . . . . . . . . . . . . . . 331
The Image Hose
How it Works . . . . . . . . . . . . . . . . . . 334
Using the Image Hose . . . . . . . . . . . 334
Controlling the Image Hose . . . . . . . 336
Indexing . . . . . . . . . . . . . . . . . . . . . . 337
Creating Nozzles for the Image Hose 340
Nozzle Libraries . . . . . . . . . . . . . . . . 347
Creating a Nozzle from a Movie . . . . 347
Mosaics
Getting Started with Mosaics . . . . . . 351
Tile Settings . . . . . . . . . . . . . . . . . . . 354
Working with Mosaics . . . . . . . . . . . 356
Mosaic Commands . . . . . . . . . . . . . . 357
Working with Tessellation Mosaics . . 360
Using Shapes
About Shapes . . . . . . . . . . . . . . . . . . 365
Creating Shapes . . . . . . . . . . . . . . . . 368
Setting Shape Attributes . . . . . . . . . . 372
Editing Shapes . . . . . . . . . . . . . . . . . 373
Working with Shapes . . . . . . . . . . . . 378
Working with Text
The Text Layer . . . . . . . . . . . . . . . . . 385
Applying Effects to Text . . . . . . . . . . 386
Exporting Text . . . . . . . . . . . . . . . . . 390
The Web
Features for the Web . . . . . . . . . . . . 393
Creating Web Page Backgrounds . . . 393
Creating Web Buttons . . . . . . . . . . . 396
Using the Image Slicer . . . . . . . . . . . 397
Creating Rollovers . . . . . . . . . . . . . . . 403
Image Maps . . . . . . . . . . . . . . . . . . . 406
Creating GIF Files . . . . . . . . . . . . . . . 409
Using Web-Safe Colors . . . . . . . . . . . 411
Brushes for the Web . . . . . . . . . . . . . 412
Scripting
Understanding Scripting . . . . . . . . . . 415
How Scripts Work . . . . . . . . . . . . . . . 416
The Scripts Palette . . . . . . . . . . . . . . 416
Recording Scripts . . . . . . . . . . . . . . . 417
Playing Scripts . . . . . . . . . . . . . . . . . 418
Editing Scripts . . . . . . . . . . . . . . . . . 419
Scripts and Movies . . . . . . . . . . . . . . 420
Animation and Video
Creating Animations and Video . . . . 423
The Frame Stacks Palette . . . . . . . . . 424
Creating a Movie . . . . . . . . . . . . . . . 425
Modifying a Movie . . . . . . . . . . . . . . 429
Animation Considerations . . . . . . . . . 430
Combining Movies . . . . . . . . . . . . . . 431
Rotoscoping . . . . . . . . . . . . . . . . . . . 432
Saving and Exporting Movies . . . . . . 438
Animations for the World Wide Web 442
Printing
Understanding Printing . . . . . . . . . . . 445
Setting Up Printing . . . . . . . . . . . . . . 446
Printing an Image . . . . . . . . . . . . . . . 447
Color Management . . . . . . . . . . . . . 447
The Color Management Dialog Box . . 448
Options for Files Saved as Encapsulated

Table of contentsiv
PostScript (EPS) . . . . . . . . . . . . . . . . 454
Keyboard Shortcuts
Toolbox Commands . . . . . . . . . . . . . 456
Palette Commands . . . . . . . . . . . . . 457
File Menu Commands . . . . . . . . . . . 457
Edit Menu Commands . . . . . . . . . . . 457
Canvas Menu Commands . . . . . . . . 458
Effects Menu Commands . . . . . . . . . 458
Select Menu Commands . . . . . . . . . 458
Shapes Menu Commands . . . . . . . . 458
Window Menu Commands . . . . . . . 459
Screen Navigation . . . . . . . . . . . . . . 459
Palette Navigation . . . . . . . . . . . . . . 459
Brush Tools . . . . . . . . . . . . . . . . . . . 459
Selection Tools . . . . . . . . . . . . . . . . 460
Adjuster Tools . . . . . . . . . . . . . . . . . 461
Shape Tools . . . . . . . . . . . . . . . . . . . 462
Animation . . . . . . . . . . . . . . . . . . . . 463
Lighting . . . . . . . . . . . . . . . . . . . . . . 463
Layer Section Tools . . . . . . . . . . . . . 463
Mosaics . . . . . . . . . . . . . . . . . . . . . . 464

1
Welcome to Corel Painter
8
Corel® Painter™ 8 is the leading
Natural-Media® painting
application. Corel Painter lets you
simulate a wide range of art tools,
from felt pens, charcoal, and colored
pencils to water color and oils.
What’s New in Corel
Painter 8?
Corel Painter lets you experiment with
the widest range of Natural-Media
tools. You can expand your digital
drawing and painting techniques with
a portfolio of new features.
Corel Painter features a redesigned
user interface, including a new
toolbox, Brush selector bar, property
bar, Info palette, and new palette
design and behavior.
Corel Painter also includes a Mixer
palette that realistically mimics the
traditional paint mixing experience.
Digital water color, a new Sketch
effect, and more than 400 new brushes
all expand your creative potential.
You can create custom brush variants
using the new Brush Creator, which
includes the Randomizer, Transposer,
and Stroke Designer. Corel Painter
also includes redesigned layer masks
and channels that provide a smoother
workflow and greater compatibility
with Adobe® Photoshop®.
Redesigned User Interface
Corel Painter features a redesigned
user interface, which is based on the
following new elements.
Toolbox
The toolbox has been redesigned
vertically and, by default, is docked to
the top-left corner of the document
window. The toolbox lets you access
the tools in Corel Painter, as well as

Welcome to Corel Painter 82
the primary and secondary colors, and
provides easy access to the Paper,
Pattern, Gradient, Nozzle, Weave,
and Brush Look libraries.
The toolbox can be undocked and
moved anywhere inside the
application window, or it can be
turned off.
Property Bar
The property bar replaces the
Controls palette. The property bar is
context-sensitive depending on which
tool is selected, providing commonly
used controls for each tool.
The property bar is docked below the
menu bar by default, but it can be
undocked and moved to any location
in the document window, or turned
off.
Brush Selector
The Brush Selector lets you choose a
brush category, using the Brush
Category picker, and a brush variant,
using the Brush Variant picker. The
name of the selected brush category
and variant is displayed on the right
side of the Brush Selector. You have
the option to view the categories and
variants by a thumbnail or list view.
The Brush Selector is docked, by
default, to the top-right corner of the
document window, beside the
property bar. It can be undocked and
moved to any location in the
document window, or it can be turned
off.
Palettes
The palettes have been redesigned for
this version of Corel Painter, and they
include the following new features:
•Group/Ungroup — Yo u c a n g r o u p
and ungroup palettes by dragging
them together or apart to create
any combination of palettes.
•Resizeable — You can increase or
decrease the size of list palettes,
such as the Layers, Channels, and
Scripts palettes.
Info Palette
The new Info palette provides access
to the following information:
•Image size preview
• Document information, such as
width and height
• X and Y coordinates and the
cursor position
• Context-sensitive information
based on the selected tool. For
example, if the Eyedropper tool is
selected, the HSV and RGB
information is displayed.
• Unit information, such as pixels,
inches, and resolution
Mixer Palette
The new Mixer palette lets you mix
colors interactively. The Mixer palette
contains a Brush tool and a Palette
Knife tool for applying and mixing
colors, mimicking the traditional
experience of mixing two or more
colors on a palette.

Corel Painter 3
The Mixer palette also includes an
Eyedropper tool for sampling specially
mixed colors from imagery, as well as
Zoom and Pan tools for easy
navigation in the palette. You can
choose to save your Mixer palette
settings for future use, and you can
create a custom color set from the
colors in the Mixer palette.
Digital Water Color
Digital Water Color is a simple,
transparent medium that is ideal for
hand painting line drawings, touching
up photographs, or creating simple
water color washes.
Sketch Effect
The new Sketch effect in Corel
Painter lets you convert images or
photographs to simple pencil
drawings, while providing controls for
the amount of paper grain being
applied, the heaviness of the pencil
line, and the desired level of detail.
New Brush Variants
Corel Painter includes over 400 new
Brush variants. New brushes are
included in the following categories:
•Acrylics
•Airbrushes
•Artists
•Blenders
• Calligraphy Pens
•Chalks
•Charcoals
•Colored Pencils
•Conte
•Crayons
• Digital Water Color
• Distortion
• Erasers
•Felt Pens
•F-X
•Gouache
•Image Hose
•Liquid Ink
•Oil Pastels
•Oils
• Palette Knives
•Pastels
•Pattern Pens
•Pencils
•Pens
•Photo
•Sponges
•Sumi-e
•Tinting
•Water Colors
Brush Creator
Corel Painter features a Brush
Creator, which is designed to make
the brush variant creation process easy
and fun. The Brush Creator includes
three key features:
•Randomizer — The Randomizer
lets you choose an existing brush
variant and randomize its
properties to create a new variant.
You can set the amount of
randomization to determine how
much of the original brush’s

Welcome to Corel Painter 84
properties remain—a low amount
will result in variants that are very
similar to the original, while a high
amount will result in variants that
are radically different. To help you
visualize how the new brush
variants will look, the Randomizer
provides a brush stroke preview of
each new variant.
•Transposer — The Transposer lets
you change the properties of one
brush variant using the properties
of another. For example, you can
choose the 2B Pencil and create
brush variants that are mutated
toward another variant, such as
Charcoal. To help you visualize
how the new brush variants will
look, the Transposer provides a
brush stroke preview of each new
variant.
•Stroke Designer — The Stroke
Designer lets you modify the
properties of brush variants using
advanced controls. The Stroke
Designer has 16 different sets of
controls: General, Size, Spacing,
Angle, Bristle, Well, Rake,
Random, Mouse, Cloning,
Impasto, Image Hose, Airbrush,
Water, Digital Water, and Liquid
Ink. To make the brush creation
process more visual and
interactive, the Stroke Designer
includes a live preview that
updates each time you make
changes to the brush variant.
Industry-Standard Masks,
Layer Masks, and Channels
Layer Masks: The redesigned layer
masks let you hide and reveal areas of
layers without making permanent
changes to an image.
Channels: The Channels palette lets
you use alpha channels to create and
store masks to modify, separate, and
preserve specific areas of an image.
And So Much More...
• Thumbnail previews for Layers,
Layer Masks, and Channels
•Brush cursor preview that lets you
see the size of the brush you’re
painting with
• Enhanced keyboard shortcuts to
make it easier to transition
between Corel Painter and other
applications
• Enhanced file compatibility with
Adobe Photoshop
• New paper textures, patterns,
Image Hose nozzles, brush looks,
gradients, and more!
• Extra content CD, including 100
pictures from
http://www.brandxpictures.com,
hundreds of brushes, paper
textures, and more!
About Your User Guide
You can find answers to most of your
questions in the Corel® Painter™User
Guide. It provides information you
need to get the most out of Corel
Painter.
The Corel Painter User Guide is for
both the Mac OS® and Windows®
platforms. As a convention, Mac OS
commands precede Windows
commands in the text.

Corel Painter 5
When a modifier key differs between
the Mac OS and Windows, the Mac
OS modifier is listed first, followed by
the Windows modifier. For example,
Command + I (Mac OS) or Ctrl + I
(Windows) means that Mac OS users
would press Command + I and
Windows users would press Ctrl + I.
Choosing a menu item from a menu
follows the convention “Choose menu
name > menu item.” For simplicity,
the term “folder” refers to directories
as well as folders. The Corel Painter
interface for Mac OS and Windows
platforms is identical, unless
otherwise specified.
Registering Products
Registering products is important.
Registration provides you with timely
access to the latest product updates,
valuable information about product
releases, and access to free downloads,
articles, tips and tricks, and special
offers.
You can register a Corel product
• online—follow the instructions
provided on the Corel Web site
• by mail—send the product
registration card to the Corel
Customer Service Center nearest
you
• during installation—follow the
instructions provided by the
product setup
Corel Support Services
Corel Support Services can provide
you with prompt and accurate
information about product features,
specifications, pricing, availability,
services, and technical support. For
the most current information on
support services available for your
Corel product, please visit
www.corel.com/support.

2
The Workspace
The Corel Painter workspace has been
designed to give you easy access to
tools, effects, commands, and features.
The workspace is organized across a
series of menus, selectors, and
interactive palettes. Some features are
also available in the frame of the
document window.
Using the Menus and
Document Window
Using the commands on the Corel
Painter menu bar, you can:
• work with files and editing
commands
• adjust and apply effects
• perform selection operations, work
with shapes, and create animations
• control the document window or
the Corel Painter workspace
The document window lets you access
the following features with the click of
a button:
• tracing paper
•grid
• color correction
•impasto effect
•drawing mode
• navigation
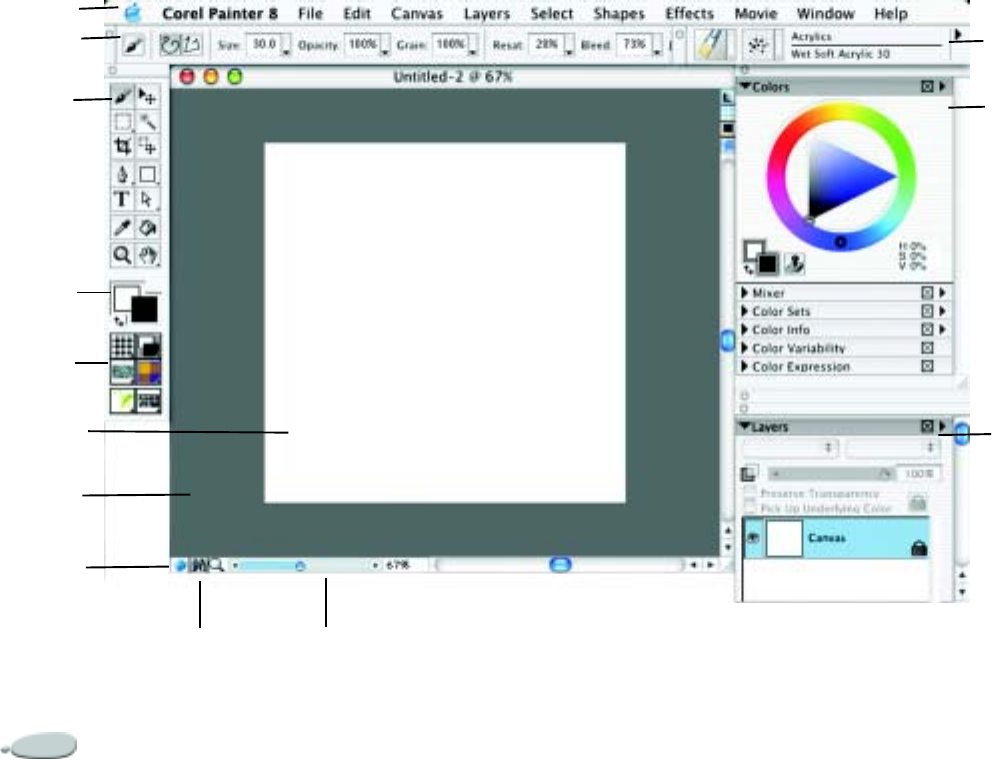
The Workspace8
Workspace Tour
Document
window
Toolbox
Property
bar
Canvas
Brush
selector
Colors
palette
Layers
palette
Drawing
mode icon
Navigation
icon Zoom slider
Color
Selection box
Content
selectors
Menu bar
Corel Painter 9
Using the Toolbox
In the toolbox, there are tools to make
marks, draw shapes, fill shapes with
color, view and navigate, and make
selections. There are also six selectors
that let you choose papers, gradients,
patterns, weaves, looks, and nozzles.
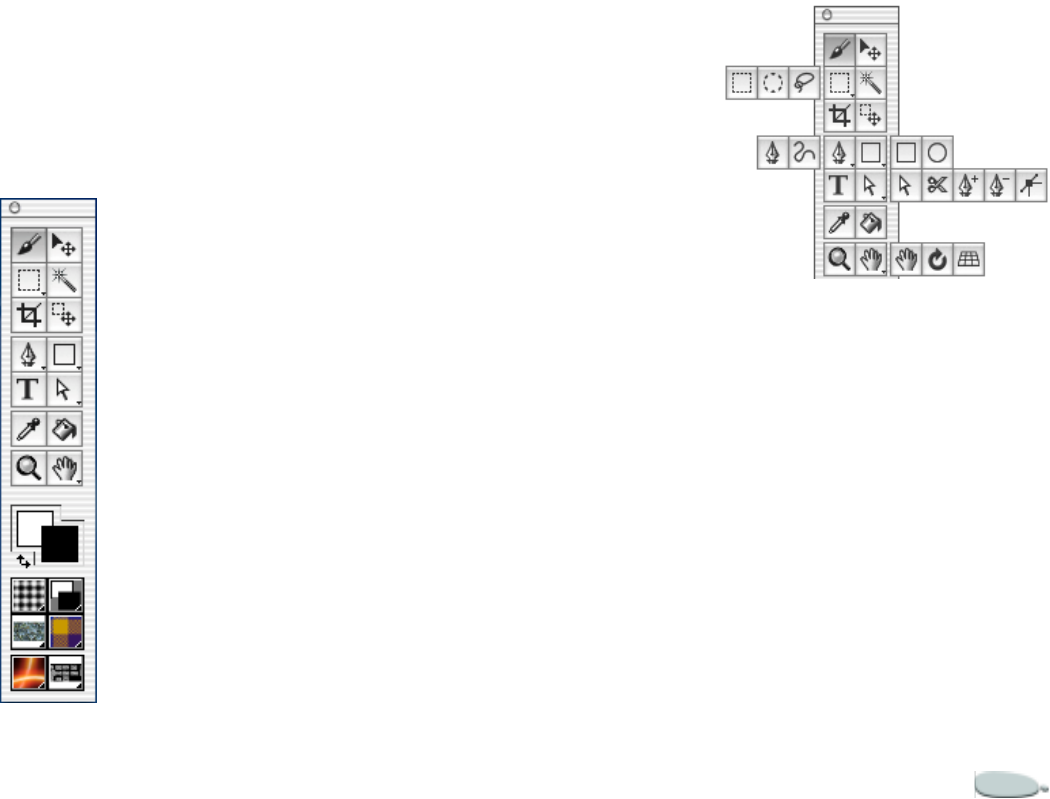
The toolbox.
Some tools of similar function share a
space in the toolbox. The button for
only one of these tools is displayed at a
time. Any tool that has a triangle in
the bottom-right corner has one or
more tools underneath it in a flyout
menu.
The toolbox is open by default;
however, it can be closed. You can
move the toolbox around the
document window, and you can dock
the toolbox to the document window
or to other palettes.
The current tool can be modified by
options on the property bar, which
change as you change tools. For more
information, see “Using the Property
Bar” on page 14.
To access tools grouped in flyout
menus:
1In the toolbox, hold down the tool
icon whose flyout menu you want
to open.
2Choose the tool you want to use.
Some tools share a space in the toolbox. Hold
down the tool button that’s displayed to open
the flyout menu.
To close the toolbox
•Do one of the following:
• Click the Close button in the
top corner of the toolbox.
•Choose Window menu >
Hide Toolbox.
To open the toolbox, choose
Window menu > Show Toolbox.
To move the toolbox
1Place the cursor over the title bar of
the toolbox.
The Workspace10
2Drag the toolbox to a new location
in the document window.
To dock the toolbox
1Place the cursor over the title bar of
the toolbox.
2Drag the toolbox to the edge of the
document window or a palette.
3When the toolbox lines up with
the edge of the document window
or palette, release the mouse
button.
The toolbox will snap into place.
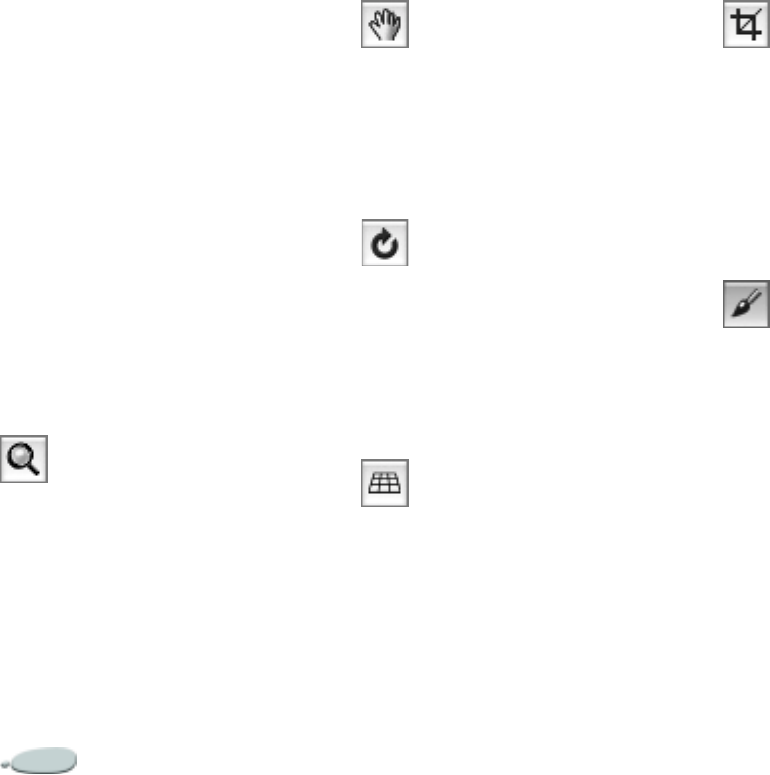
Navigation and Utility Tools
The Magnifier Tool
You can use the Magnifier tool to
magnify areas of an image when you
are performing detailed work, or to
reduce areas to get an overall view of
an image. For more information, see
“Zooming” on page 37.
The Grabber Tool
The Grabber tool gives you a quick
way to scroll an image. For more
information, see “Repositioning
Documents” on page39.
The Rotate Page Tool
The Rotate Page tool lets you rotate an
image window to accommodate the
way you draw naturally. Refer to
“Rotating Documents” on page 39 for
more information.
The Perspective Grid Adjuster Tool
The Perspective Grid Adjuster tool
lets you select and move the location
of the perspective grid lines, the
vanishing point, the horizon line, the
ground line, and the picture plane.
See “Using the Perspective Grid” on
page 45 for more information.
The Crop Tool
The Crop tool lets you remove
unwanted edges from the image. For
more information, see “Cropping
Images” on page40.
Tools that Apply Color
The Brush Tool
You use the Brush tool to make marks
on the Canvas or a layer. The Brush
tool represents a category of marking
tools. Within the Brush category are
pencils, pens, chalk, an airbrush, oil
paints, water colors and more.
When the Brush tool is selected, you
can choose specific brushes from the
Brush selector bar. For more
information about selecting brushes
and tools, refer to “Selecting a Brush”
on page 103.
Corel Painter 11
You can set opacity, grain, and
drawing style (freehand strokes or
straight line strokes) on the property
bar.
The Paint Bucket Tool
The Paint Bucket tool lets you fill an
area. The property bar shows choices
for what area to fill and what to fill it
with. The Color Tolerance and Color
Feather values let you control the
extent of fill and opacity in
neighboring areas. You can also
choose to anti-alias a fill.
Double-click the Paint Bucket tool to
specify what color in the image to lock
out of your fill. For more information
on the Paint Bucket tool, refer to
“Filling Techniques” on page118.
The Dropper Tool
The Dropper tool lets you pick up a
color from an existing image. The
property bar shows you values for the
color. When you select a color with the
Dropper tool, that color becomes the
current color on the Colors palette.
For more information, see “Sampling
Colors from Imagery” on page 80.
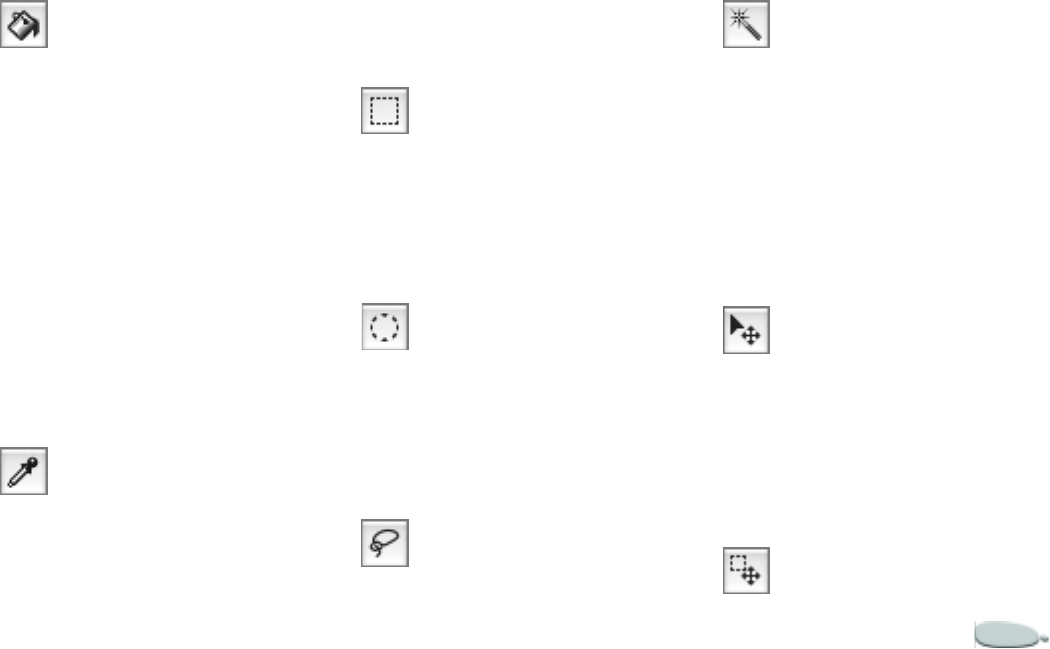
The Selection Tools
The Rectangular Selection Tool
You use the Rectangular Selection tool
to create rectangular selections. Refer
to “Using Selection Tools” on
page 206 for more information.
The Oval Selection Tool
You use the Oval Selection tool to
create oval selections. Refer to “Using
Selection Tools” on page 206 for more
information.
The Lasso Tool
The Lasso tool lets you draw a
freehand selection. Refer to “Using
Selection Tools” on page 206 for more
information.
The Magic Wand Tool
The Magic Wand tool lets you click or
drag in the image to select an area of
similar color. Refer to “Using the
Magic Wand” on page207 for more
information.
The Adjuster Tools
The Layer Adjuster Tool
The Layer Adjuster tool is used to
select, move and manipulate layers.
Refer to “Using Layers and Layer
Masks” on page 229 for more
information.
The Selection Adjuster Tool
The Workspace12
The Selection Adjuster tool lets you
select, move, and manipulate
selections created with the
Rectangular, Oval, and Lasso selection
tools and those converted from
Shapes.
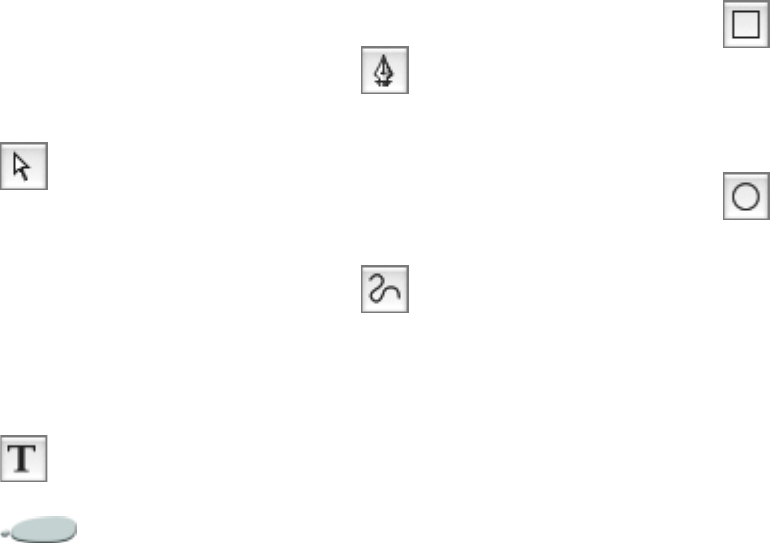
The Shape Tools
Corel Painter creates all shapes by
using Bézier curves. Every shape you
create automatically becomes a
separate layer in the document.
Shapes are listed on the Layers palette.
The Shape Selection Tool
The Shape Selection tool is for editing
Bézier curves (shape paths). You use
the Shape Selection tool to select and
move anchor points and to adjust their
control handles. Refer to “Working
with Shapes” on page 378 for more
information.
The Text Tool
The Text tool creates text shapes. Use
the Text palette to set the font, point
size, and tracking. For more
information, see “Working with Text”
on page 385.
The Shape Design Tools
You use the Pen tool and the Quick
Curve tool to draw shapes.
The Pen Tool
The Pen tool lets you create straight
lines and curves in shape objects. For
more information, see “Using Shapes”
on page 365.
The Quick Curve Tool
The Quick Curve tool lets you create
shape paths by drawing freehand
curves. For more information, see
“Using Shapes” on page 365.
The Shape Objects Tools
The Shapes Objects tools create
rectangular or oval shapes. When you
create a shape, the details are
displayed on the property bar.
For more information, see “Creating
Shapes” on page 368.
The Rectangular Shape Tool
You use the Rectangular Shape tool to
create rectangular shape objects.
The Oval Shape Tool
You use the Oval Shape tool to create
oval shape objects.
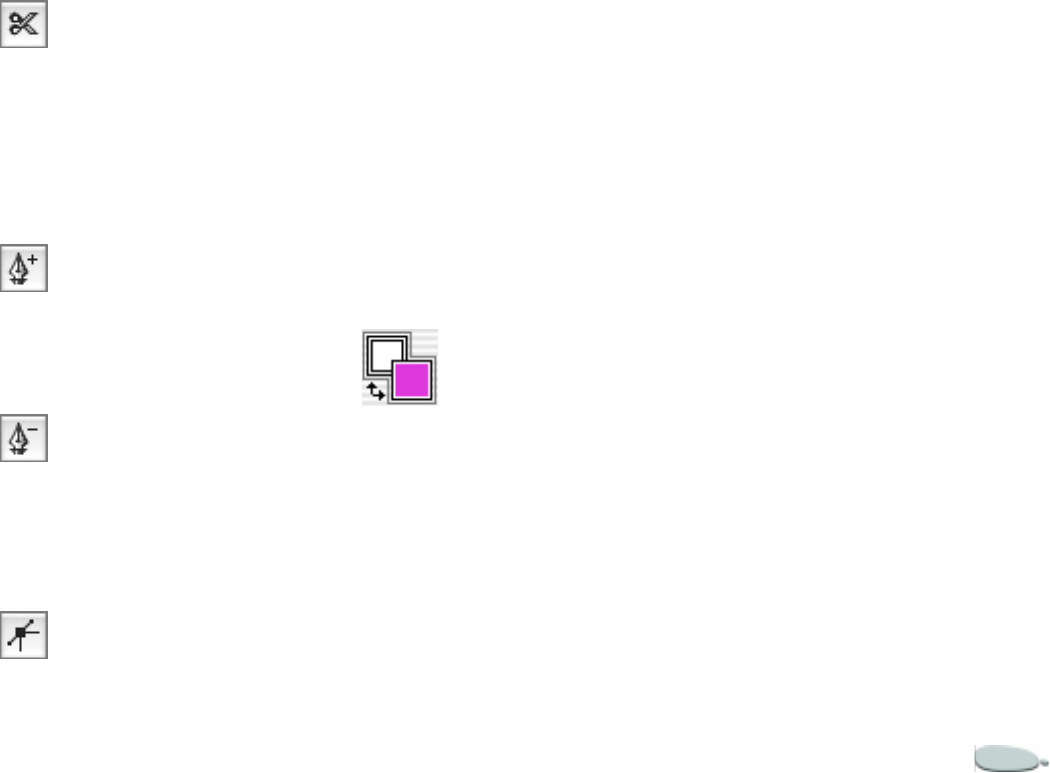
The Shape Edit Tools
The Shape Edit tools allow you to
manipulate existing shapes. For more
information, see “Editing Shapes” on
page 373.
Corel Painter 13
The Scissors Tool
You use the Scissors tool to cut an
open or closed segment. If the
segment is closed, once you click on a
line or point to cut the shape path, the
shape path becomes open.
The Add Point Tool
You use the Add Point tool to create a
new anchor point on a shape path.
The Remove Point Tool
You use the Remove Point tool to
remove an anchor point from a shape
path.
The Convert Point Tool
The Convert Point tool is used to
convert between smooth and corner
anchor points.
The Color Selection Box
The Color Selection box lets you
choose primary and secondary colors.
The front rectangle displays the
primary color, and the back rectangle
displays the secondary color. For more
information, refer to “Understanding
Primary and Secondary Colors” on
page 79.
The Color Selection box.
To change the primary or
secondary color:
1Double-click the primary or
secondary color rectangle.
2Choose a color from the Color
dialog box.
Using Selectors
The selectors in the toolbox give you
quick access to the libraries for the
following Corel Painter elements:
papers, gradients, patterns, weaves,
looks, and nozzles.
You can display items in selectors as
thumbnails or in a list. You can also
access commands from each selector
menu. If the command you want is
not available, you can display the
entire palette that corresponds to the
selector.
To open a selector:
1Click the flyout menu arrow on
the bottom-right corner of the
selector you want to open.
2Choose an item from the list.
To display items as thumbnails or
in a list:
1Click the flyout menu arrow on
the bottom-right corner of the
selector you want to open.
2Click the selector menu arrow, and
choose List or Thumbnails.
The Workspace14
To access selector menu
commands:
1Click the flyout menu arrow on
the bottom-right corner of the
selector you want to open.
2Click the selector menu arrow, and
choose a command.
To display a selector’s palette
1Click the flyout menu arrow on
the bottom-right corner of the
selector you want to open.
2Click the selector menu arrow, and
choose Launch Palette.
Note
•
This command is not available from
the Look and Nozzle selectors.
Using the Property Bar
The property bar in Corel Painter is
context-sensitive — it changes
according to the tool you are using.
You can access settings and options for
each tool, and you can change them
according to your preferences using
the boxes or pop-up sliders. Tool
settings are retained when you switch
from one tool to another. You can also
use the property bar to restore the
default settings of the selected tool.
The property bar is docked
horizontally to the menu bar by
default. You can move the property bar
anywhere in the document window,
dock it under the menu bar again, or
close it.
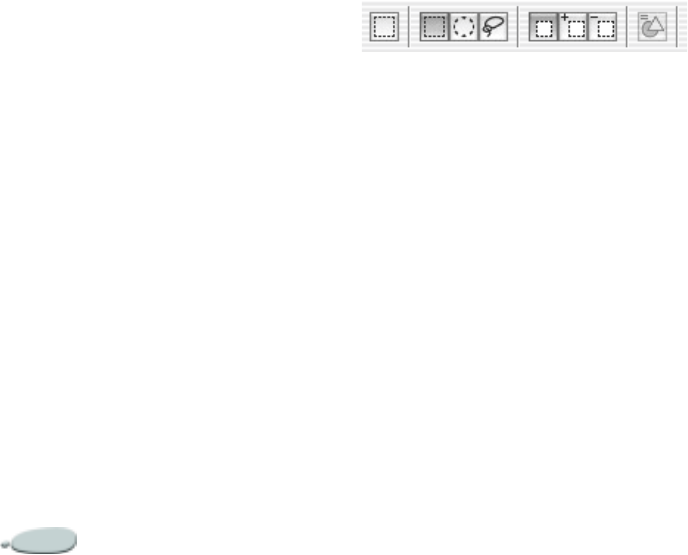
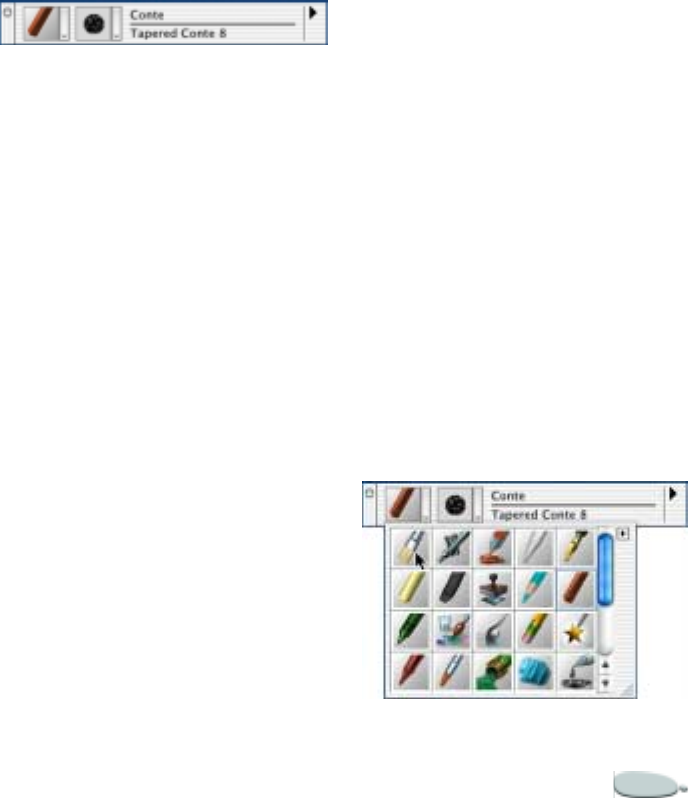
The property bar for the Rectangular Selection
tool.
To access tool settings on the
property bar:
•Choose a tool from the toolbox.
Tool settings are displayed on the
property bar.
To change tool settings on the
property bar:
1Choose a tool from the toolbox.
2Do any of the following:
• Type a value in the box next to
the control, or click the arrow
next to the control and adjust
the pop-up slider.
• Enable or disable the check box
next to the option you want to
use.
Note
•
Not all of these options are available
for every tool. The settings change
depending on the tool selected.
To reset the default tool settings:
•Click the Reset Tool button on the
property bar.
Note
•
The Reset Tool button on the property
bar has the same icon as the selected tool
in the toolbox.
To move the property bar:
•Point to the bar on the right side of
the property bar, and drag it to its
new location.
To dock the property bar:
•Point to the title bar of the property
bar, and drag it under the menu
bar.
The property bar snaps into place.
Corel Painter 15
To close the property bar:
•Do one of the following:
•Choose Window menu >
Hide Property Bar.
• If the property bar is undocked,
click the close button on the
title bar.
Tip
•
To show the property bar, choose
Window menu > Show Property Bar.
Using the Brush Selector
Bar
The Brush selector bar lets you choose
from a variety of brush categories and
variants. Brush categories are groups
of similar brushes and media. Brush
variants are specific brushes and brush
settings within a brush category.
The name of the selected brush
category appears at the top of the
Brush selector bar. The name of the
selected brush variant appears under
the brush category name.
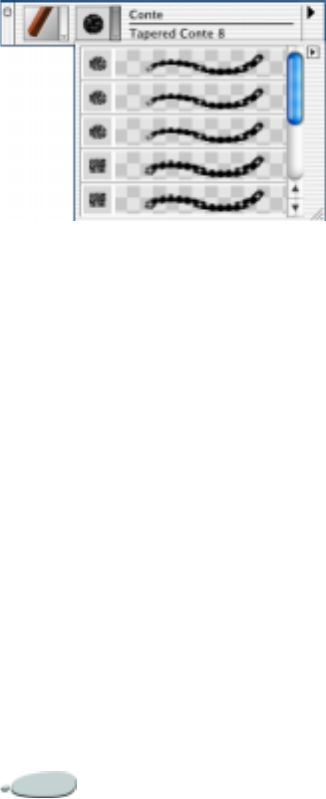
The Brush selector bar.
To display the Brush selector bar:
•Choose Window menu > Show
Brush Selector Bar.
To choose a brush from the Brush
selector bar:
1On the Brush selector bar, click the
Brush Category arrow and choose
a brush category.
2Click the Brush Variant arrow, and
choose a variant.
Previewing Brushes
The Brush Category selector shows
you a preview of the currently selected
brush category and lets you choose a
new brush category. The Brush
Variant selector does the same for
brush variants.
You can preview brush categories and
variants as thumbnails or in list
format. Brush variants can also be
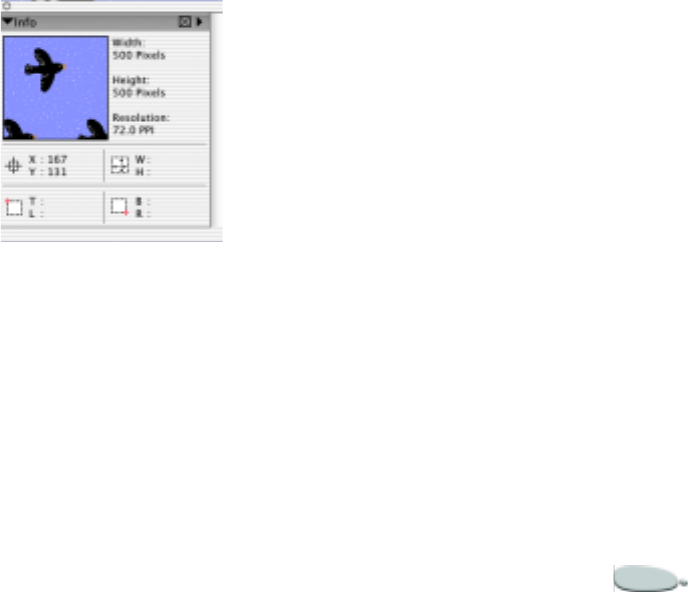
previewed as brush strokes. The
Stroke view shows you both the dab
type and brush stroke of the selected
brush variant.
To display brush categories and
variants as thumbnails or lists:
1On the Brush selector bar, click the
Brush Category or Brush Variant
arrow.
2Click the selector menu arrow, and
choose List or Thumbnails.
If you’re displaying brush variants,
you can also choose the Stroke
view.
Note
•
The Stroke view is available only on
the Brush Variant selector menu.
Items in the Brush selector bar can be displayed
as thumbnails.
The Workspace16
The Stroke view is available for brush variants.
Brush Selector Bar Menu
Commands
The Brush selector bar menu
commands are used for creating and
loading brushes, working with brush
variants, and manipulating brush
strokes. For more information, see
“Managing Brushes” on page 183.
Moving and Docking the
Brush Selector Bar
The Brush selector bar is displayed at
the top-right of the property bar by
default. It can be moved to a new
location in the document window, or
it can be docked to the edge of the
document window or other palettes.
To move the Brush selector bar
•Point to the title bar of the Brush
selector bar, and drag it to its new
location.
To dock the Brush selector bar
1Point to the title bar of the Brush
selector bar, and drag it to the edge
of the document window or a
palette.
2When the Brush selector bar is
lined up with the edge of the
document window or palette,
release the mouse button.
The Brush selector bar snaps into
place.
Closing the Brush Selector
Bar
You can close the Brush selector bar to
hide it from view.
To close the Brush selector bar
•Do one of the following:
•Choose Window menu >
Hide Brush Selector Bar.
• If the Brush selector bar is
undocked, click the close but-
ton on the title bar.
The Brush Creator
The Brush Creator is designed to
make the brush variant creation
process easy and fun. You can use the
Randomizer to create random brush
variants, the Transposer to blend two
brush variants, and the Stroke
Designer to adjust the settings of
brush variants. For more information,
see “The Brush Creator” on page 143.
To open the Brush Creator
•Do one of the following:
•Choose Window menu >
Brush Creator.
•Press Command + B (Mac
OS) or Ctrl + B (Windows).
Working with Palettes
The interactive palettes in Corel
Painter let you access the commands,
controls, and settings available when
creating documents.

Corel Painter 17
Showing and Hiding Palettes
You can show or hide a palette by
choosing its name from the Window
menu, from a selector, or by using the
key combination shown on the
Window menu.
To show or hide a palette:
•Do one of the following:
•Choose Window menu, and
choose the palette you want to
show or hide.
• Choose a selector from the
toolbox, click the selector menu
arrow, and choose Launch Pal-
ette.
• Use the keyboard shortcut for
the palette you want to show or
hide:
Press Command (Mac OS) or Ctrl
(Windows) +
1 = Colors
2 = Mixer
3 = Color Sets
4 = Layers
5 = Channels
6 = Text
7 = Info
8 = Gradients
9 = Patterns
Tip
•
You can also hide a palette by clicking
the close box on the palette title bar.
To show or hide all palettes:
•Choose Window menu > Show/
Hide Palettes.
Exploring the Palettes
As you work with Corel Painter, you’ll
use the following groups of palettes.
The Color Palettes
•The Colors palette lets you choose
primary and secondary colors for
painting in Corel Painter
documents. You can also use the
Clone Color option on the Colors
palette. For more information, see
“Working with Color” on page 77.
•The Mixer palette lets you mix and
blend colors as you would on an
artist’s palette. It contains its own
set of tools. For more information,
see “The Mixer Palette” on
page 82.
•The Color Sets palette displays the
colors in the current color set. You
use color sets to organize groups of
colors. Some color sets are
organized by both name and color
relationship. For more
information, refer to “Using Color
Sets” on page 85.
•The Color Info palette contains
color information for the selected
color, in HSV or RGB values. You
can also use the Clone Color
option with this palette. For more
information, see “Color
Information” on page 89.
•The Color Variability palette
contains sliders to adjust color
variability values. For more
information, see “Color
Variability” on page 89.
•The Color Expression palette lets
you determine how colors are
expressed in Corel Painter
documents. For more information,
refer to “Color Expression” on
page 91.

The Workspace18
The Papers, Gradients,
Patterns, and Weaves
Palettes
•The Papers palette lets you choose
and edit paper textures for your
document. You can preview paper
textures as thumbnails or in a list,
and see a thumbnail preview of the
selected paper. For more
information, see “Using Paper
Texture” on page 61 and
“Choosing Paper Textures” on
page 63.
•The Gradients palette lets you
choose and edit gradients that can
be applied to Corel Painter
documents. You can preview
gradients as thumbnails or in a list,
and see a thumbnail preview of the
selected gradient. For more
information, see “Using
Gradients” on page 93.
•The Patterns palette lets you
choose and edit patterns. You can
preview patterns as thumbnails or
in a list, and see a thumbnail
preview of the selected pattern. For
more information, refer to “Using
Patterns” on page 66.
•The Weaves palette lets you choose
and edit weaves. You can preview
weaves as thumbnails or in a list,
and see a thumbnail preview of the
selected weave. For more
information, see “Using Weaves”
on page 72.
The Layers and Channels
Palettes
•The Layers palette contains
thumbnail previews of all the
layers in a Corel Painter
document. You can use the buttons
on the Layers palette to arrange
layers, use plug-ins, add new layers
(including Water Color and
Liquid Ink layers), create layer
masks, and delete layers. You can
also set the composite method and
depth, adjust the opacity, and lock
and unlock layers. For more
information, see “Using Layers
and Layer Masks” on page 229.
•The Channels palette contains
thumbnail previews of all the
channels in a Corel Painter
document, including RGB
composite channels, layer masks,
and Alpha channels. The buttons
on the palette can be used to load,
save, and invert existing channels,
and to create new channels. For
more information, see “Using
Alpha Channels” on page219.
The Text and Scripts Palettes
•The Text palette lets you perform
all tasks relating to text in a Corel
Painter document, such as
choosing fonts, adjusting opacity,
and applying drop shadows. For
more information, refer to
“Working with Text” on page 385.
•The Scripts palette gives you
access to all commands and
settings relating to scripts. For
example, you can open, close, play,
and record scripts from the Scripts
palette. For more information, see
“Scripting” on page 415.
Corel Painter 19
The Image Portfolio and
Selection Portfolio Palettes
•The Image Portfolio contains all
of the images in the current image
library. You can view the images as
thumbnails or in a list, as well as a
thumbnail preview of the current
image. For more information, see
“Using the Image Portfolio” on
page 254.
•The Selection Portfolio contains
all of the selections in the current
selection library. You can view the
images as thumbnails or in a list,
as well as a thumbnail preview of
the current selection. For more
information, see “Using the
Selection Portfolio” on page217.
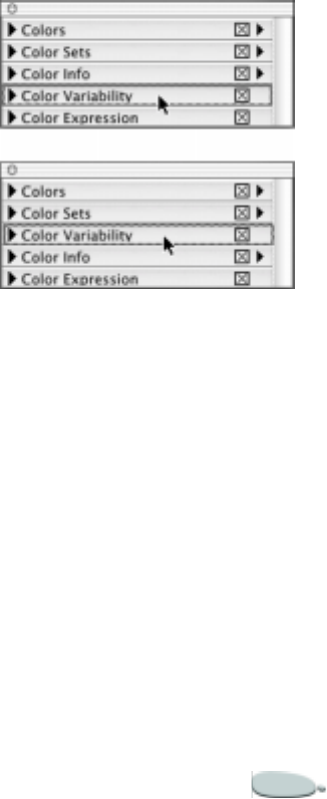
The Info Palette
The new Info palette provides you
with an image preview; document
information, such as width and
height; X and Y coordinates and the
cursor position; context-sensitive
information based on the selected
tool; and unit information, such as
pixels, inches, and resolution.
You can choose to view a canvas
preview, which shows you the contents
of the canvas, or a page layout preview,
which shows you the entire document.
You can also choose how RGB values
will display on the Info palette — as
actual values, a percentage of the
values, or as hexadecimal values.
The Info palette.
To choose an image preview style
on the Info palette:
•On the Info palette, click the
palette menu arrow, and choose
Canvas Preview or Page Layout
Preview.
To choose how RGB values will
display on the Info palette:
1On the Info palette, click the
palette menu arrow, and choose
Display RGB Values As.
2Choose an option from the list.
The Tracker Palette
The Tracker palette temporarily stores
brush categories, variants, and dab
types when you apply brush strokes to
the canvas. Each time you use a new
brush, the variant is saved in the
Tracker palette. You can return to a
brush variant you like by choosing it
from the Tracker palette.
You can view the brush variants stored
in the Tracker palette as thumbnail
images, in a list, or as strokes. The
Tracker palette can be resized to
display more or fewer brush variants;
however, it will only store up to 25
variants at a time.
You can clear selected brush variants,
clear all brush variants, and save
brush variants using the Tracker

The Workspace20
palette. Brush variants are stored even
after the document you were working
on has been closed.
The Tracker palette.
To choose a brush variant from
the Tracker palette:
•Click the brush variant you want
to use.
To view brush variants in the
Tracker palette:
•On the Tracker palette, click the
palette menu arrow, and choose
List, Thumbnails, or Stroke.
To resize the Tracker palette:
•Point to the resize handle in the
bottom-right corner of the palette,
and drag to make the palette larger
or smaller.
The number of variants displayed
varies according to the size of the
palette.
To clear a selected brush variant
from the Tracker palette:
1On the Tracker palette, click the
brush variant you want to remove.
2Click the palette menu arrow, and
choose Clear Selected.
To clear all brush variants from
the Tracker palette:
•On the Tracker palette, click the
palette menu arrow, and choose
Clear All.
To save a brush variant on the
Tracker palette:
1On the Tracker palette, click the
brush variant you want to save.
2Click the palette menu arrow, and
choose Save Variant.
3In the Save Variant dialog box, type
a name in the Save As box.
Enable the Save Current Colors
check box to retain current color
settings.
Navigating Palettes
When a palette is displayed, it must be
expanded for you to access its settings.
You can collapse palettes to save screen
real estate, while keeping them
displayed in the application.
If you have many palettes displayed
and expanded, the view of other
palettes can be obscured. You can
scroll through palettes to locate the
elements you want to work with.
To expand or collapse a palette:
•Click the palette arrow in the top
corner of the palette.
When the triangle points down,
the palette is expanded. When it
points to the right, the palette is
collapsed.
To scroll through a palette:
•Do one of the following:
Corel Painter 21
• Use the scrollbar on the right
side of the palette to scroll
through the palette.
• Press Option + click (Mac OS)
or Alt + click (Windows), and
drag vertically inside the
palette. The cursor changes to a
hand and the palette scrolls as
you drag.
Using Palette Menus
Most palettes in Corel Painter contain
menus from which you can access a
series of palette-specific commands.
For example, you can use the palette
menu on the Papers palette to capture,
make, and invert paper textures, and
to open the Paper Mover and library.
To access the commands on a
palette menu:
•Click the palette menu arrow.
Setting Palette Layout
You can set up the palette layout in
Corel Painter to best suit your
working style. Palettes can be
arranged in the document window to
give you easy access to the tools and
controls you use most often, and to
maximize screen real estate.
You can also group and reposition
palettes according to your preferences,
and you can dock them to the edges of
the document window or other
palettes.
Arranging Palettes
You can drag a palette to any location
that’s convenient for your work. Corel
Painter saves palette arrangements so
that the next time you start the
program, the workspace appears as
you left it.
You can save several different palette
layouts for future use, and you can
later delete layouts. You can also
return the palette layout to the Corel
Painter default.
Arrange palettes to create a layout that is
convenient for you.
To save a layout:
1Arrange your palettes the way you
want them saved.
2Choose Window menu > Arrange
Palettes > Save Layout.
3In the Palette Layout dialog box,
type a name in the New Palette
Layout box.
To use a saved layout:
•Choose Window menu > Arrange
Palettes > Name of Layout.
Corel Painter restores the saved
palette layout.
The Workspace22
To delete a saved layout:
1Choose Window menu > Arrange
Palettes > Delete Layout.
Corel Painter opens a dialog box
listing all saved layouts.
2From the list, select the layout you
want to delete.
3Click Delete.
To return to the default palette
layout:
•Choose Window menu > Arrange
Palettes > Default.
To resize palettes
•Drag the resize handle in the
bottom-right corner of the open
palette.
Grouping and Repositioning
Palettes
In Corel Painter, palettes appear by
default in small, intuitive groupings.
You can customize these groupings by
moving palettes from one group to
another. You can include as many or as
few palettes as you want in a group.
You can also reposition items to a new
location within a group.
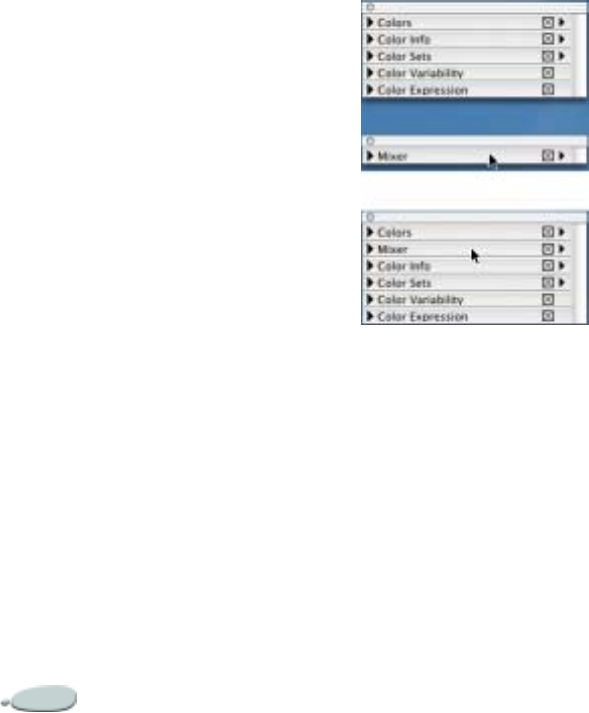
Customized palette groupings. In this example,
the Mixer palette has been grouped with the
other color palettes.
To group palettes
1Place the cursor over the palette
bar.
The cursor displays as a hand.
2Drag the palette bar, and place it
on top of the palette with which
you want to create a group.
3Release the mouse button.
A new group of palettes is formed.
4Repeat steps 1 to 3 for each palette
you want to add to the group.
To ungroup palettes
1Place the cursor over the palette
bar.
The cursor displays as a hand.
2Drag the palette bar away from the
group.
3Release the mouse button.
The palette is removed from the
group.
4Repeat steps 1 to 3 for each palette
you want to ungroup.
To reposition items in grouped
palettes:
1Place the cursor over the palette
bar.
The cursor displays as a hand.
2Drag the palette to a new location
in the group.
3Release the mouse button.

Corel Painter 23
Docking Palettes
If you need some room on your
screen, but don’t want to collapse or
group palettes, you can save valuable
screen real estate by docking palettes.
This handy feature of Corel Painter
lets them be docked into place when
they get close to the top or bottom
edge of another palette. In addition to
tidying up your workspace, this
feature can help keep a palette from
being covered up by another palette.
To dock palettes:
1Place the cursor over the title bar of
the palette you want to dock.
2Drag the palette to the top or
bottom of a second palette.
3When the first palette lines up
with the second palette, release the
mouse button.
The palette will snap into place.
4Repeat steps 1 to 3 for each set of
palettes you want to dock.
To undock palettes:
1Place the cursor over the title bar of
the palette you want to undock.
2Drag the palette to another
location in the workspace.
3Repeat steps 1 and 2 for each
palette you want to undock.
Libraries and Movers
What are Libraries?
A library is a saved collection of
similar items that can be loaded into a
selector. For example, the built-in
brushes (and their variants) are
contained in the default brushes
library, which is loaded when you
open Corel Painter. You can find more
brush libraries in the Corel Painter
folder. As you customize brushes and
other resources, you can save them
into your own libraries.
Libraries are available for paper
textures, patterns, gradients, weaves,
brushes, looks, nozzles, layers,
selections, lighting, and scripts. You
can have any number of libraries, but
only one of each type can be open at a
time.
When you want other items, you can
load alternate libraries. Libraries allow
you to extend the Corel Painter tools
and resources, without overloading a
selector.
The methods for working with all
libraries are the same, except for
brushes. You can create new libraries,
add items, or move items between
libraries.
The methods for working with the
libraries for Brushes, their categories,
and variants are different. Brushes are
loaded into memory when you open
Corel Painter, so adding brushes to
the default brush library increases the
need for RAM. If you’re working close
to the memory threshold, you’ll want
to organize new brushes into
secondary libraries. When you want a
different brush set, just switch
libraries. This helps Corel Painter be
more efficient with memory usage.
See “Using Brush Libraries” on
page 26 for more information.
It is a good idea to limit the number of
resources in each library. This makes
it easier to find a particular tool and
helps Corel Painter manage memory.
The Workspace24
What are Movers?
The tools for creating libraries and
managing their contents are contained
in the Movers. A Mover is provided on
the selector menu and/or the palette
menu for each resource supported by
libraries. Selectors and/or palettes
with Movers are: Papers, Gradients,
Patterns, Weaves, Nozzles, Looks,
Scripts, Image Portfolio, and Selection
Portfolio.
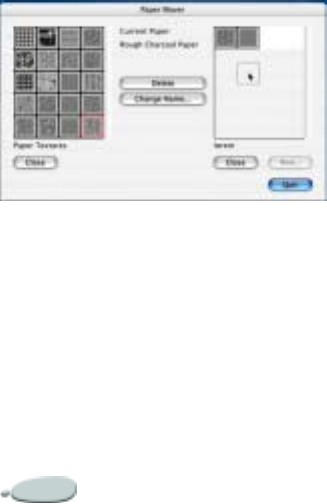
Use the Paper Mover command to customize
your paper libraries. Each resource type has a
mover. Most movers are located on a palette
menu or selector.
Adding Resources to the
Current Library
As you work with Corel Painter and
create new resources, you can save
them to the current library.
To add resources to the current
library:
1Click the selector menu arrow or
palette menu arrow for the
resource you want to add to the
library.
2Choose Save [Resource Name].
3In the Save dialog box, type a
name in the Save As box.
Note
•
Over time, with additions and
deletions, library file sizes are
compounded. For best results, save new
items into new libraries.
Loading Alternate Libraries
When you want to use the items of a
different library, you must load the
alternate library.
To load an alternate library:
1Open the selector or display the
palette from which you want to
load an alternate library.
2Click the selector menu arrow or
the palette menu arrow, and
choose Load Library.
3In the Load Library dialog box,
locate and choose the library you
want to open.
Corel Painter loads the resources
from that library into the selector
and palette.
Tip
•
When you save an item, Corel Painter
puts it in the current library. If this is not
where you want it, be sure to switch
libraries before saving the resource. You
can move items between libraries, but
switching libraries before saving the
resource will spare you that extra step.
Creating a Library
To create a new library:
1Click the selector menu arrow or
palette menu arrow for the

Corel Painter 25
resource you want to use to create
the new library.
2Choose [Resource Name] Mover.
3In the Mover dialog box, click
New.
4In the New Library dialog box,
browse to the location where you
want to save the new library.
5Type a descriptive name in the File
Name box, and click Save.
The new library’s name appears
on the right side of the Mover
window. The area above the name
is blank because this new library is
empty. To put items in it, you can
move them from other libraries.
Tip
•
It’s a good idea to save libraries in the
same place. This makes them easy to
locate and load when you want them.
Customizing Libraries
The tools for creating libraries and
managing their contents are contained
in the Movers. A Mover is provided on
the selector menu and/or palette
menu for each resource supported by
libraries.
Brush libraries are created and
managed differently. See “Using
Brush Libraries” on page 26 for
procedures.
Moving Items Between
Libraries
Movers copy resources from the
library on one side of the Mover
window to the library on the other
side of the Mover window.
When you open a Mover, the
resources of the current library are
listed on the left. This is the library
you’ll move items “from.” If this is not
what you want, you can open a
different library as the source.
When the source library is open on
the left side and the destination library
is open on the right, you are ready to
move resources.
To open a new library as the
source:
1Click the selector menu arrow or
palette menu arrow for the
resource you want to use.
2Choose [Resource Name] Mover.
3In the Mover dialog box, click
Close to close the current library.
4Click Open.
5In the Open Library File dialog
box, choose a library to use as the
source library.
To open a new destination library:
1Click the selector menu arrow or
palette menu arrow for the
resource you want to use.
2Choose [Resource Name] Mover.
3In the Mover dialog box, click
Open.
4In the Open Library File dialog
box, choose a library file to use as
the destination library.
To move an item from one library
to another:
•In the Mover dialog box, drag the
item from the source library to the
destination library.

The Workspace26
Modifying a Library
You can modify a library by renaming
items, deleting items, and deleting
entire libraries.
Renaming Items
You can rename items in libraries to
suit your preference.
To change the name of an item:
1Open the Mover for the item you
want to modify.
2Do one of the following:
• Double-click the icon of the
item.
• Choose the item and click
Change Name.
3In the Change Name dialog box,
type the new name in the Change
To box.
Deleting Items from Libraries
If you want to delete a resource from a
library, you can—but be careful. Once
you remove one of the default brushes
(even if it’s by mistake), the only way
to retrieve it is to reinstall Corel
Painter. If you must reinstall Corel
Painter, you’ll lose any of the custom
resources you’ve created and saved
into the default libraries.
To delete an item from a library:
1Open the Mover for the item you
want to delete.
2Choose the item you want delete.
3Click the Delete button in the
Mover dialog box.
To avoid deleting items from
libraries when reinstalling:
•Move saved items to a location
other than the default libraries.
Deleting a Library
To delete an entire library, delete the
file from the Corel Painter directory.
Be careful not to delete the Corel
Painter default libraries. Corel Painter
needs them to start properly.
To delete a library on the Mac OS:
1Use the Finder™ to open the
folder.
2Drag the library file to the Trash.
To delete a library on Windows:
1Use the Windows Explorer to open
the folder.
2Select the file.
3Press Delete, or drag the file to the
Recycle Bin.
Using Brush Libraries
In Corel Painter, users work with
brush libraries in the Brushes folder.
The Painter Brushes folder is the
default library that loads when you
open Corel Painter.
Each folder within the Painter
Brushes default library folder is a
brush category. In each category
folder, there is a JPEG graphic, which
is the icon seen on the Brush selector
bar.
In each category folder are XML files,
which are the brush variants available
for that brush category.

Corel Painter 27
Creating and Importing Brush
Libraries
You may want to create a library of
your favorite brush variants to have
them all in one category. You can also
import brush libraries and access
them through the Brush selector bar.
To create a brush library
1In the Brushes folder, create and
name a new folder for your library.
2In the new folder you just created,
create and name a new folder for
your brush category.
3In the brush category folder you
created in step 2, copy XML files
from other existing folders.
4In Corel Painter, click the selector
menu arrow on the Brush selector
bar, and choose Load Library.
5In the Brush Libraries dialog box,
choose the brush category folder
you created in step 2, and click
Import.
Notes:
•
This procedure works only for brushes
created in version 7 and later of Corel
Painter. To use brushes created in version
6 or earlier of Corel Painter, you must
first import them, and then load them.
For information about importing brushes,
see “To import a brush library” on
page 27.
•
If you want an icon to appear on the
Brush selector bar, you must create a
JPEG and save it with the same name as
the library. Save it at the same level as the
brush category folder.
To import a brush library
1On the Brush selector bar, click the
selector menu arrow, and choose
Import Brush Library.
2In the Select Brush Library dialog
box, choose a library, and click
Open.
The brush library is imported into
Corel Painter and can be accessed
through the Brush selector bar.
Note
•
Brushes libraries created in version 6
or earlier of Corel Painter are imported as
.BRS files.
Deleting a Brush Library
To delete a brush library, delete the
folder from the Brushes folder.
Be careful not to delete the Corel
Painter default libraries, which are
stored in the Painter Brushes folder.
Corel Painter needs them to start
properly.
To delete a library on Mac OS:
1Use the Finder to find the library
folder.
2Drag the library folder to the
Trash.
To delete a library on Windows:
1Use the Windows Explorer to find
the library folder.
2Select the folder.
3Press Delete, or drag the folder to
the Recycle Bin.
Customizing Palettes
To give everyone the freedom to work
in their own style, Corel Painter
supports custom palettes that contain
exactly the features you want. Since
The Workspace28
the features on a custom palette are
immediately available, you can choose
them with a single click.
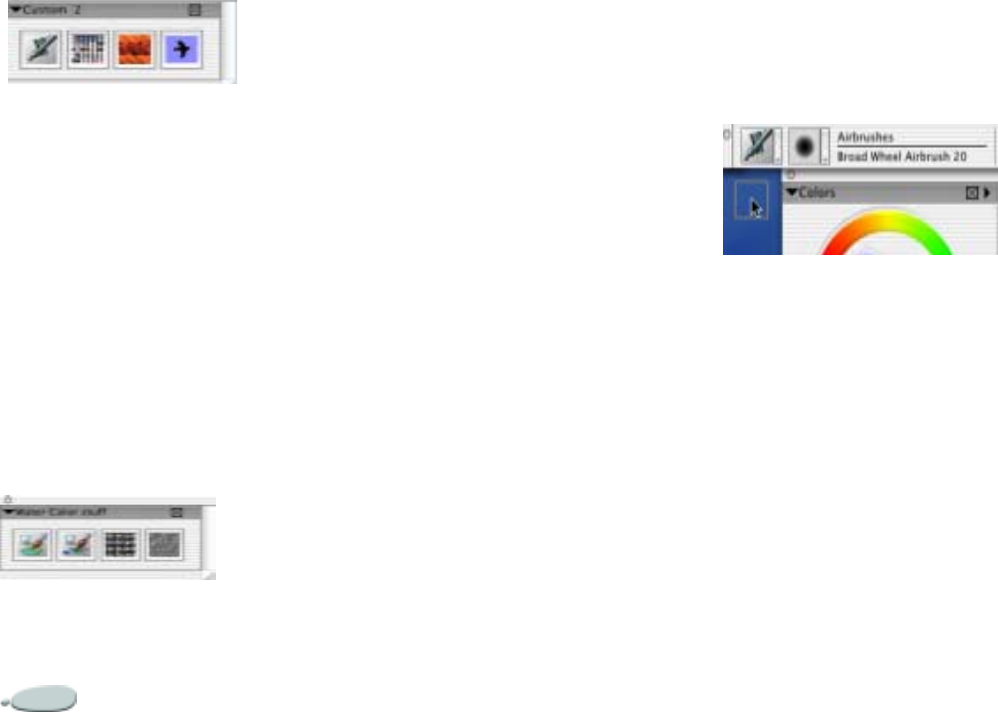
Custom palettes help you organize material for
specific needs.
You can put items from any of the six
content palettes—papers, patterns,
looks, weaves, nozzles, or gradients—
on a custom palette. You can also add
any Menu command, such as File >
New, to a custom palette.
You might want to create special
palettes for a particular project or
method of working that you use
frequently. You can create a whole
series of palettes and switch between
them as you change projects or work
methods.
You might create a Water Color palette with
the brush variants you use often and your
favorite paper textures.
You can create as many custom
palettes as you like. Corel Painter
saves them from session to session, so
it’s easy to get right to work.
Items that appear on a custom palette
are references (aliases) to the original.
This means that if you change the
original—for example, by modifying
and saving a brush variant—the
custom palette button loads the
newest version. On the other hand, if
you delete the original, Corel Painter
won't be able to find it to load it again.
Creating Custom Palettes
Tearing Off to Create a New
Palette
If the item you want is represented in
a palette with an icon, you can create a
new palette by just dragging the icon
out of the palette. This works for art
materials (Paper Textures, Gradients,
Patterns, and Weaves), nozzles, and
looks.
To create a custom palette by
dragging:
1Drag an icon or button out of its
palette.
When you release the mouse
button, Corel Painter creates the
custom palette. It contains an icon
for the item you dragged out.
Drag a tool out of a palette to create a custom
palette.
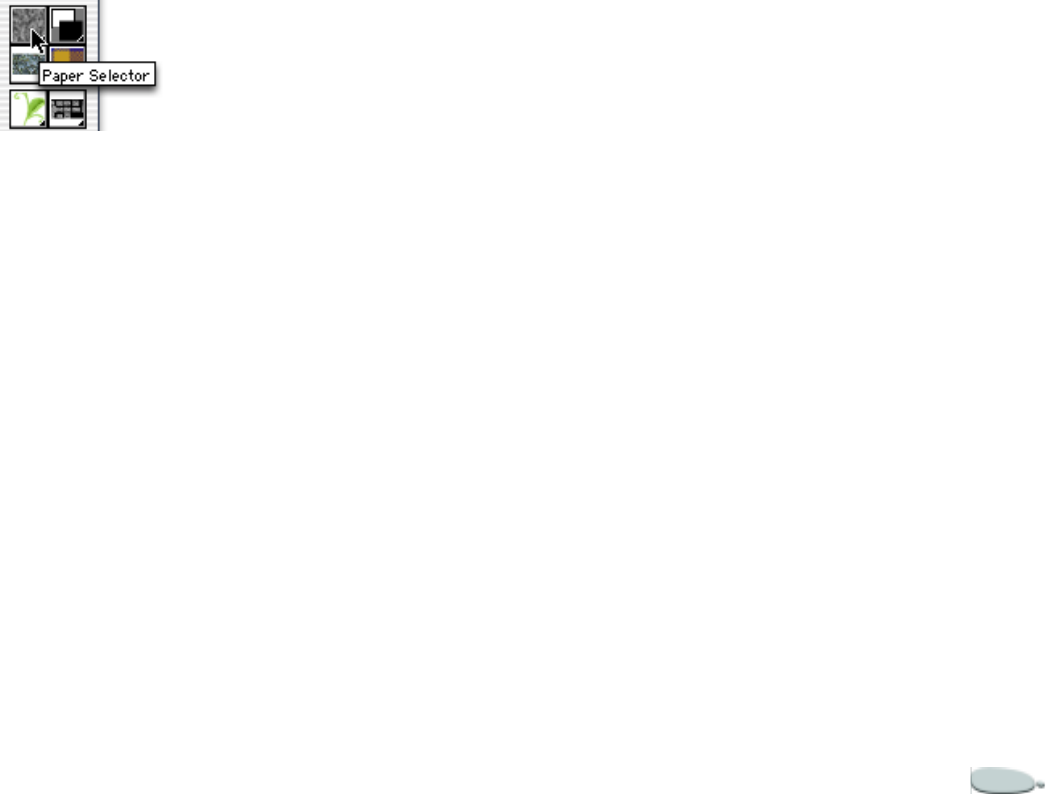
To enable Tool Tips for a custom
palette:
•Enable Tool Tips by choosing
Help menu> Show Tool Tips. All
you have to do is move your mouse
over a feature and the tip appears.
Corel Painter 29
Tool Tips identify an item by name.
Adding to a Custom Palette
You'll want to add items to the palettes
you create.
To add items to a custom palette:
1Locate the next item you want to
add.
2Drag the item’s icon to the location
you want in the custom palette.
When you drop an icon on top of
an existing icon, the palette
automatically expands to the right.
Note
•
Corel Painter does not permit tools
from the main Tools palette to be added to
custom palettes.
Tip
•
To keep the palette across the edge of
your screen, you can arrange icons
vertically or horizontally. To do this, drag
the bottom right corner of the palette to
make more room.
To rearrange the layout in a
custom palette:
•Hold down the Shift key, and
move the icon or button to where
you want it.
To delete an item from a custom
palette:
•Hold down the Shift key, and drag
the icon or button out of the
palette.
Placing Menu Commands on
a Palette
You can add a button for any of the
menu commands to a custom palette.
You can add commands from the
main menus or from the palette
menus.
To place menu commands on a
custom palette:
1Choose Window menu> Custom
Palette> Add Command.
Corel Painter displays the Add
Command dialog that lets you
choose whether you want to create
a custom palette or add a menu
item to an existing palette.
2With the Add Command dialog
open, choose the menu item you
want. The Add Command dialog
displays the command as a Menu
Item.
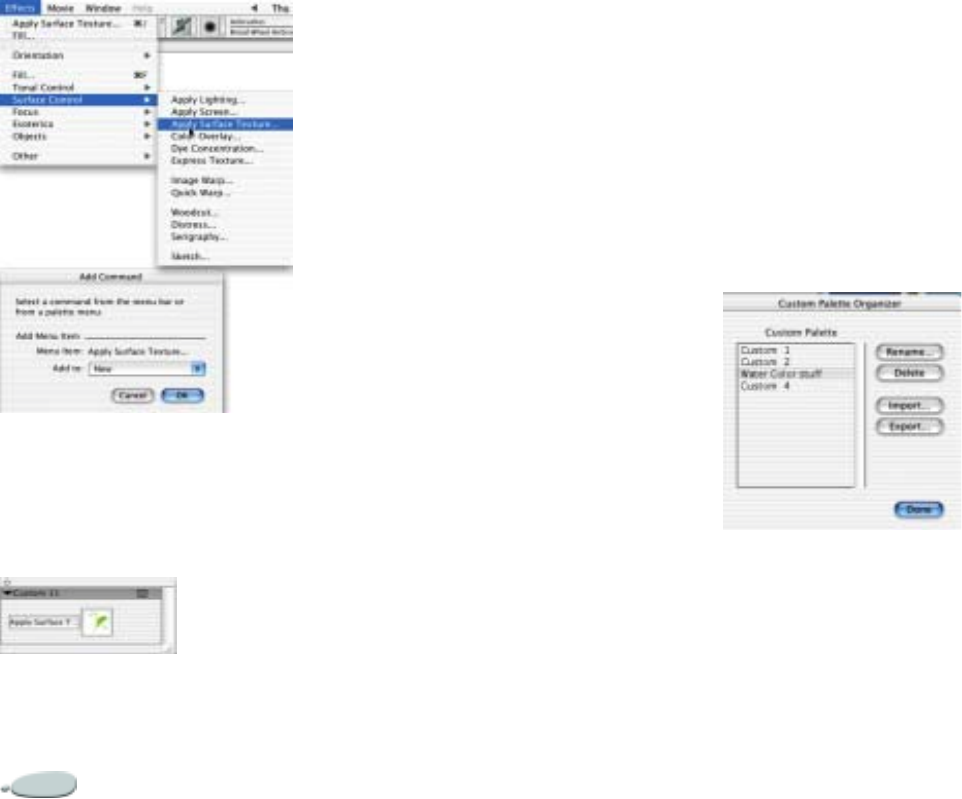
The Workspace30
3Click OK to close the Add
Command dialog.
The custom palette now contains a
button for the chosen menu
command.
Using Custom Palettes
Custom palettes behave very much
like the standard palettes. You can
move them around by dragging the
title bar. You can resize them, but not
smaller than the contents require.
You can create as many custom
palettes as you like. However, since
you probably won't want to use them
all at once, you can close a palette to
keep your workspace uncluttered.
To show a hidden custom palette:
•Choose Window menu> Custom
Palette> your palette name.
To hide a custom palette:
•On the custom palette, click the
Close box.
Managing Custom Palettes
The Custom Palette Organizer is the
tool for managing your custom
palettes. Corel Painter provides names
for custom palettes; you’ll probably
want to rename the palettes you
create.
Corel Painter keeps your custom
palettes from one session to the next.
If you like creating custom palettes,
the list might get unwieldy. You might
want to remove obsolete custom
palettes or those you don't use very
often.
You can also save a custom palette to a
file. If you save it to a file, you can
remove it from Corel Painter, and
then load it again later.
You can use the Custom Palette Organizer to
organize your custom palettes.
Note
•
Corel Painter supports custom palette
files created only with version 8. Custom
palettes created with earlier versions of
Corel Painter will not load.

Corel Painter 31
To use the Custom Palette
Organizer:
1Choose Window menu> Custom
Palette> Organizer.
2Use the Organizer to rename, save
(export), load (import), and delete
custom palettes. Each operation is
described below.
3When you are finished with the
organizer, click Done.
To load a custom palette:
1From the Custom Palette
Organizer, click Import.
2Corel Painter displays an Open
dialog so you can choose the file
where the custom palette is saved.
To save a custom palette:
1From the list, select the palette you
want, and click Export.
2Corel Painter displays a Save
dialog so you can name the file and
choose a location. It's a good idea
to keep all your saved palettes in
the same place.
To rename a custom palette:
1From the list, select the palette you
want, and click Rename.
2Corel Painter prompts you for the
new name. Enter a name and click
OK.
To remove a custom palette:
•From the list, select the palette you
want, and click Delete.
Setting Palette Layout
When you quit Corel Painter, the
program saves the palette
arrangement. The next time you run
the program, Corel Painter restores
the palettes as they were when you
quit.
You can open and close palettes
individually. You can also control the
display of the palette layout with
Window menu> Hide/Show
Palettes.
Corel Painter offers some supporting
features that can help with palette
display.
Arranging Palettes
You can save a customized palette
layout. This makes it easy to return to
this particular layout. You can save
several different layouts.
To save a layout:
1Arrange your palettes the way you
want them saved.
2Choose Window menu> Arrange
Palettes> Save Layout.
3Corel Painter prompts you to
name the new palette layout. Enter
a name and click OK.
To use a saved layout:
•Choose Window menu> Arrange
Palettes> name of layout. Corel
Painter restores the saved palette
layout.
For example, Window menu>
Arrange Palettes> Default
immediately returns palettes to the
default palette layout.
To delete a saved layout:
1Choose Window menu> Arrange
Palettes> Delete Layout.

The Workspace32
Corel Painter opens a dialog listing
all saved layouts.
2From the list, select the layout you
want to delete. Click Delete.
3
Basics
The Corel Painter application
provides a digital workspace in which
you can create new imagery or alter
existing imagery using the Corel
Painter Natural-Media tools and
effects. Your working image is known
as a document and is displayed in a
document window—this document
window includes navigation and
productivity features to help you work
efficiently.
As you create an image, you can save
your document in a number of
different file formats: RIFF (Corel
Painter native format), JPEG, TIFF,
and Photoshop (PSD), to name a few.
Corel Painter also lets you open/
import images in many file formats.
Every artist works in a unique way,
and every computer system has its
own configuration of memory, disks,
printers, and accessories. Corel
Painter preferences let you customize
the program for your own work style
and optimum performance on your
particular system. You can also
optimize the features of your tablet
and pens in Corel Painter.
Opening Documents
The first step to creating an image in
Corel Painter is opening a document.
You can open a blank Canvas by
creating a new document, work with
an existing image by opening a file,
place a file into a document, or
acquire an image from a scanner or
digital camera to place directly into a
document.
Creating New Documents
The New command creates a blank,
untitled document based on the
specifications you set in the New
dialog box.
•Canvas Size shows the RAM
requirement for creating the
document at the specified width,

Basics34
height, and resolution. This
number does not reflect the file
size for the saved document. A
saved Corel Painter file is usually
25% to 50% of the size of the
working document, depending on
the number of colors it contains.
•Width and Height determine the
dimensions of the Canvas. You can
change the unit of measurement
using the menu. Choose from
pixels (the default), inches,
centimeters, points, picas, and
columns (2" wide).
•Resolution is the number of pixels
per inch (ppi) or centimeter that
make up an image. In the New
dialog, setting the document’s
pixels per inch is the same as
setting its dpi. Refer to
“Understanding Resolution” on
page 36 for detailed information
about document, screen, and print
resolutions.
•Paper Color lets you select a
background paper color—or
Canvas color—when you create a
new document. The default is
white.
•Picture Type lets you set up a
document to contain a single
image frame or multiple frames for
a movie. The default is single
frame.
To create a new document:
1Choose File menu > New.
2In the New dialog box, enter
values for the width, height, and
resolution of the document.
Change the unit of measurement
by choosing an option from the
menu.
3Click in the Paper Color box to set
the document’s background to a
color other than white.
Choose a color from the system
color picker that appears.
4Choose a picture type.
5Click OK.
A new document appears in the
workspace.
Opening Existing Documents
You can open documents from other
graphics applications and use Corel
Painter to add brush strokes, tints, or
paper textures. Or, you can clone a
document to re-create it in a different
medium.
Corel Painter lets you open the
following file formats:
• RIFF—Corel Painter native
format (RIF)
• TIFF (TIF)
• CMYK TIF (TIF)
• Photoshop formats (PSD)—Corel
Painter preserves layers and alpha
channels. Layer effects and
adjustment layers are not
supported and should be merged
or flattened in Adobe Photoshop.
•Windows Bitmap (BMP)
•PC Paintbrush (PCX)
•TARGA® (TGA)
• GIF—Corel Painter does not
convert GIF animations to frame
stacks.
• JPEG (JPG)
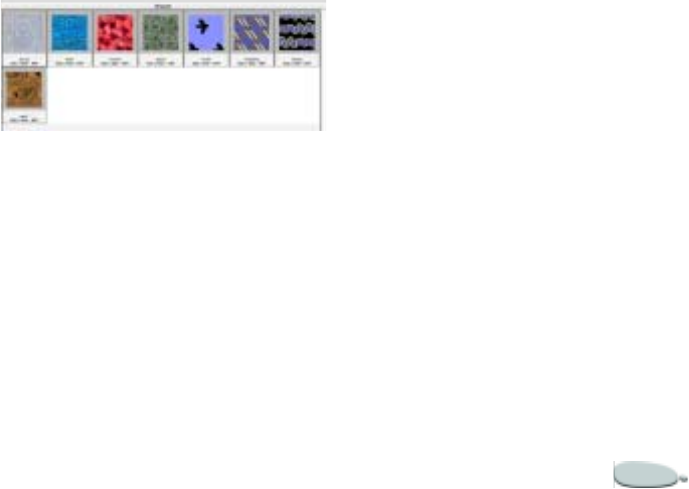
Corel Painter 35
• Frame stacks (FRM)—Corel
Painter animation files.
•QuickTime™ (MOV), Video for
Windows (AVI), and numbered
files. For more information, refer
to “Opening a Movie” on page 426
or “Working with Numbered
Files” on page 441.
Note
•
Corel Painter does not support LZW
compressed TIFF file format. Only
uncompressed TIFF files open into Corel
Painter.
To open an existing document:
1Choose File menu > Open.
2In the Select Image dialog box, use
the dialog controls to locate the file
you want to open.
Corel Painter lists every image’s
file size, file format, and
dimensions in pixels. In addition,
files saved in Corel Painter include
a thumbnail image for browsing
purposes.
3Click Browse.
The Browse dialog box shows
thumbnails for all the RIFF files in
a folder.
4Double-click the file name, or
select a file and click Open.
Tip
•
The File menu also offers you a
shortcut to previously opened documents.
Before choosing Open in the File menu,
check the recently opened files list at the
bottom of the File menu.
The Browse dialog box displays a thumbnail
image of files.
Placing Files
Placing a file lets you import an image
into an existing Corel Painter
document. The placed image becomes
a new reference layer in the
document—you can transform
(resize, rotate, slant) it on screen by
dragging its handles. A placed file
maintains its link to the source file
until you commit it to standard layer
format.
Refer to “Working with Reference
Layers” on page 246 for general
information about working with
reference layers.
To place a file:
1Choose File menu > Place.
2Select an image file and click
Open.
3In the Place dialog box, set the
options:
•Horizontal and Vertical Scal-
ing suggests a scale to fit the
image in the current document.
To change the size, enter a scal-
ing percentage in the Horizon-
tal Scale and Vertical Scale
fields.
•Constrain Aspect Ratio main-
tains the proportions of the
image. Disable this option to
distort the image.
•Retain Alpha retains the file’s
mask. When the image is
placed, the image mask

Basics36
becomes the layer mask. Dis-
able this option to discard the
mask.
4Do one of the following:
• To place the image in a particu-
lar location, click on that loca-
tion in the document.
• To place the image in the cen-
ter of the document, click OK.
Acquiring Images
You can acquire images for Corel
Painter directly from an external
device—such as a scanner or digital
camera—if the device provides a:
• Photoshop-compatible plug-in
module (Mac OS)
• TWAIN driver (Windows)
Before acquiring images:
• Install the device plug-in module
on your computer.
This plug-in module is provided
by the manufacturer of your
scanner or digital camera. Refer to
the device documentation for
installation instructions.
Corel Painter can access plug-ins
from any single folder on your
computer. This location can be
inside the Corel Painter folder, in a
generic plug-ins folder on your
hard drive, or in the Photoshop
Plug-Ins folder.
• Make sure your TWAIN driver is
properly installed.
Understanding Resolution
When working with images in a
digital workspace, it is helpful to
understand the concept and
applications of resolution. Resolution
refers to how Corel Painter measures,
displays, saves, and prints images—
either as small squares of color known
as pixels or as mathematical objects
known as vectors.
A document’s resolution affects both
its appearance on your computer
screen and its print quality. You can
specify a document’s resolution when
you create a new document, acquire
an image, and save/export a file.
Resolution and Screen
Appearance
Most monitors have a resolution of 72
dpi (dots per inch). Because of this,
the Corel Painter display default is 72
ppi (pixels per inch). This means that
each pixel in the Corel Painter image
occupies one pixel on your monitor.
The display resolution does not affect
the document’s actual ppi—only how
the image is displayed on the monitor.
For example, a 300 ppi document
displays at approximately four times
its actual size. This happens because
each pixel in the Corel Painter image
occupies one pixel on your monitor,
and the monitor’s pixels are four times
the size of the image’s pixels. Put
another way, at 300 pixels per inch,
your document will be approximately
a quarter of its on-screen size when
printed. In this example, if you want
to view the image at actual size, set the
zoom level to 25%.
Keep in mind that if you leave the
dimensions in pixels and then change
the pixels per inch (resolution), the
actual printed size will be affected by
the change. If you set your document
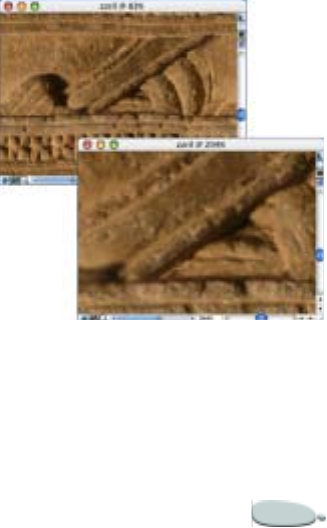
Corel Painter 37
size in inches, centimeters, points, or
picas and change resolution, the
dimensions will not be affected by the
change.
Resolution and Print Quality
The resolution of output devices
(printers) is measured in dpi and, in
the case of halftones, lines per inch
(lpi). Output device resolutions vary
depending on the type of press and
paper you’re printing on. Generally, a
photograph will be output at a crisp
150 lpi if printed on glossy magazine
stock and at 85 lpi for more porous,
and therefore more forgiving,
newspaper stock.
If you are using a personal laser
printer or inkjet printer, set your
document size in inches, centimeters,
points, or picas at the dpi specific to
your printer. Most printers will
produce excellent output from images
set to 300 ppi. Your file will be output
correctly, at the best resolution for
your laser printer and at the proper
size. Increasing the file’s ppi setting
does not necessarily improve the
output, and can make for a larger and
sometime unwieldy file.
If you are using a commercial printer
or a more sophisticated output device,
the dimensions of the image should
always be set to the actual size it will
appear in the printed piece. For the
resolution, a good rule of thumb is to
set your document’s pixels per inch to
twice the desired lpi. So, when lpi is
150, the pixels per inch should be
twice that, or 300; if the lpi is 85, the
pixels per inch should be 170. It’s a
good idea to check with your service
bureau if you have questions about
output device resolution.
Working with Documents
Viewing Documents
You can change your view of an image
by changing its level of magnification
(zooming in or out), repositioning the
document in the Corel Painter
workspace, or rotating the document.
You can also change the characteristics
of the document window by changing
the screen mode, and by selecting
options from the Canvas menu.
Zooming
By default, Corel Painter opens a
document at 100% magnification, but
you can change the level of
magnification by zooming. You can
zoom in and out using the Magnifier
tool, reset magnification and zoom to
fit the screen. You can even zoom in
and out while working with other
tools.
The Magnifier tool lets you zoom in and out by
clicking in the document window.
To zoom in:
1Do one of the following:
Basics38
• Choose the Magnifier tool
in the toolbox.
• Hold down Command + Spa-
cebar (Mac OS) or Ctrl + Spa-
cebar (Windows).
The Magnifier cursor shows a plus
sign (+) — indicating you are
increasing magnification
(zooming in).
2Click or drag in the document
window.
• Clicking magnifies the image
to the next level, as defined in
the Zoom Level menu on the
property bar.
• When you drag, Corel Painter
chooses the magnification level
that most closely conforms to
the selected area and centers
the screen view on that area.
The percentage the document is
magnified appears in the
document window’s title bar.
To zoom out:
1Do one of the following:
• Choose the Magnifier tool and
hold down Option (Mac OS)
or Alt + Ctrl (Windows).
•Hold down Option +Com-
mand +Spacebar (Mac OS) or
Alt + Ctrl + Spacebar (Win-
dows).
The Magnifier cursor shows a
minus sign (-) — indicating you
are decreasing magnification
(zooming out).
2Click in the document window.
Each click reduces the
magnification to the next level, as
defined in the Zoom Level menu
on the property bar.
Tip
•
You can also zoom in or out by
moving the Scale slider, typing a value in
the bottom left corner of the image
window, or choosing an option from the
Zoom Level pop-up menu on the property
bar.
To zoom using the Magnifier tool
1In the toolbox, click the Magnifier
tool.
2Choose a zoom level from the
Zoom Level pop-up menu on the
property bar.
To reset magnification to 100%:
•Double-click the Magnifier tool.
To zoom to fit the screen:
Do one of the following:
•Choose Window menu > Zoom
to Fit Screen.
•Double-click the Grabber tool in
the toolbox .
Corel Painter generates a view of
the entire document to fit the size
of your screen.
To access the Magnifier tool while
any other tool is selected:
•Press Command + Spacebar (Mac
OS) or Ctrl + Spacebar
(Windows) and click to zoom in;
press Command + Option +
Spacebar (Mac OS) or Ctrl + Alt
+ Spacebar (Windows) and click
to zoom out.
Corel Painter 39
Repositioning Documents
The Grabber tool allows you to
reposition a document in the Corel
Painter workspace and view different
areas of an image.
To use the Grabber tool:
1Activate the Grabber tool by:
• Choosing the Grabber tool .
• Holding down the Spacebar.
The cursor changes to the Grabber
tool and the property bar shows the
zoom level. You can change the
zoom level from the property bar.
2Do one of the following:
• Drag in the document window
to scroll through your image.
• Click once in the document
window to center the image.
To access the Grabber tool from
any tool:
•Hold down the Spacebar.
To size your image window to fit
the screen area:
•Do one of the following:
• Double-click the Grabber tool.
•Choose Window menu >
Zoom to Fit.
• Click Fit on Screen on the
property bar.
Tip
•
To return the image window to center,
click once with the Grabber tool or click
Center Image on the property bar.
Rotating Documents
The Rotate Page tool lets you rotate an
image on the screen to accommodate
the way you draw naturally.
To rotate the page:
1Activate the Rotate Page tool by:
• Clicking it in the toolbox
.
• Holding down Option + Spa-
cebar (Mac OS) or Alt + Spa-
cebar (Windows).
The cursor changes to a hand with
a pointing finger.
2Drag in the document window to
rotate the image.
Move the cursor clockwise to rotate
the image clockwise. Move the
cursor counter-clockwise to rotate
the image counter-clockwise.
The new rotation angle appears on
the property bar.
Tip
•
You can also rotate an image by
specifying a rotation angle on the property
bar.
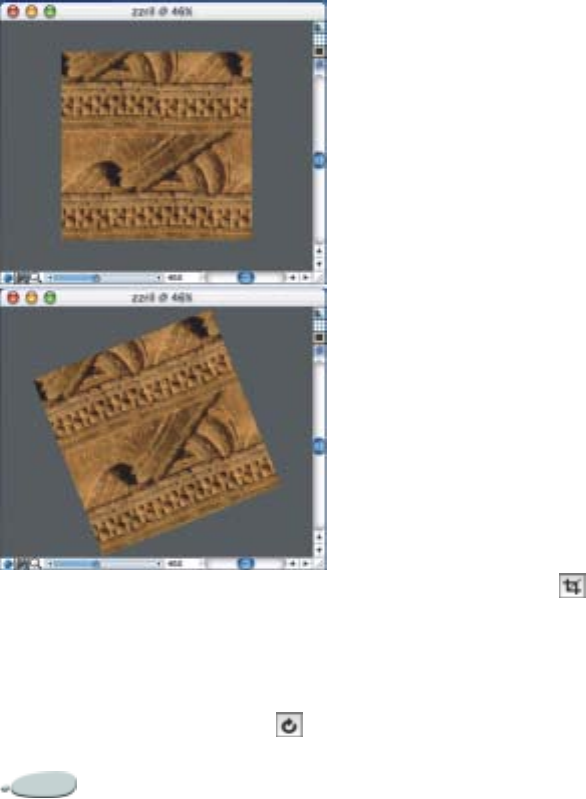
Basics40
Rotate a document to accommodate the way
you naturally draw.
To return an image to its original
orientation:
1Activate the Rotate Page tool .
2Do one of the following:
• Click once in the document
window.
• Double-click the Rotate Page
tool.
• Click the Reset Tool button on
the property bar.
To constrain rotation to 90°
increments:
•Hold down the Shift key while
rotating.
Cropping Images
You can remove unwanted edges from
the image with the Crop tool. You can
adjust the ratio of the cropped image,
and choose to maintain the aspect
ratio.
To crop an image:
1Click the Crop tool in the
toolbox.
2Drag inside the image to define the
rectangular area you want to keep.
You can adjust the rectangle by
dragging a corner or any of its
edges.
3When you’re ready to execute the
crop, click inside the rectangle.
To constrain cropping to a square:
•Press Shift + drag while defining
the rectangular area with the Crop
tool.
To adjust the ratio of the cropped
image:
1Click the Crop tool in the toolbox.
2On the property bar, type ratio
values in the boxes.
3If necessary, enable the Ratio check
box to maintain aspect ratio when
cropping the image.
Using Full Screen Mode
Full screen mode allows you to hide
your computer’s desktop and view the
document window without scroll bars.
When full screen mode is on, the
document window is centered over a
solid background. All Corel Painter

Corel Painter 41
features—except the buttons on the
document window—work when
using full screen mode.
To toggle the full screen mode on
and off:
•Press Command + M (Mac OS)
or Ctrl + M (Windows), or choose
Window menu > Screen Mode
Toggle.
Tip
•
You can position the image window
anywhere on the screen by holding down
the Spacebar and dragging with your
mouse or stylus.
Image Size Information
You can use the Info palette to check
image size. For more information, see
“The Info Palette” on page 19.
Resizing the Canvas
If you want the same image at a
different scale, you can resize the
canvas. You can also change the size of
the drawing area, and you can crop
the canvas.
To resize the canvas:
1Choose Canvas menu > Resize.
Corel Painter displays the Resize
dialog box, which shows the
current and new size by width,
height, and resolution.
2Enter a new value for width,
height or resolution.
For more information on these
values, refer to “Creating New
Documents” on page 33.
3The Constrain File Size option lets
you choose how to deal with
dimensions relative to resolution.
When Constrain File Size is
enabled, you can change the
height and width of the image
together. The resolution will
change accordingly.
When Constrain File Size is
disabled, you can change the
height and width independently of
the resolution, and vice versa.
If you choose Pixels or Percent as
the unit and enter a value, Corel
Painter automatically disables the
Constrain option.
4Click OK.
To resize the drawing area:
1Choose Canvas menu > Canvas
Size.
2In the Canvas Size dialog box,
specify the number of pixels you
want to add to any side of the
canvas.
Enter negative values to reduce the
canvas size.
To crop the canvas:
1Display the image at a scale where
you can see all of it.
2In the toolbox, choose the Crop
tool .
3Drag in the image to describe the
rectangular area you want to keep.
4Adjust the rectangle by dragging a
corner or any of its edges.
The property bar shows the size
and location of the cropping
rectangle.
To constrain the cropping
rectangle to a certain aspect ratio,
enter values for the width and
height aspect, and enable the Ratio
option on the property bar.

Basics42
5Click inside the rectangle to
perform the cropping operation.
Using Rulers
Corel Painter lets you show or hide
rulers along the top and left sides of
the document window. Each mark on
a ruler is known as a tick and
represents the unit of measurement.
You can set the unit of measurement
to pixels, inches, centimeters, points,
or picas.
As you drag an image around the
document window, the rulers scroll to
show the position of the Canvas in the
document window. The origin of the
document is the intersection of the
zero (0) ticks on each ruler. By
default, the origin is the upper left
corner of the Canvas. Changing the
origin resets the location of the 0 ticks
on the rulers.
To display or hide rulers:
•Choose Canvas menu > Rulers >
Show Rulers or Hide Rulers.
To set the ruler units:
1Choose Canvas menu > Rulers >
Ruler Options, or hold down
Option (Mac OS) or Alt
(Windows) and click in the ruler.
2In the Ruler Options dialog box,
choose a unit of measurement
from the Ruler Unit pop-up menu.
To change the origin:
1Click the box at the intersection of
the rulers (upper left corner of the
document window).
2Drag diagonally into the
document window.
Crosshairs display to mark the new
origin point.
3Position the crosshairs and release
the mouse button.
The ruler numbers update to show
the new origin as 0, 0.
To restore the origin:
•Double-click the box at the
intersection of the rulers (upper
left corner of the document
window).
Using Guides
Guides are non-printing lines that
appear over the image in the
document window. They are very
helpful in aligning image elements.
You can place guides at any position in
the document window and easily
reposition and remove them.
The Snap to Ruler Ticks option
enables the guides you create to land
precisely on the tick marks.
Each guide also has options that let
you change its color and lock it so that
it can’t be dragged.
To display or hide guides:
•Choose Canvas menu > Guides
> Show Guides or Hide Guides.
To create a guide:
1Show the rulers and the guides.
2Click in a ruler at the position
where you want to place the guide.
A guide appears in the document
window and a triangular marker
appears in the ruler.
Corel Painter 43
A black triangle marks the guide’s position in
the ruler.
To reposition a guide:
Do one of the following:
•Drag the guide’s marker to any
point of the ruler.
•Double-click the guide’s marker to
display the Guide Options dialog
box and enter a value in the Guide
Position field.
To enable the Snap to Ruler Ticks
option:
•Choose Canvas menu > Rulers >
Snap to Ruler Ticks.
To set a guide’s color:
1Double-click the guide’s marker.
2In the Guide Options dialog box,
click the Guide Color color chip
and choose a color.
To change the color of all guides,
enable the Same Color for All
Guides option.
To lock or unlock a guide:
1Double-click the guide’s marker to
display the Guide Options dialog
box.
2Enable or disable the Lock Guide
option.
To remove a guide:
•Drag the guide’s marker off the
edge of the document window.
To remove all guides:
1Double-click the guide’s marker to
display the Guide Options dialog
box.
2Click the Delete All Guides
button.
Setting the Snap to Guides
Option
The Snap to Guides option enables
selections and tool operations to
“snap” to a guide within 6 pixels of the
cursor (or edge).
The following operations respect Snap
to Guides:
• Dragging with the Rectangular
and Oval Selection tools.
• Dragging with the Crop tool .
• Drawing straight lines with the
Brush tool .
• Clicks made with the Pen tool .
• Clicking with the Text tool to
create a text entry point.
• Clicking and dragging with the
Paint Bucket tool and
Magnifier tool .
• Dragging shapes and selections.
The edges of the content and the
selection rectangle for the shapes
and selections snap to the guides.
The cursor—wherever it might be
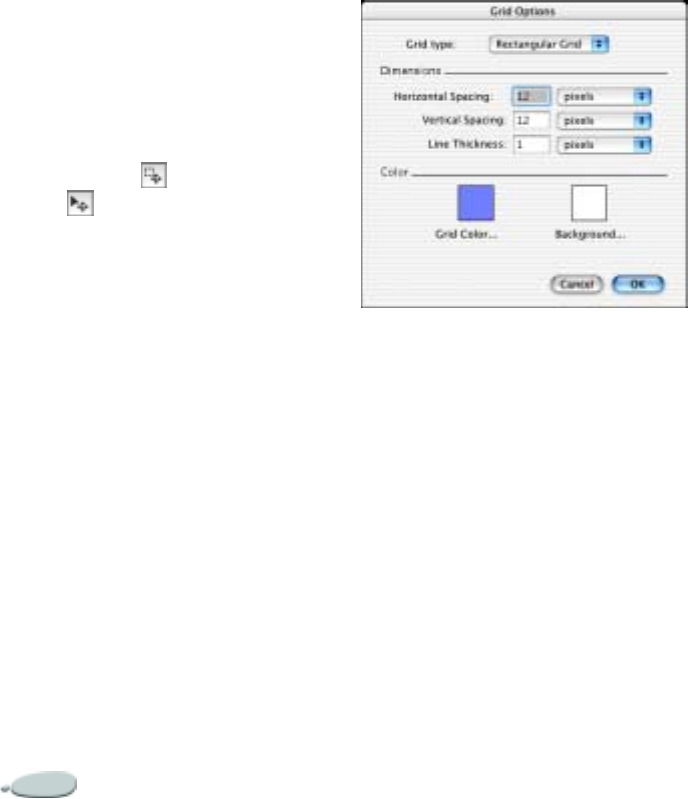
Basics44
in the object—also snaps to the
guide.
• Dragging the handles of reference
layers, shapes, and selections to
transform them.
• Dragging with the Selection
Adjuster tool or Layer Adjuster
tool .
To enable Snap to Guides:
•Choose Canvas menu > Guides
> Snap to Guides.
The option is enabled when the
menu item has a check beside it.
Using the Grid
Corel Painter provides a grid to help
you in laying down brush strokes or
creating shapes. You can set the types,
size, line thickness, color, and
transparency of the grid. You can also
print grid lines.
The Grid Options dialog box.
To activate the grid:
Do one of the following:
•Choose Canvas menu > Grid >
Show Grid.
•Click the Toggle Grid button on
the right side of your image
window.
Your image now has a
non-printing grid.
To set grid options:
1Choose Canvas menu > Grid >
Grid Options.
2In the Grid Options dialog box,
choose a grid type from the Grid
Type pop-up menu.
3Enter values for Horizontal
Spacing (the distance between
horizontal lines), Vertical Spacing
(the distance between vertical
lines), and Line Thickness.
The unit of measure can be in
pixels, inches, centimeters, points,
picas, columns (2" wide), or
percent.
4Click in the Grid Color color chip
to set the color of the grid lines.
5Click in the Background color chip
to set the grid’s background color.
To print grid lines
•Choose Effects menu > Esoterica
> Grid Paper.
Setting the Snap to Grid
Option
The Snap to Grid option enables
certain tool operations to “snap” to a
grid within 6 pixels of the cursor.
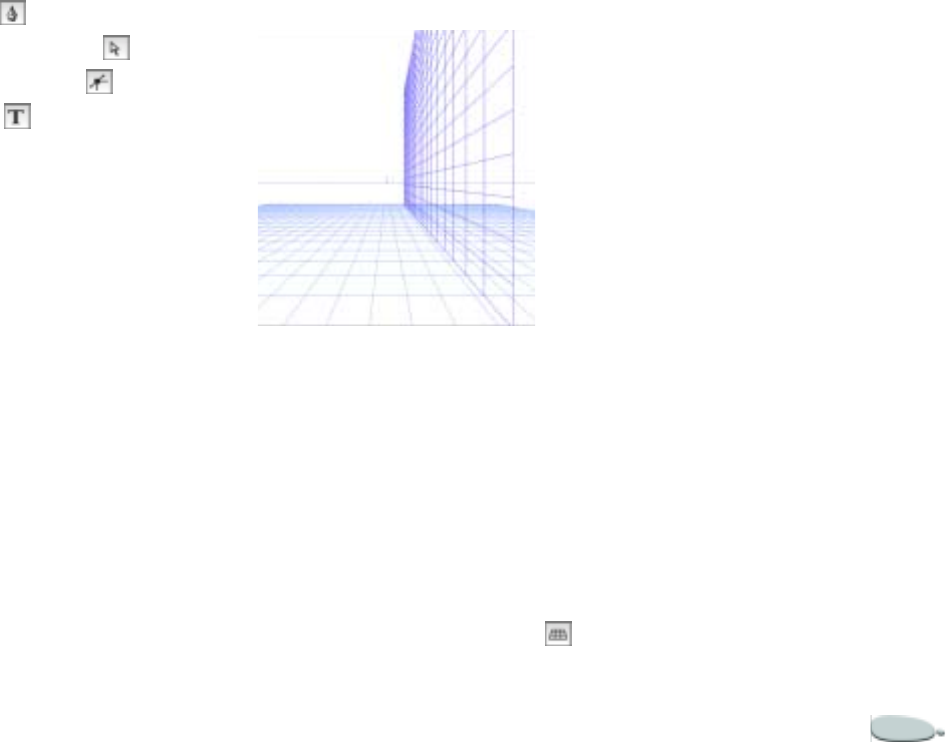
Corel Painter 45
The following tools respect Snap to
Grid:
•Pen tool
•Shape Selection tool
• Convert Point tool
• Text tool
To enable Snap to Grid:
•Choose Canvas menu > Grid >
Snap to Grid.
The option is enabled when the
menu item has a check beside it.
Using the Perspective Grid
Corel Painter provides perspective
grids as a guide to help you create
three-dimensional images. Perspective
grids are a non-printing array of lines
that converge at a single vanishing
point. In Corel Painter you can set the
type, line color, and spacing of the
perspective grid. You can modify the
location of the vertical plane and
horizon line by using the Perspective
Grid Adjuster tool. Any perspective
grid options that you create or modify
can also be opened for use in another
drawing.
Use perspective grid lines to help you create 3-
D images.
To activate or hide the default
perspective grid:
•With an image open, choose
Canvas menu > Perspective Grids
> Show Grid or Hide Grid.
To create a new perspective grid:
1In the toolbox, click the
Perspective Grid Adjuster tool .
2On the property bar, click the Add
Preset button beside the Presets
pop-up menu.
3In the Save Preset dialog box, enter
a name in the Save As box.
4Enable the check boxes
corresponding to the grids you
want to see.
5Choose a color for the horizontal
and vertical grid lines in the Color
boxes.
6Enter a value in the Spacing box.
Tip
•
To reset the perspective grid defaults at
any time, click the Reset Tool button on
the property bar.
To open a perspective grid:
1In the toolbox, click the
Perspective Grid Adjuster tool.
2On the property bar, choose a grid
from the Presets pop-up menu.
To remove a grid preset:
1In the toolbox, click the
Perspective Grid Adjuster tool.

Basics46
2On the property bar, choose an
option from the Grid Type pop-up
menu.
3Click the Delete Preset button.
The grid type disappears.
To adjust the perspective grid
lines:
1Choose Canvas > Perspective
Grids > Show Grid.
2Click the Perspective Grid
Adjuster tool in the toolbox.
3To move the horizontal plane grid,
hold the cursor over the nearest
edge of the horizontal plane grid.
The cursor becomes a double-
pointed arrow.
4Drag to move the horizontal plane
grid up or down.
5To move the vertical plane grid,
hold the cursor over the nearest
edge of the vertical plane grid.
The cursor becomes a double-
pointed arrow.
6Drag to move the vertical plane
grid left or right.
Drag-and-Drop Features
Dragging Between Documents
You can copy selections and layers
between Corel Painter documents by
dragging from one window to the
other. When you drag a selection to a
new document window, Corel Painter
automatically turns the selection into
a layer. When you drag a layer to a
new document, the layer keeps its
original properties.
Dragging Between Programs
(Mac OS)
Corel Painter supports drag-and-drop
functionality between applications on
Mac OS. This can be a quick,
convenient way to acquire or export
imagery.
On the Mac OS, you can drag files
from Photoshop directly into Corel
Painter.
Raster imagery that you drag into a
Corel Painter document window
becomes a layer. You can drag a PICT
file from the Finder to a Corel Painter
document. The PICT image becomes
a layer.
You can also drag layers out of Corel
Painter to another application or to
the Finder; the exported imagery is in
PICT format, supported by most
applications. When you drag out one
of these objects, it will automatically
rasterize a shape or dynamic layer (at
its current settings) to become a PICT.
Note
•
Though dragging and dropping
between programs is not supported on the
Windows platform, computers running on
either Mac OS or Windows platforms
support copying and pasting between
Corel Painter and other programs.
Saving Files
Corel Painter provides several options
for saving files.
To save a file in its current format:
•Choose File menu > Save.

Corel Painter 47
To save a file with a different
name or format:
1Choose File menu > Save As.
2In the Save Image As dialog box,
use the controls to specify a file
name, location, and format.
Saving RIF Files
RIF is the Corel Painter native format,
which retains special information
about your document. For example, a
RIF file maintains layers so you can
return to the file to re-access them.
It’s a good idea to always save files in
RIF format first. Think of RIF files as
“work in progress” files. When a file is
ready for production, then save it to
GIF, JPEG, CMYK, TIF, or another
file format.
Corel Painter lets you compress files
and save disk space with a lossless
compression method.
When saving in RIF format, leave the
Uncompressed option disabled to
minimize file size on your hard disk.
Saving JPEG Files
Corel Painter supports the JPEG file
format. Because of its small file size
and high quality, JPEG is commonly
used to transmit files through a
modem. Unlike GIF, JPEG displays a
full range of colors.
JPEG allows you to compress your file
on a scale of Fair to Excellent, where
quality is directly proportional to file
size. These quality settings will let you
achieve compression ratios of less than
10:1 to greater than 100:1. JPEG is a
“lossy” file format, meaning that a
decompressed JPEG file will not be
identical pixel-for-pixel to the
original. However, because the JPEG
algorithm takes into account the
sensitivity of the eye to different
colors, the higher quality settings
should achieve visually satisfying
results.
You can assign a URL to layers and
placed images and then save the file in
GIF or JPEG format to produce an
image map. For more information,
refer to “Client-Side Image Mapping”
on page 406.
When you save a file in JPEG format,
Corel Painter displays the JPEG
dialog box, with the following options:
• The JPEG Encoding Quality
options—Excellent, High, Good,
and Fair—let you set file
compression on a scale of
Excellent to Fair.
The Excellent option compresses
the least, but retains the most data.
Fair compresses the most, but loses
the most data.
• The Quality slider adjusts the
quality.
• The Smoothness slider applies
smoothing to the entire image.
This is useful when using the Fair
option, to blur the edges of JPEG
artifacts. The default is 0. Keep in
mind that using a high smoothness
setting can cause blurring.
• The JPEG preview window
displays any changes you make to
the image as you work.
• The Progressive JPEG option
creates a progressive JPEG file.
Progressive format is useful when
using a file on the Web. As the

Basics48
name implies, progressive format
displays an image in stages—as a
series of scans—while the file
downloads. The first scan is a low
quality image; the following scans
improve in quality. This allows the
user to see the whole image very
quickly.
• The HTML Map Options—
National Center for
Supercomputing Applications
(NCSA) Map File, Conseil
Europeén pour la Recherche
Nucléaire (CERN) Map File, and
Client Side Map File—let you
generate an image map. Use the
NCSA Map File or CERN Map
File option to generate a server-
side image map. Use the Client
Side Map File option to generate a
client-side image map.
Refer to “Image Maps” on
page 406 for more information
about image map types.
It is best not to decompress and
recompress a file multiple times.
Although JPEG can compress and
discard data not visible or obvious, the
degradation of the data can affect the
condition of your file.
When a file has lost a significant
amount of data, block patterns can
appear in areas of the image. If you try
to use the Apply Surface Texture
feature on a JPEG file, you may find it
will accent the block patterns.
Saving GIF Files
Corel Painter allows you to save
documents in GIF file format. GIF is
an 8-bit (or less) file format commonly
used to display graphics on the Web.
When you save a file as a GIF, you can
choose from 4 up to 256 colors. You
can choose how your colors will be
displayed and what part of your image
will be transparent.
You can use the Color Set option to
force all colors to match the colors in
the current color set. This option uses
the colors in the color set for the color
table in the GIF file. This can be
useful when doing Web work,
especially if you want to constrain
colors to a specific color set or control
the number of colors in a Web page,
thus controlling image file size. The
default color set in Corel Painter is a
“Web safe” color set, mapping to the
default Netscape Navigator® color
set.
An Imaging Method determines how
your 24-bit Corel Painter document
will be converted to the limited
number of colors that GIF uses. If you
choose Quantize to Nearest Color,
Corel Painter picks the color nearest to
that of each pixel. If you choose
Dither Colors, Corel Painter will
apply a pattern to the colors chosen to
generate a more accurate, less banded
result.
Corel Painter can also save a frame
stack as a GIF animation file. For
more information, refer to “Creating
Animated GIFs” on page410.
If you want your image to have
transparency, click the checkbox for
Output Transparency. Most programs
that display GIF files support
transparency, but for those that don’t,
you should specify the color of the
“transparent” area. If your image will
be displayed on the World Wide Web,

Corel Painter 49
click the Background is WWW Gray
option. You can also choose to use the
background color of your Web page by
clicking the option button for
Background is BG Color.
For programs that support
transparency, your selection will
determine which areas are transparent
and which are not. The Threshold
slider determines what selection
(loaded mask) value becomes
transparent. You can see how the
Threshold slider is affecting the
transparency of your image in the
preview window in the dialog box.
Transparency is displayed in the
preview window by a rectangular
lattice. You can toggle between the
Preview window and your Save As
GIF options to get exactly what you
want. Enable the checkbox for
Interlace GIF File if your image will
be displayed on a Web page.
For information on creating masks,
refer to “Using Selections” on
page 203.
Saving RGB TIF and CMYK TIF
Files
TIFF facilitates exchange between
applications and computer platforms.
It’s a widely supported bitmap image
format, allowing you to save with
either CMYK or RGB color space
information. When you save a file as
CMYK TIF, Corel Painter creates a
color separation, which can then be
used for four-color process printing.
Saving Adobe Photoshop
Files
Corel Painter can save files in Adobe
Photoshop format. For optimum
compatibility, shapes are rasterized
and masks are placed in channels.
When you save, you have RGB and
CMYK options as you do when saving
TIFF files.
Saving Encapsulated
PostScript (EPS) Files
The encapsulated PostScript® (EPS)
files in Corel Painter conform to the
Desktop Color Separation (DCS) 2.0
format (EPS-DCS 5 file format).
Although Corel Painter saves files in
EPS-DCS, it can’t read EPS-DCS. If
you plan to save an image in
EPS-DCS, it’s a good idea to save it in
another format first so you’ll have a
copy of it that you can reopen in Corel
Painter.
When you save an image as EPS-
DCS with Output Preview turned on,
Corel Painter uses the loaded
International Color Consortium
(ICC) profile to prepare the
separation files. If you’re using the
Hexachrome® ICC profile, Corel
Painter prepares six separation files—
Cyan, Magenta, Yellow, Green,
Orange, and Black. For more
information on Output Preview and
color management, refer to “Printing”
on page 445.
Although you can save your images as
CMYK EPS separations, Corel
Painter can’t open or edit CMYK files.
When you save a file in EPS-DCS,
Corel Painter opens the EPS Options
dialog box, with these options:
•Hex (ASCII) Picture Data
provides another way of storing

Basics50
PostScript information. Some page
design programs require that this
option be checked. The file sizes
will be approximately twice as
large when saved with this option.
•Preview Options—No preview,
Black and white preview, and
Color preview—specify whether to
save preview data and in what
format. The resulting preview file
is a low-resolution (72 ppi) file.
If you have an older laser printer,
you have to use the black and
white preview to print these files.
Although the preview or display is
black and white, the color
information remains intact.
Recovering Lost Work
How can you recover work lost in a
corrupt image file? When you work
with computers, sometimes
uncontrollable events cause files to
become corrupt. No backup? Lost all
your work? Do you have to create the
whole image again?
Maybe not. There’s one way to try
recovering lost work. Corel Painter
records all actions into the Current
Script. If Corel Painter is stopped and
restarted within 24 hours, the old
current script is still available, saved as
“{date}{time}” and a new current
script is started. By default, the dated
scripts are saved for one day, but you
can reset this to a longer time in
General Preferences.
The dated scripts can be used to replay
actions for recovering lost work or
creating scripts for movies. Also, you
can use the Script List to cut and paste
portions of the dated script that are
useful. Just open the dated script and
delete the last few commands, then
play the script to re-create the work
and try saving the file again.
For more information, see “Scripting”
on page 415.
Closing Documents and
Quitting the Application
To close a document:
•Do one of the following:
• Click the current window’s
close box.
•Choose File menu > Close.
•Press Command + W (Mac
OS) or Ctrl + W (Windows).
To quit Corel Painter:
•Do one of the following:
• (Mac OS) Choose Corel
Painter 8 menu > Quit Corel
Painter 8.
• (Windows) Choose File menu
> Quit.
Tip
•
You can also quit Corel Painter by
pressing Command + Q (Mac OS) or
Ctrl + Q (Windows).
Setting Preferences
Corel Painter has several different
preference dialog boxes: General,
Brush Tracking, Customize Keys,
Undo, Shapes, Internet, Save,
Operating System, and Palettes.
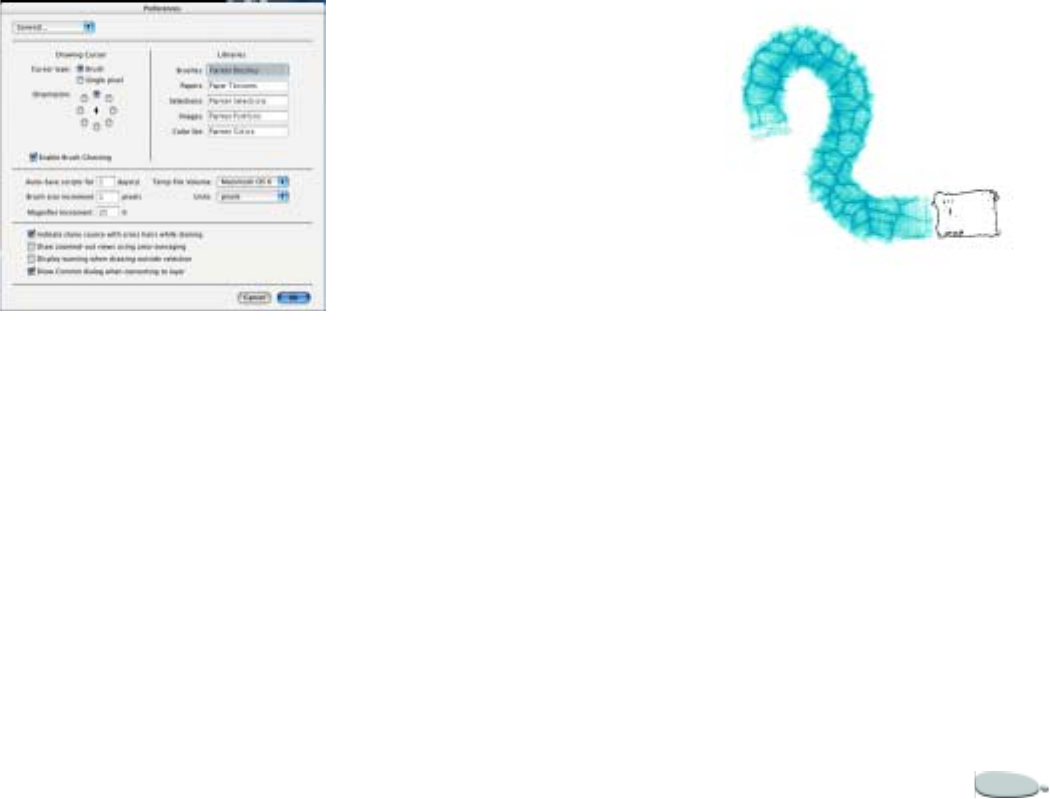
Corel Painter 51
Use the General Preferences dialog box to
customize your application.
General Preferences
To access General preferences:
•Do one of the following:
• (Mac OS) Choose Corel
Painter 8 menu > Preferences
> General.
• (Windows) Choose Edit menu
> Preferences > General.
Tip
•
To make changes to other preferences
before closing the Preferences dialog box,
choose another preference type from the
pop-up menu.
Cursor Setup
Corel Painter gives you several choices
for the appearance of your cursor.
• To choose whether the cursor will
be a brush or a single pixel, check
an option in the Drawing Cursor
area.
• To determine the direction the
cursor will point (depending on
your design and your preferences),
click the appropriate option in the
Orientation area. This option is
only available with the Brush
cursor type.
• To set the cursor to show the brush
size and shape, enable the Brush
Ghosting option. Brush Ghosting
gives you immediate visual
feedback on the cursor, showing
you the shape and size of the
selected brush.
When you use a brush with “Enable Brush
Ghosting” enabled, the cursor shows the shape
of the brush.
Setting the Default Libraries
Corel Painter provides standard
libraries that contain brushes, paper
grains, selections, layers, and color
sets. The Libraries section of the
General Preferences dialog box lets
you designate which libraries appear
by default.
To set default libraries:
•Enter library file names in the
Brushes, Papers, Selections,
Layers, and Color Set text fields.

Basics52
Note
•
The default libraries must reside in the
Corel Painter folder.
Auto-Save Scripts
When you create an image, Corel
Painter records all the operations you
perform. This recording is known as a
background script and is saved on the
Scripts palette.
The Auto-Save Scripts preference
governs how long Corel Painter saves
background scripts before deleting
them. In the text field, enter the
number of days for which you want
Corel Painter to save background
scripts.
For more information about creating
and using scripts, refer to “Scripting”
on page 415.
Brush Size Increment
The Brush Size Increment preference
lets you set the increment value in
pixels.
Magnifier Increment
The Magnifier Increment preference
lets you set the percentage of
magnification the magnifier will
increment by.
Temp File Volume
Choosing the temp file volume selects
the disk volume that Corel Painter
will put its temporary file on and use
to access virtual memory. Choose the
volume name (Mac OS) or letter
(Windows) from the Temp File
Volume pop-up menu.
Units
The Units preference lets you choose
units of measurement used by the
application’s various sliders and other
measurement options.
Cloning Preference
When you clone an image, Corel
Painter uses the color information
from the original as you fill in your
clone. If you would like Corel Painter
to display what part of the original
you’re cloning, check the box next to
Indicate Clone Source With
Crosshairs While Cloning.
Draw Zoomed-out Views Using
Area-Averaging
When looking at an image at under
100% magnification, screen draw is
faster if you leave this option
unchecked, and slower but more
accurate if checked.
Display Warning When Drawing
Outside Selection
Checking this box enables the
warning that appears when you draw
outside a selection.
Show Commit Dialog When
Converting to a Layer
Enable this checkbox if you want to
reinstate the Commit dialog after you
have selected the Don’t Ask Again
button in the Commit dialog.
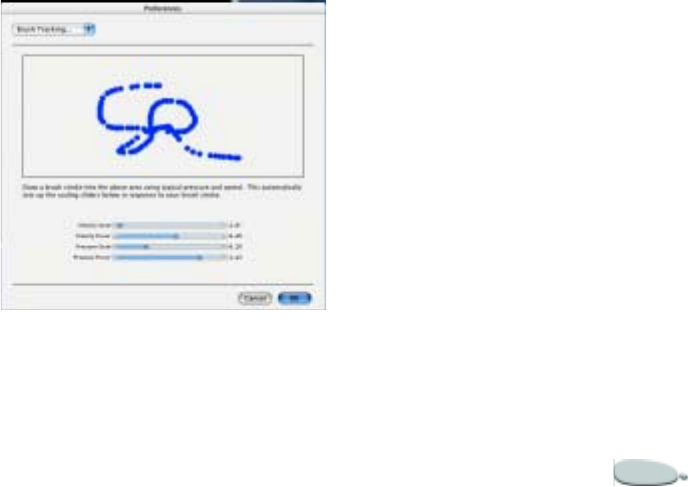
Corel Painter 53
Brush Tracking Preferences
When you draw with traditional
media, the amount of pressure you use
with a tool determines how dense and
how wide your strokes are. Using a
pressure-sensitive stylus with Corel
Painter gives you this same kind of
control. Each artist has a different
strength or pressure level in a stroke.
The Brush Tracking preference lets
you adjust Corel Painter to match
your stroke strength. This is
particularly useful for artists with a
light touch. If a light stroke leaves no
color on the Canvas, you should use
Brush Tracking to increase sensitivity.
You might also change brush tracking
between phases of a project. You could
use a light touch when sketching with
a pencil brush variant, then set
tracking for more pressure when you
switch to an oil paint variant.
Corel Painter saves Brush Tracking
between sessions, so whatever tracking
sensitivity you set will be the default
next time you open the application.
To set Brush Tracking:
1Do one of the following:
• (Mac OS) Choose Corel
Painter 8 menu > Preferences
> Brush Tracking.
• (Windows) Choose Edit menu
> Preferences > Brush Track-
ing.
2Drag in the scratch pad in a
“normal” stroke.
Use the pressure and speed you
prefer when drawing or painting.
For specific adjustments, you can
move the sliders.
Use the Brush Tracking dialog to customize
how Corel Painter responds to your stylus
pressure and speed.
Customize Keys Preferences
Corel Painter lets you assign
commands to your keyboard function
keys (the F-keys). This saves you time
by giving you immediate keyboard
access to your favorite commands.
Using the Shift key with the function
keys lets you double the number of
commands you can use.
To assign commands to function
keys:
1Do one of the following:
• (Mac OS) Choose Corel
Painter 8 menu > Preferences
> Customize Keys.
• (Windows) Choose Edit menu
> Preferences > Customize
Keys.
2Choose the function key you want
to use from the menu.
3If you want to use the Shift key in
combination, enable the Shift
checkbox.
Current Function shows the
command now assigned to this key.

Basics54
4Choose the command you want,
either from a main menu or a
palette menu.
New Function shows the
command you’ve chosen.
5Click Set to assign this command
to the selected key.
6Repeat steps two through six for
each key you want to set.
7When you’re finished, click OK.
Tip
•
Click Summary for a list of the
function keys that have been assigned.
Undo Preferences
Multiple Undo allows you to undo
and redo up to 32 levels of changes.
Corel Painter sets 32 levels as the
default.
Undo levels apply across open
documents. With five levels set, if you
have two documents open and you
have “undone” three operations on
the first document, you can undo only
two operations on the second
document.
Multiple Undo can use a significant
amount of disk space. If you perform
multiple operations on the entire
image, the whole image must be saved
for each undo step.
To set undo levels
1Do one of the following:
• (Mac OS) Choose Corel
Painter 8 menu > Preferences
> Undo.
• (Windows) Choose Edit menu
> Preferences > Undo.
2Enter a number between 1 and 32
in the box.
Shape Preferences
You can set the default fill and stroke
in the Shape Preferences dialog box.
These settings apply to new shapes
you create.
If you enable Big Handles, the Bézier
curve control handles will appear
larger. You may find it easier to work
with them in the larger size.
You can also specify colors for the
wing color, point color, and outline
color.
To change shape preferences:
1Do one of the following:
• (Mac OS) Choose Corel
Painter 8 menu > Preferences
> Shapes.
•(Windows) Choose Edit menu
> Preferences > Shapes.
2Select your preferences from the
following options:
•Drawing Options — Controls
how Corel Painter displays
shapes as you create them (On
Draw) and when a shape path
is closed (On Close). The
default setting is Stroke On
Draw and Fill On Close.
•Big Handles — Controls the
size of the anchor points and
direction wing handles. This
can make them easier to grab
and drag. If you want big
points, enable this option.

Corel Painter 55
•Outline Color — Controls the
color for the shape outline
paths. Double-click the color
chip to change the color.
•Selected Point Color — Con-
trols the color for selected
anchor points (unselected
anchor points appear
“hollow”). Double-click the
color chip to change the color.
•Wing Color — Controls the
color for the control wings and
handles. Double-click the color
chip to change the color.
Internet Preferences
Corel Painter works closely with your
Internet browser to help you take
advantage of resources on the
Internet. Whether you use Netscape
Navigator, Microsoft® Internet
Explorer, or another browser, you can
launch your browser from within
Corel Painter.
The browser will take you directly to
the URL specified in the Internet
Preferences dialog box. This
streamlines your access to program
help, technical support, additional art
materials, and libraries.
The level of memory in your system
can limit your ability to run Corel
Painter and your browser application
at the same time. For more
information, refer to “Physical
Memory Usage” on page 56.
The Corel Painter installer should be
able to locate and link to your browser
automatically. In some cases, though,
you will need to manually select the
browser. For example, you’d need to
do this if you have more than one
browser.
To change the default URL:
1Do one of the following:
• (Mac OS) Choose Corel
Painter 8 menu > Preferences
> Internet.
• (Windows) Choose Edit menu
> Preferences > Internet.
2Type a new URL in the Default
Library Browsing URL field.
Save Preferences
You can set color space prompt
preferences automatically when
saving files, so that you do not need to
choose a color space every time you
save.
For Mac OS only, Corel Painter allows
you to select file extension preferences.
To set color space prompt
preferences
1Do one of the following:
• (Mac OS) Choose Corel
Painter 8 menu > Preferences
> Save.
• (Windows) Choose Edit menu
> Preferences > Save.
2Choose one of the following
options from the TIFF and PSD
pop-up menus:
• RGB — automatically saves
the file as RGB
• CMYK — automatically saves
the file as CMYK
• Prompt on Save — prompts
you to choose a color space
every time you save a file

Basics56
To set file extension preferences
(Mac OS)
1Choose Corel Painter 8 menu >
Preferences > Save.
2Choose one of the following
options from the Append pop-up
menu:
• Always — always adds the
appropriate file extension when
saving
• Never — never adds a file
extension when saving
• Ask When Saving — prompts
you to choose whether or not to
add a file extension when sav-
ing
Operating System
Preferences (Windows)
Computers running Windows have
some additional options.
To access Operating System
preferences:
•Choose Edit menu > Preferences
> Operating System.
Configuring Your Browser to
Recognize Software Resources
Your browser must be set to recognize
Corel Painter files and instructed
what to do with them.
This is something you’ll do in your
browser. Consult your browser
documentation for more information.
Physical Memory Usage
For best performance, choose
Maximum Memory for Painter on the
Operating System Preferences page,
and run Corel Painter with no other
programs running in the background.
Choosing Half Memory for Painter on
the Operating System Preferences
page allows Corel Painter to run more
efficiently while other Windows
applications are running.
Printing Options
Free Memory for Printing will
increase printing speed by writing the
active image to disk, increasing the
amount of memory available for the
print manager and the printer driver.
No Print Banding disables print
banding for devices that support it.
Disabling print banding can help
some PostScript printers, but will hurt
the performance of some bitmap
printers, such as the
Hewlett-Packard® DeskJet®
printers. Most dot matrix printers will
be faster with No Print Banding left
unchecked. If you experience
problems printing in landscape
orientation, you may have to turn off
banding by checking the option
button in the dialog box.
Display Options
If your video display driver is set to 16-
bit colors, you can experience some
color irregularities on your screen
when using Corel Painter. Checking
the No Device Dependent Bitmaps
option will correct this problem with
most 16-bit color video displays. If you
are not using 16-bit colors, this
checkbox will have no effect on your
system.

Corel Painter 57
Palettes
Palettes have been redesigned for
Corel Painter, allowing you to have
more control over snapping and
grouping them.
To change palette behavior
1Do one of the following:
• (Mac OS) Choose Corel
Painter 8 menu > Preferences
> Palettes.
• (Windows) Choose Edit menu
> Preferences > Palettes.
2Choose your preferences from the
following options:
• Autoscroll — lets you scroll
through a palette with many
elements automatically.
• Snapping Behavior — deter-
mines where palettes are
docked in relation to other ele-
ments on the user interface
• Snapping Tolerance — deter-
mines the minimum distance,
in pixels, between the palette
and other elements on the user
interface before docking
Using Two Monitors
The Corel Painter user interface can
be displayed across two or more
monitors. You can drag any of the
Corel Painter palettes, the property
bar, and the toolbox to any monitor;
however, each palette must be
displayed entirely on one monitor at a
time.
If a palette straddles two monitors, it
will automatically snap to the nearest
vertical edge of the monitor with the
largest portion of the palette. If the
palette is displayed equally on both
monitors, it will snap to the vertical
edge of the left monitor.
For best performance, make sure both
monitors are set to the same
resolution. In Windows, you must
stretch the application window to
straddle both monitors, then redesign
your workspace.
For information on configuring your
system to display across two or more
monitors, refer to your operating
system documentation.
Using Plug-ins
Plug-ins are software modules that
extend Corel Painter capabilities.
Many plug-ins come with Corel
Painter and are automatically installed
in the Corel Painter > Plug-ins
folder. Other special effects plug-ins
are available for purchase from third-
party software developers.
Corel Painter uses the following types
of plug-ins:
•Effects filters offer special effects
for raster images. You can access
available filters at the bottom of the
Effects menu, below standard
effects.
Most Photoshop-compatible filters
run on Corel Painter; however,
there are some exceptions. For
example, because Corel Painter is
an RGB-based program, it cannot
run filters that are specific to
CMYK or Grayscale modes. Check
with the manufacturer to
determine if a filter is compatible
with Corel Painter.
•Plug-in brushes extend the power
of the Brush tool.

Basics58
•Dynamic plug-ins are different
from other effects plug-ins because
you can re-access their controls
and change the characteristics of
the effect at any time.
•Acquire plug-ins support
acquisition of images through
external devices (such as scanners
and digital cameras) and file
formats not built into the
application.
•Export plug-ins export image data
and support special output devices.
For example, many photo-realistic
dye-sublimation printers include
export modules to provide better
control over output quality than
the standard print interface.
Note
•
Mac OS: Third-party plug-ins that are
not designed for native PowerPC®
architecture will not work in Corel
Painter.
Installing Plug-ins
Where you install a plug-in module
depends on its type.
Plug-in brushes and dynamic plug-ins
are specific to Corel Painter and must
reside in a specific location in the
Corel Painter > Plug-ins folder. The
Corel Painter standard plug-in
brushes and dynamic plug-ins are
automatically installed in the correct
location. However, if you want to
install new plug-in brush and
dynamic plug-in modules, you must
manually place them in the correct
location.
Other plug-in modules are used by
multiple software applications and
can reside anywhere on your
computer. For Corel Painter to access
such plug-ins, you must place an alias
(Mac OS) or shortcut (Windows) to
the source folder in the Corel Painter
> Plug-ins folder. During start-up,
Corel Painter uses the alias or shortcut
to load the plug-ins.
To install a new plug-in brush:
1Drag the plug-in brush module
into the Corel Painter > Plug-ins
folder.
2If Corel Painter is running, restart
it to activate the new plug-in.
To install a new dynamic plug-in:
1Drag the dynamic plug-in module
into the Corel Painter > Plug-ins
folder.
2If Corel Painter is running, restart
it to activate the new plug-in.
To install an effects, acquire, or
export plug-in:
1Follow the installation instructions
provided by the plug-in
manufacturer.
You can install plug-ins anywhere
on your computer—inside the
Corel Painter folder, in a generic
plug-ins folder on your hard drive,
or in another location.
2If you installed the plug-in in the
Corel Painter > Plug-ins folder,
Corel Painter automatically loads
the plug-in during startup.
3If you installed the plug-in in
another location:
• (Mac OS) Select the folder con-
taining the plug-in. Choose
Make Alias from the File menu.
• (Windows) Select the folder
containing the plug-in in My
Computer or Windows

Corel Painter 59
Explorer. Choose Create Short-
cut (or New > Shortcut) from
the File menu.
4Move the alias/shortcut into the
Corel Painter > Plug-ins folder.
5If Corel Painter is running, restart
it to activate the new plug-in.
Note
•
To access all Photoshop plug-ins, make
an alias (Mac OS) or shortcut (Windows)
to the Photoshop Plug-ins folder.
Wacom Intuos Support
Corel Painter supports the Wacom®
Intuos™ tablet, pen, and airbrush
technology.
Painting with an Intuos
Tablet and Pen
The Intuos tablet provides 1,024 levels
of pressure sensitivity to help you
create smooth curves, gradual
transitions, and precise brush strokes.
Corel Painter allows you to take
advantage of tilt and bearing input
from an Intuos pen in new and
exciting ways.
Note
•
The mouse mode option in the Wacom
controls panel—which causes a stylus to
behave like a mouse—is not compatible
with Corel Painter. Always use pen mode
when painting with an Intuos tablet and
pen.
Brush Tracking
Every artist uses a different pressure
when drawing on an Intuos tablet.
The Corel Painter Brush Tracking
preference helps you customize your
Intuos tablet to meet your pressure
sensitivity needs. Refer to “Brush
Tracking Preferences” on page 53 for
more information.
Expressions Settings
Settings you make in the Expressions
area of the Brush Creator allow you to
tie brush features like Opacity, Grain,
Angle, Size, Jitter, Resaturation,
Bleed, Flow, and Depth to stylus data,
such as Velocity, Direction, Pressure,
Wheel, Tilt, and Bearing. For more
information about using the
Expressions section in the Brush
Creator, refer to “Expression Settings”
on page 164.
Minimum Size Settings
In Corel Painter, the Minimum Size
setting lets you take even further
advantage of stylus input data. When
Size is set in the Expressions area of
the Brush Creator to respond to stylus
pressure, and a Min Size setting is set
to a small percentage of the brush
Size, the strokes you make with the
stylus create amazingly realistic
results. Responding to the elegance of
subtle movements, as your stylus
pressure eases, brush strokes taper. As
pressure increases, brush strokes
widen, just as they would with a real
brush.
Using the Intuos Airbrush
Wheel
The Intuos Airbrush—the first true
computer airbrush—provides
fingertip media flow control. Corel
Painter airbrushes respond to angle
(tilt), bearing (direction), and flow
(wheel setting) data from the Intuos

Basics60
stylus, allowing for a truly realistic
brush stroke. For example, as you tilt
your stylus, specks of media land on
the paper in a way that reflects that
tilt. Corel Painter airbrushes create
conic-sections that mirror your stylus
movements. Corel Painter airbrushes
take advantage of the Intuos airbrush
stylus wheel control. Like the needle
control on a real airbrush, the Intuos
wheel control adjusts airbrush flow, or
how much medium is applied. For
more information about using the
new airbrushes, refer to “Painting
with Airbrushes” on page 114.
Using Multiple Intuos Pens
All Intuos pens—both standard and
airbrush—feature ToolID™, which
allows you to configure and work with
multiple pens during a Corel Painter
session.
For example, let’s assume you have
two Intuos pens: Pen 1 and Pen 2. Pen
1 is set to an Oil brush variant; Pen 2
is set to an Artists variant.
Every time you bring Pen 1 into the
tablet’s proximity, Corel Painter
automatically changes the active
brush to the Oil brush. Every time
you bring Pen 2 into the tablet’s
proximity, Corel Painter switches to
the Artists brush. If you’ve adjusted
the tool assigned to a pen’s size or
other settings, Corel Painter
remembers those changes for the next
time you use that pen.
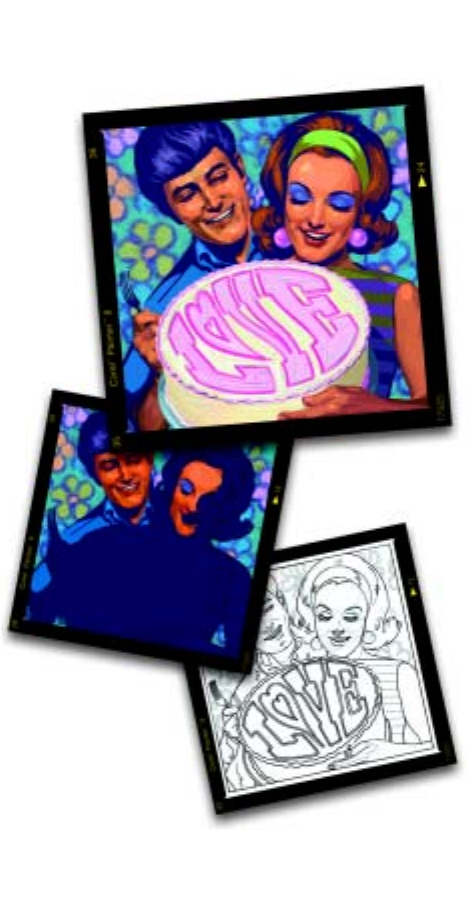
4
Using Textures, Patterns, and Weaves
In Corel Painter, paper textures,
gradients, patterns, and weaves can all
be applied to your image. You can
brush some of them on, get them to
interact with each other, spray them,
smear them, and even create your
own. Best of all, you never have to run
to the store in the middle of creating to
get a new tube of paint or the right
kind of paper.
You’ll use these items in several ways:
• to load a Brush tool with media for
painting
• to fill selections with the Effects
menu > Fill command or the
Paint Bucket tool
• to control certain image effects,
like Apply Surface Texture
This chapter explains how to select,
customize, and create textures,
patterns, and weaves, as well as how to
save them to a library for future use.
Papers, patterns, and weaves all use
libraries. The default libraries offer
sample materials. You’ll find more
libraries, with additional materials, on
the Corel Painter CD and on the
Corel Web site. For more information
about libraries, including how to load
alternate libraries, create your own
libraries, and manage library content,
refer to “What are Libraries?” on
page 23.
Using Paper Texture
In the real world, a marking tool has
different results when applied to
surfaces with different textures. Corel
Painter allows you to control the
texture of the canvas to achieve the
results you’d expect from Natural-
Media on a given surface—pencil on
Water Color paper, felt pens on cotton
paper, chalk on the sidewalk, and so
on.
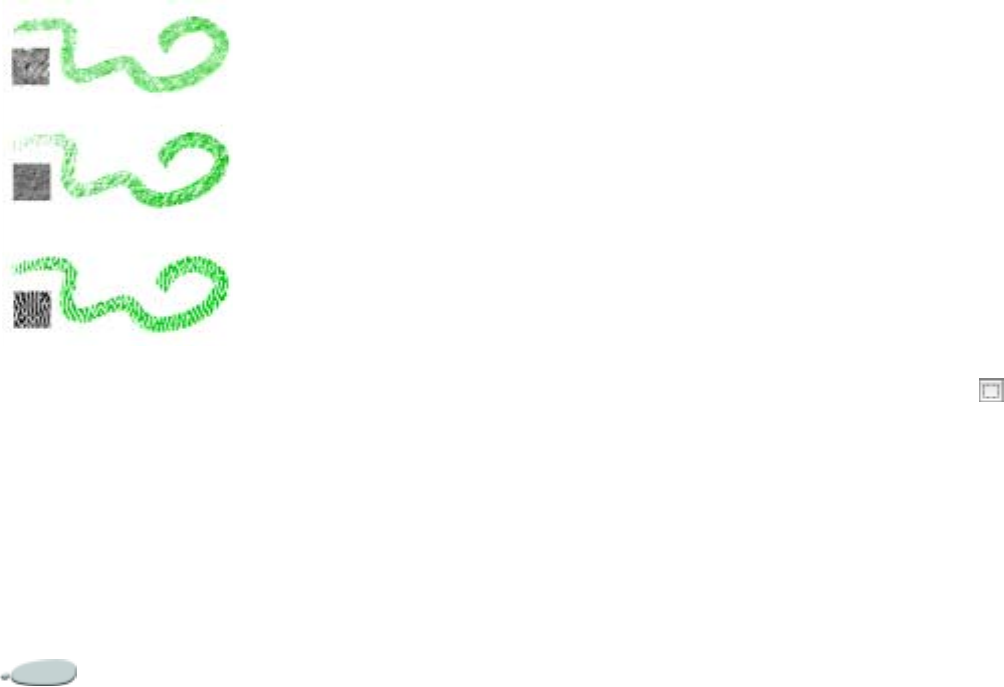
Using Textures, Patterns, and Weaves62
Of course, some brushes, like the
Airbrush, don’t reveal paper texture in
their strokes. This follows the
behavior of the natural tool.
Most of the brushes interact with the current
paper texture.
Paper textures are useful in many
ways. The brushes interact with paper
“grain,” just as natural tools react with
the texture of the surfaces beneath
them. Paper grains are useful in
applying Surface Texture and other
Effects, like Glass Distortion. You can
select different paper textures, modify
them, organize them in libraries, and
even create your own custom textures.
In Corel Painter, brushes that react
with paper texture have a “grainy
method.” For more information about
brush methods, refer to “Methods and
Subcategories” on page 152.
Note
•
The terms “paper grain” and “paper
texture” are used here synonymously.
Adjusting the Grain
When you choose a brush that
interacts with paper grain, you see the
results with each stroke. When you
find a brush and paper combination
that you really like, you can save it as a
Look.
If you have a stylus and tablet, you can
adjust paper grain by changing the
stroke of the stylus on a pressure-
sensitive tablet. In most cases, a light
stroke colors only the peaks and ridges
of the grain. A heavy stroke fills color
deep into the pockets and valleys. You
can also affect paper grain by using
the Grain settings on the Stroke
Designer tab of the Brush Creator.
When you want paper grain to appear
uniformly across an image, create your
artwork first and then apply the grain
as a surface texture. If you apply paper
texture when you create an image, the
texture is erasable.
With erasable texture, you won’t be
able to erase brush strokes without
erasing paper texture at the same time.
You’ll find that adding paper texture
as the last step, not the first step, in
developing your image often works
best.
To save a Look:
1In the toolbox, click the
Rectangular Selection tool .
2Drag in the image to make a
selection of the look you want to
save.
3In the toolbox, open the Look
selector and click the selector
menu arrow.
4Choose New Look.
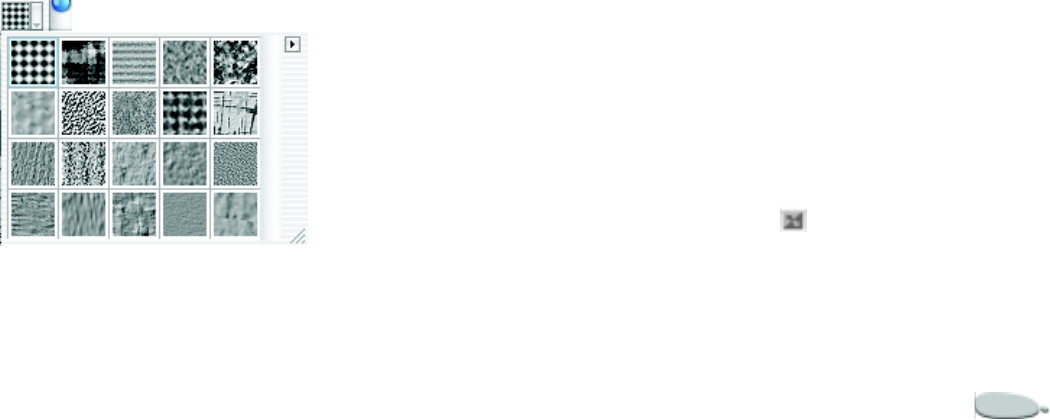
Corel Painter 63
5In the New Look dialog box, type a
name in the Save As box.
Choosing Paper Textures
The Papers palette is where all paper
textures are stored. In addition to
using it to select papers, you can use
this palette to invert, resize, or
randomize paper grain; control
brightness and contrast; or to open
other paper libraries. For more
information on working with libraries,
refer to “Loading Alternate Libraries”
on page 24.
The Paper selector on the Papers palette.
To choose a paper texture:
1Choose Window menu > Show
Papers to display the Papers
palette.
If the Papers palette is not
expanded, click the palette arrow.
2Click the Paper selector arrow to
display the available paper
textures.
3Choose a paper texture from the
Paper selector.
The Papers palette shows the
dimensions of the selected paper
(in pixels). Corel Painter tiles the
paper to cover as much canvas as
needed.
Tips
•
You can also choose a paper texture
from the Paper selector in the toolbox.
•
Corel Painter uses the currently
selected texture, so you can make a few
strokes, then change the paper and make a
few more strokes with different results.
Inverting and Scaling Paper
Textures
You can think of paper texture as a
three-dimensional landscape. Usually,
brushes react to paper texture by
coloring peaks and ignoring valleys.
Enabling the Invert Paper option
makes color fill the valleys, instead of
the peaks.
You can adjust the paper texture scale
to resize the paper texture. Scaling
paper grain affects how the grain
appears in brush strokes and images.
To invert paper grain:
1Choose Window menu > Show
Papers.
2On the Papers palette, do one of
the following:
• Click the palette menu arrow,
and choose Invert Paper.
• Click the Invert Paper button
.
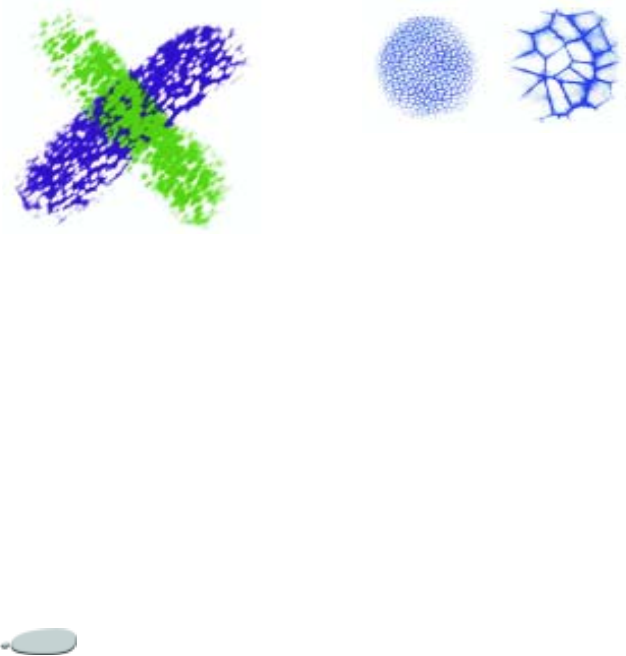
Using Textures, Patterns, and Weaves64
Tip
•
You can also use the Paper selector in
the toolbox to invert paper grain. Click
the Paper selector, click the selector menu
arrow, and choose Invert Paper.
Two brush strokes overlapping. The green one
was painted with the grain inverted.
To change paper texture scale:
1Choose Window menu > Show
Papers.
2On the Papers palette, use the
Paper Scale slider to resize the
paper grain.
As you move the slider, the texture
preview updates to display the new
grain size. You can scale texture
down to 25% or up to 400%.
Note
•
Scaling large textures can use a great
deal of RAM. Most textures in Corel
Painter are from 50 to 400 pixels square at
100% scaling.
Brush strokes on paper grains with different
scale values.
Randomizing Paper Grain
Normally, paper grain is fixed, which
means the texture is in the same
position each time you apply a brush
stroke. You can change this when you
want grain to be applied randomly.
To randomize paper grain:
1Choose Window menu > Show
Brush Creator.
2Click the Stroke Designer tab, and
choose Random.
3Enable the Random Brush Stroke
Grain option.
Controlling Paper Texture
Brightness and Contrast
Brightness can be thought of as
controlling the depth of the paper
grain. Paper that is less bright acts as if
the grain is shallow.
Contrast can be thought of as
controlling the steepness of the paper
grain. The grain in higher contrast
paper goes from high to low more
quickly and with fewer intermediate
levels.
To change paper texture
brightness:
1Choose Window menu > Show
Papers.
2Adjust the Paper Brightness slider
to modify the brightness of the
grain.
To change paper texture contrast:
1Choose Window menu > Show
Papers.
2On the Papers palette, use the
Paper Contrast slider to modify the
contrast of the grain.

Corel Painter 65
Creating Paper Textures
The Make Paper command lets you
make your own paper textures.
To create a paper texture:
1Choose Window menu > Show
Papers.
2On the Papers palette, click the
palette menu arrow and choose
Make Paper.
3In the Make Paper dialog box,
choose a pattern from the Pattern
pop-up menu to use as the basis of
your paper texture.
4Adjust the Spacing slider.
Moving the Spacing slider to the
right opens up space between rows
and columns in the selected
pattern.
5Adjust the Angle slider.
Moving the Angle slider changes
the direction in which the pattern’s
rows are lined up.
6When you like the look of the
texture, enter a name.
Your new texture appears as the
last item in the Paper selector.
Tip
•
You can also use the Paper selector in
the toolbox to create paper. Click the
Paper selector, click the selector menu
arrow, and choose Make Paper.
The Make Paper dialog box allows you to
create your own textures based on patterns in
the Pattern pop-up menu.
Capturing Paper Textures
The Capture Paper command lets you
turn a section of an image into a paper
texture. Once you save textures, they
are available from the Papers palette.
To capture paper texture:
1Open or create an image.
2Select all or a piece of your source
image.
3On the Papers palette, click the
palette menu arrow and choose
Capture Paper.
If you want to blend the distinction
between tile borders, move the
Crossfade slider in the Save Paper
dialog box to the right.
4Type the name of your new
texture.
Your texture now appears in the
Paper selector and is added to the
current library.
Tips
•
You can also use the Paper selector in
the toolbox to capture paper texture. Click
the Paper selector, click the selector menu
arrow, and choose Capture Paper.
•
The Make Fractal Pattern feature
creates excellent textures. Some weaves
also produce good textures. For more
information, see “Turning a Fractal
Pattern into a Paper Texture” on page 69.
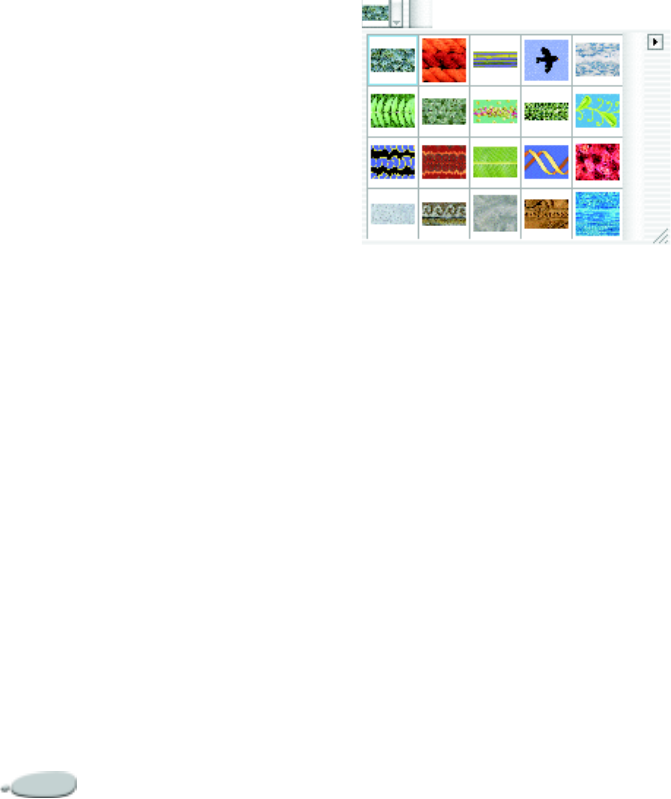
Using Textures, Patterns, and Weaves66
Using Patterns
A pattern is a repeating design. The
smallest unit of a pattern is known as
a “tile.” When you fill an area with a
pattern, the tile is repeated across the
selected area.
With patterns, you can:
• fill selections with imagery
• paint patterns directly onto your
image, with computed brushes
that use rendered dab types
• paint using a cloning brush
• control image effects
You’ll find a sampling of patterns in
the default Pattern library. You’ll find
other pattern libraries on the Corel
Painter CD.
The Patterns palette shows a preview
of the pattern, gives tile image
dimensions, and gives you options for
scaling and arranging the tile when
used in fills.
The Pattern selector on the Patterns palette.
Patterns are created by repeating a
rectangular image tile across an area.
Ideally, images intended to be tiled are
created so that they tile seamlessly.
Corel Painter provides ways to help
you generate seamless tiles.
You can capture a pattern after you
create it and manipulate it to be a half-
drop design, traditionally used in
wallpaper designs. Your patterns can
be added to the Pattern library.
Fractal patterns can be used to create
interesting landscapes in Corel
Painter.
To choose a pattern:
1Choose Window menu > Show
Patterns.
If the Patterns palette is not
expanded, click the palette arrow.
2On the Patterns palette, click the
Pattern selector.
3Choose a pattern from the Pattern
selector.
Tip
•
You can also choose a pattern from the
Pattern selector in the toolbox.
To adjust the appearance of a
pattern
1Choose Window menu > Show
Patterns.
2Choose a pattern from the Pattern
selector.
3Enable one of the following
options:
•Rectangular places the tile in a
regular grid for fills. The Offset
slider does not apply.
•Horizontal offsets the tiles in
subsequent rows. The Offset
slider controls the amount of
offset.

Corel Painter 67
•Vertical offsets the tiles in sub-
sequent columns. The Offset
slider controls the amount of
offset.
4Adjust the Pattern Scale slider to
control the dimensions of the
pattern.
After setting these options, the
pattern is ready to use.
To fill an image with pattern tiles:
1On the Patterns palette, choose a
pattern.
2Choose Effects menu > Fill.
3In the Fill dialog box, choose
Pattern.
Note
•
To see tiling in an image, the image
must be larger than the tile.
To paint with a pattern:
1From the Brush selector, choose a
brush that applies media to a
document.
2On the Stroke Designer page of
the Brush Creator, choose
General.
3From the Source pop-up menu,
choose one of the following:
•Pattern — paints with a pat-
tern containing no mask infor-
mation.
•Pattern with Mask — paints
using mask data contained in
the pattern.
•Pattern As Opacity — paints
with the pattern at a reduced
opacity.
4Choose Window menu > Show
Patterns.
5Choose a pattern from the Pattern
selector.
6Paint in the image.
Notes:
•
If you have not set a clone source,
Corel Painter uses the current pattern in
any operation referring to clone source
colors or luminance. This means you can
paint with a pattern using a Cloner brush.
•
If the Source option is not available
(grayed out), the selected brush can apply
color only. In that case, select a rendered
brush, or choose Rendered from the Dab
Type pop-up menu.
•
When painting with a pattern, keep in
mind that direction matters. Corel
Painter flips the pattern you’re painting
when you change directions, so apply
strokes in the same direction for a uniform
effect.
Editing a Pattern Tile
If a pattern preview isn’t detailed
enough or you want to edit an existing
pattern, you can open the pattern tile
in its own window. By loading a
pattern as a file, you can view the
pattern closely and modify it.
Once a pattern becomes a tile, you can
paint off one side of the Canvas and
watch your stroke appear on the
opposite side of the Canvas,
automatically wrapping to the other
side.
Refer to “Creating Seamless Tiles” on
page 68 for more information about
editing pattern tiles.
To edit a pattern tile:
1On the Patterns palette, choose a
pattern from the Pattern selector.
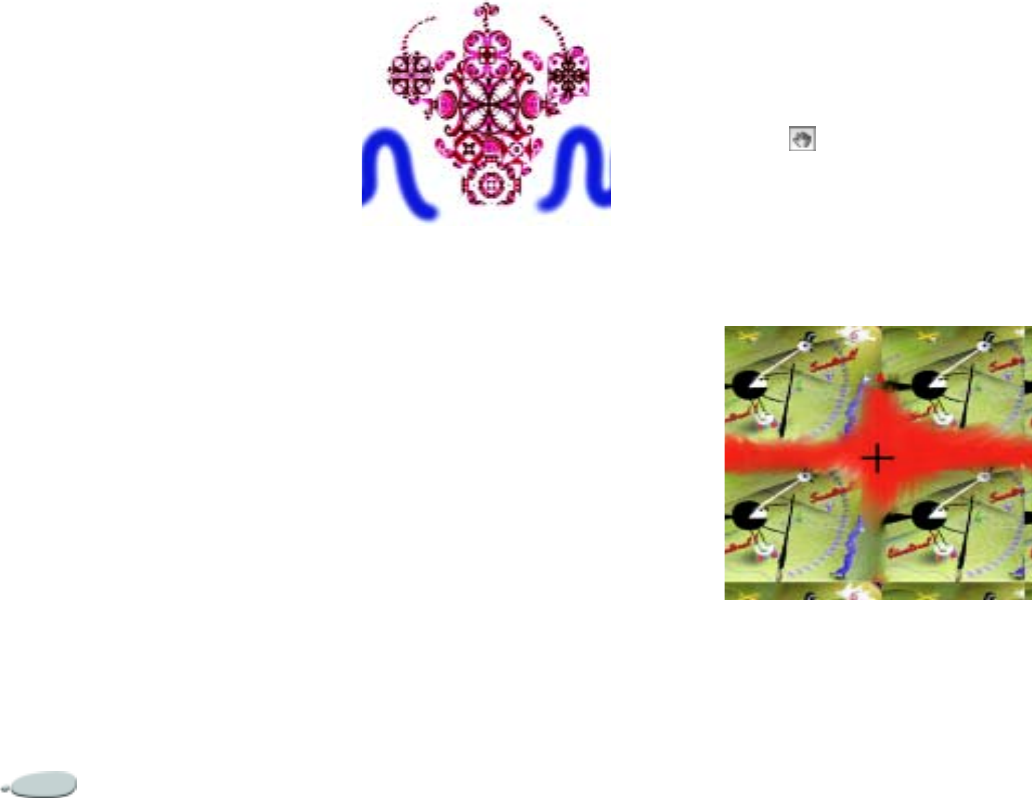
Using Textures, Patterns, and Weaves68
2Click the palette menu arrow, and
choose Check Out Pattern.
Corel Painter opens the selected
pattern tile in its own document
window.
You can now edit the pattern tile as
you would any image. To put the
modified pattern back in the palette,
you must save it to the Pattern library.
For more information about saving
patterns to a library, refer to “Adding
Patterns to the Pattern Library” on
page 70.
Creating Seamless Tiles
Patterns are created by repeating a
rectangular image tile across an area.
When you develop patterns, you’re
creating images that will be tiled.
Ideally, those images must tile
seamlessly. That is, the eye should not
be able to distinguish tile edges. Corel
Painter provides ways to help you
generate images that will tile easily.
The wrap-around colors feature lets you paint
off one side of an image and onto the other side.
To help in making seamless tiles,
Corel Painter gives documents
defined as pattern tiles two special
characteristics: wrap-around colors
and wrap-around seams.
• With wrap-around colors, a brush
stroke dragged off one edge of an
image appears on the other side.
This makes it easier to paint
seamless, self-tiling patterns.
• The wrap-around seams feature
lets you move the edges of pattern
tiles to the center of the image,
where their tonal differences are
more apparent and easier to
correct.
To minimize seams:
1On the Patterns palette, click the
palette menu arrow and choose
Define Pattern.
2In the toolbox, choose the Grabber
tool .
3Hold down the Shift key and drag
inside the image.
You’ll see a horizontal and vertical
line where image edges meet.
4When the crossing lines are
centered, release the mouse button.
The wrap-around seams feature lets you move
the pattern tile edges to the middle so you can
edit them.

Corel Painter 69
To remove edge lines
•Do one of the following:
• Set the Straight Cloner brush
to clone from somewhere
inside the image to preserve
detailed imagery. Refer to
“Painting in the Clone” on
page 190 for more information
about cloning.
• Paint out edge lines using any
color brush.
• Smear across edge lines with a
Water or Drip brush.
• Copy a selection to a layer and
move it over the line. Feather
the layer and reduce opacity to
help produce clean transitions.
Drop the layer when you’re sat-
isfied. Refer to “Using Layers
and Layer Masks” on page 229
for more information about
working with layers.
Turning a Fractal Pattern into
a Paper Texture
You can turn a fractal pattern into a
paper texture that will be saved to the
Paper library.
To convert a fractal pattern to a
texture:
1On the Patterns palette, click the
palette menu arrow and choose
Check Out Pattern.
The pattern displays in a new
image window.
2Choose Effects menu > Tonal
Control to adjust image elements
such as brightness, contrast, and
luminance.
3When you’re satisfied with the
tonal balance, choose Select menu
> All.
4Choose Window menu > Show
Papers to display the Papers
palette.
5Click the palette menu arrow and
choose Capture Paper.
6In the Save Paper dialog box, set
the crossfade to 0.00.
7Name the paper texture.
Creating and Capturing
Patterns
Corel Painter offers three ways to
create patterns:
• Define the current image as a
pattern, then add it to the Pattern
library.
• Create a rectangular selection,
then capture it as a pattern. For
more information about creating
selections, see “Creating
Selections” on page 206.
• Make a Fractal pattern, then add it
to the library. For more
information on creating fractal
patterns, see “Creating Fractal
Patterns” on page 71.
After creating a pattern tile, you’ll
probably want to refine it, so that it
tiles seamlessly. Refer to “Creating
Seamless Tiles” on page 68.
Images that you turn into patterns and
save in RIF format maintain their
pattern characteristics even after being
saved and reopened.
Creating patterns can become
addictive. It’s a good idea to keep
libraries small. Use the Patterns
Mover to create new libraries and
delete unwanted patterns. You can
switch libraries whenever you want to
use a different set of patterns. For
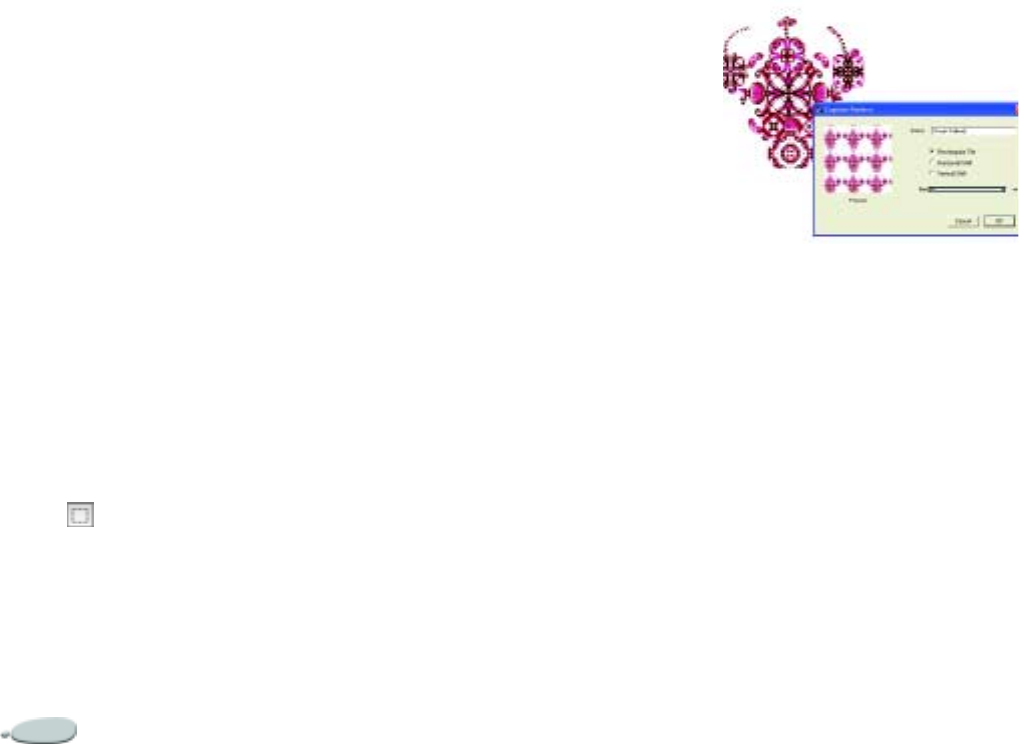
Using Textures, Patterns, and Weaves70
more information about movers, refer
to “Moving Items Between Libraries”
on page 25.
To create a pattern:
1Open the image file you want to
create a pattern from.
2Choose Window menu > Show
Patterns to display the Patterns
palette.
3Click the palette menu arrow, and
choose Define Pattern.
Tip
•
With the Grabber tool selected, you
can hold down the Shift key and drag the
seams to the center of the image. For best
results, do this at 100% scale, not zoomed
in.
To capture a pattern:
1Using the Rectangular Selection
tool , select the area of the
image you want to use as a pattern.
Remember, selection edges meet
when the image is tiled, so select
carefully.
2Choose Window menu > Show
Patterns to display the Patterns
palette.
3Click the palette menu arrow and
choose Capture Pattern.
4Enable one of the following
options:
•Rectangular Tile — places the
tile in a regular grid for fills.
The Bias slider does not apply.
•Horizontal Shift — offsets the
tiles in subsequent rows. The
Bias slider controls the amount
of offset.
•Vertical Shift — offsets the tiles
in subsequent columns. The
Bias slider controls the amount
of offset.
As you try different tile
arrangements and Bias settings,
the Preview window shows the
result.
5Enter a descriptive name for the
pattern.
Corel Painter captures the pattern
and saves it to the current library.
Once saved, you can find the
captured pattern on the Patterns
palette. If you want to edit it, you
can check it back out of the library.
The Capture Pattern dialog box lets you decide
how much to offset pattern tiles and in which
direction.
Adding Patterns to the
Pattern Library
You can add any image as a pattern tile
to the current Pattern library.
To add a pattern to the library:
1On the Patterns palette, click the
palette menu arrow and choose
Add Image to Library.
2In the Save Image dialog box, give
it a descriptive name.
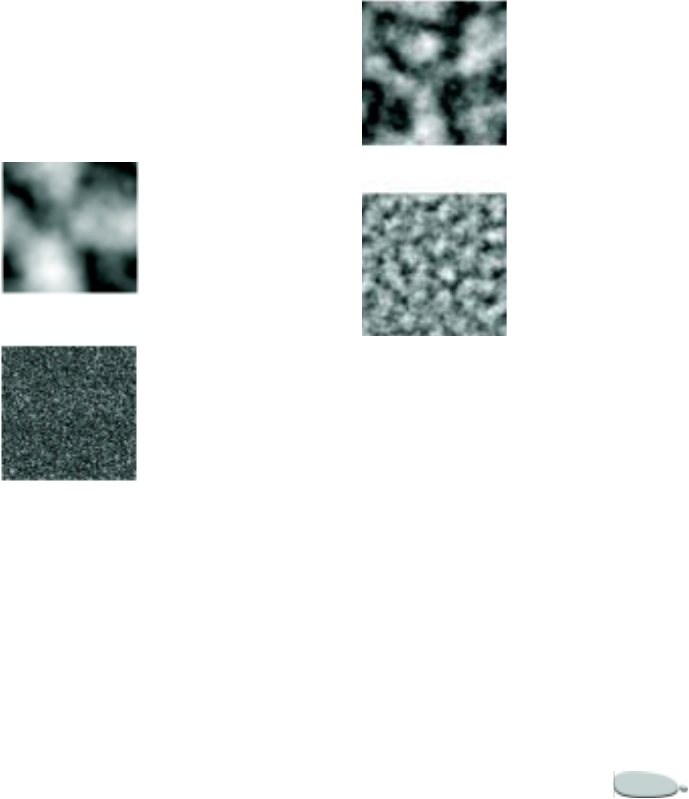
Corel Painter 71
If a pattern with that name already
exists in this library, you are
prompted to replace it. If you don’t
want to replace the existing
pattern, click No to try again with
a different name.
Creating Fractal Patterns
The Make Fractal Pattern command is
a pattern generator that creates
interesting landscapes. These
topographic patterns can be filled with
color and even embossed using a
paper texture.
When you create fractal patterns, the
following options allow you to fine-
tune your creation:
•Size sets the exact size of the tile
you are creating. If your computer
has a lot of memory, you can make
a large file with a high resolution.
Depending on how much memory
your computer has available to
Corel Painter, some of the size
options may not be available.
•Power controls the intricacy of the
pattern’s definition, as if you were
“zooming” in and out on a
textured surface with a
microscope. Move the Power slider
to the right to zoom out and see
many small patterns. Move the
Power slider to the left to zoom in
and see fewer large patterns.
The Power slider determines the degree
of detail. Top=-200%, bottom=0%.
•Feature Size defines the number of
prominent features within the tile.
Moving the slider to the left
increases the number of repetitions
per tile.
The Feature Size slider determines the number
of repetitions per tile. Top=90%,
bottom=20%.
•Softness adjusts the edge softness
of the pattern.
•Angle changes the direction from
which you view the fractal.
•Thinness emphasizes the
direction suggested by the lines of
the fractal pattern. Thinner lines
produce a more linear look.

Using Textures, Patterns, and Weaves72
Low Thinness settings show the fractal as
streaks. Use the Angle slider to change the
direction of streaking.
Corel Painter uses four channels to
store graphic information: Red,
Green, Blue, and Alpha.
You can place information other than
color values in these channels.
Channel options allow you to
visualize this information in new and
different ways.
•Height as Luminance displays
pseudo-height information as
luminance. Images generated with
this option are useful in
conjunction with the Apply
Surface Texture effect. White areas
are represented as peaks, and dark
areas become depressions.
•Gradient Bearing uses the Red
channel to display the bearing of
the down angle of a height field.
•Surface Normal uses the Green
and Blue channels to represent the
X and Y components of the surface
normal (angle perpendicular to the
surface at a given point) of the
height field (Green=X, Blue=Y).
These two latter options for viewing a
fractal texture are offered for purely
aesthetic reasons. One way to take
advantage of them is to create color
variations of the texture with the
Adjust Colors feature.
To create fractal patterns:
1On the Patterns palette, click the
palette menu arrow and choose
Make Fractal Pattern.
2In the Make Fractal Pattern dialog
box, adjust the fractal options.
Changes you make appear in the
Preview window.
3When you are satisfied with your
selections, click OK.
Give Corel Painter a little time to
create your new pattern file. When
Corel Painter is finished, your
pattern file is displayed in its own
document window.
Tips
•
To colorize a fractal pattern, choose an
appropriate gradient and use the Express
in Image feature.
•
You can also create interesting patterns
by choosing a colorful gradient and using
the Express in Image command on the
Gradients palette.
Using Weaves
The Weaves palette is, in effect, a
virtual loom that you can use to create
weaves to use as fill patterns.
Libraries of weaves are included with
Corel Painter. You can modify a weave
by changing the way it displays the
scaling and thickness of its threads, or
its color. You can also create and save
weaves of your own. You can preview
your changes before you apply them.
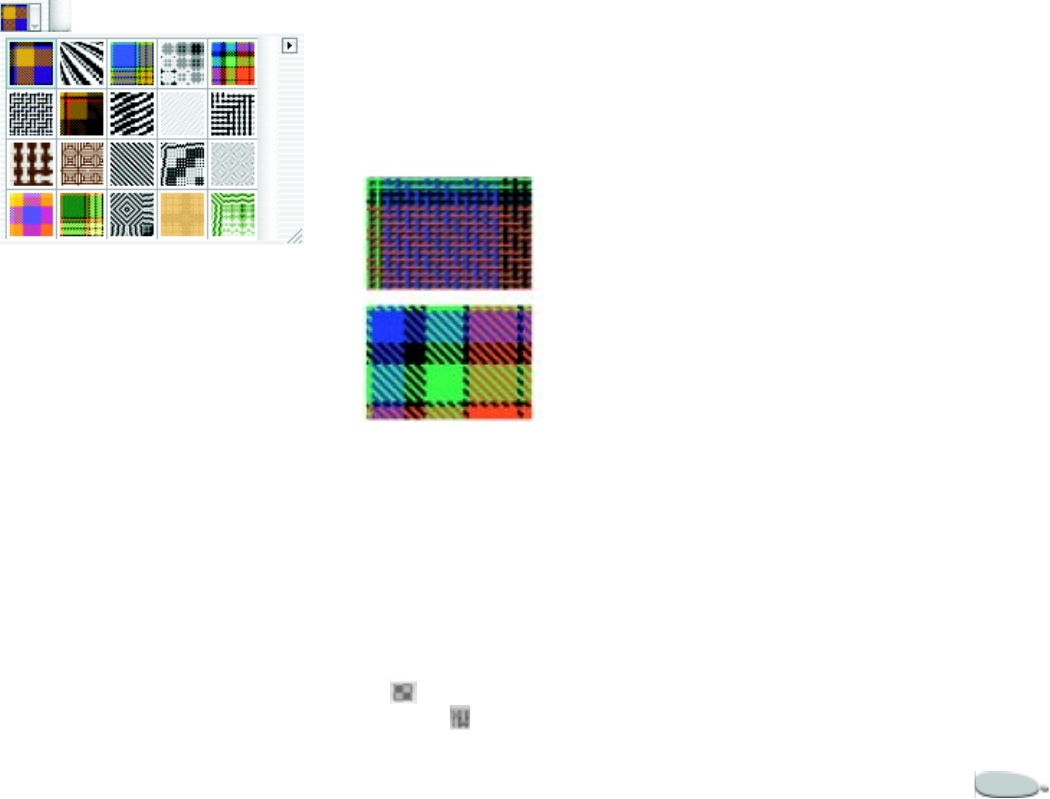
Corel Painter 73
The Weave selector on the Weaves palette.
To choose a weave:
1Choose Window menu > Show
Weaves.
If the Weaves palette is not
expanded, click the palette arrow.
2On the Weaves palette, click the
Weave selector.
3Choose a weave from the Weave
selector.
Tip
•
You can also choose a weave from the
Weave selector in the toolbox.
Changing Weave Display
Corel Painter can display a weave as
two-dimensional or show the
interwoven threads three-
dimensionally, complete with
shadows.
A weave can appear differently when displayed
either as two-dimensional or three-
dimensional.
To change how a weave is
displayed:
1Choose Window menu > Show
Weaves to display the Weaves
palette.
2Click the Two-Dimensional Weave
or the Three-Dimensional
Weave icon.
The button changes to show either
a two-dimensional (Blocks) or
three-dimensional (Fibers) weave.
Note
•
Depending on which weave is
selected, you might or might not see a
change in the Preview window. For
different two- and three-dimensional
effects, you can adjust the scaling and
thickness sliders at the bottom of the
Weaves palette.
Adjusting Scaling and
Thickness
The four sliders at the bottom of the
Weaves palette control the thickness of
threads and the spacing between
them. The top two sliders control
horizontal dimensions; the bottom
two control vertical dimensions. By
adjusting these sliders, you can create
a wide variety of weaves with any one
of the patterns supplied.
To adjust scaling and thickness:
1On the Weaves palette, choose a
weave from the Weave selector.

Using Textures, Patterns, and Weaves74
The weave displays in the Preview
window.
2Click the Three-Dimensional
Weave icon to show a three-
dimensional weave.
For most weaves, you won’t see a
change in the preview until you
adjust the scale and thickness
values.
3Adjust the horizontal and vertical
scale sliders to increase the scale,
thus enlarging the weave.
4Adjust the horizontal and vertical
thickness sliders to reduce the
thickness.
You should begin to see a change
in the weave preview.
Note
•
Thickness sliders affect the three-
dimensional display. When you select a
two-dimensional display, the thickness
sliders have no effect.
Editing Weave Colors
Each weave uses its own Color Set.
You can display the Color Set used for
a weave, change the colors in the set,
and apply them to the weave.
Remember that you can open several
palettes and rearrange them to make it
easier to see the controls you need.
For more information about Color
Sets, see “Using Color Sets” on
page 85.
To display the color set for a
weave:
1On the Weaves palette, choose a
weave from the Weave selector.
2Click the palette menu arrow, and
choose Get Color Set.
The Color Set for the selected
weave appears.
To change weave colors:
1Choose a new color from the
Colors palette or a color set, or
sample a color with the Dropper
tool .
2Choose Window menu > Show
Weaves to display the Weaves
palette.
3Hold down Option (Mac OS) or
Alt (Windows), and double-click
the color swatch on the weave
Color Set that you want to replace.
The new color replaces the old
one.
4Click the palette menu arrow, and
choose Put Color Set.
The Preview window shows the
weave with the new colors. If you
fill an image with the weave
pattern, Corel Painter now uses the
new color set.
Saving Weaves
After altering the scaling, thickness, or
color of a weave, you can save your
changes as a new weave.
To save a weave:
1On the Weaves palette, click the
palette menu arrow and choose
Save Weave.
2In the Save Weave dialog box, type
a name for the weave.
If you don’t type a new name,
Corel Painter replaces the existing
weave with the changed weave.
The new weave pattern appears in
the current weaves library.

Corel Painter 75
Advanced Weaving
Corel Painter lets you create woven
fabrics of virtually any description.
You can create fabrics for wallpapers,
carpets, clothes, and furniture.
To create your own weaves:
1On the Weaves palette, click the
palette menu arrow and choose
Edit Weave.
2In the Edit Weave dialog box,
adjust the controls for drafting a
weave on the 8-harness, 8-treadle
loom.
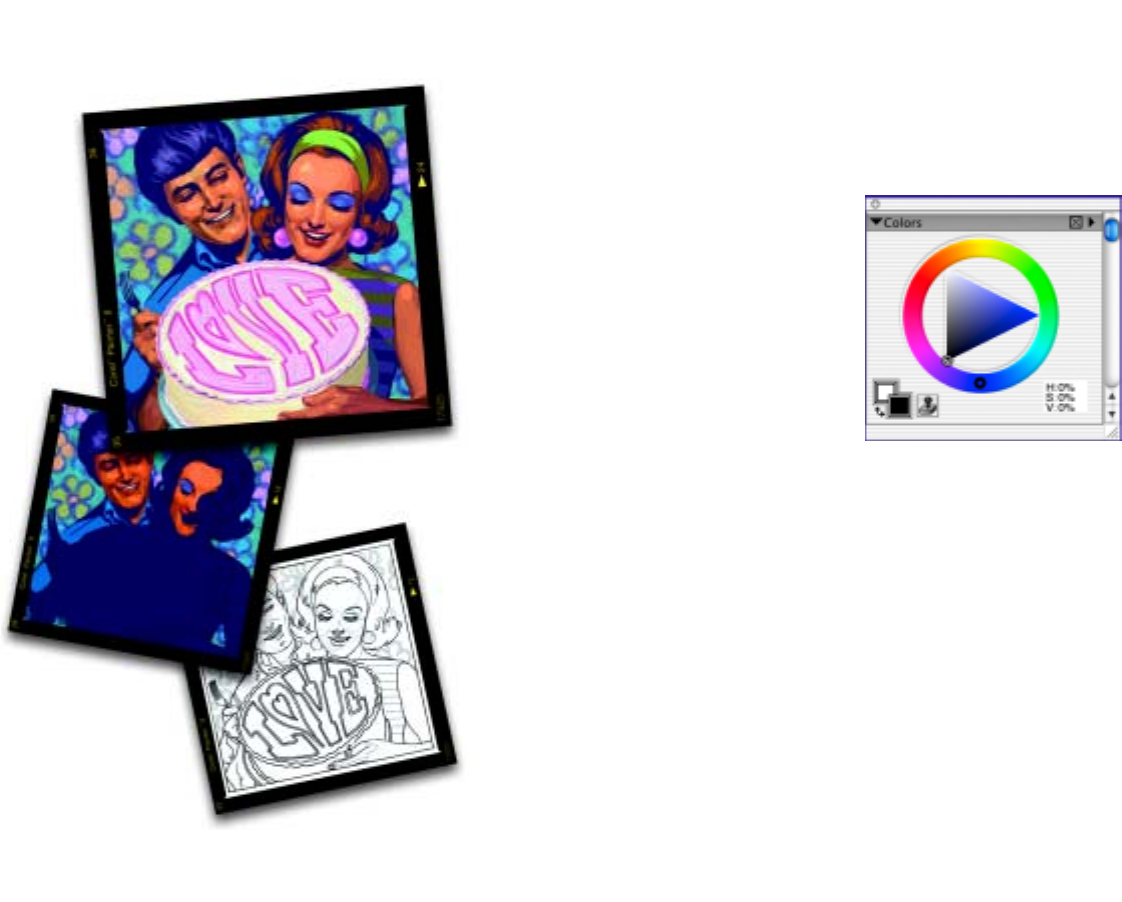
5
Color
Corel Painter offers many ways to
apply color to your image, from
changing the paper color, to choosing
colors for your brush strokes, to
applying gradients to an entire image
or selection.
Working with Color
You can select colors in several ways.
You can use:
• the Color pickers on the Colors
palette
• the Dropper tool, which samples
color from the image
• the Use Clone Color setting,
which pulls color from a source
• the Mixer palette
• the Color Sets palette
The Colors palette is one place you can select a
color to add to your image.
To display the Colors palette:
•Choose Window menu > Show
Colors.
Changing Paper Color
You can change a document’s paper
color—the color of the background
Canvas—at any time. This color
appears when you delete a filled area
or use the eraser to remove color.
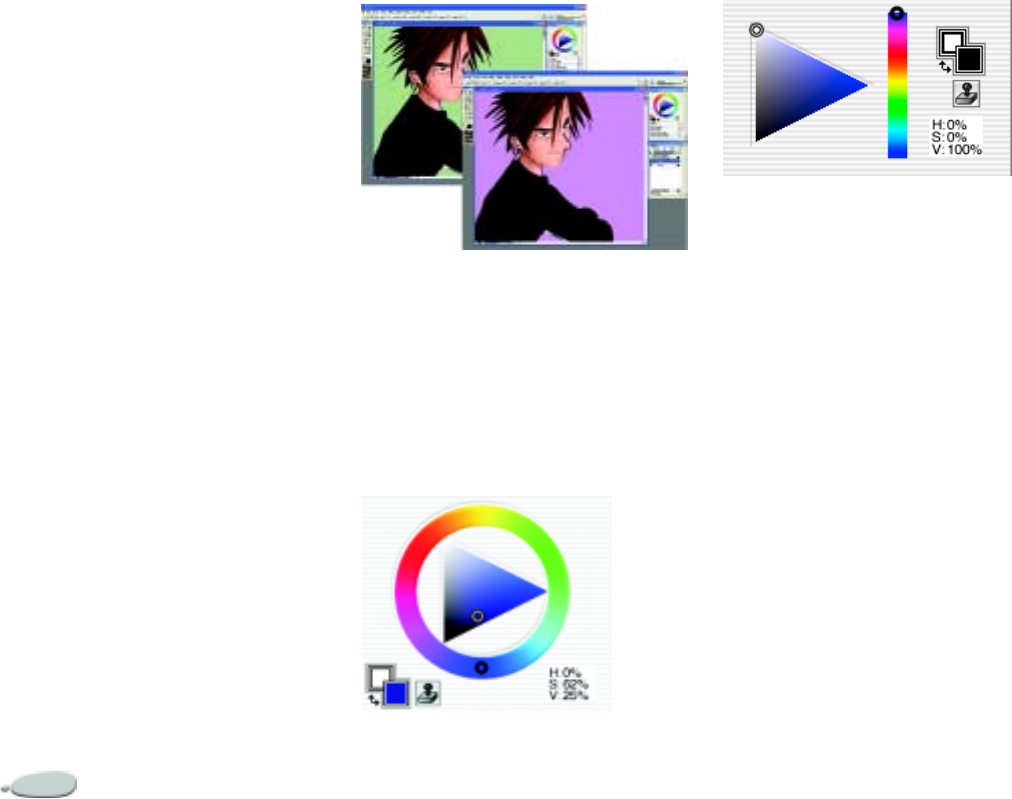
Color78
To change the existing paper
color:
1Choose a primary color from the
Colors palette.
2Choose Canvas menu > Set Paper
Color.
3To expose the new paper color, do
one of the following:
• Make a selection, and cut or
delete it.
• Use the eraser brush to erase
part of your image.
Note
•
Do not use a bleach variant to expose
the new paper color, unless the paper color
is white. Bleach variants will erase to
white, regardless of the paper color.
For more information about choosing
colors, see “Using the Color Pickers”
on page 78.
If you change the existing paper color, you must
delete an area to view the change.
Using the Color Pickers
Corel Painter provides two Color
pickers: standard and small. The
Colors palette menu lets you select
between the two pickers.
The standard Color picker.
The small Color picker.
The standard Color picker has a hue
ring and a color triangle. Within the
triangle, colors are organized by value
and saturation.
• Values span the triangle from top
to bottom, with the top of the
triangle being the highest value
(white), the bottom the lowest
value (black).
• Saturation levels go from left to
right. Dragging or clicking to the
right produces the purest color
within the predominant hue.
Dragging or clicking to the left
reduces the level of color
saturation, giving “muddier” or
grayer colors.
Corel Painter 79
The small Color picker displays a
color triangle, with the hue ring as a
single bar.
To choose a hue and color from
the standard Color picker:
1Choose Window menu > Show
Colors to display the Colors
palette.
If the Colors palette is not
expanded, click the palette arrow.
2Click the palette menu arrow, and
choose Standard Colors.
3Drag the circle on the color ring to
select the predominant hue.
You can also select a hue by
clicking once anywhere on the
ring.
The triangle displays all the
available colors within that
selected hue.
4Select a color on the triangle by
dragging the circle or click the
color you want.
To choose a hue and color from
the small Color picker:
1Choose Window menu > Show
Colors to display the Colors
palette.
2Click the palette menu arrow, and
choose Small Colors.
3Drag the slider on the color bar to
select the predominant hue.
You can also select a hue by
clicking once anywhere on the bar.
The triangle displays all the
available colors within that
selected hue.
4Select a color on the triangle by
dragging the circle or click the
color you want.
Understanding Primary and
Secondary Colors
The color you select appears in one of
two overlapping rectangles displayed
on the Colors palette. The front
rectangle represents the selected
primary color. The back rectangle
shows the selected secondary color. By
default, black is the primary color and
white is the secondary color. Most of
the time you’ll work with the primary
color.
Overlapping rectangles display the current
primary and secondary colors.
Don’t confuse the secondary color
with what other graphics programs
call “the background color.” In Corel
Painter, the “background color” is the
paper color.
The secondary color is for multicolor
brush strokes, two-point gradients,
and Image Hose effects. It’s used
when more than one color is applied.
To choose the primary color:
1Choose Window menu > Show
Colors to display the Colors
palette.
2Click the front rectangle.
3Choose a color using the Color
picker.
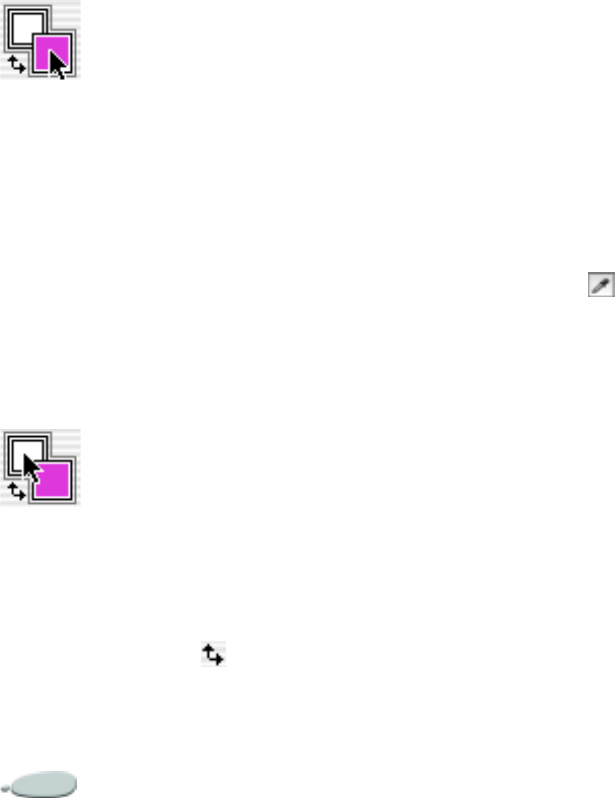
Color80
Click the front rectangle to set the primary
color.
To choose the secondary color:
1On the Colors palette, click the
back rectangle.
2Choose a color using the Color
picker.
If you usually work with the
Primary color, you might want to
re-click the front rectangle so that
it will be selected the next time you
go to the color picker.
Click the back rectangle to set the secondary
color.
To swap primary and secondary
colors:
•Click the swap icon .
Sampling Colors from
Imagery
In addition to choosing colors on the
Colors palette, you can use the
Dropper tool to select, or “pick up,” a
color from an existing image.
To use the Dropper tool:
1Click the front or back rectangle to
select a primary or secondary color.
2Click the Dropper tool in the
toolbox.
3Move the cursor to the color you
want to pick up, and click it.
The color picker updates to display
the color you’ve selected.
Note
•
The Dropper tool picks up visible
color only. You can’t select a hidden color
with the Dropper tool.
Tip
•
You can quickly get the Dropper tool
by pressing D on the keyboard.
To access the Dropper tool from
other tools:
•Press Option (Mac OS) or Alt
(Windows).
Note
•
The Dropper tool doesn’t work with
all tools.
Cloning Color
The Clone Color option is another
way to choose color. This feature lets
the brush pick up color from an
original (source) image. Brushes
using dab-based Dab Types take an
average based on samples of color
from the clone source, resulting in an
approximation of the original color.
Brushes using rendered Dab Types
sample several colors, loading each
into individual bristles of the brush,
allowing for startlingly realistic
results. For more information about
cloning, refer to “Cloning Imagery”
on page 187.
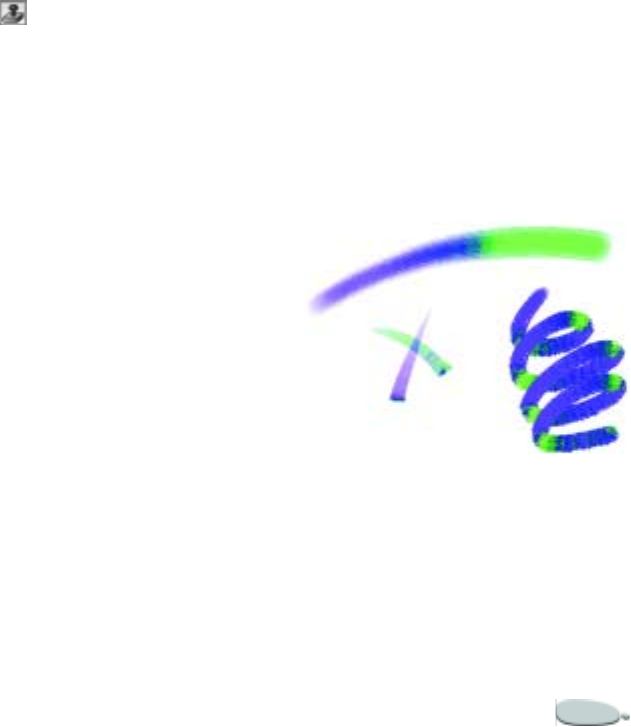
Corel Painter 81
To set up a clone source
1Choose File menu > Open, and
choose the file you want to use as a
clone source.
2Choose File menu > Clone.
3Choose Select menu > All, and
press Delete (Mac OS) or
Backspace (Windows).
Now you can work in the new file,
taking data from the original
source file.
Tip
•
You can also use this feature when
creating a mosaic. For more information,
see “Mosaics” on page 349.
To use clone colors:
1Set up a clone source.
If you don’t set a file as the source,
Corel Painter uses the current
Pattern.
2Choose a brush from the Brush
selector bar.
3Choose Window menu > Show
Colors to display the Colors
palette.
4Do one of the following:
• Click the palette menu arrow,
and choose Use Clone Color.
• Click the Clone Color button
on the Colors palette.
Enabling the Clone Color option
disables the color picker. This is a
reminder that your color
information is coming from the
clone source.
5When you paint in the clone file,
Corel Painter uses colors from the
clone source image.
Note
•
When you change the brush or
variant, Corel Painter turns Use Clone
Color off. Be sure to turn it back on to
continue working with the clone color.
Using Two Colors at Once
Usually, you’ll work with only the
primary color—the front rectangle of
the two overlapping rectangles on the
Colors palette. Using one color
produces a solid-color brush stroke.
By selecting a secondary color, you
can determine the colors for
multicolored brush strokes. Many
brush variants are able to paint with a
variable range of colors.
The settings on the Color Expression
palette determine when Corel Painter
uses one color or the other. For more
information about using color
expression, see “Color Expression” on
page 91.
You can use two colors at once in a brush
stroke.
To set up a two-color brush
stroke:
1Choose a brush from the Brush
selector bar.
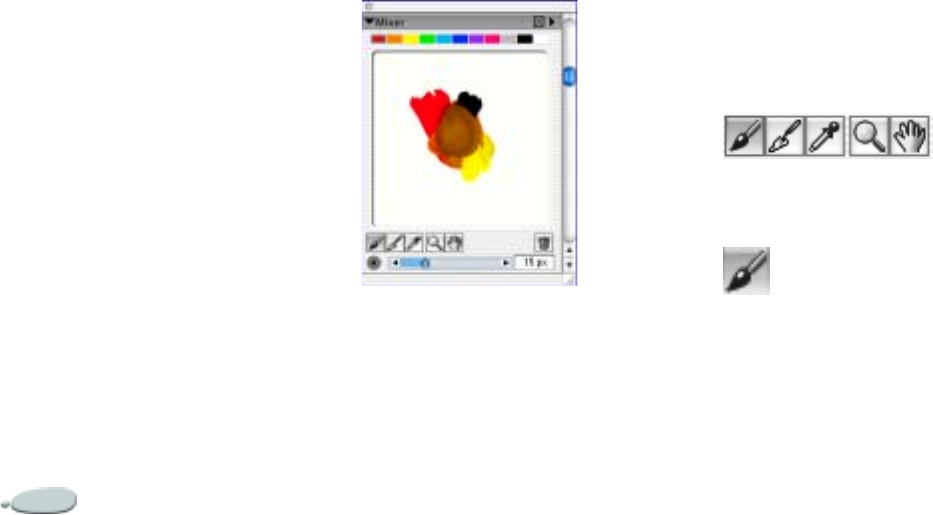
Color82
2Choose Window menu > Show
Colors to display the Colors
palette.
3Choose a primary and secondary
color from the standard or small
Color Picker.
Refer to “Understanding Primary
and Secondary Colors” on page 79
for more information about setting
primary and secondary colors.
4Choose Window menu > Show
Color Expression to display the
Color Expression palette.
5Choose Direction from the
Controller pop-up menu.
6Paint in the document.
The primary color is used in one
direction and the secondary color
is used in the other.
Note
•
You can also choose a color from a
color set.
Tip
•
You might want to try a different
setting from the Controller pop-up menu
on the Color Expression palette. Try
setting it to Pressure instead of Direction.
The Mixer Palette
The Mixer palette mimics the
traditional experience of mixing colors
on an artist’s palette. You can apply
two or more colors to the Mixer Pad,
blending them together to get the
color you want.
Colors can be saved, loaded, and reset
on the Mixer palette, saved as color
swatches, and saved to color sets.
The Mixer palette.
To display the Mixer palette
•Choose Window menu > Show
Mixer.
To change the Mixer Pad
background
1Choose Window menu > Show
Mixer.
2Click the palette menu arrow, and
choose Change Mixer
Background.
3In the Color dialog box, choose a
background color.
The Mixer Palette Tools
The tools on the Mixer palette are
used to apply, mix, sample, and clear
color on the Mixer Pad.
The Mixer palette tools.
The Brush Tool
The Brush tool acts as a loaded paint
source, applying color to the Mixer
Pad. Color loaded on it also blends
with color already on the Mixer Pad.
Corel Painter 83
The Palette Knife Tool
The Palette Knife mixes colors already
on the Mixer Pad. It does not add new
colors to the Mixer Pad.
The Eyedropper Tool
The Eyedropper tool samples color on
the Mixer Pad for use on the canvas.
The sampled color becomes the
primary color on the Colors palette.
The Zoom Tool
The Zoom tool lets you zoom in and
out of areas on the Mixer Pad.
The Pan Tool
The Pan tool lets you scroll through
the Mixer Pad.
The Clear and Reset Canvas Tool
The Clear and Reset Canvas tool
erases the contents of the Mixer Pad
and resets the zoom level to 100%.
The Brush Size Slider
The Brush Size slider lets you
increase or decrease the size of the
Brush tool and the Palette Knife tool.
If you adjust the Brush Size slider, the
new value is retained when you
reopen the application.
The Mixer Palette Colors
Color wells at the top of the Mixer
palette store commonly used colors
you can use on the Mixer Pad. A series
of colors appears by default; however,
these colors can be changed to suit the
individual preferences of the artist.
Mixer colors can be saved, loaded, and
reset to the default.
To change Mixer palette colors
1Choose Window menu > Show
Mixer to display the Mixer palette.
If the Mixer palette is not
expanded, click the palette arrow.
2Choose Window menu > Show
Colors to display the Colors
palette.
3On the Colors palette, choose a
color from the standard or small
Color Picker.
4On the Mixer Color palette, choose
the color well you want to change
on the Mixer Color selector.
5In the color well, press Command
+ click (Mac OS) or Ctrl + click
(Windows).
The new color appears in the color
well.
To save Mixer palette colors
1Choose Window menu > Show
Mixer to display the Mixer palette.
2Click the palette menu arrow, and
choose Save Mixer Colors.
3In the Save Mixer Colors dialog
box, type a name for the mixer
colors and choose where you want
to save the Mixer swatches (MSW)
file.
4Click Save.
Color84
To load Mixer palette colors
1Choose Window menu > Show
Mixer to display the Mixer palette.
2Click the palette menu arrow, and
choose Load Mixer Colors.
3In the Load Mixer dialog box,
choose the Mixer swatches (MSW)
file you want to load.
4Click Open.
To reset the Mixer palette colors
1Choose Window menu > Show
Mixer to display the Mixer palette.
2Click the palette menu arrow, and
choose Reset Mixer Colors.
Mixing Colors
Using the Mixer Pad, the color wells,
and the Brush and Palette Knife tools,
you can create new colors for use in
your images.
When you have finished mixing and
sampling colors, you can clear the
Mixer Pad, or save it as a Mixer Pad
(MXS) file that you can open and use
later.
To mix colors
1Choose Window menu > Show
Mixer to display the Mixer palette.
2Click the Brush tool .
3Choose a color from the color well,
and paint on the Mixer Pad.
4Choose a second color from the
color well, and paint on the Mixer
Pad.
5Do one of the following:
• Use the Brush tool to add to
and blend the colors.
• Use the Palette Knife tool to
blend the colors.
To sample a color from the Mixer
Pad
1Choose Window menu > Show
Mixer to display the Mixer palette.
2Click the Eyedropper tool .
3On the Mixer Pad, click the color
you want to sample.
The sampled color becomes the
primary color in the image.
To clear the Mixer Pad
1Choose Window menu > Show
Mixer to display the Mixer palette.
2Do one of the following:
• Click the palette menu arrow,
and choose Clear Mixer Pad.
• On the Mixer palette, click the
Clear and Reset Canvas
button .
To save a Mixer Pad
1Choose Window menu > Show
Mixer to display the Mixer palette.
2Click the palette menu arrow, and
choose Save Mixer Pad.
3In the Save Mixer Pad dialog box,
type a name for the mixer colors
and choose where you want to save
the Mixer Pads (MXS) file.
4Click Save.
To load a Mixer Pad
1Choose Window menu > Show
Mixer to display the Mixer palette.
2Click the palette menu arrow, and
choose Open Mixer Pad.
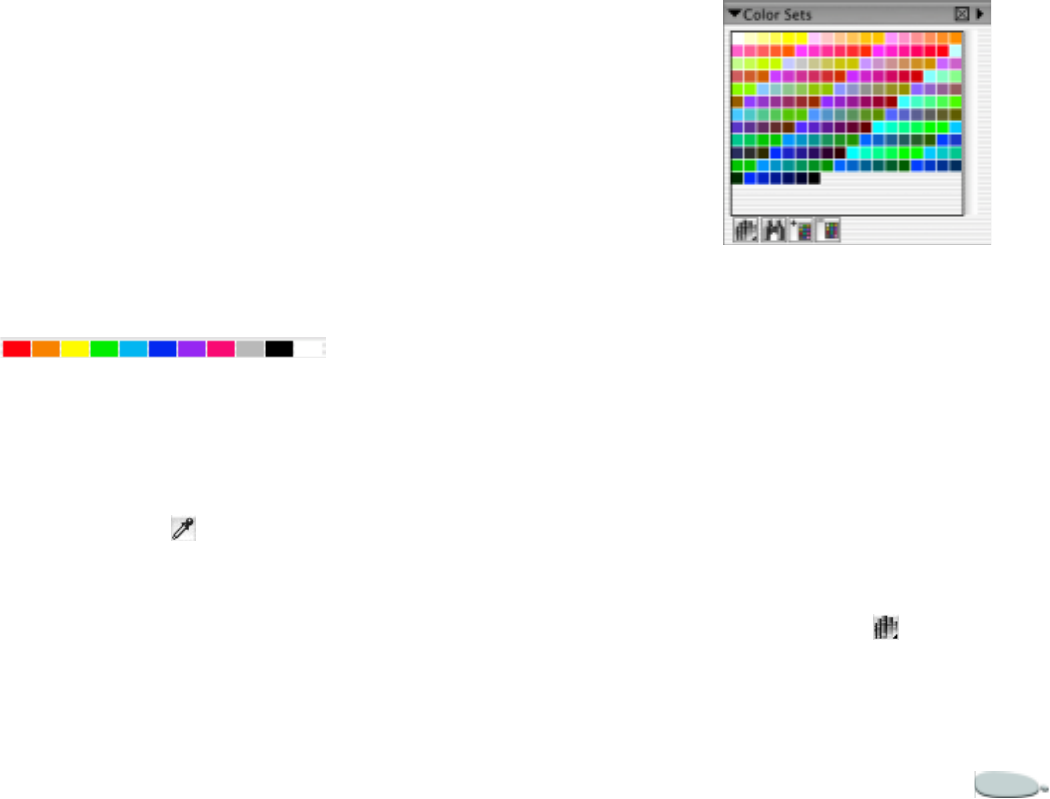
Corel Painter 85
3In the Open Mixer Pad dialog box,
choose the Mixer Pads (MXS) file
you want to open.
4Click Open.
Creating Color Swatches
If you have mixed colors that you are
particularly happy with, you can save
them as color swatches and add them
to color sets. For more information
about color sets, see “Using Color
Sets” on page 85.
Color swatches that you create on the Mixer
palette can be saved.
To add a color swatch to the color
set
1On the Mixer palette, click the
Eyedropper tool , and choose
the color you want to save as a
color swatch.
2Click the palette menu arrow, and
choose Add Swatch to Color Set.
The selected color is added to the
current color set.
To create a color set from the
Mixer Pad
1Choose Window menu > Show
Mixer to display the Mixer palette.
2Click the palette menu arrow, and
choose New Color Set from Mixer
Pad.
Using Color Sets
Corel Painter uses color sets to
organize groups of colors. Some color
sets are organized by both name and
color relationship.
Corel Painter provides several color
sets—Corel Painter Colors, Mac OS
and Windows system palettes, and the
PANTONE MATCHING
SYSTEM® are a few. Only one color
set can be open at a time, but you can
easily load a different set.
The Color Sets palette.
To display the Color Sets palette:
•Choose Window menu > Show
Color Sets.
To choose a color from a color set:
•On the Color Sets palette, click a
color.
To open a different color set:
1On the Color Sets palette, click the
palette menu arrow or the Library
Access button , and choose
Open Color Set.
2In the Select Color dialog box,
choose a color set and click Open.

Color86
You can set a default color set in
the Preferences dialog box. For
more information, refer to “Setting
Preferences” on page 50.
To save a color set
1On the Color Sets palette, click the
palette menu arrow or the Library
Access button, and choose Save
Color Set.
2In the Enter Color Set Name
dialog box, choose where you want
to save the file.
3Type a name for the color set in the
File Name box.
4Click Save.
Finding Colors in a Color Set
There are two ways to find a particular
color in a color set. You can search for
the color by name or have Corel
Painter find the color that comes
closest to matching the current color.
To find a color:
1On the Color Sets palette, do one
of the following:
• Click the Find Color button
.
• Click the palette menu arrow,
and choose Find Swatch.
2In the Find Color dialog box, do
one of the following:
• Enable the By Name option,
and type a name in the box.
• Enable Closest to Current
Color.
3Click Begin.
4Click OK when the desired color is
found.
If the color set is visible, Corel
Painter surrounds the found color
with a selection frame.
If you search for a color by name,
but a color with that name is not
found, the OK button is not
available (grayed out).
Customizing Color Set
Layouts
You can arrange colors in a color set in
a variety of ways. You can sort by hue,
luminance, and saturation; determine
the size of color swatches; decide
whether to have grid lines; and
indicate whether the colors in the set
are named. You can change a color set
until it’s exactly the way you want it.
To change how colors are sorted:
1On the Color Sets palette, click the
palette menu arrow and choose
Sort Order.
2Choose one of the following
options:
•Saved — sorts colors in the
order they were originally
entered.
•HLS — sorts colors by hue,
luminance, and saturation.
•LHS — sorts colors by lumi-
nance, hue, and saturation.
•SHL — sorts colors by satura-
tion, hue, and luminance.
To adjust color swatch size:
1On the Color Sets palette, click the
palette menu arrow, and choose
Swatch Size.
2Do one of the following:
• Choose a pixel value.
• Choose Customize.
Corel Painter 87
3If you choose Customize, move the
Width and Height sliders in the
Customize dialog box, or type
values in the Width and Height
boxes.
To turn the grid on or off:
•On the Color Sets palette, click the
palette menu arrow, and choose
Show Grid to toggle the display of
the grid on and off.
Turning the grid off eliminates
lines between colors. You can see
more colors, but the separations
between colors are not as distinct
as when the grid is on.
To turn color names on or off:
•Click the palette menu arrow, and
choose Display Name to toggle the
display of color names on or off.
Creating Color Sets
You can create your own color sets to
control the colors in particular projects
or to create groups of favorite painting
colors. Creating clearly named color
sets can be very useful. For example,
you could call a color set Shades of
Purple, Hero Image, My Crayons, or
Rollover Buttons—all offering you
easy access to recognizable color sets.
You can create color sets from:
• the Color pickers on the Colors
palette
•an image
• a selection on an image
•a layer
• the Mixer palette
Before you create a new color set, you
may be prompted to save the current
color set. For more information, see
“To save a color set” on page 86.
To create a new color set using
the Color pickers
1On the Color Sets palette, click the
palette menu arrow, and choose
New Empty Color Set.
2On the Colors palettes, choose a
color from the standard or small
Color picker.
3On the Color Sets palette, click the
Add Color to Color Set button .
Notes:
•
For information about adding colors
to a color set, see “Editing Color Sets” on
page 88.
•
For more information about selecting
colors, refer to “Using the Color Pickers”
on page 78.
To create a color set from an
image, selection, layer, or the
Mixer palette
•On the Color Sets palette, click the
palette menu arrow or the Library
Access button , and choose one
of the following:
•New Color Set from Image —
This option is available only if
you have an image open. A
color set appears, containing all
the colors in the image.
•New Color Set from Layer —
This option is available only if
an active layer is selected in
your image. A color set appears,
containing all the colors in the
active layer.
•New Color Set from Selection
— This option is active only if
you have an active selection on

Color88
your image. A color set appears,
containing all the colors in the
selected area of the image.
•New Color Set from Mixer —
A color set appears, containing
all of the colors used in the
Mixer palette.
Tip
•
When working on Web pages, you can
keep the number of colors used in an
image (and subsequent image size) low by
creating a color set and using only colors
in that set.
Editing Color Sets
You can customize color sets by
adding, deleting, or replacing colors.
You can also name or rename
individual colors in a color set.
Naming colors in a color set can be
useful. You can then search for a color
by name or annotate the colors you
use, right in the document window.
For more information on searching for
a color, refer to “Finding Colors in a
Color Set” on page 86. For more
information about annotating colors,
refer to “Annotating Colors” on
page 91.
To add a color:
1Choose the color you want to add
from the Colors palette, from a
color set, or from an existing
image.
2On the Color Sets palette, click the
Add Color to Color Set button .
The color is added to the current
color set.
3If you like, double-click the color
swatch to enter a name for the
color.
You can change the name later by
double-clicking on the swatch
again and entering a new name.
4Repeat this procedure for all the
colors you want to add.
Note
•
Because Corel Painter closes the
current color set before displaying a new
one, if you want to add a color from an
existing color set, select the color in the
existing color set before you open the
destination set.
To delete a color:
1Choose Window menu > Show
Color Sets.
2On the Color Sets palette, click the
Delete Color from Color Set
button .
3In the warning dialog box, click
Yes.
Corel Painter deletes the chosen
color from the color set window.
To replace a color:
1Choose the color you want to add
from the Colors palette, from a
color set, or from an existing
image.
2Hold down Command (Mac OS)
or Ctrl (Windows), and click the
color you want to replace.
The new color replaces the old one
in the color set.
To name or rename a color:
1Choose Window menu > Show
Color Sets.
2Double-click a color swatch on the
Color Sets palette.
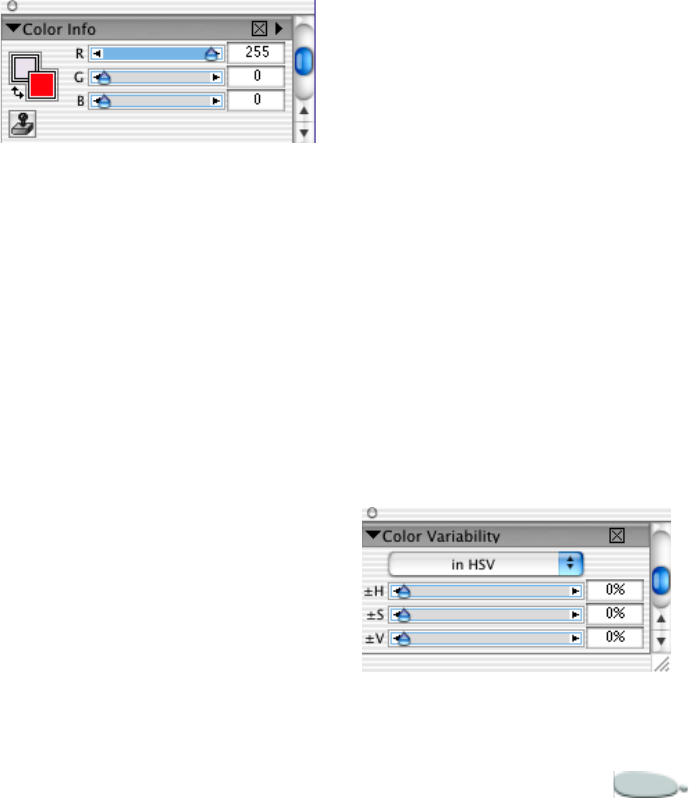
Corel Painter 89
3Type a color name in the Set Color
Name dialog box.
Color names can be up to 31
characters long.
Color Information
Color information for a selected color
is available on the Color Info palette.
The Color Info Palette
The Color Info palette shows the
HSV and RGB values for the selected
color. Corel Painter gives RGB values
in decimal format. These values can
be adjusted by moving the sliders, or
by typing new values in the
corresponding boxes.
You can also use the Color Info palette
to enable the Clone Color option. For
more information on clone color, see
“Using Clone Color” on page 198.
The Color Info palette.
To display the Color Info palette
•Choose Window menu > Show
Color Info.
To set RGB or HSV values
1On the Color Info palette, click the
palette menu arrow and choose
one of the following:
•Display as RGB.
•Display as HSV.
2Move the sliders to adjust the
values, or type new values in the
boxes.
You can preview the new color in
the primary and secondary color
rectangles on the Color Info
palette.
Tip
•
You can display hexadecimal RGB
values on the Colors palette by pressing
Shift + click in the HSV/RGB square.
Hexadecimal RGB values can be useful
when authoring for the Web.
Color Variability
Color variability allows you to create
brush strokes of more than one color.
Variability can be used to enhance the
Natural-Media appearance of your
work.
The Color Variability Palette
The Color Variability palette contains
sliders to adjust color variability
values.
The Color Variability palette.

Color90
To display the Color Variability
palette
•Choose Window menu > Show
Color Variability.
Setting Color Variability
Color variability can be set according
to HSV or RGB mode, and it can be
based on the current gradient or color
set.
To set color variability:
1On the Colors palette, choose a
primary color from the standard or
small Color picker.
2Choose Window menu > Show
Color Variability to display the
Color Variability palette.
3Choose In HSV from the pop-up
menu.
4Adjust the Hue, Saturation, and
Value sliders to control hue,
saturation, and value ranges for
color variability.
• Move the ±Hue slider to the
right to increase the number of
hues in the resulting brush
stroke. These colors are the
ones adjacent to the selected
color on the color wheel.
• Move the ±Saturation slider to
the right to increase variability
in the color intensity of the
brush stroke.
• Move the ±Value slider to the
right to increase variability in
the brightness of the brush
stroke.
You can try different ±HSV
settings with any of the brushes to
get interesting results.
Note
•
When you save a brush variant, the
current color variability setting is also
saved.
Tip
•
When working with brushes like the
Loaded Oils brush or the Van Gogh and
Seurat variants of the Artists brush,
moving these sliders to the right can add
natural, almost 3D-looking effects to your
Web page images.
To set color variability in RGB
mode:
1On the Colors palette, choose a
primary color from the standard or
small Color picker.
2Choose Window menu > Show
Color Variability to display the
Color Variability palette.
3Choose In RGB from the pop-up
menu.
4Move the R, G, and B sliders to
control color variability of red,
green, and blue values.
To set color variability based on
the current gradient:
1On the Colors palette, choose a
primary color from the standard or
small Color picker.
2Choose Window menu > Show
Color Variability to display the
Color Variability palette.
3Choose From Gradient from the
pop-up menu.
From Gradient causes random
colors from the current gradient to
be chosen for color variability.
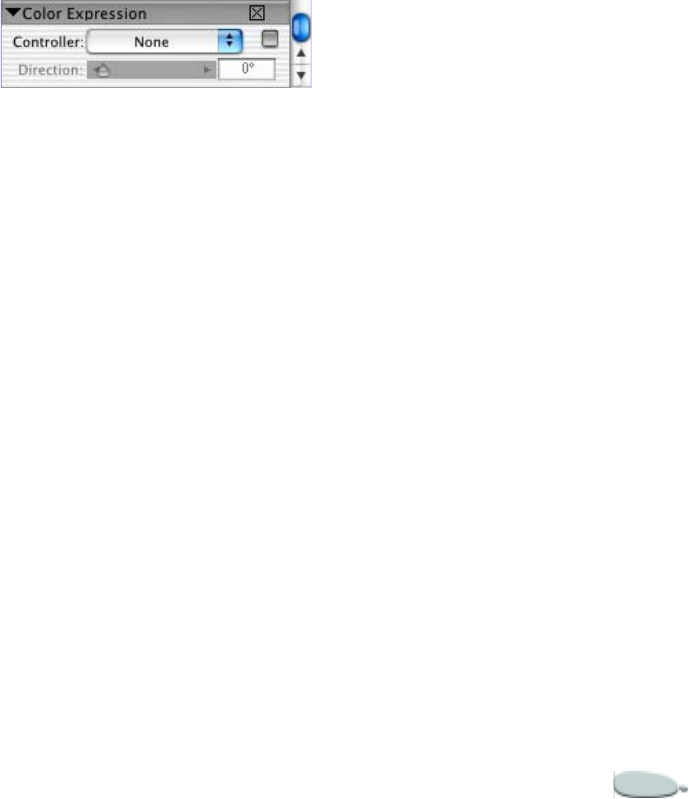
Corel Painter 91
To set color variability based on
the current color set:
1On the Colors palette, choose a
primary color from the standard or
small Color picker.
2Choose Window menu > Show
Color Variability to display the
Color Variability palette.
3Choose From Color Set from the
pop-up menu.
From Color Set causes random
colors from the current color set to
be chosen for color variability.
Color Expression
Color expression determines where
Corel Painter should use the primary
or secondary color in an image.
The Color Expression Palette
The Color Expression palette lets you
introduce input, such as direction,
that controls output when applying
two-color brush strokes.
The Color Expression palette.
To display the Color Expression
palette
•Choose Window menu > Show
Color Expression.
To set Color Expression controls
1Choose Window menu > Show
Color Expression to display the
Color Expression palette.
2From the Controller pop-up menu,
choose one of the following:
•None — applies no adjustment
to the color expression
•Velocity — adjusts the color
expression based on the drag-
ging speed
•Direction — adjusts the color
expression based on the direc-
tion of the stroke, and accord-
ing to the value you set with the
slider or in the box
•Pressure — adjusts the color
expression based on stylus pres-
sure
•Wheel — adjusts the color
expression based on the wheel
settings on an airbrush stylus,
specifically the Wacom Intuos
Airbrush stylus
•Tilt — adjusts the color expres-
sion based on the angle of the
stylus from the tablet
•Bearing — adjusts the color
expression based on the direc-
tion in which the stylus points
•Source — adjusts the color
expression based on the lumi-
nance of the clone source
•Random — adjusts the color
expression at random
3If you want to switch the primary
and secondary colors, enable the
Invert check box to invert the color
expression.
Annotating Colors
The Annotation feature uses color
names as labels for the colors in your
images. Labels are small text boxes
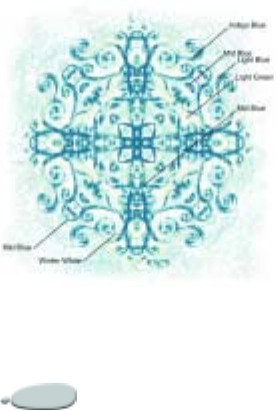
Color92
connected to lines that point to an
individual color in your on-screen or
printed image. Annotating colors in
an image can help you track, and
limit, which colors are used, which
can help you control image size. After
you create annotations, you can hide
or show them, or delete them.
You must name color swatches in the
active color set to generate useful
annotations. You can change color
names after you have added them as
annotations. For information about
naming color sets, see “To name or
rename a color:” on page 88.
Create labels, or annotations, for individual
colors in your image.
Annotations are kept in a separate
layer on top of the image and can be
saved in the RIF format with your
image. Annotations are included
when you record a script, and are
properly scaled when you play back at
a different resolution.
When you move a layer, its
annotations go with it. If you move an
annotated layer on top of another, the
visible annotation might actually
belong to the underlying layer, even
though it appears to be labeling the
top one.
When you annotate a color that
doesn’t exactly match a color in the
active color set—for example, when
you’re annotating brush strokes
applied at less than 100% opacity—
Corel Painter approximates the color,
displays the name of the nearest
match, and adds an asterisk after the
color name to indicate a near match.
When you refill an annotated area, the
annotation is updated to reflect the
new color. Refer to “Filling
Techniques” on page118 for more
information.
To create annotations:
1Use a color set that includes names
for the colors.
2Choose Canvas menu >
Annotations > Annotate.
3Position the cursor on the color
you wish to annotate and drag to
an area outside the color’s
boundaries.
When you release the mouse or
stylus button, a color name
appears, attached to a line that
points to the annotated color.
4After annotating as many colors as
needed, click Done in the
Annotation dialog box.
To delete an annotation:
1Choose Canvas menu >
Annotations > Annotate.
2Click the annotation tag (name) to
select it.
3Press Delete (Mac OS) or
Backspace (Windows).
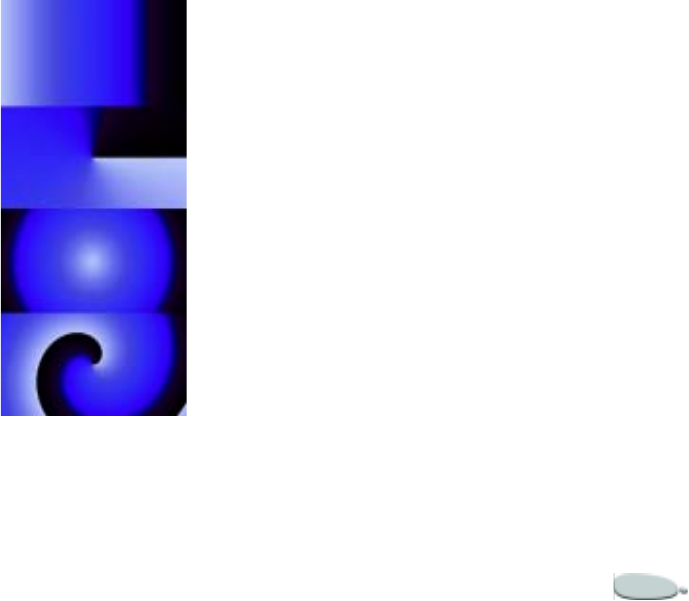
Corel Painter 93
To show or hide annotations:
1Choose Canvas menu >
Annotations > Show
Annotations.
The annotations appear.
2Choose Canvas menu >
Annotations > Hide Annotations
to hide the annotations.
To change color names after
annotating an image:
1Choose the annotation you want to
rename.
2Press Delete (Mac OS) or
Backspace (Windows).
3On the Color Sets palette, double-
click the color swatch of the color
you want to rename.
4Type a new name in the Set Color
Name dialog box.
5Choose Canvas menu >
Annotations > Annotate.
6Re-create the deleted annotation.
7Repeat the procedure for each
annotation you want to rename.
Using Gradients
A gradient is a gradual transformation
from one color into another.
Sometimes they are called blends or
fountains. Corel Painter provides
several different types of gradients:
linear, radial, circular, and spiral.
Examples of gradient types, from top to
bottom: linear, radial, circular, and spiral.
You can use gradients to:
• Fill an image selection, layer, or
channel. For more information,
see “Using Selections” on
page 203, “Using Layers and Layer
Masks” on page 229, and “Using
Alpha Channels” on page219.
• Control a Pop-Art Fill effect.
(Other effects work best when you
use a filled mask.) For more
information, see “Pop Art Fill” on
page 311.
• Express the gradient in an existing
image by mapping gradient colors
to image luminance. For more
information, see “Creating Texture
Using Image Luminance” on
page 280.
• Brush with a gradient with one of
the computed brushes (using one
of these dab types: line airbrush,
projected, or rendered). For more
information, see “Dab Types” on
page 148.
Although Corel Painter comes with
libraries full of gradients, you’ll
invariably want to create some of your
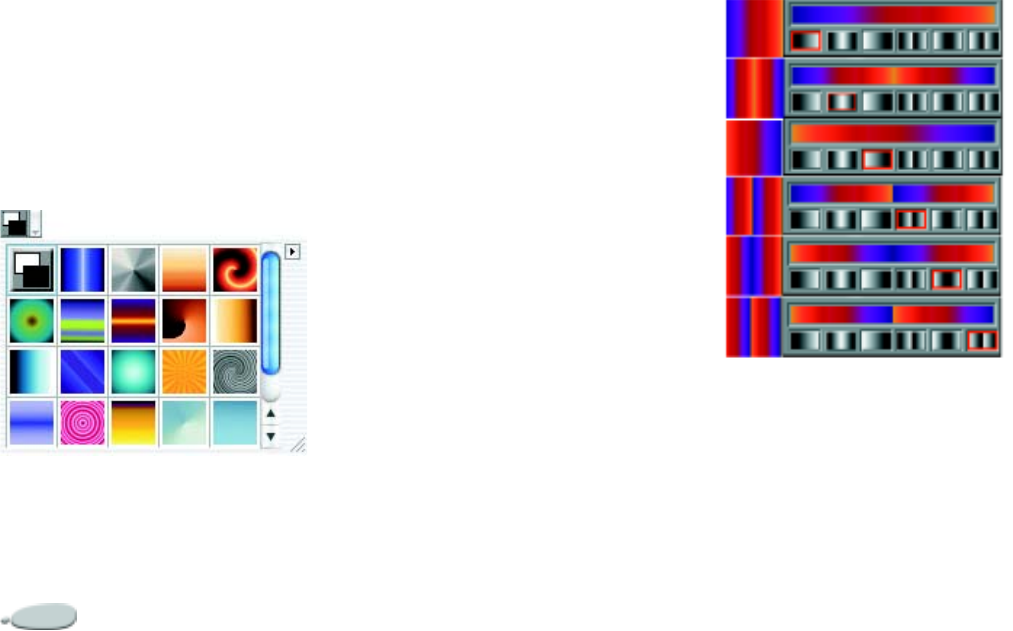
Color94
own. To do that, you just need to
define two colors and create a gradient
between them.
You can also capture gradients from
existing images or create your own
libraries of gradients. Use the options
on the Gradients palette to select and
adjust Corel Painter gradients.
Gradients are stored in libraries. You
can load alternate libraries of
gradients to increase your choices. For
more information about working with
libraries, refer to “Loading Alternate
Libraries” on page 24.
The Gradient selector on the Gradients palette.
To select a gradient:
1Choose Window menu > Show
Gradients to display the Gradients
palette.
If the Gradients palette is not
expanded, click the palette arrow.
2Click the Gradient selector and
choose a gradient style.
3Click one of the Gradient Types on
the right of the palette to select
between the four types of
gradients—linear, radial, spiral, or
circular.
The Preview window shows how
current settings affect a selected
gradient.
To change gradient order:
1Choose Window menu > Show
Gradients to display the Gradients
palette.
2Click one of the Gradient Orders
at the bottom of the palette to
determine how the gradient
behaves:
• left to right
• left to right and mirrored
•right to left
• left to right and doubled
•right to left and mirrored
• right to left and doubled
The Preview Strip (above the
gradient orders) shows the selected
gradient order.
Examples of gradient orders.
To change a gradient angle:
1Choose Window menu > Show
Gradients to display the Gradients
palette.
2Drag the red ball in the gradient
angle ring, or click once anywhere

Corel Painter 95
on the ring to change the gradient
angle.
A corresponding numeric value
appears below the gradient
preview.
To change spiral tension:
1Choose Window menu > Show
Gradients to display the Gradients
palette.
2Do one of the following:
• Hold down Command (Mac
OS) or Ctrl (Windows) while
you drag the red ball in the gra-
dient angle ring to change how
tightly wound the spiral gradi-
ent becomes.
• Click inside the gradient pre-
view to cause Corel Painter to
rotate the gradient for you.
Click anywhere outside the
preview to stop the rotation.
Creating and Editing
Gradients
You can create from very simple to
very complex gradients. For a simple
two-point gradient, you just need to
choose a primary and a secondary
color, then have Corel Painter create a
gradient between them. For more
complex gradients, use the Gradient
Editor or capture gradients from
existing artwork. Color control points
in the Gradient Editor are used to
control at which point a new gradient
starts.
You can save gradients and use them
to fill a selected object. For more
information on filling an object, refer
to “Filling Techniques” on page 118.
To create a two-point gradient:
1Choose Window menu > Show
Colors to display the Colors
palette.
2On the Colors palette, click the
primary color rectangle and choose
a primary color.
3Click the secondary color rectangle
and choose a secondary color.
4Choose Window menu > Show
Gradients.
5Choose Two-Point from the
Gradient selector.
Note
•
When creating a two-point gradient,
set a color for the right control point, and
then set a color for the far left control
point.
Tip
•
You can also select colors in between
the end colors to create interesting
gradient effects.
To edit or create a complex
gradient:
1Choose Window menu > Show
Gradients to display the Gradients
palette.
2Click the palette menu arrow, and
choose Edit Gradient.
The colored ramp across the top of
the Edit Gradient dialog box
displays the current gradient. The
pointed gray markers along the
bottom of the bar are color control
points. You can position these
pointed markers to change the
color of the blend at individual
gradient points.
3Click a color control point to select
it.
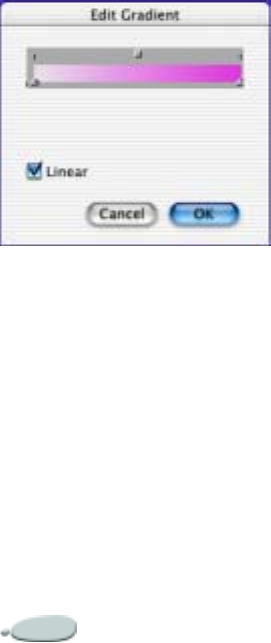
Color96
4On the Colors palette, click the
primary color rectangle and choose
a primary color.
5Repeat steps three and four for
each color control point you want
to edit.
Use the Edit Gradient dialog box to create or
edit gradients.
To add color control points
1Choose Window menu > Show
Gradients to display the Gradients
palette.
2Click the palette menu arrow and
choose Edit Gradient.
3In the Edit Gradient dialog box,
click anywhere in the color ramp
bar.
The control point is added,
without affecting color.
4Click the new color control point
to select it.
5Open the Colors palette and
choose a color.
Tip
•
You can press Option + click (Mac
OS) or Alt + click (Windows) in the bar
to both create a control point and set it to
the current color
To delete a control point:
1Choose Window menu > Show
Gradients to display the Gradients
palette.
2Click the palette menu arrow, and
choose Edit Gradient.
3In the Edit Gradient dialog box,
click a control point to select it.
4Press Delete (Mac OS) or
Backspace (Windows) to delete a
selected color control point.
To save a gradient:
1Choose Window menu > Show
Gradients to display the Gradients
palette.
2Click the palette menu arrow, and
choose Save Gradient.
3In the Save Gradient dialog box,
enter a name for the gradient.
Creating Blending Ramps
Blending ramps determine how a
gradient blends: linearly or non-
linearly.
To create ramps that blend
linearly:
1Choose Window menu > Show
Gradients to display the Gradients
palette.
2Click the palette menu arrow, and
choose Edit Gradient.
3In the Edit Gradient dialog box,
enable the Linear check box.
Linear is the default gradient.
To create non-linear gradients:
1Choose Window menu > Show
Gradients to display the Gradients
palette.
2Click the palette menu arrow and
choose Edit Gradient.
Corel Painter 97
3Disable the Linear check box.
All ramps within the gradient are
now non-linearly blended using
smooth curves.
Tip
•
When using non-linear ramps, use the
Color Spread slider to control the color
smoothness at each color control point.
Changing Gradient Color Hue
Color hue is represented in the Edit
Gradient dialog box by boxes located
at the midpoints between the adjacent
color control points. They allow you
to change the hue of the blend within
that segment.
To change the color hue:
1Choose Window menu > Show
Gradients to display the Gradients
palette.
2Click the palette menu arrow, and
choose Edit Gradient.
3In the Edit Gradient dialog box,
click a square hue box above the
color ramp bar.
4Select an option from the Color
Hue pop-up menu:
•RGB blends directly between
the red, green, and blue com-
ponents of the two colors.
•Hue Clockwise and Hue
Counterclockwise blend
between the endpoint colors by
rotating around the color
wheel.
Note
•
For a better understanding of this
concept, refer to the standard Color picker
(ring and triangle) and note the order of
the colors on the Hue ring. Notice that as
you change parameters within the Edit
Gradient dialog box, gradient previews
are updated on the Gradients palette.
Capturing a Gradient from an
Image
You can use any existing imagery as a
source for creating new gradients.You
could capture the colors in a photo of
a sunset or paint your own range of
colors as the content of a gradient.
To make perfect blends between a series of
colors, it’s better to work with a row of single
pixels rather than a large piece of an image.
To capture a gradient:
1Select a horizontal or vertical area.
Make the selection as narrow as
possible.
If the selection is horizontal, Corel
Painter uses the first row of pixels
starting at the upper left for the
gradient.
If the selection is vertical, Corel
Painter uses the first column of
Color98
pixels, starting at the upper left for
the gradient.
2Choose Window menu > Show
Gradients to display the Gradients
palette.
3Click the palette menu arrow, and
choose Capture Gradient.
4In the Save Gradient dialog box,
type a name for the gradient.
The new gradient is saved in the
current library. In the future, you
can choose it by name from the
Gradients palette.
For information about working with
libraries, refer to “Libraries and
Movers” on page 23.
Note
•
Once a gradient is captured, it can no
longer be edited. To change a captured
gradient, change the artwork from which
it was captured, and then recapture the
gradient.
Mapping a Gradient to
Luminance in an Image
You can map a gradient to an existing
image, replacing an image’s colors
with those of the gradient. This effect
applies gradient colors to the pixels of
the image, based on their luminance
values.
Corel Painter allows you to apply a gradient
based on the luminance value of existing
colors.
To express a gradient in an image:
1Open the image you want to use.
Select part of the image or use the
entire image.
2Choose Window menu > Show
Gradients to display the Gradients
palette.
3Select the gradient you want to
use.
4Click the palette menu arrow, and
choose Express in Image.
5In the Express in Image dialog
box, adjust the Bias slider to define
how the gradient is mapped.
Corel Painter replaces the colors in
the image with the colors in the
gradient, based on matching
luminance.

6
Painting
The Corel Painter application lets you
draw and paint, as you might in the
real world. In your studio, you use
brushes, pens, pencils, chalk,
airbrushes, and palette knives to make
marks on a canvas or piece of paper.
With Corel Painter, an infinite variety
of marks are possible. Like a fully
stocked art store, Corel Painter
supplies you with many different
brushes and drawing tools, each with
modifiable characteristics.
Exploring Painting
Many of the Corel Painter pre-built
brushes (known as brush variants) are
digital equivalents of real-life brushes
you might already use. Others let you
create imagery that isn’t possible with
real-life tools.
Corel Painter features “computed”
brushes that create smooth,
continuous strokes. Use these brushes
to apply color, brush on gradients, or
paint with patterns. For more
information about computed brushes,
refer to “Using Computed Brushes”
on page 102.
Corel Painter brushes can be changed
in many ways to create the look you
desire. For example, you can start with
a pencil, then change the settings until
it works like an airbrush. You can also
modify an oil pastel to create a pastel
brush, or make a leaky pen act like a
camel hair brush. Suddenly, the art
store has unlimited aisles and floors,
giving you the freedom to create
whatever you imagine. For more
information about using controls to
customize brushes, refer to
“Customizing Brushes” on page 143.
The result of any single mark or stroke
you make with a Corel Painter
drawing tool depends on:
• the brush category (or drawing
tool) you choose. Refer to “Brush

Painting100
Categories” on page 100 for more
information.
• which brush variant is selected
within the brush category. Refer to
“Selecting a Brush” on page 103
for more information about
selecting a specific brush variant.
• controls such as brush size,
opacity, and how much color
penetrates paper texture. Refer to
“Brush Settings” on page 104 for
more information.
• the current paper texture. Refer to
“Choosing Paper Textures” on
page 63 for more information
about selecting paper.
• the color, gradient, or pattern you
select to use as media. Refer to
“Painting with Color” on page 108
and “Painting with Gradients and
Patterns” on page 112 for more
information about choosing media
to apply.
• the brush method. Refer to
“Methods and Subcategories” on
page 152.
Understanding Brushes
The Brush tool represents a wide
variety of tools you can use to mark on
your document, including oils,
sponges, pencils, and chalk. Brush
strokes are created when you use the
tools to drag on the canvas.
On the Brush selector bar, pre-built
brushes (brush variants) are arranged
into recognizable categories. Corel
Painter brushes are built to emulate
Natural-Media tools. This lets you
select a tool with a reasonable
expectation of how it will behave. In
an art store, if the tools in one aisle
don’t produce the results you want,
you can try a different aisle. Similarly,
with Corel Painter, you can try
different brush categories to find the
tool you want.
You can use the pre-built Corel
Painter brushes as they are, or you can
adjust them to suit your purposes.
Many artists use Corel Painter brush
variants with only minor
adjustments—to size, opacity, or grain
(how much color penetrates paper
texture). If you want to make more
extensive modifications to a brush or
create a totally new brush variant,
there are controls for doing just that.
Refer to “Customizing Brushes” on
page 143 for more about using the
Brush Creator to customize brushes,
and to “Saving Brush Variants” on
page 183 for how to save modified
brushes as custom variants.
Most Corel Painter brushes apply
media (a color, gradient, or pattern) to
an image. Some brushes, however, do
not apply media. Instead, they make
changes to pixels already in the image.
For example, the Just Add Water
brush smudges and dilutes existing
colors in the image with smooth, anti-
aliased strokes. Using one of these
brushes on a blank area of the canvas
has no effect.
Brush Categories
On the Brush selector bar, you can
choose from a list of brush categories.
Brush categories are designed with
real media in mind, so you can select a
tool with an expectation of how it will
behave.

Corel Painter 101
Users of previous versions of Corel
Painter may notice changes in brush
categories and variants. This was done
to take advantage of new brush stroke
capabilities. If you’re looking for a
brush from a previous version, you
can reload the old brush library. For
more information, refer to “Loading
Alternate Libraries” on page 24.
Here are a few Corel Painter brush
categories that apply media:
•Liquid Ink brushes combine ink
with paint to create a thick, liquid
paint effect. Refer to “Setting
Liquid Ink Controls” on page 179
for more information about setting
controls for Liquid Ink brushes.
•Water Color brushes allow you to
control the wetness and
evaporation rate of the paper to
effectively simulate the natural
media. Refer to “Setting Water
Controls” on page 176 for more
information about setting controls
for Water Color brushes.
•Pens, like the Scratchboard Rake
and Bamboo Pen, never clog,
spatter, or run dry.
•Image Hoses let you paint with
multiple images. Image Hose
variants are named in a way that
tells you which animation
parameter and animator is in
effect. For example, the Size/P
Angle/R Image Hose variant links
size to stylus pressure and sets the
angle randomly. Refer to “Using
the Image Hose” on page 334 for
more information.
•Airbrushes apply fine sprays of
color. Computed airbrushes
carefully mirror the feel of a real
airbrush in action.
•Oils and Acrylics give effects you’d
expect from oil paints and acrylics.
All of the variants cover underlying
brush strokes, many are capable of
multi-colored strokes, and others
interact with underlying pixels to
create realistic effects.
The Smeary Flat variant in the
Oils category combines Bearing
sensitivity, Brush Loading, and an
inverted Pressure setting for Bleed.
This causes the brush to drag
underlying pixels more than it
applies media, resulting in a very
realistic brush stroke.
The Smeary Flat brush variant (from the Oils
category) illustrates how Bearing, Brush
Loading, and an inverted Pressure setting for
Bleed combine to give realistic results.
The following Corel Painter brush
categories affect only existing pixels
and do not apply media:
•Erasers let you remove color down
to the paper color or white. You can
also use erasers to increase color
density, building toward black.
•Photo tools can be used for photo
correction and manipulation.

Painting102
Using Computed Brushes
Corel Painter includes a batch of
Natural-Media brushes that use a
media application method called
“rendered dab types” to produce
“computed” brush strokes. These
brushes create wonderfully realistic,
continuous, smooth-edged strokes.
They are fast and more consistent
because the strokes are computed as
you draw, not created by applying dabs
of color. In fact, you can’t draw fast
enough to leave dabs or dots of color
in a stroke because they’re just not
there. These brushes allow for rich
features that are not possible with dab-
based media application. You can take
better advantage of tilt and angle, and
you can paint with patterns or
gradients. For information about
using rendered dab types when
customizing brushes, refer to “Dab
Types” on page148.
Using a Stylus or Mouse
When you reach for a wide, flat brush,
you expect the stroke you make with it
to be dependent on how you hold the
brush. A stroke using the face of the
brush comes out wide. A mark using
the edge is narrow.
Paint with the face of a flat brush for a wide
stroke; use the edge for a narrow stroke.
Corel Painter produces realistic brush
strokes that fade in and out; change
width, tilt and angle; or penetrate
based on the stylus input. Brush
variants that use computed brushes,
such as the Smeary Flat variant in the
Oils category, also react to stylus tilt
(how vertical the stylus is held) and
bearing (the compass direction in
which the stylus is pointing).
Tilt can significantly affect brush
strokes. If you get unexpected results,
especially with bristle-type brushes or
airbrushes, try reducing the tilt of
your stylus. Extreme tilt angles are
usually undesirable.
Many Corel Painter brushes also
respond to stylus pressure (how hard
you press with the stylus). Depending
on variant settings, greater stylus
pressure can increase the width of a
brush stroke, the penetration of color,
or the degree of other effects. The
Corel Painter airbrushes also respond
to the finger-wheel on the Wacom
Intuos airbrush, simulating a needle
control that adjusts how much ink is
sprayed.
You can link brush settings, like size,
opacity, and angle, to stylus input data
such as velocity, direction, pressure,
airbrush wheel, tilt, and bearing. Refer
to “Expression Settings” on page 164
for more information about linking
brush settings to stylus input controls.
In theory, a mouse has no pressure
information. A mouse button is either
“on” (button down), or “off” (button
up). Corel Painter introduces mouse
controls that let you simulate stylus
pressure, tilt, bearing, and wheel
settings.

Corel Painter 103
If you are using a mouse with Corel
Painter, you can compensate for the
lack of pressure information by
adjusting size, opacity and grain on
the property bar. For example,
reducing opacity or grain can produce
the same results as pressing more
lightly with a stylus.
The content CD contains brushes
designed specifically for use with a
mouse. For information about loading
alternate brush libraries, refer to
“Loading Alternate Libraries” on
page 24.
Corel Painter lets you record brush
strokes, save them, and use stroke
data. This means you can record a
brush stroke created using a stylus,
save it, and then have Corel Painter
use the recorded stroke data. This
makes it possible to paint using a
mouse and get results based upon a
stroke made with a stylus. Refer to
“Recording and Playing Back Strokes”
on page 117 for more information
about recording brush strokes to
further enhance mouse functionality.
To adjust pressure, tilt, and
bearing when using a mouse:
1On the Stroke Designer page of
the Brush Creator, click Mouse.
2Move the Pressure slider.
A 100% setting uses maximum
pressure.
3Move the Tilt slider.
A 90-degree setting simulates a
stylus that is perpendicular to the
tablet.
4Move the Bearing slider.
A setting of zero indicates that if a
stylus were in use, it would be
pointing left.
Tip
•
To see the effect of the tilt setting, use
the Fine Spray variant of the Airbrush
category.
To adjust wheel settings when
using a mouse:
1On the Stroke Designer page of
the Brush Creator, click General.
2Choose Wheel from the
Expression pop-up menu.
3Choose Mouse.
4Move the Wheel slider.
A 90-degree setting indicates that if
a stylus were in use, it would be
perpendicular to the tablet.
Selecting a Brush
To show the Brush selector bar:
•Do one of the following:
• In the toolbox, double-click the
Brush tool .
•Choose Window menu >
Show Brush Selector Bar.
To choose a brush:
1On the Brush selector bar, choose a
brush category from the Brush
selector.
2Choose a variant from the Variant
selector.
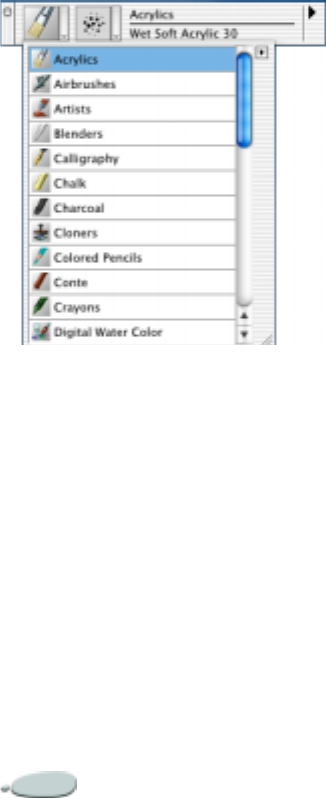
Painting104
The Brush selector lists the brush categories.
Brush Settings
Basic brush controls for size, opacity,
and grain are located on the property
bar. The property bar may also
contain additional controls for the
selected brush category, such as
resaturation, bleed, and jitter.
When a brush is selected and
positioned over the canvas, the cursor
changes, by default, into a “ghost” of
the brush—mirroring size and
shape—so you can see the area that
you’re about to paint. This is a handy
way to see if a change in size is
required.
The Brush Creator contains other
controls, depending on the selected
variant. You’ll want to eventually learn
about these and other advanced
controls. For example, the Brush
Creator offers more sophisticated
controls for resizing and shaping
brushes, including a Minimum (Min)
size setting. When a brush takes
advantage of the Min size setting,
you’ll see strokes taper and widen as
stylus pressure or direction is varied.
For complete information about using
the Brush Creator, refer to
“Customizing Brushes” on page 143.
For more about saving customized
brushes as custom variants, refer to
“Saving Brush Variants” on page 183.
Setting Brush Size
The Size slider on the property bar
determines the size of a single brush
dab. The text field next to this slider
lets you enter a specific size (in pixels).
To set brush size:
1Choose the Brush tool from the
toolbox.
2Choose a brush.
3On the property bar, type a value
in the Size box, or adjust the pop-
up slider.
Corel Painter may need to rebuild
the brush after you resize it.
Automatic building of modified
brushes is the default in Corel
Painter. Expect a short delay while
this happens.
To use the resize shortcut:
1Hold down
Command+Option+Shift (Mac
OS) or Ctrl+Alt+Shift
(Windows).
2With the Brush tool, drag in the
image window.
A circle representing the brush size
is displayed beside the pointer.
When the circle is the size you
want, release the mouse button.
3Click the image to reactivate the
Brush tool.

Corel Painter 105
A handy way to set brush size is to use the
keyboard shortcut.
Adjusting Opacity
The Opacity slider controls the degree
to which a stroke “covers” or “builds
up” on the underlying pixels.
80% opacity (top), and 20% opacity (bottom).
To set opacity:
1Choose the Brush tool from the
toolbox.
2Choose a brush.
3On the property bar, type a
percentage in the Opacity box, or
adjust the pop-up slider.
When Opacity is set low, the
applied color is thin, allowing you
to see through to the underlying
colors. When set high, color being
applied covers underlying pixels
more completely.
Note
•
Some methods and dab types do not
allow for adjustments in opacity.
Setting Grain
The Grain slider controls how much
color penetrates into the paper texture.
Lower settings show more of the
grain.
89% grain (top), and 12% grain (bottom).
To set grain:
•On the Brush property bar, type a
percentage in the Grain box, or
adjust the pop-up slider.
Move the slider to the left to reduce
penetration and reveal more
texture. Move it to the right to
increase penetration and reveal less
grain.
Note
•
For liquid media brushes, grain
controls the amount of “pull”. For Image
Hose brushes, grain controls the mixture
with the secondary color. For other
brushes, such as airbrushes, the Grain
slider is not available (grayed out).

Painting106
Where You Can Paint
You can paint on the Canvas or on a
layer above the Canvas. When a layer
is selected (highlighted on the Layers
palette), it is the target for your brush
strokes.
If you are using a Water Color brush,
you can paint only on a Water Color
layer. If you are using a Liquid Ink
brush, you can paint only on a Liquid
Ink layer. For more information, refer
to “The Water Color Layer” on
page 125 and “The Liquid Ink Layer”
on page 131.
If you try to paint on a shape, dynamic
layer, or reference layer, you must
commit it to a standard layer so that
your brush strokes are accepted.
Another possible destination for your
brush strokes is a channel or layer
mask. When a channel or layer mask
is selected, it is the target for your
brush strokes. For more information,
refer to “Editing Channels” on
page 225 or “Working with Layer
Masks” on page 255.
When you have an active selection,
painting is confined to the selection by
default. Refer to “Working with
Selections” on page 203 for more
information about selections.
In all cases, your brush strokes go to
the selected target, so make sure of the
destination before starting to paint.
Marking the Canvas
You mark the canvas by dragging in
the document window with a Brush
tool that applies media. Each time you
drag, you create a brush stroke.
When you use complex brushes, you
see a dotted line on the canvas before
the mark appears. For example, the
Gloopy variant of the Impasto brush
requires complex computations that
delay the stroke’s appearance on the
screen. When you experience a delay,
you can queue up strokes, without
losing any stroke data.
Freehand vs. Straight Line
Drawing
You can draw unconstrained lines,
called freehand, or you can draw
straight lines. Options on the property
bar let you choose the drawing style.
With the Freehand drawing style, you
can drag with any motion or in any
direction. The stroke follows your
drag path.
Drag to create strokes using the Freehand
drawing style.
With the Straight Lines drawing style,
Corel Painter connects points with a
straight line.
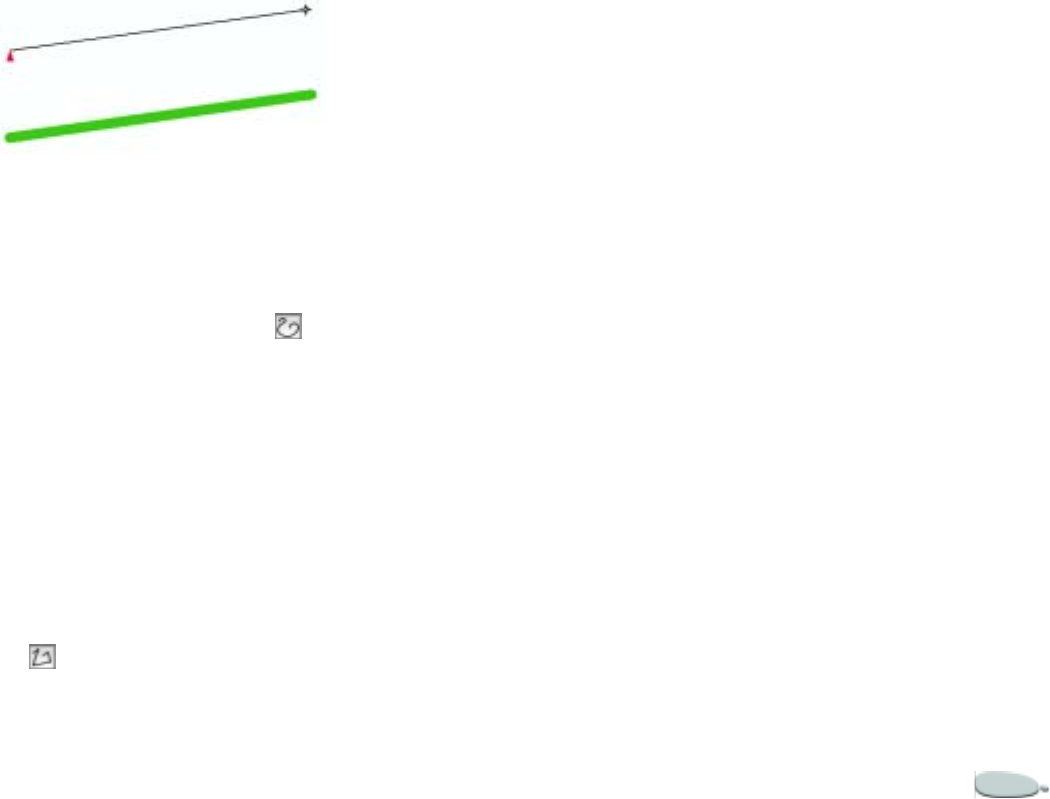
Corel Painter 107
Click to create the first point. Click or drag to
create a stroke using the Straight Lines
drawing style.
To draw freehand lines:
1On the Brush property bar, click
the Freehand Strokes button .
2Drag on the canvas.
Tip
•
You can use shortcut keys to toggle
between freehand and straight line
drawing styles. Press B to choose freehand
style, or press V to choose straight line
style.
To draw straight lines:
1On the Brush property bar, click
the Straight Line Strokes button
.
2Click the canvas at the point where
you want to start your line.
3Do one of the following:
• Click at the point where you
want to end the line.
• Drag to place the end point
exactly where you want it.
Corel Painter connects the first
and second points with a straight
line.
4To continue drawing from the
second point, click or drag to create
additional points on the canvas.
Corel Painter connects each point
with a straight line.
5To end a line, do one of the
following:
•Press Return (Mac OS) or
Enter (Windows) to close the
polygon. The final point is con-
nected to the origin with a
straight line.
• Click the Freehand Strokes
button to return to the freehand
drawing style without closing
the polygon.
•Press V to end the current poly-
gon, so you can begin a new
one.
Constraining Stroke Angles
In either drawing style, you can
constrain your strokes to 45°
increments. With the Freehand style,
each stroke is constrained to a straight
line with the angle depending on the
orientation of the stroke. With the
Straight Lines style, points are
connected with lines at angles of 45°
increments.
To constrain strokes to 45°
increments:
•Hold down Shift (Mac OS) or
Alt+Shift (Windows) as you drag
or click.
Tip
•
In Straight Line mode, you can also
constrain lines to the grid by enabling the
Snap to Grid option. Choose Canvas
menu > Grid > Snap to Grid.
Undoing Strokes
If you make a stroke you don’t like,
you can use the Undo command to
remove it. Repeat the command to
remove previous strokes. You can set

Painting108
how many individual strokes can be
undone. For more information, refer
to “Undo Preferences” on page 54.
To undo a stroke:
•Choose Edit menu > Undo.
Tip
•
You can also undo a stroke by pressing
Command+Z (Mac OS) or Ctrl+Z
(Windows).
Fading Strokes
Sometimes you apply a stroke, but
want it to be less opaque, or faded.
To fade a stroke:
1Choose Edit menu > Fade.
2Set the undo amount for the
opacity you want.
The preview shows the results of
your selection.
Letting Media Pool
Corel Painter computed brushes allow
media to build up or “pool” when you
move a brush slowly. Pooling creates
very realistic strokes, especially with
airbrushes.
You can also cause media to pool by
simply touching and pausing with the
selected brush. You can enable this
feature in the Brush Creator.
To enable media pooling
1On the Stroke Designer page of
the Brush Creator, click Spacing.
2Enable the Continuous Time
Deposition check box.
Note
•
When this option is disabled, you must
move the brush (even just slightly) to
cause media to be deposited.
Using an airbrush, paint pools when pausing a
stroke for 1 second, 4 seconds, and 7 seconds.
Making 360-Degree Strokes
There are no restrictions on bearing
(stylus direction) in Corel Painter.
This lets you create full 360-degree
strokes by completing the arc of a
stroke, without interruption. This is
true for non-computed brushes.
Computed brushes use bearing, with
the exception of those that use the
Rendered dab type.
Painting with Color
Before actually painting, you must
choose what media to apply. Most
often, you’ll probably choose to apply
a color, but selecting a color is just the
beginning. Corel Painter offers a
powerful range of color features,
including random color variability
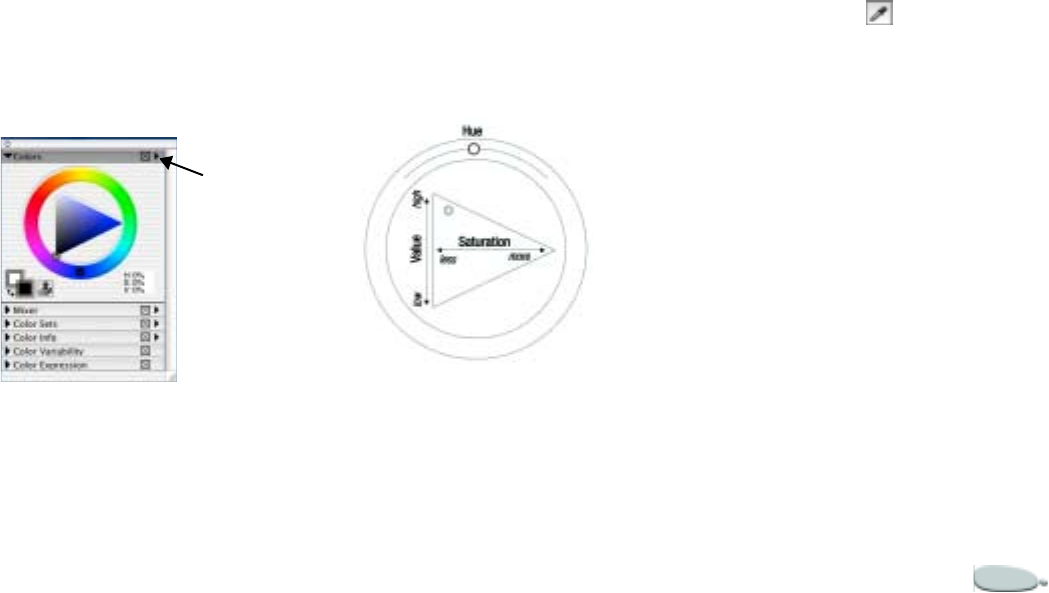
Corel Painter 109
and color sets. For more detailed
information about using color, refer to
“Working with Color” on page 77.
To paint with color:
1Select a brush that applies media
to a document.
If the Colors palette is not
displayed, choose Window menu
> Show Colors.
2On the Colors palette, click the
palette menu arrow and choose
Standard Colors.
Use the Colors palette to choose a color for
painting.
3Drag or click in the ring to select a
hue.
4Drag or click in the triangle to pick
the saturation.
The color you select is displayed in
the front rectangle below the color
ring. This is the primary color.
The back rectangle shows the
secondary color. The secondary
color is not the canvas color; it is
used to create two-color brush
strokes and two-point gradients.
Refer to “Understanding Primary
and Secondary Colors” on page 79
for more information.
Drag in the ring to select a hue. Drag in the
triangle to pick the saturation.
To paint with a color already in
the image:
1Select a brush that applies media
to a document.
2Hold down Option (Mac OS) or
Alt (Windows), and click a color in
the image.
The Brush tool toggles to the
Dropper tool . The color is
“picked up” by the Dropper tool
and becomes the primary color.
Refer to “Sampling Colors from
Imagery” on page 80 for more
information about using the
Dropper tool.
Creating Two-Color Brush
Strokes
Usually, you work with only the
primary color—the front rectangle of
the two overlapping rectangles on the
Colors palette. Using one color
produces a solid, one-color brush
stroke. By selecting a secondary color,
you can create a two-color brush
stroke.
Palette menu
arrow

Painting110
To set up a two-color brush
stroke:
1On the Brush selector bar, choose a
brush category from the Brush
selector.
Not all brushes can create two-
color brush strokes. Acrylics,
Calligraphy, and Chalk make good
choices.
2From the Variant selector, choose a
variant with a non-computed dab
type; for example, Circular.
If the Colors palette is not
displayed, choose Window menu
> Show Colors.
3On the Colors palette, click the
palette menu arrow and choose
Standard Colors.
4Click the Primary Color (front)
rectangle .
5Choose a color on the Colors
palette or the Color Sets palette.
The front rectangle shows your
selection.
6Click the Secondary Color (back)
rectangle .
7Choose a color on the Colors
palette or the Color Sets palette.
The back rectangle shows your
selection.
8Click the Primary Color (front)
rectangle.
This reactivates the primary color
for the next time you pick a color.
9Choose Window menu > Show
Color Expression to display the
Color Expression palette.
If the palette is not expanded, click
the palette arrow.
10 On the Color Expression palette,
choose Direction from the
Controller pop-up menu.
11 Paint a “T” in your document.
Draw some loops and circles to see
how the transition between colors
depends on brush stroke direction.
Note
•
For information about using the Color
Sets palette to choose a color, refer to
“Using Color Sets” on page 85.
Tip
•
For different results, try different
Controller settings. For example, choose
Pressure to create color transitions based
on the pressure you apply with your stylus.
Loading Multiple Colors
Imagine the ability to load color at a
bristle level, picking up different
colors with each “hair” of a brush—
like filling tiny ink wells. Imagine also
the ability to move multiple colors
along with a palette knife, dragging
them across your canvas or paper. The
Brush Loading feature affects how
paint comes off a brush and what
happens to the pixels underneath.
When Brush Loading is not active,
brushes interact with previously
applied colors by sampling underlying
pixels, then loading the brush with
one new color—the average of those
that were sampled. With Brush
Loading active, brushes can literally
“pick up” existing colors, hair by hair.
This capability offers truer color
interaction, astounding color
variations, and better cloning results.
To paint with multiple colors:
1Choose a brush.
2On the Stroke Designer page of
the Brush Creator, click General.
3Choose Static Bristle from the Dab
Type pop-up menu.

Corel Painter 111
4Choose Multi from the Stroke
Type pop-up menu.
5On the Stroke Designer page, click
Well, and enable the Brush
Loading check box.
This enables the brush’s ability to
pick up underlying colors.
6Adjust the Resaturation and Bleed
sliders.
The Bleed setting determines how
much underlying paint is affected
by the brush stroke. A low
Resaturation setting, combined
with a higher Bleed setting, can
enhance the Brush Loading
feature. A resaturation value of 0,
combined with differing levels of
bleed, will cause your brush to
smear image color, rather than
deposit it. In this case, the lower
the bleed, the longer the smear.
7On the Stroke Designer page, click
Spacing, and adjust the Spacing
and Min Spacing sliders to create
fewer “echo” artifacts in your
smeared stroke.
8Drag a brush stroke through
existing paint to see how paint is
“picked up” from the underlying
pixels and moved across the
Canvas.
Tips
•
It is easier to see the Brush Loading
feature if the canvas is not white. To fill
the canvas with another color, refer to
“Filling an Area with Media” on
page 118.
•
You can tie brush controls like Bleed
to the Controller setting on the Color
Expression palette. For example, if you
choose Pressure, each stroke bleeds more or
less, depending on how hard you press the
stylus. For more information, refer to
“Expression Settings” on page 164.
Troubleshooting
Why doesn’t your brush stroke
appear? What to check:
• Primary color—on the Colors
palette, what color is the Primary
Color (front) rectangle? Is it a
color that will show up when
applied to your image? Click the
Primary Color rectangle to be sure
it’s selected, and then set the
correct color.
• Opacity—check the Opacity
setting on the property bar and, if
necessary, adjust the pop-up slider
to increase opacity.
• Brush method—Brush method
describes the basic nature of a
brush. To check the brush method,
click General on the Stroke
Designer page of the Brush
Creator. If you’re drawing with a
light color on a dark background,
the method must be set to Cover,
in order to show the lighter color.
• Drawing mode—if you have made
a selection, the drawing mode
determines what part of the
selection is protected. Refer to
“Selecting a Drawing Mode” on
page 204 for more information.
• Layers—are you drawing on the
canvas with a layer blocking your
view of the brush stroke? On the
Layers palette, close the visibility
eye of each layer to see only the
canvas.

Painting112
Painting with Gradients
and Patterns
With the Corel Painter computed
brushes, you can brush on gradients,
which are gradual transformations of
one color into another. Refer to “Using
Gradients” on page 93 for more
information. The Corel Painter
computed brushes can also brush on
patterns (repeating designs). Refer to
“Using Patterns” on page 66 for more
information.
When you paint with a pattern, you
can adjust the pattern’s scale. Scale
affects a pattern brush stroke in a
special way—it determines the
resolution of the painted patterns.
Small scale causes blurry computed
brush strokes. Large scale causes
sharper strokes. Here’s why:
The brush stroke is always drawn as
the entire pattern, sized to fit in the
current dab size. Scaling the pattern
down very small (say to 20%), makes
the brush stroke appear blurry,
because the dab is significantly bigger
than the pattern. Scale the pattern up
to 100% and the dab is as clear as it
can get. Settings over 100% have no
effect on the appearance of the brush
stroke.
Here’s how to picture what’s going
on:
Imagine that the current pattern is 100
pixels across and the current brush
size is fifty pixels across. With the
pattern set to 100%, Corel Painter
shrinks 100 pixels into a 50 pixel area,
which is easy for it to do without
visible loss of accuracy. If you scale the
pattern up to 200%, it looks just as
clear as the original, and fitting it into
the 50-pixel brush size creates a brush
stroke that looks the same as when the
pattern was scaled at 100%. Scale the
pattern to 50% and the original will be
the same size as the brush, so still
there is no difference in the resulting
brush stroke.
Now, keep scaling downward. As the
size of the pattern is scaled below the
size of the brush, Corel Painter must
increase the size of the pattern to fit
the 50 pixel area of the brush stroke.
When images are scaled up, after
being first scaled down, the image
becomes blurry. This is especially
noticeable if you scale the pattern well
below brush size. At 20%, the pattern
now only consists of 20 pixels and has
lost eighty percent of the original data.
When Corel Painter expands that to
50 pixels (the brush stroke size), the
loss of data becomes very visible.
Smaller scale settings result in even
blurrier brush strokes. Go down to
2%, and the pattern is only 2 pixels
across and is able to contain, at most,
four colors (two across and two
down). When Corel Painter expands
that to fit the brush stroke, you won’t
see any of the original pattern, just a
fairly uniform color, across the dab.
To paint with a gradient:
1Select a brush that applies media
to a document.
If the Gradients palette is not
displayed, choose Window menu
> Show Gradients.
If the Gradients palette is not
expanded, click the palette arrow.
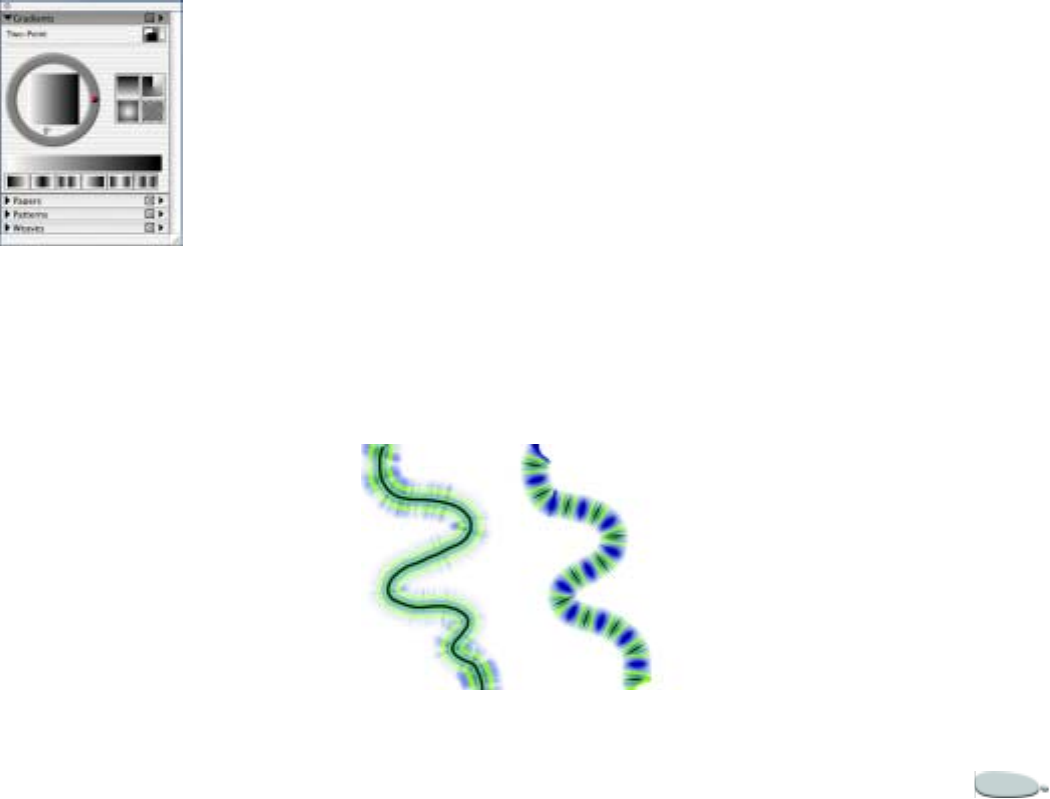
Corel Painter 113
The Gradients palette
2On the Gradients palette, choose a
gradient from the Gradient
selector.
In the center of the palette, the
Preview window shows the
selected gradient.
3Click one of the following
Gradient Order buttons:
• Left to Right
•Mirrored Left to Right
• Double Left to Right
•Right to Left
• Mirrored Right to Left
• Double Right to Left
The preview above the Order
buttons illustrates how the selected
order affects the gradient. Refer to
“Using Gradients” on page 93 for
more information about gradient
order.
4On the Stroke Designer page of
the Brush Creator, click General.
5From the Dab Type pop-up menu,
choose a dab type that activates
Source; for example, Rendered.
6Choose one of the following from
the Source pop-up menu:
•Gradient—apply the current
gradient across the width of the
stroke.
•Gradient Repeat—repeat the
current gradient along the
length of the stroke.
Painting with a gradient using Gradient (left)
and Gradient Repeat (right)
Notes:
•
If the Source option is not available
(grayed out), the selected brush can apply
color only. In that case, select a computed
brush or choose a dab type that activates
Source.
•
Although you can choose a gradient
type (Linear, Radial, Circular, or Spiral)
on the Gradients palette, a Linear
gradient type is always used when
painting with a gradient.
Tips
•
You can also choose a gradient from
the Gradient selector in the toolbox. Corel
Painter uses the current gradient order.
•
Keep in mind when painting with a
gradient that direction matters. Corel
Painter flips the gradient when you
change direction, so apply strokes in the
same direction for a uniform effect.
To paint with a pattern:
1Select a brush that applies media
to a document.
If the Patterns palette is not
displayed, choose Window menu
> Show Patterns.
If the Patterns palette is not
expanded, click the palette arrow.
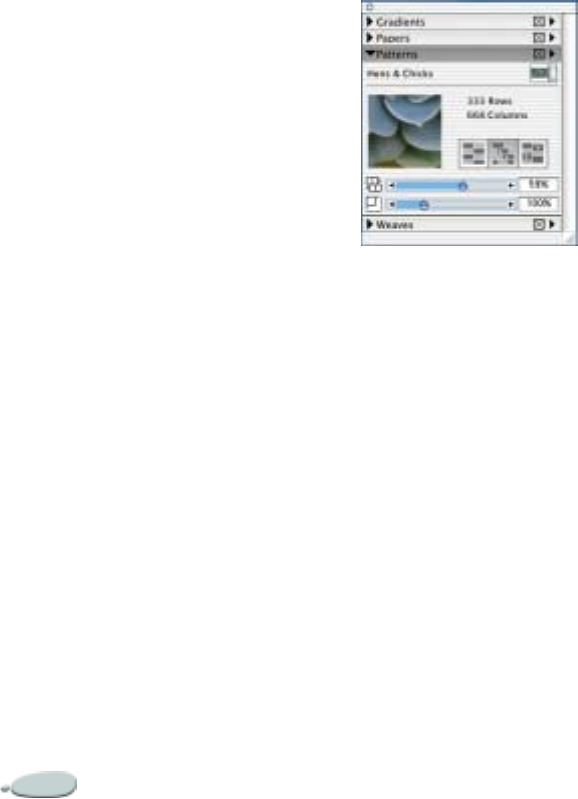
Painting114
2On the Patterns palette, choose a
pattern from the Pattern selector.
3Adjust the Pattern Scale slider.
4On the Stroke Designer page of
the Brush Creator, click General.
5From the Dab Type pop-up menu,
choose a dab type that activates
Source, for example, Rendered.
6Choose one of the following from
the Source pop-up menu:
•Pattern—paint with a pattern
containing no mask informa-
tion.
•Pattern with Mask—paint
using mask data contained in
the pattern.
Note
•
If the Source option is not available
(grayed out), the selected brush can apply
color only. In that case, select a computed
brush or choose a dab type that activates
Source.
Tip
•
Keep in mind when painting with a
pattern that direction matters. Corel
Painter flips the pattern when you change
direction, so apply strokes in the same
direction for a uniform effect.
The Patterns palette
To paint with pattern opacity:
1Select a brush that applies media
to a document.
2On the Patterns palette, choose a
pattern from the Pattern selector.
3On the Stroke Designer page of
the Brush Creator, click General.
4From the Dab Type pop-up menu,
choose a dab type that activates
Source, for example, Rendered.
5Choose Pattern As Opacity from
the Source pop-up menu.
Pattern As Opacity is the only
computed dab type that responds
to methods (Cover and Buildup),
allowing it to respond to
Graininess.
6Paint on your image.
Corel Painter applies the current
color, using luminance in the
pattern to control opacity. Light
colors in the pattern are rendered
as transparent (or very low
opacity). Dark colors in the pattern
are rendered as very dark (or high
opacity).
Painting with Airbrushes
The Corel Painter computed
airbrushes are so realistic, you feel as
though you’re using the real thing.
Taking advantage of computed dab
type technology, most airbrush
functionality is now available. For
more about computed brushes, refer
to “Using Computed Brushes” on
page 102.
The best way to get used to the Corel
Painter airbrushes is to play with
them. Select each variant and spray
paint onto the Canvas, without
worrying about running out of
compressed air. Computed airbrushes
can paint with color, patterns, or
variants. There’s a variant that blows
hair-like strokes, as well as a variant
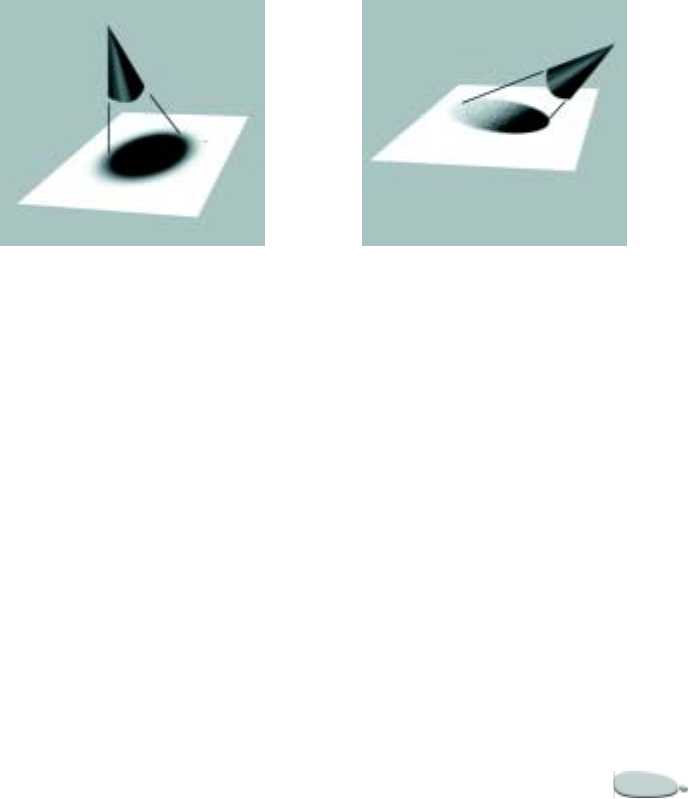
Corel Painter 115
that just blows existing paint around
on the Canvas, like using the hose
without an airbrush attached.
Try out the Fine Spray variant in the
Airbrushes category for an example of
how Bearing and Flow settings
combine to give realistic airbrush
results.
For information about the Airbrush
controls in the Brush Creator, refer to
“Setting Airbrush Controls” on
page 175.
Conic Sections
Previously, digital airbrushes projected
a thin mist of dots (or paint dabs) onto
the Canvas. The Digital Airbrush
variant (named Fat Stroke in previous
versions of Corel Painter) is included
in the default brush library. With a
digital airbrush, dots are laid down, or
sprayed, within a circular area, like the
circle thrown by a flashlight that is
perfectly perpendicular to a piece of
paper. The area of application remains
circular, regardless of tilt, bearing, or
stylus pressure. Density, or flow,
adjustments can be mimicked with
adjustments to the Opacity setting.
Previous airbrushes sprayed a thin layer of dots
within an area that was always circular, like a
circle of light from a flashlight that’s
perpendicular to a piece of paper.
Now, airbrushes respond to angle
(tilt), bearing (direction), and flow
(wheel setting) data from a stylus,
allowing for a truly realistic brush
stroke. For example, as you tilt your
stylus, specks of media land on the
paper in a way that reflects that tilt.
Imagine, again, the circle of light
thrown by a flashlight. The moment
the flashlight is no longer
perpendicular to the paper, the shape
of the cone of light changes, creating a
“conic-section.” In the same manner,
Corel Painter airbrushes create conic-
sections that mirror your stylus
movements.
Angle and tilt determine the shape and size of
the conic-section created by Corel Painter
airbrushes, like a circle of light from a
flashlight that is no longer perpendicular to the
paper.
Extreme tilt angles affect large areas of
the canvas. This can slow the brush
down, as it tries to squirt paint too far
from the stylus.
Adjusting Spread
You can adjust airbrush spread in the
Brush Creator. Airbrush spread
controls affect how paint spreads out
as it is applied. In other words, it sets
the size of the cone of spread from the
tip of the airbrush or spray can.
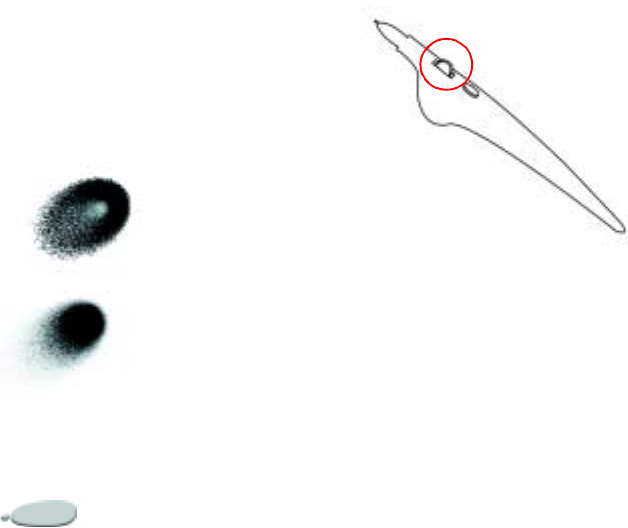
Painting116
A good range for the Spread setting is
30-40%. Narrow Spread and Angle
settings can cause problems. Narrow
Spread combined with a very tilted
stylus can cause paint to be deposited
away from the cursor.
Varying Edges
You can vary the edges of the paint
sprayed from an airbrush to achieve
desired softness. You do this by
selecting a brush tip or “profile” in the
Brush Creator. Each profile gives you
a different edge to the paint you spray.
For more information, refer to “Brush
Tips” on page 156.
Airbrush edges created with the Water Color
profile (top) and the Medium profile (bottom).
Adjusting Flow
Although you can still adjust Opacity
to apply fainter or darker dots of
media, some Corel Painter airbrushes,
for example, the Fine Wheel Airbrush
variant, take advantage of stylus wheel
controls. Like the needle control on
real airbrushes, the wheel control
adjusts airbrush flow, or how much
media is applied.
Adjust airbrush flow with the wheel control on
many airbrush styluses.
To increase or decrease media
flow from an airbrush:
•Do one of the following:
• Move the stylus wheel toward
the tip, or forward, to decrease
flow. Move it away from the tip,
or backward, to increase flow.
• On the Stroke Designer page of
the Brush Creator, click Air-
brush, and adjust the Flow and
Min Flow sliders. Flow sets the
maximum flow. Min Flow sets
the minimum amount of flow
as a percentage of Flow.
Tips
•
You can reverse the effect of moving
the airbrush wheel by enabling the Invert
check box on the Color Expression palette,
or by enabling the Invert Flow Expression
check box on the Stroke Designer page of
the Brush Creator.
•
In the Brush Creator, you can also
determine flow based on stylus
information, such as velocity or pressure,
by choosing an expression from the Flow
Expression pop-up menu.
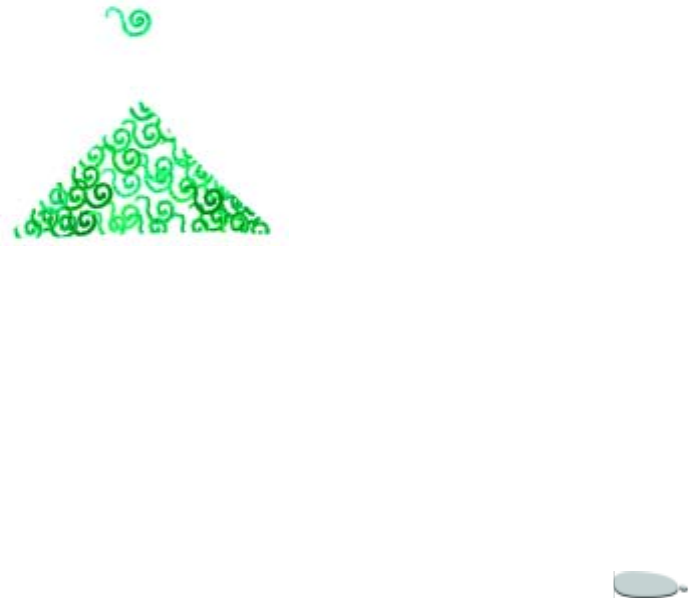
Corel Painter 117
Controlling Droplet Size
You can control the size of the
airbrush droplets. This is not the same
as adjusting the size of the brush. The
larger the brush, the more droplets are
sprayed.
To change the size of airbrush
droplets:
1On the Stroke Designer page of
the Brush Creator, click General.
2Choose Airbrush from the Dab
Type pop-up menu.
3Choose Size.
4Move the Feature slider left for
smaller droplets, or right for larger
droplets.
Notes:
•
Very large droplets may produce
unexpected results.
•
The Feature setting is not available for
variants using the Pixel Airbrush or Line
Airbrush dab types.
Recording and Playing
Back Strokes
Corel Painter will play back any stroke
you record, wherever you click. This is
a great way to create a series of
identical strokes, for example, when
creating hatching.
A brush stroke (top) is recorded and played
back within a triangular selection.
Another way to use a recorded stroke
is with Auto Playback. Auto Playback
repeats the recorded stroke at random
positions on the page.
You can also save recorded strokes for
later use. You can play back saved
strokes, and you can paint with the
data from a saved stroke. This can be
particularly useful if you work part of
the time with a stylus and other times
with a mouse. You can record brush
strokes made with a stylus, save them
for later use, then use the data from
that stroke, allowing stylus type results
while using a mouse for input.
To record a stroke:
•On the Brush selector bar, click the
menu arrow and choose Record
Stroke.
The next brush stroke you make is
saved in memory.
To play back a stroke:
1On the Brush selector bar, click the
menu arrow and choose Playback
Stroke.
2Click where you want to repeat the
stroke.
Corel Painter centers the stroke on
the point you click. You can repeat
the stroke as many times as you
like.
3On the Brush selector bar, click the
menu arrow and choose Playback
Stroke to turn off playback.

Painting118
To play back strokes randomly:
•On the Brush selector bar, click the
menu arrow and choose Auto
Playback.
Corel Painter repeats the stroke at
random positions until you click.
To save a stroke:
1On the Brush selector bar, click the
menu arrow and choose Save
Stroke.
2In the Save Stroke dialog box, type
a name.
Corel Painter adds the stroke to the
list of saved strokes.
To select a saved stroke:
•On the Brush selector bar, click the
menu arrow, choose Strokes, and
choose a saved stroke.
The selected stroke is used when
you play back strokes or use stroke
data.
To use stroke data:
1Select a saved stroke.
2On the Brush selector bar, click the
menu arrow and choose Use
Stroke Data.
3Draw brush strokes.
The resulting strokes will vary
pressure based on the recorded
stroke, but will be shaped like the
stroke you draw.
Filling Techniques
Filling an Area with Media
You can fill an area of an image with a
gradient, pattern, weave, or color.
What about filling with paper? The
paper is a texture; it has no color by
itself. However, you can get texture
into an image with various image
effects. Many surface control effects let
you use paper as the control medium.
For more information about surface
control effects, refer to “Apply Surface
Texture” on page277 and “Other
Surface Control Effects” on page 286.
To fill an area of an image:
1Do one of the following :
• If you want to fill only part of
an image, make a selection.
• If you want to fill a layer, select
the layer on the Layers palette.
• If you want to fill an alpha
channel, select the channel on
the Channels palette.
• If you want to fill the entire
image, make sure there are no
selections.
2Choose Effects menu > Fill or
press Command+F (Mac OS) or
Ctrl+F (Windows).
3In the Fill dialog box, enable one
of the following to fill with:
• Current Color
• Pattern
•Gradient
•Weave
4Adjust the Opacity slider.
Note
•
Corel Painter uses the current color,
pattern, gradient, or weave. Before filling,
choose the media you want from the
corresponding selector in the toolbox.

Corel Painter 119
Filling Images Based on Color
You can use the Paint Bucket tool to
fill image areas based on pixel color.
This method can be used on the
canvas or in a channel. Corel Painter
fills areas based on color boundaries
and the current Tolerance and Feather
settings.
Tolerance sets the amount of variance
allowed from the color of the pixel you
click on. With Tolerance set low, the
Paint Bucket fills only contiguous
pixels that are very close to the color of
the pixel you click on. With Tolerance
high, the Paint Bucket fills a greater
range of colors.
Feathering softens the edges of the fill
by controlling the fill opacity for pixels
with colors outside the Tolerance
range. With Feather set to zero (the
default), only pixels in the Tolerance
range are filled. With Feather set low,
pixels with colors just outside the
Tolerance range receive partial fill.
Increasing the Feather setting
increases the range of colors that
receive partial fill. Pixels with colors
further from the Tolerance range
receive a more transparent fill.
Typically, when Feather is high,
Tolerance is set low.
The Lock Out Color feature protects
areas of a given color from accidental
filling. You can choose a color that will
not accept filling when clicked with
the Paint Bucket. Black is the default
locked-out color.
To fill an image based on color:
1Choose the Paint Bucket tool
from the toolbox.
2Click the Fill Image button on
the property bar.
3Choose one of the following from
the Fill pop-up menu:
•Current Color—fills with the
selected color
•Grad—fills with the selected
gradient
•Clone Source—fills using the
current clone source image. If
you haven’t defined a clone
source, Corel Painter fills with
the current pattern.
•Weave—fills with the selected
weave
4Choose the specific material you
want from the Fill selector.
5Type a value in the Tolerance box,
or adjust the pop-up slider, to
specify the range of colors to be
filled.
6Type a value in the Feather box, or
adjust the pop-up slider, to specify
the fill opacity for pixels outside
the Tolerance range.
If you want to create intermediate
fill values on the boundaries,
enable the Anti-Alias check box.
This gives soft edges to the fill.
Anti-aliasing is desirable when
Feather is zero or extremely low.
7Click the area of the image you
want to fill.
If the result is not what you want,
undo the fill, change the settings,
and try again.
Tips
•
To see how Fill Image works, do the
following:
1. On a blank document, draw several
brush strokes of different colors.
2. Select a new color.
3. Choose the Paint Bucket tool and click
the Fill Image button on the property bar.
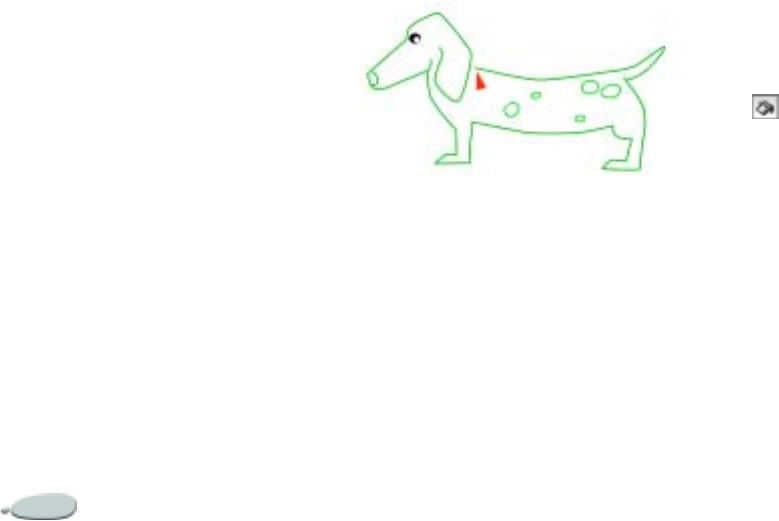
Painting120
4. Click an area of the image.
5. Choose Edit menu > Undo, and click
an area of the image containing a
different color.
6. Change the Tolerance and Feather
settings and repeat steps 4-5.
•
You can constrain the fill to a
rectangular area by dragging with the
Paint Bucket tool.
To choose a lock-out color:
1On the Colors palette, choose the
color you want protected.
2Double-click the Paint Bucket tool
in the toolbox.
3In the Lock Out Color dialog box,
click Set.
The color swatch updates to the
new color, and the Lock Out Color
check box is enabled.
Filling Cells
You can use the Paint Bucket tool to
fill the interior of areas bounded by
lines. This is especially good for
producing solid fills of regions
bounded by anti-aliased lines.
If you want to fill regions completely,
without affecting the lines, you can
first copy the lines to a selection.
Then, when you fill the cells, the lines
are protected. For information about
the method used to copy lines to a
selection, refer to “Creating an Auto
Selection” on page 208. You can also
control how well the Paint Bucket
respects the selection by setting the
mask threshold.
Cartoon animators used to paint lines first and
then fill them by painting on the back of the
cell.
To copy lines to a selection:
1Choose Select menu > Auto
Select.
2In the Auto Select dialog box,
choose Image Luminance from the
Using pop-up menu.
3Click OK.
Corel Painter creates a selection
that will protect the dark lines.
When you protect anti-aliased or
non-black lines in this way, the
lines in the selection have varying
levels of transparency—depending
on the pixel luminance. The Mask
Threshold lets you compensate for
the semi-transparency of the
selection to get just the fill you
want.
To set the mask threshold for the
Paint Bucket:
1Double-click the Paint Bucket tool
in the toolbox.
2In the Lock Out Color dialog box,
move the Mask Threshold slider.
This slider controls how well the
Paint Bucket respects the selection.
At zero, the fill will overrun the
selection boundaries. Higher
threshold values force the fill to
respect the boundaries. The
appropriate threshold setting
depends on the softness of your
lines. You’ll have to experiment
with the Mask Threshold slider
settings until the fill is limited to
the area within the line.
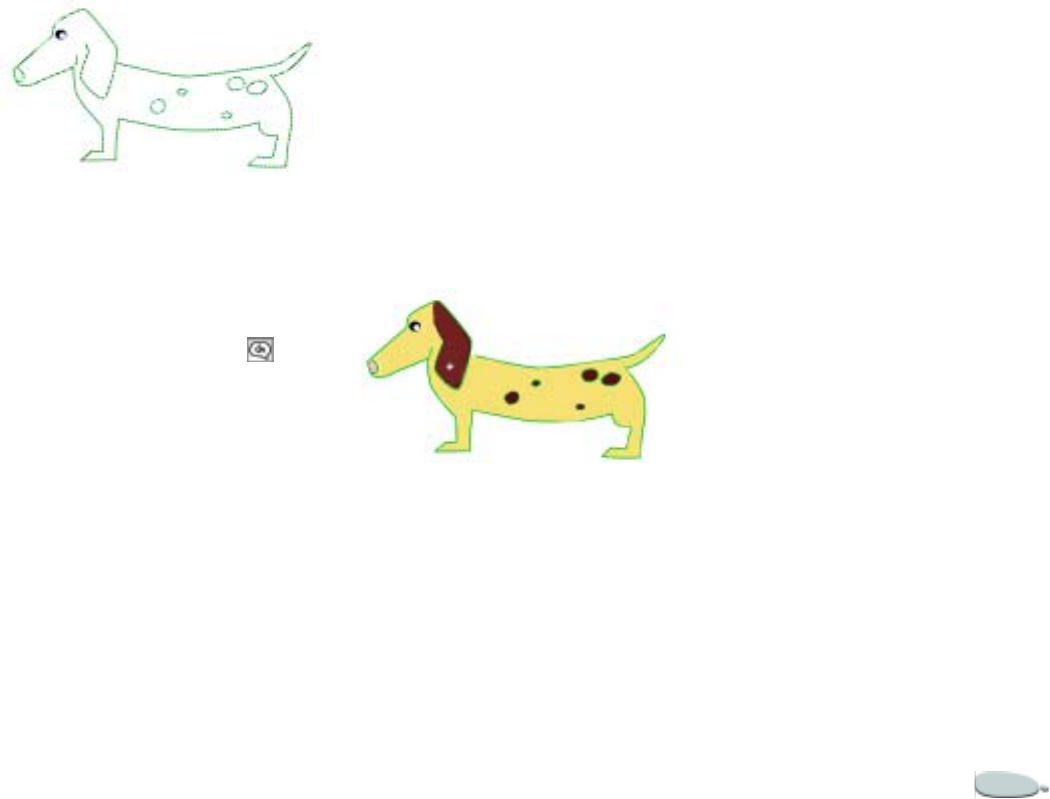
Corel Painter 121
14% is a good setting for lines created with the
Scratchboard tool variant.
To fill cells:
1Choose the Paint Bucket tool from
the toolbox.
2Click the Fill Cell button on
the property bar.
3Choose one of the following from
the Fill pop-up menu:
•Current Color—fills with the
selected color
•Grad—fills with the selected
gradient
•Clone Source—fills using the
current clone source image. If
you haven’t defined a clone
source, Corel Painter fills with
the current pattern.
•Weave—fills with the selected
weave
4Choose the specific material you
want from the Fill selector.
5Click inside a bounded region.
Corel Painter fills the area.
If the fill overruns the lines, you
should increase the Mask
Threshold setting. If the fill leaves
line pixels anti-aliased to the
background color, you should
reduce the Mask Threshold
setting.
The finished cartoon after filling the cells.
Tips
•
To see how Fill Cell works, do the
following:
1. Draw a black circle on a blank
document.
2. Select a new color.
3. Choose the Paint Bucket tool, and click
the Fill Cell button on the property bar.
4. Click inside the circle.
5. Choose Edit menu > Undo.
6. Select another color.
7. Click outside the circle.
•
You can constrain the fill to a
rectangular area by dragging with the
Paint Bucket tool.
•
If you are recording your session as a
script, cell fills are captured as well. When
playing back at a different resolution, cell
fills (and their limiting rectangles) are
properly scaled. For information on
recording and playing back sessions, refer
to “Understanding Scripting” on
page 415. For information on limiting
rectangles, refer to “Limiting and
Preventing Leakage” on page 121.
Limiting and Preventing
Leakage
In complex drawings, lines don’t
always meet. This can create fill leaks
into areas you don’t want to be
filled—sometimes through the whole
image.
You can’t always tell if there’s a leak
just by looking at your image. If you
click a small area and see the prompt,
“Now Looking for Extent of Fill,”

Painting122
there’s probably a leak and Corel
Painter is preparing to fill a bigger
area than you had in mind. In this
case, you can abort the fill.
You can limit leakage to a specific
rectangular area. In typical cartoon
line work, unbounded areas—for
example, hair, tail feathers, and brush
bristles—sometimes must be filled. By
limiting leakage to a specific area, you
can close off these items.
You can also close leaks by copying the
lines to a selection (refer to “To copy
lines to a selection:” on page 120),
saving the selection to a channel,
editing the channel, and then
reloading it to the selection. For more
information about editing channels,
refer to “Editing Channels” on
page 225.
To abort a fill:
•Press Command+. (period) (Mac
OS) or Ctrl+. (Windows).
Note
•
If you don’t catch the fill in time,
choose Edit menu > Undo or press
Command+Z (Mac OS) or Ctrl+Z
(Windows) to undo a fill that has leaked
outside of the boundaries.
To limit leakage:
1Choose the Paint Bucket tool from
the toolbox.
2On the property bar, click the Fill
Cell button or the Fill Image
button.
3Drag to create a rectangle that just
covers the area you want to fill.
If there is no leak, only the area
within the lines is filled. If there is
a leak, the fill will go outside the
area, but not beyond the
constraints of your rectangle.
To close a leak:
1Copy the lines to a selection.
Refer to “To copy lines to a
selection:” on page 120.
2Choose Select menu > Save
Selection.
3In the Save Selection dialog box,
choose New from the Save To pop-
up menu.
4Click OK.
A new channel is displayed on the
Channels palette.
5On the Channels palette, display
and select the channel.
6On the Brush selector bar, choose
the same brush you used to create
the lines.
7On the Colors palette, set Black as
the current primary color.
8Paint in the channel to close the
gaps.
9Choose Select menu > Load
Selection.
10 In the Load Selection dialog box,
choose the modified channel from
the Load From pop-up menu.
11 Enable the Replace Selection
option to replace the original with
the edited version.
If you want to adjust the mask
threshold, double-click the Paint
Bucket tool in the toolbox and
move the slider.
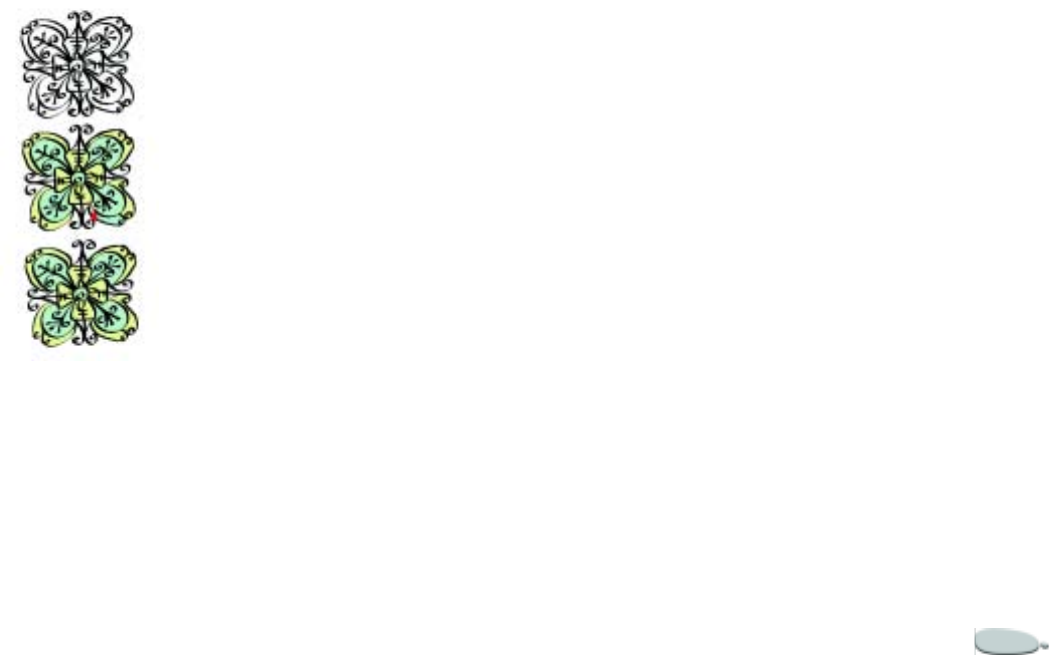
Corel Painter 123
Note
•
The channel does not have to be
selected to contain the fill. If you deselect
the channel on the Channels palette, the
loaded selection is still in effect.
Edit the channel to close leaks. Remember to
load the channel back into the selection after
editing.
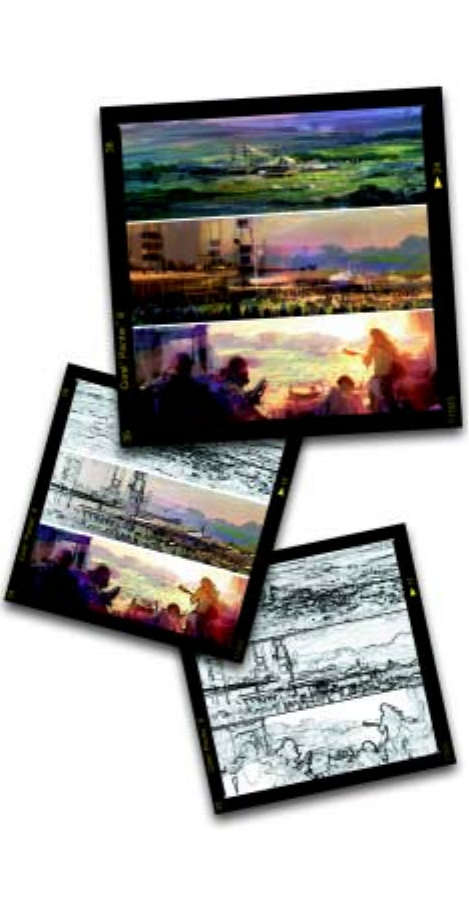
7
Using Water Color
Corel Painter features two ways to
work with water colors: the Water
Color layer and Digital Water Color.
The Water Color Layer
Water Color brushes paint into a
water color layer, which enables the
colors to flow and mix and absorb into
the paper.
In Corel Painter, you can edit the
Water Color layer as you would any
other layer, including erasing and
blurring, without changing anything
in the image layer. For example, you
can draw pencil outlines in the image
layer, then overlay water color shading
without smudging the pencil lines.
You can lift the canvas to the Water
Color layer, which transfers
information from the canvas to the
Water Color layer. This is useful if you
want to apply Water Color effects to a
photograph, for example.
You can wet the entire Water Color
layer, which activates a diffusion
process that you can control.
Unless a Water Color layer is already
selected, a new Water Color layer is
automatically created when a Water
Color brush is applied to an image.
The Water Color layer appears on the
Layers palette and is characterized by
a blue water droplet icon. When the
icon is falling, it indicates that the
drying process is underway. It is a
good practice to monitor the Water
Color icon while painting with Water
Color brushes. If too many strokes are
laid down, particularly with respect to
slow-drying brushes, the application
can become slower. In this situation, it
is best to wait for the drying process to
finish before continuing.

Using Water Color126
To create a new Water Color layer:
1Choose Window menu > Show
Layers to display the Layers
palette.
If the Layers palette is not
expanded, click the palette arrow.
2Do one of the following:
• On the Layers palette, click the
palette menu arrow, and choose
New Water Color Layer.
• Click the New Water Color
Layer button at the bottom
of the Layers palette.
To lift the canvas to the Water
Color layer:
1Apply one or more strokes to the
canvas with a Water Color brush
variant.
2Choose Window menu > Show
Layers to display the Layers
palette.
3Click the palette menu arrow, and
choose Lift Canvas to Water Color
Layer.
To wet the Water Color layer:
1Apply one or more strokes to the
canvas with a Water Color brush
variant.
2Choose Window menu > Show
Layers to display the Layers
palette.
3Click the palette menu arrow, and
choose Wet Entire Water Color
Layer.
Tip
•
To stop the diffusion process, click the
palette menu arrow on the Layers palette,
and choose Dry Water Color Layer.
Working with Water Color
Variants
The Water Color brush variants
produce natural looking water color
effects. All the Water Color variants,
except Wet Eraser, interact with the
canvas texture.
Stylus pressure affects the width of the
brush stroke for all the Water Color
brush variants (except Wet Eraser).
Increased pressure widens a brush
stroke; less pressure narrows a stroke.
Water Color Dab Types
Refer to “Dab Types” on page 148 for
more information about Water Color
Dab Types.
Water Controls
You can adjust the Water controls
when you have selected a Water Color
brush from the Brush selector bar.
The Water controls on the Stroke
Designer page of the Brush Creator
allow you to specify various settings
for your Water Color brushes. For
example, you can adjust brush size,
control diffusion, and determine how
the paper texture will interact with the
brush strokes. Refer to “Setting Water
Controls” on page 176 for more
information.
Size
The Feature setting in the Size area of
the Stroke Designer separates bristles.
The higher the setting, the farther
apart hairs appear. Use a low setting to
make more solid strokes. When using
Water Color brushes, the diffusion of
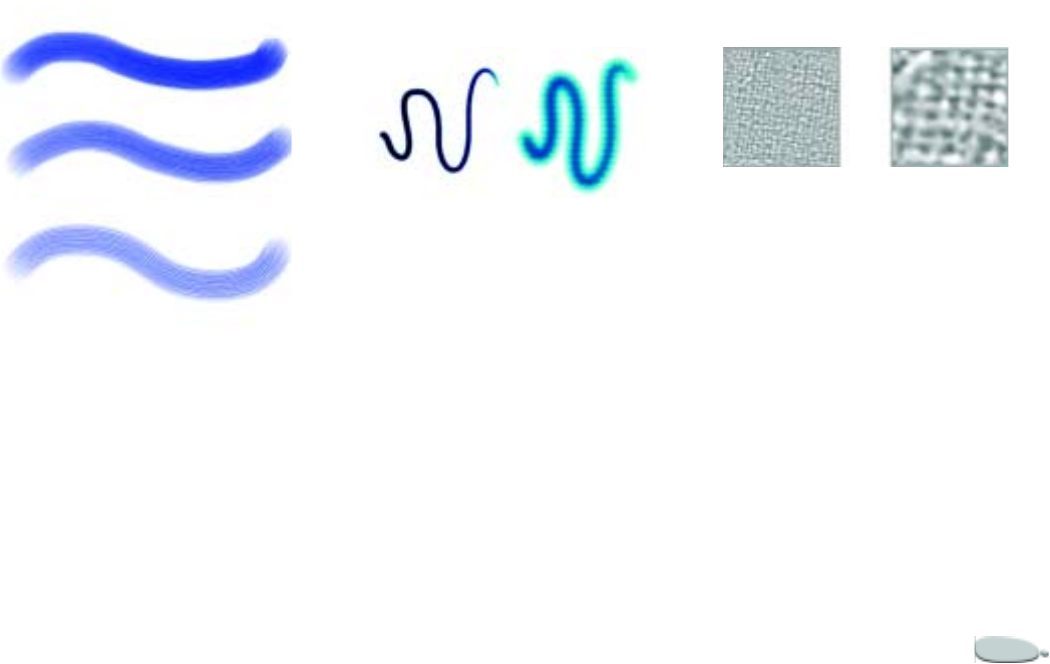
Corel Painter 127
the brush stroke eliminates the
appearance of individual bristles. You
can experiment with the Feature slider
and its effect on different Water Color
brushes.
The Feature slider and its effect on Water Color
brushes.
Diffusion
With natural water colors, wet paper
produces more diffused strokes.
Diffusion mimics this effect in Corel
Painter by creating soft, feathery edges
on the strokes of some water color
variants.
Diffusion spreads color into the grain.
Make sure the current texture is
appropriate for the diffusion effect you
want. For more information about
adjusting the amount of diffusion in a
brush stroke, see “Diffuse Amount”
on page 177.
A water color stroke before and after diffusion.
Applying a Paper Texture
The Water Color brushes interact with
paper grain — the colors flow, mix,
and are absorbed into the paper. The
luminance information of the current
paper grain is used to determine how
the paint diffuses into the paper and
how it dries.
You can experiment with adjusting the
sliders on the Papers palette and
seeing their effect on the Water Color
brushes. The Scale slider controls the
size of the grain. The Contrast slider,
as it applies to the Water Color layer,
controls the height of the grain
surface. Adjusting the Contrast slider
to the right increases the height of the
grain and adds more texture as a
result. Refer to “Using Paper Texture”
on page 61 for more information.
The Scale slider controls the size of the paper
grain. Left=50%, right=200%.
Digital Water Color
The Digital Water Color brushes
paint directly on the canvas or on a
regular layer so you can create effects
similar to those of Water Color
brushes without using a separate layer.
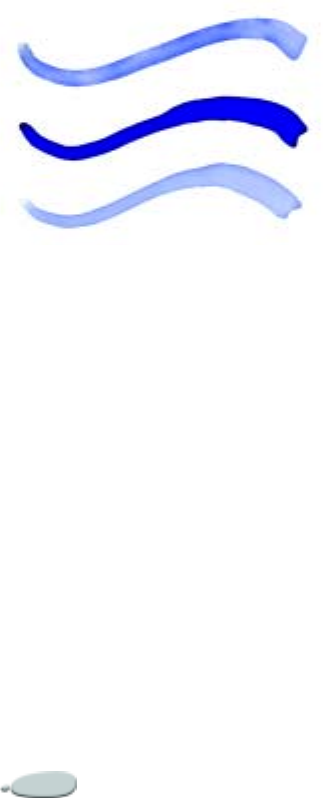
Using Water Color128
The Digital Water Color brushes create effects
similar to those of Water Color brushes, but
without creating a separate layer.
Digital Water Color Diffusion
Digital Water Color brushes also use
diffusion to create soft, feathery edges
on the brush strokes. You can adjust
the amount of diffusion using the
controls on the Stroke Designer page
of the Brush Creator.
To adjust diffusion:
1Apply one or more strokes with a
Digital Water Color variant.
If you would like to restrict the
diffusion to a region, make a
selection with any selection tool.
The diffusion effect will apply only
within the selection.
2On the Stroke Designer page of
the Brush Creator, click Digital
Water Color.
3Adjust the Diffusion slider.
Drag the slider to the right to
increase diffusion, to the left to
decrease diffusion.
4Paint on the Scratch Pad of the
Brush Creator to preview the
settings.
Note
•
For more information, see “Setting
Digital Water Color Controls” on
page 182.
Tips
•
You can also adjust the amount of
diffusion in the Digital Water Color area
of the Stroke Designer before applying
brush strokes.
•
You can also adjust the Diffusion
slider on the property bar.
Wet Fringe
The Wet Fringe slider controls the
amount of pooling of water and paint
at the edges of Digital Water Color
brush strokes.
To adjust Wet Fringe:
1Apply one or more strokes with a
Digital Water Color variant.
If you would like to restrict the
diffusion to a region, make a
selection with any selection tool.
The pooling effect will apply only
within the selection.
2On the Stroke Designer page of
the Brush Creator, click Digital
Water Color.
3Adjust the Wet Fringe slider.
Drag the slider to the right to
increase pooling, to the left to
decrease pooling.
4Paint on the Scratch Pad of the
Brush Creator to preview the
settings.
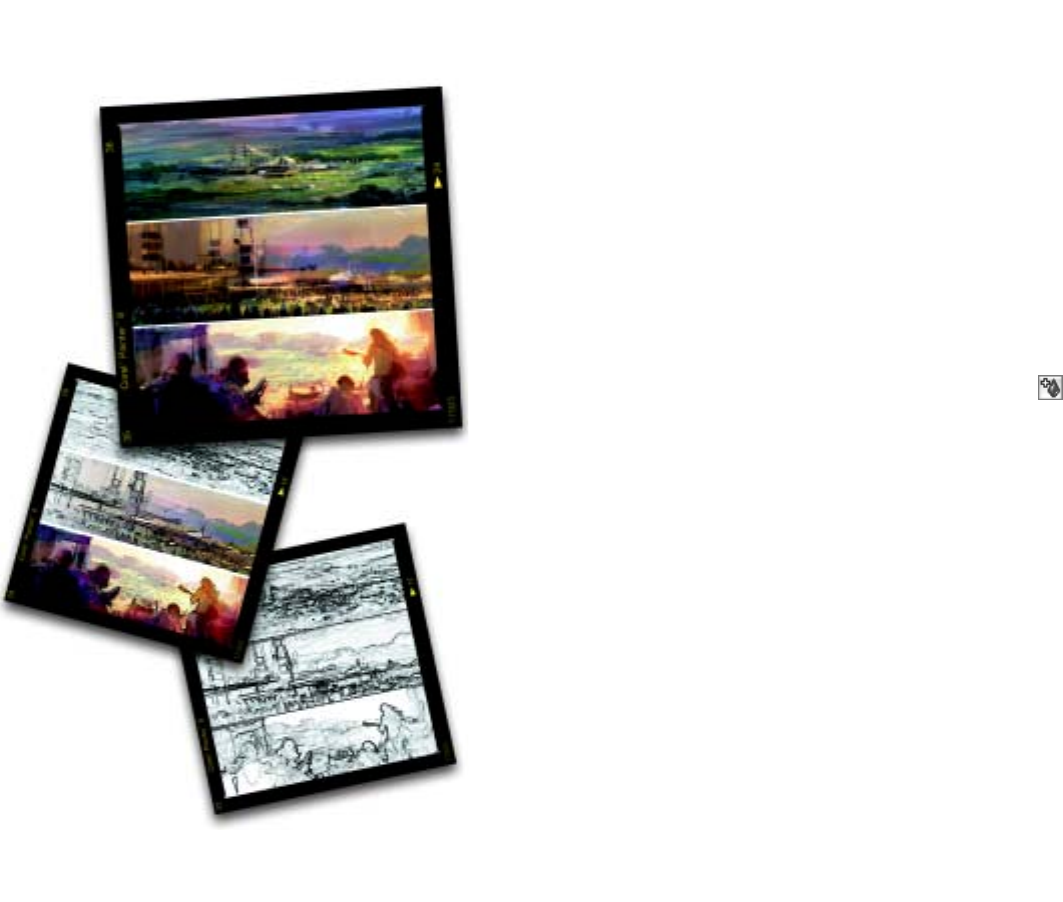
8
Using Liquid Ink
Liquid Ink brushes in Corel Painter
create liquid paint effects that
simulate traditional ink-based media.
The Liquid Ink Layer
Liquid Ink layers are displayed on the
Layers palette. They are identified by
an ink droplet icon.
Unless you have a Liquid Ink layer
already selected, a new Liquid Ink
layer is automatically created when a
Liquid Ink brush is applied to an
image.
You can experiment with the settings
in the Liquid Ink Layer Attributes
dialog box, which let you control the
appearance of depth and adjust the
threshold of the edges of the ink.
To create a new Liquid Ink layer:
1Choose Window menu > Show
Layers to display the Layers
palette.
If the Layers palette is not
expanded, click the palette arrow.
2Do one of the following:
• On the Layers palette, click the
palette menu arrow, and choose
New Liquid Ink Layer.
•Click the New Liquid Ink
Layer button at the bottom
of the Layers palette.
To adjust Liquid Ink layer
attributes:
1On the Layers palette, double-click
the Liquid Ink layer you want to
modify.
2In the Liquid Ink Layer Attributes
dialog box, do any or all of the
following:
• Type a name for the layer in the
Name box.
• Adjust the position of the layer
in the Top and Left boxes.
• Type layer information in the
Notes box.
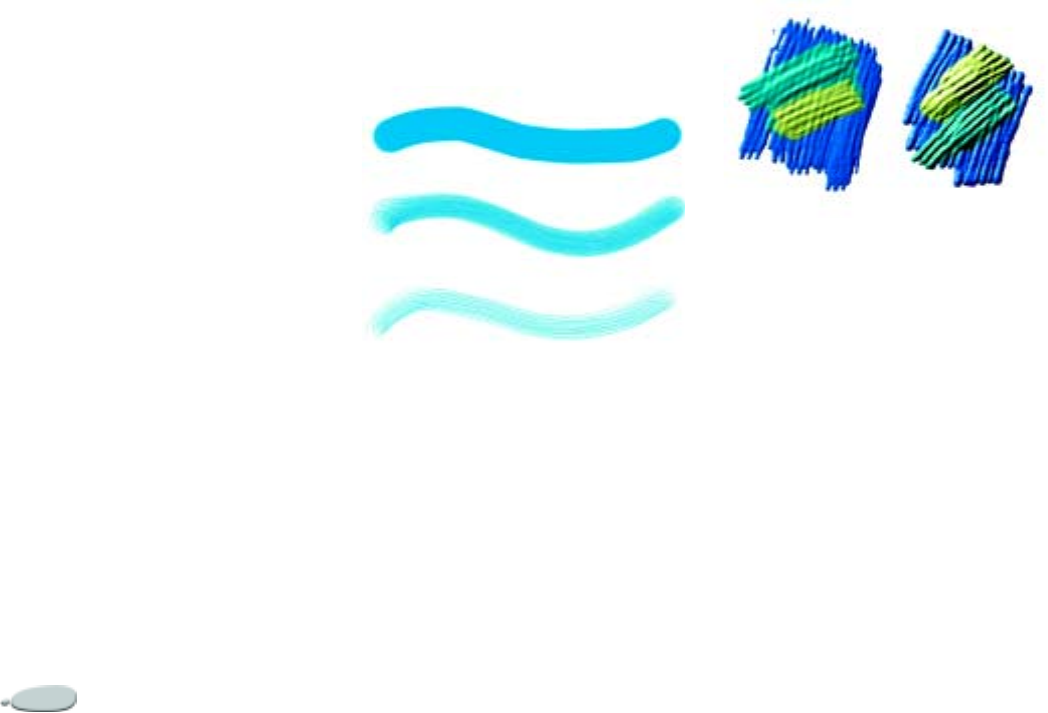
Using Liquid Ink132
• Adjust the Threshold slider to
increase or decrease the width
of the brush stroke.
• Adjust the Amount slider to
increase or decrease the height,
or three-dimensional appear-
ance, of the brush stroke.
Liquid Ink Controls
You can adjust the Liquid Ink controls
when you have selected a Liquid Ink
brush from the Brush selector bar.
The controls on the Stroke Designer
page of the Brush Creator allow you
to specify various settings for your
Liquid Ink brushes. For example, you
can select Liquid Ink brush type, size,
smoothness, and stroke volume. Refer
to “Setting Liquid Ink Controls” on
page 179 for more information.
Size
The Feature slider in the Size area of
the Stroke Designer page lets you
determine the space between bristles.
You can experiment with the Feature
slider and its effect on different Liquid
Ink brushes; the higher the setting,
the farther apart hairs appear. Use a
low setting to make more solid strokes.
When using Liquid Ink brushes, the
adhesion of the bristles minimizes the
appearance of individual bristles.
The Feature slider and its effect on
Liquid Ink brushes.
Expression
You can use the Expression settings in
the Liquid Ink area of the Stroke
Designer page to vary Liquid Ink
effects, such as volume, in response to
controllers like stroke direction or
velocity. Use the Pressure controller to
create layered Liquid Ink strokes.
Refer to “Expression Settings” on
page 164 for more information.
Light pressure is used to apply overlapping
strokes (left). Increased pressure produces a
heavier layering effect (right).
Applying Lighting Effects
You can use the Surface Lighting
controls to add light sources and
change lighting angles to give the
appearance of height to a Liquid Ink
brush stroke. Refer to “Apply
Lighting” on page 274 for more
information about applying lighting
effects.
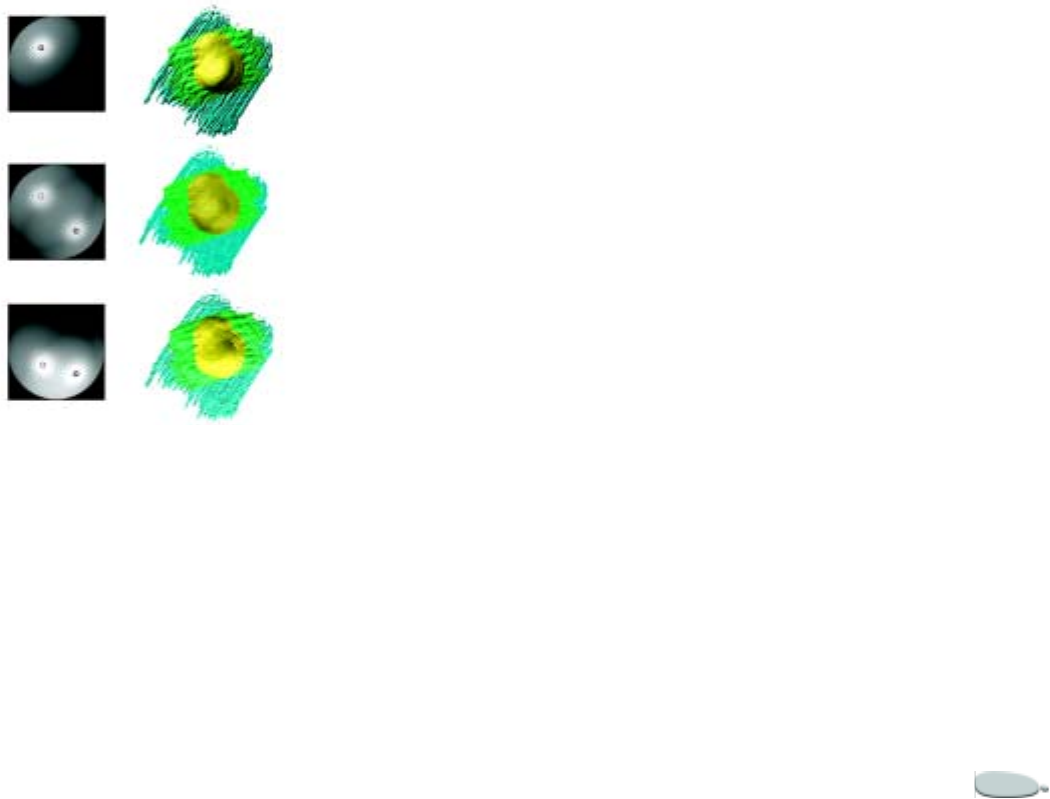
Corel Painter 133
Adjusting the lighting angles and adding
multiple light sources add height to Liquid Ink
brush strokes.
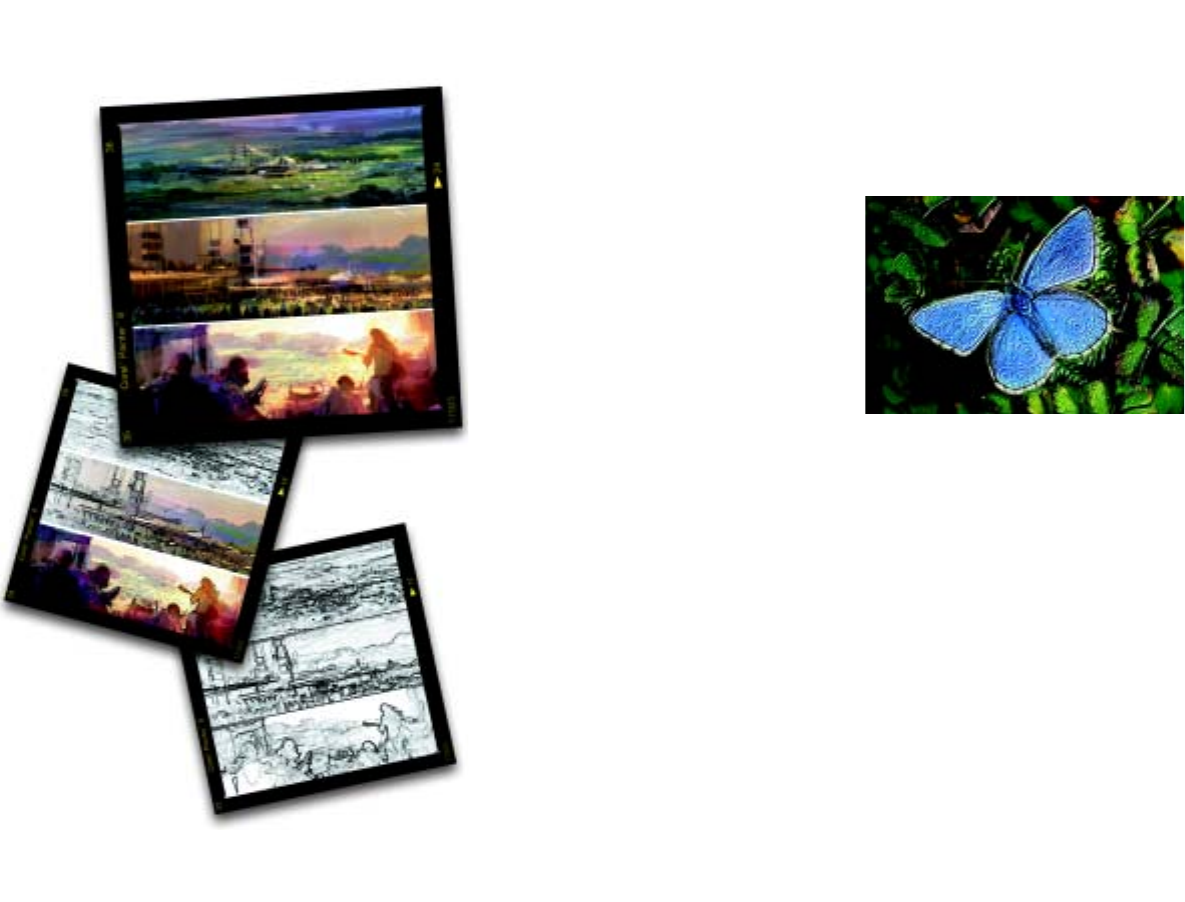
9
Impasto
Impasto is the classic technique of
applying thick paint on a canvas to
create depth. In Corel Painter,
impasto refers to the brush feature
that allows brushes to paint with the
illusion of depth. You can use different
brushes to simulate different types of
Natural-Media, such as thick oil paint
or chalk with texture.
To create an impasto effect, you must
first activate the Impasto layer. Next,
you choose the Impasto brush
category and a variant. Impasto brush
strokes appear textured and three-
dimensional. You can alter the
appearance of impasto brush strokes
using depth and lighting controls.
In Corel Painter, most brush variants
can be transformed into custom
impasto brushes using the Brush
Creator.
Impasto creates wonderful textured paintings.
The Impasto Layer
When you use an Impasto brush,
you’re painting onto a virtual Impasto
layer that contains all the depth
information created as you paint. The
Impasto layer is not part of the layer
hierarchy and does not appear on the
Layers palette.
The Canvas layer holds the depth
information for the entire image,
including any layers. When it is active,
it also shows how the Impasto
Lighting affects your strokes.

Impasto136
To activate or deactivate the
Impasto layer:
•To activate the Impasto layer, click
the Impasto icon on the document
window.
•To deactivate the Impasto layer,
click the icon again.
The Impasto icon on the document window.
To clear the Impasto layer:
•Choose Canvas menu > Clear
Impasto.
Creating an Impasto
Effect
You can apply a variety of Impasto
brush strokes using an Impasto
variant. These brushes simulate
different types of Natural-Media
effects with depth, such as thick oil
paint.
You control the Impasto effect by
changing the paint thickness, or
depth. Refer to “Adjusting Impasto
Depth” on page 136 for more
information.
You can also set how light sources
shine on the Impasto brush strokes,
add or delete lights, and change light
color and position. Refer to “Adjusting
Surface Lighting” on page 137 for
more information.
If you want to create your own custom
variants, use the Brush Creator to
adjust brush properties. Refer to
“Creating Custom Impasto Brushes”
on page 138 for more information.
To create an Impasto effect:
1Click the Impasto icon on the top-
right corner of the document
window.
2On the Brush selector bar, choose
Impasto from the Brush selector.
3Choose an Impasto variant from
the Variant selector.
4Choose Canvas menu > Surface
Lighting.
5In the Surface Lighting dialog box,
set the depth attributes.
6In the same dialog box, set light
source attributes.
7Paint on the canvas or layer.
Adjusting Impasto Depth
You can control the appearance of
depth using the Amount, Picture,
Shine, and Reflection settings. At any
time, you can change these settings to
get different texture effects.
Adjustments affect the entire Impasto
layer. To change the depth of
individual brush strokes, you can vary
stylus settings or build up media.
Refer to “Controlling the Depth
Interaction of a Medium” on page 140
for more information.
The Amount slider affects the
thickness of the entire Impasto layer.
It does not affect individual brush
strokes, nor does it affect its
relationship with other Impasto
strokes.
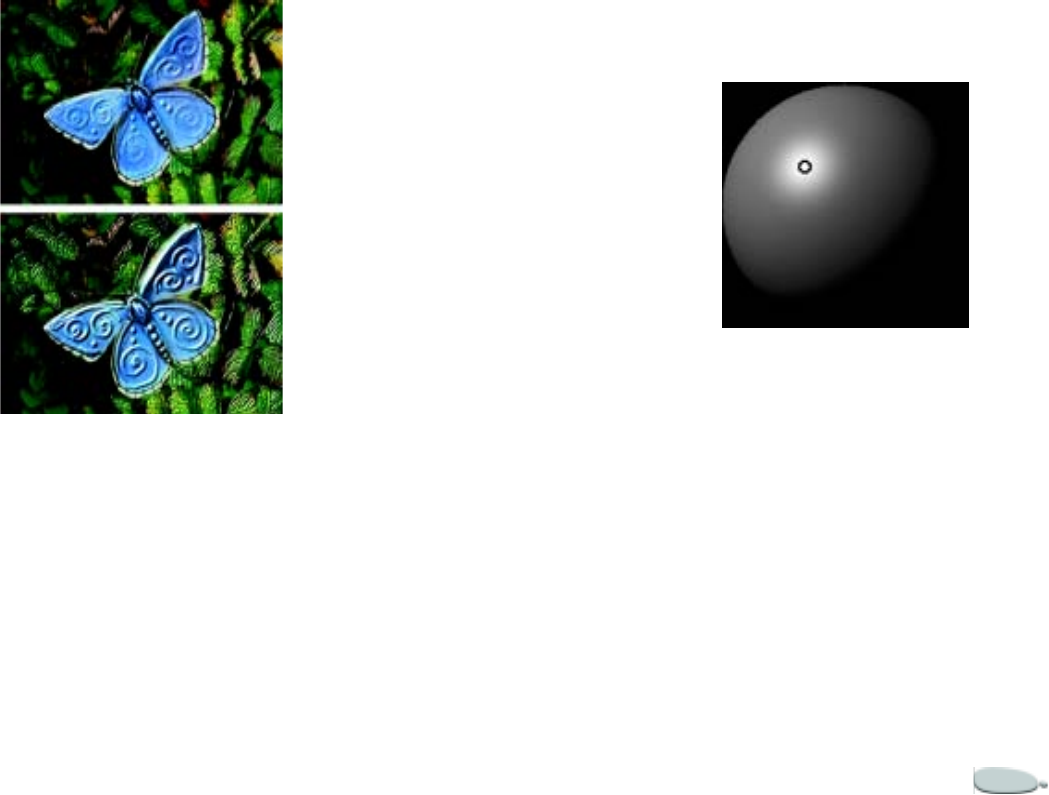
Corel Painter 137
You can adjust the appearance of depth in the
entire Impasto layer with the Amount slider.
•Picture controls how much color
appears in the image. At its lowest
value, all the color is washed out,
leaving only the highlights.
•Shine controls how much
highlight appears on the surface of
strokes. Higher Shine values make
the stroke look metallic.
•Reflection maps a clone source
image or pattern onto the texture
at a variable percentage. Refer to
“Working with Reflection Maps”
on page 284 for more information.
Adjusting Surface
Lighting
Lighting can be a big part of the
overall depth effect Impasto creates.
Just as the right lighting can bring out
the deep textured look of a stroke, the
wrong lighting can wash out the effect
altogether.
The Surface Lighting controls let you
set up the position and attributes of
light sources that shine on your
Impasto brush strokes.
These controls are global, meaning
they affect all the Impasto brush
strokes on all layers.
Setting Light Position
The lighting sphere shows all the
possible surface angles and how the
lights illuminate them. The light
indicators on the sphere show the
current positions of all the light
sources.
The lighting sphere with a light indicator.
Adding and Deleting Lights
You can add as many light sources as
your system’s memory allows.
Remember, each light interacts with
all the Impasto brush strokes, so be
careful not to set up colored lights that
clash with the colors in your
composition or light sources that
created unwanted shadows.
To add a light:
•Click on the lighting sphere.

Impasto138
A new light indicator (small circle)
appears where you click.
To delete a light:
•Click on a light indicator and press
Delete.
Viewing Lights
The Display slider beneath the sphere
controls the brightness of the sphere,
so that it’s easier to see light positions.
It does not affect the lights themselves.
The Show Light Icons check box lets
you hide or show the light indicators
on the sphere.
To change a light’s angle:
•Drag a light indicator on the
sphere.
Setting Light Properties
The three Light Controls sliders let
you set the intensity and brightness of
a light source.
•Brightness indicates the amount of
contribution of the light to the
overall lighting color.
•Conc (concentration) adjusts the
spread of the light’s shine over the
surface.
•Exposure globally adjusts the
overall lighting amount from
darkest to brightest.
You can also change a light’s color
using the Light Color control. You can
have multiple colored lights interact
with the depth to produce different
textural effects.
To change light color:
1Click the Light Color icon.
2On the color picker, choose a color.
Creating Custom Impasto
Brushes
Using the Impasto brush settings in
the Brush Creator, most brush
variants can become Impasto brushes.
The controls let you set drawing and
depth methods, the amount of depth
applied, and the brush interaction.
The Impasto settings act identically to
other brush settings, in that they can
be saved as part of a variant or applied
to any active brush.
For more information on creating new
brush variants, see “The Brush
Creator” on page 143.
To create an Impasto variant:
1Choose the Brush tool from the
toolbox.
2On the Stroke Designer page of
the Brush Creator, click Impasto.
3Choose a drawing method from
the Draw To pop-up menu.
4Choose an application method
from the Depth Method pop-up
menu.
5Adjust the Depth slider to set how
much depth the brush applies.
6Adjust the Smoothing slider to set
the transitions in the texture.
Higher Smoothing values produce
less textured strokes.
7Adjust the Plow slider to control
how much a depth stroke displaces
other strokes that it intersects.

Corel Painter 139
Setting Drawing Method
All of the drawing methods affect the
next strokes you make in the
document.
Impasto has three drawing methods:
•Draw to Color applies color. You
can set the color on the Colors
palette.
•Draw to Depth applies depth to
the image.
•Draw to Depth and Color applies
both color and depth to the image.
Setting Depth Method
The Depth Method pop-up menu lets
you choose a control medium for
applying depth.
Corel Painter uses the luminance
(brightness) information in the
control medium to determine how
much depth is applied within a stroke.
Light areas of the medium receive
more depth; dark areas receive less.
Black areas appear flat.
For example, when you use Paper as
the Depth Method, the bright and
dark areas of the paper grain
determine where grooves and bumps
appear in the stroke.
The Impasto stroke produced when Paper is
used as the Depth Method.
There are five depth methods you can
choose from:
•Uniform applies depth evenly.
Strokes have little texture.
•Erase levels the depth layer. If you
created texture strokes you don’t
like, use this setting to remove
them.
Erase applies only to depth, not to
color. When you set the Drawing
Method to Depth and Color, the
Erase method removes depth
while applying color.
The amount of depth removed
depends on the value of the Depth
slider. If you want to remove the
entire Impasto stroke, set Depth to
0.
•Paper controls depth using the
current paper texture. You can
choose different papers and change
their scale using the Papers selector
in the toolbox. Refer to “Inverting
and Scaling Paper Textures” on
page 63 for more information.
•Original Luminance uses a clone
source’s luminance to control
depth. Refer to “Creating Texture
Using Clone Source Luminance”
on page 281 for more information.
•Weaving Luminance controls
depth using the current Weave.
You can choose different weaves
using the Weaves selector in the
toolbox.

Impasto140
Inverting a Depth Method
You can invert the Depth Method
using the Invert option. When a
method is inverted, the negative of the
source is used in the stroke.
For example, using Invert with Weave
luminance switches the luminance
values of the current weave so that
light areas of the weave become dark
and vice versa. This results in an
inverted texture within the Impasto
brush strokes.
Controlling the Depth
Interaction of a Medium
When you start painting using a
Depth Method, you’re painting with a
new medium — one that can have
texture and builds up depth as you
layer brush strokes.
The Impasto sliders in the Brush
Creator let you set how much depth is
applied with a stroke, the amount of
texture applied within a stroke, and
how each stroke interacts with other
Impasto brush strokes.
•Depth controls the depth of
individual strokes. Higher values
produce stokes that have deeper
grooves.
•Smoothing controls the transition
of the texture applied to a stroke.
•Plow controls how much a stroke
interacts with other Impasto brush
strokes.
When a stroke with a high Plow
value encounters another Impasto
stroke, it displaces the depth of the
existing stroke. In essence your
brush stroke “plows” through
existing strokes.
Plow can produce incredibly
realistic effects.
The effects of high and low Plow settings.
• The Negative Depth option
changes the direction of depth.
When Negative Depth is enabled,
the brush digs valleys instead of
raising ridges.
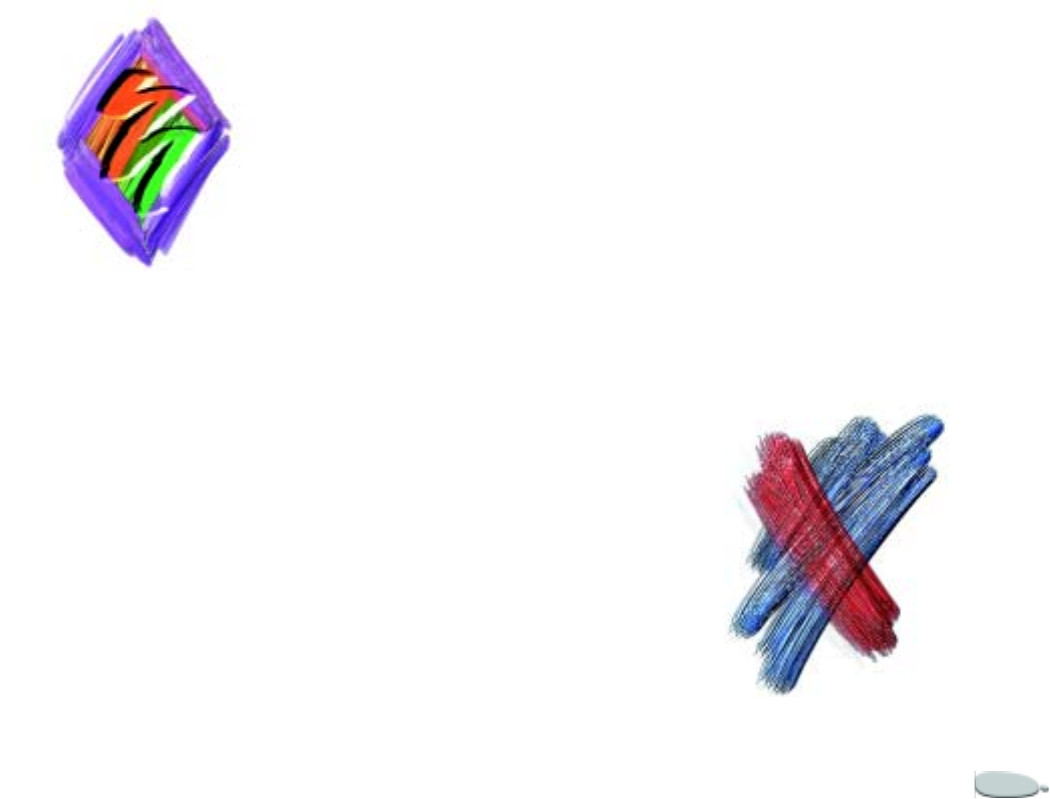
Corel Painter 141
Normally, the Impasto media raises ridges and
bumps. The Negative Depth option forces
Impasto to excavate instead.
Varying Input to Control
Depth
In addition to the Impasto controls,
you can also use the Depth slider in
the Brush Creator to add more
complexity to your stokes.
The Depth slider can alter the flow of
depth as you paint. Using one of the
nine input controllers, you can control
the flow of depth based on pressure,
velocity, or bearing. Refer to “Setting
Impasto Controls” on page 173 for
complete descriptions of controllers.
To use the Depth brush feature:
1On the Stroke Designer page of
the Brush Creator, click Impasto.
2Choose Depth from the Draw To
pop-up menu.
3Choose a depth method from the
Depth Method pop-up menu.
4Adjust the Depth slider, and
choose an expression from the
Expression pop-up menu.
Note
•
For a realistic effect, try varying Depth
inversely with Pressure. Set the Depth
menu to Pressure and check the Invert
option. This applies paint more thickly
when you press lightly, but applies it
thinly if you press hard, just as when
you’re using real paint.
Blending Impasto with
Other Layers
You can control how Corel Painter
blends Impasto brush strokes with
imagery on other layers by selecting a
composite depth method on the
Layers palette.
The Composite Depth menu provides
the following methods for combining
Impasto brush strokes:
•Add — When this method is
active, Corel Painter combines
depth information between
layers—brush strokes on different
layers build up where they overlap.
Painting with an Impasto variant
on a layer with Add set does not
change the composite depth
setting.
Painting with an Impasto variant
on a layer with Ignore set changes
the method back to Add.
An example of the Add Composite Method.
Impasto142
•Subtract — When this method is
active, depth information between
layers is removed. Impasto brush
strokes on top layers create grooves
in the image data beneath them.
Painting with an Impasto variant
on a layer with Subtract set does
not change the composite depth
setting.
An example of the Subtract Composite
Method.
•Replace — When this method is
active, layer masks replace the
depth information from lower
layers with information from top
layers. Wherever strokes overlap,
only the top stokes are visible; the
lower strokes are completely
covered.
Painting with an Impasto variant
on a layer with Replace set does
not change the composite depth
setting.
An example of the Replace Composite Method.
•Ignore — When this method is
active, Impasto brush strokes do
not interact with image data on
different layers.
With Ignore active, the display of
depth for the layer is turned off,
even when the View Depth icon
on the document window is active.
This makes it possible to disable
display of depth for individual
layers.
Painting with an Impasto variant
on a layer with Ignore set changes
the method to Add.
This is the default composite
method.
You can set a different composite
method for every layer in a document.
Refer to “Blending Layers Using
Composite Methods” on page 248 for
more information.

10
The Brush Creator
The Brush Creator helps to make it
fun and easy to create brush variants
in Corel Painter.
This chapter provides descriptions
and procedures for building,
customizing, and saving the many
parameters of any brush type using
the Brush Creator.
Customizing Brushes
The Corel Painter brushes are
adjustable in a myriad of ways. In fact,
the default variants in the libraries on
the Brush selector bar are built with
the same set of controls used to build
every other variant. They’ve just been
adjusted until the results emulate a
real-life drawing tool.
Although these default brushes do
excellent work, you’ll probably want
to adapt them to your particular
needs, refining them to fit your own
style of working. You can change Size,
Shape, Angle, Flow, and much, much
more.
Changes you make to brush variants,
including basic controls, like Size and
Opacity, are saved until the Restore
Default Variant command is selected.
Corel Painter also allows you to save
custom brushes as the default, as new
variants, or as Looks.
Using the Brush Creator
The Brush Creator provides controls
for customizing and creating brush
variants. The Brush Creator is
integrated tightly with Corel Painter,
but contains its own tools, palettes,
menus, and workflow. The user
interface of the application changes
depending on whether you are using
the main application or the Brush
Creator.
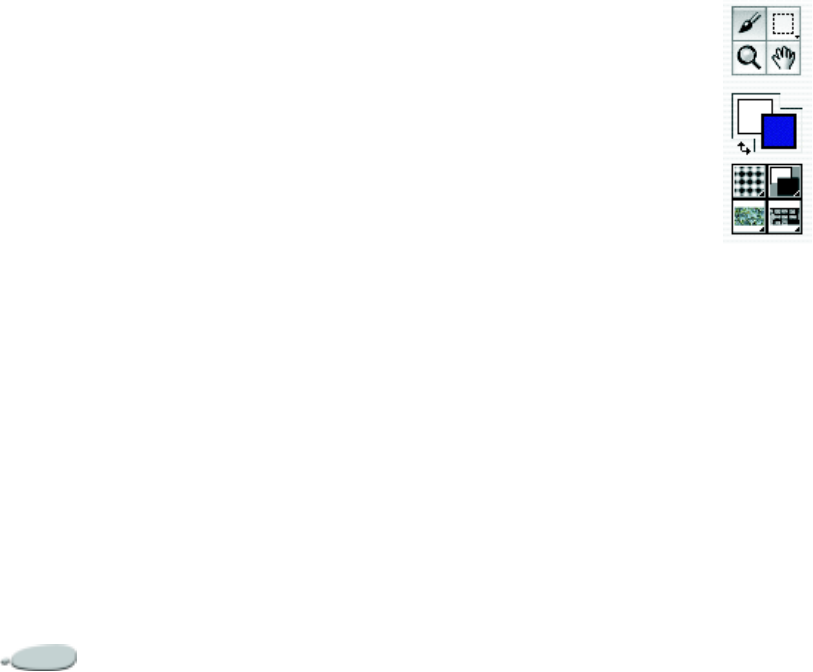
The Brush Creator144
There are three elements to the Brush
Creator: the Randomizer, the
Transposer, and the Stroke Designer.
The Randomizer creates random
brush settings for the selected brush
category and variant.
The Transposer creates new brush
settings based on the transition from
one brush category and variant to
another.
The Stroke Designer lets you control
the size and shape of the media a
brush applies, the way the dabs are
repeated in a stroke, the media
(usually color) that flows from a
brush, and how a brush interacts with
underlying pixels.
To open the Brush Creator:
•Do one of the following:
•Choose Window menu >
Show Brush Creator.
•Press Command + B (Mac
OS) or Ctrl + B (Windows).
To access the Randomizer,
Transposer, or Stroke Designer
pages:
1Choose Window menu > Show
Brush Creator.
2Click one of the following tabs:
•Randomizer
•Transposer
• Stroke Designer
Tip
•
Throughout the documentation, the
steps for accessing these pages are replaced
with a direction to go directly to the
particular page; for example, “On the
Stroke Designer page, click General.”
The Main Window
The main window of the Brush
Creator contains three tabs:
Randomizer, Transposer, and Stroke
Designer. Each has its own user
interface.
The other components of the main
window are the toolbox, the preview
grid and window, the Scratch Pad, and
the palettes.
The Toolbox
The Brush Creator toolbox contains
tools, a color picker, and four libraries
for use in designing brush variants.
The Brush Creator toolbox.
Tools
The Brush tool applies brush strokes
to the Scratch Pad, just as it applies
brush strokes to the canvas in Corel
Painter. The Brush tool is selected by
default when you open the Brush
Creator, and it’s set to the brush you
were last using in Corel Painter.
The Rectangular and Oval Selection
tools, and the Lasso tool, let you make
selections on the Scratch Pad, just as
you would in Corel Painter.
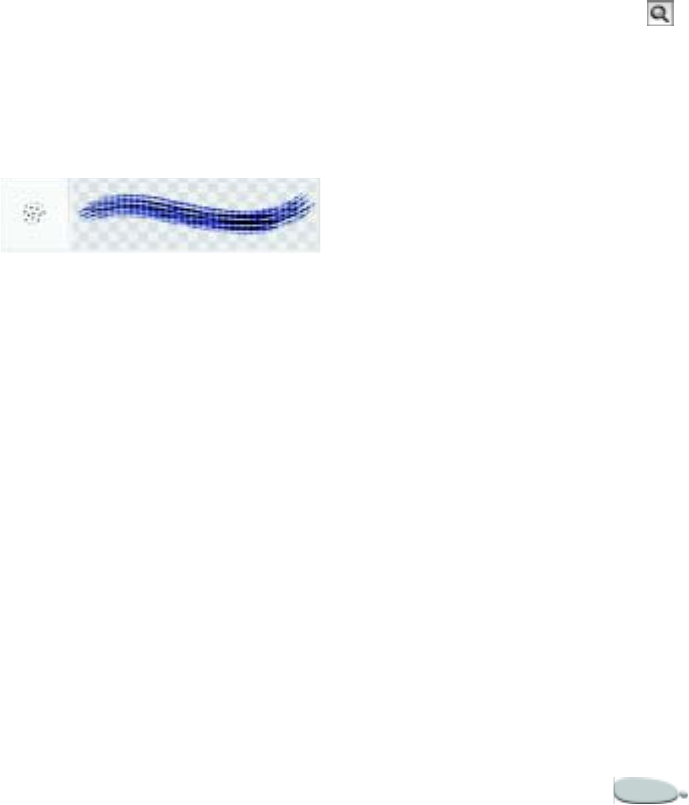
Corel Painter 145
The Magnifier tool lets you zoom in
on areas of the Scratch Pad.
The Grabber tool lets you scroll
around the Scratch Pad.
Color Picker
The toolbox contains a primary and a
secondary color rectangle. Click either
rectangle to open the Color Picker
dialog box and choose a new color.
Libraries
Four libraries are available in the
toolbox: papers, gradients, patterns,
and nozzles.
The Preview Grid and
Window
The preview grid is located on the left
side of the main window on the
Randomizer and Transposer pages. It
contains a Brush selector bar, and it
displays several variations of brush
strokes for the selected brush. You can
use these brush strokes as variants to
be randomized or transposed. The
preview window displays the variant
you select.
By increasing the size of the main
window, you also make more brush
strokes available in the preview grid.
The preview grid.
To resize the preview grid
•Drag the resize handle at the
bottom-right corner of the main
window.
Using the Scratch Pad
When creating new brushes, you can
test the brush strokes on the Scratch
Pad. You can zoom in to and out of
specific areas of the Scratch Pad,
adjust the brush size, make selections,
and clear the Scratch Pad.
To zoom in to the Scratch Pad
1Do one of the following:
• Choose the Magnifier tool
in the toolbox.
• Hold down Command +
Spacebar (Mac OS) or Ctrl +
Spacebar (Windows).
The Magnifier cursor shows a plus
sign (+), indicating you are
increasing magnification
(zooming in).
2Click or drag in the Scratch Pad.
To zoom out of the Scratch Pad
1Do one of the following:
• Choose the Magnifier tool, and
hold down Option + Com-
mand (Mac OS) or Alt + Ctrl
(Windows).
• Hold down Option +Com-
mand +Spacebar (Mac OS) or
Alt + Ctrl + Spacebar (Win-
dows).
The Magnifier cursor shows a
minus sign (-), indicating you are
decreasing magnification
(zooming out).
2Click in the Scratch Pad.
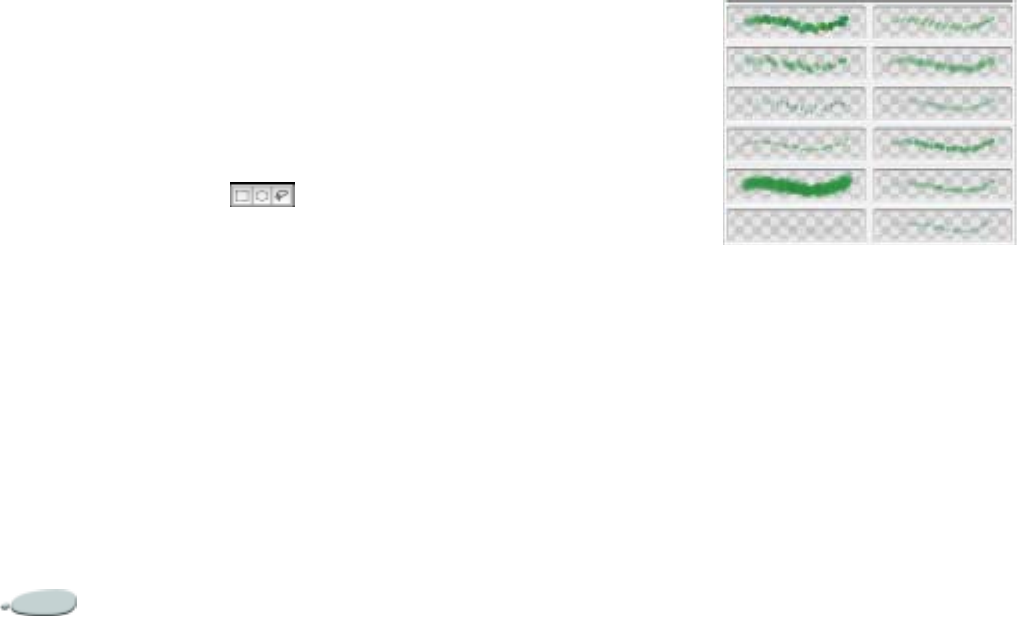
The Brush Creator146
Tip
•
You can also adjust the Zoom slider in
the bottom-left corner of the main
window to zoom in and out.
To adjust brush size in the Scratch
Pad
•Adjust the Size slider above the
Scratch Pad.
To make a selection in the Scratch
Pad
1In the toolbox, choose the
Rectangular Selection, Oval
Selection, or Lasso tool .
The three selection tools share the
same space in the toolbox. Holding
down the tool button provides
access to the hidden tool.
2Drag in the document to make
your selection.
For more information about
making selections, see “Using
Selection Tools” on page 206.
To clear the Scratch Pad
•Click the Clear button.
Palettes
There are seven palettes in the Brush
Creator: Colors, Tracker, Color
Variability, Color Expression, Papers,
Patterns, and Gradients. The Colors
and Tracker palettes are open by
default.
You can choose primary and
secondary colors on the Colors palette,
or you can choose to clone color. For
more information, see “Working with
Color” on page 77.
The Tracker palette keeps a visual
record of all brush strokes made in the
Scratch Pad. You can choose a brush
variant from the Tracker palette to use
in Corel Painter. For more
information, see “The Tracker
Palette” on page 19.
Colors and brush strokes selected in
the Brush Creator will carry over to
the main application.
Using the Randomizer
The Randomizer takes the current
brush category and variant, creates
random settings for them, and
displays variants created from these
random settings. You can then choose
a new randomized variant from the
preview grid to use in the application,
or you can use one of these news
variants to create even more
randomized variants.
Randomized brush variants.
To create a random brush variant
1Do one of the following:
• On the Brush selector bar,
choose a brush category and
variant.
• Choose a brush stroke from the
preview grid.
Random settings are created based
on the default settings.
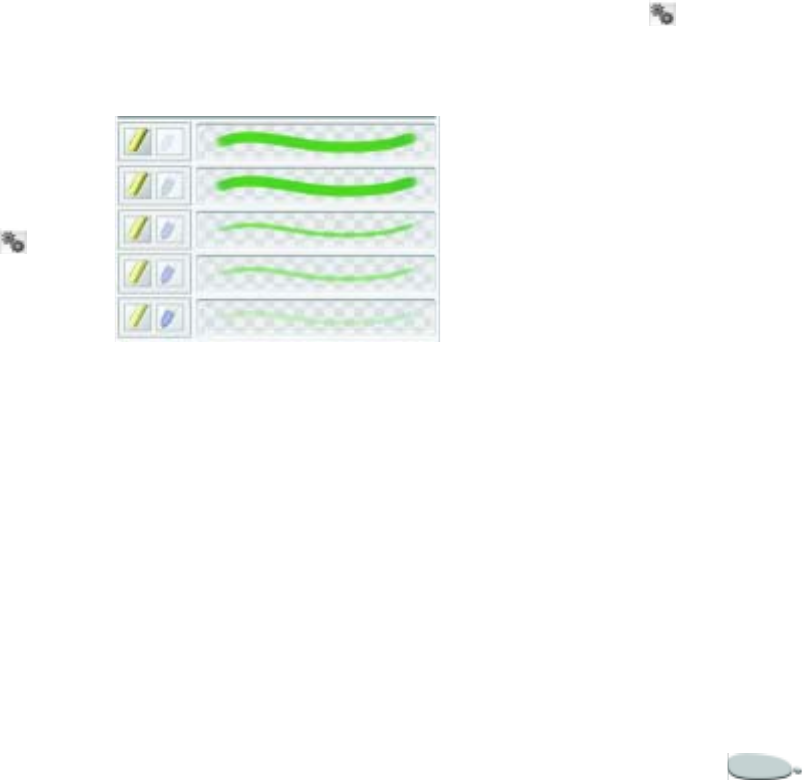
Corel Painter 147
2To fine-tune the settings of the
randomized variants displayed in
the preview grid, adjust the
Amount of Randomization slider.
Move the slider to the right to
increase the amount of
randomization; move it to the left
to decrease the amount.
3To create a new set of randomized
settings, click the Randomize
Current Selection button .
Tip
•
You can choose a brush category and
variant in the main application or in the
Brush Creator.
Using the Transposer
The Transposer creates new brush
variants based on a transition from
one variant to another. For example,
you can choose to combine variants
from the Pencils and Felt Pens
categories. The Transposer will use
the settings from each variant to create
new variants.
The Transposer uses two Brush
selector bars, at the top and bottom of
the page. The top Brush selector bar is
used to choose the From variant; the
bottom one is used to choose the To
variant. The Transposer uses these
two variants to create a series of new
brush strokes.
Transpo sed b ru sh varian ts .
To create a transposed brush
variant
1Do one of the following:
• On the Brush selector bars at
both the top and bottom of the
Transposer page, choose a
brush category and variant.
• Choose a brush stroke from the
preview grid.
This brush variant becomes the
next variant to be transposed.
2Click the Transpose Current
Selection button .
To choose a new brush variant
from the Preview window
•Click a brush stroke in the Preview
window.
This variant becomes the next
variant to be transposed.
Using the Stroke Designer
The Stroke Designer lets you tweak
the various settings for each brush
variant to create new brushes. A series
of controls, each containing its own
settings, can be adjusted on the Stroke
Designer page.
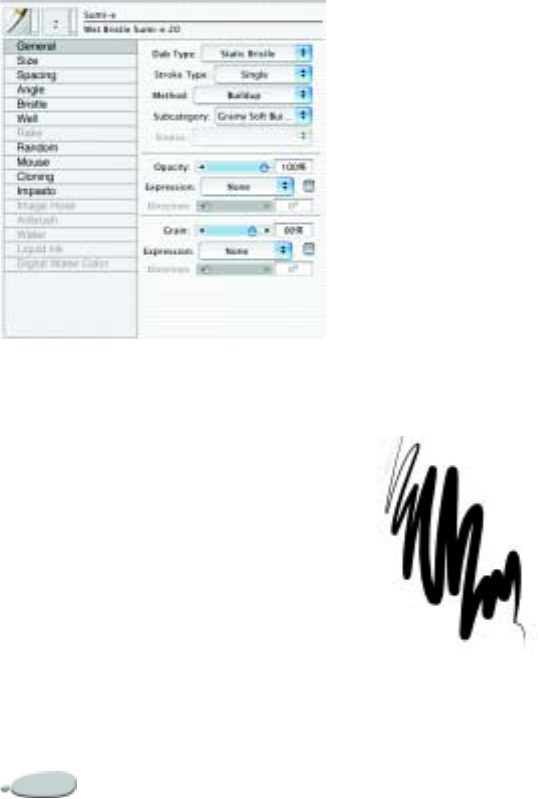
The Brush Creator148
The Stroke Designer.
Setting General Controls
Dab Types
Dab types are media application
methods. Corel Painter produces
“computed” brush strokes using
rendered dab types that are computed
during the stroke.
Earlier versions of Corel Painter used
“dab-based” media application, where
brushes apply small dots of media to
create brush strokes. With Spacing
between dabs set small, strokes appear
smooth. Zoom in close enough, and
you can probably tell that the brush
stroke is made up of tiny dabs of color.
Make a rapid brush stroke or set
spacing between dabs large, and
strokes can become trails of dots.
Rendered dab types create continuous,
smooth-edged strokes. They’re fast
and less artifact prone than dab-based
media application. In fact, you can’t
draw fast enough to leave dabs or dots
of color showing in a stroke, because
they’re just not there. Rendered dab
types allow rich new features, that
were not possible with dab-based
media application.
The Scratchboard Pen illustrates the smooth
stroke that can be accomplished with the Corel
Painter rendered Dab Types.
Corel Painter brushes use one of the
following dab types.
• Circular (dab-based)—Circular
dabs are controlled by the sliders in
the Size and Angle areas of the
Stroke Designer.
• Single Pixel (dab-based)—A
Single Pixel dab consists of one
pixel only. You can’t change its
size. You’ll use single pixel brushes
most often when you zoom in for
editing at the pixel level.
• Static Bristle (dab-based)—Bristle
dabs are controlled by the sliders in
the Size area of the Stroke
Designer. When you select the
Static Bristle dab type, the preview
grid displays a bristly profile.
• Captured (dab-based)—Captured
dabs are dab shapes you create and
capture. Refer to “Capturing
Brush Dabs” on page184.

Corel Painter 149
A captured dab is for a captured brush. It lets
you paint with specific shapes and designs.
• Camel Hair (rendered)—You use
Camel Hair dabs to create a bristle
brush with a circular array of
bristles. Individual brush hairs can
have their own color and can pick
up underlying colors
independently of the Brush
loading option. Increase color
variability in Corel Painter to
make each hair a separate color.
For more information about color
variability, see “Color Variability”
on page 89.
The Feature slider in the Size area
separates bristles. The higher the
setting, the farther apart hairs
appear. Use a low setting to make
more solid strokes. For more
information about the Size
controls, see “Setting Size
Controls” on page 155.
The effects of Feature on the stroke.
• Flat (rendered)—You use Flat
dabs to create a flat brush, like
those used to apply paint to houses
or walls. Brushes that use Flat dabs
respond to bearing, allowing for
flat or narrow strokes, depending
on how the stylus is held. Flat dabs
are always perpendicular to the
shaft of the stylus.
The Feature setting in the Size
area separates bristles.
• Palette Knife (rendered)—You use
these dabs to create brushes that
are the opposite of Flat dab
brushes. With resaturation set low,
you can use these brushes to
scrape, push, or pick up, and
rapidly drag colors along. Palette
Knife dabs are always parallel to
the shaft of the stylus.
The Feature setting in the Size
area separates bristles.
• Bristle Spray (rendered)—You use
Bristle Spray dabs to create
brushes that can use airbrush
controls. These brushes recognize
tilt, which separates bristles on the
opposite side of the tilt. Holding
down Option + Shift (Mac OS) or
Alt + Shift (Windows) when
painting reverses the spray
direction.
Adjust the Feature slider in the
Size area to separate bristles.
• Airbrush (rendered)—You use
Airbrush dabs to create brushes
that act like airbrushes. Bearing

The Brush Creator150
(direction) and angle (tilt) affect
the eccentricity of the resulting
conic section. The Feature slider in
the Size area controls the size of
the individual droplets of media.
Set Feature too high and you
might get undesirable artifacts.
Holding down Option + Shift
(Mac OS) or Alt + Shift
(Windows) when painting reverses
the spray direction.
• Pixel Airbrush (rendered)—You
use these dabs to create brushes
that work like airbrushes. Brushes
that use Pixel Airbrush dabs
cannot use the Feature setting to
control the size of individual
droplets of media. Holding down
Option + Shift (Mac OS) or Alt
+ Shift (Windows) when painting
reverses the spray direction.
• Line Airbrush (rendered)—You
use these dabs to create brushes
that work like airbrushes. Brushes
that use Line Airbrush dabs spray
lines instead of droplets of media.
Holding down Option + Shift
(Mac OS) or Alt + Shift
(Windows) when painting reverses
the spray direction.
• Projected (rendered)—You use
Projected dabs to create brushes
that act like airbrushes. Brushes
created with Projected dabs work
similarly to the airbrush from
previous versions of the
application, but react to bearing
and angle data. They create conic
sections with an overall softness.
Holding down Option + Shift
(Mac OS) or Alt + Shift
(Windows) when painting reverses
the spray direction.
• Rendered (rendered)—You use
Rendered dabs to create brushes
that conform the source to a stroke.
Use the Source pop-up menu to
control what is mapped into the
computed brush strokes. For more
information, see “Source” on
page 154.
• Liquid Ink—You use Liquid Ink
dabs to create liquid paint effects
that simulate traditional ink-based
media. You can give a Liquid Ink
brush stroke the appearance of
height by applying lighting effects.
There are five types of Liquid Ink
dab types: Liquid Ink Camel Hair,
Liquid Ink Flat, Liquid Ink
Palette Knife, Liquid Ink Bristle
Spray, and Liquid Ink Airbrush.
• Water Color—You use Water
Color dabs to create brushes that
work like water color brushes. The
colors flow and mix and absorb
into the paper. You can control the
wetness and evaporation rate of the
paper. There are five types of Water
Color dab types: Water Color
Camel Hair, Water Color Flat,
Water Color Palette Knife, Water
Color Bristle Spray, and Water
Color Airbrush.
To choose a dab type:
1On the Stroke Designer page of
the Brush Creator, click General.
2Choose a dab type from the Dab
Type pop-up menu.
Corel Painter 151
Stroke Types
Stroke type determines how media is
applied during a brush stroke.
Corel Painter brushes use one of the
following stroke types.
•Single—A Single stroke type
draws one dab path that
corresponds exactly to the brush
stroke you make.
You can use Bristle, Captured, or
one of the bristly rendered dab
types (such as Camel Hair) with
the Single stroke type to create the
effect of multiple bristles.
The Single stroke type has one dab path.
• Multi—A Multi stroke type draws
a set of randomly distributed dab
paths, positioned around the brush
stroke you make. These dabs leave
dab paths that are not parallel and
might overlap. Each time you
apply a multi-stroke brush, the
result might differ.
Increasing the Jitter value in the
Random area spreads out the
strokes in a multi-stroke brush.
Multi-stroke brushes must be
precomputed, which can generate
a delay in their appearance on the
screen. Because of this delay,
multi-stroke brushes work best
when you apply them in short,
controlled strokes.
The Multi stroke type draws a set of randomly
distributed dab paths.
• Rake—A Rake stroke type draws a
set of evenly distributed dab paths.
The several dab paths in a rake
brush stroke are parallel. You can
control all other aspects of the
stroke by using settings in the Rake
area of the Stroke Designer.
Each bristle in a Rake brush can
have a different color. Increasing
Color Variability in Corel Painter
causes bristles to be colored
differently.
A rake stroke is composed of evenly distributed
dab paths.
• Hose—The Hose stroke type
applies only to the Image Hose.
It’s a single stroke composed of the
current Image Hose Nozzle file.
To learn more about the Image
Hose and Nozzle files, refer to
“Using the Image Hose” on
page 334.
The Hose stroke type uses the current Nozzle
file as media.
To choose a stroke type:
1On the Stroke Designer page of
the Brush Creator, click General.

The Brush Creator152
2Choose a stroke type from the
Stroke Type pop-up menu.
Methods and Subcategories
The brush method defines the most
basic level of brush behavior. A brush
method is the foundation on which all
other brush variables build. You can
think of the method and method
subcategory as attributes of the
stroke’s appearance.
Because the method sets a brush
variant’s most basic behavior, you can
alter a variant’s behavior by changing
its method. For example, suppose you
want a Charcoal-looking stroke, but
instead of hiding underlying strokes,
you want brush strokes to build to
black. You can get this effect by
changing the method to Buildup.
Perhaps you want a variant of the Pens
brush category to smear underlying
colors. You can change its method
from Cover to Drip. Some brush
effects are less easily affected by other
methods, and results may differ.
Each method can have several
variations, called method
subcategories. These subcategories
further refine the brush behavior. The
following terms are used in describing
most method subcategories:
• Soft methods produce strokes with
hard, “pixellated” edges.
• Flat methods produce smooth,
anti-aliased strokes.
• Hard methods produce brush
strokes with semi anti-aliased
edges.
•Grainy methods produce brush
strokes that react to paper texture.
• In a few instances, you’ll see the
words “edge” and “variable” in a
method subcategory. “Edge”
means strokes are thick and sticky
looking. “Variable” means a brush
stroke starts off a bit more
transparent.
Combining a method with a method
subcategory results in a specific brush
style you can assign to a given brush.
For example, Grainy Hard Cover
means that brush strokes interact with
paper grain and have semi anti-aliased
strokes that hide underlying pixels.
Grainy Hard Cover is the default
method for Chalk and Charcoal.
The brush stroke on top was created using
Grainy Hard Buildup. The stroke on bottom
was created using Soft Variable Buildup.
Corel Painter supplies the following
methods:
• Buildup
•Cover
• Eraser
•Drip
•Mask (Cover)
•Cloning
•Wet
• Digital Wet
•Plug-in
Corel Painter 153
Buildup Method
The Buildup methods produce brush
strokes that build toward black as you
overlay them. A real-world example of
buildup is the felt pen: Scribble on the
page with blue, then scribble on top of
that with green, then red. The
scribbled area keeps getting darker—
approaching black.
Even if you were to apply a bright
color like yellow, you couldn’t lighten
the scribble—it would stay dark. This
is buildup. Crayons and Felt Pens are
buildup brushes.
An example of the Buildup method.
Cover Method
The Cover methods produce brush
strokes that cover underlying strokes,
such as oil paint in a traditional
studio. No matter what colors you
paint, you can always apply a layer of
paint that completely hides what’s
underneath. Even with a black
background, a thick layer of yellow
will be pure yellow. Some Chalk and
Pen variants are examples of brushes
that use the Cover method.
An example of the Cover method.
Eraser Method
The Eraser methods either erase,
lighten, darken, or smear the
underlying colors.
An example of the Eraser method.
Drip Method
The Drip methods interact with the
underlying colors to distort the image.
An example of the Drip method.
Mask Method
Due to Corel Painter masking
capabilities, the Mask method is
provided only for compatibility with
earlier versions of the application.
Mask methods are now mapped to the
Cover method. Normally, you will not
use the Mask method.
Cloning Method
The Cloning methods take imagery
from a clone source and re-create
them in another location, often
rendering them in a Natural-Media
style. For more about cloning imagery
refer to “Cloning Imagery” on
page 187.
The Brush Creator154
An example of the Cloning method.
Plug-in Method
Plug-in is a special category of
method subcategories. It defines no
specific brush behavior, but is an open
door to a wide range of subcategories.
It’s well worth your time to browse
through the Plug-in method
subcategories. There, you’ll find
methods such as Left Twirl. Left Twirl
gives you a brush with the dab and
stroke of an Impressionist performing
left-handed twirls.
You can give any built-in brush the power of a
plug-in by changing its method and
subcategory.
Wet Method
The Wet method applies brush strokes
to a Water Color layer. For more
information, see “The Water Color
Layer” on page 125.
Digital Wet
The Digital Wet method applies
digital water color brush strokes to the
canvas or a regular layer. For more
information, see “Digital Water
Color” on page 127.
To choose a method and
subcategory:
1On the Stroke Designer page of
the Brush Creator, click General.
2Choose a method from the
Method pop-up menu.
3Choose a subcategory from the
Subcategory pop-up menu.
Source
Source selects the media that is
applied by the brush variant. Source
applies only to some dab types like
Line Airbrush, Projected, and
Rendered. Refer to “Painting with
Color” on page 108 for more
information about setting a media
source.
Corel Painter brushes use one of the
following source types:
• Color—applies primary or
secondary color.
• Gradient—applies the current
gradient across the length of the
stroke.
• Gradient Repeat—applies the
current gradient repeatedly along
the stroke.
• Pattern—paints with a pattern
containing no mask information.

Corel Painter 155
• Pattern with Mask—paints with a
pattern limited by the pattern’s
mask.
• Pattern as Opacity—the
Luminance of the pattern becomes
the opacity of the stroke.
To choose a media source:
1On the Stroke Designer page of
the Brush Creator, click General.
2Choose a source from the Source
pop-up menu.
Opacity
The Opacity slider determines how
Corel Painter should vary the density
of the media being applied. It sets the
maximum opacity of the selected
brush.
The opacity of an Airbrush variant is
often set to be determined by stylus
pressure. More pressure yields more
opaque strokes. Use the Expressions
settings on the Stroke Designer page
to tie Opacity to stylus or mouse data.
To set brush opacity:
1On the Stroke Designer page of
the Brush Creator, click General.
2Move the Opacity slider left to
reduce opacity. Move it right to
increase opacity.
Grain
The Grain slider determines the
maximum amount of paper texture
Corel Painter should reveal in a brush
stroke.
Some default variants have their grain
component determined by pressure.
Increasing pressure causes the pencil
to “dig into” the paper. Use the
Expressions settings on the Stroke
Designer page to tie grain to stylus or
mouse data.
You can also use the paper’s brightness
and contrast settings to control brush-
grain interaction. For more
information, see “Using Paper
Texture” on page 61.
To set grain:
1On the Stroke Designer page of
the Brush Creator, click General.
2Move the Grain slider left to
reduce the penetration into the
grain. Move it right to increase the
penetration.
More grain is visible with lower
settings.
Setting Size Controls
The Size brush feature determines
how Corel Painter varies the width of
the brush stroke. The range from
minimum to maximum is determined
by Size and Min Size sliders in the
Size area of the Stroke Designer page.
Preview
The Preview window in the Size area
of the Stroke Designer page shows
how your changes affect the brush
dab. Clicking in the Preview window
lets you toggle between “hard” and
“soft” views of the dab.
The Preview supports only hard and
soft views of dab based brushes.
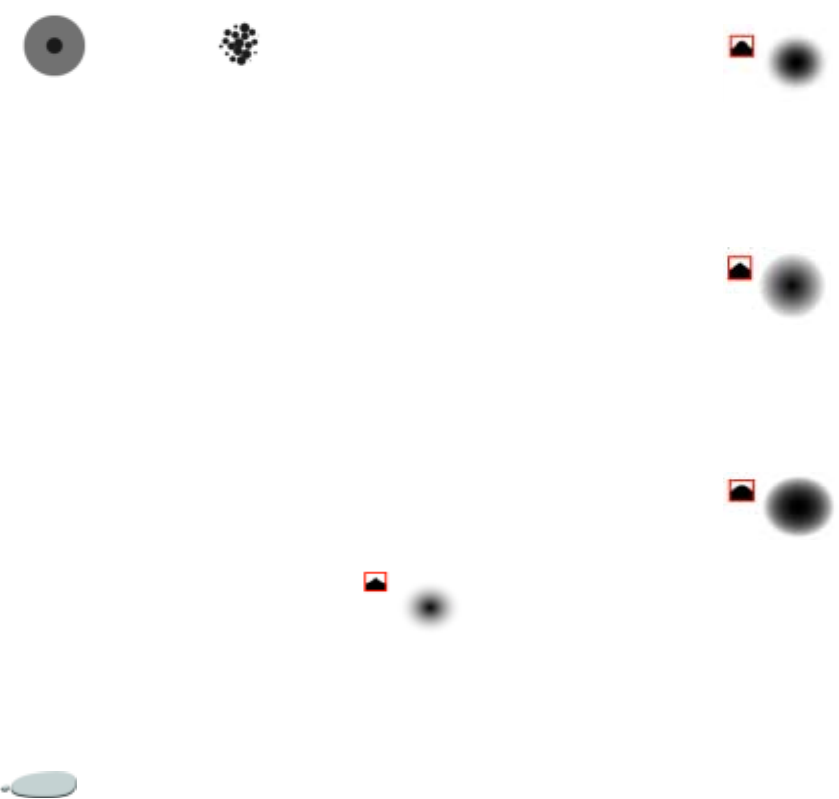
The Brush Creator156
Click in the Preview window to toggle
between Hard view and Soft view.
In the hard view, concentric circles
show the minimum and maximum
Size of a brush. The inner (black)
circle shows the minimum dab width.
The outer (gray) circle shows the
maximum dab width. Remember that
some brushes vary the line width
based on pressure or stroke speed. The
difference between the diameter of the
two circles shows the range in which
the stroke width will vary.
In the soft view, shading shows the
density distribution of the brush tip.
The density distribution describes
how much of the medium is conveyed
by a given point on the brush dab. For
example, an individual dab made by
an airbrush produces a soft-edged
circular mark with minimum density
at the outer edge of the dab. Density
increases inward to a maximum value
at the exact center of the dab.
Soft view cannot be used for Image
Hose or rendered dab types.
Brush Tips
The brush tip, or “profile,” shows a
cross-section of density distribution
across the diameter of the dab. You can
think of a brush tip profile as a bell
curve graph representing the density
spread across the brush dab.
Different mediums have different
density distributions. Changes in the
density distribution produce different
marking qualities in a brush stroke.
For rendered airbrush dab types, the
tip profile controls the concentration
of the spray.
Corel Painter brushes use one of the
following Brush Tip Profiles:
Pointed Profile
Pointed Profile provides maximum
density at the center, with rapid fall-
off to the edge.
Medium Profile
Medium Profile has a wide area of
greater density at the center, with
rapid fall-off to the edge.
Linear Profile
Linear Profile provides maximum
density at the center with an even fall-
off to the edge.
Dull Profile
Dull Profile provides maximum
density at the center, with a high
density weighting to the edge.
Hard view Soft view
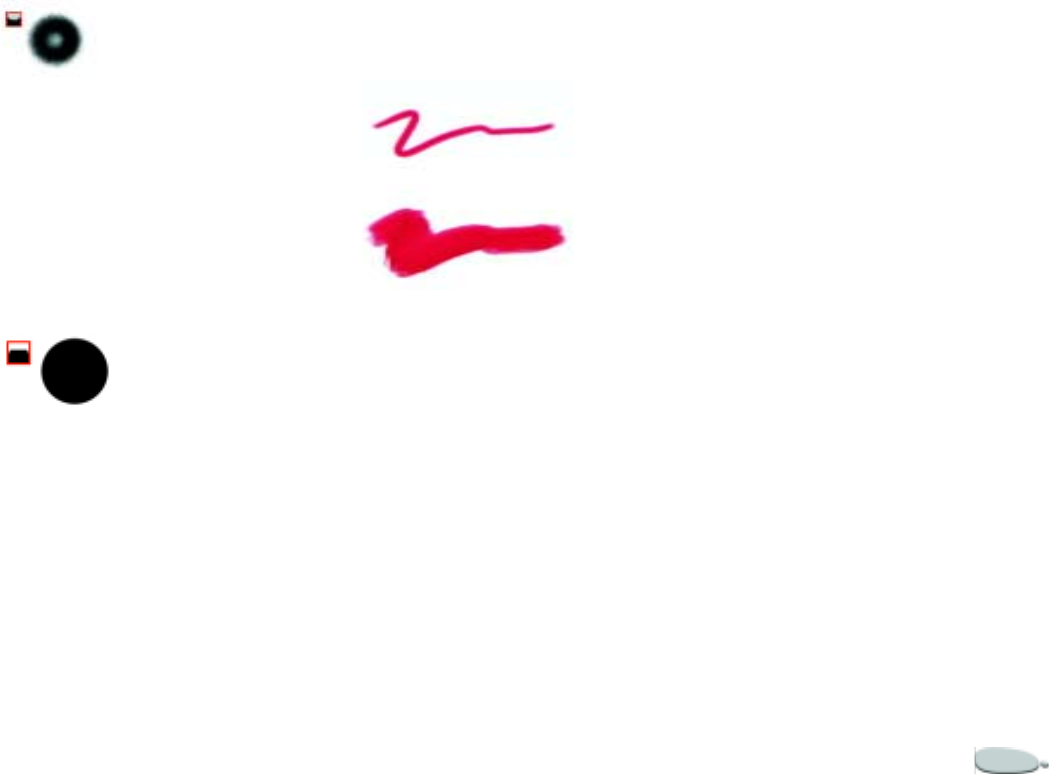
Corel Painter 157
Water Color Profile
Water Color Profile provides
maximum density at the outer edge in
a ringlike fashion, with medium
internal density.
This tip may be used with the
rendered dab types to yield a hollow
dab or a spray concentration.
1-Pixel Edge
1-Pixel Edge provides maximum
density throughout, with a rapid fall-
off at the edge, producing a one-pixel,
anti-aliased edge.
To choose a brush tip:
1On the Stroke Designer page of
the Brush Creator, click Size.
2Click the Brush Tip Profile that
you want to use.
Size
The Size slider controls the width of
the brush and the brush stroke.
The Size slider controls the width of the brush.
As Size changes, you might need to
adjust the Spacing controls for
brushes that use non-rendered or dab-
based dab types, because gaps might
appear in the stroke.
To set brush size in the Stroke
Designer:
1On the Stroke Designer page of
the Brush Creator, click Size.
2Move the Size slider right to make
the brush larger. Move it left to
make the brush smaller.
Tips
•
You don’t need to open the Size area of
the Stroke Designer page to adjust the size
of a brush. You can type a value in the
Size box on the property bar, or you can
adjust the slider on the property bar. For
more information on the property bar, see
“Using the Property Bar” on page 14.
•
You can also press the square brackets,
[and ], to decrease and increase the brush
size according to the value specified in
General Preferences. For more
information, see “General Preferences” on
page 51.
To use the brush sizing shortcut:
1Hold down Command + Option
+ Shift (Mac OS) or Ctrl + Alt +
Shift (Windows) and drag in the
image window.
A circle that represents the brush
diameter appears beneath the
cursor.
2When you’ve dragged the circle to
the size you want, release the
mouse button.

The Brush Creator158
The brush sizing shortcut lets you use keyboard
commands to adjust the brush size right in the
document window.
Min Size
In your studio, you expect the pressure
you exert on a brush or drawing tool
to make a difference in the width of
the resulting brush stroke.
The Min Size control allows you to
create a brush stroke that is amazingly
realistic. You can set up a brush that
really responds to the elegance of
subtle hand movements. As stylus
pressure eases, brush strokes taper in
response. As pressure increases, brush
strokes widen just as they would with
a real brush.
Min Size represents a percentage of
the Size setting and is the smallest
stroke size for the selected brush. Now
that Size is always the largest stroke
size and Min Size sets the smallest
stroke size (in relationship to the Size
setting), it’s easy to control overall
stroke size variation.
To set minimum stroke size:
1On the Stroke Designer page of
the Brush Creator, click Size.
2Move the Min Size slider right to
make the minimum brush size
larger. Move it left to make the
minimum brush size smaller.
Size Step
The Size Step slider controls the
transition between narrow and wide
sections of a stroke. Moving the slider
to the right makes the transition
appear more abrupt. Moving it to the
left makes the transition smoother.
Size step is applicable only to dab-
based brushes.
The Size Step slider controls the transition
between the narrow and wide sections of a
stroke.Top=1%, bottom=100%.
To set stroke transition:
1On the Stroke Designer page of
the Brush Creator, click Size.
2Move the Size Step slider right to
increase the transition between
brush sizes. Move it left to make
the transitions smaller.
Feature
The Feature slider determines the size
of the dabs of paint applied by a
rendered dab type brush.
Setting Spacing Controls
When a brush stroke uses a dab-based
dab type, Corel Painter creates the
stroke with a series of dabs. By
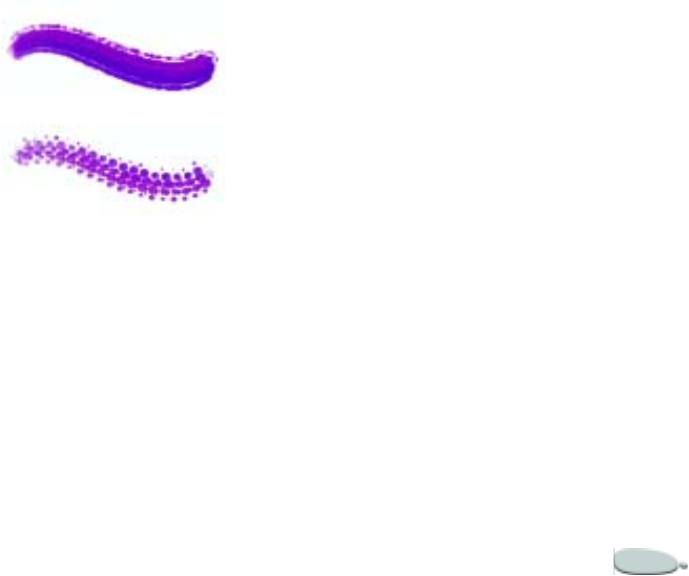
Corel Painter 159
adjusting the spacing between those
dabs, you can control the continuity of
the brush stroke.
Spacing
The Spacing slider controls the
distance between brush dabs in a
stroke.
To set spacing between brush
dabs:
1On the Stroke Designer page of
the Brush Creator, click Spacing.
2Move the Spacing slider right to
increase the spacing between dabs,
bringing spacing closer to the size
of the dab itself.
When the Spacing slider is at
100%, the Size of the dab equals
the spacing. For example, a dab
that’s 10 pixels across is repeated
every 10 pixels.
3Move the Spacing slider left to
decrease the distance between
dabs, until they begin to overlap.
Overlapping increases the density
of the stroke and makes it look
more continuous.
Min Spacing
The Min Spacing slider specifies the
minimum number of pixels between
dabs. If you don’t want a continuous
stroke, you can adjust the Min
Spacing to create a dotted or dashed
line. Each dot or dash is one brush
dab.
The Min Spacing slider controls the minimum
number of pixels between dabs. Top=2.0,
bottom=10.5.
To set minimum dab spacing:
1On the Stroke Designer page of
the Brush Creator, click Spacing.
2Move the Min Spacing slider right
to increase the minimum spacing
between dabs. Move it left to
decrease the minimum spacing
between dabs.
Damping
Damping is used to smooth otherwise
jagged brush strokes for brushes using
rendered dab types. Higher values
make the stroke smoother. (On a very
technical note, Damping suspends a
stroke in a mathematical spring area,
using calculations to even out edges
and reduce jaggedness.)
High values of Damping will actually
round out corners of a stroke. A value
of 50% works best. Higher values
might be necessary for jittery input
devices like a mouse.
To set smooth rendered dab
strokes:
1On the Stroke Designer page of
the Brush Creator, click Spacing.
2Move the Damping slider to the
right to even out jagged strokes.
Move it left to allow for more
ragged transitions between points
on the stroke.
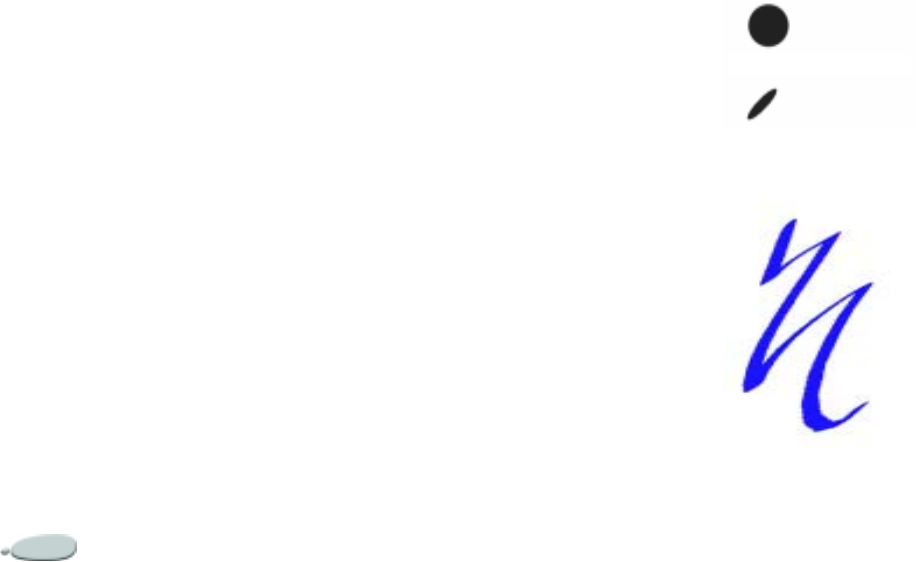
The Brush Creator160
Continuous Time Deposition
Continuous Time Deposition controls
whether you must move a brush
before media is applied. With
Continuous Time Deposition
enabled, media begins flowing at the
first touch.
Brushes that use rendered dab types
take full advantage of this setting,
causing media to pool realistically
when the stroke is slowed or paused.
Brushes that use dab-based dab types
require a full pause in the stroke
before media begins to pool. You use
Continuous Time Deposition mostly
with airbrush tools.
With Continuous Time Deposition
disabled, you must move a brush
before media flows.
To set Continuous Time
Deposition:
1On the Stroke Designer page of
the Brush Creator, click Spacing.
2Enable the Continuous Time
Deposition check box.
Cubic Interpolation
Cubic Interpolation smooths jagged
brush strokes by adding points to dab
paths, primarily for brushes that use
dab-based dab types. Unlike
Damping, which uses mathematical
calculations to smooth jagged edges,
Cubic Interpolation inserts additional
points into dab paths, which are used
to replot brush strokes.
Cubic Interpolation is best for dab-
based dab types, while Damping is
best for rendered dab types.
To set smooth strokes by adding
path points:
1On the Stroke Designer page of
the Brush Creator, click Spacing.
2Move the Points slider to the right
to add points and even out jagged
strokes. Move it left to decrease the
number of additional points.
Setting Angle Controls
Squeeze
Squeeze controls the shape of the
brush dab. Squeezing a brush changes
it from round to elliptical. You use
Squeeze controls with Circular and
Captured dab types.
The Squeeze slider controls the shape of the
brush dab. Top=100%, bottom=25%.
Examples of Squeeze used to create a
Calligraphy effect with a Pen brush.

Corel Painter 161
To set brush shape:
1On the Stroke Designer page of
the Brush Creator, click Angle.
2Move the Squeeze slider to the left
to make a dab more elliptical.
Move it to the right to make a dab
rounder.
Angle
The Angle slider controls the angle of
an elliptical brush dab and the length
of the ellipse. You use Angle controls
with Circular and Captured dab types.
The Angle slider controls the angle of an
elliptical brush dab—it is significant only for
dabs with Squeeze below 100%. Top=90°,
bottom=45°.
To set elliptical brush dab angle:
1On the Stroke Designer page of
the Brush Creator, click Spacing.
2Move the Angle slider right to
rotate the dab clockwise. Move the
slider to the left to rotate the brush
counterclockwise.
Angle Range
For dab-based brushes, the Ang Range
slider lets you specify a range of dab
angles that may appear in a brush
stroke.
To take advantage of this feature, you
must set up the brush to base the
angle on some factor, like stroke
direction or bearing. You’ll do this
with the Expression settings on the
Stroke Designer page.
The Angle Range slider controls the range of
dab angles that can appear in a brush stroke.
Top=0°, bottom=180°.
To set brush dab angle range:
1On the Stroke Designer page of
the Brush Creator, click Angle.
2Move the Ang Rng slider right to
increase the range of angles that
can appear in a dab. Move the
slider to the left to reduce the range
of angles that can appear in a
stroke.
Setting this slider to 360° means
you can get every angle between 0°
and 360° in your stroke.

The Brush Creator162
Angle Step
For dab-based brushes, the Ang Step
slider controls the increment of
change for brushes with an Ang
Range greater than 0°. For example,
setting the Ang Step to 5° means you
get a brush dab every 5° within the
current angle range setting.
The Angle Step slider controls the increment of
change for brushes with an Angle Range
greater than 0°. Top=0°, bottom=90°.
To set brush angle increment:
1On the Stroke Designer page of
the Brush Creator, click Angle.
2Move the Ang Step slider right to
get fewer angles. Move it left to
create more angles.
Setting Bristle Controls
Bristles create the look of a real brush
stroke, complete with the striations
that hairs on a real brush make. Use
the controls in the Bristle area of the
Stroke Designer page to design the
many individual bristles in a single
brush dab.
To see the effect of the Bristle sliders,
click Size on the Stroke Designer page
and click in the preview window to
show the “soft” view of the dab. The
bristled dab changes as you move
bristle control sliders. For more
information about Size controls, see
“Setting Size Controls” on page 155.
If you choose Rake as the stroke type,
you can adjust Brush Scale and
Contact Angle in the Rake area of the
Stroke Designer page. For more
information on the Rake controls,
refer to “Setting Rake Controls” on
page 167.
Thickness
The Thickness slider controls the
diameter of separate bristles.
The Thickness slider controls the diameter of
the individual bristles. Top=17%,
bottom=87%.
To set bristle thickness:
1On the Stroke Designer page of
the Brush Creator, click Bristle.
2Move the Thickness slider to the
left to reduce the density of the
medium left by the stroke. Move it
right to increase brush density.
When the slider is fully to the left,
the brush will leave a faint
stroke—even if Opacity is set to
100%.
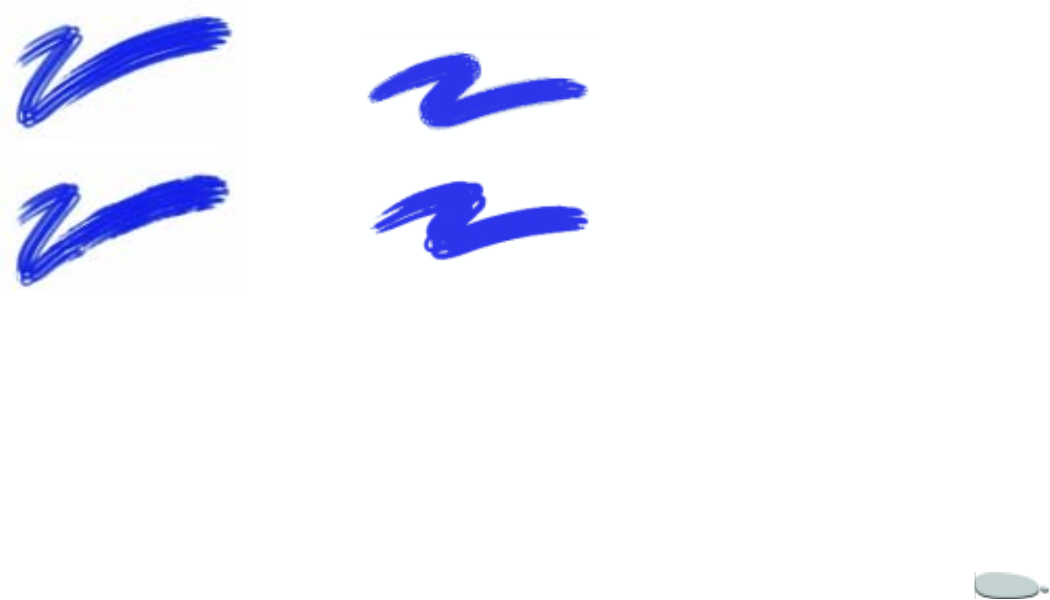
Corel Painter 163
Clumpiness
The Clumpiness slider applies a
random variance to the thickness of
each bristle. Clumpiness is
proportional to Thickness. This
produces an effect that looks like some
of the bristles have clumped together.
The Clumpiness slider controls how bristles
“clump together”. Top=0%, bottom=100%.
To set clumping of bristles:
1On the Stroke Designer page of
the Brush Creator, click Bristle.
2Move the Clumpiness slider to the
left to reduce the amount of
clumping together of bristles.
Move it right to increase
clumpiness.
Hair Scale
The Hair Scale slider controls the
density of bristles in the brush dab
and, therefore, the number of bristles
in the dab.
The Hair Scale slider controls the density of
bristles in the brush dab. Top=410%,
bottom=990%.
To set bristle density:
1On the Stroke Designer page of
the Brush Creator, click Bristle.
2Move the Hair Scale slider to the
left to reduce the amount of bristle
density, creating a fine-hair brush.
Move it right to increase density.
Scale/Size
The Scale/Size slider controls the
degree of Size variation applied to the
bristles of a brush. At 0% there is no
size change applied to the bristles.
Setting this slider to a value greater
than 0% creates a set of scaled
iterations of the dab.
At 100% Size/Scale, when the brush
size changes, the bristles scale in
proportion to the size. At 8% Size/
Scale, when the brush size changes,
the bristles remain a constant absolute
size.
The Scale/Size control is invalid if
there is no size range (that is, Size
Min set to 100%).

The Brush Creator164
The Scale/Size slider controls the degree of Size
variation applied to a bristle set.Top=0%,
bottom=100%.
To scale bristles according to
brush size:
1On the Stroke Designer page of
the Brush Creator, click Bristle.
2Move the Scale/Size slider to the
left to reduce the degree of size
variation. Move it right to increase
size variation.
Expression Settings
Corel Painter lets you control brush
effects along the stroke based on a
number of real-time input factors. For
example, many brushes vary their
Opacity or Size in response to changes
in stylus pressure. This is merely their
default setting. You can use the
Expression settings on the Stroke
Designer page to vary these effects in
response to other factors, like stroke
direction or velocity.
Expression settings are linked to
individual controls on the Stroke
Designer page. These are: General,
Size, Angle, Well, Random, Impasto,
Airbrush, and Liquid Ink.
To choose an Expression setting:
1On the Stroke Designer page of
the Brush Creator, click a control
that contains Expression settings.
2Choose one of the following
options from the Expression pop-
up menu:
• None — applies no adjustment
to the brush feature
• Velocity — adjusts the brush
feature based on the dragging
speed. Dragging quickly will
minimize the setting; dragging
slower increases it.
• Direction — adjusts the
selected brush feature based on
the direction of the stroke
• Pressure — adjusts the brush
feature based on stylus pres-
sure. Greater pressure increases
the setting for that brush fea-
ture.
• Wheel — adjusts the brush fea-
ture based on the wheel setting
on an airbrush stylus, specifi-
cally the Intuos Airbrush stylus.
The maximum value is set
when the wheel is pushed all
the way forward. The mini-
mum is set when the wheel is
pushed all the way back.
• Tilt — adjusts the brush fea-
ture based on the angle of the
stylus from the tablet. For
example, when the stylus is
perpendicular to the tablet, Tilt
=0.
• Bearing — adjusts the brush
feature based on the direction
in which the stylus points
• Source — adjusts the brush
feature based on the luminance
of the clone source. Higher
luminance (closer to white)

Corel Painter 165
increases the setting for that
component—for example, a
wider stroke.
• Random — adjusts the brush
feature at random
• Sequential — applies only to
Rank 2 or 3 Image Hose
brushes. When enabled, this
feature picks out nozzles from
the index, in order.
3If you like, enable the Invert check
box beside the Expression pop-up
menu to reverse the effect of the
Expression setting.
Note
•
Not all stylus models convey tilt or
bearing information.
Direction
The Direction slider below the
Expression pop-up menu adjusts the
angle value of the Direction controller.
The angle value represents the
direction to which the Controller
responds. For instance, when the
Controller is set to direction, this
setting controls at what angle a brush
stroke narrows or widens, particularly
useful for calligraphic effects.
To set controller direction:
1On the Stroke Designer page of
the Brush Creator, click a control
that contains Expression settings.
2Choose Direction from the
Expression pop-up menu.
3Drag the Direction slider until the
desired angle is achieved for
controller behavior.
Setting Well Controls
The Well controls determine how a
brush conveys its medium (color) to
the paper. The Resaturation, Bleed,
and Dryout controls work together to
determine how much color a brush
has at the start and finish of a stroke.
Brush Loading
Brush Loading affects how dab-based
brushes interact with underlying
pixels. When Brush Loading is active,
brushes can literally “pick up” existing
colors, hair by hair. This capability
offers truer color interaction,
astounding color-variations smearing,
and better cloning results.
When Brush Loading is not active,
brushes interact with previously
applied colors by sampling underlying
pixels, then loading the brush with
one new color—the average of those
that were sampled.
When you’re using Brush Loading,
it’s best to use a very low spacing
setting. For more information about
spacing controls, see “Setting Spacing
Controls” on page 158.
Resaturation
Resaturation controls the amount that
color is replenished in a stroke. If the
Resaturation slider is at zero, the
brush does not get any color. When
Resaturation is below 10% (and Bleed
is less), a brush stroke fades in gently.
When Resaturation is at zero and
Bleed is set high, an airbrush can
move underlying colors, as when
using just the airbrush hose to blow
paint around on the canvas.
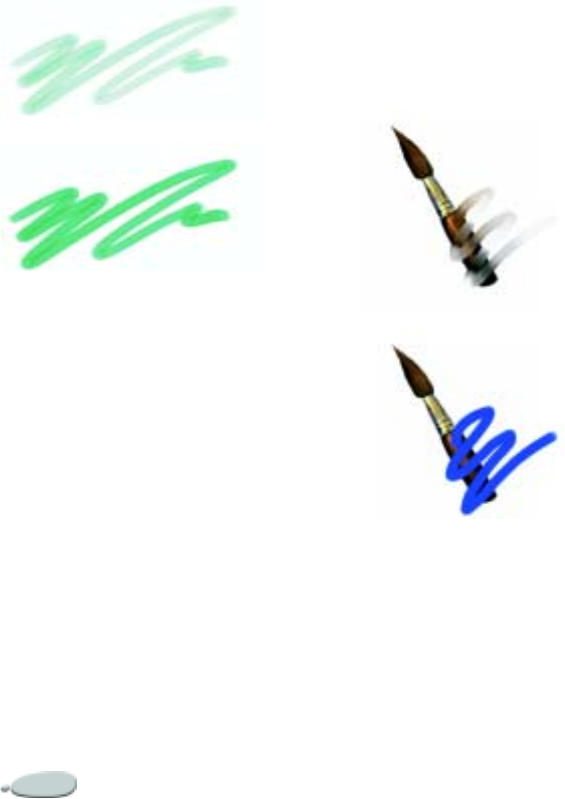
The Brush Creator166
The Resaturation slider controls the amount of
color replenished in the stroke. Top=25%,
bottom=100%.
To set resaturation:
1On the Stroke Designer page of
the Brush Creator, click Well.
2Move the Resaturation slider left to
reduce the amount of color
replenished in a stroke. Move it
right to increase the amount of
color.
Bleed
The Bleed slider controls how much
the brush colors smear underlying
colors—including the paper color.
When Bleed is higher than
resaturation, more color bleeds than
covers, so the stroke will never reach
full Opacity.
The Bleed slider controls the amount of
underlying color mixed in with the selected
color. Top=55%, bottom=1%.
To set color bleed:
1On the Stroke Designer page of
the Brush Creator, click Well.
2Move the Bleed slider left to
reduce the amount of interaction
with underlying pixels. Move it
right to increase interaction.
Dryout
The Dryout control determines how
quickly a brush runs out of medium.
Dryout is measured in pixels. Moving
the slider to the left makes a brush’s
reservoir empty more quickly. This
can lead to brush strokes that fade out
gently. If the Dryout control is set
high, the brush never runs out of
color.
Dryout works in conjunction with
Bleed, so Bleed must be above zero to
take advantage of Dryout. You can
modulate the Dryout effect by
changing the Bleed setting.
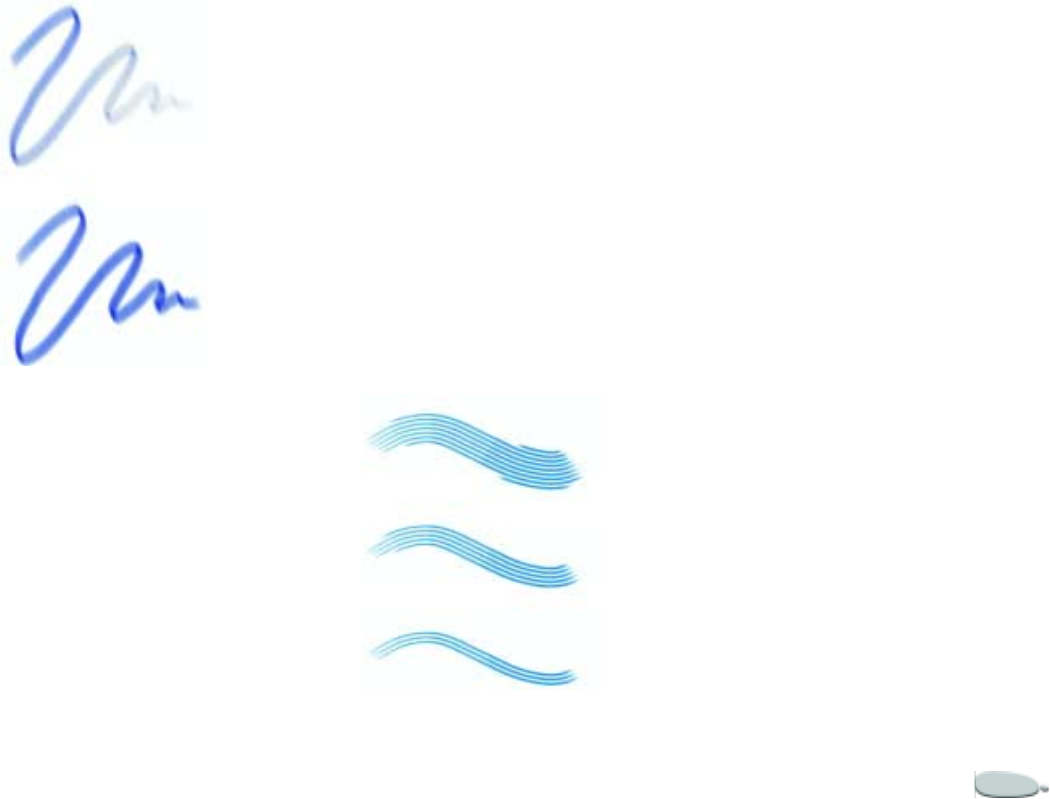
Corel Painter 167
The Dryout slider controls how fast the brush
runs out of medium. Top=724,
bottom=22026.
To set brush dryout:
1On the Stroke Designer page of
the Brush Creator, click Well.
2Move the Dryout slider left to
shorten the distance the brush can
move before it dries out. Move it
right to lengthen the distance.
Setting Rake Controls
The Rake controls lets you control the
sophisticated features of a Rake stroke,
which maintains the angle of the
brush head as the stroke changes
direction. As the brush turns, bristles
come in and out of contact.
Contact Angle
The Contact Angle slider adjusts how
much of the brush touches the
painting surface. In other words, the
number of rake “tines” that touch the
Canvas at once.
The Contact Angle controls determine how
much of the brush contacts the painting
surface. Top=180°, middle=125°,
bottom=0°.
To set brush contact angle:
1On the Stroke Designer page of
the Brush Creator, click Rake.
2Move the Contact Angle slider to
the left to create a low contact
angle—few of the dabs are in
contact with the paper. Move the
slider all the way to the right to
create a high contact angle—all of
the dabs contact the paper.
Brush Scale
Brush Scale controls the spacing
between individual bristles that
compose the Rake. The Size of each
dab is determined in the Size area of
the Stroke Designer page. For more
information, see “Setting Spacing
Controls” on page 158.

The Brush Creator168
Brush Scale controls the spacing between
individual dabs in the rake. Higher Brush
Scale settings spread the dabs. Top=2500%,
bottom=0%.
To set brush scale:
1On the Stroke Designer page of
the Brush Creator, click Rake.
2Move the Brush Scale slider right
to bring the scale closer to equaling
the dab width.
When the scale is 100%, the stroke
width equals the dab width times
the number of dabs.
3Move the slider left to cause dabs
to overlap.
When the scale is less than 100%,
the dabs overlap. Overlapping dabs
create a natural, subtle stroke
when used with Turn Amount and
Soften Bristle Edge.
Turn Amount
When you turn a real brush to paint a
curve, bristles at the edges move in
and out of contact with the painting
surface, depending on the brush’s
location on the curve (inside or
outside).
Turn Amount simulates this bristle
displacement.
The Turn Amount slider controls the
displacement of inside and outside bristles.
Top=0%, bottom=150%.
To set bristle displacement:
1On the Stroke Designer page of
the Brush Creator, click Rake.
2Move the Turn Amount slider
right to increase how much the
displacement changes are based on
the direction of the brush.
3Move it left to decrease how much
the displacement changes are
based on the direction of the
brush.
Bristle
The Bristle controls set the number of
bristles or dabs used for Multi and
Rake stroke types.
To set bristle number:
1On the Stroke Designer page of
the Brush Creator, click Rake.
2Move the Bristle slider right to
increase how many bristles are in
the brush. Move it left to decrease
the number.
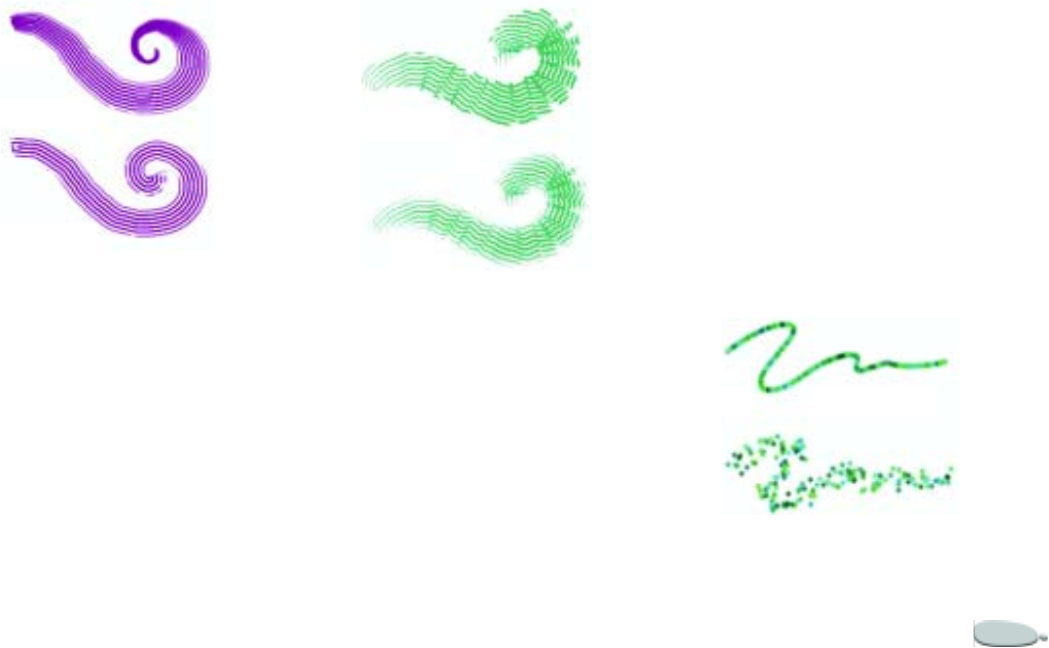
Corel Painter 169
Spread Bristles
The Spread Bristles control
dynamically adjusts brush scale based
on pressure. The harder you press, the
more the brush fans out.
Spread Bristles controls the spacing of bristles,
based on stylus pressure. The harder you press,
the more the bristles spread. If you want the
Spread constant, disable this option.
Top=enabled, bottom=disabled.
To set bristle spacing:
1On the Stroke Designer page of
the Brush Creator, click Rake.
2Enable the Spread Bristles check
box.
Soften Bristle Edge
Soften Bristle Edges makes a brush’s
outer dabs semi-transparent. This
option is particularly nice when used
with Turn Amount.
Soften Bristle Edge turns the outer dabs semi-
transparent.Top=disabled, bottom=enabled.
To soften bristle edge:
1On the Stroke Designer page of
the Brush Creator, click Rake.
2Move the Soften Bristle Edge
slider right to increase outer dab
transparency. Move it left to
decrease transparency.
Setting Random Controls
Corel Painter uses randomness to
introduce an “accidental” quality in
color and stroke. Randomness
contributes to the appealing, unique
look of artwork created in Corel
Painter. You can control brush
randomness with settings in the
Random area of the Stroke Designer
page.
Jitter
The Jitter control introduces a
randomized jitter to the brush stroke.
Instead of appearing directly along the
stroke, dabs appear randomly outside
the brush stroke path.
The Jitter slider creates a randomized jitter in
the brush stroke. Top=0, bottom=3.13.

The Brush Creator170
To set Jitter:
1On the Stroke Designer page of
the Brush Creator, click Random.
2Move the Jitter slider to the left to
decrease deviation from the stroke
path. Move it right to increase
deviation from the stroke path.
Clone Location Variability
Both Clone Location sliders work
with brushes of the Cloning method.
The Variability control lets you
randomly offset the location where the
clone brush samples the source.
When Variability is zero, the pixels of
the source and destination images
correspond precisely—using a cover
brush at full Opacity (and no Grain)
simply re-creates the source image.
The Variability slider controls the offset of the
clone based on the location of the source
image.Top=0, bottom=12.
Introducing a degree of randomness
disturbs the pixel-to-pixel
correspondence. The resultant
variations in the image distance the
clone from its photographic source,
which can contribute to a Natural-
Media appearance.
To set clone location variability:
1On the Stroke Designer page of
the Brush Creator, click Random.
2Move the Clone Location
Variability slider to the right to
increase the range (distance) the
sample can be offset. Move it left to
limit offset, causing source and
destination images to correspond
more precisely.
Note
•
Clone location sliders do not have an
effect when Clone Color is checked in the
Colors palette. They have an effect only
when a Clone method is in use.
How Often
The How Often slider controls the
period between random offsets.
To set the period between
random offsets:
1On the Stroke Designer page of
the Brush Creator, click Random.
2Move the slider to the left to cause
a greater number of samples to be
offset.
This gives the clone image a
rough, distorted look.
3Move the How Often slider right
to increase the period, causing
samples to be offset less frequently.
This keeps the clone image more
coherent.
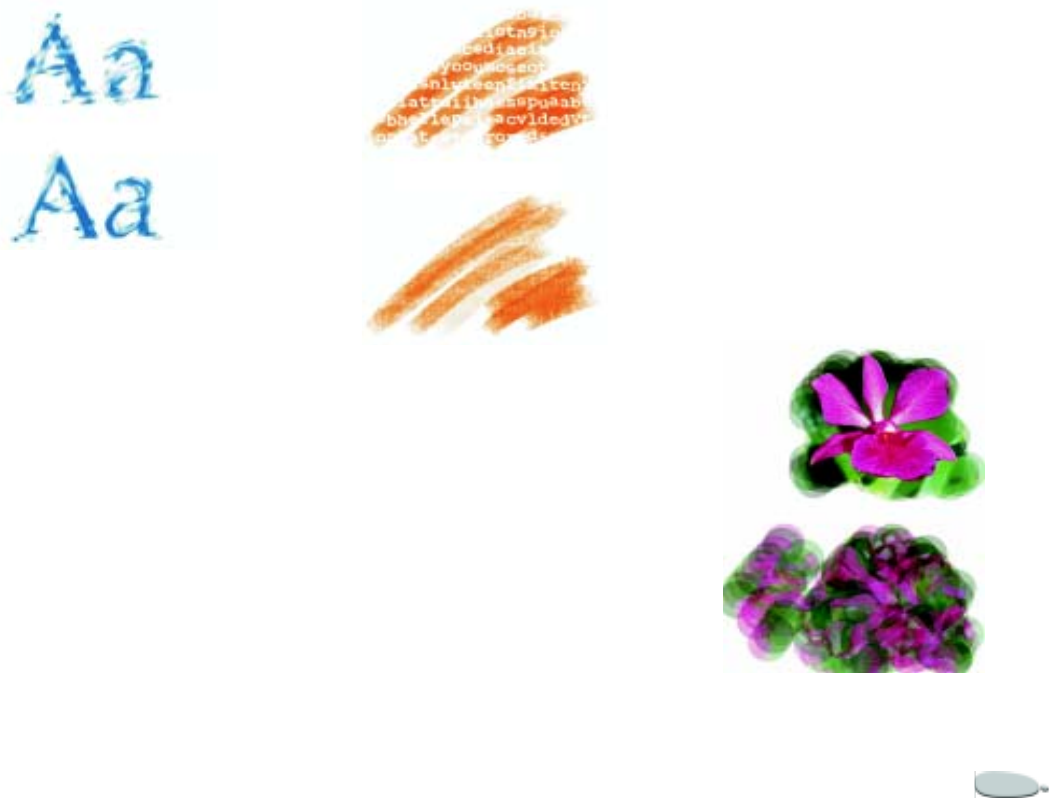
Corel Painter 171
The How Often slider controls the period
between random offsets. Top=0, bottom=15.
Random Brush Stroke Grain
Normally, when you make a brush
stroke, the paper grain is fixed. Strokes
repeated over an area will bring out
the same grain.
The Random Brush Stroke Grain
option randomly moves the paper
grain for each dab of each stroke.
The Random Brush Stroke Grain option
randomly moves the paper grain for each
stroke. Top=disabled, bottom=enabled.
To choose the Random Brush
Stroke Grain option:
1On the Stroke Designer page of
the Brush Creator, click Random.
2Enable the Random Brush Stroke
Grain check box.
Random Clone Source
Random Clone Source randomly
samples the source document, then
places strokes on the clone
destination. There’s no
correspondence between the samples
taken from the source and where they
are placed on the clone. The result is a
random pattern of the predominant
colors and edges of the source. The
brush and stroke determine the nature
of the pattern.
You might use Random Clone Source
with a faint, stipple brush to add noise
to an image. In this case, the clone
source image merely contains the
“noise” colors you wish to add.
The Random Clone Source option randomly
samples the source document. Top=disabled,
Bottom=enabled.

The Brush Creator172
To choose the Random Clone
Source option:
1On the Stroke Designer page of
the Brush Creator, click Random.
2Enable the Random Clone Source
check box.
Setting Mouse Controls
In theory, a mouse has no pressure
information. A mouse button is either
“on” (button down), or “off” (button
up). The Corel Painter Mouse
controls let you simulate stylus
Pressure (how hard you would be
pressing with a stylus), Tilt (how
vertical the stylus is held), Bearing
(the compass direction the stylus is
pointing), and Wheel (how much ink
is sprayed) settings.
You can record and save brush strokes
created with a stylus, then have Corel
Painter use the saved stroke’s Pressure,
Tilt, Bearing, and Wheel settings
when you make marks using a mouse.
Refer to “Recording and Playing Back
Strokes” on page 117 for more
information about using saved brush
strokes to further enhance mouse
functionality.
To set pressure for the mouse:
1On the Stroke Designer page of
the Brush Creator, click Mouse.
2 Drag the Pressure slider.
A 100% setting uses maximum
pressure.
To set tilt for the mouse:
1On the Stroke Designer page of
the Brush Creator, click Mouse.
2Drag the Tilt slider.
A 90º setting indicates that if a
stylus were in use, it would be
perpendicular to the tablet.
To set bearing for the mouse:
1On the Stroke Designer page of
the Brush Creator, click Mouse.
2Drag the Bearing slider.
A setting of zero indicates that if a
stylus were in use, it would be
pointing left.
To set ink flow for the mouse:
1On the Stroke Designer page of
the Brush Creator, click Mouse.
2Drag the Wheel slider.
A setting of 100% indicates that
maximum flow is in effect.
Setting Cloning Controls
The Cloning controls are specific to
cloning method brushes and affect
other brushes only when the Clone
Color option is enabled.
Clone Color
The Clone Color control directs a
brush to pick up color from a source
image. Clone Color takes averaged
samples of color from the clone
source, resulting in an approximation
of the original.
The Clone Color option is also
available on the Colors palette. For
more information, see “Cloning
Color” on page 80.
To set Clone Color:
1On the Stroke Designer page of
the Brush Creator, click Cloning.
2Click the Clone Color check box to
enable the option. Click it again to
disable the option.

Corel Painter 173
Clone Type
The Clone Type control lets you
choose between several cloning
variations. These variations are
arranged according to the number of
reference points used. With two or
more reference points, you can apply a
transformation (rotate, skew, scale
mirror, perspective) during cloning.
For complete information on using
the different clone types, refer to
“Cloning Imagery” on page 187.
To set Clone Type:
1On the Stroke Designer page of
the Brush Creator, click Cloning.
2Choose a type from the Clone
Type pop-up menu.
Obey Source Selection
The Obey Source Selection option
uses any selection in the clone source
region to constrain painting in the
destination. If a transform Clone Type
is used, the selection is appropriately
transformed. This option is available
only with the Cloning method.
To constrain painting in the
destination:
1On the Stroke Designer page of
the Brush Creator, click Cloning.
2Click the Obey Source Selection
check box to enable the option.
Click it again to disable the option.
Copy Source Selection
When Copy Source Selection is
enabled, the Cloner brush reproduces
the source selection information in the
destination selection. This option is
available only with the Cloning
method.
To reproduce the source selection
information in the destination
selection:
1On the Stroke Designer page of
the Brush Creator, click Cloning.
2Click the Copy Source Selection
check box to enable the option.
Click it again to disable the option.
4-Point Tiling
With this option enabled, your clone
source is tiled in a repeating pattern.
To tile clone source:
1On the Stroke Designer page of
the Brush Creator, click Cloning.
2Click the 4-Point Tiling check box
to enable the option. Click it again
to disable the option.
Setting Impasto Controls
Impasto controls let you create brush
variants that paint with the illusion of
depth. For more information about
Impasto techniques, see “Impasto” on
page 135.
Drawing Method
There are three Impasto Drawing
Methods: Color, which applies only
color, Depth, which applies only
depth, and Color and Depth, which
applies both color and depth to the
image.

The Brush Creator174
To choose a drawing method
1On the Stroke Designer page of
the Brush Creator, click Impasto.
2Choose a Drawing Method from
the Draw To pop-up menu.
Depth Method
The Depth Methods in Corel Painter
use the luminance information in the
control medium to determine how
much depth is applied within a stroke.
You can use the Invert and Negative
Depth options to affect the way the
stroke appears.
For more information on Depth
methods, see “Setting Depth Method”
on page 139.
To choose a Depth method
1On the Stroke Designer page of
the Brush Creator, click Impasto.
2Choose a Depth Method from the
Depth Method pop-up menu.
To invert a Depth method
1On the Stroke Designer page of
the Brush Creator, click Impasto.
2Enable the Invert check box.
To choose the Negative Depth
option:
1On the Stroke Designer page of
the Brush Creator, click Impasto.
2Enable the Negative Depth check
box.
Depth
The Depth slider determines how
much depth is applied to Impasto
brush strokes. When you set Depth
Expression to Pressure and the Invert
option is enabled, less depth is applied
as you press harder—just as it would
using a real brush.
Refer to “Adjusting Impasto Depth”
on page 136 for more information
about painting with depth.
To set depth
1On the Stroke Designer page of
the Brush Creator, click Impasto.
2Drag the Depth slider to the right
to increase Depth. Drag it to the
left to decrease Depth.
Smoothing
Smoothing controls the transition of
the texture applied to a stroke.
To set Smoothing
1On the Stroke Designer page of
the Brush Creator, click Impasto.
2Move the Smoothing slider to the
right to increase the Smoothing
effect. Move it to the left to
decrease the effect.
Plow
Plow controls how much a stroke
interacts with other Impasto brush
strokes. In essence your brush stroke
“plows” through existing strokes.
To set Plow
1On the Stroke Designer page of
the Brush Creator, click Impasto.
2Move the Plow slider to the right to
increase the Plow effect. Move it to
the left to decrease the effect.

Corel Painter 175
Setting Image Hose
Controls
The Image Hose controls let you
design 1, 2, and 3 Rank nozzles. Refer
to “Creating Nozzles for the Image
Hose” on page 340 for more
information.
The settings for each Rank are the
same as the Expression settings, with
one addition: Sequential. For more
information, see “Expression Settings”
on page 164.
Rank 1
This control lets you assign an input
to locate Rank 1 imagery within an
Image Hose nozzle.
Rank 2
This control lets you assign an input
to locate Rank 2 imagery.
Rank 3
This control lets you assign an input
to locate Rank 3 imagery
To choose an Expression setting
for a Rank
1On the Stroke Designer page of
the Brush Creator, click Image
Hose.
2Choose an Expression setting from
the pop-up menus.
Setting Airbrush Controls
Airbrush controls adjust Spread, or
how much media spreads out as it’s
applied, and Flow, or how much
media is actually applied.
Spread
Spread controls how paint spreads out
as it is applied. In other words, it sets
the size of the cone of spread from the
tip of the airbrush or spray can. A
good range for the Spread setting is
30-40%. Narrow Spread and Angle
settings can cause problems. Narrow
Spread and Tilt can cause paint to be
deposited away from the cursor.
To set paint spread:
1On the Stroke Designer page of
the Brush Creator, click Airbrush.
2Move the Spread slider left to
reduce the amount of spread.
Move it right to increase the
amount of spread.
Min Spread
The Min Spread control determines
the smallest amount that paint can
spread out as it is applied. The Min
Spread setting represents a percentage
of the Spread setting.
To set minimum paint spread:
1On the Stroke Designer page of
the Brush Creator, click Airbrush.
2Move the Min Spread slider left to
reduce the smallest amount of
spread allowed. Move it right to
increase the smallest amount of
spread allowed.
Flow
Flow controls how much media is
applied by an airbrush stroke. The
Flow control acts like the needle
control on a real airbrush. Use the
Expression settings on the Stroke
Designer page to tie Flow to the wheel
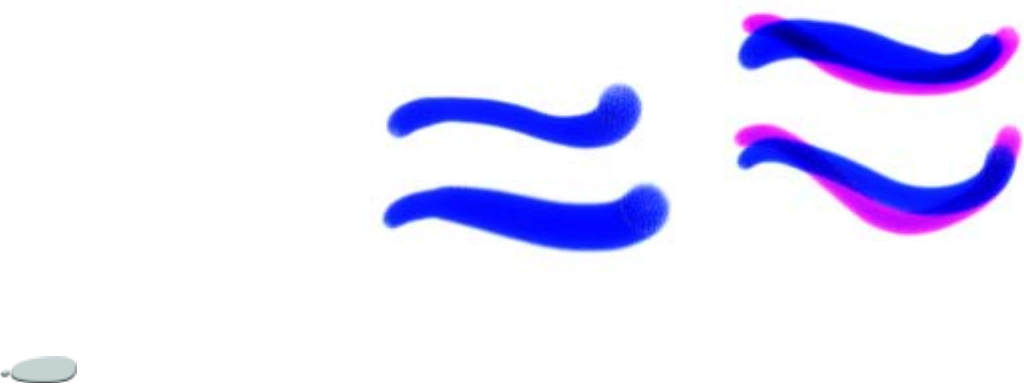
The Brush Creator176
on an airbrush stylus. Because the
airbrush dab types deposit many small
dabs to create their spray paint look,
you might need to cut down on the
flow to speed up the airbrush.
To set ink flow:
1On the Stroke Designer page of
the Brush Creator, click Airbrush.
2Move the Flow slider left to reduce
the smallest amount of media
applied with a stroke. Move it right
to increase the amount of media
applied.
Min Flow
The Min Flow control determines the
smallest amount of paint flow that can
be applied during a stroke. The Min
Flow setting represents a percentage
of the Flow setting.
To set minimum ink flow:
1On the Stroke Designer page of
the Brush Creator, click Airbrush.
2Move the Min Flow slider left to
reduce the smallest amount of flow
allowed. Move it right to increase
the smallest amount of flow
allowed.
Setting Water Controls
Water Controls work with Water
Color layers. A Water Color layer is
automatically created when you apply
a stroke with a Water Color brush.
The layer is editable from the Layers
palette.
Wetness
Wetness controls the dilution and the
spread of the dye. As Wetness is
increased, the resulting stroke will
expand over a larger area, eliminating
the appearance of brush hairs.
The Wetness slider controls the dilution and
spread of the dye. Top=0, bottom=40.
To set wetness:
1On the Stroke Designer page of
the Brush Creator, click Water.
2Move the Wetness slider to the left
to create a more uniform brush
stroke. Move it right to have the
water flow more in the direction of
the wind.
Pickup
Pickup controls how much dry dye
gets picked up during diffusion.
Lower values mean that there is no
mixing or leaching of dyes. Higher
values produce more leaching.
The Pickup slider controls how much dye gets
picked up during diffusion. Top=0%,
bottom=100%.
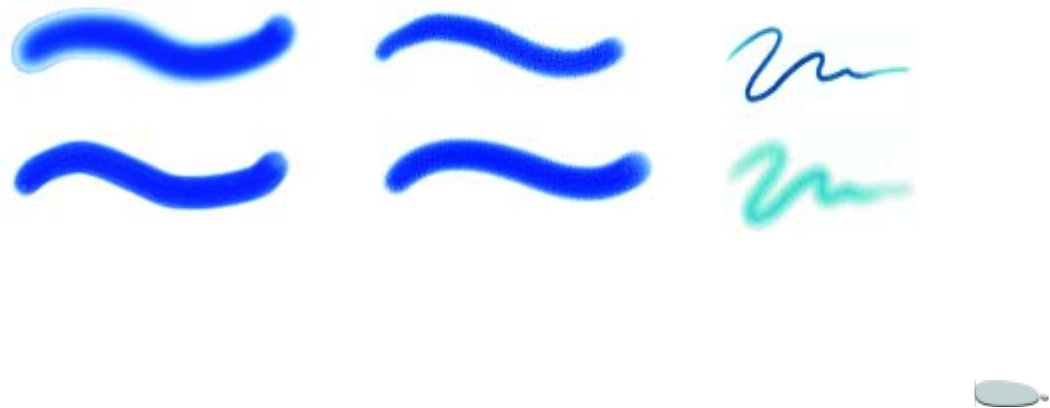
Corel Painter 177
To set dye pickup:
1On the Stroke Designer page of
the Brush Creator, click Water.
2Move the Pickup slider right to
increase the amount of leaching.
Move it left to reduce the amount
of leaching.
Dry Rate
Dry Rate controls the rate at which
water dries during diffusion. Lower
values cause greater spread, while
higher values reduce the amount of
spread.
The Dry Rate slider controls the rate at which
water dries during diffusion. Top=1%.
bottom=50%.
To set the dry rate:
1On the Stroke Designer page of
the Brush Creator, click Water.
2Move the Dry Rate slider right to
reduce the amount of spread.
Move it left to increase the amount
of spread.
Evaporation Threshold
Evaporation Threshold controls the
minimum amount of water which can
still diffuse. Lower values cause
greater spread, while higher values
reduce the amount of spread.
The EvapThreshold slider controls the
minimum amount of water which can still
diffuse.Top=1%, bottom=50%
To set the evaporation threshold:
1On the Stroke Designer page of
the Brush Creator, click Water.
2Move the Evap Threshold slider
right to reduce the amount of
spread. Move it left to increase the
amount of spread.
Diffuse Amount
Diffuse Amount controls the amount
of dye that gets diffused. High
diffusion creates soft edges that
feather into the grain, similar to
painting on wet, absorbent paper. Low
diffusion is like painting on dry paper.
Use the Diffusion slider to control the spread of
the stroke. Top=0, bottom=8.
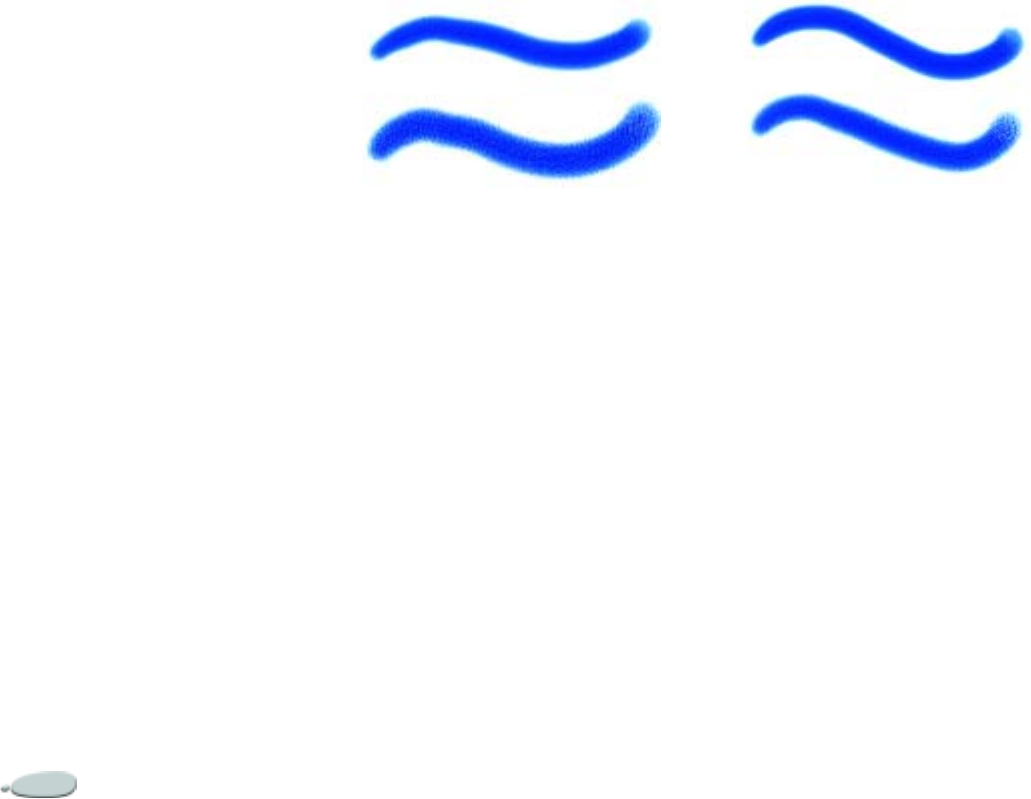
The Brush Creator178
To set the diffusion amount:
1On the Stroke Designer page of
the Brush Creator, click Water.
2Move the Diffuse Amt slider right
to create soft edges that feather
into the grain. Move it left to
emulate painting on dry paper.
Capillary Factor
Capillary Factor controls the grain’s
effect on diffusion. Lower values
result in a smoother edge.
To set effect of grain on diffusion:
1On the Stroke Designer page of
the Brush Creator, click Water.
2Move the Cap Factor slider right to
create rougher edges. Move it left
to create smoother, more
continuous results.
Grain Soak-In
Grain Soak-In controls the graininess
of soak-in when drying. You can lower
both Capillary Factor and Grain
Soak-In values to reduce grain effects.
The Grain Soak-in slider controls the
graininess of soak-in when drying. Top=0%,
bottom=100%.
To set grain soak-in:
1On the Stroke Designer page of
the Brush Creator, click Water.
2Move the Grn Soak-In slider right
to create rougher surfaces. Move it
left to create smoother, more
continuous results.
Accurate Diffusion
Enable the Accurate Diffusion check
box to use a smaller diffusion window.
Disabling Accurate Diffusion results
in a larger, less accurate window being
used.
Enable the Accurate Diffusion check box to use
a smaller diffusion window. Top=Accurate
Diffusion enabled, bottom=Accurate
Diffusion disabled.
To set accurate diffusion
1On the Stroke Designer page of
the Brush Creator, click Water.
2Click the Accurate Diffusion check
box.
Wind Force
You can specify the amount of Wind
Force exerted on the diffusing
particles. Set the Wind Force slider to
zero to turn off directional diffusion.
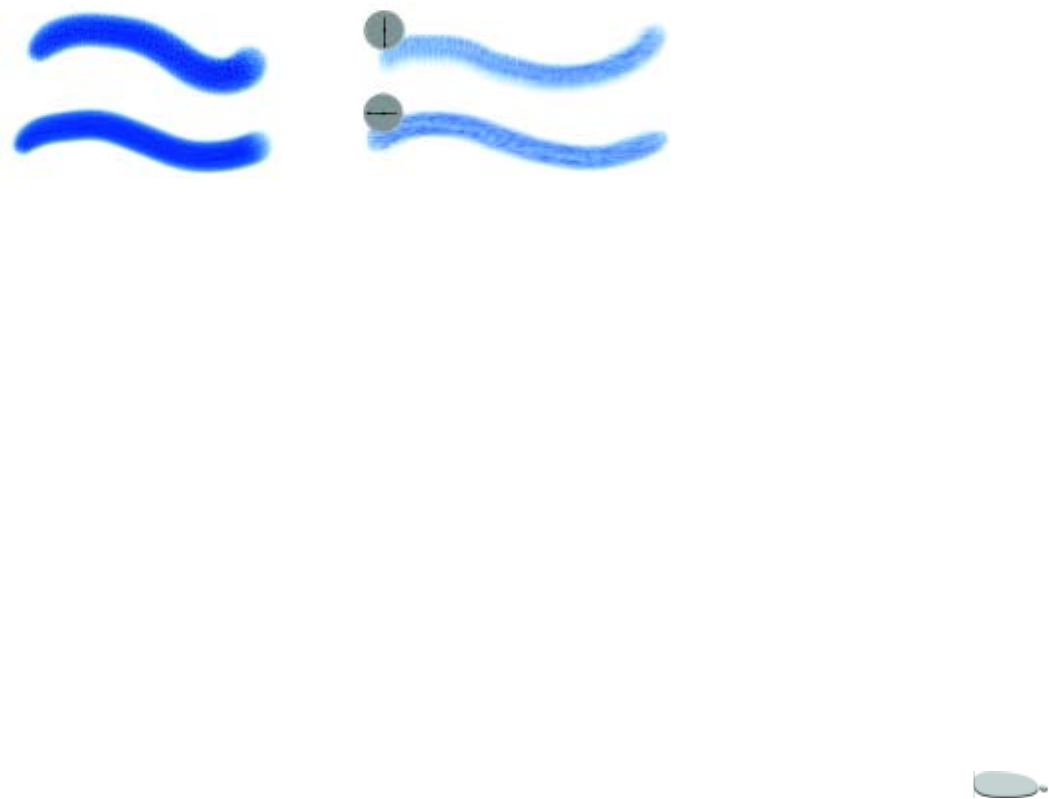
Corel Painter 179
Wind Force controls the amount of force
exerted on diffusing particles.Top=0%,
bottom=25%.
To set wind force:
1On the Stroke Designer page of
the Brush Creator, click Water.
2Move the Wind Force slider to the
right to increase wind force. Move
it to the left to decrease wind force.
Wind Direction
You can specify Wind Direction,
which controls the direction in which
the particles diffuse. This can be used
to simulate tilting a wet Water Color
to introduce dye migration gravity
effects.
Wind Direction controls the direction in which
the particles diffuse. Top=270°, bottom=180°.
To set wind direction:
1On the Stroke Designer page of
the Brush Creator, click Water.
2Drag the Wind Direction control
to the desired degree.
Setting Liquid Ink
Controls
Liquid Ink controls work with Liquid
Ink layers. Use the Liquid Ink
controls to specify qualities such as
type, smoothness, and volume of a
brush stroke. You can adjust the
Liquid Ink controls when you have
selected a Liquid Ink brush from the
Brush selector bar.
Ink Type
Liquid Ink is divided into two basic
properties: Ink and Color. The Ink
component provides the form of the
brush stroke, while the Color
component applies color to the Ink
form. The Ink and Color components
can be used together or controlled
separately.
You can select from the following Ink
types:
• Ink Plus Color—applies the
currently selected color to the Ink
form
• Ink Only—applies only the Ink
component
• Color Only—applies only the
Color component
• Soften Ink Plus Color—applies
Color to an Ink form, causing inks
and colors to blend into one
another
• Soften Ink Only—applies only the
Ink component
• Soften Color Only—applies only
the Color component
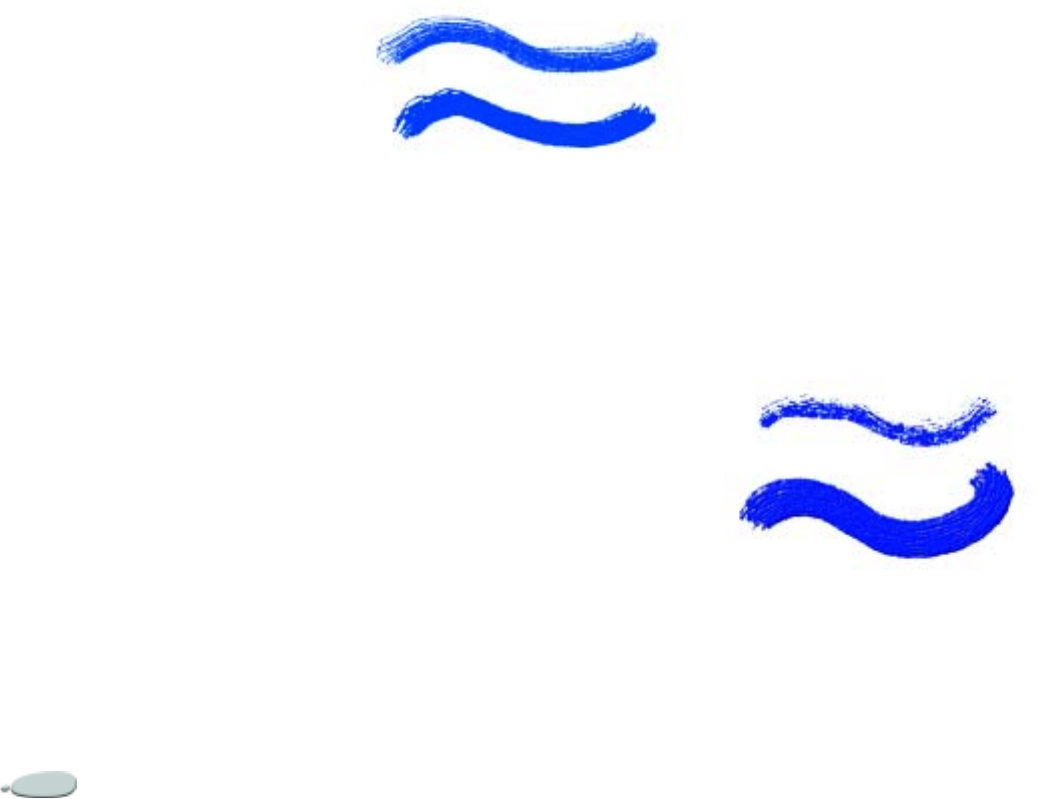
The Brush Creator180
•Resist—repels Ink
• Erase—deletes Ink and Color
• Presoftened Ink Plus Color—
applied in conjunction with
surface depth effects
To choose an ink type:
1On the Stroke Designer page of
the Brush Creator, click Liquid
Ink.
2Choose a Liquid Ink type from the
Ink Type pop-up menu.
Smoothness
The Smoothness slider controls the
“tack” of the brush strokes. Lower
values result in coarser brush strokes.
Higher values cause brush strokes to
appear smoother.
The Smoothness slider controls the “tack” of
brush strokes. Top=0%, bottom=100%.
To set smoothness:
1On the Stroke Designer page of
the Brush Creator, click Liquid
Ink.
2Adjust the Smoothness slider.
Lower values result in coarse
brush strokes. Higher values cause
brush strokes to blend into one
another and appear smoother.
Volume
The Volume slider controls the height
of the brush stroke, or how much
medium is applied to the image.
Higher values result in thicker strokes.
Used to control the amount of spray
from Liquid Ink airbrushes when this
brush feature is tied to Wheel,
adjustments to the wheel on an
airbrush stylus (especially the Intuos
Airbrush Stylus) act like a needle
control on a real airbrush.
You can use the Depth controls in the
Impasto area of the Stroke Designer to
give Liquid Ink brush strokes the
appearance of height. Refer to “Setting
Impasto Controls” on page 173 for
more information about Depth
controls.
The Volume slider controls the height of the
brush stroke. Top=100%, bottom=500%.
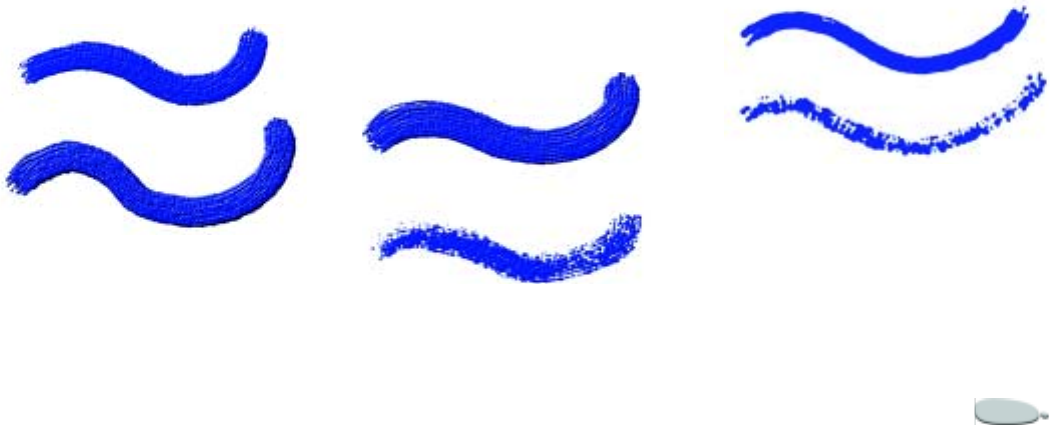
Corel Painter 181
To set ink volume:
1On the Stroke Designer page of
the Brush Creator, click Liquid
Ink.
2Adjust the Volume slider.
Higher values result in thicker
strokes.
Minimum Volume
The Min Volume slider controls the
maximum variation in volume. A
value of 100%, for example, means no
variation in volume during the brush
stroke.
The Min Volume slider controls the maximum
variation in volume. Top=100%,
bottom=0%
To set maximum variation in
volume:
1On the Stroke Designer page of
the Brush Creator, click Liquid
Ink.
2Adjust the Min Volume slider.
If you want volume to relate to
stylus pressure, choose Pressure
from the Expression pop-up
menu.
Random Volume
The Rand Vol slider controls the
randomness in volume within the
brush stroke. A value of zero results in
a perfectly smooth brush stroke.
The Rand Vol slider controls the randomness in
volume within the brush stroke. Top=0%,
bottom=100%.
To set random volume:
1On the Stroke Designer page of
the Brush Creator, click Liquid
Ink.
2Adjust the Rand Vol slider.
Lower values result in smoother
brush strokes.
Random Size
The Rand Size slider controls the
randomness in size within a brush
stroke. A value of zero results in a
perfectly smooth brush stroke.
The Rand Size slider controls the randomness
in size within a brush stroke. Top=0%,
bottom=100%.
To set random size:
1On the Stroke Designer page of
the Brush Creator, click Liquid
Ink.
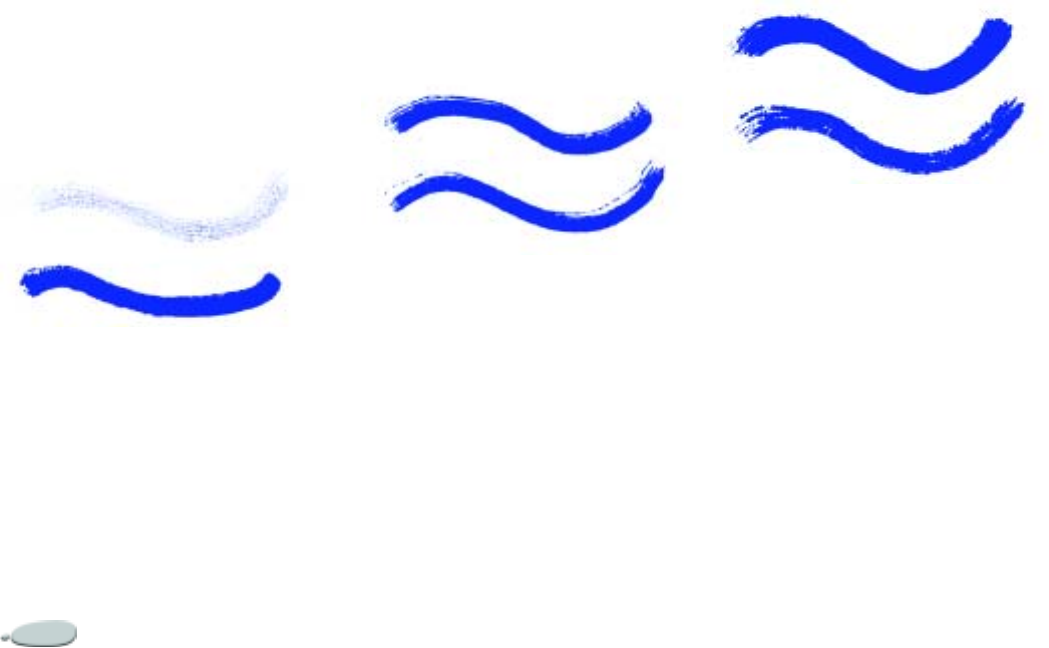
The Brush Creator182
2Adjust the Rand Size slider.
Lower values result in smoother
brush strokes.
Bristle Fraction
The Bristle Frac slider controls the
thickness of the bristles. Higher values
cause the bristles to stick together and
result in a smoother brush stroke.
Lower values cause the individual
brush strokes to become visible.
The Bristle Fraction slider controls the
thickness of the bristles. Top=3%,
bottom=20%.
To set bristle fraction:
1On the Stroke Designer page of
the Brush Creators, click Liquid
Ink.
2Adjust the Bristle Frac slider.
Higher values result in smoother
brush strokes.
Random Bristle Volume
The Rand Br Vol slider controls the
variation in bristle heights. A value of
zero signifies that all of the bristles are
of equal height.
The Rand Br Vol slider controls the variation
in bristle heights. Top=0%, bottom=75%.
To set random bristle volume:
1On the Stroke Designer page of
the Brush Creator, click Liquid
Ink.
2Adjust the Rand Br Vol slider.
Random Bristle Size
The Rand Br Size slider controls the
variation in bristle widths. A value of
zero signifies that all of the bristles are
of equal width.
The Rand Br Size slider controls the variation
in bristle widths. Top=0%, bottom=100%.
To set random bristle size:
1On the Stroke Designer page of
the Brush Creator, click Liquid
Ink.
2Adjust the Rand Br Size slider.
Setting Digital Water
Color Controls
Digital Water Color controls let you
create effects similar to those of Water
Color brushes without using a
separate layer.

Corel Painter 183
Diffusion
The Diffusion slider is used to create
soft, feathery edges on the brush
strokes.
For more information about
Diffusion, see “Digital Water Color
Diffusion” on page 128.
Wet Fringe
The Wet Fringe slider controls the
amount of pooling of water and paint
at the edges of Digital Water Color
brush strokes.
For more information about Wet
Fringe, see “Wet Fringe” on page 128.
Managing Brushes
Saving Brush Variants
After you’ve customized a variant to
act exactly how you want it to act, you
can use it immediately. In fact,
adjusting brushes as you paint is
something you’ll probably do often.
Changes you make to brush variants
are saved until the Restore Default
Variant command is selected.
If you want to keep a customized
version of a brush variant, Corel
Painter lets you do it as a new variant
or as a Look.
Variant settings are included when
you save a Look, but Looks also
include paper texture, pattern,
gradient and nozzle data. Refer to
“Saving a Brush Look” on page 185
for more about saving the combined
look of a variant.
It’s easier to find a variant when the
variant list is short. You can manage
the number of variants in a Brush
category by creating new categories,
then saving variants you create there.
To save current settings as a
custom variant:
1Do one of the following:
• On the Tracker palette in the
Brush Creator or Corel
Painter, choose the variant you
want to save, click the Tracker
palette menu arrow, and choose
Save Variant.
• In Corel Painter, click the
selector menu arrow on the
Brush selector bar and choose
Save Variant.
• In the Brush Creator, choose
Variant menu > Save.
2In the Save Variant dialog box, type
a name for the new variant.
3Enable the Save Current Colors
check box if you want the current
primary and secondary colors
saved with the variant.
If a variant uses the Clone Color
option, it is not necessary to enable
Save Current Colors.
Your new variant appears on the
variant menu, in the current brush
category. A new XML file is
created in the Brush category
folder.
To return the current variant to
default settings:
1Choose the variant from the Brush
selector bar.
2Click the selector menu arrow and
choose Restore Default Variant.
Choose Restore All Default
Variants to reset all of the settings
The Brush Creator184
for every brush variant you may
have adjusted.
To delete a variant:
1Choose the variant from the Brush
selector bar.
2Click the selector menu arrow and
choose Delete Variant.
3Click Yes to delete the variant.
The variant’s related XML file is
deleted from the Brush category
folder.
Copying Variants between
Brush Categories
If you create a variant, then decide you
want it in a different brush category,
you can copy it there. After copying,
you can then delete the original.
To copy a variant to a different
brush category:
1Choose the variant you want to
copy from the Brush selector bar.
2Click the selector menu arrow and
choose Copy Variant.
3In the Copy Variant dialog box,
choose the destination brush
category from the pop-up menu.
The brush variant is copied to the
selected category. (Remember to
delete the variant in the category
from which it was copied.)
Tip
•
You can also copy Brush variants at
the root of the category folder by copying
the XML files to the desired category. This
is much quicker when copying multiple
files.
Capturing Brush Dabs
You can create your own brush dab
shapes. Any shape is possible.
When you’ve created a shape you like, select
and capture it.
To create a brush dab shape:
1On a white background, draw a
brush shape in black.
Use shades of gray to define what
you wish to be partially transparent
areas of the brush.
To follow stroke direction, a
captured brush set must face
toward the right side.
2Choose the Rectangular Selection
tool from the toolbox .
3Hold down the Shift key and drag
across your brush shape to create a
square selection.
Corel Painter uses the selected area
to map brush Size. When the
brush is created, this area is
sampled to compute each brush
dab.
When the original area must be
scaled to the Size of the brush dab,
sampling can appear aliased. The
greater the scaling, the more
aliasing is apparent. To prevent too
much aliasing, create a shape with
soft (grayscale) edges and draw it
close to the Size you’ll use.
4On the Brush selector bar, choose
the brush category where you want
Corel Painter 185
to save the variant for the captured
dab shape.
5Click the selector menu arrow and
choose Capture Dab.
6On the Stroke Designer page of
the Brush Creator, click Size to see
the captured brush dab.
7If necessary, change the Size,
Squeeze, and Angle settings.
8Draw with the brush on the
canvas.
If you like the results you’ve
captured, you can save the brush as
a new variant. Refer to “Saving
Brush Variants” on page 183 for
how to save brush customizations
for later use.
You can paint with a captured brush, just as
you would with other brushes.
Creating a New Brush
Category
The brushes that appear as icons on
the Brush selector bar are really
categories for collections of similar
variants. You can add your own brush
categories to the Brush selector bar.
You might want to create a brush
category if you’ve customized a
medium and you want to keep its tools
organized.
To create a new brush category:
1Draw a small image to use as the
icon for the new brush.
This will appear on the Brush
selector bar, like the default brush
category icons.
2Choose the Rectangular Selection
tool from the toolbox.
3Hold down the Shift key and drag
across the image to create a square
selection.
4Do one of the following:
• On the Brush selector bar, click
the selector menu arrow, and
choose Capture Brush Cate-
gory.
• In the Brush Creator, choose
Brush menu > Capture Brush
Category.
5In the Capture Brush dialog box,
type a name.
Your new brush and its icon now
appear on the Brush selector bar.
Saving a Brush Look
A Look is a variant that has a paper
texture, pattern, gradient, or nozzle
assigned to it. A variant alone does not
know about underlying texture or
other elements. The Look, on the
other hand, associates additional data
with a particular variant and saves it as
a complete Look. Regardless of a
document’s current libraries, when
you select a Look, you use the
elements that are part of that look. If
the specific libraries are not available,
Corel Painter prompts you to locate
them.
You can save a Look so you can use it
later. A saved Look keeps all variant
settings plus the paper, pattern,
gradient, or nozzle settings.
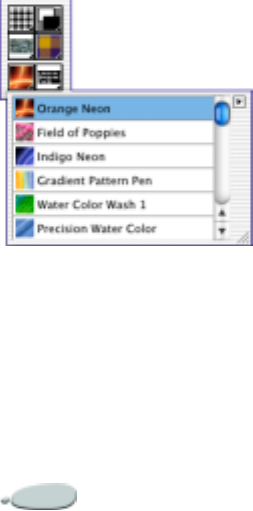
The Brush Creator186
To save a Brush Look:
1In the toolbox, click the Look
selector menu arrow, and choose
New Look.
2In the New Look dialog box, type a
name for the look.
The icon for the Look you’ve
created is saved into the Look
selector in the toolbox. This is a
handy visual reminder of what the
Look does.
Saved Looks appear in the Look selector in the
toolbox.
In the case of the Image Hose brush,
the Look might have a particular
nozzle file attached. For more
information about working with the
Image Hose and Nozzle files, refer to
“Using the Image Hose” on page 334.
To use a saved Look:
•In the toolbox, choose a look from
the Look selector.
Corel Painter loads the correct
variant and materials for the saved
Look.
Using Brush and Looks
Libraries
Corel Painter comes with several
brush libraries. You can also create
new libraries for brushes and Looks
and add your custom brushes to them.
Create as many brush libraries as
needed.
Library features are identical for all
resource types (Papers, Brushes,
Looks, Patterns, Gradients, Weaves,
Scripts, Layers, and Selections
portfolios). For more information on
Library features, refer to “Libraries
and Movers” on page 23.
It’s a good idea to limit the number of
tools in a library. This makes it easier
to find a particular tool and helps
Corel Painter manage memory.
Corel Painter loads brushes into
memory when you launch it, so
adding variants to the default brush
library increases the program’s need
for RAM. Organize new brushes into
secondary libraries for better
efficiency. When you want a different
brush set, just switch libraries.
11
Cloning and Tracing
Cloning is a feature that can help you
create art, quickly and easily. Cloning
is the process of taking imagery from
one area or document (the source)
and re-creating it in another area or
document (the destination).
Cloning is a two-step process: First,
you set a clone source, then you work
in a destination area. The source and
destination can be in separate
documents or in different areas of the
same document.
Cloning Imagery
Cloning-method brush variants are
the most common way to develop
imagery in a clone destination. These
variants re-create the source imagery
while they effectively “filter” it,
reproducing it in an “artistic style,”
such as pastel chalk or water color.
Cloning allows you to “filter” source imagery
to create Natural-Media renderings.
Advanced, multi-point cloning lets
you transform (rotate, scale, slant,
apply perspective) imagery as you
clone it. Corel Painter offers other
interesting ways to take advantage of
clone source/destination relationships,
like the Corel Painter imaginary “light
box” method, Tracing Paper.
Because cloning can be simple or
complex, this chapter begins with
basics, then progresses to advanced
cloning techniques.

Cloning and Tracing188
Cloning a Document
One way to use the Corel Painter
cloning feature is to clone an entire
file, creating a clone source/
destination relationship between two
documents.
The clone of the file is more than a
copy. It maintains a pixel-for-pixel
correspondence with its source
document. For this reason, the source
must remain open while you work in
the clone.
Here are some ways you can take
advantage of a clone source/
destination relationship:
• Trace the source imagery using
Tracing Paper (like using a “light
box”). Refer to “Using Tracing
Paper” on page 188 for more
information.
• Paint source imagery into a
destination area using Cloner
brushes. Refer to “Painting in the
Clone” on page 190 for more
information about painting with
Cloner brushes.
• Load a brush with color taken
from a clone source. Refer to
“Cloning Color” on page 80 for
more information.
• Create a mosaic or tessellation
using source imagery. Refer to
“Mosaics” on page 349.
• Add three-dimensional effects after
setting up a clone source/
destination relationship.
• Control brush features for painting
using variant settings from the
source image.
• Develop a selection/channel. Refer
to “Using Selections” on page 203
and “Using Alpha Channels” on
page 219.
To clone a document:
1Open an image file.
This will be the clone source. A
good clone source document
contains well defined imagery.
2Choose File menu > Clone.
Corel Painter creates a duplicate of
the original document. This is the
clone. It appears in its own
document window, with the words
“Clone of” preceding the original
document’s name in the title bar.
Note
•
If a source image has layers, cloning
creates a fully composited copy. You can
take advantage of this to automatically
drop all layers or flatten an image for
faster printing.
Using Tracing Paper
You can use cloning to help you trace
the source image by using Tracing
Paper, the on-screen “light box” in
Corel Painter. When Tracing Paper is
in use, you see a faded out version of
the clone source, as if it were displayed
on top of a light box, underneath real
tracing paper.
As you trace, brush strokes appear at
50% opacity. When you finish tracing
and turn Tracing Paper off, the faint
source image disappears and your
brush strokes appear at 100% opacity.
Note
•
To use Tracing Paper, the source and
clone documents must be the same size.
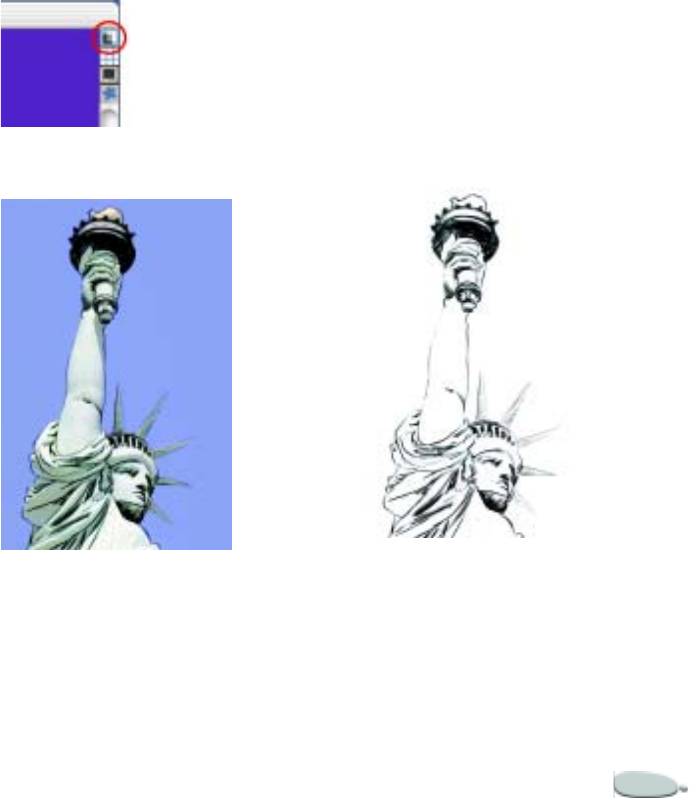
Corel Painter 189
To trace an image:
1Choose File menu > Clone to
create a clone of the original
document you wish to trace.
2With the clone selected, choose
Select menu > Select All.
3Press Delete (Mac OS) or
Backspace (Windows) to clear the
entire canvas.
4Do one of the following:
• Click the Tracing Paper icon in
the vertical scroll bar.
•Choose Canvas menu >
Tracing Paper.
• Press Command + T (Mac
OS) or Ctrl + T (Windows).
A 50% ghost of the source image
shows through the tracing paper.
5Trace over the image using any
Corel Painter brush variant.
Brush strokes appear at 50%
opacity when Tracing Paper is
turned on.
Click the Tracing Paper icon to toggle tracing
paper on and off.
Use the Tracing Paper feature to view the clone
source for tracing.
To turn tracing paper off:
•Do one of the following:
• Click the Tracing Paper icon
again.
•Choose Canvas menu >
Tracing Paper.
•Press Command + T (Mac
OS) or Ctrl + T (Windows).
The faint source image disappears
and brush strokes appear at 100%
opacity.
When you turn Tracing Paper off, you can see
what you’ve traced.
To resume tracing:
•To resume tracing, turn Tracing
Paper back on.
Cloning and Tracing190
The faint source image returns and
you can continue tracing.
Changing Clone Source
For more flexibility in setting up
cloning relationships, Corel Painter
lets you set any open document as a
clone source. You can do this to re-
establish a source/destination
relationship between two files. You
might also do this to choose special
source imagery for controlling an
image effect.
To set an open document as the
clone source:
•Choose File menu > Clone
Source and select which of the
open documents is the clone
source.
Note
•
If you lose track of which document is
the clone source, choose File menu >
Clone Source. The file with a check beside
its name is the clone source.
To make an open file the clone
source for the next file you open:
1Hold down the Command (Mac
OS) or Ctrl (Windows) key.
2Choose File menu > Clone.
3In the Open dialog box, choose a
file to use as the clone source.
Painting in the Clone
Painting with a Cloner brush is
similar to painting with any Corel
Painter tool, except that Cloner
variants take their color information
from a clone source, instead of from
the Colors palette.
Some Cloner brush variants
reproduce source imagery directly.
Other Cloner variants reproduce with
low opacity and soft edges or use
paper grain and specialized dabs for
particular media effects.
When you paint with a Cloner brush,
it picks up color from the clone source,
while you control the size and
direction of brush strokes. It’s a great
way to get Natural-Media renderings
from photographic source material.
The Oil Brush Cloner is just one interesting
Cloner brush variant.
You can create new Cloner brushes or
refine existing Cloner variants using
the Brush Creator. For more
information about customizing
brushes, refer to “Customizing
Brushes” on page 143.
The Corel Painter brushes that have
buildup methods, like pencils and felt
pens, build toward black. If you clone
with one of these brushes in a dark
area of your image, you may not
achieve the desired results. Use the
Opacity slider or text box to control
how rapidly these brushes build up to
black. You can also choose chalk or
one of the other tools that cover
underlying colors.

Corel Painter 191
To paint with Cloner brushes:
1Create a clone of the document
you wish to paint.
2With the clone selected, choose
Select menu > Select All.
3Press Delete (Mac OS) or
Backspace (Windows) to clear the
entire canvas.
4Choose a Cloner brush from the
Brush selector bar.
On the property bar, adjust size,
opacity, and grain penetration.
5Paint in the image.
Note
•
If you don’t set a clone source, Cloner
brushes paint with imagery from the
current Pattern.
•
For increased color accuracy, you can
enable the Brush Loading option. For
more information, see “Brush Loading”
on page 198.
Tip
•
Some artists use Edit menu > Fade
after clearing the Canvas to bring back
some of the imagery.
Using Auto Clone
Using a Cloner brush can take a long
time if you’re working on a large area.
To save time, you can have Corel
Painter make brush strokes for you,
using the Auto Clone feature.
When you use Auto Clone with the
Felt Pen Cloner and other tools that
turn black as you repeat strokes, areas
darken rapidly. You can slow down the
color buildup and still use Auto Clone
by lowering the Opacity value on the
property bar. You can also change
color values in the clone source.
Another way to automate cloning is to
record and play back individual brush
strokes. Refer to “Recording and
Playing Back Strokes” on page 117.
Auto Clone works particularly well
with the Driving Rain Cloner and the
Seurat variant of the Artist brush.
To fill a cloned area automatically:
1Select the brush variant you want
to clone with.
If you want only a part of your
image to be affected, make a
selection. Without an active
selection, the effect is applied to
the entire canvas.
2Do one of the following:
• Enable the Clone Color button
on the Colors palette.
• Click the palette menu arrow
on the Colors palette, and
choose Use Clone Color.
3Choose Effects menu >
Esoterica> Auto Clone.
Corel Painter automatically
applies dabs of paint to the selected
area, using source imagery as the
media.
4Click anywhere inside the image to
stop Auto Clone when the right
amount of clone image is
completed to suit your design.
Notes:
•
If you apply Auto Clone to a large
area, the paint may fill areas sparsely.
When you click to stop Auto Clone, it
stops at that point. It won’t continue to
fill the selected area. To fill an area
completely, you must let the Auto Clone
finish.
Cloning and Tracing192
•
For more information about making
selections, refer to “Using Selections” on
page 203.
Tip
•
If you use a variant with Auto Clone
that isn’t a Cloner variant, click Clone
Color on the Colors palette to make it
pick up color from the source document.
For more color variety in the dabs Corel
Painter applies, set the ±H, ±S, and ±V
sliders on the Color Variability palette to
15% each.
Using Auto Van Gogh
You can have Corel Painter place
directional brush strokes to produce a
Van Gogh–like rendition of cloned
imagery.
For more information about using
Auto Van Gogh, see “Auto Van Gogh”
on page 302.
Auto Van Gogh is an effect that places
directional strokes based on clone source.
Point-to-Point Cloning
Point-to-point cloning lets you clone
within a document or between
different areas of separate documents.
Point-to-point is also known as offset
cloning.
To apply point-to-point cloning
effects, you must set source and
destination reference points. Source
reference points specify the area in the
source document that you want to
clone. Destination reference points
indicate the area where you want the
cloned imagery to appear.
To indicate the area of the source
document you’re cloning, you can
turn the crosshair cursor on.
To clone point-to-point within a
document:
1Do one of the following:
• Choose a Cloner brush from
the Brush selector bar.
• Enable the Clone Color option
on the Colors palette.
• Click the palette menu arrow
on the Colors palette, and
choose Use Clone Color.
2Choose File menu > Clone
Source, and choose the image you
want to reference.
If no image is set as a clone source,
the brush will reference the
current pattern.
3Hold down Option (Mac OS) or
Alt (Windows).
A crosshair cursor appears.
4Click inside the source image to set
the source reference point.
A green marker appears on the
image to indicate the reference
point for the source imagery.
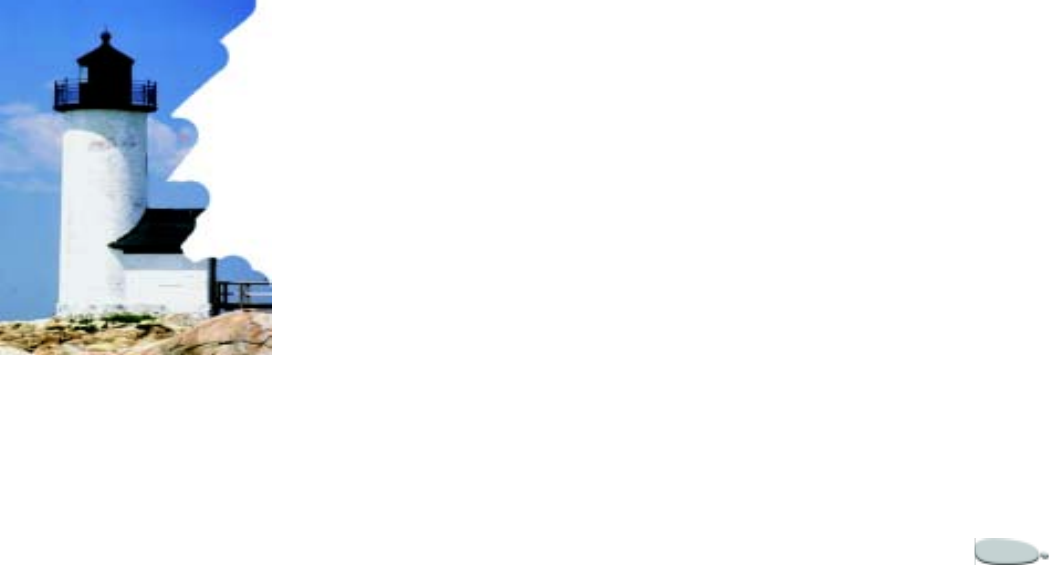
Corel Painter 193
5Begin painting in the destination
area.
Note
•
You can set the destination area before
painting by clicking while holding down
Option + Shift (Mac OS) or Alt + Shift
(Windows). A red marker indicates the
destination area.
Cloning within a document with the
destination marker showing.
To clone point-to-point between
documents:
1Do one of the following:
• Choose a Cloner brush from
the Brush selector bar.
• Enable the Clone Color option
on the Colors palette.
• Click the palette menu arrow
on the Colors palette, and
choose Use Clone Color.
2Choose File menu > Clone
Source, and choose the image you
want to reference.
If no image is set as a clone source,
the brush will reference the
current pattern.
3Hold down Option (Mac OS) or
Alt (Windows), and click inside
the source document to set the
reference point for the source area.
A green marker appears on the
image to indicate the reference
point for the source imagery.
4Select the destination document.
5Hold down Option + Shift
(Mac OS) or Alt + Shift
(Windows), and click inside the
source document to set the
reference point for the destination
area.
A red marker appears on the image
to indicate the reference point for
the destination imagery.
6Start painting at the point you
want to begin applying the source
imagery.
To change to a crosshair cursor:
1Choose Edit menu >
Preferences> General.
2In the Preferences dialog box,
enable the Indicate Clone Source
With Crosshairs While Cloning
option.
The crosshairs indicate which area
of the original image you're
cloning as you paint.
Multi-Point Cloning
The Cloner brush category holds
variants that use multi-point cloning
to apply a transformation to the source
imagery at the time you clone it. To
take advantage of the cool cloning
effects you can get with these variants,
multi-point cloning requires you to set
multiple source and destination
reference points.
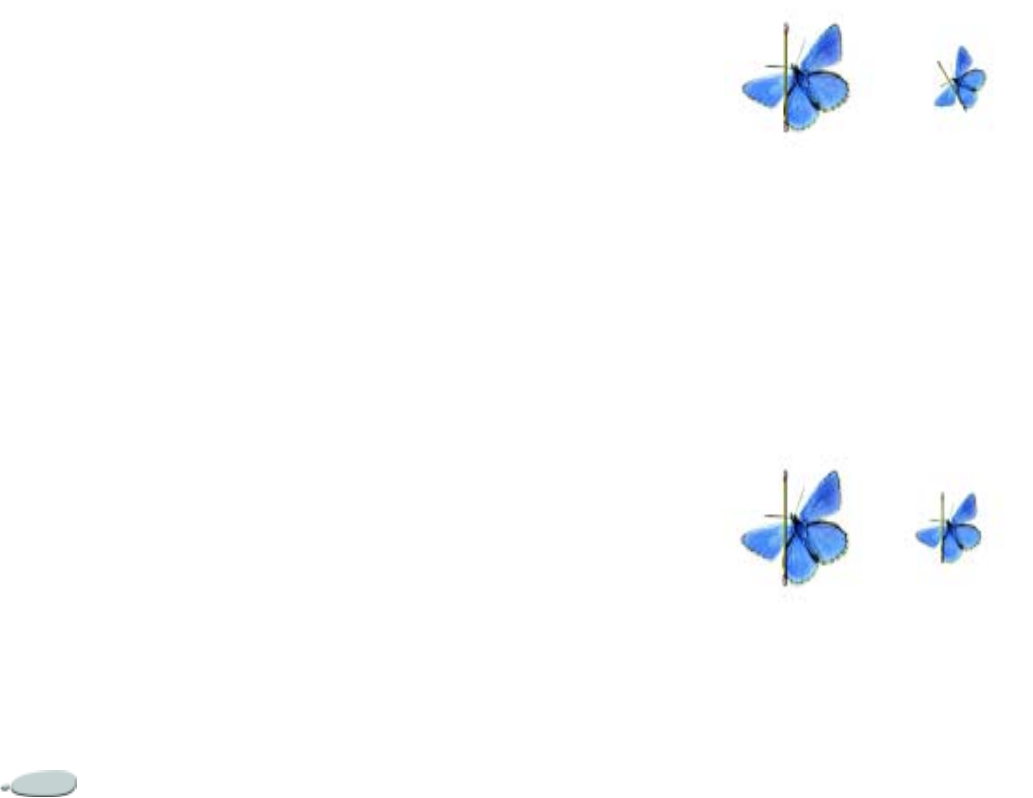
Cloning and Tracing194
Selecting a Clone Type
Corel Painter lets you establish
different kinds of relationships
between the clone source and
destination. These are characterized
by how many reference points you
use.
For each number of reference points
used, different transformations are
possible. All of these cloning types are
valid for cloning method brushes and
brushes that use the Clone Color
option or a clone source, such as Fill.
You must set source and destination
reference points before using a multi-
point cloning brush.
The number of source and destination
reference points required for each
clone type is shown in parentheses.
Clone Types are:
• Normal (0) — The reference is
between the top, left corners of the
source and destination documents
and patterns. This means that the
pixels of the destination document
correspond directly with the pixels
in the source document. This type
of cloning is valid only between
documents. No transformations
occur. Zero-point cloning is the
basic cloning between documents.
Refer to “Cloning a Document” on
page 188 for more information
about basic cloning.
• Offset (1) — The brush offsets the
imagery from the source. The
source and destination areas can be
separate places in the same or
different documents. Offset
cloning is basic point-to-point
cloning and is useful for
retouching photographs. Refer to
“Point-to-Point Cloning” on
page 192 for more information
about point-to-point cloning.
• Rotate & Scale (2) — The brush
rotates and scales source imagery.
Cloning with rotate and scale. Note that the
source and destination reference points are
numbered and connected by a line.
• Scale (2) — The brush scales the
source imagery. The distance
between the two destination
points, in relation to the distance
between the two source points,
determines the scaling
transformation.
Cloning with scale.
• Rotate (2) — The brush rotates the
source imagery. The line between
the two destination points, in
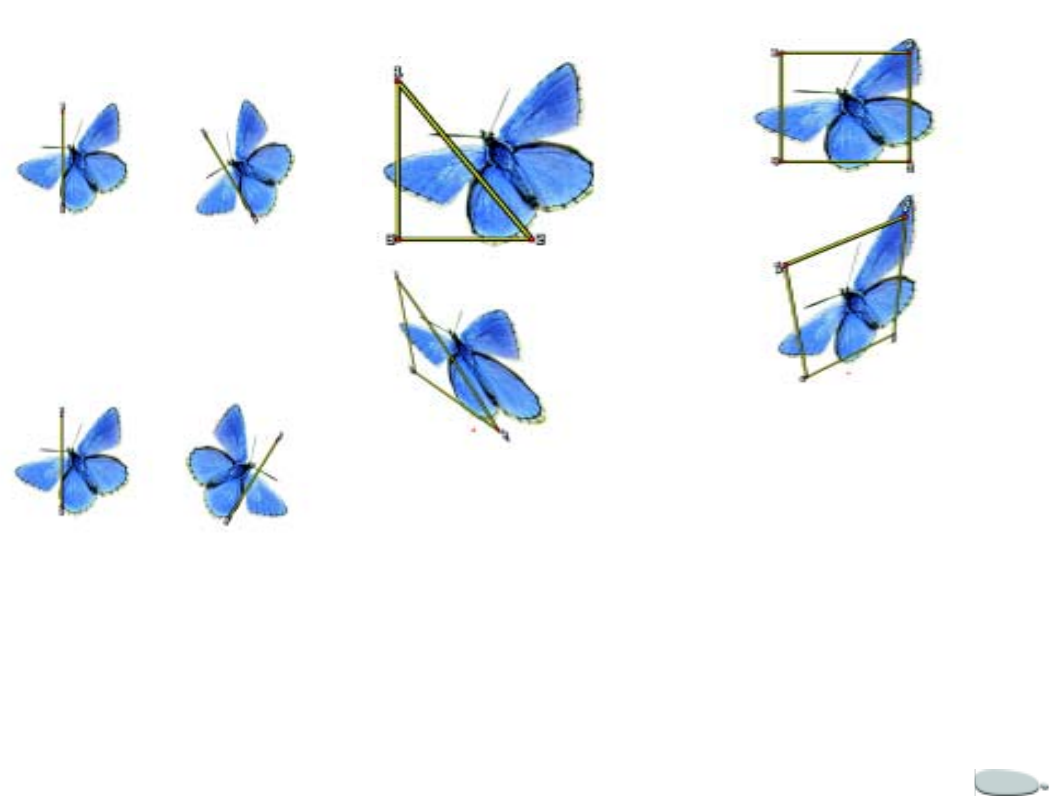
Corel Painter 195
relation to the line between the
two source points, determines the
rotation transformation.
Cloning with rotate.
• Rotate & Mirror (2) — The brush
rotates and mirrors (flips) the
source imagery.
Cloning with rotate and mirror.
• Rotate, Scale, & Shear (3) — The
brush rotates, scales, and shears
(slants) the source imagery. The
relative positions of the three
source and destination reference
points determine the
transformation effect.
Cloning with rotate, scale, and shear.
• Bilinear (4) — The brush applies a
bilinear warp to the source
imagery. The relative positions of
the four source and destination
points describe the bilinear
transformation.
Cloning with bilinear.
• Perspective (4) — The brush
applies perspective to the source
imagery. The relative positions of
the four source and destination
points describe the perspective
transformation.

Cloning and Tracing196
Cloning with perspective.
To set a clone type:
1Do one of the following:
• Choose a Cloner brush from
the Brush selector bar.
• Enable the Clone Color option
on the Colors palette.
• Click the palette menu arrow
on the Colors palette, and
choose Use Clone Color.
2On the Stroke Designer page of
the Brush Creator, choose
Cloning.
3Choose a clone type from the
Clone Type list.
Setting Reference Points
Before you can paint with a multi-
point Cloner brush, you must set the
correct number of source and
destination reference points. Source
points can be in one document and
destination points in another, or both
sets of points can be in the same
document.
Once source and destination reference
points are set, you can start painting
with the multi-point Cloner brush.
There are times when you don’t have
to place source points. When cloning
source files and patterns, Corel
Painter places source points for you,
located in each of the corners of the
document. These corner source points
are ideal for perspective cloning with
4-point tiling. If you don’t want to use
these default source points, just move
them or set source points of your own.
For more information, see “Filling
with Transformed Cloning” on
page 201.
To set source reference points:
1On the Brush selector bar, click the
variant selector arrow and choose a
multi-point Cloner bush variant.
Multi-point Cloner brush variants
are indicated by the number of
source and destination reference
points required for each clone type
beside the variant name. For
example, the xScale 2P variant
requires two reference points.
2Hold down Option (Mac OS) or
Alt (Windows), and click in the
source area for each reference
point required.
3Points appear in the source
imagery as you click, along with
identifying numbers.
Note
•
You can use other Cloner brush
variants by selecting a new variant and
setting a clone type. Refer to “Selecting a
Clone Type” on page 194 for more
information.
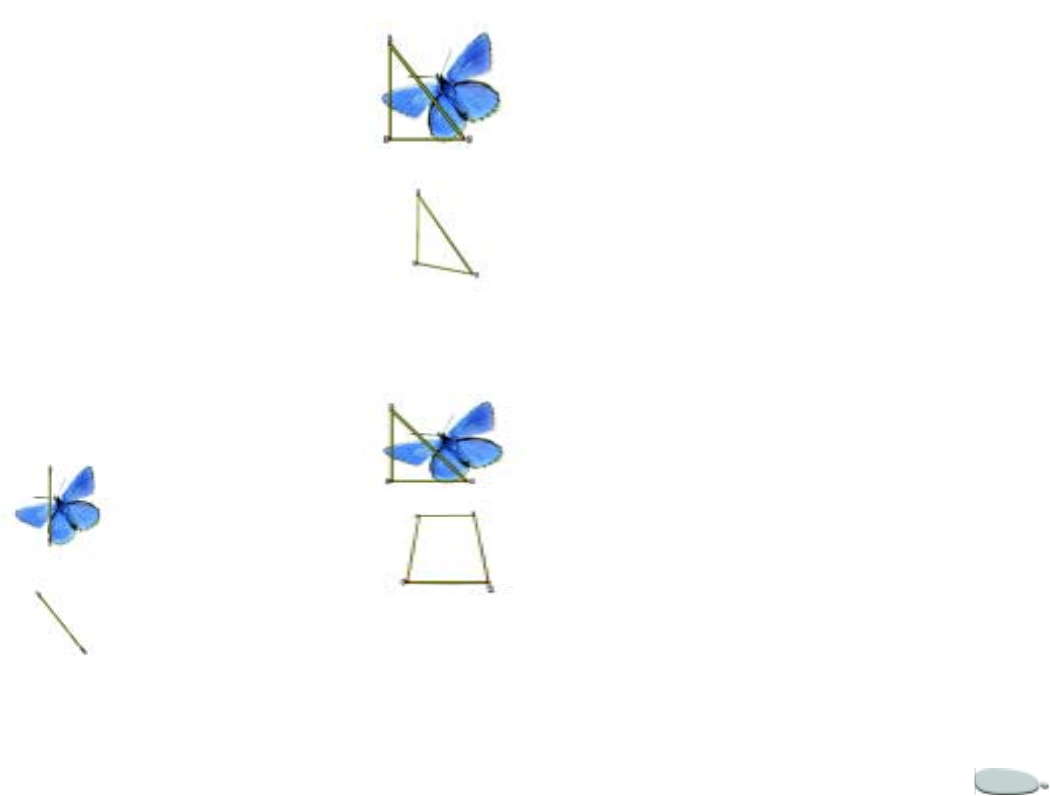
Corel Painter 197
Tip
•
You can reposition reference points by
holding down Option (Mac OS) or Alt
(Windows) and dragging the points to
their new position.
To set destination reference
points
1Select the destination document.
2On the Brush selector bar, click the
variant selector arrow and choose a
multi-point Cloner bush variant.
3Hold down Option + Shift
(Mac OS) or Alt + Shift
(Windows), and click in the
destination area for each reference
point required.
Setting two destination reference points in
preparation for Rotate & Scale cloning.
Sample source-destination reference points for
Rotate, Scale, & Shear cloning.
Sample source-destination reference points for
Perspective cloning.
To move source points to a
pattern:
•On the Patterns palette, click the
palette menu arrow, and choose
Check Out Pattern.
This moves source points into a
new “checked out pattern”
window. For more information
about checking out patterns, refer
to “Editing a Pattern Tile” on
page 67.
Tip
•
You can reposition reference points by
holding down Option (Mac OS) or Alt
(Windows) and dragging the points to
their new position.
Turning Other Brushes
into Cloners
Corel Painter offers two ways to get
other brushes to act like Cloners:
• using the Clone Color option
• switching to the Cloning method

Cloning and Tracing198
Using Clone Color
You can turn almost any brush into a
Cloner with the Clone Color option.
Clone Color causes a brush to pick up
color from the source image, while
staying true to its own stroke nature.
The Clone Color option is useful for
creating mosaics and tessellations
based on source imagery.
To use Clone Color
1Choose Window menu > Show
Colors to display the Colors
palette.
If the Colors palette is not
expanded, click the palette arrow.
2Click the Clone Color button .
Note
•
Be sure you reselect Clone Color if you
change brushes while cloning imagery.
Brush Loading
For greater color accuracy while
cloning, use brush loading. This
causes the brush to pick up individual
colors in different regions of the brush
dab.
Without Brush Loading, the Clone
Color option uses a single, averaged
color from the source for each brush
dab. This results in an approximation
of the original. You can use the Clone
Color option without Brush Loading
to create an artistic impression of the
source.
To enable the Brush Loading
option:
1On the Stroke Designer page of
the Brush Creator, choose Well.
2Enable the Brush Loading option.
Cloning Method
You can turn almost any brush into a
Cloner variant by setting its method to
Cloning in the Brush Creator, and
choosing the cloning method
subcategory appropriate to the
intended media style.
Because the cloning methods use a
full set of pixels from the original
document for each brush dab, you get
a truer copy of the original than you
might using the Clone Color option.
Unlike using Clone Color, using the
cloning methods preserves the
original image texture in the clone.
Cloning methods are good to use
when you want to precisely re-create
portions of a source image.
Here’s a brief description of the
cloning method subcategories. For a
more in-depth discussion of these
methods, refer to “Methods and
Subcategories” on page 152.
•Hard Cover Cloning — Results in
partially anti-aliased brush strokes
that hide underlying strokes.
• Soft Cover Cloning — Produces
anti-aliased brush strokes that
cover layered ones.
• Grainy Hard Cover Cloning —
Works like Hard Cover Cloning,
but brush strokes also interact with
paper grain.
• Grainy Soft Cover Cloning —
Works like Soft Cover Cloning, but
brush strokes also interact with
paper grain.
• Drip Cloning — Pushes color
around as if it were wet, cloning
the original with distortions based
on your stroke.

Corel Painter 199
Fine-tuning the Cloning
Methods
You can customize and fine-tune
cloning methods in the Brush Creator.
To adjust a cloning method:
1On the Stroke Designer page of
the Brush Creator, choose
Random.
2Modify the sliders and options to
change the character of the variant:
• Move the Jitter slider to the
right to determine the amount
of randomness in the brush
stroke.
• Choose an expression from the
Expression pop-up menu to
vary the brush stroke.
• Move the Direction slider to
adjust the angle value of the
Direction control.
• Move the Variability slider to
the right to soften brush
strokes. This works best with
bristle brushes, creating an
impressionistic effect.
• Move the Variability slider a bit
to the right and the How Often
slider to the left to give drawing
tools a “sketchy” feel.
• Random Clone Source makes
the cloning method randomly
pick up pieces from the source
document. What you get with
your brush is random snippets
of the source image.
•Random Brush Stroke Grain
makes the cloning methods
randomly pick up texture from
the current paper grain.
Using a Selection while
Cloning
The Cloning control in the Brush
Creator has options for using the
active selection from the source
region.
Using a selection requires a Cloning
Method. It does not work for brushes
of other methods that use the Clone
Color option on the Colors palette.
Cloning selection options are:
• Obey Source Selection — causes
brush strokes to respect the active
selection in the source region.
When you paint in the destination,
your strokes are constrained to a
region that corresponds to the
source selection. For cloning types
that apply a transform, the
selection is transformed.
• Copy Source Selection — copies
the active selection in the source
region. When you paint in the
destination, your strokes clone the
selection’s pixels as well as the
RGB pixels. For cloning types that
apply a transform, the copied
selection has the transform. Copy
Source Selection is often used
together with Obey Source
Selection.
With Obey Source Selection enabled,
the brush paints in the area that
corresponds to the source selection.
With Copy Source Selection enabled,
the brush clones the selection along
with the color.
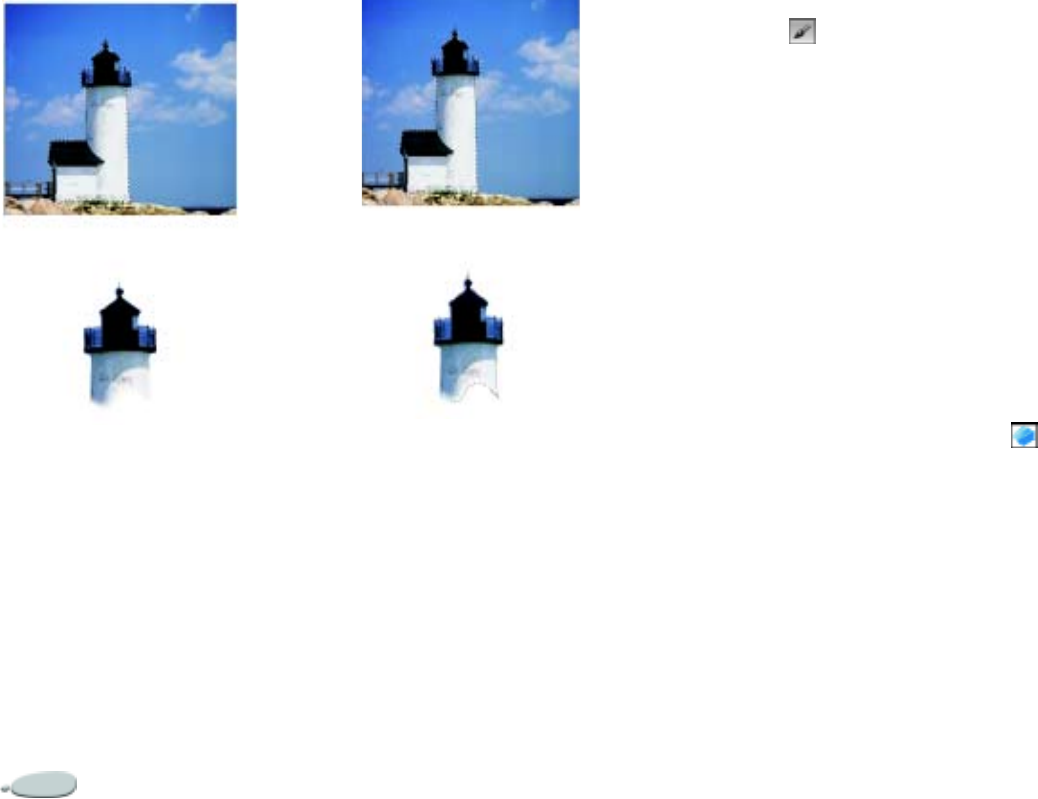
Cloning and Tracing200
Use Obey Source Selection to paint in the area
that corresponds to the source selection. Use Copy Source Selection to clone the
selection and the color.
To clone using the source
selection:
1Set up a selection for the portion of
the source image you want to
clone.
The selection should closely
outline the region you want to use.
For information about setting up a
selection, refer to “Using
Selections” on page 203.
2In the toolbox, choose the Brush
tool .
3Choose a cloning brush from the
Brush selector bar.
4On the Stroke Designer page of
the Brush Creator, choose
Cloning.
5Choose a Clone Type from the
pop-up menu.
6Enable the Obey Source Selection
option, the Copy Source Selection
option, or both.
7Set source and destination
reference points.
Destination reference points can
be in the same or in a different file.
8Click the Drawing Mode icon
in the bottom left corner of the
canvas, and choose Draw
Anywhere.
Setting the drawing mode to Draw
Anywhere is important. If you try
to clone while in another drawing
mode, your strokes will not reach
the canvas.
9Paint in the destination.
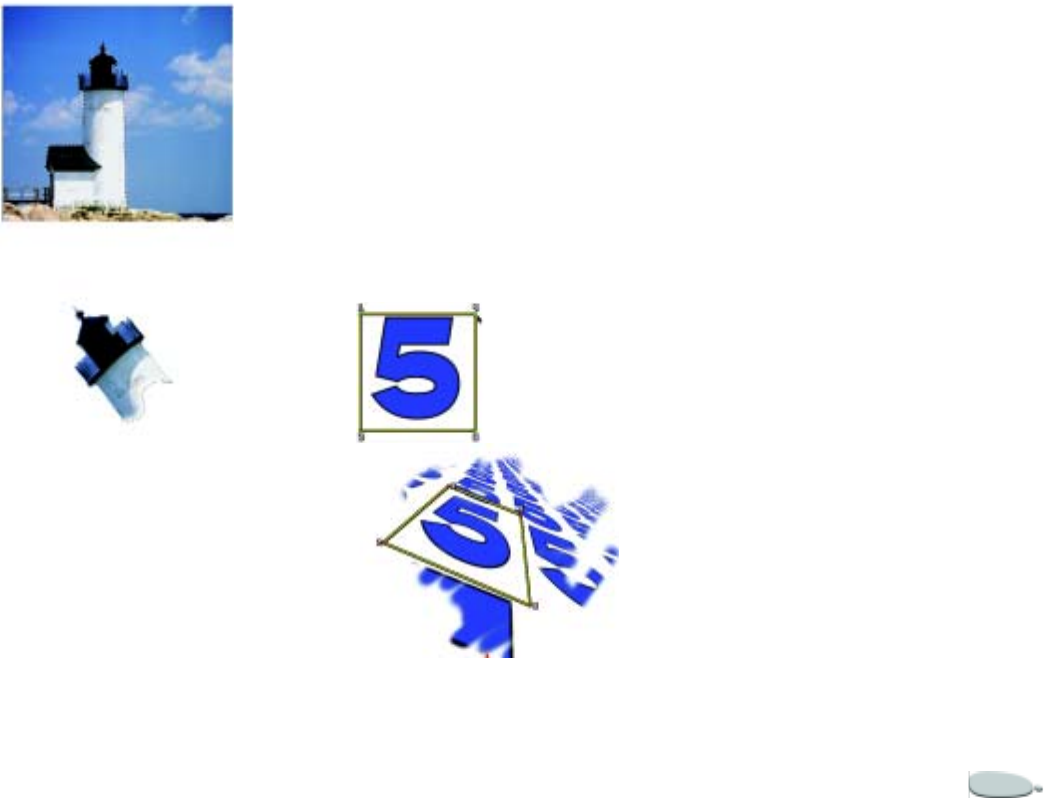
Corel Painter 201
This image uses Rotate & Scale cloning with
both Obey Source Selection and Copy Source
Selection enabled.
Repeating Source Imagery
Tiling allows you to repeat source
imagery across a larger area in the
clone destination. The 4-point tiling
option is available for Bilinear or
Perspective cloning.
The quadrilateral set by the four clone
source points defines an image tile. In
the clone destination, the tile is
warped according to the relative
positions of the source and destination
reference points and repeated as
necessary to cover the area. This
feature is particularly useful when
filling with the clone source. For more
information, see “To fill with
transformed clone imagery:” on
page 202.
With 4-Point Tiling, the source imagery is
repeated.
Filling with Transformed
Cloning
Instead of using a Brush tool to
produce transformed imagery in the
destination, you can use the Paint
Bucket tool or the Fill command.
Filling is preferred when you want to
cover a large area evenly. Filling is
particularly useful when using
Perspective cloning with 4-point tiling
and a seamless pattern as the source.
If you’re using 4-point tiling with a
pattern, you don’t need to set source
reference points. Corel Painter
automatically puts reference points in
the corners of the pattern, starting in
the upper left (0, 0) and moving
clockwise. This is ideal for most uses
of Bilinear or Perspective cloning.
If you want to set the source references
of a pattern to points other than the
corners, you can set the source points
in the “checked out pattern” window.
For more information, refer to
“Editing a Pattern Tile” on page 67.
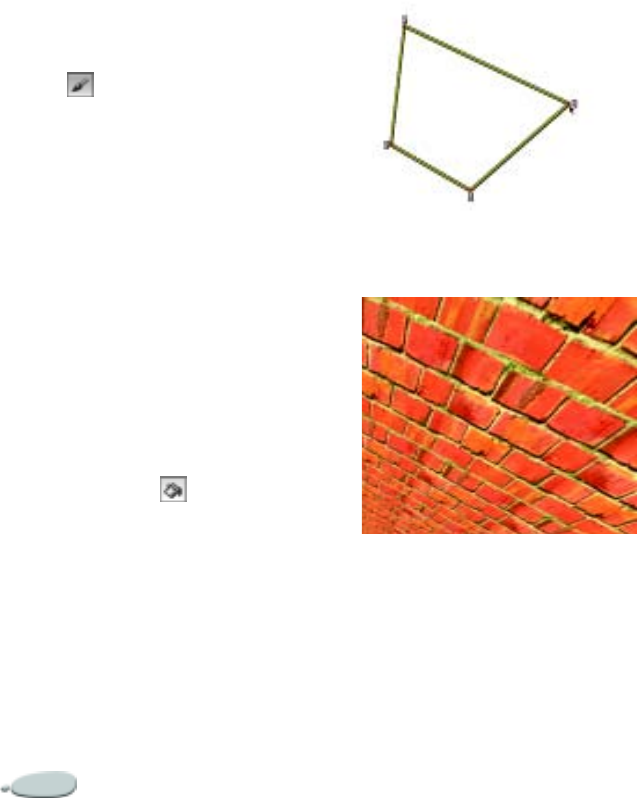
Cloning and Tracing202
To fill with transformed clone
imagery:
1In the toolbox, choose the Brush
tool .
2Choose a Cloner brush and variant
from the Brush selector bar.
3On the Stroke Designer page of
the Brush Creator, choose
Cloning.
4Choose the transformation you
want from the Clone Type pop-up
menu.
5Set up clone source and
destination reference points.
If you want, create a selection to
constrain the fill.
6Do one of the following:
• In the toolbox, choose the Paint
Bucket tool , and click in
the destination area.
•Choose Effects menu > Fill to
fill with the Clone Source,
Gradient, Weave or Current
Color.
The destination points determine where the
transformation occurs.
By using transformed clone information, the
brick pattern becomes a steep wall.
12
Using Selections
A selection marks off areas of the
canvas for “special treatment.” It can
either protect an area from change or
designate the area that you want to
change.
You can save selections as alpha
channels. This lets you store selections
and edit them with brushes and image
effects. For more information about
alpha channels, refer to
“Understanding Alpha Channels” on
page 219.
Having one selection, but multiple
channels, is convenient and powerful.
It’s easy to save selections, then
reactivate them later. You can also
create a selection from multiple
channels by adding, subtracting, or
intersecting them.
Working with Selections
Corel Painter provides a variety of
tools and commands for creating
selections in a document. Each time
you create a new selection, Corel
Painter deactivates the old one.
You can use selections in several ways:
• To constrain brush strokes. You
can protect the area inside or
outside the selection.
• To isolate an area of the canvas for
applying an image effect. Corel
Painter applies the effect only to
the selection. You can also set
different levels of protection within
a selection to create partial
intensity of the effect.
• To choose the area of the canvas
you want to cut or copy.
• To choose the area of the canvas
that you want to move or copy to a
new layer.

Using Selections204
• To apply a brush stroke along a
selection border.
You can save and reload selections.
Saving a selection creates a channel.
Loading a selection reactivates it on
the canvas, where it controls your
painting and image effects.
Corel Painter lets you combine
selections in powerful ways. Refer to
“Combining Selections Using
Boolean Operations” on page 212 for
more information.
About Selection Types
There are two types of selections:
• Path-based selections are defined
by a closed path. They provide two
levels of selection—what’s inside
the path is selected, and what’s
outside is not. You can move path-
based selections around, and scale
and rotate them with the Selection
Adjuster tool. Path-based
selections offer some other
advantages you’ll learn about later.
• Pixel-based selections are defined
at the pixel level. These selections
can be moved, but they cannot be
resized or rotated. They can be
transformed into path-based
selections.
Pixel-based selections provide 256
levels of protection to the canvas.
Each pixel in the selection sets a
level of protection for its
corresponding color pixel in the
RGB image. Opaque areas of the
selection provide 100% protection
and prevent brush strokes and
effects from marking the canvas.
Clear areas of the selection provide
no protection and allow brush
strokes and effects to mark the
canvas. Where the selection is
shaded, or semi-transparent, brush
strokes and effects are partially
applied. This lets you paint and
apply effects with varying levels of
intensity within a selection.
The method you use to create a
selection determines its type.
Selections created with the
Rectangular Selection, Oval Selection,
and Lasso tools, and selections
converted from shapes, are path-
based. Selections created with the
Magic Wand tool or the Auto Select or
Color Select command are pixel-
based.
When you save a selection, it becomes
a channel, which is pixel-based. When
you load a channel to a selection, the
selection is always pixel-based. A
pixel-based selection can be converted
to a path-based selection. For more
information, refer to “Transforming
Selections” on page 214.
Selecting a Drawing Mode
The drawing mode determines
whether the inside or outside of a
selection is protected when you paint
on an image.
To select a drawing mode:
1Point to the Drawing Mode icon in
the bottom-left corner of the
document window, and hold down
the mouse button.
2Choose one of the following
buttons:
Draw Anywhere disables
protection based on the
selection—brush strokes are
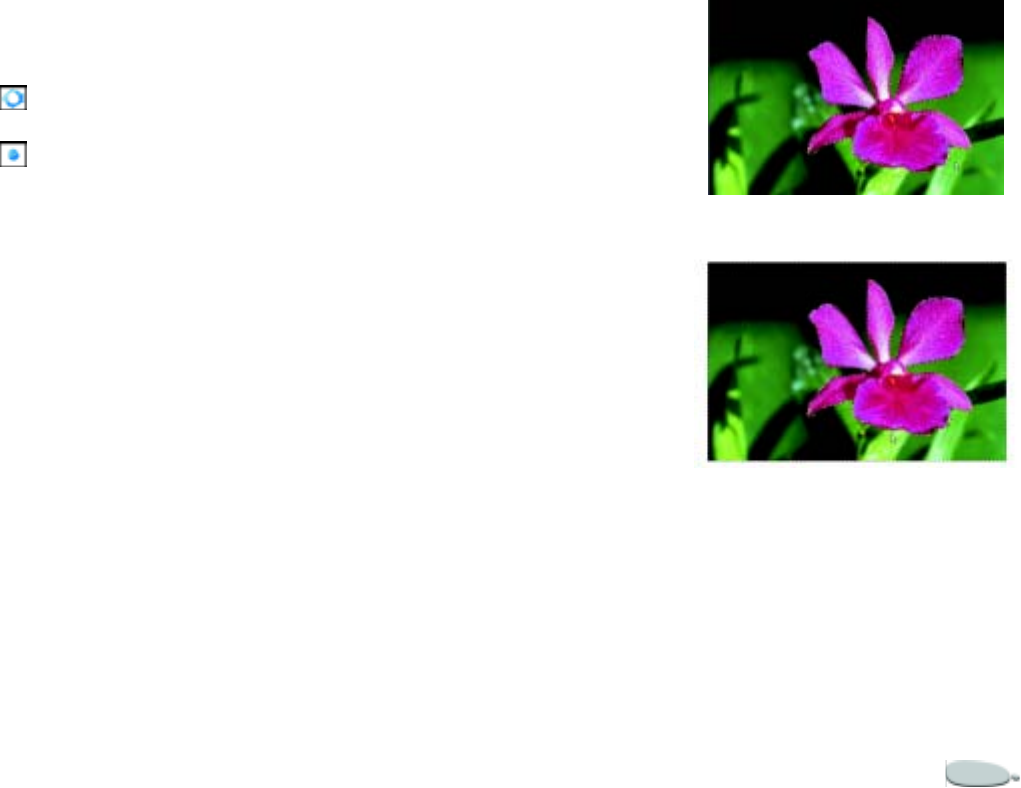
Corel Painter 205
allowed anywhere on the canvas.
The selection is still active for
applying effects and using the Cut
or Copy command.
Draw Outside protects the area
inside the selection.
Draw Inside protects the area
outside the selection, similar to
using a stencil. Only the selected
region accepts brush strokes.
Turning Selections On and
Off
To turn off a selection:
•Choose Select menu > None.
Tip
•
You can also turn off a selection, or
“deselect” it, by clicking outside the
selection with the Oval Selection,
Rectangular Selection, or Lasso tool.
To re-activate a selection:
•Choose Select menu > Reselect.
Note
•
This command is available only if you
have turned off a selection.
Hiding and Showing the
Marquee
You can control display of the
selection marquee.
To hide or show the selection
marquee:
•Choose one of the following:
•Select menu > Hide Marquee.
•Select menu > Show Mar-
quee.
Note
•
The drawing mode is in effect even if
the marquee is hidden.
Inverting the Selection
Inverting a selection switches the
selection area. For example, if you
have an image of a boat on the water
and you’ve created a precise selection
of the boat, you can select everything
but the boat by inverting the selection.
In this image, the flower is selected.
After inverting the selection, everything but the
flower is selected.
A pixel-based selection can have 256
values in it, like a grayscale image.
Inverting a pixel-based selection is
equivalent to the negative of a
grayscale image. For example, a pixel
that has 80% luminance will have 20%
luminance when inverted.
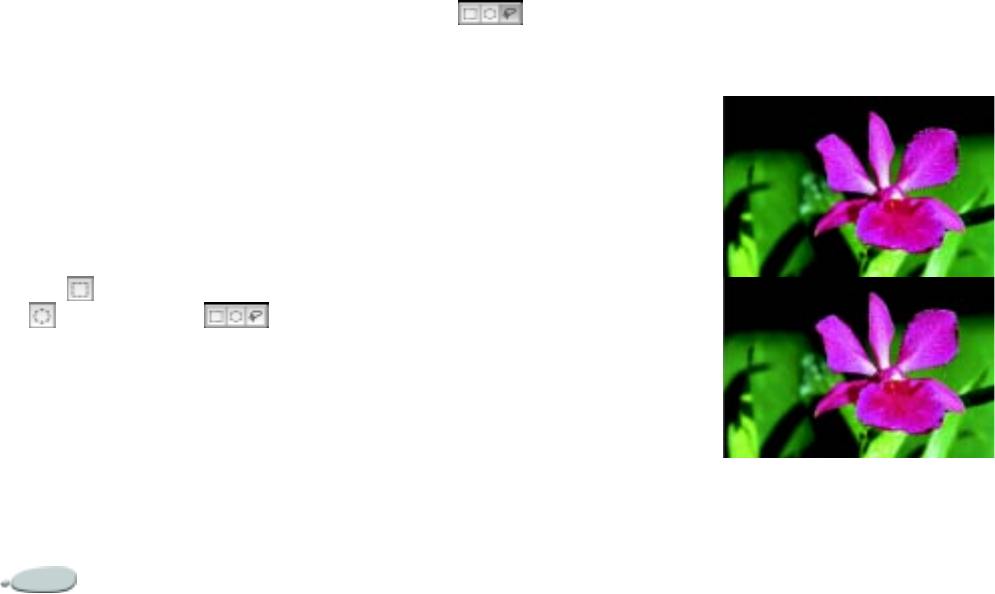
Using Selections206
To invert a selection:
•Choose Select menu > Invert.
Creating Selections
Using Selection Tools
The Rectangular Selection, Oval
Selection, and Lasso tools create path-
based selections. With these tools, you
can create a new selection, add to the
current selection, or subtract from the
current selection.
You can also select the entire canvas.
To select an oval or rectangular
area:
1Choose the Rectangular Selection
tool or the Oval Selection tool
from the toolbox .
2On the property bar, click the New
Selection button.
3Drag in the document window to
select an area.
Tip
•
To constrain your selection to a square
or a circle, hold down Control+Shift
(Mac OS) or Ctrl+Shift (Windows)
while making your selection.
To select a freehand area:
1Choose the Lasso tool from the
toolbox .
2On the property bar, click the New
Selection button.
3Draw a freehand border around
the area you want to select in the
document window.
Note
•
If you draw an open path, Corel
Painter connects the endpoints with a
straight line before creating the selection.
To add to a selection:
1Choose a selection tool from the
toolbox.
2Do one of the following:
• Click the Add to Selection but-
ton on the property bar, and
select the area you want to add.
•Hold down Shift, and select
the area you want to add.
Tip
•
You can add selections using any
combination of selection tools, including
the Magic Wand tool. If you add pixel-
based and path-based selections, the result
is a pixel-based selection. For more
information about creating pixel-based
selections with the Magic Wand tool, refer
to “Using the Magic Wand” on page 207.
Adding to a path-based selection.
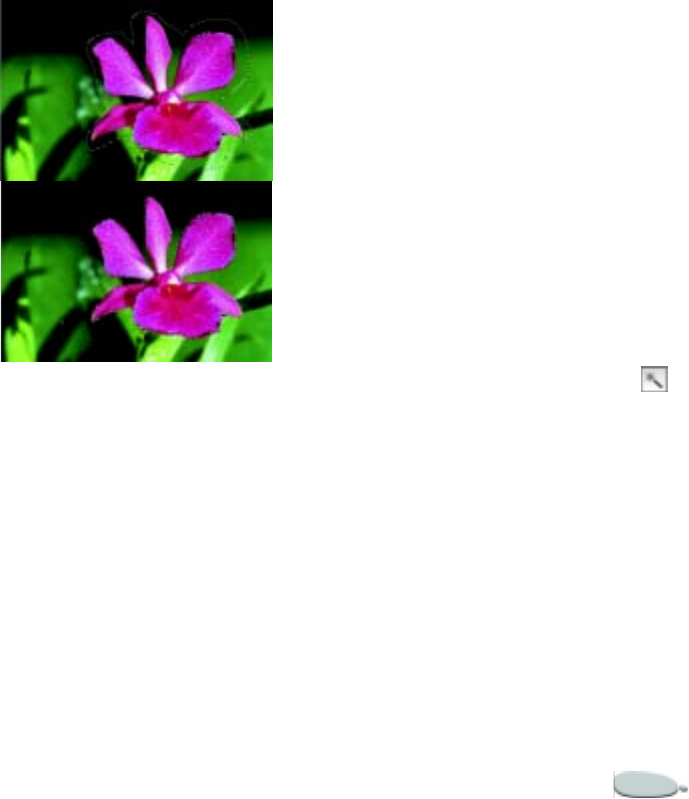
Corel Painter 207
To subtract from a selection:
1Choose a selection tool from the
toolbox.
2Do one of the following:
• Click the Subtract from Selec-
tion button on the property bar,
and select the area you want to
subtract.
• Hold down Option (Mac OS)
or Alt (Windows), and select
the area you want to subtract.
The selection is “cut out” from the
current selection.
Tip
•
You can subtract selections using any
combination of selection tools, including
the Magic Wand tool. If you subtract
different selection types, the result is a
pixel-based selection. For more
information about creating pixel-based
selections with the Magic Wand tool, refer
to “Using the Magic Wand” on page 207
for more information. For more
information about selection types, refer to
“About Selection Types” on page 204.
Subtracting from a path-based selection.
To select the entire canvas:
•Choose Select menu > All.
Using the Magic Wand
The Magic Wand tool creates pixel-
based selections. Groups of pixels are
selected based on color. You can adjust
settings to control the range of colors,
and you can choose to include
contiguous or non-contiguous pixels.
You can use the Magic Wand to create
a new selection, add to the current
selection, or subtract from the current
selection. You can add and subtract
selections using any combination of
selection tools. For example, you can
create a selection with the Magic
Wand and add a rectangular area with
the Rectangular Selection tool, or you
can create a selection with the Lasso
tool and add to it with the Magic
Wa nd .
To select an area using the Magic
Wand tool:
1Choose the Magic Wand tool
from the toolbox.
2On the property bar, adjust any of
the following settings:
•Tolerance controls the amount
of variance allowed from the
selected color. Higher values
create a larger range of colors.
•Anti-Alias creates intermedi-
ate selection values on the
selection boundaries. This
gives soft edges to the work you
do with the selection.
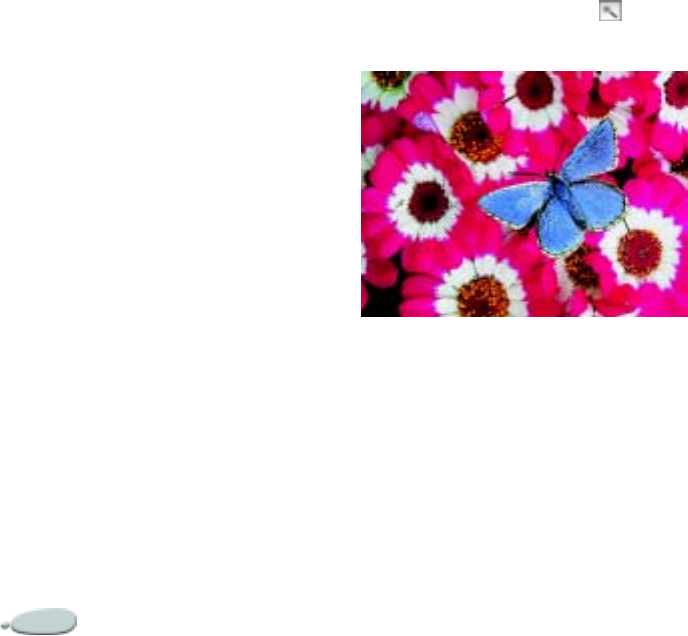
Using Selections208
•Contiguous, when enabled,
selects contiguous pixels.
3On the property bar, click one of
the following buttons:
•New Selection
• Add to Selection
• Subtract from Selection
4In the document window, do one
of the following:
• Click to select the color in the
middle of the range of colors
used to make the selection.
• Drag over an area to define the
range of colors used to make
the selection.
It can take a moment for Corel
Painter to calculate and load the
selection.
Notes:
•
The default tolerance for selections is
32. It can be adjusted from 1 to 255.
•
If you add to the current selection, you
add to the range of values that the Magic
Wand selects rather than create an
additional selection with a unique seed
color.
Tips
•
If you want to restrict your selection to
a rectangular area, press Option+Shift
(Mac OS) or Alt+Shift (Windows) and
drag a bounding rectangle in your image.
•
You can restore the default settings by
clicking the Reset Tool button on the
property bar.
Adding to a selection with the Magic Wand
Creating an Auto Selection
Auto Select creates a selection based
on your choice of image
characteristics. The Invert option
allows you to invert the selection you
create.
To generate an Auto Selection:
1Choose Select menu > Auto
Select.
2In the Auto Select dialog box,
choose an image characteristic
from the Using pop-up menu.
•Paper creates a selection using
the current paper texture.
•3D Brush Strokes creates a
selection based on the differ-
ence between the current image
and the clone source. If no
clone source is selected, Corel
Painter uses the current pat-
tern. For information about
clones, refer to “Cloning and
Tracing” on page 187.
•Original Selection imports the
selection from the clone source
document. You can use this fea-
ture to transfer a selection from
another document. For best
results, the dimensions of the
source and working document
should match. You must estab-
lish a clone source file, and cre-
ate a selection in this file, for
this option to be valid. For

Corel Painter 209
information about clones, refer
to “Cloning and Tracing” on
page 187.
•Image Luminance creates a
selection based on the current
image’s light and dark areas.
•Original Luminance produces
a selection in the current docu-
ment based on the clone
source’s light and dark areas.
This option lets you import an
image to the selection. If no
clone source is selected, Corel
Painter uses the current pat-
tern.
•Current Color creates a selec-
tion of pixels of the current pri-
mary color. You might want to
use the Dropper tool to pick a
color from the image before
using the Current Color
option.
If you want to invert the selection,
enable the Invert check box.
3Click OK to generate the selection.
Selecting By Color
Corel Painter lets you create a non-
contiguous selection based on a range
of colors.
To generate a color-based
selection:
1Choose Select menu > Color
Select.
2With the Color Select dialog box
open, click in the document
window to pick a color.
3Adjust the H Extents (hue), S
Extents (saturation), and V
Extents (value) sliders to control
the range of colors.
These sliders control the selected
range. You can drag the limits of
the range in either direction.
4Adjust the H Feather (hue), S
Feather (saturation), and V
Feather (value) sliders to control
the feathering at the edges of the
color space extents.
This helps soften the selection
edge.
5The Preview window shows the
selected area as a red overlay on the
image. Drag in the Preview to see
other parts of the document.
6Click OK to generate the selection.
Creating Selections from
Layers
You can create a selection from a layer.
The new selection outlines the
contents of the layer, without
modifying the layer. For more
information about layers, refer to
“Layer Basics” on page 230.
To create a selection from a layer:
1On the Layers palette, select a
layer.
2Choose Select menu > Load
Selection.
3In the Load Selection dialog box,
choose the selected layer’s
transparency from the Load From
pop-up menu.

Using Selections210
Converting Selections to
and from Shapes
You can convert selections to shapes,
and shapes to selections. When you
convert a selection to a shape, you can
use the Shape Edit tools to adjust the
path and define exactly the selection
area you want. Then you can convert
the shape back to a selection.
You can convert both path-based and
pixel-based selections to shapes.
When the selection is pixel-based,
Corel Painter may create multiple
shapes. The selection marquee is used
to define outline paths for the new
shape or shapes.
Converting a shape creates a path-
based selection. This is useful if the
path you want for a selection already
exists as a shape. This will be the case
for text or if you’ve been using the
shape tools to edit the selection path.
For more information about shapes,
refer to “Creating Shapes” on
page 368.
You can also convert a selection to a
layer. For more information, refer to
“To create a layer based on a
selection:” on page 233.
To convert the current selection
to a shape:
•Choose Select menu > Convert to
Shape.
Corel Painter creates the shape,
giving it the default shape
attributes.
Tip
•
If a pixel-based selection has a lot of
intermediate grayscale values, the result
might not be what you want. Save the
selection to a channel, and then use
Brightness/Contrast to increase definition.
Load the channel to the selection and then
convert it to a shape.
To convert a shape to a selection:
1Select the shape you want to
convert.
The shape must be closed.
2Choose Shapes menu > Convert
to Selection.
The outline of the shape creates
the selection path. Everything
within the outline is 100% selected.
Saving Selections
Saving a selection generates a
channel. Channels save selections for
future use and provide additional
editing control.
When you save a selection, you can
create a new channel or modify an
existing channel. You can replace an
existing channel, add the selection to
an existing channel, subtract it from
an existing channel, or intersect it
with an existing channel. For more
information, refer to “Combining
Selections Using Boolean Operations”
on page 212.
To save a selection to a new
channel:
1Create a selection.
2Do one of the following:
•Choose Select menu > Save
Selection.

Corel Painter 211
• On the Channels palette, click
the Save Selection as Channel
button .
3In the Save Selection dialog box,
choose New from the Save To pop-
up menu.
If you want to specify a name, type
a name in the Name box.
Note
•
If you do not specify a name, new
channels are named incrementally:
Alpha 1, Alpha 2, and so on.
To modify an existing channel:
1Create a selection.
2Do one of the following:
•Choose Select menu > Save
Selection.
• On the Channels palette, click
the Save Selection as Channel
button.
3In the Save Selection dialog box,
choose an existing channel from
the Save To menu.
4Select an operation:
•Replace Mask replaces the
channel with the saved selec-
tion.
•Add To Mask combines the
current selection with the cho-
sen channel.
•Subtract From Mask subtracts
the current selection from the
chosen channel.
•Intersect With Mask deter-
mines the intersection of the
selection and the chosen chan-
nel, and saves this to the chan-
nel.
Loading Selections
Loading a selection reactivates a
selection that was saved as a channel.
When you load a selection, you can
replace the current selection, add it to
the current selection, subtract it from
the current selection, or intersect it
with the current selection. For more
information, refer to “Combining
Selections Using Boolean Operations”
on page 212.
To load a selection from a
channel:
1Do one of the following:
•Choose Select menu > Load
Selection.
• Click the Load Channel as
Selection button on the
Channels palette.
2In the Load Selection dialog box,
choose a channel from the Load
From pop-up menu.
3Choose a loading operation:
•Replace Selection replaces the
current selection with the cho-
sen channel.
•Add To Selection adds the
channel to the current selec-
tion.
•Subtract From Selection sub-
tracts the channel from the cur-
rent selection. In other words,
the channel “cuts away” from
the selection.
•Intersect With Selection deter-
mines the intersection of the
channel and the current selec-
tion. This intersection becomes
the new selection.
Using Selections212
Combining Selections
Using Boolean Operations
When you save selections, you can use
Boolean operations (add, subtract,
and intersect) to combine the saved
selection with an existing channel.
Adding a selection combines it with
the existing channel. Subtracting a
selection cuts it out of the existing
channel. When you intersect a
selection, you include only those parts
that are common to the selection and
the existing channel.
For information about specifying
Boolean operations when saving
selections, refer to “To modify an
existing channel:” on page 211.
When you load saved selections, or
channels, you can use Boolean
operations to combine the loaded
channel with the current selection.
Adding a channel combines it with the
current selection. Subtracting a
channel cuts it out of the current
selection. When you intersect a
channel, you include only those parts
that are common to the current
selection and the loaded channel.
For information about specifying
Boolean operations when loading
selections, refer to “To load a selection
from a channel:” on page 211.
There are many practical uses for
loading a selection using Boolean
operations. For example, in the owl
image below, the artist created and
saved selections for each area she
wanted to work with separately—the
eyes, beak, and outline.
To show the selections clearly in the
graphics below, the selections were
saved to channels, reloaded, and
displayed as red overlays. For
information about displaying
channels as colored overlays, refer to
“To view a channel as a colored
overlay:” on page 222.
The owl image.
The following steps are performed to
create a precise “face” selection that
does not include the beak and eyes:
• The eye and beak channels (saved
selections) are loaded and added.
• The combined selection is saved to
the “eyebeak” channel.
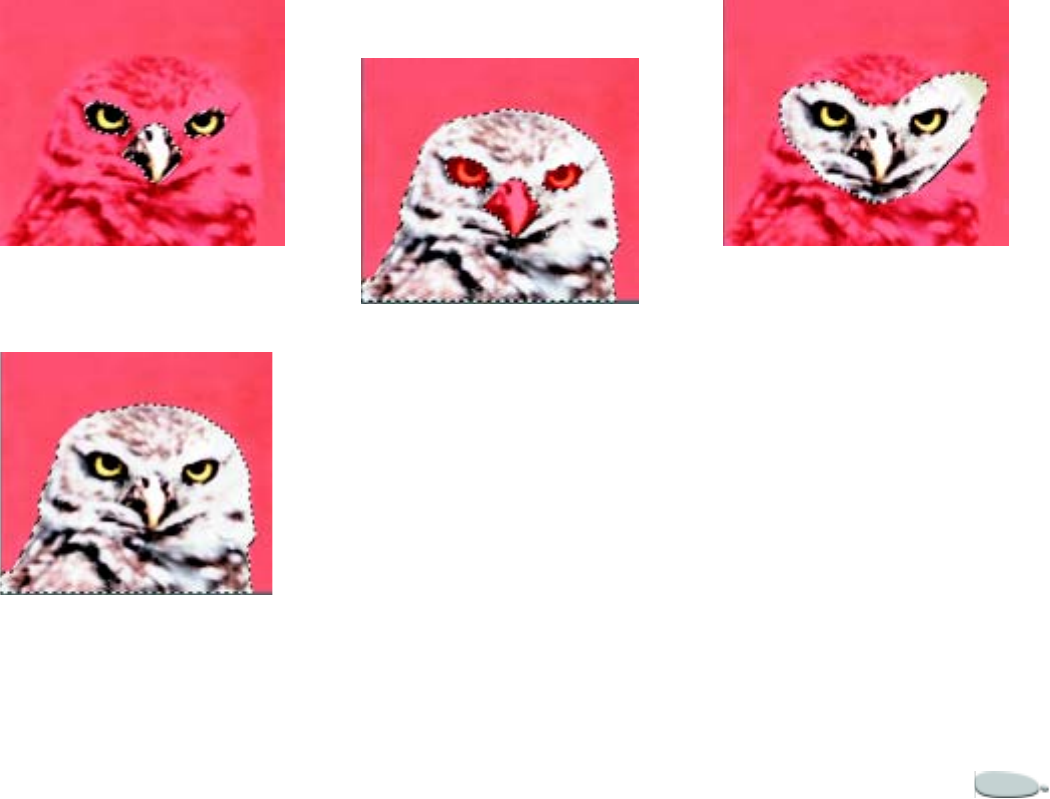
Corel Painter 213
The eye and beak selections are added and
saved to the “eyebeak” channel.
• The “outline” channel is loaded.
The “outline” channel is loaded as a selection
and displayed as a red overlay.
• The “eyebeak” channel is loaded
and subtracted from the “outline”
channel.
• The resulting selection is saved to
the “head” channel.
The “head” channel is created by loading the
“outline” channel and subtracting the
“eyebeak” channel.
• A rough “face” selection is drawn
with the Lasso tool. The eyes,
beak, and a portion of the
background are included.
The original “face” selection.
• The “head” channel (the outline
with eyes and beak subtracted) is
loaded and intersected with the
rough “face” selection. This
removes the eyes, beak, and
background portion.
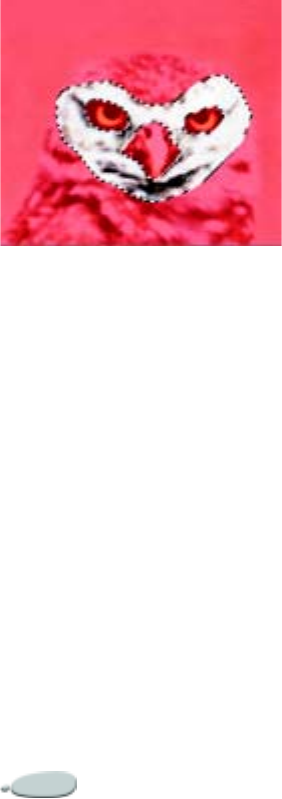
Using Selections214
The modified “face” selection after loading and
intersecting the “head” channel.
• The resulting selection is saved to
the “face” channel.
Now, with a precise selection of the
face, it’s easy to control brush strokes
and constrain effects.
You can also combine selections when
you create them by adding to, or
subtracting from, the current
selection. You can combine selections
made with different tools. For more
information, refer to the procedures
“To add to a selection:” on page206
and “To subtract from a selection:” on
page 207.
Transforming Selections
Path-based selections support many
transformations that pixel-based
selections do not. You can convert a
pixel-based selection to a path-based
selection to apply transformations to
it. However, when you convert a pixel-
based selection, the modified selection
is reduced to having two levels of
protection.
To convert a path-based selection to a
pixel-based selection, you can save it
to a channel and reload it to a
selection. For more information, refer
to “Saving Selections” on page 210
and “Loading Selections” on
page 211.
To determine if a selection is pixel-
based or path-based, use the Selection
Adjuster tool. If the selection displays
handles when the Selection Adjuster
tool is active, the selection is path-
based. If the selection does not have
handles, it is pixel-based. For more
information about selection types,
refer to “About Selection Types” on
page 204.
To convert a pixel-based selection
to a path-based selection:
1Create a pixel-based selection.
2Choose Select menu > Transform
Selection.
Corel Painter generates paths from
the outlines of the pixel-based
selection. You can now use the
Selection Adjuster tool for
transformations.
Editing Path-Based
Selections
You can use the Selection Adjuster
tool to make changes to your selection.
The Select menu also has several
options for editing selections.
Unless otherwise noted, the
procedures in this section are possible
only with path-based selections.
Using the Selection Adjuster
Tool
The Selection Adjuster tool lets you
move selections. You can also scale,
rotate, and skew path-based
selections.
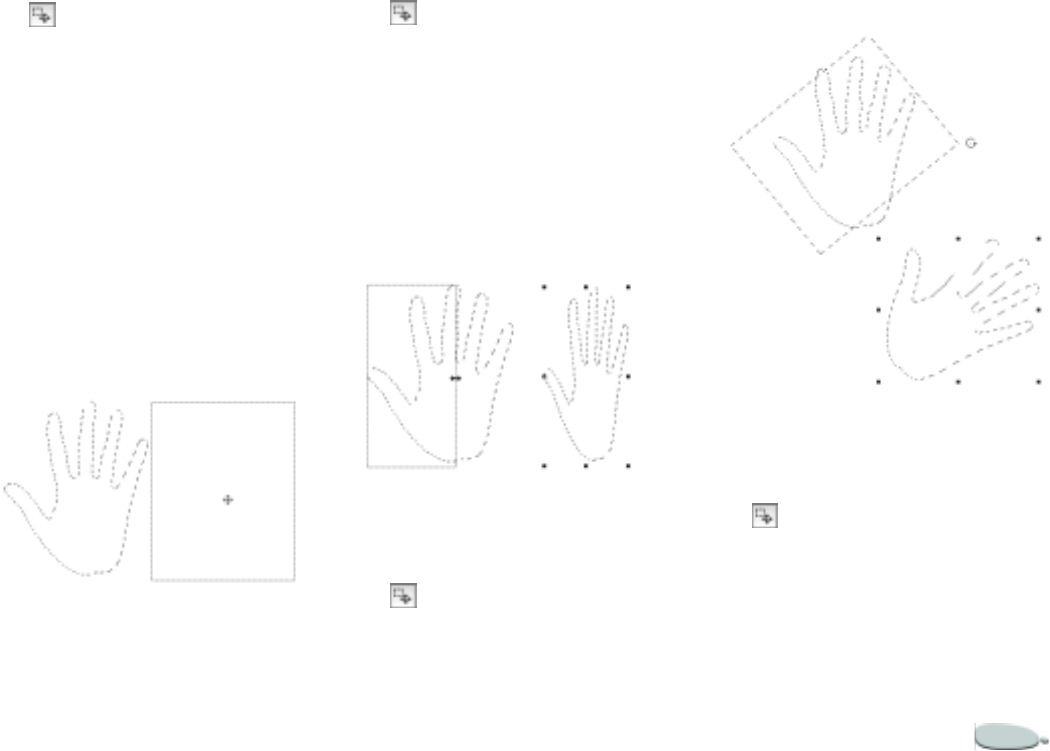
Corel Painter 215
To move a selection:
1Choose the Selection Adjuster tool
from the toolbox.
2Drag the selection.
Note
•
You can move a pixel-based selection
with the Selection Adjuster tool; however,
if a portion moves off the canvas, it is
subtracted from the selection.
Tip
•
You can also move a path-based
selection by nudging it with the arrow
keys. With the Selection Adjuster tool,
click the selection, and then press an
arrow key a few times.
Drag a selection with the Selection Adjuster
tool to move it.
To scale a selection:
1Choose the Selection Adjuster tool
from the toolbox.
2Click the selection.
3Do one of the following:
• Drag a corner handle to scale in
two dimensions. If you want to
constrain the aspect ratio, hold
down Shift while you drag.
• Drag a side, top, or bottom
handle to scale in one dimen-
sion.
Drag a side handle to scale horizontally.
To rotate a selection:
1Choose the Selection Adjuster tool
from the toolbox.
2Click the selection.
3Hold down Command (Mac OS)
or Ctrl (Windows), and drag a
corner handle.
Rotating a selection.
To skew a selection:
1Choose the Selection Adjuster tool
from the toolbox.
2Click the selection.
3Hold down Command (Mac OS)
or Ctrl (Windows), and drag a side
handle.
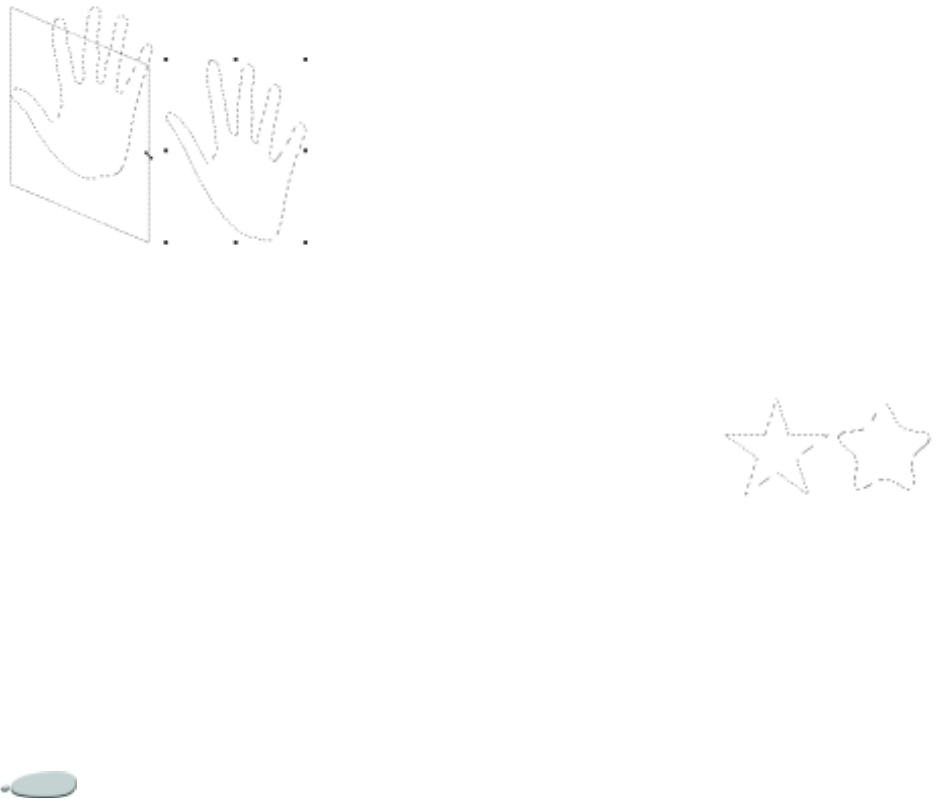
Using Selections216
Skewing a selection.
Feathering Selections
You can feather both path-based and
pixel-based selections to soften the
transitions between selected and
un-selected areas. If you feather a
path-based selection, it is converted to
a pixel-based selection to allow
varying levels of protection at the
edges.
To feather a selection:
1Choose Select menu > Feather.
2In the Feather Selection dialog
box, enter the number of pixels you
want to feather.
3Click OK.
Tip
•
When the selection marquee is shown,
feathering may be difficult to see. It is
easier to see the effect of feathering if you
save the selection to a channel and view
the channel. For more information, refer
to “To view a channel as a colored
overlay:” on page 222.
Widening and Contracting
Selections
You can widen or contract a selection
by a set number of pixels. When you
widen a selection, it is expanded on all
sides by the specified number of
pixels. When you contract a selection,
Corel Painter shrinks it on all sides by
the specified number of pixels.
To widen a selection:
1Choose Select menu > Modify >
Widen.
2In the Widen Selection dialog box,
enter a number of pixels.
To contract a selection:
1Choose Select menu > Modify >
Contract.
2In the Contract Selection dialog
box, enter a number of pixels.
Smoothing Selections
You can smooth a selection by
removing sharp edges, rounding
corners, and straightening the outline
path.
To smooth a selection:
•Choose Select menu > Modify >
Smooth.
Repeat the command until the
path is as smooth as you want it.
The selection — before and after smoothing.
Creating a Border Selection
You can create a selection from the
border, or outline, of the current path-
based selection. You can customize the
border selection by specifying the
width.
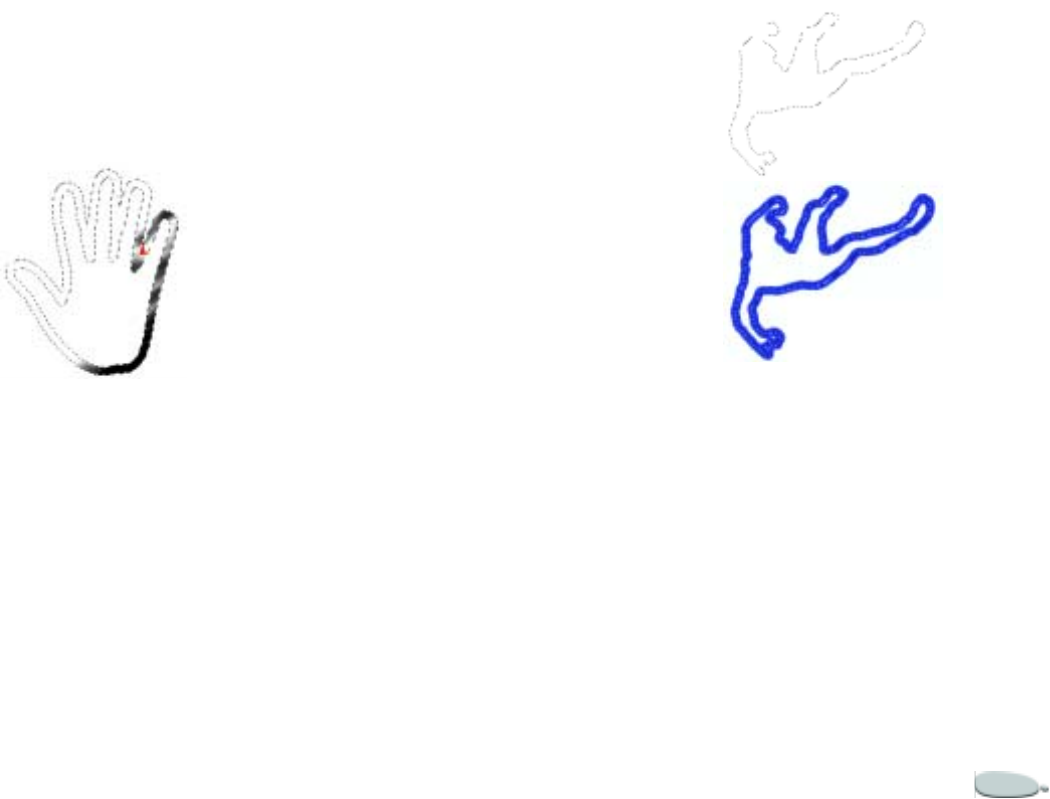
Corel Painter 217
To create a border selection:
1Choose Select menu > Modify >
Border.
2In the Border Selection dialog box,
enter the number of pixels for the
width of the border.
A border selection with airbrush strokes applied
Stroking Selections
You can apply a stroke to a path-based
selection. Corel Painter uses the
current brush variant, brush size,
color, and paper texture to apply a
stroke along the border of a selection.
This is an excellent way to get brush
strokes to follow specific contours.
You can set the drawing mode to
control whether brush strokes are
placed inside the selection border,
outside the selection border, or on
both sides of the selection border. For
more information, refer to “Selecting a
Drawing Mode” on page 204.
To stroke a selection:
1Create a path-based selection.
2Choose the brush variant, color,
and paper texture you want to use.
3On the property bar, type a value
in the Size box, or adjust the pop-
up slider.
4Click the Drawing Mode icon in
the bottom-left corner of the
document window, and choose a
drawing mode.
5Choose Select menu > Stroke
Selection.
Repeat the command to build
strokes. Change brushes if you
like.
Tip
•
For a unique effect, you can nudge the
selection by a few pixels and choose the
command again. To nudge the selection,
click it with the Selection Adjuster tool,
and then press an arrow key a few times.
Stroking a selection using the Draw Anywhere
drawing mode applies strokes to both sides of
the selection border.
Using the Selection
Portfolio
Corel Painter provides a library of
sample selections in the Selection
Portfolio. You can use any of the
selections in the portfolio. If you
create a path-based selection that you
want to use again, you can store it in
the portfolio. You can add your
selections to the sample library, or you
can create your own library. For

Using Selections218
information about creating and using
your own libraries, refer to “Libraries
and Movers” on page 23.
To store a selection in the
portfolio:
1Create the path-based selection
you want to store.
2Choose Window menu > Show
Selection Portfolio.
3Choose the Selection Adjuster tool
from the toolbox.
4Drag the selection to the Selection
Portfolio palette.
5In the Save Selection dialog box,
type a name for the selection.
To use a selection from the
portfolio:
•On the Selection Portfolio palette,
do one of the following:
• Drag a selection to the docu-
ment window.
• Double-click a selection.
This places the selection in its
original position on the canvas,
provided that the document
dimensions are the same.
Note
•
The current selection is replaced.

13
Using Alpha Channels
The primary function of an alpha
channel is to store a selection you
might want later. You can save
multiple selections in a channel.
Understanding Alpha
Channels
An alpha channel is a mask through
which you can paint on, and apply
effects to, an image. The alpha
channel stores 8 bits of information
per pixel, which means that each pixel
can be assigned one of 256 (28) levels
of gray—from 0 (black) to 255
(white). White areas of the channel
are selected, and black areas of the
channel are protected. Intermediate
levels of gray are partially protected.
For example, areas that are 50% gray
will allow 50% of the brush stroke or
effect to get through the channel to
the image.
Alpha channels work like selections.
Selections, however, are available only
when working with the active image
during the current session. You can
save your selection, which creates an
alpha channel. Channels remain
inactive (for canvas control) until you
load them to a selection. You can think
of a channel as a “dormant selection.”
For more information about
selections, refer to “Working with
Selections” on page 203.
Corel Painter lets you create up to 32
alpha channels. The channels are
listed on the Channels palette, where
you can select and control them.
You can edit a channel in a number of
ways and then load it as a selection.
Stored channels remain part of the file
when you save in Corel Painter or
Photoshop format. No matter how
many times you work on a file, the
channels are available whenever you
need them.

Using Alpha Channels220
Creating Channels
You can create a channel from a
selection or create a new, blank
channel.
You can also create a new channel by
copying an existing channel. For more
information, refer to “To copy a
channel:” on page 224.
To save a selection to a channel:
•Choose Select menu > Save
Selection.
For additional information, refer to
“Saving Selections” on page 210.
To create a new, blank channel:
•On the Channels palette, do one of
the following :
• Click the palette menu arrow
and choose New.
• Click the New Channel button
.
Generating Channels
Automatically
Corel Painter lets you generate a
channel based on the light and dark
areas of a number of sources,
including paper, pattern, and clone
source.
You can also create a channel based on
a range of colors.
To generate a channel based on
luminance:
1On the Channels palette, do one of
the following:
• To generate a new channel,
choose the RGB channel from
the list.
• To replace a channel, choose it
from the list.
2Click the palette menu arrow, and
choose New From.
3In the New From dialog box,
choose one of the following
options from the pop-up menu:
•Paper creates a channel using
the current paper texture.
•3D Brush Strokes creates a
channel based on the difference
between the current image and
the clone source. If no clone
source is selected, Corel Painter
uses the current pattern. For
information about clones, refer
to “Cloning and Tracing” on
page 187.
•Original Selection imports the
selection from the clone source
document. You can use this fea-
ture to transfer a selection from
another document. For best
results, the dimensions of the
source and working document
should match. You must estab-
lish a clone source file, and cre-
ate a selection in this file, for
this option to be available. For
information about clones, refer
to “Cloning and Tracing” on
page 187.
•Image Luminance creates a
channel based on the current
image’s light and dark areas.
For Image Luminance to be
effective, the image must have
high contrast. Images with low
contrast will produce a semi-
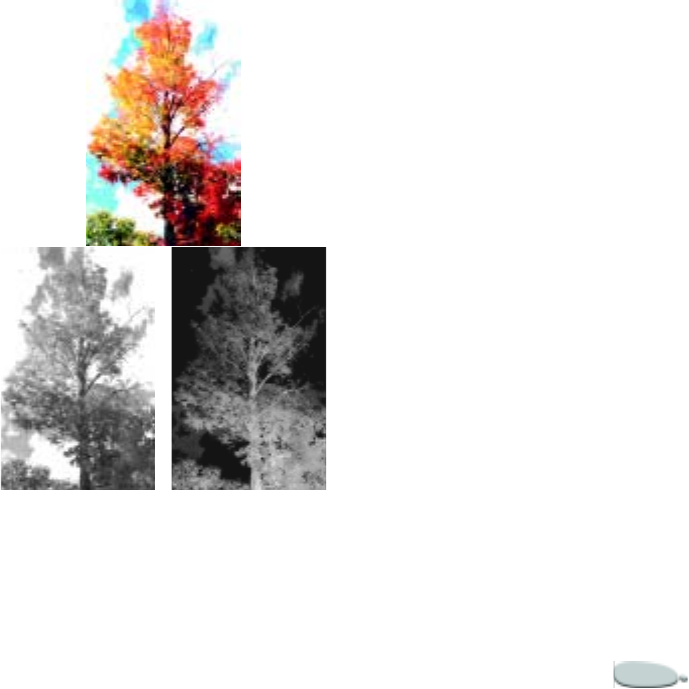
Corel Painter 221
solid channel, without clear
delineation between the
selected and protected areas.
•Original Luminance produces
a channel based on the clone
source’s light and dark areas.
This option lets you import an
image to the channel. If no
clone source is selected, Corel
Painter uses the current pat-
tern.
•Current Color creates a chan-
nel based on pixels of the cur-
rent primary color. Areas of the
current color are protected; the
rest of the image is selected.
You might want to use the
Dropper tool to pick a color
from the image before using
the Current Color option.
If you want to invert the channel,
enable the Invert check box.
Note
•
A channel can have 256 values in it,
like a grayscale image. Inverting a
channel is equivalent to creating the
negative of a grayscale image. For
example, a pixel with 80% luminance
will have 20% luminance when inverted.
A pixel with 30% luminance will have
70% luminance when inverted.
An image (above) and the channels created
using image luminance (bottom-left) and
inverted image luminance (bottom-right).
To generate a color-based
channel:
1On the Channels palette, do one of
the following:
• To generate a new channel,
choose the RGB channel from
the list.
• To replace a channel, choose it
from the list.
2Click the palette menu arrow, and
choose New from Color Range.
3With the Color dialog box open,
click in the document window to
pick a color.
The color you select is the middle
of the range of colors used to create
the channel.
4In the Color dialog box, adjust the
H Extents (hue), S Extents
(saturation), and V Extents (value)
sliders.
These sliders control the selected
range. You can drag the limits of
the range in either direction.
5Adjust the H Feather (hue), S
Feather (saturation), and V
Feather (value) sliders to control
the feathering at the edges of the
color space extents.

Using Alpha Channels222
This helps soften the edges of the
channel.
If you want to invert the channel,
enable the Inverted check box.
Tip
•
The preview window in the Color
dialog box shows the channel as a red
overlay on the image. You can drag in the
preview to see other parts of the image.
Importing Channels from
Other Programs
When RGB files that were created in
Photoshop are opened in Corel
Painter, anything in the alpha
channels (#4 and above) will appear
as a channel in Corel Painter.
Conversely, when you save your Corel
Painter file in Photoshop format, all
channels are placed into channels #4
and above.
Managing Channels
The Channels palette lists the RGB
color image and each channel you’ve
saved.
If a layer is selected, and the layer has
a layer mask, the Channels palette
also lists the layer mask. For
information about layer masks, refer
to “Working with Layer Masks” on
page 255.
To display the Channels palette:
•Choose Window menu > Show
Channels.
If the palette is not expanded, click
the palette arrow.
Selecting and Viewing
Channels
If you want to edit a particular
channel, you must select it.
You can view or hide a channel. The
eye icon next to the channel’s
thumbnail on the Channels palette
lets you view or hide a channel. When
the eye is open, the channel displays
in the document window. When the
eye is closed, the channel is hidden.
Corel Painter offers two ways to view a
channel—as a colored overlay on the
image or in grayscale. Colored
overlays are red by default, but you
can change the color. For more
information, refer to “To set channel
attributes:” on page 223.
Selecting and viewing a channel are
distinct operations—you can view a
channel without selecting it, and you
can select a channel without viewing
it.
You can view the RGB image and
more than one channel, but your
editing applies only to the one item
selected on the Channels palette—the
RGB image or a channel.
To select a channel:
•On the Channels palette, choose a
channel from the list.
Tip
•
When you want to work on the image
again, choose RGB from the list.
To view a channel as a colored
overlay:
•On the Channels palette, click the
eye icon next to the channel’s
thumbnail to open the eye.
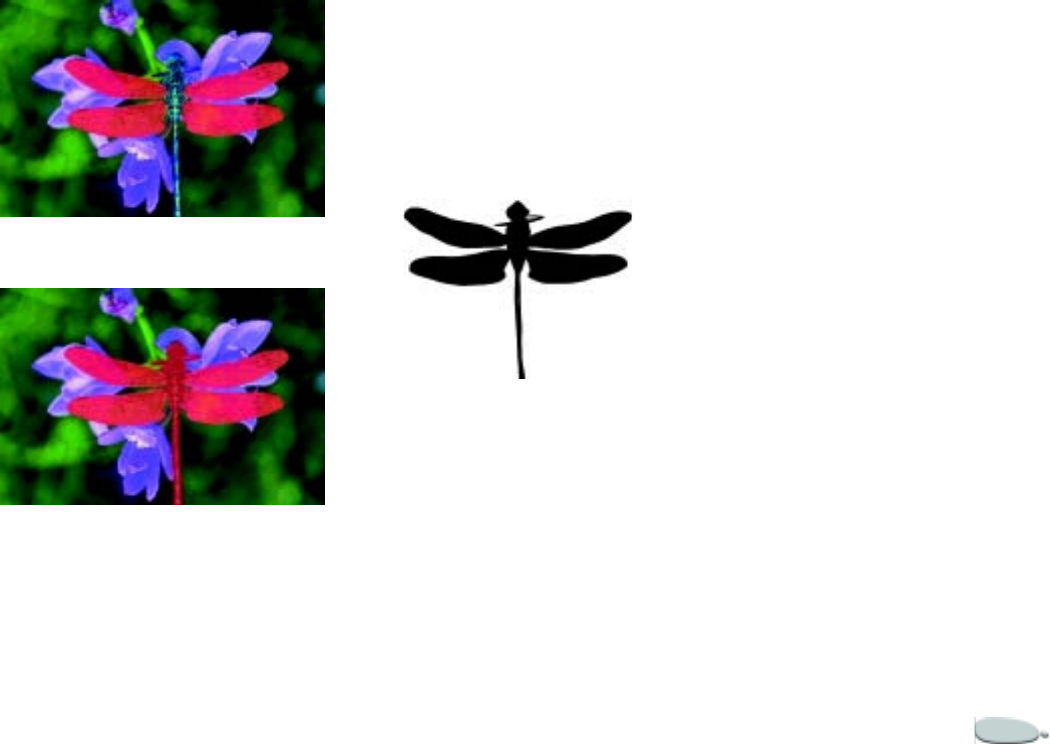
Corel Painter 223
In this mode, the RGB image is
always displayed.
The “wings” channel and the RGB image are
displayed.
The “wings” and “body” channels are displayed
as red overlays on the RGB image. The eye
icons for both channels, and for RGB, are
open.
To view a channel as a grayscale
image:
1On the Channels palette, make
sure the channel is hidden (eye
closed) and not selected.
2Click the channel name.
In this mode, the RGB image is
hidden.
A channel protecting the wings and body is
displayed in grayscale. The RGB image is
hidden.
To hide a channel:
•Click the eye icon next to the
channel item to close the eye.
Setting Channel Attributes
Each channel has a set of display
attributes that can make it easier to
use and help you distinguish it from
the other channels.
These attributes do not affect the
function of the channel; they affect
only how the channel displays as you
work on it.
Corel Painter names new channels
incrementally: Alpha 1, Alpha 2, and
so on. Renaming a channel makes it
easier to work with, especially if you
have several in the document. You can
choose the channel you want
immediately if you’ve given it a
descriptive name.
To set channel attributes:
1On the Channels palette, choose a
channel from the list.
2Do one of the following:
• Click the palette menu arrow,
and choose Channel Attributes.
• Double-click the channel name
in the list.

Using Alpha Channels224
3In the Channel Attributes dialog
box, drag the Opacity slider to set
the channel display strength.
4Click the color chip, and choose a
display color in the Color Picker
dialog box.
If you want to see the color overlay
in grayscale, choose black.
A channel is easiest to use as an
overlay when its color is a strong
contrast with the predominant hue
of the RGB image. You might want
to use a different color for each
channel.
5Enable one of the following
options to specify where the color
overlay displays:
•Masked Areas
• Selected Areas
If you want to rename the channel,
type a name in the Name box.
Tip
•
If you want the channel displayed at
its full intensity, set Opacity to 100%.
Choose a lower value to display the
channel more transparently so you can
follow the underlying RGB imagery as
you edit the channel.
Working with Channels
You can create a new channel by
copying an existing channel.
If you’ve finished working with a
particular channel you can delete it.
You can also clear a channel without
deleting it, leaving you with a blank
channel.
The channel is a grayscale image. By
inverting it, you can make dark pixels
light, and light pixels dark.
To copy a channel:
1On the Channels palette, choose a
channel from the list.
2Click the palette menu arrow, and
choose Duplicate.
3In the Duplicate Channel dialog
box, choose New from the
Destination pop-up menu.
Tip
•
You can also copy to an existing
channel, which replaces that channel. To
do this, choose the channel to replace from
the Destination pop-up menu.
To delete a channel:
1On the Channels palette, choose a
channel from the list.
2Do one of the following:
• Click the palette menu arrow,
and choose Delete.
• Click the Delete button at
the bottom of the Channels
palette.
To clear a channel:
1On the Channels palette, choose a
channel from the list.
2Click the palette menu arrow, and
choose Clear.
To invert a channel:
1On the Channels palette, choose a
channel from the list.
2Click the palette menu arrow, and
choose Invert.

Corel Painter 225
A channel — before and after inversion.
Editing Channels
A channel allows certain types of
editing not possible in a selection.
You can paint in a channel or apply
effects to it. Feathering a channel
softens the transitions between light
and dark areas.
You can also fill a channel with a color,
pattern, gradient, or weave. You can
fill an entire channel or an area of a
channel, or you can fill a channel
based on existing color. For more
information, refer to “Filling Images
Based on Color” on page119.
When you edit a channel, you are
making modifications to the channel,
and not the image. You can use shades
of gray only; no colors are available.
This is because the alpha channel is a
grayscale image, separate from the
RGB image. The resulting channel
can be used afterwards to make
changes to your image.
If you want to modify a specific area of
a channel, you can create a selection.
The current selection is available to
the RGB image and all channels. For
more information, refer to “Creating
Selections” on page 206.
Editing a channel does not affect how
the channel displays. For information
about setting the color and opacity of
the displayed channel overlay, refer to
“Setting Channel Attributes” on
page 223.
To paint in a channel:
1On the Channels palette, display
and select the channel you want to
work with.
If you want to paint only on a
specific area of the channel, make
a selection.
2Choose the Brush tool from the
toolbox.
3On the Brush selector bar, choose a
brush category and variant.
The Pen and Airbrush categories
make good choices.
4On the Colors palette, choose a
color.
Only grayscale values are available.
Black adds to the channel. White
erases from it.
When you paint in the channel,
hue is irrelevant. The channel
carries 8 bits of information and
you need only set a level in that
range. The value scale is between
black and white.
5On the property bar, type a value
in the Opacity box, or adjust the
pop-up slider.
6Type a value in the Size box, or
adjust the pop-up slider.
7Paint in the document window.

Using Alpha Channels226
To apply an effect to a channel:
1On the Channels palette, display
and select the channel you want to
work with.
If you want to apply the effect to a
specific area of the channel, make
a selection.
2Choose an effect from the Effects
menu.
To learn more about image effects,
explore “Using Image Effects” on
page 259.
To feather a channel:
1On the Channels palette, display
and select the channel you want to
work with.
2Click the palette menu arrow, and
choose Feather.
3In the Feather dialog box, type a
number of pixels.
A channel — before and after feathering.
To fill a channel:
1On the Channels palette, display
and select the channel you want to
work with.
If you want to fill only a specific
area of the channel, make a
selection.
2In the toolbox, choose a color,
pattern, gradient, or weave from
the corresponding selector.
3Choose Effects menu > Fill.
4In the Fill dialog box, enable one
of the following to fill with:
• Current Color
•Pattern
•Gradient
•Weave
Current Color fills with the
current shade of gray.
5Adjust the Opacity slider.
Note
•
For more information on the Fill
command, refer to “Filling an Area with
Media” on page 118.
To fill a channel based on color:
1On the Channels palette, display
and select the channel you want to
work with.
2Choose the Paint Bucket tool
from the toolbox.
3On the property bar, click the Fill
Image button .
4Choose one of the following from
the Fill pop-up menu:
•Current Color—fills with the
current color—a shade of gray.
•Grad—fills with the selected
gradient.
•Clone Source—fills using the
current clone source image. If
you haven’t defined a clone
source, Corel Painter fills with
the current pattern.
•Weave—fills with the selected
weave.
5Choose the specific material you
want from the Fill selector.
6To specify the range of gray to be
filled, type a value in the Tolerance
box, or adjust the pop-up slider.
7To specify the fill opacity for pixels
outside the Tolerance range, type a

Corel Painter 227
value in the Feather box, or adjust
the pop-up slider.
If you want to create intermediate
fill values on the boundaries,
enable the Anti-Alias check box.
This gives soft edges to the fill.
Anti-aliasing is desirable when
Feather is zero or extremely low.
8Click the area of the channel you
want to fill.
If the result is not what you want,
undo the fill, change the settings,
and try again.
Notes:
•
The Paint Bucket applies a fill only to
a visible channel. Make sure the channel’s
eye icon is open before using the Paint
Bucket.
•
For complete information on Paint
Bucket controls, refer to “Filling Images
Based on Color” on page 119.
Tip
•
You can return to the default Paint
Bucket settings by clicking the Reset Paint
Bucket button on the property bar.
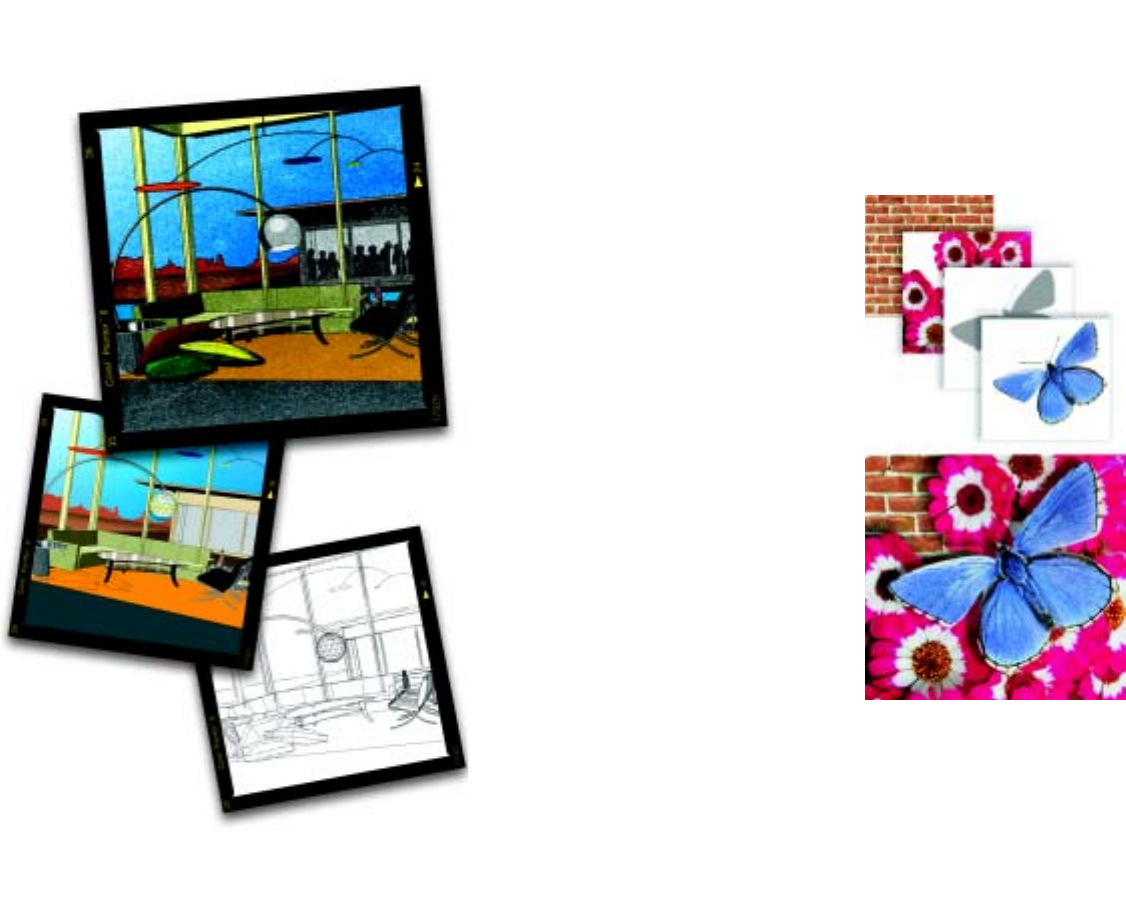
14
Using Layers and Layer Masks
When you open a new document and
create an image, your work appears on
a background layer known as the
canvas. You can add additional layers
to a document, which allows you to
manipulate the visual elements in the
image independently of the canvas.
Layers provide one of the great
advantages of creating images in a
digital workspace—the freedom to
experiment with different
compositions and effects without
risking an unwanted, permanent edit.
The Corel Painter RIF file format
preserves layers when you save a
document, so you can easily make
changes at a later time. There’s no
need to re-create the entire
composition—just modify one or
more layers. The result is a dynamic
and flexible design environment. Think of layers as sheets of clear material, such
as acetate. Painting on a layer obscures the image
below it. Areas of a layer that don’t contain
imagery remain transparent.

Using Layers and Layer Masks230
Layer Basics
In Corel Painter, layers are objects
that contain image data. Because each
layer is a distinct object, you can move
it around and edit it without
interfering with the image data on the
canvas or other layers. Likewise, you
can work on the canvas without
interfering with any of the other
layers.
Layers can contain two types of
images: pixel-based images and
vector-based images. How you work
with a layer depends on the type of
data it contains—however, all layers
in a document have the following
characteristics in common:
• They are listed on the Layers
palette. The Layers palette
manages the hierarchy of layers
and includes controls for selecting,
hiding, locking, deleting, naming,
and grouping layers.
• You can cut, copy, paste, move, and
align them using the Layer
Adjuster tool.
• They interact with underlying
images based on a specified
composite method.
Pixel-based Layers
You can create pixel-based images on a
layer using any brush variant, with the
following exceptions:
•Water Color brushes
• Liquid Ink brushes
• Brushes that use the Wet method
You can also create pixel-based images
on a layer by pasting or placing an
image.
Layers play a role in more specialized
functions, such as building an image
hose nozzle, embedding a URL in an
image, or creating an animation.
Vector Shape Layers
Shapes are vector-based objects. When
you create a shape with one of the
shape tools (Pen, Quick Curve,
Rectangular Shape, Oval Shape, or
Text), Corel Painter automatically
adds a new layer to the document.
Each new shape becomes a separate
layer; you can group multiple shapes
together or merge them into a single
shape.
Shapes cannot contain pixel
information. To perform pixel-based
operations—such as painting in a
shape with a brush or filling it with a
gradation—you must convert the
shape to a pixel-based layer.
This chapter covers only managing
shapes on the Layers palette. “Using
Shapes” on page 365 contains detailed
information about creating and
working with shapes.
Floating Object Layers
Floating object layers contain imagery
that can be moved around the layer.
For more information, refer to
“Working with Floating Objects” on
page 242.
Reference Layers
Reference layers are low resolution
representations of other layers. Using
reference layers lets you more easily

Corel Painter 231
manipulate standard layers. For more
information, refer to “Working with
Reference Layers” on page 246.
Dynamic Layers
Dynamic layers are a class of layers
that provide dynamic effects to the
underlying image.
Some dynamic layers interact with the
underlying imagery in a specific area
to produce effects—such as the Glass
Distortion and Equalize dynamic
layers. Other dynamic layers interact
with the underlying imagery as you
apply brush strokes—such as the
Liquid Metal dynamic layer.
Dynamic layers are different from
other effects because they are distinct
objects—you can access them on the
Layers palette and update their
controls to modify the effect at any
time.
This chapter covers only managing
dynamic layers on the Layers palette.
“Using Dynamic Plug-ins” on
page 313 contains detailed
information about creating and
working with dynamic layers.
Water Color Layers
The Water Color layer is a special
layer reserved for Water Color
brushes. It enables the paint applied
with these brushes to mix and flow
together. You can create multiple
Water Color layers in a document.
These layers are part of the layer
hierarchy and appear on the Layers
palette, where they are characterized
by a blue ink droplet icon.
In earlier versions of the application, if
you applied water color brush strokes,
they were applied to the canvas layer
and, as such, were uneditable. Now,
when you apply a Water Color brush
to the canvas or to an image layer, a
new Water Color layer is
automatically created. You can edit
Water Color layers as you would any
other layer, including erasing and
blurring, without affecting other
layers.
Refer to “The Water Color Layer” on
page 125 for more information about
working with Water Color layers.
Liquid Ink Layers
The Liquid Ink layer is a special layer
reserved for Liquid Ink brushes. You
can create multiple Liquid Ink layers
in a document. These layers are part
of the layer hierarchy and appear on
the Layers palette, where they are
characterized by a black ink droplet
icon.
When you apply one of the Liquid Ink
brushes to the canvas or to an image
layer, a new Liquid Ink layer is
automatically created. You can edit
Liquid Ink layers without affecting
other layers.
Refer to “The Liquid Ink Layer” on
page 131 for more information about
working with Liquid Ink layers.
Working with Layers
When you work with layers, you use
the Layers palette and the Layer
Adjuster tool.
Using Layers and Layer Masks232
The Layers Palette
The Layers palette lists all the layers
in a document and provides options
for managing them.
You can access many layer functions
and commands using the buttons at
the bottom of the palette, and the
palette menu (accessed by clicking the
palette menu arrow in the top-right
corner of the palette).
The Layers palette displays icons next
to each layer to indicate the layer’s
type and characteristics.
Pixel-based layer
Water Color layer
Liquid Ink layer
Shape layer
Floating object
Reference layer
Dynamic layer
Grouped layer
Expanded group
Visible layer
Hidden layer
Locked layer
On the Layers palette, you can set
layer opacity and choose a composite
method. For information about layer
opacity, refer to “Setting Layer
Opacity” on page 248. For
information about composite
methods, refer to “Blending Layers
Using Composite Methods” on
page 248.
Information about the dimensions
and position of layer content is
displayed on the Info palette. For
more information, refer to “The Info
Palette” on page 19.
To display the Layers palette:
•Choose Window menu > Show
Layers.
If the palette is not expanded, click
the palette arrow.
The Layer Adjuster Tool
With the Layer Adjuster tool, you can
select and work with layers. When you
choose the Layer Adjuster tool from
the toolbox, the property bar contains
options for selecting layers
automatically and for changing a
layer’s position in the hierarchy.
For information about selecting layers
automatically, refer to “Selecting
Layers” on page 235. For information
about changing the layer hierarchy,
refer to “Changing Layer Hierarchy”
on page 238.
Creating Layers
You can create new pixel-based layers,
Water Color layers, or Liquid Ink
layers directly from the Layers palette.
You can duplicate layers and copy
layers between documents.
You can also create a layer based on a
selection. This copies or converts the
contents of a selection to a new layer.
For information about creating
selections, refer to “Creating
Selections” on page 206.
Corel Painter 233
For information about creating
dynamic layers, refer to “Creating
Dynamic Layers” on page314.
For information about creating vector
shape layers, refer to “Creating
Shapes” on page 368.
To create a new layer:
• Click one of the following buttons
at the bottom of the Layers palette:
• New Layer
• New Water Color Layer
• New Liquid Ink Layer
Tip
•
You can also create a new layer by
clicking the palette menu arrow and
choosing New Layer, New Water Color
Layer, or New Liquid Ink Layer.
To duplicate a layer:
1Choose the Layer Adjuster tool
from the toolbox.
2On the Layers palette, select a
layer.
3In the document window, hold
down Option (Mac OS) or Alt
(Windows), and click the layer.
Corel Painter duplicates the layer
in place. Select and move the new
layer to reveal the original layer in
the document window.
Note
•
For more information about selecting
layers, refer to “Selecting Layers” on
page 235.
To copy a layer between
documents:
1With the Layer Adjuster tool,
select a layer on the Layers palette.
2Do one of the following:
• In the document window, drag
the layer to another document.
•Choose Edit menu > Copy,
display the other document,
and then choose Edit menu >
Paste.
Note
•
For more information about selecting
layers, refer to “Selecting Layers” on
page 235.
Tip
•
You can also paste a copied layer from
the Clipboard to a new document by
choosing Edit menu > Paste Into New
Image.
To create a layer based on a
selection:
1Make a selection.
2Do one of the following:
• To convert the selection, choose
Select menu > Float or click
the selection with the Layer
Adjuster tool.
• To convert and move the selec-
tion, drag it with the Layer
Adjuster tool.
• To copy the selection, hold
down Option (Mac OS) or Alt
(Windows) and click the selec-
tion with the Layer Adjuster
tool.
• To copy and move the selec-
tion, hold down Option (Mac
OS) or Alt (Windows) and
drag the selection with the
Layer Adjuster tool.

Using Layers and Layer Masks234
Tips
•
You can also convert a selection to a
layer by rotating, scaling, distorting, or
flipping a selection. Refer to “Orientation
Effects” on page 262 for more information.
•
You can also create a new layer by
copying or cutting, and pasting, a selection.
Naming Layers
Corel Painter assigns each layer (or
group) a default name when you
create it. This name references the
object’s type and creation order.
For example, pixel-based layers are
titled Layer 1, Layer 2, and so on. A
shape’s title is based on the tool you
use to create it— Rect # for the
Rectangular Shape tool, Oval # for
the Oval Shape tool, and Shape # for
the Pen and Quick Curve tools.
As you add more layers and groups to
a document, it can become difficult to
remember what image data each layer
contains. By assigning layers and
groups descriptive names, you can
easily keep track of the separate pieces
of an image.
To name a layer or group:
1On the Layers palette, select a layer
or group.
2Do one of the following:
• Click the palette menu arrow
and choose Layer Attributes.
• For pixel-based layers and ref-
erence layers, double-click the
item on the Layers palette, or
select an item and press Return
(Mac OS) or Enter (Windows).
3In the Layer Attributes dialog box,
type a new name in the Name box.
Note
•
You cannot change the name of the
canvas layer.
Saving Files Containing
Layers
You can save your Corel Painter
document in the RIFF format with
“live” layers—the layers continue to
function when you reopen the file.
RIFF is the only format that preserves
layers in their original state.
If you save a Corel Painter document
in PSD (Photoshop) format, all layers
convert to standard Photoshop
transparent layers. Photoshop does
not preserve groups; each layer in a
group becomes its own Photoshop
layer. For information about grouping
layers in Corel Painter, refer to
“Grouping Layers” on page 238.
If you save a Corel Painter document
to PSD format, keep in mind how
layer composite methods in Corel
Painter convert to blend modes in
Photoshop:
Corel Painter
Composite
Method
Photoshop
Blend Mode
Gel Darken
Colorize Color
Reverse-Out Normal
Shadow Map Multiply
Magic Combine Lighten
Pseudocolor Normal
Normal Normal
Dissolve Dissolve
Multiply Multiply
Screen Screen
Overlay Overlay
Soft Light Soft Light
Corel Painter 235
For more information about
composite methods, refer to “Blending
Layers Using Composite Methods” on
page 248.
If you save a file to a file format other
than RIFF or PSD, the layers drop (or
merge) into a single background
image.
Deleting Layers
To delete a layer:
1On the Layers palette, select the
layer.
2Do one of the following:
• Click the palette menu arrow,
and choose Delete Layer.
• Click the Delete button at
the bottom of the Layers pal-
ette.
Notes
•
You can also delete shapes by pressing
Delete (Mac OS) or Backspace
(Windows).
•
You cannot delete the canvas.
Managing Layers
Selecting Layers
Selecting a layer lets you make
changes to it. If no layers are selected,
any changes you make apply to the
canvas.
The Auto Select Layer option changes
your ability to select and move layers
with the Layer Adjuster tool.
By default, the Auto Select Layer
option is disabled. This means that
the layer selection is “locked in”—the
Layer Adjuster tool affects only the
selected layer or layers. In other words,
you cannot select a layer by clicking it
in the document window; you must
select a layer by clicking it on the
Layers palette.
When the Auto Select Layer option is
enabled, you can select layers
automatically with the Layer Adjuster
tool by clicking an area of layer
content in the document window.
To select a layer:
•Do one of the following:
• Click a layer on the Layers pal-
ette.
• Choose the Layer Adjuster tool
from the toolbox. With the
Auto Select Layer check box on
the property bar enabled, click
anywhere in a layer’s content.
Tips
•
You can also press the F key to activate
the Layer Adjuster tool.
•
If you are working with a shape, you
can switch to the Shape Selection tool by
double-clicking a shape with the Layer
Adjuster tool.
To select multiple layers:
•Do one of the following:
Hard Light Hard Light
Darken Darken
Lighten Lighten
Difference Difference
Hue Hue
Saturation Saturation
Color Color
Luminosity Luminosity
Corel Painter
Composite
Method
Photoshop
Blend Mode
Using Layers and Layer Masks236
• On the Layers palette,
Shift+click each layer you
want to select.
• Choose the Layer Adjuster tool
from the toolbox. With the
Auto Select Layer check box on
the property bar enabled, in the
document window drag over
the layers you want to select.
To select all layers in a document:
•On the Layers palette, click the
palette menu arrow and choose
Select All.
Corel Painter selects all layers
except the canvas.
To deselect layers:
•Do one of the following:
• On the Layers palette, click
Canvas (the last item in the
list).
• On the Layers palette, click the
palette menu arrow and choose
Deselect.
Deselecting all layers
automatically selects the Canvas
layer.
Showing Layer Indicators
You can show the layer indicators to
see display handles at the corners of a
layer’s content when it is selected.
Show the layer indicators to mark the corners of
a selected layer.
To show layer indicators:
•On the Layers palette, click the
palette menu arrow and choose
Show Layer Indicators.
Tip
•
To hide the layer indicators, click the
palette menu arrow and choose Hide Layer
Indicators.
Locking Layers
You can lock layers to avoid
accidentally changing them. When a
layer is locked, you cannot select it
with the Layer Adjuster tool in the
document window.
You can, however, move a locked layer
or shape by nudging it. For more
information, refer to “Moving Layers”
on page 244.
To lock or unlock a layer:
1Select the layer on the Layers
palette.
2Do one of the following:
• On the Layers palette, click the
Lock Layer button .
• Click the palette menu arrow
and choose Lock.
The Locked Layer icon appears
next to a locked layer on the Layers
palette.
Viewing Layers
You can control your view of an image
in the document window by changing
layer visibility settings. This is helpful
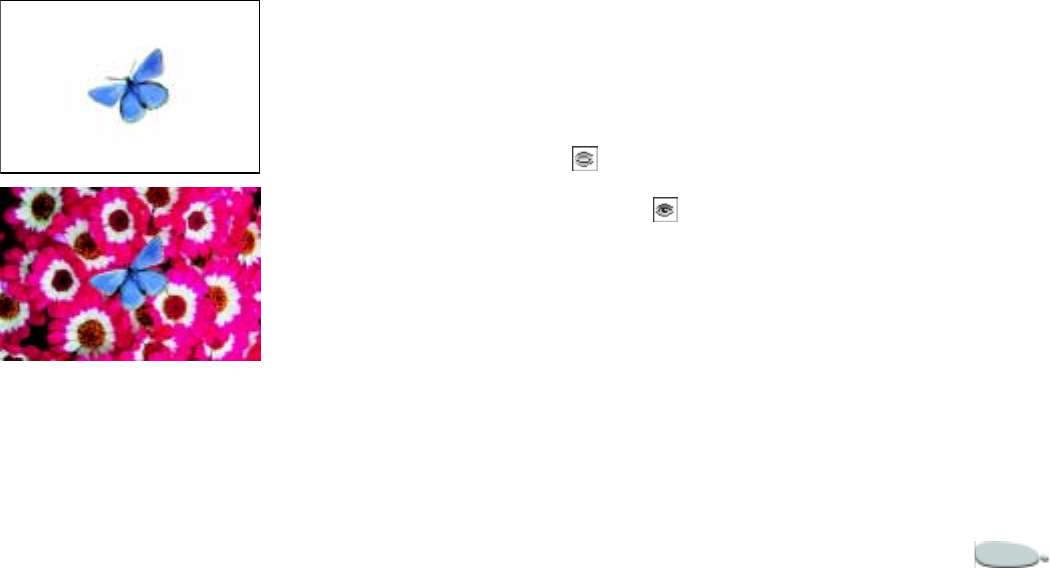
Corel Painter 237
both in compositing an image and
applying effects. You can hide one
layer to gain better visibility of the
layer below it. Or, you can set up
different states of an image to create
rollover effects for use on the Web. For
more information about creating
rollovers, refer to “Creating Rollovers”
on page 403.
Use layer visibility settings to create different
states of an image. In the top example, the layers
containing the background are hidden; in the
bottom example, the layers containing the
background are showing.
Layer visibility settings stay active
when printing or saving to some file
formats. In other words, the content of
hidden layers does not print and is not
saved. However, RIF and PSD file
formats preserve hidden layers as part
of the document. Refer to “Saving
Files Containing Layers” on page 234
for more information about how
layers are saved in different file
formats.
To show or hide a layer:
•Click the eye icon next to the layer
name on the Layers palette.
When the eye is shut , the layer
is hidden in the document
window. When the eye is open ,
the layer is visible in the document
window.
To show or hide the canvas:
•Click the eye icon next to Canvas
on the Layers palette.
When the eye is shut, the canvas is
represented by a checkerboard.
When the eye is open, the canvas is
visible in the document window.
Viewing Layer Position
The Info palette contains information
about the size and position of the
selected layer’s content on the canvas.
Think of the area of a layer that
contains imagery as being marked by
a bounding box. The Info palette
displays the dimensions and position
of the bounding box, not the entire
area of the layer. This makes it easy to
determine the exact size and location
of a layer’s content in the document.
•W is the width of the layer’s
content, measured in pixels.
•H is the height of the layer’s
content, measured in pixels.
•T is the position of the top edge of
the layer’s bounding box,
measured in pixels from the top
edge of the canvas.
•L is the position of the left edge of
the layer’s bounding box,
measured in pixels from the left
edge of the canvas.
•B is the position of the bottom edge
of the layer’s bounding box,
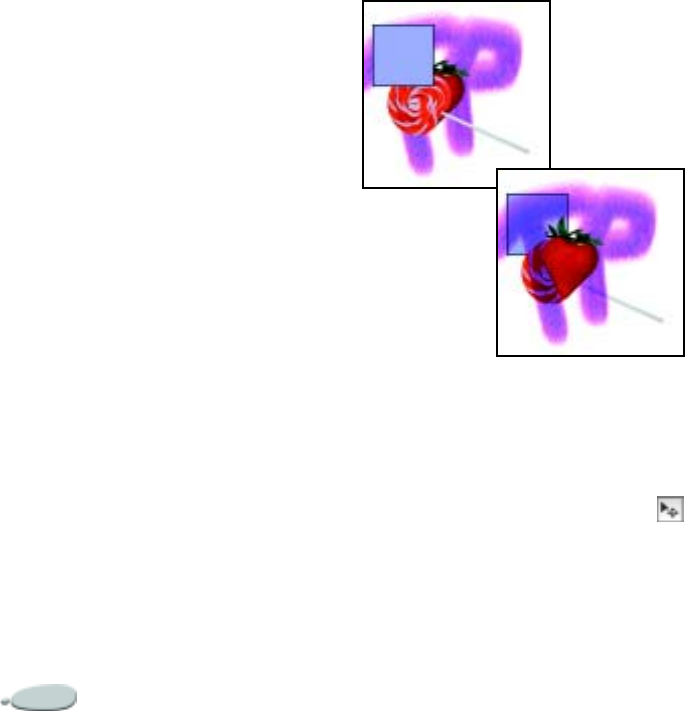
Using Layers and Layer Masks238
measured in pixels from the top
edge of the canvas.
•R is the position of the right edge
of the layer’s bounding box,
measured in pixels from the left
edge of the canvas.
To display the Info palette:
•Choose Window menu > Show
Info.
If the palette is not expanded, click
the palette arrow.
Changing Layer Hierarchy
The hierarchy of layers determines
how the layers in a document interact.
When you create a new pixel-based
layer, it appears on top of the existing
layers (when the canvas is selected) or
on top of the selected layer. New
Water Color, Liquid Ink, and dynamic
layers are always created on top of
existing layers. Depending on its
transparency, masking, and
compositing characteristics, the layer
will obscure or otherwise affect the
underlying layers.
A document’s layer hierarchy is
reflected on the Layers palette. The
bottom layer is always the Canvas.
Change the hierarchy of layers to create different
effects.
To change a layer’s position in the
hierarchy:
1Choose the Layer Adjuster tool
from the toolbox.
2On the Layers palette, select the
layer you want to reposition in the
hierarchy.
3Do one of the following:
•Choose Layers menu > Move
to Bottom.
•Choose Layers menu > Move
to Top.
•Choose Layers menu > Move
Down One Layer.
•Choose Layers menu > Move
Up One Layer.
Tips
•
You can also reposition a layer by
dragging it to a new position on the Layers
palette.
•
You can also reposition a layer by
clicking the Move to Bottom, Move to Top,
Move Down One Layer, or Move Up One
Layer button on the property bar.
Grouping Layers
Grouping layers enables you to
control them as a unit. A group can
contain any combination of layers:
pixel-based layers, Water Color layers,
Liquid Ink layers, shapes, and
dynamic layers.
You can move, rename, hide, show,
lock, and set options for a group just
as you do for a single layer. However,
Corel Painter 239
you cannot paint across layers in a
group or change the composite
method for a group.
To work with individual layers in a
group, you must open the group.
Close the group to regain control of
the group as a unit.
Collapsing a group reduces its
contents to a single layer.
To create a group:
1On the Layers palette, select the
layers you want to group.
Refer to “Selecting Layers” on
page 235 for more information
about selecting multiple layers.
2Do one of the following:
• Click the Layer Commands
button , and choose Group.
• Click the palette menu arrow,
and choose Group.
The layers are collected under a
group item on the Layers palette.
Note
•
If you select non-sequential layers
(layers not next to each other in the list),
Corel Painter creates the group at the
position of the top-most layer.
To open and close a group:
•On the Layers palette, click the
triangle icon to the left of the
group.
When the arrow points down
and you can see the group items,
the group is open. When the arrow
points to the right and the
names of the group members are
hidden, the group is closed.
To add a layer to a group:
1On the Layers palette, open the
destination group.
2Drag a layer to the group.
Tip
•
You can create a nested group by
dragging a closed group to the open
destination group.
To remove a layer from a group:
1Open the group.
2Drag the layer out of the group.
To ungroup layers:
1On the Layers palette, select the
group.
If the group is open, click the
triangle icon to close it.
2Do one of the following:
• Click the Layer Commands
button , and choose
Ungroup.
• Click the palette menu arrow,
and choose Ungroup.
To collapse a group:
1On the Layers palette, select the
group.
2Do one of the following:
• Click the Layer Commands
button , and choose Col-
lapse.
• Click the palette menu arrow,
and choose Collapse.
If the group contains shapes,
Liquid Ink layers, or dynamic
layers, the Commit dialog box is
displayed. Click Commit All to
convert the items to pixel-based

Using Layers and Layer Masks240
layers before collapsing the entire
group.
Note
•
If you want to collapse a group
containing a Water Color layer, you must
first convert the Water Color layer to a
default layer and change its composite
method to Default. For more information
about composite methods, refer to “Blending
Layers Using Composite Methods” on
page 248.
Merging Layers with the
Canvas
Dropping a layer (or group) merges its
contents with the canvas. Once you
drop a layer, you can no longer access
the layer’s content separately from the
canvas.
You can drop specific layers or you can
drop all layers at once.
When you drop a layer, you can
choose to create a selection based on
the layer contents. If the layer has a
layer mask, the mask is used to make
the selection. Refer to “Working with
Layer Masks” on page 255 for more
information about layer masks. For
more information about selections,
refer to “Working with Selections” on
page 203.
To drop specific layers:
1On the Layers palette, select the
layers (or groups) you want to
drop.
2Do one of the following:
• Click the Layer Commands
button , and choose Drop.
• Click the palette menu arrow,
and choose Drop.
To drop all layers:
•On the Layers palette, click the
palette menu arrow and choose
Drop All.
To make a selection by dropping a
layer:
•On the Layers palette, click the
palette menu arrow and choose
Drop and Select.
Editing Layers
You can edit a layer’s content by
applying effects to it, transforming its
dimensions, or painting on it. You can
also move layer content to change the
overall image layout.
About Brush Methods
The Natural-Media environment
enables brush strokes on different
layers to interact with each other.
However, mixing brush strokes that
use the Cover and Buildup methods
on the same layer can produce
unexpected results. This is caused by a
conflict between the brush method
and the layer’s composite method.
• Brushes that use the Buildup
method—such as those in the Felt
Pens or Pencils category—work
best on layers that use the Gel
composite method. In fact, when
you paint on a blank layer using
the Buildup method, Corel Painter
automatically sets the layer’s
composite method to Gel.

Corel Painter 241
• Brushes that use the Cover
method work best on layers using
the Default composite method.
For more information about layer
composite methods, refer to “Blending
Layers Using Composite Methods” on
page 248.
For more information about brush
methods, refer to “Methods and
Subcategories” on page 152.
Preserving Layer
Transparency
Areas of a layer that don’t contain
imagery are transparent. You can
preserve the transparent areas of a
layer with the Preserve Transparency
check box on the Layers palette. This
option affects what areas of a layer you
can create imagery on. It also affects
the results of erasing or deleting
imagery on a layer.
By default, the Preserve Transparency
check box is disabled, which lets you
paint anywhere on the layer. When
Preserve Transparency is enabled, the
transparent areas are preserved, and
you are confined to painting on areas
of the layer that already contain
imagery.
The results of painting on a layer with the
Preserve Transparency option disabled and
enabled
A good way to think about the
Preserve Transparency option is in
terms of a layer mask. As described in
“Working with Layer Masks” on
page 255, a layer mask defines the
visible areas of a layer.
Preserve Transparency provides a
powerful selective editing capability
for altering the strokes you've already
applied and creating interesting
effects. For example, enable Preserve
Transparency to fill a set of hand-
drawn letters with a pattern, a color
gradient, or other brush strokes.
Preserve Transparency also affects the
results of cutting or erasing on a layer.
• When Preserve Transparency is
disabled, erasing or deleting
imagery restores transparency to
the area—revealing the underlying
image.
• When Preserve Transparency is
enabled, erasing or deleting
imagery reveals the document’s
paper color. In effect, erasing or
deleting with Preserve
Transparency enabled is the same
as painting or filling with the
document’s paper color.
Disabled
Enabled
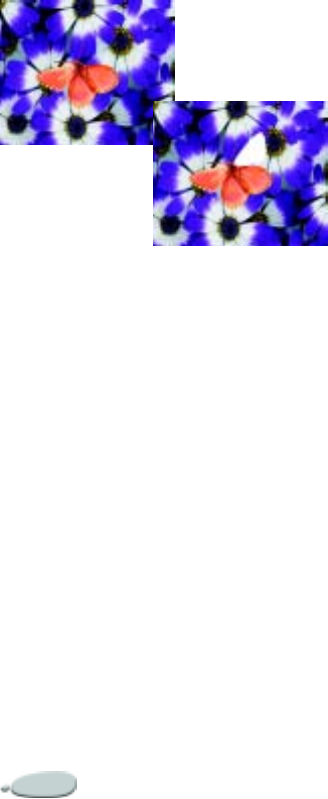
Using Layers and Layer Masks242
Erasing part of a layer with the Preserve
Transparency option disabled restores
transparency (top). When the option is enabled,
erasing reveals the paper color (bottom).
To preserve layer transparency:
•On the Layers palette, enable the
Preserve Transparency check box.
Tip
•
You can also load a layer’s
transparency to a selection. On the Layers
palette, Control+click the layer (Mac
OS) or right-click the layer (Windows),
and choose Select Layer Transparency. For
more information about selections, refer to
“Working with Selections” on page 203.
Painting on Layers
When a layer is selected, you can use
the brushes to paint, draw, erase, or
clone in a layer. When painting on
layers, keep the following points in
mind:
• Water Color brushes can be used
only on Water Color layers; on a
Water Color layer, you can paint
only with Water Color brushes.
• Liquid Ink brushes can be used
only on Liquid Ink layers; on a
Liquid Ink layer, you can paint
only with Liquid Ink brushes.
• You can’t paint across grouped
layers—you must collapse the
group first.
• Before painting on a shape, you
must commit it to a pixel-based
layer. Corel Painter prompts you to
commit a shape if you attempt to
paint on it. Once committed, you
cannot re-access the shape’s vector
controls.
• You can protect areas of a layer
from painting by creating a
selection. For more information,
refer to “Creating Selections” on
page 206.
• You can control what parts of a
layer are visible and hidden by
creating a layer mask. For more
information, refer to “Working
with Layer Masks” on page 255.
To paint on a layer:
1Select a layer.
2On the Brush selector bar, choose a
brush category and variant.
3Paint on the layer in the document
window.
The Preserve Transparency option
affects what areas of a layer you
can paint on. Refer to “Preserving
Layer Transparency” on page 241
for more information.
Working with Floating
Objects
You can make a selection on a layer
using the Rectangular Selection, Oval
Selection, Lasso, or Magic Wand tool.
Selections on layers function in the
same way as selections on the
canvas—you can use them to

Corel Painter 243
constrain brush strokes, to isolate an
area of the layer for applying an effect,
or to choose an area of the layer to cut
or copy.
By default, when you move a
selection, only the selection marquee
moves, not the imagery. To move
selected imagery on a layer, you must
“float” the selection. In effect, this
turns the selected area of the layer into
a floating object. You can move
floating objects around a layer to
create new compositions.
Each layer in a document can have
only one floating object at a time. You
can drop a floating object to merge it
with the layer. Many operations
automatically drop (or merge) the
floating object back to its parent layer.
When you save a document to RIFF
format, Corel Painter preserves all
floating objects. However, saving a
document to a non-RIFF file format
automatically drops floating objects
onto their parent layers.
To create a floating object:
1Make a selection on a layer using a
selection tool.
2Do one of the following:
• Click the selection with the
Layer Adjuster tool .
•Choose Select menu > Float.
The floating object appears as an
item below the parent layer on the
Layers palette.
To reposition a floating object:
1On the Layers palette, select the
floating object.
2Do one of the following:
• In the document window, drag
the floating object to the new
location with the Layer
Adjuster tool.
• Press the arrow keys to move
the floating object one pixel at a
time.
To drop a floating object:
1On the Layers palette, select the
floating object.
2Click the Layer Commands button
, and choose Drop.
Adding Drop Shadows
Adding shadows to a layer’s content
can enhance the appearance of an
image. You can add a drop shadow to
a single layer or to a group.
Drop shadows are also helpful for
developing Image Hose nozzles. For
more information, refer to “Preparing
Images” on page 341.
When you add a drop shadow, Corel
Painter creates a new layer for the
shadow and groups it with the
original. This enables you to select
and modify the drop shadow layer
independently from the original layer.
To add a drop shadow:
1Select a layer (or group).
2Choose Effects menu > Objects
> Create Drop Shadow.
3In the Drop Shadow dialog box,
type values in the following boxes:
•X-Offset and Y-Offset—the
distance, in pixels, from the
center of the layer image to the
shadow.
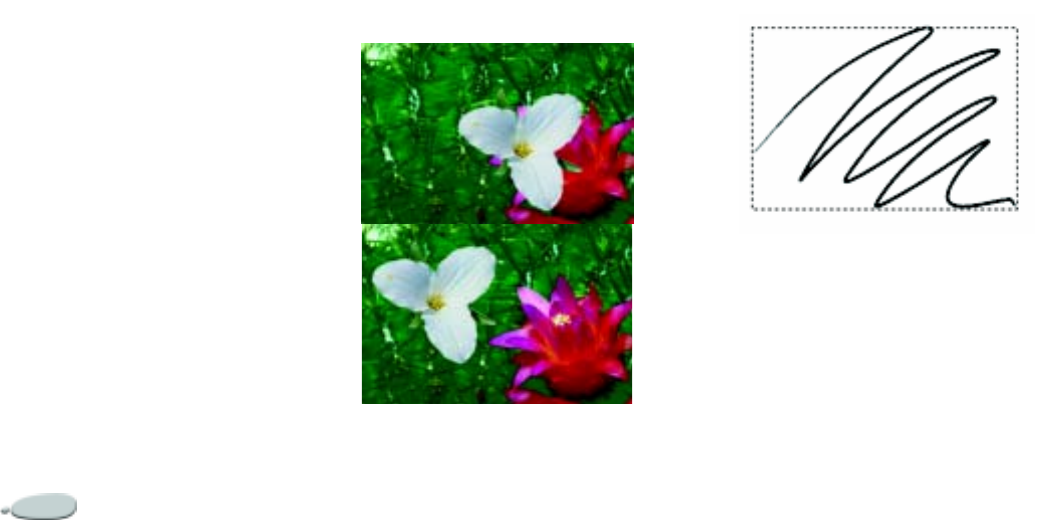
Using Layers and Layer Masks244
•Opacity—the degree to which
the shadow covers underlying
imagery. Setting opacity to
100% obscures underlying
imagery; lower values create a
more transparent shadow.
•Radius—the amount of blur at
the edge of the shadow. The
radius is half the distance
across the blurred region. If you
set Radius to zero, you create a
sharp-edged shadow.
•Angle—the direction of the
blur.
•Thinness—the amount of blur
applied perpendicular to the
Angle. If a blur shows streaks,
increase Thinness to soften it.
If you want to merge the drop
shadow layer with the image layer,
enable the Collapse to One Layer
check box.
Creating Patterns on Layers
You can use the same pattern-making
techniques on layers as you do on the
canvas. However, a pattern’s wrap-
around features do not apply to layers.
This is because the canvas has edges,
but layers do not—they are unlimited
in size. If you shift a pattern on a layer,
the pattern does not wrap around.
Refer to “Using Patterns” on page 66
for more information.
Moving Layers
When a layer is selected, you can
move its content anywhere in the
document to create a new image
layout.
Repositioning layer content helps you achieve the
optimal image composition quickly and easily.
Think of a layer’s content as being
contained by an invisible bounding
box. This bounding box is a rectangle
that marks the left, right, top, and
bottom edges of the layer’s content.
When you move or align a layer, you
work with the dimensions and
position of this bounding box, not the
entire area of the layer. This allows
you to easily position the contents of a
layer in relation to the canvas.
This layer contains a brush stroke. The content
area is defined by an invisible bounding box.
The layer indicators provide a visual
representation of the bounding box.
Refer to “Showing Layer Indicators”
on page 236 for more information.

Corel Painter 245
To move a layer:
1On the Layers palette, select the
layer (or group) you want to move.
2Choose the Layer Adjuster tool
from the toolbox.
3In the document window, drag the
selected layer.
To nudge a layer:
1On the Layers palette, select the
layer (or group) you want to move.
2Press the arrow keys to move the
selected layer one pixel at a time.
To move a layer to a specific
location:
1On the Layers palette, select a layer
or group.
2Do one of the following:
• Click the palette menu arrow,
and choose Layer Attributes.
• For pixel-based layers and ref-
erence layers, double-click the
item on the Layers palette, or
select an item and press Return
(Mac OS) or Enter (Windows).
3In the Layer Attributes dialog box,
type values in the following boxes:
•Top—distance in pixels from
the top edge of the canvas to
the top edge of the layer’s con-
tent. Increase to move the layer
down, or decrease to move the
layer up.
•Left—distance in pixels from
the left edge of the canvas to
the left edge of the layer’s con-
tent. Increase to move the layer
to the right, or decrease to move
the layer to the left.
Note
•
If you use negative values, or values
larger than the canvas dimensions, the
layer is placed partially or wholly outside
the canvas.
Aligning Layers
You can align layers horizontally or
vertically.
To align layers, the following steps are
performed:
• Corel Painter calculates the
“destination” point for the
alignment procedure.
For example, if you align layers to
the left, the destination is the left-
most point of all selected layers. If
you align horizontally to the
center, the destination is the
midpoint between the left-most
edge and the right-most edge of
the selected layers.
• Corel Painter aligns the
corresponding edge of each
selected layer’s bounding box to
the destination point.
For example, if you align layers to
the left, Corel Painter moves each
layer so that the left edge of its
bounding box lines up with the
destination point. If you align
horizontally to the center, Corel
Painter moves each layer so that
the horizontal midpoint of its
bounding box lines up with the
destination point.
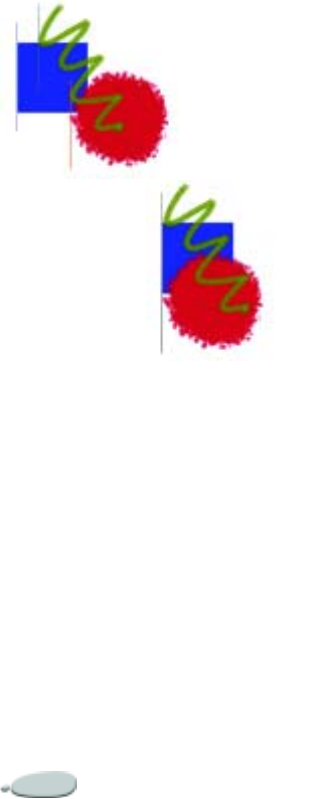
Using Layers and Layer Masks246
The left edge of the square is the left-most point of
all the layers (top). The layers are aligned
horizontally to the left so that all the layers line
up with the left-most point (bottom).
To align layers:
1Select the layers (or groups) you
want to align.
2Choose Effects menu > Objects
> Align.
3In the Align Shapes dialog box,
enable any of the following
Horizontal options:
•Left aligns the left edges of the
layers’ content.
•Center aligns the midpoints of
the layers’ content horizontally.
•Right aligns the right edges of
the layers’ content.
•None preserves the existing
horizontal alignment.
4Enable any of the following
Vertical options:
•Top aligns the top edges of the
layers’ content.
•Middle aligns the midpoints of
the layers’ content vertically.
•Bottom aligns the bottom edges
of the layers’ content.
•None preserves the existing
vertical alignment.
Working with Reference
Layers
Reference layers get their image
content from an external source—
either a pixel-based layer in the
current document or a separate file.
They provide a low resolution
representation of the original image
that you can quickly manipulate in
ways that would otherwise take
longer.
Working with a reference layer allows
you to transform (resize, rotate, slant)
a layer onscreen by dragging its
handles. You can adjust various
options. Transformations display in
the document window immediately.
When you’ve finished applying
transformations, commit the reference
layer back to a standard layer. Corel
Painter examines the source image to
restore the original resolution.
You cannot edit the image data in a
reference layer. If you try to paint on
or apply effects to a reference layer,
Corel Painter prompts you to commit
it back to a pixel-based layer.
You can create a reference layer based
on an existing layer or by placing an
image. Refer to “Placing Files” on
page 35 for more information about
placing images.
To create a reference layer:
1Select a layer.
2Choose Effects menu >
Orientation >Free Transform.
The layer’s icon on the Layers
palette changes and an eight-

Corel Painter 247
handled box marks the boundary
of the layer’s contents in the
document window.
To resize a reference layer:
1Select a reference layer.
2Do one of the following:
• Drag a corner handle to resize
the layer in two directions at
once. If you want to maintain
the layer proportions, hold
down Shift as you drag. The
pointer changes as you position
it over a handle .
• Drag a side handle to resize the
layer in one direction only.
To rotate a reference layer:
1Select a reference layer.
2Hold down Command (Mac OS)
or Ctrl (Windows), and drag a
corner handle. The pointer
changes as you position it over a
corner handle .
To skew a reference layer:
1Select a reference layer.
2Hold down Command (Mac OS)
or Ctrl (Windows), and drag a side
handle. The pointer changes as
you position it over a side
handle .
To set reference layer options:
1Select a reference layer.
2Choose Effects menu >
Orientation > Set Transform.
3In the Set Transform dialog box,
adjust any of the following
settings:
•Retain Alpha—works with
placed images to retain the
file’s alpha channel. When the
image is placed, the channel
becomes the layer mask. Dis-
able this option to discard the
channel.
•Horizontal and Vertical—the
scaling relationship between
the reference layer and the
source layer. If the scaling is
low, 33% for example, and you
increase it, Corel Painter refers
to the source layer to get more
pixel data.
•Constrain Aspect Ratio—
maintains the proportions of
the image. Disable this option
to distort the image propor-
tions.
•Rotation and Slant—rotate or
slant the layer based on an orig-
inal position of 0°. Enter posi-
tive values to rotate/slant the
layer counter-clockwise; enter
negative values to rotate/slant
the layer clockwise.
•Fast—sets a high sampling
ratio to produce a low resolu-
tion reference layer. A low reso-
lution reference layer contains
less information, so it can be
transformed quickly.
•Clean—sets the sampling ratio
at 1 to 1 to produce a reference
layer of the highest possible res-
olution—up to that of the
source. This shows a better
image as you work, but takes
much longer to calculate trans-
formations.
Notes
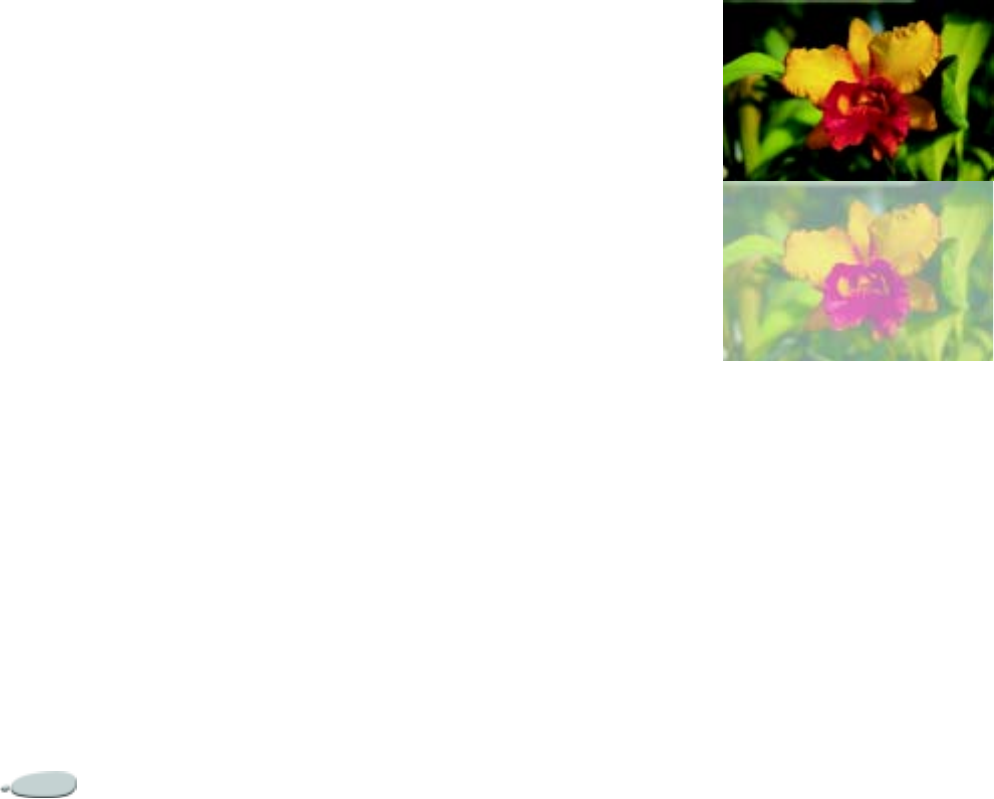
Using Layers and Layer Masks248
•
The Quality setting (Fast or Clean)
applies only to the quality of the reference
layer. When you convert a reference layer to
a pixel-based layer, Corel Painter
resamples the original image to produce the
best possible resolution.
•
Reference Image shows the pixel
dimensions of the original image. This is
static information—you can’t change the
Reference Image values.
To commit a reference layer:
1Select a reference layer.
2Choose Effects menu >
Orientation > Commit
Transform.
The conversion process might take
a few seconds, depending on the
size and quality of the layer.
Changing Layer
Characteristics
Setting Layer Opacity
You can adjust a layer’s opacity to
create different levels of transparency.
The opacity slider covers a range of
0% (completely transparent) to 100%
(completely opaque).
To change a layer’s opacity:
1Select the layer you want to
change.
2On the Layers palette, do one of
the following:
• Move the Opacity slider.
• Type a percentage in the Opac-
ity box and press Return (Mac
OS) or Enter (Windows).
The top example shows the background layers at
100% opacity. The bottom example shows them
at 50% opacity.
Blending Layers Using
Composite Methods
A layer’s composite method controls
how it interacts with the underlying
image. You can change composite
methods to create special effects
without changing the actual images
that make up a document.
Corel Painter provides two types of
composite settings:
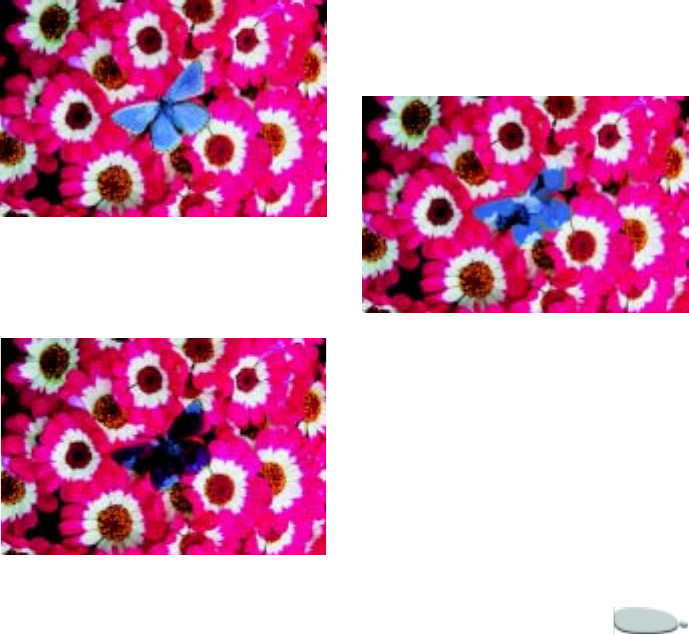
Corel Painter 249
•Composite Method sets the
standard composite method.
•Composite Depth controls how a
layer’s image data interacts with
depth information on the canvas
and other layers.
For example, if the canvas contains
Impasto brush strokes, the Composite
Depth setting determines what
happens when these brush strokes
intersect with brush strokes on the
layer.
Refer to “Blending Impasto with
Other Layers” on page 141 for more
information about Composite Depth
options.
You can set a different composite
method for every layer in a document.
Keep in mind the role of the
underlying image in creating an
effect—you might achieve an
unexpected result if the underlying
image is solid black or white.
The best way to understand the
different composite methods is by
seeing them in action. Quickly cycle
through a layer’s composite methods
to create new and interesting versions
of your image.
The available composite methods are:
Default
In the Default method, the layer
covers (hides) the underlying image.
Gel
The Gel method tints the underlying
image with the layer’s color. For
example, a yellow layer gives the
underlying image a yellow cast.
Corel Painter automatically sets a
layer’s composite method to Gel if you
paint on it with a brush that uses the
Buildup method.
Colorize
The Colorize method replaces the hue
and saturation of the canvas pixels
with the hue and saturation of the
layer pixels.
You can use this feature to convert a
color image to grayscale, or a grayscale
image to color. A black layer turns the
underlying color image into a
Using Layers and Layer Masks250
grayscale image. A colored layer adds
color to an underlying grayscale
image.
Reverse-Out
In the Reverse-Out method, the layer
inverts the colors beneath it. Reverse-
Out is a great way to remove text.
Place a layer over black text to turn it
white.
A color’s inverse, also known as its
complementary color, is the color on
the opposite side of the color wheel.
With Reverse-Out, the colors in the
layer are ignored; the layer content
becomes transparent and reveals the
inverse of the colors beneath it.
Shadow Map
Shadow Map blocks light, letting you
create shadows without changing the
image.
Magic Combine
In the Magic Combine method, the
layer is combined with the underlying
image based on luminance. The parts
of the layer that are lighter than the
underlying image are visible. The
parts that are darker are replaced by
the lighter area of the underlying
image.
One way to use this method is to fill
text. With a photograph as the top
layer and black text as the underlying
image, choosing Magic Combine fills
the text with the image.
Pseudocolor
The Pseudocolor method translates
the layer’s luminance into hue. You
can use this method to turn a
grayscale layer into a spectrum of
color.
Corel Painter 251
Normal
The Normal method works like the
Default method; the layer covers the
underlying image. The Normal
method is the default mode in
Photoshop.
Dissolve
Dissolve combines the image color
with the layer color based on opacity.
Multiply
Multiply combines colors to create a
darker color.
Screen
Screen combines colors to create a
lighter color.
Overlay
Overlay combines colors while
preserving the highlights and shadows
of the image color.
Soft Light
Soft Light darkens or lightens colors
depending on the luminance of the
layer color.
Using Layers and Layer Masks252
Hard Light
Hard Light multiplies or screens
colors, depending on the luminance of
the layer color.
Darken
Darken takes the darker of the image
and the layer color and uses that color.
Lighten
Lighten takes the lighter of the image
or layer color and uses that color.
Difference
Difference subtracts one color from
the other, depending on which color
has a greater brightness value.
Hue
Hue creates a color by combining the
luminance and saturation of the
image color with the hue of the layer
color.
Saturation
Saturation creates a color by
combining the luminance and hue of
the image color with the saturation of
the layer color.
Corel Painter 253
Color
Color creates a new color by
combining the luminance of the
image color with the hue and
saturation of the layer color.
Luminosity
Luminosity creates a new color from
the hue and saturation of the image
color and the luminance of the layer
color. This is the opposite of Color.
GelCover
The GelCover method uses a
combination of the Default method
and the Gel method. The edges of the
layer’s content tint the underlying
image with their color (the Gel
method). The rest of the layer covers
the underlying image (Default
method).
To change a layer’s composite
method:
1Select a layer.
2On the Layers palette, choose a
composite method from the
Composite Method pop-up menu.
Other Layer Options
The Layer Attributes dialog box
contains options for setting different
layer attributes. You can change a
layer’s name, adjust its position,
specify image map information, and
record notes.
“Naming Layers” on page234 gives
instructions for how to change a
layer’s name.
“Moving Layers” on page 244 gives
instructions for moving a layer to a
specific location.
An image map is a Web feature that
lets you assign a URL to a layer. When
the file is saved to JPEG or GIF
format, the user can link to the URL
by clicking the image-mapped region
of the file.
For more information about creating
image maps, refer to “Client-Side
Image Mapping” on page 406.
To record notes for a layer:
1Select a layer (or group).
2Do one of the following:
• Click the palette menu arrow
on the Layers palette, and
choose Layer Attributes.
• For pixel-based layers and ref-
erence layers, double-click the
item on the Layers palette, or
select an item and press Return
(Mac OS) or Enter (Windows).
•Choose Layers menu > Layer
Attributes.
3Type in the Note box.
Using Layers and Layer Masks254
Note
•
You cannot record notes for a layer if
you enable the WWW Map Clickable
Region check box for image mapping.
Using the Image Portfolio
The Image Portfolio is a convenient
place to store images you want to use
again.
To display the Image Portfolio
palette:
•Choose Window menu > Show
Image Portfolio.
If the Image Portfolio palette is not
expanded, click the palette arrow.
To add an item to the Image
Portfolio:
1Select a layer.
2Do one of the following:
• To cut the layer from the cur-
rent document, drag it to the
Image Portfolio palette using
the Layer Adjuster tool .
• To copy the layer, hold down
Option (Mac OS) or Alt (Win-
dows), and drag it to the Image
Portfolio palette using the
Layer Adjuster tool.
3In the Save Image dialog box, type
a name in the Save As box.
Note
•
The Image Portfolio holds only pixel-
based layers. If you want to add a shape,
Water Color, Liquid Ink, or dynamic layer
to the Image Portfolio, you must first
convert it to a default layer.
To use an image from the Image
Portfolio:
•Drag an item from the Image
Portfolio palette to the document
window.
Corel Painter places the image portfolio item in a
new layer.
Using Image Portfolio
Libraries
You can create your own Image
Portfolio libraries to organize layers by
category. When you’re creating a
library, keep in mind that the smaller
the library, the easier it will be to see
its contents at a glance.
The Image Mover command on the
Image Portfolio palette menu lets you
move items between Image Portfolio
libraries.
For more information about moving
items between libraries, refer to
“Libraries and Movers” on page 23.
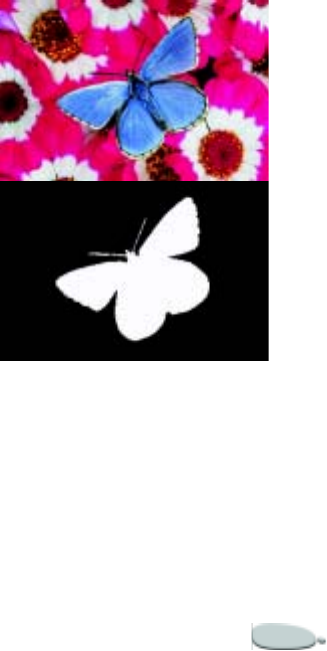
Corel Painter 255
Working with Layer Masks
You can create a layer mask to define
what areas of a layer are visible in the
document window.
Masking originated as a technique for
creating color separations, where
sheets of masking material were hand-
cut to define the color regions in an
image. In the Corel Painter digital
workspace, the layer mask is a
powerful tool for controlling image
composition and effects.
Layer Masks vs. Channels
A layer mask is similar to an alpha
channel. Both are grayscale images
that you can create and edit. Although
the Channels palette provides access
to both channels and layer masks,
their characteristics and functions are
different:
• The canvas can have up to 32
alpha channels; each layer can
have at most one layer mask.
• Channels don’t influence the
visibility of the canvas image; a
layer mask defines what areas of a
layer’s image are visible.
• An alpha channel, when loaded,
protects designated areas of an
image; a layer mask does not
provide protection.
• A channel is enabled by loading it
to a selection; a layer mask can be
enabled and disabled at any time.
For more information about channels,
refer to “Understanding Alpha
Channels” on page 219.
Creating Layer Masks
A layer mask is a grayscale image.
Where the mask is white, the layer
content is visible; where the mask is
black, the layer is transparent,
revealing the imagery below it.
Intermediate levels of gray are
partially transparent.
You can create a new, blank layer
mask, or you can create a layer mask
based on the layer’s transparency. A
layer mask based on transparency is
white wherever the layer has content,
and black in other areas. For more
information about layer transparency,
refer to “Preserving Layer
Transparency” on page 241.
You can also copy a channel to a layer
mask.
A layer mask for the butterfly layer is created
based on its transparency. Black areas are
transparent; white areas reveal the image.
To create a new, blank layer mask:
1Select a layer.
2Do one of the following:
Using Layers and Layer Masks256
• On the Layers palette, click the
Create Layer Mask button .
•Choose Layers menu > Create
Layer Mask.
The layer mask icon displays
next to the layer name on the
Layers palette.
To create a layer mask based on
transparency:
1Select a layer.
2Choose Layers menu > Create
Layer Mask from Transparency.
The layer mask icon displays
next to the layer name on the
Layers palette.
Notes
•
You can create layer masks based on
transparency for pixel-based layers only.
Other layers must first be converted to
default layers.
•
Earlier versions of Corel Painter used
layer visibility masks. If you have a file
with a modified visibility mask that was
created with an earlier version of Corel
Painter, use this procedure to load the
visibility mask to a layer mask.
To copy a channel to a layer mask:
1Align the layer with the portion of
the channel you want.
2Select the layer on the Layers
palette.
3Click the Create Layer Mask
button.
A blank layer mask is created.
4On the Channels palette, select the
channel you want to copy.
5Click the palette menu arrow, and
choose Duplicate.
6In the Duplicate Channel dialog
box, choose the layer mask from
the Destination pop-up menu.
Corel Painter copies to the layer
mask the portion of the channel
that coincides with the layer
content.
Selecting and Viewing Layer
Masks
Before you work with a layer mask,
you must select it. You can also view a
layer mask as a grayscale image.
Selecting a layer mask and viewing it
are distinct operations—you can select
a layer mask without viewing it.
To select a layer mask:
1On the Layers palette, choose a
layer that has a layer mask.
The layer mask is displayed on the
Channels palette.
2Do one of the following:
• On the Channels palette, click
the layer mask.
• On the Layers palette, click the
layer mask icon next to the
layer name.
To view a layer mask:
1Select a layer with a layer mask.
2On the Channels palette, click the
layer mask.
In this mode, the RGB image is
hidden.
To hide a layer mask:
•Click the eye icon next to the layer
mask item to close the eye.
Managing Layer Masks
You can copy a layer mask to an alpha
channel.

Corel Painter 257
If you’ve finished working with a layer
mask, you can delete it. You can also
clear a layer mask without deleting it,
leaving you with a blank mask.
The layer mask is a grayscale image.
By inverting it, you can make dark
pixels light, and light pixels dark.
You can disable a layer mask, which
lets you view the entire layer. The
layer mask can be re-enabled at any
time.
If you like the result of a layer mask,
you can apply it. This permanently
removes the hidden parts of the layer
and deletes the layer mask.
Although a layer mask does not
protect areas of a layer from being
edited, you can load a layer mask to a
selection. The selection provides
protection to the hidden parts of the
layer. For more information about
selections, refer to “Working with
Selections” on page203.
The name of a layer mask on the
Channels palette reflects the name of
the layer (Layer Name Layer Mask).
Although you cannot change the
name of a layer mask, it automatically
updates if you change the layer name.
When you move a layer, Corel Painter
also moves the layer mask to maintain
the pixel correspondence.
To copy a layer mask to a channel:
1Select a layer mask.
2On the Channels palette, click the
palette menu arrow, and choose
Duplicate.
3In the Duplicate Channel dialog
box, choose New from the
Destination pop-up menu.
Tip
•
You can also copy to an existing
channel, which replaces that channel. To
do this, choose the channel to be replaced
from the Destination pop-up menu.
To delete a layer mask:
1Select a layer mask.
2Do one of the following:
• On the Channels palette, click
the palette menu arrow, and
choose Delete.
• Click the Delete button at
the bottom of the Channels
palette.
•Choose Layers menu > Delete
Layer Mask.
To clear a layer mask:
1Select a layer mask.
2On the Channels palette, click the
palette menu arrow and choose
Clear.
To invert a layer mask:
1Select a layer mask.
2On the Channels palette, click the
palette menu arrow and choose
Invert.
To disable a layer mask:
1Select a layer mask.
2Choose Layers menu > Disable
Layer Mask.
A red ‘X’ is displayed over the layer
mask icon.
To enable a layer mask:
1Select a layer mask.
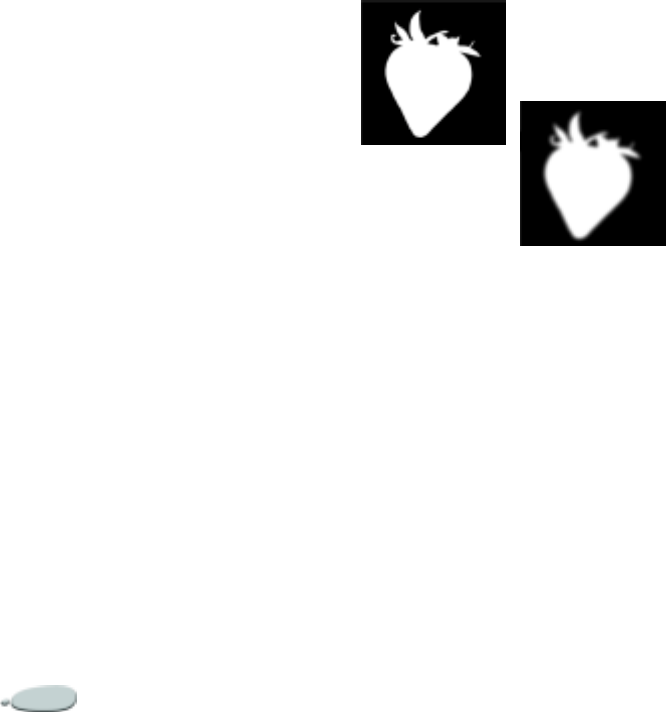
Using Layers and Layer Masks258
2Choose Layers menu > Enable
Layer Mask.
To apply a layer mask:
1Select a layer mask.
2Choose Layers menu > Apply
Layer Mask.
To load a layer mask to a
selection:
1On the Layers palette, select a layer
that has a layer mask.
2 Control+click the layer mask icon
(Mac OS) or right-click the layer
mask icon (Windows), and choose
Load Layer Mask to Selection.
Editing Layer Masks
When you select a layer mask, you can
edit it as you do a channel. You can
paint in a layer mask; apply effects to
it; fill it with a color, pattern, gradient,
or weave; and feather it. You do not
have to view a layer mask to edit it;
you can select the layer mask, make
changes to it, and view the resulting
image immediately.
For information about editing layer
masks, refer to “Editing Channels” on
page 225.
A layer mask before and after feathering
When you edit a layer mask, you are
making modifications to the mask,
and not to the layer’s image. You can
use shades of gray only; no colors are
available. This is because the layer
mask is a grayscale image, separate
from the RGB image.
The paint and effects you apply to a
layer mask are reflected as follows:
• Applying white removes from the
mask, which reveals more of the
layer.
• Applying black adds to the mask,
which conceals more of the layer.
• Applying an intermediate gray
value makes the mask semi-
transparent.
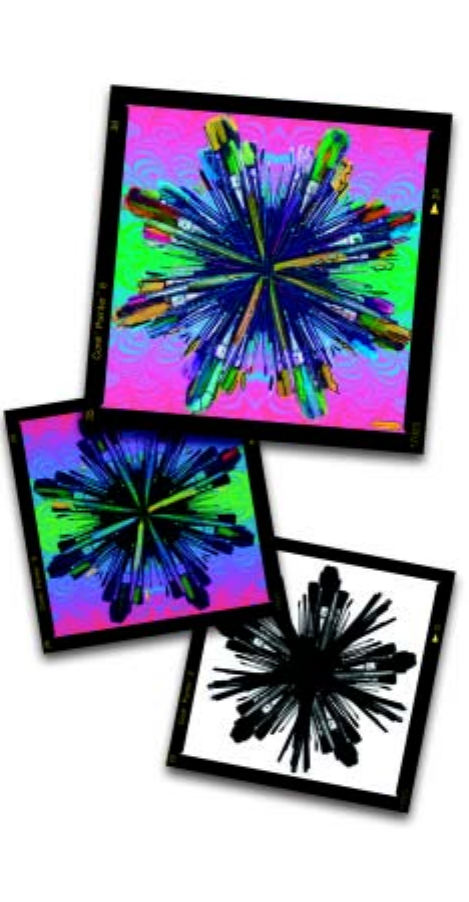
15
Using Image Effects
The Corel Painter image effects let
you do everything from correcting
colors to retouching images to creating
a completely new image from a
source.
The effects range from practical tools,
like the orientation, tonal control and
focus effects, to artistic expressions,
like embossing, color overlay, Van
Gogh, and posterize.
Traditional artistic methods inspire
many of the Corel Painter effects.
In some cases, effects involve using
other Corel Painter features such as
clones, special brushes, or layers.
You’ll find most of the information
you’ll need to use an effect contained
in this chapter. However, where you
need more detailed information about
a specific Corel Painter feature, a
cross-reference is provided.
Basics of Applying Effects
You apply most of the Corel Painter
effects in the same manner:
• Select where to apply the effect.
• Choose a specific effect.
• Set effect options and click OK to
apply it to your image.
Each effect can have several options
and parameters that might require
you to use other features such as
selections, layers, colors, paper
textures, and gradients.
In addition to working with other
palettes, you can get the most out of
the effects if you understand more
about application methods and the
Fade feature.
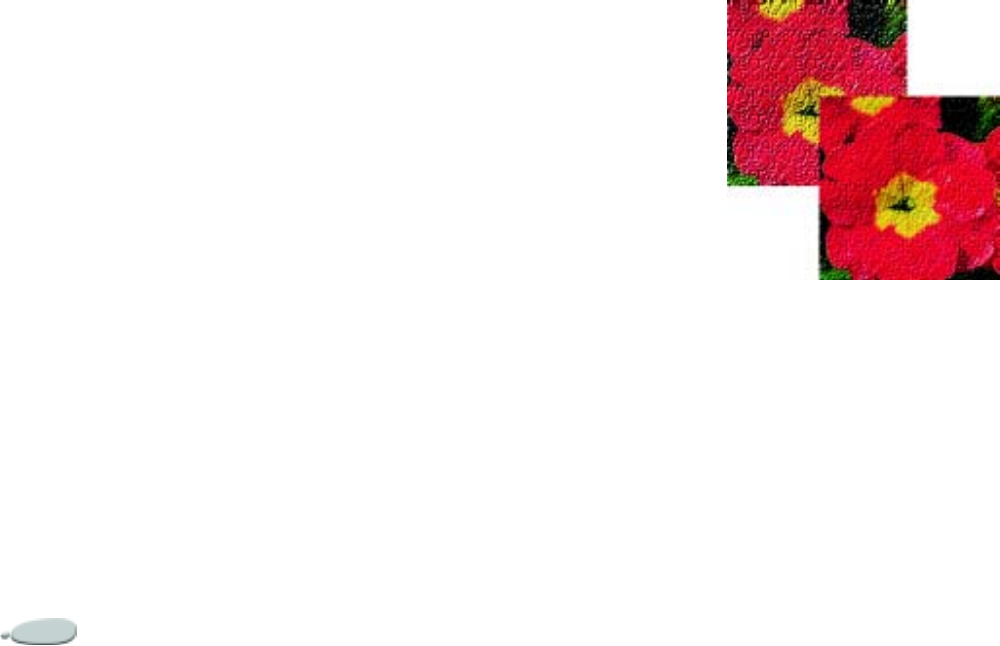
Using Image Effects260
Selecting Where to Apply
Effects
You can apply special effects to a
selection, a layer, or the entire image.
• If there is no selection, the effect is
applied to the entire image.
• If you want to apply an effect to a
region of the Canvas, select that
area before choosing an effect
command. You can use any of the
selection tools, including the
Rectangular Selection tool, the
Oval Selection tool, the Lasso, and
the Magic Wand. For more
information about these tools, refer
to “Creating Selections” on
page 206.
• If you want to apply an effect to a
layer, select that layer before
choosing an effect. Corel Painter
applies the effect to the entire layer.
For more information about
selecting a layer, refer to “Selecting
Layers” on page 235.
• If you apply an effect to a shape,
dynamic layer, or reference layer,
you must first commit the layer to
an image layer.
Effects and Open Palettes
You can change settings such as colors,
papers, patterns, and gradients while
you experiment with an effect. To do
this, you need to display all required
palettes before choosing an effect. For
example, the Color Overlay effect
combines the selected paper texture
and primary color to define the
overlay. If the Papers and Color
palettes are open when you choose the
effect, you can change paper grains
and colors to create different overlays
before applying the effect to your
image. Any changes in the paper or
color appear in the preview window in
the Color Overlay dialog box. You can
move effects dialog boxes around on
your screen, if necessary, for full access
to other palettes.
Using Fade with Effects
The Fade command lets you undo a
percentage of the last effect applied to
the image. You can use this feature to
control the intensity of an effect.
Use the Fade dialog to undo a percentage of
your last effect.
To experiment with fade:
1Open a new document.
2Paint a colorful image or fill it with
a pattern.
3Choose an effect, adjust the
settings, and click OK to apply the
effect.
4Choose Edit menu > Fade.

Corel Painter 261
5In the Fade dialog box, drag the
slider.
The image in the preview window
changes.
6When you are satisfied with the
settings, click OK to apply the
effect.
If you change your mind, choose
Edit menu > Undo.
Recently Used Effects
Commands
At the top of the Effects menu, Corel
Painter displays the last two effects
you applied. This lets you quickly re-
apply frequently used effects.
Tip
•
You can also use keyboard shortcuts to
apply the last two effects. Re-apply the last
effect by pressing Command+/ (Mac OS)
or Ctrl+/ (Windows). Re-apply the
second-last effect by pressing
Command+; (Mac OS) or Ctrl+;
(Windows).
About the Using Menu
Many of the Corel Painter effects
dialog boxes have a Using pop-up
menu that lets you specify a source, or
method. The source determines how
an effect is applied to different areas of
an image; a larger degree of change is
applied to light areas of the source,
and a smaller degree of change is
applied to dark areas. For example,
when you use the Paper method, the
effect is applied based on the light and
dark areas of the selected paper
texture.
The choices in the Using pop-up
menu vary between effects. They
include:
•Uniform Color
•Paper
• Image Luminance
• Original Luminance (clone
source)
•3D Brush Strokes
•Alpha channel or Layer mask
This option is available only if
your document has a channel or a
layer with a layer mask.
The sections explaining the different
effects describe these options.
In most cases, you can see the results
of choosing different options in the
Preview window of an effect’s dialog.
The best way to see how these options
affect your images is to try them.
Third-party Plug-ins
You can obtain additional effects by
using third-party plug-ins. Usually,
these are purchased separately. You
can access third-party plug-ins from
within Corel Painter using the Effects
menu.
For information on locating your
plug-ins for Corel Painter, refer to
“Using Plug-ins” on page 57. For
information about installing third-
party effects plug-ins, refer to “To
install an effects, acquire, or export
plug-in:” on page 58.
To use third-party plug-ins from
within Corel Painter:
1Select all or part of your image.
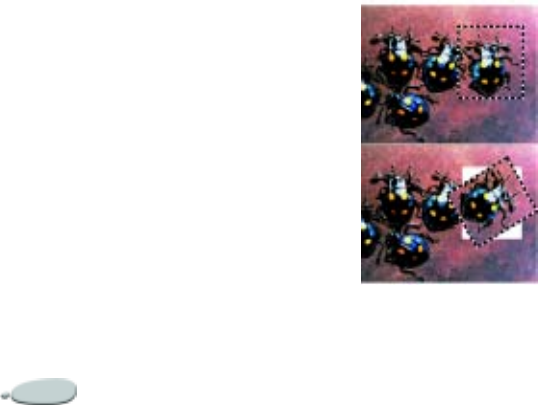
Using Image Effects262
2Choose Effects menu > Other >
Plug-in Filter and choose the
effect you want.
All third-party plug-ins are located
in submenus.
Note
•
Plug-ins that pertain to grayscale or
CMYK images are not supported.
Acquire/Export Plug-ins
You can use the Acquire or Export
commands in the File menu to
transfer images to and from supported
devices, such as scanners, film
recorders, and color printers.
Orientation Effects
You can change the orientation of part
or all of your image by rotating,
scaling to a larger or smaller size, or
flipping horizontally or vertically.
Images can also be distorted.
Corel Painter applies orientation
effects to layers only. Therefore, when
you rotate, scale, flip, or distort an
image or selection, Corel Painter first
converts it to a layer. The image or
selection remains a layer until you
merge it with the canvas. For more
information, refer to “Merging Layers
with the Canvas” on page 240.
Rotating Images
The Rotate effect lets you rotate all or
part of an image.
Sometimes the rotated layer does not
fit within the canvas area. You can
change the canvas size so you can see
the entire rotated image. For more
information, refer to “Resizing the
Canvas” on page 41.
You can rotate part of an image.
To rotate an image:
1Select a layer or area of the canvas.
If you want to rotate the entire
image, select nothing.
2Choose Effects menu >
Orientation > Rotate.
3Do one of the following:
• In the document window, drag
a corner handle of the selection.
The Rotate Selection dialog
box displays the rotated angle
in degrees.
• In the Rotate Selection dialog
box, specify the rotation angle
in degrees. A positive number
rotates counterclockwise; a
negative number rotates clock-
wise.
4Click OK to apply the effect.
Scaling Images
The Scale command lets you change
the dimensions of part or all of an
image.
To scale an image:
1Select a layer or area of the canvas.
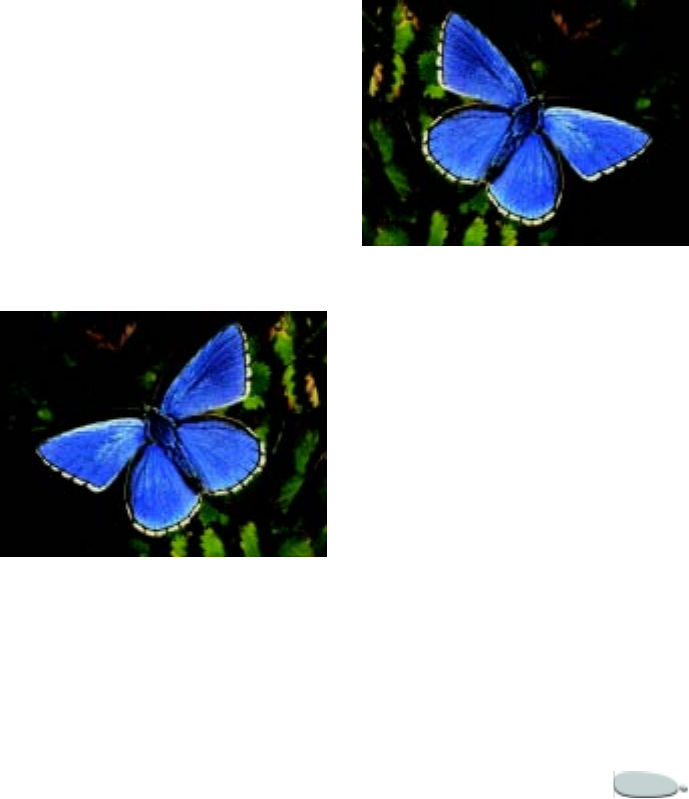
Corel Painter 263
If you want to scale the entire
image, select nothing.
2Choose Effects menu >
Orientation > Scale.
3Do one of the following:
• In the document window, drag
a handle of the selection. The
Scale Selection dialog box dis-
plays the horizontal and verti-
cal scale percentages.
• In the Scale Selection dialog
box, specify the horizontal and
vertical scale percentages.
4Enable any of the following
options:
•Constrain Aspect Ratio—
maintains the selection’s pro-
portions. Disabling this option
lets you change horizontal and
vertical measurements inde-
pendently.
•Preserve Center—enable this
option to keep the image or
selection anchored in its loca-
tion, based on the center of the
image.
5Click OK to apply the effect.
Flipping Images
You can flip all or part of an image
horizontally (from left to right) or
vertically (from top to bottom).
To flip an image horizontally:
1Select a layer or area of the canvas.
If you want to flip the entire image,
select nothing.
2Choose Effects menu >
Orientation > Flip Horizontal.
Original image
Image flipped horizontally
To flip an image vertically:
1Select a layer or area of the canvas.
If you want to flip the entire image,
select nothing.
2Choose Effects menu >
Orientation > Flip Vertical.
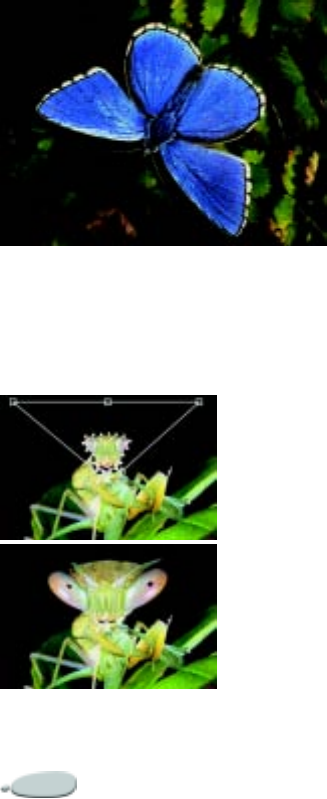
Using Image Effects264
Image flipped vertically
Distorting Images
You can distort all or part of an image.
Original image and part of the image distorted.
To distort an image:
1Select a layer or area of the canvas.
If you want to distort the entire
image, select nothing.
2Choose Effects menu >
Orientation > Distort.
3In the document window, drag any
of the selection handles to reshape
the selection.
4If you want to see a more accurate,
but slower, rendering of your
changes, enable Better (Slower) in
the Distort Selection dialog box.
Enabling this option is particularly
useful in highly distorted images.
5Click OK to apply the effect.
Free Transforming Images
The Free Transform, Set Transform,
and Commit Transform commands
work only with reference layers. Refer
to “Working with Reference Layers”
on page 246 for more on these
commands.
Correct Colors
Color correction lets you make
adjustments in the relative amounts of
the color components in an image.
Color correction is often used to
improve a color-casted or washed-out
scan. You can also use it to create
surreal color effects.
If a layer is selected, color correction is
applied only to the layer. If no layer is
selected, the entire image is color
corrected.
Color correction is based on adjusting
gamma response curves. You can
adjust the gamma curves for red,
green, blue, or all three color
components. The gray Master curve
controls all color components equally.
The curves describe how the input
color values are adjusted to create the
output (corrected) color values.
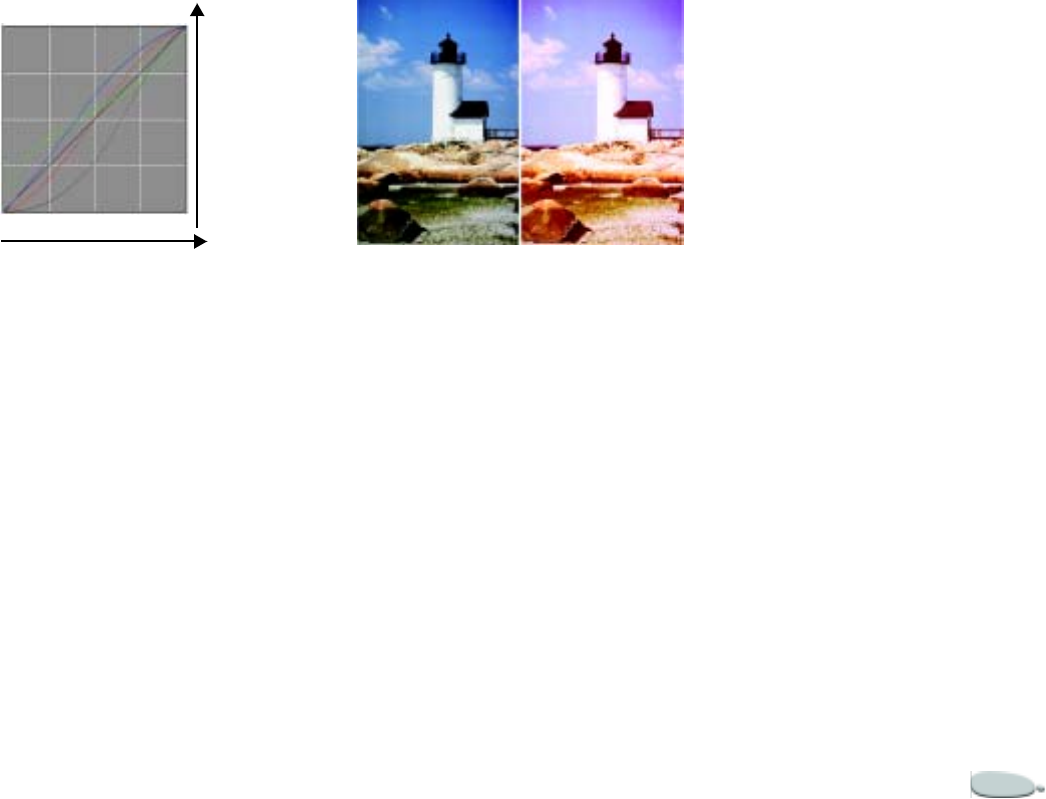
Corel Painter 265
A gamma curve.
The horizontal axis describes the
input values (original color values).
The vertical axis describes the output
values (corrected values).
Before you adjust a curve, it appears
perfectly diagonal (45 °), which
indicates that all input and output
values are equal.
Corel Painter maps light values at the
top of the graph and darker values at
the bottom.
When editing RGB curves, the
current color is indicated by a colored
point on the curve.
Use the Color Correction dialog to correct
colors.
The Color Correction dialog provides
access to four correction methods that
control how you adjust a gamma
curve:
• Contrast and Brightness
•Curve
• Freehand
•Advanced
You can use a single method or a
combination of methods to adjust the
image.
Correcting Colors Using
Contrast and Brightness
This method lets you adjust the
contrast or brightness of colors, while
maintaining the tonal transitions in
the original image.
You’ll notice that as you adjust the
Contrast or Brightness sliders, the end
points of the curves remain fixed.
That’s because the effect maintains
the levels from the original image.
You’ll always have 256 distinct levels,
regardless of how much you adjust the
sliders.
Contrast adjusts the difference
between light and dark values. As you
increase Contrast, the curve takes on
an “S” shape, indicating that light
colors are becoming lighter and dark
colors darker.
Original Color Values
Cor-
rected
Values
Light
Dark
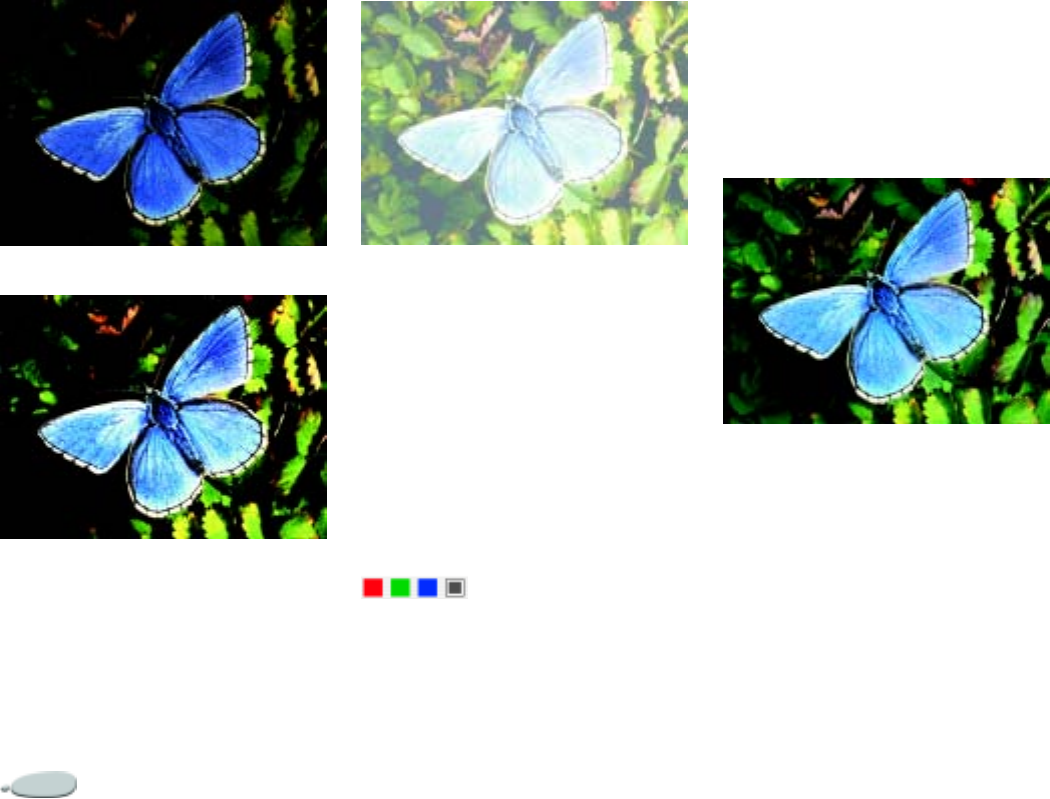
Using Image Effects266
Original image
Color correction using Contrast.
Brightness moves all values on a curve
to a brighter tone or darker tone.
Color correction using Brightness.
To correct colors using contrast
and brightness:
1Choose Effects menu > Tonal
Control > Correct Colors.
2In the Color Correction dialog box,
choose Contrast and Brightness
from the pop-up menu.
3For each color you want to adjust,
click the color icon and adjust the
Contrast and Brightness sliders.
Color icons in the Color Correction dialog box.
Tip
•
Click the gray Master icon to adjust all
color curves at once.
Correcting Colors Using
Curve
The Curve method lets you drag the
color curves to reshape them. This lets
you to create very specific changes in
color values.
Color correction using the Curve method.
You can control the overall effect of
your changes using the Effect slider.
The slider controls how much of the
curve moves in response to your
dragging. When the slider is all the
way to the right, the entire curve
moves. As the value is reduced, a
smaller portion of the curve moves.
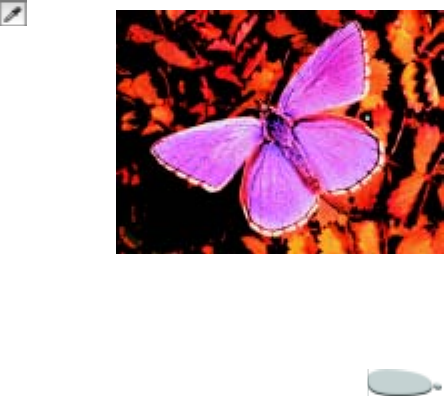
Corel Painter 267
To correct colors by reshaping
curves:
1Choose Effects menu > Tonal
Control > Correct Colors.
2In the Color Correction dialog box,
choose Curve from the pop-up
menu.
3For each color you want to adjust,
do the following:
• Click the color icon for the
curve you want to reshape.
• Adjust the position of the Effect
slider to set the intensity of your
changes.
• Move the pointer over the
curve and, when the pointer
changes to a pointing hand,
drag the curve.
Tip
•
If you want to reshape all color curves
at once, click the gray Master icon.
Equalizing Images using
Curve
Equalizing an image involves
increasing the contrast by resetting the
darkest and lightest points and then
evenly distributing the values across
those two points.
To automatically set black and
white points:
•Click the Auto Set button in the
Color Correction dialog.
To manually set black or white
points:
1Choose the Dropper tool from
the toolbox.
2In the document window, click the
color you want to assign as the
darkest or lightest point.
3Choose Effects menu > Tonal
Control > Correct Colors.
4In the Color Correction dialog box,
choose Curve from the pop-up
menu.
5Click one of the following:
•Black Point—Corel Painter
assigns all colors equal to or
darker than the current pri-
mary color to black.
•White Point—Corel Painter
assigns all colors equal to or
lighter than the current pri-
mary color to white.
Correcting Colors Using
Freehand
Freehand lets you draw the curve as
you want it. This method is
particularly useful when you want
posterized or solarized effects.
Color correction using the Freehand method.
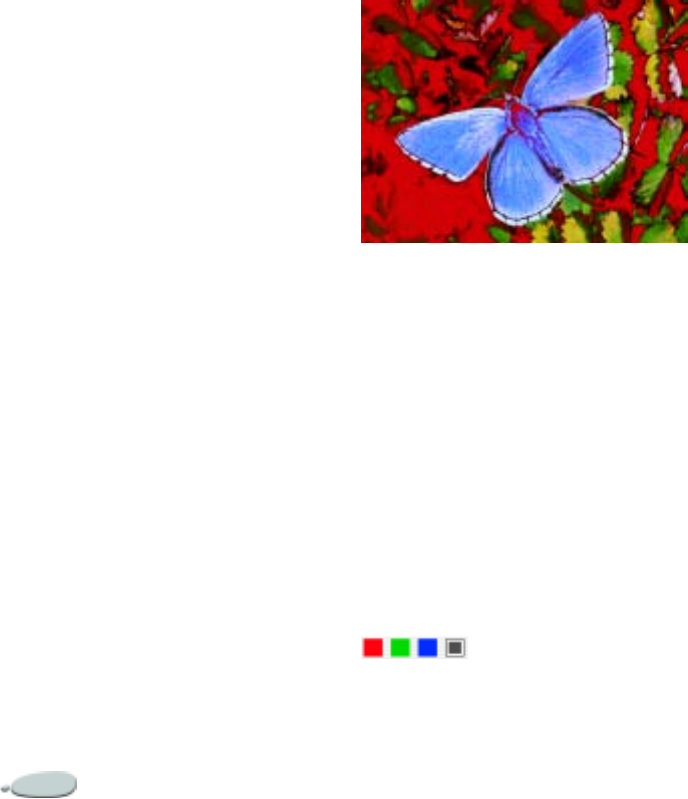
Using Image Effects268
To correct colors using the
Freehand method:
1Choose Effects menu > Tonal
Control > Correct Colors.
2In the Color Correction dialog box,
choose Freehand from the pop-up
menu.
3For each color you want to adjust,
do the following:
• Click the color icon.
• Move the pointer over the
graph and, when the pointer
changes to a pencil, drag to
draw a new curve.
Tip
•
If you want to redraw all color curves
at once, click the gray Master icon.
Correcting Colors Using
Advanced
The Advanced method allows you to
set the red, green, and blue curves
numerically at five points: Highlight,
1/4 Tone, Midtone, 3/4 Tone, and
Shadow. These points coincide with
the vertical grid lines.
Color correction using the Advanced method.
To correct colors using the
Advanced method:
1Choose Effects menu > Tonal
Control > Correct Colors.
2 In the Color Correction dialog
box, choose Advanced from the
pop-up menu.
3For each color you want to adjust,
do one of the following:
• Click the color icon and drag
the corresponding curve.
• Enter values in the boxes.
Color icons in the Color Correction dialog box.
Other Tonal Control
Effects
The Tonal Control commands in the
Effects menu let you adjust or alter
colors in an image.
Adjust Colors
The Adjust Colors effect lets you
control the hue, saturation, and value
of an image in much the same way as
you would adjust your television.
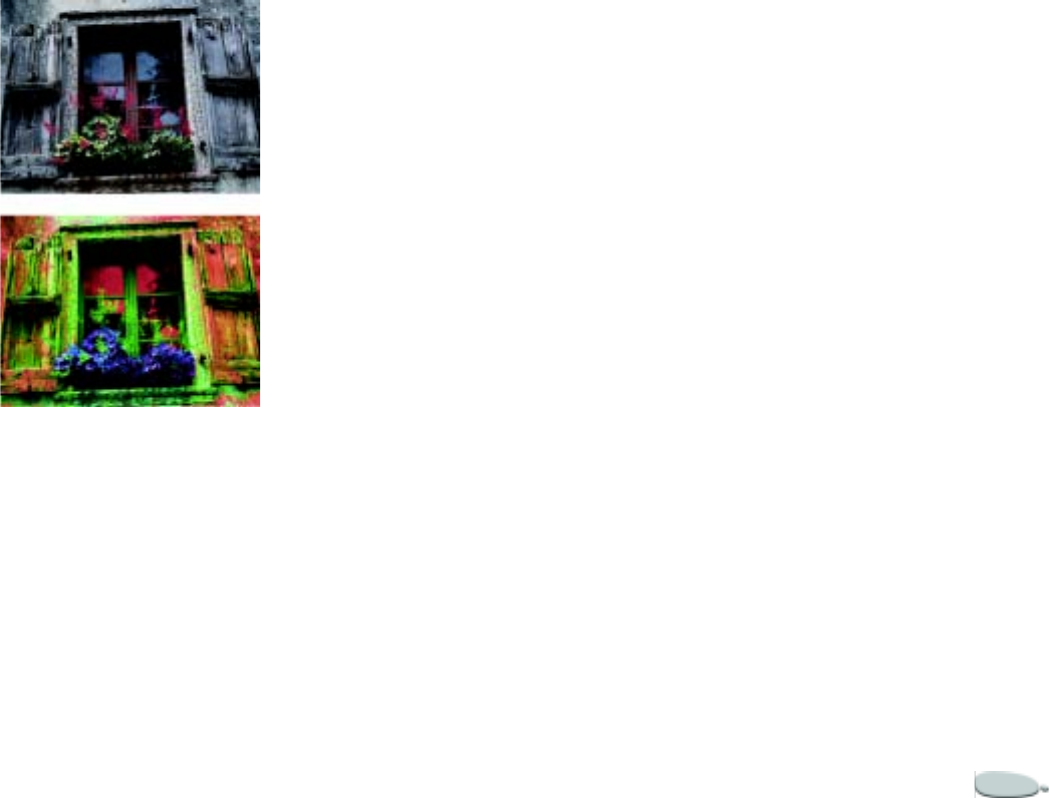
Corel Painter 269
Use the Adjust Color dialog to change the hue,
saturation, and value of an image.
To adjust colors:
1Select a layer or area of the canvas.
If you want to adjust colors in the
entire image, select nothing.
2Choose Effects menu > Tonal
Control > Adjust Colors.
3In the Adjust Color dialog box,
choose one of the following
methods from the Using pop-up
menu:
• Uniform Color adjusts all pix-
els equally.
• Paper uses the selected paper
grain to control the color
adjustment.
• Image Luminance uses the
luminance of the image as the
model for color adjustment.
Areas of greater luminance are
adjusted more.
• Original Luminance uses the
luminance of the clone source
as the model for color adjust-
ment. If you have not set up a
clone source, the current pat-
tern is used.
• [Alpha channel] or [Layer
mask] uses the selected alpha
channel or layer mask as the
model for controlling color
adjustment. For example, a
black-to-white gradation in the
channel or mask will allow you
to adjust the color progressively
across the image. Where the
channel or mask is black, colors
are not changed. Where the
channel or mask is white, the
adjustment applies fully. Tran-
sitional areas receive propor-
tional color adjustments.
4Adjust the sliders to control the
overall hue, saturation, and value
levels in the selection.
• Hue Shift adjusts the colors of
the pixels by changing their
hue. Moving the slider to the
right shifts the hue counter-
clockwise on the color ring.
• Saturation adjusts the amount
of pure hue in the color. Mov-
ing the slider all the way to the
left creates a grayscale image.
• Value adjusts color brightness.
Moving the slider to the left
darkens colors.
You can see changes in the Preview
window. You can drag in the
Preview window to see different
areas of the image.
If you want to return the image or
selection to the way it was, click
Reset. This resets all of the sliders.
5When you are satisfied with the
settings, click OK to apply the
effect.
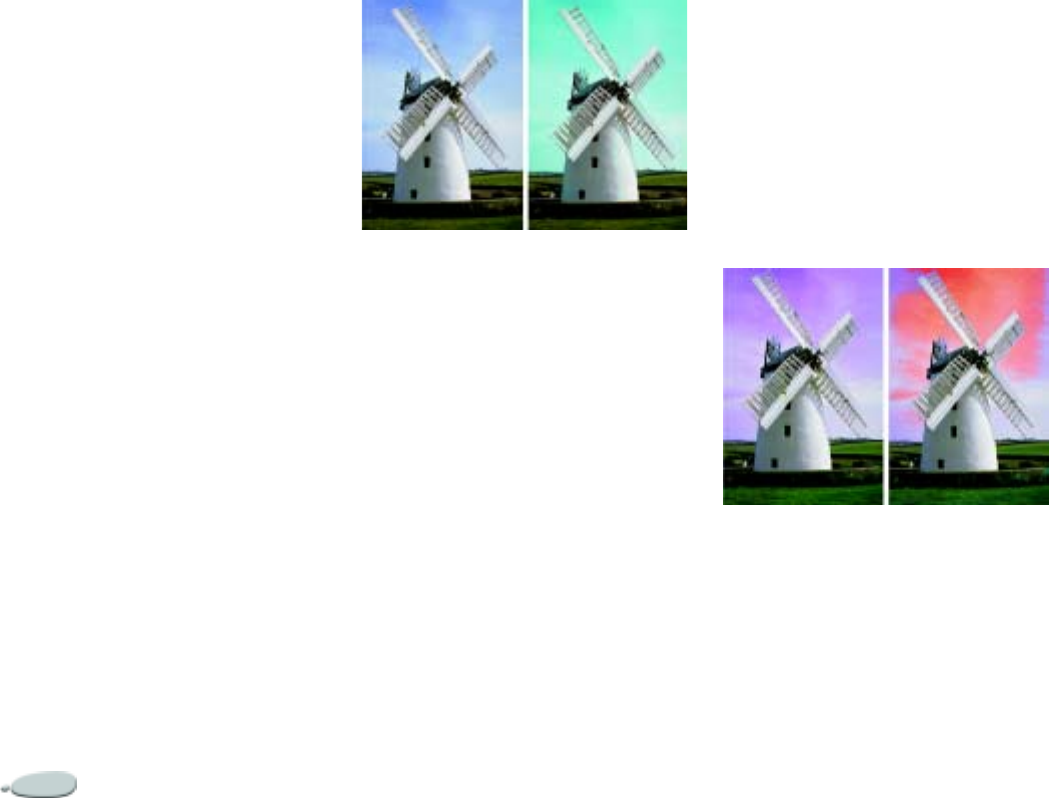
Using Image Effects270
Note
•
With all methods other than Uniform
Color, pixels assigned higher luminance
receive a greater color adjustment.
Adjust Selected Colors
Adjust Selected Colors is similar to the
Adjust Colors effect, but it works only
on a specified range of colors within
an image. You choose a color in an
image and adjust colors within a range
of that color. You could, for example,
turn yellow peppers to red peppers.
You can adjust colors that are exactly
the same as the color you select, or you
can choose colors within a range,
based on proximity (on the color
wheel or color space) to the selected
color.
Selective color adjustments change only certain
colors in the image.
The Extents sliders determine the
extent of the HSV color space around
the selected center color:
• H Extents controls the number of
hues adjusted. Only hues within
the specified percentage of hues on
the color wheel are adjusted.
• S Extents controls the range of
saturation adjusted. Only
saturations within this range are
adjusted.
• V Extents controls the range of
values adjusted.
By combining these three settings, you
can set up a very specific range of
colors to adjust. For example, you can
limit changes to a very specific shade
of red.
Feather affects the softness at the edge
of the selected colors. These sliders
can help you create smoother
transitions between the replaced color
and the original.
A replaced color with and without feathering.
The choice of methods is the same as
for Adjust Colors. For more
information, refer to “To adjust
colors:” on page 269.
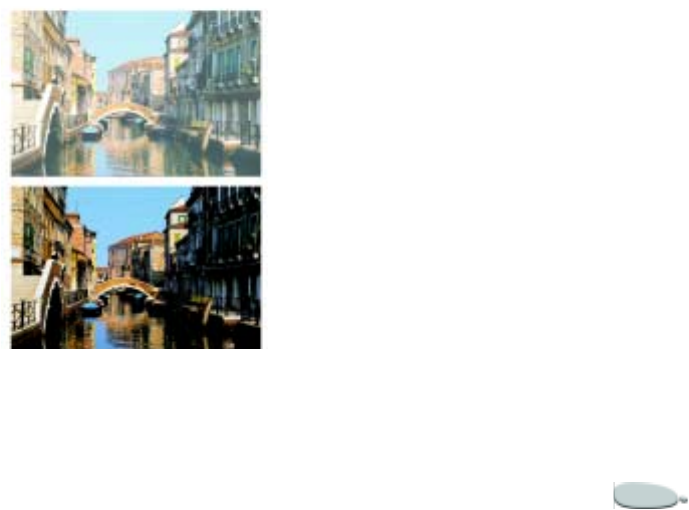
Corel Painter 271
To adjust a selected color:
1Choose Effects menu > Tonal
Control > Adjust Selected
Colors.
The Adjust Selected Colors dialog
appears.
2Move your cursor over the original
image in the image window (your
cursor becomes a dropper), and
click the color you want to adjust.
The Colors palette displays the
selected color as the primary color.
3Choose a method from the Using
pop-up menu to determine what
Corel Painter will use as the source
for the color adjustment.
4Adjust the Extents and Feather
sliders to select a range of colors to
adjust.
Move the Extents sliders to the
right to increase the amount of
color space affected by the effect.
5Adjust the bottom three sliders to
control the overall hue, saturation,
and value levels.
You can see changes in the Preview
window. You can drag in the
Preview window to see different
areas of the image.
If you want to reset the sliders to
the default settings, click Reset.
6When you are satisfied with the
settings, click OK to apply the
effect.
Brightness/Contrast
The Brightness/Contrast dialog
adjusts the brightness and contrast of
the overall image in RGB.
Before and after Brightness/Contrast.
You can also adjust brightness and
contrast as a function of dye densities
by adjusting the dye concentration.
Refer to “Dye Concentration” on
page 288 for more information.
To adjust RGB brightness and
contrast:
1Select a layer or area of the canvas.
If you want to apply the effect to
the entire image, make sure there
are no selections.
2Choose Effects menu > Tonal
Control > Brightness/Contrast.
The Brightness/Contrast dialog
appears.
3Drag the upper slider to adjust
image contrast. Drag the lower
slider to adjust image brightness.
The image is adjusted when you
release the mouse or stylus.
If you want to reset the sliders to
the default settings, click Reset.
4Click Apply.
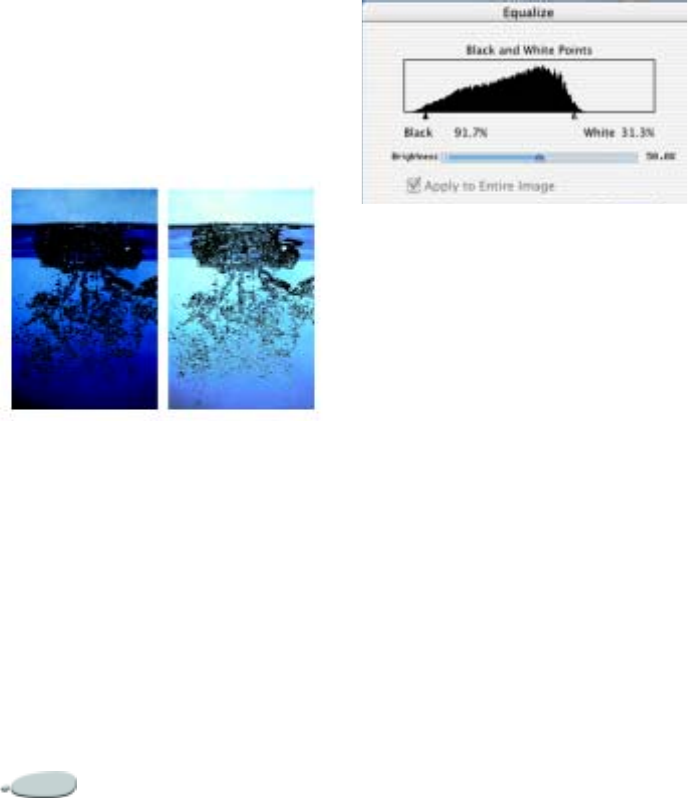
Using Image Effects272
Equalize
The Equalize effect improves
contrast, adjusting black and white
points and distributing the brightness
levels throughout the entire range of
available levels.
Before and after Equalize.
Corel Painter lets you equalize an
image by creating a histogram
showing the number of pixels for each
brightness level value and then
allowing you to adjust those values.
Equalize also allows gamma
adjustment, which lightens or darkens
an image without changing highlights
or shadows.
The histogram is represented by the silhouette.
Each peak shows the number of pixels for a
brightness level. You can adjust white and
black points by dragging the triangles.
To equalize colors:
1Select a layer or area of the canvas.
If you want to apply the effect to
the entire image, make sure there
are no selections.
2Choose Effects menu > Tonal
Control > Equalize.
Corel Painter automatically adjusts
the image or selection so that the
lightest color is white and the
darkest color is black.
3In the Equalize dialog box, adjust
contrast by dragging the black and
white markers under the
histogram.
Any values in the image located to
the right of the white marker
become white; any values to the
left of the black marker become
black.
4Adjust the gamma by doing one of
the following:
• Move the Brightness slider to
the right to increase gamma,
making the image darker.
• Move the Brightness slider to
the left to decrease gamma,
making the image lighter.
Changing the gamma adjusts only
the midtones of an image and
leaves the black and white areas
untouched.
5Click OK to apply changes.
A preview of the changes is applied
to the original image, but is not
final until you click OK. If you
want to revert to the original
image, click Cancel.
Tip
•
If you made a selection and you want
to equalize the entire image, enable Apply
to Entire Image in the Equalize dialog
box.
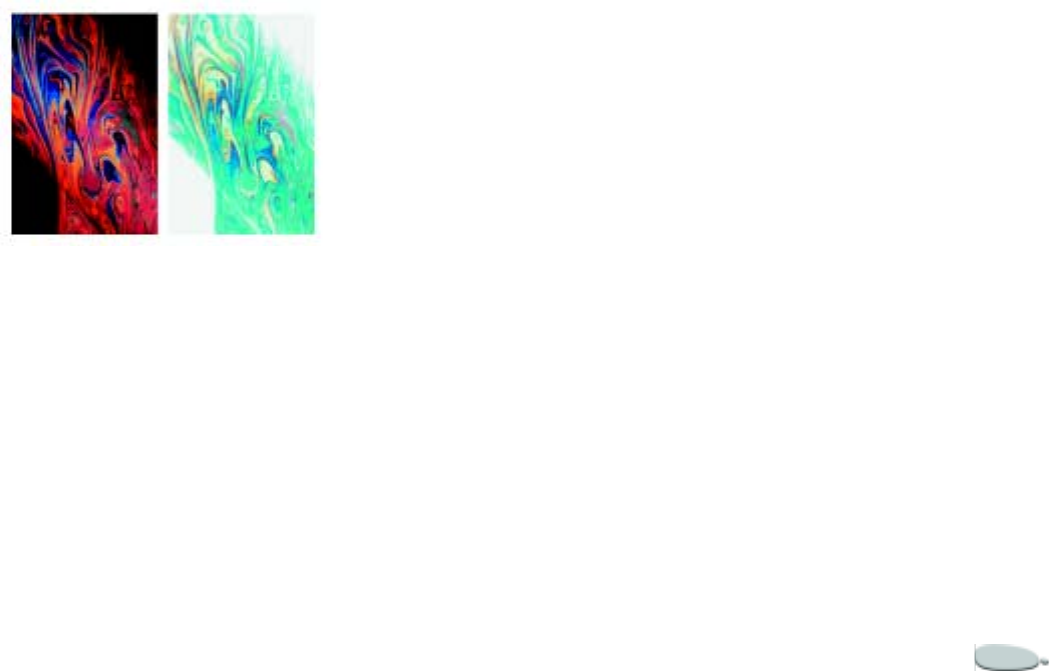
Corel Painter 273
Negative
The Negative effect inverts all the
colors in your image or in the selected
layer.
Positive and negative versions of an image.
To invert colors:
1Select a layer or area of the canvas.
If you want to invert the entire
image, select nothing.
2Choose Effects menu > Tonal
Control > Negative.
Posterize
Posterizing reduces the number of
color levels an image contains.
To posterize an image:
1Select a layer or area of the canvas.
If you want to apply the effect to
the entire image, make sure there
are no selections.
2Select Effects menu > Tonal
Control > Posterize.
3In the Posterize dialog box, specify
a number of levels.
The fewer levels, the more
dramatic the effect.
4When you are satisfied with the
settings, click OK to apply the
effect.
Tips
•
To posterize an image combined with
a paper grain, refer to “Apply Screen” on
page 286.
•
To posterize to two levels and also
adjust the brightness, refer to “Equalize”
on page 272.
Video Legal Colors
The Video Legal Colors effect makes
the colors in an image compatible
with video. Colors that aren’t possible
in video are converted to video legal
colors.
Only bright yellows and cyans are not
video legal. Corel Painter supports
both the National Television
Standards Committee (NTSC) for the
U.S. and Phase Alternation by Line
(PAL) for European video systems.
To apply video legal colors:
1Select a layer or area of the canvas.
If you want to apply the effect to
the entire image, select nothing.
2Choose Effects menu > Tonal
Control > Video Legal Colors.
3In the Video Legal Colors dialog
box, choose NTSC or PAL from
the System pop-up menu.
Posterize Using Color Set
Corel Painter can posterize your
image based on a color set. This
allows you to create an image with
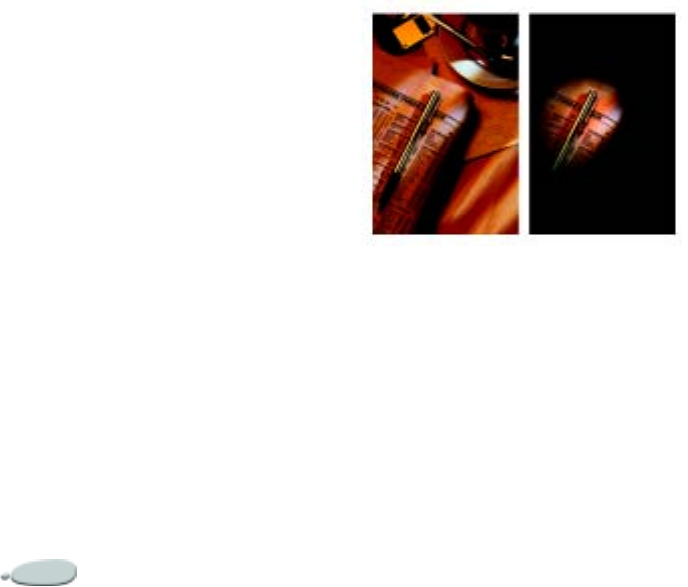
Using Image Effects274
only a specified set of colors in it. This
is useful for multimedia work, as well
as applications like silkscreening.
This effect can also be used to reduce
colors in an image so that it appears
correctly on the Web. For more
information, refer to “Working with
Posterize Using Color Set” on
page 411.
To posterize an image using a
color set:
1Select a layer or area of the canvas.
If you want to apply the effect to
the entire image, select nothing.
2Open or create a color set.
For instructions on creating a color
set, refer to “Using Color Sets” on
page 85.
3Choose Effects menu > Tonal
Control > Posterize Using Color
Set.
The image is reduced to the colors
in the current color set.
Apply Lighting
The Apply Lighting effect lets you
shine one or more light sources on an
image.
Apply Lighting is like hanging your
artwork in a gallery and adjusting
colored spotlights to illuminate it.
Before and after Apply Lighting.
You can choose different lighting
effects from the Corel Painter library,
or you can create your own effects by
defining brightness, distance, color,
and other characteristics.
Once you’ve produced a lighting effect
you like, you can save it in a library for
use with other images.
Your computer must have a math
coprocessor to use the Apply Lighting
effect.
Applying Preset Lighting
Effects
The Lighting library contains several
preset lighting environments. You can
use these directly or as a starting point
for customized lighting.
To apply preset lighting effects:
1Select a layer or area of the canvas.
If you want to apply the effect to
the entire image, make sure there
are no selections.
2Choose Effects menu > Surface
Control > Apply Lighting.
3In the Apply Lighting dialog box,
click a preset thumbnail.
The lighting effect is displayed in
the preview window.
4When you are satisfied with the
settings, click OK to apply the
effect.
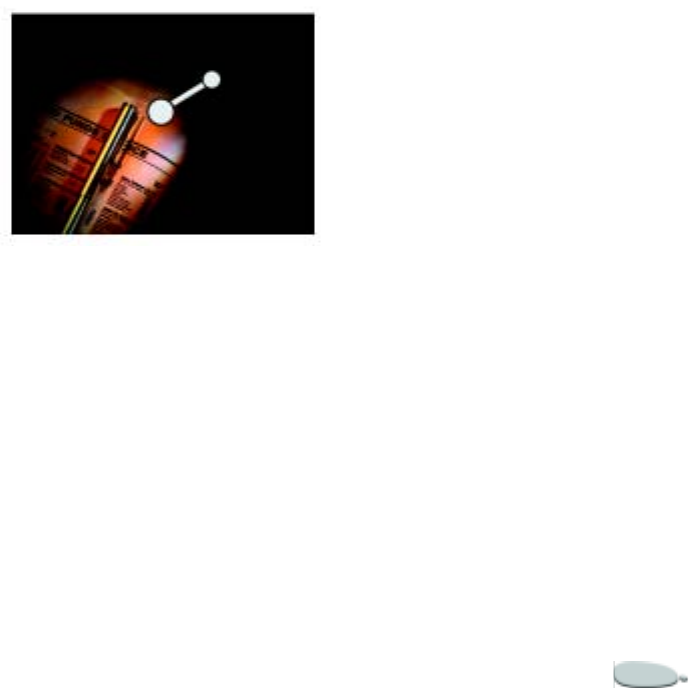
Corel Painter 275
Creating Custom Lighting
You can use the controls in the Apply
Lighting dialog to add, delete, and
position light sources. You can also set
light properties to create unique
lighting effects.
The Preview window shows the
current position of each light source
and the angle of its projection.
The four steps to create custom
lighting are:
• Adding or deleting light sources
• Positioning lights
• Setting light properties
• Saving light settings
Adding and Deleting Light
Sources
The lighting effect is created by
applying light from different sources
to the image. You can add or delete as
many light sources as you wish. Your
only limit is your system’s memory.
When you add a light source, a new
indicator appears in the preview
window. The small part of the light
indicator is the origin (the point from
which the light is shining). The large
part of the indicator is the point the
light shines toward.
Light source indicator
To add a light source:
•Click anywhere in the preview
window.
To delete a light source:
1Click an indicator.
2Press Delete.
Positioning Lights
The type of lighting effect you create
is determined by the position of light
on the image. You can use the light
indicators to move and direct light
sources.
To move a light source:
•Drag the large end of the indicator
to the point where you want the
light to originate.
To change the direction of a light:
•Drag the small end of the light
indicator until the light is pointing
in the desired direction.
Setting Light Properties
You can set light properties such as
brightness, distance, elevation, and
color.
Light properties have a cumulative
effect. For example, if you turn up a
light’s brightness, you might need to
adjust exposure.

Using Image Effects276
To change a light’s properties:
1Click an indicator to select it.
2Adjust any of the following sliders:
• Brightness is like a dimmer
knob. Moving it to the left
turns down the light source;
moving it to the right increases
brightness.
• Distance controls how far the
light is from the image. If you
move the light source closer,
you might have to change the
image’s exposure (seebelow).
• Elevation sets the light’s angle
in relation to the Canvas. At 90°
the light is shining straight
down, and at 1° it’s nearly hori-
zontal.
• Spread sets the angle of the
light cone.
• Exposure is the image’s bright-
ness, as in photography. Mov-
ing the slider to the left
decreases exposure and darkens
the image; moving it to the
right increases exposure and
lightens the image.
• Ambient is the surrounding
light in an image. If you have
no individual lights in your
image, the ambient lighting
will govern the overall lightness
of the image. Moving the
Ambient slider to the left dark-
ens the overall lighting; moving
it to the right increases the
light.
To change light color:
1Click an indicator.
2Click the Light Color icon, and
choose a color from the color
picker.
3Click the Ambient Light Color
icon, and choose a color for the
surrounding light from the color
picker.
Saving Lighting Effects
After you’ve adjusted lighting and
created an effect you like, you can save
the settings in the library. This lets you
quickly use the same settings on
another image.
To save specific lighting effects:
1After setting up a lighting effect,
click Save.
2In the Save Lighting dialog box,
type a name for your new lighting
effect.
The effect is saved to the default
Corel Painter settings library, and a
thumbnail is displayed in the
Apply Lighting dialog box.
Creating Lighting Effects
Libraries
You can create your own lighting
libraries to store your custom lighting
effects. You can use the Lighting
Mover to move saved lighting effects
into your new library.
This way, you can set up effects for
different purposes and access them
quickly.
To create a custom lighting
library:
1In the Apply Lighting dialog box,
click Library.
2Click New.
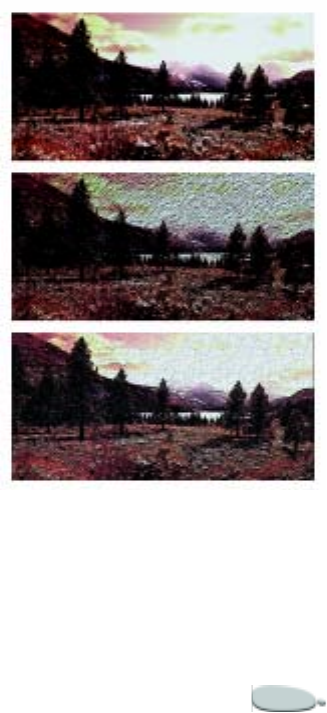
Corel Painter 277
3In the Create File dialog box,
specify a name for your library and
click Save.
A blank library is created and
becomes the current library.
4In the Apply Lighting dialog box,
click Lighting Mover.
Your new library appears on the
left side of the Lighting Mover
dialog box.
5Click Open, locate the Corel
Painter Settings library, and click
Open.
Any new lighting effects you saved
are displayed at the end of the
library.
6Click the effect you want to move
into your new library. The effects
name appears in the center of the
dialog.
7Drag the effect to the new library
on the left.
The effect is copied to the new
library. If you want to delete it
from the Corel Painter Settings
library, click Delete.
Apply Surface Texture
The Apply Surface Texture effect lets
you add a three-dimensional surface
texture to your image. You can use this
feature to apply a paper texture across
the image, to give depth to the brush
strokes of an oil painting, or to make
mosaic tiles three-dimensional.
Surface texture is created either by
applying a paper texture or by using
information from a clone source to
determine depth and height. There
are five methods for creating texture:
• Using a paper texture
• Using the difference from a clone
source
• Using image luminance
• Using the luminance from a clone
source
• Using a channel or layer mask
The Apply Surface Texture effect also
lets you apply a reflection map to your
surfaces that can make the textured
parts of the image look metallic or
glass-like. Refer to “Working with
Reflection Maps” on page 284 for
more information.
Your computer must have a math
coprocessor to use the Apply Surface
Texture effect.
Examples of effects created with Apply Surface
Texture.
©1999, Jack Davis
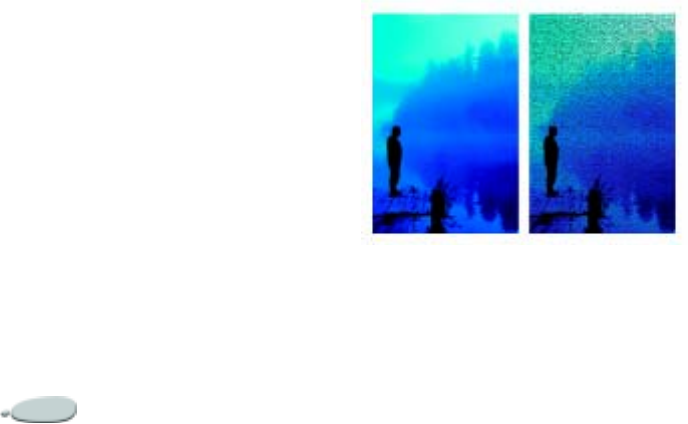
Using Image Effects278
Setting Appearance of Depth
Properties
The surface texture you apply is made
up of a material. That material can be
subtle and blend with the original
image, or it can be highly reflective or
shiny, distorting the original image.
The Appearance of Depth sliders on
the Apply Surface Texture dialog let
you control material properties.
• The Amount slider controls how
much surface texture is applied to
the image. Moving the slider all
the way to the right applies the
maximum amount.
• Picture controls how much of the
color from the original image is
applied to the texture. At 100%, the
full color of the picture shines
through. Move the slider to the left
to display more black, leaving only
the shine.
• The Shine slider controls how
much highlight appears on the
surface of the texture. Higher
Shine values make the texture look
metallic.
• Reflection maps a clone source
image or pattern onto the texture
at a variable percentage.
Creating Texture Using Paper
When you create a texture using
Paper, the current paper texture is
applied to your image. If the Papers
palette is open, you can choose
different papers and change their scale
to try different textures.
The preview window is updated
automatically to reflect paper changes.
Texture created using Paper grain.
To create surface texture using
paper:
1Select a layer or area of the canvas.
If you want to apply the effect to
the entire image, make sure there
are no selections.
2Choose Effects menu > Surface
Control > Apply Surface Texture.
3In the Apply Surface Texture
dialog box, choose Paper from the
Using pop-up menu.
If you want to apply an inverted
paper texture, enable the Inverted
check box.
4Adjust the Softness slider to
control the amount of distortion
created by the texture.
Increasing softness creates more
intermediate steps, which
produces a smoother distortion.
5Adjust the Appearance of Depth
sliders.
Refer to “Setting Appearance of
Depth Properties” on page 278 for
more information.
6Adjust the Light Controls sliders.
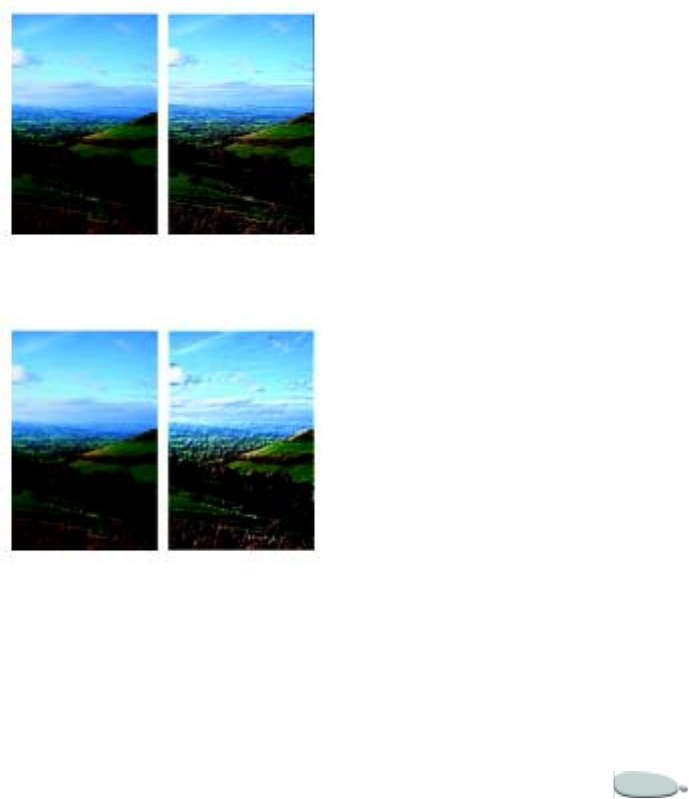
Corel Painter 279
For more information, refer to
“Applying Lighting to a Texture”
on page 285.
7Click OK to apply the effect.
Creating Texture Using 3D
Brush Strokes
When you create a texture using 3D
Brush Strokes, the difference in
luminance between the clone source
and the current document is used to
determine the look of the texture.
If you change the colors in the clone
or posterize the clone, the texture is
based on color differences. If you paint
on the clone, however, you can make
the brush strokes appear three-
dimensional, giving them the illusion
of oil paints.
For information about cloning, refer
to “Cloning Imagery” on page 187.
An example of the texture created when
Posterize is applied to the clone source.
An example of the texture created when brush
strokes are applied to a cloned image.
To create surface texture using 3D
brush strokes:
1Open the original image.
2Choose File menu > Clone.
If you want to alter the clone
before using 3D Brush Strokes,
apply an effect or paint on it.
3Select a layer or area of the canvas.
If you want to apply the effect to
the entire image, make sure there
are no selections.
4Choose Effects menu > Surface
Control > Apply Surface Texture.
5In the Apply Surface Texture
dialog box, choose 3D Brush
Strokes from the Using pop-up
menu.
If you want to apply an inverted
texture, enable the Inverted check
box.
6Adjust the Softness slider to
control the amount of distortion
created by the texture.
Increasing softness creates more
intermediate steps, which
produces a smoother distortion.
7Adjust the Appearance of Depth
sliders.
Refer to “Setting Appearance of
Depth Properties” on page 278 for
more information.
8Adjust the Light Controls sliders.
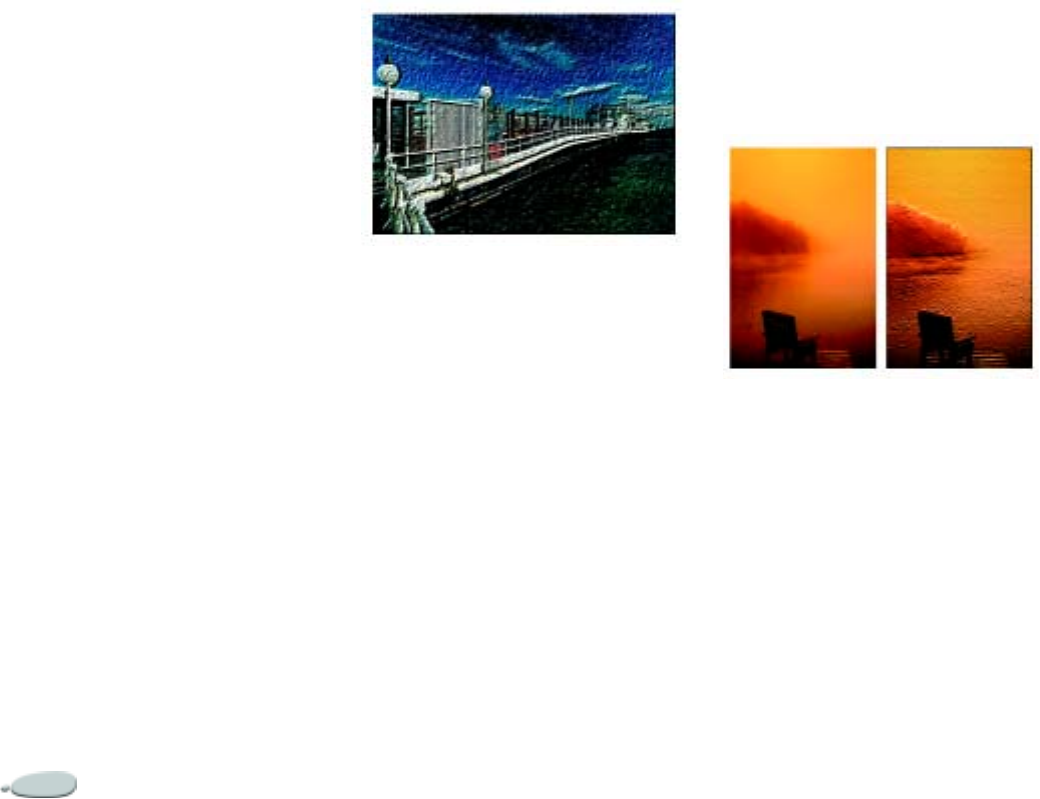
Using Image Effects280
For more information, refer to
“Applying Lighting to a Texture”
on page 285.
9Click OK to apply the texture.
Creating Three-Dimensional
Oils
Because the 3D Brush Strokes
method uses the difference between
the clone source and its clone to define
a 3D texture, you can create the
illusion of dimensional oils by
painting on the clone.
The look of the strokes on the clone
determines how realistic the final 3D
strokes appear. So, you may want to
set up a more complex brush before
painting. For example, you can apply
a paper texture to the stroke.
An example of 3D brush strokes with paper
texture.
Many of the brush variants reveal the
paper texture automatically in their
strokes.
You can apply a paper texture when
you first create an image, then paint or
draw over it to make a textured canvas
for your strokes. However, the texture
is erasable, so you might not end up
with the same texture across the
document surface. Generally, you’ll
add the paper texture as the last step in
producing artwork.
You can also use advanced brush
settings to make realistic strokes. For
example, you can use the Brush
Loading option to move underlying
colors as you make brush strokes. You
can also apply other settings like Bleed
and Max/Min Brush size to create
complex strokes. Refer to
“Customizing Brushes” on page 143
for more on these features.
An example of 3D brush strokes with Brush
Loading and Bleed settings applied.
Creating Texture Using Image
Luminance
When you create a texture using the
Image Luminance method, the
current image’s luminance, or
lightness, determines where surface
texture is added. Light parts of the
image create dents; darker parts create
raised areas.
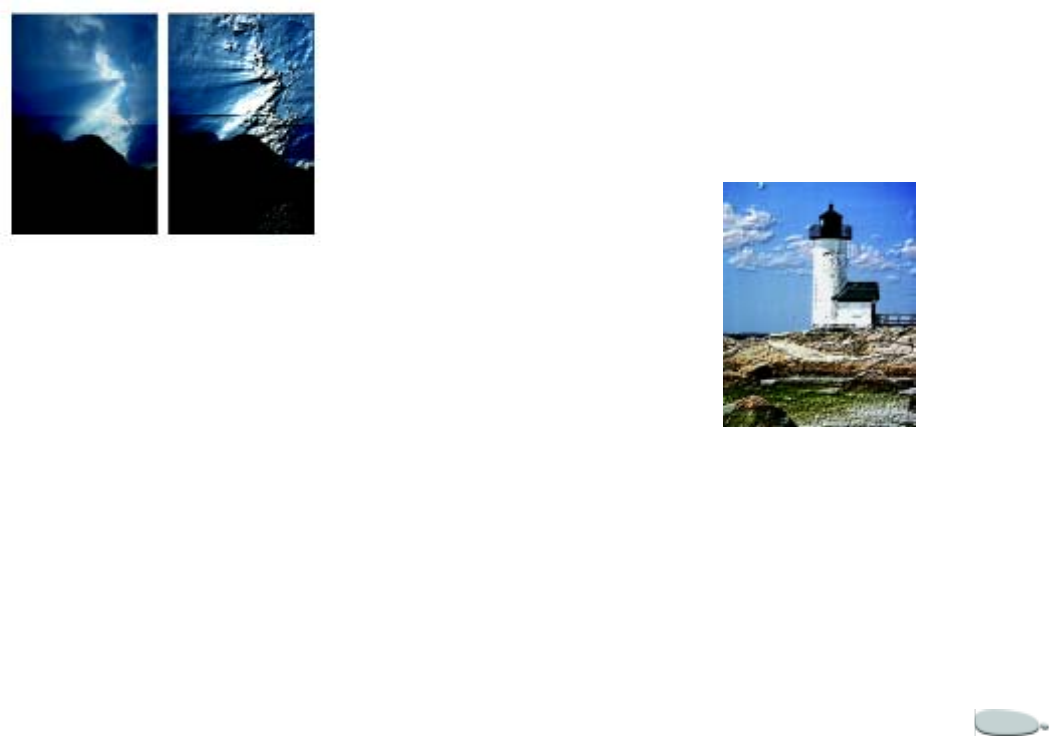
Corel Painter 281
The overall effect gives an embossed
look to the edges of the imagery.
Texture based on Image Luminance.
To create surface texture using
image luminance:
1Select a layer or area of the canvas.
If you want to apply the effect to
the entire image, make sure there
are no selections.
2Choose Effects menu > Surface
Control > Apply Surface Texture.
3In the Apply Surface Texture
dialog box, choose Image
Luminance from the Using pop-
up menu.
If you want to apply an inverted
texture, enable the Inverted check
box.
4Adjust the Softness slider to
control the amount of distortion
created by the texture.
Increasing softness creates more
intermediate steps, which
produces a smoother distortion.
5Adjust the Appearance of Depth
sliders.
Refer to “Setting Appearance of
Depth Properties” on page 278 for
more information.
6Adjust the Light Controls sliders.
For more information, refer to
“Applying Lighting to a Texture”
on page 285.
7Click OK to apply the texture.
Creating Texture Using Clone
Source Luminance
When you create a texture using clone
source luminance, the dents and
bumps in the texture are determined
by the light and dark areas in the clone
source, and applied to its clone.
The unique thing about this method
is that you can create interesting
embossed looks by changing the clone
source. Any image effects or brush
strokes you apply to the source result
in different textures.
For example, you can create raised
areas in the clone by darkening the
area in the source image.
Texture based on clone source luminance.
To create surface texture based
on clone source luminance:
1Open an image.
2Choose File menu > Clone.
3Alter the clone by applying an
effect, painting, or choosing a
pattern or gradient.
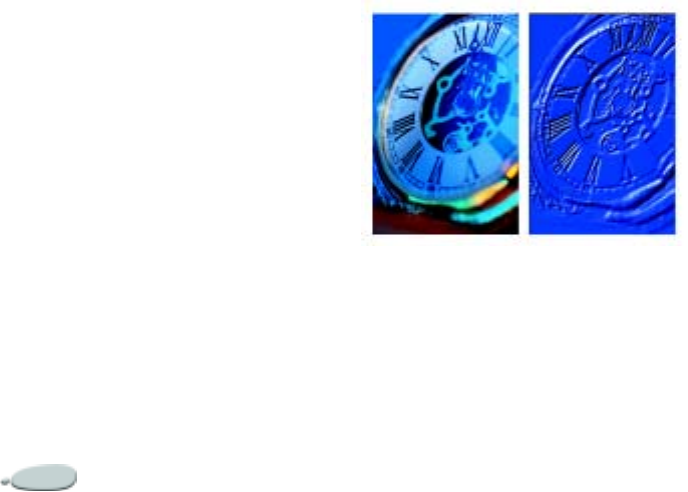
Using Image Effects282
4Select a layer or area of the canvas.
If you want to apply the effect to
the entire image, make sure there
are no selections.
5Choose Effects menu > Surface
Control > Apply Surface Texture.
6In the Apply Surface Texture
dialog box, choose Original
Luminance from the Using pop-
up menu.
If you want to apply an inverted
texture, enable the Inverted check
box.
7Adjust the Softness slider to
control the amount of distortion
created by the texture.
Increasing softness creates more
intermediate steps, which
produces a smoother distortion.
8Adjust the Appearance of Depth
sliders.
Refer to “Setting Appearance of
Depth Properties” on page 278 for
more information.
9Adjust the Light Controls sliders.
For more information, refer to
“Applying Lighting to a Texture”
on page 285.
10 Click OK to apply the texture.
Creating Embossing Effects
One of the most effective ways of
using the Original Luminance
method is to create an embossed
image. Unlike standard emboss
effects, Apply Surface Texture lets you
control not only the height of the
texture, but also the lighting and
material properties of the embossing.
The embossed effect
To create an embossed effect:
1Open an image.
2Choose File menu > Clone.
3Choose a color other than black
from the Colors or Color Sets
palette.
If you want the embossed image to
be white, leave the screen blank,
select all, then delete.
4Choose Effects menu > Fill.
5Enable the Current Color option.
6Click OK to fill the clone file with
color.
7Choose Effects menu > Surface
Control > Apply Surface Texture.
8In the Apply Surface Texture
dialog box, choose Original
Luminance from the Using pop-
up menu.
The preview window shows how
the embossed image will look.
9Adjust any of the Appearance of
Depth or Light Controls sliders.
10 Click a Light Direction button to
change the location of highlights
and shadows.
If you want to change the light
color, click the Light Color icon
and choose a color from the color
picker.
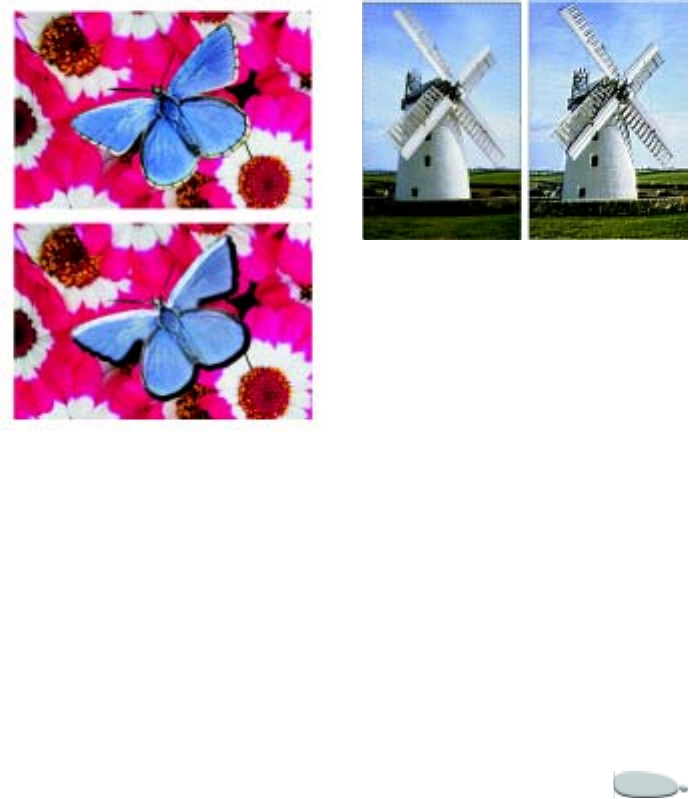
Corel Painter 283
11 When you are satisfied with the
settings, click OK to apply the
effect.
Creating Texture Using
Channels and Layer Masks
Corel Painter lets you produce surface
texture based on an alpha channel or a
layer mask.
You can use this method only if your
image has a saved alpha channel or a
layer with a layer mask.
When you choose a channel, the
texture is applied around the edges of
the channel so that the area it covers
appears raised.
When you choose a layer mask, the
layer mask is used to determine the
boundaries of the texture. In this case,
texture is applied to the edges of the
layer mask. Refer to “Working with
Layer Masks” on page 255 for more on
layer masks.
Texture based on a saved alpha channel.
Texture based on a layer mask.
To create surface texture based
on a channel or layer mask:
1Select a layer or area of the canvas.
If you want to apply the effect to
the entire image, make sure there
are no selections.
If you want to use a layer mask,
you must select the layer.
2Choose Effects menu > Surface
Control > Apply Surface Texture.
3In the Apply Surface Texture
dialog box, choose the channel or
layer mask from the Using pop-up
menu.
If you want to apply an inverted
texture, enable the Inverted check
box.
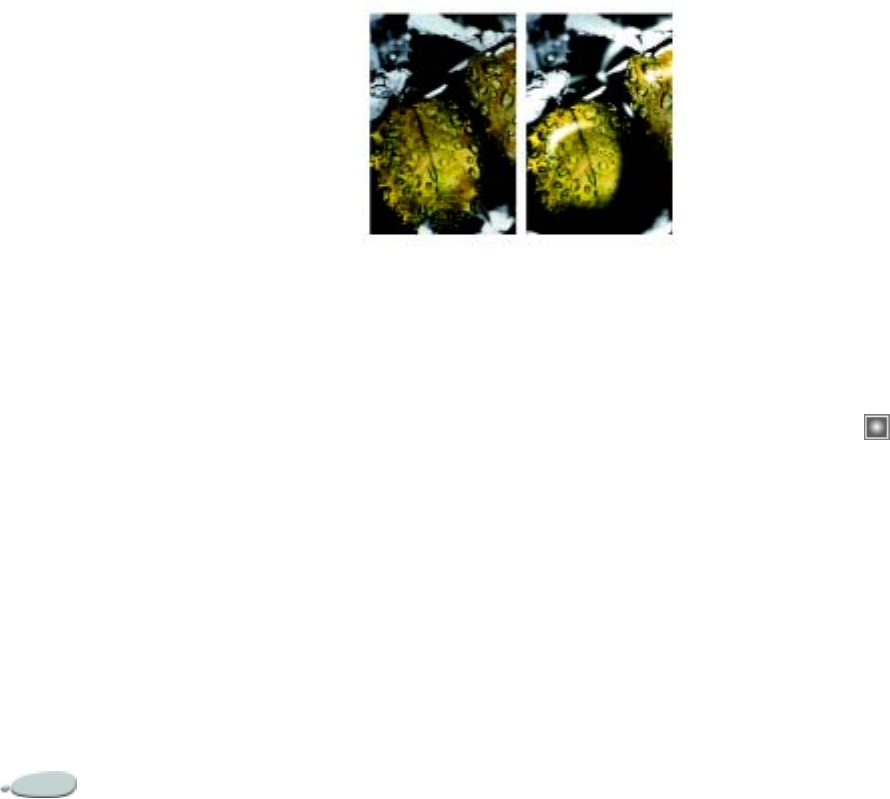
Using Image Effects284
4Adjust the Softness slider to
control the amount of distortion
created by the texture.
Increasing softness creates more
intermediate steps, which
produces a smoother distortion.
5Adjust the Appearance of Depth
sliders.
Refer to “Setting Appearance of
Depth Properties” on page 278 for
more information.
6Adjust the Light Controls sliders.
For more information, refer to
“Applying Lighting to a Texture”
on page 285.
7Click OK to apply the texture.
Working with Reflection
Maps
A Reflection map is an image mapped
onto a texture to produce the illusion
that it’s reflecting light from the
surrounding environment. You can
use the reflection map pattern to
quickly apply a realistic reflection. In
most cases, a reflection map makes
your texture look like chrome or
polished metal.
A typical reflection map.
You can use either a pattern or a clone
source image as a reflection map. By
adjusting the Reflection slider, you
control how much of the image
appears in the texture.
If your image has a clone source, the
source image is mapped onto the
texture. Otherwise Corel Painter uses
the current pattern as the reflection
map.
You can use the Image Warp effect to
approximate the reflection from a
curved surface. For more information,
refer to “Image Warp” on page 289.
To create a reflection map from a
clone source:
1Create a new image to use as the
reflection.
If you want to approximate the
reflection from a curved surface,
apply the Image Warp effect.
2Choose File menu > Clone
Source > [filename].
3In the original image, select the
area you want to be reflective.
4Choose Layers menu > New
Layer to create a new layer from
the selection.
5On the Layers palette, select the
layer, and click the Create Layer
Mask button .
Using a layer mask simplifies the
process because the layer mask
matches the shape of the reflection
area exactly. Refer to “Working
with Layer Masks” on page 255 for
more information about layer
masks.
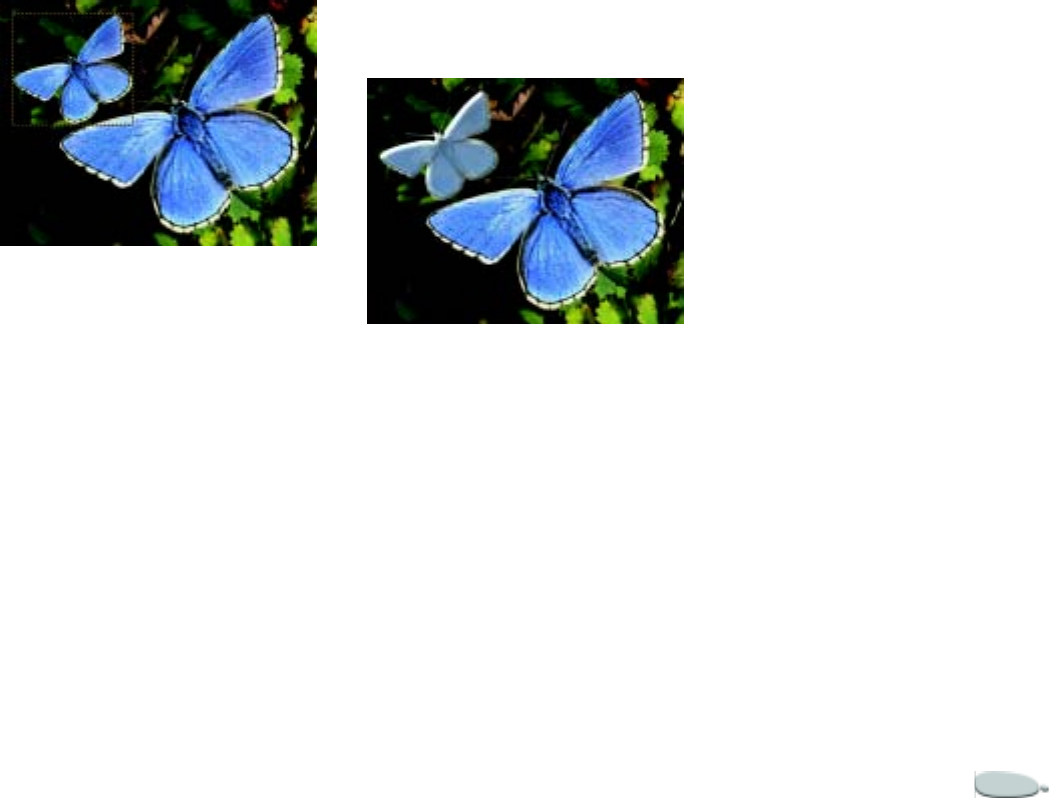
Corel Painter 285
A layer, ready to become reflective.
6Select the layer.
When a layer is selected, effects
apply only to the layer.
7Choose Effects menu > Surface
Control > Apply Surface Texture.
8In the Apply Surface Texture
dialog box, choose the layer mask
from the Using pop-up menu.
9Adjust the Reflection slider to
control the amount of reflection
you want.
10 Adjust the Softness slider to
control the mapping from the
edges of the layer’s image.
Increasing Softness gives a
rounder, more three-dimensional
look to the surface.
11 When you are satisfied with the
settings, click OK to apply the
effect.
The resulting chrome-plated butterfly.
Applying Lighting to a
Texture
A large part of the final look of your
textures is determined by the lighting
you apply. Bad lighting can obscure
details in a pattern or surface. Good
lighting can add interesting highlights
and enhance reflections.
You can add, delete, and position light
sources, and you can set light
properties.
To add a light:
•In the Apply Surface Texture
dialog box, click the light sphere.
A new light indicator (a small
circle) is added to the light sphere.
Tip
•
The Show Light Icons check box lets
you hide or show the light indicators.
To delete a light:
•Click a light indicator and press
Delete.
Setting Light Position
You can position lights by enabling
one of the Light Direction options, or
you can create a custom lighting setup
by working in the sphere.
The Light Direction options represent
eight different preset lighting angles.
The lighting sphere shows all the
possible surface angles and how the
lights illuminate them. The light
indicators on the sphere show the
current positions of all the light
sources.
Using Image Effects286
The lighting sphere with a light indicator.
The Display slider beneath the sphere
controls the brightness of the sphere
so that it’s easier to see light positions.
It does not affect the lights themselves.
To change a light’s position:
•On the lighting sphere, drag a light
indicator.
Tip
•
You can also change a light’s position
by selecting a light indicator on the sphere
and enabling one of the Light Direction
options.
Setting Light Properties
The three Light Controls sliders let
you set the properties of a light source.
You can also change a light’s color.
• Brightness indicates the intensity
of the light.
• Conc (concentration) adjusts the
spread of the light’s shine over the
surface.
• Exposure globally adjusts the
overall lighting amount from
darkest to brightest.
To change light color:
1Click the Light Color icon.
2In the color picker, choose a color.
Other Surface Control
Effects
The Surface Control effects let you
manipulate paper, color, and light to
produce a variety of interesting visual
effects. Many of these effects also let
you add texture to an image,
producing the illusion of paint on a
canvas or paper.
Apply Screen
Apply Screen is another way to add
texture to an image. It combines
luminance, the selected paper texture,
and the three colors you pick, to add a
three-color screen to animage.
Apply Screen using Image Luminance.
To apply a screen:
1Select a layer or area of the canvas.
If you want to apply the effect to
the entire image, make sure there
are no selections.
2Choose Effects menu > Surface
Control > Apply Screen.
3In the Apply Screen dialog box,
choose three colors by clicking
each color icon and choosing a
color from the color picker.
4Move the Threshold 1 slider to
determine how much of the
second and third colors will be in
the image.
Moving the slider to the left
increases the amount of the third
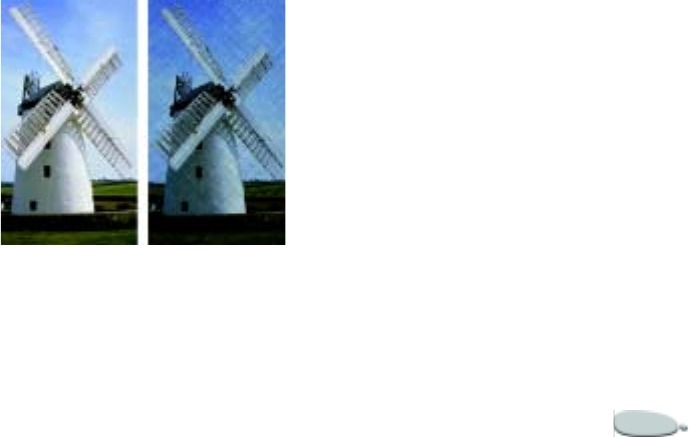
Corel Painter 287
color. Moving it to the right
increases the amount of the second
color.
5Move the Threshold 2 slider to
determine how much of the first
color will be in the image.
Moving the slider to the left
decreases the amount of the first
color. Moving it to the
right increases the amount of the
first color.
6Choose one of the following
methods from the Using pop-up
menu:
•Paper produces a screen using
the paper grain. If the Papers
palette is open, you can choose
different textures while the
Apply Screen dialog is open.
•Image Luminance creates tex-
ture based on the image’s
brightness. It is similar to a
three-level posterization.
•Original Luminance adds tex-
ture based on the clone source
document’s brightness.
•[Alpha channel] or [Layer
mask] adds texture based on
the luminance of a channel or
layer mask. The pop-up menu
lists each alpha channel in the
document. If a layer with a
layer mask is selected, the layer
mask is also listed.
7When you are satisfied with the
settings, click OK to apply the
effect.
Color Overlay
Use the Color Overlay effect to
simultaneously add color and texture
to an image.
The Color Overlay effect.
The color is taken from the current
color on the Colors palette. Both color
and texture are applied using one of
five methods:
•Uniform Color adds a flat tint to
the image.
•Paper overlays a color using the
paper texture as a mapping model.
More color is applied to light areas
in the paper grain; less color is
applied to dark areas.
•Image Luminance uses the
image’s brightness as the model for
the color overlay. More of the effect
is applied to light areas in the
original image; less is applied to
darker areas.
•Original Luminance uses the
luminance of the clone source as
the model for the color overlay.
Light areas in the clone source
produce more color in the image.
•[Alpha channel] or [Layer mask]
uses the values in the channel or
layer mask as the model for the
color overlay. More color is applied
to the light areas of the channel or
mask, and less to dark areas.
You can use this method only if
you have a saved alpha channel or
a layer mask in your image.

Using Image Effects288
To create a color overlay:
1Show the Colors and Papers
palettes.
2Select a layer or area of the canvas.
If you want to apply the effect to
the entire image, make sure there
are no selections.
3Choose a color from the Colors
palette.
If you want to base the color on a
paper grain, choose a paper texture
on the Papers palette.
4Choose Effects menu > Surface
Control > Color Overlay.
5In the Color Overlay dialog box,
choose a method from the Using
pop-up menu.
6Move the Opacity slider until the
preview reflects the desired opacity.
7Enable any of the following
options:
•Dye Concentration allows the
paper to absorb the color.
•Hiding Power allows the color
to cover what’s beneath it.
8When you’re satisfied with the
settings, click OK to apply the
effect.
Dye Concentration
The Dye Concentration effect adjusts
color intensity and adds surface
texture by adjusting pigments. You can
use this effect to lighten an
underexposed photo or to darken an
overexposed one.
To adjust the dye concentration:
1Select a layer or area of the canvas.
If you want to apply the effect to
the entire image, make sure there
are no selections.
2Choose Effects menu > Surface
Control > Dye Concentration.
The Adjust Dye Concentration
dialog box is displayed. While the
dialog box is open, the controls on
the Papers palette can be adjusted.
3Choose a method from the Using
pop-up menu:
•Uniform Color adjusts color
based solely on Maximum
slider values. The Minimum
slider has no effect. Setting the
Maximum slider above 100%
increases color density. A value
below 100% decreases it.
•Paper adjusts color using the
paper texture as a mapping
model.
•Image Luminance uses the
image’s brightness as the model
for the color adjustment.
•Original Luminance uses the
luminance of the clone source
as the model for the adjust-
ment.
•[Alpha channel] or [Layer
mask] uses the values in the
alpha channel or layer mask as
the model for the dye concen-
tration adjustment. You can use
this method only if you have a
saved channel or a layer mask
in your image.
4Adjust the Minimum and
Maximum sliders as needed.
If you think of texture as peaks and
valleys, the Maximum slider
controls the amount of dye on the
peaks and the Minimum slider
controls the amount of dye in the
valleys. You can set Maximum as
high as 800%.
The lower you set Minimum,
which can be as low as 0%, the
higher the contrast between peaks
Corel Painter 289
and valleys. The higher the
Minimum slider, the flatter the
paper appears.
5When you are satisfied with the
settings, click OK to apply the
effect.
Express Texture
The Express Texture effect generates a
high contrast version of an image in
grayscale. With this feature, you can
create a visual effect similar to a
custom halftone screen, like a
mezzotint or line screen.
Express Texture is similar to Apply
Screen with anti-aliasing built in.
The Express Texture effect.
To apply express texture:
1Select a layer or area of the canvas.
If you want to apply the effect to
the entire image, make sure there
are no selections.
2Choose Effects menu > Surface
Control > Express Texture.
3In the Express Texture dialog box,
choose a method from the Using
pop-up menu.
You can base the effect on the
current paper texture, a channel or
layer mask, image luminance, or
original luminance (clone source).
4Use the following guidelines to
adjust the sliders:
• Gray Threshold determines
where the threshold is, between
pure black and pure white.
• Grain determines how deeply
the texture penetrates the sur-
face.
• Contrast determines how many
levels of black and white there
are. For example, low contrast
generates pure gray, medium
contrast produces levels of
grayscale, building up to a high
contrast black and white
screen.
5Click OK to apply the effect.
Tips
•
If you want to restore some of the
original color to the image after applying
this effect, choose Edit menu > Fade.
Fade restores some or all of the original
colors.
•
If you want to add a new set of colors,
you can apply an express gradient to the
image. On the Gradients palette, choose a
gradient, click the palette menu arrow,
and choose Express In Image.
Image Warp
The Image Warp effect lets you distort
the surface of an image as if it were a
sheet of pliable film. You can make
images look as though they’re
reflected in a fun house mirror.
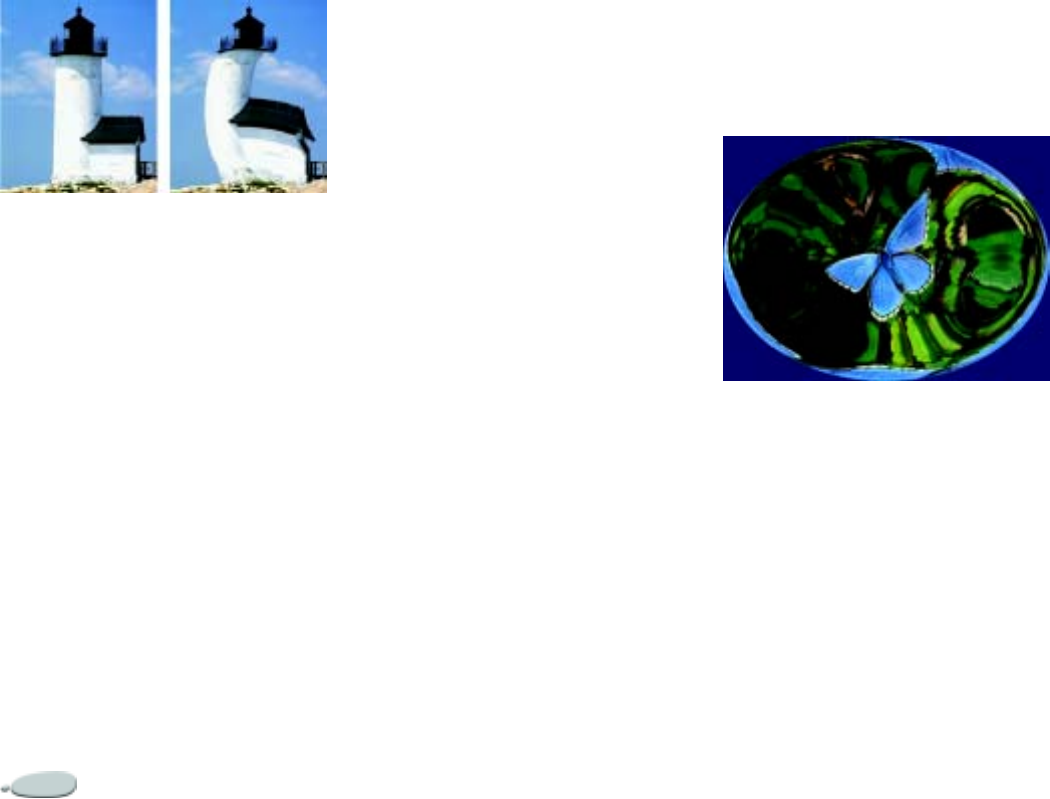
Using Image Effects290
Use the Image Warp effect to warp your image.
Your computer must have a math
coprocessor to use the Image Warp
effect.
To warp an image:
1Select a layer or area of the canvas.
If you want to apply the effect to
the entire image, make sure there
are no selections.
2Choose Effects menu > Surface
Control > Image Warp.
3 In the Image Warp dialog box,
choose one of the following warp
methods:
• Linear pulls the selected area as
if you were pulling from the top
of a cone.
• Cubic pulls a flat surface out-
wards.
• Sphere pulls a surface as if it
were a lens.
4Adjust the Size slider.
This slider controls the size of the
area affected by dragging the
cursor. The higher the number, the
smaller the affected area.
5In the preview window, drag to
distort the image.
A circle displays as you drag,
indicating the area affected.
6When you are satisfied with the
settings, click OK to apply the
effect.
Quick Warp
The Quick Warp command lets you
create some basic distortions, like
stretch or bulge. These distortions are
useful for preparing images for
reflection maps when applying surface
texture. For more information about
surface texture and reflection maps,
refer to “Working with Reflection
Maps” on page 284.
There are five types of distortions you
can create using Quick Warp:
• Sphere warps the image
spherically, like a reflection on a
polished silver ball. Use the Power
and Angle Factor sliders to
intensify and twist the effect.
An example of a Sphere distortion.
• Bump warps the center of the
image toward you, making it
appear convex. Use the Angle
Factor slider to twist the effect.
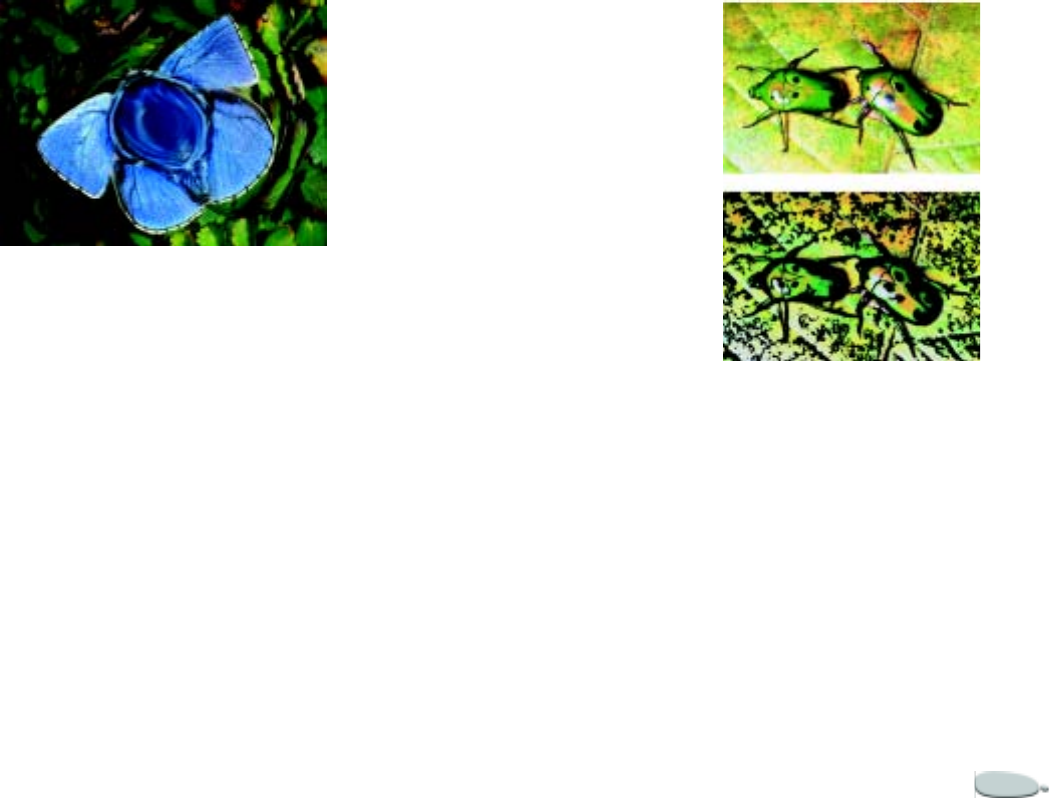
Corel Painter 291
An example of a Bump distortion.
• Valley warps the center of the
image away from you, making it
appear concave. Use the Angle
Factor slider to twist the effect.
• Swirl distorts the image in a spiral.
The Angle Factor slider controls
how many times the image spirals.
• Ripple distorts the image in
concentric rings, like the rings
created when you drop a stone into
a pool of water. Use the Power and
Angle Factor sliders to intensify
and twist the effect.
To apply Quick Warp effects:
1Choose Effects menu > Surface
Control > Quick Warp.
2In the Quick Warp dialog box,
enable a warp method.
3Adjust the Power and Angle Factor
sliders to control the warp effects.
4When you are satisfied with the
settings, click OK to apply the
effect.
Note
•
Quick Warp applies to the entire
canvas—not to selections or layers.
Woodcut
The Woodcut effect is useful for
creating woodcut or linoleum block
prints of photographs. You can save
preset Woodcut effects to apply to
other photographs or paintings.
The Woodcut effect.
To apply woodcut effects
1Choose Effects menu > Surface
Control > Woodcut.
2In the Woodcut dialog box, enable
any of the following check boxes:
• Output Black—output the
black part of the effect. Disable
this option if you want to out-
put in color only.
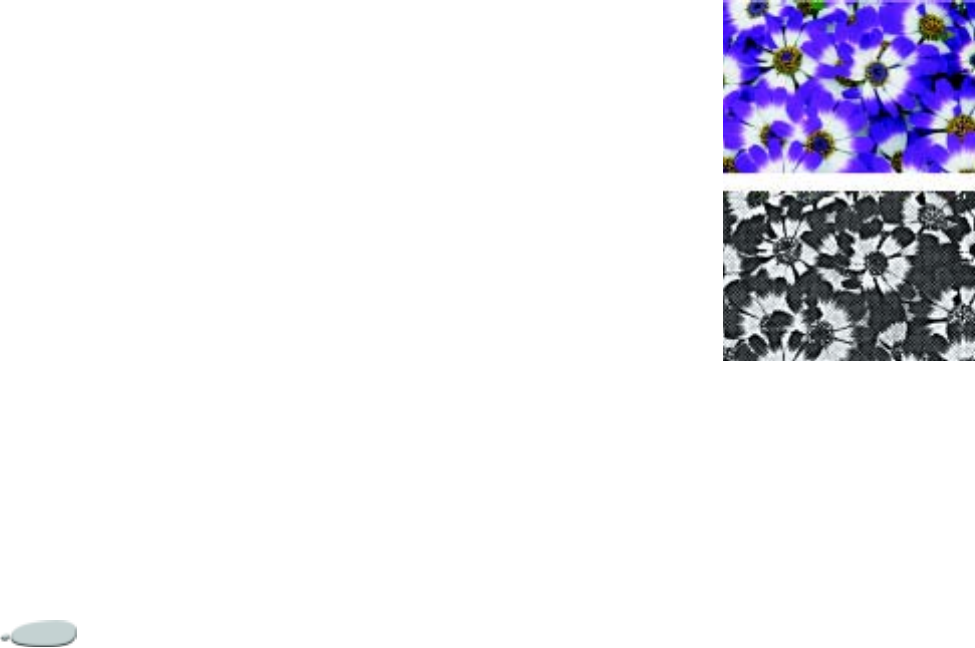
Using Image Effects292
• Output Color—output the
color part of the effect. Disable
this option if you want to out-
put in black and white only.
3Use the following guidelines to
adjust the sliders:
• Black Edge determines the
detail of the black edge. Larger
values produce thick, black
edges around objects. Smaller
values produce more intricate
edges.
• Erosion Time determines the
number of erosion iterations
performed on the black edge.
The higher the erosion, the
simpler the edge.
•Erosion Edge controls the
amount of smoothing on the
black edge. Larger values pro-
duce a rounded appearance to
the black edge.
• Heaviness determines the
amount of black in the final
image.
4Enable one of the following
options:
• Auto Color—automatically
compute the color set from the
original image’s colors.
• Use Color Set—use a pre-
defined color set.
5Adjust the N Colors (number of
colors) and Color Edge sliders.
6When you are satisfied with the
settings, click OK to apply the
effect.
Note
•
You can adjust the number of colors
only if you have enabled the Auto Color
option.
Tips
•
You can change the colors in a color
set by clicking a color and then clicking a
new color on the Color Sets palette.
•
You can save a woodcut effect as a
preset by clicking Save in the Woodcut
dialog box and specifying a preset name in
the Save Preset dialog box.
Distress
The Distress effect can be used on
images and text. You can base the
effect upon the currently selected
paper or pattern.
The Distress effect.
To apply distress effects:
1Choose Effects menu > Surface
Control > Distress.
2In the Distress dialog box, adjust
any of the following sliders:
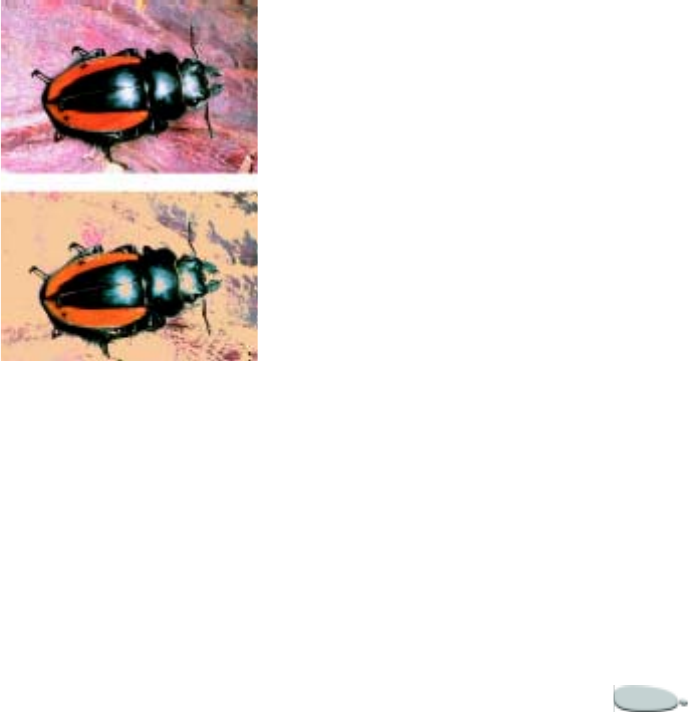
Corel Painter 293
• Edge Size determines the size
of the edge enhancement.
• Edge Amount determines the
amount of edge enhancement.
• Smoothing determines the
roundness of the edge between
black and white.
• Variance determines the
amount of grain added to the
edge.
• Threshold determines how
much black is in the image.
3Choose a method from the Using
pop-up menu.
You can base the effect on the
current paper grain or the original
luminance (clone source).
4When you are satisfied with the
settings, click OK to apply the
effect.
Serigraphy
The Serigraphy effect is useful for
using photographs to generate images
that appear to be silk-screened or
woodblock cuts. Each color reduction
is saved as a separate layer, enabling
you to edit the layer individually after
the effect has been applied.
The Serigraphy effect.
To apply serigraphy effects:
1Choose Effects menu > Surface
Control > Serigraphy.
2In the Spot color dialog box, adjust
any of the following sliders:
• Smoothing determines the
smoothness of the black edge.
• Threshold determines the total
amount of color difference
from the center color.
• Dist Weighting determines the
amount of color distance from
the center color.
• Hue Weighting determines
how much hue contributes to
the effect.
• Sat Weighting determines how
much saturation contributes to
the effect.
• Lum Weighting determines
how much luminance contrib-
utes to the effect.
3Click Match Color, and choose a
color from the Color Picker.
This is the center color—the color
upon which the effect will be
based.
4Click Fill Color, and choose a color
from the Color Picker.
This color is used on the new layer.
5Click Create Serigraphy Layer.
6When you are satisfied with the
results, click Done.
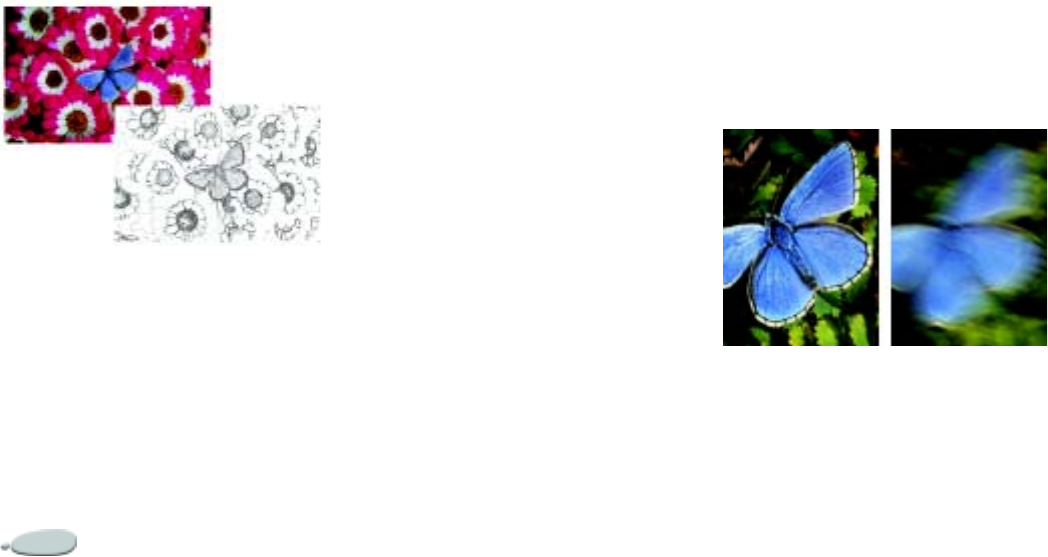
Using Image Effects294
Tip
•
You can also specify Match and Fill
Colors by clicking a color in the image.
Sketch
You can use the Sketch effect to
convert an image to a black and white
pencil sketch.
The Sketch effect
To apply the sketch effect:
1Select a layer or area of the canvas.
If you want to apply the effect to
the entire image, make sure there
are no selections.
2Choose Effects menu > Surface
Control > Sketch.
3In the Sketch dialog box, adjust
any of the following sliders:
•Sensitivity—determines sensi-
tivity to detail. Low values
detect only the main edges.
High values detect the main
edges as well as thin lines, such
as the lines around a person’s
eyes.
•Smoothing—determines how
much noise is filtered out.
Higher values result in wider,
lighter, and more blurry lines.
•Grain—determines how much
of the paper grain is revealed in
the sketch marks. Drag this
slider to the right to show more
of the paper grain.
•Threshold—the Threshold
High and Threshold Low set-
tings are used to remove noise
after edge detection. Threshold
High is used to flag light pixels
which may be just noise in the
image. Threshold Low is used
to test surrounding pixels.
If you want to save your settings as
a preset, click Save and specify a
preset name in the Save Preset
dialog box.
Focus Effects
The Focus commands in the Effects
menu let you create sharpening,
softening, motion blurring, and glass
distortion effects.
Camera Motion Blur
This effect creates a blur similar to
what you'd get in a photograph by
jostling the camera during a long
exposure. It's particularly effective
with an image showing lights on a
dark background.
Using the Camera Motion Blur to create
ablur.
To apply camera motion blur:
1Select a layer or area of the canvas.

Corel Painter 295
If you want to apply the effect to
the entire image, make sure there
are no selections.
2Choose Effects menu > Focus >
Camera Motion Blur.
3 In the image window, drag to
create the blur motion.
The direction and intensity of the
blur is determined by your pointer
movement. For example, fast
movement produces a different
blur than slow. A longer drag path
increases the amount of blur.
Straight, curved, and zigzag
movements also produce different
effects.
4In the Camera Motion Blur dialog
box, adjust the Bias slider to move
the origin of motion along the drag
path.
5When you are satisfied with the
settings, click OK to apply the
effect.
Depth of Field
This effect creates a blur based on
“distance from the plane of camera
focus.” Because you're working in a
2D image, you can use the control
medium to describe the distance of
different pixels.
The “M” is a floating shape. The blur on the
shadow was created using Depth of Field.
The Depth of Field effect is a variable
“circle of confusion” blur. You can
specify the radius of the confusion
circles for different regions of the
image.
To apply depth of field:
1Select a layer or area of the canvas.
If you want to apply the effect to
the entire image, make sure there
are no selections.
2Choose Effects menu > Focus >
Depth of Field.
3In the Depth of Field dialog box,
choose a source from the Using
pop-up menu.
Darker regions of the source
receive greater blur.
4Adjust the sliders to set the
minimum and maximum radius of
the blur regions.
The maximum size must be
greater than the minimum size.
Note
•
This effect can take quite a while to
process—especially with larger Min Size
and Max Size settings.
Glass Distortion
The Glass Distortion effect creates the
kind of distortions you would see if
you were looking at your image
through a sheet of glass. You can make
your image appear as if it is behind the
pebble glass of a shower door, or you
can distort your image beyond
recognition.
Glass distortion works by relocating
the pixels of the image based on a
displacement map. The map is created
by combining displacement
information from a source with a
preset map type.
Using Image Effects296
The Glass Distortion effect.
There are five sources of displacement
information:
•Paper uses the information in a
paper texture to displace pixels.
More displacement is applied to
light areas of the texture and less to
dark areas. Paper texture is good
for creating the pebbled glass
effect. Unless you want frosted
glass, you’ll probably want to
increase the scale of the paper.
•3D Brush Strokes uses the
difference in luminance between
the clone source and the current
document.
•Image Luminance uses the light
and dark areas in the current
document to determine the
intensity of distortions.
•Original Luminance uses the
clone source’s luminance. Use a
tessellation as the clone source to
produce a bumpy glass effect.
•[Alpha channel] or [Layer mask]
uses the luminance of a channel or
layer mask. More distortion
appears in the light areas of the
channel. You must have a saved
alpha channel or layer mask to use
this source.
This is a good choice for a
controlled distortion map. For
example, gradations in the channel
lead to a progressive distortion
effect. Shapes in the channel
produce distortions with distinct
outlines.
There are three types of maps:
•Refraction displaces pixels in the
same way that an optical lens
bends light. This is the best map
type for distortions you’d expect
from looking through glass.
•Vector Displacement moves pixels
in a specific direction.
•Angle Displacement moves pixels
in different directions.
To apply a glass distortion effect:
1Select a layer or area of the canvas.
If you want to apply the effect to
the entire image, make sure there
are no selections.
2Choose Effects menu > Focus >
Glass Distortion.
3In the Glass Distortion dialog box,
choose a source from the Using
pop-up menu.
The amount of displacement
depends on the value assigned to
the image pixels from the Using
source.
If you want to work with an
inversion of the selected source,
enable the Inverted check box.
4Adjust the Softness slider to
control the transitions between
displaced colors.
Increasing Softness creates more
intermediate steps, which
produces a smoother distortion. If
Corel Painter 297
you experience aliasing in a glass
distortion, try increasing Softness.
5Choose a map type from the Map
pop-up menu.
6Choose Fast or Good from the
Quality pop-up menu.
7Adjust the following sliders:
•Amount controls the degree of
displacement. Increasing the
Amount distorts your image
more.
•Variance creates multiple varia-
tions in the neighborhood of
the displacement. The result of
increasing variance depends on
the type of image and other set-
tings.
•Direction controls the direction
of displacement. Three o’clock
corresponds to 0°. The Refrac-
tion map type is not dependent
on direction.
As you make changes, the preview
window shows their effect.
8Click OK to apply the effect.
Motion Blur
This effect makes an image appear as
if it has been blurred by movement.
Motion blur applied to a photograph.
To apply a motion blur effect:
1Select a layer or area of the canvas.
If you want to apply the effect to
the entire image, make sure there
are no selections.
2Choose Effects menu > Focus >
Motion Blur.
In the Motion Blur dialog box,
adjust the following sliders:
•Radius sets the amount (dis-
tance) of blur. Moving the
slider to the right makes the
image look as though it’s mov-
ing faster.
•Angle sets the direction in
which the image appears to
travel. Zero degrees blurs in the
direction of 3 o’clock.
•Thinness blurs the image in a
direction perpendicular to the
angle you choose with the
Angle slider.
3Click OK to apply the effect.
Sharpen
This effect heightens contrast by
intensifying highlights and shadows.
Sharper images are created using
either Gaussian or circular aperture.
Gaussian aperture sharpens the red,
green, and blue components of color;
circular aperture sharpens an image
based on luminance.
Using Image Effects298
Using the Sharpen dialog to sharpen the focus.
To sharpen focus:
1Select a layer or area of the canvas.
If you want to apply the effect to
the entire image, make sure there
are no selections.
2Choose Effects menu > Focus >
Sharpen.
3In the Sharpen dialog box, enable
one of the following aperture
options:
•Gaussian
•Circular
4Use the following guidelines to
adjust the sliders:
•Amount determines how much
of the edge of an element is
affected.
•Highlight determines the
intensity of the bright areas.
Move the slider to the right to
brighten the highlights.
•Shadow determines the depth
of the shadows. The higher the
percentage, the darker the
shadows.
If you have chosen the Gaussian
aperture and you want to sharpen
only selected colors, enable any of
the Red, Green, or Blue check
boxes.
5Click OK to apply the effect.
Soften
This effect increases the transition
from one part of your image to
another, enhancing the anti-aliasing
of strokes. Images are softened using
either Gaussian or circular aperture.
Gaussian aperture is useful for
creating smooth, optical blurs or
defocusing; circular aperture is useful
for creating shadow maps cast by a
circular light source like the sun.
The Super Soften effect is a stronger
version of Soften.
To soften focus:
1Select a layer or area of the canvas.
If you want to apply the effect to
the entire image, make sure there
are no selections.
2Choose Effects menu > Focus >
Soften.
3In the Soften dialog box, choose
one of the following apertures:
•Gaussian
•Circular
4Adjust the Amount slider.
The farther the slider is to the
right, the more steps there are
between image elements, which
creates more blurring.
5When you are satisfied with the
settings, click OK to apply the
effect.
Zoom Blur
This effect creates a blur by zooming
in on (or out from) an area. Imagery
around the zoom point stays clear.
Imagery distant from the zoom point
is blurred more. This is a great way to
call attention to a particular area of the
image.
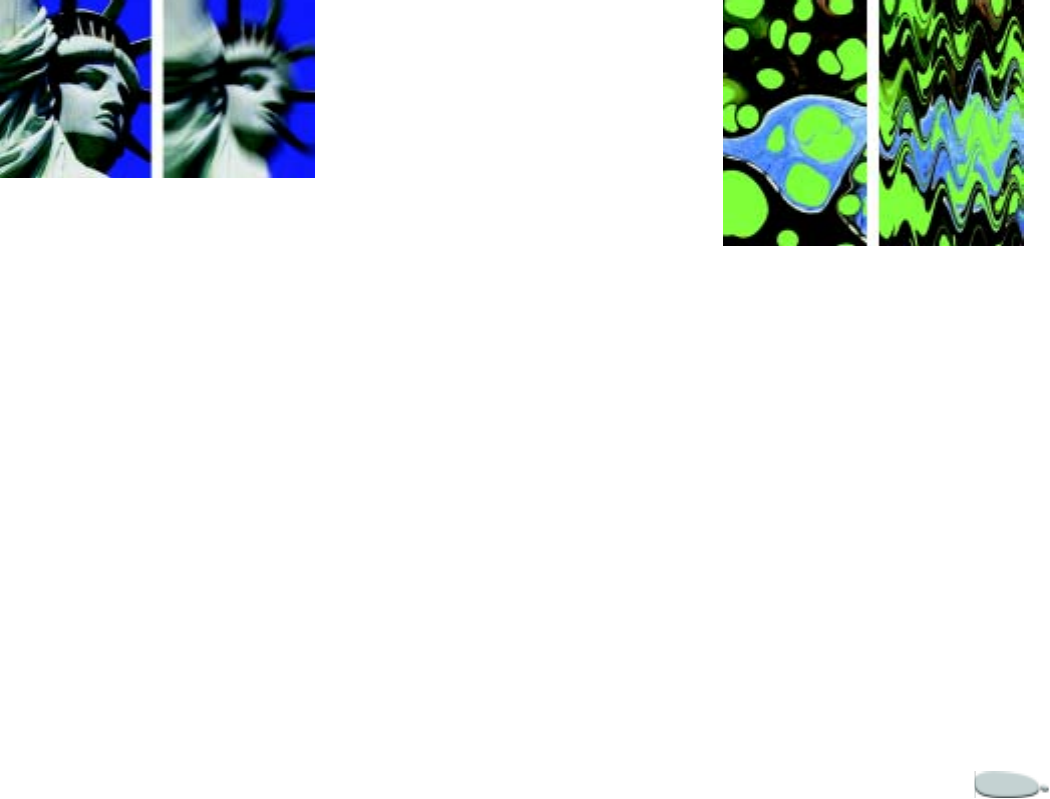
Corel Painter 299
Using the Zoom Blur dialog to blur the focus.
To apply zoom blur:
1Select a layer or area of the canvas.
If you want to apply the effect to
the entire image, make sure there
are no selections.
2Choose Effects menu > Focus >
Zoom Blur.
3In the document window, click the
image to specify the zoom point.
4In the Zoom Blur dialog box,
adjust the Amount slider to
determine the amount of blur.
If you want to create the blur by
zooming in, enable the Zoom In
check box. If you want to create the
blur by zooming out, disable the
Zoom In check box.
5When you are satisfied with the
settings, click OK to apply the
effect.
Esoterica Effects
The Esoterica Effects menu holds
some interesting and specialized
effects.
Marbling
Marbling creates intricate distortions
of an image, following a technique
that dates back to the 12th century.
The marbling effect is created by
dragging a fork, or rake, across an
image, creating an effect similar to a
fork dragging through a mix of
chocolate syrup and melted ice cream.
The Marbling effect.
Each time you drag a rake across an
image, you create a step. You can create
marbling recipes that include several
steps—each one using a different
rake, direction, and waviness. You can
save marbling recipes and reuse them.
Marbling works best with patterns or
textures. The Blobs effect is an
excellent way of creating the raw
materials for marbling; filling with a
pattern is another. Refer to “Blobs” on
page 303 for more on the Blobs effect.
To create a marbling recipe:
1Select a layer or area of the canvas.

Using Image Effects300
If you want to apply the effect to
the entire image, make sure there
are no selections.
Selections can help you control the
marbling when you have a
particular effect in mind. For
example, the rake path normally
begins from the edge of the image.
If you want the rake path to begin
in the center of a blob, select an
area that begins at the blob’s
center.
2Choose Effects menu > Esoterica
> Apply Marbling.
3In the Apply Marbling dialog box,
choose a direction for the rake
stroke:
•Right-to-Left
•Left-to-Right
• Top-to-Bottom
• Bottom-to-Top
4Create a rake stroke by adjusting
any of the following sliders and
clicking Add Step:
• Spacing adjusts the distance
between rake teeth. The slider
controls the number of teeth in
the rake. When the slider is all
the way to the right, the rake
has one tooth.
• Offset moves the rake perpen-
dicular to the path direction.
Use Offset to adjust the posi-
tion of the rake lines.
• Waviness changes the ampli-
tude (height) of the waves.
When Waviness is set to zero,
the path is straight.
• Wavelength determines the dis-
tance between wave peaks.
• Phase slides the wave in the
rake direction. This lets you set
where in the curve—peak,
downslope, valley, or upslope—
the rake begins in the image.
• Pull controls how much the
rake distorts the image. Lower
values produce thin, short dis-
tortions. Higher values create
stronger distortions.
• Quality lets you control the
smoothness in the marbled
image. Low Quality settings
produce an aliased effect. The
marbling looks rough with
scattered pixels. Increasing
Quality adds anti-aliasing,
making color distortions appear
smoother and more fluid.
As you adjust the sliders, the
dotted lines in the preview show
the rake path.
5Repeat steps 3-4 for each rake step
you want to create.
The Apply Marbling dialog box
displays the current step number
and the total number of steps in
the recipe. You can move between
steps by clicking the forward and
backward arrow buttons.
6When you are satisfied with the
settings, click OK to apply the
effect.
Notes:
•
Steps are applied in order, so
subsequent steps work from the result of
the previous one.
•
A large part of the final look of the
marble depends on whether you start
horizontally or vertically, with a fine
comb or coarse rake.
•
Each step you add increases the time it
takes to apply the recipe.
Corel Painter 301
To replace a step:
•In the Apply Marbling dialog box,
click Replace.
The current step is replaced using
the current settings.
To clear a recipe:
•In the Apply Marbling dialog box,
click Reset.
The current recipe is deleted.
To save a recipe:
1In the Apply Marbling dialog box,
click Save.
2In the Save Marbling dialog box,
specify a name.
To load a recipe:
1In the Apply Marbling dialog box,
click Load.
2In the Marbling Recipes dialog
box, choose a recipe.
Auto Clone
The Auto Clone effect automatically
applies brush dabs to your image. The
types of dabs depend on the currently
selected brush. The color is picked up
from the clone source.
The best way to produce a Natural-
Media version of an image is to first
clone it and then choose a brush that
produces artistic dabs. The Driving
Rain variant of the Cloner brush
works well for generating a hand-
drawn look. The Seurat variant of the
Artists brush also works well.
In this example, the Seurat variant was used
with the Auto Clone effect.
The Auto Clone effect has no dialog.
It uses the current brush settings and
the clone color.
For information on cloning, refer to
“Cloning Imagery” on page 187.
If you apply Auto Clone to a large
area, the paint may fill smaller
rectangular tiles one at a time. If you
click to stop the Auto Clone, it won’t
automatically finish the final tile of
the overall selected area. To fill in
non-rectangular areas, you can use
Auto Clone with a selection. For more
information, refer to “Creating
Selections” on page 206.
When you use Auto Clone with the
Felt Pen Cloner and other tools that
turn black as you repeat strokes, areas
darken rapidly. You can slow down the
color buildup and still use Auto Clone
by dimming your original image.
Another way to automate cloning is by
recording and playing back individual
brush strokes. This feature is
especially useful for filling in
backgrounds. For more information,
refer to “Recording and Playing Back
Strokes” on page 117.
Using Image Effects302
To fill an area with cloned brush
strokes:
1Open an image file to use as a
clone source.
2Do one of the following:
• To use Auto Clone in a new,
blank document, choose File
menu > Clone. In the clone,
choose Select menu > All, and
press Delete.
• To enhance an existing image
with Auto Clone, open the
image and choose File menu >
Clone Source > [clone
source]. Any open image can
be selected as the clone source.
Differences in file size might
affect results. If no source is
selected, the current pattern is
used.
3Select the brush and variant you
want to use to add strokes.
If you chose a variant from a brush
category other than Cloners, click
the Colors palette menu arrow and
enable Use Clone Color.
4Make a selection if you want to
apply the effect to a portion of your
image.
If nothing is selected, the entire
image is affected.
5Choose Effects menu > Esoterica
> Auto Clone.
Dabs of paint are automatically
applied to the selected area.
6Click anywhere in the image to
turn off the effect.
Tip
•
You can increase color variation in the
paint dabs by setting the H, S, and V
values to 15% on the Color Variability
palette.
Auto Van Gogh
The Auto Van Gogh effect works with
the Auto Van Gogh variant of the
Artists brush. This algorithmic
approach to placing directional brush
strokes results in a Van Gogh-like
rendition of an image.
Using Auto Van Gogh.
The effect requires two passes. The
first pass determines the angles of the
brush dabs. The second pass applies
the dabs. The image is then rendered
in a set of directional brush strokes.
To apply Auto Van Gogh to an
image:
1Select the image you want to use.
2Choose File menu > Clone to
create a clone.
3On the Brush selector bar, choose
Artists from the Brush selector.
4Choose Auto Van Gogh from the
Variant selector.
5On the Color Variability palette,
adjust any controls.
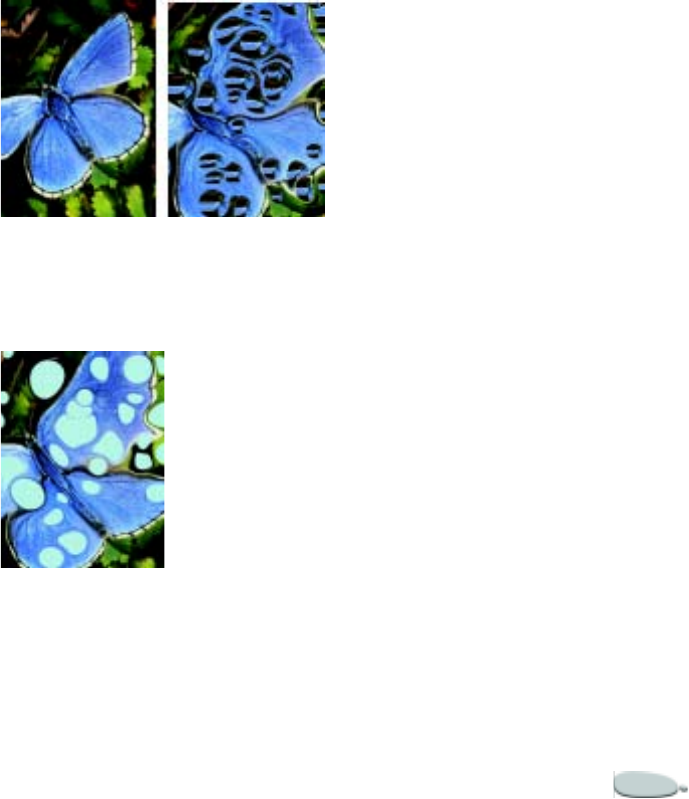
Corel Painter 303
6Choose Effects menu > Esoterica
> Auto Van Gogh.
Blobs
Blobs creates a pattern similar to oil
floating on water. The effect takes a
source and puts it in a swirling pattern
by placing blobs on the image. The
underlying image is distorted as if it
were liquid.
You can use one of three sources to fill
in the blobs:
•Paste Buffer uses the current
contents of the Clipboard to fill in
the blobs. You can produce blobs
that look like bubbles by creating a
circular selection that’s shaded like
a sphere, and copying it to the
Clipboard.
A Blob effect created using Clipboard contents.
•Current Color uses the color
selected on the Colors palette to fill
the blobs.
A Blob effect created using Current Color.
•Pattern uses the current pattern on
the Patterns palette to fill in blobs.
Blobs create a nice basis for the
Marbling effect because they create
interesting color patterns. You may
want to apply this effect to your
original image before applying
Marbling. For more information
about marbling, refer to “Marbling”
on page 299.
Your computer must have a math
coprocessor to use the Blobs effect.
To apply a blob effect:
1Do one of the following:
• To use the Clipboard contents
to fill the blobs, make a selec-
tion and press Command+C
(Mac OS) or Ctrl+C (Win-
dows) to copy the selection to
the Clipboard.
• To use the current color to fill
the blobs, choose a color on the
Colors palette.
• To use a pattern to fill the
blobs, choose a pattern on the
Patterns palette.
2Open or select the image where
you want to create the blobs.
3Choose Effects menu > Esoterica
> Blobs.
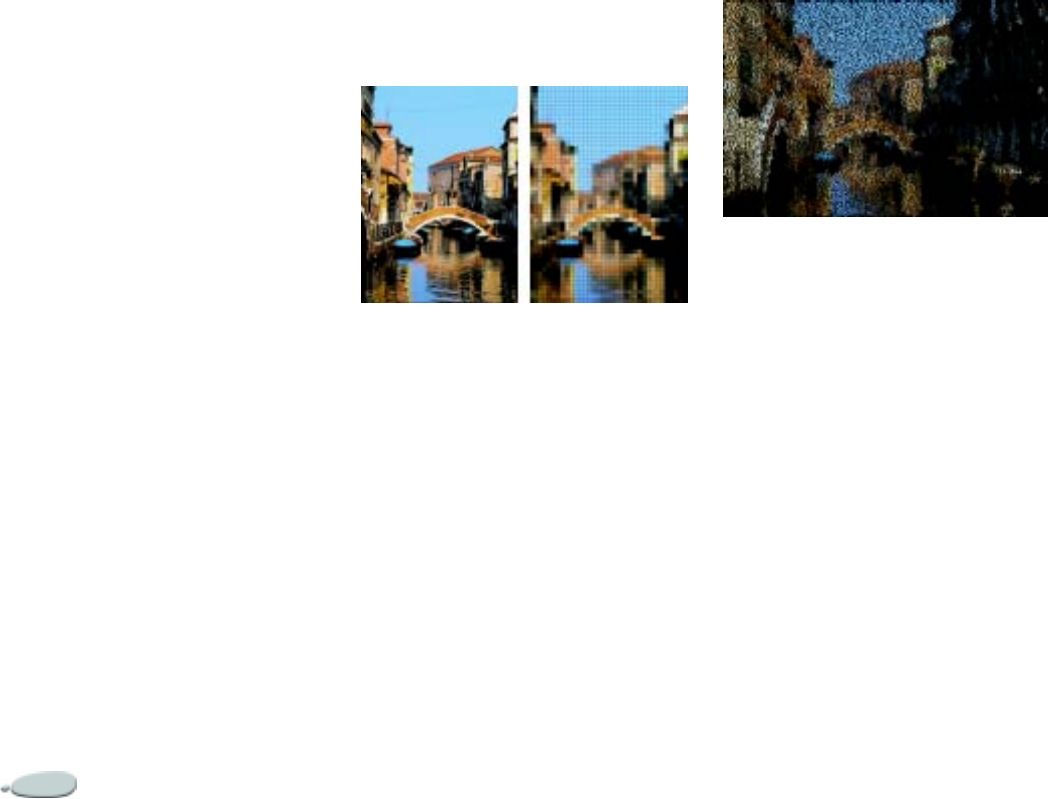
Using Image Effects304
4In the Create Marbling Stone
Pattern dialog box, specify the
number of blobs.
5Specify the minimum and
maximum size of the blobs.
6Enter a Subsample value.
This option creates the anti-
aliasing steps.
7Choose a source from the Fill
Blobs With pop-up menu.
8The Seed is a number used in
randomizing the blobs.
Each time you apply the effect, a
different seed number is generated.
You may enter a specific number if
you like.
9Click OK to apply the effect.
Custom Tile
This effect turns your image into tiles.
Corel Painter generates tiles based on
a preset pattern, like bricks or
hexagons, or from a paper pattern,
clone source, or channel. If you use a
preset pattern, the tiles are uniform in
size and cover the entire image evenly.
The color of each tile is determined by
applying the average color of the
image pixels it covers.
Tiles generated using a preset pattern.
When you generate tiles from either a
paper pattern, clone source, or
channel, tiles are based on light and
dark concentrations in the selected
source. In this case, the shape of the
tiles is varied and may not cover your
image evenly.
Tiles generated using a paper pattern.
The Custom Tile effect functions
differently than the Mosaic and
Tessellation features. For more
information on Mosaics and
Tessellations, refer to “Getting Started
with Mosaics” on page 351.
To apply custom tiles:
1Select a layer or area of the canvas.
If you want to apply the effect to
the entire image, make sure there
are no selections.
2Choose Effects menu > Esoterica
> Custom Tile.
3In the Custom Tile dialog box,
choose a tile pattern or source from
the Using pop-up menu.
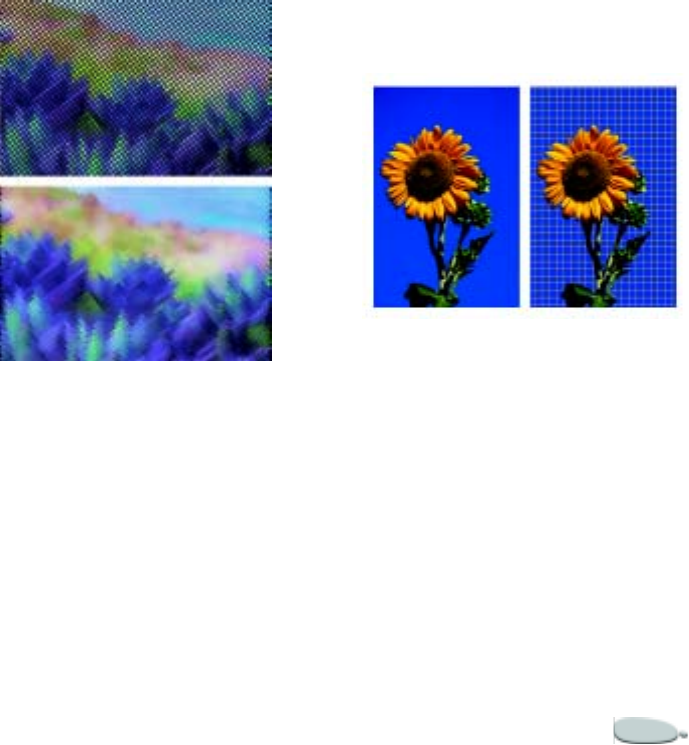
Corel Painter 305
4Adjust any of the following pattern
properties:
• For Brick, use the Brick Width
and Brick Height sliders to
adjust the size of the bricks.
• For the other built-in tile
shapes, use the Angle and Scale
sliders to adjust the tile orienta-
tion and size.
• For Original Luminance,
Paper, and channel or layer
mask, use the Threshold slider
to draw the line between
“light” and “dark.” Everything
above the Threshold value
becomes tiles, and everything
below becomes grout.
5Adjust the Thickness slider to
control the width of the cracks
between tiles (grout lines).
6Adjust the Blur Radius slider to set
the sampling radius for blurring
the crack or grout color. Increasing
the Blur Radius adds more
neighboring colors to the crack
pixels in each pass.
7Blur Passes sets the number of
times the crack pixels are blurred.
More passes mix more tile color
into the cracks. Blurring occurs
only when Blur Passes is greater
than zero.
Blurring changes the grout appearance.
If you want grout to show between
the tiles, enable the Use Grout
check box.
8Click the Grout color chip, and
choose a grout color from the
Color Picker.
Grid Paper
The Grid Paper effect adds a grid of
horizontal lines, vertical lines,
rectangles, or dots to an image.
Grid paper becomes part of the image.
Unlike the Grid Overlay, which is a
transparent layer that floats above
your image as a reference, Grid Paper
becomes part of your image.
To apply grid paper:
1Select a layer or area of the canvas.
If you want to apply the effect to
the entire image, make sure there
are no selections.
2Choose Effects menu > Esoterica
> Grid Paper.
Using Image Effects306
3In the Grid Options dialog box,
choose a grid type from the pop-up
menu.
You can choose Rectangular Grid,
Vertical Lines, Horizontal Lines,
or Dot Grid.
4Set the dimensions of the grid
using the following options:
• Horizontal Spacing determines
the amount of space between
horizontal lines.
• Vertical Spacing determines the
amount of space between verti-
cal lines.
• Line Thickness sets the width
of grid lines.
5Select Grid and Background
colors.
• Grid Color changes the color of
grid lines. Click the Grid Color
icon, and choose a color from
the Color Picker.
• Background changes the grid’s
background color. Click the
Background icon, and choose a
color from the Color Picker.
The Transparent Background
option, used for the Grid Overlay,
is not available for Grid Paper.
6Click OK to apply the effect.
Growth
The Growth effect generates branch-
like designs from a central point and
adds them to your image. The designs
resemble architectural renderings of
trees.
Examples of Growth patterns.
Growth patterns are created using the
current primary color. You have access
to the Colors palette while the Growth
dialog box is open, so you can change
the primary color at any time.
To create growth patterns:
1Choose a color on the Colors
palette.
2Choose Effects menu > Esoterica
> Growth.
3In the Growth dialog box, enable
any of the following check boxes:
•Hard Edges—enable to create
growth patterns with hard
edges; disable to create growth
patterns with soft, feathery
edges
•Fractal—enable to create open-
ended (fractal) patterns; disable
to create non-fractal patterns
that are closed on the outside
by a ring
4Use the following guidelines to
adjust the sliders.
• Flatness reshapes the growth
pattern like a lens effect. Move
the slider to the left for a con-
cave lens effect. Move the slider
to the right for a “fish-eye” lens
effect.
• Thinout affects how the size of
the growth pattern is distrib-
uted from the center to the out-
side edges. At over 100%, the

Corel Painter 307
outside edges become thicker.
At under 100%, the edges
become finer and more deli-
cate.
• Random affects how symmetri-
cal the growth patterns appear.
Lower values generate straight-
line, geometrical designs.
Higher values generate dis-
torted, crooked designs.
• Thickness uniformly adjusts
the weight of the lines within
the design. Move the slider to
the left for thinner lines and to
the right for thicker lines. The
growth pattern never gets thin-
ner than one pixel.
• Branch determines how many
branches come from the center
to the outside edge. It has a
range of 1 through 20. The
default is 3.
•Max Level determines the
number of levels or sub-levels
that appear in the tree. Specifi-
cally, Max Level determines
how the branches split to the
outside edge.
• Fork adjusts the overall intri-
cacy of the outermost branches.
• Fork Ratio is like Fork, but it
affects only the tips of the out-
ermost branches.
5Without closing the Growth dialog
box, drag to create a growth
pattern in the document window.
As you drag, you see the outline of
the growth pattern. When you
release, the pattern is created.
6Do one of the following:
• To apply the current growth
pattern, click OK.
• To discard all patterns, click
Cancel.
When you click Cancel, all the
growth patterns you have created
since you opened the dialog are
deleted. It’s a good idea to click
OK to save each pattern you create.
Note
•
The sliders in the Growth dialog box
affect both fractal and non-fractal growth
patterns in a similar way, with the
exception of Fork and Fork Ratio, which
affect only fractal growth patterns.
Highpass
Highpass suppresses low frequency
areas containing gradual or smooth
transitions of brightness levels. This
leaves high frequency areas, or just the
edges of an image, containing stark
shifts between brightness levels.
The Highpass effect uses either
Gaussian or circular aperture.
Gaussian aperture affects the red,
green, and blue components of color;
circular aperture uses image
luminance.
You can make the highpass more
pronounced by using the Equalize
effect.
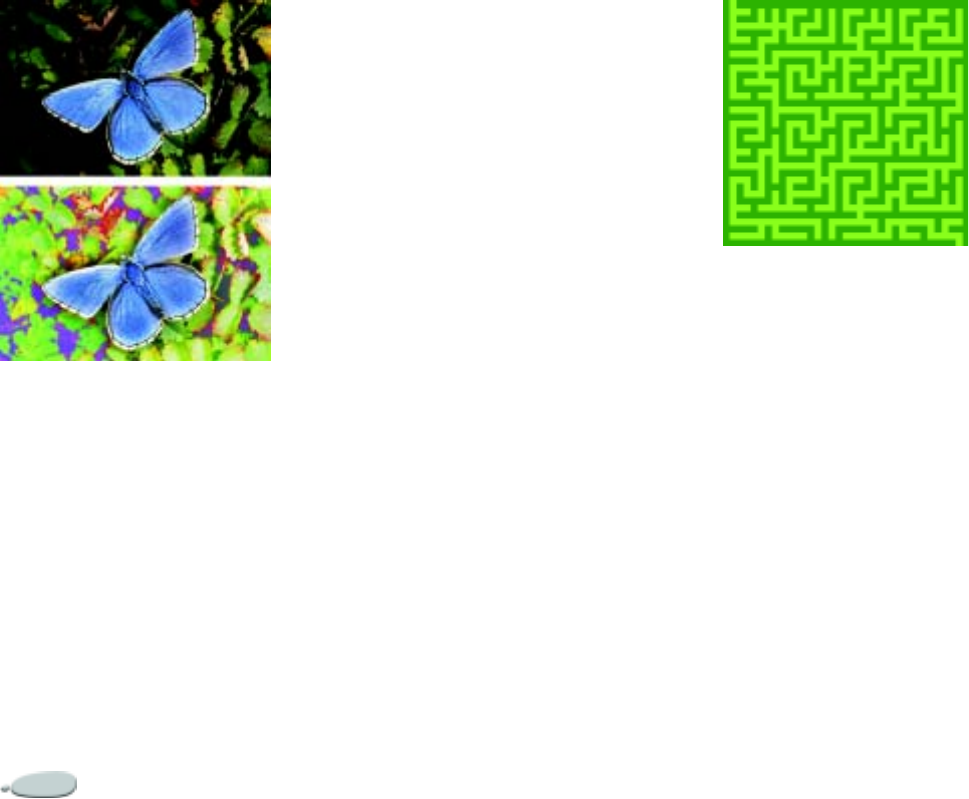
Using Image Effects308
Highpass introduces stark shifts between
brightness levels.
To apply a highpass effect:
1Select a layer or area of the canvas.
If you want to apply the effect to
the entire image, make sure there
are no selections.
2Choose Effects menu > Esoterica
> Highpass.
3In the Highpass dialog box, choose
one of the following aperture
options:
•Gaussian
•Circular
4Move the Amount slider to
determine how much to suppress
the low frequency areas.
This value defines a radius, in
pixels, around each pixel in the
selected image area. Moving the
slider to the left suppresses larger
amounts of low frequency
information. Moving the slider to
the right suppresses smaller
amounts.
5Click OK to apply the effect.
Maze
The Maze effect generates an image of
a maze. Typically, you'll create a maze
in a new, blank image. Each maze has
one “solution”—an open path from
the entrance to the exit.
Mazes produce interesting designs.
You can capture a portion of the maze
as a pattern or paper texture, or use
the maze as a source for other effects.
Mazes must be rectangular. They do
not respect the contours of a non-
rectangular selection.
To apply a maze effect:
1Select a layer or area of the canvas.
If you want to apply the effect to
the entire image, make sure there
are no selections.
2Choose Effects menu > Esoterica
> Maze.
3In the Maze dialog box, set any of
the following options:
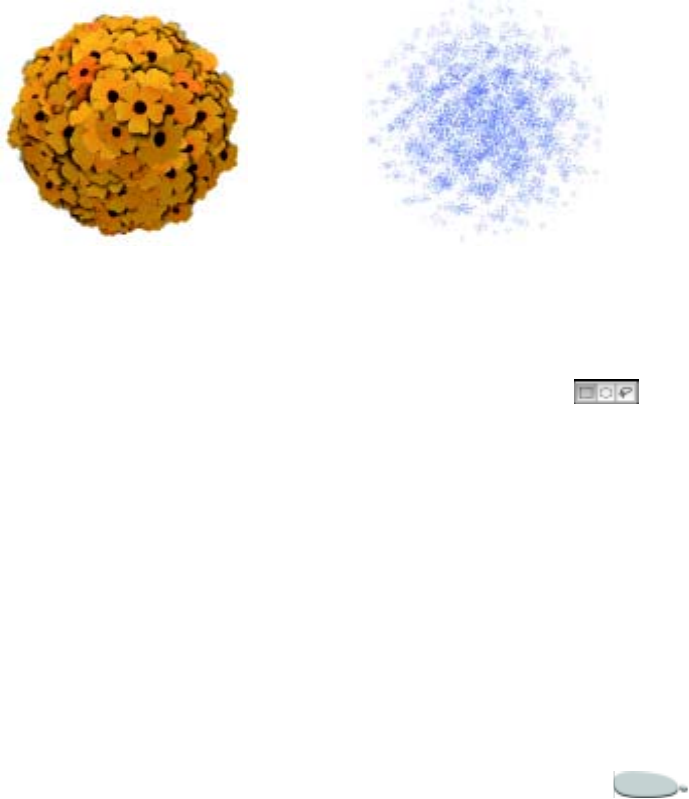
Corel Painter 309
• Patterned—constrains barriers
to the horizontal.
• Display Solution—displays the
path from the entrance to the
exit.
• Seed—used to generate a ran-
dom maze pattern.
• Thickness—sets the width of
barriers and paths.
4Click the Maze Color icon and
choose a maze color from the
Color Picker.
5Click the Background icon and
choose a background color from
the Color Picker
6Click OK to apply the effect.
Place Elements
Place Elements is an effect designed to
automate the application of brush
dabs. It's particularly useful with the
Image Hose brush. For more
information on the Image Hose, refer
to “Using the Image Hose” on
page 334.
An example of Place Elements used with the
Image Hose.
Place Elements creates a virtual
sphere within the confines of a
selection rectangle. When the
selection is square, the sphere is
perfectly round; when the selection is
rectangular, the sphere is elongated or
flattened.
A number of points are created at
random locations on the sphere. The
points then seek to distance
themselves from each other, and a
brush dab is placed at each point.
Each dab’s appearance is adjusted
based on its location on the sphere.
An example of Place Elements used with a
brush.
To place elements:
1Choose the Rectangular Selection
tool from the toolbox .
2Drag to create a selection.
This selection determines the
location and size for the effect.
3Do one of the following:
• If you want to use the Image
Hose, choose a nozzle from the
Nozzle selector on the toolbox.
• If you want to apply paint dabs,
select a brush and choose a pri-
mary color.
4On the Colors palette, set the
secondary color to black.

Using Image Effects310
The effect automatically controls
mixing of the secondary color with
Nozzle elements to produce depth
shading. Shadows tend toward
black, so this is a good color to use.
5Choose Effects menu > Esoterica
> Place Elements.
6In the Place Elements dialog box,
specify a number of iterations.
In each iteration, the points seek to
distance themselves from each
other on the surface of the virtual
sphere. The points start at random
locations, so if you set zero as the
number of iterations, their
placement is completely random.
Higher numbers of iterations
increase the regularity of the
spacing.
7Adjust the Points slider to set the
number of points to create on the
virtual sphere.
Each point created correlates to an
image element placed.
8Select the Number of Levels.
With one level, each point receives
only one element.
With two levels, each point
receives an element, then is used as
the center for another virtual
sphere on which point iteration
and element placement repeats.
The third level extends sphere
creation and element placement
once more.
The number of elements increases
rapidly with more than one level.
For example, if you choose 12
points and three levels you'll create
12+(12x12)+(12x12x12) = 1884
elements. Of course, many of these
will probably be covered by later
placements.
9Adjust the Radius Fraction slider.
Radius Fraction determines the
size of the virtual spheres created
at the second and third levels. The
first level radius is multiplied by
the fraction amount to determine
the radius of the second level
spheres.
The fraction is used again between
the second and third levels. Higher
values (above 1.0) increase
overlapping of the spheres. Lower
values (below 1.0) preclude
overlapping (when sufficient
iterations are used to distribute the
points.)
10 Adjust the Oversizing slider.
Oversizing controls the diameter
of the level one virtual sphere in
relation to the selection marquee.
At 2.5, the sphere fits within the
selection. Higher numbers shrink
the sphere. Lower numbers stretch
it beyond the selection.
11 Adjust the Ambient Amount slider.
Ambient Amount controls the use
of the secondary color in elements
that appear on the virtual sphere
away from the light source. This is
how the clump of placed elements
exhibits coherent three-
dimensional shading when black is
used as the secondary color. The
default is 0.7, which produces good
shading results. Increasing the
value brings in more of the
secondary color. Decreasing it
reduces secondary color mixing.
12 Enable Display Iterations to
display a small marker for each
point after each iteration.
When this option is enabled, you
can see the points move as they
seek to avoid each other. This can
be a help in deciding the number
of iterations to use.
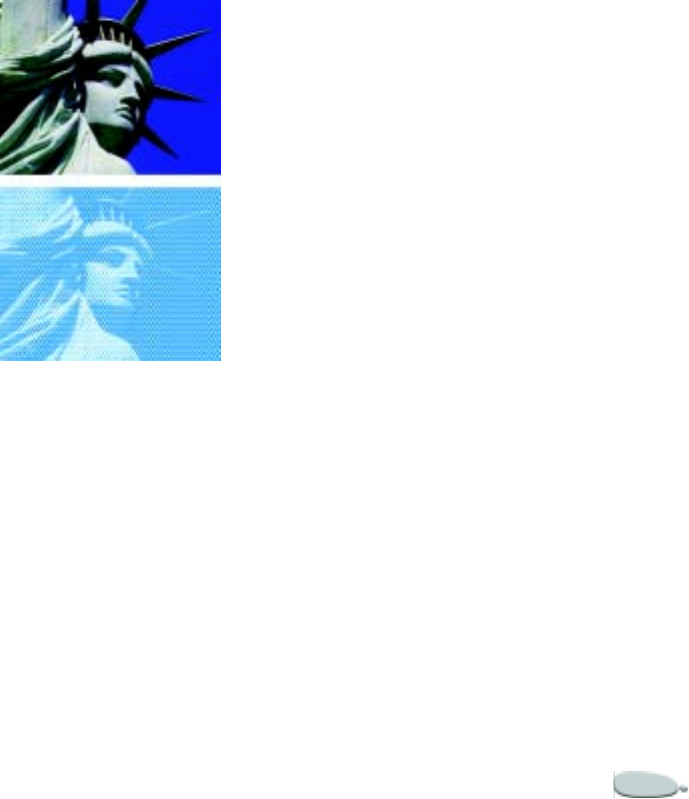
Corel Painter 311
13 Adjust the Delay Time slider to set
a pause between each iteration
display.
With a slight pause, you can see
the track of the moving points
more clearly.
Tip
•
If you have chosen two or three levels,
you can prevent overlapping elements by
enabling the Cull Interiors check box.
This removes points that occur inside of
other spheres, before elements are placed.
This option increases processing time for
the effect.
Pop Art Fill
This effect lets you cover an image
with pseudo half-tone dots. You can
also use the Pop Art Fill effect with
other Corel Painter features and
effects to create a pop art image.
The Pop Art Fill effect.
To apply pop art fill:
1Select a layer or area of the canvas.
If you want to apply the effect to
the entire image, make sure there
are no selections.
2Choose Effects menu > Esoterica
> Pop Art Fill.
3In the Pop Art Fill dialog box,
choose a source from the Using
pop-up menu.
If you want to work with an
inverted version of the source,
enable the Inverted check box.
4Adjust the Scale slider to set the
dot size.
5Adjust the Contrast slider to mix in
the luminance of the control
medium.
This is particularly useful when
using Image Luminance.
6Click the Dab Color icon and
choose a dot color from the Color
Picker.
7Click the Background icon and
choose a background color from
the Color Picker.
To create a pop art image:
1Open an image, and choose File
menu > Clone.
2Choose Effects menu > Tonal
Control > Adjust Colors.
3In the Adjust Color dialog box,
drag the Saturation slider all the
way to the left.
This reduces the image to
grayscale.
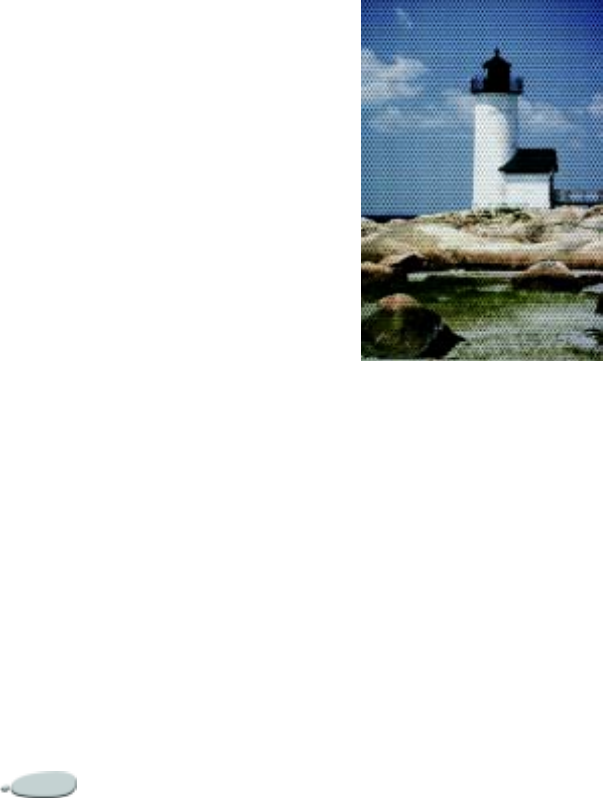
Using Image Effects312
4Choose Effects menu > Esoterica
> Pop Art Fill.
5In the Pop Art Fill dialog box, set
the dab color to black and the
background color to white.
6Adjust the Scale slider, and click
OK.
The Pop Art Fill effect is applied to
the clone.
7Choose Select menu > All.
8Choose Select menu > Float.
9Choose Edit menu > Copy.
10 Close the clone file.
11 In the original image file, choose
Edit menu > Paste.
The copied layer is pasted into the
original image file.
12 On the Layers palette, choose
Darken from the Composite
Method pop-up menu.
This makes the background image
visible through all white areas of
the Pop Art layer.
Tip
•
If you want to change the colors in the
image, deselect the layer on the Layers
palette, and apply an effect.
A Pop Art image with the Express Gradient
and Posterize effects applied.
Objects Effects
There are two Objects effects—Drop
Shadow and Align. These effects work
only on layers and are explained in
“Adding Drop Shadows” on page 243
and “Aligning Layers” on page 245.
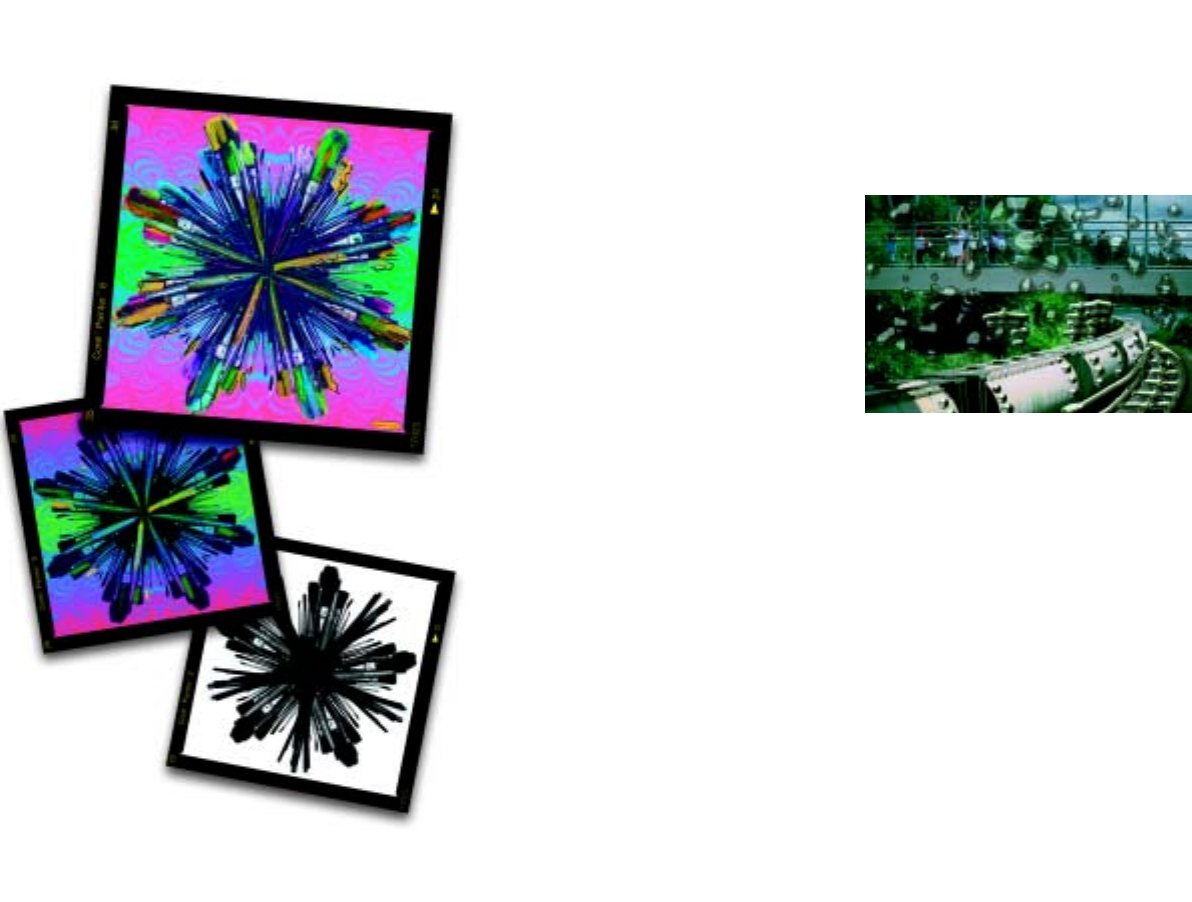
16
Using Dynamic Plug-ins
Dynamic plug-ins are a category of
floating layers that let you apply
effects to an image. They are called
“dynamic” because you can modify
the effect any number of times
without damaging the source image.
Each dynamic plug-in provides new
capabilities for manipulating images.
The function and behavior of
dynamic plug-ins falls into three
major categories. Dynamic plug-ins
can:
•Create a new layer
• Alter an existing layer
• Adjust the underlying imagery
(what it's floating over)
The Liquid Metal dynamic plug-in lets you
paint with either metal or liquid.
When you save the file in RIF format,
the dynamic layer retains its dynamic
nature. Any time you open the file,
you can adjust the effect.
Dynamic Plug-in Basics
The Dynamic Plug-ins button on the
Layers palette provides access to the
currently installed dynamic plug-ins,
which you can use to create dynamic
layers.

Using Dynamic Plug-ins314
To access the dynamic plug-ins:
1Choose Window menu > Show
Layers to display the Layers
palette.
2On the Layers palette, click the
Dynamic Plug-ins button .
A list of dynamic plug-ins is
displayed.
Creating Dynamic Layers
The steps for creating dynamic layers
vary slightly for the different types of
dynamic plug-ins.
Details about creating and working
with a specific dynamic layer appear
later in this chapter.
Like all floating objects, dynamic
layers appear in the Layer list on the
Layers palette, where they are
identified by the plug icon.
To create a dynamic layer of a specific
size, make a selection in the document
window. The new layer will conform
to the dimensions and location of the
selection.
If no selection is active, Corel Painter
makes the new dynamic layer the
same size as the Canvas. For more
information about selections, refer to
“Creating Selections” on page 206.
To create a dynamic layer:
1Select a layer or area in which to
apply the effect, if required by the
type of dynamic plug-in.
2On the Layers palette, click the
Dynamic Plug-ins button and
choose a dynamic plug-in.
3In the dialog box, choose options
to set the effect you want.
The dynamic layer is added to the
Layer list on the Layers palette.
Note
•
Once you choose a dynamic plug-in,
you can’t cancel the operation. If you
decide you don’t want the dynamic layer,
click OK to close the dialog box, and
remove the dynamic layer by choosing
Edit menu > Undo. You can also remove
the dynamic layer on the Layers palette by
clicking the palette menu arrow and
choosing Delete Layer.
Changing Dynamic Layer
Settings
Once you’ve created a dynamic layer,
you can open its options dialog and
change its settings.
To change a dynamic layer’s
settings:
1Select the dynamic layer in the
document window or on the
Layers palette.
2On the Layers palette, do one of
the following:
• Click the palette menu arrow,
and choose Options.
• Double-click the dynamic
layer.
3In the Options dialog box, change
any settings.
Managing Dynamic Layers
You can select, move, group, hide,
show, and lock dynamic layers, as well
as change their display order, opacity,
and composite method, as you do
other layers. For information on these
features, refer to “Using Layers and
Layer Masks” on page 229.
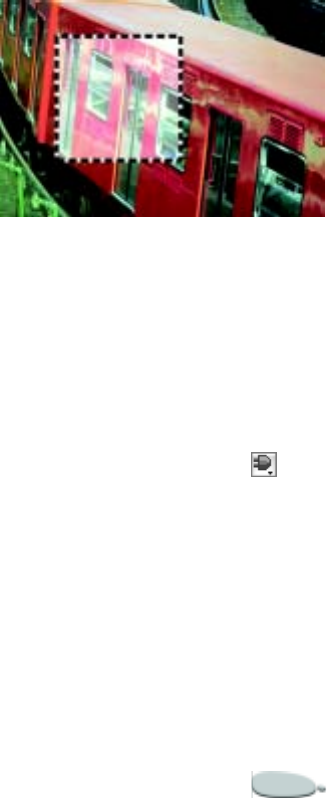
Corel Painter 315
Committing Dynamic Layers
At some point, you may want to
finalize the effect and make the result
a standard layer. This will enable you
to work with the image in ways not
possible when the effect is held in a
dynamic layer.
Committing a dynamic layer captures
its current appearance to a pixel-based
layer. Once a dynamic layer is
committed, you can no longer adjust
the effect. The following operations
automatically generate a prompt to
commit a dynamic layer:
•painting on a dynamic layer
• applying an additional effect or
dynamic plug-in
• dropping a dynamic layer
• collapsing a group that contains a
dynamic layer
• saving to a non-RIFF format
Reverting Dynamic Layers
The Revert command allows you to
restore source images to their original
condition. This feature is available
only for dynamic plug-ins that modify
a layer—Burn, Tear, and Bevel World.
To revert a dynamic layer:
1Select the modified layer in the
document window or on the
Layers palette.
2On the Layers palette, click the
palette menu arrow and choose
Revert to Original.
Corel Painter extracts the original
layer content and discards the
dynamic layer.
Brightness/Contrast
The Brightness/Contrast dynamic
plug-in creates a layer that applies
brightness and contrast adjustments to
the imagery beneath it.
The Brightness/Contrast dynamic layer affects
all imagery beneath the layer.
To create a Brightness/Contrast
dynamic layer:
1Make a selection in the document
window if you want the new
dynamic layer to be a specific size.
2On the Layers palette, click the
Dynamic Plug-ins button and
choose Brightness and Contrast.
3In the Brightness/Contrast dialog
box, drag the sliders to adjust the
image contrast and brightness.
If you don’t like the results and
you want to start again, click Reset
to restore the default settings.
4Click OK to apply the settings.
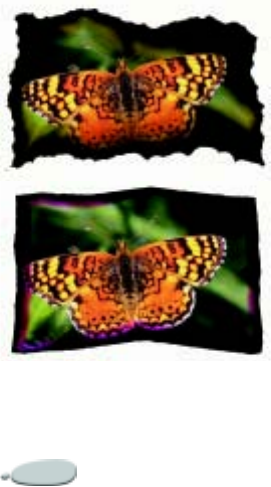
Using Dynamic Plug-ins316
Note
•
You can also use the plug-in’s Opacity
slider on the Layers palette to adjust the
Brightness/Contrast effect.
Burn
The Burn dynamic plug-in applies a
burn effect to the edges of the selected
layer or area. You can adjust the
amount and character of the burn
with sliders.
Different burn settings produce diverse results.
To burn a layer or selection:
1Select the layer or area of the
Canvas you want to burn.
If you select an area, Corel Painter
automatically creates a new layer
when you apply the burn.
2On the Layers palette, click the
Dynamic Plug-ins button and
choose Burn.
3In the Burn Options dialog box,
drag the sliders and set the controls
to adjust the burn effect.
•Burn Margin describes the
width of the burn effect in rela-
tion to the layer’s size.
•Flame Breadth describes the
width of the scorched region.
The burn color appears in the
scorch.
•Flame Strength describes how
much of the layer is consumed
by the burn. Increasing Flame
Strength shrinks the layer.
•Wind Direction changes the
burn amount for different sides
of the layer.
•Wind Strength determines
how much change the Wind
Direction control imparts.
•Jaggedness describes the
amount of irregularity in burnt
edges.
•Use Paper Texture lets you use
the current paper to vary dye
concentration in the scorch
region.
•Burn Interior Edges lets you
burn interior edges as well.
Disable this option to protect
the interior edges.
•Burn Color displays the color
used in the scorch area. You can
change the color if you like.
Click the color chip and use the
color picker to select a color.
•Reset restores the default set-
tings.
•Save As Default sets a new
default based on the current
settings.
•Preview enables and disables
Corel Painter from displaying
your changes to the image.
•Off disables Corel Painter from
applying the settings to the
image. You can return later and
turn the burn back on.
4Click OK to apply the settings.
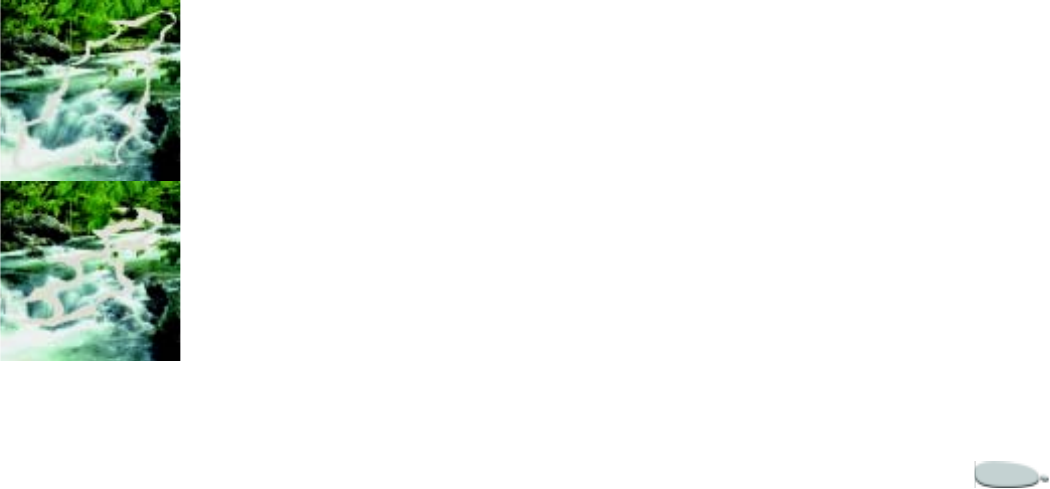
Corel Painter 317
Tip
•
You can use the Revert command to
restore a source image to its original
condition. Refer to “Reverting Dynamic
Layers” on page 315 for more
information.
Tear
The Tear dynamic plug-in applies a
torn paper effect to the edge of a
selected layer or area.
You can tear a little or a lot.
To tear a layer or selection:
1Select the layer or area of the
Canvas you want to tear.
If you select an area, Corel Painter
automatically creates a new layer
when you apply the tear.
2On the Layers palette, click the
Dynamic Plug-ins button and
choose Tear.
3In the Tear Options dialog box,
drag the sliders and set the controls
to adjust the tear effect.
•Margin describes the width of
the tear effect from the edge of
the layer.
•Strength describes how much
of the layer is torn away.
•Jaggedness describes the
amount of irregularity in torn
edges.
•Tear Color shows the color
used at the edge of the tear. You
can change the color if you like.
Click the color chip and use the
color picker to select a color.
•Tear Interior Edges lets you
tear interior edges as well. Dis-
able this option to protect inte-
rior edges.
•Reset restores the default set-
tings.
•Save As Default sets a new
default based on the current
settings.
•Preview enables (checked) and
disables (unchecked) Corel
Painter from displaying your
changes to the image.
•Off disables (checked) Corel
Painter from applying the set-
tings to the image. You can
return later and turn the tear
back on.
4Click OK to apply the settings.
Tips
•
Use a rough paper texture to create a
better tear.
•
You can use the Revert command to
restore a source image to its original
condition. Refer to “Reverting Dynamic
Layers” on page 315 for more
information.
Bevel World
The Bevel World dynamic plug-in
applies 3D bevel effects, or angled
edges, to selected layers or areas.
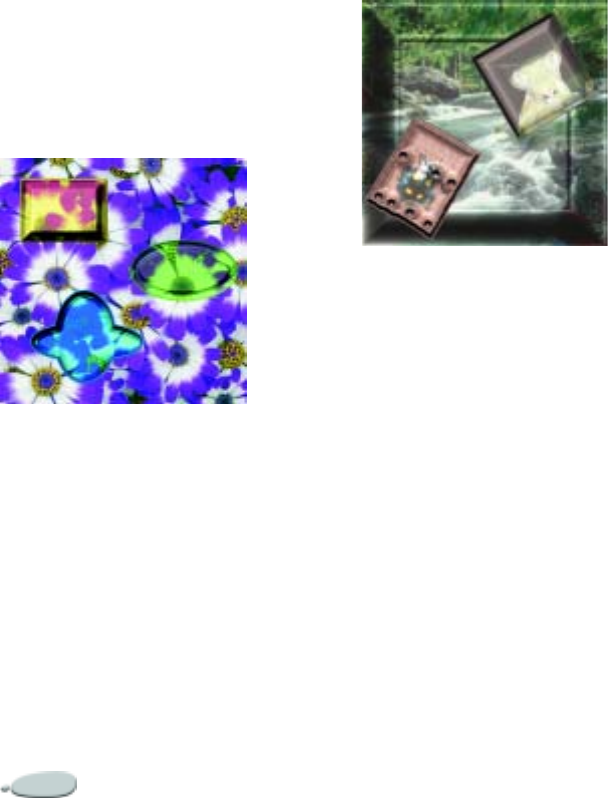
Using Dynamic Plug-ins318
To create a 3D button with text on it,
use Bevel World to create the
background button first. Then create
your text floating over the button.
Group the text and button together,
then Collapse the layer group.
An infinite variety of bevel profiles is possible.
Both bevel shape and lighting can be
controlled to create unique effects.
The Bevel World dialog has controls for 3D
bevel shape and lighting.
Bevel Controls
•Preview shows a real-time preview
based on the options you set.
•Bevel Width describes the width of
the bevel in relation to the layer
diameter.
•Outside Portion controls the
portion of the bevel that appears
outside of the layer.
•Outside Color determines the
color of the outside portion of the
bevel. This applies only when
Outside Portion is above zero. You
can click the Outside Color chip
and use the color picker to set the
color.
•Rim Slope describes the angle of
the rim (innermost portion) of the
bevel.
•Cliff Portion describes the
horizontal distance between the
base and the rim.
•Cliff Height describes the vertical
distance between the base level
and rim level.
•Cliff Slope describes the angle of
the cliff (middle portion) of the
bevel.
•Base Slope describes the angle of
the base (outermost portion) of the
bevel.
•Smoothing controls the roundness
of the transitions between base,
cliff, and rim as well as the
sharpness of the resulting ridges.
•Bevel Interior edges enables
(checked) beveling on the interior
edges of the bevel area.
•Off (when checked) disables Corel
Painter from applying the settings
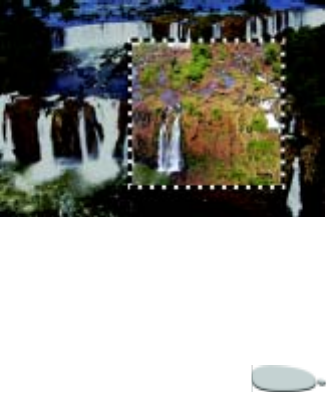
Corel Painter 319
to the image. You can return later
and turn the bevel back on.
Light Controls
Lighting changes can make a huge
difference in the 3D appearance of the
bevel.
You can change the light’s angle by
dragging in the preview sphere. You
can also change the light’s position
and angle by dragging the Light
Direction and Light Height sliders.
With Light Height at maximum, the
light shines straight down on the layer
and the Light Direction setting has no
effect. When Light Height is less than
maximum, the Light Direction slider
rotates the light around the center.
To choose a color for the light, click
the Light Color chip and use the color
picker to set a color.
•Brightness controls the light’s
intensity.
•Scatter adjusts the spread of the
light’s shine over the surface.
•Shine describes the prevalence of
highlights.
•Reflection controls how much of
the source image is visible in the
bevel. If you are working with a
clone, the clone source is mapped
onto the surface at a variable
percentage. A discussion of
reflection maps can be found in
“Working with Reflection Maps”
on page 284.
To bevel a layer or selection:
1Select the layer or area of the
Canvas you want to bevel.
If you select an area, Corel Painter
automatically creates a new layer
when you apply the bevel.
2On the Layers palette, click the
Dynamic Plug-ins button and
choose Bevel World.
If the Commit dialog box displays,
click Commit to commit the
dynamic layer to an image layer.
3In the Bevel World dialog box,
specify the settings you want.
Tip
•
You can use the Revert command to
restore a source image to its original
condition. Refer to “Reverting Dynamic
Layers” on page 315 for more
information.
Equalize
The Equalize dynamic plug-in creates
a layer that improves contrast in
underlying imagery. It does this by
adjusting black and white points and
distributing the brightness levels
throughout the entire range of
available levels.
The Equalize dynamic layer is applied to a
rectangular selection.
Using Dynamic Plug-ins320
The Equalize dynamic plug-in creates
a histogram showing the number of
pixels for each brightness level value.
Equalize allows gamma adjustment,
which lightens or darkens an image
without changing highlights or
shadows.
To create an Equalize dynamic
layer:
1Make a selection in the document
window if you want the new
dynamic layer to be a specific size.
2On the Layers palette, click the
Dynamic Plug-ins button and
choose Equalize.
3In the Equalize dialog box, adjust
the contrast by dragging the small
black and white markers under the
histogram.
Any values in the image located to
the right of the white marker
become white; any values to the
left of the black marker become
black.
4Drag the Brightness slider to
adjust only the midtones of an
image and leave the white and
black areas untouched.
5Click OK to apply the settings.
Note
•
You can also use the Opacity slider on
the Layers palette to adjust the Equalize
effect.
Glass Distortion
The Glass Distortion dynamic plug-in
creates a layer that applies Glass
Distortion to the imagery beneath it.
You can move the layer in the
document to view the distortion over
different imagery.
For best results, you should have
interesting imagery beneath the Glass
Distortion dynamic layer.
The Glass Distortion dynamic layer in action.
To create a Glass Distortion
dynamic layer:
1Make a selection in the document
window if you want the new
dynamic layer to be a specific size.
2On the Layers palette, click the
Dynamic Plug-ins button and
choose Glass Distortion.
3In the Glass Distortion Options
dialog box, choose a displacement
source from the Using pop-up
menu.
•Paper uses the selected paper
texture. Paper texture is good
for creating the pebbled glass
effect. Unless you want frosted
glass, you’ll probably want to
increase the scale of the paper.
•Current Selection uses the cur-
rent selection.
•Image Luminance uses the
current document’s luminance.
•Original Luminance uses the
clone source’s luminance.
Image pixels are displaced based
on the light and dark areas of the
source.
4Drag the sliders and set controls to
adjust the distortion effect.
Corel Painter 321
•Inverted, when enabled, lets
you work with an inversion of
the selected source.
•Softness controls the transi-
tions between displaced colors.
Increasing softness creates
more intermediate steps, which
produces a smoother distortion.
If you experience aliasing in a
glass distortion, try increasing
Softness.
•Amount controls the degree of
displacement. A higher amount
leads to more distortion.
•Variance creates multiple varia-
tions in the neighborhood of
the displacement. The result of
increasing variance depends on
the type of image and other set-
tings.
Tips
•
You can also use the Opacity slider on
the Layers palette to adjust the Glass
Distortion effect.
•
You can move the Glass Distortion
layer in the document window to distort
other areas of the image.
The Glass Distortion dynamic layer using
Paper
The Glass Distortion dynamic layer using
Image Luminance
Kaleidoscope
The Kaleidoscope dynamic plug-in
creates a layer that produces
kaleidoscope effects from the imagery
it floats over.
The traditional kaleidoscope is a
hollow tube with a set of mirrors and
colored chips at one end. You peer into
the other end and enjoy the highly
symmetrical patterns the mirrors
create from the colored chips.
For best results, you should have
interesting imagery beneath the
Kaleidoscope dynamic layer. You can
move the layer in the document to see
the effect on different imagery.
To create a Kaleidoscope dynamic
layer:
1On the Layers palette, click the
Dynamic Plug-ins button and
choose Kaleidoscope.
2In the Kaleidoscope dialog box,
specify the size of the dynamic
layer.
Kaleidoscopes must be square.
3Click OK to create a Kaleidoscope
layer.
Using Dynamic Plug-ins322
Tip
•
You can move the Kaleidoscope layer
to different regions of the document to
distort other imagery. Try using the arrow
keys to see the Kaleidoscope animate.
Drag the Kaleidoscope layer to different areas
for new effects.
To create a pattern from a
Kaleidoscope:
1Move the Kaleidoscope dynamic
layer until it displays imagery you
like.
2On the Layers palette, select the
Kaleidoscope layer.
3Click the palette menu arrow, and
choose Drop to commit the layer.
4Choose Edit menu > Copy.
5Choose Edit menu > Paste into
New Image.
6Select the kaleidoscope portion of
the image, and capture the pattern.
For more information on
capturing patterns, refer to
“Creating and Capturing Patterns”
on page 69.
Liquid Lens
Liquid Lens creates a dynamic layer
where you can distort and smear the
underlying imagery. You can create
“fun house” mirror effects, melting
images, and more.
For best results, you should have
interesting imagery beneath the
Liquid Lens dynamic layer.
Applying Distortion
You’ll use the Liquid Lens by
choosing a tool, setting sliders to
control the effect, then dragging in the
document window to create
distortion. You can change slider
settings or tools, then drag again for
different results. The Eraser tool lets
you remove distortion.
Liquid Lens Tools
You can apply distortion with the
Circle, Brush, Right Twirl, Left Twirl,
Bulge, or Pinch tools. These tools
function similarly, but apply different
distortion effects.
The Circle
The Circle tool creates circles of distortion.
Drag in the direction you want the distortion
to move. Size and Spacing have no effect on
the Circle tool.
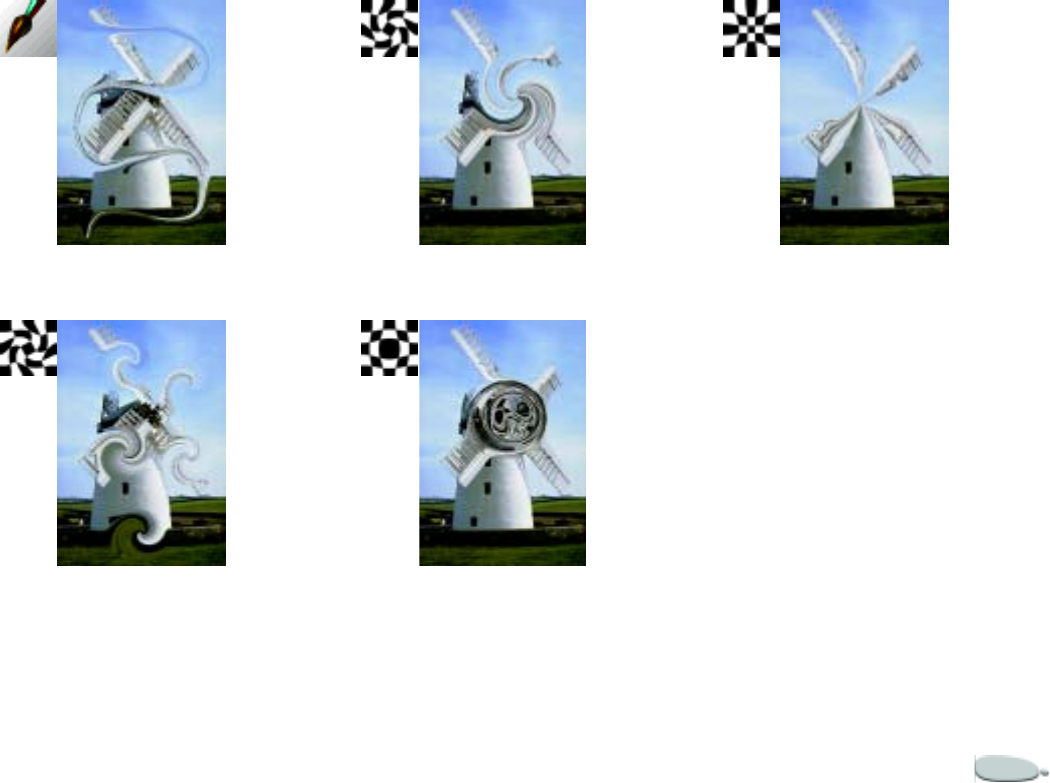
Corel Painter 323
The Brush
The Brush distorts in the direction you drag.
Right Twirl
Right Twirl distorts in clockwise spirals.
Left Twirl
Left Twirl distorts in counter-clockwise spirals.
Bulge
Bulge distorts outward, pushing imagery out.
Pinch
Pinch distorts inward, drawing imagery closer.
Liquid Lens Controls
You can adjust the following settings
to customize the distortion effect.
•Amount—controls the degree of
distortion applied. With the slider
close to zero, you create minimal
distortion. Negative values create
distortion counter to the stroke
direction. This breaks up the
image more.
•Smooth—changes the blending
between the distortion stroke and
the unaffected imagery. Higher
values make a smooth, continuous
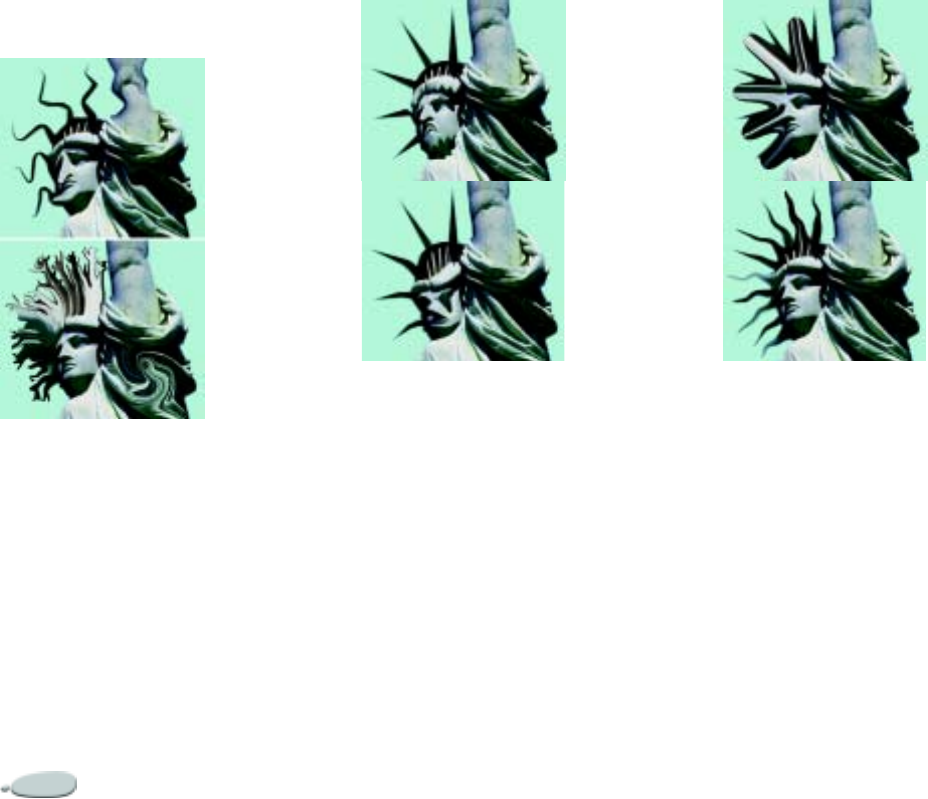
Using Dynamic Plug-ins324
distortion. Lower values create
individual dabs of distortion.
Low Smooth settings make abrupt distortions.
Higher Smooth settings let distortions
transition smoothly into other areas.
•Size—changes the diameter of the
distortion tool and the size of rain,
which scatters distortion droplets
in the layer.
Samples of how the Size slider affects
distortion.
•Spacing—changes the distance
between distortion dabs.
Low spacing makes a smooth, continuous
stroke. High spacing lets the dabs appear
individually.
•Reset—restores the default
settings.
•Rain—scatters distortion droplets
in the layer. Raindrops distort
downward, melting the image.
To create a Liquid Lens dynamic
layer:
1Deselect all layers.
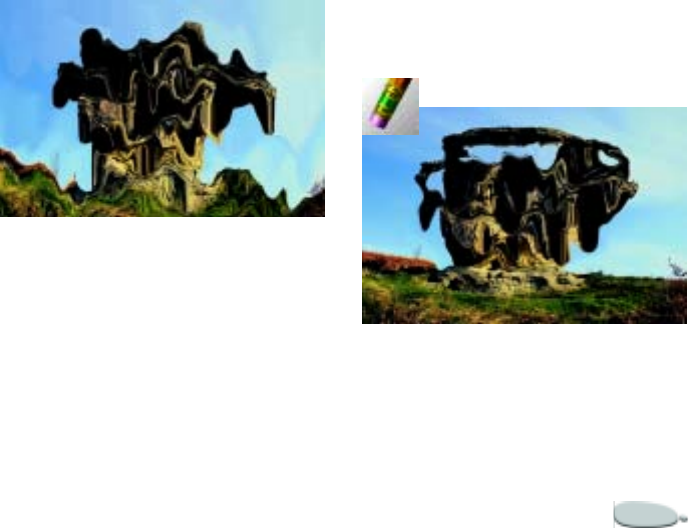
Corel Painter 325
2On the Layers palette, click the
Dynamic Plug-ins button and
choose Liquid Lens.
3In the Liquid Lens dialog box,
choose a Liquid Lens tool.
4Use the sliders and controls to
adjust the distortion effect.
Refer to “Liquid Lens Controls”
on page 323 for more information.
5Drag in the document window to
create distortion.
If you don’t like the distortions and
you want to start again, click the
Clear button.
6Click OK to end the Liquid Lens
session.
Tip
•
You can move the Liquid Lens layer
to different regions of the document to
distort other imagery.
To use Rain:
1Deselect all layers.
2On the Layers palette, click the
Dynamic Plug-ins button and
choose Liquid Lens.
3In the Liquid Lens dialog box, set
the sliders to describe the
distortion you want.
4Click Rain.
Corel Painter scatters distortion
droplets on the layer.
5Click anywhere to stop the rain.
If Smooth and Size are very high,
the rain might continue for a
moment after you click.
Rain melts the image.
Erasing Distortion
Undo features are not available when
working with the Liquid Lens. Use
the Liquid Lens Eraser tool to clear
distortion from an area.
To erase distortion:
1In the Liquid Lens dialog box,
choose the Eraser tool.
2Set the sliders for Size, Spacing,
and Smooth to describe the type of
erasing you want.
Higher Smooth settings create
softer transitions from the erasure
to the remaining distortion.
3Drag in the document window.
The original underlying imagery
returns.
Eraser
Remove distortion with the Eraser tool.
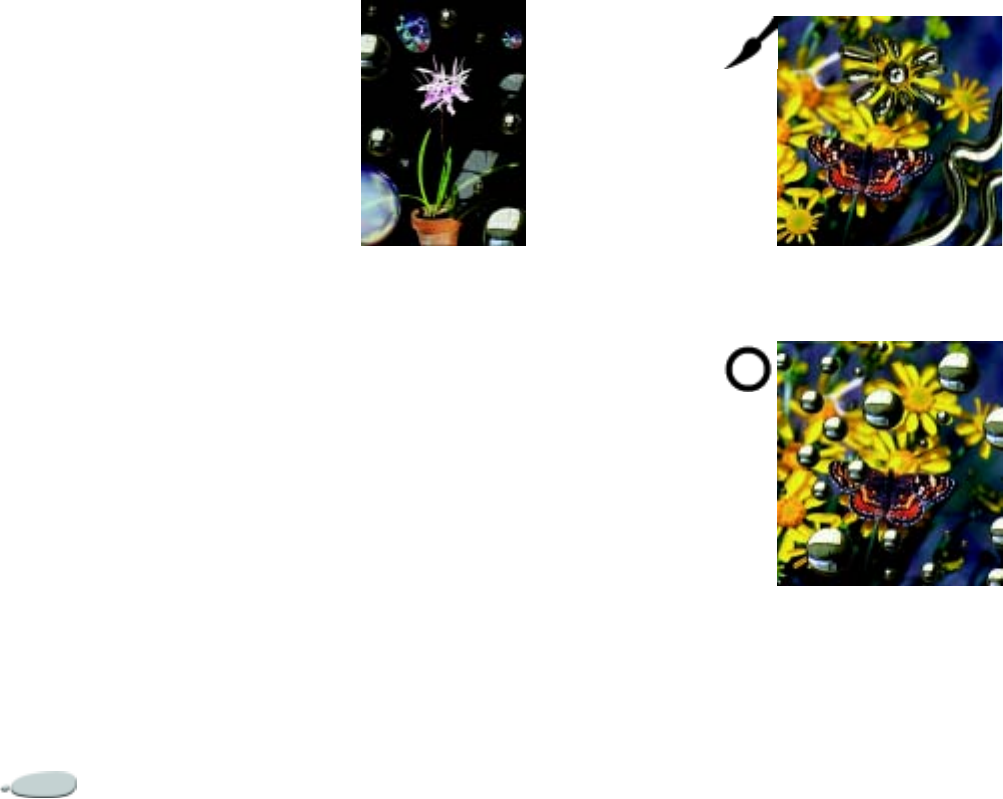
Using Dynamic Plug-ins326
Liquid Metal
The Liquid Metal dynamic plug-in
lets you paint on a layer with liquid
and metal. You can apply droplets of
water that distort the underlying
image through refraction. You can also
create globs of shiny metal that flow
together and move like mercury. A
slider (Refraction) sets the difference
between water and metal, so you can
achieve intermediate effects.
Negative metal can be used to create
holes in metal.
This text uses the term “metal” to
refer to the media applied—even if the
settings turn the effect more toward
water.
The Liquid Metal dynamic plug-in creates
either liquid metal or translucent, refractive
liquid.
Liquid Metal Tools
You can apply metal with the Brush
tool, the Circle tool, or the Rain
feature. You can adjust the size of your
brush or rain droplets.
The Brush is the default applicator.
You can use the Brush tool to paint
with metal. You can use the Circle tool
to create circles of metal. The Rain
feature lets you scatter metallic
droplets on the layer.
Brush
You can create strokes of metal with the Brush
tool.
Circle
You can create circles of metal with the Circle
tool.
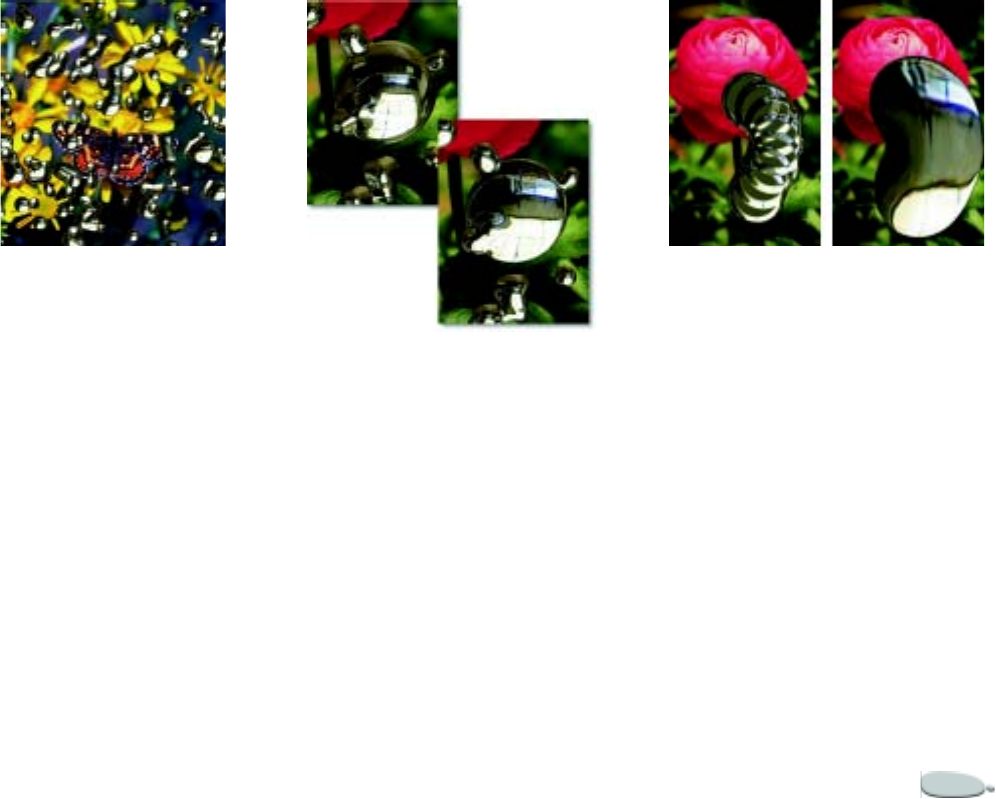
Corel Painter 327
Metal raindrops fall randomly with the Rain
feature.
Liquid Metal Controls
You can adjust the following settings
to customize the appearance of the
liquid metal.
•Amount—controls the emphasis
of the metal effect (from the
Refraction slider) for all droplets in
the layer. The extreme left and
extreme right are the inverse of
each other. To create water effects,
set the Amount to –0.5. This will
make the droplets magnify the
imagery underneath them.
Reflection and Refraction invert when you
move the Amount slider to either extreme.
•Smooth—changes the perimeter
range. The perimeter range
determines the droplet’s tendency
to “join” its neighbors. The
Smooth setting applies to all
selected droplets and new droplets
you create.
Low Smooth settings keep droplets distinct
(left). Higher Smooth settings make the
droplets flow together (right).
•Size—changes the diameter of the
selected droplets. The Size setting
applies to all selected droplets and
new droplets you create with the
Brush tool or Rain. It does not
affect the Circle tool.
•Volume—adjusts visibility along
the perimeter. The Volume setting
applies to all selected droplets and
new droplets you create.
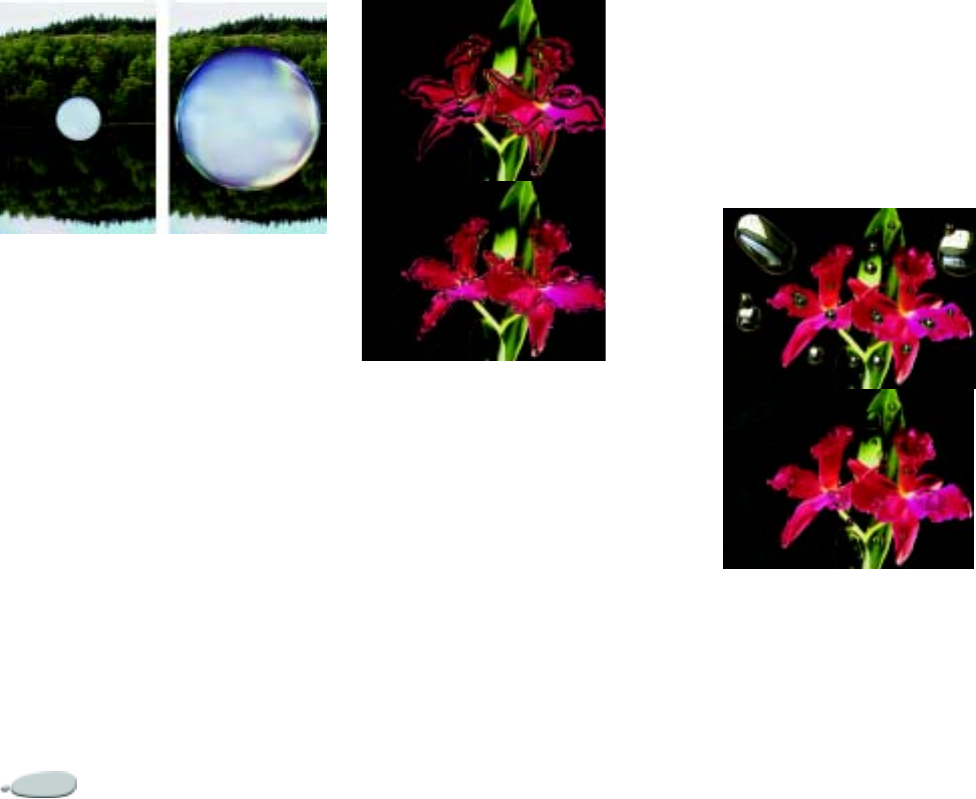
Using Dynamic Plug-ins328
Increasing Volume beyond 100% extends
visibility beyond the droplet circle into the
perimeter range. Decreasing Volume below
100% shrinks the visible portion of the droplet,
“drying it up.”
•Spacing—adjusts the spacing
between droplets in strokes you
create with the Brush tool.
A stroke with low spacing—the droplets flow
together. A stroke with high spacing—each
droplet is distinct.
•Map—specifies the type of metal
or reflection map. The type applies
to the entire layer. You can apply
metal and change the type later.
For information about using
reflection maps and patterns, refer
to “Using Reflection Maps” on
page 329.
•Refraction—controls droplet
appearance. The slider represents a
scale between reflection and
refraction. The Refraction setting
applies to all droplets in the layer.
If you want to paint with
translucent liquid, increase the
Refraction slider. As Refraction
nears 100%, the metal becomes
transparent. The droplets look like
a simple liquid—oil or water.
Low refraction means high reflection (top).
High refraction creates translucent, refractive
liquid (bottom).
•Surface Tension—makes the
droplets appear more round and
three-dimensional.

Corel Painter 329
•Reset—restores the default
settings.
To create a Liquid Metal dynamic
layer:
1Deselect all layers.
2On the Layers palette, click the
Dynamic Plug-ins button and
choose Liquid Metal.
3In the Liquid Metal dialog box,
choose the Circle or Brush tool.
Refer to “Liquid Metal Tools” on
page 326 for more information.
4Choose one of the following metal
types from the Map pop-up menu:
•Standard Metal
•Chrome 1
•Chrome 2
•Interior
• Clone Source
5Use the sliders and controls to
adjust the appearance of the metal.
Refer to “Liquid Metal Controls”
on page 327 for more information.
6Drag in the document window to
apply the metal.
If you want to clear the effect and
start again, click Clear.
7Click OK to end the Liquid Metal
session.
To use Rain:
1Deselect all layers.
2On the Layers palette, click the
Dynamic Plug-ins button and
choose Liquid Metal.
3In the Liquid Metal dialog box, set
the sliders and controls to adjust
the metal.
4Click Rain.
Corel Painter scatters metal
droplets on the layer.
5Click anywhere to stop the rain.
To create negative metal:
•Press Option (Mac OS) or Alt
(Windows), and drag with the
Circle or Brush tool.
You will create holes in your metal.
As you drag through positive pools,
the negative metal will divide and
separate the existing metal.
To adjust the size of the brush or
drops of rain:
1In the Liquid Metal dialog box,
choose the Liquid Metal Selector
tool , and click outside the
droplets to deselect all.
2Change the Size slider to the
desired value.
3Click the Brush tool and paint, or
click Rain.
Tip
•
You can also adjust the size of existing
metal by selecting the droplets and
moving the Size slider. For information
about selecting droplets, refer to “To select
metal droplets:” on page 330.
Using Reflection Maps
Metal is highly reflective. You can
customize the look by using a clone
source or a pattern as a reflection map.
For more information about cloning,
refer to “Cloning a Document” on
page 188. For more information about
creating and choosing patterns, refer
to “Using Patterns” on page 66.
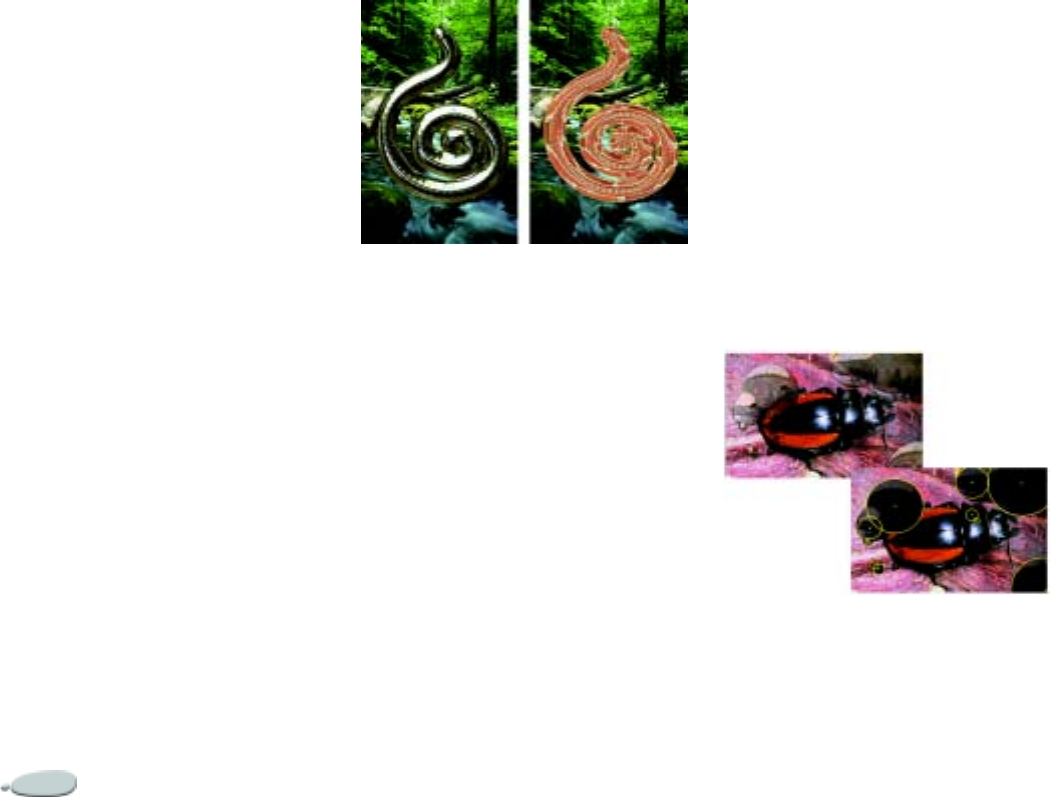
Using Dynamic Plug-ins330
To use a reflection map:
1Specify a clone source or choose a
pattern.
2Deselect all layers.
3On the Layers palette, click the
Dynamic Plug-ins button and
choose Liquid Metal.
4In the Liquid Metal dialog box,
choose Clone Source from the
Map pop-up menu.
5Adjust any settings.
6With the Circle or Brush tool, drag
in the document window to apply
the metal.
If you want to clear the effect and
start again, click Clear.
7Click OK to end the Liquid Metal
session.
Note
•
If no clone source has been specified,
Corel Painter uses the current pattern as
the reflection map.
The same piece of metal changes appearance
when a pattern is used as the reflection map.
Working with Metal
A stroke of metal is made up of a series
of discrete droplets. You can select one
or several droplets and move them or
change their properties. Refer to
“Liquid Metal Controls” on page 327
for information about which slider
settings apply to selected droplets.
The “handles” show the droplet’s
circle and center point. Showing the
handles on the droplets isn’t necessary
for selecting them, but it can make
your work easier.
The droplets applied in the last stroke
are automatically selected. Each new
stroke deselects the droplets of the
previous one.
The Undo feature is not available
when working with metal; however,
you can remove selected metal, the
last metal applied, or all metal on the
layer.
To show the handles:
•In the Liquid Metal dialog box,
enable Display Handles.
When you enable “Display Handles,” you can
see the droplet circles and center points.
To select metal droplets:
1Choose the Metal Selector tool.
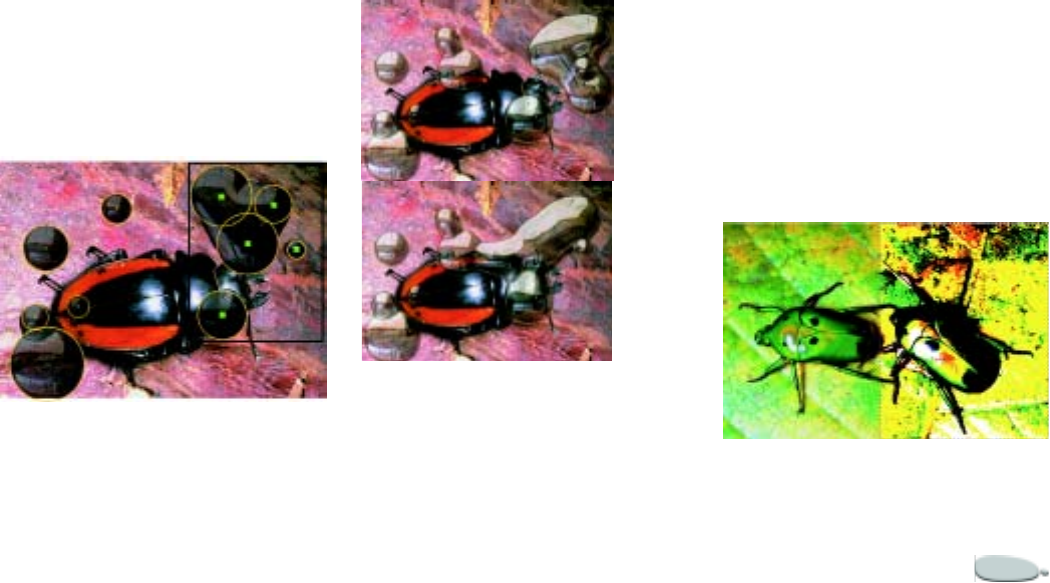
Corel Painter 331
2Do one of the following:
• Drag across the droplets you
want to select.
• If Display Handles is enabled,
click the center point handle of
a droplet.
• If handles are not displayed,
click a droplet anywhere.
Hold down Shift, and click
additional droplets to add to (or
subtract from) the selection.
When a droplet is selected, the
center point handle is displayed as
a solid.
Drag over the droplets you want to select.
To move metal:
•Drag the center of one of the
droplets to move the selected
group.
Notice how the droplets seek to
join other droplets they encounter.
You can control this tendency with
the Smooth slider.
You can drag the center of one of the droplets to
move the selected group.
To remove metal:
•Do one of the following:
•Press Delete (Mac OS) or
Backspace (Windows) to
remove the last metal applied.
• Using the Metal Selector tool,
select the metal and press
Delete (Mac OS) or Backspace
(Windows).
•In the Liquid Metal dialog box,
click Clear to remove all metal
on the layer.
Posterize
The Posterize dynamic plug-in creates
a layer that reduces the number of
color levels in the imagery it floats
over.
A Posterize dynamic layer modifies the right
half of this image.

Using Dynamic Plug-ins332
To create a Posterize dynamic
layer:
1Make a selection in the document
window if you want the new
dynamic layer to be a specific size.
2On the Layers palette, click the
Dynamic Plug-ins button and
choose Posterize.
3In the Posterize dialog box, specify
the number of color levels you
want.
The value applies to each color
channel—red, green, and blue.
4Click OK to apply the effect.
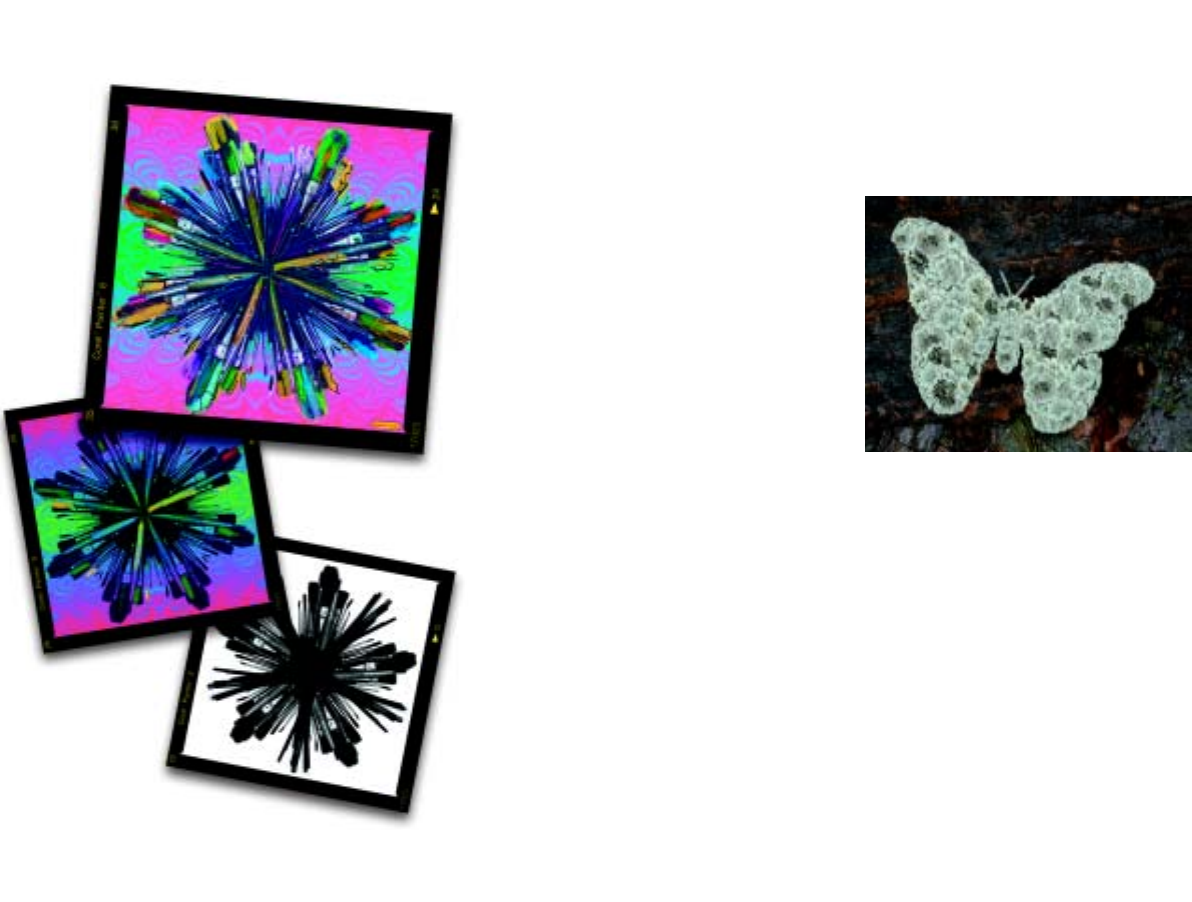
17
The Image Hose
The Image Hose is a milestone in the
evolution of art tools. Instead of
painting with color, the Image Hose
paints with images—and not just one
or two images at a stroke, but a variety
of changing images.
The images flowing from the hose
change as you make a brush stroke.
The Image Hose gives you complete
control of the image output. For
example, by increasing stylus pressure,
you can paint larger or more colorful
images. Or, by changing the direction
of the stroke, you can change the
angle of the images. This is just a
sample of the possible controls. By
creating your own sets of images,
anything is possible.
The Image Hose feature allows you to paint
with images.
The Image Hose deposits 24-bit
images with an 8-bit mask. The mask
enables you to layer the images gently,
without aliased edges or artifacts.
You can load the Image Hose with
leaves, bark, grass, stones, people—
images of any description. When you
paint with these image elements, you
can build them into coherent
shapes—a tree, a hill, a cobblestone
street, a crowd of people.
The Image Hose334
How it Works
The Image Hose is a brush. To use it,
you must first load it with images. The
images are kept in special nozzle files.
On a garden hose, you attach a nozzle
to control the flow of water; in Corel
Painter, you attach a nozzle to the
Image Hose to control its medium—
images.
A nozzle file can contain any number
of images. Usually, the images are
similar and form a logical series—that
is, the images progress along some
order. For example, the images might
increase in size, or advance in angle.
It is not necessary for images to
progress in a logical series, but the
Image Hose is more effective when
they do.
“Indexing” refers to the method used
to select particular images from the
many images in a nozzle file. Which
input to use for indexing is controlled
in the Brush Creator by modifying the
Image Hose settings on the Stroke
Designer tab. You can hose images
sequentially, at random, based on
pressure, stroke direction, and several
other factors.
The images are indexed so that Corel
Painter can locate and paint specific
images on request. As you paint with
the Image Hose, you can request
specific images from the nozzle index
by varying your input value.
Increasing an input value takes
images from later in the series. For
example, you can set up the nozzle so
that by pressing harder with a
pressure-sensitive stylus, you paint
with larger images.
You control the images themselves in
the nozzle file. If you want more
variety in the images, create more
images in the nozzle file. “Creating
Nozzles for the Image Hose” on
page 340 covers designing and
creating nozzle files.
As your Image Hose requirements
become more exacting, you can create
complex nozzles that involve two
progressions—for example, images get
larger and change angle. In this case,
you’ll use one input factor to
determine image size, and use a
second factor to determine image
angle. This creates a 2-Rank Nozzle.
A 2-Rank Nozzle progresses in two dimensions.
In this example, the first rank changes angle,
the second rank changes size.
Using the Image Hose
The Image Hose is easy to use and
offers a number of options for the
behavior of “nozzle spray.”
As with other Corel Painter brushes,
the Image Hose has several variants.
These built-in variants combine
nozzle control factors with brush
settings to create different hose effects.
Corel Painter 335
The Nozzle selector in the toolbox.
The following descriptions will give
you an idea of the effect of each
variant.
Random, Sequential, Directional,
Pressure, and (Source) Luminance
refer to the indexing rule by which
images are selected from the nozzle
file. The letters R, P, and D in a
variant’s name refer to random,
pressure, and direction. For more
information, refer to “Scale” on
page 337.
Spray and Linear refer to the
placement of images in relation to the
stroke. Spray variants scatter images.
Linear variants place images directly
on the stroke path. For more
information, refer to “Controlling the
Image Hose Brush” on page 336.
You can use these variants as a starting
point and then adjust the brush and
nozzle controls to hose the images just
as you want them.
To select a nozzle and use the
Image Hose:
1Choose the Brush tool from the
toolbox.
2On the Brush selector bar, choose
the Image Hose from the Brush
selector.
3Click the Variant selector and
choose a variant.
Each variant delivers the images
differently.
4In the toolbox, click the Nozzle
Selector and choose a nozzle.
5Make a brush stroke on the canvas.
Adjusting Opacity and Color
You can use the property bar to adjust
the opacity of nozzle images or to mix
them with a secondary color.
The Opacity slider allows you to make
nozzle images semi-transparent. If
you move the slider all the way to the
left, the images become invisible.
You can change the opacity of Image Hose
strokes. Top=100% opacity, bottom=20%
opacity.
The Grain slider allows you to mix the
secondary color with the nozzle
images. If the slider is set to 100%, the
nozzle images remain pure. As you
move the slider to the left, more of the
secondary color appears in the images.
The Image Hose336
If the slider is set to 90%, Corel Painter
mixes 10% of the secondary color to
90% of the image. This is a handy way
to adjust the shading of image
elements.
For information on selecting a
secondary color, refer to
“Understanding Primary and
Secondary Colors” on page 79.
You can turn down the Grain to mix in the
secondary color. Top=100% grain,
bottom=39% grain.
Controlling the Image
Hose
The Image Hose has three
components of control: The Image
Hose brush, the nozzle controls, and
the nozzle file.
• You’ll adjust the brush to
determine the placement of images
in the stroke.
• You’ll use the Nozzle controls on
the property bar to change the
scale and to set the rules for
indexing.
• You’ll create your own nozzle files
to determine the image content
and ranking.
Controlling the Image Hose
Brush
Nozzle controls for the Image Hose
primarily affect where the images
appear in the stroke, such as whether
the images are scattered or closely
spaced.
To modify the Image Hose
settings
1Choose Window menu > Brush
Creator, and click the Stroke
Designer tab.
2Choose any of the controls in the
left pane, and adjust the settings in
the right pane.
Spacing Images
You control the space between images
with the Spacing settings in the Brush
Creator. Moving the Spacing slider to
the right increases the spacing
between image elements.
The Spacing slider controls the spacing of the
images. Top=85%, bottom=20%.

Corel Painter 337
Because spacing is based on the
diameter of the brush, the Size
settings also affect image spacing.
Increasing the brush size adds space
between hosed images. Size settings
affect the size of the image elements
themselves.
The Min Size slider also affects the
size of images applied by the Image
Hose. When set to stylus pressure or
direction, the Min Size setting
determines how much size variability
is present when you apply images.
For more information on the Spacing
settings, refer to “Setting Spacing
Controls” on page 158. Refer to “Size”
on page 157, and “Min Size” on
page 158 for more about the Size and
Min Size controls.
Randomizing Placement
You randomize the proximity of
images to the stroke path with the
Jitter slider on the property bar. When
the slider is all the way to the left,
images are hosed directly in the stroke.
Moving the slider to the right
increases the scattering of the images.
You can also adjust the Jitter slider
with the Random settings on the
Stroke Designer tab. For more
information, refer to “Setting Random
Controls” on page 169.
Expression Settings
The Expression settings on the Stroke
Designer tab offer dynamic control
over the brush settings described
above. This can lead to interesting
effects. For example, angle settings
apply when you’re using the Image
Hose to paint on imagery.
For more information on the
Expression settings, refer to
“Expression Settings” on page 164.
Scale
You can control the size of the nozzle
images with the settings in the Stroke
Designer.
The Set Nozzle Scale command in
the Nozzles selector menu lets you
control the size of image elements
delivered by the Image Hose. At 100%,
the images are the same size as they
are in the nozzle file.
To adjust the scale
1In the toolbox, click the Nozzle
selector.
2Click the selector menu arrow, and
choose Set Nozzle Scale.
3Type a value in the New Scale box.
Tip
•
You can also change the size of images
delivered by the Image Hose, using the
Size slider on the property bar—just as
you would with other brushes.
Indexing
As you paint with the Image Hose,
Corel Painter selects images from the
nozzle file based on one or more rules.
This selection process is known as
indexing. This indexing determines
which images from the many in the
nozzle file are delivered from the
Image Hose. The Image Hose settings
in the Stroke Designer let you change
the rules for indexing the images.
The Image Hose338
Image nozzle files can be created with
one, two, or three image progressions
known as “ranks.” Corel Painter offers
these three rankings, so each nozzle
file can be identified as a 1-Rank, 2-
Rank, or 3-Rank nozzle.
The following indexing factors are
available in Corel Painter:
•None
•Velocity
•Direction
•Pressure
•Tilt
•Bearing
•Source
•Random
• Sequential
For more information about the rank
system, refer to “Designing Nozzles:
1, 2, or 3 Ranks” on page 340.
To change the indexing rule:
1On the Stroke Designer page of
the Brush Creator, choose Image
Hose.
2For each rank in the nozzle,
choose a rank type from the pop-
up menu.
3If necessary, adjust the Direction
settings.
Note
•
The Rank 2 and Rank 3 types have no
effect on a 1-Rank nozzle. The rank types
are described below.
Rank Types
Sequential indexes images in the
order they appear in the rank—
moving left to right, and top down,
just as you read English.
Above: sequential indexing. Below: random
indexing.
Random selects images from the rank
at random.
Randomness can add irregularity of
color and texture to the areas you
paint with the Image Hose. This
contributes to the aesthetics of the
painting because minor irregularities
occur in natural structures.
Source delivers images based on the
luminance of pixels in the clone
source (or current pattern if you have
not set a clone source). The pixels of
the working document have a direct
correspondence with the pixels of the
clone source image. As the luminance
increases, Source delivers images from
later in the rank.
For best results, the clone source
should have the same dimensions as
the document in which you’re
working. For more information on
setting up and using a clone source,
refer to “Changing Clone Source” on
page 190.
Depending on the nozzle you’re
using, Source can be quite useful. For
example, if the source image is black
on the left and progresses through
gradations to white on the right, the
Corel Painter 339
Image Hose delivers images from the
start of the rank at the left of the
document, in the dark area. As the
brush moves to the right into the
lighter area, the Image Hose delivers
images from later in the rank.
To take advantage of this feature, you
may want to create a special source
image for the single purpose of
controlling the Image Hose.
The clone source image or pattern for
controlling the Image Hose may be
grayscale. Remember, Corel Painter
uses only the luminance values.
Indexing based on Source.
Bearing indexes images based on the
position of the stylus. Not all stylus
models convey this information. This
control does not work with a mouse.
Tilt indexes images based on the tilt of
the stylus. Not all stylus models
convey this information. This control
does not work with a mouse.
Pressure indexes images based on
stylus pressure. Greater pressure
selects images from later in the rank.
Pressure works only with pressure-
sensitive tablets.
Pressure is a great control for
requesting images from a nozzle. For
example, if you set up your nozzle file
to progress from small to larger
images, heavier strokes deliver larger
images.
Direction indexes images from the
rank based on the direction of the
stroke. The first item in the rank
matches to a left-right stroke (toward
3 o’clock). As the stroke direction
progresses counter-clockwise, the
Image Hose delivers subsequent
images from the rank.
The number of elements in the rank
determines the directional change
required to index a different element.
For example, a nozzle file that
contains 72 images at progressive
angles delivers a different item at
every 5° of stroke direction (360°/
72=5°).
This Arrow nozzle is an example of indexing
based on Direction.
Velocity indexes images from the rank
based on the speed of the stroke. A
faster stroke delivers elements from
later in the rank. Velocity is often used
with a mouse to mimic pressure.
Velocity can be difficult to control. For
this reason, you might want to use it
in a rank with few elements.
None returns one element only— the
last in the rank.
The Image Hose340
Nozzle Options
The Nozzle Selector has one option
for the Image Hose—Use Brush Grid.
When Use Brush Grid is enabled, the
Image Hose places images in a regular
grid pattern. The grid size follows the
grid in the nozzle file.
Enable Use Brush Grid to place images on a
perfect grid.
Creating Nozzles for the
Image Hose
The Nozzle Ranking System
A 1-Rank indexing system is simply a
numbered sequence. You can locate
any element in the sequence by giving
its number. For example, “Item 3.”
In Corel Painter, you locate and
deliver images by varying input—for
example, by pressing harder with the
stylus or changing the direction of the
stroke. For information on the input
factors you can use to control
indexing, refer to “Scale” on page 337.
A 2-Rank indexing system uses two
perpendicular indexes. The first rank
extends horizontally and the second
extends vertically. Again, you’ll vary
input to locate an item for either rank.
You can think of indexing in the two
ranks as “selecting a column” and
“selecting a row.” The Image Hose
delivers the image from the nozzle
where the selected column and row
intersect. For this to work properly,
you must use different input factors
for selecting in each rank.
A 3-Rank indexing system extends the
2-Rank model. The third rank is
created by repeating the 2-Rank “set.”
Within the selected set, the 1-Rank
and 2-Rank indexing (described
above) is used. In order for this to
work properly, you must use different
input factors for selecting in each
rank.
A 3-Rank indexing system can be used
with calendar dates. Any day, in the
past or future, can be located, given
the month, day, and year. For example,
“February 25, 1962 (2/25/1962).”
Designing Nozzles: 1, 2, or 3
Ranks
A nozzle file contains a series of
images arranged in a regular grid.
Usually, the images are progressive in
terms of size, shape, angle, or color.
Progression is not necessary, but it
increases the sophistication of the
Image Hose. For example, a nozzle
file with images progressing in size
can be set up so that greater stylus
pressure paints incrementally larger
images.
A 1-Rank Nozzle progresses in one dimension.
In this example, changing angle is the first
rank.
What if you want a two-dimensional
progression, such as having image
elements increasing in size and
Corel Painter 341
changing angle? To do this, you’ll
need to set up your images as a 2-
Rank nozzle file. Painting with a 2-
Rank nozzle, you can control where
your image comes from in terms of
both progressions. In this case, you use
a different input factor to control the
location of the image elements in each
rank.
In the following image, Rank 1 is a
progression in angle, and Rank 2 is a
progression in size. It would make
sense to use direction to control Rank
1 and pressure to control Rank 2.
A 2-Rank Nozzle progresses in two dimensions.
In this example, changing angle is the first rank
and changing size is the second rank.
You can extend the nozzle to a third
progression, creating a 3-Rank nozzle.
Again, you use a separate input factor
to control the location in each rank.
In the following image, Rank 3 is a
progression in color. You might
control this final rank with
randomness, velocity, or source—
depending on your plans for the
image.
If you use one input factor to control
two ranks, some image elements
become unavailable.
Color is the third rank in this 3-Rank Nozzle.
For information on setting the input
factor for each rank, refer to “Scale”
on page 337.
Consider the way you will control
each rank before building a nozzle.
The way you lay out the images can
limit the ways you can control the
indexing.
Before you begin building a nozzle,
you must decide what rank level you
need. And, you must determine how
many elements you want in each
progression.
Preparing Images
Regardless of the rank level of the
nozzle you are making or the method
you use to build it, the following tips
will help you develop the individual
images.
Each element in an Image Hose
nozzle must be selected. The selection
allows you to paint with images of
irregular shape. Only what is inside
the selection will flow from the
Image Hose.

The Image Hose342
You might want to work by creating a
silhouette of the image shape as a
selection, then fill in the color
information later. With soft edges to
the selection, you can create images
that are anti-aliased automatically.
This improves the continuity across
an area of hosed images.
You can create Image Hose nozzles
from layers. As you create image
elements, turn them into layers. If the
layer looks good when dropped on
different backgrounds, the image will
look good as a nozzle element.
Building a nozzle from layers offers
advantages in convenience, as well.
Another technique is to float the
image on a black background and add
a drop shadow. This will enhance the
appearance of three dimensions, as
image elements build up in layers.
When all elements have the shadow in
the same position, it appears the light
source is the same across the painted
area.
For more information on working
with layers, refer to “Working with
Layers” on page 231.
Creating a 1-Rank Nozzle
from a Group of Layers
To create a 1-Rank nozzle from
layers:
1Create image elements as layers for
the nozzle.
The alignment of layers in the
document doesn’t affect the nozzle
building process.
2Choose Window menu > Show
Layers to show the Layers palette.
If the Layers palette is not
expanded, click the palette arrow.
The top layer on the list will be the
first element in the nozzle
sequence. Moving down the list
advances through the element
progression.
3Rearrange the layer hierarchy to
create the progression you want in
the nozzle.
4If any item on the Layers palette is
a group, click the Layer
Commands button and choose
Collapse to convert it to a standard
layer.
5Hold down the Shift key and select
each item in the list.
6Click the Layer Commands button
and choose Group.
All the items are now part of the
same group.
7In the toolbox, click the Nozzle
selector.
8Click the selector menu arrow and
choose Make Nozzle From Group.
Corel Painter creates a new,
untitled image. This is your nozzle
file.
9Choose File menu > Save.
10 Give the file a descriptive name
and save it in RIFF format.
Creating a nozzle from layers.
Corel Painter 343
Loading Nozzle Files
If you’ve created a separate nozzle file
that isn’t part of a library, you can
load it into the Image Hose library for
future use.
To load a nozzle file:
1In the toolbox, click the Nozzle
selector.
2Click the selector menu arrow, and
choose Load Nozzle.
3Choose a nozzle from the Select
Image dialog box, and click Open.
Note: The first time you load a
nozzle, Corel Painter may ask for
some information on the image’s
construction. “Creating Nozzles
for the Image Hose” on page 340
covers this.
To add a nozzle to the current
library:
1In the toolbox, click the Nozzle
selector.
2Click the selector menu arrow, and
choose Add Nozzle to Library.
3In the Save dialog box, name the
nozzle.
You can now choose an indexing
rule and paint with your 1-Rank
nozzle.
Tip
•
If you want to create your own nozzle
libraries, refer to “Nozzle Libraries” on
page 347.
Painting with a nozzle created from layers.
A 1-Rank Nozzle doesn’t mean the
images must be in one line. Corel
Painter will wrap images onto several
lines to create a document of
reasonable shape. Corel Painter
follows a mathematical rule in
reconstructing the rank of images.
This rule is contained in the Nozzle
Definition. You’ll learn more about
this in “Building the Nozzle” on
page 344.
Nozzles are most useful when they deliver
similar images with some irregularity, for
example, butterflies on flowers.
Creating a 2-Rank Nozzle on
a Grid
Nozzles of two and three ranks cannot
be created from a layer group. You
must build these nozzles manually.
The Image Hose344
The indexing system requires the
nozzle images to fit in a regular grid.
You can create a nozzle file by setting
up a grid and placing an image
element at the center of each cell.
Determining the Grid Cell
Size
The cell size is based on the smallest
rectangle that will hold the largest
image element (including its
selection).
To make sure your images fit in the
grid, copy your largest image element
to a layer. Refer to “Creating Layers”
on page 232 for more information.
To determine the grid cell size:
1In the toolbox, click the Layer
Adjuster tool , and choose a
layer.
Corel Painter displays the pixel
width and height of the layer’s
content. You might want to use
slightly larger values as the grid
size.
2Determine the number of
elements you want in each rank.
3Multiply the number of items in
Rank-1 by the cell width.
This value is the cell width.
4Multiply the number of items in
Rank-2 by the cell height.
This value is the cell height.
To create the grid
1Choose File menu > New, and
enter the appropriate width and
height dimensions in the Width
and Height boxes.
2Choose Canvas menu > Grid >
Grid Options.
3In the Grid Options dialog box, set
the Horizontal and Vertical
Spacing to the values of the cell
width and height, and click OK.
4Show the grid by clicking the
Toggle Grid button above the
vertical scroll bar on the image
window.
The grid should describe the
number of elements you want in
each rank—Rank 1 horizontally,
and Rank 2 vertically.
Click the Grid button to display a grid in the
image window.
Building the Nozzle
Once you have set up the nozzle
images in the grid, you can build your
nozzle.
To build a nozzle:
1Place one image element in the
center of each grid cell.
The easiest way to do this is with
layers. Follow an appropriate
progression based on your
intentions for controlling this
nozzle. Each image element must
be included in the selection. If you
bring image elements into the grid
as layers, they will bring their layer
mask with them.
2Choose Window menu > Show
Layers.
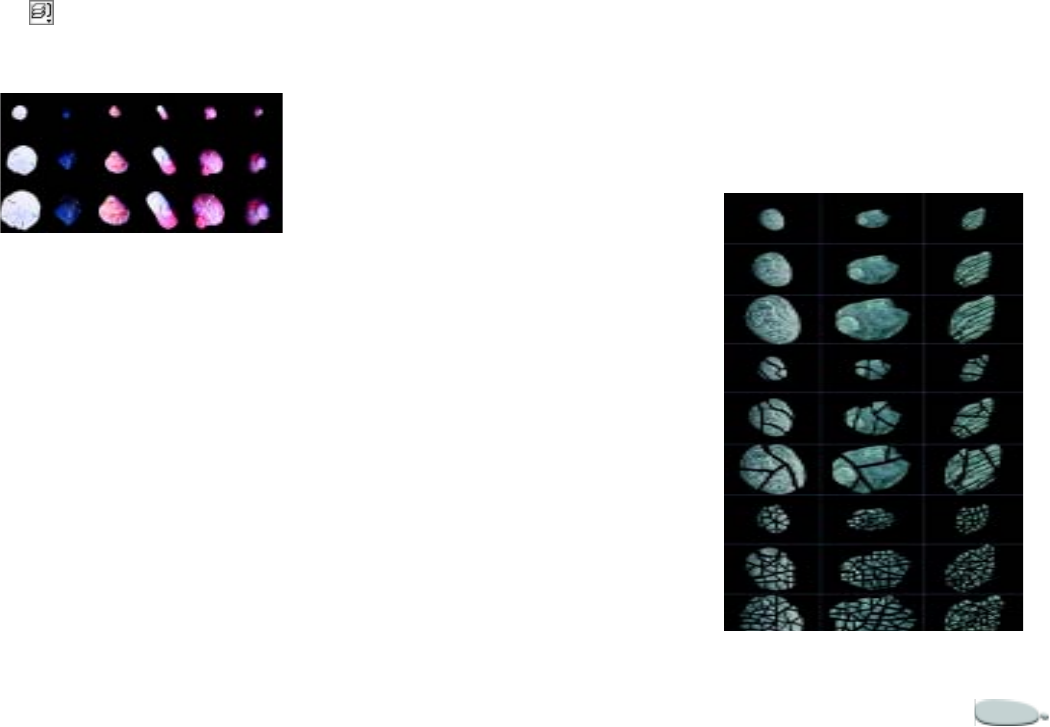
Corel Painter 345
3On the Layers palette, select all the
layers.
4Click the Layer Commands button
, and choose Drop.
5Choose File menu > Save As, and
save the file in RIFF format.
The finished 2-Rank Nozzle—Shell Scales.
Loading a Nozzle
After you build a nozzle, you can load
it into the Image Hose.
The first time you load the nozzle file,
the Nozzle Definition dialog box
appears, where you must enter
information about the math use to
create the file—the size of each cell
and how many image elements there
are. Corel Painter needs this
information to index images correctly.
To load a nozzle:
1In the toolbox, click the Nozzle
selector.
2Click the selector menu arrow, and
choose Load Nozzle.
3In the Select Image dialog box,
choose the nozzle and click Open.
4In the Item Width and Height
boxes in the Nozzle Definition
dialog box, enter the values you set
in the nozzle file.
These values describe the cell grid
size.
5In the Rank columns, enter the
number of image elements in each
progression.
If the values you enter do not
describe the file, Corel Painter
won’t accept them. In other words,
the “number of items” multiplied
by the “item size” must equal the
dimensions of the nozzle file.
Remember, you still need to
modify the settings on the Stroke
Designer tab in the Brush Creator
to describe the control factors for
each rank.
Note
•
For more information on setting up
the nozzle progression, refer to
“Controlling the Image Hose” on
page 336.
Creating a 3-Rank Nozzle
You can create a 3-Rank Nozzle using
the grid method.
The Broken Shells—a 3-Rank Nozzle.
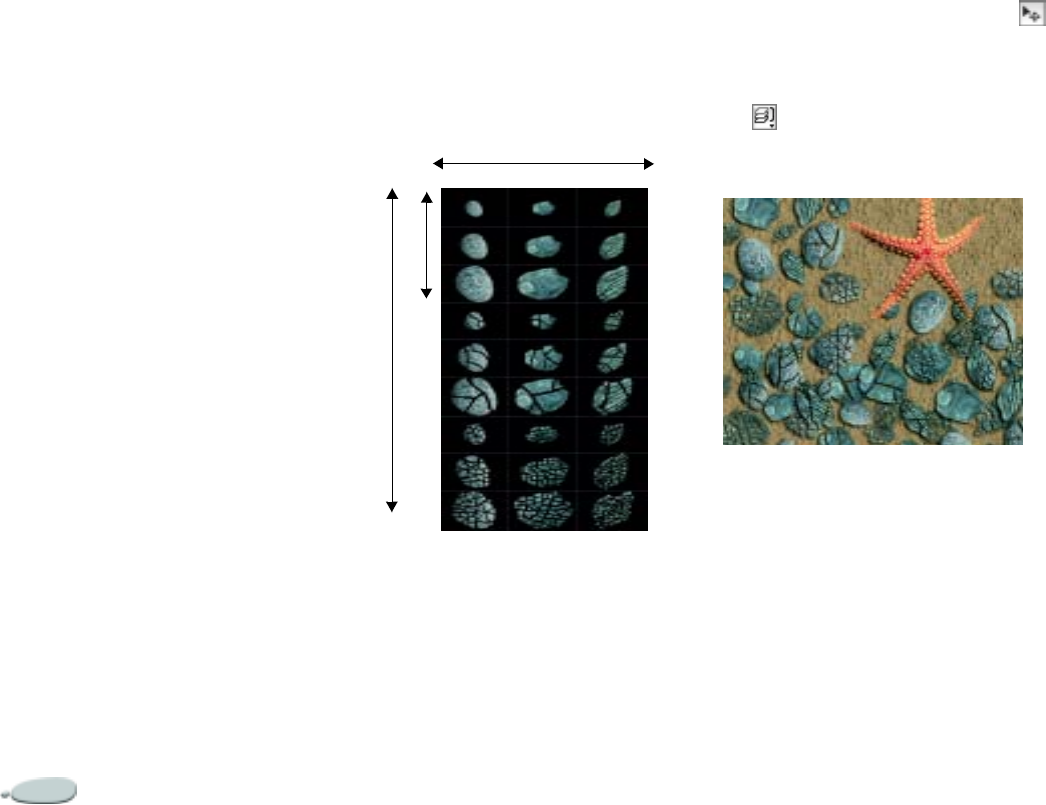
The Image Hose346
To create a 3-Rank nozzle:
1Build or open a 2-Rank file.
2Determine the number of
elements you want in the third
rank.
3Choose Window menu > Show
Info to show the Info palette, and
check the height of the current
nozzle file.
4Multiply the number of items in
the third rank by the height of the
file.
The result you get will be the
height of your 3-Rank Nozzle file.
5Choose Select menu > Reselect,
and choose Select menu > Float.
6Choose Edit menu > Copy.
Now you must extend this file
vertically to accommodate the
items in the third rank.
7Choose Canvas menu > Canvas
Size.
8Add the correct number of pixels to
set the canvas to the height of your
3-Rank nozzle.
Now you can develop imagery for
each item (set) in the third rank.
9Choose Edit menu > Paste, and
position the pasted layer in the
area you added.
The images should be centered in
the grid cells.
This nozzle file has three items in Rank 1,
three items in Rank 2 and three items in Rank
3.
10 If necessary, modify the images in
this layer.
11 Choose the Layer Adjuster tool
from the toolbox, and select the
layer.
12 Click the Layer Commands button
, and choose Drop.
13 Choose File menu > Save, and
save the file in RIFF format.
Painting with the 3-Rank Nozzle “Broken
Shells.”
Notes:
•
If this is a new file and you did not
define it as a 1- or 2-Rank nozzle earlier,
refer to “Creating a 2-Rank Nozzle on a
Grid” on page 343.
•
If you previously defined this file as a
nozzle, you must edit the definition to
describe the three ranks you created.
Rank 1 (Variety)
Rank 3 (Shape)
Rank 2 (Size)

Corel Painter 347
Nozzle Libraries
Nozzle libraries let you save and
retrieve sets of nozzle files.
For information on loading alternate
libraries, creating new libraries, and
moving items between libraries, refer
to “Libraries and Movers” on page 23.
To add a nozzle to the library:
1In the toolbox, click the Nozzle
selector.
2Click the selector menu arrow, and
choose Load Nozzle.
3Locate your nozzle file in the
dialog box, and click Open.
4If necessary, enter the values to
define the number of elements,
their size, and rank.
5In the toolbox, click the Nozzle
selector.
6Click the selector menu arrow, and
choose Add Nozzle to Library.
To retrieve a nozzle:
1In the toolbox, click the Nozzle
selector.
2Click the selector menu arrow, and
choose Check Out Nozzle.
Corel Painter opens the nozzle file
in an image window.
3If necessary, edit the file.
4To put it back in the library, click
the Nozzle selector menu arrow in
the toolbox and choose Add
Nozzle to Library.
Creating a Nozzle from a
Movie
Frame after frame of a Corel Painter
movie can flow from the Image Hose.
The frame size describes the “Item
Size.” If you’re creating a movie just to
turn it into a Nozzle, set the frame
size just large enough to hold your
largest image element.
You can use the selection in each
frame to control the shape of the
images.
To make a nozzle file from a
movie:
1Open the movie you wish to turn
into a nozzle file.
2In the toolbox, click the Nozzle
selector.
3Click the selector menu arrow, and
choose Make Nozzle from Movie.
An untitled image file appears
containing each movie frame.
4If you didn’t create selections in a
frame of the Frame Stack, you can
create the selections now.
Remember, each image element
must be included in the selection.
5Save it as a RIFF file.
You can now open and use the
RIFF file like any 1-Rank nozzle
file.
Creating a 2-Rank Nozzle
from a Movie
The Make Nozzle from Movie
command automatically creates a 1-
Rank nozzle. If you want, you can use
this technique to create a 2-Rank
nozzle.
To make a 2-Rank nozzle from a
movie:
1Arrange the image elements in sets
according to the second rank.

The Image Hose348
For example, if the second rank is a
progression in color, the movie
should be arranged “red set, purple
set, blue set” and so on. Each “set”
is the first rank progression.
2In the toolbox, click the Nozzle
selector.
3Click the selector menu arrow, and
choose Make Nozzle from Movie.
4Choose File menu > Get Info.
The File Information dialog box
holds the information Corel
Painter uses to index in this file.
5Edit the statement to describe the
nozzle index you created.
For example, “12 items” describes
a 1-Rank nozzle with 12 image
elements. Changing this to “4 by 3
items” describes a 2-Rank nozzle
with four items in rank 1 and three
items in rank 2.
Note
•
Do not allow empty frames at the end
of the movie. The total number of frames
must equal the number of elements in
Rank 1 multiplied by the number of
elements in Rank 2.
18
Mosaics
Making mosaics is a classical art
technique that creates pictures from
colored tiles and grout. In Corel
Painter, the Make Mosaic feature and
its companion, Make Tessellation, let
you create tile mosaics and stained-
glass window formations.
The Make Mosaics feature lets you
paint with a mosaic medium. In
essence, you’re painting with tiles.
The medium you paint with can be
simple colored tiles or colors cloned
from an original image. This way, you
can paint an original image on a blank
canvas or re-create an image from a
cloned photo.
Each tile is an independent object and
carves its shape so that it fits perfectly
with surrounding tiles. You can erase
and/or reshape tiles to create the
perfect mosaic design.
A mosaic image.
The Make Tessellation feature takes
an original image and creates tile inlay
patterns from non-rectangular tiles.
This feature divides your image into
polygonal shapes and then converts
the shapes into tiles.
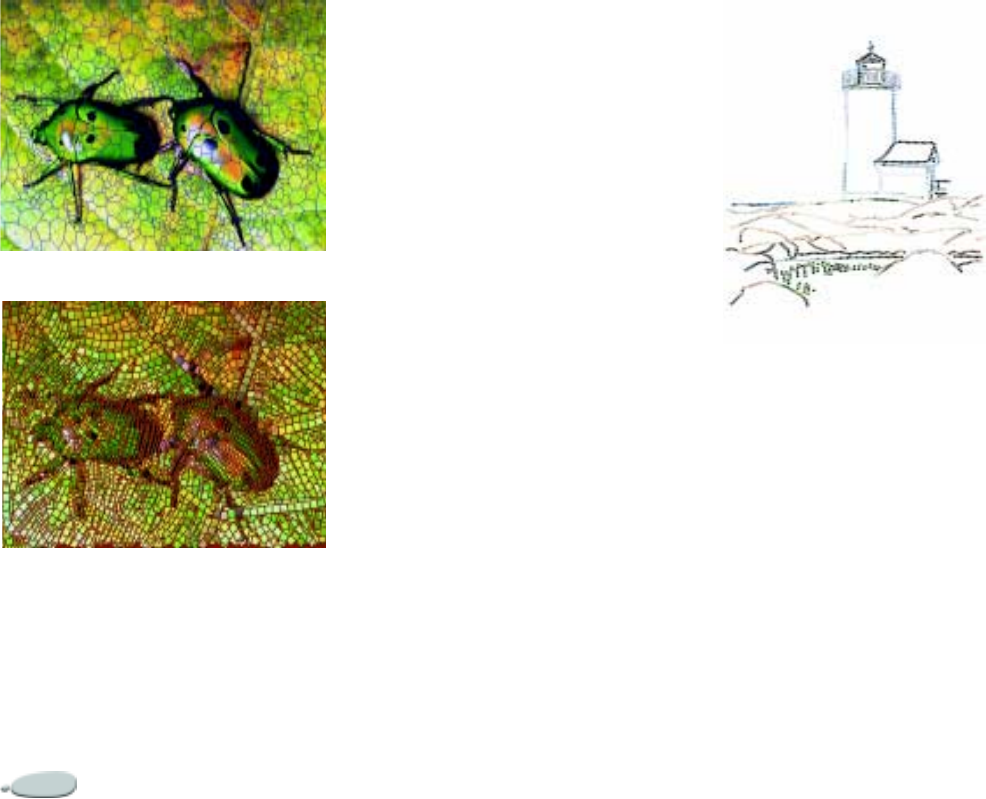
Mosaics350
A mosaic based on Tessellation.
A mosaic with a surface texture.
After creating a mosaic, using either of
the two methods, you can give it a
three-dimensional appearance. You
can also apply brush strokes to the
mosaic. A brush such as Distortion
will smear the tile colors. For
instructions on adding dimension to
the tiles, refer to “Render Tiles into
Mask” on page 358.
Suggestions for Creating
Mosaics
If you are either cloning from an
existing image or creating a mosaic
design from scratch, you’ll want to
follow a few suggestions:
• Use your first few courses of
mosaic tiles to delineate the most
important contours of your
subject—just as if you were
drawing with a pencil. Describe
the most important lines of your
scene first. Additional courses of
tiles should follow the initial
contours.
Tiles applied to the outline of an image.
• Use larger tiles in areas of flat color
and smaller tiles in regions where
you must add more detail. In flat
color areas, it’s effective to
introduce some color variability.
Tiles used in traditional mosaics
rarely have uniform color.
• If you’re working in a clone, turn
on the Tracing Paper feature by
enabling the Use Tracing Paper
check box in the Make Mosaics
dialog box. This helps you follow
the source imagery.
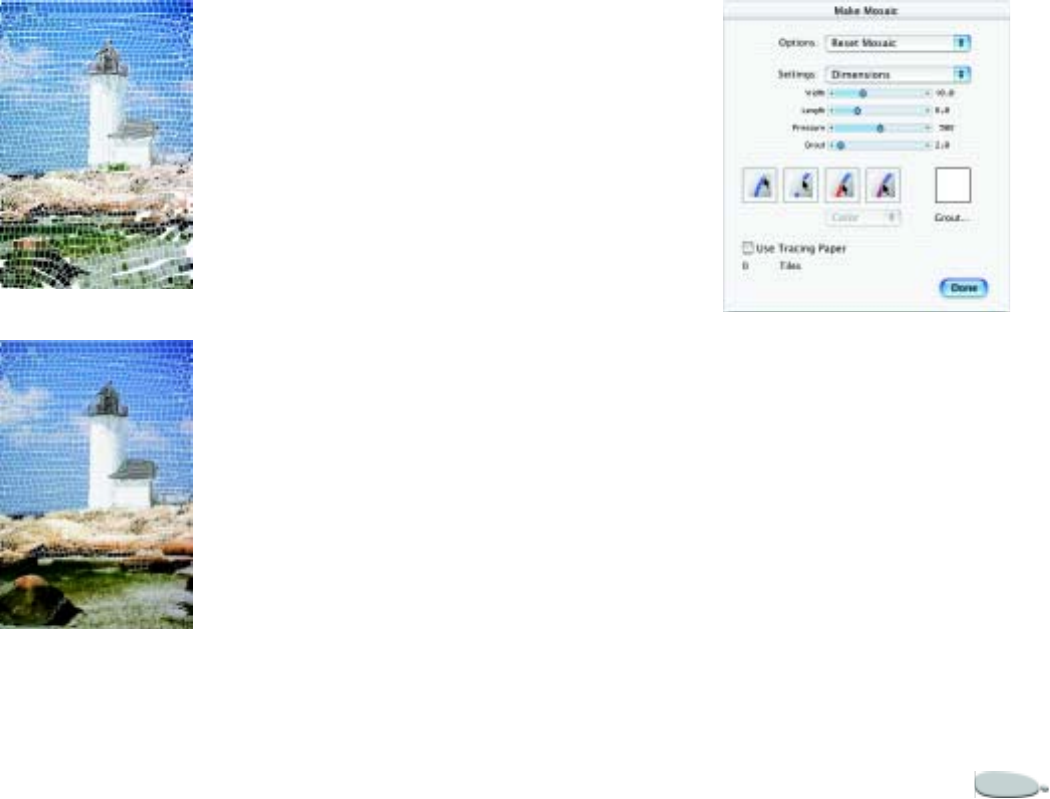
Corel Painter 351
Clone without source imagery showing.
Clone with source imagery showing.
Getting Started with
Mosaics
The Mosaic feature differs from the
other Natural-Media tools in Corel
Painter. When you’re working with
the mosaics medium, you’re actually
working in a different mode. This
means that you must have the Make
Mosaic dialog box open and you can’t
access any other tools or features—
except for the Colors palette.
To create a mosaic:
1Open a new document or clone an
existing document.
2Choose Canvas menu > Make
Mosaic.
The Make Mosaic dialog box
provides all the controls for
working in this medium. When
painting with mosaic tiles, you’ll
work with one of four tools: Apply
Tiles, Remove Tiles, Change Tile
Color, or Select Tiles.
Use the Make Mosaic dialog box to change
your artwork into tiles.
Saving to a RIFF File
If you save a mosaic in the RIFF
format, you can open the file later,
choose the Make Mosaic command,
and continue working.
RIFF is the only file format that will
save the resolution-independent
mosaic tile objects. Saving in any
other format prohibits you from
resuming the mosaic process. All file
formats will save the rendered image
of the mosaic tiles on the canvas.
Mosaics352
Creating the Mosaic Effect
When in Mosaics mode, you can add,
remove, and reshape mosaic tiles. You
can choose a color to paint with or use
the Clone Color. You can also set
grout thickness.
The following key commands help in
working with the entire mosaic:
Applying and Removing Tiles
To apply tiles:
1Choose Canvas menu > Make
Mosaic.
2In the Make Mosaic dialog box,
click the Apply Tiles button .
3Drag in the document window.
New tiles flow from your stroke.
Tip
•
You can also have Corel Painter do the
tile work automatically with the Stroke
Selections and Fill Selection commands.
To remove tiles:
1Choose Canvas menu > Make
Mosaic.
2In the Make Mosaic dialog box,
click the Remove Tiles button .
3Select the tiles you want to remove.
Tile Color
The selected primary color on the
Colors palette determines the color.
You might want to add some color
variability to build visual interest.
When working in a clone document,
you can color the tiles based on the
clone source.
To use multi-colored tiles:
1Choose Window menu > Show
Color Variability to display the
Color Variability palette.
If the Color Variability is not
expanded, click the palette arrow.
2Choose a color variability method
from the pop-up menu.
3Move the sliders or type values in
the boxes to adjust the color
variability settings.
To base colors on a clone source:
•After cloning an image, enable the
Clone Color option on the
Colors palette.
Normally, each tile is given a single
color. If you want more options for
coloring tiles, render the tiles to a
channel. You can then convert the
channel to a selection to paint directly
on the tiles, apply effects, or fill them
with a pattern, weave, gradient, or
image. Refer to “Render Tiles into
Mask” on page 358 for more
information.
Changing Tile Color
There are several ways to change tile
color. You can adjust the value, change
the hue, or randomize variability. You
can adjust the color for individual tiles
or across areas of the mosaic.
Key Command Description
aselect all Selects
every tile.
ddeselect all Deselect
all tiles.

Corel Painter 353
To change tile color individually:
1Choose Canvas menu > Make
Mosaic.
2In the Make Mosaic dialog box,
click the Change Tile Color button
.
The adjustment mode menu
beneath the tool icon becomes
active.
3Choose a color adjustment mode
from the menu.
•Color changes the tile to the
current primary color.
•Darken applies a small amount
of black.
•Lighten applies a small
amount of white.
•Tint applies a small amount
(10%) of the current primary
color.
•Vary adds color variability,
based on the variability settings
on the Colors palette. On the
Colors and Color Variability
palettes, choose the color and
variability settings you want to
use.
4Select the tiles you want to change.
To change tile color in selected
tiles:
1Choose Canvas menu > Make
Mosaic.
2In the Make Mosaic dialog box,
click the Select Tiles button .
3Click or drag across the tiles you
want to select. Borders appear on
selected tiles.
You can select contiguous tiles of
the same color (no variability
allowed) by holding down the
Command (Mac OS), Control
(Mac OS), or Ctrl (Windows) key
and selecting a group of tiles.
Clicking on a tile already selected
deselects it.
4Choose a color from the Colors
palette.
Press one of the following keys to
apply the described color change to
the selected tiles:
Grout Color
Any area not covered by tiles is
considered grout. The grout color is
assigned to the mosaic background
when you begin working.
Key Command Description
ccolor Changes the
tile to the
current
primary
color.
t tint Applies a
small
amount
(10%) of the
current
primary
color. Repeat
to
accentuate.
v vary Adds color
variability,
based on the
variability
settings in
the Color
controls.
Repeat until
you are
satisfied
with the
results.
Key Command Description
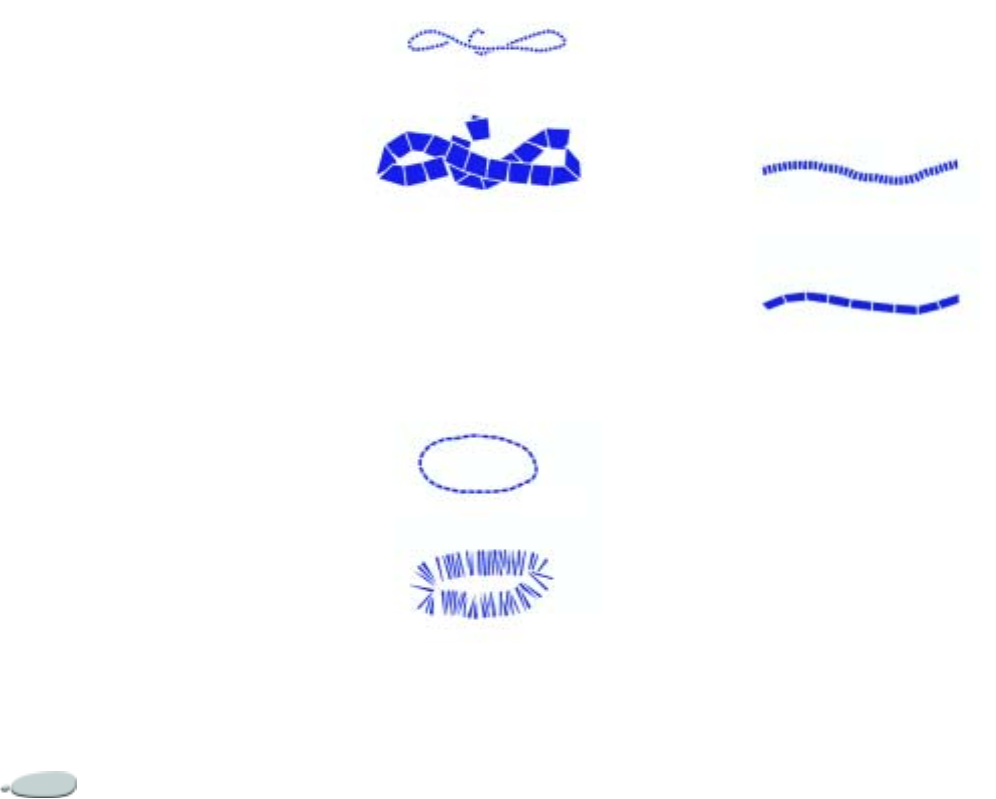
Mosaics354
To change the grout color:
1Choose Canvas menu > Make
Mosaic.
2In the Make Mosaic dialog box,
click the Grout color chip.
Use the Color Picker to select a
grout color. You can change the
grout color at any time. However,
changing the grout color
automatically re-renders the
mosaic.
Tile Settings
Tile shapes have two categories of
control: Dimensions and
Randomness. Use the Settings menu
to choose which category you want to
change.
Dimensions
The Dimensions sliders let you
control the basic size of the tiles and
grout spacing.
Use the Dimensions sliders to control size and
spacing of the tiles. Top=3.9, bottom=27.9.
Width Dimensions
Width sets the width of the tiles in
pixels.
The Dimensions: Width slider controls the
width of the tiles. Top=3.5, bottom=30.4.
Length Dimensions
Length sets the length of the tiles in
pixels.
The Dimensions: Length slider controls the
length of the tiles. Top=4.1, bottom=24.2.
Pressure
Tile width depends on stylus pressure.
The Pressure slider allows you to
control the width variance under
differently weighted strokes.
With the Pressure slider set at zero, a
light stroke produces narrow tiles and
a heavier stroke creates wider tiles.

Corel Painter 355
Increasing the Pressure slider
increases the effect of pressure on the
width of the tiles. By increasing the
Pressure setting, you can prevent the
creation of narrow tiles in response to
a light stroke. Setting Pressure to
100% creates uniformly wide tiles,
regardless of the pressure.
The Dimensions: Pressure slider controls how
pressure affects tile width. Top 0%,
bottom=100%.
Grout Dimensions
Grout sets the spacing between tiles in
pixels.
The Dimensions: Grout slider controls the
spacing between tiles. Top=0%,
bottom=15%.
Randomness
The Randomness sliders allow you to
control the uniformity of the tile
shapes. Increasing randomness makes
the shapes more erratic—each
different from the last.
For example, if the Length dimension
is 10 pixels, a Length randomness of
25% creates tiles that are randomly
given a length from the range of 7.5 to
12.5 pixels.
Width Randomness
Increasing Width randomness allows
the width to vary by the set
percentage.
The Randomness: Width slider controls the
randomized tile width. Width=92%.
Length Randomness
Increasing Length randomness allows
the length to vary by the set
percentage.
The Randomness: Length slider controls the
randomized tile length. Length=98%.

Mosaics356
Cut Randomness
With Cut randomness set to 0, the
edges of the tile are created
perpendicularly to the stroke.
Increasing Cut randomness allows the
angle of the tile ends to vary.
The Randomness: Cut slider controls angle of
the end tiles. Cut=90°.
Grout Randomness
Increasing Grout randomness allows
the spacing between tiles to vary by
the set percentage.
The Randomness: Grout slider controls the
randomness of the spacing between tiles.
Grout=100%.
Working with Mosaics
Each mosaic tile you create is stored as
a resolution-independent object
within the Corel Painter image
database. This means that if you resize
an image composed of mosaic tiles,
your image can be displayed at the
same quality as if it was originally
created at higher resolution.
The image that you see displayed is
the set of all mosaic tiles rendered as
an image onto the canvas. Mosaics can
be re-rendered at any time. Once you
exit the Make Mosaic dialog box, you
can treat this rendered image just like
any photograph or painting. You can
paint it, apply effects to it, select
portions of it, or increase the canvas
size. However, once you choose
Re-render Mosaic, Corel Painter
erases any imagery that is not a tile or
grout.
Mosaics and Layers
The first thing the Mosaic feature does
is cover the entire canvas with grout.
This obliterates images that are on the
canvas, but leaves objects that hover
above the canvas, such as layers and
shapes. These objects are not deleted,
but they do cover up the mosaic you’re
working on.
Note
•
The Mosaic feature works with the
entire canvas. You cannot apply mosaic
tiles inside a layer.
Compositing with Mosaics
If you want to composite a mosaic
with some other image, you have
several options:
• using multiple documents
•using layers
• layering mosaics
Using Multiple Documents
You can create the mosaic in its own
document. When you’re satisfied with
the result, float and copy the mosaic to
the document where you want to
composite it.

Corel Painter 357
Using Layers
You can float the non-mosaic portion
of the image. Create the mosaic on the
canvas. When you’re satisfied with the
mosaic, you can drop the layers.
Layering Mosaics
If a mosaic already exists in the
document when you open the Make
Mosaic dialog box, Corel Painter
assumes you want to keep existing
tiles and does not apply new grout. To
avoid this, you can use a layer to create
a mosaic on top of an image.
To layer mosaics:
1Create a mosaic, then click Done
to exit the Make Mosaic dialog
box.
2Fill, paint, and drop layers to create
your background.
3When you return to Make Mosaic,
your background image remains
and you can place tiles over the top
of it.
Removing tiles placed on an image
reveals the grout, not the image.
Fitting Tiles Together
When working with real ceramic tiles,
it is physically impossible to merge
tiles. You can put them close to each
other, but you can’t make them
occupy the same space. Likewise, the
mosaic tiles in Corel Painter respect
each other’s space. Tiles don’t overlap
or merge. Corel Painter adjusts the
shape of the tiles to fit them together
while maintaining the grout lines. So,
when you want to re-lay the tiles in an
area, you must remove the existing
tiles.
For more information on removing
tiles, refer to “Reset Mosaic” on
page 357.
Mosaic Commands
Once you have created a mosaic, you
can use several powerful mosaic
features to improve your image.
Reset Mosaic
This command removes all tiles from
the document. Corel Painter clears the
canvas, leaving only the grout color.
If you want to remove tiles selectively,
use the Remove Tile tool discussed in
“Applying and Removing Tiles” on
page 352.
Re-Render Mosaic
This command re-creates the mosaic
from the grout color and the tile object
information. Re-rendering first fills
the image with the grout color and
then re-renders the mosaic tiles at the
resolution of the document. You can
use this command to change the
resolution of the tiles, after you
change the resolution of your
document.
To re-render tiles:
1Open an image that is the size you
want.
2Create a mosaic, and click Done to
exit the Make Mosaic dialog box.
3Choose Canvas menu > Resize.
In the dialog box, disable the
Constrain File Size option and set
the resolution to a higher value.
When Corel Painter finishes
resizing, you’ll notice the tiles have
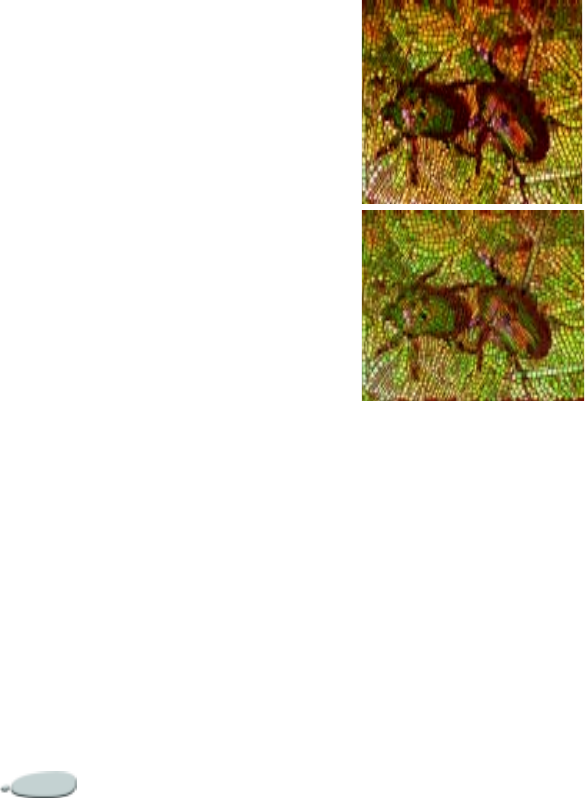
Mosaics358
blurred. You can correct this
problem by re-rendering the
mosaic.
4Choose Canvas menu > Make
Mosaic.
5In the Make Mosaic dialog box,
choose Re-Render Mosaic from the
Settings pop-up menu.
Corel Painter replaces the resized,
blurry tiles with tiles rendered at
the higher resolution.
Render Tiles into Mask
This command places the tile shapes
in a new channel named Mosaic Mask
(on the Channels palette).
This feature has several uses. The
most common is adding depth to the
tiles.
Use Surface Texture to create a look of 3D tiles.
With the tiles in a channel, you can
load the mosaic pattern as a selection
or you can invert the channel to use
the grout as a selection. This can be
particularly interesting when working
with a tessellated mosaic.
To give the mosaic tiles a three-
dimensional look:
1After creating the mosaic, choose
Render Tiles into Mask from the
Options pop-up menu.
2Click Done to exit the Make
Mosaic dialog box.
3Choose Effects menu > Surface
Control > Apply Surface Texture.
4In the Apply Surface Texture
dialog box, choose Mosaic Mask
from the Using pop-up menu.
5Change the Amount and Softness
sliders to achieve the level of relief
you want.
In most cases, you’ll want the
Picture slider at 100%. For more
information on surface texture
options, refer to “Apply Surface
Texture” on page 277.
Because Corel Painter uses the tile
shapes (from the channel), the
resulting surface texture gives the
tiles an excellent 3D appearance.
Starting with a Triangle
When the Start with Triangle
command is enabled, Corel Painter
creates a triangle as the first tile in
each stroke. This is particularly useful
when filling a “V” shaped space with
tiles.
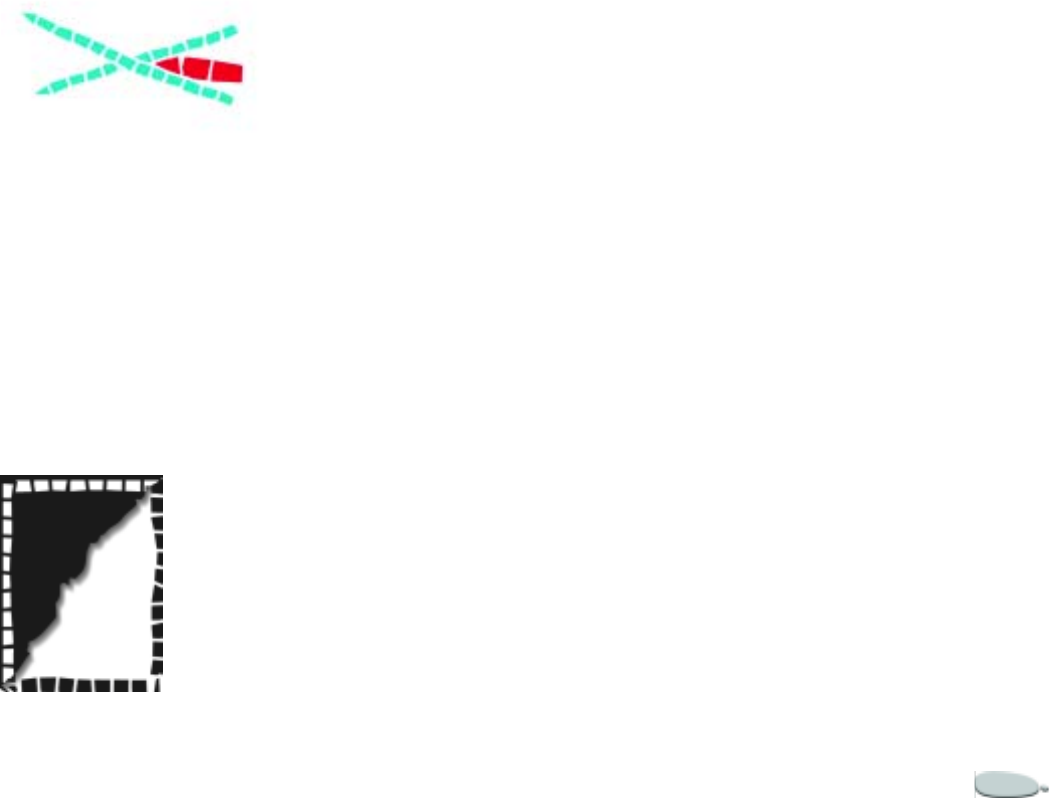
Corel Painter 359
Start with Triangle makes a perfect wedge in
the “v.”
Respecting the Edge of an
Image
When the Respect Edge of Image
command is enabled, Corel Painter
maintains a grout line at the perimeter
of the image. Tiles you create at the
edge of the image do not violate the
grout line.
Respect Edge of Image ensures the tiles you
create at the edge will not violate the
grout line. In this example, the white tiles
respect the edge, while the black tiles do not.
Stroke Selections and Fill
Selection
The Stroke Selections and Fill
Selection commands are provided for
applying mosaic tiles to selections.
The Mosaic selections features work
only with path-based selections. You
might need to use the Transform
Selection command to convert a
channel-based selection to a path-
based selection. For more information,
refer to “About Selection Types” on
page 204.
Stroking and filling a selection makes
sense only when you change a
parameter between operations; for
example, if you change the tile color or
dimensions. If you are planning to use
the stroke and fill features, remember
to apply the stroke before you apply
the fill.
To create a mosaic in a selection:
1Set up the area you want to tile as
an active selection.
2Choose Canvas menu > Make
Mosaic.
3In the Make Mosaic dialog box,
choose Dimensions or
Randomness from the Settings
pop-up menu.
4Choose the color for the tile and
the grout.
5Use the Options pop-up menu to
select the command you want:
• Stroke Selections creates one
row of tiles along each selection
path.
• Fill Selection applies multiple
rows of tiles, working in from
the path until the selected area
is filled with tiles.
6Click Done to exit the Make
Mosaic dialog box.
Notes:
•
In some cases, Corel Painter might not
put a tile in every space. You can fill
openings by choosing the Apply Tiles tool
and putting them in yourself.
•
If you don’t like the way Corel Painter
filled an area, you can use the Remove
Tiles tool to clear it. Then you can re-
apply tiles by hand.
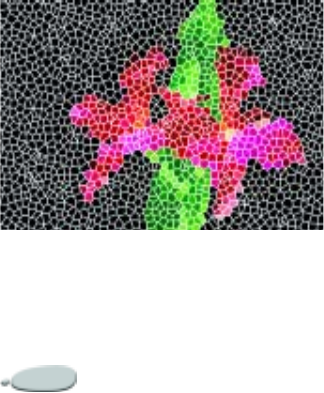
Mosaics360
Working with Tessellation
Mosaics
A tessellation is a type of mosaic that
uses non-rectangular tiles.
Tessellation tiles are subject to the
same rules as the rectangular mosaic
tiles.
The Make Tessellation feature works
by dividing the canvas into polygonal
shapes, which become the mosaic
tiles. The polygons themselves are sets
of points, connected by line segments.
You can control the number of points
and their distribution. You can also
specify how the points are connected.
A tessellation mosaic uses non-rectangular
tiles.
After choosing the Make Tessellation
feature, the polygons appear as mosaic
tiles, are given the primary color, and
are surrounded by the grout lines
described in the Make Mosaic dialog
box.
You can use the tools in the Make
Mosaic dialog box to remove tiles and
change their color. However, you can’t
re-apply tiles.
To create a tessellation:
1Open a new document.
2Choose Canvas menu > Make
Mosaic.
3In the Make Mosaic dialog box,
choose Dimensions from the
Settings menu.
4Adjust the Grout slider to describe
the thickness you want for the
grout lines, and select a grout
color.
5Click Done to exit the Make
Mosaic dialog box.
6Choose Canvas menu > Make
Tessellation.
7Do one of the following:
• Click or drag in the document
to create points. Repeat to add
more points. Corel Painter con-
nects the points to form the
polygons.
• In the Make Tessellation dialog
box, choose one of the com-
mands from the Options pop-
up menu. You can add 500
points randomly, evenly spaced,
or based on a clone source doc-
ument.
8Choose a tessellation tile shape
from the Display pop-up menu.
Corel Painter forms polygons by
connecting the points according to
the Display type.
You can choose from one of three
display options:
•Triangles
•Cracks
•Pieces
9If you want to clear all points,
choose Reset from the Options
pop-up menu.
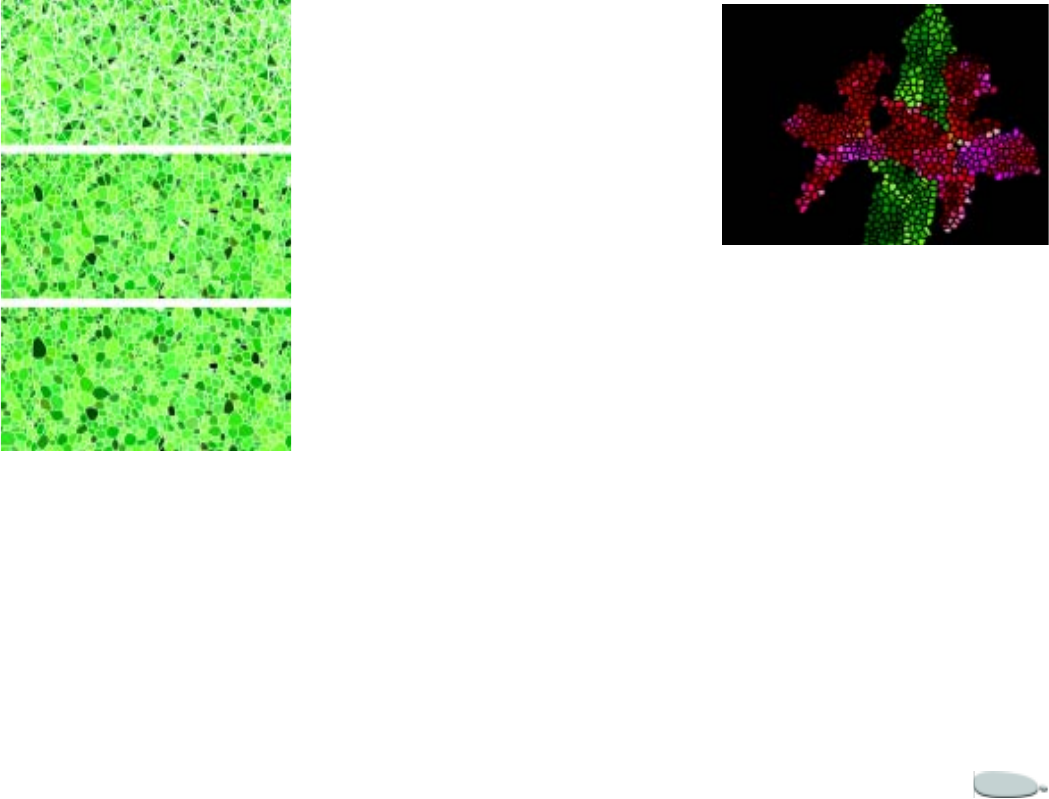
Corel Painter 361
You can base your Tessellation on Triangles,
Cracks or Pieces.
Corel Painter converts the
polygons to mosaic tiles, then
renders the mosaic image to the
canvas.
Notes:
•
Adding points based on a clone source
is a powerful option. The 500 points are
distributed according to the luminance of
the clone source. Lighter regions receive a
greater density of points and, so, smaller
polygons.
•
The number of points appears in the
corner of the Make Tessellation dialog
box.
Tips
•
Repeat a command from the Add
Points menu to create more points. You
can alternate between dragging and using
an add-points command. The points
accumulate.
•
You might want to convert a regular
image to a tessellation. If so, set up the
image as the clone source. Enable the
Clone Color option on the Colors palette.
Then make the tessellation.
A finished tessellation resembles stained glass.
To add points using strokes:
1Open a new document.
2Choose Canvas menu > Make
Mosaic.
3In the Make Mosaic dialog box,
choose Dimensions from the
Settings pop-up menu.
4Adjust the Grout slider to describe
the thickness you want for the
grout lines, and select a grout
color.
5Click Done to exit the Make
Mosaic dialog box.
6Choose Canvas menu > Make
Tessellation.
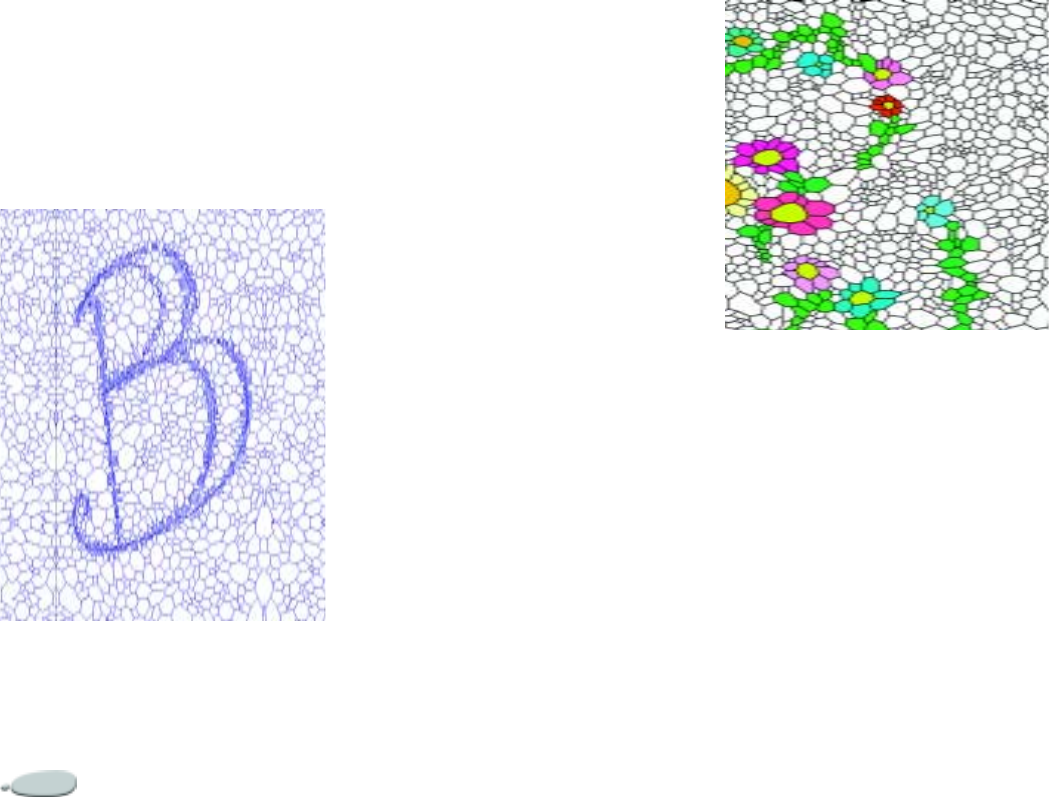
Mosaics362
7In the Make Tessellation dialog
box, choose Add 500 Evenly
Spaced Points from the Options
pop-up menu.
8Create a shape by making strokes
in the document.
The points along the stroke will
have increased density.
Adding points in the shape of a letter by
stroking. The letters appear as a swath of
smaller polygons.
Notes:
•
You can continue stroking to add
higher concentrations of polygons in very
specific areas. This way, you can create
specific patterns or shapes.
•
It is possible to create a huge number
of points. More points mean more
polygons, which increase the time it takes
to convert to a mosaic. Keep this in mind
to avoid overwhelming your system.
Coloring Tessellations
After the tessellation appears as a
mosaic, you can open the Make
Mosaic dialog box and modify the tile
colors using the Change Tile Color
tool.
When you create a tessellation with
the current color and the grout color
set to black, and choose Make Mosaic,
the image appears totally black. Don’t
worry—it’s not empty. With the
Change Tile Color tool, you can set
the primary color to a bright color, and
stroke in the document. Colored,
tessellated tiles appear beneath your
stroke. You can also base the color on
the color in a clone source if you
enable Clone Color on the Colors
palette.
Once you have a tessellation, you can use Make
Mosaic from the Canvas menu to paint on the
tiles.
Advanced Settings for
Tessellations
The following commands for
tessellations are available from the
Options pop-up menu in the Make
Mosaic dialog box:
• Reset Mosaic — removes all tiles
from the document, leaving only
the grout color

Corel Painter 363
• Re-Render Mosaic — re-creates
the mosaic from the grout color
and the tile object information
• Render Tiles into Mask — places
the tile shapes in a new channel
The other mosaic commands relate to
creating tiles, so they don’t apply to
tessellations.
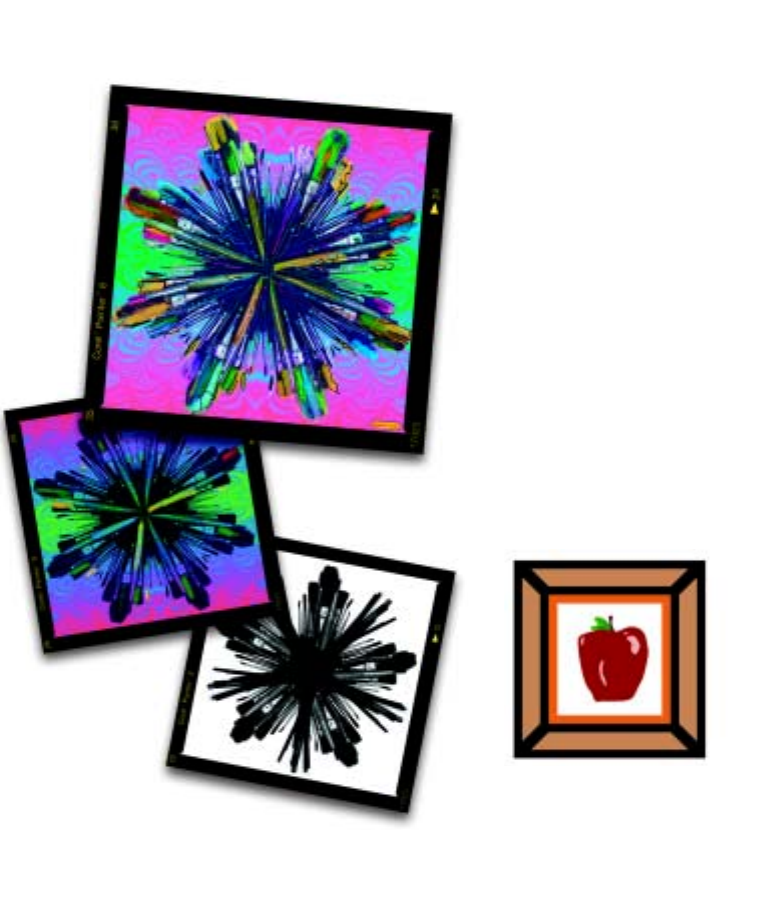
19
Using Shapes
Shapes are vector-based objects that
you can draw, modify, and fill. Shapes
can be open or closed. They can be
simple lines, curves, or text outlines.
You can create and edit shapes with
the precision of a drawing program
and integrate them with the Natural-
Media environment in Corel Painter.
In this chapter you’ll learn how to
create shapes and set their stroke and
fill attributes. You’ll learn how to
modify shapes, edit their outlines, and
convert them to pixel-based layers.
An image created with shapes.
About Shapes
In Corel Painter, you work mainly
with bitmaps, or raster images.
Bitmaps are composed of tiny squares
called pixels; each pixel is mapped to a
location in an image and has a
numerical color value. The location
and color value data are stored as
bits—hence the name bitmaps.
Vector graphics are made up of lines,
curves, objects, and fills that are all
calculated mathematically. Shapes are
vector objects, and you can work with
them in Corel Painter in much the
same way you work with vector
objects in drawing programs like
CorelDRAW® and Adobe®
Illustrator®.
Corel Painter draws shapes in an anti-
aliased fashion. This anti-aliasing
gives objects a smooth edge, as
opposed to the jagged edges apparent
in some drawing programs. Some
clipart objects actually look like

Using Shapes366
photographic elements when
imported in Corel Painter and
displayed with anti-aliasing.
Anti-aliased shapes are typically
slower to draw to the screen in Corel
Painter than aliased objects are in
drawing programs. So, you may want
to do most of your object creation in
your drawing program. You can then
import the vector artwork into Corel
Painter, tweak it with the drawing
tools, and add some Natural-Media
effects.
Shapes in Corel Painter can be
interleaved with pixel-based layers, so
you can layer both styles of artwork in
a single composition. You can convert
vector objects and groups into pixel-
based layers and use any of the effects
or painting tools on these floating
objects to create Natural-Media
artwork.
You can also use shapes to generate
selections. You can convert shapes to
selections and vice versa. The tools for
adjusting shapes allow precise control
over the outline path, so you may
want to use shapes to create some of
your selection paths. For more
information about selections, refer to
“Working with Selections” on
page 203.
Shapes as Layers
In Corel Painter, shapes are
implemented as layers. When you
create a shape, a new layer is added to
your document.
The shapes you create are listed on the
Layers palette. Many of the options
and controls for working with pixel-
based layers apply equally to shapes.
For example, you can apply effects to
shapes or give them a composite
method to control how the shape
interacts with the underlying image.
Shapes follow the same layering rules
as pixel-based layers, and you can
manipulate them in many of the same
ways.
Shapes differ from pixel-based layers
by the type of data they contain.
Shapes are vector objects; pixel-based
layers are constructed of pixels.
If you want to work with pixel
information in a shape, you can
convert the shape to a pixel-based
layer. In many cases, Corel Painter
will do this for you automatically. For
example, if you paint on a shape,
Corel Painter asks if you want to
commit the shape to an image layer.
You can also deliberately convert a
shape or group of shapes to a pixel-
based layer.
For more information about layers,
refer to “Layer Basics” on page 230.
For information about changing layer
hierarchy and working with groups,
refer to “Managing Layers” on
page 235.
For information about moving and
aligning layers, refer to “Moving
Layers” on page 244.
For information about layer composite
methods, refer to “Blending Layers
Using Composite Methods” on
page 248.
To convert a shape to a pixel-
based layer:
1Choose the Shape Selection tool
from the toolbox .
2Click the shape to select it.
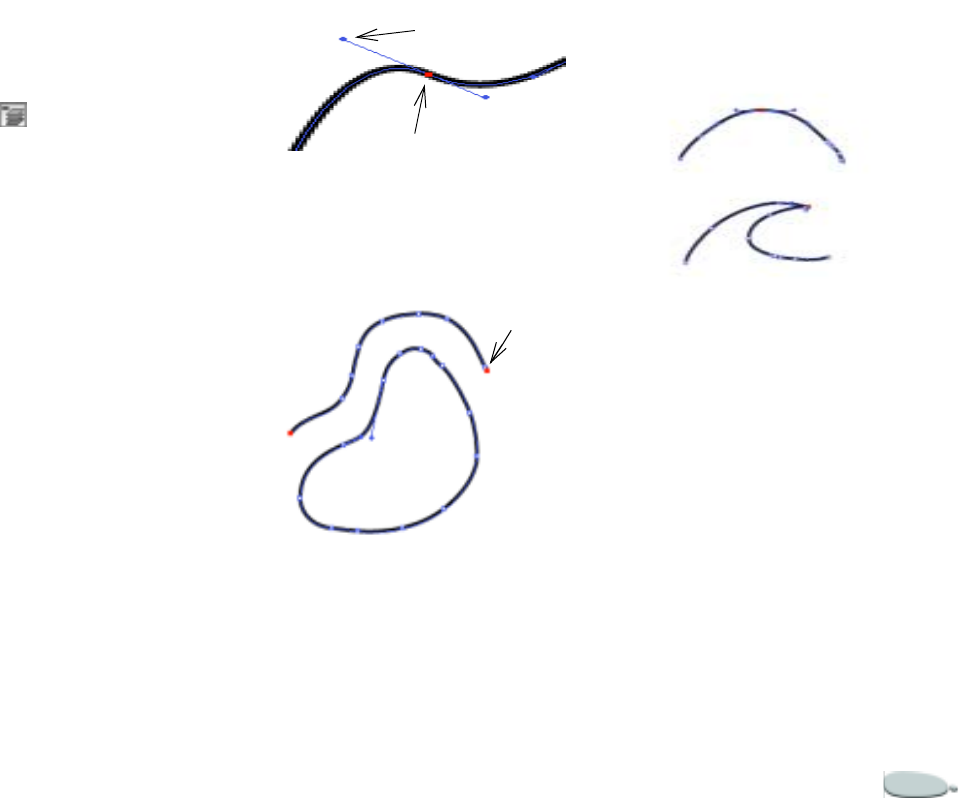
Corel Painter 367
3Do one of the following:
•Choose Shapes menu > Con-
vert to Layer.
• Click the Convert to Layer but-
ton on the property bar.
Working with Bézier Lines
The paths used to create shapes are
known as Bézier lines. Bézier lines
can be straight or curved, and they
consist of anchor points connected by
line segments.
When the path is a curve, “wings,”
represented by a straight line, extend
from the anchor points. The wings are
tangent to the curve. The wings have
control “handles” on them. By
dragging the wing handle, you can
change the curvature of the line
segment.
Paths can be modified using anchor points and
wing handles.
Shapes can be open (with endpoints)
or closed (without endpoints).
Open paths contain endpoints; closed paths do
not.
Anchor points can be either smooth or
corner points. A smooth point allows
you to manipulate the segments on
both sides of an anchor point by
dragging a handle. A corner point
restricts the manipulation of the
segments to the one side of the anchor
point that has a handle.
An anchor point can be a smooth point (top) or
a corner point (bottom).
Saving Files Containing
Shapes
When you save files in the RIFF
format, Corel Painter maintains
shapes as vector objects on separate
layers. In other formats, shapes merge
with the Canvas. In the Photoshop
format, shapes convert to bitmapped
images and are assigned to
appropriate layers.
anchor point
wing handle
endpoint
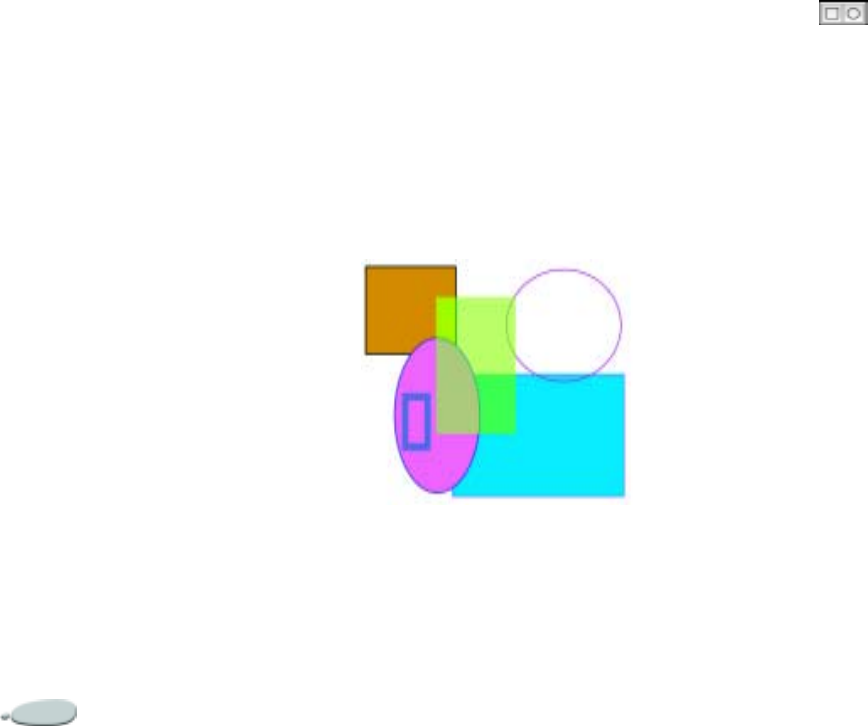
Using Shapes368
Printing Images Containing
Shapes
For information on printing files
containing shapes, refer to “Printing”
on page 445.
Creating Shapes
You can create shapes in the following
ways:
• By using one of the five shape
tools: the Pen, Quick Curve,
Rectangular Shape, Oval Shape, or
Text tool.
• By converting a selection path to a
shape.
• By acquiring an Adobe Illustrator
file using File menu > Acquire.
• By pasting an Adobe Illustrator
object from the Clipboard.
As you create shapes, Corel Painter
gives them default attributes for stroke
and fill. For instructions on setting the
default shape attributes, refer to
“Shape Preferences” on page 54.
The Shape manipulation tools are in
the toolbox. You can toggle between
the Shape Selection tool, and any of
the shape design and editing tools, by
holding down Command (Mac OS)
or Ctrl (Windows). This makes it
convenient to quickly make a
selection before you add to or edit it.
Shape Object Tools
You can use the rectangular or oval
Shape tools to create shapes.
Use the Shape tools to create oval and
rectangular shapes.
To create a rectangle or an oval:
1Choose the Rectangular Shape tool
or the Oval Shape tool from the
toolbox .
2On the property bar, set any of the
following attributes:
•Stroke—enable this check box
to create a shape with a stroke,
or outline.
•Stroke Color—if the Stroke
check box is enabled, choose a
color for the stroke.
•Fill—enable this check box to
create a shape with a fill.
•Fill Color—if the Fill check
box is enabled, choose a color
for the fill.
3Drag in the document window.
Tips
•
If you want to create a perfect square
or circle, hold down Shift while you drag.
•
The property bar and the Info palette
display information about the shape. To
display the Info palette, choose Window
menu > Show Info.
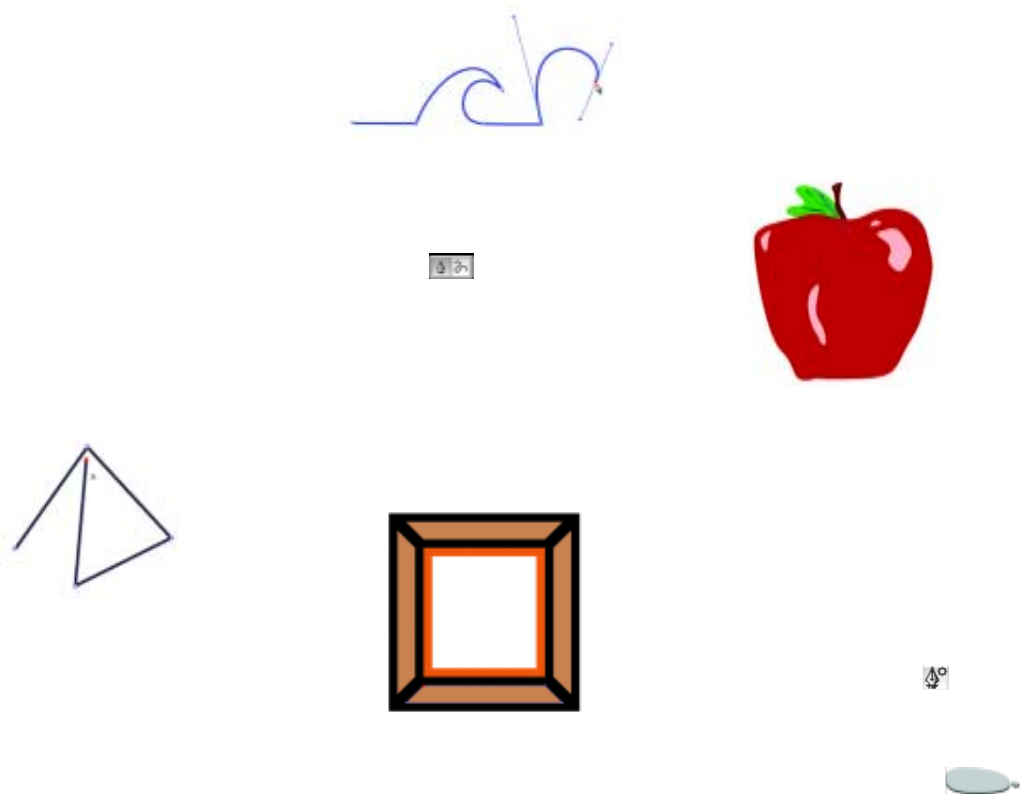
Corel Painter 369
Pen Tool
The Pen tool lets you create shapes
using Bézier lines. Use the Pen tool
when you want to draw straight lines
or smooth, flowing curves. You can
create shapes containing any
combination of straight and curved
lines.
You can easily adjust shapes after you
create them. For more information,
refer to “Editing Shapes” on page 373.
You can also convert between smooth
and corner points. For more
information, refer to “Converting
between Smooth and Corner Points”
on page 376.
Click to create anchor points connected by
straight line segments.
Drag to curve the segments between points.
To draw a Pen tool shape:
1Choose the Pen tool from the
toolbox .
2In the document window, click
where you want to begin.
3Do one of the following:
• To make a straight line seg-
ment, click where you want to
end the segment. Corel Painter
draws a straight line between
the two anchor points.
Shapes created with straight line segments.
•To make a curved line segment,
drag to create a new anchor
point and wing. The angle and
length of the wing determine
the curvature of the path. The
farther you drag, the longer the
wing and the deeper the curve.
Shapes created with curved line segments.
4Repeat step 3 as often as necessary,
combining straight and curved
segments until you have the shape
you want.
5Finish the shape by doing one of
the following:
• Close the shape by clicking or
dragging the first anchor point.
• Close the shape by clicking the
Close Shape button on the
property bar.
Using Shapes370
• Hold down Command (Mac
OS) or Ctrl (Windows) to tem-
porarily access the Shape Selec-
tion tool, and click outside the
shape to deselect it.
Tips
•
You can constrain the placement of the
points by snapping to the grid. For
information about displaying and
snapping to the grid, refer to “Using the
Grid” on page 44.
•
Each click or drag adds to the path. If
you unintentionally add to the path, press
Delete (Mac OS) or Backspace
(Windows) to remove the last anchor
point.
To add to an open shape path:
1Click an endpoint with the Pen
tool.
2Click or drag where you want to
add an anchor point.
Note
•
You can add to a path from an
endpoint only. You cannot add to a closed
path, or to the middle of an open path.
Tip
•
You can also select an endpoint by
holding down Command (Mac OS) or
Ctrl (Windows) and clicking the endpoint
or dragging a marquee over it.
Quick Curve Tool
The Quick Curve tool allows you to
create Bézier curves by drawing
freehand lines, as if you were drawing
with a pen or pencil.
To draw a freehand shape:
1Choose the Quick Curve tool from
the toolbox .
2Click where you want to start the
shape or line, and drag.
As you drag, a dotted line appears.
When you release the mouse or
stylus, the Quick Curve shape
appears.
If you want to close the shape,
finish at the same point where you
began.
Tip
•
You can add to either endpoint of a
Quick Curve shape by selecting the
endpoint and dragging out from it. To
select an endpoint, hold down Command
(Mac OS) or Ctrl (Windows), and click
the endpoint or drag over it.
Draw freehand shapes with the Quick Curve
tool.
Shapes and Selections
Converting a selection to a shape
enables you to edit the contour using
the Bézier editing tools. When you are
satisfied with the contour, you can
convert the shape outline back to a
selection.

Corel Painter 371
If you are simply scaling, rotating, or
skewing a selection path, use the
Selection Adjuster tool. If you must
edit the profile of the curve, convert
the selection to a shape.
Working from a selection path also lets
you create shapes based on regions of
the image. For example, if you used
the Magic Wand to select a region of
common color, you could convert the
Magic Wand selection path to a shape.
For more information about
selections, refer to “Creating
Selections” on page206.
You can convert a selection to a shape.
To convert a selection to a shape:
1Do one of the following:
• Create a selection in the image.
• From the Selection Portfolio
palette, drag a selection to the
document window.
2Choose Select menu > Convert to
Shape.
Corel Painter converts the
selection to a shape, giving it the
default shape attributes. The new
shape appears on the Layers
palette.
Note
•
For best results, the selection should be
path-based. If the selection is pixel-based,
choose Select menu > Transform
Selection to convert it to a path-based
selection.
To convert a shape to a selection:
1Select the shape you want to
convert with the Layer Adjuster
tool or the Shape Selection tool
.
Alternatively, select the shape layer
on the Layers palette.
2Choose Shapes menu > Convert
to Selection.
Tip
•
If you select the shape with the Layer
Adjuster tool or the Shape Selection tool,
you can also click the Convert to Selection
button on the property bar.
Acquiring Shapes from
Adobe Illustrator
You may want to work with shapes
you’ve created in Adobe Illustrator.
Corel Painter lets you import the
shape contents of files in Illustrator
EPS format.
Some Adobe Illustrator file options are
not supported by Corel Painter.
Patterns, placed images, gradients,
masks, and text cannot be interpreted
by Corel Painter. If the file contains
text, convert the text to outlines.
Corel Painter also supports PostScript
on the clipboard when pasting into a
Corel Painter document. This
convention allows applications to
exchange high-quality vector
PostScript information. With
PostScript on the clipboard, you can
copy from Illustrator and paste into
Corel Painter when both applications
are running. Corel Painter will import
PostScript content from a clipboard,
but will only export pixel-based layers
and selections.

Using Shapes372
To acquire shapes from Adobe
Illustrator:
1In Corel Painter, choose File
menu > Acquire > Adobe
Illustrator File.
2In the Adobe Illustrator File dialog
box, select the Adobe Illustrator file
and click Open.
To convert text in Adobe
Illustrator:
1In Adobe Illustrator, select the text
using a selection tool.
2Choose Type menu > Create
Outlines.
Setting Shape Attributes
You can specify several characteristics
for a shape.
When you apply a stroke to a shape,
you can choose the color, opacity, and
width of the path outlining the shape.
You can also control the way line ends
are drawn and joined.
You can also apply a fill to a shape by
coloring the area enclosed by the
stroke. When you fill a shape, you can
choose the color and opacity of the fill.
Stroke and fill attributes apply to both
open and closed shapes. Before filling
an open shape, Corel Painter closes
the shape by connecting the endpoints
with a straight line.
You can also change the default shape
attributes. For more information, refer
to “Shape Preferences” on page 54.
To set shape attributes:
1Select one or more shapes whose
attributes you want to change.
You can select a shape by clicking it
with the Shape Selection tool, or
clicking its name on the Layers
palette.
2Do one of the following:
•Choose Shapes menu > Set
Shape Attributes.
•Press Return (Mac OS) or
Enter (Windows).
• Double-click a shape’s name
on the Layers palette.
3In the Set Shape Attributes dialog
box, specify any of the following
stroke attributes:
•Stroke—enable the Stroke
check box to apply a stroke to
the selected shape. To remove
the stroke, disable the check
box.
•Color—double-click the color
chip, and choose a color from
the Color Picker.
•Opacity—controls the opacity
of the stroke. Adjust to the right
to make the stroke more solid.
Adjust to the left to make the
stroke more transparent.
•Width—controls the thickness
of the stroke.
•Line cap—controls the end-
points of open shapes. Choose
Projecting, Round, or Butt.
•Line join—determines how
corners are created when two
segments meet. Choose Miter,
Round, or Bevel.
•Miter Limit—if you have cho-
sen a line join style, you can
specify a miter limit. When
lines are joined at a sharp
Corel Painter 373
angle, a sharp corner is created.
You can set the miter limit to
smooth out the sharpness.
4Specify any of the following Fill
attributes:
•Fill—to fill a shape, enable the
Fill check box. To empty the
shape (clear the fill), disable the
Fill check box.
•Color—double-click the color
chip and choose a color from
the Color Picker.
•Opacity—controls the opacity
of the fill. Adjust to the right to
make the fill more solid. Adjust
to the left to make the fill more
transparent.
5Choose one of the following fill
methods:
• Fill overlaps—Overlap-
ping areas are filled.
• Don’t fill overlaps—Over-
lapping areas are not filled and
multiple overlaps alternate
between filled and not filled.
6Set the general shape attributes.
•Flatness controls how many
straight lines the program uses
to approximate a curve when
printing. PostScript output
devices create curved lines by
linking a series of short, straight
lines that progress in angle.
The smaller the flatness setting,
the greater the number of
straight lines and the more
accurate the curve.
If you want to apply the settings to
new shapes you create, click Set
New Shape Attributes.
Notes:
•
Usually, it is not necessary to change
the flatness setting. You may want to
change it to adjust for a particular high
resolution printer or to avoid a PostScript
limitcheck error. Check with your output
service to find out if they have a
recommended flatness setting.
•
A change in flatness will appear only
in your output, not on your screen.
Tips
•
You can also specify the Stroke, Stroke
Color, Fill, and Fill Color attributes on
the property bar when you select a shape
with the Layer Adjuster or Shape
Selection tool.
•
You can also use the Effects menu >
Fill command or the Paint Bucket tool to
fill a shape. Since these methods apply
pixel data to the region, Corel Painter
first converts the shape to a pixel-based
layer. For more information, refer to
“Filling Techniques” on page 118.
Editing Shapes
Corel Painter provides five tools for
editing shapes. As you work, you’ll
switch tools based on the type of
changes you’re going to make.
Shape Selection drags anchor
points and control handles.
From any other editing tool, you can
toggle to the Shape Selection tool by
pressing Command (Mac OS) or Ctrl
(Windows).
Scissors cuts the segment at the
point you click.
Add Point adds an anchor point
where you click on the curve.
Remove Point deletes the anchor
point you click.
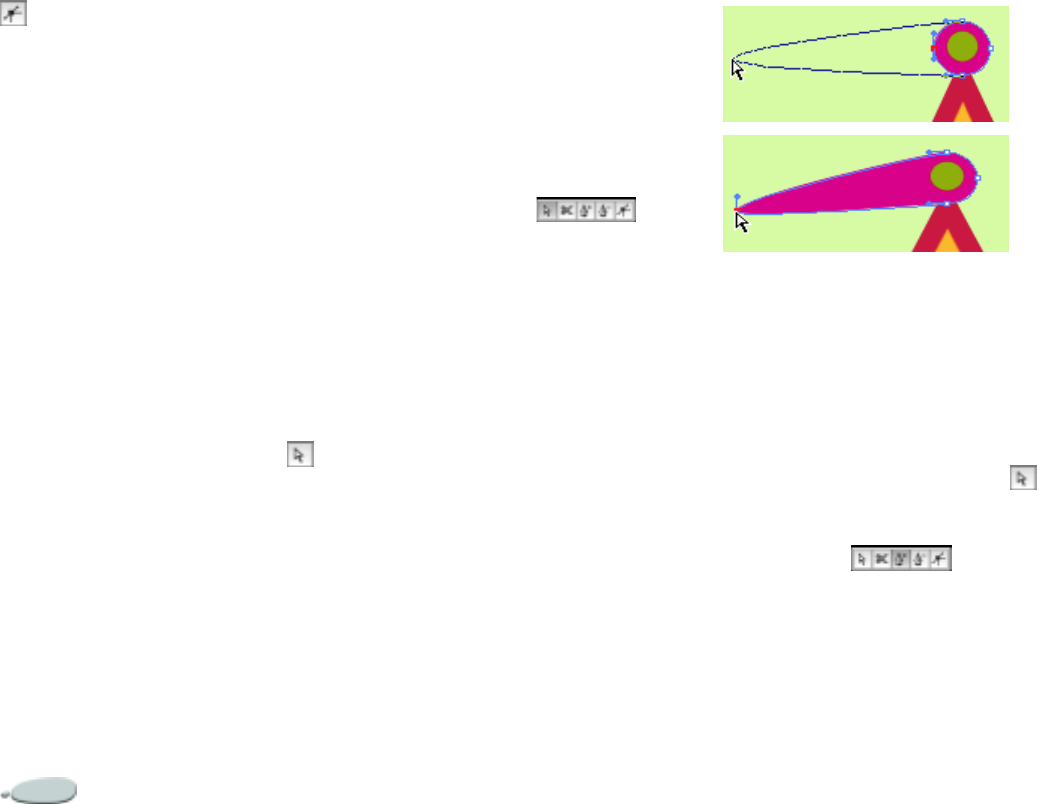
Using Shapes374
Convert Point changes anchor
points from corner points into smooth
points and vice versa.
Selecting a Shape
If you don’t see the shape’s outline
path, you’ll want to select the shape—
to display the path and anchor
points—before proceeding. It is easier
to work when you can see the path
and points.
For information about selecting
shapes as layers, refer to “Selecting
Layers” on page 235.
To select a shape:
•With the Shape Selection tool ,
click a shape.
Tip
•
If you are using the Layer Adjuster
tool, you can double-click a shape to
switch to the Shape Selection tool and
select the shape. The Auto Select Layer
option on the property bar affects how the
Layer Adjuster tool works.
Moving Anchor Points
You can move anchor points by
dragging them. You can move one or
several points.
To move anchor points:
1Choose the Shape Selection tool
from the toolbox .
2Click an anchor point to select it,
or marquee select a point by
dragging over it.
If you want to select several points,
marquee select them by dragging
over all the points. All anchor
points within the marquee are
selected—including those from
other shapes.
If you want to add to the selection,
hold down Shift and select more
points.
3Drag the point to a new location.
If you have selected several points,
dragging one moves all of them.
Drag an anchor point to move it.
Adding Anchor Points
You can add anchor points to create
new vertices or curves.
To add an anchor point:
1With the Shape Selection tool ,
select a shape.
2Choose the Add Point tool from
the toolbox .
3Click where you want to add the
point.
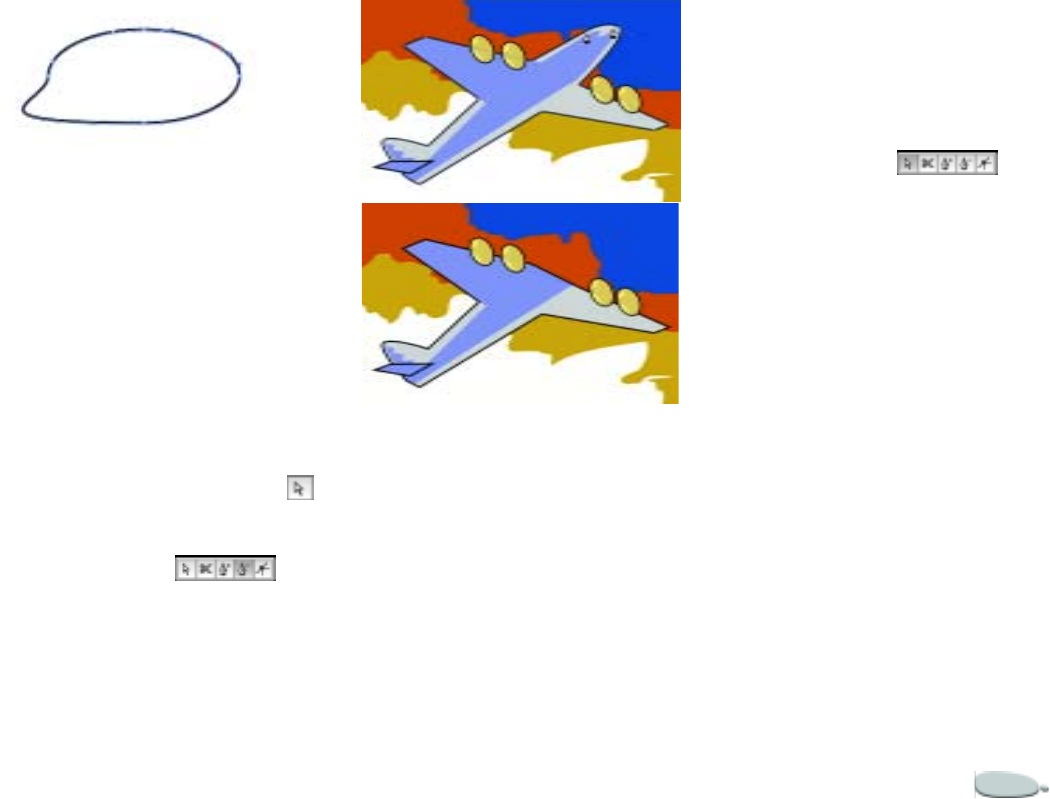
Corel Painter 375
Use the Add Point tool to add anchor points to
the path.
Deleting Anchor Points
You can delete anchor points to
change the shape of the path or to
smooth a contour that has
unnecessary points. This might occur
when you draw with the Quick Curve
tool or create a shape from a selection.
To delete an anchor point:
1With the Shape Selection tool ,
select a shape.
2Choose the Remove Point tool
from the toolbox .
3Click the anchor point you want to
delete.
The anchor point is deleted, but
the path remains connected.
Use the Remove Point tool to delete anchor
points.
Adjusting Curvature
The angle and length of the wing
determine the curvature of the
segments on either side of the anchor
point. The longer the wing, the deeper
the curve. The result of moving a
wing depends on whether the anchor
point is defined as a smooth point or a
corner point. For information about
smooth and corner points, refer to
“Converting between Smooth and
Corner Points” on page 376.
To adjust a curve:
1Choose the Shape Selection tool
from the toolbox .
2Click a shape to select it.
If an anchor point’s wings are not
displayed, drag over the anchor
point to display them.
3Drag a wing handle to set the
curve you want.
Tip
•
You can also adjust a curve by
dragging a line segment with the Shape
Selection tool.
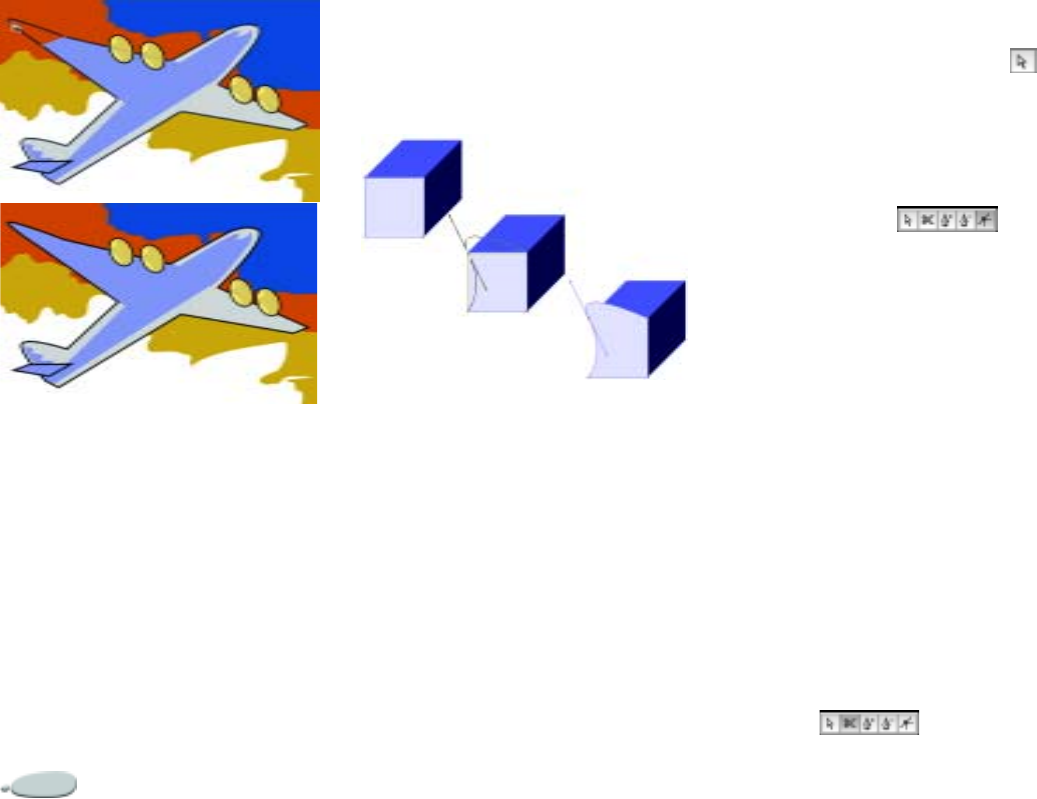
Using Shapes376
Use the Shape Selection tool to drag a wing
handle.
Converting between Smooth
and Corner Points
Two connecting curves (or straight
lines) share one anchor point, which
can be a smooth or corner point. The
wings on smooth and corner points
behave differently.
When you drag the handle on one
wing of a smooth point, the curves on
both sides of the point change. With a
smooth point, you adjust the angle of
the wings concurrently.
A corner point is converted to a smooth point.
When you drag the handle on one
wing of a corner point, only the curve
on that side of the point changes. With
a corner point, you can adjust the
angle of the wings independently.
You can use the Convert Point tool to
convert between smooth and corner
points.
To convert a smooth or corner
point:
1With the Shape Selection tool ,
select an anchor point.
If the anchor point’s wings are not
displayed, drag over the anchor
point to display them.
2Choose the Convert Point tool
from the toolbox .
3Click one of the anchor point’s
wing handles.
Note
•
After converting a point, you must use
the Shape Selection tool for further
adjustments. If you try to adjust an anchor
point with the Convert Point tool, the
anchor point will be converted again.
Cutting a Segment
You may want to open a shape so that
you can add new curves or connect
another open shape. You can do this
with the Scissors tool.
To cut a shape:
1Choose the Scissors tool from the
toolbox .
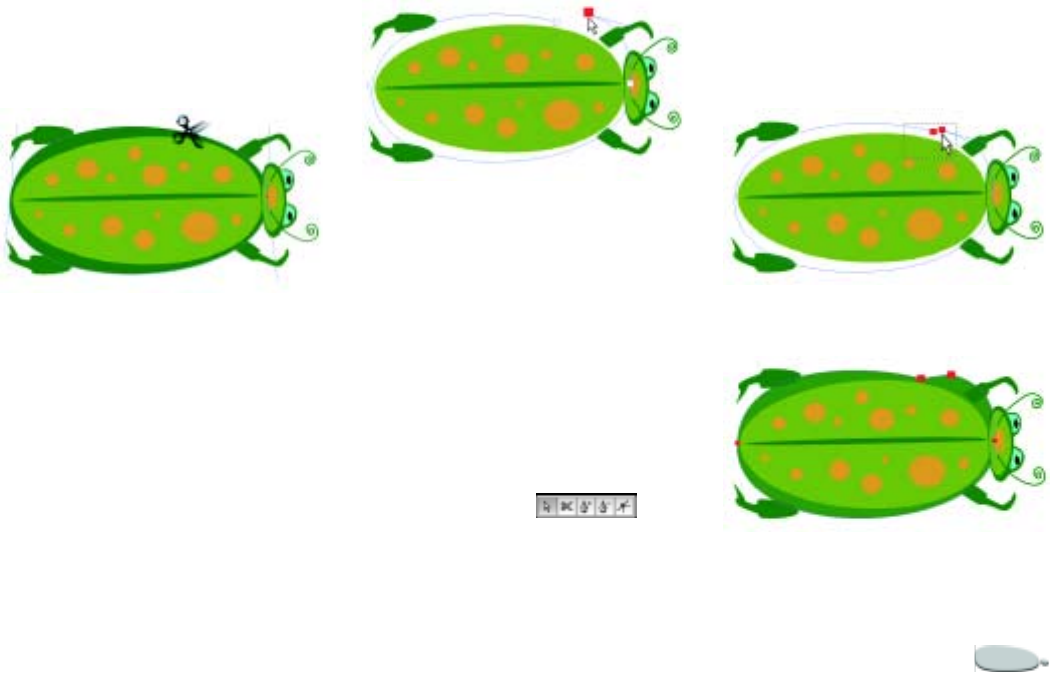
Corel Painter 377
2Click where you want to split the
shape (you cannot click an
endpoint).
The Hot Spot of the Scissors tool is
where the blades cross. Position
the cross on the line.
The scissors snap closed
momentarily, and two new anchor
points are created.
The Scissors tool opens and closes to cut
the path.
3Choose the Shape Selection tool
from the toolbox and drag the new
anchor points or segments.
The new anchor points are on top
of each other, and both are
selected. If you try to drag one of
them with the Shape Selection
tool, both move. To separate the
points, first deselect them, then
drag the top point away.
If you want to remove a section of
the path, click another place on the
path. Then use the Shape
Selection tool to drag the segment
away.
Once a path is cut, it can be moved.
Joining Endpoints
The Join Endpoints command allows
you to connect any two endpoints—of
the same shape or of different shapes.
This lets you close an open shape or
attach one shape to another.
To join endpoints:
1Choose the Shape Selection tool
from the toolbox .
2Select the two anchor points you
want to join.
You can do this by dragging a
selection marquee around both
points or by clicking the first point,
then Shift-clicking the second
point.
3Choose Shapes menu > Join
Endpoints.
A straight line is created between
the two points.
Use the Shape Selection tool to select two
endpoints.
Use the Join Endpoints command to connect
two endpoints.
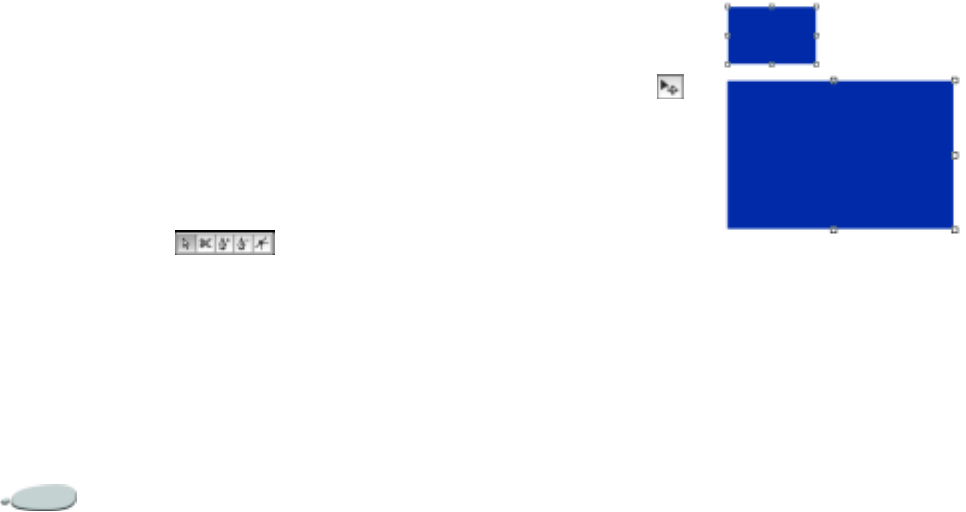
Using Shapes378
Averaging Anchor Points
Averaging moves two or more anchor
points with respect to each other in
horizontal, vertical, or both
dimensions.
One of the basic uses for averaging is
when you are going to join the
endpoint of one curve to the endpoint
of another. Averaging the endpoints in
both directions brings them precisely
on top of each other. Now, when you
join the endpoints, Corel Painter
merges them to a single point, through
which the path continues. Without
averaging first (if the points are just
“near each other”), Corel Painter joins
them with a segment.
To average anchor points:
1Choose the Shape Selection tool
from the toolbox .
2Select the anchor points you want
to average.
It is often easiest to drag a marquee
around the points you want.
3Choose Shapes menu > Average
Points.
4In the Average Points dialog box,
choose Both, Horizontal, or
Vertical.
Working with Shapes
Resizing Shapes
You can resize a shape or group of
shapes by directly manipulating the
objects with the Layer Adjuster tool or
by using the Scale command.
To resize a shape:
1Choose the Layer Adjuster tool
from the toolbox.
2Select the shape or group you want
to resize.
You can hold down the Shift key to
select additional items.
A selection rectangle appears
around the shapes. The rectangle
has a handle on each corner and
side.
3Drag one of the handles to resize
the selected shape.
To resize in one dimension, drag
one of the side handles. To resize
in both dimensions, drag one of
the corner handles.
Tips
•
You can maintain the proportions by
holding down Shift as you drag.
•
You can also choose Effects menu >
Orientation > Scale to increase or
decrease size by a fixed percentage. For
more information, refer to “Scaling
Images” on page 262.
Resizing a shape
Rotating Shapes
You can rotate a shape or group of
shapes by directly manipulating the
objects with the Layer Adjuster tool or
by using the Rotate command. For
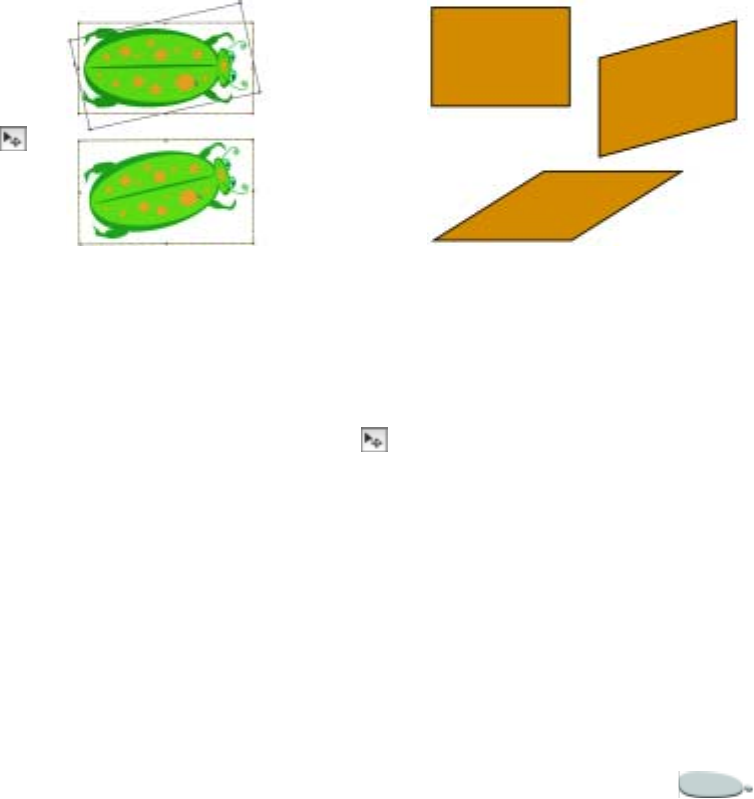
Corel Painter 379
more information on the Rotate
command, refer to “Rotating Images”
on page 262.
To rotate a shape:
1Choose the Layer Adjuster tool
from the toolbox.
2Select the shape or group you want
to rotate.
You can hold down Shift to select
additional items.
A selection rectangle appears
around the shapes. The rectangle
has a handle on each corner and
side.
3Choose Effects menu >
Orientation > Rotate.
4In the Rotate Selection dialog box,
specify a number of degrees.
This command works for both
shapes and pixel-based layers.
Tip
•
You can also rotate a shape by holding
down Command (Mac OS) or Ctrl
(Windows) and dragging a corner handle.
Rotating a group of shapes
Skewing and Distorting
Shapes
To skew a shape:
1Choose the Layer Adjuster tool
from the toolbox.
2Select the shape or group you want
to rotate.
3Hold down Command (Mac OS)
or Ctrl (Windows), and drag a
middle handle.
A rectangle (top-left) is skewed by dragging a
side middle handle (top-right) and by dragging
the top middle handle (bottom).
To distort a shape:
1Select a shape.
2Choose Effects menu >
Orientation> Distort.
3With the Distort Selection dialog
box open, drag the selection
handles in the document window.
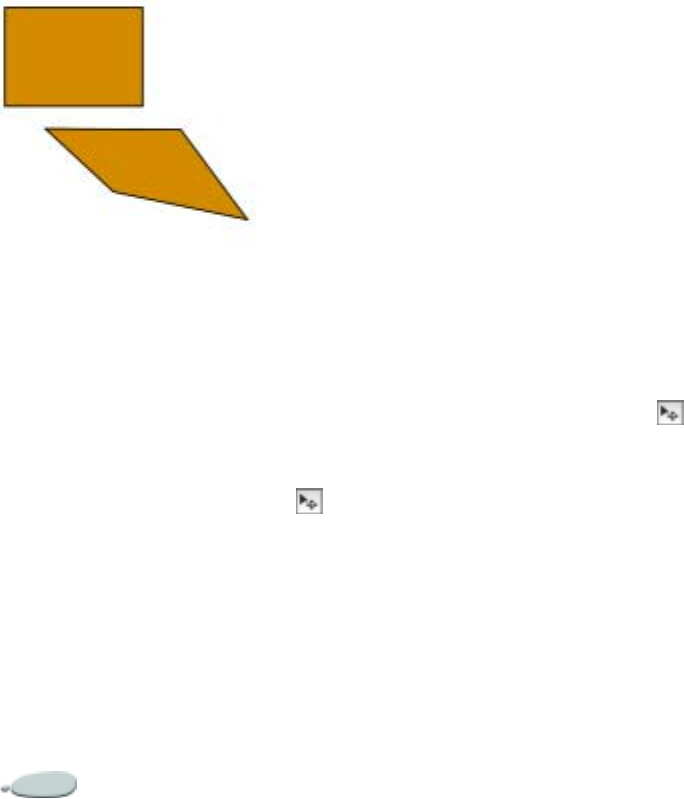
Using Shapes380
Distorting a shape
Flipping Shapes
You can flip a shape horizontally or
vertically.
To flip a shape:
1Select a shape.
2Choose the Layer Adjuster tool
from the toolbox.
3Do one of the following:
• To flip horizontally, drag a top
or bottom handle past the
opposite handle.
• To flip vertically, drag a side
handle past the opposite han-
dle.
Tip
•
You can also flip a shape by selecting it
and choosing Effects menu > Orientation
> Flip Horizontal or Effects menu >
Orientation > Flip Vertical.
Duplicating Shapes
Duplicating creates an identical copy
of the selected shape. Corel Painter
also lets you duplicate shapes using
compound transformations.
Transformed duplicates are created
according to the options you set.
To duplicate a shape:
1Choose the Layer Adjuster tool
from the toolbox.
2Hold down Option (Mac OS) or
Alt (Windows), and click or drag
the shape.
To change duplication settings:
1Choose Shapes menu > Set
Duplicate Transform.
2In the Set Duplicate Transform
dialog box, specify any of the
following settings:
•Translation controls where, in
relation to the original, Corel
Painter creates duplicate
shapes. The offset values are in
pixels. When H. Offset and V.
Offset are both zero, the dupli-
cate is created precisely on top
of the original. If both values
are 100, the duplicate appears
100 pixels lower and 100 pixels
to the right. Negative values
offset the duplicate up and to
the left, respectively.
•Scaling controls the size of
duplicates in relation to the
original. The scale values are
percentages.
• Constrain Aspect Ratio main-
tains the aspect ratio of the
shape. If you want to create dis-
torted duplicates, disable this
option and specify different
percentages for horizontal and
vertical scaling.
•Rotation lets you specify a
number of degrees to rotate
duplicates. Positive values
rotate counterclockwise, and
negative values rotate clock-
wise.
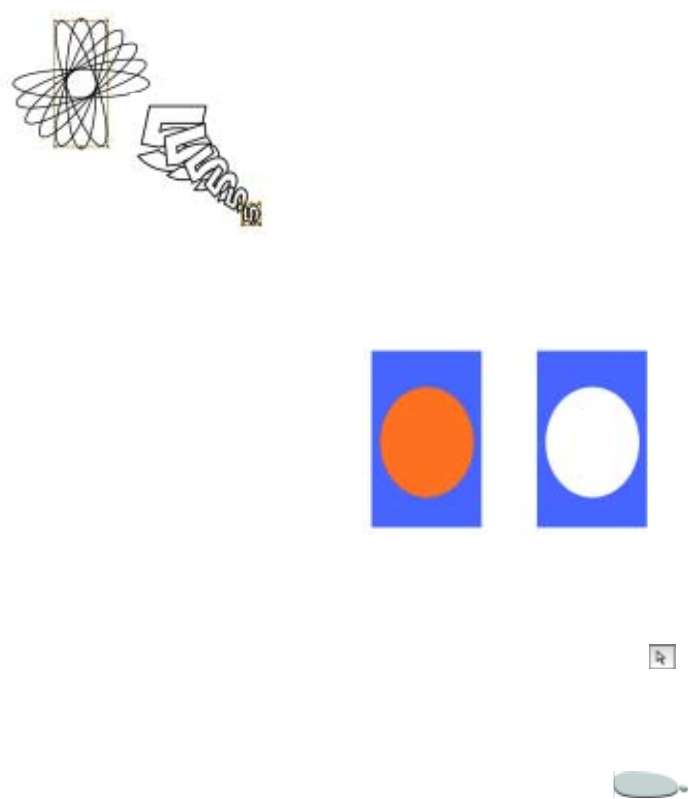
Corel Painter 381
•Slant controls the degree of
slant applied to duplicates. Pos-
itive values slant duplicates to
the right. Negative values slant
them to the left. Slant accepts
values between
–90° and 90°. However, as val-
ues approach the extremes, the
duplicate shape becomes noth-
ing but a streak.
To create a transformed
duplicate:
1Select the shape you want to
transform.
2Choose Shapes menu >
Duplicate.
Corel Painter creates a duplicate
shape according to the
specifications you’ve set.
This duplicate is now the selected
shape. You can choose the
Duplicate command again or press
Command+] (Mac OS) or
Ctrl+] (Windows) to repeat the
transformation on the new shape.
The oval shape was duplicated using rotation
only (top). The “number 5” shape was
duplicated using translation, scaling, and
rotation (bottom).
Grouping Shapes
Shapes can be grouped, allowing you
to manipulate multiple shapes as a
single unit. Since shapes are created
on layers, you group shapes in the
same way you group layers.
You cannot scale, rotate, flip or distort
groups that contain a mixture of pixel-
based layers and shapes. You must
manipulate these two types of entities
independently before you group them.
For more information about grouping,
refer to “Grouping Layers” on
page 238.
Creating Compound Shapes
In a compound shape, two shapes are
combined into a single shape. The
resulting shape takes on the attributes
of the shape on the topmost layer. If
the shape is filled, any overlapping
areas are not filled.
Compound shapes can be used to cut
a void in one shape using another
shape.
You can release a compound shape,
which reverts it to the original shapes.
The rectangle and the oval are combined to
create a compound shape.
To create a compound shape:
1With the Shape Selection tool ,
select two shapes.
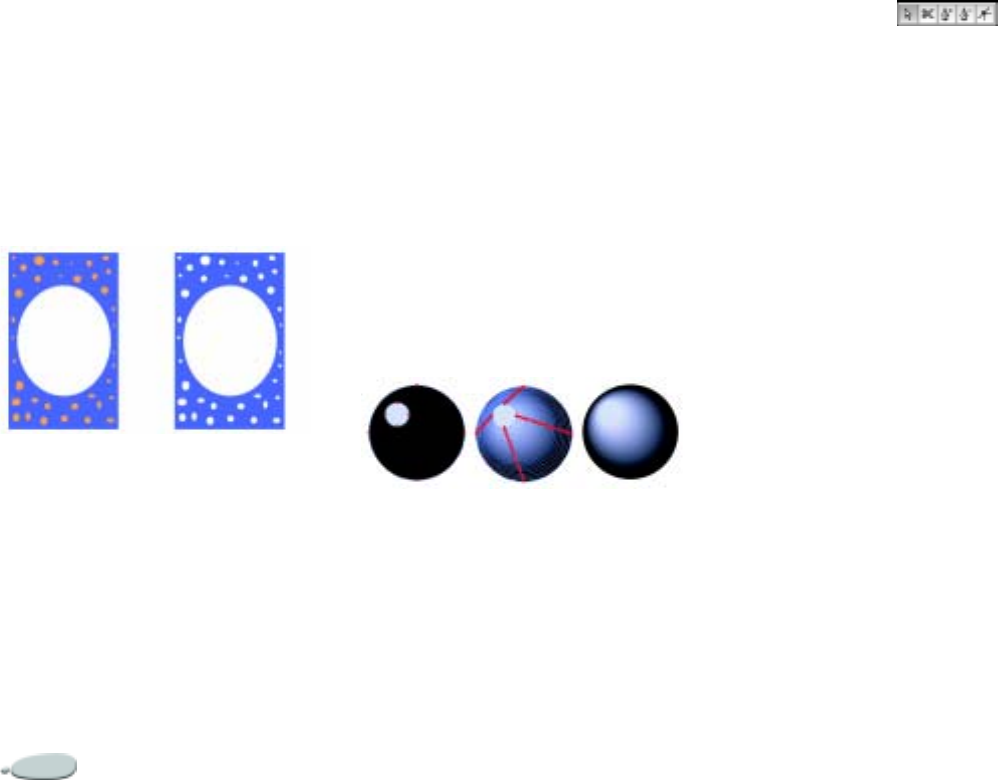
Using Shapes382
Hold down Shift and select both
shapes, or drag over the shapes to
marquee select them.
2Choose Shapes menu > Make
Compound.
Tip
•
You can create nested compound
shapes by creating a compound shape
from a shape and a compound shape.
The resulting compound shape can itself be
used again to create another compound shape.
To release a compound shape:
1Select a compound shape.
2Choose Shapes menu > Release
Compound.
Blending Shapes
Blending creates intermediate shapes
between two or more selected shapes.
This is useful for morphing one shape
into another. It is also used to simulate
shading on irregular shapes. Blending
applies to both the stroke and fill
attributes, as well as to the shape size.
You can blend a shape group to
another group, but you can’t blend
between a single shape and a group.
Blending between groups offers
interesting effects, especially if the
groups are blends themselves.
The small circle is blended with the large circle
to create a shading effect.
To blend shapes:
1Position the shapes you want to
blend.
2Arrange the shape layers.
Blends will progress from lower
layers to higher layers.
3Choose the Shape Selection tool
from the toolbox .
4Select the shapes you want to
blend.
Use the Shift key to select two or
more.
5Choose Shapes menu > Blend.
6In the Blend dialog box, specify a
number of steps.
Number of Steps controls the
number of intermediate shapes
that are created.
7Choose one of the following ramp
types:
• Blend shapes are evenly spaced.
• Spacing starts wide and
decreases approaching the end
of the blend.
• Spacing starts small and
increases approaching the end
of the blend.
• Spacing is wide in the middle
and decreases toward both
ends.
8Choose one of the following Ramp
Color Space options:
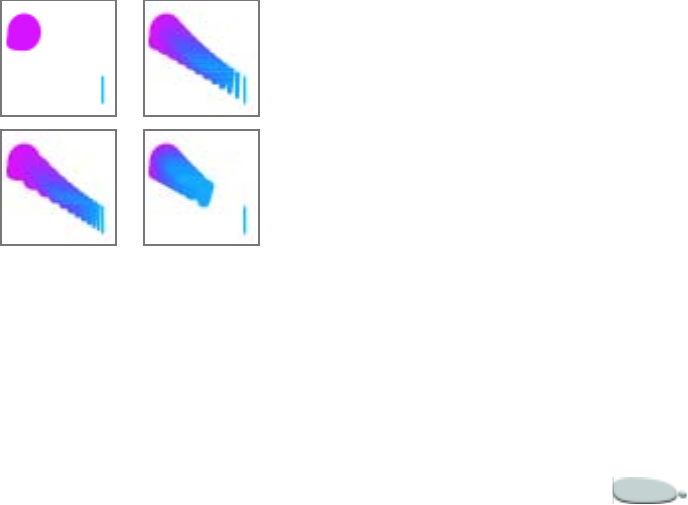
Corel Painter 383
•RGB—the color progresses
directly over the course of the
blend.
•Hue CW—the color progresses
clockwise in the color wheel to
reach the destination color.
•Hue CCW—the color
progresses counterclockwise in
the color wheel to reach the
destination color.
9Specify a Perspective Factor.
Perspective Factor controls the
spacing of intermediate shapes.
Acceptable values are between 0.01
and 100. With a Perspective Factor
of 1.0, the shapes are spaced evenly.
With a Perspective Factor less than
1, shapes are closer at the
beginning of the blend and farther
apart at the end of the blend. With
a Perspective Factor greater than 1,
shapes are farther apart at the
beginning of the blend and closer
at the end of the blend.
10 Enable any of the following
options:
•Arc Length Matching—enable
this option if you are blending
shapes containing a different
number of anchor points.
•Align Shape Start Points—
enable this option to base the
orientation of intermediate
shapes on the orientation of the
start and end shapes. When
disabled, Corel Painter bases
the orientation of intermediate
shapes on the starting point
(first anchor point) of the start
and end shapes. This can create
a “tumbling” appearance in the
intermediate shapes.
Two shapes (top left) are blended using a
perspective factor of 1.0 (top right), 4.0
(bottom left), and 0.1 (bottom right).
Saving Shapes
Corel Painter doesn’t have a shapes
library. However, because of the close
relationship between shape outlines
and selection paths, you can save
shape outlines in the Selection
Portfolio. Refer to “Using the
Selection Portfolio” on page 217 for
complete information.
Exporting Shapes to Adobe
Illustrator
Corel Painter lets you export shape
data to the Adobe Illustrator format.
Exporting to Illustrator format will
save only the Shapes, not the Canvas
or any other layers in the document.
Transparency and compositing
methods are lost when exporting to
Illustrator format.
To export shapes:
1Choose File menu > Export >
Adobe Illustrator File.
2In the Export as Illustrator File
dialog box, specify a location and
filename, and click Save.
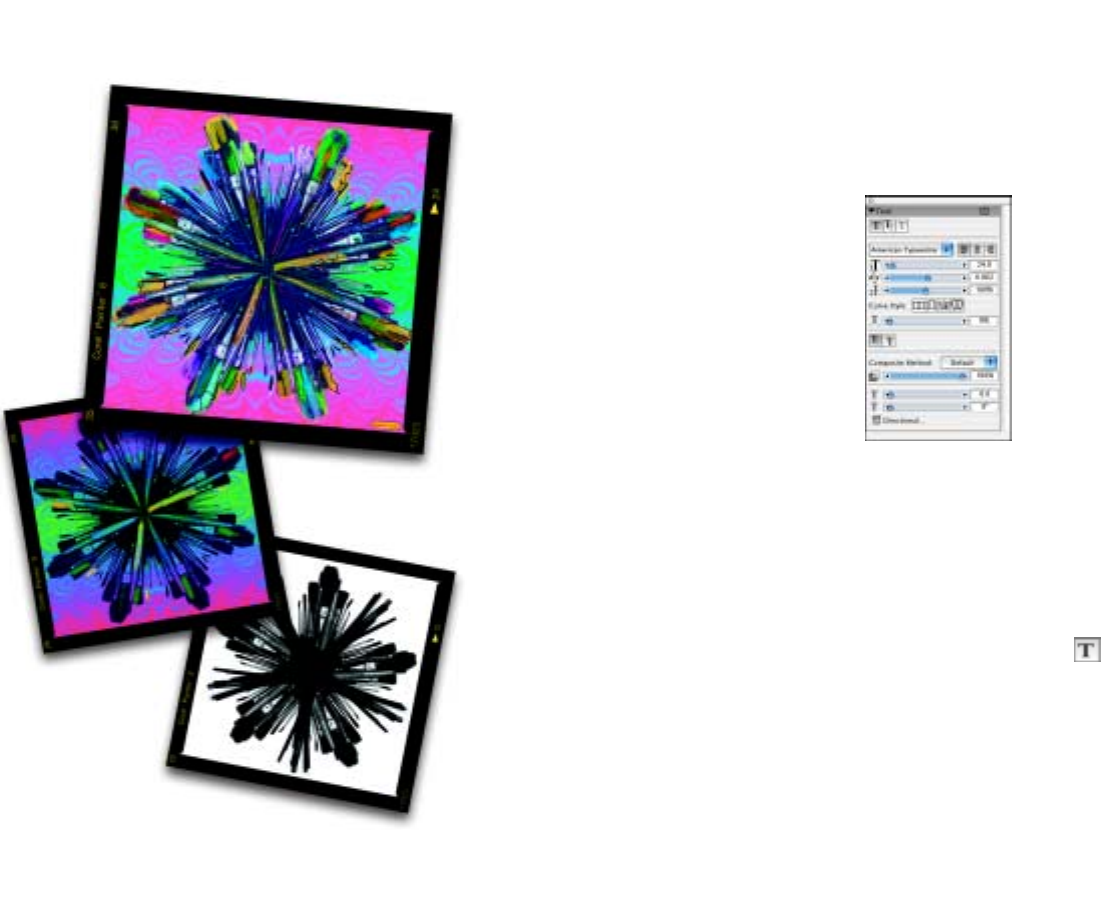
20
Working with Text
Corel Painter lets you position and
manipulate editable text on your
image.
The Text Layer
A text layer holds a single text block.
When you create a new text layer with
the text tool, that layer becomes visible
on the Layers palette, and is
represented by a T icon. With the text
on a separate layer, you can work with
your image without changing any text
attributes. You can select the text layer
and edit it at any time. Your text
remains fully editable until you drop it
onto the canvas.
The Text palette.
To create text:
1Choose Window > Show Text to
display the Text palette.
If the Text palette is not expanded,
click the palette arrow.
2Choose the Text tool from the
toolbox.
3Click anywhere in the document
window, and type.

Working with Text386
Dropping Text
While you are working with text, it
resides on a layer and is not yet a part
of the image. When a text layer is
dropped, it integrates with the canvas
and can no longer be edited.
To drop a text layer onto the
canvas:
1On the Layers palette, select a text
layer.
If you want to select more than one
text layer, highlight several layers
and group them.
2Click the Layer Commands button
at the bottom of the Layers
palette, and choose Drop.
Applying Effects to Text
Before you drop a layer, you can apply
any of the effects available on the Text
palette. The Text palette contains all
the tools and controls you’ll need to
set text appearance and flow. You can
change the text font, size, and
position. You can also adjust the
spacing between letters or lines. You
can stretch, rotate, and skew text. You
can apply a shadow to your text, and
adjust shadow attributes.
Font
You can select a font on the Text
palette.
To select a font:
1Choose Window menu > Show
Text.
2On the Text palette, choose a font
from the Font pop-up menu.
Tip
•
To display a list of all available fonts,
choose Other Fonts from the Font pop-up
menu.
Note
•
You can also adjust many text
elements on the property bar when the
Text tool is selected.
Point Size
The Point Size slider on the Text
palette lets you adjust the size of text
proportionally.
To change point size:
•On the Text palette, adjust the
Point Size slider.
Color
You can fill your text with color from
the Colors palette.
To fill text with color:
1Choose the Text tool from the
toolbox.
2Click anywhere in the document
window, and type.
3Choose Window menu > Show
Colors to display the Colors
palette.
4Choose a color on the Colors
palette.
Tip
•
You can also choose a color before you
type any text.
Note
•
If the Text layer is not selected, the
color will not be applied to the text. For
more information about the Text layer, see
“The Text Layer” on page 385.
Corel Painter 387
Alignment
A text block can be left, right, or center
justified. The text baseline origin is
used as the reference point for the text
alignment. You can specify
justification on the Text palette.
To align text:
1Choose Window menu > Show
Text to display the Text palette.
2On the Text palette, enable one of
the following buttons:
•Align Left
•Align Center
• Align Right
Kerning Text
Kerning refers to adjusting the
amount of space between letters. Corel
Painter does this automatically with
most fonts. However, you can fine-
tune the spacing with the Tracking
slider.
To kern text:
1Choose Window menu > Show
Text.
2On the Text palette, adjust the
Tracking slider.
Drag left to decrease letter spacing
or right to increase it.
Adjusting Leading
Leading refers to the amount of space
between lines of text. You may want to
change the Leading from the default.
The default spacing between lines is
set at 100%.
To adjust leading manually:
1Choose Window menu > Show
Text.
2On the Text palette, drag the
Leading slider to the right to
increase space between lines or to
the left to decrease it.
Stretching, Rotating, and
Skewing Text
Stretching text affects both the
horizontal and vertical size. As you
stretch vertically, the text appears
thinner and taller. As you stretch
horizontally, the text appears flatter
and shorter.
Rotating text pivots the text from the
end point of the text block. Depending
on the alignment of the text, it pivots
from the bottom-left corner, bottom-
right corner, or center. You can also
skew the text by slanting the text to the
right or left.
To stretch text:
1Select text using the Layer
Adjuster tool .
2Drag the corner handles in the
direction you want to stretch the
text.
To rotate text:
1Select text using the Layer
Adjuster tool.
2Hold down Command (Mac OS)
or Ctrl (Windows), and drag one
of the corner handles.
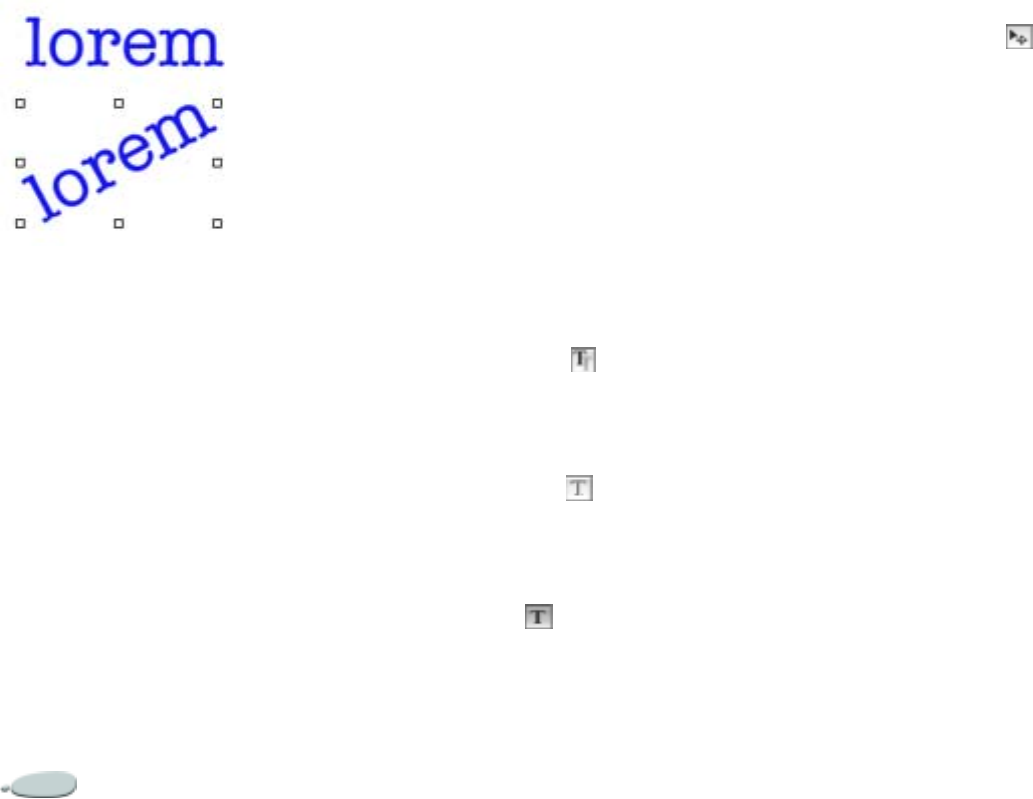
Working with Text388
Rotated text.
To skew text:
1Select text using the Layer
Adjuster tool.
2Hold down Command (Mac OS)
or Ctrl (Windows), and drag one
of the center handles on either side
of the text.
Tip
•
If the bounding box is not showing,
click the Layers palette menu arrow and
choose Show Layer Marquee.
Adding Shadows
You can apply a shadow to text and
adjust the shadow position. You can
select an external shadow, which
places the shadow behind the text, or
an internal shadow, which places the
shadow inside the text.
To add a shadow:
1Choose Window menu > Show
Text.
2On the Text palette, enable one of
the following buttons:
• External Shadow — cre-
ates a shadow that makes your
letters look as though they’re
casting a shadow onto a sheet
of paper held beneath them.
• Internal Shadow — creates
a shadow that makes your let-
ters look like cutouts, above a
sheet of paper the color of the
text.
• No Shadow — removes a
shadow.
To move the shadow:
•Select the Layer Adjuster tool
and drag the shadow to where you
want it.
Setting Opacity
Opacity controls the transparency of
text or shadows. Your text’s shadow
should be semi-transparent. You can
also use opacity to fade the color of
text.
To adjust opacity:
1Choose Window menu > Show
Text.
2On the Text palette, move the
Opacity slider to the left to increase
transparency or to the right to
increase opacity.
Adding a Blur
You can add either a focus or
directional blur to text and shadows.
Focus blurs make text fuzzy. You can
use the Focus blur to soften the edges
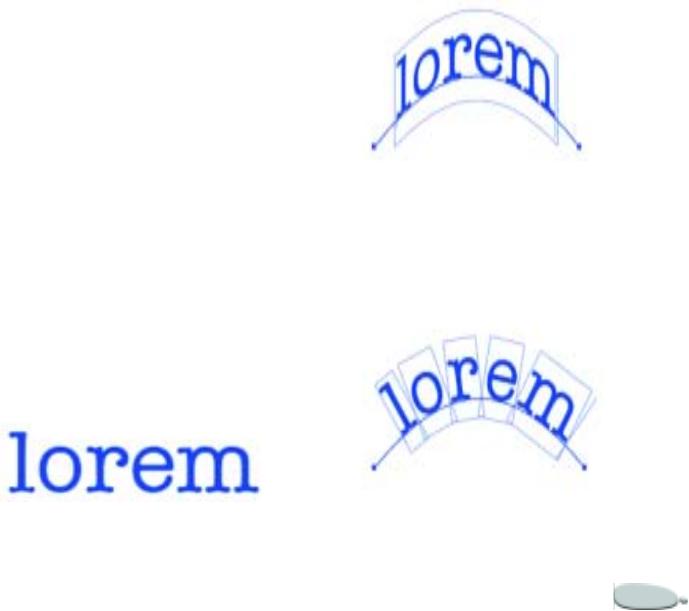
Corel Painter 389
of text characters. Directional blurs
lets you specify the direction in which
the blur occurs.
To add a blur:
1Choose Window menu > Show
Text.
2Choose Window menu > Show
Layers.
3On the Layers palette, select the
Text layer or the Shadow layer.
4On the Text palette, adjust the
Blur slider.
If you want to apply directional
blur, enable the Directional Blur
option, and adjust the Direction
slider.
The first half of the slider adds a
left-to-right blur on the text; the
second half adds an up-and-down
blur.
Composite Method
You can change the composite method
for body text or shadow of a selected
text layer by making a choice from the
pop-up menu on the Text palette. You
can specify whether you're modifying
the composite method for the text
body or the drop shadow. Refer to
“Blending Layers Using Composite
Methods” on page 248 for more
information about changing the
composite method.
Curving Text
You can define a curve style and path
(baseline) along which your text will
flow. The baseline that a curve style
creates is a Bézier curve, meaning that
the shape can be controlled using
control handles and anchor points.
Refer to “Working with Bézier Lines”
on page 367 for more information on
working with anchor points and
control handles.
There are four curve styles to choose
from:
• The Curve Flat style flows along a
straight line.
Curve Flat style applied to text.
• The Curve Ribbon style flows the
text along a curve and keeps the
letters in an upright position.
When you apply the Curve Ribbon
style, you can use Shift and the
Rotate tool to control how the text
moves around the baseline.
Curve Ribbon style applied to text.
• The Curve Perpendicular style
places the text along the curve,
where each letter is perpendicular
to the curve.
Curve Perpendicular style applied to text.
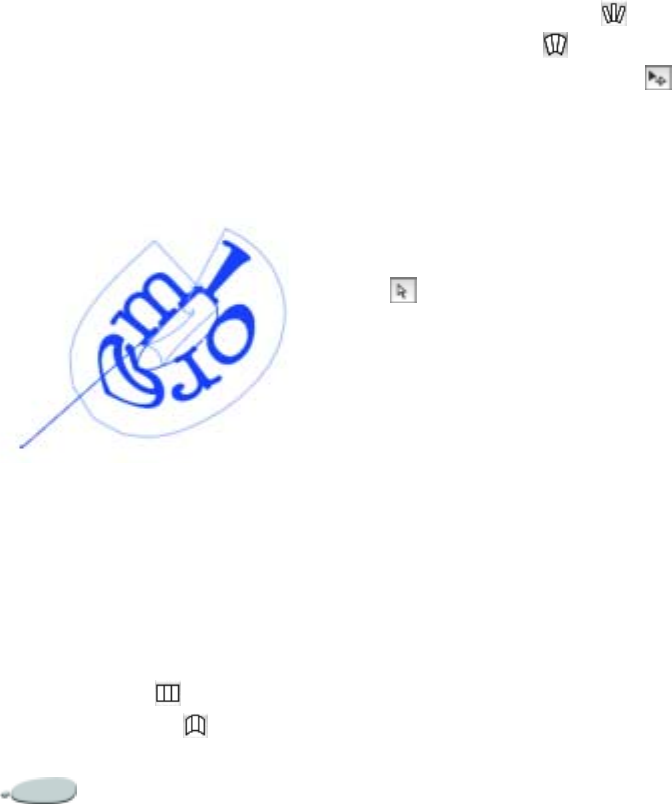
Working with Text390
• The Curve Stretch style actually
changes the shape of the letters to
fill in the space that would be left
when the curve bends.
For example, if text is set on a
circular path, Corel Painter makes
the tops of the letters heavier and
thicker to fill in space.
Distorted text on a circular path using the
Curve Stretch style.
To set a curve style:
1Choose Window menu > Show
Text.
2On the Text palette, click a Curve
Style icon:
•Curve Flat
•Curve Ribbon
• Curve Perpendicular
•Curve Stretch
3Select the Layer Adjuster tool
and drag the handles of the
bounding box to adjust the text.
To change the path:
1Choose Window menu > Show
Text.
2Choose the Shape Selection tool
from the toolbox.
3Click an end point on the path.
4Drag the handles to change the
shape of the path.
Using Center on Baseline
You can control how the text is
centered on the line. You can move the
center point by dragging on the slider
or by changing the alignment.
Dragging the Centering slider also
changes where the text starts and stops
on a line. The Centering slider has no
effect on the Curve Flat style.
To change centering:
1Choose Window menu > Show
Text.
2On the Text palette, choose a
Curve Style icon.
3Drag the Centering slider to the
right or left.
The text moves along the curve.
Exporting Text
You can export text layers into shapes
or default layers so that you can apply
effects, gradations, blends or surface
textures to text.
Converting Text Layers to
Standard Masked Layers
After text layers have been converted
to standard layers, you can fill text
with a gradation, use the paint bucket,
or paint the inside of the letters. You
can also apply Surface Control
Textures to give the text a three-
dimensional appearance. Refer to
“Using Image Effects” on page 259 for
information about applying effects.

Corel Painter 391
After you convert a text layer to a
standard layer, you can still adjust the
compositing method and opacity of
the new layers.
To convert a text layer to a
standard layer:
1On the Layers palette, choose a
text layer.
2Click the palette menu arrow, and
choose Convert to Default Layer.
Note
•
If the text has an outside or an inside
shadow, then two layers — one for the
text and one for the shadow — are created
within a group.
Converting a Text Layer to
Shapes
After a text layer has been converted to
shapes, you can kern letters
individually and edit the outlines of
the characters themselves. You can
also edit the shape attributes of the
new text; for example, to give it an
outline. Refer to “Using Shapes” on
page 365 for more information about
shapes.
To convert a text layer to shapes:
1On the Layers palette, choose a
text layer.
2Click the palette menu arrow, and
choose Convert Text to Shapes.
The text layer is replaced by a
group of shape layers.
Note
•
Text shadows and blurring effects are
not converted when using this command.

21
The Web
The World Wide Web has quickly
become the most prevalent
environment for communications
today. The Web features of Corel
Painter let you take natural media to
the next level—the Internet.
Features for the Web
Felt pens, charcoal, colored pencils,
water colors, oils, paint brushes, plug-
in effects, and text merge with image-
slicing, client-side image maps, and
rollovers to create breathtaking
Natural-Media effects for any Web
site.
This chapter offers tips and
techniques for using Corel Painter
features to create imagery for the Web.
It introduces you to the Image Slicer,
rollovers, and image maps—all
features specifically designed to help
you create Web content.
Creating Web Page
Backgrounds
Designing Backgrounds
One secret to designing good
backgrounds for your Web pages is to
make them subtle and unobtrusive.
This is particularly important if the
background is used behind text. You
can lighten patterns using the Edit
menu > Fade command, to make
them more suitable for displaying
behind text.
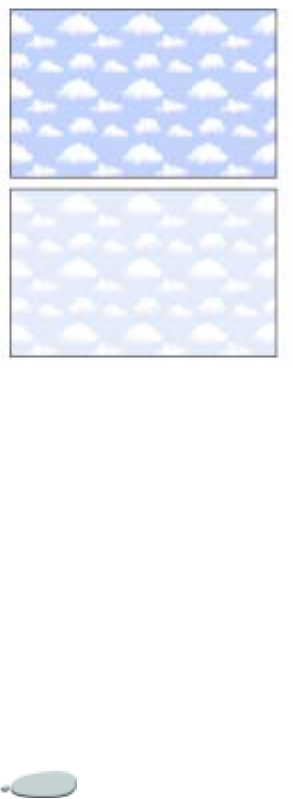
The Web394
Choose Edit menu > Fade to lighten the
pattern.
Controlling Background
Color
Using HTML, you can achieve a solid
background color for a page, table, or
Cascading Style Sheet (CSS) element.
Although Corel Painter can’t assist
you with actually setting the
background color in your HTML
code, you can use Corel Painter to
determine the hexadecimal format of a
color, which is used in HTML.
To display the RGB values of the
current color on the Colors palette,
click the palette menu arrow and
choose Display As RGB. To display
these values in hexadecimal format,
click the palette menu arrow and
choose Display As Hex. Concatenate
the three values (R, G, and B) to
determine the hexadecimal number
required for your HTML code. For
example, ‘FF0000’ is the hexadecimal
value for red.
Using a background color closely
matched to your background image
takes no additional download time
and creates a pleasing transition. For
example, suppose your page loads a
dark green seamless background tile.
The tile takes a little time to
download. While it’s loading, the
browser displays the page, using the
page background color (which, if not
explicitly defined, is usually gray or
white). This can cause a jarring visual
transition. Depending upon the text
color used, it can even make a page
impossible to read until the
background image has finished
loading.
Using Tiled Backgrounds
When a background image is smaller
than the boundaries of the display
area for a page, table, or Cascading
Style Sheet layer, Web browsers
automatically repeat the image,
effectively creating a tiled pattern.
Corel Painter makes it easy to create
tiling background images for use in
Web pages.
The CSS features in modern browsers
let you apply background tiles to more
elements than ever before. In the past,
you could apply them only to a page
itself, or possibly to a table. Now, with
CSS, layers or block-level elements—
anything you can display on its own
line in traditional HTML layout—
can have a background image.
Since authors are no longer limited to
using tiled backgrounds for just pages,
possibilities open up for the creative
use of tiles behind such elements as
borders, call-out boxes, or sidebars.
You can use any image or selection to
define a pattern. For information
about creating, editing, saving, and
filling with patterns, refer to “Using
Patterns” on page 66.
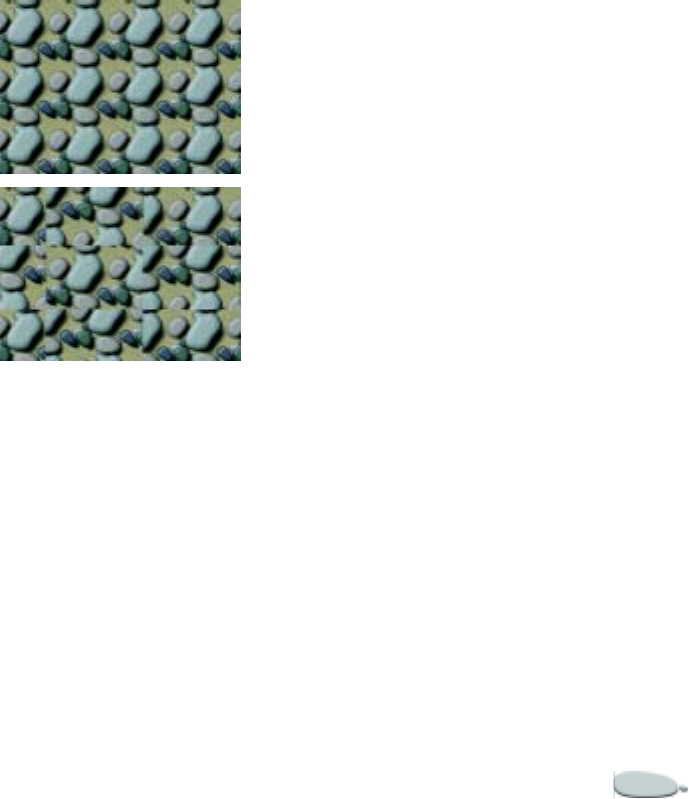
Corel Painter 395
An image designed for use as part of a
pattern is normally created so that it
tiles seamlessly. That is, the eye should
not be able to distinguish the edges
between tile repetitions.
Corel Painter has features that can
help you create seamless tiles, which
you can then use as interesting Web
backgrounds. For more information,
refer to “Creating Seamless Tiles” on
page 68.
The Glass Distortion effect, the Super
Soften effect (with the “wrap around”
box checked), and most of the Tonal
Control effects preserve the seamless
quality of the pattern. Some effects,
such as Apply Surface Texture, can
result in a noticeable seam, so
experiment.
Example of using seamless and non-seamless tiles
in a pattern.
A way to partially avoid seams that
occur with effects such as Apply
Surface Texture is to apply the effect
several times at lower strengths (by
reducing the Amount slider). Shift the
pattern a little (using Shift-Spacebar)
between each application. This tends
to “distribute” the seams and make
them less noticeable.
Tile dimensions should be as small as
practical, but should probably never
go below 20 x 20 pixels. If a tile is too
small, it actually takes the browser
longer to render it over a large area.
When you’ve finished creating your
tile, save the image in RIFF format, in
case you must work with it later in
Corel Painter. Then, save it in either
JPEG or GIF format for later use on
the Web.
Web backgrounds should, ideally, be
saved as GIFs, with as few colors as
possible, to reduce file size. You can
also use JPEGs, but JPEGs often have
larger file sizes. As a rule of thumb,
any background tile over 20 KB is
probably too large. For more
information about saving an image in
GIF or JPEG format, refer to “Saving
Files” on page 46.
Creating Tiles with the Make
Fractal Pattern
Another easy way to design seamless
tiles is to take advantage of the neat
effects you can create with the Make
Fractal Pattern command. Make
Fractal Pattern is a pattern generator

The Web396
that creates organic patterns, which
can make interesting background tiles.
The patterns it generates can be filled
with color and even enhanced with a
paper texture.
For more information about the Make
Fractal Pattern command, refer to
“Creating Fractal Patterns” on
page 71.
Color Overlay, the Water Color
brushes, and Cloning are other
options you can apply to a pattern.
Beautiful, complex effects can also be
achieved by applying Glass Distortion
to a pattern created with Make Fractal
Pattern.
Creating Web Buttons
Using Shapes and Selections
You can create Web buttons using
shapes or by choosing a selection from
the Selection Portfolio. For
information about creating shapes,
refer to “Creating Shapes” on
page 368. For information about using
selections, refer to “To use a selection
from the portfolio:” on page 218.
3D Techniques
You may want to use one or more of
the texturing options in Corel Painter
to create 3D effects. The following
sections describe several powerful
ways to quickly add texture to the
buttons you create.
Once you’ve added a desired 3D
effect, try altering the light source to
create a second image that represents
the button in a different state, or try
using the Hue Shift slider in the
Effects menu > Tonal Color >
Adjust Colors dialog.
Adding Shadows
Shadows lend a definite 3D flare to a
Web page. You can quickly add drop
shadows to text, buttons, shapes, and
layers. When you apply a drop shadow
to a shape, the shape loses its vector
quality and becomes a pixel-based
layer. For more information about
creating drop shadows, refer to
“Adding Drop Shadows” on page 243.
Applying Surface Texture
Leading the array of Corel Painter
Web-friendly tools, Apply Surface
Texture could easily become a Web
designer’s best friend. You can use the
Apply Surface Texture feature to apply
3D effects to Web buttons, bars, or
other elements.
You can use the Reflection option to
create an effect you would expect to
see in objects made of glass or
polished metal, like a chrome bumper
on a classic car. You can use the Mask
setting to round the edges of layers.
The Image Luminance option gives
your buttons an “embossed” look.
Using Apply Surface Texture in these
ways can make your Web buttons take
on an interesting 3D appearance. For
more information about applying
surface texture, refer to “Apply Surface
Texture” on page 277.
Using the Impasto Technique
The Impasto feature lets you create
the illusion of depth by applying thick
paint to the canvas. You can use the
Impasto technique to add a 3D
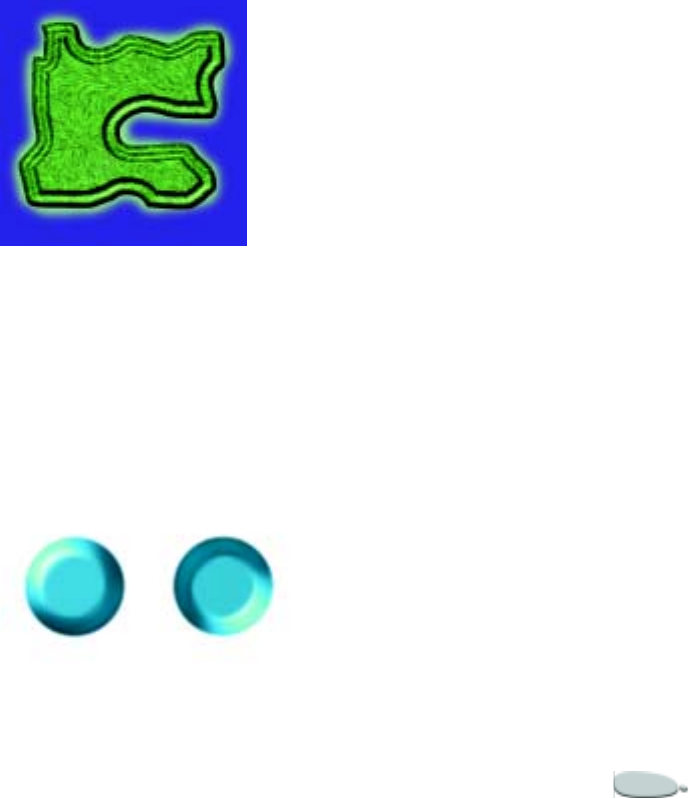
Corel Painter 397
appearance to all or discrete areas of
your image. For more information,
refer to “Impasto” on page 135.
Indicating Button States
You can create a rollover effect by
displaying a second image when a
Web button is clicked. This creates
two states for the button (“normal”
and “clicked”). For more information
about creating rollover effects, refer to
“Creating Rollovers” on page 403.
Using Bevel World
No discussion of creating Web buttons
would be complete without
mentioning Bevel World. Bevel World
is a dynamic plug-in that can add 3D
angled edges to your shapes and
selections.
You can bevel any element in your painting, then
turn it into a 3D button.
Bevel World has controls that affect
the 3D bevel shape being applied, as
well as controls to adjust lighting. Try
experimenting with lighting controls.
By changing the lighting on a bevelled
surface, you can easily create different
states for your Web buttons.
Altering lighting in the Bevel World dialog is
an easy way to create images that indicate button
states.
For more information about Bevel
World, refer to “Bevel World” on
page 317.
You can decide later to change
settings, as long as you have not
committed the layer. Double-click the
Plug-in Layer in the Layer List. Corel
Painter opens the dialog so you can
change the settings. To understand
more about committing a layer, refer
to “Committing Dynamic Layers” on
page 315.
Using the Image Slicer
Using a large graphic for navigation is
common on the Web. With Corel
Painter, you can segment a graphic
into slices. Each slice is exported as a
separate image, then reassembled
using an HTML table.
Most useful for implementing
rollovers, the Image Slicer plug-in can
also, in some cases, let you replace
high-bandwidth image areas with
lower-bandwidth HTML elements.
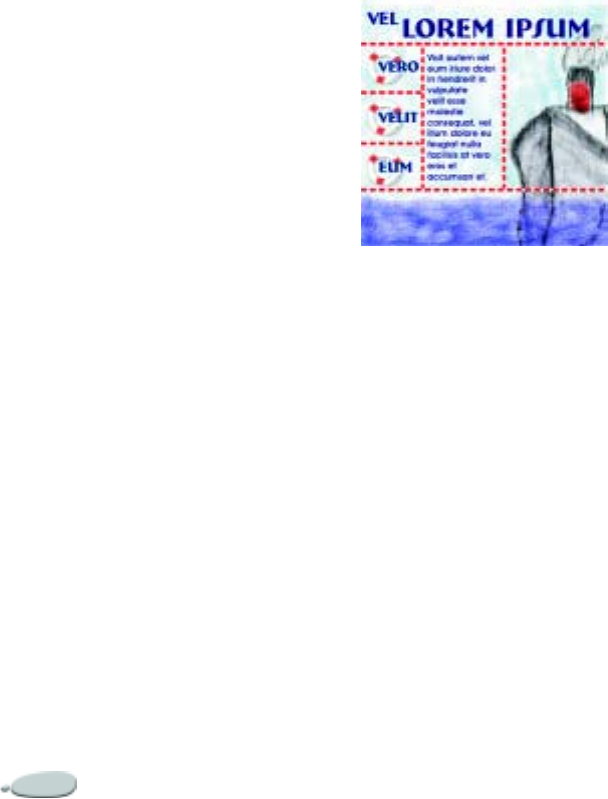
The Web398
Segmenting a large graphic into
smaller, optimized image files can
reduce load time while letting you
control the resulting image quality.
The Image Slicer supports these
export options:
•GIF
•JPEG
• TIFF (for lossless export to other
graphics applications)
•No Export
For example, one part of your image
might contain a photo; a second, a
graphic image; and a third, some text.
With the Image Slicer, you can:
• export a photo area (where color is
most important) to the JPEG file
format
• export a flat-color slice (which will
look fine in 256 colors or less), to
the GIF file format
• export nothing at all for a slice that
contains text only (opting instead
to code the text in HTML)
You can optimize each slice in your image,
depending on content.
Deciding When to Slice
Images
The Image Slicer plug-in is most
useful when your image contains
rollovers. For more information, refer
to “Creating Rollovers from Image
Slices” on page 404. Image mapping,
in contrast, is most useful when you
want to define multiple clickable links
within a single image. For more
information about image mapping
support, refer to “Image Maps” on
page 406.
Use image slicing if:
• your image includes areas that
feature rollovers.
• one or more areas of your image
(for example, flat color areas) can
be significantly more compressed
than other areas. Use the Image
Slicer and set export options
accordingly.
• you can replace some areas of your
image with pure HTML elements,
like text, form elements, or table
cell backgrounds.
• the image must reappear on many
pages, with small changes on each
page (as with a navigation bar).
The browser caches most of the
common slices, which can help
performance.
• you want to create different links
for different areas of your image.
Understanding the Image
Slicer
You don’t have to know HTML or
JavaScript™ to create a sliced image
because the Corel Painter Image
Slicer plug-in generates it for you.

Corel Painter 399
However, it’s helpful to have some
understanding of how tables operate
within HTML, as the slices will
become part of a table.
A table displays information in rows
and columns, with borders that can be
shown or hidden. Tables allow you to
format or lay out elements on a page
to create alignment and space.
If one or more of the slices is designed
to be a rollover, the Image Slicer plug-
in generates the JavaScript needed for
the rollover effect. Refer to
“Understanding Rollovers” on
page 403.
After you’ve used the Image Slicer
plug-in, you can use the HTML file it
creates as a starting point, or you can
copy the HTML code for the table
and any JavaScript for rollover effects
into your own HTML file.
The Image Slicing Layer
The Corel Painter Image Slicer plug-
in creates an Image Slicing layer that
stores information about how your
image is sliced (segmented) and about
how each slice of your image should
be exported.
Every time you apply the Image
Slicer, a new Image Slicing layer is
created. Each Image Slicing layer
generates code for an HTML table. Be
careful not to open multiple instances
of the Image Slicer plug-in when
you’re slicing an image. Create one
Image Slicing layer, then just double-
click it on the Layers palette to
continue working.
There may actually be times when you
want to have more than one Image
Slicing layer. For example, if you want
to slice an image in different ways for
use on different Web pages, you could
create an Image Slicing layer for each
page. For most slicing purposes,
however, you should create only one
Image Slicing layer.
The Image Slicer works on the
imagery below it in the layer stack.
Because of this, the Image Slicing
layer must be topmost in the layer
stack.
If you add layers to your image after
adding the Image Slicing layer, be sure
to move the Image Slicing layer to the
top of the layer stack before exporting
the slices again. For more information
about re-ordering layers, refer to
“Changing Layer Hierarchy” on
page 238.
If all or most of your image slices are
of the same file format (GIF, JPEG,
TIFF, or No Export), have the same
number of image states, or reference
the same URL, you can save time by
setting those options before creating
any slices.
Working with Image Slices
You create image slices by adding
horizontal or vertical slice lines to
your image. You can also create both a
horizontal and a vertical line at once.
You can move or delete single lines.
When a slice is created, it is given an
incremental name (Image1, Image2,
and so on). This name is also the
filename for the slice.
After you create slices, you can rename
them, export them, and set options
such as links so the user can click the
The Web400
slice to jump to a specified location.
For specific information about GIF
options, see “Saving GIF Files” on
page 48. For specific information
about JPEG options, see “Saving
JPEG Files” on page 47.
You can also set options for using
slices as rollovers. For more
information, refer to “Creating
Rollovers” on page 403.
After setting options for all the slices
in your image, you can export them.
To slice an image:
1Open the image you want to slice.
Starting with a resolution of 72 dpi
is recommended.
2On the Layers palette, make sure
that no layers are selected.
3On the Layers palette, click the
Dynamic Plug-ins button , and
choose Image Slicer.
4In the Image Slicer dialog box,
click one of the following tools:
• Horizontal tool—defines
horizontal slices
• Vertical tool—defines verti-
cal slices
• Combined tool—defines
slices using both vertical and
horizontal slice lines
5In the image window, click where
you want to add a slice line. A plus
sign next to the cursor indicates
you are adding a new slice to the
image.
As you move the cursor around in
the image window, the X and Y
coordinates are displayed in the
Image Slicer dialog box. A small
preview window displays a
zoomed-in version of your image
to help create slices based on color.
Once a slice is defined, its top, left,
bottom, and right coordinates, as
well as the slice size (in pixels), are
displayed.
Note
•
If a layer is selected before you slice, an
Image Slicing layer is created on top of it,
using the same dimensions. Although this
behavior can be useful at times, such as
when you want to export a single graphic
element, it’s important to make sure no
layer is selected if you want to slice the
entire image.
To move a slice line:
1In the Image Slicer dialog box,
click the Horizontal tool or the
Vertical tool.
2In the image window, move the
pointer over the line you want to
move.
3When the pointer changes to
include positioning arrows, drag
the slice line to a new position.
To delete a slice line:
1In the Image Slicer dialog box,
click the Horizontal tool or the
Vertical tool.
2In the image window, hold down
Command (Mac OS) or Ctrl
(Windows), and move the pointer
over the line you want to delete.
3When the pointer changes to
include a minus sign,
Command+click the line (Mac
OS) or Ctrl+click the line
(Windows).
To rename a slice:
1In the Image Slicer dialog box,
choose a slice from the Slice pop-
up menu.

Corel Painter 401
2In the File Name box, type the new
name.
The new name displays in the
Slice pop-up menu the next time
you select a slice.
Note
•
By default, slices are automatically
named according to their position order
(Image1, Image2, and so on, moving from
left to right, top to bottom). These names
correspond to cells in the HTML table that
reconstructs your image. When you rename
a slice, Corel Painter disables the Auto
option for that slice. If you re-enable the
Auto option, you revert to the automatic,
position-related slice name, and any name
that you may have previously entered is
overwritten.
To set slice options:
1In the Image Slicer dialog box,
choose a slice from the Slice pop-
up menu.
2From the File Type pop-up menu,
choose a file format.
If you do not want an image file
exported, such as when a portion
of the image can be replaced by an
HTML element, choose No
Export.
3Click Options, and specify the
options you want for the chosen
file format.
4Specify any of the following
optional settings:
• Link URL—specify a URL to
link to when the slice is clicked.
You can enter either an absolute
or a relative URL.
• Image ALT Text—specify the
text to be displayed when the
pointer is moved over an image
in the browser. This is equiva-
lent to the “ALT” attribute of
the HTML <IMG> tag. If the
slice will be used in a rollover,
this text is displayed in the
browser’s status bar during the
rollover.
• Rollover State—if you want to
use the selected slice as a roll-
over, specify the rollover states
to be supported.
To export slices:
1In the Image Slicer dialog box,
click Export Settings for Current
Image State, and specify any of the
following options:
• Location where HTML table
will be created—click Select,
and specify a filename and
location for the HTML file.
• Generate HTML Code in ALL
CAPS—enable or disable this
option.
• Location where images will be
exported—click Select, and
specify a filename and location
for the exported images.
• Include JavaScript—if slices in
the image are to be used for
rollovers, enable this option
and indicate which state the
current image represents.
• Use Single Color Table for All
GIF Slices—constrain all GIF
slices in the image to the same
color table. Enabling this
option can help avoid palette
clashes between slices exported
to GIF.
2Click Export.
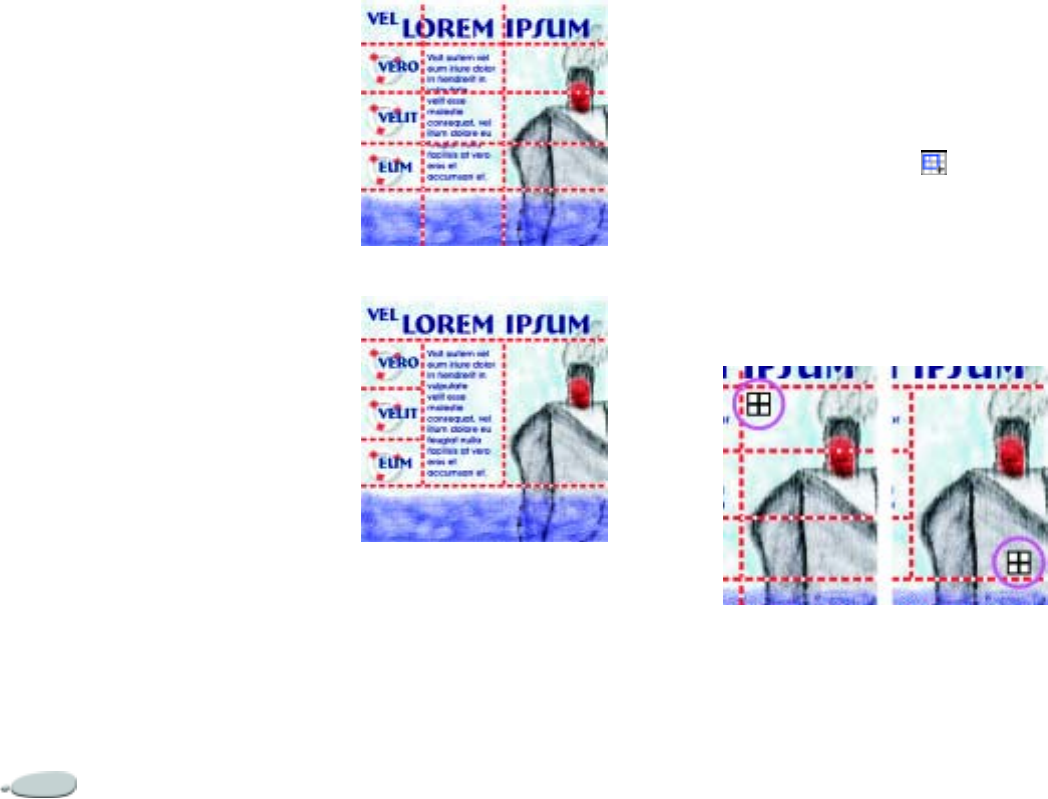
The Web402
Note
•
RIFF format contains data about your
image that is lost when you convert it to
GIF or JPEG. If you may need to edit the
file later, save a RIFF copy before you
generate a GIF or JPEG version.
Grouping Slices
You can fine-tune your sliced image by
combining slices that go together or
that do not contain slice objects.
For example:
• You might want a slice that extends
across several “columns” in the
slice map. To accomplish this, you
can group smaller slices into a
large slice.
• There could be a large area of your
image that shows only a single
background color. Grouping the
slices in these areas makes it easy
to export a single GIF image with
a small number of colors. Be sure
to set the GIF color settings
accordingly.
A sliced image, before slices are grouped.
After grouping slices.
Grouped areas must remain
rectangular. If you create a nested
group, previously grouped slices may
be ungrouped in order to create a
rectangular shape.
Automatically assigned slice names
change based on the top-left slice in
the group.
To group slices:
1In the Image Slicer dialog box,
click the Select tool .
2In the image window, click the
top-left slice to be included in the
group, and drag down or to the
right, or both, until the target slices
are selected. When you release the
mouse button, the slices are
grouped.
Click the top-left slice and drag until a new,
larger slice is created.
Corel Painter 403
To ungroup slices:
•Click the Select tool and
Shift+click a grouped slice.
All slices are ungrouped. If you
ungroup a nested group, all levels
are ungrouped and the original
slices are displayed.
Creating Rollovers
Understanding Rollovers
Rollovers are interactive objects that
can change in appearance when you
click or point to them. They are often
used as navigation tools on the Web.
For example, you can make a button
change color when it is clicked or
display text when you point to it.
The rollover effect is accomplished in
the Web browser using JavaScript
image swapping. The idea is simple:
each rollover area uses two or more
separate images of the same
dimensions. In response to a user
action (like moving the pointer over
the image), one image is quickly
replaced by another.
A rollover in the Mouse out state (top) and the
Mouse over state (bottom).
In effect, this creates a simple
animation, and each of the separate
images can be thought of as frames in
that animation. For our purposes, we
refer to each frame as a “state.” Corel
Painter supports three possible states
for each rollover:
•Mouse out — This is the default
image. Corel Painter displays it
when the page first loads, and also
when the pointer moves off the
rollover. If the Web browser doesn't
support JavaScript image
swapping, this image is the only
one that will be displayed.
•Mouse over — This image displays
when the pointer moves over the
rollover.
•Mouse click — This image
displays when the user clicks the
rollover. When the user releases
the mouse button, the Mouse out
image is displayed again.
Not all browser versions support these
states. The Mouse over and Mouse out
states display in browsers that support
JavaScript 1.1 (Netscape Navigator 3.0
and higher and Microsoft Internet
Explorer 4.0 and higher).
The Mouse click state displays in
browsers that support JavaScript 1.2
(Netscape Navigator 4.0 and higher
and Microsoft Internet Explorer 4.0
and higher). Browsers that do not
support these versions of JavaScript
(like Netscape Navigator 2.0 and
Microsoft Internet Explorer 3.0), or
that don’t implement JavaScript at all,
do not display rollover effects.

The Web404
Creating Rollovers from
Image Slices
Using the Image Slicer, you can divide
your image into rectangular areas
called slices. Each slice can have one
of the following rollover state
combinations:
•No rollover — The slice has no
rollover states.
•Mouse over-out — The slice has
two states: Mouse over and Mouse
out.
•Mouse over-out-click — The slice
has three states: Mouse over,
Mouse out, and Mouse click.
A single image can contain different
slices with different rollover
combinations. This means that one
slice can be set to Mouse over - out,
another slice can be set to Mouse over
- out - click, another slice can be set to
No rollover, and so on.
For more information about the
Image Slicer, refer to “Using the
Image Slicer” on page 397. For more
information about setting the number
of rollover states, refer to the
procedure “To set slice options:” on
page 401.
Before using the Image Slicer, you
must carefully analyze your image.
• Which image areas should have
rollover effects?
• Which rollover state combinations
(see above) will be used for each
area?
• How will you create the rollover
states for each of these areas?
The third item in this list deserves
special note. Since each rollover area
must have two or three separate states,
you must decide how you will
represent each of these states.
The most common method of
representing states is to use multiple
layers (one for each state), then hide
and show them, as necessary. Another
option is to use Shapes or Dynamic
Text, then redefine their attributes
(color, opacity, size, and so on) for
each state.
Whatever method you choose, make
sure you can easily move between
states for each slice. This is necessary
when exporting states using the Image
Slicer.
Press Option+click (Mac OS) or
Alt+click (Windows) to control
alignment when duplicating layers for
use in rollovers. If in doubt, check
layer alignment by double-clicking
each layer and verifying the Position
> Top and Position > Left fields.
Make any necessary adjustments in
alignment by typing numbers into
these fields.
To define rollovers with the Image
Slicer, follow the general steps below.
For detailed information, refer to the
procedures in “Working with Image
Slices” on page 399.
To define rollovers:
1Set up your image so you can
easily move between states for each
rollover area or slice.
2Use the Image Slicer's slice tools to
divide the image. Each rollover
area in the image should occupy its
own slice.

Corel Painter 405
3For each rollover slice, specify the
supported rollover states (Mouse
over - out or Mouse over - out -
click). You do this by choosing an
option from the Rollover State
pop-up menu in the Image Slicer
dialog box. For more information,
refer to the procedure, “To set slice
options:” on page 401.
Exporting Rollover Slices
Once you have defined slices, you are
ready to export the slices and the
associated HTML file. You must do a
separate export operation for each
rollover state.
Because there are two or three possible
states, you must do two or three
separate export operations. All the
Mouse out (default) images are
exported together, all the Mouse over
images are exported together, and all
the Mouse click images (if any) are
exported together.
To export rollover slices:
1Set up your image so that all slices
display their Mouse out (default)
state.
This is how you want slices to
appear when the Web page first
loads. As mentioned in “Creating
Rollovers from Image Slices” on
page 404, this is often done by
hiding or showing layers, or by
changing the attributes of Shapes
or Dynamic Text.
2On the Layers palette, double-click
the Image Slicing layer in the
Layer list.
3In the Image Slicer dialog box,
click Export Settings for Current
Image State.
4In the Export Settings dialog box,
enter the HTML and image export
locations.
5Enable the Include JavaScript
check box, and enable the Mouse
out (default) option.
6Click Export.
Corel Painter exports the slices and
the HTML file.
7Click OK in the Image Slicer
dialog to return to the image.
8Set up the image so that all slices
with rollovers display their Mouse
over state.
This is how you want slices to look
when the user's cursor passes over
them. You can choose to do this by
manipulating layers in your image.
9On the Layers palette, double-click
the Image Slicing layer in the
Layer list.
10 In the Image Slicer dialog box,
click Export Settings for Current
Image State.
11 In the Export Settings dialog box,
enable the Include JavaScript
check box, and enable the Mouse
over option.
12 Click Export.
Corel Painter exports the Mouse
over slices and displays a
confirmation message.
13 Click OK in the Image Slicer
dialog to return to the image.
If slices in your image have a
Mouse click state, repeat steps 8
through 13 for this state.
14 Load the exported HTML file into
your Web browser and test the
rollover effects to make sure they
work as you intended.
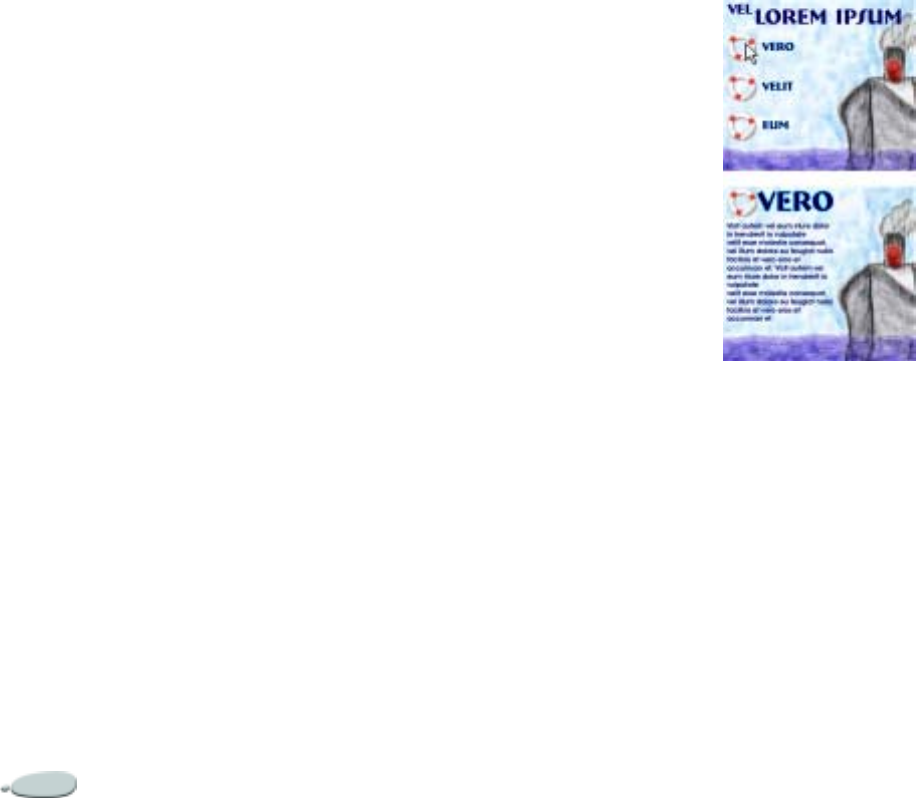
The Web406
Notes
•
You must exit the Image Slicer dialog to
manipulate the image.
•
It’s important not to modify the image
slice settings in any way between each of
these export operations (for example, do not
change any slice name or resize/add slices).
Any changes you make may result in a
nonfunctional HTML file. If you decide to
modify one or more slice settings, you must
repeat the export process from the
beginning.
Image Maps
Understanding Image Maps
An image map is a Web feature that
lets you jump to different locations by
clicking on specific areas within an
image.
There are two types of image maps:
• Client-side image maps store
image map information right in
your HTML document. URL
information appears at the bottom
of the browser window when a
cursor is moved over the mapped
areas.
• A server-side image map works
differently. Image map
information is saved in a separate
file that is stored on a server and
accessed by a Common Gateway
Interface (CGI) script. Coordinate
information, not URL
information, is displayed at the
bottom of the browser window
when a cursor is moved over a
mapped area.
Client-side image maps are faster and
more efficient because all the imagery
information is present in the HTML
for the page. A server-side image map,
in contrast, requires an extra round
trip of information between the
browser and the Web server. However,
client-side image maps are not
supported by very old browsers
(Netscape Navigator 1.0, for
example).
When a hotspot is clicked (top), the browser
jumps to the page referenced by that link
(bottom).
Client-Side Image Mapping
A client-side image map is an image
that has “hotspots” directly associated
with URL information. When a
hotspot is clicked, the browser jumps
to the page referenced by that link
information.
A client-side image map recognizes
circular and rectangular “hotspots.”
Therefore, Corel Painter treats a
Corel Painter 407
circular area as a circle and a rectangle
as a rectangle. Oval areas are exported
as rectangles.
Image maps are created using layers.
The size of the layer determines the
clickable area. For information about
working with layers, refer to “Using
Layers and Layer Masks” on page 229.
The size of the layer determines the size of the
clickable area, or hotspot.
Server-side image mapping handles
circles and ovals differently. With
server-side mapping, you can export
ovals. For more information on server-
side image maps, refer to “Server-Side
Image Mapping” on page 408.
To define a client-side image map:
1Select or create a layer or shape in
the exact place in your image
where you want a link created.
If you can’t see the layer’s
marquee, click the palette menu
arrow on the Layers palette and
choose Show Layer Indicators.
2On the Layers palette, select a layer
in the Layer list.
3Click the palette menu arrow, and
choose Layer Attributes.
4In the Layer Attributes dialog box,
specify a name for the layer.
5Enable the WWW Map Clickable
Region check box.
6In the URL box, specify a URL to
associate with this portion of your
image, for example, http://
www.corel.com.
7Click OK to return to the image.
8Deselect the layer, then define the
next area of your image map.
If there are two or more
overlapping areas in an image
map, the topmost one takes
priority.
9Export your image to the GIF or
JPEG file format. In the Save As
GIF Options or Save As JPEG
Options dialog box, enable the
Client Side Map File check box to
indicate that Corel Painter should
export an HTML file containing
the image map definition.
Note
•
The RIFF format contains data about
your image that is lost when you convert it
to GIF or JPEG. If you want to edit the
file later, save a RIFF copy before you
generate a GIF or JPEG version.
When a client-side image map is
exported, Corel Painter exports both
the image and an HTML file. You can
then open the HTML file in a text or
HTML editor and copy the code into
another Web page.
To define a default URL for an
image map:
1To define a default, or base, URL
to use when a user clicks outside of
defined hotspot areas in an image
map, choose File menu > Get
Info when no layers, shapes, or
plug-ins are selected.

The Web408
The File Information dialog is
displayed.
2Select WWW Map default URL.
3Enter a URL address.
4Click OK.
If you don’t provide a default URL,
clicking outside the defined hotspot
areas has no effect.
Server-Side Image Mapping
In Corel Painter, you can define a
layer as a clickable region. Corel
Painter saves this image map
information within a separate text file,
which you can upload to your Web
server. It can then be accessed by a
CGI script.
Because server-side image mapping is
becoming obsolete, be sure to read the
previous section on client-side image
mapping support.
To create a server-side image
map:
1Select or create a layer or shape in
the exact place in your image
where you want a link created. For
information about working with
layers and setting general layer
preferences, refer to “Using Layers
and Layer Masks” on page 229.
2On the Layers palette, select a layer
in the Layer list.
3Click the palette menu arrow and
choose Layer Attributes.
4In the Layer Attributes dialog box,
specify a name for the layer.
5Enable the WWW Map Clickable
Region check box.
6In the URL box, specify a URL to
associate with this portion of your
image, for example, http://
www.corel.com.
7Click OK to return to the image.
8Deselect the layer, then select the
next hotspot in your image map.
Try to avoid overlapping hotspot
areas within an image map.
You can set a default base URL to
use if the user clicks outside of
your defined hotspot areas. See
“To define a default URL for an
image map:” on page 407.
9Export your image to the GIF or
JPEG file format. In the Save As
GIF Options or Save As JPEG
Options dialog box, enable either
the NCSA Map File check box or
the CERN Map File check box,
depending on which format is
recommended by your Internet
Service Provider.
When you save the image, Corel
Painter creates an additional text
file that describes the clickable
regions and their associated URLs.
10 Store both files (the image file and
its associated image map definition
file) on your Web server, as
directed in the documentation for
your image mapping CGI script/
program. Both files must be
present for the server-side image
map to work.
Note
•
The RIFF format contains data about
your image that is lost when you convert it
to GIF or JPEG. If you want to edit the
file later, save a RIFF copy before you
generate a GIF or JPEG version.
Corel Painter 409
Creating GIF Files
Creating Transparent GIFs
The ability to define transparent areas
in a GIF file is used everywhere on the
Web today. If designed correctly, GIFs
with transparent areas are very
effective when displayed over
background colors or tiles.
A transparent GIF (the airplane) is displayed
over a blue background image.
With the increasing use of Cascading
Style Sheets (CSS), Dynamic HTML
(DHTML), and layers, there are even
more possibilities for using
transparency to your advantage.
In Corel Painter, the method of
defining transparency during GIF
export is to define the transparent
areas based on the current selection.
When your image contains layers, you
will often want the edges of the
floating elements to define the
transparent areas. For more
information about layers, refer to
“Using Layers and Layer Masks” on
page 229.
When saving to the GIF file format,
you can reduce the number of colors,
which translates into smaller files. For
more information about reducing the
number of colors, refer to “Reducing
the Number of Colors” on page 410.
For information about other options
available for saving GIF files, refer to
“Saving GIF Files” on page 48.
To create a transparent GIF from a
layer or group of layers:
1To output transparency in a GIF,
you need an active selection. Select
a layer or group of layers.
2On the Layers palette, click the
palette menu arrow and choose
Drop and Select.
The layers are merged with the
canvas and a selection containing
the contents of the dropped layers
is made.
3Choose File menu > Save As.
4In the Save dialog box, choose the
GIF file format, specify a location
and filename, and click Save.
5In the Save As GIF Options dialog
box, enable the Output
Transparency check box to make
the selected area the only part of
the canvas displayed on your Web
page.
6Enable one of the following
options:
•Background is WWW Gray
sets the transparent color to
75% gray (the default back-
ground color of the Netscape
Navigator browser).
•Background is BG Color sets
the transparent color to the sec-
ondary color on the Colors pal-
ette. Note that this setting does
not refer to the HTML page’s
background color.
7In the Preview window, verify that
the selected area is correctly

The Web410
masked and that the transparent
area is correctly positioned.
Transparent areas are designated
with a grid.
If necessary, drag in the Preview
window to view all parts of the
image.
8Choose one of the following
imaging methods:
•Quantize to Nearest Color
causes Corel Painter to look at
each pixel and pick the nearest
color. This is useful when the
image you are saving has broad
areas of a single color.
•Dither Colors causes Corel
Painter to apply a stippled
effect to the colors chosen to
generate a more accurate, less
banded result. Unfortunately,
Dither Colors can reduce the
effectiveness of GIF file com-
pression.
Note
•
The RIFF format contains data about
your image that is lost when you convert it
to GIF or JPEG. If you want to edit the
file later, save a RIFF copy before saving to
the GIF or JPEG file format.
Creating Animated GIFs
Corel Painter can open a QuickTime
movie, which can be painted on, then
saved as an animated GIF.
Additionally, you can create a new
movie or animation from scratch in
Corel Painter and save it as an
animated GIF, QuickTime, or Audio/
Video Interleaved (AVI) movie.
For information about creating
movies, refer to “Creating a Movie” on
page 425. For information about
creating and exporting animated
GIFs, refer to “Animations for the
World Wide Web” on page 442.
Reducing the Number of
Colors
Web designers are always seeking a
careful balance when creating
graphics for the Web. Artwork and
imagery must be as rich and vibrant as
possible while remaining small and
easily downloadable.
One way of keeping an image’s file
size small is to reduce the number of
colors used to create that graphic
element. Reducing the number of
colors used reduces file size and,
therefore, download time.
A Web artist may end up saving
multiple versions (varying in the
number of colors used) of the same
graphic element. These versions must
then be placed on a page, loaded to the
page, and viewed to determine if the
quantity of colors used is acceptable.
This whole process can be time-
consuming and confusing.
In Corel Painter, you can make this
decision during the process of saving
the image to GIF format, by using the
Preview window on the GIF Save As
dialog.
To visually reduce the number of
colors
1Choose File menu > Save As and
name your image file.
2Choose the GIF file format, and
click Save.
3Click OK to dismiss the layer
warning, if displayed.
4In the Save As GIF Options dialog
box, in the Number of Colors area,
choose 256 colors.

Corel Painter 411
In the preview window, the image
appears in 256 colors.
5Change the number of colors to
128.
In the preview window, the image
appears in 128 colors.
6Continue reducing the number of
colors in the graphic until you find
the minimum number of colors
necessary for adequate display on
your Web page.
7Choose Quantize to Nearest Color
if you want Corel Painter to look at
each pixel and pick the nearest
color. Choose Dither Colors if you
want Corel Painter to apply a
pattern to the colors chosen to
generate a more accurate, less
banded result.
You can now either save the
graphic element to place on the
web page or return to Corel
Painter to work on the design and
color balance.
Note
•
The RIFF format contains data about
your image that is lost when you convert it
to GIF. If you want to edit the file later,
save a RIFF copy before you generate a
GIF version.
Using Web-Safe Colors
Using a Web-safe color table becomes
important when you expect to deliver
your Web page to viewers who use
monitors displaying 256 or fewer
colors. On such a monitor, Web
browsers dither colors that aren’t
found in the Web-safe palette. So,
depending on your audience, making
sure that some or all of your image
conforms to the Web-safe palette can
make good sense.
The colors in the default palette
included with Corel Painter are the
same 216 colors present in the
Netscape browser-safe palette.
Included with Corel Painter are Web-
safe color palettes that identify colors
by a hex value displayed immediately
under each color chip—values used in
HTML code to identify a color.
To select a Web-safe color palette:
1Click the palette menu arrow on
the Color Sets palette, and choose
Open Color Set.
2In the Select Color Set dialog box,
select the Hexadecimal folder
within the Color Sets folder.
3Choose a hex file from the list, and
click Open.
The selected color palette displays
on the Color Sets palette.
Working with Posterize Using
Color Set
You can use the Posterize Using Color
Set option to force your image to use
the default color set. Posterize Using
Color Set can help make colors in
your resulting image ready for
delivery to the Web — without a lot of
dithering or shifting of colors.
Posterizing means adjusting the
number of color levels an image
contains. Corel Painter can
automatically constrain all the colors
in your image to a web-safe, 216-color
palette. Although the Posterize Using
Color Set option is not designed to be

The Web412
a highly sophisticated method of
reducing color (it offers you no control
over exactly how color reduction is
performed), Posterize Using Color Set
can be a real time-saver.
In addition, you can constrain the
colors you use to the default or
another Corel Painter Web-safe
palette, utilize new Web-safe single
color brushes (refer to “One-Color
Brushes” on page 412) and keep the
number of colors in your image to a
minimum.
To use Posterize Using Color Set
to adjust color levels:
1Select an area of your image you
want affected or select nothing if
you want the entire image affected.
2Make sure the proper color set is
active.
3Select Effects menu > Tonal
Control > Posterize Using Color
Set.
It’s important to note that exporting to
GIF format can compromise the color
set values used when Posterize Using
Color Set has been performed. For
best results in those cases:
• First, save your reduced-color
image in a 24-bit format, like
Windows Bitmap, TIFF, or PICT.
This maintains the benefits of
defining Web-safe colors in Corel
Painter.
• Next, open the image in a tool that
supports indexed color to save the
GIF—one that offers “constrain to
color set” features, such as
GifBuilder (Mac OS) or GIF
Construction Set (Windows).
• Finally, save the image to GIF
format. The web-safe colors from
Corel Painter are maintained and
your image is ready to go right on
the Web.
Brushes for the Web
Natural-Media and Low
Bandwidth
Web artists are pulled between the
desire for beautiful imagery and the
need for small image file sizes, with
faster download times.
Bitmapped images can be roughly
divided into two general types—
images with areas of flat color and
continuous-tone images. Continuous-
tone images (which most of the
normal features in Corel Painter
produce) are best saved as JPEG
images. Images with flat areas of color
are best saved as GIF images. The
more regions of flat color contained in
an image, the more compressed
(smaller) the resulting GIF file. For
more information about reducing
colors in the final GIF file, refer to
“Reducing the Number of Colors” on
page 410.
The strength of Corel Painter is its
Natural-Media brushes; however,
Corel Painter is also versatile in the
creation of flat color suitable for GIF
images on the Web.
One-Color Brushes
You can set the brush controls to
create areas of flat color, while keeping
all the feeling and nuance of a
Natural-Media brush. These brush
edges are aliased, meaning they have
jagged edges. For example, if a brush

Corel Painter 413
color is black, there are no
intermediate gray pixels at the brush’s
edge. There is either black or the
background color. In addition to a flat
color, this brush type responds to
paper texture. Different paper textures
cause the same type of brush stroke to
look different.
Magnified detail of the stroke is shown to the left
of each W-stroke. In this image, the identical
brush and stroke is applied using a different
paper texture.
To make a brush with a flat-edged
appearance, change the method to
Cover and the subcategory to Grainy
Edge Flat Cover in the Brush Creator.
For more information about the Brush
Creator, refer to “The Brush Creator”
on page 143. If you have created some
of your own brush variations in Corel
Painter, you can convert them to Web-
friendly brushes, too.
To change the brush method and
subcategory:
1On the Stroke Designer page of
the Brush Creator, click General.
2From the Method pop-up menu,
choose Cover.
3From the Subcategory pop-up
menu, choose Grainy Edge Flat
Cover.
The result is the current brush
with a Web-friendly hard edge.
4Save your creation as a variant.
Note
•
Brushes that require a particular
method, such as Wet, Eraser, or Plug-in,
will not work as well with the Cover
method. If you use another brush method,
you will not be working with a one-color
brush.
Web-Friendly Brushes
Included with Corel Painter are
brushes that have been converted from
the default Corel Painter brushes to
Web-friendly, low-bandwidth brushes.
To load Corel Painter Web-friendly
brushes into a library:
1In the Brush Creator, choose
Brush menu > Import Brush
Library.
2In the Select Brush Library dialog
box, locate the Web brushes library
on the CD-ROM.
3Click Open.
A set of one-color Web brushes, along
with some one-color Calligraphy
brushes, is included with Corel
Painter.
Experiment with these brushes, using
different papers for Web-friendly
Natural-Media effects.
Install the brushes, then use the file
browsing feature (accessed from the
Open dialog box) to review all the
Web-friendly variations on standard
Corel Painter brushes. Here are some
samples of what you’ll find:
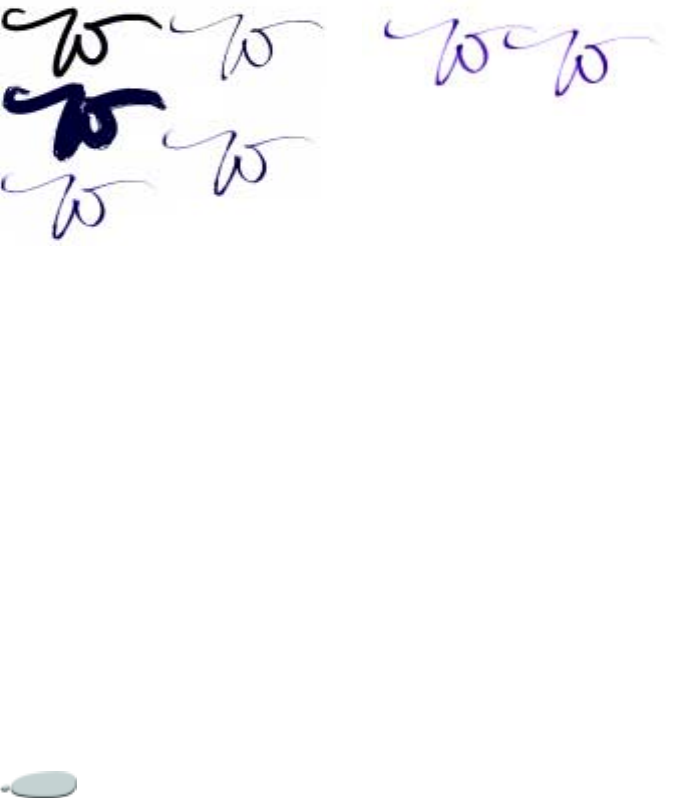
The Web414
Examples of brush strokes produced by Web-
friendly brushes.
A few of the new brush variants
included in Corel Painter are not one-
color brushes. If you are concerned
about having Web-safe colors, make
sure the Corel Painter Color set or the
Corel Painter Colors-WEB Color Set
is loaded, then change the image into
Web-safe colors by choosing Effects
menu > Tonal Control > Posterize
Using Color Set. For more
information about the Posterize Using
Color Set command, refer to
“Working with Posterize Using Color
Set” on page 411.
Calligraphic velocity (left) and calligraphic
velocity posterized (right).
Use a digitizing tablet for the brush’s
colors to work properly. When the first
color is darker than the second color,
dark areas show up in the thicker parts
of the brush strokes—the places
where brush velocity is slower. After
posterizing, the stroke has the
appearance of pigment that has
pooled in one place and dried darker.
The result is a very web-efficient,
limited-color image, with the
appearance of natural media.
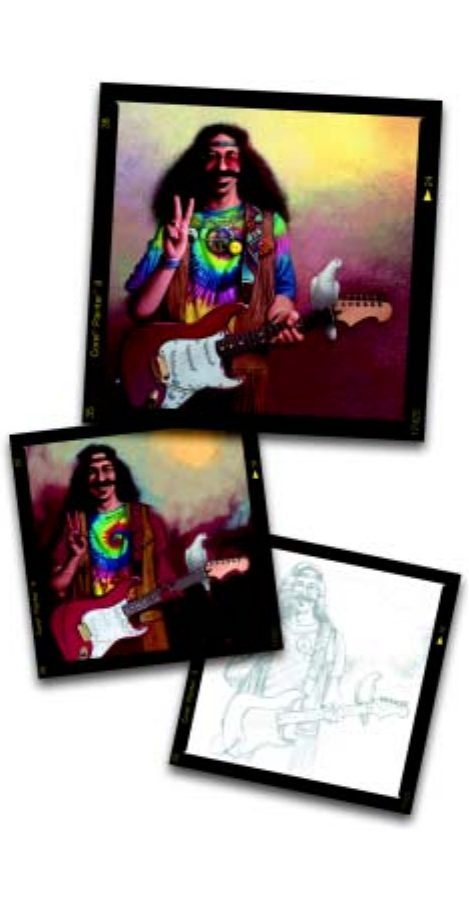
22
Scripting
Scripts allow you to record every
action you make in the Corel Painter
application. Scripts can replay the
artist’s process of creating an image, or
they can hold procedures and
operations. For example, if you must
apply color adjustments to a collection
of images, you can script these
operations. Playing back the script lets
you perform color correction on other
images with the click of a button.
By default, every action you perform is
recorded in an “always script” that’s
used for operations such as undo.
Understanding Scripting
A script is similar to a video. You can
record, edit, and play it back at any
time from the Scripts palette. The
ability to edit scripts step-by-step also
gives you control over recorded action
sequences.
You can record anything in a script—
from a single edit command to an
entire work session.
There are a number of ways to take
advantage of scripting:
• Scripts offer the ultimate in Undo.
If you record your work, you can
revert to any stage in the project by
playing the script and stopping it at
the stage you want.
• You can use scripts to create
macros. If you have a repetitive
task or an operation you use
frequently, you can record that
series of commands. Whenever
you want to perform the task, play
the script.
• You can play back a script at a
different resolution. You can record
at a low resolution, then
automatically produce the same
results at a higher resolution.
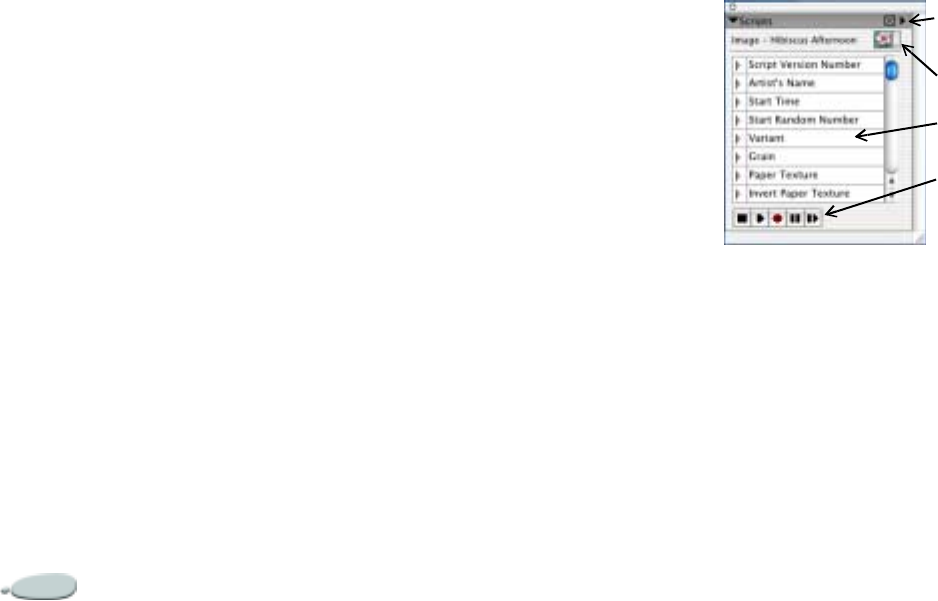
Scripting416
• You can record a script that plays
back using the current art
materials. For example, you can
record a script of a pencil drawing,
then open a new document,
choose a different paper texture,
color, and brush, and play back the
script. Watch Corel Painter repeat
your drawing with the selected art
materials.
• Scripts are a great educational tool.
Playing the script of an art project
lets you see the step-by-step
process used to make the image.
It’s like looking over the artist’s
shoulder.
• Scripts are particularly useful for
working with movies. When you
have an operation you want to
apply to each frame in a movie,
record the set of commands in a
script. You can then apply the
script to the entire movie as one
command.
• When you play a script, you can
output it to a movie. Every action
you take becomes a frame in the
movie. This is a great way to create
special effects for your QuickTime
or Video for Windows (VFW)
movies.
How Scripts Work
The Script recorder saves each
instruction you give Corel Painter,
including what values, locations,
colors, and textures are used. By
repeating the instructions, you can
reproduce the artwork “from scratch.”
Because Corel Painter saves
instructions, scripts are efficient and
flexible. For example, you can play a
script one instruction at a time. You
can also edit scripts, taking a few
instructions from one script and
inserting them into another one.
The Scripts Palette
The Scripts palette supplies the basic
tools for recording, playing, and
storing scripts.
To show the Scripts palette:
•Choose Window menu > Show
Scripts.
Note
•
The Script list is empty until you open
a script for editing.
To hide the Scripts palette:
•Choose Window menu > Hide
Scripts.
The Scripts palette
Record and Playback Buttons
The Script buttons on the bottom of
the palette make it easy to stop, play,
record, pause, and step forward when
you’re working with scripts.
Script list
Script selector
Script buttons
Palette menu
arrow

Corel Painter 417
Script buttons, from left to right: Stop, Play,
Record, Pause, and Step Forward.
Script List
The Script list on the Scripts palette
offers tighter control in developing
and playing scripts. The Script list
contains the instructions that make up
a script. You can edit, copy, and move
instructions. You can also copy and
move instructions between scripts. For
more information, refer to “Editing
Scripts” on page 419.
Recording Scripts
When you record a script, first you set
up your Script Options.
Record Initial State records the tools
and art materials you use during the
session, including brushes, colors, and
paper textures. Corel Painter plays the
session using the materials you
recorded.
When Record Initial State is disabled,
Corel Painter uses the tools and art
materials selected at the time you play
back the script. So, by disabling
Record Initial State, you can use a
different brush, color, and paper
texture each time you play the script.
Save Frames on Playback and the
frame rate option are for playback. For
more information on these options,
refer to “Converting a Scripted
Session into a Movie” on page 420.
After you have set the Script Options,
you begin the recording and perform
the actions you want scripted.
Corel Painter saves new scripts to the
current library. You can move scripts
between libraries using the Script
Mover. For information on working
with libraries and movers, refer to
“Libraries and Movers” on page 23.
Because Corel Painter always saves
your script data, this data can build up
in your Corel Painter Script Data file.
You can control the number of days
these scripts persist in the file by
entering a number of days into the
Auto Save box in the General
Preferences dialog. For more
information, refer to “Setting
Preferences” on page 50.
To record a script:
1On the Scripts palette, click the
palette menu arrow and choose
Script Options.
2In the Script Options dialog box,
set your options.
If you want to record a script
where you can change art
materials on playback, disable the
Record Initial State option.
3Click the palette menu arrow and
choose Record Script, or click the
Record button.
The Record button glows red
while recording.
4Draw, paint, or use any features
and effects you want to record.
5When you’re finished, click the
palette menu arrow and choose
Stop Recording Script, or click the
Stop button.
6In the Script Name dialog box,
type a name.

Scripting418
Corel Painter automatically adds
an icon for the script in the Script
selector.
Note
•
If brushes, papers, patterns, or other
materials required by the script are stored
in alternate libraries, these libraries must
be available during playback.
Playing Scripts
When you play your recorded script,
you can sit back and watch the
operations unfold. In Corel Painter,
replaying a script of a painting is like
watching the artist at work.
Playing a Script from the
Scripts Palette
To play a script:
1On the Scripts palette, choose a
script from the Script selector.
If you want to load another script
library, click the selector menu
arrow and choose Load Library.
2Click the Play button.
The button glows green during
playback.
3Use the Stop, Pause, and Step
Forward buttons to control
playback.
Tips
•
To switch between List and
Thumbnails view in the Script selector,
click the selector menu arrow and choose
List or Thumbnails.
•
You can also use Command+. (Mac
OS) or Ctrl+. (Windows) to stop a script
from playing.
Replaying a Script at a New
Resolution
Replaying a script at a higher
resolution is a good way of creating a
high-resolution image without
working on a high-resolution image.
When you’re creating the image, you
can get smoother, more responsive
performance by working at low
resolution. Then, when you play back
the script at a higher resolution, you
get the benefit of a higher quality
image.
The record-to-playback scaling ratio is
limited. A factor of 4 is probably too
much. For best results, experiment.
To record for resolution-
independent playback:
1Before you start recording, open a
new document at the resolution in
which you want to work.
2Before painting or drawing, choose
Select menu > All, or press
Command+A (Mac OS) or
Ctrl+A (Windows).
This action creates a reference
rectangle that is part of the
recording. The rectangle must be
recorded to play a session back into
a higher resolution file later.
3Click the Record button.
4Deselect the reference rectangle by
doing one of the following:
•Choose Select menu > None.
• Draw inside the selected area.
•Press Command+D (Mac OS)
or Ctrl+D (Windows).
5Proceed with your script recording
as usual.

Corel Painter 419
To play back at a different
resolution:
1Create a new document with the
resolution at which you want to
play the script.
If you want the resulting image to
be a higher resolution than the
original, create a document with
proportionally larger dimensions.
For example, if the original
document is 500 X 500 pixels,
make the new document 1000 X
1000 pixels to double the size.
If the destination document has a
different aspect ratio from the
original, the image created by the
script will be proportionally
distorted.
2On the Scripts palette, click the
Script selector arrow and choose
the resolution-independent script
you recorded.
3Before playing back the script,
choose Select menu > All, or press
Command+A (Mac OS) or
Ctrl+A (Windows) in the new
document. The rectangle recorded
at the outset of the original script is
referenced to the selected rectangle
in this document.
4Click Play.
The original script replays into the
new document. All brushes, paper
textures, and related functions are
appropriately scaled for the new
resolution.
Editing Scripts
Corel Painter lets you edit your scripts.
You can cut, copy, and paste steps to
change script behavior. You must first
open the script before you can edit.
Opening a Script
To open a script for editing:
1On the Scripts palette, click the
palette menu arrow and choose
Open Script.
2In the dialog box, choose a script
and click Open.
Corel Painter displays the script’s
instructions in the Script list.
If the script you want is in a
different library, click Open
Library.
Note
•
The open script becomes the current
script and is displayed in the Script
selector. If you choose another script from
the Script selector, the open script does not
change.
To close an open script:
•On the Scripts palette, click the
palette menu arrow and choose
Close Script.
Working with Script
Instructions
You can edit a script to change the
order of instructions, remove an
instruction, or add a segment from a
different script.
An open script displays in the Script
list as a series of instructions, each
with a triangle at its left. You can click
the triangle to open the instruction
and see the steps or parameters it uses.
Most of these parameters can be edited
by double-clicking them.
Corel Painter always records every
action you take in the “always script.”
This script appears as (Current Script)

Scripting420
in the Open Script dialog. You cannot
edit the “always script.” However, if
you open this script, you can copy
instructions from it and paste them
into another script. In this way, you
can easily record recently taken steps
into a script.
To select one or several
instructions:
•You can select a single instruction
by clicking it.
• You can select multiple
instructions by holding down Shift
and clicking each instruction.
•You can select all instructions in a
script by clicking the palette menu
arrow and choosing Select All.
•You can deselect all selected script
instructions by clicking the palette
menu arrow and choosing
Deselect.
To copy, cut, and paste
instructions:
1Select one or more instructions.
2Click the palette menu arrow and
choose Cut or Copy.
3Select the instruction before which
you want to paste.
4Click the palette menu arrow and
choose Paste.
Note
•
Corel Painter stores copied instructions
on the Clipboard, so you can close one
script, open another, and paste the
instructions there.
Creating a New Script
To create a new script:
1On the Scripts palette, click the
palette menu arrow and choose
New Script.
2You can now build a script by
copying segments from other
scripts and pasting them into the
new script.
Scripts and Movies
Corel Painter allows you to play back
a script in a movie file. This allows
you to create some interesting effects,
as well as automate processes.
Corel Painter lets you apply a script to
a movie. This feature is particularly
useful when you have a script that
functions as a macro.
For example, you might want to apply
an effect like Motion Blur to a video
clip. You can record a script that
applies the Motion Blur effect to a
single image. Then, with a single
command, you can apply the script to
each frame of a movie. You can also
use a script to set grain position in a
movie.
For more information about applying
a script to a movie, refer to “Applying
Scripts to Movies” on page 433. For
more information about setting the
resolution of a movie, refer to
“Replaying a Script at a New
Resolution” on page 418.
Converting a Scripted Session
into a Movie
You can convert a script into a Corel
Painter movie and save it as a
QuickTime or AVI movie. Every
action you take becomes a frame in

Corel Painter 421
the movie. This is a great way of
creating special effects for your
movies.
For more information about creating
movies, see “Creating a Movie” on
page 425.
If the script was recorded to be
resolution-independent, you can
replay your session into a movie with
different dimensions. For additional
information, refer to “Replaying a
Script at a New Resolution” on
page 418.
If the script is not resolution-
independent and the new image
window is larger, the script plays back
in the upper-left corner of the movie.
If the new image is smaller than the
script dimensions, only the upper-left
portion of the scripted session appears
in the movie.
To replay a script into a movie:
1On the Scripts palette, click the
Script selector arrow and choose a
script.
2Open a new image at the size you
want the movie to be.
3On the Scripts palette, click the
palette menu arrow and choose
Script Options.
4In the Script Options dialog box,
enable Save Frames on Playback.
This is the option that directs
Corel Painter to create a movie on
playback.
5Choose how many tenths of a
second you want between frames.
The lower the number, the more
frequently a frame is created and
the more fluid the movie is. More
frames, however, use more disk
space.
6On the Scripts palette, click Play.
7In the Enter Movie Name dialog
box, type a name, choose a
destination folder, and click Save.
8In the New Frame Stack dialog
box, choose the number of layers of
onion skin and the storage type
you want. Corel Painter plays the
script into the frame stack.
Note
•
Not all actions can be converted into a
movie. For example, a script that contains
a File menu > New command will not
be converted properly.

23
Animation and Video
An animation is a series of drawings
with progressive change. When
viewed in rapid succession, they create
a moving image.
Because Corel Painter has its full suite
of Natural-Media tools and effects
available for each image in a frame
stack, it’s an extraordinary program
for creating original animation.
The animation features in the Corel
Painter application give you the power
to work with video and create
animations, including onion skinning
and rotoscoping.
Onion skinning is a feature animators
use to view previous and future frames
while working in the current frame.
Rotoscoping is the ability to paint on
and apply effects to existing movies.
Corel Painter controls allow you to
clone, trace, edit, and combine
movies.
In this chapter, you’ll learn animation
and compositing techniques. You’ll
learn how to create, open, and modify
movies, how to navigate the Frame
Stacks palette, and how to export
movies to QuickTime or VFW/AVI
format (Windows only).
Creating Animations and
Video
Creating Animations
Corel Painter offers several methods to
create original animations:
• By cloning or tracing video. For
more information, refer to
“Cloning a Movie” on page 436.
• By manipulating layers
• By drawing each frame by hand
Corel Painter has powerful features
that simplify animation and help you
get the best quality possible. You can
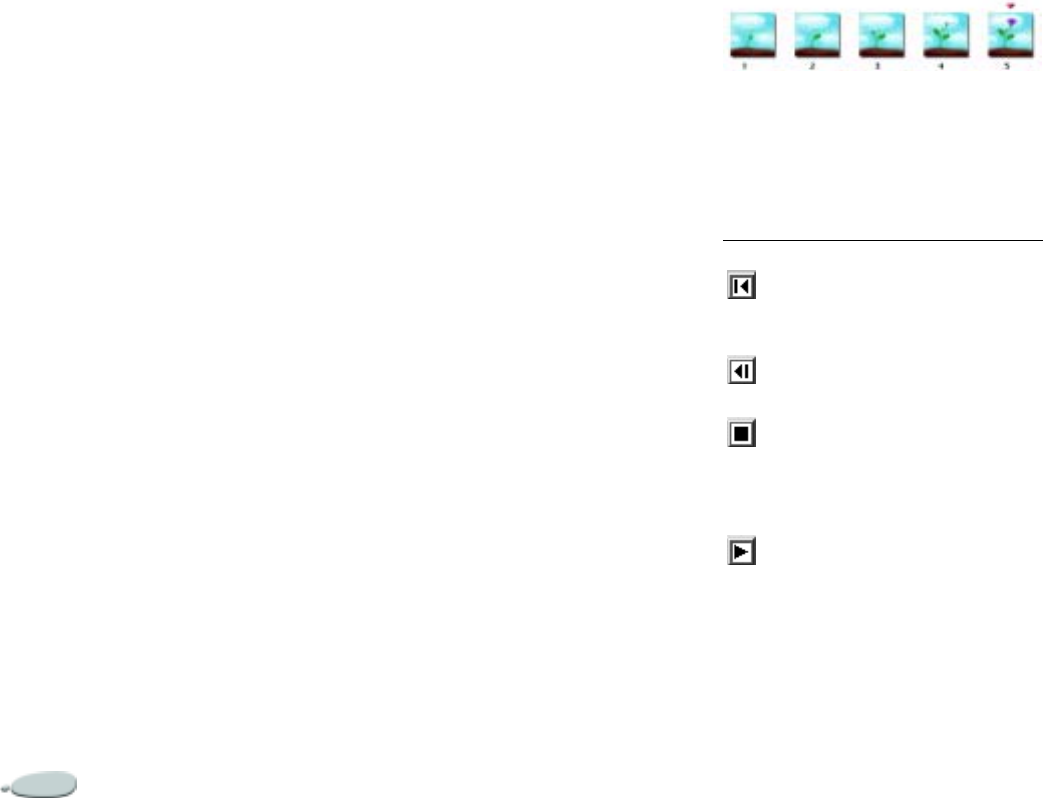
Animation and Video424
use the Natural-Media tools in Corel
Painter to create your own animations
with a traditional look. Onion
skinning allows you to see multiple
frames at the same time. In Corel
Painter, you can view up to five frames
at a time: the current frame and four
other frames adjacent to it. This will
help you determine where the next
frame of motion should be drawn. You
can play back your animation over
and over as you create it, to be sure
you have the correct flow of
movement.
Working with Video
Corel Painter offers certain ways of
working with video that QuickTime
or Audio Video Interleaved (AVI)
applications don’t. You can use any of
the Corel Painter brushes, textures,
and effects to modify a QuickTime or
AVI movie. You can paint directly into
video frames, you can clone video
using the Natural-Media tools, and
you can combine or composite portions
of one video clip with another.
When you open a QuickTime or AVI
movie, Corel Painter automatically
converts it to a frame stack. A frame
stack is a series of images, each equal
in size and resolution.
Corel Painter does not provide
features for working with audio.
When you’re finished with the movie
in Corel Painter, you can save it as a
QuickTime, AVI, or animated GIF
file. You can then open the
QuickTime or AVI movie in a video-
editing application, like Adobe®
Premiere®, where you can add sound
effects and other finishing touches.
The Frame Stacks Palette
In Corel Painter, digital video and
animation files are known as movies
or frame stacks. Whether you’re
working with imported video or
building a new animation, the tools
you’ll use are the same. They’re found
on the Frame Stacks palette and in the
Movie menu.
The number of frames displayed on the Frame
Stacks palette is determined by the number of
onion skin layers. A red triangle displays above
the current frame.
Icon Keyboard
shortcut Comment
Rewind Home Returns to the first
frame in a stack
Step
Reverse Page Down Moves back one
frame
Stop Command
+. (Mac
OS) or
Ctrl+.
(Windows)
Halts a frame
stack that’s play-
ing
Play Command
+Shift+P
(Mac OS)
or
Ctrl+Shift
+P (Win-
dows)
Plays the frame
stack

Corel Painter 425
The frame stack format in Corel
Painter is a series of images, each
equal in size and resolution. The
Frame Stacks palette appears
whenever you open or create a movie
file. The Frame Stacks palette must
stay open while you work with a
movie.
You’ll work in one frame at a time—
the one appearing in the image
window. The Frame Stacks palette
helps you navigate the frames in the
stack and choose which frame to
modify.
Each frame in a frame stack can have
one layer. For example, if you drag an
item from the image portfolio onto a
frame, Corel Painter places the image
on a layer. You can move the image
around using the Layer Adjuster tool.
However, when you move between
frames or close the file, Corel Painter
drops all layers—the layer is deleted
and the layer’s content is flattened
onto the background Canvas. Refer to
“Using Layers and Layer Masks” on
page 229 for more information about
working with layers.
The Frame Stacks palette displays
thumbnails of several frames. The
frame numbers appear under the
thumbnails. The current frame is
shown with a red triangle over it.
The number of thumbnails is
determined by the layers of onion skin
you’ve chosen. By default, QuickTime
and AVI files are opened with two
layers of onion skin. For more
information on onion skinning, refer
to “Understanding Onion Skinning”
on page 427.
Navigating through a Movie
To select a frame:
•You can select a particular frame by
clicking its thumbnail.
To jump to a particular frame:
•Choose Movie menu > Go To
Frame and enter the number of the
frame you want.
Creating a Movie
The first step in creating a new
animation is to create a movie file.
Corel Painter automatically saves
movie files as you proceed from frame
to frame.
To create a new movie:
1Choose File menu > New.
2In the New Picture dialog box,
select the frame size and paper
color you want.
The standard digital video frame is
640 by 480 pixels, which is a 4:3
aspect ratio. Many people work at
Step
Forward Page Up Advances to the
next frame. When
a frame is the last
in the stack, Corel
Painter adds a
new frame to the
end and advances
Fast For-
ward End Advances to the
last frame in the
stack
Icon Keyboard
shortcut Comment

Animation and Video426
sizes consistent with this aspect
ratio.
3Click the Movie radio button
under Picture Type and enter the
number of frames you want to
create.
Remember, you will be able to add
and delete frames at any time.
4Click OK. A dialog prompts you to
name your new movie.
5Type a name for the movie and
click Save.
6In the New Frame Stack dialog
box, choose a number of onion
skin layers.
The number of onion skin layers
determines the number of frames
displayed in the Frame Stacks
palette. For more information
about onion skinning, refer to
“Understanding Onion Skinning”
on page 427.
7Choose one of the following
storage types:
• 8-bit gray — 256 levels of gray
• 8-bit color system palette —
256 colors
• 15-bit color with 1-bit alpha —
32,768 colors and a layer for a
channel
• 24-bit color with 8-bit alpha —
16.7 million colors and a layer
for an anti-aliased channel
8Click OK.
When the movie opens, the Frame
Stacks palette appears and the
image window displays the first
frame of the movie.
Note
•
The storage type lets you specify the
color depth for saving each frame. This
applies to the saved frame stack—not to
working in the current frame. For example,
choosing 256 colors as the storage type still
allows you to work with a selection and
24-bit tools in the image window for the
current frame. As soon as you change
frames, however, the image is saved in the
256 color format and the selection is lost. If
you want to maintain selections in saved
frames, you’ll need to choose the 15-bit or
24-bit storage type. These storage types
allow you to take advantage of compositing
options that require a selection layer.
Opening a Movie
Quite often, you’ll start by opening a
movie created in another program—
like a captured video segment. You’ll
also open an existing movie if you
worked on a frame stack earlier and
now want to return to it.
For efficiency, don’t bring in more
video frames than you’re going to
work on. For example, if you have a
two minute video clip and you want to
paint on the first 10 seconds, don’t
open the entire clip in Corel Painter.
You’re better off separating the first 10
seconds in your editing application
and bringing in just those frames.
After finishing that clip in Corel
Painter, you can join it to the other
part in your editing application.
You can also import a movie that has
been saved as a series of numbered
files. For more information, refer to
“Working with Numbered Files” on
page 441.
To open a QuickTime or AVI movie
or a Corel Painter frame stack:
1Choose File menu > Open.
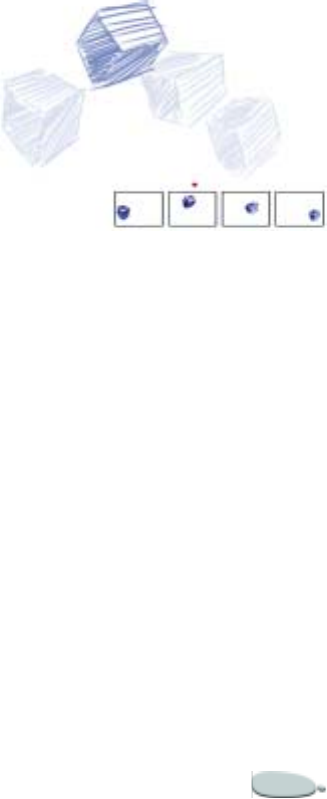
Corel Painter 427
2In the Open dialog box, locate the
movie or frame stack.
When a file is selected, the dialog
shows the frame size, file size, and
the number of frames. If a preview
is available, it will show a
thumbnail of the first frame.
3Click Open.
4In the Open Frame Stack dialog
box, choose the number of onion
skin layers you want to appear in
the Frame Stacks palette.
The number you choose also
determines the number of
thumbnails visible in the Frame
Stacks palette. In most cases, you’ll
want four or five layers.
5Click OK.
The Frame Stacks palette appears
and the image window displays the
first frame of the movie.
Notes
•
When you open a QuickTime or AVI
movie, Corel Painter makes a frame stack
copy of the movie. This ensures the original
won’t be changed.
•
Frame stacks are uncompressed, so you
will need an adequate amount of disk space
to create them. For example, a 1 MB
QuickTime or AVI movie can become a 20
MB frame stack.
Understanding Onion
Skinning
Traditional cartoon animators work
on an onion skin paper that allows
them to see a sequence of frames
through the transparent layers. They
then draw successive frames using the
previous frames for reference. Seeing
the several images superimposed helps
in incrementing the action evenly.
Corel Painter lets you work in two to
five layers of onion skin. You specify
the number of layers when you open a
frame stack. To change the number of
onion skin layers, you must close the
file and re-open it.
Onion skin view (Tracing Paper on). Each frame
in the frame stack represents one onion skin layer.
To use the onion skin feature:
•Choose Canvas menu > Tracing
Paper or press Command+T
(Mac OS) or press Ctrl+T
(Windows).
In the image window, the current
frame appears darkest. Each frame
moving away is progressively
fainter.
The Frame Stacks palette displays a
linear view of the onion skin layers.
Each thumbnail represents one onion
skin layer, and the thumbnail of the
current frame has a red triangle above
it.
Animation and Video428
You can change the current frame by
clicking any thumbnail in the Frame
Stacks palette. This lets you view a
frame in any position of the onion
skin sequence. For example, if you
want to display the reference frames
before the current frame, set the
current frame to the far-right position
in the palette. If you want to display
the frames before and after the current
frame, set the current frame to the
middle thumbnail in the palette.
Animating with Layers
One of the simplest ways to create
animation in Corel Painter is to move
an item from the Image Portfolio
palette across a series of frames.
This is the most basic example of
animating with layers. Adding
multiple layers allows you to make
more complex animations.
You can also group layers and move
them simultaneously, but be careful.
When you leave a frame, Corel
Painter drops the layers in that frame.
When a layer is dropped, its contents
are merged with the canvas and can
no longer be accessed separately. For
this reason, you may want to work
from the background forward; start by
animating what’s farthest from your
point of view. For more information,
refer to “Merging Layers with the
Canvas” on page 240.
You can also rotate a layer. Rotating a
layer can degrade its on-screen image
quality, but this does not affect its
printed quality.
The more you work with layers, the
more creative ways you’ll find to
animate them.
To create motion with layers:
1Choose File menu > New.
2Enable Movie and enter 1 frame.
3Open the Image Portfolio palette
by choosing Window menu >
Show Image Portfolio.
4Drag an item from the Image
Portfolio palette to the document
window.
A new layer is created.
5Position the layer to the far left of
the image window.
6Click the Step Forward button
on the Frame Stacks palette.
A new frame is added and becomes
the current frame. The layer in the
previous frame is merged with the
canvas. In the new, current frame,
the layer is active.
7On the keyboard, press the right
arrow key five times to nudge the
image toward the center of the
frame.
8Repeat steps 6 and 7 until you’ve
created a dozen frames.
9In the last frame, deselect the layer.
10 Click the Play button on the
Frame Stacks palette.
The portfolio image moves across
the screen.
Repeating Actions
You can repeat actions to create an
animated cycle. Take, for example, a
blinking eye. For this type of action,
draw the cycle once and repeat it as
many times as needed.
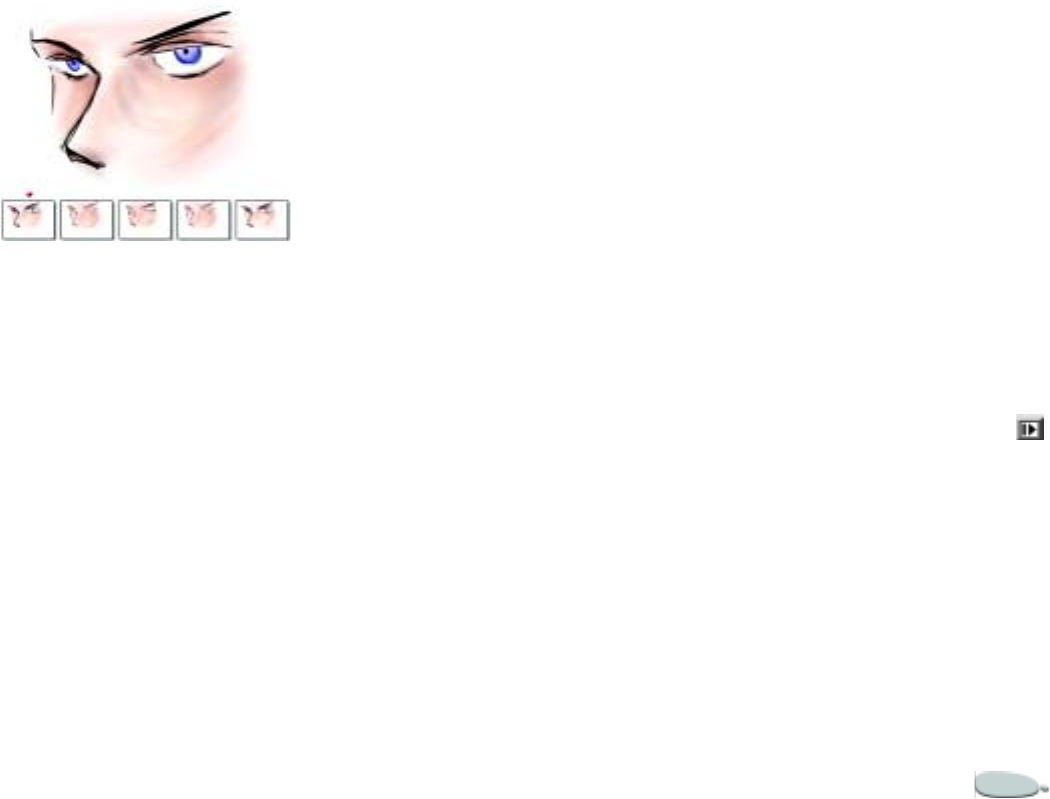
Corel Painter 429
This example shows a blinking eye as an
animated cycle. You draw the frames once, and
then repeat them.
To create a clean cycle, the beginning
and ending images must be the same.
For example, in an animation of a
blinking eye, the eye would be open at
the beginning and the end. This way,
when the end of one cycle is “hooked
up” to the beginning of the next, the
action continues smoothly.
Scrolling a background is another
example of a cycled action.
Commonly, a subject remains in one
place while the background slides by.
Modifying a Movie
Frames can be added to, or deleted
from, a movie. You can also erase the
contents of a frame while leaving the
frame in the movie. These changes
cannot be undone, so it’s best that you
create your animation in segments
and combine them when you are
finished.
Adding Frames to a Movie
You can add frames at any time to
your movie. Frames can be added at
the end or beginning of a movie or
between any frame in the stack. You
can also repeat the last frame at the
end of the stack.
To add frames to a movie:
1Choose Movie menu > Add
Frames.
A dialog prompts you to enter the
number of frames to add and
choose where to insert them.
2Click Before or After and enter a
frame number as reference.
For example, to add 6 blank frames
before frame 10, enter 6 in the Add
box, click Before, and enter 10 in
the frame number box. To add
frames before frame 1, click At start
of movie. To add frames after the
last frame, click At end of movie.
3When you’ve set the number and
selected the insertion point, click
OK.
To repeat the last frame:
1Select the last frame in the movie.
2Choose Movie menu > Clear
New Frames to disable this option.
The check mark beside the Clear
New Frames menu item is
removed.
3Click the Step Forward button
on the Frame Stacks palette.
Tip
•
You can add blank frames at the end of
a movie with Step Forward by enabling
Movie menu > Clear New Frames.

Animation and Video430
Deleting Frames from a
Movie
When you delete frames, the frames
are removed from the movie and
subsequent frames are renumbered as
necessary.
To delete frames from a movie:
1Choose Movie menu > Delete
Frames.
2In the Delete Frames dialog box,
enter the range of frames you wish
to delete.
Erasing Frame Contents
Erasing clears the image to the paper
color. The frames themselves remain
in the movie.
To erase frame contents:
1Choose Movie menu > Erase
Frames.
2In the Erase Frames dialog box,
enter the range of frames whose
contents you wish to erase.
Animation Considerations
This section provides more
information on creating animations.
These topics can give you ideas about
how to work with animation files.
Color
You might want to create a color set for
the animation. Creating a color set
helps you better control the use of
color. For example, you wouldn’t want
the colors of your characters shifting
between frames. Using a particular
color set prevents this from
happening.
Not all colors are video legal. For
information about converting colors
for use in video, refer to “Video Legal
Colors” on page 273. For more
information about using color, refer to
“Working with Color” on page 77.
You might want to set up an image of
each character with annotations to
specify which colors to use in which
areas.
Frame Rate—A Matter of
Time
Frame rate describes the number of
image frames displayed per second
(fps). The frame rate can determine
not only how big a file your animation
is, but also how smooth the motion
appears.
When you save a movie as a
QuickTime or AVI file, you can
specify the rate of display. This doesn’t
necessarily mean that what you
specify is what you’ll experience.
Factors like frame size, compression
method, and computer speed can
prevent some movies from achieving
their set rate.
If your animations are going no
farther than the computer, frame rates
of 8, 10, and 12 fps are good choices.
If you intend to create your work for
NTSC video, 15 fps is a good choice.
If you’re less concerned with quality,
you might use 10 fps.
• The frame rate of film is 24 fps.
• The frame rate of NTSC video is
30 fps (29.97 fps in broadcast

Corel Painter 431
video). This is the video standard
used in the United States.
• The frame rate of PAL video is
25 fps.
These frame rates are sufficient to
produce smooth, continuous motion
with filmed or video-recorded
subjects.
Animation drawings contain far less
detail than live-action images. The
difference in the level of detail allows
animations to be produced at frame
rates significantly below those
designed for live action. Because of the
smoothness of color fills and
continuity between images,
animations can look quite nice at rates
between 10 and 15 frames per second.
You must consider frame rates to know
how many drawings are needed to
make actions smooth, natural, and
consistent throughout the project.
The computer can display frames at
any reasonable rate. You’ll define the
rate after creating the artwork. The
Frame Stacks palette does not provide
control over frame display rates. For
more control over display rates, save
the movie as QuickTime or AVI.
You can’t display different sections of a
movie at different rates. What you can
do is create sections separately at
different rates, then modulate them to
the same rate before joining them.
This is the kind of work you’ll do in
your video-editing application.
Movies and File Size
Keep in mind that video and
animation can produce huge files.
When planning a project, be careful
you don’t over-estimate your available
disk space. To get an idea of disk
requirements, consider this example:
Each 640 by 480, 24-bit color frame is
1.2 MB. At this size, a 12 fps, 30-
second animation would consume
more than 400 MB of disk space.
To calculate the disk space
required for a frame stack:
1(Frame Width) X (Frame Height)
X (Bytes per Pixel) X (number of
frames)= Bytes required to save
the frame stack.
2Divide by 1024 to convert to
kilobytes.
Notes
•
Bytes per Pixel is determined by the
storage type. For example, 24-bit color
with an 8-bit alpha channel uses 4 bytes
per pixel. For more information about
storage types, refer to “Creating a Movie”
on page 425.
•
When you save a movie as QuickTime
or AVI, the file size can be reduced by
compression. For more information on
compression, refer to “Saving and
Exporting Movies” on page 438.
Combining Movies
You can combine movies by inserting
the contents of one movie into
another.
You can insert only a Corel Painter
movie, not a QuickTime or AVI movie
or numbered files. Convert your
movie to a Corel Painter frame stack
before trying to insert it.
The movie you insert must have the
same frame size (width and height) as
the current movie.
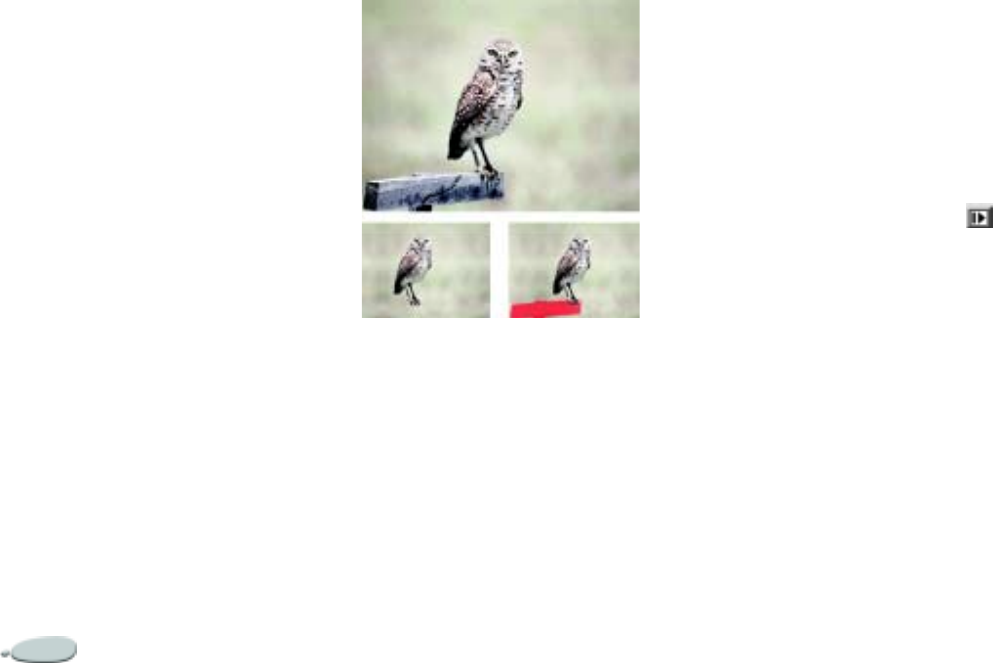
Animation and Video432
You’ll get better results if the movie
you insert is designed for the same
frame rate as the current movie.
You can insert a movie before or after a
specific frame, at the start of a movie,
or at the end of a movie.
To insert a movie:
1Choose Movie menu > Insert
Movie.
2In the Insert Movie dialog box,
choose where to insert the movie
and click OK.
3In the Select Movie dialog box,
locate the movie you want to
insert, and click Open.
Rotoscoping
Rotoscoping is the process of painting
on a movie, applying effects to a
movie, or compositing a portion of the
images from one movie with the
images of another. This is often done
to put the action of a person filmed in
one place on a background filmed in
another. You can also use rotoscoping
to remove an element from a video
clip. As an example, we made a short
movie of an owl on a roost. After
capturing the video digitally, we
imported it into Corel Painter and
removed the roost frame by frame,
using the masking tools.
At the top is a frame of a movie showing an owl
perched on a roost. The bottom left frame shows
the owl without the roost. The bottom right
frame shows the mask used to hide the roost.
Rotoscoping is also useful for adding a
background to an animation. The
process is the same whether you’re
working with digitized video or
painted animation cells.
Applying Effects to a Single
Frame
You can paint on, or apply effects to
any frame in a movie. For information
about applying effects, refer to “Basics
of Applying Effects” on page 259.
To paint on or apply an effect to a
single frame:
1Using the Frame Stacks palette, go
to the frame you want to work in.
To go to a frame, you can click on
the thumbnail of the frame or click
the Step Forward button to
advance to the frame. You can also
choose Movie menu > Go to
Frame and enter the number of the
frame to which you want to go.
2When the frame appears in the
image window, you can use any of
the Natural-Media tools to modify
the image. Anything you can do in
a single image, you can do in a
frame. Paint with a brush, add
layers, or apply an effect to a
selection or to the entire image.
Paint on the image in the image
window—not on the thumbnail in
the Frame Stacks palette.

Corel Painter 433
3When you’re ready to work on the
next frame, click the Step Forward
button.
Changing frames automatically
saves the frame. You cannot undo
changes after the frame is saved.
Applying Scripts to Movies
The Script feature in Corel Painter
lets you repeat the same actions for
each frame in a movie. For example,
you might want to apply an effect like
Glass Distortion to a video clip. You
can record a script that applies the
Glass Distortion effect to a single
image, then with a single command,
apply that script to the entire movie.
For complete information on working
with scripts, refer to “Scripting” on
page 415.
A script can contain almost any
action—a single command, a series of
commands, or the many steps in
creating an original drawing. You’ll
devise scripts based on the needs of
your project.
There is no Undo for applying a script
to a movie. You might want to work
with a copy of the movie, or you might
apply the script to a short sample
movie to test it.
To create a script for a movie:
1Become familiar with recording a
script in “Scripting” on page 415.
2Working with a separate sample
image, determine the precise set of
actions you want to record as a
script; for example, applying the
Adjust Colors or Brightness/
Contrast effect.
3When you’ve determined the
actions, start over with your
sample image. This time, record
the entire process as a script.
4Save the script and assign it a
descriptive name—you might
want to use it on a different project
sometime in the future.
To apply a script to a movie:
1Open the movie to which you want
to apply the script.
2Choose Movie menu > Apply
Script to Movie.
3A dialog appears listing the scripts
in the current library and offers
options for using them.
4Double-click the script you saved.
Corel Painter applies that script to
each frame in the stack. If you have
few, small frames in your movie,
and the script is not a complicated
one, the script can be applied
quickly. If the movie has several
large frames, a complicated script
could take a long time.
Using Scripts to Set Grain
Position
You might use a script to apply a
surface texture (paper grain) to an
entire movie. In this case, you have
several options for the position of the
grain in each frame. You can put the
grain in exactly the same position,
move the grain randomly, or move it
linearly by a set number of pixels.
For instructions on applying surface
texture and dye concentration, refer to
“Basics of Applying Effects” on
page 259. For instructions on
recording a script, refer to “Scripting”
on page 415.

Animation and Video434
To set grain position:
1Record a script that applies surface
texture or dye concentration to an
entire image.
2Choose Movie menu > Set Grain
Position. The Frame-to-Frame
Grain Position dialog appears.
3Choose one of the following
options:
Grain Stays Still—this option
allows the grain to remain in the
same position throughout the
movie.
Grain Moves Randomly—this
option moves the grain as the
movie plays.
Grain Moves Linearly—this
option increments the grain
movement. Fill in the number of
pixels you want the grain to move
horizontally and vertically from
one frame to the next.
4Click OK.
5Apply the grain script by choosing
Movie menu > Apply Script to
Movie. Each frame is textured
according to your selected method.
Tip
•
If you choose Grain Moves Randomly,
you must disable the Record Initial State
option when recording your script. For more
information, refer to “Recording Scripts”
on page 417.
Using Scripts to Apply Brush
Strokes
Corel Painter also lets you apply a
brush stroke to a movie.
Corel Painter divides the stroke into as
many segments as there are frames
and places the segments in successive
frames.
This feature is most useful when used
with the Image Hose. When you
apply a brush stroke to a movie using
the Image Hose brush, Corel Painter
deposits one or more Nozzle images
on each frame. If the Nozzle file is an
animated sequence—for example, a
person walking—Corel Painter can
drop successive images on successive
frames. Play the movie back, and the
person walks across the image
window. For this to work, you must set
up the Nozzle file appropriately and
have the right Image Hose brush size.
For more information, refer to “Using
the Image Hose” on page 334.
To apply a brush stroke script:
1Record a brush stroke.
For more information on this
feature, refer to “Recording and
Playing Back Strokes” on
page 117.
2Open a movie file.
3Choose Movie menu > Apply
Brush Stroke to Movie.
Compositing Movies
You can composite two movies
together into one—for example, you
can composite a foreground action
against a new background. To do this,
you must create a selection in each
frame of the foreground movie. For
information about selections, refer to
“Creating Selections” on page 206.
You can also create an alpha channel
for each frame and load it as a
selection as you work. For more
information, refer to “Creating
Channels” on page 220.
Corel Painter 435
When creating selections in the
foreground movie, if the background
is uniform—all white, for example—
you can take advantage of the
automatic selection and script
features. For more information, refer
to “Automatic Selecting and Scripting
for Efficiency in Compositing” on
page 436.
The drawing mode determines
whether Corel Painter draws inside or
outside of a selection, so you can
create selections that either include or
exclude the foreground image—
whichever is easiest—then set the
drawing mode accordingly. For more
information about drawing modes,
refer to “Selecting a Drawing Mode”
on page 204.
To composite one movie with
another:
1Open the foreground movie.
2In each frame, create a selection
that defines the foreground image.
Because the foreground image
continues to move, the selection in
each frame must be different.
3When each frame of the
foreground is properly protected by
a selection, rewind the movie to
frame 1.
4Open the background movie or
image.
If the background is a movie,
rewind it to frame 1.
5Do one of the following:
• Select the background movie
and choose Movie menu > Set
Movie Clone Source.
• Select the background image
and choose File menu > Clone
Source > [Image Title].
6Select the foreground movie.
7Click the Drawing Mode button in
the bottom-left corner of the
document window and choose one
of the following:
• Draw Outside—choose this
mode if you selected the por-
tion of the image that you want
to keep.
• Draw Inside—choose this
mode if you selected the por-
tion of the image that you want
to replace.
You can also invert the selection
instead of changing the drawing
mode.
8On the Brush selector bar, choose
Cloners from the Brush selector,
and choose a variant from the
Variant selector.
If you want to bring the
background across perfectly, select
the Straight Cloner variant.
9Paint in the foreground movie to
replace the background using the
clone source.
10 Click the Step Forward button
and paint the background of the
next frame.
If your clone source is a movie,
Corel Painter automatically
advances the foreground and clone
source movies by one frame. The
movies stay synchronized as you
proceed.
11 Repeat step 10 for each frame in
the movie.
Tip
•
If you want to automate the painting
process, you can record the complete
painting of one frame as a script, then
apply that script to the entire movie. Of
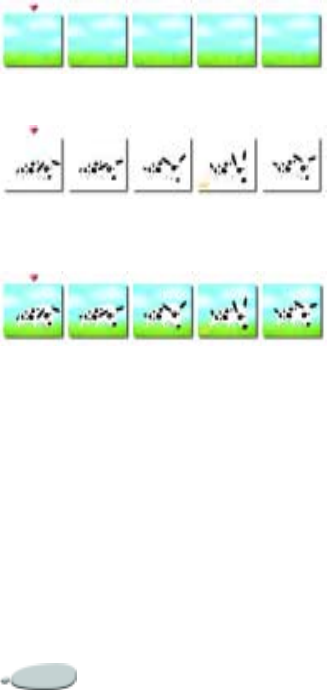
Animation and Video436
course, this assumes that the entire movie
can use the cloned background. For more
information, refer to “Applying Scripts to
Movies” on page 433.
The frame stack of the background movie
The frame stack of the foreground movie where
selections of the dog are generated
The composited movie
Automatic Selecting and
Scripting for Efficiency in
Compositing
When compositing movies, it takes a
long time to generate selections and
paint in the background for each
frame. Scripting can make this much
easier and faster. For information
about recording scripts, refer to
“Scripting” on page 415.
You can create a selection based on
image characteristics or color. You do
this once and record the process as a
script. You can then apply the script to
all frames in your movie. For
information about creating selections
based on image characteristics, refer to
“Creating an Auto Selection” on
page 208. For information about
creating selections based on color,
refer to “Selecting By Color” on
page 209.
To use Scripting and Auto Select
to create a movie:
1Work with a separate, sample
image to determine whether Auto
Select or Color Select works best
with your image.
2When you’ve determined the
settings for the best method, start
over. This time, record the Auto
Select or Color Select process as a
script. When you’ve finished
creating the selection, stop
recording. Save the script.
3Open the frame stack you wish to
create selections in.
4Choose Movie menu > Apply
Script to Movie.
5In the dialog box, select the Auto
Select or Color Select script you
saved.
Corel Painter applies the script to
each frame in the stack.
Cloning a Movie
Cloning from one movie to another is
almost like cloning from one image to
another. The only difference is that
you are cloning from one sequence of
frames to another sequence of frames.
In this case, by advancing one frame
in the clone frame stack, Corel Painter
automatically advances one frame in
the source frame stack.
When you set a movie clone source,
the current frame in the clone is
matched to the current frame in the
source. If both movies are rewound to
frame 1, the clone-to-source
correspondence is 1-1, 2-2, 3-3. This
means that the source for frame 1 in
the clone movie is frame 1 in the
source movie, and so on. If you like,

Corel Painter 437
you can create a different
correspondence by choosing other
frames before setting the movie clone
source. For example, if the current
frame of the clone movie is frame 1
and the current frame of the source
movie is frame 5, the correspondence
would be 1-5, 2-6, 3-7. This means
that the source for frame 1 in the clone
movie is frame 5 in the source movie,
and so on.
For information on cloning brushes,
refer to “Cloning Imagery” on
page 187.
You can control the areas cloned by
setting up a selection in the clone
movie. For complete information on
creating selections, refer to “Working
with Selections” on page 203.
Additionally, you can use Auto Clone
to do the cloning. You can also record
an Auto Clone script and apply the
script to the new movie with a Cloner
brush selected. For more information
about using Auto Clone, refer to “Auto
Clone” on page 301 or “Using Auto
Clone” on page 191. For information
about working with scripts, refer to
“Recording Scripts” on page 417.
To clone a movie:
1Choose File menu > Open and
open the source movie you want to
clone.
2Create a new movie with the same
dimensions and number of frames
as the source.
With these two frame stacks open,
you’re ready to clone the source
into the new movie.
3Select frame 1 of the new movie.
4With the source movie selected,
choose the first frame you want to
clone.
5Choose Movie menu > Set Movie
Clone Source.
6Select the new movie.
7Using any Cloner brush, paint on
the image window.
You will be painting the source
movie into the clone.
8When you’re finished cloning in
one frame, advance to the next
one.
Corel Painter automatically
advances the clone source to
maintain the frame-to-frame
correspondence.
Note
•
If you have a Corel Painter movie open
and you choose File menu > Clone,
Corel Painter will create a clone only of the
frame in the image window.
To apply an Auto Clone script to a
movie:
First record the Auto Clone effect on a
sample image and save the script.
1Open the frame stack you wish to
clone in.
2Choose Movie menu > Apply
Script to Movie.
3In the dialog, select a saved Auto
Clone script.
Corel Painter clones the source
movie into the destination movie.
Tracing a Movie
Have you ever wanted to animate
your own cartoon, but didn’t know
where to start? The Tracing Paper
feature in Corel Painter makes it
possible to trace the contents of a
movie into a brand-new animated
feature. This is particularly useful
with video as the source.

Animation and Video438
For best results, the source should
have the same frame rate you intend
for the animation. For more
information on frame rates, refer to
“Frame Rate—A Matter of Time” on
page 430.
To trace a movie:
1Choose File menu > Open and
open the source movie you want to
trace.
2Create a new movie with the same
dimensions and number of frames
as the source.
With these two frame stacks open,
you’re ready to trace the source
into the new movie.
3With the original movie selected
and rewound to frame 1, choose
Movie menu > Set Movie Clone
Source.
4Select the new movie and choose
Canvas menu > Tracing Paper.
The first frame of the original
movie appears ghosted in the first
frame of the new movie.
5Trace the first frame using any of
the Corel Painter tools, textures,
and effects.
6When finished, click the Step
Forward button on the Frame
Stacks palette (or press Page Up)
and trace the second frame.
7Continue frame by frame until you
have created your own animation.
Saving and Exporting
Movies
Corel Painter provides several options
for saving and exporting your finished
movies.
Some file formats (like QuickTime
and Video for Windows) have
compression options available.
Exporting a Single Image
from a Movie
To export a frame as a single
image:
1Display the frame you want to
export in the image window.
You can click on the frame
thumbnail in the Frame Stacks
palette or use the controls in the
Frames Stacks palette to display
the frame.
2Choose File menu > Save As. The
Save Movie dialog appears.
3Select Save current frame as
image.
4In the Save dialog box, choose a
location and file format, enter a
name for the file, and click Save.
Exporting Movies as
QuickTime Movies
You can export a movie as a
QuickTime movie on either the
Macintosh or Windows platform.
QuickTime supports several
compression schemes. The following
descriptions should help you choose
one; however, you’ll probably want to
experiment with different compressors
and settings to identify the best
settings for your work. You may also
have additional compression methods
available.
•Animation—this compression
method works well with areas of
continuous tone. If you set Quality
to Best and make every frame a key

Corel Painter 439
frame, this compressor is lossless.
For most Corel Painter
animations, this compressor is a
good choice.
•Cinepak®—this method produces
acceptable motion and image
quality at remarkably small file
sizes. It is the preferred format for
CD-ROM delivery and transfer
across the Internet. Cinepak can
take a long time to compress, and
it can be difficult to find the best
compression settings for certain
image types and frame rates.
•Graphics—this method is limited
to 256 colors. It compresses the file
at a greater ratio than the
Animation compressor, but does
not play as quickly.
•None—with this setting, no
compression is used, so the images
retain all of their quality. With a
large frame size, some computers
might not be fast enough to play at
a high frame rate.
•Photo-JPEG—JPEG is an
international standard for image
compression. It allows high
compression ratios while
maintaining excellent image
quality. However, it does not play
at high rates.
•Video—this method is designed
for recording and playing back
digitized video at high rates.
Because of the spatial compression
method it uses, the Video
compressor does not provide great
results for images with large areas
of continuous tone, such as those
in most animations.
The compression ratio is inversely
proportional to image quality. The
Quality slider allows you to set an
optimum level between the amount of
compression and image quality. For
most work in Corel Painter, you’ll
want Quality set to High.
Frames per second controls the speed
of display. Specify the number of
frames you want displayed per second.
Key frames are used in temporal
compression methods. Each key frame
is stored in its entirety. The next set of
frames—up to the next key—are
saved only as changes. With some
compression methods, you can specify
the frequency of key frames with the
Key Frame Every option.
With some compression methods, you
can also limit the speed of data
transmission with the Limit Data Rate
option. The data rate limit overrides
the Quality setting, if necessary, to
keep the compressed movie within the
set limit.
To export a Corel Painter movie as
a QuickTime movie:
1Choose File menu > Save As.
2In the Save Movie dialog box,
enable the Save Movie as
QuickTime option.
3In the Enter Movie Name dialog
box, choose a location, enter a
name for the file, and click Save.
4In the Compression Settings
dialog box, choose a compression
method from the pop-up menu.
5Specify the options you want.

Animation and Video440
Exporting a Movie as an AVI
Movie (Windows)
If you are using a Windows system,
you can export your movie as an AVI
movie.
AVI supports several compression
schemes. The following descriptions
should help you choose one; however,
you’ll probably want to experiment
with different compressors and
settings to identify the best settings for
your work. You may also have
additional compression methods
available.
• Cinepak produces acceptable
motion and image quality at
remarkably small file sizes. It is the
preferred format for CD-ROM
delivery and transfer across the
Internet. Cinepak takes a long
time to compress, and it can be
difficult to find the best
compression settings for certain
image types and frame rates.
• Indeo® Video R3.2 is capable of
full-motion playback on systems
with a hardware compression
accelerator.
• Microsoft Video 1 is designed for
recording and playing back
digitized video at high rates.
• Full Frames (Uncompressed) uses
no compression, so the images
retain all of their quality. With a
large frame size, some computers
might not be fast enough to play at
a high frame rate. This is the
preferred format for transferring
Corel Painter movies to
AVI-editing applications.
The compression ratio is inversely
proportional to image quality. The
Compression Quality slider allows
you to set an optimum level between
the amount of compression and image
quality.
Key frames are used in temporal
compression methods. Each key frame
is stored in its entirety. The next set of
frames—up to the next key—are
saved only as changes. With some
compression methods, you can specify
the frequency of key frames with the
Key Frame Every option.
With some compression methods, you
can also limit the speed of data
transmission with the Data Rate
option. The data rate limit overrides
the Quality setting, if necessary, to
keep the compressed movie within the
set limit.
To export a Corel Painter movie as
an AVI movie:
1Choose File menu > Save As.
2In the Save Movie dialog box,
enable the Save Movie as AVI
option, and specify the number of
frames per second.
3In the Enter Movie Name dialog
box, choose a location, enter a
name for the file, and click Save.
4In the Video Compression dialog
box, choose a compression method
from the Compressor pop-up
menu.
5Specify the options you want.
For some compression methods,
you can press Configure to specify
additional options.

Corel Painter 441
Working with Numbered Files
Corel Painter supports importing and
exporting numbered files. Numbered
files are any series of files that are the
same size and resolution, and named
following a specific style, which
includes a number at the beginning or
end of each file name. For example,
the first frame might be called
Movie01, the second frame Movie02,
and so on.
When you export a movie as
numbered files, you can import the
numbered files into an application
that may not support other movie
formats.
When exporting, you specify the
filename for the first file. You must
include zeroes so that all numbered
files have the same number of digits.
For example, if you are creating
numbered files from 1 to 24, include
“01” in the filename. If you are
creating numbered files from 89 to
110, include “089” in the filename.
Importing numbered files is an
excellent method of bringing an
animation from another 3D or
animation program into Corel
Painter.
When importing numbered files, the
file format must be supported by Corel
Painter, and the number of digits in
each filename must be the same.
When you import numbered files, you
create a new frame stack, and you are
prompted to choose a number of
onion skin layers and a storage type.
For more information, refer to
“Creating a Movie” on page425.
To export a movie as numbered
files:
1Choose File menu > Save As. The
Save Movie dialog appears.
2Select Save movie as numbered
files.
3In the Save dialog box, choose a
location and file format, enter a
name for the first file, and click
Save.
You must begin or end the
filename with a number—for
example, “01Movie” or
“Animation14.”
To import numbered files:
1Choose File menu > Open.
2In the Open dialog box, enable the
Open Numbered Files check box.
3Select the first numbered file.
4Double-click the last numbered
file. You can also select it and click
Open.
5In the Enter Movie Name dialog
box, choose a location to save the
imported movie, enter a filename,
and click Save.
6In the New Frame Stack dialog
box, choose a number of onion
skin layers and a storage type.
7Click OK. Corel Painter sequences
the images into the frames of a
new frame stack.

Animation and Video442
Animations for the World
Wide Web
Corel Painter lets you export a frame
stack as an animated GIF file. The
animated GIF format is ideal for
displaying simple animations on the
World Wide Web (WWW).
Animated GIFs are easy to create and
add to your Web pages. You give them
the same HTML tag you would any
GIF image. The only difference is that
the browser displays the file as an
animation. Animated GIFs can be
used as a link anchor or as an image
map. However, they cannot be used as
a background.
Your browser must support GIF
animations for the images to display
properly.
Refer to “The Web” on page 393 for
more information about creating
content for Web pages.
Creating Animated GIFs
If your movie is intended for the Web,
you should consider file size and
number of colors in your animation,
as these factors affect the speed of the
animation.
Create your animation in a Corel
Painter frame stack. Take advantage of
your favorite animation features and
techniques to develop the images.
As you design your animation,
consider the file size and transfer time
necessary. Your animations will be
more accessible if they're small
enough to download in a reasonable
time. You can minimize file size by
considering the following:
• Reduce the frame size. A smaller
frame leads to a smaller file. You
choose the frame size when you
create a new movie. If you import
an existing animation or video, you
cannot resize the frames.
• Limit the number of frames. Good
animations do not necessarily need
a large number of frames. Each
frame increases the file size, so if
you can get by with fewer frames,
do it.
• Limit the number of colors. Fewer
colors in the image reduces the size
of the color palette and leads to
smaller files. For best results,
choose colors from the default 256-
color set. This color set matches
the color palette of Netscape
Navigator, so the colors in your
GIF will be reproduced on the
client without dithering.
If the animation requires
transparency, you must set up a
selection for each frame. For
information about creating selections,
refer to “Creating Selections” on
page 206.
Exporting Animated GIFs
There are many options available
when saving to the GIF file format.
You can choose the number of colors
and the imaging method—Quantize
or Dither.

Corel Painter 443
If you want to gradually display
images in the Web browser as they
load, you can enable the Interlaced
option.
If you have created selections in each
frame, you can make your image
transparent and choose your
background option. You might need to
adjust the Threshold slider to
determine at what selection mask
value the image becomes transparent.
For more information on these GIF
options, refer to “Saving GIF Files” on
page 48.
You can also set animation-specific
GIF options—Frame Delay, Disposal
Method, and Looping.
The Frame Delay allows you to
specify a pause (in 100ths of a second)
between each frame. Without a delay,
the frames appear as quickly as the
system can load and display them.
The display of each image (especially
with larger frames) will vary between
computer systems, so the actual
animation display rate may be lower.
You can use the Frame Delay to
approximate a particular frame rate.
For example, you capture some one-
quarter size video at 8 frames per
second (fps). You want 8 frames to
appear in one second, so divide one
second (100 hundredths of a second)
by 8. The result is 8/100=12.5.
Discard the decimal portion and enter
12 as the frame delay. Discarding the
decimal is the only allowance for the
time required to display each image.
For a large frame size, you might want
to allow more time for display.
The Disposal Method lets you specify
what happens to an image after it has
been displayed (and its frame delay
has passed), and before the next image
is displayed. The disposal method is
significant only when using
transparency that differs between
frames.
• With Default, the client browser’s
default disposal method is used.
• With None, the image is left on-
screen and the next frame is
rendered over it.
• With Background, the region
covered by the image is restored to
the background color.
• With Previous, the region covered
by the graphic is returned to the
imagery of the previous frame.
If you want the animation to repeat,
enable the Loop option. Enter the
number of times the animation should
repeat. If you want it to repeat
indefinitely, enter 0 (zero).
To export a frame stack as an
animated GIF:
1With the frame stack open, choose
File menu > Save As.
2In the Save Movie dialog box,
choose Save Movie as GIF
Animation.
3In the Enter Movie Name dialog
box, choose a location, enter a
filename, and click Save.
4In the Save as GIF Options dialog
box, specify the options you want.
You can now use your browser to open
the file and view the animation. You
can place the animation on a Web
page with the same HTML image tag
you’d use for a simple GIF file.

Animation and Video444
In the client browser, the animation
will appear one frame at a time during
the download. In most cases, this will
be significantly slower than the
intended display rate. After all frames
have been downloaded, the browser
will loop the animation (if the loop
option is used), with the specified
delay between frames. The animation
plays from the browser’s cache so it’s
much faster.
If the animation in the browser
window stops playing, it’s probably
finished the set number of loops. In
some browsers, you can get it started
again by resizing the window. In all
browsers, you can get it started again
by reloading the page.

24
Printing
You can print Corel Painter images on
a wide variety of printers, including
PostScript, Windows Graphics Device
Interface (GDI), and Quick Draw®
printers, and high-resolution
imagesetters.
Understanding Printing
Even if your final goal is to print high-
quality color prints, it’s a good idea to
first print proofs on any printer you
have available.
You can use a black and white printer
to check page size and placement of
images on the page. If you have a color
printer, you can print proofs to get a
general impression of what your
image will look like. Keep in mind
that the proof is not an accurate
representation of a final print
produced by an offset printing process.
The print process, inks, and paper
types combined will affect the final
output.
To help you prepare for color printing
and to ensure that you get the best
results when you do print, Corel
Painter supports color management
through the Kodak® Color
Management System (KCMS).
Color management is not enabled by
default. If you want to use it while you
work or when you print, you must first
set it up for your system. Refer to
“Color Management” on page 447 for
more on KCMS in Corel Painter.
Printing Images with Vector
Shapes
Shapes can be interleaved with layers
on the Layers palette, which can affect
the way your document prints.
Shapes are inherently resolution-
independent—they're mathematical
representations of curves, not actual
pixels. When you print on a PostScript
printer, these curves are usually

Printing446
turned into PostScript paths and
printed at the full printer resolution,
although there are some exceptions.
Some effects that you can apply to
Corel Painter shapes, such as
transparency and compositing, are not
actually printable with PostScript
Level I or II. You must rasterize them
on the canvas before printing.
Any object in a lower position on the
Layers list “touched” by a rasterized
shape must also be rasterized to
preserve the effect. For example, if you
have a shape with transparency on top
of a number of other shapes, all the
shapes below it must be rasterized to
preserve the transparency all the way
down to the canvas. This is true even
if the overlap area is small.
Similarly, if you place any imagery
from a layer partially over a shape, the
shape must be rasterized to print
correctly.
If you want shapes to print at the full
resolution of your printer, make sure
they do not overlap with raster layers,
that they are not transparent, and that
their compositing method is set to
Default.
Printing Composited Images
Having many layers and shapes in a
document increases printing time.
Printing a fully composited version of
the image is much faster.
Instead of creating a composited
version by dropping all the layers in
the image, you can clone the file, and
then print the clone. Keep layers in
the saved RIF file so you can return
and make changes. For more
information about cloning
documents, see “Cloning a
Document” on page 188.
Setting Up Printing
Options for setting up your file for
printing depend on several factors—
the output device, color versus black
and white printing, and whether you
are printing separations.
Mac OS options are located in the
Page Setup dialog box.
Windows options are contained in the
Print Setup dialog box.
To access print settings:
•Choose File menu > Page Setup.
Previewing an Image
To preview an image:
•On the Info palette, click the
palette menu arrow and choose
one of the following:
•Choose Canvas Preview to
view the image as it appears on
your canvas with no relation to
the printing paper.
•Choose Page Layout Preview
to view the image as it will
appear on the currently selected
printing paper.
Image Size and Printing
If you want to print an image that is
larger than a selected page size, you
can size the image to fit the page. For
example, when this option is enabled,
a 12” x 12” image would be resized to
fit on an 8 1/2” x 11” page.

Corel Painter 447
To size an image to fit your page:
1Do one of the following:
• (Mac OS) Choose File menu
> Page Setup.
• (Windows) Choose File menu
> Print.
2Enable the Size to Fit Page check
box.
Note
•
If an image is larger than the page size
and you haven’t enabled Size to Fit Page,
your image will not print.
Printing an Image
Once you have chosen options in the
Page/Print Setup dialog box, you are
ready to print.
To print an image:
1Choose File menu > Print to
open the Print dialog box.
The top half of the dialog box
contains the standard print
commands.
2Select one of the four printing
methods that Corel Painter
supports.
•Check Color Quick Draw/GDI
Printing if your printer is not a
PostScript printer. Some com-
mon examples are the Hewlett-
Packard DeskJet, the Canon®
Bubble Jet, and the EPSON
Stylus®. You cannot print sep-
arations to non-PostScript
printers.
• Check Color PostScript if you
plan to print to a color Post-
Script device. The Minolta
QMS™ ColorScript and Tek-
tronix® color thermal printers
are examples of color PostScript
printers.
• Check Separations to print sep-
arations. The output consists of
four pages, one each for cyan,
magenta, yellow, and black. You
can print separations from
Corel Painter with any Post-
Script device, including high-
resolution imagesetters.
•Check the B & W PostScript
option if you are printing on a
black and white PostScript laser
printer.
Corel Painter places a color bar,
registration marks, and color name
on each of the four separated
plates.
3If you want to use the Color
Management System to control
printing, enable the Use Output
Preview option. For more
information, refer to “Color
Management” on page 447.
Note
•
Corel Painter uses the device’s default
screening information to produce high
quality color separations. If you save to
EPS format with Output Preview off,
Corel Painter uses the Color Studio
separation tables with your device’s
default screening. For more information
about saving to EPS format, see “Saving
in EPS file format for Printing” on
page 454.
Color Management
Corel Painter features color
management controls designed to
match colors between various devices,
such as scanners, digital cameras,
printers, and monitors.

Printing448
Understanding Color
Management
Each device has a range of colors, or
color space, that it uses. For example,
a monitor displays a different set of
colors than a printer reproduces. So
some colors may print differently than
they appear on the screen.
You can use a color management
system to translate colors from one
device to another. Color profiles
define the color space for your
monitor and for the input and output
devices you use.
Color management helps ensure color
consistency and accuracy. It improves
your output quality and saves you
time and money by helping to avoid
reprinting.
Color management is designed to help
artists create full color images for
printing, in two ways:
• It lets you view an on-screen
preview of how your image will
look when printed on a particular
printer.
• It lets you apply a device-specific
“optimization” to the color data
when printing from Corel Painter
or saving to EPS format.
Color management is not an issue for
artists creating for the World Wide
Web, CD-ROM interface, games, or
any project destined for the computer
display.
The Color Management
Dialog Box
The Color Management dialog box
looks like this.
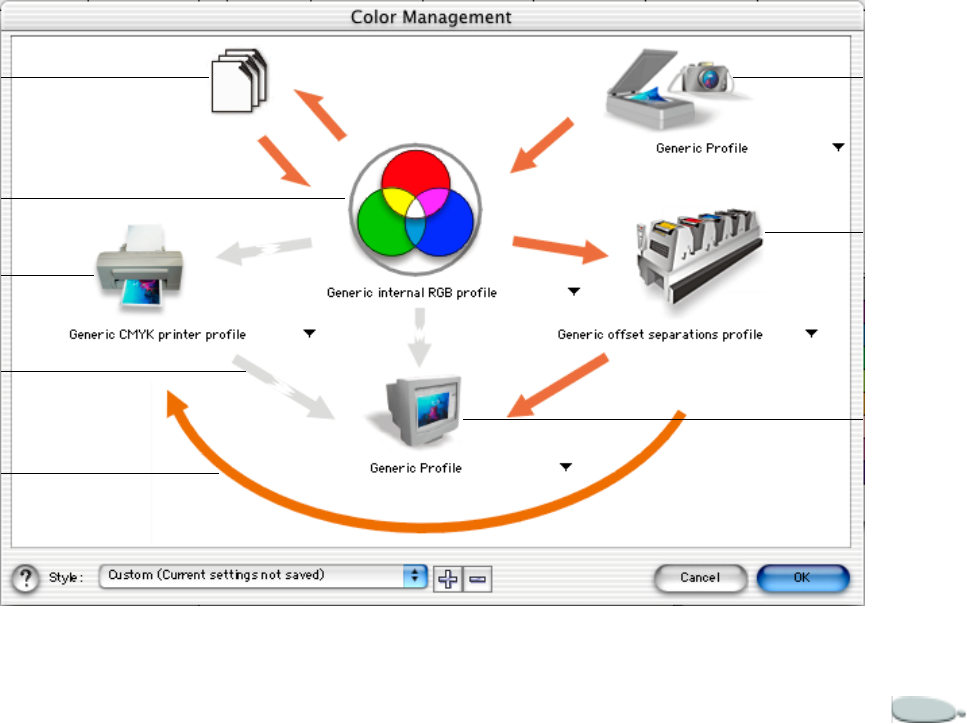
Corel Painter 449
Active
arrow
Scanner/
digital camer
a
icon
Separations
printer icon
Monitor icon
Inactive
arrow
Import/
export
icon
Internal
RGB icon
Compos-
ite printer
icon
Printing450
In the Color Management dialog box,
you can activate the following icons:
• Scanner/digital camera icon
• Separations printer icon
• Monitor icon
• Composite printer icon
• Import/export icon
• Internal RGB icon
• Arrows
With the exception of the scanner/
digital camera icon, you can click
these elements to choose color
management options. When you click
the icons, you can choose advanced
settings that relate to the devices they
represent. For example, clicking on
the composite printer icon allows you
to link color profiles with any printer
connected to your computer.
In addition, you can click the arrows
to enable or disable them. The arrows
appear orange when enabled, and
grayed and broken when disabled. You
can use the arrows to correct colors
between devices, and control how
colors are displayed.
The following table contains
descriptions of what happens when an
arrow is enabled or disabled.
Arrow Enabled Disabled
From the
scanner/digi-
tal camera to
internal
RGB
The scanner/
digital cam-
era profile is
used for
color correc-
tion.
The profile
is not used.
From inter-
nal RGB to
the monitor
Colors are
calibrated for
display using
the monitor's
color profile.
Colors are
not cali-
brated for
display.
From inter-
nal RGB to
the compos-
ite printer
The printer's
profile is
used for
color correc-
tion.
The profile
is not used.
From the
composite
printer to the
monitor
The moni-
tor simu-
lates a
composite
printer out-
put.
The moni-
tor does not
simulate a
composite
printer out-
put.
From inter-
nal RGB to
the separa-
tions printer
The separa-
tions printer
profile is
used for
color correc-
tion.
The profile
is not used.
You c an
override this
setting in
the Print
dialog box.
From the
separations
printer to the
monitor
The moni-
tor simu-
lates color
separations
printer out-
put.
The moni-
tor does not
simulate
color sepa-
rations
printer out-
put.
From the
separations
printer to the
composite
printer
The com-
posite
printer simu-
lates separa-
tions printer
output.
The com-
posite
printer does
not simu-
late separa-
tions printer
output.
From inter-
nal RGB to
import/
export
Internal
RGB pro-
files are
embedded.
ICC pro-
files are not
embedded.
Fr om
import/
export to
internal
RGB
Embedded
ICC profiles
are used.
ICC pro-
files are
ignored.
Arrow Enabled Disabled
Corel Painter 451
Working with Color Profiles
A color management system helps you
consistently achieve accurate colors
across a variety of devices. The first
stage in setting up your color
management system is to choose color
profiles for your monitor and each of
the devices you use, such as scanners,
digital cameras, and printers.
Different brands and models of
monitors, scanners, digital cameras,
and printers have different color
spaces, and thus require different
color profiles. Some widely used
profiles are installed with your
application.
Standard ICC (International Color
Consortium) color profiles are used in
your application. You can choose color
profiles for a:
•monitor
• scanner/digital camera
• composite printer
• separations printer
• internal RGB color space
You can also choose to get profiles
from disk or get profiles online. To
choose the appropriate profile for a
device, check the manufacturer's
documentation for a device.
To choose a color profile:
1Click Canvas menu > Color
Management.
2Click a profile name under one of
the following icons:
• Scanner/digital camera
• Separations printer
•Monitor
• Composite printer
•Internal RGB
3Choose a profile from the pop-up.
Obtaining Additional Color
Profiles
If you need additional profiles or
updates, you can get them from the
application CD, or you can download
them.
To copy a color profile from the
CD:
1Click Canvas menu > Color
Management.
2Below a device icon, choose Get
Profile From Disk from the color
profile pop-up menu.
3Insert the application CD.
4In the Browse For Folder dialog
box, choose the folder where the
profiles are located.
5In the Install from Disk dialog box,
choose the color profile you want
to copy.
6Click Choose.
To download a color profile:
1Click Canvas menu > Color
Management.
2Below a device icon, choose
Download Profiles from the color
profile pop-up menu.
3In the dialog box, enable the check
box for each profile you want to
download.
4Click Download.
5In the Save As dialog box, choose a
destination for the color profile.
Printing452
If you want to store the new color
profile with the existing profiles,
download it to the application's
Color folder.
Choosing Advanced Color
Management Settings
To choose a color engine and
rendering intent
1Click Canvas menu > Color
Management.
2Click the Internal RGB icon .
3In the Advanced Settings dialog
box, choose one of the following
from the Rendering Intent pop-up
menu:
• Absolute colorimetric—good
for images that use spot colors
• Automatic—default setting
• Perceptual—good for a variety
of images, especially bitmapped
images and photographic
images
• Relative colorimetric—good for
producing proofs on inkjet
printers
• Saturation—good for vector
graphics (lines, text, and solid
colored objects)
4Choose an option from the Color
Engine pop-up menu.
To use embedded color profiles
1Click Canvas menu > Color
Management.
2Click the Import/Export icon .
3In the Import area, enable one of
the following options:
• Use embedded ICC profile
•Always convert using
• Ignore embedded ICC profile
4In the Export area, enable one of
the following options:
• Embed internal ICC profile
•Always embed using
• Do not embed ICC profiles
Notes:
•
When you enable the Use Embedded
ICC Profile or Always Convert Using
import options, as well as the Always
Embed Using export option, you can
choose a profile from the pop-up.
•
When you enable the Embed Internal
RGB profile or the Always Embed Using
export options, the Adobe Photoshop
(.psd) file format is exported with an
embedded ICC profile.
To choose advanced settings for
printers
1Click Canvas menu > Color
Management.
2Click one of the following icons:
• Composite printer
• Separations printer
3Choose a setting from the pop-up
menu.
Note
•
If you choose an advanced setting, that
setting will override the profile that
displays under the printer icon in the
Color Management dialog box.
To use color management styles:
1Click Canvas menu > Color
Management.
2Choose one of the following from
the Styles pop-up menu:
• Color management off
Corel Painter 453
• Default settings
• Optimized for desktop printing
• Optimized for professional out-
put
• Optimized for the Web
Correcting Colors for Display
To correct colors for display
1Click Canvas menu > Color
Management.
2Do one of the following:
• To correct display colors, click
the arrow from the Internal
RGB icon to the Monitor
icon .
• To display simulation of a com-
posite printer output, click the
arrow from the Composite
printer icon to the Monitor
icon .
• To display simulation of a color
separations printer output,
click the arrow from the
Separations printer icon to
the Monitor icon .
• To display simulation of a sepa-
rations printer on a composite
printer, click the arrow from
the Separations printer icon
to the Composite printer
icon .
Notes:
•
Arrows appear orange when they are
enabled, and grayed and broken when
they are disabled.
•
The display simulation of a
separations printer on a composite printer
does not affect output.
Enabling or Disabling the
Color Management Style
To enable or disable the selected
color management style:
•Click the Color Correction icon
on the document window frame.
When the icon shows colors, the
color management style is applied
to the image.
When the icon shows black, the
color management style is not
applied to the image.
Note
•
Some color management settings, such
as Default, Optimized for Desktop, and
Optimized for Professional Output, can
result in on-screen colors appearing dull.
For a brighter display of on-screen colors,
choose another color management setting,
or turn off color management.
Tip
•
You can add or delete a color
management style by clicking on the plus
(+) or minus (-) buttons.
About KCMS
Corel Painter supports color
management through the Kodak
Color Management System. Kodak is
the leader in advanced color systems
and the KCMS is designed to meet the
most demanding standards in color
production work.
KCMS integrates with your system
software, where Corel Painter and
other programs can use it. Several files
must be loaded on startup to enable
KCMS for a work session. If the files
aren’t loaded, KCMS is unavailable.

Printing454
The Corel Painter Installer places the
KCMS files in the correct locations. If
you choose not to install the KCMS
files, the color management features
described in this section will be
unavailable. If you want to use KCMS
files, run the Corel Painter Installer
again and do a custom install to obtain
just the KCMS files.
If you need a profile for your output
device, you can contact the
manufacturer and ask for the ICC
profile for your specific device. You
can also contact Kodak directly.
Options for Files Saved
as Encapsulated
PostScript (EPS)
Saving in EPS file format for
Printing
EPS files in Corel Painter conform to
the Desktop Color Separation format
(EPS-DCS format). Although you
save files in EPS-DCS, you can’t open
EPS-DCS. If you plan to save an
image in EPS-DCS, it’s a good idea to
save it in another format first so you
will have a copy of it you can reopen
in Corel Painter.
When Output Preview is turned on
and you save in EPS, Corel Painter
uses the loaded ICC profiles to control
separation. If Output Preview is
turned off, Corel Painter uses the
default separation tables. For more
information, refer to “Color
Management” on page 447.
To save a file in EPS format:
1Choose File menu > Save As.
2In the Save As dialog box, choose
EPS from the Save As Type pop-
up menu, and click Save.
3In the EPS Options dialog box,
enable the Hex (ASCII) Picture
Data option to change the data
format.
This is just another way of storing
PostScript information. Some
programs require this option be
checked. The file size will be
approximately twice as large when
the file is saved with this option.
4Enable one of the following
Preview options:
•No preview
• Black and white preview
• Color preview
Notes:
•
If you have an older laser printer, you
may have to use the black and white
preview to print these files on your laser
printer. Although the preview or display is
black and white, the color information
remains intact.
•
If you are going to create on-line
documents as well as printed
documents—for example a PDF—be
sure to choose a high-quality color
preview.
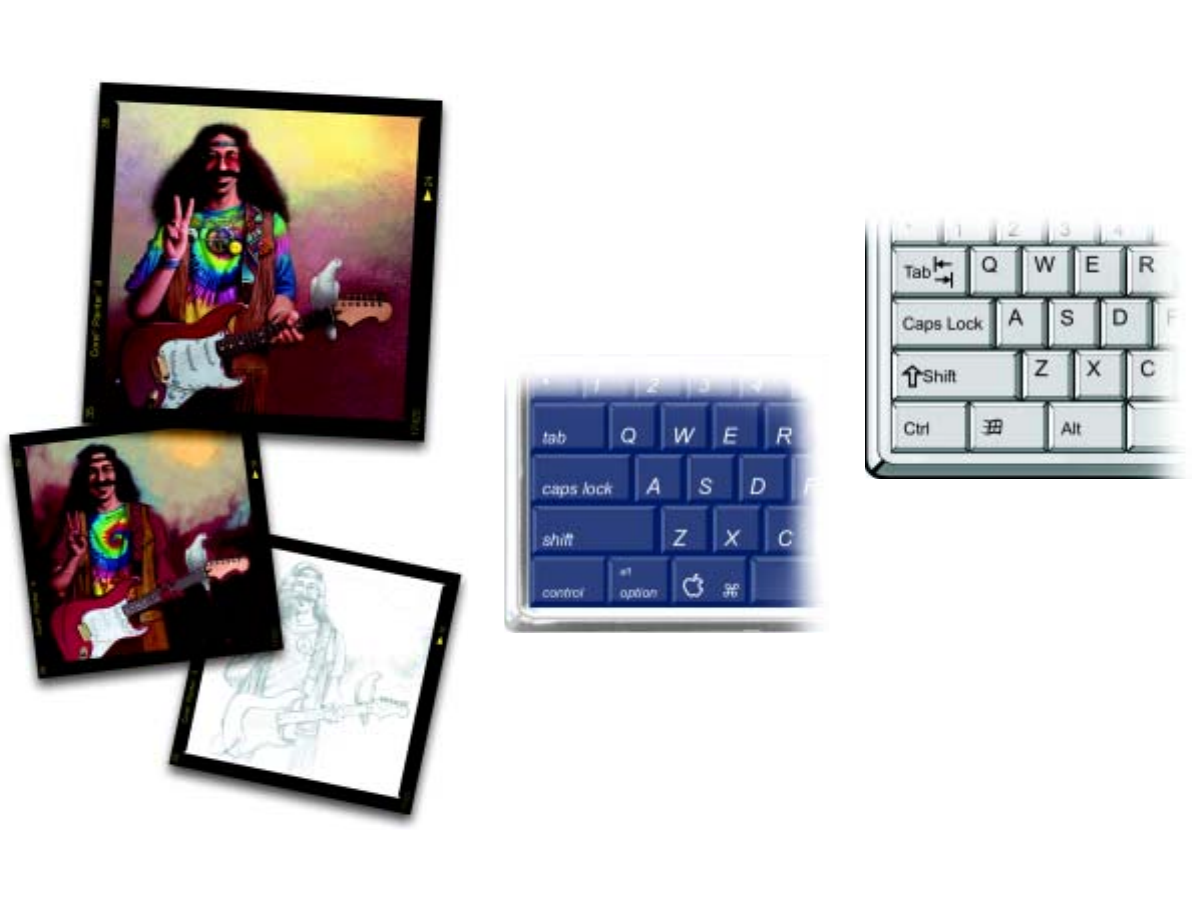
25
Keyboard Shortcuts
Many features in Corel Painter have
keyboard shortcuts. These allow the
user to access a variety of tools quickly
and easily using the keyboard, rather
than selecting them from a menu or
palette.
The four modifier keys on a Mac-compatible
keyboard are Command, Option, Shift, and the
Spacebar.
The four modifier keys on the Windows
keyboard are Ctrl, Alt, Shift, and the Spacebar.
The keyboard shortcuts rely on four
modifier keys on Mac-compatible and
Windows keyboards: Command,
Option, Shift, and the Spacebar on the
Mac OS; and Ctrl, Alt, Shift, and the
Spacebar on Windows.
Some of the same key combinations
are reused to provide different actions
depending on which tool is currently
selected. For example, holding down

Keyboard Shortcuts456
the Shift key while using the Rectangle shape tool
constrains the shape to a square; whereas holding down the
Shift key while using a Cloning brush sets the clone
destination.
Toolbox Commands
Tool Name Shortcut Key
Navigation and Utility Tools
Magnifier M
Grabber G
Rotate Page E
Perspective .
Crop C
Drawing and Painting Tools
Brush (Freehand line) B
Brush (Straight line) V
Paint Bucket K
Dropper D
Selection Tools
Rectangular Selection R
Oval Selection O
Lasso L
Magic Wand W
Adjuster Tools
Layer Adjuster F
Selection Adjuster S
Shape Selection H
Shape Design Tools
Pen P
Quick Curve Q
Text T
Shape Object Tools
Rectangular Shape I
Oval Shape J
Shape Edit Tools
Scissors Z
Add Point A
Convert Point Y
Remove Point X
Tool Name Shortcut Key

Corel Painter 457
Palette Commands File Menu Commands
Edit Menu Commands
Command Mac OS Windows
Show/Hide Colors Command + 1 Ctrl + 1
Show/Hide Mixer Command + 2 Ctrl + 2
Show/Hide Color Sets Command + 3 Ctrl + 3
Show/Hide Layers Command + 4 Ctrl + 4
Show/Hide Channels Command + 5 Ctrl + 5
Show/Hide Text Command + 6 Ctrl + 6
Show/Hide Info Command + 7 Ctrl + 7
Show/Hide Gradients Command + 8 Ctrl + 8
Show/Hide Patterns Command + 9 Ctrl + 9
Command Mac OS Windows
New Command + N Ctrl + N
Open Command + O Ctrl + O
Close Command + W Ctrl + W
Save Command + S Ctrl + S
Save As Shift + Com-
mand + S Shift + Ctrl + S
Page Setup Shift + Com-
mand + P Shift + Ctrl + P
Print Command + P Ctrl + P
Brush Creator Command + B Ctrl + B
Quit Command + Q Ctrl + Q
Command Mac OS Windows
Undo Command + Z Ctrl + Z
Redo Command + Y Ctrl + Y
Fade Command +
Shift + F Ctrl + Shift + F
Cut Command + X Ctrl + X
Copy Command + C Ctrl + C
Paste Command + V Ctrl + V

Keyboard Shortcuts458
Canvas Menu Commands
Effects Menu Commands
Select Menu Commands
Shapes Menu Commands
Command Mac OS Windows
Tracing Paper Command + T Ctrl + T
Resize Image Shift + Com-
mand + R Shift + Ctrl + R
Command Mac OS Windows
Last Effect Command + / Ctrl + /
Second to Last Effect Command +
Shift + / Ctrl + Shift + /
Fill Command + F Ctrl + F
Tonal Control
Correct Colors Shift + Com-
mand + K Shift + Ctrl + K
Equalize Command + E Ctrl + E
Negative Command + I Ctrl + I
Command Mac OS Windows
Select All Command + A Ctrl + A
Deselect Command + D Ctrl + D
Invert Shift + Com-
mand + I Shift + Ctrl + I
Reselect Shift + Com-
mand + D Shift + Ctrl + D
Hide Marquee Shift + Com-
mand + H Shift + Ctrl + H
Load Selection Shift + Com-
mand + G Shift + Ctrl + G
Command Mac OS Windows
Group Command + G Ctrl + G
Ungroup Command + U Ctrl + U
Join Endpoints Shift + J Ctrl + J
Duplicate Command + ] Ctrl + ]
Set Shape Attributes Command + [ Ctrl + [

Corel Painter 459
Window Menu Commands
Screen Navigation
Palette Navigation
Brush Tools
Command Mac OS Windows
Show/Hide Palettes Tab Tab
Zoom In Command +
Plus sign Ctrl + Plus sign
Zoom Out Command +
Minus sign Ctrl + Minus
sign
Zoom to Fit Command + 0 Ctrl + 0
Full Screen Window Command + M Ctrl + M
Command Mac OS Windows
Scroll Image with Grabber Spacebar Spacebar
Center Image Spacebar + click Spacebar + click
Zoom In Spacebar +
Command +
click
Spacebar + Ctrl
+ click
Zoom Out Spacebar +
Command +
Option + click
Spacebar + Ctrl
+ Alt + click
Rotate Image Spacebar +
Option + drag Spacebar + Alt +
drag
Constrain Rotate to 90
Degrees Shift + Option +
Spacebar + drag Spacebar + Alt +
Shift + drag
Orient Screen to Default
View Shift + Option +
click Shift + Alt +
click
Command Mac OS Windows
Scroll Contents of Palette Option + click +
drag Alt + click +
drag
Expand/Collapse All Pal-
ettes Shift + click on
Open/Close tri-
angle
Shift + click on
Open/Close tri-
angle
Command Mac OS Windows
Brush Controls
Dropper Option Alt
Layer Adjuster Command Ctrl
Resize Brush Shift + Option +
Command Shift + Alt +
Ctrl
Increase Current Brush
Size Incrementally ]]
Decrease Current Brush
Size Incrementally [[
Constrain to 45 degrees Shift Shift
Adjust Opacity in 10%
Increments 1 to 0 keys 1 to 0 keys
Unconstrained Draw Shift + 1 Shift + 1
Draw Outside Shift + 2 Shift + 2
Draw Inside Shift + 3 Shift + 3

Keyboard Shortcuts460
Selection Tools
Load Nozzle Command + L Ctrl + L
Cloning
Set Clone Source Option Alt
Set Clone Destination Option + Shift Alt + Shift
Re-link Clone Source Command +
Option + Clone Ctrl + Alt +
Clone
Colors
Correct Colors Command +
Shift + K Ctrl + Shift + K
Toggle Between Primary
and Secondary Colors Shift + X Shift + X
Gradations
Adjust Spiral Command +
Angle Adjuster Ctrl + Angle
Adjuster
Paint Bucket
Limit Fill Extent Drag Drag
Dropper Option Alt
Command Mac OS Windows
Command Mac OS Windows
Rectangle, Oval, and
Lasso Selection Tools
Constrain to Square or
Circle Shift + click Shift + click
Add to Selection Shift Shift
Subtract from Selection Option Alt
Magic Wand
Add Color to Selection Shift + click Shift + click
Add Range of Colors to
Selection Shift + drag Shift + drag
Remove Color from Selec-
tion Option + click Alt + click
Remove Range of Colors
from Selection Option + drag Alt + drag

Corel Painter 461
Adjuster Tools
Command Mac OS Windows
Layer Adjuster Command
(except when
either the Screen
Navigation or
Shape Tools are
selected)
Ctrl (except when
either the Screen
Navigation or
Shape Tools are
selected)
Selection Adjuster Command (when
Selection Tools
are selected)
Ctrl (when Selec-
tion Tools are
selected)
Shape Selection Tool Command (when
Shape Tools are
selected)
Ctrl (when Shape
Tools are
selected)
Layer Adjuster
Duplicate Option + drag Alt + drag
Delete layer Command +
Shift + D Ctrl + Shift + D
Move Layer by One Screen
Pixel Arrow keys Arrow keys
Hide/Display Marquee Command +
Shift + H Ctrl + Shift + H
Attribute Dialog Box for
Current Layer Enter Enter
Adjust Opacity in 10%
increments 1 to 0 keys 1 to 0 keys
Select All Layers Command +
Shift + Option +
A
none
Deselect Layers Command +
Shift + Option +
D
none
Select/Deselect Mode Command +
Shift Ctrl + Shift
Selection Adjuster
Reposition Click inside active
selection, and
drag
Click inside active
selection, and
drag
Duplicate Option + drag Alt + drag
Command Mac OS Windows

Keyboard Shortcuts462
Shape Tools
Shape Design Tools
Shape Objects Tools
Move Selection by One
Screen Pixel Arrow keys, on
canvas Arrow keys, on
canvas
Delete Current Selection Delete Backspace
Select/Deselect Mode Shift Shift
Free Transform
Resize Corner handles Corner handles
Resize/Preserve Aspect Shift + corner
handles Shift + corner
handles
Resize/One Dimension Side handles Side handles
Skew Command + side
handles Ctrl + side han-
dles
Rotate Command + cor-
ner handles Ctrl + corner
handles
Command Mac OS Windows
Shape Selection Tool Tog-
gle Command Ctrl
Command Mac OS Windows
Command Mac OS Windows
Pen
Add to Current Point Click last point Click last point
Quick Curve
Add to Current Endpoint Click and draw
from endpoint Click and draw
from endpoint
Command Mac OS Windows
Rectangle
Constrain to Square Shift + click Shift + click
Circle
Constrain to Circle Shift + click Shift + click

Corel Painter 463
Shape Selection Tool
Animation
Lighting
Layer Section Tools
Command Mac OS Windows
Direct Selection
Select Start Point of Shape Home Home
Select Endpoint of Shape End End
Select Previous Point in
Shape Page Up Page Up
Select Next Point in Shape Page Down Page Down
Move Path by One Screen
Pixel Arrow keys Arrow keys
Delete Selected (closed)
Shape Delete Backspace
Command Mac OS Windows
First Frame of Stack Home Home
Last Frame of Stack End End
Next Frame Page Up Page Up
Previous Frame Page Down Page Down
Stop at Current Frame Option + Stop Alt + Stop
Stop and Return to Cur-
rent Starting Frame Command Ctrl
Command Mac OS Windows
Lighting Mover Shift + Com-
mand + L Shift + Ctrl + L
Command Mac OS Windows
Group Command + G Ctrl + G
Ungroup Command + U Ctrl + U

Keyboard Shortcuts464
Mosaics
Command Mac OS Windows
Get Tile Color Option + click
tile Alt + click tile
Get Tile Shape Command +
click tile Ctrl + click tile
Delete Tile Shift + click tile Shift + click tile
Select All Tiles A A
Deselect All Tiles D D
Change Selected Tiles to
Current Color CC
Tint Selected Tiles with
Current Color TT
Vary Color of Selected
Tiles VV

Index A
Add Point Tool . . . . . . . . . . . . . . . . . . . . . . . 13
Adjust Colors effect . . . . . . . . . . . . .268, 269
Adjust Selected Colors effect . . . . .270, 271
Adobe Illustrator file format
acquiring shapes from . . . . . . . . . . . . . 371
exporting shapes to . . . . . . . . . . . . . . . . 383
Adobe Photoshop file format
saving . . . . . . . . . . . . . . . . . . . . . . . . . . . . . 49
Airbrushes . . . . . . . . . . . . . . . . . . . . . . . . . . 114
adjusting flow . . . . . . . . . . . . . . . . . . . . . 116
adjusting spread . . . . . . . . . . . . . . . . . . . 115
circular spray area . . . . . . . . . . . . . . . . . 115
droplet size . . . . . . . . . . . . . . . . . . . . . . . 117
pooling . . . . . . . . . . . . . . . . . . . . . . . . . . . 108
stylus settings . . . . . . . . . . . . . . . . . . . . . 115
varying edges . . . . . . . . . . . . . . . . . . . . . 116
Aligning
layers . . . . . . . . . . . . . . . . . . . . . . . .245, 246
Alpha channels . . . . . . . . . . . . . . . . . . . . . 219
loading selections from . . . . . . . . . . . . . 211
modifying with selections . . . . . . . . . . . 211
saving selections to . . . . . . . . . . . . . . . . 210
Anchor points
adding and deleting . . . . . . . . . . . . . . . 374
averaging . . . . . . . . . . . . . . . . . . . . . . . . . 378
converting . . . . . . . . . . . . . . . . . . . . . . . . 376
moving . . . . . . . . . . . . . . . . . . . . . . . . . . . 374
Angle
setting brush angle . . . . . . . . . . . . . . . . 161
Animated GIFs
creating . . . . . . . . . . . . . . . . . . . . . . . . . . 442
exporting . . . . . . . . . . . . . . . . . . . . . . . . . 442
Animations . . . . . . . . . . . . . . . . . . . . . . . . . 423
considerations . . . . . . . . . . . . . . . . . . . . 430
creating . . . . . . . . . . . . . . . . . . . . . . . . . . 423
creating animated GIFs . . . . . . . . . . . . 442
exporting GIF file format . . . . . . . . . . . 442
GIF file format . . . . . . . . . . . . . . . . . . . . 410
shortcuts . . . . . . . . . . . . . . . . . . . . . . . . . 463
Web . . . . . . . . . . . . . . . . . . . . . . . . . . . . . 442
Annotations . . . . . . . . . . . . . . . . . . . . . . . . . 91
creating and deleting . . . . . . . . . . . . . . . . 92
hiding and showing . . . . . . . . . . . . . . . . 93
renaming colors . . . . . . . . . . . . . . . . . . . . 93

Indexii
Apply Lighting effect . . . . . . . . . . . . . . . . 274
customizing . . . . . . . . . . . . . . . . . . . . . . 275
Apply Screen effect . . . . . . . . . . . . . . . . . 286
Apply Surface Texture effect . . . . . . . . . 277
applying lighting . . . . . . . . . . . . . . . . . . 285
embossing . . . . . . . . . . . . . . . . . . . . . . . . 282
using 3D brush strokes . . . . . . . . . . . . . 279
using a channel or layer mask . . .283, 284
using luminance . . . . . . . . . . . . . . 281, 282
using paper . . . . . . . . . . . . . . . . . . . . . . . 278
Auto Clone effect . . . . . . . . . . .191, 301, 302
Auto Van Gogh effect . . . . . . . . . . .192, 302
AVI file format
exporting . . . . . . . . . . . . . . . . . . . . . . . . . 440
opening . . . . . . . . . . . . . . . . . . . . . . . . . . 426
B
Backgrounds
controlling color . . . . . . . . . . . . . . . . . . 394
creating . . . . . . . . . . . . . . . . . . . . . . . . . . 393
tiled . . . . . . . . . . . . . . . . . . . . . . . . . . . . . 394
transparent GIFs . . . . . . . . . . . . . . . . . . 409
Bearing
adjusting for mouse . . . . . . . . . . . . . . . . 103
stylus settings . . . . . . . . . . . . . . . . . . . . . 108
Bevel World plug-in . . . . . . . . . . . . . . . . . 317
bevelling a layer or selection . . . . . . . . 319
controls . . . . . . . . . . . . . . . . . . . . . . . . . . 318
light controls . . . . . . . . . . . . . . . . . . . . . 319
Web . . . . . . . . . . . . . . . . . . . . . . . . . . . . . 397
Bézier lines . . . . . . . . . . . . . . . . . . . . . . . . . 367
Blend modes . . . . . . . . . . . . . . . . . . . . . . . 234
Blending
impasto brush strokes with layers . . . . 141
layers . . . . . . . . . . . . . . . . . . . . . . . . . . . . 248
shapes . . . . . . . . . . . . . . . . . . . . . . . . . . . 382
Blending ramps
creating . . . . . . . . . . . . . . . . . . . . . . . . . . . 96
linear . . . . . . . . . . . . . . . . . . . . . . . . . . . . . 96
Blobs effect . . . . . . . . . . . . . . . . . . . . . . . . 303
combining with marbling . . . . . . . . . . 299
Boolean operations
combining selections with . . . . . . . . . . 212
Borders
creating selections from . . . . . . . . . . . . 216
Brightness
adjusting . . . . . . . . . . . . . . . . . . . . . 265, 271
paper texture . . . . . . . . . . . . . . . . . . . . . . 64
Brightness/Contrast effect . . . . . . . . . . . 271
Brightness/Contrast plug-in . . . . . . . . . . 315
settings . . . . . . . . . . . . . . . . . . . . . . . . . . 315
Brush Creator . . . . . . . . . . . . . . . . . . . 16, 143
opening . . . . . . . . . . . . . . . . . . . . . . . . . . 144
palettes . . . . . . . . . . . . . . . . . . . . . . . . . . 146
resizing preview grid . . . . . . . . . . . . . . 145
tools . . . . . . . . . . . . . . . . . . . . . . . . . . . . . 144
Brush dabs
creating shapes for . . . . . . . . . . . . . . . . 184
Brush libraries . . . . . . . . . . . . . . . . . . . . . . . 26
creating and deleting . . . . . . . . . . . . . . . 27
importing . . . . . . . . . . . . . . . . . . . . . . . . . 27
Brush loading . . . . . . . . . . . . . . . . . . . . . . 110
Brush Looks
saving . . . . . . . . . . . . . . . . . . . . . . . . . . . 185
using saved . . . . . . . . . . . . . . . . . . . . . . . 186
Brush methods
and layer composite methods . . . . . . . 240
Brush Selector Bar . . . . . . . . . . . . . . . . . . . 15
closing . . . . . . . . . . . . . . . . . . . . . . . . . . . . 16
displaying items . . . . . . . . . . . . . . . . . . . 15
docking . . . . . . . . . . . . . . . . . . . . . . . . . . . 16
moving . . . . . . . . . . . . . . . . . . . . . . . . . . . 16
Brush strokes
360 degrees . . . . . . . . . . . . . . . . . . . . . . . 108
applying in movies . . . . . . . . . . . . . . . . 434
constraining angles . . . . . . . . . . . . . . . . 107
creating . . . . . . . . . . . . . . . . . . . . . . . . . . 106
creating texture with . . . . . . . . . . . . . . . 280
fading . . . . . . . . . . . . . . . . . . . . . . . . . . . 108
playing back . . . . . . . . . . . . . . . . . . 117, 118
recording . . . . . . . . . . . . . . . . . . . . . . . . . 117

iii Corel Painter
saving . . . . . . . . . . . . . . . . . . . . . . . . . . . . 118
selecting saved . . . . . . . . . . . . . . . . . . . . 118
undoing . . . . . . . . . . . . . . . . . . . . . . . . . . 107
using two colors . . . . . . . . . . . . . . . . . . . 109
Brush tips . . . . . . . . . . . . . . . . . . . . . . . . . . 156
airbrushes . . . . . . . . . . . . . . . . . . . . . . . . 116
choosing . . . . . . . . . . . . . . . . . . . . . . . . . 157
Brush Tool . . . . . . . . . . . . . . . . . . . . . . . . . . . 10
Brush variants
choosing . . . . . . . . . . . . . . . . . . . . . . . . . 147
copying between categories . . . . . . . . . 184
creating random variants . . . . . . . . . . . 146
creating transposed variants . . . . . . . . . 147
deleting . . . . . . . . . . . . . . . . . . . . . . . . . . 184
restoring default settings . . . . . . . . . . . 183
saving . . . . . . . . . . . . . . . . . . . . . . . . . . . . 183
Water Color . . . . . . . . . . . . . . . . . . . . . . 126
Brushes . . . . . . . . . . . . . . . . . . . . . . . . . . . . 100
categories . . . . . . . . . . . . . . . . . . . . . . . . . 100
choosing . . . . . . . . . . . . . . . . . . . . . . . . . . 15
Cloner . . . . . . . . . . . . . . . . . . . . . . .191, 197
computed . . . . . . . . . . . . 99, 102, 108, 112
creating a new category . . . . . . . . . . . . 185
custom impasto . . . . . . . . . . . . . . . . . . . 138
customizing . . . . . . . . . . . . . . . . . . . . . . 143
dab types . . . . . . . . . . . . . . . . . . . . . . . . . 148
grain . . . . . . . . . . . . . . . . . . . . . . . . . . . . . 105
Image Hose . . . . . . . . . . . . . . . . . . . . . . 336
loading . . . . . . . . . . . . . . . . . . . . . . . . . . . 110
managing . . . . . . . . . . . . . . . . . . . . . . . . 183
methods . . . . . . . . . . . . . . . . . . . . . . . . . . 152
opacity . . . . . . . . . . . . . . . . . . . . . . . . . . . 105
painting with a stylus . . . . . . . . . . . . . . 102
pooling media . . . . . . . . . . . . . . . . . . . . 108
previewing . . . . . . . . . . . . . . . . . . . . . . . . 15
selecting . . . . . . . . . . . . . . . . . . . . . . . . . . 103
settings . . . . . . . . . . . . . . . . . . . . . . . . . . . 104
sizing . . . . . . . . . . . . . . . . . . . . . . . . . . . . 104
stroke types . . . . . . . . . . . . . . . . . . . . . . . 151
subcategories . . . . . . . . . . . . . . . . . . . . . 152
Web . . . . . . . . . . . . . . . . . . . . . . . . . 412, 413
Burn plug-in . . . . . . . . . . . . . . . . . . . . . . . . 316
settings . . . . . . . . . . . . . . . . . . . . . . . . . . . 316
C
Camera Motion Blur effect . . . . . . . . . . . 294
Canvas
creating brush strokes . . . . . . . . . . . . . . 106
cropping . . . . . . . . . . . . . . . . . . . . . . . . . . 41
hiding and showing . . . . . . . . . . . . . . . 237
painting on . . . . . . . . . . . . . . . . . . . . . . . 106
resizing . . . . . . . . . . . . . . . . . . . . . . . . . . . 41
Capturing
brush dabs . . . . . . . . . . . . . . . . . . . . . . . . 184
gradients . . . . . . . . . . . . . . . . . . . . . . . . . . 97
paper textures . . . . . . . . . . . . . . . . . . . . . . 65
patterns . . . . . . . . . . . . . . . . . . . . . . . . . . . 69
Channels . . . . . . . . . . . . . . . . . . . . . . . 219, 222
applying effects to . . . . . . . . . . . . . 225, 226
clearing . . . . . . . . . . . . . . . . . . . . . . . . . . 224
copying . . . . . . . . . . . . . . . . . . . . . . 224, 257
creating . . . . . . . . . . . . . . . . . . . . . . . . . . 220
creating texture with . . . . . . . . . . . . . . . 283
deleting . . . . . . . . . . . . . . . . . . . . . . . . . . 224
duplicating . . . . . . . . . . . . . . . . . . . . . . . 224
editing . . . . . . . . . . . . . . . . . . . . . . . . . . . 225
feathering . . . . . . . . . . . . . . . . . . . . 225, 226
filling . . . . . . . . . . . . . . . . . . . . . . . . 225, 226
generating automatically . . . . . . . . . . . 220
generating based on color . . . . . . . . . . 221
generating based on luminance . . . . . 220
importing . . . . . . . . . . . . . . . . . . . . . . . . 222
inverting . . . . . . . . . . . . . . . . . . . . . . . . . 224
loading selections from . . . . . . . . . . . . 211
modifying with selections . . . . . . . . . . 211
naming . . . . . . . . . . . . . . . . . . . . . . . . . . 223
painting . . . . . . . . . . . . . . . . . . . . . . . . . . 225
saving selections to . . . . . . . . . . . . 210, 220
selecting . . . . . . . . . . . . . . . . . . . . . . . . . 222
setting display attributes . . . . . . . . . . . 223
viewing and hiding . . . . . . . . . . . . . . . . 222
viewing as colored overlays . . . . . . . . . 222
viewing in grayscale . . . . . . . . . . . . . . . 223
Clearing
Impasto layer . . . . . . . . . . . . . . . . . . . . . 136
Mixer Pad . . . . . . . . . . . . . . . . . . . . . . . . . 84
Scratch Pad . . . . . . . . . . . . . . . . . . . . . . 146

Indexiv
Clone Color . . . . . . . . . . . . . . . . . . . . . . . . 172
using . . . . . . . . . . . . . . . . . . . . . . . . . . . . . 81
Clone types
selecting . . . . . . . . . . . . . . . . . . . . . . . . . . 194
setting . . . . . . . . . . . . . . . . . . . . . . . . . . . 196
Cloning
automatically . . . . . . . . . . . . .191, 301, 302
brush loading . . . . . . . . . . . . . . . . . . . . . 198
changing clone source . . . . . . . . . . . . . 190
clone source . . . . . . . . . . . . . . . . . . . . . . . 81
Cloner brushes . . . . . . . . . . . . . . . . . . . . 191
color . . . . . . . . . . . . . . . . . . . . . . . . . . . . . . 80
constraining painting in destination . 173
documents . . . . . . . . . . . . . . . . . . . . . . . 188
fills . . . . . . . . . . . . . . . . . . . . . . . . . . 119, 121
imagery . . . . . . . . . . . . . . . . . . . . . . . . . . 187
movies . . . . . . . . . . . . . . . . . . . . . . . . . . . 436
moving source points . . . . . . . . . . . . . . 197
multi-point . . . . . . . . . . . . . . . . . . . . . . . 193
offset . . . . . . . . . . . . . . . . . . . . . . . . . . . . . 192
point-to-point between documents . . 193
point-to-point within a document . . . 192
repeating source imagery . . . . . . . . . . . 201
reproducing source selection . . . . . . . . 173
selections . . . . . . . . . . . . . . . . . . . . . . . . . 199
setting reference points . . . . . . . . . . . . . 196
tiling . . . . . . . . . . . . . . . . . . . . . . . . . 173, 201
turning brushes into Cloner brushes . 197
using Clone Color . . . . . . . . . . . . . . . . . 198
using for embossing effect . . . . . . . . . . 282
using source selection . . . . . . . . . . . . . . 200
using tracing paper . . . . . . . . . . . . . . . . 188
Van Gogh effect . . . . . . . . . . . . . . . . . . . 302
Cloning method . . . . . . . . . . . . . . . . . . . . 198
adjusting . . . . . . . . . . . . . . . . . . . . . . . . . 199
Closing documents . . . . . . . . . . . . . . . . . . 50
Color
adding swatches to a color set . . . . . . . . 85
adjusting . . . . . . . . . . . . . . . . .268, 270, 271
adjusting for video . . . . . . . . . . . . . . . . . 273
adjusting levels . . . . . . . . . . . . . . . . . . . 412
annotations . . . . . . . . . . . . . . . . . . . . . . . . 91
background . . . . . . . . . . . . . . . . . . . . . . . 394
bleed . . . . . . . . . . . . . . . . . . . . . . . . . . . . 110
changing primary and secondary . . . . . 13
choosing . . . . . . . . . . . . . . . . . . . . . . . . . . 79
cloning . . . . . . . . . . . . . . . . . . . . . . . . . . . 80
contrast and brightness . . . . . . . . . . . . 265
correcting . . . . . . . . . . . . . . . . . . . . . . . . 264
correcting for display . . . . . . . . . . . . . . 453
creating color sets . . . . . . . . . . . . . . . . . . 87
expression . . . . . . . . . . . . . . . . . . . . . . . . . 91
fills . . . . . . . . . . . . . . . . . . . . . . . . . . . . . . 118
inverting . . . . . . . . . . . . . . . . . . . . . . . . . 273
loading . . . . . . . . . . . . . . . . . . . . . . . . . . 110
mixing . . . . . . . . . . . . . . . . . . . . . . . . . . . . 84
movies . . . . . . . . . . . . . . . . . . . . . . . . . . . 430
painting with . . . . . . . . . . . . . . . . . 108, 109
penetration . . . . . . . . . . . . . . . . . . . . . . . 105
primary and secondary . . . . . . . . . . . . . . 79
reducing number . . . . . . . . .273, 286, 410
sampling from imagery . . . . . . . . . 80, 109
sampling from the Mixer Pad . . . . . . . . 84
setting color expression . . . . . . . . . . . . . 91
variability . . . . . . . . . . . . . . . . . . .89, 90, 91
Web-safe . . . . . . . . . . . . . . . . . . . . . . . . . 411
Color correction . . . . . . . . . . . . . . . . . . . . 264
contrast and brightness . . . . . . . . 265, 266
Curve method . . . . . . . . . . . . . . . . 266, 267
equalizing . . . . . . . . . . . . . . . . . . . . . . . 267
Freehand method . . . . . . . . . . . . . . . . . 267
setting black and white points . . . . . . 267
Color Expression palette . . . . . . . . . . . . . . 91
Color Info palette . . . . . . . . . . . . . . . . . . . . 89
Color management . . . . . . . . . . . . . . . . . 447
enabling or disabling styles . . . . . . . . . 453
settings . . . . . . . . . . . . . . . . . . . . . . 448, 452
using styles . . . . . . . . . . . . . . . . . . . . . . . 452
Color Overlay effect . . . . . . . . . . . . . 287, 288
Color profiles . . . . . . . . . . . . . . . . . . . . . . . 451
choosing . . . . . . . . . . . . . . . . . . . . . . . . . 451
embedded . . . . . . . . . . . . . . . . . . . . . . . . 452
obtaining . . . . . . . . . . . . . . . . . . . . . . . . 451
Color sets . . . . . . . . . . . . . . . . . . . . . . . . . . . 85
adding color swatches . . . . . . . . . . . . . . 85

v Corel Painter
adding colors . . . . . . . . . . . . . . . . . . . . . . 88
choosing colors . . . . . . . . . . . . . . . . . . . . . 85
creating . . . . . . . . . . . . . . . . . . . . . . . . . . . 87
creating from the Mixer Pad . . . . . . . . . 85
customizing layout . . . . . . . . . . . . . . . . . 86
deleting colors . . . . . . . . . . . . . . . . . . . . . 88
displaying for weaves . . . . . . . . . . . . . . . 74
editing . . . . . . . . . . . . . . . . . . . . . . . . . . . . 88
finding colors . . . . . . . . . . . . . . . . . . . . . . 86
opening . . . . . . . . . . . . . . . . . . . . . . . . . . . 85
posterizing with . . . . . . . . . . . . . . . . . . . 273
renaming colors . . . . . . . . . . . . . . . . . . . . 88
replacing colors . . . . . . . . . . . . . . . . . . . . 88
saving . . . . . . . . . . . . . . . . . . . . . . . . . . . . . 86
setting color variability . . . . . . . . . . . . . . 91
Color Variability palette . . . . . . . . . . . . . . 89
Combining
layers with the canvas . . . . . . . . . . . . . . 240
Committing
dynamic layers . . . . . . . . . . . . . . . . . . . . 315
Composite methods . . . . . . . . . . . . . . . . . 248
changing . . . . . . . . . . . . . . . . . . . . . . . . . 253
converting to blend modes . . . . . . . . . . 234
Compositing
mosaics . . . . . . . . . . . . . . . . . . . . . . . . . . 356
movies . . . . . . . . . . . . . . . . . . . . . . . . . . . 435
printing . . . . . . . . . . . . . . . . . . . . . . . . . . 446
scripting . . . . . . . . . . . . . . . . . . . . . . . . . . 436
Compound shapes
creating . . . . . . . . . . . . . . . . . . . . . . . . . . 381
releasing . . . . . . . . . . . . . . . . . . . . . . . . . 382
Computed brushes . . . . . . 99, 102, 108, 112
Constraining
fills . . . . . . . . . . . . . . . . . . . . . . . . . . 120, 121
lines . . . . . . . . . . . . . . . . . . . . . . . . . . . . . 106
Contrast
adjusting . . . . . . . . . . . . . . . . . . . . . 265, 271
paper texture . . . . . . . . . . . . . . . . . . . . . . 64
Convert Point Tool . . . . . . . . . . . . . . . . . . . 13
Copying
layers . . . . . . . . . . . . . . . . . . . . . . . . . . . . 233
Corel Support Services . . . . . . . . . . . . . . . . 5
Correct Colors effect . . . . . . . . . . . . . . . . 264
Crop Tool . . . . . . . . . . . . . . . . . . . . . . . . . . . 10
Cropping . . . . . . . . . . . . . . . . . . . . . . . . . . . . 40
canvas . . . . . . . . . . . . . . . . . . . . . . . . . . . . 41
constrain to square . . . . . . . . . . . . . . . . . 40
Curves
adjusting . . . . . . . . . . . . . . . . . . . . . . . . . 375
Custom Tile effect . . . . . . . . . . . . . . . . . . 304
Customizing
brushes . . . . . . . . . . . . . . . . . . . . . . . . . . 143
color set layout . . . . . . . . . . . . . . . . . . . . . 86
libraries . . . . . . . . . . . . . . . . . . . . . . . . . . . 25
palettes . . . . . . . . . . . . . . . . . . . . . . . . 28, 30
Cutting
segments . . . . . . . . . . . . . . . . . . . . . . . . . . 13
shape segments . . . . . . . . . . . . . . . . . . . 376
D
Dab types . . . . . . . . . . . . . . . . . . . . . . . . . . 148
choosing . . . . . . . . . . . . . . . . . . . . . . . . . 150
Depth
creating appearance of . . . . . . . . . . . . . 278
Impasto . . . . . . . . . . . . . . . . . . . . . . . . . . 136
Depth method
controlling medium interaction . . . . . 140
impasto . . . . . . . . . . . . . . . . . . . . . . . . . . 139
inverting . . . . . . . . . . . . . . . . . . . . . . . . . 140
varying input . . . . . . . . . . . . . . . . . . . . . 141
Depth of Field effect . . . . . . . . . . . . . . . . 295
Diffusion
Digital Water Color . . . . . . . . . . . . . . . 128
Water Color . . . . . . . . . . . . . . . . . . . . . . 127
Digital Water Color . . . . . . . . . . . . . . . . . 127
adjusting diffusion . . . . . . . . . . . . 128, 183
pooling . . . . . . . . . . . . . . . . . . . . . . 128, 183
Displaying
color sets for weaves . . . . . . . . . . . . . . . . 74
guides . . . . . . . . . . . . . . . . . . . . . . . . . . . . 42
rulers . . . . . . . . . . . . . . . . . . . . . . . . . . . . . 42

Indexvi
Distortion
applying to images . . . . . . . . . . . . . . . . 264
Glass Distortion effect . . . . . . . . . . . . . 296
Image Warp effect . . . . . . . . . . . . . . . . . 289
Liquid Lens plug-in . . . . . . . . . . . . . . . 322
Quick Warp effect . . . . . . . . . . . . . . . . . 290
Distress effect . . . . . . . . . . . . . . . . . . . . . . 292
Docking
Brush Selector Bar . . . . . . . . . . . . . . . . . 16
palettes . . . . . . . . . . . . . . . . . . . . . . . . . . . . 23
property bar . . . . . . . . . . . . . . . . . . . . . . . 14
toolbox . . . . . . . . . . . . . . . . . . . . . . . . . . . . 10
Documents
cloning . . . . . . . . . . . . . . . . . . . . . . . . . . . 188
closing . . . . . . . . . . . . . . . . . . . . . . . . . . . . 50
creating . . . . . . . . . . . . . . . . . . . . . . . . . . . 33
opening . . . . . . . . . . . . . . . . . . . . . . . .33, 34
repositioning . . . . . . . . . . . . . . . . . . . . . . 39
rotating . . . . . . . . . . . . . . . . . . . . . . . . . . . 39
viewing . . . . . . . . . . . . . . . . . . . . . . . . . . . 37
Dragging
between documents . . . . . . . . . . . . . . . . . 46
between programs . . . . . . . . . . . . . . . . . . 46
Drawing
freehand lines . . . . . . . . . . . . . . . . . . . . . 106
inside and outside selections . . . . . . . . 204
modes . . . . . . . . . . . . . . . . . . . . . . . . . . . 204
straight lines . . . . . . . . . . . . . . . . . . . . . . 106
styles . . . . . . . . . . . . . . . . . . . . . . . . . . . . 106
Drawing area
resizing . . . . . . . . . . . . . . . . . . . . . . . . . . . 41
Drawing method . . . . . . . . . . . . . . . . . . . 139
Drop shadows
adding . . . . . . . . . . . . . . . . . . . . . . . . . . . 243
Dropper Tool . . . . . . . . . . . . . . . . . . . . . . . . 11
accessing . . . . . . . . . . . . . . . . . . . . . . . . . . 80
sampling color . . . . . . . . . . . . . . . . . . . . . 80
Dropping
layers . . . . . . . . . . . . . . . . . . . . . . . . . . . . 240
Duplicating
layers . . . . . . . . . . . . . . . . . . . . . . . . . . . . 233
shapes . . . . . . . . . . . . . . . . . . . . . . . . . . . 380
Dye Concentration effect . . . . . . . . . . . . 288
Dynamic layers . . . . . . . . . . . . . . . . . . . . . 231
committing . . . . . . . . . . . . . . . . . . . . . . . 315
creating . . . . . . . . . . . . . . . . . . . . . . . . . . 314
managing . . . . . . . . . . . . . . . . . . . . . . . . 314
reverting . . . . . . . . . . . . . . . . . . . . . . . . . 315
settings . . . . . . . . . . . . . . . . . . . . . . . . . . 314
Dynamic plug-ins . . . . . . . . . . . . . . . . . . . 313
E
Editing
channels . . . . . . . . . . . . . . . . . . . . . . . . . 225
color sets . . . . . . . . . . . . . . . . . . . . . . . . . . 88
complex gradients . . . . . . . . . . . . . . . . . . 95
layers . . . . . . . . . . . . . . . . . . . . . . . . . . . . 240
pattern tiles . . . . . . . . . . . . . . . . . . . . . . . . 67
scripts . . . . . . . . . . . . . . . . . . . . . . . . . . . 419
shapes . . . . . . . . . . . . . . . . . . . . . . . . . . . 373
weave colors . . . . . . . . . . . . . . . . . . . . . . . 74
Effects
applying . . . . . . . . . . . . . . . . . . . . . 259, 260
applying to movie frames . . . . . . . . . . 432
blurring . . . . . . . . . . . . . . . . . .294, 297, 298
embossing . . . . . . . . . . . . . . . . . . . . . . . . 282
Esoterica . . . . . . . . . . . . . . . . . . . . . . . . . 299
fading . . . . . . . . . . . . . . . . . . . . . . . . . . . 260
Focus . . . . . . . . . . . . . . . . . . . . . . . . . . . . 294
Impasto . . . . . . . . . . . . . . . . . . . . . . . . . . 136
Orientation . . . . . . . . . . . . . . . . . . . . . . . 262
recently used commands . . . . . . . . . . . 261
settings . . . . . . . . . . . . . . . . . . . . . . . . . . 260
sources for . . . . . . . . . . . . . . . . . . . . . . . 261
Surface Control . . . . . . . . . . . . . . . 274, 286
Tonal Control . . . . . . . . . . . . . . . . 264, 268
Endpoints
joining . . . . . . . . . . . . . . . . . . . . . . . . . . . 377
EPS file format
printing . . . . . . . . . . . . . . . . . . . . . . . . . . 454
saving . . . . . . . . . . . . . . . . . . . . . . . . 49, 454
Equalize effect . . . . . . . . . . . . . . . . . . . . . 272
adjusting gamma . . . . . . . . . . . . . . . . . 272

vii Corel Painter
Equalize plug-in . . . . . . . . . . . . . . . . . . . . 319
settings . . . . . . . . . . . . . . . . . . . . . . . . . . . 320
Esoterica effects . . . . . . . . . . . . . . . . . . . . 299
Auto Clone . . . . . . . . . . . . . . . . . . .191, 301
Auto Van Gogh . . . . . . . . . . . . . . .192, 302
Blobs . . . . . . . . . . . . . . . . . . . . . . . . . . . . 303
Custom Tile . . . . . . . . . . . . . . . . . . . . . . 304
Grid Paper . . . . . . . . . . . . . . . . . . . . . . . 305
Growth . . . . . . . . . . . . . . . . . . . . . . . . . . 306
Highpass . . . . . . . . . . . . . . . . . . . . . . . . . 307
Marbling . . . . . . . . . . . . . . . . . . . . . . . . . 299
Maze . . . . . . . . . . . . . . . . . . . . . . . . . . . . 308
Place Elements . . . . . . . . . . . . . . . . . . . . 309
Pop Art Fill . . . . . . . . . . . . . . . . . . . . . . . 311
Exporting
an image from a movie . . . . . . . . . . . . . 438
AVI file format . . . . . . . . . . . . . . . . . . . . 440
image slices . . . . . . . . . . . . . . . . . . . . . . . 401
movies . . . . . . . . . . . . . . . . . . . . . . . . . . . 438
movies as numbered files . . . . . . . . . . . 441
QuickTime movies . . . . . . . . . . . . . . . . 438
rollover slices . . . . . . . . . . . . . . . . . . . . . 405
shapes . . . . . . . . . . . . . . . . . . . . . . . . . . . 383
Express Texture effect . . . . . . . . . . . . . . . 289
Expression settings . . . . . . . . . . . . . . . . . . 164
choosing . . . . . . . . . . . . . . . . . . . . . . . . . 164
choosing for a rank . . . . . . . . . . . . . . . . 175
F
Fading
effects . . . . . . . . . . . . . . . . . . . . . . . . . . . . 260
strokes . . . . . . . . . . . . . . . . . . . . . . . . . . . 108
Feathering
selections . . . . . . . . . . . . . . . . . . . . . . . . . 216
Filling . . . . . . . . . . . . . . . . . . . . . . . . . . . . . . 118
aborting . . . . . . . . . . . . . . . . . . . . . . . . . . 122
areas . . . . . . . . . . . . . . . . . . . . . . . . . . . . . 118
based on color . . . . . . . . . . . . . . . . . . . . 119
cells . . . . . . . . . . . . . . . . . . . . . . . . . 120, 121
channels . . . . . . . . . . . . . . . . . . . . . 225, 226
closing leaks . . . . . . . . . . . . . . . . . . 121, 122
constraining fills . . . . . . . . . . . . . . 120, 121
mask threshold . . . . . . . . . . . . . . . . . . . . 120
preventing leakage . . . . . . . . . . . . . . . . 121
protecting areas . . . . . . . . . . . . . . . . . . . 119
restricting area . . . . . . . . . . . . . . . . . . . . 121
techniques . . . . . . . . . . . . . . . . . . . . . . . 118
text with color . . . . . . . . . . . . . . . . . . . . 386
using clone source . . . . . . . . . . . . . 119, 121
using the Paint Bucket tool . . . . . . . . . 118
with gradients . . . . . . . . . . . .118, 119, 121
with patterns . . . . . . . . . . . . . . . . . . . . . 118
with transformed cloning . . . . . . . . . . . 201
with weaves . . . . . . . . . . . . . .118, 119, 121
Flipping
images horizontally . . . . . . . . . . . . . . . . 263
images vertically . . . . . . . . . . . . . . . . . . 263
shapes . . . . . . . . . . . . . . . . . . . . . . . . . . . 380
Floating objects . . . . . . . . . . . . . . . . . . . . 242
creating . . . . . . . . . . . . . . . . . . . . . . . . . . 243
dropping . . . . . . . . . . . . . . . . . . . . . . . . . 243
repositioning . . . . . . . . . . . . . . . . . . . . . 243
Flow
adjusting for airbrushes . . . . . . . . . . . . 116
Focus effects . . . . . . . . . . . . . . . . . . . . . . . 294
Camera Motion Blur . . . . . . . . . . . . . . 294
Depth of Field . . . . . . . . . . . . . . . . . . . . 295
Glass Distortion . . . . . . . . . . . . . . . . . . 295
Motion Blur . . . . . . . . . . . . . . . . . . . . . . 297
Sharpen . . . . . . . . . . . . . . . . . . . . . . . . . . 297
Soften and Super Soften . . . . . . . . . . . 298
Zoom Blur . . . . . . . . . . . . . . . . . . . . . . . 298
Font
changing point size . . . . . . . . . . . . . . . . 386
selecting . . . . . . . . . . . . . . . . . . . . . . . . . 386
Fractal patterns
converting to paper texture . . . . . . . . . . 69
creating . . . . . . . . . . . . . . . . . . . . . . . . . . . 71
Frame Rate . . . . . . . . . . . . . . . . . . . . . . . . . 430
Frame Stacks palette . . . . . . . . . . . . . . . . 424
Frames
adding and deleting . . . . . . . . . . . . . . . 429
erasing . . . . . . . . . . . . . . . . . . . . . . . . . . . 430
erasing contents . . . . . . . . . . . . . . . . . . . 430

Indexviii
repeating . . . . . . . . . . . . . . . . . . . . . . . . . 429
G
Gamma
adjusting . . . . . . . . . . . . . . . . . . . . . . . . . 272
GIF file format
animated . . . . . . . . . . . . . . . . . . . . . . . . . 410
creating animations . . . . . . . . . . . . . . . . 442
exporting animations . . . . . . . . . . . . . . 442
saving . . . . . . . . . . . . . . . . . . . . . . . . . . . . . 48
transparent . . . . . . . . . . . . . . . . . . . . . . . 409
Glass Distortion effect . . . . . . . . . . .295, 296
Glass Distortion plug-in . . . . . . . . . . . . . 320
settings . . . . . . . . . . . . . . . . . . . . . . . . . . . 320
Grabber Tool . . . . . . . . . . . . . . . . . . . . . . . . 10
repositioning documents . . . . . . . . . . . . 39
Gradients . . . . . . . . . . . . . . . . . . . . . . . . . . . 93
adding color control points . . . . . . . . . . 96
angle . . . . . . . . . . . . . . . . . . . . . . . . . . . . . 94
capturing . . . . . . . . . . . . . . . . . . . . . . . . . . 97
color hue . . . . . . . . . . . . . . . . . . . . . . . . . . 97
color variability . . . . . . . . . . . . . . . . . . . . 90
creating complex . . . . . . . . . . . . . . . . . . . 95
creating non-linear . . . . . . . . . . . . . . . . . 96
creating two-point . . . . . . . . . . . . . . . . . . 95
deleting control points . . . . . . . . . . . . . . 96
editing complex . . . . . . . . . . . . . . . . . . . . 95
expressing in an image . . . . . . . . . . . . . . 98
filling with . . . . . . . . . . . . . . .118, 119, 121
mapping image luminance . . . . . . . . . . 98
order . . . . . . . . . . . . . . . . . . . . . . . . . . . . . 94
painting with . . . . . . . . . . . . . . . . . . . . . 112
saving . . . . . . . . . . . . . . . . . . . . . . . . . . . . . 96
selecting . . . . . . . . . . . . . . . . . . . . . . . . . . 94
spiral tension . . . . . . . . . . . . . . . . . . . . . . 95
Grid Paper effect . . . . . . . . . . . . . . . . . . . 305
Grids . . . . . . . . . . . . . . . . . . . . . . . . . . . . . . . 44
activating . . . . . . . . . . . . . . . . . . . . . . . . . 44
setting options . . . . . . . . . . . . . . . . . . . . . 44
Snap to Grid . . . . . . . . . . . . . . . . . . . . . . . 44
Grouping
layers . . . . . . . . . . . . . . . . . . . . . . . . 238, 239
palettes . . . . . . . . . . . . . . . . . . . . . . . . . . . 22
shapes . . . . . . . . . . . . . . . . . . . . . . . . . . . 381
Grout
color . . . . . . . . . . . . . . . . . . . . . . . . . 353, 354
dimensions . . . . . . . . . . . . . . . . . . . . . . . 355
randomness . . . . . . . . . . . . . . . . . . . . . . 356
Growth effect . . . . . . . . . . . . . . . . . . . . . . 306
Guides . . . . . . . . . . . . . . . . . . . . . . . . . . . . . . 42
color . . . . . . . . . . . . . . . . . . . . . . . . . . . . . . 43
creating . . . . . . . . . . . . . . . . . . . . . . . . . . . 42
displaying and hiding . . . . . . . . . . . . . . . 42
locking and unlocking . . . . . . . . . . . . . . 43
removing . . . . . . . . . . . . . . . . . . . . . . . . . . 43
repositioning . . . . . . . . . . . . . . . . . . . . . . 43
snap to . . . . . . . . . . . . . . . . . . . . . . . . . . . . 43
Snap to Ruler Ticks . . . . . . . . . . . . . . . . 43
H
Hiding
annotations . . . . . . . . . . . . . . . . . . . . . . . 93
guides . . . . . . . . . . . . . . . . . . . . . . . . . . . . 42
rulers . . . . . . . . . . . . . . . . . . . . . . . . . . . . . 42
selections . . . . . . . . . . . . . . . . . . . . . . . . 205
Highpass effect . . . . . . . . . . . . . . . . . 307, 308
HSV values
setting . . . . . . . . . . . . . . . . . . . . . . . . . . . . 89
Hue
adjusting . . . . . . . . . . . . . . . . . . . . . . . . . 269
I
Image Hose . . . . . . . . . . . . . . . . . . . . . . . . 334
controlling . . . . . . . . . . . . . . . . . . . . . . . 336
creating nozzles . . . . . . . . . . . . . . . . . . . 340
determining grid cell size . . . . . . . . . . 344
indexing . . . . . . . . . . . . . . . . . . . . . 337, 338
nozzle libraries . . . . . . . . . . . . . . . . . . . 347
preparing images . . . . . . . . . . . . . . . . . . 341
randomizing image placement . . . . . . 337
rank types . . . . . . . . . . . . . . . . . . . . . . . . 338
ranking system . . . . . . . . . . . . . . . . . . . . 340
spacing images . . . . . . . . . . . . . . . . . . . . 336
using . . . . . . . . . . . . . . . . . . . . . . . . . . . . 334

ix Corel Painter
Image maps . . . . . . . . . . . . . . . . . . . . . . . . 406
client-side . . . . . . . . . . . . . . . . . . . . . . . . 406
default URL . . . . . . . . . . . . . . . . . . . . . . 407
server-side . . . . . . . . . . . . . . . . . . . . . . . . 408
slicing vs. mapping . . . . . . . . . . . . . . . . 398
Image Portfolio . . . . . . . . . . . . . . . . . . . . . 254
using libraries . . . . . . . . . . . . . . . . . . . . . 254
Image Slicer . . . . . . . . . . . . . . . . . . . . . . . . 397
slice layers . . . . . . . . . . . . . . . . . . . . . . . . 399
slicing vs. mapping . . . . . . . . . . . . . . . . 398
Image slicing . . . . . . . . . . . . . . . . . . . . . . . 400
deleting slice lines . . . . . . . . . . . . . . . . . 400
exporting slices . . . . . . . . . . . . . . . . . . . . 401
grouping slices . . . . . . . . . . . . . . . . . . . . 402
moving slice lines . . . . . . . . . . . . . . . . . 400
renaming slices . . . . . . . . . . . . . . . . . . . . 400
setting options . . . . . . . . . . . . . . . . . . . . 401
ungrouping slices . . . . . . . . . . . . . . . . . . 403
Image Warp effect . . . . . . . . . . . . . . . . . . 289
Images
exporting from movies . . . . . . . . . . . . . 438
flipping . . . . . . . . . . . . . . . . . . . . . . . . . . 263
previewing . . . . . . . . . . . . . . . . . . . . . . . . 446
printing . . . . . . . . . . . . . . . . . . . . . . . . . . 447
tracing . . . . . . . . . . . . . . . . . . . . . . . . . . . 189
Impasto
adding and deleting lights . . . . . . . . . . 137
adjusting depth . . . . . . . . . . . . . . . . . . . 136
blending with layers . . . . . . . . . . . . . . . 141
creating custom brushes . . . . . . . . . . . . 138
depth method . . . . . . . . . . . . . . . . . 139, 174
drawing method . . . . . . . . . . . . . . 139, 173
inverting depth method . . . . . . . . 140, 174
negative depth . . . . . . . . . . . . . . . . . . . . 174
setting light properties . . . . . . . . . . . . . 138
Impasto effect . . . . . . . . . . . . . . . . . . . . . . 136
Impasto layer . . . . . . . . . . . . . . . . . . . . . . . 135
activating and deactivating . . . . . . . . . 136
clearing . . . . . . . . . . . . . . . . . . . . . . . . . . 136
Importing
Adobe Illustrator shapes . . . . . . . . . . . . 371
brush libraries . . . . . . . . . . . . . . . . . . . . . 27
movies as numbered files . . . . . . . . . . . 441
placing files . . . . . . . . . . . . . . . . . . . . . . . . 35
Indexing
Image Hose . . . . . . . . . . . . . . . . . . . . . . 337
Info palette . . . . . . . . . . . . . . . . . . . . . . . . . 19
choosing preview style . . . . . . . . . . . . . . 19
choosing RGB display . . . . . . . . . . . . . . 19
image size information . . . . . . . . . . . . . . 41
Installing
plug-ins . . . . . . . . . . . . . . . . . . . . . . . . . . . 58
J
JPEG file format
saving . . . . . . . . . . . . . . . . . . . . . . . . . . . . . 47
K
Kaleidoscope plug-in . . . . . . . . . . . . . . . . 321
creating patterns . . . . . . . . . . . . . . . . . . 322
settings . . . . . . . . . . . . . . . . . . . . . . . . . . 321
KCMS (Kodak Color Management System)
453
Keyboard shortcuts . . . . . . . . . . . . . . . . . 455
adjuster tools . . . . . . . . . . . . . . . . . . . . . 461
animation . . . . . . . . . . . . . . . . . . . . . . . . 463
brush tools . . . . . . . . . . . . . . . . . . . . . . . 459
Canvas menu . . . . . . . . . . . . . . . . . . . . . 458
Edit menu . . . . . . . . . . . . . . . . . . . . . . . 457
Effects menu . . . . . . . . . . . . . . . . . . . . . 458
File menu . . . . . . . . . . . . . . . . . . . . . . . . 457
lighting . . . . . . . . . . . . . . . . . . . . . . . . . . 463
mosaics . . . . . . . . . . . . . . . . . . . . . . . . . . 464
navigation . . . . . . . . . . . . . . . . . . . . . . . . 459
palettes . . . . . . . . . . . . . . . . . . . . . . . . . . 457
Select menu . . . . . . . . . . . . . . . . . . . . . . 458
selection tools . . . . . . . . . . . . . . . . . . . . . 460
Shapes menu . . . . . . . . . . . . . . . . . . . . . 458
toolbox . . . . . . . . . . . . . . . . . . . . . . . . . . . 456
Window menu . . . . . . . . . . . . . . . . . . . . 459
L
Lasso Tool . . . . . . . . . . . . . . . . . . . . . . . 11, 206
Layer Adjuster Tool . . . . . . . . . . . . . . 11, 232
Layer masks . . . . . . . . . . . . . . . . . . . . . . . . 255

Indexx
applying . . . . . . . . . . . . . . . . . . . . . . . . . . 258
clearing . . . . . . . . . . . . . . . . . . . . . . . . . . 257
compared to channels . . . . . . . . . . . . . . 255
copying to channels . . . . . . . . . . . . . . . . 257
creating . . . . . . . . . . . . . . . . . . . . . . 255, 256
creating texture with . . . . . . . . . . . . . . . 283
deleting . . . . . . . . . . . . . . . . . . . . . . . . . . 257
editing . . . . . . . . . . . . . . . . . . . . . . . . . . . 258
enabling and disabling . . . . . . . . . . . . . 257
hiding . . . . . . . . . . . . . . . . . . . . . . . . . . . 256
inverting . . . . . . . . . . . . . . . . . . . . . . . . . 257
loading to selections . . . . . . . . . . . . . . . 258
managing . . . . . . . . . . . . . . . . . . . . . . . . 256
selecting . . . . . . . . . . . . . . . . . . . . . . . . . . 256
viewing . . . . . . . . . . . . . . . . . . . . . . . . . . 256
Layers . . . . . . . . . . . . . . . . . . . . . . . . . . 229, 230
adding to groups . . . . . . . . . . . . . . . . . . 239
aligning . . . . . . . . . . . . . . . . . . . . . .245, 246
and brush methods . . . . . . . . . . . . . . . . 240
annotating . . . . . . . . . . . . . . . . . . . . . . . . 253
bevelling . . . . . . . . . . . . . . . . . . . . . . . . . 319
blending . . . . . . . . . . . . . . . . . . . . . . . . . 248
changing hierarchy . . . . . . . . . . . . . . . . 238
collapsing groups . . . . . . . . . . . . . . . . . . 239
composite methods . . . . . . . . . . . . 234, 248
converting from shapes . . . . . . . . . . . . . 366
copying between documents . . . . . . . . 233
creating . . . . . . . . . . . . . . . . . . . . . . . . . . 232
creating floating objects on . . . . . . . . . 243
creating from selections . . . . . . . . . . . . 233
creating groups from . . . . . . . . . . . . . . . 239
creating patterns on . . . . . . . . . . . . . . . 244
deleting . . . . . . . . . . . . . . . . . . . . . . . . . . 235
dropping . . . . . . . . . . . . . . . . . . . . . . . . . 240
dropping floating objects . . . . . . . . . . . 243
duplicating . . . . . . . . . . . . . . . . . . . . . . . 233
dynamic layers . . . . . . . . . . . . . . . . 231, 314
editing . . . . . . . . . . . . . . . . . . . . . . . . . . . 240
floating objects . . . . . . . . . . . . . . . . . . . . 230
floating selections . . . . . . . . . . . . . . . . . 242
grouping . . . . . . . . . . . . . . . . . . . . . . . . . 238
hiding and showing . . . . . . . . . . . . . . . 237
hierarchy . . . . . . . . . . . . . . . . . . . . . . . . . 238
Image Portfolio . . . . . . . . . . . . . . . . . . . 254
Impasto . . . . . . . . . . . . . . . . . . . . . . . . . . 135
in mosaics . . . . . . . . . . . . . . . . . . . . . . . . 357
Liquid Ink layers . . . . . . . . . . . . . . 131, 231
locking and unlocking . . . . . . . . . . . . . 236
managing . . . . . . . . . . . . . . . . . . . . . . . . 235
masking . . . . . . . . . . . . . . . . . . . . . . . . . . 255
merging with the canvas . . . . . . . . . . . 240
movies . . . . . . . . . . . . . . . . . . . . . . . . . . . 428
moving . . . . . . . . . . . . . . . . . . . . . . 244, 245
naming . . . . . . . . . . . . . . . . . . . . . . . . . . 234
nudging . . . . . . . . . . . . . . . . . . . . . . . . . . 245
opacity . . . . . . . . . . . . . . . . . . . . . . . 241, 248
opening and closing groups . . . . . . . . 239
order . . . . . . . . . . . . . . . . . . . . . . . . . . . . 238
painting on . . . . . . . . . . . . . . . . . . . 106, 242
palette . . . . . . . . . . . . . . . . . . . . . . . . . . . 232
pixel-based layers . . . . . . . . . . . . . . . . . 230
preserving transparency . . . . . . . . . . . . 242
reference layers . . . . . . . . . . . . . . . 230, 246
removing from groups . . . . . . . . . . . . . 239
repositioning floating objects . . . . . . . 243
resizing . . . . . . . . . . . . . . . . . . . . . . . . . . 246
rotating . . . . . . . . . . . . . . . . . . . . . . . . . . 246
saving . . . . . . . . . . . . . . . . . . . . . . . . . . . 234
selecting . . . . . . . . . . . . . . . . . . . . . . . . . 235
settings . . . . . . . . . . . . . . . . . . . . . . . . . . 253
shapes . . . . . . . . . . . . . . . . . . . . . . . 230, 366
showing indicators . . . . . . . . . . . . . . . . 236
text . . . . . . . . . . . . . . . . . . . . . . . . . . . . . . 385
transforming . . . . . . . . . . . . . . . . . . . . . 246
transparency . . . . . . . . . . . . . . . . . . . . . . 241
types . . . . . . . . . . . . . . . . . . . . . . . . . . . . . 230
ungrouping . . . . . . . . . . . . . . . . . . . . . . 239
viewing . . . . . . . . . . . . . . . . . . . . . . . . . . 236
viewing position . . . . . . . . . . . . . . . . . . 237
Water Color layers . . . . . . . . . . . . 125, 231
Libraries . . . . . . . . . . . . . . . . . . . . . . . . . . . . 23
adding patterns . . . . . . . . . . . . . . . . . . . . 70
adding to . . . . . . . . . . . . . . . . . . . . . . . . . . 24
brushes . . . . . . . . . . . . . . . . . . . . . . . . . . 186
creating . . . . . . . . . . . . . . . . . . . . . . . . . . . 24
customizing . . . . . . . . . . . . . . . . . . . . . . . 25
deleting . . . . . . . . . . . . . . . . . . . . . . . . . . . 26
deleting items . . . . . . . . . . . . . . . . . . . . . 26
loading alternates . . . . . . . . . . . . . . . . . . 24
loading Web-compatible brushes . . . 413

xi Corel Painter
Looks . . . . . . . . . . . . . . . . . . . . . . . . . . . . 186
modifying . . . . . . . . . . . . . . . . . . . . . . . . . 26
moving items between . . . . . . . . . . . . . . 25
nozzle . . . . . . . . . . . . . . . . . . . . . . . . . . . 347
renaming items . . . . . . . . . . . . . . . . . . . . 26
setting default . . . . . . . . . . . . . . . . . . . . . . 51
Lighting
adding and deleting sources . . . . . . . . 275
adjusting for textures . . . . . . . . . . .285, 286
applying . . . . . . . . . . . . . . . . . . . . . . . . . . 274
applying to textures . . . . . . . . . . . . . . . . 285
color . . . . . . . . . . . . . . . . . . . . . . . . . . . . . 276
creating libraries . . . . . . . . . . . . . . . . . . 276
customizing . . . . . . . . . . . . . . . . . . . . . . 275
positioning sources . . . . . . . . . . . . . . . . 275
saving effects . . . . . . . . . . . . . . . . . . . . . . 276
setting properties . . . . . . . . . . . . . . . . . . 275
shortcuts . . . . . . . . . . . . . . . . . . . . . . . . . 463
Lights
adding and deleting . . . . . . . . . . . . . . . . 137
angle . . . . . . . . . . . . . . . . . . . . . . . . . . . . . 138
color . . . . . . . . . . . . . . . . . . . . . . . . . . . . . 138
position . . . . . . . . . . . . . . . . . . . . . . . . . . 137
viewing . . . . . . . . . . . . . . . . . . . . . . . . . . 138
Lines
drawing . . . . . . . . . . . . . . . . . . . . . . . . . . 106
Liquid Ink
brush size . . . . . . . . . . . . . . . . . . . . . . . . 132
controls . . . . . . . . . . . . . . . . . . . . . . . . . . 132
ink type . . . . . . . . . . . . . . . . . . . . . .179, 180
lighting effect . . . . . . . . . . . . . . . . . . . . . 132
Liquid Ink layers . . . . . . . . . . . . . . . . . . . . 131
creating . . . . . . . . . . . . . . . . . . . . . . . . . . 131
settings . . . . . . . . . . . . . . . . . . . . . . . . . . . 131
Liquid Lens plug-in . . . . . . . . . . . . . . . . . . 322
controls . . . . . . . . . . . . . . . . . . . . . . . . . . 323
distortion . . . . . . . . . . . . . . . . . . . . . . . . . 322
erasing distortion . . . . . . . . . . . . . . . . . . 325
Rain . . . . . . . . . . . . . . . . . . . . . . . . . . . . . 325
settings . . . . . . . . . . . . . . . . . . . . . . . . . . . 324
tools . . . . . . . . . . . . . . . . . . . . . . . . . . . . . 322
Liquid Metal plug-in . . . . . . . . . . . . . . . . 326
adjusting brush or rain size . . . . . . . . . 329
controls . . . . . . . . . . . . . . . . . . . . . . . . . . 327
creating negative metal . . . . . . . . . . . . . 329
moving metal . . . . . . . . . . . . . . . . . . . . . 331
Rain . . . . . . . . . . . . . . . . . . . . . . . . . . . . . 329
reflection maps . . . . . . . . . . . . . . . . . . . . 329
removing metal . . . . . . . . . . . . . . . . . . . 331
selecting droplets . . . . . . . . . . . . . . . . . . 330
settings . . . . . . . . . . . . . . . . . . . . . . . . . . . 329
showing display handles . . . . . . . . . . . 330
tools . . . . . . . . . . . . . . . . . . . . . . . . . . . . . 326
working with metal . . . . . . . . . . . . . . . . 330
Loading
Mixer Pad . . . . . . . . . . . . . . . . . . . . . . . . . 84
Mixer palette colors . . . . . . . . . . . . . . . . . 84
nozzle files . . . . . . . . . . . . . . . . . . . . . . . 343
Locking
layers . . . . . . . . . . . . . . . . . . . . . . . . . . . . 236
Looks
saving . . . . . . . . . . . . . . . . . . . . . . . . . . . . 62
Luminance
mapping gradients . . . . . . . . . . . . . . . . . 98
M
Magic Wand Tool . . . . . . . . . . . . . . . . 11, 207
anti-aliasing . . . . . . . . . . . . . . . . . . . . . . 207
Magnifier Tool
accessing . . . . . . . . . . . . . . . . . . . . . . . . . . 38
zooming . . . . . . . . . . . . . . . . . . . . . . . . . . 38
Managing brushes . . . . . . . . . . . . . . . . . . 183
Marbling effect . . . . . . . . . . . . . . . . . . . . . 299
creating recipes . . . . . . . . . . . . . . . . . . . 299
saving recipes . . . . . . . . . . . . . . . . . . . . . 301
Maze effect . . . . . . . . . . . . . . . . . . . . . . . . 308
Menus . . . . . . . . . . . . . . . . . . . . . . . . . . . . . . . 7
Merging
layers . . . . . . . . . . . . . . . . . . . . . . . . . . . . 248
layers with the canvas . . . . . . . . . . . . . . 240
Methods . . . . . . . . . . . . . . . . . . . . . . . . . . . 152
choosing . . . . . . . . . . . . . . . . . . . . . . . . . 154
Mixer Pad
changing background . . . . . . . . . . . . . . . 82

Indexxii
clearing . . . . . . . . . . . . . . . . . . . . . . . . . . . 84
creating color sets . . . . . . . . . . . . . . . . . . 85
loading . . . . . . . . . . . . . . . . . . . . . . . . . . . . 84
saving . . . . . . . . . . . . . . . . . . . . . . . . . . . . . 84
Mixer palette . . . . . . . . . . . . . . . . . . . . . . . . 82
tools . . . . . . . . . . . . . . . . . . . . . . . . . . . . . . 82
Mixer palette colors . . . . . . . . . . . . . . . . . . 83
changing . . . . . . . . . . . . . . . . . . . . . . . . . . 83
loading . . . . . . . . . . . . . . . . . . . . . . . . . . . . 84
resetting . . . . . . . . . . . . . . . . . . . . . . . . . . . 84
saving . . . . . . . . . . . . . . . . . . . . . . . . . . . . . 83
Mosaics
applying tiles . . . . . . . . . . . . . . . . . . . . . 352
commands . . . . . . . . . . . . . . . . . . . . . . . 357
compositing . . . . . . . . . . . . . . . . . . . . . . 356
creating . . . . . . . . . . . . . . . . . . . . . . . . . . 351
creating in a selection . . . . . . . . . . . . . . 359
filling selections . . . . . . . . . . . . . . . . . . . 359
filling v-shaped spaces . . . . . . . . . . . . . 358
grout color . . . . . . . . . . . . . . . . . . . . . . . . 353
layering . . . . . . . . . . . . . . . . . . . . . . . . . . 357
removing tiles . . . . . . . . . . . . . . . . . . . . . 352
render tiles into mask . . . . . . . . . . . . . . 358
re-rendering . . . . . . . . . . . . . . . . . . . . . . 357
resetting . . . . . . . . . . . . . . . . . . . . . . . . . . 357
respecting image edge . . . . . . . . . . . . . . 359
saving in RIFF file format . . . . . . . . . . 351
shortcuts . . . . . . . . . . . . . . . . . . . . . . . . . 464
stroke selection . . . . . . . . . . . . . . . . . . . . 359
tile color . . . . . . . . . . . . . . . . . . . . . . . . . 352
tile dimensions . . . . . . . . . . . . . . . . . . . . 354
using multiple documents . . . . . . . . . . 356
working with . . . . . . . . . . . . . . . . . . . . . 356
Motion Blur effect . . . . . . . . . . . . . . . . . . 297
Mouse . . . . . . . . . . . . . . . . . . . . . . . . . . . . . 102
simulating a stylus . . . . . . . . . . . . 102, 103
Movers . . . . . . . . . . . . . . . . . . . . . . . . . . . . . 23
Movies . . . . . . . . . . . . . . . . . . . . . . . . . . . . . 420
adding frames . . . . . . . . . . . . . . . . . . . . 429
applying brush strokes . . . . . . . . . . . . . 434
applying effects to a frame . . . . . . . . . . 432
applying scripts . . . . . . . . . . . . . . . . . . . 433
cloning . . . . . . . . . . . . . . . . . . . . . . . . . . 436
color . . . . . . . . . . . . . . . . . . . . . . . . . . . . . 430
combining . . . . . . . . . . . . . . . . . . . . . . . . 431
compositing . . . . . . . . . . . . . . . . . . . . . . 435
creating . . . . . . . . . . . . . . . . . . . . . . . . . . 425
creating from a nozzle . . . . . . . . . . . . . 347
creating from scripts . . . . . . . . . . . . . . . 420
creating motion . . . . . . . . . . . . . . . . . . . 428
creating scripts . . . . . . . . . . . . . . . . . . . . 433
deleting frames . . . . . . . . . . . . . . . . . . . 430
exporting . . . . . . . . . . . . . . . . . . . . . . . . . 438
exporting a single image . . . . . . . . . . . 438
exporting as numbered files . . . . . . . . 441
file size . . . . . . . . . . . . . . . . . . . . . . . . . . 431
frame rate . . . . . . . . . . . . . . . . . . . . . . . . 430
importing numbered files . . . . . . . . . . 441
inserting . . . . . . . . . . . . . . . . . . . . . . . . . 432
modifying . . . . . . . . . . . . . . . . . . . . . . . . 429
navigating . . . . . . . . . . . . . . . . . . . . . . . . 425
onion skinning . . . . . . . . . . . . . . . . . . . 427
opening . . . . . . . . . . . . . . . . . . . . . . . . . . 426
repeated actions . . . . . . . . . . . . . . . . . . . 428
rotoscoping . . . . . . . . . . . . . . . . . . . . . . . 432
saving . . . . . . . . . . . . . . . . . . . . . . . . . . . 438
scripting for compositing . . . . . . . . . . . 436
tracing . . . . . . . . . . . . . . . . . . . . . . . . . . . 437
Multi-Point cloning . . . . . . . . . . . . . . . . . 193
N
Negative effect . . . . . . . . . . . . . . . . . . . . . 273
Nozzles
color . . . . . . . . . . . . . . . . . . . . . . . . . . . . . 335
creating . . . . . . . . . . . . . . . . . . . . . . . . . . 340
creating 3-rank . . . . . . . . . . . . . . . . . . . 346
creating from a group of layers . . . . . . 342
creating from a movie . . . . . . . . . . . . . 347
creating on a grid . . . . . . . . . . . . . . . . . 343
libraries . . . . . . . . . . . . . . . . . . . . . . . . . . 347
loading . . . . . . . . . . . . . . . . . . . . . . . . . . 343
opacity . . . . . . . . . . . . . . . . . . . . . . . . . . . 335
ranking system . . . . . . . . . . . . . . . . . . . . 340
scale . . . . . . . . . . . . . . . . . . . . . . . . . . . . . 337
selecting . . . . . . . . . . . . . . . . . . . . . . . . . 335
Numbered files . . . . . . . . . . . . . . . . . . . . . 441
exporting . . . . . . . . . . . . . . . . . . . . . . . . . 441

xiii Corel Painter
importing . . . . . . . . . . . . . . . . . . . . . . . . 441
O
Offset cloning . . . . . . . . . . . . . . . . . . . . . . 192
Onion skinning . . . . . . . . . . . . . . . . . . . . . 427
Opacity . . . . . . . . . . . . . . . . . . . . . . . . . . . . 155
brushes . . . . . . . . . . . . . . . . . . . . . . . . . . . 105
drop shadows . . . . . . . . . . . . . . . . . . . . . 244
layers . . . . . . . . . . . . . . . . . . . . . . . .241, 248
reducing . . . . . . . . . . . . . . . . . . . . . . . . . 108
setting . . . . . . . . . . . . . . . . . . . . . . . . . . . 155
text . . . . . . . . . . . . . . . . . . . . . . . . . . . . . . 388
Opening
Brush Creator . . . . . . . . . . . . . . . . . . . . . 144
color sets . . . . . . . . . . . . . . . . . . . . . . . . . . 85
documents . . . . . . . . . . . . . . . . . . . . . .33, 34
Orientation effects . . . . . . . . . . . . . . . . . . 262
Distort . . . . . . . . . . . . . . . . . . . . . . . . . . . 264
flipping . . . . . . . . . . . . . . . . . . . . . . . . . . 263
Rotate . . . . . . . . . . . . . . . . . . . . . . . . . . . . 262
Scale . . . . . . . . . . . . . . . . . . . . . . . . . . . . . 262
Oval Selection Tool . . . . . . . . . . . . . . . . . . . 11
Oval Shape Tool . . . . . . . . . . . . . . . . . . . . . 12
P
Page setup . . . . . . . . . . . . . . . . . . . . . . . . . 446
image size . . . . . . . . . . . . . . . . . . . . . . . . 447
Paint Bucket Tool . . . . . . . . . . . . . . . . 11, 119
mask threshold . . . . . . . . . . . . . . . . . . . . 120
Painting . . . . . . . . . . . . . . . . . . . . . . . . . 99, 106
360-degree brush strokes . . . . . . . . . . . 108
constraining angles . . . . . . . . . . . . . . . . 107
in a clone . . . . . . . . . . . . . . . . . . . . . . . . . 190
on layers . . . . . . . . . . . . . . . . . . . . . 106, 242
on the canvas . . . . . . . . . . . . . . . . . . . . . 106
playing recordings . . . . . . . . . . . . . . . . . 118
troubleshooting . . . . . . . . . . . . . . . . . . . 111
two-color strokes . . . . . . . . . . . . . . . . . . 109
with a tablet and pen . . . . . . . . . . . . . . . 59
with airbrushes . . . . . . . . . . . . . . . . . . . 114
with Cloner brushes . . . . . . . . . . . . . . . 191
with color . . . . . . . . . . . . . . . . . . . . . . . . 108
with gradients . . . . . . . . . . . . . . . . . . . . 112
with multiple colors . . . . . . . . . . . . . . . 110
with pattern opacity . . . . . . . . . . . . . . . 114
with patterns . . . . . . . . . . . . . .67, 112, 113
with two colors . . . . . . . . . . . . . . . . . . . . . 81
Palette menus . . . . . . . . . . . . . . . . . . . . . . . 21
Palettes . . . . . . . . . . . . . . . . . . . . . . . . . . . . . 17
adding items to custom . . . . . . . . . . . . . 29
arranging . . . . . . . . . . . . . . . . . . . . . . . . . . 21
arranging custom . . . . . . . . . . . . . . . . 30, 31
Channels . . . . . . . . . . . . . . . . . . . . . . . . . . 18
collapsing . . . . . . . . . . . . . . . . . . . . . . . . . 20
Color Expression . . . . . . . . . . . . . . . . 17, 91
Color Info . . . . . . . . . . . . . . . . . . . . . . 17, 89
Color Sets . . . . . . . . . . . . . . . . . . . . . . . . . 17
Color Variability . . . . . . . . . . . . . . . . 17, 89
Colors . . . . . . . . . . . . . . . . . . . . . . . . . . . . 17
customizing . . . . . . . . . . . . . . . . .28, 29, 30
deleting custom . . . . . . . . . . . . . . . . . . . . 31
deleting layout . . . . . . . . . . . . . . . . . . . . . 22
displaying from selectors . . . . . . . . . . . . 14
docking . . . . . . . . . . . . . . . . . . . . . . . . . . . 23
expanding . . . . . . . . . . . . . . . . . . . . . . . . . 20
Frame Stacks . . . . . . . . . . . . . . . . . . . . . 424
Gradients . . . . . . . . . . . . . . . . . . . . . . . . . 18
grouping . . . . . . . . . . . . . . . . . . . . . . . . . . 22
hiding . . . . . . . . . . . . . . . . . . . . . . . . . . . . 17
Image Portfolio . . . . . . . . . . . . . . . . . . . . 19
in the Brush Creator . . . . . . . . . . . . . . . 146
Info . . . . . . . . . . . . . . . . . . . . . . . . . . . . . . 19
Layers . . . . . . . . . . . . . . . . . . . . . . . . . . . . 18
layout . . . . . . . . . . . . . . . . . . . . . . . . . . 21, 31
layout for custom . . . . . . . . . . . . . . . . . . . 29
loading custom . . . . . . . . . . . . . . . . . . . . 31
Mixer . . . . . . . . . . . . . . . . . . . . . . . . . . 17, 82
navigating . . . . . . . . . . . . . . . . . . . . . . . . . 20
Papers . . . . . . . . . . . . . . . . . . . . . . . . . . . . 18
Patterns . . . . . . . . . . . . . . . . . . . . . . . . . . . 18
renaming custom . . . . . . . . . . . . . . . . . . 31
repositioning . . . . . . . . . . . . . . . . . . . . . . 22
resizing . . . . . . . . . . . . . . . . . . . . . . . . . . . 22
saving custom . . . . . . . . . . . . . . . . . . . . . 31
saving layout . . . . . . . . . . . . . . . . . . . . . . 21
Scripts . . . . . . . . . . . . . . . . . . . . . . . . 18, 416

Indexxiv
scrolling . . . . . . . . . . . . . . . . . . . . . . . . . . . 20
Selection Portfolio . . . . . . . . . . . . . . . . . . 19
shortcuts . . . . . . . . . . . . . . . . . . . . . . . . . 457
showing . . . . . . . . . . . . . . . . . . . . . . . . . . . 17
showing custom . . . . . . . . . . . . . . . . . . . . 30
Text . . . . . . . . . . . . . . . . . . . . . . . . . . . . . . 18
Tool Tips for custom . . . . . . . . . . . . . . . 28
Tracker . . . . . . . . . . . . . . . . . . . . . . . . . . . 19
Weaves . . . . . . . . . . . . . . . . . . . . . . . . . . . . 18
Paper color
changing . . . . . . . . . . . . . . . . . . . . . . . . . . 77
Paper grain
adjusting . . . . . . . . . . . . . . . . . . . . . . . . . . 62
randomizing . . . . . . . . . . . . . . . . . . . . . . . 64
scripts . . . . . . . . . . . . . . . . . . . . . . . . . . . . 433
setting in movies . . . . . . . . . . . . . . . . . . 433
Paper texture . . . . . . . . . . . . . . . . . . . . . . . . 61
adjusting brightness . . . . . . . . . . . . . . . . 64
adjusting contrast . . . . . . . . . . . . . . . . . . 64
applying . . . . . . . . . . . . . . . . . . . . . . 277, 278
capturing . . . . . . . . . . . . . . . . . . . . . . . . . . 65
choosing . . . . . . . . . . . . . . . . . . . . . . . . . . 63
creating . . . . . . . . . . . . . . . . . . . . . . . . . . . 65
from a fractal pattern . . . . . . . . . . . . . . . 69
inverting . . . . . . . . . . . . . . . . . . . . . . . . . . 63
revealing when painting . . . . . . . . . . . . 105
scaling . . . . . . . . . . . . . . . . . . . . . . . . . . . . 63
Water Color . . . . . . . . . . . . . . . . . . . . . . 127
Paths
adding to shapes . . . . . . . . . . . . . . . . . . 370
Pattern tiles
creating seamless tiles . . . . . . . . . . . . . . . 68
editing . . . . . . . . . . . . . . . . . . . . . . . . . . . . 67
filling with . . . . . . . . . . . . . . . . . . . . . . . . 67
Patterns . . . . . . . . . . . . . . . . . . . . . . . . . . . . . 66
add to library . . . . . . . . . . . . . . . . . . . . . . 70
adjusting appearance . . . . . . . . . . . . . . . 66
capturing . . . . . . . . . . . . . . . . . . . . . . . . . . 69
choosing . . . . . . . . . . . . . . . . . . . . . . . . . . 66
creating . . . . . . . . . . . . . . . . . . . . . . . . . . . 69
creating effects with . . . . . . . . . . . . . . . 306
creating from Kaleidoscope plug-in . 322
creating on layers . . . . . . . . . . . . . . . . . . 244
filling with . . . . . . . . . . . . . . . . . . . . . . . 118
painting with . . . . . . . . . . . . . .67, 112, 113
Pen Tool . . . . . . . . . . . . . . . . . . . . . . . . 12, 369
drawing shapes . . . . . . . . . . . . . . . . . . . 369
Perspective Grid Adjuster Tool . . . . . . . . 10
Perspective grids . . . . . . . . . . . . . . . . . . . . . 45
activating and hiding . . . . . . . . . . . . . . . 45
adjusting lines . . . . . . . . . . . . . . . . . . . . . 46
creating . . . . . . . . . . . . . . . . . . . . . . . . . . . 45
opening . . . . . . . . . . . . . . . . . . . . . . . . . . . 45
removing presets . . . . . . . . . . . . . . . . . . . 45
Place Elements effect . . . . . . . . . . . . . . . . 309
Playing scripts . . . . . . . . . . . . . . . . . . . . . . 418
Plug-ins . . . . . . . . . . . . . . . . . . . . . . . . . . . . . 57
accessing . . . . . . . . . . . . . . . . . . . . . . . . . 261
Acquire and Export . . . . . . . . . . . . . . . 262
Bevel World . . . . . . . . . . . . . . . . . . . . . . 317
Brightness/Contrast . . . . . . . . . . . . . . . 315
Burn . . . . . . . . . . . . . . . . . . . . . . . . . . . . 316
dynamic . . . . . . . . . . . . . . . . . . . . . . . . . 313
Equalize . . . . . . . . . . . . . . . . . . . . . . . . . 319
Glass Distortion . . . . . . . . . . . . . . . . . . 320
installing . . . . . . . . . . . . . . . . . . . . . . . . . . 58
Kaleidoscope . . . . . . . . . . . . . . . . . . . . . 321
Liquid Lens . . . . . . . . . . . . . . . . . . . . . . 322
Liquid Metal . . . . . . . . . . . . . . . . . . . . . 326
Posterize . . . . . . . . . . . . . . . . . . . . . . . . . 331
Tear . . . . . . . . . . . . . . . . . . . . . . . . . . . . . 317
third-party . . . . . . . . . . . . . . . . . . . . . . . 261
Point-to-point cloning . . . . . . . . . . . . . . 192
between documents . . . . . . . . . . . . . . . 193
within a document . . . . . . . . . . . . . . . . 192
Pooling
media . . . . . . . . . . . . . . . . . . . . . . . . . . . . 108
Pop Art Fill effect . . . . . . . . . . . . . . . . . . . 311
Posterize effect . . . . . . . . . . . . . . . . . . . . . 273
using a color set . . . . . . . . . . . . . . . . . . . 273
Posterize plug-in . . . . . . . . . . . . . . . . . . . . 331
settings . . . . . . . . . . . . . . . . . . . . . . . . . . 332
Preferences
Brush Tracking . . . . . . . . . . . . . . . . . . . . 53

xv Corel Painter
Internet . . . . . . . . . . . . . . . . . . . . . . . . . . . 55
Operating System (Windows) . . . . . . . . 56
setting . . . . . . . . . . . . . . . . . . . . . . . . . . . . 50
Shapes . . . . . . . . . . . . . . . . . . . . . . . . . . . . 54
Undo . . . . . . . . . . . . . . . . . . . . . . . . . . . . . 54
Pressure
adjusting for mouse . . . . . . . . . . . . . . . . 103
Previewing
brushes . . . . . . . . . . . . . . . . . . . . . . . . . . . . 15
images . . . . . . . . . . . . . . . . . . . . . . . . . . . 446
Primary color . . . . . . . . . . . . . . . . . . . . . . . . 79
Printing . . . . . . . . . . . . . . . . . . . . . . . . . . . . 445
advanced settings . . . . . . . . . . . . . . . . . . 452
composited images . . . . . . . . . . . . . . . . 446
EPS file format . . . . . . . . . . . . . . . . . . . . 454
images . . . . . . . . . . . . . . . . . . . . . . . . . . . 447
page setup . . . . . . . . . . . . . . . . . . . . . . . . 446
shapes . . . . . . . . . . . . . . . . . . . . . . .368, 445
Property Bar . . . . . . . . . . . . . . . . . . . . . . . . . 14
closing . . . . . . . . . . . . . . . . . . . . . . . . . . . . 15
docking . . . . . . . . . . . . . . . . . . . . . . . . . . . 14
moving . . . . . . . . . . . . . . . . . . . . . . . . . . . . 14
tool settings . . . . . . . . . . . . . . . . . . . . . . . . 14
Q
Quick Curve Tool . . . . . . . . . . . . . . . . . . . . . 12
Quick Warp effect . . . . . . . . . . . . . . .290, 291
QuickTime file format
exporting . . . . . . . . . . . . . . . . . . . . . . . . . 438
opening . . . . . . . . . . . . . . . . . . . . . . . . . . 426
Quitting . . . . . . . . . . . . . . . . . . . . . . . . . . . . . 50
R
Randomizer . . . . . . . . . . . . . . . . . . . . . . . . 146
creating brush variants . . . . . . . . . . . . . 146
Randomizing
paper grain . . . . . . . . . . . . . . . . . . . . . . . . 64
Rank types . . . . . . . . . . . . . . . . . . . . . . . . . 338
Recording
brush strokes . . . . . . . . . . . . . . . . . . . . . 117
scripts . . . . . . . . . . . . . . . . . . . . . . . . . . . . 417
Recovering files . . . . . . . . . . . . . . . . . . . . . . 50
Rectangular Selection Tool . . . . . . . . . . . . 11
Rectangular Shape Tool . . . . . . . . . . . . . . 12
Reference layers . . . . . . . . . . . . . . . . . . . . 246
committing . . . . . . . . . . . . . . . . . . . . . . . 248
creating . . . . . . . . . . . . . . . . . . . . . . . . . . 246
resizing . . . . . . . . . . . . . . . . . . . . . . . . . . 247
rotating . . . . . . . . . . . . . . . . . . . . . . . . . . 247
settings . . . . . . . . . . . . . . . . . . . . . . . . . . . 247
skewing . . . . . . . . . . . . . . . . . . . . . . . . . . 247
Reflection maps
creating texture with . . . . . . . . . . . . . . . 284
using with Quick Warp . . . . . . . . . . . . 290
Remove Point Tool . . . . . . . . . . . . . . . . . . . 13
Renaming
annotations . . . . . . . . . . . . . . . . . . . . . . . . 93
library items . . . . . . . . . . . . . . . . . . . . . . . 26
Render tiles into mask . . . . . . . . . . . . . . . 358
Replacing
colors in color sets . . . . . . . . . . . . . . . . . . 88
Repositioning
documents . . . . . . . . . . . . . . . . . . . . . . . . 39
guides . . . . . . . . . . . . . . . . . . . . . . . . . . . . 43
palettes . . . . . . . . . . . . . . . . . . . . . . . . . . . 22
Resaturation
adjusting . . . . . . . . . . . . . . . . . . . . . . . . . 110
Resetting
Mixer palette colors . . . . . . . . . . . . . . . . . 84
Resizing
canvas . . . . . . . . . . . . . . . . . . . . . . . . . . . . 41
drawing area . . . . . . . . . . . . . . . . . . . . . . 41
shapes . . . . . . . . . . . . . . . . . . . . . . . . . . . 378
Resolution . . . . . . . . . . . . . . . . . . . . . . . . . . 36
of scripts . . . . . . . . . . . . . . . . . . . . . . . . . 418
print quality . . . . . . . . . . . . . . . . . . . . . . . 37
screen appearance . . . . . . . . . . . . . . . . . . 36
RGB values
setting . . . . . . . . . . . . . . . . . . . . . . . . . . . . 89
setting color variability . . . . . . . . . . . . . . 90
RIF file format

Indexxvi
layers and . . . . . . . . . . . . . . . . . . . . . . . . 234
saving . . . . . . . . . . . . . . . . . . . . . . . . . . . . . 47
Rollovers
creating . . . . . . . . . . . . . . . . . . . . . . . . . . 403
defining . . . . . . . . . . . . . . . . . . . . . . . . . . 404
exporting slices . . . . . . . . . . . . . . . . . . . . 405
indicating button states . . . . . . . . . . . . 397
Rotate Page Tool . . . . . . . . . . . . . . . . . . . . . 10
rotating documents . . . . . . . . . . . . . . . . . 39
Rotating
documents . . . . . . . . . . . . . . . . . . . . . . . . 39
images . . . . . . . . . . . . . . . . . . . . . . . . . . . 262
shapes . . . . . . . . . . . . . . . . . . . . . . . . . . . 378
Rotoscoping . . . . . . . . . . . . . . . . . . . . . . . . 432
Rulers . . . . . . . . . . . . . . . . . . . . . . . . . . . . . . . 42
changing origin . . . . . . . . . . . . . . . . . . . . 42
hiding and displaying . . . . . . . . . . . . . . . 42
setting units of measurement . . . . . . . . 42
S
Sampling
color from imagery . . . . . . . . . . . . . . . . . 80
color from the Mixer Pad . . . . . . . . . . . . 84
colors . . . . . . . . . . . . . . . . . . . . . . . . . . . . 109
Saturation
adjusting . . . . . . . . . . . . . . . . . . . . . . . . . 269
Saving
Adobe Photoshop file format . . . . . . . . 49
brush Looks . . . . . . . . . . . . . . . . . . . . . . 185
brush variants . . . . . . . . . . . . . . . . . . . . . 183
color sets . . . . . . . . . . . . . . . . . . . . . . . . . . 86
EPS file format . . . . . . . . . . . . . . . . 49, 454
files . . . . . . . . . . . . . . . . . . . . . . . . . . . . . . . 46
files containing shapes . . . . . . . . . . . . . 367
GIF file format . . . . . . . . . . . . . . . . . . . . 48
gradients . . . . . . . . . . . . . . . . . . . . . . . . . . 96
JPEG file format . . . . . . . . . . . . . . . . . . . 47
layers . . . . . . . . . . . . . . . . . . . . . . . . . . . . 234
Looks . . . . . . . . . . . . . . . . . . . . . . . . . . . . . 62
Mixer Pad . . . . . . . . . . . . . . . . . . . . . . . . . 84
Mixer palette colors . . . . . . . . . . . . . . . . . 83
mosaics . . . . . . . . . . . . . . . . . . . . . . . . . . 351
movies . . . . . . . . . . . . . . . . . . . . . . . . . . . 438
recorded brush strokes . . . . . . . . . . . . . 118
RIF file format . . . . . . . . . . . . . . . . . . . . . 47
shapes . . . . . . . . . . . . . . . . . . . . . . . . . . . 383
TIFF file format . . . . . . . . . . . . . . . . . . . 49
weaves . . . . . . . . . . . . . . . . . . . . . . . . . . . . 74
Scaling
Image Hose images . . . . . . . . . . . . . . . 337
images . . . . . . . . . . . . . . . . . . . . . . . . . . . 262
Scissors Tool . . . . . . . . . . . . . . . . . . . . . . . . 13
Scratch Pad . . . . . . . . . . . . . . . . . . . . . . . . 145
adjusting brush size . . . . . . . . . . . . . . . 146
clearing . . . . . . . . . . . . . . . . . . . . . . . . . . 146
making a selection . . . . . . . . . . . . . . . . 146
zooming in and out . . . . . . . . . . . . . . . 145
Screens
applying texture . . . . . . . . . . . . . . . . . . . 286
Scripts . . . . . . . . . . . . . . . . . . . . . . . . . . . . . 416
applying brush strokes in movies . . . . 434
applying to movies . . . . . . . . . . . . . . . . 433
automatic selecting . . . . . . . . . . . . . . . . 436
Auto-Save Scripts . . . . . . . . . . . . . . . . . . 52
closing . . . . . . . . . . . . . . . . . . . . . . . . . . . 419
converting to movies . . . . . . . . . . . . . . . 420
copying instructions . . . . . . . . . . . . . . . 420
creating . . . . . . . . . . . . . . . . . . . . . . . . . . 420
creating for movies . . . . . . . . . . . . . . . . 433
editing . . . . . . . . . . . . . . . . . . . . . . . . . . . 419
for compositing . . . . . . . . . . . . . . . . . . . 436
opening . . . . . . . . . . . . . . . . . . . . . . . . . . 419
playing . . . . . . . . . . . . . . . . . . . . . . . . . . 418
recording . . . . . . . . . . . . . . . . . . . . . . . . . 417
resolution . . . . . . . . . . . . . . . . . . . . . . . . 418
selecting instructions . . . . . . . . . . . . . . 420
setting paper grain . . . . . . . . . . . . . . . . 433
Scripts palette . . . . . . . . . . . . . . . . . . . . . . 416
script list . . . . . . . . . . . . . . . . . . . . . . . . . 417
Secondary color . . . . . . . . . . . . . . . . . . . . . 79
Segments
cutting . . . . . . . . . . . . . . . . . . . . . . . . . . . . 13
cutting shapes . . . . . . . . . . . . . . . . . . . . 376
Selecting

xvii Corel Painter
brushes . . . . . . . . . . . . . . . . . . . . . . . . . . . 103
clone type . . . . . . . . . . . . . . . . . . . . . . . . 194
gradients . . . . . . . . . . . . . . . . . . . . . . . . . . 94
layers . . . . . . . . . . . . . . . . . . . . . . . . . . . . 235
nozzles . . . . . . . . . . . . . . . . . . . . . . . . . . . 335
saved brush strokes . . . . . . . . . . . . . . . . 118
script instructions . . . . . . . . . . . . . . . . . 420
shapes . . . . . . . . . . . . . . . . . . . . . . . . . . . 374
Selection Adjuster Tool . . . . . . . . . . .11, 214
Selection Portfolio . . . . . . . . . . . . . . . . . . 217
Selections . . . . . . . . . . . . . . . . . . . . . . . . . . 203
adding to . . . . . . . . . . . . . . . . . . . . . . . . . 206
and shapes . . . . . . . . . . . . . . . . . . . . . . . . 370
anti-aliasing . . . . . . . . . . . . . . . . . . . . . . 207
bevelling . . . . . . . . . . . . . . . . . . . . . . . . . 319
cloning . . . . . . . . . . . . . . . . . . . . . . . . . . . 199
combining using Boolean operations 212
converting pixel-based to path-based . 214
converting to and from shapes . .210, 371
creating along borders . . . . . . . . . . . . . . 216
creating from clone source . . . . . .208, 209
creating from layers . . . . . . . . . . . .209, 240
creating layers from . . . . . . . . . . . . . . . . 233
deselecting and reselecting . . . . . . . . . . 205
disabling protection . . . . . . . . . . . . . . . . 204
drawing modes . . . . . . . . . . . . . . . . . . . . 204
editing . . . . . . . . . . . . . . . . . . . . . . . . . . . 214
feathering . . . . . . . . . . . . . . . . . . . . . . . . 216
floating . . . . . . . . . . . . . . . . . . . . . . . . . . . 242
freehand . . . . . . . . . . . . . . . . . . . . . . . . . 206
generating automatically . . . . . . . . . . . 208
generating based on color . . . . . . 207, 209
hiding and showing . . . . . . . . . . . . . . . 205
importing from other documents . . . . 208
in the Scratch Pad . . . . . . . . . . . . . . . . . 146
inverting . . . . . . . . . . . . . . . . . . . . . . . . . 205
loading . . . . . . . . . . . . . . . . . . . . . . . . . . . 211
modifying channels with . . . . . . . . . . . 211
moving . . . . . . . . . . . . . . . . . . . . . . . . . . 215
oval . . . . . . . . . . . . . . . . . . . . . . . . . . . . . . 206
path-based . . . . . . . . . . . . . . . . . . . . . . . 204
pixel-based . . . . . . . . . . . . . . . . . . . . . . . 204
protecting inside and outside . . . . . . . 204
rectangular . . . . . . . . . . . . . . . . . . . . . . . 206
reusing . . . . . . . . . . . . . . . . . . . . . . . . . . . 217
rotating . . . . . . . . . . . . . . . . . . . . . . . . . . 215
saving . . . . . . . . . . . . . . . . . . . . . . . . 210, 217
scaling . . . . . . . . . . . . . . . . . . . . . . . . . . . 215
selecting entire canvas . . . . . . . . . . . . . 207
skewing . . . . . . . . . . . . . . . . . . . . . . . . . . 215
smoothing . . . . . . . . . . . . . . . . . . . . . . . . 216
stroking . . . . . . . . . . . . . . . . . . . . . . . . . . 217
subtracting from . . . . . . . . . . . . . . . . . . 207
tools . . . . . . . . . . . . . . . . . . . . . . . . . . . . . 206
transforming . . . . . . . . . . . . . . . . . . . . . . 214
types . . . . . . . . . . . . . . . . . . . . . . . . . 204, 214
widening and contracting . . . . . . . . . . 216
Selectors . . . . . . . . . . . . . . . . . . . . . . . . . . . . 13
accessing menu commands . . . . . . . . . . 14
displaying items . . . . . . . . . . . . . . . . . . . . 13
displaying palettes . . . . . . . . . . . . . . . . . . 14
Serigraphy effect . . . . . . . . . . . . . . . . . . . 293
Shadows
adding . . . . . . . . . . . . . . . . . . . . . . . . . . . 243
Shape Selection Tool . . . . . . . . . . . . . . . . . 12
Shapes . . . . . . . . . . . . . . . . . . . . . . . . . . . . . 365
acquiring from Adobe Illustrator . . . . 371
adding anchor points . . . . . . . . . . . . . . 374
adding to paths . . . . . . . . . . . . . . . . . . . 370
adjusting curves . . . . . . . . . . . . . . . . . . . 375
and selections . . . . . . . . . . . . . . . . . . . . . 370
as layers . . . . . . . . . . . . . . . . . . . . . . 230, 366
averaging anchor points . . . . . . . . . . . . 378
Bézier lines . . . . . . . . . . . . . . . . . . . . . . . 367
blending . . . . . . . . . . . . . . . . . . . . . . . . . 382
converting points . . . . . . . . . . . . . . . . . . 376
converting to and from selections 210, 371
converting to layers . . . . . . . . . . . . . . . . 366
converting to selections . . . . . . . . . . . . 371
creating . . . . . . . . . . . . . . . . . . . . . . . . . . 368
creating compound shapes . . . . . . . . . 381
creating rectangles or ovals . . . . . . . . . 368
cutting segments . . . . . . . . . . . . . . . . . . 376
deleting anchor points . . . . . . . . . . . . . 375
distorting . . . . . . . . . . . . . . . . . . . . . . . . . 379
drawing with the Pen tool . . . . . . . . . . 369
duplicating . . . . . . . . . . . . . . . . . . . . . . . 380
editing . . . . . . . . . . . . . . . . . . . . . . . . . . . 373

Indexxviii
exporting to Adobe Illustrator . . . . . . . 383
flipping . . . . . . . . . . . . . . . . . . . . . . . . . . 380
grouping . . . . . . . . . . . . . . . . . . . . . . . . . 381
joining endpoints . . . . . . . . . . . . . . . . . 377
moving anchor points . . . . . . . . . . . . . . 374
printing . . . . . . . . . . . . . . . . . . . . . .368, 445
releasing compound shapes . . . . . . . . . 382
resizing . . . . . . . . . . . . . . . . . . . . . . . . . . 378
rotating . . . . . . . . . . . . . . . . . . . . . . . . . . 378
saving . . . . . . . . . . . . . . . . . . . . . . . . . . . . 383
saving files containing . . . . . . . . . . . . . 367
selecting . . . . . . . . . . . . . . . . . . . . . . . . . . 374
setting attributes . . . . . . . . . . . . . . . . . . 372
skewing . . . . . . . . . . . . . . . . . . . . . . . . . . 379
tools . . . . . . . . . . . . . . . . . . . . . . . . . . . . . 368
transforming duplicates . . . . . . . . . . . . 381
Sharpen effect . . . . . . . . . . . . . . . . . . . . . . 297
Size
Liquid Ink brushes . . . . . . . . . . . . . . . . 132
setting in the Stroke Designer . . . . . . . 157
Water Color brushes . . . . . . . . . . . . . . . 126
Sizing images . . . . . . . . . . . . . . . . . . . . . . . 262
Sketch effect . . . . . . . . . . . . . . . . . . . . . . . 294
Skewing
selections . . . . . . . . . . . . . . . . . . . . . . . . . 215
shapes . . . . . . . . . . . . . . . . . . . . . . . . . . . 379
Smoothing
selections . . . . . . . . . . . . . . . . . . . . . . . . . 216
Snapping
to grid . . . . . . . . . . . . . . . . . . . . . . . . . . . . 44
to guides . . . . . . . . . . . . . . . . . . . . . . . . . . 43
Soften effect . . . . . . . . . . . . . . . . . . . . . . . 298
Source imagery
repeating . . . . . . . . . . . . . . . . . . . . . . . . . 201
tiling . . . . . . . . . . . . . . . . . . . . . . . . . . . . 201
Spacing
Image Hose images . . . . . . . . . . . . . . . 336
Special effects
applying . . . . . . . . . . . . . . . . . . . . . . . . . 259
Spread
adjusting for airbrushes . . . . . . . . . . . . 115
Straight lines
drawing . . . . . . . . . . . . . . . . . . . . . . . . . . 106
Stroke data
using . . . . . . . . . . . . . . . . . . . . . . . . . . . . 118
Stroke Designer . . . . . . . . . . . . . . . . . . . . . 147
Airbrush controls . . . . . . . . . . . . . . . . . . 175
Angle controls . . . . . . . . . . . . . . . . . . . . 160
Bristle controls . . . . . . . . . . . . . . . . . . . . 162
Cloning controls . . . . . . . . . . . . . . . . . . 172
Digital Water Color controls . . . . . . . . 182
General controls . . . . . . . . . . . . . . . . . . 148
Image Hose controls . . . . . . . . . . . . . . . 175
Impasto controls . . . . . . . . . . . . . . . . . . 173
Liquid Ink controls . . . . . . . . . . . . . . . . 179
Mouse controls . . . . . . . . . . . . . . . . . . . 172
Preview window . . . . . . . . . . . . . . . . . . 155
Rake controls . . . . . . . . . . . . . . . . . . . . . 167
Random controls . . . . . . . . . . . . . . . . . . 169
Size controls . . . . . . . . . . . . . . . . . . . . . . 155
Spacing controls . . . . . . . . . . . . . . . . . . 158
Water controls . . . . . . . . . . . . . . . . . . . . 176
Well controls . . . . . . . . . . . . . . . . . . . . . 165
Strokes
applying to selection borders . . . . . . . 217
choosing types . . . . . . . . . . . . . . . . . . . . 151
Stylus
360 degree stroke . . . . . . . . . . . . . . . . . . 108
controlling bleed . . . . . . . . . . . . . . . . . . 111
controlling color . . . . . . . . . . . . . . . . . . 110
holding . . . . . . . . . . . . . . . . . . . . . . 102, 108
recording brush strokes for a mouse . 103
simulating with a mouse . . . . . . . 102, 103
tapering strokes . . . . . . . . . . . . . . . . . . . 104
using with airbrushes . . . . . . . . . . . . . . 115
wheel controls . . . . . . . . . . . . . . . . . . . . 116
Subcategories . . . . . . . . . . . . . . . . . . . . . . 152
choosing . . . . . . . . . . . . . . . . . . . . . . . . . 154
Super Soften effect . . . . . . . . . . . . . . . . . 298
Surface
lighting . . . . . . . . . . . . . . . . . . . . . . . . . . 137
texture . . . . . . . . . . . . . . . . . . . . . . . . . . . 277
Surface Control effects . . . . . . . . . . . . . . 286

xix Corel Painter
Apply Lighting . . . . . . . . . . . . . . . . . . . . 274
Apply Screen . . . . . . . . . . . . . . . . . . . . . 286
Apply Surface Texture . . . . . . . . . . . . . 277
Color Overlay . . . . . . . . . . . . . . . . . . . . . 287
Distress . . . . . . . . . . . . . . . . . . . . . . . . . . 292
Dye Concentration . . . . . . . . . . . . . . . . 288
Express Texture . . . . . . . . . . . . . . . . . . . 289
Image Warp . . . . . . . . . . . . . . . . . . . . . . 289
Quick Warp . . . . . . . . . . . . . . . . . . . . . . 290
Serigraphy . . . . . . . . . . . . . . . . . . . . . . . . 293
Sketch . . . . . . . . . . . . . . . . . . . . . . . . . . . 294
Woodcut . . . . . . . . . . . . . . . . . . . . . . . . . 291
Surface texture
applying . . . . . . . . . . . . . . . . . . . . . . . . . . 278
T
Tear plug-in . . . . . . . . . . . . . . . . . . . . . . . . 317
settings . . . . . . . . . . . . . . . . . . . . . . . . . . . 317
Tessellation mosaics . . . . . . . . . . . . . . . . . 360
adding points using strokes . . . . . . . . . 361
coloring . . . . . . . . . . . . . . . . . . . . . . . . . . 362
creating . . . . . . . . . . . . . . . . . . . . . . . . . . 360
settings . . . . . . . . . . . . . . . . . . . . . . . . . . . 362
Text
adding shadows . . . . . . . . . . . . . . . . . . . 388
adjusting leading . . . . . . . . . . . . . . . . . . 387
applying effects . . . . . . . . . . . . . . . . . . . 386
blurring . . . . . . . . . . . . . . . . . . . . . . . . . . 388
centering . . . . . . . . . . . . . . . . . . . . . . . . . 390
creating . . . . . . . . . . . . . . . . . . . . . . . . . . 385
dropping . . . . . . . . . . . . . . . . . . . . . . . . . 386
filling with color . . . . . . . . . . . . . . . . . . 386
kerning . . . . . . . . . . . . . . . . . . . . . . . . . . 387
opacity . . . . . . . . . . . . . . . . . . . . . . . . . . . 388
path . . . . . . . . . . . . . . . . . . . . . . . . . . . . . 390
rotating . . . . . . . . . . . . . . . . . . . . . . . . . . 387
setting curve style . . . . . . . . . . . . . . . . . 390
skewing . . . . . . . . . . . . . . . . . . . . . . . . . . 387
stretching . . . . . . . . . . . . . . . . . . . . . . . . 387
Text layer . . . . . . . . . . . . . . . . . . . . . . . . . . 385
Text Tool . . . . . . . . . . . . . . . . . . . . . . . . . . . . 12
Texture
applying . . . . . . . . . . . . . . . . .277, 286, 287
applying lighting to . . . . . . . . . . . . . . . . 285
creating from channels and layer masks .
283
creating from clone source luminance 281
creating from image luminance . . . . . 280
creating from paper . . . . . . . . . . . . . . . . 278
creating from reflection maps . . . . . . . 284
creating with 3D brush strokes . . 279, 280
embossing . . . . . . . . . . . . . . . . . . . . . . . . 282
expressing . . . . . . . . . . . . . . . . . . . . . . . . 289
Third-party plug-ins . . . . . . . . . . . . . . . . . 261
Three-dimensional oils . . . . . . . . . . . . . . 280
TIFF file format
saving . . . . . . . . . . . . . . . . . . . . . . . . . . . . . 49
Tiles
adding depth . . . . . . . . . . . . . . . . . . . . . 358
applying to mosaics . . . . . . . . . . . . . . . . 352
color . . . . . . . . . . . . . . . . . . . . . . . . . . . . . 352
cut . . . . . . . . . . . . . . . . . . . . . . . . . . . . . . 356
dimensions . . . . . . . . . . . . . . . . . . . . . . . 354
fitting together . . . . . . . . . . . . . . . . . . . . 357
randomness . . . . . . . . . . . . . . . . . . . . . . 355
removing . . . . . . . . . . . . . . . . . . . . . . . . . 357
removing from mosaics . . . . . . . . . . . . 352
render into mask . . . . . . . . . . . . . . . . . . 358
re-rendering . . . . . . . . . . . . . . . . . . . . . . 357
respecting image edge . . . . . . . . . . . . . 359
settings . . . . . . . . . . . . . . . . . . . . . . . . . . 354
special effects . . . . . . . . . . . . . . . . . . . . . 304
width . . . . . . . . . . . . . . . . . . . . . . . . . . . . 354
Tiling
using source imagery . . . . . . . . . . . . . . 201
Tilt
adjusting for mouse . . . . . . . . . . . . . . . 103
Tonal Control effects . . . . . . . . . . . . 264, 268
adjusting colors . . . . . . . . . . . . . . . . . . . 268
adjusting selected colors . . . . . . . . . . . . 270
Brightness/Contrast . . . . . . . . . . . . . . . 271
correcting colors . . . . . . . . . . . . . . . . . . 264
equalizing images . . . . . . . . . . . . . . . . . 272
negative images . . . . . . . . . . . . . . . . . . . 273
Posterize . . . . . . . . . . . . . . . . . . . . . . . . . 273
Video Legal Colors . . . . . . . . . . . . . . . . 273

Indexxx
Toolbox . . . . . . . . . . . . . . . . . . . . . . . . . . . . . . 9
Brush Creator . . . . . . . . . . . . . . . . . . . . . 144
closing . . . . . . . . . . . . . . . . . . . . . . . . . . . . . 9
docking . . . . . . . . . . . . . . . . . . . . . . . . . . . 10
moving . . . . . . . . . . . . . . . . . . . . . . . . . . . . . 9
shortcuts . . . . . . . . . . . . . . . . . . . . . . . . . 456
Tools
accessing . . . . . . . . . . . . . . . . . . . . . . . . . . . 9
Brush Creator . . . . . . . . . . . . . . . . . . . . . 144
Tracing
images . . . . . . . . . . . . . . . . . . . . . . . . . . . 189
movies . . . . . . . . . . . . . . . . . . . . . . . . . . . 437
resuming . . . . . . . . . . . . . . . . . . . . . . . . . 189
Tracing paper . . . . . . . . . . . . . . . . . . . . . . . 188
turning off . . . . . . . . . . . . . . . . . . . . . . . . 189
Tracker Palette . . . . . . . . . . . . . . . . . . . . . . . 19
choosing brush variants . . . . . . . . . . . . . 20
clearing brush variants . . . . . . . . . . . . . . 20
resizing . . . . . . . . . . . . . . . . . . . . . . . . . . . 20
saving brush variants . . . . . . . . . . . . . . . 20
viewing brush variants . . . . . . . . . . . . . . 20
Transparency
preserving on layers . . . . . . . . . . . . . . . . 241
Transposer . . . . . . . . . . . . . . . . . . . . . . . . . 147
choosing a brush variant . . . . . . . . . . . 147
creating brush variants . . . . . . . . . . . . . 147
U
Undoing strokes . . . . . . . . . . . . . . . . . . . . 107
Ungrouping
layers . . . . . . . . . . . . . . . . . . . . . . . . . . . . 239
V
Value
adjusting color brightness . . . . . . . . . . 269
Vector objects . . . . . . . . . . . . . . . . . . . . . . 230
Video
adjusting colors for . . . . . . . . . . . . . . . . 273
working with . . . . . . . . . . . . . . . . . . . . . 424
W
Wacom Intuos
pen . . . . . . . . . . . . . . . . . . . . . . . . . . . . . . . 59
support . . . . . . . . . . . . . . . . . . . . . . . . . . . 59
tablet . . . . . . . . . . . . . . . . . . . . . . . . . . . . . 59
Warping . . . . . . . . . . . . . . . . . . . . . . . 289, 290
Water Color
diffusion . . . . . . . . . . . . . . . . . . . . . . . . . 127
paper textures . . . . . . . . . . . . . . . . . . . . . 127
Water Color brushes
size . . . . . . . . . . . . . . . . . . . . . . . . . . . . . . 126
variants . . . . . . . . . . . . . . . . . . . . . . . . . . 126
Water Color layer . . . . . . . . . . . . . . . . . . . 125
creating . . . . . . . . . . . . . . . . . . . . . . . . . . 126
lifting the canvas to . . . . . . . . . . . . . . . . 126
wetting . . . . . . . . . . . . . . . . . . . . . . . . . . 126
Water controls . . . . . . . . . . . . . . . . . . . . . 126
Weaves . . . . . . . . . . . . . . . . . . . . . . . . . . . . . 72
changing weave display . . . . . . . . . . . . . 73
choosing . . . . . . . . . . . . . . . . . . . . . . . . . . 73
creating . . . . . . . . . . . . . . . . . . . . . . . . . . . 75
displaying color sets . . . . . . . . . . . . . . . . 74
editing colors . . . . . . . . . . . . . . . . . . . . . . 74
filling with . . . . . . . . . . . . . . .118, 119, 121
saving . . . . . . . . . . . . . . . . . . . . . . . . . . . . 74
scale . . . . . . . . . . . . . . . . . . . . . . . . . . . . . . 73
thickness . . . . . . . . . . . . . . . . . . . . . . . . . . 73
Web
animations . . . . . . . . . . . . . . . . . . . . . . . 442
background color . . . . . . . . . . . . . . . . . 394
Bevel World plug-in . . . . . . . . . . . . . . . 397
brushes . . . . . . . . . . . . . . . . . . . . . . 412, 413
creating animated GIFs . . . . . . . . . . . . 410
creating backgrounds . . . . . . . . . . . . . . 393
creating buttons . . . . . . . . . . . . . . . . . . . 396
creating fractal pattern tiles . . . . . . . . . 395
image maps . . . . . . . . . . . . . . . . . . . . . . 406
image slicing . . . . . . . . . . . . . . . . . 397, 400
impasto technique . . . . . . . . . . . . . . . . 396
loading brushes into library . . . . . . . . 413
reducing number of colors . . . . . . . . . 410
safe colors . . . . . . . . . . . . . . . . . . . . . . . . 411
surface texture . . . . . . . . . . . . . . . . . . . . 396

xxi Corel Painter
transparent backgrounds . . . . . . . . . . . 409
Web buttons . . . . . . . . . . . . . . . . . . . . . . . 396
3D techniques . . . . . . . . . . . . . . . . . . . . 396
adding shadows . . . . . . . . . . . . . . . . . . . 396
indicating rollover states . . . . . . . . . . . . 397
shapes and selections . . . . . . . . . . . . . . 396
Woodcut effect . . . . . . . . . . . . . . . . . . . . . 291
Z
Zoom Blur effect . . . . . . . . . . . . . . . . . . . . 298
Zooming
in and out . . . . . . . . . . . . . . . . . . . . . . . . . 37
Magnifier Tool . . . . . . . . . . . . . . . . . . . . . 38
reset magnification . . . . . . . . . . . . . . . . . 38
Scratch Pad . . . . . . . . . . . . . . . . . . . . . . . 145
to fit screen . . . . . . . . . . . . . . . . . . . . . . . . 38
