ecom instruments 300011GR02 Ci70 User Manual
ecom instruments GmbH Ci70
UserManual.wiki
>
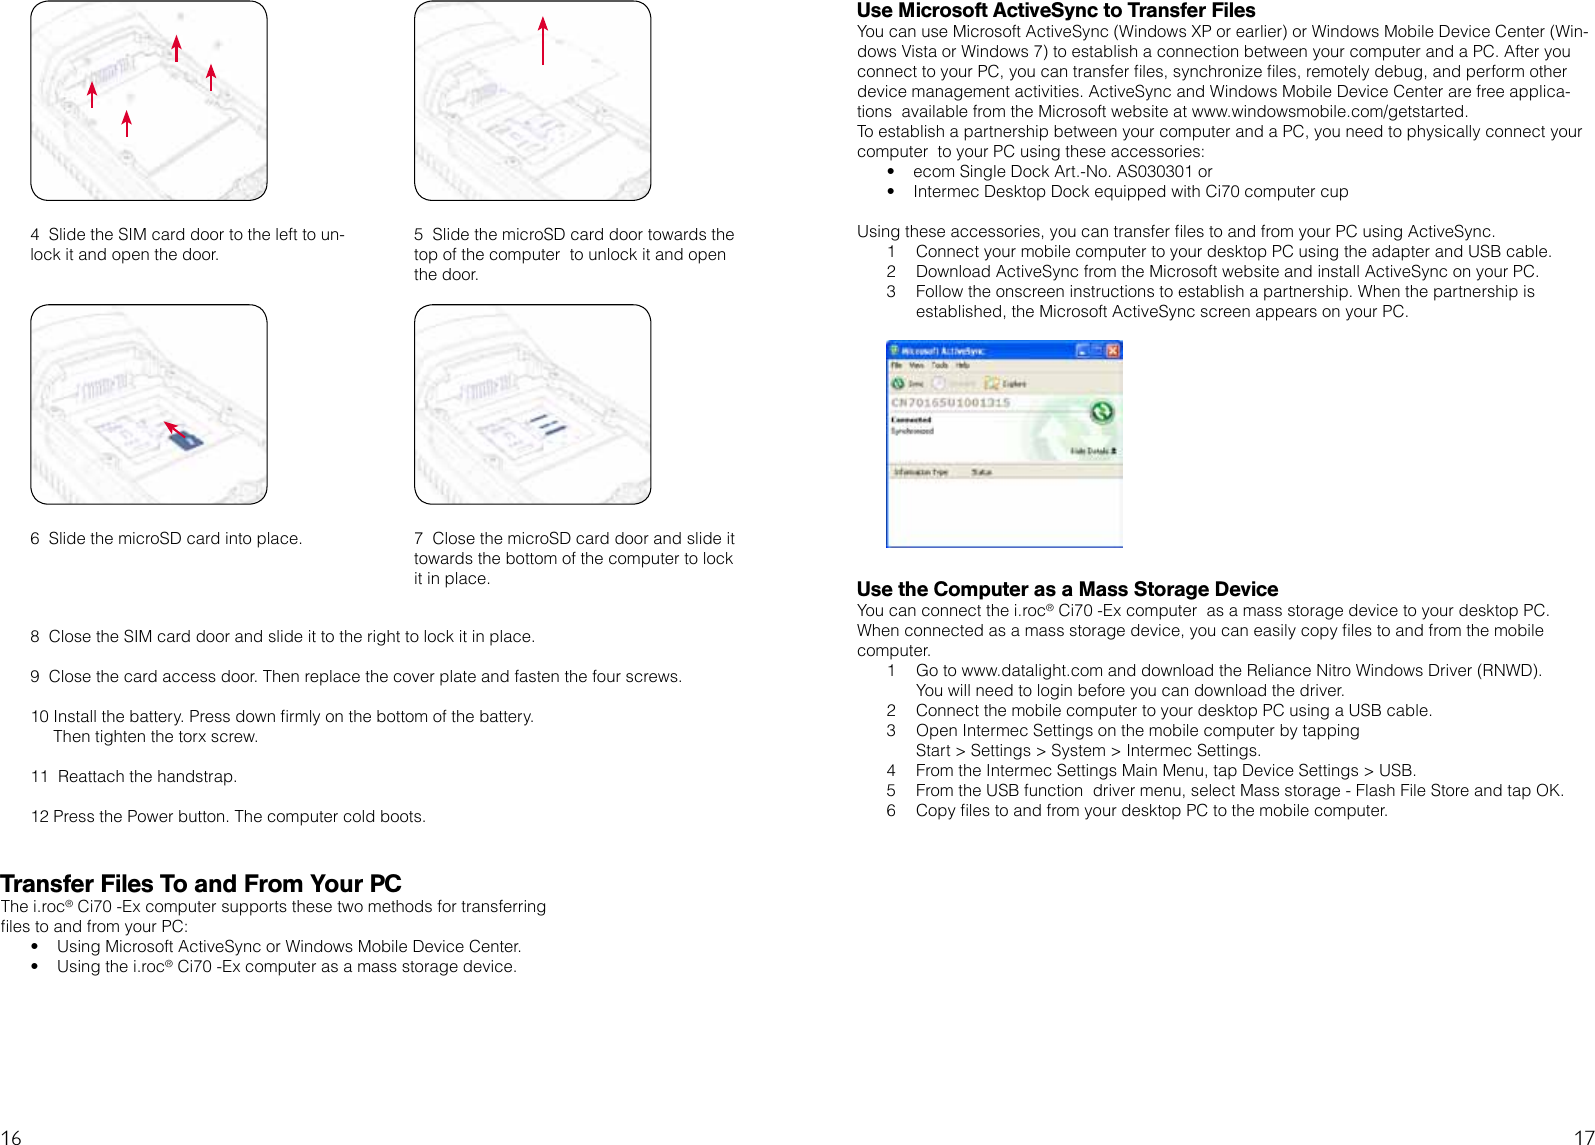
ecom instruments
>
300011GR02 User Manual
>
user manual
Contents
1.
user manual
2.
FCC Compliance Statement
3.
user manual statement 300011AL35E00
4.
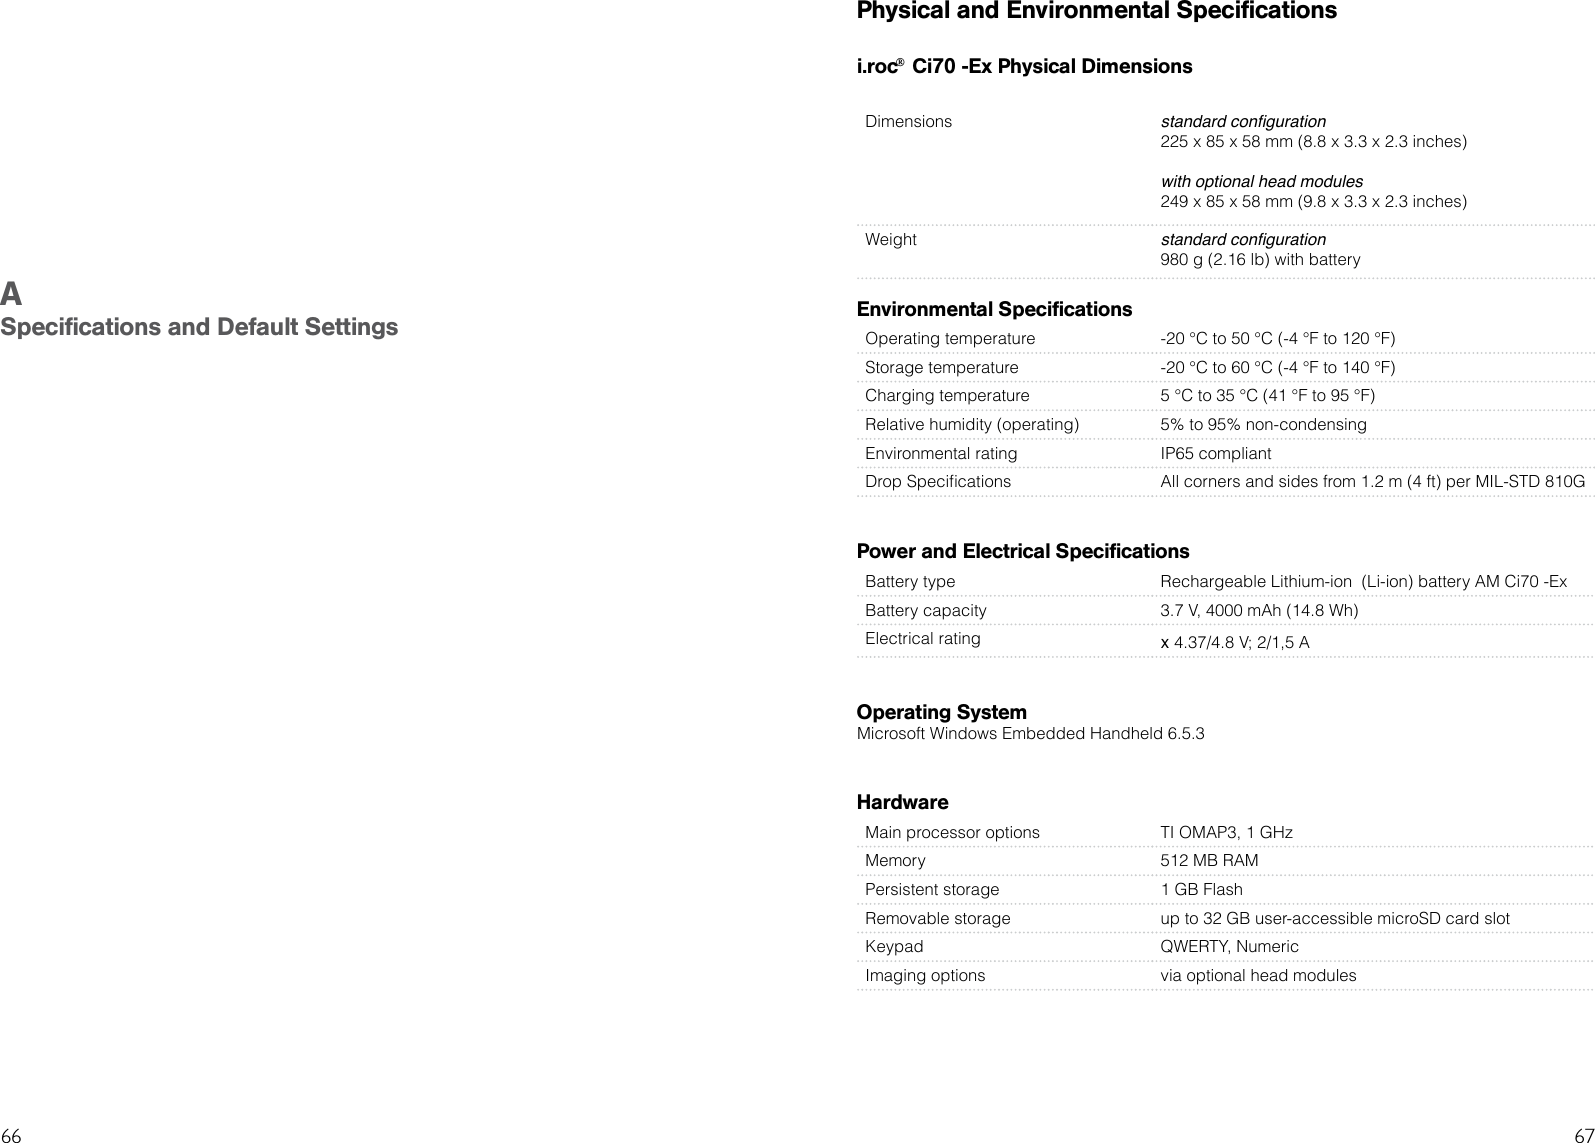
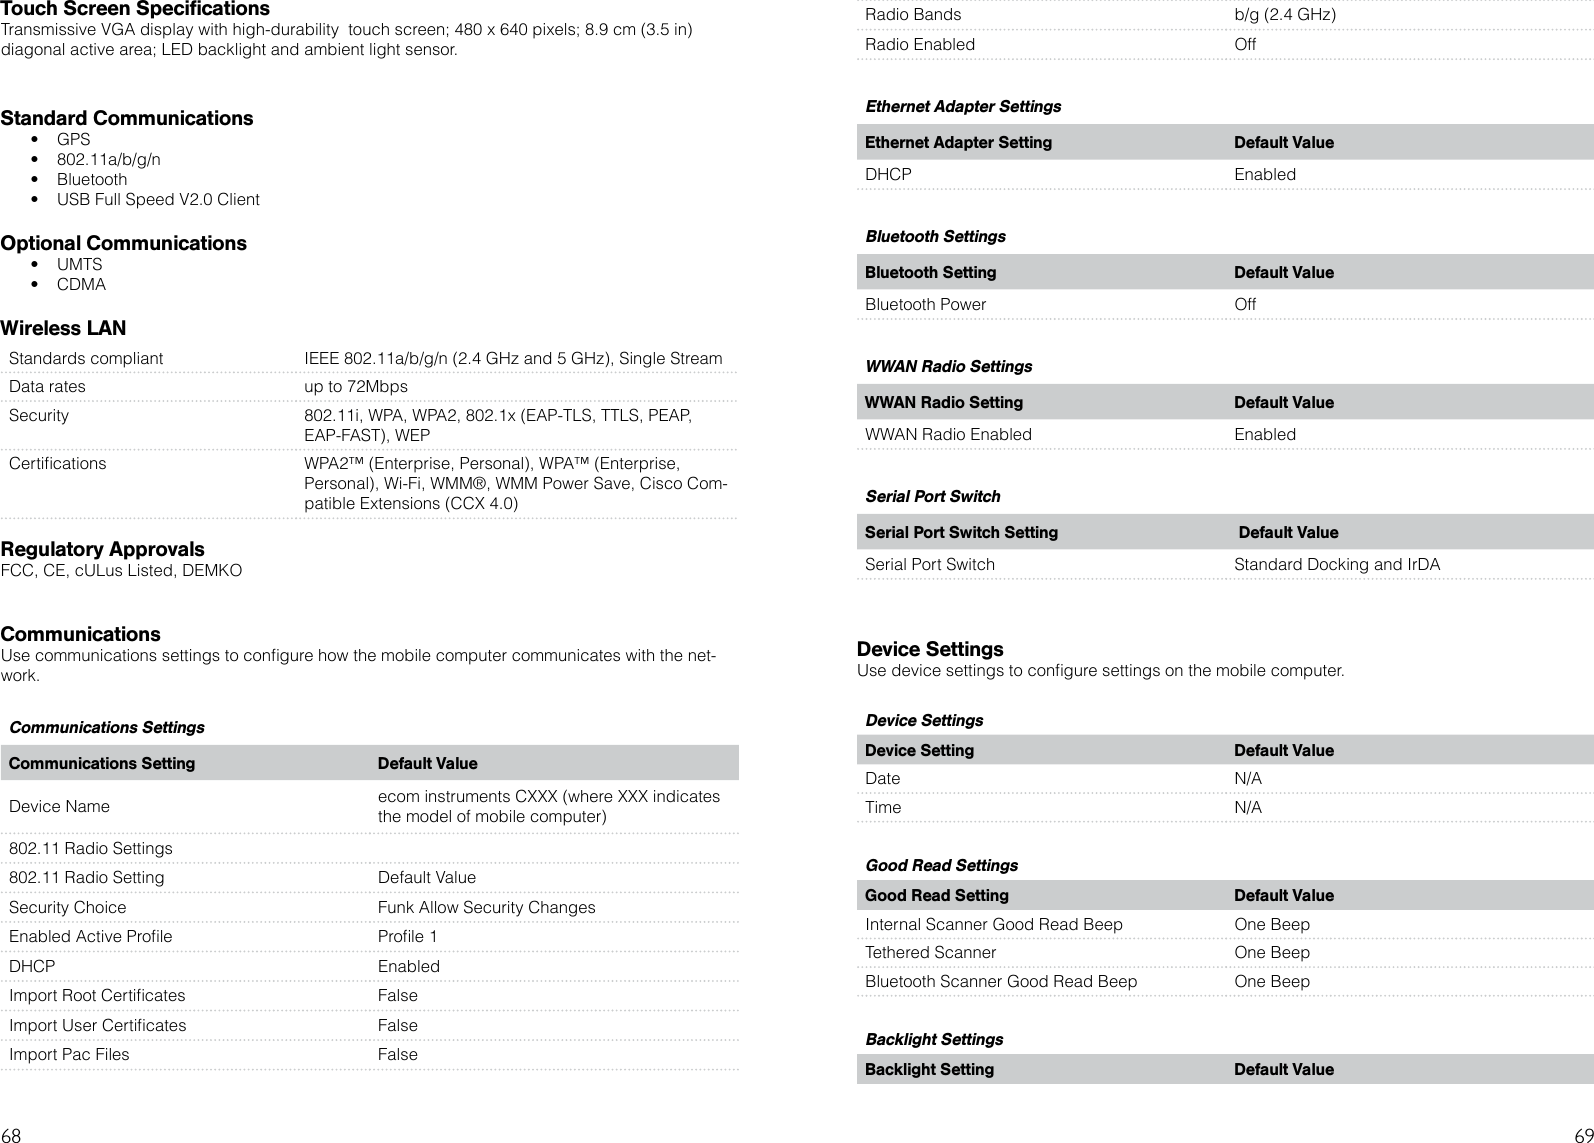
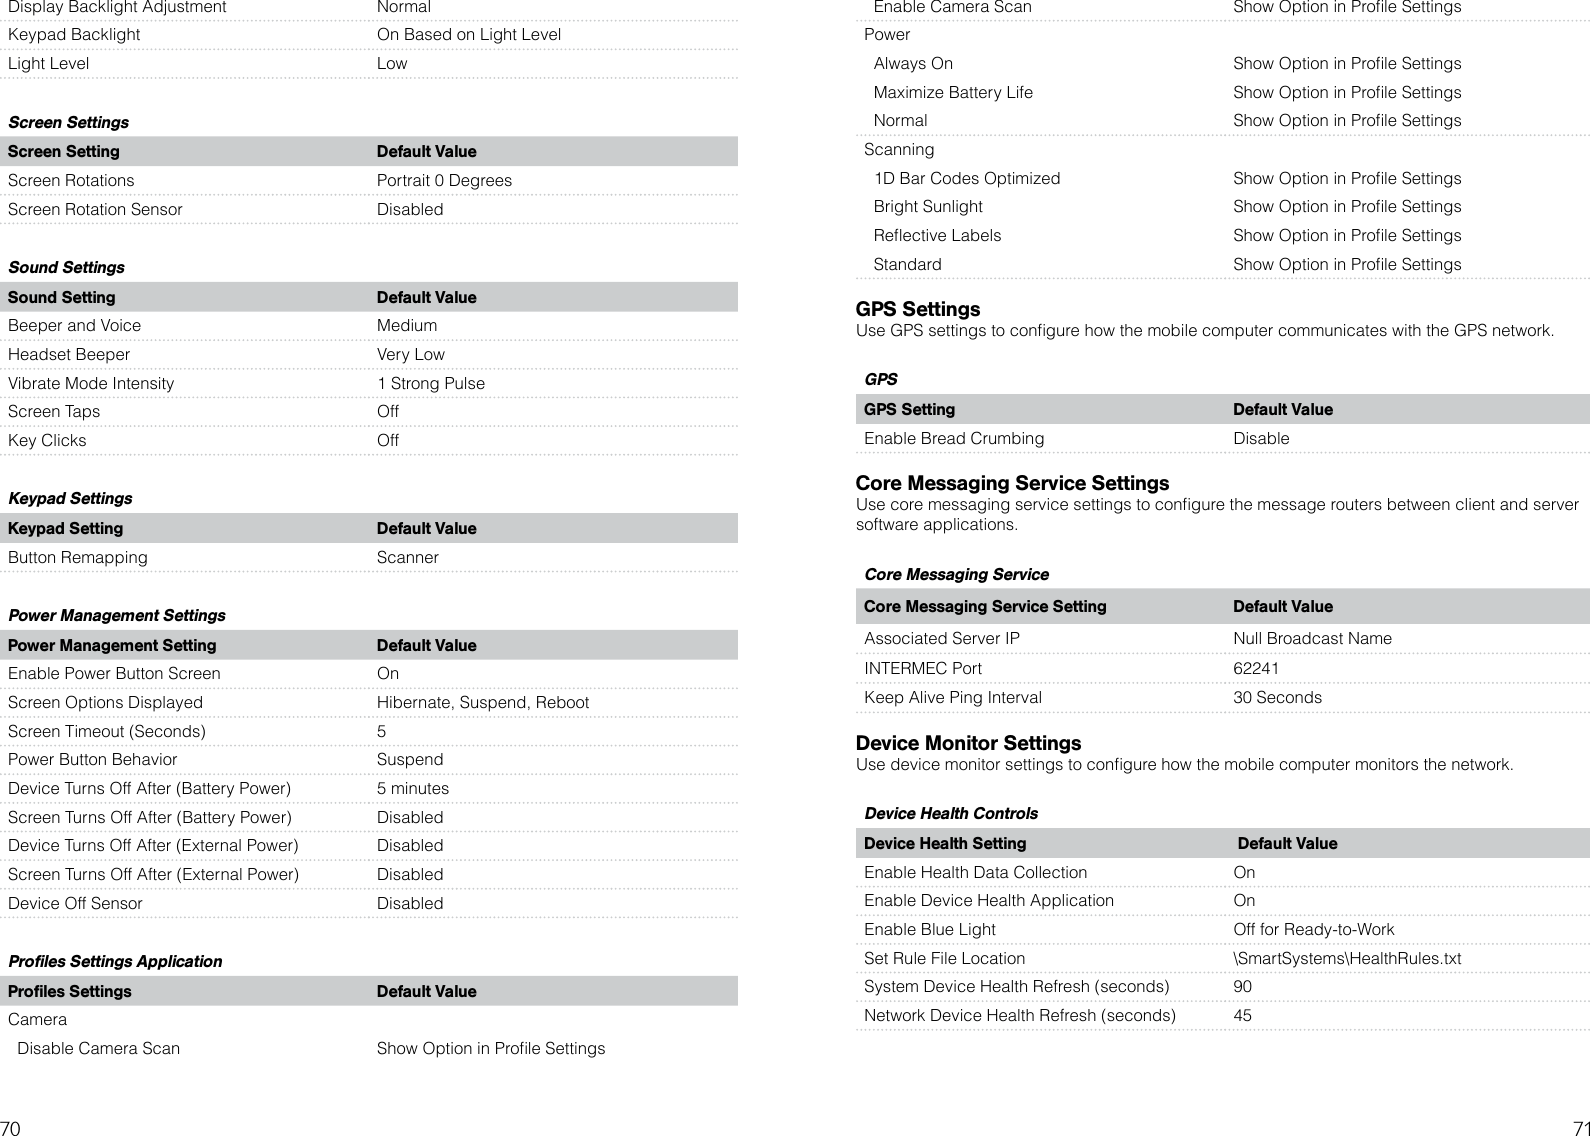
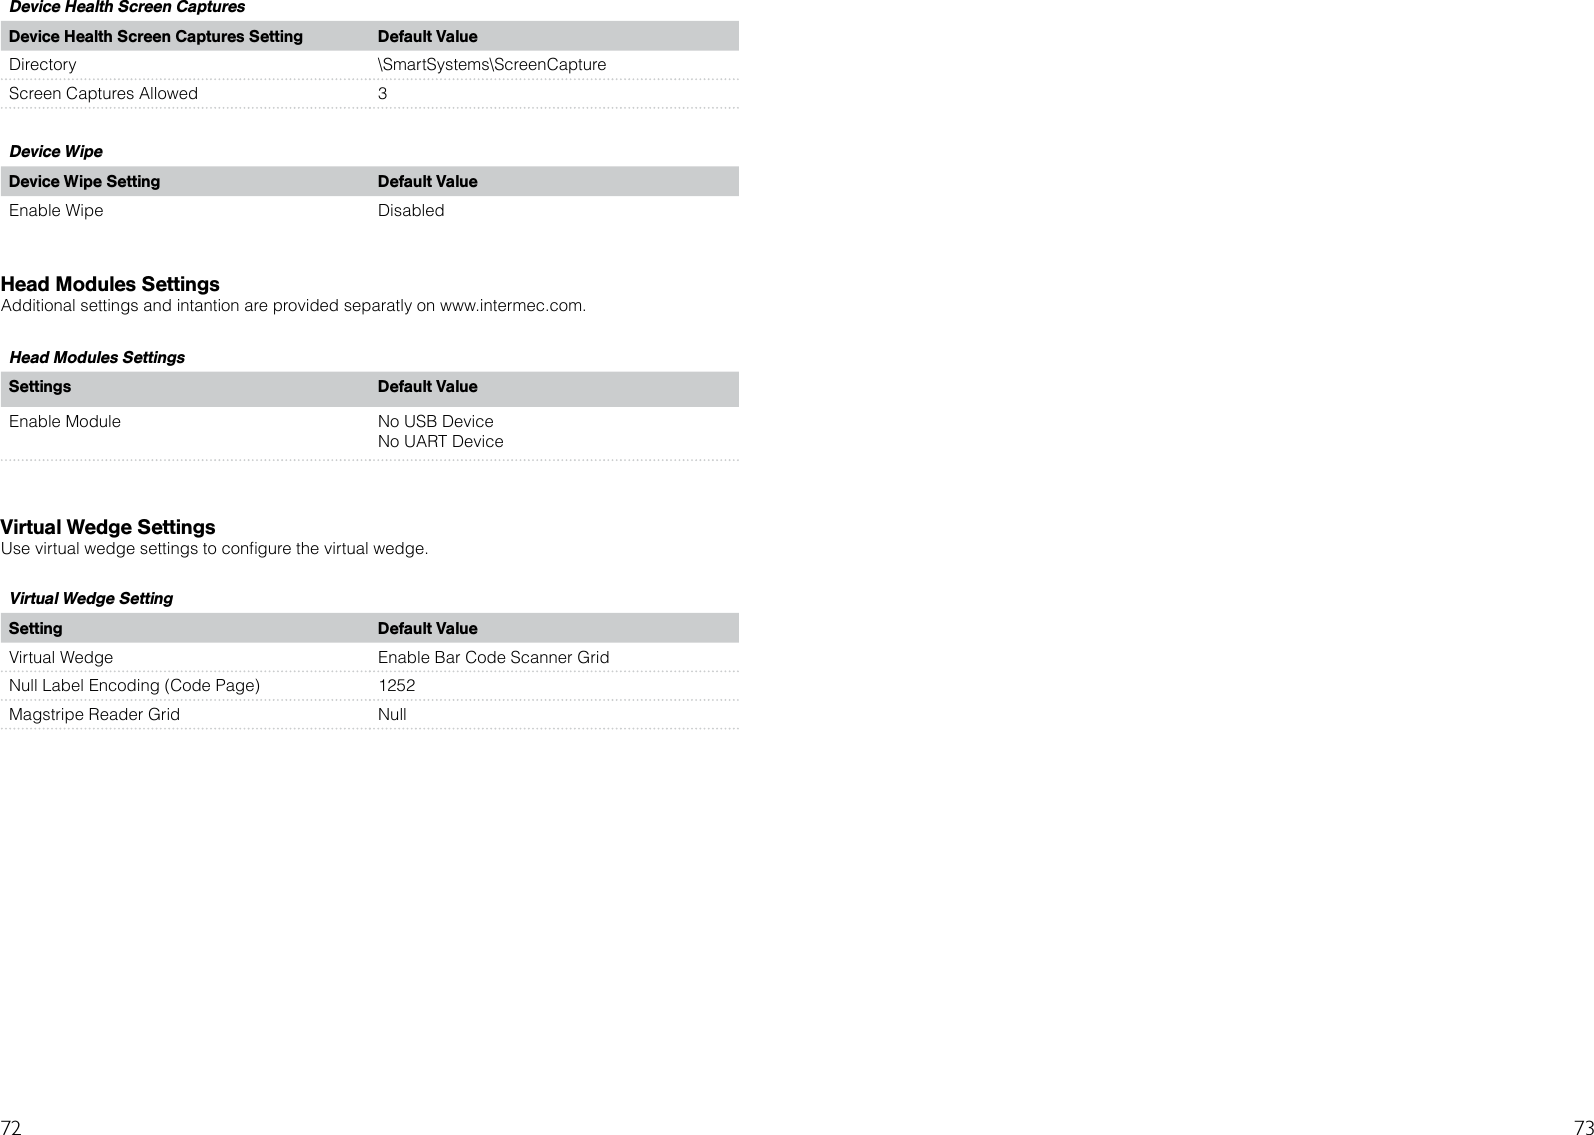
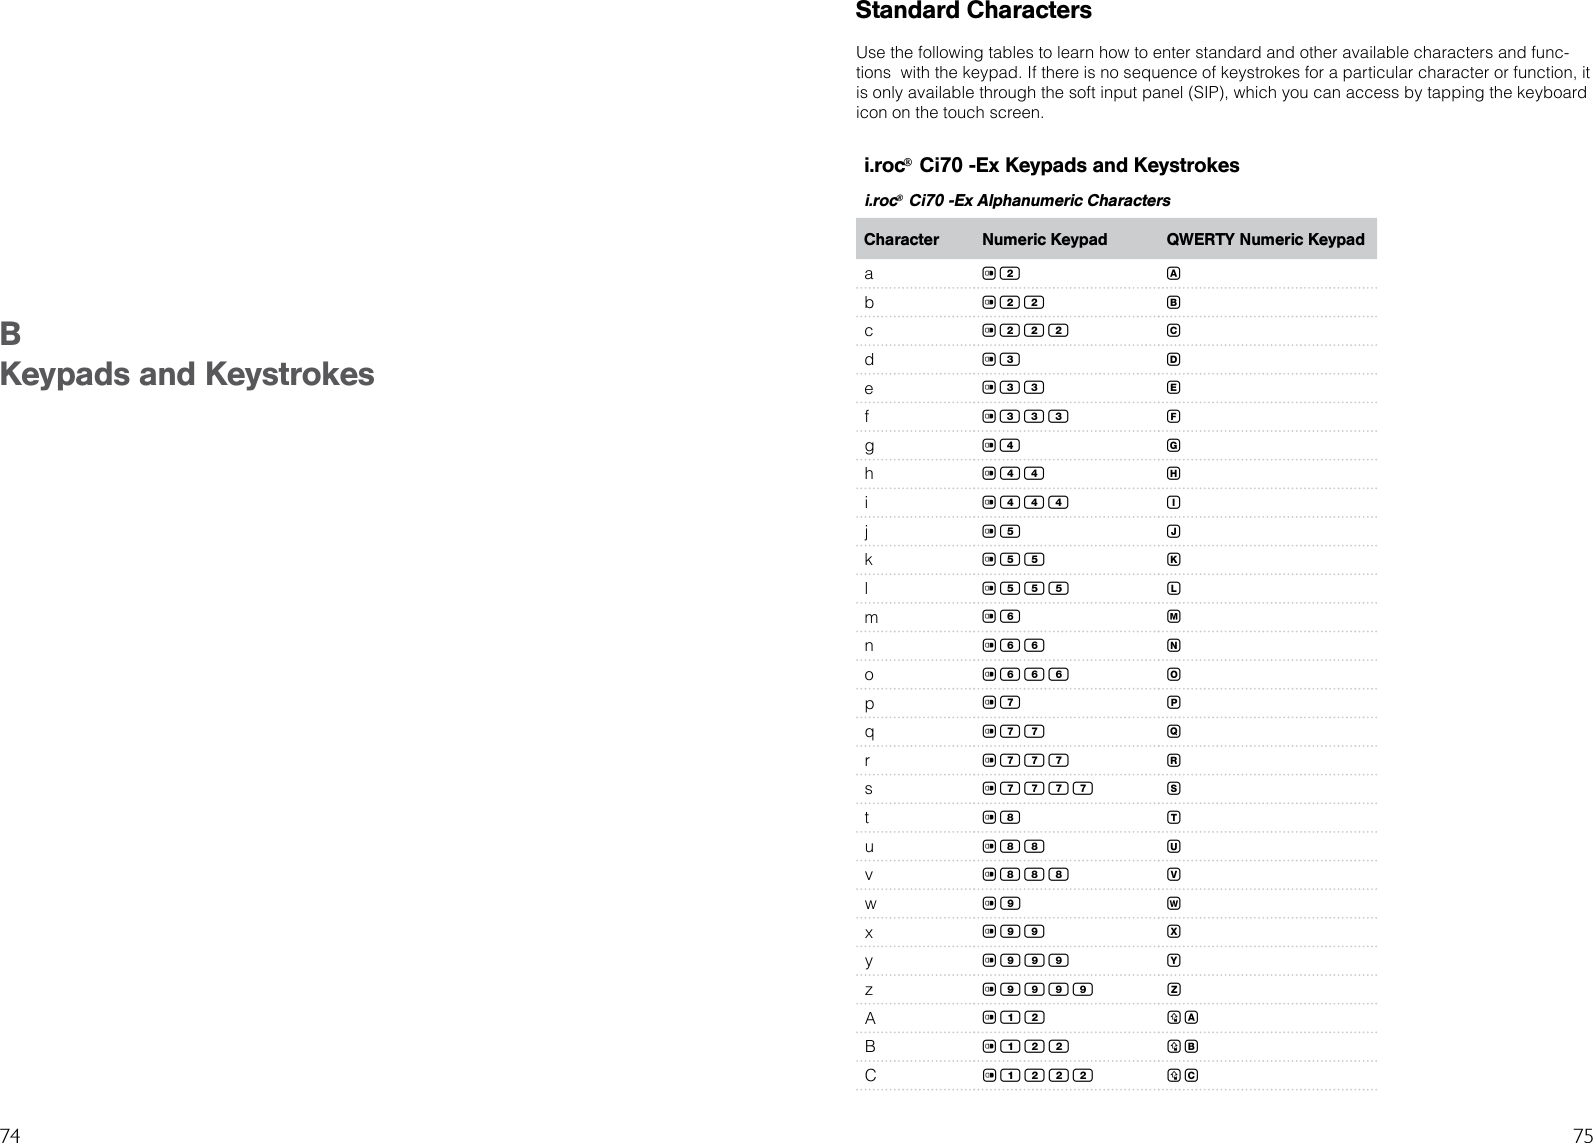
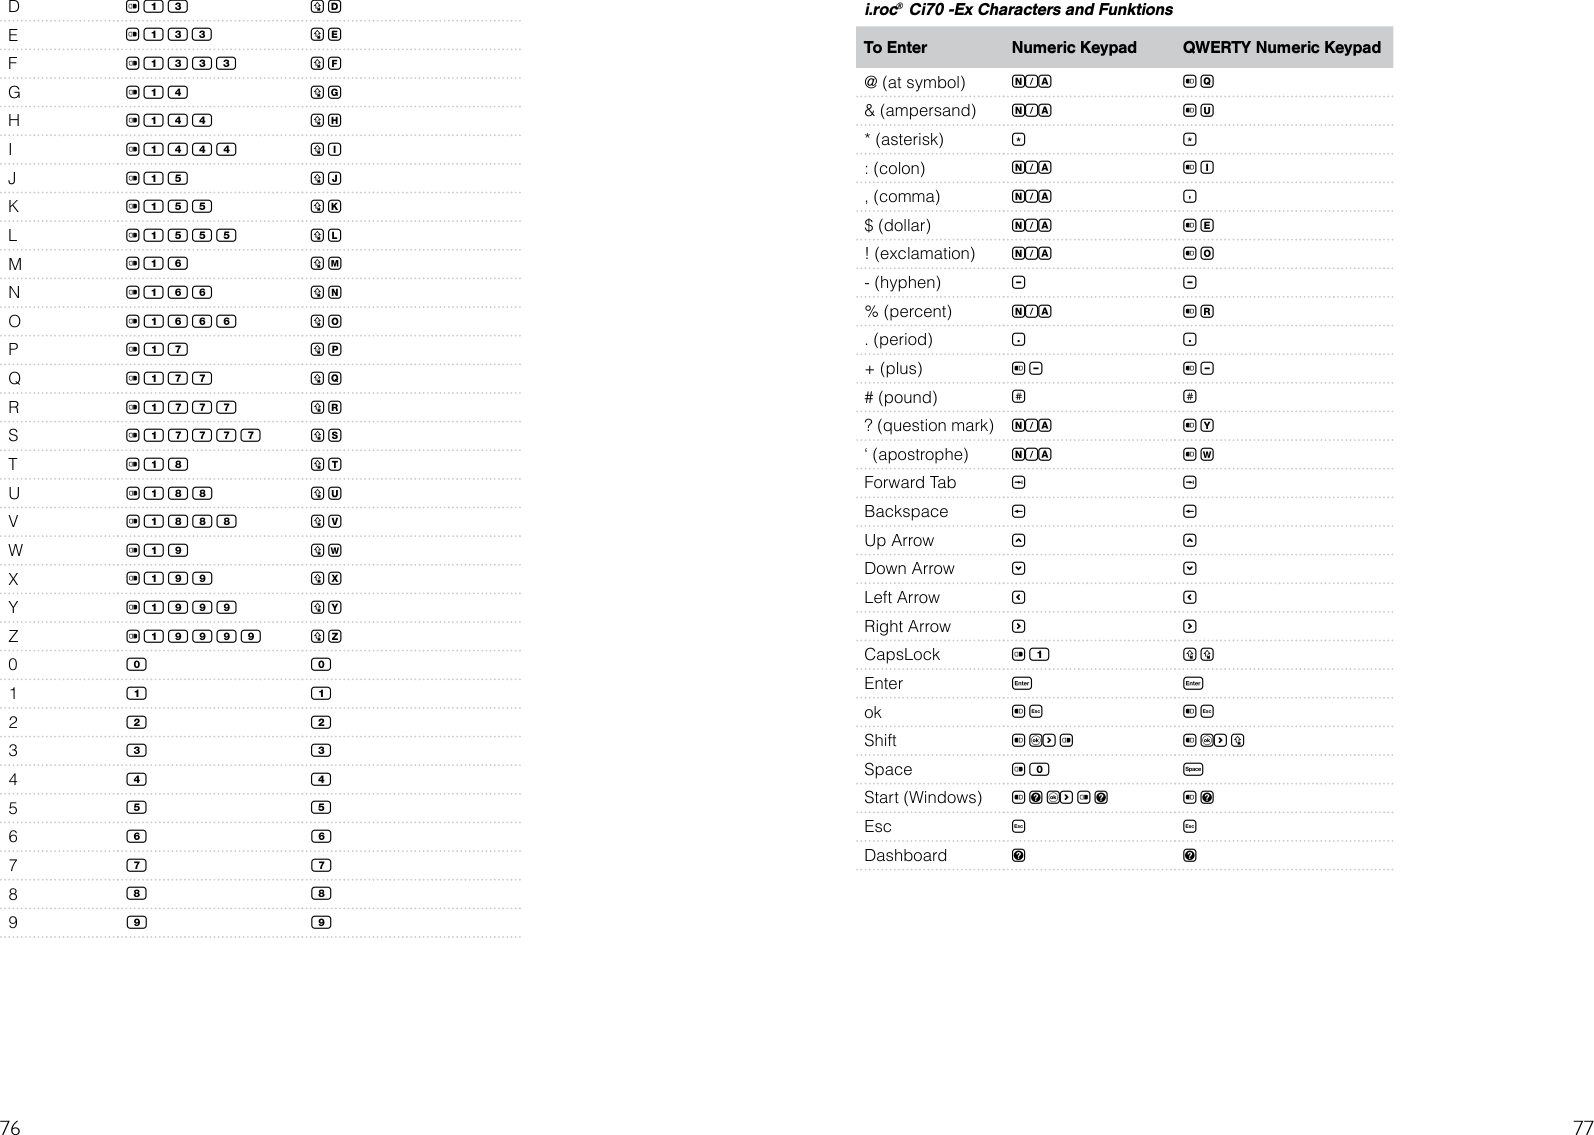
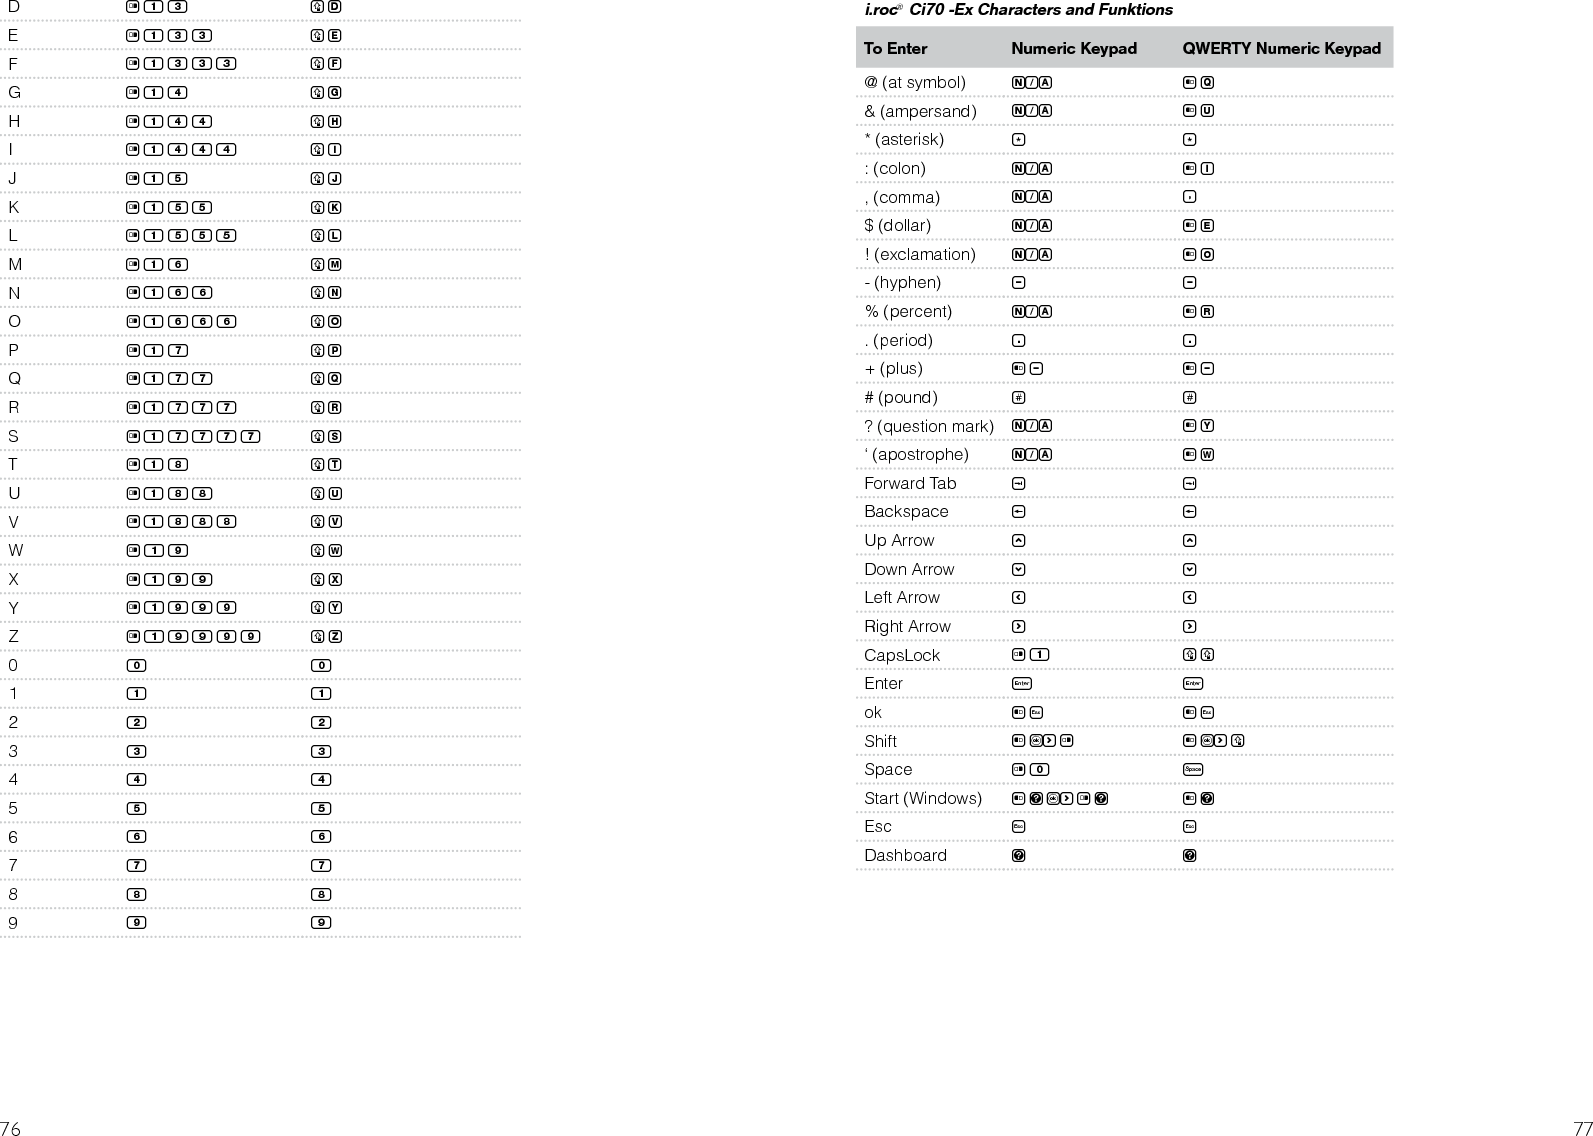
User Manual i.roc Ci70 -Ex
5.
300011AL01A00 User Manual i.roc Ci70 -Ex
6.
300011AL14E01_FCC Compliance Statement
user manual
Navigation menu
Upload a User Manual
Namespaces
Wiki Guide
HTML
PDF
Info
Views
User Manual
Discussion / Help
Navigation