Contents
- 1. User's Manual (revised)
- 2. User Manual
User Manual
i-SENS, Inc.
465-6 Wolgye4-dong, Nowon-gu
Seoul 139-845, Korea
www.i-sens.com
Medical Technology Promedt
Consulting GmbH,
Altenhofstrasse 80,D-66386
St. Ingbert, Germany
ⓒ 2012 i-SENS, Inc. All Rights Reserved. PGA1E3121 REVx 05/2012
0123

Owner’s Booklet
Blood Glucose Monitoring System
Data Transmission
Welcome to the AutoChek t BGMS
Blood Glucose Monitoring System
Thank you for purchasing the AutoChek t Blood Glucose Monitoring System.
The system provides you with safe, convenient, and painless blood glucose in vitro
(i.e., outside the body) diagnostic monitoring. You can obtain accurate results in just
5 seconds with a small (0.5 ㎕ ) blood sample.
The AutoChek t Blood Glucose Monitoring System is intended for the quantitative
measurement of glucose in fresh capillary whole blood samples drawn from the
fingertips and alternative sites such as the forearm, palm, thigh, and calf.
The AutoChek t Blood Glucose Monitoring System is intended for self testing
outside the body (in vitro) by people with diabetes at home as an aid to monitor the
effectiveness of diabetes control.
The AutoChek t is capable of sending test results to AutoChek t’s remote database
by using cellular data transmission. AutoChek t securely uploads and manages
blood glucose readings, eliminating the need to maintain personal logbooks.

Table of Contents
Important Information : Read This First! -------------------------------------- 6
Important Information----------------------------------------------------------- 7
Specifications ------------------------------------------------------------------- 8
AutoChek t Blood Glucose Monitoring System ------------------------------ 9
AutoChek t Blood Glucose Test Strip --------------------------------------- 10
AutoChek t Blood Glucose Meter -------------------------------------------- 12
AutoChek t Blood Glucose Meter -------------------------------------------- 13
AutoChek t Blood Glucose Meter Display ---------------------------------- 14
Adjusting the Date, Time and Unit ------------------------------------------- 15
Setting up Your System ------------------------------------------------------- 15
Setting the Sound On/Off ---------------------------------------------------- 19
Setting the Cellular function On/Off ----------------------------------------- 20
Setting the ‘Test Result Reset’ ----------------------------------------------- 23
Checking the System --------------------------------------------------------- 24
Comparing the Control Solution Test Results ------------------------------ 27
Using the Lancing Device ---------------------------------------------------- 28
Preparing the Lancing Device for Blood Sample Retrieval --------------- 29
Preparing the Meter and Test strip ------------------------------------------ 31
Applying Blood Sample ------------------------------------------------------ 32
Information
Preparation
Testing

Result Data Transmission I--------------------------------------------------- 34
Result Data Transmission II -------------------------------------------------- 35
Automatic time adjusting ----------------------------------------------------- 37
Discarding Used Lancets ----------------------------------------------------- 38
Alternative Site Testing ------------------------------------------------------- 39
HI and Lo Message ------------------------------------------------------------ 42
Target Blood Glucose Ranges ----------------------------------------------- 43
Meter Memory ----------------------------------------------------------------- 44
Setting the post-meal alarm (PP2 alarm) ------------------------------------ 46
Setting the Alarm Function --------------------------------------------------- 46
Setting the Time Alarms (alarm 1~3) ---------------------------------------- 48
Charging Your AutoChek t Blood Glucose Meter -------------------------- 50
Caring for Your System ------------------------------------------------------- 52
Understanding Error and Other Message ----------------------------------- 52
General Troubleshooting ----------------------------------------------------- 52
Understanding Error and other Message ----------------------------------- 53
Performance Characterstic --------------------------------------------------- 58
Warranty Information --------------------------------------------------------- 60
Additional function
Maintenance
www.i-sens.com 6
To receive safe and optimum system benefits, please read the entire manual
contents before the system.
Please note the following instructions:
• Do not use the system for the diagnosis of diabetes or for
testing newborns.
• Use only fresh capillary whole blood samples for testing.
• Alterative site and fingertip test result may differ significantly due
to rapid change in the glucose level post meal, insulin injection, or
exercise.
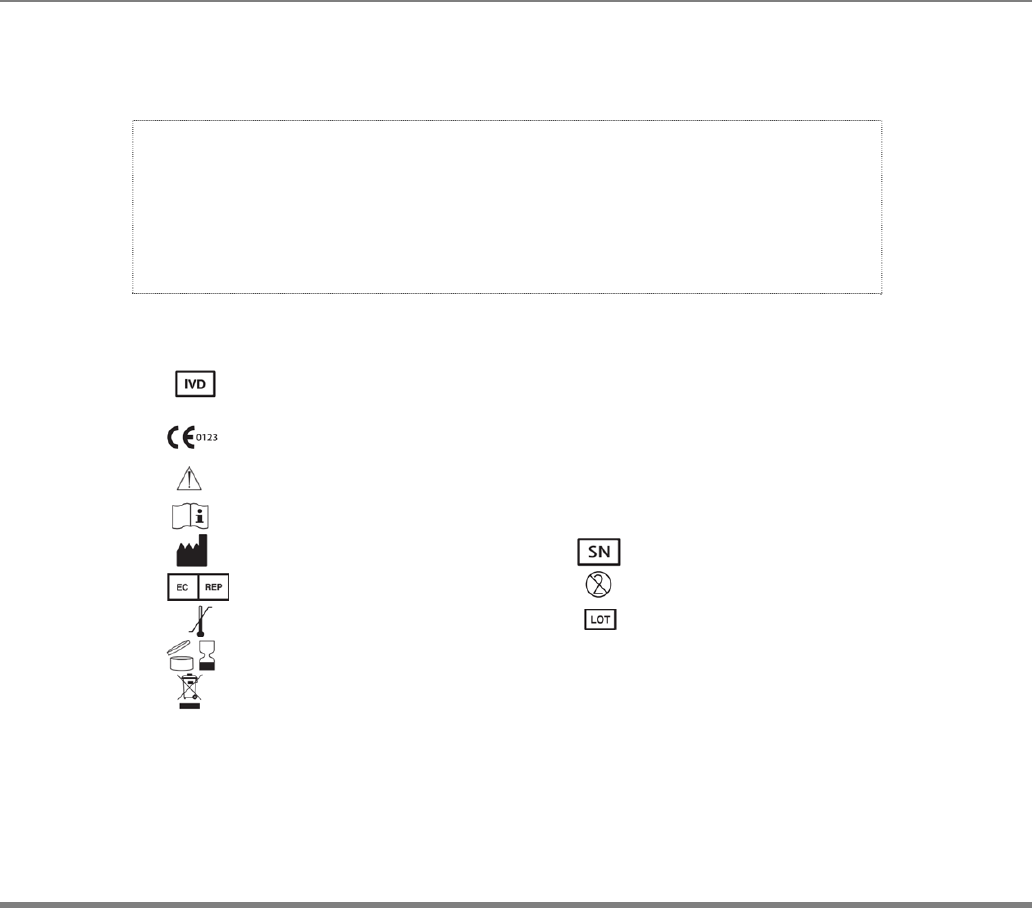
The following chart explains the symbols you’ll find in the AutoChek t User Manual,
product packaging, and product inserts.
For
in
vitro
diagnostic use
This product fulfills the requirements for Directive 98/79/EC
0123
In
vitro
diagnostic medical devices
Cautions for safety and optimum product use
Consult instruction for use
Manufacturer Serial number
Authorized representative
Do not reuse
Temperature limitations Batch code
Use by (unopened or opened test strip container)
Do not discard this product with other household-type waste
Important Information : Read This First!

www.i-sens.com 7
· The AutoChek t blood glucose monitoring system is intended for self-
testing outside the body (in vitro diagnostic use).
· The glucose in the blood sample mixes with special chemicals on the
test strip where to produce a small electrical current. The AutoChek t
meter detects this electrical current and measures the amount of
glucose in the blood sample.
· The AutoChek t blood glucose meter is designed to minimize code related
errors in monitoring by using the no-coding function.
· The AutoChek t blood glucose meter should be used only with the
AutoChek t strip.
· Do not use the system for testing newborns or pregnant women
because test results may be affected by the red blood cell count
(hematocrit).
· Very high (60% or more) or very low (20% or less) hematocrit can lead
to incorrect test results.
· A glucose value of less than 3.9 mmol/L may indicate hypoglycemia and a value
of more than 13.3 mmol/L may indicate hyperglycemia.
If you need assistance, please contact your authorized i-SENS sales
representative or visit www.i-sens.com for more information.
Important Information
www.i-sens.com 8
• Product specifications
Reported result range 20 ~ 600 mg/dL(1.1 ~ 33.3 mmol/L)
Sample size Minimum 0.5 ㎕
Test time 5 seconds
Sample type Fresh capillary whole blood
Calibration Plasma-equivalent
Assay method Electrochemical
Power 3.7V Lithium – Polymer Battery
(Rechargeable Type)
Memory 250 test result
Size 45L x 96.9W x 18H (mm)
Weight 66.1g
• Operating ranges
Temperature 10~40°C(50 ~ 104 °F)
Relativity humidity 10 ~ 90%
Hematocrit 20 ~ 60%
Specifications
www.i-sens.com 9
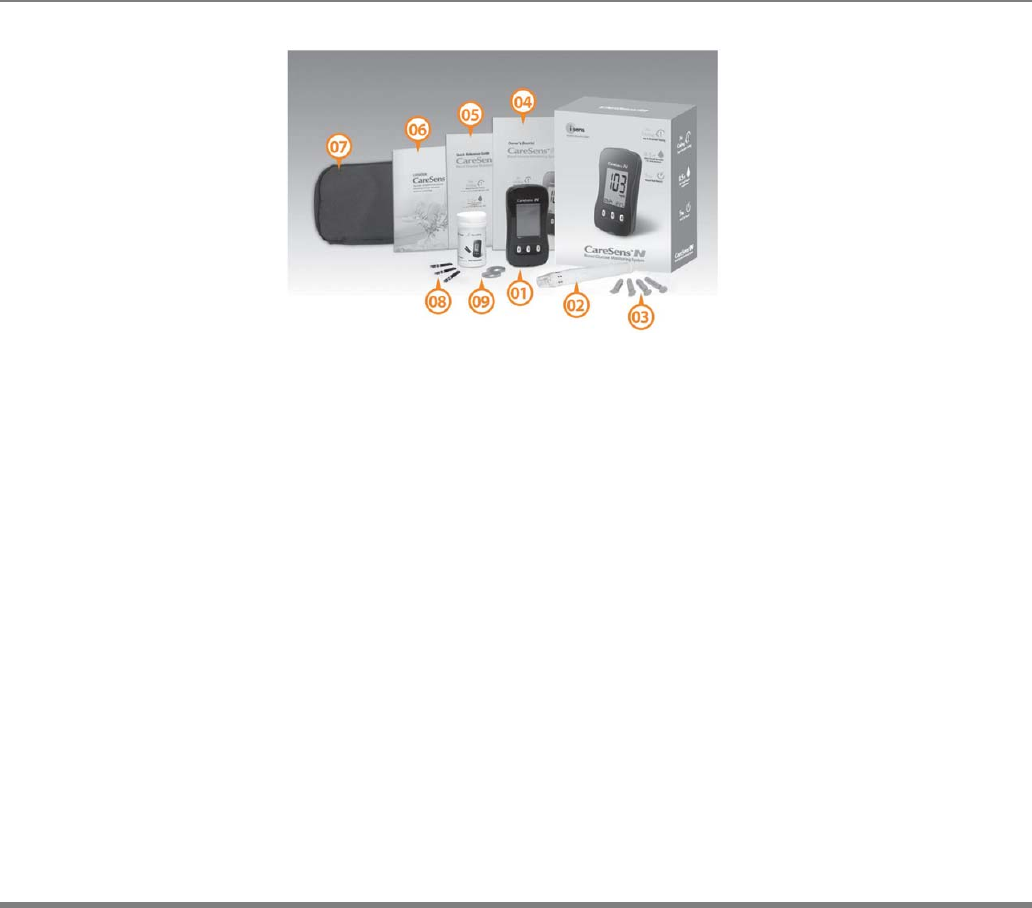
•Components
• Certain components may not be included depending on the
place of purchase
• Check all the components after opening the AutoChek t
blood glucose monitoring system package.
The exact contents are listed on the main box
• The cable for data transmission can be ordered separately.
Please contact your authorized i-SENS sales representative.
①Glucose Meter
②Lancing Device
③Lancets(10) ⑦Carrying Case
④Owner’s Booklet ⑧Test Strip
⑤Quick Reference Guide
⑥Logbook
Autochek t Blood Glucose Monitoring System
www.i-sens.com 10
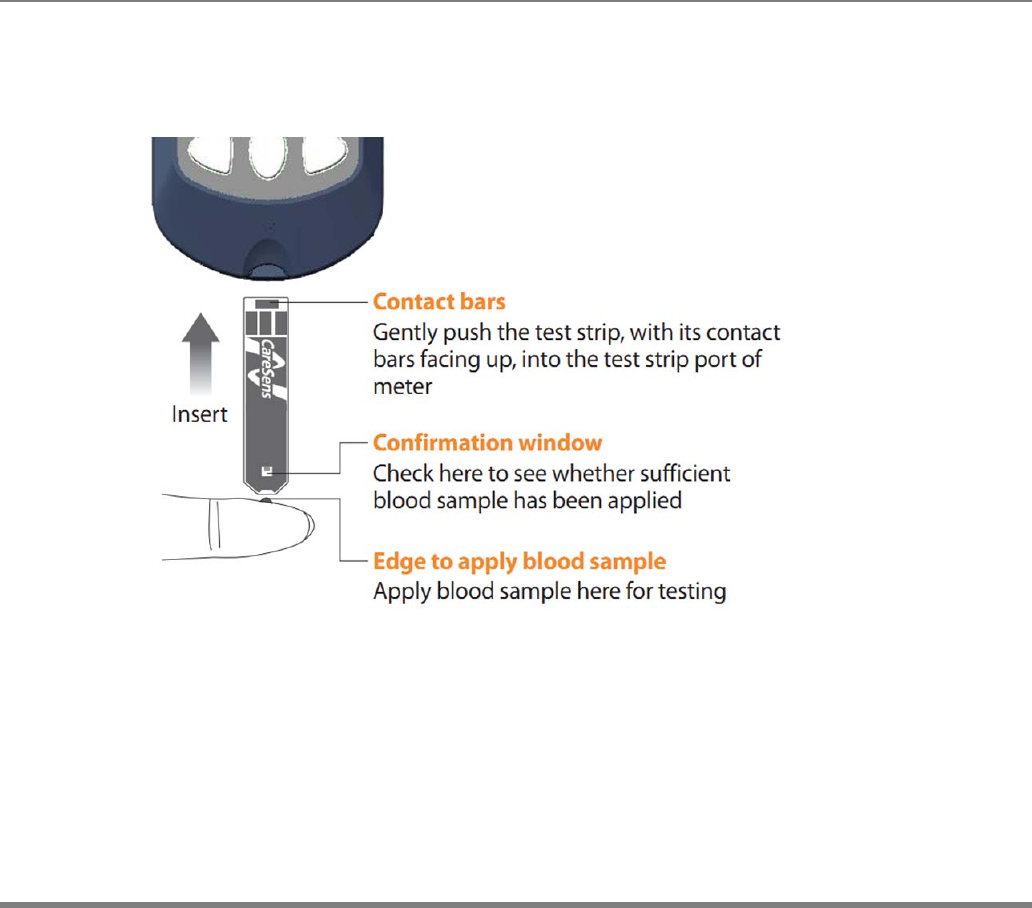
The AutoChek t blood glucose monitoring system measures blood glucose quickly
and accurately. It automatically absorbs the small blood sample applied to the narrow
edge of the test strip.
Autochek t Blood Glucose Test Strip

www.i-sens.com 11
Warning!
· The AutoChek t test strip should be used only with fresh
capillary whole blood samples.
· Do not reuse test strips.
· Do not use test strips past the expiration date.
· Test strips in new, unopened containers and test strips in
containers that have been opened can be used up until the
expiration date printed on the test strip box and container
label if the test strips are used and stored according to its
storage and handling methods.
· Store test strips in a cool and dry place at a temperature
· of 1 ~ 30˚C (34 ~ 86˚F).
· Keep away test strips from direct sunlight or heat and
do not refrigerate or freeze.
· Store test strips only in their original vial.
· Close the vial tightly after removing a test strip for testing
and use the strip immediately.
· Handle test strips only with clean and dry hands.
· Do not bend, cut, or alter test strips in any way.
· For detailed storage and usage information, refer to
the AutoChek t test strip package insert.
Caution:
Keep the meter testing supplies away from young children.
www.i-sens.com 12
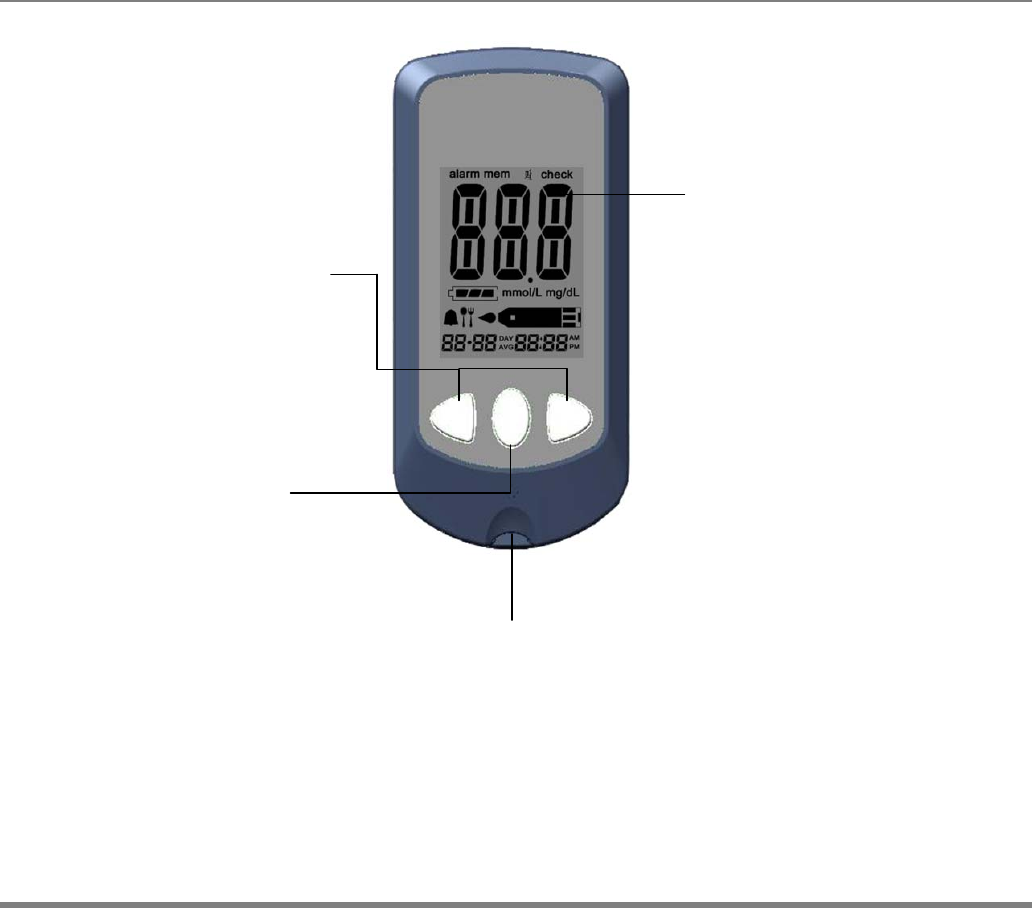
Display
Shows results
and messages
▲▼ Buttons
Select or changes
information
S Button
Turns the meter
on/off and
confirms menu
selections
Test Strip Port
Insert test strip here
Autochek t Blood Glucose Meter
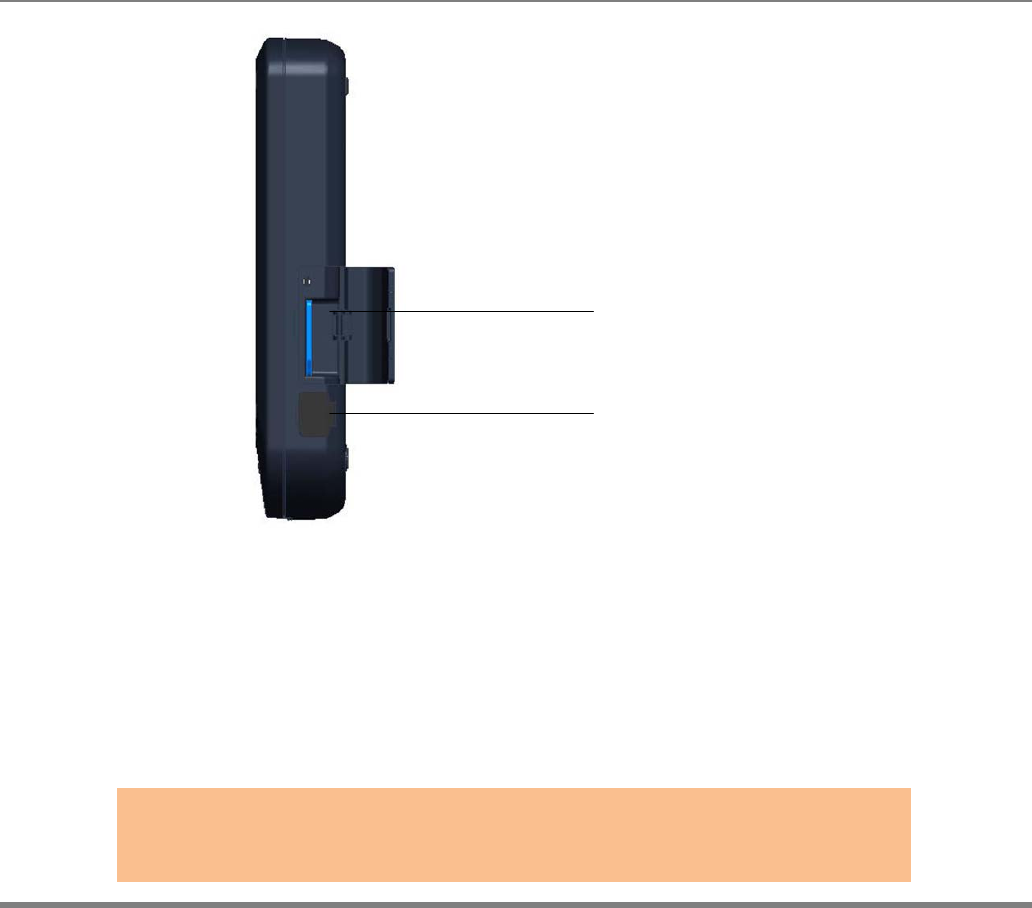
www.i-sens.com 13
SIM Card Slot
Insert a Mobile
SIM Card
Communication port
Charging the
Battery or Used to
transfer data from the
meter to a computer a
Mini USB Cable
Autochek t Blood Glucose Meter
Note:
The mini USB cable for data transmission to PC can be ordered
Separately, Please contact your authorized i-SENS sales representative.
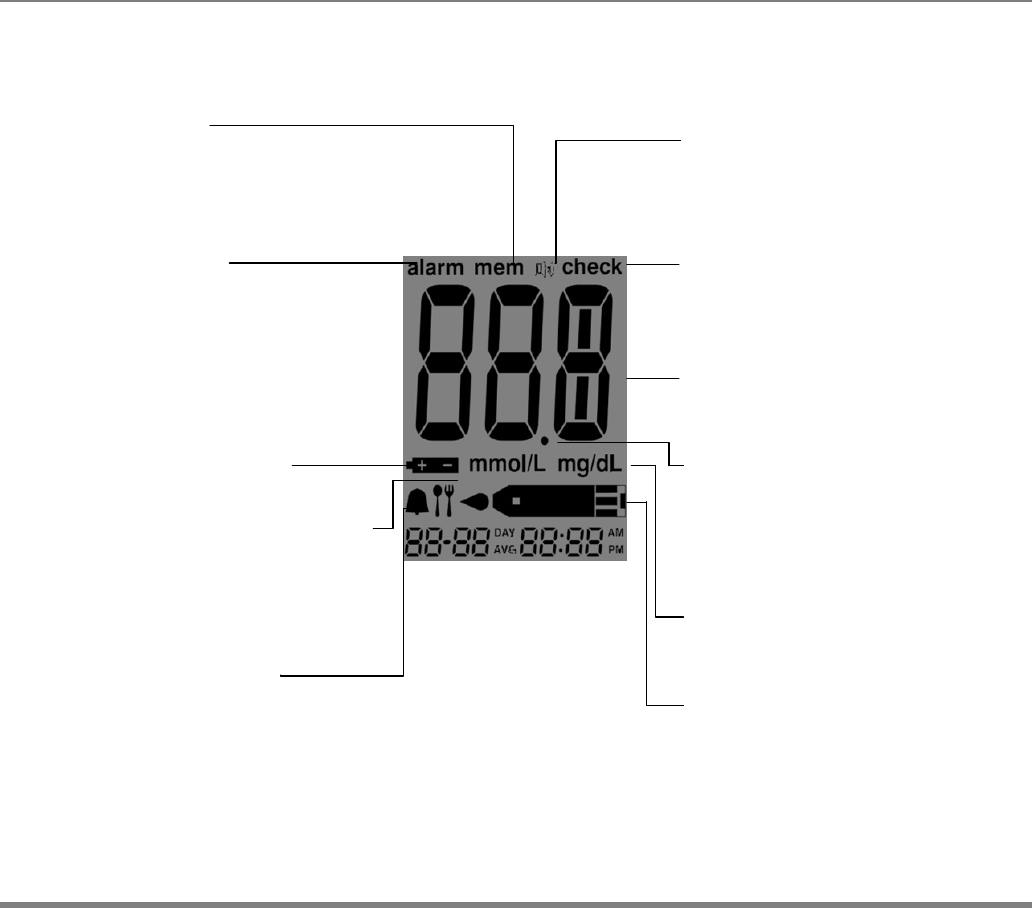
www.i-sens.com 14
mem
Appears when test
result stored in the
memory are displayed
Sound icon
Appears only when
the sound is set to
OFF
alarm
Appears when the
time alarm has been
set
check
Appears when test
result have not been
saved
mmol/L
Unit for measuring
blood glucose
Battery icon
Battery level indicator
Post-meal test flag
Appears during post-
Meal testing and
When post-meal test
Result are displayed
Test result
Test results
displaying panel
Decimal point
Appears when the
blood glucose
measuring unit is set
to mmol/L
mg/dL
Unit for measuring
blood glucose
Blood insertion icon
Unit for measuring
blood glucose
Autochek t Blood Glucose Meter Display
Alarm icon
Appears when the post
-meal alarm has been
set
www.i-sens.com 15
Press and hold the S button for 3 seconds to turnon the meter. After all settings
are finished, press and hold the S button for 3 seconds to turn off the meter.
Press ▲ or ▼ to reach the accurate value. Press and hold ▼ to scroll faster
Adjusting the Date, Time and Unit
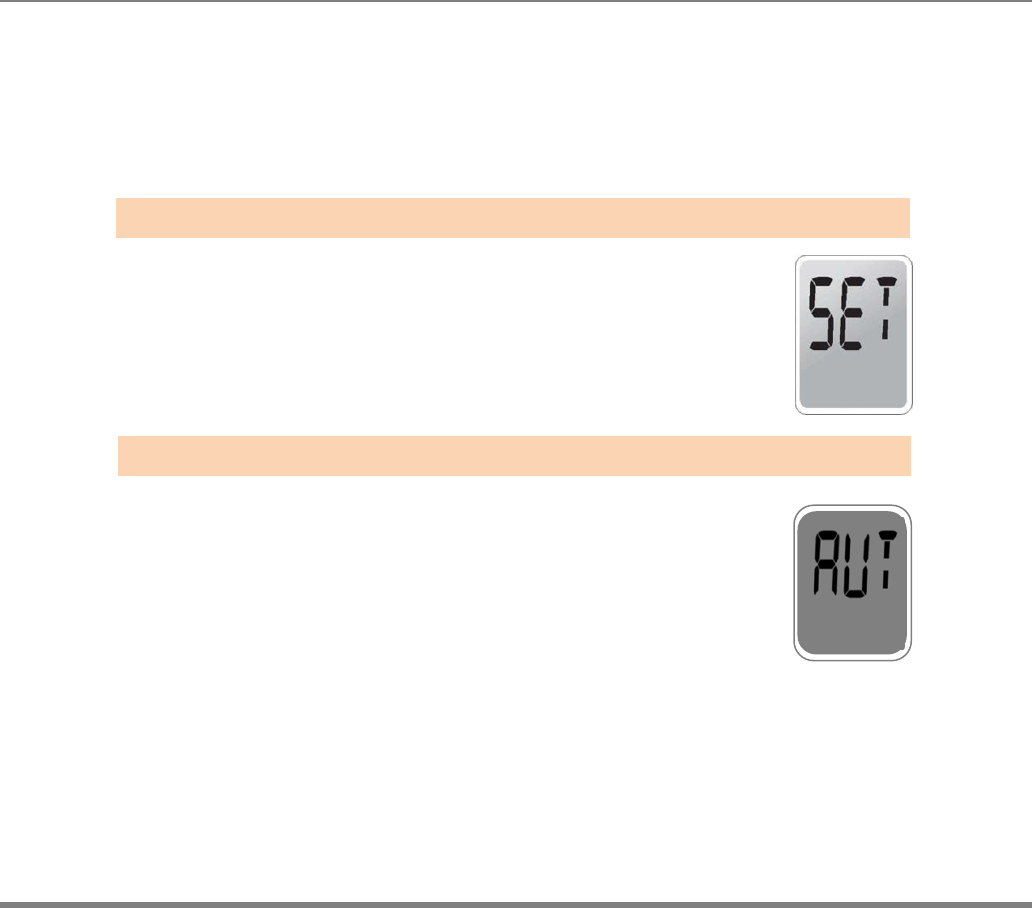
Press and hold the S button for 3 seconds to
turnon the meter. After all the segments
flash across the screen, the ‘SET’ character icon
will be displayed on the screen.
Press the S button again to enter the year setting mode.
Enter the SET mode and press the S button until
the ‘AUT’ appears on the screen.
By pressing the S button one more time,
the meter will automatically adjust itself to
the correct current time.
(refer the Automatic time adjusting)
Setting up Your System
Ste
p
1 Enterin
g
the SET Mode
Ste
p
2 Select the automatic time ad
j
ustin
g
mode
www.i-sens.com 16
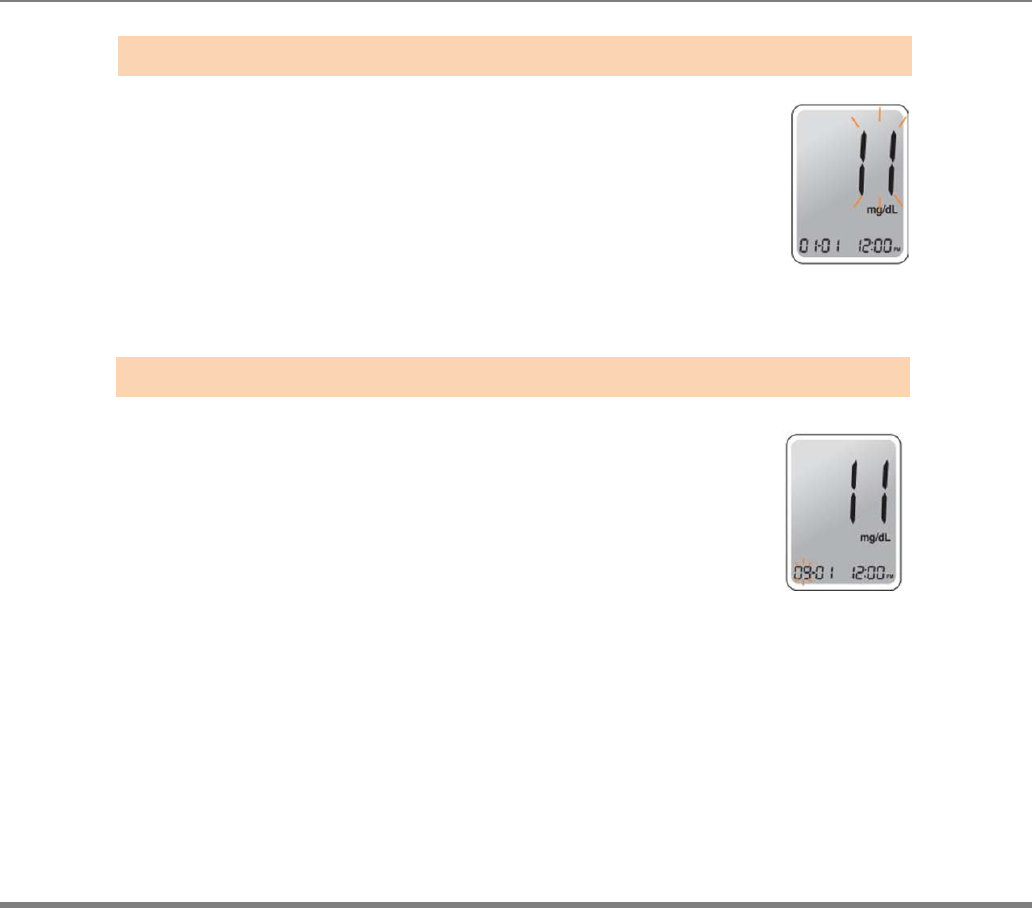
If user didn’t select the ‘automatic time adjusting mode ‘
at the “Step 2”, The number that appears on the screen
after the meter is turned on indicates the year of
manufacture. Press and release the or
to adjust until the correct year appears.
Press and hold the button to scroll through the
numbers quickly. After setting the year,
press the S button to confirm your selection and
enter the month setting mode
A number indicating the month will be
blinking on the left corner of the screen.
Press the ▲ or ▼ until the correct month appears.
Press the S button to confirm your selection and
enter the date setting mode.
Ste
p
3 Settin
g
the Year
Ste
p
4 Settin
g
the Month
www.i-sens.com 17
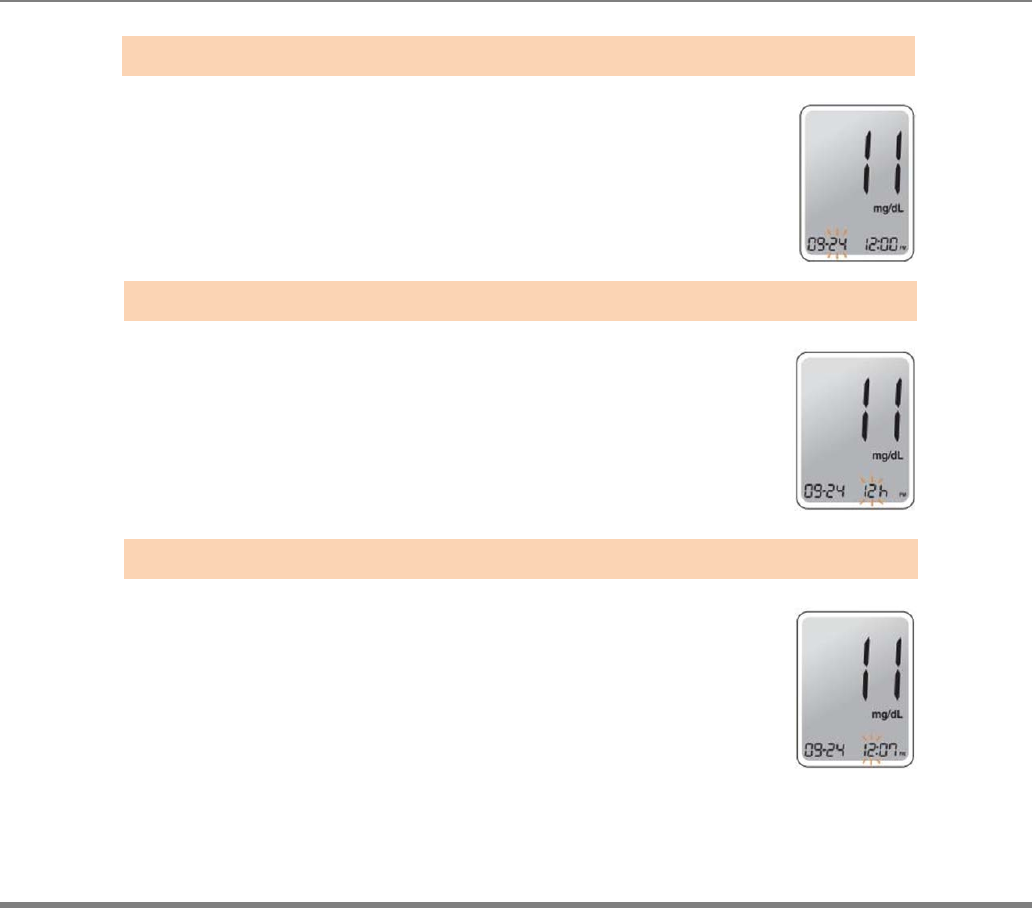
Press the▲ or ▼until the screen displays
The correct date. Press the S button to
confirm the date and enter the time setting mode.
The meter can be set in AM/PM 12-hour or
24-hour clock format. Press the▲ or ▼ to select a
format. The AM / PM icon is not displayed in the 24-
hour format. After selecting the format press the S
button to enter the hour setting mode.
Press the ▲ or ▼ until the correct hour
appears. After the hour is set, press the S
button to enter the minute setting mode.
Ste
p
5 Settin
g
the Date
Ste
p
6 Settin
g
the Time
Ste
p
7 Settin
g
the Hour
www.i-sens.com 18
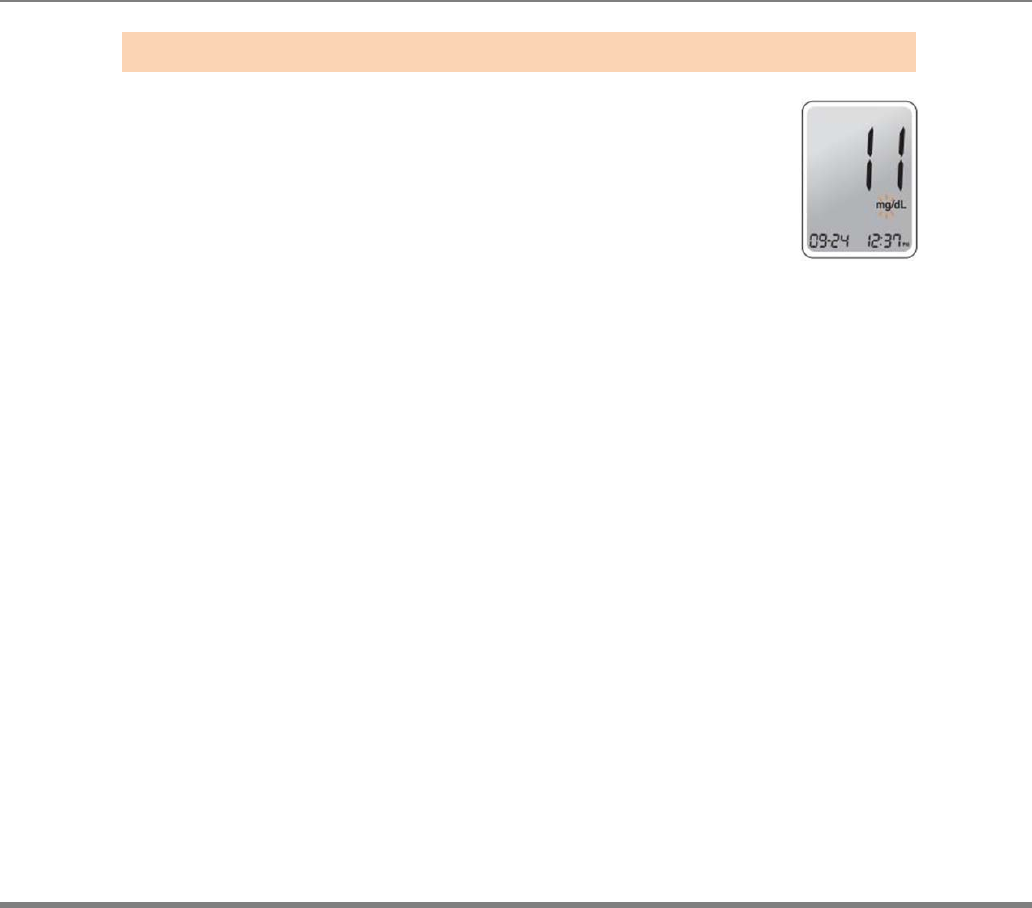
Press the ▲ or ▼ until the correct minute
appears. After setting the minute, press the S
button to enter the unit setting mode
Ste
p
8 Settin
g
the Minute
www.i-sens.com 19
Setting the Sound On/Off
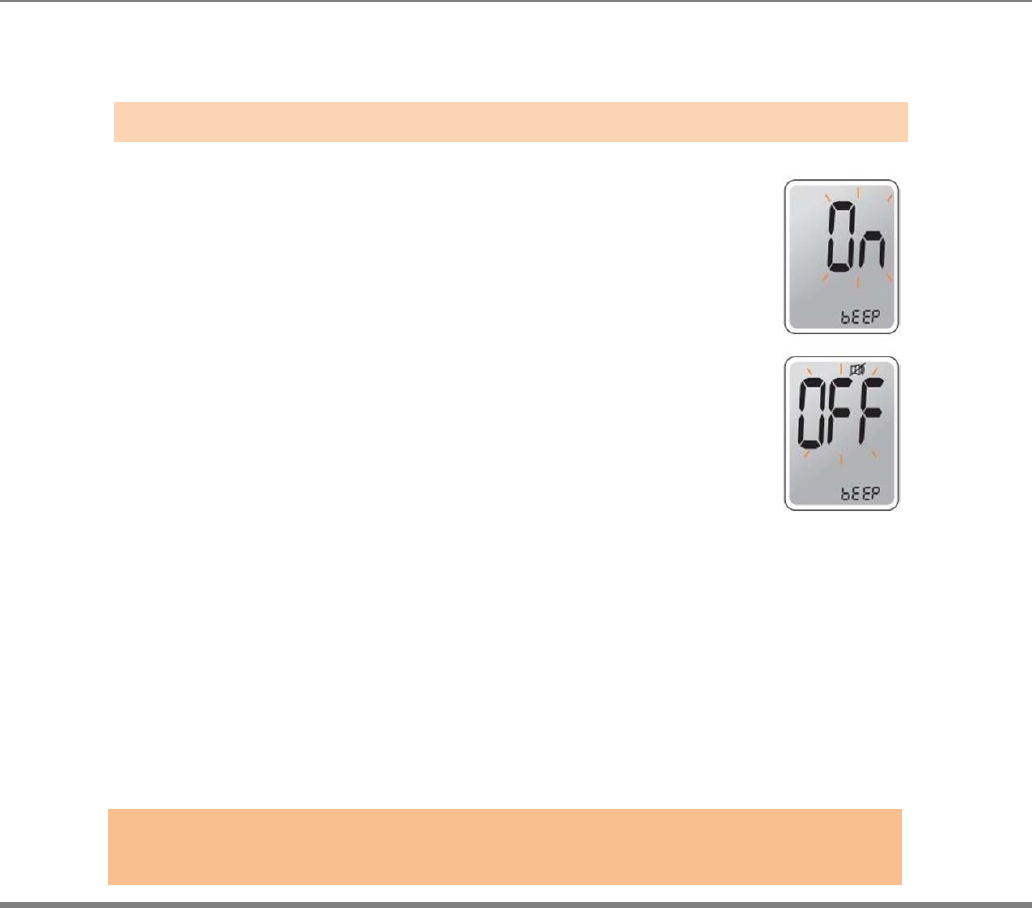
On the sound option menu, pressing the ▲ or ▼, the
screen will display the On or OFF. Press the S button to
confirm the selection.
The meter will beep in the following instances,
if the meter’s sound is set to On.
•
When the test strip is inserted in the meter
•
When the blood sample is absorbed into the test
strip and the test starts
•
When the test result is displayed
•
When you push the S button or ▲button to check
the memory
•
When you push the ▲ button to set the post-
meal (PP2) alarm
•
When it is time for a preset blood glucose test
If the sound is set to OFF, none of the sound
functions will work
Note:
Only when the sound is set to OFF, icon appears on the display
Ste
p
9
www.i-sens.com 20
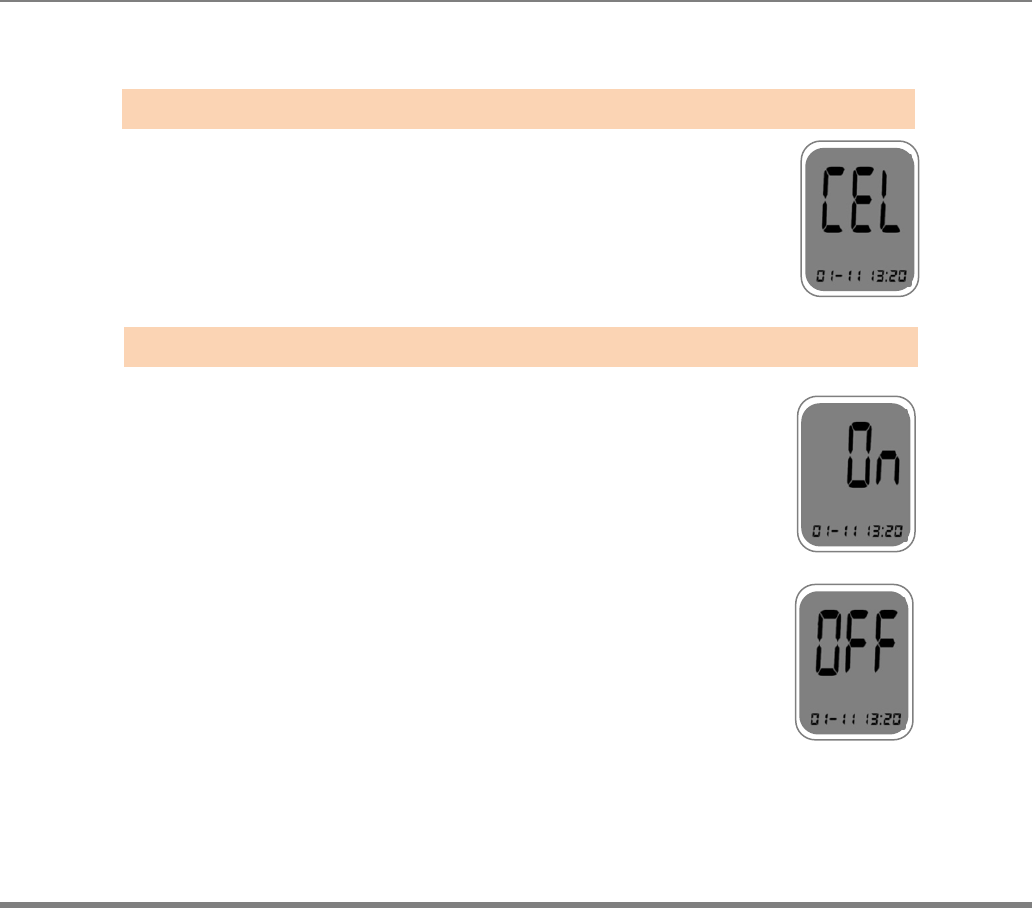
Setting the Cellular function On/Off
Enter the SET mode and press the S button until
the ‘CEL’ appears on the screen. On this screen,
the cellular function of the meter can be activated
or deactivated.
From the ‘CEL’ screen, press the ▲ or ▼ button until
the ‘On’ character icon appears on the screen. Press
the S button to turn on the cellular function of the meter.
From the ‘CEL’ screen, press the ▲ or ▼ button until
OFF’ appears on the screen. Press the S button to turn
off the cellular function of the meter.
Ste
p
10
Ste
p
11
www.i-sens.com 21
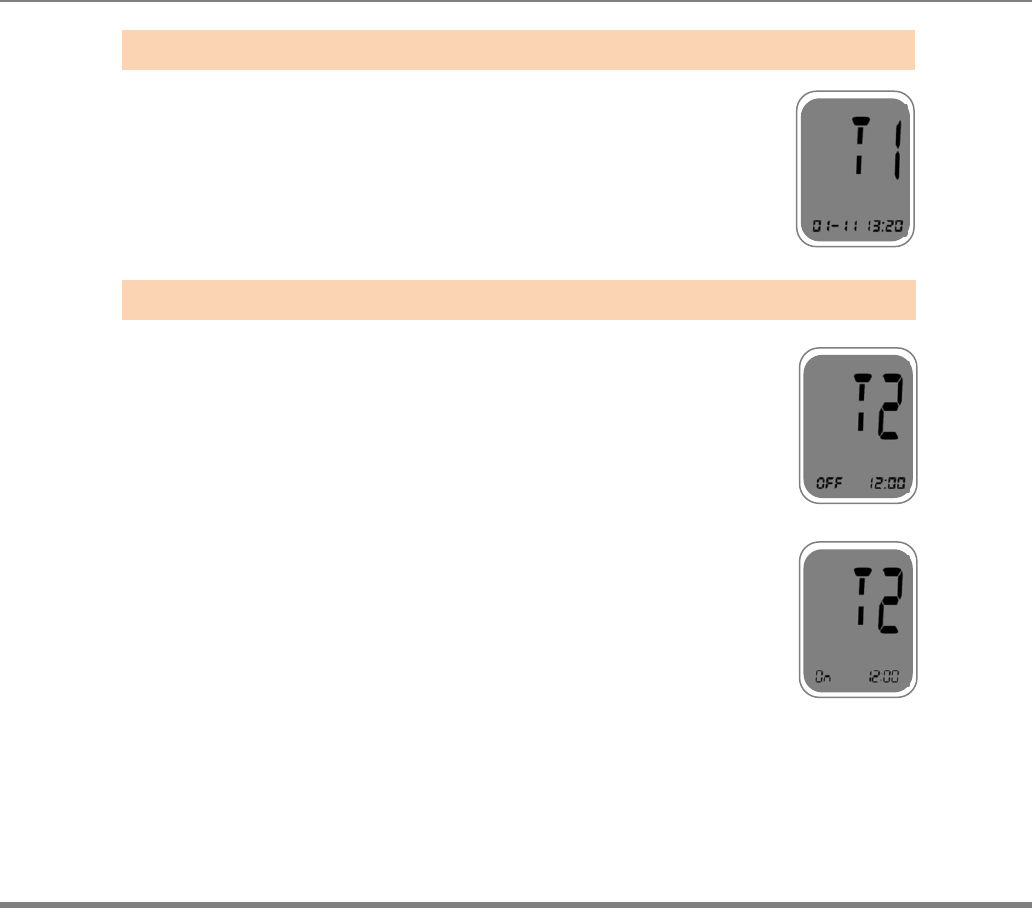
Once the cellular function of the meter is turned on,
the meter can immediately transmit the test result
data to the designated
server by choosing Transfer Mode 1 (T1 mode).
After turning on the cellular function is turned on, the ‘T1’
will be appeared, once the ‘T1’ appears, press the
S button to choose Transfer Mode 1
Once the cellular function of the meter is turned on,
the meter can transmit the test result data to the
designated SMS server once a day at a reserved
time by choosing Transfer Mode 2 (T2mode).
In order to choose Transfer Mode 2, press the ▲ or ▼ until
‘T2’ appears from the ‘T1’ screen. Once the ‘T2’
appears, press the S button and the ‘OFF’ will blink.
Press the ▼ button to turn on Transfer Mode 2.
Ste
p
12
Ste
p
13
www.i-sens.com 22
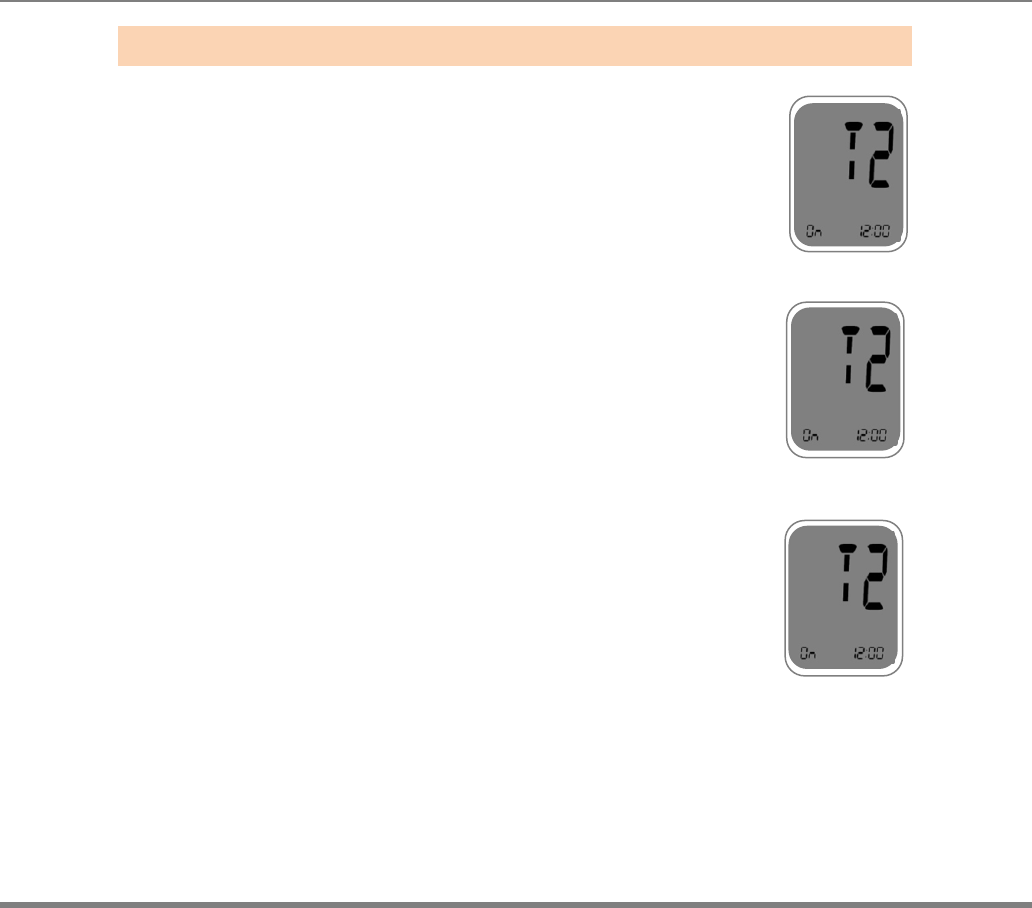
Once Transfer Mode 2 is turned on,
press the ▲ or ▼ until the correct hour appears.
After the hour is set, press the S button to enter
the minute setting mode. Press the ▲ or ▼
until the correct minute appears. Once correct
hour and minutes are set, press S button to
confirm the schedule.
Ste
p
14
www.i-sens.com 23
Setting the ‘Test Result Reset’
(Deleting all the saved test result)
In this mode all the test results stored in the meter can be deleted.
Please note that if you select YES, all the stored test results will be deleted and
cannot be restored.
After the beeper mode is set,
press the S button to enter the ‘Test Result Reset’
mode.
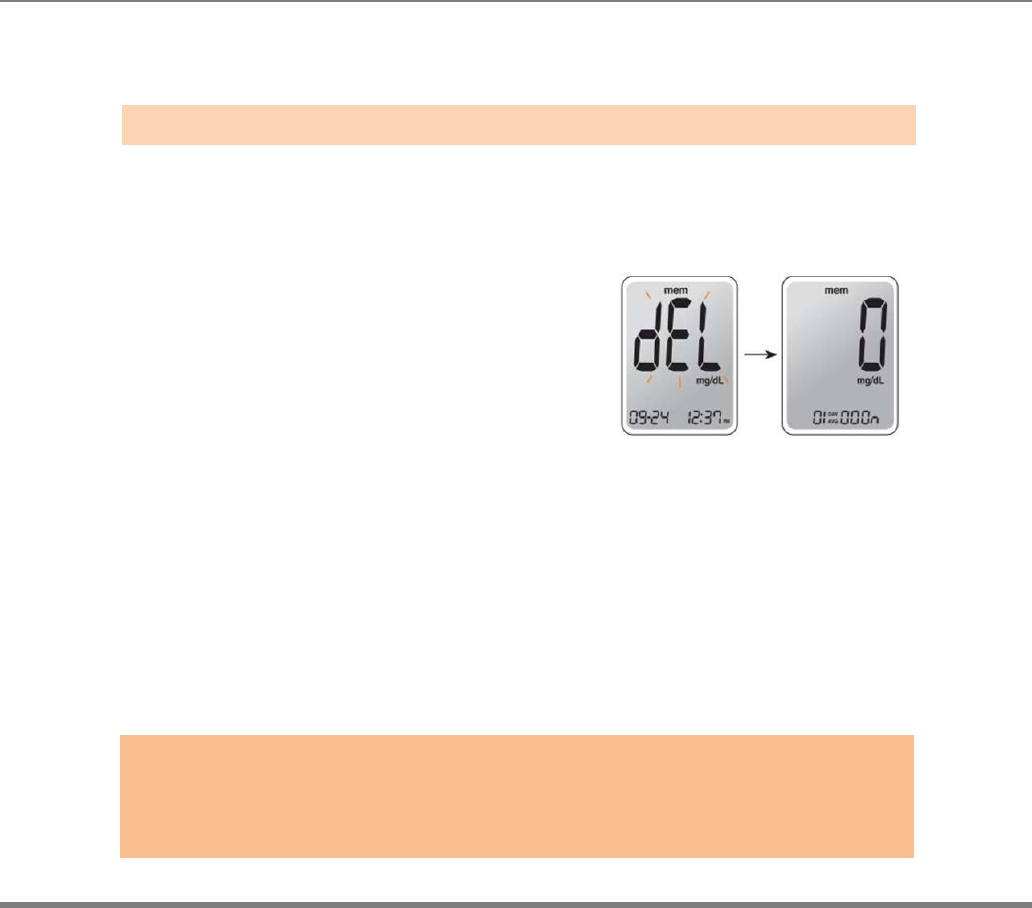
The ‘dEL’ will blink on the screen.
Press the ▲ or ▼ to alternate between ‘YES’ or
‘no’. To delete all the stored test results press the
S button when the screen displays
‘YES’. Then, all the test results stored in
the meter will be deleted and the screen will
be similar to the picture on the right.
If you do not want to delete the results press the S button when the screen
displays ‘no’. Then, the screen will return to step 2. Please, see page 12.
Note:
At any stage, If the S button is pressed for 3 seconds, Time, Date another setting
mode will finish and meter will be turned off.
Press and hold the ▼ to scroll through number quickly
Ste
p
15

www.i-sens.com 24
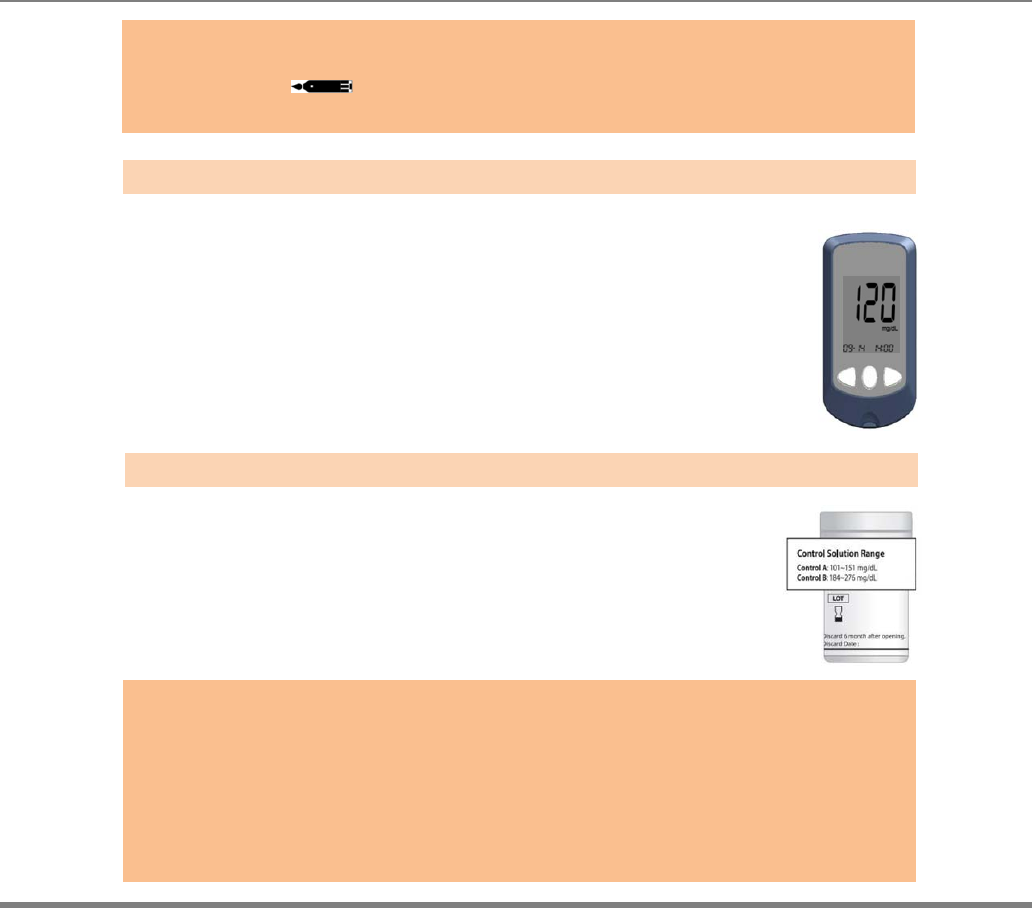
You may check your meter and test strips using the AutoChek t Control
Solution.
The AutoChek t Control Solution contains a known amount of glucose
and is used to check that the meter and the test strips are working
properly.
The test strip vials have AutoChek t Control Solution ranges printed on
their labels. Compare the result displayed on the meter to the AutoChek
t Control Solution range printed on the test strip vial.
Before using a new meter or a new vial of test strips, you may
conduct a control solution test following the procedure on page 18.
Note:
•
Use only the AutoChek t Control Solution.
•
Check the expiration dates printed on the vial. When you first open a
control solution vial, record the discard date (date opened plus three
months) in the space provided on the label.
•
Make sure your meter, test strips, and control solution are at room
temperature before testing. Control Solution tests must be done at room
temperature (20 ~ 25˚C, 68 ~ 77˚F).
•
Before using the control solution, shake the vial, discard the first few drops
and wipe the tip clean.
• Close the control solution vial tightly and store at
a temperature of 8 ~ 30˚C (46 ~ 86˚F).
You may do a control solution test:
•
When using the meter for the first time.
•
Whenever you open a new vial of test strips.
•
If the meter or test strips do not function properly.
•
If your symptoms are inconsistent with the blood glucose test results, and when
you feel that the meter or test strips are not working properly
•
If you drop or damage the meter.
Checking the System
www.i-sens.com 25
Control Solution Testing
Insert a test strip into the meter’s test strip port, with the contact
bars facing upwards.
Gently push the test strip into the port until the meter beeps.
Be careful not to break the strip while pushing it in.
The icon will be displayed on the screen.
Shake the AutoChek t Control
Solution vial before each test.
Remove the cap and squeeze the
vial to discard the first drop. Then
wipe the tip with a clean tissue
or cloth. After the symbol
appears on the display, apply the
solution to the narrow edge of the
test strip until the meter beeps.
Make sure the confirmation window fills completely.
Caution:
If all the results you get from testing continuously (at least three times)are within the
range printed on the test strip, the meter and test strips are working properly and you
may use them for your blood glucose test.
Step 1
Step 2
www.i-sens.com 26
A test result will appear after the meter counts down
from 5 to 1.
After your control solution result appears on the display,
press the ▼ for 3 seconds until the ‘check’ icon
appears on the display. When the ‘check’ icon is
displayed, the result is not stored in the meter’s
memory and is not included in the averages.
Compare the result displayed on the meter to the range
printed on the test strip vial. The result should fall within
the range on the test strip vial.
Used strips should be discarded and disposed.
Note:
The meter may be turned off, if the blood sample is not applied within
2 minutes of the icon appearing on the screen.
If the meter is turned off, remove the strip, reinsert, and start from step 1.
Step 3
Step 4
Caution:
• If the results you get are not within this range, the meter and test strip
may not work properly. Then, stop using the meter and contact the
nearest i-SENS representative.
• The range printed on the test strip vial is for the AutoChek t
Control Solution only. It does not have any connection to your
blood glucose level.

www.i-sens.com 27
Comparing the Control Solution Test Results
Repeat the control test if the test result falls outside the range
printed on label of the test strip vial. Out of range results
may occur due to the following factors:
• When the control solution vial was not shaken well,
• When the control solution is past its expiration date or is
contaminated,
• When the meter, the strip or the control solution were exposed to high or low
temperatures,
• When the first few drops of the control solution were not discarded or the tip of
the vial was not wiped clean,
• When the test strip is past its expiration date,
• When the meter is not functioning properly.
Note:
The AutoChek t Control Solution can be purchased separately. Please contact
your authorized i
-
SENS sales representative.
www.i-sens.com 28
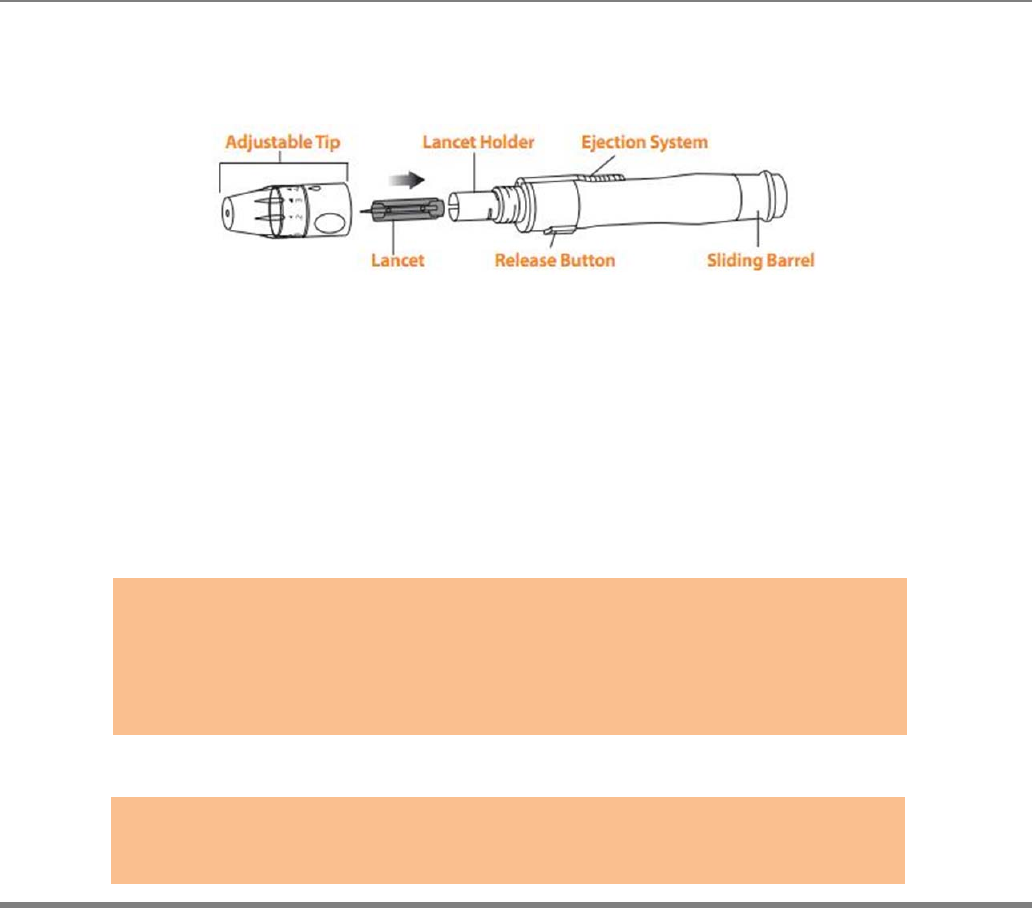
You will need a lancing device in order to collect a blood sample. You may use the
lancing device contained in the AutoChek t Blood Glucose Monitoring System or
any other medically approved lancing device.
•
The lancing device should be used by one individual and communal use is
strongly discouraged
• Use a soft cloth or tissue to wipe the lancing device. If necessary, a small
amount of alcohol on a soft cloth or tissue may be used.
Caution:
To avoid infection when drawing a sample, use a lancet only one time, and:
• Do not use a lancet that has been used by others.
• Always use a new sterile lancet.
• Keep the lancing device clean.
Note:
Repeated puncturing at the same sample site may cause pain or skin calluses.
Choose a different site each time
y
ou test.
Using the Lancing Device

www.i-sens.com 29
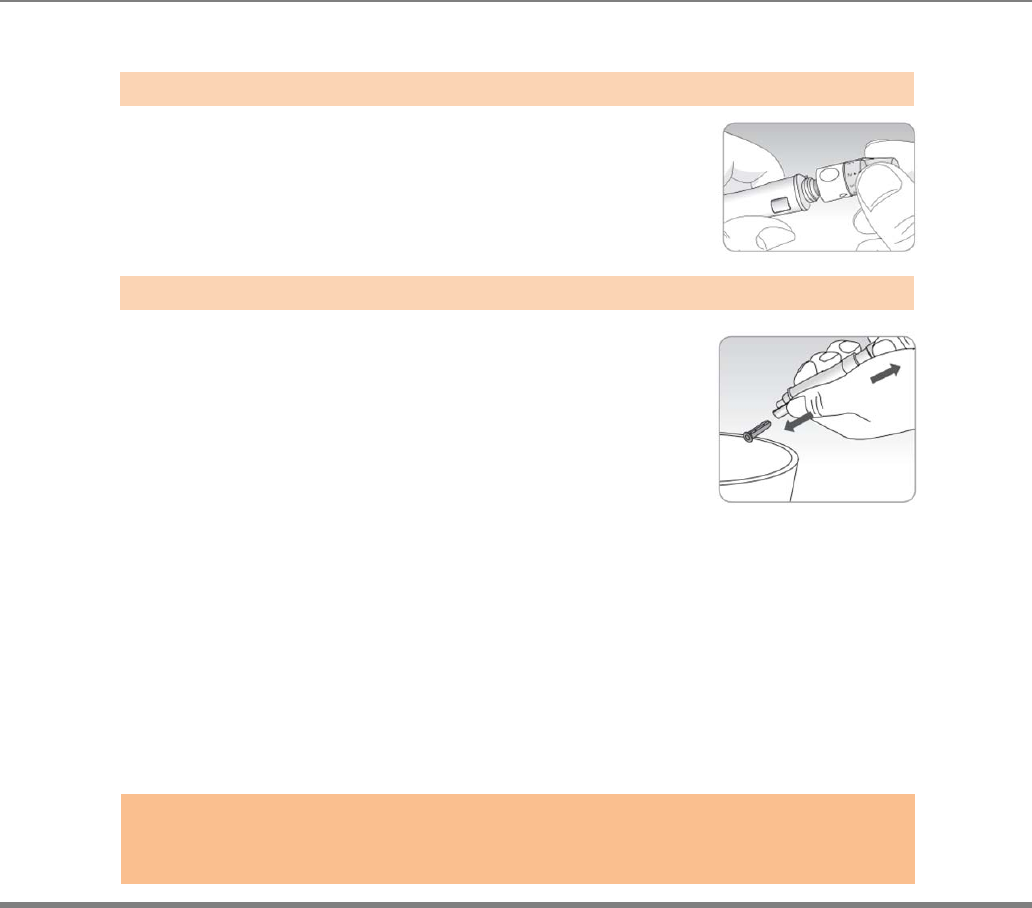
Preparing the Lancing Device for Blood Sample Retrieval
Wash hands and fingertip sample site with
soap and warm water.
Rinse and dry thoroughly.
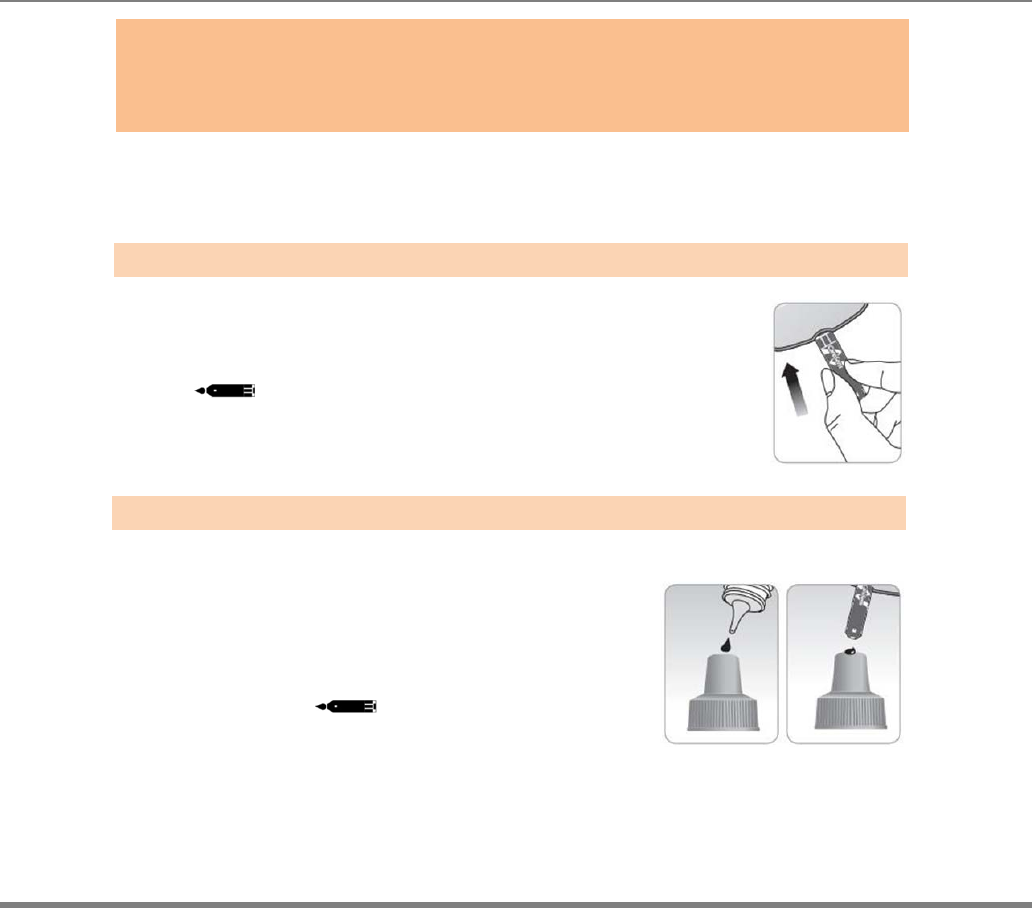
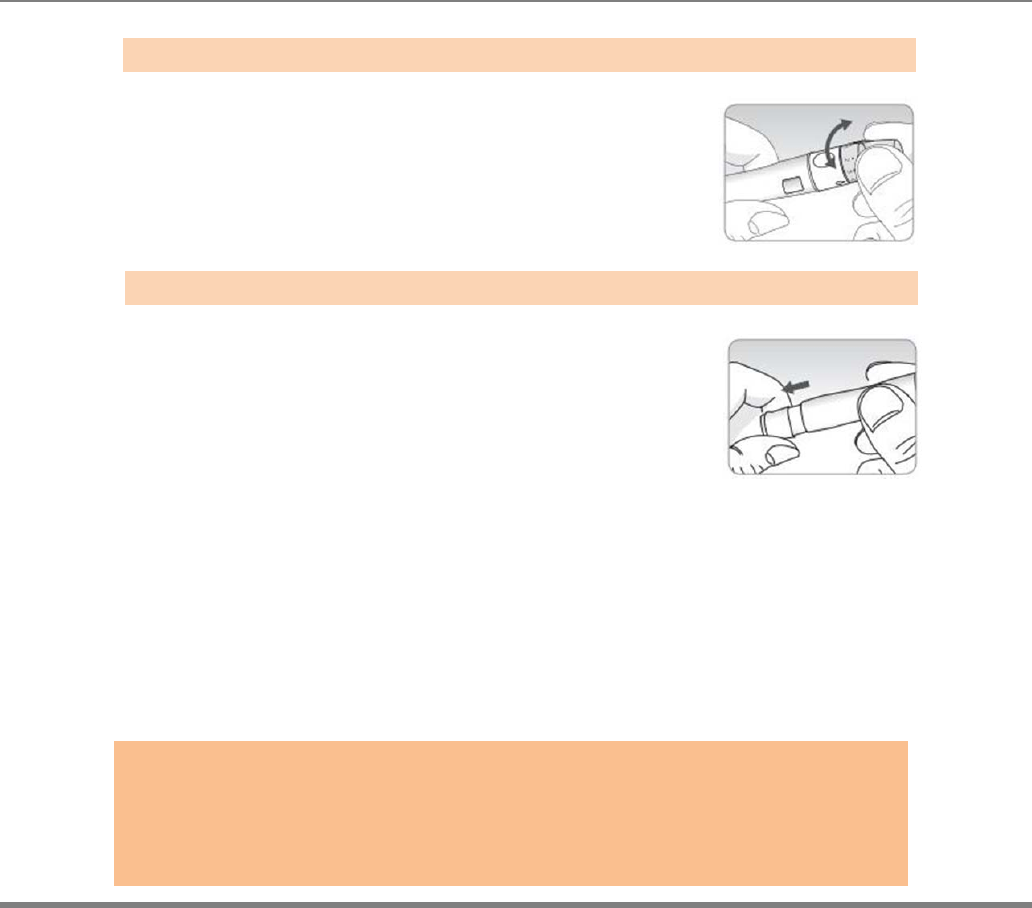
Unscrew the lancing device tip
Firmly insert the new lancet into the lancet
holder. Hold lancet firmly.
Gently twist to pull off the protective disk.
Save the disk to recap the lancet after use.
Replace the lancing device tip.
Step 1
Step 2
Step 3
www.i-sens.com 30
Select a desired depth of one-to-five
(1-5) on the lance’s adjustable tip. Rotate
the to align the desired number with the
A beginning setting of three (3) is
recommended.
To cock the lancing device, hold the tip in one hand.
Pull the sliding barrel on with the other hand. The
lancing device is cocked when you feel a click.
Step 4
Step 5
Note:
The skin depth to retrieve samples will vary for various people at different
sample sites. The lance’s adjustable tip allows the best depth of skin
penetration for an adequate sample size.
A beginning setting of three (3) is recommended.
www.i-sens.com 31
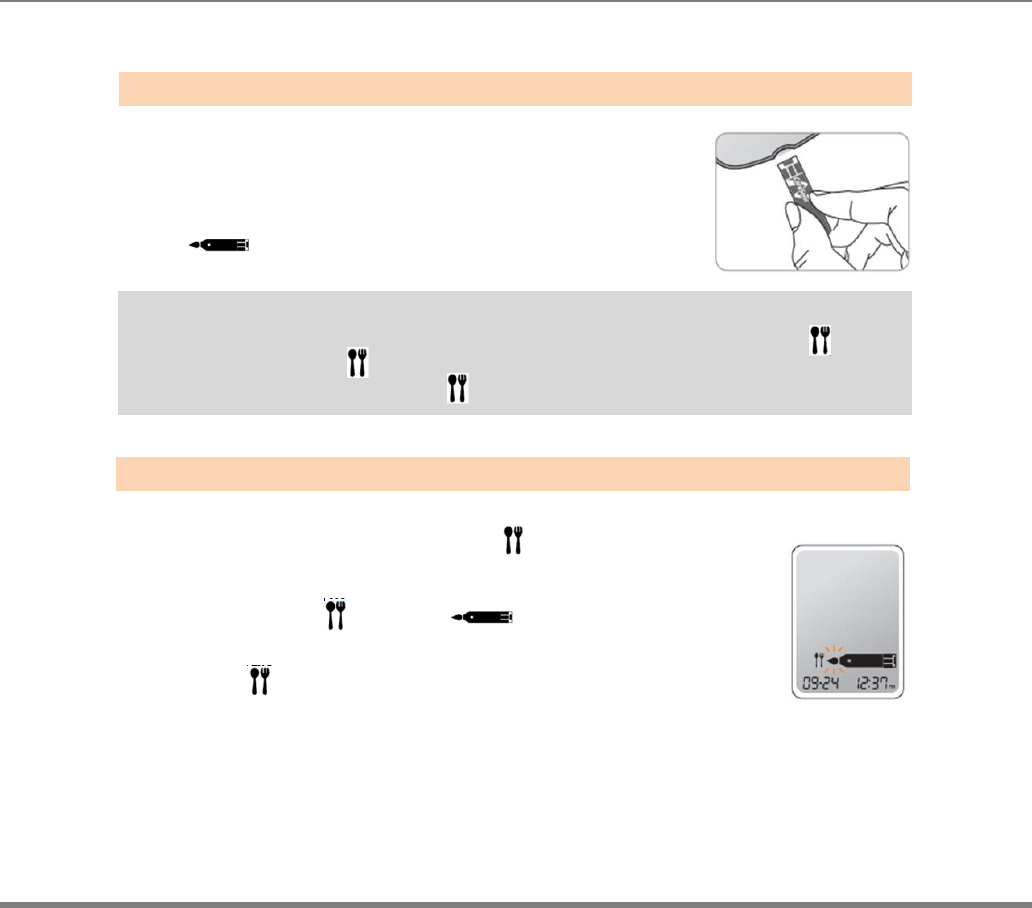
Preparing the Meter and Test strip
Insert a test strip with the contact bars
facing upwards into the meter port.
Push the strip in gently until the meter beeps.
Be careful not to bend the test strip.
The symbol will appear on the screen.
If you want to attach an post-meal flag ( )
to a test result, press and hold the ▼ for 3
seconds after inserting the test strip.
The post-meal flag( ) and the symbol
will appear on the screen
The test result will also be displayed with the post
-meal flag( ).
If you do not want to save the result the result as a
Postmeal test, move on to the step 8 after the step 6.
Flagging Post-meal Test Result
The AutoCheck t meter allows you to flag a result of an post-meal test with the ( ) icon.
The post-meal test flag ( ) can be attached just before applying the blood sample.
Once you attach the post-meal flag ( ) to the test results, it cannot be deleted.
Step 6
Step 7
www.i-sens.com 32
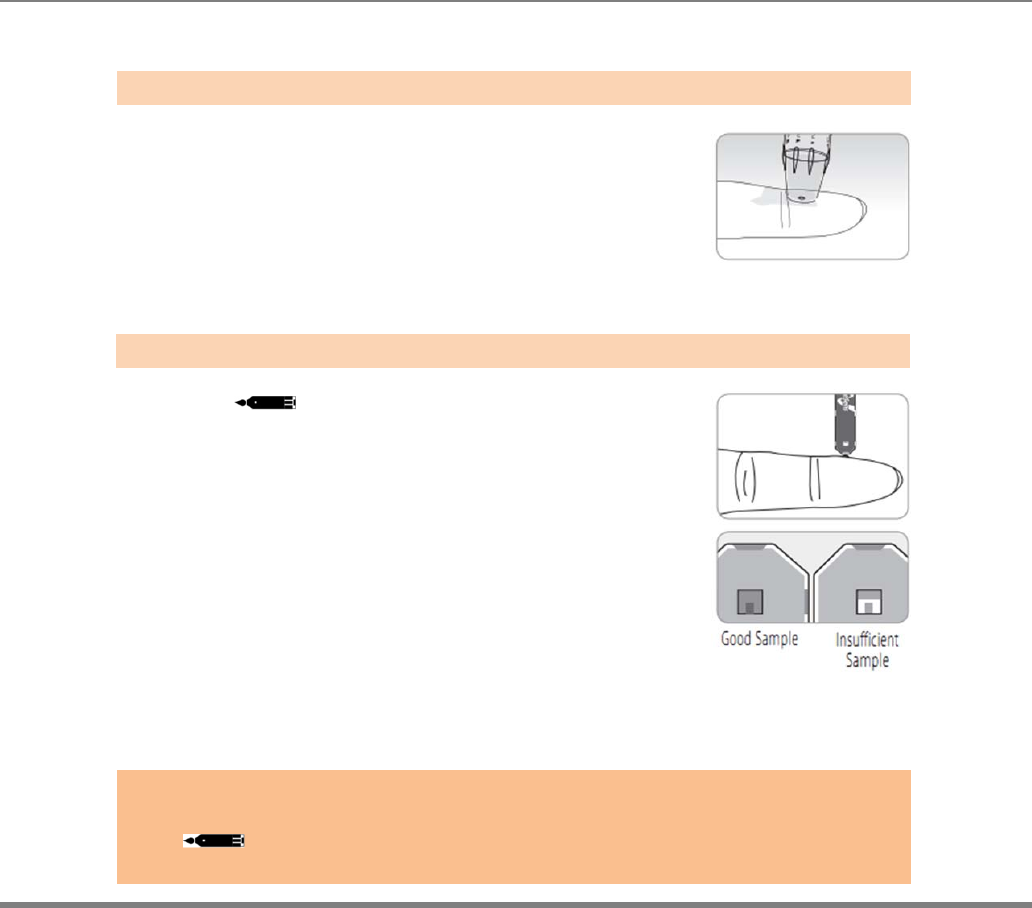
Applying Blood Sample
Obtain a blood sample using the lancing
device. Place the device against the pad of
the finger. The best puncture sites are on the
middle or ring fingers. Press the release
button. Remove the device from the finger.
Wait a few seconds for a blood drop to form.
A minimum volume of 0.5 microliter is needed to fill the
Confirmation window. (actual size of 0.5㎕ : • )
After the symbol appears on the screen,
Apply the blood sample to the narrow end of
the test strip till the meter beeps.
If the confirmation window filled before the meter
Finishes down then discard the test strip new one.
If confirmation window is not filled in because of
Abnormal viscosity or insufficient volume,
Er4 message will appear.
Step 8
Step 9
Note:
The meter may switch off if the blood sample is not applied within 2 minutes of
The icon appearing on the screen. If the turns off, remove the strip and
reinsert into the meter.
www.i-sens.com 33
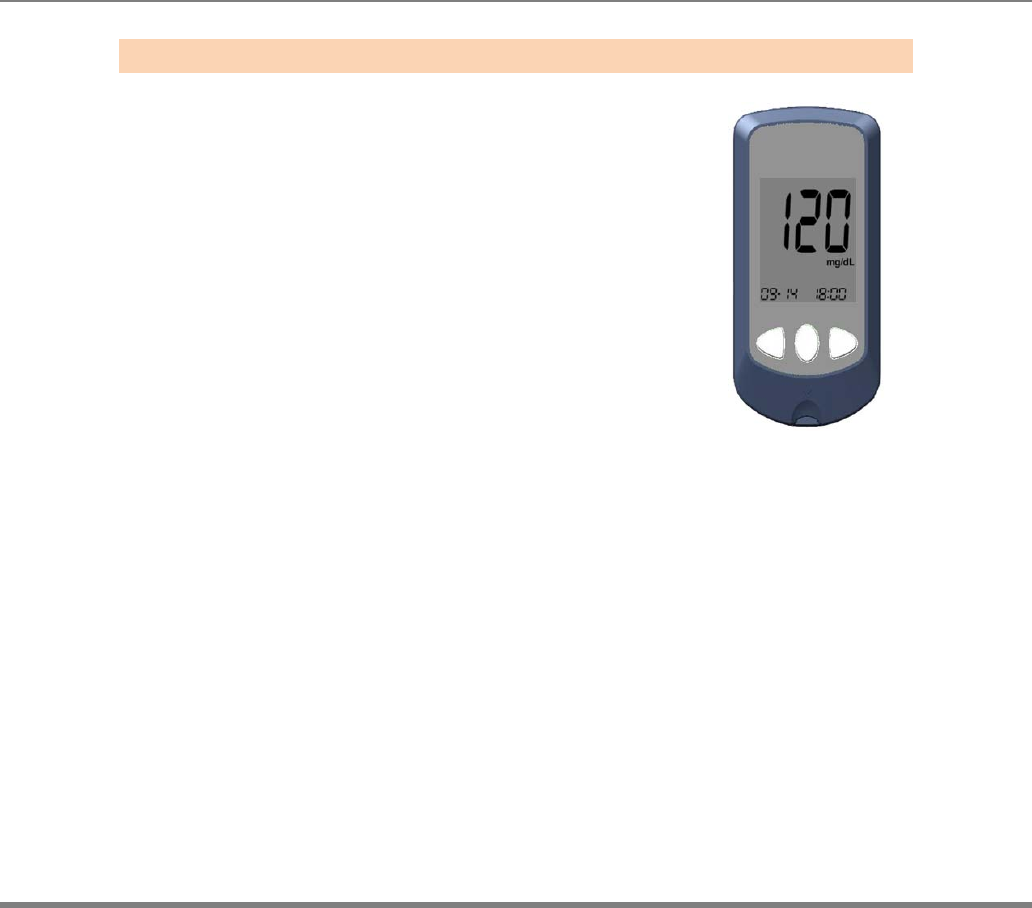
The test result will appear after the meter
counts down from 5 to 1. The result will
be automatically stored in the meter’s
memory.
If the test strip is removed after the test
result is displayed, the meter will be automatically
turned off after 3 seconds.
Discard used test strips safely and dispose.
Step 10
www.i-sens.com 34
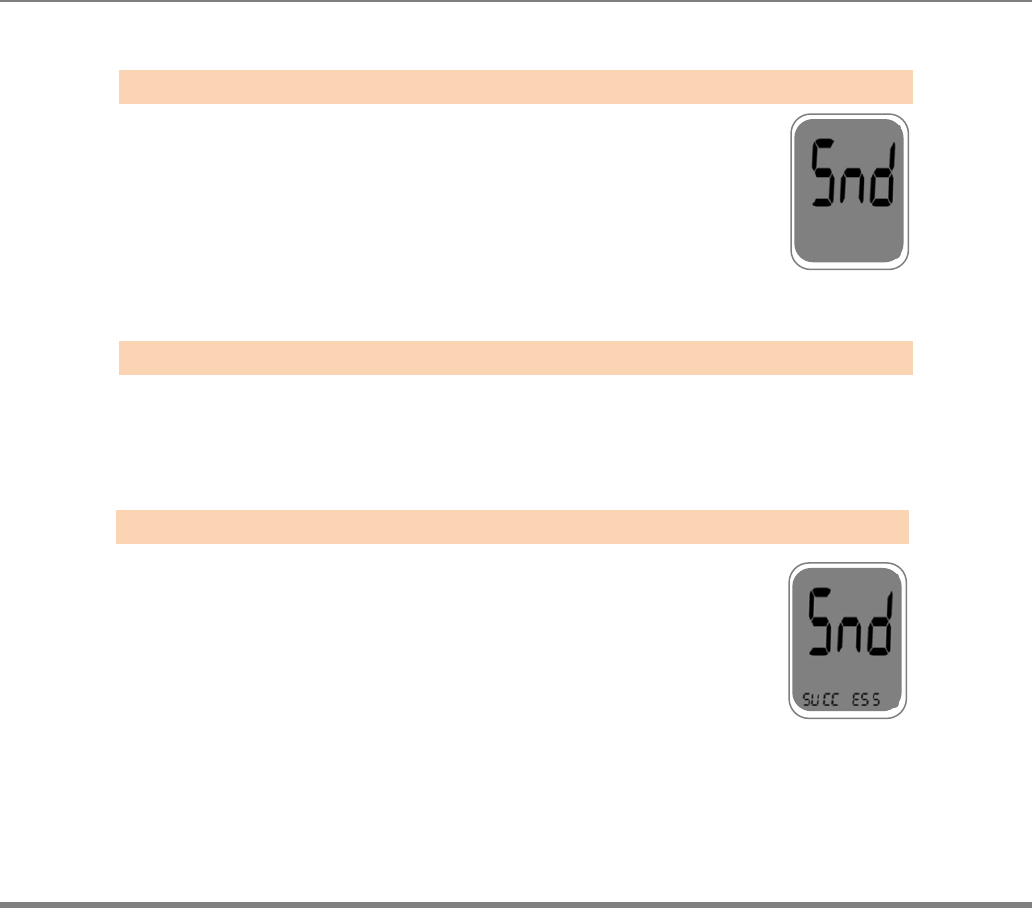
Result Data Transmission I
In the “T1” mode, the measured data is sent to
a server immediately after each measurement.
(Refer the Setting the Cellular function On/Off )
After measuring Blood glucose and discard an used test strip,
the meter
will starting the data transfer operation. ‘Snd’ will be appeared
on the screen.
Once the data transfer begins, the progress indication
dash dot (blinking) will be appeared at the bottom of the
screen.
When the meter successfully sent the test result, ‘SUCC ESS’
will be appeared at the bottom of the screen.
Step 1
Step 2
Step 3
www.i-sens.com 35
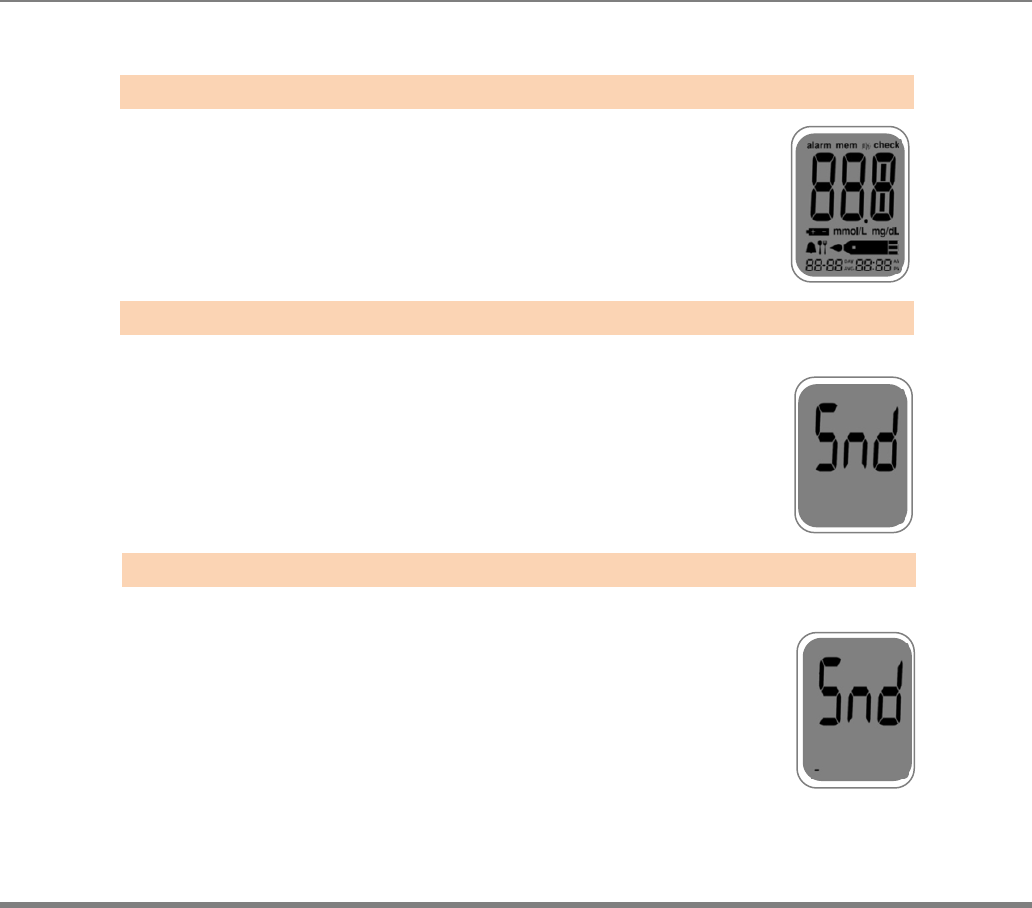
Result Data Transmission II
Transfer mode 2 (T2 Mode)
(Refer the Setting the Cellular function On/Off )
User can set the schedule, then BGM sends
all test results to the server once a day only at a
reserved time.
At the reserved time, GSM meter wakes up
automaticallyandgathering all measured data of the day
The data will be sentto the server. “Snd” appears during the
data transfer.
At the bottom of thescreen,
it displays the progress indicator dots.
Step 1
Step 2
Step 3

www.i-sens.com 36
When the meter successfully sent the test result, ‘SUCC ESS’
will be appeared at the bottom of the screen.
Step 4
www.i-sens.com 37
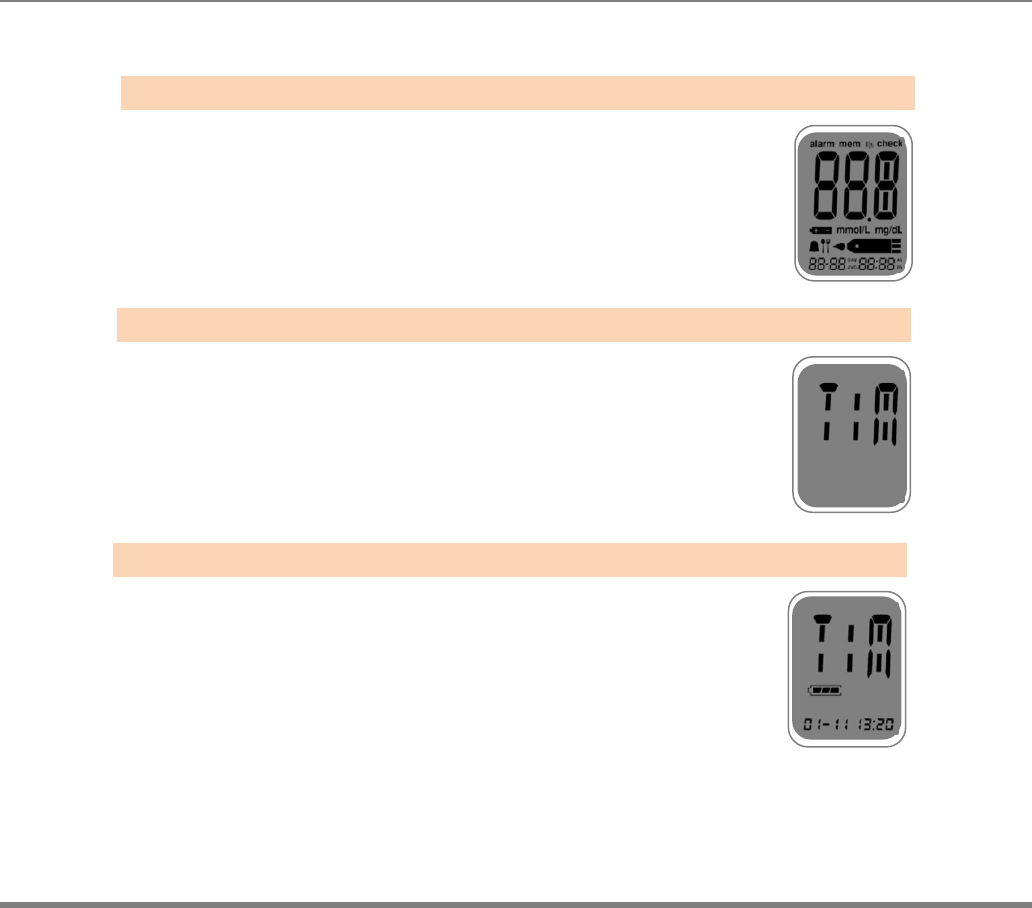
Automatic time adjusting
In the sleep mode, press the ▼ button until display “TIM”
When “TIM” appears, release the ▼ button
When the Autochek t retrieve cellular network
time, it will display the local time at the bottom of the screen.
Step 1
Step 2
Step 3
www.i-sens.com 38
Discarding Used Lancets
Unscrew the general lancing device tip.
Place the protective cover on the lancet.
Push the lancet ejector forward with the
thumb and simultaneously pull out the
sliding barrel to dispose the used lancet into
a proper biohazard container.
Step 1
Step 2
Cautions:
The lancet is for single use only. Never share or reuse a lancet. Always
dispose of lancets properly.

www.i-sens.com 39
AutoChek t BGMS is caplable of testing your blood glucose from your palm, arms,
tight, or calves, usually referred to as an alternative site test, or AST.
Alternate site testing can be less painful than fingertip testing,. However, because of
the physiological differences between your fingertip and palm, AST results may be
significantly different.
While AST may reduce the pain during testing, it may not be simple for everyone
and the following precautions should be observed during testing.
You should consult with your doctor before using alternate site testing.
Please understand the following informationbefore testing outside of the
fingertip
(palm, arms, thighs, or calves).
The capillary blood of the fingertip shows the change in glucose more rapidly
than AST.
Therefore, the test results from the fingertip test and AST may differ.
This might caused by lifestyle or ingested food have an effect on
glucose levels.
What is AST(Alternative Site Testing)?
Things to know when using AST
Alternative Site Testing

www.i-sens.com 40
Acceptable situation for AST
• Fasting period
• Before a meal
• Before sleeping
• Do not ignore the symptoms of hyperglycemia or hypoglycemia.
• When the results of the test do not reflect one’s opinion, retest using the
fingertip test. If the test results do not reflect one’s opinion, please consult
a doctor.
• Do not rely on the AST results for changing one’s treatment method
• The amount glucose in alternative sites differs from person to person
• Before using AST, please consult your regular physician
Situation requiring fingertip test
• When the glucose levels are rapidly increasing during the
two hours after a meal or exercise
• When sick or when glucose levels seem quite lower than test value
• When hypoglycemia is not well recognized
• When insulin has the biggest effect 2 hours after an insulin injection
•
•
•
•
AST Precautions

www.i-sens.com 41
Note:
Results from alternative site and fingertip samples may appear differently as
there is a time lag for the glucose levels to reach the same value. Use a
fingertip for drawing if you suffer from hypoglycemia or have experienced
hypoglycemic shock or symptoms.
drawing if you suffer from hypoglycemia or have experienced hypoglycemic
shock or s
y
m
p
toms.
Note:
If the sample drop of blood runs or spreads due to contact with hair or with a
line in you palm, do not use that sample. Try puncturing again in a smoother
area.
www.i-sens.com 42
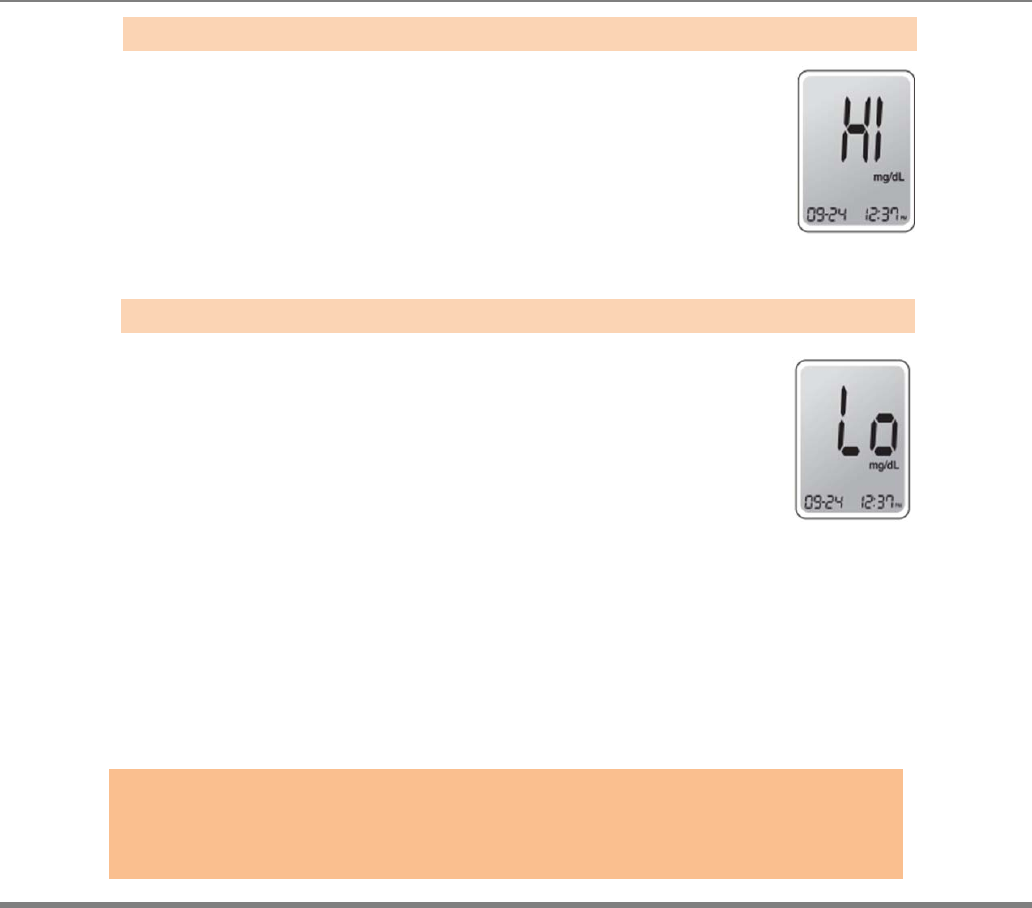
The meter displays results between 20 ~ 600
mg/dL (1.1 ~ 33.3 mmol/L). The Hi icon
will be appeared when the blood glucose level is more
than 600 mg/dL (33.3 mmol/L) and indicates
hyperglycemia.
If the Hi icon is displayed again on re-testing,
please contact your healthcare professional
immediately.
The Lo icon appears when the result is less
than 20 mg/dL (1.1 mmol/L) and indicates
hypoglycemia
If the Lo icon is displayed again on re-testing,
please contact your healthcare professional
immediately.
HI Message
Lo Message
Note:
Please contact your authorized i-SENS sales representative,
if such messages are displayed even though you do not have
h
y
per
g
l
y
cemia or h
y
po
g
l
y
cemia.
HI and Lo Message

www.i-sens.com 43
Source : Diagnosis of Diabetes, NIH Publication
No. 05-4642, January 2005
Reminde
r
s
Your target ranges
Time of day from your healthcare expert
Before breakfast
Before lunch or dinner
1 hour after meals
2 hour after meals
Between 2 a.m. and 4 a.m.
Target Blood Glucose Ranges
www.i-sens.com 44
The AutoChek t meter can save up to 500 glucose test results with time and date.
If the memory is full, the oldest test result will be deleted and the latest test result
will be stored.
The AutoChek t meter calculates and displays the averages of total test results,
pre-meal test (Pr) results, and post-meal test ( ) results from the last 1, 7, 14, 30
and 90 days.
Viewing Test Result Stored in the Meter’s Memory
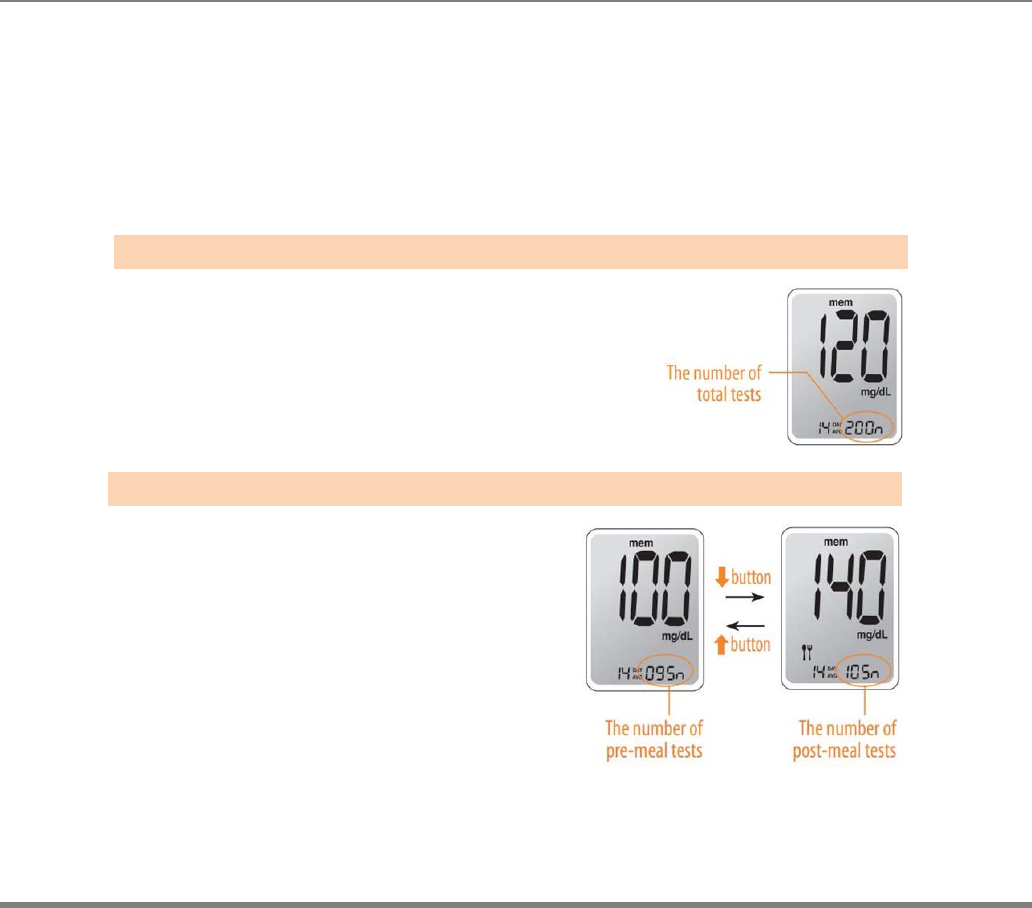
Press the ▲ or S button to turn the meter on.
p
The current date and time will be displayed
at the bottom of the screen for 2 seconds,
followed by the 1 day average value and
the number of the test results saved within
the last 14 days.
Press the ▼ button
to view the average value and
the number of tests performed before a meal
for the last 14 days.
Press the ▼ button again to check the
average value and the number of tests
performed after a meal for the last 14 days.
Step 1
Step 2
Meter Memory

www.i-sens.com 45
Use the ▼ button to scroll through the test results, starting from the most
recent and ending with the oldest. Press the ▲ button to return to the result seen
previously.
After checking the stored test results, press the S button to turn off the meter.
Step 3
Note:
Bypressing the ▼ button ,the latest test result saved in the meter’s memory will be
displayed on the screen along with the date and time.
Press and hold the▼ button to scroll through the test results.
www.i-sens.com 46
Four types of alarms can be set in the AutoChek t meter: one post- meal alarm
(PP2 alarm) and three time set alarms (alarm1 ~ 3).
The PP2 alarm goes off 2 hours after setting the alarm.
The alarms ring for 15 seconds and can be silenced by pressing ▲,▼, or the S
button.
Also the alarms can be turned of by inserting a test strip.
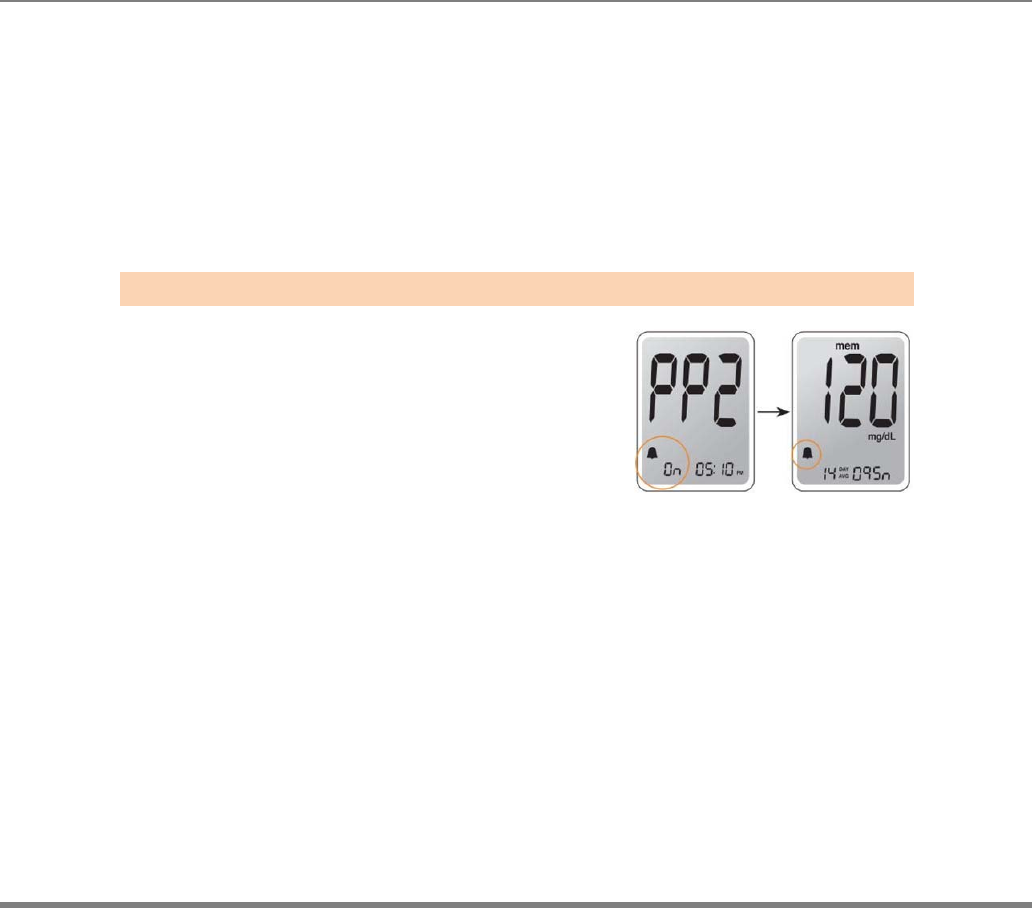
Setting the post-meal alarm (PP2 alarm)
Without inserting a test strip,
press and hold the ▲ button
for 3 seconds to set the
post-meal alarm. The ‘PP2’ character,
the bell ( ) icon and then the ‘On’ character
will be displayed. The screen will then
automatically be switched to the memory
check mode. Thenthe bell ( ) icon,
which indicating that the PP2 alarm has been set,
will be displayed on the screen.
Step 1 Setting the PP2 alarm On
Setting the Alarm Function
www.i-sens.com 47
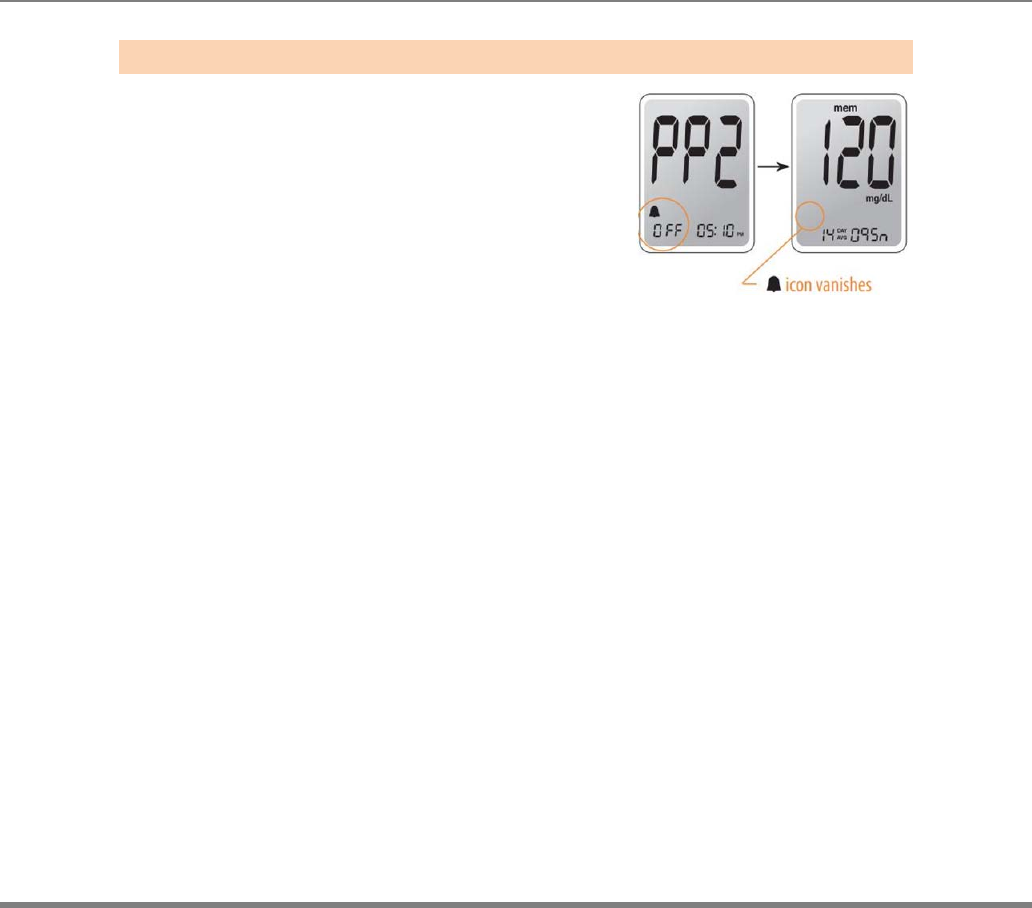
To turn off the PP2 alarm, press and hold
the ▲ button for 3 seconds. The ‘PP2’ character,
the bell ( ) icon, and then the ‘OFF’ character
will be appeared on the screen. Then the
screen will be switched
automatically to the
memory check mode without the bell ( ) icon
being displayed.
Step 2 Setting the PP2 alarm Off
www.i-sens.com 48
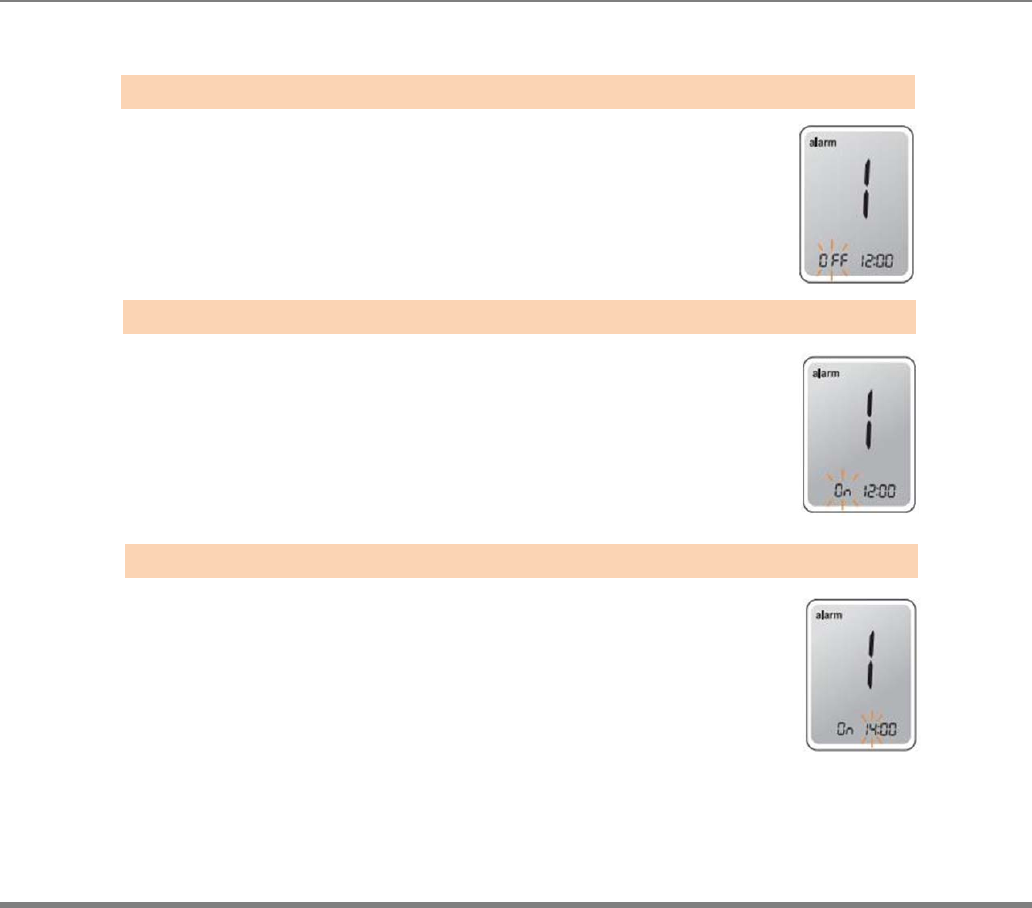
Setting the Time Alarms (alarm 1~3)
Without inserting a test strip, press the ▲ button and
the S button simultaneously for 3 seconds
to enter the time alarm mode. The ‘alarm1’
will be displayed while the ‘OFF’ character
blinks on the screen.
By pressing the ▼ button, the ‘alarm1’ is set and the
‘On’ character will be displayed on the screen.
Press the ▼ button again to cancel the ‘alarm1’. The
‘OFF’ icon will be blinked on the screen.
Press the ▲ button to adjust the time of the ‘alarm1’.
A number representing the time will be blinked
on the screen. Press the ▼ button to set the time.
Press the ▲ button to end.
Step 1
Step 2
Step 3
www.i-sens.com 49
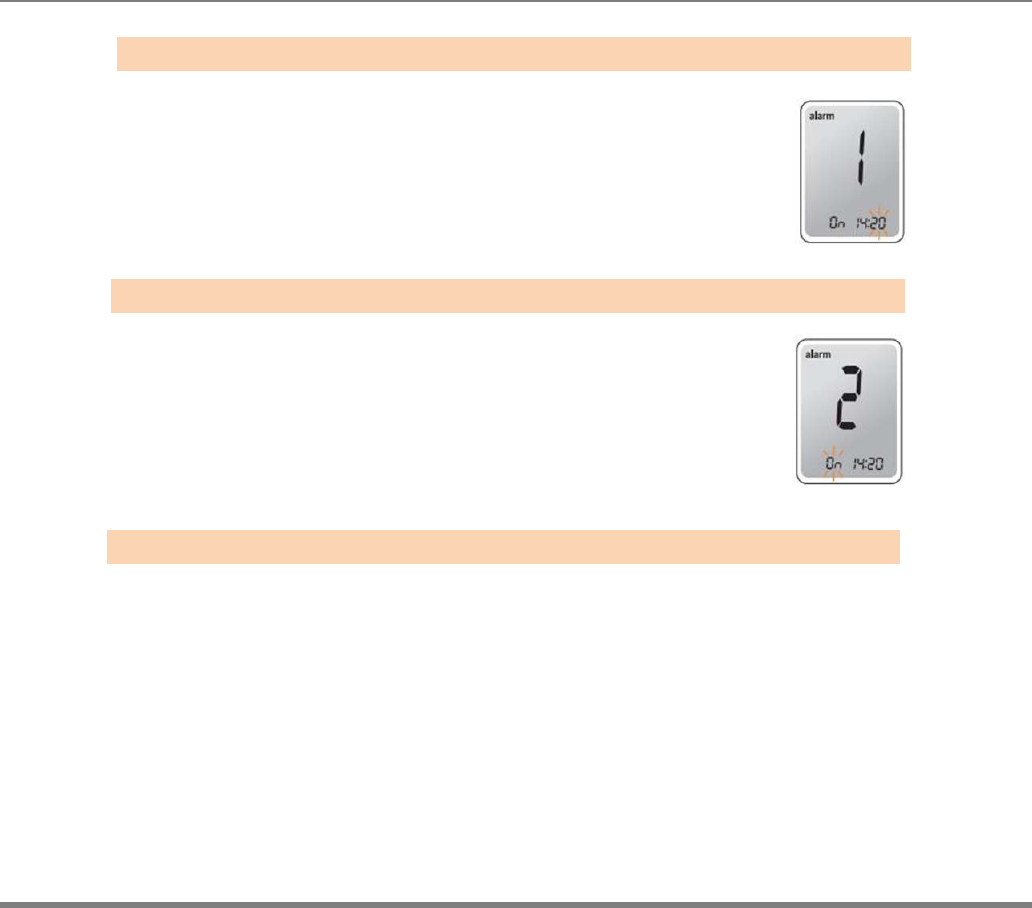
By pressing the ▲ button, the number indicating the
minute will start blinking. Press the ▼ button to set the
accurate minute.
Press the S button to finish and to enter the
‘alarm 2’ mode.
Repeat steps 2 to 5 to set the remaining
time alarms (alarm 2 ~ 3).
Press the S button for 3 seconds to finish
and turn the meter off.
Step 4
Step 5
Step 6
www.i-sens.com 50
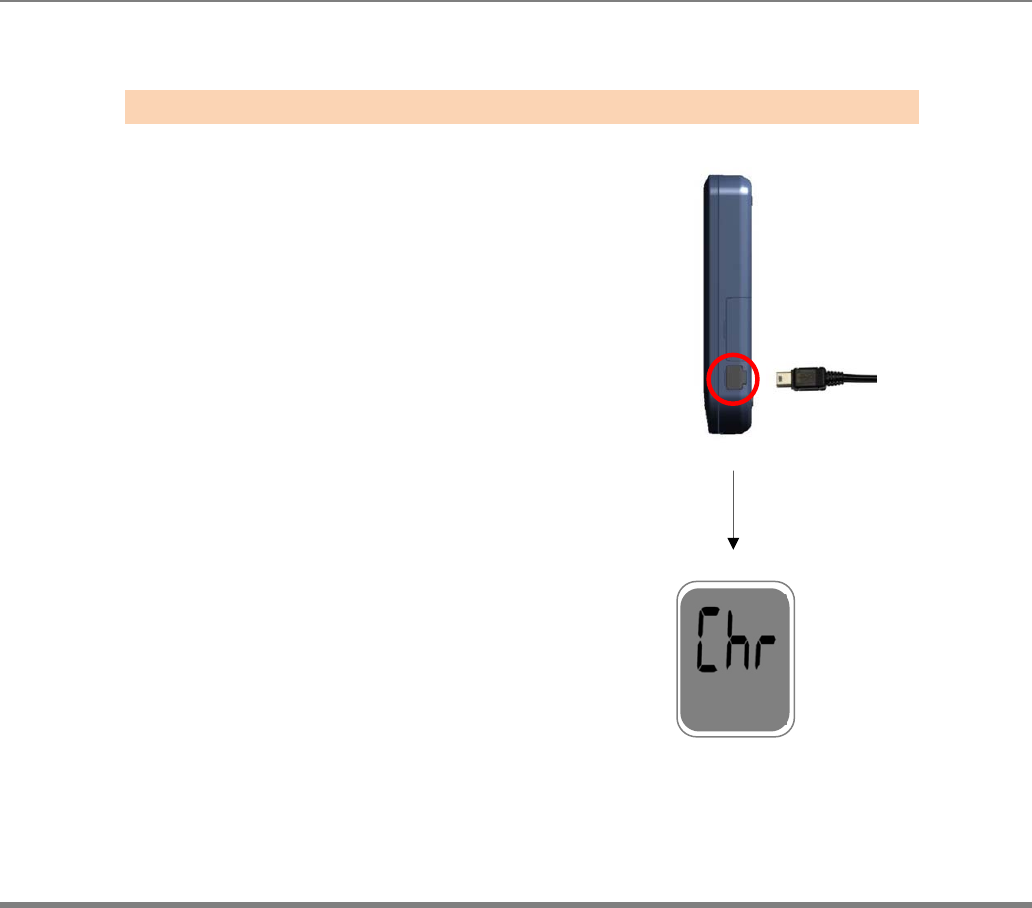
Charging Your AutoChek t Blood Glucose Meter
Plug the mini USB cable into AC adaptor
Plug the other end of the mini USB cable
into the BGM’s charging port which is located
on the side of the BGM.
Once the mini USB cable is plugged, the
BGM will start charging and the ‘Chr’ will be
displayed on the screen.
Step 1
www.i-sens.com 51
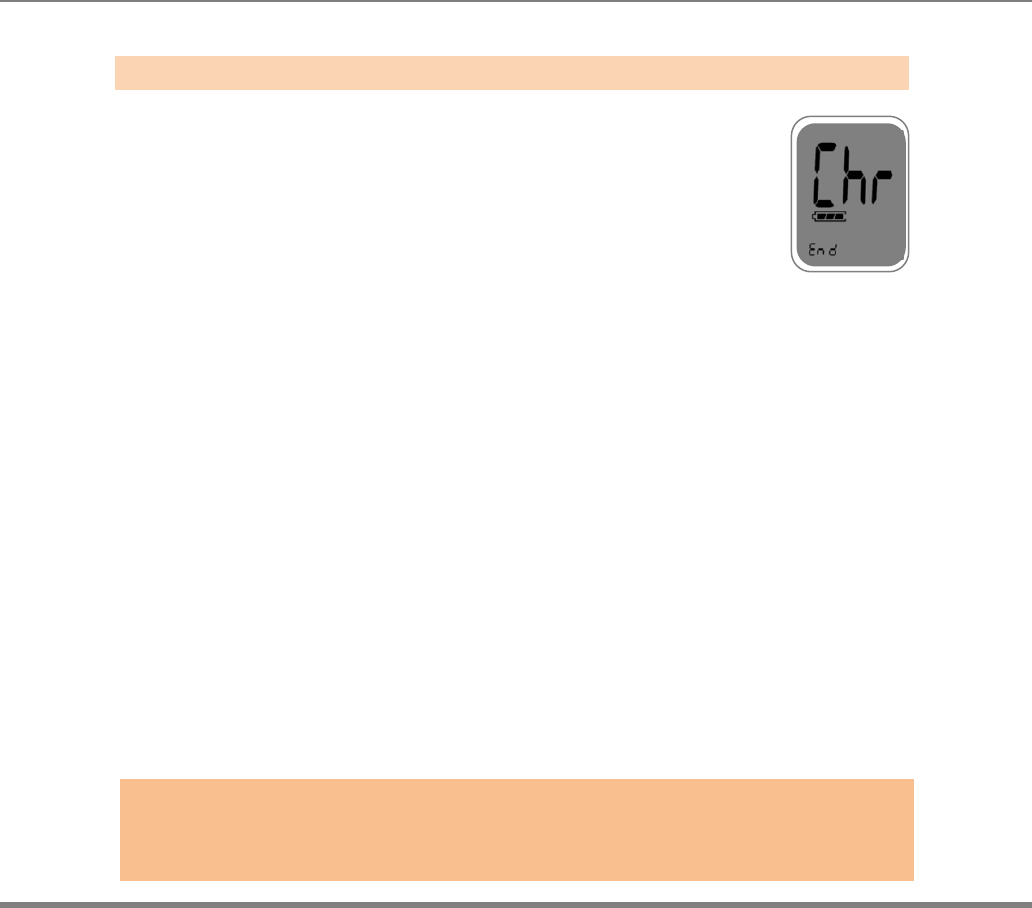
Once charging is completed, the ‘End’ will
be appeared at bottom left of the screen.
Step 2
Caution :
If the meter won’t charge, please do not attempt to take apart, repair, or modify the
meter. Please contact your authorized i-SENS sales representative,

www.i-sens.com 52
Use a soft cloth or tissue to wipe the meter exterior. If necessary the soft cloth or
tissue might be dipped in a small amount of alcohol.
Do not use organic solvents such as benzene, or acetone, or household and
industrial cleaners that may cause irreparable damage to the meter.
Store all the meter components in the portable case to prevent loss.
Caution
• Do not expose the meter to direct sunlight or heat for an
extended period of time.
• Prevent the entry of dirt, dust, blood, or water at the meter’s
test strip port.
• Do not drop the meter or submit it to strong shocks.
• Do not try to fix or alter the meter in any way.
• Keep the meter away from strong electromagnetic fields
such as cell phones and microwave ovens.
• AutoChek t meter should be used only with AutoChek t
strips.
• Keep the meter in a cool and airy place.
Caring for Your System

www.i-sens.com 53
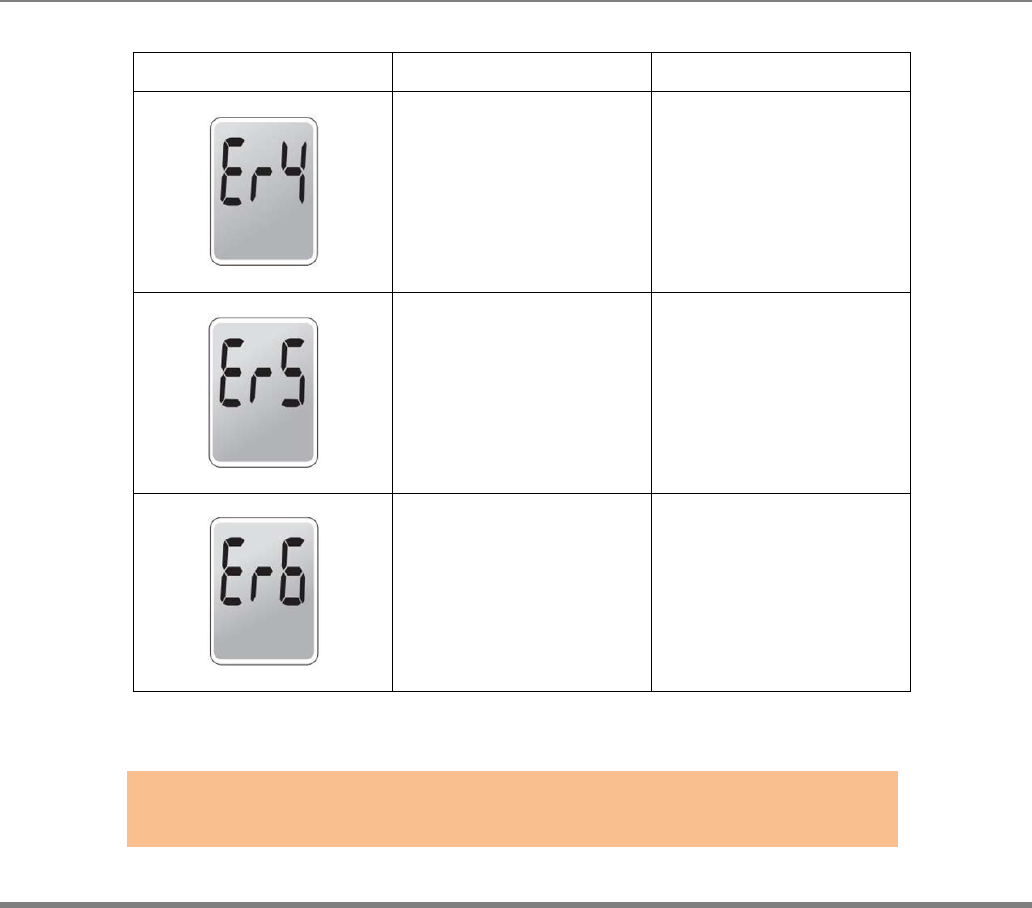
Message What It Means What To Do
A used test strip was
inserted.
Repeat the test with a
new test strip.
The blood or control
solution sample was
applied before the
icon
appeared.
Repeat the test with a
new test strip and
wait until the
icon appears before
applying the blood
sample.
The temperature
during the test was
above or below the
operating range.
Move to an area
where the temperature is
within the operating range
(10 ~ 40 °C/ 50 ~ 104
°F) and repeat the test
after 30 minutes.
Understanding Error and other Message
www.i-sens.com 54
Message What It Means What To Do
The blood sample
has abnormally high
viscosity or
insufficient volume.
Repeat the test after
inserting a new test
strip.
A non-AutoChek t
test strip was used.
Test strip was not
inserted properly.
Repeat the test with a
AutoChek t test strip.
Insert a test strip with
the contacting bars
facing upwards and
push in gently until
the meter beeps.
There is a problem
with the meter.
Do not use the meter.
Contact your
authorized i-SENS
sales representative.
Note:
if the error messages persist, contact your authorized i-SENS sales representative
www.i-sens.com 55
Message
What It Means
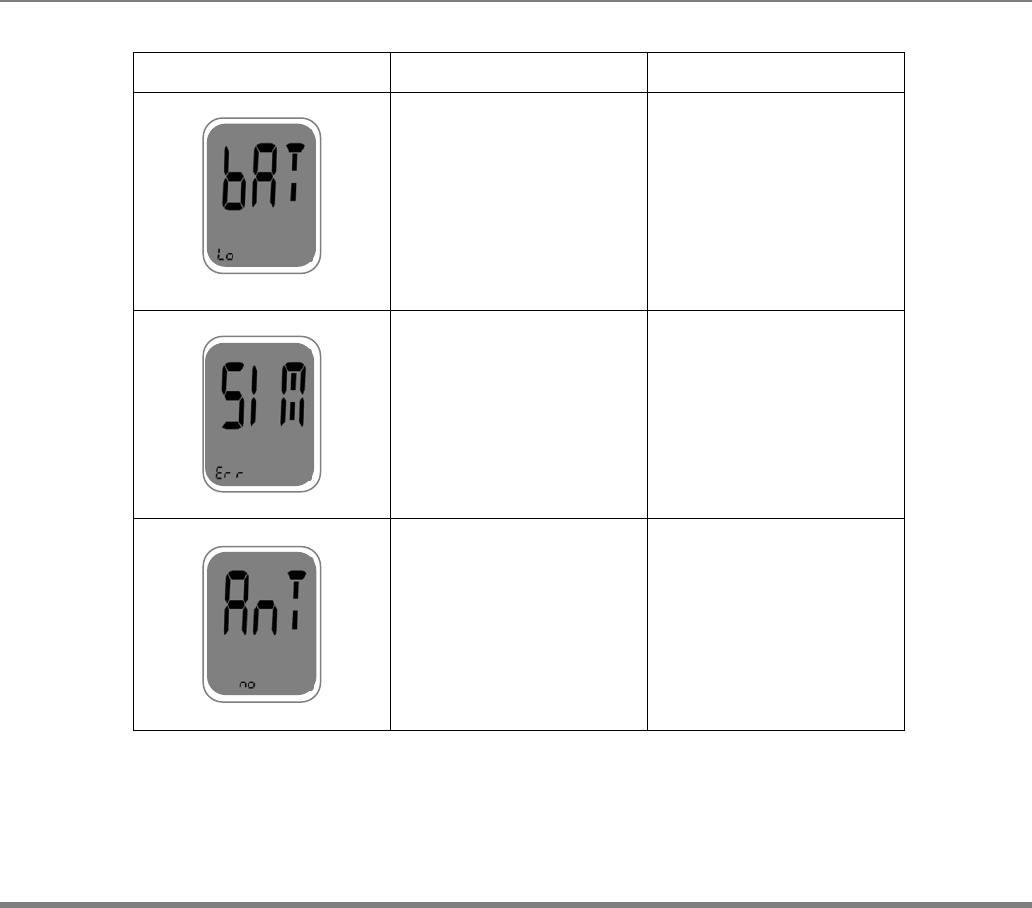
What To Do
When battery level is low Charge the battery.
SIM Card error:
No SIM Card or invalid
SIM Card insertion
Check if the SIM card is
Properly inserted in the
Meter. If the SIM card is
Properly inserted. Check
If there is any defect on
the SIM card
Radio Signal error:
Can’t detect GSM Signal
Or Signal strength is not
enough
Check to see if there is
Cellular coverage in your
Area. Please move to the
Area where you get better
Cellular coverage.
www.i-sens.com 56
Message
What It Means
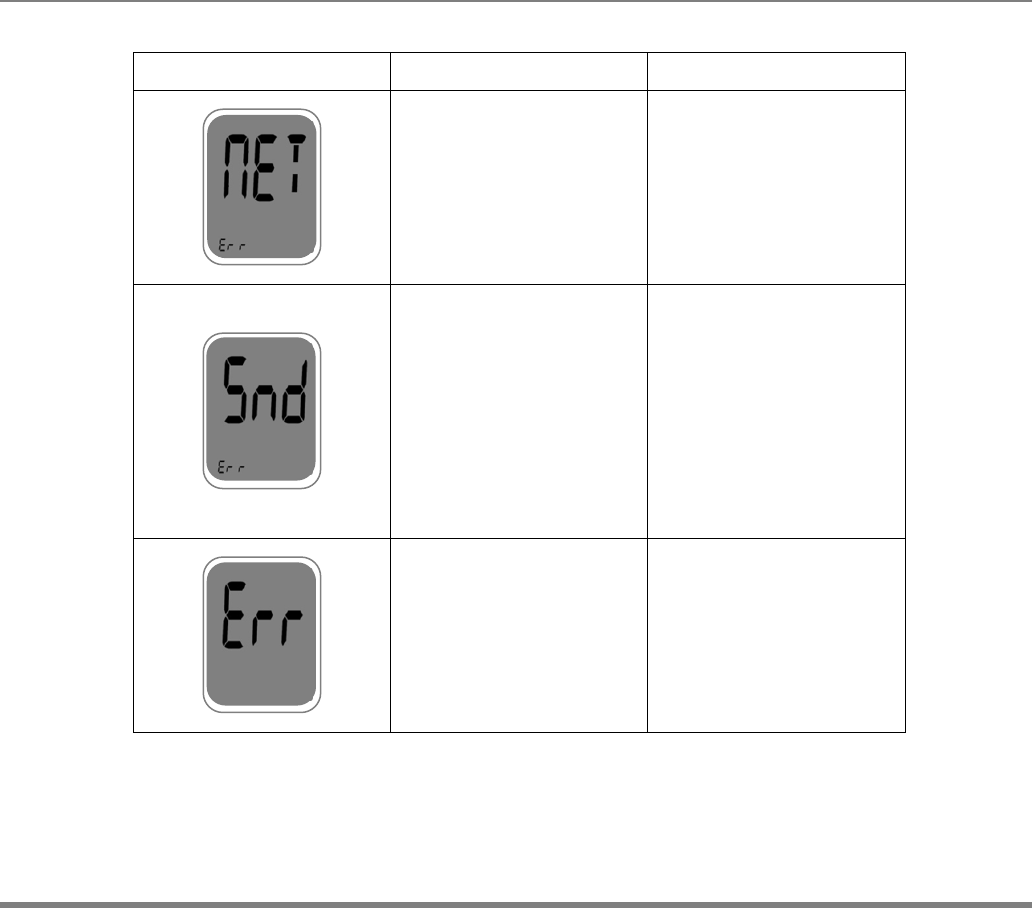
What To Do
Network registration error:
System can’t register at
Service network
(AT&T, T-mobile or other
Service providers)
Check if the SIM card
Is properly inserted in
The meter or contact
The service provider
To see if there is any
Network issue
Message Send error:
Your data transmission is
Not successful
Try to send the test
Result data one more
time.
If the meter fails to send
the test result data,
Please contact your
authorized i-SENS sale
representative
System Error:
GSM MODEM Hardware
Error occurred
Please contact your
Authorized i-SENS sales
representative

www.i-sens.com 57
Problem Trouble shooting
The display is blank
even after inserting
a test strip.
Check whether the test strip is inserted with the contact
bars facing up. Check if the strip has been
inserted completely till the end.
Check whether the batteries are inserted with the ‘+’ side
facing up.
Charging the batteries.
The test does not
start even after
applying the blood
sample on the strip
Check if the confirmation window is filled adequately.
Repeat the test after inserting a new test strip.
The test result
doesn’t match your
expectation.
Repeat the test after inserting a new test strip.
Check the validity period of the test strip.
Check the meter.
The data transmission is
Not successful
Check the battery level
Check the SIM card is properly inserted in the meter or
if the SIM card is activated.
If testing indoors, move closer to a window for better
cellular reception
Test outdoors and check see if there is cellular
coverage in your area
Note:
If the problem is not resolved, please contact your authorized
i-SENS sales representative.
www.i-sens.com 58
The performance of AutoChek t Blood Glucose Monitoring System Strips has been
evaluated in laboratory and in clinical tests.
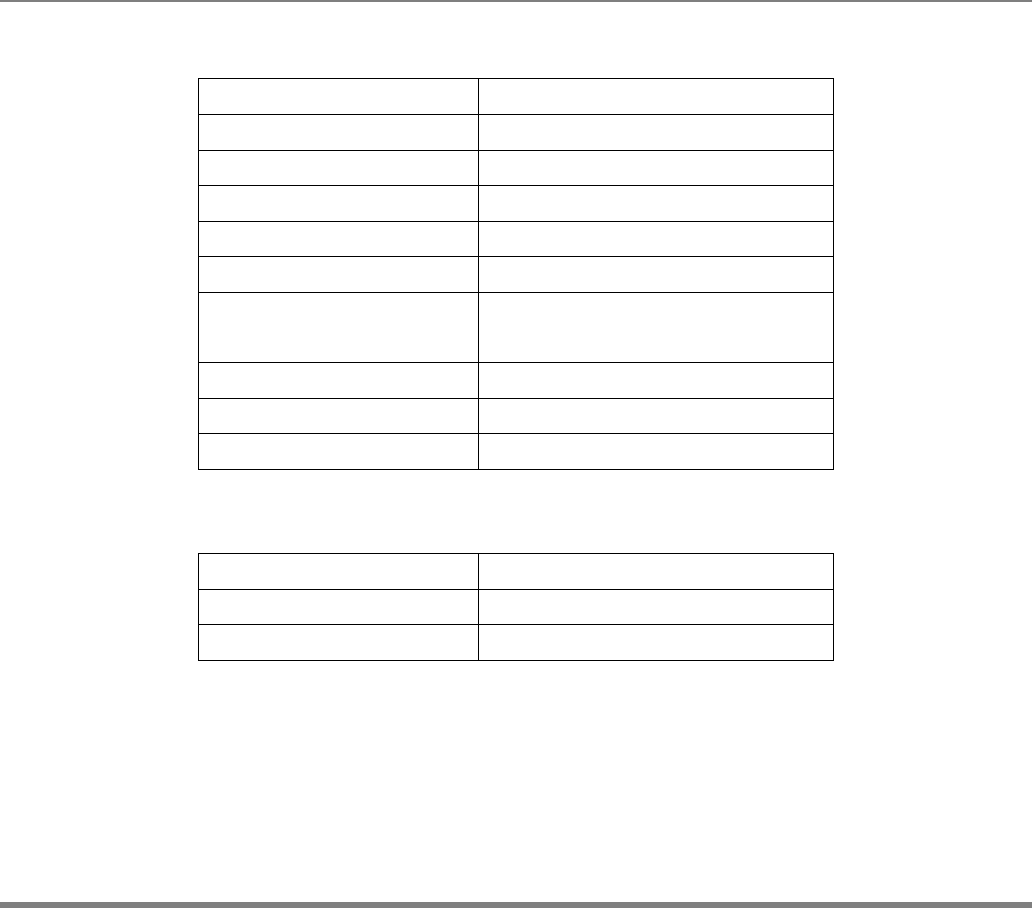
Accuracy: The accuracy of the AutoChek t BGM System (ModelGM505YAA) was
assessed by comparing blood glucose results obtained by patients with those
obtained using a YSI Model 2300 Glucose Analyzer, a laboratory instrument
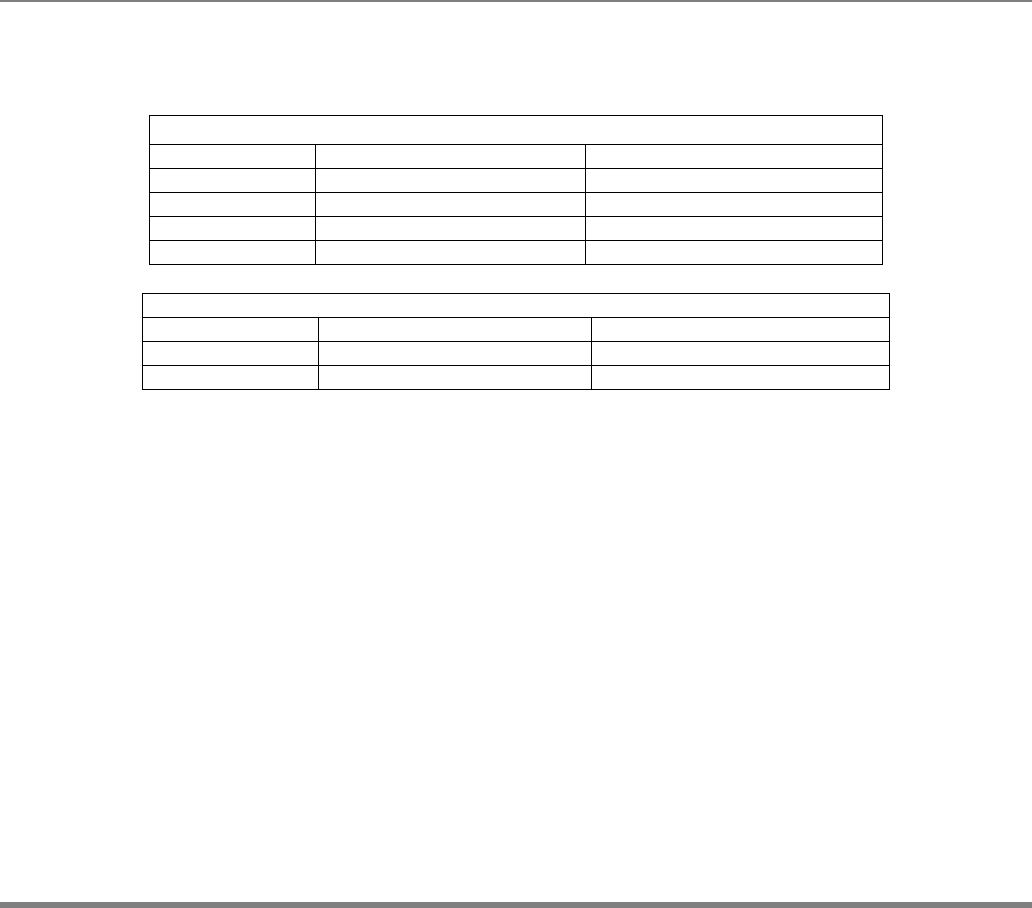
The following results were obtained by 110 diabetic patients at clinic centers.
Accuracy results for glucose concentration<75 mg/dL (4.2 mmol/L)
Accuracy results for glucose concentration≧75 mg/dL (4.2 mmol/L)
Slope
Y-intercept
Correlation coefficient(r)
Number of sample
Range tested
0.961
3.5 mg/dL
0.995
110
30 ~ 485 mg/dL
Within±5mg/dL
(Within±0.28mmol/dL)
Within±10mg/dL
(Within±0.56mmol/dL)
Within±15mg/dL
(Within±0.83mmol/dL)
13/17(76%) 16/17(94%) 17/17(100%)
Within±5% Within ±10% Within±15% Within±20%
45/93(48%) 88/93(96%) 93/93(100%) 93/93(100%)
Performance Characteristic
www.i-sens.com 59
Precision: The precision of AutoChek t Test strip was estimated with venous
blood sample in the laboratory.
Within Run Precision
Blood average 38.1 mg/dL (2.1 mmol/L) SD = 1.9 mg/dL (0.11 mmol/L)
Blood average 86.1 mg/dL (4.8 mmol/L) SD = 3.2 mg/dL (0.2 mmol/L)
Blood average 124.5 mg/dL (6.9 mmol/L) CV = 4.1%
Blood average 189.1 mg/dL (10.5 mmol/L) CV = 2.6%
Blood average 334.5 mg/dL (18.6 mmol/L) CV = 2.8%
Total Precision
Control average 43.1 mg/dL (2.4 mmol/L) SD = 2.0 mg/dL (0.11 mmol/L)
Control average 113.4 mg/dL (6.3 mmol/L) CV = 3.3%
Control average 381.2 mg/dL (21.2 mmol/L) CV = 4.2%
This study shows that there could be variation of up to 4.2%

www.i-sens.com 60
Manufacturer’s Warranty
i-SENS, Inc. warrants that the AutoChek t Meter shall be free of
defects in material and workmanship in normal use for a period
of five (5) years. The meter must have been subjected to normal
use. The warranty does not cover improper handling, tampering,
use, or service of the meter. Any claim must be made within the
warranty period.
The i-SENS company will, at its discretion, repair or replace a
defective meter or meter part that is covered by this warranty.
As a matter of warranty policy, i-SENS will not reimburse the
consumer’s purchase price.
Obtaining Warranty Service
To obtain warranty service, you must return the defective meter
or meter part along with proof of purchase to your nearest
i-SENS Authorized Warranty Station.
Warranty Information
* FCC ID : OELGM505YAA
RF Exposure Statement (2.1091)
FCC RF Radiation Exposure Statement: This equipment complies with FCC RF Radiation exposure limits set forth for an uncontrolled
environment. This device and its antenna must not be co-located or operating in conjunction with any other antenna or transmitter.
This equipment should be installed and operated with a minimum distance of 10mm between the radiator and your body.
FCC Part 15.19
This device complies with part 15 of the FCC Rules. Operation is subject to the following two conditions: (1) This
device may not cause harmful interference, and (2) this device must accept any interference received, including
interference that may cause undesired operation.
FCC Part 15.21
Any changes or modifications (including the antennas) made to this device that are not expressly approved by the manufacturer may
void the user's authority to operate the equipment.
Part 15.105 (B)
Note : This equipment has been tested and found to comply with the limits for a Class B digital device, pursuant to part 15 of the
FCC Rules. These limits are designed to provide reasonable protection against harmful interference in a residential installation This
equipment generates, uses and can radiate radio frequency energy and, if not installed and used in accordance with the instructions,
may cause harmful interference to radio communications, However, there is no guarantee that interference will not occur in a
particular installation. If this equipment does cause harmful interference to radio or television reception, which can be determined by
turning the equipment off and on, the user is encouraged to try to correct the interference by one or more of the following
measures:
--Reorient or relocate the receiving antenna.
--Increase the separation between the equipment and receiver.
--Connect the equipment into an outlet on a circuit different from that to which the receiver is connected.
--Consult the dealer or an experienced radio/TV technician for help.
Modifications not expressly approved by the manufacturer could void the user's authority to operated the equipment under FCC
rules.