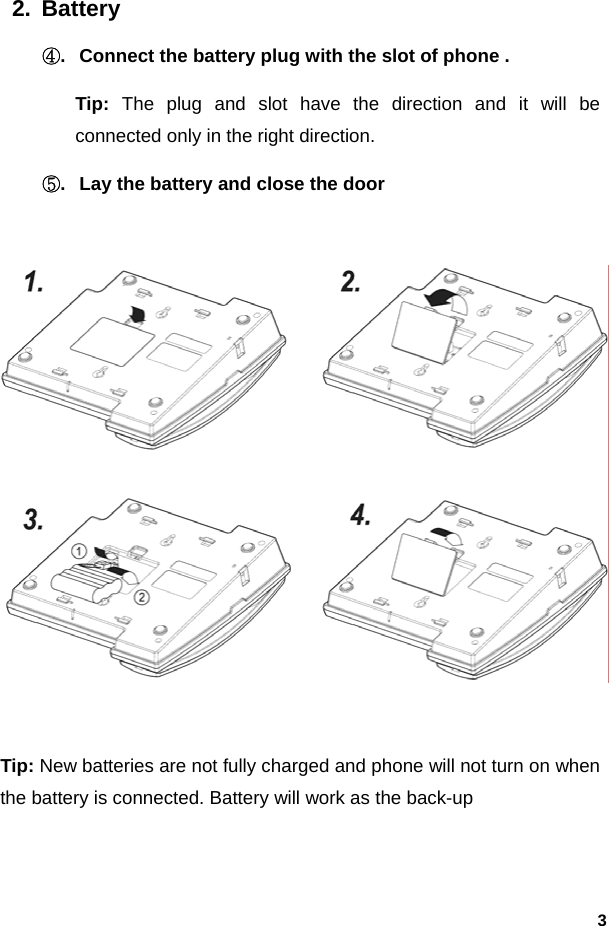
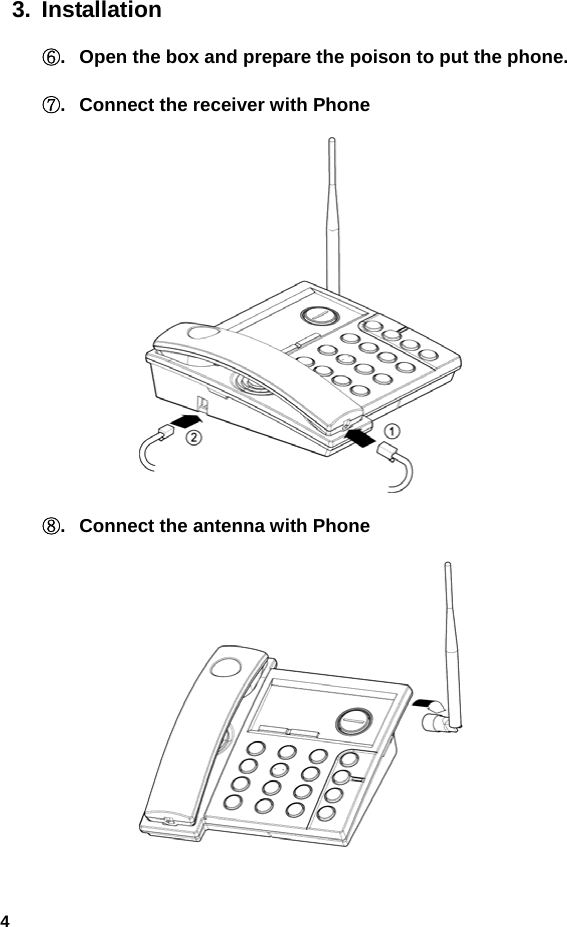
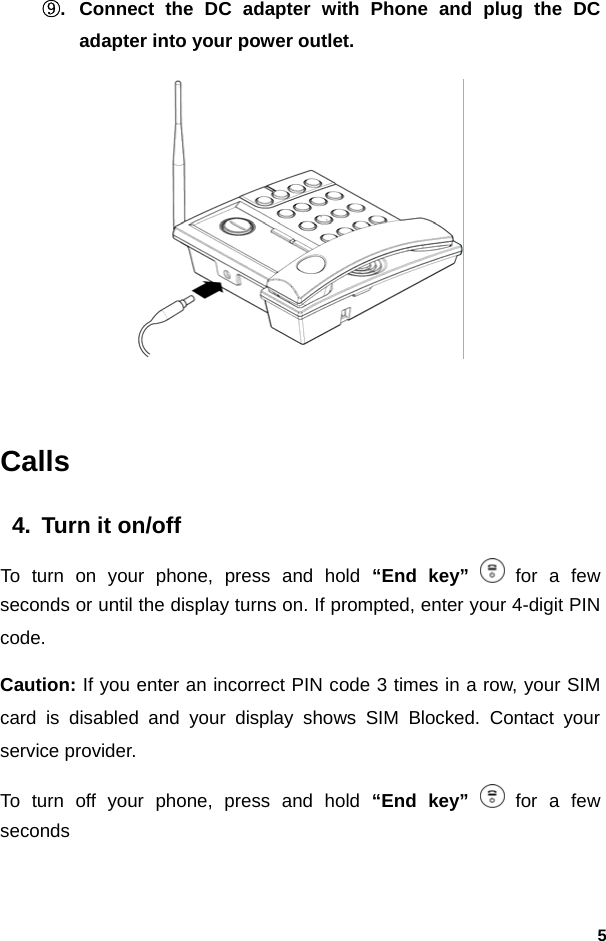
i Sirius FX850P GSM850/PCS1900 Dual Band Terminal Equipment(WLL) User Manual FX 850P Manual eng rev
i-Sirius Co.,Ltd GSM850/PCS1900 Dual Band Terminal Equipment(WLL) FX 850P Manual eng rev
UserManual.wiki
>
i Sirius
>
FX850P User Manual
manual
Navigation menu
Upload a User Manual
Namespaces
Wiki Guide
HTML
PDF
Info
Views
User Manual
Discussion / Help
Navigation

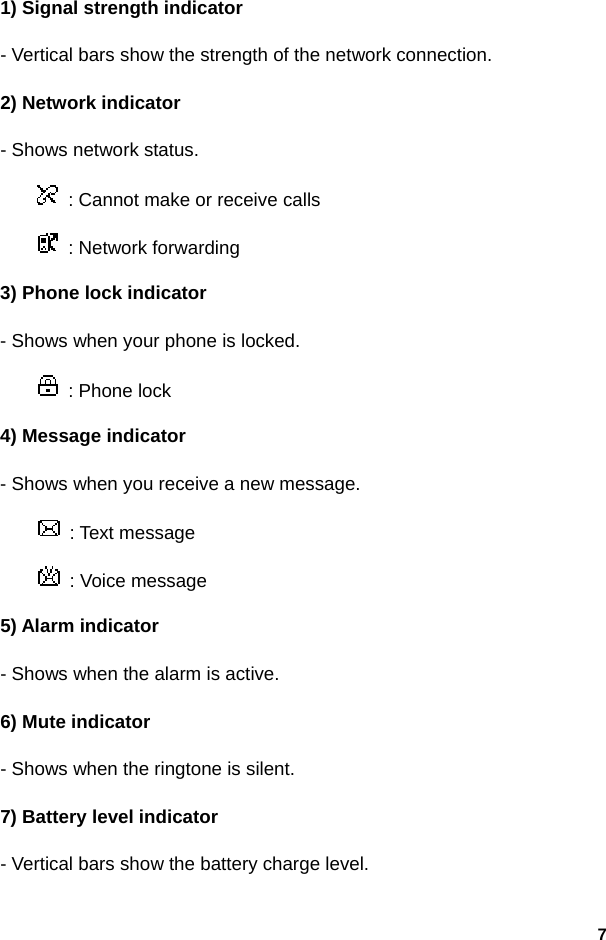
![65. Make a call 1) Raise your receiver and enter phone number which you want to call. 2) Enter phone number and press “Call key” to make a call. Tip: In some menus like Phonebook, Message, Call log, etc. which have individual phone number, Press “Call key” directly to make a call. 6. Answer a call When your phone rings, just raise your receiver to answer, or press “Call key” or “Speaker key” to answer in speaker phone mode. Basics 7. Display The display shows when you turn on the phone. [Status indicator] Status indicators Time & Date Soft keys PLMN Greeting text](https://usermanual.wiki/i-Sirius/FX850P/User-Guide-788401-Page-8.png)
![910. Phonebook [Add new entry] Entering: “Left soft key” > “Phonebook” > “Create” > “Save to SIM” or “Save to phone” Shortcut: Enter a phone number in the idle screen, and then press the save key to create an entry for that number. [Phonebook list] Entering: “Left soft key” > “Phonebook” > “Browse” Shortcut: Press “Right soft key” in the idle screen. 11. Phone lock You can lock your phone to prohibit others from using the phone. Phone lock is not SIM card lock nor SIM lock by the operator. [Change Password] Entering: “Left soft key” > “Settings” > “Security Setup” > “Phone Lock” > “Change Phone PW” Tip: The original PW is “0000” [Turn phone lock on/off] Entering: “Left soft key” > “Settings” > “Security Setup” > “Phone Lock”](https://usermanual.wiki/i-Sirius/FX850P/User-Guide-788401-Page-11.png)
![10Tip: If phone lock is on, you need to enter the phone PW, whenever phone turn on. Customize 12. Date & Time You need to set Date & Time setting when you turn the phone at the first time. Entering: “Left soft key” > “Settings” > “Phone Settings” > “Clock Settings” > “Date & Time setting” 13. Ringtone [Change ringtone] Entering: “Left soft key” > “Tone” > “Tone Setup” > “Incoming Call” [Change volume] Entering: “Left soft key” > “Tone” > “Volume” > “Ring Tone” Shortcut: Press “Navigation key” in the idle screen.](https://usermanual.wiki/i-Sirius/FX850P/User-Guide-788401-Page-12.png)
![12Move the focusing box using “Navigation key” to change the type, time and Bell and Press “Save” after finishing the editing. Entering: “Left soft key” > “Accessories” > “Alarm” 18. Calendar You can change the month by “Navigation key” . Entering: “Left soft key” > “Accessories” > “Calendar” 19. Calculator Entering: “Left soft key” > “Accessories” > “Calculator” Shortcut: Press “Calculation key” in the idle screen. [Step1] Enter the first value by number keys](https://usermanual.wiki/i-Sirius/FX850P/User-Guide-788401-Page-14.png)
![13 [Sept2] Select the calculating mark by the upper/lower navigation key The calculating mark will toggle between “ , , , ” [Step3] Enter the second value by number keys [Step4] Press left to display the result of calculation. And you can continue the next calculation from step3.](https://usermanual.wiki/i-Sirius/FX850P/User-Guide-788401-Page-15.png)