i Sirius FX853C DUAL-BAND WLL PHONE User Manual FX 903C Manual eng 20071212
i-Sirius Co.,Ltd DUAL-BAND WLL PHONE FX 903C Manual eng 20071212
UserManual.wiki
>
i Sirius
>
FX853C User Manual
USERS MANUAL
Navigation menu
Upload a User Manual
Namespaces
Wiki Guide
HTML
PDF
Info
Views
User Manual
Discussion / Help
Navigation


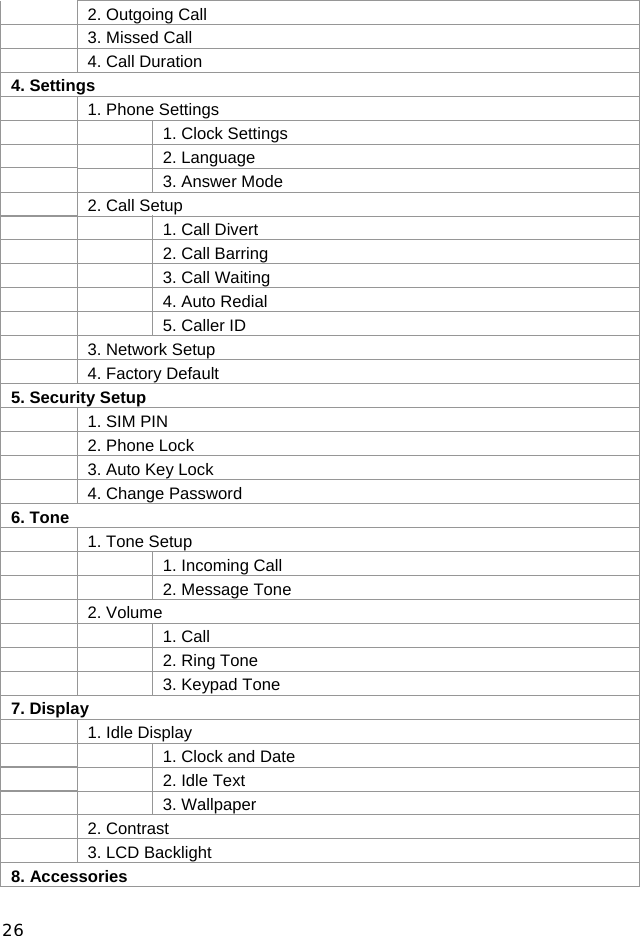

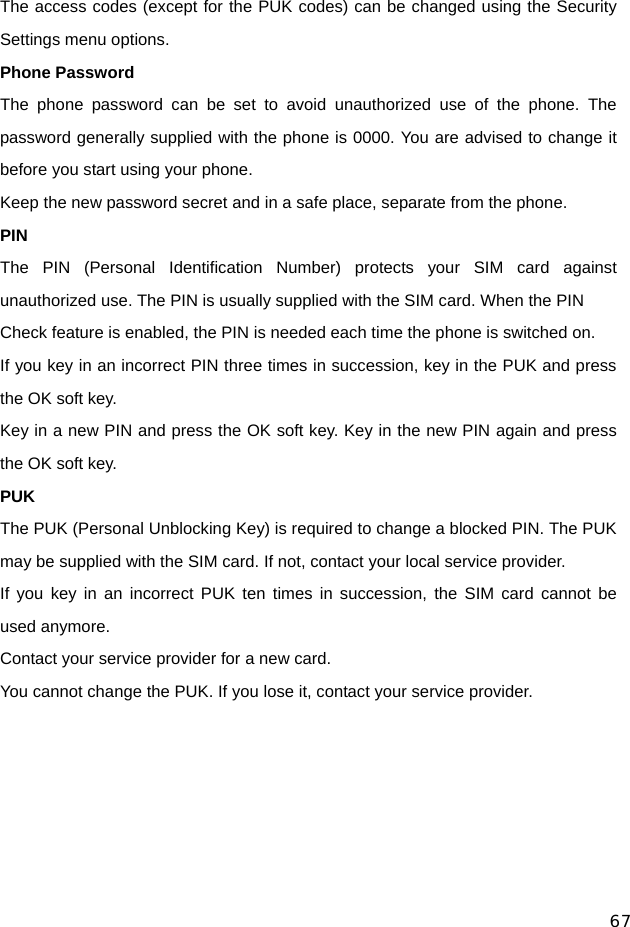
![28 6. ENTERING LETTERS AND NUMBERS You can enter letters, as well as numbers, when storing information in your phone by using your phone’s keypad. To enter letters, press the key associated with the letter you wish to enter until it appears on the screen (numbers will also appear). 6.1. Entering Letters When you want to add new names or when you view names in the Phone Book, your phone automatically switches to “abc” mode and displays “abc” icon. Key Characters Key Characters Key Characters Key Characters 1 , . ? ! @ 1 7 p q r s 7 β $ 2 a b c 2 å æ ä à ç á 8 t u v 8 ù ü ú 3 d e f 3 è é 9 w x y z 9 4 g h i 4 ì í 0 (Space) 0 5 j k l 5 £ * , . ‘ ? ! “ @ ¥ $ _ ‘ ~ { } [ ] | ? # ¤ % & ( ) * + - / : ; < = > § ¿ 6 m n o 6 ö ø ò ñ ó # Change letter case(*) * : abc Î Abc Î ABC Î 123 rotated 6.1.1. Editing name or phone number To edit a name already stored in the Phone Book: z From the main screen, use the right soft key. z From the Phone Book list, select the name you want to edit. z To edit, press the left soft key and scroll down to the edit option. z Select the name or the phone number you want to change. z Press the left soft key to enter edit mode. z Press to scroll the cursor to the left.](https://usermanual.wiki/i-Sirius/FX853C/User-Guide-922352-Page-28.png)