i Tech Dynamic C51-A04105-XX Portable Bluetooth Multimedia Player User Manual
i.Tech Dynamic Limited Portable Bluetooth Multimedia Player Users Manual
Users Manual
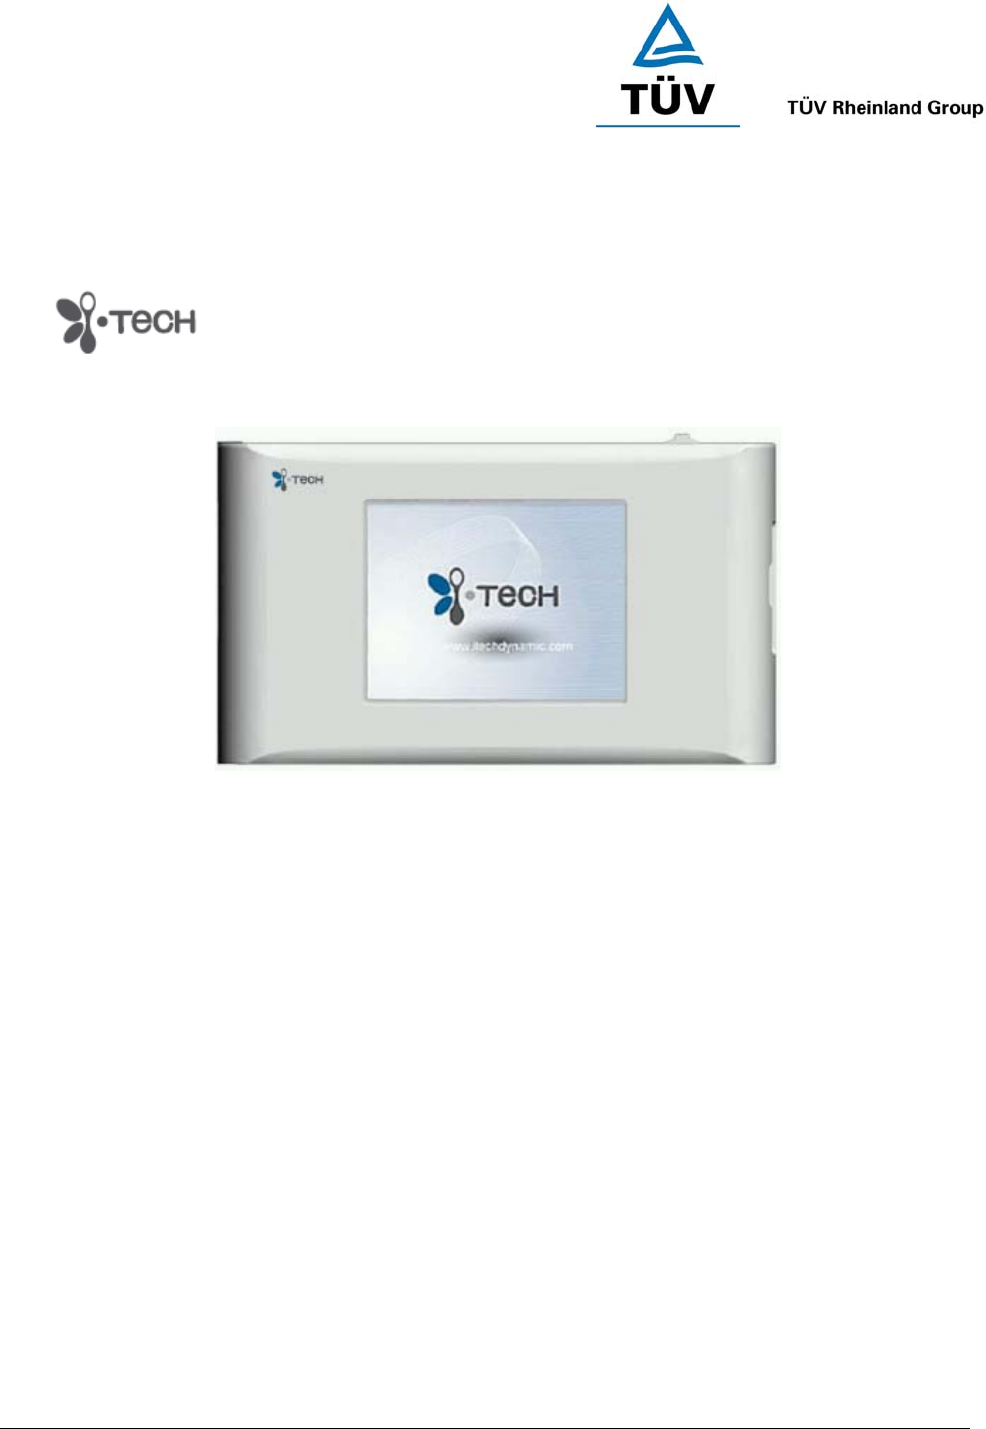
www.tuv.com
Test Report No.: 14009130 001 Appendix 4 page 17 of 45
1.6 User Manual
(Cover)
i.Tech PowBox V25
User Guide

www.tuv.com
Test Report No.: 14009130 001 Appendix 4 page 18 of 45
Table of Content
OVERVIEW ...................................................................................................21
MAIN MENU ..................................................................................................24
1 VIDEO.........................................................................................................25
1.0 Video Menu .......................................................................................................................25
1.1 Play Video .........................................................................................................................25
1.2 Delete Video......................................................................................................................25
2 AUDIO ........................................................................................................27
2.0 Audio Menu.......................................................................................................................27
2.1 Play Audio.........................................................................................................................27
2.1 Delete Audio .....................................................................................................................28
3 PHOTO .......................................................................................................29
3.0 Photo Menu.......................................................................................................................29
3.1 Display Mode ....................................................................................................................29
3.2 Delete Photo .....................................................................................................................29
3.3 Direct Print ........................................................................................................................30
3.4 Rotate Photo.....................................................................................................................30
4 RECORD ....................................................................................................31
4.0 Record Menu.....................................................................................................................31
4.1 Recording Video (AV in) ..................................................................................................31
4.2 Voice memo(Mic in) .........................................................................................................32
4.3 Recording Audio (Audio in) ............................................................................................32
5 ACCESSORY .............................................................................................33
5.1 Snake Game......................................................................................................................33
5.2 Russian Game ..................................................................................................................33
5.3 Set Alarm...........................................................................................................................33
5.4 Calendar ............................................................................................................................33
6 SETUP........................................................................................................34
6.1 Set Time ............................................................................................................................34
6.2 Speaker .............................................................................................................................34
6.3 Language ..........................................................................................................................34
6.4 Storage ..............................................................................................................................34
6.5 TV Out................................................................................................................................35
6.6 Auto Power OFF ...............................................................................................................35

www.tuv.com
Test Report No.: 14009130 001 Appendix 4 page 19 of 45
6.7 Default ...............................................................................................................................35
6.8 Software Upgrade ............................................................................................................35
7 FORMAT ....................................................................................................36
7.0 Format Menu.....................................................................................................................36
8 BLUETOOTH .............................................................................................37
8.0 Bluetooth Stereo ..............................................................................................................37
9 ABOUT i.Tech............................................................................................39
9.0 About i.Tech......................................................................................................................39
Care and Maintenance.................................................................................40

www.tuv.com
Test Report No.: 14009130 001 Appendix 4 page 20 of 45
Dear Customer,
i.Tech thanks for your choice of this exciting PowBox V25 product. PowBoxV25 is a multi-functional mobile
media centre to provide high quality sound playback and recording, photo viewing video playback and recording.
It is also compatible with Bluetooth stereo headset.
Bluetooth Specification v1.2 Class 2
Supports Bluetooth A2DP Profile
Compatible with Bluetooth headset
High-resolution 262k colours LCD Display
Support 1GB SD / MMC Card
Supports TV Out
Supports MPEG4-ASF, JPG, MP3, WMA
Replaceable Rechargeable Power
USB Power Charging

www.tuv.com
Test Report No.: 14009130 001 Appendix 4 page 21 of 45
1
2
3
5
4
7
6
OVERVIEW
PowBox V25 Overview
Fig. 1
1. POWER – Hold for 3 sec to turn on.
2. BACK – Press to go back to the previous/upper menu.
3. SOFTKEY 1 – Depends on the menu nature, press to select from the option items
4. SOFTKEY 2 – Depends on the menu nature, press to select from the option items
5. UP – Move up/Increase Volume/Zoom In
6. DOWN – Move Down/Decrease Volume/Zoom Out
7. LEFT/RIGHT/OK – Move Left/Right, press down OK for Confirm/Start/Pause/Stop.
www.tuv.com
Test Report No.: 14009130 001 Appendix 4 page 22 of 45
11
12
8
10
9
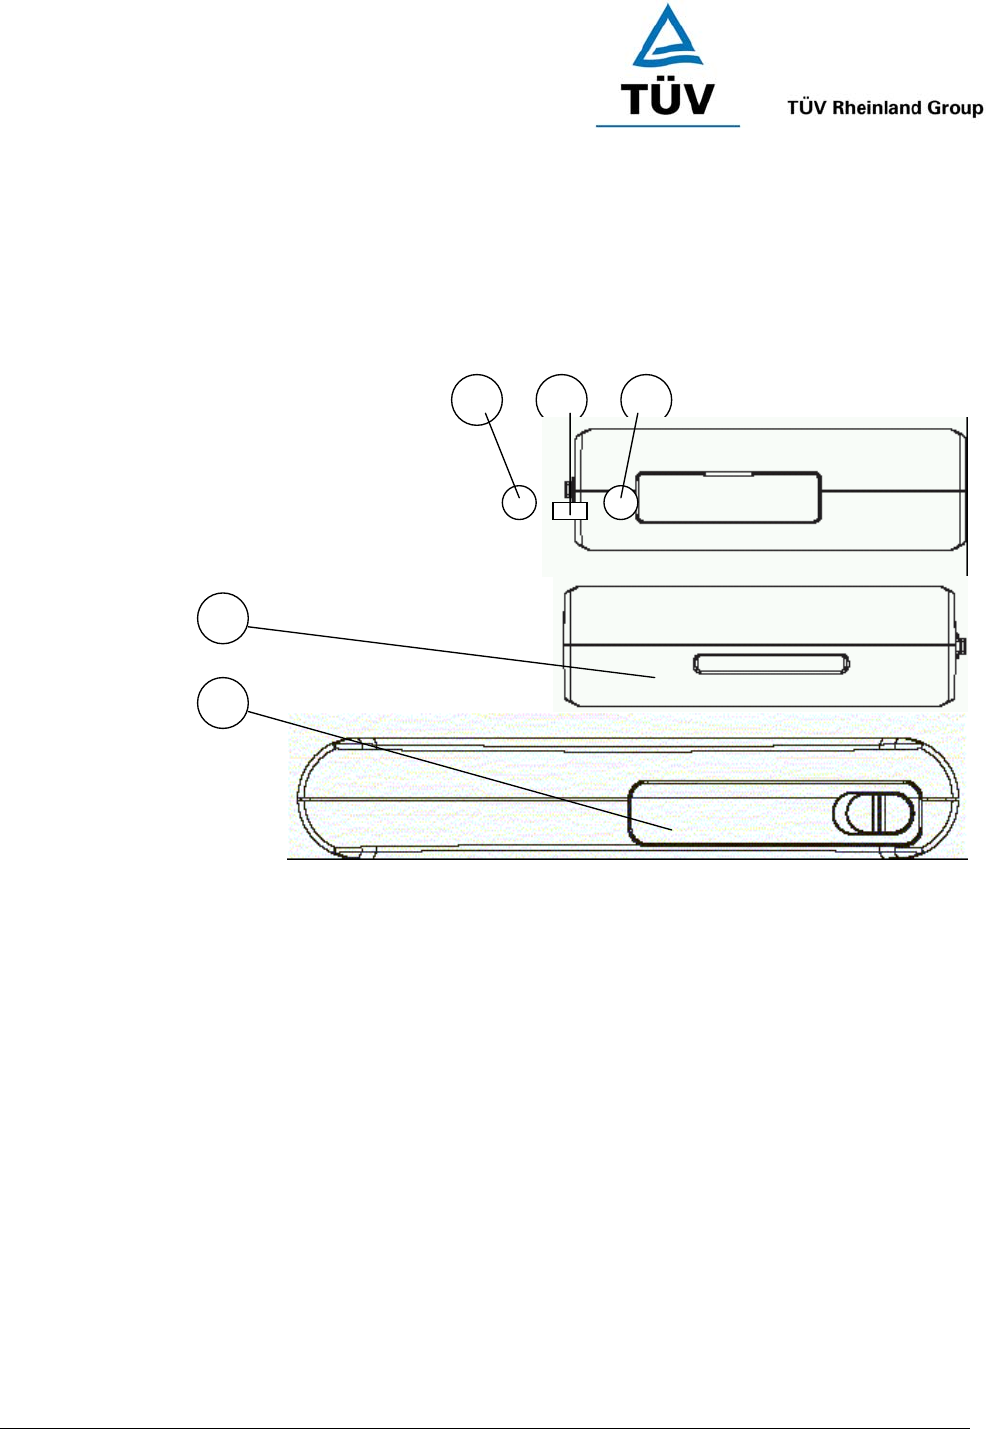
8. AV OUT – To connect via an AV cable for transmitting video image to TV
9. USB – For charging and also connecting with PC for file transfer.
10. AV IN – To connect the PowBox V25 with AV equipments(e.g. TV, Video Recorder, Viewcam etc.) via an AV
cable.
11. SD/MMC CARD SLOT – For external memory (SD Card/MMC Card)
12. BATTERY SLOT – For the rechargeable Lithium Battery
Fig. 2

www.tuv.com
Test Report No.: 14009130 001 Appendix 4 page 23 of 45
Getting Started
♦ Use only the iTech charger/adaptor.
♦ Before using for the first time, you must fully charge the battery.
♦ Hold the button for 3 sec to start the PowBox V25.
♦ Press the / and turn the button for navigation.
♦ At any menu, press to return to the previous menu.
♦ At any menu, hold the button for 3 sec again to shut down the PowBox V25.

www.tuv.com
Test Report No.: 14009130 001 Appendix 4 page 24 of 45
MAIN MENU
Fig 3
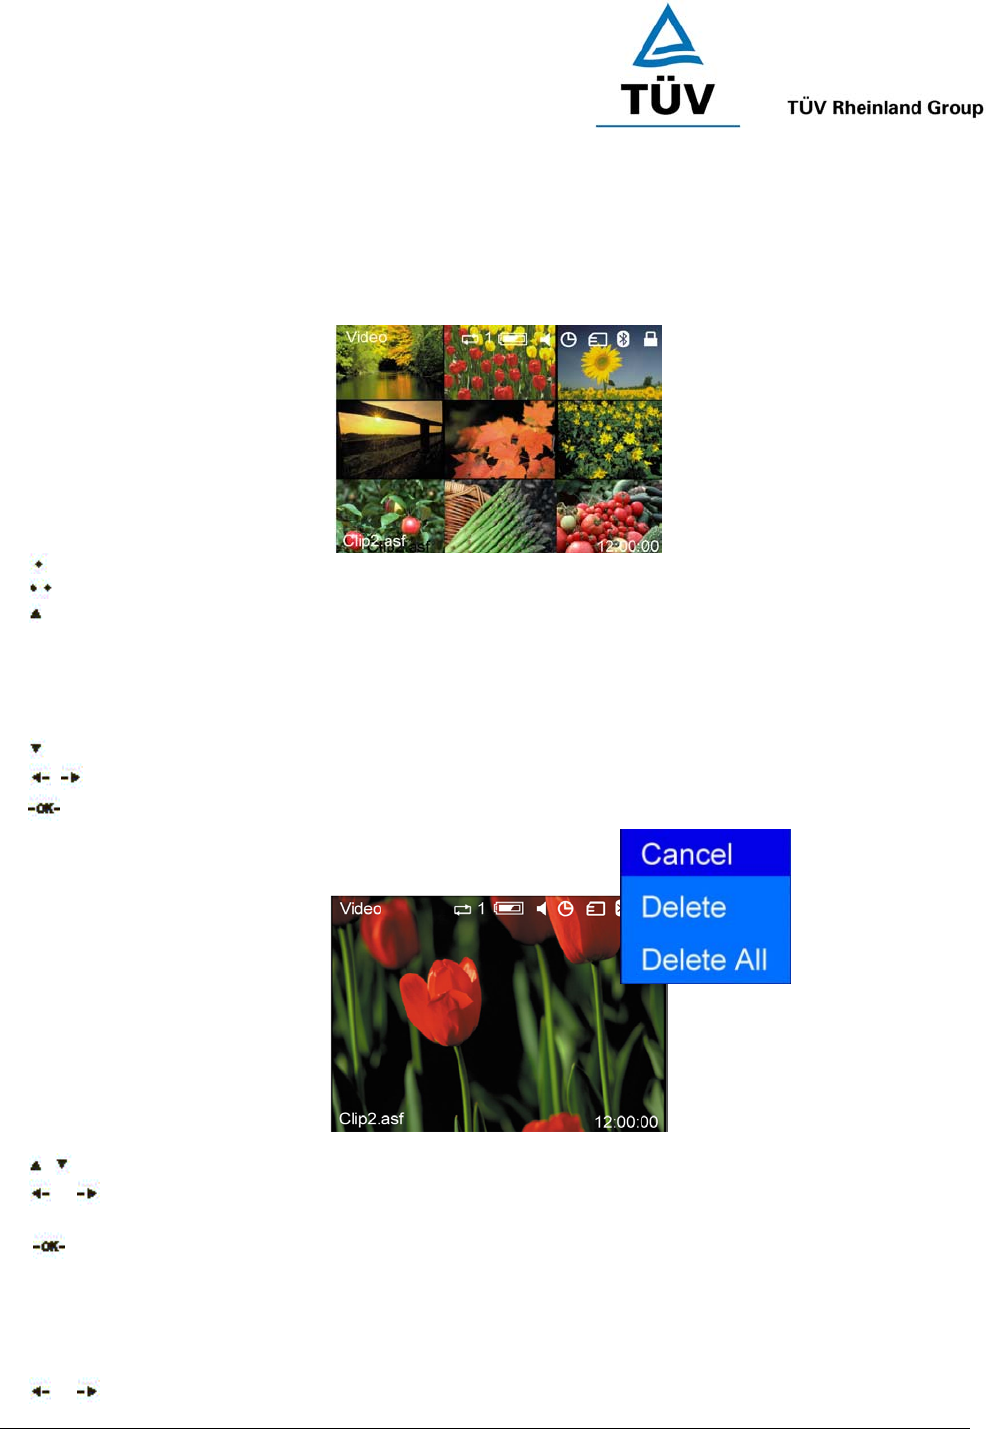
/ Using the UP/DOWN and LEFT/RIGHT button to navigate the menu and / press button to
confirm.
Hold the SOFTKEY 1 for 3 sec to toggle the LCD ON/OFF..
Hold the SOFTKEY 2 for 3 sec to toggle the HOLD mode.
www.tuv.com
Test Report No.: 14009130 001 Appendix 4 page 25 of 45
1 VIDEO
1.0 Video Menu
Press the SOFTKEY 1 to display the selected video information.
Press the SOFTKEY 2 to go to the Delete menu(see 1.2).
Press the UP button for selecting the PLAY MODE
ONCE - Play the video clip only once.
REPEAT, - Repeat playing the same video
REPEAT ALL- Repeat playing all the video
RANDOM - Play the video randomly
Press the DOWN button for MUTE/UNMUTE function
/ Press LEFT/RIGHT button for choosing the video clip
Press OK to play the selection.
1.1 Play Video
/ Press UP/DOWN to increase/decrease the volume.
or Long hold LEFT/RIGHT button for fast rewinding or forwarding the video.
Short Press LEFT/RIGHT button for playing the previous or next video.
Press OK to play or pause.
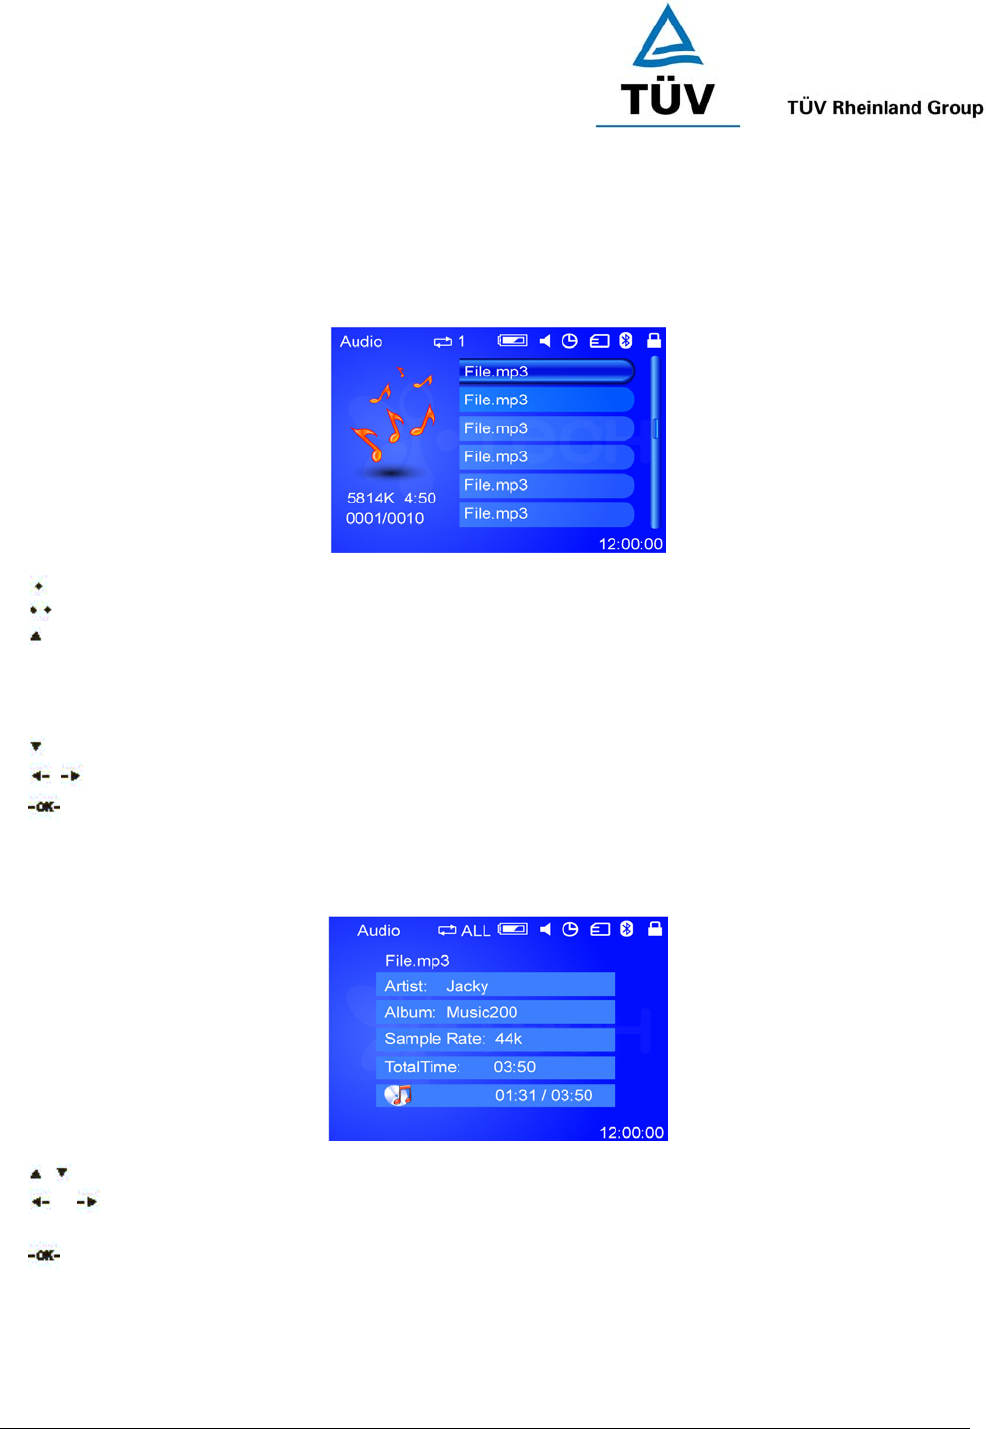
1.2 Delete Video
For Deleting a video clip, first to select the item to be deleted,
or Press LEFT/RIGHT button to move up or down.

www.tuv.com
Test Report No.: 14009130 001 Appendix 4 page 26 of 45
Select OK to confirm selection.
www.tuv.com
Test Report No.: 14009130 001 Appendix 4 page 27 of 45
2 AUDIO
2.0 Audio Menu
Press the SOFTKEY 1 to display the selected audio information.
Press the SOFTKEY 2 to go to the Delete menu(see 2.2).
Press the UP button for the Play Mode
ONCE - Play the MP3 file only once.
REPEAT, - Repeat playing the same file
REPEAT ALL - Repeat playing all the files
RANDOM - Play the MP3 file randomly
Press the DOWN button for MUE/UNMUTE all audio.
/ Press the LEFT/RIGHT button for moving UP/DOWN the audio list.
Press OK button to play the selection.
2.1 Play Audio
/ Press UP/DOWN to increase the volume.
or LONG HOLD LEFT/RIGHT button for fast rewinding or forwarding.
SHORT PRESS LEFT/RIGHT to play the previous or next music.
Play or pause the music.

www.tuv.com
Test Report No.: 14009130 001 Appendix 4 page 28 of 45
2.1 Delete Audio
For Deleting a music, first to select the item to be deleted,
or Press LEFT/RIGHT button to move up or down.
Select OK to confirm selection.

www.tuv.com
Test Report No.: 14009130 001 Appendix 4 page 29 of 45
3 PHOTO
3.0 Photo Menu
Press the SOFTKEY 1 to display the selected photo information.
Press the SOFTKEY 2 to go to the Delete menu(see 3.2).
Press the UP button for the Play Mode
ONCE - Play the photo only once.
AUTO LOOP - Play a slide show of all photos.
RANDOM - Play the slide show randomly.
Press the DOWN button for setting the AUTO LOOP duration(3s, 5s, 15s)
/ Press the LEFT/RIGHT button for moving UP/DOWN the photo album.
Press OK to display the photo.
3.1 Display Mode
Press the SOFTKEY 1 to set the start up photo for the slide show.
Press the SOFTKEY 2 to go to the Rotate & Print menu. In this menu, you may select either to PRINT
the photo by send the image to a printer via Bluetooth or to ROTATE the selected photo.
/ Press UP/DOWN button to zoom in or out.
or Press the LEFT/RIGHT button to display the previous or last photo.
Press OK to play or pause.
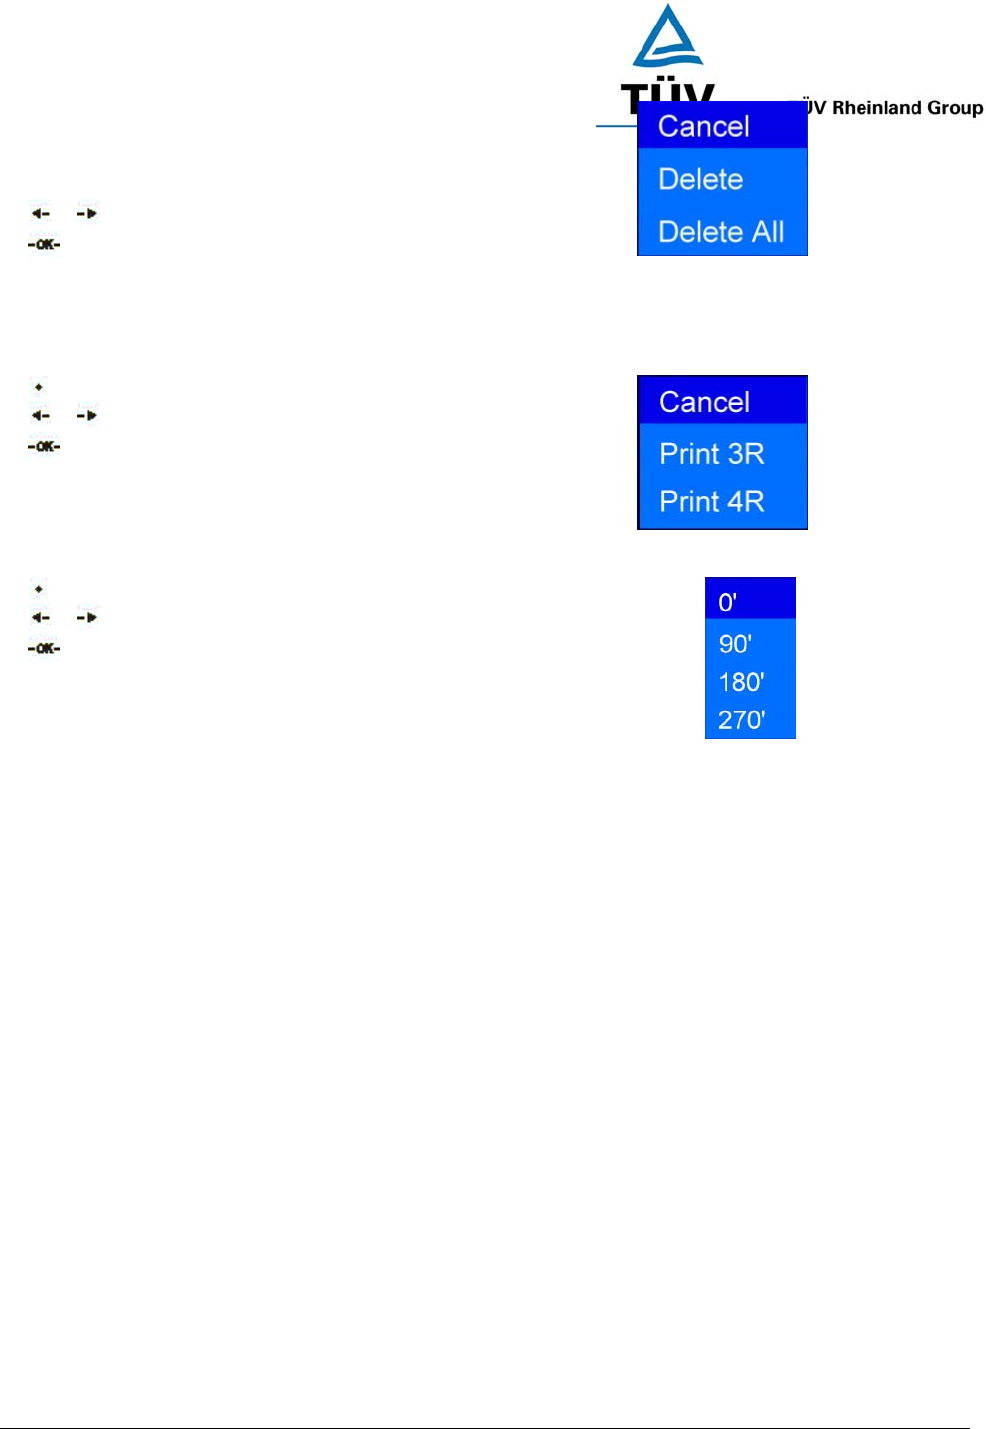
3.2 Delete Photo
www.tuv.com
Test Report No.: 14009130 001 Appendix 4 page 30 of 45
For Deleting a music, first to select the item to be deleted,
or Press LEFT/RIGHT button to move up or down.
Select OK to confirm selection.
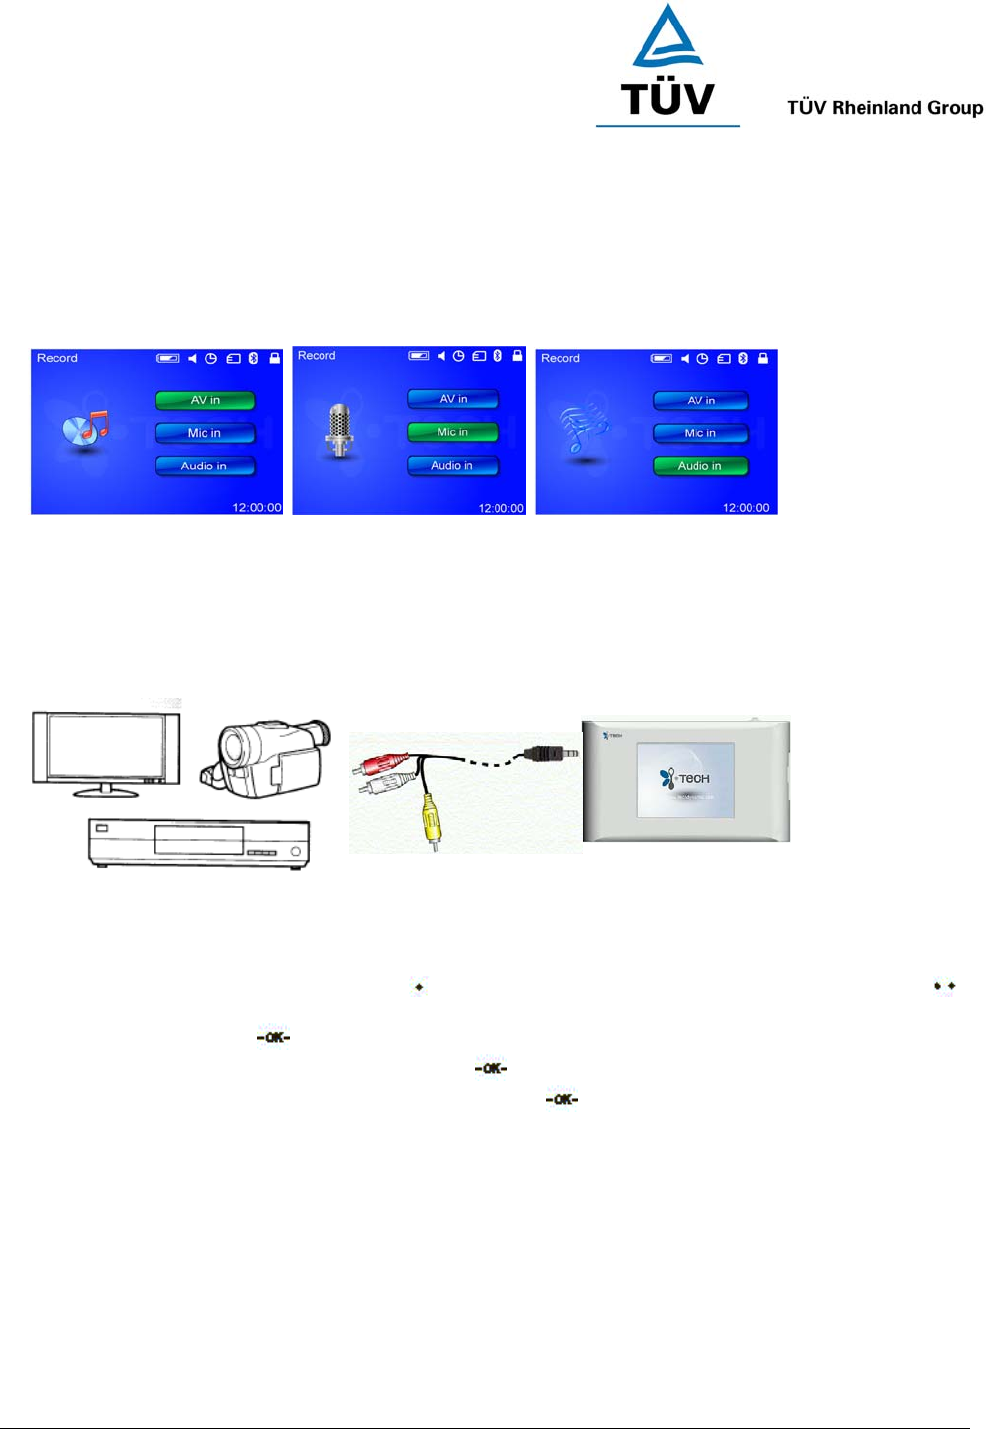
3.3 Direct Print
You may select the print out size from the option box,
Press SOFTKEY 1 to display the photo information.
or Press LEFT/RIGHT button to move up or down.
Press OK to select.
3.4 Rotate Photo
There will be 4 options for rotation, 0o, 90o, 180o & 270o
Press SOFTKEY 1 to display the photo information.
or Press LEFT/RIGHT button to move up or down.
Press OK to select.
www.tuv.com
Test Report No.: 14009130 001 Appendix 4 page 31 of 45
4 RECORD
4.0 Record Menu
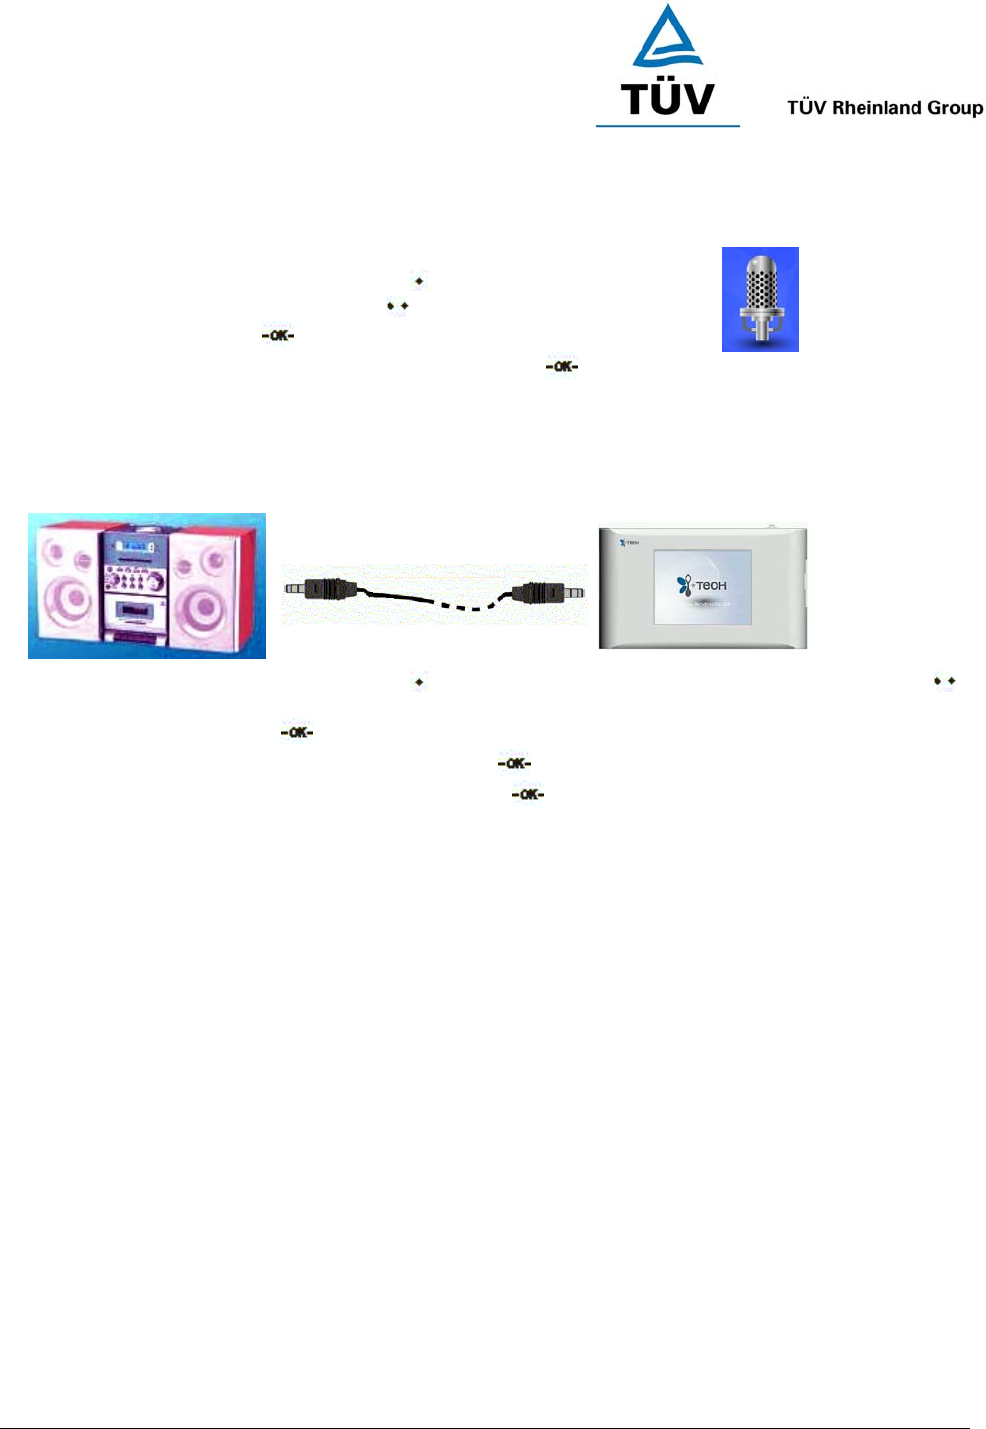
The PowBox V25 provides the variety of recording capabilities. You may record your favorite TV show or
VCD/DVD movie using the AV cable. You may record from your audio system such as your Hi-Fi system with
the 3.5mm stereo audio cable. You may also use the PowBox V25 as a voice recorder and record your
important voice memo and store it either on the internal memory or onto a SD/MMC card.
4.1 Recording Video (AV in)
1) Connect the AV cable – For all the AV devices, you need to plug in the three pins(Red, White & Yellow)
correctly:
Red – Audio OUT (R)
White – Audio Out (L)
Yellow – Video OUT
2) Plug the pin (Black) into the PowBox V25 AV IN slot.
3) Adjust the recording time by pressing the button to set record length increase by 1 min and press the
button decrease by 1 min.
4) Select AV in and press button.
5) When you entered the AV in menu, simply press button again to START.
6) It will stop recording by the preset recording time or press button to STOP.
www.tuv.com
Test Report No.: 14009130 001 Appendix 4 page 32 of 45
4.2 Voice memo(Mic in)
1) Connect the other end to the PowBox V25 Audio In slot.
2) Adjust the recording time by pressing the button to set record
length increase by 1 min and press the button decrease by 1 min.
3) Select Mic in and press button to start recroding.
4) It will stop recording by the preset recording time or press button to STOP.
4.3 Recording Audio (Audio in)
1) Plug the 3.5mm audio cable to the Audio Out of your Hi-Fi system.
2) Connect the other end to the PowBox V25 Audio In slot.
3) Adjust the recording time by pressing the button to set record length increase by 1 min and press the
button decrease by 1 min.
4) Select Audio in and press button.
5) When you entered the Audio in menu, simply press button again to START.
It will stop recording by the preset recording time or press button to STOP.

www.tuv.com
Test Report No.: 14009130 001 Appendix 4 page 33 of 45
5 ACCESSORY
Accessory contains 4 applications:
1) Snake game
2) Russian game
3) Alarm Clock
4) Calendar
5.1 Snake Game
/ Press UP/DOWN button to move up/down.
/ Press LEFT/RIGHT button to move left/right.
Press OK to start or pause.
5.2 Russian Game
/ Press the UP/DOWN button to GRADE up/down.
or Press the LEFT/RIGHT button to move left/right.
Press OK to start or pause.
5.3 Set Alarm
Press the SOFTKEY 1 to set alarm ON/OFF.
/ Press UP/DOWN button to increase/decrease the set time.
or Press LEFT/RIGHT button once to move left or right.
Press OK to confirm.
5.4 Calendar
/ Press UP/DOWN button to go PREVIOUS / NEXT year.
or Press LEFT/RIGHT button to go PREVIOUS / NEXT month.
www.tuv.com
Test Report No.: 14009130 001 Appendix 4 page 34 of 45
6 SETUP
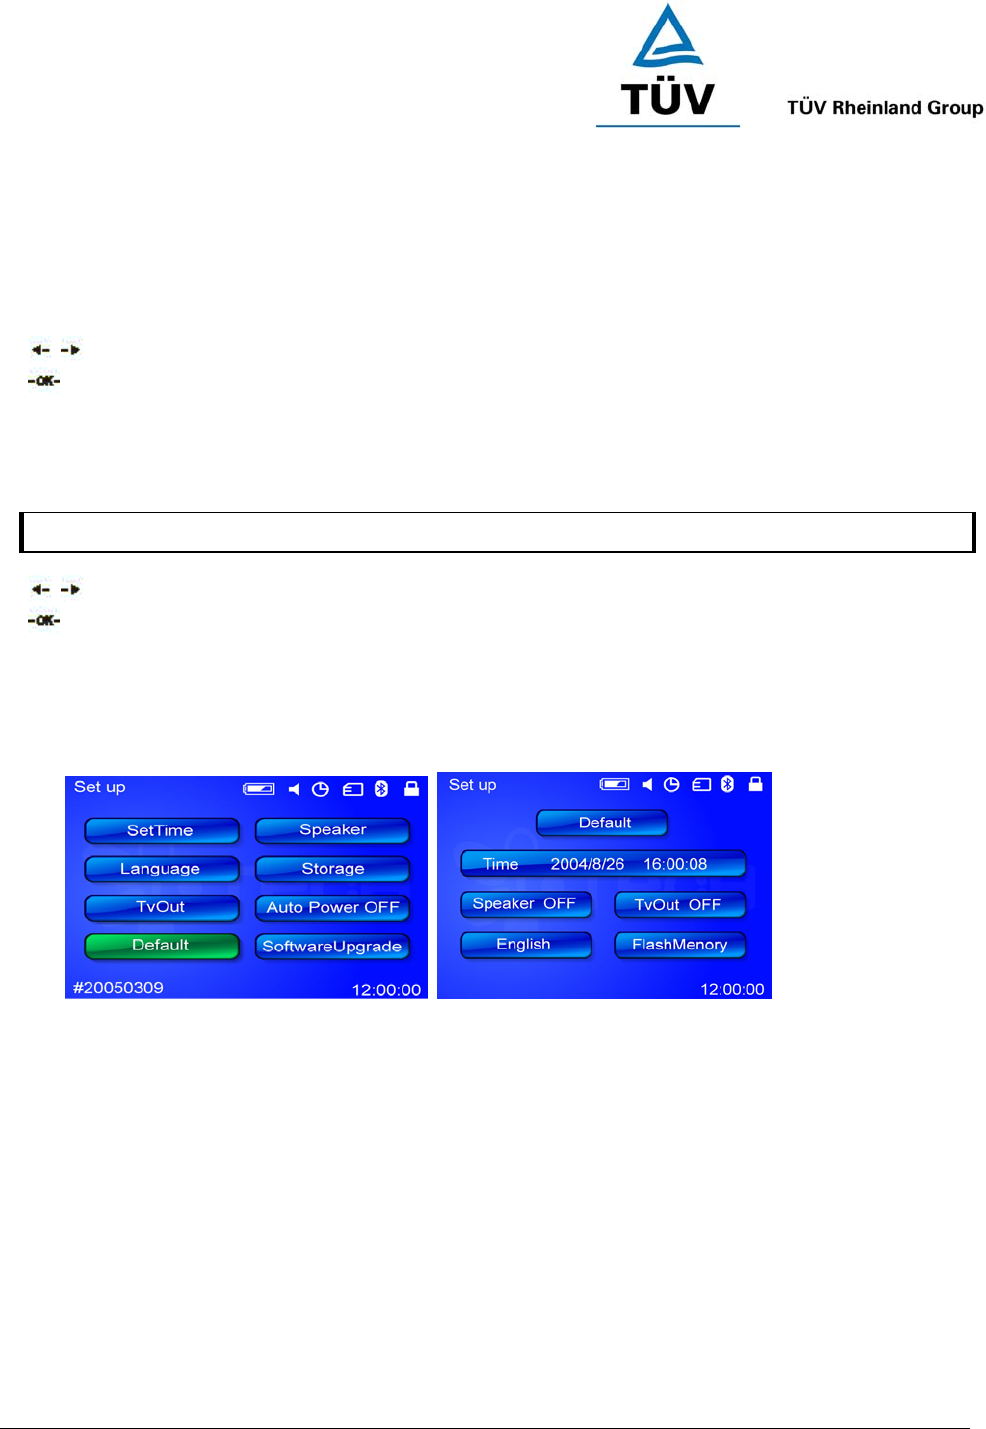
Set up menu contains all sorts of setting that you can adjust on the PowBox V25, this section will explain briefly
each individual function.
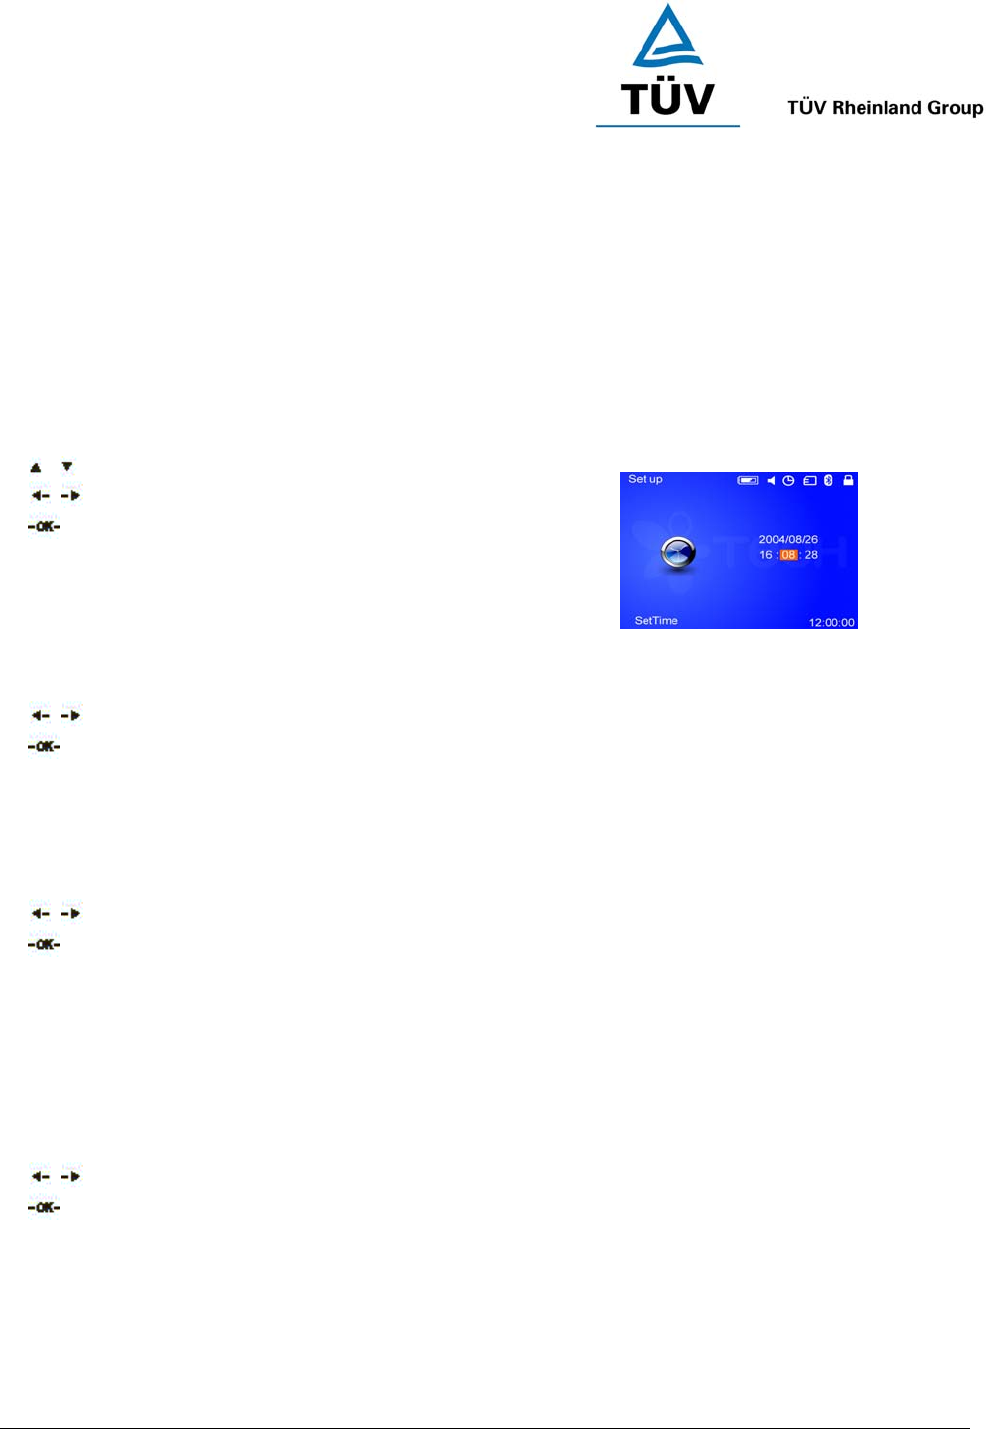
6.1 Set Time
The internal clock can be set, simply move the cursor around and input the correct Date (YYYY/MM/DD) and
Time(HH:MM:SS) and press OK to confirm.
/ Press the UP/DOWN button to increase/decrease.
/ Press LEF/RIGHT button to move.
Press OK to confirm the preset time.
6.2 Speaker
The internal speaker can be switch on/off by this menu, simply move the cursor to ON and confirm, the internal
speaker will be turned on.
/ Press the UP / DOWN to move up/down.
Press OK to select.
6.3 Language
The user interface language can be changed in this menu, simply move the cursor to the language that you wish
to read and press OK to confirm.
/ Press UP/DOWN button to move up/down.
Press OK to select.
6.4 Storage
By default, if there is no external memory card is inserted, everything will be operated under the internal memory
AND if there is an external memory card is inserted, all the operations will be handled i.e. to READ and to
WRITE to/from, the external memory card. In this menu option, you may wish to read or write to/from the internal
memory even a memory card is inserted.
To activate, simply move the cursor to the memory that you wish to operator and press OK to confirm.
/ Press UP/DOWN button to move up/down.
Press OK to select.
www.tuv.com
Test Report No.: 14009130 001 Appendix 4 page 35 of 45
6.5 TV Out
PowBox V25 provides the capability to display on the LCD display as well as to output the content to the TV.
Under this TV Out mode, the Powerbox V25 LCD will become blank which is a normal behaviour.
To activate, simply move the cursor to the memory that you wish to operator and press OK to confirm.
/ Press UP/DOWN button to move up/down.
Press OK to select.
6.6 Auto Power OFF
You can preset the auto power off time in the selection of NEVER, 3, 15 or 30 Minutes. To activate, simply move the cursor to the memory
that you wish to operator and press OK to confirm.
/ Press UP/DOWN button to move up/down.
Press OK to select.
6.7 Default
The DEFAULT option provides a quick access to reset the settings as shown inside the default page. To reset,
simply enter the DEFAULT menu and press OK to activate.
6.8 Software Upgrade

www.tuv.com
Test Report No.: 14009130 001 Appendix 4 page 36 of 45
7 FORMAT
7.0 Format Menu
Format option is provided but you must be sure that you
have made a backup or you really want to erase everything
that stored in the PMP.
To format, move to the “YES” icon and select OK.
Press SOFTKEY 1 to format the internal memory
Press SOFTKEY 2 to format the external memory (SD/MMC Card)..
Press OK to confirm the selection.
www.tuv.com
Test Report No.: 14009130 001 Appendix 4 page 37 of 45
1
2
8 BLUETOOTH
8.0 Bluetooth Stereo
PowBox V25 gives you an alternative to enjoy the multi-media with our wireless Bluetooth solution. PowBox V25
empowered the Bluetooth 1.2 A2DP spec which allows you to pair up with our stereo Bluetooth headset.
Get Prepared
♦ Prior to using your Headset for the first time, you must fully charge the headset. You can charge the headset
with the USB charging cable that is provided in the package. Charging is finished when the red light turns
blue (approxi. 3 hours).
♦ You must pair the headset with a Bluetooth-enabled mobile handset.
www.tuv.com
Test Report No.: 14009130 001 Appendix 4 page 38 of 45
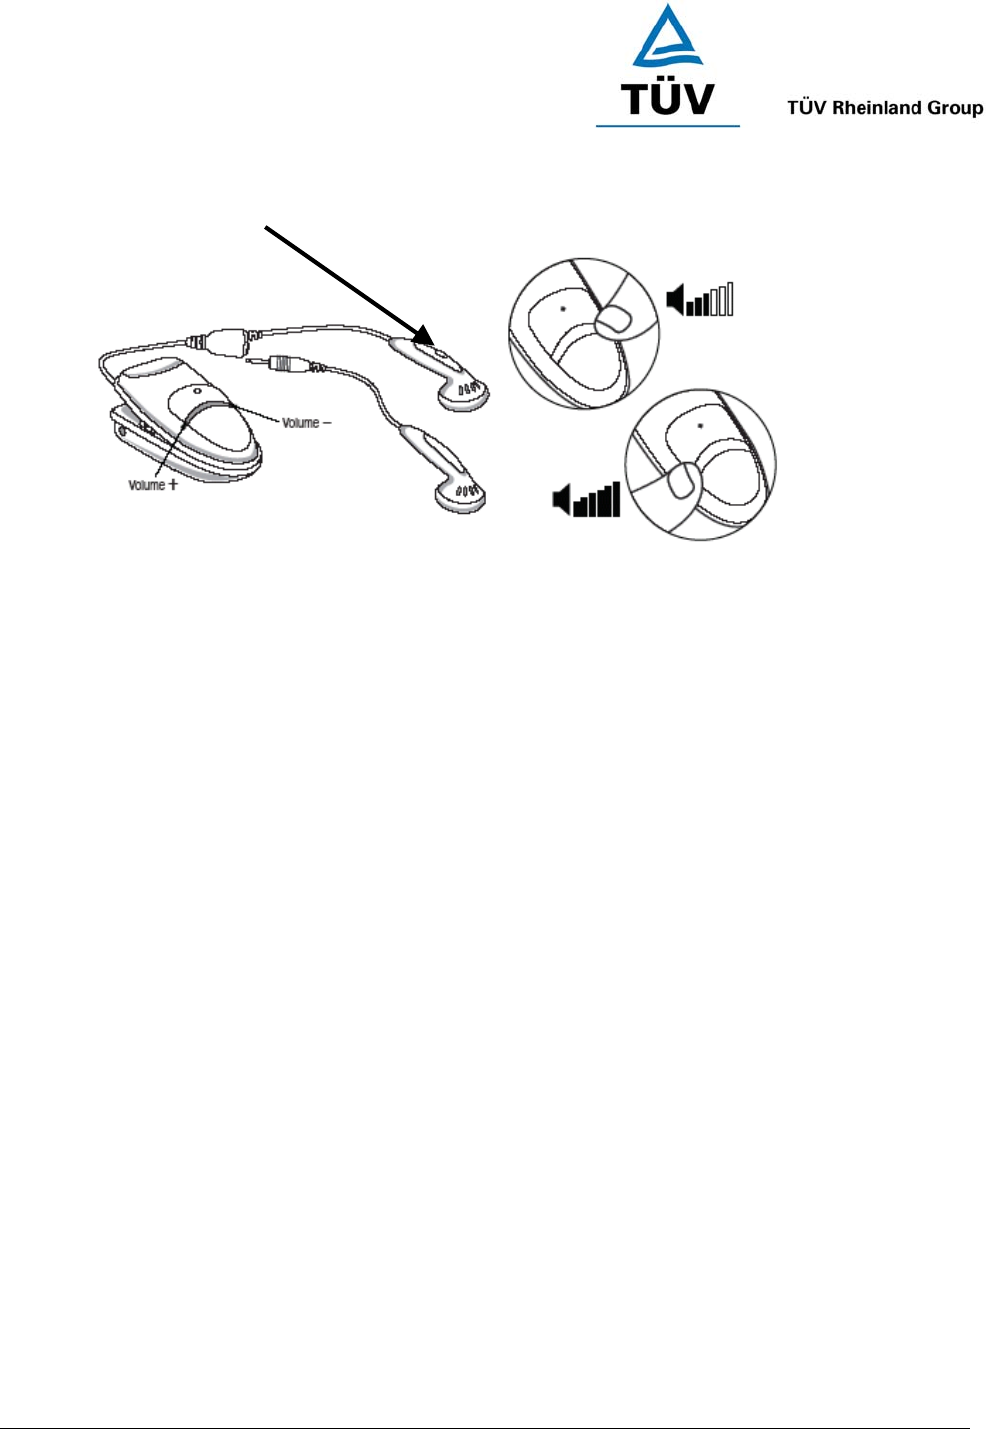
MFB (Multi-Function Button)
Setp 1> Pairing the Headset with Your Handset
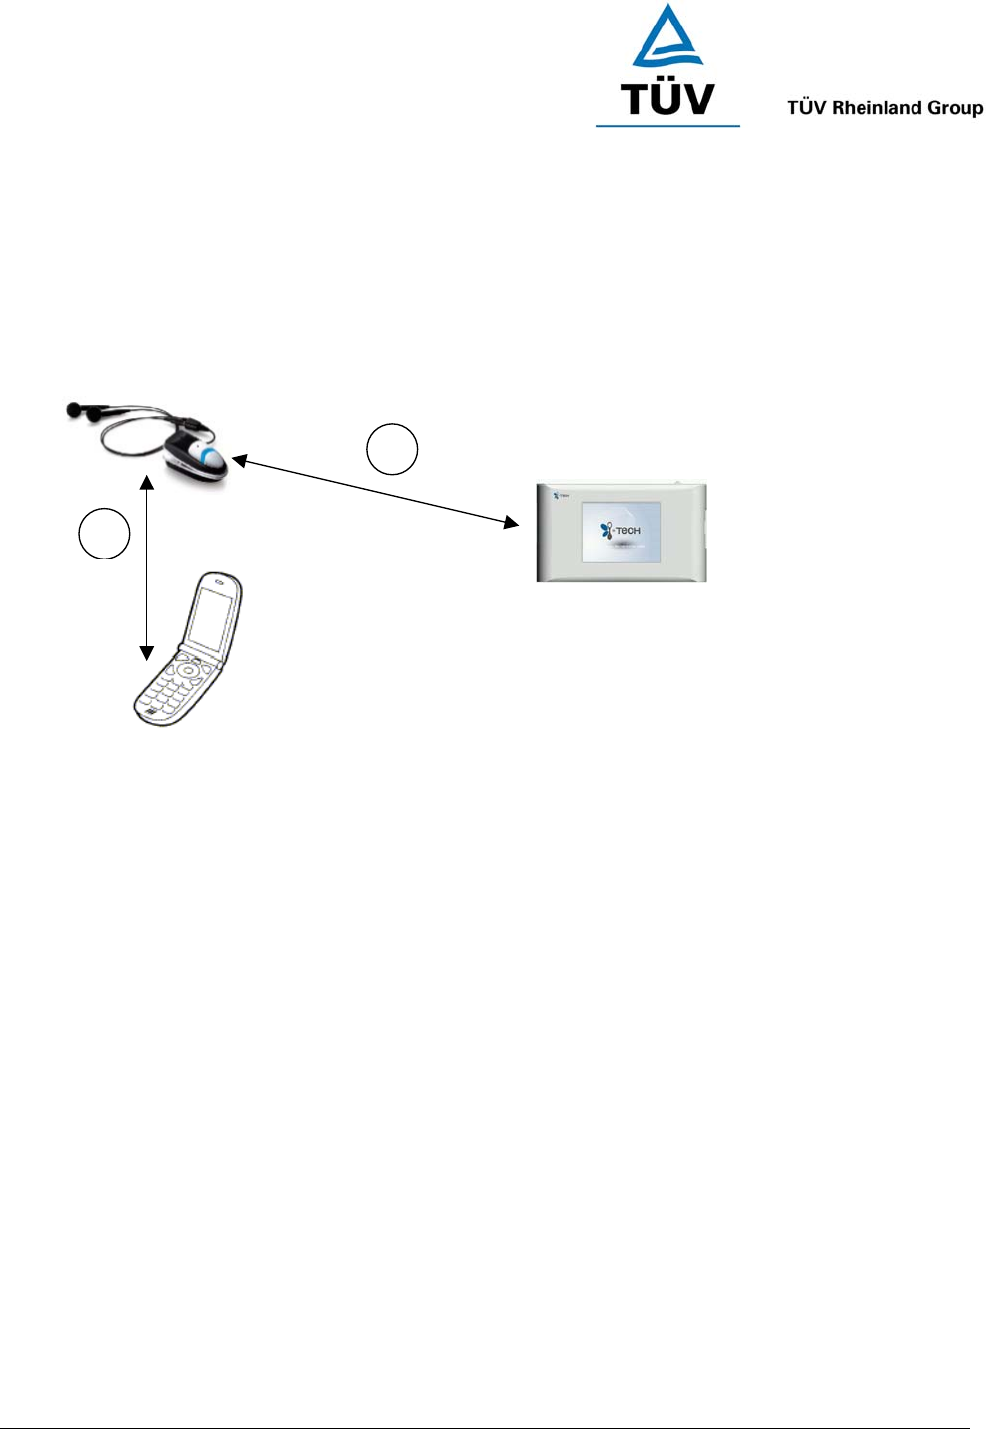
1. Place the headset and the mobile handset where they are easily viewable by no more than 1 meter apart.
2. Ensure the headset is OFF.
3. Press and hold the MFB until the headset LED alternately flashes blue and red.
4. Activate your mobile handset’s Bluetooth function by referring to your mobile handset user guide for details.
5. Set the mobile handset to search for Bluetooth devices within about 1 meter as instructed in the mobile
handset user guide and select “i.Tech stereo headset” from the list.
6. Enter the preprogrammed passkey “8888” and press “OK” to pair your headset and mobile handset. When
the pairing is complete, the headset LED will flash blue rapidly for 5 times followed by a long beep.
7. Go back to your mobile handset’s main menu. For certain mobile handset models, a headset icon will be
shown on the screen. You should now be able to make and receive calls using your headset.
Setp 2> Pairing the Headset with the PowBox V25
8. Turn off the headset by holding the MFB for 3 sec until you hear a short beep.
9. Turn the headset back on again by holding the MFB until you see the headset LED alternately flashes blue
and red. In this stage, you headset is in “pairing mode”.
10. Place the headset and the PMP where they are easily viewable by no more than 1 meter apart, also keep
the handset in range as well.
11. Go to the Bluetooth Stereo menu on the PMP and select Bluetooth “ON” by pressing OK button. Now, the
PMP is also in “pairing mode”.
12. Observe the LED on the Bluetooth headset, a long flashing blue light indicates the headset has been
successfully paired with the PMP. At the same time, the Bluetooth headset is also paired with your mobile
handset.
IMPORTANT If the pairing cannot be completed within 2 minutes while the pairing mode is activated, the
headset LED flashes purple red with 3 beeps and the headset is turned off. Please repeat Steps 2 to 7 to
pair the headset and the mobile handset or Step 8 to 12 to pair the headset and PMP again.
www.tuv.com
Test Report No.: 14009130 001 Appendix 4 page 39 of 45
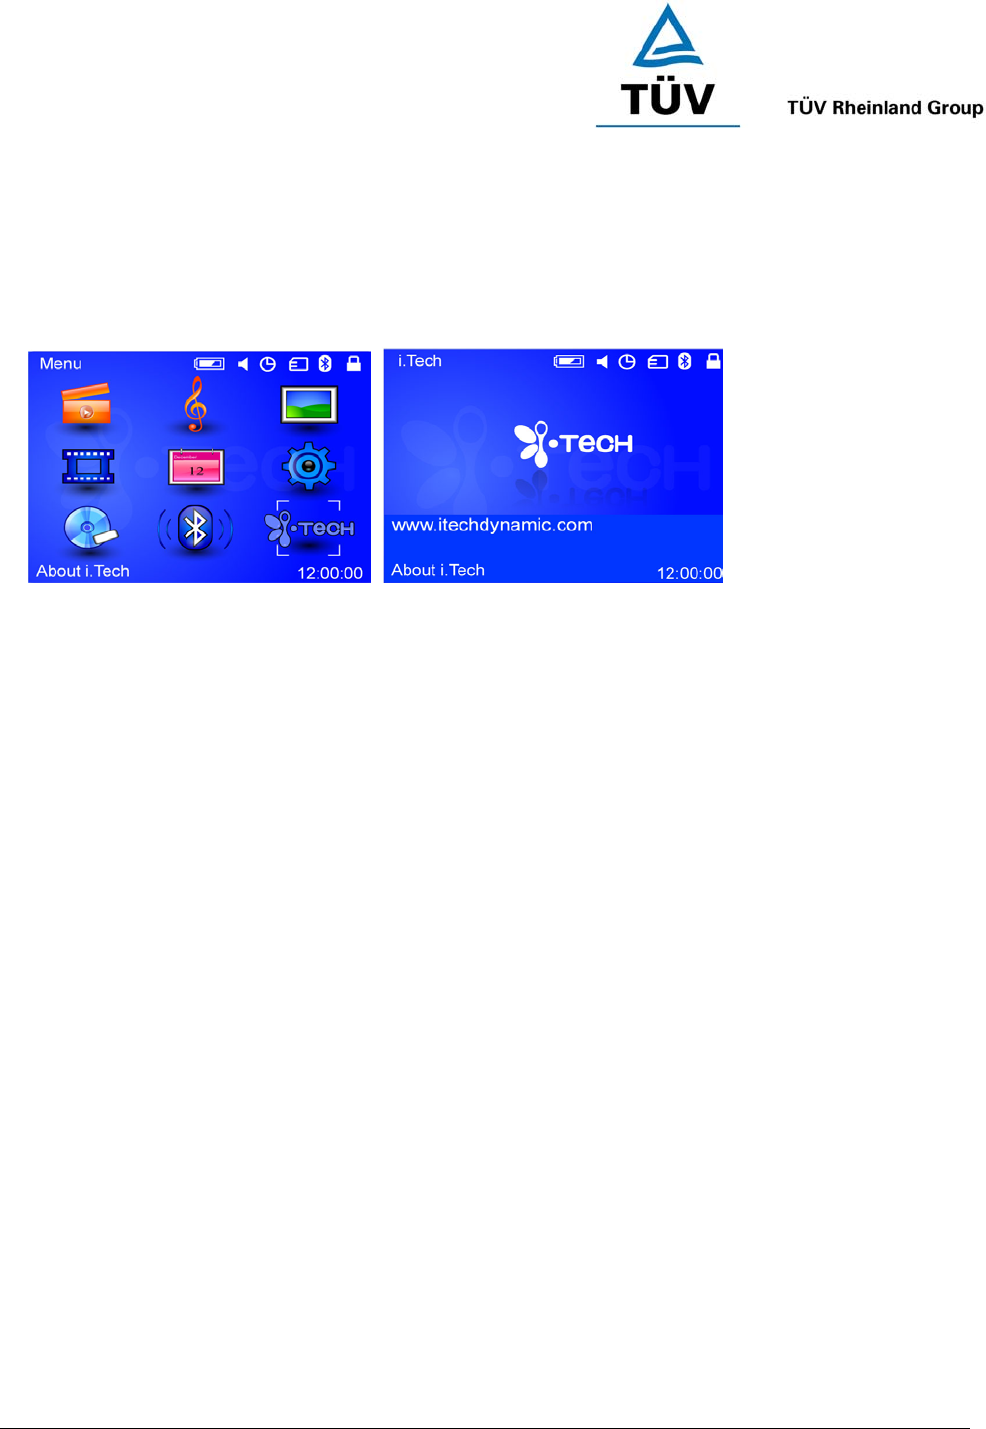
9 ABOUT i.Tech
9.0 About i.Tech
This menu provides you all the information about i.Tech.

www.tuv.com
Test Report No.: 14009130 001 Appendix 4 page 40 of 45
Care and Maintenance
PMP
♦ Consider turning your PMP off before placing it in your pocket or bag to avoid unintended power
consumption.
♦ Do not expose the PMP to liquid, moisture or humidity as it is not waterproof.
♦ Do not use abrasive cleaning solvents to clean the PMP.
♦ Do not expose the PMP to extremely high or low temperatures.
♦ Do not dispose of the PMP in a fire as it will result in explosion.
♦ Do not expose your PMP to contact with sharp objects as this will cause scratches and damage.
♦ Do not stick anything inside the PMP as this may damage internal components.
♦ Do not attempt to disassemble the PMP as it does not contain serviceable components.
♦ If you do not use the PMP for long periods, be sure to store it in a dry place, free from extreme temperatures
and dust.

www.tuv.com
Test Report No.: 14009130 001 Appendix 4 page 41 of 45
Rechargeable Battery
♦ Charge the battery in accordance with the instruction supplied with this user guide.
♦ Only use the manufacturer supplied charger when charging the headset.
Charging
♦ Only use the manufacturer supplied charger when charging the PMP.
♦ Do not disassemble the charger as it may expose you to dangerous voltages of other risks. Incorrect
reassembly can cause electric shock when the PMP is subsequently used.
♦ Do not use the charger outdoors or in damp areas.
♦ Avoid charging the PMP in extremely high and low temperatures.

www.tuv.com
Test Report No.: 14009130 001 Appendix 4 page 42 of 45
Safety Information
♦ Check local laws regarding use of a mobile handset and headset while driving. If you use the headset while
driving, ensure your attention and focus remains on your responsibility of driving safely.
♦ Never allow children to play with the PMP or headset – small parts may be a choking hazard.
♦ Observe all signs that require an electrical device or RF radio product to be switched off in designated
areas. These could include hospitals, blasting areas, and potentially explosive atmospheres.
♦ Turn off your headset prior to boarding an aircraft. Do not use your headset in an aircraft.
♦ Do not open or mutilate the rechargeable battery.
♦ Dispose of batteries according to local regulations. Do not dispose as household waste

www.tuv.com
Test Report No.: 14009130 001 Appendix 4 page 43 of 45
Troubleshooting
If you are unable to connect your headset and the PMP, please try the following:
♦ Ensure your headset is turned off and is properly charged.
♦ Ensure the headset is paired with your mobile handset.
♦ Ensure the Bluetooth feature in activated on your PMP. You can see a Bluetooth icon when it is activated.
♦ Ensure the headset is within a maximum of 10 meters of the PMP and there are no obstructions, such as
walls or other electronic devices in between.
If the above steps do not solve your problem, please recharge the headset and PMP and remove the PMP
battery for a while.
For more information, please visit http://www.itechdynamic.com

www.tuv.com
Test Report No.: 14009130 001 Appendix 4 page 44 of 45
Product Specifications
Display: 2.5” 262k colours TFT LCD
External Battery: 1050mAh Li-Polymer Rechargeable Battery
Operating Current: 200mA
Internal Memory: 128MB Nand-Flash (Usable 100MB)
External Memory: Up to 1GB
Interface; USB 1.1
Bluetooth Specification: Version 1.2 Class 2
Bluetooth Profile Supported: A2DP
Range of Frequency: 2.4GHz Spectrum
Dimensions: 110 mm (L) x 68mm (W) x 20mm (H)
Nominal Charging Time: Within 3 hours
Operating Time*: Up to 4 hours
Weight: 140 grams

www.tuv.com
Test Report No.: 14009130 001 Appendix 4 page 45 of 45
(Back Cover)
© 2005 Hutchison Harbour Ring Enterprises Limited
All rights in this publication are reserved and no part may be reproduced without the prior written permission of
the publisher. The contents of this publication are believed to be correct at the time of going to press, but any
information, specifications, products or services mentioned may be modified, supplemented or withdrawn without
further notice.
The Stylized i.Tech logos are trademarks owned by Hutchison Harbour Ring Enterprises Limited or its affiliates.
Bluetooth® and the Bluetooth logos are trademarks owned by Bluetooth SIG, Inc, USA and licensed to i.Tech
Dynamic Limited.
This device complies with Part 15 of the FCC Rules. Operation is subject to the following two conditions:
(1) this device may not cause harmful interference, and
(2) this device must accept any interference received, including interference that may cause undesired
operation.
Caution: Changes or modifications not expressly approved by the party responsible for compliance could void
the user's authority to operate the equipment.
i.Tech declares under our sole responsibility that the headset is in conformity with the provisions of the following
Council Directives: 1999/5/EC
Printed in China