iControl Networks GATEWAY2 Low Power Transceiver User Manual
iControl Networks Inc. Low Power Transceiver
UserManual.wiki
>
iControl Networks
>
GATEWAY2 User Manual
>
user manual
Contents
1.
user maual
2.
user manual
user manual
Navigation menu
Upload a User Manual
Namespaces
Wiki Guide
HTML
PDF
Info
Views
User Manual
Discussion / Help
Navigation
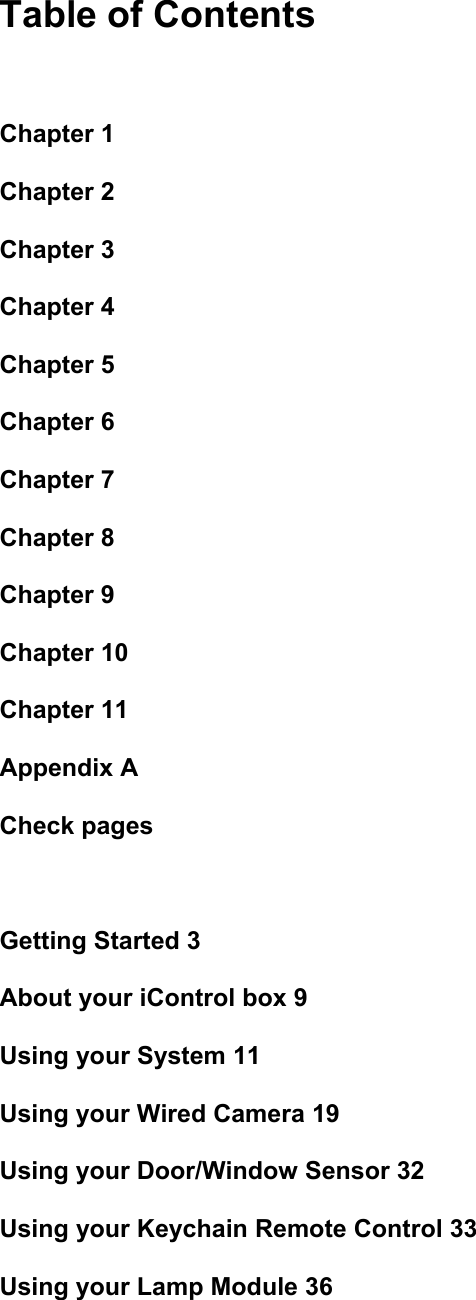


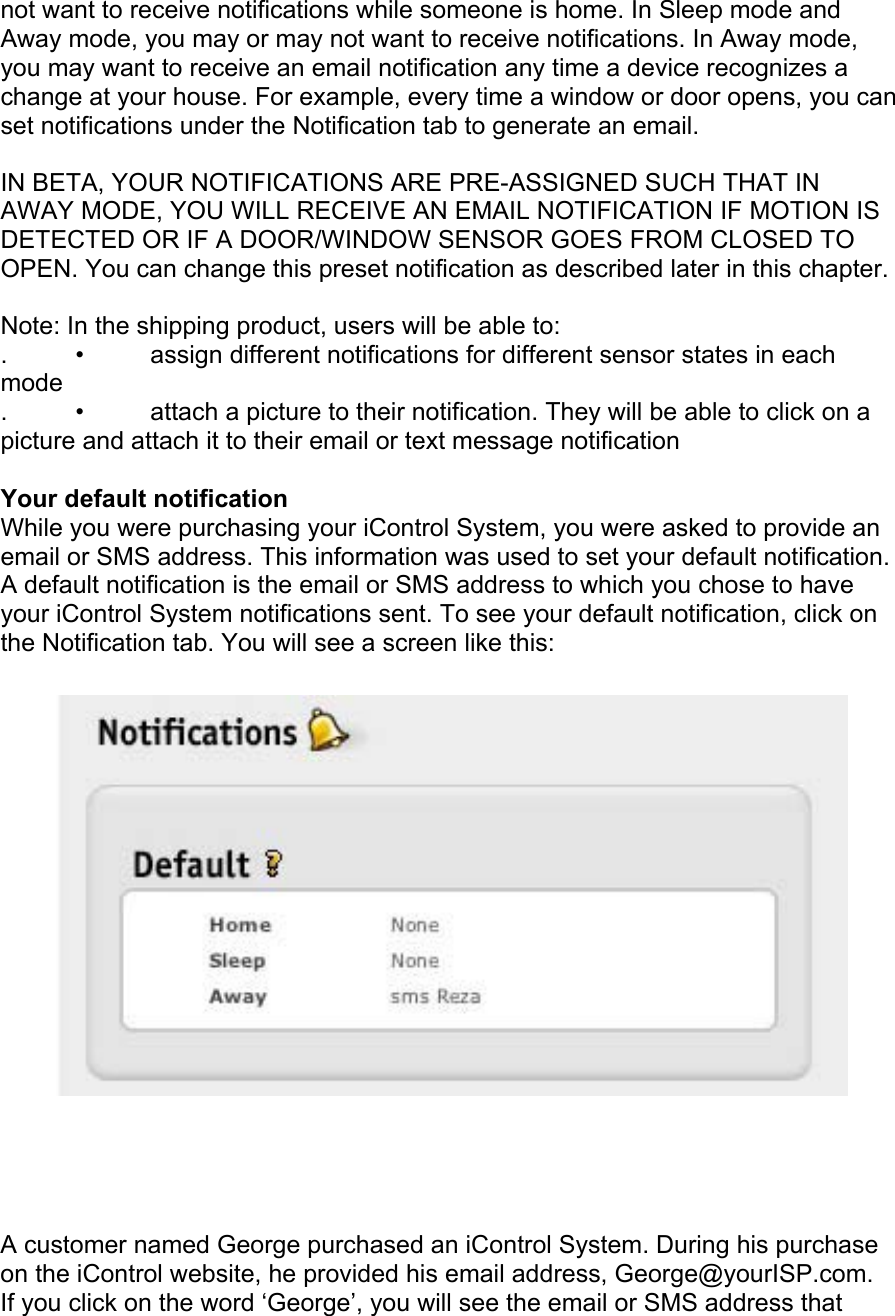
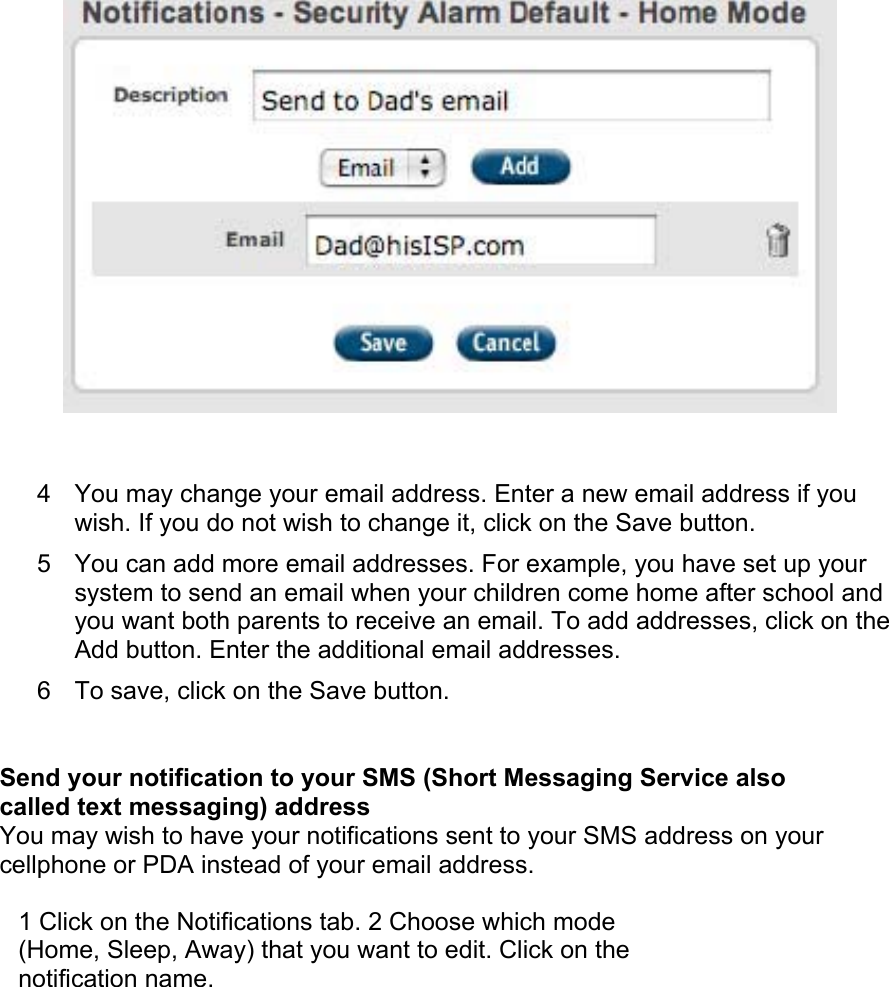
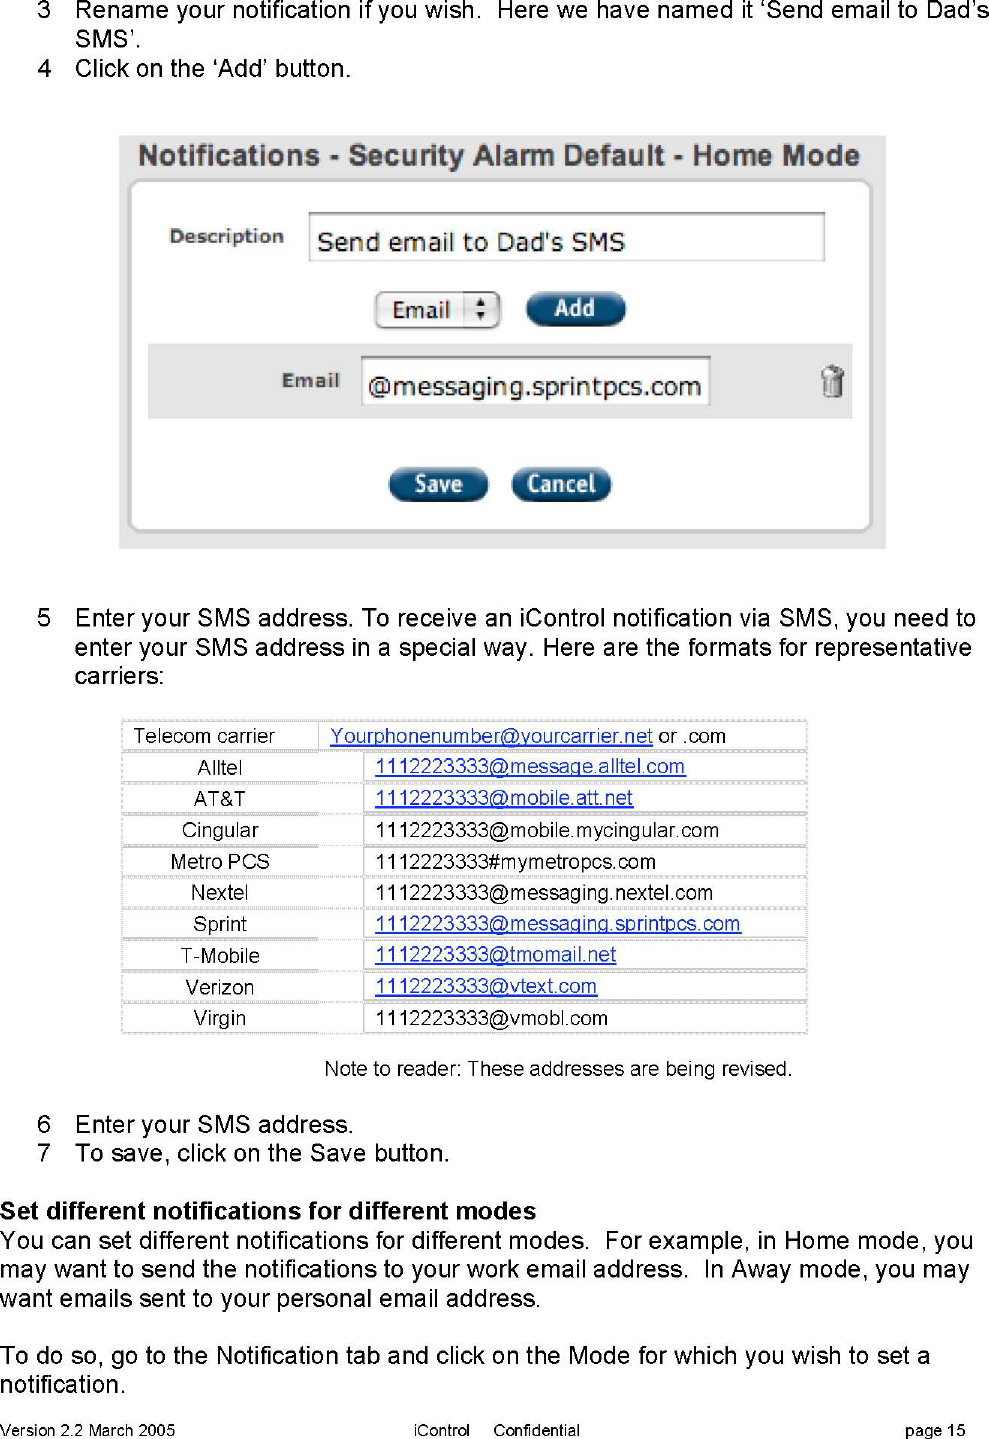
![Change or Set Notifications A notification is an email or SMS (Short Message Service also referred to as text messaging) message sent to your PC, PDA, or cell phone alerting you that a device recognized a change in your location. For example, a Motion Sensor may sense that someone has entered a room; a Door/Window Sensor may report that a door is open. Here is an example of an email notification sent to ‘brian@icontrol.com’ regarding his office Motion Sensor detecting that someone occupied his office at 8:31PM on 10 July 2004. [Note to reader: the wording of an email notification will change for the shipping product from this cryptic style to proper grammar and composition] You can assign notifications on a mode or device basis. In Home mode, you may](https://usermanual.wiki/iControl-Networks/GATEWAY2.user-manual/User-Guide-747448-Page-12.png)
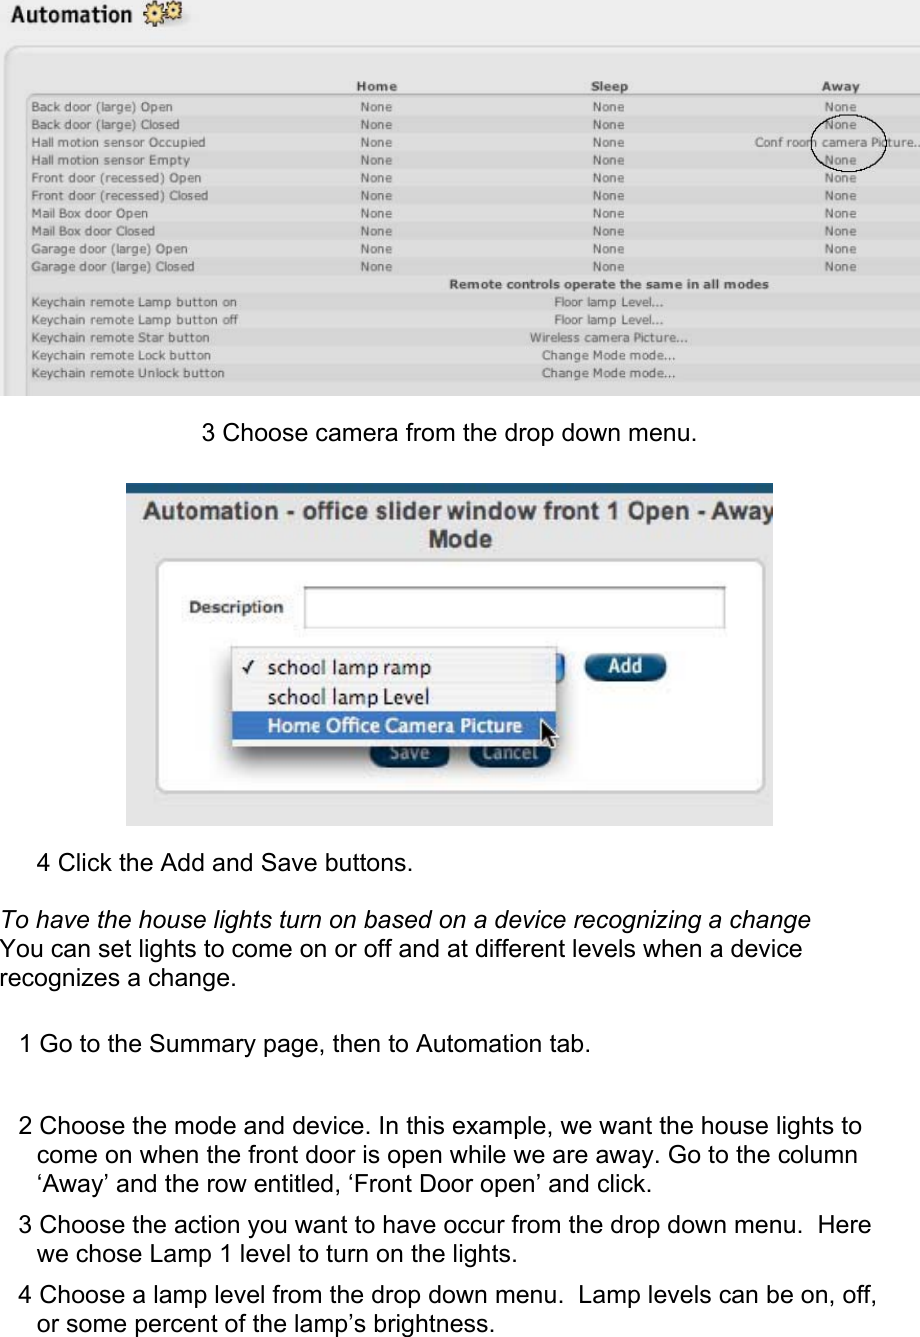
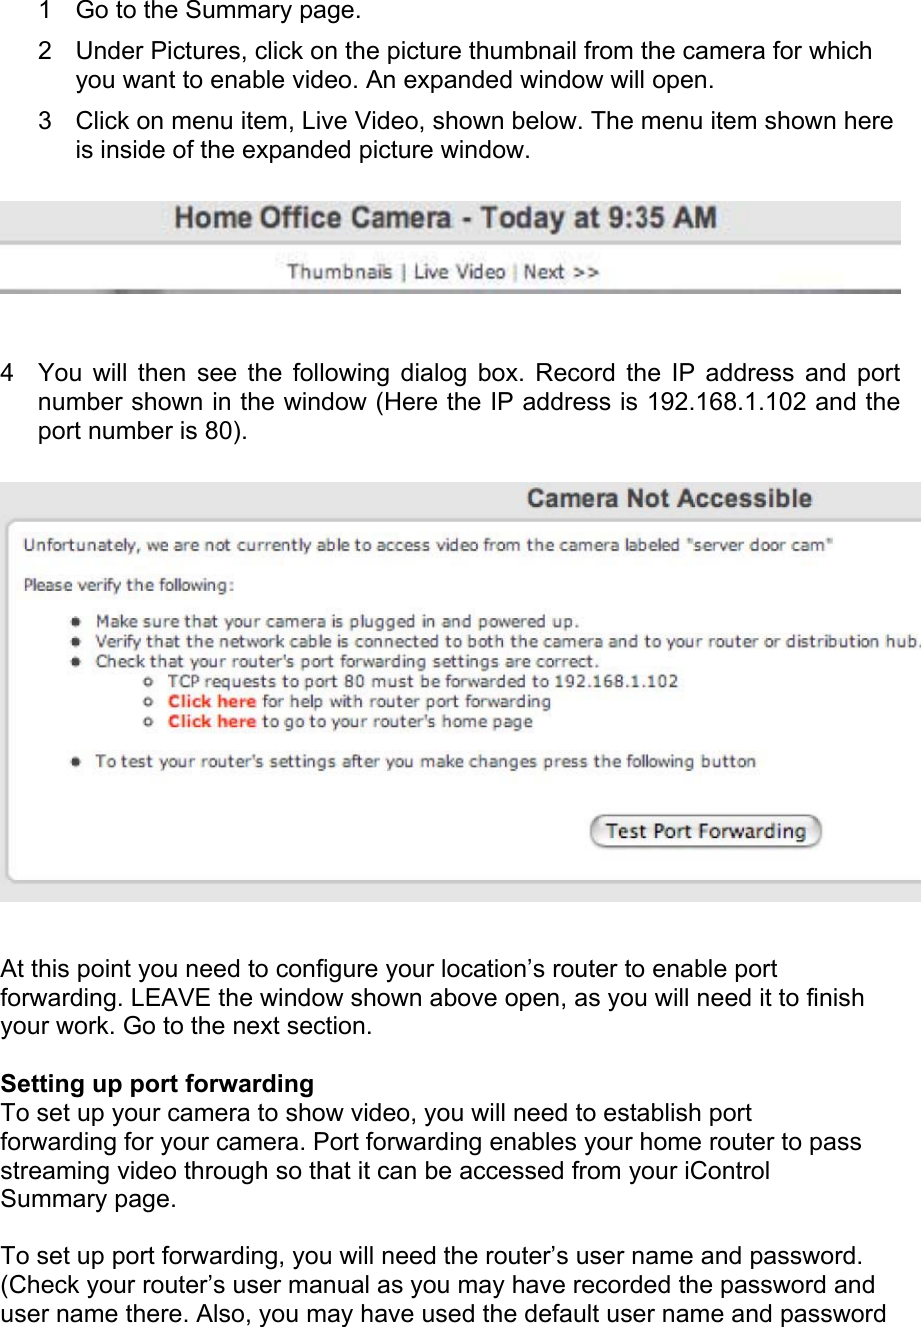
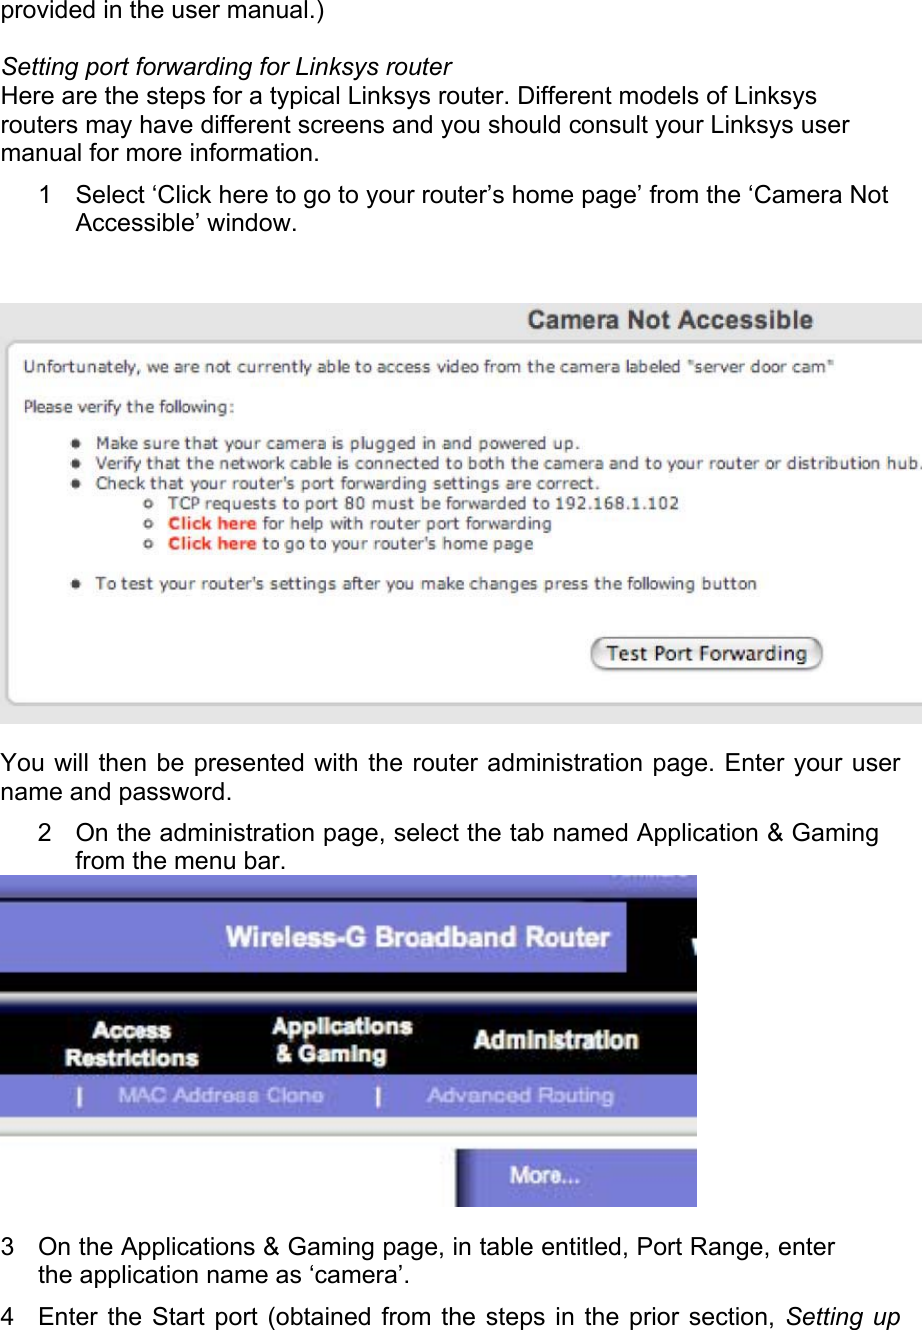
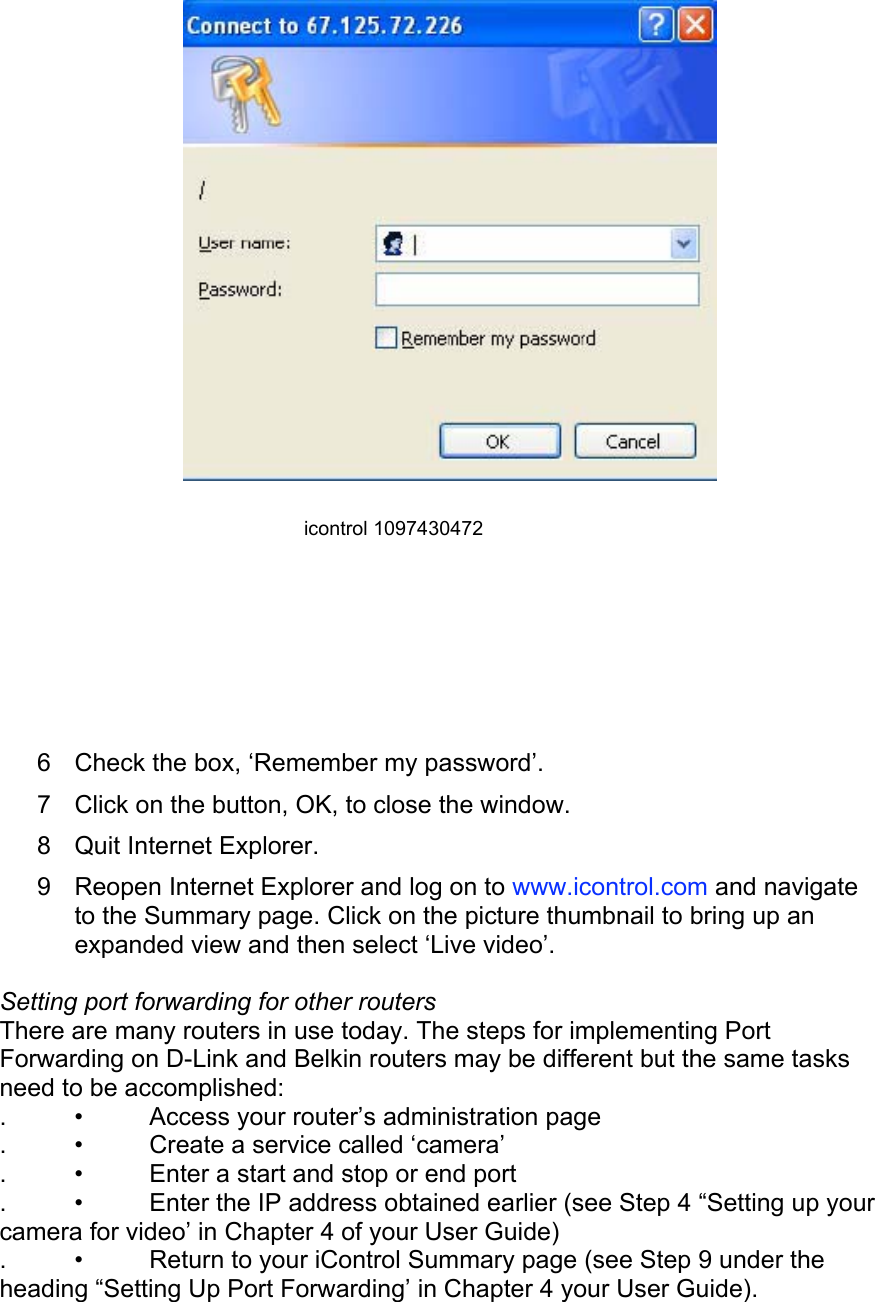
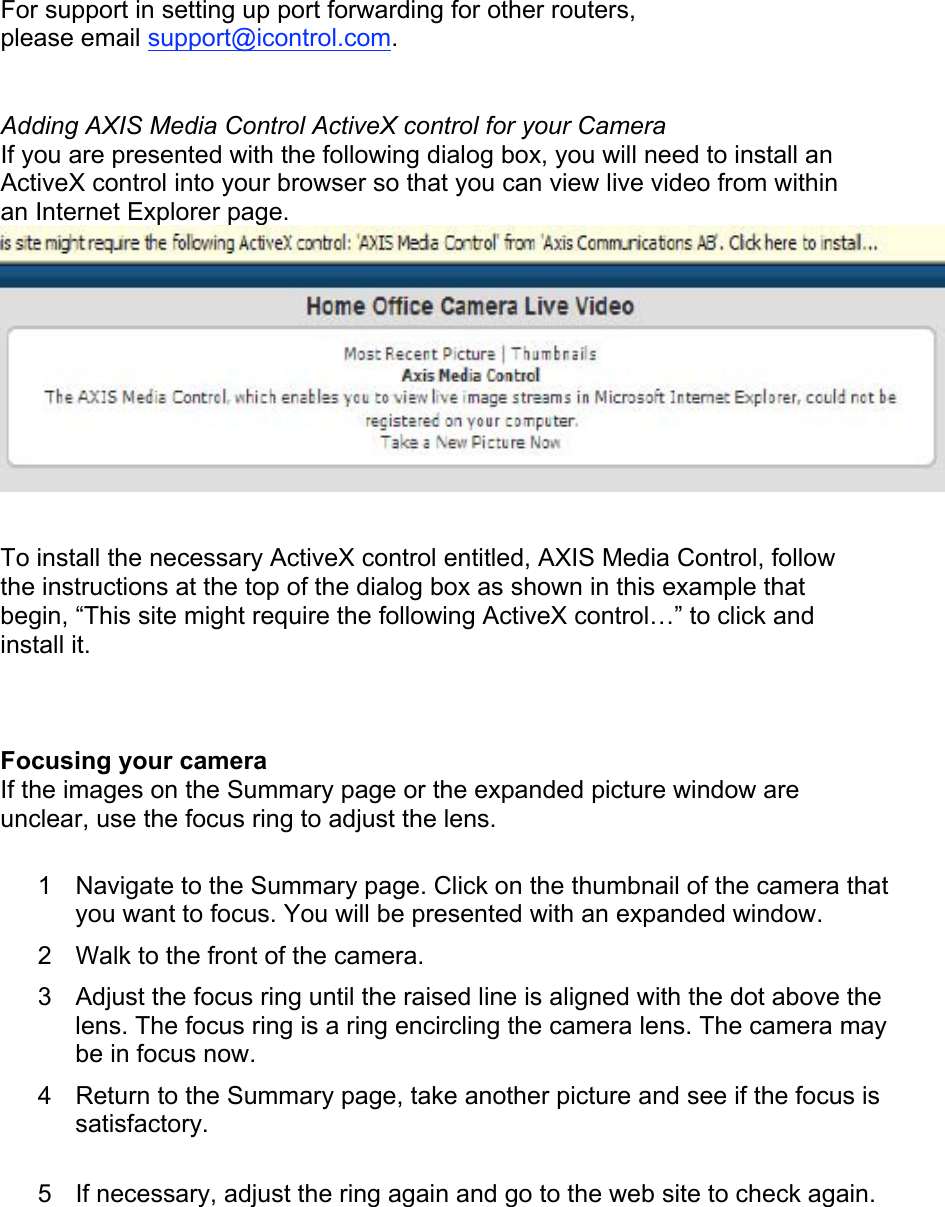
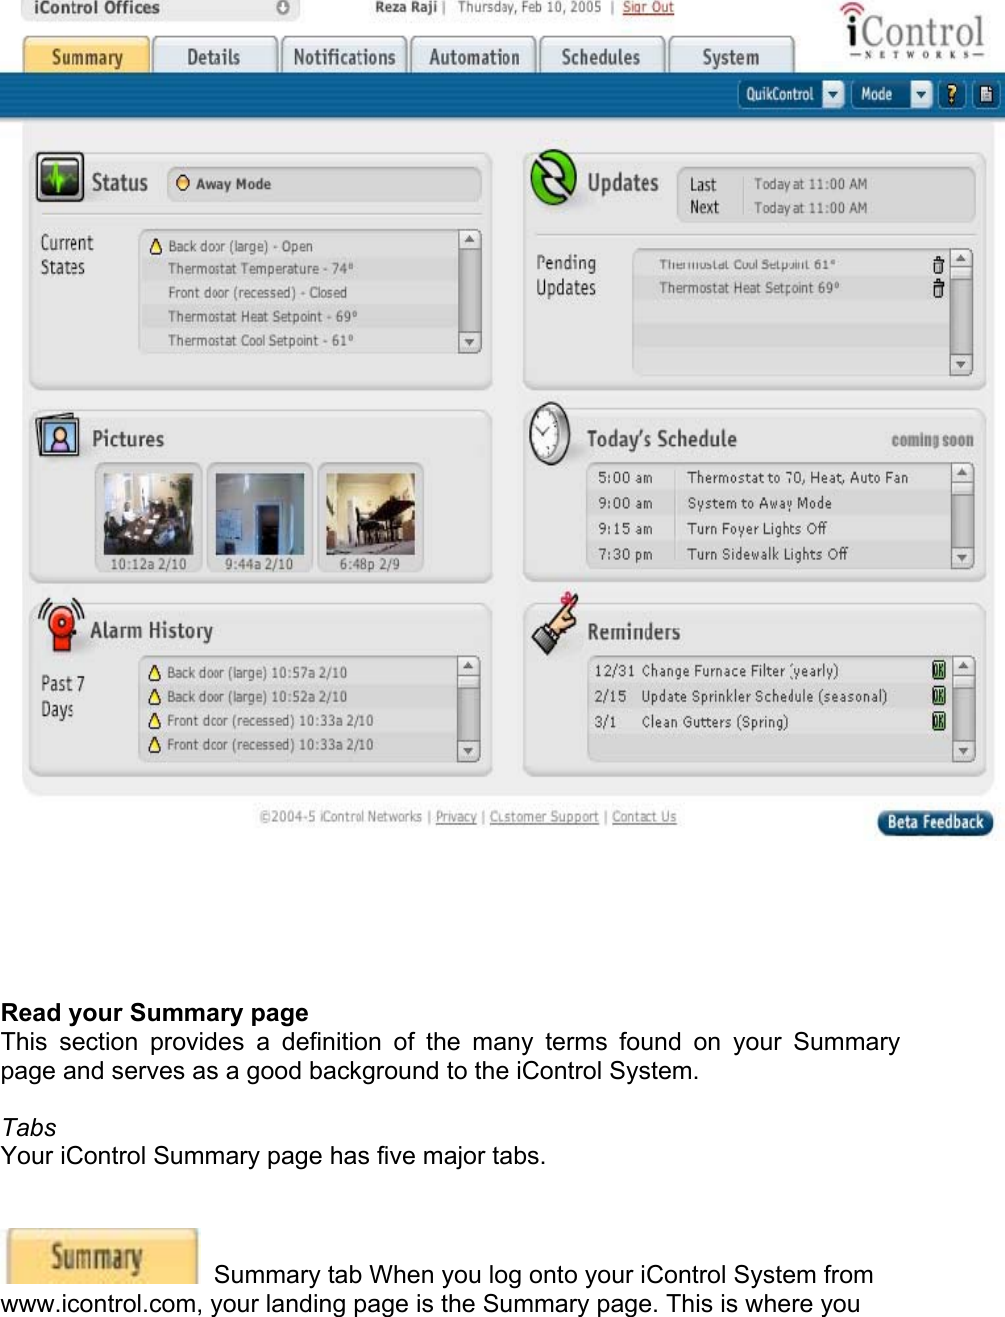
![your camera for video.) in the Start field. In this example it is 80. Enter the end port in the End field as 80. The Start port and end port are the same in this example. 5 Select the protocol as ‘Both’ in the Protocol field. 6 Enter the IP Address obtained from the steps in the prior section, Setting up your camera for video, in the IP Address field. 7 Check the check box under the heading, Enable. 8 Select the Save Settings button to save your entries. 9 Close your browser window and return to your iControl Summary page. Select the thumbnail of the camera that you have enabled for video. You will be presented with an expanded window. Select the menu item, Live Video, from the menu bar at the top of the window. 10 At this point you should see live video. If you do not, you will again be presented with a dialog box entitled, Camera not Accessible. Click on the button, Test port forwarding, to test your port forwarding work. If it does not test properly, email beta@incontrol.com. [Note to reader: In the dialog box, ‘Click here to get help with your router’ is not available in Beta] 11 If you want to review your settings, navigate to your system tab, select the camera that you would like to review and click on advanced settings. You should see a dialog box similar to this:](https://usermanual.wiki/iControl-Networks/GATEWAY2.user-manual/User-Guide-747448-Page-24.png)