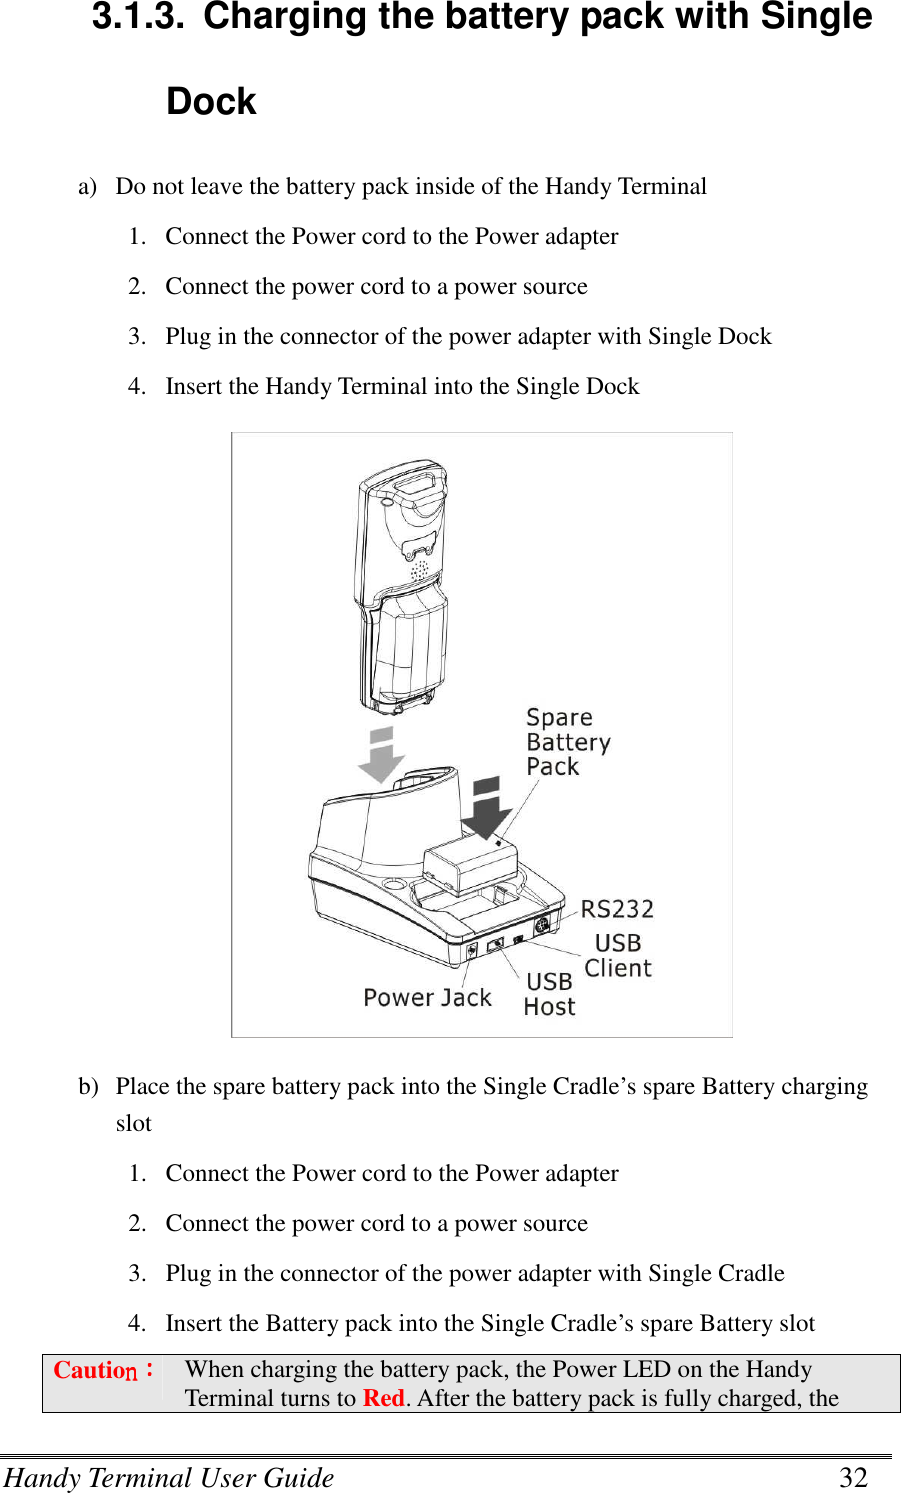
iWaylink PDT001 Portable Data Terminal User Manual IT8000 user Menu for FCC
Bitatek Co., Ltd. Portable Data Terminal IT8000 user Menu for FCC
UserManual.wiki
>
iWaylink
>
PDT001 User Manual
Manual
Navigation menu
Upload a User Manual
Namespaces
Wiki Guide
HTML
PDF
Info
Views
User Manual
Discussion / Help
Navigation
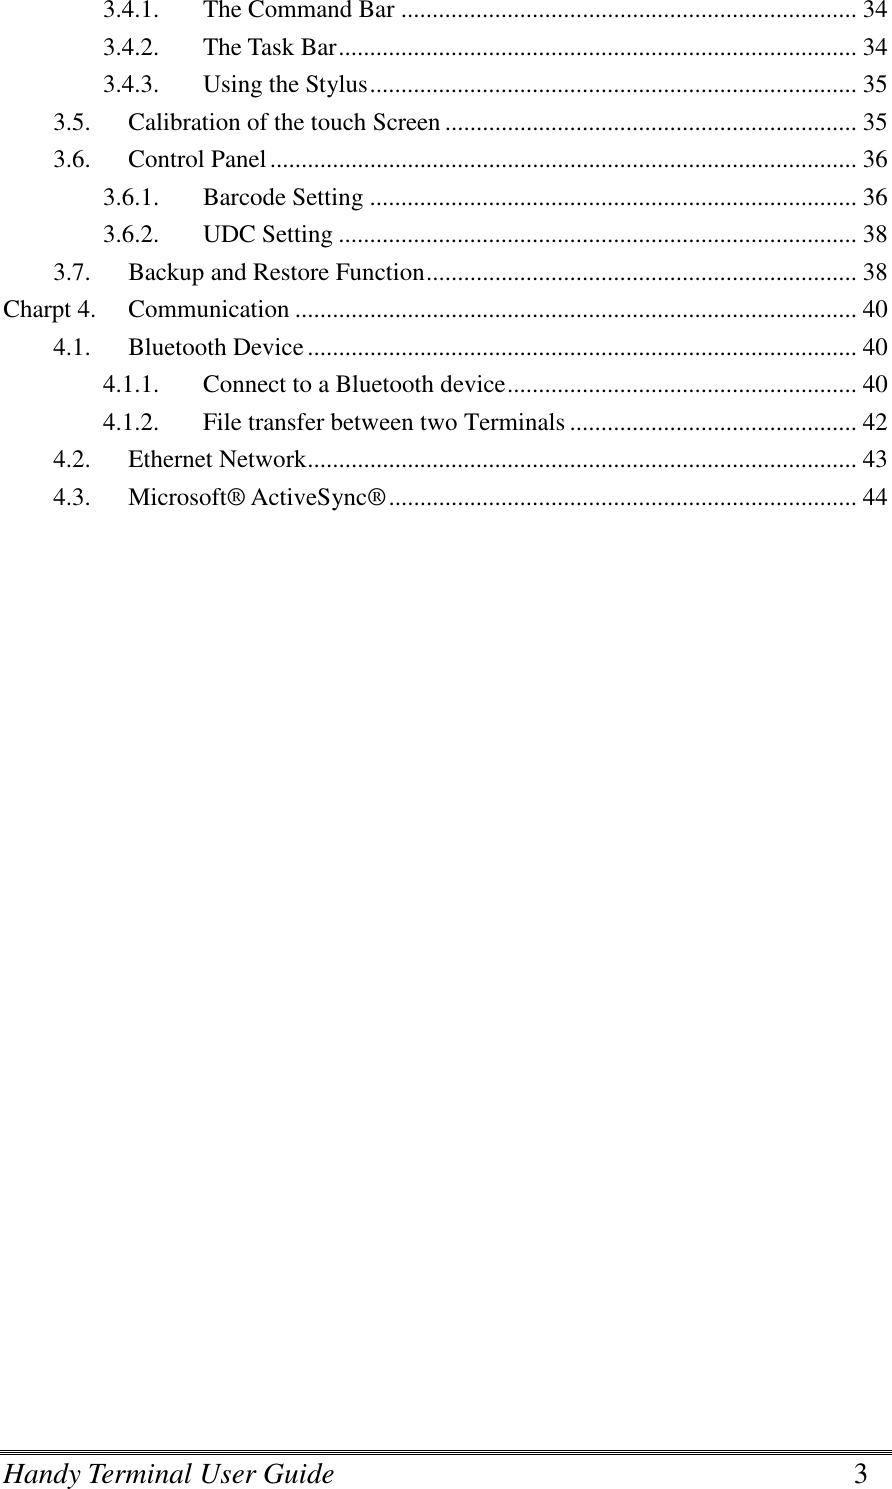
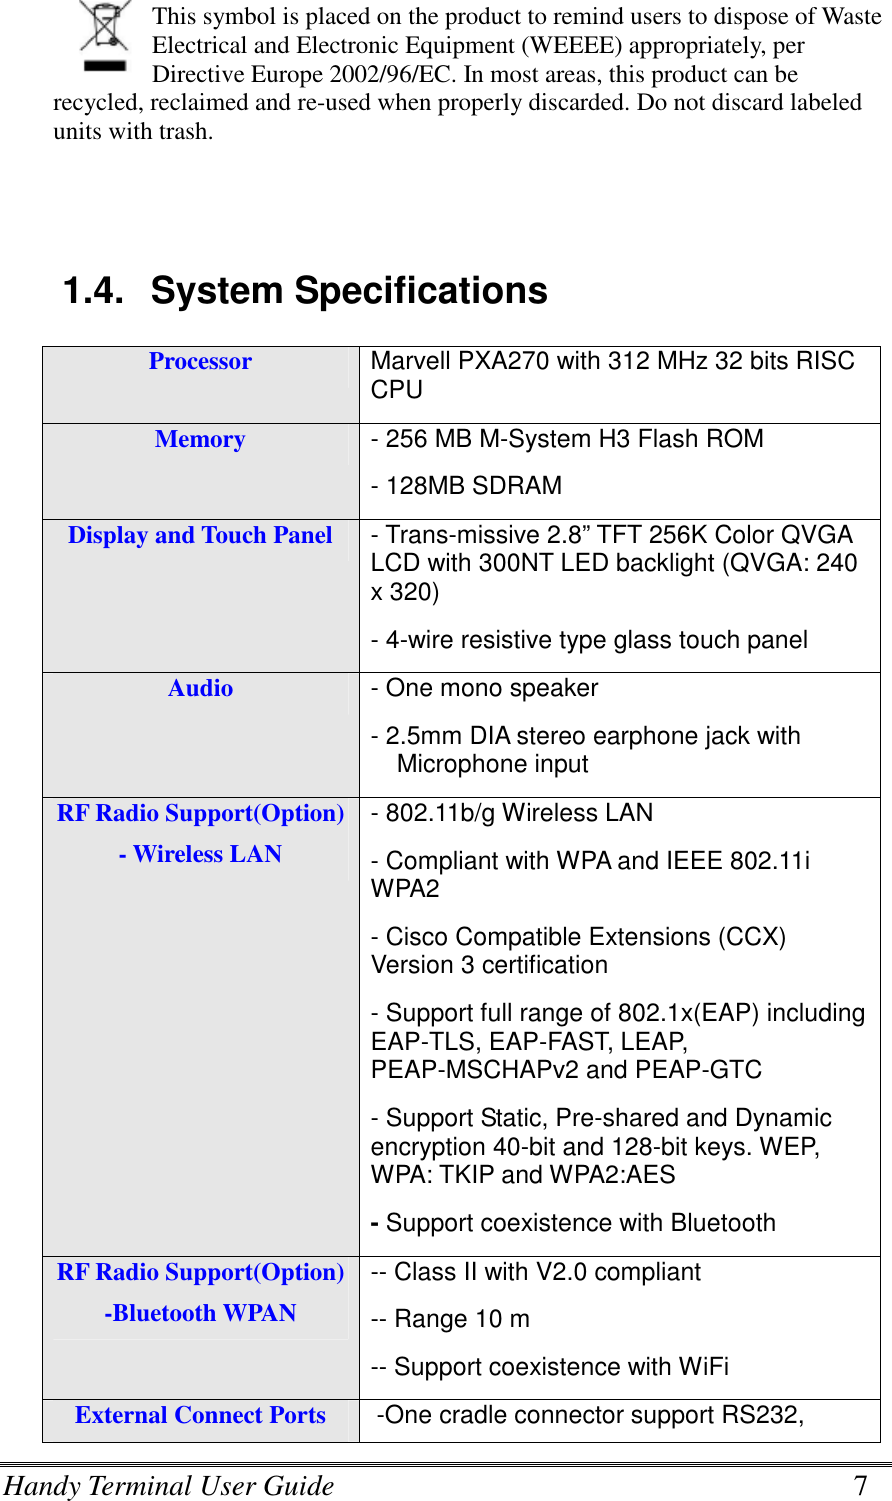

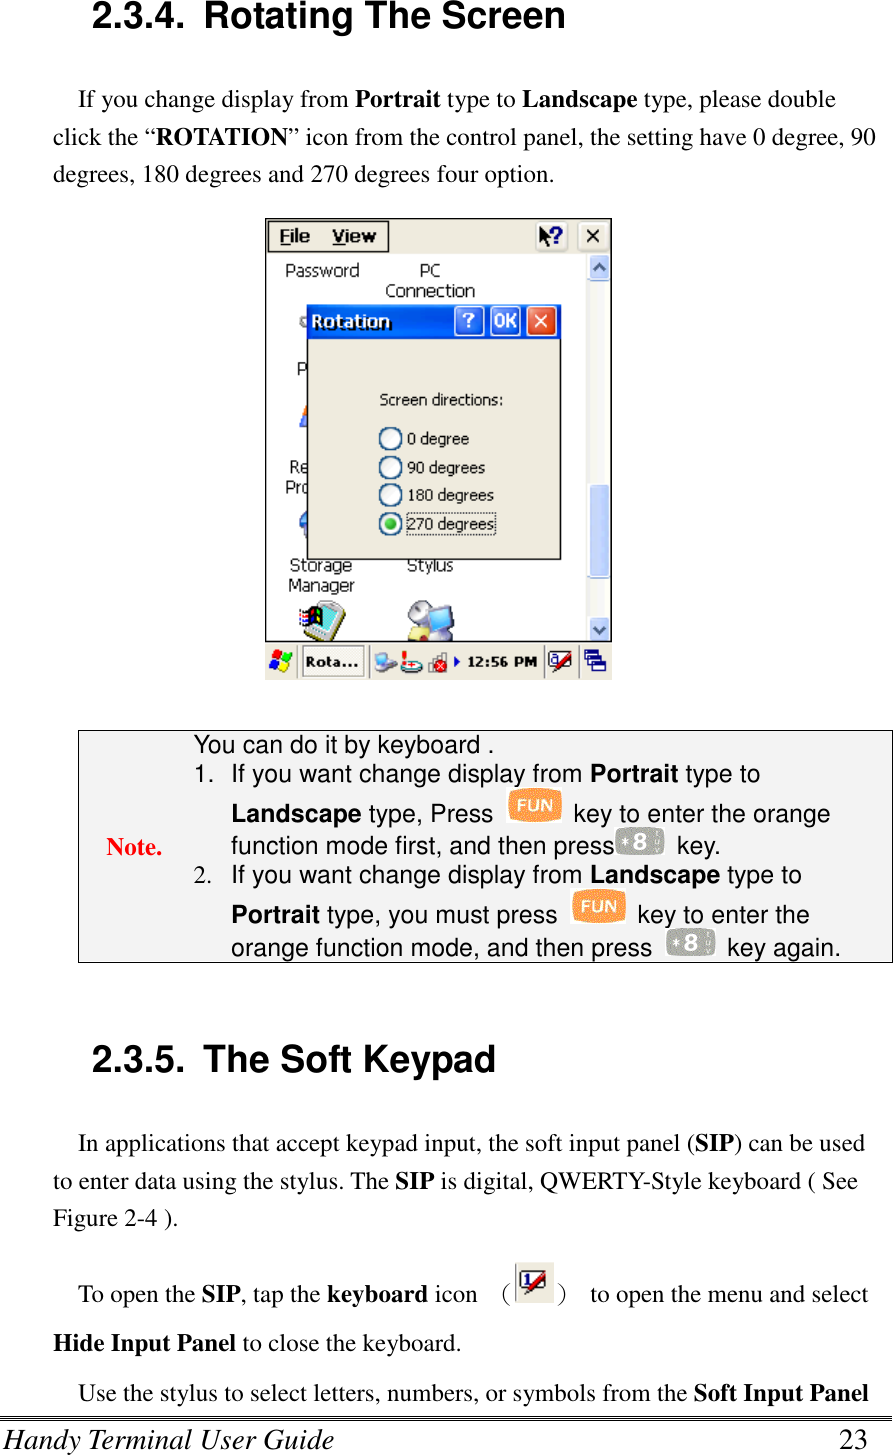
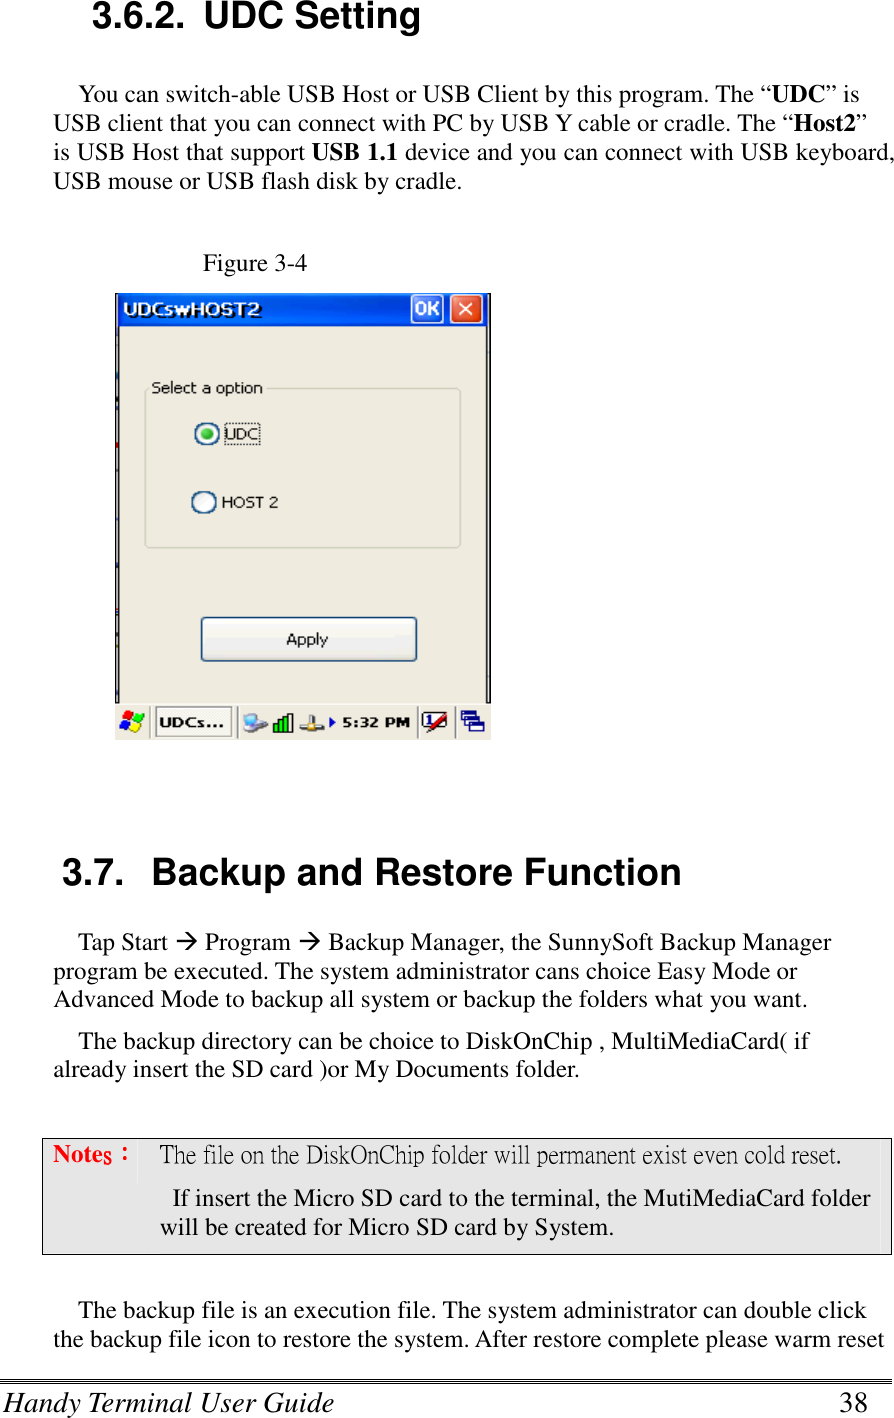
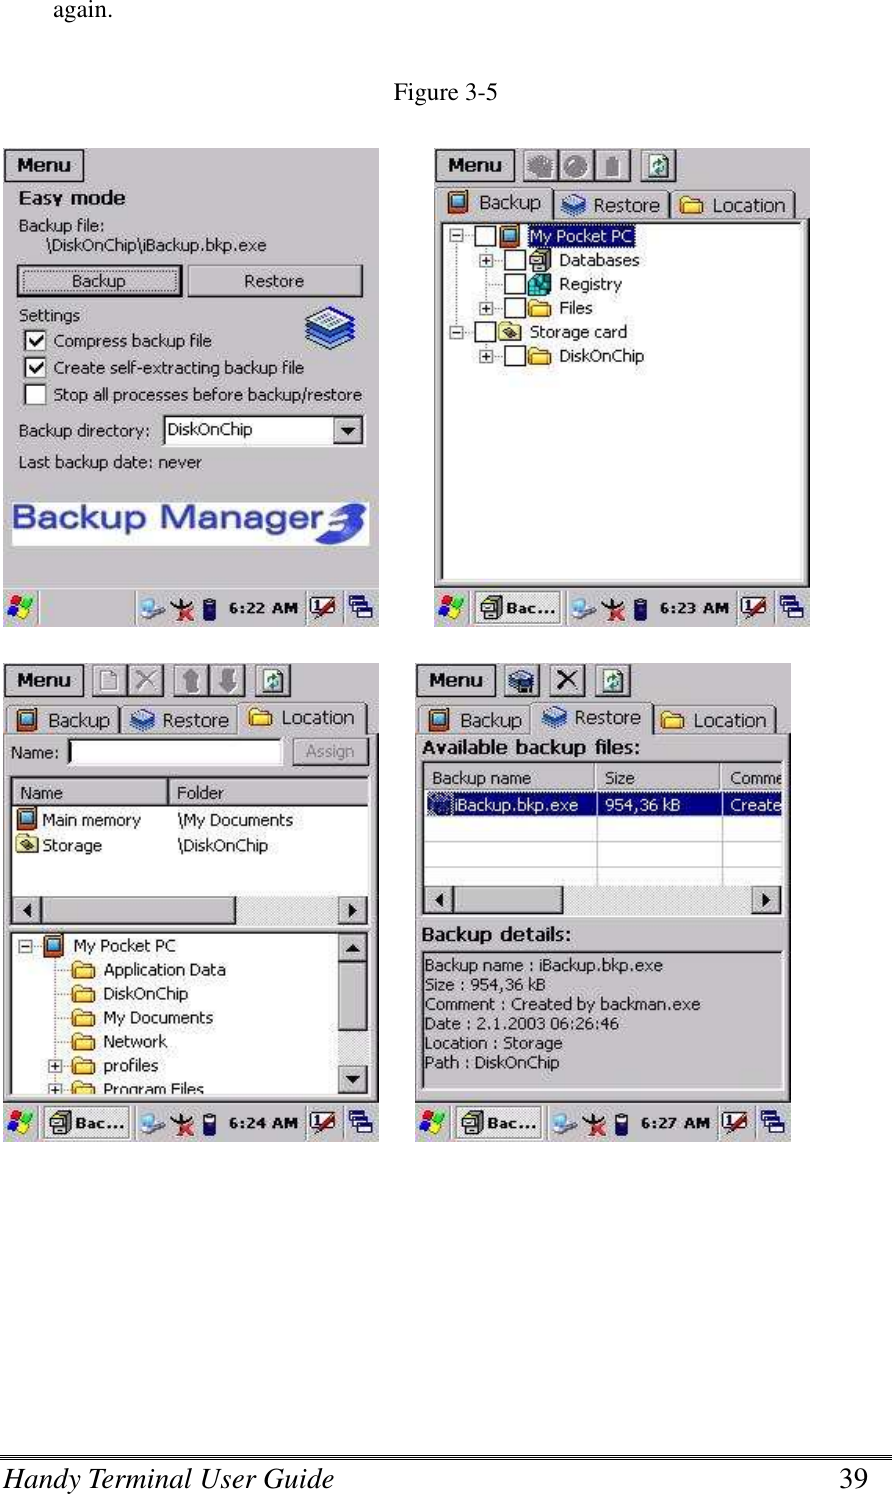
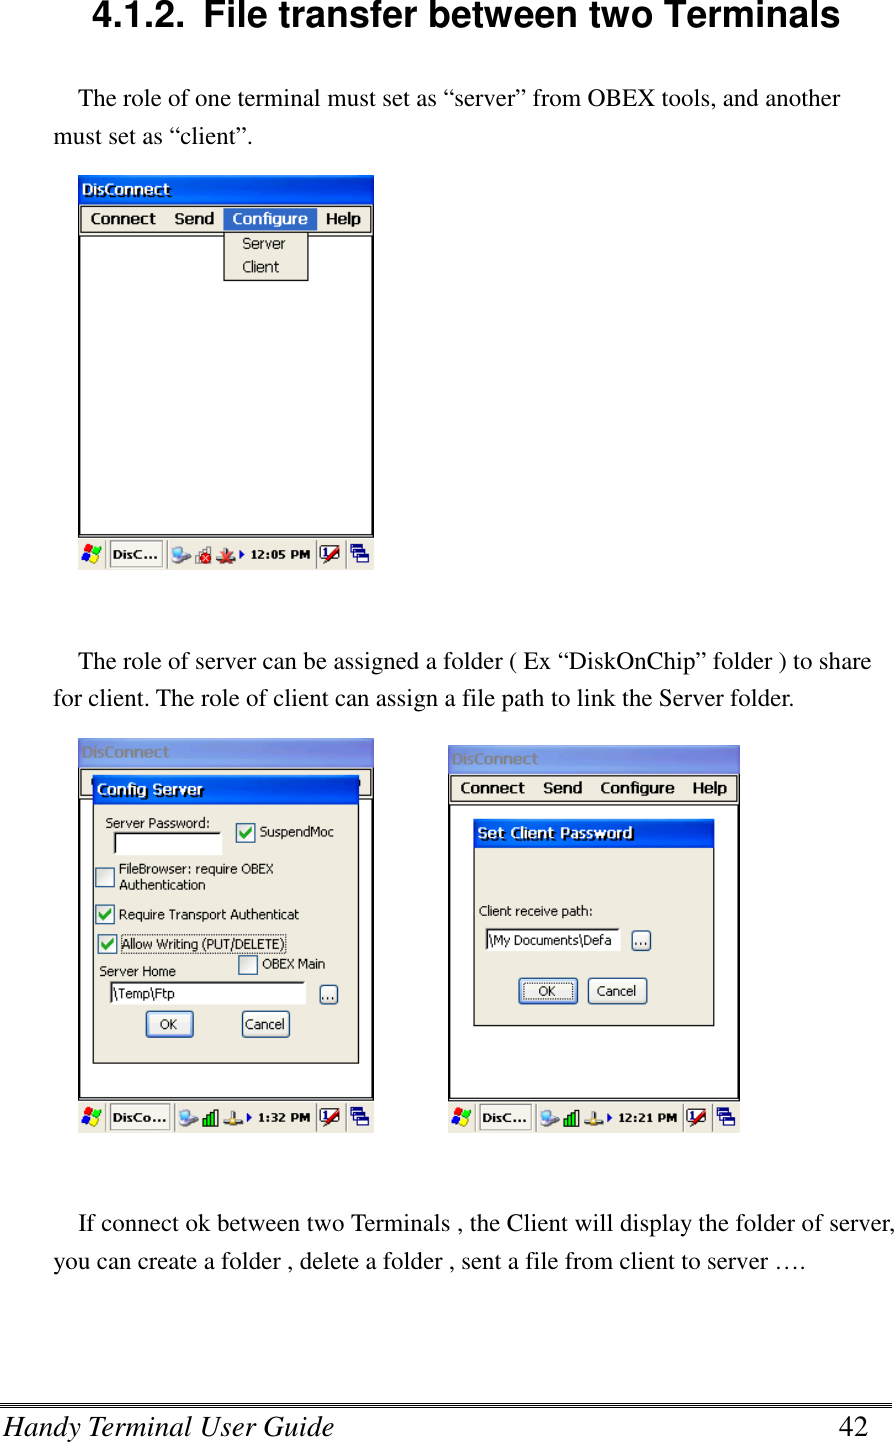
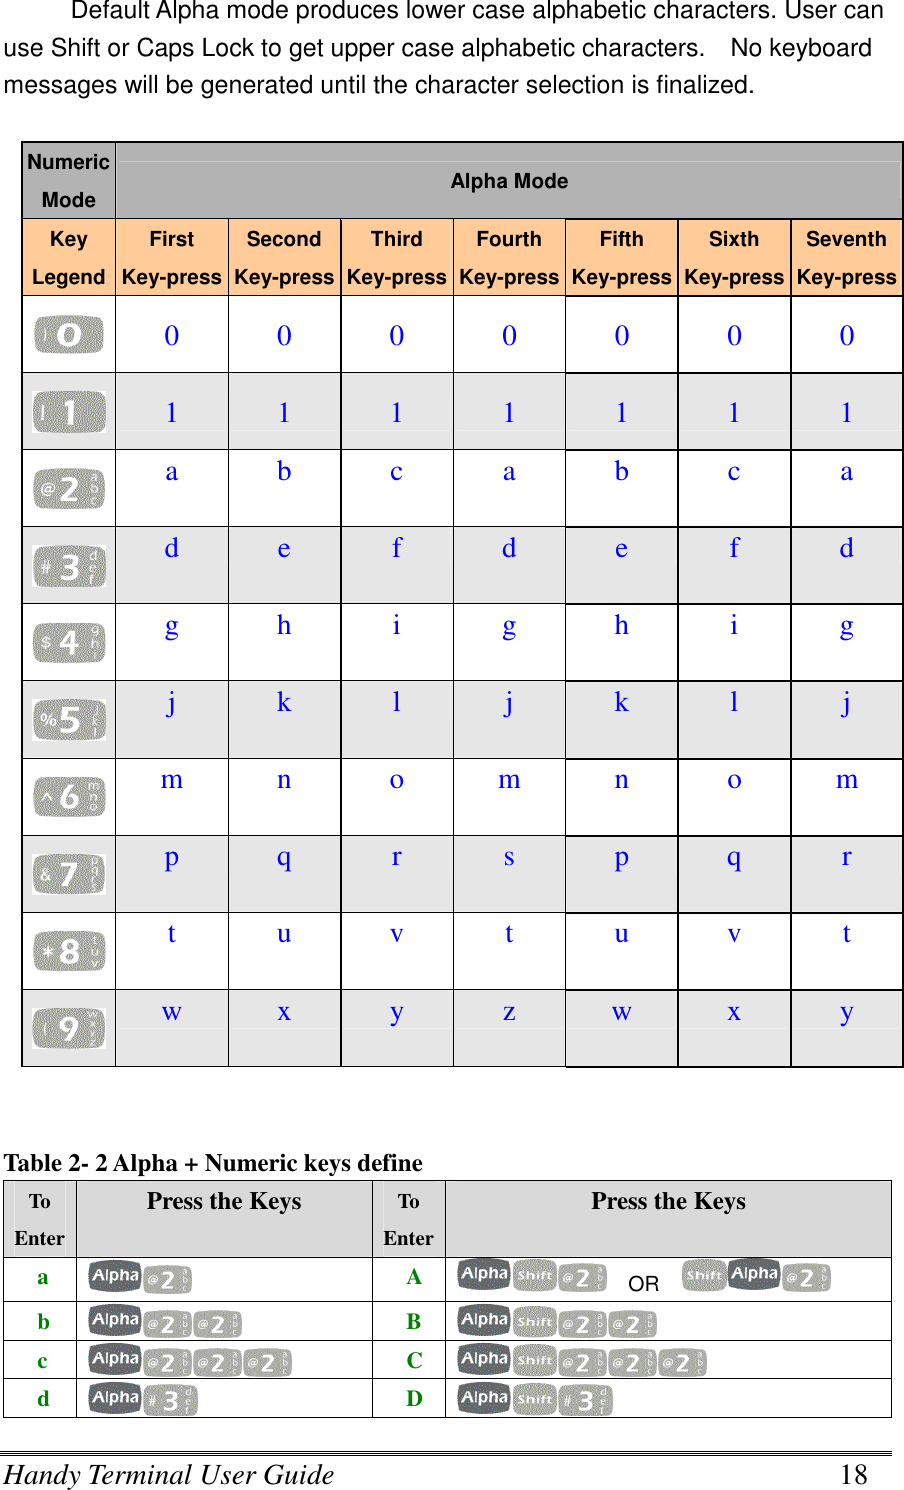
![Handy Terminal User Guide 16 Position Legend Default Shift Function Orange Function Blue Function 5 F2 F10 F6 6 F3 F11 F7 7 F4 F12 F8 8 Up Arrow [Page Up] [Increase Volume] 9 Down Arrow [Page Down] [Reduce Volume] 10 Left Arrow [Reduce Backlight] 11 Right Arrow [Increase Backlight] 12 1 ! ﹕ ﹔ 13 2 @ + 14 3 # End [ 15 4 $ € 16 5 % - 17 6 ^ ] 18 7 & [Windows Icon] ` 19 8 * [Screen Rotation] ~ 20 9 ( [K/B Lock Icon] " 21 0 ) ? ⁄](https://usermanual.wiki/iWaylink/PDT001/User-Guide-1084711-Page-16.png)
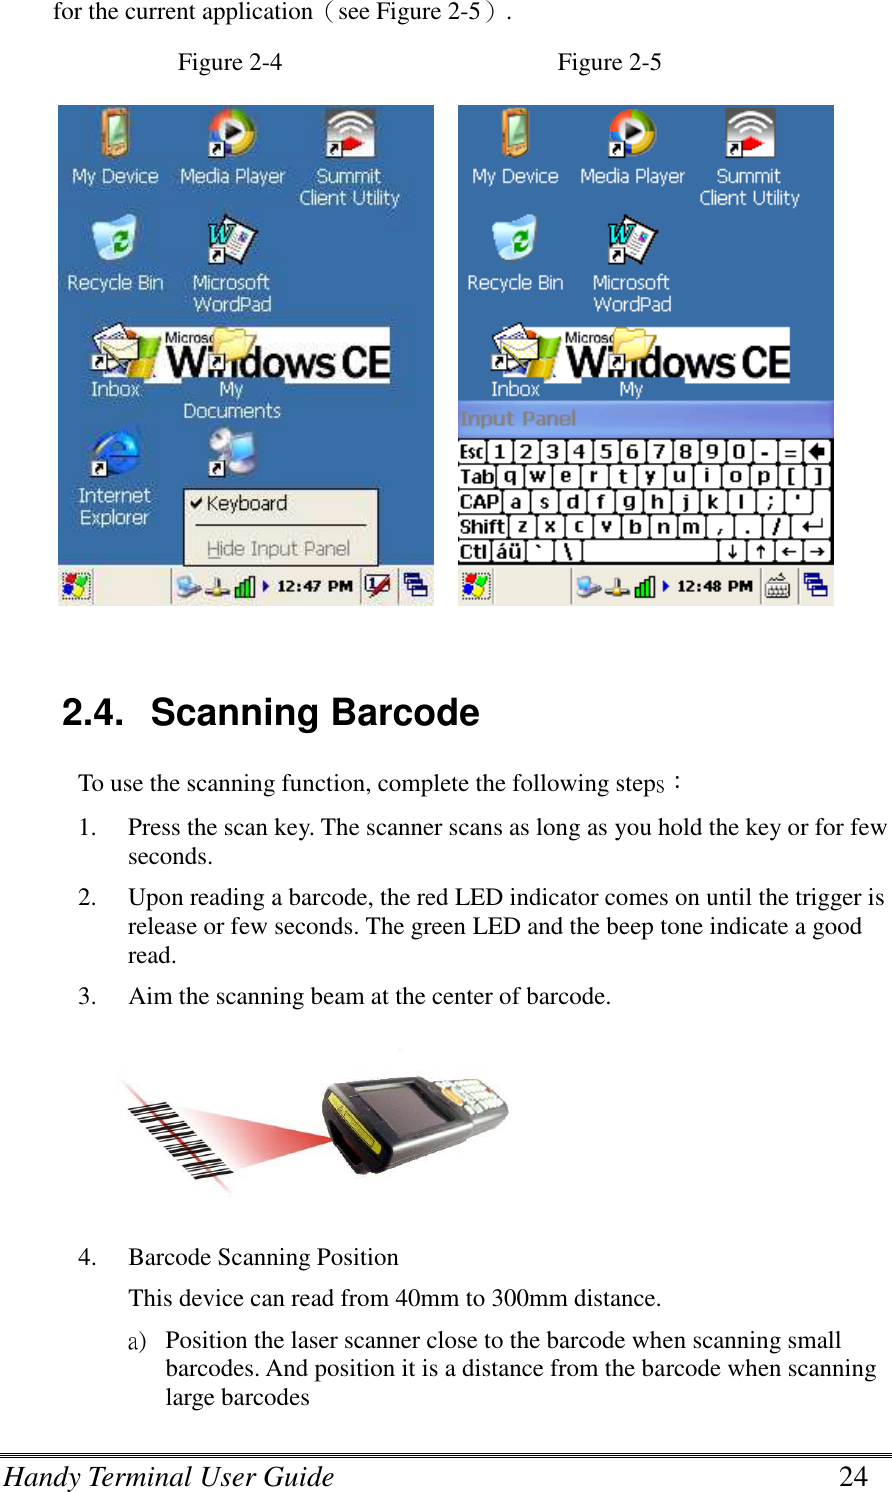
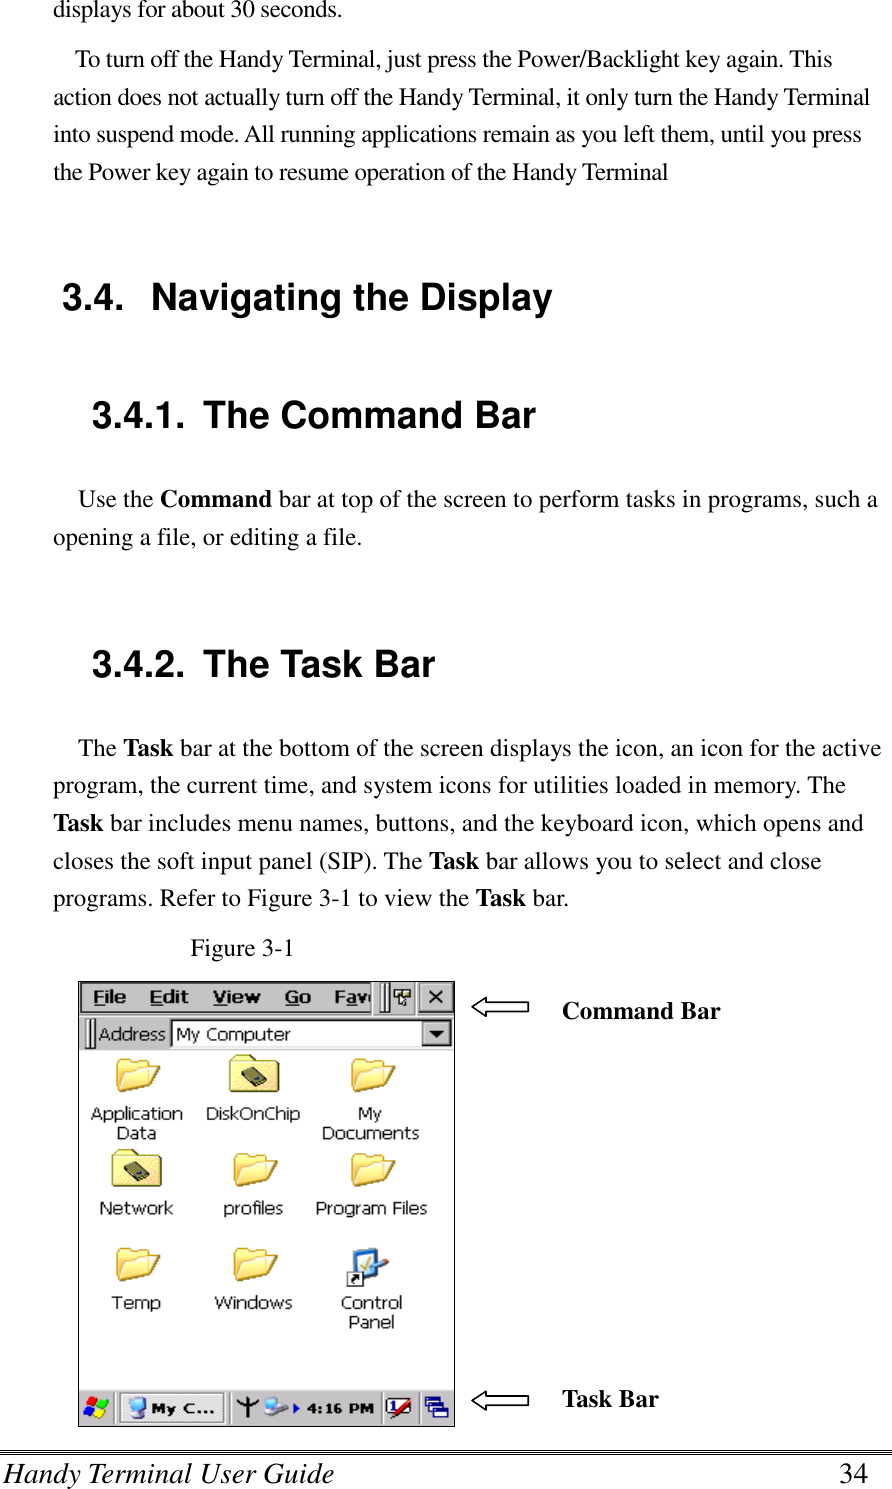
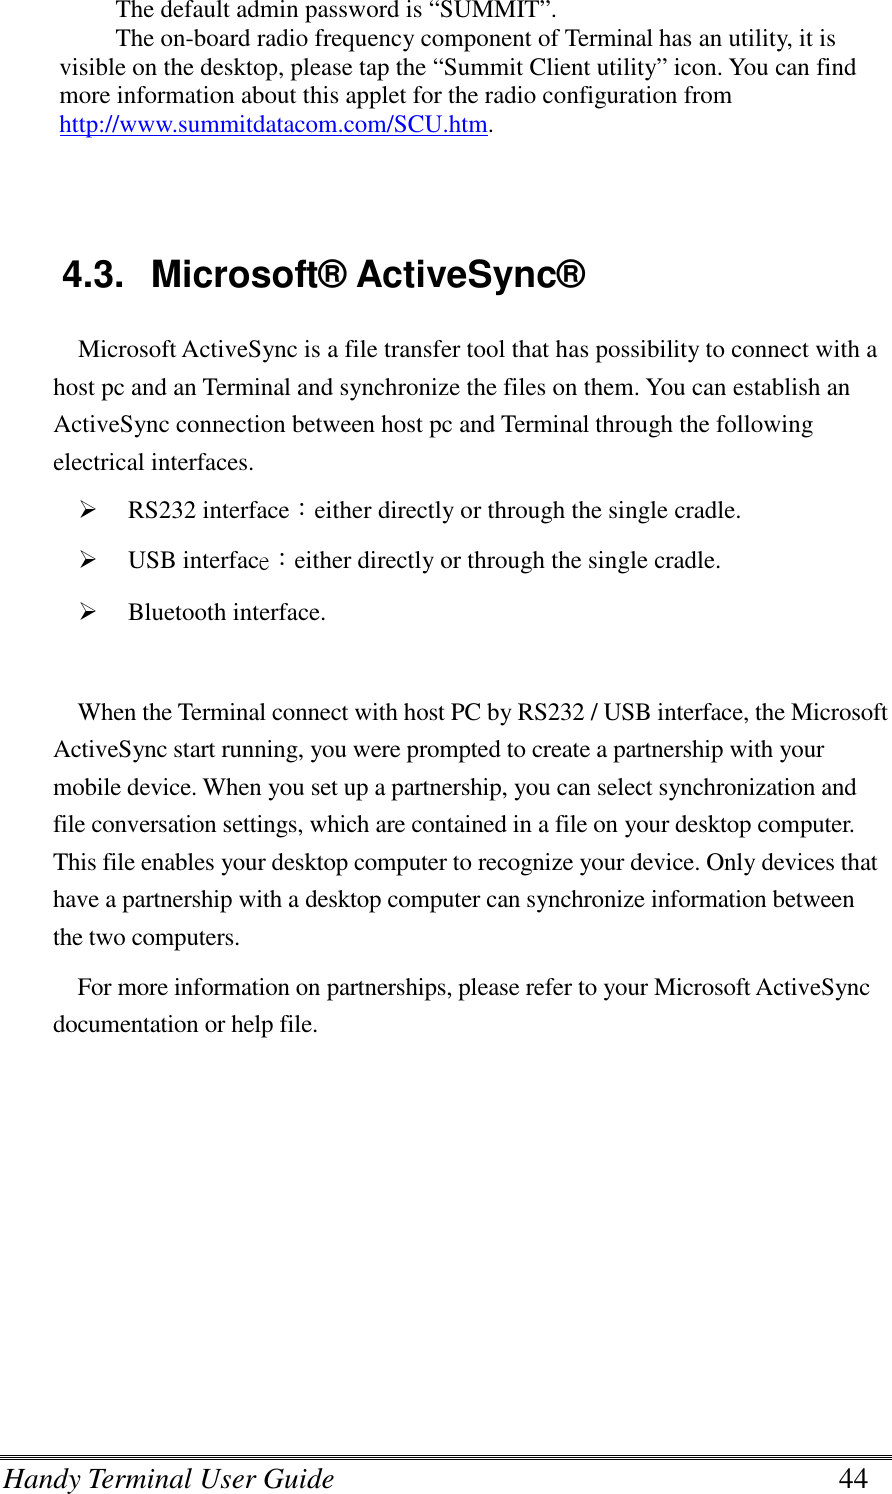
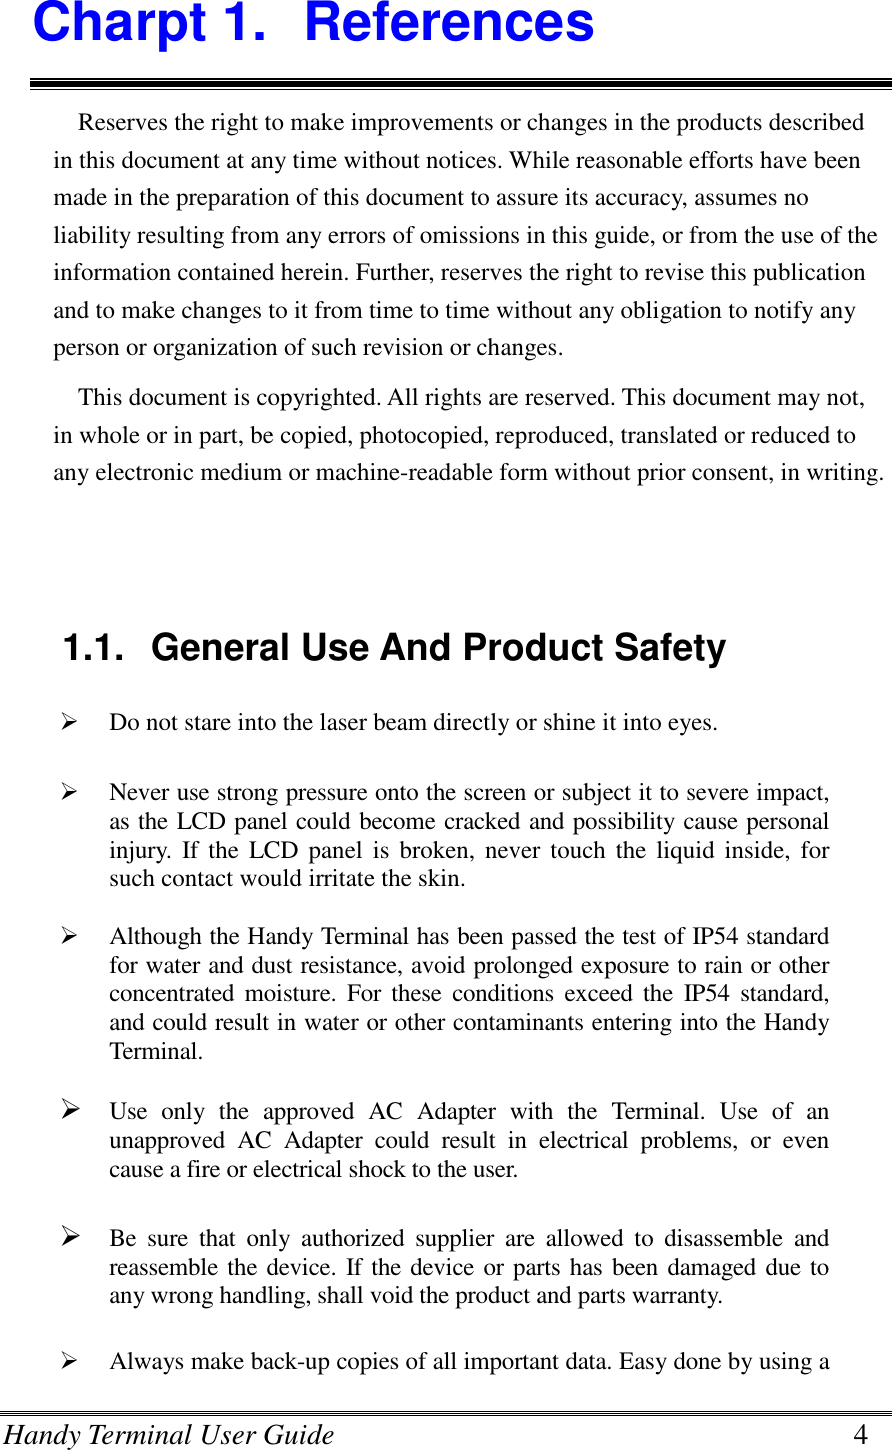
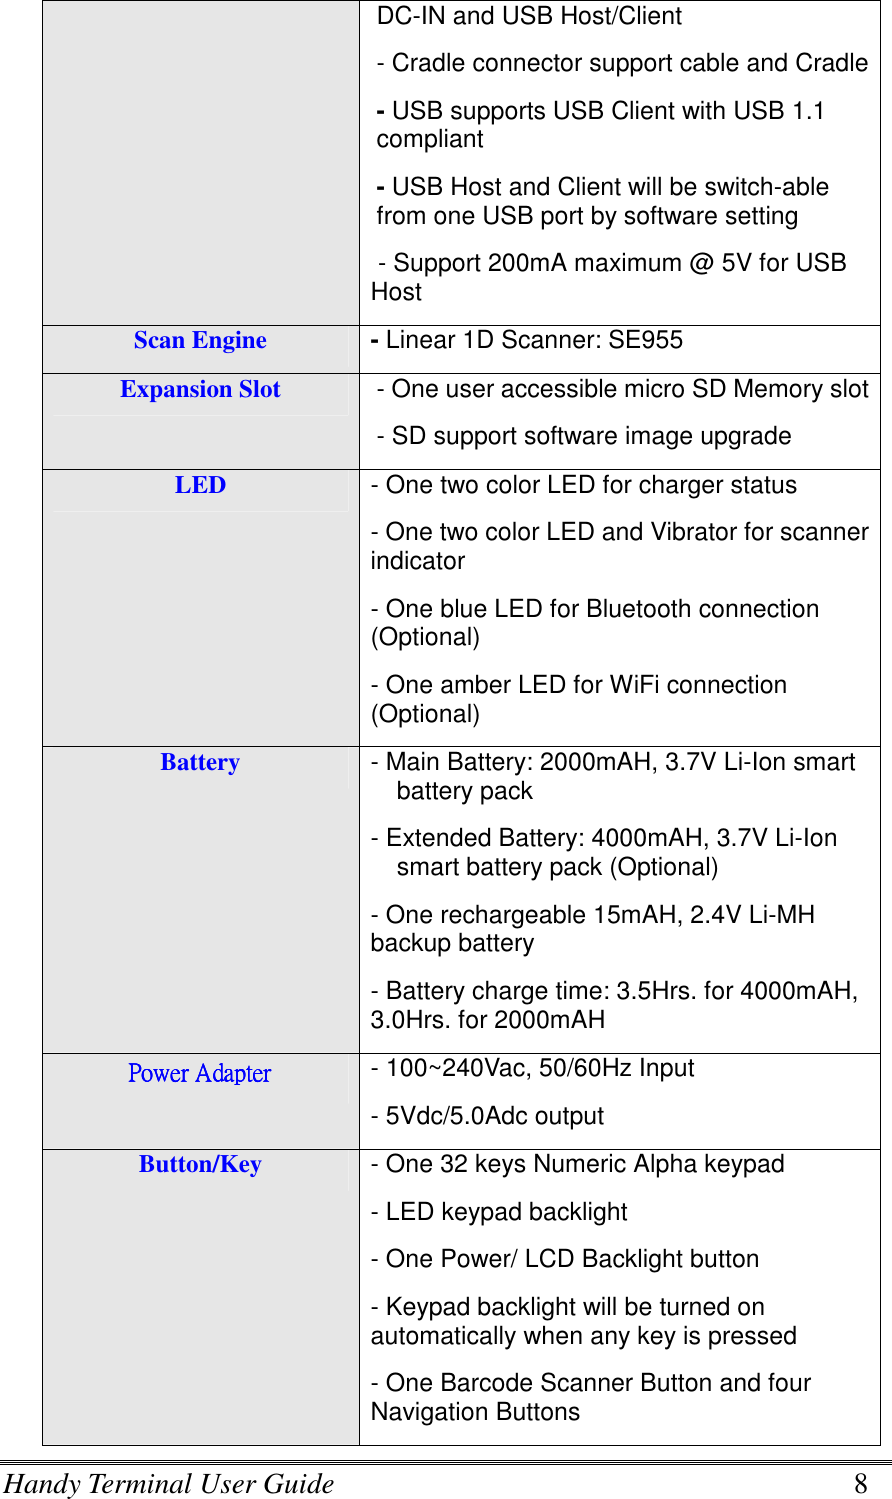
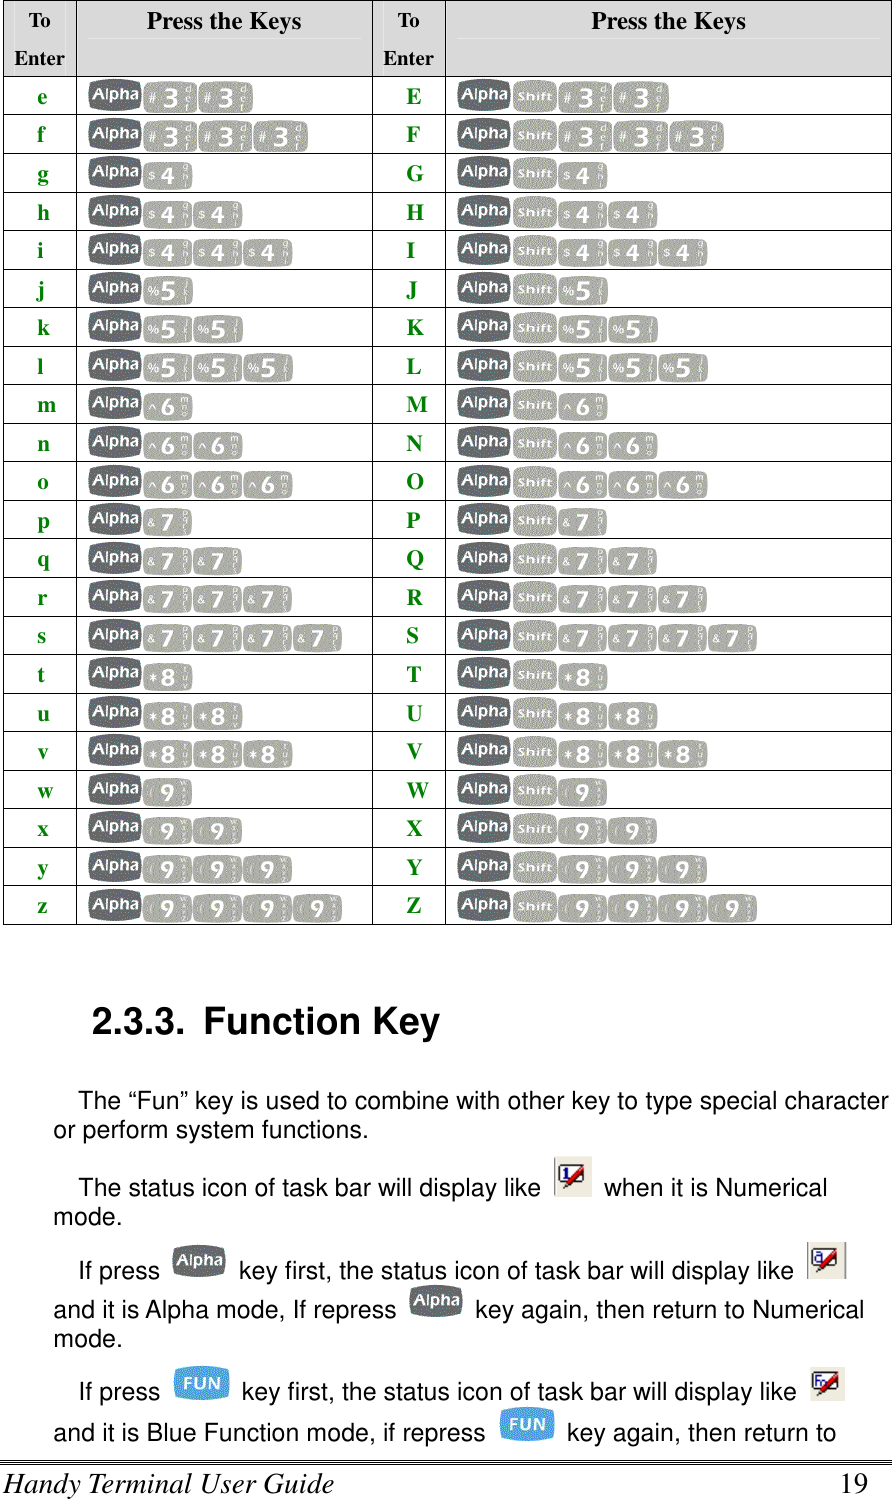
![Handy Terminal User Guide 17 Position Legend Default Shift Function Orange Function Blue Function 22 , < { ‘ 23 ‧ > } = 24 BkSp [Home Logo] Space 25 Enter Shift mode Cancel Shift mode 26 Tab [Back Tab] Caps Lock 27 Delete | \ Ins 28 Enter Blue function mode Enter Orange Function Mode Cancel Blue Function Mode Cancel Blue Function Mode 29 Enter Alpha mode 30 Control _ Alt 31 Enter Orange Function mode Cancel Orange Function Mode Enter Blue Function Mode Cancel Orange Function Mode 32 Power Suspend Power Suspend Power Suspend Power Suspend 2.3.2. Numeric Keypad Alpha Mode and Triple Click In the 32-key Numeric keypad system, an ‘Alpha’ mode allows Alphabetic characters to be entered. To enter the Alpha mode, press the ALPHA key. After that, the 0, 1, 2, … 8, 9 keys will only represent Alphabetic characters, per the table below.](https://usermanual.wiki/iWaylink/PDT001/User-Guide-1084711-Page-17.png)
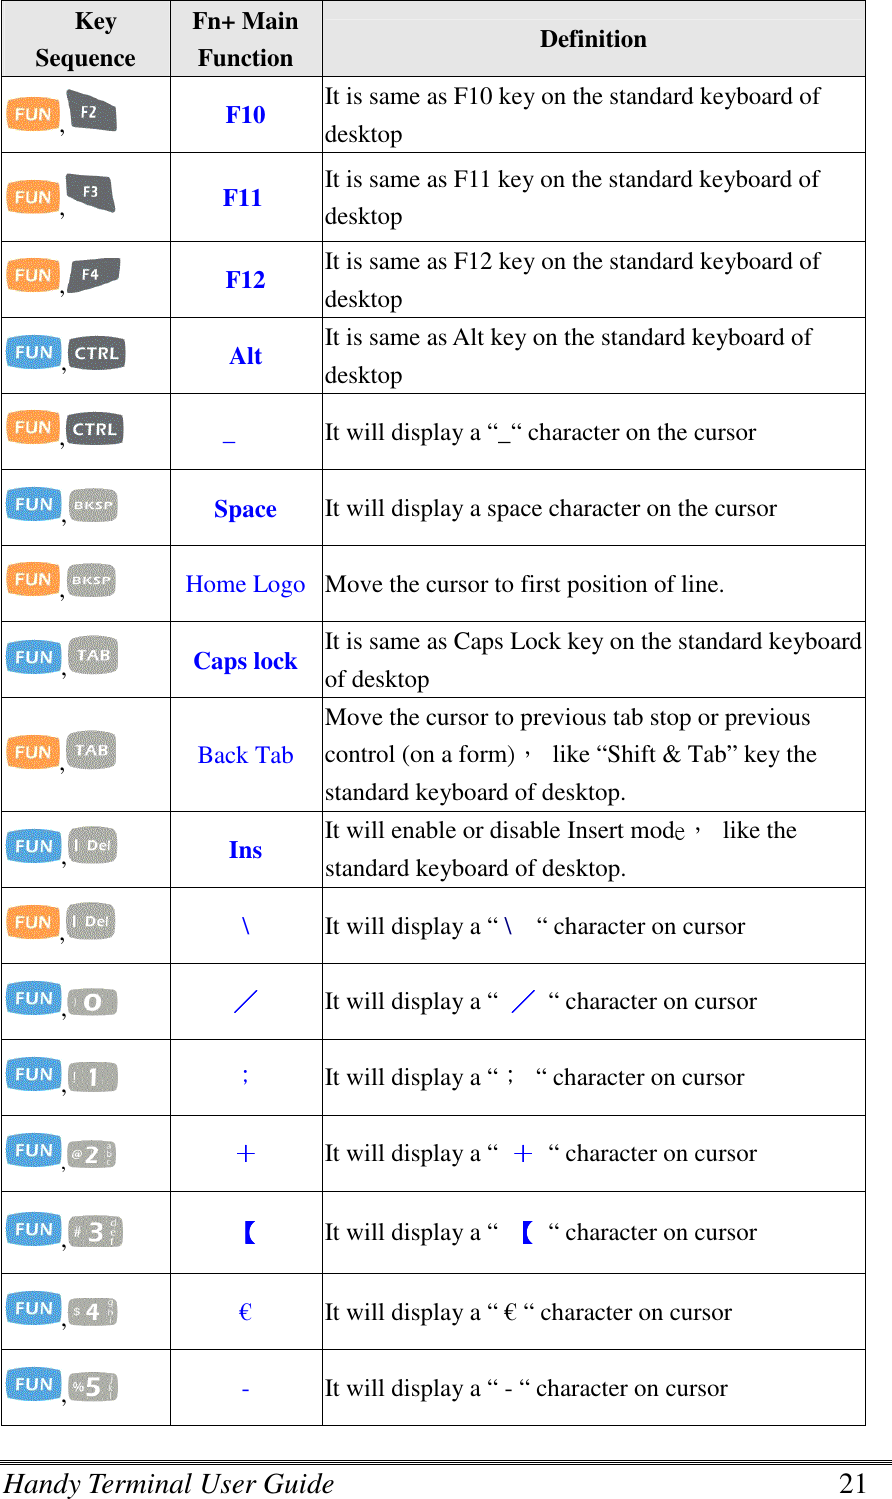
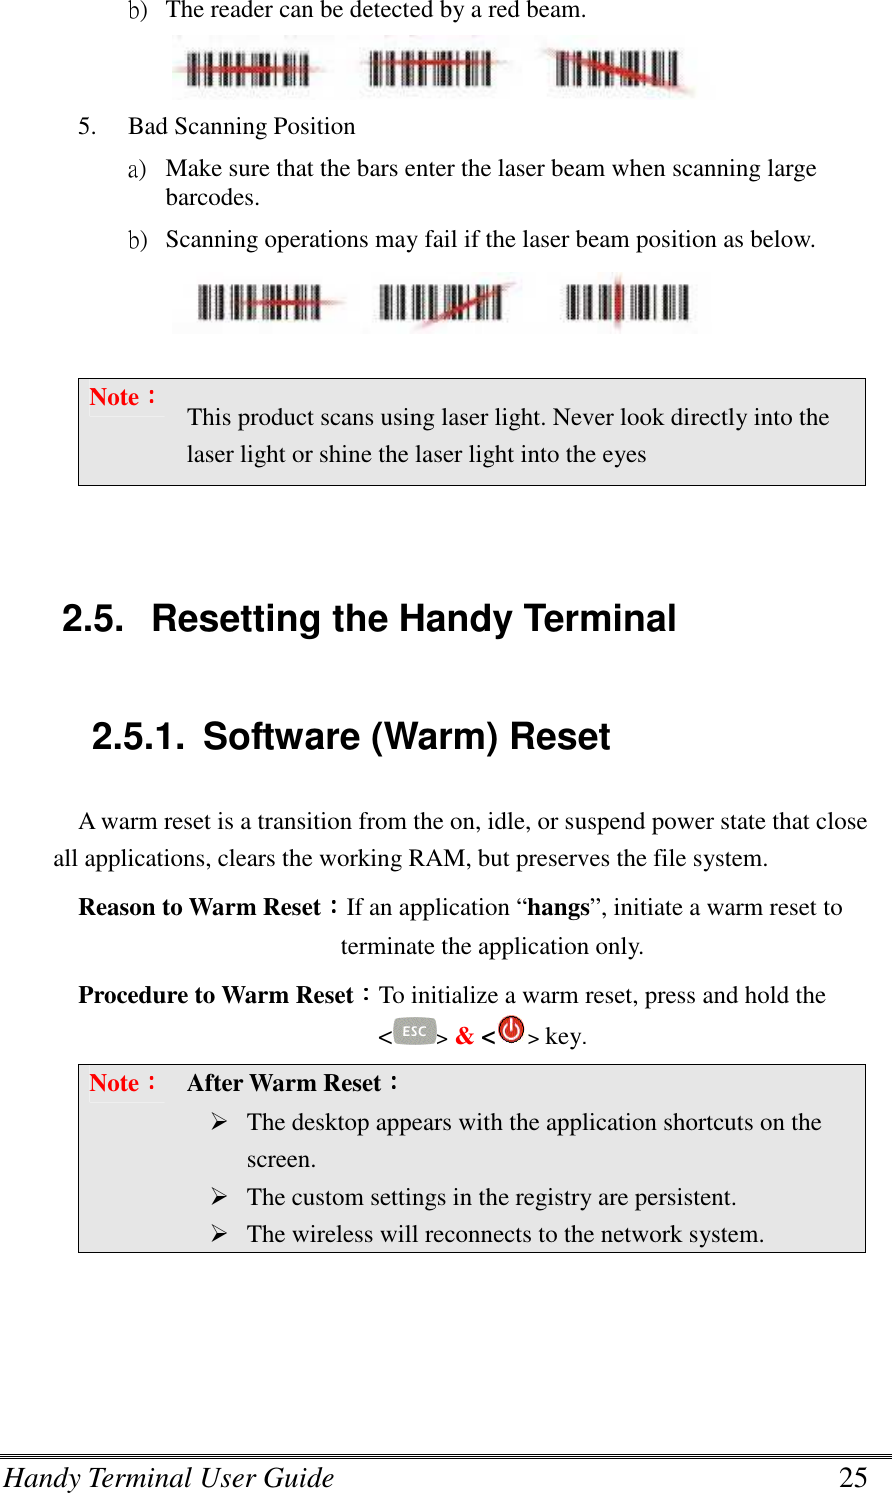
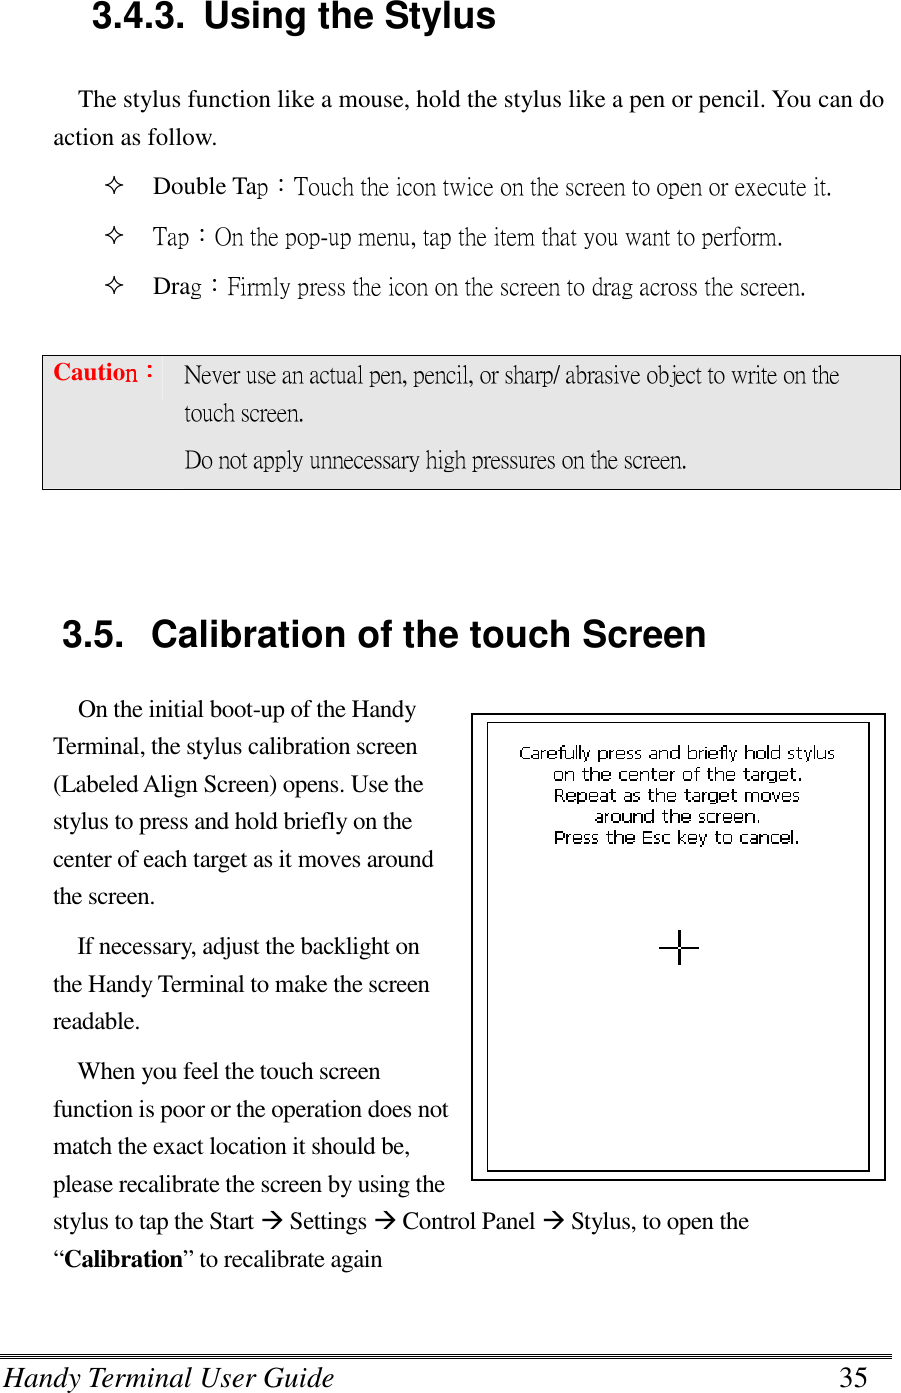
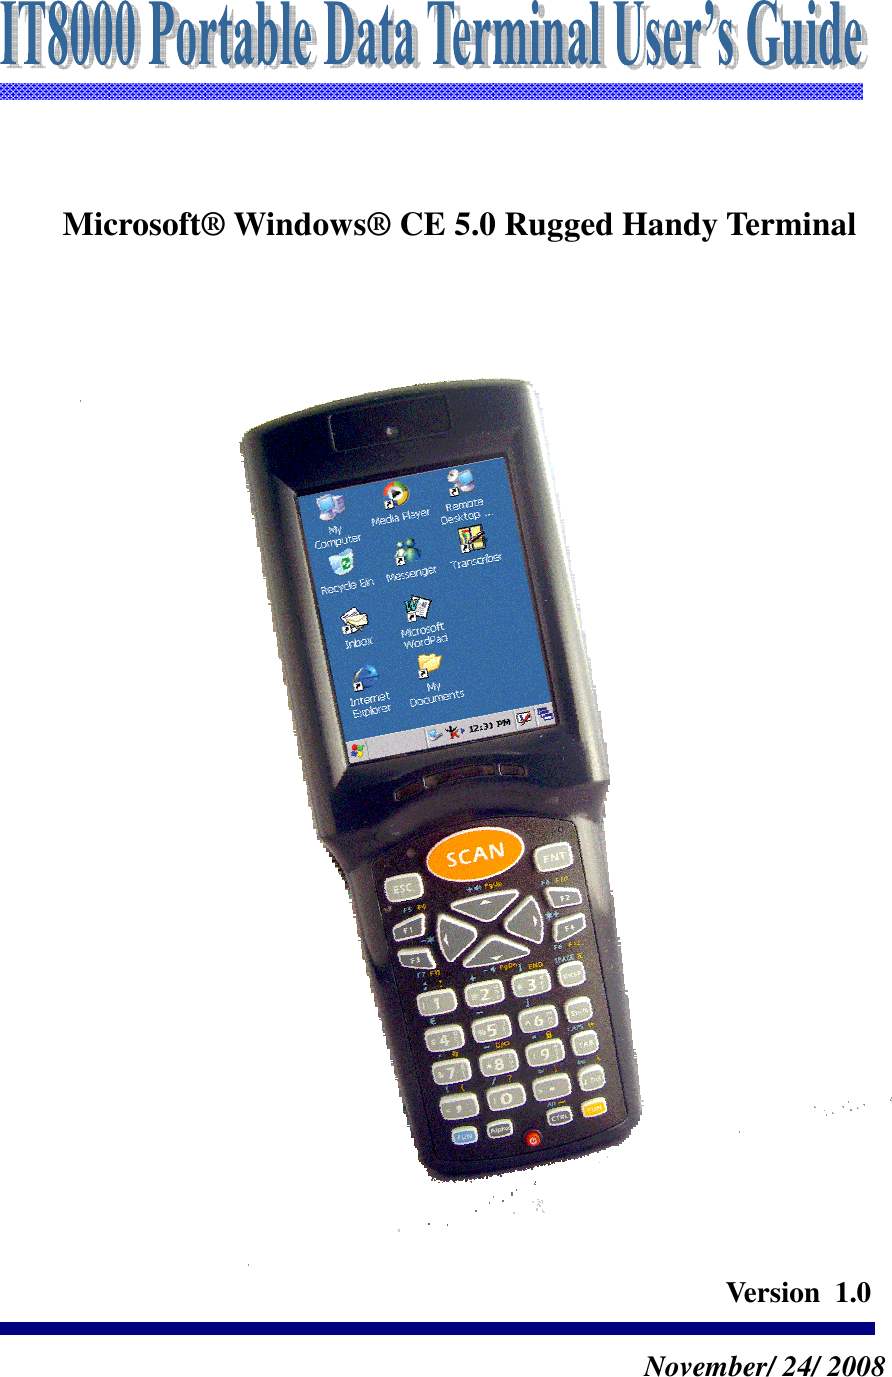
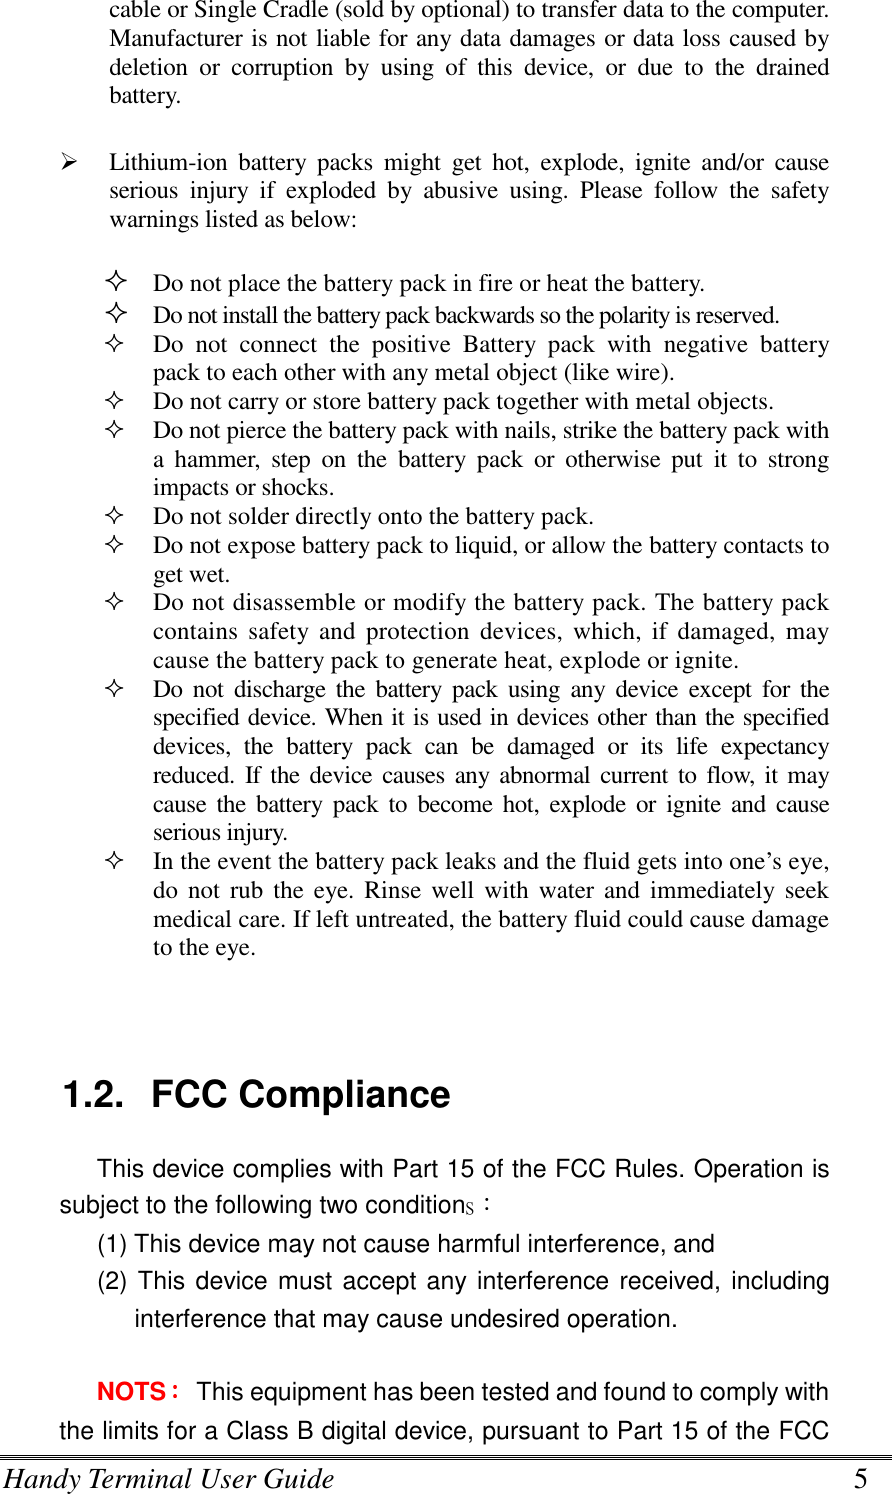
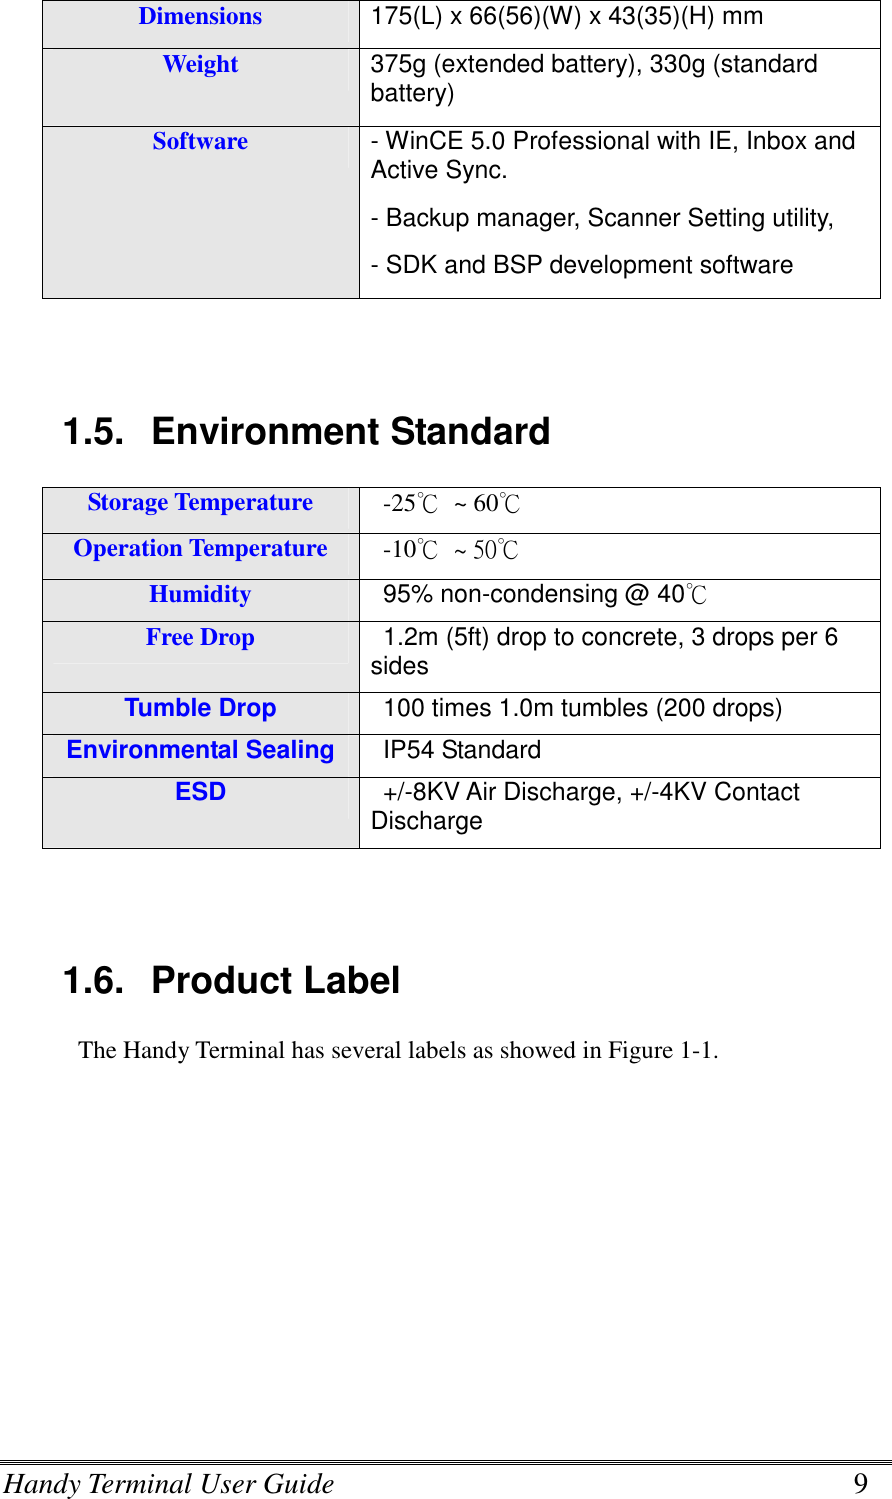
![Handy Terminal User Guide 22 Key Sequence Fn+ Main Function Definition , 】】】】 It will display a “ 】】】】 “ character on cursor , ` It will display a “ ` “ character on cursor , ~ It will display a “ ~ “ character on cursor , " It will display a “ " “ character on cursor , ? It will display a “ ? “ character on cursor , : It will display a “:“ character on cursor , End Move the cursor to the end of line. , It will pop up the start menu of system. , [Screen Rotation] If you change display from portrait type to landscape type, please press key first, and then press key. Otherwise, if you change display from landscape type to portrait type, you must press key, and then press key again. , [K/B Lock Icon] If you want lock the Keyboard, please press key first, and then press key. Otherwise, if you want unlock keyboard, you must press key, and then press key again. , ‘ It will display a “ ‘ “ character on cursor , { It will display a “ { “ character on cursor , = It will display a “ = “ character on cursor , } It will display a “ } “ character on cursor](https://usermanual.wiki/iWaylink/PDT001/User-Guide-1084711-Page-22.png)