DrayTek VDSL 35b Security Firewall User Guide
File info: application/pdf · 37 pages · 1.78MB
Vigor 2865 UK Quick Start Guide
Vigor 2865 UK Quick Start Guide - Draytek
Read the installation guide thoroughly before you set up the router. ○ The router is a complicated electronic unit that may be repaired only be.
DrayTek Vigor V2865ac Router Quick Start Guide
DrayTek Vigor 2865ac Multi-WAN Dual Band VDSL2/ADSL2 WiFi VPN Router | NetXL
Full PDF Document

If the inline viewer fails, it will open the original document in compatibility mode automatically. You can also open the file directly.
Extracted Text
d
i
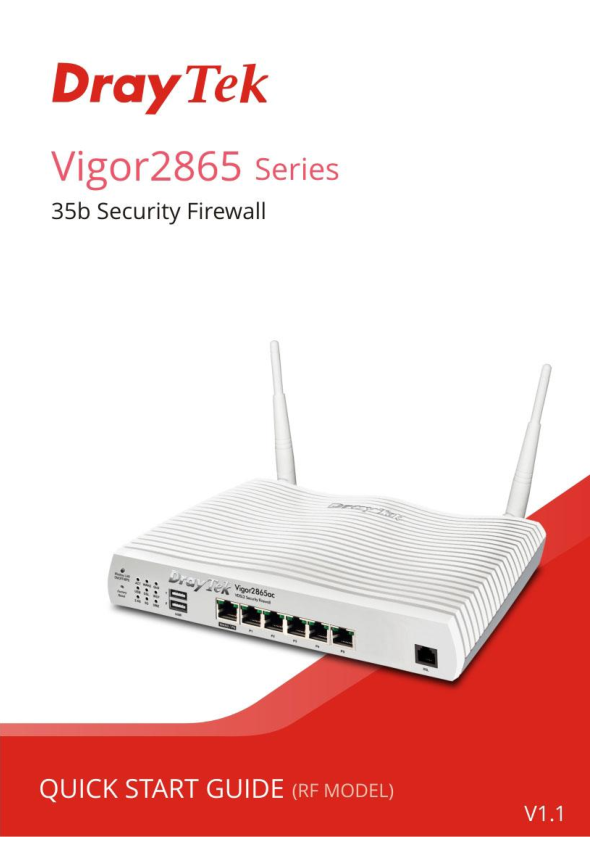
Vigor 2865 VDSL 35b Security Firewall
Quick Start Guide
(Wireless models)
Version: 1.2 Firmware Version: V4.0.5.1 Region: United Kingdom & Ireland For updates and support, visit www.draytek.co.uk
Date: April 28, 2020
Note: Product specification is subject to continuous evolution which may not always be reflected in current documentation. For the formal specification
and details of the supported features of your product, please refer only to the web site at www.draytek.co.uk ii
Safety Instructions and Approval
Safety Instructions
Warranty
Read the installation guide thoroughly before you set up the router. The router is a complicated electronic unit that may be repaired only be
authorized and qualified personnel. Do not try to open or repair the router yourself. Do not place the router in a damp or humid place, e.g. a bathroom. Do not stack the routers. The router should be used in a sheltered area, within a temperature range of +5 to +40 Celsius. Do not expose the router to direct sunlight or other heat sources. The housing and electronic components may be damaged by direct sunlight or heat sources. Do not deploy the cable for LAN connection outdoor to prevent electronic shock hazards. Keep the package out of reach of children. When you want to dispose of the router, please follow local regulations on conservation of the environment.
We warrant to the original end user (purchaser) that the router will be free from any defects in workmanship or materials for a period of two (2) years from the date of purchase from a DrayTek authorized dealer in the UK/Ireland. Please keep your purchase receipt in a safe place as it serves as proof of date of purchase. During the warranty period, and upon proof of purchase, should the product have indications of failure due to faulty workmanship and/or materials, we will, at our discretion, repair or replace the defective products or components, without charge for either parts or labour, to whatever extent we deem necessary tore-store the product to proper operating condition. Any replacement will consist of a new or re-manufactured functionally equivalent product of equal value, and will be offered solely at our discretion. This warranty will not apply if the product is modified, misused, tampered with, damaged by external factors, used with unapproved accessories or subjected to abnormal working conditions. Warranty applies to hardware only, not software or firmware. Defects which do not significantly affect the usability of the product will not be covered by the warranty. We reserve the right to revise the manual and online documentation and to make changes from time to time in the contents hereof without obligation to notify any person of such revision or changes.
iii
Declaration of Conformity
Hereby, DrayTek Corporation declares that the radio equipment type Vigor2865 is in compliance with Directive 2014/53/EU.
The full text of the EU Declaration of Conformity is available at the following internet address:
http://www.draytek.com.tw/ftp/Vigor2865/Document/CE/
Manufacturer: DrayTek Corp.
Address:
No. 26, Fu Shing Road, HuKou Township, HsinChu Industrial Park, Hsin-Chu County, Taiwan 303
Product:
Vigor2865 Series
Importer: SEG, 11 Capital Business Park, Borehamwood, Herts, WD6 1GW
Frequency Information for Europe area:
2.4G WLAN 5G WLAN LTE
3G
2412MHz - 2472 MHz, max. TX power: 19.98dBm *1
5160MHz - 5340 MHz, max. TX power: 22 dBm
*2
5480MHz - 5720 MHz, max. TX power: 27 dBm
B1[1920-1980 MHz (TX); 2110-2170 MHz (RX)]; B3[1710-1785 MHz (TX);
1805-1880 MHz (RX)]; B7[2500-2570 MHz (TX); 2620-2690 MHz (RX)];
B8[880-915 MHz (TX); 925-960 MHz (RX)]; B20[832-862 MHz (TX); 791-821
MHz (RX)]; *3
B1[1920-1980 MHz (TX); 2110-2170 MHz (RX)]; B3[1710-1785 MHz (TX);
1805-1880 MHz (RX)]; B5[824-849 MHz (TX); 869-894 MHz (RX)]; B8[880-915
MHz (TX); 925-960 MHz (RX)]
*3
Requirements in AT/BE/BG/CZ/DZ/DK/EE/FR/DE/IS/IE/IT/EL/ES/
CY/LV/LI/LT/LU/HU/MT/NL/NO/PL/PT/RO/SI/SK/TR/FI/SE/CH/
UK/HR. 5150MHz~5350MHz is for indoor use only.
(*1: for 2.4G WLAN model; *2: for 5G WLAN model; *3: for LTE model) This product is designed for LTE, DSL and 2.4GHz /5GHz WLAN network use in the UK & Ireland.
*The external power supply used for each product will be model dependent.
1
2
3
4
5
6
7
8
9
A Manufacturer
CWT
CWT
CWT
CWT
CWT
APD
APD
APD
APD
B Address
No. 222, Sec. No. 222, Sec. No. 222, Sec. No. 222, Sec. No. 222, Sec. No.5, Lane 83, No.5, Lane 83, No.5, Lane 83, No.5, Lane 83,
2, Nankan Rd., 2, Nankan Rd., 2, Nankan Rd., 2, Nankan Rd., 2, Nankan Rd., Lung-Sou St., Lung-Sou St., Lung-Sou St., Lung-Sou St.,
Lujhu
Lujhu
Lujhu
Lujhu
Lujhu
Taoyuan City Taoyuan City Taoyuan City Taoyuan City
Township, Township, Township, Township, Township, 330, Taiwan 330, Taiwan 330, Taiwan 330, Taiwan
Taoyuan
Taoyuan
Taoyuan
Taoyuan
Taoyuan
County 338, County 338, County 338, County 338, County 338,
Taiwan
Taiwan
Taiwan
Taiwan
Taiwan
C Model identifier
2ABB012F UK 2ABB018F UK 2ABL024F UK 2ABL030F UK 2ABN036F UK WA-12M12FG WB-18D12FG WA-24Q12FG WA-36A12FG
2ABB012F EU 2ABB018F EU 2ABL024F EU 2ABL030F EU 2ABN036F EU WA-12M12FK WB-18D12FK WA-24Q12FK WA-36A12FK
D Input voltage
100~240V
100~240V
100~240V
100~240V
100~240V
100~240V
100~240V
100~240V
100~240V
E Input AC frequency
50/60Hz
50/60Hz
50/60Hz
50/60Hz
50/60Hz
50/60Hz
50/60Hz
50/60Hz
50/60Hz
Output voltage DC
12.0V
12.0V
12.0V
12.0V
12.0V
12.0V
12.0V
12.0V
12.0V
F Output current
1.0A
1.5A
2.0A
2.5A
3.0A
1.0A
1.5A
2.0A
3.0A
G Output power
12.0W
18.0W
24.0W
30.0W
36.0W
12.0W
18.0W
24.0W
36.0W
H Average active
84.9%
86.2%
87.6%
87.8%
89.8%
83.7%
85.4%
88.6%
88.2%
efficiency
I Efficiency at low load
73.6%
78.0%
81.3%
83.3%
83.7%
74.5%
80.5%
86.4%
85.4%
10%
J No-load power
0.07W
0.07W
0.07W
0.07W
0.07W
0.07W
0.10W
0.07W
0.10W
consumption
External power supply (Power Adapter) information. For more updates, please visit www.draytek.co.uk.
iv
Join the UK mailing list
Users in the UK & Ireland can sign up to our mailing list which goes out approximately 4 times per year with products news, updates, hints & tips and offers.
For details, please visit www.draytek.co.uk/list
Firmware & Tools Updates
Due to the continuous evolution of DrayTek technology and emerging risks, router firmware updates may be issued. Please consult the DrayTek web site for more information on newest firmware, tools and documents: www.draytek.co.uk (For UK/Ireland)
Regional and Network Compatibility
For all models, please check that you have been supplied with a device intended for your geographic region and networks. Hardware and software varies by region, as well as local support and warranty services. To be sure of compatibility and local support, ensure that you are buying the correct product through authorized channels. The outside of the product's box will state the region compatibility (e.g. "Applied Region: UK"). If you are unsure, check with DrayTek or your supplier. The use of unofficial components (e.g. PSUs) or adapting interfaces or the use of unauthorized software/firmware may cause malfunction, product damage or personal danger and invalidates your warranty and access to support services.
v
Table of Contents
1. Package Contents ................................................................................................ 1 2. Panel Explanation................................................................................................. 2
2.1 Vigor2865ac / Vigor2865Lac / Vigor2865ax............................................................................... 2 2.2 Vigor2865Vac ............................................................................................................................. 6
3. Hardware Installation ........................................................................................... 8
3.1 Network Connection ................................................................................................................... 8 3.2 LTE Antenna & SIM Card Installation (LTE models only)........................................................... 9 3.3 Wall-Mounted Installation ..........................................................................................................11 3.4 Rack Mount Kit Installation....................................................................................................... 12
4. Setup & Configuration........................................................................................ 13
4.1 Accessing the Router Web Interface ........................................................................................ 13 4.2 WAN1 - ADSL and VDSL2 Connection Setup.......................................................................... 16
4.2.1 PPPoE connection with VDSL and 35b ...................................................................... 16 4.2.2 DHCP / Static IP connection with VDSL and 35b ....................................................... 19 4.2.3 PPPoA connection with ADSL / ADSL2+.................................................................... 22 4.3 WAN2 � Ethernet Connection Setup........................................................................................ 23 4.3.1 PPPoE......................................................................................................................... 24 4.3.2 Static or Dynamic IP.................................................................................................... 25 4.4 LTE Modem Setup (LTE models only) ..................................................................................... 26
5. Getting Further Help........................................................................................... 30
5.1 Additional Feature Setup .......................................................................................................... 30 5.2 Keep up to date with our mailing list ........................................................................................ 30 5.3 Firmware Updates .................................................................................................................... 31 5.4 Security & Router Best Practice ............................................................................................... 31
vi
1. Package Contents
Vigor router
Quick Start Guide (This document)
RJ-11 to RJ-11 Cable (Annex A) (Connects to your DSL line)
RJ-45 Cable (Ethernet) (Connects to your PC or Switch)
Antenna + Magnetic Base (L models)
or
Antenna (ac/ax models)
UK-type Power Adapter
The maximum power consumption is 28 Watts.
1
2. Panel Explanation
2.1 Vigor2865ac / Vigor2865Lac / Vigor2865ax
LED ACT WAN2
QoS USB
LTE
(LTE models only)
Status Off Blinking On Off Blinking On Off On Off Blinking On Off
Blinking
DSL
On
Blinking
WCF
On
Off
Explanation The router is powered off The router is ready and operating normally Internet connection is ready for use Internet connection is offline Data is being transmitted over WAN2 Quality of Service is active Quality of Service is inactive USB device is connected and ready for use No USB device is connected Data is being transmitted over USB LTE internet is connected and ready for use LTE modem is not detected, or has serious problem (e.g., no SIM card, SIM pin error, SIM deactivated, etc.) Slowly: LTE modem is connecting Quickly: Data is being transmitted over LTE DSL connection synchronised Slowly: DSL connection not currently synchronising or not detected Quickly: DSL connection is synchronising Web Content Filter is active (It is enabled from [Firewall] > [General Setup]) Web Content Filter is inactive
2
2.4G / 5G
(Wireless LAN)
On Off Blinking
DMZ
On
Off
Blinking
LED on Connector
2.4G: 2.4GHz Access Point is active 5G: 5GHz Access Point is active Wireless Access point is inactive 2.4GHz/5GHz LED will blink slowly when transmitting over that interface ACT & WLAN LEDs blink rapidly when WPS is ready for WPS clients to connect. After 2 minutes, the router will disable WPS pairing mode DMZ Port is enabled DMZ Port is not enabled Data is being transmitted through DMZ Port
WAN2 / P6
LAN P1~P5
Left LED
Right LED Left LED
Right LED
On Off Blinking On Off On Off Blinking On Off
Ethernet WAN (RJ45) is connected Ethernet WAN is disconnected Data is transmitting (sending/receiving) The port is connected with 1000Mbps The port is connected with 10/100Mbps Ethernet LAN (RJ45) is connected Ethernet LAN is disconnected Data is transmitting (sending/receiving) The port is connected with 1000Mbps The port is connected with 10/100Mbps
The port "WAN2 / P6" is switchable. It can be used for LAN connection or WAN connection according to the settings configured in WUI.
3
Interface Wireless LAN ON/OFF/WPS
Factory Reset
USB1~2 / USB WAN2 / P6
Description Wireless band will be switched on/off in a cycle:
2.4G (On) and 5G (On) � Default state. 2.4G (Off) and 5G (On) � press and release the button
once.
2.4G (On) and 5G (Off) � press and release the button twice.
2.4G (Off) and 5G (Off) � press and release the button three times.
When WPS is enabled in the router's web interface, press this button for more than 2seconds to enable WPS pairing mode.
Restore the default settings. Usage: Turn on the router (ACT LED is blinking). Press gently and hold for more than 5 seconds. When the ACT LED blinks rapidly, release the button and the router will restart with its factory default configuration.
Connector for a USB 3G/4G modem, storage, printer or USB Thermometer
RJ-45 Gigabit Ethernet connector for WAN modem / router
4
LAN P1-P5 DSL
PWR ON/OFF
Dual SIM Slot
RJ-45 Gigabit Ethernet connectors for local network devices RJ-11 connector for ADSL or VDSL line RP-SMA Connector for installing WLAN antennas
Connector for the power adapter Power Switch. Turns the unit on or off SMA Antenna Connector for installing LTE antennas (LTE models only) SIM1 & SIM2 (LTE models only): Standard size SIM card slot - Mini or Micro SIMs will require a SIM card adapter (not included) to fit.
See Section 3.2 for more information on fitting a SIM card.
5
2.2 Vigor2865Vac
LED ACT WAN2
QoS USB
DSL
Status Off Blinking On Off Blinking On Off On Off Blinking On Blinking
Phone1/2
2.4G/5G
(Wireless LAN)
On Off Blinking On
Off Blinking
LED on Connector
WAN2 / P6
LAN P1~P5
Left LED
Right LED Left LED
Right LED
On Off Blinking On Off On Off Blinking On Off
Explanation The router is powered off The router is ready and operating normally Internet connection is ready for use Internet connection is offline Data is being transmitted over WAN2 Quality of Service is active Quality of Service is inactive USB device is connected and ready for use No USB device is connected Data is being transmitted over USB DSL connection synchronised Slowly: DSL connection not currently synchronising or not detected Quickly: DSL connection is synchronising The phone connected to this port is off-hook The phone connected to this port is on-hook A phone call is incoming 2.4G: 2.4GHz Access Point is active 5G: 5GHz Access Point is active Wireless Access point is inactive 2.4GHz/5GHz LED will blink slowly when transmitting over that interface ACT & WLAN LEDs blink rapidly when WPS is ready for WPS clients to connect. After 2 minutes, the router will disable WPS pairing mode
Ethernet WAN (RJ45) is connected Ethernet WAN is disconnected Data is transmitting (sending/receiving) The port is connected with 1000Mbps The port is connected with 10/100Mbps Ethernet LAN (RJ45) is connected Ethernet LAN is disconnected Data is transmitting (sending/receiving) The port is connected with 1000Mbps The port is connected with 10/100Mbps
6
The port "WAN2 / P6" is switchable. It can be used for LAN connection or WAN connection according to the settings configured in WUI.
Interface Wireless LAN ON/OFF/WPS
Factory Reset
USB1~2 WAN2 / P6 LAN P1-P5 Phone 1/2 DSL
PWR ON/OFF
Description Wireless band will be switched on/off in a cycle: 2.4G (On) and 5G (On) � Default state. 2.4G (Off) and 5G (On) � press and release the button
once. 2.4G (On) and 5G (Off) � press and release the button
twice. 2.4G (Off) and 5G (Off) � press and release the button
three times. When WPS is enabled in the router's web interface, press this button for more than 2seconds to enable WPS pairing mode. Restore the default settings. Usage: Turn on the router (ACT LED is blinking). Press gently and hold for more than 5 seconds. When the ACT LED blinks rapidly, release the button and the router will restart with its factory default configuration.
Connector for a USB 3G/4G modem, storage, printer or USB Thermometer
RJ-45 Gigabit Ethernet connector for WAN modem / router
RJ-45 Gigabit Ethernet connectors for local network devices
RJ-11 connectors for VoIP usage with analogue telephones RJ-11 connector for ADSL or VDSL line
RP-SMA Connector for installing WLAN antennas
Connector for the power adapter
Power Switch. Turns the unit on or off
7
3. Hardware Installation
This section will guide you through installing the router's port connections and fitting the router securely, either to a wall using the supplied mounting hardware, or into a 19" rack with the optional RM1 rack mounting kit. Before starting to configure the router, you must first connect up the cables.
3.1 Network Connection
1. ADSL/VDSL Connections: Connect the VDSL/ADSL interface to the Modem or DSL port of the external splitter/microfilter (not supplied) with the RJ-11 line cable. In some cases, your RJ-11 DSL socket will be built-into your phone line socket on the wall and you won't have a separate microfilter/splitter. WAN2 Connections: Connect the cable Modem/DSL Modem/Media Converter to the WAN port of router with Ethernet cable (RJ-45).
2. LAN Connections: Connect a LAN port of the router to your computer or switch.
3. Wireless Antennas: Screw the supplied wireless antennas on to the antenna connectors on the back of the router.
4. Power Supply: Connect the power adapter to the Vigor 2865's PWR socket on the rear and plug the power adapter into a suitable mains socket. Turn the Vigor 2865 on using its power switch.
5. The router will start up. After completing the system test, the ACT LED will light up and start blinking once per second to indicate that it is ready for use. (For more detailed information of LED status, please refer to section 3. Panel Explanation)
8
3.2 LTE Antenna & SIM Card Installation (LTE models only)
Extension Base
The supplied LTE antenna should be fitted to the magnetic antenna base before connecting the antenna to the router. There are two LTE antenna connectors on the unit; if only a single antenna can be installed, use the LTE antenna connector adjacent to the power switch (highlighted below).
Primary LTE Antenna Connector
SIM Card Slot
Extension Base
Before installing the SIM card, turn the router off. It should not be fitted while the router is powered on. When installing a SIM card into the router, un-screw and remove the SIM card slot cover. When inserted, the SIM card contacts should be facing downwards with the notch on the left side pointing towards back of the router.
9
The SIM card slot is designed for Standard size SIM cards only, fitting a Mini or Micro SIM without a Standard size SIM card adapter could result in damage to the SIM card slot. Push the SIM card into either slot until it `clicks' into place, with the SIM card's contacts facing downwards like so:
Vigor2865 LTE routers have two types of antenna connector; the LTE modem (black antennas) use the inner SMA antenna connectors. The Wireless LAN (white antennas) use the outer RP-SMA antenna connectors. These must be installed onto the correct antenna connectors for normal LTE signal and normal Wireless LAN functionality. The supplied antennas should be installed to the connectors as shown: SMA jack for LTE Antenna (with extension base)
SMA jack for WLAN Antenna
10
3.3 Wall-Mounted Installation
DrayTek Vigor 2865 series routers have keyhole type mounting slots on the underside to hang the router on, using screws attached to a wall or other surface.
1. A template is provided in the Vigor router packaging box to enable you to space the screws correctly on the wall
2. Place the template on the wall in the desired position and drill holes through the cardboard template at the marked points
3. Fit screws into the wall using the appropriate type of wall plug for the wall material
Note
The recommended drill diameter is 6.5mm (1/4").
4. With the screws installed, the router can be slotted into place
11
3.4 Rack Mount Kit Installation
The DrayTek Vigor2865 series router can be fitted securely in a standard 19" 1U rack mount space using the RM1 Rack Mount Plate (available separately). When fitted, the router is held firmly and cannot be removed, pushed back or fall off the bracket accidentally.
The router must be fitted into the bracket before you fix the bracket into your rack. To fit it correctly, locate the groove around the edge of the front panel of the router. The front of the RM1 bracket slides into this groove, therefore preventing the router from moving once fitted.
Once the router has been dropped into the groove, you can fit the bracket into the rack using the screws supplied.
12
4. Setup & Configuration
This section provides examples of how to initially access the router and configure internet access for the most common types of Internet connection in the UK. If the instructions in this quick start guide do not allow you to get online with your ISP or type of Internet connection, there are additional guides available from the Product Knowledgebase on www.draytek.co.uk.
Note
To access the router, your PC will need to either get its IP address using DHCP or have an IP address in the 192.168.1.x range. For details on how to change this, please refer to the "Trouble Shooting" section in the User Guide.
4.1 Accessing the Router Web Interface
Open a web browser on your PC and type https://192.168.1.1.
The https:// prefix ensures that your connection is encrypted using SSL so that your session data cannot be intercepted. Without that prefix, your data passes in clear text.
You may get a warning from your browser (IE, Chrome, Edge, Safari etc.) about your server (the router) having an invalid certificate. Your browser will demand further confirmation or exception before allowing access. The warnings will look something like these examples.
An example of how to access the router via HTTPS with Mozilla Firefox:
13
An example from Microsoft Edge, click "Continue to this webpage" to proceed:
Most other browsers will present equivalent warnings. In each case, following the prompts/links will allow you to access the router's web interface. It is still encrypted with SSL/TLS.
Note
This warning appears because the router's default certificate is 'self-signed' rather than issued to you by a certificate authority who has verified your identity. A self-signed certificate means that you cannot verify the identity of the server, but as it's your own local router, that shouldn't be an issue - your connection is still encrypted.
The router login prompt will then request a username and password to allow access.
The factory default login details are: Username: admin Password: admin
14
Note
If you cannot access the web interface, please go to the "Trouble Shooting" section in the User Guide to determine the cause of and solve your problem.
Upon successful login, the router will display the Dashboard, which shows a summary of the router model, WAN status, front panel port status and other information:
Note
We recommend configuring a secure password when first logging in to the router's administration interface.
The router's administration password can be changed from [System Maintenance] > [Administrator Password]
15
4.2 WAN1 - ADSL and VDSL2 Connection Setup
The WAN1 interface of the Vigor 2865 router can connect to either an ADSL / ADSL2+ connection or a VDSL2 / 35b Supervectoring connection. If your Internet connection uses VDSL2 or 35b and your ISP has supplied you with a Username and Password to connect to the Internet, go to section 4.2.1 PPPoE connection with VDSL and 35b If your Internet connection uses VDSL2 and your ISP does not supply or require a Username and Password to connect to the Internet, go to section 4.2.2 DHCP / Static IP connection with VDSL and 35b If your Internet connection uses ADSL or ADSL2+ and your ISP has supplied you with a Username and Password to connect to the Internet, go to section 4.2.3 PPPoA connection with ADSL / ADSL2+
4.2.1 PPPoE connection with VDSL and 35b
1. Go to [WAN] > [General Setup] and click on the WAN1 link:
2. On the settings page, Enable the Service � VLAN Tag insertion:
16
Set the Service - Tag value to 101 if you're in the UK. Set the Service - Tag value to 10 if you're in Ireland.
Note
These VLAN tag values are required to connect to ISPs that operate on the Openreach or OpenEir VDSL2 networks, if your ISP operates on a different VDSL2 network, this tag value may differ. Please check with your ISP or the DrayTek UK Knowledgebase for ISP specific guides.
The DSL mode can be set to "VDSL2 only" but this is not required. Click OK on that page to apply the changes.
3. Go to [WAN] > [Internet Access]
Set the WAN1 Access Mode to PPPoE / PPPoA, then click the Details Page button to proceed:
4. On the PPPoE / PPPoA settings tab:
Select the Enable radio button at the top of the page to ensure that the PPPoE interface is enabled.
17
Input the username into the Username field and password in the Password field, as required. The Service Name does not need to be specified.
If your ISP has provided a static IP address, that can be specified by setting the Fixed IP setting to Yes and entering the IP in the Fixed IP Address field.
Click OK on this page to apply the changes and the router will then prompt to restart.
Click OK to restart the router.
5. Once the router has restarted, the [Online Status] > [Physical Connection] page will display the VDSL information and PPP connection status. If the WAN1 section shows an IP address, it has connected to the internet successfully:
Note
If the WAN 1 IP address displayed begins with 172.16.x.x, it's possible that the ISP has not accepted the supplied Username and Password for the Internet connection.
Check that the ISP Access Setup - Username and Password match the details supplied by your ISP.
18
4.2.2 DHCP / Static IP connection with VDSL and 35b
1. Go to [WAN] > [General Setup] and click on the WAN1 link:
2. On the settings page, Enable the Service � VLAN Tag insertion. Set the Tag value setting to 101 if you're in the UK. Set the Tag value setting to 10 if you're in Ireland. The DSL mode can be set to "VDSL2 only" but this is not required. Click OK on that page to apply the changes.
Note
These VLAN tag values are required to connect to ISPs that operate on the Openreach or OpenEir VDSL2 networks, if your ISP operates on a different VDSL2 network, this tag value may differ. Please check with your ISP or the DrayTek UK Knowledgebase for ISP specific guides.
19
3. Go to [WAN] > [Internet Access] Set the WAN1 Access Mode to MPoA / Static or Dynamic IP, then click the Details Page button to proceed:
4. In the MPoA / Static or Dynamic IP settings: Select the Enable option and select Obtain an IP address automatically which will obtain an IP from the ISP using DHCP. If your ISP has provided a static IP range, with a Network address and a Subnet Mask, specify that with the Specify an IP address option.
Click OK on this page to apply the changes and the router will then prompt to restart. Click OK to restart the router.
20
5. Once the router has restarted, the [Online Status] > [Physical Connection] page will display the VDSL information and PPP connection status. If the WAN1 section shows an IP address, it has connected to the internet successfully:
21
4.2.3 PPPoA connection with ADSL / ADSL2+
1. Go to [WAN] > [Internet Access] Firstly set the WAN1 Access Mode to PPPoE / PPPoA, then click the Details Page button to proceed:
2. On the PPPoE / PPPoA settings tab: The details for the VPI and VCI settings for ADSL should be correct for UK usage, with 0 and 38 being the defaults. In most cases, it will not be necessary to change these. The Modulation setting can be left on its default of Multimode which will auto-detect the correct ADSL type to use. Select the Enable radio button at the top of the page to ensure that the PPPoE interface is enabled. Input the username into the Username field and password in the Password field, as required. The Service Name does not need to be specified. If your ISP has provided a static IP address, that can be specified by setting the Fixed IP setting to Yes and entering the IP in the Fixed IP Address field.
Click OK on this page to apply the changes and the router will then prompt to restart. Click to restart the router.
22
3. Once the router has restarted, the [Online Status] > [Physical Connection] page will display the ADSL information and PPP connection status, if the WAN1 section shows an IP address, it has connected to the internet successfully:
Note
If the WAN 1 IP address displayed begins with 172.16.x.x, it's possible that the ISP has not accepted the supplied Username and Password for the Internet connection.
Check that the ISP Access Setup - Username and Password match the details supplied by your ISP.
4.3 WAN2 � Ethernet Connection Setup
The WAN2 interface of the Vigor 2865 router can connect to a modem such as the Vigor 130 VDSL2 to Ethernet modem, an ISP supplied router or another network with an Internet connection. If you are using a modem and your ISP has supplied you with a Username and Password to connect to the Internet, go to section 4.3.1 PPPoE If the router is connected to a modem and the ISP does not supply or require a Username and Password to connect to the Internet, or you are connecting the WAN2 connection to another router or network go to section 4.3.2 Static or Dynamic IP
23
4.3.1 PPPoE
This connection method will typically be used with a modem such as the Vigor 130 VDSL2 modem, which passes through the PPPoE connection from the ISP to the router. 1. Go to [WAN] > [Internet Access]
Firstly set the WAN2 Access Mode to PPPoE, then click the Details Page button to proceed:
2. In the PPPoE settings tab:
Select the Enable radio button at the top of the page to ensure that the PPPoE interface is enabled. Input the username into the Username field and password in the Password field, as required. The Service Name does not need to be specified. If your ISP has provided a static IP address, that can be specified by setting the Fixed IP setting to Yes and entering the IP in the Fixed IP Address field. Click OK on that page to save the settings and the router will then prompt to restart, allow it to restart to properly apply the changes. Once the router has restarted, log back into the web interface and select [Online Status] > [Physical connection], if it has connected, the relevant WAN Interface status text will be in green along with an IP address which indicates that the connection is active and ready for use.
24
4.3.2 Static or Dynamic IP
1. Go to [WAN] > [Internet Access] Set the WAN2 Access Mode to Static or Dynamic IP, then click the Details Page button to proceed:
2. In the Static or Dynamic IP settings:
Select the Enable option and select Obtain an IP address automatically which will obtain an IP from the ISP with DHCP. If your ISP has provided a static IP range, with a Network address and a Subnet Mask, specify that with the Specify an IP address option. Click OK on this page to apply the changes and the router will then prompt to restart. Click to restart the router. Once the router has restarted, log back into the web interface and select [Online Status] > [Physical connection], if it has connected, the relevant WAN Interface status text will be in green along with an IP address which indicates that the connection is active and ready for use.
25
4.4 LTE Modem Setup (LTE models only)
The LTE modem integrated into DrayTek LTE routers ("L" suffix) can connect directly to a mobile broadband network and operate as either a main internet connection or a backup internet connection. The modem is integrated into the router instead of using a separate USB modem and requires a SIM card to connect to the mobile broadband network required. The settings for the mobile broadband network will vary by provider, some will require the APN (Access Point Name) while others may require that and a username and password. If those details are not set, the mobile network may reject the connection attempts of the Vigor LTE router, which will result in the router showing no signal / no IP address. To configure the LTE WAN interface on the router, it is first necessary to fit the SIM card in the router, refer to section 3.2 for details of SIM card and antenna installation. After the SIM card has been installed, power on the router, access the router's web interface and go to [WAN] > [General Setup] to confirm the LTE WAN options, by clicking the LTE link:
In the LTE General Setup options, ensure that the connection is Enabled and set the Active Mode as required. If the internet connection should always be available, set it to Always On:
26
If the connection will be used as a backup internet connection, set the Active Mode to Failover: � Select "Any of the selected WAN" if the LTE connection will come online if only
one WAN interface selected goes offline. For instance, in the example below, if either WAN1 or WAN2 are offline, the LTE WAN interface will become active:
� Select "All of the selected WAN" if the LTE connection will come online only when all of the WAN interfaces selected are offline:
Click OK to save those changes. Go to [WAN] > [Internet Access]. Set the Access Mode to 3G/4G LTE Modem (DHCP Mode) and click the Details Page button:
On the Details for the LTE WAN interface:
27
Set the 3G/4G LTE Modem (DHCP mode) setting to Enable and configure these settings as required for your SIM card / ISP: SIM PIN code � If your SIM card has a PIN code, enter it, otherwise leave this blank Network Mode - 4G/3G/2G auto-selects the ideal network type. Set this to a specific mode to force that connection type, i.e. 4G Only. APN Name � Enter the APN required for your SIM card. This may vary by plan / SIM type, check with your provider if you're not sure. Username and Password � Enter these if required by the ISP. Authentication � Select PAP or CHAP. Select PAP Only if your ISP requires it
Click OK to save and apply those settings. Go to the [Dashboard] to check the network connection state under the LTE Status section:
The [Online Status] > [Physical Connection] page will show connection details for the LTE WAN interface. If the details show in red text, the LTE internet connection is down. When the LTE details text shows in green, the router will be able to use that WAN interface for internet access. If the LTE WAN is configured to operate as a backup, the router will keep this internet connection offline until the requirements are met (other WAN interfaces down) for it to come online.
28
Additional details on the LTE modem status can be found under [LTE] > [Status]:
29
5. Getting Further Help
If the router does not appear to be operating correctly or you cannot get online to the Internet, please visit our web site (www.draytek.co.uk) for further troubleshooting advice or to contact our support technicians. Always have your serial number to hand. Users in the UK/Ireland using qualifying products should visit for support options including email support, telephone support, our help knowledgebase and access to the UK user support forums. If you are outside of the UK/Ireland, please contact your own local supplier, email to support@draytek.com or visit www.draytek.com/support For warranty service, in the first instance, please contact the support services, as listed above, for help in diagnosing or eliminating the problem or issue. The support department can arrange repair or service if then deemed necessary. The standard Vigor 2865 series warranty is `Return to base' (RTB) unless you have VigorCare which provides enhanced services (see www.draytek.co.uk/vigorcare). You should keep your proof of purchase (original invoice) safely in case warranty or other service is ever required.
5.1 Additional Feature Setup
This is a quick setup guide to get you online with your new router. Your Vigor 2865 series router is capable of very much more and has a plethora of other features. These are covered in the main user manual, which is available on the Downloads page: https://www.draytek.co.uk/support/downloads
The online knowledgebase has additional information on how to configure the router's Internet connectivity and more advanced features: https://www.draytek.co.uk/support/product-knowledgebase
5.2 Keep up to date with our mailing list
Now that you have your DrayTek product, you should keep up to date with product updates (firmware), security advisories and other product news, advice or special offers. Users in the UK/Ireland can subscribe to our mailing list. For details and to subscribe, please visit In other countries or regions, please contact your local distributor/supplier for local options.
30
5.3 Firmware Updates
It is strongly recommended that you keep your router firmware up to date with the latest version in order to have all of the latest security and feature improvements. Always obtain firmware from official sources, i.e. (for UK/Ireland users). There are two firmware file types: .all - upgrade retaining all previous settings .rst - upgrade and reset to factory default
It is recommended to take a configuration backup prior to upgrading the firmware.
5.4 Security & Router Best Practice
Your router is the gateway to an entire business network and data. Even the best security equipment requires correct usage in order to ensure that its features are effective. There are many simple practices that every router user should adopt to help reduce the risk to their network or business as well as some very common and simple mistakes that people habitually make - simple mistakes which could then be exploited by others. We've produced our free guide "Router Best Practice" which contains essential information for anyone installing, configuring or using a broadband router or wireless LAN. Available to download: https://www.draytek.co.uk/best
31