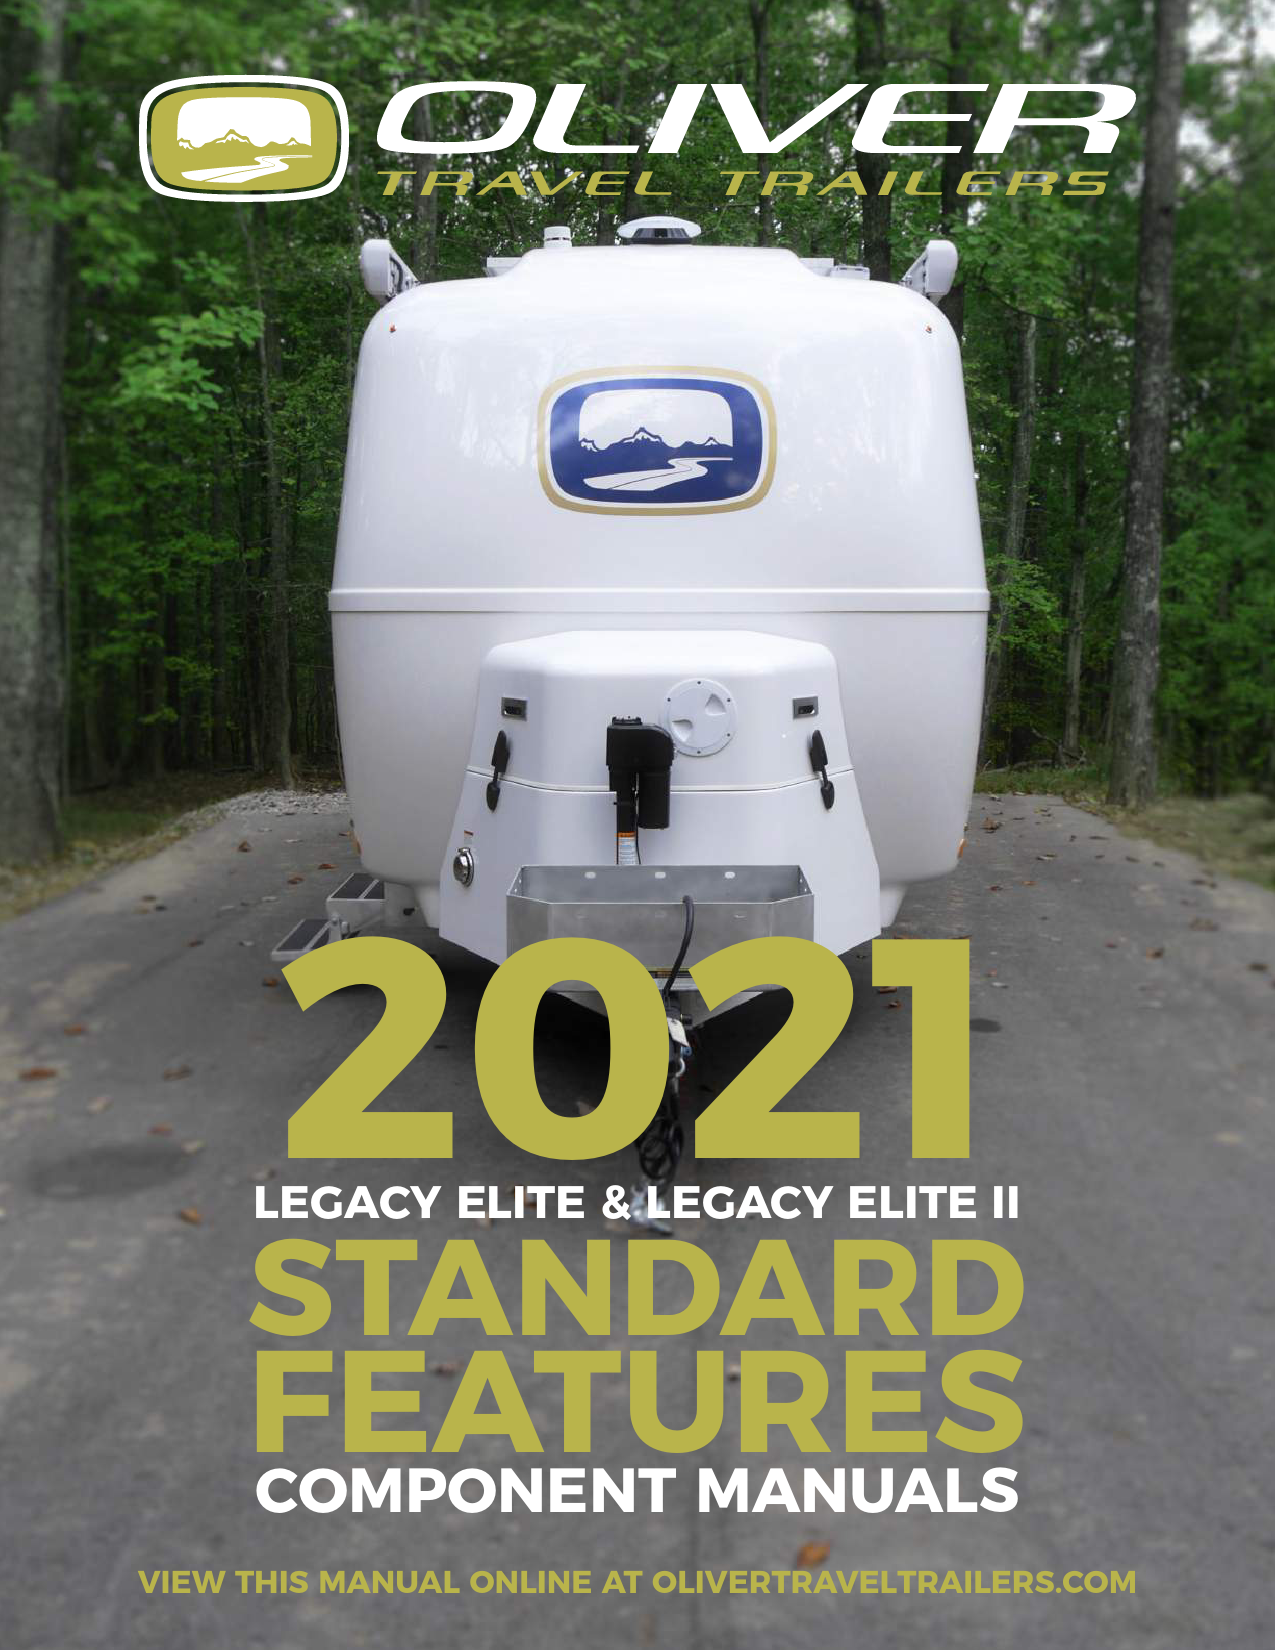
STANDARD - Oliver Travel Trailers

STANDARD COMPONENT WARRANTY INFORMATION. BARKER STABILIZATION JACK (TONGUE). BULLDOG COUPLER. HIGH POINTE MICROWAVE. DOMETIC LP/CO DETECTOR.

Oliver Travel Trailers

OTT-2021-Standard-Features-Guide-compressed
2021
LEGACY ELITE & LEGACY ELITE II
STANDARD
FEATURES
COMPONENT MANUALS
VIEW THIS MANUAL ONLINE AT OLIVERTRAVELTRAILERS.COM

STANDARD FEATURES COMPONENT MANUALS
TABLE OF CONTENTS

4-7 8-10 11-12 13-26 27-44 45-56 57-71 72-97 98-99 100-135 136-164 165-212 213-219 220-225 226-255 256-272 273-279 280-287 288-303 304-307 308-314 315-326 327-354

STANDARD COMPONENT WARRANTY INFORMATION BARKER STABILIZATION JACK (TONGUE) BULLDOG COUPLER HIGH POINTE MICROWAVE DOMETIC LP/CO DETECTOR DOMETIC PORCELAIN TOILET AND PARTS LIST DOMETIC STOVE DOMETIC THERMOSTAT FIRE EXTINGUISHER FURRION STEREO GARNET SEELEVEL II TANK MONITOR GIRARD POWERED AWNING MAXXAIR FAN/REMOTE MAXXAIR BATH FAN NORCOLD REFRIGERATOR FOR LEGACY ELITE NORCOLD REFRIGERATOR FOR LEGACY ELITE II PROGRESSIVE DYNAMICS CHARGE CONTROLLER PROGRESSIVE DYNAMICS POWER CONVERTER PROGRESSIVE INDUSTRIES SURGE PROTECTOR SHURFLO WATER PUMP SMOKE DETECTOR SUBURBAN WATER HEATER VIZIO TV

STANDARD COMPONENT WARRANTY INFORMATION
AirXcel MAXX Fan & Bath Fan
AirXcel 3050 N. Saint Francis St., Wichita, KS 67219
Email: rvp_sales@airxcel.com Phone: 316-832-3468 Warranty: 2-Year Limited
Anderson "No-Sway" Weight Distribution Hitch
Andersen Hitches 3125 North Yellowstone Highway, Idaho Falls, ID 83401-1709
Email: N/A Phone: 800-635-6106 Warranty: Limited Lifetime
Barker's VIP 3000 and VIP 3500 Power Jacks
Barker Manufacturing 1125 Watkins Road, Battle Creek, MI 49015
Email: sales@barkermfg.com Phone: (888) 367-6978 Warranty: 2-Year Extended
Bulldog Collar-Lok Coupler ­ 7,000 lbs.
Cequent Performance Products, Inc. 47912 Halyard Drive Suite 100, Plymouth, MI 48170
Email: N/A Phone: 888-521-0510 Warranty: 1-Year
Cooper Tires
Cooper Tire & Rubber Company 701 Lima Ave., Findlay, OH 45840
Email: cooperinfo@coopertire.com Phone: (800) 854-6288 Warranty: 50,000 miles
Dehco Kitchen Faucet, Kitchen Sink, & Bath Sink
Dehco Inc. 3601 Charlotte Ave, Elkhart, IN 46517
Email: warranty@dehco.com Phone: 800-621-2278 Warranty: 1-Year
4

STANDARD COMPONENT WARRANTY INFORMATION
Dexter Axles and EZ Flex Suspension
Dexter Axle Corporate Headquarters 2900 Industrial Parkway East, Elkhart, IN 46516
Email: N/A Phone: (574) 295-7888 Warranty: 2-Years
Dometic A/C and Thermostat
Dometic 2320 Industrial Pkwy, Elkhart, IN 46516
Email: customersupportcenter@dometicusa.com Phone: 800-544-4881 Warranty: 2-Year Limited
Dometic Cooktop
Dometic 2320 Industrial Pkwy, Elkhart, IN 46516
Email: customersupportcenter@dometicusa.com Phone: 800-544-4881 Warranty: 2-Year Limited
Dometic Furnace
Dometic 2320 Industrial Pkwy, Elkhart, IN 46516
Email: customersupportcenter@dometicusa.com Phone: 800-544-4881 Warranty: 2-Year Limited
Dometic Toilet
Dometic 2320 Industrial Pkwy, Elkhart, IN 46516
Email: customersupportcenter@dometicusa.com Phone: 800-544-4881 Warranty: 2-Year Limited
Furrion - Stereo & Speakers
Furrion 52567 Independence Ct., Elhart, IN 46514
Email: support@furrion.com Phone: 888-354-5792 Warranty: 1-Year Limited
5

STANDARD COMPONENT WARRANTY INFORMATION
Girard Awning
Girard Systems 1361 Calle Avanzado, San Clemente, CA 92673
Phone: (800) 382-8442 Warranty: 2-Year
High Pointe Microwave
Collins & Company 17880 Commerce Drive, Bristol, IN 46507
Phone: (574) 848-1118 Warranty: 1-Year
ITC RV Fontana Exterior Shower
ITC Global Headquarters 230 East Lakewood Blvd., Holland, Michigan 49424
Email: sales@itc-us.com Phone: 616-396-1355 Warranty: 1-Year
Norcold Refrigerator
Thetford Corp 7101 Jackson Road, Ann Arbor, MI 48103
Email: N/A Phone: 800-543-1219 Warranty: 1-Year Limited
Phoenix Bath Faucet
Phoenix Faucets 583 Miller Rd., Avon Lake, OH 44012
Email: N/A Phone: 800-222-6041 Warranty: Limited Lifetime
Powertron Deep Cycle 12V
Trojan Battery Sales 11301 47th Street, Clearwater, FL 33762
Email: sales@trojanbatterysales.com Phone: 800-282-3750 Warranty: Powerton Deep Cycle 2-Year
6

STANDARD COMPONENT WARRANTY INFORMATION
Progressive Dynamics Converter/Power Center
Progressive Dynamics, Inc. 507 Industrial Road, Marshall, MI 49068
Email: PDIWEST1@aol.com Phone: 269-781-4241 Warranty: 2-Years
Progressive Industries EMS-HW30C Surge Protector
Progressive Industries, Inc. 1020 Goodworth Dr., Apex, NC 27539
Email: sales@progressiveindustries.net Phone: 919-462-8280 Warranty: Limited Lifetime
Shurflo 4008 RV Revolution By-Pass Pump
SHURFLO® East 52748 Park Six Court, Elkhart, IN 46514
Email: customer_service@SHURFLO.com Phone: 800-854-3218 Warranty: 1-Year
Suburban Water Heater
Suburban Manufacturing Co. 676 Broadway Street, Dayton, TN 37321
Email: N/A Phone: 423-775-2131 Ext. 7107 Warranty: 2-Year Limited
VanAir Ventline Bathroom Exhaust Fan
Ventline 902 South Division St., Bristol, IN 46507
Email: N/A Phone: (574) 848-4491 Warranty: 1-Year
Vizio TV
Vizio Irvine, CA
Email: techsupport@vizio.com Phone: (877) 698-4946 Warranty: 1-Year
7

BARKER STABILIZATION JACK (TONGUE)

VIP 3000 POWER JACK OWNER'S INSTRUCTIONS P/N 30826(WHITE) OR P/N 31696, 31837 (BLACK )

H&H Engineering VIP 3,000 Power Jack is designed to lift up to 3,000 pounds a full 18". It's design also includes a night light, a build in leveling device, attached foot plate, and an emergency crank handle. An important part of owning and using VIP Jack is being sure it is properly installed and serviced.

GENERAL SAFETY:
Read and understand the Jack installation instructions. Always block trailer wheel when using the jack. Remove jewelry (watches, rings, etc.)

BEFORE INSTALLATION:

Remove present jack

Raise your travel trailer's front end and place blocks or stabalizing jacks under the front "A" frame. Lower the trailer until it rests securely on stabilizing jacks or blocks. Retract present jack and remove.
INSTALLATION: Install Jack in hole and secure with 3 bolts & 3 internal tooth lockwashers (bolt holes are threaded) Attach the foot plate to VIP Jack with .50-20 bolt and .50" lockwasher

30 amp slow blow fuse

"A" frame coupler

30 AMP
(+)

SERIHEISG3H0P0O0WER
Supplied by customer

VIP Jack

travel trailer battery

Connect the lead-wire directly to the positive (+) lead of the travel trailer's battery using a twelve (12) gage wire. Be sure the connection is a good one. THE 30 AMP SLO-BLO FUSE MUST BE INSTALLED AS SHOWN.

IMPORTANT
To insure a good electrical ground an internal tooth lockwasher must be in place for this bolt. Make sure powdercoat or paint is removed from "A" frame coupler under washer and that tagged hole is used.

IMPORTANT NOTICE:
If it is necessary to change the position of the powerhead relative to the post and flange (in order to provide clearance between powerhead and LP gas bottle or LP gas cover, or more clearance between the lift gate and the powerhead) loosen set screws and rotate head without lifting off coupling. Retighten set screws when head is in desired position.

H&H ENGINEERING
DIVISION OF BARKER MFG. CO. 730 E. MICHIGAN AVE. / P.O. BOX 460 BATTLE CREEK MI 49016 / (269) 965-2371
8

© Copyright H&H Engineering 1989

PAGE:
1 OF 4
REV. LETTER:
E

DATE:

FORM #:

21 APR 08 30842

ECN#:
13855

APPROVED:

BARKER STABILIZATION JACK (TONGUE)

VIP 3000 POWER JACK OWNER'S INSTRUCTIONS P/N 30826(WHITE) OR P/N 31696, 31837 (BLACK )

OPERATION (ELECTRIC)
REMEMBER TO KEEP HANDS AND FEET FROM UNDER THE FOOT PLATE WHEN USING POWER JACK.

The "night-light" is controlled by this toggle switch

When VIP JACK reaches the end of it's travel (either raising or lowering) the internal clutch activates

UP

Dolly wheels are not recommended.

Jack will raise and

lower by this

toggle switch

SERIHEISG3H0P0O0WER

Warning DOWN AVOID THE RISK OF INJURY OR DEATH TO YOURSELF AND OTHERS: .USE THE JACK FOR LIFTING THE TRAVEL TRAILER ONLY. .NEVER GET BENEATH THE TRAILER WHEN IT IS SUPPORTED BY THE JACK. .SUPPORT THE VEHICLE WITH THE APPROPRIATE MEANS.

OPERATION (MANUALLY):
If an electrical failure should occur the emergency handle may be inserted into the jack post and the jack can be raised or lowered. (Access can be obtained by twisting cap off.) If the powerhead is removed crank can still be used to raise and lower jack.
SERIPEeSrf3oH0rmi0gah0nce

WARNING!!!

WARNING

Do not use toggle switch with crank handle in place. Breaking this rule will cause

Don't risk serious injury or death in a shearing or
squeezing accident. Keep

serious injury or death.

body, hands, and feet away.

19989
.REMEMBER TO KEEP HANDS AND FEET OUT FROM UNDER THE FOOT PLATE WHEN
USING THE POWER JACK!!
.DOLLY WHEELS ARE NOT RECOMMENDED.

BREAKING THESE RULES WILL CAUSE SERIOUS INJURY OR DEATH.

H&H ENGINEERING
DIVISION OF BARKER MFG. CO. 730 E. MICHIGAN AVE. / P.O. BOX 460 BATTLE CREEK MI 49016 / (269) 965-2371

© Copyright H&H Engineering 1989

PAGE:
2 OF 4

DATE:

FORM #:

21 APR 08 30842

REVISION LETTER: ECN#:

APPROVED:

E

13855

9

BARKER STABILIZATION JACK (TONGUE)

VIP 3000 POWER JACK OWNER'S INSTRUCTIONS P/N 30826(WHITE) OR P/N 31696, 31837 (BLACK )

STRAP ATTACHMENT:
1. Press strap (1) onto the stud (2) at the bottom of the cap. 2. Press the retaining ring (3) on stud (2) snug it down against the strap (1). 3. Repeat this process (4) on the stud found on the inside of the cover.
THIS WILL SECURE YOUR CAP.

COVER, INSIDE

BOTTOM OF CAP

3

1

4 2

MAINTENANCE:
Once a year, the powerhead should be removed and a liberal amount of grease (preferably a grease with high melting point) applied directly to the coupling on which the drive pin rests.
DO NOT POUR OIL into top of the jack post.
Once a year, the housing cover should be removed and the gears inspected for proper lubrication. Remove 4 screws and tap around edge of housing to free cover. DO NOT insert screw driver blade! (This may damage mating surfaces.) Before replacing cover, clean mating surfaces. If lubrication is needed, use Mobilith 460 grease or equivalent.

SCHEMATIC WIRING DIAGRAM

P/N 16263 MOTOR

H&H ENGINEERING
DIVISION OF BARKER MFG. CO. 730 E. MICHIGAN AVE. / P.O. BOX 460 BATTLE CREEK MI 49016 / (269) 965-2371
10

© Copyright H&H Engineering 1989

PAGE:

DATE:

3 OF 4 21 APR 08

REVISION LETTER: ECN#:

E

13855

FORM #:
30842
APPROVED:

BULLDOG COUPLER

Bulldog Collar-LokTM Couplers

®
Read, Understand, Follow and Save These Instructions

Read, understand and follow all of these instructions and warnings (Instructions) before installing and using this product. Install and use this product only as specified in these instructions. Improper installation or use of this product may result in property damage, serious injury, and/or death. Never allow installation or use of this product by anyone without providing them with these instructions. You must read, understand and follow all instructions and warnings for any product(s) to which this product is used in conjunction with or installed. Save these instructions with the product for use as a reference for any future installation and use of the product.

WARNING Failure to follow these warnings and instructions may result in property damage, serious bodily injury, and/or death.

· Purchaser/owner must ensure that product is installed according to these · Keep the ball pocket and mechanism clean. When parking or storing

instructions.

your trailer, keep the coupler off the ground so dirt and/or other foreign

· Purchaser/owner must not alter or modify product.

material will not build up in the coupler ball pocket.

 Operator and bystanders should never position any part of body under · Do not tow if ball is not fully seated and/or coupler is not closed.

any portion of this product or the load being supported.

· All welding must be performed by a AWS certified welder.

 Do not allow children to play on or around this product or the load being · This product rated according to SAE J684.

supported.

Before Towing:

· Weigh your trailer plus added load. Do not exceed lesser of mounting

· Check vehicle, channel, hitch, hitch ball and coupler for signs of wear

bracket, coupler, hitch, vehicle, ball, or trailer weight ratings (including load). or damage and that the coupler handle opens and closes freely. If coupler

· Never exceed maximum rated capacity. Refer to stamped markings or and/or channel is deformed or damaged, replace complete coupler and

decals on product to obtain rated capacity. If uncertain, contact Cequent bracket.

Performance Products at 1-800-632-3290 or www.cequentgroup.com · Always replace bent, broken, or worn parts before using this product.

· Use only the proper ball for this coupler as indicated on the coupler body. · Check that the hitch ball is fully seated in the coupler ball pocket, close

If uncertain, contact Cequent Performance Products at 1-800-632-3290 coupler and insert pin behind the collar or through the latch.

or www.cequentgroup.com

· Check channel hardware for wear and proper tightness. Replace bent,

· Always secure load, vehicle and trailer (by blocking wheels) before

broken, or worn hardware. Tighten hardware to appropriate SAE

latching/unlatching coupler.

proofload specifications (See table specs). Use only grade 5 hardware.

· Use caution when uncoupling as tongue may rise suddenly due to

· Make sure that the trailer safety chains are properly connected to the

negative tongue load.

towing vehicle and trailer according to SAE J684.

· After installing channel and/or coupler, if coupler operation has been · Make sure that all trailer lighting is hooked up and working properly.

impared in any way, do not use it.

Coupler Installation

Warning: Failure to follow all installation instructions could result in coupler failure.

Before mounting the coupler confirm that there will be no interference from the tow vehicle, tongue, ground, and any other mounted accessories while stationary or in motion. Before installing, check for interference in open and closed positions. Check for interference again after installation is complete. All welding must be performed by an AWS certified welder. The coupler must be rigidly attached to the trailer in order for the coupler to support its maximum rated load according to SAE J684. After installation, check to make sure that coupler operation has not been impaired in any way. Do not use coupler if its operation has been impaired.

Weld-on Instructions:  All welding must be performed by an AWS certified welder. · Assure the coupler internal stop is butted against the end of the trailer tongue for maximum overlap. · If using a weld-on coupler, weld 3/16" around the interface between coupler and tongue. See illustrations below. No undercut or washout
while welding.

2B, 4B and 5B Models

3B Model

Minimum Tongue Overlap - 7"

Minimum Tongue Overlap - 6.5"

Minimum Tongue Overlap - 8.5"

Minimum Tongue Overlap - 2.5" (Tongue may fit over or into coupler)

Bolt-on Instructions:

· Assure that the coupler internal stop is butted against the end of trailer tongue for maximum overlap before securing.

· Torque grade 5 bolts with locknuts to appropriate SAE proof load specifications (See table specs). No deformation of

trailer tongue end allowed.

· The number and size of fasteners required must be specified by the trailer manufacturer.

3.0" Channel

(Not included)

Torque Specs Ø 3/8" - 23 ft.lbs. Ø 1/2" - 55 ft. lbs. Ø 5/8" - 110 ft. lbs.

Retaining Pin

Supplied Hardware

Minimum Tongue Overlap - 8.5"

Minimum Tongue Overlap - 7"

Maintenance

Keep ball pocket and mechanism clean. The

Oil

following procedures should be performed at least

Oil

annually:

 Check welds and mounting bolt torque.

· Grease ball pocket.

· Oil pivot points with SAE 30 wt. motor oil.

· Inspect retaining pins and replace if necessary.

Oil

Grease (Ball Pocket)

Printed in Mexico

F3290 (Rev E-4718) 1/15

11

BULLDOG COUPLER

M-Style Coupler
Pin

L-Style Coupler

Lever

Pin

Operation
To Couple: 1) Block trailer wheels. 2) Align hitch ball beneath coupler. 3) If the coupler is closed, open it by removing the pin behind the collar and sliding the collar away from
the ball pocket. Be sure the coupler cap is open and holds the collar back. 4) Lower the trailer onto the hitch ball. 5) Visually check that the hitch ball is fully seated in the coupler. 6) After the hitch ball is seated in the coupler, carefully close the coupler cap. Be sure the collar springs
toward the ball pocket and captures the coupler cap. 7) Reinsert the pin behind the collar. Do not tow without pin in place. 8) Always secure safety chains to vehicle before towing according to SAE J684.
To Uncouple: 1) Block trailer wheels. 2) Open the coupler by removing the pin behind the collar and sliding the collar away from the ball pocket.
Be sure the coupler cap is open and holds the collar back. 3) Raise the trailer from the hitch ball.

Coupler is Open Cap is Open

Coupler is Closed Collar is Capturing Cap

12

Collar (Back)
H-Style Coupler
Pin

Cap (Open)

Body

Collar (Forward)

Cap (Closed)

Body

To Couple: 1) Block trailer wheels. 2) Align hitch ball beneath coupler. 3) If the coupler is closed, open it by removing the pin in the latch and lifting the latch. Be sure the coupler
cap is open and holds the collar back. 4) Lower the trailer onto the hitch ball. 5) Visually check that the hitch ball is fully seated in the coupler. 6) After the hitch ball is seated in the coupler, carefully close the coupler cap and lower the latch. Be sure the collar springs toward the ball pocket and captures the coupler cap. 7) Reinsert the pin in the latch. Do not tow without pin in place. 8) Always secure safety chains to vehicle before towing according to SAE J684.

Latch

To Uncouple: 1) Block trailer wheels. 2) Open the coupler by removing the pin in the latch and lifting the latch. Be sure the coupler cap is open
and holds the collar back. 3) Raise the trailer from the hitch ball.

How to Order
Use only Cequent Performance Products' parts or parts of equal quality for repair. Replacement parts are available through Cequent Performance Products' Customer Service Department, 1-800-632-3290. Please specify product model number.
Limited Five Year War ranty
Limited Warranty. Cequent Performance Products, Inc. ("We" or "Us") warrants to the original consumer purchaser only ("You") that the product will be free from material defects in both material and workmanship for a period of five years, ordinary wear and tear excepted; provided that installation and use of the product is in accordance with product instructions. There are no other warranties, express or implied, including the warranty of merchantability or fitness for a particular purpose. If the product does not comply with this limited 5 year warranty, Your sole and exclusive remedy is that We will replace the product without charge to You and within a reasonable time or, at our option, refund the purchase price. This warranty is not transferable.
Limitations on the Warranty. This limited warranty does not cover: (a) normal wear and tear; (b) damage through abuse, neglect, misuse, or as a result of any accident or in any other manner; (c) damage from misapplication, overloading, or improper installation, including welds; (d) improper maintenance and repair; and (e) product alteration in any manner by anyone other than Us, with the sole exception of alterations made pursuant to product instructions and in a workmanlike manner.
Obligations of Purchaser. To make a warranty claim, contact Us at 47912 Halyard Dr. Suite 100, Plymouth, MI 48170, 1-800-632-3290, identify the product by model number, and follow the claim instructions that will be provided. Any returned product that is replaced or refunded by Us becomes our property. You will be responsible for return shipping costs. Please retain your purchase receipt to verify date of purchase and that You are the original consumer purchaser. The product and the purchase receipt must be provided to Us in order to process Your warranty claim.
Remedy Limits. Repair or replacement is Your sole remedy under this limited warranty or any other warranty related to the product. We shall not be liable for service or labor charges incurred in removing or replacing a product or any incidental or consequential damages of any kind.
Assumption of Risk. You acknowledge and agree that any use of the product for any purpose other than the specified use(s) stated in the product instructions is at Your own risk.
Governing Law. This limited warranty gives You specific legal rights, and You also may have other rights which vary from state to state. This limited warranty is governed by the laws of the State of Michigan, without regard to rules pertaining to conflicts of law. The state courts located in Oakland County, Michigan shall have exclusive jurisdiction for any disputes relating to this warranty.

47912 Halyard Dr. Suite 100 Plymouth, MI 48170 USA 800/632-3290 www.cequentgroup.com

HIGH POINTE MICROWAVE

Microwave Oven

INSTRUCTION MANUAL

Model:EM925AQR

PRECAUTIONS TO AVOID POSSIBLE EXPOSURE TO EXCESSIVE MICROWAVE ENERGY
(aR) eDaodnotthaettesmeptintosotpreuractetitohins sovcenawreithfuthlelydoboer ofopernesuinsceinthgis ycaonurersult in mhwicaitrrhmotfhwuel aesxavpfeeotsyouirvneteetornlom,cikacsrn.odwakveeeenpergity.cItairseimfupollryta.nt not to break or tamper (bI)f yDoounoftoplllaocewanthy oebjienctsbterutwceteinotnheso, vyeon ufrornot fvaceenanwd itlhlepdrooorvoidr aelloywosuoilworith maclneayneyrereasirdsueotof agcocuomdulsatee rovnisceea.ling surfaces.
(c) Do not operate the oven if it is damaged. It is particularly important that the oven door closes properly and that there is no damage to the: (1) DOOR (bent) (2) HINGES AND LATCHES (broken or loosened)
SA(3V) EDOTOHRESSEEALISNASNTDRSUECALTINIOGNSSURCFAACREEFULLY
(d) The oven should not be adjusted or repaired by anyone except properly qualified service personnel.
ADDENDUM
If the apparatus is not maintained in a good state of cleanliness, its surface could
be degraded and affect the lifespan of the apparatus and lead to a dangerous
situation.
Specifications

Model: Rated Voltage:

EM925AQR 120V~ 60Hz

Rated Input Power(Microwave): 1350W

Rated Output Power(Microwave): 900W

Oven Capacity: Turntable Diameter: External Dimensions:

1.0 Cu.ft. 10.6 inch
19.1X14.8X11.5 inch

Net Weight:

Approx.28.2 Lbs

Warning:

Handling the cord on this press or cords associated with accessories sold with this product, will expose you to lead a chemical known to the state of California to cause cancer, and birth defects or other reproductive harm. Wash hands after handling.
13

HIGH POINTE MICROWAVE
SAFETY
1. The oven must be on a level surface. 2. The turntable and turntable roller rest must be in the oven during cooking. Place the
cookware gently on the turntable and handle it carefully to avoid possible breakage. 3. Incorrect use of browning dish may cause the turntable to break. 4. Use only the specified bag size when using Popcorn. 5. The oven has several built-in safety switches to ensure that the power remains off when
the door is open. Do not tamper with these switches. 6. Do not operate the microwave oven empty. Operating the oven with no food or food that
is extremely low in moisture can cause fire, charring or sparking. 7. Do not cook bacon directly on the turntable. Excessive heating of the turntable
may cause the turntable to break. 8. Do not heat baby bottles or baby food in the microwave oven. Uneven heating
may occur and could cause physical injury. 9. Do not heat narrow-necked containers, such as syrup bottles. 10. Do not attempt to deep-fry in your microwave oven. 11. Do not attempt home canning in this microwave oven, as it is impossible to be sure all
contents of the jar have reached boiling temperature. 12. Do not use this microwave oven for commercial purposes. This microwave oven is made
for household use only. 13. To prevent delayed eruptive boiling of hot liquids and beverages or scalding yourself,
stir liquid before placing the container in the oven and again halfway through cooking time. Let stand in the oven for a short time and stir again before removing the container. 14. Use carefully when cooking food in the microwave oven to avoid burning due to excessive cooking. 15. Failure to maintain the oven in a clean condition could lead to deterioration that could adversely affect the life of the appliance and possibly result in a hazardous situation.
Radio Interference
1. Operation of the microwave oven may cause interference to your radio, TV or similar equipment.
2. When there is interference, it may be reduced or eliminated by taking the following measures: 1) Clean door and sealing surface of the oven 2) Reorient the receiving antenna of radio or television. 3) Relocate the microwave oven with respect to the receiver. 4) Move the microwave oven away from the receiver. 5) Plug the microwave oven into a different outlet so that microwave oven and receiver are on different branch circuits.
3
14

HIGH POINTE MICROWAVE

IMPORTANT SAFETY INSTRUCTIONS

WARNING

To reduce the risk of fire, electric shock, injury to persons or exposure to excessive microwave oven energy when using your appliance, follow basic precautions, including the following:

1. Read all instructions before using the

10. Use this appliance only for its intended

appliance.

uses as described in this manual. Do

2. Read and follow the specific: "PRECAUTIONS TO AVOID POSSIBLE EXPOSURE TO EXCESSIVE MICROWAVE ENERGY" on page 2.
3. As with most cooking appliances, close

not use corrosive chemicals or vapors in this appliance. This oven is specifically designed to heat or cook food. It is not designed for industrial or laboratory use.

supervision is necessary to reduce the risk 11. As with any appliance, close

of a fire in the oven cavity.

supervision is necessary when used

If materials inside the oven ignite: 1. Keep the oven door closed. 2. Turn the oven off, and unplug the appliance. 3. Disconnect the power cord, shut off power at the fuse or circuit breaker panel. 4. Do not overcook food. Carefully attend the appliance when paper, plastic, or other combustible materials are placed inside the oven to facilitate cooking. 5. Do not use the oven cavity for storage purposes. Do not store combustible items such as bread, cookies, paper products, etc. inside the oven. 6. Remove wire twist-ties and metal handles from paper or plastic containers/bags before placing them in the oven. 7. This oven must be grounded. Connect only to properly grounded outlet. See "GROUNDING INSTRUCTIONS" on
page 5. 8. Install or locate this oven only in accordance with the installation instructions provided. 9. Some products such as whole eggs,

by children. 12. Do not operate this oven if it has a
damaged cord or plug, if it is not working properly or if it has been damaged or dropped. 13. This appliance should be serviced only by qualified service technicians. Contact the nearest authorized service facility for examination, repair or adjustment. 14. Do not cover or block any vents on the oven. 15. Do not store or use this appliance outdoors. 16. Do not use this oven near water, for example, near a kitchen sink, in a wet basement, near a swimming pool, or similar locations. 17. Do not immerse cord or plug in water. 18. Keep cord away from heated surfaces. 19. Do not let cord hang over edge of table or counter. 20. When cleaning door and oven surfaces use only mild, nonabrasive soaps or detergents applied with a sponge or soft cloth.

water with oil or fat, sealed to explode

and therefore should not be heated in

this oven.

4

15

HIGH POINTE MICROWAVE

21. Liquids, such as water, coffee, or tea are able to be overheated beyond the boiling point without appearing to be boiling. Visible bubbling or boiling when the container is removed from the microwave oven is not always present. THIS COULD RESULT IN VERY HOT LIQUIDS SUDDENLY BOILING OVER WHEN THE CONTAINER IS
DISTURBED OR A SPOON OR OTHER UTENSIL IS INSERTED INTO THE LIQUID. i) Do not overheat the liquid.

ii) Stir the liquid both before and halfway through heating it.

iii) Do not use straight-sided containers with narrow necks.

iv) After heating, allow the container to stand in the microwave oven for a short time

before removing the container.

v) Use extreme care when inserting a spoon or other utensil into the container.

SAVE THESE INSTRUCTIONS

To Reduce the Risk of Injury to Persons

GROUNDING INSTRUCTIONS

DANGER
Electric Shock Hazard Touching some of the internal components can cause serious personal injury or death. Do not disassemble this appliance.

plugged into an outlet that is properly installed and grounded. Consult a qualified electrician or serviceman if the grounding instructions are not completely understood or if doubt exists as to whether the appliance is properly grounded. If it is necessary to use an extension cord, use only a 3-wire extension cord that

WARNING
Electric Shock Hazard Improper use of the grounding can result in electric shock. Do not plug into an outlet until appliance is properly installed and grounded.
Three-pronged (grounding) plug

has a 3-pronged grounding plug, and a 3-slot receptacle that will accept the plug on the appliance. The marked rating of the extension cord shall be equal to or greater than the electrical rating of the appliance. 1. A short power-supply cord is provided to reduce the
risks resulting from becoming entangled in or tripping over a longer cord. 2. Longer cord sets or extension cord is provided to reduce the risks resulting from becoming entangled

in or tripping over a longer cord.

3. If a long cord sets or extension cord is used:

1) The marked electrical rating of the cord set or

extension marked electrical rating of the cord set or

extension cord should be at least as great as the

This appliance must be grounded. In the electrical rating of the appliance.

event of an electrical short circuit,

2) The extension cord must be a grounding-type

grounding reduces the risk of electric

3-wire cord.

shock by providing an escape wire for the 3) The longer cord should be arranged so that it will

electric current. This appliance is equipped not drape over the countertop or tabletop where it

with a cord having grounding wire with can be pulled on by children or tripped over

a grounding plug. The plug must be

unintentionally.

5

16

HIGH POINTE MICROWAVE

UTENSILS
CAUTION
Personal Injury Hazard Tightly-closed utensils could explode. Closed containers should be opened and plastic pouches should be pierced before cooking.

See the instructions on "Materials you can use in
microwave oven or to be avoided in microwave oven."
There may be certain non-metallic utensils that are not
safe to use for microwaving. If in doubt, you can test the
utensil in question following the procedure below.
Utensil Test: 1. Fill a microwave-safe container with 1 cup of cold
water (250ml) along with the utensil in question. 2. Cook on maximum power for 1 minute. 3. Carefully feel the utensil. If the empty utensil is
warm, do not use it for microwave cooking. 4. Do not exceed 1 minute cooking time.

Materials you can use in microwave oven
Utensils Remarks

Aluminum foil
Browning dish
Dinnerware Glass jars Glassware Oven cooking bags Paper plates and cups Paper towels Parchment paper Plastic
Plastic wrap Thermometers Wax paper

Shielding only. Small smooth pieces can be used to cover thin parts of meat or poultry to prevent overcooking. Arcing can occur if foil is too close to oven walls. The foil should be at least 1 inch (2.5cm) away from oven walls.
Follow manufacturer's instructions. The bottom of browning dish must be at least 3/16 inch (5mm) above the turntable. Incorrect usage may cause the turntable to break. Microwave-safe only. Follow manufacturer's instructions. Do not use cracked or chipped dishes.
Always remove lid. Use only to heat food until just warm. Most glass jars are not heat resistant and may break. Heat-resistant oven glassware only. Make sure there is no metallic trim. Do not use cracked or chipped dishes.
Follow manufacturer's instructions. Do not close with metal tie. Make slits to allow steam to escape.
Use for short­term cooking/warming only. Do not leave oven unattended while cooking. Use to cover food for reheating and absorbing fat. Use with supervision for a short-term cooking only. Use as a cover to prevent splattering or a wrap for steaming.
Microwave-safe only. Follow the manufacturer's instructions. Should be labeled "Microwave Safe". Some plastic containers soften, as the food inside gets hot. "Boiling bags" and tightly closed plastic bags should be slit, pierced or vented as directed by package.
Microwave-safe only. Use to cover food during cooking to retain moisture. Do not allow plastic wrap to touch food. Microwave-safe only (meat and candy thermometers).
Use as a cover to prevent splattering and retain moisture.

6

17

HIGH POINTE MICROWAVE

Materials to be avoided in microwave oven

Utensils Remarks

Aluminum tray Food carton with metal handle Metal or metaltrimmed utensils
Metal twist ties Paper bags

May cause arcing. Transfer food into microwave-safe dish. May cause arcing. Transfer food into microwave-safe dish.
Metal shields the food from microwave energy. Metal trim may cause arcing. May cause arcing and could cause a fire in the oven. May cause a fire in the oven.

Plastic foam

Plastic foam may melt or contaminate the liquid inside when exposed to high temperature.

Wood

Wood will dry out when used in the microwave oven and may split or crack.

SETTING UP YOUR OVEN

Names of Oven Parts and Accessories

Remove the oven and all materials from the carton and oven cavity.

Your oven comes with the following accessories:

Glass tray

1

A

Turntable ring assembly 1

Instruction Manual

1

F

ED

CB

G

A) Control panel

B) Turntable shaft

C) Turntable ring assembly

D) Glass tray

E) Observation window

F) Door assembly

G) Safety interlock system

7

18

HIGH POINTE MICROWAVE

Turntable Installation

Hub (underside)

a. Never place the glass tray upside down. The glass tray should never be restricted.

b. Both glass tray and turntable ring assembly must

Glass tray

always be used during cooking. c. All food and containers of food are always placed

on the glass tray for cooking.

d. If glass tray or turntable ring assembly cracks or

Turntable shaft

breaks, contact your nearest authorized service

Turntable ring assembly center.

Countertop Installation

Remove all packing material and accessories. Examine the oven for any damage such as dents or broken door. Do not install if oven is damaged.

Installation 1. Select a level surface that provides
enough open space for the intake and/or outlet vents.

12 inch(30cm)

3.0 inch(7.5cm)

OPEN

3.0 inch(7.5cm)

Cabinet: Remove any protective film found on the microwave oven cabinet surface. Do not remove the light brown Mica cover that is attached to the oven cavity to protect the magnetron.
(3) Blocking the intake and/or outlet openings can damage the oven.
(4) Place the oven as far away from radios and TV as possible. Operation of microwave oven may cause interference to your radio or TV reception.
2. Plug your oven into a standard household outlet. Be sure the voltage and the frequency is the same as the voltage and the frequency on the rating label.

(1) Leave a minimum clearance of 12 inches (30cm) above the oven.
(2) Do not remove the legs from the bottom of the oven.
A minimum clearance of 3.0 inches (7.5cm) is required between the oven and any adjacent walls. One side must be open.

WARNING: Do not install oven over a range cooktop or other heat-producing appliance. Unless using manufactures built-in kit and instructions. If improbably installed near or over a heat source, the oven could be damaged and the warranty would be void.

For Built-in kits: a.Model number and brand of built-in kit:KITR2501S,HIGH POINTE b.MWO model number and brand which employ built-in Kit:EM925AQR,HIGH POINTE IMPORTANT: This Built-In Kit is ONLY For Use With HIGH POINTE Microwave Ovens Model EM925AQR Where This Built-In Kit, Model KITR2501S Is Specified On . The Back Of The Unit And In The INSTRUCTION MANUAL.
8

19

HIGH POINTE MICROWAVE

OPERATION Control Panel and Features

(1)

(6)

(2)

(7)

(3)

(8)

(9)

(4)

(5)

(10)

(11)

(1) Time Defrost (2) Time Cook (3) Power (4) Number keys (5) Stop/Cancel: clears all previous settings
pressed before cookingstarts. During cooking: press once to stop oven; twice to stop and clear all entries.
(6) Weight Defrost (7) Clock (8) Kitchen Timer (9) Auto Menu (10) Start/ +30SEC. (11) Memory

9

20

HIGH POINTE MICROWAVE

OPERATION
1. Power Level
11 power levels are available.

Level 10 9

8

7

6

54

3

2

10

Power 100% 90% 80% 70% 60% 50% 40% 30% 20% 10% 0%

Display PL10 PL9 PL8 PL7 PL6 PL5 PL4 PL3 PL2 PL1 PL0

2. Clock Setting
(1) Press " CLOCK "once, "00:00" will display.
(2) Press the number keys and enter the current time. For example, time is 12:10 now, please press "1, 2, 1, 0" in turn.
(3) Press " CLOCK " to finish clock setting. ":" will flash and the clock will be lighted.
(4) If the numbers input are not within the range of 1:00--12:59, the setting will be invalid until valid numbers are input.
Note: (1) In the process of clock setting, if the " STOP/CANCEL " button is pressed or if there is no operation within 1 minute, the oven will go back to the former setting automatically. (2) If the clock need to be reset, please repeat step 1 to step 3.

3. Kitchen Timer
(1) Press "KITCHEN TIMER " once, the screen will display 00:00, the first hour figure flash. (2) Press the number keys and enter the timer time. (The maximum cooking time is
99 minutes and 99 seconds.) (3) Press " START/+30SEC. " to confirm setting. (4) When the timer time arrives, the buzzer will ring 5 times.
If the clock has been set (12-hour system), the screen will display the current time.
Note: 1) The kitchen time is different from 12-hour system. Kitchen Timer is a timer. 2) During kitchen timer, any program cannot be set.

4. Microwave cook (1) Press "TIME COOK" once, the screen will display "00:00". (2) Press number keys to input the cooking time; the maximum cooking time is 99
minutes and 99 seconds. (3) Press " POWER " once, the screen will display "PL10". The default power is 100% power.
Now you can press number keys to adjust the power level. (4) Press " START/+30SEC." to start cooking.
10

21

HIGH POINTE MICROWAVE
Example: to cook the food with 50% microwave power for 15 minutes. a. Press "TIME COOK" once. "00:00" displays. b.Press "1", "5", "0", "0" in order. c.Press "POWER" once, then press "5" to select 50% microwave power. d.Press "START/+30SEC." to start cooking. Note:1) In the process of setting , if the " STOP/CANCEL" button is pressed or if there is no operation within 1 minute, the oven will go back to the former setting automatically. 2) If "PL 0" selected, the oven will work with fan for no power. You can use this level to
remove the odour of the oven. 3)During microwave cooking, "POWER" can be pressed to change the power you need.
After pressing "POWER",the current power flash for 3 seconds, now you can press number button to change the power. The oven will work with the selected power for the rest time.
5. Speedy Cooking (1) In waiting state, instant cooking at 100% power level can be started by select a cooking
time from 1 to 6 minutes by pressing number pads1 to 6. Press " START/+30SEC." to increase the cooking time; the maximum cooking time is 99 minutes and 99 seconds. (2) In waiting state, instant cooking at 100% power level with 30 seconds' cooking time can be started by pressing " START/+30SEC ". Each press on the same button will increase cooking time by 30 seconds. the maximum cooking time is 99 minutes and 99 seconds. Note: during microwave cooking and time defrost, time can be added by pressing
"START/+30SEC." button.
6. Weight Defrost Function (1) Press " WEIGHT DEFROST "once, the screen will display "dEF1". (2) Press numerical buttons to input weight to be defrosted.
Input the weight ranged between 4~100 Oz. (3) Press " START/+30SEC. " to start defrosting and the cooking time remained will be
displayed.
11
22

HIGH POINTE MICROWAVE
7. Time Defrost Function (1) Press " TIME DEFROST " once, the screen will display "dEF2". (2) Press number pads to input defrosting time. The effective time range is 0:01~99:99. (3) The default microwave power is power level 3. If you want to change the power level,
press " POWER " once, and the screen will display "PL 3", then press the number pad of the power level you wanted. (4) Press " START/+30SEC. " to start defrosting. The remained cooking time will be displayed.
8. POPCORN
a) Press " POPCORN " repeatedly until the number you wish appears in the display, "1.75", "3.0" ,"3.5"Oz will display in order. For example, press "POPCORN" once, "1.75" appears.
b) Press " START/+30 SEC. " to cook, buzzer sounds once. When cooking finishes, buzzer will sound fiven times and then turn back to waiting state.
9. POTATO
a) Press " POTATO " repeatedly until the number you wish appears in the display, "1", "2", "3" will display in order. "1"SET : 1 potato (approximate 8 Oz) "2"SETS: 2 potatoes (approximate 16 Oz) "3"SETS: 3 potatoes (approximate 24 Oz) For example, press "POTATO" once, "1" appears.
b) Press " START/+30 SEC. " to cook, buzzer sounds once. When cooking finishes, buzzer sounds five times and then turn back to waiting state.
10. FROZEN VEGETABLE
a) Press " FROZEN VEGETABLE " repeatedly until the number you wish appears in the display, "4.0", "8.0", "16.0" Oz will display in order. For example, press "FROZEN VEGETABLE" once, "4.0" appears.
b) Press " START/+30 SEC. " to cook, buzzer sounds once. When cooking finishes, buzzer sounds five times and then turn back to waiting state.
11. BEVERGAE
a) Press " BEVERAGE " repeatedly until the number you wish appears in the display, "1", "2", "3" cup will display in order. One cup is about 120ml. For example, press "BEVERAGE" once, "1" appears.
b) Press " START/+30 SEC. " to cook, buzzer sounds once. When cooking finishes, buzzer sounds five times and then turn back to waiting state. 12
23

HIGH POINTE MICROWAVE
12. DINNER PLATE
a) Press " DINNER PLATE " repeatedly until the number you wish appears in the display, "9.0", "12.0", "18.0" Oz will display in order. For example, press "DINNER PLATE" once, "9.0" appears.
b) Press " START/+30 SEC. " to cook, buzzer sounds once. When cooking finishes, buzzer sounds five times and then turn back to waiting state.
13. PIZZA a) Press " PIZZA " repeatedly until the number you wish appears in the display,
"4.0", "8.0", "14.0" Oz will display in order. For example, press " PIZZA" once, "4.0" appears. b) Press " START/+30 SEC. " to cook, buzzer sounds once. When cooking finishes, buzzer sounds five times and then turn back to waiting state.
14. MEMORY FUNCTION (1) Press "0/MEMORY" to choose memory 1-3 procedure. The screen will display 1, 2, 3. (2) If the procedure has been set, press " START/ +30 SEC." to use it. If not, continue to
set the procedure. Only one or two stages can be set. (3) After finishing the setting, press "START/ +30 SEC." once to save the procedure.
If press " START/ +30 SEC." again, it will start cooking. Example: To set the following procedure as the second memory, that is memory 2.
To cook the food with 80% microwave power for 3 minutes and 20 seconds. The steps are as follow: a. In waiting states, press "0/MEMORY" twice, stop pressing until the screen displays "2". b.Press "TIME COOK" once, then press "3", "2", "0" in order. c. Press "POWER" once, "PL10" displays, then press "8" and "PL8" displays. d. Press "START/ +30 SEC." to save the setting. Buzzer sounds once and the screen will
display "2". If you press "START/+30SEC." again, the procedure will be saved as the memory 2 and operated. e. If the electricity is not cut off, the procedure will be saved all the time. If it is, the procedure need to reset. f. If you want to run the saved procedure, in waiting state, press "0/MEMORY" twice, screen displays "2", then press "START/+30SEC." to run.
13
24

HIGH POINTE MICROWAVE

15. Multi-stage cooking At most 2 stages can be set for cooking. In multi-stage cooking, if one stage is defrosting, then defrosting shall be placed at the first stage automatically.
Note: Auto cooking cannot work in the multi-stage cooking.
Example: if you want to cook with 80% microwave power for 5 minutes + 60% microwave power for 10 minutes. The cooking steps are as following:
(1) Press "TIME COOK" once, then press "5", "0", "0" to set the cooking time;
(2) Press "POWER" once, then press "8" to select 80% microwave power. (3) Press "TIME COOK" once, then press "1", "0", "0", "0" to set the cooking time; (4) Press "POWER" once, then press "6" to select 60% microwave power. (5) Press "START/ +30 SEC." to start cooking.

16. LOCK FUNCTION FOR CHILDREN Lock: In waiting state, press " STOP/CANCEL " for 3 seconds, there will be a long "beep"

denoting the entering into the children-lock state; meanwhile, screen will display "

".

Lock quitting: In locked state, press " STOP/CANCEL " for 3 seconds, there will be a long "beep" denoting that lock is released.

17. INQUIRING FUNCTION (1) In cooking state, press " CLOCK ", the oven will display clock for three seconds.
(2) In the microwave cooking state, press " POWER " to inquire microwave power level, and the current microwave power will be displayed. After three seconds, the oven will turn back to the previous state. In multi-stage state, the inquiring way can be done by the same way as above.
18. COOKING END REMINDING FUNCTION When the cooking is over, the buzzer will sound 5 "beep"s to alert user the cooking is finished.

19. OTHER SPECIFICATIONS (1) In standby state , if the set clock digital tube displays current time, the icon " : " would
flash; otherwise, it shows " 0:00 ". (2) In setting function state, the screen displays corresponding setting.
(3) In working or pause state, the screen displays surplus cooking time.

14

25

HIGH POINTE MICROWAVE

Maintenance
Troubleshooting
Check your problem by using the chart below and try the solutions for each problem. If the microwave oven still does not work properly, contact the nearest authorized service center.

TROUBLE
Oven will not start

POSSIBLE CAUSE
a. Electrical cord for oven is not plugged in.
b. Door is open. c. Wrong operation is set.

Arcing or sparking

a. Materials to be avoided in microwave oven were used.
b. The oven is operated when empty.
c. Spilled food remains in the cavity.

Unevenly cooked foods

a. Materials to be avoided in microwave oven were used.
b. Food is not defrosted completely.
c. Cooking time, power level is not suitble.
d. Food is not turned or stirred.

Overcooked foods

Cooking time, power level is not suitable.

Undercooked foods

a. Materials to be avoided in microwave oven were used.
b. Food is not defrosted completely.
c. Oven ventilation ports are restricted.
d. Cooking time, power level is not suitable.

Improper defrosting

a. Materials to be avoided in microwave oven were used.
b. Cooking time, power level is not suitable.
c. Food is not turned or stirred.

POSSIBLE REMEDY
a. Plug into the outlet. b. Close the door and try
again. c. Check instructions.
a. Use microwave-safe cookware only.
b. Do not operate with oven empty.
c. Clean cavity with wet towel.
a. Use microwave-safe cookware only.
b. Completely defrost food.
c. Use correct cooking time, power level.
d. Turn or stir food.
Use correct cooking time, power level.
a. Use microwave-safe cookware only.
b. Completely defrost food. c. Check to see that oven venti-
lation ports are not restricted. d. Use correct cooking time,
power level.
a. Use microwave-safe cookware only.
b. Use correct cooking time, power level.
c. Turn or stir food.

15

PN:16170000A27964

26

DOMETIC LP/CO DETECTOR
Atwood Mobile Products LLC 1120 North Main Street Elkhart, IN 46614-3203
USA & Canada 1-866-869-3118 Internet: http://www.atwoodmobile.com
No index entries found.
Models LPCO
USER'S MANUAL AND INSTALLATION INSTRUCTIONS
TESTED TO UL2034, UL1484 AND CSA 6.19
For questions concerning your Alarm, please call our Customer Service at 1-866-869-3118
Please have the following information ready when calling:
Alarm Model Number (located on the back of alarm): Alarm Assembly Number (located on the back of alarm): Date of Manufactured (located on the bottom of alarm): Date of Purchase: Where Purchased:
P/N 30094 Rev E 3/15 1
27

DOMETIC LP/CO DETECTOR
What to do When the Alarm Sounds!
Carbon Monoxide or Propane Alarm Procedure
WARNING: Activation of the CO or LP Alarm
indicates the presence of Carbon Monoxide (CO) or Propane (LP) which can kill you.
If alarm sound 4 quick beeps, 5 seconds off CO is present If alarm sound 6 quick beeps, 5 seconds off LP is present If alarm sound 4-6 quick beeps with multi-tone both CO and LP is present
1. Immediately move to fresh air ­ outdoors or by an open door/window. Do a head count to check that all persons are accounted for. Do not re-enter the premises nor move away from the open door/window until the emergency services responders have arrived, the premises have been aired out, and your alarm remains in its normal condition.
2. Call your emergency service (Fire Department or 911)
PHONE NUMBER
Never restart the source of a CO or LP problem until it has been corrected. Never ignore the sound of the alarm! If the alarm is sounding, pressing the test/reset button will terminate the alarm. If the CO or LP condition that caused the alert in the first place continues, the alarm will reactivate. If the unit alarms again within 6 minutes, it is sensing high levels of CO or LP which can quickly become a dangerous situation.
READ ENTIRE MANUAL BEFORE USING THIS ALARM Your new Atwood Carbon Monoxide and Propane (CO/LP) alarms are sophisticated instruments that has been carefully designed and tested to detect CO and LP build up in a residential or recreation vehicle environment.
2
28

DOMETIC LP/CO DETECTOR
Carbon Monoxide (CO) and Liquefied Petroleum (LP or Propane) gases can cause hazardous conditions when found in high concentrations. Both gases are known to be found in recreational vehicles and the proper detection of these gases provides a safe environment for the occupants of the vehicle.
CARBON MONOXIDE AWARENESS The following are the symptoms of Carbon Monoxide poisoning and must be discussed with all occupants of the vehicle.
1. Mild Exposure: Slight headache, nausea, vomiting, fatigue ("Flue like symptoms). 2. Medium Exposure: Severe throbbing headache, drowsiness, confusion, fast heart
rate. 3. Extreme Exposure: Unconsciousness, convulsions, heart and lung failure, brain
damage, and death. Many cases of reported CARBON MONOXIDE POISONING indicate that while victims are aware they are not well, they become so disoriented they are unable to save themselves by either exiting the building or calling for assistance. Young children and house hold pets are typically the first affected. This device does not provide warnings for all levels of CO. Individuals with certain medical conditions may consider using a warning device that provides both audible and visual signals for carbon monoxide concentrations below 30 ppm. Everyone is susceptible to the danger of CO, but experts agree that unborn babies, small children, pregnant women, senior citizens and people with heart or respiratory problems are at the highest risk for serious injury or death. If you experience ANY symptoms of CO poisoning, consult your physician. Be aware that the following conditions can result in transient CO situations, such as:
1. Excessive spillage or reverse venting of fuel burning appliances caused by:
x Outdoor ambient conditions such as wind direction and/or velocity, including high
gusts of wind; heavy air in the vent pipes (cold/humid air with extended periods between cycles).
x Negative pressure differential resulting from the use of exhaust fans. x Simultaneous operation of several fuel burning appliances competing for limited
internal air.
x Vent pipe connection vibrating loose from clothes dryers, furnaces, or water
heaters.
3
29

DOMETIC LP/CO DETECTOR
x Obstructions in or unconventional vent pipe designs which amplify the above
situations. 2. Extended operation of un-vented fuel-burning devices (range, oven, fireplace, etc. 3. Temperature inversions which can trap exhaust gasses near the ground. 4. Car idling in an open or closed attached garage, or near a home.
LIQUEFIED PETROLEUM GAS AWARENESS LP gas is commonly called Propane and is sold commercially as a suitable fuel in portable and permanent heating and cooking appliances. It is important to detect LP gas due to its explosiveness at concentrated volumes. The lowest explosive limit for LP concentration is 2,1000 parts per million (ppm). This detector was designed to alarm at 10% of this limit or 2100 ppm.
Important Warning Statements
IMPORTANT: This carbon monoxide alarm is designed to detect carbon monoxide from ANY source of combustion. It is NOT designed to detect smoke, fire, or any other gas
WARNING: Carbon monoxide alarms are not smoke alarms. This carbon monoxide alarm is not a substitute for installing and maintain an appropriate number of smoke alarms in your home. This carbon monoxide alarm will not sense smoke, fire, or any poisonous gas other than carbon monoxide even though carbon monoxide can be generated by fire. For this reason you must install smoke alarms to provide early warning of fire and to protect you and your family from fire and its related hazards.
CAUTION: This alarm will only indicate the presence of carbon monoxide or propane
at the sensors. Carbon monoxide or propane may be present in other areas. WARNING: This product is intended for use in ordinary indoor locations of family
living units. It is not designed to measure compliance with commercial or industrial standards, It is not suitable for installation in hazardous locations as defined in the National Electric Code. The Installation of this device should not be used as a substitute for proper installation, use and maintenance of fuel burning appliances, including appropriate ventilation and exhaust systems. It does not prevent CO from occurring, nor can it solve and existing CO
4
30

DOMETIC LP/CO DETECTOR
problem. WARNING: This device is designed to protect individuals from acute effects of
carbon monoxide exposure. It may not fully safeguard individuals with specific medical conditions. If in doubt, consult a medical practitioner. Individuals with medical problems may consider using warning devices which provide audible and visual signals for carbon monoxide concentrations under 30 PPM. This carbon monoxide and propane alarm requires a continuous supply of electrical power ­ it will not work without power. This alarm has not been investigated for carbon monoxide detection below 70 PPM.
WARNING: If alarm has been subjected to abnormally cold temperatures, the alarm may exhibit an Error condition. Allow the alarm to warm and press the "Test/Reset" button to reset the alarm. TEST ALARM OPERATION AFTER VEHICLE HAS BEEN IN STORAGE, BEFORE EACH TRIP, AND AT LEAST ONCE PER WEEK DURING USE.
WARNING:
If the information in this manual is not followed exactly, a fire or explosion may result causing property damage, personal injury or loss of life.
WHAT TO DO IF YOU SMELL GAS
x Evacuate all persons from vehicle. x Shut off gas supply at gas container or source. x Do not touch any electrical switch, or use any phone or radio in vehicle. x Do not start vehicle's engine or electric generator. x Contact nearest gas supplier or qualified Service Technician for repairs. x If you cannot reach a gas supplier or qualified Service Technician, contact the
nearest fire department.
x Do not run on gas supply until gas leak(s) has been repaired.
Note: two self-adhesive emergency contact labels are provided. The user must add telephone numbers for the local emergency service provider and for a qualified service
5
31

DOMETIC LP/CO DETECTOR

technician. User must place one label next to the alarm. The other label must be placed near a source of fresh air where you plan to gather in the event the alarm indicates carbon monoxide presence.

TESTING Note: Unit must be powered for three minutes before test can be performed.

The Test/Rest button is used to verify proper alarm operating. Executing the test function sounds the alarm and lights up all LED's. The test will sound the alarm twice, with 4 "beeps" in 1 second followed by 5 seconds of silence. By pressing the button, you can verify that the alarm sounds and that all visual indicators function properly. The alarm is internally monitored while powered to ensure proper operation and to detect faults.
Important
x This detector will only indicate the presence of CO or LP gas at the sensor. Gases
may be present in other areas.
x The detector is not suitable as a smoke or fire detector. Not suitable for installation
in hazardous locations as defined in the National Electrical Code.

MODEL DESCRIPTION

LP=Propane

CO=Carbon Monoxide

D=12Vdc A=120Vac O=OEM R=Retail

OEM Package

Model

Part No

LPCO_DOW 36636

LPCO_DOB 31011

LPCO_AOW 36520

LPCO_AOB 31003

Surface Box 31128

Color White Black White Black Black

Retail Package

Model

Part No

LPCO_DRW 36681

LPCO_DRB 31012

LPCO_ARW 36521

LPCO_ARB 31004

Surface Box 36689

Color White Black White Black White

6

32

DOMETIC LP/CO DETECTOR

SPECIFICATIONS

LP

CO

70 ppm for 60 to 240 minutes

Alarm Level:

2100 ppm for 10 seconds 150 ppm for 10 to 50 minutes

400 ppm for 4 to 15 minutes

Audio Alarm

Min. 85 dB at 10 Feet

Visual Alarm

LP blinking red LED and Chirping

CO blinking red LED and Chirping

Malfunction

Red Fault LED on and chirping sound

Sensor End of Life Alarm

Blinking red LED's and Chirping

Dimensions

3-9/16" H X 3-7/16" W

Supply Voltage Thresholds

9 to 18 VDC (13.5 V nominal)

Supply Current (Max)

75 am

Supply Current (Typical)

40 mA

IAS Tested @

67% to 133% of supply voltage

Current Draw

Typical 70 mA ­ Alarm 100 mA

POWER CONSERVATION MODE

Current Draw

10 mA

Temperature

-40° to 70° C (-40° to 158°F)

Storage Temperature

-40° to 70° C (-40° to 158°F)

Humidity

15 to 90%

W arranty

Limited, 2 year

Alarm Lifetime

7 years ( powered operation)

Standards

ETL tested to UL 2034 & UL 1484 Residential and RV and Complies with CSA 6.19

For Service and Information Contact
Atwood Mobile Products LLC, 1874 South Pioneer Road Salt Lake City, Utah 84104-4226
Consumer Service Department, 1120 North Main, Elkhart, IN 46514 USA.
Phone: 866-869-3118

ALARM OPERATION
7

33

DOMETIC LP/CO DETECTOR
The alarm includes four LED indicators, an LP, CO and LPCO oscillating multi-tone audible alarms, and one Test/Reset button that provide interaction and feed back with your alarm. The indicators allow you to troubleshoot your alarm and to determine the proper actions to take. The visual indicators are labeled Power, Fault, Carbon Monoxide, and Propane. The alarm operates in six separate modes that will be identified in this section. Power Off Mode This mode indicates that there is insufficient power provided to the alarm. The indicators and button will not function in this mode. Sufficient power must be provided to the alarm to exit this mode. Normal Gas Detection Mode This mode indicates that gas concentrations are continuously monitored. It also indicates that gas concentrations are at safe levels. In this mode the Power indicator will be lit, and all other indicators will not be active. The Test function for the Test/Reset button will be active. Alarm Active Mode This mode indicates that one or more gas concentrations have achieved unsafe levels. In this mode the Power indicator will be lit. In the case that the CO concentration is unsafe the Carbon Monoxide indicator will be lit. In the case that the LP concentration is unsafe the Propane indicator will be lit. In this mode the audible indicator will signal an alarm, and the Reset function of the Test/Reset button will be active. This mode will be exited automatically if the CO concentration falls to a safe level for an extended period of time and LP concentrations falls below 500 ppm for greater than 10 seconds. Alarm Test Mode This mode indicates that the Test function of the Test/Reset button was imitated. In this mode, all visual indicators will be lit, and the audible indicator will signal an alarm. The test/Rest button will not function during this mode. This mode will be exited automatically within 10 seconds.
8
34

DOMETIC LP/CO DETECTOR

Alarm Reset / Stabilization Mode This mode indicates that the alarm is stabilizing for the first 3 minutes after power-up or the first 6 minutes after the Rest Function was initiated. In this mode the Power indicator
will be lit, and the reset alarm's indicator will be flashing. The other visual indicators, the audible indicator, and the Test/Reset button function will be off. This mode will be exited if the previously inactive alarm is triggered. If gas concentrations are still high after the 6 minutes, the previous alarm will reactivate.

Fault Mode This mode indicates that a fault has been detected that compromises some alarm function. If a fault is detected on only one of the sensors, the other sensor would function
normally. The table below lists the indicator actions and the corresponding alarm status. This mode will be exited automatically when the fault is cleared. If the fault persists, the alarm is not functioning properly and must be replaced to ensure your safety in the area.

End of Life Mode The Detector will operate in end-of-life mode after the Detector has been powered for 7 years +/- 128 days. This represents the operating life of the sensors used to detect CO and LP gas. After 7 years, the sensors are no longer reliable and the Detector must be replaced. Once end-of-life mode has been entered, it is permanent, even after a power out cycle. If the reset/test button is pressed during end-of-life mode, the audible alarm will be silenced for 48 hours before being automatically reactivated. The power visual indicator will be on and the CO and/or LP visual indicators will be flashing. The audible alarm will be sounding per table below.

FUNCTIONS Feature Power LED
Propane LED Carbon

Function Flashing On Flashing Off Flashing

Status Power supply fault Power supply OK Propane alarm disabled Propane alarm OK Carbon Monoxide alarm disabled

9

35

DOMETIC LP/CO DETECTOR

Monoxide LED Fault LED
Audible Indicator
End of life

Off

Carbon Monoxide alarm OK

On

Fault active

Chirp

Fault Active

4 Chirps

CO Alarm Active

6 Chirps

LP Alarm Active different tone

4-6 Chirps Co-LP Oscillating multi-tone Alarm Active

Chirp

Sensor failure

ON

Both CO & LP LED's steady on

Figure 1: Fault Indicator Actions

IMPORTANT ­ If this alarm does not test properly return it immediately for repair or replacement.

The visual indicators have two distinct functions: On and Flashing. The "On" function is indicated by constant solid brightness of the LED. The "Flashing" function is indicated by the LED blinking once every second.

The audible indicator has two distinct functions: Alarm and Fault. In the "Alarm" mode for the CO the alarm will sound four "beeps" in 1 second followed by 5 seconds of silence, after 4 minutes of alarming, the silence will last for 1 minute between the 4 beeps. For the LP the alarm will sound six "beeps" in 1 second continually. In the "fault" function, the alarm will last for 1 minute. In the "Fault" function, the alarm will sound a "chirp" once every 40 seconds until the fault is cleared.
INSTALLATION INSTRUCTIONS
x LP/CO units when possible should be mounted lower to detect LP gas first due to its
explosive nature and CO will be detected through air current circulation.
x Select a location as close as possible to appliances that could be potential sources
of LP gas leaks and where the initial concentration may be greatest.
x DO NOT INSTALL next to doors or windows that may dilute the concentration of
any LP gas presents in the environment and preclude a timely alarm signal.
x DO NOT INSTALL the detector in a closet or in a location that could become
obstructed by a curtain, hanging clothes or any other objects.
10

36

DOMETIC LP/CO DETECTOR

x DO NOT LOCATE detector where it could be exposed to splashes of water or
grease or where it could be damaged by impact with moving objects (i.e. furniture, feet, etc.).
x DO NOT INSTALL on a wall switch controlled by a power line or ground fault circuit. x Usually you will find more than one suitable location that will also provide ease of
viewing and connection to power.
x DO NOT INSTALL in any location within 5 feet (1.5m) of any cooking appliance. x Never use detergents or solvents to clean the alarm chemicals can permanently
damage or temporarily contaminate the sensor.
x Avoid spraying air freshener, hair spray, paint or other aerosols near the alarm.
x The following is a list of substances that at high levels can affect the sensor and cause an alarm. (Methane, propane, iso-butane, ethylene, ethanol, alcohol, carbon
monoxide, iso-propylene, benzene, toluene, ethyl acetate, hydrogen, hydrogen sulfide, sulfur dioxides.)

DINNING

KITCHEN

BEDROOM

BEDROOM

WIRING

LIVING ROOM

BEDROOM

RECOMMENDED LOCATIONS

11 37

DOMETIC LP/CO DETECTOR
x Before routing the wires, disconnect the 12 VDC power supply to avoid shorting.
Make sure that the power connections are made to a properly fused circuit (15 amp maximum) 1 amp fuse is recommended for single or multiple detector installation. Can be fused through a distribution panel or power supply box.
x Connection to a Master Storage Switch is acceptable. The alarm will be off along
with all other 12 volt equipment when the storage switch is turned to the off position. DO NOT USE THE RV WHEN THE STORAGE SWITCH IS IN USE.
x All connections must be in accordance with the National Electrical Code in the
United States and the Canadian Electric Code in Canada. All connection must use approved wiring and connectors of an appropriate size see wiring diagram labeled, "Figure A".
x Some models are hard wired with a 110 AC adapter allowing the unit to be plug
directly into a 110 AC wall outlet as shown.
SURFACE MOUNTING BOX
1. A detachable mounting box allows the unit to be mounted as a surface installation. If
desired you can purchase the optional mounting box for surface installation by ordering part no. 31128 black or 36689 white part.
2. Mounting box is attached to the surface location were the alarm is to be mounted
with two screws see instructions below.
3. To remove cover flange from alarm insert a flat blade screw driver into the middle of
12
38

DOMETIC LP/CO DETECTOR

the slot at the top of the flange and pry down to lift the flange off the alarm.
4. To install the mounting box to the alarm place the alarm inside the box and fasten in
place with the four screws provided.
5. Reinstall the cover flange by placing the flange against the alarm and snapping it
into place.

Surface Mounting

1. Mark on the desired mounting surface a box approximately 3" inch wide by 3" high draw and cut hole.
2. Route power leads to the opening and connect wires to the detector per the wiring diagrams.
3. Remove cover flange as describe above in surface mounting box section.
4. Center and mount the base over the outline done in step 1 with two screws provide through the two holes in the box.
5. Snap the cover onto the base 6. Verify that the LED lights(s) align within the
cutouts of the face.

Ø 1.0"

3.0" 3.0"

Flush Mounting
1. Verify that there is a minimum of (A) 1-1/2" inches of free space behind the wall.
2. Mark on the desired mounting surface a box approximately (B) 3-1/2" inch wide by (C) 35/8" high and cutout.
3. Route power leads to the opening and connect wire to the detector per the wiring diagrams.
4. Install the detector and excess wiring through the opening until mounting flange is flush to the wall.
13

B AC

39

DOMETIC LP/CO DETECTOR
5. Mount the unit using the 4 screws provided one in each corner of the flange.
AC Power Adapter Mounting
x Power supply can be plugged into a 120 VAC wall outlet either on the surface or
behind a wall in a cabinet if so desired. 1. Cut a hole in the wall large enough to put the adapter through to the outlet. Put the
adapter through the mounting box before screwing the box onto the wall. 2. Following steps outlined above for either surface or flush mounting of the alarm. 3. Adapter wire is run underneath the mounting box when install a surface mounted
alarm.
OPERATING INSTRUCTIONS Applying power to the detector will cause the detector to display a Power green LED light. Warm Up Operation - The LP LED light will flash green every 8 seconds for the first 3 minutes indicating the unit is going through normal warm and check functions. Normal Operation ­ Detector displays a solid green light with no other lights on.
DETECTOR TEST 1. Press "TEST" button until alarm sounds; then release the "TEST" button. 2. The detector will sound three times. 3. The LED will flash red; then return to normal operation and display a flashing green LED every 8 seconds. 4. This test must be carried out not less than once per week to ensure proper operation of the detector.
LP GAS DETECTION Whenever the measured concentration of LP gas exceeds 2000 ppm, the detector will provide a visual and audible alarm by sounding the buzzer and flashing the LED red. The buzzer may be temporarily silenced by pressing the test button. However, until the measured concentration is reduced to a safe level, the alarm will sound again within 4 minutes.
POWER MANAGEMENT The operating voltage for the detector is 8 VDC to 16 VDC. In these conditions, the unit will meet the specifications of the UL 1484 standard. The actual voltage applied the
14
40

DOMETIC LP/CO DETECTOR
detector in a recreational vehicle may drop below the minimum 8 VDC. The Atwood Detector is designed to provide the user with a Low Voltage Warning before reaching the level and to provide additional distinct, clear warnings and alarms after the 8 VDC level is reached. However, if available power supplied to the unit is below the operating voltage of 8 VDC, the detectors will not detect gas or provide you protection against dangerous levels of LP or CO. The following descriptions of operational modes will provide the user with an understanding of how the detector performs to conserve available battery power and alert the user to non-operating duce to battery draw-down.
Low Power Warning Mode When the available voltage is between 10 VDC and 8 VDC, the LED will flash orange. In this mode, the detector is still fully operational; and capable of both sensing and providing an alarm to dangerous concentrations of LP gas; and is providing the user a warning that the available power is nearing the bottom limit of the operating voltage range. Steps should be taken to maintain available power at an acceptable level.
Power conservation Mode: When the available power is between 8 VDC and 6 VDC, the microprocessor is programmed to place the detector into Power Conservation Mode. In this mode the detector is capable of neither sensing nor providing an alarm to dangerous concentrations of LP gas. The detector conserves the remaining available power by reducing its power consumption to approximately 10 milliamps (10mA). In this mode, the detector will emit 3 quick "chirps" once and flash RED/ORANGE repeatedly every 3 minutes.
Low Power Alarm Mode: When the available power falls below 6 VDC, the LED will display a steady RED LED. This condition will remain until power is depleted or restored to a level exceeding 10 VDC. Again, in this mode the detector is neither sensing nor providing an alarm to dangerous concentrations of LP gas. If after restoring available power to a level in excess of 10 VDC, the detector stays in this steady RED LED mode (even after pressing the TEST button), return the detector to the Atwood Service Center. This is an indication of possible microprocessor failure.
15
41

DOMETIC LP/CO DETECTOR
The power management functions of the Atwood Detector are designed to make the most efficient use of available power and to provide the user with the maximum protection through district warnings and alarms. Power Failure If no power is applied to the unit or there is a failure of power circuits, there will be no identification from the LED. If there is no indication from the LED, but the audible alarm sounds when the TEST button is pressed, then the LED is defective and the user must contact the Atwood Service Center. End of Life Unit is designed to give maximum life of sensors under normal conditions. This is seven years from date of installation of unit. A sticker has been provided to recorded this information and should be placed next to the unit were it can be viewed. At the end of life the unit will give two quick "chirps" and both the LP and CO LED's will turn red. This state will continue until unit is replaced. If the reset/test button is pressed during end-of-life mode, the audible alarm will be silenced for 48 hours before being reactivated. The lamps states will remain unchanged while the audible alarm is silenced for this period at the end of the 48 hours the audible alarm will be turned and the alarm will remain on and can't be silenced both LED's will remain on. The alarm in this condition will not sense either LP or CO gases. YOU MUST REPLACE ALARM it is not field reparable.
TROUBLE SHOOTING QUICK-GUIDE
Use this chart to determine in which mode the detector is executing. Match the detector to the state of the indicator on the left to narrow down the possible operating modes.
16
42

DOMETIC LP/CO DETECTOR

Function
Normal Operation
CO
LP
Low Power below 6 V DC Power conservation 6-8 V DC Minimal Power 8-10 V DC No Power Error or fault
End of Life

LED Display
Power LED Green flashes every 30 seconds CO LED Red flashes with beeps
LP LED Red flashes with beeps
Power LED Red steady on
Power LED Red and Orange flashing Power LED Orange flashing NO LED
CO & LP LED Red steady on

Alarm Sound
None
4 quick beeps, 5 seconds silence repeating 6 quick beeps, 5 seconds silence repeating (tone difference from CO) None
3 quick beeps 3 minutes silence repeating
None
None
1 quick beep 40 silence
2 quick beeps 5 seconds silence repeating

Unit Status
Normal DC operation (sensing no CO or LP) Alarm condition. Dangerous concentrations of CO detected Alarm condition Dangerous concentrations of LP detected
Alarm is not detecting
Alarm CO and LP detecting
Alarm is not detecting Unit in fault mode not detecting Unit sensor are depleted

Recommendation
None
Refer to "What to do When the Alarm Sound" (inside front cover) Refer to "What to do When the Alarm Sound" (inside front cover)
Correct power source unit will not operate with low or no power Correct power source unit will not operate with low or no power
Correct power source unit will not operate with low or no power Correct or restore power imminently Test/Reset test button if fault does not clear replace unit Imminently replace alarm

17

43

DOMETIC LP/CO DETECTOR
WARRANTY
Atwood Mobile Products LIMITED WARRANTY
Atwood Mobile Products, LLC warrants to the original owner and subject to the below mentioned conditions, that this hydro flameTM product will be free of defects in material or workmanship for a period of two years from the original date of purchase. Atwood's liability hereunder is limited to the replacement of the product, repair of the product, or replacement of the product with a reconditioned product at the discretion of the manufacturer. This warranty is void if the product has been damaged by accident, unreasonable use, neglect, tampering or other cause not arising from defects in material workmanship. This warranty extends to the original owner of the product only and is subject to the following conditions:
1. For two years from the date of purchase, Atwood will repair or replace any part defective in material or workmanship. This warranty includes reasonable labor charges required to remove and replace the part. Service calls to customer's location are not considered part of these charges and are, therefore, the responsibility of the owner.
2. In the event of a warranty claim, the owner must contact, in advance, either an authorized Atwood Service Center or the Atwood Service Department. Warranty clam service must be performed at an authorized Atwood Service Center (a list will be provided at no charge) or an approved by the Consumer Service Department, 1120 North Main, Elkhart, IN 46514 USA. Phone: 1-866869-3118.
3. RETURN PARTS MUST BE SHIPPED TO ATWOOD "PREPAID". Credit for shipping costs will be included with the warranty clam. The defective parts become the property of Atwood Mobile Products, LLC and must be returned to the Atwood Mobile Products, Quality Assurance Dept., Salt Lake City, Operations 1874 South Pioneer Road, Salt Lake City, Utah 84104 USA.
4. This warranty applies only if the unit is installed according to the installation instructions provided and complies with local and state codes.
5. The warranty period on replacement parts is the unused portion of the original warranty period.
6. Damage or failure resulting from misuse (including failure to seek proper repair service). Misapplication, alternations, water damage, freezing or not using genuine Atwood parts are the owner's responsibility.
7. Atwood does not assume responsibility18for any loss of use of vehicle, loss of time, inconvenience, expense for gasoline, telephone, travel, lodging, loss or damage to personal property or revenues. Some states do not allow the exclusion or limitation of incidental or consequential damages, so the above limitations or exclusions may not apply to you.
8. Any implied warranties are limited to (2) two years. Some states do not allow limitations on how long an implied warranty lasts, so the above limitation may not apply to you. This warranty gives you specific legal rights and you may also have other rights which vary from state to state.
9. Replacement parts purchased outside of the original furnace warranty carry a 90 day warranty. This includes the part at no charge and reasonable labor charges to replace it.
This Gas Detector is designed for use in recreation vehicles for warning of LP or CO gases. Any other use, unless authorized in writing by the Atwood Engineering Department, voids this warranty
44

DOMETIC PORCELAIN TOILET AND PARTS LIST

EN

Gravity-flush toilet Instruction manual

310 and 320 Series Gravity-Flush Toilets

1 45

DOMETIC PORCELAIN TOILET AND PARTS LIST

STOP

IF SERVICE OF THIS TOILET IS EVER REQUIRED,
READ THIS BEFORE SERVICING PRODUCT.
DO NOT REMOVE TOILET FROM VEHICLE. DO NOT SEPARATE CERAMIC BOWL FROM PLASTIC BASE. DO NOT REMOVE FOOT PEDAL FROM BASE. DISASSEMBLY OF COMPONENTS MAY VOID WARRANTY. SEE MANUAL AND REPLACEMENT KITS FOR SERVICE INFORMATION.
Dometic Corporation Sanitation Division
Call Customer Service: 1-800-321-9886 (8 a.m. ­ 5 p.m. ET)

TOILET DOES NOT NEED TO BE REMOVED FROM VEHICLE FOR BASIC REPAIRS (if necessary)

Flush ball seal ­ Dometic's revolutionary ball seal allows future replacement of worn or damaged ball seals without requiring tools or toilet disassembly. The ball seal can be changed in just a few minutes without removing the toilet from the floor. Detailed replacement instructions are included with replacement ball seal kits.

Snap-in water valve cartridge ­ Allows easy replacement of worn or damaged water valves. In cold climates, be sure to follow winterizing procedure in owner's manual to help avoid water valve failure. Refer to replacement instructions in new water valve kit prior to removal or installation of water valve assembly.

Factory-sealed bowl-to-base assembly ­ Unlike other Dometic footpedal toilets, the bowl and base of 310 and 320 series toilets should not be separated for any reason.

Each Dometic toilet is 100% factory-tested to assure a watertight seal in the toilet bowl before it is shipped. After installation at the RV or other vehicle factory, the entire toilet and waste tank system is floodtested for leaks by filling the system with water to the rim of the toilet bowl. This process requires holding the flush ball open with a device which may temporarily distort the ball seal from its original shape and, as a result, cause the seal to leak water into the waste tank during normal use. The ball seal may need to be reconditioned to its original shape. IF NEW TOILET DOES NOT HOLD WATER IN BOWL ... Please follow the procedures below before attempting to replace the seal. 1. Hold flush ball in full open position by pressing on
pedal. 2. Using finger, apply moderate downward pressure
around edge of ball seal. 3. Close flush ball. 4. Keeping flush ball closed, pour one quart of
hot tap water into toilet bowl. 5. Let water cool completely. 6. Check for leak. If leak still persists, flush ball seal should be replaced. Follow instructions provided with replacement seal kit.
2 46

DOMETIC PORCELAIN TOILET AND PARTS LIST
Dometic Gravity-Flush Toilet

1

2

A

G

B H B
C C
F D

E

I

A

J

F D

3

F

E

G

E

A

B

4

C

D

5

C

A

B

3 47

DOMETIC PORCELAIN TOILET AND PARTS LIST

Notes on using the manual

Dometic Gravity-Flush Toilet

Table of contents

EN

1 Notes on using the manual . . . . . . . . . . . . . . . . . . . . . . . . . . . . . . . . . . . . . . . . . . . . . . . . . 4 2 General safety instructions . . . . . . . . . . . . . . . . . . . . . . . . . . . . . . . . . . . . . . . . . . . . . . . . . 4 3 Intended use . . . . . . . . . . . . . . . . . . . . . . . . . . . . . . . . . . . . . . . . . . . . . . . . . . . . . . . . . . . . 5 4 Specifications . . . . . . . . . . . . . . . . . . . . . . . . . . . . . . . . . . . . . . . . . . . . . . . . . . . . . . . . 5 - 6 5 Components . . . . . . . . . . . . . . . . . . . . . . . . . . . . . . . . . . . . . . . . . . . . . . . . . . . . . . . . . . . . 6 6 Installation . . . . . . . . . . . . . . . . . . . . . . . . . . . . . . . . . . . . . . . . . . . . . . . . . . . . . . . . . . . 6 - 7 7 Operation. . . . . . . . . . . . . . . . . . . . . . . . . . . . . . . . . . . . . . . . . . . . . . . . . . . . . . . . . . . . . . . 7 8 Cleaning. . . . . . . . . . . . . . . . . . . . . . . . . . . . . . . . . . . . . . . . . . . . . . . . . . . . . . . . . . . . . . . . 8 9 Winterization and storage . . . . . . . . . . . . . . . . . . . . . . . . . . . . . . . . . . . . . . . . . . . . . . . 8 - 9 10 Troubleshooting . . . . . . . . . . . . . . . . . . . . . . . . . . . . . . . . . . . . . . . . . . . . . . . . . . . . . . . . . 10 11 Warranty . . . . . . . . . . . . . . . . . . . . . . . . . . . . . . . . . . . . . . . . . . . . . . . . . . . . . . . . . . . . . . 11 12 Customer service. . . . . . . . . . . . . . . . . . . . . . . . . . . . . . . . . . . . . . . . . . . . . . . . . . . . . . . . 11

1 Notes on using the manual

Caution! Safety Instruction: Failure to observe this instruction can cause material damage and impair the function of the device.

Note Supplementary information for operating the device.

fig. 1 A, page 3 : This refers to an element in an illustration. In this example, item A in figure 1 on page 3.
2 General safety instructions
The manufacturer will not be held liable for claims for damage resulting from the following: · Faulty installation or connection · Damage to the unit from mechanical influences, misuse or abuse · Alterations to the unit without express written permission from the manufacturer · Use for purposes other than those described in this manual
2.1 Warnings
The following statements must be read and understood before installing, servicing and/or operating this product. Modification of this product may result in property damage. 1. Do not use chlorine or caustic chemicals, such as laundry bleach or drain-opening types, in the
system. These products damage the seals in toilets and other plumbing valves. 2. Do not permit foreign objects (paper towels, paper cups, diapers, sanitary napkins, etc.) to be
flushed through the toilet. 3. Mechanical seal toilets are designed to only discharge directly into a holding tank. Horizontal
pipe runs as found in conventional residential or commercial plumbing systems cannot be accommodated. 4. Toilet bowl must be regularly cleaned and winterized according to "Cleaning" and "Winterization and storage" procedures on pages 8-9, or your warranty coverage may be voided.
4 48

DOMETIC PORCELAIN TOILET AND PARTS LIST

Dometic Gravity-Flush Toilet

Intended use / Specifications

3 Intended use
Dometic 310 and 320 series toilets provide lightweight, residential-size toilets for installation directly above a holding tank.
3.1 Benefits
PowerFlush technology. Improved pressurized rim flow creates high-speed, full bowl rinsing. Premium user comfort. Full-size seat, deep bowl and 18-in. (457 mm) seat height result in greater homelike performance. Easy installation. Two-bolt design fits most existing toilet floor flanges ­ great for new or replacement installations. Just place on floor flange, tighten bolts, connect water, and it's ready. Compact design. Small footprint with 10-inch or 11-inch (254 or 279 mm) rough-in. Ergonomically enhanced pedal operation. Lower pedal height for easier use; "one-direction" action to add water and flush.

4 Specifications

4.1 Materials

Materials
Toilet bowl: vitreous ceramic Model 310 toilet seat: polypropylene Model 320 toilet seat: wood Flush ball seal: nitrile butyl rubber

Base, foot pedal, water valve: polypropylene Water valve: polypropylene Vacuum breaker: ABS/polypropylene Floor seal: nitrile rubber, foam

4.2 Minimum installation requirements

Fitting

0.5 in. NPT

Water Supply

Flow rate

3.0-5.0* gpm / 11.4-18.9 lpm recommended 2.0 gpm / 9.5 lpm minimum

Static pressure

30-100 PSI / 206.8-689.5 kPa

Discharge

Floor flange

3 in./76 mm ID, 1/4-7/16 in. (6-11 mm) thick

* Water supply that exceeds 5.0 gpm / 18.9 lpm may require a flow restrictor at toilet inlet. Specifications subject to change without notice.

4.3 Toilet dimensions (fig. 2 , page 3)

Dimensions Ref.
Model 310

A

20 in. / 508 mm

Model 320 20 in. / 508 mm

B

15 in. / 381 mm

15 in. / 381 mm

C

19 in. / 483 mm

22 in. / 559 mm

D

18 in. / 457 mm - seat height 18 in. / 457 mm - seat height

E

14.75 in. / 375 mm

16 in. / 406 mm

F

33 in. / 838 mm - seat lid up 33 in. / 838 mm - seat lid up

5 49

DOMETIC PORCELAIN TOILET AND PARTS LIST

Dometic Gravity-Flush Toilet

Installation / Operation

6.2 Toilet installation
1. To replace an older toilet, turn off water supply to toilet. Remove and drain water supply line. Remove toilet hold-down bolts/screws. Remove toilet from floor. Remove and discard old floor flange seal and hold-down bolts. Verify center of floor flange is at least 10 inches / 254 mm (for model 310) or 11 inches / 279 mm (for model 320) from back wall (fig. 3 A, page 3). Make sure top surface of floor flange is clean and free of any debris or sealant.
2. If installing a new floor flange, make certain that toilet mounting holes are located at the correct angle (fig. 3 B, page 3). Floor flange must be secured to floor with a minimum of four screws (8 is preferred). Insert two supplied T-bolts into slots in floor flange (fig. 4 , page 3).
3. Verify that floor flange seal is installed on base of toilet (fig. 5 A, page 3). Carefully set toilet over floor flange. Align holes in toilet base with T-bolts as toilet is lowered onto floor flange. Toilet must be aligned so that outlet of base fits inside of floor flange outlet hole.
Note Entire toilet base does not rest completely on floor yet. Floor seal must be compressed in following steps.
4. Install floor mounting nuts and washers onto T-bolts. Carefully torque nuts to 30-40 inchpounds. DO NOT OVERTIGHTEN. Alternate between sides when tightening to prevent distortion of base. When tight, base should be securely attached and flat against floor. Attach bolt covers onto nuts. (Fig. 5 B, page 3)
5. If toilet is being installed in a shower stall, apply a bead of caulk around base of toilet to prevent water seepage under base.
6. Connect water supply line and torque connection to 30-40 inch-pounds. DO NOT OVERTIGHTEN. (Fig. 5 C, page 3)
7. Turn on water supply line. Flush toilet several times and check for leaks.
7 Operation

7.1 Add water to bowl

To add water to the toilet, press the flush pedal part way down. Water flows into the bowl while flush ball remains closed. If the flush ball moves, let up on the pedal slightly. Adding water to an empty bowl helps prevent holding tank odors from entering the living space. Adding water is recommended prior to flushing solids and toilet paper.
7.2 Flush toilet

Flush directions are located under toilet seat lid.

To flush, press pedal down until it contacts the floor. Release pedal after complete flush.

· When flushing liquids, press the pedal for 1-2 seconds. · When flushing solids, press pedal until contents are rinsed from bowl. Flushing longer than
necessary will cause holding tank to fill too quickly.

A small amount of water will collect in the bowl after a flush to create an airtight seal.

Note To prevent holding tank odors from entering the living space, make sure a small amount of water remains in the toilet bowl.

7 50

DOMETIC PORCELAIN TOILET AND PARTS LIST

Cleaning / Winterization and storage

Dometic Gravity-Flush Toilet

8 Cleaning
8.1 Routine toilet cleaning
For routine cleaning, use SeaLand® Toilet Bowl Cleaner. If you cannot find it in your area, contact Dometic for your nearest dealer. If the cleaner is not available, use most any non-abrasive bathroom and toilet bowl cleaner. Please follow label instructions.
8.2 Flush ball/seal cleaning
After a period of time, mineral deposits from hard water may build up on the flush ball or seal, resulting in a slow water leak. To prevent this, periodically clean the flush ball and seal.
1. Remove minor debris from the flush ball and seal by slowly pressing and releasing the flush pedal several times. This will loosen and rinse debris from the surfaces. Repeat several times for stubborn buildup.
2. If step 1 does not fully clean the ball and seal, clean with a soft bristle brush and SeaLand toilet bowl cleaner. Fully clean the top of the flush ball and under the seal where it contacts the flush ball. After cleaning underside of seal, apply light downward pressure to top of seal while brushing around full perimeter of seal.
3. If this does not correct a leaking seal, it may require replacement.

9 Winterization and storage
When a Dometic toilet is stored for long periods of time or may be exposed to temperatures below freezing, the toilet must be winterized or stored according to one of the following procedures.
Caution This toilet is not intended for use when exposed to temperatures below freezing.
Caution Never use automotive-type antifreeze (ethylene glycol) in freshwater systems.
Note Use nontoxic antifreeze (propylene glycol) designated for potable water systems. (See vehicle owner's manual.)
Storage options
Non-toxic Antifreeze Winterization (recommended method) 1. Pour antifreeze in potable water tank according to instructions from antifreeze manufacturer. 2. Flush toilet several times until antifreeze has flowed completely through toilet. For toilets with
hand sprayer, the hand sprayer must be turned on to assure antifreeze is cycled through the sprayer.
Drain Water from Toilet 1. Turn off water supply to toilet. 2. Remove water supply line from water valve. 3. Place a small container under water valve inlet to catch draining water.
(continued on next page)
8 51

DOMETIC PORCELAIN TOILET AND PARTS LIST

Dometic Gravity-Flush Toilet

Winterization and storage

4. Press flush pedal and allow water to completely drain from water valve and vacuum breaker. 5. Leave water line disconnected until threat of freezing temperature is past.
Note Never leave vehicle or premises unoccupied for extended periods of time with municipal water supply or onboard water pump turned on when there is a possibility of freezing temperature.

IMPORTANT: Toilet warranty does not cover freeze-damaged water valve

The Dometic 310 and 320 series toilet warranty expressly excludes coverage for any damages to the toilet or vehicle that may occur as a result of improper winterization of the toilet. An indicator of improper winterization is freeze damage to the water valve which results in leaks.

Dometic 310 and 320 series toilet water valves exceed maximum water pressure as defined by

6

North American plumbing code agencies. However,

if trapped water freezes in piping that supplies water

to the toilet, it expands and creates extremely high

pressure that can damage the valve (see photo).

To avoid this, winterize the toilet as described in

this manual. If freeze-damage occurs as a result of

improper winterization, replace the water valve with

a 300/310/320 toilet water valve kit, part number

385311641. IF WATER VALVE IS RETURNED FOR

WARRANTY CLAIM, DOMETIC RESERVES THE

RIGHT TO DENY CLAIM IF PROBLEM IS CAUSED

BY FREEZE DAMAGE.

A B

Fig. 6 A ­ Freeze Damage Indicator Window: white stress marks indicate freeze damage B ­ Water valve damage due to severe exposure to below-freezing temperature

9 52

Troubleshooting

DOMETIC PORCELAIN TOILET AND PARTS LIST
Dometic Gravity-Flush Toilet

10 Troubleshooting

Problem
1. Water will not stay in bowl.

Possible Cause

Service Instruction

a. Flush ball seal is not properly positioned.
b. Flush ball or seal is dirty. c. Worn or damaged flush ball seal.

a. Press pedal to hold flush ball open, then lightly press down around edge of ball seal with finger to conform to flush ball.
b. Clean flush ball and seal. c. Replace seal.

2. Odor from toilet when flush ball a. Plugged holding tank vent.

a. Clear obstruction from vent.

is open.

b. Odor from holding tank contents. b. Add deodorant to holding tank.

3. Odor from toilet when flush ball is closed.

a. No water in bowl. b. Damaged flush ball seal. c. Damaged floor flange seal.

a. Add water to bowl. b. Replace seal. c. Replace floor seal.

4. Flush ball will not close completely.

a. Too much friction between flush ball and seal.

a. Clean and lubricate flush ball and seal with silicone spray or furniture polish.

5. Water flow into toilet will not stop.

a. Worn or defective water valve. a. Replace water valve.

6. Water does not enter toilet bowl properly.

a. Insufficient water flow rate at toilet inlet.
b. Screen at water valve inlet is clogged.
c. Water valve is worn or damaged. d. Plugged rim wash holes in toilet.

a. Make sure flow rate at toilet inlet is 3.0-5.0 gpm / 11.4-18.9 lpm (recommended rate).
b. Clean screen.
c. Replace water valve. d. Clean rim wash holes.

7. Hand sprayer leaks (hand sprayer is not provided with all models).

a. Hand sprayer is defective.

a. Replace hand sprayer.

8. Water is leaking from water valve.

a. Water line connection is loose or not seated properly.
b. Water valve is damaged or defective.

a. Insure that threads are not cross-threaded and tighten connection.
b. Replace water valve.

9. Water is leaking from toilet base. a. Toilet is not secure to floor. b. Worn or defective floor flange seal.

a. Tighten toilet mounting bolts. b. Replace floor flange seal.

10. Water is leaking from rear of toilet.

a. Loose vacuum breaker.
b. Damaged or defective vacuum breaker.
c. Cracked or defective toilet bowl.

a. Make sure vacuum breaker stem is pushed fully into sealing grommet in back of bowl.
b. Replace vacuum breaker.
c. Replace toilet.

10 53

DOMETIC PORCELAIN TOILET AND PARTS LIST

Dometic Gravity-Flush Toilet

Warranty / Customer service

11 Warranty
Manufacturer's Two-Year and Ten-Year Limited Warranty
Dometic Corporation warrants, to the original purchaser only, that this Dometic® gravity discharge toilet, if used for personal, family or household-like purposes, is free from defects in material and workmanship for a period of two (2) years from the date of purchase.
Dometic also warrants, to the original purchaser only, that the ceramic portion of the toilet bowl will not scratch or craze for a period of ten (10) years if used for personal, family or household-like purposes, and is regularly cleaned as described in the product owner's manual.
If this Dometic product is placed in commercial or business use, it will be warranted, to the original purchaser only, to be free of defects in material and workmanship for a period of ninety (90) days from the date of purchase.
Dometic reserves the right to replace or repair any part of this product that proves, upon inspection by Dometic, to be defective in material or workmanship. All labor and transportation costs or charges incidental to warranty service are to be borne by the purchaser-user.
EXCLUSIONS IN NO EVENT SHALL DOMETIC BE LIABLE FOR INCIDENTAL OR CONSEQUENTIAL DAMAGES, FOR DAMAGES RESULTING FROM IMPROPER INSTALLATION, OR FOR DAMAGES CAUSED BY NEGLECT, ABUSE, ALTERATION, OR USE OF UNAUTHORIZED COMPONENTS. THIS INCLUDES FAILURES WHICH MAY RESULT FROM NOT FOLLOWING THE WINTERIZATION OR CLEANING PROCEDURES AS DESCRIBED IN THIS OWNER'S MANUAL. ALL IMPLIED WARRANTIES, INCLUDING ANY IMPLIED WARRANTY OF MERCHANTABILITY OR FITNESS FOR ANY PARTICULAR PURPOSE, ARE LIMITED TO A PERIOD OF ONE (1) YEAR FROM DATE OF PURCHASE.
IMPLIED WARRANTIES No person is authorized to change, add to, or create any warranty or obligation other than that set forth herein.Implied warranties, including those of merchantability and fitness for a particular purpose, are limited to one (1) year from the date of purchase for products used for personal, family or household-like purposes, and ninety (90) days from the date of purchase for products placed in commercial or business use.
OTHER RIGHTS Some states do not allow limitations on the duration of an implied warranty, and some states do not allow exclusions or limitations regarding incidental or consequential damages; so, the above limitations may not apply to you. This warranty gives you specific legal rights, and you may have other rights which vary from state to state.
To obtain warranty service, first contact the local dealer from whom the product was purchased or go to http://www.dometic.com/enus/Americas/USA/Customer-Support/ for a dealer near you.

12 Customer service

12.1 Toilet model identification
The toilet model identification label is located on the toilet base under the water valve. Please have this information ready if contacting Dometic for customer service.

12.2 Contact information

There is a strong, worldwide network to assist in servicing and maintaining your toilet system. For the Authorized Service Center near you, please call from 8:00 a.m. to 5:00 p.m. (ET) Monday through Friday.

You may also contact or have your local dealer contact the Parts Distributor nearest you for quick response to your replacement parts needs. They carry a complete inventory for the Dometic product line.

Telephone:

1 800-321-9886 U.S.A. and Canada

330-496-3211

International

Fax:

330-496-3097

U.S.A. and Canada

330-496-3220

International

Web site:

http://www.Dometic.com

11 54

DOMETIC PORCELAIN TOILET AND PARTS LIST
Dometic Gravity-Flush Toilet
Dometic Group is a customer-driven, world-leading provider of leisure products for the RV, automotive, truck and marine markets. We supply the industry and aftermarket with a complete range of air conditioners, refrigerators, awnings, cookers, sanitation systems, lighting, mobile power equipment, comfort and safety solutions, windows, doors and other equipment that make life more comfortable away from home. Dometic Group supplies a wide range of workshop equipment for service and maintenance of built-in air conditioners. Dometic Group also provides specially designed refrigerators for hotel rooms, offices, wine storage and transport and storage of medical products. Our products are sold in almost 100 countries and are produced mainly in wholly-owned production facilities around the world.

® Registered; TM Trademark of Dometic Corporation

© Dometic Corporation

600346504-book

05/11

12

DOMETIC CORPORATION, SANITATION DIVISION 13128 SR 226 | PO BOX 38
BIG PRAIRIE, OHIO 44611 USA www.Dometic.com

55

DOMETIC PORCELAIN TOILET AND PARTS LIST
56

DOMETIC STOVE
HOT PRODUCTS COOKTOP

EN D21 Drop-in Cooktop
Installation and Operating Manual  .  .  .  .  .  .  .  .  .  .2
FR Plaque de cuisson encastrable D21
Manuel d'installation et d'utilisation  .  .  .  .  .  .  .  . 14
Recreational Vehicle Gas Cooking Appliance

D21
WARNING: If the information in this manual is not followed exactly, a fire or explosion may result, causing property damage, personal injury, or death.
­ Do not store or use gasoline or other flammable vapors and liquids in the vicinity of this or any other appliance. ­ WHAT TO DO IF YOU SMELL GAS
· Do not try to light any appliance. · Do not touch any electrical switch. · Do not use any phone in your recreational vehicle. · Clear the recreational vehicle of all occupants. · Turn off the gas supply tank valve(s) or main gas supply. · Immediately call your gas supplier for instructions. · If you cannot reach your gas supplier, call the fire department. ­ Have the gas system checked and leakage source corrected by a qualified installer, service agency, manufacturer or dealer, or the gas supplier.

57

DOMETIC STOVE

D21 Drop-in Cooktop

NORTH AMERICAN ADDRESS INFORMATION

USA & CANADA Service Office Dometic Corporation 1120 North Main Street Elkhart, IN 46514

Service Center & Dealer Locations Visit: www .dometic .com

REVISION E | Form No . 50269 07/19 | ©2019 Dometic Corporation
I Read these instructions carefully. These instructions must stay with this product.

CONTENTS
1 Explanation of symbols and safety instructions  .  .  .  .  .  .  .  .  .  .  .  .  .  .  .  .  .  .  .  .  .  .  .  .  .  .  .  .  .  .  .  .  .  .  .  .  .  .  .  .  .  .  .  . 3 2 General information  .  .  .  .  .  .  .  .  .  .  .  .  .  .  .  .  .  .  .  .  .  .  .  .  .  .  .  .  .  .  .  .  .  .  .  .  .  .  .  .  .  .  .  .  .  .  .  .  .  .  .  .  .  .  .  .  .  .  .  .  .  .  .  .  .  . 4 3 Intended use  .  .  .  .  .  .  .  .  .  .  .  .  .  .  .  .  .  .  .  .  .  .  .  .  .  .  .  .  .  .  .  .  .  .  .  .  .  .  .  .  .  .  .  .  .  .  .  .  .  .  .  .  .  .  .  .  .  .  .  .  .  .  .  .  .  .  .  .  .  .  .  . 4 4 Installation .  .  .  .  .  .  .  .  .  .  .  .  .  .  .  .  .  .  .  .  .  .  .  .  .  .  .  .  .  .  .  .  .  .  .  .  .  .  .  .  .  .  .  .  .  .  .  .  .  .  .  .  .  .  .  .  .  .  .  .  .  .  .  .  .  .  .  .  .  .  .  .  .  . 5 5 Operation  .  .  .  .  .  .  .  .  .  .  .  .  .  .  .  .  .  .  .  .  .  .  .  .  .  .  .  .  .  .  .  .  .  .  .  .  .  .  .  .  .  .  .  .  .  .  .  .  .  .  .  .  .  .  .  .  .  .  .  .  .  .  .  .  .  .  .  .  .  .  .  .  .  . 8 6 Maintenance, cleaning, and storage .  .  .  .  .  .  .  .  .  .  .  .  .  .  .  .  .  .  .  .  .  .  .  .  .  .  .  .  .  .  .  .  .  .  .  .  .  .  .  .  .  .  .  .  .  .  .  .  .  .  .  .  .12 7 Disposal .  .  .  .  .  .  .  .  .  .  .  .  .  .  .  .  .  .  .  .  .  .  .  .  .  .  .  .  .  .  .  .  .  .  .  .  .  .  .  .  .  .  .  .  .  .  .  .  .  .  .  .  .  .  .  .  .  .  .  .  .  .  .  .  .  .  .  .  .  .  .  .  .  .  .  .12 8 Replacement parts  .  .  .  .  .  .  .  .  .  .  .  .  .  .  .  .  .  .  .  .  .  .  .  .  .  .  .  .  .  .  .  .  .  .  .  .  .  .  .  .  .  .  .  .  .  .  .  .  .  .  .  .  .  .  .  .  .  .  .  .  .  .  .  .  .  .  .13
Limited two-year warranty  .  .  .  .  .  .  .  .  .  .  .  .  .  .  .  .  .  .  .  .  .  .  .  .  .  .  .  .  .  .  .  .  .  .  .  .  .  .  .  .  .  .  .  .  .  .  .  .  .  .  .  .  .  .  .  .  .  .  .  .  .  .  . 13

EN

2

58

DOMETIC STOVE

D21 Drop-in Cooktop

1 EXPLANATION OF SYMBOLS AND SAFETY INSTRUCTIONS
This manual has safety information and instructions to help you eliminate or reduce the risk of accidents and injuries .
1.1 Recognize safety information
 This is the safety alert symbol . It is used to alert you to potential physical injury hazards . Obey all safety messages that follow this symbol to avoid possible injury or death .

1.2 Understand signal words

A signal word will identify safety messages and property damage messages, and will indicate the degree or level of hazard seriousness .

 indicates a hazardous situation that, if not avoided, could result in death or serious injury .

injury .

indicates a hazardous situation that, if not avoided, could result in minor or moderate


 is used to address practices not related to physical injury .
I indicates additional information that is not related to physical injury .

1.3 Supplemental directives
 Read and follow all safety information and instructions to avoid possible injury or death . Read and understand these instructions before installation, use, and maintenance of this product . Incorrect installation, operation, and maintenance of this product can lead to serious injury . The installation must comply with all applicable local or national codes, including the latest edition of the following standards:

U.S.A. · ANSI/NFPA70, National Electrical Code (NEC) · ANSI/NFPA 1192, Recreational Vehicles Code · ANSI Z21 .57, Recreational Vehicle Code

Canada · CSA C22 .1, Parts l & ll, Canadian Electrical Code · CSA Z240 RV Series, Recreational Vehicles

1.4 General safety messages

 Failure to obey the following warnings could result in death or serious injury:
· This product must be installed by a qualified service technician . · Dometic gas-operated cooking units are for use with LP gas only and for installation in recreational
vehicles only (e .g . travel trailers, motor homes, tent campers, etc .) . Any other uses can lead to property damage, serious injury, or death . · Improper installation, adjustment, service, or maintenance can cause injury, property damage, or death . Refer to this manual . For assistance or additional information, consult a qualified installer, service agency, manufacturer, or the gas supplier . · Do not store or use gasoline or other flammable vapors and liquids in the vicinity of this or any other appliance . · Shut off all gas appliances and pilot lights when refueling gasoline or LP tanks, or when the vehicle is in motion . Failure to do so can result in property damage, serious injury or death . · Gas flames consume oxygen, which must be replaced to assure proper combustion . A window or air vent should be open slightly while using any cooking appliance . Failure to provide fresh air during combustion can lead to carbon monoxide poisoning and could result in serious injury or death .
· When the Cooktop is in use, the Cover must be fully open and in the upright position .

3

EN

59

DOMETIC STOVE

D21 Drop-in Cooktop

Do not use the Cover as a griddle or cooking surface . Doing so could result in property damage or injury . 

 The Cover must be closed when the vehicle is in motion .
I Have the installer or dealer show you where the main gas shut off valve is located so that you will know how and where to turn off the gas supply when necessary .
2 GENERAL INFORMATION
I The images used in this document are for reference purposes only . Components and component locations may vary according to specific product models . Measurements may vary ±0 .38 in . (10 mm) .

Included Parts #6 x 3/4" Screws (2) Nylon Washers Corner Pieces

Quantity 2 2 4

Recommended Tools Drill #2 Drive Screwdriver

3/32" Drill Bit Crescent Wrenches (2)

Optional Parts*

Reference Number

Metal Cover Glass Cover

50236 50255

*The glass cover is preinstalled on the SECG model and the metal cover is preinstalled on the BPWM models . Available as an accessory for all other models .

3 INTENDED USE
This Drop-in Cooktop (hereinafter referred to as "Cooktop") is designed and intended for use inside, or for temporary use outside, the recreational vehicle (hereinafter referred to as "RV") for which it is supplied . Use these instructions to ensure correct installation, function, and operation of the Cooktop . While this Cooktop is approved for outside installation, portable or outdoor installations into an enclosure not made from metal or wood must be approved by Dometic prior to use . Do not store the Cooktop outdoors . This Cooktop is not designed for installation adjacent to another Cooktop .
The manufacturer accepts no liability for damage in the following cases:
· Faulty assembly or connection . · Damage to the product resulting from mechanical influences and excess voltage . · Alterations to the product without express permission from the manufacturer . · Use for purposes other than those described in the operating manual . Dometic Corporation reserves the right to modify appearances and specifications without notice .

EN

4

60

DOMETIC STOVE

D21 Drop-in Cooktop

4 INSTALLATION
 FIRE, EXPLOSION, OR BURN HAZARD . Do not use matches, candles, or other sources of ignition to test fittings and gas lines for leaks . Doing so could result in an explosion, causing serious injury or death .
I The gas line material between the Cooktop and the bottom shield must be rated for a minimum of 300°F (149°C) exposure .

4.1 Constructing the cabinet
For proper operation, the cabinet must:
· Be properly constructed of wood or metal, to the dimensions shown . · Be squared to the counter top and cabinet face . · Have the cabinet opening be level from side to side and from front to rear . · Be positioned so that no combustible material can be placed next to the Cooktop sides . If there is a gap
between the Cooktop and an adjacent cabinet, you must close the gap prior to installing the Cooktop .

1

J

I

H

B

A

FG

D

C

E

A 

B 

C

D

E

F §

G

H 

I* J¥

13 .75" 17 .875" 1 .875" 2 .25" 0 .75" 2 .625"/1 .125" 4 .125" 19 .50" *

¥

(350 mm) (455 mm) (48 mm) (58 mm) (20 mm) (67 mm/29 mm) (105 mm) (20 mm)

 For proper fit, these dimensions must be within +/- 1/8" (3 .2 mm) .
§ 2 .625" (67 mm) for all models without preinstalled cover . 1 .2" (31 mm) for models with preinstalled cover (SECG and BPWM models) .
 19 .50" (H) [20 mm] is the minimum vertical distance between combustible material and the Cooktop . Installer must follow requirements of table 2-6 .7 .2 of ANSI 1192 .
* > nominal width of the Cooktop
¥ 13 .00" (J) [331 mm] is the maximum depth of cabinets installed above cooking tops per ANSI Z21 .57, Clause 1 .25 .1 .L .

5

EN

61

DOMETIC STOVE

D21 Drop-in Cooktop

4.2 Placing your cooktop

Inside installation

2
Nylon Washer

Screw

Cooktop

Outside installation 3

RV Exterior

Corner Piece
Drilled Hole

Counter Cutout

 Locate and cut the opening in the countertop according to the dimensions in "4 .1 Constructing the cabinet" on page 5 .
 Drill holes in the countertop to match the location of the screw holes on the Cooktop .
 Place one corner piece (supplied) at each corner of the opening, so that the lip of the corner piece is flat against the countertop .
 Insert the screws and nylon washers (supplied) to install the Cooktop .
 Place the Cooktop into the opening so that is rests on top of the corner pieces . Hand-tighten the screws to the countertop .
 Verify the Cooktop is level from side to side and front to rear .
 Tighten the screws to secure the Cooktop to the countertop using a #2 screwdriver . Do not overtighten .

Cooktop
I Do not store the Cooktop outside .

EN

6

62

DOMETIC STOVE

D21 Drop-in Cooktop

4.3 Connecting the propane gas
4 (Rear of unit)

4.4 Connecting the 12 V ignition

5

+­

Switch

Gas Hose

Gas Connection

(Bottom)

 Run a propane-certified hose from the propane supply tank to the gas connection on the Cooktop .
 Tighten according to appropriate RV and gas codes . Use two wrenches when tightening . Hold regulator in place while tightening hose .
 Turn ON the gas supply by turning the gas shutoff valve on the tank counterclockwise .
 Check for leaks using a non-corrosive leak detection fluid . Do not use a soap and water solution . Leak test pressures in excess of 13 .9" W .C . (1/2 psi) of air pressure will invalidate the warranty .
 After confirming there are no leaks, turn OFF the gas supply by turning the gas shut-off valve on the tank clockwise .

LN Igniter Electrode
Igniter Electrode

+ ­ DO NOBTACTTTOHENRISNYECOCORTNTDNOIERC1E2TC0IOTONCRUIS2R4FR0OEVRNOT1L2OTVSNOLAYLC.T.

Ground
 Connect the positive and negative wires to the terminal block on the back of the Cooktop .
I Connecting the wires to the wrong terminal will cause the igniter not to operate and can damage the ignition coil .
I For 12 V circuits only . Connecting to a higher voltage circuit can cause ignition coil damage

7

EN

63

DOMETIC STOVE

D21 Drop-in Cooktop

4.3 Connecting the propane gas
4 (Rear of unit)

4.4 Connecting the 12 V ignition

5

+­

Switch

Gas Hose

Gas Connection

(Bottom)

 Run a propane-certified hose from the propane supply tank to the gas connection on the Cooktop .
 Tighten according to appropriate RV and gas codes . Use two wrenches when tightening . Hold regulator in place while tightening hose .
 Turn ON the gas supply by turning the gas shutoff valve on the tank counterclockwise .
 Check for leaks using a non-corrosive leak detection fluid . Do not use a soap and water solution . Leak test pressures in excess of 13 .9" W .C . (1/2 psi) of air pressure will invalidate the warranty .
 After confirming there are no leaks, turn OFF the gas supply by turning the gas shut-off valve on the tank clockwise .

LN Igniter Electrode
Igniter Electrode

+ ­ DO NOBTACTTTOHENRISNYECOCORTNTDNOIERC1E2TC0IOTONCRUIS2R4FR0OEVRNOT1L2OTVSNOLAYLC.T.

Ground
 Connect the positive and negative wires to the terminal block on the back of the Cooktop .
I Connecting the wires to the wrong terminal will cause the igniter not to operate and can damage the ignition coil .
I For 12 V circuits only . Connecting to a higher voltage circuit can cause ignition coil damage

7

EN

64

D21 Drop-in Cooktop

DOMETIC STOVE

5 OPERATION

5.1 Operating/safety guidelines
 BURN HAZARD, FIRE, EXPLOSION, AND/OR CARBON MONOXIDE HAZARD Failure to obey the following warnings could result in damage, a burn hazard, possible explosion, carbon monoxide buildup, serious injury, or death:
· Avoid negative draft or positive draft situations or the operation of this Cooktop during excessively windy conditions . Negative draft caused by air moving across the Cooktop may blow out the burner flame or move the flame into the Cooktop, resulting in damage, a burn hazard, possible explosion, carbon monoxide buildup, injury, or death . Do not operate the Cooktop in excessively windy conditions as this may cause a negative or positive draft . Doing so may blow out the top burner flame during use, and can result in an explosion, fire hazard, injury, or death .
· The Cooktop must be completely separated and/or sealed from other air moving or air-consuming devices such as, but not limited to, furnaces, microwave ovens, clothes dryers, cooling fans, and doors or drawers in common cabinets . Failure to do so can affect the appliance(s) combustion air supply by creating either a negative or positive draft, which can result in serious injury or death .
· Do not use the Cooktop for space heating . Doing so may cause overheating of the Cooktop and/or could cause carbon monoxide poisoning, resulting in serious injury or death .
· While operating the Cooktop, frequently check the temperature of contents within cabinet areas above the Cooktop . Do not store flammable or combustible material in cabinets above, or above and adjacent to, the Cooktop . Failure to follow this instruction could result in a fire, serious injury, or death .
· Do not heat unopened containers . They could explode . The hot contents may cause burns and container particles may cause injury .
· Do not store flammable materials on, in, or near Cooktop . Any fumes can create an explosion and/or fire hazard .
· Do not operate Cooktop if it is damaged or not working properly . · Verify sufficient gas supply before attempting to light any burner . Air in the gas supply line will
significantly delay burner ignition, and a burner may light unexpectedly as the air in the line clears out and is replaced by LP gas; this unexpected ignition may burn you . Air may be introduced into the supply line when the vehicle gas bottle is replaced, during servicing of other gas appliances, etc . · If any burner should extinguish (after initially lighting or due to accidental blowout), turn all burner knobs clockwise to OFF and WAIT 5 MINUTES before attempting to re-light the burner . · Do not touch burners, burner grates, or areas near burners during and after use . Do not let clothing or other flammable materials contact burners or areas near burners until these areas have had sufficient time to cool . · Use large enough pans to cover the burner area and contain the cooked food . This will reduce or eliminate heavy splattering or spills that can ignite and burn you . · Be sure that glass cooking utensils are safe for use on the Cooktop . Only certain kinds of glass utensils are suitable for surface or burner use without breaking due to sudden changes in temperature . · Never leave burners unattended when in use, as pan contents may boil over, resulting in smoke or a grease spill that may ignite . · Turn pan handles inward, but not over other top burners . This reduces the chance of burns due to bumping a pan . · Because grease is flammable, never allow grease to collect around top burners or on the Cooktop surface . Wipe up any grease spills immediately . · Never use water on grease fires, and never pick up a flaming pan . Smother a flaming pan with a tightfitting lid or cookie sheet . Flaming grease outside of the pan can be extinguished with baking soda or a multipurpose dry chemical or foam-type fire extinguisher . · Use care when lighting a burner by hand . If the burner lights unexpectedly, or your hand is close to the burner, you may be burned . · Burner flame should not extend beyond the edge of the cooking utensil . The flame could burn you and cause poor cooking results . · Control knobs must be turned OFF when not cooking . Someone could be burned or a fire may start if a

EN

8

65

DOMETIC STOVE

D21 Drop-in Cooktop

burner is accidentally left ON .
5.2 Operating your cover
This section describes how to open and close the glass and metal covers on the Cooktop . The glass cover is preinstalled on the SECG model and the metal cover is preinstalled on the BPWM models . Covers are available as accessories for all other models .

Opening the glass cover

Opening the metal cover

6

7

 Lift the Cover from the corner slot . Raise it completely, then gently lower the Cover down to rest on the back of the Cooktop .
Closing the glass cover 8

 Lift the Cover from the center slot . Raise it completely, then gently lower the Cover down to lock into the back of the Cooktop .
 Unclip the wind guards, open them, and lower them into position between the Cooktop and the grate .
Closing the metal cover
9

Metal Pin

Hinge

 Lift the Cover up, then gently lower it down onto the Cooktop .

 Fold the wind guards, clip them together, and lift them up .
 Lift up the Cover, then gently lower it down onto the Cooktop .

9

EN

66

DOMETIC STOVE

D21 Drop-in Cooktop

5.3 Preparing your cooktop for use


 Glass can be easily scratched . Use care when setting items on the top of the cover . Avoid sliding items across the cover . Do not drop objects onto the cover, as this may cause breakage .

10

11

Gas Shut-Off Valve

Top Cover

Cooktop

(Rear of unit)

Gas Connection

 Turn the gas ON at the gas shut-off valve (counterclockwise) .

I If your Cooktop is equipped with a top cover, lift the top cover when operating the Cooktop . See "5 .2 Operating your cover" on page 9 .

5.4 Lighting the burner
All burner controls operate counterclockwise and must be pressed inward when turning to light . Do not attempt to light more than one burner at a time .

12

Burner

Match

13

Burner

Knob

Spark Igniter

Knob

 To light the Cooktop with a match, turn the knob counterclockwise and IMMEDIATELY hold a lit match near the burner .

 To light the Cooktop using a spark igniter, turn the knob counterclockwise and press the spark igniter button until it clicks and the burner ignites .

EN

10

67

DOMETIC STOVE

14

Burner

D21 Drop-in Cooktop

Electronic Ignition

Knob

 To light the Cooktop using the electronic ignition, turn the knob counterclockwise, then press and hold the electronic ignition button until the burner lights .

5.5 Extinguishing the burner
15

5.6 Changing the battery (battery ignition)
16

Knob

 To extinguish the burner, turn the knob to the "OFF" position to stop the flow of gas to the burner .

Ignition Switch Cover

Battery

 Unscrew the ignition switch cover .  Remove and replace the AAA battery .

11

EN

68

DOMETIC STOVE

D21 Drop-in Cooktop

6 MAINTENANCE, CLEANING, AND STORAGE

 BURN HAZARD, FIRE, EXPLOSION, AND/OR CARBON MONOXIDE HAZARD . Keep Cooktop area clear of combustible cleaning materials, gasoline, and other flammable vapors and liquids . Failure to obey this warning could result in damage, a burn hazard, possible explosion, carbon monoxide buildup, serious injury, or death .
Failure to obey the following cautions could result in damage or injury:
· All Cooktop surfaces, burner grates, and burners must be cool before cleaning or disassembling the Cooktop .
· Clean all surfaces quickly after spills .
· Use warm soapy water only to clean the burner grates, burner box, painted surfaces, porcelain surfaces, stainless steel surfaces, and plastic items on your Cooktop . Do not use gritty or acid-type cleaners . Do not use steel wool or abrasive cleaners, as they will damage your Cooktop . Use only non-abrasive plastic scrubbing pads .
· Do not allow foods containing acids (such as lemon juice, tomato juice, or vinegar) to remain on porcelain or painted surfaces . Acids may remove the glossy finish . Pitting and discoloration will result if spills are allowed to remain for any length of time on stainless steel . Do not allow spills to remain on burner caps . Caps could be permanently stained if spills are not cleaned up promptly .
I Proper installation and care will help keep your Cooktop looking and operating like new . Most cleaning can be performed using normal household items .

6.1 Cleaning your cooktop

6.2 Storing your cooktop

17

18

Vegetable Oil

Grill Gas Hose

Burner Box

 Remove the grill from the Cooktop .
 Dry all surfaces and the burner box then spray surfaces with vegetable oil or a similar product to help prevent the surface from rusting during storage .
I Clean oil off of the surface of the Cooktop before reinstalling and operating the Cooktop .

I Refer to your installation manual for additional detail and safety messaging .
 Disconnect the gas hose from the Cooktop . Remove the screws securing the Cooktop and lift the Cooktop out of the cutout .
 Pack the Cooktop in its original packaging, or other suitable materials, to protect it from damage .

7 DISPOSAL
Place packaging material only in the appropriate recycling waste bins, whenever possible . Do not dispose of the range or slide-in without consulting a local recycling center or specialist dealer for details about how to dispose of the range or slide-in in accordance with the applicable national and local regulations .

EN

12

69

DOMETIC STOVE
D21 Drop-in Cooktop
8 REPLACEMENT PARTS
 BURN HAZARD, FIRE, EXPLOSION, AND/OR CARBON MONOXIDE HAZARD . Use only Dometic replacement parts and components, which are specifically approved for use with the Drop-In Cooktop . Failure to obey this warning could result in damage, a burn hazard, possible explosion, carbon monoxide buildup, serious injury, or death . For the most current parts information, visit www .eDometic .com .
LIMITED TWO-YEAR WARRANTY
LIMITED TWO-YEAR WARRANTY AVAILABLE AT WWW .DOMETIC .COM/WARRANTY . IF YOU HAVE QUESTIONS, OR TO OBTAIN A COPY OF THE LIMITED WARRANTY FREE OF CHARGE, CONTACT:
DOMETIC CORPORATION CUSTOMER SUPPORT CENTER 1120 NORTH MAIN STREET ELKHART, INDIANA, USA 46514 1-800-544-4881 OPT 1

13

EN

70

Mobile living made easy.

DOMETIC STOVE

YOUR LOCAL DEALER
dometic.com/dealer

dometic.com
YOUR LOCAL SUPPORT
dometic.com/contact

YOUR LOCAL SALES OFFICE
dometic.com/sales-offices

71

DOMETIC THERMOSTAT

BLUETOOTH® CAPACITIVE TOUCH THERMOSTAT

3316420.XXX

MODEL COOL/FURNACE COOL/FURNACE/HEAT STRIP COOL/FURNACE/HEAT PUMP

OPERATING INSTRUCTIONS

Read these instructions carefully. These instructions MUST stay with this product.

REVISION B

USA

Form No. 3316468.000 10/16 SERVICE OFFICE

(French 3316469.000_B)

Dometic Corporation

©2016 Dometic Corporation 1120 North Main Street

LaGrange, IN 46761

Elkhart, IN 46514

CANADA Dometic Corporation 46 Zatonski, Unit 3 Brantford, ON N3T 5L8
CANADA

Service Center & Dealer Locations
Please Visit: www.eDometic.com

72

DOMETIC THERMOSTAT
INTRODUCTION
This Bluetooth® Capacitive Touch thermostat (hereinafter referred to as "CT thermostat" or "product") is designed and intended for use in a Recreational Vehicle (hereinafter referred to as "RV"). Use these instructions to ensure correct installation, function, and operation of product.
'RPHWLF&RUSRUDWLRQUHVHUYHVWKHULJKWWRPRGLI\DSSHDUDQFHVDQGVSHFL¿FDWLRQVZLWKRXWQRWLFH
TABLE OF CONTENTS
INTRODUCTION ...........................................................................................................................................2
DOCUMENT SYMBOLS ............................................................................................................................... 3
FCC AND IC REGULATIONS........................................................................................................................ 3
FAMILIARIZATION ........................................................................................................................................ 3 A. Features .................................................................................................................................... 3 B. System Initialization................................................................................................................... 4 C. Factory Preset Settings ............................................................................................................. 4 D. Quick Reference........................................................................................................................ 4
CT THERMOSTAT PROGRAMMING AND OPERATION ............................................................................. 5 A. Turning The CT Thermostat On And Off.................................................................................... 5 B. Switching Between ºF and ºC.................................................................................................... 5 C. Displaying The Inside Temperature ........................................................................................... 5 D. Setting The Fan Speed (Fan Mode) .......................................................................................... 6 E. Setting The Temperature ........................................................................................................... 6
BLUETOOTH® PROGRAMMING AND OPERATION.................................................................................... 7 A. Pairing A Mobile Device With A CT Thermostat......................................................................... 7 B. Changing The CT Thermostat Name....................................................................................... 11 C. Setting/Unsetting The Default Device...................................................................................... 15 D. Connecting To A Different CT Thermostat ............................................................................... 18 E. Switching From Fahrenheit to Celsius .................................................................................... 20 F. Removing A Paired CT Thermostat From The App ................................................................ 21 G. A Note On CT Thermostat Factory Reset And Lost Pairs........................................................ 21
MODE DESCRIPTION ................................................................................................................................ 22 A. Cool Mode ............................................................................................................................... 22 B. Furnace Mode ......................................................................................................................... 22 C. Heat Pump Mode (Select Models)........................................................................................... 22 D. Heat Strip Mode (Select Models)............................................................................................. 23
SPECIAL FEATURES.................................................................................................................................. 23 A. Capacitive Touch Interface ...................................................................................................... 23 B. Compressor Time Delay .......................................................................................................... 23 C. Defrost Cycle ........................................................................................................................... 23 D. Low Ambient Heat Pump Lock Out.......................................................................................... 23 E. Power Interruption ................................................................................................................... 24 F. LCD Error Code....................................................................................................................... 24
GENERAL INFORMATION.......................................................................................................................... 24 A. Frost Formation ....................................................................................................................... 24 B. Reduce Heat Gain ................................................................................................................... 25 C. Disclaimer................................................................................................................................ 25
MAINTENANCE ..........................................................................................................................................25 A. Thermostat .............................................................................................................................. 25 B. Air Filter ................................................................................................................................... 25 C. Return Air Housing .................................................................................................................. 26 D. Fan Motor ................................................................................................................................ 26
SERVICE-UNIT DOES NOT OPERATE...................................................................................................... 26
2
73

DOMETIC THERMOSTAT
DOCUMENT SYMBOLS
Indicates additional information that is NOT related to physical injury.
FCC AND IC REGULATIONS
This device complies with Part 15 of the FCC Rules. Operation is subject to the following two conditions: (1) this device may not cause harmful interference, and (2) this device must accept any interference received, including interference that may cause undesired operation of the device. This equipment has been tested and found to comply with the limits for a Class B digital device, pursuant to part 15 of the FCC Rules. These limits are designed to provide reasonable protection against harmful interference in a residential installation. This equipment generates, uses and can radiate radio frequency energy, and if not installed and used in accordance with the instructions, may cause harmful interference to radio communications. However, there is no guarantee that interference will not occur in a particular installation. If this equipment does cause harmful interference to radio or television reception, which can be determined by turning the equipment off and on, the user is encouraged to try to correct the interference by one or more of the following measures:
 Reorient or relocate the receiving antenna  Increase the separation between the equipment and receiver.  Connect the equipment into an outlet on a circuit different from that to which the receiver is
connected.  Consult the dealer or an experienced radio/TV technician for help. This device complies with Industry Canada license-exempt RSS standard(s). Operation is subject to the following two conditions: (1) this device may not cause interference, and (2) this device must accept any interference, including interference that may cause undesired operation of the device. Under Industry Canada regulations, this radio transmitter may only operate using an antenna of a type and maximum (or lesser) gain approved for the transmitter by Industry Canada. To reduce potential radio interference to other users, the antenna type and its gain should be so chosen that the equivalent isotropically radiated power (e.i.r.p.) is not more than that necessary for successful communication.
FAMILIARIZATION
To familiarize yourself with the operation of your new CT thermostat, review the following diagrams and accompanying text explaining functional characteristics of this system.
A. Features
 Capacitive Touch Interface  Bluetooth® Connection  Blue LED Backlight  Liquid Crystal Display (LCD)  Auto Fan  Indoor Temperature Display  Air Conditioner - Provides additional indoor air circulation during furnace operation
3
74

DOMETIC THERMOSTAT

FAMILIARIZATION

B. System Initialization

An installer needs to perform a system initialization.
1. Ensure the CT thermostat is Off.
2. Simultaneously press and hold the Up ( ) button and the LCD will show "- -". This completes system initialization.

/ Mode button for three seconds.

3. Set the furnace On/Off temperature differential. See "B. Furnace Mode" on page 22.

C. Factory Preset Settings
The CT thermostat is pre-programmed to these settings:

Heating Cooling Fan Speed
Mode Furnace Differential

68ºF / 20ºC 72ºF / 22ºC
Auto Off 2ºF

D. Quick Reference
See FIG. 1 for control button quick reference.
FIG. 1

Up Button: Press To Increase Temperature Set-Point

Mode Button: Press To Power On, Off, And Toggle Between Modes of Operation

Down Button: Press To Decrease Temperature Set-Point
4
75

DOMETIC THERMOSTAT
CT THERMOSTAT PROGRAMMING AND OPERATION
A. Turning The CT Thermostat On And Off
1. Press the / Mode button to turn the CT thermostat on. See FIG. 1. 2. To turn the CT thermostat off, continue pressing the / Mode button until "Off" appears on
the LCD. After 15 seconds of illumination, the LCD turns off. Dependent upon the systems installed, the Mode options you will scroll through are Off, Fan, Cool, Furnace, Heat Pump, and Heat Strip.
B. Switching Between ºF and ºC
1. Simultaneously press the Up ( ) and Down ( ) buttons to toggle the LCD between °F and °C. See FIG. 2.
FIG. 2
C. Displaying The Inside Temperature
1. Ensure the CT thermostat is in Off mode. If it is not, press the / Mode button until you reach Off mode.
2. Press either the Up ( ) or Down ( ) button to display the temperature. See FIG. 3
FIG. 3
Inside Temperature
5
76

DOMETIC THERMOSTAT
CT THERMOSTAT PROGRAMMING AND OPERATION
D. Setting The Fan Speed (Fan Mode)
Fan mode provides three speed settings:  Low ­ Fan operates continuously at a low speed.  High ­ Fan operates continuously at a high speed.  Auto ­ Fan and compressor cycle on and off and the speed varies based on room tempera-
ture and temperature setting on the CT thermostat. When the temperature difference between the room and the CT thermostat is:  >5 °F (-15 °C), the fan operates at a high speed  <4 °F (-15.5 °C), the fan operates at low speed. 1. Press the / Mode button until the Fan icon appears. 2. Press the Up ( ) or Down ( ) button until the desired fan speed appears on the LCD. See FIG. 4.
FIG. 4

Fan Speed

Fan Icon

E. Setting The Temperature
The possible modes for setting the temperature are Cool, Furnace, Heat Pump, and Heat Strip. See "Mode Description" on page 22 for more information on these mode settings. 1. Press the / Mode button until you see your desired mode on the LCD. 2. Press the Up ( ) and Down ( ) buttons until you reach your desired temperature setting.
The maximum temperature setting is 90 °F (32 °C). The minimum for heating is 40 °F (4.4 °C) and 55 °F (13 °C) for cooling. See FIG. 5.
FIG. 5

Temperature Set-Point

6
77

DOMETIC THERMOSTAT
BLUETOOTH® PROGRAMMING AND OPERATION
A. Pairing A Mobile Device With A CT Thermostat
Before you begin, ensure you are standing within 3' (1 m) of the CT thermostat you wish to pair your mobile device with. Do not touch the CT thermostat for 15 seconds to ensure the backlight is RII&RQ¿UPWKH%OXHWRRWK®LFRQLVEOLQNLQJVORZO\ÀDVKHVDWVHFRQGLQWHUYDOV
If the Bluetooth® icon is illuminated, this device is already connected to an app. Disconnect the other mobile device in order to connect to this CT thermostat. If the Bluetooth® icon is not visible the Bluetooth® radio may have gone to sleep to conserve power (after 5 days of system inactivity). Press any button to wake the Bluetooth® system and ensure the icon is blinking slowly. 1. Open the Dometic Climate Control App on your mobile device and go to the pair management screen. If no CT thermostats are paired with the mobile device this will be indicated with a pop-up. Press OK the clear the pop-up and display the Pair Management screen. a. If you already have CT thermostats paired with the mobile device the app will attempt to connect to the last used thermostat or the default thermostat (see "C. Setting/Unsetting The Default Device" on page 15). Press Cancel while connecting is in progress to show the Pair Management screen b. If a paired thermostat is connected, the main screen displays. Select the Settings menu and then press Disconnect to show the Pair Management screen. 2. Press Add New Connection. See FIG. 6.
FIG. 6
7
78

DOMETIC THERMOSTAT
BLUETOOTH® PROGRAMMING AND OPERATION
3. Select one of the available CT thermostat devices on the list that displays on the screen. The DSSZLOODWWHPSWWRFRQQHFWWRWKH&7WKHUPRVWDWDQGWXUQWKHGLVSOD\EDFNOLJKWRQWRFRQ¿UP the app is communicating with the correct CT thermostat. When the CT thermostat backlight is lit, it is communicating with the mobile device. To start pairing with the selected CT thermostat, press Pair With Selected Thermostat. See FIG. 7. If the backlight on the CT thermostat you wish to pair with does NOT come on within 10 seconds, select a different CT thermostat from the list.
FIG. 7
4. Press the / Mode button on the CT thermostat until OFF mode is selected. A 2-digit PIN displays. FIG. 8 shows a 2-digit pin of "21" as an example:
FIG. 8
8
79

DOMETIC THERMOSTAT
BLUETOOTH® PROGRAMMING AND OPERATION
Steps 5-6 MUST be completed within 15 seconds. Otherwise, the pairing process MUST be repeated from step 2. 5. Enter this 2-digit code twice in the app and press Enter. FIG. 9 shows "2121".
FIG. 9
9
80

DOMETIC THERMOSTAT
BLUETOOTH® PROGRAMMING AND OPERATION
6. Upon successful connection, the app displays an interface similar to your CT thermostat. See FIG. 10.
FIG. 10
7. It is recommended to re-name the CT thermostat at this point. See "B. Changing The CT Thermostat Name" on page 11 for more information.
10
81

DOMETIC THERMOSTAT

BLUETOOTH® PROGRAMMING AND OPERATION
B. Changing The CT Thermostat Name

You can either change the name of the CT thermostat while connected (from the Main screen) or while disconnected (from the Pair Management screen).
Renaming a device from the Main screen:
1. Select the Settings menu (upper left) and press Change Name. See FIG. 11. 2. Enter any name which makes it easy for you to identify the system controlled by the CT ther-
mostat. For example "Bed Room" or "Living Room". See FIG. 12.
3. Press Update to change and save the new name. See FIG. 12.

FIG. 11

FIG. 12

11
82

DOMETIC THERMOSTAT
BLUETOOTH® PROGRAMMING AND OPERATION
Renaming a device from the Pair Management screen: 1. Touch the line for the CT thermostat you wish to re-name. 2. Press Change Name. See FIG. 13.
FIG. 13
12
83

DOMETIC THERMOSTAT
BLUETOOTH® PROGRAMMING AND OPERATION
3. Enter any name which makes it easy for you to identify the system controlled by the CT thermostat. For example "Bed Room" or "Living Room". Press Update to save the new name. See FIG. 14.
FIG. 14
13
84

DOMETIC THERMOSTAT
BLUETOOTH® PROGRAMMING AND OPERATION
4. The new name appears on the screen. See FIG. 15.
FIG. 15
14
85

DOMETIC THERMOSTAT
BLUETOOTH® PROGRAMMING AND OPERATION
C. Setting/Unsetting The Default Device
Assuming at least one paired device exists, the app normally reconnects to the last connected CT thermostat when the app launches. If you wish to override this behavior you can set a default device. The default device is the only CT thermostat that the app will try to connect to automatically regardless of the last connected CT thermostat. Only one default CT thermostat can be set per mobile device. To set the default device: 1. Disconnect from the CT thermostat to display the Pair Management screen. 2. Choose the paired CT thermostat you want to make the default device. 3. From the pop-up menu select Set as Default. See FIG. 16.
FIG. 16
15
86

DOMETIC THERMOSTAT
BLUETOOTH® PROGRAMMING AND OPERATION
4. $VQRZÀDNHLFRQZLOODSSHDUEHVLGHWKHQDPHRIWKH&7WKHUPRVWDWLQWKH3DLUHG0DQDJHPHQW screen to show that it is now selected as the default. See FIG. 17.
FIG. 17
16
87

DOMETIC THERMOSTAT
BLUETOOTH® PROGRAMMING AND OPERATION
To unset a default device: 1. Disconnect from the CT thermostat to display the Pair Management screen. 2. &KRRVHWKH&7WKHUPRVWDWZLWKWKHVQRZÀDNHLFRQ 3. From the pop-up menu press Unset as Default. See FIG. 18.
FIG. 18
4. 7KHVQRZÀDNHLFRQGLVDSSHDUVIURPWKH&7WKHUPRVWDW
17
88

DOMETIC THERMOSTAT
BLUETOOTH® PROGRAMMING AND OPERATION
D. Connecting To A Different CT Thermostat
1. To connect to a different CT thermostat (up to four maximum), select the top-left corner of the app to access the Settings menu. See FIG. 19.
2. Press Disconnect to disconnect from the currently-connected CT thermostat. See FIG. 19.
FIG. 19
18
89

DOMETIC THERMOSTAT
BLUETOOTH® PROGRAMMING AND OPERATION
3. Either press ConnectWRFKRRVHDQDOUHDG\FRQ¿JXUHG&7WKHUPRVWDW6HH),*RUIROORZ the steps in "A. Pairing A Mobile Device With A CT Thermostat" on page 7 to add a new connection.
FIG. 20
19
90

DOMETIC THERMOSTAT
BLUETOOTH® PROGRAMMING AND OPERATION
E. Switching From Fahrenheit to Celsius
Display units can only be changed while a CT thermostat is connected. The displayed temperature units will only be changed on the mobile device, and NOT on the CT thermostat device itself. To change the CT thermostat device display see instructions for changing the display units on the CT thermostat. 1. Select the top-left corner of the app to access the Settings menu. See FIG. 21. 2. Choose Change to Celsius/Fahrenheit.
FIG. 21
20
91

DOMETIC THERMOSTAT
BLUETOOTH® PROGRAMMING AND OPERATION
F. Removing A Paired CT Thermostat From The App
1. Disconnect from the CT thermostat to display the Pair Management screen. 2. Choose the CT thermostat you wish to remove from the app and press Remove Pairing to
remove the CT thermostat from the app. See FIG. 22.
FIG. 22
G. A Note On CT Thermostat Factory Reset And Lost Pairs
On CT thermostats equipped with Bluetooth® control the system initialization feature also resets the Bluetooth® system and removes all known mobile device pairs from the CT thermostat. Also if more than four mobile devices are connected with a CT thermostat, the CT thermostat only remembers pairing information on the four most recent devices paired. Any mobile devices that were paired with a CT thermostat that undergoes a system initialization or pair removal, will need to be paired again with the CT thermostat. The app will automatically remove device pairs from its paired list if it detects that it is no longer paired with the CT thermostat on a connection attempt. This is indicated by a pop-up message in the app. See the instructions for performing a CT thermostat factory reset.
21
92

DOMETIC THERMOSTAT
MODE DESCRIPTION
A. Cool Mode
In Cool Mode, the system cycles the compressor On and Off based on room air temperature and WHPSHUDWXUH VHWSRLQW RQ WKH &7 WKHUPRVWDW 7KH IDQ WXUQV RQ ¿UVW IROORZHG E\ WKH FRPSUHVVRU approximately 2 minutes later. There are three fan speeds in Cool Mode:
 "Low": Fan operates continuously at low speed. The compressor cycles On and Off.  "High": Fan operates continuously at high speed. The compressor cycles On and Off.  "Auto": Fan speed varies depending on the difference between the temperature set-point
and room air temperature. The compressor and the fan cycle On and Off with the CT thermostat.
B. Furnace Mode
There are three fan speeds in Furnace Mode:  "Low": Fan operates continuously at low speed.  "High": Fan operates continuously at high speed.  "Auto": Fan is Off. If additional indoor air circulation provided by the air conditioner is NOT desired during Furnace Mode, select "Auto" in Fan Mode to shut the air conditioner fan off. If "Low" or "High" is selected, the air conditioner fan will continue to operate at the selected speed.
In Furnace Mode the system cycles the RV furnace On and Off based on room air temperature DQGWHPSHUDWXUHVHWSRLQWRQWKH&7WKHUPRVWDW&7WKHUPRVWDWFDQEHFRQ¿JXUHGWRRSHUDWHXVLQJ an On / Off differential of either 1ºF (-17 °C) or 2ºF (-16.6 °C). This feature is programmed during the system initialization. To set the temperature differential, the system must be Off. Press the Down ( ) button and simultaneously press and hold the / Mode button for three seconds. Press the Up ( ) button to toggle between "d1" and "d2", "d1" for 1ºF (-17 °C) differential and "d2" for 2ºF (-16.6 °C) differential.
C. Heat Pump Mode (Select Models)
In Heat Pump Mode, the system cycles the compressor On and Off based on room air temperature and temperature set-point on the CT thermostat. When the system calls for heating there will be a delay of approximately 2 minutes. There are three fan speeds in Heat Pump Mode:
 "Low": Fan operates continuously at low speed. The compressor cycles On and Off.  "High": Fan operates continuously at high speed. The compressor cycles On and Off.  "Auto": Fan speed varies depending on the difference between the temperature set-point
and room air temperature. The compressor and the fan will cycle On and Off with the CT WKHUPRVWDW&RPSUHVVRUVKXWVRII¿UVWIROORZHGE\WKHIDQLQDSSUR[LPDWHO\VHFRQGV This mode of operation is a customer option usually selected when temperatures are below 70 ºF DQGWKHXVHUQHHGVWRZDUPWKHOLYLQJVSDFH7KLVUHYHUVHVUHIULJHUDQWÀRZLQWKHDLUFRQGLWLRQHU causing warm air to be dispensed inside rather than cold, and cold air is dispensed outside rather than warm. This mode of operation can cause a dilemma where the outside coil, which is now dispensing cold air, can freeze up due to cold air blowing across the coil mixed with outside temperature. A system freeze up can render the heat pump inoperable. There is a defrost feature that prevents this from happening. See "C. Defrost Cycle" on page 23 for more information.
22
93

DOMETIC THERMOSTAT
MODE DESCRIPTION
D. Heat Strip Mode (Select Models)
In Heat Strip Mode, the system cycles the heat strip On and Off based on room air temperature and temperature set-point on the CT thermostat. There are three fan speeds in Heat Strip Mode:
 "Low": Fan operates continuously at low speed. Heat strip cycles On and Off.  "High": Fan operates continuously at high speed. Heat strip cycles On and Off.  "Auto": Fan operates in low speed and will cycle On and Off with the CT thermostat.
SPECIAL FEATURES
A. Capacitive Touch Interface
The capacitive touch interface provides a clean, modern user interface. Capacitive touch interface requires skin contact to function, therefore it will NOT work through gloves, bandages, etc. 0RLVWXUHLQFOXGLQJZHW¿QJHUVRQWKHFDSDFLWLYHWRXFKLQWHUIDFHFDQFDXVHVHQVRUVWR become unresponsive until the water evaporates.
B. Compressor Time Delay
A time delay of approximately 2 minutes occurs anytime the compressor is required to begin cooling or heat pump cycle.
C. Defrost Cycle
During heat pump operation, if the outside coil begins to freeze up, a defrost cycle is initiated that temporarily puts the heat pump back into air conditioning mode. This reverses the refrigerant ÀRZ DQG PHOWV LFH IRUPLQJ RQ WKH RXWVLGH FRLO 7\SLFDOO\ WKLV RFFXUV ZKHQ RXWVLGH WHPSHUDWXUHV are below 42 ºF (5.5 °C) and repeats every 25 minutes of compressor run time. During this cycle WKHXQLWZLOOFHDVHWRSURYLGHKRWDLUÀRZWHPSRUDULO\7KLVLVQRUPDODQGLVNOT and indication of malfunction.
Defrost cycling SHALL continue until measured temperature of the outside sensor is < 30 ºF (-1 °C) or > 42 ºF (5.5 °C).
D. Low Ambient Heat Pump Lock Out
All heat pumps are constrained to operation at a temperature range determined by outside condiWLRQV 6LQFH DOO KHDW SXPSV ORVH HI¿FLHQF\ DW ORZ RXWVLGH DPELHQW WHPSHUDWXUHV WKH KHDW SXPS has a lock out feature that prevents Heat Pump Mode of operation when temperatures fall below 30 ºF (-1 °C). If system is set in Auto Mode fan will be turned off. The fan will remain on if the fan setting is set to Low or High. However, the compressor will not run and there will be no heat function below 30 ºF (-1 °C).
23
94

DOMETIC THERMOSTAT

SPECIAL FEATURES
E. Power Interruption
In the event power to the air conditioner or control is interrupted, the system will restart with the previous set-points once power is restored.
F. LCD Error Code
When the system determines one of the faults listed has occurred, an error code displays on the LCD.

Error Code:

E1

Loss of communication between CT thermostat and module board. LCD will cycle be-

tween E1 and previous mode setting. System will shut down.

E2

Open circuit or out of range Indoor Temperature Sensor. Heating and cooling operation

will be locked out. Fan operation can continue to operate.

E3

Shorted Indoor Temperature Sensor. Heating and cooling operation will be locked out.

Fan operation can continue to operate.

E4

Open circuit or out of range Outdoor Temperature Sensor (select models). Heat Pump

operation will be locked out. Air Conditioner, Fan, and Furnace operation can continue to

operate.

E5

Open Circuit or out of range Freeze Sensor. Air Conditioner mode of operation will be

locked out, but displays the last temperature set-point.

GENERAL INFORMATION
A. Frost Formation
1. On Cooling Coil
a. Frost on a small portion of the coil is not unusual. Under certain conditions, ice may form on the evaporator coil. This is indicated by very cold output at very low air speed and the LFLQJFDQEHVHHQWKURXJKWKHDLULQOHWKROHZLWKWKH¿OWHUUHPRYHG,IWKLVVKRXOGRFFXU LQVSHFW WKH ¿OWHU DQG FOHDQ LI GLUW\ 0DNH VXUH DLU YHQWV DUH RSHQ DQG QRW REVWUXFWHG Units have a greater tendency to frost when the outside temperature is relatively low. This may be prevented by adjusting the thermostat control knob to a warmer setting (counter clockwise). Should frosting continue, operate on any FAN ONLY setting until the cooling coil is free of frost; then resume normal operation. If frost condition persist, contact your local service center for assistance.
2. On Outdoor Coil While Heating
a. Operation at low outdoor temperatures causes low coil temperatures. This can result in ice forming on the outdoor coil in certain conditions. This is indicated by reduced heat output and could fully stop fan rotation in extreme conditions. To avoid this, the system controls turn off the compressor if outdoor temperature drops below 42° F (5° C) and returns heating when the temperature raises 5° F (-15° C).

24
95

DOMETIC THERMOSTAT
GENERAL INFORMATION
B. Reduce Heat Gain
The ability of this air conditioner to maintain the desired inside temperature depends on the heat gain of the RV. Some preventative measures taken by the occupants of the RV can reduce the heat gain and improve the performance of the air conditioner. During extremely high outdoor temperatures, the heat gain of the RV may be reduced by:  Parking the RV in a shaded area  Using window shades (blinds and/or curtains)  Keeping windows and doors shut or minimizing usage  Avoiding the use of heat producing appliances 2SHUDWLRQRQ+LJK)DQ&RROLQJPRGHZLOOJLYHRSWLPXPRUPD[LPXPHI¿FLHQF\LQKLJKKXPLGLW\RU high outside temperatures. Starting the air conditioner early in the morning and giving it a "head start" on the expected high outdoor ambient will greatly improve its ability to maintain the desired indoor temperature. For a more permanent solution to high heat gain, accessories like Dometic outdoor patio and window awnings will reduce heat gain by removing the direct sun. They also add a nice area to enjoy company during the cool of the evening.
C. Disclaimer
The manufacturer of this unit will not be responsible for damage caused by condensation forming on ceilings, windows, or other surfaces. Air contains water vapor which condenses when temperature of a surface is below Dew point. During normal operation this unit is designed to remove a certain amount of moisture from the air, depending on the size of the space being conditioned. Keeping doors and windows closed when this air conditioner is in operation will greatly reduce the chance of condensation forming on interior surfaces.
MAINTENANCE
A. Thermostat
1. Clean the CT thermostat with a dry soft cloth. Do NOT spray water directly on CT thermostat. Do NOT use solvents for cleaning.
If a moist soft cloth is needed to clean the CT thermostat surface, the sensors may become unresponsive. If this happens, it will be necessary to allow the water enough time to evaporate for sensors to regain responsiveness.
B. Air Filter
1. 3HULRGLFDOO\DPLQLPXPRIHYHU\ZHHNVRIRSHUDWLRQUHPRYHWKHDLU¿OWHUORFDWHGEHKLQGWKH return air grille and wash it with soap and water, let dry and then reinstall. NEVER UXQXQLWZLWKRXWUHWXUQDLU¿OWHULQSODFH7KLVZLOOSOXJWKHXQLWHYDSRUDWRUFRLOZLWK dirt and may substantially degrade the performance of the unit over time.
25
96

DOMETIC THERMOSTAT
MAINTENANCE
C. Return Air Housing
1. Clean housing with a soft cloth dampened with water and a mild detergent. NEVER use furniture polish, solvents, scouring pads or powders.
D. Fan Motor
1. The blower motor is factory lubricated and requires no service.
SERVICE-UNIT DOES NOT OPERATE
In the unlikely event the unit fails to operate or operates improperly, check the following before calling your service center.
 If the RV is connected to a motor generator, make sure the motor generator is running and producing power.
 If the RV is connected to a power supply by a land line, make sure the line is sized properly to run unit load and that it is plugged into the power supply.
 Check the 120 Vac fuse or circuit breaker. Make sure the fuse is not burnt or that the circuit breaker is "ON" and not activated.
 Check the 12 Vdc fuse or circuit breaker. Make sure the fuse is not burnt or that the circuit breaker is "ON" and not activated.
After the above checks have been made, and unit still does not operate, please visit www.eDometic.com to ORFDWHDVHUYLFHFHQWHUQHDU\RX7KLVSURGXFW0867EHVHUYLFHGE\DTXDOL¿HGVHUYLFHWHFKQLFLDQ:KHQ contacting a service center, always give the following:
 8QLWPRGHODQGVHULDOQXPEHU7KLVLQIRUPDWLRQFDQEHIRXQGRQWKHLGHQWL¿FDWLRQODEHOORFDWHG RQWKHXQLWEDVHSDQ5HPRYHWKHUHWXUQDLU¿OWHUWRYLHZWKHLGHQWL¿FDWLRQODEHO
 Air Distribution Box (if equipped) model and serial number. This information can be found on WKHUDWLQJSODWHORFDWHGRQWKHFHLOLQJWHPSODWH5HPRYHWKHUHWXUQDLU¿OWHUWRYLHZWKHUDWLQJ plate.
 Electronic Control Kit (if equipped) part number and serial number. This information can be IRXQGRQWKHLGHQWL¿FDWLRQODEHOORFDWHGRQWKHVLGHRIWKHHOHFWURQLFFRQWUROER[5HPRYHWKH UHWXUQDLU¿OWHUWRYLHZWKHLGHQWL¿FDWLRQODEHO
26
97

FIRE EXTINGUISHER

User's Manual
Auto Fire Extinguishers

M08-0039-001 M 07/04

Model FESA5

IMPORTANT! Please read carefully and save.
This user's manual contains important information about your fire extinguisher's operation. If you are installing this fire extinguisher for use by others, you must leave this manual--or a copy of it--with the end user.
Read extinguisher label and the entire user's manual carefully before installing or using the unit. Make sure everyone in your household is completely familiar with the operation of the extinguisher, and review the instructions regularly. In an emergency, you will not have time to read instructions.

TABLE OF CONTENTS
Important Information About Fire Extinguishers . . . . . . . . . . . . . .1 Read Before Installing or Using This Fire Extinguisher . . . . . . . . .1 Where to Install This Extinguisher . . . . . . . . . . . . . . . . . . . . . . . . .1 How to Install This Extinguisher . . . . . . . . . . . . . . . . . . . . . . . . . . .1 Checking and Inspecting the Fire Extinguisher . . . . . . . . . . . . . . .1 How to Operate Your Fire Extinguisher in a Fire Emergency . . . .2 After the Fire is Extinguished . . . . . . . . . . . . . . . . . . . . . . . . . . . . .2 How to Clean After Using a Fire Extinguisher . . . . . . . . . . . . . . . .2 If Your Fire Extinguisher Needs Service . . . . . . . . . . . . . . . . . . . . .2 Disposing of a Used Extinguisher . . . . . . . . . . . . . . . . . . . . . . . . .2 Limited Warranty . . . . . . . . . . . . . . . . . . . . . . . . . . . . . . . . . . . . . . .2 All Rights Reserved. © 2004 BRK Brands, Inc. First Alert®, 3901 Liberty Street Road, Aurora, IL 60504-8122 Consumer Affairs: (800) 323-9005 · www.firstalert.com
IMPORTANT INFORMATION ABOUT FIRE EXTINGUISHERS
NOTE: Be sure the extinguisher is rated to fight the type of fire most likely to occur in the area you choose to install it. Since household fires commonly start in the kitchen, you should always install an extinguisher in the kitchen. For added security, you should also install additional extinguishers in utility areas, and other living areas in your household.
Fire extinguishers are classified by fire type. The A, B and C rating system defines the kinds of burning materials each fire extinguisher is designed to fight. The numbers in front of the A, B, or C indicate the rating for size of the fire the unit can extinguish. Using the wrong type of fire extinguisher can do more harm than good. Make sure you understand which fire extinguisher to use on each class of fire!
Class A rating: The agent/powder is suitable for fighting small fires involving wood, paper, cloth, rubber, and some plastics. Class B rating: The agent/powder is suitable for fighting small fires involving grease, oil, gasoline, kerosene, and other flammable liquids. Class C rating: The agent/powder is suitable for fighting small fires in "live" electrical equipment.
Model FESA5 is rated 5-B:C. It is NOT rated to fight Class A fires.
READ BEFORE INSTALLING OR USING THIS FIRE EXTINGUISHER!

· This extinguisher is designed for use against small fires that have just started and are small enough to fight safely. It is not designed to fight large fires that are burning out of control. If the fire is too hot or smoky for you to get within 6 feet (2 meters) of it, do not try to fight it yourself. Warn everyone, evacuate the premises, and have someone call the Fire Department from outside the building. Trying to fight a large fire yourself can result in injury or death.
· Do not puncture or burn any fire extinguisher. The contents are under pressure, and the extinguisher could explode.
· Never locate this extinguisher close to an engine, stove or other source of heat. It is pressurized and could rupture or explode if exposed to temperatures over 150° F (66° C).
· This extinguisher contains a dry powder extinguishing agent. The agent/powder is nontoxic, but can irritate skin. When using this unit, avoid breathing the powder. Always ventilate the area after use.
1

WHERE TO INSTALL THIS EXTINGUISHER

This extinguisher is designed to be used in your car or other vehicle. It has a special mounting bracket to keep the unit from discharging accidentally. We recommend you mount the extinguisher to keep it safe from puncture or other damage. Since not every vehicle can accommodate the mounting bracket, the bracket is also designed to keep the extinguisher from rolling if you do not mount it.

This Fire Extinguisher may be mounted:

Do NOT mount this Fire Extinguisher:

· In the trunk of a vehicle
· On an inside panel of a vehicle

· To the dashboard of the vehicle
· To the exterior of a vehicle

· On a clean, dry surface where the temperature does not go above 120° F (49° C) or below ­40° F (­40° C)

· To the engine of a vehicle
· On or near any other source of heat

HOW TO INSTALL THIS EXTINGUISHER
NOTE: Since surface types vary, mounting screws are not included. Purchase screws or bolts specifically designed for the surface on which you will mount the fire extinguisher. The fire extinguisher label lists its maximum weight.
Installing the Mounting Bracket in A Vehicle

· This extinguisher has a quick-release bracket for mounting. Mount the extinguisher as shown in "Installing the Mounting Bracket."
· Do not use sheet metal screws or wood screws; vehicle vibrations may loosen them.
· Do not make holes in the vehicle structure if you are not sure what is on the other side. You may accidentally cause severe damage to electrical lines, gasoline lines or tanks, or other vehicle systems.
· Do not break the plastic loop holding the safety pin in place! This loop prevents accidental discharge of the fire extinguisher. Break the loop only in an emergency before using the fire extinguisher.

Remove mounting bracket from extinguisher by unlocking the clasp and pulling the bracket away from the extinguisher. Use two strong screws (such as #8 machine screws) to mount the bracket securely onto metal or another solid surface that can support the weight of the fire extinguisher. The mounting bracket must be secure so you can remove the extinguisher quickly in an emergency.

1. Install the mounting bracket as shown in "Installing The Mounting Bracket" using strong screws (such as #8 machine screws) with washers and nuts. The screws should not be longer than necessary to accommodate a washer and nut. Mounting screws, washers, and nuts are not included (see Note above.)

Installing the Mounting Bracket

2. After installing the mounting bracket, replace the extinguisher on the bracket with the nose of the extinguisher pointing into the bracket.

CHECKING AND INSPECTING THE FIRE EXTINGUISHER

DO NOT CHECK THE PRESSURE OR TEST THE FIRE EXTINGUISHER BY SQUEEZING THE TRIGGER, EVEN BRIEFLY. ONCE USED IT WILL GRADUALLY LOSE PRESSURE AND WILL NOT BE FULLY CHARGED FOR USE IN AN EMERGENCY.

1. Inspect and test the extinguisher once a week. Start by removing the extinguisher from the mounting bracket/cap.

Checking the Pressure

Check the extinguisher pressure by

pressing the green button on top of the

cap as shown in "Checking the

Pressure." If the button pops back up,

the extinguisher is properly pressurized

and ready to use. If the button stays

down, the extinguisher has lost pres-

sure and must be replaced.

2. Check for signs of damage or misuse.

Make sure you can still read all the text

on the label. Carefully examine the sur-

face of the extinguisher for corrosion.

You can help prevent corrosion by

cleaning the extinguisher if it gets wet or dirty. If you notice corro-

sion during the warranty period, return the unit to First Alert® (see

"Limited Warranty" at the end of this manual).

3. Make sure the tamper indicator ("safety seal") is still intact as shown in "Location Of The `Safety Seal'" and

Location of the "Safety Seal"

the nozzle is clean and unobstructed.

4. When you finish inspecting the fire

extinguisher, always put it back into

the mounting bracket. Make sure the

handle is locked down and the safety

seal is intact.

For more information about fire extinguishers, consult the NFPA Standard #10, "Portable Fire Extinguishers," available from the National Fire Protection Association, Inc., Batterymarch Park, Quincy, MA 02169, USA.

98

FIRE EXTINGUISHER

HOW TO OPERATE YOUR FIRE EXTINGUISHER IN A FIRE EMERGENCY
· Make sure your extinguisher may be safely and effectively used on the small fire you want to fight. Always use extreme caution when fighting any fire. Fight a fire only where there is a clear escape path to allow you to get out safely if the fire gets worse.
· Avoid breathing smoke and heated fumes; stay low if necessary. Burning materials will release toxic fumes. Inhaling these fumes may cause injury or death.

HOW TO CLEAN AFTER USING A FIRE EXTINGUISHER
NOTE: The powder spray from the extinguisher may spread over a wide area, and may soil upholstery, carpets and walls. · Sweep/vacuum up as much of the powder as possible. Then use
a damp cloth to wipe off the remaining agent.
· If you have any questions about cleaning appliances that the agent has come into contact with, please contact the appliance manufacturer.
IF YOUR EXTINGUISHER NEEDS SERVICE
This fire extinguisher is a disposable device that is NOT rechargeable.

· Always stand back far enough away from the fire--near an exit--and make sure nothing is between you and your escape route. If you get too close to a fire, you risk getting burned or hit by splattering material like grease. If the fire is too hot or smoky for you to get within 6 feet (2 meters), DO NOT try to fight the fire yourself. Evacuate immediately and call the Fire Department.
· For fires on a kitchen stove, turn oven or burners off immediately if possible. If you can't reach the oven or burner controls safely, extinguish the fire first, then turn them off.
· Fight the fire from an upwind direction with your back to any strong air current. Trying to fight a fire with currents blowing towards you can result in serious injury.
TO FIGHT THE FIRE

· Turn off the engine immediately if you suspect a vehicle fire. Evacuate the car, sending passengers a safe distance away. If you see flames escaping from under the vehicle's hood, the fire is too large to fight. DO NOT attempt to open the hood or fight the fire; instead move a safe distance from the car and call for help immediately. Trying to fight this size fire could result in injury or death.
· If there are no visible flames and you attempt to fight a small fire, always use extreme caution if lifting your vehicle's hood. Flames may flash when you open the hood, which can cause severe injury or death.

· This unit will not operate with mounting bracket attached. The extinguisher must be removed from the mounting bracket or it cannot discharge its contents to fight a fire.

If You Suspect a Vehicle Fire:

1. Pull vehicle over, away from all traffic.

2. Turn off vehicle engine.

3. Evacuate all passengers and move them a safe distance from the vehicle. Do not plug a cellular phone into your own vehicle to call the Fire Department.

4. Remove the extinguisher from the mounting bracket.

5. Hold the extinguisher firmly, with the nozzle facing away from you. Pull out the pin to break the `Safety Seal.' You won't be able to squeeze the trigger until the safety seal is removed.

Breaking the Safety Seal

6. Stand back 6 feet (2 meters) from the fire and make sure the fire is not between you and your exit.

7. Hold the extinguisher upright and aim the nozzle at the base of the fire.
8. Press and hold the trigger to discharge the powder.

Press and Hold Trigger To
Discharge Powder

9. Sweep the spray at the base of the burning material, using quick side-to-side motions. (If the spray scatters the fire, move back.)

10. Move slowly towards the fire as the extinguisher spray pushes the fire back. Maintain a 6-foot (2 meter) distance between you and the front of the fire at all times.

11. Completely discharge the contents of the extinguisher and make sure the fire is completely out. Flashbacks are common with fires.

AFTER THE FIRE IS EXTINGUISHED

Do not start the vehicle up or plug in any electrical accessories (cellular phone, CD player, TV or VCR, etc.) until the vehicle has been cleaned up completely. It is very important to remove the powder from electrical equipment after a fire. If the powder gets wet, it can conduct electricity. (Using a dry chemical extinguisher on wet electrical equipment can be hazardous for this reason.) This may worsen an electrical leakage problem, impair the equipment's insulation, or create an electrical shock hazard.
If you think the fire had an electrical origin:
· Turn off the engine and do not touch any electrical wires, fuses or accessories.
· Leave the vehicle and stay a safe distance away until the Fire Department arrives.
· Do not restart the vehicle or plug in any electrical appliances or accessories until a licensed mechanic has inspected the vehicle's electrical system.

Do not try to service or repair this fire extinguisher under any circumstances. Do not try to remove the nozzle or valve assembly. This is a pressurized device that can cause serious injury if tampered with. If there is a problem and it is still under warranty, please see "How to Obtain Warranty Service" in the Limited Warranty.
DISPOSING OF A USED EXTINGUISHER
Completely discharge the extinguisher outdoors by turning the unit upside down and pulling the trigger. Dispose of the empty unit properly and replace it with a new fire extinguisher.
Never puncture, burn or expose this fire extinguisher to temperatures over 150° F (66° C) even if it is fully discharged. The contents are under pressure and it could explode.
LIMITED WARRANTY
BRK Brands, Inc. ("BRK") the maker of First Alert® brand products, warrants that for a period of five years from the date of purchase, this product will be free from defects in material and workmanship. BRK, at its option, will repair or replace this product or any component of the product found to be defective during the warranty period. Replacement will be made with a new or remanufactured product or component. If the product is no longer available, replacement may be made with a similar product of equal or greater value. This is your exclusive warranty. This warranty is valid for the original retail purchaser from the date of initial retail purchase and is not transferable. Keep the original sales receipt. Proof of purchase is required to obtain warranty performance. BRK dealers, service centers, or retail stores selling BRK products do not have the right to alter, modify or any way change the terms and conditions of this warranty. This warranty does not cover normal wear of parts or damage resulting from any of the following: negligent use or misuse of the product, use on improper voltage or current, use contrary to the operating instructions, disassembly, repair or alteration by anyone other than BRK or an authorized service center. Further, the warranty does not cover acts of God, such as fire, flood, hurricanes and tornadoes. BRK shall not be liable for any incidental or consequential damages caused by the breach of any express or implied warranty. Except to the extent prohibited by applicable law, any implied warranty of merchantability or fitness for a particular purpose is limited in duration to the duration of the above warranty. Some states, provinces, or jurisdictions do not allow the exclusion or limitation of incidental or consequential damages or limitations on how long an implied warranty lasts, so the above limitations or exclusion may not apply to you. This warranty gives you specific legal rights, and you may also have other rights that vary from state to state, or province to province. How to Obtain Warranty Service: Service: If service is required, do not return the product to your retailer. In order to obtain warranty service, contact the Consumer Affairs Division at 1-800-323-9005, 7:30 AM to 5:00 PM, Central Standard Time, Monday through Friday. To assist in serving you, please have the model number and date of purchase available when calling. Address: 303 Nelson Avenue, Neosho, MO 64850-8806
First Alert® is a registered trademark of the First Alert Trust.
M08-0039-001 M 07/04

2

99

FURRION STEREO
Entertainment System DV1230 Système de divertissement DV1230 Sistema de entretenimiento DV1230
Instruction Manual Manuel d'instructions Manual de instrucciones

Product picture is for reference only. La photo du produit est aux fins de référence seulement. La imagen del producto es solo de referencia.

Model/Modèle/Modelo: DV1230

100

English

FURRION STEREO
Welcome
Thank you and congratulations for purchasing the Furrion® DV1230 Entertainment System. Before operating your new product, please read these instructions carefully. This instruction manual contains information for safe use, installation and maintenance of the product. Please keep this instruction manual in a safe place for future reference. This will ensure safe use and reduce the risk of injury. Be sure to pass on this manual to new owners of this product. The manufacturer does not accept responsibility for any damages due to not observing these instructions. If you have any further questions regarding our products, please contact us at support@furrion.com
1
101

English

FURRION STEREO
Contents
Welcome ...........................................................................................................1 Contents ...........................................................................................................2 Safety and Notice ..............................................................................................3
Safety.............................................................................................................................................. 3 Class 1 Laser Product....................................................................................................................3 Notice of compliance .....................................................................................................................4
Introduction ......................................................................................................5
What's in the box............................................................................................................................5 Precautions ....................................................................................................................................5 Features ......................................................................................................................................... 5 Supported Format..........................................................................................................................6
Functional Overview .........................................................................................7
Control Panel ................................................................................................................................. 7 Remote Control .............................................................................................................................8
Before Operation ..............................................................................................10
Wiring Diagram ..............................................................................................................................10 View of Wiring Connecting Socket .................................................................................................10 Description of Wiring Connecting Cables......................................................................................11 Prepare the Remote Control..........................................................................................................14 Quick Reference Guide...................................................................................................................15 Common Operation........................................................................................................................18 Radio Operation .............................................................................................................................20 Basic Disc / USB Operation ...........................................................................................................21 Advanced Disc / USB Operation.....................................................................................................22 Set up the DVD System Menu ........................................................................................................ 25 Bluetooth Operation.......................................................................................................................30 App Operation ................................................................................................................................31
Maintenance .....................................................................................................32
Maintenance and Cleaning of Discs ..............................................................................................32
Troubleshooting................................................................................................ 33 Specifications ...................................................................................................35 Warranty........................................................................................................... 36
2
102

English

FURRION STEREO

Safety and Notice

Safety
CAUTION
RISK OF ELECTRIC SHOCK DO NOT OPEN
WARNING: TO REDUCE THE RISK OF FIRE OR ELECTRIC SHOCK, DO NOT REMOVE COVER ( OR BACK). NO USER SERVICEABLE PARTS INSIDE. REFER SERVICING TO QUALIFIED SERVICE PERSONNEL.
WARNING
TO REDUCE THE RISK OF FIRE OR ELECTRIC SHOCK, DO NOT EXPOSE THIS APPLIANCE TO RAIN OR MOISTURE.
The lightning flash with arrowhead symbol within an equilateral triangle is intended to alert the user to the presence of uninsulated dangerous voltage within the product's enclosure that may be of sufficient magnitude to constitute a risk of electric shock. The exclamation point within an equilateral triangle is intended to alert the user to the presence of important operating and maintenance (servicing) instructions in the literature accompanying the appliance.
Class 1 Laser Product
Laser product symbol: Located on the rear panel of the unit, this symbol indicates this unit is a class 1 laser product that only uses weak laser and produces no hazardous radiation outside of the unit.
1. Read through this instruction manual before installation and use.
2. Do not touch the power plug with wet hands.
3

3. Switch off the power when the unit is not in use. (Disconnect the power plug from the power outlet when you do not intend to use the unit for a prolonged period of time.) Before moving the unit, remove the disc from the unit/tray first.
4. Do not open the cover or touch any of the components inside of the unit. Only a qualified technician should service the unit.
5. To avoid damaging the unit, do not expose the unit to direct sunlight or objects that radiate heat.
6. Do not place the unit in moist or humid conditions. Moisture will affect normal operation and damage the unit.
7. Place the unit on a flat, well-ventilated location. Please ensure the ventilation holes are not covered to avoid overheating and malfunction.
8. Clean the panel and case with a soft dry cloth only. Do not apply any kind of thinner, alcohol or sprays.
9. The apparatus should not be exposed to dripping or splashing. Do not place objects filled with liquids (such as vases) on the apparatus.
WARNING
 Do not ingest the battery contained within the remote control supplied with the unit as this battery represents a chemical burn hazard.
 This product contains a coin/button cell battery.
 If the coin/button cell battery is swallowed, it can cause severe internal burns in just 2 hours and can lead to death.
 Keep new and used batteries away from children.
 If the battery compartment does not close securely, stop using the product and keep it away from children.
 If you think batteries might have been swallowed or placed inside any part of the body, seek immediate medical attention.

103

English

FURRION STEREO

Safety and Notice

CAUTION
 Danger of explosion if battery is incorrectly replaced.
 Replace only with the same or equivalent battery type.
 The battery should not be exposed to excessive heat such as sunshine or fire.
Notice of compliance
The device complies with Part 15 of the FCC Rules. Operation is subject to the following two conditions: 1. This device may not cause harmful
interference, and 2. This device must accept any interference
received, including interference that may cause undesired operation.
FCC rules This equipment has been tested and found to comply with the limits for a Class B digital device, pursuant to part 15 of the FCC Rules. These limits are designed to provide reasonable protection against harmful interference in a residential installation. This equipment generates, uses and can radiate radio frequency energy and, if not installed and used in accordance with the instruction manual, may cause harmful interference to radio communications. However, there is no guarantee that interference will not occur in a particular installation. If this equipment does cause harmful interference to radio or television reception, which can be determined by turning the equipment off and on, the user is encouraged to try to correct the interference by one or more of the following measures:

 Relocate the receiving antenna.  Increase the separation between
equipment and receiver.  Connect the equipment into an outlet on
a circuit different from that to which the receiver is connected.  Consult the dealer or an experienced radio/TV technician for help.
FCC Radiation Exposure Statement This equipment complies with FCC radiation exposure limits set forth for an uncontrolled environment. This transmitter must not be co-located or operating in conjunction with any other antenna or transmitter.
All registered and unregistered trademarks are property of their respective owners.
Changes or modifications not expressly approved by the party responsible for compliance could void the user's authority to operate the equipment.

4

104

English

FURRION STEREO
Introduction
What's in the box
Thanks for purchasing the Furrion DV1230 Entertainment System. This manual will help you set up and begin using your product. Please read this manual thoroughly and keep this manual in a safe place for future reference. First, check the contents of your box with the parts checklist below:  Main set  Remote control  Harness (200mm)  Audio RCA adapter cable (1.5m)  Hang tag  Printed materials
Precautions
Connect this unit to a 12V DC negative ground battery system which is standard in North American and European vehicles. Ensure when installing the unit, all wire ends which are not being used are terminated with an insulated end to avoid wires shorting or earthing which can lead to the risk of fire or electrical shock. Avoid inserting foreign objects into the disc loading slot of the unit as this will cause malfunction. Do not expose this unit to moisture or wet environments. If condensation is present on the screen, wait for 1 hour or more for the moisture to evaporate. If the interior of the vehicle is extremely hot, do not use the unit until the vehicle's internal temperature has cooled down. Do not use cleaning products on the front face of the unit. Only use a slightly damp cloth for cleaning. Do not attempt to disassemble or adjust this unit. Contact a service center for assistance.
Features
 Digital AM / FM Tuner  DVD/CD-R/RW/MP3/MP4/WMA Compatible  Bluetooth with NFC function  Auxiliary inputs on front and rear  USB input with charging function  3 - zone multiroom independent audio output  1 x HDMI output with ARC function  1 x HDMI input  1 x RCA audio/video output for connecting additional TV  1 x RCA audio/video input  1 x coaxial audio input  1 x optical audio input  1 x subwoofer output  1 x headphone output  Clock / alarm clock 5
105

English

FURRION STEREO

Introduction
Supported Format

Supported Video Format

File Extension
.avi .divx
.mpg
.dat .vob
.mp4

Container Video Codec

MPEG-4 Visual

DivX

AVI

4.xx/5.xx/6.xx/3ivX

XviD

MPEG-1

MPG MPEG-1/MPEG-2

DAT

MPEG-1/MPEG-2

VOB

MPEG-1/MPEG-2

MP4

MPEG-4 Visual

Audio Codec
Dolby Digital (AC3) WMA/PCM/LPCM
AAC-LC (2ch) MPEG-Audio (MP1/MP2/MP3)
Dolby Digital (AC3) LPCM
MPEG-Audio (MP1/MP2/MP3)
Dolby Digital (AC3) LPCM
MPEG-Audio (MP1/MP2/MP3)
Dolby Digital (AC3)
Dolby Digital (AC3) WMA/PCM/LPCM
AAC-LC (2ch) MPEG-Audio (MP1/MP2/MP3)

Resolution
720 x 480 (30fps) 720 x 576 (30fps)
720 x 480 (30fps) 720 x 576 (30fps) 720 x 480 (30fps) 720 x 576 (30fps)
720 x 480 (30fps) 720 x 576 (30fps)

Supported Audio Format

Remark

File Extension

Audio Codec

Bit Rate

Sampling Rate

Remark

.mp3

MP3

16kbps - 320kbps

8k - 48kHz

.wma

WMA

16kbps - 320kbps

8k - 48kHz

Note: Compatibility with the above file formats is not guaranteed.

Only WMA7/ WMA8/WMA9
(CBR/VBR) supported (only
353 format supported)

6

106

Functional Overview
Control Panel

FURRION STEREO

English

1
Turn on the unit or switch to standby mode.
2
Eject the loaded disc.
3 ZONE 1/ZONE 2/ ZONE 3 Turn on or off the audio source in each of the different areas where your speakers are connected.
4 Number buttons (1 - 6) Select and enter numbers. 1/MENU: Display the title list during DVD/VCD playback. 3/RDM: Select random playback mode. 4/RPT: Select repeat playback mode.
5 Disc slot
6 SELEQ Select various system settings. Select a preset sound effect.
7 Source buttons Select the corresponding sound source: DISC/USB, AM/FM, BT, or AUX.
8 NFC detection area
9 LCD screen
10 IR sensor for remote control

11 AUX socket Connect to the 3.5mm audio output socket on an auxiliary device.

12

socket

Connect a headphone.

13 HDMI IN socket Connect to the HDMI output socket on an AV device.

14
Enter alarm setting mode.

15 USB socket Connect a USB storage device.

16 RESET Reset the unit and load its factory default settings.

17 MIC Built-in microphone.

18

/ OK

Adjust brightness of the LCD screen.

Confirm your selection.

19
Mute or un-mute the audio output.

20
Stop playback.

7

107

English

FURRION STEREO

Functional Overview

21 VOLUME -/+ knob Turn the knob clockwise / counterclockwise to increase / decrease volume.

22

/

Accept or make a call.

(Press and hold) Reject or end a call.

23

/

Skip to the previous/next track.

Fast backward/forward within a track.

Tune to a radio station.

24
Start (resume) / pause playback.

Remote Control

2

3

1

4

31

5

6

30

7

29

8

28

9

27

10

26

11

25

12

24

13

23

14

22

15

21

16

20

17

19

18

1 PWR Turn on the unit or switch to standby mode.

2 EJECT Eject the loaded disc.

3 Source buttons Select the corresponding sound source: DVD/USB, AM/FM, AUX (ARC, F AUX, R AUX, AV, HDMI, COAXIAL, or OPTICAL), or AV IN.

4
Return to the previous menu.

5 / Navigate left / right in a menu.

6 OK Confirm your selection.

7 / Navigate up / down in a menu.

8

/ (CLEAR)

Skip to the previous/next track.

Fast backward / forward within a track.

Tune to a radio station.

(CLEAR): Clear a wrong input.

9
Start (resume) / pause playback.

10 Number buttons (0 - 9) and 10+ Select and enter numbers. 0/TA: (For Europe only) Enable / disable TA (Traffic Announcement) mode. 5/-10: Skip 10 tracks backward during MP3/WMA playback. 6/+10: Skip 10 tracks forward during MP3/WMA playback. 9/AF: (For Europe only) Enable / disable AF (Alternative Frequency) mode. 10+ / PTY: Input a number larger than 9. (For Europe only) Select a PTY (Program Type).

8

108

English

FURRION STEREO

Functional Overview

11 SEARCH Show or hide the search window during disc playback.
12 APS/ Start automatic programming of radio stations. Scan preset radio stations. Reject or end a call.
13 RPT Select repeat playback mode.
14 RDM Select random playback mode.
15 SUBT/REDIAL Select the caption language during DVD playback (if available). Redial the last dialed number.
16 TITLE/PBC Display the title list during DVD/VCD playback. Turn on / off PBC (PlayBack Control) of a disc (if available).
17 STEP/ Play a DVD/VCD frame by frame. Accept or make a call.
18 MUTE/LOUD Mute or un-mute the audio output. Enable or disable the loudness effect.
19 OSD Display the playback status.
20 PROG Access or exit program playback.
21 AUDIO Select a subtitle language (if available) during DVD playback. Select a sound mode (MONO LEFT, MONO RIGHT, or STEREO) during VCD playback.

22 A-B Play a specific segment in a chapter / track repeatedly.
23 EQ Select a preset EQ sound effect.
24 ZOOM During DVD/VCD playback, zoom in / out on images.
25 ST/ANGLE/# In FM mode, switch between stereo and mono sound output. During DVD playback, adjust the viewing angle (if available).
26 LOC/SLOW.FWD/* In radio mode, enable or disable local mode. During disc playback, select a slow forward speed.
27 CLOCK Enter clock setting mode. Display the clock.
28
Stop playback.
29 +/Increase / decrease volume.
30 SETUP Access or exit the DVD system menu.
31 SEL Select various system settings. Select a preset sound effect.

9

109

English

FURRION STEREO
Before Operation
Wiring Diagram
View of Wiring Connecting Socket
10
110

English

FURRION STEREO
Before Operation
Description of Wiring Connecting Cables
11
111

English

FURRION STEREO
Before Operation
12
112

English

FURRION STEREO
Before Operation
Location
1. Choose a mounting location away from humid areas, water sources, appliances or any equipment that can radiate heat.
2. Select an area on a wall or cabinet which is free from cables, fuel or brake lines. Ensure the area behind the unit has a vent hole or if it is an enclosed box, it has adequate room around the rear of the unit for cooling.
3. Ensure when the unit is mounted the wires at the rear are not pressed against the heat sink.
Installing the unit
 Before installing the unit, connect the wiring temporarily and make sure the unit and the system work properly.
 Fix the unit with screws according to the following diagram. 1. Remove the plastic shell from the front panel on the unit. 2. Fix the unit with 4 pieces of #8 pan head self tapping screws. 3. Put back the plastic shell on the front panel of the unit.
13
113

English

FURRION STEREO

Before Operation

Prepare the Remote Control
1. Before using the remote control for the first time, pull the insulating sheet out of the remote control in the direction indicated by the arrow. (Fig.1)

Remote control battery note
1. Improper use of a battery may cause overheating or an explosion that could result in injury or fire.
2. Battery leakage may cause damage to the remote control. Battery Life: 6 months with normal use in normal room temperature.
3. Do not short the battery. 4. Do not throw the battery into fire. 5. To avoid the risk of accident, keep the
battery out of reach of children.

Fig. 1
2. Press the movable block hold in the direction indicated by arrow A (Fig.2), then pull the battery holder out of the remote control as the direction indicated by arrow B. (Fig.2)

Fig. 2
3. Replace the old battery with a new one, with the (+) polarity side upward. (Fig.3)
4. Insert the battery holder into the original position in the remote control. (Fig.3)

Fig. 3

side up

14

114

English

FURRION STEREO

Operation
Quick Reference Guide

Power on/off, switch to standby mode Mute Select a source Adjust volume Select a feature / setting Select a preset EQ
Set clock
Set alarm

General Operation
Press to turn the unit on or enter standby mode. Press and hold to turn the unit off.
Press MUTE to mute sound. The icon flashes on the display. Press MUTE again to restore the sound.
Press DISC/USB, AM/FM, AUX, BT to select Disc (with a disc loaded), USB (with a USB storage device connected), AM/FM, AUX, or BT.
Rotate the VOLUME -/+ knob to adjust volume.
1. Press SELEQ once or more to select VOL, BAS (without EQ preset), TRE (without EQ preset), BAL, LOUD ON/OFF, LOC ON/OFF, ST ON/OFF, BEEP ON/ OFF, SUB ON/OFF, or CLOCK. 2. Rotate the VOLUME -/+ knob to select a feature / setting.
Press and hold SELEQ once or more to select CINEMA, ROCK CLASSIC, FLAT, or EQ OFF.
1. Press SELEQ on the front panel once or more (or press and hold CLOCK on the remote control) to enter clock setup mode. 2. Rotate the VOLUME -/+ knob to adjust the hour. 3. Press / to enter minute setting. 4. Rotate the VOLUME -/+ knob to adjust the minute. The time on the clock is set automatically after a few seconds of inactivity.
Press and hold once or more to enter alarm clock and source settings. Repeat the operations in clock setting to set the alarm. Two alarm sources are available for selection: TUNER and USB.

Turn alarm on/off

Press to turn on or off the set alarm. When the alarm is set, the icon will stay on the LCD.

Adjust brightness Select speakers Reset

Press once or more to select a brightness level for the front panel: LOW, MIDDLE or HIGH.
Press and hold ZONE 1, ZONE 2 or ZONE 3 to select speaker output. The corresponding zone number will be displayed on the LCD once selected.
Press RESET with a sharp object to reset the unit and load its factory default settings.

15

115

English

FURRION STEREO

Operation

Select radio region

Radio Operation
Press and hold AM/FM for 2 seconds to set the AM/FM radio region (USA1/USA2/AUSTRALIA/EUROPE).

Manual tuning

Press

/

to move the radio frequency down or up one step at a time.

Automatic tuning

Press and hold

/

to search for the next strongest station automatically.

Select a band

Press AM/FM once or more to select FM1, FM2, FM3, AM1, or AM2.

Store and recall a preset station

Press and hold any one of the six preset buttons (1-6) to store the current frequency. Press the corresponding preset number button to recall the stored frequency.

Store stations automatically

Press and hold APS on the remote control (or on the front panel) to automatically store the six strongest stations on the current band. Up to 18 FM stations and 12 AM stations can be stored.

Scan preset stations

Press APS on the remote control (or the current band.

on the front panel) to scan presets 1-6 on

LOC

Press LOC on the remote control to turn on / off the LOC (local) function.

Stereo/mono

In FM mode, press SEL one or more to select stereo or mono sound output.

16
116

English

FURRION STEREO

Operation

Insert a disc
Eject the disc Select a chapter / track Fast backward / forward Pause playback
Stop playback
Repeat
Random
Title

Disc / USB Operation
With the label facing up, insert a disc into the disc slot. The disc will automatically begin playback.
Press EJECT to eject the disc.

Press

/

to skip to the previous or next chapter / track.

Press and hold

/

to fast backward / forward.

Press Press

to temporarily stop playback. again to resume playback.

Press once to pause playback. Then you can press to resume. Press twice to stop playback. Then press to start playback from the beginning of the first chapter / track.

Press RPT to select RPT ONE/RPT DIR/RPT ALL/RPT OFF MODE. Press RPT again to resume.

Press RDM to play each track in random order. Press RDM again to resume.

In DVD/VCD mode, press TITLE on the remote control to display the title list.

Bluetooth Operation

Accept or make a call

Press / on the front panel (or on the remote control) to accept an incoming call, or dial or redial a telephone number.

Reject or end a call

Press and hold / on the front panel (or press on the remote control) to reject or end a call.

17
117

English

FURRION STEREO

Operation

Common Operation
Turn the unit on or switch to standby mode
Press to turn the unit on or switch to standby mode.
Select a source
DISC / USB - Once a DVD or USB is inserted into the unit, the unit will automatically switch to the corresponding source. If a disc has already been inserted and the unit is playing from another source, you can press DVD / USB to select DVD. AM/FM - Press this button to scroll through FM1, FM2, FM3, AM1, and AM2. Press and hold this button once or more to select the radio region: USA1, USA2, AUSTRALIA, or EUROPE. BT - Press this button to enable Bluetooth connection. AUX - Press this button to scroll through the AUX inputs available for the unit. F AUX - Connection on the front of the unit to connect an external audio source. R AUX - Connection on the rear of the unit, normally used to connect TV sound input. AV - Connection on the rear of the unit to connect an external audio source. HDMI - Connection on the front of the unit. COAXIAL - Connection on the rear of the unit. OPTICAL - Connection on the rear of the unit. HDMI OUT (ARC) - Connection on the rear of the unit, used to connect a TV with Audio Return Channel function. Make sure the ARC function of the TV is on.  For details on setting and operating your TV,
refer to the instruction manual for the TV.

About Audio Return Channel (ARC)
ARC allows audio signals to travel both ways under HDMI Control. If you connect a TV that supports HDMI Control and ARC to the unit with a single HDMI cable, you can output video/ audio to the TV or input TV audio to the unit. In case noises are produced from the speakers connected to the unit because TV audio signals input to the unit via ARC are not supported by the unit, use the TV's speakers.
Adjust volume
Rotate the VOLUME -/+ knob clockwise to increase volume, or rotate counterclockwise to decrease volume.
Mute
1. Press MUTE to mute sound output in any source mode. 'MUTE' will be displayed on the screen.
2. Press MUTE again to resume.
Display and set the clock
1. To display the clock on the LCD screen, press CLOCK on the remote control. In standby mode, the clock time will stay on the LCD.
2. To adjust or set the clock, press SELEQ on the front panel once or more to enter clock setup mode. Press / to switch between hour and minute setting. Rotate the VOLUME -/+ knob to adjust the hour / minute. The time on the clock is set automatically after a few seconds of inactivity.

18

118

English

FURRION STEREO

Operation

Set the alarm
1. Press and hold once or more to enter alarm clock and source settings.
2. Repeat the operations in clock setting to set the alarm. Two alarm sources are available for selection: TUNER and USB.
 Press to turn on or off the set alarm. When the alarm is set, the icon will stay on the LCD.
Select a preset EQ mode
Press and hold SELEQ to select the preset music equalizer curves: CINEMA, ROCK, CLASSIC, FLAT, or EQ OFF.
Turn on / off LOUD mode
Press SELEQ on the front panel once or more to turn on / off LOUD mode.
Adjust the sound equalizer curves
1. Press SELEQ on the front panel once or more to select a sound equalizer curve: VOL, BAS (without preset EQ), TRE (without preset EQ), BAL, LOUD ON/OFF, LOC ON/ OFF, ST ON/OFF, BEEP ON/OFF, or SUB ON/OFF.
2. Rotate the VOLUME -/+ knob on the front panel to select a sound feature.
Select ZONE 1 / ZONE 2 / ZONE 3
Press and hold ZONE 1 / ZONE 2 / ZONE 3 to turn on or off the audio source in each of the different areas where your speakers are connected.
The corresponding zone number will be displayed on the LCD once selected. Note: ZONE 3 supports independent audio output control.

 Press ZONE 3 to activate independent audio selection mode. The "ZONE 3" icon will flash on the LCD.
 Select the media source (DISC/USB, AM/ FM, BT, F AUX/R AUX, AV, HDMI, COAXIAL, OPTICAL), then adjust the audio effect and preset EQ independently.
 After setting ZONE 3 audio output, you can press ZONE 3 again to switch back to ZONE1/ZONE 2 audio output control mode (ZONE 1 and ZONE 2 in the same group). The "ZONE 3" icon will stop flashing.
- If ARC is selected as the media source of ZONE 3 (ZONE 1/ZONE 2), the media source of ZONE 1/ZONE2 (ZONE 3) can be selected as DISC/USB, AM/FM, BT, F AUX, R AUX, AV, or ARC.
- If AM/FM or BT is selected as the media source of ZONE 3 (ZONE 1/ZONE 2), the media source of ZONE 1/ZONE2 (ZONE 3) can be selected as DISC/USB, AM/FM, BT,F AUX, R AUX, AV HDMI, COAXIAL, OPTICAL, or ARC.
- If USB/DISC is selected as the media source of ZONE 3 (ZONE 1/ZONE 2), the media source of ZONE 1/ZONE2 (ZONE 3) can be selected as AM/FM, BT, F AUX, R AUX, or AV.
Reset the unit
In case of incorrect display, button failure, or distorted sound, you can press RESET with a sharp object such as a clip to reset the unit and load its factory default settings.

19

119

English

FURRION STEREO

Operation

Radio Operation

Select a radio region

In radio mode, press and hold AM/FM to select your desired radio region: USA1/USA2/ AUSTRALIA/EUROPE.

Select AM/FM band

In radio mode, press AM/FM once or more to select your desired radio band: FM1, FM2, FM3, AM1, or AM2. The selected band will be displayed on the front panel.

Tune to / search for radio stations

In radio mode:

 Press and hold

/

on the front

panel (or / on the remote

control) to automatically search down/up

for an available station from the current

frequency.

 Press

/

on the front panel

(or / on the remote control)

to manually search up or down for

your desired station from the current

frequency.

Use the / APS button

In radio mode:
1. Press and hold on the front panel (or APS on the remote control) to search for radio frequencies with sufficient signal strength (starting from the lowest frequency and ending until the search cycle is finished). Then the 6 strongest stations are preset to the memory bank of the corresponding preset number. The AS operation is implemented in each bank of the selected band. When the AS operation is finished, radio broadcast will resume on M1. (A total of 3x6 stations for FM and 2x6 stations for AM can be stored.)

2. Press on the front panel (or APS on the remote control) to search for each preset radio station starting from M1. When the field strength level is above the threshold of the stop level, the radio holds at that preset number for a few seconds, and then searches again. The search stops on M1 when the search cycle is finished.
NOTE: On FM band, FM1, FM2, FM3 is checked once at a time. On AM band, AM1, AM2 is checked once at a time.
Use the preset number button (1-6)
In radio mode:
1. To store the current frequency on the current band, press and hold any one of the six preset number buttons (1-6).
2. To recall the preset memory on the current band, press one of the preset buttons (1-6).
Switch between STEREO/MONO
Press SELEQ on the front panel (or ST on the remote control) once or more to select ST ON or ST OFF mode in FM mode.
Use the LOC ON / OFF function
1. In radio mode, when the signals of the distant radio stations are very weak and the reception is poor during tuning, press SELEQ on the front panel (or LOC on the remote control) once or more to select LOC OFF mode, and then tune again for the distant radio stations.
2. In radio mode, too strong signals from the local radio stations may lead to interference. You can press SELEQ on the front panel (or LOC on the remote control) once or more to select LOC ON mode, and then re-tune to the local stations if required.

20

120

English

FURRION STEREO

Operation

Basic Disc / USB Operation
Start playback
1. Press to turn on the unit. 2. Turn on the TV set, from which the video
output is connected to the video input of the unit. If nothing displays on the TV screen when the unit is turned on, ensure that the TV is set to the right video input (not TV channel). For example, if the TV is connected with the unit via the VIDEO 1 INPUT, then you need to set the TV to VIDEO1. 3. Insert a disc into the disc slot (with the label side facing up). NOTE:  Discs that are seriously scratched or of poor manufacturing or recording quality may not play.  If the unit cannot read a disc in normal conditions, please try to eject and reload the disc.  In addition to normal CD and DVD, this unit supports CD-R, CD-R/W, DVD-R and DVD-R/W playback as well. However, depending on the conditions of the recording equipment, recording program or the disc itself, some CD-R, CD-R/W, DVD-R or DVD-R/W may not play.  When dealing with CD-R, CD-R/W, DVD-R or DVD-R/W recording, too high recording speed may result in poor signal quality and therefore, it is recommended to select as low recording speed as possible.
Pause playback
When playing DVD/VCD/CD/MP4/MP3/WMA discs, press to pause playback. You can press again to resume normal playback.

Stop playback
 When playing DVD/VCD/MP3/WMA/CD discs, press once to pause playback, then you can press to resume normal playback.
 During playback, press twice to stop playback, then you can press to start playback from the beginning of the first chapter / track.
Select a chapter/track

Press

/

on the front panel (or

/ on the remote control) during playback

to select the previous / next chapter or track

for playback.

Note: You can press and hold

/

on

the front panel (or

on the remote

control) to fast backward / forward within a

chapter / track.

Select a chapter / track with the number buttons

 When playing DVD/VCD (PBC OFF)/MP3/ WMA/CD discs, use number buttons (0 9) to directly select and play a chapter / track numbered 1 to 9.
 To play a chapter / track with the serial number larger than 9, use the 10+ and 0 - 9 buttons. For example, to play the 13th chapter / track, first press the 10+ button once, then press the 3 button; to play the 34th chapter / track, first press the 10+ button 3 times, then press the 4 button.
Note: You can press and hold the 5/-10 or 6/+10 buttons to skip 10 tracks forward / backward (for MP3/WMA only).

21

121

English

FURRION STEREO

Operation

Select a chapter / track from the root/PBC menu (if available)
For DVD: 1. Press TITLE on the remote control to
display the title list. 2. Press the navigation buttons to select your
desired title, and then press OK or to open the root menu of the selected title. 3. Press the navigation buttons to select your desired chapter, then press OK or
to play the selected chapter.  During playback, you can press 1/MENU
on the front panel (or press and hold TITLE on the remote control) to display the root menu of the current title directly, and then perform the same operation to resume normal playback. For VCD: 1. When PBC is enabled, the beginning of the disc will play with the PBC menu (if available) displayed on the TV screen. 2. Press the number buttons to select your desired track to play. For MP3/WMA:  During playback, the root menu is displayed on the TV screen all the time (TITLE/PBC unavailable).  Press the navigation buttons to select your desired folder, and then press OK or
to open the folder. Press the navigation buttons to select your desired file, and then press OK to play the selected file. For CD: The TITLE/PBC button is disabled.
Terminate playback
1. Press EJECT to eject the disc. 2. Press and hold on the front panel (or
press on the remote control) to turn off the unit.

Advanced Disc / USB Operation

Fast backward / forward

During normal playback, press and hold

/

on the front panel (or

/

on the remote control) once or more to fast

backward or forward at the following speed:

x2, x4, x8, x20, or normal.

During fast backward / forward, press to resume normal playback.

Slow forward

 During playback, press SLOW_FWD on the remote control to slow forward.
 Press SLOW_FWD consecutively to decrease the playback speed as follows: x1/2, x1/3, x1/4, x1/5, x1/6,x1/7, normal.
 During slow forward, press to resume normal playback.
Note: The function is only available for video playback.

Play frame by frame

1. During DVD/VCD playback, press STEP on the remote control consecutively to play frame by frame forward.
2. Press to resume normal playback.

Play repeatedly

Repeat One / All 1. During DVD playback:
Press RPT to select REP CHAPTER, REP TITLE, REP ALL, or REP OFF. 2. During VCD (PBC OFF)/CD playback: Press RPT to select REP ONE, REP ALL, or OFF. The RPT button is unavailable when PBC is enabled during VCD playback. 3. During MP3/WMA playback: Press RPT to select REP ONE, REP DIR, REP ALL, or OFF.

22

122

English

FURRION STEREO

Operation

Repeat A-B Use this function if you want to repeat a specific segment on a disc that you define:
1. Press A-B at a point (A) where you want it to be the start point of the repeat segment.
2. Press A-B again at a point (B) where you want it to be the terminal point of the repeat segment. Then the segment will be played repeatedly.
 To cancel A-B repeat mode and resume normal playback, press A-B for the third time. Note: During DVD/VCD/MP3/WMA/CD playback, points A and B must be within the same track.
Play from a specified chapter / track or specified time
During DVD playback: 1. Press SEARCH on the remote control to
display a search box, with the title field highlighted. 2. Use the number buttons to input the serial number of a title. 3. Use the navigation buttons to highlight the chapter field, and then use the number buttons to input the serial number of a chapter. 4. Press OK or to play the selected chapter. During VCD/MP3/WMA/CD playback: 1. Press SEARCH on the remote control to display a search box, with the track field highlighted. 2. Use the number buttons to input the serial number of a track, and then press OK or to play the selected track.
Play randomly
During DVD/VCD (PBC OFF)/MP3/WMA/CD playback, press RDM once or more to switch between RANDOM ON and RANDOM OFF. In RANDOM ON mode, the chapters / tracks will be played randomly.
23

Play from different angles
During DVD playback, press ANGLE on the remote control once or more to view from different angles. Note: - This function is only available for DVD
discs recorded with different camera angles. - The ANGLE button is unavailable for VCD/ MP3/WMA/CD discs.
Zoom in / out during playback
1. During DVD/VCD playback, press ZOOM on the remote control once or more to enlarge a certain area of the images on the screen with these multiples: ZOOMx2, ZOOMx3, ZOOMx4, ZOOMx1/2, ZOOMx1/3, ZOOMx1/4, ZOOM OFF.
2. Press one of the navigation buttons to select the area you want to enlarge.
Change the caption language
When playing DVDs, press SUBT on the remote control once or more to select the caption language or turn off the caption (if available).
Note: This function is unavailable for VCD/ MP3/WMA/CD discs.
Change the audio language
 When playing DVDs, press AUDIO on the remote control once or more to select the desired language type (if available).
 When playing VCD discs, press AUDIO on the remote control once or more to select MONO L, MONO R, AUTO L, AUTO R, or Stereo (no language function).
 For CD/WMA/MP3, the AUDIO button is invalid.

123

English

FURRION STEREO

Operation

Check the playback status
When playing DVD/VCD/CD discs, press OSD on the remote control once or more to turn on or off playback status display.  For DVD discs, this function allows you
to check such information as the current title and chapter numbers, and the elapsed and remaining time of both the current title and chapter etc.  For VCD/CD discs, this function allows you to check such information as the current track number, and the elapsed and remaining time of both the current track and the whole disc.
Program playback
This function allows you to play some titles / chapters / tracks on a DVD/VCD/MP3/WMA/ CD disc in your specified order. 1. During playback, press PROG on the
remote control to enter a program interface as follows: For DVDs
For VCD/MP3/WMA/CD discs
2. Use the navigation buttons to move the cursor onto the desired place for inputting the sequence number.

3. Use the number buttons to input the title / chapter / track sequence numbers you want in your desired order.
4. Press directly, or use the navigation buttons to move the cursor onto PLAY, and then press OK on the remote control to play the programmed titles / chapters / tracks in the programmed order.
 To exit program playback, press followed by , or press PROG twice again.
 To remove all programmed sequence numbers, move the cursor onto CLEAR, and then press OK on the remote control.
 To change the programmed sequence, move the cursor onto the item you want to change, and then input the desired sequence number.
 During VCD playback with PBC enabled, PBC will be disabled when you enter program playback.
Play a JPEG picture CD
In disc mode, the root menu is displayed on the screen with MP3/WMA files being played at the same time. (TITLE / PBC button unavailable). In the root menu, the left file sort icon is for MP3/WMA files, the middle one is for video files, and the right one is for JPEG files. If one of these 3 sorts of files does not exist, you cannot move the cursor onto the corresponding file sort icon. 1. Press the navigation buttons to select
your desired folder, file or file sort icon from the root menu. 2. Press OK or to open the selected folder, or play the selected file, or play the selected sort of files only.  In the root menu, you can also use the number buttons to select a file for playback.

24

124

English

FURRION STEREO

Operation

 After selecting the JPEG file sort icon and entering the folder, you can use the navigation buttons to select your desired JPEG file, and then press OK or to start full-screen playback starting from the selected JPEG picture.
 During JPEG playback, use the navigation buttons to change the angle of the displayed picture as follows: : 90 degrees clockwise : 90 degrees counterclockwise : Up <--> Down : Left <--> Right
 During JPEG playback, press PROG on the remote control to change the picture refresh mode.
 During JPEG playback, press to stop playback and return to the root menu.
 During JPEG playback, the following buttons are unavailable: SLOW-FWD, SUBT, TITLE/PBC, ANGLE, STEP, AUDIO, RDM and A-B.
 In JPEG mode, the other operations are the same as those in MP3/WMA mode.
Play MP4
In disc mode, the root menu is displayed on the screen and the first file will be played automatically. During playback, you can press to stop playback and return to the root menu. 1. Press the navigation buttons to select
your desired folder or file from the root menu. 2. Press OK or to open the folder, or play the selected file.  In the root menu, you can also use the number buttons to select a file for playback.  The ANGLE, PROG, RDM, and TITLE/PBC buttons are invalid.  The other functions are the same as those in DVD operation, while the repeat function is the same as that in MP3/WMA operation.

ESP and ID3 functions
 The unit supports the ESP (Electrical Shock Protection) function to ensure smooth disc playback on the move.
 During MP3/WMA playback, the current file and folder names as well as the ID3 information (if available in V1.0/2.0 format) will scroll on the LCD screen. The ID3 information includes the song title, and the artist and album name.
USB operation
Power on the unit, then connect a USB storage device to the USB socket. The screen will display the root menu of the USB storage device.
This unit supports picture (JPEG format), audio (MP3 or WMA format) and video (MP4 format) playback. All the operations are the same as those of the corresponding format.
NOTE: 1. Compatibility with all file formats is not
guaranteed. 2. Not all USB products can be charged from
the unit.
Set up the DVD System Menu
1. Press SETUP on the remote control to access the DVD System Menu on the TV screen. There are 6 setup pages in total.
2. Press / to select a desired setup page. 3. Press / to select a setup item on the
selected setup page. 4. Press to enter the setup item. 5. Press / to select an option for the
setup item, and then press OK to confirm.  Press to return to the upper level.  Press SETUP on the remote control again
or use the navigation buttons to highlight EXIT SETUP and then press OK to exit the System Menu.

25

125

English

FURRION STEREO

Operation

The 6 setup pages of the DVD System Menu are as follows:
SYSTEM SETUP
TV SYSTEM
The unit supports output of various TV systems. If your TV only supports NTSC or PAL system, the screen will blink and become colorless when the wrong TV system is selected. In this case go to TV SYSTEM and select NTSC, PAL or AUTO to match the system of your TV.
RESOLUTION
Select the resolution level.
TV TYPE
Select an option below to match your TV screen size. 4:3 PS: Choose the item when connecting a TV set with 4:3 screen. When playing pictures of 16:9 size, the left and right parts of the video will be cut out, and displayed on full screen. 4:3 LB: Choose the item when connecting a TV set with 4:3 screen. When playing pictures of 16:9 size, the top and bottom parts of the TV screen will be turned into a black square respectively. 16:9: Choose the item when connecting a TV set with 16:9 wide screen.
PASSWORD
Lock or unlock the rating level of Parental Control. The default state is locked, and the default password is 0000.

You can set a new password that you like: Select PASSWORD and then press to enter the setup item. Input the original password 0000, and then press OK to unlock it. Press to enter the setup item again, then input a new password that you like and finally press OK to confirm.
RATING
Set a new rating level for Parental Control.  Select PASSWORD and then press to
enter the setup item. Input the set password, and then press OK to unlock the rating level setting for Parental Control.  Select RATING and then press to enter the setup item. Use the navigation buttons to select your desired rating level, and then press OK to confirm.  Select PASSWORD again and then press to enter the setup item. Input the password and then press OK to lock the new rating level setting for Parental Control.
DEFAULT
Reset all settings to their original status.
LANGUAGE SETUP
OSD LANGUAGE
Select the language of the system menu and all interfaces displayed during playback.
AUDIO LANG
Select the audio language.
SUBTITLE LANG
Select the subtitle language.
26

126

FURRION STEREO

Operation
MENU LANG
Select the disc menu language.
AUDIO SETUP

SHARPNESS
Adjust the sharpness of video output.
SPEAKER SETUP

English

AUDIO OUT
Select a digital output method: SPDIF/OFF, SPDIF /RAW, or SPDIF/PCM.
HDMI AUDIO:
AUTO: Selected to output the audio automatically by RAW or PCM type.
VIDEO SETUP
BRIGHTNESS
Adjust the brightness of video output.
CONTRAST
Adjust the contrast of video output.
HUE
Adjust the hue of video output.
SATURATION
Adjust the saturation of video output.
27

DOWNMIX Select your desired sound effect when there is no center speaker or subwoofer. LT/RT: When playing a disc with PRO LOGIC Dolby stereo effect, choose the item to output audio signal with vivid theatre effect. STEREO: If you choose this item, for audio signal with 5.1 channels, only signal of the left and right channels will be output; for audio signal with 2 channels, the common stereo signal will be output. VSS: If you choose this item, for a disc recorded with 5.1 channels, the main channel speakers can output audio signal with VSS effect.
DIGITAL SETUP
DYNAMIC RANGE
After selecting the compression mode of LINE OUT, you can set this item to adjust the linear compression ratio. FULL: Set the Peak-to-Peak value of the audio signal to minimum. OFF: Set the Peak-to-Peak value to maximum.

127

English

FURRION STEREO

Operation

DUAL MONO
Select a desired audio output mode for the left and right channels of signal. It is mainly for Karaoke of Ac3. There are 4 modes in all: STEREO, MONO L, MONO R, MIX MONO
About Parental Control
Q: After insertion of a DVD into the disc slot, a dialogue box appears, asking for a password of 4 digits. Why?
A: This is because the movie you are playing was rated with Parental Control, and the current rating level of the unit is lower than the one of the current disc. You must input the right password and enter it into the Parental Control setup menu and then set an equal or higher rating level than the one of the current disc.
Note:  If you have not changed the password,
the factory preset password for the unit will be empty. You will need to input a desired password and verify it by inputting the password again before entering the Parental Control setup menu.  For the rating level setup of Parental Control of the unit, please refer to the relative content of the SYSTEM SETUP menu for details.

Accessories: Parental Control The Parental Control function of a DVD player can be used to control playback of movie scenes on a DVD disc set with a rating level. You can set the DVD player (including the software player on a PC) with a certain rating level via the SETUP MENU on the TV screen. If the rating level set in the disc is higher than the one set in the DVD player, the DVD player cannot play the disc. Sometimes the Parental Control sequences in some discs are different from each other. The rating level setup can be protected with a password. If you select Unlock, the Parental Control function will be invalid, and the whole content of the disc can be played.
A DVD disc can be designed with different rating levels of Parental Control so that the DVD player can play different versions of scenes from the same movie based on the set rating levels. Depending on the DVD feature of seamless switching, the scenes unsuitable for children will be cleared or replaced by other suitable scenes automatically.
All rating levels of Parental Control are as follows: Unlock 1. Kid Safe 2. G 3. PG 4. PG 13 5. R 6. NC 17 7. Adult

28
128

English

Operation
Region Code
Q: No DVD playback. REGION ERROR is displayed after insertion of a disc into the disc slot. Why?
A: Because the DVD player and disc have different region codes. If they do not match, the DVD player cannot play the disc.
Appendix: Region code of DVD The Motion Picture Association of America (MPAA) divided the world into 6 regions, and allocated every region a code, named the region code. The region codes and the countries or areas represented by the region codes are as follows: Region I: America, Canada, East-Pacific
Islands; Region 2: Japan, West Europe, North Europe,
Egypt, South Africa, Middle East; Region 3: South-east Asian countries
including Taiwan, Hong Kong, South Korea, Thailand, Indonesia, etc.; Region 4: Australia, New Zealand, Central South America, South Pacific Islands; Region 5: Russia, Mongolia, Indian Peninsula, Middle Asia, East Europe, North Korea, North Africa, North-west Asia etc.; Region 6: China mainland.

FURRION STEREO

29
129

English

FURRION STEREO

Operation

Bluetooth Operation
Pair DV1230 with your mobile phone
1. Activate Bluetooth mode on your mobile device. Then press BT on the front panel of DV1230 to enter pairing mode.
2. When DV1230 is detected by your mobile phone, the device name FURRION DV1230-XXXX (where X can be any character from A-Z or number from 0-9) is shown on your mobile phone.
3. Select the device name on your mobile phone, then an input box will pop up, asking you to input a password.
4. Input 0000 and confirm. Upon successful pairing and connection, 'LINK OK' will appear on the LCD of DV1230.
Note: 1. Some mobile phones support automatic
re-connection after first-time pairing with DV1230. Some other mobile phones may need you to select the device name (FURRION DV1230-XXXX) from the list of paired Bluetooth devices to confirm reconnection. 2. In case of casual disconnection, select the device name (FURRION DV1230-XXXX) from the list of paired Bluetooth devices to confirm re-connection.
Disconnect / unpair DV1230 from your mobile phone
1. To disconnect: On your mobile phone, select the connected device name (FURRION DV1230-XXXX) from the list of paired Bluetooth devices and confirm disconnection.
2. To unpair: Press and hold BT on the front panel of DV1230 for about 5 seconds to clear the pairing information.

Operate your mobile phone via
Bluetooth
When the Bluetooth connection is ready, the call you make or receive will be transferred from your mobile phone to DV1230. 1. When connected: Use controls on your
mobile phone to switch sound output between DV1230 and the mobile phone. 2. To dial a number with the remote control of DV1230:  Use number buttons 0-9 to enter a telephone number. * You can press CLEAR to cancel a wrong input if necessary.  Press / on the front panel (or on the remote control) to call out. 3. To redial a number:  Press / on the front panel (or on the remote control) to show the last dialed number on the LCD and call out. 4. To accept a call: When there is an incoming call, press /
on the front panel (or on the remote control) to accept the call. 5. To reject a call: When there is an incoming call, press and hold / on the front panel (or press on the remote control) to reject the call. 6. To end a call: During a call, press and hold / on the front panel (or press on the remote control) to end the call. Note: When there is an incoming call, the calling number will be displayed on the screen of DV1230.

30

130

English

FURRION STEREO

Operation

Play an audio file from another Bluetooth device to DV1230
"LINK OK" is displayed when DV1230 is paired and connected with another Bluetooth device.
If the Bluetooth device supports A2DP, you can stream music from the Bluetooth device to DV1230 for playback.
To play audio through Bluetooth, you must activate Bluetooth mode on your mobile device. If the Bluetooth device supports AVRCP, you can use the basic audio playback control functions (such as play/pause) from DV1230. Note: In other modes (except during a call via Bluetooth), press BT on the front panel to switch between different modes.
Set up Bluetooth connection using NFC (only supporting mobile phones with NFC function)
1. Enable the NFC function of your mobile phone and make sure the screen is active and unlocked.
2. Move your mobile phone towards DV1230 so that the NFC detection area on your mobile phone touches that on DV1230. You can now connect your mobile phone with or disconnect it from DV1230 conveniently. Note: For first-time pairing and connection, you will be asked to enter a password. Please enter "0000".

App Operation
 With the Furrion ES control App (either Android or iOS version), you can use your mobile device as a remote control.
 The App uses BT Low Energy (BLE) technology to connect to DV1230 instead of infrared in the physical remote control, thus getting free of line-of-sight connection.
 While the App checks for compatibility, you can cross-check the specifications of your mobile device to see if it supports BLE technology before installation.
 Find and download "Furrion ES Control" from Google Play (Android) or App Store (iOS) on your mobile device. Run the App as instructed.
 The App works with various models in the Furrion DV range entertainment system.
Install and use the App
1. Install the ES Control App on your mobile phone.
2. Enable Bluetooth on your mobile phone, and run the APP.
3. Select the device name "DV1230-4.0XXXX" (where X can be any character of A-Z or number 0-9) to connect.
4. Use the available functions on the App to control DV1230 freely.

31
131

English

FURRION STEREO
Maintenance
Maintenance and Cleaning of Discs
Disc Maintenance
1. To keep the disc clean, handle the disc by its edge, and do not touch the disc surface of the play side.
2. Do not stick paper or tape on the disc. If there is glue on the disc surface, wipe it off before using.
3. Do not expose the disc to direct sunlight, or nearby heat sources such as caliduct, or leave it in a car parked in direct sunlight where there can be a considerable rise in temperature.
4. Put the disc inside a disc case after finishing playback.
Disc Cleaning
1. Before playing, wipe the disc with a clean cloth, wipe the disc outwards from the disc center.
2. Do not use petrol, thinners, commercially available cleaners or anti-static sprays for plastic LPs to wipe discs.
32
132

English

FURRION STEREO

Troubleshooting

Please read the user manual carefully before using the product. If you have any problems with this product, please refer to the below troubleshooting guide to help you resolve the issue.

TROUBLE/SYMPTOM

SOLUTION

Ensure that the power switch is on.

No picture, sound and Ensure that the wall inlet is OK.

indication

Ensure that the power cord is not damaged or the fuse is not blown.

Ensure that the power connection is OK.

Ensure that the audio output of the unit is in good connection with the TV's audio input.

No sound but picture Check whether the audio connector is damaged.

OK

Check whether you have turned down the volume.

Ensure that the AUDIO setup of the unit is correct.

Ensure that the audio is not muted.

Black and white picture or screen rolling

Ensure that the TV SYSTEM (e.g. PAL, NTSC) setup is correct.

Ensure that the video output of the unit is in good connection with the TV's video input.

No picture but sound OK

Ensure that you have turned your TV to the AV input channel connecting to the unit.
Check whether the video connector is damaged.

Ensure that the VIDEO setup of the unit is correct.

Check whether AUDIO setup is correct.

Check whether the disc is scratched or stained.

Flaws in picture or sound

Check whether the AV connector and output terminal are stained.
Check whether there is condensation inside the lens. If so, leave the unit off for an hour or so, and then try again.

Check whether the installation angle is less than 30.

Ensure that you have inserted the disc into the disc slot.

Check whether the disc has been put in the reverse side.

Check whether the disc is distorted.

No disc or bad disc

Check whether the disc is stained or scratched badly. Ensure that the disc format is compatible with the unit.

Ensure that the temperature inside the car is not too high. If so, let the unit cool off until the ambient temperature returns to normal.

Insert another disc into the disc slot.

33

133

English

FURRION STEREO

Troubleshooting

TROUBLE/SYMPTOM

SOLUTION

Remote control does not work

Check the battery of the remote control and make sure that it is not dead. Direct the remote control to the IR sensor of the unit. Check whether there are obstacles between the remote control and IR sensor.

Turn off the power, then turn on again.

Some function buttons do not work

Reset the unit, then turn on again.

Remove the front panel from the unit, then put it back and turn on again.

The radio does not work

Check whether the antenna cable is connected firmly, or manually tune for a station.

Functions locked or no response for Bluetooth function

Press RESET with a sharp object such as a clip to reset the unit and load its factory default settings.

134

English

Specifications

General Specification

Power supply requirement Total power
Dimensions

DC 12V
RMS (4x25W + 2x15W) 913/16" x 45/8" x 7" (249 x 118 x 178 mm)

DVD Deck Specification

Format
Video system
Audio system Loading system Mounting angle

DVD/VCD/JPEG/MP4/WMA/CD NTSC/PAL/PAL-M/PAL-N/ AUTO (optional) 24 bit/96KHz Auto Loading 0 to +/-30

Video Specification

Video type
Horizontal resolution

16:9 and 4:3 Load impedance: 75 ohms
600

Audio Specification

Audio output (Analog audio)
Frequency response
S/N ratio (Audio)

2.0V 20Hz ~ 20KHz (at 1 KHz 0 dB) 60dB (at 1 KHz 0 dB)

Separation

50dB

Speaker output 4 

Radio Specification

FM section
Frequency range
Usable sensitivity I.F frequency AM section

87.5MHz - 107.9MHz (US) 87.5MHz - 108.0MHz (EU) 87.5MHz - 108.0MHz (AUS)
3uV
10.7MHz

Frequency range

530KHz -1710KHz (US) 522KHz -1620KHz (EU) 522KHz -1710KHz (AUS)

Bluetooth Specification

Bluetooth Version

V4.0

Operation Frequency

2.4GHz ( ISM BAND)

Bluetooth Output

4dBm

34

English

FURRION STEREO
Warranty
FURRION WARRANTS FOR A PERIOD OF 1 YEAR FROM DATE OF RETAIL PURCHASE BY THE ORIGINAL END-USE PURCHASER, THAT THIS PRODUCT, WHEN DELIVERED TO YOU IN NEW CONDITION, IN ORIGINAL PACKAGING, FROM A FURRION AUTHORIZED RESELLER AND USED IN NORMAL CONDITIONS, IS FREE FROM ANY DEFECTS IN MANUFACTURING, MATERIALS, AND WORKMANSHIP. IN CASE OF SUCH DEFECT, FURRION SHALL REPLACE OR REPAIR THE PRODUCT AT NO CHARGE TO YOU. THIS WARRANTY DOES NOT COVER: PRODUCTS WHERE THE ORIGINAL SERIAL NUMBERS HAVE BEEN REMOVED, ALTERED OR CANNOT READILY BE DETERMINED; DAMAGE OR LOSS CAUSED BY ACCIDENT, MISUSE, ABUSE, NEGLECT, PRODUCT MODIFICATION, FAILURE TO FOLLOW INSTRUCTIONS IN INSTRUCTION MANUAL, COMMERCIAL OR INDUSTRIAL USE; DAMAGE OR LOSS CAUSED TO THE DECORATIVE SURFACE OF PRODUCT; TO ANY DATA, SOFTWARE OR INFORMATION; AND NORMAL WEAR AND TEAR. THIS WARRANTY ONLY PROTECTS THE ORIGINAL END-USER ("YOU") AND IS NOT TRANSFERABLE; ANY ATTEMPT TO TRANSFER THIS WARRANTY SHALL MAKE IT IMMEDIATELY VOID. THIS WARRANTY IS ONLY VALID IN THE COUNTRY OF PURCHASE.
THIS WARRANTY AND REMEDIES SET FORTH ABOVE ARE EXCLUSIVE AND IN LIEU OF ALL OTHER WARRANTIES, REMEDIES AND CONDITIONS, WHETHER ORAL OR WRITTEN, EXPRESS OR IMPLIED. FURRION SPECIFICALLY DISCLAIMS ANY AND ALL IMPLIED WARRANTIES, INCLUDING, WITHOUT LIMITATION, WARRANTIES OF MERCHANTABILITY AND FITNESS FOR A PARTICULAR PURPOSE. IF FURRION CANNOT LAWFULLY DISCLAIM IMPLIED WARRANTIES UNDER THIS LIMITED WARRANTY, ALL SUCH WARRANTIES, INCLUDING WARRANTIES OF MERCHANTABILITY AND FITNESS FOR A PARTICULAR PURPOSE ARE LIMITED IN DURATION TO THE DURATION OF THIS WARRANTY.
No Furrion reseller, agent, or employee is authorized to make any modification, extension, or addition to this warranty.
FURRION IS NOT RESPONSIBLE FOR DIRECT, INDIRECT, SPECIAL, INCIDENTAL OR CONSEQUENTIAL DAMAGES RESULTING FROM ANY BREACH OF WARRANTY OR CONDITION, OR UNDER ANY OTHER LEGAL THEORY, INCLUDING BUT NOT LIMITED TO LOST PROFITS, DOWNTIME, GOODWILL, DAMAGE TO OR REPLACEMENT OF ANY EQUIPMENT OR PROPERTY, ANY COSTS OF RECOVERING, REPROGRAMMING, OR REPRODUCING ANY PROGRAM OR DATA STORED IN OR USED WITH FURRION PRODUCTS. FURRION'S TOTAL LIABILITY IS LIMITED TO THE REPAIR OR REPLACEMENT OF THIS PRODUCT PURSUANT TO THE TERMS OF THIS WARRANTY.
SOME STATES DO NOT ALLOW THE EXCLUSION OR LIMITATION OF INCIDENTAL OR CONSEQUENTIAL DAMAGES OR EXCLUSIONS OR LIMITATIONS ON THE DURATION OF IMPLIED WARRANTIES OR CONDITIONS, SO THE ABOVE LIMITATIONS OR EXCLUSIONS MAY NOT APPLY TO YOU. THIS WARRANTY GIVES YOU SPECIFIC LEGAL RIGHTS, AND YOU MAY ALSO HAVE OTHER RIGHTS THAT VARY BY STATE OR (WHERE APPLICABLE IN THE COUNTRIES WHERE FURRION HAS NON-US/CANADIAN AUTHORIZED DEALERS) COUNTRY. NO ACTION OR CLAIM TO ENFORCE THIS WARRANTY SHALL BE COMMENCED AFTER THE EXPIRATION OF THE WARRANTY PERIOD.
Keep your receipt, delivery slip, or other appropriate payment record to establish the warranty period. Service under this warranty must be obtained by contacting Furrion at warranty@furrion.com
Product features or specifications as described or illustrated are subject to change without notice.

36
Furrion Innovation Center & Institute of Technology
 52567 Independence Ct., Elkhart, IN 46514, USA  Toll free:1-888-354-5792  Email: support@furrion.com
©2007-2018 Furrion Ltd. Furrion® and the Furrion logo are trademarks licensed for use by Furrion Ltd. and registered in the U.S. and other countries.
©2007-2018 Furrion Ltd. Furrion® et le logo Furrion sont des marques déposées par Furrion Ltd. et enregistrées aux Etats-Unis et ailleurs.
©2007-2018 Furrion Ltd. Furrion® y el logotipo de Furrion y son marcas comerciales con licencia de uso de Furrion Ltd. y están registradas en los Estados Unidos y en otros países.
FURRION.COM
IM-FAV00039 V2.0

135

GARNET SEELEVEL II TANK MONITOR
SEELEVEL II TM
RV Tank Monitor

MODEL 709-P3 MANUAL

IMPORTANT OPERATOR INFORMATION
DATE INSTALLED: ____________________________________________________________________ SERIAL NUMBER: ____________________________________________________________________

Black Water Tank Grey Water Tank Fresh Water Tank

Signal Level

Sender Height

Printed in Canada
www.garnetinstruments.com
136

GARNET SEELEVEL II TANK MONITOR
GARNET
SEELEVEL II TM
Tank Monitor
MODEL 709-P3
Table of Contents
CHAPTER 1 - OVERVIEW.............................................................................................3 CHAPTER 2 - SYSTEM DESCRIPTION .....................................................................4 CHAPTER 3 - OPERATING INSTRUCTIONS ..........................................................6 CHAPTER 4 - DISPLAY CALIBRATION.....................................................................7 CHAPTER 5 - SENDER PROGRAMMING ...............................................................9 CHAPTER 6 - INSTALLATION GUIDE..................................................................... 13 CHAPTER 7 - TROUBLESHOOTING GUIDE......................................................... 20 CHAPTER 8 - SPECIFICATIONS ............................................................................... 28 CHAPTER 9 - SERVICE AND WARRANTY INFORMATION ............................ 29 MAIL IN WARRANTY ................................................................................................. 31

Page 2

709-P3 Manual_v3.5 - 01-Sep-2018

709-P3 Manual

137

GARNET SEELEVEL II TANK MONITOR
CHAPTER 1 - OVERVIEW
The SEELEVEL II TM Tank Monitor represents a massive leap forward in level measurement technology for the Recreational Vehicle industry. The SeeLeveL has a combination of features, accuracy, reliability, and diagnostic capability that have never been available before.
Model 709-P3 will monitor the battery voltage, the fresh water and sewer holding tanks, and includes a pump switch. The information is displayed on a 3-digit alpha-numeric LED display. In addition, the system can display the operating characteristics of each of the tank sending units, giving it unsurpassed diagnostic capability.
WARNING: All power circuits must be fused. If a fuse
is not provided with the system then it is the installer's responsibility to install a fuse with a maximum rating of 7.5 amps. A relay is required if more than 7.5 amps is needed for the pump.
For more detailed information please refer to Chapter 7
"TROUBLESHOOTING GUIDE" and section "How to avoid damaging the display or pump switch due to excessive current".

138

709-P3 Manual

Page 3

GARNET SEELEVEL II TANK MONITOR
CHAPTER 2 - SYSTEM DESCRIPTION
The SeeLeveL consists of a display unit that mounts inside the RV, and sender panels that stick to the side of the holding tank. A single 2 conductor wire is used to connect all the sender panels to the display.
The Sender:(DFKVHQGHUSDQHOLVDÁH[LEOHVHOIDGKHVLYHSULQWHG circuit board which is adhered to the side of the holding tank. The sender panel can be cut to length to match the height of the tank, and it auto calibrates itself so that it can read from Empty to Full regardless of the height of the tank. The sender scans the water level through the tank wall using advanced digital techniques programmed into the sender microprocessor. When the sender transmits the water or sewer level information to the display, it sends a digital code that has built in error detection, making it highly unlikely for the display to read an incorrect level, even if the wiring is marginal. In addition to the level, the sender also transmits diagnostic information about its operation. This information can be used to determine if there is buildup of sludge on the inside of the tank, or to determine if the sender is damaged or delaminating from the side of the tank. If sludge buildup in the WDQNEHFRPHVH[WUHPHWKHJDXJHZLOOFHDVHWRRSHUDWHSURSHUO\ so by monitoring the signal power the tank can be cleaned before WKHEXLOGXSJHWVH[FHVVLYH7KUHHGLIIHUHQWVHQGHURSWLRQV-6 710ES, and 710SS) and the ability to double stack the senders provide accurate level measurement for tank heights ranging from
4½" to 34".
The Display: The display receives the information from the three sender panels via a single 2 conductor wire, and displays the level information in percent of full on a 3-digit LED display. When the button for a particular tank is pressed, the display shows the level for that tank. If the button is pressed and released, the display will show the level for about 5 seconds and then shut down automatically. If another button is pressed before the display shuts down, then the new level will immediately be shown. If the same water or waste button is pressed twice, the display will hold on that tank and continue to show updated levels for 5 minutes EHIRUHVKXWWLQJRII7KLVDOORZVWKHXVHUWRPRQLWRUWKHÀOOLQJRU draining of a tank. By pressing two buttons at once, the diagnostic functions can be accessed; these are described in detail in the troubleshooting chapter.

Page 4

709-P3 Manual

139

GARNET SEELEVEL II TANK MONITOR
If a sender is operating properly and connected to the display with good wiring, then the display will show the level normally. If the wiring is disconnected, shorted, or cut, or if the sender panel is defective, then the display will indicate an error code. The various error codes are shown in the troubleshooting chapter.
With these diagnostic features and the digital nature of the tank level sensing technology, it is almost impossible for the system to indicate an incorrect water level, and in the very unlikely event it does occur, servicing is greatly aided with the diagnostic information.
The system also shows the RV battery voltage by measuring the voltage which powers the display. The voltage is shown with a resolution of 0.1 volt.

140

709-P3 Manual

Page 5

GARNET SEELEVEL II TANK MONITOR
CHAPTER 3 - OPERATING INSTRUCTIONS
The display is the only system component that is accessed by the user. All user input to the display is done using the four buttons along the bottom of the display. Operation of the display is as follows:
To read a water or sewer tank level:
1. Press the button corresponding to the tank to be checked and release it, the display will show the level in percent on the LED display. If no other button is pressed, then the display will shut off after about 5 seconds.
2. ,I DQRWKHU EXWWRQ LQFOXGLQJ BATT) is pressed before the  VHFRQG WLPH LV XS IRU WKH ÀUVW EXWWRQ WKH GLVSOD\ ZLOO immediately switch to showing the new level or voltage. The 5 second timeout is restarted every time a button is pressed.
3. To continuously display a reading, press and release the desired button, and then press the same button a second time. When the button is released, the display will be in hold mode, which is indicated by the decimal point on the right hand side turning on. While the display is in the hold mode it will recheck the level once per second so the user can watch WKHOHYHOFKDQJHZKLOHWKHWDQNLVEHLQJÀOOHGRUGUDLQHG7KH display will automatically shut off after 5 minutes in hold mode. To end the hold mode before the 5 minutes is up, press any tank button, and the display will shut off.
To read the battery voltage:
1. Press the BATT button and release it, the display will show the battery voltage on the LED display.
2. If no other button is pressed, then the display will shut down after about 5 seconds. If the BATT button is held down, the display will continuously recheck the voltage and show WKH XSGDWHG YDOXH  7KH UHDGLQJ PD\ ÁLFNHU EDFN DQG IRUWK EHWZHHQWZRYDOXHVIRUH[DPSOHDQGYROWV7KLVLV normal behavior for a digital voltage display.
3. If another button is pressed before the 5 second time is up for the BATT button, the display will immediately switch to showing the value for the new button. The 5 second timeout is restarted every time a button is pressed.
4. There is no hold mode for the battery voltage.

Page 6

709-P3 Manual

141

GARNET SEELEVEL II TANK MONITOR
CHAPTER 4 - DISPLAY CALIBRATION
To program the LED brightness:
1. If the display is to be used inside the coach, the LED brightness should be low. If it is to be used in the service bay area where sunlight can reach it, the LED brightness should be high.
2. To program the LED brightness, the display needs to enter the brightness programming mode. To do this, press and hold down the BATT button, the display will show the battery voltage.
3. While continuing to hold down the BATT button, press and hold down the GREY button. Continue to hold down both buttons for about 5 seconds until the display shows "bri" to indicate the brightness programming mode. When this occurs release both buttons.
4. The display will now indicate the brightness that is currently programmed by showing "b-1", "b-2", "b-3", or "b-4", where "b-1" is the minimum brightness and "b-4µLVWKHPD[LPXP brightness.
5. Press the GREY tank button to increase brightness, or the FRESH tank button to decrease brightness.
6. When the display shows the correct brightness, press the BATTEXWWRQWRH[LWWKHSURJUDPPLQJPRGH
To program the number of senders for each tank:
1. To program the number of senders for each tank, the display needs to enter the sender programming mode. This should only be done at the time of installation, there is no reason to change the number of senders afterward. Make sure that the number of senders programmed into the display matches with the number of senders connected, otherwise the display will show an error.
2. To enter the sender programming mode, press and hold down the button for the tank to be programmed, the display may show a level or an error message for that tank.
3. While continuing to hold down the button for the tank, press and hold down the BATT button. The display will immediately show "dIAµGLDJQRVWLFVFRQWLQXHWRKROGGRZQERWKEXWWRQV until the display enters the programming mode, this should take about 5 seconds.

142

709-P3 Manual

Page 7

GARNET SEELEVEL II TANK MONITOR
4. When the programming mode is entered, the display will show "FrS" if entering the number of senders for the fresh tank, "GrS" if entering the grey tank, or "bLS" if entering the black tank. When this occurs release both buttons.
5. The display will now show "1SEµRQHVHQGHURU´2SEµWZR senders), based on what is currently programmed into the display. These are the only two options, the display will not work with more than two senders per tank.
6. To change the number of senders, press the tank button, each time the button is pressed the display will switch to the other number.
7. When the display shows the correct number of senders, press the BATTEXWWRQWRH[LWWKHSURJUDPPLQJPRGH(DFKWDQN will need to be calibrated individually using this procedure.
The battery voltage is calibrated at the factory, this should never need to be changed.

Page 8

709-P3 Manual

143

GARNET SEELEVEL II TANK MONITOR
CHAPTER 5 - SENDER PROGRAMMING
To program the 710ES or 710SS sender for the correct tank:
1. Since the senders are all connected in parallel to save wiring and to simplify installation, the senders must be programmed so they know which tank they are on. The senders can be programmed for either the fresh, grey, or black tank. This is done with the two tabs on the top corners of the sender. See the following diagram.
2. The senders default to fresh tank operation if the programming is not altered. Consequently, if the sender is for the fresh tank, nothing further needs to be done to it.
3. If the sender is for the grey tank, remove the tab that says "GRYµQH[WWRLW
4. If the sender is for the black tank, remove the tab that says "BLKµQH[WWRLW
5. This is all that is required to program the senders for the correct tank. However, if you make an error, you have one chance to correct it, as described below.
6. If the "GRY" tab has been removed and it should be a black tank sender, or if the "BLK" tab has been removed and it should be a grey tank sender, then cut out the recessed greyblack correction tab that says "GBCµQH[WWRLW7KLVUHYHUVHV the effect of the grey and black tabs.
7. If either the "GRY" or "BLK" tabs have been removed and it should be for a fresh tank, then remove the other "GRY" or "BLK" tab. When both the "GRY" and "BLK" tabs are removed, it is equivalent to neither of them being removed.
8. If the sender is single, no further programming is required. 9. If double stacked senders are used, the top sender must have
additional programming, as described below. 10. Refer to the 710ES and 710SS sender programming diagram.
To program the 710ES or 710SS sender as top or bottom:
1. Since the senders are all connected in parallel to save wiring and to simplify installation, the senders must be programmed so they know whether they are a single, top, or bottom sender. This is done with the tab at the top center of the sender. See the following diagram.

144

709-P3 Manual

Page 9

GARNET SEELEVEL II TANK MONITOR
2. The senders default to single or bottom operation if the programming is not altered. Consequently, if the sender is for single or bottom operation, nothing further needs to be done WRLWEH\RQGSURJUDPPLQJLWIRUWKHFRUUHFWWDQN
3. For a top sender, remove the tab that says "TOPµQH[WWRLW
4. This is all that is required to program the senders for single, top, or bottom use. However, if you make an error, you have one chance to correct it, as described below.
5. If the "TOP" tab has been removed and it should be a single or bottom sender, then cut out the recessed top correction tab that says "TCµQH[WWRLW7KLVUHYHUVHVWKHHIIHFWRIWKH top tab.
6. Verify that both the top and bottom senders have been programmed for the correct tank.
To program the 710JS sender for the correct tank:
1. Since the senders are all connected in parallel to save wiring and to simplify installation, the senders must be programmed so they know which tank they are on. The senders can be programmed for either the fresh, grey, or black tank. This is done with the two tabs on the top corners of the sender. See the following diagram.
2. The senders default to fresh tank operation if the programming is not altered. Consequently, if the sender is for the fresh tank, nothing further needs to be done to it.
3. If the sender is for the grey tank, remove the tab that says "GRYµQH[WWRLW
4. If the sender is for the black tank, remove the tab that says "BLKµQH[WWRLW
5. This is all that is required to program the senders for the correct tank. However, if you make an error, you have one chance to correct it, as described below.
6. If the "GRY" or "BLK" tab has been removed by mistake, the sender can be changed to a fresh tank sender by cutting the RWKHUFRUQHUWDE´GRY" or "BLK").
7. 5HIHUWRWKH-6VHQGHUSURJUDPPLQJGLDJUDP

Page 10

709-P3 Manual

145

GARNET SEELEVEL II TANK MONITOR

710ES AND 710SS SENDER PROGRAMMING
709-P3 Manual

Page 11

146

GARNET SEELEVEL II TANK MONITOR

710JS SENDER PROGRAMMING

Page 12

709-P3 Manual

147

GARNET SEELEVEL II TANK MONITOR

CHAPTER 6 - INSTALLATION GUIDE

1. Please refer to the "Troubleshooting and Installation Tips" section in Chapter 7 for details on avoiding installation issues.
2. The installation consists of mounting the display inside the RV, cutting and fastening the senders to the sides of the holding tanks, connecting wiring, and programming the display. When wiring DO NOT use spade connectors to join wires, only use crimp on butt connectors or solder the wires together.
3. Mount the display by cutting a hole in the wall 3" wide by 1 7/8"
high and bringing the wiring out through the hole to connect to the display panel connector.
4. Connect the wiring according to the following table. It is HDVLHUWRFRQQHFWWKHZLULQJWRWKHGLVSOD\FRQQHFWRUÀUVWDQG then plug the connector into the display panel. The senders need to be grounded to a single ground wire from the display. Make sure that the system ground is connected to the breaker panel ground.

Wire Color Red 18 gauge Black 18 gauge Blue 18 gauge White 18 gauge

Function +12V power input to monitor Ground Tank senders Pump indicator

5. Determine where to mount the senders on the tanks. They ZLOO QHHG WR KDYH D ÁDW DUHD RQ WKH VLGH RI WKH WDQN ODUJH enough so the whole width of the sender is in contact with the side of the tank, all the way from the top to the bottom of the tank. Make sure that any metal is at least an 1" away from either side or the top and bottom of the sender, and at least 2" away from the face of the sender. Clean the area well so that there is no dust, grease, oil, water, etc., that would prevent the adhesive on the sender from sticking.
6. Measure the height of the tank to determine which sender FRQÀJXUDWLRQ WR XVH DQG KRZ ORQJ WKH VHQGHUV VKRXOG EH Refer to the following table. Note:'2127PL[VHQGHUW\SHV when stacking senders.

148

709-P3 Manual

Page 13

GARNET SEELEVEL II TANK MONITOR

Tank Height
4½" - 5"
5" - 7" 7" - 13" 13" - 17" 17" - 25" 25" - 34"

Sender Options

Best Resolution Other Acceptable

-6

-

-6

ES

ES

SS

stacked ES

SS

stacked ES

stacked SS

stacked SS

-

For single sender applications:
The sender ends should be ¼" to ¾" away from the top and
bottom of the tank, to allow for the thickness of the tank top and ERWWRP DQG DQ\ ERZV LQ WKHP VHH WKH GLDJUDPV  7KH VHQGHUV are calibrated to account for this distance from the bottom of the tank. The SS sender is cut to the nearest even 2" in length. The (6 VHQGHU LV FXW WR WKH QHDUHVW HYHQ µ LQ OHQJWK IRU H[DPSOH for a system with a tank height of 11.75", cut the sender to be
10.5" long, this allows 5/8" at each end when the sender is centered
YHUWLFDOO\ RQ WKH WDQN 7KH -6 VHQGHU LV FXW WR WKH QHDUHVW µ LQ length. IMPORTANT: DO NOT cut the 710SS sender shorter than 6". This sender will not work if it is cut shorter than 6". DO NOT
cut the 710ES sender shorter than 4½". This sender will not work if it is cut less than 4½µ'2127FXWWKH-6VHQGHUVKRUWHUWKDQ
4". This sender will not work if it is cut less than 4".
For double stacked sender applications:
For tall tanks, double stacked 710ES or 710SS senders are used.
The sender ends should be ¼" to ¾" away from the top and
bottom of the tank, to allow for the thickness of the tank top and ERWWRP DQG DQ\ ERZV LQ WKHP VHH WKH GLDJUDPV  7KH VHQGHUV are calibrated to account for this distance from the bottom of the
tank. In addition, there needs to be a gap of 1/16" to 1/8" in between
the double senders. Therefore the total length of both senders
will be: tank height -¼"-¼"-1/8", then rounded down to the nearest
µ(6VHQGHURUµ66VHQGHU7KHWRSDQGERWWRPVHQGHUV VKRXOG EH DSSUR[LPDWHO\ WKH VDPH OHQJWK IRU EHVW UHVXOWV  )RU
H[DPSOHLIWKHWDQNKHLJKWLVµWKHQµ¼"-¼"-1/8"= 21 3/8", so
the total length of both ES senders will be 21". Make both senders 10.5" long.

Page 14

709-P3 Manual

149

GARNET SEELEVEL II TANK MONITOR

710ES AND 710SS SENDER

150

709-P3 Manual

Page 15

GARNET SEELEVEL II TANK MONITOR

710JS SENDER

Page 16

709-P3 Manual

151

GARNET SEELEVEL II TANK MONITOR

7. 7RPDNHWKHVHQGHUVWKHULJKWOHQJWKDVVXPLQJWKH\DUHWRR long) they will need to cut off with a pair of scissors. The end to be cut is the bottom end, which is the opposite end IURP WKH WRS ZKHUH WKH ZLUHV FRPH RXW VHH WKH GLDJUDPV DO NOT cut the sides, and DO NOT cut the 710ES sender
shorter than 4 ½", the 710SS sender shorter than 6" or the
-6VHQGHUVKRUWHUWKDQµ7KHFXWPXVWEHLQEHWZHHQWKH VHQVRUSDGVDQGWKHFXWPXVWEHPDGHSDUDOOHOWRWKHH[LVWLQJ bottom end. Double check your measurements, if the sender is cut too short, it cannot be lengthened.
8. The senders need to be programmed so they know which tank they are on. This is done by selectively cutting off the tabs on the top of the sender. See the chapter entitled "SENDER PROGRAMMING" for details.
9. For double stacked sender systems, the senders also need to be programmed so they know whether they are being used as top or bottom senders. See the chapter entitled "SENDER PROGRAMMING" for details.
10. Once the sender is cut to length and programmed, do a test by taping the sender to the tank wall. Make sure there are no air gaps between the sender and the tank. Verify operation before permanently sticking the sender to the tank wall. 2QFHSURSHURSHUDWLRQKDVEHHQFRQÀUPHGFDUHIXOO\SHHOWKH backing paper off the adhesive. Do this slowly to prevent the adhesive from being ripped off the sender, and to prevent the backing paper from ripping. Be careful not to bend the sender sharply in the process. Position the sender over the side of the tank and carefully stick it down. MAKE SURE THAT THE END WITH WIRES IS POINTING UP!! Position the bottom
of the sender at least ¼" above the bottom of the tank, or
slightly higher if required to equalize the space at the top and bottom of the tank. Make sure that the sender is square with the tank. You only have one shot at this, if you try to peel it off the tank once it is stuck the sender may be damaged by the sharp bending. Carefully press the sender down to the tank so that all of the adhesive is contacting the tank wall.
11. Do steps 5 to 10 for the other two holding tanks.
12. Connect all the blue wires from the senders together, and to the blue wire from the display. Connect the black wire from each sender to ground at the display. It is very important that the display and the senders have the same ground. Use crimp on butt connectors to fasten the wires together. Make sure that the wires from the sender are routed to the RIGHT side of the sender, away from the sender. NEVER route the wires to the left of the sender. If they drape over the sender they could affect the reading. Secure the wires with tie wraps

709-P3 Manual

Page 17

152

GARNET SEELEVEL II TANK MONITOR
or something similar so that the wires do not rattle or press against the sender, this may result in sender damage or wires breaking over time. Refer to the enclosed wiring diagrams.
13. All that remains now is calibration and testing. The tank senders will self calibrate to whatever length they are cut, so they will always read from 0% to 100%. The display needs to be set to a single or double sender system for each tank. See the chapter entitled "DISPLAY CALIBRATION" and the section "To program the number of senders for each tank" for details. Make sure you do it for each tank.
14. For the initial test, have the tank at least ¼ full of water or
sewage, and verify that the percent level reading looks correct VHH WKH FKDSWHU HQWLWOHG "OPERATING INSTRUCTIONS" and the section "To read a water or sewer tank level" for details). Check to see that the signal power is at least 20% VHH WKH FKDSWHU HQWLWOHG "TROUBLESHOOTING GUIDE" and the section "To review the sender diagnostics" for details). If the signal power is too low, make sure that the VHQGHUV LV ZHOO VWXFN WR WKH VLGH RI WKH WDQN DQG WKDW WKH tank is reasonably clean inside, as a large buildup will reduce VLJQDO VWUHQJWK  7KH JDXJH ZLOO ZRUN ZLWK PD[LPXP VLJQDO strengths as low as 20%, but it is good to have at least 50% to 60% at installation so that there is some margin available for buildup in the tank. Note that the system "learns" about the characteristics of the tank with use, so the readings may be inaccurate when the tank is empty or almost empty when the V\VWHP LV ÀUVW WHVWHG  2QFH WKH WDQN KDV EHHQ ÀOOHG DW OHDVW
¼ full the system will be properly "taught" and should read
correctly after that.
15. If equipped, connect the pump switch as required.
16. WARNING: The pump switch is rated for a maximum of 7.5 amps. The use of a relay is required if more than 7.5 amps is needed. A 7.5 amp (max) fuse must be installed in the series with the 12V power circuit to the switch!
17. Verify that the battery voltage reads correctly. If it appears low, make sure you have good wiring for the 12 volt power and the ground.

Page 18

709-P3 Manual

153

GARNET SEELEVEL II TANK MONITOR

Typical Double Stacked 710ES or 710SS Sender Installation

709-P3 Manual

Page 19

154

GARNET SEELEVEL II TANK MONITOR

CHAPTER 7 - TROUBLESHOOTING GUIDE
Display trouble codes:
If a sender or its wiring is not operating properly, the following codes are shown on the display:
1. If a sender is unresponsive or there is an open circuit in the wiring so that the sender is not connected, the display will indicate an open circuit by showing "OPn" on the LED display.
2. If a sender is shorted or there is a short in the wiring, the display will indicate a short circuit by showing "Sht" on the LED display.
3. If a sender is sending bad data, there is damaged wiring, or if there is electrical interference, the display will indicate a data error by showing "Err" on the LED display. Also, if the senders have not been programmed correctly, they can interfere with one another and result in "Err" on the LED display. Check all the senders to make sure they are programmed correctly. If they are, replace the sender that is creating the error.
4. If the display has been programmed for a single sender, and double stacked senders have been connected, the display will show "StA". In this case, change the senders or reprogram the display as required. If only a top sender has been connected, the display will show "nbo", indicating that no bottom sender has been received. If the tank should only have a single sender, correct the programming on the sender, it should not be a top sender.
5. If the display has been programmed for double stacked senders for tall tanks, and only the bottom sender is working and the top one is not, then the display will show "ntP" indicating that no top sender is being received. If the top is working but no bottom sender is being received, then the display will show "nbo". If neither sender is working, then the display will show "OPn". Check the wiring and the programming of the senders. If all is OK with that, replace the bad sender.
6. The display contains a permanent memory which is used to store the programming for battery voltage calibration value and the tank sender signal levels. These signal levels are used to help the system adapt to the tanks, which increases sender accuracy at low tank levels. If this memory should fail, "CAL" ZLOO EH ÁDVKHG RQ WKH /(' GLVSOD\ LQGLFDWLQJ D FDOLEUDWLRQ failure. It will be necessary to replace the display if this occurs.
7. There are no diagnostics for the battery voltage.

Page 20

709-P3 Manual

155

GARNET SEELEVEL II TANK MONITOR

The diagnostics can be used to check the wiring and the senders:
1. If a short circuit is showing, disconnect the senders one at a time at the sender location. If the short circuit indication goes away when a sender is removed, then that sender is bad. If all the senders are removed but a short circuit still shows, then the wiring may be shorted. Disconnect the sender wire at the display, the short indication should go away. If it doesn't, the display is bad.
2. If an open circuit for all the senders is showing, it is most likely a wiring open circuit or display failure, since it is unlikely that all three senders are bad. Try shorting the wiring together at the display, the display should indicate a short circuit. If it doesn't, the display is bad. If it does, then remove that connection and short the wires together at the sender locations. If no short circuit is shown, then the wiring is open. If the display does show a short circuit, then the senders must be bad.
3. If a single sender is showing an open, try shorting the wiring together right at that sender. If a short now shows, the sender is bad or not wired properly. If no short circuit shows on the display, the wiring to that sender is open.
To review the sender diagnostics:
1. The sender diagnostics can be reviewed periodically to check for any degradation of the tank senders. If a sender appears to be malfunctioning, reviewing the diagnostics should be the ÀUVWVWHSLQWKHWURXEOHVKRRWLQJSURFHVV
2. There are two diagnostics for the senders: the signal power, and the sender height.
The signal power is an indication of how much signal is being transmitted through the tank wall and picked up by the receive part of the sender. If the signal power is too low, it can indicate a sender which is detached from the tank, excessive buildup on the inside of the tank, bad wiring to the sender, low battery voltage, or a defective sender. Typical signal power should be 50% to 60%. The minimum signal power for proper operation is 20%.
The sender height is the number of receive segments present in the sender. To determine the length of the sender, multiply the calibration by 2.0 (SS sender) or 1.5 (ES sender) or 1.0 (JS sender) to get the length in inches. The senders always auto calibrate to the length that they are cut, so this diagnostic allows WKH XVHU WR FRQÀUP WKH OHQJWK DQG WR PDNH VXUH WKDW WKH DXWR calibration is working properly.

709-P3 Manual

Page 21

156

GARNET SEELEVEL II TANK MONITOR
3. To check the diagnostics, press and hold the button for the tank to be checked, the display will show the level for that tank.
4. While continuing to hold down the button for the tank, press the BATT button. When the display shows "dIA", release the buttons, the display will then change to showing the signal power diagnostic. This is indicated by a "P" showing on the OHIWGLJLWIRUH[DPSOHµP26" indicates a 26% signal power.
5. The signal power will show for 5 seconds. The display will then change to showing the sender height. This is indicated by a small "hµVKRZLQJRQWKHOHIWGLJLWIRUH[DPSOH´h 6" indicates that the sender has 6 receive segments, which is 6" KLJKIRUD-6VHQGHUµKLJKIRUDQ(6VHQGHURUµKLJKIRU an SS sender.
6. After 5 seconds of showing the height, the display will shut off.
TROUBLESHOOTING AND INSTALLATION TIPS
What to do if the system freezes or is unresponsive:
1. If the display is unresponsive, it may be "hung" due to a static discharge or electrical noise. Try rebooting it by shutting off the 12V power to it for a few seconds, then turning it back on.
What to do if operation becomes erratic or stops completely:
1. Make sure all wiring connections are solid. Do not use spade connectors to join wiring as they will degrade over time. Use insulated crimp-on butt connectors or solder and insulate the wire connections.
What to do in dual console systems if the two displays do not read the same:
1. For dual display console applications, if the consoles disagree the most likely reason is a bad console ground. Both console grounds, and the sender grounds, must be connected together with ground wiring. Do not depend on metal chassis components. See item 2 in the following section for further details.
What to do if readings jump or are inaccurate 1. We have had a few instances where 120VAC interference has
caused the readings to stall and create a gap; readings would skip from 50% to 70% and then begin to function again. The cause was wiring between consoles and senders being tied

Page 22

709-P3 Manual

157

GARNET SEELEVEL II TANK MONITOR

WRRFORVHWRHQWUDQFHER[HVIRUVKRUHSRZHURUEXQGOHGZLWK RWKHUKLJK$&YROWDJHOLQHVRUMXQFWLRQER[HV
2. Always ground the senders and the console to the same ground circuit. This is very important; RV's can have several ground circuits with resistance between them. We have had instances where two consoles are installed with a different ground for the service bay console and interior console. If you see different levels from each console on the same tank, then the ground circuit is not common. Connect both consoles to the same ground back to the breaker panel ground point.

What to do if the system indicates a residual or non-zero water level even though the tank is drained completely:

1. 7KLV FDQ EH GXH WR D FRQYH[ WDQN ERWWRP RU D VORSHG WDQN ERWWRP,QWKHFDVHRIWKHFRQYH[ERWWRPWDQNDULQJRIZDWHU may remain after draining. In the case of the sloped bottom WRWKHGUDLQYDOYHVLGHDYHU\VPDOODPRXQWRIZDWHUOHIWLQ the tank will result in a non-zero level indication. In both of these cases, temporary installation of the sender using duct tape or masking tape will allow the installer to check WKH WDQN OHYHO EHIRUH FRPPLWWLQJ WR D ÀQDO VHQGHU SRVLWLRQ After cutting the sender to length and connecting the wires, be sure to tape down both sides of the sender to eliminate air gaps between the sender and tank surface which can cause low signal strength and unpredictable performance. The ends of the sender must be at least ¼" to ½" away from the tank bottom and top to allow for wall thickness. The H[WHULRU ERWWRP  WRS RI WKH WDQN DUH QRW WKH VDPH DV WKH LQWHULRUERWWRP WRSGHSHQGLQJRQWKHWDQNZDOOWKLFNQHVV the inside height is ½" to 1" shorter than the outside height. .QRZLQJWKHZDOOWKLFNQHVVRI\RXUWDQNZLOODOORZ\RXWRÀQG the optimal sender position; placing the sender where it can "see" the water will ensure proper level calculation and sender operation.
2. The signal strength should be in the 50% range for best performance. If the signal strength is in the 20% range it is indicative of a high resistance in a connector, a bad ground, RULPSURSHUERQGLQJRIWKHVHQGHUWRWKHWDQNDSRVVLEOHDLU gap on one or both sides of the sender).
3. With the console installed you can check the level on each tank, if you get an indicated level of 10% to 20% and you know this is too high, reposition the sensor board as follows:
,QWKHFDVHRIDFRQYH[WDQNERWWRPXVXDOO\IRXQGRQODUJHÁDW tanks, raising the sender is the best solution to accomplish a zero reading when the tank is empty. This may result in having to shorten the sender by an additional segment.

709-P3 Manual

Page 23

158

GARNET SEELEVEL II TANK MONITOR
On sloped tanks, which are used to promote complete draining, one alternative is to measure the end of the tank opposite from the drain valve. It may be necessary to extend the wire harness to be able to measure on the optimal side. On the drain valve side, the best choice is to elevate the sender to avoid reading a puddle at the drain valve.
4. 7KHFORVHSUR[LPLW\RIPHWDOWRWKHVHQGHUFDQEHPLVLQWHUSUHWHG as water, since they have similar electrical characteristics. Any metal such as steel, aluminum, copper, or brass can affect the sender reading if it is closer than about 2" brackets, straps, pipes, ducts, etc. close to the sender you may have to move the sender away from them. Again, trial positioning using WDSH LV QHFHVVDU\ XQWLO WKH SUREOHP GLVDSSHDUV )OH[LEOH pieces of metal can be held away from the sender with rubber wedged between the sender and the metal. If the metal is off to the side of the sender, or just butting to the edge then it is usually not a problem, particularly on the right hand side of the sender.
5. Make sure that metal doors or covers are far enough away from the sender as well, once everything is closed up the SRVLWLRQLQJPD\FKDQJH7KHV\PSWRPVRIH[SRVXUHWRODUJH metal components are usually a non-zero reading when the tank is empty, or the level appearing to jump suddenly as the WDQNLVGUDLQHGRUÀOOHG
6. On fresh tanks there is sometimes a potential to not be able to use all the water in the tank, we suggest you elevate the fresh sender 1" off the tank bottom and position the top of WKHVHQGHUWRDOORZIRUYHQWSRVLWLRQLIWKHYHQWLVRQWKHVLGH of the tank). This way you should see `0' before the pump starts to suck air. Some tanks have a sump style draw system, in this case there is no concern with unusable water, just allow for the wall thickness when positioning the sender board XVXDOO\óµWRµPDUJLQIURPWKHRXWHUVKHOO,IWKHVHQGHULV SRVLWLRQHGDERYHWKHYHQWWKHQWKHPD[LPXPUHDGLQJPD\EH less than 100%.
7. There may be a buildup on the inside walls of black and grey tanks. We get calls occasionally about older coaches that have not been in service for a few years in which the black tank will now indicate a level even though it is empty. The likely cause is WKDWWKHWDQNKDVDVLJQLÀFDQWEXLOGXSSUREDEO\H[FHHGLQJôµ WRóµWKLFN5HGH[LVQRWDQDFFHSWDEOHFKHPLFDOWRSURPRWH clean tank walls; it is far too slow to get the breakdown action started. Use an RV type of liquid chemical, we suggest Tissue Digester, Sensor Cleaner, or the latest we have used called +DSS\ &DPSHUV +ROGLQJ 7DQN ([WUHPH &OHDQHU DYDLODEOH DW www.happycampersworld.com  7KH QH[W WLPH \RX WDNH D

Page 24

709-P3 Manual

159

GARNET SEELEVEL II TANK MONITOR
trip, leave with a high concentration of the chemical in the WDQN DQG DSSUR[LPDWHO\  IXOO RI IUHVK ZDWHU  +RSHIXOO\ you can drive for 2-3 days allowing the tank levels to rise WKURXJK QRUPDO XVH  :H UHFRPPHQG WKDW \RX H[FHHG WKH level that you see the system report when the tank is empty. After the sloshing and the soaking hopefully the build-up will EHÁXVKHGDZD\ZKHQWKHWDQNLVGUDLQHGDQGÁXVKHG,I\RX still have symptoms the treatment may required a few more times. The waste did not build up on the tank wall in one day, so it may not dissolve in one treatment! The build-up looks OLNHZDWHUWRWKHV\VWHPVLQFHLWKROGVDVLJQLÀFDQWYROXPHRI ZDWHULQWKHEXLOGXSDUHD,WWDNHVPXFKPRUHWKDQDÀOPRU piece of tissue to cause the error.
What to do if the system reads a zero water level at all times, or does not reach 100%:
1. 7KLVPD\EHGXHWRH[FHVVLYHWDQNZDOOWKLFNQHVV:HKDYH
tested the sender on an actual tank with 3/8" wall thickness
WRHQVXUHSURSHURSHUDWLRQ,I\RXHQFRXQWHUDQH[FHVVLYHO\ thick tank wall the symptom will be a zero reading regardless of the actual tank level. The cross check would be to test the sender on another tank by taping it in place temporarily,
if it now works the tank wall thickness is well over 3/8". You
can also use a 1 gallon jug or a 5 gallon pail as a test tank to crosscheck operation of the sender.
2. A symptom we have seen is the sender will not indicate 100% when the tank is full. If the sender is positioned too high on the tank, then water cannot reach high enough on the sender for it to read 100%. The top of the sender must be at least ¼" to ½" away from the top of the tank to allow for wall thickness.
3. Another possibility is a tank wall thickness issue that may occur at the corners or edges of the tank. This has not been a common issue, and the only correction you can make is to move the board slightly lower, away from the thick area.
What to do if sender delamination occurs:
1. We have had reports of the senders literally falling off the tanks or showing serious delamination. This is likely caused by a lack of tank surface preparation. Surface prep is very simple, wipe the area to be adhered to with products like Pro Bond, alcohol, or acetone. Do not use thinners because they leave residues which attack the adhesive. Ambient temperatures of less than 60°F or 15°C prevent the bonding agents in the

709-P3 Manual

Page 25

160

GARNET SEELEVEL II TANK MONITOR
adhesive from working properly; use a heat gun to warm the tank surface if necessary. Also be sure the surface is dry, again a heat gun is the best way to dry the bonding area. Finally, the surface of the tank must be smooth. The adhesive works much better on smooth surfaces, if necessary use an orbital VDQGHUZLWKÀQHJULWSDSHUJULWWRTXLFNO\DFFRPSOLVKWKH desired smoothness.
2. Another possibility is the wiring harness pulling on the sender. Make sure the wiring to the tank sender is well supported so that it does not put a load on the sender. Be sure to support all connecting harnesses; do not let the board support the harness, this will in time cause delamination of the board from the tank. One simple way to do this is to use Gorilla tape across the top of the sender at a 90 degree angle to the sender orientation, with the wiring held in place by the tape. The wires from the sender must be routed straight up or to the right for reliable operation.
How to protect the sender from road spray and debris:
1. 2QLQVWDOODWLRQVZKHUHWKHKROGLQJWDQNLVH[SRVHGWRXQGHU FKDVVLV URDG VSUD\ DQG Á\LQJ URFNV HWF ZH UHFRPPHQG WKH use of an auto body undercoat, which is easily purchased in auto parts stores. This tar based material clings well to the senders and protects from water and debris.
2. One material in particular is 3M Professional Grade Rubberized Undercoating, product code 03584. Another product that works well is a Dominion Sure Seal rubberized undercoating such as Gravel Guard Rocker Guard Coating.
3. After the system is completed and tested apply the undercoat over the complete board using two coats. Do not use lacquer, enamel paint, or plastic paint for auto bumpers as these contain chemicals that will dissolve the conformal coating on the board and cause malfunctions.
How to avoid damaging the display when mounting:
1. If mounting the display in a metal panel or wall there is a risk of permanent damage due to a jagged opening or too small of an opening. The metal panel can short circuit the display rendering it inoperable and requiring the installer to replace it. Ensure that the edges of the cutout are smooth and that no material is bent outward where it can dig into the display. Make sure that the cutout is large enough so that the display can be easily inserted without having to angle it. There is a ½" border all around the display to cover the edge of the hole, so

Page 26

709-P3 Manual

161

GARNET SEELEVEL II TANK MONITOR
if the hole is a bit larger than the minimum requirement it will still be covered by the display.
2. When fastening the display to the panel, make sure that it is centered in the hole and not resting on one edge.
3. Non-conductive mounting spacers are available to help prevent damaging the display. Contact Garnet for further details.
How to avoid damaging the display or pump switch due to excessive current:
1. Please be aware that the water pump switch circuit has a limitation on current draw of 7.5 amps, some large pumps can draw over 10 amps. These high drain pumps must use a relay or the display console printed circuit will overheat and damage the display permanently.
2. If the 12V supply line from the electrical panel does not have a 7.5 amp fuse rating, please be sure to install the supplied fuse holder with a 7.5 amp automotive style fuse inline on the +12V red wire.
3. WARNING: All power circuits must be fused. If a fuse is not provided with the system then it is the installer's responsibility to install a fuse with a maximum rating of 7.5 amps. A relay is required if more than 7.5 amps is needed for the pump.

162

709-P3 Manual

Page 27

GARNET SEELEVEL II TANK MONITOR
CHAPTER 8 - SPECIFICATIONS

Resolution Accuracy: Temperature range: Sender materials: Sender length range:
Display mounting panel: System power requirements: Wiring: LPG:
Pump switch:

JS sender: ¼" (6 mm) (6VHQGHUPP SS sender: ½" (13 mm)
+/- 8% or better, limited by resolution and tank height and shape. +32 to +140 °F (0 to + 60 °C)
0.008" thick glass epoxy circuit board with conformal coating for circuit protection. Laminated on the back with 3M 300LSE Bonding Adhesive.
JS sender: 4" to 6", which will measure tank heights IURPò´WR´ ES sender: 4 ½" to 12", which will measure tank KHLJKWVIURP´WR´VLQJOHVHQGHUDQGXSWR´ (dual senders). SS sender: 6" to 16", which will measure tank heights IURP´WR´VLQJOHVHQGHUDQGXSWR´GXDO senders).
Black panel, approximately 4" wide by 2.8" high by 1" thick (102mm wide X 71mm high X 25mm thick). Panel screws to wall.
Display requires 12 volts from the RV battery, the system will function from 11 volts to 16 volts. Current drain is less than 200mA.
A single two wire conductor required from the display to the senders. All the senders are wired in parallel. 12 V power and ground required for display.
-
The pump switch is rated for a maximum of 7.5 amps. The use of a relay is required if more than 7.5 amps is needed. A 7.5 amp (max) fuse must be installed in series with the 12V power circuit to the switch!

Page 28

709-P3 Manual

163

GARNET SEELEVEL II TANK MONITOR
CHAPTER 9 - SERVICE AND WARRANTY INFORMATION
The warranty will only apply only if the warranty card that is shipped with the equipment has been returned to Garnet Instruments Ltd.

DISCLAIMER OF WARRANTY ON HARDWARE Garnet Instruments Ltd. warrants equipment manufactured by Garnet to be free from defects in material and workmanship under normal use and service for a period of one year from the date of sale from Garnet or an Authorized Dealer. The warranty period will start from the date of purchase or installation as indicated on the warranty card. Under these warranties, Garnet shall EH UHVSRQVLEOH RQO\ IRU DFWXDO ORVV RU GDPDJH VXIIHUHG DQG WKHQ RQO\ WR WKH H[WHQW RI *DUQHW·V invoiced price of the product. Garnet shall not be liable in any case for labor charges for indirect, special, or consequential damages. Garnet shall not be liable in any case for the removal and/or reinstallation of defective Garnet equipment. These warranties shall not apply to any defects or other damages to any Garnet equipment that has been altered or tampered with by anyone other than Garnet factory representatives. In all cases, Garnet will warrant only Garnet products which DUHEHLQJXVHGIRUDSSOLFDWLRQVDFFHSWDEOHWR*DUQHWDQGZLWKLQWKHWHFKQLFDOVSHFLÀFDWLRQVRIWKH particular product. In addition, Garnet will warrant only those products which have been installed DQGPDLQWDLQHGDFFRUGLQJWR*DUQHWIDFWRU\VSHFLÀFDWLRQV

LIMITATION ON WARRANTIES 7KHVHZDUUDQWLHVDUHWKHRQO\ZDUUDQWLHVH[SUHVVHGRULPSOLHGXSRQZKLFKSURGXFWVDUHVROGE\ *DUQHWDQG*DUQHWPDNHVQRZDUUDQW\RIPHUFKDQWDELOLW\RUÀWQHVVIRUDQ\SDUWLFXODUSXUSRVHLQ respect to the products sold. Garnet products or parts thereof assumed to be defective by the purchaser within the stipulated warranty period should be returned to the seller, local distributor, or directly to Garnet for evaluation and service. Whenever direct factory evaluation, service or UHSODFHPHQW LV QHFHVVDU\ WKH FXVWRPHU PXVW ÀUVW E\ HLWKHU OHWWHU RU SKRQH REWDLQ D 5HWXUQHG 0DWHULDO $XWKRUL]DWLRQ 50$ IURP *DUQHW ,QVWUXPHQWV GLUHFWO\  1R PDWHULDO PD\ EH UHWXUQHG WR Garnet without an RMA number assigned to it or without proper factory authorization. Any returns must be returned freight prepaid to: Garnet Instruments Ltd, 286 Kaska Road, Sherwood Park, Alberta, T8A 4G7. Returned warranted items will be repaired or replaced at the discretion of Garnet Instruments. Any Garnet items under the Garnet Warranty Policy that are deemed irreparable by Garnet Instruments will be replaced at no charge or a credit will be issued for that item subject to the customer's request.

If you do have a warranty claim or if the equipment needs to be serviced, contact the installation dealer. If you do need to contact Garnet, we can be reached as follows:

CANADA Garnet Instruments Ltd. 286 Kaska Road Sherwood Park, AB T8A 4G7 CANADA email: info@garnetinstruments.com

UNITED STATES Garnet US Inc. 5360 Granbury Road Granbury, TX 76049 USA email: infous@garnetinstruments.com

164

709-P3 Manual

Page 29

GIRARD AWNING
GG750 AWNING
INSTALLATION SERVICE and REPAIR MANUAL REV 01222020
RV AWNING PRODUCTS
1361 CALLE AVANZADO, SAN CLEMENTE, CA 92673 (800) 382-8442 FAX (949)276-5500 www.girardrv.com 165

GIRARD AWNING

Upon receiving your shipment, it is your responsibility to check the contents. If any product is damaged upon receipt, it is your responsibility to refuse the shipment.

MODEL

SERIAL No.

MODEL

SERIAL No.

MODEL

SERIAL No.

MODEL

SERIAL No.

WARNING
To prevent the motor from overheating do not exceed 4 minutes of operation per hour.
ALL ELECTRICAL WORK MUST BE CARRIED OUT BY QUALIFIED PERSONNEL AND CONFORM TO APPLICABLE ELECTRICAL CODES AND STANDARDS.
· Turn off power before beginning any electrical work. · Please consult your RV's wiring diagram to locate any wiring prior to
any drilling or any installation procedures.
Page 2 of 49 166

GIRARD AWNING
· Ensure that placement of controls, cables, and wires are not in any way obstructed. This can damage the components and obstruct electrical current.
· Use only certified components.
Girard Systems awnings may be operated in light wind and rain conditions. When periods of heavy rain and or high wind are expected the awning must be closed. Never leave the awning open and unattended. Damage caused by wind and rain is not covered by warranty. All awnings must be closed prior to moving the vehicle for any reason. As an extra safety precaution a visual check that every awning is fully closed is required. Damage caused by failure to comply with these instructions is not covered by warranty. Before using your awning, ensure that the area into which the awning will be deployed is free of obstructions (Trees, walls, pillars, posts, other vehicles etc.) Damage caused by collisions with any of the above or similar is not covered by warranty. Before using your awning make sure that all of your electrical circuits are operating correctly.
Page 3 of 49 167

GIRARD AWNING
CONTENTS
Basic System Overview .................................................................................................. 5 Installation Manual, Product Description ....................................................................... 8 Tools Required ............................................................................................................... 9 Unpacking .................... ................................................................................................ 9 Layout and Mounting the Brackets ...............................................................................11 Bracket placement chart ..................... ....................................................................... 12 Mounting the Awning ....................................................................................................15 Weather Stripping Installation (Sidewall Application) ................................................. 16 Electronic Controls Installation.................................................................................... 17 Rocker Switch Wiring ................................................................................................... 17 Testing and Adjustments .............................................................................................. 30 Adjusting Motor Limit Switches ................................................................................... 30 Manual Override ............................................................................................................32 Adjusting Pitch and Elbow Height .................................................................................33 Testing the Motion Sensor ............................................................................................36 Adjusting the Lead Rail .................................................................................................37 Troubleshooting Guide ..................................................................................................39 Common Repair Procedures ..........................................................................................40 Motor Replacement .......................................................................................................40 Fabric Replacement .......................................................................................................43 Arm Replacement ..........................................................................................................45 GG 750 Exploded View ...................................................................................................47 Component Identification ...............................................................................................48
Page 4 of 49 168

GIRARD AWNING
BASIC SYSTEM OVERVIEW
1. Mechanical system ­ consisting of: · The enclosure (or cassette) protects the awning while closed. · The roller tube which is mounted within the cassette. · The top cover or fabric rolled onto the roller tube and connected to the lead
rail that extends from the enclosure when the awning is opened. · The folding arms that supports the lead rail and the fabric. · (Option) tubular motor which is mounted inside of the roller tube that controls
the extension and retraction of the awning. · (Option) manual crank handle and drive system that controls the extension and
retraction of the awning 2. Electronic controls ­ (Option) to power and operate the motor · Motor Control module ­ 98GC1146C. This works in conjunction with the other
electronic controls and the user controls included in the installation to extend and retract the awning as required. · Motion Sensor ­ 98GC779, which enables automatic retraction of the awning during periods of high wind that may damage the awning system. · Wired Motion Sensor ­ 98GC780B, Wired motion sensor that works in conjunction with 98GC781B and 98GC783B wired wall switch controllers. 3. User Controls ­ (Option) Hand held remote controllers and wall mounted remote switches will differ according to the individual customer's needs, single or multi-channel handsets, with or without LED switching facility, and wall switches will differ depending upon how many awnings they are required to control. · 98GC104 ­ Single channel awning remote control · 98GC1063 ­ Single channel remote with LED switching · 98GC229 ­ Single channel remote wall switch · 98GC781B ­ Wired wall switch controller · 98GC783B ­ Wired wall switch controller · 98GGC101 ­ Dual Rocker Switch
Page 5 of 49 169

GIRARD AWNING

98GC1146C

98GC779 170

98GC780B

Page 6 of 49

GIRARD AWNING

98GC104

98GC1063

98GC229

98GC781B

98GC783B
Page 7 of 49 171

GIRARD AWNING
INSTALLATION MANUAL
FOR PERSONAL SAFETY AND QUALITY OF INSTALLATION, TWO INSTALLERS ARE RECOMMENDED FOR THIS PRODUCT.
WARNING
To prevent the motor from overheating do not exceed 4 minutes of operation per hour. Overheating will destroy the motor.
PRODUCT DESCRIPTION
The GG750 awning system provides protection from the sun at a touch of a button. The GG750 awning is built to your specifications with the highest quality materials available, your unit features:
· A standard 12VDC motor that operates with a wireless motor control or rocker switch.
· Motion sensor that will retract the awning to prevent damage from the wind.
· A hand held remote control · A wall mounted remote switch · Options include; electronic automation controls to ensure proper closing
at all times, a control to retract all awnings when the vehicles' motor is started, and more.... The GG750 awning controls use an RF (radio frequency) link to communicate with each other. This simplifies the installation and maintenance by removing the need for extensive wiring. This RF network is called the G-Link system. For more information please refer to the G-Link manual that was included with your awning. All necessary power cables are supplied with this product.
Page 8 of 49 172

GIRARD AWNING
GETTING STARTED
Tools required: · Electric Drill · Tape measure · (2) ladders · Chalk line · Flat head screwdriver (small) · Phillips screwdriver · Caulking gun · (2) tubes silicone caulking · Drill bits: 1/8", 3/8", 7/16", 1/4" · Allen wrenches: 4mm · Open-end wrenches: 19mm, 17mm · Keyhole saw
A. UNPACKING
1. Before starting any of the installation procedures unpack the awning and inspect the product for any possible damage that may have occurred during shipping.
2. Before starting any of the installation procedures ensure that the length, fabric, and motor placement of your awning are correct.
3. When you have determined that the product is to your satisfaction, remove the mounting brackets and place the awning in a safe location while preparing the RV. a. To remove the brackets locate the slide lock that retains the bracket to the housing. (Figure 1) b. Using a 4mm Allen wrench, loosen the set screws on the slide locks. c. Once the set screws have been loosened the slide locks should slide freely, clear the slide lock away from the bracket. d. You should now be able to remove the bracket.
4. If you have discovered any damage or missing parts please contact your supplier.
Page 9 of 49
173

GIRARD AWNING
(Figure 1) Page 10 of 49
174

GIRARD AWNING
B. LAYOUT AND MOUNTING THE BRACKETS
1. SIDEWALL APPLICATION, AWNING BRACKET ­ NOTE: Please take into consideration all possible clearances, and obstacles before installing this awning. Items such as slide rooms, etc. vary from one manufacturer to another. Please consult Girard Systems if there are any questions regarding your installation.
a. The mounting brackets can accommodate ¼" lag bolts for mounting. b. Determine the location for the final installation position of the awning, including
height to be installed. c. Mounting brackets must be installed at the locations shown in bracket
placement diagram (see Figure 2). NOTE: When installing a three arm awning, make sure one of the applicable center brackets is directly behind the shoulder of the middle arm.
Page 11 of 49 175

GIRARD AWNING
(Figure 2) Page 12 of 49
176

GIRARD AWNING
Failure to follow these instructions will void the warranty of this product. e. Now that you have determined the bracket locations, using the bracket as your template, mark the holes for fastening the bracket. NOTE: Use chalk line to make absolute sure brackets are mounted in straight line. f. Using a 1/8" bit, pilot drill the centers of the marked holes. Inside of the RV verify the locations of the backing plates. Note: Please consult your RV's wiring diagram to ensure that no wiring will be damaged while drilling the hole. g. Pre-drill four 1/4 inch holes per mounting bracket through the pilot holes. h. Apply a liberal amount of silicone caulking around each hole before installing the brackets. i. Install the 2 outer brackets, and then the middle bracket(s) (if required) with four ¼ x 1 1/2" carriage bolts, washers, lock nuts and backing plate per bracket. (Figure 2) j. Tighten bolts and then apply silicone caulking to the top edge and both sides of each bracket. k. For the motorized option, on the motor side of the awning drill a 7/16 inch hole for the awning motor power cable to enter the RV near the electrical source. Position the hole 4" inch from end of awning. Do not drill hole higher or lower than the bracket. This will ensure that it will not be seen after the awning is installed.
3. SIDEWALL APPLICATION, AWNING RAIL MOUNTING a. Determine the location for the final installation position of the awning, including
height to be installed. b. Cut the awning rail to 6" less than the awning length. c. Position the awning rail on the mounting location, making sure it is level. d. To attach the awning to the awning rail, angle it at 90 degrees and then insert
the corresponding track on the awning into the awning rail (Figure 3). e. Once the awning rail is inserted, rotate the awning down so it is flush with the
mounting surface and resting against it. f. Open the awning to allow access to the inside of the main housing.
Page 13 of 49
177

GIRARD AWNING
g. Use 1 lag screw and washer every 16" to secure the bottom of the awning to the vehicle, drilling through the back of the awning housing and into the vehicle (Figure 3).
(Figure 3) Page 14 of 49
178

GIRARD AWNING
C. MOUNTING THE AWNING.
1. Lift the awning into position for fastening to the vehicle mounted brackets. a. Ladders are usually sufficient; however, a scaffold or forklift may be used. b. If using a forklift use all necessary caution to protect the surface of the awning. Lift from the center of the awning to maintain product balance while elevating.
2. Place the awning onto the brackets while feeding the motor power cable through the hole. A small amount of lubricant may aid the feeding of the cable. Make sure the grooves of the awning are securely engaged into the channels on the bracket. (Figure 4)
(Figure 4)
3. Secure the awning by moving the slide locks along the bottom awning track until they are located under their respective brackets (Figure 5). The final position of the slide lock should be directly under the shoulder of the arm. Page 15 of 49 179

GIRARD AWNING
(Figure 5) 4. Once the final location of the slide locks has been achieved, tighten both set screws
on each slide lock with a 4mm Allen wrench (Figure 6). This secures the awning in place.
(Figure 6)
(OPTIONAL, WEATHER STRIPPING NOT INCLUDED, SIDEWALL APPLICATION ONLY)
1. Trim weather stripping to the length of the awning and remove any overhang. 2. Make a small cut in the weather stripping to allow for the motor cord. 3. Apply generous beads of silicone along the weather stripping. 4. Push weather stripping firmly into place. 5. Wipe off excess silicone.
Page 16 of 49 180

GIRARD AWNING
D. ELECTRONIC CONTROLS INSTALLATION
A. Rocker Switch Wiring
The rocker switch is wired according to Figure 8.

(Figure 8)

Page 17 of 49 181

GIRARD AWNING
B. GC1146C DC Motor Controller Wiring
Wiring Diagram
NOTE: The larger (18) gauge red/black wire coming out of the control box is the incoming power. The smaller (22) gauge red/black wire is the LED outgoing power.
Page 18 of 49 182

GIRARD AWNING
C. Motion Sensor (98GC779G) and LED Connections

4 conductor power supply

Page 19 of 49 183

GIRARD AWNING
Programming the Motion Sensor (98GC779G)
Preparation for Pairing NOTE: All electronic kits shipped from the factory are preprogrammed and do not require programming. This section is intended for reprogramming if required.
Remove the 2 small Phillips screws which secure the motion sensor to the awning.

Then turn it over.

Fig.1

Fig.2 Page 20 of 49
184

GIRARD AWNING

Remove the 4 Phillips screws holding the module together. Remove the base plate and silicone insert.

Base Plate

Magnet

Insert

Fig.3

Turn the base plate over (Magnet down). Then place the motion sensor on top of it so that the magnet is aligned with the reed switch.
This is required to allow re-programming

Reed Switch Adjustment Dial

LED

Fig.4

Programming Button

Page 21 of 49 185

GIRARD AWNING
Page 22 of 49 186

GIRARD AWNING
D. Switch Control with Wired Motion Sensor
Description
The 98GCK-49 is a combination controller (98GC781" B" or "W") and Hard Wired Motion Sensor (98GC780" B" or "W") kit, it can be ordered in either Black or White. The 98GCK-49 kit is used for a Single DC awning with LED. The 98GCK-49 also includes an Ignition Retract-Lock function to retract the awning if the engine is ON. See wiring diagram to see how to wire this function.
Page 23 of 49 187

GIRARD AWNING
Specification
· Operating Voltage: 11 VDC ~14VDC · Current: Up to 10A · LED light control · RS485 communication to operate the motion sensor · Maximum run time is 4 minutes · Operating Temperature 32 to 120F
Fig. 1 Page 24 of 49
188

GIRARD AWNING
Mounting Diagram:
The required opening to install this Controller is 2 5/8" x 2 5/8" X 1 1/4" depth.

Fig. 2

Page 25 of 49 189

GIRARD AWNING
Page 26 of 49 190

GIRARD AWNING
Wired Motion Sensor
Fig. 3
This wired motion sensor communicates directly to the DC motor Controller 98GC781(B), (W) by RS485 Protocol.
Attach the motion sensor to the lead rail using the mounting tab, see figure 3 above.
Page 27 of 49 191

GIRARD AWNING
Motion Sensor Installation view:
Fig. 4
Fig. 5 Page 28 of 49
192

E. Wiring Diagram:

GIRARD AWNING

Fig. 6
Page 29 of 49 193

GIRARD AWNING
TESTING AND ADJUSTMENTS
OVERVIEW
A. Adjusting Motor-limit switches B. Manual Override C. Adjusting Pitch and Elbow height D. Motion Sensor Testing
A. ADJUSTING MOTOR LIMIT SWITCHES
TOOLS REQUIRED Black plastic key provided with awning, or 4mm (5/32") Allen wrench.
NOTE: The motor limit switches have been adjusted to the correct positions at the factory prior to shipment. When fully retracted the awning motor is set to stop the exact moment the awning box closes. When fully extended the fabric should be taut and the arms should be slightly bent, exposing a gap of about ¼" at the elbows.
Always check the motor limits after installation to ensure that the awning opens and closes correctly. Awning fabric can stretch over time, this will require an adjustment of the IN and/or OUT limit switch.
IMPORTANT: EXTREME CARE SHOULD BE TAKEN TO ENSURE THAT THE MOTOR LIMIT TURNS OFF AT THE EXACT MOMENT THE AWNING BOX CLOSES. FAILURE TO DO SO WILL CAUSE THE MOTOR TO RUN WHEN THE AWNING IS CLOSED. THIS WILL DESTROY THE MOTOR.
1. The motors used in Girard Systems awnings are reversible.
2. The motor has limit settings for both OUT (extension) and IN (retraction).
Page 30 of 49
194

GIRARD AWNING
3. The limit switches can be adjusted by use of the black key provided with the awning, or you may use a 4mm (5/32") Allen wrench.
4. Extend the awning a few feet to gain access to the motor. Locate the motor. The limit adjustment screws are located on the head of the motor. Using the symbols printed next to the adjustment screws, turn the black key (or 4mm Allen wrench) to make the necessary adjustments. The motors are labeled with a + or a ­ to indicate the adjustment direction.
5. Approximately ¼ turn of the adjustment screw represents about 1" of awning movement. NEVER set outward limits so that the fabric is slack with full arm extension. For proper adjustment set limit switch to stop the motor just before the arms lock. This will expose about a 1/4" gap at the elbow.
Page 31 of 49
195

GIRARD AWNING
B. MANUAL OVERRIDE
1. In case of motor issues, the GG750 has a manual override to close the awning. 2. Remove the endcap opposite the motor, by removing the 3 Philips head screws. 3. Using a 13mm wrench, turn the manual override shaft in order to close the
awning, see Figure 10. NOTE: The manual override is one-way, it can only close the awning. 4. Figure 10 is showing a right hand motor version of the GG750. If you have a left hand version, the manual override will be on the opposite side.
(Figure 10)
Page 32 of 49
196

GIRARD AWNING
C. ADJUSTING PITCH and ELBOW HEIGHT
NOTE: Adjustment of the Elbow height and pitch, will affect the height of the awning lead rail when it is fully deployed. This adjustment is usually required after an arm replacement. Also, if the elbow of the arm hits the bottom of the casing as the lead rail closes. Tools Required
· 17mm open-end wrench · 19mm (3/4") open-end wrench · 4mm Allen wrench 1. ELBOW HEIGHT a. Extend the awning approximately 12" b. To lower the elbow: Locate screw C located on the side of the shoulder, the
top bolt. (Figure 11) Using a 17mm open-end wrench, rotate the bolt counter-clockwise to lower the arm position. Then use a 19mm wrench to tighten Screw D, the bottom bolt. c. To raise the elbow: Locate screw C located on the side of the shoulder, the top bolt. (Figure 11) Using a 17mm open-end wrench, rotate the bolt clockwise to raise the arm position. Then use a 19mm wrench to loosen Screw D, the bottom bolt. d. Close the awning completely to ensure smooth operation, that the lead rail lies flush and square along the length of the cassette, and that the arms fold inside the cassette without interference.
Page 33 of 49
197

GIRARD AWNING
(Figure 11) 2. ADJUSTING PITCH a. Extend the awning to its fully extended length. b. Locate screw A, adjustment nut located on front side of the shoulder assembly
(Figure 12, 13). Using a 17mm wrench rotate the nut counterclockwise to lower the pitch or clockwise to raise the pitch. DO NOT OVERTIGHTEN AS THIS WILL RESULT IN DAMAGE TO THE AWNING. LIFTING UP ON THE ARM SLIGHTLY TO RELIEVE PRESSURE MAY BE NECESSARY. c. Close the awning completely to ensure smooth operation and that the lead rail lies flush and square along the length of the cassette.
Page 34 of 49
198

GIRARD AWNING
(Figure 12)
Page 35 of 49
199

GIRARD AWNING
(Figure 13)
D. TESTING THE MOTION SENSOR (Wind Sensor)
1. Partially extend the awning (at least 3 feet). 2. Physically activate the motion sensor by shaking the awning lead rail. 3. At this point the awning should retract; if not, check that there is a 12VDC supply to the motion sensor and that the motion sensor is correctly programmed. NOTE: The Motion sensor will send a retract signal to the motor of the awning it is programmed to on the RV. If there are multiple awnings extended that begin to retract
Page 36 of 49
200
Page 30 of 49

GIRARD AWNING
simultaneously under windy conditions, the power system of the vehicle must be able to withstand the resulting surge of current. The surge will be the greatest when the awnings are fully extended. When testing the system verify all of the awnings will close when fully extended.
E. ADJUSTING THE LEAD RAIL
The lead rail on your awning has been preset at +/- 3 degrees. This allows the lead rail to rest firmly into the cassette and also creates a weather resistant seal for travel. To increase or decrease the pitch angle insert a 4mm Allen wrench into the Pitch adjustment screw, screw B (Figure 13). Turn clockwise to increase the pitch and turn counterclockwise to decrease the pitch. Ensure that the pitch adjustment screw is set evenly on all of the arms.
TROUBLESHOOTING GUIDE
PROBLEM: The lead rail is binding on the side of the awning casing; i.e. the rail is offset from housing. SOLUTION:
· Open the awning about 3 feet. · Loosen the lead rail horizontal adjustment screws on all arms (Figure 14). · Locate and remove the two fabric set screws that are on each end of the lead
rail (Figure 14). The lead rail is now ready to be shifted. · Retract the awning until the lead rail is about 4 inches from the fully closed
position. · Using a rubber mallet, tap the end of the lead rail to move it into the correct
position. · When proper alignment has been achieved tighten the lead rail horizontal
adjustment screws (Figure 14), and then replace the fabric screws (Figure 15).
Page 37 of 49
201

GIRARD AWNING
(FIGURE 14)
(FIGURE 15) PROBLEM: The motor side of the awning closes when the awning is retracted but the opposite end does not. SOLUTION: Refer to "Adjusting the Lead Rail" on page 37. If this does not solve the issue please call the Girard Systems service line at (949)259-4000 or toll free at (800)382-8442.
Page 38 of 49
202

GIRARD AWNING
PROBLEM: Motor will not operate. SOLUTION:
· Check that the panel fuse on the 12VDC circuit is good · If your vehicle has an Awnings Power Main Switch, locate that switch and make
sure it is in the ON position. · If this does not solve the issue please call the Girard Systems service line at
(949)259-4000 or toll free at (800)382-8442. PROBLEM: The motor will operate for 10-12" and then stop. SOLUTION: The motor may not be receiving enough power to operate correctly.
· Check to ensure that you have a minimum of 12VDC at the motor connection, if not switch on your generator or connect to shore power.
· If this does not solve the issue please call the Girard Systems service line at (949)259-4000 or toll free at (800)382-8442.
PROBLEM: The fabric is loose when the awning is fully extended; i.e. the roller keeps turning after the awning arms have locked open. SOLUTION: The motor's OUT limits must be reset to factory standards. Please refer to the "Adjusting the Motors Limit Switches" section on page 30-31. PROBLEM: The motor stops before the lead rail has closed completely into the awning cassette on either or both sides. There is no apparent binding of the awning components. SOLUTION: The GG750 Awning is equipped with a manual override motor which has manual limit settings. The IN limit may need to be adjusted to allow the box to be closed tighter. Refer to the "Adjusting the Motors Limit Switches" section on page 30-31.
Page 39 of 49
203

GIRARD AWNING
PROBLEM: As the awning is closing, the elbow of one or more of the arms is hanging down preventing the case from closing. SOLUTION: Please refer to the "Adjusting Pitch and Arm (Elbow) Height on page 34-35.
COMMON REPAIR PROCEDURES
MOTOR REPLACEMENT
NOTE: Replacement procedures vary due to motor styles, placement, factory installation methods, and preferences of different vehicle manufacturers. These variations primarily effect how the motors are accessed; replacement operations are generally the same for any situation.
A. REMOVING THE OLD MOTOR
1. Use tie straps on either side of the awning to secure the lead rail of the awning to the cassette. The strap will slide in between the awning and coach wall on each end. Take care to leave slack in the straps so when the motor side endplate is removed the lead rail will open approximately 2" to take pressure off the awning.
2. Identify which side the motor is located on. Proceed to take off the motor side endcap by removing the three #3 Philips screws , there are two located on the bottom and one on top. Please take note that some RV manufacturers have requested the endcap top screw to be left out due to clearance issues with slide toppers.
3. Proceed to take off the motor endplate. (Figure 17) Take caution when taking the last screw out of the plate and when removing the plate as it will be under pressure until it is separated from the motor. Upon removal of the plate the lead rail of the awning will open into the straps freeing the pressure from the motor.
4. Confirm that there is no power heading to motor, cut motor wire close to motor leaving a small amount for warranty testing. Grip motor by the head and pull out of tube making sure to hold the roller tube to keep it in position on other end of awning.
Page 40 of 49
204

GIRARD AWNING

(Figure 16)

(Figure 17)

Page 41 of 49
205

GIRARD AWNING
B. INSTALLING THE NEW MOTOR
1. With the new motor in hand, align the notch in the drive (at the far end of the motor) with the indentation in the awning roller tube. Slide the motor all the way in. Turn the motor until its inner notch also lines up with its indentation on the tube.
2. Feed motor cable completely through the hole in the motor plate. 3. Make sure the awning roller tube is still seated and connected into the roller tube
support bracket at the opposite end of the awning. 4. Rotate the motor and roller tube assembly until the motor wire is
positioned towards the top of the awning. 5. Reinstall the motor plate, lining the square motor peg up with the corresponding
slot. Reinstall the 3 screws securing the motor plate (Figure 17). 6. Cut and strip the motor wires preparing for heat shrink butt connection, slide a
piece of heat shrink onto one end of the wires. 7. Connect the new motor wires with heat shrink butt connectors and heat shrink. 8. Test for the proper function of the new motor by using the Remote Control or
the wall switch. NOTE: The motor limits are not adjusted yet, take care to only test motor to make sure it is moving in each direction a small amount to confirm. 9. After the motor has been replaced, the motors' limit switches must be adjusted. Please refer to the "ADJUSTING MOTOR LIMIT SWITCHES" section of this manual. 10. Replace motor side awning endcap with applicable screws.
Page 42 of 49
206

GIRARD AWNING
FABRIC REPLACEMENT
A. FABRIC REPLACEMENT PROCEDURE This procedure involves removal of the awning motor and roller tube to attach the replacement fabric to the existing tube. NOTE: FOR PERSONAL SAFETY, AND BEST RESULTS IT IS RECOMMENDED THAT TWO TECHNICIANS PERFORM THIS FUNCTION.
B. REMOVING THE OLD FABRIC 1. Partially extend the awning approximately two feet, tie strap each side of lead rail
to case to prepare for motor and tube removal. Open awning a few more inches until fabric is slack and pressure is off of fabric/motor. 2. Identify which side the motor is located on. Proceed to take off the motor side endcap by removing the three #3 Philips screws, there are two located on the bottom and one on top. Please take note that some RV manufacturers have requested the endcap top screw to be left out due to clearance issues with slide toppers. 3. Proceed to take off the motor endplate. (#2 Philips, Figure 17) Take note that there will be no pressure on the endplate as long as the fabric is slack and the lead rail is being held by the tie straps.
4. Confirm that there is no power heading to motor, cut motor wire in the middle of wire leaving enough room for reconnection on either side of wire. Leave Motor in end of tube as it will not need to be removed for roller tube removal.
5. Visually identify the white bushing on the non motor side where the roller tube is connected. You will need to make sure upon removal of the tube that this bushing stays installed on the non motor side endplate and doesn't get lost.
6. Take off both lead rail endcaps and remove fabrics screws on either side of lead rail. (Figure 18)
7. The roller tube and fabric are now ready to be removed, take caution and remove tube from housing while sliding the lead rail end of the fabric out of the channel on lead rail, make sure that the motor does not fall out of tube.

(Figure 18)

Page 43 of 49
207

GIRARD AWNING
C. INSTALLING THE NEW FABRIC IMPORTANT: REPLACEMENT FABRICS ARE ROLLED AND FOLDED FOR SHIPMENT. THE SEAMS MUST FACE DOWNWARDS AS THE FABRIC IS INSTALLED. THERE IS A SMALL WHITE POLY (POLYESTER) ROPE INSERTED IN THE FABRIC THAT WILL SLIDE INTO THE LEAD RAIL.
1. The old fabric's trim insert will need to be removed from the roller tube, it is held on by clear tape along the length of the tube and black duct tape on each end. Take note of how the trim insert sits in the channel of the tube as the new fabric trim insert will need to be inserted correctly and then taped in the same fashion as the existing insert was attached.
2. With the new fabric attached to the tube, roll up the fabric as even and tight as you can in the correct direction. (The fabric should roll from the bottom of the tube when the awning is extending) Slide the tube with the motor and fabric assembly back into the case of the awning as it came out. Confirm the non motor side of the roller tube is correctly in the bushing that is mounted on the non motor side endplate.
3. Repeat steps 1-10 of motor installation section B.
Page 44 of 49
208

GIRARD AWNING
ARM REPLACEMENT
Follow this procedure when a damaged, spring loaded arm needs to be replaced. There are no repairable parts inside of the arm, if the elbow joint has broken the entire arm must be replaced. TOOLS REQUIRED: 5mm Allen wrench, 17mm wrench, 19mm wrench, Tie down or duct tape

WARNING
· Follow installation instructions carefully. · Awning arms are packaged under heavy spring tension. · To avoid serious personal injury do not remove protective wrapping until
directed to do so.

Check arm for wiring: if wired arm, wiring will need to be replaced

1. Support the lead rail and carefully open the awning a few feet. If the elbow is open tie a large rag around to protect the fabric from the elbow.
2. Remove the 5mm Allen head screw at the lead rail connection, slide out the arm from the lead rail, fold and use a tie down or tape to secure the arm in the folded position very carefully.

3. At the shoulder of the arm (connecting it to the main housing), loosen the 17mm and 19mm bolts on the side (Figure 11).

4. With the shoulder bolts loose, this will allow removal of the arm from the

shoulder. Ensure the 17mm and 19mm bolts stay in place on the shoulder. NOTE: MAKE SURE TO LOOSEN (NOT REMOVE) THE PITCH

ADJUSTMENT NUT (FIGURE 13) SO THAT THE ARM ATTACHMENT

BOLTS ARE NOT ANGLED WHEN INSERTING NEW ARM.

Page 45 of 49

209

GIRARD AWNING
5. Verify the metal sleeve is still on the 19mm bolt inside the shoulder. Attach the new arm to the shoulder using the 17mm and 19mm bolts, tightening both evenly.
6. With the awning open about 18", unband the high tension arm very carefully. Slowly guide it into position on the lead rail and fasten it in place with the 5mm allen head screw.
7. Adjust the arms' pitch angle to match the others by rotating the head of the pitch-adjustment screw (Figure 13, screw A) as follows; rotate in a clockwise direction to raise the arm, or rotate counterclockwise to lower it. Fully tighten both lock nuts on the shoulder assembly. Please refer to the "ADJUSTING THE PITCH ANGLE" section of this manual.
8. The elbow height may need to be adjusted, using the 17mm and 19mm bolts (Figure 11).
Page 46 of 49
210

GIRARD AWNING
Page 47 of 49
211

GIRARD AWNING

GG750 COMPONENT IDENTIFICATION

ITEM

DESCRIPTION

1

L Track Mount

2

Mounting Bracket

3

Sprinter Van Bracket Set

4

Roller Tube

5

Gudgeon

6

Bushing Insert

7

End Cap Hole Plug

8

Fabric Guide

9

Fabric Guide B

10 Shoulder Angle Guide

11 Foam Washer

12 Manual Crank Gearbox (Manual Verison Only)
13 Washer Plastic Side Plate

14 Bushing Insert Cover

15 Screw for Gear Box

16 Fabric Screw Anchor

17 Fabric Screw

18 Poly Rope Roller Tube

19 Fabric Poly Rope

20 Wire Electrical for Arm

21 Main Housing

22 Lead Rail

23 End Cap Left

24 End Cap Right

25 Lead Rail End Cap Left

26 Lead Rail End Cap Right

27 Roller Tube Support Bracket

28 Shoulder Assembly Left

29 Shoulder Assembly Right

30 Arm Left 3'3"

31 Arm Right 3'3"

PART NUMBER (WHITE)
7523001-01 7523003-02 7523005-03 7523007-04 N/A 7526009-06 7523010-07 7523011-08 7523012-09 7523013-10 7523014-11 7523015-12

PART NUMBER (BLACK)
7523002-01 N/A 7523006-03 N/A 7523008-05 N/A N/A N/A N/A N/A N/A N/A

7523016-13 7523017-14 7523018-15 7523019-16 7523020-17 7523021-18 7523022-19 N/A 7523107-W21 7523108-W22 7523109-W23 7523110-W24 7523111-W25 7523112-W26 7523113-W27 7523114-W28 7523115-W29 7523116-W30 7523117-W31

N/A N/A N/A N/A N/A N/A N/A 7523023-20 7523107-B21 7523108-B22 7523109-B23 7523110-B24 7523111-B25 7523112-B26 7523113-B27 7523114-B28 7523115-B29 7523116-B30 7523117-B31

Item

Description

30 Arm Left 6'7" 31 Arm Right 6'7" 30 Arm Left 8' 31 Arm Right 8' 32 Lead Rail Connector Left 33 Lead Rail Connector Right 34 Manual Crank Handle (Manual
Version Only)

Part Number (White)
7523118-W30
7523119-W31
7523120-W30
7523121-W31
7523122-W32
7523123-W33
7523124-W34

PaPartgeN4u8mobfe4r9 (Black)
7523118-B30 7523119-B31 7523120-B30 7523121-B31 7523122-B32 7523123-B33 7523124-B34

212

MAXXAIR FAN/REMOTE
MAXXFAN® INSTALLATION INSTRUCTIONS, INFORMATION AND OPERATING GUIDE
FOR ALL MAXXFAN® Deluxe MODELS
5100K, 5101K, 5301K, 6200K, 6201K, 6401K, 7000K, 7001K, 7500K, 7501K, 8000K, 8001K, 8500K, 8501K, 8700K, 8751K, 8900K, 8951K

READ AND SAVE THESE INSTRUCTIONS
NOTE: Refer to supplied Operating Instructions regarding the model you have purchased.
The MAXXFAN installs into a standard RV roof opening of 14" x 14".
To determine if your roof opening is correctly sized, simply remove the interior ceiling garnish trim ring of your existing roof vent and measure the ceiling opening or verify the opening is large enough by sliding the MAXXFAN interior garnish trim ring into the opening.
Due to the EXHAUST / INTAKE LOUVERS that face the rear of the vehicle, the MAXXFAN requires a roof area clear of obstructions such as air conditioners, storage boxes, etc. for at OHDVW´WRWKHUHDURIWKHH[LVWLQJVWDQGDUGURRIYHQWÀDQJHRXWHUUHDUHGJH
The MAXXFAN is designed for a minimum roof thickness of 1 1/8" to a maximum of 6 1/2". If your roof thickness is less than 1 1/8", build additional thickness at the ceiling opening using wood or other suitable material.
The MAXXFANUHTXLUHVDPLQLPXP9ROW'&DPSVHUYLFH&RQ¿UPWKDWWKHFLUFXLW you intend to use will accommodate the additional load. Use the proper gauge stranded wire for electrical connections.
WARNING! 7RUHGXFHULVNRI¿UHLQMXU\WRSHUVRQVRUGDPDJHWRSURSHUW\XVHRQO\
in the manner intended by AIRXCEL, INC. Should you have questions, please contact AIRXCEL/MAXXAIR VENTILATION SOLUTIONS Customer Service at 316.832.4357.

P/N: 11D90001K 08-2017

213

MAXXAIR FAN/REMOTE
MAXXFAN® 2 YEAR LIMITED WARRANTY
AIRXCEL, INC. - RV PRODUCTS DIVISION / MAXXAIR RETAINING KNOB SERIAL NUMBER Ventilation Solutions warrants to be free of manufacturing defects, regardless of ownership for a period of two (2) years from the original date of purchase. If the product is installed as original equipment on a vehicle, the warranty period shall begin on the date of the original purchase of the vehicle. In all other instances, the warranty shall begin on the date the product was purchased. You must keep your original sales receipt. This Limited Warranty does not include "Acts of God," failure due to misuse, improper installation or accidental / incidental damages. Please call AIRXCEL, INC. at 1-316-832-4357 if you have any questions or need assistance.
Please have your original sales receipt and MAXXFAN Serial Number readily available. AIRXCEL will correct the confirmed defect within 45 days by repair or replacement without charge for materials and labor. This limited warranty does not cover any freight costs for the return of the product to or from AIRXCEL, INC. or costs associated with installation, removal or reinstallation of the product.
We invite your comments and suggestions regarding our products. Any information you supply is for AIRXCEL / MAXXAIR's internal use and will not be shared or sold to others.
The Serial Number for your MAXXFAN is located on the back page of this booklet and on the fan control plate under the round insect screen frame. (Your serial number may or may not be located in the same position as referenced in the above image). Reference your operating guide. Rotate the four retaining knobs 180° and remove the screen to view. DO NOT OPERATE the MAXXFAN with the screen removed.
CAUTIONS AND CARE OF YOUR MAXXFAN® This product has been manufactured using prime UV stabilized Polymers for maximum toughness and durability. However, the use of caustic or solvent based chemicals can cause cracking and product failure.
PLEASE CLEAN ALL PARTS WITH MILD SOAP AND WATER ONLY. Do not use Petroleum Containing Additives or Solvent Based Products on any of the MAXXFAN's components or its corrosion resistant hardware.
LISTED BELOW ARE SOME KNOWN CHEMICAL PRODUCTS TO BE AWARE OF: NON COMPATIBLE CHEMICALS - DO NOT USE THESE: Ketones, Esters, Acetone or other like solvents, Halogenated Hydrocarbons, Amines, Aromatic Hydrocarbons, (Loctite Formulas), or any products containing references to: chemicals that are not to be used on plastics.
GENERALLY COMPATIBLE (But should be used in low concentration where possible) Acids, Alcohol, Alkalis, Aliphatic Hydrocarbons, Mild Soap Solution (avoid strong Alkaline Material), Silicone Oil or Greases (avoid those containing Aromatic Hydrocarbons or other additives). Review the contents of your cleaning materials carefully.
For additional information regarding your NEW MAXXFAN® Deluxe, please refer to the INFORMATION AND OPERATION GUIDES
FOR YOUR PARTICULAR MODEL ON THE FOLLOWING PAGES.
4
214

MAXXAIR FAN/REMOTE

INFORMATION AND OPERATING GUIDE
KEYPAD FOR MAXXFAN® Deluxe MODELS
5301K · 6401K

KNOB, VENT LID OPEN/CLOSE Manual Opening Pull to unlock prior to turning. Rotate Knob clockwise to Close Vent Lid; Rotate Knob counter-clockwise to Open Vent Lid. Push "IN" to lock when Vent Lid is open or closed. It may be necessary to slightly rotate the knob to properly align it while pushing it up to lock.
Do not use excessive force when operating Knob.
KEYPAD CONTROLS Use Keys on Keypad to control MAXXFAN functions (see descriptions below).
INSECT SCREEN RETAINER KNOB Rotate all 4 knobs 1/2 turn to remove screen. Caution: Never operate fan with screen removed.
CEILING FAN MODE With the fan motor running, close the Vent Lid to enter Ceiling Fan Mode. The fan motor will continue to run and circulate air within the RV cabin.
SERIAL NUMBER LABEL The serial number label is located underneath the round insect screen.
NOTE: The MAXXFAN is designed to be fully opened or fully closed when the vehicle is moving.

KEYPAD CONTROLS
KEYPAD FOR MAXXFAN® Deluxe MODELS
5301K · 6401K
CAUTION: When removing insect screen for cleaning, turn the MAXXFAN OFF and remove the vehicle 12 volt power to the MAXXFAN. When cleaning your MAXXFAN, use only a mild detergent solution.

FAN ON 1-2-3-4

Turns the Fan Motor ON to the last

selected speed

When the fan is running, cycles

through four (4) speeds, once HIGH

FAN OFF

FAN ON SPEED is reached, fan motor cycles 1-2-3-4 back to LOW SPEED

Turns the Fan Motor OFF at any selected speed
FAN 5 OFF

215

MAXXAIR FAN/REMOTE
INFORMATION AND OPERATING GUIDE
KEYPAD FOR MAXXFAN® Deluxe MODELS
5100K, 5101K, 6200K, 6201K, 7000K, 7001K, 7500K, 7501K, 8000K, 8001K, 8500K, 8501K
KNOB, VENT LID OPEN/CLOSE Manual Opening Models
Pull to unlock prior to turning. Rotate Knob clockwise to Close Vent Lid; Rotate Knob counter-clockwise to Open Vent Lid. Push "IN" to lock when Vent Lid is open or closed.
Automatic Opening Models
Allows closing of the vent lid in the event of RV power loss. This knob does not lock. Do not push in or pull out. Rotate knob clockwise to close vent lid; rotate knob counter-clockwise to open vent lid.
Do not use excessive force when operating Knob.
KEYPAD CONTROLS Use Keys on Keypad to control MAXXFAN functions (see descriptions on next page). NOTE: IR Sensor not on all models
INSECT SCREEN RETAINER KNOB Rotate all 4 knobs 1/2 turn to remove screen. Caution: Never operate fan with screen removed
THERMOSTAT TEMPERATURE SENSOR
CEILING FAN MODE With the fan motor running, close the Vent Lid to enter Ceiling Fan Mode. The fan motor will continue to run and circulate air within the RV cabin.
SERIAL NUMBER LABEL The serial number label is located underneath the round insect screen.
NOTE: The MAXXFAN is designed to be fully opened or fully closed when the vehicle is moving.
CAUTION: When removing screen for cleaning, turn the MAXXFAN OFF and remove the vehicle 12 volt power to the MAXXFAN. When cleaning your MAXXFAN, use only a mild detergent solution.
6
216

MAXXAIR FAN/REMOTE

KEYPAD CONTROLS KEYPAD FOR MAXXFAN® Deluxe INTAKE/EXHAUST MODELS 5100K, 6200K, 7000K, 7500K,
8000K, 8500K

KEYPAD CONTROLS KEYPAD FOR MAXXFAN® Deluxe EXHAUST ONLY MODELS 5101K, 6201K, 7001K, 7501K 8001K, 8501K

127($EHHSLQJVRXQGZLOOFRQ¿UPHDFKNH\SUHVV
ON/OFF:8VHWKLVNH\WRVWDUWWKHIDQRUWRWXUQRWKHIDQ2Q$XWRPDWLF2SHQLQJ0RGHOV WKHOLGZLOODOVRRSHQRUFORVHZKHQWKHIDQLVWXUQHGRQRUR2Q0DQXDO2SHQLQJ0RGHOV SXVKLQJWKLVNH\ZKLOHLQ$XWR0RGHZLOOH[LW$XWR0RGHWXUQRWKHIDQDQGWKHOLGZLOOVWD\ in the position you selected. On Automatic Opening Models this button will exit Auto mode, WXUQWKHIDQRDQGFORVHWKHOLG
IN/OUT: Use this key to reverse the direction of the fan, the fan will slow down and pause for two (2) seconds before resuming operation in the opposite direction. Note: In Auto Mode the fan direction is automatically positioned to Exhaust, but may be overridden and changed to Intake by depressing this key. PLEASE NOTE: THIS KEY HAS BEEN REMOVED ON EXHAUST ONLY MODELS
AUTO: Auto Mode allows the thermostat to turn the fan ON and OFF depending on the thermostat setting. Press this key once for less than three (3) seconds to enter Auto Mode, WKUHH  TXLFN EHHSV ZLOO FRQ¿UP WKH 0$;;)$1 KDV HQWHUHG$XWR 0RGH  7R (;,7$XWR Mode, press the ON/OFF key. Initial factory set point for the thermostat is 78°F/25°C. The green LED ZLOOOLJKWWRLQGLFDWHWKH0$;;)$1LVLQ$XWR0RGH7RDGMXVWIROORZLQVWUXFWLRQVEHORZ If no previous thermostat temperature was entered, or you wish to change a previous set temperature, press the HOLD TO SET key for more than 3 seconds and you will hear one long beep and the WKHUPRVWDWZLOOEHUHVHWWR)7RIXUWKHUDGMXVWWKHVHWWHPSHUDWXUHLIGHVLUHGXVHWKHRU$UURZ NH\VWRDGMXVWDWLQFUHPHQWVSHUSUHVV7KHIDQZLOOHPLWDEHHSLQJVRXQGWRFRQ¿UPWKLVVHWWLQJ,I a previous thermostat temperature was entered, the fan will remember this temperature setting and the next time you enter Auto Mode, the fan will start ventilating automatically as directed by the thermostat. 7KHIDQVSHHGZLOODXWRPDWLFDOO\DGMXVWEDVHGRQWKHFDELQWHPSHUDWXUH$VFDELQWHPSHUDWXUHULVHV the fan increases in speed. Note: If 12 volt RV power is removed from the MAXXFAN, the thermostat will be reset to 78°F/25°C.
ARROW - When in Auto Mode:8VHWKH $UURZNH\VWRDGMXVWWKHWKHUPRVWDWVHW temperature up or down in 1° increments per press. When in Manual Mode:8VHWKH $UURZNH\VWRDGMXVWWKHIDQVSHHGXSRUGRZQ When the fan speed reaches either the maximum or minimum speed, the fan will respond with 2 quick beeps to indicate this.
ARROW KEYS PRESSED TOGETHER: Automatic Lift Models Only 3UHVVWKH $UURZNH\VDWWKHVDPHWLPHWR2SHQRU&ORVHWKHOLG7KHIDQPRWRUZLOOUHPDLQLQ its current state.
7

217

MAXXAIR FAN/REMOTE

REMOTE CONTROL OPERATING GUIDE
WIRELESS REMOTE CONTROL FOR
MAXXFAN® Deluxe MODELS 7000K · 7500K
Optional for 8000K, 8500K, 8700K, 8900K Models

FAN ON & POWER OFF - Press this button: · To start the fan · 7RWXUQWKHIDQR · To exit Auto Mode

5HPRYHSURWHFWLYH¿OPIURP Display Screen

VENT LID POSITION - Press this button to open or close the vent lid · While the fan is running in Manual Mode press once to close the vent lid and enter "Ceiling Fan" Mode. NOTE: This button is not active in Auto Mode. If the fan loses 12volt RV power or power is removed from the fan, use the knob located at the ceiling to manually open or close the vent lid if desired.

AIR EXHAUST / INTAKE - Press this button to reverse the fan from intake or exhaust NOTE: In Auto Mode, the fan direction is automatically positioned to Exhaust, but may be overridden and changed to Intake by depressing this key.

FAN AUTO MODE - Press this button to enter Auto Mode · Auto Mode allows the fan lid to automatically open and the fan motor to operate as dictated by the thermostat set point temperature. Once the cabin temperature cools and reaches the set point temperature, the fan lid will close DQGWKHIDQPRWRUZLOOVKXWR · 3UHVVLQJWKLVEXWWRQZKLOHLQ$XWR0RGHZLOOVKXWR$XWR0RGHFORVHWKHYHQWOLG DQGVKXWRWKHIDQPRWRU

THERMOSTAT SET TEMPERATURE
TEMP + ~ Press this button to increase the Set Temperature for Auto Mode. TEMP - ~ Press this button to decrease the Set Temperature for Auto Mode. NOTE: The thermostat temperature range is from 29°F to 99°F or -2°C to 37°C. To change from Fahrenheit to Celsius on the temperature display, press and hold both set temperature keys simultaneously.

FAN SPEED Fan Speed + ~ Press

SET TEMPERATURE

TRANSMIT

LOW BATTERY INDICATOR

this button to increase

the fan speed. The fan has ten speeds. Fan Speed - ~ Press this

AUTO MODE INDICATOR

ROOM TEMPERATURE

button to decrease the

fan speed. The fan has ten speeds. NOTE: When the fan

FAN ON INDICATOR

VENT LID IN AUTO MODE

speed reaches either the maximum or minimum

CEILING FAN

speed, the fan will respond with 2 quick

FAN OFF INDICATOR

VENT LID POSITION

beep sounds to indicate

this.

FAN SPEED

CEILING FAN MODE AIR DIRECTION

LOW BATTERY

INDICATOR

INDICATOR

· When the battery is at full charge, three black power bars are displayed.

· One or zero power bars displayed indicates the batteries need replacement.

TRANSMISSION SIGNAL · This symbol is displayed on the screen when any button is pressed to indicate the signal was transmitted to the fan. · A beep sound from the ceiling unit indicates the signal from the remote control was received by the fan.

8
218

MAXXAIR FAN/REMOTE

REMOTE CONTROL OPERATING GUIDE
WIRELESS REMOTE CONTROL FOR
MAXXFAN® Deluxe MODELS 7001K · 7501K
Optional for 8001K, 8501K Models

FAN ON & POWER OFF - Press this button: · To start the fan · 7RWXUQWKHIDQR · To exit Auto Mode

5HPRYHSURWHFWLYH¿OPIURP Display Screen

VENT LID POSITION - Press this button to open or close the vent lid · While the fan is running in Manual Mode press once to close the vent lid and enter "Ceiling Fan" Mode. NOTE: This button is not active in Auto Mode. If the fan loses 12volt RV power or power is removed from the fan, use the knob located at the ceiling to manually open or close the vent lid if desired.

AIR OUT

FAN AUTO MODE - Press this button to enter Auto Mode · Auto Mode allows the fan lid to automatically open and the fan motor to operate as dictated by the thermostat set point temperature. Once the cabin temperature cools and reaches the set point temperature, the fan lid will close DQGWKHIDQPRWRUZLOOVKXWR · 3UHVVLQJWKLVEXWWRQZKLOHLQ$XWR0RGHZLOOVKXWR$XWR0RGHFORVHWKHYHQWOLG DQGVKXWRWKHIDQPRWRU

THERMOSTAT SET TEMPERATURE
TEMP + ~ Press this button to increase the Set Temperature for Auto Mode. TEMP - ~ Press this button to decrease the Set Temperature for Auto Mode. NOTE: The thermostat temperature range is from 29°F to 99°F or -2°C to 37°C. To change from Fahrenheit to Celsius on the temperature display, press and hold both set temperature keys simultaneously.

FAN SPEED Fan Speed + ~ Press

SET TEMPERATURE

TRANSMIT

LOW BATTERY INDICATOR

this button to increase

the fan speed. The fan has ten speeds. Fan Speed - ~ Press this

AUTO MODE INDICATOR

ROOM TEMPERATURE

button to decrease the

fan speed. The fan has ten speeds. NOTE: When the fan

FAN ON INDICATOR

VENT LID IN AUTO MODE

speed reaches either the maximum or minimum

CEILING FAN

speed, the fan will respond with 2 quick

FAN OFF INDICATOR

VENT LID POSITION

beep sounds to indicate

this.

FAN SPEED

CEILING FAN MODE AIR DIRECTION

LOW BATTERY

INDICATOR

INDICATOR

· When the battery is at full charge, three black power bars are displayed.

· One or zero power bars displayed indicates the batteries need replacement.

TRANSMISSION SIGNAL · This symbol is displayed on the screen when any button is pressed to indicate the signal was transmitted to the fan. · A beep sound from the ceiling unit indicates the signal from the remote control was received by the fan.

9

219

MAXXAIR BATH FAN
MAXXFAN DOME
INSTALLATION INSTRUCTIONS, INFORMATION AND OPERATING GUIDE
FOR MODELS 3810, 3812

READ AND SAVE THESE INSTRUCTIONS
NOTE: Refer to Installation Instructions, Information and Operation Guides regarding the model you have purchased.
The MAXXFAN Dome fan is an exhaust fan only.
The MAXXFAN Dome fan installs into a 6 1/4 inch diameter opening.
To determine if your roof opening is correctly sized, simply remove the interior ceiling garnish trim ring of your existing roof vent and measure the ceiling opening or verify the opening is large enough by sliding the MAXXFAN Dome sleeve into the opening.
The MAXXFAN Dome is designed for a minimum roof thickness of 1 inch to a maximum of 6 inches.
The MAXXFAN Dome fan requires a minimum 12 Volt DC, 2 amp service. Confirm that the circuit you intend to use will accommodate the additional load. Circuit must be fused and use appropriate gauge stranded wire for electrical connections.
WARNING! TO REDUCE THE RISK OF FIRE, ELECTRIC SHOCK, OR INJURY TO PERSONS, OBSERVE THE FOLLOWING:
a) Use this unit in the manner intended by AIRXCEL, INC. If you have questions, contact the manufacturer.
b) Before servicing or cleaning unit, switch power off at service panel and lock the service disconnecting means to prevent power from being switched on accidentally. When the service disconnecting means cannot be locked, securely fasten a prominent warning device, such as a tag, to the service panel.
CAUTION! FOR GENERAL VENTILATION USE ONLY. DO NOT USE TO EXHAUST HAZARDOUS OR EXPLOSIVE MATERIALS AND VAPORS.

P/N: 11A90041Z

08-09-2019

220

MAXXAIR BATH FAN

INSTALLATION INSTRUCTIONS
WARNING! TO REDUCE THE RISK OF FIRE, ELECTRIC SHOCK, OR INJURY TO PERSONS, OBSERVE THE FOLLOWING:
Installation work and electrical wiring must be done by qualified persons(s) in accordance with all applicable codes and standards, including fire-rated construction.
STEP 1 The MAXXFAN Dome fan requires a minimum 6 1/4 inch diameter roof opening. If you are replacing another type already installed, remove the old existing roof vent. Remove all old roof sealant for a minimum of 2" entirely around the roof opening.

STEP 2
Prior to installing the MAXXFAN Dome in the roof opening, apply a continuous strip of BUTYL tape or equivalent to the underside of the flange in the groove provided.
CAUTION! When installing your
MAXXFAN Dome fan, only use a caulking/sealant compatible with the flange (plastic product) and the roof surface. DO NOT use materials containing solvents such as or similar to Xylene, Toluene, Methyl Ethyl Ketone (MEK), Acetate or Acetone as they can damage the flange. Also, Polysulfide (Thiokol) type sealants must be avoided. If in doubt, please contact the manufacturer of your RV.

STEP 3 When inserting the MAXXFAN Dome fan into the roof opening:
· orient the fan with the button toward the front of the coach.
· ensure that the fan wires are hanging to the inside of the coach.
Center the fan in the opening.
Using the eight (8) screws provided, attach the flange to the roof at each dimple location along the flange.
Note: Opening the fan lid gives better access to the flange for assembling the screws.
Screw into the dimple to pierce the flange, making sure not to overtighten the screws to avoid cracking the flange. STEP 4 After the MAXXFAN Dome fan has been installed, remove the excess BUTYL caulk that may have squeezed out. Using a sealer such as Dicor self-leveling lap sealant or similar caulking, apply a daub over every exposed screw head. In addition, apply a bead (approximately 3/16" dia.) along the outside edge of the flange all the way around the fan.
THIS COMPLETES THE ROOF TOP
PORTION OF THE INSTALLATION

221

MAXXAIR BATH FAN
CAUTION! Disconnect main vehicle power before connecting 12 volt DC power to the MAXXFAN Dome exhaust fan. STEP 5

· If the roof is thicker than 1 inch the extension sleeve must be used.
· A roof that is 6 inches thick will use the full-length extension sleeve without trimming.

VEHICLE ROOF
THICKNESS
6.0
1.0 inch

SLEEVE LENGTH TO CUTOFF

LED
NONE (use full length sleeve)
Not Applicable, Sleeve not used

NON-LED
NONE (use full length sleeve)
Not Applicable, Sleeve not used

· If the roof is between 1 inch and 6 inches, the extension sleeve may need to be trimmed.
· Measure the distance from the vehicle ceiling to the base of the MAXXFAN Dome fan. Cut the extension sleeve longer than the dimension measured to accommodate the depth of the garnish ring. Refer to table below for additional length required.
NOTE: Mark and cut the extension sleeve per figure 5 shown above.

VEHICLE ROOF THICKNESS

LENGTH TO ADD TO CEILING THICKNESS
MEASUREMENT

LED

NON-LED

1 1/8 to 5 7/8 inch

15/16 inch

1/2 inch

222

MAXXAIR BATH FAN

opening. This will help center the garnish ring in the opening.
· Ensure that the wires are not pinched. The wires should be routed on the outside of the sleeve. The excess wire should lay in the garnish ring to keep them contained.

STEP 6 Non-LED MAXXFAN Dome
Using the supplied wire splices, connect the Positive (+) 12VDC supply wire to the MAXXFAN Dome fan wire marked "POS 12VDC" and the Negative (-) 12VDC supply wire to the MAXXFAN Dome fan wire marked "Neg. 12VDC".
· If the sleeve is needed, insert the sleeve into the garnish ring positioning the notch in the sleeve to line up the wiring.
· Raise the garnish ring to the ceiling ensuring that the garnish ring is centered over the fan opening.
· If using the sleeve, the sleeve will overlap the base that extends in the

· Secure the garnish ring to the ceiling with the four (4) screws provided in the small parts package.
· Reconnect the main vehicle power to the MAXXFAN Dome.
This completes the installation of the MAXXFAN Dome exhaust fan.

223

MAXXAIR BATH FAN

STEP 7 LED MAXXFAN Dome
Using the supplied wire nuts, connect the Positive (+) 12VDC supply wire to the MAXXFAN Dome fan wire and the LED light wire marked "POS 12VDC" and the Negative (-) 12VDC supply wire to the MAXXFAN Dome fan wire and the LED light wire marked "Neg. 12VDC".
· If the sleeve is needed, insert the sleeve into the garnish ring positioning the notch in the sleeve to line up the wiring.
· Raise the garnish ring to the ceiling ensuring that the garnish ring is centered over the fan opening.
· If using the sleeve, the sleeve will overlap the base that extends in the opening. This will help center the garnish ring in the opening.
· Ensure that the wires are not pinched. The wires should be routed on the outside of the sleeve. The excess wire and wire nuts should lay in the garnish ring to keep them contained.

· Secure the garnish ring to the ceiling with the four (4) screws provided in the small parts package.
· Reconnect the main vehicle power to the MAXXFAN Dome.
This completes the installation of the MAXXFAN Dome fan.

224

MAXXAIR BATH FAN

OPERATION OF YOUR MAXXFAN Dome fan
· To open the MAXXFAN Dome lid push the button on the handle to dis-engage the clip and slide the handle up till the clip engages the upper opening.

USER INSTRUCTIONS SERVICING
Cleaning of your MAXXFAN Dome may be achieved with mild soap and water only. The screen can be removed for cleaning by removing the four (4) screws. Before removing the screen for cleaning, ensure the fan is turned to the OFF position.

· To close the lid, push the button on the

CAUTION: Do not operate the fan with

handle to dis-engage the clip and pull

the screen removed.

the handle down till the clip engages the lower opening.

The MAXXFAN Dome fan has a 5 amp fuse. To access the fuse, turn the fuse cap

· Operation of your MAXXFAN Dome

to the left to remove the cap. Replace the

simply entails pushing the ON/OFF

fuse with a 5 amp, type GMA fast acting

button on the fan to activate the

fuse. Replace the fuse cap to secure the

exhaust fan.

fuse in the fuse holder.

· The optional LED lighting on thePLACE CONSUShMoEulRd yLouAhBaEveLqHueEsRtioEns, please contact

garnish ring is operated by the push

AIRXCEL / MAXXAIR VENTILATION

button on the garnish ring. The LED

SOLUTIONS Customer Service at

lighting and fan operate independently

316.832.4357.

· Close the lid to impede infiltration of air when exhaust fan is not in use.

For WARRANTY information, please visit www.airxcel.com/maxxair.

· The MAXXFAN Dome fan should not be operated with the lid closed.

For additional product information please visit www.AIRXCEL.com AIRCEL, INC. ­ RV Products Division / MAXXAIR
3050 N. St. Francis St.  Wichita, KS 67219  316.832.3400

225

NORCOLD REFRIGERATOR FOR LEGACY ELITE

Installation and Owner's Manual
For N3000 models with touchscreen
! WARNING FIRE OR EXPLOSION HAZARD
If you smell gas: 1. Open Windows 2. Do not attempt to light appliance. 3. Do not touch electrical switches. 4. Extinguish any open flame 5. Shut off fuel supply. 6. Evacuate immediately and call emergency services.
Failure to follow these instructions could result in fire or explosion, which could cause property damage, personal injury, or death.

! WARNING

Improper installation, adjustment, alteration, service or maintenance can cause injury or property damage. Refer to this manual. For assistance or additional information, contact a qualified installer, service agency, or the gas supplier.

FOR YOUR SAFETY Do not store or use gasoline or other flammable vapors and liquid in the vicinity of this or any other appliance.

! WARNING

DO NOT install this refrigerator in below deck marine applications. Do not install this refrigerator in a fixed indoor cabin or other dwelling applications. This refrigerator must use only NORCOLD designed and approved outside air intake and exhaust ventilation for correct and safe operation. Any other ventilation could cause lethal combustion exhaust fumes and/or explosive propane gas fumes to be in the living area and/or to be below deck.

NORCOLD, Inc. P.O. Box 4248 Sidney, OH 45365-4248

English
Norcold Customer Support Dept. Telephone: 800-543-1219 Fax: 734-769-2332
Web Site: www.norcold.com
Part No. 635607M (5/31/2018)

226

NORCOLD REFRIGERATOR FOR LEGACY ELITE
Table of Contents
Owner's Manual .......................................................................................................................................................................................3 Safety Awareness..............................................................................................................................................................................3 Safety Instructions.............................................................................................................................................................................3 About Your Refrigerator.....................................................................................................................................................................4 Refrigerator components............................................................................................................................................................4 Storage Volume..........................................................................................................................................................................4 Leveling......................................................................................................................................................................................5 Operation during travel...............................................................................................................................................................5 Use of refrigerator compartment ................................................................................................................................................5 Moving storage shelves .............................................................................................................................................................5 Moving door bins........................................................................................................................................................................5 Using slide out ...........................................................................................................................................................................5 Using Drawer .............................................................................................................................................................................6 Freezer compartment.................................................................................................................................................................6 Control Panel with Touchscreen........................................................................................................................................................6 Turn refrigerator on ....................................................................................................................................................................6 Anti-condensation heater ...........................................................................................................................................................6 Selecting a Source .....................................................................................................................................................................7 Sources ......................................................................................................................................................................................7 Select cooling level ....................................................................................................................................................................7 Turn refrigerator off ....................................................................................................................................................................7 Temperature Control System.............................................................................................................................................................8 Effects of High Altitude on Propane Gas Operation ..........................................................................................................................8 Effects of Freezing Temperatures on Refrigerator Operation............................................................................................................8 Refrigerator Care Checklist ...............................................................................................................................................................8 Defrosting ..........................................................................................................................................................................................9 Cleaning ............................................................................................................................................................................................9 Remove Slide-out box system.........................................................................................................................................................10 Remove Drawer ..............................................................................................................................................................................10 Check the Seal of the Doors ...........................................................................................................................................................10 Refrigerator Storage........................................................................................................................................................................ 11 Storage Lock ................................................................................................................................................................................... 11 Refrigerator Maintenance Checklist ................................................................................................................................................12 Refrigerator Maintenance................................................................................................................................................................12 Gas flame appearance.............................................................................................................................................................12 Remove and clean the burner orifice .......................................................................................................................................13 Wiring Diagram and Pictorial...........................................................................................................................................................14 Replacement Parts..........................................................................................................................................................................15 Troubleshooting...............................................................................................................................................................................15 Frequently Asked Questions ..........................................................................................................................................................15
Installation Manual..................................................................................................................................................................................16
Safety Awareness............................................................................................................................................................................16 Safety Instructions...........................................................................................................................................................................16 Certification and Code Requirements .............................................................................................................................................17 Ventilation Requirements ................................................................................................................................................................17 Key Refrigerator Dimensions ..........................................................................................................................................................18 Assemble the Enclosure for the Refrigerator ..................................................................................................................................18 Install the Lower and Upper Vents ..................................................................................................................................................19 Reverse the Door Swing (optional) .................................................................................................................................................23 Install Door Panel ............................................................................................................................................................................24 Handling ..........................................................................................................................................................................................25 Install the Refrigerator .....................................................................................................................................................................25 Combustion Seal .............................................................................................................................................................................25 Connect the Electrical Components ................................................................................................................................................26
Connect the 120 volts AC supply .............................................................................................................................................26 Connect the 12 volts DC supply...............................................................................................................................................26 Connect the Propane Gas Components .........................................................................................................................................27 Connect the propane gas supply system .................................................................................................................................27 Connect the gas supply line to the refrigerator ........................................................................................................................27 Examine the gas supply system for leaks ................................................................................................................................28 Ignition and Start Up........................................................................................................................................................................28 Control Panel with Touchscreen......................................................................................................................................................28 Removing Air From the Propane Gas Supply Lines........................................................................................................................29 Set the Controls to Automatic Mode Operation ...............................................................................................................................30 Turn Refrigerator Off .......................................................................................................................................................................30 Remove the Refrigerator .................................................................................................................................................................30
Installation and Owner's Manual 2
227

NORCOLD REFRIGERATOR FOR LEGACY ELITE

Safety Awareness

Owner's Manual

Read this manual carefully and understand the contents before you use the refrigerator.

Be aware of possible safety hazards when you see the safety alert symbol on the refrigerator and in this manual. A signal word follows the safety alert symbol and identifies the danger of the hazard. Carefully read the descriptions of these signal words to fully know their meanings. They are for your safety.

! WARNING

This signal word means a hazard, which if ignored, can cause dangerous personal injury, death, or much property damage.

! CAUTION

This signal word means a hazard, which if ignored, can cause small personal injury or much property damage.

Safety Instructions

! WARNING
- The storage of flammable materials behind or around the refrigerator creates a fire hazard. Do not use the area behind the refrigerator to store anything, especially flammable materials (gasoline, cleaning supplies, etc.)
- Do not remove the round ground prong from any of the AC power cords. Do not use a two prong adapter or an extension cord with any of the AC power cords.
- A circuit overload can result in an electrical fire if the wires and/or fuses are not the correct size. Use only the wire and fuse sizes as written in the "Installation Manual".
- Incorrect installation, adjustment, change to, or maintenance of this refrigerator can cause personal injury, property damage, or both. Have service and maintenance work done by your dealer or by a Norcold authorized service center.
- Disconnect both the AC and DC power sources before doing any maintenance work on the refrigerator. All service work on this refrigerator must be done by a qualified service technician.
- Do not bypass or change the refrigerator's electrical components or features.
- When you discard an appliance, remove all doors to prevent accidental entrapment and suffocation.
- Do not spray liquids near electrical outlets, connections, or the refrigerator components. Many liquids are electrically conductive and can cause a shock hazard, electrical shorts, and in some cases fire.
- The refrigerator cooling system is under pressure. Do not try to repair or to recharge a defective cooling system. The cooling system contains sodium chromate. The breathing of certain chromium compounds can cause cancer. The cooling system contents can cause severe skin and eye burns, and can ignite and burn with an intense flame. Do not bend, drop, weld, move, drill, puncture, or hit the cooling system.
- At regular intervals, make sure that the refrigerator flue the burner, the vent areas, and the ventilation air pathway between the vents is completely free from any flammable material or blockage. After a period of storage, it is especially important to check these areas for any flammable material or blockage caused by animals.
! CAUTION
- The rear of the refrigerator has sharp edges and corners. To prevent cuts or abrasions when working on the refrigerator, be careful and wear cut resistant gloves.

228

Installation and Owner's Manual 3

NORCOLD REFRIGERATOR FOR LEGACY ELITE

About Your Refrigerator
model N3104

model N3150

Art02363

model N3141

ART 02724

ART 02593

Refrigerator components 1.......................................................................................................................................................................................Refrigerator door 2............................................................................................................................................................................................. Freezer door 3...................................................................................................................................................................................................Door lock 4......................................................................................................................................................... Security lock (dependent on model) 5........................................................................................................................................................ Control panel with LCD touchscreen 6................................................................................................................................................................................Freezer compartment 7............................................................................................................................................................................................. Ice cube tray 8......................................................................................................................................................................... Refrigerator compartment 9............................................................................................................................................................................................... Cooling fins 10..................................................................................................................................................................................... Storage shelves 11.......................................................................................................................................................................................... Vegetable bin 12.............................................................................................................................................................................................. Serial label 13.................................................................................................................................................................................................Door bins 14..........................................................................................................................................................................................Bottle retainer 15...........................................................................................................................................................................................Slide out Box 16........................................................................................................................................................................................ Bottom Drawer 17........................................................................................................................................................................................ Bottle Retainer
Storage volume

This refrigerator is made for storage of foods and frozen food and for making ice.

Total capacity:

model N3104 - 3.7 cubic feet

model N3150 - 5.3 cubic feet

model N3141 - 5.0 cubic feet

Installation and Owner's Manual 4

229

NORCOLD REFRIGERATOR FOR LEGACY ELITE

Leveling

! CAUTION

The refrigerator is made to operate within 3° off level side-to-side and 6° off level front-to-back (as looking at the front of the refrigerator). Operating it at more than these limits can cause damage to the cooling system and create a risk of personal injury or property damage. Make sure the vehicle is level before you operate the refrigerator.

Operation during travel

While the refrigerator should be level when the vehicle is stopped, performance during travel is not usually affected.
Use of refrigerator compartment

Art02359

You can organize your refrigerator as desired by moving the storage shelves and door bins. Make sure the door can still be closed after reorganizing shelves and bins.

Moving storage shelves( N3141 and N3104 Models only)

Remove and save the screw below the plastic clamp on the right side of the storage. Turn the plastic clamp upwards, as illustrated. Lift the right side a bit, and move the storage shelf to the desired position. First place the left side of the storage shelf in the refrigerator wall, then the right side in the corresponding groove. Turn the plastic clamp downwards, and replace the screw underneath.(See Art02359)

Moving storage shelves( N3150 Model only)

Place a tool with a flat end firmly inside the oval opening of the clip (1). Hold the block under the clip with your free hand (2). (See Art02726) Gently move the tool away from the fridge wall (approximtely 30 degrees) while keeping its end on the bottom of the oval opening(3). After removing the safety block, rotate the clip upwards to release the shelf (4). Move the storage shelf to the desired position. Rotate the clip downwards until the shelf snaps into place. Place the block at the bottom of the shelf until you hear a click sound.(See Art02727)

Moving door bins

Push a door bin out of the locking with both hands, as illustrated. Place this door bin back in the desired position and push it back on the locking. (See Art02360)

For the best cooling performance:

- Let air move freely inside the entire food compartment.

- Do not cover the shelves with plastic, paper, etc.

To decrease the amount of ice that collects on the cooling fins:

- Cover all liquids and moist foods.

- Let all hot foods cool before putting them in the refrigerator.

- Do not open the door any longer than necessary.

Using slide out- N3141

You may use the slide out box as a tray for all your breakfast or lunch items. Slide out the complete box and put it directly on the table.To remove the slide out box, pull the box until it stops. Then lift the box at the front, as illustrated [Art02594]. The box is now free to remove.

Art02360 ART 02726
ART 02727

ART 02594

Installation and Owner's Manual 5

230

NORCOLD REFRIGERATOR FOR LEGACY ELITE

Using drawer- N3141

The drawer is specially designed for bottle , cans, vegatables and is divided into two compartments by the bottle retainer. [See Art02595]

NOTICE The bottle retainer is secured into position and should not be relocated.

! CAUTION The maximum storage capacity of the drawer is 33lbs. Freezer compartment

The freezer compartment is made to keep pre-frozen food frozen and not to quick freeze food. Keep pre-frozen foods in the freezer compartment.

NOTICE Do not put other items on the ice tray while the water is freezing. The water freezes more rapidly if the thermostat is at the COLDEST position.

NOTICE Do not wash the vegetable bins, door bins, or bin slides in a dishwasher. The vegetable bins, door bins, and bin slides are not dishwasher safe.
Control Panel With Touchscreen

ART 02595

Art02366

5........................................................................................................................................................ Control panel with LCD touchscreen 5a........................................................................................................................................................................................... On/off switch 5b........................................................................................................................................................................................... Touchscreen 5c.........................................................................................................................................................................................Mode symbols 5d...........................................................................................................................................................................Cooling level indicators 5e............................................................................................................................... Symbol `anti-condensation' (only for model N3150)
5f................................................................................................................................................................................................ Error code

Turn refrigerator on

Start up the refrigerator and let it cool for eight hours before loading with food. If the refrigerator does not start to cool down after about two hours, contact your dealer or a Norcold authorized service center.

For best cooling performance, level your vehicle before operating the refrigerator.

To turn the refrigerator on, push the on/off switch and hold it for 1 second, as illustrated. A light in the on/off switch will turn green.(See Art02352)

After 10 seconds the settings will dim. The green light indicates the refrigerator is still functioning.
To check the settings push the on/off button again. The currently active settings will light up. For optimal performance, turn the refrigerator on eight hours before placing food.

Art02352

Anti-condensation heater (present on refrigerator model N3150 & N3141)

To prevent condensation from forming on the control panel , the anti-condensation function is automatically turned on (no symbol visible). Only turn this function off when it is necessary to conserve vehicle battery charge.

To turn OFF the anti-condensation heater, push on the anti-condensation button. The symbol on the control panel will light up, indicating that the anti-condensation heater has been turned OFF. (See Art02369)

To turn the anti-condensation heater back on, push the anti-condensation button again. The symbol on the control panel will go off, indicating that the anti-condensation heater has been turned ON.

Art02369

Installation and Owner's Manual 6

231

NORCOLD REFRIGERATOR FOR LEGACY ELITE

Selecting a source

After turning the refrigerator on, push the source button several times, as illustrated. Push until the desired source is selected. (See Art02367)

Sources

Auto

The refrigerator automatically selects the best source available (in order: AC, DC, gas)

Art02367

AC

The refrigerator is powered by AC.

DC

The refrigerator is powered by the battery of your vehicle.

Gas

The refrigerator is powered by propane gas.

Art02357

Always use the gas or AC mode to start up and cool. Operating on 12V DC is only effective while the engine of the vehicle is running.

If the `auto' function on the refrigerator is selected, but no source is available, a light in the on/off switch blinks red.

The performance of the refrigerator operating on 12V DC is dependent on the thickness and length of the wiring and the overall installation of the vehicle.

Select cooling level

After turning the refrigerator on, push the cooling level button several times, as illustrated. Push until the desired level is selected. (See Art 02368)

Lowest cooling
level

Highest cooling
level

We advise to set the refrigerator on cooling level 3, with an ambient temperature between 60°F and 75°F. A higher temperature needs a higher cooling level, a lower temperature a lower level.

Art02368

Turn refrigerator off

Before defrosting the refrigerator or storing your vehicle, turn the refrigerator off. Push the on/off switch, as illustrated, and hold it for 2 seconds to turn off the refrigerator. All lights will go out. (See Art02353)

NOTICE

If storing the vehicle for an extended period of time, make sure to disconnect the fan at the rear of the refrigerator, as explained in section entitled "Refrigerator Storage".

Art02353

232

Installation and Owner's Manual 7

NORCOLD REFRIGERATOR FOR LEGACY ELITE
Temperature Control System
Although the refrigerator is not frost -free, it is made to limit frost on the cooling fins. At regular intervals, the temperature control system automatically melts most of the frost from the cooling fins. The water from the cooling fins drains into a collection cup that is attached to the back of the refrigerator. The heat of the cooling system evaporates the water from the collection cup.
Effects of High Altitude on Propane Gas Operation
When you operate the refrigerator on propane gas at altitudes higher than 5500 feet above sea level: - You may experience reduced cooling performance of the refrigerator. - You may experience burner outages.
To avoid these possible problems, Norcold recommends that you operate the refrigerator on AC when at altitudes higher than 5500 feet above sea level.
Effects of Freezing Temperatures on Refrigerator Operation
A gas absorption refrigerator is not designed to operate in freezing temperatures. If the refrigerator is not equipped for low temperature operation, and if the cooling system of the refrigerator is exposed to temperatures of 32° F or lower for an extended period of time, the refrigerator operation may be disrupted. The refrigerator operation will resume when the cooling system of the refrigerator warms sufficiently. Disrupted operation of the refrigerator, due to extended exposure to temperatures of 32° F or lower, and any costs incurred to warm the cooling system of the refrigerator are not covered by the Norcold limited warranty. Please contact your local RV dealer for information about how to resume refrigerator operation or about how to equip your refrigerator for operation in freezing temperatures. Do not change the installation or the venting of your refrigerator. Refrigerator failures, which are the result of changes to either the refrigerator installation or to the venting, are not covered by the Norcold limited warranty.
Refrigerator Care Checklist
Your refrigerator will give you years of trouble free service if you do these simple checks every three to six months: - Keep the food compartment and the freezer clean. See "Cleaning". - Defrost the refrigerator as necessary. See "Defrosting". - Make sure the door seals correctly. See "Door Sealing". - Be aware of any cooling changes that are not because of weather, loading, or gas control changes. If changes occur, contact your dealer or service center. - Make sure the gas supply is propane gas only and not butane or a butane mixture. - When in propane gas operation, examine the appearance of the flame. See "Gas Flame Appearance". - Make sure the air flow in the lower intake vent, through the refrigerator coils and condenser, and out the upper exhaust vent is not blocked or decreased. - Make sure the area behind the refrigerator is clear. Do not use the area behind the refrigerator for storage of anything, especially gasoline and other flammable vapors and liquids.

Installation and Owner's Manual 8

233

NORCOLD REFRIGERATOR FOR LEGACY ELITE

Defrosting

The cooling fins of the refrigerator operate at below freezing temperature and will naturally form frost from humidity, which is always present in the air. The humidity inside the refrigerator increases:

- with higher outside temperature and humidity.

- with the storage of non-sealed fresh foods or warm foods.

- with the amount of time that the door(s) are open.

- with any air leakage into the refrigerator.

Although the refrigerator is not frost -free, it is made to limit frost on the cooling fins. At regular intervals, the temperature control system automatically melts most of the frost from the cooling fins. The water from the cooling fins drains into a collection cup that is attached to the back of the refrigerator. The heat of the cooling system evaporates the water from the collection cup.

It is normal for frost to collect inside the freezer. Excess frost decreases the cooling performance of the refrigerator. Defrost the refrigerator and freezer as necessary:

- Remove all food from the refrigerator.

- Turn the refrigerator OFF.

NOTICE Defrosting the refrigerator makes excess water inside the refrigerator.

- Remove the drain hose from the drip cup at the rear of the refrigerator.

- Put the drain hose into a half-gallon or larger container to capture water.

- Put dry towels (etc.) inside the refrigerator and freezer to absorb melted frost.

! CAUTION

High temperatures can cause the inside surfaces of the refrigerator to warp or melt. Do not use pans of HOT water, hair dryer, or any other high temperature devices to defrost the refrigerator. Do not use any hard or sharp objects to remove frost. Damage to the interior of the refrigerator can occur.

- To increase the speed of defrosting, put pans of WARM water in the refrigerator and freezer.

- Remove the wet towels (etc.) and dry the interior.

- Remove the drain hose from the large container and put the drain hose back into the drip cup.

- Remove the large container from the enclosure.

- Start up the refrigerator.

- Allow the refrigerator to cool down.

- Return all food to the refrigerator.

Cleaning
A good time to clean the refrigerator is just after you defrost it. Clean the inside of the refrigerator as often as necessary to avoid food odors:
- Remove all food from the refrigerator. NOTICE Do not use abrasive cleaners, chemicals, or scouring pads because they can damage the interior of the refrigerator. - Wash the interior with a mild cleaner or a solution of liquid dish detergent and warm water. - Rinse with a solution of baking soda and clean water. - Dry with clean cloth. - Put all food in the refrigerator.

Installation and Owner's Manual 9

234

NORCOLD REFRIGERATOR FOR LEGACY ELITE
Remove Slide out Box System (Art02596) - Open the refrigerator door. - Remove slide out box - Slide the rail system to the right. - Remove slide out box. - Once area is clean, move the rail system to the left. - Place the slide out box back into refrigerator.
NOTICE Make sure the slide out box snaps into place.

Remove Drawer

ART 02596

- Open the refrigerator door

- Pull the drawer until it stops.

- Push it a little bit back and push the guide locks backwards. (See Art02616)

- Pull the drawer twoards you and lift the wheels over the curves. (See Art02599)

- Clean the desired area and place the drawer back into the refrigerator.

- Push the guide locks forward

- Tilt the drawer over the wheels.

- Push the drawer into the refrigerator.

ART 02616
Check the Seal of the Doors
If either door does not seal correctly, excess frost will collect inside the refrigerator. Make sure the doors seal correctly (See Art00980):
- Close each door on a piece of paper that is about the size and thickness of a dollar bill.
- Gently pull the paper.
- You should feel a slight drag between the gasket and the cabinet.
- Do this on all four sides of the door.
- If you do not feel a slight drag on the paper, the door does not seal correctly.
- Have your dealer or an authorized Norcold Service Center correct the seal of the door.

Art00980

Installation and Owner's Manual 10

ART 02599
235

NORCOLD REFRIGERATOR FOR LEGACY ELITE

Refrigerator Storage
Before the refrigerator is stored for an extended (seasonal) period of time:
- Defrost and clean the interior of the refrigerator.
- To prevent odors and mold in the refrigerator, keep all doors open during storage. Rotate the hook at door lock 45 degrees and lock it in place by using the strike plate, as illustrated.
- Disconnect the fan at the rear of the refrigerator. Unplug the connector on the red wire of the DC power cord, where shown as illustrated. (Art02362)
If the refrigerator is stored for an extended period of time, before start up:
- Make sure there are no obstructions in the vents, the ventilation air pathway, the burner, the orifice, or the flue area.
- Reconnect the fan at the rear of the refrigerator. Plug together the connectors on the red wire of the DC power cord, where shown as illustrated. (Art02331)

Art02362

N3141 Storage Lock

Open the door and rotate the storage lock as illustrated. (See Art2600) - Then close the door until you here the first click.

Art02331

- Make sure the door is still part way open.

When you use the refrigerator after storage, always make sure to rotate the storage lock back to its original position. (See Art02601)

ART 02601
236

ART 02600
Installation and Owner's Manual 11

NORCOLD REFRIGERATOR FOR LEGACY ELITE

Refrigerator Maintenance Checklist

Read and understand the following maintenance sections of this manual.

NOTICE

Norcold is not responsible for installation, adjustment, alteration, service, or maintenance performed by anyone other than a qualified RV dealer or a Norcold authorized service center.

Have a qualified RV dealer or a Norcold authorized service center do these annual safety and maintenance checks:

- Examine the gas supply lines for leaks

- Replace or repair if needed.

- Make sure the propane gas pressure is 11 inches of water column.

- Adjust if needed.

- Make sure the combustion seal is complete and intact.

- Replace or repair it if needed.

- Make sure the burner and the burner orifice are clean.

- Clean if needed.

- Make sure the electrode spark gap is 1/8 - 3/16 inch.

- Adjust if needed.

- Make sure the AC voltage is 108 - 132 volts and the DC voltage is 10.5 - 15.4 volts.

- Make sure the area at the rear of the refrigerator is free of any combustible materials, gasoline, and other flammable vapors and liquids.

Refrigerator Maintenance

Gas flame appearance:

! CAUTION

While in GAS operation, examine the appearance of the gas flame:

- Turn the refrigerator on, select manual gas mode, and coldest temperature setting.

- Open the lower intake vent.

The burner box cover can be hot. Wear gloves to avoid burns.

- Remove the burner box cover by removing the screw.

- Look at the gas flame [75] (See Art01605).

- The flame should be:
- a darker blue color on the inside of the flame and a lighter blue color on the outside of the flame.

Art01605

- a constant shape without flickering.

- Contact your dealer or Norcold authorized service center if the flame is:

- yellow

- flickering or changing shape.

- Make sure the flame does not touch the inside of the flue tube [76].

- If the flame touches the inside of the flue tube, contact your dealer or Norcold authorized service center.

- Close the burner box door.

76 75

Installation and Owner's Manual 12

237

NORCOLD REFRIGERATOR FOR LEGACY ELITE

Remove and clean the burner orifice

Your dealer or Norcold authorized service center must do this procedure. Remove and clean the burner orifice (See Art00956):

77 80 79

78

- Close the valve at the propane gas tank(s).

- Push the on/off switch and hold it for 2 seconds to turn off the refrigerator.

! CAUTION The burner box cover can be hot. Wear gloves to avoid burns. - Open the lower intake vent.

Art 00956

- Remove the burner box cover by removing the screw.

! WARNING

To avoid possible propane gas leaks, always use two wrenches to loosen and tighten the gas supply line connections.

- Remove the flare nut from the orifice assembly [77] (See Art00956).

- Remove the orifice assembly from the burner [78].

! WARNING

Do not try to remove the orifice [79] from the orifice adapter [80] when cleaning. Removal will damage the orifice and seal of the orifice and can cause a propane gas leak. Leaking propane gas can ignite or explode which can result in dangerous personal injury or death. Do not clean the orifice with a pin or other objects.

- Clean the orifice assembly with air pressure and alcohol only.

- Using a wrench, assemble the orifice assembly to the burner.

- Assemble the flare nut to the orifice assembly.

- Examine all of the connections for gas leaks.

- Clean the burner box.

- Assemble the burner box cover.

238

Installation and Owner's Manual 13

NORCOLD REFRIGERATOR FOR LEGACY ELITE

Wiring Diagram and Pictorial

WIRING PICTORIAL / PLAN DE CABLAGE

Power Control Module / Module Connexion de Puissance Fan /

MODEL/MODELE N3104-N3141-N3150

TYPE U

Solenoid Gas valve / Electrovanne de gaz

Burner Control Module / Module de
Contrôle Brûleur

Fuse 20A /

Earth tab / Terre

Ventilateur
Fuse 4A / fusible 4A

fusible 20A

Spark electrode / Bougie à ionisation
Battery pack (E option only) / Boitier porte piles (pour
Display Module / Panneau de commande modèles LED uniquement)

Resettable fuse 1.1A / Fusible réarmable 1.1A

Thermoswitch / sonde thermique

120VAC powercord /

cordon d'alimentation

Fuse 1A /

120VCA

fusible 1A

-+-+

12VDC - HC / 12VCC-HC
12VDC - LC / 12VCC-LC Engine Run/+ après contact
Thermistor / Sonde thermostatique

Power / Mise en marche

Source / Source d'énergie

Level / Sélecteur Div. Heat. / Batt. /

puissance

Anti Batt.

condensation

Divider heater (Double door only) / Anti condensation (modèles double porte uniquement)

WIRING DIAGRAM / SCHEMA DE CABLAGE MODEL/MODELE N3104-N3141-N3150 TYPE U

120VAC heater / résistance 120VCA 12VDC heater / résistance 12VCC
AC heater / résistance CA

120VAC/ L
120VCA 12VDC-LC +/ 12VCC-LC + 12VDC-HC +/ 12VCC-HC +
fuse 1A / fusible 1A
PCM

fuse 4A / fusible 4A

fuse 1.1A / fusible 1.1A

fuse 20A /

5V

fusible 20A PSU

+12V-LC

to +5V-DM

DM

Comm. GND

N

12VDC-LC COM/ COM 12VCC-LC

DC heater / résistance CC 3V3

12VDC-HC COM/ COM 12VCC-HC

PSU

Spark electrode /

BCM µC

Bougie à ionisation Solenoid gas valve /

Electrovanne de gaz

Thermoswitch / sonde thermique

Fan / Ventilateur

+12V-LC

to +5V-DM

PCM

Comm. GND

4xA B
µC

10/11xC DE

+12V-LC

to +5V-DM

PCM

Comm. GND

5V PSU

4xF B

µC

11xG DE

DM-LED DM-LED+

DM-LCD

A) Push buttons: Power, Back, Mode/Enter, Next /

D) Interior lights / Lumière intérieure

Commandes: Mise en marche, Retour, Valider, Suivant.

E) Divider heater (double door only) / Anti condensation (modèles double porte uniquement)

B) Reed switch / Contacteur

F) Push button Power and 3x touch switch: source, temperature, divider heater / Commandes : Mise

C) LED's: 3x Source (4x in case of LED+), 5x Temperature,

en marche et 3 commandes tactiles : Source d'energie, sélection de puissance, anti condensation

Divider heater, battery (red) /

G) LCD symbols: auto mode, 3x source, 5x temperature, divider heater, 2 digit error code / modèle

Modèle LED = 3 sources d'énergie (4x en cas de LED+), 5 sélections

LCD = mode automatique, 3 sources d'énergie, 5 sélections de puissance,anti

de puissance, anti condensation, indicateur changement de piles (rouge) condensation, code erreur ( 2 chiffres).
690888

ART 02551

Installation and Owner's Manual 14

239

NORCOLD REFRIGERATOR FOR LEGACY ELITE
Replacement Parts
You may purchase replacement parts through your local RV dealer or authorized Norcold Service Center.

Troubleshooting

In case of a problem, an error code on the control panel can light up. When error codes 1, 2, 4, 5, 8, 9, 12 or 13 are visible, directly contact your dealer or a Norcold Service Center.

For below error codes, first read the associated instructions. If this will not solve the problem, contact your dealer or a Norcold Service Center.

3

The refrigerator does not work on gas: check if the gas bottle is not empty · check if the valve of the gas bottle and all shut-off valves are open · turn the refrigerator off and on again · try to run the refrigerator on another power source

6

The refrigerator does not work on 12V: make sure the engine is running · try to run the refrigerator on another power source

7

The refrigerator does not work on 12V: make sure the engine is running · try to run the refrigerator on another power source.

10 The refrigerator does not work on 120V: check if 120V AC is available · try to run the refrigerator on another power source

11 18

The refrigerator does not work in AUTO mode: check if the sources are connected · try to run the refrigerator manually on a power source
All symbols on the control panel light up: wait a few seconds until the refrigerator starts normal.

Frequently Asked Questions
What can I do, when the refrigerator does not start?
Check if you turned on the refrigerator according to the instructions, if the vehicle stands level or if there is an available energy source to start the refrigerator with. If none of this is the case, please contact your dealer or a Norcold Service Center.
The refrigerator does not cool sufficiently, what can I do?
Check if the vents aren't covered or blocked from the outside, if the refrigerator stands level, if the highest cooling level of the refrigerator is selected, if the door of the refrigerator still closes properly, if there is not too much ice on the cooling fins, or if the fan wire is disconnected at the rear of the refrigerator. If none of this is the case, please contact your dealer or a Norcold Service Center.
All lights on the control panel are blinking, what should I do?
Please contact your dealer or a Norcold Service Center.

240

Installation and Owner's Manual 15

NORCOLD REFRIGERATOR FOR LEGACY ELITE

Safety Awareness

Installation Manual

Read this manual carefully and understand the contents before you install the refrigerator.

Be aware of possible safety hazards when you see the safety alert symbol on the refrigerator and in this manual. A signal word follows the safety alert symbol and identifies the danger of the hazard. Carefully read the descriptions of these signal words to fully know their meanings. They are for your safety.

! WARNING

This signal word means a hazard, which if ignored, can cause dangerous personal injury, death, or much property damage.

! CAUTION

This signal word means a hazard, which if ignored, can cause small personal injury or much property damage.

Safety Instructions

! WARNING

- This refrigerator is not approved for use as a free standing refrigerator. It is equipped for the use of propane gas only and cannot be changed to use any other fuels (natural gas, butane, etc.).

- Incorrect installation, adjustment, alteration, or maintenance of this refrigerator can cause personal injury, property damage, or both.

- Obey the instructions in this manual to install intake and exhaust vents.

- Do not install the refrigerator directly on carpet. Put the refrigerator on a metal or wood panel that extends the full width and depth of the refrigerator.

- Do not allow anything to touch the refrigerator cooling system.

- Propane gas can ignite and cause an explosion that can result in property damage, personal injury, or death. Do not smoke or create sparks. Do not use an open flame to examine the propane gas supply line for leaks. Always use two wrenches to tighten or loosen the propane gas supply line connections.

- Make sure the electrical installation obeys all applicable codes. See "Certification and Code Requirements" section.

- Do not bypass or change the refrigerator's electrical components or features.

- Do not spray liquids near electrical outlets, connections, or the refrigerator components. Many liquids are electrically conductive and can cause a shock hazard, electrical shorts, and in some cases fire.

- The refrigerator cooling system is under pressure. Do not try to repair or to recharge a defective cooling system.

- The cooling system contains sodium chromate. The breathing of certain chromium compounds can cause cancer. The cooling system contents can cause severe skin and eye burns, and can ignite and burn with an intense flame. Do not bend, drop, weld, move, drill, puncture, or hit the cooling system.

! CAUTION

The rear of the refrigerator has sharp edges and corners. To prevent cuts or abrasions when working on the refrigerator, use caution and wear cut resistant gloves.

Installation and Owner's Manual 16

241

NORCOLD REFRIGERATOR FOR LEGACY ELITE

Certification and Code Requirements

This refrigerator is certified by CSA International as meeting the latest edition of ANSI Z21.19 / CSA 1.4 standards for installation in mobile homes or recreational vehicles.

The refrigerator must be installed in accordance with this "Installation Manual" in order for the Norcold limited warranty to be in effect. In addition, the installation must conform to the following, as applicable:
In the United States and Canada:

Art01290

- Local codes, or in the absence of local codes, the National Fuel Gas Code, ANSI Z223.1/NFPA 54, the Natural Gas and Propane installation Code, CSA B149.1, ANSI A119.2 Recreational Vehicles Code, and CSA Z240 RV Series, Recreational Vehicles.

- A manufactured home (mobile home) installation must conform with the Manufactured Home Construction and Safety Standard, Title 24 CFR, Part 3280 [formerly the Federal Standard for Mobile Home Construction and Safety, Title 24 (part 280), and the current CSA Z240.4, Gas-equipped Recreational Vehicles and Mobile Housing.

- If an external power source is utilized, the appliance, when installed, must be electrically grounded in accordance with local codes or, in the absence of local codes, the National Electrical code, and ANSI/NFPA 70, or the Canadian Electrical Code, CSA C22.2. Parts 1 and 2.

All propane gas supply piping and fittings must obey local, state, and national codes about type and size. These components must also obey the current NFPA 1192 section 2-4, and in Canada with the current CAN 1-6.10 Standard.

Ventilation Requirements

! WARNING

The completed installation must:

- Make sure there is sufficient intake of fresh air for combustion.

- Make sure the living space is completely isolated from the combustion system of the refrigerator.

- Make sure there is complete and unrestricted ventilation of the flue exhaust which, in gas mode, can produce carbon monoxide. The breathing of carbon monoxide fumes can cause dizziness, nausea, or in extreme cases, death.

- Make sure the refrigerator is completely isolated from its heat generating components through the correct use of baffles and panel construction.

Certified installation needs one lower intake vent and one upper exhaust vent. Install the vents exactly as written in this manual. Any other installation method voids both the certification and the factory warranty of the refrigerator.

The bottom of the opening for the lower intake vent, which is also the service access door, must be even with or immediately below the floor level. This allows any leaking propane gas to escape to the outside and not to collect at floor level.

CSA International certification allows the refrigerator to have zero (0) inch minimum clearance at the sides, rear, top, and bottom. While there are no maximum clearances specified for certification, the following maximum clearances are necessary for correct refrigerator performance:

Bottom

0 inch min.

0 inch max.

Each Side 0 inch min

1/2 inch max.

Top

0 inch min.

1/4 inch max.

Rear

0 inch min.

1 inch max.

242

Installation and Owner's Manual 17

NORCOLD REFRIGERATOR FOR LEGACY ELITE
These clearances plus the lower and upper vents cause the natural air draft that is necessary for good refrigeration. Cooler air comes in through the lower vent, goes up around the refrigerator coils where it removes the excess heat from the refrigerator components, and goes out through the upper vent. If this air flow is blocked or decreased, the refrigerator will not cool correctly.
Each NORCOLD model is certified by CSA International for correct ventilation. Install only the certified vents that are listed in this manual.
Key Refrigerator Dimensions

Height* (in.)

Width (in.)

Depth* (in.)

Total Volume (cu. ft.)

N3104Axx

32 5/16

20 11/16

23 3/8

3.7

N3150Axx

49 1/16

20 11/16

22 7/8

5.3

N3141Axx

59 1/16

16 15/32

22 3/32

5.0

* Height dimension includes feet. Depth dimension includes the door.

Freezer Volume (cu. ft.)
0.39 0.88 0.52

Assemble the Enclosure for the Refrigerator

1. Use the table below, and associated figures, to determine the enclosure size.

Model

Height (in.)

Width (in.)

Depth (in.)

Door Depth "FC" (in.)

N3104Axx N3150Axx N3141Axx

32 1/2 49 3/16 59 3/16

20 13/16 min. to 20 15/16 max. 20 13/16 min. to 20 15/16 max. 16 5/8 min. to 16 3/4 max.

20 3/8 min. 19 7/8 min. 21 1/16 min

3 1/16 3 1/16

2. Make sure the floor is solid and level.

- The floor must be metal or a wood panel and extend the full width and depth of the enclosure.

- The floor must be able to support the weight of the refrigerator and its contents.

- The Minimum distance between the bottom of the enclosure and the floor is 12mm. (N3141Only)

3. Make sure there are no adjacent heat sources such as a furnace vent, a hot water heater vent, etc.

4. If there is more than 1/2 inch between either side of the refrigerator and the inside of the enclosure:

- Fill the space with fiberglass insulation or add a baffle to eliminate the excess clearance.

- Make sure that the batt-type insulation extends from the enclosure face, to the combustion seal at the rear of the refrigerator cabinet.

- Securely attach the batt-type insulation to the enclosure so that it remains in this position during refrigerator installation, if it becomes wet, and in windy conditions.

Net Weight (lb.) 61 85 84
Art02343

Installation and Owner's Manual 18

Art02344
243

NORCOLD REFRIGERATOR FOR LEGACY ELITE
Install the Lower and Upper Vents

1. Using the following chart, decide which vents and rough opening (RO) sizes to use:

Certified Vent

P/N

RO Height

RO Width

Upper Roof Exhaust Cap

622293

N/A

N/A

Upper Roof Exhaust Vent

616319

24 in.

5 1/4 in.

Large Vent (3 Louver)

621156xx

13 ¾ in.

21 ½ in.

Large Vent (10 Louver)

690136xx

9 13/16 in.

19 5/16 in.

Small Vent

633588xx

6 5/32 in.

17¾ in.

Universal Upper and Lower Vent

620505xx

6 3/16 in.

17 13/16 in.

N3141 ONLY

691100xx

9 in.

(690577 & 690680)

15 3/4 in.

Install the vents exactly as described. Any other method will invalidate the warranty for the refrigerator.

NOTICE 2. Install the lower intake vent (See Art02337, Art02338, and Art02339):

The lower intake vent is also the service access opening for the components on the rear of the refrigerator.

! WARNING

Make sure the bottom of the opening of the lower intake vent is even with or immediately below the floor level. This allows any leaking propane gas to escape to the outside and not to collect at floor level.

- Make sure the bottom of the opening of the lower intake vent [9] is even with or immediately below the floor level.

- Align the lower intake vent vertically below the coils [10] and the condenser [11] of the refrigerator.

3. Install the upper exhaust vent:

! CAUTION

Make sure that no sawdust, insulation, or other construction debris is on the refrigerator or in the

14

enclosure. Debris can cause a combustion hazard and

prevent the refrigerator from operating correctly.

NOTICE

Tighten the screws of the upper roof exhaust cap to 10 inchpounds max. Also make sure that the air flow around the upper roof exhaust cap is not blocked or decreased by other roof mounted features such as a luggage carrier, an air conditioner, a solar panel, etc.

- If the design of the vehicle allows, install the roof exhaust vent [12] directly above the condenser [11] of the refrigerator (See Art02337):

- Install a baffle [13] to prevent stagnant hot air in the area [14] above the refrigerator.

Overall Vent Size 10½ in. x 33 in. 7 7/16 in. x 26 7/32 in. 16 15/32 in. x 24 7/32 in. 11 1/16 in. x 21 in. 7 11/32 in. X 19 1/32 in. 8 5/32 in. X 19 5/8 in. 10 1/8 in X 17inches
11
10
9 Art02339
12 13
19 16 11
19 10
16 17 9

27

Art02337

244

Installation and Owner's Manual 19

NORCOLD REFRIGERATOR FOR LEGACY ELITE

- Make sure the baffle is the full width of the inside of the enclosure.

! WARNING

The front baffle [13] completes the combustion seal at the top of the refrigerator. Make sure that the baffle is sealed around all edges (against the top edge of the refrigerator, against the enclosure side walls, and against enclosure ceiling in front of the vent). See also section entitled "Combustion Seal".

- If the design of the vehicle does not allow you to install the roof exhaust vent directly above the condenser [11] of the refrigerator (See Art02338):

- Align the roof exhaust vent [12] above the condenser [11] of the refrigerator and move it inboard as necessary.

- Install two baffles [13] to prevent stagnant hot air in the area [14] above the refrigerator.

- Make sure the baffles are the full width of the inside of the enclosure.

- Make sure that the baffles are no more than 45° from vertical [20].

- Put one baffle between the top rear edge of the refrigerator and the inside edge of the upper exhaust vent opening.

! WARNING

The front baffle [13] completes the combustion seal at the top of the refrigerator. Make sure that the baffle is sealed around all edges (against the top edge of the refrigerator, against the enclosure side walls, and against enclosure ceiling in front of the vent). See also section entitled "Combustion Seal".

- Put the other baffle between the outside edge of the upper exhaust vent opening and the side wall of the vehicle.

- If the depth of the enclosure is 20 3/8 inches or more and is less than 21 3/8 inches [27], no baffles are necessary at the rear of the enclosure.

13

14

20

11

10

27

14

13

12
19 16
19 16 17
9 Art02338 12
19 11

21

10
17 9 27 Art02341

Installation and Owner's Manual 20

245

NORCOLD REFRIGERATOR FOR LEGACY ELITE

- If the depth of the enclosure is 21 3/8 inches or more and is less than 22 3/8 inches [27], add two baffles [16] to the rear of the enclosure (See Art02337 and Art02338).

- For model N3104, put one baffle 10 inches above the bottom of the enclosure [17], or at the top of the lower intake vent opening, whichever is higher.
- For model N3150, put one baffle 12 inches above the bottom of the enclosure [17], or at the top of the lower intake vent opening, whichever is higher.

13

14

20

- Put the other baffle at the lowest edge of the condenser [11] of the refrigerator.

- Make sure that the baffles are 1 inch or less [19] from the coils [10] and condenser [11] of the refrigerator. 10
- Make sure that the baffles are the full width of the inside of the enclosure.

- If the depth of the enclosure is more than 22 3/8 inches [27], install a wood or an aluminum or galvanized sheet solid box baffle [21] in the rear of the enclosure (See Art02341 and Art02342).

- Make sure that the horizontal bottom of the solid box baffle is even

27

with or above the top edge of the lower exhaust vent [9].

- Make sure that distance from the enclosure floor to the vertical bottom edge of the solid box baffle [17] is 10 in. for N3104 models and 12 in. for N3150 models.

- Make sure that the back of the solid box baffle is perpendicular to the bottom of the enclosure.

- Make sure that the back of the solid box baffle is either against the top of the enclosure or against the angled baffle [13] (depending on the vehicle design).

- Make sure that the solid box baffle is one inch or less [19] from the coils [10] and condenser [11] of the refrigerator.

- Make sure that the solid box baffle is the full width of the inside of the enclosure.

12
19 11 21
17 9 Art02342
22
23
Art02340

246

Installation and Owner's Manual 21

NORCOLD REFRIGERATOR FOR LEGACY ELITE

- If the design of the vehicle does not allow you to install a roof exhaust vent, install an upper side-wall exhaust vent.

NOTICE

The distance from the front of the breaker to the rear of the condenser [22] (See Art02340) is 19 11/32 in. for N3104 and 19 1/16 for N3150. For the N3141 it is 19 5/8inches.

NOTICE

The distance from the bottom of the refrigerator (including feet) to the bottom of the condenser [23] (See Art02340) is 27¼ in. for N3104 and 42 9/16 for N3150. For the N3141 it is 53 1/4 inches.

! CAUTION

Only use an upper side-wall exhaust vent on refrigerator models that are equipped with a fan. If you use an upper side wall exhaust vent on a refrigerator model that is not equipped with a fan, the refrigerator cooling performance will be poor.

14

13

11 24

15 213

- Make sure the refrigerator model is equipped with a

26

fan.

- Install the upper side-wall exhaust vent [24] (See Art02334 and Art02335).
- Make sure the distance [25] from the bottom of the enclosure to the top of the rough opening for the upper exhaust vent is at least 32 ½ in. for N3104 and 49 3/16 for N3150.

25 10
9

- Make sure the distance [25] from the bottom of

the enclosure to the top of the rough opening for the upper exhaust vent is at least 64 in. for N3141

27

Art02334

- Align the upper exhaust vent [24] horizontally above the lower intake vent [9] of the refrigerator.
- To prevent stagnant hot air in the area above the refrigerator [14], install an aluminum or galvanized steel sheet baffle [13] between the top of the refrigerator and the top of the upper exhaust vent.

15

13

14

24

11

- Make sure the baffle is the full width of the inside of the enclosure.

! WARNING

The top baffle [13] completes the combustion seal at the top of the refrigerator. Make sure that the baffle is sealed around all edges (against the top edge of the refrigerator, against the enclosure side walls, and against vehicle wall or enclosure ceiling above the vent). See also section entitled "Combustion Seal".

26

213

25 10

Installation and Owner's Manual 22

9

27

Art02335

247

NORCOLD REFRIGERATOR FOR LEGACY ELITE

- When using an upper side-wall exhaust vent:
- If the depth of the enclosure is 20 3/8 inches or more and is less than 22 3/8 inches [27], install a bent aluminum or galvanized steel sheet baffle [26] to the rear of the enclosure (See Art02334 and Art02335).
- If the depth of the enclosure (for N3141) is 21 1/16 inches or more and is less than 23 1/16 inches [27], install a bent aluminum or galvanized steel sheet baffle [26] to the rear of the enclosure (See Art02334 and Art02335).

- Make sure that the bend of the baffle is the full width of the inside of the enclosure.

- Make sure that the bend of the baffle is even with or below the bottom edge of the upper intake vent door frame.

- Make sure that the top edge of the baffle is between 1/4 inch [213] below the condenser and 1 1/2 inches above the bottom of the condenser and that there is 1/4 inch or less clearance [15] between the rear of the condenser and the baffle.

- For the best cooling performance, the baffle should be 1/4 inch below the bottom of the condenser.
- If the depth of the enclosure is more than 22 3/8 inches [27], install a wood or an aluminum or galvanized steel sheet solid box baffle [21] between the lower intake vent and the upper exhaust vent (See Art02336).
- If the depth of the enclosure is more than 23 1/16 inches (For N3141) [27], install a wood or an aluminum or galvanized steel sheet solid box baffle [21] between the lower intake vent and the upper exhaust vent (See Art02336).
- Make sure that the solid box baffle is the full width of the inside of the enclosure.
- Make sure that the horizontal bottom of the solid box baffle is even with or above the top edge of the lower exhaust vent [9].

13 14

15 11

24

213

21 25 10

17 9
27

Art02336

- Make sure that distance from the enclosure floor to the vertical bottom edge of the solid box baffle [17] is 10 in. for N3104 and 12 in. for N3150 and 21 in. for N3141.

- Make sure that the back of the solid box baffle is perpendicular to the bottom of the enclosure.

- Make sure that the horizontal top of the solid box baffle is even with or below the bottom edge of the upper exhaust vent [24].

- Make sure that the vertical top edge of the baffle is between 1/4 inch [213] below the condenser and 1 ½ inches above the bottom of the condenser.

- Make sure that there is 1/4 inch or less clearance [15] between the rear of the condenser and the baffle.

Reverse the Door Swing (optional)

NOTICE

N3000 series refrigerators are designed so that door swing can be reversed in the field, using kits that can be purchased separately. Door swing reversal should be done before installing the refrigerator in the vehicle.
Installation and Owner's Manual 23

248

NORCOLD REFRIGERATOR FOR LEGACY ELITE

Install Door Panels - N3141

NOTICE

The doors are made to accept decorative panels. The decorative panels must be 0.12 inches or less in thickness. Install the decorative door panels in the refrigerator doors and drawers before installing the refrigerator in the vehicle.

1. To make a door panel for a flat cabinet, the panel needs to be 15.47inches wide x 37.40inches high.

2. To make a door panel for a flat drawer, the panel needs to be 15.47inches wide x 17.83inches high.

3. Install the decorative panels:

- Remove door from refrigerator. (See Art02612)

- Remove panel retainer. (See Art02615) -Pull and rotate the panel reatainer. Rotate the middle, then the left and right side.

- Slide panels in the door and drawer.(See Art02613)

- Click the panel retainers in place. (See Art02614)

- Place door back onto the refrigerator.

ART 02612

ART 02615

ART 02613
Manuel de l'utilisateur/manuel d'installation 24

ART 02614
249

NORCOLD REFRIGERATOR FOR LEGACY ELITE
Handling
Only carry the refrigerator at the strap handles on top (1), if equipped. Do not use your knee to lift the refrigerator (2).

Art02348

Install the Refrigerator
- Push the refrigerator completely into the enclosure.
- Use screws to fix the refrigerator, and the white caps for finishing.
- For the N3104, 4 screws and 4 white caps are supplied.
- For the N3150, 6 screws and 6 white caps are supplied.
- For the N3141, 6 screws and 6 white caps are supplied.

Art02345

Combustion Seal
Position sealing as shown in the figure. Fix the strips to the sides of the refrigerator (B) in a vertical direction at the rear of the refrigerator. Fix the upper and lower flap of the combustion sealing (A) as the drawing shows.

Art02349

Art02346

250

Art02347
Installation and Owner's Manual 25

NORCOLD REFRIGERATOR FOR LEGACY ELITE

NOTICE

Upper flap (A) may have already been installed as a ventilation baffle. See also section entitled "Install the Lower and Upper Vents", Step 3.

The sealing area must be separated air-tight from the living area.

! WARNING

If the combustion seals are not being used or fail to seal properly in the unit, use a different kind of sealing to keep hazardous combustion gases out of the living area of the vehicle. If the seal is not complete, exhaust fumes can be present in the living area of the vehicle. The breathing of exhaust fumes can cause dizziness, nausea, or in extreme cases, death.

Connect the Electrical Components

AC Operation, 120 volts AC voltage (132 volts max. - 108 volts min.)

DC Operation, 12 volts DC control voltage (15.4 volts max. - 10.5 volts min.)

This refrigerator operates on these electrical sources. Operation out of these limits may damage the refrigerator's electrical circuit parts and will void the warranty.

! WARNING

The rear of the refrigerator cooling system has hot surfaces and sharp surfaces that can damage electrical wiring. Make sure that there is a good clearance between all electrical wiring and the cooling system of the refrigerator. Position any electrical wiring within the refrigerator enclosure opposite the burner side of the refrigerator. Do not put any electrical wiring through the roof exhaust vent. Failure to correctly position electrical wiring can result in electrical shock or fire.

Connect the 120 volts AC supply

! WARNING

Connect the AC power cord(s) only to a grounded three-prong receptacle. Do not remove the round ground prong from any of the AC power cords. Do not use a two prong adapter or an extension cord with any of the AC power cords. Operation of the refrigerator without correct ground can cause dangerous electrical shock or death if you are touching the metal parts of the refrigerator.

Plug the AC power cord(s) into a grounded three-prong receptacle:

- Make sure the receptacle is positioned within easy reach of the lower intake vent.

- Make sure the power cord(s) does not touch the burner cover, the flue pipe, or any hot component that could damage the insulation of the power cord.

Connect the 12 volts DC supply

As the distance from the vehicle battery to the refrigerator increases, the correct AWG wire size and fuse size also increases. If the wire size is too small for the distance, a voltage drop occurs. The voltage drop decreases the output of the system heater and causes poor cooling performance.

! WARNING

If you use an incorrect wire size and/or fuse size, electrical fire can result. 1. Determine the min. wire size and the max. fuse size to use:

- Measure the distance from the vehicle battery to the refrigerator.

- If the distance is 0 - 20 feet, use a minimum of 10 AWG wire and a maximum 30 Amp fuse.

- If the distance is over 20 feet, use a minimum of 8 AWG wire and a maximum 40 Amp fuse.

- If the wire size is larger than the min. size, use the correct fuse per RVIA A119.2 standard or local codes.

Installation and Owner's Manual 26

251

NORCOLD REFRIGERATOR FOR LEGACY ELITE

2. Install a fuse in DC power supply wires between the battery and the refrigerator:

- Put fuse as close to the battery as possible.

3. Connect the DC power supply wires:

These models have 2 connection points to prevent the battery from being discharged by the refrigerator when the engine is not running.

High current supply

red cable (+) and white cable (-) for heating element. Only turned on if signal on D+

Art02370 TYCO / AMP 180906

Low current supply

purple (+) and black (-) for electronics.

D+ signal

orange, + when engine runs

Use Stocko / Tyco / Amp 6-pole housing, or equivalent, with Lear connectors, or equivalent, wired as shown.

NOTICE

Do not use the chassis of the refrigerator or the vehicle frame as one of the conductors. Attach the DC power supply wires only to the battery and the DC power cord of the refrigerator.

Art02350

TYCO / AMP 280314

Connect the Propane Gas Components

This refrigerator operates on propane gas at a pressure of 11 inches Water Column Propane.

The controls operate on 12 volts DC (10.5 volts min. - 15.4 volts max.). Operation out of these limits can damage the refrigerator electrical circuit parts and will void the warranty.

Connect the propane gas supply system:

! WARNING

Be very careful when working on or near the propane gas system.

- Do not smoke, or use an open flame near the propane gas system.

- Do not use an open flame to examine for leaks.

- Do not connect the refrigerator to the propane gas tank without a pressure regulator between them.

- To avoid a propane gas leak, always use two wrenches to tighten or loosen the propane gas supply line connections.

- Leaking propane gas leak can ignite or explode and result in dangerous personal injury or death.

Connect the gas supply line to the refrigerator:

- Make sure that all tubing and fittings obey all local, state, and national codes about size and type.

- Make sure that all flexible metal connectors obey the current CAN1-6.10 Standard.

252

Installation and Owner's Manual 27

NORCOLD REFRIGERATOR FOR LEGACY ELITE

- Make sure that the materials used for the gas supply line obey both the current ANSI A 119.2 (NFPA 1192) and CSA Z240 Standards on Recreational Vehicles. Norcold recommends the use of 3/8 inch copper tubing as the gas supply line and requires a 3/8 inch SAE (UNF 5/8-18) male flare fitting as the connection to the refrigerator.

- Put the propane gas supply line up through the floor of the enclosure.

- Make sure the hole through the floor is large enough allow clearance for the gas supply line.

- Put a weather resistant seal (grommet, sealant, etc.) around the gas supply line where it goes through the floor to prevent vibration and abrasion.

- To prevent vibration and abrasion, make sure that the gas supply line is not against anything in the enclosure.

- Attach the gas supply line to the bulkhead fitting of the refrigerator.

Examine the gas supply system for leaks:

! WARNING

Do not allow the leak detecting solution to touch the electrical components. Many liquids are electrically conductive and can cause electrical shorts and in some cases, fire.

Use a leak detecting solution to examine the gas supply line and all propane gas connections for leaks. If you use compressed air for the test:

- The pressure of the compressed air at the manual shut off valve of the refrigerator must not be more than 1/2 psig (14 inches Water Column).

- If the pressure of the compressed air is more than 1/2 psig (14 inches Water Column), remove the gas supply line from the bulkhead fitting of the refrigerator before the test.

- If the pressure of the compressed air is equal to or less than 1/2 psig (14 inches Water Column), close the manual shut off valve of the refrigerator before the test.

Ignition and Start Up
Before ignition or start up of the refrigerator: - Make sure the air flow in the lower intake vent, through the refrigerator coils and condenser, and out the upper exhaust vent is not blocked or decreased. - Make sure there are no combustible materials in or around the refrigerator.

Control Panel with Touchscreen

Art02366
Control panel with LCD touchscreen ........................................................................................................................................................5 On/off switch...........................................................................................................................................................................................5a Touchscreen ...........................................................................................................................................................................................5b Mode symbols ........................................................................................................................................................................................ 5c Cooling level indicators...........................................................................................................................................................................5d Symbol `anti-condensation' (only for model N3150) ...............................................................................................................................5e Error code................................................................................................................................................................................................5f
Installation and Owner's Manual 28
253

NORCOLD REFRIGERATOR FOR LEGACY ELITE

Removing Air From the Propane Gas Supply Lines

For safety reasons, the burner is made to ignite on propane gas within a specified amount of time. When starting the refrigerator for the first time, after storage, or after replacing propane gas tank, the propane gas supply lines can have air in them. Due to the air in the gas supply lines, the burner may not ignite on propane gas within the specified amount of time.

To remove the air from the propane gas supply lines:

- Make sure that all of the gas valves are open.

- To turn the refrigerator on, push the on/off switch and hold it for 1 second, as illustrated. A light in the on/off switch will turn green.

- Push the source button several times, as illustrated. Push until the flame appears on the display. This means that the refrigerator is operating on propane gas. Art02357
- The refrigerator will start a 30 second trial for ignition. During the 30 second trial for ignition, the refrigerator controls open the gas safety valve and the igniter sparks. After 30 seconds, the refrigerator controls close the gas safety valve and the igniter stops sparking.

Art02352

- If the air in the propane gas supply lines prevents the burner from ignition on propane

gas, the fault code

3 will appear in the center display.

- Push the on/off switch, as illustrated, and hold it for 2 seconds to turn the refrigerator off. All lights will go out.

- To start another trial for ignition, push the on/off switch and hold it for 1 second to turn the refrigerator on. A light in the on/off switch will turn green.

Art02367

- The refrigerator will start another 30 second trial for ignition. During the 30 second trial for ignition, the refrigerator controls open the gas safety valve and the igniter sparks. After 30 seconds, the refrigerator controls close the gas safety valve and the igniter stops sparking.
- When the flame appears on the display and no fault code remains, this means that the refrigerator is operating on propane gas.

Art02353

- At this time, all of the air is removed from the propane gas supply lines and you may select AUTO mode of operation if you wish.

- Depending on how much air may be in the propane gas supply lines, you may need to repeat the 30 second trial for ignition two or three times.

- If the burner does not ignite on propane gas after three attempts, refer to the "Troubleshooting" section of this manual; consult your local dealer or an authorized Norcold Service Center, if necessary.

254

Installation and Owner's Manual 29

NORCOLD REFRIGERATOR FOR LEGACY ELITE

Set the Controls to Automatic Mode Operation
Push the source button several times, as illustrated. Push until the desired source (A, `auto') is selected and displayed.
If the engine is running, DC mode will be selected and displayed.
If the engine is not running, and 120 volts AC is available to the refrigerator, AC mode will be selected and displayed.
If the engine is not running, and 120 volts AC is NOT available to the refrigerator, gas mode will be selected and displayed.
Art02357
If the gas does not ignite after several attempts, refer to the "Troubleshooting" section of this manual.
If the `auto' function on the refrigerator is selected, but no source is available, a light in the on/off switch blinks red.

Art02367

Turn Refrigerator Off

Before defrosting the refrigerator or storing your vehicle, turn the refrigerator off. Push the on/off switch, as illustrated, and hold it for 2 seconds to turn the refrigerator off. All lights will go out.

NOTICE

If storing the vehicle for an extended period of time, make sure to disconnect the fan at the rear of the refrigerator, as explained in section entitled "Refrigerator Storage".

Art02353

Remove the Refrigerator

Your dealer or Norcold authorized service center must do this procedure.

! CAUTION

The rear of the refrigerator has sharp edges and corners. To prevent cuts or abrasions when working on the refrigerator, be careful and wear cut resistant gloves.

1. Close the valve at the propane gas tank(s).

! WARNING

To avoid possible propane gas leaks, always use two wrenches to loosen and tighten the gas supply line connections.

2. Open the lower intake vent , and remove the refrigerator AC power cord from the receptacle.

3. Remove the DC wiring from the refrigerator:

- Remove the DC fuse or remove the DC wiring from the battery or the converter.

- Remove the refrigerator DC power cord from the vehicle wiring plug.

4. Remove the gas supply line from the bulkhead fitting of the refrigerator.

5. Remove the white plastic plugs from the sides of the refrigerator interior.

6. Remove the screws from the sides of the refrigerator interior.

7. Remove the refrigerator from the opening.

Installation and Owner's Manual 30

255

NORCOLD REFRIGERATOR FOR LEGACY ELITE II

Owner's Manual
For N41X models - 4.5 cu. ft., 2-way or 3-way, refrigerators. For N51X models - 5.5 cu. ft., 2-way or 3-way, refrigerators. The model numbers of 3-way refrigerators include ".3". The model numbers of 2-way models do not. The letter "X" in the model number above, stands for a letter or a numeral which means a refrigerator option.
! WARNING FIRE OR EXPLOSION HAZARD
If you smell gas: 1. Open Windows 2. Do not attempt to light appliance. 3. Do not touch electrical switches. 4. Extinguish any open flame 5. Shut off fuel supply. 6. Evacuate immediately and call emergency services.
Failure to follow these instructions could result in fire or explosion, which could cause property damage, personal injury, or death.

! WARNING

Improper installation, adjustment, alteration, service or maintenance can cause injury or property damage. Refer to this manual. For assistance or additional information, contact a qualified installer, service agency, or the gas supplier.

FOR YOUR SAFETY Do not store or use gasoline or other flammable vapors and liquid in the vicinity of this or any other appliance.

NORCOLD, Inc. P.O. Box 4248 Sidney, OH 45365-4248
256

English
Norcold Customer Support Dept. Telephone: 800-543-1219 Fax: 734-769-2332
Web Site: www.norcold.com
Part No. 635480B (10/1/2014)

NORCOLD REFRIGERATOR FOR LEGACY ELITE II

Table of Contents
For defined warranty terms, please see the one page warranty statement included in the product information packet.
Safety Awareness.....................................................................................................................................................................................2 Safety Instuctions .....................................................................................................................................................................................3 About Your Refrigerator ............................................................................................................................................................................3
Storage volume .................................................................................................................................................................................3 Leveling .............................................................................................................................................................................................3 Operation during travel......................................................................................................................................................................3 Food compartment ............................................................................................................................................................................4 Flip-up shelf.......................................................................................................................................................................................4 Door bins ...........................................................................................................................................................................................4 Freezer compartment ........................................................................................................................................................................4 Door latch for travel and storage .......................................................................................................................................................4 Temperature control system ..............................................................................................................................................................4 Operating the Refrigerator Controls .........................................................................................................................................................5 Control Panel............................................................................................................................................................................................5 Automatic mode operation ................................................................................................................................................................5 Removing the air from the propane gas supply lines ........................................................................................................................6 Set the controls to automatic mode operation...................................................................................................................................6 Set the controls to manual mode operation.......................................................................................................................................7 Cooling unit sensing ..........................................................................................................................................................................7 Backup operating system ..................................................................................................................................................................8 DC Operation Precautions (3-way models only) ......................................................................................................................................8 DC Operation Guidelines (3-way models only) ........................................................................................................................................9 Effects of High Altitude on Propane Gas Operation .................................................................................................................................9 Effects of Freezing Temperatures on Refrigerator Operation...................................................................................................................9 Refrigerator Care Checklist ......................................................................................................................................................................9 Defrosting ...............................................................................................................................................................................................10 Cleaning ................................................................................................................................................................................................. 11 Drip tray ................................................................................................................................................................................................. 11 Door Sealing........................................................................................................................................................................................... 11 Refrigerator Maintenance Checklist .......................................................................................................................................................12 Refrigerator Storage ...............................................................................................................................................................................12 Refrigerator Maintenance .......................................................................................................................................................................13 Gas flame appearance ....................................................................................................................................................................13 Remove and clean the burner orifice ..............................................................................................................................................13 Remove the Refrigerator ........................................................................................................................................................................14 Reinstall the Refrigerator........................................................................................................................................................................14 Replacement Parts .................................................................................................................................................................................15 Wiring Diagram and Pictorial ..................................................................................................................................................................15 Fault Codes ............................................................................................................................................................................................16

Safety Awareness

Read this manual carefully and understand the contents before you use the refrigerator.

Be aware of possible safety hazards when you see the safety alert symbol on the refrigerator and in this manual. A signal word follows the safety alert symbol and identifies the danger of the hazard. Carefully read the descriptions of these signal words to fully know their meanings. They are for your safety.

! WARNING

This signal word means a hazard, which if ignored, can cause dangerous personal injury, death, or much property damage.

This signal word means a hazard, which if ignored, can cause small personal injury or much property
! CAUTION damage.

Owner's Manual 2

257

NORCOLD REFRIGERATOR FOR LEGACY ELITE II
Safety Instructions
! WARNING
- The storage of flammable materials behind or around the refrigerator creates a fire hazard. Do not use the area behind the refrigerator to store anything, especially flammable materials (gasoline, cleaning supplies, etc.)
- Do not remove the round ground prong from the refrigerator AC power cord. Do not use a two prong adapter or extension cord on the AC power cord.
- A circuit overload can result in an electrical fire if the wires and/or fuses are not the correct size. Either use the wire and fuse sizes as writtten in the "Installation Manual" or refer to your local codes or the applicable RVIA Standards for the correct wire and fuse sizes.
- Incorrect installation, adjustment, change to, or maintenance of this refrigerator can cause personal injury, property damage, or both. Have service and maintenance work done by your dealer or by an Norcold authorized service center.
- Disconnect both the AC and DC power sources before doing any maintenance work on the refrigerator. All service work on this refrigerator must be done by a qualified service technician.
- Do not bypass or change the refrigerator's electrical components or features.
- When you discard an appliance, remove all doors to prevent accidental entrapment and suffocation.
- Do not spray liquids near electrical outlets, connections, or the refrigerator components. Many liquids are electrically conductive and can cause a shock hazard, electrical shorts, and in some cases fire.
- The refrigerator cooling system is under pressure. Do not try to repair or to recharge a defective cooling system. The cooling system contains sodium chromate. The breathing of certain chromium compounds can cause cancer. The cooling system contents can cause severe skin and eye burns, and can ignite and burn with an intense flame. Do not bend, drop, weld, move, drill, puncture, or hit the cooling system.
- At regular intervals, make sure that the refrigerator flue the burner, the vent areas, and the ventilation air pathway between the vents are completely free from any flammable material or blockage. After a period of storage, it is especially important to check these areas for any flammable material or blockage caused by animals.
! CAUTION
- The rear of the refrigerator has sharp edges and corners. To prevent cuts or abrasions when working on the refrigerator, be careful and wear cut resistant gloves.

About Your Refrigerator

Storage Volume:

This refrigerator is made to store fresh and frozen foods and for making ice.

Total capacity Freezer capacity Food compartment capacity

N41X 4.50 cubic feet
.81 cubic feet 3.69 cubic feet

N51X 5.50 cubic feet
.81 cubic feet 4.69 cubic feet

Leveling:

!

CAUTION

The refrigerator is made to operate within 3° off level side-to-side and 6° off level front-to-back (as looking at the front of the refrigerator). Operating it at more than these limits can cause damage to the cooling system

and create a risk of personal injury or property damage. Make sure the vehicle is level before you operate

the refrigerator.

258

Owner's Manual 3

NORCOLD REFRIGERATOR FOR LEGACY ELITE II

Operation during travel:

While the refrigerator should be level when the vehicle is stopped, performance during travel is not usually effected.

Food compartment:

Ignite or start up the refrigerator and let it cool for eight hours before loading with food. If the refrigerator does not start to cool down after about two hours, contact your dealer or an authorized Norcold Service Center.

For the best cooling performance:

- Let air move freely inside the entire food compartment.

- Do not cover the shelves with plastic, paper, etc.

To decrease the amount of ice that collects on the cooling fins:

- Cover all liquids and moist foods.

- Let all hot foods cool before putting them in the refrigerator.

- Do not open the door any longer than necessary.

Flip-up shelf:

The flip-up shelf supplies a space to store tall bottles. To use the flip-up shelf, lift the center of the shelf and fold it up against the inside wall of the refrigerator.

Door Bins:

You may put the door bins [52] of the fresh food compartment in a location that best meets your need (See Art01114). To remove the bins, lift them over the locator and pull them forward. To install the bins, push them onto the locator.

NOTICE

Do not wash the door bins in a dishwasher. The door bins are not dishwasher safe.

Freezer compartment:

The freezer compartment is made to keep pre-frozen food frozen and not to quick freeze food. Keep pre-frozen foods in the freezer compartment.

NOTICE

Do not put other items on the ice tray while the water is freezing. The water freezes more rapidly if the thermostat is at the coldest temperature setting.

Door latch for travel and storage:

During travel, the door latch prevents the door from opening. There are no chains, slides, or any devices that you must engage.

52 Art01114

During storage, the door latch prevents the door from completely closing. Use it to prevent odors when the refrigerator is shut down for a long period of time.
To use the door latch for storage (See Art00979):

161 162

- Open the door just so the door latch [161] is between the ribs [166] of the latch plate [162].

Temperature control system:

166

Although the refrigerator is not frost -free, it is made to limit frost on the cooling fins. At regular intervals, the temperature control system automatically melts most of the frost from the cooling fins. The water from the cooling fins drains into a collection cup that is attached to the back of the refrigerator. The heat of the cooling system evaporates the water from the collection cup.

Art00979

Owner's Manual 4

259

NORCOLD REFRIGERATOR FOR LEGACY ELITE II

Operating the Refrigerator Controls

Control panel:

The refrigerator control panel (see Art01562) is above the refrigerator door. A 12 volt DC power supply is necessary for the control functions of the refrigerator to operate. The refrigerator receives DC power from the 12 volt system of the vehicle; either an auxiliary battery, a converter, or the vehicle engine battery.

35 36 32 31 30

The ON / OFF button [30] starts and shuts down the refrigerator:
- To turn on the refrigerator, push and release the ON / OFF button.

AC AUTO

LP GAS DC

1-COLD 9-COLDEST

TEMP SET MODE

ON/OFF

- To turn off the refrigerator, push the ON / OFF button for one second and then release.

Art01562

33 34

164

The TEMP SET button [32] controls the temperature adjustment of the freezer and the fresh food compartment. The temperature adjustment that you select does not change if the mode of operation of the refrigerator changes.

- Push the TEMP SET button and the temperature setting "1-9" appears in the center display [33].

- Push and hold the TEMP SET button and the temperature setting changes.

- When the desired temperature setting shows, release the TEMP SET button.

- The temperature setting shows for ten seconds and then the current operation mode of the refrigerator shows.

- The number "9" is the coldest temperature setting.

The MODE button [31] controls the operation mode of the refrigerator.

- Push and hold the MODE button and a light bar shows in the center display beside each of the four operating modes of the refrigerator, one at a time.

- There is one automatic mode of operation and two manual modes of operation.

NOTICE On 3-way models only, there are three manual modes of operation.
- When the light bar shows beside the mode of operation that you choose, release the MODE button to operate the refrigerator in that mode.

Automatic mode operation:

When the refrigerator is in AUTO mode, it automatically uses the most efficient energy source that is available for operation. During operation, if a more efficient energy source becomes available, the refrigerator controls change from the current energy source to the more efficient energy source as follows:

- The first choice is AC operation if 120 volts AC is available to the refrigerator.

- The second choice is propane gas operation if 120 volts AC is not available to the refrigerator.

- The third choice is DC operation (3-way models only) if neither 120 volts AC nor propane gas is available to the refrigerator.

260

Owner's Manual 5

NORCOLD REFRIGERATOR FOR LEGACY ELITE II
Removing air from the propane gas supply lines: For safety reasons, the burner is made to ignite on propane gas within a specified amount of time. When starting the refrigerator for the first time, after storage, or after replacing propane gas tank, the propane gas supply lines can have air in them. Due to the air in the gas supply lines, the burner may not ignite on propane gas within the specified amount of time. To remove the air from the propane gas supply lines:
- Make sure that all of the gas valves are open. - Push the ON / OFF button to turn the refrigerator on. - Push and hold the MODE button until the light bar beside LP GAS [36] shows.
- This means that the refrigerator is operating on propane gas. - If the air in the propane gas supply lines prevents the burner from ignition on propane gas, the fault code "F" will appear in the
center display. - Push and hold the ON / OFF button for one second and then release to turn the refrigerator off. - Push the On / Off button to turn the refrigeratro on. - The refrigerator will start a 30 second trial for ignition.
- During the 30 second trial for ignition, the refrigerator controls open the gas safety valve and the igniter sparks. - After 30 seconds, the refrigerator controls closes the gas safety valve and the igniter stops sparking. - When the light bar beside the LP GAS shows and no fault code remains, this means that the refrigerator is operating on propane gas. - At this time, all of the air is removed from the propane gas supply lines and you may select AUTO mode of operation if you wish. - Depending on how much air may be in the propane gas supply lines, you may need to repeat the 30 second trial for ignition two or three times. - If the burner does not ignite on propane gas after two or three attempts, stop and consult your local dealer or an authorized Norcold Service Center. Set the controls to automatic mode operation: - Push the ON / OFF button to turn the refrigerator on. - Push and hold the MODE button until the light bar shows beside AUTO [34] and then release. - If 120 volts AC is available to the refrigerator: - The light bar beside AC [35] also shows in the center display. - After ten seconds, the light bar beside AC goes off and only the light bar beside AUTO remains. - This means that the refrigerator is operating on AC electric. - If 120 volts AC is not available to the refrigerator: - The light bar beside AC also shows in the center display. - After a few seconds, the light bar beside AC goes off and the light bar beside LP GAS shows.

Owner's Manual 6

261

NORCOLD REFRIGERATOR FOR LEGACY ELITE II

- After 10 seconds, the light bar beside LP GAS goes off and only the light bar beside AUTO remains.

- This means that the refrigerator is operating on propane gas.

- On 2 way models only, if neither 120 volts AC nor propane gas is available to the refrigerator:

- The fault codes "F" and then "A" show in the center display.

- On 3-way models only, if neither 120 volts AC nor propane gas is available to the refrigerator:

- The refrigerator control will automatically change to DC electric operation.

NOTICE

DC electric operation is less efficient than AC electric and propane gas. Use DC electric operation only to maintain the refrigerator temperature while in transit and if the other energy sources are not available. Do not use DC electric to initially decrease the temperature of the refrigerator.

If an energy source is available to the refrigerator, but is not operating correctly:

- A fault code shows in the center display.

- The refrigerator controls try to change to a less efficient energy source.

- If a less efficient energy source is not available:

- A fault code shows in the center display.

- Refer to the "Fault Codes" section of this manual.

Set the controls to manual mode operation:

- Push the ON / OFF button to turn the refrigerator on.

- Push and hold the MODE button until the light bar shows beside AC [35] and then release.

- This means that the refrigerator is operating on AC electric.

- Push and hold the MODE button until the light bar shows beside LP GAS [36] and then release.

- This means that the refrigerator is operating on propane gas.

- Push and hold the MODE button until the light bar shows beside DC [164] and then release.

- This means that the refrigerator is operating on AC electric.

If the energy source is interrupted:

- A fault code shows in the center display.

- Refer to the "Fault Codes" section of this manual.

Cooling unit sensing:

The controls have the ability to sense the operation of the cooling unit. If the controls sense that the cooling unit has stopped cooling:

- The heat sources to the cooling unit are turned off and are locked out by the controls.

- A fault code "n" shows in the Center display.

262

Owner's Manual 7

NORCOLD REFRIGERATOR FOR LEGACY ELITE II

You can reset the controls and remove this fault code one time. To reset the controls, shut off and then start the refrigerator.

- To turn off the refrigerator, push the ON / OFF button for one second and then release.

- To turn on the refrigerator, push and release the ON / OFF button.

If you reset the controls and the fault occurs again before the refrigerator completes a full cooling cycle:

- The heat sources to the cooling unit are turned off and are locked out.

- A fault code "n" shows in the Center display.

- This time you can not reset the fault. Have the refrigerator serviced by your dealer or a Norcold authorized Service Center as soon as possible.

Backup operating system:

This refrigerator has a backup operating system. The backup operating system allows the refigerator to continue to cool if the temperature sensor of the refrigerator should fail.

If this failure occurs:

- The refrigerator automatically changes to the backup operating system.

- When you push the TEMP SET button, the temperature setting flashes in the center display for ten seconds.

- After the temperature setting flashes, the mode of operation appears in the center dispaly.

- The backup operating system can overfreeze or thaw the contents of the freezer and the fresh food compartment.

- Make sure the temperatures of the freezer and the fresh food compartment are satisfactory.

NOTICE

If you open the door(s) too often, the temperatures inside the freezer and fresh food compartment do not become stable. Allow the refrigerator to operate for about one hour after each adjustment change before you examine the contents. The number "9" is the coldest temperature setting.

- If the temperature is too warm, push and hold the TEMP SET button to raise the temperature setting by one number.

- If the temperature is too cold, push and hold the TEMP SET button to lower the temperature setting by one number.

- Have the refrigerator serviced by your dealer or an Norcold authorized Service Center as soon as possible.

DC Operation Precautions (3-way models only)
This refrigerator is made to operate on DC power while your vehicle is "in transit" and AC power or propane gas sources are not available. Operate the refrigerator on DC power only when the vehicle engine is running. For the refrigerator to operate correctly on DC power, the battery must be maintained in a fully charged condition. For the battery to be fully charged at all times during refrigerator operation on DC, the vehicle engine must be running and the battery charging system must be in good operating condition. Keep in mind the following electrical precautions for DC operation of the refrigerator:
- Good battery condition is necessary for correct DC operation. - The capacity of the battery charging system must be more than what is necessary for the refrigerator and other DC appliances. - While the vehicle engine is running, make sure the voltage of the DC power supply leads at the refrigerator is more than 11.5 VDC.

Owner's Manual 8

263

NORCOLD REFRIGERATOR FOR LEGACY ELITE II
DC Operation Guidelines (3-way models only)
DC operation is intended only to maintain the temperature of the refrigerator and its contents when they are already cool. The DC operation is not intended for the initial start up and cooling of the refrigerator. Always use either the AC operation or propane gas operation to initially start up and cool the refrigerator. The refrigerator must be cooled and the temperature must be steady before you operate the refrigerator on DC. Keep in mind the following guidelines for DC operation of the refrigerator:
- Use DC operation of the refrigerator while the vehicle is in transit. - Do not use DC operation until the refrigerator and its contents are completely cooled. - Only use DC operation if the vehicle battery and battery charging system are in good operating condition.
Effects of High Altitude on Propane Gas Operation
When you operate the refrigerator on propane gas at altitudes higher than 5500 feet above sea level: - You may experience reduced cooling performance of the refrigerator. - You may experience burner outages.
To avoid these possible problems, Norcold recommends that you operate the refrigerator on AC when at altitudes higher than 5500 feet above sea level.
Effects of Freezing Temperatures on Refrigerator Operation
A gas absorption refrigerator is not designed to operate in freezing temperatures. If the refrigerator is not equipped for low temperature operation, and if the cooling system of the refrigerator is exposed to temperatures of 32° F. or lower for an extended period of time, the refrigerator operation may be disrupted. The refrigerator operation will resume when the cooling system of the refrigerator warms sufficiently. If the refrigerator is equipped for low temperature operation, the refrigerator will operate in temperatures down to 0° F. Disrupted operation of the refrigerator, due to extended exposure to temperatures of 32° F. or lower, and any costs incurred to warm the cooling system of the refrigerator are not covered by the Norcold limited warranty. Please contact your local RV dealer for information about how to resume refrigerator operation or about how to equip your refrigerator for operation in freezing temperatures. Do not change the installation or the venting of your refrigerator. Refrigerator failures, which are the result of changes to either the refrigerator installation or to the venting, are not covered by the Norcold limited warranty.
Refrigerator Care Checklist
Your refrigerator will give you years of trouble free service if you do these simple checks every three to six months: - Keep the food compartment and the freezer clean. See "Cleaning". - Defrost the refrigerator as necessary. See "Defrosting". - Make sure the door seals correctly. See "Door Sealing".

264

Owner's Manual 9

NORCOLD REFRIGERATOR FOR LEGACY ELITE II
- Be aware of any cooling changes that are not because of weather, loading, or gas control changes. If changes occur, contact your dealer or an authorized Norcold Service Center.
- Make sure the gas supply is propane gas only and not butane or a butane mixture.
Defrosting
The cooling fins of the refrigerator operate at below freezing temperature and will naturally form frost from humidity, which is always present in the air. The humidity inside the refrigerator increases:
- with higher outside temperature and humidity. - with the storage of non-sealed fresh foods or warm foods. - with the amount of time that the door(s) are open. - with any air leakage into the refrigerator. Although the refrigerator is not frost -free, it is made to limit frost on the cooling fins. At regular intervals, the temperature control system automatically melts most of the frost from the cooling fins. The water from the cooling fins drains into a collection cup that is attached to the back of the refrigerator. The heat of the cooling system evaporates the water from the collection cup. It is normal for frost to collect inside the freezer. Excess frost decreases the cooling performance of the refrigerator. Defrost the refrigerator and freezer as necessary: - Remove all food from the refrigerator. - Turn the refrigerator OFF.
NOTICE Defrosting the refrigerator makes excess water inside the refrigerator.
- Remove the drain hose from the drip cup at the rear of the refrigerator. - Put the drain hose into a half-gallon or larger container to capture water. - Put dry towels (etc.) inside the refrigerator and freezer to absorb melted frost.
High temperatures can cause the inside surfaces of the refrigerator to warp or melt. Do not use pans of
! CAUTION HOT water, a hair dryer, or any other high temperature devices to defrost the refrigerator. Do not use any
hard or sharp objects to remove frost. Damage to the interior of the refrigerator can occur. - To increase the speed of defrosting, put pans of WARM water in the refrigerator and freezer. - Remove the wet towels (etc.) and dry the interior. - Remove the drain hose from the large container and put the drain hose back into the drip cup. - Remove the large container from the enclosure. - Start up the refrigerator. - Allow the refrigerator to cool down. - Return all food to the refrigerator.

Owner's Manual 10

265

NORCOLD REFRIGERATOR FOR LEGACY ELITE II
Cleaning
A good time to clean the refrigerator is just after you defrost it. Clean the inside of the refrigerator as often as necessary to avoid food odors:
- Remove all food from the refrigerator.
NOTICE Do not use abrasive cleaners, chemicals, or scouring pads because they can damage the interior of the refrigerator.
- Wash the interior with a solution of liquid dish detergent and warm water. - Rinse with a solution of baking soda and clean water. - Dry with a clean cloth. - Put all food in the refrigerator. Drip tray: To remove and clean the drip tray: - Locate the plastic clip that is around the wire shelf in front of the drip tray. - Remove and save the screw that attaches the plastic clip to the inside of the refrigerator cabinet. - Pull the self forward to remove from the refrigerator - Make sure that the drip tray is empty of water. - Pull the drain tube plug out from the inside of the drip tray and out of the drain hose. - Pull the drip tray forward to remove from the slots in the refrigerator cabinet. - Clean the drip tray. - Put the drain tube plug down into the drip tray and push the drip tray back into the original position. - Push the drain hose back onto the drain tube plug. - Put the wire shelf and plastic clip back in the original position. - Attach the plastic clip with the screw.
Door Sealing
If the door does not seal correctly, excess frost will collect inside the refrigerator. Make sure the door seals correctly: - Close the door on a piece of paper that is about the size and thickness of a dollar bill (See Art00980). - Gently pull the paper. - You should feel a slight drag between the gasket and the cabinet. - Do this on all four sides of the door.
Art00980

266

Owner's Manual 11

NORCOLD REFRIGERATOR FOR LEGACY ELITE II

- If you do not feel a slight drag on the paper, the door is not sealing correctly: - Make sure the screws of the hinges are tight. - Make sure the door gasket does not touch the door latch: - If the door gasket touches the door latch, loosen the screws of the door latch. - Raise the door latch just so it does not touch and tighten the screws of the door latch. - Make sure the door latch holds the door closed.

Refrigerator Maintenance Checklist

Read and understand the following maintenance sections of this manual.

NOTICE

Norcold is not responsible for installation, adjustment, alteration, service, or maintenance performed by anyone other than a qualified RV dealer or an authorized Norcold Service center.

Have a qualified RV dealer or an authorized Norcold Service Center do these annual safety and maintenance checks:

- Examine the gas supply lines for leaks. - Replace or repair if necessary.
- Make sure the propane gas pressure is 11 inches of water column.

76 75

- Adjust if necessary.

- Make sure the combustion seal is complete and intact.

- Replace or repair it if necessary.

- Make sure the burner and the burner orifice are clean (See Art00956). - Clean if necessary.
- Make sure the electrode spark gap [167] is 1/8 - 3/16 inch (See Art00955).

167 Art00955

- Adjust if necessary.

77 80 79

78

- Make sure the AC voltage is 108 - 132 volts and the DC voltage is 10.5 - 15.4 volts.

- Make sure the thermocouple tip is clean and secure.

- Make sure the area at the rear of the refrigerator is free of any combustible materials, gasoline, and other flammable vapors and liquids.

Art 00956

Refrigerator Storage

Before the refrigerator is stored for an extended (seasonal) period of time: - Defrost and clean the interior of the refrigerator. - Close the doors with the storage latch.
If the refrigerator is stored for an extended period of time, before start up: - Make sure there are no obstructions in the vents, the ventilation air pathway, the burner, the orifice, or the flue area.

Owner's Manual 12

267

NORCOLD REFRIGERATOR FOR LEGACY ELITE II

Refrigerator Maintenance

Gas flame appearance:

While in propane gas operation, examine the appearance of the gas flame:

- Push and hold temperature setting button until the "9" shows and then release.

- Open the lower intake vent.

! CAUTION The burner box cover can be hot. Wear gloves to avoid burns.
- Open the burner box door [165] and look at the gas flame [75] (See Art00955 and Art00975).

- The flame should be:

- a darker blue color on the inside of the flame and a lighter blue color on the outside of the flame.

- a constant shape without flickering.

- Contact your dealer or Norcold authorized service center if the flame is:

- yellow

- flickering or changing shape. - Make sure the flame does not touch the inside of the flue tube [76].

49

91

165 Art00975

- If the flame touches the inside of the flue tube, contact your dealer or an authorized Norcold Service Center.

- Close the burner box door.

Remove and clean the burner orifice:

NOTICE Your dealer or an authorized Norcold Service Center must do this procedure.
To remove and clean the burner orifice:

- Close the valve at the propane gas tank(s).

- Close the manual shut off valve of the refrigerator.

- Shut down the refrigerator..

- Open the lower intake vent.

! CAUTION The burner box cover can be hot. Wear gloves to avoid burns.
- Remove the burner box cover by removing one screw.

! WARNING

To avoid possible propane gas leaks, always use two wrenches to loosen and tighten the gas supply line at the refrigerator's manual shut off valve.

- Remove the flare nut from the orifice assembly [77] (See Art00956).

- Remove the orifice assembly from the burner [78].

! WARNING

Do not try to remove the orifice [79] from the orifice adapter [80] when cleaning. Removal will damage the orifice and seal of the orifice and can cause a propane gas leak. Leaking propane gas can ignite or explode which can result in dangerous personal injury or death. Do not clean the orifice with a pin or other objects.

268

Owner's Manual 13

NORCOLD REFRIGERATOR FOR LEGACY ELITE II

- Clean the orifice assembly with air pressure and alcohol only. - Using a wrench, assemble the orifice assembly to the burner.
- Assemble the flare nut to the orifice assembly. - Tighten the flare nut by hand. - Hold the orifice assembly securely and, using a wrench, tighten the flare nut 1/4 revolution only. - Examine all of the connections for gas leaks.
Remove the Refrigerator

NOTICE Your dealer or an authorized Norcold Service Center must do this procedure.

The rear of the refrigerator has sharp edges and corners. To prevent cuts or abrasions when working on the
! CAUTION refrigerator, be careful and wear cut resistant gloves.
1. Close the valve at the propane gas tank(s).

! WARNING

To avoid possible propane gas leaks, always use two wrenches to loosen and tighten the gas supply line at the refrigerator's manual shut off valve.

2. Open the lower intake vent and remove the gas supply line from the manual shut off valve of the refrigerator.

3. Remove the AC power cord from the receptacle.

4. Remove the DC wiring from the refrigerator:

- Remove the DC wiring from the battery or the converter of the vehicle.

- Put a mark on the DC wires so you can put them back in the correct location.

- Remove the DC wires from the refrigerator.5. Remove the screws which fasten the refrigerator to the floor.

6. Remove the door from the refrigerator.

7. Remove the screws which fasten the refrigerator to the wall.

8. Remove the refrigerator from the opening.

9. Attach the door to the refrigerator.

Reinstall the Refrigerator

NOTICE Your dealer or an authorized Norcold Service Center must do this procedure.

! WARNING

Make sure the combustion seal is not broken, is completely around the refrigerator mounting flanges, and is between the mounting flanges and the wall of the enclosure. If the combustion seal is not complete, exhaust fumes can be present in the living area of the vehicle. The breathing of exhaust fumes can cause dizziness, nausea, and in extreme cases, death.

1. Push the refrigerator completely into the enclosure.

2. Remove the door from the refrigerator.

Owner's Manual 14

269

NORCOLD REFRIGERATOR FOR LEGACY ELITE II

3. Put the screws though the mounting flanges and into the wall.

4. Attach the door to the refrigerator

!

CAUTION

The rear of the refrigerator has sharp edges and corners. refrigerator, be careful and wear cut resistant gloves.

To prevent cuts or abrasions when working on the

5. Open the lower intake vent and put the screws through refrigerator and into the floor.

! WARNING

To avoid possible propane gas leaks, always use two wrenches to loosen and tighten the gas supply line at the refrigerator's manual shut off valve.

6. Attach the gas supply line to the manual shut off valve of the refrigerator.

7. Open the valve at the propane gas tank(s).

! WARNING

Do not allow the leak checking solution to touch the electrical components. Many liquids are electrically conductive and can cause a shock hazard,electrical shorts, and in some cases fire.

8. Examine the gas supply line for leaks.

9. Connect the DC wiring to the refrigerator:

- Install the DC fuse or connect the DC wiring to the battery or the converter.

- Connect the DC wires from the refrigerator.

10. Connect the AC power cord to the receptacle.

Replacement Parts
You may purchase replacement parts through your local RV dealer or an authorized Norcold Service Center.

Wiring Diagram and Pictorial
The parts of the wiring diagram are (See Art01775): The parts of the wiring pictorial are (See Art01776):
AC heater .................................................................................................................................................................................................A Thermister ............................................................................................................................................................................................... B Gas valve................................................................................................................................................................................................. C Igniter....................................................................................................................................................................................................... D Temperature switch (optional) ................................................................................................................................................................. E Fan (optional) ...........................................................................................................................................................................................F DC heater (optinal) .................................................................................................................................................................................. G Chassis ground........................................................................................................................................................................................ H DC board (optional) ..................................................................................................................................................................................I Switched 12 VDC .....................................................................................................................................................................................1 Fused continuous 12 VDC........................................................................................................................................................................2 Communications.......................................................................................................................................................................................3 Display ground..........................................................................................................................................................................................4 Auxiliary ground (optional)........................................................................................................................................................................5 Auxiliary +12 VDC (optional) ....................................................................................................................................................................6 Gas valve +12 VDC..................................................................................................................................................................................7 5 A Fuse DC ...........................................................................................................................................................................................F1 8A Fuse AC.............................................................................................................................................................................................F2 30 A Fuse DC .........................................................................................................................................................................................F3

270

Owner's Manual 15

NORCOLD REFRIGERATOR FOR LEGACY ELITE II

I

*F1 30 AMP

YL/JN

DC_HTR 12VDC

P1

12VDC + 12 VDC/VCD

G

1

GND - 12 VDC/VCD

2 HTR_GND

YL/JN

GND

BK/NR

12 T1 P3

5 AMP F1 12VDC
GND

RD/RG

POWER BOARD / PANNEAU D'ALIMENTATION

D
WH/BC

P1

C

1

2
- WH/BC
3

YL-GN-/JN-VE
H
BK/NR

4

5+

WH/BC

WH/BC 6

7

8

2

7

9

10

1 RD/RG 6

LIMIT_OUT WH/BC LIMIT_IN

5 B

BK/NR

RD/RG

RD/RG RD/RG

BK/NR

F E

WH-RD/BC-RG

BK/NR AC_HT_HI2

AC_HT_HI
A
P2

BK/NR

1

AC_HT_LO2

2

AC_HT_LO

33

BU/BL

44

WH-VT/BC-VT

8 AMP

5 F2
6

L2

} 120 VAC

L1

120 VCA

H

Art01775

P1 GN/VE
1
2
3 4 5 WH/BC 6
7

OVERLAY/REVÊTRMENT
P2 TEMP MODE ON-OFF
1 2 3 4 5
DISPLAY BOARD/CARTE D'AFFICHAGE

Owner's Manual 16

OVERLAY/REVÊTRMENT 5

DISPLAY BOARD/

CARTE D'AFFICHAGE

4

2

A AC HEATER / ÉLÉMENT CHAUFFANT CA

B THE4RMISTOR / THERMISTANCE

2

C GAS VALVE / ROBINET DE GAZ

D IGNITER / ALLUMEUR

* E TEMPERATURE SWITCH / INTERRUPTRUR DE TEMPÉRATURE

* F FAN / VENTILATEUR

* G DC HEATER / ÉLÉMENT CHAUFFANT CD

H CHASSIS GROUND / MASSE DU CHASSIS

D

* I PD2C BOARD / PANNEAU CD T1

I

6

1

* POWER BOA-ROD/PPTAINONNEAAUL D/ 'FAALICMUENLTTAATTIOIFN

DC_HTR

F2

F1

8 AMP

GND HTR_GND
GND

GND 12VDC 5 AMP

L1 L2 AC_HT_LO AC_HT_LO AC_HT_HI AC_HT_HI LIMIT_IN LIMIT_OUT

30 AMP

12V

12V

10

P1

1

1 SWITCHED 12VDC / COMMUTÉ 12VCD

* F1

G

-12VDC/VCD +12VDC/VCD

2 FUSED CONTINUOUS 12VDC/ CONTINU

FONDU 12VCD

3 COMMUNICATIONS / COMMUNICATIONS

H

4 DISPLAY GROUND / 7AFFICHAGE LA TERRE

* 5 AUXILIARY GROUND / MASSE ACUXILIAIRE * 6 AUXILIARY +12VDC / AUXILIAIRE +12VCD
7 GAS VALVE +12VDC / ROBINET DE GAZ +12VCD

H

A

F1 5 AMP DC FUSE / FU4SIBLE DE 5 AMPERES CD

F2 8 AMP AC FUSE / FUSIBLE DE 5 AMPERES CA

* F1 30 AMP DC FUSE / FUSIBLE DE 30 AMPERES CD
Art01776

B
1
E F
3 1

A AC HEATER / ÉLÉMENT CHAUFFANT CA
B THERMISTOR / THERMISTANCE
C GAS VALVE / ROBINET DE GAZ
D IGNITER / ALLUMEUR
* E TEMPERATURE SWITCH / INTERRUPTRUR DE TEMPÉRATURE * F FAN / VENTILATEUR * G DC HEATER / ÉLÉMENT CHAUFFANT CD
H CHASSIS GROUND / MASSE DU CHASSIS

271

NORCOLD REFRIGERATOR FOR LEGACY ELITE II

Fault Codes

Fault Code

Fault Code Meaning

Corrective Actions

No display.

DC voltage is unavailable to the refrigerator control panel or the refrigerator is OFF.

Check: - That the refrigerator is ON. - That the battery charging equipment of the vehicle is operational. - The the AC/DC converter is operational (if applicable). - See your dealer or authorized Norcold Service Center.

"F"

The burner did not

Check:

ignite or re-ignite.

- That the valve of the propane gas tank(s) is open.

- That the propane gas is at the correct pressure.

- That the manual shut off valve of the refrigerator is open.

- That there is no air in the propane gas supply line. See "Removing air

from the propane gas supply lines" section of this manual.

"A"

AC voltage is

Check:

unavailable to the

- That the refrigerator is plugged into a serviceable outlet.

refrigerator control.

- That the fuse or circuit breaker is intact.

- That the vehicle generator is operational (if applicable).

- See your dealer or authorized Norcold Service Center.

"C"

DC voltage to the

Check:

refrigerator control

- That the battery charging equipment of the vehicle is operational.

panel is too low.

- The the AC/DC converter is operational (if applicable).

- See your dealer or authorized Norcold Service Center.

"n"

The refrigerator cooling 1st time - Before reset

unit has stopped

Check:

cooling.

- That the vents are not blocked.

- That a door(s) is not open. Close door(s).

- That the vehicle is level.

2nd time - After reset. This is not owner serviceable. See your dealer or authorized Norcold Service Center.

Temperature setting flashes for ten seconds
and mode appears.

The refrigerator is operating on the "Back Up Operating System".

This is not owner serviceable. See your dealer or authorized Norcold Service Center.

"H"

This is a fault within the This is not owner serviceable. See your dealer or authorized Norcold Service

refrigerator controls. Center.

"r"

This is a fault within the This is not owner serviceable. See your dealer or authorized Norcold Service

refrigerator controls. Center.

"S"

This is a fault within the This is not owner serviceable. See your dealer or authorized Norcold Service

refrigerator controls. Center.

272

Owner's Manual 17

PROGRESSIVE DYNAMICS CHARGE CONTROLLER
Installation and Operation Guide for PD4000 Series Power Control Center
arEewxawtevwna.dipleardbolwegafrorerrsapsnuitrvieceshdasyena.tcom

Member
Thank you for selecting Progressive Dynamics as your choice for your RV power needs. We'd like to welcome you to a full line of industry leading and time tested products including our newest addition to the PDI family, the PD4000 Series POWER CONTROL CENTER. The PD4000 Series POWER CONTROL CENTER offers break-through technologies that help maintain and lengthen the life of your batteries such as our patented Charge Wizard. The heart of the PD4000 is the INTELI-POWER Converter. The built-in Charge Wizard microprocessor constantly monitors the battery voltage then automatically adjusts the converter output voltage to provide the proper charging voltage for fast recharges and long-term maintenance. The intelligent way to charge and maintain your RV battery. With enough AC and DC branches you'll have plenty of options for your growing RV needs.

Progressive Dynamics, Inc.
507 Industrial Rd. Marshall, MI 49068 www.progressivedyn.com
Patent Numbers: 5,687,066 - 5,600,550 - 5,982,643 - 6,184,649 - 7,782,002
© 2011 Progressive Dynamics, Inc. All rights reserved.

110145 Rev F
273

PROGRESSIVE DYNAMICS CHARGE CONTROLLER Table of Contents

Installation Instructions

1

Wiring Diagram

1

Features and Operating Instructions

2

The Charge Wizard

2

Reverse Battery Protection

2

Technical Specs and Troubleshooting

3-4

LIMITED WARRANTY
I. LIMITED WARRANTY: Progressive Dynamics, Inc. warrants its power control center to be free from defects in material or workmanship under normal use and service; and limits the remedies to repair or replacement.
II. DURATION: This warranty shall extend for a period of two years from the original date of purchase, and is valid only within the continental limits of the United States and Canada.
III. WARRANTY EXCLUSIONS: This warranty specifically does not apply to: A. Any product which has been repaired or altered in any way by an unauthorized person or service station; B. Damage caused by excessive input voltage, misuse, negligence or accident; or an external force; C. Any product which has been connected, installed or adjusted or used other than in accordance with the instructions furnished, or has had the serial number altered, defaced or removed; D. Cost of all services performed in removing and re-installing the power converter; and E. ANY LOST PROFITS, LOST SAVINGS, LOSS OF USE OF ENJOYMENT OR OTHER INCIDENTAL DAMAGES ARISING OUT OF THE USE OF, OR INABILITY TO USE, THE PRODUCT. THIS INCLUDES DAMAGES TO PROPERTY AND, TO THE EXTENT PERMITTED BY LAW, DAMAGES FOR PERSONAL INJURY. THIS WARRANTY IS IN LIEU OF ALL OTHER WARRANTIES, INCLUDING IMPLIED WARRANTIES OF MERCHANTABILITY AND FITNESS FOR A PARTICULAR PURPOSE.
IV.PROOF OF PURCHASE: A warranty claim must be accompanied by proof of the date of purchase.
V. CLAIM PROCEDURE: Upon discovery of any defect, Progressive Dynamics, Inc. shall be supplied the following information at the address listed in this manual:
A. Name and address of the claimant; B. Name and model of the product; C. Name, year and model of the recreational vehicle in which the product was installed; D. Date of purchase; and E. Complete description of the claimed defect.
Upon determination that a warranty claim exists (a defect in material or workmanship occurring under normal use and service,) the converter section shall be shipped postage prepaid to Progressive Dynamics, Inc. together with proof of purchase. The product will be repaired or replaced and returned postage prepaid.
For Warranty Service Call: (269) 781-4241
Progressive Dynamics, Inc.
274

a P P ' v
(C

PROGRESSIVE DYNAMICS CHARGE CONTROLLER

Installation Instructions

Page 1

The PD4000 series POWER CONTROL CENTER should be installed horizontally (converter section to the left). Unit is NOT ignition protected. Do not mount in the LP gas or the battery compartment. Cut mounting hole to approximately 10 3/4" wide X 7 1/4" high. Connect wiring system using proper connections and appropriately sized cable clamp. A closure plug kit for any unused Romex connectors may be purchased from Progressive Dynamics, Inc. Part Number PD812374.

For installations without an external DC disconnect switch connect battery POS (+) to the BATTERY POS. + lug. The ALTERNATE BATTERY POS. + lug is not used. (see wiring diagram for lug locations)

DC DISCONNECT: For installations incorporating an external DC disconnect switch, connect battery POS (+) and the
BATTERY POS. + lug to the same pole on the external disconnect switch. Remove the JUMPER. Connect the ALTERNATE BATTERY POS. + to other pole on the external disconnect switch. (see wiring diagram for component locations)

The OEM should test the POWER CONTROL CENTER converter under full load conditions in its intended mounting location to ensure proper ventilation. Failure to provide adequate ventilation will prevent the converter from supplying full output power.

The INTELI-POWER converters are not designed for zero clearance compartments.

The POWER CONTROL CENTER was not designed for wet or damp locations. Install in an interior / dry location.

The following breakers are suitable for MAIN and BRANCH breakers
ITE/Siemens--QP,QT
Thomas & Betts--TB & TBBD Series

MAIN

Branch

Square D--HOM, HOMT

30A

15A

Cutler Hammer/Bryant--BR,BRD Series

GE--HACR

BATTERY NEG. -

Detailed Wiring Diagram Note: Some factory installed wiring not shown for clarity.

Filler Plate
ITE/Siemens QF3 GE TQLFPI
MAIN BREAKER HOLD DOWN MAIN BREAKER (NOT SUPPLIED) AC HOT IN (BLACK)

BATTERY POS. +
JUMPER
ALTERNATE BATTERY POS. + (DC DISCONNECT)

AC GROUND IN (GREEN)
AC IN GROUND (GREEN) TO CONVERTER
AC HOT (BLACK) TO CONVERTER
AC NEUTRAL IN (WHITE)
AC NEUTRAL (WHITE) TO CONVERTER
Note: Above image may vary, depending on model.
Consult a licensed electrician or an RV technician for installation assistance

275

PROGRESSIVE DYNAMICS CHARGE CONTROLLER

User Information

Page 2

Many options will be installed prior to the purchase of your new RV, however there are a few options that you should be aware of while operating your new POWER CONTROL CENTER.

The PD4000 series incorporates a microprocessor to provide a three-stage charge profile to ensure rapid, yet safe recharging of 12 volt batteries. These three separate stages BOOST, NORMAL, and STORAGE modes ensure that the battery is automatically recharged and maintained with minimum maintenance (i.e. reduced need to add water).

BOOST MODE: If the converter senses that the battery voltage has dropped below a preset level the output voltage is increased to approximately 14.4 volts DC to rapidly recharge the battery.

NORMAL MODE: Output voltage set at approximately 13.6 volts DC.

STORAGE MODE: When the converter senses that there has been no significant battery usage for 30 hours the output voltage is reduced to 13.2 volts DC for minimal water usage. When in storage mode the microprocessor automatically increases the output voltage to 14.4 volts DC for 15 minutes every 21 hours to help reduce sulfation of the battery plates.

- All times and voltages provided above are approximate. -

CAUTION
IT IS IMPORTANT THAT THE FLUID LEVEL OF ANY CONNECTED BATTERIES BE CHECKED ON A REGULAR BASIS. ALL BATTERIES WILL "GAS" AND LOSE SOME FLUID WHEN CONTINUOUSLY
CONNECTED TO ANY CHARGING SOURCE. ~Does not apply to "gel-cell" batteries~

CONVERTER OUTPUT
VOLTAGE

14.8 14.4 14.2

BOOST MODE 14.4 VOLTS RAPIDLY BRINGS RV BATTERY UP TO 90% OF FULL CHARGE.

EQUALIZE MODE 14.4 VOLTS EVERY 21 HOURS FOR A PERIOD OF 15 MINUTES
TO PREVENT BATTERY STRATIFICATION.

14.0

13.8

13.6

13.4 13.2 13.0 12.8 12.6

NORMAL MODE 13.6 VOLTS SAFELY COMPLETES CHARGE
STORAGE MODE 13.2 VOLTS MAINTAINS CHARGE WITHOUT GASSING OR WATER LOSS

12.4 0 4 8 12 16 20 24 28 32 36 40 44 48 52 56 60 68 72 76 80 RECHARGE TIME IN HOURS

REVERSE BATTERY PROTECTION CIRCUIT If a battery is accidentally hooked up backwards, the converter will be protected. Easily accessible ATC type fuses will blow when a battery is connected in reverse. Correct battery wiring and replace fuses with same type and rating. The LED will glow if one of the fuses blow. Appropriate fuse size is indicated on the circuit board.

The DC Section: The DC panel features up to 12 fused positions rated for up to 30 amps for accessories.

276

CAUTION FOR CONTINUED PROTECTION AGAINST RISK OF FIRE OR ELECTRICAL SHOCK,
REPLACE ONLY WITH SAME TYPE AND RATING FUSE.

PROGRESSIVE DYNAMICS CHARGE CONTROLLER

AC RATING COPPER WIRE ONLY. RATED 75 C MIN MAXIMUM SERVICE: 30 AMPS, 120V 50/60 HZ SINGLE PHASE LINE TERMINALS SIZE 6-14 AWG LOAD TERMINALS SIZE 6-14 AWG NEUTRAL AND GROUND SIZE 6 - 14 AWG SHORT CIRCUIT CURRENT RATING: SUITABLE FOR USE ON NO MORE THAN 120 VOLTS AC, 10,000 AMPERES MAX, LIMITED TO THE LOWEST INTERRUPTING CAPACITY OF ANY BREAKER INSTALLED

Page 3
MAXIMUM CONTINUOUS LOADS ON MAINS OR BRANCH CIRCUITS NOT TO EXCEED 80% OF THE CIRCUIT BREAKER RATINGS

NEUTRAL/GND WIRE COMBINATIONS: (1) #12 STRANDED & (1) #14 SOLID (1) #12 STRANDED & (1) #14 STRANDED (1) #12 SOLID & (1) #14 STRANDED (1) #12 SOLID & (1) #14 SOLID (2) #14 STRANDED OR (2) #14 SOLID (2) #12 STRANDED OR (2) #12 SOLID (2) #10 STRANDED OR (2) #10 SOLID

TORQUE DATA

LINE TERMINAL: SEE CIRCUIT BREAKER

NEUTRAL BAR & GROUND:

#4 - #6 35 IN. LBS

#8

30 IN. LBS

#10 - #14 25 IN. LBS

Model AC Section DC Section
Converter Section

Specifications
(Specifications subject to change without notice)

PD4045

PD4060

120 VAC 30 Amps Maximum - 7 Branch Circuits Max *

12 VDC 60A Max. - 12 Branch Circuits

12 VDC 75A Max - 12 Branch Circuits

Input: 105-130 VAC 50/60 Hz 725 Watts
Output: 13.6 VDC, 45 Amps
Weight: 5.70 lbs

Input: 105-130 VAC 50/60 Hz 1000 Watts
Output: 13.6 VDC, 60 Amps
Weight: 6.35 lbs

* Consult local regulatory authority for possible branch circuit restrictions

TROUBLE SHOOTING GUIDE

PROBLEM

POSSIBLE CAUSES

ACTION

No Output

120 VAC supply not connected Reverse battery fuses blown (See page 2 for location) Short circuit
Unit has shutdown due to overheating Unit has shutdown due to over voltage
(Converter will shut down if the input voltage exceeds 132 VAC)

Connect power supply Check AC distribution panel for proper operation Check for reverse battery connection. Replace fuses with same type and rating (See page 2) Trace RV circuits for possible fault Check air flow Allow unit to cool Check input voltage Correct input voltage

Low Output

Compartment gets too hot Excessive load for converter Input voltage not between 105-130 VAC

Check air flow to the converter Improve ventilation to the compartment Reduce load requirements or install larger converter Correct input supply voltage

Bad battery cell(s)

Replace battery

Add another load to the generator, this may reduce the "spikes" to an

Unit has shutdown due to over voltage. Intermittent or no Output

acceptable level

on Generator, works on Some generators exhibit excessive voltage spikes on Contact generator manufacturer for possible defect in the generator

Shore Power

the AC power output, this may cause the over voltage

protection to shut the unit down

Consult a licensed electrician or an RV technician for installation assistance

277

PROGRESSIVE DYNAMICS CHARGE CONTROLLER

Page 4

Do not replace the converter section unless the following checks have been performed:

1. Use an AC voltmeter to check for the proper voltage at the 120 VAC breaker that the converter is connected to. This voltage should be between 105 and 130 volts.
2. Remove the reverse battery fuses and check the converter output from the CONVERTER GND to the CONVERTER POS terminals on the DC board. This should be 13.6 VDC.
3. Check the Reverse Battery fuses . These fuses will only blow if the battery or DC output leads were connected in reverse, even for a moment. If they are blown check the polarity of the battery connections before replacing them.
4. If the Converter output is not present and there is AC to the converter , the converter is defective.

Disconnect converter wires from DC board.

Remove screw that secures metal plate to housing.
If you should need to replace the power converter for any reason, follow these steps to safely remove the converter section.
Make sure all power is disconnected before proceeding.
1. Remove the neutral, ground, and hot wires that lead to the converter on the AC side. 2. Remove the converter output wires from the DC board, ground and positive. 3. Finally unscrew the screw that holds the metal converter plate to the plastic housing.
For factory repairs, return only the converter section. Make sure you use proper packaging to ensure the product's safe arrival.

Disconnect converter wires from AC hot, NEU, and GND bar connections.

278

PROGRESSIVE DYNAMICS CHARGE CONTROLLER
Progressive Dynamics, Inc.
507 Industrial Rd Marshall MI 49068
Visit us on the web for other great products.
www.progressivedyn.com
279

PROGRESSIVE DYNAMICS POWER CONVERTER

PD9100 / 9200 SERIES POWER CONVERTER OWNERS MANUAL

PROGRESSIVE DYNAMICS, INC. POWER CONVERTER LIMITED WARRANTY
I. LIMITED WARRANTY: Progressive Dynamics, Inc. warrants its power converter to be free from defects in material or workmanship under normal use and service; and limits the remedies to repair or replacement.

II. DURATION: This warranty shall extend for a period of two years from the original date of purchase, and is valid only within the continental limits of the United States and Canada.

III. WARRANTY EXCLUSIONS: This warranty specifically does not apply to: A. Any power converter which has been repaired or altered in any way by an unauthorized person or
service station; B. Damage caused by excessive input voltage, misuse, negligence or accident; or an external force; C. Any power converter which has been connected, installed or adjusted or used other than in accordance
with the instructions furnished, or has had the serial number altered, defaced or removed; D. Cost of all services performed in removing and re-installing the power converter; and E. ANY LOST PROFITS, LOST SAVINGS, LOSS OF USE OF ENJOYMENT OR OTHER
INCIDENTAL DAMAGES ARISING OUT OF THE USE OF, OR INABILITY TO USE, THE PRODUCT. THIS INCLUDES DAMAGES TO PROPERTY AND, TO THE EXTENT PERMITTED BY LAW, DAMAGES FOR PERSONAL INJURY. THIS WARRANTY IS IN LIEU OF ALL OTHER WARRANTIES, INCLUDING IMPLIED WARRANTIES OF MERCHANTABILITY AND FITNESS FOR A PARTICULAR PURPOSE.

IV. PROOF OF PURCHASE: A warranty claim must be accompanied by proof of the date of purchase.

V. CLAIM PROCEDURE: Upon discovery of any defect, Progressive Dynamics, Inc. shall be supplied the following information at the address listed below:

A.

Name and address of the claimant;

B.

Name, model and serial number of the power converter;

C.

Application in which the power converter was installed. (Includes manufacturer,

model and model year where applicable)

D.

Date of purchase; and

E.

Complete description of the claimed defect.

Upon determination that a warranty claim exists (a defect in material or workmanship occurring under normal use and service,) the power converter shall be shipped postage prepaid to Progressive Dynamics, Inc. together with proof of purchase. The power converter will be repaired or replaced and returned postage prepaid.

Extended warranties are available for purchase at www.progressivedyn.com

Progressive Dynamics Inc. 507 Industrial Rd. Marshall, MI 49068
service@progressivedyn.com www.progressivedyn.com

110953C

280

PROGRESSIVE DYNAMICS POWER CONVERTER

INSTALLATION INSTRUCTIONS

NOTES: · Horizontal mounting of the power converter, is recommended although it can be mounted in any position that provides unobstructed ventilation to the fan and vent holes. · The OEM should test the power converter under full load conditions in its intended mounting location. This will insure that there is sufficient unobstructed ventilation to the converter allowing it to operate at its maximum rated load. Failure to provide adequate ventilation to the converter will cause the converter output to be reduced as it responds to ambient conditions. · The INTELI-POWER converters are not designed for zero clearance compartments. · Use a 5/32" hex driver to tighten the output screws. Do not exceed 50 in-lbs. torque on the output terminals. · The INTELI-POWER converters are not weather tight or designed for wet mounting locations. They must be protected from direct contact with water. · Avoid the introduction of foreign materials into the case as this could damage or cause a malfunction of the converter.

Installation Steps: 1. Secure converter firmly to mounting surface. 2. Connect ground lug (found on unit base) to
chassis. · Ground wire to be between 6 and 12AWG
wire. · Tighten lug to 25 ­ 35 in-lbs. 3. Disconnect battery from both positive (+) and ground (-) cables. 4. Connect battery ground (-) to converter NEG (-) lug. · Conductor to be between 2 and 14AWG
(follow all applicable codes when sizing conductor) · Tighten lug to 30 ­ 50 in-lbs. 5. Disconnect any optional pendants or modules. 6. Plug converter into appropriate outlet. 7. Using a DC voltmeter, verify converter output. The power converter is working properly if the voltage is above 13VDC (12V models), 26VDC (24V models, 14.3VDC (12V 9100L models), and 28.4VDC (24V 9100-24L models). If no output is present, refer to the trouble shooting guide in this manual. 8. Disconnect power to converter 9. Connect battery positive (+) to converter POS (+) lug. · Conductor to be between 2 and 14AWG (follow all applicable codes when sizing conductor) · Tighten lug to 30 ­ 50 in-lbs. Note: When connecting battery to converter POS (+), a spark may occur. This is normal. 10. Reconnect battery to both positive (+) and ground (-) cables. 11. Reconnect any optional pendants or modules. 12. Reconnect power to converter.

281

GENERAL INFORMATION The INTELI-POWER series power converters are state-of-the-art electronic converter / battery chargers. Their compact size and quiet operation gives greater flexibility in selecting the mounting location for either OEM installation or after market replacement. All INTELI-POWER series power converters have been designed and tested to provide maintenance free operation and undergone tens of thousands of hours of strenuous engineering testing to ensure years of trouble free operation. The INTELI-POWER 9200 series converter incorporates the Charge Wizardmicroprocessor which constantly monitors the battery voltage and automatically adjusts the converter output voltage to provide the proper charging voltage for fast recharges and long-term maintenance. INTELI-POWER 9100 series converters incorporate the Total Charging Management System (TCMS) interface. The TCMS interface connects the converter to optional devices that can automatically control the output voltage of the converter thereby controlling the charge rate to the batteries. (See below for Charge W izardfunctions and performance) INTELI-POWER 9100L series converters do NOT support the Charge Wizardfunctionality or provide a TCMS interface. The 9100L series converters incorporate an interface for a remote shutdown module for use with a smart lithium battery system.
FEATURES MULTIPLE BATTERY CHARGING... INTELIPOWER converters have the capability of charging multiple batteries at the same time! They can even charge a combination of different capacity batteries. GFCI PROTECTION... INTELI-POWER converters have the LOWEST ground fault leakage. With this unit, the user can confidently utilize the RV's AC outlets without being concerned about a ground fault interruption of the facilities power source. REVERSE BATTERY PROTECTION prevents damage if battery leads are cross connected. Since the only consequence of cross connection is a blown fuse, damage to or possible replacement of the converter is avoided. Cross connection of battery leads is the only thing that will blow these fuses.

Replacement fuses are available at any automotive store.
CAUTION IF THE REVERSE BATTERY PROTECTION FUSES ARE BLOWN DURING INSTALLATION, CHECK TO SEE THAT THE BATTERY HAS BEEN CONNECTED PROPERLY BEFORE REPLACING THE FUSES. REPLACE THE FUSES ONLY WITH THE SAME TYPE AND RATING AS THE ORIGINAL FUSES. USING OTHER FUSES MAY RESULT IN CONVERTER DAMAGE, VEHICLE DAMAGE, INJURY OR OTHER CONSEQUENCES (SEE WARRANTY). ELECTRONIC CURRENT LIMITING... Should demand exceed the rated capacity of the converter or a short circuit occur, the output voltage of the converter drops to almost zero until the situation is corrected. This feature prevents blown fuses, damage to the converter, 12 volt motors and wiring. AUTOMATIC THERMAL PROTECTION... Should an over temperature condition occur, the converter will reduce power output. The converter automatically resumes normal operation when a safe operating temperature is reached. IGNITION PROTECTION... All INTELI-POWER series converters are ignition protected. VARIABLE SPEED COOLING FAN... An electronic sensor monitors converter temperature. Higher demand generates higher heat, requiring higher fan speeds. Lower demand means lower heat and fan speed. This means the fan may not operate at night or will operate at a very slow, quiet speed when demand is low and the owner is trying to sleep. HIGH VOLTAGE PROTECTION... This circuit shuts the converter down if a surge or spike in input voltage is detected. The converter will automatically return to normal operation when the condition is corrected. LOW VOLTAGE PROTECTION... INTELIPOWER converters automatically shut down if input voltage is insufficient for continued operation. When the low voltage situation is corrected, the INTELIPOWER converter automatically resumes normal operation.

282

GENERAL OPERATION The INTELI-POWER series converter will supply "clean" power from input voltages that range from 90-130 VAC (205-265 VAC for 230 volt models). The INTELI-POWER series of converters are primarily designed for use with a battery, however, the output of the INTELI-POWER converters are a regulated, filtered DC voltage that can power sensitive electronics without the need for a battery or other filtering. At normal input voltages the full load rated capacity is available. At input voltages less than 105 VAC (205 VAC for 230 volt models) the converter may not supply full rated output capacity. 9100L - The full rated load is available for load, battery charging or both. When functioning as a regulated battery charger the converter has a nominal voltage output of 14.6 VDC for 12 volt models and 29.2 VDC for 24 volt models. The system is designed to sense voltage on the battery and will taper the charging current as the battery becomes charged.
CAUTION The 9100L series converter/chargers are
designed to recharge lithium iron phosphate batteries.
DO NOT USE TO RECHARGE LEAD/ACID BATTERIES!
9100 - The full rated load is available for load, battery charging or both. When functioning as a regulated battery charger the converter has a nominal voltage output of 13.6 VDC for 12 volt models and 27.2 VDC for 24 volt models. The system is designed to sense voltage on the battery and will taper the charging current as the battery becomes charged. When the vehicle is to be stored for extended periods of time it is recommended that the batteries be disconnected, unless a TCMS Charge Wizardis attached to the TCMS interface. Reconnect battery once a month to maintain a full charge.

9200 - The full rated load is available for load, battery charging or both. When functioning as a regulated battery charger the converter has a nominal voltage output of 13.6 VDC for 12 volt models and 27.2 VDC for 24 volt models. The system is designed to sense voltage on the battery and automatically selects one of three operating modes (normal, boost and storage) to provide the correct charge level to the batteries. BOOST MODE: If the converter senses that the battery voltage has dropped below a preset level the output voltage is increased to approximately 14.4 VDC (28.8 VDC for 24 volt models) to rapidly recharge the battery. NORMAL MODE: Output voltage set at approximately 13.6 VDC (27.2 VDC for 24 volt models). STORAGE MODE: When the converter senses that there has been no significant battery usage for 30 hours the output voltage is reduced to 13.2 VDC (26.4 VDC for 24 volt models) for minimal water usage. When in storage mode the microprocessor automatically increases the output voltage to 14.4 VDC (28.8 DC for 24 volt models) for approximately 15 minutes every 21 hours to help prevent sulfation of the battery plates.
CAUTION IT IS IMPORTANT THAT THE FLUID
LEVEL OF ANY CONNECTED BATTERIES BE CHECKED ON A REGULAR BASIS. ALL BATTERIES WILL "GAS" AND LOSE SOME FLUIDS WHEN CONTINUOUSLY CONNECTED
TO ANY CHARGING SOURCE

283

CHARGE WIZARD... The INTELI-POWER 9200 series converters have the Charge Wizardcontrolled charging module built in. The Charge Wizardis a microprocessor-controlled device incorporated in Progressive Dynamics 9200 Series INTELI-POWER converters which constantly monitors the battery, and automatically adjusts the converter output voltage based on its charge status. The Charge Wizardhas four (4) operating modes (BOOST, NORMAL, STORAGE and EQUALIZE). Each mode is automatically selected by the Charge Wizardand ensures a fast yet safe recharge for your battery. See chart below for details.

BOOST MODE

EQUALIZE MODE

NORMAL MODE

STORAGE MODE

NOTE: Converter output voltages are 2x the values listed in above table for 24 volt models.
Boost Mode (14.4V for 12V models and 28.8V for 24V models) - Boost mode is to rapidly recharge a battery up to 90% of full charge. Required 8 hours to return the battery to 90% of full charge and approximately 11 hours to reach full charge.** Normal Mode (13.6V for 12V models and 27.2V for 24V models) - Normal mode is to safely complete the charge of a battery. Required 40 hours to return the battery to 90% of full charge and approximately 78 hours to reach full charge.** Storage Mode (13.2V for 12V models and 26.4V for 24V models) ­ Storage mode is to maintain a batteries charge as well as help prevent battery stratification and sulfation. Required 60 hours to return the battery to 90% of full charge and approximately 100 hours to reach full charge.** Equalize Mode (14.4V for 12V models and 28.8V for 24V models) - The Charge Wizardwill automatically switch to equalize mode for approximately 15 minutes every 21 hours the converter remains in storage mode. This will help prevent battery stratification, sulfation and loss of battery capacity (useful life). ** Times based on a PD9155 recharging a 125AH battery that has been discharged to 10.5V.
- All times and voltages provided above are approximate. The integrated Charge Wizard's ability to change the output voltage of the converter will significantly reduce the amount of time it takes to recharge your battery. The lower voltage for Storage mode helps prevents gassing and reduces water loss during long-term storage.

284

OPTIONAL REMOTE PENDANT
Your INTELI-POWER 9200 converter may have been supplied with a Remote Pendant. The Remote Pendant is optional on OEM but is included with all retail models and plugs in to the accessory port of the 9200 series converter. While the built-in Charge Wizardautomatically determines which operating mode is best suited to recharge or maintain optimum battery condition, the Remote Pendant allows for manual override and has an indicator light to indicate the mode of operation. BOOST MODE - Indicated by green LED remaining on.
NORMAL MODE - When the battery is between 50% and 90% charged, the green LED will flash once per second. When the battery has reached 90% of full charge the green LED will flash 2 - 3 times per second.
STORAGE MODE - Indicated by green LED flashing every 6 - 8 seconds.
MANUAL BUTTON - The manual button has been provided to allow the operator to temporarily override the converter (not recommended) or to verify the converter is operating properly. For manual operation, press and hold the button. The indicator light will soon remain "ON" indicating Boost Mode. Continue to hold the button and the light will blink rapidly indicating the converter is in the Normal Mode. Continue to hold the button until the light blinks slowly indicating the converter is now in the Storage Mode. After the manual button is released the converter will stay in the selected mode. When the battery charge status changes, the converter will return to the automatic mode of operation to prevent damage to the battery.
If a REMOTE PENDANT was not provided with your INTELI-POWER 9200 Series converter, you
can purchase one from your local RV dealer or online at www.progressivedyn.com

OPTIONAL TCMS CHARGE WIZARD Your INTELI-POWER 9100 converter is equipped with a TCMS interface. The TCMS Charge Wizard pendant plugs into the TCMS interface to provide computer control and monitoring of your batteries charge state. The Charge Wizardautomatically determines which operating mode is best suited to recharge or maintain optimum battery condition. The Charge Wizard Pendant allows for manual override and has an indicator light to indicate the mode of operation. BOOST MODE - Indicated by green LED remaining on. NORMAL MODE - When the battery is between 50% and 90% charged, the green LED will flash once per second. When the battery has reached 90% of full charge the green LED will flash 2 - 3 times per second. STORAGE MODE - Indicated by green LED flashing every 6 - 8 seconds. MANUAL BUTTON - The manual button has been provided to allow the operator to temporarily override the converter (not recommended) or to verify the converter is operating properly. For manual operation, press and hold the button. The indicator light will soon remain "ON" indicating Boost Mode. Continue to hold the button and the light will blink rapidly indicating the converter is in the Normal Mode. Continue to hold the button until the light blinks slowly indicating the converter is now in the Storage Mode. After the manual button is released the converter will stay in the selected mode. When the battery charge status changes, the converter will return to the automatic mode of operation to prevent damage to the battery.
The TCMS Charge Wizard Pendant can be purchased from your local RV dealer or online at
www.progressivedyn.com
OPTIONAL REMOTE SHUTDOWN MODULE Your INTELI-POWER 9100L converter is equipped with a Remote Shutdown Module interface. The converter can be shutdown using either a high or low side control, or by connecting two wires by means of a mechanical switch or relay contacts. This allows the battery management system to shutdown the converter after battery charging and balancing are complete.

285

TROUBLE SHOOTING GUIDE

PROBLEM 1. No Output 2. External Fuses Blown 3. Low Output

POSSIBLE CAUSES Proper AC power not connected External Fuses Blown
Short Circuit Unit has shutdown due to overheating
Unit has shutdown due to over voltage (Also see Item 4 below) (No over voltage protection for 230V units) Optional remote shutdown module is active. (PD9100L only) Reverse Battery Hook Up Excessive load for converter Input voltage not between 105-130 VAC (205-265 VAC for 230V units)

ACTION Connect power supply Check AC distribution panel for proper operation Check for reverse polarity Replace fuses with same type and rating Trace circuits for possible fault Check air flow Allow unit to cool Check input voltage Converter will shut down if the input voltage exceeds 132 Volts Correct input voltage Remove remote shutdown module.
Correct hook up and replace fuses with same type and rating Reduce load requirements or install larger converter Correct input supply voltage

Bad battery cell(s)

Replace battery

4. Intermittent or no Output on Unit has shutdown due to over voltage.

Add another load to the generator, this may reduce the "spikes" to

Generator, works on Shore

an acceptable level

Power

Some generators exhibit excessive voltage Contact generator manufacturer for possible defect in the

spikes on the AC power output, this may cause generator

the over voltage protection to shut the unit down

Remote Shutdown Module does not have

Confirm Remote Shutdown Module voltage is between 5 and 30

stable voltage.

VDC

Do not replace the converter unless the following checks have been performed:
1. Loosen the screw on the positive terminal and disconnect the positive wire. Read the converter output voltage using a DC voltmeter. The power converter is working properly if the voltage is above 13VDC (12V models), 26VDC (24V models, 14.3VDC (12V 9100L models), and 28.4VDC (24V 9100-24L models).
2. If the converter output is zero volts, use an AC voltmeter to check for proper voltage at the 120VAC outlet that the converter is plugged into. This voltage should be between 105 and 130 volts (206 and 265 volts for 230V models).
3. Check the fuses located at the front of the converter. These fuses will only blow if the battery or DC output leads were connected in reverse, even for a moment. Replace the fuses and repeat step 1.
4. Disconnect optional Remote Pendant, TCMS Charge Wizard, or Remote Shutdown Module. Read the converter output voltage using a DC voltmeter. The power converter is working properly if the voltage is above 13VDC (12V models), 26VDC (24V models, 14.3VDC (12V 9100L models), and 28.4VDC (24V 9100-24L models).
NOTES:  When replacing fuse(s) it may be necessary to remove the TCMS plug or lithium shutdown module (if so equipped) to provide clearance for fuse replacement.  Disconnect all power sources before replacing fuses.

286

PD9130(L) Input: 105-130 VAC 60 Hz
500 Watts Output: 13.6 VDC, 30 Amps (9130L) ­ 14.6 VDC, 30 Amps Dimensions: 4.5H x 8.25L x 7.25W
Weight: 4.5lbs PD9_60(L)
Input: 105-130 VAC 60 Hz 1000 Watts
Output: 13.6 VDC, 60 Amps (9160L) ­ 14.6 VDC, 60 Amps Dimensions: 3.6H x 8L x 9W
Weight: 5.8lbs PD9_25-24(L) Input: 105-130 VAC 60 Hz
775 Watts Output: 27.2 VDC, 25 Amps (9125-24L) ­ 29.2 VDC, 25 Amps Dimensions: 4.5H x 8.25L x 7.25W
Weight: 4.5lbs

INPUT/OUTPUT SPECIFICATIONS (Specifications subject to change without notice)
PD9140(L) Input: 105-130 VAC 60 Hz
600 Watts Output: 13.6 VDC, 40 Amps (9140L) ­ 14.6 VDC, 40 Amps Dimensions: 4.5H x 8.25L x 7.25W
Weight: 4.5lbs PD9_70(L)
Input: 105-130 VAC 60 Hz 1250 Watts
Output: 13.6 VDC, 70 Amps (9170L) ­ 14.6 VDC, 70 Amps Dimensions: 3.6H x 8L x 9W
Weight: 5.8lbs PD9_40-24A(L) Input: 105-130 VAC 60 Hz
1300 Watts Output: 27.2 VDC, 40 Amps (9140-24AL) ­ 29.2 VDC, 40 Amps Dimensions: 3.6H x 8L x 9W
Weight: 6.0lbs

PD9_45(L) Input: 105-130 VAC 60 Hz
725 Watts Output: 13.6 VDC, 45 Amps (9145L) ­ 14.6 VDC, 45 Amps Dimensions: 4.5H x 8.25L x 7.25W
Weight: 4.5lbs PD9_80A(L) Input: 105-130 VAC 60 Hz 1300 Watts Output: 13.6 VDC, 80 Amps (9180AL) ­ 14.6 VDC, 80 Amps Dimensions: 3.6H x 8L x 9W Weight: 6.0lbs PD9260-230 Input: 205-265 VAC 50/60 Hz 1000 Watts Output: 13.6 VDC, 60 Amps Dimensions: 3.6H x 8L x 9W Weight: 5.8lbs NOT UL OR CUL LISTED

Grounding Lug (located on AC end)

Chassis Ground

Reverse Battery Fuse(s)

CAUTION RISK OF FIRE: Chassis bonding wire must be a separate wire ran directly from the grounding lug provided on the converter. DO NOT connect output negative to chassis using the same wire.

TCMS Charge Wizard Interface (PD9100 only) Remote Shutdown Module Interface (PD9100L only)

Accessory Port (PD9200 only)

DC Distribution
Panel

-

+

Battery

287

PROGRESSIVE INDUSTRIES SURGE PROTECTOR
Electrical Management System (EMS)
EMS-HW30C & EMS-HW50C
Installation & Operating Guide for: Model EMS-HW30C Rated at 120V/30A and Model EMS-HW50C Rated at 240V/50A
"Surgio Says" Lifetime Warranty on all EMS & SSP Surge
Protection Models
288

PROGRESSIVE INDUSTRIES SURGE PROTECTOR
Features
High/Low Voltage Protection | Whenever AC power lowers below 104 volts, or rises above 132 volts, the EMS automatically shuts down power to the RV. The EMS will monitor the power and once the AC power rises above 104 volts, or drops below the 132 volt level the time delay indicator flashes for the preset time and then automatically restores power to the RV.
Time Delay for A/C Compressor | If AC power is interrupted or the EMS detects a fault condition, the built in time delay is activated. There are two settings on the EMS: one is 136 seconds (02:16), and the other is 15 seconds. Consult your air conditioner manual to see if it has a time delay built in. If so, use the 15 second delay, if not, use the 136-seconds delay. The factory setting is 15 seconds.
3-Mode Surge Protection (EMS-HW30C) | This feature provides full surge protection L-N, L-G, and N-G. Total Joule rating is 1,790J and 44,000A surge current. Response time <1 Nano second.
5-Mode Surge Protection (EMS-HW50C) | This feature provides full surge protection L-N, L-N, L-G, L-L, and N-G. Joule rating is 3,580J and 88,000A surge current. Response time <1 Nano second
Surge Indicator | In the event of a power surge and the surge protector circuit is damaged within the EMS-L-N or L-G the digital error code will read E10. This indicates the EMS needs to be serviced.
Reverse Polarity Protection | If AC power has a reverse polarity condition, the EMS will not allow power to the RV and the error code will read E 1
Open Neutral Protection | If AC power has an open neutral, the display will not light and the EMS will not allow power to the RV.
1 | ProgressiveIndustries.net
289

PROGRESSIVE INDUSTRIES SURGE PROTECTOR
Open Ground Protection | If AC power has an open ground condition, the EMS will read an error code of E2, and power will not be allowed to the RV.
AC Frequency Protection | If AC power frequency deviates plus/minus 9 hertz from 60 cycles per second, the EMS will shut down AC power. An Error code of E 7 will be displayed when the frequency is high; and an Error code of E 8 will be displayed when frequency is low.
Accidental 240V Protection | If 240 volts is detected when plugging into AC power the EMS will NOT allow power to the RV. If this condition occurs while power is applied to the RV, the EMS shuts off power instantly. The display will read the voltage and E 3 for the error. NEVER BYPASS THE EMS WHEN THIS OCCURS)
Remote Display | Continuously scrolls the AC power information, including voltage, current, frequency, error codes and previous errors. Each reading is displayed for two (2) seconds.
Previous Error Code | Previous error code (PE) indicates what error occurred and why power was interrupted. To delete code, disconnect power from EMS.
ByPass | This switch is located on the remote display and allows the user to bypass the EMS in the event of failure, thus allowing AC power into the RV. This does not disable the surge protection portion of the EMS; however, all other features are disabled.
Modular Design | Replacement parts are designed for simple plug-and-play making repairs extremely user friendly.
Microprocessor Controlled | The computer and remote display are driven by state-of-the-art microprocessors that are programmed with software to drive the entire EMS unit.
Technical Support 919-267-6964 | 2
290

PROGRESSIVE INDUSTRIES SURGE PROTECTOR
Warnings
· Do not exceed the rating on the EMS for any reason. These devices are designed to be reduced down to 120V/15A and maintain full protection.
· Do not modify the EMS in any way as this will void the warranty, compromise protection and could result in possible shock, and/or a fire hazard.
· It is important to always check the pedestal power outlet for charring;; this condition means the AC receptacle is providing a weak connection. Should this condition exists, DO NOT USE as it could result in possible melting of the RV power plug.
· Progressive Industries recommends you have a certified electrician or
an authorized dealer perform the installation of the EMS.
· All AC power extension cords in conjunction with your EMS unit should be rated 10 gauge for 120V, 30A systems or 6 gauge for 240V, 50A systems and rated for outdoor use to reduce the risk of electrical shock. Small gauge cable will have a higher resistance and can result in voltage loss or an electrical fire.
· Whenever servicing or installing the EMS, or any other AC powered device, make sure AC power is disconnected.
· RV wiring is different than wiring found in homes; the neutral and ground conductors are isolated in the RV, unlike in a home where they are tied at the service panel. Therefore, never connect neutral and ground together for any reason. This could result in a ground fault condition, and may result in electric shock and/or a fire hazard.
· Never solder the ends of the wires you attach during installation. This includes the Red, Black and White whites
· Never plug the EMS into an inverter.
3 | ProgressiveIndustries.net
291

PROGRESSIVE INDUSTRIES SURGE PROTECTOR
Installation Instructions Before Transfer Box
HW50C Visual Photo Library on page 11 | Wiring Diagram on page 13 HW30C Visual Photo Library on page 12 | Wiring Diagram on page 13
For installation, in addition to the EMS Kit, you will need: · 6 mounting screws · In some cases you will need a jumper cable, length to be determined based on the placement of the EMS · Always use #10 wire.
1. Unplug RV from AC power and be sure generator is off. 2. Determine a location for the EMS control box. 3. Cut the RV power cord about three (3) inches greater than the distance
from the junction box to the desired location of the EMS control box. Then strip back the outer insulation three (3) inches on input, and three (3) inches on output cable. (See visual references on pages 11-13). 4. Strip back each conductor 3/8" on both stripped ends. (See visual references on pages 11-13 ) and attach ring terminals to green ground wires. If this wire is a solid wire, do not use ring terminals. Loop the wire around the ground screw. 5. Remove the lid from the EMS. Next ,remove the display, cable and pack of screws and then back off the six set screws from top of contactor (L1, L2, etc.) 6. Take your long cable with the plug end and connect it to the input side by sliding through the wire restraint on the end of the EMS control box. Then connect the wires to the contactor by attaching black to L1, white to L2, red to L3, and green to ground screw on side of box. (See visual references on pages 11-13). Torque down set screws and ground nut to secure connections. 7. Take the short cable coming from the junction box by sliding it through the wire restraint output side of the EMS control box. Next slide the black wire through the current sensor containing the green tape and connect to T1, then connect the white wire to T2. Now slide the red wire through the other sensor and attach to T3. The arrow side off the sensor needs to fact T1 and T3.
[Continued on page 5]
Technical Support 919-267-6964 | 4
292

PROGRESSIVE INDUSTRIES SURGE PROTECTOR
Installation Before Transfer Box Cont'd
Attach the green ground wire to the ground screw on side of box. (See visual references on pages 11-13). Make sure the wire colors match up from each other. Torque down set screws and ground nut to secure connections. 8. Double check all connections and make sure they are secure. 9. Remove the two screws on contactor where marked L1, L2, etc. Next remove the top plastic plate with markings. Examine inside ensuring there are no loose plastic pieces inside the contactor. If so, remove and re-install cover with two screws. (See visual references on pages 11-13).
Caution: If you break off a tab and do not remove it, this may stop the contactor from working and allow 240 volts in the RV.
10. Secure cable ends by tightening down strain reliefs over the input and output wires. Do not over tighten as this could bit through the insulation and cause a short.
11. Set time delay jumper on the circuit board. The factory setting is for 15 seconds. Remove jumper to set for 136 seconds (02:16). See Features Section on time delay to determine which to use. (See visual references on pages 11-13).
12. Plug in remote display and cable. (This cable is not a phone cable, but rather a data cable). NEVER PLUG IN DISPLAY WHILE RV POWER IS ON.
13. Attach EMS lid with the six black machine screws provided. 14. Mount the EMS control box. 15. Installation is complete. Next, plug in and follow operating
instructions.
5 | ProgressiveIndustries.net
293

PROGRESSIVE INDUSTRIES SURGE PROTECTOR
Installation After Transfer Box for Protection from both Generator and AC Power
HW50C Visual Photo Library on page 11 | Wiring Diagram on page 13 HW30C Visual Photo Library on page 12 | Wiring Diagram on page 13
For installation, in addition to the EMS Kit, you will need: · 6 mounting screws · In some cases you will need a jumper cable, length to be determined based on the placement of the EMS · Always use #10 wire
1. Unplug RV from the AC power and be sure generator is off. 2. Locate transfer switch box; determine where the EMS control box will
be mounted. 3. Measure the distance between the transfer switch and the control box
and add one (1) foot. This is the length of cable that will be required for the installation. Make sure 6-gauge, 4 conductor cables are used. 4. Remove lid from transfer box, disconnect and remove the output cable. 5. Take jumper cable and strip back one end three (3) inches and the other end the same as the end removed from the transfer box. The cable removed from the transfer box must have at least three (3) inches of the outer insulation removed. (See visual references on pages 11-13). 6. Strip back all conductors 3/8" and attach ring terminals to green ground wires. (See visual references on pages 11-13). If this wire is solid wire, do not use ring terminals. Loop the wire around the screw. 7. Remove the lid from EMS. Remove the digital display, cable and pack of screws and then back off the six set screws from top of contactor. (L1, L2, etc.) 8. Take the jumper cable and connect it to the input side by sliding through the wire restraint on the end of the EMS control box and then connect black to L1; white to L2; red to L3, green to ground screw. (See visual references on pages 11-13). Torque down set screws and ground nut to secure connections.
[Continued on page 7]
Technical Support 919-267-6964 | 6
294

PROGRESSIVE INDUSTRIES SURGE PROTECTOR
Installation After Transfer Box for Protection from both Generator and AC Power
Continued from page 6
9. The cable that came from the transfer box connects to the output side of the EMS control box in the same manner. Next slide the black wire through the current sensor containing the green tape and connect to T1, then connect the white wire to T2. Now slide the red wire through the other current sensor and attach to T3. The arrow side off the sensor needs to face T1 and T3. Next, attach the green ground d wire to the ground screw on side of box. (See visual references on pages 11-13). Make sure the conductor's colors match up across from each other. Torque down the set screws and ground nut to secure connections.
10. Connect the loose end of the jumper cable to the transfer switch. See wiring diagram on transfer switch if needed.
11. Double check all connections to ensure they are secure. 12. Secure cable ends by tightening down strain reliefs over the input and
output wires. Do not over tighten as this could bite through insulation and cause a short. 13. Set time delay jumper on the circuit board. Factory setting is for 15 seconds. Remove jumper to change setting to 136 seconds (02:16). See Features Section on time delay to determine which to use. (See visual references on pages 11-13). 14. Plug in digital remote and cable. (This cable is not a phone cable, but rather a data cable.) NEVER PLUG IN DISPLAY WHILE RV POWER IS ON. 15. Attach lid with the six black machine screws provided and attach transfer switch lid. 16. Mount the EMS control box. 17. Installation is complete. Next, plug in and follow operating instructions.
7 | ProgressiveIndustries.net
295

PROGRESSIVE INDUSTRIES SURGE PROTECTOR
Operating Instructions
1. Plug into A/C power. 2. Digital display will read 888 for one second and then begin
scrolling the voltage, amps, line frequency and error code, if any. In addition, the time delay light will flash while the EMS is going through its countdown and will stop when the unit engages (Bottom right hand corner.) If delay light does not flash, a fault condition is present. Look at the Error code chart to determine what the AC power problem is. 3. You may notice when first plugging in, the display may read E 9. This indicates the display has not received the data from the computer yet. Do not be alarmed, this is normal. By the next scroll through, it should read E 0 if the AC power is normal. 4. The digital display will give you a three digit number indicating your line voltage. Next, it will give you a "0A" reading indicating current (amps) Current (amps) will read zero until the time delay is complete (136 seconds or 15 seconds, depending on your settings). Then you will notice a number between 0 and 50. This number indicates how many amps the RV is drawing. Next, you will notice "60H", indicating your line frequency. This number should remain fairly consistent; however, it may read plus/minus one or two. Lastly, note the E code. E 0 is normal and only when E 0 or E10 is present will the delay light flash and allow power to the RV. Refer to the Error code chart card that was provided or see Error Code Chart for additional information. 5. Verify the error code E 0 is displayed and set up is now complete.
IMPORTANT: The display will only read voltages between approximately 78 volts and 255 volts.
NOTE: If the wiring reads anything different than correct, the EMS will not turn on and we recommend you move to a different source of AC power or use your generator power. Also, if power is below 104 volts or above 132 volts, the EMS will not turn on, and we recommend using your generator power.
Technical Support 919-267-6964 | 8
296

PROGRESSIVE INDUSTRIES SURGE PROTECTOR
Error Code Chart
E 0 - Normal Operating Condition E 1 - Reverse Polarity (hot and neutral wires reversed) E 2 - Open Ground (no ground wire connection) E 3 - Line 1 High Voltage (line voltage above 132V) E 4 - Line 1 Low Voltage (line voltage below 104V) E 5*- Line 2 Voltage High (Line voltage above 132V) E 6*- Line 2 Voltage Low (Line voltage below 104V) E 7 - Line Frequency High (line frequency above 69 cycles per
second) E 8 - Line Frequency Low (line frequency below 51 cycles per
second) E 9 - Data Link Down (call technical support) E10 - Replace Surge Protector Module (call Progressive Industries
Tech support) * Code only apply to EMS-HW50C models
Note: If the EMS cuts the power to the RV it will show a PE code following the E code. This denotes the previous error or why the EMS shut down. Example: The EMS cuts power for low voltage on Line 1, and then the power is restored. The Error Code reads E 0, but the PE code reads PE 4 which tells the user low voltage was the reason for the EMS previously cutting power. This PE error code will be deleted when power is disconnected from the EMS.
Accidental 240 volt Protection: Should this condition occur, the display will read 240 volts instead of displaying the voltage and the error code message will read E 3. AC power will shut down instantly. DO NOT UNDER ANY CIRCUMSTANCES BYPASS THE EMS; OTHERWISE, THIS WILL RESULT IN SEVERE DAMAGE TO THE RV.
9 | ProgressiveIndustries.net
297

PROGRESSIVE INDUSTRIES SURGE PROTECTOR
Troubleshooting Guide
Common installation mistakes: 1. Check connections. Input is the plug side of the RV and black
should be attached to L1, white to L2. Output (going to the RV) should match up. T1 is black, T2 white. The green ground gets attached to the input and output on the side of the box. 2. Make sure the input wires are, in fact, the input wires. Connecting the output to the input of the EMS will cause the device to malfunction. 3. If the EMS is still not functioning at this point, follow instructions below prior to calling Progressive Industries Technical Support.
In order for the on-call Technician to help troubleshoot the problem(s) you are experiencing and render the best possible solution, it is necessary you be at your RV when you place your call.
1. If the display is illuminated and scrolling information, note the Error Code. If there is an Error code of 1-9, the device will interrupt the power. See Error Chart for definition of AC power problem. The device being off when an Error Code is present indicates the product is working properly and protecting your coach.
2. If the display is illuminated and reading Error code E 0, and yet no power is present in the coach, please contact Progressive Industries Tech Support. You must wait for the time delay light to stop flashing.
3. If the display is not illuminated and power is in the coach there is a connection issue between the display and the main control box. Contact Technical Support.
Progressive Industries Tech Support can only help if the above information is provided; therefore, please do not call until this information is obtained. Again, it is necessary for your to be at the RV when you place your call. To recap...
1. Are the connections correct? 2. What is the Error Code message being displayed? 3. Is the delay indicator flashing?
Technical Support 919-267-6964 | 10
298

PROGRESSIVE INDUSTRIES SURGE PROTECTOR
Photo Library for the EMS-HW50C
Strip back the outer insulation three (3) inches on input, and three (3) inches on output cable.
11 | ProgressiveIndustries.net 299

PROGRESSIVE INDUSTRIES SURGE PROTECTOR
Photo Library for the EMS-HW30C
Technical Support 919-267-6964 | 12 300

PROGRESSIVE INDUSTRIES SURGE PROTECTOR
Wiring Diagram for EMS-HW50C
Wiring Diagram for EMS-HW30C
13 | ProgressiveIndustries.net 301

PROGRESSIVE INDUSTRIES SURGE PROTECTOR
Progressive Industries Warranty
Lifetime Warranty Information for Models: EMS-PT30C | EMS-PT50C | EMS-HW30C | EMS-HW50C
EMS-LCHW30 | EMS-LCHW50 | SSP-30 | SSP-50
Progressive Industries, Inc. (PII) offers a Lifetime Warranty on all models listed above to be free from defects in material and workmanship. Products must be properly installed and maintained. PII cannot be responsible for neglect or misuse of product(s). In the event a properly installed unit proves defective under normal use, PII will repair or replace the defective unit at its discretion.
This warranty is exclusive to PII and in lieu of all other warranties, obligations or liabilities implied by PII.
This is a non-transferable Lifetime Warranty and is exclusive to the original owner and covers those products purchased from an authorized dealer, retailer or seller. This warranty does not cover unauthorized labor. Technical Support is available seven days a week, by phone to assist in diagnosing and directing the replacement of appropriate components.
Unforeseen circumstances whereby your EMS or SSP products are not covered include:
· Natural disasters: i.e., hurricanes, floods, earthquakes, etc.; · Vehicle accidents on highways, streets or off-road; · Failure to remove or unplug product prior to driving off; and, · Failure to ensure pedestal plug is clean and maintains a snug fit when
you plug in, and make sure your cord is clean when plugging into the portable unit.
For additional information regarding Progressive Industries' Warranty and/or information on returning your unit for repair please visit our website at www.progressiveindustries.net
Technical Support is available 7 Days a Week!
Technical Support 919-267-6964 | 14
302

PROGRESSIVE INDUSTRIES SURGE PROTECTOR
Progressive Industries, Inc. 1020 Goodworth Drive Apex, NC 27539 919.267.6948
ProgressiveIndustries.net
Our products are proudly made in the U.S.A.
303

SHURFLO WATER PUMP

SHURFLO® 4008 RV REVOLUTIONTM BY-PASS PUMP INSTALLATION & OPERATION MANUAL

16 AWG [1.28mm] or heavier wire Connector

Switch

Fuse Red lead (+)

Ground Black

Surface Solide

Flexible Braided High Flow Hose

Strainer
Typical Pump Installation

INSTALLATION PREPARATION

INSTALLATION GUIDELINES
 Solid Surface within 6' of tank.  Minimize flow restrictions in the system.  No Accumulator needed.  Flexible hose on inlet and outlet.  Minimize plumbing elbows and valves.  Accessible location.  Strainer on pump inlet.  Properly Sized wiring.  Properly electrical protection.  Properly sized plumbing.

The goal of installation is to provide a quiet, easy-to-maintain installation with good flow and low backpressure. This can be accomplished with the following guidelines:
 Mount on a solid surface in an accessible location for strainer cleaning and pump maintenance.
 1/2" Male threaded models are intended to be used with SHURFLO swivel barb fittings which seal with an internal taper when hand tightened. CAUTION: Sealers and Teflon tape may act as lubricant causing cracked housings or stripped threads due to over-tightening. Sealer may enter the pump inhibiting valve action, causing no prime or no shut-off. A failure due to foreign debris is not covered under warranty.
 Use flexible high-pressure hose on the pump inlet and outlet [such as SHURFLO Kit 94-591-01]. The pumps ports and strainer should not be connected to plastic or rigid pipe, or the pump's normal motion will transmit through rigid plumbing causing noise, and possibly loosening or cracking components.
FLOW MANAGEMENT SOLUTIONS

 Pump must use an adequate 50-mesh strainer [such as SHURFLO 255 series strainers].
 Use a minimum of 1/2" [13mm] Inner Diameter plumbing. Smaller ID plumbing will cause cavitation, high back pressure, low flow and noise.
 No need for an accumulator with bypass pumps.
 Pump is designed for intermittent duty only: Do not use these pumps for running a Reverse-Osmosis [RO] Filtration System. High pressurecontinuous duty usage will shorten the life of the pump and is not covered under warranty.
 Wire Size is 16 GA MINIMUM, 12GA is recommended--See Wire Chart in Electrical Section for minimum sizing.
 Minimum power requirement is a 10 Amp circuit.
 Reduce restrictions on inlet and outlet. This includes small inner diameter shut-off valves, winterizing valves and elbows.
911-1008 REV. K

 If the RV has an Intellitec Pump Controller, it must be rated at 10 or 15 amps; If the controller is rated at 7.5 Amps, a new controller or a high-amp relay must be used.
MOUNTING
 Mount the pump within 6 feet of the tank for best performance and pump life. The pump will pull farther, but the farther it pulls the more work it does, increasing vibration and noise, and reducing the output and pump life.  Mount pump in a space of at least 1 cubic foot for adequate ventilation to prevent overheating.  Pump may be mounted in any position.  Mount pump for easy access for cleaning strainer, maintenance and service.  Mount pump on a solid surface to prevent vibration and noise.
1

304

SHURFLO WATER PUMP

ELECTRICAL

ABOUT THE BY-PASS

 The pump works best on an individual filtered circuit, protected by the recommended fuse or breaker specified on the label.

 A 15-Amp switch is recommended and should be on the positive lead (red wire).

 Wire Sizing: Proper wire sizing is required for good pump operation. If the wire is too small, low voltage will affect the pump performance and can create a fire hazard. SHUT OFF POWER TO THE PUMP WHEN LEAVING THE RV UNATTENDED.

Ft. [m]

AWG [mm2]

0-25

[0-7.6]

16

[1.3]

25-50 [7.6-15.2]

14

[2.1]

50-70 [15.2-21.3]

12

[3.3]

70-110 [21.3-33.5]

10

[5.3]

Minimum Wire Size for a 10% voltage drop on a 12VDC, 15 Amp Circuit. Length is the distance from the power source to pump and back to ground.

PLUMBING
Installation of a strainer is required to prevent debris from entering the pump. For noise and vibration reduction we recommend at least 18 in. [.5 M] of 1/2" [13mm] I.D. flexible high-pressure hose to both ports. The pump ports and strainer should not be connected to plastic or rigid pipe. This hose should be anchored where it meets the hard plumbing to reduce plumbing vibration.

OPERATION

NOTE: By-pass adjustment should only be performed by a professional technician with proper gauges and equipment.
The by-pass is a spring loaded diaphragm that opens up allowing water from the discharge side back to the inlet side. The by-pass is set to begin opening at about 40 psi and creating full by-pass at about 62 psi (lower pressure pumps will vary depending on the by-pass and pressure shut-off settings). The pressure switch on the pump is set to shut off at 55 psi. If the switch or by-pass are adjusted too much, the by-pass and switch shut-off can overlap and THE PUMP WILL NOT SHUT OFF. Screw-
SANITIZING
Potable water systems require periodic maintenance to keep components working properly and deliver a consistent flow of fresh water. Sanitizing is recommended: prior to storing, after a period of storage, or any time the system is opened or contaminated, as follows:
NOTE: Check your Vehicle Owner's Manual for specific instructions. By-pass any filters or remove filter cartridges.
1. Determine the amount of common household bleach needed to sanitize the tank.
A) 2 ounces of bleach per 15 gallons tank size: 60 gallon tank [15 x 4] = 4 x 2 ounces = 8 ounces of bleach.
B) I ml bleach per 1 liter tank size: 300 liter tank = 300 milliliters of bleach.

ing the switch screw in clockwise will raise the shut-off pressure. Unscrewing the switch screw counterclockwise will lower the pump shut-off pressure. Screwing the by-pass screw in will raise the pressure at which the by-pass starts and raise the full by-pass pressure. Unscrewing the by-pass screw counterclockwise will lower the pressure at which by-pass starts and lower the full by-pass pressure.
WARNING: If full by-pass is reached before the shut-off setting, the pump will not shut off. Full by-pass pressure setting should be at least 10 psi higher than pump shut off pressure.
2. Mix the bleach with water in a container such as a gallon jug. If tank is filled through a pressurized fitting, pour the bleach into the hose before attaching the hose to the city water entry.
3. Pour the bleach solution into the tank and fill the tank with potable water. Rock the RV back and forth to coat top and sides of potable water tank.
4. Open all faucets (Hot & Cold) allowing the water to run until the odor of chlorine is detected. Allow four (4) hours of contact time to disinfect completely. Doubling the solution concentration allows for a contact time of one (1) hour.
5. Drain the tank. Refill the tank and flush the system once or twice until the odor has decreased. The residual chlorine odor and taste is not harmful.

This pump is designed for intermittent duty only. The pump operates normally up to about 40-psi, where a spring-loaded by-pass valve opens, allowing flow back from the output side to the input side, providing smooth, steady flow with virtually no cycling, all the way down to a trickle. As a faucet is opened back up, the pressure will drop, the by-pass will close and full flow is again obtained. This allows good flow, even with today's restrictive showers and pullout sprayer faucets. Performance will vary, of course, depending on the voltage to the pump; lower voltage = lower flow, higher voltage = higher flow. Remember your electrical safety: It is always best to shut power to the pump OFF when leaving the RV unattended.
2

WINTERIZING
Refer to the vehicle owner's manual for specific winterizing instructions.
If water is allowed to freeze in the system, serious damage to the plumbing and pump may occur. Failures of this type will void the warranty. The best guarantee against damage is to completely drain the pump and perform the following:
1. Drain the water tank. If the tank doesn't have a drain valve, open all faucets allowing the pump to operate until the tank is empty.
2. Open all the faucets (including the lowest valve or drain in the plumbing), allow the pump to purge the water from the plumbing, and then turn the pump OFF.

3. Using a pan to catch the remaining water, remove the plumbing at the pump's inlet/outlet ports. Turn the pump ON, allowing it to operate until the water is expelled. Turn OFF power to the pump once the plumbing is emptied. Do not reconnect the pump plumbing. Make a note at tank filler as a reminder: "Plumbing is disconnected".
4. All faucets must be left open to guard against any damage.
5. Potable anti-freeze may be poured down drains and toilets to protect p-traps and toilet seals. Sanitize the plumbing system before putting the plumbing system back in service.

305

SHURFLO WATER PUMP

TROUBLESHOOTING

Vibration induced by driving can loosen plumbing, strainers and pump hardware. Check for system components that are loose. Also, refer to the chart below for trouble-shooting tips.
PUMP WILL NOT START/ BLOWS CIRCUIT
 Electrical connections, fuse or breaker, main switch, and ground connection.
 Is the motor hot? Thermal breaker may have triggered; it will reset when cool.
 Is voltage present at the switch? Bypass pressure sw. Does the pump operate?
 Charging System for correct voltage (±10%) and good ground.
 For an open or grounded circuit, or motor; or improperly sized wire.
 For seized or locked diaphragm assembly (water frozen?).
WILL NOT PRIME/SPUTTERS (No discharge/Motor runs)
 Is the strainer clogged with debris?  Is there water in the tank, or has air
collected in the hot water heater?  Is the inlet tubing/plumbing suck-
ing in air at plumbing connections (vacuum leak)?  Is inlet/outlet plumbing severely restricted or kinked? Restrictive valves?  Proper voltage with the pump operating (±10%).  For debris in pump inlet/outlet valves or swollen/dry valves.  Pump housing for cracks or loose drive assembly screws.

RAPID CYCLING  For restrictive plumbing and flow restrictions in faucets/shower heads.  Water filter/purifier should be on separate feed line.  Shut-off pressure set too low.
PUMP WILL NOT SHUT-OFF / RUNS WHEN FAUCET IS CLOSED
 Output side (pressure) plumbing for leaks, and inspect for leaky valves or toilet.
 For air trapped in outlet side (water heater) or pump head.
 For correct voltage to pump (±10%).  For loose drive assembly or pump
head screws.  Are the valves held open by debris
or is the rubber swollen?  Pressure switch operation. By-pass
set higher than shut-off.
NOISY OR ROUGH OPERATION  For plumbing which may have
vibrated loose.  For a restricted inlet (clogged
strainer, kinked hose, restrictive valves).  Is the pump plumbed with rigid pipe causing noise to transmit?  Does the mounting surface amplify noise (flexible)? Does it bang like a drum?  For mounting feet that are loose or are compressed too tight.  For air in the system. Check all fixtures for air and bleed system.  The motor with pump head removed. Is noise from motor or pump head?

LEAKS FROM PUMP HEAD OR SWITCH  For loose screws at switch or pump head.  Switch diaphragm ruptured or pinched.  For punctured diaphragm if water is present in drive assembly.
MAINTENANCE
Normal pump maintenance is all that is needed: Checking and cleaning of the strainer, normal sanitizing and winterizing and occasionally checking all plumbing hardware and fittings for tightness. Lack of sanitizing is the number one reason for premature pump failure and poor performance over time. Lack of sanitizing will cause scale buildup on the diaphragm and valves, causing low flow and leak back [occasional pump cycling with no faucets open or tank filling up when hooked up to city water].

306

REPAIR KITS

ITEM COMPONENT PARTS KIT

1, 5 Upper Assembly

94-800-00

2

Valve Assembly

94-800-01

3

2.5° Drive Assembly 94-800-02

4

Motor

94-11-302-00

N/S Check Valve

94-800-03

1, 2, 3, 5 Pump Head

94-800-04

N/S Pressure Switch

94-800-05

3

SHURFLO WATER PUMP

FLOW MANAGEMENT SOLUTIONS 3545 HARBOR GATEWAY SOUTH, SUITE 103, COSTA MESA, CA 92626, (800) 854-3218 WWW.SHURFLO.COM

All Pentair trademarks and logos are owned by Pentair, Inc. All other brand or product names are trademarks or registered marks of their respective owners. Because we are continuously improving our products and services, Pentair reserves the right to change specifications without prior notice. Pentair is an equal opportunity employer.

911-1008 Rev. K 12/14 ©Pentair, Inc. All Rights Reserved.

8

307

SMOKE DETECTOR
USER'S MANUAL
COMBINATION CARBON MONOXIDE & SMOKE ALARM
Features: · Separate sensors to detect smoke
and CO; the two alarm systems work independently · Powered by two "AA" batteries · Side access drawer for easy battery replacement

IMPORTANT! PLEASE READ CAREFULLY AND SAVE.
This user's manual contains important information about your Combination Carbon Monoxide & Smoke Alarm's operation. If you are installing this Alarm for use by others, you must leave this manual--or a copy of it--with the end user.

CONFORMS TO UL STD 217
AND
UL STD 2034
Model SCO5

M08-0117-011 Q 06/12 Printed in Mexico

© 2012 BRK Brands, Inc. All rights reserved. Distributed by BRK Brands, Inc. 3901 Liberty Street Road, Aurora, IL 60504-8122 Consumer Affairs: (800) 323-9005 · www.firstalert.com
All First Alert® Smoke Alarms conform to regulatory requirements, including UL217 and are designed to detect particles of combustion. Smoke particles of varying number and size are produced in all fires.
Ionization technology is generally more sensitive than photoelectric technology at detecting small particles, which tend to be produced in greater amounts by flaming fires, which consume combustible materials rapidly and spread quickly. Sources of these fires may include paper burning in a wastebasket, or a grease fire in the kitchen. Photoelectric technology is generally more sensitive than ionization technology at detecting large particles, which tend to be produced in greater amounts by smoldering fires, which may smolder for hours before bursting into flame. Sources of these fires may include cigarettes burning in couches or bedding. For maximum protection, use both types of Smoke Alarms on each level and in every bedroom of your home.
INTRODUCTION
FIRE SAFETY TIPS
Follow safety rules and prevent hazardous situations: 1) Use smoking materials properly. Never smoke in bed. 2) Keep matches or lighters away from children; 3) Store flammable materials in proper containers; 4) Keep electrical appliances in good condition and don't overload electrical circuits; 5) Keep stoves, barbecue grills, fireplaces and chimneys grease- and debrisfree; 6) Never leave anything cooking on the stove unattended; 7) Keep portable heaters and open flames, like candles, away from flammable materials; 8) Don't let rubbish accumulate.
Keep alarms clean, and test them weekly. Replace alarms immediately if they are not working properly. Smoke Alarms that do not work cannot alert you to a fire. Keep at least one working fire extinguisher on every floor, and an additional one in the kitchen. Have fire escape ladders or other reliable means of escape from an upper floor in case stairs are blocked.
BASIC SAFETY INFORMATION
· Dangers, Warnings, and Cautions alert you to important operating instructions or to potentially hazardous situations. Pay special attention to these items.
· This Smoke/CO Alarm is approved for use in single-family residences. It is NOT designed for marine or RV use.
· This combination Smoke/Carbon Monoxide Alarm has two separate alarms. The CO Alarm is not designed to detect fire or any other gas. It will only indicate the presence of carbon monoxide gas at the sensor. Carbon monoxide gas may be present in other areas. The Smoke Alarm will only indicate the presence of smoke that reaches the sensor. The Smoke Alarm is not designed to sense gas, heat or flames.
· This Smoke/CO Alarm cannot operate without working batteries. Removing the batteries for any reason, or failing to replace the batteries at the end of their service life, removes your protection.
· NEVER ignore any alarm. See "If Your Smoke/CO Alarm Sounds" for more information on how to respond to an alarm. Failure to respond can result in injury or death.
308· The Silence Features are for your convenience only and will not correct a problem. See "Using the Silence Features" for details. Always check your home for a potential problem after any alarm.

· This Smoke/CO Alarm cannot operate without working batteries. Removing the batteries for any reason, or failing to replace the batteries at the end of their service life, removes your protection.

· NEVER ignore any alarm. See "If Your Smoke/CO Alarm Sounds" for more information on how to respond to an alarm. Failure to respond can result in injury or death.

·RETChOe MSiMleEncNeDFEeDatPuLreAsCaErMe EfoNrTyour convenience only and will not correct a problem. See "Using the Silence Features" for details. Always check yourShUoGmGeESfoTrEDa pAoRtEeAnStiaFlOpRroINbSleTmALaLfItNeGr any alarm. Failure to doSsMoOcKaEn AreLsAuRlMt iSn, iCnOjurAyLAoRr MdeSa, tAhN. D COMBO UNITS

· Test this Smoke/CO Alarm once a week. If the Alarm ever fails to test correctly, have it replaced immediately! If the Alarm iKsEnYo: t
working properly, it cannot alert you to a problem. SMOKE ALARMS

· This product is intended for use in ordinary indoor locations of family living units. It is not designed to measure CO leSSvMILeEOlNKsCEEiAnFLEAARTMURWEITH compliance with Occupational Safety and Health Administration

(OSHA) commercial or industrial standards. IndividualCsOwALiAthRMS

medical conditions that may make them more sensitive to carbon

monoxide may consider using warning devices whichBSpMOTrOoHK,EvO/iCRdOCeAOLMABRIMNASTION

audible and visual signals for carbon monoxide concentrations

under

30

ppm.

For

additional

information

on

carbSNouFgnPgAemrsetceoodmnlomoceaxntiidodantseioanres

based (NFPA

on 72

and your medical condition contact your physiciafonr.Smoke Alarms and NFPA 720 for

Carbon Monoxide Alarms). Always

FCC Compliance

refer to national and local codes before beginning any installation.

ThisInenqeuwipcmoensnttruhcatsionbeAeCnatnedsAteCd/DaCndsmfoukendalatormcsoMmUpSlyT with the limits for a

Clasbse Bintdeirgciotnanl edcetveidceto, mpuerestuNaFnPtAtorecPoamrtm1e5ndoaftitohnes.FCC rules. These limits are

daerseis·gidneedWnttihaoel npinrisontvsaitdlalaelltiinroegna.osTonhntiahsbeeleqwupairlplo,mttehecentittoognpeanegedargainetesost ,fhuSasrmmeosfkuaelninAdtleacrrafmnersreansdhcioeautienld be

radio frepqluaecnecdybeentweregeyna4ndin,cifhneost(1in0s2tamllemd) aanndd u1s2eidncinheascc(3o0rd5amncme) wfroitmh the

the instrwucatlli/ocnesil,inmgalyincea. use harmful interference to radio communications.

How·eveWr, thheenreinistanlolingguaornanthteectehilaintgth, eplianctertfehreenaclaermwiallsncoltooscectuortihnea particulacreinntsetralalastipoons. sIfibtlhei.s equipment does cause harmful interference to radio· orItneleeivthiseironcarseec,eipntsiotanl,l awthliecahsct a4ninbcehedset(e1r0m2inmemd )bfyrotmurnwinhgertehetheeqwuiapll- and ment offcaenilidngonm, etheet. uSseeer "isAveonicdoinugraDgeaddtoAitrryStpoaceosrr"efcotrtmheoirneteinrfoeremnacteiobny. one NorOmTEo:reFoorf tahney floolcloawtioinng, mmeaakseusruerse: no door or other obstruction could keep · Rcaerobroienntmoornroexloidceatoerthsme orekceefivroinmg raenatcehninnag. the Alarm.
· IInncsrteaallsinegthSemsoepkea/raCtOionAblaertmwseeinn MthoebeiqleuiHpommenetsand receiver. · tCaFhrooeernarnmeaeciscnetiipmvtoehusrem.seibsqleeuc.ipuFmroitreynmitnosinrtetaolsl aeoncnueoriuStytml,epot ukoten/oCanOeciurAcnluaitirtmindiaeffsaecrcehlnortsoeforomtom. eMtahacanhtyosfoleledpeirng · Cmoonbsiulelthtohme edsea(elesrpoercaianllyexthpoesrienbcueidlt braedfoioreor19T7V8t)ehcahvneicliiattnlefoorr hneolpin. sulation. bWyaFrIonifrfisynitongAus:urleClmarhttoai/onbBngil,ReeisKthioosBmrrimamenpoidsodsrin,ftiaoIcnntactwt.ito,eonclliosniunstolstdautllvhlaoueteindpditr,tsohodoerunuicfsitny,esorni'udsoetaareuwextahpulorlnsersistouysnrleytlyoo.aofpptphereoravateemdount the equipment.
ThisWdeHviEceRcEomTpHlieIsSwAithLAPaRrtM15SoHf tOheUFLCDC RNuOleTs. OBpEeraINtioSnTisAsLuLbjEecDt
to thDeofoNllOowTinlogctawtoe cthoinsdSitmionosk:e(/1C) OthiAsladremvic: e may not cause harmful iinntcelur·fdeirnegIennxcintgertea,emrarafneegdrleyes(n2d,c)ufeutshrttniyhs,aadcdteeimrvtryiaocyooemrcmgasruu,esscatersaayuwcnacldreseeppastasirca.eendsyoainpntederraufetnirofeinnn.icseheredcaetitvicesd., Avoid

· Where combustion particles are produced. Combustion particles form

when something burns. Areas to avoid include poorly ventilated kitchens,
INSTAgaLraLgAesT, aInOdNfurnace rooms. Keep units at least 20 feet (6 meters) from
the sources of combustion particles (stove, furnace, water heater, space
WHERhEeaTteOr) ifINpoSsTsiAblLe.LInTaHreIaSs wAhLeAreRaM20-foot (6 meter) distance is not

Minimumpocssoivbelera­gien fmoor dSumlaor,kme oAblailerm, osr, sams arellecromhommeensd,efdorbeyxathmepNleat­ioitnaisl Fire ProtrectoiomnmAesnsdoecdiatihoenS(NmFoPkAe),AilsaromnebSemploakceedAlasrmfaor nfroemvertyheflsoeofr,uienl-burning every sleseopuirncgesaraesa,paonsdsibinlee. vTehrey bpeladcreomomen(tSreeco"mRemgeunladtaotriyonInsfoaremianttioendFeodr to Smoke Akleaermp sth"efsoer dAelatarmilssoant athreeaNsFoPnAabrelecodmistmanecnedafrtoiomnsa). fuel-burning source,
and thus reduce "unwanted" alarms. Unwanted alarms can occur if a For CO SAmlaormkesA, tlahremNiastipolnaacleFdirdeirPecrotltyecnteioxnt tAosasofuceial-tibounrn(NinFgPsAo) urercceo.mVmenetnildatse that a COtheAslaermaresahsouasldmbuecchenastraplloyslsoicbalet.ed outside of each separate sleeping haadroemdai·teiino. ntWkaahinleticCdtihhmOcienmanAu5selsa.dfeerAimaeuirttsnec(w1iuvn.air5creneianmtnecittedhysteaocsrleafaspntr)hmaoderfsara.batewnedybcrecoodoooormkokionsinm.ggF,soamarpnoapdkdlieoadnneincdeteovp.ertIronhyteaeleicsrvmtsieotolnrkeo,eafinmyssoestunanrslleoarr

NOT·E: FIonreaxdtrdeemdeplyrohteucmtiiodna, rinesatsa.llTahnisaAdldairtmionsahl oSumldokbee/CaOt leAalasrtm10atfeleeats(3t meters)

15 feet (4fr.o6mmaetsehrso)waewr,aysafuronma,thhuemfuidrnifaiecre, voarpfuoerilzbeur,rdniinsghwhaesaht esro, ularcuendwrhyerroeom,

possibleu. tInilitsymroalolemr ,hoormoetsheorr sinoumrcaenuofaf chtiugrhedhuhmomideitsy.where this distance

ocar nont·hoet rbIfenuemdliarbeiuncrttanisinnuegndls,igoinhustr.ctael.l

the Alarm as Installing the

far away as possible from Alarm closer than 15 feet

the furnace (4.6 meters)

will n·ot hInartmurtbhueleAnlat ramir, lbikuet mneaayr icnecirleinagsefatnhse ofrreqoupeenncwy ionfduonwwsa.nBtelodwainlagrmasir. may

prevent CO or smoke from reaching the sensors.

In ge·nerInala, rienasstawllhceoremtbeimnapteiorantuSremioskceoladnedr tChaanrb4o0n° FM(o4n.4o°xCid) eorAhlaortmters:than

· On e1v0e0ry°Fle(3v7e.l8o° fCy)o. uTrhehsoemaer,eianscliundcilnugdefinniosnh-eadiractotnicdsitaionndedbacsreamwel nsptsa.ces,

· Insiduenefinveisrhyebdeadtrtoicosm, ,uensinpseuclaiatlelydiof rpepopolrelysilneseuplawteitdh ctheeilindgoso,rppoarrcthlyeos,r and comgpalertaeglyesc.losed.

· I·n thIen hinasllencet ainr fevseteryd salreeeapsi.ngInsaerecats. Icf aynoucrlohgomthe hoapsenminugltsiptloe tshleespeingsing areacsh, ainmstbaellr.a unit in each. If a hall is more than 40 feet (12 meters) long,

i·nstaLlleassutnhitaant1e2acinhcheensd.(305 mm) away from fluorescent lights. Electrical

· At th"enotoispe"ofcfairnstin-ttoe-rsfeerceowndithflothoer steanirsso.r.

· A·t thIne b"doettaodmaoir"f tshpeabceas.emSeeent"Astvaoirids.ing Dead Air Spaces".

· For additional coverage, install Alarms in all rooms, halls, and storage aAreVaOs,IDwIhNeGre tDeEmApeDraAtuIrResSnPoArmCaEllySremain between 40° F and 100° F (4.4° C and 37.8° C). "Dead air" spaces may prevent smoke from reaching the Smoke/CO Alarm. To avoid dead air spaces, follow installation recommendations below.
On ceilings, install Smoke/CO Ala1rms as close to the center of the ceiling as possible. If this is not possible, install the Smoke/CO Alarm at least 4 inches (102 mm) from the wall or corner.

For wall mounting (if allowed by building codes), the top edge of Smoke/CO Alarms should be placed between 4 inches (102 mm) and 12 inches (305 mm) from the wall/ceiling line, below typical "dead air" spaces.

On a peaked, gabled, or cathedral ceiling, install first Smoke/CO Alarm within 3 feet (0.9 meters) of the peak of the ceiling, measured horizontally. Additional Smoke/CO Alarms may be required depending on the length, angle, etc. of the ceiling's slope. Refer to NFPA 72 for details on requirements for sloped or peaked ceilings.

H
ThTe sincg SThmscisot Too Both use,
To p
TO Do acTtoi Alar 1.
2.
If A If tFh NbaO1tT not 2 3.
3 4.
4
5 TO
6 1. 7
8 2.
3.
N
· T w 9 ·
It is im prope Smok
1
R
T ar · ·

·

OPTIONAL LOCKING

RM
S TO 17 034 O5
Inc.
n. s. ric ed
n d in s
y uits; bris-
ert nd e
arate er at s. t
es. e on. ds" o ot s. m.

SMOKE DETECTOR

RECOREMCMOEMNMDEENDDPELDACPELMACEENMT ENT SMOKSMESUOAGLKAGESREUAMSGLTSAGE,REDCMSOATSREA, DECLAAOASRRAMFELOASARS,RAMIFNNOSSDR,TACAINNOLSDLMTINCBAGOOLLMUINBNGOITUSNITS

KEY: KEY:
SMOKE ALARMS SMOKE ALARMS

SMOKE ALARM WITH SILENCSEMFOEKATEUARLEARM WITH
SILENCE FEATURE
CO ALARMS CO ALARMS

BOTH, OR COMBINATION

SMOKEB/COOTHA,LOARRMCOSMBINATION

SMOKE/CO ALARMS

Suggested locations are based on NFPA reScuogmgmesetendaloticoantsio(nNsFPaAre7b2ased on

for SmoNkFePAAlarremcosmanmdenNdFaPtAio7n2s0(NfoFrPA 72

CarbonfMoroSnmoxoikde Alarms)a. nAdlwNaFyPsA 720 for refer toCnaartbioonnaMl aonndolxoicdaelAcloadrmess). Always

before breefgeirntnoinngaatinoynainlsatnadllaloticoanl. codes

In new construction AC and AC/DC smoke alarms MUST

before beginning any installation.

be intIenrcnoenwneccotnesdtrtuocmtioenetANCFaPnAdrAecCo/mDCmsemndoakteioanlsa.rms MUST

be interconnected to meet NFPA recommendations.

·

Wwp·laahlcel/encWwpdeliaanhibllciselne/etncgtadwelillniiibelnnisneegetgnta.wolll4iinenneigetnnh.coeh4newistnahc(lel1h, 0ewth2sae(lml1,t0omth2p)emaetndomdgp)e1ae2ondfdginSe1cmh2ooefisnkSecm(3hA0oel5skaer(mm3A0msl5a)srmhfmroomsum)lsdhftrhoboeuemldthbee

· Wc·ehnetenWcreinhanssetetnparloilnaisnsssgtipabololliensn.sgtihboelenc.tehileincge, iplinlagc,eptlahceeatlahremalaasrmcloassectloosteheto the

· Icn·eieliintIchgneemireliicnethageestm.reS,ceieaenests.et"Sa,Alielnveaostti"daAlelilnvaagostitdDle4ienaaigsndtcDh4AeeiairsndSc(1hpA0eair2scSe(m1ps0"ma2cf)oemfrsro"mmmfo)orfrwreomhimneofrroewerhmtihneaefroetiwromtanhla.eltaiwonandl.l and

NcaOrbToENcna:OrFmbToooErnn:aoFmnxoyoirdlnoeaocnoxayirtdilsooemncoa,ortmkisoeamnkf,oreomkmseaukfrrreeeoamsncuohrreiednaogncoohtrhidnoeogrAootrlhtahoeremrAro.lotahbrmesrt.roubcstitoruncctioounldcokueeldpkeep

ImaFIofnrofoeysrioantbamusiImaFIoallfeurnlirosfinloeysnmahriiopantbmgtoaomiusoioalmulbSeurslinsimnilsmenmla,heiipsmgbtiooostioholm(uebkeSiesonsmce.issmelm,eu/FipismbiCrosetoehil(tekepOrcieoyisces.oismmaui/AFiprnnmlCtroleoelsayioatrpOrctnyetirtasoimthmawliAsrlnontltoleeosolsaysoarclntneletiirtaunnetihmwnlbrsslotiMSstetueososyaucmiln,oellliiltulnnaepibonburbstuiikMeSsntltueetyeaduimif,otl/lool,tslHCapbornoubteooOuikeernleemnted1ifiutAf/oo9,siHeCnnylrn7oaseiooOsote8rrimnum1di)inuAf9heiaennylae7aarsiwsotesa8vriumcedia)cnuhlheallnlosiaeartsrwsetsavoouleeceaoncruhelmtlllonlyosoitsror..stoouelfneMeonratoemhtlacoyoeinhro.n. yefnsaMsautomolheacllaeieodnhntpuyeisasoinrunmolnetlgla.eodtpueioinrnntg.

D·WoHNIenED·WxOtgRorTHeaENIemrlnEaoxOegtcgTRrlTeayeaHsEtmrld,eaoIuegfScTutslehayrtHsnityAsd,e,aIufLcSdSutsehiAmrrtnityArsyR,oaoLcdkoSoMeiemArmrt/grysRCooSr,ekooOMHcaemrrs/AaOgsCySwrl,aeUOalHcrarsmrLesAaOpyaDw:lasaUacl.rrNesmLepsaDO:asac.TnNedsBOuanETnfdinIBiuNsnEhSfeinTdIiNsAahStLetiTdcLsAEa.tLDAticLvsoE.idDAvoid

·
· ·

uWIfWkprhaStaktsgwnrehh···oiennteaoomthcieeihceuladdretsmieosaheothptrxssyneecmgtcirkeituWIfWkprhaStaktsgwonheabnrrertehhaeernoiesnnteaaouoeh)mmutholscieeus5ihcseosceuladdrretmrsemisAieoo,sfesahceehoot.hpmtraxsssfyn­lemeecamgatceepirnroekmaAeitseonheaebererstnalsedeeowrrinsayu,iueh)mundboplmtrsAuds5tecsseosrahnmrooeiesAuouho,fescceshldo.m(masiwsrfarff1c­nlsmeuais,auieepnroeumaAssebrceeo.totmgeassmnlsrsdemowrri5ihyu,ilorndobitpdpmtnnreAadtesbe"heauhbniooemsunmuta.dhoulucusldnm(laseciewrufarfe1cncsuSlisnI,uinautbcasrephdbnrarc.eo.totsemgasmarswmmtnr5eruihtalrsorT,oitdpnnee,aaaaebesdc"ashreuorbaiomshnmmta.dulruosrhluta.ntalaeceanusueiekericdSlnIoucsnaAtonbcaroepehdrnp)traare.se.ailmmemcwmtnneruptarrebaorossT,de,eeaadTaeeAsdcassrsloraifsssiohamprlraocsrwdhltah".taoelansua..seoaikaecriadstaoucsiiAon,nohierpa)twsrflaKnferebryr.ilmmeimcnpaomartrelebeeoostyhmedaleoeAdTeiAebsrnslcrrcifsssiierap,rlacepwdhc"lg.oeelolemslba..aasoapaceaestavroiihn,nhxiaowamsflrveKnofrebarsyrsiomttadomteuleeoktydhmheapl.oA2aipkeb(rnncririrtciiueurssn,odeUpeol0cilgl.seolemillbnaasattpcemtegevrcr-ohhnnoaxsoamgrvieicoaefrasnszoomownottdviuoskedddhpea.ch2mapakfuec(omniirtidauuus.srntiodUloeol0ipl,ls,teutilnmandtetcmteygCorlc-mhapnofaddesg(iic.atlefrfunzok6-esooewlnboviraieseeiddsberaeochmanafdumecosmendmsfauh.rtiulmponpda,l,tteuti,amndewbyanCarolmocerapafdde2c(nf.tlflututk6eoa-toaesotealbfrai0eoeieieisbrrseonl.asnrrodrmseoe,nmsffrhltmufmpghntIdauynt)eiaim,awenhwobanareocereasxds2scenfsvelntutareoatoaaltaafti0,oetoei-teaisrctsnl.sirhrosrmbpoe1,elrnu(frrtltmaafght6Imeuyne)aeuiar0mawetnrhsponueicsesnxdssrrelshtvemoinlanarfnetealrnaectio,toee-teiakescttdic.ihsemtebp1cneelrneuaf(ertae­aarl6mueVteaucr0egdattrtysmepninuicseeessnirusrlhtmo(trdilnafnestreke3rlnrnecssor-e,eionkeieftdoicin.tetseb)conteeiafseomoanie­dfrulcsulVtfucegdrtptaymtmeenirohrameeesseiruosttca(tradnersorek3relnts,srm-,econrieefoinintsb)noti,esomonirdfuscslfusgrpatmer,ohrame)rottcaaneroet,mecreinn,erssg,)

· In· dirIencdt isreucntligshutn.light.

· ·
·

IpIIcu1gnnn···hn0areatfr0ianiuvamnr°FseergIpIiIcu1gbesnnnnbaehn0a(ruhc3tseesatfr0ialetn7.iruvaCemnrw.°dFsie.ergnnOi8beshnbaetfa(°uhcee3tsesatoCletsrt7.rCeirew.irdt)ic.,n.neO8shsttldfTam°ei,eekatohCmsruteaoiereirt)ncrpk,.esnessiteelednTmaeei,krshsamfaaueaoru.erotrnrpkluseInecamineeenraaeetesresssafiaaerlrdu.iierotnricsnlueaIcamtgonccrasceterseloshfiuecralpdliiieddnnicsanonaetggneosoccscrrlrnohcftoulcathpyollirhddonaneonaoiegnegsno-nsprasrnctoteelthhiu4yolrnrhnoecel0nasaoigon°w-otnospenaFstrepiehdiusd4nrne(n.cel0di4astcnoi°.owotooei4ennFwrnpii°dlsdgniesCe(n.dis4t.dcng)i.ooBeti4sonocwni°,llrgroiesCatnpshwh.dwgo)oeBtisronloctc,ltsrsgroehatepphwhreawnoaoestiisrcnrlht,citsesgnameahepsngrneana,adstiyscrh,ienamasngna,dy

· L"n·eosissL"etnhe"oascisnsaetn1h"2aincnitanen1crh2fieneirtsneec(rw3hfe0eitr5she (mtw3h0miet5h)smtaehwnmesao)syrae.fwnrosaomyr.ffrloumoreflsucoernetscligenhttsl.igEhltesc.tEricleacltrical

· In· "deInad"daeiar"dsapiar"cesps.aSceese. "SAeveoi"dAinvgoidDienagdDAeiardSpAaircSeps"a.ces".

AVOAIDVIONIGDIDNEGADDEAAIDR ASIPRACSPEASCES T"Do eaavT"doDoiadeaiarvd"doesiaadpdiard"caeesiarpsdsampcaaeaircsyesmppsr,aaefcyvoeelplsnor,twefvsoeimlnlnosotwtkaselimlnafsortoitkoamenllafrrrteeoiocamnocmhrreienmcagocemhtnhidnmeagetSitnomhdneoasktSbieome/nCloosOkwbe.eA/ClloaOwrm.A.larm. (pO1on0s2sci(pOmeb1oinl0lmeis2n.sc)gIimefbfrsioltlm,ehimni.i)nsgIfsftrsihtosta,hemlniilnswoSsttiahtmsalpellnoolowokSsretasmc/ilpblCoooolrOeksnre,secA/iirnbCo.laslrOertna,meAlilrns.ltasharteamsllScstlmohaessoekScetlmoo/CsoteOhkeetoA/cCltaeOhrnemtAecrlaaetornmflteetahrasetotflce4teahiisnleitncchg4eeiaisnlisnchgeass fAFroolamrrmwfFAtrshaoolaelmsrlrhmwwmotsahauolellsluld/hcnwmobetauiioelnlillund/gpcnglbea(tiliicefilnnieangpedlgll,oa(biblcwfieneeaeteldlwodl,owebbwbeeeytentylwodbp4weuibceiinlyatdnyclbiphn4"uidegciisenladcacl(io1dnh"dd0egae2seicsar(m"o)1d,d0smtaehp2)isearma")c,tneosmtdhpsp).ea1aec2tndeodgispne.c1eh2odefgisnSec(m3ho0eof 5skSe(mm3/C0mo5Ok)em/CmO) AwOseltdoinctdhp.aiieotneAwOsidofptldo3incntetodhhp.aafarieieeoltnkipedfSopce3etntemedoha(aaif0,rleokeilk.ngepke9Scegdaeetmed'm/ba(siCc0,loklieeen.sgOek9tidlgealdeoi',nAmr/bpssCcgolleae)eessOr.rtoidl.melocRif,Anrpassetgolheta)fsrhmee.ro.mercRfapdtasyetoehrtfaamhbeeNkleeraFpcdtoyrPoeeerfaAbaiqNtlklehiun7Fceiorr2gPeeefc,Aqidfteloihiunni7drleisirg2nedetca,pgedfeloi,etlniadrnmlfsiiienddlrtsesapgienatleo,tlgsaSnnmfuiidmolrrsresineenoatodqgsktSnhuuehomeir/rroneCeeolrdeqmiOtkznhueohegeiA/rnontCellhtrtaemasiO,zrnlmolaefgyoAnnn.trlhgttaas,lrelmalfy,on.rgle,

HOWHOTWO ITNOSTINASLTLATLHLISTHAILSAARLMARM
sccTteehaiiilrlsiitnnisccTngcgtegehoaoii.oilmrlsiritnrniwnbgcgwgioanoa.olmalrlrlat.wbiwsoIiatnnaolaillsulSat.tisnlmoIitnonooeitsukdSatenlmibnt/oaeCoetlbkdOoalewebt/At.aeColRlbapOoelrwemdaAt.deolRwavp"eirWcamdaesdeh.wvde"YireWcaoesesuhTi.godemYnreoIeuensusdsTitgotmatinnolIuelnssbdTtsathtelatilinoslmtlshAbTtoiasheluallidsrnmtmehtAeovi"sliduacbdrneoemetfnoevo"nidrctbehetoehefnoeonrtehthee

PARTPSAORFTSTHOIFS TSHMISOKSEM/OCKOEA/CLAORAMLARM

1 Te1st/STeilsetn/cSeileBnuctetoBnutton

2 3 4

BPC234oaOwttAeeBPCrlrayo/aOSrwtCmtmAeeorloLrmay/EkSrpCmeDmaoAroLmtlEkmaperDemaAnrttlLmaEremDntLED

ToolsToyoolus wyoilul nweielldn: efpleaedtnh:cepiflal,aeddtnhrsceiclilla,rweddwirtsihdcllrr3wiev/wi1ethr6d,"rh3ivoa/1ermr6,5m"mhoaemrmr.5mdmreimlrl.bditr,ill bit,

· saDinon·ygntlhaeosDiin-ntonsygcgttnoalheeotnili-ntsonsgecentoacteutontlinsonttiehnehticitstusohtnuauttihnthtniiciitststhatumaounntnnaaiciotytnattymponbrnoaeeaotyvnhlteiypenbnrrkoeteeatvihdltleiaenfnrtrrkomoteamiodtloatfrhrtwromoeaomruoroxdtkrhiweilneiavaogruirrcyxdkpeieirldsniova.egiprcCvyepieocrrdslneoy.e.np.CvIeetioccrilnetsyin.n.aIegtcitsinag · uiaDnnro·goituncsnauiDohnadrntaogorimietjunnucsnsbionhnatdetcaatrretmieljnilunaosbtindnnnhtecedatibrsetdlilponoautfrxdnnhoneeedirivbstsdeiponoucnfrxsvonaeteterinvtatsrheilonplacenavsrnatteuetintaovenrhlenlpilaeetanrnoctfeturitvoveonsreeinlmmicertnacoofjtaurltvkosrlnjeaeiummccrrnaftmojrciaulooktilnjnnimeauocgrnbnftm.rrciooeoObtixnanimoonecgxnlbshy.r.o.eiObAAnxaongiCecrxlshytc.p.hiuAnAoerigCwrrsetecepnhrunoteersswdr-seeenrntessd-

IFAfelyaaortmuuFAIfrelweyataoosratm"uunthrtsweteetosaocm"nttlhistoooeeuctnocknm.ttlitiooonhucngekn. bbttiarnhatgetcebkbrearyatt,ctcepokrlmeyetap,csapoerlmetrmapesaeaerndttrmt,ehoeaerndt"lot,Ohocpekrt"iltooOhncepaktSlitoLmhnoeoacSklkeLmin/oCogckOkein/CgO 1. Hs1eo.pldaHsrbaeoatpelsdaeirtbaffaitrreosmemitlyffitrrahomnemdlyuttnahwineti.dsuttntwhitie.stmthoeunmtionugnbtirnagckbertacckoeutncteorucnlotecrkcwloiscekw(leisfte) (tloeft) to 2. Himn2oso.iluddneHimtnthioosonelifugddtmnehstthoeliooneuftmgnmtihstosioenluoaugnltmintgibitsonnirnugaeagncdlsitgkbliionennrtgtaestcdahs(kgevlioenae1ttirsnt2tahisc(gevotaae't1lcihrna2tleoisnccotcdak'telchhiaplleooinnocrcdgsikzeitoh(ipiolonoinorntrgsaiwzialto(ainmoonldlrn)toawstualroananmltctdli)honeseutgraon)av.rtcoteihneuretgniac)dv.raoelturhtneicdalthe 3. Pm3uo.tutnhPmteuiontuugtnnhhitteionwlugehnshei.torewlehiste.wreonit'twgoent'tcgoevterceodvewreitdh dwuitsht dwuhsetnwyhoeundyroilul tdherill the 4. Uo4us.tinlingUoeuasstinl3ying/o1eua6s"t3yra(/o51cu6em"tdrma.(5c)emddrm.ill)bditr,illdbriiltl,adhriolllae hthorloeutghhrotuhgehctehnetecreonftethr eofotvhael oval 5. tIhnh5ose.leeyrstItha.nhrotTseehlaeeyefprsltaup.trstlThehahaeesfpwtlsuipctcisltharhhseescwtwtsrhicecietawrhsnecccwtaerhhneileoaicwnnrhcgscoaehongrilsoircenrhn(wgsinotalogyrltslreh.wnw(eiinttalphyltllha.awseihttiphaclmaabsmahtgiacemrw,bmiiafthgneresw,cciifetrhesnwsesasccr)eryeis,nwsutaosnr)tytiih,lneutonttihl e 6. L6in.e tLhineemthoeunmtionugnbtirnagckbertacukpeot vuepr othveerptlhaestipclassctricewscarnecwhaonrsc.hors. 7. Ss7lco.rteswSsulcostrhitensewgumtsthhioneeugntmwtthionoeugsntcbwtrirnoeagwcskscberrpetarwctooksvetipdht reetoodcv.tiedhileeindcg.eoilirnwgaollr twhraollutghhrotuhgehmthoeunmtionugnting 8. bt"BbtAtcnhhh-8aoaaAe"eee.ntttfttotbnutbfeeoeurBAtocbt"nbtanrrrehhhrl-yyaat"otaaiAlem"ttyeee-canttt.erfwc.ttoektibtn"ibrutfMeeonontieiecuraotaenrrramIeshrtelaayyft"ctslil,metytsitc-pathve.rtwccirh.(enkhitat"eiiiroMonhnnnteeieciseratenamIsgcdtbheteaf"cbmsl,tel,asr+ittupethtvatthirch(thetn"hdrateiitothhetnnmeenetseerehtneegcdtbteore"debimA.rtynl,ar+tuinue)taet"Mhlatthtea"npddri+twtshetnlmentreisaohet"teemtootoartedweoiAr.oycnafruin)(ee"Melnhntat2ttanpdoi+wshhrnld)r.isao"teemotoatwoocafr(eenhtn2ttohhrd).ee NOTEN:OrTTeThhcEeee:iuGvrTTeniRhhnciteeEgemEiuGbvNnaiaRniyttEgLtebmEigbreNayhaeyttppLtfeboilbgarewyrhseieehtpprfef.ollybsawrswaieehbhrfe.loeysunwatybheooevuuentrinyyeso6vtuae0lrilnystseh6tcea0ollbnstaedhtcsetoewbrniaehdtsest.enwTrithehhisees.nuiTstnhhniitesoirsuismnniatol.irsmal.

TwhaernbTwsahaytertoenbursaytythdtoeeourouytrnhdiwetoiwoullrnirliwletnsiwliolsitrtlleocnsplioosetstriaocntplgeoesuwriannittlgeehsouwsunittblehbasoatsuttettberbaireaitesttestaer.irreeiesisna.sretailnlesdta. lTlehdis. This

9.

Ausmtmh9nptooet.a,auupatcnnusAusmtmlhahttrnptiinirooennttna,mahuuggtptatceohnn'usslbbhaettrSpiirrnirbnntnaabmmlhaaggtcctaeochs'okkssbbeeekeeSperr.bettaawblm..aac/ccaCiWLcslotkkoshieeOkeenceh.ettetwke..hAc/wnCiuWLelltoaihpiOgsncghremuetktuehAhiwnid(uederltaeiipoeggsgrgssehmuttuuhhatioid(i)deerdrtneeiuoegegsnsthsltiuhtnhatiooie)leedrnneiudtentslihtnioelenidt

NsytoonOuaaTpdcENsytpjoaonu:eOnausOadTtpdrncEooptjcahu:nteenaesOtdotttrneahoottlcheitnhtgehaeteSneotteammmhStleitheoogmhenkSuneotenmmm.kS/tCeoieomnn/kuOgCoten.kO/AbtCierlnaa/AOgCrclmaOkAbrerlmiaaAts,rclmakremits,

10. TTee1ss0tt.intTThgeee"ssttSfiontmhrgeo"dkeSfoetmar/CiodlsOke.etaA/CillasOr.mA.laSreme. "SWeeee"kWlyeekly

···aTRrheEisaobCIoaTtsffoGhue···aTRinfurlnffteruesnrhdetihcecUsastuEiiw/ueteseihnosidaobCIoaTtsfnthfLoGheSruetisnsfeuriatlnaahfftter.uesnhmigudetiAhtmcstecUosasitTtuieprw/muetaeyoeliiehfnospbiedRmpntchSkLsmeStrtmalesseliathheaaheteytm.hmisgeuAtemmest/ea,otiTtMtetnprsCmohdayoyhliaefpbSeteoRmpkeicOSidkonsmatnnmadlenmleAhheeteyredmtStgseac/eeeAme/.a,sotCMttnmsmesCIsohdclyhilAaykSegaNto)OkaeiOy.idooaaneanrnndnmmenAcomgkred/tSTtgeAacw/eCnaeAu.eseoaCdmsmeIslnoclei/lAOEabyykgaNm)OCtaty.eoaatreehornmaomncoNbOkAmugk/cefTeAlwCna.useeseaolbdcalnouaAAote/OEabymelmcrCttnteeltrdmehoablaoNmeiaaNblOekAuocteefrles.ns.asemsolbuacaCutaAAnotumcssmeoclcr.nteeldsmtoioablEnNNeiaadalekeotneomregs.nsiaeedmtunantCtanepvo.ucysstmocc.mepeersoFtoioeEneNanrdakeuonoimisgvnaieatedurtlnnstolaanepvswoo.ythcemitmcepeerdwoFeeodoeaenrouodiurwisvun-aatuanmkrlssfolnanabisiwrtoehermnaeihwtctedywheodeog(ne;eosadorurweuug-,oanpmnkalsxffnedacbilirttsraerdncaehewontlyceheevg(nped;tpsaataloarseuougy,eotpnanasclxfrsedrcltsracvileeudlcvseaonylacorreueveip.drtpsbactmmalmasiCouyentludnasocerspsrs'ouicvileseurl,rvsa,tyunmaotrrurbsei.rs,rstubcmtmmeeiouCodnicludtopnreltfphss'uvtouitsr,luirot,teeuasonmthrbsers,rncttunteeeoudoetdicstrpnsrltf.heuvtt.luiot.eeasohernctnedetsrs.e..

OPTOIPOTNIAOLNALLOCLKOICNKGINFGEAFTEUARTEUSRES
The optional locking features are designed to discourage unauthorized removal of the batteries or Alarm. It is not necessary to activate the locks in

309

RE · Ch You bat are ·
·
·
Act me rep bat "ch To Ala 1. 2. 3.
4.
IF
WH
Typ Ca
Sm
IF
I
Ac (CO you IF T 1. 2.
3.
4.
NO tion in a hea and equ
IF
RE

SMOKE DETECTOR

since they may damage the unit.

NO

· If the Smoke/CO Alarm becomes contaminated by excessive dirt, dust

tio

and/or grime, and cannot be cleaned to avoid unwanted alarms, replace

in

the unit immediately.

he

Continued...

an

eq

OPTIONAL LOCKING FEATURES

The optional locking features are designed to discourage unauthorized removal of the batteries or Alarm. It is not necessary to activate the locks in single-family households where unauthorized battery or Alarm removal is not a concern.

IF
RE

This Smoke/CO Alarm has two separate locking features: one to lock the battery compartment, and the other to lock the Smoke/CO Alarm to the mounting bracket. You can choose to use either feature independently, or use them both.

·

Tools you will need: · Needle-nose pliers or utility knife · Standard flathead screwdriver.

Both locking features use locking pins, which are molded into the mounting bracket. Depending on which locking features you

use, remove one or both pins from the mounting bracket using needle-nose pliers or a utility knife.

·

To permanently remove either locking pin, insert a flathead screwdriver between the locking pin and the lock, and pry the pin out of the lock.

TO LOCK THE BATTERY COMPARTMENT

· TO UNLOCK THE BATTERY COMPARTMENT
W

Do not lock the battery compartment until you activate the battery and test the Smoke/CO Alarm.
1. Install the batteries before attaching the Alarm to the bracket. Insert the two (2) AA batteries (included) into the battery compartment. Match the terminals on the end of the battery with the terminals on the unit. Match "+" to "+" and "-" to "-." If the batteries are not fully inserted, the unit cannot receive battery power.

1. Remove the Smoke/CO Alarm from the mounting bracket. If the unit is locked to the bracket, see the section "To Unlock the Mounting Bracket."
2. Insert a flathead screwdriver under the head of the locking pin, and gently pry it out of the battery compartment lock. (If you plan to relock the battery compartment, save the locking pin.)

2. Push and hold Test/Silence button until the alarm sounds.

3. To relock the battery compartment, close the battery door and reinsert locking pin in lock.

If the unit does not alarm during testing, DO

4. Reattach the Smoke/CO Alarm to the

NOT lock the battery compartment! Install new

mounting bracket.

Al

batteries and test again. If the unit still does

Al

not alarm, replace it immediately.

3. Using needle-nose pliers or a utility knife,

U

detach one locking pin from the mounting

bracket.
4. Push the locking pin through the hole near the battery door latch on the back of the Smoke/CO Alarm.

When replacing the batteries, always test the Smoke/CO Alarm before relocking the battery compartment.

Ne ba
Th an It

TO LOCK THE MOUNTING BRACKET

1. Using needle-nose pliers or a utility knife, detach one locking pin from the mounting bracket.

s

g

2. Insert the locking pin through the hole

on the back of the Smoke/CO Alarm as

shown in the diagram.

3. When you attach the Smoke/CO Alarm to the mounting bracket, the locking pin's head will fit into a notch on the bracket.

Th

TO UNLOCK THE MOUNTING BRACKET

Pr

Af

m 1. Insert a flathead screwdriver into the

rectangular cut-out on the mounting

W

bracket nearest to the locking pin.

Th

up

op

2. Pry the Smoke/CO Alarm away from the bracket by pushing up on the screwdriver and turning the Smoke/CO Alarm counterclockwise (left) at the same time.

If co wi

S

)

Th up

WEEKLY TESTING

On

co

· NEVER use an open flame of any kind to test this unit. You might accidentally damage or set fire to the unit or to your home. The

You can test this Smoke/CO Alarm: Press and hold the Test/Silence button 3-5 seconds until unit starts to alarm.

th po

built-in test switch accurately tests the unit's operation as required by Underwriters Laboratories, Inc. (UL). NEVER use vehicle exhaust!

During testing, you will see and hear the following sequence:

To go

,

Exhaust may cause permanent damage and voids your warranty.

· The Horn will sound 3 beeps, pause, 3 beeps. The Power/Smoke LED

un

· DO NOT stand close to the Alarm when the horn is sounding.

flashes Red and the CO LED will be Off.

Exposure at close range may be harmful to your hearing. When testing, step away when horn starts sounding.

· Next the Horn will sound 4 beeps, pause, 4 beeps. The Power/Smoke

S

LED will be Off and the CO LED flashes Red.

Th

If the unit does not alarm, make sure the batteries are correctly installed,

up

It is important to test this unit every week to make sure it is working properly. Using the test button is the recommended way to test this

and test again. If the unit still does not alarm, replace it immediately.

Te

si

Smoke/CO Alarm.

Af

2

3

310

for use. Test the Smoke/CO Alarm. Never use water, cleaners or solvents since they may damage the unit.

· If the Smoke/CO Alarm becomes contaminated by excessive dirt, dust

and/or grime, and cannot be cleaned to avoid unwanted alarms, replace

the unit immediately.

Continued...

CKING FER·AEGTRUeULloARcRaEteMStAhIeNuTnEitNiAf iNt CsoEu,nCdosnfrteinquueednt unwanted alarms. See "Where This
mheneootvaalcoofntcheernbC.ahttoeAorlisaeirsnmgoSrahAroelauprlldmacN.eIomttieBsnentoIbntasntttaeelclreyed:s"sfaorrydteotaailcst.ivate the locks in
y compartmentY, oaunrdStmheooketh/CerOtoAloacrmk trheequires two standard AA batteries. The following e independentlby,aottreurisees tahremacbcoetpht.able as replacements: Duracell MN1500. These batteries ad screwdrivear.re available at many local retail stores.

cket. Depending on which locking features you

ers or a utility k·nifeA. lways use the exact batteries specified by this User's Manual.

DO NOT use rechargeable batteries. Clean the battery contacts and

also those of the device prior to battery installation. Install batteries

tween the lockingcoprirnecatnlyd wthitehlorecgka, radndtopproyltahreityp(in+ oanudt o-f).the lock.

· Please dispose of or recycle used batteries properly, following any

TO

UNLoloOrcCraelKcryeTcglHuinElagtBioorAngTsa.TnCEizoRantYisouCnltOtyoMofuiPnrAdloRacTnaMlewlEeacNstTrtoenmicasnraegceymcleinngt

authority facility in

your area. DO NOT DISPOSE OF BATTERIES IN FIRE. BATTERIES 1. RemoMvAeYthEeXSPmLOokDeE/COORALlaErAmKf.rom the
mounting bracket. If the unit is locked to

the bracket, see the section "To Unlock

th·e MKoeuenptinbgatBteraryckoeut.t"of reach of children. In the event a battery is

swallowed, immediately contact your poison control center, your

a ng

2.

Ihnesaedraptoshafysftslheaiecrtihiolaeounacs,dkoiinsnrcgjutrhepryewindm,NraaiavntyediorongucaencnldutBelry.ratptthreeyryit

Ingestion out

hotline

at

202-625-3333

of the battery compartment lock. (If you plan

-

ltoomAccreketniulnotagcilnkbpwaitnhth.te)eicrbhyasittteeirsrvyiicncesotlamiflelpeaddr.etmpAelelnntdht,essobanavtettheterhieeSsmsopkeec/iCfieOd

Alarm and above are

the environacceptable

d

replacement batteries for this unit. Regardless of the manufacturer's suggested

3. Tboartetelorycklifteh,eyboauttMerUyScTomreppalarctme ethnet, bcalotsteery immediately once the unit starts th"cehbiraptitnegry" (dthoeor"laonwd breaitntesreyrtwloacrnkiinngg"p).in in

lock.

To replace the batteries (without removing

Alarm from the ceiling or wall):

o

4. Rm12eo..autntOPatrpicenehsgnstbhttrheaaebcSskbmeAaott.takener/ydCcBOoamAslpasarhmrtomwtoenntithn.ethe diagram

and remove each battery.

3. Insert the new batteries, making sure they snap completely into the battery compartment.

AB

Match the terminals on the ends of the

When rebpalattceirniegstwheithbtahtetetreierms,inaallwsaoynsttheesut nit.

tbhaettSe4rm.yocCtkholeeom/suCpenOaitthrAtbemlyaberpanmrttete.sbrsyeinfcogormethpreeaTlroetmcstke/iSnntigl,eantnhcdee

then test button.

TO UIFNLYOCOKUTRHESMMOOUKNTEIN/CG OBRAACLKAERTM SOUNDS

WHAT TO DO FIRST­IDENTIFY THE TYPE OF ALARM

1. IrneTscyetparetngaouffllaaArtlhaceruamtd-osuctroewn dthrievemr oinutnotitnhge bCraacrkbeotnnMeaorneosxt itdoeth(CeOlo) cking pin.

What You See and Hear CO LED: Flashes Red

Horn: 4 beeps, pause, 4 beeps, pause

Power/Smoke LED: Off 2. Pry the Smoke/CO Alarm away from the
bSramcokekteby pushing up on the screwdrivePr oawnder/Smoke LED: Flashes Red

turning the Smoke/CO Alarm counterclocHkowrins:e3 beeps, pause, 3 beeps, pause

(left) at the same time.

CO LED: Off

IF THE CO ALARM SOUNDS

"ALARM-MOVE TO FRESH AIR"

LaYl.

TESTINGIf

you hear everyone

the CO alarm horn and the CO red light is flashing, move to a source of fresh air. DO NOT remove the batteries!

You can test this Smoke/CO Alarm: Press and hold the Test/Silence button 3-5 seAccotnudastiounntoil fuynoitusrtaCrOts Atolaarlmarmin.dicates the presence of carbon monoxide During(CtOes) twinhgi,cyhoucawnilkl silel eyoaun.dInheoatrhtehrewfoolrlodws,inwghseenquyeonucreC: O Alarm sounds,
· yTohuemHuosrtnnwoitllisgonuonrde 3it!beeps, pause, 3 beeps. The Power/Smoke LED IFflaTsHhEesCROedALanAdRtMheSCIGONLAELDSwOiUll NbeDSO:ff.

· 1N. exOtptehreatHeotrhne wTeilsl ts/oSuilnendc4e bbeuettposn,.pause, 4 beeps. The Power/Smoke 2L. EDCawllilylobuer Oemff earngdenthcey sCeOrvLicEeDs, ffliareshdeespRaretdm.ent or 911. Write down the
Iafntdheteusnti_nta_ugd_mao_ib_en_se._rIn_fo_otf_hty_eao_l_uua_rnr_mlio_t_,cs_amt_ill_ale_kmd_eo_ee_srg_su_ern_ne_oc_ttyh_aes_le_ab_rrva_mi_tct_,ee_rr_ehi_eep_srlea_a:_c_ree_i_tc_oi_mr_r_me_c_et_dl_yia_i_tne_sl_yt_a._ll_e_d_,____ 3. Immediately move to fresh air--outdoors or by an open door or window. Do a head count to check that all persons are accounted for. Do not reenter the premises, or move away from the open door or window until the emergency services responde3r has arrived, the premises have been aired out, and your CO Alarm remains in its normal condition.

4. After following steps 1-3, if your CO Alarm reactivates within a 24-hour

period, repeat steps 1-3 and call a qualified appliance technician to inves-

tigate for sources of CO from fuel-burning equipment and appliances, and

inspect for proper operation of this equipment. If problems are identified

e

during this inspection have the equipment serviced immediately. Note any

combustion equipment not inspected by the technician, and consult the

m anufacturers' instructions, or contact the manufacturers directly, for more

information about CO safety and this equipment. Make sure that motor

vehicles are not, and have not, been operating in an attached garage or

adjacent to the residence. Write down the number of a qualified appliance

technician here:

s

__________________________________________________________________

NOTE: A qualified appliance tech nician is defined as "a person, firm, corpora-

tion, or company that either in person or through a representative, is engaged

in and responsible for the installation, testing, servicing, or replacement of

heating, ventilation, air conditioning (HVAC) equipment, combustion appliances

...

and equipment, and/or gas fireplaces or other decorative combustion

equipment."

IF THE SMOKE ALARM SOUNDS

NOTE: A qualified appliance tech nician is defined as "a person, firm, corporation, or company that either in person or through a representative, is engaged
SMOKE DETECTOR in and responsible for the installation, testing, servicing, or replacement of
heating, ventilation, air conditioning (HVAC) equipment, combustion appliances and equipment, and/or gas fireplaces or other decorative combustion equipment."
WHAT YOU NEED TO KNOW ABOUT CO

IF TWHEHASTMIOSKCEOA?LARM SOUNDS

RESPCOONiDsIaNnGinTvOisiAbNle,AoLdAoRrleMss, tasteless gas produced when fossil fuels do not burn completely, or are exposed to heat (usually fire). Electrical appliances

· IoaftftTkttyeahehprneeoipcstsouiaeoentllnneyfiuet.nd,eNatoiallaEsanlnVrldiyomnEtcpdRsplrauoarindopgngdeandeu:norceyWroeeo.uouCaosndaOsyr,i.etcauonlaaaotrlit,moctne.hsItaghtrincanootgarriletn,hqgoeuilti,uhrneneasitat,uyliaortaruilmsrgiwammsa,amrgyneairdnsegiosalutiyneloteu,in

inCjuormy morondeaaptphl.iances are often sources of CO. If they are not properly main-

·

NRAanhcCtleeaadaomvOirnnmemroerie"esvdtmrtsri,aoenaowamgprsrvei"etotebahoCvsilapmeadOtytdpaateodihnrnnruoeegisrepudeibsdenpriraewnrdnloy.tsoiattsuevwnealeractbinettethiltidoseoialnsantaf,tr.lhteoashIodmernem,masolataeeer(lsdacbamraadawmaurteioltsnfesupedmrondeoyocnwirbotteisaoypc,eneacwan,rnoneaiCnnodrtOgodekoytdoinltewsheSgvefefmenorisclsrmswoieefkeconaeaasktn./tnmehC"t,reohAOiersekiprete-crto,qi.g)ou.hfiictn"kgly.

smSYokMe PawTaOyMfroSmOthFeCunOit.PTOheISalOarNmINwGill reset automatically.

· IfTtheesuensiyt malpatrommssgaeret erevlearteydontoe oCuOt PoOf tISheONhoINuGseainmdmsheoduialdteblye. discussed

WHATwiTthOADLOL hINouCseAhSoEldOmFeFmIRbEers. · MDoildn'Et xppaonsicu;rset:aSylicgahltmh.eFaodlalocwhey, onuaur sfaema,ilvyoemsictianpg,efaptliagnu.e ("flu-like" symptoms).

· MGeedt iouumt oEfxtphoeshuoreu:sTeharosbqbuinicgkhlyeaadsapcohses,idbrleo.wDsionne'stss,tcoopntfousgioent, fast heart rate.

EdxretrsesmedeoErxcpoollseucrtea:nCyothninvugl.sions, unconsciousness, heart and lung failure.

· EFxepeol sduoroerstowCitahrbthoenbMaocknooxfidyeoucrahnacnadubseefborreainopdeanminaggeth,edmea. th.

If a door is cool, open it slowly. Don't open a hot door. Keep doors

Tahnids wCOindAolawrsmcmloesaesdu, ruensleesxspyoosuurme tuostCeOscoavpeer tthimroeu. gIthatlhaermms. if CO levels are · eCxotrveemr eyloyuhr ingohsien ansdhomrot uptehriwodithofaticmloet,ho(rprifefCeOrablelyvedlsamrepa)c. h a certain mini-
mTaukme sohvoert,aslhoanlglopwerbioredatohfst.ime. The CO Alarm generally sounds an alarm

· bMeefoerteatthyeoounrspeltaonfnseydmmpetoemtinsginpalavceeraoguet,shideealtyhoyuar dhuoltms.eW, hy is this important? Banecdaduoseayhoeuadneceoduntot tboemwaakrenesduroef eavpeorytbenotdiayl gCoOt opurot bsalefmelyw. hile you can still
· rtrGCeheaaaaivcctleltttthyhwineoeeyutlFilrmaierareeend.oDdnIunroeegtpmshafseart,etonmtlyhieneexrgnneittpwytaohoesrelutl,esrbdbonuouacitnlmdabsiaenees.gcspoooomrfsgeCseiOdbtilseheoexfrlrppioeo.mnsAtuelosrdueo,ta,svnyididoceutci.nmagnscmnhoaildylorbennegeaarnwdare · pNeetvsemr gayo bbeacthkeinfsirisdteaaffebcutrendin. gThbeuialdvienrgagfoerhaenaylthreyaasodnu.lt might not feel any

· sCyomnptatocmt ysowurhFenirethDeeCpaOrtAmlaernmt fsoor uidnedass. Honowmeavkeirn,gpeyouprlehwomithe csaarfdeira. c or respiratory problems, infants, unborn babies, pregnant mothers, or elderly

people can be more quickly and severely affected by CO. If you experience AlarmesvehnamveildvasryiomupstolimmsitoaftiConOsp. Soieseon"iGnge,nceoranlsuLlitmyiotautriodnosctoorf iSmmmoekdeia/CteOly! Alarms" for details.
FINDING THE SOURCE OF CO AFTER AN ALARM

USINCtoGalrobcToanHtemEtohSneoIsLxoiEduerNciesCoaEfnCoFOdEoaArflteTesrUsa,RninEavilSsairbmle.

gas, which often makes it difficult These are a few of the factors that

can make it difficult to locate sources of CO:

Never rem·ovHeotuhesebwatetellrvieesntiolaqteudiebt eafnoruenwthaenitnevdesatlaigramto. rRaermriovevsin.g the

batteries ·disPabrolebsletmhecaaluarsmedabnyd "rebmacokvdersafytoinugr."protection.

The and

Scoilerrnecc·et

tFhTeeraaptnursroeibeilnsetminC.teODnodpnerodobttluoesmteemtchpaeouSrsaielredilnycbseyileFsnepcaeetuctrihaeelinchioercmrnuemwrgshetilanecnyycoesusit.uidaetniotnifys.

It will BnoetccaoursrecCt aOCmOapyrodbislesmipaotreebxytintghueisthimaefiaren. investigator arrives, it may be diffi-

TPhreesSspcitlehuanelytcTtefoeosFrlteo/aaScntiaulyetrenecctcaeharebbnuostteontmoumnrpcoooernnaootrhfilxyeCidqaOeula.ieriBmnt RvacenKosuvtBneigrwraafaontnirdotaesntd, olIeanralacssr.tmes3r-hvf5oiacrslelseenccvooaentrldlab.lse.moinbultiegsa.ted to

After tPheOTTesEt/NSilTenIcAeLbuSttOonUisRreCleEasSedO, tFhe CReOd LIEND TblHinkEs dHuOrinMg tEhe silence

modeF. uel-burning appliances like:

WhenfpirotehrptealabSclmee,ohgekaaesteAkrli,atcgrhmaesniosrraSwnilgoeeondcoerbdcuornoikntWgoph,en the CO Alarm is Silenced

The SgmaoskeclAotlahrems wdrilyl erer.main silent for The CO alarm will remain silent for

cwuoIfoppitlnehlttrgeoianocDcvost1uiemloorb5eaonnracsomgmr.tcrokgtakpiaoednecgiieudpihnknetdaeteeccods,dsrohe,lanoreiahmltoaarhdsetrkeeniiamsnci­netnclts.yehgeroueaexontfrccuefnpdhihrdceeenia­mcivneontiticonnnergeegdteny.rovw,repbmanipltaoteeilcnrkogher:edfauApslutotpofeaetrterrt,etorns4t4oiamumllnyiindnduiuntategenssga,.egifraoCiunOs.

levels remain the horn will

Improper use of appliance/device:
SILEionNpaeCnraIetNinnGcgloaTsbeHdarEabreeLcauO(eliWkgerilaBl ogAraTvraeTghEeicRloerY WARNING
This ssiclerneceenefdeaptuorrechc)a. n temporarily quiet the low battery warning "chirp" for up toT8rahnosuiresn.tPCreOssPtrhoebTleemsts/S: i"letrnacnesibenutt"toonr oonn-tahgeaainla-romff-caogvaeinr. CO problems can Oncebtehecalouwsebdabttyeroyuwtdaornoirncgo"ncdhitiriopn" ssialenndcoetfheeartusrpeeicsiaalcctirvcautemds,tathneceusn.it continTuheesftoollfolawsihngthceoGnrdeietinonligshctaonncreesaulmt iinnuttreafnosrie8nhtoCuOrs.sAitfutearti8onhso:urs, pthoeslsoi1wb.leb;cEatoxthtnceidesrysitusi"onicvniehtsiwrssppui"liclllwahngioalletsr:oeosrpureemrvaeet.resReweviptehlanotciunetgtbhoaeftftbueaerylttaeppropiewlisaenarc!sessocoanusaesd by outdoor gTuonoitdinsetooaucTnte··idvssat tWtN"Mheceeiohntgdhivdareepitsdin"vaitfreoneepndapcicpttrtieueeohsrsneaes(u:lacmornPoweidrlnded/ubo/sithfasrefutev)tt.mreheerleinoydtcTiwaaeitilaysr,rtrwe/niSnsiintcuilhgellutniednwcxgiinetlelgfbrnroehudmsitegutdohmtnh,peegaeu(gruLisosaEteidynDso.wffTblianehesdxetwhshue.aensHueisntaetnawcfvdayilylcnlsae.isr)i.n
· Several appliances running at the same time competing for limited
SILENCINfrGeshTaHir.E END OF LIFE SIGNAL
This silen·ceVfeenattupriepecacnontenmecptoiornarsilyvibqruaietint gthleooEsnedfroofmLifcelowthaersnidngrye"crsh,irfpu"rnfaocres, or up to 2 daysw. aYtoeur hceaantesrisle.nce the End of Life warning "chirp" by pressing the Test/Silen·ceObbusttrounc.tiTohnes hinoronr wunilcl ocnhvirepn,taiocnkanlovwelnetdpgiipneg dtheastigtnhse wEhnidchofcaLnifeamplify silence featuthree haabsovbeeesnituaacttioivnast.ed.

After 2a.ppEroxxteimndaetdelyop2edraatyiosn, tohfeuEnvnednotefdLfifueel"cbhuirrnpin"gwdilel vreicseusm(rea.nge, oven, fireplace).

3. Temperature inversions, which4 can trap exhaust close to the ground. 4. Car idling in an open or closed attached garage, or near a home.

These conditions are dangerous because they can trap exhaust in your home. Since these conditions can come and go, they are also hard to recreate during a CO investigation.

HOW CAN I PROTECT MY FAMILY FROM CO POISONING?
A CO Alarm is an excellent means of protection. It monitors the air and sounds a loud alarm before Carbon Monoxide levels become threatening for average, healthy adults.
A CO Alarm is not a substitute for proper maintenance of home appliances.
To help prevent CO problems and reduce the risk of CO poisoning:
· Clean chimneys and flues yearly. Keep them free of debris, leaves, and nests for proper air flow. Also, have a professional check for rust and corrosion, cracks, or separations. These conditions can prevent proper air movement and cause backdrafting. Never "cap" or cover a chimney in any way that would block air flow.
311 · Test and maintain all fuel-burning equipment annually. Many local gas or oil companies and HVAC companies offer appliance inspections for a nominal fee.
· Make regular visual inspections of all fuel-burning appliances. Check

To hel ·
· R
F · a tu d
M · ·
· ·
· · ·
CmInOaandAuraSindel
REG SMO
REG
WHAT Under Alarms descri time (i UL203
·
·
·
* Appr Humid Tohf e30uAnp
S A CO Al SinceN · A"nF hree · A2n a2d Stands monoax Acco(r1d mono(2x presen from in abnedlowf(i3r Mono(4x design precio(5 if Ala(r6m Gas D aiEpslptahnmryoml)t0(Ct.RAh Audibre
REGSF
RECO Instal The Na on eve the STm Placeinm
re o S n
S a p a to m a fa th a
S if u p o co
T s p C w se

..
e This
g teries
and ries ny ty in S
r 333
ironable gested rts
pause
d pause
ove s!
xide s, D
e ,____ dow. retil the aired our nves, and ied e any the more or or ance ____ poraaged of ances

NOTE: A qualified appliance technician is defined as "a person, firm, corporation, or company that either in person or through a representative, is engaged
SMOKE DETECTOR in and responsible for the installation, testing, servicing, or replac ement of
heating, ventilation, air conditioning (HVAC) equipment, combustion appliances and equipment, and/or gas fireplaces or other decorative combustion equipment."
WHAT YOU NEED TO KNOW ABOUT CO

IF TWHEHASTMIOSKCEOA?LARM SOUNDS

RESPCOONiDsIaNnGinTvOisiAbNle,AoLdAoRrleMss, tasteless gas produced when fossil fuels do not burn completely, or are exposed to heat (usually fire). Electrical appliances

· IoaftfktTttyeahehprneeoipcstsouiaeoentllnneyfiuet.nd,eNatoiallaEsanlnVrldiyomnEtcpdRsplrauoarindopgngdeandeu:norceyWroeeo.uouCaosndaOsyr,i.etcauonlaaaotrlit,moctne.hsItaghtrincanootgarriletn,hqgoeuilti,uhrneneasitat,uyliaortaruilmsrgiwammsa,amrgyneairdnsegiosalutiyneloteu,in

inCjuormy morondeaaptphl.iances are often sources of CO. If they are not properly main-

·

NaRAnthcCleeaadaomvOirnnmemroerie"esdvtmrtsri,aoenaowamgprsrvei"ettoebahoCvsilapmeadOtytdpaateodihnrnnruoegeisrepudeisbdenprireawnrdnloy.tsoiattsuevwenaleractbinettethiltidoseoialnsantaf,tr.lhteoashIodemnrem,masolataeeer(lsdacbamraadawmaurteioltsnfesupemdrondeoyocnwirbotteisaoypc,eneacwan,rnoneaiCnnodrtOgodekoytdoinltewsheSgvefefmenorisclsrmswoieefkeconaeasatkn./tmnehC"t,reohAOiersekiprete-crto,qi.g)ou.hfiictn"kgly.

smSYokMe PawTaOyMfroSmOthFeCunOit.PTOheISalOarNmINwGill reset automatically.

· IfTtheesuensiyt malpatrommssgaeret erevlearteydonteo oCuOt PoOf tISheONhoINuGseainmdmsheoduialdteblye. discussed

WHATwiTthOADLOL hINouCseAhSoEldOmFeFmIRbEers. · MDoildn'Et xppaonsicu;rset:aSylicgahltmh.eFaodlalocwhey, onuaur sfaema,ilvyoemsictiangp,efaptliagnu.e ("flu-like" symptoms).

· MGeedt iouumt oEfxtphoeshuoreu:sTeharosbqbuinicgkhlyeaadsapcohses,idbrleo.wDsionne'stss,tcoopntfousgioent, fast heart rate.

EdxretrsesmedeoErxcpoollseucrtea:nCyothninvugl.sions, unconsciousness, heart and lung failure.

· EFxepeol sduoroerstowCitahrbthoenbMaocknooxfidyeoucrahnacnadubseefborreainopdeanminaggeth,edmea. th.

If a door is cool, open it slowly. Don't open a hot door. Keep doors

Tahnids wCOindAolawrsmcmloesaesdu, ruensleesxspoyosuurme tuostCeOscoavpeer tthimroeu. gIthatlhaermms. if CO levels are · eCxotrveemr eyloyuhr ingohsien ansdhomrot uptehriwodithofaticmloet,ho(rprifefCeOrablelyvedlsamrepa)c. h a certain mini-
mTaukme sohvoert,aslohanlglopwerbioredatohfst.ime. The CO Alarm generally sounds an alarm

· bMeefoerteatthyeoounrspeltaonfnseydmmpetoemtinsginpalavceeraoguet,shideealtyhoyuardhuoltms.eW, hy is this important?

Baencdaduoseayhoeuadneceoduntot tboemwaakrneesduroef eavpeorytbenotdiayl gCoOt opurot bslaefmelyw. hile you can still

·

rtrGCeheaaaaivcctleltttthyhwineoeeyutlFilrmaierareeend.oDdnIunroeegtpmshafseart,etonmtlyhieneexrgnneittpwytaohoesrelutl,esrbdbonuouacitnlmdabsiaenees.gcspoooomrfsgeCseiOdbtilseheoexfrlrppioeo.mnsAtuelosrdueo,ta,svnyididoceutci.nmagns

may be aware no longer children and

· pNeetvsemr gayo bbeacthkeinfsirisdteaaffebcutrendin. gThbeuialdvienrgagfoerhaenayltrheyaasodnu.lt might not feel any

· sCyomnptatocmt ysowurhFenirethDeeCpaOrtAmlaernmt fsoor uidnedass. Honowmeavkeinr,gpeyouprlehwomithe csaarfdeira. c or respiratory problems, infants, unborn babies, pregnant mothers, or elderly

people can be more quickly and severely affected by CO. If you experience AlarmesvehnamveildvasryiomupstolimmsitoaftiConOsp. oSieseon"iGnge,nceoransl uLlitmyiotautriodnosctoorf iSmmmoekdeia/CteOly! Alarms" for details.
FINDING THE SOURCE OF CO AFTER AN ALARM

USINCtoGalrobcToanHtemEtohSneoIsLxoiEduerNciesCoaEfnCoFOdEoaArflteTesrUsa,RninEavilSsairbmle.

gas, which often makes it difficult These are a few of the factors that

can make it difficult to locate sources of CO:

Never rem·ovHeotuhesebwatetellrvieesntiolaqteudiebt eafnoruenwthaenitnevdesatlaigramto. rRaermriovevsin.g the

batteries ·disPabrolebsletmhecaaluarsmedabnyd "rebmacokvdersafytoinugr."protection.

The and

Scoilerrnecc·et

tFhTeeraaptnursroeibeilnsetminC.teODnodpnerodobttluoesmteemtchpaeouSrsaielredilnycbseyileFsnepcaeetuctrihaeelinchioercmrnuemwrgshetilanencyycoesusit.uidaetniotnifys.

It will BnoetccaoursrecCt aOCmOapyrodbislesmipaotreebxytintghueisthimaefiaren. investigator arrives, it may be diffi-

TPhreesSspcitlehuanelytcTtefoeosFrlteo/aaScntiaulyetrenecctcaeharebbnuostteontmoumnrpcoooernnaootrhfilxyeCidqaOeula.ieriBnmt RvacenKosuvtBneigrwraafaontnirdotaesntd, olIeanralacssr.tmes3r-hvf5oiacrslelseenccvooaentrldlab.lse.moinbultiegsa.ted to

After tPheOTTesEt/NSilTenIcAeLbuSttOonUisRreCleEasSedO, tFhe CReOd LIEND TblHinkEs dHuOrinMg tEhe silence

modeF. uel-burning appliances like:

WhenfpirotehrptealabSclmee,ohgekaaesteAkrli,atcgrhmaesniosrraSwnilgoeeondcoerbdcuornoikntWgoph,en the CO Alarm is Silenced

The SgmaoskeclAotlahrems wdrilyl erer.main silent for The CO alarm will remain silent for

cwuoIfoppitlnehlttrgeoianoDccvost1uimeoolrb5eaonnrascomgmr.tcorkgtakiapoednecgiieudpihnknetdaeteeccods,dsrohe,alnoreiahmltoarahdsetrkeeniiamsnc­nietnclts.eyhgreoueaexontfrccuefnpdhirhdceeenia­mivcneontiticonnnergeegdteny.orvw,repbmanipltaoteeilcnrkogher:edfauApslutotpofeaetrterrt,etorns4t4oiamumllnyiindnduiuntategenssga,.egifraoCiunOs.

levels remain the horn will

Improper use of appliance/device:
SILEionNpaeCnraIetNinnGcgloaTsbeHdarEabreeLcauO(elWikgerilBal ogAraTvraeTghEeicRloerY WARNING
This ssiclerneceenefedaptuorrechc)a. n temporarily quiet the low battery warning "chirp" for up toT8rahnosuiresn.tPCreOssPtrhoebTleemsts/S: i"letrnacnesibenutt"toonr oonn-tahgeaainla-romff-caogvaeinr. CO problems can Oncebtehecalouwsebdabttyeroyuwtdaornoirncgo"ncdhitiriopn" ssialenndcoetfheeartusrpeeicsiaal cctirvcautemds,tathneceusn.it continTuheesftoollfolawsihngthceoGnrdeietinonligshctaonncreesaulmt iinnuttreafnosrie8nhtoCuOrs.sAitfutearti8onhso:urs, pthoeslsoi1wb.leb;cEatoxthtnceidesrysitusi"onicvniehtsiwrssppui"liclllwahngioalletsr:oeosrpureemrvaeet.resReweviptehlanotciunetgtbhoaeftftbueaerylttaeppropiewlisaenarc!sessocoanusaesd by outdoor gTuonoitdinsetooaucTnte··idvssat NtWt"Mheceeiohngtdhivdareepitsdin"vaitferoneepndpacicprttteiueeohsrsenase(u:lacmornPoewidrlnded/ubo/sithfasrfeuetv)tt.mreheerlenioydtcTiwaaeitliaysrr,trew/niSnsiintucihlgelltuinendwcxgiinetlelgfrbnroehdumsitegutdohmthn,peegeauru(gLisosaEtediynDso.wffbTlianeehsdxtewhhsue.aensueHisntaetnawcfvdayilycnl lsae.isr).in
· Several appliances running at the same t ime competing for limited
SILENCINfrGeshTaHir.E END OF LIFE SIGNAL
This silen·ceVfeeanttupreipecacnontenmecptoioranrsilyvibqruaietitngthleooEsnedforofmLifcelowthaernsindgry"ecrsh,irfpu"rnfaocr es, or up to 2 daysw. aYtoeur hceaantesrisle.nce the End of Life warning "chirp" by pressing the Test/Silen·ceObbusttrounc.tiTohnes hinoronr wunilcl ocnhvirepn, taiocnkanlovwelnetdpgiipneg dtheastigtnhse wEhnidchofcLainfeamplify silence featuthree haabsovbeeesnituaacttioivnaste. d.

After 2a.ppEroxxteimndaetdelyop2edraatyiosn, tohfeuEnvnednotefdLfifueel"bchuirrnpin"gwdilel vreicseusm(rea.nge, oven, fireplace).

3. Temperature inversions, which4 can trap exhaust close to the ground. 4. Car idling in an open or closed attached garage, or near a home.

These conditions are dangerous because they can trap exhaust in your home. Since these conditions can come and go, they are also hard to recreate during a CO investigation.

HOW CAN I PROTECT MY FAMILY FROM

CO POISONING?

A CO Alarm is an excellent means of protection. It monitors the air and sounds a loud alarm before Carbon Monoxide levels become threatening for average, healthy adults.

A CO Alarm is not a substitute for proper maintenance of home appliances.

To help prevent CO problems and reduce the risk of CO poisoning:

· Clean chimneys and flues yearly. Keep them free of debris, leaves, and nests for proper air flow. Also, have a professional check for rust and corrosion, cracks, or separations. These conditions can prevent proper air movement and cause backdrafting. Never "cap" or cover a chimney in any way that would block air flow.

312

· Test and maintain all fuel-burning equipment annually. Many local gas or oil companies and HVAC companies offer appliance inspections for a nominal fee.

· Make regular visual inspections of all fuel-burning appliances. Check

To help prevent CO problems and reduce the risk of CO poisoning:

if t

· Clean chimneys and flues yearly. Keep them free of debris, leaves, and nests for proper air flow. Also, have a professional check for rust and corrosion, cracks, or separations. These conditions can prevent proper air movement and cause backdrafting. Never "cap" or cover a chimney

us po or co

in any way that would block air flow.

Th

· Test and maintain all fuel-burning equipment annually. Many local gas REoCr OoiMl cMomENpaDnEieDs LaOndCAHTVIAOCNcSoFmOpRanSieMsOoKffeEr AapLAplRiaMncSe, iCnospneticntuioends for Foar andodmitiinoanlafleceo. verage, it is recommended that you install a Smoke Alarm in

se pre CO we

·allMroaokmesr,ehgaullasr, vsitsouragl einsapreeacst,iofinnsisohfedallaftutiecls-,baunrndinbgasaepmpleianntsc,ews.hCerheetcekmpera-

se

turaepspnlioarnmcaelslyforermexacinebsseitvweereunst4a0n° dF (s4c.a4l°inCg).aAnldso10c0h°eFck(3t7h.e8°flCa)m. Me aoknethseure no

be

dobourronreor tahnedr opbilostruligchtitosn. Tcohueldflakmeepshsmouoldkebferobmluree.aAchyienlglotwheflaSmmeoke Alarms.

Th

MoKmreeeeapsnpstehfceuiefbilcloisawlnleyo,rtidnboseotinar glol nSbumthrnoeekfdeurcAnoalamcrepmlceslto:eslyeda.nUdsCeOvemntasy

be present. or fans when

· thOeyn aerveearyvaleilvaeblleofoynoaulrl fhuoeml-beu, rinncinlugdainpgplifainnischees.dMaattkicessaunred abpapsleiamnecnetss.

ho sm

· arIensviednetedvetroy tbheedorouotsmid,ee.sDpoecniaoltlygrifillpoerobpalerbseleceupe winidthoothrse,dooroinr partly or

gacroamgepsleoterloynclsocsreede.n porches.

·· ChInecthkefohraellxnheaaurset vbearcyksfloewepfirnogmarCeOa. sIfoyuorcuersh. oCmhechkatshme dulrtaipftlehosoledepoinng anaroepaesr,aitninsgtaflluarnuanciet ifnoreacbha.cIkf darahfat.llLisoomkofroer tchraanck4s0ofneefturlonnagce(1h2eamt eters),

exincshtaanllgaerusn. it at each end.

·· ChAetcthkethteophouf stheeofrirgsat-rtaog-eseocnonthdeflootohrerstsaiidrwe aoyf,sahnadreadt wthaell.bottom · Keoef pthwe ibndasoewmseanntdstdaoirowrsayo. pen slightly. If you suspect that CO is

escaping into your home, open a window or a door. Opening windows

CmInOaandAuraSidnelnapaqtiadltereuinmiocrnfidcrrinefoosii,dcmtmnosfoarenuoeermnenerqntscdgsiutltisiicioerari.naeendrnmtiyzytfoose,oeuinargryrtennasogadidufrfiioodecrmnsaraee.a.ndSlCkItmftlpeyhwiorsedoskictuetrehkeecrecAcrwaetollyaiailtomorshemneumny. cCouienlunOonsrdtdsalleeeeolrldvdcaseattmAillaosCFn.naidtrvoeeawrrDriaAyhelaCsfprt./oaDRtrmotCemdsaeutdoanntttiiefthfsoyitsorobcuesurtarrteent

REGULATORY INFORMATION FOR SMOKE/CO ALARMS

C

REGULATORY INFORMATION FOR CO ALARMS

WHAT LEVELS OF CO CAUSE AN ALARM?

Underwriters Laboratories Inc. Standard UL2034 requires residential CO

Alarms to sound when exposed to levels of CO and exposure times as

C

described below. They are measured in parts per million (ppm) of CO over

l

time (in minutes).

UL2034 Required Alarm Points*: · If the alarm is exposed to 400 ppm of CO, IT MUST ALARM BETWEEN 4 and 15 MINUTES.

· If the alarm is exposed to 150 ppm of CO, IT MUST ALARM BETWEEN 10 and 50 MINUTES.

· If the alarm is exposed to 70 ppm if CO, IT MUST ALARM BETWEEN 60 and 240 MINUTES.

* Approximately 10% COHb exposure at levels of 10% to 95% Relative Humidity (RH).

Tohf e30uAnpGiptEmisNfdCoerYs3igP0nLdeAadCynsEo.Mt tEoNaTlarRmECwOheMnMexEpNoDseAdTItOo NaSconstant level Standards: Underwriters Laboratories Inc. Single and Multiple Station Smoke

Alarms 217. CO Alarms are designed to alarm before there is an immediate life threat. SinceNyFoPuAc7a2nnCohtaspeteero2r 9smell CO, never assume it's not present.

· A"nFoerxypoousruirnefotorm1a0t0iopnp, tmheoNf CatOiofnoarl2F0irme iAnluatrems manady Snoigtnaaffliencgt aCvoedraeg, eN,FPA 72,

hreeaaldthsyaasdfuolltlos,wbsu:"t after 4 hours the same level may cause headaches.

· A2n9e.5x.p1o* sRuerequtoire4d00DpeptemctoifoCn.O may cause headaches in average, healthy a2d9u.l5ts.1a.1ft*erW3h5emreinreuqteusir,ebdubt ycaonthcearugsoevdeernaitnhgalfatewrs2, chooduerss., or standards for a

B m w

Standspaerdcsif:icUtnydperwofriotecrcsuLpaabnocrya,toapriepsroIvnecd. Ssingle aanndd Mmuullttiippllee-Ssttaattiioonn csamrbooken

T

monoaxlaidrme salsahrmalsl bUeLi2n0s3ta4l.led as follows:

P

Acco(r1d)i*nIgn taoll UslnedeepriwngriterorsomLasbaonradtogruieessItnrco.oUmLs2034, Section 1-1.2: "Carbon

c

mono(2x)id*Oeuatlsairdmesocfoevaecrehdsbeypathraetsee drewqeulilrinegmeunntist salreeeipnitnegndaerdeat,owreitshpinon2d1tfot t(6h.e4 m)

presenceofoaf ncyardbooonrmtoonaosxliedeepfirnogmrsoooumrc,ewsitshucthheads,isbtaunt cneotmlimeaitseudretod, aelxohnagusat path

from inteorfnatrla-cvoeml bustion engines, abnormal operation of fuel-fired appliances,

banedlowf(i3ret)hpOolasnceeetsvh.eaCrtyOcloeAuvlleadrlmcoafsuaasredewaineltolelisnnsdgoeudf natibot,ilaiitnlyacrtlmuodraientagccatbrtabosoetnhmemedonantnsogxeidrse

levels of Carbon

T c s
B a

Mono(4x)idOenexepvoesryurlee.v"eTl hoifs aCrOesAidlaermntiamlobnoitaorrds athnedaciraaret tohcecAulpaarmnc, yan(sdmisall facility), designedintcoluadlainrmg bbaesfoerme eCnOtsleavnedlsebxeccluodmineglifcerathwrel astpeancinegs. aTnhdisuanllfoinwishyeodu attics

n a

precio(5u)s*Intimtheetolivlienagveartehae(sh)ooufsae ganudesctosrureitcet the problem. This is only possible

H

if Ala(r6m)sInartehelolcivaitnegd,airnesat(asll)eodf, aanrdesmidaeinnttaiainl ebdoaarsddaensdcrcibaerde ionctchuispamnacnyual. Gas Det(esmctaiollnfaactilTityyp) ical Temperature and Humidity Ranges: The CO Alarm is not formulated to detect CO levels below 30 ppm typically. UL tested for false

S 7 F

alarm(RreespirsitnatnecdewtoithMpeethrmanises(i5o0n0frpopmm)N, FBPuAtan7e2®(,3N00atpiopnma)l, FHireeptAalnaerm(5a0n0dppSmig)n,aling

B

EthylCAocdeetaCteo(p2y0r0igphptm©),2Is0o1p0roNpaytlioAnlcaol hFoirle(2P0r0otpepcmtio)nanAdssCoacribaotinonD,ioQxuidinec(y5,0M00A

ppm)0. 2V2a6lu9e.sTmhiesarseupreringtaesdamndatvearipaol riscnoontcethnetractoiomnpsleintepaarntsd poeffricmiailllipoon.sition of

the National Fire Protection Association, on the referenced subject which is

AudibreleprAelsaernmte: d85ondlBy mbyintihmeusmtaantd1a0rdfeientit(3s menettierersty).), (National Fire Alarm and

REGSFUiirgeLnPaAlrioTntgOecCRtoioYdneI®ANsasFnodOcNiRaFtMiPoAnA,7TIn2Ic®O.a, NrQeurFiengOciysR,teMrSeAdM0t2rOa2dK6e9Em). aArkLsAofRtMheSNational

F

RECOMMENDED LOCATIONS FOR SMOKE ALARMS

Continued...

D

Installing Smoke Alarms in Single-Family Residences

oTnheevNeartyiofnloaolrF, iirneePvreortyesclteioenpiAngssaorceiaa,tiaonnd(NinFePvAe),ryrebceGodmrEomoNemnE.dIsnRonAneewLScmoLnosIktMeruAcItlTaiorAnm,TIONS ODF

the STmhoiskSemAolakrem/CsOmAuslatrmbeisAiCntpenodweedrefodrarnesdidinetnetriaclounsnee.cIteids .nSoet ein"teAngdeendcyfor use in

PlacerinmedqeuunsirtterRimaelecanoptsmplfimocaretCniodanarsbtiowonnhseM"reofnoOorcxdcideuetpaaAiltsliao.rnmalsSmaufesttybaendmHete.aTlthheASdmmCoinkoiesntAtrailnatiuromendp(O.o..SrtHioAn)

Fir

of this device is not intended to alert5hearing impaired residents. Special purpose Smoke Alarms should be installed for hearing impaired residents (CO Alarms are

not yet available for the hearing impaired).

Smoke/CO Alarms may not waken all individuals. Practice the escape plan at least twice a year, making sure that everyone is involved ­ from kids to grandparents. Allow children to master fire escape planning and practice before holding a fire drill at night when they are sleeping. If children or others do not readily waken to the sound of the Smoke/CO Alarm, or if there are infants or family members with mobility limitations, make sure that someone is assigned to assist them in fire drill and in the event of an emergency. It is recommended that you hold a fire drill while family members are sleeping in order to determine their response to the sound of the Smoke/CO Alarm while sleeping and to determine whether they may need assistance in the event of an emergency.

Smoke/CO Alarms cannot work without power. Battery operated units cannot work if the batteries are missing, disconnected or dead, if the wrong type of batteries are used, or if the batteries are not installed correctly. AC units cannot work if the AC power is cut off for any reason (open fuse or circuit breaker, failure along a power line or at a power station, electrical fire that burns the electrical wires, etc.). If you are concerned about the limitations of battery or AC power, install both types of units.

This Smoke/CO Alarm will not sense smoke or CO that does not reach the sensors. It will only sense smoke or CO at the sensor. Smoke or CO may be present in other areas. Doors or other obstructions may affect the rate at which CO or smoke reaches the sensors. If bedroom doors are usually closed at night, we recommend you install an alarm device (Combination CO and Smoke Alarm, or separate CO Alarms and Smoke Alarms) in each bedroom and in the hallway

SMOKE DETECTOR

RECOMMENDED LOCATIONS FOR SMOKE ALARMS, Continued For additional coverage, it is recommended that you install a Smoke Alarm in all rooms, halls, storage areas, finished attics, and basements, where temperatures normally remain between 40° F (4.4° C) and 100° F (37.8° C). Make sure no door or other obstruction could keep smoke from reaching the Smoke Alarms. More specifically, install Smoke Alarms: · On every level of your home, including finished attics and basements. · Inside every bedroom, especially if people sleep with the door partly or
completely closed. · In the hall near every sleeping area. If your home has multiple sleeping
areas, install a unit in each. If a hall is more than 40 feet long (12 meters), install a unit at each end. · At the top of the first-to-second floor stairway, and at the bottom of the basement stairway.
Specific requirements for Smoke Alarm installation vary from state to state and from region to region. Check with your local Fire Department for current requirements in your area. It is recommended AC or AC/DC units be interconnected for added protection.
AGENCY PLACEMENT RECOMMENDATIONS Standards: Underwriters Laboratories Inc. Single and Multiple Station Smoke Alarms 217. NFPA 72 Chapter 29 "For your information, the National Fire Alarm and Signaling Code, NFPA 72, reads as follows:" 29.5.1* Required Detection. 29.5.1.1* Where required by other governing laws, codes, or standards for a specific type of occupancy, approved single and multiple-station smoke alarms shall be installed as follows: (1)*In all sleeping rooms and guest rooms (2)*Outside of each separate dwelling unit sleeping area, within 21 ft (6.4 m)
of any door to a sleeping room, with the distance measured along a path of travel (3) On every level of a dwelling unit, including basements (4) On every level of a residential board and care occupancy (small facility), including basements and excluding crawl spaces and unfinished attics (5)*In the living area(s) of a guest suite (6) In the living area(s) of a residential board and care occupancy (small facility) (Reprinted with permission from NFPA 72®, National Fire Alarm and Signaling Code Copyright © 2010 National Fire Protection Association, Quincy, MA 02269. This reprinted material is not the complete and official position of the National Fire Protection Association, on the referenced subject which is represented only by the standard in its entirety), (National Fire Alarm and Signaling Code® and NFPA 72® are registered trademarks of the National Fire Protection Association, Inc., Quincy, MA 02269).
Continued...

AGENCY PLACEMENT RECOMMENDATIONS, Continued
California State Fire Marshal (CSFM) Early warning detection is best achieved by the installation of fire detection equipment in all rooms and areas of the household as follows: A Smoke Alarm installed in each separate sleeping area (in the vicinity, but outside bedrooms), and Heat or Smoke Alarms in the living rooms, dining rooms, bedrooms, kitchens, hallways, finished attics, furnace rooms, closets, utility and storage rooms, basements, and attached garages.
ABOUT SMOKE ALARMS
Battery (DC) operated Smoke Alarms: Provide protection even when electricity fails, provided the batteries are fresh and correctly installed. Units are easy to install, and do not require professional installation.
AC powered Smoke Alarms: Can be interconnected so if one unit senses smoke, all units alarm. They do not operate if electricity fails. AC with battery (DC) back-up: will operate if electricity fails, provided the batteries are fresh and correctly installed. AC and AC/DC units must be installed by a qualified electrician.
Smoke/CO Alarms for Solar or Wind Energy users and battery backup power systems: AC powered Smoke/CO Alarms should only be operated with true or pure sine wave inverters. Operating this Alarm with most batterypowered UPS (uninterruptible power supply) products or square wave or "quasi sine wave" inverters will damage the Alarm. If you are not sure about your inverter or UPS type, please consult with the manufacturer to verify.
Smoke Alarms for the hearing impaired: Special purpose Smoke Alarms should be installed for the hearing impaired. They include a visual alarm and an audible alarm horn, and meet the requirements of the Americans With Disabilities Act. Can be interconnected so if one unit senses smoke, all units alarm.
Smoke alarms are not to be used with detector guards unless the combination has been evaluated and found suitable for that purpose.
All these Smoke Alarms are designed to provide early warning of fires if located, installed and cared for as described in the user's manual, and if smoke reaches the Alarm. If you are unsure which type of Smoke Alarm to install, refer the National Fire Protection Association (NFPA) Standard 72 (National Fire Alarm and Signaling Code) and NFPA 101 (Life Safety Code). National Fire Protection Association, One Batterymarch Park, Quincy, MA 02269-9101. Local building codes may also require specific units in new construction or in different areas of the home.
SPECIAL COMPLIANCE CONSIDERATIONS
This Smoke Alarm is suitable for use in apartments, condominiums, townhouses, hospitals, day care facilities, health care facilities, boarding houses, group homes and dormitories provided a primary fire detection system already exists to meet fire detection requirements in common areas like lobbies, hallways, or porches. Using this Smoke Alarm in common areas may not provide sufficient warning to all residents or meet local fire protection ordinances/regulations.
This Smoke Alarm alone is not a suitable substitute for complete fire detection systems in places housing many people--like apartment buildings, condominiums, hotels, motels, dormitories, hospitals, health care facilities, nursing homes, day care facilities, or group homes of any kind. It is not a suitable substitute for complete fire detection systems in warehouses, industrial facilities, commercial buildings, and special-purpose non-residential buildings which require special fire detection and alarm systems. Depending on the building codes in your area, this Smoke Alarm may be used to provide additional protection in these facilities.
In new construction, most building codes require the use of AC or AC/DC powered Smoke Alarms only. In existing construction, AC, AC/DC, or DC powered Smoke Alarms can be used as specified by local building codes. Refer to NFPA 72 (National Fire Alarm and Signaling Code) and NFPA 101 (Life Safety Code), local building codes, or consult your Fire Department for detailed fire protection requirements in buildings not defined as "households".
HUD MAP Program Certain HUD battery powered Smoke Alarm applications, especially those that fall under HUD 223(f) MAP (Multi-family Accelerated Processing), may require a 10 Year sealed tamper resistant battery. This alarm does not meet that requirement. Substitute First Alert SA340B.

GENERAL LIMITATIONS OF SMOKE/CO ALARMS

This Smoke/CO Alarm is intended for residential use. It is not intended for use in industrial applications where Occupational Safety and Health Administration (OSHA) requirements for Carbon Monoxide Alarms must be met. The Smoke Alarm portion of this device is not intended to alert hearing impaired residents. Special purpose Smoke Alarms should be installed for hearing impaired residents (CO Alarms are not yet available for the hearing impaired).
Smoke/CO Alarms may not waken all individuals. Practice the escape plan at least twice a year, making sure that everyone is involved ­ from kids to grandparents. Allow children to master fire escape planning and practice before holding a fire drill at night when they are sleeping. If children or others do not readily waken to the sound of the Smoke/CO Alarm, or if there are infants or family members with mobility limitations, make sure that someone is assigned to assist them in fire drill and in the event of an emergency. It is recommended that you hold a fire drill while family members are sleeping in order to determine their response to the sound of the Smoke/CO Alarm while sleeping and to determine whether they may need assistance in the event of an emergency.
Smoke/CO Alarms cannot work without power. Battery operated units cannot work if the batteries are missing, disconnected or dead, if the wrong type of batteries are used, or if the batteries are not installed correctly. AC units cannot work if the AC power is cut off for any reason (open fuse or circuit breaker, failure along a power line or at a power station, electrical fire that burns the electrical wires, etc.). If you are concerned about the limitations of battery or AC power, install both types of units.
This Smoke/CO Alarm will not sense smoke or CO that does not reach the sensors. It will only sense smoke or CO at the sensor. Smoke or CO may be present in other areas. Doors or other obstructions may affect the rate at which CO or smoke reaches the sensors. If bedroom doors are usually closed at night, we recommend you install an alarm device (Combination CO and Smoke Alarm, or

adequate early warning. Recommended minimum protection is one alarm device in every sleeping area, every bedroom, and on every level of your home. Some experts recommend battery powered Smoke and CO Alarms be used in conjunction with interconnected AC powered Smoke Alarms. For details, see "About Smoke Alarms" for details.
Smoke/CO Alarms may not be heard. The alarm horn loudness meets or exceeds current UL standards of 85 dB at 10 feet (3 meters). However, if the Smoke/CO Alarm is installed outside the bedroom, it may not wake up a sound sleeper or one who has recently used drugs or has been drinking alcoholic beverages. This is especially true if the door is closed or only partly open. Even persons who are awake may not hear the alarm horn if the sound is blocked by distance or closed doors. Noise from traffic, stereo, radio, television, air conditioner, or other appliances may also prevent alert persons from hearing the alarm horn. This Smoke/CO Alarm is not intended for people who are hearing impaired.
The Alarm may not have time to alarm before the fire itself causes damage, injury, or death, since smoke from some fires may not reach the unit immediately. Examples of this include persons smoking in bed, children playing with matches, or fires caused by violent explosions resulting from escaping gas.
This Smoke/CO Alarm is not a substitute for life insurance. Though this Smoke/CO Alarm warns against increasing CO levels or the presence of smoke, BRK Brands, Inc. does not warrant or imply in any way that they will protect lives. Homeowners and renters must still insure their lives.
This Smoke/CO Alarm has a limited life. Although this Smoke/CO Alarm and all
313 of its parts have passed many stringent tests and are designed to be as reliable as
possible, any of these parts could fail at any time. Therefore, you must test this device weekly. The unit should be replaced immediately if it is not operating properly.

injury, or death, since smoke from some fires may not reach the unit immedi-

.

Smoke/CO Alarms cannot work without power. Battery operated units cannot work

ately. Examples of this include persons smoking in bed, children playing with

if the batteries are missing, disconnected or dead, if the wrong type of batteries are

matches, or fires caused by violent explosions resulting from escaping gas.

d
r y

used, or if the batteries are not installed correctly. AC units cannot work if the AC
SMOKE DETECTOR power is cut off for any reason (open fuse or circuit breaker, failure along a power line
or at a power station, electrical fire that burns the electrical wires, etc.). If you are concerned about the limitations of battery or AC power, install both types of units.

This Smoke/CO Alarm is not a substitute for life insurance. Though this Smoke/CO Alarm warns against increasing CO levels or the presence of smoke, BRK Brands, Inc. does not warrant or imply in any way that they will protect lives. Homeowners and renters must still insure their lives.

This Smoke/CO Alarm will not sense smoke or CO that does not reach the

sensors. It will only sense smoke or CO at the sensor. Smoke or CO may be

r

present in other areas. Doors or other obstructions may affect the rate at which CO or smoke reaches the sensors. If bedroom doors are usually closed at night,

we recommend you install an alarm device (Combination CO and Smoke Alarm, or

This Smoke/CO Alarm has a limited life. Although this Smoke/CO Alarm and all of its parts have passed many stringent tests and are designed to be as reliable as possible, any of these parts could fail at any time. Therefore, you must test this device weekly. The unit should be replaced immediately if it is not operating properly.

separate CO Alarms and Smoke Alarms) in each bedroom and in the hallway

This Smoke/CO Alarm is not foolproof. Like all other electronic devices, this

e

between them.

Smoke/CO Alarm has limitations. It can only detect smoke or CO that reaches the

This Smoke/CO Alarm may not sense smoke or CO on another level of the home. Example: This alarm device, installed on the second floor, may not sense

sensors. It may not give early warning of the source of smoke or CO is in a remote part of the home, away from the alarm device.

smoke or CO in the basement. For this reason, one alarm device may not give

s

n

TROUBLESHOOTING GUIDE

If the Alarm...

Problem...

You should...

Horn "chirps" about once per minute.

s

Horn does three "chirps" every minute;

LED has 3 rapid flashes with "chirps".

Low battery warning.
MALFUNCTION SIGNAL. Device is not working properly, and needs to be replaced.

Install two new AA batteries*.
Units under warranty should be returned to manufacturer for replacement. See "Limited Warranty" for details.

The light flashes GREEN and the horn sounds 5 "chirps" every minute.

END OF LIFE SIGNAL. Alarm needs to be replaced.

Immediately replace the Alarm.

Carbon Monoxide Alarm ONLY:
CO Alarm goes back into alarm 4 minutes after you Silence it.

CO levels indicate a potentially dangerous situation.

IF YOU ARE FEELING SYMPTOMS OF CO POISONING, EVACUATE your home and call 911 or the Fire Department. Refer to "If The CO Alarm Sounds" for details.

CO Alarm sounds frequently even though no high

The CO Alarm may be improperly located. Refer to Relocate your Alarm. If frequent alarms continue,

levels of CO are revealed in an investigation.

"Where to Install This Alarm" for details.

have home rechecked for potential CO problems.

You may be experiencing an intermittent CO

problem.

N

Smoke Alarm ONLY:

N

Smoke Alarm sounds when no smoke is visible.

Unwanted alarm may be caused by non-emergency Silence Alarm using Test/Silence button; clean the

source like cooking smoke.

Alarm's cover with a soft, clean cloth. If frequent

unwanted alarms continue, relocate your Alarm.

Alarm may be too close to a kitchen, cooking

appliance, or steamy bathroom.

*For a list of acceptable replacement batteries, see "Regular Maintenance."

If you have questions that cannot be answered by reading this manual, call Consumer Affairs at 1-800-323-9005, M-F 7:30 a.m. to 5:00 p.m. (CST)

LIMITED WARRANTY

y

BRK Brands, Inc., ("BRK") the maker of First Alert® brand products warrants that for a period of seven years from the date of purchase, this product will be free from defects in material and workmanship. BRK, at its option, will repair or replace this product or any component of the product found to be defective during the warranty period. Replacement

will be made with a new or remanufactured product or component. If the product is no longer available, replacement may be made with a similar product of equal or greater value.

This is your exclusive warranty. This warranty is valid for the original retail purchaser from the date of initial retail purchase and is not transferable. Keep the original sales receipt.

Proof of purchase is required to obtain warranty performance. BRK dealers, service centers, or retail stores selling BRK products do not have the right to alter, modify or any way

change the terms and conditions of this warranty.

This warranty does not cover normal wear of parts or damage resulting from any of the following: negligent use or misuse of the product, use on improper voltage or current, use contrary to the operating instructions, disassembly, repair or alteration by anyone other than BRK or an authorized service center. Further, the warranty does not cover Acts of God, such as fire, flood, hurricanes and tornadoes or any batteries that are included with this unit.

BRK shall not be liable for any incidental or consequential damages caused by the breach of any express or implied warranty. Except to the extent prohibited by applicable law, any implied warranty of merchantability or fitness for a particular purpose is limited in duration to the duration of the above warranty. Some states, provinces or jurisdictions do not allow the exclusion or limitation of incidental or consequential damages or limitations on how long an implied warranty lasts, so the above limitations or exclusion may not apply to you. This warranty gives you specific legal rights, and you may also have other rights that vary from state to state or province to province.

How to Obtain Warranty Service

Service: If service is required, do not return the product to your retailer. In order to obtain warranty service, contact the Consumer Affairs Division at 1-800-323-9005,

7:30 AM - 5:00 PM Central Standard Time, Monday through Friday. To assist us in serving you, please have the model number and date of purchase available when calling.

e

For Warranty Service return to: BRK Brands, Inc., 25 Spur Drive, El Paso, TX 79906

,

Battery: BRK Brands, Inc. make no warranty, express or implied, written or oral, including that of merchantability or fitness for any particular purpose with respect to battery.

0

For your records, please record:

Date Purchased: __________________Where Purchased: _____________________

m n,

Date Installed: ____________/____________Month/Year

..

First Alert® is a registered trademark of the First Alert Trust.

6

Replace alarm 7 years after installation. Please write the date in the space provided: _____________/____________Month/Year The alarm will also provide an audible End-of-Life Signal approximately 7 years after installation to remind you to replace the unit. The End-of-Life Signal can be silenced for up to 2 days. Do not unplug the alarm or remove the batteries until you get replacement.
Printed in Mexico M08-0117-011 Q 06/12 7

314

SUBURBAN WATER HEATER
INSTALLATION AND OPERATION MANUAL
DIRECT VENT GAS WATER HEATER
MODELS SW6D · SW6DE · SW6DM · SW6DEM
FOR INSTALLATION IN RECREATIONAL VEHICLES AND MOBILE HOUSING
FOR YOUR SAFETY WHAT TO DO IF YOU SMELL GAS ! DO NOT TRY TO LIGHT ANY APPLIANCE. ! DO NOT TOUCH ANY ELECTRIC SWITCH: DO NOT USE ANY PHONE IN YOUR VEHICLE. ! IMMEDIATELY CALL YOUR GAS SUPPLIER FROM A NEIGHBOR'S PHONE. FOLLOW THE GAS SUPPLIER'S INSTRUCTIONS. ! IF YOU CANNOT REACH YOUR GAS SUPPLIER, CALL THE FIRE DEPARTMENT.
FREEZE WARNING DRAIN HEATER IF SUBJECT TO FREEZING TEMPERATURES.
WARNING: IMPROPER INSTALLATION, ADJUSTMENT, ALTERATION, SERVICE OR MAINTENANCE CAN CAUSE INJURY OR PROPERTY DAMAGE. REFER TO THIS MANUAL. FOR ASSISTANCE OR ADDITIONAL INFORMATION, CONSULT A QUALIFIED INSTALLER, SERVICE AGENCY OR THE GAS SUPPLIER.
FOR YOUR SAFETY DO NOT STORE OR USE GASOLINE OR OTHER COMBUSTIBLE MATERIALS OR LIQUIDS NEAR OR ADJACENT TO THIS HEATER OR ANY OTHER APPLIANCE. THIS APPLIANCE SHALL NOT BE INSTALLED IN ANY LOCATION WHERE FLAMMABLE LIQUIDS OR VAPORS ARE LIKELY TO BE PRESENT.
AN ODORANT IS ADDED TO THE GAS USED BY THIS W ATER HEATER.
INSTALLER: AFFIX THESE INSTRUCTIONS TO OR ADJACENT TO W ATER HEATER. OW NER: RETAIN THESE INSTRUCTIONS AND W ARRANTY FOR FUTURE REFERENCE.
ALL TECHNICAL AND W ARRANTY QUESTIONS SHOULD BE DIRECTED TO THE COMPANY LISTED ON THE W ARRANTY, OR RATING PLATE W HICH CAME W ITH YOUR W ATER HEATER.
SUBURBAN MANUFACTURING COMPANY 676 Broadway Street
Dayton, Tennessee 37321 423-775-2131
Fax: 423-775-7015
315

SUBURBAN WATER HEATER
INSTALLATION REQUIREMENTS
W ARNING! Installation of this appliance must be made in accordance with the written instructions provided in this m anual. No agent, representative or employee of Suburban or other person has the authority to change, m odify or waive any provision of the instructions contained in this m anual.
CAUTION: If possible, do not install the water heater to where the vent can be covered or obstructed when any door on the trailer is opened. If this is not possible, then the travel of the door m ust be restricted in order to provide a 6" m inim um clearance between the water heater vent and any door whenever the door is opened.
CAUTION: Due to the differences in vinyl siding, this appliance should not be installed on vinyl siding without first consulting with the m anufacturer of the siding or cutting the siding aw ay from the area around the appliance vent.
C AU TIO N : In any installation in which the vent of this appliance can be covered due to the construction of the RV or som e special feature of the RV such as slide out, pop-up etc., always insure that the appliance cannot be operated by setting the therm ostat to the positive "OFF" position and shutting off all electrical and gas supply to the appliance.
CAUTION: Do not install this appliance to where the vent term inates below a slide-out. This appliance is not to be installed under any overhang. It m ust be free and clear of any type overhang.
This installation m ust conform with the requirem ents of the authority having jurisdiction or in the absence of such requirem ents with the latest edition of the National Fuel Gas Code AN SI Z223.1; and the latest edition of the Am erican National Standard for Recreational Vehicles-501C. In Canada the installation should conform with the following standards.
A. For installation in Recreational Vehicle
1. Gas - C SA standard CSA Z240.4.2 Installation Requirem ents for Propane Appliances and Equipm ent in Recreations Vehicles.
2. Electrical - CSA standard C22.2 No. 148/Z240.6.2 Electrical Requirem ents for Recreational Vehicles.
3. Plum bing - CSA standard CSA Z240.3.2 Plum bing Requirem ents for Recreational Vehicles.
B. For installation in Mobile Housing
1. G as - C S A stan dard CS A Z240.4.1 Installation R equirem ents for G as Burning Appliances and Equipm ent in Mobile Hom es.
2. Electrical - CSA standard CS A C22.1 Canadian Electrical Code Part 1.
3. Plum bing - CSA standard CSA Z240.3.1 Plum bing Requirem ents for Mobile H om es.
The appliance shall be disconnected from the gas supply piping system during any pressure testing of the system .
The appliance and its gas connections shall be leak tested before placing the appliance in operation.
All air for com bustion m ust be supplied from outside the structure. Air for com bustion m ust not be supplied from occupied spaces.
INSTALLATION INSTRUCTIONS
Minim um clearance from com bustible construction on sides, top, floor and rear = 0 inches. Provide room for access to rear of heater for servicing.
Provide an opening flush with floor in outer wall of coach as shown. W all of coach should be fram ed as shown in Figure 1. Maintain inside dim ensions listed below. Do not install on carpet unless the carpet is covered by a metal or wood shield covering the entire area underneath the water heater. If you prefer, you m ay cut away the carpet from this area.
INSTALLATION USING FLUSH MOUNT FRAME & DOOR
(See Figure 2 for Illustration)
A. Position heater into fram ed opening as illustrated. Slide unit into opening until the front of the control housing is flush with the exterior coach skin.

B. Secure the control housing to the coach wall (fram ed opening) at the top and sides of control housing com partm ent using screws or other suitable fasteners. Recess the screws or fasteners back far enough from the front edge of control housing (approxim ately 1 1/2") in order to clear the flange on door fram e. The door fram e, when installed, m ust not overlap onto screw or other fastener head. If due to the wall thickness, it is not possible to secure the water heater without covering the fastener head with the door fram e, it is im portant to not over tighten the fastener and distort the control housing. Over tightening of the fastener m ay cause water heater leaks between the control housing and the door fram e.
NOTE: Caulk around screw or fastener heads to assure water tight seal.
C. Install chocks, one on each side of water heater, as illustrated in Figure 1A.
D. On m esa or yoder type sidewalls, flatten the wall area around the opening.
E. Caulk around fram ed opening (trailer skin) as illustrated.
F. Caulk around door fram e using 2 beads of silicone caulking (or suitable caulking) - one on flange to seal to control housing and one around back side of fram e to seal to coach skin. (See detail A in illustration.)
G . Insert door fram e into control housing and secure with three (3) N o. 8-15 x 3 1/2" screws provided.
H. To install door, place the two holes in the bottom of the door over the door pins on the fram e. Close the door so that the latch protrudes through the slot in the door. Turn latch 90 degrees to fasten door.
I. The m odule board on models SW 6D and SW 6DE is not secured to the water heater. It is to be perm anently m ounted by the installer.
The m odule board m ust be m ounted to where it is accessible for service yet out of way of children. It should be located in a place where it cannot be subjected to m oisture, cleaning chem icals, flam m able vapors and liquids, etc.
The board and all wiring to the board m ust be protected in order to prevent dam ages and accidental contact with these parts. The m odule board m ay be m ounted with two (2) No. 6 x 5/8 screws or other suitable hardware.
INSTALLATION USING HINGED DOOR
(See Figure 3 for illustration)
A. Position heater into fram ed opening as illustrated.
B. On m esa or yoder type sidewalls, flatten the wall area around the opening.
C. Caulk around fram ed opening (trailer skin) as illustrated.
D. Lay a bead of silicone caulking (or suitable caulking) around the inner edge of the control housing (top, bottom and sides). See detail "A" in illustration. This will seal fram e to control housing.
E. Apply a bead of silicone caulking (or suitable caulking) around back side of door fram e. See detail "A" in illustration. This will seal fram e to coach skin.
F. Fit the door fram e into control housing (over the caulking already applied) and pull fram e tight to control housing using the three (3) No. 8-15 x 3 1/2" screws provided.
G. Push water heater into fram ed opening until back side of door fram e (now attached to control housing) is against the side of the coach and firm ly attach with screws around the perim eter of the fram e. NOTE: The two (2) holes in bottom of fram e identified as "A" in Figure 3 are also used to m ount door hinge to the fram e.
H. Install chocks, one on each side of water heater, as illustrated in Figure 1A.
I. Attach door to fram e as illustrated.
J. Close the door so that the door latch protrudes through the slot in the door. Turn latch 90 degrees to fasten door.
K. The m odule board on m odels SW 6D and SW 6DE is not secured to the water heater. It is to be perm anently m ounted by the installer.
The m odule board m ust be m ounted to where it is accessible for service yet out of way of children. It should be located in a place where it cannot be subjected to m oisture, cleaning chem icals, flam m able vapors and liquids, etc.
The board and all wiring to the board m ust be protected in order to prevent dam ages and accidental contact with these parts. The m odule board m ay be m ounted with two (2) No. 6 x 5/8 screws or other suitable hardware.

316

Figure 1

Figure 1A
2

SUBURBAN WATER HEATER
Figure 2

Figure 3

317

SUBURBAN WATER HEATER
MAKING WATER CONNECTIONS
A. W ater connections are m ade at the rear of the water heater. Refer to Figure 4 for all m odels except SW 6DM and SW 6DEM. For SW 6DM and SW 6DEM, refer to Figure 5 or 6. C onnect the hot and cold water lines to the 1/2" fem ale pipe fitting provided on rear of tank. These fittings are m arked "HOT" and "COLD". NOTE: Inside each fitting is a plastic fill tube. Its purpose is to enhance water circulation. DO NOT REM OVE PLASTIC FILL TUBE.
IMP O R TA N T: Use a pipe thread c om pound suitable for potable water or pipe thread tape on all connections to assure they will not leak.
B. For ease of rem oval, it is suggested that a pipe union be installed in each water line.
C. Fill tank with water. Open both hot and cold water faucets to expel air from tank. W hen tank is filled and water flows from faucets, close both faucets and check all connections for leaks.
CAUTION: If you use air pressure to check for leaks, the pressure m ust not exceed 30 PSI (in accordance with 4-9.1.1 of ANSI A119.2).
NOTE: After leak testing, drain water from tank.
MAKING GAS CONNECTIONS
A. Connect a 3/8" gas supply line to the 3/8 flare fitting at gas valve located in the control housing. W hen m aking the gas connection, hold the gas fitting on the valve with a wrench when tightening the flare nut. Failure to hold fitting secure could result in a gas leak due to fitting being dam aged. N O T E : It will be necessary to rem ove the grom m et from the control housing, m ake the gas connection at the valve, then reinstall grom m et.
W ARNING! It is im perative that grom m et and gas line through grom m et be caulked air tight. If not tightly sealed, m oisture and potential harm ful flue products could vent through opening and into living area of trailer. (See Figure 7.)
B. Turn on gas and check all fittings and connections for leaks, using a soap and water solution. Correct even the slightest leak imm ediately.
W AR NING! Do not use an open flam e to check for leaks!
HIGH ALTITUDE DERATION
Suburban water heaters are certified by nationally recognized testing laboratories for operation without m odifications at altitudes up to 4,500 feet. Operation above this elevation m ay require derating by 4 percent for every 1,000 feet above sea level. For exam ple, at 8,000 feet, the water heater should be derated approximately 32 percent.
If the unit is not properly derated, lack of sufficient oxygen for com bustion m ay produce im proper burner operation. Pilot outage caused by burner lift-off or sooting from a yellow burner m ay occur indicating the possibility of carbon m onoxide. You m ay also notice a lack of efficiency in heating the water because of incom plete com bustion of the burner at these higher altitudes.
Consult with the local gas com pany, your dealer, an RV service agency or Suburban Manufacturing Com pany for proper derating of the unit. Change-out of the orifice (derating) should be done by the dealer or a qualified service agency.
N O TE: It is im portant that once the unit has returned to lower elevation (below 4,500 feet), this high altitude deration and pilot adjustm ents (if equipped) be reversed for proper operation of the unit.

Model SW6DM Figure 5
Model SW6DEM Figure 6

Figure 4
318

Figure 7
4

SUBURBAN WATER HEATER

MAKING ELECTRICAL CONNECTIONS 12 VOLTS D.C.
A. Applicable to following m odels: SW 6D, SW 6DE, SW 6DM and SW 6DEM.
B. Refer to Figure 2 for location of D.C . junction box on m odels SW 6D and SW 6DE. Refer to Figure 5 and 6 for location of D.C. junction box on models SW 6DM and SW 6DEM.
C. The electrical connections m ust be m ade in accordance with local codes and regulations. In the absence of local codes and regulations, refer to the latest edition of the National Electrical Code AN SI\NFPA No. 70.
In Canada, the electrical installation should conform with CSA standard CSA C22.2 No. 148/Z240.6.2 Electrical R equirem ents for Recreational Vehicles and CSA C22.1 Canadian Electrical C ode Part 1 when installing the unit in recreational vehicles and mobile hom es respectively.
D. Make the 12 Volt D.C. electrical connections following the wiring diagram illustrated in Figure 8.
If the power supply is to be from a convertor, we recom m end that the converter system be wired in parallel with the battery. This will serve two purposes:
1. Provide a constant voltage supply 2. Filter any A.C. spikes or volt surges
W e recom m end insulated term inals be used for all electrical connections.

INSTALLATION OF MOTOR AID HEAT EXCHANGER A. Place copper "Y"s in heater as shown in Figure 10. B. Secure hoses to "Y"s with hose clam ps. C. Attach hose from m otor-aid heat exchanger to "Y"s. D. Secure hoses to m otor-aid and "Y"s with clam ps. E. Check all connections for water leaks and proper water circulation through m otor-aid heat exchanger, with engine running. The system should be checked annually for deterioration of heater hose and hose connections. Replace as needed.

Figure 10
MAINTENANCE
W ARNING! If the user of this appliance fails to m aintain it in the condition in which it was shipped from the factory or if the appliance is not used solely for its intended purpose or if appliance is not m aintained in accordance with the instructions in this m anual, then the risk of a fire and/or the production of carbon m onoxide exists which can cause personal injury, property dam age or loss of life.

Figure 8
MAKING ELECTRICAL CONNECTIONS
120 VOLTS A.C.
A. Applicable to following m odels SW 6DE and SW 6DEM.
B. Refer to Figure 2 for location of A.C. junction box on m odel SW 6DE. Refer to Figure 6 for A.C. junction box on m odel SW 6DEM.
C. The electrical connections m ust be m ade in accordance with local codes and regulations. In the absence of local codes and regulations, refer to the latest edition of the National Electrical Code AN SI/NFPA No. 70.
In Canada, the electrical installation should conform with CSA standard CSA C22.2 No. 148/Z240.6.2. Electrical requirem ents for Recreational Vehicles and CSA C22.1 Canadian Electrical Code Part 1 when installing the unit in recreational vehicles and mobile hom es respectively.
D . C heck rating plate and wiring diagram (Figure 9) before proceeding. Install a fused safety switch or circuit breaker of adequate capacity between heater and electrical power source. Attach the black and white wires from the fused switch or breaker to corresponding colored wires in heater junction box. A green wire from a well grounded source m ust be attached to the green nut in the junction box.
CAUTION: Before applying the 120 VAC power to the water heater junction box, be sure the switch for electric elem ent is in the "OFF" position.
W ARNING! Before the switch for the electric elem ent is turned to the "ON" position, the w ater heater tank m ust be filled with water. See "Safety W arnings".

W ARNING: For your safety, all repairs should be perform ed by your dealer or a qualified service person.
A. Main Burner: Do not allow the burner to burn with a yellow flam e, because sooting will occur. (See Safety W arnings). If the burner flam e is yellow and has an erratic pattern, shut unit down and contact a qualified service agency. Do not continue operating unit with im proper burner flam e. (See Figure 11 for correct and incorrect burner flam e appearance.)
B . Periodically inspect unit for soot. If soot is present anywhere on water heater, im m ediately shut unit down and contact your dealer or a qualified service person. Soot is a sign of incom plete com bustion and m ust be corrected before operating water heater. Areas to check would include:
1. Check for an obstruction in burner or the flue box.
2. Check the screen in the door to see that no foreign m aterial has accum ulated to prevent flow of com bustion and ventilating air.
3. Check to be sure there is no flam e present at burner orifice or burner whenever m ain gas valve is closed. This can be checked by turning the OFF/ON switch to the "OFF" position.
C. Frequent checks should be m ade of the grom m et on the gas inlet to assure tight seal. (See "Making Gas Connections").
D. Periodically check wiring and wire connection to be sure wiring is not dam aged/frayed and that all term inals and connections are tight and in com pliance with codes (See "Making W ire Connections").

Figure 9

Figure 11
5

319

SUBURBAN WATER HEATER
SAFETY WARNINGS
W AR NING! It is im perative that the water heater tank be filled with water before operating the water heater. Operation of the water heater without water in the tank may result in dam age to the tank and/or controls. This type of dam age is not covered by the lim ited warranty.
W ARNING! Hydrogen gas m ay result if you have not used this heater for two weeks or m ore. HYDROGEN GAS IS EXTREM ELY FLAM M ABLE. To reduce the risk of injury under these conditions, open the hot water faucet for several m inutes at the kitchen sink before you use any electrical appliance connected to the hot water system . If hydrogen is present, you probably will hear an unusual sound such as air escaping through the pipe as the water begins to flow.
Hydrogen gas m ay be present even after water has been drained from the tank. Open faucet at sink and allow system to vent for several m inutes (510 minutes).
Do not sm oke or have any open flam e near the open faucet. Do not attem pt to light pilot or m ain burner. On DSI m odels, be sure the switch is "OFF".
Should overheating occur, or the gas supply fail to shut off, shut off the m anual gas valve to the appliance before shutting off the electrical supply. Do not use this appliance if any part has been subm erged under water. Im m ediately call a qualified service technician to inspect the appliance and to replace any part of the control system and any gas control that has been subm erged under water.
Do not alter the operation of your water heater nor change the design/construction of your water heater. Accessories are being m arketed for RV products which we do not recom m end. For your safety, only factory authorized parts are to be used on your water heater.
Periodically inspect the vent for obstructions or presence of soot. Soot is form ed whenever com bustion is incom plete. This is your visual warning that the water heater is operating in an unsafe m anner. If soot is present, im m ediately shut the w ater heater down and contact your dealer or a qualified service person.
W hen considering add-on room s, porch or patio, attention m ust be given to the venting of your water heater. For your safety, do not term inate the vent on your water heater inside add-on room s, screen porch or onto patios. Doing so will result in products of com bustion being vented into the room s or occupied areas.
Never operate the heater if you sm ell gas. Do not assum e that the sm ell of gas in your RV is norm al. Any tim e you detect the odor of gas, it is to be considered life threatening and corrected im m ediately. Extinguish any open flam es including cigarettes and evacuate all persons from the vehicle. Shut off gas supply at LP gas bottle. (See Safety notice on front cover of this manual.)
NOTE: Always open both the cold and hot water faucets when filling vehicle water tank to allow air pockets to be forced out of the water heater. W hen water flows from the heater faucets, close both faucets.
W ARNING! Do not store or use com bustible m aterials or liquids near or adjacent to this heater. The appliance shall not be installed in any location where flam m able liquids or vapors are likely to be present.
Be sure the power is "OFF" to the water heater ignition system during any type of refueling and while vehicle is in m otion or being towed.
The therm ostat on your water heater is not adjustable. It is a tem perature sensing lim it designed to m aintain a water tem perature of 130/F (54/C). W ater tem peratures over 130/F (54/C) can cause severe burns instantly or death from scalds; therefore, be careful w hen using hot water. Children, disabled and elderly are at highest risk of being scalded. Always feel water before bathing or showering.

Figure 13

Figure 14

ANODE PROTECTION
The tank in this water heater is protected by a m agnesium or alum inum anode to prolong the life of the tank by absorbing the corrosive action of hot water. Under norm al use, the anode rod will deteriorate and because of this, we recom m end it be replaced yearly. NOTE: W ater with high levels of iron and/or sulfate will increase the rate of deterioration; therefore, m ore frequent replacem ent m ay be req uired. If anode rod is m ostly eaten away, replace it with a new one. (S ee Figure 12) To prevent a water leak when replacing the anode rod, a pipe thread sealant approved for potable water (such as Teflon tape) m ust be applied to the threads of the anode rod. Proper application of a thread sealant will not interfere with the anode's tank protection. Operating the water heater without proper anode protection will decrease tank life and will void your warranty on the tank. NO TE: Tank is drained by rem oving anode rod (See "Drain and Storage" instructions). To extend anode life, drain water from tank whenever RV is not being used. Avoid any extended tim e of non use with water in tank. Also, refer to section on winterizing.
W ARNING! Do not replace the anode rod with any non-Suburban accessory part, such as an "add-on" electric heating elem ent. Item s such as these are not approved to be installed in S uburban products. They could create an unsafe condition and will also void all warranties.
Figure 12
PRESSURE RELIEF VALVE
The tem perature and pressure relief valve is designed to open if the tem perature of the water within the heater reaches 210/F, or if the water pressure in the heater reaches 150 pounds. R ecreational vehicle water system s are closed system s and during the water heating cycle the pressure build-up in the water system will reach 150 pounds. W hen this pressure is reached, the pressure relief valve will open and water will drip from the valve. This dripping will continue until the pressure is reduced to below 150 pounds, and the valve closes. This condition is norm al and does not indicate a defective relief valve.
W ARNING! Do not place a valve between the relief valve and the tank. Do not plug the relief valve under any circum stances.
WATER WEEPING OR DRIPPING FROM PRESSURE RELIEF VALVE
You m ay experience water weeping or dripping from your water heater's Pressure and Tem perature (P & T) R elief Valve when your water heater is operating. W ater weeping or dripping from the P & T Valve does not always m ean the P & T Valve is defective. As water is heated, it expands. The water system in a recreational vehicle is a closed system and does not allow for the expansion of heated water. W hen the pressure of the water system exceeds the relieving point of the P & T Valve, the valve will relieve the excess pressure. Suburban recom m ends that a check valve not be installed directly at the inlet to the water heater tank. This will increase weeping of the pressure relief valve.
W ARNING! Do not rem ove or plug the relief valve.
One way to reduce the frequency of this occurrence is to m aintain an air pocket at the top of the water heater tank. This air pocket will form in the tank by design. However, it will be reduced over tim e by the everyday use of your water heater. To replenish this air pocket:
1. Turn off water heater. 2. Turn off cold water supply line. 3. Open a faucet in the RV. 4. Pull out on the handle of the Pressure Relief (P & T) Valve and allow water to flow from the valve until it stops. 5. Release handle on P & T Valve - it should snap closed. 6. Close faucet and turn on cold water supply; as the tank fills, the air pocket will develop. Repeat this procedure as often as needed to reduce the frequency of the weeping of the P & T Valve. If the weeping persists after following this procedure, you m ay elect to install an expansion or accum ulator tank in the cold water line between the tank and check valve to relieve the pres su re caused by therm al expansion. Contact your local dealer for assistance.
THERMOSTAT AND MANUAL RESET
M ODELS: SW 6D, SW 6DE, SW 6DM and SW 6DEM (See Figure 13)
The m odel water heaters listed above are equipped with a high tem perature limit as a cut-off device. Tem perature above 180/F will cause m anual reset button to trip shutting down m ain burner. To activate burner, the water tem perature m ust be below 110/F, push reset button to re-activate burner.

6

320

THERMOSTAT AND MANUAL RESET
M ODELS SW 6DE and SW 6DEM (See Figure 14)
The m odel water heaters listed above are equipped with a high tem perature lim it as a cut-off d evice. Tem perature above 180/F will cause m anual reset button to trip shutting down the electric elem ent.
To activate elem ent, the water tem perature m ust be below 110/F, push reset button to re-activate the electric elem ent.
DRAINING AND STORAGE INSTRUCTIONS
If RV is to be stored during winter m onths, the water heater m ust be drained to prevent dam age from freezing.
1. Turn off electrical power to water heater either at the switch from the electrical elem ent or at breaker.
2. Shut off gas supply to water heater.
3. Turn off pressure pum p on water system .
4. Open both hot and cold water faucets.
5. Remove anode rod from tank.
6. Follow RV m anufacturer's instructions for draining entire water system .
NOTE: Be certain to refill water heater with water and rem ove all air from tank and lines before re-lighting or before turning on electrical power.
ODOR FROM HOT WATER SYSTEM
O dor from the hot water system is not a service problem and m any water supplies contain sufficient am ounts of sulphur to produce an odor. The odor is sim ilar to rotten eggs and is often referred to as "sulph ur w ater". It is not harm ful - only unpleasant to sm ell. Sulphur water can be caused by a chem ical action or by bacteria. T he solution to elim inate is chlorination of the water system . Add about six (6) ounces of chlorinated com m on household liquid bleach to each 10 gallons in the water tank. Then run the chlorinated water throughout the system ,

SUBURBAN WATER HEATER
opening each faucet one at a tim e until you sm ell the chlorine. Let the RV sit for a few days and the chlorine should take care of the problem . Then you will need to take care of the chlorine. Rem ove the chlorine by flushing the system with fresh water. This m ay take several attem pts. You m ay consider adding a filtering system that rem oves chlorine and prevents sulphur water. If the sulphur or rotten egg smell continues, flush the system once again as described above and replace anode rod as necessary.
REMOVING WATER HEATER
1. Shut off gas supply and disconnect gas supply line from water heater.
2. On all Electric M odels, disconnect 120 V.A.C. supply at junction box mounted on heater.
3. On all DSI Models, disconnect 12 V.D.C. power supply at junction box on heater.
4. On Models SW 6D and SW 6DE disconnect all wires at m odule board.
5. Shut off water supply. Drain water from tank following instructions under "Draining and Storage".
6. Disconnect hot and cold water lines from water heater.
7. Rem ove screws or nails securing control housing to fram ed opening.
8. Slide heater out. To reinstall, follow instructions in m anual under "Installation Instructions".
WINTERIZING
If your water heater plum bing system is equipped with a bypass k it, use it to close off the water heater, drain the water heater com pletely and leave the water heater closed off (out of the system ) in the bypass position particularly if you are introducing antifreeze into the plum bing system . Antifreeze can be very corrosive to the anode rod creating prem ature failure and heavy sedim ent in the tank. If the plum bing system is not equipped with a bypass kit, and you intend to winterize by adding antifreeze to the system , rem ove the anode rod (storing it for the winter) and replace it with a 3/4" drain plug.

FOR YOUR SAFETY READ BEFORE OPERATING

W AR NING! If the user of this appliance fails to m aintain it in the condition in w hich it w as shipped from the factory or if the appliance is not used solely for its intended purpose or if appliance is not m aintained in accordance w ith the instructions in this m anual, then the risk of a fire and/or the production of carbon m onoxide exists which can cause personal injury, property dam age or loss of life.

OPERATING INSTRUCTIONS

W AR N IN G ! If you do not follow these instructions exactly, a fire or explosion m ay result causing property dam age, personal injury or loss of life.
W ARNING: Before operating water heater, be sure tank is filled with water. See "Safety W arnings".

N O TE : E ach ignition cycle will have a 15 second purge before spark cycle if system is a three try system .
8. If lockout occurs before m ain burner lights, turn switch to "O FF", wait five seconds and turn switch to "ON" position. This will restart the ignition cycle. The first start-up of the heater m ay require several ignition cycles before all air is purged from the gas lines.
If the burner will not com e on, the following item s should be checked before calling a service person.

A. This appliance does not have a pilot. It is equipped with an ignition device which autom atically lights the burner. Do not try to light the burner by hand.
B. BEFORE LIG HTING sm ell all around the appliance area for gas. Be sure to sm ell next to the floor because som e gas is heavier than air and will settle on the floor.
W HAT TO DO IF YOU SM ELL GAS C Do not try to light any appliance. C Do not touch any electric switch. C Do not use any phone in your building. C Im m ediately call your gas supplier from a neighbor's phone. Follow the gas
supplier's instructions. C If you cannot reach your gas supplier, call the fire departm ent.
C. This is an autom atic gas valve, no adjustm ents are necessary. Do not attem pt to repair the gas valve. This m ay result in a fire or explosion. D. Do not use this appliance if any part has been under water. Im m ediately call a qualified service technician to inspect the appliance and to replace any part of the control system and any gas control which has been under water. E. Before operating water heater, check the location of the vent to m ake sure it will n ot be blocked by the opening of any door on the trailer. If it can be blocked, do not operate the water heater with the door open.
OPERATING INSTRUCTIONS
1. STOP! R ead the safety inform ation provided.
2. Turn off all electric power to the appliance.
3. Turn "OFF" gas supply.

1. Switch turned off.
2. Gas supply to heater is em pty or turned off.
3. Reset button on ECO is tripped.
OPERATING INSTRUCTIONS FOR UNITS W ITH ELECTRIC ELEM ENT Electric water heaters are designed to operate with a minimum amount of service problems; however, proper operation and care is essential. By far the m ost com m on trouble with electric water heaters results from energizing the water heater before it is filled with water. Even brief operation of the electric elem ent without water in the tank will burn-out the electric heating elem ent. To energize the electric heating elem ent, turn the switch to "ON". The switch is located behind the water heater door in the lower left corner of the control housing. The water tem perature will be regulated by the therm ostat.
TO TURN OFF WATER HEATER 1. Turn switch to "OFF" position. 2. Turn off electrical power to the appliance. 3. Turn off gas supply. 4. If vehicle is to be stored or heater is going to be turned off while subject to freezing tem perature, drain water heater. (See "Draining and Storage Instructions.")

4. W ait five m inute s fo r g as to clear the area. If you sm ell gas then S TO P ! Follow instructions in item B of the safety inform ation. If you don't sm ell gas, go to next step.

5. Turn "ON" gas supply.

6. Turn on electrical power to the appliance.

7. Turn switch to "O N " p osition. If the burner does not light, the system will autom atically attem pt two m ore tries for ignition before lock-out.

7
321

SUBURBAN WATER HEATER
PARTS ILLUSTRATION AND REPLACEMENT PARTS LIST
Only factory authorized parts are to be used. Do not attem pt to repair defective parts.
W hen ordering repair parts from your dealer or a distributor, always give the following inform ation:
1. P art N um ber (Not Item N o.) 2. Part Description 3. Model No. and Serial No. of your Heater 4. Num ber of Parts Required

PARTS LIST FOR MODELS SW6D · SW6DE (Figure 15)

Item No. 1 3 6 7 8 10 11 12 13 15 16 18 20 21 24 25 26 28 29 31 32 33 34 35 36 37 38 39 41 42 44 45 46 47 48 49 50 51 52 53 55 56 57

Part Number

D e s c rip tio n

SW6D

SW6DE

Module Board . . . . . . . . . . . . . . . . . . . . . . . . . . . . . . . . . . . . . . . . . . . . . . . . . . . . . . 520814

520814

Cover, Module Board . . . . . . . . . . . . . . . . . . . . . . . . . . . . . . . . . . . . . . . . . . . . . . . 090487

090487

Bushing, Snap 1/2" . . . . . . . . . . . . . . . . . . . . . . . . . . . . . . . . . . . . . . . . . . . . . . . . . 070270

070270

Bushing, Strain Relief 5/8" . . . . . . . . . . . . . . . . . . . . . . . . . . . . . . . . . . . . . . . . . . . 230216

230216

D.C. Junction Box Assem bly . . . . . . . . . . . . . . . . . . . . . . . . . . . . . . . . . . . . . . . . . 090517

090517

Back Assem bly, Flue Collector . . . . . . . . . . . . . . . . . . . . . . . . . . . . . . . . . . . . . . . 101682

101682

Front, Flue Collector . . . . . . . . . . . . . . . . . . . . . . . . . . . . . . . . . . . . . . . . . . . . . . . . 101776

101776

Valve, Pressure Relief . . . . . . . . . . . . . . . . . . . . . . . . . . . . . . . . . . . . . . . . . . . . . . 161157

161157

Screw #10 x 1/4 . . . . . . . . . . . . . . . . . . . . . . . . . . . . . . . . . . . . . . . . . . . . . . . . . . . 121577

121577

Cover, Therm ostat/Hi-Lim it . . . . . . . . . . . . . . . . . . . . . . . . . . . . . . . . . . . . . . . . . . 090562

090562

Gasket, Therm ostat Cover . . . . . . . . . . . . . . . . . . . . . . . . . . . . . . . . . . . . . . . . . . . 070987

070987

Grommet . . . . . . . . . . . . . . . . . . . . . . . . . . . . . . . . . . . . . . . . . . . . . . . . . . . . . . . . 070874

070874

Bracket, Electrode Mounting . . . . . . . . . . . . . . . . . . . . . . . . . . . . . . . . . . . . . . . . . 063187

063187

Electrode . . . . . . . . . . . . . . . . . . . . . . . . . . . . . . . . . . . . . . . . . . . . . . . . . . . . . . . . 232258

232258

Cover, Elem ent . . . . . . . . . . . . . . . . . . . . . . . . . . . . . . . . . . . . . . . . . . . . . . . . . . . . . ------

090445

Gasket, Elem ent Cover . . . . . . . . . . . . . . . . . . . . . . . . . . . . . . . . . . . . . . . . . . . . . . ------

070988

Burner Assem bly with orifice . . . . . . . . . . . . . . . . . . . . . . . . . . . . . . . . . . . . . . . . . 010843

010843

Electric Elem ent with Gasket . . . . . . . . . . . . . . . . . . . . . . . . . . . . . . . . . . . . . . . . . . ------

520789

Anode . . . . . . . . . . . . . . . . . . . . . . . . . . . . . . . . . . . . . . . . . . . . . . . . . . . . . . . . . . . 232767

232767

Grommet . . . . . . . . . . . . . . . . . . . . . . . . . . . . . . . . . . . . . . . . . . . . . . . . . . . . . . . . . 071246

071246

Bushing, Snap 1/2" . . . . . . . . . . . . . . . . . . . . . . . . . . . . . . . . . . . . . . . . . . . . . . . . . . ------

070270

Switch, Electric Elem ent . . . . . . . . . . . . . . . . . . . . . . . . . . . . . . . . . . . . . . . . . . . . . . ------

232362

Gas Fitting . . . . . . . . . . . . . . . . . . . . . . . . . . . . . . . . . . . . . . . . . . . . . . . . . . . . . . . 170374

170374

Bracket, Valve Mounting . . . . . . . . . . . . . . . . . . . . . . . . . . . . . . . . . . . . . . . . . . . . 063243

063243

Valve, Gas (LP) . . . . . . . . . . . . . . . . . . . . . . . . . . . . . . . . . . . . . . . . . . . . . . . . . . . 161109

161109

Manifold, Outlet . . . . . . . . . . . . . . . . . . . . . . . . . . . . . . . . . . . . . . . . . . . . . . . . . . . 171420

171420

#10 x 1/4 (4 Required) . . . . . . . . . . . . . . . . . . . . . . . . . . . . . . . . . . . . . . . . . . . . . . 121577

121577

Screw #8-32 x 3/8 Hex HD. (2 Required) . . . . . . . . . . . . . . . . . . . . . . . . . . . . . . . . 121958

121958

Switch Assem bly, 12 V.D.C. T-Stat/Hi-Lim it . . . . . . . . . . . . . . . . . . . . . . . . . . . . . 232282

232282

Switch Assem bly, 120 V.A.C. T-Stat/Hi Lim it . . . . . . . . . . . . . . . . . . . . . . . . . . . . . . ------

232306

Cover, Junction Box . . . . . . . . . . . . . . . . . . . . . . . . . . . . . . . . . . . . . . . . . . . . . . . . . ------

090576

G rom m et, Gas Inlet . . . . . . . . . . . . . . . . . . . . . . . . . . . . . . . . . . . . . . . . . . . . . . . . 070989

070989

Bushing, Snap 7/8" . . . . . . . . . . . . . . . . . . . . . . . . . . . . . . . . . . . . . . . . . . . . . . . . .

------

230218

A.C. Junction Box Assem bly . . . . . . . . . . . . . . . . . . . . . . . . . . . . . . . . . . . . . . . . .

------

090575

Nut, 10-24 Keps (Green) . . . . . . . . . . . . . . . . . . . . . . . . . . . . . . . . . . . . . . . . . . . . 121576

121576

Bushing, Snap 7/8" . . . . . . . . . . . . . . . . . . . . . . . . . . . . . . . . . . . . . . . . . . . . . . . . .

------

230218

Foam Jacket Assem bly Com plete . . . . . . . . . . . . . . . . . . . . . . . . . . . . . . . . . . . . . . 520868

520868

Switch, Lam p and Plate Assem bly . . . . . . . . . . . . . . . . . . . . . . . . . . . . . . . . . . . . 232589

232589

Screw 8m m - 4.0 x 1/2 Hex W asher Head (2 Required) . . . . . . . . . . . . . . . . . . . . 121943

121943

Burner Bracket . . . . . . . . . . . . . . . . . . . . . . . . . . . . . . . . . . . . . . . . . . . . . . . . . . . . 063444

063444

1/4 Loxit Nut (Manifold to Burner) . . . . . . . . . . . . . . . . . . . . . . . . . . . . . . . . . . . . . . 171463

171463

1/4 Loxit Nut (Manifold to Valve) . . . . . . . . . . . . . . . . . . . . . . . . . . . . . . . . . . . . . . 171463

171463

Electrode W ire (Not Shown) . . . . . . . . . . . . . . . . . . . . . . . . . . . . . . . . . . . . . . . . . . 232456

232456

322

SUBURBAN WATER HEATER
Figure 15
323

SUBURBAN WATER HEATER

PARTS LIST FOR MODEL SW6DM (Figures 16 and 17)

Item No. 1 4 5 7 8 9 10 11 12 13 14 17 18 19

Part Number

D e s c rip tio n

SW6DM

Cover, Module Board . . . . . . . . . . . . . . . . . . . . . . . . . . . . . . . . 090340

Cover Junction Box . . . . . . . . . . . . . . . . . . . . . . . . . . . . . . . . . . 090344

Screw 10-32 x 3/8 (Green) . . . . . . . . . . . . . . . . . . . . . . . . . . . . 121702

Switch, Lam p and Plate Assem bly . . . . . . . . . . . . . . . . . . . . . 232589

Bushing, Snap 7/8" . . . . . . . . . . . . . . . . . . . . . . . . . . . . . . . . . . 230218

Insulator, Module Board . . . . . . . . . . . . . . . . . . . . . . . . . . . . . . 070807

Module Board . . . . . . . . . . . . . . . . . . . . . . . . . . . . . . . . . . . . . . 520814

Back Assem bly, Flue Collector . . . . . . . . . . . . . . . . . . . . . . . . . 101682

Valve, Pressure Relief . . . . . . . . . . . . . . . . . . . . . . . . . . . . . . . 161157

Gasket, Therm ostat Cover . . . . . . . . . . . . . . . . . . . . . . . . . . . . 070987

Cover, Therm ostat/Hi-Lim it . . . . . . . . . . . . . . . . . . . . . . . . . . . . 090562

Front, Flue Collector . . . . . . . . . . . . . . . . . . . . . . . . . . . . . . . . . 101776

Screw 10 x 1/4 . . . . . . . . . . . . . . . . . . . . . . . . . . . . . . . . . . . . . 121577

Grom m et . . . . . . . . . . . . . . . . . . . . . . . . . . . . . . . . . . . . . . . . . . 070874

Item No. 21 22 23 25 26 27 28 29 30 31 32 34 36 37 38 39 41 42

Part Number

D e s c rip tio n

SW6DM

Electrode . . . . . . . . . . . . . . . . . . . . . . . . . . . . . . . . . . . . . . . . . . . 232258

Bracket, Electrode Mounting . . . . . . . . . . . . . . . . . . . . . . . . . . . . 063187

Burner Assem bly with orifice . . . . . . . . . . . . . . . . . . . . . . . . . . . 010843

1/4 Loxit Nut (Manifold to Valve) . . . . . . . . . . . . . . . . . . . . . . . . . 171463

Valve, Gas (LP) . . . . . . . . . . . . . . . . . . . . . . . . . . . . . . . . . . . . . 161109

Manifold Outlet . . . . . . . . . . . . . . . . . . . . . . . . . . . . . . . . . . . . . . 171420

Screw 10 x 1/4 (4 Required) . . . . . . . . . . . . . . . . . . . . . . . . . . . . 121577

Screw 8-32 x 3/8 Hex HD (2 Required) . . . . . . . . . . . . . . . . . . . 121958

Bracket, Valve Mounting . . . . . . . . . . . . . . . . . . . . . . . . . . . . . . . 063243

Gas Fitting . . . . . . . . . . . . . . . . . . . . . . . . . . . . . . . . . . . . . . . . . 170374

Switch Assem bly 12 V.D.C. T-Stat/Hi-Lim it . . . . . . . . . . . . . . . . 232282

Grom m et . . . . . . . . . . . . . . . . . . . . . . . . . . . . . . . . . . . . . . . . . . . 071246

Anode . . . . . . . . . . . . . . . . . . . . . . . . . . . . . . . . . . . . . . . . . . . . . 232767

G rom m et, Gas Inlet . . . . . . . . . . . . . . . . . . . . . . . . . . . . . . . . . . 070989

Screw 8m m - 4.0 x 1/2 Hex W asher Head (2 Required) . . . . . . 121943

Burner Bracket . . . . . . . . . . . . . . . . . . . . . . . . . . . . . . . . . . . . . . 063444

1/4 Loxit Nut (Manifold to Burner) . . . . . . . . . . . . . . . . . . . . . . . . 171463

Electrode W ire (Not Shown) . . . . . . . . . . . . . . . . . . . . . . . . . . . . 232454

REAR VIEW SW6DM
Figure 16

FRONT VIEW SW6DM Figure 17
10
324

SUBURBAN WATER HEATER

PARTS LIST FOR MODEL SW6DEM (Figures 18 and 19)

Item No. 1 4 5 7 8 9 10 11 12 13 14 16 17 18 19 20 23 25 26

Part Number

D e s c rip tio n

SW6DEM

Cover, Module Board . . . . . . . . . . . . . . . . . . . . . . . . . . . . . . . . . 090340

Cover, Junction Box (12 V.D.C.) . . . . . . . . . . . . . . . . . . . . . . . . . 090344

Screw 10-32 x 3/8 (Green) . . . . . . . . . . . . . . . . . . . . . . . . . . . . . 121702

Switch, Lam p and Plate Assem bly . . . . . . . . . . . . . . . . . . . . . . 232589

Bushing, Snap . . . . . . . . . . . . . . . . . . . . . . . . . . . . . . . . . . . . . . 230218

Insulator, Module Board . . . . . . . . . . . . . . . . . . . . . . . . . . . . . . . 070807

Module Board . . . . . . . . . . . . . . . . . . . . . . . . . . . . . . . . . . . . . . . 520814

Cover, Junction Box . . . . . . . . . . . . . . . . . . . . . . . . . . . . . . . . . . 090464

Nut 10-24 Keps (Green) . . . . . . . . . . . . . . . . . . . . . . . . . . . . . . . 121576

Bushing . . . . . . . . . . . . . . . . . . . . . . . . . . . . . . . . . . . . . . . . . . . . 070486

Back, Flue Collector . . . . . . . . . . . . . . . . . . . . . . . . . . . . . . . . . . 101682

Screw #10 x 1/4 . . . . . . . . . . . . . . . . . . . . . . . . . . . . . . . . . . . . . 121577

Front, Flue Collector . . . . . . . . . . . . . . . . . . . . . . . . . . . . . . . . . . 101776

Valve, Pressure Relief . . . . . . . . . . . . . . . . . . . . . . . . . . . . . . . . 161157

Gasket, Therm ostat Cover . . . . . . . . . . . . . . . . . . . . . . . . . . . . . 070987

Cover, Therm ostat/Hi-Lim it . . . . . . . . . . . . . . . . . . . . . . . . . . . . . 090562

Grom m et (2 Required) . . . . . . . . . . . . . . . . . . . . . . . . . . . . . . . . 070874

Electrode . . . . . . . . . . . . . . . . . . . . . . . . . . . . . . . . . . . . . . . . . . . 232258

Bracket, Electrode Mounting . . . . . . . . . . . . . . . . . . . . . . . . . . . . 063187

Item No. 28 29 30 32 33 34 36 37 38 39 40 41
43 44 45 47 48 49 50 52 53

Part Number

D e s c rip tio n

SW6DEM

Cover, Elem ent . . . . . . . . . . . . . . . . . . . . . . . . . . . . . . . . . . . . . . 090445

Gasket, Elem ent Cover . . . . . . . . . . . . . . . . . . . . . . . . . . . . . . . 070988

Burner Assem bly with orifice . . . . . . . . . . . . . . . . . . . . . . . . . . . 010843

1/4 Loxit Nut (Manifold to Valve) . . . . . . . . . . . . . . . . . . . . . . . . . 171463

Electric Elem ent with Gasket . . . . . . . . . . . . . . . . . . . . . . . . . . . 520789

Anode . . . . . . . . . . . . . . . . . . . . . . . . . . . . . . . . . . . . . . . . . . . . . 232767

Grommet . . . . . . . . . . . . . . . . . . . . . . . . . . . . . . . . . . . . . . . . . . . 071246

Switch, Electric Elem ent . . . . . . . . . . . . . . . . . . . . . . . . . . . . . . . 232362

Valve, Gas (LP) . . . . . . . . . . . . . . . . . . . . . . . . . . . . . . . . . . . . . 161109

Manifold, Outlet . . . . . . . . . . . . . . . . . . . . . . . . . . . . . . . . . . . . . . 171420

Screw 10 x 1/4 (4 Required) . . . . . . . . . . . . . . . . . . . . . . . . . . . . 121577

Screw #8-32 x 3/8 Hex HD . . . . . . . . . . . . . . . . . . . . . . . . . . . . 121958

Bracket, Valve Mounting . . . . . . . . . . . . . . . . . . . . . . . . . . . . . . . 063243

Gas Fitting . . . . . . . . . . . . . . . . . . . . . . . . . . . . . . . . . . . . . . . . . 170374

Bushing, Snap 1/2" . . . . . . . . . . . . . . . . . . . . . . . . . . . . . . . . . . . 070270

Switch Assem bly, 120 V.A.C. T-Stat/Hi-Lim it . . . . . . . . . . . . . . . 232306

Switch Assem bly, 12 V.D.C. T-Stat/Hi-Lim it . . . . . . . . . . . . . . . . 232282

G rom m et, Gas Inlet . . . . . . . . . . . . . . . . . . . . . . . . . . . . . . . . . . 070989

Screw 8m m - 4.0 x 1/2 Hex W asher Head (2 Required) . . . . . . 121943

Burner Bracket . . . . . . . . . . . . . . . . . . . . . . . . . . . . . . . . . . . . . . 063444

1/4 Loxit Nut (Manifold to Burner) . . . . . . . . . . . . . . . . . . . . . . . . 171463

Electrode W ire (Not Shown) . . . . . . . . . . . . . . . . . . . . . . . . . . . . 232454

REAR VIEW SW 6D EM
Figure 18

FRONT VIEW SW6DEM Figure 19
11

325

SUBURBAN WATER HEATER

TWO YEAR LIMITED WARRANTY SUBURBAN RECREATIONAL VEHICLE WATER HEATER
TWO YEAR LIMITED WARRANTY

This Suburban product is warranted to the original purchaser to be free from defects in material and workmanship under normal use and maintenance for a period of two years from date of purchase whether or not actual use begins on that date. It is the responsibility of the consumer/owner to establish the warranty period. Suburban does not use warranty registration cards for its standard warranty. You are required to furnish proof of purchase date through a Bill of Sale or other payment records. Suburban will replace any parts that are found defective within the first two years and will pay a warranty service allowance directly to the recommended Suburban Service Center at rates mutually agreed upon between Suburban and its recommended service centers. Replacement parts will be shipped FOB the shipping point within the Continental United States, Alaska and Canada to the recommended service center performing such repairs. All freight, shipping and delivery costs shall be the responsibility of the owner. The exchanged part or unit will be warranted for only the unexpired portion of the original warranty. Before having warranty repairs made, confirm that the service agency is a recommended service center for Suburban. DO NOT PAY THE SERVICE AGENCY FOR WARRANTY REPAIRS; SUCH PAYMENTS WILL NOT BE REIMBURSED. Suburban reserves the right to examine the alleged defect in the water heater or component parts, and it is the owner's obligation to return the water heater and/or component parts to Suburban or its representative. When returning a water heater, it must include all component parts and the serial number plate. Returned component parts must be individually tagged and identified with the water heater's model number, serial number and date of installation. For warranty service, the owner/user should contact the nearest recommended Suburban Service Center, advising them of the model and serial numbers (located on the water heater) and the nature of the defect. Transportation of the RV to and from the Service Center and/or travel expenses of the Service Center to your location is the responsibility of the owner/user. A current listing of recommended service center may be obtained from Suburban's website: www.rvcomfot.com. If you cannot locate a recommended service center locally, the service agency chosen to perform warranty repairs must contact our Service Department at 423-775-2131 for authorization before making repairs. Unauthorized repairs made will not be paid by Suburban.
THREE YEAR LIMITED WARRANTY ON TANK

The inner tank is further warranted to be free from defects in material and workmanship during the third year after the date of original purchase. A replacement water heater will be provided under the same conditions as stated in the two year warranty EXCEPT no labor reimbursement will be provided. LIMITATION OF WARRANTIES

ALL IMPLIED WARRANTIES (INCLUDING IMPLIED WARRANTIES OF MERCHANTABILITY) ARE HEREBY LIMITED IN DURATION TO THE PERIOD FOR WHICH EACH LIMITED WARRANTY IS GIVEN. SOME STATES DO NOT ALLOW LIMITATIONS ON HOW LONG AN IMPLIED WARRANTY LASTS SO THE ABOVE LIMITATIONS MAY NOT APPLY TO YOU. THE EXPRESSED WARRANTIES MADE IN THIS WARRANTY ARE EXCLUSIVE AND MAY NOT BE ALTERED, ENLARGED, OR CHANGED BY ANY DISTRIBUTOR, DEALER OR OTHER PERSON WHOMSOEVER. SUBURBAN WILL NOT BE RESPONSIBLE FOR:

1. Normal maintenance as outlined in the installation, operating and service instructions owner's manual including cleaning of component parts and cleaning or replacement of the burner orifice. Any water damage arising, directly or indirectly, from any defect in the water heater or component parts or from its use. 2. Initial checkouts and subsequent checkouts which indicate the water heater is operating properly, or diagnosis without repair. 3. Damage or repairs required as a consequence of faulty or incorrect installation or application not in conformance with Suburban instructions. 4. Failure to start and/or operate due to loose or disconnected wires; water or dirt in controls, fuel lines and gas tanks; improper gas pressure; low voltage. 5. Cleaning or adjustment of components; electrode, burner tube, pilot and thermocouple. 6. Costs incurred in gaining access to the water heater. 7. Parts or accessories not supplied by Suburban. 8. Freight charges incurred from parts replacements. 9. Damage or repairs needed as a consequence of any misapplication, abuse, unreasonable use, unauthorized alteration, improper service, improper operation or failure to provide reasonable and necessary maintenance. 10. Suburban products whose serial number has been altered, defaced or removed. 11. Suburban products installed or warranty claims originating outside the Continental U.S.A., Alaska, Hawaii and Canada. 12. Damage as a result of floods, winds, lightning, accidents, corrosive atmosphere or other conditions beyond the control of Suburban. 13. ANY SPECIAL, INDIRECT OR CONSEQUENTIAL PROPERTY, ECONOMIC OR COMMERCIAL DAMAGE OF ANY NATURE WHATSOEVER. Some states do not allow the exclusion of incidental or consequential damages, so the above limitation may not apply to you. NO REPRESENTATIVE, DEALER, RECOMMENDED SERVICE CENTERS OR OTHER PERSON IS AUTHORIZED TO ASSUME FOR SUBURBAN MANUFACTURING COMPANY ANY ADDITIONAL, DIFFERENT OR OTHER LIABILITY IN CONNECTION WITH THE SALE OF THIS SUBURBAN PRODUCT. This warranty gives you specific legal rights, and you may also have other rights which vary from state to state.
IF YOU HAVE A PRODUCT PROBLEM

FIRST:

If your RV has its original water heater and is still under the RV manufacturer's warranty, follow the steps suggested by your dealer or manufacturer of the RV.

SECOND:

Contact a conveniently located recommended Suburban Service Center. Describe to them the nature of your problem, make an appointment, if necessary, and provide for delivery of your RV to the selected service center.

THIRD:

For the location of the nearest Service Center, refer to the listing provided or contact:

Suburban Manufacturing Company Customer Service Department 676 Broadway Street Dayton, Tennessee 37321 (423) 775-2131, Ext. 7101 www.rvcomfort.com

For future reference, you should record the following inform ation MODEL NUMBER _________________________________ SERIAL NU MBER _________________________________ STOCK NUMBER _________________________________

DATE OF PURCHASE _____________________________

326

Part Number 204319 6-15-07

VIZIO TV

USER MANUAL
Models: D24h-G9, D32h-G9, D40f-G9, D50x-G9, V405-G9, V505-G9 & V655-G9

Safety & Certification

THANK YOU FOR CHOOSING VIZIO

IMPORTANT SAFETY INSTRUCTIONS

or objects have fallen into the apparatus, the apparatus has been

And congratulations on your new VIZIO TV. To get the most out of your new VIZIO product, read these instructions before using your product and retain them for future reference. Be sure to inspect the package contents to ensure there are no missing or damaged parts.
PRODUCT REGISTRATION To purchase or inquire about accessories and installation services for your VIZIO product, visit our website at www.VIZIO.com or call toll free at (877) 698-4946.

Your TV is designed and manufactured to operate within defined design limits. Misuse may result in electric shock or fire. To prevent your TV from being damaged, the following instructions should be observed for the installation, use, and maintenance of your TV. Read the following safety instructions before operating your TV. Keep these instructions in a safe place for future reference.
· To reduce the risk of electric shock or component damage, switch off the power before connecting other components to your TV.
· Read these instructions.
· Keep these instructions.

exposed to rain or moisture, does not operate normally, or has been dropped.
· Unplug the power cord before cleaning your TV.
· When moving your TV from an area of low temperature to an area of high temperature, condensation may form in the housing. Wait before turning on your TV to avoid causing fire, electric shock, or component damage.
· A distance of at least three feet should be maintained between your TV and any heat source, such as a radiator, heater, oven, amplifier etc. Do not install your TV close to smoke. Operating your TV close to smoke or moisture may cause fire or electric shock.

We recommend that you register your VIZIO product at www.VIZIO.com. WHEN READING THIS MANUAL

· Heed all warnings. · Follow all instructions. · Do not use this apparatus near water.

· Slots and openings in the back and bottom of the cabinet are provided for ventilation. To ensure reliable operation of your TV and to protect it from overheating, be sure these openings are not blocked or covered. Do not place your TV in a bookcase or cabinet

· Clean only with dry cloth.

unless proper ventilation is provided.

When you see this symbol, please read the accompanying important warning or notice. It is intended to alert you to the presence of important operating instructions.
When you see this symbol, please read the accompanying helpful tip.

· Do not block any ventilation openings. Install in accordance with the manufacturer's instructions.
· Do not install near any heat sources such as radiators, heat registers, stoves, or other apparatus (including amplifiers) that produce heat.
· Do not defeat the safety purpose of the polarized or grounding-type plug. A polarized plug has two blades with one wider than the other. A grounding type plug has two blades and a third grounding prong. The wide blade or the third prong are provided for your safety. If the provided plug does not fit into your outlet, consult an electrician for replacement of the obsolete outlet.

· Never push any object into the slots and openings on your TV cabinet. Do not place any objects on the top of your TV. Doing so could short circuit parts causing a fire or electric shock. Never spill liquids on your TV.
· Your TV should be operated only from the type of power source indicated on the label. If you are not sure of the type of power supplied to your home, consult your dealer or local power company.
· Do not apply pressure or throw objects at your TV. This may compromise the integrity of the TV. The manufacturer's warranty does not cover user abuse or improper installations.

· Protect the power cord from being walked on or pinched particularly at plugs, convenience receptacles, and the point where they exit from

· The power cord must be replaced when using different voltage than the voltage specified. For more information, contact your dealer.

the apparatus.

· When connected to a power outlet, power is always flowing into your

· Only use attachments/accessories specified by the manufacturer.

TV. To totally disconnect power, unplug the power cord.

· Use only with the cart, stand, tripod, bracket, or table


· The lightning flash with arrowhead symbol within an equilateral

specified by the manufacturer, or sold with the apparatus.

triangle is intended to alert the user to the presence of

When a cart is used, use caution when moving the cart/

un-isolated, dangerous voltage within the inside of your TV that

apparatus combination to avoid injury from tip-over.

may be of sufficient magnitude to constitute a risk of electric

shock to persons.

· Unplug this apparatus during lightning storms or when unused for

long periods of time.

· Do not overload power strips and extension cords. Overloading can

result in fire or electric shock.

· Refer all servicing to qualified service personnel. Servicing is

required when the apparatus has been damaged in any way, such

· The wall socket should be installed near your TV

as power-supply cord or plug is damaged, liquid has been spilled

and easily accessible.

ii

327

VIZIO TV

· Only power of the marked voltage can be used for your TV. Any other voltage than the specified voltage may cause fire or electric shock.
· Do not touch the power cord during lightning. To avoid electric shock, avoid handling the power cord during electrical storms.
· Unplug your TV during a lightning storm or when it will not be used for long period of time. This will protect your TV from damage due to power surges.
· Do not attempt to repair or service your TV yourself. Opening or removing the back cover may expose you to high voltages, electric shock, and other hazards. If repair is required, contact your dealer and refer all servicing to qualified service personnel.
· WARNING: Keep your TV away from moisture. Do not expose your TV to rain or moisture. If water penetrates into your TV, unplug the power cord and contact your dealer. Continuous use in this case may result in fire or electric shock.
· Do not use your TV if any abnormality occurs. If any smoke or odor becomes apparent, unplug the power cord and contact your dealer immediately. Do not try to repair your TV yourself.
· Avoid using dropped or damaged appliances. If your TV is dropped and the housing is damaged, the internal components may function abnormally. Unplug the power cord immediately and contact your dealer for repair. Continued use of your TV may cause fire or electric shock.
· Do not install your TV in an area with heavy dust or high humidity. Operating your TV in environments with heavy dust or high humidity may cause fire or electric shock.
· Follow instructions for moving your TV. Ensure that the power cord and any other cables are unplugged before moving your TV.
· To prevent injury, this apparatus must be securely attached to the floor/wall in accordance with the installation instructions.
· When unplugging your TV,grab the head of the power plug, not the cord. Pulling on the power cord may damage the wires inside the cord and cause fire or electric shock. When your TV will not be used for an extended period of time, unplug the power cord.

· If any of the following occurs, contact the dealer: - The power cord fails or frays. - Liquid sprays or any object drops into your TV. - Your TV is exposed to rain or other moisture. - Your TV is dropped or damaged in any way. - The performance of your TV changes substantially.
· This apparatus shall not be exposed to dripping or splashing and no objects filled with liquids, such as vases, shall be placed on the apparatus.
· The mains plug or appliance coupler is used as the disconnect device, the disconnect device shall remain readily operable.
· CAUTION: These servicing instructions are for use by qualified service personnel only. To reduce the risk of electric shock, do not perform any servicing other than that contained in the operating instructions unless you are qualified to do so.
· The lightning flash with arrowhead symbol within an equilateral triangle is intended to alert the user to the presence of uninsulated DANGEROUS VOLTAGE within the product's enclosure that may be of sufficient magnitude to constitute a risk of electrical shock to persons.
· WARNING: Exposure to loud sounds can damage your hearing causing hearing loss and tinnitus (ringing or buzzing in the ears). With continued exposure to loud noises, ears may become accustomed to the sound level, which may result in permanent damage to hearing without any noticeable discomfort.
· Install the TV where it cannot be pulled, pushed or knocked over.
· Do not allow children to hang onto the product.
· Store the accessories (remote, batteries, etc.) in a location safely out of the reach of children.
· The American Academy of Pediatrics discourages television viewing for children younger than two years of age.
· WARNING: Never place a television set in an unstable location. A television set may fall, causing serious personal injury or death.

· Ensuring the television set is not overhanging the edge of the supporting furniture.
· Not placing the television set on tall furniture (for example, cupboards or bookcases) without anchoring both the furniture and the television set to a suitable support.
· Not placing the television set on cloth or other materials that may be located between the television set and the supporting furniture.
· Educating children about the dangers of climbing on furniture to reach the television set or its controls.
· If your existing television set is being retained and relocated, the same considerations as above should be applied.
· WARNING: To prevent injury, this apparatus must be securely attached to the floor/wall in accordance with the installation instructions.

· To reduce risk of electric shock, do not touch the connector with wet hands.

· Many injuries, particularly to children, can be avoided by taking simple precautions such as:

· Insert batteries in accordance with instructions. Incorrect polarities

· Using cabinets or stands recommended by the manufacturer of the

may cause the batteries to leak which can damage the remote control

television set.

or injure the operator. Do not expose batteries to excessive heat such as sunshine, fire or the like.

· Only using furniture that can safely support the television set.

iii

TELEVISION ANTENNA CONNECTION PROTECTION If an outside antenna/satellite dish or cable system is to be connected to the TV, make sure that the antenna or cable system is electrically grounded to provide some protection against voltage surges and static charges. Article 810 of the National Electrical Code, ANSI/NFPSA 70, provides information with regard to proper grounding of the mast and supporting structure, grounding of the lead-in wire to an antenna discharge unit, size of the grounding conductors, location of antenna discharge unit, connection to grounding electrodes, and requirements of the grounding electrode. Lightning Protection For added protection of the TV during a lightning storm, or when it is left unattended or unused for long periods of time, unplug the TV from the wall outlet and disconnect the antenna or cable system. Power Lines Do not locate the antenna near overhead light or power circuits, or where it could fall into such power lines or circuits. Remember, the screen of the coaxial cable is intended to be connected to earth in the building installation.
328

Ground Clamp

Antenna Lead In Wire

Electric Service Equipment

Antenna Discharge Unit (NEC Section 810-20)
Grounding Conductors (NEC Section 810-21) Ground Clamps
Power Service Grounding Electrode System
(NEC ART 250, part H)

iv

VIZIO TV

For DTS patents, see http://patents.dts.com.
Manufactured under license from DTS, Inc. DTS, the Symbol, DTS and the Symbol together, and DTS Studio Sound are registered trademarks and/or trademarks of DTS, Inc. in the United States and/or other countries. © DTS, Inc. All Rights Reserved.

For DTS patents, see http://patents.dts.com.
Manufactured under license from DTS, Inc. DTS, the Symbol, DTS and the Symbol together, and DTS Studio Sound II are registered trademarks and/or trademarks of DTS, Inc. in the United States and/or other countries. © DTS, Inc. All Rights Reserved.
* Only available on D50x-G9, V405-G9, V505-G9 and V655-G9

Dolby, Dolby Audio, and the double-D symbol are trademarks of Dolby Laboratories. Manufactured under license from Dolby Laboratories. Confidential unpublished works. Copyright © 1992-2015 Dolby Laboratories. All rights reserved.

The terms HDMI, HDMI High-Definition Multimedia Interface, and the HDMI Logo are trademarks or registered trademarks of HDMI Licensing Administrator, Inc.

v

Table Of Contents

Getting to Know Your TV .............................................7
Front Panel ..........................................................................................7 Rear Panel ...........................................................................................8 Connecting Your Devices ...................................................................11 Wall-mounting the TV .........................................................................14 Using the Remote ...............................................................................15
Completing The First-Time Setup ...............................16
Using the On-Screen Menu .........................................17
Navigating the On-Screen Menu........................................................17 Changing the Input Source ................................................................17 Changing the Screen Aspect Ratio.....................................................18 Adjusting the Picture Settings............................................................19
Adjusting More Picture Settings .....................................................19 Adjusting the Color Temperature...................................................20 Adjusting the Picture Mode Edit Settings ......................................20 Saving a Custom Picture Mode.......................................................20 Locking/Unlocking a Custom Picture Mode...................................21 Deleting a Custom Picture Mode....................................................21 Resetting a Picture Mode ................................................................21 Adjusting the Color Tuner Settings ................................................22 Adjusting the Audio Settings..............................................................24 Adjusting the Network Settings .........................................................25 Setting Timers ..................................................................................... 27 Setting the Timer .............................................................................27

Setting the Auto Power Off Feature ...............................................27 Setting Up Channels ...........................................................................28
Scanning for Channels ....................................................................28 Skipping Channels ...........................................................................28 Listening to Alternate Audio ..............................................................29 Changing the Analog Audio Language ...........................................29 Parental controls ................................................................................30 Using Parental Controls ..................................................................30 Enabling or Disabling Program Ratings .........................................30 Locking and Unlocking Channels....................................................30 Blocking and Unblocking Content by Rating .................................30 Setting Up Closed Captioning ............................................................31 Changing the Appearance of Digital Closed Captions ..................31 Renaming Devices on the Input Menu ..............................................33 Changing the TV Settings ...................................................................34 Viewing System Information...........................................................34 Changing the On-Screen Menu Language .....................................34 Setting the Time and Local Settings ...............................................35 Adjusting the CEC Settings..............................................................35 Changing the TV Name....................................................................36 Using the Reset & Admin Menu.........................................................37 Restoring the TV to Factory Default Settings.................................37 Turning the Power Indicator On or Off ..........................................37 Using the Info Window .......................................................................39

SmartCast HomeSM........................................................40
What is SmartCast Home?...............................................................40 What You Can Do with SmartCast Home .......................................40 How to Launch SmartCast Home ...................................................40
WatchFree.....................................................................41
What is WatchFree? .........................................................................41 What You Can Do with WatchFree..................................................41 How to Launch WatchFree ..............................................................41
Playing USB Media .......................................................42
Displaying USB Media.........................................................................42 Preparing Your USB Drive to Play USB Media ...............................42 Removing the USB Drive from the TV ............................................42
Troubleshooting & Technical Support........................46
Specifications ...............................................................50
Regulatory Information ...............................................52
Limited Warranty .........................................................53
Legal Information.........................................................55

vi

329

VIZIO TV

Getting to Know Your TV

1

FRONT PANEL

Remote Sensor and Power Indicator

When using the remote, aim it directly at this sensor. The power indicator flashes on when the TV turns on, then goes out after several seconds.

To keep the power indicator on as long as the TV is on, see Turning the Power Indicator On or Off.

7

Rear Panel - D24h-G9
HDMI - Connect an HDMI device.
Composite - Connect a composite. Video/ L/R
Coaxial - Connect to a coaxial cable from cable, satellite, or antenna. Stereo Audio Out - Connect 3.5 mm audio device, such as a headset or sound bar.
USB - Connect a USB thumb drive to play photo, music, or video. Optical Audio Out - Connect to an optical/SPDIF audio device, such as home audio receiver.

Power - Press to turn on the TV. Press and hold to turn the TV off.

Volume - Press to increase or decrease the TV volume level.

VOL

Input - Press to access the input menu.

INPUT

1
Note: The image shown here is for illustrative purposes only and may be subject to change. The actual number of ports and their locations may vary, depending on the model.
8

330

Rear Panel - D40f-G9

HDMI - Connect an HDMI device.

Component/Composite - Connect a component or composite.

Audio Out - Connect to an RCA device, such as sound bar.
Coaxial - Connect to a coaxial cable from cable, satellite, or antenna. USB - Connect a USB thumb drive to play photo, music, or video.
Optical Audio Out - Connect to an optical/SPDIF audio device, such as home audio receiver. Ethernet - Connect an Ethernet cable to modem/ router.

Power - Press to turn on the TV. Press and hold to turn the TV off.

Volume - Press to increase or decrease the TV volume level.

VOL

Input - Press to access the input menu.

INPUT

Rear Panel - D32h-G9, D50x-G9, V405-G9, V505-G9 & V655-G9 HDMI - Connect an HDMI device.

Composite - Connect a composite device.

Audio Out - Connect to an RCA device, such as sound bar.
Coaxial - Connect to a coaxial cable from cable, satellite, or antenna. USB - Connect a USB thumb drive to play photo, music, or video.
Optical Audio Out - Connect to an optical/SPDIF audio device, such as home audio receiver. Ethernet - Connect an Ethernet cable to modem/ router.

Power - Press to turn on the TV. Press and hold to turn the TV off.

Volume - Press to increase or decrease the TV volume level.

VOL

Input - Press to access the input menu.

INPUT

VIZIO TV
1
Note: The image shown here is for illustrative purposes only and may be subject to change. The actual number of ports and their locations may vary, depending on the model.
9
1
Note: The image shown here is for illustrative purposes only and may be subject to change. The actual number of ports and their locations may vary, depending on the model.
10
331

VIZIO TV

Connecting Your Devices
CONNECTING A DEVICE - AUDIO & VIDEO CABLE TYPES Your TV can be used to display output from most devices. 1. Verify that your device has a video port that matches an available port on the TV (HDMI, Component, etc.). 2. Connect the appropriate cable (not included) to the TV and the device. 3. Turn the TV and your device on. Set the TV's input to match the connection you used (HDMI-1, HDMI-2, etc.).

HDMI CABLE HDMI

COMPONENT CABLE

R

L Pr/Cr Pb/Cb Y

COMPOSITE (AV) CABLE (Shared with Component input)

Y

L

R

1
COAXIAL CABLE Coaxial

Note: The actual ports and their locations may vary, depending on the TV model.

CONNECTING A DEVICE - D24h-G9 ONLY D24h-G9 includes a Composite In / AV In port that requires additional adapters (not included). 1. Connect the appropriate cable (not included) to the TV and the device using an adapter (not included). 2. Turn the TV and your device on. Set the TV's input to match the connection you used (Composite).

Composite input on back of TV*
Video/ L/R

Connecting to a composite device Video / Audio L/R
Adapter (Not Included)

*The actual ports and their locations may vary, depending on the TV model.

332

11
1
Composite Connection on Your Device
12

CONNECTING A DEVICE - AUDIO CABLE TYPES Your TV can be output sound to an audio device, such as a receiver or sound bar. 1. Verify that your device has audio port that matches an available port on the TV (Optical, RCA, etc). 2. Connect the appropriate cable (not included) to the TV and the device. 3. Turn the TV and your device on.

HDMI CABLE HDMI

RCA CABLE

L

R

VIZIO TV
1
OPTICAL/SPDIF CABLE Optical

Note: The actual ports and their locations may vary, depending on the TV model.
13

WALL-MOUNTING THE TV To mount your TV on a wall, you will need a wall mount. Consult the information on this page to find the appropriate mount for your TV.
Be sure the mount you choose is capable of supporting the weight of the TV. After you have determined that you have the correct mount for your TV, you can begin the installation.
To install your TV on a wall: 1. Disconnect any cables connected to your TV. 2. Place the TV face-down on a clean, flat, stable surface. Be sure the surface
is clear of debris that can scratch or damage the TV. 3. If attached, remove the stands by loosening and removing the screws. 4. Attach your TV and wall mount to the wall, carefully following the
instructions that came with your mount. Use only with a UL-listed wall mount bracket rated for the weight/load of this TV.
Installing a TV on a wall requires lifting. To prevent injury or damage to the TV, ask someone to help you.

1
Note: The image shown here is for illustrative purposes only and may be subject to change. The actual number of ports and their locations may vary, depending on the model.

D24h-G9

D32h-G9

D40f-G9

D50x-G9

V405-G9

V505-G9

V655-G9

Screw Size: Hole Depth:

M4 8.5 mm

M4 8.5 mm

M6 10 mm

M6 9 mm

M6 10 mm

M6 9 mm

M6 9 mm

Hole Pattern:

100 mm x 100 mm

100 mm x 100 mm

200 mm x 200 mm

200 mm x 200 mm

200 mm x 200 mm

200 mm x 200 mm

400 mm x 200 mm

Weight w/o Stand:

6.90 lb (3.13 kg)

9.26 lb (4.20 kg)

14.33 lb (6.5 kg)

21.32 lb (9.67 kg)

14.99 lbs (6.80 kg)

21.32 lb (9.67 kg)

45.81 lb (20.78 kg)

14

333

VIZIO TV

nguage for your TV.

Español

Français

Back

you using your TV? Store Demo

ou VIZIO TV located?

Mexico

Canada

1

USING THE REMOTE Note that specific buttons may vary depending on your model.

INPUT

Power Turn television on or off
Input Change the currently displayed input

App Launcher Quickly launch the pictured app

Replacing the Batteries
1. Find the notch on the back of the remote. Insert a coin and pry open the back cover.

SmartCast HomeSM Button

or

Launch SmartCast Home/Return to SmartCast Home

Screen

Closed Caption Open the closed caption menu CC Open Accessibility menu by holding down this button for 5 seconds.

MENU EXIT
OK
BACK INFO

Menu Display the settings menu
Exit Close the on-screen menu
Arrow Buttons Navigate the on-screen menus
OK/Play/Pause Select the highlighted menu option and play or pause content
Back Go to the previous on-screen menu
Info Display the info window
WatchFreeTM Access WatchFree channels (not available in Canada)

1

2

3

4

5

6

7

8

9

0

PIC

Mute Turn the audio on or off
Last Return to the channel last viewed
Number Pad Manually enter a channel
Pic Cycle through the different picture setting modes Enabled/disable talk back feature* Dash Use with number pad to manually enter a digital sub-channel (for example, 18-4 or 18-5) Wide Change the picture display size/aspect ratio Enable/disable zoom mode*

2. Insert two batteries into the remote control. Make sure that the (+) and (-) symbols on the batteries match the (+) and (-) symbols inside the battery compartment.
3. Replace the battery cover.
In many places batteries cannot be thrown away or discarded with household waste. Please ensure you properly dispose of your batteries consistent with the laws and/or regulations where you live. For more information please visit: www.vizio.com/environment
WARNING: keep the remote control batteries away from children. It may cause choking and/or lead to a fire or chemical burn if mishandled. Do not dispose of batteries infire. Replace only with batteries of the correct type.

Volume Up/Down

VOL

CH

Increase or decrease the loudness of the audio

*Enabled/disabled different accessibility features by holding down each of these buttons for 5 seconds.

Channel Up/Down Change the channel

When needed, VIZIO recommends replacing the batteries that came with this remote with two, new Duracell `AAA' alkaline batteries
15

Completing The First-Time Setup

Choose a Wi-Fi Network.

2

Terms & Conditions.
Your use of this device and software functionality are covered by VIZIO and Google `s respec
By pressing "Accept All", you agree to be bound by the (i) VIZIO Terms of Service and Privacy Policy Policy. NOTE: Accepting the terms and policiesis a condition of using the Cas

VIZIO Terms & Conditions

VIZIO Privacy Policy

Google Pri Policy

Skip For Now

Accept

The first time you turn on the TV, the on-screen instructions will guide you through each of the steps necessary to get your TV ready for use.
Before you begin the first-time setup: · Your TV should be installed and the power cord should be connected to an electrical outlet. · If you have a wireless network, have the network password ready. · If you are connecting to your network with an Ethernet cable, connect it to the Ethernet port on the TV.

Congratulations! Start streaming your fa
shows now!
Start Watching

Choose a language for your TV.

English

Español

Français

Back
1. Choose your language.

ChooHsoewaaWrei-yFoi uNuestwinogrky.our TV?

Home Use

Store Demo

2. Choose home use.

Where is you VIZIO TV located?

USA

Mexico

Canada

Choose a Wi-Fi Network.

3. Choose your country.

Let's seCt uhpoolosceaal cWhia-FninNelest.work.
To search for local broadcast channels, make sure the cable from the antenna, wall or cable box is properly connected to your VIZIO TV.

Next

Skip

Public Wi-Fi

John's Network

Ana's Network

Encrypted

Rescan Networks

Hotten Netwok

Help

Skip

4. Choose your Wi-Fi and enter the password.

Which room is your VIZIO TV Located?

Family Room

Living Room

Master

Bedroom

Game Room

Add Custom Location
5. Name your TV.

Let's set up local channels.
To search for local broadcast channels, make sure the cable from the antenna, wall or cable box is properly connected to your VIZIO TV.

Next

Skip

6. Scan for channels.

Terms & Conditions.
Your use of this device and software functionality are covered by VIZIO and Google `s respective Terms of Service and Privacy Policies.
By pressing "Accept All", you agree to be bound by the (i) VIZIO Terms of Service and Privacy Policy and (ii) the Google Terms of Service and Privacy Policy. NOTE: Accepting the terms and policiesis a condition of using the Cast functionality of this device.

VIZIO Terms & Conditions

VIZIO Privacy Policy

Google Privacy Policy

Google Terms & Conditons

Skip For Now

Accept All

7. Accept the T&Cs and register your device.

Congratulations! Start streaming your favorite
shows now!
Start Watching
By the way...
You can turn your phone into the ultimate remote. The VIZIO SmartCastTM App brings together TV Shows, movies, and more from multiple apps into one simple experience. Download now from the App Store or Google Play.
All set!

16

334

Where is you VIZIO TV located?

USA

Mexico

Canada

Let's set up local channels.
To search for local broadcast channels, make sure the cable from the antenna, wall or cable box is properly connected to your VIZIO TV.

Next

Skip

VIZIO TV

Using the On-Screen Menu

3

Your TV features an easy-to-use on-screen menu.

To open the on-screen menu, press the Menu button on the remote.

From this menu, you can: · Adjust the Picture settings · Adjust the Audio settings · Adjust the Network settings · Set up the Timers · Adjust the Channel settings · Set up Closed Captioning · Name and adjust Inputs · Adjust TV settings

TV Settings
Picture Audio Network Timers Channels Closed Captions Input Settings System User Manual

· View the User Manual

NAVIGATING THE ON-SCREEN MENU To open the on-screen menu: 1. Press the Menu button on the remote. 2. Use the Arrow buttons to highlight a menu option, and press the OK
button to select that option.
While navigating the on-screen menu, you can press the Back button at any time to return to the previous menu screen. The Exit button will close the on-screen menu.

CHANGING THE INPUT SOURCE
External devices, such as DVD players, Blu-ray Players, and video game consoles, can be connected to your TV. To use one of these devices with your TV, you must first change the input source using the Input menu.
To change the input sources:
1. Press the Input button on the remote. The Input menu is displayed.
2. Use the Right/Left Arrow buttons or the Input button on the remote to highlight the input you wish to view and press OK. The selected input is displayed.
Input Name

Change Input SMARTCAST WatchFree HDMI-1 HDMI-2 HDMI-3 HDMI-4 COMP TV

Note: Inputs may vary by TV.
You can change the input names that appear on the Input menu to make your devices easy to recognize. See Renaming Devices on the Input Menu for more information.
17

3

CHANGING THE SCREEN ASPECT RATIO

To change the screen aspect ratio: Menu > System > Aspect Ratio
Use the Arrow buttons to highlight the aspect ratio you wish to view and press OK.

Some programs have black bars on the top or sides of the picture so that the picture keeps its original shape. Examples include widescreen movies and older television programs.

Your TV can display images in different modes: Normal, Stretch, Wide, Zoom, and Panoramic.
· Normal (default) ­ No change to aspect ratio. · Stretch ­ When the 16:9 signal is a 4:3 image with black bars left and
right, stretches to fill the screen. · Wide ­ Stretches a 4:3 aspect ratio to fill 16:9 screen. If a 16:9 image,
adds black bars to top and bottom. · Zoom ­ Expands image both horizontally and vertically by 14%. · Panoramic* - Stretches a 4:3 image to fill 16:9 screen with an
algorithm so the center doesn't look stretched.

Normal

Stretch

Wide

Zoom

Tip: The aspect ratio cannot be changed for Ultra HD content or HDR content.

*Available aspect ratio settings may vary by input source. Panoramic mode is only available for standard definition TV (480i/480p).
18

335

VIZIO TV

3

ADJUSTING THE PICTURE SETTINGS
Your TV can be adjusted to suit your preferences and viewing conditions.
If you save changes to the settings for a picture mode, an asterisk appears after its name (see Saving a Custom Picture Mode).
To adjust the picture settings: 1. Press the Menu button on the remote. The on-screen menu is
displayed. 2. Use the Arrow buttons on the remote to highlight Picture and press
OK. The Picture menu is displayed. 3. Use the Arrow buttons on the remote to highlight Picture Mode,
then use the Left/Right Arrow buttons to change the picture mode: · Standard mode sets the picture settings to the
default settings. · Calibrated mode sets the picture settings to values ideal for
watching TV in a brightly-lit room. · Calibrated Dark mode sets the picture settings to values ideal for
watching TV in a dark room. · Vivid mode sets the picture settings to values that produce a
brighter, more vivid picture. · Game mode reduces throughput delays and optimizes the picture
settings for displaying game console output. · Computer mode optimizes the picture settings for displaying
computer output.

4. To manually change each of the picture settings, use the Up/ Down Arrow buttons on the remote to highlight that picture setting, then use the Left/Right Arrow buttons to adjust the setting:

· Backlight - Adjusts the LED

brightness to affect the overall

brilliance of the picture. Backlight

cannot be adjusted when starting Picture

from some picture modes.
· Brightness - Adjusts the black level of the picture. When this setting is too low, the picture may

Picture Mode Backlight Brightness

be too dark to distinguish details.

Contrast

When this setting is too high, the picture may appear faded or washed out.
· Contrast - Adjusts the white level of the picture. When this

Color Tint Sharpness More Picture

setting is too low, the picture may Picture Mode Edit

appear dark. When this setting is

Color Calibration

too high, the picture may appear

faded or washed out. If the setting

is too high or too low, detail may

be difficult to distinguish in dark

or bright areas of the picture.

Back
Calibrated 90 50 50 50 0 20

· Color - Adjusts the intensity of the picture colors.

· Tint - Adjusts the hue of the picture. This setting is useful in adjusting the flesh tones in the picture. If flesh appears too orange, reduce the level of color before adjusting tint.

· Sharpness - Adjusts the edge sharpness of picture elements. It can be used to sharpen non-HD (high definition) content; however, it will not produce detail that does not otherwise exist.

When you have finished adjusting the picture settings, press the Exit button on the remote.

Adjusting More Picture Settings

To adjust more picture settings:
1. From the PICTURE menu, use the Arrow buttons to highlight More Picture, and then press OK.

More Picture Color Temperature Black Detail*

Back Normal
Off

2. Use the Arrow buttons to highlight

Backlight Control

On

the setting you wish to adjust, then

Reduce Noise

press the Left/Right Arrow buttons to

change the setting:

Game Low Latency

Off

Film Mode*

On

· Color Temperature - See Adjusting

the Color Temperature.

Color Space**

Auto

· Black Detail* - Adjusts the

Gamma

2.2

average brightness of the picture

to compensate for large areas of

brightness. Select Off, Low, Medium,

or High.

· Backlight Control - When ON, it will improve the contrast ratio of the picture by adjusting backlight zones. Specific adjustments are based on content.

· Reduce Noise: - Reduce Signal Noise - Diminishes artifacts in the image caused by the digitizing of image motion content. Select Off, Low, Medium, or High. - Reduce Block Noise - Reduces pixelation and distortion for mpeg files. Select Off, Low, Medium, or High.

· Game Low Latency - Select On to reduce video delay (lag) when gaming.

· Film Mode* - Optimizes the picture for watching film. Select Auto or Off.

· Color Space** ­ Select color space for the source. Video sources use YCbCr, but PC uses RGB. Available for HDMI input only.

· Gamma - Set the shape of the Gamma curve. Use lower Gamma values for bright room conditions, and higher values when it's dark.

3. When you have finished adjusting More Picture Settings, press the Exit button on the remote.

* Not applicable to D24h-G9

**Applicable models: D50x-G9, V505-G9, V405-G9 and V655-G9

19

3

Adjusting the Color Temperature
Adjusting the color temperature changes the white balance of the picture.

To adjust the color temperature:

1. From the MORE PICTURE menu, use

the Arrow buttons to highlight Color

Color Temperature

Back

Temperature, and then press OK.

2. Use the Arrow buttons on the remote to highlight a color temperature preset

Normal Cool

and then press OK.

Computer

· Normal is optimized for television viewing.

· Cool produces a blue-hued picture.

· Computer optimizes the picture for use as a PC monitor.

3. When you have finished adjusting the color temperature, press the Exit button on the remote.

Adjusting the Picture Mode Edit Settings
Picture Mode Edit Settings allow you to make precise adjustments to the picture and to create picture modes to save groups of picture settings.

To adjust the Picture Mode Edit settings:

1. From the PICTURE menu, use the Arrow

buttons to highlight Picture Mode Edit,

and then press OK. The PICTURE MODE Picture Mode Edit

Back

EDIT menu is displayed.

Save Picture Mode

2. Use the Arrow buttons to highlight the setting you wish to adjust, then press OK to change the setting:

Lock Picture Mode Reset Picture Mode - Vivid

· Save Picture Mode - Save a custom picture mode.

· Lock Picture Mode - Prevent changes to custom picture modes. Choose between On or Off.

· Reset Picture Mode - Reset the picture mode settings to factory default values.

Saving a Custom Picture Mode
Custom picture modes allow you to save a group of custom settings for various viewing conditions and video sources.
· Changes made while on any preset picture mode will add an asterisk on the top right corner of the preset mode.
· The custom picture mode is not automatically saved.

To save a custom picture mode:
1. From the PICTURE MODE EDIT menu, use the Arrow buttons to highlight Save Picture Mode, and then press OK. The SAVE PICTURE MODE menu is displayed.
2. Use either on-screen keyboard to enter a name for your custom picture mode.
3. Highlight Save and press OK.
4. Press the Exit button to exit the menu screens.

Save Picture Mode

Back

abc def ghi j k l mn o p q r s t u v wx y z 0 1 2 3 4 5 6 7 8 9 .@# äêí Space

Save

 Only available on customized preset modes.

20

336

Locking/Unlocking a Custom Picture Mode
Custom picture modes can be locked/unlocked with a unique PIN to prevent accidental changes to their settings.

To lock all custom picture modes:
1. From the PICTURE MODE EDIT menu, use the Arrow buttons to highlight Lock Picture Mode, and then press OK. The LOCK PICTURE MODE menu is displayed.
2. Use the Number Pad on your remote to enter a unique 4-digit PIN. If a system PIN is set, then lock/ unlock. If no system PIN is set, then you will be prompted to set a PIN.
3. Highlight Save and press OK.
4. Press the Exit button to exit the menu screens.

Lock Picture Mode

Back

Enter the System PIN to lock all custom picture modes.

System Pin Code

Cancel

Save

To unlock all custom picture modes:
1. From the PICTURE MODE EDIT menu, use the Arrow buttons to highlight Lock Picture Mode, and then press OK. The LOCK PICTURE MODE menu is displayed.
2. Use the Arrow buttons to select Off.
3. Use the Number Pad on your remote to enter your 4-digit PIN.
4. Make any desired changes to the picture modes.
5. Then turn ON Lock Picture Mode.
6. Press the Exit button to exit the menu screens.

Deleting a Custom Picture Mode Custom picture modes that are no longer needed can be deleted.
Inputs assigned to a deleted custom picture mode become assigned to the Calibrated picture mode.

To delete a custom picture mode:

1. From the PICTURE MODE EDIT menu, use the Arrow buttons to highlight Delete Picture Mode, and then press OK. The DELETE PICTURE MODE window is displayed.

To delete the user created Custom 1 picture mode, select the Delete button.

Delete

Cancel

2. Use the Left/Right Arrow buttons to highlight Delete and press OK.

3. Press the Exit button to exit the menu screens.

Resetting a Picture Mode
A preset picture mode that has been edited can be restored to the factory default settings.

To reset a customized preset picture mode:
1. From the PICTURE MODE EDIT menu, use the Arrow buttons to highlight Reset Picture Mode, and then press OK. The RESET PICTURE MODE window is displayed.
2. Use the Left/Right Arrow buttons to highlight Reset and press OK.
3. Press the Exit button to exit the menu screens.

Select Reset to restor the Standard picture mode to factory defaults.

Reset

Cancel

VIZIO TV
3
21

3

Adjusting the Color Tuner Settings
The Color Tuner settings allow you to adjust the HSB color and 11 point white balance, turn color channels off for testing, and display color bar, flat, and ramp test patterns.
The Color Tuner, 11 Point White Balance, and test patterns allow technicians to manually calibrate the TV. Calibration requires specialized training, an input with precisely set colors, and a specialized light meter.

To adjust the HSB color settings:
1. From the COLOR CALIBRATION menu, use the Arrow buttons to highlight Color Tuner, and then press OK. The Color Tuner menu is displayed.

Red

Hue

0

Saturation

-1

Brightness

-24

Offset

0

Gain

0

Green 0 5 0 0 0

Color Tuner Blue 0 -4 -22 0 0

Cyan 0 0 0

Magenta 25 -2 0

Yellow -14 0 0

2. Use the Arrow buttons on the remote to highlight the Hue, Saturation, Brightness, Offset, or Gain of the color you wish to adjust. Press the OK button.
3. Use the Left/Right Arrow buttons to adjust the value. When you are finished press the OK button to save the setting.
4. When you have finished adjusting the color tuner settings, press the Exit button.

To turn color channels off and on:
1. From the COLOR CALIBRATION menu, use the Arrow buttons to highlight Color Tuner, and then press OK. The COLOR TUNER menu is displayed.

Red

Hue

0

Saturation

-1

Brightness

-24

Offset

0

Gain

0

Green 0 5 0 0 0

Color Tuner Blue 0 -4 -22 0 0

Cyan 0 0 0

Magenta 25 -2 0

Yellow -14 0 0

2. Use the Arrow buttons on the remote to highlight Red, Green, or Blue.
3. Press the OK button to turn the color channel off or on. An X appears over a color channel that has been turned off.
4. Use the Arrow buttons to highlight another color channel to turn off or on. Only two color channels can be turned off at the same time.
5. When you have finished with the color channels, press the Exit button.

To adjust the 11 Point White Balance settings:
1. From the Color Tuner menu, use the Arrow buttons to highlight Color Tuner, and then press the Left/Right Arrow buttons until the 11 POINT WHITE BALANCE menu is displayed.

Gain 5%

11 Point White Balance

Red

Green

0

0

Blue 0

To show or hide the SMPTE Test Pattern: 1. From the Color Tuner menu, use the Arrow buttons to highlight
Calibration Tests, and then press the Left/Right Arrow buttons until the SMPTE TEST PATTERN menu is displayed.
SMPT Test Pattern
Off
2. Use the Arrow buttons on the remote to highlight Off. Use the Left/ Right Arrow buttons to highlight On to show the SMPTE Pattern. --or-- To hide the SMPTE Test Pattern, use the Left/Right Arrow buttons to highlight Off.
3. When you are finished, press the Exit button.
To show or hide the Flat Test Pattern: 1. From the Color Tuner menu, use the Arrow buttons to highlight
Calibration Tests, and then press the Left/Right Arrow buttons until the FLAT TEST PATTERN menu is displayed.
Flat Test Pattern
Off

2. Use the Arrow buttons on the remote to highlight the Gain and Color values you wish to adjust. Press the OK button and use the Left/Right Arrow buttons to adjust the value. When you are finished, press the OK button to save the setting.

2. Use the Arrow buttons on the remote to highlight Off. Use the Left/ Right Arrow buttons to select the percentage brightness for the flat test pattern. Selecting a percentage immediately shows the flat pattern at that brightness.
--or--
To disable the Flat Test Pattern, use the Left/Right Arrow buttons to highlight Off.

3. When you have finished, press the Exit button.

3. When you are finished, press the Exit button.

22

337

VIZIO TV

To show or hide the Ramp Test Pattern: 1. From the Color Tuner menu, use the Arrow buttons to highlight
Calibration Tests, and then press the Left/Right Arrow buttons until the RAMP TEST PATTERN menu is displayed.
Ramp Test Pattern
Off

To show or hide the Uniformity Analyzer Test Pattern: 1. From the Color Tuner menu, use the Arrow buttons to highlight
Calibration Test, and then press the Left/Right Arrow buttons until the UNIFORMITY ANALYZER TEST PATTERN menu is displayed.
Uniformity Analyzer Test Pattern
Off

2. Use the Arrow buttons on the remote to highlight Off. Use the Left/ Right Arrow buttons to select the color for the ramp test pattern. Selecting a color immediately shows that color ramp.
--or--
To hide the Ramp Test Pattern, use the Left/Right Arrow buttons to highlight Off.
3. When you are finished, press the Exit button.

2. Use the Arrow buttons on the remote to highlight Off. Use the Left/ Right Arrow buttons to highlight On to show the Uniformity Analyzer Test Pattern.
--or--
To hide the Uniformity Analyzer Test Pattern, use the Left/Right Arrow buttons to highlight Off.
3. When you are finished, press the Exit button.

ADJUSTING THE AUDIO SETTINGS

To adjust the audio settings:

1. Press the Menu button on the

remote. The on-screen menu

is displayed.

Audio

Back

2. Use the Arrow buttons on the remote Speakers

Auto

to highlight Audio and press OK. The

Volume Control Display

On

Audio menu is displayed.

Surround Sound

On

3. Use the Arrow buttons to highlight

Volume Leveling

On

the setting you wish to adjust, then

press Left/Right Arrow buttons to

Balance

0

change the setting:

Lip Sync

0

· Speakers - Turns the built-in speakers Digital Audio Out

Auto

On or Off.

Analog Audio Out

Fixed

· Volume Control Display - Toggle between On or Off to hide or display the on-screen volume slider that appears when volume is adjusted.

· Surround Sound - Surround sound uses DTS TruSurroundTM to deliver an immersive surround sound experience from the TV's internal speakers. TruSurround completes the entertainment experience by providing deep, rich bass and by delivering crisp details and clear, intelligible dialog. Select On or Off.

· Volume Leveling - Volume leveling uses DTS TruVolumeTM to maintain consistent volume levels during transitions between program content, AV formats, and input sources. Select On or Off. In a few cases, volume leveling may artificially suppress volume increases, making it difficult to hear dialog or flattening sudden noises. If this occurs, turn volume leveling off.

When the TV speakers are set to On, DTS signals cannot be passed through digital audio outputs.

· Lip Sync - Adjusts the synchronization between the display image and the accompanying audio track.
· Digital Audio Out - Changes the type of processing for digital audio out and HDMI ARC output when connected to a home theater audio system. Select Auto, PCM, Dolby D or Bitstream.
You must select Bitstream for audio with more than two channels (3.0, 5.0, or 5.1, for example).
· Analog Audio Out - Sets the volume control properties for the RCA connector when connected to a home theater audio system. Select Variable if you are controlling the volume with the TV's volume controls, or select Fixed if an external audio device (sound bar or AV receiver) will control the volume.
4. When you have finished adjusting the audio settings, press the Exit button on the remote.

· Balance - Adjusts the loudness of the audio output from the left and right speakers.

338

3
23
3
24

VIZIO TV

3

ADJUSTING THE NETWORK SETTINGS
Your TV is Internet-ready, featuring both an Ethernet port and built-in high-speed Wireless-N. D24h-G9 , D32h-G9 and D40f-G9 support Wireless-N. D50x-G9, V405-G9, V505-G9 and V655-G9 support Wireless-AC.

If your TV is connected to a network with an Ethernet cable, you will not see the wireless network connection menu. You must unplug the Ethernet cable to set a wireless network connection

Connecting to a Wireless Network
To connect to a wireless network whose network name (SSID) is being broadcast:
1. Press the Menu button on the remote. The on-screen menu is displayed.
2. Use the Arrow buttons on the remote to highlight Network and press OK. The NETWORK menu is displayed.
3. If you do not see your wireless network displayed, highlight More Access Points and press OK. The WIRELESS ACCESS POINTS menu, which is a list of available wireless networks, is displayed.
4. Highlight the name of your wireless network (this is the network's SSID) and press OK.
5. Using the on-screeen keyboard, enter your network's password, then highlight Connect and press OK.
6. Press the Exit button on the remote.

Network

Back

Wired Connection

Disconnected

Wireless Access Points

Manual Setup Hidden Networks Test Connection

Changing the Manual Setup Settings
Advanced users can fine-tune the network settings using the Manual Setup feature.

To change advanced network settings:

1. From the NETWORK menu, highlight Manual Setup and press OK. The MANUAL SETUP menu is displayed.
2. To change the settings manually, use the Arrow buttons on the remote to highlight DHCP and then use the Left/ Right Arrow buttons to change the setting to Off.
3. Use the Arrow and OK buttons to adjust each setting:
· IP Address - The IP address assigned to the TV.

Manual Setup
DHCP IP Adress Subnet Mask Defult Gateway Pref. DNS Server Alt DNS Server RJ45 Mac Wireless Mac

Back
Off __. __.__.__ __. __.__.__ __. __.__.__ __. __.__.__ __. __.__.__ 0:0:0:0:0:0 0:0:0:0:0:0

· Subnet Mask - The subnet Exit 2D
· Default Gateway - Your network's default gateway address.

Save Cancel

· Pref. DNS Server - Your preferred domain name server address.

· Alt. DNS Server - Your alternate domain name server address.

4. Use the Arrow buttons on the remote to highlight Save and press OK. 5. Press the Exit button on the remote.

Finding MAC Addresses for Network Setup
The security settings on your router may require you to enter the TV's MAC address in the router's settings. To find the TV's MAC address:
1. From the NETWORK menu, highlight Manual Setup and press OK. The MANUAL SETUP menu is displayed.
2. Find the MAC address for the TV at the bottom of the list. The MAC addresses for the connections in use are displayed:
· RJ45 MAC - The Ethernet or RJ45 MAC address may be needed to set up your network when you have connected the TV to your network when you have connected the TV to your network with an Ethernet (Cat 5) cable.
· Wireless MAC - The Wireless (WiFi) MAC address may be needed to connect your TV to your network with WiFi.

25

3

Connecting to a Hidden Network

To connect to a wireless network whose network name (SSID) is not being broadcast:

1. From the NETWORK menu, highlight Hidden Network and press OK. The ENTER ACCESS POINT NAME screen is displayed.
2. Using the on-screen keyboard, enter your network's name (SSID), then highlight Connect and press OK.

Back
Enter Acces Point Name
Enter your access point name. This is used to connect to an access point with a hidden SSID.

3. Using the on-screen keyboard, enter your network's password, then highlight Connect and press OK.
4. Press the Exit button on the remote.

abc def ghi j k l mn o p q r s t u v wx y z 0 1 2 3 4 5 6 7 8 9 .@# äêí Space

Testing Your Network Connection
To test your network connection:
1. From the NETWORK menu, highlight Test Connection and press OK.
2. The TEST CONNECTION screen displays the connection method, network name, signal strength, and download speed of your network connection.
3. Press the Exit button on the remote.

Connect

26
339

VIZIO TV

3

SETTING TIMERS

Setting the Timer

When activated, the TV's timer will turn the TV off after a set period of time.

1. Press the Menu button on the

remote. The on-screen menu is

displayed.

Timers

Back

2. Use the Arrow buttons on the remote to highlight Timers and press OK. The TIMERS menu is displayed.

Sleep Timer Auto Power Off Blank Screen

Off 10 Minutes

3. Use the Left/Right Arrow buttons on the remote to highlight the period of time after which you want the TV to go to sleep: 30, 60, 90, 120, or 180 minutes. If you don't want the sleep timer to activate, change the setting to Off.

4. When you have finished setting the sleep timer, press the Exit button on the remote.

Setting the Auto Power Off Feature
To help save energy, your TV is set by default to turn off after 10 minutes without a video or audio signal. This feature can be deactivated.
To set the Auto Power Off feature:
1. From the TIMERS menu, use the Up/Down Arrow buttons on the remote to highlight Auto Power Off.
2. Use the Left/Right Arrow buttons on the remote to change whether the TV will turn off. If you don't want the TV to turn off when there is no signal, change the setting to Off. Otherwise, select 10 minutes.
3. When you have finished setting the auto power off time, press the Exit button on the remote.

Using the Blank Screen Feature
To help save LED life, your TV screen can turn on or off while audio is streaming. To use the Blank Screen feature:
1. From the TIMERS menu, use the Up/Down Arrow buttons on the remote to highlight Blank Screen.
2. Press the OK button to immediatly blank the screen.
3. To exit Blank Screen, press any key.

27

3

SETTING UP CHANNELS

You can use the TV's Channels menu to: · Find Channels · Select channels to skip · Select Analog Audio mode · Select the language for Digital Audio · Set Parental Controls

Channels
Find Channels Skip Channels Analog Audio Digital Audio Parental Control

Back
Stereo English

Scanning for Channels
The TV may need to scan for channels before it can display programs and their associated information. A channel scan is required for free over-the-air channels (using an antenna) and cable channels from an outof-the-wall connection (without a cable box). Moving the TV to an area with different channels requires the TV to scan for channels again.

To perform an Auto Channel Scan:

1. From the CHANNELS menu,

Find Channels

Back

highlight Find Channels, and press

OK. The auto channel scan begins.

Channels Found

2. Wait until the channel scan is 100% complete. Highlight Done and press OK.
3. Press the Exit button on the remote.

Digitial : 8 Analog: 12 45% Complete

If the channel scan is canceled, the channels that were already discovered are retained. A new channel scan will clear all channels.

Cancel

Skipping Channels
After a channel scan is completed, you may find that some channels are too weak to watch comfortably. There may also be some channels you do not want to view. You can remove these channels from the TV's memory with the Skip Channel feature.
Channels that have been removed with the Skip Channel feature can still be viewed if the channel is entered using the Number Pad. If you wish to completely block a channel from being viewed, use the parental controls. See Locking and Unlocking Channels.

To remove a channel:

1. From the CHANNELS menu, highlight

Skip Channel, and press OK. The

SKIP CHANNEL menu is displayed.

Skip Channels

Back

2. For each channel you wish to remove, use the Up/Down Arrow buttons on the remote to highlight the channel
and press OK. A P appears to the right of each channel you select.

0 Test 0 1 Test 1 2 Test 2

3. When you have selected all of the channels you wish to remove, press the Exit button on the remote.

3 Test 3 4 Test 4

28
340

LISTENING TO ALTERNATE AUDIO
Changing the Analog Audio Language Some analog over-the-air (free) and cable channels broadcast programs in more than one language. The TV's Analog Audio feature allows you to listen to audio in an alternate language using Secondary Audio Programming (SAP).
Not all programs are broadcast in SAP. The Analog Audio Language feature only works when the program being viewed is being broadcast with Secondary Audio Programming.

To use the Digital Language feature:
1. From the CHANNELS menu, highlight Digital Audio and press OK. The DIGITAL LANGUAGE menu is displayed.
2. Select your preferred language: English, Spanish/Video Description, French. Press OK.
3. Press the Exit button on the remote.

Digital Audio

Back

English Spanish/ Video Description
French

To use the Analog Audio feature:

1. From the Channels menu, highlight

Analog Audio and press OK. The

Analog Audio

Back

Analog Audio menu is displayed.

Stereo

2. Select Stereo, SAP (secondary audio

SAP

programming), or Mono. Press OK.
Mono

3. Press the Exit button on the remote.

VIZIO TV
3

29

3

Parental controls
USING PARENTAL CONTROLS
The TV's parental controls allow you to prevent the TV from displaying certain channels or programs without a password.
Other devices have their own parental control settings.
The PARENTAL CONTROLS menu only appears when: · You are using the tuner to receive your TV signals, such as when you
are using an antenna for Over-the-Air signals or when connected to cable TV directly from the wall (no cable box). · You have a device connected using a composite video cable or a coaxial cable, such as a VCR, satellite or cable box, or DVR.
Accessing the Parental Controls Menu To access the PARENTAL CONTROLS menu: 1. Press the Menu button on the remote. The on-screen menu is
displayed. 2. Use the Arrow buttons on the remote to highlight Channels and
press OK. The CHANNELS menu is displayed. 3. Use the Arrow buttons on the remote to highlight Parental Controls
and press OK. 4. Enter your set System PIN.
To set a custom PIN passcode, see Setting a System Pin.

Enabling or Disabling Program Ratings To manage program content according to its rating, you must enable the Program Rating feature.
To enable or disable the Program Rating feature: 1. From the PARENTAL CONTROLS menu, highlight Locks and press OK.
The LOCKS menu is displayed. 2. Select On or Off and press OK.
Locking and Unlocking Channels When a channel is locked, it will be inaccessible. Locking a channel is a
good way to prevent children from viewing inappropriate material.
To lock or unlock a channel: 1. From the PARENTAL CONTROLS menu, highlight Channel Locks and
press OK. The CHANNEL LOCKS menu is displayed. 2. Highlight the channel you want to lock or unlock and press OK.
3. When a channel is locked, the Lock icon appears locked. The channel is not accessible unless the parental PIN is entered.
4. When a channel is unlocked, the Lock icon appears unlocked. The channel is accessible.

Blocking and Unblocking Content by Rating A channel may sometimes broadcast programs that are meant for children, and at other times broadcast programs that are meant for mature audiences. You may not want to block the channel completely using a channel lock, but you may wish to block certain programs from being viewed.
For a list of content ratings and their definitions, visit www.tvguidelines.org.
When this is the case, you can use the TV's Rating Block feature to block content based on its rating.
To block or unblock content by its rating: 1. From the PARENTAL CONTROLS menu, highlight the content type you
want to adjust and press OK: · USA TV - USA television program broadcasts. · USA Movie - USA movie broadcasts. · Canadian English - Canadian English television program broadcasts. · Canadian French - Canadian French television program broadcasts. 2. For each rating type you want to block or unblock, use the Up/Down
and Left/Right Arrow buttons on the remote to highlight the rating type and press OK. 3. When the rating type is blocked, the Lock icon appears locked. Content with this rating and all higher ratings cannot be viewed. 4. When the rating type is unblocked, the Lock icon appears unlocked. Content with this rating and all lower ratings can be viewed.
If you want to block all unrated content, highlight Block Unrated Shows and use the Arrow buttons on the remote to select On. 5. When you are finished adjusting the rating level blocks, press the Exit
button on the remote.

30

341

VIZIO TV

SETTING UP CLOSED CAPTIONING
Your TV can display closed captions for programs that include them. Closed captions display a transcription of a program's dialogue.
If the program you are viewing is not being broadcast with closed captions, the TV will not display them.

The Closed Captions menu does not appear when an HDMI input is selected.

To activate or deactivate closed captions:

1. Press the Menu button on the

remote. The on-screen menu is

Closed Captions

Back

displayed.

Closed Captions

Off

2. Use the Arrow buttons on the remote to highlight Closed Captions and press OK. The CLOSED CAPTIONS menu is displayed.

Analog Closed Captions CC1 Digital Closed Captions CS1 Digital Style

3. Use the Arrow buttons on the remote to highlight Closed Captions and then use the Left/Right Arrow buttons to select On or Off.

4. Use the Arrow buttons on the remote to highlight either Analog or Digital Closed Captions.

5. Use the Left/Right Arrow buttons on the remote to select the caption channel you wish to display, then press Exit.

Changing the Appearance of Digital Closed Captions
Digital closed captions can be displayed according to your preference. See the diagram on the next page for an explanation of the parts of the closed caption area.

To change the appearance of digital closed captions:

1. From the CLOSED CAPTIONS menu, use the Arrow buttons to highlight Digital Style and press OK.

2. Use the Left/Right Arrow buttons on the remote to select Custom. The DIGITAL STYLE menu appears as shown.

3. Use the Up/Down Arrow buttons on the remote to highlight the setting you wish to change, then use the Left/Right Arrow buttons to change the setting:

· Caption Style - Choose As Broadcast to keep default settings or Custom to manually change each setting.

· Text Style - Change the font used for the closed captioning text.

· Text Size - Make the text larger or smaller.

Digital Style

Back

· Text Color - Change the color of the text.

Text Style

As Broadcast

· Text Opacity - Change the transparency of the text.
· Text Edges - Change the effects at the edges of the text, such as raising the edges or adding drop shadows.
· Text Edges Color - Change the color of the text edge effects.
· Background Color - Change the color of the background directly behind the text.
· Background Opacity - Change the transparency of the background directly behind the text.

Test Size

Large

Text Color

Blue

Text Opacity

As Broadcast

Text Edges

As Broadcast

Text Edges Color

As Broadcast

Background Color As Broadcast

Background Opacity As Broadcast

Window Color

As Broadcast

Window Opacity

As Broadcast

· Window Color - Change the color of the closed captioning box.

· Window Opacity - Change the opacity of the closed captioning box.

4. When you are satisfied with the appearance of the closed captions, press the Exit button on the remote.

Typical choices include:
· Opaque background, transparent window--Only a strip of background appears behind the text, expanding as the text appears. This is the typical "As Broadcast" mode.
· Opaque background and window in the same color--When text appears, the entire line fills with color at once.
In the example, the closed caption text is green, the background is black, and the window is red.

Text

Background

3
31
3

342

CLOSED CAPTION TEXT SAMPLE
Window CLOSED CAPTIONS SCREEN LAYOUT 32

VIZIO TV

3

RENAMING DEVICES ON THE INPUT MENU

You can rename the inputs to make them easier to recognize on the Input menu. For example, if you have a DVD player connected to the Component input, you can rename that input to display "DVD Player." See Changing the Input Source.

Input Name

To change the name of an input:
1. Press the Menu button on the remote. The on-screen menu is displayed.
2. Use the Arrow buttons on the remote to highlight Input Settings and press OK. The INPUT SETTINGS menu is displayed.
3. Highlight the input device that you want to rename and press OK.
To use a preset input name:
· Highlight the Name Input row and press OK.
· Highlight the input name and use the Left/Right Arrow buttons on the remote to cycle through preset input names

Input Settings
TV HDMI-1 HDMI-2 HDMI-3 COMP

--or-- To enter a custom name: · Highlight the Name Input row and press OK. · Enter your custom label using the on-screen keyboard. · Highlight and press OK. · The Input Name changes to show the custom name that you created. 4. When you have finished naming your input, press the Exit button on
the remote.

Back
Blu-Ray Cable Box
HDMI-3 Game Console

Custom Name

33

3

CHANGING THE TV SETTINGS

Using the SYSTEM menu, you can: · Check for updates · View system information · Change the on-screen menu
language · Set time zone and local settings · Adjust the CEC settings · Adjust the power mode settings · Adjust to preserve Aspect Ratio or fill
the screen · Name the TV · Review and maintain the list of
paired devices · Adjust accessibility settings · Reset the TV settings & setup
administrative controls

System

Back

Check for Updates

System Information

Menu Language

English

Time & Local Settings

CEC

Power Mode

Quick Start

Aspect Ratio

Normal

TV Name

Office TV

Mobile Devices

Accessibility

Reset and Admin

Checking for System Updates

Changing the On-Screen Menu Language

To check for a system update:

Your TV can display the on-screen menu in

1. Press the Menu button on the remote. The on-screen Menu is displayed.

different languages.

Menu Language

Back

To change the on-screen menu language:

2. Use the Arrow buttons on the remote to highlight System and press OK. The SYSTEM menu is displayed.

1. Press the Menu button on the remote. The on-screen menu is displayed.

English Español

3. Use the Arrow buttons on the remote to highlight Check for Updates and press OK. The TV will begin to check for updates.

2. Use the Arrow buttons on the remote to highlight System and press OK. The

Français

4. If an update is found, the TV will ask to confirm the update. If no

SYSTEM menu is displayed.

update is found, the screen will note No Update Available.

3. Use the Arrow buttons on the remote

to highlight Menu Language and

press OK. The MENU LANGUAGE menu

is displayed.

Viewing System Information
To view technical data and status information about your TV and network connection:
1. Press the Menu button on the remote. The on-screen menu is displayed.

4. Highlight your preferred language (English, Español, or Français) and press OK.
5. Press the Exit button on the remote.

2. Use the Arrow buttons on the remote to highlight System and press OK. The SYSTEM menu is displayed.

3. Highlight System Information and press OK.

4. Use the Up/Down Arrow buttons to scroll through the system information.

5. When you are finished reviewing the system information, press the Exit button on the remote.

34
343

VIZIO TV

3

Setting the Time and Local Settings

To ensure the correct time is displayed when you press the Info button, set the TV's time zone:

1. Press the Menu button on the remote. The on-screen menu is displayed.
2. Use the Arrow buttons on the remote to highlight System and press OK. The SYSTEM menu is displayed.
3. Use the Arrow buttons on the remote to highlight Time & Local Settings and press OK. The menu headed by the local date and time is displayed.

Time and Local Settings

Back

June 11, 2018 11:48AM

Time Zone

Pacific (-8)

Daylight Savings Time

Auto

Time Format

Country

USA

4. Highlight Time Zone and press OK. The TIME ZONE menu is displayed.

5. Highlight your time zone and press OK.

6. Highlight Daylight Saving Time and press OK. The DAYLIGHT SAVING TIME menu is displayed. Choose On if it is currently Daylight Savings Time, Off if it is Standard Time, or Auto to have the system automatically detect Daylight Savings Settings.

7. Press the Exit button on the remote.

Adjusting the CEC Settings The CEC function on your TV enables you to control devices connected to HDMI (ARC) input with the included remote, without any programming. Using CEC, your VIZIO TV remote can control: · Power On/Off · Volume · Mute
Not all HDMI devices support CEC. See your device's user manual for details.
To enable, disable, or adjust CEC settings: 1. Set up your audio device and connect it to the HDMI-1(HDMI Arc)
input on the TV 2. On your audio device, select the HDMI ARC input. 3. Press the Menu button on the remote. The on-screen menu is
displayed. 4. Use the Arrow buttons on the remote to highlight System and press
OK. The SYSTEM menu is displayed. 5. Use the Arrow buttons on the remote to highlight CEC and press OK.
The CEC menu is displayed. 6. Highlight CEC and press OK. Select a setting and then press OK. · CEC - To use CEC, you must select Enable. · Device Discovery - To determine if your device is connected and
supports CEC, select Device Discovery and then press OK. 7. Press the Exit button on the remote.

Adjusting the Power Mode Your TV is set to Eco Mode by default. When the TV is powered off, Eco Mode setting uses less than 0.5W of power. Quick Start Mode enables your Display to power on faster.
Please note that by changing this setting the energy consumption required to operate this device will change.
To switch between Eco Mode and Quick Start Mode: 1. Press the Menu button on the remote. The on-screen Menu is
displayed. 2. Use the Arrow buttons on the remote to highlight System and press
OK. The SYSTEM Menu is displayed. 3. Use the Arrow buttons on the remote to highlight Power Mode and
press OK. The Power Mode Menu is displayed. 4. Highlight either Eco Mode or Quick Start Mode and press OK to
select.

35

3

Changing the TV Name
Naming your TV helps differentiate it from other cast devices you may have in your home.

To edit your TV name:

1. Press the Menu button on the remote. The on-screen menu is displayed.
2. Use the Arrow buttons on the remote to highlight System and press OK. The SYSTEM menu is displayed.
3. Use the Arrow buttons on the remote to highlight TV Name and press OK. The TV name input menu is displayed.

Back TV Name
Living Room TV
abc def ghi j k l mn o p q r s t u v wx y z 0 1 2 3 4 5 6 7 8 9 .@# äêí Space

4. Enter your custom name using the on-screen keyboard.
5. Press the Exit button on the remote.

Ok Cancel

Manging Mobile Devices
Your TV can be paired with a mobile device so you can easily control your TV across multiple devices .

To see a list of paired devices or unpair a device:

1. Press the Menu button on the

Mobile Devices

Back

remote. The on-screen Menu is

displayed.

Djae's Tablet

2. Use the Arrow buttons on the remote to highlight System and press

Ana's Phone Work iPad

OK. The SYSTEM Menu is displayed.

3. Use the Arrow buttons on the remote to highlight Mobile Devices and press OK. The list of paired devices appears.

4. Highlight a device name to delete it and press OK.

5. Use the Left/Right Arrows to select Yes or No when asked to confirm.

Accessibility settings
VIZIO is committed to providing intuitive, user-friendly products. Your new VIZIO TV offers several accessibility features that can help you get the most out of it.

To access the Accessibility menu:
1. Press the Menu button on the remote control.
2. Use the Arrow and OK buttons to navigate and select System à Accessibility.
3. Talk Back - Turn Text-to-Speech Talk Back On or Off. Text-to-Speech Talk Back enables your TV to speak all settings changes and adjustments using the remote in English.
4. Speech Rate* - Adjusts the rate in which Text-to-Speech is spoken. Select Slow, Normal (Default), or Fast.
5. Zoom Mode - Enlarges a section of the screen by approximately 200%.

Accessibility
Talk Back Speech Rate Zoom Mode

Back
Off Normal
Off

To access the Closed Caption menu:
· Press the Menu button on the remote control.
· Use the Arrow and OK buttons to navigate and select Closed Captions.

To access the Video Description menu:
· Press the Menu button on the remote control.
· Use the Arrow and OK buttons to navigate and select Settings à Channel à Digital Audio à Spanish/ Video Description.

*Available only in English.

36

344

VIZIO TV

3

USING THE RESET & ADMIN MENU

You can use the TV's RESET & ADMIN menu to restore the TV to its factory default settings as well as access other system settings.

Using the RESET & ADMIN, you can:
· Reset the TV to factory settings
· Force the system to power off and on
· Create a system pin code to lock content and picture settings
· Enable or disable program offers and suggestions
· Enable or disable anonymous debug data for system performance.
· Start or stop the Store Demo Mode

Reset & Admin

Back

Reset to Factory Defaults

Soft Power Cycle

Power Indicator

On

System PIN Code

USB Power

Always On

Viewing Data

VIZIO Privacy Policy

Store Demo

Restoring the TV to Factory Default Settings All of the on-screen menu settings can be reset to the factory defaults.
If you restore the TV to the factory default settings, all changes you have made to the settings will be lost! This includes any wireless or picture settings
To restore the TV to its factory default settings: 1. Press the Menu button on the remote. The on-screen menu is
displayed. 2. Use the Arrow buttons on the remote to highlight System and press
OK. The SYSTEM menu is displayed. 3. Highlight Reset & Admin and press OK. The RESET & ADMIN menu is
displayed. 4. Highlight Reset to Factory Defaults and press OK. If you have
changed the set system PIN, enter it now.

Turning the Power Indicator On or Off
The Power Indicator on the front of your TV normally does not glow when the TV is on. You can change this setting if you prefer the light to be on.
To turn the Power Indicator Light On or Off:
1. Press the Menu button on the remote. The on-screen menu is displayed.
2. Use the Arrow buttons on the remote to highlight System and press OK. The System menu is displayed.
3. Use the Arrow buttons on the remote to highlight Reset & Admin and press OK. The Reset & Admin menu is displayed.
4. Highlight Power Indicator and press OK.
5. Use the Left/Right Arrow buttons to select On or Off.

The TV displays, "Select Reset to restore all TV settings to factory defaults and clear all account information."
5. Highlight Reset and press OK.
6. Wait for the TV to turn off. The TV will turn back on shortly afterward and the setup process will begin.

Performing a Soft Power Cycle A soft power cycle forces the TV to turn off then on again.
1. Press the Menu button on the remote. The on-screen menu is displayed.
2. Use the Arrow buttons on the remote to highlight System and press OK. The SYSTEM menu is displayed.
3. Highlight Reset & Admin and press OK. The RESET & ADMIN menu is displayed.
4. Highlight Soft Power Cycle and press OK." 5. Highlight Yes and press OK. 6. The TV will turn off then on again

37

3

Setting a System PIN

You can set a System Pin to lock content and picture modes as well as prevent accidental system resets. The first time you select System PIN code, you will need to create a PIN. To create a PIN.

1. Press the Menu button on the

remote. The on-screen menu is

displayed.

System PIN Code

Back

2. Use the Arrow buttons on the remote to highlight System and press OK. The SYSTEM menu is displayed.

Change the PIN used for the System PIN.

3. Highlight Reset & Admin and press OK. The RESET & ADMIN menu is displayed.

New PIN

4. Highlight System PIN Code and press Confirm PIN OK."

5. Enter and confirm your new PIN.

Cancel

Save

6. Highlight and select Save to confirm.

Using the USB Power Feature

The USB port can be used to charge

devices The two options for this feature

USB Power

Back

are:

Always On

· Always On - Power is always available.

Off When TV Off

· Off When TV Off - When the TV is

powered off, no power is available.

You will need to enter your current PIN code the next time you access this menu or if you'd like to change your PIN.

About Viewing Data
Video ACR collects data related to publicly available content displayed on your television/display, such as the identity of your broadcast, cable, or satellite television provider, and the television programs and commercials viewed (including time, date, channel, and whether you view them live or at a later time). We also collect unique identifiers about this TV, including the IP address. This data is collectively referred to as "Viewing Data." For more information about Viewing Data and how VIZIO protects its customers' privacy, please consult our privacy policy at www.vizio.com/privacy.
When ACR collection is turned on, we may share Viewing Data with authorized data partners including analytics companies, media companies and advertisers. VIZIO and its authorized data partners use Viewing Data to generate summary analysis and reports of how users engage with content on their TVs and other devices. VIZIO Viewing Data is sometimes enhanced with household demographic data and data about digital actions (e.g. digital purchases and other consumer behavior taken by devices associated with the IP Address we collect). Viewing Data also enables our authorized data partners to deliver advertising relevant to your profile that you might find useful, both on the VIZIO TV/display and other devices sharing your IP Address. Viewing Data is also used to help content publishers, broadcasters or content distribution services create or recommend more relevant entertainment based on summary insights, as well as helps us improve the design of our products, software and services.
You can easily turn this feature On or Off in the RESET & ADMIN menu. If you have trouble enabling or disabling Viewing Data, please contact VIZIO Customer Support by going to support.vizio.com and selecting Contact Us.
For more information, see https://www.vizio.com/viewingdata and review VIZIO's privacy policy at https://www.vizio.com/privacy.

38

345

VIZIO TV

3

USING THE INFO WINDOW
The Info Window can be displayed by pressing the Info button on the remote: · Press the Info button one time to display the TV name, current input, picture mode, network name, and time.

Current Input

Picture Mode

Network Name

TV Name

Living Room

HDMI-1

Wide

HomeWiFi 5:00 pm

Time

INFO WINDOW 39

SmartCast HomeSM

4

What is SmartCast HomeSM? SmartCast Home lets you discover, stream, and control your content like never before! Access top apps, like Netflix, Hulu, and Amazon Prime Video by using the remote to easily browse and launch content directly from the home screen. SmartCast Home makes finding something to watch easy and fun.
What you can do with SmartCast Home: · Stream high quality entertainment. · Launch top tier apps directly from the home screen. · Unlock your photos and videos by mirroring your laptop or mobile device onto your TV. · Turn your iOS or Android device into the ultimate streaming companion with the VIZIO
SmartCast Mobile app. · Rearrange apps on your home screen just the way you like it. · Works with Google Assistant and Amazon Alexa.
How to Launch SmartCast Home: Begin streatming with SmartCast Home by:
· Press the SmartCast Home or button on your remote. --or--
· Select SmartCast from the list of inputs.

Home Movies TV Shows Support Extra
1
Discover
2
Apps
3
1. Marquee Content Carousel - Launch content with one click. 2. Discover - New or popular content across multiple apps. 3. Streaming Apps on your TV

40

346

VIZIO TV

WatchFreeTM

What is WatchFreeTM? VIZIO WatchFree takes your cord-cutting entertainment experience one step further! With the simple press of a button, enjoy free streaming TV with over 100 live TV channels to choose from ­ news, movies, sports, comedy, music and more. A built-in on-screen guide makes finding something to watch easier than ever. And it's all FREE ­ no fees, no subscriptions, or logins.
What you can do with WatchFree: · Stream over 100 live TV channels absolutely free ­ news, movies, sports, comedy, music and more. · Navigate through channels, organized by genre, with an intuitive on-screen guide. · Watch 1000's of free movies from major studios. · Watch the best of the internet TV. · No logins, subscriptions or transactions fees.
How to Launch WatchFree: To launch and begin watching entertainment offered on WatchFree: · Press the Input button on your remote and select WatchFree
-or· Simply select the WatchFree app logo from the SmartCast Home app row.

1 Zoneless
2018 · 2h · TV-G · Sci-Fi
Outer space: The closest known resemblance to a perfect vacuum. It has essentially no friction, allowing countless stars, planets, and moons to move about freely. This is the story of one man's journey in this mysterious place.

FAVORITES 115

9:00 Music

9:30

107
2
203

Zoneless College Football

204

Network Security

Fun WIth Max & Daniel

205

The City

206

Weekend Recap

1. Show Details - Find out show information. 2. On-Screen Guide - Over 100 live TV and audio channels organized by genre.

4
10:00 Kansas C The Kitch

Note: Not available in Canada.
41

Playing USB Media

4

The USB Media Player allows you to connect a USB thumb drive to your TV and play music, video, or photos.

Preparing Your USB Drive to Play USB Media To display USB media, you must first save your videos onto a USB thumb drive: · The USB thumb drive must be formatted as FAT32. · Files on the USB thumb drive must end in a supported file extension
( .mp3, .jpg, etc.) · The player is not designed to play media from external hard drives,
MP3 players, cameras, or smartphones.
Displaying USB Media
To display your USB media: 1. Connect your USB thumb drive to the USB port on the side of the TV. 2. The TV will recognize the USB stick. Use the Arrow Keys on the
remote to select the content you'd like to play.
-OR-
3. Select USB from the bottom streaming icons on the SmartCast Homepage.

Removing the USB Drive from the TV To safely remove your USB drive from the TV: 1. Turn off the TV. 2. Disconnect your USB thumb drive from the USB port on the side of
the TV.
Do not remove the USB thumb drive while the TV is on. Doing so may damage the drive.

Note: The image shown here is for illustrative purposes only and may be subject to change. The actual number of ports and their locations may vary, depending on the model.

You can display your photos in Fullscreen. Select the photo, press OK, then highlight Fullscreen and press OK

42

347

VIZIO TV

4

Back Button Highlight this button and press OK to return to the previous screen.

Connected Sources displays connected USB devices.

Music USB1: MyFlashDrive

Current Folder
Playback Controls Use to control audio playback. Highlight Play/Pause, Previous, or Next and press OK.

My Music

Now Playing Information displays song title, album title, and artist name.

Progress Bar displays the duration of the currently-playing song. The blue bar will lengthen as the song progresses.

Fab Apple Dream On The Answer Is Yes By Ana Banana
5:50 MyFlashDrive\Audio\root\My Music

8:46

# Track 1 Starry Summer 2 Downspin 3 Mango Dream 4 Crystal Waters 5 Smooth Waves

Album Summer Mix Summer Mix Beach Mix Beach Mix Breezy Mix

Artist JCheesy JCheesy
Ana Banana
The Dash Rio Steve

Duration 2:42 6:20 8:46 4:21 7:58

Toggle Music/Photos Sort by Album/Artist/Track

Browse Photos Sort: Artist A-Z View: All

Album Art If included on the USB thumb drive and associated with your music, the album art will display here.
Folder Contents/Playlist This area displays the contents of the currently selected folder. You can browse files and folders using the Arrow and OK buttons on the remote.

Toggle between viewing all content and only viewing folders.

Page 1 of 1
Page Information If your USB thumb drive has more files than can be displayed on a single screen, the page information is displayed here.

MUSIC PLAYER 43

Back Button Highlight this button and press OK to return to the previous screen.

Connected Sources displays connected USB devices.
Current Folder

Video USB1: MyFlashDrive
My Videos

MyFlashDrive\Video\root\My Videos
# File 1 Family Vacation - California 2 26th Birthday Party 3 Japan 2017 4 Aby's Graduation

Date -

Duration
00:23:43 00:38:18 00:41:08 00:25:32

Sort by Date or File Name

Sort: Date New-Old View: Folders

View All or View Folders

Page 1 of 1
Page Information If your USB thumb drive has more files than can be displayed on a single screen, the page information is displayed here.

4
Folder Contents/Playlist This area displays the contents of the currently selected folder. You can browse among files using the Arrow and OK buttons on the remote.
VIDEO PLAYER 44

348

VIZIO TV

4

Back Button Highlight this button and press OK to return to the previous screen.

Back Button Highlight and press OK to return to left column.
Current Folder Displays the folder path.

Connected Sources displays connected USB devices.

Photo USB1:

Current Folder root

Start Fullscreen Slideshow
Sort by Date or File Name View Thumbnails/Folders Adjust Slideshow Settings View Music Files

Start Slideshow Sort: Name A-Z View: Thumbnails
Settings Browse Music File Name: D 1920x1080

Resolution: 1920x1080

Size:

1607270KB

VIZIO_2GB\Photo\root

A.jpg D.jpg G.jpg

B.jpg E.jpg

C.jpg F.jpg

H.jpg Page 1 of 1

I.jpg

Folder Contents This area displays the contents of the currently selected folder. You can browse files and folders using the Arrow and OK buttons on the remote.

Photo Information displays the name, resolution, and file size of the selected photo.

Page Information If your USB thumb drive has more files than can be displayed on a single screen, the page information is displayed here.

PHOTO VIEWER 45

Troubleshooting & Technical Support

Do You Have Questions? Find Answers At
SUPPORT.VIZIO.COM

Find help with:
· New Product Set-up · Connecting Your Devices · Technical Problems · Product Updates · And More

Live Chat Support Available

You can also contact our award-winning support team at: Phone: (877) 698-4946 (TOLL-FREE)

Or text VIZIO support using your mobile device: Text Message: (205) 301-3729
Note: This number accepts SMS/MMS messages only. No voice calls accepted. Message and data rates may apply. Only available in the U.S.

A
46

349

VIZIO TV
A
Take A Moment To Register Your Product At
VIZIO.COM/PRODUCT-REGISTRATION
Why Register?
Customized Support
Get assistance quickly with your information on-hand.
News & Offers
Take advantage of the latest news and special offers from VIZIO.
Safety & Satisfaction
Stay up to date with important product updates and notifications.
REGISTER YOUR VIZIO PRODUCT NOW
47

HELP TOPICS
The remote is not responding. · Make sure the batteries are properly inserted matching the
- and + symbols. · Replace the batteries with fresh ones.
The TV displays "No Signal." · Press INPUT button on the remote control to select a different
input source. · If you are using cable TV or antenna connected directly to the TV,
scan for channels. See Scanning for Channels.
There is no power. · Ensure the TV is plugged into a working electrical outlet. · Ensure the power cable is securely attached to the TV. · Press the Power/Standby button on the remote or on the back of
the TV to turn the TV on.
The power is on, but there is no image on the screen. · Ensure all cables are securely attached to the TV. · Ensure all devices are connected correctly. Devices differ; see your
device's user manual for details. · Adjust Brightness, Contrast, or Backlight.
See Adjusting the Picture Settings. · Press the INPUT button on the remote to select a different
input source.
The sound is flat or dialog is not audible. · Turn off Volume Leveling. See Adjusting the Audio Settings.
Where do I find information on the accessibility features of this product and other VIZIO products? · Please visit https://www.vizio.com/accessibility, Email us at:
Accessibility@vizio.com, or give us a call at 1-877-698-4746.

A

There is no sound. · Press Volume Up on the remote control. · Press the MUTE button on the remote to ensure mute is off. · Check the audio settings. See Adjusting the Audio Settings. · Check the audio connections of external devices (Blu-ray player, game
console, cable/satellite box) that are connected to the TV. · If you are using an antenna, the signal strength of the channel may be
low. Ensure your antenna is connected securely to the TV and move the antenna around the room or close to a window for the best signal.
The colors on the TV don't look right. · Adjust the Color and Tint settings in the Picture menu. See Adjusting
the Picture Settings. · Select a pre-set picture mode. See Adjusting the Picture Settings. VIZIO
recommends selecting Calibrated. · Check all cables to ensure they are securely attached.
The image quality is not good. · For the best image quality, view high-definition programs using digital
sources. Connect your devices with HDMI cables. · If you are using an antenna, the signal strength of the channel may be
low. Ensure your antenna is connected securely to the TV and move the antenna around the room or close to a window for the best signal.
The picture is distorted. · Move the TV away from electrical appliances, cars, and
fluorescent lights. · Ensure all cables are securely attached.
The buttons on the remote aren't working. · Ensure you are only pressing one button at a time. · Point the remote directly at the TV when pressing a button. · Replace the remote batteries with new ones. See Replacing the
Batteries.

The TV image does not cover the entire screen. · If you are using TV, AV, or Component with 480i input, go to: Menu >
System > Aspect Ratio to change the screen mode.
The TV has pixels (dots) that are always dark. · Your HD TV is precision-manufactured using an extremely high level
of technology. However, sometimes pixels may not display correctly. These types of occurrences are inherent to this type of product and do not constitute a defective product.
I see "noise" or static on the screen. · When your TV's digital capabilities exceed a digital broadcast signal,
the signal is up-converted (improved) to match your TV's display capabilities. This up-converting can sometimes cause irregularities in the image. · If you are using an antenna, the signal strength of the channel may be low. Ensure your antenna is connected securely to the TV and move the antenna around the room or close to a window for the best signal.

48

350

VIZIO TV

A

When I change input source, the TV image changes size. · The TV remembers the viewing mode on each input source. If the
viewing mode on the new input source differs from the one on the input source you switch from, the difference may be noticeable. · See Changing the Screen Aspect Ratio.
How do I download the VIZIO SmartCast MobileTM app? · Make sure your phone or tablet is connected to a Wi-Fi network.
Open a browser on your phone or tablet. Navigate to vizio.com/smartcastapp and follow the on-screen instructions to download the VIZIO SmartCast MobileTM app.
How do I change the Inputs? · Press the Input button on the back of the TV to cycle through
the Inputs. · Press the Input button on the basic remote to cycle through
the Inputs. · Make sure the VIZIO SmartCast · MobileTM app is installed on your phone or tablet. Open the VIZIO
SmartCast MobileTM app. Tap on the Device list and select your TV. Tap on the Input key and select the Input of your choice.
How do I connect to my Wi-Fi network? · On your TV remote, press the Menu button then go to Network >
Select your Wi-Fi name > Enter password. · Open the VIZIO SmartCast MobileTM app on your phone or tablet.
Tap on the device list and select your Display. Tap on the Settings icon > Network > Wireless Access Points. Select your Wi-Fi network from the list, enter the Wi-Fi password, and tap Connect.
How do I stream apps like Netflix to my VIZIO SmartCastTM TV? · Download and open a Chromecast-enabled apps on your mobile
device. Then tap the Cast button.

How do I exit Demo Mode · Press and hold the Input button on the back of the TV to exit the
demo mode.
How do I watch Cable/Antenna TV channels? · If you subscribe to cable or satellite, simply connect an HDMI cable
(not included) to the receiver. · If you use external antennas to watch local broadcast channels, use a
coaxial cable to connect.
Some of my Channels are missing. · Press the MENU button on your TV remote and select the channels
option. Then select Find Channels. · Open the VIZIO SmartCast MobileTM app on your phone or tablet.
Click on: Control > Your TV/Device Name > Settings Icon > Channels > Find Channels.
How do I disable/enable Viewing Data? · Press the MENU button on your remote and select the System option.
Select Reset & Admin. Then select Viewing Data to turn the feature on or off. · Open the VIZIO SmartCast MobileTM app on your phone or tablet. Click on: Control > Your TV/Device Name > Settings Icon > System > Reset & Admin > Viewing Data Slider.
The television will not turn on using Alexa or Google Assistant. · Ensure the television is in Quick Start mode. · Tap on Menu > System > Power Mode > Quick Start.
How do I know I am getting 4K resolution or HDR content such as Dolby Vision? · As you are watching content on the television, press the INFO button
on the remote or VIZIO SmartCast MobileTM app. You will see the current resolution being displayed along with the version of video. · HDR will show as a Dolby Vision icon, HDR10 or HLG.

The TV has pixels (dots) that are always dark.
· Your HD TV is precision-manufactured using an extremely high level of technology. However, sometimes pixels may not display correctly. These types of occurrences are inherent to this type of product and do not constitute a defective product.
I see "noise" or static on the screen.
· When your TV's digital capabilities exceed a digital broadcast signal, the signal is up-converted (improved) to match your TV's display capabilities. This up-converting can sometimes cause irregularities in the image.
· If you are using an antenna, the signal strength of the channel may be low. Ensure your antenna is connected securely to the TV and move the antenna around the room or close to a window for the best signal.

49

Specifications

Size Viewable Area MOUNTING
Dimensions w/ Stand
Dimensions w/o Stand
Weight w/ Stand Weight w/o Stand Mounting Screw Size Hole Pattern PICTURE QUALITY Maximum Resolution LCD Backlight Refresh Rate INPUTS / OUTPUTS HDMI Inputs Component Video Inputs Composite Video Inputs Ethernet Input RF Atenna Input USB Audio Output OTHER Remote Control Model Power Consumption Standby Power Voltage OSD Language
Certification

D24h-G9 24" 23.5"

D32h-G9 32" 31.5"

D40f-G9 40" 39.5"

D50x-G9 50" 49.5"

21.83" x 14.78" x 6.18" (554.5 x 375.4 x 157.0 mm)
21.83" x 13.15" x 2.06" (554.5 x 334.0 x 52.3 mm)
7.01 lb (3.18 kg) 6.90 lb (3.13 kg)
M4 100 mm x 100 mm

28.64" x 18.97" x 7.04" (727.5 x 482.4 x 178.7 mm)
28.64" x 16.98" x 2.46" (727.5 x 431.4 x 62.6 mm)
9.44 lb (4.28 kg) 9.26 lb (4.20 kg)
M4 100 mm x 100 mm

35.51" x 22.59" x 8.36" (902.0 x 573.8 x 212.3 mm)
35.51" x 20.40" x 2.55" (902.0 x 518.2 x 64.8 mm)
14.55 lb (6.60 kg) 14.33 lb (6.5 kg)
M6 200 mm x 200 mm

44.13" x 28.00" x 10.07" (1120.9 x 711.2 x 255.8 mm)
44.13" x 25.59" x 2.42" (1120.9 x 650.0 x 61.5 mm)
21.83 lb (9.90 kg) 21.32 lb (9.67 kg)
M6 200 mm x 200 mm

720p Edgelit LED
60 Hz

1366 x 768 (HD) Full Array LED
60 Hz

1920 x 1080 (Full HD) Full Array LED 60 Hz

3840 x 2160 (UHD) Full Array LED 60 Hz

2 0 1 0 1 1 HDMI ARC, Digital Optical

2 0 1 1 1 1 HDMI ARC, RCA, Digital Optical

2 1 1 1 1 1 HDMI ARC, RCA, Digital Optical

3 0 1 1 1 1 HDMI ARC, RCA, Digital Optical

XRT136 45W <0.5W 120V
English, French, Spanish

XRT136 69W <0.5W 120V
English, French, Spanish

XRT136 75W <0.5W 120V
English, French, Spanish

XRT136 135W <0.5W 120V English, French, Spanish

UL, cUL, FCC Class B, BETS-7/

UL, cUL, FCC Class B, BETS-7/

UL, cUL, FCC Class B, BETS-7/

UL, cUL, FCC Class B, BETS-7/

ICES-003 Class B, IC, HDMI (CEC, ARC) ICES-003 Class B, IC, HDMI (CEC, ARC) ICES-003 Class B, IC, HDMI (CEC, ARC) ICES-003 Class B, IC, HDMI (CEC, ARC)

Dolby Audio

Dolby Audio

Dolby Audio

Dolby Audio

B
50

351

VIZIO TV

Specifications

Size Viewable Area MOUNTING
Dimensions w/ Stand
Dimensions w/o Stand
Weight w/ Stand Weight w/o Stand Mounting Screw Size Hole Pattern PICTURE QUALITY Maximum Resolution LCD Backlight Refresh Rate INPUTS / OUTPUTS HDMI Inputs Component Video Inputs Composite Video Inputs Ethernet Input RF Atenna Input USB Audio Output OTHER Remote Control Model Power Consumption Standby Power Voltage OSD Language
Certification

V405-G9 40" 39.5"

V505-G9 50" 49.5"

V655-G9 65" 64.5"

35.51" x 22.70" x 8.36" (902.0 x 576.5 x 212.4 mm)
35.51" x 20.51" x 2.55" (902.0 x 521.0 x 64.8 mm)
15.21 lb (6.90 kg) 14.99 lb (6.80 kg)
M6 200 mm x 200 mm

44.13" x 28.00" x 10.07" (1120.9 x 711.2 x 255.8 mm)
44.13" x 25.59" x 2.42" (1120.9 x 650.0 x 61.5 mm)
21.83 lb (9.90 kg) 21.32 lb (9.67 kg)
M6 200 mm x 200 mm

57.37" x 35.61" x 11.95" (1457.2 x 904.6 x 303.5 mm)
57.37" x 33.10" x 2.41" (1457.2 x 840.7 x 61.1 mm)
46.69 lb (21.18 kg) 45.81 lb (20.78 kg)
M6 400 mm x 200 mm

3840 x 2160 (UHD) Full Array LED 60 Hz

3840 x 2160 (UHD) Full Array LED 60 Hz

3840 x 2160 (UHD) Full Array LED 60 Hz

3 0 1 1 1 1 HDMI ARC, RCA, Digital Optical

3 0 1 1 1 1 HDMI ARC, RCA, Digital Optical

3 0 1 1 1 1 HDMI ARC, RCA, Digital Optical

XRT136 98W <0.5W 120V
English, French, Spanish

XRT136 135W <0.5W 120V English, French, Spanish

XRT136 200W <0.5W 120V English, French, Spanish

UL, cUL, FCC Class B, BETS-7/

UL, cUL, FCC Class B, BETS-7/

UL, cUL, FCC Class B, BETS-7/

ICES-003 Class B, IC, HDMI (CEC, ARC) ICES-003 Class B, IC, HDMI (CEC, ARC) ICES-003 Class B, IC, HDMI (CEC, ARC)

Dolby Audio

Dolby Audio

Dolby Audio

B
51

Regulatory Information

C

FCC Class B Radio Interference Statement NOTE: This equipment has been tested and found to comply with the limits for a Class B digital device, pursuant to Part 15 of the FCC Rules. These limits are designed to provide reasonable protection against harmful interference in a residential installation. This equipment generates, uses and can radiate radio frequency energy, and if not installed and used in accordance with the instructions, may cause harmful interference to radio communications. However, there is no guarantee that interference will not occur in a particular installation. If this equipment does cause harmful interference to radio or television reception, which can be determined by turning the equipment off and on, the user is encouraged to try to correct the interference by one or more of the following measures:
Reorient or relocate the receiving antenna.
Increase the separation between the equipment and receiver.
Connect the equipment into an outlet on a circuit different from that to which the receiver is connected.
Consult the dealer or an experienced radio/TV technician for help.
This device complies with Part 15 of the FCC Rules. Operation is subject to the following two conditions: (1) this device may not cause harmful interference, and (2) this device must accept any interference received, including interference that may cause undesired operation.

Notice The changes or modifications not expressly approved by the party responsible for compliance could void the user's authority to operate the equipment.
Shielded interface cables and AC power cord, if any, must be used in order to comply with the emission limits.
The manufacturer is not responsible for any radio or TV interference caused by unauthorized modification to this equipment. It is the responsibilities of the user to correct such interference.

CPC-2-1-28 d'Industrie Canada, License optionnelle pour les appareils radio de faible puissance, pour plus de détails.
Industry Canada Class B emission compliance statement
This Class B digital apparatus complies with Canadian ICES-003. Cet appareil numérique de la classe B est conforme à la norme NMB-003 du Canada.

FCC Warning Changes or modifications not expressly approved by the party responsible for compliance with the FCC Rules could void the user's authority to operate this equipment.
Caution Always use a power outlet that is properly grounded.
Canada Notice for License-Exempt Radio Apparatus This device complies with Industry Canada's license-exempt RSSs. Operation is subject to the following two conditions: (1) This device may not cause harmful interference, and (2) this device must accept any interference received, including interference that may cause undesired operation.

This device operates on a no-protection no-interference basis. Should the user seek to obtain protection from other radio services operating in the same TV bands, a radio license is required. Please consult Industry Canada's document CPC-2-1-28, Optional Licensing for Low-Power Radio Apparatus in the TV Bands, for details.

Cet appareil est conforme aux CNR exempts de licence d'Industrie Canada. Son fonctionnement est sujet aux deux conditions suivantes:
1. le dispositif ne doit pas produire de brouillage préjudiciable, et
2. ce dispositif doit accepter tout brouillage reçu, y compris un brouillage susceptible de provoquer un fonctionnement indésirable

Cet appareil fonctionne sur une base sans protection et sans interférence. Dans le cas où l'utilisateur cherche à obtenir de la protection des autres services de radio fonctionnant sur les mêmes bandes TV, aucune license est requise. Veuillez consulter le document
52

352

VIZIO TV

Limited Warranty

D

UNITED STATES AND CANADA

Your Obligations Before Service

BY USING YOUR VIZIO PRODUCT YOU AGREE TO BE BOUND BY ALL

You must obtain pre-authorization before sending your product to a

What to Do If You Are Not Satisfied With Service

THE TERMS OF THIS WARRANTY. BEFORE USING YOUR VIZIO PRODUCT,

VIZIO service center. You may be required to supply a purchase receipt

If you feel VIZIO has not met its obligations under this warranty, you

PLEASE READ THIS WARRANTY CAREFULLY. IF YOU DO NOT AGREE TO

(or copy) to show that the product is within the warranty period. When

may attempt to resolve the issue informally with VIZIO. If you are unable

THE TERMS OF THIS WARRANTY, DO NOT USE THE VIZIO PRODUCT AND,

you return a product to a VIZIO service center, you must ship the

to resolve the issue informally and wish to file a formal claim against

WITHIN THIRTY (30) DAYS OF THE DATE OF PURCHASE, RETURN IT FOR A

product in its original packaging or in packaging that affords an equal

VIZIO, and if you are a resident of the United States, you must submit

REFUND TO THE AUTHORIZED RETAILER WHERE YOU PURCHASED IT.

degree of protection. VIZIO Technical Support will provide instructions

your claim to binding arbitration according to the procedures described

This warranty contains a binding arbitration agreement and a class

for packing and shipping the product to the VIZIO service center. ALL

below, unless an exception applies. Submitting a claim to binding

action waiver for United States residents. If you live in the United States,

USER DATA AND DOWNLOADED APPLICATIONS STORED ON A PRODUCT

arbitration means that you do not have the right to have your claim

the binding arbitration agreement and class action waiver affect your

WILL BE DELETED IN THE COURSE OF SOME IN-HOME AND ALL SHIP-IN

heard by a judge or jury. Instead your claim will be heard by a neutral

rights under this warranty. Please read the text under the section titled

WARRANTY SERVICE. If this occurs, your product will be restored to its

arbitrator.

"Binding Arbitration Agreement; Class Action Waiver (U.S. Residents Only)" carefully.
How Long This Warranty Lasts For non-commercial use, VIZIO warrants the product on the terms set forth below for one (1) year from the date of original purchase. For commercial use, VIZIO warrants this product on the terms set forth

original state. You will be responsible for restoring all applicable user data and downloaded applications. Recovery and reinstallation of user data and downloaded applications is not covered under this warranty. In order to protect your personal information, VIZIO recommends that you always clear all personal information from the product before it is serviced, regardless of the servicer.

Binding Arbitration Agreement; Class Action Waiver (U.S. Residents Only) UNLESS YOU HAVE BROUGHT AN ELIGIBLE CLAIM IN SMALL CLAIMS COURT OR HAVE OPTED OUT AS DESCRIBED BELOW, ANY CONTROVERSY OR CLAIM RELATING IN ANY WAY TO YOUR VIZIO PRODUCT, INCLUDING ANY CONTROVERSY OR CLAIM ARISING OUT OF OR RELATING TO THIS

below for ninety (90) days from the date of original purchase.

VIZIO's Responsibilities

WARRANTY, A BREACH OF THIS WARRANTY, OR THE VIZIO PRODUCT'S

If VIZIO determines that a product is covered by this warranty, VIZIO will

SALE, CONDITION OR PERFORMANCE, WILL BE SETTLED BY BINDING

What This Warranty Covers

(at its option) repair or replace it, or refund the purchase price to you.

ARBITRATION ADMINISTERED BY THE AMERICAN ARBITRATION

VIZIO warrants the product against defects in materials and

There will be no charge for parts or labor during the warranty period.

ASSOCIATION AND CONDUCTED BY A SINGLE ARBITRATOR APPOINTED

workmanship when the product is used normally in accordance with

Replacement parts may be new or recertified at VIZIO's option and sole

BY THE AMERICAN ARBITRATION ASSOCIATION, IN ACCORDANCE WITH

VIZIO's user guides and manuals.

discretion. Replacement parts and VIZIO's labor are warranted for the

ITS COMMERCIAL ARBITRATION RULES AND ITS SUPPLEMENTARY

Except where restricted by law, this warranty applies only to the original

remaining portion of the original warranty or for ninety (90) days from

PROCEDURES FOR CONSUMER-RELATED DISPUTES. You may learn more

purchaser of a new product. The purchase must have been made from

warranty service, whichever is longer.

about the American Arbitration Association and its rules for arbitration

an authorized retailer in the United States (including Puerto Rico) or

by visiting www.adr.org or by calling 800-778-7879. Since this warranty

Canada. The product must also be located in the country where it was

Types of Service

concerns a transaction in interstate or international commerce, the

purchased at the time of warranty service.

TVs that are 32 inches or larger will usually be serviced in-home. In-home

Federal Arbitration Act will apply.

Zero Bright Pixel Defect Guarantee (Displays Only) Your product may qualify for a warranty against "zero bright pixel" defects for the duration of the warranty on select new product purchases. To determine if this guarantee applies to your product, refer to the model's product information page at www.vizio.com, look for the "zero bright pixel" guarantee on the box, or contact VIZIO Technical Support at the email address or telephone number below.
How to Get Service Before obtaining warranty service, you may visit www.vizio.com for additional help and troubleshooting. To obtain warranty service, contact VIZIO Technical Support via email at TechSupport@VIZIO.com or via phone at 877 MY VIZIO (877-698-4946).

service requires complete and easy access to the product and does not include de-installation or re-installation of the product. In-home service is subject to availability. VIZIO will provide other service options when in-home service is not available.All other VIZIO products must be sent to a VIZIO service center to obtain warranty service. VIZIO is not responsible for transportation costs to the service center, but VIZIO will cover return shipping to the customer.
What This Warranty Does Not Cover This warranty does not cover: (a) cosmetic damage; (b) normal wear and tear; (c) improper operation; (d) improper voltage supply or power surges; (e) signal issues; (f) damage from shipping; (g) acts of God; (h) customer misuse, modifications or adjustments; (i) installation, set-up, or repairs attempted by anyone other than by a VIZIO authorized service center; (j) products with unreadable or removed serial numbers; (k) products requiring routine maintenance; or (l) products sold "AS IS", "CLEARANCE", "FACTORY RECERTIFIED", or by a non-authorized reseller.

The filing fees to begin and carry out arbitration will be shared between you and VIZIO, but in no event will your fees ever exceed the amount allowable by the American Arbitration Association, at which point VIZIO will cover all additional administrative fees and expenses. VIZIO waives its right to recover attorneys' fees in connection with any arbitration under this warranty. If you are the prevailing party in an arbitration to which the Supplementary Procedures for Consumer-Related Disputes applies, then you are entitled to recover attorneys' fees as the arbitrator may determine. The dispute will be governed by the laws of the state or territory in which you resided at the time of your purchase (if in the United States). The place of arbitration will be Irvine, California, or your county of residence (if in the United States). The arbitrator will have no authority to award punitive or other damages not measured by the prevailing party's actual damages, except as may be required by statute. The arbitrator will not award consequential damages, and any award will be limited

53

to monetary damages and will include no equitable relief, injunction, or direction to any party other than the direction to pay a monetary amount. Judgment on the award rendered by the arbitrator will be binding and final, except for any right of appeal provided by the Federal Arbitration Act, and may be entered in any court having jurisdiction. Except as may be required by law, neither you nor VIZIO nor an arbitrator may disclose the existence, content, or results of any arbitration under this warranty without the prior written consent of you and VIZIO. ANY DISPUTE, WHETHER IN ARBITRATION, IN COURT, OR OTHERWISE, WILL BE CONDUCTED SOLELY ON AN INDIVIDUAL BASIS. VIZIO AND YOU AGREE THAT NO PARTY WILL HAVE THE RIGHT OR AUTHORITY FOR ANY DISPUTE TO BE ARBITRATED AS A CLASS ACTION, A PRIVATE ATTORNEY GENERAL ACTION, OR IN ANY OTHER PROCEEDING IN WHICH EITHER PARTY ACTS OR PROPOSES TO ACT IN A REPRESENTATIVE CAPACITY. NO ARBITRATION OR PROCEEDING WILL BE JOINED, CONSOLIDATED, OR COMBINED WITH ANOTHER ARBITRATION OR PROCEEDING WITHOUT THE PRIOR WRITTEN CONSENT OF ALL PARTIES TO ANY SUCH ARBITRATION OR PROCEEDING. Exceptions to Binding Arbitration Agreement and Class Action Waiver IF YOU DO NOT WISH TO BE BOUND BY THE BINDING ARBITRATION AGREEMENT AND CLASS ACTION WAIVER, THEN: (1) you must notify VIZIO in writing within sixty (60) days of the date that you purchased the product; (2) your written notification must be mailed to VIZIO at 39 Tesla, Irvine, CA 92618, Attn: Legal Department; and (3) your written notification must include (a) your name, (b) your address, (c) the date you purchased the product, and (d) a clear statement that you wish to opt out of the binding arbitration agreement and class action waiver. In addition, you may pursue a claim in small claims court in your county of residence (if in the United States) or in Orange County, California. In such case the provisions of the section titled "Binding Arbitration Agreement; Class Action Waiver (U.S. Residents)" will not apply.
Exclusions and Limitations TO THE GREATEST EXTENT PERMITTED BY APPLICABLE LAW, THERE ARE NO EXPRESS WARRANTIES OTHER THAN THOSE DESCRIBED ABOVE. ANY IMPLIED WARRANTIES, INCLUDING ANY IMPLIED WARRANTY OF MERCHANTABILITY AND FITNESS FOR A PARTICULAR PURPOSE, WILL BE LIMITED IN DURATION TO THE WARRANTY PERIOD SET FORTH ABOVE. SOME STATES AND PROVINCES DO NOT ALLOW LIMITATIONS ON HOW LONG AN IMPLIED WARRANTY LASTS, SO THE ABOVE LIMITATION MAY NOT APPLY TO YOU. VIZIO WILL NOT BE RESPONSIBLE FOR LOSS OF USE, LOSS OF INFORMATION OR DATA, COMMERCIAL LOSS, LOST REVENUE OR LOST PROFITS, OR OTHER INDIRECT, SPECIAL, INCIDENTAL OR CONSEQUENTIAL DAMAGES, EVEN IF VIZIO HAS BEEN ADVISED OF THE

POSSIBILITY OF SUCH DAMAGES, AND EVEN IF THE REMEDY FAILS OF ITS ESSENTIAL PURPOSE. SOME STATES AND PROVINCES DO NOT ALLOW THE EXCLUSION OR LIMITATION OF INCIDENTAL OR CONSEQUENTIAL DAMAGES, SO THE ABOVE LIMITATION OR EXCLUSION MAY NOT APPLY TO YOU. IN LIEU OF ANY OTHER REMEDY FOR ANY AND ALL LOSSES AND DAMAGES RESULTING FROM ANY CAUSE WHATSOEVER (INCLUDING VIZIO'S NEGLIGENCE, ALLEGED DAMAGE, OR DEFECTIVE GOODS, NO MATTER WHETHER SUCH DEFECTS ARE DISCOVERABLE OR LATENT), VIZIO MAY, AT ITS SOLE AND EXCLUSIVE OPTION AND IN ITS DISCRETION, REPAIR OR REPLACE YOUR PRODUCT, OR REFUND ITS PURCHASE PRICE. AS NOTED, SOME STATES AND PROVINCES DO NOT ALLOW THE EXCLUSION OR LIMITATION OF INCIDENTAL OR CONSEQUENTIAL DAMAGES, SO THE ABOVE LIMITATION OR EXCLUSION MAY NOT APPLY TO YOU.
How the Law Applies This warranty gives you specific legal rights, and you may also have other rights, which vary from state to state and province to province. This warranty applies to the greatest extent permitted by applicable law.
General No employee or agent of VIZIO may modify this warranty. If any term of this warranty, other than the class action waiver, is found to be unenforceable, that term will be severed from this warranty and all other terms will remain in effect. If the class action waiver is found to be unenforceable, then the entire section titled "Binding Arbitration Agreement; Class Action Waiver (U.S. Residents Only)" will not apply. This warranty applies to the maximum extent not prohibited by law.
Changes to Warranty This warranty may change without notice, but any change will not affect your original warranty. Check www.vizio.com for the most current version.

D
54

353

VIZIO TV

Legal Information

E

Software Licenses All software is provided subject to a software license agreement(s) and you agree that you will be bound by such license agreement(s) in addition to these terms. Your use of this product is subject to VIZIO's privacy policy, which may be updated from time to time, and is available to view at http://www.vizio.com/privacy.
Export Regulations Customer acknowledges that the VIZIO products, which include technology and software, are subject to customs and export control laws in the United States ("US"). The products may also be subject to the customs and export control laws and regulations of the country in which the products are manufactured and/or received.

Dolby, Dolby Vision, Dolby Audio, and the double-D symbol are trademarks of Dolby Laboratories. Manufactured under license from Dolby Laboratories. Confidential unpublished works. Copyright © 1992-2015 Dolby Laboratories. All rights reserved.
Google Play logo, YouTube, and Chromecast built-in are trademarks of Google LLC.
Other names of companies, products, and services used in this User Manual may be trademarks, trade names or service marks of others and VIZIO, Inc. disclaims any interest in trademarks, trade names or service marks other than its own. Mention of non-VIZIO products is for informational purposes only.

Packaging Disposal VIZIO encourages the recycling of the packaging used for this product. Please break-down all boxes and recycle eligible materials according to local laws and regulations. For more information please go to www.vizio. com/environment or call (800) 374-3473.
Accessibility For information on the accessibility features of this product and other VIZIO products please visit: https://www.vizio.com/accessibility Email: Accessibility@vizio.com Phone: 1-877-698-4746

Internet Connectivity Network conditions, environmental and other factors may negatively

App services featured on the included IR remote may vary and may not be available in all regions.

affect connectivity and the resulting video quality, if any. The applications and content of the applications pictured herein or described in accompanying documentation may only be available in certain countries

4K or HDR availability varies by app and may be subject to subscription fees, internet service, and device capabilities.

or languages, may require additional fees or subscription charges, and

Other names of companies, products, and services used in this User

may be subject to future updates, modifications or discontinuation

Manual may be trademarks, trade names or service marks of others

without notice. VIZIO has no control over third party applications or

and VIZIO, Inc. disclaims any interest in trademarks, trade names or

content and assumes no responsibility for the availability or interruption

service marks other than its own. Mention of non-VIZIO products is for

of such applications or content. Additional third party terms, conditions

informational purposes only.

and restrictions apply.

Battery Disposal

Information in this User Manual is subject to change without notice. To review the most updated version of this User Manual and the associated Quick Start Guide, go to http://www.vizio.com.

Caution:This product may be shipped with batteries.Do not dispose of batteries in a fire or withordinaryhouseholdwaste. Batteries may explode and can cause damage. Replace

© 2019 VIZIO, Inc. All Right Reserved.

batteries only with the same or equivalent type of battery

This User Manual may not be copied in whole or in part without the written permission of VIZIO, Inc. VIZIO, Inc. has made reasonable efforts to ensure the accuracy of the information provided herein. All product specifications, functionality, features, configurations, performance,

recommended by VIZIO. The disposal of batteries may be regulated by your state.For more information on recycling or properly disposing of your batteries, please check with your state or go to www. vizio.com/environment.

design and other product information described herein are subject to

Product Recycling

change without notice. VIZIO, Inc. is not responsible for typographical,

The disposal and recycling of consumer electronic products may be

technical, or descriptive errors.

regulated by your state. Always properly dispose of your VIZIO products

VIZIO, the VIZIO logo, the V logo, and other terms and phrases are trademarks or registered trademarks of VIZIO, Inc.

in accordance with local laws and regulations. VIZIO supports the proper recycling of our products. For information on how to properly recycle your VIZIO products and to learn more

The terms HDMI, HDMI High-Definition Multimedia Interface, and the HDMI Logo are trademarks or registered trademarks of HDMI Licensing Administrator, Inc.

about consumer electronics recycling laws, please go to www. vizio.com/environment or call (800) 374-3473.

© 2019 VIZIO INC. ALL RIGHTS RESERVED.

190812SL

55

354

SERVICE DEPARTMENT
228 INDUSTRIAL AVE HOHENWALD, TENNESSEE 38462
TOLL FREE: 866-205-2621 EMAIL: SERVICE@OLIVERTRAVELTRAILERS.COM
SEE OUR VIDEOS AT OLIVERTRAVELTRAILERS.COM


Adobe InDesign 15.1 (Windows) 3-Heights™ PDF Optimization Shell 6.3.1.5 (http://www -tools.com)