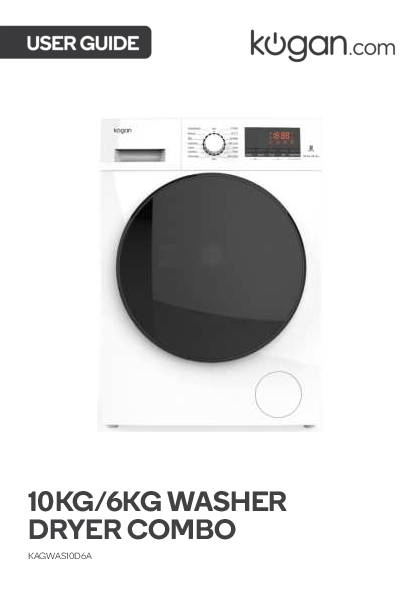
Kogan 10KG/6KG Washer Dryer Combo
Model: KAGWAS10D6A
Safety & Warnings
Warning
Read and understand thoroughly these safety instructions before use. The items indicated here are very important safety precautions, which must be followed. Kogan.com cannot be held liable for damage caused by non-compliance with the warning and safety instructions or resulting from incorrect use or operation. This appliance can be used by children aged from 8 years and above and persons with reduced physical sensory or mental capabilities or lack of experience and knowledge if they have been given supervision or instruction concerning the use of the appliance in a safe way and understand the hazards involved. Children shall not play with the appliance. Cleaning and user maintenance shall not be made by children without supervision. Children aged less than 3 years should be kept away unless continuously supervised.
Technical safety
- Before setting up the washer-dryer, check it for any externally visible damage. Do not install or use a damaged washer-dryer.
- Before connecting the washer-dryer, ensure that the connection data on the plate (voltage and current) match the electricity supply. If in any doubt, consult a qualified electrician.
- The electrical safety of this washer-dryer can only be guaranteed when continuity is complete between it and an effective earthing system which complies with current local and national safety regulations. It is most important that this basic safety requirement is present and regularly tested; where there is any doubt the household wiring system should be inspected by a qualified electrician.
- Do not connect the washer-dryer to the mains electricity supply by an extension lead. Extension leads do not guarantee the required safety of the appliance.
- Unauthorised repairs could result in unforeseen dangers for the user. Repairs should only be undertaken by Kogan.com. Ensure the current is not supplied to the machine until after maintenance or repair work has been carried out.
- If the connection cable is damaged or broken, it must only be replaced by Kogan.com to protect the user from danger.
- Faulty components must only be replaced by genuine Kogan.com original spare parts. Only when these parts are fitted can the safety standards of the machine be guaranteed.
This washer-dryer must always be earthed.
Correct use
- To avoid the risk of personal injury or damage to the washer-dryer, do not install it in a place where it is damp or exposed to rainfall.
- Do not install the washer-dryer in direct sunlight, as this may damage the plastic components over time and shorten the life of the washer-dryer.
- Do not install the washer-dryer in a place where temperatures below freezing may occur. Frozen hoses may burst or split. The reliability of the electronic control unit may be impaired at temperatures below freezing point.
- Do not spray the washer-dryer with water when cleaning it.
- Keep the washer-dryer away from fire or heat sources.
- Before using the washer-dryer for the first time, check that the transit bolts at the rear of the machine have been removed. During spinning, transit bolts which are still in place may result in damage to both the machine and adjacent furniture or appliances.
Illustration of a washer-dryer with a sun symbol indicating direct sunlight and a water droplet symbol indicating dampness, with a cross over them, warning against installation in such conditions.
- Turn off the tap if the machine is to be unused or unattended for an extended period (e.g., holiday), especially if there is no floor drain (gully) in the immediate vicinity.
- Take care to ensure that foreign objects (e.g., nails, pins, coins, paper clips) do not find their way into the machine with the laundry. These may damage components of the machine, which in turn can result in damage to the laundry.
- Do not wash water-repellent things (e.g., raincoats) in the washer-dryer.
- Only remove laundry from the washer-dryer once the drum has stopped turning. Reaching into a moving drum is extremely dangerous and could result in injury.
Safety with children
- Keep children away from the washer-dryer at all times. To avoid the risk of injury, do not allow children to play on or near it, or to play with its controls. Supervise children whilst you are using it.
- Older children may only use the washer-dryer if its operation has been clearly explained to them and they are able to use it safely, recognising the dangers of misuse.
- For machines with a "porthole" door, remember that the porthole glass will be hot when washing at very high temperatures. Do not allow children to touch it.
Unscrew the drain pump filter to let water run out when the machine is not in use for an extended period.
Illustration of a child playing with a ball near a washing machine, with a warning symbol indicating danger.
Overview
Diagram showing the front of the washer-dryer with labels pointing to: Control panel, Drawer (for detergent or fabric softener), Door glass, Door, Drainage pump damper, Drain pump filter, Power cable, Transit bolts, Rear cover, Top cover, Knob, Side panel, Door seal, Drain hose, Adjustable feet, Cold water inlet valve.
Diagram showing the rear of the washer-dryer with labels pointing to: Power cable, Transit bolts, Rear cover, Cold water inlet valve.
The artwork in this user guide is intended for reference only and may differ from the actual product.
Unpacking the machine
- Remove all packaging (including foam base) or vibration and noise may occur.
- Dispose of all plastic wrapping safely and keep it out of the reach of children, as it presents a suffocation hazard.
- It is normal that some water drops may appear on the packing plastic and the door glass; this is a result of final quality control testing and is no cause for alarm.
Accessories
Make sure that you have received all of the items shown below. Do not dispose of any packaging before confirming.
| Accessories | Name | Qty. | Accessories | Name | Qty. |
|---|---|---|---|---|---|
| [Image of inlet hose] | Inlet Hose | 1 | [Image of U piece] | "U" Piece | 1 |
| [Image of transit bolt caps] | Transit Bolts Caps | 4 | [Image of manual] | Manual | 1 |
Removing transit bolts
Illustration showing the rear of the washer-dryer with transit bolts highlighted.
- Remove all the transit bolts at the back of the machine with the appropriate tools.
- Plug the holes with the transit bolts caps supplied.
- Keep the transit bolts for future transportation; whenever the machine is transported, as the transit bolts must be refitted to avoid damage to the drum.
Strong vibration, noise or failures may occur if the transit bolts are not removed.
Installation
Locating the machine
Illustration showing a washer-dryer positioned in a corner, with 10cm clearance indicated on both sides to the walls.
- A concrete floor is the most suitable installation surface for a washer-dryer, being far less prone to vibration during the spin cycle than wooden floorboards or carpeted surfaces.
- The machine must be level and securely positioned. The distance between the machine and wall must be at least 10 cm.
- To avoid vibrations during spinning, the machine should not be installed on soft floor coverings.
Level adjustment
Close-up illustration of the adjustable feet of the washer-dryer, showing 'Loose', 'Locked', 'High', and 'Low' positions. A larger diagram shows the base of the machine with adjustable feet.
The machine must stand perfectly level on all four feet to ensure safe and proper operation. Incorrect installation may increase electricity and water consumption and may cause the machine to move about during operation.
If the machine is not level:
- Using a spanner, turn the locknut in a clockwise direction to loosen. Then turn locknuts together with adjust feet to unscrew.
- To avoid vibrations during spinning, the machine should not be installed on soft floor coverings.
Vibration and noise may occur if the locknuts do not sit firmly up against the housing.
Drain hose connection
1. Directly into a sink
If the outlet spigot has not been used before, remove any block/plug that may be in place. Push the drain hose onto the spigot and secure with a clip if required, ensure a loop is formed in the drain hose to prevent waste from the sink entering the washer-dryer. If required, the drain hose can be extended to a length of 4 m.
Two diagrams showing the drain hose connected to a sink trap, with one illustrating a 'Loop' to prevent backflow.
2. Connected securely to a standpipe
Firstly, form a hook in the end of the drain hose using the plastic "U" piece supplied. Place the drain hose into your standpipe, which should have an internal diameter of approximately 30mm, thus ensuring there is an air brake between the drain hose and standpipe. When discharging into a standpipe, ensure that the top of the standpipe is no more than 90cm and no less than 60cm above floor level.
Diagrams showing the 'U' piece supplied, the washer-dryer with the drain hose connected to a standpipe, and a diagram indicating the required height of the standpipe (60-90cm).
Water inlet connection
Connect the inlet hose supplied with the machine to a tap with a 3/4" thread. Do not use hoses that have been previously installed with other machines. Installation should comply with local water authority and building regulations requirements.
Two diagrams showing the connection of the inlet hose to a tap with a 3/4" thread, and the connection to the inlet valve at the back of the machine.
Labels: "Inlet valve for cold water", "Inlet hose for cold water (white nut)".
Washing preparation
How to use Washer
Before washing clothes for the first time, you must run a complete cycle without clothes.
Steps:
- Turn the program select knob to "Cotton" position.
- Press "Start/Pause" button.
If there is any water leftover from quality control testing, this will drain the water.
Operation
Illustration of the washer-dryer control panel with program selection knob and buttons: Start/Pause, Dry, Temp, Speed, Rinse+. Labels indicate programs like Wash & Dry 60', Refresh, Dry, Quick Dry, Quick, Synthetic, Rinse+ Spin, Daily, 4S Wash, High Temp, Down, Heavy, Drum Clean, Spin. Digital display shows '18:88'.
| # | Button | Function |
|---|---|---|
| 1 | Start/Pause (▶||) | Press to start or pause a wash cycle. Door cannot be opened when paused. Press and hold for 3 seconds to pause and add clothes, unless water level or drum temperature is high. Complete cycle to drain water and release door. |
| 2 | Dry | Select drying time (0, 60, 90, 120, 150, 180, 210, 240, 270, 300, 330, 360, 390 minutes). Required lamp lights up. |
| 3 | Temp | Press repeatedly to change wash temperature. |
| 4 | Speed | Press repeatedly to change spin speed. |
| 5 | Rinse+ | Press repeatedly to change rinse times. |
| 6 | Program Select Knob | Turn clockwise or anticlockwise to select program. Program cannot be changed once running, unless turning to "Off" to stop. Door remains locked until cycle completion. |
For safety, do not turn the program select knob to "Off" while the machine is running, as hot water may cause burns or scalding. The door lock opens automatically after the drum cools sufficiently.
Child lock (Rinse+ & Speed)
The function of the child lock is to lock the control panel to prevent misuse by children.
- Press the "Rinse+" and "Speed" buttons simultaneously for 3 seconds.
- When the icon "??" is illuminated, child lock is enabled. Can be selected during a washing cycle.
- When enabled, all keys and knob are unavailable, except for the knob turn to the position.
Mute (Temp)
This function silences all prompt tones and alert sounds whilst it is enabled.
To start: Press "Temp" button for 3 seconds.
To cancel: Press "Temp" button for 3 seconds again.
Delay start (Temp & Dry)
This function allows a delay time to be set before the selected cycle begins.
- Select desired program with the control knob.
- Simultaneously press "Temp" and "Dry" buttons to enter delay mode.
- Press "Temp" and "Dry" buttons repeatedly to select delay time.
- Press "Start" button to begin the cycle once the set delay time elapses.
Control Panel Display
An overview of the symbols and icons that may appear on the Control Panel.
- 18:88 Digital display: Shows time, speed, rinse times, and error codes.
- Remaining time: ⏳ Displays the remaining time for the current cycle.
- Delay time: ⏰ This icon will appear once the delay time is displayed.
- Child lock: ?? This icon will appear once the child lock function is enabled.
- Door lock: ? This icon will appear when door lock function is enabled.
- Dry: ☀️ The icon will be illuminated when the dry function is selected and will flicker during the drying process.
- Main wash: ? The icon will illuminate in standby mode when a program with the main wash function is selected. It will flicker during operation, illuminate when paused, and turn off when the cycle has finished.
- Rinse: ? The icon will illuminate in standby mode when a program with the main rinse function is selected. It will flicker during operation, illuminate when paused, and turn off when the cycle has finished.
- Final spin: ? The icon will illuminate in standby mode when a program is selected. It will flicker during operation, illuminate when paused, and turn off when the cycle has finished.
Program Guide
| Program | Weight (kg) | Time (min) | Temp (°C) | Rinse Times | Spin Speed (rpm) | Dry Time (min) |
|---|---|---|---|---|---|---|
| Daily | 10 | 76 | 0/20 /40/60 | 2/3/4/5 | 0/400/600/800 /1000/1200/1400 | 0/60/90/120/150/180/210 /240/270/300/330 |
| 4S Wash | 7 | 49 | 20 2/3/4/5 | 0/400/600/800 /1000/1200/1400 | 0/60/90/120/150/180/210 /240/270/300/330 | |
| High Temp | 6 | 131 | 95 2/3/4/5 | 0/400/600 /800/1000 | -- | |
| Down | 4 | 66 | 0/20 /40 | 3/4/5 | 0/400/600/800 | -- |
| Heavy | 10 | 99 | 0/20 /40/60 | 3/4/5 | 0/400/600/800 /1000/1200 | -- |
| Drum Clean | 0 | 109 | 60/95 | 2 | 600 | 35 |
| Spin | 10 | 11 | -- | -- | 0/400/600/800 /1000/1200/1400 | 0/60/90/120/150/180/210 /240/270/300/330 |
| Rinse/ Spin | 10 | 16 | 1/2/3/4 | 0/400/600/800/ 1000/1200/1400 | 0/60/90/120/150/180/210 /240/270/300/330 | |
| Synthetic | 5 | 51 | 0/20 /40/60 | 2/3/4 | 0/400/600/800 /240/270 | 0/60/90/120/150/180/210 /240/270 |
| Quick | 3.5 | 18 | 2/3/4 | 0/400/600/800 /1000/1200 | -- | |
| Quick Dry | 1 | 42 | -- | -- | 0/1400 | 42 |
| Dry | 6 | 60 | -- | -- | 0/1400 | 0/60/90/120/150/180/210 /240/270/300/330 |
| Refresh | 4 | 35 | -- | -- | -- | 35 |
| Wash & Dry 60' | 1 | 60 | 0 2/3/4 | 0/400/600/800 /1000/1200 | 42 |
Clothes Preparation
- Sort laundry by colour and care label.
- Empty pockets. Foreign objects can cause damage.
- Close zips, fasten hooks and toggles before washing.
Illustration of folded clothes.
- Dark textiles often contain excess dye and should be washed separately several times before being included in a mixed load. Always wash whites and coloureds separately.
- Badly soiled areas, stains etc. should be pre-treated with liquid detergent stain removers etc.
- Turn over the clothes which pill easily and have a woollen surface before putting them into the machine.
Washing Notes
- Do not wash items with a "?" symbol on the tag, woolen clothes, silk, leather/foam rubber items, or items washed with volatile solvents (detergents, gasoline).
- For drying hand-washed clothes, use the highest spin speed and a suitable dry program.
- Do not exceed the marked weight for drying.
- The drying cycle uses tap water; ensure the tap is open and water is cold.
- Drying excessive amounts may take longer and result in incomplete drying. Dry in several parts if needed.
- For burn prevention, the machine reduces drum temperature before the dry program ends. Time may stop on display. Do not stop during cooling; door remains locked if drum is still hot.
- When dry function is selected, default spin speed and time are maximum. Speed and time can be adjusted.
Put clothes into washer
Unfold the laundry and load loosely into the drum. Mixing both large and small items gives better wash results and also helps distribute the load evenly during spinning. The most efficient use of energy and water is achieved when a full load is washed. However, do not overload as this causes creases and reduces cleaning efficiency.
Ensure no garments are caught between the door and the seal.
Illustration showing laundry being loaded loosely into the drum of a washing machine.
Adding detergent to the drawer
Illustration of the detergent drawer, showing compartments for Main wash and Fabric softener.
- Open the drawer and add adequate detergent into the main wash compartment marked " | " or " || ".
- Add fabric softener into the compartment marked "?". Do not exceed the maximum level mark.
- Close the drawer.
The correct amount of detergent depends on:
- The quantity of laundry
- The soiling level of the laundry:
- Lightly soiled: no visible dirt or stains. Possible slight body odour.
- Normally soiled: visibly dirty and/or just a few slight stains.
- Heavily soiled: visible dirt and stains and/or dried on soiling.
- The water hardness level.
It is recommended to use low foaming powder for all temperature washing programs. The third compartment of the detergent drawer is not usable.
Washing steps
- Turn on the water tap and connect the power.
- Open the door and put clothes into the drum one by one.
- Close the door and add detergent and fabric softener to the dispenser.
- Choose the desired program by turning the knob.
- Press the "Temp." button to select wash temperature.
- Press "Start/Pause" button to start the washer-dryer.
- An alert tone sounds when the cycle is finished.
Washing program chart
| Programme | Washing Symbol | Fabric |
|---|---|---|
| Daily | [95/60/40/30°C symbol] | Cottons, linens, or cotton mix fabrics, e.g. towels, underwear, T-shirts etc. |
| 4S Wash | [95/60/40/30°C symbol] | Cottons, linens, or cotton mix fabrics, e.g. towels, underwear, T-shirts etc. |
| High Temp | [95°C symbol] | Cottons, linens, or cotton mix fabrics. Washing clothes at 95°C, which would assist with sterilisation and disinfection. |
| Down | [40/30°C symbol] | Down jackets coats. |
| Heavy | [95/60/40/30°C symbol] | Clothes with large volume |
| Drum Clean | [95/60°C symbol] | For cleaning the drum. Do not add clothes to the drum while running this program. |
| Spin | [No symbol] | Separate spin for cotton and linen items |
| Rinse/Spin | [Rinse symbol, Spin symbol] | For rinsing items which can then be washed in a Cotton program. Do not add detergent. |
| Synthetic | [60/40/30°C symbol] | Synthetic or mixed fabrics, underwear, coloured garments, non-shrink shirts. |
| Quick | [40/30°C symbol] | New clothes or a small amount of clothes which are not very dirty. |
| Quick Dry | [Dry symbol] | Can be used to dry a small amount of clothes. |
| Dry | [Dry symbol] | Can be used to dry clothes. |
| Refresh | [No symbol] | Used to remove stale smells and creases. |
| Wash & Dry 60' | [60/40/30°C symbol] | Can be used to wash and dry a small amount of clothes. |
Important Notes
Notes:
- When the washing cycle finishes, the machine enters standby mode and powers off after 10 minutes of inactivity.
- The machine has a balance control device for stability during spin. If laundry is unevenly distributed, it redistributes it by reverse drum rotation. This may happen several times. If uneven distribution persists after 15 minutes, the machine will not spin. Redistribute load manually and reselect spin program.
Door lock
The door locks when the machine starts. The door can be opened by pressing "Start/Pause" during a cycle, except in the following cases:
- If the temperature inside the drum is above 53°C, the door remains locked.
- When the water is above a certain level, the door remains locked.
It is recommended to run a cycle to completion to drain water, then wait two minutes for the door to unlock.
In an emergency, turn the program select knob to "Off" and wait 2 minutes to open the door. CAUTION – Water may be hot, which could lead to scalding.
IMPORTANT: Do not try to open the door when the washing cycle is not finished, or power supply is cut off during the washing cycle. The temperature may be high enough to present a risk of scalding or burning.
Important: Do not try to open the door if the washing cycle has not finished or power supply is cut off during the washing cycle. The temperature may be high and you may be scalded.
Cleaning & Care
WARNING:
Disconnect the machine from the mains electricity supply and remove the plug from the socket before cleaning. The washer-dryer must not be hosed down.
Cleaning the exterior
Clean the exterior with a mild non-abrasive agent or soap and water, using a well-wrung-out cloth, and wipe dry with a soft cloth.
WARNING:
Do not use solvents, abrasive cleaners, glass cleaners or all-purpose cleaning agents, as these might damage plastic surfaces and other components.
Cleaning the washing drum
Clean the drum every 3 months using the "Drum Clean" program.
Cleaning the drawer
Remove detergent residue regularly. Follow these steps:
- Pull out the drawer until resistance is felt. Press down the release catch and pull the drawer completely out.
- Remove the siphon from its compartment and clean it.
- Clean the dispenser using a brush and warm water.
Two diagrams showing how to remove and clean the detergent drawer.
Cleaning the Drawer Housing
Use a bottle brush to remove detergent residues inside the drawer housing.
Illustration showing a bottle brush being used to clean the detergent drawer housing.
Cleaning the water inlet filter
Use pointed nose pliers to withdraw the plastic filter, putting it back and securing it after cleaning. Filters should be checked every 6 months, or more often if water supply is interrupted.
The filter must be put back in place after cleaning.
Illustration showing pliers being used to remove a filter from the water inlet.
Cleaning the drain pump filter
- Disconnect the machine from the mains electricity supply and open the lower cover with a screwdriver.
- Place a container under the pump. Unscrew and remove the filter.
- Clean the filter carefully.
The filter should be cleaned every 2 months, or when the "E03" error is displayed on screen.
Diagrams showing how to access and clean the drain pump filter.
Specifications
| Specification | Value |
|---|---|
| Power | 220V-240V~/50Hz |
| Washing/drying capacity | 10kg/6kg |
| Rated Power | 2000W |
| Water Pressure | 0.02-0.8MPa |
| Net\Gross Weight | 70kg/75kg |
| Out Dimensions (W x D x H) mm | 595 x 665 x 845 |
Disposal
This marking indicates that this appliance should not be disposed of with other household wastes. To prevent possible harm to the environment or human health from uncontrolled waste disposal, recycle it responsibly to promote the sustainable reuse of material resources.
Recycling symbol indicating that the appliance should not be disposed of with household waste.
Important (for temperatures below 0°C)
If the machine is exposed to temperatures below 0°C, certain precautions should be taken.
- Turn off the water tap.
- Unscrew the inlet hose.
- Unhook the drain hose from the rear support and position the end of this hose and the inlet hose in a bowl. Run the spin program.
- Disconnect the appliance.
- Reattach the inlet hose and reposition the drain hose.
- Ensure that the room temperature is above 0°C before starting the machine again.
Troubleshooting
| Problem | Error | Possible Cause | Solutions |
|---|---|---|---|
| The machine takes an excessive time to fill. | E01 | 1. The water tap is not open. 2. The drain hose is not connected. 3. The water inlet valve is damaged. | 1. Open the water tap. 2. Hook up the hose. 3. Contact Kogan.com. |
| The door lock alarm sounds. | E02 | 1. The door is not locked securely. 2. Garment is caught between the door and the seal. 3. The door lock is damaged. | 1. Lock the door well. 2. Put the garment into the drum. 3. Contact Kogan.com. |
| The machine takes an excessive time to drain. | E03 | 1. The drain hose is squashed or kinked 2. The drain pump filter is blocked. 3. The drainage system pipes are blocked. | 1. Check the drain hose. 2. Clean the filter. 3. Check the drainage system and clean it. |
| Water overflows/ water sensor malfunctions. | E04 | 1. The water inlet valve is damaged. 2. The connection between the water sensor and wire is not secure. 3. The water sensor is damaged. | 1. Change the water inlet. 2. Check the connection and ensure it is secure. 3. Contact Kogan.com. |
| The motor does not work. | E05 | 1. The connection between the motor and wire is not secure. 2. The motor's overheat protection has enabled. 3. The motor is damaged. | 1. Check the connection and ensure it is secure. 2. Check if the machine is overloaded. Switch off the machine and retry when the motor cools. 3. Contact Kogan.com. |
| There is a heating tube fault. | E06 | 1. The connection between the heating tube and wire is not secure. 2. The heating tube is damaged. | 1. Check the connection and ensure it is secure. 2. Contact Kogan.com. |
| There is a temperature sensor fault. | E07 | 1. The connection between the wire and temperature sensor is not secure 2. The temperature sensor is damaged. | 1. Check the connection and ensure it is secure. 2. Contact Kogan.com. |
| Excessive cooling time | Edc | The cooling time is over ten minutes at the end of drying. | Ensure that the tap is open and that the water is cold. |
| Inverter fails to start | E09 | 1. The connection between the inverter and wire is not secure. 2. The inverter is damaged. | 1. Check the connection and ensure it is secure. 2. Contact Kogan.com. |
Need more information?
We hope that this user guide has given you the assistance needed for a simple set-up. For the most up-to-date guide for your product, as well as any additional assistance you may require, head online to help.kogan.com
kogan.com


