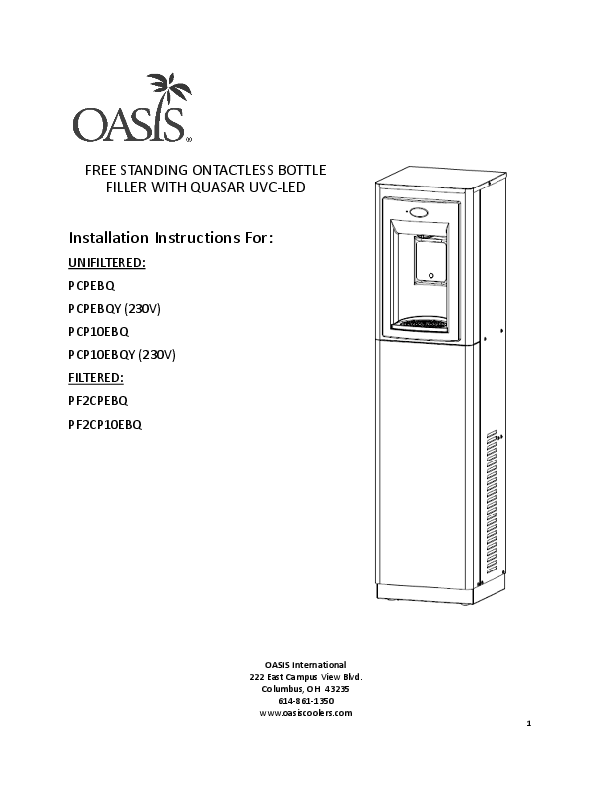
Oasis Free Standing Contactless Bottle Filler with Quasar UVC-LED
Installation Instructions
Product Specifications
Dimensions:
- Depth: 13.35" (339.0 mm)
- Width: 12" (304.8 mm)
- Height: 49.7" (1262.4 mm)
Refrigerant: R-134a
Input Voltage: 115 VAC, 60 HZ or 220/240 VAC, 50/60HZ (See Data Plate)
Important Requirements
- Use only original and new parts for reliability and optimization.
- Always wear proper protection during service or maintenance.
- Do not use corrosive acidic products or metal brushes for cleaning.
- Do not wash the unit using high-pressure water.
- Connect to a water supply with a pressure of 45 PSI minimum to 100 PSI maximum (3.10 bar minimum to 6.89 bar maximum).
- WARNING: DO NOT USE WITH WATER THAT IS MICROBIOLOGICALLY UNSAFE OR OF UNKNOWN QUALITY.
- ATTENTION: Ensure proper connections to quick connect fittings to avoid leaks. See Section 5.
- CAUTION: Do not place undue stress or side load on plastic fittings.
- CAUTION: Do not activate the sensor without water.
Safety Warnings
Read the following instructions carefully before using the water dispenser:
- The unit must be connected to a 115 VAC GFCI or 230VAC power supply as listed on the equipment data label.
- The unit must be protected by a properly installed 20 amp circuit breaker. Verify the electrical current is correct for the unit's power.
- To avoid electrical shock, always unplug the unit before servicing.
- If the power supply cord is damaged, it must be replaced by a special cord or assembly from the manufacturer or its service agent.
- This appliance must be earthed.
- Children should be supervised to ensure they do not play with this appliance.
Getting Started
What's Included:
- a. CONTACTLESS BOTTLE FILLER
- b. STABILIZER BRACKET
- c. OPTIONAL VERSAFILTER III (filtered models only)
- d. OPTIONAL REMEDI FILTER (filtered models only)
A diagram shows the contactless bottle filler, stabilizer bracket, VersaFilter III, and Remedi filter element.
Proper Quick Connect Fitting Connection Instructions
Quick-Connect Fittings
- Cut plastic tubing ends square and straight. Do not deform the tube.
- Ensure the outer surface of the tube is clear of marks or scratches for a length equal to twice the tube diameter.
- Avoid sharp changes in direction when routing the tubing to prevent kinking.
- Fittings consist of two parts: a body and a collet.
- To install a tube: Push the tube through the collet until it seats firmly at the bottom of the fitting.
- To remove a tube: Push and hold the collet against the body while pulling the tube out.
Diagrams illustrate the process of pushing a tube into the fitting and releasing it.
Installation
Steps 1 & 2:
- Carefully unpack the Water Dispenser and remove the filter (filtered models only).
- Remove the Front Panel by removing the 2 screws at the bottom of the panel on the sides.
Diagrams show the dispenser and its internal components after removing the front panel. An arrow indicates removing T15 TORX SCREWS (QTY. 2).
Steps 3 through 5 (for optional filters):
Note: If the unit is equipped with a two-stage filtration system, the Remedi filter was shipped installed. The VersaFilter III was placed in the alcove for shipping.
- Unpack the VersaFilter III and remove the sanitary cap.
- Orient the filter so that the rectangular lug on top faces forward.
- Push the filter into the filter housing and rotate it one-quarter turn to the right until it stops.
Diagram 3 shows the VersaFilter III with a lug and the filter housing. It notes that the Remedi Filter is shown in the Green Filter housing and was installed at the factory. An important note advises turning off the water supply and depressurizing lines before replacing the filter cartridge.
Step 6:
- Locate the snap bushing in the back of the cabinet and feed the 1-1/2" OD Drain Pipe through the hole.
Diagrams 4 and 5 show the front and rear views, indicating the location of the P-Trap behind the filter mounting bracket and the drain pipe after completing Step 6.
Steps 7 through 9:
- Connect the 1/4" OD water supply tube to the 1/4" quick connect fitting on the back of the unit. Refer to Section 5 for instructions. IMPORTANT: Before connecting the water supply, flush the building water supply.
- Connect the 1-1/2" OD drain pipe to the Elbow Coupling (not provided) and connect to the building drain.
- Attach the stabilizing bracket to the unit with the provided screws. Secure the bracket to the wall with wall anchors provided by others.
Diagram 6 (Rear View) shows where to connect the water supply and drain, and where to attach the stabilizer bracket.
Steps 10 through 17:
NOTE: This unit contains the QUASAR UVC LED. Do not operate the electronic bottle filler dispenser until the cooling tank is filled and the water filters are flushed.
- Purging Air From Cooling Tank and Flushing Filters:
- Remove the top of the unit by removing one screw on each side.
- Locate the ball valve as shown in Diagram 7.
- Place a container in the alcove.
- Open the ball valve and leave it open until water flows continuously without air. If filters are installed, continue running water until it runs clear. Then close the Ball Valve.
- Check the system for any leaks.
- Rotate the fan blade to ensure it is free of obstructions.
- ENERGIZING UNIT: Check the available power supply against the water dispenser data plate to ensure correct electrical service. The water dispenser is intended to be connected to a 20A minimum ground fault circuit interrupting (GFCI) device to meet UL requirements. Plug the Power Supply Cord into the outlet.
- Place a bottle in the alcove to purge additional air in the Cooling Tank and water lines. The Water Dispenser sensor will run for 20 seconds and shut-off. Repeat this 2 or 3 times until a steady stream of water dispenses.
- SETTING UP PCB ELECTRONICS: Follow instructions in Section 7 to change default settings.
- Re-install the Front Panel and the 2 screws.
- Set up is complete. Enjoy!
Diagram 7 shows the top view with the Ball Valve indicated.
Quasar UVC-LED Operation
QUASAR is a form of dispense point water treatment that utilizes UVC-LEDs to inactivate pathogens.
Operation:
- The QUASAR activation is automatic. The UVC-LEDs turn ON when water is dispensed and OFF when the dispense stops.
- During non-use periods, the QUASAR automatically cycles ON for ten seconds every ten minutes to keep the dispense point fresh and clean.
- When the QUASAR is ON, the LED light near the top of the alcove will turn ON. The LED will be BLUE when the QUASAR is working properly.
- If QUASAR is not working properly, the LED light will be RED. The light will remain ON, and water dispense will be stopped until the problem is resolved.
IMPORTANT: Never operate the QUASAR without water connected to the system. Lack of water can cause the QUASAR to overheat.
Indicator Light:
- BLUE = operating normally
- RED = QUASAR failure and water will not dispense.
An illustration shows the indicator light on the dispenser.
Set-Up Guide for Dispenser PCB Electronics
Factory Default Program Settings:
- Units - Gallons
- Unfiltered unit
- Flow Meter = Rate Selected
- Filter Capacity = 1250 gallons [4731 liters]
- Bottle Count = 0.5L (1 Bottle)
- Flow Rate = 1.2 GPM
- 20 second maximum dispense time
The top panel needs to be removed by taking out one screw on each side. Set aside until programming is complete. Remove the wire tie bundling the pushbutton inside the bottle dispenser. Program using the pushbutton through the top of the dispenser.
A diagram shows the pushbutton.
To Change Program Settings:
A table lists the Display options and their corresponding Actions for changing settings like Units (LTR/GAL), Filter status (UNFILT/FILT?), Flow Meter, Rate Selection, Resetting counts, Filter Capacity, Bottle Rule (3 sec rule?), Bottle Count, and Dispense Time.
P/N: 030099-629, 7/2020
©2020 LVD Acquisition, LLC; OASIS is a registered trademark of LVD Acquisition, LLC dba OASIS International.
References
Related Documents
 |
OASIS International Hydration Solutions: Bottle Fillers, Drinking Fountains & Filtration Explore OASIS International's comprehensive range of hydration solutions, including bottle fillers, drinking fountains, and filtration systems. Discover models designed for durability, efficiency, and advanced water purification technologies like QUASAR UV-C LED. |
 |
OASIS Free Standing Contactless Bottle Filler Installation Instructions Detailed installation instructions for OASIS Free Standing Contactless Bottle Fillers, including models PCPEBF, PCP10EBF, PCPEBFY, PCP10EBFY, and PFCP10EBF. Covers product specifications, requirements, safety, setup, and PCB electronics configuration. |
 |
Oasis Modular Series Electronic Bottle Fillers: Installation and User Guide Comprehensive user and installation guide for Oasis Modular Series Electronic Bottle Fillers, including models MWEBF, MW8EBF, MW12EBF, MWSMEBF, MWSM8EBF, MWSM12EBF, MEBF, M8EBF, M12EBF, MEBFEE, M8EBFEE, and M12EBFEE. Covers inspection, installation, plumbing, electrical connections, maintenance, and setup. |
 |
Oasis Aquapointe MWEBF Electronic Bottle Filler - Specifications and Features Detailed specifications, features, accessories, and installation guidelines for the Oasis Aquapointe MWEBF modular, non-refrigerated electronic bottle filler. Includes compliance information and warranty details. |
 |
OASIS M8CREBF Bi-Level Radii Drinking Fountain & Modular Aquapointe Electronic Bottle Filler Technical Specifications Comprehensive technical specifications for the OASIS M8CREBF refrigerated bi-level drinking fountain and modular Aquapointe electronic bottle filler. Details include performance, features like Freshield antimicrobial technology, installation guidance, warranty information, and certifications. |
 |
How to Find Your OASIS and Waterways Model and Serial Number A comprehensive guide to locating model and serial numbers on OASIS and Waterways water dispensers, coolers, bottle fillers, and dehumidifiers for service, warranty, and identification purposes. |
 |
Oasis MMRSLSBF: Bi-Level Drinking Fountain and Bottle Filler Specifications Comprehensive specifications for the Oasis MMRSLSBF modular bi-level drinking fountain and Aquapointe™ mechanical bottle filler. Details features, installation, certifications, warranty, and accessories for this non-refrigerated, ADA-compliant unit. |
 |
Manuale di Formazione Dispenser Acqua Oasis Manuale tecnico completo per dispenser d'acqua Oasis, destinato ai tecnici di manutenzione. Include procedure di funzionamento, manutenzione, disinfezione, risoluzione dei problemi e riparazione per garantire prestazioni ottimali. |