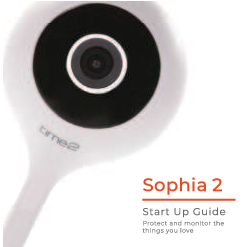
Time2 Sophia 2 Start Up Guide
Protect and monitor the things you love.
What's in the box
The following items are included:
- Sophia WiFi Camera ?
- USB Cable
- Mounting Adhesive
- Power Adapter
- Start Up Guide
Be ready: You will need your WiFi router password. Write it down below so it's handy when you need it!
Get Started
Connect the Sophia camera to the mains using the provided power adapter and USB cable. Ensure the USB cable is firmly inserted into the base.
The red LED indicator will illuminate once plugged in, and Sophia will chime twice before she is ready to connect.
If you wish for Sophia to record footage, you must insert a micro SD card. Sophia supports any sized micro SD card up to 128GB.
Understanding the LED Indicator Lights:
- Solid Red: Starting up ?
- Flashing Red: Ready to connect ? (flashing)
- Solid Blue: Connected ?
Diagram Description: A line drawing shows the Sophia camera with ports labeled 'RESET' and 'MICRO SD'. Power connection points are indicated at the base.
Download App
Download the “Clan at home” App from the iOS App Store or Google Play Store.
App Store Screenshot Description: A smartphone screen shows the 'Clan at home' app in the Apple App Store, with an 'Open' button.
Google Play Screenshot Description: A smartphone screen shows the 'Clan at home' app in the Google Play Store, with an 'Install' button.
Links:
Register
Follow these steps to register your account in the Clan at Home app:
Step 1: Initiate Registration
Select 'Register' on the app's login screen. Carefully read the Privacy Policy and select 'Agree' to proceed.
App Screenshot Description: A blurred image shows a smartphone screen with 'Login' and 'Register' buttons. A finger icon points to 'Register'.
Step 2: Enter Email Address
Enter your email address in the provided field and tap 'Continue'.
App Screenshot Description: A smartphone screen shows a registration form with fields for 'United Kingdom' and 'Email', and a 'Continue' button. A finger icon points to the email field.
Step 3: Enter Verification Code
Enter the verification code that was sent to your email address.
App Screenshot Description: A smartphone screen displays a 'Verification Code' input field with dashed boxes for each digit.
Step 4: Set Password
Create a password for your account. The password must contain 6-20 letters and numbers.
App Screenshot Description: A smartphone screen shows a 'Set Password' field with a prompt for password requirements and a 'Confirm' button. A finger icon points to the password field.
Add Home
Set up your home location within the app:
Step 1: Access 'Me' Tab
Click on the 'Me' icon located in the bottom right-hand corner of the app screen.
App Screenshot Description: A smartphone screen shows the main app interface with a bottom navigation bar. A finger icon points to the 'Me' icon.
Step 2: Select Home Management
From the 'Me' screen, select 'Home Management'.
App Screenshot Description: A smartphone screen shows menu options including 'Home Management', 'Center', 'More Services', and 'Settings'. A finger icon points to 'Home Management'.
Step 3: Add Your Home
Select 'My Home', enter a name for your home, and specify a location. Then, click 'Save'.
App Screenshot Description: A smartphone screen shows a 'Home Management' interface. A finger icon points to the 'Add Home' button. Another screen shows fields for 'Name' and 'Location', with a 'Save' button. A notification bubble says 'Home information has been updated'.
Step 4: Complete Home Creation
Click 'Complete' to finalize the creation of your home profile.
Add Sophia2 Camera
Follow these steps to add your Sophia 2 camera to the app:
Step 1: Initiate Device Addition
In the 'My Home' screen, click the plus (+) icon in the top right-hand corner.
App Screenshot Description: A smartphone screen shows a weather widget and a list of rooms. A '+' icon is highlighted in the top right. A finger icon points to the '+'.
Step 2: Select Camera Type
On the 'Add Device' screen, select 'Security & Sensors' from the left-hand menu, then click 'Smart Camera'.
App Screenshot Description: A smartphone screen shows categories like 'Electrical Engineering', 'Lighting', 'Smart Camera', 'Security & Sensor', etc. A finger icon points to 'Smart Camera'.
Step 3: Prepare for Pairing
Ensure the camera's LED indicator is flashing red. Check the tick box and press 'Next'.
App Screenshot Description: A screen shows a camera image and a prompt. A tick box and a 'Next' button are visible. A finger icon points to the tick box.
Step 4: Enter WiFi Password
If your WiFi is 5GHz, please set it to 2.4GHz. Enter your WiFi router password and press 'Next'.
App Screenshot Description: A screen shows options for 2.4GHz and 5GHz WiFi bands, a field for WiFi name ('EbusinessWifi'), a password field, and a 'Next' button.
Step 5: Scan QR Code
Remove the protective film from the camera lens. Hold your phone up to the Sophia camera so it can scan the QR code displayed on your phone.
Diagram Description: A drawing shows the Sophia camera and a smartphone displaying a QR code. The camera lens is positioned towards the phone.
Step 6: Confirm Pairing
If you heard Sophia chime, press “I heard the beep”. If you did not hear the chime, reposition Sophia in front of the phone and try again.
App Screenshot Description: A screen shows a QR code and a prompt. Buttons include 'I Heard a Prompt'. A finger icon points to 'I Heard a Prompt'.
Step 7: Device Connection
Sophia will now establish a connection to the Clan network. This may take a moment.
App Screenshot Description: A screen shows an animation indicating 'Adding device...' with a progress circle.
Step 8: Finalize Setup
Once connected, you can change Sophia's name and assign her to a specific room. Press 'Done' to complete the setup.
App Screenshot Description: A screen shows 'Added successfully' with the camera name 'Sophia2'. Options to select a room are visible. A 'Done' button is highlighted. A finger icon points to the 'Done' button.
Live View
Access the live feed from your Sophia camera:
- Hear what is happening: Listen to audio from around the camera. ?
- Video Quality: Select the video quality. Lower quality may broadcast more smoothly.
- Full Screen: View the feed in full screen mode. ?️
- Save Screenshot: Save a snapshot of the current view to your smartphone memory. ?
- Speak: Select this to speak into the camera and have your voice broadcast. ?️
- Record: Record live footage directly to your smartphone memory. ?
- Playback: View recorded footage. ▶️
- Alarm: Turn on to receive instant alerts on your phone when movement is detected. ?
Smartphone Interface Description: A screenshot of the app's live view screen for 'Sophia 2'. Icons for Screenshot, Speak, Record, Playback, and Alarm are visible at the bottom. Indicators for Signal strength and recording status are at the top. Orange lines point from descriptive text to specific UI elements.
Add SD Card
To enable recording, insert a micro SD card into your Sophia camera. Sophia supports any sized micro SD card up to 128GB.
Step 1: Power Off
Turn off the power to Sophia.
Step 2: Insert SD Card
Locate the micro SD card slot on the side of Sophia. Insert the card firmly until it clicks into place.
Diagram Description: A drawing of the Sophia camera shows the 'MICRO SD' slot on the side. An orange line points to the slot, labeled 'Micro SD Card Slot'.
Step 3: Power On
Turn the power to Sophia back on.
Format SD Card
Before Sophia can start recording, you must format the Micro SD Card via the app.
Step 1: Access SD Card Settings
Select your camera in the app, click the pencil icon ✏️ in the top right, and then select 'SD Card Settings'.
App Screenshot Description: A smartphone screen shows camera settings. Options include 'Device Information', 'Tap-to-Run and Automation', and 'SD Card Settings'. A finger icon points to 'SD Card Settings'.
Step 2: Format Card
Click 'Format SD Card' and then press 'Confirm'. Sophia will begin formatting the Micro SD Card.
App Screenshot Description: A pop-up message on a smartphone screen reads 'Please format the Micro SD card' with 'Cancel' and 'Confirm' buttons. A finger icon points to 'Confirm'.
Please note: Formatting may take a couple of minutes.
Playback
Review recorded footage:
- Hear Sound: Listen to audio recorded with the footage. ?
- Full Screen: View playback in full screen mode. ?️
- Timeline Navigation: Slide the timeline to select the specific time you wish to view. ⏱️
- Save Footage: Save the playback camera footage to your phone's memory. ?
- Change Date: Select a different date for video playback. ?
- Save Screenshot: Save a screenshot of the playback video to your phone's memory. ?
Smartphone Interface Description: A screenshot of the app's playback screen, showing a video of a dog. Controls for timeline, date, and actions like 'Calendar', 'Record', and 'Screenshot' are visible. Orange lines point to descriptive text.
Cloud Storage (Single Camera)
Instead of using a Micro SD card, you can opt for cloud storage. The camera can be set to record continuously or only when it detects movement. You can choose to store footage for 7, 14, or 30 days.
Step 1: Access Settings
Click on the pencil icon ✏️ next to your camera in the app.
Step 2: Purchase Cloud Service
Navigate to 'Purchase VAS' (Value Added Services) or a similar option to view cloud storage plans.
App Screenshot Description: A smartphone screen shows camera settings. Options include 'Device Information', 'Tap-to-Run and Automation', 'Basic function settings', 'Detection alert setting', and 'Purchase VAS'.
Step 3: Select Subscription
Click 'Subscribe' on the 'Video Cloud Storage' option.
App Screenshot Description: A screen shows 'Video Cloud Storage' with a 'Subscribe' button.
Step 4: Choose Plan and Pay
Choose your desired service (e.g., Monthly 7days recording, Monthly 30days recording, Annually 7days recording) and proceed to make the payment.
App Screenshot Description: A screen lists different cloud storage plans with prices (£4.99 for 7 days, £9.99 for 30 days, £49.00 annually) and 'Purchase' buttons.
Cloud Storage (Multiple Cameras)
Bundle your Cloud Storage for multiple cameras. Note that this option may set cameras to record only when movement is detected.
Step 1: Access 'Me'
Click on the 'Me' tab in the bottom right corner of the app.
Step 2: Navigate to Services
Click on 'More Services'.
Step 3: Select Cloud Storage Option
Click on 'Cloud Storage for cameras'.
Step 4: Subscribe
Click 'Subscribe'.
Step 5: Choose Plan and Pay
Select your preferred service package and proceed to payment.
App Screenshot Description: A series of screenshots showing the process of selecting bundled cloud storage for multiple cameras, similar to the single camera option but with options for multiple device support.
Multi Camera View
View feeds from multiple Sophia cameras simultaneously:
Step 1: Access Camera List
In the app, click on the camera icon ? in the top right-hand corner to view all connected devices.
App Screenshot Description: A smartphone screen shows a list of connected devices: 'Oscar 2', 'Sophia 2', 'iPixo Outdoor Bullet Camera', and 'Olivia 2'. A '+' icon is in the top right.
Interface Controls:
- Red Outline: Indicates the currently selected camera for control. ?
- Hear Camera Audio: Listen to what is happening around the selected camera. ?
- Save Screenshot: Save a snapshot of the current view to your smartphone memory. ?
- Speak: Select to speak into the camera. ?️
- Record Live Footage: Record live video to your smartphone memory. ?
- Full Screen: View the selected camera feed in full screen. ?️
Smartphone Interface Description: A screenshot showing a multi-camera view with four camera feeds displayed. Controls are at the bottom.
Web View
Access your cameras via a web browser:
Step 1: Visit Website
Go to the following website on your PC: https://www.time2technology.com/webview/. A QR code will be displayed.
Web Browser Screenshot Description: A web browser window shows the 'Smart Camera Terminal' interface with a large QR code for login.
Step 2: Access 'Me' in App
Open the Clan at Home App on your smartphone and click on 'Me' in the bottom right-hand corner.
App Screenshot Description: A smartphone screen shows the 'Me' tab with various options like 'Home Management', 'Message Center', 'More Services', and 'Settings'.
Step 3: Access QR Scan
Click on the square icon ? in the top right-hand corner of the 'Me' screen.
App Screenshot Description: A smartphone screen shows the 'Me' tab. A finger icon points to a square icon in the top right.
Step 4: Scan QR Code
Using your phone, scan the QR code displayed on your PC. Ensure the QR code is within the green square on your phone's scanner.
Smartphone Interface Description: A smartphone screen shows a 'Scan QR to login' interface with a camera view.
Step 5: Confirm Login
On your phone, click 'Confirm Login' to access the web view.
Smartphone Interface Description: A smartphone screen shows a confirmation prompt for logging into the IPC web. A 'Confirm login' button is visible. A finger icon points to it.
Web Interface Navigation:
- Select the home where you would like to view your cameras.
- Select your specific camera.
- Speaker: Listen in on what is going on around your camera. ?
- Full Screen: View the camera feed in full screen. ?️
- Cloud Service: View recorded footage from the Cloud Service. ☁️
- Multi Camera View: Select how many cameras you would like to see at once. ???
Web Interface Description: A screenshot of the 'Smart Camera Terminal' web interface showing multiple camera feeds. Numbered indicators point to different sections: 1. Home selection, 2. Camera selection, 3. Speaker icon, 4. Full screen icon, 5. Cloud Service link, 6. Multi Camera View icons.
Reset
If you are experiencing trouble connecting to your Sophia camera, you may need to perform a reset.
How to Reset Sophia 2
Press and hold the 'Reset' button on the back of the camera for up to 10 seconds. The camera will chime twice, and the LED indicator will flash red when the reset is complete.
Diagram Description: A drawing of the Sophia camera shows the 'RESET' button on the back. An orange line points to the button.
Installation
Easy Mounting
Peel off both sides of the mounting adhesive tape. Stick one side to the bottom of the camera and the other side onto the surface where you would like to place Sophia.
Diagram Description: A drawing illustrates the mounting process. It shows the camera base, the 3M adhesive pad, and a wall surface.
Be a part of Clan
Are you on Facebook? Join our Clan to connect with other members and our dedicated UK-based support team:
www.facebook.com/groups/partoftheclan
Need Further Help?
Contact our Customer Support team on Social Media:
Or visit our support page:
