File info: application/pdf · 9 pages · 997.27KB
Priority Assist Phone - Telstra
4 5 Telstra Priority Assist Phone User manual Emergency Contacts card Included in your Priority Assist Phone package 1 An easy guide for setting up your Phone.
manual. Emergency. Contacts card. Included in your. Priority Assist. Phone package. 1. An easy guide for setting up your Phone. Priority Assist ...
Full PDF Document

If the inline viewer fails, it will open the original document in compatibility mode automatically. You can also open the file directly.
Extracted Text
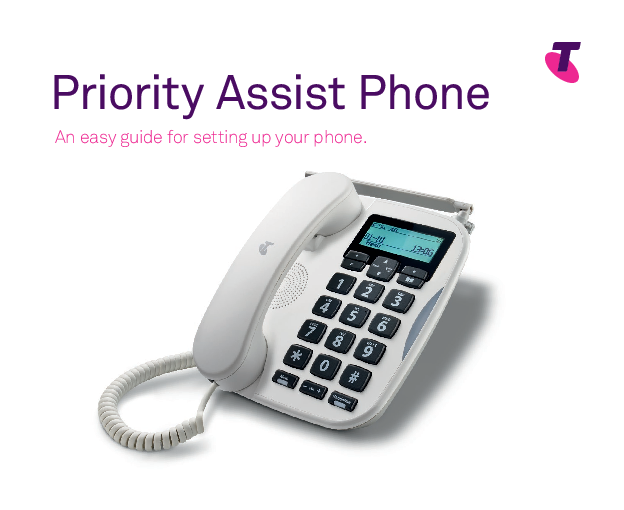
Priority Assist Phone
An easy guide for setting up your phone.
1

Your new Telstra Priority Assist Phone has several important features to keep you connected in case of an emergency.
� Emergency back-up via Telstra's 3G & 4G network so you can continue to make calls in case of a service outage.
� Up to 8 hours battery back-up in case of a mains power outage. � 9 programmable speed dial keys so you can easily reach important
contacts with one button press (see page 11 for details). � An Emergency Contacts card for quick reference to your important
contacts and speed dial numbers.
Need support?
Call 13 22 00 or visit telstra.com if you need more assistance to set up your Priority Assist Phone.
2

Contents

Included in your Priority Assist Phone package

4

Installation

6

Set-up steps

8

Time & date

10

Important contacts & Speed dials

11

Using the phone

12

Wall mounting

13

Troubleshooting

14

Emergency support

16

3

Included in your Priority Assist Phone package
4

Back

Calls

List

R

ABC

DEF

123

GHI

JKL

MNO

456

PQRS

TUV

WXYZ

789

*0 #
M

Mute

VOL

Handsfree

Telstra Priority Assist Phone

Priority Assist Phone
An easy guide for setting up your Phone.
1

Emergency Contacts

Keep track of your important contacts in case of emergencies.

Speed Dial Number

Name

Phone Number

1

2

3

4

5

6

7

8

9

PriorityAssistPhone QSG_V3.indd 1

User

2/9/19 9:07 am

Emergency

manual

Contacts card

5

Installation

1. Plug in the

power adapter

1

Ensure the power point

stays on so that the

phone's back-up battery

remains charged. Your

fully charged phone

battery will remain

operational for up to

8 hours in the event

of a power outage.

6

2. Connect to a telephone socket
Using the grey phone cable supplied, connect the phone to your telephone socket.
2
Got an older-style telephone wall socket? You may need to purchase an adapter first. These can be found at most hardware or electronics stores.

3. Check for dial tone
� Pick up your handset and check that you have a dial tone.
� If a dial tone is heard, you will be able to make and receive calls now.
In the event of a phone line or power outage, you should still hear a tone. Your Telstra Priority Assist Phone will automatically switch over to the battery and/or emergency mobile back-up mode to ensure you can make calls as usual.
The next section will show you how to set up your phone.

O1-O1
Menu

12:O1

Back

Calls List

R

ABC

DEF

123

GHI

JKL

MNO

456

PQRS

TUV

WXYZ

789

*0 #
M

Mute

VOL

Handsfree

7

Set-up steps
Make the most of your phone by setting up these features: Time & date Speed dial numbers Important contacts If you have problems setting up your phone please call us on 13 22 00.
8

Display screen Back
Select Recall last missed call
Handset

O1-O1
Menu

12:O1

Back

Calls

List

R

ABC

DEF

123

GHI

JKL

MNO

456

PQRS

TUV

WXYZ

789

*0 #
M

Mute

VOL

Handsfree

Mute

Antenna
Scroll up Calls list Select Contacts Scroll down Alphanumeric buttons
Handsfree (Speaker) Volume +/-
9

Time & date
Navigate to the Set time & date menu to adjust the date and time as shown.

O1-O1
Menu

12:O1

Back

Calls List

R

1. Starting at the Home screen, select Menu.

OK

Back

Back

Calls List

R

2. Clock symbol appears. Select OK.

Clock/Alarm

Set

time & date

OK

Back

Back

Calls List

R

3. Tap Down arrow to scroll past Alarm option to Set time & date option. Select OK.

Time & date
Set time:
Back

Back

Calls List

R

4. Use the alphanumeric buttons to set current time (4 digits). Select Next.

Time & date
Set date:
Back

Back

Calls List

R

5. Use the alphanumeric buttons to set current date. Select Save.
You will hear a beep and see `Saved' on screen.

Add new contact
OK

Back

Back

Calls List

R

To navigate back to the Home screen or to previous options, use the Select button to choose `Back' when it appears on the screen.

10

Important contacts
Navigate to the Contacts menu to input the names and phone numbers as shown.

O1-O1
Menu

12:O1

Add new contact
OK

Back

Name:
Doctor
Next

Clear

Number
2356
Save

Clear

Back

Calls List

R

Back

Calls List

R

Back

Calls List

R

Back

Calls List

R

1. Starting at the Home screen, select the book symbol button for Contacts. Select Options.

2. Select OK to Add new contact.

Speed dials

3. Enter the contact name using the alphanumeric buttons, tapping the letter button until the correct letter appears in the screen. Select Next to save Name.

4. When Number screen appears, enter the contact number using the alphanumeric buttons. Select Save.
You will hear a beep and see `Contact Saved' on screen.

Navigate to the speed dials menu to input up to 9 speed dial numbers as shown.

O1-O1
Menu

12:O1

Back

Calls List

R

OK

Back

Back

Calls List

R

Speed dial 1

Add

Back

Back

Calls List

R

Note: If a previously saved speed dial number appears on screen, scroll with Down arrow until `Empty' appears on screen, then add new number as outlined.

1. Starting at the Home

2. Use Down arrow button to 3. At Speed dials Empty

screen, select the Menu

scroll to Speed dials

screen, select Add. Use the

Select button.

symbol. Select OK.

alphanumeric buttons to enter

the number. Select Save.

You will hear a beep and see `Saved

11

as Speed dial' on screen.

Using the phone
Ringer tone & volume settings Navigate to the Settings menu to set ringer tone and volume as shown.
Ringer tone

O1-O1
Menu

12:O1

Back

Calls List

R

1. Starting at the Home screen, select the Menu Select button.

Ringer volume

OK

Back

Back

Calls List

R

1. Return to the Spanner symbol screen and Select OK.
12

OK

Back

Back

Calls List

R

2. Use Down arrow to scroll to the Spanner symbol Select OK.

Ringer tone
OK

Back

Back

Calls List

R

3. Select Ringer tone OK.

Melody
OK

Back

BBBaacckk

CCaaalllllslss List

R

4. Use Up arrow to scroll through up to 15 melody options. Select OK to save chosen melody.

Ringer volume
OK

Back

Back

Calls List

R

2. Use Down arrow to scroll to Ringer volume. Select OK.

Back

Callllss List

R

3. Use Up arrow to increase volume, or Down arrow to decrease volume. Select OK.

Handsfree/Speaker
settings Press the Handsfree button
to use speaker phone.

Mute

� + VOL

Handsfree

Wall mounting
Your phone comes ready to be placed on a table, but converts easily for wall mounting by rotating the base plate, as follows:
1. Turn the phone so that the base faces up.
You will see that the notches point downwards and the high point of the wedge shape is at the top of the phone.
2. Remove the detachable base bracket and rotate it 180 degrees so that the notches now point upwards. Click it back into place on the phone.
You will see that the wedge shape is now at the lower edge of the phone.
3. Change the hook switch position for hanging the handset up. Use finger pad to push down the base of the hook switch to flip it into reverse position with hollow end facing up.
4. Hang handset onto the phone unit so that it clicks into the hook switch hollow to hold it firm.
5. Keep the phone and power cables tidy by running them through the provided space.

Desk mount position

Wall mount position

Wedge shape under the top of phone

Wedge shape under the lower edge of phone

Notches Down

Hook switch

for desk mount

Back

Calls List

R

ABC

DEF

1 2 H3ook switch

GHI
4

JKL
5

fhoor lwM6lNoOawll

end up mount

PQRS
7
*
M
Mute

TUV
8
R

WXYZ

9

Back

Calls List

0

# ABC

DEF

123

VOL
GHI
4

Handsfree

JKL

MNO

56

PQRS

TUV

WXYZ

789

*0 #
M

Mute

VOL

Handsfree

Notches Up

R
1
GHI
4
PQRS
7
*
M
Mute

Back

Calls List

ABC

DEF

23

JKL

MNO

56

TUV

WXYZ

89

0 #13

VOL

Handsfree

Troubleshooting

Issue A blank display
Low Signal Strength (3G or 4G)
Screen displaying SIM card with X

What to check
Make sure the power adapter is plugged into a 240V powerpoint and the other end is plugged into the base of phone. Make sure the power point is switched on.
Check the antenna is screwed correctly onto the phone. Ensure the antenna is in the upright position. Move the phone to another area in your premises and/or closer to a window until more signal bars appear.
Check the SIM card has not been removed from the device. Reset the SIM card and ensure it is placed the correct way up.

If this works, then... The screen will display.
Signal Strength bar should increase.
3G or 4G icon should now be seen in place of SIM card (with cross) icon.

No dial tone

Call volume is too low

Mute

� + VOL

Handsfree

Place the phone back on the hook and pick it up again. Check that the cable between the Handset and main unit is connected.

Dial tone should be restored.

Ensure the ringer is set to an adequate volume level by increasing the volume using the (- Vol +) button.

Volume should increase.

14

Issue
Ringer tone volume is too low

What to check
Scroll through Menu options to Settings. Select Ringer Volume. Use Up arrow to increase volume.

If this works, then... Volume should increase.

Phone is beeping intermittently and display shows `Battery Low' (i.e. no power to the unit and the internal battery pack is running low)
Display is showing `Line Fault Call 132200'

The phone is using its internal batteries. Ensure the phone is connected to a 240V power point and that it is switched on.

Beeping should stop and display should clear once mains power is restored.

This appears when the phone is not connected to a working phone socket and is operating in mobile mode. You can press the Hide button to clear this temporarily, however we recommend that you contact Telstra if you suspect there is a line fault.

Display will clear and return back to the home screen.

Need Support?
If you're still having technical issues, please call Telstra on 13 22 00.

15

Emergency support
Your Telstra Priority Assist Phone has two key features to protect you in case of phone or power outage.
1. Mobile back-up Your phone comes with a pre-installed SIM card which will provide an automatic switchover to a mobile service if for any reason there is a phone line outage. This means that for outgoing calls your phone will operate as usual, without you having to do a thing. The mobile service will switch back to standard operation when the phone line service is restored.
2. Battery back-up Your phone comes with a battery installed. This is so your phone can automatically draw on the phone battery power in the event of a power outage. Your fully charged phone battery will remain operational for up to 8 hours in the event of a power outage. Note: It is important that your phone is plugged into a power source at all times. This will ensure that your phone battery is fully charged when you need it.
Your Telstra Priority Assist Phone also comes with a magnetic Emergency Contacts card which can be used to write down your most important contacts for quick reference in case of emergencies.

Emergency Contacts

Keep track of your important contacts in case of emergencies.

Speed Dial Number

Name

Phone Number

1

2

3

4

5

6

7

8

9

Telstra Support 13 22 00