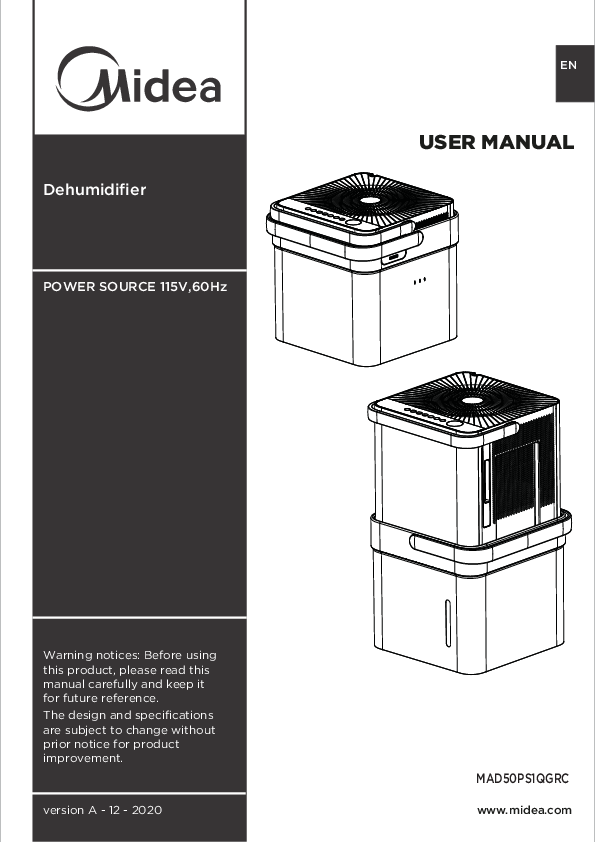
Midea Dehumidifier
Model: MAD50PS1QGRC
Power Source: 115V, 60Hz
User Manual
Version A - 12 - 2020
Website: www.midea.com
Safety Precautions
❗ CAUTION: This symbol indicates the possibility of property damage or serious consequences.
⚠️ WARNING: This symbol indicates the possibility of personnel injury or loss of life.
General Safety Warnings
- ❌ DO NOT exceed the rating of the power outlet or connection device.
- ❌ DO NOT operate or stop the unit by switching the power on or off.
- ❌ DO NOT damage or use an unspecified power cord.
- ❌ DO NOT modify power cord length or share the outlet with other appliances.
- ❌ DO NOT insert or pull out plug with wet hands.
- ❌ DO NOT install the appliance in a location that may be exposed to combustible gas.
- ❌ DO NOT place the unit near a heat source.
- ❌ DISCONNECT the power if strange sound, smell, or smoke comes from it.
- ❌ NEVER try to take apart or repair the unit by yourself.
- ❌ BEFORE cleaning, turn off the power and unplug the unit.
- ❌ DO NOT use the machine near flammable gas or combustible substances such as gasoline, benzene, thinner, etc.
- ❌ DO NOT drink or use the water drained from the unit.
- ❌ DO NOT take the water bucket out during operation.
- ❌ DO NOT use the unit in small spaces.
- ❌ DO NOT put in places where water may splash onto the unit.
- ✔️ PLACE the unit on a level, sturdy section of the floor.
- ❌ DO NOT cover the intake or exhaust openings with cloths or towels.
- ⚠️ CARE should be taken when using the unit in a room with infants, children, elderly people, and people not sensitive to humidity.
- ❌ DO NOT use in areas where chemicals are handled.
- ❌ NEVER insert your fingers or other foreign objects into grilles or openings. Take special care to warn children of these dangers.
- ❌ DO NOT place heavy objects on the power cord and take care so that the cord is not compressed.
- ❌ DO NOT climb up on or sit on the unit.
- ✔️ ALWAYS insert the filters securely. Clean filters every two weeks.
- ❗ IF water enters the unit, turn the unit off and disconnect the power. Contact a qualified service technician.
- ❌ DO NOT place flower vases or other water containers on top of the unit.
- ❌ DO NOT use extension cords.
Appliance Safety (French Section Translation)
- This appliance is not intended for use by persons (including children) with reduced physical, sensory or mental capabilities, or lack of experience and knowledge, unless they have been given supervision or instruction concerning use of the appliance by a person responsible for their safety.
- If the supply cord is damaged, it must be replaced by the manufacturer, its service agent or similarly qualified persons in order to avoid a hazard.
- Before any cleaning or maintenance operation, the appliance must be disconnected from the power supply.
- Do not install the appliance in a location where it may come into contact with flammable gases. A risk of fire exists if the appliance is surrounded by flammable gases.
- If the appliance is overturned during operation, turn it off and unplug it immediately. Visually inspect the appliance to ensure there is no damage. If you believe the appliance is damaged, contact a technician or customer service for assistance.
- During a thunderstorm, please turn off the power to avoid any damage to the appliance in case of lightning.
- Do not place the cord under the carpet. Do not cover the cord with rugs, runners or similar coverings. Do not route the cord under furniture or appliances. Arrange the cord away from the traffic area where no one can trip over it.
- Do not operate the appliance with a damaged cord or plug. Take the appliance to an authorized repair center for examination and/or repair.
- The appliance must be installed in accordance with national wiring regulations.
- Contact an authorized technician for repair or maintenance of the appliance.
- Turn off the appliance when it is not in use.
- Ensure that the appliance is properly earthed. A suitable earth connection is important to minimize the risks of electric shock and fire. The power cord is equipped with a three-prong plug for protection against electric shock. Your appliance should be used in a properly earthed socket-outlet. If the socket-outlet you intend to use is not properly earthed or protected by a time-delay fuse or circuit breaker, please consult a qualified electrician to install a suitable outlet.
Preparation
Identification of Parts
NOTE: All illustrations are for explanation purposes only. Your machine may differ slightly. The actual shape shall prevail.
- Air outlet grille
- Control panel
- Handle
- Quick glance light (some units)
- Air intake grille
- Air filter (behind the grille)
- Water bucket
- Caster (some units)
Installation Instructions
- Take out the dehumidifier from the package.
- Hold the handle and lift the dehumidifier up, pull out the power cord, and rotate 90° counterclockwise ↩️90°.
- Place the dehumidifier into the water bucket gently according to the ALIGN label ? until it clicks in place ✅. Do never install it rudely.
NOTE: During operation, it is normal if you press the top cover and the dehumidifier shakes slightly.
Storage Instructions
- Press in the convex piece in the water bucket.
- Lift the dehumidifier body handle, rotate 90° clockwise ↪️90°.
- Install the power cord into the in-line slot, put the dehumidifier into the package to store ?.
Caster Installation and Disassembly Instructions (some units)
Installation:
- Attach the caster to the bottom of the unit.
- Use a block ? to fix it as shown in the picture.
Disassembly:
- To remove the caster, use a screwdriver ? to prop up the block, then take it down ❌.
- Then remove the caster ❌.
Operating Instructions
Design Notice: In order to ensure the optimal performance of our products, the design specifications of the unit are subject to change without prior notice.
Positioning the Unit
- Place the dehumidifier on a smooth, level floor strong enough to support the unit with a full bucket of water.
- Allow at least 20cm (approx. 8 inches) of air space on all sides of the unit for good air circulation (at least 40cm or approx. 16 inches of air space on the air outlet).
- Place the unit in an area where the temperature will not fall below 5°C (41°F). The coils can become covered with frost at temperatures below 5°C (41°F), which may reduce performance.
- Place the unit away from the clothes dryer, heater, or radiator.
- Use the unit to prevent moisture damage anywhere books or valuables are stored.
- A dehumidifier operating in a basement will have little or no effect in drying an adjacent enclosed storage area, such as a closet, unless there is adequate circulation of air in and out of the area.
- DO NOT use outdoors.
- This dehumidifier is intended for indoor residential applications only. It should not be used for commercial or industrial applications.
- Close all doors, windows, and other outside openings to the room.
Using the Unit
- When first using the dehumidifier, operate the unit continuously for 24 hours. Make sure the plastic cover on the continuous drain hose outlet is installed tightly and properly so there are no leaks.
- Select a suitable location, making sure you have easy access to an electrical outlet.
- Plug the unit into an electrical socket-outlet with earth connection.
- Make sure the Water bucket is correctly fitted, otherwise the unit will not operate properly.
- This unit is designed to operate with a working environment between 5°C/41°F and 32°C/90°F, and between 30% RH (Relative Humidity) and 80% RH.
- If the unit has been switched off and needs to be switched on again quickly, allow approximately three minutes for the correct operation to resume.
- DO NOT connect the dehumidifier to a multiple socket outlet which is also being used for other electrical appliances.
NOTE: When the water in the bucket reaches a certain level, please be careful to move the machine to avoid it falling over.
Control Panel Features
NOTE: The following control panels are for explanation purpose only. The control panel of the unit you purchased may be slightly different according to the models. Your machine may not contain some indicators or buttons. The actual shape shall prevail.
Indicators:
- Wireless light ?
- Bucketless Mode ?❌
- Filter clean light ?
- Pump light (for pump model only) ?
Buttons:
- Power button ?: Press to turn the dehumidifier on and off. Note: When the compressor starts or stops running, the unit may make a loud noise; this is normal.
- Mode button ?️: Press to select the desired operation mode: Continuous dehumidifying, Dryer/Max (model dependent), Smart dehumidifying (on some models), and Setting dehumidifying. When you push the button to change operation modes, the unit will make a beep sound. In Continuous, DRY, Smart, or Setting dehumidifying modes, the humidity setting can be adjusted (except Continuous, Dryer, Smart modes).
- UP ⬆️ / DOWN ⬇️ buttons: Humidity Set Control. In Setting dehumidifying mode, the humidity level can be set within a range of 35%RH to 85%RH in 5% increments. Press and hold the button to continuously decrease humidity; press and hold the button to continuously increase humidity.
- Fan button ?: Control the fan speed. Press to select fan speed in three steps: low, medium, and high (On some models, fan speed is selectable in two steps: low and high). The fan speed indicator light illuminates under different settings. Press and hold the Fan button for 3 seconds to eliminate the filter reminder when the filter light flickers. Note: The unit operates for 250 hours, then enters filter clean reminder.
- FILL LEVEL button ?: Control the bucket capacity. Press to select bucket capacity in four steps: 1, 2, 3, and 4. When the pump function is turned on, the pump indicator light illuminates and the bucket capacity will be at step 4.
- Timer button ⏰: Initiate the Auto start or Auto stop feature, in conjunction with the UP ⬆️ and DOWN ⬇️ buttons. When the unit is on, press the Timer button to activate the Auto stop feature. When the unit is off, press this button to activate the Auto start feature. Press or hold the UP/DOWN buttons to change the Auto time by 0.5 hour increments, up to 10 hours, then at 1 hour increments up to 24 hours. The control will count down the time remaining until start. The selected time will register in 5 seconds and the system will automatically revert back to display the previous humidity setting. Turning the unit ON or OFF at any time or adjusting the timer setting to 0.0 will cancel the Auto start or Auto stop feature. When the LED display window displays the code P2, the Auto start or Auto stop feature will also be cancelled.
- PUMP feature ?⚙️ (On some models): Press and hold the UP/DOWN buttons for 2 seconds to initiate the PUMP feature. Press and hold again for 2 seconds to stop it. When the PUMP feature is on, the bucket capacity cannot be selected and is set to step 4. Note: When the PUMP feature is active, it works when the water is full at step 4.
- Wireless button ? (On some models): Press and hold the POWER button for 3 seconds to initiate the Wireless connection mode. The LED DISPLAY shows 'AP' to indicate you can set Wireless connection. If connection is successful within 8 minutes, the unit will exit Wireless connection mode automatically and the Wireless indicator illuminates. If connection fails within 8 minutes, the unit exits Wireless connection mode automatically.
Display ?️:
Shows the set % humidity level (35%-85%) or auto start/stop time (0-24) while setting, then shows the actual room % humidity level (30% RH to 90% RH, with ±5% accuracy).
Error Codes ❌:
- EH60 - Room temperature sensor error. Unplug and plug back in. If error repeats, call for service.
- EH61 - Evaporator tube temperature sensor error. Unplug and plug back in. If error repeats, call for service.
- EH0b - Display board and master control board communication error. Unplug and plug back in. If error repeats, call for service.
Protection Codes ?️:
- P2 - Bucket is full. Empty the bucket and replace it in the right position.
- Eb - Bucket malfunction. Replace the bucket in the right position to clear the malfunction.
Note: When one of the above malfunctions occurs, turn off the unit and check for obstructions. Restart the unit. If the malfunction is still present, turn off the unit and unplug the power cord. Contact the manufacturer or its service agents or a similar qualified person for service.
Other Features
- Auto Defrost ❄️➡️☀️: When frost builds up on the evaporator coils, the compressor will cycle off and the fan will continue to run until the frost disappears. Note: During auto defrosting, the unit may make a sound of refrigerant flowing; this is normal.
- Auto Shut Off ?: The dehumidifier shuts off when the bucket is full. For some models, the fan motor will continue to run for 30 seconds.
- Wait 3 minutes before resuming operation ⏳3️⃣: After the unit has stopped, it cannot be restarted for the first 3 minutes to protect the unit. Operation will automatically start after 3 minutes.
- Auto-Restart ?: If the unit breaks off unexpectedly due to a power cut, it will restart with the previous function setting automatically when the power resumes.
- Continuous dehumidifying mode ??: The unit dehumidifies continuously, and humidity cannot be selected. Press the Mode button to exit.
- Smart dehumidifying mode ?? (On some models): The unit automatically controls room humidity in a comfortable range of 45%-55% according to room temperature. The humidity setting function is invalid.
- Setting dehumidifying mode ⚙️?: The unit can be adjusted in a range of 35%-85% RH, and the humidity setting can be adjusted (increase/decreasing) in 5% increments. Press the MODE button to exit.
- Quick glance light ✨? (On some models): Emits red light when humidity is >70%, yellow light when humidity is 45%-70%, and green light when humidity is <45%. The light can be activated or deactivated by pressing and holding the Fan button and UP button simultaneously for 2 seconds.
- MAX mode MAX (On some models): Provides MAX dehumidification with fan speed fixed at high.
- Dryer mode ? (On some models): Provides MAX dehumidification; fan speed cannot be adjusted.
Note for Dryer/MAX mode: 1. Must be operated in a closed room; do not open doors and windows. 2. For best effectiveness, first dehydrate wet clothes. 3. Direct airflow at wet clothes. 4. Thick/heavy clothes may not achieve optimal dehumidification. Allow 30-50cm (approx. 12-20 inches) of distance on the top and right side of the unit to the wet clothes.
Bucketless Mode ?❌ (on some models)
The dehumidifier can be used without a bucket. The unit will not remind you when the bucket is full. It is suggested to:
- Check if the tube is properly connected.
- Link the other end of the tube to a place with unlimited capacity, such as a sink or a basin.
- Do not place the other end of the tube in a container with limited capacity, otherwise water may overflow onto the floor.
To exit Bucketless mode:
- Press FILL LEVEL ? and UP ⬆️ buttons simultaneously for 2 seconds.
- Turn off the power ?.
NOTE: It may cause an unexpected exit from the bucketless mode when the tank float touches the micro switch (at the bottom of the unit). Please check if the bottom of the unit is clear under bucketless mode. Ensure the unit is placed on a flat, horizontal table (tilt angle < 1 degree). Ensure the tube is properly connected to the drain before entering bucketless mode. The overall height of the tube should be lower than the drain to avoid water backflow and ensure smooth discharge. On Bucketless mode, the table height must be more than 10cm. Place the end of the hose into the drain area or container. Do not touch the switch or the unit will exit Bucketless mode. Do not move the unit when it is working; turn off power and unplug before moving.
Removing Collected Water ?➡️
There are two ways to remove collected water:
Method A: Use the Bucket
- When the unit is off, if the bucket is full, the unit will beep 8 times (on some models) and the LED DISPLAY shows "P2".
- When the unit is on, if the bucket is full, the compressor turns off and the fan turns off after 30 seconds for drying the water of the condenser, then the unit will beep 8 times and the LED DISPLAY shows "P2".
- Lift the dehumidifier body handle, separate the dehumidifier body from the tank. Put the dehumidifier body aside.
- Throw away the water from the water outlet and replace the bucket.
Note: Lift the water bucket and throw away the water. Remove the rubber plug at the bottom of the bucket to drain off the water. Do not touch any parts inside the unit when removing the bucket. Be sure to insert the dehumidifier body gently all the way into the bucket. If there is some water in the unit when you remove the bucket, make sure to dry the unit.
Method B: Continuous Draining ?➡️
- Water can be automatically emptied into a floor drain by attaching the unit with a water hose (not included).
- Remove the cover located on the back of the water bucket, then remove the rubber plug. Attach a drain hose and lead it to the floor drain or a suitable drainage facility.
- Make sure the hose is secure so there are no leaks.
- Direct the hose toward the drain area, making sure that there are no kinks that will stop the water flowing.
- Place the end of the hose into the drain area and make sure the end of the hose is level or downwards to let the water flow smoothly. Do never let it go up.
Note: When the continuous drain feature is not being used, remove the drain hose from the outlet, reinstall the rubber plug and cover.
Method C: Pump Draining ⚙️?➡️ (on some models)
- Water can be automatically emptied into a floor drain or a suitable drainage facility by attaching the pump drain outlet with a pump drain hose.
- Install the pump hose into the pump hose intake of the unit, and rotate it.
- Install the pump drain hose into the pump drain hose outlet for a depth of 15mm at least, then lead the water hose to the floor drain or a suitable drainage facility.
- Press the pump drain hose outlet in and take the pump drain hose out from it. Take the pump hose out from the unit. Make sure not to let water drip onto the floor.
- Put the dehumidifier on the bucket again.
- Press and hold the UP/DOWN buttons ⬆️/⬇️ for 2 seconds to initiate the PUMP feature. When the PUMP is activated, the bucket capacity is at the 4th fill level and cannot be selected. The PUMP works only if the bucket is full of water at the 4th fill level.
- Make sure the hose is secure so there are no leaks.
- Direct the hose toward the drain, making sure that there are no kinks that will stop the water flowing.
- Place the end of the hose into the drain and make sure the end of the hose is level or down to let the water flow smoothly. Do never let it up.
Note: The pump may cause loud noise when it starts to work for 3-5 minutes; this is a normal phenomenon. Do not use this operation when the outdoor temperature is equal to or less than 0°C (32°F), otherwise water will become ice that will cause the water hose to be blocked up and the unit to fail. Make sure to empty the bucket once a week when using the pump draining feature. When the pump draining feature is not being used, remove the pump drain hose from the outlet.
Care and Maintenance
Turn the dehumidifier off and remove the plug from the wall outlet before cleaning.
Clean the Grille and Case ??
- Use water and a mild detergent. Do not use bleach or abrasives.
- Do not splash water directly onto the main unit. Doing so may cause an electrical shock, cause the insulation to deteriorate, or cause the unit to rust.
- The air intake and outlet grilles get soiled easily, so use a vacuum attachment or brush to clean.
Clean the Bucket ??
Every few weeks, clean the bucket to prevent growth of mold, mildew, and bacteria. Partially fill the bucket with clean water and add a little mild detergent. Swish it around in the bucket, empty and rinse. Note: Do not use a dishwasher to clean the bucket. After cleaning, the bucket must be in place and securely seated for the dehumidifier to operate.
Clean the Air Filter ?️?
The air filter behind the two flanks grille should be checked and cleaned at least every two weeks or more often if necessary. NOTE: DO NOT RINSE OR PUT THE FILTER IN AN AUTOMATIC DISHWASHER.
To remove:
- Grip the handle on the filter and pull it outward.
- Clean the filter with warm, soapy water. Rinse and let the filter dry before replacing it.
To attach:
- Insert the air filter back into the unit.
CAUTION: DO NOT operate the dehumidifier without a filter because dirt and lint will clog it and reduce performance.
Note: The cabinet and front may be dusted with an oil-free cloth or washed with a cloth dampened in a solution of warm water and mild liquid dishwashing detergent. Rinse thoroughly and wipe dry. Never use harsh cleansers, wax or polish on the cabinet front. Be sure to wring excess water from the cloth before wiping around the controls. Excess water in or around the controls may cause damage to the unit.
When Not Using the Unit for Long Periods ?
- After turning off the unit, wait one day for water collecting before emptying the bucket.
- Clean the main unit, water bucket, and air filter.
- Cover the unit with a plastic bag.
- Store the unit upright in a dry, well-ventilated place.
Troubleshooting Tips ❓?
Before calling for service, review the chart below first.
| Problem | What to Check |
|---|---|
| Unit does not start |
|
| Dehumidifier does not dry the air as it should |
|
| The unit makes a loud noise when operating |
|
| Frost appears on the coils | This is normal. The dehumidifier has an Auto defrost feature. |
| Water on floor |
|
| EH60, EH61, EH0b, Eb, or P2 appear in the display | These are error codes and protection codes. See the CONTROL PANEL FEATURES section. |
App Instructions ?
Declaration of Conformity ✅
Midea declares that this Dehumidifier complies with the essential requirements and other relevant provisions of Directive 1999/5/EC.
Specification of Wireless Module ?⚙️
- Model: US-OSK103
- Standard: IEEE 802.11 b/g/n
- Antenna Type: External omnidirectional Antenna
- Frequency: 2.4 GHz (wireless)
- Maximum Transmitted Power: 19.8 dBm Max
- Dimensions: 41 x 24 x 5 (mm)
- Operation Temperature: 0°C ~ 45°C / 32°F ~ 113°F
- Operation Humidity: 10% ~ 85%
- Power Input: DC 5V/300 mA
Precautions ⚠️
- Supports operating systems: iOS 7+ or Android 4+.
- OS updates may cause temporary incompatibility; Midea is not responsible for issues caused by OS updates or network problems.
- Supports WPA-PSK/WPA2-PSK encryption (recommended).
- Requires a smartphone with at least a 5-megapixel camera for QR code scanning.
- Network connectivity issues may cause requests to time out; rerun network configuration if needed.
- Conflicting information between the app and the product may occur due to unstable network connectivity. The information displayed on the actual product is always the most accurate. Refresh the app to re-sync.
Midea will not be responsible for any problems caused by incompatibility or network issues with your wireless router and mobile phone.
System Overview ℹ️
Devices required:
- Smartphone with compatible iOS or Android system.
- Wireless Router.
- Smart Dehumidifier.
Download and Install the App ⬇️?
Scan the QR codes below or search for "Midea Air" on Google Play or the App Store.
Android QR code: [Placeholder for Android QR code image description]
Apple QR code: [Placeholder for Apple QR code image description]
All images in this manual are for reference only; your product and app may look slightly different. The actual product and app instructions have to be considered.
Create Your Account ?✍️
Ensure your smartphone is connected to your wireless router with a working 2.4GHz internet connection.
- Press "Sign Up".
- Enter your email address and password.
- Press "Registration".
- If you forget your password, press "Forgot password?" on the main menu, enter your email address, and press "Reset Password".
Ensure your smartphone can connect to the intended wireless network and is not connecting to other networks in range.
Additional App and Smart Home Functions ?✨
For additional instructions, scan the QR code below.
[Placeholder for QR code image description for additional functions]
Warranty ?
These products have been made to quality standards and are guaranteed for domestic use against manufacturing faults. There is a one (1) year full warranty from the original purchase date and a limited 2nd through 5th year sealed system warranty if used for normal domestic purposes. This warranty does not affect your statutory rights.
In case of any malfunction, please contact Midea service technicians at the toll-free service line: 1-866-646-4332 (8 AM - 6 PM EST, Monday-Friday; 8 AM - 4 PM EST, Saturday).
Midea reserves the right to repair or replace the defective product at its discretion. Any warranty is invalid if the product has been overloaded, neglected, improperly used, or subjected to attempted repair by an unauthorized agent. Heavy-duty or daily professional/commercial usage is not guaranteed.
Due to continuous product improvement, Midea reserves the right to change product specifications without prior notice.
For instructions on how to properly drain Freon, please contact customer service at 1-866-646-4332.
Related Documents
 |
Midea Cube Dehumidifier Installation Guide Step-by-step installation instructions for the Midea Cube Dehumidifier, including unit positioning and optional caster installation. Learn how to set up your Midea dehumidifier for optimal performance. |
 |
Midea Energy Star Dehumidifier with Auto Restart: Instruction Manual Comprehensive instruction manual for the Midea Energy Star Dehumidifier with Auto Restart, covering operation, maintenance, safety, and troubleshooting. |
 |
Midea Dehumidifier Report: Technical Specifications and Model Differences Comprehensive report detailing Midea dehumidifier models, including product specifications, model variations, safety markings, and installation guidelines. Covers US and Canadian requirements. |
 |
Midea Dehumidifier User Manual: MAD22S1AWWT, MAD35S1AWWT, MAD50PS1AWBL Comprehensive user manual for Midea dehumidifiers (models MAD22S1AWWT, MAD35S1AWWT, MAD50PS1AWBL), covering setup, operation, features, maintenance, troubleshooting, warranty, and app connectivity. |
 |
Midea MDP Dehumidifier User Manual Comprehensive user manual for the Midea MDP Dehumidifier, covering safety precautions, unit specifications, operating instructions, installation guidelines, care and cleaning procedures, and troubleshooting tips. Includes model numbers MAD30C1YWS, MAD50C1YWS, MAD70C1YWS, MAD70P1YWS. |
 |
Midea MAD22S1WWT Dehumidifier - ENERGY STAR Certified Specifications Detailed specifications and ENERGY STAR certification information for the Midea MAD22S1WWT dehumidifier, including model number, water removal capacity, and energy efficiency. |
 |
Midea MDDP50 Dehumidifier Owner's Manual & Installation Guide This comprehensive manual provides essential information for the Midea MDDP50 dehumidifier, covering safety, installation, operation, maintenance, and troubleshooting to ensure optimal performance and user safety. |
 |
Midea MAD Series Dehumidifier User Manual - Setup, Operation, and Troubleshooting Comprehensive user manual for Midea MAD series dehumidifiers (MAD20S1QWT, MAD35S1QWT, MAD50S1QWT, MAD50PS1QWT, MAD50PS1QGR). Includes safety precautions, setup, installation, operation, care, troubleshooting, app instructions, and warranty information. |