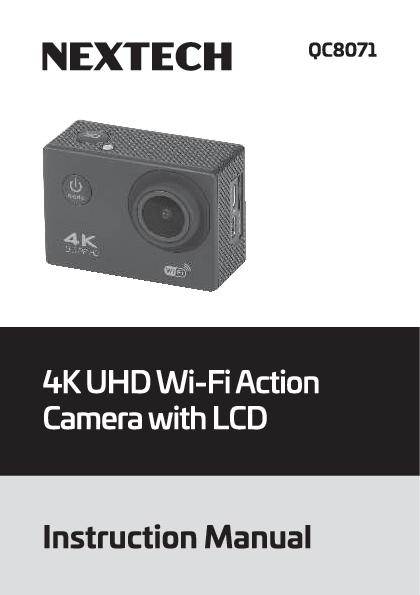
NEXTECH QC8071
4K UHD Wi-Fi Action Camera with LCD
Instruction Manual
INTRODUCTION
Thank you for purchasing this Nextech Action Camera. Please read the instruction manual carefully before using the product.
The documentation provided will allow you to fully enjoy the features this unit has to offer.
Please save this manual for future reference.
PRODUCT OVERVIEW
A detailed description of the camera's physical features and controls.
A compact, black action camera is shown from the front-left. It has a prominent lens on the front. Below the lens, "4K ULTRA HD" is printed. To the right of the lens, a Wi-Fi logo is visible. On the top surface, there is a circular button labeled "mode" with a power symbol (⚡) inside it. The camera has a textured grip on the sides.
The camera's top view shows the "Shutter" button and the "Power/Mode Button" (⚡). The side view shows "Selector Up" (⬆️) and "Selector Down" (⬇️) buttons. The camera body is branded with "4K", "30FPS", and "Wi-Fi" (?).
The rear-right view highlights the ports and compartments: "Micro USB Port" (?), "Micro SD Card Slot" (?), "HDMI OUT" (?), "Battery Compartment" (?), and "Compartment Lock" (?).
PARTS & FUNCTIONS
- Power/Mode Button (⚡):
- Press and hold for about 3 seconds to turn ON/OFF the camera.
- Press once to cycle between camera modes and menu in settings page.
- Shutter (?):
- Press once to start recording or take a picture.
- Press once to select the current option in the settings menu.
- Selector Up (⬆️):
- Press once to move the selector in menu options on the settings page.
- Press once to activate Wi-Fi mode (only works when in picture or video capture mode).
- Selector Down (⬇️):
- Press once to move the selector in menu options on the settings page.
- Micro USB Port (?):
- Can be used for charging the device with a 5V/1A charger.
- Can be used for data transfer.
- Micro SD Card Slot (?):
- File storage which can support up to 64GB.
- Compartment Lock (?):
- Used for locking and unlocking the Battery Compartment Cover.
HOW TO USE
Installing Micro SD Card
Please make sure that you are using a branded Micro SD Card, preferably a class 10. Insert the card with the contact pins facing the Micro USB Port, then gently push it until it clicks.
Installing/Removing Battery
After unlocking the compartment lock (?), gently take out the side near the lock first to remove the battery cover and access the battery (?). Please place the battery correctly and gently push it in. Do not force the battery in if it won't go all the way; it is possible that it is not inserted right or there is something inside that stops the battery from going in.
Charging the device
The camera can be charged from many sources such as a computer or any USB charger, which may be a wall USB charger or a car charger. If using a wall USB charger, please make sure that the charger amperage output is at least and not more than 1A.
Take Picture/Record a Video
Turn ON the camera (⚡), select the desired mode (Photo/Video) and adjust to desired settings. Aim the camera to the subject and use the in-built display to adjust angle/aim, then press the Shutter Button (?) once to capture a picture or start and stop recording.
Wi-Fi Mode (?)
While in capture mode, press once to activate the camera Wi-Fi. The Wi-Fi SSID and password will be displayed on screen. During this time, the camera is inoperable.
Download and install the app "XDV" before connecting your smartphone to the camera Wi-Fi.
The app interface, named "CarCam", displays a live preview of a person skateboarding. Below the preview are options for "Ordinary Video", "Loop Video", and "Time-lapse Video". At the bottom, navigation tabs include "Shoot", "Media Library", and "Setup".
The app allows you to use your smartphone as a shutter in "Shoot" mode.
Media Library allows you to view the saved files in your smartphone and in the camera storage.
Settings will give you the access to change the picture/recording quality.
ACCESSORIES
- Waterproof Housing: A clear protective case for underwater use.
- Handle Bar/Pole Mount: A versatile clamp for attaching the camera to cylindrical objects.
- Mount 1: A standard three-prong adapter for mounting.
- Mount 2: A flat, adhesive mount for attaching to surfaces.
- Mount 3: An articulated mount for flexible camera positioning.
- Mount 4: A screw-in mount with a threaded base.
- Clip: A clip for attaching the camera to clothing or gear.
- Bandages: Straps with Velcro for securing the camera.
- Battery: A 3.7V Li-ion 900mAh rechargeable battery.
- USB Cable: For charging the device and transferring data.
FAQ
Q) Why is the camera not charging?
- Make sure that the charger and the charging cable you are using are working and properly connected to the camera.
- If you are using a smartphone charger, amperage affects the charging capacity of the camera, so please use the required power (5V 1A).
Q) Why can't I take a picture or record a video?
- Please make sure that there is enough space on your memory card. The quality of the video/picture affects storage space.
Q) The picture quality is blurred?
- Please make sure that the lens is cleaned with a glass cleaning cloth.
MAINTENANCE
- Retain these instructions for future use.
- Clean the product with a damp cloth and mild soap.
- Do not expose this product to rain or moisture.
- Be careful not to turn or twist the cables used in this product too much, as it can lead to malfunction and failure.
- This product is not designed to be submerged in water and will malfunction if this occurs.
- This product has no user-serviceable items inside. Do not open this product, as it risks user injury and would void the warranty.
- Keep the unit away from strong magnetic fields to avoid interference with the product.
DISTRIBUTION
Distributed by:
Electus Distribution Pty. Ltd.
320 Victoria Rd, Rydalmere
NSW 2116 Australia
www.electusdistribution.com.au
Made in China
