Home
›
E5080B Method of Implementation (MOI) for USB Type-C to Type-C Cable Assembly Compliance Test

E5080B Method of Implementation (MOI) for USB Type-C to Type-C Cable Assembly Compliance Test
File info: application/pdf · 57 pages · 3.31MB
E5080B Method of Implementation (MOI) for USB Type-C to Type-C Cable Assembly Compliance Test
USB4, Type-C, Cable, Connector, MOI, E5080B, Vector, Network, Analyzer, VNA
E5080B Method of Implementation (MOI) for USB Type-C to Type ...
Extracted Text
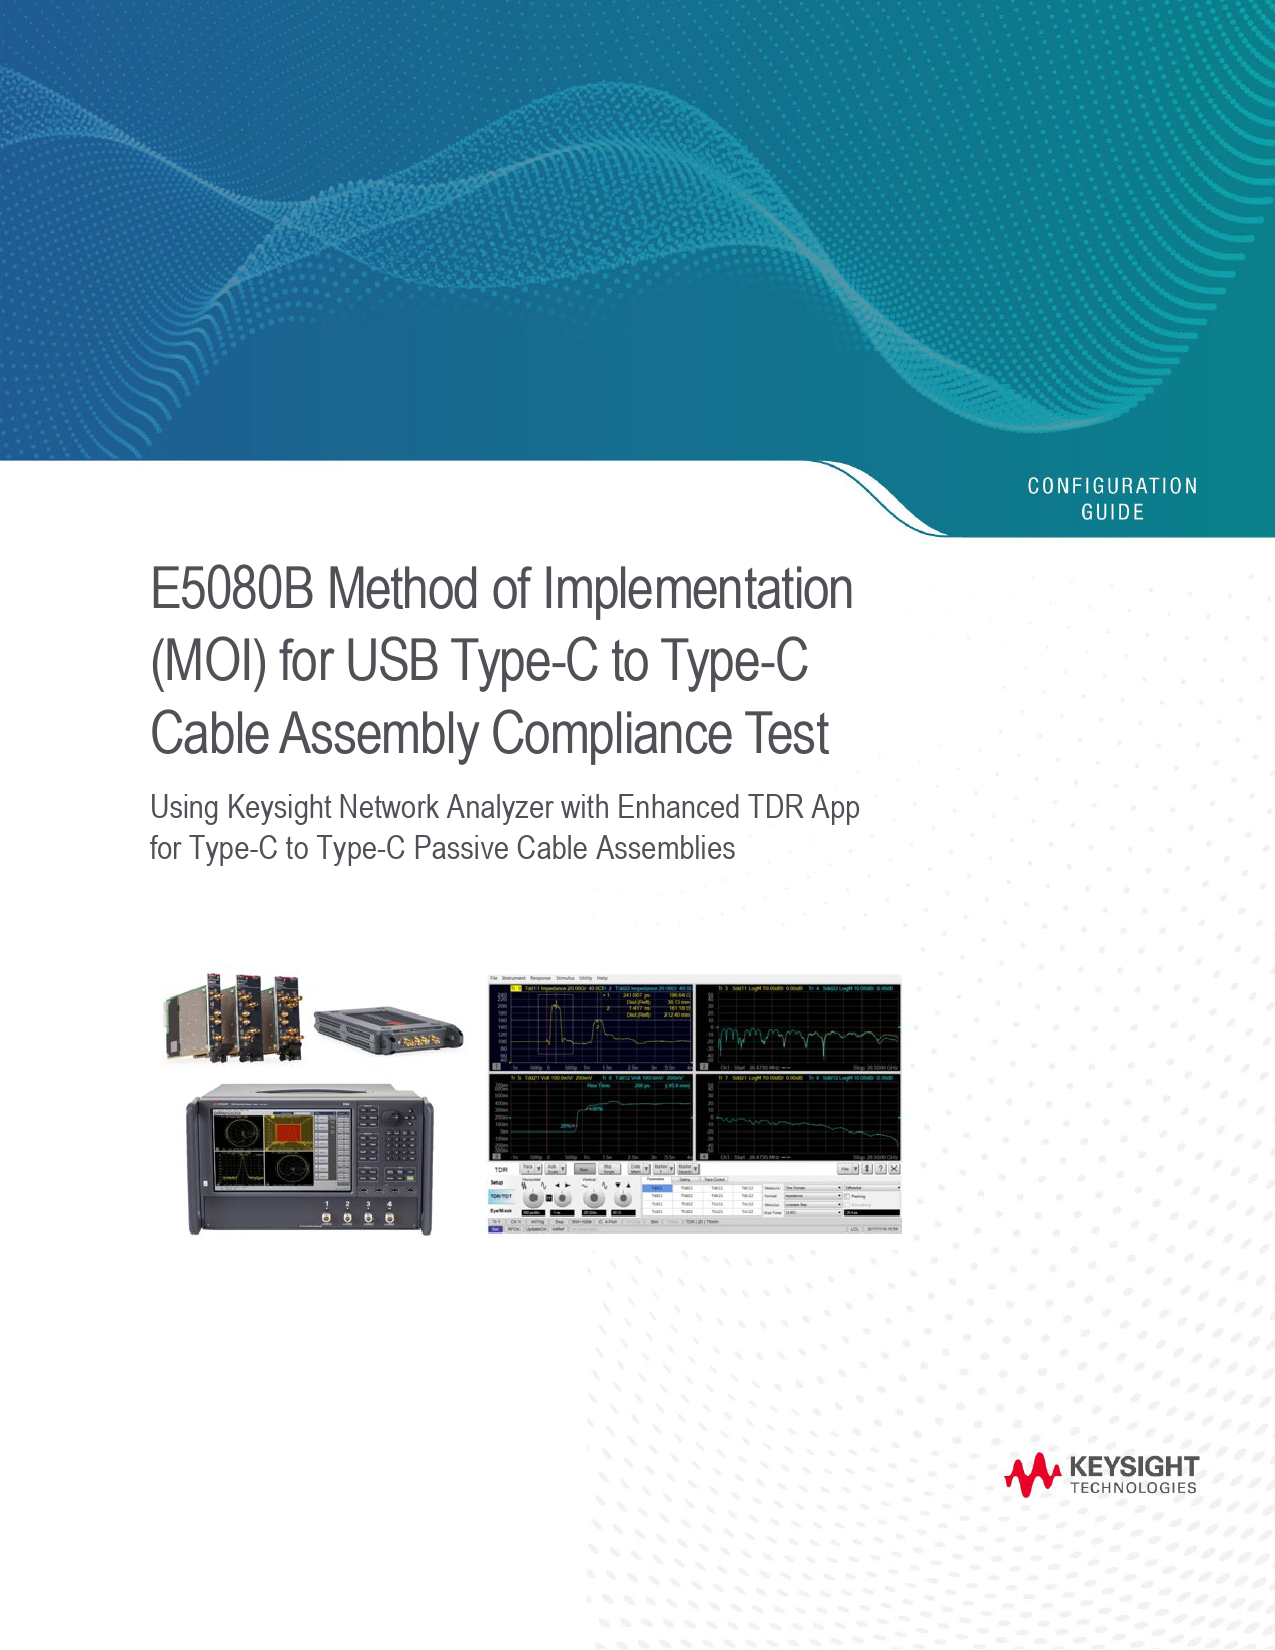
E5080B Method of Implementation (MOI) for USB Type-C to Type-C Cable Assembly Compliance Test
Using Keysight Network Analyzer with Enhanced TDR App for Type-C to Type-C Passive Cable Assemblies

Find us at www.keysight.com

Page 1

Table of Contents
1. Revision History.......................................................................................................................................... 4 2. Configuration Requirements........................................................................................................................ 5 3. Test Procedure ........................................................................................................................................... 6 3.1 Test Flow Chart......................................................................................................................................... 6 3.2 Test Port Cable and Fixture Connection..................................................................................................... 7 3.3 Description of Measurement Window......................................................................................................... 7 4. Measurement Setups................................................................................................................................ 10 4.1 Recalling a State File............................................................................................................................... 10 4.2 Common Parameters Setup for Frequency Domain Measurements ......................................................... 12
4.2.1 Setup for High-Speed Signal Measurement .................................................................................... 12 4.2.2 Setup for Low-Speed Signal Measurement ..................................................................................... 13 4.3 Calibration Setup..................................................................................................................................... 13 4.3.1. ECal Calibration on Time Domain .................................................................................................. 13 4.3.2 De-embedding on Time Domain ..................................................................................................... 14 4.3.3. ECal Calibration on Frequency Domain ......................................................................................... 15 4.3.4. De-embedding on Frequency Domain............................................................................................ 15 4.3.5. Adjustment of effective rise time .................................................................................................... 16 5. Measurement and Data Analysis............................................................................................................... 17 5.1 D+/D- Differential Impedance................................................................................................................... 18 5.2 D+/D- Intra-Pair Skew.............................................................................................................................. 18 5.3. D+/D- Propagation Delay........................................................................................................................ 19 5.4 D+/D- Pair Attenuation............................................................................................................................. 19 5.5 Channel Metrics (ILfitatNq, IMR, IXT, IRL, Differential-to-Common-Mode Conversion) - For USB4 Gen2
and USB3.2 Gen2 ................................................................................................................................ 20 5.6 Channel Operating Margin, COM (Normative � For USB4 Gen3 only)...................................................... 23 5.7 Differential-to-Common-Mode Conversion ............................................................................................... 26 5.8 Cable Shielding Effectiveness .............................................................................................................. 27 5.9 [Raw Cable] Differential Impedance (Informative) .................................................................................... 30 5.10 [Raw Cable] Intra-Pair Skew (Informative) ............................................................................................. 31 5.11 [Raw Cable] Differential Insertion Loss (Informative) .............................................................................. 31 5.12 [Mated Connector] Differential Impedance (Informative)......................................................................... 33 5.13 [Mated Connector] Channel Metrics (ILfitatNq, IMR, IXT, IRL, Differential-to-Common-Mode Conversion) -
Normative for USB4 Gen3.................................................................................................................... 33 5.14 [Mated Connector] Differential Insertion Loss (Informative) .................................................................... 36

Find us at www.keysight.com

Page 2

5.15 [Mated Connector] Differential Return Loss (Informative) ....................................................................... 37 5.16 [Mated Connector] Differential NEXT & FEXT between SS Signal Pairs (Informative) ............................ 37 5.17 [Mated Connector] Differential NEXT and FEXT between D+/D- Pair and SS Signal Pairs (Normative for
USB4 Gen3)......................................................................................................................................... 38 5.18 [Mated Connector] Differential to Common-Mode Conversion (Normative for USB4 Gen3)..................... 39 5.19 Differential Insertion Loss (Informative).................................................................................................. 40 5.20 Differential Return Loss (Informative)..................................................................................................... 40 5.21 Differential NEXT & FEXT between SS Signal Pairs (Informative).......................................................... 41 5.22 Differential NEXT and FEXT between D+/D- Pair and SS Signal Pairs (Informative) .............................. 42 5.23 [Low Speed Signal] Characteristic Impedance on CC Wire and SBU ..................................................... 43 5.24 [Low Speed Signal] Crosstalk, VBUS Loop L/C, Coupling Factor ........................................................... 44 5.25 [Low Speed Signal] Coupling between CC and Differential D+/D- .......................................................... 47 5.26 [Low Speed Signal] Single-Ended Coupling between CC and D+/D- ...................................................... 47 5.27 [Low Speed Signal] Coupling between VBUS and Differential D+/D-...................................................... 48 5.28 [Low Speed Signal] Single-ended Coupling between SBU_A and SBU_B.............................................. 48 5.29 [Low Speed Signal] Single-ended Coupling between SBU_A/SBU_B and CC........................................ 49 5.30 [Low Speed Signal] Coupling between SBU_A/SBU_B and Differential D+/D-........................................ 50 6.Manual Setup ............................................................................................................................................. 50 6.1. Channel & Trace Setup .......................................................................................................................... 50 6.2. D+/D- Intra-Pair Skew............................................................................................................................. 51 6.3 Crosstalk Compensation.......................................................................................................................... 52 6.4 D+/D- Pair Propagation Delay.................................................................................................................. 53 6.5 Differential Impedance............................................................................................................................. 53 6.6 [Low-Speed Signal] Single-ended Impedance.......................................................................................... 54 6.7 Common Parameters Setup for Frequency-domain Measurements.......................................................... 54 6.7.1 Setup for High-Speed Signal Measurement......................................................................................... 54 6.7.2 Setup for Low-Speed Signal Measurement ........................................................................................... 55 6.8 Defining Limit Line Tables ....................................................................................................................... 56 Web Resources............................................................................................................................................. 57

Find us at www.keysight.com

Page 3

1. Revision History

Revision

Comments

1.0

First draft for E5080B series

1.1

- Added Channel Metrics test for Mated Connector

- Updated new release of USB-IF compliance tool

Date 30-Nov-2020 12-Jan-2021

Reference documents
1. Universal Serial Bus Type-C Connectors and Cable Assemblies Compliance Document; Revision 2.0 (Apr 29, 2020).
2. Universal Serial Bus Type-C Cable and Connector Specification; Release 2.0 (August 2019).

Find us at www.keysight.com

Page 4

2. Configuration Requirements

Description

Test Equipment

Network Analyzer

Keysight Network Analyzer: (20 GHz is recommended as USB4/Type-C cable/connector requires measurements up to 20 GHz)

� E5080B-4K0: 4-port test set, 9 kHz to 20 GHz or � P5024/25A Streamline USB Series VNA or � M9804/05A PXI Multiport VNA

Note: Ensure that E5080B firmware revision is at least version A.14.10 or above (Windows 10)

Software

S9x011A/B Enhanced time-domain analysis with TDR * Selection is based on the VNA platforms. x=6 for ENA, x=7 for Streamline USB, x=5 for PXI

Compliance Tool
ECal or Mechanical Cal Kit Test Fixture
Adapter (for E5080B only) RF Cable
Terminator

Compliance Tool provided by USB-IF: https://compliance.usb.org/files/Ger_iPar_v0p91a_relea se.zip (Released 7-Dec-2020) https://compliance.usb.org/files/IntePar_1p6.zip (Released 3-Jan-2021)
N4433D-010/0DC 4-Ports Electronic Calibration (ECal) Module or 85052D Economy Mechanical Calibration Kit
USB Type-C official test fixture and calibration standards, or an equivalent set of fixtures and standards. Note: Fixtures for testing USB Type-C connectors and cable assemblies are available for purchase through LUXSHARE-ICT.
Coaxial straight Female-SMA Female-SMA 50-Ohm adapters (Keysight 1250-1666).
3.5 mm or SMA cables of 4 GHz bandwidth or more (EG: 5062-6691) * Y1740A-100 (3.5-mm m-m, 36 inch) cable is recommended for Streamline USB and PXI VNA.
50-ohm terminations to terminate unused channels.

Qty 1 ea.
1 ea. 2 ea. 1 ea. 1 ea.
4 ea. 4 ea. 16 ea.

Find us at www.keysight.com

Page 5

3. Test Procedure
3.1 Test Flow Chart

Steps Step 1

Procedure
The VNA should be powered on and allowed to warm up - recommendation is for 24 hours prior to measurement. � Recommended to set the frequency sweep range 20 GHz for the USB Type-C
SuperSpeed pairs as required by the spec. � The IF Bandwidth should be low enough to help reduce noise effects (e.g. < 300 Hz).

Step 2

Set measurement conditions by recalling a state file or manual setup. There are 3 type of USB Type-C Cable-Connector tests state files and MOIs. Choose the right one base on your DUT type. 1. Type-C to Type-C Passive Cable Assemblies (for High Speed Signal and Low Speed
Signals) 2. Type-C to Legacy USB Cable Assemblies 3. Type-C to Legacy USB Adapter Assemblies

Step 3 Connect USB Type-C Test fixture to test ports of the VNA.

Step 4 For Time Domain Measurements, perform Electronic Calibration (ECal) and de-embedding.

Step 5

For Frequency Domain Measurements, perform Electronic Calibration (ECal) and deembedding.

Step 6

Perform Time Domain Measurements - D+/D- Differential Impedance (Normative) - D+/D- Intra-Pair Skew (Normative) - D+/D- Propagation Delay (Normative) - [Raw Cable] Differential Impedance (Informative) - [Raw Cable] Intra-Pair Skew (Informative) - [Mated Connector] Differential Impedance (Normative for USB4 Gen3, Informative for
USB 3.2 Gen2, USB4 Gen2) - [Low Speed Signal] Characteristic Impedance (Informative)

Step 7

Perform Frequency Domain Measurements - D+/D- Pair Attenuation (Normative) - Channel Metrics (ILfitatNq, IMR, IXT, IRL) (Normative) - Channel Operating Margin, COM (Normative � USB4 Gen3) - Differential-to-Common Mode conversion) (Normative) - Cable Shielding Effectiveness (Normative) - [Raw Cable] Differential Insertion Loss (Informative) - [Mated Connector] - Channel Metrics (ILfitatNq, IMR, IXT, IRL) (Normative for USB4 Gen3) - [Mated Connector] Differential Insertion Loss (Informative) - [Mated Connector] Differential Return Loss (Informative) - [Mated Connector] Differential NEXT & FEXT between SS Signal Pairs (Informative)

Find us at www.keysight.com

Page 6

- [Mated Connector] Differential NEXT & FEXT between D+/D- Pair and SS Signal Pairs (Normative for USB4 Gen3, Informative for USB 3.2 Gen2, USB4 Gen2) - [Mated Connector] Differential to Common Mode Conversion (Normative for USB4 Gen3, Informative for USB 3.2 Gen2, USB4 Gen2) - Differential Insertion Loss (Informative) - Differential Return Loss (Informative) - Differential NEXT & FEXT between SS Signal Pairs (Informative) - Differential NEXT & FEXT between D+/D- Pair and SS Signal Pairs (Informative) - [Low Speed Signal] Crosstalk, VBUS Loop L/C, Coupling Factor - [Low Speed Signal] Coupling between CC and Differential D+/D- [Low Speed Single-ended Coupling between CC and D+/D- [Low Speed Signal] Coupling between VBUS and Differential D+/D- [Low Speed Signal] Single-ended Coupling between SBU_A and SBU_B - [Low Speed Signal] Single-ended Coupling between SBU_A/SBU_B and CC - [Low Speed Signal] Coupling between SBU_A/SBU_B and Differential D+/D-
3.2 Test Port Cable and Fixture Connection
Cable under test will be tested in the following manner

Example: USB4 Type-C to Type-C Cable Assembly Test
3.3 Description of Measurement Window
The following figure is the description of the measurement window. Find us at www.keysight.com

Page 7

Normative and Informative Parameters (High Speed Signal)

Find us at www.keysight.com

Page 8

Normative and Informative Parameters (Low Speed Signal)
Note:
1. Hard Keys are displayed in Blue color and Bold. (Example: Avg, Analysis) 2. Soft keys (Keys on the screen) are displayed in Bold. (Example: S11, Real, Transform) 3. Buttons (in the TDR) are displayed in Green color and Bold. (Example: Trace, Rise Time) 4. Tabs (in the TDR) are displayed in Brown color and Bold. (Example: Setup, Trace Control)
Find us at www.keysight.com

Page 9

4. Measurement Setups
4.1 Recalling a State File
This section describes how to recall a state file for Time Domain and Frequency Domain settings. A state file can be downloaded from Keysight.com at the following URL. www.keysight.com/find/ena-tdr_compliance If you use your local PC to download, save the state file to a USB mass storage device in order to move it to the VNA unit. Connect the USB mass storage device into the front USB port of the VNA unit. For manual measurement settings, refer to Chapter 6.0 Appendix for manual setup procedure. Note: For USB Type-C to Type-C passive cable assemblies compliance tests, there are two state files. One for high speed signal tests and the other for low speed signal tests respectively. Recall one of two state files then follow the procedure below. 1. Click Setup > Main > Meas Class... to launch measurement class setup dialog box 2. Select TDR and click OK.
3. Select Close and confirm with Yes to close the setup wizard.

Find us at www.keysight.com

Page 10

4. Select Click Advanced Mode of TDR software and Click Yes to enter the advanced mode. 5. Click File > Recall State. Select the state file (*.tdr) and click Open to recall. 6. The windows will launch pre-define state file configuration for USB Type-C compliance testing.

7. All the measurement settings including calibration information can be saved. Select File > Save State As... > State and Cal Set Date (*.csa) to save the settings.

Find us at www.keysight.com

Page 11

4.2 Common Parameters Setup for Frequency Domain Measurements
4.2.1 Setup for High-Speed Signal Measurement
1. Press Channel Next to select Channel 2. 2. Select Sweep > Sweep Setup and key-in sweep properties as below:
� Set Start value to "10 MHz". � Set Stop value to "20 GHz". � Set Points and set to "2000". � Set IF Bandwidth to "1 kHz".

3. Select Cal > Fixtures > Fixture Setup > Port Z... Select and check "Enable Port Z Conversion (all ports)" to turn ON Port Z conversion.
4. Select Meas > Balanced > Topology... > BAL-BAL 5. Select Balanced Port > 1 BAL > Port 1- Port 3 6. Select Balanced Port > 2 BAL > Port 2- Port 4

Find us at www.keysight.com

Page 12

4.2.2 Setup for Low-Speed Signal Measurement
1. Press Channel Next to select Channel 2. 2. Select Sweep > Sweep Setup and key-in sweep properties as below:
� Select Sweep Type as "Log Frequency". � Set Start value to "300 kHz". � Set Stop value to "100 MHz". � Set Power value to "10 dBm" � Set Points and set to "1601". � Set IF Bandwidth to "1 kHz".

4.3 Calibration Setup
The purpose of this step is to calibrate the RF effects such as delay, loss or mismatch of RF cables and test fixture traces before measurements. In order to remove the fixture trace effect, two calibration methods (ECal calibration & de-embedding or TRL calibration) are available with the VNA firmware.
4.3.1. ECal Calibration on Time Domain
Full calibration is performed by using the 4-port ECal Module (i.e. N4433A) at the end of RF cables connected to the VNA's test ports. The effect of the fixture is removed by de-embedding the fixture traces with S-parameter Touchstone files.
ECal calibration and de-embedding for time-domain measurements are performed by the TDR software.
1. Press Channel Next to select Channel 1. 2. Click Setup tab. 3. Click ECal to launch the TDR Setup Wizard.

Find us at www.keysight.com

Page 13

4. Connect the VNA ports (port 1 to 4) to the ECal module with RF cables. 5. Click Calibrate to perform ECal Calibration.

6. Click Next > to proceed 7. Click Finish to complete the ECal.
4.3.2 De-embedding on Time Domain
1. Click Adv Waveform tab > De-embedding to launch Advanced Waveform wizard.

2. Click De-embedding box to set the Touchstone file. 2 port files (*.s2p) for single ended lines or 4 port files (*.s4p) for differential lines can be selected for the de embedding function.
3. Load the USB Type-C 2X THRU Touchstone file for as below (files are available in state file zip): Select Port1 > Load "2x_AFR_Top_L_Port1.s2p" file. Select Port3 > Load "2x_AFR_Top_R_Port3.s2p" file. Select Port2 > Load "2x_AFR_Bot_L_Port2.s2p" file. Select Port4 > Load "2x_AFR_Bot_R_Port4.s2p" file.
4. Enable the de-embedding function and Click OK.

Find us at www.keysight.com

Page 14

Note: For more details about the de-embedding function, refer to the VNA help below. http://ena.support.keysight.com/e5080/manuals/webhelp/eng/index.htm#S3_Cals/Fixturing.htm#dee mbed
4.3.3. ECal Calibration on Frequency Domain
ECal calibration and de-embedding for frequency-domain measurements are performed by the VNA firmware. 1. Press Channel Next to select Channel 2. 2. Connect the VNA ports (Port 1 to 4) to the ECal module with RF cables. 3. Press Cal > Main > Other ECal > Ecal... > select 4-Port ECal and click Next to proceed Ecal.

4.3.4. De-embedding on Frequency Domain

1. Press Cal > Fixtures > Fixture Setup > 2-port DeEmbed...and check on Enable De-embedding (all ports) to de-embed fixture trace.
2. Select User S2P File and specify a 2-port de-embedding file (*.s2p). Select Port-1 > User Defined (S2P File) > Load "2x_AFR_Top_ L_Port1.s2p" file. Select Port-3 > User Defined (S2P File) > Load "2x_AFR_Top_ R_Port3.s2p" file. Select Port-2 > User Defined (S2P File) > Load "2x_AFR_Bot_ L_Port2.s2p" file. Select Port-4 > User Defined (S2P File) > Load "2x_AFR_Bot_ R_Port4.s2p" file.

Find us at www.keysight.com

Page 15

3. Close and proceed.

Note: For more details about the de-embedding function, refer to the VNA help below.
2-port de-embedding http://ena.support.keysight.com/e5080/manuals/webhelp/eng/index.htm#S3_Cals/Fixturing.htm#dee mbed
4.3.5. Adjustment of effective rise time
After performing the calibration, the effective rise time entering the USB connector pins should adjusted for the specification in time domain measurements.
1. Press Channel Next to select Channel 1. 2. Double click to maximize the selected trace in the screen. 3. Open TDR/TDT tab. Select the trace of interest. 4. Confirm effective rise time for each trace.

Trace

Test Parameters

Rise Time %

Target Rise Time

Tr 1 & 5

D+/D- Differential Impedance

20 - 80 %

400 ps

Tr 4

D+/D- Propagation Delay

20 - 80 %

400 ps

Tr 3 & 7

D+/D- Intra-Pair Skew

20 - 80 %

400 ps

Tr 2 & 6

[Raw Cable] Differential Impedance

10 - 90 %

200 ps

Tr 15 & 16

[Mated Connector] Differential Impedance

20 - 80 %

40 ps

Tr 25,26, 27,28

[Low Speed Signal] Characteristic Impedance on 20 - 80 % CC Wire and SBU

400 ps

Find us at www.keysight.com

Page 16

5. Measurement and Data Analysis
The connections for Type-C to Type-C cable assembly, raw cable and mated connector are assumed as follows (Note: TF stands for Test Fixture). For cable assembly frequency domain measurements, the standard compliance tool is used for the pass/fail judgment. The manual measurement procedures for raw cable, mated connector, and several test items of cable assembly using the Enhanced Option TDR are also supported with the limit lines.
1. Connect USB Type-C test fixtures to the test port cables according to tables below. Unused terminals should be terminated with 50-ohm terminators.
2. Press Channel Next key on the instrument front panel to select Channel 1/Channel 2. 3. Click Stop Single for Time Domain measurements. 4. Press Trigger > Single for Frequency Domain measurements.

Type-C to Type-C Cable Assembly Connection (High Speed Signal)

TF L Side Type-C (Receptacle)

Cable Assembly

Type-C (Plug)

Type-C (Plug)

TF R Side Type-C (Receptacle)

D+/D-


D+/D-

Tx1+/Tx1-


Rx1+/Rx1-

Rx1+/Rx1-


Tx1+/Tx1-

Tx2+/Tx2-


Rx2+/Rx2-

Rx2+/Rx2-


Tx2+/Tx2-

Raw Cable Connection A Side D+/DTx1+/Tx1Rx1+/Rx1Tx2+/Tx2Rx2+/Rx2-
Mated Connector Connection TF 1 Type-C (Receptacle) D+/DTx1+/Tx1Rx1+/Rx1Tx2+/Tx2Rx2+/Rx2-
Find us at www.keysight.com

Raw Cable    n/a n/a
Mated Connector


B Side D+/DTx1+/Tx1Rx1+/Rx1Tx2+/Tx2Rx2+/Rx2-
TF 2 Type-C (Plug) D+/DTx1+/Tx1Rx1+/Rx1Tx2+/Tx2Rx2+/Rx2-

Page 17

5.1 D+/D- Differential Impedance

Multiple reflections from impedance mismatches cause noise at the receiver. Therefore, the impedance profile provides an indication of multiple reflection induced noise. This test ensures that the signal conductors of the USB Type-C connectors have the proper impedance.

1. Connect the VNA ports (port 1 to 4) to the test fixture ports with RF cables.

VNA Port# Test Fixtures

Port 1 L Side D+

Port 2 R Side D+

Port 3 L Side D-

Port 4 R Side D-

Note: Unused fixture pots should be terminated with 50-ohm terminators.

2. Press Channel Max to maximize Channel 1 on the screen.

3. Select Trace 1 (Tdd11).

4. Double-click the Trace to maximize the selected trace on the screen.

5. Click Stop Single.

6. Confirm the measured impedance is within the limit shown below. Otherwise, it will show Fail.

7. Select Trace 5 (Tdd22) and repeat Step 5-6 for the far end of the DUT.

DUT Type

Max Limit

Min Limit

Type-C to Type-C passive cable assembly Type-C to legacy cable assembly Type-C to legacy adapter assembly

105  105  105

75  75  75

Note: The measurement should be evaluated using a 400ps (20%-80%) rise time.

5.2 D+/D- Intra-Pair Skew

The propagation delay skew measurement ensures that the signal on both the D+ and D- lines of cable assembly arrive at the receiver at the same time.

1. Connect the VNA ports (port 1 to port 4) to the test fixture ports with RF cables.

VNA Port# Test Fixtures

Port 1 L Side D+

Port 2 R Side D+

Port 3 L Side D-

Port 4 R Side D-

2. Press Double-click on the instrument front panel to enlarge the trace.

3. Press Channel Next to select Channel 1.

4. Select Trace 3 (T31).

5. Click Stop Single

6. Read the Delta Time and confirm the measured value is within the limit shown below. Otherwise, Fail.

DUT Type

Test Limit

Type-C to Type-C passive cable assembly Type-C to legacy cable assembly Type-C to legacy adapter assembly

If Delta Time < 100 psec: Pass, else: Fail If Delta Time < 20 psec: Pass, else: Fail

Note: The measurement should be evaluated using a 400ps (20%-80%) rise time.

Find us at www.keysight.com

Page 18

5.3. D+/D- Propagation Delay

The propagation delay measurement is to verify the end to end propagation of the D+/D- lines of the cable assembly.

1. Connect VNA ports (port 1 to port 4) to the test fixture ports with RF cables.

VNA Port# Test Fixtures

Port 1 L Side D+

Port 2 R Side D+

Port 3 L Side D-

Port 4 R Side D-

2. Press Double-click on the instrument front panel to enlarge the trace.

3. Select Trace 4 (Tdd21).

4. Click Stop Single.

5. Read Marker Value 1 on Trace 4 and confirm the measured value is within the limit shown below.

DUT Type Type-C to Type-C passive cable assembly
Type-C to legacy cable assembly

Test Limit
If the time at the rising edge < 26 nsec: Pass, else: Fail
Type-C to Micro-B: If the time at the rising edge < 10 nsec: Pass, else: Fail Type-C to legacy: If the time at the rising edge < 20 nsec: Pass, else: Fail

Note: The measurement should be evaluated using a 400ps (20%-80%) rise time.

5.4 D+/D- Pair Attenuation

This test ensures the D+/D- pair of a cable assembly can provide adequate signal strength to the receiver in order to maintain a low error rate.

1. Connect VNA ports (port 1 to port 4) to the test fixture ports with RF cables.

VNA Port# Test Fixtures

Port 1 L Side D+

Port 2 R Side D+

Port 3 L Side D-

Port 4 R Side D-

2. Press Channel Next to select Channel 2.

3. Select Trace 11 (Sdd21). 4. Press Double-click on the instrument front panel to enlarge the trace.

5. Press Trigger > Single. 6. Run and confirm the measured values is within the limit shown below. Otherwise, it will show Fail.

Find us at www.keysight.com

Page 19

DUT Type Type-C to Type-C passive cable assembly
Type-C to legacy cable assembly
Type-C to legacy adapter assembly

Start Frequency 50 MHz 100 MHz 200 MHz 50 MHz

End Frequency Start Limit

100 MHz

-1.02 dB

200 MHz

-1.43 dB

400 MHz

-2.40 dB

400 MHz

-0.70 dB

End Limit -1.43 dB -2.40 dB -4.35 dB -0.70 dB

5.5 Channel Metrics (ILfitatNq, IMR, IXT, IRL, Differential-to-Common-Mode Conversion) - For USB4 Gen2 and USB3.2 Gen2
The USB4 Gen2 and USB3.2 Gen2 test results of channel metrics will check with a standard tool (InterPar.exe) provided by USB-IF. The USB Type-C compliance tool may be down-loaded from the following link: http://compliance.usb.org/files/IntePar_1p6.zip (Released 3-Jan-2021) Fifteen 4-port Touchstone files(*.s4p) will measure and save by the VNA firmware, and then imported by the compliance tool to conduct cable assembly compliance test. Note: USB4 Gen3 Cable assembly will use Ger_iPar compliance tool to run the COM and Channel Metrics. Refer to Section 5.6: Channel Operating Margin (COM) Note: Trace 11 is allocated for the measurements though, other traces can be used to check the measurement results with the limit line and the pass/fail judgment as described in Note below Note: Turn off the Port Z conversion in order to perform the measurements based on 50-ohm port impedance setting which required by the standard compliance tool.

1. Connect the VNA ports (port 1 to 4) to the test fixture ports with RF cables. 2. Select Cal > Fixtures > Fixture Setup > Port Z... uncheck "Enable Port Z Conversion (all ports)" to
turn OFF Port Z conversion.

Find us at www.keysight.com

Page 20

3. Press Channel Next to select Channel 2. 4. The same connection can use for below measurement for Pass/Fail testing. Select the desired trace
as described to check the limit line and the pass/fail judgment. Press Double-click on the instrument front panel to enlarge the trace.
� 5.4 D+/D- Pair Attenuation (Trace 11) � 5.7: Differential-to-Common-Mode Conversion (Trace 10) � 5.17: Differential Insertion Loss (Trace 21) � 5.18: Differential Return Loss (Trace 22) � 5.19: Differential NEXT and FEXT between SS Signal Pair (Trace 23) � 5.20: Differential NEXT and FEXT between D+/D- Pair and SS Signal Pairs (Trace 24) 5. Press Trigger > Single. 6. Press Save Recall > Save Other > Save Data...> Filename.s4p to save the measured Touchstone file (*.s4p). Select format "Real/Imaginary" and "Normal" mode > then OK. 7. Connect the VNA ports with test fixture ports shown below and repeat step 3 to step 6 to save all 15setsTouchstone files (*.s4p) for Tx1/Rx1 pairs.

Test Path Name Tx(L), Tx(R) [1,2,3,4]
Rx(L), Rx(R) [5,6,7,8]
D+/D-(L), D+/D-(R) [9,10,11,12] Tx(L), Rx(L) [1,3,5,7] Tx(R), Rx(R) [2,4,6,8] Tx(L), D+/D-(L) [1,3,9,11] Rx(L), D+/D-(L) [5,7,9,11] Tx(R), D+/D-(R) [2,4,10,12] Rx(R), D+/D-(R) [6,8,10,12] Tx(L), Rx(R) [1,3,6,8] Tx(R), Rx(L) [2,4,5,7] Tx(R), D+/D-(L) [2,4,9,11] Rx(R), D+/D-(L) [6,8,9,11] Tx(L), D+/D-(R) [1,3,10,12] Rx(L), D+/D-(R) [5,7,10,12]

Trace Tr-10/ 21/22 Tr-10/ 21/22 Tr-11 Tr-23 Tr-23 Tr-24
Tr-24 Tr-24 Tr-24 Tr-23 Tr-23
Tr-24 Tr-24 Tr-24 Tr-24

Port 1 L Side Tx1+
L Side Rx1+
L Side D+ L Side Tx1+ R Side Rx1+ L Side Tx1+ L Side Rx1+ R Side Rx1+ R Side Tx1+ L Side Tx1+ R Side Rx1+ R Side Rx1+ R Side Tx1+ L Side Tx1+ L Side Rx1+

Port 2 R Side Rx1+
R Side Tx1+
R Side D+ L Side Rx1+ R Side Tx1+ L Side D+ L Side D+ R Side D+ R Side D+ R Side Tx1+ L Side Rx1+ L Side D+ L Side D+ R Side D+ R Side D+

Port 3

Port4

L Side Tx1- R Side Rx1-

L Side Rx1- R Side Tx1-

L Side DL Side Tx1R Side Rx1L Side Tx1L Side Rx1R Side Rx1R Side Tx1L Side Tx1R Side Rx1R Side Rx1R Side Tx1L Side Tx1L Side Rx1-

R Side DL Side Rx1R Side Tx1L Side DL Side DR Side DR Side DR Side Tx1L Side Rx1L Side DL Side DR Side DR Side D-

Find us at www.keysight.com

Page 21

8. Open the Excel spreadsheet [High_Config_4ports.xlsx and modify "Cable Type" to 1 (C2C- Gen2 or C2C-Gen1) and S-parameter Path and Name to match them with fifteen 4 port Touchstone files (*.s4p) you measured. Do not change "Number of VNA Ports" and "Port Arrangement".
9. Launch the USB.org compliance test tool and load the excel spreadsheet "[High_Speed]_Config_4ports.xlsx" by clicking "Load Config Spreadsheet". Click Import to import fifteen 4 port Touchstone files (*.s4p), then click Check Compliance for pass/fail judgment.

10. Connect the VNA ports with test fixture ports shown below and repeat step 3 to step 6 to save all necessary Touchstone files (*.s4p) in the VNA, then repeat step 8 to step 9 for Tx2/Rx2 pairs.

Test Path Name Tx(L), Tx(R) [1,2,3,4]

Trace Tr-23

Port 1

Port 2

Port 3

Port4

L Side Tx2+ R Side Rx2+ L Side Tx2- R Side Rx2-

Rx(L), Rx(R) [5,6,7,8] D+/D-(L), D+/D-(R) [9,10,11,12] Tx(L), Rx(L) [1,3,5,7] Tx(R), Rx(R) [2,4,6,8] Tx(L), D+/D-(L) [1,3,9,11] Rx(L), D+/D-(L) [5,7,9,11] Tx(R), D+/D-(R) [2,4,10,12] Rx(R), D+/D-(R) [6,8,10,12] Tx(L), Rx(R) [1,6,3,8]
Tx(R), Rx(L) [5,2,7,4]

Tr-23
Tr-11
Tr-23
Tr-23
Tr-24
Tr-24
Tr-24
Tr-24
Tr-10/ 21/22 Tr-10/ 21/22

L Side Rx2+ R Side Tx2+ L Side Rx2- R Side Tx2-

L Side D+ R Side D+ L Side D-

R Side D-

L Side Tx2+ L Side Rx2+ L Side Tx2- L Side Rx2-

R Side Rx2+ R Side Tx2+ R Side Rx2- R Side Tx2-

L Side Tx2+ L Side D+ L Side Tx2- L Side D-

L Side Rx2+ L Side D+ L Side Rx2- L Side D-

R Side Rx2+ R Side D+ R Side Rx2- R Side D-

R Side Tx2+ R Side D+ R Side Tx2- R Side D-

L Side Tx2+ R Side Tx2+ L Side Tx2- R Side Tx2-

R Side Rx2+ L Side Rx2+ R Side Rx2- L Side Rx2-

Find us at www.keysight.com

Page 22

Tx(R), D+/D-(L) [2,4,9,11] Rx(R), D+/D-(L) [6,8,9,11] Tx(L), D+/D-(R) [1,3,10,12] Rx(L), D+/D-(R) [5,7,10,12]

Tr-24 Tr-24 Tr-24 Tr-24

R Side Rx2+ L Side D+ R Side Tx2+ L Side D+ L Side Tx2+ R Side D+ L Side Rx2+ R Side D+

R Side Rx2- L Side DR Side Tx2- L Side DL Side Tx2- R Side DL Side Rx2- R Side D-

11. After completed the measurement, Press Cal > Fixtures > Fixture Setup > Port Z... check "Enable Port Z Conversion (all ports)" to turn ON Port Z conversion as default setting.

5.6 Channel Operating Margin, COM (Normative � For USB4 Gen3 only)
Channel Operating Margin (COM) is checked with a standard compliance tool (Ger_iPar.exe) provided by USB IF after the measurements have made. Download the tool from USB-IF link: https://compliance.usb.org/files/Ger_iPar_v0p91a_release.zip (Released 7-Dec-2020)
4-port Touchstone files (*.s4p) is measured and saved by the VNA firmware, and then imported by the compliance tool to conduct cable assembly compliance tests. Recommended to run full S-parameters for High-speed TX/RX pairs (28-sets) + Optional for D+/D- Pairs (16-sets) to run the COM tool.

Note: The Port Z conversion is turned off, so the measurements are performed based on 50-ohm port impedance setting required by the standard tool. Select Cal > Fixtures > Fixture Setup > Port Z... uncheck "Enable Port Z Conversion (all ports)" to turn OFF Port Z conversion.
1. Connect the VNA ports (port 1 to 4) to the test fixture ports with RF cables. 2. Select Cal > Fixtures > Fixture Setup > Port Z... uncheck "Enable Port Z Conversion (all ports)" to
turn OFF Port Z conversion.

Find us at www.keysight.com

Page 23

3. Press Channel Next to select Channel 2. 4. The same connection can use for below measurement for Pass/Fail testing. Select the desired trace
as described to check the limit line and the pass/fail judgment. Press Double-click on the instrument front panel to enlarge the trace.
� 5.4 D+/D- Pair Attenuation (Trace 11) � 5.7: Differential-to-Common-Mode Conversion (Trace 10) � 5.17: Differential Insertion Loss (Trace 21) � 5.18: Differential Return Loss (Trace 22) � 5.19: Differential NEXT and FEXT between SS Signal Pair (Trace 23) � 5.20: Differential NEXT and FEXT between D+/D- Pair and SS Signal Pairs (Trace 24) 5. Press Trigger > Single. 6. Press Save Recall > Save Other > Save Data...> Filename.s4p to save the measured Touchstone file (*.s4p). Select format "Real/Imaginary" and "Normal" mode > then OK. 7. Connect the VNA ports with test fixture ports shown below and repeat step 3 to step 6 to save all necessary Touchstone files (*.s4p) for VNA.

High-Speed TX/RX (SS Signal) Pair

Test Path Name Tx1(L), Tx1(R) [1,2,3,4]
Tx1(L), Rx1(R) [1,6,3,8] Tx1(L), Tx2(R) [1,10,3,12]

Trace
Tr-10/ 21/22 Tr-23
Tr-23

Tx1(L), Rx2(R) [1,14,3,16]

Tr-23

Tx1(L), Rx1(L) [1,5,3,7]

Tr-23

Tx1(L), Tx2(L) [1,9,3,11]

Tr-23

Tx1(L), Rx2(L) [1,13,3,15]

Tr-23

Tx1(R), Rx1(L) [2,5,4,7]

Tr-23

Tx1(R), Tx2(L) [2,9,4,11]

Tr-23

Tx1(R), Rx2(L) [2,13,4,15]

Tr-23

Tx1(R), Rx1(R) [2,6,4,8]

Tr-23

Tx1(R), Tx2(R) [2,10,4,12]

Tr-23

Tx1(R), Rx2(R) [2,14,4,16]

Tr-23

Rx1(L), Rx1(R) [5,6,7,8] Rx1(L), Tx2(R) [5,10,7,12]

Tr-10/ 21/22 Tr-23

Rx1(L), Rx2(R) [5,14,7,16]

Tr-23

Find us at www.keysight.com

Port 1
L Side Tx1+
L Side Tx1+ L Side Tx1+ L Side Tx1+ L Side Tx1+ L Side Tx1+ L Side Tx1+ R Side Tx1+ R Side Tx1+ R Side Tx1+ R Side Tx1+ R Side Tx1+ R Side Tx1+
L Side Rx1+
L Side Rx1+ L Side Rx1+

Port 2

Port 3

R Side Rx1+ L Side Tx1-

R Side Tx1+ L Side Tx1R Side Rx2+ L Side Tx1R Side Tx2+ L Side Tx1L Side Rx1+ L Side Tx1L Side Tx2+ L Side Tx1L Side Rx2+ L Side Tx1L Side Tx1+ R Side Tx1L Side Rx2+ R Side Tx1L Side Tx2+ R Side Tx1R Side Rx1+ R Side Tx1R Side Tx2+ R Side Tx1R Side Rx2+ R Side Tx1-

R Side Tx1+ L Side Rx1-

R Side Rx2+ L Side Rx1R Side Tx2+ L Side Rx1-

Port 4
R Side Rx1-
R Side Tx1R Side Rx2R Side Tx2L Side Rx1L Side Tx2L Side Rx2L Side Tx1L Side Rx2L Side Tx2R Side Rx1R Side Tx2R Side Rx2-
R Side Tx1-
R Side Rx2R Side Tx2-
Page 24

Rx1(L), Tx2(L) [5,9,7,11] Rx1(L), Rx2(L) [5,13,7,15] Rx1(R), Tx2(L) [6,9,8,11] Rx1(R), Rx2(L) [6,13,8,15] Rx1(R), Tx2(R) [6,10,8,12] Rx1(R), Rx2(R) [6,14,8,16] Tx2(L), Tx2(R) [9,10,11,12]
Tx2(L), Rx2(R) [9,14,11,16] Tx2(L), Rx2(L) [9,13,11,15] Tx2(R), Rx2(L) [10,13,12,15] Tx2(R), Rx2(R) [10,14,12,16] Rx2(L), Rx2(R) [13,14,15,16]
Optional

Tr-23 Tr-23 Tr-23 Tr-23
Tr-23 Tr-23 Tr-10/ 21/22 Tr-23
Tr-23 Tr-23 Tr-23 Tr-10/ 21/22

L Side Rx1+ L Side Rx1+ R Side Rx1+ R Side Rx1+ R Side Rx1+ R Side Rx1+
L Side Tx2+
L Side Tx2+ L Side Tx2+ R Side Tx2+ R Side Tx2+
L Side Rx2+

L Side Tx2+ L Side Rx1L Side Rx2+ L Side Rx1L Side Rx2+ R Side Rx1L Side Tx2+ R Side Rx1R Side Tx2+ R Side Rx1R Side Rx2+ R Side Rx1-
R Side Rx2+ L Side Tx2-
R Side Tx2+ L Side Tx2L Side Rx2+ L Side Tx2L Side Tx2+ R Side Tx2R Side Rx2+ R Side Tx2-
R Side Tx2+ L Side Rx2-

L Side Tx2L Side Rx2L Side Rx2L Side Tx2R Side Tx2R Side Rx2-
R Side Rx2-
R Side Tx2L Side Rx2L Side Tx2R Side Rx2-
R Side Tx2-

D+/D- Pair and SS Signal Pairs Test Path Name
D+/D-(L), Tx1(L) [17,1,19,3] D+/D-(L), Tx1(R) [17 2 19 4] D+/D-(L), Rx1(L) [17 5 19 7] D+/D-(L), Rx1(R) [17 6 19 8] D+/D-(L), Tx2(L) 17 9 19 11] D+/D-(L), Tx2(R) [17 10 19 12] D+/D-(L), Rx2(L) [17 13 19 15] D+/D-(L), Rx2(R) [17 14 19 16] D+/D-(R), Tx1(L) [18 1 20 3] D+/D-(R), Tx1(R) [18 2 20 4] D+/D-(R), Rx1(L) [18 5 20 7] D+/D-(R), Rx1(R) [18 6 20 8] D+/D-(R), Tx2(L) [18 9 20 11] D+/D-(R), Tx2(R) [18 10 20 12] D+/D-(R), Rx2(L) [18 13 20 15] D+/D-(R), Rx2(R) [18 14 20 16]

Trace Tr-24 Tr-24 Tr-24 Tr-24 Tr-24 Tr-24 Tr-24 Tr-24 Tr-24 Tr-24 Tr-24 Tr-24 Tr-24 Tr-24 Tr-24 Tr-24

Port 1 L Side D+ L Side D+ L Side D+ L Side D+ L Side D+ L Side D+ L Side D+ L Side D+ R Side D+ R Side D+ R Side D+ R Side D+ R Side D+ R Side D+ R Side D+ R Side D+

Port 2 L Side Tx1+ R Side Tx1+ L Side Rx1+ R Side Rx1+ L Side Tx2+ R Side Tx2+ L Side Rx2+ R Side Rx2+ L Side Rx1+ R Side Tx1+ L Side Tx1+ L Side Rx1+ L Side Rx2+ R Side Tx2+ L Side Tx2+ R Side Rx2+

Port 3 L Side DL Side DL Side DL Side DL Side DL Side DL Side DL Side DR Side DR Side DR Side DR Side DR Side DR Side DR Side DR Side D-

Port 4 L Side Tx1R Side Tx1L Side Rx1R Side Rx1L Side Tx2R Side Tx2L Side Rx2R Side Rx2L Side Rx1R Side Tx1L Side Tx1L Side Rx1L Side Rx2R Side Tx2L Side Tx2R Side Rx2-

7. After completed the measurement, Press Cal > Fixtures > Fixture Setup > Port Z... check "Enable Port Z Conversion (all ports)" to turn ON Port Z conversion as default setting.
8. Open the Excel spreadsheet "s4p_example_0p91a.xlsx" and update "file location path" (sp_file_1 until sp_file_28) with 28-sets 4-port Touchstone files (*.s4p) you measured.
9. Modify the excel spreadsheet "USB4_Gen3_CableCom_Config_Example1.xlsx". Use "comp_check_type" = 1, "case_number" = [1] for 4-ports measurements and "Cable_Type" = 0 for passive cable.

Find us at www.keysight.com

Page 25

10. Launch the USB.org compliance test tool (Ger_iPar.exe) load the excel spreadsheet "USB4_Gen3_CableCom_Config_Example1.xlsx" to execute the COM tool to check compliance for COM pass/fail judgment. The result is show in "*COM_report.xlsx" for COM and "*cable_iPar_report.xlsx" for Channel metrics result in the results folder.

5.7 Differential-to-Common-Mode Conversion

The main purpose of this requirement is to limit the cable assembly EMI emission.

1. Connect the VNA ports (port 1 to 4) to the test fixture ports with RF cables.

VNA Port#

Port 1

Port 2

Port 3

Port 4

Test Fixtures

L Side Tx1+

R Side Rx1+

L Side Tx1-

R Side Rx1-

2. Select Trace 10 (Scd21). 3. Press Trigger > Single. Press Double-click on the instrument front panel to enlarge the trace. 4. Confirm the measured differential to common mode conversion is less than or equal to -20 dB across

the frequency range from 100 MHz to 10 GHz. Note: The conversion does not require embedding the reference host and the reference device with

the mated cable assembly; it is for the mated cable assembly only.

DUT Type
Type-C to Type-C passive cable assembly (USB4 Gen3)
Type-C to Type-C passive cable assembly (USB3.2 Gen 2 and USB4 Gen 2) Type-C to legacy cable assembly

Start Frequency End Frequency Start Limit

100 MHz

10 GHz

-17.00 dB

100 MHz 100 MHz

10 GHz 10 GHz

-20.00 dB -20.00 dB

End Limit -17.00 dB
-20.00 dB -20.00 dB

Find us at www.keysight.com

Page 26

Type-C to legacy adapter assembly

100 MHz

7.5 GHz

-15.00 dB -15.00 dB

5. Repeat the same operation of step 3 to step 4 for all the combinations below to confirm the measured

differential-to-common-mode conversion is within the specification.

VNA Port# Test Fixtures

Port 1 L Side Rx1+ L Side Tx2+ L Side Rx2+

Port 2 R Side Tx1+ R Side Rx2+ R Side Tx2+

Port 3 L Side Rx1L Side Tx2L Side Rx2-

Port 4 R Side Tx1R Side Rx2R Side Tx2-

5.8 Cable Shielding Effectiveness

Shielding Effectiveness is checked with a standard compliance tool (IntePar.exe) provided by USB IF after the measurements have made using a shielding effectiveness test fixture. Download the tool from USB-IF link: http://compliance.usb.org/files/IntePar_1p6.zip (Released 3-Jan-2021).

4 port Touchstone files (*.s4p) is measured and saved by the VNA firmware, and then imported by the compliance tool to conduct cable assembly compliance tests. The manual measurement procedure using the ENA Option TDR is also supported with the limit lines.

Note: The Port Z conversion is turned off, so the measurements are performed based on 50-ohm port impedance setting required by the standard tool.

1. Connect the VNA ports (port 1 to 3) to the test fixture ports with RF cables.

VNA Port# Test Fixtures

Port 1 (SE) SE

Port 2 (Bal+) Tx1+

Port 3 (Bal-) Tx1-

2. Press Meas > Balanced > Topology > SE-BAL 3. In the setup table, select Balanced Port > 1 SE = Port 1 (VNA+) 4. In the setup table, select Balanced port > 2 BAL = Port 2 (VNA+) & Port 3 (VNA-) as shown below.

5. Select Cal > Fixtures > Fixture Setup > Port Z... uncheck "Enable Port Z Conversion (all ports)" to turn OFF Port Z conversion.

Find us at www.keysight.com

Page 27

6. Click Adv Waveform tab > De-embedding and turn off De Embedding.

7. Press Trace Next to select Trace 13 (Sds21) 8. Press Trigger > Single. 9. Press Trace Next to select Trace 14 (Scs21) 10. Press Meas > Balanced > Other > Scs21 11. Press Trigger > Single 12. Confirm the measured Sds21/Scs21 is within the limits shown below.

Differential Model (Sds21)

DUT Type Type-C to Type-C passive cable assembly
Type-C to legacy cable assembly
Type-C to legacy adapter assembly

Start Frequency
10.0 MHz 1.6 GHz 5.0 GHz 10.0 MHz 1.6 GHz 5.0 GHz 10.0 MHz 1.6 GHz 5.0 GHz

End Frequency
1.6 GHz 4.0 GHz 6.0 GHz 1.6 GHz 4.0 GHz 6.0 GHz 1.6 GHz 4.0 GHz 6.0 GHz

Start Limit
-55.0 dB -50.0 dB -50.0 dB -49.0 dB -44.0 dB -44.0 dB -44.0 dB -39.0 dB -39.0 dB

End Limit
-55.0 dB -50.0 dB -50.0 dB -49.0 dB -44.0 dB -44.0 dB -44.0 dB -39.0 dB -39.0 dB

Common Model (Scs21)
DUT Type Type-C to Type-C passive cable assembly
Type-C to legacy cable assembly
Find us at www.keysight.com

Start Frequency 10.0 MHz 1.6 GHz 5.0 GHz 10.0 MHz 1.6 GHz 5.0 GHz

End Frequency 1.6 GHz 4.0 GHz 6.0 GHz 1.6 GHz 4.0 GHz 6.0 GHz

Start Limit -40.0 dB -35.0 dB -35.0 dB -34.0 dB -29.0 dB -29.0 dB

End Limit -40.0 dB -35.0 dB -35.0 dB -34.0 dB -29.0 dB -29.0 dB

Page 28

Type-C to legacy adapter assembly

10.0 MHz 1.6 GHz

1.6 GHz 4.0 GHz

-24.0 dB -24.0 dB

-24.0 dB -24.0 dB

5.0 GHz

6.0 GHz

-24.0 dB

-24.0 dB

13. Press Save Recall > Save Other > Save Data...> Filename.s4p to save the measured Touchstone file (*.s4p). Select format "Real/Imaginary" and "Normal" mode > then OK.
14. Repeat the same operation of step 10 to step 11 for all the following combinations to confirm the measured Sds21/Scs21 is within the specification.

VNA Port# Test Fixtures

Port 1 (SE) SE SE SE

Port 2 (Bal+) Rx1+ Tx2+ Rx2+

Port 3 (Bal-) Rx1Tx2Rx2-

15. Launch compliance tool and select "8. Shielding Effectiveness (Type-C to Type-C)" for "Select Cable Type", check "4-Port VNA". Load 4 port Touchstone file (*.s4p) by clicking "1>>", click "Import" to import 4-port Touchstone file (*.s4p), then click "Check Compliance" for pass/fail judgment.

16. Press Meas > Balanced> Topology > BAL-BAL to reset the setting. 17. In the setup table, select Balanced Port > 1 BAL = Port 1 (VNA+) & Port 3 (VNA-) 18. In the setup table, select Balanced port > 2 BAL = Port 2 (VNA+) & Port 4 (VNA-) as shown below 19. Press Analysis > Fixture Simulator > De Embedding to turn on De Embedding.

Find us at www.keysight.com

Page 29

20. After completed the measurement, Press Cal > Fixtures > Fixture Setup > Port Z... check "Enable Port Z Conversion (all ports)" to turn ON Port Z conversion as default setting.
Informative Measurements
Informative electrical performance targets are provided for raw cables, mated connectors and mated cable assemblies. These targets are not part of the USB Type-C compliance requirements but provided for the purpose of design guidelines and manufacturing control. For [Raw Cable] and [Mated Connector] measurements, apply the appropriate calibration depending on the test fixture and also set the appropriate port-Z conversion by pressing Channel Next to select Channel 2 frequency domain measurements , then Cal > Fixtures > Fixture Setup > Port Z... Set Port Z Conversion (45-ohm for all Port1 /2/3/4 Z0 Real for [Raw Cable] and 42.5-ohm for all Port1/2/3/4 Z0 Real for [Mated Connector].

5.9 [Raw Cable] Differential Impedance (Informative)

1. Connect the VNA ports (port 1 to 4) to the test fixture ports with RF cables.

VNA Port# Test Fixtures

Port 1 A Side Tx1+

Port 2 B Side Tx1+

Port 3 A Side Tx1-

Port 4 B Side Tx1-

2. Press Channel Next to select Channel 1 3. Select Trace 2 (Tdd11). 4. Double-click the Trace to maximize the selected trace on the screen. 5. Click Stop Single. 6. Confirm the measured impedance is within the limit shown below. Otherwise, it will show Fail. 7. Select Trace 6 (Tdd22) and repeat Step 4-5 for far-end of the DUT.

DUT Type

Max Limit

Min Limit

Shielded Differential Pair (SDP)

95

85

Single-ended coaxial SS+ signal wires 48

42

Note: The impedance should be evaluated using a 200ps (10%-90%) rise time.

8. Connect the VNA ports (port 1 to 4) to the test fixture ports with RF cables.

VNA Port# Test Fixtures

Port 1 A Side Rx1+

Port 2 B Side Rx1+

Port 3 A Side Rx1-

Port 4 B Side Rx1-

Find us at www.keysight.com

Page 30

9. Repeat the same operation of step 3 to step 7 to confirm the measured impedance for Rx pair is within the specification.

5.10 [Raw Cable] Intra-Pair Skew (Informative)

1. Connect the VNA ports (port 1 to 4) to the test fixture ports with RF cables.

VNA Port# Test Fixtures

Port 1 A Side Tx1+

Port 2 B Side Tx1+

Port 3 A Side Tx1-

Port 4 B Side Tx1-

2. Press Double-click on the instrument front panel to enlarge the trace. 3. Select Trace 3 (T31). 4. Click Stop Single. 5. Read the Delta Time and confirm the measured value is within the limit shown below. Otherwise, Fail.

Test Limit

If Delta Time < 10 psec: Pass, else: Fail

Note: The measurement should be evaluated using a 200ps (10%-90%) rise time.

6. Connect the VNA ports (port 1 to 4) to the test fixture ports with RF cables.

VNA Port# Test Fixtures

Port 1 A Side Rx1+

Port 2 B Side Rx1+

Port 3 A Side Rx1-

Port 4 B Side Rx1-

7. Repeat the same operation of step 3 to step 5 to confirm the measured skew for Rx pair is within the specification.

5.11 [Raw Cable] Differential Insertion Loss (Informative)

1. Connect the VNA ports (port 1 to 4) to the test fixture ports with RF cables.

VNA Port# RF Connection

Port 1 A Side Tx1+

Port 2 B Side Tx1+

Port 3 A Side Tx1-

Port 4 B Side Tx1-

2. Press Channel Next to select Channel 2. 3. Select Trace 9 (Sdd21). 4. Press Trigger > Single 5. Run and confirm the measured value is within the limit shown below. Otherwise, it will show Fail.
Change and set the limit according to DUT type. (Refer Manual setup section on Defining limit line).

DUT Type
Twisted Pair Construction (34AWG)

Start Frequency 625 MHz 1.25 GHz 2.50 GHz

End Frequency 1.25 GHz 2.50 GHz 5.00 GHz

Start Limit -1.8 dB -2.5 dB -3.7 dB

End Limit -2.5 dB -3.7 dB -5.5 dB

5.00 GHz

7.50 GHz

-5.5 dB

-7.0 dB

7.50 GHz

10.00 GHz -7.0 dB

-8.4 dB

10.00 GHz

12.50 GHz -8.4 dB

-9.5 dB

Coaxial Construction (34 AWG)

12.50 GHz 625 MHz

15.00 GHz 1.25 GHz

-9.5 dB -1.8 dB

-11.0 dB -2.8 dB

Find us at www.keysight.com

Page 31

1.25 GHz

2.50 GHz

-2.8 dB

-4.2 dB

2.50 GHz

5.00 GHz

-4.2 dB

-6.1 dB

5.00 GHz

7.50 GHz

-6.1 dB

-7.6 dB

7.50 GHz

10.00 GHz -7.6 dB

-8.8 dB

10.00 GHz

12.50 GHz -8.8 dB

-9.9 dB

12.50 GHz

15.00 GHz -9.9 dB

-12.1 dB

Note: The limit is based on 34 AWG conductor size. Change and set the test limit based on DUT type limit below (34AWG/32AWG/30AWG/28AWG) as stated in USB Type-C CTS.

6. Connect the VNA ports (port 1 to 4) to the test fixture ports with RF cables.

VNA Port# RF Connection

Port 1 A Side Rx1+

Port 2 B Side Rx1+

Port 3 A Side Rx1-

Port 4 B Side Rx1-

7. Repeat the same operation of step 3 to step 5 to confirm the measured insertion loss is within the specification.

Find us at www.keysight.com

Page 32

5.12 [Mated Connector] Differential Impedance (Informative)

1. Connect the VNA ports (port 1 to 4) to the test fixture ports with RF cables.

VNA Port# Test Fixtures

Port 1 TF1 Tx1+

Port 2 TF2 Tx1+

Port 3 TF1 Tx1-

Port 4 TF2 Tx1-

2. Press Channel Next to select Channel 1 3. Select Trace 15 (Tdd11). Change and set the limit according to table below (Refer Manual setup
section on Defining limit line). 4. Double-click the Trace to maximize the selected trace on the screen. 5. Click Stop Single. 6. Confirm the measured impedance is within the limit shown below. Otherwise, it will show Fail. 7. Select Trace 16 (Tdd22). Repeat Step 4-5 for far-end of the DUT.

DUT Type Mated connector � USB 3.2 Gen2 and USB4 Gen2

Max Limit 94

Min Limit 76

Note: The impedance should be evaluated using a 40ps (20%-80%) rise time.

8. Repeat the same operation of step 3 to step 7 to confirm the measured impedance for following combinations are within the specification.

VNA Port# Test Fixtures

Port 1 TF1 Rx1+ TF1 Tx2+ TF1 Rx2+

Port 2 TF2 Rx1+ TF2 Tx2+ TF2 Rx2+

Port 3 TF1 Rx1TF1 Tx2TF1 Rx2-

Port 4 TF2 Rx1TF2 Tx2TF2 Rx2-

5.13 [Mated Connector] Channel Metrics (ILfitatNq, IMR, IXT, IRL, Differential-to-Common-Mode Conversion) - Normative for USB4 Gen3 only
Channel metrics or Signal Integrity Characteristic - ILfitatNq, IMR, IXT, IRL, Differential-to-Common-Mode Conversion is checked with a standard compliance tool (Ger_iPar.exe) provided by USB IF after the measurements have made. The same tool is use for USB4 Gen3 COM test. Download the tool from USBIF link: https://compliance.usb.org/files/Ger_iPar_v0p91a_release.zip (Released 7-Dec-2020).
4-port Touchstone files (*.s4p) is measured and saved by the VNA firmware, and then imported by the compliance tool to conduct cable assembly compliance tests. It required full S-parameters for High-speed TX/RX pairs (28-sets) + D+/D- Pairs (16-sets) to run the compliance tool.
Note: The Port Z conversion is turned off, so the measurements are performed based on 50-ohm port impedance setting required by the standard tool. Select Cal > Fixtures > Fixture Setup > Port Z... uncheck "Enable Port Z Conversion (all ports)" to turn OFF Port Z conversion.
1. Connect the VNA ports (port 1 to 4) to the test fixture ports with RF cables. 2. Select Cal > Fixtures > Fixture Setup > Port Z... uncheck "Enable Port Z Conversion (all ports)" to
turn OFF Port Z conversion.

Find us at www.keysight.com

Page 33

3. Press Channel Next to select Channel 2. 4. The same connection can use for below measurement for Pass/Fail testing. Select the desired trace
as described to check the limit line and the pass/fail judgment. Press Double-click on the instrument front panel to enlarge the trace.

� 5.14: [Mated Connector] Differential Insertion Loss (Trace 12) � 5.15: [Mated Connector] Differential Return Loss (Trace 17) � 5.16: [Mated Connector] Differential NEXT and FEXT between SS Signal Pair (Trace 18) � 5.17: [Mated Connector] Differential NEXT and FEXT between D+/D- Pair and SS Signal Pairs
(Trace 19) � 5.18: [Mated Connector] Differential to Common Mode Conversion (Trace 20) 5. Press Trigger > Single. 6. Press Save Recall > Save Other > Save Data...> Filename.s4p to save the measured Touchstone file (*.s4p). Select format "Real/Imaginary" and "Normal" mode > then OK. 7. Connect the VNA ports with test fixture ports shown below and repeat step 3 to step 6 to save all necessary Touchstone files (*.s4p) for VNA.

High-Speed TX/RX (SS Signal) Pair

Test Path Name Tx1(L), Tx1(R) [1,2,3,4]
Tx1(L), Rx1(R) [1,6,3,8] Tx1(L), Tx2(R) [1,10,3,12]

Trace
Tr-12/ 17/20 Tr-18
Tr-18

Tx1(L), Rx2(R) [1,14,3,16]

Tr-18

Tx1(L), Rx1(L) [1,5,3,7]

Tr-18

Tx1(L), Tx2(L) [1,9,3,11]

Tr-18

Tx1(L), Rx2(L) [1,13,3,15]

Tr-18

Tx1(R), Rx1(L) [2,5,4,7]

Tr-18

Tx1(R), Tx2(L) [2,9,4,11]

Tr-18

Tx1(R), Rx2(L) [2,13,4,15]

Tr-18

Tx1(R), Rx1(R) [2,6,4,8]

Tr-18

Tx1(R), Tx2(R) [2,10,4,12]

Tr-18

Tx1(R), Rx2(R) [2,14,4,16]

Tr-18

Rx1(L), Rx1(R) [5,6,7,8] Rx1(L), Tx2(R) [5,10,7,12]

Tr-12/ 17/20 Tr-18

Port 1 TF1 Tx1+
TF1 Tx1+ TF1 Tx1+ TF1 Tx1+ TF1 Tx1+ TF1 Tx1+ TF1 Tx1+ TF2 Tx1+ TF2 Tx1+ TF2 Tx1+ TF2 Tx1+ TF2 Tx1+ TF2 Tx1+ TF1 Rx1+
TF1 Rx1+

Port 2 TF2 Tx1+
TF2 Rx1+ TF2 Tx2+ TF2 Rx2+ TF1 Rx1+ TF1 Tx2+ TF1 Rx2+ TF1 Tx1+ TF1 Rx2+ TF1 Tx2+ TF2 Rx1+ TF2 Tx2+ TF2 Rx2+ TF2 Rx1+
TF2 Tx2+

Port 3 TF1 Tx1-
TF1 Tx1TF1 Tx1TF1 Tx1TF1 Tx1TF1 Tx1TF1Tx1TF2 Tx1TF2 Tx1TF2 Tx1TF2 Tx1TF2 Tx1TF2 Tx1TF1 Rx1-
TF1 Rx1-

Port 4 TF2 Tx1-
TF2 Rx1TF2 Tx2TF2 Rx2TF1 Rx1TF1 Tx2TF1Rx2TF1Tx1TF1 Rx2TF1 Tx2TF2 Rx1TF2 Tx2TF2 Rx2TF2 Rx1-
TF2 Tx2-

Find us at www.keysight.com

Page 34

Rx1(L), Rx2(R) [5,14,7,16] Rx1(L), Tx2(L) [5,9,7,11] Rx1(L), Rx2(L) [5,13,7,15] Rx1(R), Tx2(L) [6,9,8,11] Rx1(R), Rx2(L) [6,13,8,15] Rx1(R), Tx2(R) [6,10,8,12] Rx1(R), Rx2(R) [6,14,8,16] Tx2(L), Tx2(R) [9,10,11,12]
Tx2(L), Rx2(R) [9,14,11,16] Tx2(L), Rx2(L) [9,13,11,15] Tx2(R), Rx2(L) [10,13,12,15] Tx2(R), Rx2(R) [10,14,12,16] Rx2(L), Rx2(R) [13,14,15,16]

Tr-18 Tr-18 Tr-18 Tr-18
Tr-18 Tr-18 Tr-18 Tr-12/ 17/20 Tr-18 Tr-18 Tr-18 Tr-18 Tr-12/ 17/20

TF1 Rx1+ TF1 Rx1+ TF1 Rx1+ TF2 Rx1+ TF2 Rx1+ TF2 Rx1+ TF2 Rx1+ TF1 Tx2+
TF1 Tx2+ TF1 Tx2+ TF2 Tx2+ TF2 Tx2+ TF1 Rx2+

TF2 Rx2+ TF1 Tx2+ TF1Rx2+ TF1 Tx2+ TF1 Rx2+ TF2 Tx2+ TF2 Rx2+ TF2 Tx2+
TF2 Rx2+ TF1 Rx2+ TF1 Rx2+ TF2 Rx2+ TF2 Rx2+

TF1 Rx1TF1 Rx1TF1 Rx1TF2 Rx1TF2 Rx1TF2 Rx1TF2 Rx1TF1 Tx2-
TF1 Tx2TF1 Tx2TF2 Tx2TF2 Tx2TF1 Rx2-

TF2 Rx2TF1 Tx2TF1 Rx2TF1 Tx2TF1 Rx2TF2 Tx2TF2 Rx2TF2 Tx2-
TF2 Rx2TF1 Rx2TF1 Rx2TF2 Rx2TF2 Rx2-

D+/D- Pair and SS Signal Pairs Test Path Name
D+/D-(L), Tx1(L) [17,1,19,3] D+/D-(L), Tx1(R) [17 2 19 4] D+/D-(L), Rx1(L) [17 5 19 7] D+/D-(L), Rx1(R) [17 6 19 8] D+/D-(L), Tx2(L) 17 9 19 11] D+/D-(L), Tx2(R) [17 10 19 12] D+/D-(L), Rx2(L) [17 13 19 15] D+/D-(L), Rx2(R) [17 14 19 16] D+/D-(R), Tx1(L) [18 1 20 3] D+/D-(R), Tx1(R) [18 2 20 4] D+/D-(R), Rx1(L) [18 5 20 7] D+/D-(R), Rx1(R) [18 6 20 8] D+/D-(R), Tx2(L) [18 9 20 11] D+/D-(R), Tx2(R) [18 10 20 12] D+/D-(R), Rx2(L) [18 13 20 15] D+/D-(R), Rx2(R) [18 14 20 16]

Trace Tr-19 Tr-19 Tr-19 Tr-19 Tr-19 Tr-19 Tr-19 Tr-19 Tr-19 Tr-19 Tr-19 Tr-19 Tr-19 Tr-19 Tr-19 Tr-19

Port 1 TF1 D+ TF1 D+ TF1 D+ TF1 D+ TF1 D+ TF1 D+ TF1 D+ TF1 D+ TF2 D+ TF2 D+ TF2 D+ TF2 D+ TF2 D+ TF2 D+ TF2 D+ TF2 D+

Port 2 TF1 Tx1+ TF2 Tx1+ TF1 Rx1+ TF2 Rx1+ TF1 Tx2+ TF2 Tx2+ TF1 Rx2+ TF2 Rx2+ TF1 Rx1+ TF2 Tx1+ TF1 Tx1+ TF1 Rx1+ TF1 Rx2+ TF2 Tx2+ TF1 Tx2+ TF2 Rx2+

Port 3 TF1 DTF1 DTF1 DTF1 DTF1 DTF1 DTF1 DTF1 DTF2 DTF2 DTF2 DTF2 DTF2 DTF2 DTF2 DTF2 D-

Port 4 TF1 Tx1TF2 Tx1TF1 Rx1TF2 Rx1TF1 Tx2TF2 Tx2TF1 Rx2TF2 Rx2TF1 Rx1TF2 Tx1TF1 Tx1TF1 Rx1TF1 Rx2TF2 Tx2TF1 Tx2TF2 Rx2-

8. After completed the measurement, Press Cal > Fixtures > Fixture Setup > Port Z... check "Enable Port Z Conversion (all ports)" to turn ON Port Z conversion as default setting.
9. Open the Excel spreadsheet "s4p_example_0p91a.xlsx" and update "file location path" (sp_file_1 until sp_file_28) with 28-sets 4-port Touchstone files (*.s4p) you measured.
10. Modify the excel spreadsheet "USB4_Gen3_CableCom_Config_Example1.xlsx". Use "Comp_check_type" = 4 for connector, "Cable_Type" = 0 for passive cable and "case_number" = [1] for 4-ports measurements.

Find us at www.keysight.com

Page 35

11. Launch the USB.org compliance test tool (Ger_iPar.exe), load the excel spreadsheet "USB4_Gen3_CableCom_Config_Example1.xlsx" to execute the compliance tool to check compliance for pass/fail judgment. The result is show in "*cable_iPar_report.xlsx" for Channel metrics result in the results folder.

5.14 [Mated Connector] Differential Insertion Loss (Informative)

1. Connect the VNA ports (port 1 to 4) to the test fixture ports with RF cables.

VNA Port# Test Fixtures

Port 1 TF1 Tx1+

Port 2 TF2 Tx1+

Port 3 TF1 Tx1-

Find us at www.keysight.com

Port 4 TF2 Tx1-

Page 36

6 Press Channel Next to select Channel 2. 7 Select Trace 12 (Sdd21). 8 Press Trigger > Single 9 Run and confirm the measured value is within the limit shown below. Otherwise, it will show Fail.

Start Frequency 100 MHz

End Frequency 2.50 GHz

Start Limit -0.6 dB

End Limit -0.6 dB

2.50 GHz 5.00 GHz 10.00 GHz

5.00 GHz 10.00 GHz 12.50 GHz

-0.6 dB -0.8 dB -1.0 dB

-0.8 dB -1.0 dB -1.25 dB

12.50 GHz

15.00 GHz

-1.25 dB

-1.50 dB

10 Connect the VNA ports (port 1 to 4) to the test fixture ports with RF cables. Repeat the same operation of step 3 to step 5 to confirm the measured values are within the specification.

VNA Port# Test Fixtures

Port 1 TF1 Rx1+ TF1 Tx2+ TF1 Rx2+

Port 2 TF2 Rx1+ TF2 Tx2+ TF2 Rx2+

Port 3 TF1 Rx1TF1 Tx2TF1 Rx2-

Port 4 TF2 Rx1TF2 Tx2TF2 Rx2-

5.15 [Mated Connector] Differential Return Loss (Informative)

1. Connect the VNA ports (port 1 to 4) to the test fixture ports with RF cables.

VNA Port# Test Fixtures

Port 1 TF1 Tx1+

Port 2 TF2 Tx1+

Port 3 TF1 Tx1-

Port 4 TF2 Tx1-

2. Press Channel Next to select Channel 2. 3. Select Trace 17 (Sdd11). 4. Press Trigger > Single 5. Run and confirm the measured value is within the limit shown below. Otherwise, it will show Fail.

Start Frequency 100 MHz

End Frequency 5 GHz

Start Limit -20 dB

End Limit -20 dB

5 GHz

10 GHz

-20 dB

-13 dB

10 GHz

15 GHz

-13 dB

-6 dB

6. Connect the VNA ports (port 1 to 4) to the test fixture ports with RF cables. Repeat the same operation of step 3 to step 5 to confirm the measured values are within the specification.

VNA Port# Test Fixtures

Port 1 TF1 Rx1+ TF1 Tx2+ TF1 Rx2+

Port 2 TF2 Rx1+ TF2 Tx2+ TF2 Rx2+

Port 3 TF1 Rx1TF1 Tx2TF1 Rx2-

Port 4 TF2 Rx1TF2 Tx2TF2 Rx2-

5.16 [Mated Connector] Differential NEXT & FEXT between SS Signal Pairs (Informative)

1. Connect the VNA ports (port 1 to 4) to the test fixture ports with RF cables.

VNA Port#

Port 1

Test Fixtures

TF1 Tx1+

2. Press Channel Next to select Channel 2.

Port 2 TF1 Rx1+

Port 3 TF1 Tx1-

Port 4 TF1 Rx1-

Find us at www.keysight.com

Page 37

3. Select Trace 18 (Sdd21). 4. Press Trigger > Single 5. Run and confirm the measured differential crosstalk is within limit below. Otherwise, it will show Fail.

Start Frequency 100 MHz 5 GHz 10 GHz

End Frequency 5 GHz 10 GHz 15 GHz

Start Limit -40 dB -40 dB -36 dB

End Limit -40 dB -36 dB -30 dB

6. Connect the VNA ports (port 1 to 4) to the test fixture ports with RF cables. Repeat the same operation of step 3 to step 5 to confirm the measured value is within the specification.

VNA Port# Test Fixtures

Port 1 TF1 Tx1+ TF1 Tx1+ TF1 Tx1+ TF1 Tx1+ TF1 Tx1+ TF2 Tx1+ TF2 Tx1+ TF2 Tx1+ TF2 Tx1+ TF2 Tx1+ TF2 Tx1+ TF1 Rx1+ TF1 Rx1+ TF1 Rx1+ TF1 Rx1+ TF2 Rx1+ TF2 Rx1+ TF2 Rx1+ TF2 Rx1+ TF1 Tx2+ TF1 Tx2+ TF2 Tx2+ TF2 Tx2+

Port 2 TF2 Tx2+ TF2 Rx2+ TF1 Rx1+ TF1 Tx2+ TF1 Rx2+ TF1 Tx1+ TF1 Rx2+ TF1 Tx2+ TF2 Rx1+ TF2 Tx2+ TF2 Rx2+ TF2 Tx2+ TF2 Rx2+ TF1 Tx2+ TF1Rx2+ TF1 Tx2+ TF1 Rx2+ TF2 Tx2+ TF2 Rx2+ TF2 Rx2+ TF1 Rx2+ TF1 Rx2+ TF2 Rx2+

Port 3 TF1 Tx1TF1 Tx1TF1 Tx1TF1 Tx1TF1Tx1TF2 Tx1TF2 Tx1TF2 Tx1TF2 Tx1TF2 Tx1TF2 Tx1TF1 Rx1TF1 Rx1TF1 Rx1TF1 Rx1TF2 Rx1TF2 Rx1TF2 Rx1TF2 Rx1TF1 Tx2TF1 Tx2TF2 Tx2TF2 Tx2-

Port 4 TF2 Tx2TF2 Rx2TF1 Rx1TF1 Tx2TF1Rx2TF1Tx1TF1 Rx2TF1 Tx2TF2 Rx1TF2 Tx2TF2 Rx2TF2 Tx2TF2 Rx2TF1 Tx2TF1 Rx2TF1 Tx2TF1 Rx2TF2 Tx2TF2 Rx2TF2 Rx2TF1 Rx2TF1 Rx2TF2 Rx2-

5.17 [Mated Connector] Differential NEXT and FEXT between D+/D- Pair and SS Signal Pairs (Normative for USB4 Gen3)

(Informative for USB4 Gen2 and USB3.2 Gen2)

1. Connect the VNA ports (port 1 to 4) to the test fixture ports with RF cables.

VNA Port# Test Fixture

Port 1 TF1 D+

Port 2 TF1 Tx1+

Port 3 TF1 D-

Port 4 TF1 Tx1-

2. Press Channel Next to select Channel 2. 3. Select Trace 19 (Sdd21). 4. Press Trigger > Single 5. Run and confirm the measured differential crosstalk is less than or equal to -30dB up to 5GHz.
Otherwise, it will show Fail.

Find us at www.keysight.com

Page 38

DUT Type USB4 Gen 3

Start Frequency 100 MHz

End Frequency 5 GHz

Start Limit -50 dB

End Limit -50 dB

5 GHz

7.5 GHz

-50 dB

-50 dB

USB3.2 Gen 2 and USB4 Gen 2

100 MHz 5 GHz

5 GHz 7.5 GHz

-40 dB -40 dB

-40 dB -36 dB

6. Repeat the same operation of step 3 to step 5 for all the following combinations to confirm the

measured crosstalk is within the specification.

VNA Port# Test Fixtures

Port 1 TF1 D+ TF1 D+ TF1 D+ TF1 D+ TF1 D+ TF1 D+ TF1 D+ TF2 D+ TF2 D+ TF2 D+ TF2 D+ TF2 D+ TF2 D+ TF2 D+ TF2 D+

Port 2 TF2 Tx1+ TF1 Rx1+ TF2 Rx1+ TF1 Tx2+ TF2 Tx2+ TF1 Rx2+ TF2 Rx2+ TF1 Rx1+ TF2 Tx1+ TF1 Tx1+ TF1 Rx1+ TF1 Rx2+ TF2 Tx2+ TF1 Tx2+ TF2 Rx2+

Port 3 TF1 DTF1 DTF1 DTF1 DTF1 DTF1 DTF1 DTF2 DTF2 DTF2 DTF2 DTF2 DTF2 DTF2 DTF2 D-

Port 4 TF2 Tx1TF1 Rx1TF2 Rx1TF1 Tx2TF2 Tx2TF1 Rx2TF2 Rx2TF1 Rx1TF2 Tx1TF1 Tx1TF1 Rx1TF1 Rx2TF2 Tx2TF1 Tx2TF2 Rx2-

5.18 [Mated Connector] Differential to Common-Mode Conversion (Normative for USB4 Gen3)

(Informative for USB4 Gen2 and USB3.2 Gen2)

1. Connect the VNA ports (port 1 to 4) to the test fixture ports with RF cables.

VNA Port# Test Fixtures

Port 1 TF1 Tx1+

Port 2 TF2 Tx1+

Port 3 TF1 Tx1-

Port 4 TF2 Tx1-

7. Press Channel Next to select Channel 2. 8. Select Trace 20 (Scd21). 9. Press Trigger > Single. 10. Run and confirm the measured value is within the limit shown below. Otherwise, it will show Fail.

DUT Type USB4 Gen 3
USB3.2 Gen 2 and USB4 Gen 2

Start Frequency 100 MHz 100 MHz 2.5 GHz 7.5 GHz

End Frequency 10 GHz 2.5 GHz 7.5 GHz 10 GHz

Start Limit -20 dB -30 dB -25 dB -20 dB

End Limit -20 dB -30 dB -25 dB -20 dB

11. Repeat the same operation of step 3 to step 5 to confirm the measured values are within the

specification.

Find us at www.keysight.com

Page 39

VNA Port# Test Fixtures

Port 1 TF1 Rx1+ TF1 Tx2+ TF1 Rx2+

Port 2 TF2 Rx1+ TF2 Tx2+ TF2 Rx2+

Port 3 TF1 Rx1TF1 Tx2TF1 Rx2-

Port 4 TF2 Rx1TF2 Tx2TF2 Rx2-

5.19 Differential Insertion Loss (Informative)

1. Connect the VNA ports (port 1 to 4) to the test fixture ports with RF cables.

VNA Port# Test Fixtures

Port 1 L Side Tx1+

Port 2 R Side Rx1+

Port 3 L Side Tx1-

Port 4 R Side Rx1-

2. Press Channel Next to select Channel 2. 3. Select Trace 21 (Sdd21). 4. Press Trigger > Single 5. Run and confirm the measured value is within the limit shown below. Otherwise, it will show Fail.
Note: The limit setting in state file is based on USB3.2 Gen 2 and USB4 Gen 2 Pairs. Change and set the test limit based on your DUT type in Table below. Refer Manual setup procedure on how to change the limit line. Go to Math> Analysis > Limit Table > to edit the limit table.

DUT Type USB4 Gen 3

Start Frequency 100 MHz

End Frequency 2.5 GHz

Start Limit -1.0 dB

End Limit -4.2 dB

2.5 GHz

5.0 GHz

-4.2 dB

-6.0 dB

5.0 GHz

10.0 GHz

-6.0 dB

-7.5 dB

10.0 GHz

12.0 GHz

-7.5 dB

-9.3 dB

USB3.2 Gen 2 and USB4 Gen 2

12.0 GHz 100 MHz 2.5 GHz

15.0 GHz 2.5 GHz 5.0 GHz

-9.3 dB -2.0 dB -4.0 dB

-11.0 dB -4.0 dB -6.0 dB

5.0 GHz

10.0 GHz

-6.0 dB

-11.0 dB

10.0 GHz

15.0 GHz

-11.0 dB

-20.0 dB

6. Connect the VNA ports (port 1 to 4) to the test fixture ports with RF cables. Repeat the same operation of step 3 to step 5 to confirm the measured values are within the specification.

VNA Port# Test Fixtures

Port 1 L Side Rx1+ L Side Tx2+ L Side Rx2+

Port 2 R Side Tx1+ R Side Rx2+ R Side Tx2+

Port 3 L Side Rx1L Side Tx2L Side Rx2-

Port 4 R Side Tx1R Side Rx2R Side Tx2-

5.20 Differential Return Loss (Informative)

1. Connect the VNA ports (port 1 to 4) to the test fixture ports with RF cables.

VNA Port# Test Fixtures

Port 1 L Side Tx1+

Port 2 R Side Rx1+

Port 3 L Side Tx1-

Port 4 R Side Rx1-

2. Press Channel Next to select Channel 2. 3. Select Trace 22 (Sdd11). 4. Press Trigger > Single 5. Run and confirm the measured value is within the limit shown below. Otherwise, it will show Fail.

Find us at www.keysight.com

Page 40

DUT Type
All Type (USB4 Gen 3, USB4 Gen 2 and USB3.2 Gen 2)

Start Frequency 100 MHz 5.0 GHz 7.5 GHz 10.0 GHz

End Frequency 5.0 GHz 7.5 GHz 10.0 GHz 15.0 GHz

Start Limit -18.0 dB -18.0 dB -10.0 dB -8.0 dB

End Limit -18.0 dB -10.0 dB -8.0 dB -5.0 dB

6. Connect the VNA ports (port 1 to 4) to the test fixture ports with RF cables. Repeat the same operation of step 3 to step 5 to confirm the measured values are within the specification.

VNA Port# Test Fixtures

Port 1 L Side Rx1+ L Side Tx2+ L Side Rx2+

Port 2 R Side Tx1+ R Side Rx2+ R Side Tx2+

Port 3 L Side Rx1L Side Tx2L Side Rx2-

Port 4 R Side Tx1R Side Rx2R Side Tx2-

5.21 Differential NEXT & FEXT between SS Signal Pairs (Informative)

1. Connect the VNA ports (port 1 to 4) to the test fixture ports with RF cables.

VNA Port# Test Fixtures

Port 1 L Side Tx1+

Port 2 R Side Tx1+

Port 3 L Side Tx1-

Port 4 R Side Tx1-

2. Press Channel Next to select Channel 2. 3. Select Trace 23 (Sdd21). 4. Press Trigger > Single

5. Run and confirm the measured differential crosstalk is within limit below. Otherwise, it will show Fail.

DUT Type
All Type (USB4 Gen 3, USB4 Gen 2 and USB3.2 Gen 2)

Start Frequency 100 MHz 5 GHz 10 GHz

End Frequency 5 GHz 10 GHz 15 GHz

Start Limit -40 dB -40 dB -35 dB

End Limit -40 dB -35 dB -32 dB

6. Connect the VNA ports (port 1 to 4) to the test fixture ports with RF cables. Repeat the same operation of step 3 to step 5 to confirm the measured value is within the specification.

VNA Port# Test Fixtures

Port 1
L Side Tx1+ L Side Tx1+ L Side Tx1+ L Side Tx1+ L Side Tx1+ R Side Tx1+ R Side Tx1+ R Side Tx1+ R Side Tx1+ R Side Tx1+ R Side Tx1+ L Side Rx1+ L Side Rx1+ L Side Rx1+

Port 2
R Side Rx2+ R Side Tx2+ L Side Rx1+ L Side Tx2+ L Side Rx2+ L Side Tx1+ L Side Rx2+ L Side Tx2+ R Side Rx1+ R Side Tx2+ R Side Rx2+ R Side Rx2+ R Side Tx2+ L Side Tx2+

Port 3
L Side Tx1L Side Tx1L Side Tx1L Side Tx1L Side Tx1R Side Tx1R Side Tx1R Side Tx1R Side Tx1R Side Tx1R Side Tx1L Side Rx1L Side Rx1L Side Rx1-

Port 4
R Side Rx2R Side Tx2L Side Rx1L Side Tx2L Side Rx2L Side Tx1L Side Rx2L Side Tx2R Side Rx1R Side Tx2R Side Rx2R Side Rx2R Side Tx2L Side Tx2-

Find us at www.keysight.com

Page 41

L Side Rx1+ R Side Rx1+ R Side Rx1+ R Side Rx1+ R Side Rx1+ L Side Tx2+ L Side Tx2+ R Side Tx2+ R Side Tx2+

L Side Rx2+ L Side Rx2+ L Side Tx2+ R Side Tx2+ R Side Rx2+ R Side Tx2+ L Side Rx2+ L Side Tx2+ R Side Rx2+

L Side Rx1R Side Rx1R Side Rx1R Side Rx1R Side Rx1L Side Tx2L Side Tx2R Side Tx2R Side Tx2-

L Side Rx2L Side Rx2L Side Tx2R Side Tx2R Side Rx2R Side Tx2L Side Rx2L Side Tx2R Side Rx2-

5.22 Differential NEXT and FEXT between D+/D- Pair and SS Signal Pairs (Informative)

1. Connect the VNA ports (port 1 to 4) to the test fixture ports with RF cables.

VNA Port# Test Fixture

Port 1 L Side D+

Port 2 L Side Tx1+

Port 3 L Side D-

Port 4 L Side Tx1-

2. Press Channel Next to select Channel 2. 3. Select Trace 24 (Sdd21). 4. Press Trigger > Single 5. Run and confirm the measured differential crosstalk is within limit below. Otherwise, it will show Fail.

DUT Type
All Type (USB4 Gen 3, USB4 Gen 2 and USB3.2 Gen 2)

Start Frequency 100 MHz 5 GHz

End Frequency 5 GHz 7.5 GHz

Start Limit -35 dB -35 dB

End Limit -35 dB -30 dB

6. Repeat the same operation of step 3 to step 5 for all the following combinations to confirm the measured crosstalk is within the specification.

VNA Port# Test Fixtures

Port 1 L Side D+ L Side D+ L Side D+ L Side D+ L Side D+ L Side D+ L Side D+ R Side D+ R Side D+ R Side D+ R Side D+ R Side D+ R Side D+ R Side D+ R Side D+

Port 2 R Side Tx1+ L Side Rx1+ R Side Rx1+ L Side Tx2+ R Side Tx2+ L Side Rx2+ R Side Rx2+ L Side Rx1+ R Side Tx1+ L Side Tx1+ L Side Rx1+ L Side Rx2+ R Side Tx2+ L Side Tx2+ R Side Rx2+

Port 3 L Side DL Side DL Side DL Side DL Side DL Side DL Side DR Side DR Side DR Side DR Side DR Side DR Side DR Side DR Side D-

Port 4 R Side Tx1L Side Rx1R Side Rx1L Side Tx2R Side Tx2L Side Rx2R Side Rx2L Side Rx1R Side Tx1L Side Tx1L Side Rx1L Side Rx2R Side Tx2L Side Tx2R Side Rx2-

Find us at www.keysight.com

Page 42

Low Speed Signal Measurement

The connections for Type-C to Type-C cable assembly (low speed signal) is assumed as follows (Note: TF stands for Test Fixture). For frequency domain measurements, the standard compliance tool is used for the pass/fail judgment. The manual measurement procedures for several test items using the ENA Option TDR are also supported with the limit lines. Use "Low-Speed" sheet in the state file for Low-Speed signal measurement.

Type-C to Type-C Cable Assembly Connection (Low Speed Signal)

TF A Side Type-C (Receptacle)

Cable Assembly

Type-C (Plug)

Type-C (Plug)

TF B Side Type-C (Receptacle)

D+/D-


D+/D-

VBUS


VBUS

CC1


CC1

SBU1


SBU1

SBU2


SBU2

5.23 [Low Speed Signal] Characteristic Impedance on CC Wire and SBU

1. Select "Low-Speed" sheet in the state file tab. Connect the VNA ports (port 1 to 2) to the test fixture ports with RF cables.

VNA Port# Test Fixtures

Port 1 A Side CC1

Port 2 B Side CC1

Note: Unused fixture pots should be terminated with 50-ohm terminators.

2. Press Channel Max to maximize Channel 1 on the screen.

3. Select Trace 25 (T11).

4. Double-click the Trace to maximize the selected trace on the screen.

5. Click Stop Single.

6. Confirm the measured impedance is within the limit shown below. Otherwise, it will show Fail.

7. Select Trace 26 (T22) and repeat Step 5-6 for the far end of the DUT.

DUT Type Cable characteristic impedance on the CC wire Cable characteristic impedance on the SBU wires

Max Limit 93  53

Min Limit 32  32

Note: The measurement should be evaluated using a 400ps (20%-80%) rise time.

8. Select Trace 27 (T11) and Trace 28 (T22) and repeat the same operation of step 3 to step 7 for all the following SBU wire combinations.

VNA Port# Test Fixtures

Port 1 A Side SBU1 A Side SBU2

Port 2 B Side SBU2 B Side SBU1

Find us at www.keysight.com

Page 43

5.24 [Low Speed Signal] Crosstalk, VBUS Loop L/C, Coupling Factor
The test results of low speed signal measurement will check with a standard tool (InterPar.exe) provided by USB-IF. The USB Type-C compliance tool may be down-loaded from the following link: http://compliance.usb.org/files/IntePar_1p6.zip (Released 3-Jan-2021). Fifteen (15-sets) 4-port Touchstone files(*.s4p) will measure and save by the VNA firmware, and then imported by the compliance tool to conduct cable assembly compliance test. Note: Trace 29 is allocated for the measurements though. Note: Turn off the Port Z conversion in order to perform the measurements based on 50-ohm port impedance setting which required by the standard compliance tool.

1. Connect the VNA ports (port 1 to 4) to the test fixture ports with RF cables.

Test Path Name

Port 1

D+(L),D+(R),D-(L),D-(R) A Side D+

[1,2,3,4]

Port 2 B Side D+

Port 3 A Side D-

Port 4 B Side D-

2. Select Cal > Fixtures > Fixture Setup > Port Z... uncheck "Enable Port Z Conversion (all ports)" to

turn OFF Port Z conversion.

3. Press Meas > Balanced > Topology > Port Z > uncheck to disable all Port Z conversion. 4. Press Channel Next to select Channel 2. 5. Select Trace 29 (Sdd21). Press Double-click on the instrument front panel to enlarge the trace. 6. Press Trigger > Single.
Find us at www.keysight.com

Page 44

7. Press Save Recall > Save Other > Save Data...> Filename.s4p to save the measured Touchstone file (*.s4p). Select format "Real/Imaginary".
8. Connect the VNA ports with test fixture ports shown below and repeat step 3 to step 6 to save all necessary Touchstone files (*.s4p) for VNA.

Test Path Name
D+(L),D+(R),VBUS(L),VBUS(R) [1,2,5,6] D+(L),D+(R),CC(L),CC(R) [1,2,7,8]

Port 1
A Side D+ A Side D+

Port 2
B Side D+ B Side D+

Port 3
A Side VBUS A Side CC1

Port 4
B Side VBUS B Side CC1

D+(L),D+(R),SBU_A(L),SBU_A(R) [1,2,9,10] D+(L),D+(R),SBU_B(L),SBU_B(R) [1,2,11,12] D-(L),D(R),VBUS(L),VBUS(R), [3,4,5,6]

A Side D+ A Side D+ A Side D-

B Side D+ B Side D+ B Side D-

A Side SBU1 B Side SBU2 A Side SBU2 B Side SBU1 A Side VBUS B Side VBUS

D-(L),D-(R),CC(L),CC(R) [3,4,7,8]

A Side D-

B Side D-

A Side CC1 B Side CC1

D-(L),D-(R),SBU_A(L),SBU_A(R [3,4,9,10] D-(L),D-(R),SBU_B(L),SBU_B(R) [3,4,11,12]
VBUS(L),VBUS(R),CC(L),CC(R) [5,6,7,8]

A Side DA Side DA Side VBUS

B Side DB Side DB Side VBUS

A Side SBU1 A Side SBU2 A Side CC1

B Side SBU2 B Side SBU1 B Side CC1

VBUS(L),VBUS(R),SBU_A(L),SBU_A(R) [5,6,9,10] VBUS(L),VBUS(R),SBU_B(L),SBU_B(R) [5,6,11,12] CC(L),CC(R),SBU_A(L),SBU_A(R) [7,8,9,10] CC(L),CC(R),SBU_B(L),SBU_B(R) [7,8,11,12] SBU_A(L),SBU_A(R),SBU_B(L),SBU_B( R) [9,10,11,12]

A Side VBUS A Side VBUS A Side CC1 A Side CC1 A Side SBU1

B Side VBUS B Side VBUS B Side CC1 B Side CC1 B Side SBU2

A Side SBU1 A Side SBU2 A Side SBU1 A Side SBU2 A Side SBU2

B Side SBU2 B Side SBU1 B Side SBU2 B Side SBU1 B Side SBU1

9. Open the Excel spreadsheet [Low_Speed_Full-Featured]_Config_4ports.xlsx and modify "Cable

Type" to 4 (C2C Low Speed � FF), and S-parameter Path and Name to match them with fifteen 4 port

Touchstone files (*.s4p) you measured . Do not change "Number of VNA Ports" and "Port

Arrangement".

10. Launch the USB.org compliance test tool and load the excel spreadsheet "[Low_Speed_Full-

Featured]_Config_4ports.xlsx" by clicking "Load Config Spreadsheet". Click Import to import fifteen

4 port Touchstone files (*.s4p), then click Check Compliance for pass/fail judgment.

11. After completed the measurement, Press Cal > Fixtures > Fixture Setup > Port Z... check "Enable

Port Z Conversion (all ports)" to turn ON Port Z conversion as default setting.

Find us at www.keysight.com

Page 45

For charged-thru cable, perform the measurements for the following connections. Six (6-sets) 4-port Touchstone files(*.s4p) will measure and save to run the compliance. Use the Excel spreadsheet [Low_Speed_Charged_Through]_Config_4ports.xlsx for pass/fail judgment.

Test Path Name
D+(L),D+(R),D-(L),D-(R) [1,2,3,4] D+(L),D+(R),VBUS(L),VBUS(R) [1,2,5,6]

Port 1 A Side D+ A Side D+

Find us at www.keysight.com

Port 2 B Side D+ B Side D+

Port 3 A Side DA Side VBUS

Port 4 B Side DB Side VBUS

Page 46

D+(L),D+(R),CC(L),CC(R) [1,2,7,8] A Side D+

D-(L),D(R),VBUS(L),VBUS(R), [3,4,5,6] D-(L),D-(R),CC(L),CC(R) [3,4,7,8]
VBUS(L),VBUS(R),CC(L),CC(R) [5,6,7,8]

A Side D-
A Side DA Side VBUS

B Side D+ B Side D-
B Side DB Side VBUS

A Side CC1 B Side CC1 A Side VBUS B Side VBUS

A Side CC1 A Side CC1

B Side CC1 B Side CC1

5.25 [Low Speed Signal] Coupling between CC and Differential D+/D-

1. Connect the VNA ports (port 1 to 3) to the test fixture ports with RF cables.

VNA Port#

Port 1

Port 2

Port 3

Test Fixtures

A Side CC1

A Side D+

A Side D-

2. Press Channel Next to select Channel 2. 3. Press Meas > Balanced > Topology > SE-BAL. 4. Select Trace 30 (Sds21). 5. Press Trigger > Single

6. Run and confirm the measured coupling is within limit below. Otherwise, it will show Fail.

DUT Type All Type

Start Frequency 0.3 MHz

End Frequency 1.0 MHz

Start Limit -60.5 dB

End Limit -50 dB

1.0 MHz

10 MHz

-50 dB

-30 dB

10 MHz

16 MHz

-30 dB

-26 dB

16 MHz

100 MHz

-26 dB

-26 dB

7. Connect the VNA ports (port 1 to 4) to the test fixture ports with RF cables. Repeat the same operation of step 3 to step 5 to confirm the measured value is within the specification.
8. Press Meas > Balanced> Topology > BAL-BAL to reset the setting.

VNA Port# Test Fixtures

Port 1 A Side CC1 B Side CC1 B Side CC1

Port 2 B Side D+ B Side D+ A Side D+

Port 3 B Side DB Side DA Side D-

5.26 [Low Speed Signal] Single-Ended Coupling between CC and D+/D-

1. Connect the VNA ports (port 1 to 2) to the test fixture ports with RF cables.

VNA Port#

Port 1

Port 2

Test Fixtures

A Side CC1

A Side D-

2. Press Channel Next to select Channel 2.

3. Select Trace 31 (S21) for USB2.0 Type-C cable assembly or Trace 32 (S21) for full-featured Type-C.

4. Press Trigger > Single

5. Run and confirm the measured coupling is within limit below. Otherwise, it will show Fail.

DUT Type
USB 2.0 Type-C Cable Assembly

Start Frequency 0.3 MHz 1.0 MHz

End Frequency 1.0 MHz 10 MHz

Start Limit -48.5 dB -38 dB

End Limit -38 dB -18 dB

Find us at www.keysight.com

Page 47

Full-featured Type-C Cable Assembly

10 MHz 0.3 MHz 10 MHz 11.8 MHz

100 MHz 10 MHz 11.8 MHz 100 MHz

-18 dB -58 dB -27.5 dB -26 dB

-18 dB -27.5 dB -26 dB -26 dB

6. Repeat the same operation of step 3 to step 5 to confirm the measured value is within the specification.

VNA Port# Test Fixtures

Port 1 A Side CC1 B Side CC1 B Side CC1

Port 2 B Side DB Side DA Side D-

5.27 [Low Speed Signal] Coupling between VBUS and Differential D+/D-

1. Connect the VNA ports (port 1 to 3) to the test fixture ports with RF cables.

VNA Port# Test Fixtures

Port 1 A Side VBUS

Port 2 A Side D+

Port 3 A Side D-

2. Press Channel Next to select Channel 2.

3. Press Meas > Balanced > Topology > SE-BAL. 4. Select Trace 33 (Sds21). 5. Press Trigger > Single 6. Run and confirm the measured coupling is within limit below. Otherwise, it will show Fail.

DUT Type All Type

Start Frequency 0.3 MHz

End Frequency 1.0 MHz

Start Limit -40 dB

End Limit -40 dB

1.0 MHz

30 MHz

-40 dB

-40 dB

30 MHz

100 MHz

-40 dB

-30 dB

7. Connect the VNA ports (port 1 to 3) to the test fixture ports with RF cables. Repeat the same operation of step 3 to step 5 to confirm the measured value is within the specification.
8. Press Meas > Balanced> Topology > BAL-BAL to reset the setting.

VNA Port# Test Fixtures

Port 1 A Side VBUS B Side VBUS B Side VBUS

Port 2 B Side D+ B Side D+ A Side D+

Port 3 B Side DB Side DA Side D-

5.28 [Low Speed Signal] Single-ended Coupling between SBU_A and SBU_B

1. Connect the VNA ports (port 1 to 2) to the test fixture ports with RF cables.

VNA Port# Test Fixtures

Port 1 A Side SBU1

2. Press Channel Next to select Channel 2.

3. Select Trace 34 (S21).

4. Press Trigger > Single

Port 2 A Side SBU2

Find us at www.keysight.com

Page 48

5. Run and confirm the measured coupling is within limit below. Otherwise, it will show Fail.

DUT Type All Type

Start Frequency 0.3 MHz

End Frequency 1.0 MHz

Start Limit -56.5 dB

End Limit -46 dB

1.0 MHz

10 MHz

-46 dB

-26 dB

10 MHz

11.2 MHz

-26 dB

-26 dB

11.2 MHz

100 MHz

-25 dB

-25 dB

6. Repeat the same operation of step 3 to step 5 to confirm the measured value is within the specification.

VNA Port# Test Fixtures

Port 1 A Side SBU1 B Side SBU2 B Side SBU2

Port 2 B Side SBU1 B Side SBU1 A Side SBU2

5.29 [Low Speed Signal] Single-ended Coupling between SBU_A/SBU_B and CC

1. Connect the VNA ports (port 1 to 2) to the test fixture ports with RF cables.

VNA Port# Test Fixtures

Port 1 A Side SBU1

Port 2 A Side CC1

2. Press Channel Next to select Channel 2.

3. Select Trace 35 (S21).

4. Press Trigger > Single

5. Run and confirm the measured coupling is within limit below. Otherwise, it will show Fail.

DUT Type All Type

Start Frequency 0.3 MHz

End Frequency 1 MHz

Start Limit -65 dB

End Limit -55 dB

1 MHz

18 MHz

-55 dB

-30 dB

18 MHz

100 MHz

-30 dB

-30 dB

6. Repeat the same operation of step 3 to step 5 to confirm the measured value is within the specification.

VNA Port# Test Fixtures

Port 1 A Side SBU1 A Side SBU2 A Side SBU2 B Side SBU1 B Side SBU1 B Side SBU2 B Side SBU2

Port 2 B Side CC1 A Side CC1 B Side CC1 B Side CC1 A Side CC1 B Side CC1 A Side CC1

Find us at www.keysight.com

Page 49

5.30 [Low Speed Signal] Coupling between SBU_A/SBU_B and Differential D+/D-

1. Connect the VNA ports (port 1 to 3) to the test fixture ports with RF cables.

VNA Port# Test Fixtures

Port 1 A Side SBU1

Port 2 A Side D+

Port 3 A Side D-

2. Press Channel Next to select Channel 2. 3. Press Meas > Balanced > Topology > SE-BAL. 4. Select Trace 36 (Sds21).

5. Press Trigger > Single

6. Run and confirm the measured coupling is within limit below. Otherwise, it will show Fail.

DUT Type All Type

Start Frequency 0.3 MHz

End Frequency 30 MHz

Start Limit -80 dB

End Limit -40 dB

30 MHz

100 MHz

-40 dB

-40 dB

7. Repeat the same operation of step 3 to step 5 to confirm the measured value is within the specification. 8. Press Meas > Balanced> Topology > BAL-BAL to reset the setting.

VNA Port# Test Fixtures

Port 1 A Side SBU1 A Side SBU2 A Side SBU2 B Side SBU1 B Side SBU1 B Side SBU2 B Side SBU2

Port 2 B Side D+ A Side D+ B Side D+ B Side D+ A Side D+ B Side D+ A Side D+

Port 3 B Side DA Side DB Side DB Side DA Side DB Side DA Side D-

6.Manual Setup
The procedures of manual setup for time domain and frequency domain measurements are introduced in this section for reference. All the required testing parameters have been properly set and saved in the respective standards testing state file (*.tdr).
6.1. Channel & Trace Setup
If TDR setup wizard is shown when launching the TDR software, click Close button in the TDR setup wizard main window.
1. Open Setup tab in the TDR software 2. Click Preset to preset the instrument Click OK in a dialog box to continue. 3. Set DUT Topology to "Differential 2 Port" Click OK in a dialog box. 4. Click Advanced Mode>> and click Yes to enter to Advanced mode.

Find us at www.keysight.com

Page 50

5. Click Stop Single. 6. Set DUT Length to "16 ns". 7. Open TDR/TDT tab. 8. Click Trace Control tab. 9. Clear Time, Marker, Rise Time & Scale check box under Coupling.
Note:
� Selecting Marker under Coupling will enable all the marker on other traces to be moved in same alignment. � Selecting Time under Coupling will enable all other traces using the same X axis (Time). � Selecting Rise Time under Coupling will enable all other traces using the sane rise time. � Selecting Scale under Coupling will enable all other traces using the sane scale.
6.2. D+/D- Intra-Pair Skew
1. Select Trace 3. 2. Open Parameters tab. 3. Select "Time Domain" and "Single-Ended" for Measure. 4. Select Formant to "Volt". 5. Select Rise Time to "20-80%" and input value to 400 ps (follow rise time setting in Table 4.1). 6. Click T31.
7. Open Trace Control tab. 8. Click Trace Settings Copy to launch trace copy dialog box.

9. Select Trace 3 in the From list. 10. Select Trace 7 in the To list. 11. Click Copy.
Find us at www.keysight.com

Page 51

12. Click Close.

13. Select Trace 7. 14. Open Parameters tab. 15. Click T42 16. Select Trace 3 (T31) 17. Click Marker Search and select  Time 18. Check  Time 19. Select Target (Stop) to Trace 7 and click OK
6.3 Crosstalk Compensation
1. Select Trace 3. 2. Press Math > Analysis > Equation Editor...> Enter an equation "S31-S32". 3. Check Enabled to enable the equation on trace. 4. Click Apply. 5. Click Close. 6. Select Trace 7. 7. Press Math > Analysis > Equation Editor...> Enter an equation "S42-S41". 8. Check Enabled to enable the equation on trace. 9. Click Apply. 10. Click Close.
Find us at www.keysight.com

Page 52

6.4 D+/D- Pair Propagation Delay
1. Select Trace 4. 2. Open Parameters tab. 3. Select "Time Domain" and "Differential" for Measure. 4. Select Formant to "Volt". 5. Select Rise Time to "20-80%" and input value "400 ps" (follow raise time requirement by USB.org). 6. Click Tdd21. 7. Input vertical scale (100 mV/div) and vertical position (200 mV). 8. Press Search> Target> Target Value and enter 200 mV. 9. Press Search> Target> Tracking> Target to turn on Tracking.
6.5 Differential Impedance
1. Select Trace 1 (Trace 2/Trace 15). 2. Open Parameters tab. 3. Select "Time Domain" and "Differential" for Measure. 4. Select Formant to "Impedance". 5. Select Rise Time to "20-80%" and input value "400 ps" (follow raise time requirement by USB.org). 6. Click Tdd11. 7. Input vertical scale (10 Ohm/div) and vertical position (50 Ohm). 8. Open Trace Control tab.

Find us at www.keysight.com

Page 53

9. Click Trace Settings Copy to launch trace copy dialog box.

10. Select Trace 1 (Trace 2/Trace 15).in the From list. 11. Select Trace 5 (Trace 6/Trace 16) in the To list. 12. Click Copy. 13. Click Close. 14. Select Trace 5 (Trace 6/Trace 16). 15. Open Parameter tab. 16. Click Tdd22.
6.6 [Low-Speed Signal] Single-ended Impedance
1. Select Trace 25 (Trace 27). 2. Open Parameters tab. 3. Select "Time Domain" and "Single-Ended" for Measure. 4. Select Formant to "Impedance". 5. Select Rise Time to "20-80%" and input value "400 ps" (follow raise time requirement by USB.org). 6. Click T11. 7. Input vertical scale (10 Ohm/div) and vertical position (50 Ohm). 8. Open Trace Control tab. 9. Click Trace Settings Copy to launch trace copy dialog box. 10. Select Trace 25 (Trace 27) in the From list. 11. Select Trace 26 (Trace 28) in the To list. 12. Click Copy. 13. Click Close. 14. Select Trace 6 (Trace 28). 15. Open Parameter tab. 16. Click T22.
6.7 Common Parameters Setup for Frequency-domain Measurements
6.7.1 Setup for High-Speed Signal Measurement
1. Press Channel Next to select Channel 2. 2. Select Sweep > Sweep Setup and key-in sweep properties as below:
� Set Start value to "10 MHz". � Set Stop value to "20 GHz". � Set Points and set to "2000". � Set IF Bandwidth to "1 kHz".

Find us at www.keysight.com

Page 54

7. Select Cal > Fixtures > Fixture Setup > Port Z... Select and check "Enable Port Z Conversion (all ports)" to turn ON Port Z conversion.
8. Set Port impedance to "42.5-ohm" for all Port1/2/3/4 Z0 Real. Note: 45-ohm for [Raw Cable] and 42.5-ohm for [Mated Connector].

6.7.2 Setup for Low-Speed Signal Measurement
1. Press Channel Next to select Channel 2. 2. Select Sweep > Sweep Setup and key-in sweep properties as below:
� Select Sweep Type as "Log Frequency". � Set Start value to "300 kHz". � Set Stop value to "100 MHz". � Set Power value to "10 dBm" � Set Points and set to "1601". � Set IF Bandwidth to "1 kHz".
Find us at www.keysight.com

Page 55

3. Select Cal > Fixtures > Fixture Setup > Port Z... Select and check "Enable Port Z Conversion (all ports)" to turn ON Port Z conversion.
4. Set Port Z impedance "42.5-ohm" for all Port1/2/3/4 Z0 Real.

6.8 Defining Limit Line Tables
1. Press Trace Next to select trace to set the limit line table. 2. Press Math> Analysis > Limit Table > to edit the limit table.
3. Press Math> Analysis > Limit... > to launch Limit Test Setup window. 4. Select to turn on "Limit Test ON" and "Limit Line ON", optional to turn on "Sound ON Fail".

Find us at www.keysight.com

Page 56

Web Resources
www.keysight.com/find/ena-tdr_compliance www.keysight.com/find/usb-vna www.keysight.com/find/na www.keysight.com/find/vnasoftware www.keysight.com/find/ecal

Learn more at: www.keysight.com
For more information on Keysight Technologies' products, applications or services, please contact your local Keysight office. The complete list is available at: www.keysight.com/find/contactus
Find us at www.keysight.com
This information is subject to change without notice. � Keysight Technologies, 2020 - 2021, Published in USA, February 8, 2021, 3120-1551.EN

Page 57