VAREX IMAGING 2530W-G5 X-ray Detectors User Guide
File info: application/pdf · 112 pages · 4.13MB
4343W 4336W 2530W Reference Manual.book
2
User Manual
Varex Imaging Corporation WUBT236ACNBT 802.11ac/a/b/g/n 2T2R Wifi Bluetooth 4.2 USB Module ZZ6-WUBT236ACNBT ZZ6WUBT236ACNBT wubt236acnbt
Full PDF Document

If the inline viewer fails, it will open the original document in compatibility mode automatically. You can also open the file directly.
Extracted Text
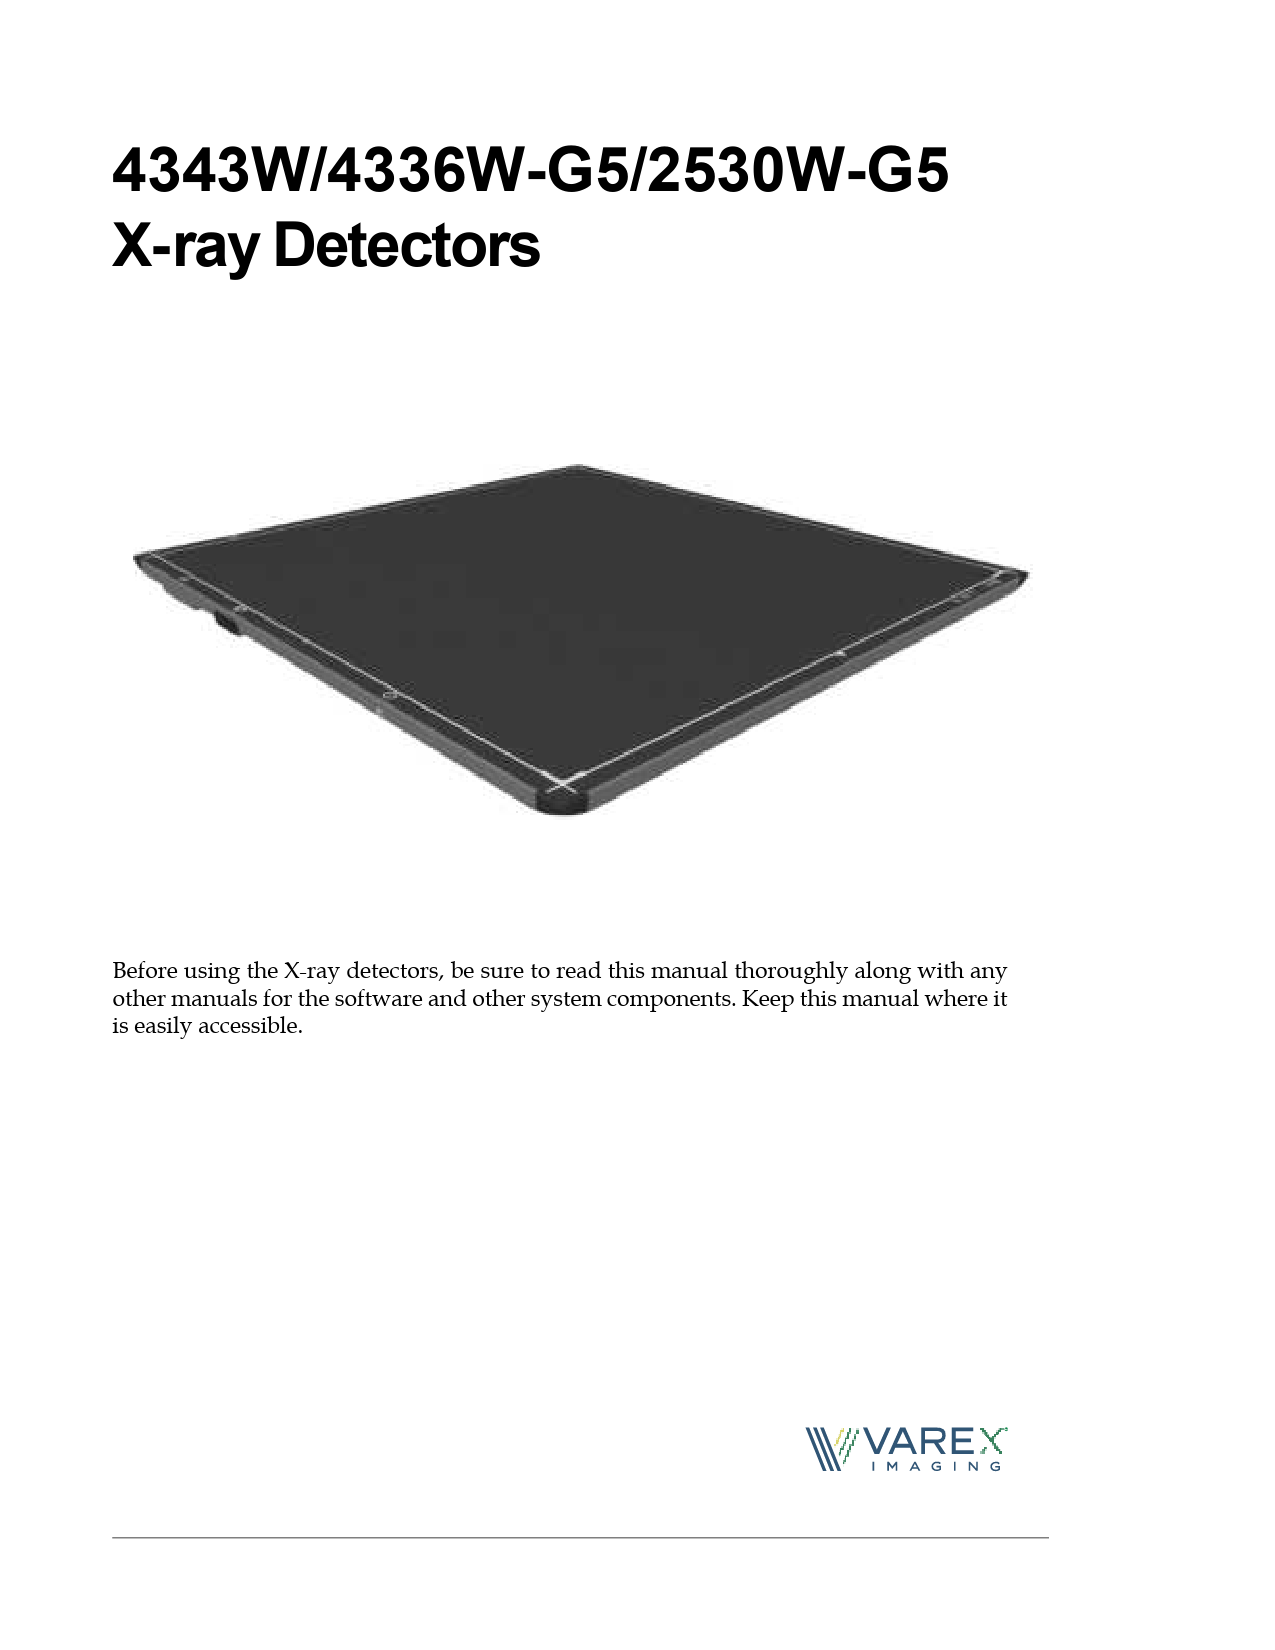
4343W/4336W-G5/2530W-G5 X-ray Detectors
Before using the X-ray detectors, be sure to read this manual thoroughly along with any other manuals for the software and other system components. Keep this manual where it is easily accessible.
�

REFERENCE MANUAL

Before You Begin

4343W/4336W-G5/2530W-G5 X-ray Detectors

Before You Begin
� To avoid personal injury or product damage, read the manual and all accompanying papers carefully before operating the X-ray detectors.
� The X-ray detectors are intended for use by qualified professional personnel who are trained and knowledgeable in the use of X-ray detectors, X-ray systems, and electrical equipment.
� Install the X-ray detector horizontally on a flat, stable surface. It is required to use a bucky or a wall-mount for vertical or tilted positions. The X-ray detector may cause an injury if it falls or is dropped.
� The User is responsible for using and maintaining the X-ray detector according to prescribed installation, usage, maintenance, handling, and storage specifications. To keep the X-ray detector and its accessories in safe and proper condition, only trained and qualified person(s) shall be in charge of maintenance.
� X-ray imaging, processing, image acquisition, and data storage must be performed in accordance with all applicable laws. The user is also responsible for compliance to laws pertaining to the privacy of image data.
� In no event is the X-ray detector manufacturer liable for direct, indirect, or consequential injury, damage, or loss of equipment operation time or image data arising from the use of the X-ray detector, its components, and/or accessories.

Protection Against Ionizing Radiation
� Exposure of any part of the human body to X-ray radiation may be harmful to health. Whenever X-ray equipment, ionizing, or radioactive sources are in use, appropriate safety precautions and measures shall be instituted, and all regulatory requirements must be met. It is the responsibility of the X-ray system installer, operator, and user to comply with applicable requirements.
� The X-ray detectors do not contain a primary barrier for X-rays or Gamma rays. The X-ray system installer or X-ray system manufacturer must provide the necessary protection based on the X-ray system's intended use.
� For portable applications, the X-ray system installer or X-ray system manufacturer must provide the necessary training for operators to protect themselves, patients, and surrounding persons.

ii

www.vareximaging.com

REFERENCE MANUAL

4343W/4336W-G5/2530W-G5 X-ray Detectors

For Your Safety
To avoid personal injury or product damage, read this manual and all accompanying information carefully before handling, installing, or using the X-ray detector. Follow all instructions, warnings, and cautions in this manual and all warnings and cautions printed on the warning label. Ignoring instructions, warnings, or cautions in the handling, installing, or use of the X-ray detector may result in personal injury, death, or product damage. Keep this manual for future reference.

Meaning of Alerts and Notes

DANGER This indicates a potentially hazardous situation which, if ignored, will result in severe personal injury, death, or substantial product damage.

WARNING This indicates a potentially hazardous situation which, if ignored, may result in severe personal injury, death, or substantial product damage.

Caution

This indicates a potential hazardous situation which, if ignored, may result in minor or moderate personal injury or damage to the product.

Note

This emphasizes or supplements important information about the main text.

www.vareximaging.com

iii

REFERENCE MANUAL

Before You Begin

4343W/4336W-G5/2530W-G5 X-ray Detectors

Installation and Environment of Use

WARNING

The X-ray detectors are intended to be installed, maintained, and used by qualified professional personnel who are trained and qualified in the installation, maintenance, and use of X-ray equipment. All parts of the X-ray detectors are suitable for use within the patient environment. The proximity of the X-ray detectors to the patient is dependent upon the application by the system integrator.

WARNING

Do not operate the X-ray detector in or around flammable gases, gas mixtures, liquids, chemicals, or other substances. Ignoring this warning may result in explosion, fire, or electric shock, which may result in severe personal injury, death, or substantial product damage.

WARNING

Do not connect the X-ray detector to any component or accessory other than the manufacturer's specified components and accessories. Ignoring this warning may result in explosion, fire, or electric shock, which may result in severe personal injury, death, or substantial product damage.

WARNING

Do not modify or alter the X-ray detector, its components, or accessories. Ignoring this warning may result in explosion, fire, or electric shock, which may result in severe personal injury, death, or substantial product damage.

WARNING The X-ray detector is not designed to control X-ray dose. The system integrator is responsible for controlling the X-ray radiation.

WARNING The X-ray detector is not intended to be used as a primary barrier to X-rays. The user is responsible for ensuring the safety of the operator, bystanders, and the subjects being radiographed.

WARNING

The X-ray detector is not suitable for use in the presence of or in combination with active implanted devices such as defibrillators and pacemakers. Doing so may prevent normal operation of these peripherals.

WARNING For portable applications, the operator and end-user must take precautions to protect themselves against dangerous X-ray exposure when using the X-ray detector in the X-ray beam path.

WARNING Portable RF communications equipment should be used no closer than 30cm from the X-ray detector or degradation of performance could result.

Caution

The X-ray detectors have an IP68 ingress protection rating. They are completely protected against ingress of dust and has protection against full water immersion for up to 60 minutes, at depths up 1m.

iv

www.vareximaging.com

4343W/4336W-G5/2530W-G5 X-ray Detectors

REFERENCE MANUAL

Caution Caution

It is important that the X-ray detector is not directly connected to the installed network. Connection of the X-ray detector with the installed computer network may disturb the IT environment.
Do not operate the X-ray detector in a location with the following conditions: � Close to fluid or places where fluid is used � Close to heat sources, such as a heater � High temperature environment � High humidity environment � High condensation environment � Extreme cold environment � Dusty environment � Salty or sulfurous environment � Near a vibrating environment � Environment where there is insufficient air circulation to enable the X-ray
detector and power supply to dissipate heat
Ignoring this caution may result in personal injury or damage to the product.

Caution Note

The X-ray detector is an applied part (patient contact device) and the surface shall not exceed 42�C. Internal temperature sensor data is provided in the diagnostic data attached to each image. These temperature measurements are well correlated with the X-ray detector external surface temperature. It is advisable to monitor this diagnostic data as an additional safety precaution, see document 03236 FP2032 - VSP Software Interface. Also, see Table 5.
The X-ray detector is intended to be installed, maintained, and used in a professional healthcare facility.

Caution

Monitor the temperature of the X-ray detector and allow the X-ray detector to cool down when the temperature of the X-ray detector gets hot. The device is not designed to supply heat to a patient. Ignoring this caution may result in personal injury or damage to the product.

Caution

An Image Quality Test or Customer Acceptance test should be performed before the X-ray detector is used for the first time with patients.

Caution

No part of the X-ray detector is intended to be attached to the patient

and/or contact the patient.

No

www.vareximaging.com

v

REFERENCE MANUAL

Before You Begin

4343W/4336W-G5/2530W-G5 X-ray Detectors

Service Cable (4343W) and Tether Cable (4336W-G5 and 2530W-G5)

WARNING Disconnect the Cable by pulling on the connector and not the cable itself. Ignoring this warning may cause substantial product damage.

WARNING

Do not modify the Cable or subject the cable to external stress or damage. Avoid placing anything heavy, including the X-ray detector, on the cable, stepping on the cable, pulling the cable, or subjecting the cable to excessive bending or bundling. Ignoring this warning may cause cable failure resulting in substantial product damage.

WARNING

The Service Cable (4343W) does not support image acquisition. It should only be used for the following: � to retrieve an orphaned image from the X-ray detector, when a wireless
connection is not available
� for service

Note

Varex Imaging tests every X-ray detector, using the tether cable, for communication and link speed defects. Varex's supplier of the tether cable individually tests each cable before shipping.

vi

www.vareximaging.com

REFERENCE MANUAL

4343W/4336W-G5/2530W-G5 X-ray Detectors

Handling

WARNING

Never disassemble, modify, or alter the X-ray detector, its components, battery pack, battery charger, or accessories. Ignoring this warning may cause electrical shock and/or unknown hazards, which may result in severe personal injury, death, or substantial product damage.

WARNING Do not use the Battery Latch as a handle. Ignoring this warning may cause damage to the Battery Latch or increase the likelihood that the X-ray detector may be dropped causing substantial product damage.

Caution

Place the X-ray detector horizontally on a flat, stable surface. If the X-ray detector is placed vertically or in any tilted position, the X-ray detector must be securely placed in the bucky tray or securely fastened to the X-ray detector enclosure or support structure. Ignoring this caution may result in personal injury or damage to the product.

Caution

Do not exceed the maximum uniform load weight of 300 kg distributed across the surface of the X-ray detector.

Caution

Do not exceed the maximum load weight of 150 kg distributed on an area of 40 mm in a diameter of the X-ray detector surface.

Caution

Do not drop the X-ray detector. If the X-ray detector is dropped, remove the X-ray detector from service, and immediately ask your establishment's safety representative to verify or re-validate the proper function of the X-ray detector prior to resuming use of the X-ray detector. Further use under abnormal conditions may result in severe personal injury, death, or substantial product damage.

Caution

In the event that the X-ray detector is dropped, a new Gain Calibration must be performed.

Caution

Do not expose the backside of the X-ray detector with X-rays. Always use the top side of the X-ray detector for examinations.

www.vareximaging.com

vii

REFERENCE MANUAL

Before You Begin

4343W/4336W-G5/2530W-G5 X-ray Detectors

Battery, Inductive Charger, and X-ray Detector Power Supply

WARNING

Do not use the battery pack if the casing is broken or if it emits an unusual odor, smoke, or excessive heat, or if it leaks any substance. Avoid contact with any substance seeping from the battery pack. If any fluid touches your skin or eyes, wash the affected area with clean, running water and immediately seek medical attention.

WARNING

The cells within the battery pack contain toxic substances. Do not attempt to open the battery packs. Do not insert any object into the battery pack or use any device to pry at the battery pack casing. Attempting to open the battery pack casing will damage the casing, which could cause the battery pack to release toxic and harmful substances causing injuries such as electric shock or burns, or cause a fire, and will render the pack unusable.

WARNING

Be sure to remove the battery before servicing and maintaining.
Do not touch the battery pack, X-ray detector, cable, connector, or any other electrical component or equipment with wet hands. Ignoring this warning may cause electrical shock, which may result in severe personal injury, death, or substantial product damage.

WARNING

Do not insert the battery into the X-ray detector when condensation is on the X-ray detector or any of its components or accessories. Ignoring this warning may cause electrical shock, which may result in severe personal injury, death, or substantial product damage.

WARNING Observe and follow all safety information in this manual and on the warning label found on the battery pack. Ignoring a warning may result in personal injury or damage to the product.

WARNING Use only charging devices approved by device manufacturer, and never attempt to bypass or override their charging protection circuits.

WARNING Keep out of reach of children.

WARNING Remove the battery pack from the X-ray detector if the X-ray detector is not likely to be used for some time.
WARNING Do not submerge the battery pack in water or other liquid.

WARNING Do not charge the battery pack near flammable materials.

viii

www.vareximaging.com

REFERENCE MANUAL

4343W/4336W-G5/2530W-G5 X-ray Detectors

WARNING Do not connect the battery pack to an electrical outlet directly, or to any other electrical source not described in the manual.

WARNING

Do not drop or hit the battery against hard objects since this may cause damage to the battery pack and risk release of the battery toxic and harmful substances, causing injuries such as electric shock or burns or causing a fire, and will render the battery pack unusable.

Caution

There is a risk of explosion, personal injury, or damage to product if the battery pack is replaced by non-OEM approved components.

Caution

The Varex provided accessory power supply for tether mode (4336WG5 and 2530W-G5) will not introduce noise. An aftermarket power supply may not be used with the X-ray detector.

WLAN

WARNING Do not obstruct the X-ray detector antenna. If it is obstructed by metal, wood, or a human body, the wireless communication can be slowed down or disconnected.

WARNING Do not route Ethernet cables near or with power cables, degradation of performance could result.

WARNING Follow the laws and regulations for each country and select the regional code accordingly.

WARNING Do not use the X-ray detector in aircraft because there is a potential affect to aviation systems.

WARNING Do not modify or alter the X-ray detector as this can violate the certification of the Radio Law.

Caution

Use WLAN access point devices to get the best communication performance. Please contact your Varex representative for a list of approved wireless access points.

www.vareximaging.com

ix

REFERENCE MANUAL

Before You Begin

4343W/4336W-G5/2530W-G5 X-ray Detectors

Caution Caution Caution

The electromagnetic emission of the X-ray detector may influence implantable medical devices like pacemakers. Check the information for these devices.
Use a Wi-Fi friendly environment and avoid Bluetooth devices, mobile phones, and other Wi-Fi devices close to the X-ray detector or router.
Do not use the 2.4GHz option with the router or access point being used with the detector. The 2.4GHz band is not available for use with these detectors.

Network

WARNING

Do not connect the X-ray detector to the common IT network, but use a point-to-point connection or tethered connection with the host computer or dedicated WLAN access point. Ignoring this warning may cause unauthorized access to this device.

WARNING Ensure that only authorized users have access to the X-ray detector and the WLAN access point. Unauthorized access may cause disruption to the normal operation of the X-ray detector and access point.

vTrigger Mode (Automatic Exposure Detection)

WARNING

The vTrigger mode requires a sufficient X-ray dose rate to the X-ray detector surface to trigger image acquisition. The required dose rate can vary at different use conditions. The system integrator must evaluate the vTrigger operation with the complete X-ray setup in order to secure the proper image acquisition in vTrigger mode.

WARNING

vTrigger starts exposure upon detecting X-rays. Before exposure, software must be switched to a configuration mode that has vTrigger enabled. Do not expose before the software indicates the X-ray detector is prepared for acquisition.

WARNING When the X-ray detector is armed, it will time-out if no exposure is initiated within ten minutes, resulting in the X-ray detector entering Standby Mode.

WARNING Do not apply any, handling, loading, mechanical shock, or electronic noise to the X-ray detector while it is in vTrigger mode.

x

www.vareximaging.com

REFERENCE MANUAL

4343W/4336W-G5/2530W-G5 X-ray Detectors

If a Problem Occurs

WARNING

If any abnormal condition, such as smoke, fumes, or strange sounds, is evident, remove the battery from the X-ray detector, and immediately ask your establishment's safety representative to contact your dealer, distributor, or device manufacturer.

Further use under abnormal conditions may result in severe personal injury, death, or substantial product damage.

WARNING

When liquid has been spilled into or on any part of the X-ray detector or battery, or when the X-ray detector, its component, or accessory is
dropped, immediately clean the liquid, see Section 14.1.2, and operation may resume.

Further use under abnormal conditions may result in severe personal injury, death, or substantial product damage.

Maintenance and Inspection

WARNING

Turn off the power of the X-ray detector, see Section 11.7, when the inspections indicated in this manual are going to be performed. Ignoring this warning may result in electric shock, which may result in severe personal injury, death, or substantial product damage.

WARNING

When the X-ray detector system is going to be cleaned; remove the battery pack, cables, and wait until the X-ray detector powers off. Never use thinner, benzine, acetone, or other flammable cleaning agents. Ignoring this warning may result in explosion, fire, or electric shock, which may result in severe personal injury, death, or substantial product damage.

WARNING

The X-ray detector must be repaired by X-ray detector manufacturer-authorized personnel only. Ignoring this warning may result in explosion, fire, electric shock, or unknown hazards, which may result in severe personal injury, death, or substantial product damage.

Caution

Follow the manufacturer's recommendations for inspecting the X-ray detector before use.

www.vareximaging.com

xi

Before You Begin

4343W/4336W-G5/2530W-G5 X-ray Detectors

This page intentionally left blank.

xii

www.vareximaging.com

REFERENCE MANUAL

Table of Contents

1.0 Scope .............................................................................................................................1
2.0 Contraindication............................................................................................................1
3.0 Intended Use..................................................................................................................1
4.0 Audience........................................................................................................................1
5.0 Abbreviations ................................................................................................................2
6.0 References.....................................................................................................................2
7.0 Definition of Symbols ................................................................................................... 3
8.0 Standards and Regulations .......................................................................................... 5
9.0 Storage and Use Conditions ........................................................................................ 6 9.1 Temperature Sensors........................................................................................................7
10.0 Description of the X-ray Detectors...............................................................................8 10.1 X-ray Detector Specifications..........................................................................................9 10.2 X-ray Detector Surfaces and Features..........................................................................13
11.0 Getting Started ............................................................................................................16 11.1 Shipment Contents .........................................................................................................16 11.2 Data Interface and Cables..............................................................................................16 11.2.1 Connecting the Service Cable for 4343W....................................................17 11.2.2 Connecting the Tether Cable for 4336W-G5 and 2530W-G5....................19 11.3 Software Installation ......................................................................................................21 11.3.1 SDK Files .........................................................................................................21 11.3.2 Bonjour Installation Files ..............................................................................21 11.3.3 Sample Code...................................................................................................22 11.3.4 Utility Software ..............................................................................................22 11.3.5 ViVA installation............................................................................................22 11.4 X-ray Detector Battery ...................................................................................................23 11.4.1 Battery Installation.........................................................................................23 11.4.2 Battery Removal.............................................................................................24 11.4.3 Battery Charge Level .....................................................................................25 11.4.4 Battery Hot-Swap...........................................................................................25 11.5 Optional Varex Provided Inductive Battery Charger ...............................................26

www.vareximaging.com

xiii

REFERENCE MANUAL

Table of Contents

4343W/4336W-G5/2530W-G5 X-ray Detectors

11.5.1 Installing the Varex Provided Inductive Battery Charger....................... 26 11.6 Using a Third-Party Inductive Battery Charger . . . . . . . . . . . . . . . . . . . . . . . . . . . . 29 11.7 Power-on and Power-off Sequence. . . . . . . . . . . . . . . . . . . . . . . . . . . . . . . . . . . . . . . 30 11.8 Reboot Sequence . . . . . . . . . . . . . . . . . . . . . . . . . . . . . . . . . . . . . . . . . . . . . . . . . . . . . . 31 11.9 LED Status Indicator Behavior . . . . . . . . . . . . . . . . . . . . . . . . . . . . . . . . . . . . . . . . . . 32 11.10 Connecting to the X-ray Detector . . . . . . . . . . . . . . . . . . . . . . . . . . . . . . . . . . . . . . . . 33 11.11 VSP Control Panel. . . . . . . . . . . . . . . . . . . . . . . . . . . . . . . . . . . . . . . . . . . . . . . . . . . . . 34
11.11.1 Access the VSP Control Panel. . . . . . . . . . . . . . . . . . . . . . . . . . . . . . . . . . . 34 11.11.2 Modify Settings. . . . . . . . . . . . . . . . . . . . . . . . . . . . . . . . . . . . . . . . . . . . . . . 36 11.11.3 Change Password . . . . . . . . . . . . . . . . . . . . . . . . . . . . . . . . . . . . . . . . . . . . . 37 11.11.4 Firmware Update . . . . . . . . . . . . . . . . . . . . . . . . . . . . . . . . . . . . . . . . . . . . . 38 11.12 X-ray Detector Calibration. . . . . . . . . . . . . . . . . . . . . . . . . . . . . . . . . . . . . . . . . . . . . . 40 11.12.1 Offset Calibration . . . . . . . . . . . . . . . . . . . . . . . . . . . . . . . . . . . . . . . . . . . . . 40 11.12.2 Offset Calibration Steps . . . . . . . . . . . . . . . . . . . . . . . . . . . . . . . . . . . . . . . . 40 11.12.3 Gain Calibration . . . . . . . . . . . . . . . . . . . . . . . . . . . . . . . . . . . . . . . . . . . . . . 42 11.12.4 Gain Calibration Steps . . . . . . . . . . . . . . . . . . . . . . . . . . . . . . . . . . . . . . . . . 44 11.13 Image Acquisition . . . . . . . . . . . . . . . . . . . . . . . . . . . . . . . . . . . . . . . . . . . . . . . . . . . . . 47 11.13.1 Acquiring Radiography Images . . . . . . . . . . . . . . . . . . . . . . . . . . . . . . . . . 48 11.13.2 Radiographic Acquisition Settings. . . . . . . . . . . . . . . . . . . . . . . . . . . . . . . 51 11.14 ViVA Configuration Settings. . . . . . . . . . . . . . . . . . . . . . . . . . . . . . . . . . . . . . . . . . . . 51 11.15 Dynamic Integration Settings . . . . . . . . . . . . . . . . . . . . . . . . . . . . . . . . . . . . . . . . . . . 54
12.0 The Detector Configuration File . . . . . . . . . . . . . . . . . . . . . . . . . . . . . . . . . . . . . . . . . 56
13.0 System Software. . . . . . . . . . . . . . . . . . . . . . . . . . . . . . . . . . . . . . . . . . . . . . . . . . . . . . 57 13.1 Radiography Acquisition . . . . . . . . . . . . . . . . . . . . . . . . . . . . . . . . . . . . . . . . . . . . . . . 57 13.2 vTrigger Acquisition (AED). . . . . . . . . . . . . . . . . . . . . . . . . . . . . . . . . . . . . . . . . . . . . 58 13.3 X-ray Generator Interface Signals. . . . . . . . . . . . . . . . . . . . . . . . . . . . . . . . . . . . . . . . 59 13.4 Position Sensing. . . . . . . . . . . . . . . . . . . . . . . . . . . . . . . . . . . . . . . . . . . . . . . . . . . . . . . 59 13.5 Autonomous Mode . . . . . . . . . . . . . . . . . . . . . . . . . . . . . . . . . . . . . . . . . . . . . . . . . . . . 60 13.6 Detector Sharing . . . . . . . . . . . . . . . . . . . . . . . . . . . . . . . . . . . . . . . . . . . . . . . . . . . . . . 60
14.0 Maintenance . . . . . . . . . . . . . . . . . . . . . . . . . . . . . . . . . . . . . . . . . . . . . . . . . . . . . . . . . 61 14.1 Cleaning and Disinfecting . . . . . . . . . . . . . . . . . . . . . . . . . . . . . . . . . . . . . . . . . . . . . . 61 14.1.1 Material Compatible Chemicals for Cleaning and Disinfecting . . . . . . 61 14.1.2 Cleaning the X-ray Detector . . . . . . . . . . . . . . . . . . . . . . . . . . . . . . . . . . . . 62 14.1.3 Disinfecting the X-ray Detector . . . . . . . . . . . . . . . . . . . . . . . . . . . . . . . . . 62 14.2 Field Replaceable Parts. . . . . . . . . . . . . . . . . . . . . . . . . . . . . . . . . . . . . . . . . . . . . . . . . 63
15.0 Troubleshooting . . . . . . . . . . . . . . . . . . . . . . . . . . . . . . . . . . . . . . . . . . . . . . . . . . . . . . 64 15.1 After-sales Service for Varex Imaging Products. . . . . . . . . . . . . . . . . . . . . . . . . . . . 68 15.2 Disposing of the X-ray Detector and Battery . . . . . . . . . . . . . . . . . . . . . . . . . . . . . . 68

xiv

www.vareximaging.com

REFERENCE MANUAL

4343W/4336W-G5/2530W-G5 X-ray Detectors

Table of Contents

16.0 Safety - Electromagnetic Interference ....................................................................... 69 16.1 Electromagnetic Emissions............................................................................................69 16.2 Electromagnetic Immunity............................................................................................70 16.3 Radio Frequency (RF) Compliance Information ........................................................76 16.3.1 United States FCC/IC Compliance .............................................................76
17.0 Regulatory ................................................................................................................... 79 17.1 Industry Canada Notice ................................................................................................79 17.2 Declaration of Conformity for European Union ........................................................81 17.3 Korea Certification .........................................................................................................82
18.0 Appendix A: Accessories ........................................................................................... 83
19.0 Appendix B: Mechanical Drawings ............................................................................ 84

www.vareximaging.com

xv

Table of Contents

4343W/4336W-G5/2530W-G5 X-ray Detectors

This page intentionally left blank.

xvi

www.vareximaging.com

REFERENCE MANUAL

List of Tables

Table 1 Table 2 Table 3 Table 4 Table 5 Table 6 Table 7 Table 8 Table 9 Table 10 Table 11 Table 12 Table 13 Table 14 Table 15 Table 16 Table 17
Table 18
Table 19 Table 20
Table 21
Table 22
Table 23 Table 24 Table 25

Abbreviations ....................................................................................................................2 References ..........................................................................................................................2 Definition of Symbols.......................................................................................................3 Standards and Regulations..............................................................................................5 Environmental Conditions ..............................................................................................6 Temperature Sensor Min and Max.................................................................................7 Specifications .....................................................................................................................9 Description of Detector Surfaces and Features...........................................................13 Description of Detector Surfaces and Features...........................................................14 Description of Detector Surfaces and Features...........................................................15 Battery Hot-Swap Operation Time...............................................................................25 LED Status Details ..........................................................................................................32 Gain Calibration Sequence in ViVA- All Modes ........................................................44 Types of Corrections that can be applied during Acquisition..................................47 Operational Mode Example ..........................................................................................56 Problems and Solutions .................................................................................................64 4343W Radiated/Conducted Emissions, Harmonics, Voltage, Fluctuations & Flicker ...............................................................................................................................69 4336W-G5 and 2530W-G5 Radiated/Conducted Emissions, Harmonics, Voltage, Fluctuations & Flicker.....................................................................................................70 4343W ESD, Transient/Burst, Surge, Voltage Variation, Magnetic Fields .............70 4343W Test Specs for Enclosure Port Immunity to RF Wireless Communications Equipment ........................................................................................................................ 72 4336W-G5 and 2530W-G5 ESD, Transient/Burst, Surge, Voltage Variation, Magnetic Fields........................................................................................................................73 4336W-G5 and 2530W-G5 Test Specs for Enclosure Port Immunity to RF Wireless Communications Equipment.........................................................................................74 Europe - Declaration of Conformity in Languages of European Community.......81 Korea Certification..........................................................................................................82 Accessories ....................................................................................................................... 83

www.vareximaging.com

xvii

List of Tables

4343W/4336W-G5/2530W-G5 X-ray Detectors

This page intentionally left blank.

xviii

www.vareximaging.com

REFERENCE MANUAL

List of Figures

Figure 1 Figure 2 Figure 3 Figure 4 Figure 5 Figure 6 Figure 7 Figure 8 Figure 9 Figure 10 Figure 11 Figure 12 Figure 13 Figure 14 Figure 15 Figure 16
Figure 17 Figure 18 Figure 19
Figure 20 Figure 21 Figure 22 Figure 23 Figure 24 Figure 25 Figure 26 Figure 27 Figure 28

Typical Detector Configuration ......................................................................................8 4343W X-ray Detector Surfaces and Features .............................................................13 4336W-G5 X-ray Detector Surfaces and Features.......................................................14 2530W-G5 X-ray Detector Surfaces and Features.......................................................15 X-ray Detector as Access Point .....................................................................................17 X-ray Detector with Router ...........................................................................................17 Service Cable Connection (4343W only)......................................................................18 Remove the Overlay.......................................................................................................19 Remove the Screw and the USB Door..........................................................................19 Tether Cable Connection 4336W-G5 and 2530W-G5 .................................................20 Setup .................................................................................................................................22 Representation of Battery Installation .........................................................................23 Unlatch Battery ...............................................................................................................24 Battery Removal..............................................................................................................24 Battery Charge Level......................................................................................................25 Varex Inductive Battery Charger Dimensions (in mm) and Mounting Hole Locations (4343W and 4336W-G5 and 2530W-G5).....................................................27 VHB Tape Placement Locations on Varex Inductive Battery Charger....................28 VHB Tape Placement Dimension on Varex Inductive Battery Charger .................28 Third-party Inductive Battery Charger 4343W/4336W-G5/2530W-G5 X-ray Detector Alignment ........................................................................................................29 Reboot Sequence .............................................................................................................31 LED Status Indicator ......................................................................................................32 The ViVA Icon.................................................................................................................33 Detector Linked in ViVA ...............................................................................................33 VSP Control Panel Access Authentication ..................................................................34 VSP Control Panel ..........................................................................................................35 Modify VSP Control Panel Settings .............................................................................36 Change Password ...........................................................................................................37 Updating the Firmware .................................................................................................38

www.vareximaging.com

xix

REFERENCE MANUAL

List of Figures

4343W/4336W-G5/2530W-G5 X-ray Detectors

Figure 29 Figure 30 Figure 31 Figure 32 Figure 33 Figure 34 Figure 35 Figure 36 Figure 37 Figure 38 Figure 39 Figure 40 Figure 41 Figure 42 Figure 43 Figure 44 Figure 45 Figure 46 Figure 47 Figure 48 Figure 49 Figure 50 Figure 51 Figure 52 Figure 53 Figure 54 Figure 55 Figure 56 Figure 57 Figure 58 Figure 59 Figure 60 Figure 61 Figure 62

Firmware Updated . . . . . . . . . . . . . . . . . . . . . . . . . . . . . . . . . . . . . . . . . . . . . . . . . . . . 39 Mode Drop Down Menu . . . . . . . . . . . . . . . . . . . . . . . . . . . . . . . . . . . . . . . . . . . . . . . 40 Initiate Offset Calibration. . . . . . . . . . . . . . . . . . . . . . . . . . . . . . . . . . . . . . . . . . . . . . . 41 Calibration Setting window . . . . . . . . . . . . . . . . . . . . . . . . . . . . . . . . . . . . . . . . . . . . . 41 Offset Calibration Progress . . . . . . . . . . . . . . . . . . . . . . . . . . . . . . . . . . . . . . . . . . . . . 41 Finish Offset Calibration . . . . . . . . . . . . . . . . . . . . . . . . . . . . . . . . . . . . . . . . . . . . . . . 42 Mode Drop Down Menu . . . . . . . . . . . . . . . . . . . . . . . . . . . . . . . . . . . . . . . . . . . . . . . 44 Initiate Gain Calibration . . . . . . . . . . . . . . . . . . . . . . . . . . . . . . . . . . . . . . . . . . . . . . . . 44 Gain Calibration Progress window . . . . . . . . . . . . . . . . . . . . . . . . . . . . . . . . . . . . . . 45 Gain Calibration Updating. . . . . . . . . . . . . . . . . . . . . . . . . . . . . . . . . . . . . . . . . . . . . . 45 Gain Calibration Complete . . . . . . . . . . . . . . . . . . . . . . . . . . . . . . . . . . . . . . . . . . . . . 46 Radiographic Acquisition Settings . . . . . . . . . . . . . . . . . . . . . . . . . . . . . . . . . . . . . . . 47 Radiographic Acquisition Settings window . . . . . . . . . . . . . . . . . . . . . . . . . . . . . . . 48 Mode Drop Down Menu . . . . . . . . . . . . . . . . . . . . . . . . . . . . . . . . . . . . . . . . . . . . . . . 48 Acquire Image Button. . . . . . . . . . . . . . . . . . . . . . . . . . . . . . . . . . . . . . . . . . . . . . . . . . 49 Acquire Image . . . . . . . . . . . . . . . . . . . . . . . . . . . . . . . . . . . . . . . . . . . . . . . . . . . . . . . . 49 Start Acquisition . . . . . . . . . . . . . . . . . . . . . . . . . . . . . . . . . . . . . . . . . . . . . . . . . . . . . . 50 Image Acquisition Progress . . . . . . . . . . . . . . . . . . . . . . . . . . . . . . . . . . . . . . . . . . . . . 50 Acquisition Type Drop Down Menu . . . . . . . . . . . . . . . . . . . . . . . . . . . . . . . . . . . . . 51 Mode Drop Down Menu . . . . . . . . . . . . . . . . . . . . . . . . . . . . . . . . . . . . . . . . . . . . . . . 51 Hardware Handshaking Not Selected . . . . . . . . . . . . . . . . . . . . . . . . . . . . . . . . . . . . 52 Hardware Handshaking Selected . . . . . . . . . . . . . . . . . . . . . . . . . . . . . . . . . . . . . . . . 52 Open System Settings . . . . . . . . . . . . . . . . . . . . . . . . . . . . . . . . . . . . . . . . . . . . . . . . . . 53 System Settings window . . . . . . . . . . . . . . . . . . . . . . . . . . . . . . . . . . . . . . . . . . . . . . . 53 Select Mode. . . . . . . . . . . . . . . . . . . . . . . . . . . . . . . . . . . . . . . . . . . . . . . . . . . . . . . . . . . 54 Acquire Image Setup. . . . . . . . . . . . . . . . . . . . . . . . . . . . . . . . . . . . . . . . . . . . . . . . . . . 54 Message Box . . . . . . . . . . . . . . . . . . . . . . . . . . . . . . . . . . . . . . . . . . . . . . . . . . . . . . . . . . 55 Enter Integration Time . . . . . . . . . . . . . . . . . . . . . . . . . . . . . . . . . . . . . . . . . . . . . . . . . 55 Exposure: Corrected Frames . . . . . . . . . . . . . . . . . . . . . . . . . . . . . . . . . . . . . . . . . . . . 57 Exposure: Raw Frames . . . . . . . . . . . . . . . . . . . . . . . . . . . . . . . . . . . . . . . . . . . . . . . . . 58 Position Sensors . . . . . . . . . . . . . . . . . . . . . . . . . . . . . . . . . . . . . . . . . . . . . . . . . . . . . . . 59 4343W Detector and Wireless Label Locations . . . . . . . . . . . . . . . . . . . . . . . . . . . . . 77 4336W-G5 Detector and Wireless Label Locations. . . . . . . . . . . . . . . . . . . . . . . . . . 78 2530W-G5 Detector and Wireless Label Locations. . . . . . . . . . . . . . . . . . . . . . . . . . 78

www.vareximaging.com

xx

REFERENCE MANUAL

4343W/4336W-G5/2530W-G5 X-ray Detectors

List of Figures

Figure 63 Figure 64 Figure 65 Figure 66 Figure 67 Figure 68

4343W X-ray Detector Dimensions in mm..................................................................84 4343W X-ray Detector Dimensions in mm..................................................................84 4336W-G5 X-ray Detector Dimensions in mm............................................................85 4336W-G5 X-ray Detector Dimensions in mm............................................................85 2530W-G5 Detector Dimension in mm........................................................................86 2530W-G5 Detector Dimension in mm........................................................................86

www.vareximaging.com

xxi

List of Figures

4343W/4336W-G5/2530W-G5 X-ray Detectors

This page intentionally left blank.

xxii

www.vareximaging.com

REFERENCE MANUAL

4343W/4336W-G5/2530W-G5 X-ray Detectors

1.0 Scope
This document describes design elements and respective interfaces for the Varex Imaging Wireless X-ray detectors 4343W, 4336W-G5, and 2530W-G5. All applicable mechanical, electronic, and software interfaces are described.

2.0 Contraindication
There are no contraindications.

3.0 Intended Use
Varex Imaging Wireless X-ray detectors and their accessories are components designed to be integrated into products by X-ray system manufacturers. Final application and intended use are determined by the X-ray system manufacturer and is based on the completed X-ray system design. It is the responsibility of the X-ray system manufacturer to confirm safety, efficacy and compliance of the X-ray system intended for use, inclusive of the X-ray detector. The Digital Radiography Software referred to in this manual is intended to be used by system integrators to control and operate the X-ray detector, as well as, for development, testing, and maintenance purposes only.

Note

The X-ray detector is designed to be integrated into a complete X-ray system by a qualified system integrator. The system integrator is responsible for obtaining FDA clearance for medical use.

4.0 Audience
This document is for users of the X-ray detector and for X-ray system manufacturers and X-ray system installers who are responsible for installing the X-ray detector into an X-ray system.

www.vareximaging.com

1

REFERENCE MANUAL

4343W/4336W-G5/2530W-G5 X-ray Detectors

5.0 Abbreviations
Table 1 Abbreviations

Abbreviations AED API a-Si CsI LED OEM PREP REQ SDK ViVA VSP vTrigger WLAN

Descriptions Automatic Exposure Detection (see vTrigger) Application Program Interface Amorphous Silicon Cesium Iodide Light Emitting Diode Original Equipment Manufacturer Prepare Request Software Developer Kit Varex Imaging and Viewing Application Varex Smart Panel Automatic Exposure Detection Wireless Local Area Network

6.0 References
Table 2 includes a list of documents referred to in this manual. For access to the following references, contact your dedicated Varex representative.
Table 2 References

References

Document Number or Location

Panel Sharing (VSP) Software Interface

03685 FP-2032

Autonomous vTrigger (VSP) Software Interface 06104

Varex Smart Panel Software Interface

03236 FP-2032

2

www.vareximaging.com

REFERENCE MANUAL

4343W/4336W-G5/2530W-G5 X-ray Detectors

7.0 Definition of Symbols
Table 3 Definition of Symbols

Symbol

On (power connection)

Description

Off (power disconnection)

Handle with Care

Direct Current

IP68

Authorized Representative in the European Community/European Union Note: This symbol does not apply to model 2530W-G5
The X-ray detectors have an IP68 ingress protection rating. It is completely protected against ingress of dust and has protection against full water immersion for up to 60 minutes, at depths up 1m. Consult Instruction for Use

Load Weight Restrictions

Do Not Discard with Domestic Waste
European Union Mark of Conformity to Applicable European Directives Note: This symbol does not apply to model 2530W-G5 Manufacturer
Non-ionizing radiation

www.vareximaging.com

3

4343W/4336W-G5/2530W-G5 X-ray Detectors

Table 3 Definition of Symbols (Continued)

Symbol

Type B Applied Part

Description

Underwriters Laboratory Safety Mark

China RoHS environmentally friendly for 10 years

REFERENCE MANUAL

4

www.vareximaging.com

REFERENCE MANUAL

4343W/4336W-G5/2530W-G5 X-ray Detectors

8.0 Standards and Regulations
The X-ray detectors are designed to be compliant with the requirements detailed in Table 4 below. All regulatory certificates are valid only if the original accessories are used. All regulatory certificates are rendered invalid if any modifications to the Product are made, or any portion thereof, without obtaining the prior written authorization of Varex Imaging.
Table 4 Standards and Regulations

Detector Standard

Description

UL 60601-1

Medical Electrical Equipment, Part 1: General Requirements for Safety 1st ed.

IEC 60601-1

Medical Electrical Equipment Part 1: General Requirements for Safety 2nd ed.

EN/IEC 60601-1

2006+A1:2013/ 2005+A1:2012 (ED. 3.1)

ANSI/AAMI ES60601-1 Medical Electrical Equipment � Part 1: General Requirements for Basic Safety

(2005)

and Essential Performance.

CSA-C22.2 No 60601-1 Medical Electrical Equipment, Part 1 General Requirements for Basic Safety

(2008)

and Essential Performance.

CAN/CSA-C22.2 No 601.1-M90, 2005

Medical Electrical Equipment, Part 1 General Requirements for Safety.

EN/IEC 60601-1-2

Medical Electrical Equipment Part 1-2: General Requirements for Basic Safety and Essential Performance Collateral Standard: Electromagnetic Compatibility 4th ed.

93/42/EECa

European Union Medical Device Directive

2014/30/ECa

European Union Electromagnetic Compatibility Directive

2014/53/EUa

European Union Radio Equipment Directive

FCC Part 15 Subpart E Telecommunication - Intentional Radiators and Unlicensed Devices

EN 301 893a

Wide-band Transmission Systems: 5GHz

EN 301 489-1a

Radio Equipment - Electromagnetic Compatibility

EN 301 489-17a

Broadband Data Transmission Systems

Note: 4343W/4336W-G5/2530W-G5 have the capability to be internally powered.

Note: MDD Class IIa

Note: A Declaration of Conformity has been filed for this product and available upon request by contacting Varex Imaginga.

a. This item is not applicable to model 2530W-G5.

www.vareximaging.com

5

REFERENCE MANUAL

4343W/4336W-G5/2530W-G5 X-ray Detectors

9.0 Storage and Use Conditions
Environments outside the specification reduce the lifetime and may irreparably damage the X-ray detector.
Table 5 Environmental Conditions

Category Storage & Transport Temperature (ambient)

Limits -20� C to +55� C

Operating Temperature (ambient) Storage and Operating Humidity Range (non-condensing)

10� C to 40� C 10% to 90%

Atmospheric Pressure Range

70kPa to 106kPa

Shock (any direction no power applied)

20G

Vibration Tolerance (25Hz, 30 min each Axis, without power)

2.5G

Ingress Protection

IP68

Detector Altitude

Operates at  3000m

Note

The X-ray detector is intended to be installed, maintained, and used in a professional healthcare facility.

6

www.vareximaging.com

REFERENCE MANUAL

4343W/4336W-G5/2530W-G5 X-ray Detectors

9.1 Temperature Sensors
Table 6 Temperature Sensor Min and Max

X-ray Detector
4343W
4336W-G5 2530W-G5

Temperature Sensor
T1 Minimum T1 Maximum T2 Minimum T2 Maximum T2 Minimum T2 Maximum T1 Minimum T1 Maximum

Max and Min Reading
16� C 46� C 16� C 46� C 19� C 47� C 19� C 48� C

Note

The T1 (4343W) and T2 temperature sensors are used to monitor the internal temperature of the glass. These are the only temperature sensors that need to be monitored by the OEM, see Table 6.

WARNING If the maximum temperature is reached, the X-ray detector must be turned off and allowed to cool. Ignoring this warning may result in
substantial product damage.

www.vareximaging.com

7

REFERENCE MANUAL

4343W/4336W-G5/2530W-G5 X-ray Detectors
10.0 Description of the X-ray Detectors
The X-ray detectors are lightweight and wireless designed for medical and veterinary use. The X-ray detector together with the Varex Smart Panel (software is designed for integration into an X-ray system. The VSP is the interface between the X-ray detector and the Client PC; such as control, image acquisition and calibration.
The X-ray detectors fit into standard bucky trays and the wireless communication enables easy migration between table and other physical applications.
The wireless access point is the interface between the X-ray detector and the imaging system and may be mounted in an equipment enclosure, or it may also be wall or ceiling mounted to maximize wireless signal strength. A Service Cable is supplied with the 4343W to allow for set-up of the wireless interface and to retrieve images from the X-ray detector in case of failed wireless transmission. A Tether Cable is provided with the 4336W-G5 and 2530W-G5 to provide power and allows operation of the X-ray detector through a wired interface.
During operation, the X-ray detector is often draped or bagged to ensure cleanliness and sterilization. It is manipulated such that the X-ray detector's input window is located near, but on the opposite side of the patient, from the X-ray source.
Figure 1 shows the configuration of the X-ray detector in the context of the typical overall imaging system.

Figure 1 Typical Detector Configuration

8

www.vareximaging.com

REFERENCE MANUAL

4343W/4336W-G5/2530W-G5 X-ray Detectors

10.1 X-ray Detector Specifications
Table 7 Specifications

Sensor

4343W

4336W-G5

2530W-G5

Detector

Amorphous Silicon active TFT/PIN diode Technology

Amorphous Silicon active TFT/PIN diode Technology

Amorphous Silicon active TFT/PIN diode Technology

Scintillator

CsI Premium, CsI Standard, and DRZ+

CsI Premium, CsI Standard, and DRZ+

CsI Premium and CsI Standard

Pixel Matrix

3072 (v) x 3072 (h)

3072 (v) x 2476 (h)

2304 (v) x 1900 (h)

Pixel Pitch

139 �m

139 �m

139 �m

Active Area

3052 (v) x 3052 (h) DRZ+, 3052 (v) x 2456 (h) DRZ+, 2204 (v) x 1960 (h) CsI

3032 (v) x 3032 (h) CsI

3032 (v) x 2436 (h) CsI

Electronics

4343W

4336W-G5

2530W-G5

Battery

Lithium-ion

Lithium-ion

Lithium-ion

Battery Charger 1 or 3 Bay, Inductive

1 or 3 Bay, Inductive

1 or 3 Bay, Inductive

ADC

16-bit

16-bit

16-bit

Mechanical

4343W

4336W-G5

2530W-G5

Housing

Plastic with Carbon Fiber Plastic with Carbon Fiber Plastic with Carbon Fiber

entrance window

entrance window

entrance window

Weight (without DRZ+ 3.1 kg (6.83 lbs), CsI DRZ+ 2.65 kg (5.84 lbs),

Battery)

3.3 kg (7.27 lbs)

CsI 2.85 kg (6.28 lbs)

CsI 2.3 kg (5.07 lbs)

Load Support

200 kg over diameter 40 150 kg over diameter 40 150 kg over diameter 40

mm at center, 300 kg entire mm at center, 300 kg entire mm at center, 300 kg entire

surface

surface

surface

Surface Temperature

Rated to not exceed 42�C Rated to not exceed 42�C Rated to not exceed 42�C

Wireless Communication

4343W

4336W-G5

2530W-G5

Signal Strength Requires > -70 dBm or no Requires > -70 dBm or no Requires > -70 dBm or no

image will be acquired

image will be acquired

image will be acquired

Standard

IEEE 802.11ac/a/n

IEEE 802.11ac/a/n

IEEE 802.11ac/a/n

Interface

USB

USB

USB

Security

� WEP

� WEP

� WEP

� WPA

� WPA

� WPA

� WPA2

� WPA2

� WPA2

Operating Voltage

DC 5V

DC 5V

DC 5V

www.vareximaging.com

9

REFERENCE MANUAL

4343W/4336W-G5/2530W-G5 X-ray Detectors

Table 7 Specifications (Continued)

Radio Antenna Frequencies
Modulation

4343W

4336W-G5

2530W-G5

2 x IPEX connector for 2T2R

2 x IPEX connector for 2T2R

2 x IPEX connector for 2T2R

� UNII - 1: 5150MHz -
5250MHz

� UNII - 1: 5150MHz -
5250MHz

� UNII - 1: 5150MHz -
5250MHz

� UNII - 3: 5725MHz -
5850MHz

� UNII - 3: 5725MHz -
5850MHz

� UNII - 3: 5725MHz -
5850MHz

Note: Subject to local reg- Note: Subject to local reg- Note: Subject to local reg-

ulations

ulations

ulations

Note: The 2.4GHz frequency is not available for use with these detectors. Do not use the 2.4GH band setting with the router or access point being used with the detector.

Note: The 2.4GHz frequency is not available for use with these detectors. Do not use the 2.4GH band setting with the router or access point being used with the detector.

Note: The 2.4GHz frequency is not available for use with these detectors. Do not use the 2.4GH band setting with the router or access point being used with the detector.

� 802.11a: OFDM (BPSK,
QPSK, 16-QAM, 64QAM)

� 802.11a: OFDM (BPSK,
QPSK, 16-QAM, 64QAM)

� 802.11a: OFDM (BPSK,
QPSK, 16-QAM, 64QAM)

� 802.11n: OFDM (BPSK,
QPSK, 16-QAM, 64QAM)

� 802.11n: OFDM (BPSK,
QPSK, 16-QAM, 64QAM)

� 802.11n: OFDM (BPSK,
QPSK, 16-QAM, 64QAM)

� 802.11ac: OFDM (BPSK,
QPSK, 16-QAM, 64QAM, 256-QAM)

� 802.11ac: OFDM (BPSK,
QPSK, 16-QAM, 64QAM, 256-QAM)

� 802.11ac: OFDM (BPSK,
QPSK, 16-QAM, 64QAM, 256-QAM)

10

www.vareximaging.com

REFERENCE MANUAL

4343W/4336W-G5/2530W-G5 X-ray Detectors

Table 7 Specifications (Continued)

Transmit Power WIFI_Chain 0
Transmit Power WIFI_Chain 1

� 802.11a: 14.5 + 1dBm
� 802.11n/ac
20_5180MHz~5240MH z: 13.5 + 1dBm
� 802.11n/ac
20_5745MHz~5825MH z: 13 + 1dBm
� 802.11n/ac
40_5190MHz: 11 + 1dBm
� 802.11n/ac
40_5230MHz: 13.5 + 1dBm
� 802.11n/ac
40_5755MHz~5795MH z: 13 + 1dBm
� 802.11ac 80: 10.5 +
1dBm
� 802.11n/ac
20_5180MHz~5240MH z: 13.5 + 1dBm
� 802.11n/ac
20_5745MHz~5825MH z: 13 + 1dBm
� 802.11n/ac
40_5190MHz: 11 + 1dBm
� 802.11n/ac
40_5230MHz: 13.5 + 1dBm
� 802.11n/ac
40_5755MHz~5795MH z: 13 + 1dBm
� 802.11ac 80: 10.5 +
1dBm

� 802.11a: 14.5 + 1dBm � 802.11a: 12 + 1dBm

� 802.11n/ac
20_5180MHz~5240MH z: 13.5 + 1dBm

� 802.11n/ac
20_5180MHz~5240MH z: 9 + 1dBm

� 802.11n/ac
20_5745MHz~5825MH z: 13 + 1dBm

� 802.11n/ac
20_5745MHz~5825MH z: 9 + 1dBm

� 802.11n/ac
40_5190MHz: 11 + 1dBm
� 802.11n/ac
40_5230MHz: 13.5 + 1dBm
� 802.11n/ac
40_5755MHz~5795MH z: 13 + 1dBm

� 802.11n/ac
40_5190MHz: 9 + 1dBm
� 802.11n/ac
40_5230MHz: 9 + 1dBm
� 802.11n/ac
40_5755MHz~5795MH z: 9 + 1dBm
� 802.11ac 80: 8 + 1dBm

� 802.11ac 80: 10.5 +
1dBm

� 802.11n/ac
20_5180MHz~5240MH z: 13.5 + 1dBm

� 802.11n/ac
20_5180MHz~5240MH z: 9 + 1dBm

� 802.11n/ac
20_5745MHz~5825MH z: 13 + 1dBm

� 802.11n/ac
20_5745MHz~5825MH z: 9 + 1dBm

� 802.11n/ac
40_5190MHz: 11 + 1dBm
� 802.11n/ac
40_5230MHz: 13.5 + 1dBm
� 802.11n/ac
40_5755MHz~5795MH z: 13 + 1dBm

� 802.11n/ac
40_5190MHz: 9 + 1dBm
� 802.11n/ac
40_5230MHz: 9 + 1dBm
� 802.11n/ac
40_5755MHz~5795MH z: 9 + 1dBm
� 802.11ac 80: 8 + 1dBm

� 802.11ac 80: 10.5 +
1dBm

www.vareximaging.com

11

4343W/4336W-G5/2530W-G5 X-ray Detectors

Table 7 Specifications (Continued)

Receive Sensitivity

� 802.11a:  -
70dBm@54Mbps

� 802.11a:  -
70dBm@54Mbps

� 802.11a:  -
70dBm@54Mbps

� 802.11n/5GHz (HT20): � 802.11n/5GHz (HT20): � 802.11n/5GHz (HT20):

 -60dBm@MCS7

 -60dBm@MCS7

 -60dBm@MCS7

� 802.11n/5GHz (HT40): � 802.11n/5GHz (HT40): � 802.11n/5GHz (HT40):

 -60dBm@MCS7

 -60dBm@MCS7

 -60dBm@MCS7

� 802.11ac (VHT80):  -
51dBm@MCS9

� 802.11ac (VHT80):  -
51dBm@MCS9

� 802.11ac (VHT80):  -
51dBm@MCS9

REFERENCE MANUAL

12

www.vareximaging.com

REFERENCE MANUAL

4343W/4336W-G5/2530W-G5 X-ray Detectors
10.2 X-ray Detector Surfaces and Features

Figure 2 4343W X-ray Detector Surfaces and Features

Table 8 Description of Detector Surfaces and Features

Number 1 2 3 4 5 6 7 8 9 10 11 12

Description Handles
Battery Alignment Marker Battery and Battery Well Replaceable Battery Latch
Antennas Inductive Charging Receiver
Patient Contact Surface Service Cable Connection
LED Status Indicator Top of X-ray detector, interior electronics location Orientation Mark, also indicates glass array coordinates (X=0, Y=0)
Orientation Mark

www.vareximaging.com

13

4343W/4336W-G5/2530W-G5 X-ray Detectors

REFERENCE MANUAL

Figure 3 4336W-G5 X-ray Detector Surfaces and Features

Table 9 Description of Detector Surfaces and Features

Number 1 2 3 4 5 6 7 8 9 10 11 12

Description Handles
Battery Alignment Marker Battery and Battery Well Replaceable Battery Latch Inductive Charging Receiver
Antennas Patient Contact Surface Tether Cable Connection
LED Status Indicator Top of X-ray detector, interior electronics location Orientation Mark, also indicates glass array coordinates (X=0, Y=0)
Orientation Mark

14

www.vareximaging.com

REFERENCE MANUAL

4343W/4336W-G5/2530W-G5 X-ray Detectors

Figure 4 2530W-G5 X-ray Detector Surfaces and Features

Table 10 Description of Detector Surfaces and Features

Number 1 2 3 4 5 6 7 8 9 10 11

Description Handle
Battery Alignment Marker and Contacts Battery Well
Replaceable Battery Latch Inductive Charging Receiver
Antennas Tether Cable Connection
LED Status Indicator Top of X-ray detector, interior electronics location Orientation Mark, also indicates glass array coordinates (X=0, Y=0)
Orientation Mark

www.vareximaging.com

15

REFERENCE MANUAL

4343W/4336W-G5/2530W-G5 X-ray Detectors
11.0 Getting Started
This section describes everything needed to get started using the X-ray detectors.
11.1 Shipment Contents
Items received in each shipment, some items may be delivered electronically: � Wireless X-ray detector � X-ray detector Test Results � VSP/ViVA System Software � Wireless X-ray detector Reference Manual
11.2 Data Interface and Cables
WARNING For proper operation, X-ray detector antennas and access point antennas should be unobstructed.
WARNING Access point should not be installed next to power supply or generator equipment. Please contact your Varex representative for a list of approved access points.
WARNING Detector in Client Mode Varex strongly recommends disabling auto channel selection or roaming on the access point. Auto channel selection or roaming may affect wireless performance if the access point channel changes while the detector is transferring an image.
WARNING Detector in Access Point Mode The detector does not support auto channel selection.

16

www.vareximaging.com

REFERENCE MANUAL

4343W/4336W-G5/2530W-G5 X-ray Detectors

Figure 5 X-ray Detector as Access Point

Figure 6 X-ray Detector with Router
11.2.1 Connecting the Service Cable for 4343W
To connect the Service Cable: 1 Pull-back the USB door. 2 Insert the Service Cable, as indicated in Figure 7.

www.vareximaging.com

17

REFERENCE MANUAL

4343W/4336W-G5/2530W-G5 X-ray Detectors

Figure 7 Service Cable Connection (4343W only)

Note

The Service Cable functions as an interface between the X-ray detector and the workstation by providing a 100Mbp/s Ethernet connection for set-up of the wireless interface and as a last resort for retrieval of images from the X-ray detector in case of wireless transmission failure.

Note The Service Cable does not support image acquisition.

Note

The Service Cable does not provide power to the X-ray detector when tethered. Before servicing, ensure that a fully charged battery is inserted.

18

www.vareximaging.com

REFERENCE MANUAL

4343W/4336W-G5/2530W-G5 X-ray Detectors
11.2.2 Connecting the Tether Cable for 4336W-G5 and 2530W-G5
To connect the Tether Cable: 1 Remove the overlay to reveal the screw holding the USB door in place, see Figure 8.
Figure 8 Remove the Overlay
2 Completely remove the screw and remove the USB door, see Figure 9.

Figure 9 Remove the Screw and the USB Door

www.vareximaging.com

19

4343W/4336W-G5/2530W-G5 X-ray Detectors
3 Plug the Tether Cable into the USB slot and tighten the thumb screw into the threaded hole to secure the connection, see Figure 10.

REFERENCE MANUAL

Figure 10 Tether Cable Connection 4336W-G5 and 2530W-G5

Note Note

The Tether Cable functions as an interface between the X-ray detector and the workstation by providing a 1 GBp/s Ethernet connection for tether communication, set-up of the wireless interface, and as a last resort for retrieval of images from the X-ray detector in case of wireless transmission failure.
The Tether Cable is verified for image acquisition.

Note

The Tether Cable provides 19V to the X-ray detector which allows it to run on tether power and charge the Battery.

Note

The detector should be set to Station Mode if it will be used wirelessly and tethered. Station Mode allows for ease of switching between wireless and tethered operation. Refer to Section 11.11.2 for Station and Access Point settings.

20

www.vareximaging.com

REFERENCE MANUAL

4343W/4336W-G5/2530W-G5 X-ray Detectors

11.3 Software Installation
The VSP SDK requires that libvsp.dll and libvsp-zf.dll and Apple's Bonjour package be installed on the workstation.
Discovery of the VSP detector is simplified also by using Zero-configuration (Zeroconf) networking for detection of the detector by the operating system.

11.3.1 SDK Files
The installation of the SDK will copy several items to the workstation: � The VSP COMM Libraries - libvsp.dll and libvsp-zf.dll � SDK API Documentation � Sample Code � ViVa Test Application � Third party libraries:
� Bonjour (optional) - used by Zeroconf
Pre-compiled DLLs are provided for customers working with a Microsoft Windows operating system. Sample code (C#) will also be provided to illustrate the sequence of API calls needed to acquire X-ray images. This will include sample code for the standard set of APIs as well as usage of the consolidated API methods. For customers working in other operating environments, source code for the VSP DLL may be licensed for re-compilation.
It should be noted that corrections files are not stored on the workstation. Corrections and configuration files are stored on the X-ray detector.

Note

Refer to:
03236 FP2032_VarexSmartPanel_SoftwareInterfaceSpecification.pdf which provides API documentation for the software.

11.3.2 Bonjour Installation Files
Bonjour is an optional installation and is required if you use the List()/vsp_list() API function and ViVA software. The following installations are provided:
� Bonjour.msi � Bonjour64.msi

www.vareximaging.com

21

REFERENCE MANUAL

4343W/4336W-G5/2530W-G5 X-ray Detectors
11.3.3 Sample Code
� vsp-example.cs � C# sample code project � vsp-example.c� C/C++sample code project
11.3.4 Utility Software
This file utility is used to transfer a configuration file to the X-ray detector. This is a service function and should not be used by OEM customers. Additionally, transferring a new file to the X-ray detector is typically only needed if modifications have been made to the configuration file.
� vsp-file.exe
11.3.5 ViVA installation
To install the ViVA application: 1 Locate the Software Packageand click Setup.
Figure 11 Setup
2 Follow all on-screen prompts.

22

www.vareximaging.com

REFERENCE MANUAL

4343W/4336W-G5/2530W-G5 X-ray Detectors

11.4 X-ray Detector Battery
This section describes installing and removing the battery, battery charge status, and battery hot-swap.

Note Note

New batteries are shipped from Varex in shut-down mode. Before installing into the X-ray detector, the battery must be inserted into the 1 or 3-bay charger to remove it from shut-down mode.
For additional PDF information about the Varex Imaging Wireless Battery and Chargers, visit www.vareximaging.com.

11.4.1 Battery Installation
1 Insert Battery at a slight angle so that the side with contacts sits over the adjoining contacts in the battery compartment.

Note

When inserting the battery the angle of the battery should not be more than 20 degrees, inserting a battery at a larger angle could cause damage to the battery contact pins.

2 Lay the battery down, with the side opposite of the battery contacts slightly lifted.
3 Press down on the lifted side of battery, the battery will snap into place in the battery compartment.
4 The X-ray detector is now ready for use.

Figure 12 Representation of Battery Installation

www.vareximaging.com

23

REFERENCE MANUAL

4343W/4336W-G5/2530W-G5 X-ray Detectors
11.4.2 Battery Removal
1 Press-in the battery latch until an audible click is heard. The latch will stay in closed position.
2 Place a finger in opening on either side of the latch and lift the battery out.
Figure 13 Unlatch Battery

Figure 14 Battery Removal

24

www.vareximaging.com

REFERENCE MANUAL

4343W/4336W-G5/2530W-G5 X-ray Detectors
WARNING Do not use the battery latch as a handle. Ignoring this warning may cause damage to the battery latch or increase the likelihood that the X-ray detector may be dropped causing substantial product damage.
11.4.3 Battery Charge Level
The Battery charge level is found on the battery. Press the indicator button on the Battery and charge level will illuminate. Each LED illuminated represents 25% charge.

Figure 15 Battery Charge Level

11.4.4 Battery Hot-Swap

The X-ray detectors are equipped with a hot-swappable battery. When a discharged battery is removed from the X-ray detector, the User will have a set amount of time for the battery hot-swap to occur.
Table 11 Battery Hot-Swap Operation Time

X-ray Detector 4343W
4336W-G5 2530W-G5

Operation Time 3 minutes

WARNING If a fully charged battery is not re-inserted within the time window, the X-ray detector will power-OFF.

Note

Acquisition and calibration features are not available while hot-swapping a battery.

www.vareximaging.com

25

REFERENCE MANUAL

4343W/4336W-G5/2530W-G5 X-ray Detectors

11.5 Optional Varex Provided Inductive Battery Charger
The Battery may be charged using the Varex provided Inductive Battery Charger while the X-ray detector is installed in the bucky tray.

Note

During image acquisition or calibration, inductive battery charging will pause if Varex Inductive Battery Charger is used.

11.5.1 Installing the Varex Provided Inductive Battery Charger
1 Install the Varex Inductive Battery Charger and Detector Support to the bucky tray.
2 Self-tapping screws with washers, machine screws with washers into PEM nuts (installed on the bucky tray), or 1mm (thickness) VHB Tape may be used to attach the Varex Inductive Battery Charger and Detector Support into the bucky tray. Use Figure 16, Figure 17, and Figure 18 for mounting locations.
3 Route the USB-C Cable from the Varex Inductive Battery Charger to the Power Supply in a way that the opening and closing of the bucky tray does not cause damage to the cable. The USB-C Cable can be replaced if damaged.

WARNING Alignment between the Varex Inductive Battery Charger and the X-ray detector should be exact. Poor alignment or foreign objects may cause overheating.

Caution The Varex Inductive Battery Charger and the X-ray detector charging location should be flush when charging.

Caution

The Varex Inductive Battery Charger and Detector Support may not fit all bucky trays. System Integrator should qualify bucky tray before installing.

Caution Screw heads must be sub-flush to avoid damage caused to the X-ray detector when inserted into the bucky tray.

26

www.vareximaging.com

REFERENCE MANUAL

4343W/4336W-G5/2530W-G5 X-ray Detectors

Figure 16 Varex Inductive Battery Charger Dimensions (in mm) and Mounting Hole Locations (4343W and 4336W-G5 and 2530W-G5)

www.vareximaging.com

27

REFERENCE MANUAL

4343W/4336W-G5/2530W-G5 X-ray Detectors Figure 17 VHB Tape Placement Locations on Varex Inductive Battery Charger

Figure 18 VHB Tape Placement Dimension on Varex Inductive Battery Charger

28

www.vareximaging.com

REFERENCE MANUAL

4343W/4336W-G5/2530W-G5 X-ray Detectors

11.6 Using a Third-Party Inductive Battery Charger
Any third-party Inductive Battery Charger meeting the Qi 1.2 standard at 15 watts may be used for battery charging outside of the bucky tray. Refer to Figure 19 for the location of the inductive charger receiver on the X-ray detector for integrating a third-party Inductive Battery Charger.

WARNING Third-party Inductive Battery Chargers must not be used in the bucky tray. Ignoring this warning may result in image artifacts or damage to
the X-ray detector.

Caution Note

Third-party Inductive Battery Chargers do not support image acquisition while using the charger.
To support image acquisition while using the charger, the Varex supplied Inductive Battery Charger must be used, see Section 11.5.

Figure 19 Third-party Inductive Battery Charger 4343W/4336W-G5/2530W-G5 X-ray Detector Alignment

www.vareximaging.com

29

REFERENCE MANUAL

4343W/4336W-G5/2530W-G5 X-ray Detectors

11.7 Power-on and Power-off Sequence
To Power-on:
1 Insert the Battery into the 1 or 3-bay charger to remove from shut-down mode (only applies to Batteries that are new).
2 Place Battery into X-ray detector making sure the Battery latches into place, see Section 11.4.1 and Section 11.4.2. The X-ray detector will automatically power-on when battery is inserted.

Note

When a Battery is inserted into the X-ray detector, the LED Status Indicator will turn orange as it boots. After booting, it connects to the configured wireless router and is in Standby Mode, where the LED Status Indicator will blink twice (2) per second. If the X-ray detector does not connect to the configured wireless router, it will blink slowly.

To Power-off: 1 Remove the battery from the X-ray detector.

Note

Removal of the Battery does not automatically power-off the X-ray detector. The X-ray detector will stay powered-on for approximately 3 minutes or until discharged after battery removal.

30

www.vareximaging.com

REFERENCE MANUAL

4343W/4336W-G5/2530W-G5 X-ray Detectors
11.8 Reboot Sequence
The X-ray detector may be rebooted if needed. To reboot: 1 Remove the tether cable. 2 Insert and remove the Battery 4 times within an 8 second window, see Figure 20.
Figure 20 Reboot Sequence
WARNING The tether cable must be removed before attempting to reboot via the battery. The battery reboot will not work if the tether cable is connected to the detector.

www.vareximaging.com

31

REFERENCE MANUAL

4343W/4336W-G5/2530W-G5 X-ray Detectors
11.9 LED Status Indicator Behavior

Figure 21 LED Status Indicator

Note

The blinking behavior occurs based on a 4Hz clock. Each digit for the blinking pattern represents 1/4s. 0 =LED OFF, 1 =LED ON, X = Previous State.

Table 12 LED Status Details

LED Behavior Orange Solid (111111) Green Blinking (100000) Green Blinking (101010) Green Solid (111111) Green Blinking (110011)
Yellow Solid (111111) Purple Blinking (1xxxxx) Blue Blinking (1xxxxx)
No LED

Status Booting No connection to the detector, blinks every 1.5 seconds Connected to the detector, blinks twice (2) per second Link Opened, detector controlled remotely, LED always on Connected to Service Cable (4343W) or Tether Cable (4336W-G5/ 2530W-G5), blinks once (1) per second Detector Error Battery Hot-Swap Active (battery exhausted or removed) Battery is able to charge
Off

32

www.vareximaging.com

REFERENCE MANUAL

4343W/4336W-G5/2530W-G5 X-ray Detectors
11.10 Connecting to the X-ray Detector
1 Place a battery into the battery slot on the X-ray detector and latch into place. The X-ray detector LED will be solid Orange, then begin to blink Green. See Table 12.
2 To link to the X-ray detector, click the ViVA icon to launch the application.
Figure 22 The ViVA Icon
3 The X-ray detector will link automatically in ViVA. When the X-ray detector is linked, the Mode Drop Down Menu will become populated.

Figure 23 Detector Linked in ViVA

Note

Automatically linking to the X-ray detector in ViVA will require that Bonjour is installed.

www.vareximaging.com

33

REFERENCE MANUAL

4343W/4336W-G5/2530W-G5 X-ray Detectors

11.11 VSP Control Panel
Varex Smart Panels utilize a Control Panel to manage detector configuration settings. The Control Panel is accessed using a web browser (using the X-ray detector's IP address). The Control Panel allows administrators to work with the following configuration settings: � Detector settings � WiFi settings � Change Password � Firmware Update � View detector information � View the Error Log � Update Country Codes file � Reset software to Factory Image

Note Note

Control Panel screens will vary slightly for the type of detector. WiFi related settings will only display for wireless detectors.
For best results, only use Firefox or a Chrome browser window.

11.11.1 Access the VSP Control Panel
To access the Control Panel:
1 Open a browser window and navigate to the IP Address of the X-ray detector, example: http://192.168.2.31
2 Authentication is required to make any modifications to the settings in Control Panel. The first time any of the links are clicked on the left side of the control panel, you will be prompted with a dialog box which allows you to log in.

Figure 24 VSP Control Panel Access Authentication

34

www.vareximaging.com

REFERENCE MANUAL

4343W/4336W-G5/2530W-G5 X-ray Detectors

Note

The Authentication Required Dialog Box will look different in each browser, but require the same User Name and Password.

3 Enter the default user and password: � User Name: admin � Password: password 4 Click Log In.

Note

Once the X-ray detector is configured, the default password should be changed.

5 The main VSP Control Panel screen displays links in the left pane. When a link is clicked the content will show in the right pane.

Figure 25 VSP Control Panel

www.vareximaging.com

35

REFERENCE MANUAL

4343W/4336W-G5/2530W-G5 X-ray Detectors
11.11.2 Modify Settings
To modify the settings: 1 Click Settings. 2 The Settings content will load and any settings that are able to be modified. 3 After inputting desired settings, click Update. The X-ray detector will reboot and the new
settings will updated on the X-ray detector.
Figure 26 Modify VSP Control Panel Settings

36

www.vareximaging.com

REFERENCE MANUAL

4343W/4336W-G5/2530W-G5 X-ray Detectors
11.11.3 Change Password
To change the password after logging in: 1 Click Change Password. 2 Enter a new Password. 3 Once the new password is entered along with its matching confirmation, click Change to
confirm the new password. 4 To clear the passwords entered in the forms, click Reset.

Figure 27 Change Password

Note

Passwords must be at least 8 characters in length.

WARNING There is no back door available to the User or Varex for password recovery. If the password is mismanaged, it will result in the return of the X-ray detector for service.

www.vareximaging.com

37

4343W/4336W-G5/2530W-G5 X-ray Detectors
11.11.4 Firmware Update
To update the VSP Firmware: 1 Click Update Firmware. This option is used to update all X-ray detector software
(embedded software, firmware, etc). 2 Select the Varex provided firmware image by clicking Browse. 3 After selecting the desired firmware, click Update Firmware to send the image to the VSP
and start the upgrade process.

REFERENCE MANUAL

Figure 28 Updating the Firmware

38

www.vareximaging.com

REFERENCE MANUAL

4343W/4336W-G5/2530W-G5 X-ray Detectors
4 During the update, another page will display showing the file upload was successful. At this point the X-ray detector will apply the updated firmware.
Figure 29 Firmware Updated
WARNING A fully charged battery should be used during firmware update. Do not remove the battery during firmware update.
WARNING Do not remove the Service Cable until the X-ray detector's LED is blinking Green.

www.vareximaging.com

39

REFERENCE MANUAL

4343W/4336W-G5/2530W-G5 X-ray Detectors

11.12 X-ray Detector Calibration
X-ray detector calibration files are stored inside the detector's non-volatile memory. There are three calibration files per mode: offset, gain, and defects. Calibration files are used for corrections during image acquisition.

Note

After a calibration, ensure the new calibration files are used by closing and re-opening the link to the X-ray detector.

11.12.1 Offset Calibration
Offset calibration compensates for fixed pattern pixel intensity variations in the image associated with the dark current and electronic offsets. The Offset reference image is an average of a series of frames acquired without X-ray and referred to as dark fields. Prior to acquiring images, an offset calibration must be performed in each mode. The Offset calibration file created by this calibration is used by the corrections module to correct the preview image.
� Offset calibration must not be performed during X-ray. � The X-ray to digital conversion factor does not change because of calibration.
11.12.2 Offset Calibration Steps
ViVA can be used to run the calibration process. 1 Choose the desired mode from the Mode Drop Down Menu.

Figure 30 Mode Drop Down Menu

40

www.vareximaging.com

REFERENCE MANUAL

4343W/4336W-G5/2530W-G5 X-ray Detectors
2 Click the Offset Calibration Button or click Offset Calibration from the menu bar under Acquisition.

Figure 31 Initiate Offset Calibration
3 A Calibration Setting window appears. 4 Enter the number of frames desired and click OK.
Figure 32 Calibration Setting window
5 An Offset Calibration Progress window appears.

Figure 33 Offset Calibration Progress

www.vareximaging.com

41

4343W/4336W-G5/2530W-G5 X-ray Detectors
6 Once all frames are acquired, the X-ray detector is updated with the averaged offset calibration frame for the current mode. The updated message will show on the progress window and calibration process is complete.
7 Click Close.

REFERENCE MANUAL

Figure 34 Finish Offset Calibration
11.12.3 Gain Calibration
To compensate for non-uniformities in the X-ray detector, a gain reference image (flat field) is used by the Corrections module to correct all images. The flat field image must be captured by the VSP prior to acquiring images. The process of capturing the flat field image is known as gain calibration.
Note The gain calibration process will include automatically running an Offset calibration to ensure that the detector is properly calibrated.

Gain calibration is based upon the linear response of the X-ray detector to dose. Normalization is achieved by applying the flat field image acquired during the gain calibration to all images corrected by the VSP. Gain calibration should be performed in the range where the detector is linear.
Flat field images acquired near or exceeding the saturation point will cause normalization failures with all images acquired until a gain calibration with the correct dose is performed.

Note

It is recommended that flat field images be acquired with a median count of approximately 11000 - 15000.

This range will ensure that gain calibration will meet both the upper and lower dose requirements under all modes of operation. Dose requirements are determined by the settings of the generator X-ray source.

42

www.vareximaging.com

REFERENCE MANUAL

4343W/4336W-G5/2530W-G5 X-ray Detectors

To reduce the effects of noise, the average of each pixel in the flat field image is calculated by accumulating a number of frames into an internal memory buffer, then dividing the sum of each pixel by the number of frames acquired.

Note

Gain calibration requires X-ray dose. Certain precautions must be taken by the human operator.

The number of calibration frames used during Gain and Offset calibrations can be adjusted under the Mode Settings pull down menu.

Note Note

We recommend accumulating 32 frames for gain calibration and 8 frames for offset calibration for optimal image quality.
Gain calibration should be performed at least once per year.

The actual number of calibration frames used is determined by the system integrator depending upon their specific performance requirements.

Note

ViVA provides the convenience of automatically running Offset Calibration as part of the gain calibration process.
However, API driven gain calibrations do not automatically run Offset Calibration. OEM Applications should be sure to run Offset Calibration prior to gain calibration.

www.vareximaging.com

43

REFERENCE MANUAL

4343W/4336W-G5/2530W-G5 X-ray Detectors

11.12.4 Gain Calibration Steps

The general procedure for gain calibration for all modes is described in Table 13.
Table 13 Gain Calibration Sequence in ViVA- All Modes

Action Power On
Offset Calibration

Results
Power On the detector by inserting a battery. Once the detector is powered on the detector is in low-power state. Wait 5 minutes prior to gain calibration.
Software performs a new Offset calibration referred to as dark field acquisition.
Note: X-rays must not be used for this part of the calibration.

Gain Calibration Repeat

Multiple Gain frames taken. Software pauses at each frame so that the operator can apply X-ray exposure.
Note: The exposure should ideally be at a level and technique
representative of the typical exposure dose for the detector
during procedures.
The above procedure must be repeated for each of the stored imaging modes.

1 Choose the desired imaging mode from the Mode Drop Down Menu.

Figure 35 Mode Drop Down Menu
2 Under the Acquisition menu, click Gain Calibration. This invokes hardware handshaking for the dark field calibration.

Figure 36 Initiate Gain Calibration

44

www.vareximaging.com

REFERENCE MANUAL

4343W/4336W-G5/2530W-G5 X-ray Detectors
WARNING In order to acquire an image with X-ray exposure in vTrigger mode, Hardware Handshaking must be enabled, see Figure 50, or an image without exposure will be returned.
3 A Gain Calibration Progress window will appear. When prompted (waiting for X-ray), perform exposure.

Figure 37 Gain Calibration Progress window
4 Once all X-ray frames have been accumulated, the calibration process will average the gain calibration image for the current mode.

Figure 38 Gain Calibration Updating
5 When complete, an updated message and successfully finished calibration message will appear. The calibration process is complete. Click Close.

www.vareximaging.com

45

REFERENCE MANUAL

4343W/4336W-G5/2530W-G5 X-ray Detectors

Figure 39 Gain Calibration Complete

Note

Gain calibration should be performed at regular intervals:
� At least, every twelve (12) months. � If the central beam of the X-ray source has been moved relative to the
X-ray detector. � If the X-ray tube is replaced. � If the X-ray detector is dropped.

46

www.vareximaging.com

REFERENCE MANUAL

4343W/4336W-G5/2530W-G5 X-ray Detectors

11.13 Image Acquisition

Acquisition can be performed after Offset and gain calibration have been performed. This section describes how to acquire images.
Before performing acquisition, settings should be checked to ensure that the desired corrections are applied to acquired frames. Table 14 lists the types of corrections that can be applied.
Table 14 Types of Corrections that can be applied during Acquisition

Type Raw Corrected Offset Corrected Gain Corrected

Images transferred to Workstation Exposed Frame and Post-Offset Frame
A single fully corrected frame A single offset corrected frame, without gain and defect correction
A single gain corrected frame, without defect correction

Note

When acquiring Corrected, Offset Corrected, and Gain Corrected images; if preview is enabled and additional preview frame will be delivered to the workstation prior to any additional frames.

1 To set the Correction type, click on Settings, the Acquisition Settings Menu will appear.

Figure 40 Radiographic Acquisition Settings

www.vareximaging.com

47

4343W/4336W-G5/2530W-G5 X-ray Detectors
2 In the Acquisition Settings window; the type of corrected image, the number of loop acquisitions (if desired), Auto Save, and Debug Verbosity may be selected. Click OK.

REFERENCE MANUAL

Figure 41 Radiographic Acquisition Settings window

11.13.1 Acquiring Radiography Images
Radiography provides single-shot, high-resolution images for diagnosis.

Note

The OEM workstation should have the ability to employ the PREP and Expose_OK signals. See Section 13.3 or Section VSPADU-UTILITY in 03236 FP2032_VarexSmartPanel_SoftwareInterfaceSpecification.PDF for an example of controlling the X-ray Generator.

1 Choose the desired imaging mode from the Mode Drop Down Menu.

Figure 42 Mode Drop Down Menu

2 Make sure Hardware Handshaking is selected, see Figure 50.

Note

In order to acquire an image with X-ray exposure in vTrigger mode, Hardware Handshaking must be enabled, see Figure 50, or an image without exposure will be returned.

48

www.vareximaging.com

REFERENCE MANUAL

4343W/4336W-G5/2530W-G5 X-ray Detectors
3 Click Acquire Image button or click Acquire Image in the Acquisition menu under the Menu Bar to begin acquiring images.
Figure 43 Acquire Image Button

Figure 44 Acquire Image

www.vareximaging.com

49

4343W/4336W-G5/2530W-G5 X-ray Detectors
4 An Acquisition Progress window will appear. Click Start Acquisition and initiate X-ray exposure.

REFERENCE MANUAL

Figure 45 Start Acquisition
5 The Radiographic Acquisition Progress window will begin to show acquisition process with a blue status bar.

Figure 46 Image Acquisition Progress
6 The acquired image can be saved in the desired file format by clicking File/Save As.

50

www.vareximaging.com

REFERENCE MANUAL

4343W/4336W-G5/2530W-G5 X-ray Detectors
11.13.2 Radiographic Acquisition Settings
In the Radiographic Acquisition Progress window the type of acquisition may be changed. 1 Click the Acquisition Type Drop Down Menu to switch between Software or Hardware
Acquisition (vTrigger).

Figure 47 Acquisition Type Drop Down Menu
11.14 ViVA Configuration Settings
This section describes the ways to view or change calibration and system settings that are currently used in ViVA. 1 Choose the desired imaging mode from the Mode Drop Down Menu.
Figure 48 Mode Drop Down Menu

www.vareximaging.com

51

REFERENCE MANUAL

4343W/4336W-G5/2530W-G5 X-ray Detectors
2 To enable or disable Hardware Handshaking, click Acquisition under the Menu Bar and select or de-select Hardware Handshaking. ViVA will remember your preferences for future launches. Hardware Handshaking is needed for gain calibration, see Section 11.12.4.
Figure 49 Hardware Handshaking Not Selected

Figure 50 Hardware Handshaking Selected

52

www.vareximaging.com

REFERENCE MANUAL

4343W/4336W-G5/2530W-G5 X-ray Detectors
3 To see System Settings, click Acquisition under the Menu Bar. 4 Click on System Settings. A System Settings window will appear. Image and calibration
settings may be turned On or Off in this window.

Figure 51 Open System Settings

Figure 52 System Settings window

www.vareximaging.com

53

REFERENCE MANUAL

4343W/4336W-G5/2530W-G5 X-ray Detectors
11.15 Dynamic Integration Settings
Dynamic Integration allows the User to change the exposure time settings within ViVA. 1 Click the desired mode from the Mode Drop Down Menu.
Figure 53 Select Mode
2 Click Acquire Image Setup from the menu bar under Acquisition.

Figure 54 Acquire Image Setup

54

www.vareximaging.com

REFERENCE MANUAL

4343W/4336W-G5/2530W-G5 X-ray Detectors
3 A message box will appear, click OK to proceed.
Figure 55 Message Box
4 Enter the integration time (exposure time) in the input box. Only values from 350 - 4000 ms will be accepted.

Figure 56 Enter Integration Time

Note

This selection will be maintained until a new integration time is entered, a different mode is selected, or the link has been closed.

www.vareximaging.com

55

REFERENCE MANUAL

4343W/4336W-G5/2530W-G5 X-ray Detectors

12.0 The Detector Configuration File
A configuration file will ship with the X-ray detector. The file is loaded by Varex onto the X-ray detector and will contain 1 or more modes. The configuration file is stored in the X-ray Detector's non-volatile memory.
The purpose of each mode is to configure the X-ray detector to achieve optimal performance during specific imaging procedures. Each mode is a combination of settings, such as; cycle time, rad or vTrigger, and integration time. The integration time or window exposure time is set dynamically, see Section 11.15. Refer to document 03236 FP-2032 - Varex Smart Panel Software Interface for more information on how to dynamically change the integration time.

The X-ray detector supports Radiographic and vTrigger modes of operation, see Table 15 for a typical mode example. The sensitivity of the X-ray detector is optimized to match the X-ray dose used in each mode.
Table 15 Operational Mode Example

Characteristic Modes
Pixel Binning Integration Time
X-ray Window Time
Cycle Time (@1000ms)
Image Area Frame Size

4343W

4336W-G5

2530W-G5

Radiography or vTrigger Radiography or vTrigger Radiography or vTrigger

1 x 1

1 x 1

1 x 1

1000ms default

550ms default

550ms default

(350ms - 4000ms possible) (350ms - 4000ms possible) (350ms - 4000ms possible)

0.35 to 4 seconds Dynamic Integration

0.35 to 4 seconds Dynamic Integration

0.35 to 4 seconds Dynamic Integration

< 4.7 seconds

< 4.1 seconds WiFi

< 3.4 seconds WiFi

< 3.1 seconds Tether

< 2.7 seconds Tether

Full Field

Full Field

Full Field

3072 x 3072

3072 x 2476

2304 x 1900

56

www.vareximaging.com

REFERENCE MANUAL

4343W/4336W-G5/2530W-G5 X-ray Detectors
13.0 System Software
The X-ray detector deploys the Varex Smart Panel (VSP) architecture. X-ray detector software is composed of two parts:
� Detector Software necessary to capture, process, and correct X-ray images (embedded in the detector).
� The VSP SDK client libraries.
Because the main software is embedded within the X-ray detector, the only software required on the workstation is a small set of DLLs that are copied from the software package to the workstation.
Software interacting with the X-ray detector make API calls to these SDK libraries to control the image acquisition process. These libraries manage connections to the X-ray detector and the transfer of files from the X-ray detector to the workstation.
13.1 Radiography Acquisition
Radiographic acquisition is controlled by software. Each acquisition results in multiple frames (exposed and post-offset). Exposure is initiated by sending the Prepare command followed by the Trigger API command. When the trigger command is sent, it starts integration. The integration time is defined in the customer configuration file and may be different for each mode. APIs can be used to obtain several of the configuration file mode settings.
When trigger is called, the software sends notifications indicating the begin and end of integration. These signals are used to interface with the X-ray generator. The exposure on notification indicates that integration has started and exposure can happen. The exposure off notification indicates that integration has stopped, and the exposure should end. X-ray exposure must happen between these two events.
As noted, each acquisition is based on at least two frames being read from the detector. The first readout is the exposed frame which is readout immediately after the integration window. The second readout is the post-offset frame(s). If corrections are turned on, corrections will be applied to the exposed frame and a single frame is transferred to the workstation as soon as possible. When the frame is transferred to the workstation, a Transfer End event is sent to the workstation indicating that the corrected frame has been delivered to the workstation (see 03236 FP-2032 - Varex Smart Panel Software Interface for more information on acquisition and use of APIs).

Figure 57 Exposure: Corrected Frames

www.vareximaging.com

57

REFERENCE MANUAL

4343W/4336W-G5/2530W-G5 X-ray Detectors
If corrections are not turned on (i.e. raw frames), multiple frames will be delivered to the workstation (i.e. uncorrected exposed frame, and the post offset), see Figure 58.

Figure 58 Exposure: Raw Frames

13.2 vTrigger Acquisition (AED)
The vTrigger acquisition is controlled by hardware. However, software is used to select a mode prior to arming the X-ray detector. With the vTrigger mode selected, vsp_acquisition_prepare() is called, to arm the X-ray detector in that mode. vTrigger modes are set up in the detector configuration file prior to use. These configuration file modes give the OEM the benefit of not requiring any hardware synchronization with the generator. A vTrigger acquisition mode utilizes the X-ray detector's hardware to sense when X-rays are exposed to the X-ray detector (i.e. Automatic Exposure Detection). Once X-rays have been detected, vTrigger automatically begins integration followed by image readout.
For modes that use vTrigger, only the Prepare command is used to arm the X-ray detector, but the Trigger command is not needed since the X-ray detector is in a vTrigger mode that uses automatic exposure detection. vTrigger modes will send the same notifications as those in the radiographic mode (e.g. exposure on, exposure off, transfer end, etc.)

Note

The minimum dose to initiate an exposure depends on system integrator requirements.

The sequences for integration and readout are the same as depicted in Figure 57 and Figure 58.

58

www.vareximaging.com

REFERENCE MANUAL

4343W/4336W-G5/2530W-G5 X-ray Detectors

13.3 X-ray Generator Interface Signals
Normally a set of hardware signals are used to interface between the X-ray detector and the X-ray generator and hand switch. For example, PREP and REQ are two hand switch signals that are typically used to indicate the user request for an X-ray exposure. Typically PREP (Prepare) indicates the user's input that X-ray exposure is imminent, while REQ (Request) indicates the user's input for immediate X-ray exposure. In response to the REQ signal, the X-ray detector will indicate the proper time for the X-ray exposure with the EXP_OK (Exposure OK) signal.
To accomplish this task of passing hardware signals to-and-from the detector, VSP provides a software version of these signals in the API. For X-ray detectors, the workstation software must provide the hardware interface to the X-ray generator and hand switch and relay those signals to the various API calls in the VSP Library. Upon receiving PREP signal, the workstation software should call the Prepare API function; upon receiving REQ signal, the workstation software should call the Trigger API function. When exposure on event is received, the workstation software should turn on the EXP_OK signal and when exposure off event is received, the workstation software shall turn off the EXP_OK signal.

Note

For interfaces connection, synchronization and timing diagrams information please reference the Software Interface Specification 03236 FP2032_VarexSmartPanel_SoftwareInterfaceSpecification.pdf.

13.4 Position Sensing
The X-ray detector is equipped with two magnetic position sensors that communicate the X-ray detector's exact position within a bucky setup to the OEM software. Refer to document 03236 FP2032 - Varex Smart Panel Software Interface for in-depth information on position sensing.
The red dots in Figure 59 indicate the locations of the 2 magnetic sensors inside the detector.

Figure 59 Position Sensors

www.vareximaging.com

59

REFERENCE MANUAL

4343W/4336W-G5/2530W-G5 X-ray Detectors

Software may be used to detect either of these sensors as 0 or 1 in various locations in an OEM system, e.g. a wall stand, table bucky, or if a grid is in use.
OEM Sensor Recommendations:
1 The magnets used in the OEM bucky or grid should have a magnetic strength rating between 1.17T and 1.21T. This will provide a magnetic field to activate the sensor in the detector without activating both of them, if they are appropriately placed.
2 The magnets used in the OEM bucky or grid must be oriented in a way that the polar fields match.
3 The magnet dimensions used by the OEM should be approximately a 10mm x 1mm disk.
13.5 Autonomous Mode
The Autonomous Mode vTrigger feature allows the wireless detector to run in an autonomous mode where it can be armed, is then disconnected from the wireless access point while remaining armed and ready for AED (Automatic Exposure Detection). In this mode, X-ray images are stored on the detector to be transferred to a client PC later.
The detector can be armed in the autonomous mode and then taken to the patient's room. In the process, the detector link will be closed and remain in the armed state, ready for X-ray. After one or more images are acquired, the detector can be synchronized again with a client PC and image(s) transferred so they can be associated with the patient study.
Refer to document 06104 for details about the software interface with the Autonomous Mode vTrigger operation.

WARNING The OEM is responsible for synchronizing the images with the respective patient names. Not complying with this requirement may result in images associated with the wrong patient.

Note

This feature does not record names or personal patient information. Varex only provides numerically named images. Personal information must be managed by the OEM's software.

13.6 Detector Sharing
The X-ray detector is equipped with Detector Sharing capability. Detector Sharing allows the IP address, password, and SSID to be set via software command. The software command for Detector Sharing can be sent via wireless or the Service Cable. Refer to document 03236 FP-2032 - Varex Smart Panel Software Interface for more information.

60

www.vareximaging.com

REFERENCE MANUAL

4343W/4336W-G5/2530W-G5 X-ray Detectors
14.0 Maintenance
In principle, the X-ray detector assembly is maintenance-free, however; it is important that all calibrations are regularly performed and used for image processing. Although the a-Si X-ray detectors are resistant to X-rays they can exhibit degradation over time when exposed to high X-ray dose environments. Sensitivity and uniformity may change depending on the weekly exposure duration and X-ray dose. Therefore, the pixel correction maps should be checked and updated regularly.
14.1 Cleaning and Disinfecting
The X-ray detector is likely to become contaminated during use. The specific material most likely to become contaminated is the X-ray grade carbon fiber input window and housing.
WARNING When the X-ray detector system is going to be cleaned or disinfected, be sure to remove the battery pack. Ignoring this warning may result in explosion, fire, or electrical shock, which may result in severe personal injury, death, or substantial product damage.
14.1.1 Material Compatible Chemicals for Cleaning and Disinfecting
All chemicals listed below are approved for use can be used for cleaning and disinfecting X-ray detector surfaces. To achieve full cleaning and disinfecting results, perform the procedures in Section 14.1.2 and Section 14.1.3 for each cleaning product. A list of chemicals is presented below: � CAVI-Wipes from Metrex � Isopropyl Alcohol
� 70% aqueous solution � Mild Soap and Water � Ethanol 70%
� Chlorine Bleach, 3% aqueous solution � Quaternary Ammonium Components
� Steris Coverage Plus NPD � 1 part Coverage Plus NPD to 255 parts Water

www.vareximaging.com

61

REFERENCE MANUAL

4343W/4336W-G5/2530W-G5 X-ray Detectors

14.1.2 Cleaning the X-ray Detector
To clean the X-ray detector: 1 Remove the battery from the X-ray detector. 2 Locate and read the cleaning instructions specified on the product label. Follow the product
instructions for cleaning.

Note

If you are using a disinfectant other than those specified, we recommend you consult a specialist for the procedure for disinfection.

3 Dispense wipe from container.
4 Visually inspect the device. If contamination is present, use a wipe to remove the contamination from the device surface. Use multiple wipes, as applicable, to remove the visible contamination.
5 Take care to remove contamination from seams, joints, and other difficult-to-reach areas.
6 Dispose of each wipe used for cleaning.
7 If visible residue from the cleaning product is evident after air-drying, remove the residue with a general Isopropyl Alcohol wipe, and let air-dry.

14.1.3 Disinfecting the X-ray Detector
To disinfect the X-ray detector: 1 Remove the battery from the X-ray detector. 2 Locate and read the cleaning instructions specified on the product label. Follow the product
instructions for cleaning.

Note

If you are using a disinfectant other than those specified, we recommend you consult a specialist for the procedure for disinfection.

3 Wipe the entire surface of the target areas of the system until they are visibly wet with the chemical solution. Target areas include any surface that was cleaned and/or any other surfaces potentially contaminated during system use.
4 Take care to wet seams, joints, and other difficult-to-reach areas.
5 Ensure that the surfaces remain visibly wet for the maximum necessary disinfection time specified on the product label.
a If a disinfection time is not specified on a chemical label for the concentration used, ensure that the surfaces remain visibly wet for a minimum of 10 minutes.

62

www.vareximaging.com

REFERENCE MANUAL

4343W/4336W-G5/2530W-G5 X-ray Detectors
b Use additional fresh wipes as needed to ensure continuous wet contact time during the specified disinfection period.
c Let air-dry. d If visible residue is evident after air-drying, remove the residue with a general Isopropyl
Alcohol wipe, and let air dry. e Do not re-use wipes. Discard wipes and gloves into the correct waste container.
WARNING Do not use flowing liquid or immersion on the X-ray detector, battery, battery compartment, or battery charger.
14.2 Field Replaceable Parts
The X-ray detector has been designed to allow for field replacement of parts that may wear out after repeated usage, avoiding the need to return the X-ray detector to Varex for repair. Contact Varex customer support (Section 15.1), for procedure to replace the following items: � Antenna Overlay � Battery Contacts � Battery Latch (w/Screw Overlay) � Carbon Fiber Overlay � Housing Overlay � Service and Tether Cable Connection Cover � Varex Inductive Charger

www.vareximaging.com

63

REFERENCE MANUAL

4343W/4336W-G5/2530W-G5 X-ray Detectors

15.0 Troubleshooting

This section describes suggestions for troubleshooting.
Table 16 Problems and Solutions

Problem

Solution

Detector fails to link wirelessly

1. Ensure that the detector is associated to the access point, refer to Table 12 for LED indicator behavior.

2. Let power-off (Section 11.7) or reboot the detector (Section 11.8), re-insert the battery, and try to associate with the access point again.

3. If the detector will still not link, power cycle the access point.

4. If the detector will still not link, check the connections and the settings on the access point. Check SSID, IP Address, and password to ensure they match.

5. If problem persists, consult the manufacturer or field service technician for help.

Intermittent or slow WiFi

Check the router band setting, band should be set to 5GHz. The

connection or slow image transfer detector will not run on the 2.4GHz frequency.

Detector causes Electro-Magnetic Interference

1. Reorient or relocate the receiving device. 2. Increase the separation between the equipment. 3. Consult the manufacturer or field service technician for help.

Acquired image is Non-linear or the pixel are past the saturation point of dose

1. Let power-off (Section 11.7) or reboot the detector (Section 11.8), re-insert the battery, re-establish the link.
2. Ensure that the tube dose is set to the correct settings.
3. Acquire another image at the recommended median count as stated in Section 11.12.3.
4. If problem persists, consult the manufacturer or field service technician for help.

64

www.vareximaging.com

REFERENCE MANUAL

4343W/4336W-G5/2530W-G5 X-ray Detectors

Table 16 Problems and Solutions (Continued)

Acquired image is completely dark
Acquired image is noisy
Acquired image shows a white or a black channel
Acquired images show defective pixels

1. Let power-off (Section 11.7) or reboot the detector (Section 11.8), re-insert the battery, re-establish the link and acquire another image.
2. Check synchronization between the X-ray detector and the X-ray source.
3. If problem persists, consult the manufacturer or field service technician for help.
1. Ensure that surrounding equipment is not interfering and re-position the detector further away from equipment.
2. Let power-off (Section 11.7) or reboot the detector (Section 11.8), re-insert the battery, re-establish the link and acquire another image.
3. Move the X-ray detector from any device that may introduce noise.
4. If problem persists, consult the manufacturer or field service technician for help.
1. Let power-off (Section 11.7) or reboot the detector (Section 11.8), re-insert the battery, re-establish the link.
2. Ensure that the tube dose is set to the correct settings.
3. Acquire another image at the recommended median count as stated in Section 11.12.3.
4. If problem persists, consult the manufacturer or field service technician for help.
1. Let power-off (Section 11.7) or reboot the detector (Section 11.8), re-insert the battery, re-establish the link.
2. Ensure that the tube dose is set to the correct settings.
3. Acquire another image at the recommended median count as stated in Section 11.12.3.
4. If the problem persists, add the defective pixels to the defect map and redo a gain calibration.
5. Acquire another image.
6. If problem persists, consult the manufacturer or field service technician for help.

www.vareximaging.com

65

REFERENCE MANUAL

4343W/4336W-G5/2530W-G5 X-ray Detectors

Table 16 Problems and Solutions (Continued)

Acquired image does not respond to exposure or the subject that is being X-rayed does not show up in the acquired images

1. Let power-off (Section 11.7) or reboot the detector (Section 11.8), re-insert the battery re-establish the link.
2. Ensure that the tube dose is set to the correct settings and that the detector is in the path of the X-ray beam.

3. Acquire another image at the recommended median count as stated in Section 11.12.3.

4. Ensure that the X-ray detector is in the X-ray Beam path.

5. If problem persists, consult the manufacturer or field service technician for help.

Acquired image shows vertical or 1. Let power-off (Section 11.7) or Reboot the detector (Section

horizontal lines

11.8), re-insert the battery, re-establish the link.

2. Ensure that the tube dose is set to the correct settings.

3. Acquire another image at the recommended median count as stated in Section 11.12.3.

4. If the problem persists, add the defects to the defect map and redo a gain calibration.

5. Acquire another image.

6. Move the X-ray detector away from any device that may introduce noise.

7. If problem persists, consult the manufacturer or field service technician for help.

Residual X-ray image from previous acquired image shows in current acquired image

Charge on the sensor pixels from an exposure beyond the saturation point of the pixels may cause a residual image. It can be erased by increasing time between exposures or taking multiple images until the artifact fades away.

Out of virtual memory

Close some of the windows that are currently open.

66

www.vareximaging.com

REFERENCE MANUAL

4343W/4336W-G5/2530W-G5 X-ray Detectors

Table 16 Problems and Solutions (Continued)

ViVA software freezes

Restart the computer and re-launch the ViVA software.

ViVA error message Detector dropped

1. Email the viva.log and vsp.log files (located where viva.exe is found) generated to:
flatpanel.warranty@vareximaging.com. This log file is normally found at C:\users\{username}\AppData\Local\ crashdumps\viva.log
1. Power-off the detector (Section 11.7) and inspect for damage.
2. If the battery does not appear damaged, place into battery charger to see if battery charger reports an error.
3. Inspect the detector for any physical damage.
4. Insert a charged battery into the detector and see if it powers on.
5. Re-establish a link.
6. Acquire an image from the detector and inspect for regions of missing data.
Note: If the detector has been dropped and is not returned to Varex, a new gain calibration must be performed.

www.vareximaging.com

67

REFERENCE MANUAL

4343W/4336W-G5/2530W-G5 X-ray Detectors
15.1 After-sales Service for Varex Imaging Products
To speak with our Technical Support Personnel, please call (800) 432-4422, wait for the voice prompt, then press 0 to be connected to an operator.
For product returns, contact your distributor or device manufacturer for shipping and packaging instructions. Do not return products to Varex Imaging for repair or service without advance notification. Include all required papers in the shipment.
We request that you obtain an RMA number for in-warranty and out-of-warranty returns of products.
Contact: flatpanel.warranty@vareximaging.com
For warranty and returns, please visit: https://www.vareximaging.com/flat-panel-service-report.
To ship the battery pack, follow the local and regional requirements for proper packaging and shipping of Lithium Batteries.
WARNING X-ray detectors containing CsI scintillators have the potential to become activated above regulatory limits for shipping if they have been exposed to high energies 8.5 MeV or higher. Varex cannot accept any activated X-ray detectors that have been used in environments 8.5 MeV or higher that exceed the local regulatory limits.
WARNING If the X-ray detector or accessories have been contaminated with potentially harmful substances, they cannot be accepted without written evidence of decontamination. See Section 14.1.2 and Section 14.1.3 for procedure of decontamination.
15.2 Disposing of the X-ray Detector and Battery
Contact your supplier or distributor, and check the terms of conditions of the purchase contract. This product should not be mixed with other commercial waste for disposal. Follow the local radiation protection regulations.
The Varex Imaging product may be attached as part of a component to other manufacturers' systems. These other manufacturers are directly responsible for the collection and processing of their own waste products under the terms of the WEEE Directive. Contact these producers directly before discarding any of their products.
WARNING Precautions should be taken to not open the X-ray detector. Depending upon the type of scintillator used, opening the X-ray detector may expose the user to potentially toxic materials.

68

www.vareximaging.com

REFERENCE MANUAL

4343W/4336W-G5/2530W-G5 X-ray Detectors

16.0 Safety - Electromagnetic Interference
This equipment generates, uses and can radiate radio frequency (RF) energy and, if not installed and used in accordance with the instructions, may cause harmful interference to other devices or may be affected by other equipment in the vicinity. If this equipment does cause harmful interference to other devices or is affected by other equipment, which can be determined by turning the equipment off and on, the user is encouraged to try to correct the interference by one or more of the measures listed in Section 15.0.
This equipment uses wireless LAN (WLAN) radios for transferring images. The WLAN power levels and antenna configurations have been tested and certified compliant through specific absorption rate (SAR) limits set by FCC/IC Canada (Less than 1.6W/kG) with separations as small as 0 cm between the panel antennas and human tissue. While compliant, it is still recommended to reduce exposure when possible by:
� Positioning subject to be X-rayed away from the antennas (this also helps reduce image transfer time).
� Removing the X-ray detector promptly when X-ray exposure is complete.
The X-ray detector does meet the IEC 60601 Safety definition for essential performance. However, some degradation of the image acquired and displayed is acceptable (e.g. small amount of noise, pixelation, video artifact, etc.) if the degradation would not affect the diagnosis or treatment. Images acquired shall be normal when the immunity interference stops. May require User intervention to clear an error message or continue operation.

16.1 Electromagnetic Emissions
Table 17 4343W Radiated/Conducted Emissions, Harmonics, Voltage, Fluctuations & Flicker

Emissions test

IEC 60601-1-2 test level

RF conducted emissions

Group 1, Class A, 150 kHz � 30 MHz

EN55011/CISPR11

RF radiated emissions

Group 1, Class A, 30 MHz � 1 GHz

EN55011/CISPR 11

Harmonic emissions

Class A

EN/IEC 61000-3-2

Voltage

Complies

fluctuations / flicker

emissions

IEC 61000-3-3

Compliance
N/A Battery power equipment not connected to mains Group 1, Class A, 30 MHz � 1 GHz
N/A Battery power equipment not connected to mains.
N/A Battery power equipment not connected to mains

Electromagnetic environment
The detector uses RF energy for its internal function. Nearby electronic equipment may be affected.
The detector uses RF energy for its internal function. Nearby electronic equipment may be affected.
The detector is suitable for use in all establishments other than domestic and those directly connected to the low voltage power supply network that supplies buildings used for domestic purposes.
The detector is suitable for use in all establishments other than domestic and those directly connected to the low voltage power supply network that supplies buildings used for domestic purposes.

www.vareximaging.com

69

REFERENCE MANUAL

4343W/4336W-G5/2530W-G5 X-ray Detectors

Table 18 4336W-G5 and 2530W-G5 Radiated/Conducted Emissions, Harmonics, Voltage, Fluctuations & Flicker

Emissions test

IEC 60601-1-2 test level

RF conducted emissions

Group 1, Class A, 150 kHz � 30 MHz

EN55011/CISPR11

RF radiated emissions

Group 1, Class A, 30 MHz � 1 GHz

EN55011/CISPR 11

Harmonic emissions

Class A

EN/IEC 61000-3-2

Voltage

Complies

fluctuations / flicker

emissions

IEC 61000-3-3

Compliance

Electromagnetic environment

For Group 1, in

The detector uses RF energy for its

frequency range

internal function. Nearby electronic

150KHz to 30 MHz equipment may be affected.

limits are not specified,

the test is unnecessary.

Group 1, Class A, 30 MHz � 1 GHz

The detector uses RF energy for its internal function. Nearby electronic equipment may be affected.

Class A Complies

The detector is suitable for use in all establishments other than domestic and those directly connected to the low voltage power supply network that supplies buildings used for domestic purposes.
The detector is suitable for use in all establishments other than domestic and those directly connected to the low voltage power supply network that supplies buildings used for domestic purposes.

16.2 Electromagnetic Immunity
Table 19 4343W ESD, Transient/Burst, Surge, Voltage Variation, Magnetic Fields

Immunity test
Electrostatic discharge (ESD) IEC 61000-4-2
Electrical fast transient/burst IEC 61000-4-4
Surge IEC 61000-4-5

IEC 60601-1-2 test level

Compliance

Electromagnetic environment

Contact Discharge: � 2, 4, 8 kV
Air Discharge: � 2, 4, 8, 15 kV

Contact Discharge: � 2, 4, 8 kV
Air Discharge: � 2, 4, 8, 15 kV

Floors should be wood, concrete, or ceramic tile. If floors are covered with synthetic material, the relative humidity should be at least 30%.

�2 kV AC Mains �1 kV I/O Lines

N/A
Battery power equipment not connected to mains

Mains power quality should be that of a typical professional healthcare environment.

�0.5 kV, �1 kV Line to Line
�0.5 kV, �1 kV, �2 kV Line to Ground

N/A
Battery power equipment not connected to mains

Mains power quality should be that of a typical professional healthcare environment.

70

www.vareximaging.com

REFERENCE MANUAL

4343W/4336W-G5/2530W-G5 X-ray Detectors

Table 19 4343W ESD, Transient/Burst, Surge, Voltage Variation, Magnetic Fields (Continued)

Immunity test

IEC 60601-1-2 test level

Voltage dips, short interruptions and voltage variations on power supply input lines
IEC 61000-4-11

Voltage dips:
0% UT (100% dip in UT) for 0,5 cycle at 0�, 45�, 90�, 135�, 180�, 225�, 270�, 315�
0% UT (100% dip in UT) for 1 cycle at 0�
70% UT (30% dip in UT) for 25/30 cycles at 0�
Voltage Interruptions:
0% UT (100% dip in UT) for 250/300 cycle

Power frequency (50/60 Hz) magnetic field
IEC 61000-4-8

30 A/m

IEC 61000-4-6

3 Vrms 150 kHz to 80 MHz

6V/m (in ISM bands between 0.15MHz and 80MHz)

80% AM (at 1kHz)

IEC 61000-4-3

3 V/m 80 MHz to 2.7 GHz

80% AM at 1 kHz

Compliance N/A Battery power equipment not connected to mains
30 A/m
N/A Battery power equipment not connected to mains
3 V/m 80 MHz to 2.7 GHz 80% AM at 1 kHz

Electromagnetic environment Mains power quality should be that of a typical professional healthcare environment. If the user of the detector requires continued operation during power mains interruptions, it is recommended that the system be powered from an uninterruptible power supply or a battery.
Magnetic field should be that of a typical location in a typical professional healthcare environment.
-
E = 6-- P d
Where P is the maximum power in W, d is the minimum separation distance in m and E is the Immunity Test Level in V/m. If the X-ray detector complies with Immunity Test Levels for this test, the 30cm minimum separation distance (in 5.2.1.1 f) may be replaced with minimum separation distances calculated from the higher Immunity Test Levels.

www.vareximaging.com

71

REFERENCE MANUAL

4343W/4336W-G5/2530W-G5 X-ray Detectors

Table 20 4343W Test Specs for Enclosure Port Immunity to RF Wireless Communications Equipment

Test Frequency

Band

Service

Modulation

Max Power

Distance

Immunity Test Level

385

380-390

TETRA 400

Pulse Modulation

1.8

0.3

27

b) 18 Hz

450

430-470 GMRS 460, FRS

FM c) +/- 5 kHz

2

0.3

28

460

deviation 1 kHz sine

710

704-787 LTE BAND 13, Pulse modulation

0.2

0.3

9

745

17

b) 217 Hz

780

810

800-960

GSM 1800;

Pulse modulation

870

TETRA 800;

b) 18 Hz

930

iDEN 820;

CDMA 850;

LTE Band 5

0.3

28

1720

1700-1990

GSM 1800;

Pulse modulation

2

0.3

28

1845

CDMA 1900;

b) 217 Hz

1970

GSM 1900;

DECT;

LTE Band 1, 3,

4, 25; UMTS

2450

2400-2570

Bluetooth,

Pulse modulation

2

0.3

28

WLAN, 802.11

b) 217 Hz

b/g/n,

RFID 2450,

LTE Band 7

5240

5100-5800

WLAN

Pulse modulation

0.2

0.3

9

5500

802.11 a/n

b) 217 Hz

5785

Note: If necessary to achieve the Immunity Test Level, the distance between the transmitting antenna and the X-ray detector may be reduced to 1m test distance is permitted by IEC 61000-4-3.

� For some services, only the uplink frequencies are included.
� The carrier shall be modulated using a 50% duty cycle square wave signal.
� As an alternative to FM modulation 50% pulse modulation at 18 Hz may be used because while it does not
represent actual modulation, it would be worst case.

72

www.vareximaging.com

REFERENCE MANUAL

4343W/4336W-G5/2530W-G5 X-ray Detectors

Table 21 4336W-G5 and 2530W-G5 ESD, Transient/Burst, Surge, Voltage Variation, Magnetic Fields

Immunity test

IEC 60601-1-2 test level

Electrostatic discharge (ESD)
IEC 61000-4-2

� 2, 4, 8 kV contact discharge
� 2, 4, 8, 15 kV air discharge

Electrical fast transient/burst
IEC 61000-4-4

�2 kV AC Mains �1 kV I/O Lines

Surge IEC 61000-4-5

�0.5 kV, �1 kV Line to Line
�0.5 kV, �1 kV, �2 kV Line to Ground

Voltage dips, short interruptions and voltage variations on power supply input lines
IEC 61000-4-11

Voltage dips:
0% UT (100% dip in UT) for 0,5 cycle at 0�, 45�, 90�, 135�, 180�, 225�, 270�, 315�
0% UT (100% dip in UT) for 1 cycle at 0�
70% UT (30% dip in UT) for 25/30 cycles at 0�
Voltage Interruptions:
0% UT (100% dip in UT) for 250/300 cycles

Compliance

Electromagnetic environment

� 2, 4, 8 kV contact discharge
� 2, 4, 8, 15 kV air discharge

Floors should be wood, concrete, or ceramic tile. If floors are covered with synthetic material, the relative humidity should be at least 30%.

�2 kV AC Mains �1 kV I/O Lines

Mains power quality should be that of a typical professional healthcare environment.

�0.5 kV, �1 kV Line to Line
�0.5 kV, �1 kV, �2 kV Line to Ground

Mains power quality should be that of a typical professional healthcare environment.

Voltage dips:
0% UT (100% dip in UT) for 0,5 cycle at 0�
0% UT (100% dip in UT) for 1 cycle at 0�
70% UT (30% dip in UT) for 25 cycles at 0�
Voltage Interruptions:
0% UT (100% dip in UT) for 250 cycles

Mains power quality should be that of a typical professional healthcare environment. If the user of the detector requires continued operation during power mains interruptions, it is recommended that the system be powered from an uninterruptible power supply or a battery.

www.vareximaging.com

73

REFERENCE MANUAL

4343W/4336W-G5/2530W-G5 X-ray Detectors

Table 21 4336W-G5 and 2530W-G5 ESD, Transient/Burst, Surge, Voltage Variation, Magnetic Fields (Continued)

Immunity test Power frequency (50/60 Hz) magnetic field IEC 61000-4-8 IEC 61000-4-6
IEC 61000-4-3

IEC 60601-1-2 test level
30 A/m
3 Vrms 150 kHz to 80 MHz 6V/m (in ISM bands between 0.15MHz and 80MHz) 80% AM (at 1kHz) 3 V/m 80 MHz to 2.7 GHz 80% AM at 1 kHz

Compliance 30 A/m

Electromagnetic environment
Magnetic field should be that of a typical location in a typical professional healthcare environment.

3 Vrms

150 kHz to 80

MHz6V/m (in ISM bands between

-

0.15MHz and 80MHz)

80% AM (at 1kHz)

3 V/m 80 MHz to 2.7 GHz
80% AM at 1 kHz

E = 6-- P d
Where P is the maximum power in W, d is the minimum separation distance in m and E is the Immunity Test Level in V/m.
If the X-ray detector complies with Immunity Test Levels for this test, the 30cm minimum separation distance (in 5.2.1.1 f) may be replaced with minimum separation distances calculated from the higher Immunity Test Levels.

Table 22 4336W-G5 and 2530W-G5 Test Specs for Enclosure Port Immunity to RF Wireless Communications Equipment

Test Frequency
385
450
710 745 780 810 870 930

Band 380-390 430-470 704-787
800-960

Service

Modulation

TETRA 400
GMRS 460, FRS 460
LTE BAND 13, 17

Pulse Modulation b) 18 Hz
FM c) +/- 5 kHz deviation 1 kHz sine
Pulse modulation b) 217 Hz

GSM 1800; TETRA 800; iDEN 820; CDMA 850; LTE Band 5

Pulse modulation b) 18 Hz

Max Power
1.8

Distance 0.3

Immunity Test Level
27

2

0.3

28

0.2

0.3

9

0.3

28

74

www.vareximaging.com

REFERENCE MANUAL

4343W/4336W-G5/2530W-G5 X-ray Detectors

Table 22 4336W-G5 and 2530W-G5 Test Specs for Enclosure Port Immunity to RF Wireless Communications Equipment (Continued)

Test Frequency

Band

Service

Modulation

Max Power

Distance

Immunity Test Level

1720

1700-1990

GSM 1800;

Pulse modulation

2

0.3

28

1845

CDMA 1900;

b) 217 Hz

1970

GSM 1900;

DECT;

LTE Band 1, 3,

4, 25; UMTS

2450

2400-2570

Bluetooth,

Pulse modulation

2

0.3

28

WLAN, 802.11

b) 217 Hz

b/g/n,

RFID 2450,

LTE Band 7

5240

5100-5800

WLAN

Pulse modulation

0.2

0.3

9

5500

802.11 a/n

b) 217 Hz

5785

Note: If necessary to achieve the Immunity Test Level, the distance between the transmitting antenna and the X-ray detector may be reduced to 1m test distance is permitted by IEC 61000-4-3.

� For some services, only the uplink frequencies are included.
� The carrier shall be modulated using a 50% duty cycle square wave signal.
� As an alternative to FM modulation 50% pulse modulation at 18 Hz may be used because while it does not
represent actual modulation, it would be worst case.

Note Note

These guidelines may not apply in all situations. Electromagnetic propagation is affected by absorption and reflection from structures, objects and people.
Field strengths from fixed transmitters, such as base stations for radio (cellular/cordless) telephones and land mobile radios, amateur radio, AM and FM radio broadcast and TV broadcast cannot be predicted theoretically with accuracy. To assess the electromagnetic environment due to fixed RF transmitters, an electromagnetic site survey should be considered. If the measured field strength in the location in which the X-ray detector is used exceeds the applicable RF compliance level above, the X-ray detector should be observed to verify normal operation. If abnormal performance is observed, additional measures may be necessary, such as reorienting or relocating the X-ray detector.

www.vareximaging.com

75

REFERENCE MANUAL

4343W/4336W-G5/2530W-G5 X-ray Detectors

16.3 Radio Frequency (RF) Compliance Information
This section describes RF Compliance information.

16.3.1 United States FCC/IC Compliance
This device complies with Part 15 of the FCC Rules. Operation is subject to the following two conditions: � This device may not cause harmful interference. � This device must accept any interference received, including interference that may cause
undesired operation.
This transmitter must not be co-located or operating in conjunction with any other antenna or transmitter. This device meets all the other requirements specified in Part 15E, Section 15.407 of the FCC Rules.
Transmission Band Frequencies: 5.2GHz and 5.8Ghz band ranges

Note

This equipment has been tested and found to comply with the limits for a Class A digital device, pursuant to part 15 of the FCC Rules. These limits are designed to provide reasonable protection against harmful interference when the equipment is operated in a commercial environment. This equipment generates, uses, and can radiate radio frequency energy and, if not installed and used in accordance with the instruction manual, may cause harmful interference to radio communications. Operation of this equipment in a residential area is likely to cause harmful interference in which case the user will be required to correct the interference at their own expense.

FCC responsible: Varex Imaging Corporation, 1678 South Pioneer Road, Salt Lake City, Utah 84104, USA, Tel: + 801/972-5000, Website: www.vareximaging.com
FCC Caution: Any changes or modifications not expressly approved by the party responsible for compliance could void the user's authority to operate this equipment.
4343W/4336W-G5: These requirements set a SAR limit of 1.6 W/kg averaged over one gram of tissue. The highest SAR value reported under this standard during product certification for use when properly worn on the body is 1.172 W/kg.
2530W-G5: These requirements set a SAR limit of 1.6 W/kg averaged over one gram of tissue. The highest SAR value reported under this standard during product certification for use when properly worn on the body is 1.564 W/kg.

76

www.vareximaging.com

REFERENCE MANUAL

4343W/4336W-G5/2530W-G5 X-ray Detectors

If this equipment does cause harmful interference to radio or television reception, which can be determined by turning the equipment off and on, the user is encouraged to try to correct the interference by one or more of the following measures noted below:
� Reorient or relocate the receiving antenna.
� Increase the separation between the equipment and receiver.
� Connect the equipment into an outlet on a circuit different from the one the receiver is connected to.
� Consult the dealer or an experienced radio/TV technician for help.
Radiation Exposure Statement:
The product complies with the FCC portable RF exposure limit set forth for an uncontrolled environment and are safe for intended operation as described in this manual. The further RF exposure reduction can be achieved if the product can be kept as far as possible from the user body or set the device to lower output power if such function is available.
The user may find the following booklet prepared by the Federal Communications Commission helpful: The Interference Handbook
This booklet is available from the U.S. Government Printing Office, Washington, D.C. 20402. Stock No. 004-000-00345-4.

Note Note

Modifications not expressly approved by the manufacturer could void the user's authority to operate the equipment under FCC rules.
In the 5150 to 5250 MHz frequency range this transmitter is restricted to indoor use only.

Figure 60 4343W Detector and Wireless Label Locations

www.vareximaging.com

77

REFERENCE MANUAL

4343W/4336W-G5/2530W-G5 X-ray Detectors Figure 61 4336W-G5 Detector and Wireless Label Locations Figure 62 2530W-G5 Detector and Wireless Label Locations

78

www.vareximaging.com

REFERENCE MANUAL

4343W/4336W-G5/2530W-G5 X-ray Detectors
17.0 Regulatory
This section includes the manufacturers' declaration of standards and regulations for which the X-ray detector complies with.
17.1 Industry Canada Notice
To prevent radio interference to the licensed service, this device is intended to be operated indoors and away from windows to provide maximum shielding. Equipment (or its transmitting antenna) that is installed outdoors is subject to licensing. The installer of this radio equipment must ensure that the antenna is located or pointed such that it does not emit RF field in excess of Health Canada limits for the general population; consult Safety Code 6, obtainable from Health Canada's web site: www.hc-sc.gc.ca/rpb
Cet appareil num�rique de la classe A est conforme � la norme NMB-003 du Canada Avis de Conformit� � la R�glementation d'Industrie Canada:
Pour emp�cher toute interf�rence aux services faisant l'objet d'une licence, cet appareil doit �tre utilis� � l'int�rieur seulement et devrait �tre plac� loin des fen�tres afin de fournir un �cran de blindage maximal. L'installateur du pr�sent mat�riel radio doit s'assurer que l'antenne est situ�e ou point�e de mani�re � ce que cette derni�re n'�mette pas de champs radio�lectriques sup�rieurs aux limites specif�es par Sant� Canada pour le grand public; consulter le Code de s�curit� 6, disponible sur le site Web de Sant� Canada, � l'adresse suivante: www.hc-sc.gc.ca/rpb
This device complies with ISED license-exempt RSS standard(s). Operation is subject to the following two conditions:
� this device may not cause interference
� this device must accept any interference, including interference that may cause undesired operation of the device.
Le pr�sent appareil est conforme aux CNR d' ISED applicables aux appareils radio exempts de licence. L'exploitation est autoris�e aux deux conditions suivantes:
� l'appareil ne doit pas produire de brouillage
� l'utilisateur de l'appareil doit accepter tout brouillage radio�lectrique subi, m�me si le brouillage est susceptible d'en compromettre le fonctionnement.
English
1 The device for operation in the band 5150-5250 MHz is only for indoor use to reduce the potential for harmful interference to co-channel mobile satellite systems;
2 The maximum antenna gain permitted for devices in the band 5725-5825 MHz shall comply with the EIRP limits specified for point-to-point and non point-to-point operation as appropriate.
3 The worst-case tilt angle(s) necessary to remain compliant with the e.i.r.p. elevation mask requirement set forth in Section 6.2.2(3) shall be clearly indicated.

www.vareximaging.com

79

REFERENCE MANUAL

4343W/4336W-G5/2530W-G5 X-ray Detectors
Franc�s
1 Les dispositifs fonctionnant dans la bande 5150-5250 MHz sont r�serv�s uniquement pour une utilisation � l'int�rieur afin de r�duire les risques de brouillage pr�judiciable aux syst�mes de satellites mobiles utilisant les m�mes canaux;
2 Le gain maximal d'antenne permis (pour les dispositifs utilisant la bande 5725-5825 MHz) doit se conformer � la limite de e.i.r.p. sp�cifi�e pour l'exploitation point � point et non point � point, selon le cas.
3 Les pires angles d'inclinaison n�cessaires pour rester conforme � l'exigence de la p.i.r.e. applicable au masque d'�l�vation, et �nonc�e � la section 6.2.2 3), doivent �tre clairement indiqu�s.
Radiation Exposure Statement 4343W/4336W-G5:
These requirements set a SAR limit of 1.6 W/kg averaged over one gram of tissue. The highest SAR value reported under this standard during product certification for use when properly worn on the body is 1.172 W/kg.
Ces exigences �tablissent une limite SAR de 1,6 W / kg en moyenne sur un gramme de tissu. La valeur SAR la plus �lev�e d�clar�e selon cette norme lors de la certification du produit � utiliser lorsqu'il est correctement port� sur le corps est de 1.172 W / kg.
Radiation Exposure Statement 2530W-G5:
These requirements set a SAR limit of 1.6 W/kg averaged over one gram of tissue. The highest SAR value reported under this standard during product certification for use when properly worn on the body is 1.564 W/kg.
Ces exigences �tablissent une limite SAR de 1,6 W / kg en moyenne sur un gramme de tissu. La valeur SAR la plus �lev�e d�clar�e selon cette norme lors de la certification du produit � utiliser lorsqu'il est correctement port� sur le corps est de 1.564 W / kg.

80

www.vareximaging.com

REFERENCE MANUAL

4343W/4336W-G5/2530W-G5 X-ray Detectors

17.2 Declaration of Conformity for European Union
Table 23 Europe - Declaration of Conformity in Languages of European Community

Language Cesky [Czech] Dansk [Danish] Deutsch [German]
Eesti [Estonian]
English Espa�ol [Spanish]
 [Greek]
Fran�ais [French]
Italiano [Italian]
Latviski [Latvian] Lietuvi
[Lithuanian]

Statement
Varex Imaging, Inc. t�mto prohlasuje, ze tento Radiolan je ve shod se z�kladn�mi pozadavky a dals�mi p�slusn�mi ustanoven�mi smrnice 1999/5/ES.
Undertegnede Varex Imaging, Inc. erkl�rer herved, at f�lgende udstyr Radiolan overholder de v�sentlige krav og �vrige relevante krav i direktiv 1999/5/EF.
Hiermit erkl�rt Varex Imaging, Inc., dass sich das Ger�t Radiolan in �bereinstimmung mit den grundlegenden Anforderungen und den �brigen einschl�gigen Bestimmungen der Richtlinie 1999/5/EG befindet.
K�esolevaga kinnitab Varex Imaging, Inc. seadme Radiolan vastavust direktiivi 1999/5/E� p�hin�uetele ja nimetatud direktiivist tulenevatele teistele asjakohastele s�tetele.
Hereby, Varex Imaging, declares that this Radiolan is in compliance with the essential requirements and other relevant provisions of Directive 1999/5/EC.
Por medio de la presente Varex Imaging. declara que el Radiolan cumple con los requisitos esenciales y cualesquiera otras disposiciones aplicables o exigibles de la Directiva 1999/5/CE.
   Varex Imaging.   Radiolan             1999/5/.
Par la pr�sente Varex Imaging d�clare que l'appareil Radiolan est conforme aux exigences essentielles et aux autres dispositions pertinentes de la directive 1999/5/CE.
Con la presente Varex Imaging dichiara che questo Radiolan � conforme ai requisiti essenziali ed alle altre disposizioni pertinenti stabilite dalla direttiva 1999/5/CE.
Ar so Varex Imaging deklar, ka Radiolan atbilst Direktvas 1999/5/EK btiskajm prasbm un citiem ar to saisttajiem noteikumiem.
Siuo Varex Imaging deklaruoja, kad sis Radiolan atitinka esminius reikalavimus ir kitas 1999/5/EB Direktyvos nuostatas.

Nederlands [Dutch] Hierbij verklaart Varex Imaging dat het toestel Radiolan in overeenstemming is met de essenti�le eisen en de andere relevante bepalingen van richtlijn 1999/5/EG.

Malti [Maltese]

Hawnhekk, Varex Imaging, jiddikjara li dan Radiolan jikkonforma mal-tiijiet essenzjali u ma provvedimenti orajn relevanti li hemm fid-Dirrettiva 1999/5/EC.

Magyar [Hungarian] Alul�rott, Varex Imaging nyilatkozom, hogy a Radiolan megfelel a vonatkoz� alapvet� k�vetelm�nyeknek �s az 1999/5/EC ir�nyelv egy�b el��r�sainak.

www.vareximaging.com

81

REFERENCE MANUAL

4343W/4336W-G5/2530W-G5 X-ray Detectors

Table 23 Europe - Declaration of Conformity in Languages of European Community (Continued)

Language Polski [Polish]
Portugu�s [Portuguese]

Statement
Niniejszym Varex Imaging owiadcza, e Radiolan jest zgodny z zasadniczymi wymogami oraz pozostalymi stosownymi postanowieniami Dyrektywy 1999/5/EC.
Varex Imaging declara que este Radiolan est� conforme com os requisitos essenciais e outras disposi�es da Directiva 1999/5/CE.

Slovensko [Slovenian]

Varex Imaging izjavlja, da je ta Radiolan v skladu z bistvenimi zahtevami in ostalimi relevantnimi dolocili direktive 1999/5/ES.

Slovensky [Slovak] Varex Imaging t�mto vyhlasuje, ze Radiolan spa z�kladn� poziadavky a vsetky pr�slusn� ustanovenia Smernice 1999/5/ES.

Suomi [Finnish]

Varex Imaging vakuuttaa t�ten ett� Radiolan tyyppinen laite on direktiivin 1999/5/EY oleellisten vaatimusten ja sit� koskevien direktiivin muiden ehtojen mukainen.

Svenska [Swedish]

H�rmed intygar Varex Imaging att denna Radiolan st�r I �verensst�mmelse med de v�sentliga egenskapskrav och �vriga relevanta best�mmelser som framg�r av direktiv 1999/5/EG.

17.3 Korea Certification
Table 24 Korea Certification
Item KC mark & Cert./Reg No.

Marking

Applicant Name () Product Name ()
Model No. ()
Manufactured Year and Month
()
Manufacturer & Country of Origin
(  )

R-R-Vrx-4336W-G5 Varex Imaging Corporation  (    (51505350, 54705850  )) 4336W-G5 Example: YYYY.MM
Varex Imaging Corporation/

82

www.vareximaging.com

REFERENCE MANUAL

4343W/4336W-G5/2530W-G5 X-ray Detectors

18.0 Appendix A: Accessories

The X-ray detector shall only be used with its approved Varex Imaging accessories and replacement parts. Product certification and warranty are void if any modifications to the product is made, or any instruction, warning, or caution is not followed.
Table 25 Accessories

Description Inductive Charger Kit Varex 3-bay Battery Charger Kit Varex 1-bay Battery Charger Kit Battery with PD Silver Overlay Battery with Crestlite Silver Overlay Battery with Black Overlay Batter with Pure White Overlay Battery with VAR-101 White Overlay
Tether Cable Service Cable Field Maintenance Kit Mains Hospital Grade 110V Cable Mains European Cable Mains Chinese Cable

Varex Part Number 147935 151611 151560 142142 142143 142144 142145 142146 148710 149961 151236 11616 660 19045

Length 5 ft/1.5m 3.3 ft/1m 3.3 ft/1m
N/A N/A N/A N/A N/A 6 ft/2m 6.5 ft/2.2m N/A 6.5 ft/2m 8.2 ft/2.5m 8.2 ft/2.5m

Note Note

Accessory or optional equipment connected to the analog and digital interfaces must be certified to the respective IEC standards (i.e., IEC 60601-1 for medical equipment). Furthermore, all configurations shall comply with the system standard IEC 60601-1-1. Anyone connecting additional or optional equipment to the signal inputs or signal outputs as part of a configuration for medical equipment is therefore responsible for compliance with the equipment standard IEC 60601-1. If in doubt, consult technical support personnel.
Upon receipt, inspect the shipment and its contents against the Delivery Note enclosed with the shipment for evidence of damage or missing components. Save all shipping containers in case a return is warranted. If there is any discrepancy, See Section 15.1.

www.vareximaging.com

83

REFERENCE MANUAL

4343W/4336W-G5/2530W-G5 X-ray Detectors
19.0 Appendix B: Mechanical Drawings
All dimensions are measured in mm.
Figure 63 4343W X-ray Detector Dimensions in mm

Figure 64 4343W X-ray Detector Dimensions in mm

84

www.vareximaging.com

REFERENCE MANUAL

4343W/4336W-G5/2530W-G5 X-ray Detectors Figure 65 4336W-G5 X-ray Detector Dimensions in mm

Figure 66 4336W-G5 X-ray Detector Dimensions in mm

www.vareximaging.com

85

REFERENCE MANUAL

4343W/4336W-G5/2530W-G5 X-ray Detectors Figure 67 2530W-G5 Detector Dimension in mm

Figure 68 2530W-G5 Detector Dimension in mm

86

www.vareximaging.com

REFERENCE MANUAL

Index

A Abbreviations 2 Accessories 83 Acquire Image 47 Alerts and Notes, Meaning of iii
B Battery
Charge Level 25 Installation 23 Removal 23 Battery Hot-Swap 25
C Calibration Procedures 40 Calibration, Gain
Counts 42 Definition 42 Frames 43 Frequency 46 Steps 44 Calibration, Offset Definition 40 Steps 40 Change Password 37 Charging, Inductive 26 Cleaning and Disinfecting Chemicals to Use 61 Detector 62 Country Code 34
D Detector
Features 13 Intended Use 1 Detector Settings 34 Modify 36 Disposal 68 DVD, Contents 57
E Electromagnetic Interference 69
F Factory Restore 34 Features, Detector 13 Firmware 34 Firmware Update 38
G Gain Calibration 42 Gain Calibration Steps 44

H Hot-Swap, Battery 25 How To
Access Control Panel 34 Acquire Image 47 Gain Calibration 44 Link 33 Offset Calibration 40 Power Off 30 Power On 30 Reboot 31
I Image Acquisition
Auto-Save 48 Corrected Image 48 Debug Verbosity 48 Loop 48 Imaging Mode 48 Inductive Charger Screws 27 Inductive Charging 26 Install Battery 23 Intended Use 1 Ionizing Radiation, Protection Against ii
L Latch, Battery 24 LED Status 32 Load Support 9 Log File 34 Log In 34
M Maintenance 61 Meaning of Alerts and Notes iii Monitor Temperature Sensor 7
N Notes and Alerts, Meaning of iii
O Offset Calibration 40 Optional Parts 83
P Password 35
Change 37 Recovery 37 Requirements 37 Power-off 30 Power-on 30 Protection Against Ionizing Radiation ii

www.vareximaging.com

87

REFERENCE MANUAL

Index
R Reboot 31 Reboot the Detector 31 Remove Battery 23
S
Safety Note Battery viii Cyber Security x Handling vii If a Problem Occurs xi Installation and Environment of Use iv Maintenance and Inspection xi Service Cable vi vTrigger Mode x WLAN ix
Safety, For Your iii Screws, Inductive Charger 27 Sensor, Temperature 7 Service
Change Password 37 Firmware Update 38 In-Warranty 68 Log In 34 Maintenance 61 Obtain RMA Number 68 Out-of-Warranty 68 Repair 68 Trouble-Shooting 64 Specifications Active Area 9 Environmental Considerations 6 Load Support 9 Signal Strength 9 Weight 9 Standards and Regulations 5 Standards, Regulatory Requirements 5
T Temperature Sensor 7 Trouble-Shooting 64 Turn off 30 Turn on 30
U Update Country Code 34 Updates 34 User Name 35
V Varex Smart Panel (VSP) 8 ViVA
Acquire Image Button 49 Acquisition Settings 47, 51 Acquisition Type Drop Down Menu 51 Calibration Settings Window 41 Change Imaging Mode 48 Configuration Settings 51 Error 67

4343W/4336W-G5/2530W-G5 X-ray Detectors
Gain Calibration Progress Window 45 Hardware Handshaking 52 Image Acquisition 47 Launch 33 Mode Drop Down Menu 40 Offset Calibration Button 41 Offset Calibration Progress window 41 Radiographic Acquisition Progress Window 50 Save Image 50 System Settings Window 53
W Weight 9 Wireless 9
X X-ray Tube 46

www.vareximaging.com

88

4343W/4336W-G5/2530W-G5 X-ray Detectors
This page intentionally left blank.
89

4343W/4336W-G5/2530W-G5 X-ray Detectors

USA

Varex Imaging Corporation

Arazy Group GmbH

1678 So. Pioneer Rd.

The Squaire 12, Am Flughafen

�

Salt Lake City, UT 84104

60549 Frankfurt am Main

United States

Germany

+1 801 972 5000 Phone

+1 801 973 5023 Fax

www.vareximaging.com

Note: These symbols do not apply to model 2530W-G5.

For a complete listing of our global offices, visit www.vareximaging.com

�2021 Varex Imaging All rights reserved. The Varex Imaging logo and design are registered trademarks of Varex Imaging or its subsidiaries,

in the United States and other countries. All other trademarks not owned by Varex Imaging or its subsidiaries that are depicted herein are the property

of their respective owners. Varex Imaging reserves the right to change this document at any time without notice and disclaims liability for editorial,

pictorial or typographical errors.

142910 D-EMC

www.vareximaging.com

90