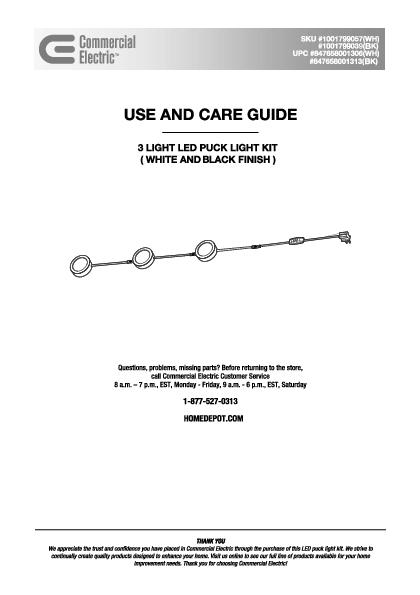
Commercial Electric 3-Light LED Puck Light Kit
SKU: #1001799057(WH), #1001799039(BK)
UPC: #847658001306(WH), #847658001313(BK)
Contact: 1-877-527-0313 | HOMEDEPOT.COM
Safety Information
⚠️ WARNING: Deviation from the assembly instructions may result in a risk of fire or electric shock.
CAUTION: The National Electrical Code (NEC) does not permit cords to be concealed where damage to insulation may go unnoticed. To prevent fire danger, do not run the cord behind walls, ceilings, soffits, or cabinets where it may be inaccessible for examination. Cords should be visually examined periodically and immediately replaced when any damage is noted.
CAUTION: For indoor and dry location use only.
CAUTION: To reduce the risk of fire, electric shock, or injury to persons use only insulated staples or plastic ties to secure cords. Route and secure cords so that they will not be pinched or damaged when the cabinet is pushed to the wall.
CAUTION: Do not operate the fixture with a missing or damaged cover or housing.
CAUTION: To prevent the risk of fire, do not install each puck LED lamp in a compartment smaller than 12 in. x 12 in. x 12 in.
CAUTION: Not intended for recessed installation in ceilings, or soffits.
CAUTION: The LED source cannot be replaced.
CAUTION: Do not stare directly into the LED source.
CAUTION: Do not dismantle or alter this fixture.
CAUTION: Do not mount this fixture near heat sources which may damage this fixture.
1. Read all instructions carefully before you begin this installation.
2. This equipment has been tested and found to comply with the limits for a Class B digital device pursuant to Part 15 of the FCC Rules and ICES-005 of the IC Rules. These limits are designed to provide reasonable installation protection. This equipment generates and can radiate radio frequency energy and, if not installed and used in accordance with the instructions, may cause harmful interference.
3. There is no guarantee that interference will not occur in a particular installation. If this equipment does cause harmful interference to radio and television reception, which can be determined by turning the equipment off and on, the user is encouraged to try to correct the interference by one or more of the following measures: a) Reorient or relocate the receiving antenna, b) Increase the separation between the equipment and the receiver, c) Connect the equipment into a different outlet and circuit from the receiver outlet and circuit, d) Consult the dealer or an experienced radio/TV technician for help.
4. Change or modification to this unit not expressly approved by the party responsible for compliance could void the user's authority to operate the equipment.
5. Rated at 120V/60Hz, 3.43W x 3, Max 3.43W x 30.
6. Linkable, add up to 30 units.
7. The product is dimmable and can be used with a dimmer switch. See compatible dimmer list this manual.
8. Suitable for recess mounting only inside a cabinet.
9. Suitable for surface mounting only inside a cabinet.
10. Compatible with Direct Wire Junction Box (SKU1006126385), sold separately.
Warranty
LIMITED WARRANTY
The manufacturer warrants this product to be free from defects in materials and workmanship for a period of five (5) years from date of purchase. This warranty applies only to the original consumer purchaser and only to products used in normal use and service. If this product is found to be defective, the manufacturer's only obligation, and your exclusive remedy, is the repair or replacement of the product at the manufacturer's discretion, provided that the product has not been damaged through misuse, abuse, accident, modifications, alterations, neglect or mishandling. This warranty shall not apply to any product that is found to have been improperly installed, set-up, or used in any way not in accordance with the instructions supplied with the product. This warranty shall not apply to a failure of the product as a result of an accident, misuse, abuse, negligence, alteration, or faulty installation, or any other failure not relating to faulty material workmanship. The manufacturer specifically disclaims any liability and shall not be liable for any consequential or incidental loss or damage, including labor/expense costs involved in the replacement or repair of said product.
Contact the Customer Service Team at 1-877-527-0313 or visit HOMEDEPOT.COM.
Pre-installation
PLANNING INSTALLATION
Read all instructions completely before you begin installation.
TOOLS REQUIRED
[Phillips screwdriver]
[Drill]
HARDWARE INCLUDED
NOTE: Hardware not shown to actual size.
| Part | Description | Quantity |
|---|---|---|
| AA | Mounting screw | 10 |
| BB | Fastener | 12 |
PACKAGE CONTENTS
The package contains the following items:
- [Part A] LED puck assembly (3)
- [Part B] Trim ring (preassembled to LED lights) (3)
- [Part C] End cap (preassembled to LED lights) (3)
- [Part D] Power cord (1)
Diagram Description: The package contents are illustrated with diagrams showing three circular LED puck assemblies (A), three trim rings (B), three end caps (C), and one power cord (D).
Dimmer Compatibility
This fixture is dimmable and compatible with certain dimmers sold at The Home Depot. Ensure lights are on a single pole with the dimmers, and the total wattage of the lights does not exceed the dimmer wattage capacity. Refer to dimmer packaging for wattage capacity.
For further questions on lights or dimmers, please contact customer service.
Lutron Brand:
- DVWCL-153PH-WH / 530826
- CTCL-153PDH-WH / 267858
- TGCL-153PH-WH / 527401
Leviton Brand:
- R12-06672-1LW / 1000024040
Installation
Installation - Surface Mounting
1. Removing the end cap
Use a flathead screwdriver to remove the end cap [Part C].
Diagram Description: An illustration shows a circular LED puck assembly with an end cap being removed using a flathead screwdriver.
2. Preparing the lights for the first time
Separate the trim ring [Part B] by pushing on the back of the LED puck assembly [Part A].
Diagram Description: An illustration shows a puck assembly [Part A] and a trim ring [Part B], with an arrow indicating to push the back of the assembly to separate the trim ring.
3. Installing the trim rings
Attach the trim ring [Part B] to the desired surface, mark the screw location. Ensure the direction of the outlet hole meets your requirement.
Pre-drill holes in the mounting surface with a 1/16 in (1.5mm) drill to make installing screws easier.
Install the trim ring [Part B] to the underside of the cabinet by inserting two mounting screws [Hardware AA] into the mounting holes on the bottom of each trim ring [Part B].
Diagram Description: An illustration shows marking screw locations on a surface, indicating the direction of the puck wire. Another diagram shows a trim ring [Part B] being attached with mounting screws [Hardware AA].
4. Installing the first LED assembly
Take the cord from the LED puck assembly [Part A] and feed the cord through the outlet hole of the trim ring [Part B].
Push the LED puck assembly [Part A] into the trim ring [Part B] while pulling the cord tight.
Diagram Description: An illustration shows feeding the cord from a puck assembly [Part A] through a trim ring [Part B], and then pushing the puck assembly into the trim ring.
5. Installing the remaining two LED assemblies
Repeat steps 1 through 4 to install the remaining two LED puck assemblies [Part A].
NOTE: 1) Ensure the LED puck assemblies install in the same direction so that you can easily connect the LED puck assemblies [Part A] with each other. 2) Measure the distance of every LED puck assembly [Part A] before installation.
Diagram Description: An illustration shows three puck assemblies [Part A] laid out in a line, with a measurement line labeled 'X' indicating spacing between them.
6. Connecting the LED puck lights
Connect the LED puck assemblies with each other. Connect the power cord [Part D] to the fixtures.
Diagram Description: An illustration shows three puck assemblies [Part A] connected in series with wires, and a power cord [Part D] plugged into the last assembly.
7. Securing the cords
Use nail-on fasteners [Hardware BB] to attach the wire on the cabinet.
Re-attach the end cap [Part C] on the last LED puck assembly [Part A].
Diagram Description: An illustration shows wires being secured to a surface using fasteners [Hardware BB], and an end cap [Part C] being attached to the final puck assembly.
Installation - Recessed Mounting
1. Preparing the lights for the first time
Repeat steps 1 through 2 in the Surface Mounting installation section of this document.
Drill a 2.95 in. round hole into the installation area.
IMPORTANT: Ensure that you measure the distance of every LED puck assembly [Part A] before drilling the installation holes.
NOTE: The depth of installation area cannot exceed 0.2 in.
Diagram Description: An illustration shows two circular cutouts on a surface, indicating the required hole size and depth limitations.
2. Inserting the LED lights
Thread the wire from the LED puck assembly [Part A] through the hole and insert the fixture into the hole. Repeat steps 1 through 2 in the Surface Mounting section for the remaining two LED assemblies [Part A].
Connect the LED puck assemblies [Part A] with each other and connect the power cord [Part D] as described in step 6 in the surface mounting installation section.
NOTE: When inserting the fixture, put the connector part into the hole first.
Diagram Description: An illustration shows a puck assembly [Part A] being inserted into a pre-drilled hole, with the connector part going in first.
Direct Wire Installation (optional)
Convert to Direct Wire:
Directly wire this fixture to a wall switch using Direct Wire Junction Box (SKU1006126385), sold separately.
Diagram Description: A schematic shows the puck light system connected to a junction box, implying a direct wire connection to a switch.
Installing the quick connector plug (optional)
The fixture wire (1) can be cut to the desired length if necessary. This helps to minimize the amount of wire underneath the cabinets.
- Remove the plug cover (2) from the plug (3).
- Press the fixture wire (1), with grooved side (4) to the right (neutral side) down and into the front of the plug (3).
- Press the fixture wire (1) down onto the metal prongs.
- Slide the plug cover (2) back onto the plug over the fixture wire (1).
Diagram Description: A series of diagrams illustrate the steps for installing a quick connector plug: removing a cover, inserting a wire into a plug, pressing the wire onto prongs, and reattaching the cover.
Luminous Intensity Distribution
The luminous intensity distribution is presented in a polar plot. The units are candelas (cd).
Key angles are noted as C0/180 at 102.2 degrees and C90/270 at 96.2 degrees.
Diagram Description: A polar coordinate graph displays luminous intensity distribution. Radial lines represent intensity in candelas (cd), and angular lines represent direction. The plot shows the light output pattern of the puck light.
Related Documents
 |
Commercial Electric 3-Light LED AC CCT Puck Light Kit with Junction Box - Use and Care Guide This guide provides instructions for the installation, use, and care of the Commercial Electric 3-Light LED AC CCT Puck Light Kit with Junction Box. It includes safety information, parts lists, dimmer compatibility, and installation steps for both surface and recessed mounting. |
 |
Commercial Electric Sebastian LED Decorative Ceiling Light - Use and Care Guide This guide provides detailed instructions for the Commercial Electric Sebastian LED Decorative Ceiling Light, covering installation, operation, maintenance, and troubleshooting. Learn about its features like CCT selection and dimmability. Model numbers include FP1236WHW48LF4H and FP1236DGR48LF4H. |
 |
Commercial Electric LED Strip Lights Installation and Care Guide Comprehensive guide for installing and caring for Commercial Electric 2ft and 4ft LED Strip Lights. Includes safety warnings, installation steps, troubleshooting, and warranty information. |
 |
Commercial Electric 3-in-1 Universal Installation Recessed Light Use and Care Guide This comprehensive guide provides detailed instructions for the Commercial Electric 3-in-1 Universal Installation Recessed Light (Model NJ03a6IN3in1-W, SKU 1011028805). It covers essential safety information, pre-installation checks, three distinct installation methods (Canless, Junction Box, Recessed Can), care and cleaning advice, troubleshooting tips, and compatibility with various dimmer models. The guide is designed for easy understanding and optimal installation. |
 |
Commercial Electric LED Direct Wire Linkable Under-Cabinet Light Use and Care Guide Comprehensive guide for installing and using the Commercial Electric LED Direct Wire Linkable Under-Cabinet Light, including safety information, specifications, and limited warranty details. |
 |
Commercial Electric Linkable LED Strip Lights: Use and Care Guide Comprehensive guide for Commercial Electric Linkable LED Strip Lights with selectable color temperature. Covers installation (surface and suspension mounting), linking features, color temperature adjustment, care, cleaning, and troubleshooting. Includes safety warnings and warranty information. |
 |
LED Fixture Dimmer Compatibility Guide: Lutron & Leviton Essential compatibility information for LED under cabinet lights with Lutron and Leviton dimmers, including model numbers and important usage notes. Learn about wattage capacity and single-pole wiring. |
 |
Commercial Electric 13-inch LED Colour Changing Flush Mount Use and Care Guide This guide provides detailed instructions for the Commercial Electric 13-inch LED Colour Changing Flush Mount (Models FM0180409-12, FM0180409-13), covering installation, safety precautions, maintenance, and troubleshooting. Learn how to safely install and care for your new lighting fixture. |