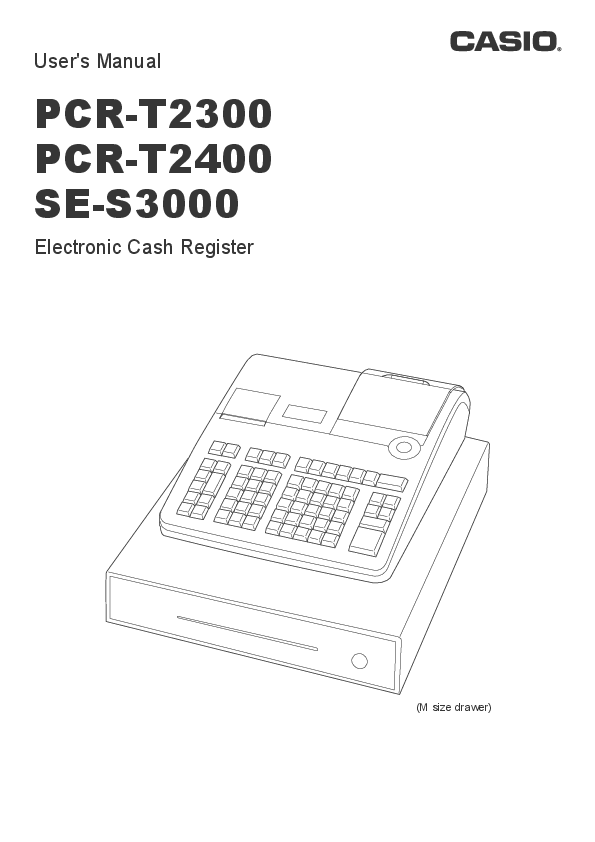
User Manual for CASIO models including: PCR-T2300, PCR-T2400, SE-S3000, Electronic Cash Register

User's Manual PCR-T2300 PCR-T2400 SE-S3000

User's Manual PCR-T2300 PCR-T2400 SE-S3000 Electronic Cash Register (M size drawer) E-2 Introduction Thank you very much for purchasing this CASIO electronic cash register. START-UP is QUICK and EASY! For the basic settings of your cash register, please see “Quick Start Guide”.

Not Your Device? Search For Manuals / Datasheets:

File Info : application/pdf, 104 Pages, 2.04MB

Document
152545 new
User's Manual
PCR-T2300 PCR-T2400 SE-S3000
Electronic Cash Register
(M size drawer)

Introduction
Thank you very much for purchasing this CASIO electronic cash register. START-UP is QUICK and EASY! For the basic settings of your cash register, please see "Quick Start Guide".

IMPORTANT

For programming assistance please visit http://casio4business.com/sa_index.html

CASIO Authorized Service Centers If your CASIO product needs repair, or you wish to purchase replacement parts, please visit http://casio4business.com.
Original Carton/Package If for any reason, this product is to be returned to the store where purchased, it must be packed in the original carton/package.
Location Locate the Cash register on a flat, stable surface, away from heaters or areas exposed to direct sunlight, humidity or dust.
Power Supply Your cash register is designed to operate on standard household current (120 V, 50/60 Hz). Do not overload the outlet by plugging in too many appliances.
Cleaning Clean the cash register exterior with a soft cloth which has been moistened with a solution of a mild neutral detergent and water, and wrung out. Be sure that the cloth is thoroughly wrung out to avoid damage to the printer. Never use paint thinner, benzene, or other volatile solvents.
The mains plug on this equipment must be used to disconnect mains power. Please ensure that the socket outlet is installed near the equipment and shall be easily accessible.
Trademark

SD and SDHC Logos are trademarks of SD-3C,LLC.

E-2

To use the cash register safely ........................................................................ E-4 To use the cash register's basic function ....................................................... E-9
Getting started....................................................................................................... E-10 Getting to know your cash register ......................................................................E-14 How to read the printouts ..................................................................................... E-19 How to use your cash register ............................................................................. E-20 Before opening your store.................................................................................... E-21 Registering items in departments ....................................................................... E-22 Basic setups and registrations ............................................................................ E-26 Other registrations ................................................................................................ E-36 Daily sales reports ................................................................................................ E-47 Advanced programmings and registrations ................................................. E-50 Advanced registrations......................................................................................... E-51 Character settings ................................................................................................. E-55 Advanced programmings ..................................................................................... E-64 Programming functions of departments and PLUs in a lump........................... E-73 Programming functions of departments and PLUs individually....................... E-76 Printing programmed data.................................................................................... E-84 Printing various sales reports.............................................................................. E-89 Using an SD card................................................................................................... E-96 Before you consider it as a problem ................................................................... E-99 Specifications ...................................................................................................... E-103
E-3

To use the cash register safely

· Congratulations upon your selection of this CASIO product. Be sure to read the following safety precautions before using it for the first time. After reading this guide, keep it close at hand for easy reference.
· Please pay due attention to the following symbols to help you use the product safely and properly and to avoid any personal injury or damage to the product.

* If this symbol is ignored and the product consequently misused, it can result in seri-
Danger ous personal injury and/or death.
* If this symbol is ignored and the product consequently misused, it may result in
Warning serious personal injury and/or death.
* If this symbol is ignored and the product consequently misused, it may result in
Caution personal injury and/or property damage.

· The figures in this manual have the following meanings.

' ! $

This symbol means be careful = a warning. The example at left is a warning about an electrical shock.
This symbol indicates something you must not do = prohibited action. The example at left means never disassemble the product.
This symbol indicates something you must do = an instruction. The example at left indicates you should unplug the product from the outlet. Please note that instructions that are difficult to express by a figure are indicated by +.

*Danger

If liquid that leaked from a battery gets in your eye, on your skin or clothes, deal with it immediately as follows.

-

1. Immediately rinse it off with lots of water. 2. Immediately get medical treatment.
Failing to act may result in a rash or loss of sight.

*Warning

Handling the register

$

· Should the register malfunction, start to emit smoke or a strange odor, or otherwise behave abnormally, immediately shut down the power and unplug the AC plug from the
power outlet. Continued use creates the danger of fire and electric shock. Contact CASIO service representative.

!

· Do not place containers of liquids near the register and do not allow any foreign matter to get into it. Should water or other foreign matter get into the register, immediately shut
down the power and unplug the AC plug from the power outlet. Continued use creates the
danger of short circuit, fire and electric shock. Contact CASIO service representative. · Should you drop the register and damage it, immediately shut down the power and unplug
the AC plug from the power outlet. Continued use creates the danger of short circuit, fire and electric shock.
· Attempting to repair the register yourself is extremely dangerous. Contact CASIO service representative.
· Never try to take the register apart or modify it in any way. High-voltage components inside the register create the danger of fire and electric shock. Contact CASIO service representative for all repair and maintenance.

E-4

To use the cash register safely

*Warning

Power plug and AC outlet

+ +
+ -

· Use only a proper AC electric outlet. Use of an outlet with a different voltage from the rating creates the danger of malfunction, fire, and electric shock. Overloading an electric outlet creates the danger of overheating and fire.
· Make sure the power plug is inserted as far as it will go. Loose plugs create the danger of electric shock, overheating, and fire.
· Do not use the register if the plug is damaged. Never connect to a power outlet that is loose.
· Use a dry cloth to periodically wipe off any dust built up on the prongs of the plug. Humidity can cause poor insulation and create the danger of electric shock and fire if dust stays on the prongs.
· Do not allow the power cord or plug to become damaged, and never try to modify them in any way. Continued use of a damaged power cord can cause deterioration of the insula-
tion, exposure of internal wiring, and short circuit, which creates the danger of electric shock and fire. · Contact CASIO service representative whenever the power cord or plug requires repair or maintenance.

*Caution

-

· Do not place the register on an unstable or uneven surface. Doing so can cause the register - especially when the drawer is open - to fall, creating the danger of malfunction,
fire, and electric shock.

Do not place the register in the following areas.

+

· Areas where the register will be subject to large amounts of humidity or dust, or directly exposed to hot or cold air.
· Areas exposed to direct sunlight, in a close motor vehicle, or any other area subject to very high temperatures.
The above conditions can cause malfunction, which creates the danger of fire.

+

· Do not overlay bend the power cord, do not allow it to be caught between desks or other furniture, and never place heavy objects on top of the power cord. Doing so can cause
short circuit or breaking of the power cord, creating the danger of fire and electric shock.

+

· Be sure to grasp the plug when unplugging the power cord from the wall outlet. Pulling on the cord can damage it, break the wiring, or cause short, creating the danger of fire and electric shock.

-

· Never touch the plug while your hands are wet. Doing so creates the danger of electric shock. Pulling on the cord can damage it, break the wiring, or cause short, creating the
danger of fire and electric shock.

-

· At least once a year, unplug the power plug and use a dry cloth or vacuum cleaner to clear dust from the area around the prongs of the power plug.
Never use detergent to clean the power cord, especially power plug.

+ · Keep small parts out of the reach of small children to make sure it is not swallowed accidentally.

E-5

To use the cash register's basic function

*Caution

Only use the specified batteries.

-

· Do not disassemble, modify or short-circuit them. · Do not put them in fire or water or heat them. · Do not mix new and old batteries or different types of batteries. · Orient the terminals +- correctly. · Remove the batteries if the system will not be used for a long time. · After batteries are spent, dispose of them as per local regulations. · Do not try to recharge dry cell batteries.

Disposing of batteries:

- · Make sure that you dispose of used batteries in accordance with the rules and regulations in your local area.

E-6

To use the cash register's basic function
 When the cash drawer does not open!
In case of power failure or the machine is in malfunction, the cash drawer does not open automatically. Even in these cases, you can open the cash drawer by pulling drawer release lever (see below). Important: The drawer will not open, if it is locked with a drawer lock key.

Drawer release lever

LIMITED WARRANTY : ELECTRONIC CASH REGISTERS
This product, except the battery, is warranted by CASIO to the original purchaser to be free from defects in material and workmanship under normal use for a period, from the date of purchase, of one year for parts and 90 days for labor. For one year, upon proof of purchase, the product will be repaired or replaced (with the same or a similar model) at CASIO's option, at a CASIO Authorized Service Center without charge for parts. Labor will be provided without charge for 90 days. The terminal resident software and programmable software, if any, included with this product or any programmable software which may be licensed by CASIO or one of its authorized dealers, is warranted by CASIO to the original licensee for a period of ninety (90) days from the date of license to conform substantially to published specifications and documentation provided it is used with the CASIO hardware and software for which it is designed. For a period of ninety (90) days, upon proof of license, CASIO will, at its option, replace defective terminal resident software or programmable software, correct significant program errors, or refund the license fee for such software. Significant program errors will be significant deviations from written documentation or specifications. These are your sole remedies for any breach of warranty. In no event will CASIO's liability exceed the license fee, if any, for such software. This warranty will not apply if the product has been misused, abused, or altered. Without limiting the foregoing, battery leakage, bending of the unit, a broken display tube, and any cracks or breaks in the display will be presumed to have resulted from misuse or abuse. To obtain warranty service you must take or ship the product, freight prepaid, with a copy of the sales receipt or other proof of purchase and the date of purchase, to a CASIO Authorized Service Center. Due to the possibility of damage or loss, it is recommended when shipping the product to a CASIO Authorized Service Center that you package the product securely and ship it insured. CASIO HEREBY EXPRESSLY DISCLAIMS ALL OTHER WARRANTIES, EXPRESS OR IMPLIED, INCLUDING ANY IMPLIED WARRANTY OF MERCHANTABILITY OR OF FITNESS FOR A PARTICULAR PURPOSE. NO RESPONSIBILITY IS ASSUMED FOR ANY INCIDENTAL OR CONSEQUENTIAL DAMAGES, INCLUDING WITHOUT LIMITATION DAMAGES RESULTING FROM MATHEMATICAL INACCURACY OF THE PRODUCT OR LOSS OF STORED DATA. SOME STATES DO NOT ALLOW THE EXCLUSION OR LIMITATION OF INCIDENTAL OR CONSEQUENTIAL DAMAGES, SO THE ABOVE LIMITATIONS OR EXCLUSIONS MAY NOT APPLY TO YOU. This warranty gives you specific rights, and you may also have other rights which vary from state to state.

E-7

To use the cash register's basic function

Manufacturer:CASIO COMPUTER CO., LTD. 6-2, Hon-machi 1-chome, Shibuya-ku, Tokyo 151-8543, Japan Responsible within the European Union:CASIO EUROPE GmbH CASIO-Platz 1, 22848 Norderstedt, Germany
Please keep all information for future reference. The declaration of conformity may be consulted at http://world.casio.com/

This mark applies in EU countries only.
This product is also designed for IT power distribution system with phase-to-phase voltage 230 V.

Laite on liitettävä suojamaadoituskostkettimilla vaurstettuun pistorasiaan Apparatet må tilkoples jordet stikkontakt Apparaten skall anslutas till jordat nätuttag.

The main plug on this equipment must be used to disconnect mains power. Please ensure that the socket outlet is installed near the equipment and shall be easily accessible.

WARNING THIS IS A CLASS A PRODUCT. IN A DOMESTIC ENVIRONMENT THIS PRODUCT MAY CAUSE RADIO INTERFERENCE IN WHICH CASE THE USER MAY BE REQUIRED TO TAKE ADEQUATE MEASURES.

GUIDELINES LAID DOWN BY FCC RULES FOR USE OF THE UNIT IN THE U.S.A. (Not applicable to other areas)
WARNING: This equipment has been tested and found to comply with the limits for a Class A digital device, pursuant to Part 15 of the FCC Rules. These limits are designed to provide reasonable protection against harmful interference when the equipment is operated in a commercial environment. This equipment generates, uses, and can radiate radio frequency energy and, if not installed and used in accordance with the instruction manual, may cause harmful interference to radio communications. Operation of this equipment in a residential area is likely to cause harmful interference in which case the user will be required to correct the interference at his own expense.
FCC WARNING: Changes or modifications not expressly approved by the party responsible for compliance could void the user's authority to operate the equipment.

E-8

Basic function

To use the cash register's basic function
Getting started....................................................................................................................... E-10 Loading memory protection batteries.......................................................................................... E-10 Installing paper roll ........................................................................................................................ E-11 Setting date, time, and tax table ................................................................................................... E-13
Getting to know your cash register ..................................................................................... E-14 General guide.................................................................................................................................. E-14 To adjust the main display............................................................................................................. E-15 To set the customer display .......................................................................................................... E-15 Display ............................................................................................................................................. E-16 Keyboard ......................................................................................................................................... E-17
How to read the printouts..................................................................................................... E-19 How to use your cash register ............................................................................................. E-20 Before opening your store.................................................................................................... E-21
Checking the time and date........................................................................................................... E-21 Preparing bills and coins for change ........................................................................................... E-21 Registering items in departments ....................................................................................... E-22 Basic setups and registrations ............................................................................................ E-26 To program basic settings.............................................................................................................E-26 Programming departments ...........................................................................................................E-28 Registering departments' preset data..........................................................................................E-29 Programming PLUs ........................................................................................................................E-31 Registering PLUs' preset data.......................................................................................................E-32 Other registrations ................................................................................................................E-36 Discount ..........................................................................................................................................E-36 Reduction ........................................................................................................................................E-37 Registering various payment methods ........................................................................................E-38 Tax shift ...........................................................................................................................................E-40 Registering returned goods ..........................................................................................................E-41 Registrations without transactions ..............................................................................................E-43 Corrections .....................................................................................................................................E-44 Daily sales reports ................................................................................................................E-48 Print out of daily sales report........................................................................................................E-49
E-9

To use the cash register's basic function
Getting started
This chapter shows how to setup the cash register and get it ready to operate.
Loading memory protection batteries
Important: These batteries protect information stored in your cash register's memory when there is a power failure or when you unplug the cash register. Be sure to install these batteries first.
1 Remove the printer cover.
2 Remove the battery compartment cover.
3 Note the (+) and (­) markings in the battery compartment. Load a set of
two new "AA" type manganese batteries so that their plus (+) and minus (­) ends are facing as indicated by the markings.
4 Replace the battery compartment cover and the printer cover.
Warning · No battery is included in the accessories. · Never try to recharge the batteries. · Do not expose batteries to direct heat, let them become shorted or try to take them apart. · Keep batteries out of the reach of small children. If your child should swallow a battery, consult a physi-
cian immediately. · There is a risk of explosion if the batteries are replaced with improper type. · Dispose of used batteries according to the instructions.
E-10

Basic function

To use the cash register's basic function
Installing paper roll
Caution (in handling the thermal paper) · Never touch the printer head and the platen. · Unpack the thermal paper just before your use. · Avoid heat and direct sunlight. · Avoid dusty and humid places for storage. · Do not scratch the paper. · Do not keep the printed paper under the following circumstances: · High humidity and temperature/direct sunlight/contact with glue, thinner or a rubber eraser.
 To install receipt paper
1 Remove the printer cover. 2 Open the platen arm by lifting it up.
3 Ensuring the paper is being fed from the bottom of the roll, lower the roll
into the space behind the printer.
4 Put the leading end of the paper over the printer.
5 Close the platen arm slowly until it locks securely. 6 Replace the printer cover, passing the leading end of the paper through
the cutter slot. Tear off the excess paper.
E-11

To use the cash register's basic function
 To install journal paper
1 By the same procedure of setting receipt paper, set journal paper on
the journal printer.
2 Using j key, feed the paper about 20 cm 3 Remove the paper guide of the take-up reel.
4 Slide the leading end of the paper into the groove on the spindle of the
take-up reel and wind it onto the reel two or three turns.
5 Replace the paper guide of the take-up reel.
6 Place the take-up reel into place behind the printer, above the roll
paper.
7 Press the j key to take up any slack in the paper. 8 Replace the printer cover.
E-12

Basic function

To use the cash register's basic function
Setting date, time, and tax table 1 Plug in the power socket into a wall outlet.
Be sure to check the rating plate on the side of the cash register to make sure that its voltage matches that of the power supply in your area.
2 As soon as the power socket is plugged in, the display
shows the language selection display. Choose your language by using ? or > keys then press F key.
3 Display changes to date and time setting display. Mov-
ing the input area (reversed area) by ? or > keys, input date, month, year and time from ten key pad. Input the time by 24 - hour system. For example, 1356 for 1:56 pm. After then press F key.
4 Display then changes to tax table selection display.
Select your state by ? or > keys and press F key. For the Canadian model, skip the following step and see page E-66 for setting Canadian rounding.
5 Select TABLE 1 or 2 and press F key.
6 Select tax rate and your area and press F key.
E-13

To use the cash register's basic function

Getting to know your cash register

General guide

4

5

3

2

6 7
8 9

1 10

1 Drawer 2 SD card slot cover 3 Printer cover 4 Receipt printer 5 Journal printer

6 Customer display 7 Main display 8 Mode switch 9 Com port connector cover 10 Drawer lock

Mode switch
Use the mode keys to change the position of the mode switch and select the mode you want to use.
PGM (Programming) This position is for setting your cash register to suit the needs of your store. RF (Refund) Use this position to correct registered items. OFF The cash register turns off in this position. REG (Register) This position is for normal transactions. X (Read) This is the position used for issuing daily sales totals report without clearing the data. Z (Reset) This position is for issuing reports of daily totals with clearing the accumulated totals. X2/Z2 (Periodic sale read/reset) Used to obtain periodic sales reports without resetting total data.

E-14

Basic function

To use the cash register's basic function

Mode keys
There are two types of mode keys: the program key (marked "PGM") and the operator key (marked "OP"). The program key can be used to set the mode switch to any position, while the operator key can select the REG and OFF position.

PGM RF OFF REG X Z X2/Z2

OP key

-

-

¡¡

-

-

-

PGM

OP

PGM key ¡ ¡ ¡ ¡ ¡ ¡ ¡

Drawer
Drawer key Magnetic plate

The drawer opens automatically whenever you finalize a registration and whenever you issue a read or reset report. The drawer will not open if it is locked with the drawer key.
Use this key to lock and unlock the drawer.
Use this plate for tacking the notes received from customer.

To adjust the main display

1 Put in fingers in the ditch of the main display and tilt it
to the angle you can see clearly.

To set the customer display 1 Lift the customer display until it stops.

2 Rotate the display so that customers can see it.

E-15

To use the cash register's basic function

Display
 Main display
During a registration

CLERK001 REG

000011

1

1 PLU001

$1.00

2

3 DEPT001

$6.00

SUBTOTAL $7.00

3

QT

4

6.00

4

After finalization

CLERK001 REG

000011

1 PLU001

$1.00

3 DEPT001

$6.00

TL

$7.00

5

CASH

$10.00

6

CG

$3.00

7

CG

$3.00

8

QT

4

$10.00

9

1 Mode/Clerk Number or name/Consecutive No. 2 Registered item Quantity/Category/Price 3 Subtotal amount 4 Total quantity/Price of the last item

5 Total amount 6 Paid by/Tendered amount 7 Change 8 Change 9 Total quantity/Tendered amount

 Customer display

DELICATESSEN
0123456'89

E-16

Basic function

To use the cash register's basic function

Keyboard

17

13 14 15

20 21 22 23 24 25

26

RECEIPT JOURNAL FEED FEED

2

RECEIPT ON/OFF

OPEN

8

--

% ­ CLK #

16 17 18

T/S 1

T/S 2

DEPT SHIFT/ DEPT#

3

POST RECEIPT

PRICE

9

7 8 9

4 5 6 4

#/NS

PLU/ S.DEPT

10

5

RF

X/FOR/ DATE/

11

1

2

3

TIME

6

ERR.CORR CANCEL

C

12 0 00

.

SIGN OFF


RA

PO

TAX PGM

HELP

28

35
5

40
10

45
15

50
20

55
25

60
30

CR ENTER 29

30

34

39

44

49

54

59

4

9

14

19

24

29 CHK

CH

31

33

38

43

48

53

58

SUBTOTAL

32

3 8 13 18 23 28

32

37

42

47

52

57

2 7 12 17 22 27

CA/AMT

33

31

36

41

46

51

56

TEND

1 6 11 16 21 26

19

27

1

f

Hold this key down to feed receipt paper from the printer.

2

Q

Use this key to switch issuing receipts on and off.

3

<

Use this key to issue a post-finalization receipt.

4

N

Non-add key: Use this key to print reference number (to identify a personal check,

credit card, etc.) during a transaction. Use this function after a numeral entry. No sale

key: Use this key to open the drawer without any registration.

5

R

Use this key to input refunded amounts or to void preceding inputs.

6

e

Use this key to correct registration errors or to cancel a transactions.

7

j

Hold this key down to feed journal paper from the printer.

8

O

Use this key to temporarily release a limitation on the number of digits for a unit price.

9

:

Use this key to register unit prices for a PLU (subdepartment).

10

PLU/ S.DEPT

Use this key to input PLU (subdepartment) numbers.

11

h

Use this key to input a quantity for a multiplication and registration of split sales of

packaged items. Between transactions, pressing this key displays the current time and

date.

12

C

Use this key to clear an entry that has not yet been registered.

13

m

Use this key to input reduction values.

14

p

Use this key to register discounts.

15

o

Use this key to input a clerk number.

16

t

Use this key without a numeric entry to change the taxable 1 status of the following

item.

E-17

To use the cash register's basic function

17

T

Use this key without a numeric entry to change the taxable 2 status of the following

item.

18

DEPT

Department no. Use this key to input department numbers. Department shift: Use this

SHIFT/

DEPT#

key to shift the department number from 1 through 30 to 31 through 60.

19 09'^ Use these keys to input numbers.

20

SIGN

Use this key to sign clerk off the register.

OFF

21

?

Use this key to move the cursor on the display up.

22

>

Use this key to move the cursor on the display down.

23

RA

Use this key following a numeric entry to register money received for non-sale trans-

actions.

24

]

Use this key following a numeric entry to register money paid out from the drawer.

25

~

Use this key to set the tax status and tax table.

26

/

Use this key to look up the procedures to set date/time, tax table etc.

27 1 to ' Use these keys to register items to departments. ! to &: NON TAX 16 to 30 : NON TAX

28

c

Use this key to register a credit sale.

29

¥

Not used for regular registrations.

30

k

Use this key to register a check tendering.

31

h

Use this key to register a charge sale.

32 o Use this key to display and print the current subtotal (including tax) amount.

33 F Use this key to register a cash sale.

E-18

Basic function

To use the cash register's basic function

How to read the printouts

· The journal/receipts are records of all transactions and operations. · The contents printed on receipts and journal are almost identical. · You can choose the journal skip function.
If the journal skip function is selected, the cash register will print the total amount of each transaction, and the details of premium, discount and reduction operations only, without printing department and PLU item registrations on the journal.
· The following items can be skipped on receipts and journal. · Taxable status · Taxable amount · Item counter

Receipt Sample

Journal Sample (with items)

Journal Sample (by half height character)

************************

* THANK YOU *

1

**

CALL AGAIN

**

************************

2 * COMMERCIAL MESSAGE *
* COMMERCIAL MESSAGE *

New Year

Sale 1st Anniversary

3

10% OFF

4

REG 20-06-2013 11:58

5

C01

0001 000123

6

1 DEPT001 T1 $1.00

7

1 DEPT002 T1 $2.00

5 DEPT003

$5.00

7 No

8

TA1

$3.00

TX1

$0.15

TL

$8.15

CASH

$10.00

CG

$1.85

9 *** BOTTOM MESSAGE ***
*** BOTTOM MESSAGE *** *** BOTTOM MESSAGE *** *** BOTTOM MESSAGE ***

REG 20-06-2013 11:58

C01

0001 000123

1 DEPT001 T1 $1.00

1 DEPT002 T1 $2.00

5 DEPT003

$5.00

7 No

TA1

$3.00

TX1

$0.15

TL

$8.15

CASH

$10.00

CG

$1.85

REG 20-06-2013 11:59

C01

0001 000124

1 DEPT001 T1 $1.00

1 DEPT012 T1 $1.00

5 DEPT003

$6.00

7 No

TA1

$2.00

TX1

$0.10

TL

$8.10

CASH

$10.00

CG

$1.90

REG 20-06-2013 11:59

C01

0001 000124

REG 20-06-2013 11:58

C01

0001 000123

1 DEPT001 T1

$1.00

1 DEPT002 T1

$2.00

5 DEPT003

$5.00

7 No

TA1

$3.00

TX1

$0.15

TL

$8.15

CASH

$10.00

CG

$1.85

REG 20-06-2013 11:59

C01

0001 000124

1 DEPT001 T1

$1.00

1 DEPT012 T1

$1.00

5 DEPT003

$6.00

7 No

TA1

$2.00

TX1

$0.10

TL

$8.10

CASH

$10.00

CG

$1.90

REG 20-06-2013 11:59

C01

0001 000125

1 Logo message 2 Commercial message 3 Preset message * 4 Preset graphic * 5 Mode/Date/Time

6 Clerk/Machine No./Consecutive No. 7 Q'ty/Item 8 Item counter 9 Bottom message

* You can choose to print preset message and graphic at the top or the bottom of the receipt. (See page E-27)
In the operation examples in this manual, the printout samples are what would be printed on receipts.

E-19

To use the cash register's basic function
How to use your cash register
The following describes the general procedure you should use in order to get the most out of your cash register. Before opening your store
· Plugged in? (page E-13) · Enough paper roll? (pages E-11 and E-12) · Date and time are correct? (pages E-21 and E-26) · Enough small change in the drawer? (page E-21)
While the store is open · Registrations (page E-22) · Issuing latest total sales report if needed. (page E-47)
After closing the store · Issuing day's total sales report. (page E-47) · Withdraw the money from the drawer. After you withdraw all the money from the drawer, we recommend that you leave the drawer open when you leave your store. (page E-21) · Turn the Mode switch to OFF. (page E-14)
E-20

Basic function

To use the cash register's basic function
Before opening your store Checking the time and date
You can check the time or date on the display whenever there is no registration being made.

Step
1 Press x key to show the date
and time on the display.
2 Press C key to clear the date/
time display.

Operation x
C

Display

Preparing bills and coins for change
To prepare coins and bills for change, you can open the drawer by pressing N key. This operation must be performed when registrations are not being made.

Opening the drawer by N key does not perform any calculation in the register. If you wish to obtain a report that tells you the total amount in drawer, use RA key instead of N key. See
page E-43.

Step

Operation

Printout

1 Press N. The cash drawer opens. N

2 Prepare coins and bills in the
drawer.

#/NS

·········

E-21

To use the cash register's basic function

Registering items in departments

The following examples show how you can use the department keys in various types of registrations. Departments are used for categorizing items for example, department 01 for vegetables, department 02 for fruits, and department 03 for canned foods etc.
 Single item sale
Sample Operation

Item Payment

Unit Price Quantity Dept. Cash

$1.00 1 01
$1.00

One $1.00 Dept. 01 item is sold and the customer paid the same amount as the total amount.

Step
1 Enter the unit price.
2 Press corresponding department
key.
3 Press F key.

Operation 1' !
F

Printout

1 DEPT001 TL CASH

$1.00 $1.00
$1.00

Further operations: · For simpler operation of single item sales, see page E-53
 Single item sales with change calculation
Sample Operation

Item Payment

Unit Price Quantity Dept. Cash

$12.34 1 01
$20.00

One item is sold and the customer paid more than the total amount.

Step
1 Enter the unit price.
2 Press corresponding department
key.
3 Press o key.

Operation 1234 !
o

Printout

1 DEPT001 TL CASH CG

$12.34 $12.34
$20.00 $7.66

4 Enter the tendered amount then
press F key. The display shows the change to be paid.

20'F

E-22

Basic function

To use the cash register's basic function

 Repeat registration
Sample Operation

Item Payment

Unit Price Quantity Dept. Cash

Step

1 Enter the unit price.

2 Press corresponding department
key repeatedly for the purchased quantity.
3 Press o key.

4 Enter the tendered amount then
press F key. The display shows the change to be paid.

$1.50 3 1
$10.00

Same priced multiple items are sold.

Operation 150

Printout

!!!
o 10'F

1 DEPT001 1 DEPT001 1 DEPT001
TL CASH CG

$1.50 $1.50 $1.50 $4.50 $10.00 $5.50

 Multiple items registration using multiplication key
Sample Operation

Item Payment

Unit Price Quantity Dept. Cash

$1.00 12 1
$20.00

Twelve pieces of $1.00 item are sold and the customer paid more than the total amount.

Step
1 Enter the the quantity then press
x key.
2 Enter the unit price and press cor-
responding department key.
3 Press o key.

Operation 12x 1'! o

Printout

12 DEPT001 TL CASH CG

$12.00 $12.00
$20.00 $8.00

4 Enter the tendered amount then
press F key. The display shows the change to be paid.

20'F

E-23

To use the cash register's basic function

 Split sales of packaged items
Sample Operation

Item Payment

Unit Price Quantity Dept. Cash

4 for $10.00

3

Three pieces of an item thats price is $10.00 for four

1

pieces are sold.

$10.00

Step
1 Enter purchased quantity then
press x key.
2 Enter the quantity of one set and
press x key.
3 Enter the package price and press
corresponding department and o keys.
4 Enter the tendered amount and
press F key.

Operation 3x 4x 10'!o
10'F

Printout

3 DEPT001 TL CASH CG

$7.50 $7.50
$10.00 $2.50

 Department shift

By using

DEPT SHIFT/

, Dept. 01 through 30 are assigned to Dept. 31 through 60.

DEPT#

Sample Operation

Item Payment

Unit Price Quantity Dept. Cash

$1.00 1 31
$1.00

Department 31 is assigned by using

DEPT SHIFT/

key.

DEPT#

Step

Operation

Printout

1 Press

DEPT SHIFT/

key.

DEPT#

"SHIFT/No" will be shown at the bottom of the display.

2 Enter the unit price and press cor-
responding department key. Then press o key. The item is registered in Dept. 31 in
this example.

3 Press F key to finalize the
transaction.

DEPT SHIFT/ DEPT#
1'!o
F

1 DEPT031 TL CASH

$1.00 $1.00
$1.00

E-24

Basic function

To use the cash register's basic function

 Department number entry
Without using Department key, you can register departments manually.
Sample Operation

Item Payment

Unit Price Quantity Dept. Cash

$13.00 1 31
$13.00

Registering an item in Dept. 31 without using Department key.

Step

Operation

Printout

1 Enter Dept. number using ten key

pad then press

DEPT SHIFT/

key.

DEPT#

2 Enter the unit price and press :
key. Then press o key.

The item is registered in Dept. 31 in

this example.

3 Press F key to finalize the
transaction.

31 DEPT SHIFT/ DEPT#
13':o
F

1 DEPT031

$13.00

TL

$13.00

CASH

$13.00

E-25

To use the cash register's basic function
Basic setups and registrations To program basic settings
You can program basic settings in the PGM mode of the Mode switch.

Step
1 By turning the Mode switch to PGM position, the display
indicates the programming top menu.
2 Use ? or > keys to choose the item you wish to set
then press F key.
Repeat the above step until the display shows an entry display.
3 Input values you wish to set and press F key.

Display

The following table shows the setting items of the basic programming.
 Program menus

Top menu [DEPT Setting]
[PLU Setting]
[Key Setting] [Date Setting] [Clerk Setting]

Sub menu

DEPT name [DEPT0001 ]

Unit Price [ 12.00 ]

Taxable Status [1&2] Group Link [03]

HAL (High amount limit) [0.00]

PLU name [PLU0001

]

Unit Price [ 12.00 ]

Taxable Status [1&2] Group Link [03]

DEPT Link [003]

Open PLU [Yes]

%-

-

TIME (24 HOUR) [19:56] MONTH [12] DAY [26] YEAR 20[12] Name [CLERK01 ] Secret No [1234]

[

]

RATE [ ]

Taxable Status [ ]

What is to be set Sets name, unit price, taxable status, item group and high amount limitation in each department. See page E-28.
Sets name, unit price, taxable status, item group, department link and open PLU in each PLU. See page E-31.
Sets name, taxable status, and whether to use taxable status or not in each function key. Sets date and time.
Sets clerk's name and number.

E-26

Basic function

To use the cash register's basic function

Top menu [Message Setting]
[POP Setting]
[Tax Setting] [General Setting] [Water Mark Setting] [SD card]
[System Setting]

Sub menu 01 Logo 1 02 Logo 2 03 Logo 3 04 Logo 4 05 Commercial 1 06 Commercial 2 07 Commercial 3 08 Commercial 4 01 Bottom 1 02 Bottom 2 03 Bottom 3 04 Bottom 4 POP Message No. 1 [ ] POP Message No. 2 [ ] POP Message No. 3 [ ] POP Message No. 4 [ ] POP Graphic No.[ ] POP Print All Message All Graphic [RATE ] [ROUND ] [CAL TYPE ] Enable clerk Journal 1/2 Print Consective No. Reset [Yes] EJ clear (After Daily Z) [Yes] EJ/SalesSD (After XZ) [Yes] YES NO [Backup  SD] [Restore SD] [Program SD] [Program SD] [SD Format ] [Backup  Flash] [AutoPropram SD] [AutoProgram SD]

What is to be set Sets logo, commercial, and bottom messages on receipts. See page E-59.
Sets preset pop messages and illustration. See page E-59.
Sets general controls of the register such as clerk assignment, printing journal in half size etc.
Exchanges sales data, program data, and receipt's message data between the register and an SD card. See page E-96.
Used to set characters, functions of keys, or calculation methods etc.

E-27

To use the cash register's basic function

Programming departments

This section explains how you can set unit prices, taxable statuses, and item groups. You can program each department linking to a certain group. For example, department 01 is for packed milk, department 02 is for cheese and both
belong to group 03 (dairy goods).

Sample Operation

Dept. 01

Unit Price Taxable status Group

$2.50 Non tax
02

Programming Dept. 01 as unit price $2.50, non taxable, belonging to Group 02.

Step

Display

1 Turn the Mode switch to PGM position. The display shows
the top screen of programming.

2 Using ? or > keys, select [DEPT Setting] then press
F key. The display shows [DEPT Setting] screen.

3 Enter the department number (01 in this example) then
press F key. The display shows department selection screen. You can change the department by using? or > keys.
4 Press F key. The display shows program input screen.
Input unit price and group link you wish to program. The top column is for setting characters to the dept. You can leave the column empty. If you wish to set characters now, please see page E-55.
5 Select [Taxable Status] and press F key. The display
shows taxable status selection screen. Choose the taxable status and press F key.

E-28

Basic function

To use the cash register's basic function

The display returns to the previous screen by pressing o key.
Registering departments' preset data
The following examples explain the operations using preset department data programmed in the previous section.

 Using preset prices
Sample Operation

Item Payment

Unit Price Quantity Dept. Cash

Step

1 Just press the corresponding De-
partment key.
2 Press F key to finalize the
transaction.

$2.50 1 02
$2.50
Operation "
F

Unit price $2.50 is preset in Dept. 02.

Printout

1 DEPT002 TL CASH

$2.50 $2.50
$2.50

E-29

To use the cash register's basic function

 Using preset tax statuses
Sample Operation

Item 1
Item 2 Payment

Unit Price Quantity Dept. Taxable Unit Price Quantity Dept. Taxable Cash

Step

1 Register five pieces of Dept. 03
item using the multiplication key.
2 Press Dept. 04 key to register one
$2.00 item.
3 Press o key to indicate the
total amount including tax.
4 Enter the tendered amount and
press F key.

$2.00 5 03 1
$2.00 1 04 2
$2.50
Operation 5x#
$
o
F

· Dept. 03 presets: Unit price $2.00, Tax status 1 (4%).
· Dept. 04 presets: Unit price $2.00, Tax status 2 (10%).

Printout

5 DEPT003 1 DEPT004
TA1 TX1 TA2 TX2 TL CASH CG

T1 $10.00 T2 $2.00
$10.00 $0.40 $2.00 $0.20
$12.60 $20.00 $7.40

E-30

Basic function

To use the cash register's basic function

Programming PLUs
Like departments, you can program unit price, taxable status, and linking item group in a PLU (Price Look Up). Using PLUs allow you to register items quickly and accurately. You can use up to 7,000 PLUs.

Sample Operation

PLU 0014

Unit Price Taxable status Group

$2.50 Non tax
03

Programming PLU 0014 as unit price $2.50, non taxable, belonging to Group 03.

Step

Display

1 Turn the Mode switch to PGM position. The display shows
the top screen of programming.

2 Using ? or > keys, select [PLU Setting] then press
F key. The display shows [PLU Setting] screen.

3 Enter the PLU number (0014 in this example) then press
F key. The display shows [PLU Setting] screen. You can change the PLU number by using? or > keys.
4 Press F key. The display shows program input screen.
Input unit price and group link you wish to program. The top column is for setting characters to the PLU. You can leave the column empty. If you wish to set characters now, please see page E-55.
5 Select [Taxable Status] and press F key. The display
shows taxable status selection screen. Choose the taxable status and press F key.

E-31

To use the cash register's basic function

The display returns to the previous screen by pressing o key.
Registering PLUs' preset data
The following examples explain the operations using preset PLU data programmed in the previous section.

 Single item sales using PLU
Sample Operation

Item Payment

Unit Price Quantity PLU No. Cash

$2.50 1 14
$3.00

Step

Operation

1 Enter the PLU number and press

PLU/ S.DEPT

key. One piece of PLU num-

ber 14 item has been registered.

Then press o key.

2 Enter tendered amount and press
F key.

14 PLU/ S.DEPT
o
3'F

One piece of PLU number 14 (preset unit price $2.50) is sold.
Printout

1 PLU0014 TL CASH CG

$2.50 $2.50
$3.00 $0.50

E-32

Basic function

To use the cash register's basic function

 PLU repeat registration
Sample Operation

Item Payment

Unit Price Quantity PLU No. Cash

$2.50 3 14
$10.00

Three pieces of PLU number 14 (preset unit price $2.50) is sold.

Step
1 Enter the PLU number.

Operation 14

2 Press

PLU/ S.DEPT

key repeatedly for the

number of sold quantity. Three

pieces of PLU 14 have been regis-

tered.

Then press o key.

3 Enter the tendered amount and
press F key.

PLU/ PLU/ PLU/ S.DEPT S.DEPT S.DEPT
o
10'F

Printout

1 PLU0014 1 PLU0014 1 PLU0014
TL CASH CG

$2.50 $2.50 $2.50 $7.50 $10.00 $2.50

 PLU registration with multiplication key
Sample Operation

Item Payment

Unit Price Quantity PLU No. Cash

$2.00 10 7
$20.00

Ten pieces of PLU number 7 item (preset unit price $2.00) are sold.

Step
1 Enter the quantity sold then press
x key. Up to 9999.999 can be entered for multiplication calculations.
2 Enter the PLU number and press
key. PLU/
S.DEPT
Then press o key.
3 Enter tendered amount and press
F key.

Operation 10x
7 PLU/ S.DEPT
o 20'F

Printout

10 PLU0007 TL CASH CG

$20.00 $20.00
$20.00 $0.00

E-33

To use the cash register's basic function

 Split sales of packaged PLU item
Sample Operation

Item Payment

Unit Price Quantity PLU No. Cash

5 for $20 3 28
$15.00

Selling three pieces of an item that is priced $20.00 for five pieces.

Step

Operation

1 Enter the quantity being purchased
and press x key for multiplication calculation. You can enter up to 9999.999 for multiplication calculations.

2 Enter the packaged quantity and
press x key. You can enter up to 9999.999 for packaged quantity.

3 Enter the PLU number of the item

and press

PLU/ S.DEPT

key.

Then press o key.

4 Enter the tendered amount and
press F key.

3x
5x
28 PLU/ S.DEPT
o 15'F

Printout

3 PLU0028 TL CASH CG

$12.00 $12.00
$15.00 $3.00

E-34

Basic function

To use the cash register's basic function

 Open PLU
Although unit price is preset in a PLU, you can enter price manually if the PLU is programmed as "Open PLU". To program open PLU, see page E-26.
Sample Operation

Item 1
Item 2 Payment

Unit Price Quantity PLU No. Unit Price Quantity PLU No. Cash

$32.80 1 30
$13.00 2 31
$60.00

PLU numbers 30 and 31 are programmed as open PLU so that the unit prices can be entered manually.

Step

1 Enter the PLU number of the first

item then press

PLU/ S.DEPT

key.

2 Enter the unit price and press :
key.

3 Enter the PLU number of the sec-

ond item then press

PLU/ S.DEPT

key.

4 Enter the unit price.

Operation 30 PLU/
S.DEPT
3280:
31 PLU/ S.DEPT
13'

Printout

1 PLU0030 1 PLU0031 1 PLU0031
TL CASH CG

$32.80 $13.00 $13.00 $58.80 $60.00
$1.20

5 Press : key repeatedly for the
number of purchased quantity and press o key.
6 Enter the tendered amount and
press F key.

::o 60'F

E-35

To use the cash register's basic function

Other registrations

Discount
The following example shows how you can use the p key for discount registrations.

 Discounts on items and subtotals
Sample Operation

Item 1
Item 2 Discount Subtotal discount Payment

Dept. 01 Quantity Taxable PLU 16 Quantity Taxable Rate Rate Taxable Cash

$5.00 1
1 (preset) $10.00 (preset)
1 2 (preset) 5% (preset in p)
3.5% Non taxable (preset)
$15.00

Five percent (preset in p key) discount on PLU number 16 (preset unit price $10.00) and discount 3.5% on the subtotal amount.

Step

Operation

1 Enter the unit price and correspond- 5'!
ing department key.

2 Enter the PLU number then press

PLU/ S.DEPT

key. The preset unit price

($10.00) is registered.

16 PLU/ S.DEPT

3 Press p key. The discount

p

amount with the preset rate (5%) is

subtracted from the last item regis-

tered (PLU 16).

4 Press o key for giving discount o
on the subtotal amount.

5 Enter the discount rate manu-
ally and press p key. Discount amount with inputted rate is subtracted from the subtotal amount.

3^5p

6 Press o key to show the total
amount including tax and discounts.
7 Enter the tendered amount and
press F key.

o 15'F

Printout

1 DEPT001 1 PLU0016
5% % ST
3.5% % TA1 TX1 TA2 TX2 TL CASH CG

T1 $5.00 T2 $10.00

T2

0.50

$14.50

0.51 $5.00 $0.20 $9.50 $0.48 $14.67 $15.00 $0.33

Printout differs depending on preset tax statuses.

· When you perform a discount operation on the last item registered, the tax of discount amount is calculated in accordance with the tax status programmed to the item.
· When you perform a discount operation on a subtotal amount, the tax of discount amount from subtotal is calculated in accordance with the tax status programmed in the p key.
· To program discount rate in p key, please see page E-26.

E-36

Basic function

To use the cash register's basic function
Reduction
Using the reduction feature, you can subtract a certain amount from an item's unit price or from a subtotal amount.

Sample Operation

Item 1
Item 2 Subtotal Payment

Dept. 01 Quantity Taxable Reduction PLU 45 Quantity Taxable Reduction Reduction Taxable Cash

$5.00 1
1 (preset) $0.25
$6.00 (preset) 1
1 (preset) $0.50 (preset)
$0.75 Non taxable (preset)
$10.00

· Reducing $0.25 (manual input) from item 1 unit price.
· Reducing $0.50 (preset amount) from item 2.
· Reducing $0.75 (manual input) from subtotal amount.

Step

Operation

1 Register item 1 by inputting the unit
price and department key.

2 Enter reduction amount manually
and press m key. $0.25 is subtracted from the unit price.

3 Register item 2 by inputting the PLU

number and

PLU/ S.DEPT

key.

4 Press m key. Pressing m key
without numeral entry subtracts the preset reduction amount ($0.50 in
this example) from the PLU's unit price.

5 Press o key for reducing
amount from the subtotal.

6 Enter reduction amount manually
then press m key. The inputted amount is subtracted from the subtotal amount.

7 Enter the tendered amount then
press F key.

500! 25m 45 PLU/
S.DEPT
m
o 75m
10'F

Printout

1 DEPT001 -
1 PLU0045 - - TA1 TX1 TL CASH CG

T1 $5.00 T1 -0.25 T1 $6.00 T1 -0.50
-0.75 $10.25
$0.41 $9.91
$10.00 $0.09

Printout differs depending on preset tax statuses.

· You can input up to seven digits reduction amount manually. · To program preset reduction amount, please see page E-26.

E-37

To use the cash register's basic function

Registering various payment methods
Other than cash payments, you can register transactions made by checks, charges, credits, or even mixed tendering.

 Check sale
Sample Operation

Item
Reference no. of check Payment

Unit Price Quantity
Check

$11.00 1
1234 $20.00

A $11.00 item is sold and customer paid by $20.00 check (check number 1234).

Step
1 Register the item purchased.

Operation 11'!

2 If you wish to record reference num- 1234N
ber such as a check number, enter the number then press N key.
3 Enter the paid amount then press 20'k
k key.

Printout

1 DEPT001 # TL CHECK CG

$11.00 1234
$11.00 $20.00 $9.00

 Charge sale
Sample Operation

Item Payment

Dept. 04 Quantity Charge

$15.00 1
$15.00

A purchased item is transacted by charge sale.

Step

Operation

1 Register the item purchased and
press o key.
2 Press h key to finalize the charge
transaction.

15'$o h

Printout

1 DEPT004

$15.00

TL

$15.00

CHARGE

$15.00

E-38

Basic function

To use the cash register's basic function

 Credit sale
Sample Operation

Item Payment

Dept. 03 Quantity Credit

Step

1 Register the item purchased and
press o key.
2 Press c key to finalize the trans-
action.

$10.00 1
$10.00

A purchased item is paid by a credit card.

Operation 10'#o

Printout

c

1 DEPT003

$10.00

TL

$10.00

CREDIT

$10.00

 Mixed payments (cash and check)
Sample Operation

Item Payment

Dept. 04 Quantity Check Cash

$55.00 1
$30.00 $25.00

Customer paid $30.00 by check and the rest in cash for $55.00 item.

Step
1 Register the item purchased and
press o key.
2 Enter the amount paid by a check
then press k key.
3 Enter the paid cash amount then
press F key.

Operation 55'$o 30'k
25'F

Printout

1 DEPT004 TL CHECK CASH CG

$55.00 $55.00
$30.00 $25.00
$0.00

E-39

To use the cash register's basic function

Tax shift
By using t or T keys, you can change the taxable status. The t key switches on and off of programmed taxable status 1 and T key changes the taxable status 2. The following table explains how tax statuses change by t or T key.

Non tax Tax status 1 Tax status 2

t 6 Tax status 1 t 6 Non-tax t 6 Tax status 1 & 2

Non tax Tax status 1 Tax status 2

T 6 Tax status 2 t 6 Tax status 1 & 2 t 6 Non-tax

Sample Operation

Item 1 Item 2 Item 3 Payment

Dept. 01 Quantity Taxable Dept. 02 Quantity Taxable Dept. 03 Quantity Taxable Cash

$2.00

1

Non tax (preset) to tax status 1 $6.00 1

· Item 1 is shifted from non-taxable to tax status 1 by t key.
· Item 2 is shifted from tax status 1 to tax status 1 & 2 by T key.

Tax status 1 (preset) to 1 & 2 · Item 3 is shifted from tax status 2 to

$7.00

non-taxable by T key.

1

· Preset tax rates : Tax 1 = 4% Tax 2 = 5%

Tax status 2 (preset) to non-tax

$30.00

Step

Operation

Printout

1 Press t then register item 1. The t2'!

tax status of the item 1 is changed

from non-taxable to tax status 1.

2 Press T then register item 2. The T6'"

tax status of the item 2 is changed

from tax status 1 to tax status 1 & 2.

3 Press T then register item 3. The T7'#

tax status of the item 3 is changed

from tax status 2 to non-taxable.

4 Press o key to indicate the

o

total amount including tax.

5 Enter tendered amount and press 20'F

F to finalize the transaction.

1 DEPT001 1 DEPT002 1 DEPT003
TA1 TX1 TA2 TX2 TL CASH CG

T1 $2.00 T12 $6.00
$7.00 $8.00 $0.32 $6.00 $0.30 $15.62 $20.00 $4.38

· To change the tax status of the next item to be registered, be sure to press t,T. · If the last item registered is programmed as non-taxable, a discount (p key) operation on this
item is always non-taxable. In this case, you cannot manually change the tax status to taxable
1 or 2 by pressing t,T keys.

E-40

Basic function

To use the cash register's basic function
Registering returned goods
 Registering returned goods in the REG mode
The following example shows how to operate for registering goods returned by customer in the REG mode.

Sample Operation

Item 1 Item 2 Item 3 Refunded Item 1 Refunded Item 3 Payment

Dept. 01 Quantity Dept. 02 Quantity PLU 001 Quantity Dept. 01 Quantity PLU 0001 Quantity Cash

Step

1 Register purchased item 1.

$2.35 1
$2.00 1
$1.20 (preset) 1
$2.35 1
$1.20 (preset) 1
$2.00
Operation
235!

2 Register purchased item 2.

2'"

3 Register purchased item 3.
4 Press R key prior to registering
returned item 1.
5 Register returned item 1.

1 PLU/ S.DEPT
R 235!

6 Press R key and register returned
item 3. Then press o key.
7 Press F key as the customer
paid exact amount.

R1 o PLU/ S.DEPT
F

Customer returned items 1 and 3 during the registration.

Printout

1 DEPT001 1 DEPT002 1 PLU0001
RF 1 DEPT001
RF 1 PLU0001
TL CASH

$2.35 $2.00 $1.20 ········ -2.35 ········ -1.20 $2.00 $2.00

E-41

To use the cash register's basic function
 Registering returned goods in the RF mode
When a customer returns goods after the transaction has been completed, use RF mode for the refund operation.

Sample Operation

Refunded Item 1
Refunded Item 2 Payment

Dept. 03 Quantity Reduced PLU 002 Quantity Discounted Cash

$4.00 1
$0.15 $1.20 (preset)
1 5% (preset)
$4.99

A customer returned two items. Item 1 was sold with $0.15 reduction and item 2 was sold with pre-programmed 5% discount.

Step

Operation

Printout

1 Turn the Mode switch to RF posi-

tion.

2 Register the returned items by the 4'#

same operations as normal registra- 15m

tion and press o key.

2 PLU/ S.DEPT

p

o

3 Press F key and pay the total F

amount back to the customer.

1 DEPT003 -
1 PLU0002 5%
%- TL CASH

$4.00 -0.15 $1.20
-0.06 $4.99
$4.99

Important
· After the refund operation, please do not forget to return the Mode switch to REG position otherwise the following registrations are stored as minus transactions.

E-42

Basic function

To use the cash register's basic function

Registrations without transactions

The followings are the operations other than normal sales transactions. Please do not perform these operations during a sales transaction.
 Registering money received on account
Use this operation when you put money in the drawer without any sales transactions such case as preparing change.
Sample Operation

Received amount

$70.00

Prepared $70.00 in the drawer for change before opening the store.

Step

Operation

Printout

1 Enter the amount put in the drawer 70' RA
then press RA key.

RA

$70.00

 Registering money paid out from the drawer.
Use this operation when you withdraw money from the drawer without any sales transactions such case as paying for a cash-on-delivery item.
Sample Operation

Paid out amount

$1.50

Paying $1.50 from the drawer.

Step
1 Enter the amount withdrawn from
the drawer then press ] key.

Operation 150]

Printout
PO

$1.50

 Opening the drawer without putting money in or out
Use this operation to open the drawer without putting money in or out. The number of N key operations will be printed on X or Z reports.
If you enter numbers prior to N key, the number will be printed on the receipt or journal. (see page E-38)

Step

Operation

Printout

1 Just press N key. The drawer

N

opens.

#/NS

·········

E-43

To use the cash register's basic function

Corrections

There are three ways to correct erroneous operations that are;
· Correcting erroneous item not registered · Correcting erroneous item already registered · Cancelling all the items registered in a transaction

 Correcting erroneously entered item not registered

Step

Operation

1 Correcting wrong unit price $2.00 to
$1.00.
2 Correcting wrong quantity 12 to 11.
3 Correcting wrong PLU number 002
to 003.
4 Correcting open PLU unit price
$6.00 to $10.00. You must re-enter the PLU number prior to entering correct unit price.
5 Correcting wrong partially tendered
cash amount $10.00 to $15.00.
6 The remaining amount is paid by
check.

2' C 1'! 12x C 11x 2'" 2 C 3 PLU/
S.DEPT
15 PLU/ S.DEPT
6' C 15 PLU/
S.DEPT
10': 10' C 15'F h

Printout

1 DEPT001 11 DEPT002
1 PLU0003 1 PLU0015
TL CASH CHECK

$1.00 $22.00
$1.30 $10.00 $34.30 $15.00 $19.30

E-44

Basic function

To use the cash register's basic function

 Correcting items immediately after the registration

Step

Operation

1 Registering an item.

1'!

2 By mistake, Dept. key has been
pressed twice so cancelling the preceding registration by e key.

2'"" e

3 Cancelling wrong PLU registration
(PLU No. 2) and re-registering correct PLU (PLU No. 5).

2 e PLU/ S.DEPT
5 PLU/ S.DEPT

4 Cancelling a registration of an open
PLU's (PLU No. 15) wrong unit price $6.00 and re-registering the item with the correct unit price $10.00.

15 PLU/ S.DEPT
6':e 15 PLU/
S.DEPT
10':

5 Cancelling a registration of an item
with wrong quantity (8 pieces) and re-registering the item with the correct quantity (6 pieces).

8x 4'$e 6x 4'$

6 The remaining amount is paid by
check.

o 50p

Cancelling wrong subtotal discount calculation (with rate of 50%) and re-calculating the discount amount with the correct rate (5%).

eo 5p

7 Cancelling wrong refund amount
($2.00) and re-registering correct amount ($2.20).

R2'" e R220"

8 Getting the subtotal amount.

o

9 Cancelling partially tendered cash 20'F

amount ($20.00) and re-registering e

correct amount ($15.00).

15'F

10 The customer paid the balance due m

by check.

Printout

1 DEPT001 1 DEPT002 1 DEPT002
CORR 1 PLU0002
CORR 1 PLU0005 1 PLU0015
CORR 1 PLU0015 8 DEPT004
CORR 6 DEPT004
ST 50% %- CORR ST
5% %- RF 1 DEPT CORR RF 1 DEPT002 TL CASH CORR CASH CHECK

$1.00 $2.00 $2.00 -2.00 $2.00 -2.00 $1.50 $6.00 -6.00 $10.00 $32.00 -32.00 $24.00 $38.50
-19.25 $19.25 $38.50
-1.93 ·········
-2.00 $2.00 ········· -2.20 $34.37 $20.00 -20.00 $15.00 $19.37

Corrected items are not printed on receipt if programmed as "Buffered receipt printing".

E-45

To use the cash register's basic function

 Voiding an item which has been already registered

Step

Display

1 During a registration.

2 Using ? or > keys, select the item you have mis-
registered.
3 Press F key. The selected item is voided.

 Cancelling all items in a transaction
Step
1 Press o key after items have been registered then
press e key.

Display

2 Select [YES] on the pop up display.

3 Press F key. The registered items are cancelled.

E-46

Basic function

To use the cash register's basic function
Daily sales reports
At the end of the business day, you can print categorized and summarized results of the day. Reset report (Z) clears all the sales data whereas the data remains in memory by Read report (X).

Please do not perform the Reset report (Z) printing while your store is open. It clears all the sales data.

Step

Display

1 Turn the Mode switch to X or Z position. The display shows
top display of sales reports.

2 Select [DAILY Z] (DAILY X when you set the Mode switch
to X) and press F key. The printer issues a sales report.
Further operations: · For individual reports, please see page E-89.

E-47

To use the cash register's basic function

Print out of daily sales report

Z

20-06-2013 17:00

1

0001

000231 2

------------------------

Z

DAILY Z

3

------------------------

Z

DEPT

0001 4

0001015 5

DEPT001

203.25
$1,108.54 6

DEPT002

183

$1,362.26

DEPT008

5

$17.22

------------------------

TL

421.25

7

$2,872.28

------------------------

Z

FIX

0001 8

0001011 9

GROSS

981.25

$6,574.40 10

NET

No 111

$7,057.14 11

CAID

$1,919.04 12

CHID

$139.04 13

CKID

$859.85 14

CRID(1)

$709.85 15

CRID(2)

$0.00

16

CRID(3)

$0.00

17

CRID(4)

$0.00

18

------------------------

RF

No 3

19

$10.22

CUST

CT 111

20

AVRG

$63.57 21

DC

$1.22 22

REF

$2.42 23

ROUND

$0.00 24

CANCEL

No 2

25

$12.97

------------------------

1 Date/time 2 Machine No./consecutive No. 3 Report title 4 Department report title/reset counter 5 Report code 6 Department count/amount *1 7 Department total count/total amount 8 Fixed total report title/reset counter 9 Report code 10 Gross total *2 11 Net total *2 12 Cash in drawer *2 13 Charge in drawer *2 14 Check in drawer *2 15 Credit in drawer 1 *2 16 Credit in drawer 2 *2 17 Credit in drawer 3 *2 18 Credit in drawer 4 *2 19 Refund mode *2 20 Number of customer *2 21 Average sales per customer *2 22 Discount total *2 23 Refund key *2
24 Rounding total *2 25 Cancellation

* 1 If total amount is zero, these items will not be printed. * 2 These items can be skipped by programming.

E-48

Basic function

To use the cash register's basic function

TA1

$2,369.69 26

TX1

$128.86 27

TA2

$2,172.96 28

TX2

$217.33 29

------------------------

GT $00000000125478.96 30

------------------------

Z

TRANS

0001 31

0001012 32

CASH

No 362
$1,638.04 33

CHARGE

No 56

$1,174.85

RA

No 4

$810.00

PO

No 5

$520.00

$5.00

CORR

No 14

$39.55

RCT

No 3

NS

No 5

------------------------

* 1 If total amount is zero, these items will not be printed. * 2 These items can be skipped by programming.

26 Taxable 1 amount *2 27 Tax 1 amount *2 28 Taxable 2 amount *2 29 Tax 2 amount *2 30 Grand total *2 31 Function key report title/reset counter 32 Report code 33 Function key count/amount *1

E-49

Advanced programmings and registrations
Advanced registrations......................................................................................................... E-51 Enabling clerk assignment ............................................................................................................E-51 Registrations with clerk assignment............................................................................................E-52 Single item cash sales ...................................................................................................................E-53
Character settings.................................................................................................................E-55 Using character keyboard..............................................................................................................E-55 Using ten key pad ...........................................................................................................................E-56 Setting characters ..........................................................................................................................E-58 Setting pop messages on receipts ...............................................................................................E-59 Setting symbol characters ............................................................................................................E-61
Advanced programmings .....................................................................................................E-64 Programming detail settings .........................................................................................................E-65
Programming functions of departments and PLUs in a lump .......................................... E-73 Programming department functions in a lump ........................................................................... E-73 Programming PLU functions in a lump ........................................................................................ E-75
Programming functions of departments and PLUs individually ...................................... E-76 Programming functions of departments individually................................................................. E-76 Programming functions of PLUs individually.............................................................................. E-78 Programming functions of transaction keys ............................................................................... E-79 Programming further clerk functions...........................................................................................E-83
Printing programmed data ...................................................................................................E-84 To print programmed unit price or percentage (other than PLU) ..............................................E-84 To print programmed characters (except PLUs) .........................................................................E-85 To print general programming (except PLUs)..............................................................................E-86 To print preset unit price of PLU ...................................................................................................E-87 To print preset characters of PLU .................................................................................................E-88 To print PLU programmings ..........................................................................................................E-88
Printing various sales reports..............................................................................................E-89 Printing various sales reports.......................................................................................................E-89 Periodic sales report ......................................................................................................................E-93
Using an SD card...................................................................................................................E-96 To format an SD card......................................................................................................................E-96 To store program data in an SD card............................................................................................E-97
Before you consider it as a problem ...................................................................................E-99 Error code table ..............................................................................................................................E-99 When "EJ FULL" sign appears on the display........................................................................... E-101 In case of power failure................................................................................................................ E-101 In case the register is locked up ................................................................................................. E-101 About the low battery indicator .................................................................................................. E-102
Specifications ...................................................................................................................... E-103
E-50

Advanced programmings and registrations
Advanced registrations Enabling clerk assignment
By assigning a clerk, clerk number or name will be printed on receipts. The following operation enables the register to use the clerk assignment.

Step

Operation

1 Turn the Mode switch to PGM position. The display shows
programming top menu.
2 Using ? and > keys, select [System Setting] and press
F key. [System Setting] is the last column on the programming top menu and is not shown on the first screen. Keep pressing > key until it appears on the screen.
3 Enter 3 from ten key pad then press o key. This
operation sets the register in program mode.
4 Enter 2722 from ten key pad and press o
key. Number 2722 is the program code for clerk assignment setting.
5 Enter 4 and eight zeros from the ten key pad then press
F key. Number 400000000 is the set code to enable clerk assignment.

3o 2722o
400000000F

If you wish to disable the clerk assignment feature later on, perform these steps and enter nine zeros in this step.
6 Press o key to complete the setting.

o

You can also program fro enabling clerk operations by detail setting program. Please see page E-72 "Set code 27".

Useful features

E-51

Advanced programmings and registrations
Registrations with clerk assignment
By signing a clerk on, the clerk name will be printed on receipts and sales reports.

Step
1 Enter the clerk number and
press o key.
2 Perform registration operations.
The clerk name is printed on receipts and displayed on top of the display.

Operation 1o

Printout

* commercial message *

REG 20-06-2013 11:58

C01

0001

000123 1

1 DEPT01

T1 $1.00

3 To sign a clerk off, enter 0 and 0o
press o key. Or just press SIGN OFF
key.

1: Clerk Name/Machine No./Consecutive No.

The clerk number is cleared when the Mode switch is turned to OFF position.

Further operation: You can sign on the register by clerk's secret number instead of clerk number. Also you can set characters for clerks' names. To set clerks' secret numbers and names, see page E-26.

E-52

Advanced programmings and registrations

Single item cash sales
A department key or a PLU programmed as single item sale status finalizes the transaction as soon as it is registered. This feature can be used only in cash sales. To program single item sales status see pages E-76 and E-77.

Sample operation 1: Simple single item sale

Item Payment

Dept. 01 Quantity Preset Cash

$1.00

1

Dept. 01 is programmed as single item sale and unit

Single item price is not preset.

$1.00

Step

Operation

Printout

1 Enter the unit price then press cor-
responding department key. The transaction is finalized immediately after the department key depression..

1'!

1 DEPT001 TL CASH

$1.00 $1.00
$1.00

Sample operation 2: Single item sale with multiplication

Item Payment

Dept. 01 Quantity Preset Cash

$1.00

3

Selling three pieces of items of dept. 01 in which

unit price $1.00 and single item sale status is pre-

Single item programmed.

$3.00

Step

Operation

1 Enter the quantity and press x
key for multiplication.
2 Press corresponding department
key. The transaction is finalized immediately.

3x !

Printout

3 DEPT001 TL CASH

$3.00 $3.00
$3.00

Useful features

E-53

Advanced programmings and registrations

Sample operation 3: Single item sale with another item

Item 1
Item 2 Payment

Dept. 03 Quantity Preset Dept. 01 Quantity Preset Cash

$2.00

1

Normal $1.00
1

Dept. 03 is a normal department while dept. 01 is programmed as unit price $1.00 and single item sale status.

Single item

$3.00

Step
1 Register item 1.

Operation 2'#

2 Single item sale department key
does not finalize the transaction as it is not single item sale.
3 Press F key to finalize the
transaction.

! F

Printout

1 DEPT003 1 DEPT001
TL CASH

$2.00 $1.00 $3.00 $3.00

E-54

Useful features

Advanced programmings and registrations

Character settings
This chapter explains how you can program department or PLU descriptions, store messages, key descriptions, report title, total descriptions (such as gross total, net total etc.) and clerk names. There are two ways to program characters which are using character keyboard and using multi typing of ten key.
Using character keyboard
 Character keyboard

78

CAPS

SHIFT

1 6

DBL SIZE

2

2 7

3 8

4 9

SPACE

3

5 0

A

B

C

D

E

a

b

c

d

e

F

G

H

I

J

f

g

h

i

j

K

L

k

l

M

N

O

m

n

o

P

Q

R

p

q

r

S

T

s

t

DEL

U

V

W

X

Y

u

v

w

x

y

Z z

SUBTOTAL

5

CA/AMT

6

TEND

1

4

1

1 Alphabet keys

Used to input characters.

2 Double size letter key

Assigns the next input character to be double sized. After setting a double sized character, press this key again to back to normal size.

3 Space key

Sets a space.

4 Delete key

Clears the last input character.

5 Program end key

Terminates the character programming.

6 Character enter key

Registers the programmed characters.

7 CAPS key

Pressing this key shifts a character from the lowercase letter to upper case letter.

8 Shift key

Pressing this key shifts the character from the uppercase letter to lower case letter.

Example: To set "Apple Juice"

A

p ple

J

u i ce

<DBL> <A> <DBL> <Shift> <p> <p> <l> <e> <Space> <CAPS> <J> <Shift> <u> <i> <c> <e> .

E-55

Advanced programmings and registrations
Using ten key pad
To set characters by using ten key, you need to press one of the ten key repeatedly until desired character appears on the display.
 Multi typing keyboard

DBL 2
SIZE

SPACE 3 C4

7 8 9
ABC DEF

4 5 6
GHI JKL MNO

1
PQRS
0

2
TUV
00


3
WXYZ
.
DEL

18 5

SUBTOTAL

6

CA/AMT

7

TEND

1 Alphabet keys

Hitting one of those keys repeatedly changes characters in the order shown in the table below.

8

A à


B å


C æ


a á


b ã

c8ÄÅÆ  ç returns to the beginning


Á


Â


À


Ã


Ç


â


ä


9 DEFdef9
 returns to the beginning

ÉÊËÈ

éêëè

V GHIghi4ÍÎÏIÌÏÎÌíí
returns to the beginning

B J  K  L  j  k  l  5 returns to the beginning

N

M ò


N ø


O ó


mno6Ñ õ returns to the beginning


Ö


Ø


Ó


Ô


Ò


Õ


ñ


ô


ö


Z P  Q  R  S  p  q  r  s  1    ß returns to the beginning

X T  U  V  t  u  v  2  TEL  Ü  Ú  Û  Ù  ü  û  ù  ú  µ
returns to the beginning
C W  X  Y  Z  w  x  y  z  3   ÿ  returns to the beginning ?0

' (Right cursor)

^ (Delete)

7@ - /:!?~()*#+ , ^;<
M  =  >  $  ¥  % &  [  ]  ``  {  |  }  ·  "  .  \  _ 

`  £    ¿  ¡    §  space

returns to the beginning

E-56

Advanced programmings and registrations

2 Double size letter key

Assigns the next input character to be double sized. After setting a double sized character, press this key again for normal size.

3 Space key

Sets a space.

4 Clear key

Clears all the characters.

5 Delete key

Clears the last input character.

6 Program end key

Terminates the character programming.

7 Character enter key

Registers the programmed characters.

8 Right cursor key

Moves the cursor to the right.

Example: To set CLASS a

C

L

A

S

S

a

<DBL>888 555 <DBL> 8 1111 '1111 <Space> 8888

Useful features

E-57

Advanced programmings and registrations

Setting characters
The following explanation shows how you can set a name in a PLU. You can also set names to departments, function keys (p, m), and clerks by the same method.

Sample Operation To set "MILK" to PLU0001 by using ten key pad. Step
1 Turn the Mode switch to PGM position. The display shows
the program top menu.

Display

2 Using > or ? keys, select [PLU Setting] and press
F key. Enter the PLU number in which you wish to set characters and press F key.
3 On the next screen, make sure that the PLU number you
wish to set is selected. If you wish to change it, use > or ? keys. Press F key.
4 Select the top column of the [PLU Setting screen] and
input the character you wish to set. In this example, 6444555'55 (for MILK). Then press F key to complete the setting.

E-58

Advanced programmings and registrations

Setting pop messages on receipts
You can set pop messages printed on receipts.

New Year

1

Sale

2

1st Anniversary

3

10% OFF

4

5

1 Pop message 1st. line 2 Pop message 2nd. line 3 Pop message 3rd. line 4 Pop message 4th. line 5 Pop illustration

 To set pop message
Step

Display

1 Turn the Mode switch to PGM position and select [POP Set-
ting] then press F key.

Useful features

2 Select [All Message] and press F key. Preset mes-
sages will be printed.
3 Select the line number of the pop message and press
F key.

4 Referring printed preset messages, input the message
number you wish to set and press F key.

5 Repeat the steps 3 and 4 for other message lines.
 To set other messages
To set logo message, commercial message, and bottom message (refer to page E-19 "Receipt sample"), perform the same procedure as the above operations except selecting [Message Setting] in step 1.
E-59

Advanced programmings and registrations

 To set pop illustration
Step

Display

1 Turn the Mode switch to PGM position and select [POP Set-
ting] then press F key.

2 Select [All Graphic] and press F key. The printer prints
preset pop illustrations.

3 From the printout, select an illustration you wish to print on
receipts.
4 Select [Print Graphic No. [ ] ] and input the illustration
number from ten key pad. Then press F key.

4 Select [POP Print] and press F key. Make sure that the
illustration you select comes out from the printer.

E-60

Advanced programmings and registrations
Setting symbol characters
You can change the symbols or titles of sales reports for example, printing "CASH IN DRW" on the sales reports instead of "CAID" for cash amount in drawer.

Step

Operation

1 Turn the Mode switch to PGM position and select [System >>F
Setting] then press F key.

[System Setting] is the last column on the programming top
menu and is not shown on the first screen. Keep pressing > key until it appears on the screen.

2 Enter 2 and press o key to set the register in the
character setting mode.

2o

3 Referring the following tables, enter two-digit memory num- BB BBo

ber and program code. Then press o key.

[Memory No.](Program code)

4 Referring the character entry methods on pages E-55 and
E-56, input characters you wish to set and press F key.

BBBBF
(Character keys)

5 If you wish to set in the next memory number, repeat step
4. If you wish to set other memory number than the next number, repeat steps 3 and 4.
6 Press o key to complete the setting.

o

Example: To set "CASH IN DRW" in memory number 3 Press 2o0301[C][A][S][H][SPACE][I][N][SPACE][D][R][W]Fo

Useful features

E-61

Advanced programmings and registrations

Sales report symbols

Memory No. Program code Contents

01

Gross total

02

Net total

03

Cash in drawer

04

Charge in drawer

05

Check in drawer

06

Credit 1 in drawer

07

Credit 2 in drawer

08

Credit 3 in drawer

09

Credit 4 in drawer

10

Cash in drawer for sub currency

11

Charge in drawer for sub currency

12

Check in drawer for sub currency

17

Refund mode total

18

Customer count

19

Average sales per customer

20

Clerk commission 1 total

21

Clerk commission 2 total

01

22

Foreign currency cash in drawer

23

Foreign currency check in drawer

26

Reduction

27

Coupon

28

Item return

29

Rounding for sub currency

30

Rounding

31

Cancellation

33

Taxable amount 1

34

Tax 1

35

Taxable amount 2

36

Tax 2

37

Taxable amount 3

38

Tax 3

39

Taxable amount 4

40

Tax 4

41

Non taxable amount

Default character GROSS NET CAID CHID CKID CRID(1) CRID(2) CRID(3) CRID(4) CAID2 CHID2 CKID2 RF CUST AVER C-1 C-2 CECA1 CECK1 DC COUPON REF ROUND ROUND CANCEL TA1 TX1 TA2 TX2 TA3 TX3 TA4 TX4 NON TAX

Memo for your settings

E-62

Advanced programmings and registrations

Other symbols

Numbers in ( ) are digits to be used.

Memory No. Program code Contents

Default character

main currency symbol (2), @ (2), No.(2), split

01

pricing (2), not used (4), sub currency symbol

· @No/

**

(2)

02

No. of item sold (2), No. of customers (2), not used (6), multiplication display(2)

NoCT@

LB

*QT

03

multiplication symbol (6), not used (6)

X

BUSY

04

taxable symbols (3 each)

T1 T1 T3 T4 T5

06

taxable symbols (3 each)

T12T13T14

T23

08

foreign currency (2 each) not used (8)

****

*

09

mode symbols (4 each) (REG, RF, not used) R E G R F R

10

23

mode symbols (4 each) (PGM, Daily X, Daily Z, Periodic)

P

X

Z

XZ

11

mode symbols (4 each) (not used, PGM read) T R G

PGMX

12

decimal (1) (for amount/ q'ty), separator (main/ sub 1 each), not used (3), square (7)

..,..,

X

13

am, pm (3each) ST symbol on main display (2) A M P M S T

16

subtotal symbol on main display (16)

ST

17

subtotal symbol for discount/premium (16)

ST

18

post receipt total symbol (16)

TL

19

change symbol (16)

CG

01

20

grand total symbol (16)

GT

Title of sales reports

Memory No. Program code Contents

01

Fixed total report title

02

Transaction key report title

03

PLU sales report title

04

Department sales report title

05

24

Group sales report title

06

Clerk sales report title

08

Hourly sales report title

09

Monthly sales report title

16

Flash report title

Default character FIX TRANS PLU DEPT GROUP CASHIER HOURLY MONTHLY FLASH

Memo for your settings

Useful features

E-63

Advanced programmings and registrations

Advanced programmings

This section explains how you can program detail settings of the register such as setting register's specific number, whether to reset consecutive number on the receipt after a Reset (Z) report or not, whether to print taxable amounts on receipts or not, etc.
The following table lists what can be programmed in this settings.

Set code

02

Cash register's unit number

Settings

No. of digit to be set
4

03

Whether to reset consecutive number after Reset (Z) report or not

8

04

Tax system (USA or Canada)

9

05

Contents of receipt/journal print

10

06

Calculation and operation methods

10

08

Contents of sales reports

10

10

Whether to print taxable amount or not

10

14

Printing of period or comma for decimal and separator on fixed total report print

8

15

Printing methods of sales reports

10

16

Printing methods of grand total

7

17

Date/time printing on journals/receipts

4

19

Double height character printing on receipts

7

21

Printing methods of messages

10

27

Clerk operation selections

9

30

Receipt message/Compressed journal print selection

5

34

Backlight on/off selection

4

E-64

Useful features

Advanced programmings and registrations
Programming detail settings
To program the detail settings of the register, please follow the operations shown below.

Step

Operation

1 Turn the Mode switch to PGM position and select [System >>F
Setting] then press F key.

[System Setting] is the last column on the programming top menu and is not shown on the first screen. Keep pressing > key until it appears on the screen.
2 Enter 3 and press o key to set the register in the
programming mode.
3 Referring the following tables, enter two-digit set code you
wish to program followed by two 2s. "22" is the identification code for programming detail settings.
4 Referring the tables below, enter program code of up to 10
digits and press F key.
5 Press o key to complete the program.

3o
BB22
[set code] For example, if you wish to program tax system:
0422 BBBBF
[Program code (up to 10 digits)]
o

Set code 02 (Machine number)
Description Machine number

Selection
Machine number

Example: To set the register's specific unit number 1234. Press 3o0222o1234Fo

Program code
BBBB D4 D3 D2 D1

Default value
ºººº D4 D3 D2 D1

Set code 03 (Whether to reset consecutive number after Reset (Z) report or not)

Description

Selection Program code

Reset consecutive number after daily reset report is issued.

Yes = 0

B

No = 1

D8

Must be "0000000" (seven zeros)

B to B D7 to D1

Example: Not resetting the consecutive number after Z report printing. Press 3o0322o10000000Fo

Default value
º D8
º to º D7 to D1

E-65

Advanced programmings and registrations

Set code 04 (Tax system)
Description Canadian rounding system Roundings Last digit: 0 to 2  0, 3 to 7  5, 8 and 9  10 US tax system = 1, Canadian tax system = 2 (Default value depends on the country shipped to)
Must be "00000000" (eight zeros)

Selection
No = 0 Yes = 7
Select 0 or 1

Program code
B D10
B D9
º to º D8 to D1

Default value
º D10
¡ or TM D9
º to º D8 to D1

Example: To set Canadian tax system with canadian rounding system. Press 3o0422o7200000000Fo

Set code 05 (Receipt printing selections)

Description

Selection

Print total line during finalization.

a

Yes = 0 No = 1

24- hour system (0) or 12 -hour system (2)

b

Select 0 or 2

Buffered receipt print (enables key operations during printing)

No = 0 Yes = 2

Skip item prints on journal. (journal skip)

No = 0 Yes = 1

Must be "000"

Print number of item sold. (item counter) Print tax symbols. Must be "000"

a No = 0 Yes = 1
b Yes = 0 No = 2

Program code
B (a+b) D10
B D9 B D8 ººº D7 D6 D5
B (a+b) D4
ººº D3 D2 D1

Default value
º (a+b) D10
º D9 º D8 ººº D7 D6 D5
º (a+b) D4
ººº D3 D2 D1

Example:
· On a receipt, not printing total amount (a = 1), printing 12 -hour system (b = 2): D10 = 3 (1 + 2). · Buffered receipt printing: D9 = 2. · Not printing items on journal (journal skip): D8 = 1. · D7 ­ D5 must be 000. · Printing number of items (a = 1), not printing tax symbols (b = 2): D4 = 3 (1 + 2). · D3 ­ D1 must be 000. Press 3o0522o3210003000Fo

E-66

Useful features

Advanced programmings and registrations

Set code 06 (Calculation and operation methods)

Description

Selection

Succeeds the taxable status and commission status of previous item when +/ - operation is performed.

a

Yes = 0 No = 1

Force money declarations before read(X) or reset (Z) reports operations.

b

No = 0 Yes = 4

Force to press o key before finalization.

a

No = 0 Yes = 1

Allow finalization when subtotal amount is zero or minus.

b

Yes = 0 No = 2

Allow multiple refund operation.

c

Yes = 0 No = 4

Affects the results of +/ -. %+/ %- calculations to items. (Net totaling)

No = 0 Yes = 1

Include commission in net total.

Yes = 0 No = 2

Clears the key buffer when a receipt is issued. (REG mode only)

a

No = 0 Yes = 1

Sounds key catch tone.

b

Yes = 0 No = 2

Allow to issue post receipt, even the original one is issued.

c

No = 0 Yes = 4

Must be "000"

Use <00> key as <000> key.

<00> = 0 <000> = 4

Must be "0"

Program code
B (a+b) D10
B (a+b+c) D9
B D8 B D7
B (a+b+c) D6
ººº D5 D4 D3
B D2 º D1

Default value
º (a+b) D10
º (a+b+c) D9
º D8 º D7
º (a+b+c) D6
ººº D5 D4 D3
º D2 º D1

Example:
· A +/- operation not succeeds taxable status and commission status (a = 1), amount in drawer should be declared before Z reporting (b = 4): D10 = 5 (1 + 4).
· o key must always be pressed for a finalization (a = 1), not allowing zero or minus subtotal in a transaction (b = 2), not allowing multiple refund operations (c = 4): D9 = 7 (1 + 2 + 3).
· Affecting the result of +/-, %+/%- to an item: D8 = 1. · Not including commission in net total: D7 = 2. · Clearing key buffer when a receipt is issued (a = 1), not sounding key catch tone (b = 2), issues post
receipts even the original receipt is issued (c = 4): D6 = 7 (1 + 2 + 3).
· D5 ­ D3 must be 000. · Using 00 key as 000 key D2 = 4. · D1 must be 0. Press 3o0622o5712700040Fo

E-67

Advanced programmings and registrations

Set code 08 (Fixed total print control)
Description Print gross sales total (GROSS) on fixed total report. Print net sales total (NET) on fixed total report. Print cash in drawer (CAID) on fixed total report. Print charge in drawer (CHID) on fixed total report. Print check in drawer (CKID) on fixed total report. Print credit in drawer on (CRID(1) ~ (4)) on fixed total report. Must be "0"

Selection

a

Yes = 0 No = 1

b

Yes = 0 No = 2

c

Yes = 0 No = 4

Yes = 0 No = 2

a

Yes = 0 No = 1

b

Yes = 0 No = 4

Print RF mode total (RF) on fixed total report.

Print the net number of customers (CUST) on fixed total report. a

Print average sales per customer (AVER) on fixed total report. b

Must be "0"

c

Print commission 1 total (C-1) on fixed total report.

a

Print commission 2 total (C-2) on fixed total report.

b

Print foreign currency cash in drawer (CECA1, CECA2) and check in drawer (CECK1, CECK2) on fixed total report.

c

Print <MINUS>, <COUPON>,<%-> and mix & match operation net total (DC) on fixed total report.

a

Print total number of <REFUND> operation (RF) on fixed total report.

b

Print nontaxable totals (NON TAX) on fixed total report.

a

Print rounded fractions (ROUND) on fixed total report.

b

Print number of cancellation (CANCEL) on fixed total report. c

Yes = 0 No = 4 Yes = 0 No = 1 Yes = 0 No = 2
Yes = 0 No = 1 Yes = 0 No = 2 Yes = 0 No = 4 Yes = 0 No = 1 Yes = 0 No = 2 Yes = 0 No = 1 Yes = 0 No = 2 Yes = 0 No = 4

Program code
B (a+b+c) D10
B D9
B (a+b) D8
º D7 B D6
B (a+b) D5
º D4
B (a+b+c) D3
B (a+b) D2
B (a+b+c) D1

Default value
º (a+b+c) D10
º D9
º (a+b) D8
º D7 º D6
TM (a+b) D5
º D4
¶ (a+b+c) D3
£ (a+b) D2
£ (a+b+c) D1

E-68

Advanced programmings and registrations

Example:
· On the fixed total report, not printing gross sales total (a = 1), not printing net sales total (b = 2), not printing cash in drawer. (c = 4): D10 = 7 (1 + 2 +4 ).
· Not printing amount in drawer on fixed total report: D9 = 1. · On fixed total report, not printing check amount in drawer (a = 1), not printing credit amount in drawer (b
= 4): D8 = 5 (1 + 4).
· D7 must be always 0. · Not printing refunded amount in RF mode on fixed total report: D6 = 4. · Not printing total number of customers on fixed total report (a = 1), not printing average sales amount
per customer (b = 2): D5 = 5 (1 + 4).
· D4 must be always 0. · On fixed total report, not printing commission 1 amount (a = 1), not printing commission 2 amount (b =
2), not printing amount of foreign currency cash and check (c = 4): D3 = 7 (1 + 2 + 3).
· On fixed total report, not printing net total of <MINUS>, <COUPON>, <%-> etc. (a = 1), not printing <REFUND> and <VOID> amounts (b = 2): D2 = 3 (1 + 2).
· On fixed total report, not printing non-taxable amounts (a = 1), not printing rounded down amount (b = 2), not printing cancelled amount (c = 4): D1 = 7 (1 + 2 + 3).
Press 3o0822o7150450737Fo

Set code 10 (Print control of taxable amount)
Description Print taxable amount 1 on receipt/journal.
Print taxable amount 2 on receipt/journal.
Print taxable amount 3 on receipt/journal.
Print taxable amount 4 on receipt/journal.
Must be "00000000" (eight zeros)

Selection

a

Yes = 0 No = 1

b

Yes = 0 No = 2

c

Yes = 0 No = 4

Yes = 0 No = 1

Program code
B (a+b+c) D10
B D9 º to º D8 to D1

Default value
º (a+b+c) D10
º D9 º to º D8 to D1

Useful features

E-69

Advanced programmings and registrations

Set code 15 (Printing methods of sales reports)

Description

Department zero skip (Departments of sales amount zero are not printed on sales reports.)

a

Clerk zero skip (Zero amounted clerks are not printed on sales reports.)

b

Transaction key zero skip (Transaction keys of sales amount zero are not printed on sales reports.)

a

PLU zero skip (Zero amounted PLUs are not printed on sales reports.)

b

Hourly sales report skip (Zero amounted time zones are not printed on sales reports.)

c

Group zero skip (Zero amounted groups are not printed on sales reports.)

Must be "00"

Selection
Yes = 0 No = 1
Yes = 0 No = 2
Yes = 0 No = 1
Yes = 0 No = 2
Yes = 0 No = 4
Yes = 0 No = 1

Print PLU numbers on the PLU report. Print sales ratio on sales reports. Issue double Z reports. Must be "000"

No = 0 Yes = 4

a

No = 0 Yes = 1

b

No = 0 Yes = 2

Program code
B (a+b) D10
B (a+b+c) D9
B D8 ºº D7 D6 B D5
B (a+b) D4
ººº D3 D2 D1

Default value
º (a+b) D10
º (a+b+c) D9
º D8 ºº D7 D6 º D5
º (a+b) D4
ººº D3 D2 D1

Set code 16 (Printing methods of grand total)
Description Print range of consecutive number on fixed total report.
Must be "00111"
Print grand total on daily sales reset (Z) report.

Selection No = 0 Yes = 1
Yes = 0 No = 1

Program code

Default value

B

º

D7

D7

ºº¡¡¡ ºº¡¡¡ D6 D5 D4 D3 D2 D6 D5 D4 D3 D2

B

º

D1

D1

E-70

Advanced programmings and registrations

Set code 17 (Date/time printing on journals/receipts)

Description

Print date on journal.

a

Print consecutive number on receipt/journal.

b

Print time on receipt.

a

Print time on journal.

b

Must be "00"

Selection
Yes = 0 No = 2
Yes = 0 No = 4
Yes = 0 No = 1
Yes = 0 No = 2

Program code
B (a+b) D4
B (a+b) D3
ºº D2 D1

Default value
º (a+b) D4
º (a+b) D3
ºº D2 D1

Set code 19 (Double height character printing on receipts)

Description

Selection

Program code

Default value

Print receipt in double height characters

No = 0

B

º

Yes = 1

D7

D7

Must be "000000" (six zeros)

ºººººº ºººººº D6 D5 D4 D3 D2 D1 D6 D5 D4 D3 D2 D1

Set code 21 (Printing methods of messages)
Description Print graphic type logo. (If "No" is selected, character logo will be printed.) Must be "000"
Print commercial message on receipts in REG/RF mode.
Print bottom message on receipts in REG/RF mode.
Must be "0000"
Must be "0".

Selection
No = 0 Yes = 2

a

No = 0 Yes = 1

b

No = 0 Yes = 2

Program code B D10
ººº D9 D8 D7
B (a+b) D6
ºººº D5 D4 D3 D2
º D1

Default value TM D10
ººº D9 D8 D7
º (a+b) D6
ºººº D5 D4 D3 D2
º D1

Useful features

E-71

Advanced programmings and registrations

Set code 27 (Clerk operation selections)
Description Allow clerk functions.
Must be "00000000"

Selection
No = 0 Yes = 4

Program code
B D9
º to º D8 to D1

Default value
º D9
º to º D8 to D1

Set code 30 (Thermal printer control)
Description Print preset receipt message and graphic.
Print preset receipt message and graphic:! at the bottom of the receipt, @ at the top of the receipt Journal compressed print (print half height characters)
Must be "000"

Selection

a

No = 0 Yes = 1

b

! = 0 @ = 2

Yes = 0 No = 1

Program code
B (a+b) D5
B D4 ººº D3 D2 D1

Default value
º (a+b) D5
º D4 ººº D3 D2 D1

Set code 34 (Backlight control)
Description Backlight
Must be "000"

Selection
Functions = 0 Not functions = 1

Program code
B D4
ººº D3 D2 D1

Default value
º D4
ººº D3 D2 D1

E-72

Useful features

Advanced programmings and registrations
Programming functions of departments and PLUs in a lump
There are two methods to set functions of departments or PLUs which are programming at once and programming individual functions.
Programming department functions in a lump
This method programs function of a department at one time.

Step

1 Turn the Mode switch to PGM position and select [System
Setting] then press F key.

2 Enter 3 and press o key to set the register in the
programming mode.

3 You can skip this step if you program in departments 01

through 30. If you wish to program in departments 31

through 60, press

DEPT SHIFT/

key.

DEPT#

4 Referring following table, input 12- digit program code.

5 Press the department key you wish to program

6 Repeat steps 3 through 5 if you wish to program functions
in another departments.
7 Press o key to complete the program.

Operation >>F
3o
DEPT SHIFT/ DEPT#
BBBB
[Program code (12 digits)]
!
For example, programming in dept. 26.
o

Example:

Programming department 31 as;

· Normal item: D12 = 0.

· D11 through D8 must be 0000.

· US taxable status 1 (a = 1) and 2 (b = 2): D7 = 3 (1 + 2)

· Allowing zero unit price (a = 1), not allowing negative unit price (b = 0), hash item (c = 4): D6 = 5 (1 + 0 + 4).

· D5 must always be 0.

· Limiting minimum entry digit: 3 digits: D4 = 3.

· As this example is for setting functions in a department, D3 should be 0.

· Applying commission 1 (a = 1), not applying commission 2 (b = 0): D2 = 1 (1 + 0).

· D1 must always be 0.

Press 3o

DEPT SHIFT/

00000350301!o

DEPT#

E-73

Advanced programmings and registrations

Department and PLU lump set code
Description Single item sales: Normal item = 0, Single item = 3
Must be "0000"

Selection 0 or 3
0000

Taxable status

Taxable status for
USA

Taxable status for Canada
Enable zero unit price.

Enable negative price.

Hash item

Must be "0"

Taxable status 1

a

No = 0 Yes = 1

Taxable status 2

b

No = 0 Yes = 2

Taxable status 3

c

No = 0 Yes = 4

Non tax = 0, Taxable 1 = 1, Taxable 2 = 2, Taxable 3 = 3, Taxable 4 = 4, Taxable 1 & 2 = 5, Taxable 1 & 3 = 6, Taxable 1 & 4 = 7

a

No = 0 Yes = 1

b

No = 0 Yes = 2

c

No = 0 Yes = 4

0

Low digit limitation (LDL) for manually entered unit price. Open PLU (only for PLU) Commission 1 (give commission on items) Commission 2 Must be "0"

Number of digits

No = 0 Yes = 4

a

No = 0 Yes = 1

b

No = 0 Yes = 2

Program code B D12
ºººº D11 D10 D9 D8
B (a+b+c) D7
B D7
B (a+b+c) D6
º D5 B D4 B D3
B (a+b) D2
º D1

Default value º D12
ºººº D11 D10 D9 D8
º D7
º (a+b+c) D6
º D5 º D4 º D3
º (a+b) D2
º D1

E-74

Advanced programmings and registrations
Programming PLU functions in a lump
This method programs functions of a PLU at one time.

Step

1 Turn the Mode switch to PGM position and select [System
Setting] then press F key.

2 Enter 3 and press o key to set the register in the
programming mode.

3 Enter four-digit PLU number then press

PLU/ S.DEPT

key.

4 Referring the table in the previous section, input 12- digit
program code.
5 Press F key.

Operation >>F
3o
0014 PLU/ S.DEPT
For example, to program PLU number fourteen.
BBBB
[Program code (12 digits)]
F

6 Repeat steps 3 through 5 if you wish to program functions
in another PLU.
7 Press o key to complete the program.

o

Useful features

E-75

Advanced programmings and registrations
Programming functions of departments and PLUs individually Programming functions of departments individually
This part explains programming methods of each function of departments individually.

Step

Operation

1 Turn the Mode switch to PGM position and select [System >>F
Setting] then press F key.

2 Enter 3 and press o key to set the register in the
programming mode.

3o

3 Referring the following table, enter two-digit set code you
wish to program followed by two 6s. The "66" is the identification code for individual programming of departments and PLUs. Then press o key.

BB66o
(set code)

4 You can skip this step if you program in departments 01

through 30. If you wish to program in departments 31

through 60, press

DEPT SHIFT/

key.

DEPT#

5 Referring the following table, enter program code and press

the department key in which you wish to set.

DEPT SHIFT/ DEPT#

123#

This example is for linking dept. 03 to item

group 123 assuming set code 11 has been

entered in step 3 and

DEPT SHIFT/ DEPT#

key is not pressed

in step 4.

6 If you wish to set the same function in another department, $

press the corresponding dept. key.

This example is for setting the same linking

group in dept. 04.

7 Repeat steps 4 and 5 to set another function in another
department.

8 Press o key to complete the program.

o

E-76

Useful features

Advanced programmings and registrations

Set code table

Set code

Description

Selection

Program code

Always "0"

0

º D2

03

Taxable status

Taxable status for
USA

Taxable status 1 Taxable status 2

Taxable status 3

a

No = 0 Yes = 1

b

No = 0 Yes = 2

c

No = 0 Yes = 4

B (a+b+c) D1

Taxable status for
Canada

Non tax = 00, Taxable 1 = 01, Taxable 2 = 02, Taxable 3 = 03, Taxable 4 = 04, Taxable 1 & 2 = 05, Taxable 1 & 3 = 06, Taxable 1 & 4 = 07

00 to 07

BB D2 D1

04 Open PLU (Only for PLU)

No = 0 Yes = 4

B

Allow unit price 0

a

No = 0 Yes = 1

05 Allow negative unit price.

b

No = 0 Yes = 2

B (a+b+c)

Hash item

c

No = 0 Yes = 4

Minimum digit of manual input unit price 07

Number of

minimum

B

digit

Commission 1 09
Commission 2

a

No = 0 Yes = 1

b

No = 0 Yes = 2

B (a+b)

Linking group (000 to 999)

000 to 999

BBB D7 D6 D5

11 Must be 0

0

º D4

Linking dept. (000 to 999) (Only for PLU)

000 to 999

BBB D3 D2 D1

15 Maximum amount of manual input unit price (up to 9999.99)

BBBBBB D6 D5 D4 D3 D2 D1

18 Single item control: Normal item = 0, Single item = 3

0 or 3

B

Example 1: To program dept. 01 as USA taxable 1 &2 3o0366o03!o

Example 2: To program dept. 02 to allow manual input unit price up to $99.00. 3o1566o9900"o

E-77

Advanced programmings and registrations
Programming functions of PLUs individually
This part explains programming methods of each function of PLUs individually.

Step

Operation

1 Turn the Mode switch to PGM position and select [System
Setting] then press F key.

2 Enter 3 and press o key to set the register in the
programming mode.

3 Referring the tables in the proceeding section, enter two-
digit set code you wish to program followed by two 6s. The
"66" is the identification code for individual programming of departments and PLUs. Then press o key.

4 Enter PLU number you wish to set and press

PLU/ S.DEPT

key.

5 Referring the table in the preceding section, enter program
code and press F key.
6 If you wish to set the same program code in the next PLU
number, press F key again.

>>F
3o
BB66o
(set code)
0005 PLU/ S.DEPT
This example is for setting a program in PLU 0005.
BBF
(Program code)
F

Perform step 5 if you wish to set another program code to the next PLU number.

To program in another PLU number (not next PLU number),

repeat steps 4 and 5.

7 Press o key to complete the settings.

o

Example 1: To set PLU 0001 as "Open PLU".

Press

3o0466o0001

PLU/ S.DEPT

4Fo

Example 2: To set PLU0012 to link item group 12 and dept. 04.

Press

3o1166o0012

PLU/ S.DEPT

0120004Fo

E-78

Useful features

Advanced programmings and registrations
Programming functions of transaction keys
This section explains how you can program functions in each transaction keys such as F, h or m keys. For example, programming F key to force entry of tendered amount.

Step

Operation

1 Turn the Mode switch to PGM position and select [System
Setting] then press F key.
2 Enter 3 and press o key to set the register in the
programming mode.
3 Referring the following tables, enter the program code then
press corresponding transaction key.
4 If you wish to program another transaction key, return to
step 3.
5 Press o key to complete the program.

>>F
3o
BBm
(Program code) The above example is for programming minus key.
o

Program code tables Default value of all the program codes are "0".

Program code for F, h and k keys.
Description Prohibit partial payment.
Prohibit tendered amount entry
Force to enter tendered amount.
Print breakdown of VAT. (Option for Single item or Currency exchange (including partial tendering foreign currency).) Must be "0"
Maximum amount for subtotal and tendered amount. e.g.) $9000, D4 = 9, D3 = 3 Maximum amount of change due.

Selection

Program code

a

No = 0 Yes = 1

b

No = 0 Yes = 2

B (a+b+c) D7

c

No = 0 Yes = 4

No = 0

B

Yes = 1

D6

0
D4: Maximum value (0 ~ 9) D3: Number of zeros (0 ~ 9)
Maximum value (0 ~ 9) Number of zeros (0 ~ 9)

B D5
BB D4 D3
BB D2 D1

Example 1: To set F key as prohibiting partial payment (a = 1), not prohibiting tendered amount entry (b = 0), and forcing to enter tendered amount (c = 4): D7 = 6.
Press 3o6000000Fo

E-79

Advanced programmings and registrations

Program code for RA and ] keys
Description Maximum amount. e.g.) $10,000; D4 = 1, D3 = 4.
Must be "00"

Selection Maximum value (0 ~ 9) Number of zeros (0 ~ 9)
00

Example: To set ] key not allowing to enter more than $900. Press 3o9200]o
Program code for m key
Description Always "0"

Selection 0

Taxable status

Taxable status for
USA

Taxable status for Canada
Allow credit balance.

Taxable status 1

a

Taxable status 2

b

Taxable status 3

c

Non tax = 00, Taxable 1 = 01, Taxable 2 = 02, Taxable 3 = 03, Taxable 4 = 04, Taxable 1 & 2 = 05, Taxable 1 & 3 = 06, Taxable 1 & 4 = 07

Must be "00"

No = 0 Yes = 1 No = 0 Yes = 2 No = 0 Yes = 4
00 to 07
No = 0 Yes = 1
00

Maximum digit of manual input unit price (Setting "9" programs NOT allowing manual entry.) Give commission 1
Give commission 2
Prepared status (Canadian tax)
Must be "0"

Number of digit

a

No = 0 Yes = 1

b

No = 0 Yes = 2

c

No = 0 Yes = 4

0

Program code BB D4 D3 ºº D2 D1
Program code º D8
B (a+b+c) D7
BB D8 D7
B D6 ºº D5 D4 B D3
B (a+b+c) D2
º D1

E-80

Advanced programmings and registrations

Program code for p key
Description Always "0"

Taxable

Taxable status 1

a

status for

Taxable

USA

Taxable status 2

b

status

Taxable status 3

c

Taxable status for
Canada

Non tax = 00, Taxable 1 = 01, Taxable 2 = 02, Taxable 3 = 03, Taxable 4 = 04, Taxable 1 & 2 = 05, Taxable 1 & 3 = 06, Taxable 1 & 4 = 07

Prohibit manual rate entry.

Rounding: Round off = 0, Cut off = 1, Round up = 2

Must be "00"

Give commission 1

a

Give commission 2

b

Must be "0"

Selection
0
No = 0 Yes = 1 No = 0 Yes = 2 No = 0 Yes = 4
00 to 07
No = 0 Yes = 2
0, 1 or 2
00
No = 0 Yes = 1 No = 0 Yes = 2
0

Program code º D8
B (a+b+c) D7
BB D8 D7
B D6 B D5 ºº D4 D3
B (a+b+c)D2
º D1

Program code for N key
Description
Allow mode change or clerk change after N key operation as first transaction. (Only for non-add function)
Must be "000000"

Selection Yes = 0 No = 1
000000

Program code
B D7
ºººººº D6 D5 D4 D3 D2 D1

Program code for o key
Description Print when the key is pressed.
Always "00000"

Selection No = 0 Yes = 4
00000

Program code
B D6
ººººº D5 D4 D3 D2 D1

Useful features

E-81

Advanced programmings and registrations

Program code for x key
Description Multiplication procedure ! Quantity × Amount, @ Amount × Quantity Roundings: Round off = 0, Cut off = 1, Round up = 2
Must be "0000"
Program code for t and T keys
Description Taxable status (01 ~ 04) (Taxable 1 if "00" is set)
Must be "000000"
Program code for c key.
Description Prohibit partial payment.
Prohibit tendered amount entry
Force to enter tendered amount.
Print breakdown of VAT.
Must be "0"
Maximum amount for subtotal and tendered amount. e.g.) $9000, D4 = 9, D3 = 3 Must be "00"

Selection ! = 0 @ = 1
0, 1, or 2
0000

Program code
B D6
B D5
ºººº D4 D3 D2 D1

Selection 01 to 04 000000

Program code
BB D8 D7
ºººººº D6 D5 D4 D3 D2 D1

Selection

Program code

a

No = 0 Yes = 1

b

No = 0 Yes = 2

B (a+b+c) D7

c

No = 0 Yes = 4

No = 0

B

Yes = 1

D6

0

B D5

D4: Maximum value (0 ~ 9) D3: Number of zeros (0 ~ 9)

BB D4 D3

00

ºº D2 D1

E-82

Useful features

Advanced programmings and registrations

Programming further clerk functions

This section explains how you can set further programming for clerks such as setting the register in training mode or setting commission rates given to clerks. In the training mode, the register operates normally but the results will not be stored in the memory. You can use this feature for getting to know the operations of the cash register for yourself or for newly hired clerks.

Step

Operation

1 Turn the Mode switch to PGM position and select [System >>F
Setting] then press F key.

2 Enter 3 and press o key to set the register in the
programming mode.

3o

3 Enter 2 -digit clerk number followed by 07. The "07" is the
identification code for further program of clerks. Then press o key. The example on the right is for programming to clerk number 10.

1007o
(Clerk no.)

4 Referring the following tables, input the set code you wish 68o
to program and press o key. The example on the right (set code) is for setting a commission rate.

5 Enter the program code and press F key. The ex-
ample on the right is for setting 8.5% to commission rate 1
and 5% to commission 2.

08500500F
(program code)

6 If you wish to set the same program to the next clerk
number, perform the step 5 again. When you set to another clerk (not next clerk number), repeat steps 3 through 5.
5 Press o key to complete the settings.

o

Set code 67 (Training mode)
Description Training mode
Must be "00000"

Selection
No = 0 Yes = 1

Example 1: To set the clerk number 15 as a clerk being trained. Press 3o1507o100000Fo

Set code 68 (Commission rates)
Description Commission rate 1 (integer)

Selection 00 to 99

Commission rate 1 (decimal)

00 to 99

Commission rate 2 (integer)

00 to 99

Commission rate 2 (decimal)

00 to 99

Program code B D6
ººººº D5 D4 D3 D2 D1
Program code BB D8 D7 BB D6 D5 BB D4 D3 BB D2 D1

E-83

Advanced programmings and registrations
Printing programmed data
After programs have been set, you can print the programmed data.

To print programmed unit price or percentage (other than PLU)

Step
1 Turn the Mode switch to PGM position and select [System Setting] then press F key.

2 Enter 1 and press o key.

3 Press o key again. The printer starts to print preset data.

Printout

P01.................... 1

CASH - %-

@0.00
@1.00 2
10%

1: Program read symbol 2: Transaction key unit price or rate 3: Department descriptor/rec-#/05 4: Unit price

DEPT001 DEPT002

0001-05 3 @1.00 4
0002-05 @2.00

E-84

Useful features

Advanced programmings and registrations

To print programmed characters (except PLUs)

Step
1 Turn the Mode switch to PGM position and select [System Setting] then press F key.

2 Enter 2 and press o key.

3 Press o key again. The printer starts to print preset data.

Printout

P02.................... 1

GROSS

0001-01

NET

0002-01

CAID

0003-01 2

CATL

0004-01

0005-01

CASH

0001-02

CHECK

0002-02 3

PD

0003-02

0004-02

DEPT001

0001-05

DEPT002

0002-05 4

DEPT03

0003-05

0004-05

GROUP01

0001-06

GROUP02

0002-06 5

GROUP03

0003-06

0004-06

C01

0001-07

C02

0002-07 6

C03

0003-07

0004-07

GT

0001-20

7

1: Program read symbol 2: Fix total character 3: Transaction key character 4: Department character 5: Group character 6: Clerk character 7: GT character 8: Special character 9: Report header character 10: Batch X/Z character 11: Receipt message 12: Text recall character

· @No/ ** / 0001-23

NoCT @LB *QT

0002-23 8

X

BUSY

0003-23

FIX

0001-24

TRANS

0002-24 9

PLU

0003-24

0004-24

DAILY X

0001-29 10

PERIODIC 1X

0002-29

PERIODIC 2X

0003-29

0004-29

0001-32

YOUR RECEIPT 11

0002-32

THANK YOU

0001-39
CHARACTER RECALL******** 12
**************** 0002-39

E-85

Advanced programmings and registrations

To print general programming (except PLUs)

Step
1 Turn the Mode switch to PGM position and select [System Setting] then press F key.

2 Enter 3 and press o key.

3 Press o key again. The printer starts to print preset data.

Printout

P03.................... 1

CASH CHECK PD

0001-02
00000000000000 2
0002-02 3 00000000000000 4
0003-02 00000000000000

DEPT001
11-66 15-66

0001-05 5 00000000000000 6
00000000 7 @1.23 8
0002-05

C01

0001-07 9

0000010001 10

67

0000000000 11

68

00000000 12

0002-07

1: Program read symbol 2: Transaction key program 3: Key character/rec-#/file-# 4: Key program 5: Department program/Key character/rec-#/
file-# 6: Key program 7: Address code 11 program 8: Address code 15 program 9: Clerk program/Clerk name/rec-#/file-# 10: Check #/secret-# 11: Compulsory 12: Commission rate 13: Time range program 14: General control program 15: Tax table 16: Batch X/Z program

0001-09 0002-09
0001-22 0002-22 0003-22
0001-28 0002-28
0001-25 TX1 TX1 TX1

00:00 -> 01:00
01:00 -> 02:00 13
02:00 -> 03:00 2200000000
0000000000 14
0000000000
10.25% 15
0000 5003

DAILY X

0001-29 16

00

11-12-17-15-00

00-00-00-00-00

PERIODIC 1X 0002-29

E-86

Useful features

Advanced programmings and registrations

Printout

0001-30 NET
0001-38 REG1 1 2 DEPT001 CASH 0002-38

17
0001-01 0020-01
000001 18 204-000 19
001-000 002-000 026-051 013-001

0001-62

000000 20
00000000000000
0000000000

MC#01

0001-91 00000000

0001-98 0002-98

00000000000000 21
00000000000000

17: Clerk detail link program
18: Arrangement program/Rec-#/file-#/arrange no.
19: Key descriptor/rec-#/file-# 20: Scheduler program
21: I/O parameter table

To print preset unit price of PLU

Step

Printout

1 Turn the Mode switch to PGM position and select [System
Setting] then press F key.
2 Enter 6 and press o key to set the register in the
programming mode.
3 Enter 104 and press o key.

P01.................... 1

#0001 - #0884

2

PLU0001

0001-04 3

@1.00 4

4 Enter starting PLU number and press F key. For

PLU0002

0002-04 @2.00

example, if you wish to print from PLU number 0001, input 0001F.

5 Enter the last PLU number and press F key. For
example, if you wish to print up to PLU number 0884, input 0884F.

1: Program read symbol 2: Range of PLU No. 3: PLU name/rec-#/04 4: Unit price

E-87

Advanced programmings and registrations

To print preset characters of PLU

Step

Printout

1 Turn the Mode switch to PGM position and select [System
Setting] then press F key.
2 Enter 6 and press o key to set the register in the
programming mode.
3 Enter 204 and press o key.
4 Enter starting PLU number and press F key.

P02.................... 1

#0001 - #0010

2

PLU0001

0001-04 3

PLU0002

0002-04

PLU0003

0003-04

5 Enter the last PLU number and press F key. To print PLU programmings

1: Program 2 mode symbol 2: Range of PLU No. 3: PLU character

Step
1 Turn the Mode switch to PGM position and select [System
Setting] then press F key.
2 Enter 6 and press o key to set the register in the
programming mode.
3 Enter 304 and press o key.
4 Enter starting PLU number and press F key.
5 Enter the last PLU number and press F key.

Printout

P03.................... 1

#0001 - #0010

2

PLU0001

0001-04 3

00000000000000 4

11-66

000000 5

13-66

<- 0001-28 6

14-66

0

15-66

@1234.56 7

PLU0002

0002-04

1: Program 3 mode symbol 2: Range of PLU No.
3: PLU name/rec-#/file-# 4: Address code 01 ~ 10, 18 program 5: Address code 11 program 6: Address code 13 program 7: Address code 15 program

E-88

Advanced programmings and registrations
Printing various sales reports
You can print categorized sales reports such as PLU sales report, item group sales report, hourly sales report etc.
· Please do not perform the reset (Z) report during the business hour as it clears stored sales data from the memory.
· Please see page E-47 for printout sample of a daily report.
Printing various sales reports
The followings are the example operation for printing an electronic journal of February 28, 2013.

Step

Display

1 Turn the Mode switch to X or Z position. The display shows
the top menu of sales reports.

2 Using ? or > keys select the report you wish to obtain.
The example on the right is for selecting electronic journal. As it is the lowest column, [EJ ] is hidden from the default top menu. Select it by keep pressing > key.
3 Press F key. The display shows the next screen ask-
ing date or consecutive number. Select [Date] and press F key.
4 Input year, month, and day from ten key pad. The journal of
assigned date will be printed if you press F key.

Useful features

E-89

Advanced programmings and registrations

 PLU sales report

X

PLU

1 0000014 2

PLU0001

17

3

0.53%

$17.00 4

#0001

5

PLU0100

42

4.03%

$69.00

#0100

------------------------

TL

188.61

6

$516.10 7

1 Read symbol/report title 2 Report code 3 PLU name/Quantity 4 Sales ratio/PLU amount 5 PLU code 6 Total Quantity 7 Total amount

 Item group sales report

X

GROUP

1 0000016 2

GROUP01

203.25 3

33.87%

$1,108.54 4

GROUP02

183

40.58%

$1,327.80

GROUP03

12

0.40%

$13.25

GROUP99

13

0.54%

$17.80

------------------------

TL

862

5

$3,272.00 6

1 Read symbol/report title 2 Report code 3 Group No./Quantity 4 Sales ratio/group amount 5 Total quantity of group 6 Group total amount

 Hourly sales report

X

HOURLY

1 0000019 2

00:00->01:00

CT

GROSS

NET

No

1.90%

3

1

4

$1.10 5

1

6

$1.20 7

23:00->00:00

CT

1

GROSS

$3.45

NET

No

1

3.90%

$3.59

------------------------

TL

CT 280

8

GROSS

$1,937.61 9

NET

No 25

10

$2,096.80 11

1 Read symbol/report title 2 Report code 3 Time zone 4 No. of customers 5 Gross sales amount 6 No. of receipts 7 Sales ratio/net sales amount 8 Total No. of customers 9 Gross total amount 10 Total No. of receipt 11 Net total amount

E-90

Useful features

Advanced programmings and registrations

 Monthly sales report

X

MONTHLY

1 0000020 2

1......

3

GROSS

1236.76

4

$12,202.57 5

NET

No 214

6

$12,202.57 7

31......

GROSS

2132

$14,187.57

NET

No 205

$13,398.76

------------------------

TL

8

GROSS

9746.63

9

$161,022.49 10

$16.52 11

NET

No 2351

12

$161,022.49 13

$68.49 14

1 Read symbol/report title 2 Report code 3 Month 4 Gross symbol/Quantity 5 Gross sales amount 6 Net symbol/No. of customers 7 Net sales amount 8 Total symbol 9 Gross symbol/Quantity 10 Gross sales amount 11 Daily gross sales average 12 Net symbol/No. of customers 13 Net sales amount 14 Daily net sales average

 Flash report

X

FLASH

1 0000071 2

DECLA GROSS NET CAID

$6,919.04 3 $0.00 4

111.15

5

$7,054.14

No 120

6

$7,263.20

$6,919.04 7

1 Read report symbol/report title 2 Report code 3 Declared amount 4 Difference 5 Gross total 6 Net total 7 Cash in drawer

About "Declared money" and "Cash in drawer"
If you programmed the register to force entry of total amount in drawer, you need to count the money in the drawer and input the amount (money declaration) before read (X) or reset (Z) report printing. On the other hand, "Cash in drawer" is the total money in the drawer calculated by the register so that you can compare the actual amount and the calculated amount.
To program money declaration, please see page E-67.

E-91

Advanced programmings and registrations

 Electronic journal

X

E-JOURNAL

1

0000058 2

REG 06-20-2013 11:58

C01

0001

000123

1 DEP0T01 T1

$1.00

1 DEPT002 T1

$2.00

5 DEPT003

$5.00 3

7 No

TA1

$3.00

TX1

$0.15

TX1

$0.10

TL

$8.10

CASH

$10.00

CG

$1.90

REG 06-20-2013 11:59

C01

0001

000124

1 Report header/title 2 Report code 3 Journal image

About electronic journal Instead of printing days' sales journal, the register stores daily sales report in the memory and you can obtain the report by assigning day or consecutive number.
To print individual department and PLUs
Instead of printing sales reports in a lump, you can obtain reports of specific departments or PLUs.

Step
1 Turn the Mode switch to X position.

2 Just press department keys or enter PLU numbers.

For example,

DEPT SHIFT/

#

for Dept.033.

DEPT#

1

DEPT SHIFT/

89

DEPT SHIFT/

for PLUs 1 and 89.

DEPT#

DEPT#

3 Press o key to exit from individual report printing.

Printout

X

INDIVIDUAL

1

DEPT033 8.13%
PLU0001 0.53%
#0001

38

2

$257.53 3

17

4

$17.00 5

6


TL

88.61 7

$516.10 8

1: Read symbol/report title 2: Department Name/No. of items 3: Sales ratio/amount 4: PLU Name/No. of items 5: Sales ratio/PLU amount 6: PLU code 7: Total No. of items 8: Total amount

E-92

Advanced programmings and registrations
Periodic sales report
Apart from daily report, you can obtain periodic sales report. The register prints total sales data from the last periodic report. Namely, if you do this operation monthly, you can obtain monthly sales reports. The cash register allows you to obtain two kinds of periodic reports so that not only monthly reports, you can also get weekly reports.

Step

Display

1 Turn the Mode switch to X2/Z2 position. The display shows
report selection screen.

2 Select a report using ? or > keys. Z1 and Z2 clear the
accumulated data while X1 and X2 store the sales data remained.
3 Press F key. The printer prints our the periodic report.

Useful features

E-93

Advanced programmings and registrations

------------------------

ZZ1 PERIODIC 1Z

1

------------------------

ZZ1 DEPT

0001 2

0001115 3

DEPT001 8.13%
DEPT002

38

4

$257.53 5

18

$1,362.26

------------------------

TL

88.61 6

$1,916.10 7

------------------------

ZZ1 FIX

0001 8

0001111 9

GROSS

981.25

10

$6,574.40

NET

No

111

11

$7,057.14

CAID

$6,919.04 12

CHID

$139.04 13

CKID

$859.85 14

CRID(1)

$709.85 15

CRID(2)

$0.00 16

CRID(3)

$0.00 17

CRID(4)

$0.00 18

------------------------

RF

No

3

19

$10.22

CUST

CT

111

20

AVRG

$63.57 21

DC

$1.22 22

REF

$2.42 23

ROUND

$0.00 24

CANCEL

No

2

25

$12.97

------------------------

TA1

$2,369.69 26

TX1

$128.86 27

TA2

$2,172.96 28

TX2

$217.33 29

1 Report title 2 Department report title/reset counter 3 Report code 4 Department Name/No. of items *1 5 Sales ratio/amount *1 6 Total No. of items 7 Total amount 8 Fixed total report title/reset counter 9 Report code 10 Gross total *2 11 Net total *2 12 Cash in drawer *2 13 Charge in drawer *2 14 Check in drawer *2 15 Credit in drawer 1 *2 16 Credit in drawer 2 *2 17 Credit in drawer 3 *2 18 Credit in drawer 4 *2 19 Refund mode *2 20 Customer number *2 21 Average sales per customer *2 22 Discount total *2 23 Refund key *2 24 Rounding total *2 25 Cancellation *2 26 Taxable 1 amount *2 27 Tax 1 amount *2 28 Taxable 2 amount *2 29 Tax 2 amount *2

E-94

Advanced programmings and registrations

------------------------

ZZ1 TRANS

0001 1

0001112 2

CASH

No 362

3

$1,638.04

CHARGE

No

56

$1,174.85

RC

No

4

$810.00

PD

No

5

$5.00

CORR

No

14

$39.55

RCT

No

3

NS

No

5

------------------------

ZZ1 CASHIER

0001 4

0001117 5

C01 NET

...............1 6
No 111
$1,845.35 7

C02

...............1 8

1 Function key report title/reset counter 2 Report code 3 Function key count/amount *1 4 Clerk report title/reset counter 5 Report code 6 Clerk name 7 Net total 8 Clerk name

* 1 Zero totalled departments/functions (the amount and item numbers are both zero) are not printed. * 2 These items can be skipped by programming.

Useful features

E-95

Advanced programmings and registrations

Using an SD card

You can store sales data or program data to an SD card or you can restore the data from SD card to your cash register.
The following table explains what you can do with an SD card.

[BackupSD] [RestoreSD] [ProgramSD] [ProgramSD] [BackupFlash]
[SD Format]

Stores sales data and program data of register to SD card. Restores sales data and program data from SD card to register. Stores program data to SD card. Restores program data from SD card to register. Stores program data into the register's built-in flash memory (for a case of power failure with flat batteries). Formats an SD for the first usage.

The following sections explain the operation examples of the features using an SD card.
To format an SD card

When you use a new SD card, you must format the SD card first.

All the data stored in the SD card will be cleared if you execute formatting.

Step
1 Insert an SD card into the SD card slot.

Display

2 Turn the Mode switch to PGM position and select [SDcard
Setting].

3 Press F key.
Select [SD Format] on the SD card setting screen.

E-96

Advanced programmings and registrations

Step
4 Select [YES] and press F key.
The register starts to format the SD card.

Display

5 Now the SD card is formatted and you can use it for storing
cash register data in it.

To store program data in an SD card
The following operation explains how you can back up all the program data in an SD card.

Step
1 Insert an SD card into the SD card slot.

Display

2 Turn the Mode switch to PGM position and select [SDcard
Setting]. Then press F key.

3 Select [ProgramSD] and press F key.

Useful features

E-97

Advanced programmings and registrations

Step
4 Select [YES] and press F key.

Display

5 After for a while, the display indicates "Backup complete".

E-98

Useful features

Advanced programmings and registrations

Before you consider it as a problem

Error code table

Error code

Message

Meaning

Action

E001 Wrong mode

Mode switch position changed before finalization.

Return the mode switch to its
original setting and finalize the operation.

E003 Wrong operator

The signed on clerk differs from the Input correct check number or asclerk performed the tracking check sign the proper clerk number. registration.

E004 Error INIT/FC

Initialization or unit lock clear opera- Complete operation. tion in progress.

E008 Please sign on

Registration without entering a clerk Enter a clerk number. number.

E010 Close the drawer

The drawer is left open longer than Close the drawer. the program time (drawer open alarm).

E011 Close the drawer

Attempt to register while the cash Close the drawer. drawer is open.

E016 Change back to REG mode

Two consecutive transactions attempted in the refund mode.

Switch to another mode and then
back to the RF mode for the next transaction.

E017 Enter CHK/TBL number

Attempt made to register an item Input a check number. without inputting a check number.

E018 Enter Table number

Attempt made to register an item without inputting a table number.

Input a table number.

E019 Enter number of customers

Finalize operation attempted without Enter the number of customer. entering the number of customer.

E021 No DEPT Link

No department linked PLU is registered.

Correct the program.

E026 Enter condiment/preparation PLU

No condiment/preparation PLU is Register condiment/preparation

registered.

PLU.

E029 In the tender operation E031 Press ST key

Item registration is prohibited, while Finalize the transaction. partial tender.

Finalization of a transaction at-
tempted without confirming the subtotal.

Press o key.

E033 Enter tendered amount

Finalize operation attempted without Enter the amount tendered. entering amount tender.

E035 Change amount exceeds limit Change amount exceeds preset limit.

Input amount tendered again.

E036 Remove money from the drawer Contents of the drawer exceed programmed limit.

Perform paidout operation.

E037 Digit or amount limitation over High amount lock out/low digit lock Enter correct amount. out error

E038 Perform money declaration

Read/reset operation without declar- Perform money declaration. ing cash in drawer.

E040 Issue guest receipt

Attempt to register a new transac- Issue a guest receipt. tion without issuing a guest receipt.

E046 REG buffer full

Registration buffer full.

Finalize the transaction.

E049 CHECK memory full

Check tracking index memory full. Finalize and close the check number currently used.

E-99

Advanced programmings and registrations

Error code

Message

Meaning

Action

E050 DETAIL memory full

Check tracking detail memory full. Finalize and close the check number currently used.

E051 CHK/TBL No. is occupied

Attempt to made use <New Check> Finalize and close the check that is

to open a new check using a

currently under the number that you

number that is already used for an want to use or use a different check

existing check in check tracking number.

memory.

E053 CHK/TBL No. is not opened

Attempt made to use <Old Check> Use the correct check number (if

reopen a new check using a number you want to reopen a check that

that is not used for an existing check already exists in check tracking

in check tracking memory.

memory) or use <New Check> to

open a new check.

E075 Negative balance cannot be finalized

Attempt to finalize a transaction

Register item(s) until the balance

when balance is less than or equal becomes positive amount.

to zero.

E101

PLU maintenance file full. Press Scanning PLU direct maintenance/ Terminate the maintenance.

<#2> to exit

batch maintenance file becomes

full.

E103 PLU Code is not exist. Input the PLU code is not existed in the file. Enter proper PLU code. PLU Code

E105 E106

PLU file full Item exists in the PLU FILE

E112 Close the journal platen arm

Scanning PLU file full The designated item has already existed in the scanning PLU file. The journal platen arm is opened.

Modify the designated item. Close the journal platen arm.

E114 Close the receipt platen arm The receipt platen arm is opened. Close the receipt platen arm.

E139

Negative balance is not allowed Attempt to register <­> or <CPN> when the balance becomes negative.

Enter proper minus/coupon amount.

E146 E200

Arrangement file full Insert SD

Arrangement file is full. SD is set.

Set the arrangement properly. Set SD.

E201 Illegal Format

Illegally formatted SD

Format the SD.

E202 File not found

The designated file is not found in Enter proper file name. the SD.

E205 File already exist.

Can not write, because designated Check the operation and retry. file has already been in the SD.

E-100

Useful features

Advanced programmings and registrations
When "EJ FULL" sign appears on the display
When the register shows this sign, issue electronic journal read report (if necessary) and reset the memory immediately.
In case of power failure
If the power supply to the cash register is cut by a power failure or any other reason, simply wait for power to be restored. The details of any ongoing transaction as well as all sales data in memory are protected by the memory backup batteries. (This is the reason to install the batteries.) · Power failure during a registration
The subtotal for items registered up to the power failure is retained in memory. You will be able to continue with the registration when power is restored. · Power failure during printing a read / reset report The data already printed before the power failure is retained in memory. You will be able to issue a report when power is restored. · Power failure during printing of a receipt / journal Printing will resume after power is restored. A line that was being printed when the power failure occurred is printed in full. · Other The power failure symbol is printed and any item that was being printed when the power failure occurred is reprinted in full.
In case the register is locked up
If you make a mistake in operation, the cash register may lock up to avoid damage to programs and preset data. Should it happens, you can use the following procedure to clear the lock up without losing any data.
1 Power off the register. 2 Insert the PGM key in the mode switch. 3 Press down f, and turn the mode switch to PGM mode. 4 The display shows 0.00, then release f 5 Press, o then issue a receipt.
E-101

Advanced programmings and registrations

About the low battery indicator

If this indicator appears when you switch the cash register on, it can mean one of three things:
· No memory backup batteries are loaded in the cash register.
· The power of the batteries loaded in the unit is below a certain level.
· The batteries loaded in the unit are dead.

Important !
Whenever the low battery indicator appears on the display, load a set of two new batteries as soon as possible. If there is a power failure or you unplug the cash register when this indicator appears, you will lose all of your sales data and settings. Be sure to keep the power cord of the cash register plugged in whenever you replace the batteries.

Category

No. of totalizers

Department PLU Hourly sales Monthly sales Clerk Transaction key & fix total Non resettable grand sales total Reset counter Comsecutive No.

200 7000
24 31 50 -1 8 1

Amount (10 digits)
O *1 O *1 O *1 O *1 O *1
O *2

* 1 -9,999,999.99 ~ 99,999,999.99 * 2 -9,999,999,999,999.99 ~ 99,999,999,999,999.99 * 3 -99,999.999 ~ 999,999.999 * 4 1 ~ 9999 * 5 1 ~ 999999 Specifications and design are subject to change without notice.

Contents

No. of items (4 digits)

Count (4 digit)

O *3

O *3

O *4

O *1 or O *3 or O *4 or O *5 O *4

No. of items (4 digits)
O *5 O *5 O *5
O *5

Periodic totalizer
O
O O

E-102

Advanced programmings and registrations

Specifications

Entry Department Main display
Customer display Printer Receipt
Journal
Paper roll Paper thickness Paper feed Print speed Listing capacity Amount Quantity Tendered amount Percent Tax rate Numbers Chronological data Date print Time print Alarm Memory protection battery
Power supply/power consumption Operation temperature Humidity Dimensions Weight

10-key system, buffer memory 8 keys (2-key roll over) Full key system 26 characters x 10 lines, Dept. name, PLU name, Total, Transaction names, Change 20 characters x 1 line. Amount 10 digits (zero suppression)
Thermal alpha-numeric system 24 digits, receipt on/off key Store name or slogan is printed automatically Thermal alpha-numeric system 24 digits Automatic take up roll winding 58 (W) × 80 (D) mm 0.06 to 0.08 mm Receipt and Journal About 14 l/s
9999999999 9999.999 9999999999 99.99 9999.9999 9999999999999999
Automatic date printout on receipt and journal, automatic calendar Automatic time printout on receipt and journal, 24-hour system/12-hour system Key catch tone, error alarm The effective service life of memory protection batteries (two new size AA manganese batteries) is approximately one year from installation into the machine. See the rating plate. 32°F to 104°F (0°C to 40°C) 10 to 90% 220 mm (H) × 400 mm (W) × 450 mm (D) (8.6" (H) × 15.7" (W) × 17.7" (D)) 10 kg (22 lbs.)

Useful features

E-103

Advanced programmings and registrations
E-104


References

Adobe InDesign CS5 J (7.0.4) GPL Ghostscript 9.52