User Guide for tv ONE models including: C3-540 CORIOmaster, C3-510 CORIOmaster mini, C3-503 CORIOmaster micro, Video Processors
Features. Output up to four video walls to monitors, LED screens, and projectors, including devices that support 4K Wide range of inputs, including HDMI, DVI, SDI, HDBaseT™, 4K, and streaming media...
Welcome to tvONE Help
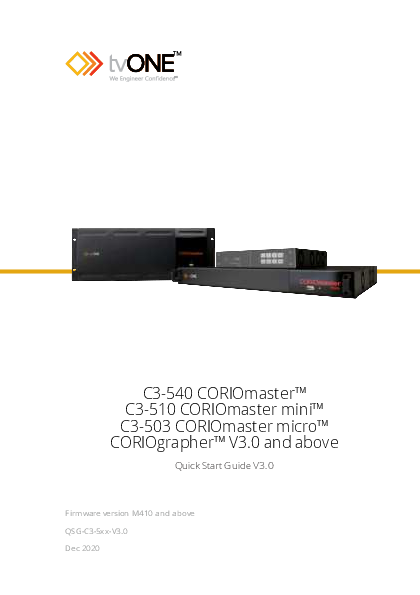
C3-540 CORIOmasterTM C3-510 CORIOmaster miniTM C3-503 CORIOmaster microTM CORIOgrapherTM V3.0 and above
Quick Start Guide V3.0
Firmware version M410 and above QSG-C3-5xx-V3.0 Dec 2020

In this guide

Welcome

1

Hardware recommendations

2

About your CORIOmasterTM

3

About your CORIOmaster miniTM

4

About your CORIOmaster microTM

5

About the buttons of your CORIOmaster microTM

6

About CORIOgrapherTM

8

Quick start

10

Set up and test audio

17

Contact us

21

Video wall worksheet

22

Get more help You can read more online. To open the online help, select CORIOgrapher, or visit help.tvone.com/r/docs/cm/home/1.

Help in

Welcome
Thanks for buying this CORIOmasterTM, CORIOmaster miniTM, or CORIOmaster microTM. CORIOmaster connects to a wide range of sources and displays, and works with CORIOgrapherTM software to allow you to build dynamic video walls with an easy-to-use visual interface.
Features
Output up to four video walls to monitors, LED screens, and projectors, including devices that support 4K Wide range of inputs, including HDMI, DVI, SDI, HDBaseTTM, 4K, and streaming media Embedded and S/PDIF audio support with S/PDIF audio module S/PDIF audio output with CORIOmaster micro Combination of different size and resolution of displays can be used Adjustable bezel compensation Edge blending of projectors Up-down-cross conversion Control your video wall with CORIOgrapher, secure IP, or serial connection HTTP and HTTPS connectivity, RESTful multi-user control, WebSocket event monitoring Horizontal alignment on analog PC inputs Crestron module available CORIOmaster: 4RU frame size CORIOmaster mini: 1RU frame size CORIOmaster micro: 1RU half rack size, up to two video walls

1

tvONE

Hardware recommendations
At tvONE, we design our products to the highest quality standards. To get the best results from our products, we recommend that you use the best quality connectors, cables, and adapters. Consider the points below when you choose accessories and position equipment.
n For best results at resolutions of 1080p60 or below with HDMI or DVI, use cables under 15 m long, or shorter if you use connection adapters. If you need to place your products more than 15 m apart, use active optical cables or a signal extender.
For best results at resolutions of 4K60 or higher with HDMI, use cables under 2-3 m, or shorter if you use connection adapters. If you need to place your products more than 3 m apart, use active optical cables or a signal extender.
See our range of active optical cables and signal extenders at help.tvone.com/r/docs/g/signal-extension.
n For best results with HDMI, use High Speed, Premium High Speed, or Ultra High Speed HDMI cables.
n For best results with DisplayPort, use certified cables under 2 m long.
n In industrial environments, use shielded Ethernet cables.
Shielded Ethernet cables are often marked F/UTP, FTP, or STP. Use shielded Cat 6 or above cables with HDBaseT input and output modules and Streaming media and 4K playback input modules.
n Use good quality USB 3.0 drives.
n For more hardware recommendations for your product, see the specification sheet.
Read more about HDMI at hdmi.org.
Read more about DisplayPort at displayport.org.

QSG-C3-5xx-V3.0

2

About your CORIOmasterTM
CORIOmaster rear panel

Input module (black)

Connect to sources

Output module (white) Connect to displays

CPU module
Optional second PSU, sold separately

Connect to your network with Ethernet Optional: connect to serial controller with RS-232 Optional: connect directly to a PC with Ethernet or RS-232
Optional: connect to electrical outlet

Sealed slots

Not available for use

Power supply unit (PSU) Connect to electrical outlet

3

tvONE

About your CORIOmaster miniTM
This guide uses the name CORIOmaster to mean CORIOmasterTM, CORIOmaster miniTM, and CORIOmaster microTM systems, unless specifically stated.
CORIOmaster mini rear panel

Power supply unit (PSU)

Connect to electrical outlet

CPU module

Connect to your network with Ethernet
Optional: connect to serial controller with RS232
Optional: connect directly to a PC with Ethernet or RS-232

Output module (white)

Connect to displays

Input module (black)

Connect to sources
Note: slot 6 is a fixed input slot, included with every CORIOmaster mini.

QSG-C3-5xx-V3.0

4

About your CORIOmaster microTM
This guide uses the name CORIOmaster to mean CORIOmasterTM, CORIOmaster miniTM, and CORIOmaster microTM systems, unless specifically stated.
CORIOmaster micro rear panel

S/PDIF audio output Power supply input Input module (black) Output module (white)
CPU module

Connect to audio device with RCA
Connect to an electrical outlet with PSU
Connect to sources
Connect to displays
Connect to your network with Ethernet Optional: connect to serial controller with RS232 Optional: connect directly to a PC with Ethernet or RS-232

5

tvONE

CORIOmaster micro mounting accessories
You can mount your CORIOmaster micro to a surface, rack, or ONErack system with our mounting accessories, sold separately. Ask your distributor about:
n RM-503-1RK-MOD ONErack mounting module for CORIOmaster micro
n RM-503-1RU-DUAL rack mounting kit for one or two CORIOmaster micro units
n RM-503-SRF surface mounting kit for CORIOmaster micro

About the buttons of your CORIOmaster microTM
You can use the buttons of the front panel to load presets, choose which window to hear, change the source playing in a window, and lock the buttons.
By default, the buttons correspond to the first eight presets, sources, or windows in your system. You can choose which button corresponds to which preset, source, or window.

Read more about mapping the buttons of your CORIOmaster micro in CORIOgrapher. Just select and search, or ask a question.
The buttons light up different colors depending on the mode and status of your CORIOmaster micro.

Colors of buttons

Buttons are The CORIOmaster micro is in

lit dimly

preset selection mode.

orange

Button is lit more brightly

The preset corresponding to button 6 is active.

Buttons are Buttons 7 and 8 do not have

not lit

corresponding presets.

QSG-C3-5xx-V3.0

6

Buttons are The CORIOmaster micro is in

lit dimly

source selection mode.

green

Button is lit more brightly

The source corresponding to button 2 is playing in the active window. You hear the audio from the active window.

Buttons are Buttons 7 and 8 do not have

not lit

corresponding sources.

Buttons 2 and 3 are lit red

The buttons of the CORIOmaster micro are locked.

Selecting the active window
n To select the active window, press and hold the button corresponding to that window until it starts flashing.
Selecting a window to hear
You hear the audio source playing in the active window on the device connected to the S/PDIF output.
n To select a window to hear, press and hold the button corresponding to that window until it starts flashing.
n You can play audio on any connected display or device with CORIOgrapher.
Selecting a preset or source
n To select a preset or source, press and release the button corresponding to that preset or source.
Changing between preset and source selection mode
n Press and hold buttons 1 and 5 until they start flashing. The buttons change color.

7

tvONE

About CORIOgrapherTM
CORIOgrapher is the software that controls your CORIOmasterTM. You can create up to four video installations, with multiple screens and windows, and add transitions and effects for a state-of-the-art dynamic video wall experience.
CORIOgrapher system requirements
CORIOgrapher:
n Works with PCs running Windows® 7 and 10 n Does not work with touch-screen-only devices, including tablets or
phones n Works with Microsoft Surface Pros and similar touch screen devices
Full support for touch screen devices is under development n Installs Windows .NET 4.6, if you don't have it n Needs 600 MB of disk space during installation n Is approximately 60 MB in size once installed
To use the preview feature, your PC must have Windows Media Player installed, and it must have been launched at least once. Preview performance depends on the specifications of your PC and number of windows in your installation.

QSG-C3-5xx-V3.0

8

CORIOgrapher main areas

Home

Home is where you connect to a device, load a configuration from a file, or create an offline configuration.

Editor

CORIOmaster and CORIOmaster2 only.
Editor is where you create your installations, each on its own canvas.

n If you have a CORIOmaster or CORIOmaster mini, you can create up to four installations.
n If you have a CORIOmaster micro, you can create up to two installations.
n If you have a CORIOmaster2, you can create up to three installations.

Dashboard is where you control the actions of Dashboard your installations.

CORIOview and CORIOmaster micro only. Standby Standby puts your device into standby mode.

Help

Help opens tvONE help for your product.

Settings is where you configure your system, Settings network, modules, and more.

9

tvONE

Quick start
This Quick Start Guide gives you an overview of the steps involved in setting up a video installation with your CORIOmasterTM, CORIOmaster miniTM, or CORIOmaster microTM hardware and CORIOgrapherTM software.
It's easy to get started with your CORIOmaster, but if you want more help with any of these steps, or with using the features of CORIOgrapher, select in CORIOgrapher and search, or ask a question. Or visit help.tvone.com/r/docs/cm/home/1.
1. Plan your installation. What do you want your installation to look like? What equipment do you need to achieve this? At the back of this guide is a plan that you can fill out.
2. Install your hardware. a. Position your displays or projectors. b. Connect your displays and sources to your output and input modules. Connect the LAN port of the CPU module to your network.
Video tearing Using a mixture of frame rates and/or resolutions can cause video tearing. For best results, make sure all your displays use the same frame rate.
c. OPTIONAL: If you have a CORIOmaster microTM, connect a digital audio device to the S/PDIF audio output.
d. Power on your CORIOmaster.

3. Install CORIOdiscover and CORIOgrapher.
Download the latest version of CORIOdiscover and CORIOgrapher from help.tvone.com/r/docs/g/software.

QSG-C3-5xx-V3.0

10

4. Open CORIOgrapher and select your CORIOmaster.
Enter your username and password to log in, and select Read to load your configuration.
n The first time you log in, make sure the Secure option is cleared.
n The default username is admin, and the default password is adminpw.

11

tvONE

If you aren't connected to a CORIOmaster, you can create an offline configuration for your device.
The media player of the Streaming media and 4K playback input module is not available when you work in an offline configuration.
5. Optional: enable secure mode. a. Select Settings > Networking. b. Select Secure connection.
c. Select Save > Yes. CORIOmaster restarts.
d. Select Secure and log in.

QSG-C3-5xx-V3.0

12

6. Optional, but recommended: name your input and output ports. Select Settings > Slot Status. Give each port a useful name. For example, describe the device connected to it.

7. In the editor, add your displays, and arrange them to match your video wall.
a. Select Editor > Show assets > Displays.
b. From Assets, select for each display you want to add.

c. Drag the displays into place to match your installation. Create a rough arrangement at this stage. When you have tested your video wall you can make your arrangement more accurate.
8. In the editor, add a window and scale it to cover the whole video wall. a. From Assets, open Sources. b. Choose a source and select .

13

tvONE

For best results, choose a source connected to hardware that is easy to play, for example, a DVD player.
Free windows can use any source, you can change the source playing in the window, and select the quality you want to use. c. Scale the window to cover all your displays.
d. Select Take to send the video wall to your CORIOmaster.

QSG-C3-5xx-V3.0

14

9. Check that your installation looks correct.
Make sure that the source for the window is playing, and check that the picture is assembled correctly.
Not the source you were expecting, blue screen, display keeps dropping signal, or no image.

Possible causes: Possible causes:

n Source connected incorrectly n Input ports named incorrectly n Source not playing n Source resolution not supported n Display does not support HDCP n Source does not support the required
number of HDCP keys n Poor quality or damaged cables
Source correct, connected, and playing. Image appears in the wrong places.
n Displays arranged incorrectly in CORIOgrapher
n Output ports named incorrectly n Displays connected incorrectly
Source and displays connected and arranged correctly.

15

tvONE

10. Repeat step 7 to add windows for all of your sources. Check that all your sources and displays work as expected. To test any sources from Streaming media and 4K playback input modules, you need to add something to your play queues first. Read more in the Quick Start Guide that came with your module, or in tvONE Help.
Read troubleshooting advice in tvONE help. In CORIOgrapher, select Help and search, or ask a question. Or visit help.tvone.com/r/docs/cm/home/1.
Next steps
Congratulations, your video installation is set up! You can now set up and test audio, make your installation more accurate, configure the best quality settings, and add transitions and effects.
If your CORIOmaster contains one or more Streaming media and 4K playback input modules, you need to set those up too.
Read about setting up the Streaming media and 4K playback input module in tvONE help.

QSG-C3-5xx-V3.0

16

Set up and test audio
Your CORIOmaster, CORIOmaster mini, or CORIOmaster micro supports embedded audio in uncompressed PCM format. CORIOmaster micro also includes an independent S/PDIF audio output.
Testing embedded audio inputs
1. From Editor, select Live changes.
2. Select an audio source from the list.

You hear the audio source from all the displays and output devices associated with this canvas.
3. Select each source in turn.
If you cannot hear a source:
n check the audio settings of the source device.
n On Editor, make sure the source is not muted. A muted source shows .
n In Settings > Slot Status, make sure Audio Enabled is selected for the source.
n If you cannot hear any sources, check the audio settings of the output devices.
n If your source is a stream with low latency, your CORIOmaster mutes the audio.

17

tvONE

n The Streaming media and 4K playback input module only supports the following embedded audio formats: n mp3 n aac
Testing embedded audio outputs
1. From Editor, select Live changes.
2. If you have a CORIOmaster micro, mute the S/PDIF output. From Audio, select Mute Audio.
3. From Displays & Windows, mute all the displays, except the one you want to test.

Select to mute a display, and to unmute a display.

QSG-C3-5xx-V3.0

18

4. Select an audio source from the list.

You hear the audio source from the display that isn't muted. 5. Mute and unmute each display until you have heard audio from all
displays. If you can't hear audio:
n Check the audio settings on the display itself.
n In Editor, make sure the source is not muted. A muted source shows .
n In Settings > Slot Status, make sure Audio Enabled is selected for the source and for the display.
n If your source is a stream with low latency, CORIOmaster mutes the audio.
n The Streaming media and 4K playback input module only supports the following embedded audio formats: n mp3 n aac
Testing the S/PDIF output of a CORIOmaster micro
1. From Editor, select Displays & Windows. 2. Mute all the displays.

Select to mute a display, and to unmute a display.

19

tvONE

3. From Editor, select Audio 4. Select a window from Audio Follows.
If you can't hear audio: n Check the audio settings on the display itself. n In Editor, make sure the source is not muted. A muted source shows . n In Settings > Slot Status, make sure Audio Enabled is selected for the source and for the display. n If your source is a stream with low latency, CORIOmaster mutes the audio. n The Streaming media and 4K playback input module only supports the following embedded audio formats: n mp3 n aac
Read more about audio in tvONE Help. In CORIOgrapher, select Help and search, or ask a question. Or visit help.tvone.com/r/docs/cm/home/1.

QSG-C3-5xx-V3.0

20

For more information, download the full user guide at help.tvone.com/r/docs/cm/home/1.
Contact us
tvone.com info@tvone.com Support NCSA: tech.usa@tvone.com Support EMEA: tech.europe@tvone.com Support Asia: tech.asia@tvone.com
Information in this document is subject to change without notice. No part of this publication may be reproduced, stored in a retrieval system, or transmitted in any form or any means electronic or mechanical, including photocopying and recording for any purpose other than the purchaser's personal use without the written permission of tvONE. Copyright © 2020 tvONETM. All rights reserved. Registered in the U.S. Patent and Trademark Office.

21

tvONE

Video wall worksheet

What is my video wall layout? In the space above, draw a picture showing what kind of wall you have in mind. Show both the displays you have in mind as well as the video windows that you would like to show.
What am I trying to accomplish with this video wall?

How many displays or outputs are needed? How many monitors are needed?

QSG-C3-5xx-V3.0

22

How many projectors are needed? How many LED walls are needed? Is edge blending required? What is the blending overlap size? What are the sizes of the displays?
What are the bezel sizes for the monitors?
What are the native resolutions of the displays?

23

tvONE

How many source signals or inputs are required? What are the source signal types?

What are the source resolutions?

What are the frame rates of the inputs?

Will the signal feeds be available at all times that the video wall is operating?
Is there any switching or processing before the signal enters the video wall processor?
How many windows will be required for the video wall? Include all windows even windows that are not active at all times.
What level of quality is required for each window? Not all windows can have the highest quality in most cases.

QSG-C3-5xx-V3.0

24

Are presets (video switching, source transitions, window movement) required for the video wall?
What type of control system will operate the wall, if any?

25

tvONE

In the spaces below, draw your preset destinations with window and transition attributes noted.

QSG-C3-5xx-V3.0

26

27

tvONE
madbuild