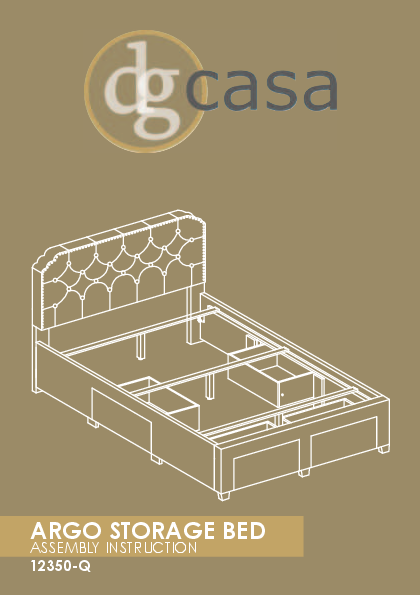
ARGO STORAGE BED
ASSEMBLY INSTRUCTION
Model: 12350-Q
WARNING
Seller and Manufacturer disclaim all and any liability for property damage, personal injury, or loss, direct, indirect, or incidental, resulting from the incorrect assembly, inadequate maintenance, improper use, or neglect of this product.
NOTICE
- Keep these assembly instructions for future reference.
- Do not use this product if there are missing parts, damaged, or broken until repairs are made and/or factory replacement parts are installed.
- Check all packing material carefully for small hardware that may have become loose inside the carton during shipment.
- Identify and count all hardware and parts to compare with parts and hardware list.
- Follow assembly instructions closely. Improper assembly can result in personal or property damage.
- Secure all bolts and screws before use.
- Every 90 days check all bolts and screws are secured.
- Some parts may have sharp corners or edges and may be heavy.
- Do not use or store this product near open flames or around flammable chemicals.
- When placing contents on non-carpeted flooring, it's recommended to use floor protection such as an area rug or furniture pads. These are not included with the purchase.
REPLACEMENT PART OR HARDWARE REQUEST:
Request a replacement by logging into the marketplace account in which the purchase was made and sending a message to the seller. To assist in expediting the request, attach applicable images relevant to the request and/or part number and quantity.
TOOLS REQUIRED:
- Phillips Screwdriver (Not Provided) ?
- Hammer/Mallet (Not Provided) ?
- Allen Wrench (Provided) ?
HARDWARE
- 1: M6 x 40 Screw (3 PCS)
- 2: M6 x 50 Screw (9 PCS)
- 3: Allen Key 100mm (1 PC)
- 4: Allen Key 70mm (1 PC)
- 5: Screw 16mm (64 PCS)
- 6: Screw 25mm (8 PCS)
- 7: Screw 32mm (46 PCS)
- 8: Screw 50mm (32 PCS)
- 9: Spring Washer (6 PCS)
- 10: Support Leg Adjuster (3 PCS)
- 11: Wood Dowel (8 PCS)
- 12: Drawer Stopper (8 PCS)
- 13: Caster (16 PCS)
ARGO STORAGE BED PARTS
- A: Headboard (1 PC)
- B: Footboard (1 PC)
- C: Side Rail (2 PCS)
- D: Headboard Leg (2 PCS)
- E: Footboard Side Leg (2 PCS)
- F: Footboard Center Leg (1 PC)
- G: Slat (3 PCS)
- H: Support Leg (3 PCS)
- I: Side Rail Support Leg (4 PCS)
- J: Drawer Front Panel (4 PCS)
- K: Drawer Back Panel (4 PCS)
- L: Drawer Left Side Panel (4 PCS)
- M: Drawer Right Side Panel (4 PCS)
- N: Drawer Bottom Panel (4 PCS)
- O: Drawer Bottom Panel Big Support Wood (8 PCS)
- P: Drawer Bottom Panel Small Support Wood (4 PCS)
ASSEMBLY INSTRUCTION
STEP 1
Attach the footboard legs (E, F) to the footboard (B) using screws (2) and allen key (3). Ensure the correct orientation as shown in the diagram.
Diagram shows parts E and F being attached to part B with screws and allen key.
STEP 2
Assemble the drawer boxes. Slide the drawer bottom panel (N) towards the front of the drawer. Attach the drawer side panels (L, M) and drawer back panel (K) to the drawer front panel (J) using screws (8). Ensure the tapped hole indicates the back of the drawer and the fabric panel indicates the front.
Diagram shows drawer assembly with parts J, K, L, M, N and screws (8). An inset shows sliding panel N and orientation details.
STEP 3
Continue assembling the drawer. Attach the drawer bottom panel supports (O, P) to the assembled drawer base using screws (7).
Diagram shows attaching parts O and P to the drawer base using screws (7).
STEP 4
Attach the casters (13) to the bottom of the drawer assembly. Align the caster mounting holes to the notches on part O and secure with screws (5).
Diagram shows attaching casters (13) to the drawer base with screws (5), aligning with part O.
STEP 5
Attach the headboard legs (D) to the headboard (A). Secure the footboard (B) to the headboard legs (D) using screws (2), spring washers (9), and allen key (3). Also, attach the footboard side legs (E) to the footboard (B) using screws (2) and allen key (3).
Diagram shows attaching parts D to A, and B to D and E, using hardware (2, 3, 9).
STEP 6
Insert wood dowels (11) into the pre-drilled holes on the side rails (C). Lightly tap into place.
Diagram shows inserting wood dowels (11) into side rails (C).
STEP 7
Attach the side rail support legs (I) to the side rails (C). Align the precut holes on part I to part 11 (wood dowels) and secure with screws (6).
Diagram shows attaching part I to part C using wood dowels (11) and screws (6).
STEP 8
Attach the assembled side rails (C with I) to the headboard (A) and footboard (B) assembly using screws (2).
Diagram shows attaching side rails (C) to the main bed frame (A, B) using screws (2).
STEP 9
Insert the drawer stoppers (12) into the designated slots on the side rails (C) to prevent drawers from over-extending.
Diagram shows inserting drawer stoppers (12) into the side rails (C).
STEP 10
Attach the slats (G) to the bed frame. Screw the slats (G) onto the wood slat supports (H) on the side rails using screws (1) and allen key (3). Rotate part 10 (Support Leg Adjuster) clockwise or counter-clockwise to adjust slat height for proper box spring support.
Diagram shows attaching slats (G) to supports (H) with screws (1) and allen key (3). An inset shows adjusting part 10.
STEP 11
Secure the slats (G) to the side rails by screwing them onto the wood slat supports using screws (7) and allen key (4).
Diagram shows securing slats (G) to the side rails with screws (7) and allen key (4).