Magix Xara 3D Maker 7 Music Rock Edition 4.0 User Guide 4 EN
User Manual: magix Music Maker Rock Edition - 4.0 - User Guide Free User Guide for Magix Music Maker Software, Manual
Open the PDF directly: View PDF ![]() .
.
Page Count: 193 [warning: Documents this large are best viewed by clicking the View PDF Link!]
- Copyright
- Preface
- Support
- Before you start
- More about MAGIX
- Introduction
- Overview of the program interface
- Quick start
- Arranger
- Video Monitor
- Media Pool
- Arranging Objects
- Audio Objects
- Audio formats
- Load and process audio files
- Smart Preview for the incorporated samples
- Change pitch/octave using the keyboard
- Audio recording
- Import audio CD
- Change the playback tempo or pitch
- Remix agent - Tempo and beat assignment
- Requirements for using the Remix Agent
- Preparation - Setting the start marker and object end
- Automatic Tempo Recognition
- Setting the manual and Onbeat/Offbeat
- Determining the start of a measure
- Using BPM and beat detection
- Save only Tempo & Beat information
- Tempo adjustment
- Problems and Remedies regarding the Auto Remix Assistant
- Harmony Agent
- Text to Speech
- Video and Bitmap Objects
- Synth Objects
- Audio effects
- Mixer
- Reprocess arrangement
- File Menu
- Edit Menu
- Menu effects
- View menu
- Online menu
- Tasks menu
- Help Menu
- Buttons overview and keyboard shortcuts
- Index


2 Copyright
www.magix.com
Copyright
MAGIX Music Maker and Goya are registered trademarks of MAGIX AG.
VST and ASIO are registered trademarks of Steinberg Media Technologies
GmbH.
Other named product names may be registered trademarks of their respective
owners.
This documentation is protected by law. All rights, especially the right of
duplication, circulation, and translation, are reserved.
No part of this publication may be reproduced in the form of copies, microfilms
or other processes, or transmitted into a language used for machines,
especially data processing machines, without the express written consent of
the publisher.
All copyrights reserved.
All other product names are trademarks of the corresponding manufacturers.
Errors in and changes to the contents as well as program modifications
reserved.
This product uses MAGIX patented technology (USP 6,518,492; USP
6,888,999) and MAGIX patent pending technology.
Copyright © MAGIX AG, 1994 – 2011. All rights reserved.

Preface 3
www.magix.com
Preface
Congratulations on purchasing MAGIX Music Maker Rock Edition 4! You have
just bought an indispensable and versatile next-generation application for all
your multimedia needs.
Today, newcomers – be it producers, DJs or MCs – must do more than just
make good music to make themselves noticeable. Music, video clips, media,
promotion & communication all belong to the job.
MAGIX Music Maker Rock Edition 4 was developed expressly to avoid the
stress of this situation: a complete, contemporary production studio for music
and video clips in Rock style, which is straightforward and simply to use for
anyone.
Equipped with fitting sound and video loops, MAGIX Music Maker Rock Edition
4 includes direct Internet connections for publishing or direct emailing of
material to the right people.
Production software + content + composition, performance, production &
publishing network or songs & videos!
Everything can be done with just a few mouse clicks. This manual explains the
how, where & why to click. It's so easy! Read through and, for best results, try
it out as you go along!
Have fun with MAGIX Music Maker Rock Edition 4.
The MAGIX Team

4 Table of Contents
www.magix.com
Table of Contents
Copyright 2
Preface 3
Support 9
Before you start 11
Package contents 11
System requirements 11
Serial number 12
Installation 13
More about MAGIX 14
MAGIX Online World 14
magix.info - Multimedia Community 14
Soundpool DVD collection 15
Introduction 16
What’s new in MAGIX Music Maker Rock Edition 4? 16
The features 17
Overview of the program interface 20
Quick start 21
Play demo project 21
Song Maker 22
Preview and load audio files 24
Position audio objects 25
Add videos or images 26
Manipulating objects 26
Effects 27
Export arrangement 27
Create Audio CD 28
Arranger 29
Normal mode/Easy mode 29
Trackboxes and Instrument icons 29
Zooming 30
Microscope 30
Move/Zoom with the mouse wheel 30
Grid 31
Playback area, Start and end markers 31

Table of Contents 5
www.magix.com
Moving the playback marker 33
Transport Bar (playback functions) 33
Arranger, Video Monitor, and Media Pool 35
Arranger buttons 35
Video Monitor 36
Arrangement overview 37
InfoBox 37
Audio peakmeter 37
Media Pool 38
Preview function 38
Soundpool settings 38
File manager settings 40
Synthesizer 43
Settings templates 43
Setting Catooh 43
Arranging Objects 44
Loading and saving arrangements 44
Multimedia files and objects 44
Select objects 45
Mute objects 45
Build or split object groups 45
Splitting objects 45
Exact object positioning 46
Duplicate objects 46
Object handles 47
Takes 48
Mixdown tracks 48
Mouse gestures 49
Audio Objects 51
Audio formats 51
Load and process audio files 51
Smart Preview for the incorporated samples 51
Change pitch/octave using the keyboard 52
Audio recording 52
Import audio CD 55
Change the playback tempo or pitch 59
Remix agent - Tempo and beat assignment 61
Harmony Agent 67
Text to Speech 68
Video and Bitmap Objects 70
Video and bitmap formats 70

6 Table of Contents
www.magix.com
Adjusting the video screen 70
Import and edit videos 70
Simplify object presentation 71
Visualizer objects 71
Extract sound from videos 71
Video effects 72
Title Editor 72
Video Compression 74
Choppy or uneven playback 75
General notes on AVI videos 75
Video export via TV-out 76
Synth Objects 77
Working with synth objects 77
BeatBox 2 78
SilverSynth Pro 86
LiViD - Little Virtual Drummer 89
Audio effects 91
Effects 91
Using audio effects 92
Object and master effects rack 94
Equalizer 96
Compressor 96
Reverb 97
MAGIX Mastering Suite (demo version) 101
Sound Warper 107
Timestretch and pitchshift 108
Vintage Effects Suite 110
Mixer 124
Track effects 124
Fader 125
Control groups 125
Track effects 126
FX tracks 126
Live monitoring 127
Master track 128
Reprocess arrangement 129
Export as email attachment 129
Export as ringtone 129
Create Audio CD 130
Upload song to Soundcloud 130
Common export options 131

Table of Contents 7
www.magix.com
File Menu 133
New arrangement 133
Load arrangement 133
Save arrangement 133
Save arrangement as... 133
Import 134
Export 134
Backup 141
Settings 142
Exit 148
Edit Menu 149
Undo 149
Redo 149
Object 149
Track 152
Range 152
Navigation 154
Select all objects 155
Menu effects 156
Song Maker 156
Audio 157
Video 160
Title 160
View menu 162
Easy mode 162
Arranger 162
Media Pool 163
Video monitor 163
Mix 164
Standard layout 165
Online menu 166
Catooh – the Online Content Library 166
MAGIX Online Album 167
magix.info - Multimedia Community 169
More online services 170
Online login details 171
Tasks menu 172
Help Menu 173
Show welcome dialog 173

Support 9
www.magix.com
Support
Dear MAGIX customer,
Our aim is to provide convenient, fast and solution-focused support at all
times. To this end, we offer a wide range of services:
Unlimited web support:
As a registered MAGIX customer, you have unlimited access to web support
offered via the convenient MAGIX service portal on http://support.magix.net,
including an intelligent help assistant, high-quality FAQs, patches and user
reports that are constantly updated.
The only requirement for use is product registration on www.magix.com
The online community - on-the-spot support and a platform for exchange:
MAGIX customers have free and unlimited access to the online community at
www.magix.info, which includes approx. 100,000 members and offers the
opportunity to ask members questions concerning MAGIX products as well as
use the search function to search for specific topics or answers. In addition to
questions & answers, the knowledge pool includes a glossary, video tutorials
and a discussion forum. The multiple experts, found round-the-clock on
www.magix.info guarantee quick answers, which sometimes come within
minutes of a question being posted.
Email support for MAGIX products:
8 (eight) weeks of free email customer service (starting from the purchase
date) is automatically included with the purchase of any new MAGIX product.
MAGIX guarantees fast processing of your request and an immediate reply.
Premium email support:
If you experience problems after the 8 weeks of free email support have
expired, you can purchase a Premium email support ticket in the MAGIX Shop
for USD 12.99 | CAD 13.99 | GBP 9.99 | AUD 18.99 | ZAR 120.00 | EUR
12.99 | SEK 119.00 | NOK 99.00 | DKK 99.00. This ticket applies to a specific
problem and is valid until it is solved; it is therefore not restricted to one email.
Reporting evident program errors is exempt from this regulation.
Please note: To be able to use the Premium email support and free product
email support via the Internet, you have to register your MAGIX product using
the serial number provided. This can be found on the CD case of your
installation CD or on the inside of the DVD box.
Additional telephone service:
Besides the large number of free customer service offers, we also offer a fee-
based telephone customer service.

10 Support
www.magix.com
Here you can find a summary of our technical support telephone numbers:
http://support.magix.net/
Mail (Europe): MAGIX Development Support, P.O. Box 20 09 14, 01194
Dresden, Germany
Mail (North America): MAGIX Customer Service, 1105 Terminal Way #302,
Reno, NV 89502, USA
Please make sure you have the following information at hand:
Program version
Configuration details (operating system, processor, memory, hard drive, etc.),
sound card configuration (type, driver)
Information regarding other audio software installed
MAGIX Sales Department
You can reach the MAGIX Sales Department workdays for help with the
following questions and problems:
Orders
Product consulting (pre-purchase)
Upgrade requests
Returns
Europe
Monday - Friday, 09:00-16:00 GMT
U.K.: 0203 3189218
Denmark: 699 18149
Sweden: 0852500858
Finland: 09 31581630
Norway: 0210 30665
North America
9 am to 4 pm EST Mon-Fri
Phone: 1-305-722-5810

Before you start 11
www.magix.com
Before you start
Package contents
DVD
On this DVD you will find the installation manager for MAGIX Music Maker Rock
Edition 4, as well as the multimedia library with sound and video files in various
genres.
The Terms and Conditions for usage of MAGIX sound and video files when
releasing your works to the public can be found in the "MAGIX Creation
Logo.pdf" file in the installation folder.
System requirements
Computer: Intel® Pentium® or AMD® Athlon® 1 GHz or higher, 512 MB RAM or
higher (1 GB recommended)
Free hard disk space: 2 GB
Graphics card with min 4 MB RAM, min. resolution 1024 x 768
16-bit sound card. Dolby® ProLogicTM Surround Sound
CD/DVD drive for program installation
Publication on MAGIX Online Album and download from Catooh only with
online connection and Microsoft® Internet ExplorerTM, version 6.0 or higher.
Sending video emails with available standard email software Microsoft®
OutlookTM or Microsoft® Outlook ExpressTM.

12 Before you start
www.magix.com
Serial number
A serial number is included with each product, and although it is not required
for the installation of the software, it does enable access to additional bonus
services. Please store this number in a safe place.
What can a serial number do?
A serial number ensures that your copy of MAGIX Music Maker Rock Edition 4
is clearly assigned to you and only you, and it makes improved and more
targeted customer service possible. Abuse of the software can be prevented
with a serial number, since it ensures that the optimum price/performance ratio
continues to be offered by MAGIX.
Where can the serial number be found?
The serial number can be found on the reverse side of your CD/DVD case. If
your product, for example, is packed in a DVD box, then you'll find the serial
number on the inside.
For versions that have been especially optimized for the Internet (download
versions), you'll receive your serial number for activating the software directly
after purchasing the product via email.
When will you need the serial number?
The serial number is required when you start or register MAGIX Music Maker
Rock Edition 4 for the first time.
Note: We explicitly recommend registering your product, since only then are
you entitled to get program updates and contact MAGIX Support. Entering the
serial number is also required for activating codecs.

Before you start 13
www.magix.com
Installation
Step 1: Insert the program disc into the drive. The installation program starts
up automatically in Windows. If the disc doesn't run automatically,
open the Windows Explorer and click the letter of the CD-ROM drive.
Now double-click on "Start.exe" to start the installer.
Step 2: To begin the installation of MAGIX Music Maker Rock Edition 4, click
on "MAGIX Music Maker Rock Edition 4". The MAGIX Music Maker Rock
Edition 4 installation program will appear.
Simply follow the instructions on screen to complete the installation process
and then click on "Continue". All files are copied onto the hard drive.
Step 3: Once the installation is complete, confirm the message by pressing
"Finish". Now you can start the program at any time from the Windows "Start"
menu.
If you would like to uninstall MAGIX Music Maker Rock Edition 4, you can do
so via the control panel under "Software". Or go to "Programs > MAGIX >
MAGIX Music Maker Rock Edition 4 > Service and Support > Uninstall MAGIX
Music Maker Rock Edition 4".

14 More about MAGIX
www.magix.com
More about MAGIX
MAGIX Online World
MAGIX Online World from MAGIX offers you a range of new services for your
photos, videos, and music that are accessible directly from the "Online" menu
in MAGIX Music Maker Rock Edition 4:
MAGIX Online Album
MAGIX Online Album (view page 167) is your personal multimedia album on the
Internet. If you want to present slideshows or videos online, then MAGIX Online
Album is the perfect service.
MAGIX Website Maker
MAGIX Website Maker helps you create a personal Internet showcase with a
professional design in just a few mouse clicks – without prior knowledge,
including your own chosen domain and email address. Publish slideshows and
videos and accessorize your site with music and various effects – anything
from a simple business card to a fireworks display of effects, professional or
private – show your best side!
More about this topic can be found under MAGIX Website Maker. (view page
170)
Catooh – the Online Content Library
If your project is missing pictures, videos, DVD menus, sounds, or samples,
then you should have a look at the huge selection available at Catooh. There
you'll be able to buy media in excellent quality for low prices: DVD menus,
Slideshow Maker styles, decorative elements, 3D power effects, 3D transition
series, MAGIX Soundpools, songs, ringtones... Perfectly suited to all MAGIX
photo, video, and music projects.
magix.info - Multimedia Community
Help and get help - Directly from within the program, you'll be able to access
magix.info - Multimedia Community, the new MAGIX Knowledge Database
(view page 169). You'll find answers to all the most frequently asked questions
about MAGIX products and multimedia in general. Couldn't find an answer to
your particular question? No problem – just ask the question yourself!

More about MAGIX 15
You can access magix.info - Multimedia Community online at
http://www.magix.info
Soundpool DVD collection
MAGIX Music Maker Rock Edition 4 includes thousands of sound and video
building blocks. Other media can be ordered later. In the MAGIX Sound
Essentials you receive professionally produced loops and samples in
impressive quality – the ideal enhancement for the most varying of music
styles, including:
Ambient
Big Beat
Easy listening
Dance / Electro
Disco / House
Soundtrack
Hip hop
Rock/Pop
Techno / trance
Special effects
In the upper menu bar under "Tasks" > "Discover more", you can order the
MAGIX Sound Essentials directly.
Tip: At www.magix.com you'll always find the latest soundpool offers.
www.magix.com

16 Introduction
www.magix.com
Introduction
What’s new in MAGIX Music Maker Rock Edition 4?
SoundCloud upload
SoundCloud® is an exciting Internet community for musicians, record
companies and anyone else who wants to distribute music and communicate
via songs. After registering with SoundCloud®, you can upload songs directly
from MAGIX Music Maker Rock Edition 4 to your personal profile. This takes
place via the menu "File > Export > Community Upload > Upload audio to
SoundCloud®..." Then, you can embed the uploaded songs in a SoundCloud®
player on other platforms such as Twitter or Facebook.
Mouse gestures
In MAGIX Music Maker Rock Edition 4 it is possible to dynamically control
video and audio effects using mouse gestures. To view a summary of all
mouse gestures, read Help.
Microscope mode
Activate this mode and click on an object to zoom in for detailed editing. This
allows individual drum hits in a loop to be edited in a very detailed way, cut
with the separation function, and then processed with individual effects. In the
lower right section of the arranger, you will see a button with four arrows
pointing outwards on it. Click this button again to reset the view to the original
settings.
User interface
The user interface has been laid out as clearly as possible. Thanks to its new
look, working in MAGIX Music Maker Rock Edition 4 is now significantly more
convenient.

Introduction 17
www.magix.com
The features
Arranger with 32 tracks
In MAGIX Music Maker Rock Edition 4 there are 32 tracks for multimedia
arrangements – enough space to create multiple polyphonic pieces, but most
importantly, you don't lose track of your project at any point.
Formats and interfaces
Import: WAV, MP3, OGG Vorbis, WMA, QuickTime™, CD-A, BMP, JPG, AVI,
MXV, WMV
Export: WAV, MP3 (optional), OGG Vorbis, WMA, AVI, MXV, WMV
Multimedia Library
The multimedia library provides audio and video building blocks ("samples") for
combining on the arranger tracks. Loads of melodies, effect templates, and
graphical animations also come supplied for you to use in new songs & video
clips.
Catooh
In the massive Catooh you'll always find the right sounds & pictures for your
projects. The clearly archived library makes it child's play to find what you're
looking for. Simply preview it and download it if you like it!
Software synthesizers
MAGIX Music Maker Rock Edition 4 includes the following synthesizers:
With the "Silver Synth" you can create your own new sounds in analog synthie
sound including filter movement and pitch recognition.
BeatBox 2 is a 16-voice drum computer with hybrid sound synthesis and a
step sequencer. The established concept of the "old" Beatbox, as matrix
programming did with Auto-Copy, introduced convenient velocity processing
and significantly improved sound production, including multi-effects section
(an effect for each drum instrument).
LiViD, our "little virtual drummer", provides realistic acoustic drum tracks. Just
a few instructions are enough for "LiviD" to play a complete drum track with
introduction, chorus, bridge, fill-ins, etc.
Audio effects
MAGIX Music Maker Rock Edition 4 provides lots of different audio effects. A
few examples:

18 Introduction
www.magix.com
You can correct tempo and pitch in real time using "Resampling",
"Timestretching" or "Pitchshifting".
The "Audio Effect Rack" supplies "Reverb", "Echo", "Equalizer", "Compressor",
"Time Processor", "Distortion", "Filter", and many classic effects with which
almost every sound can be made. MAGIX Music Maker Rock Edition 4
provides these sounds in amazingly high quality. The reverb effect, for
example, provides lots of realistic reverb algorithms to add depth and
spaciousness to your material. Design your "Favorite reverb" using the many
presets as a base with their various reverb rooms which were designed for
specific instruments and applications.
The "Vintage Effects Suite" covers "good old" guitar effects that were activated
using a foot pedal in Jimi Hendrix's era: more warmth and fullness with
"Chorus", jet-like special effects with the "Flanger" or ping-pong effects like
"Delay". This filter enables beat-matched frequency filtering, the "BitMachine"
is a distorting Lo-Fi effect for friends of those who like it a bit rougher.
The "Text-to-speech" function creates a voice from lines of text.
Media database
Find your recordings, sounds, pictures, and videos quicker and faster with the
MAGIX media database. An existing MAGIX database from the MAGIX Photo
Manager or MAGIX Media Manager is integrated in the Media Pool and can be
updated directly from MAGIX Music Maker Rock Edition 4. Use the simple
search function to find suitable pictures or MP3 files for your arrangement.
High-end 32-bit floating point
All sound changes are executed using 32-bit floating point calculation for
especially differentiated and high-quality sounds. This technology is also used
in professional studios. This way, an audio picture with especially high
dynamics can be created. Digital overmodulation and clipping become virtually
impossible.
Audio CD support
Audio CDs can be imported directly into MAGIX Music Maker Rock Edition 4.
Just insert them into the drive and press "CD/DVD". All tracks can then be
dragged into the arranger and edited with different features or effects. Whether
for remixes or as sound material for your own compositions – a new touch will
be added to your personal CD collection.
Own recordings
Use this recording function from MAGIX Music Maker Rock Edition 4 to record
vocals, noises, or instruments and integrate them into the arrangement.

Introduction 19
www.magix.com
Live Sessions
While the virtual instruments and sounds are played on the available tracks, a
new track can be recorded simultaneously in realtime. What's more, you can
also add realtime effects.
Harmony Agent
The Harmony Agent provides harmony recognition automatically and
determines the key and chord of any music title. See the guitar tablature of
your favorite song in real time for the arrangement!
Song Maker
The Song Maker lets you create new arrangements quickly and easily and
complement existing arrangements by automating the complicated steps such
as sample selection and combination. The Song Maker takes over arranging
whole sections such as intro and refrain. Therefore, you do not have to do
everything yourself – you can omit the arranging and process your selection
from the suggestions.
Mixer
MAGIX Music Maker Rock Edition 4 contains a professional Realtime Mixer
with effect rack and two Insert effects for each channel, two additional effect
tracks, two Insert effects for the master as well as additional mastering effects.
The Mixer's size can be adjusted so that more than eight tracks fit on the
screen at any one time. You can also group a number of faders of a specific
type (for example, volume or panorama) and use them all together.
Professional Mastering Suite 2.0 is included in a 30-day trial version.
Ringtone export
Convert your songs or sound effects into ringtones at the touch of a button.
Works for the standard Real Ringtone formats: MP3 and WAV.
20 Overview of the program interface
Overview of the program interface
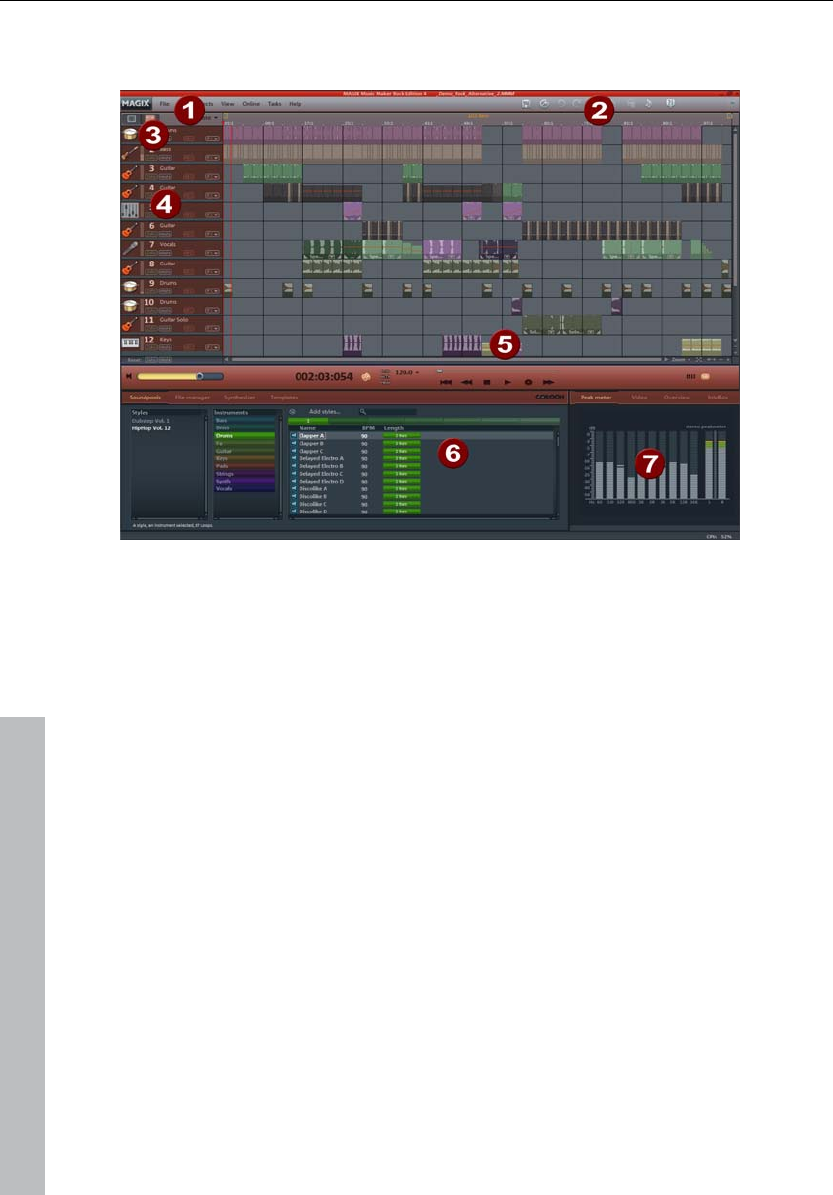
1 Menu bar This list provides the most important editing
commands.
2 Toolbar This contains the buttons for quick editing.
3 Track boxes Here you can mute whole tracks or have one play
by itself (solo). Use the FX buttons to apply track
effects.
4 Arranger You can freely position any multimedia material on
all tracks.
5 Scrollbars The lower scrollbar can be stretched and
compressed for zooming.
6 Media Pool All files listed here can be dragged into the
Arranger via drag&drop.
7 Video monitor Here, the previews for graphics or video files
which can be selected in the Media Pool are
shown. All picture material of the arrangement is
also shown here on playback. Furthermore, the
arrangement overview or an Analyzer/Peak Meter
can be displayed in the Video Monitor.
www.magix.com
Quick start 21
Quick start
This chapter explains the basic functions of MAGIX Music Maker Rock Edition
4 with a step-by-step introduction. A systematic description of the program
functions can be found in the chapters and in the extensive PDF manual.
Tip: Open the tutorial video and the "Quick start" tutorial by clicking the "Help"
menu.
Play demo project
www.magix.com
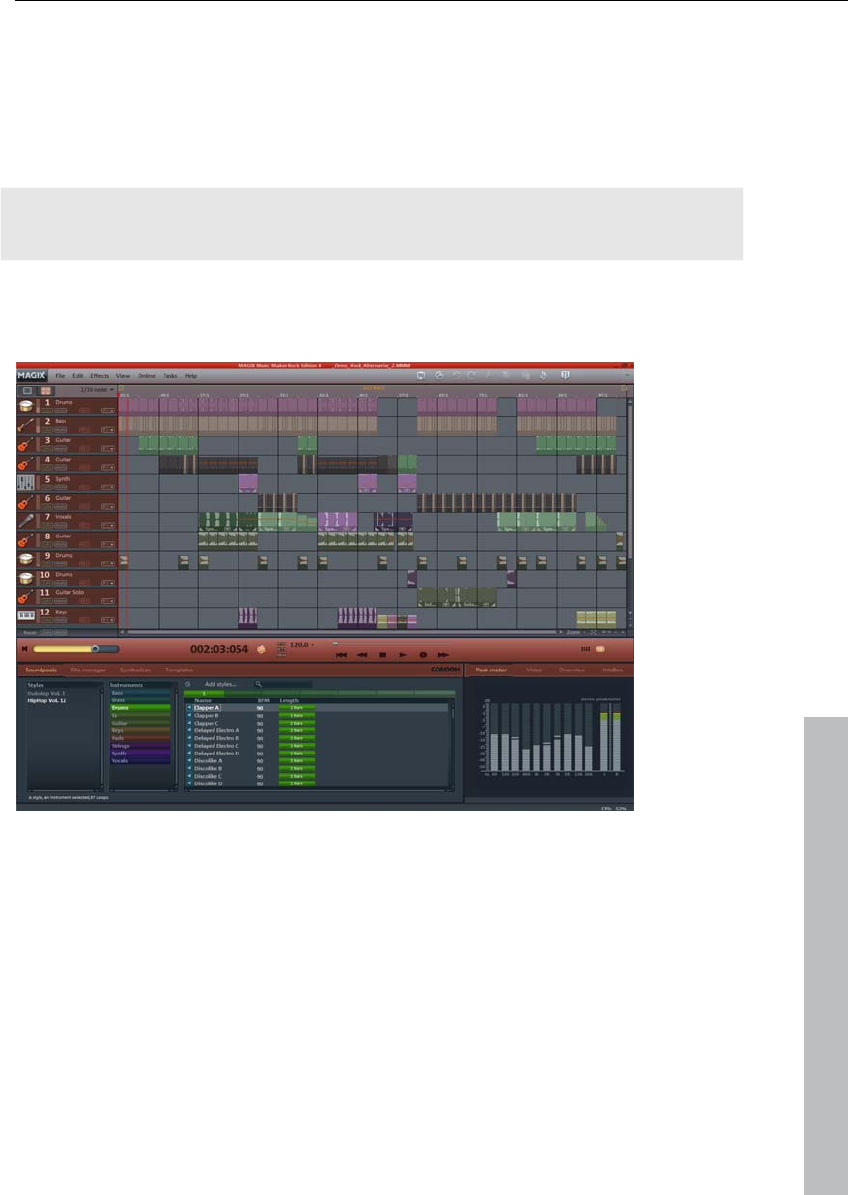
The large area with the horizontal tracks is the Arranger. Here you can make all
changes to the positions and editing of multimedia objects.
In the lower section of the program interface you can find the Media Pool. Here
you can load multimedia files with various formats into the arrangement by
pressing the left mouse button and keeping it held or by double-clicking on the
object. The Media Pool works similarly to Windows® Explorer - with some
additional features. Here, professionally produced sounds can be downloaded
from theCatooh and integrated.
In "Welcome Dialog", which appears after MAGIX Music Maker Rock Edition 4
is started for the first time, you may start a demo song. Look at the individual
22 Quick start
tracks of the song in the Arranger: In MAGIX Music Maker Rock Edition 4 you
can create a complete song by compiling objects. Click on the vertical scroll
bar on the right-hand side of the screen and drag them down (hold down the
left mouse button) in order to be able to see each track.
To play the demo, click on the Play button or press the space bar on your
keyboard. A vertical red line (the playback marker) runs across the screen and
music will play from the speakers.
Note: If you do not hear anything, check if the correct sound card is active for
playback in the Setup window (P key). Of course, the output of the sound card
has to be connected to the speakers.
Song Maker
To quickly create a first arrangement, you should let the Song Maker run by
itself and sit back and listen. Open a new, empty arrangement by clicking on
"File" and selecting "New arrangement". This opens a new arrangement with
32 empty tracks. The Song Maker automatically creates musical arrangements
from the included music files.
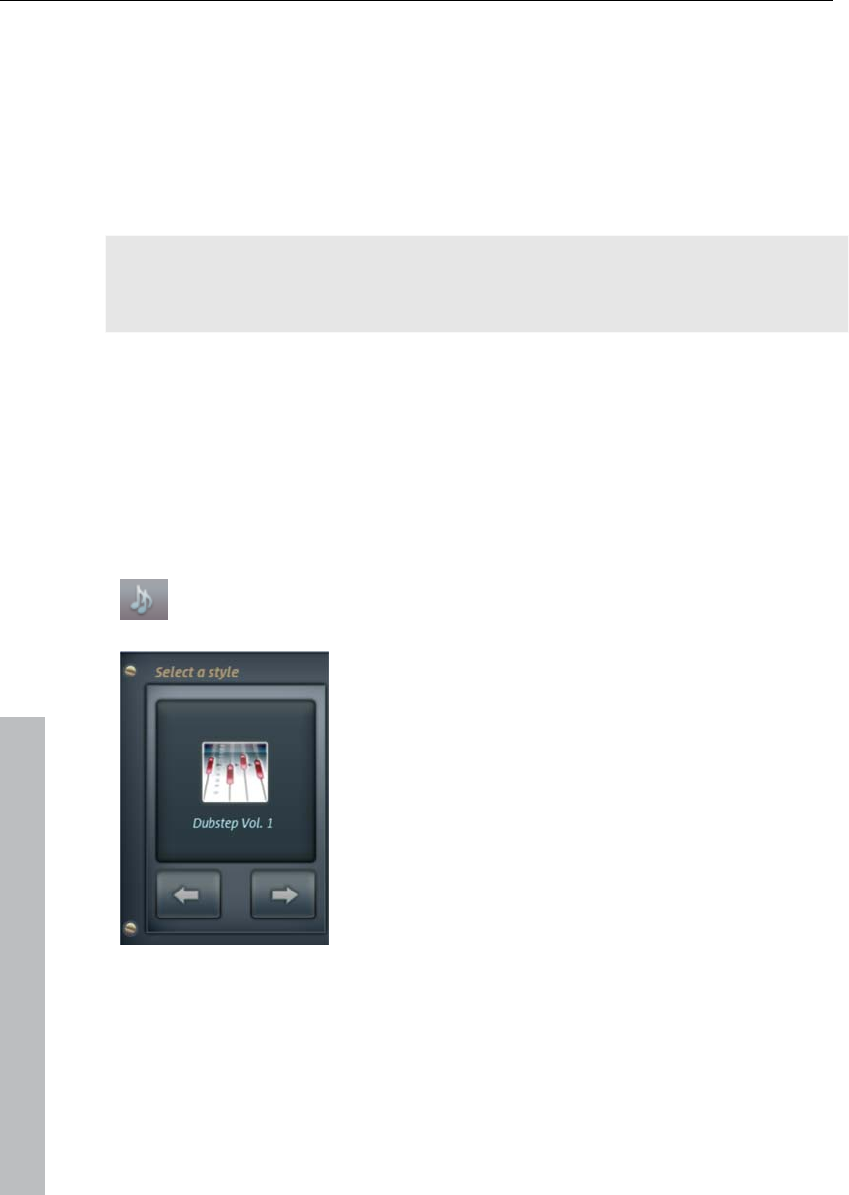
Activate the Song Maker with the button in the
upper section of the program interface.
Select a music style.
www.magix.com
Quick start 23
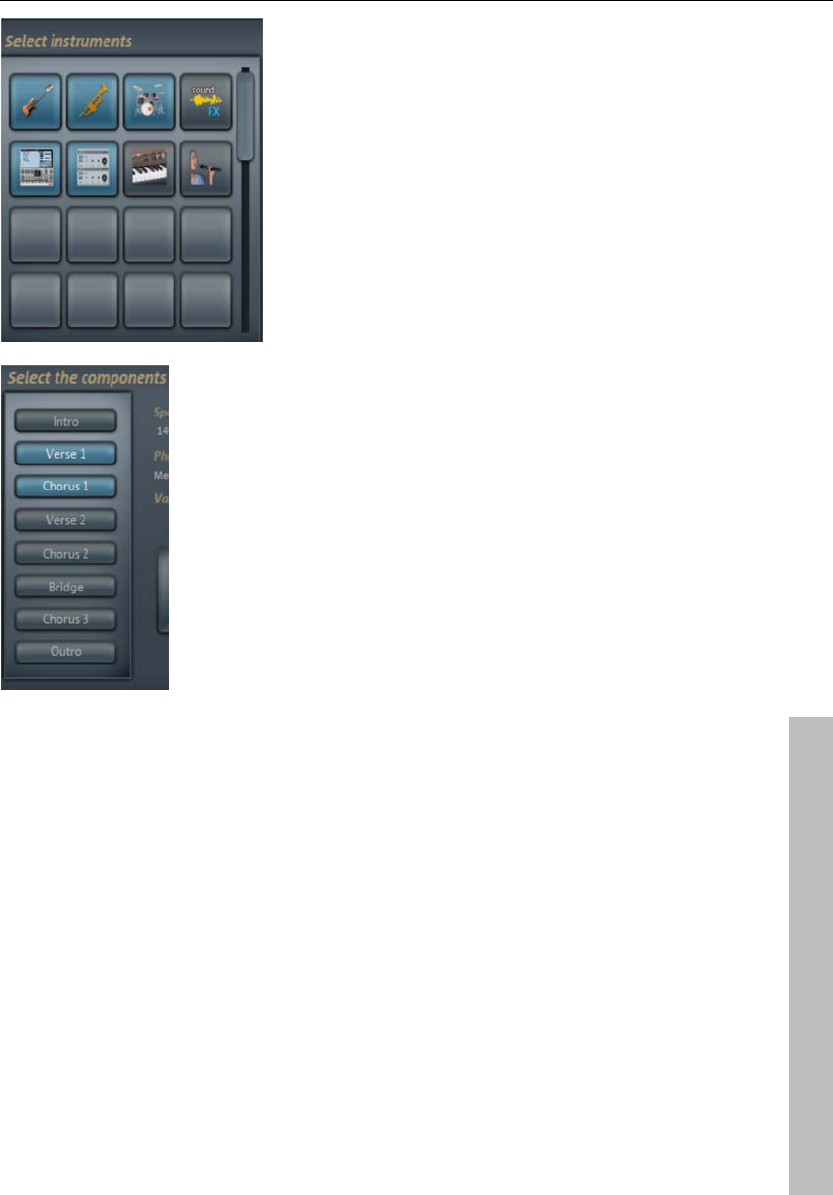
Select the instruments that you want to hear.
If, for example, you only want a rhythm
section with drums and bass, deactivate the
other instruments.
Select the song part or parts that you want to
create.
www.magix.com

24 Quick start
Now click on "Create Song". Song Maker
automatically compiles an arrangement. The
following is merely a suggestion.
Listen to the suggestion by pressing the
"Play" button. If you're not happy with the
result, you can have another arrangement
created by clicking "Cancel" and once more
on the "Create new arrangement" button.
Once you're happy with Song Maker's
suggestion, click on "Create Song". The
building blocks are only now added to the
Arranger.
To play the arrangement click on the space
bar or on the "Play" button. The arrangement
is then played back in a loop as long as the
space bar is held or the Play button is
pressed.
Your first musical arrangement is complete! Song Maker can also be used to
add more individual samples or whole song parts or to lay down a bass or
drum sound. This can then be expanded into a more complex multimedia
arrangement or refined using your own video and audio files.
Preview and load audio files
In the next step, load sound files into the arranger for positioning and editing.
Create another new, empty arrangement. To do so click "File" and select the
"New arrangement" option.
Now click on "Sounds & Videos" in the Media Pool. Various categories are
shown on the left page of the Media Pool. Click on the one of the categories to
open a sub-category. Here you can select and preview sounds. Some
instruments are categorized according to pitch. Click on any entry here. The
sound will then start playing. Each file can be previewed this way. Use the
arrow keys on your keyboard to select the various pitches. Other instruments –
like drums – are not categorized according to pitch. These entries are denoted
by a loudspeaker symbol which displays them as a normal wave file.
To load a file into the arranger, simply press "Enter". You can also drag the file
from a table onto a track in the arranger. Once you let go of the mouse button,
the file will appear as an audio object at that position.
www.magix.com

Quick start 25
Position audio objects
Each object can be moved in any way in the arranger with the mouse,
horizontally on a track as well as vertically between tracks.
Add new instruments to your first song in the arranger. For example, take a
drum sample and drag it underneath the object in a lower track which was
added beforehand.
This way, any number of files can be dragged from any folder into the arranger
and placed on top of one another, on multiple tracks, or behind one another.
Play the arrangement in the meantime. Take note of the two markers at the top
of the bar ruler – they represent the start and end points of the range to be
played. If you wish to change the playback range, the start and end markers
can be dragged (while holding down the mouse button) to any position on the
bar ruler.
Tip: You can also move the playback marker independently of the left start
marker by clicking on the lower section of the bar ruler.
www.magix.com
You do not need to interrupt playback to load new samples into the arranger.
MAGIX Music Maker Rock Edition 4 has a "Smart Preview" function: You can
simultaneously preview new samples in the Media Pool – they always run
synchronous to the song in the arranger. This function considerably simplifies
the search for suitable samples for a song you wish to create.
26 Quick start
Add videos or images
In the next step you can add video and image material. To do so, open a folder
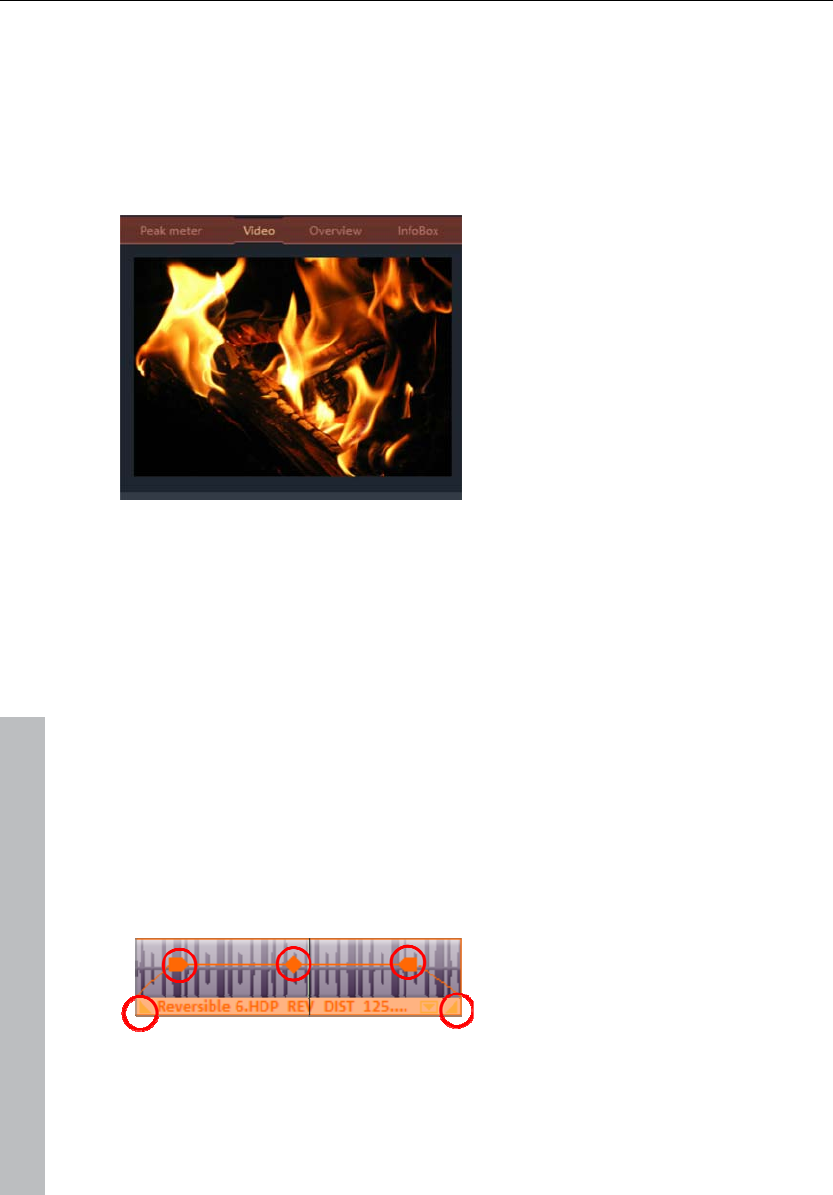
with video or photo files in the Media Pool under Data Manager and select the
ones you want. On the video monitor to the right, a preview of the selected
video file can be shown.
Once you have found a matching video, use the mouse button to drag it onto
any track (like previously with the audio files). You can place as many video
and photo files as you like under your music. You can adjust the length of the
individual objects with the help of the Object handles.
Manipulating objects
To get an impression of the object-based work method of MAGIX Music Maker
Rock Edition 4, you should become more familiar with the "Objects" on the
tracks of the Arranger.
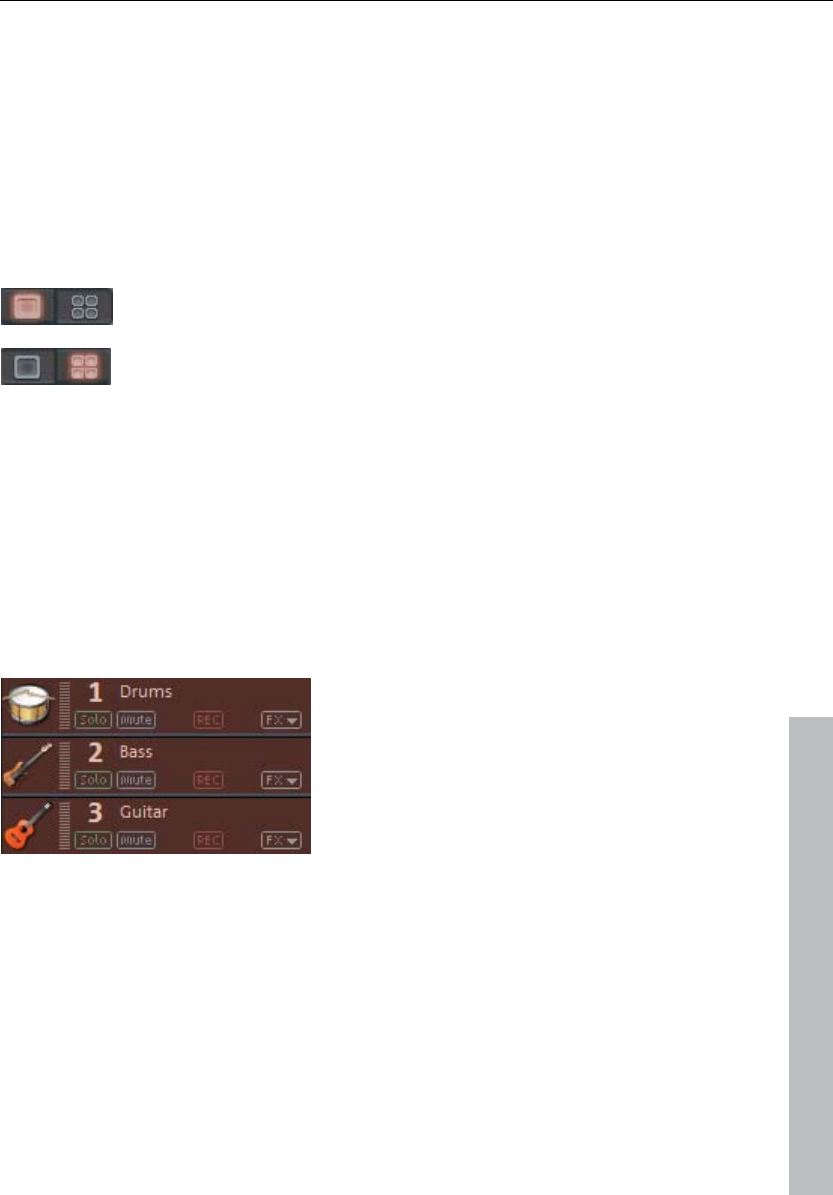
All objects can be shortened or looped by moving the mouse to one of the
lower corners of the object until it turns into a stretch symbol. You can now
stretch or compress the object length as much as you like. This way you can
create rhythm tracks from short drum samples simply by stretching them.
At the top corners of every object there are two fade handles that can be
adjusted to fade an object in or out.
www.magix.com

Quick start 27
www.magix.com
sed to adjust the volume of audio objects
and the brightness of video objects.
bjects. To do so, select "Split objects"
from the "Edit" menu. The selected object will be split at the position where the
object opens the context menu with the options available
for that specific object in the Timeline mode. The context menu can also be
Effects
ake time to experiment around with the effects. In the context
menu you can select the effects for the objects. Here, effect modules are
ts.
double-clicking. Simply open the Templates folder in the Media Pool and try
Export arrangement
diting is usually to have a good quality audio or
video file at the end. MAGIX Music Maker Rock Edition 4 supplies various
ck on "File" and select the "Export
arrangement" option.
export
d audio and video export (e. g. AVI, Windows Media
itting settings in the dialogs and click on OK or log in to the desired
The handle at the top center can be u
All objects can be split into multiple o
playback marker is.
Right-clicking on an
opened by clicking on the button with the small triangle in the lower section of
an object.
You should t
opened with which each effect can be set up to meet your exact requiremen
Effects can also be dragged onto objects by holding the left mouse button or
each of the effects listed one after the other with a mouse click. Like with all
other entries in the Media Pool, effects in this folder always have a preview as
well. If you like an effect and wish to apply it to an object in the Arranger,
simply click on it, drag it onto the object, and release the mouse button.
The purpose of arranging and e
export formats for this purpose.
To export your arrangement, cli
Now select the export format. You can choose between pure audio
(e. g. MP3, WAV,…) an
Video,…).
The Community upload option enables uploads to SoundCloud®.
Select the f
Internet community.
The arrangement will then be exported in the chosen format.

28 Quick start
www.magix.com
Note: The export calculations are independent of the playback performance.
Even if your playback on your computer begins to stutter because too much
RAM is being used for videos and effects, the export file will still be calculated
correctly. We recommend placing already finished passages of complex
arrangements via the export or mixdown function into a single file to free up
some processing power (and tracks). This kind of file can be reloaded into the
arrangement and edited further with the other parts.
Create Audio CD
rt your arrangement as a WAV file first:
e..." option.
The WAV file created can be burned as an audio CD with the included burning
To burn an audio CD, expo
Click on "File" and select the "Export arrangement -> Audio as wav
program MAGIX Speed burnR.
Arranger 29
Arranger
Normal mode/Easy mode
MAGIX Music Maker Rock Edition 4 can be operated in two different views,
and these can be activated by clicking on the button in the top left. If the
MAGIX Music Maker Rock Edition 4 interface confuses you at first, then switch
the program to "Easy" mode!
Easy mode active
Normal mode active
In the beginner mode, the program presents a clearly laid-out version which
only displays the most important buttons and switches. Functional elements for
advanced users are hidden.
This documentation describes MAGIX Music Maker Rock Edition 4 in normal
mode. If you can't find one of the functions while reading, make sure that you
don't have Easy mode turned on.
Trackboxes and Instrument icons
www.magix.com
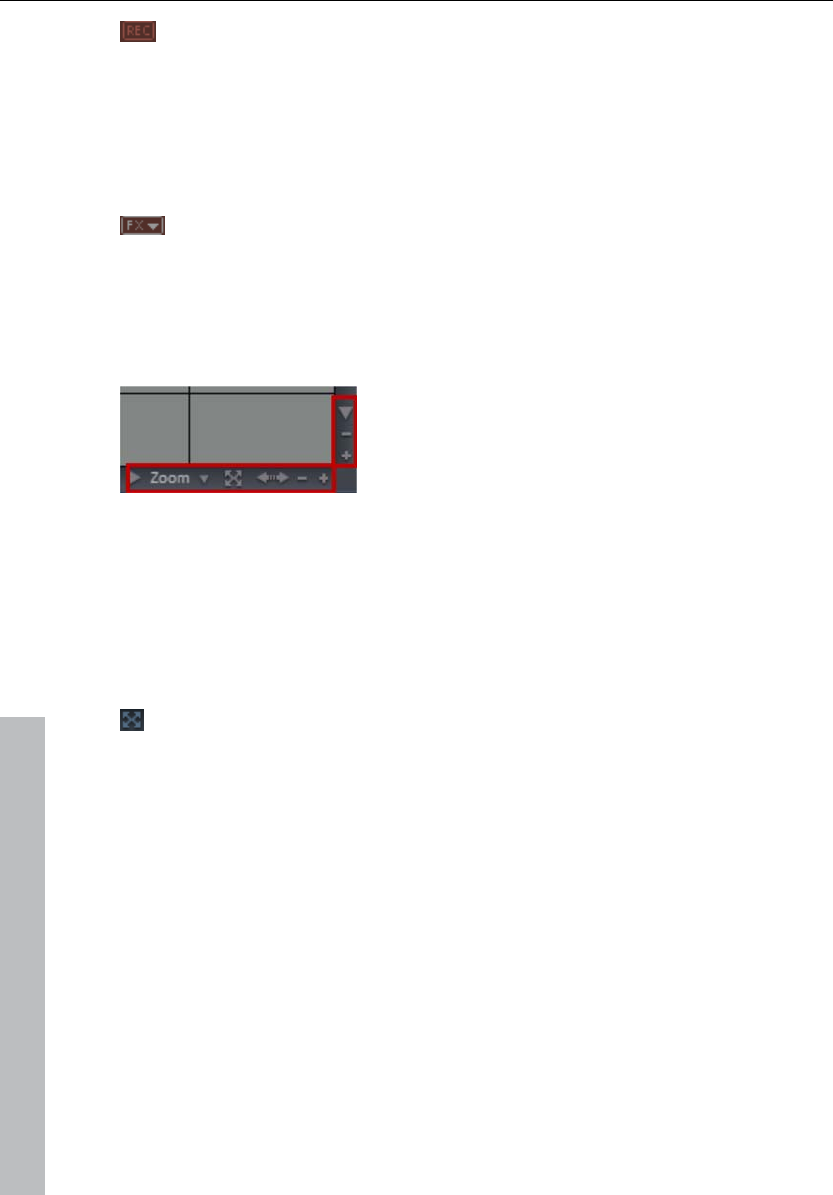
Every track box contains a field for
instrument icons. When you drag a MAGIX
Soundpool sample
At the beginning of each track is a track box where you can mute a single
audio track with the Mute button or play them Solo.
The Peak Meter can be found beside the icons. This way, you can control the
volume of the track and see if the track produces any audio sound at all.
Beside the track number to the top, you'll find the Track name field. You can
rename the track by double-clicking on the field.
30 Arranger
With REC you can activate the track for an Audio or MIDI recording.
Furthermore, monitoring is now activated, that is, you can hear the
input signal of your sound card on playback. (Find out more in the
"Mixer" chapter, "Recording/Live Monitoring" (view page 127))
If you start recording now (R key), the audio recording dialog will
open. The recorded audio material is added to this track. If there is
already an object on the same position of the track, the next empty
track will be used.
Here you can open the Track Effects menu. In it you will find presets
for track effects (view page 93) sorted according to the instrument
type.
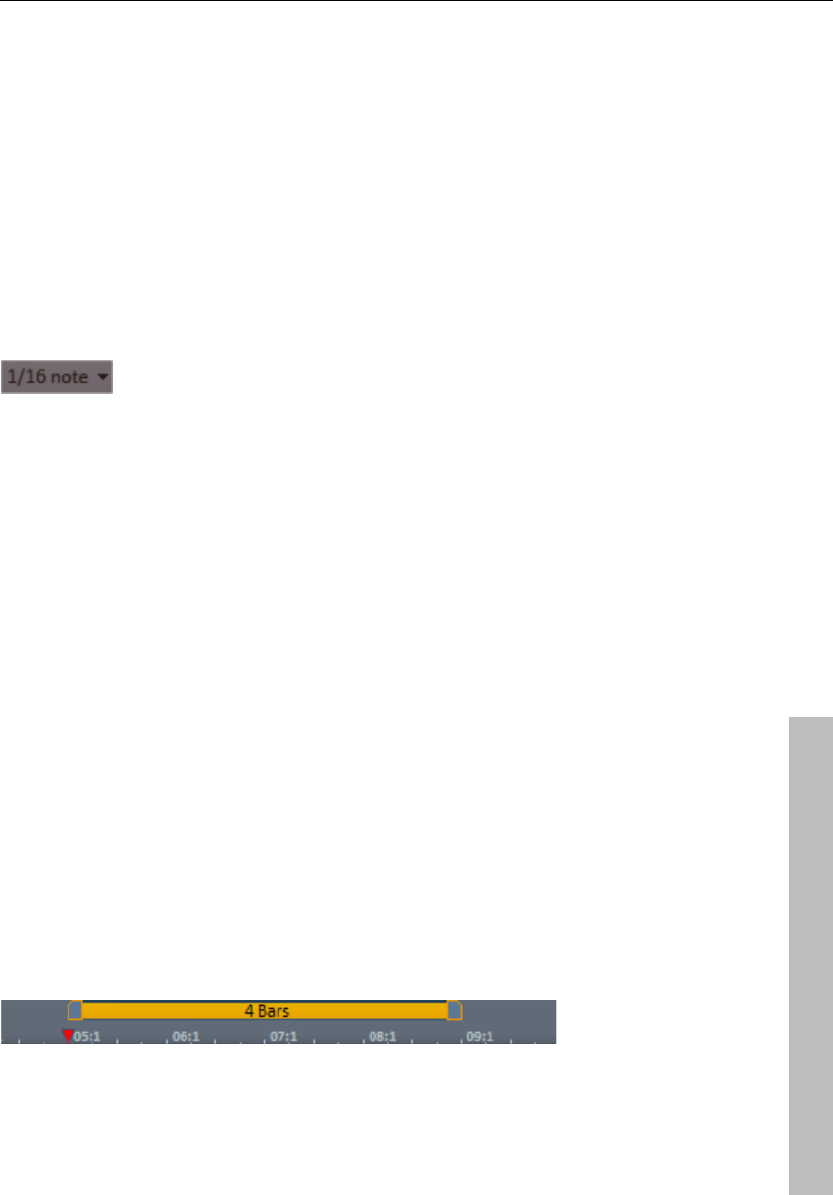
Zooming
The vertical zoom function sets the number
of visible tracks. For a lot of tracks, enlarging
the view (zooming) is sensible for editing a
single track or object.
Use the horizontal zoom functions to set up the visible section of the
arrangement on the timeline.
Microscope
Enlarge objects: Vertical and horizontal zoom stages are enlarged so
that all of the selected objects are displayed at maximum size. When
the the function is shut off, the old zoom level will reactivate.
Move/Zoom with the mouse wheel
The visible section can be moved, reduced, and increased in size by using the
scroll bars. These functions can also be executed without having to click
anywhere by using the mouse to move the scroll bars or zoom buttons or by
using the mouse wheel.
www.magix.com
Arranger 31
Grid
Timestretching in the arrangement is displayed by the vertical progress of the
tracks. To structure this progression, a timeline displaying time units has been
positioned at the top of the first track.
Two consecutive objects will seamlessly snap together even if they are on
different tracks. This avoids undesired gaps or overlaps.
The bar grid makes sure that the objects and the start, end & play markers
only snap into place at specific positions so that they can be positioned
precisely according to the beat.
,
The grid width can be set using the button to the top left.
If, for example, "1/2 beat" has been set, then the objects and markers snap
into position at all half beat positions when moved. This way there won't be
any gaps between the objects and precisely beat-matched cuts are possible.
The selection ranges from full beats to 1/16 grid sizes. Triplet values are also
possible.
The "Frame" setting allows fine positioning using the time code. The time
display in the timeline and transport control automatically changes from
bars:beats:ticks to hours:minutes:seconds:frames.
www.magix.com
"Objects" deactivates the beat grid and the grid will now only affect the object
edges. You can also deactivate the grind entirely by selecting "No grid" or by
pressing "F4".
"Select beat type" switches the timeline to irregular bars like ¾ beat.
Playback area, Start and end markers
In the upper area of the timeline, there are two markers between which
playback area is displayed, and this area can be played back as a loop
(endless).
The length of the playback area is shown in blue. The number before the point
indicates the number of bars, the number following it indicates the number of

32 Arranger
www.magix.com
fragments corresponding to the selected grid, e.g. 3.3 on a 1/16 grid = 3 bars
and 3/16. A tilde (~) in the display means that the playback area doesn’t have
the exact raster length and the loop is therefore "non-circular". Double clicking
on the playback area sets it to cover the whole arrangement; double clicking
again sets it between the start of the arrangement and the last object.
This area also determines which positions are copied or inserted into the
clipboard’s memory by the the edit menu commands "Edit range" or the
keyboard shortcuts "Ctrl + Alt + C" for "copy", "Ctrl + Alt + V" for "paste" or
"Ctrl + Alt + X" for "cut".
The right end marker is always moved together with the start marker so that
the length of the looped playback area remains constant as the start marker is
moved. So always move the start marker first and then the end marker.
The start and end markers can be moved in different ways with the mouse.
You can move them to any position via drag & drop or directly with a mouse
click: a left mouse click in the timeline moves the start marker; right clicking
moves the end marker.
It’s even easier with the keyboard: The cursor keys move the playback area
forward or backward by a whole playback area’s length. Press "Ctrl" as well to
move the playback area by a quarter of its length. "Shift" + cursor keys halves
or doubles the playback area’s length.
"Ctrl + Shift" +cursor keys enables you to lengthen or shorten the playback
area by a bar. Use this function as well to quickly move the playback area onto
a smooth bar length.
When you move the playback area while a playback is running, the old area is
always played to the end and smoothly changed into the new one after. In this
way you can remix your tracks in real-time with the keyboard!
Note: If the starting marker does not move to the right with a left click or via
the keyboard, it is because the end marker would then have to be shifted
beyond the end of the arrangement. In this case, move the start marker via
drag & drop or position the end marker!
Arranger 33
Moving the playback marker
The playback marker can be moved independent of the start marker. To do
this, click on the lower part of the timeline. If you hold "Ctrl", the playback
marker and start marker are moved simultaneously.
Once the playback marker reaches the end marker, playback is continued at
the position of the start marker. If the playback marker was positioned outside
of the playback range, the arrangement is played to the end. The selected play
area is then played as a loop.
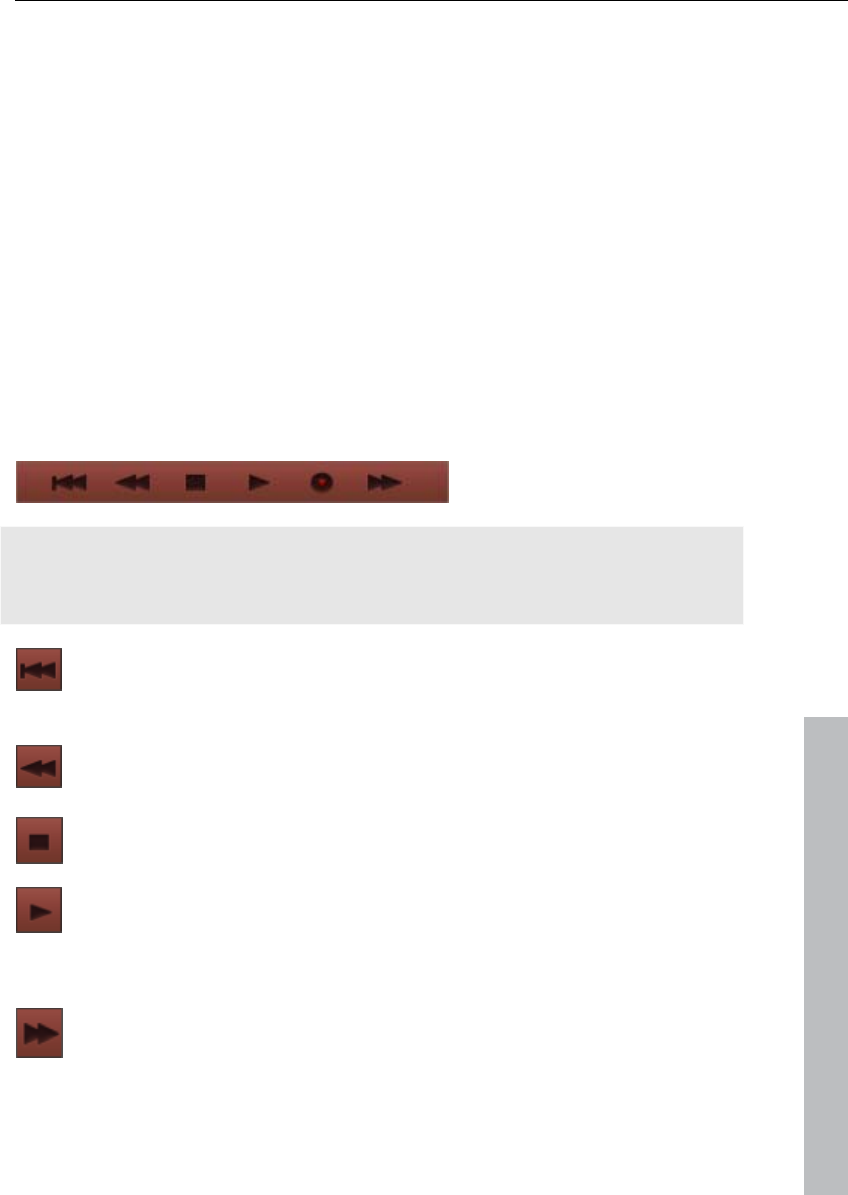
Transport Bar (playback functions)
With the playback functions of the transport bar you can control the playback
behavior of the arrangement using the mouse.
Tip: Using the space bar on your computer's keyboard you can start and stop
playback much more easily. An overview of all keyboard shortcuts is available
at the back of the manual.
www.magix.com
Back to start: With this button the start marker is quickly moved to
the beginning of the arrangement. Another click on "Back to start"
moves the start marker and the playback range to the beginning of
the arrangement.
Rewind: This function can be used to rewind to the start of the
arrangement. This means that the playback marker in the timeline is
reset.
Stop: The stop button stops playback. The playback marker returns
to the position from which it started.
Play/Pause: This button starts continuous playback of the
arrangement: If the playback marker reaches the end marker, the
range between the start and end marker will be played back as a
loop. Another click on Play stops it at the current position of the
playback marker (Pause).
Fast forward: This button quickly moves you forward in the
arrangement. This means that the start marker in the timeline is
moved forward.
34 Arranger
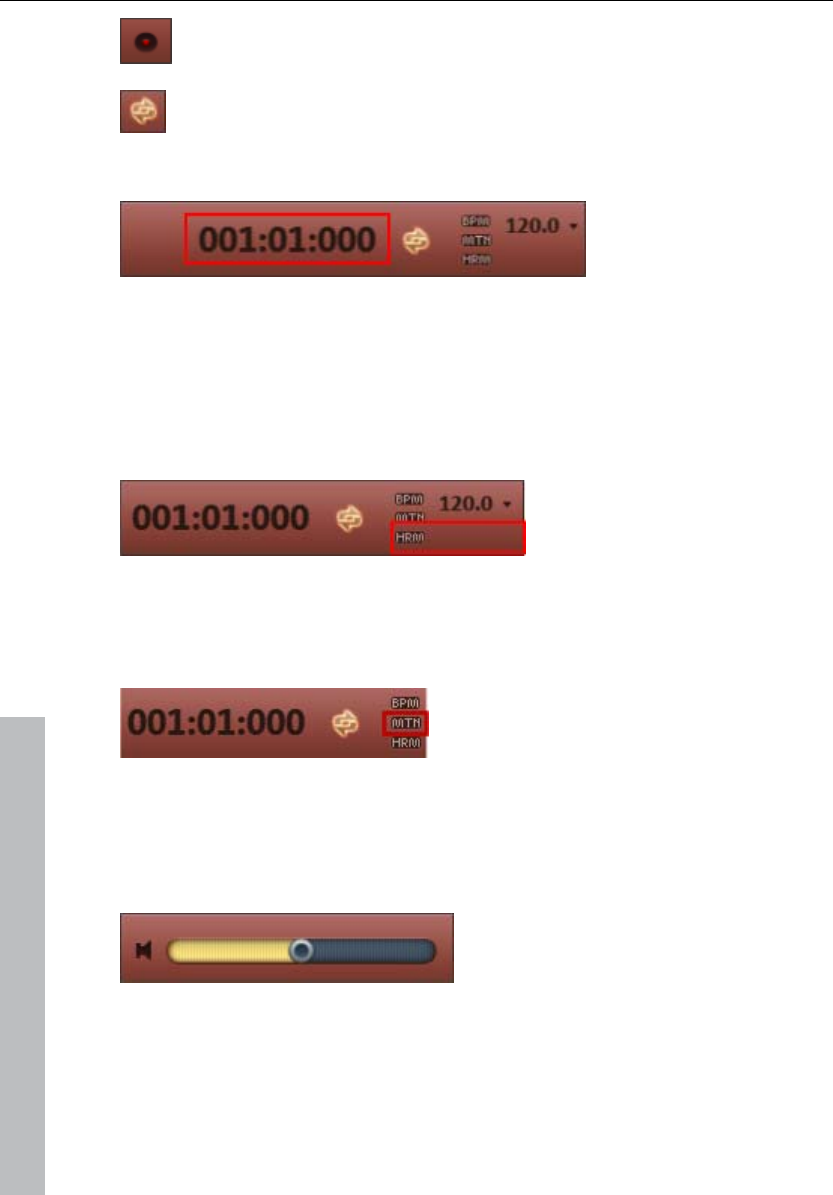
Record: You can create a recording with this button. Depending on
whether a track in the Trackbox has been activated, the audio
recording dialog (view page 54) will open.
Playing an endless loop (looped object) can be deactivated here.
Playback will always stop when the end marker is reached.
Time display
The time display is
beside the transport
controller.
The current playback position is displayed here. The unit can be switched
between beats, hours:minutes:seconds, or frames by right clicking on the time
format. Switching to remaining time display (distance to project end) is also
possible. Switching to the time remaining view (length of time until the
arrangement end) is possible.
Display harmonies
If this symbol is activated, harmony symbols will be displayed during playback.
Harmonies can be detected with the Harmony Agent (view page 67).
Metronome
If this icon is active, then a metronome (click) will play during playback and
recording. This provides helps you orient yourself with the arrangement tempo
while you make your own recordings.
Volume regulation
The volume control is to the left of the transport controller. With it, you can
quickly control the overall volume of your arrangement. To regulate the volume
of individual tracks, use the Mixer (view page 124).
www.magix.com
Arranger 35
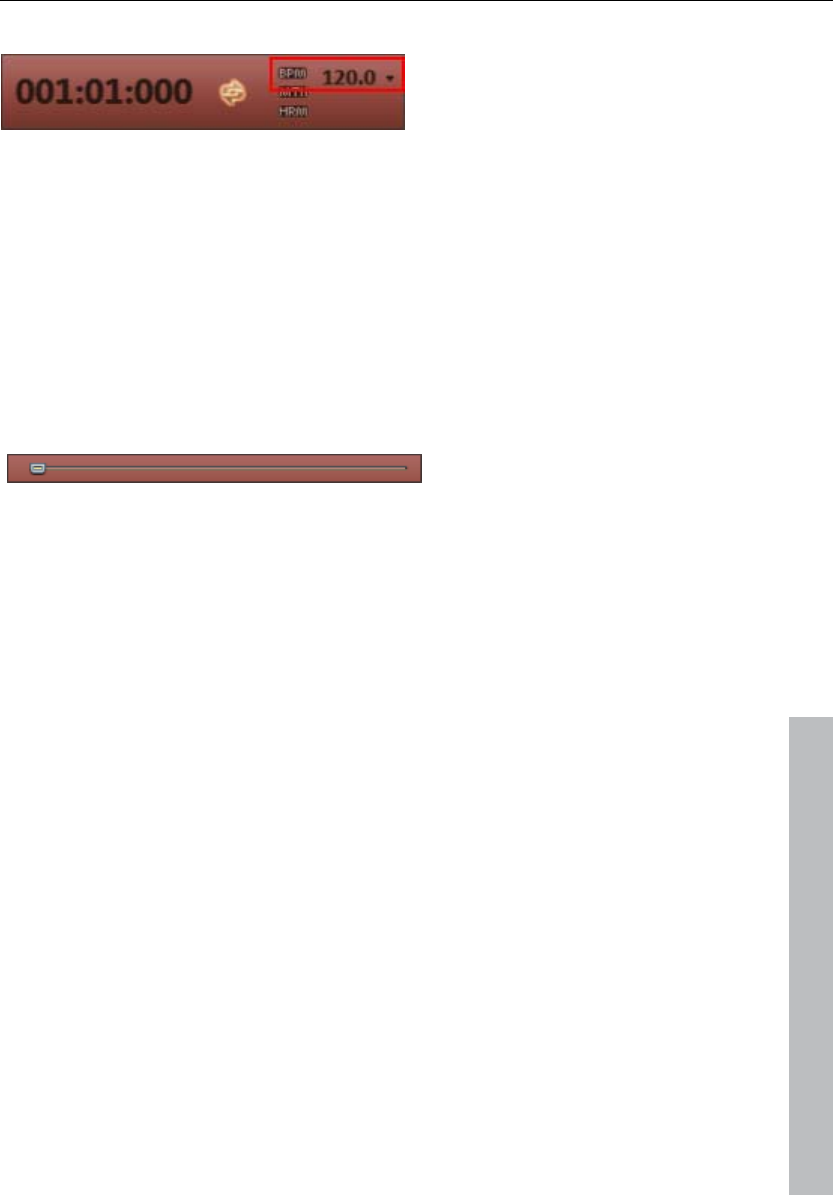
Tempo
Here, the song's beat is displayed in BPM (Beats per minute). The
arrangement tempo is set automatically by the first sample used in the
arrangement. One click on the small arrow shows the tempo fader. You can
use this to smoothly change the master tempo during playback. The objects in
the arrangement are adapted using timestretching.
By clicking on Tap you can open the Tap Tempo Dialog where you can "tap"
in the tempo. Simply click the tap button at your desired tempo or press the T
key, the tempo is measured and displayed in the dialog. Pressing OK accepts
the tempo.
Track position slider
With the position slider you can quickly move the play cursor within visible
range.
Arranger, Video Monitor, and Media Pool
If the video screen is re-opened and the Media Pool is closed, the video screen
can be freely repositioned.
www.magix.com
The "View" menu allows a standard setting to be switched on. If the option
"Standard layout" is deactivated, the entire screen can be filled by the arranger
in order to simplify positioning and editing objects.
In case of very large arrangements, the video monitor can be used as an
overview display ("Menu -> Video monitor -> Arrangement overview").
Arranger buttons
The arranger buttons for quickly opening and closing all the most important
windows can be found underneath the last track in the arranger.
36 Video Monitor
Mixer
Opens the mixer, where tracks may be mixed in regard to volume and
position in stereo panorama and effects may be added.
Effects plug-ins can also be used.
Video
Opens/Closes the Video Monitor in peakmeter mode.
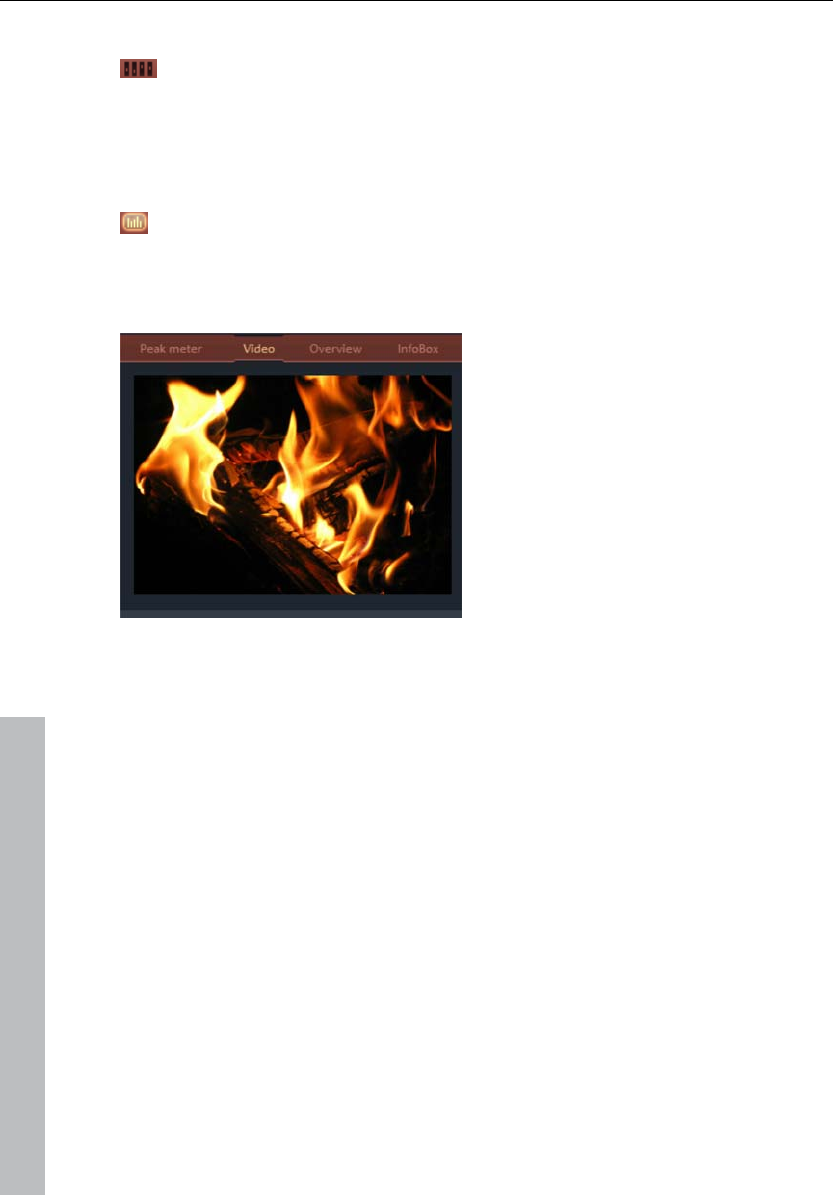
Video Monitor
Both video monitors can even be
positioned freely on the screen and
adjusted for size. Click the screen with
the right mouse button and selecting
the desired size from the context
menu – either from the presets
submenu or individually (“user
defined”). Please note that larger video
monitors require more computing
power.
To detach the video monitor from the Arranger and the Media Pool, deactivate
the standard layout in the menu window. It can then be positioned on the
screen as you wish.
The video monitor's size can be increased to the full size of the screen by
double-clicking on the video monitor or by pressing Alt-Enter. You can leave
the maximized mode by pressing Escape (Esc).
Apart from the video monitor size, you can also add a large time display on the
video monitor. Select “display play time” in the context menu and the current
play cursor position is displayed on the video monitor. Foreground color,
background color and transparency are selectable
www.magix.com

Video Monitor 37
www.magix.com
Arrangement overview
In the Overview mode, you can view the whole arrangement and you are also
able to access any object you want in a split second; zoom in directly to the
video monitor or move around the clip displayed in the arranger.
Shortcut: Alt + Shift + U
InfoBox
The InfoBox mode shows help text in the preview monitor if you hold the
mouse pointer over a button on the screen.
Audio peakmeter
The video monitor is transformed into an analyzer which displays the sound as
a graphic.

38 Media Pool
www.magix.com
Media Pool
MAGIX Music Maker Rock Edition 4's Media Pool lets you access, preview,
and load all supported media types, online and offline, e.g. with included
sound and video loops, audio CDs, MP3 songs, synthesizers, or effects.
All media types are loaded into an arrangement from local drives or directly
from the Internet via double-click or drag & drop.
The upper edge of the Media Pool contains seven buttons which operate the
Media pool in different ways:
The setting Soundpools offers a database view of all Soundpools.
The File manager is very similar to Windows Explorer. It controls and loads
media files of all types onto the hard drive.
The Synthesizer setting displays a list of the available synthesizers.
Under Templates you can find the effect settings for all types of audio, video
and title effects.
Preview function
There is a preview function for all files: By simply clicking an audio object, the
pre-listening function starts via the sound card. Video, graphics and text
objects are shown on the video screen.
As the arrangement plays on, you can experiment with sounds from the Media
Pool (see Smart Preview (view page 51)).
Note: Even while previewing, audio files are adapted to the current tempo
using timestretching (you can deactivate this in the "Audio/Video options"
menu).
Soundpool settings
This setting can be used to access Soundpool media. Access to the supplied
Soundpools is via a new, more clearly laid out database overview that enables
the display of loops, multiple styles and instrument categories, e.g. all bass
loops of every installed style or every loop of a style.
If you did not install the Soundpools on your hard drive during installation, then
insert the MAGIX Music Maker Rock Edition 4 installation DVD into the DVD
drive. The contents of the Soundpools will now be imported into the database.
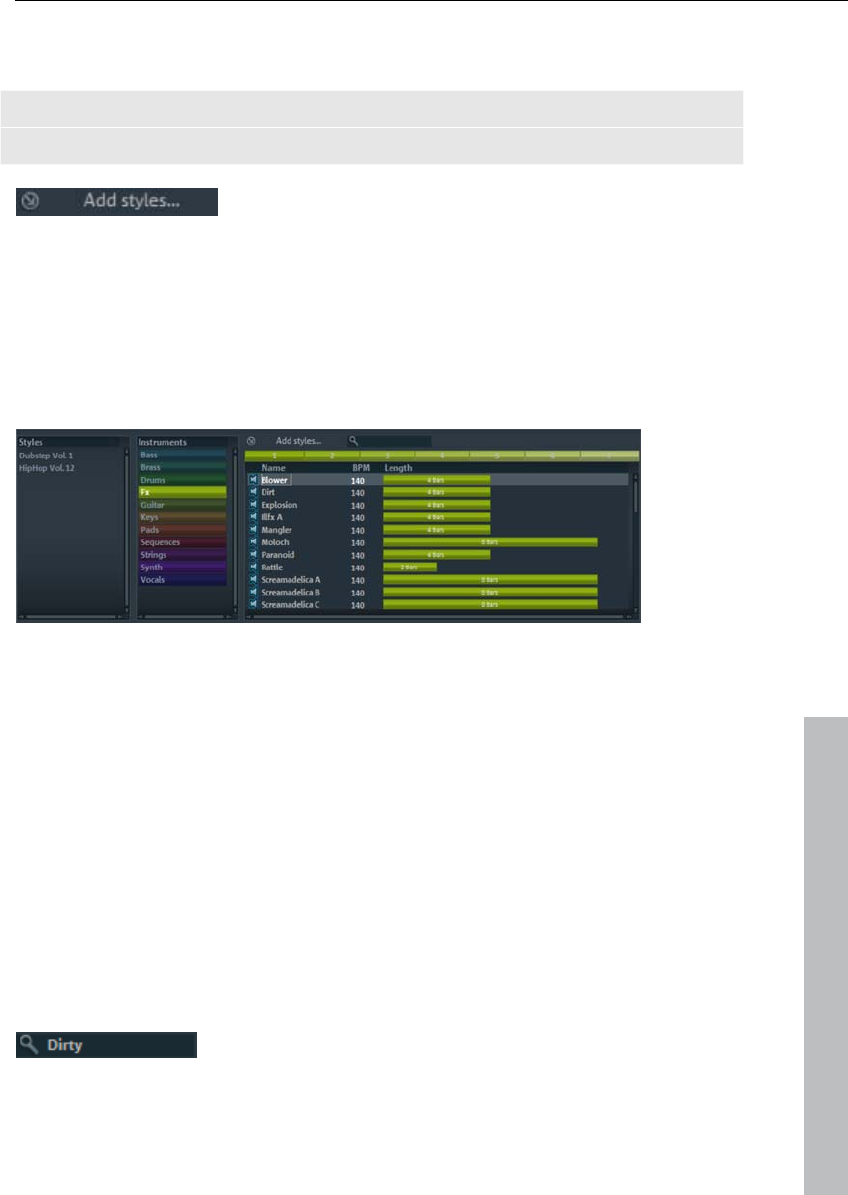
Media Pool 39
Other Soundpool media are automatically recognized and added to the
database.
Note: Under program settings -> General (view page 143), you will find
different options for maintaining and displaying the Soundpool database.
Soundpools already present on the hard disk can be
imported via "Add styles" into the database.
A Soundpool consists of one or more Styles. Styles are sound libraries that
belong together and cover a certain musical style. The samples of one style all
have a certain tempo. You can mix loops from different styles, and the tempos
will be adjusted accordingly. Within a style, loops are ordered according to
instruments, and one instrument folder contains different sounds. Each sound
can have a different pitch (except for drums and effects sounds).
www.magix.com
The Soundpool display consists of several columns: First, all styles available in
the database are shown. The second column lists the instruments. The third
column, "Name", contains the list of the sounds found. These are displayed
according to the length of the beats (1,2, or 4 beats).
The different pitches are displayed above that (if available). An entry field for full
text search is located under the match list.
The list of samples found is created based on the entry selection in the first
two columns. With "Ctrl + click" you can reduce or expand selection. No
selection ("Ctrl + click" on a single selected element) shows all entries from this
category.
If you select an instrument, e.g. "Drums" and "Percussion" and no style, then
all drums and percussion samples in the whole database will be displayed.
In the search field, you can search the list of the sounds
found for a certain sound file name.
40 Media Pool
File manager settings
MAGIX Music Maker Rock Edition 4's file manager works very similarly to
Windows Explorer. It can be used to access and load media files of all kinds,
e.g. videos, bitmaps, MP3 audio files, audio CD tracks, RTF text files for titles.
The Media Pool consists of a file list to the right (the actual “Media Pool”), in
which all loadable media types (and, if required, further subfolders) are listed,
and the navigation area on the left-hand side.
In the file list, all supported multimedia files and subdirectories of the currently
chosen directory are displayed. All entries can be loaded into the arranger
tracks by double clicking or via drag & drop.
In the navigation area, you can find different buttons for directly accessing
preset subfolders.
You can right click in the file list to define further buttons ("links"). Switch to the
folder which you would like to create a link to and select the option "Link to
folder" from the context menu.
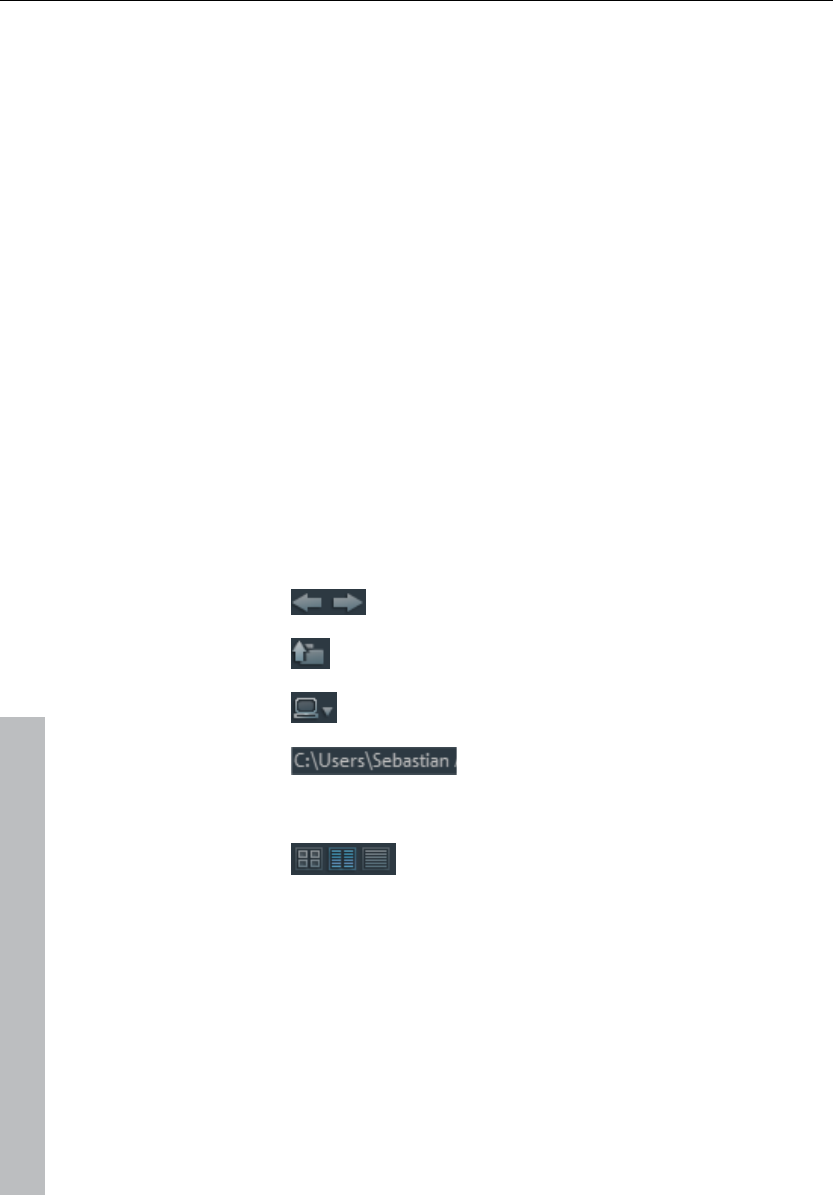
Navigation buttons
Change Play
Direction The "Back" button always returns you to
the folder where you were previously.
Parent The "Up" button brings you to the next
highest folder level.
Drive menu You can access all available drives via
the drive menu button.
Browse history
list and path
details
The path information for the current
folder is displayed in the center above.
Use the arrow button to open the menu
to find the folders you previously visited.
View These buttons switch the file view list
between icons, lists, or details.
Various file list view modes
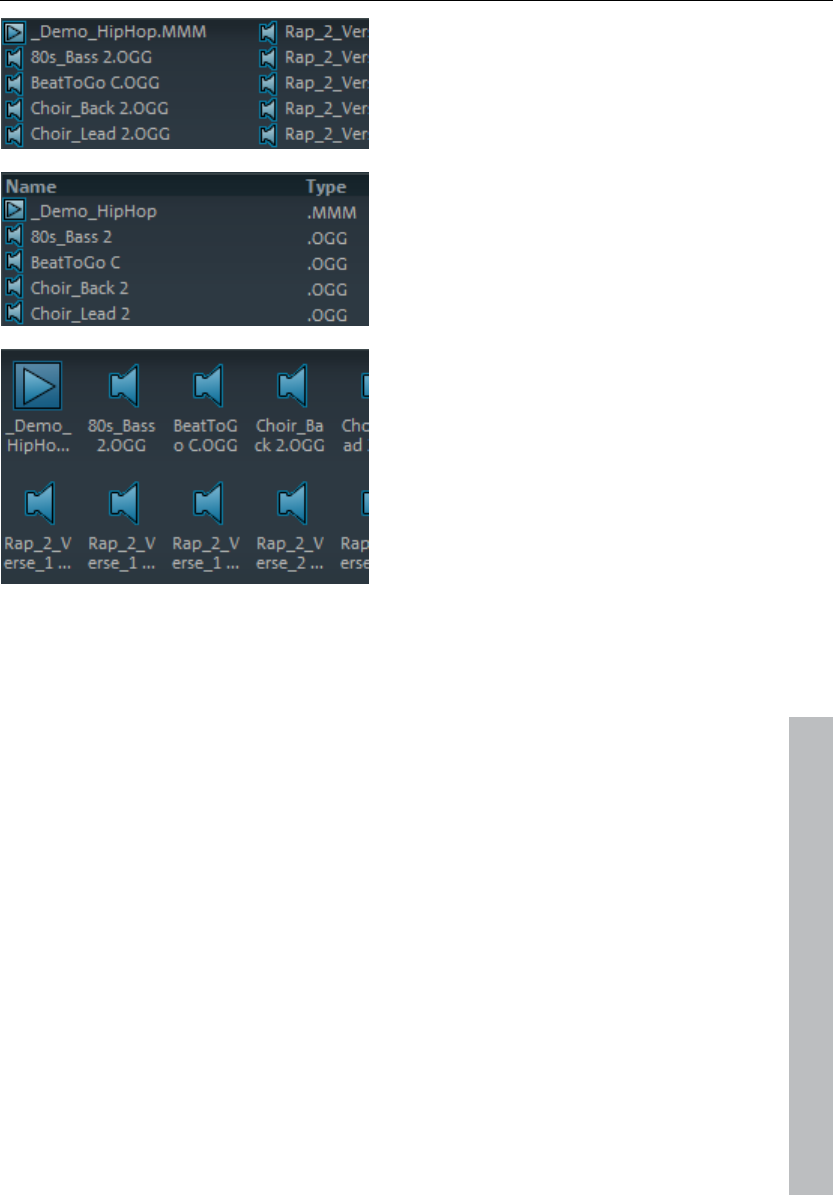
The file list displays all supported multimedia files and subfolders of the
currently selected folder. Three different views (list, detail, large symbols) can
be set by right clicking on the options or Media Pool's context menu.
www.magix.com
Media Pool 41
List: Only file names are listed. This
view mode displays the most files
simultaneously.
Details: The details section
displays the type, size, and date of
modification for every media file
beside the name. The list can be
sorted by clicking on any of these
details.
Large symbols: These can be quite
useful, since they show a preview
frame for each movie and picture
file. This allows you to sort through
the material quicker. The
disadvantage is that it takes longer
for the file list to be displayed.
Deleting, copying, and moving files
www.magix.com
All files listed in the media window can be selected, deleted, or moved into
other folders via drag & drop, just like via Windows Explorer. This way, all
objects desired for placement in an arrangement can be collected in a
separate folder beforehand.
Additional functions can be accessed via the context menu, i.e. by right
clicking an entry.
CD/DVD
Clicking this button once reads the CD that is currently in the CD-ROM drive.
In the case of data CDs, all directory and file formats supported by MAGIX
Music Maker Rock Edition 4 are displayed in the file manager. In the case of
audio CDs, all tracks appear in the file list.
My Projects
This button opens the "My Projects" folder. This is a subfolder of "My Projects"
that is named after the program (i.e. MAGIX Music Maker Rock Edition 4, only
featuring "_" instead of empty spaces). This is created automatically when the

42 Media Pool
program is installed. All new recordings and arrangements are saved here
automatically as a preset, and finished arrangements are exported here. You
may change the save location as you see fit via Program settings > Folders
(view page 143, view page 142).
My Files: This displays the contents of the "My Files" folder. This is normally
the save location of videos, pictures, music, etc. (in the corresponding
subfolders).
My MP3s
This provides quick access to your own MP3 collection. When this button is
pressed for the first time, you can select the folder where your MP3 files are
saved. You may also change this path later via "Program settings", the "Folder"
tab (Y key or "File" menu > "Settings" > "Program settings").
Database
This button displays the media files on your computer in a well-
structured database view.
This means the files are no longer displayed according to where they are
stored in the different folders but are grouped according to general
characteristics. The top "folder level" is the difference in audio, video or image
files; subfolders would be, for instance, the date for photos or the artist for
MP3 files.
In order to present media data on your PC in a database view, you first have to
add them to the MAGIX database. To do this, click on the database button to
the right and select the option Start media manager for photos and music.
This opens the corresponding MAGIX program and the database scan function
of the program.
MAGIX Music Maker Rock Edition 4 comes with the free photo and music
management programs MAGIX Photo Manager and MAGIX Music Manager. If
you have the corresponding free versions, MAGIX MP3 Maker or MAGIX Digital
Photo Maker, they will be used instead.
By right clicking on "Database" and clicking on "Database search", you can
open a special search dialog in which you can carry out a targeted search for
media.
Search the database
Quick search: Simply enter a keyword and highlight the data type (photo,
audio, video). All available Database columns are searched for the keyword.
www.magix.com

Media Pool 43
www.magix.com
Expert search: Here you can restrict your search by stating search criteria in
the following way:
Database column Condition Comparison item
e.g. dimensions greater than 800
You can search up to three database columns that are connected via "and" or
"or" simultaneously.
"AND" means only those files will be listed that match all criteria.
"OR" means only those files will be listed that match at least one of the criteria.
Synthesizer
This button opens the folder containing your synthesizers. Read more on this in
the Software synthesizers chapter.
Settings templates
The folders for installed effects presets will be opened. Even saved audio and
video effects presets as well as title templates land in these folders, so that
over time, a complete library of your own presets will accumulate. Folder for
audio effects ("Audio FX"), presets for the Vintage Effect Suite ("Vintage FX"),
video effects ("Video FX", "Video Mix FX"), automatic animations ("Visuals"),
and title templates ("Title") can be opened using the buttons to the left.
You can also add effects by drag & drop. They can simply be dragged onto the
corresponding object using the mouse.
You can also precisely set up audio effects in the effect rack (view page 90)
using the context menu.
Setting Catooh
You can preview multimedia files from the Online Content Library Catooh, load
them into the arrangement, and edit them further .
Please read the chapter entitled Catooh (view page 166)!

44 Arranging Objects
www.magix.com
Arranging Objects
In MAGIX Music Maker Rock Edition 4 you can jointly and uniformly load,
arrange, edit, and export different multimedia file formats. This chapter
describes the basic way of working with multimedia objects. This includes
audio objects, video objects, graphics, midi objects, and synth objects. Later
chapters will describe the particulars of the respective formats.
All object editing is virtual, non-destructive, and is calculated in real time during
play. The multimedia material is thus not destroyed (non-destructive editing)
and any change can be cancelled with the multi-stage undo function ("Ctrl +
Z"). You can experiment to your heart’s content without having to fear that you
will change or damage the original material.
Loading and saving arrangements
"Arrangement" refers to the objects found in the arranger (Audio, Video, MIDI,
songs, graphics, synthesizers) along with all its positions, fades, length,
volume, brightness settings and effects.
Arrangements can be saved via the menu "File"as an MMM file and loaded
again.
When loading arrangements you must ensure that all the used objects are
available in their respective folders. Often is it advisable to "Save Arrangement
and Used Media" from the menu "File" > "Backup". Then the entire
arrangement with all objects and effects are saved to a configurable folder on
the hard disk and can be easily downloaded from there.
Multimedia files and objects
All multimedia files supported by MAGIX Music Maker Rock Edition 4 can be
previewed or listened to in the File Manager by clicking and dragging into the
arranger via drag & drop. The files are displayed as objects in the tracks after
the mouse is released.
Using the "Tab" button, you can switch between two object display views.
In alternative display modes, the objects are not represented frame by frame,
but simplified. This is useful for quicker representations of video objects: RAM
is saved and the overall performance improved. Audio objects will be shown
using one or two (for stereo) waveform representations.

Arranging Objects 45
www.magix.com
Right clicking on an object opens the context menu with the most important
editing options available for that specific object.
Select objects
To edit or delete objects using the menus, you must first select them. To do
so, simply click on the object you wish to select. When the "Shift" key is
pressed, multiple objects are selected. Object modifications like cutting,
moving, effects assignment and so on, apply to all selected objects together.
The handles of selected objects light up to show that the accompanying object
has been selected and can be edited using the menu functions.
Several objects can be selected quickly by clicking on the first object in the first
track with the mouse and dragging out a square for selection. All objects
entirely or partially within the square will be selected (rubberband selection).
Mute objects
Each object can be muted individually. To do so, select the objects you wish to
mute and press "F6" (or use the corresponding command from the context
menu).
Build or split object groups
Several objects can be combined to make up a group, to avoid the objects
being unintentionally moved out of relation to each other.
Once they are combined, clicking on one object of a group will select the entire
group.
To group or separate groups, use the buttons in the toolbar or the
corresponding commands in the "edit" menu.
Splitting objects
All objects can be split. Each object section that is created is then split into
individual objects. To do so, you can select the object you wish to cut, move
the playback marker to the position where you wish to cut and select the
option "Split objects" from the "Edit" menu, or press the "T" key.

46 Arranging Objects
www.magix.com
In order to rejoin these split objects at a later stage, simply highlight the
individual parts and select the command "group" to join the selected objects
together into one group.
Exact object positioning
It is often necessary to position objects very exactly in order to maintain the
beat or avoid creating clicking during transitions or small pauses between
objects.
In MAGIX Music Maker Rock Edition 4 every object is snapped to the edges of
other objects, resulting in cleaner transitions. In addition, objects are placed on
defined positions on the grid of the arranger track. You can read more about
the grid in the arranger chapter "Grid (view page 31)".
Duplicate objects
Objects can be duplicated very easily in order to create larger arrangements.
First, the objects that need to be duplicated must be selected.
Then select the command "Edit menu -> Duplicate objects"
A copy of the object appears right beside the original which can be moved to
any position with the mouse.
It’s even faster if you click on the object that has to be copied and hold down
"Ctrl" at the same time. An object is then created which can be dragged to the
desired position. Furthermore, object copies require virtually no additional
memory!
Another way to duplicate is by using the copy/edit commands from the "Edit"
menu.
Arranging Objects 47
Object handles
With the help of the object handles, fine positioning, volume and brightness
settings, fading in and fading out as well as loops can be carried out directly in
the arranger.
All editing is carried out in real time and is already calculated during playing.
The multimedia material is not destroyed in the process (non-destructive
editing); any change can be cancelled with the multi-stage undo function ("Ctrl
+ Z").
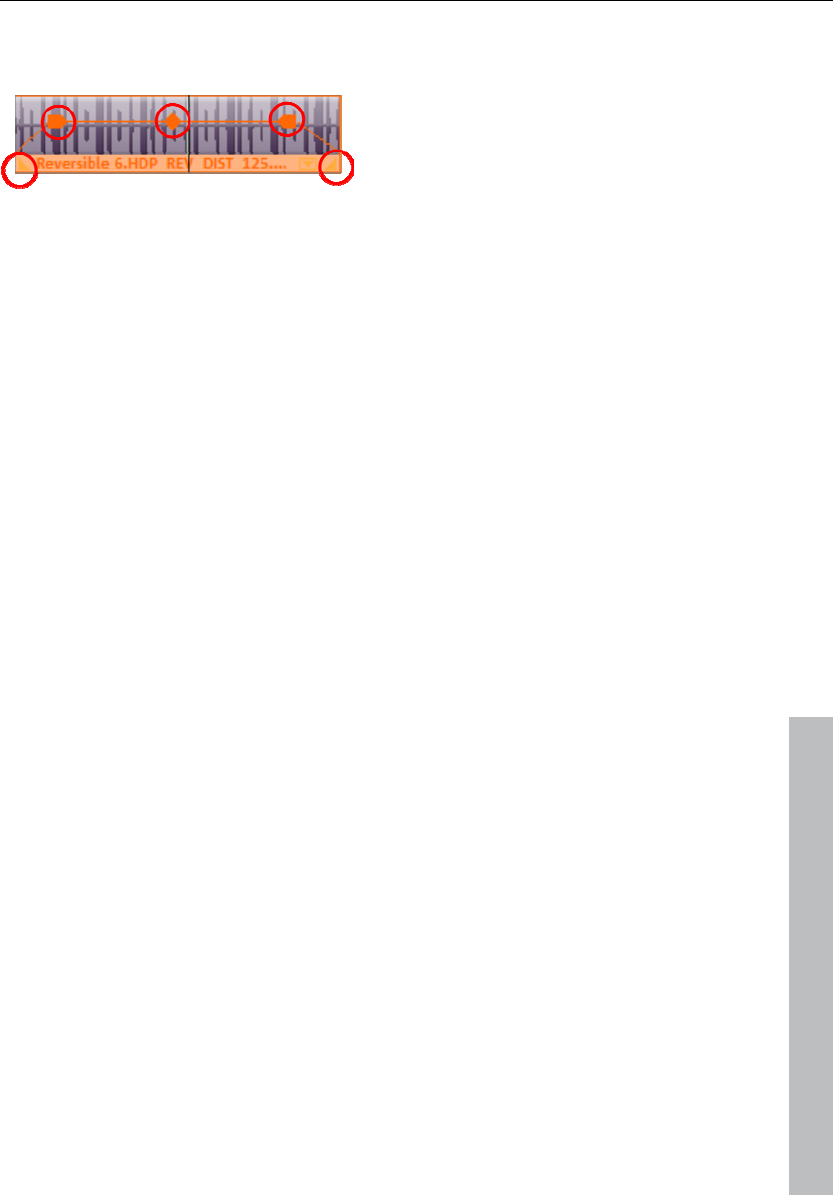
Object fades
Use the handles on the top left and right to fade an object in or out. By fading
objects in and out onto different tracks, it is possible to produce crossfades
between different objects. The length of the crossfading can be directly
regulated with the handles.
Shortening or looping objects
www.magix.com
Objects are "cut" virtually by "compressing" them with the mouse. "Pulling"
them to the right will stretch them, which results in the object being played as
a loop until the play cursor reaches the end of the object representation. In this
way it is possible to very quickly create an entire drum track from one single
drum loop or to create a long video from a short video sequence.
Guide the mouse to one of the bottom corners of the object until the mouse
pointer turns into a stretch symbol. Now you can stretch or compress the
object until it has reached the desired length.
Normally an object is always looped over the full length of the underlying data
material (audio or video file). To set a clip from a file as a loop, shorten the
object at the front and the back with the handles and choose the command
"Edit menu -> Insert user-defined loop". This function is very useful for setting
your own recording as a loop, as the silence at the beginning of a recording
can be cut away.

48 Arranging Objects
www.magix.com
Adjusting volume/brightness
With the volume/brightness handle in the top center of the object, you can
change the volume of audio and MIDI objects or adjust the brightness of video
and bitmap objects.
If several objects are played in parallel, it is possible to individually adjust the
volume or brightness ratios between objects in this manner.
The volume and brightness ratios between tracks are adjusted in the mixer.
Takes
Every object can be saves as a "Take". Takes save all editing done on an
object, like object length, fade settings and all object effects.
Takes are saved as "TAK" (*.tak) files and take up virtually no space on the
hard disk. Thus, you can cut a sample, add various effects to it and save it as
various takes in order to use these together with all their editing in other MAGIX
Music Maker Rock Edition 4 arrangements.
The original sample will not be changed, only object and effect settings will be
saved.
You can also save Synth Objects as takes, thereby creating own preset
libraries for the synthesizer.
Warning! On loading the takes, the audio or video file, for which the take was
added, must be in the original folder.
Mixdown tracks
If the arranger becomes too full to manage, the system is out of RAM, or you
just want to ”summarize” your production, use the mix down function to
convert the entire audio arrangement into a single audio and/or video file.
To do so, choose the "Mixdown" function from the "Edit" menu. You can
choose a name and a destination for storing the mix down object. The default
directory is ”My Projects”. If only audio objects are in the tracks, a wave file will
be created. If audio and video objects are combined, you can choose whether
an audio or a video file will be created.
Arranging Objects 49
The objects of the arranger or the area will be replaced by the new object.
MAGIX Music Maker Rock Edition 4 automatically normalizes the audio file, i.e.
the loudest part of the wave audio object is identical with the highest figure of
the 16-bit resolution ceiling. This guarantees the same sound quality, even if
you repeat the mix down procedure or you combine the mix down file with
other wave audio objects again and again.
Tip: The mix down function is very helpful if you want to go on using the mix
down object. To create the finished end version of the song or video it is
recommended to select the "Export arrangement" function in the "File" menu
instead of the "Mixdown" function.
Mouse gestures
Sometimes, specific menu commands that are located deep in the MAGIX
Music Maker Rock Edition 4's menu structure may be needed multiple times in
sequence, e.g. if you want to edit effects for multiple objects.
Mouse gestures help you access these menu commands quickly without
having to dig them out of the menu structure every time.
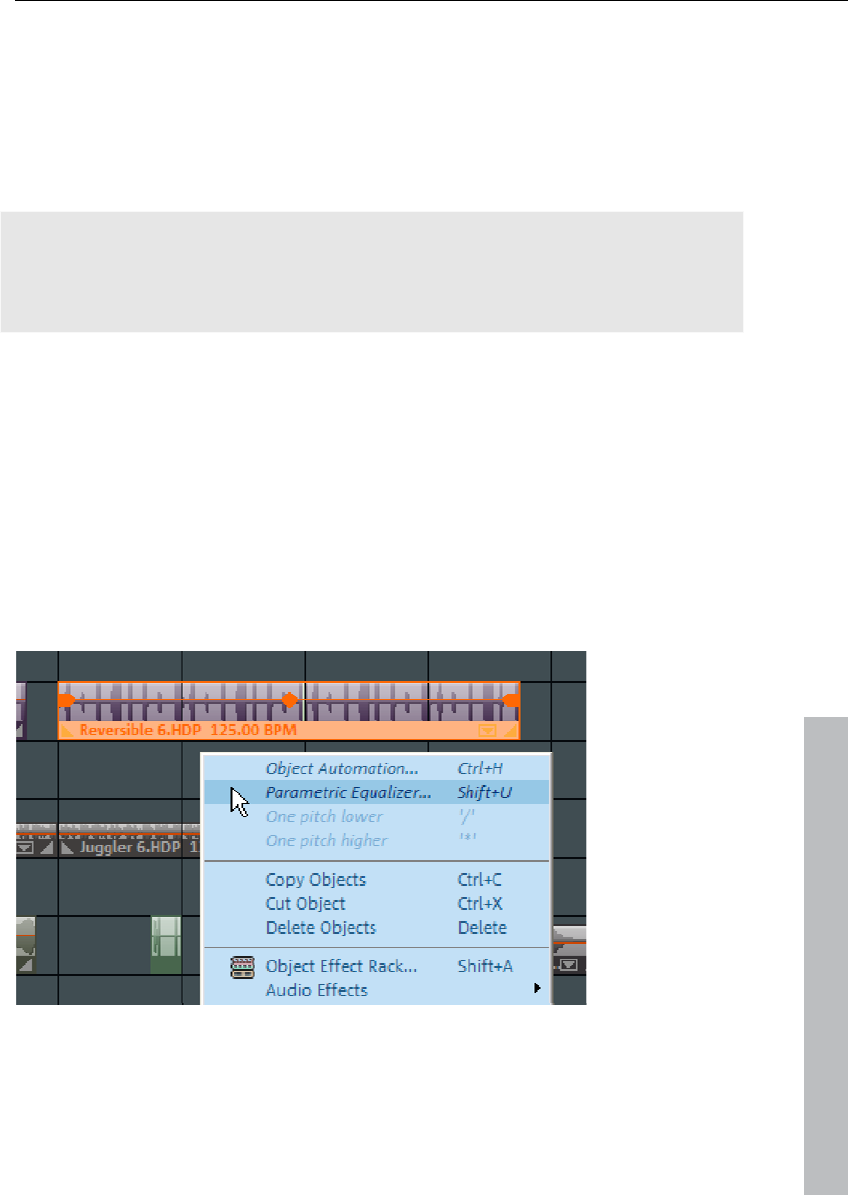
Every object in features a context menu that may be opened by right clicking.
www.magix.com
The upper section of this context menu always features the most recently used
commands for this object type. These four commands may also be opened
having to open the main menu.
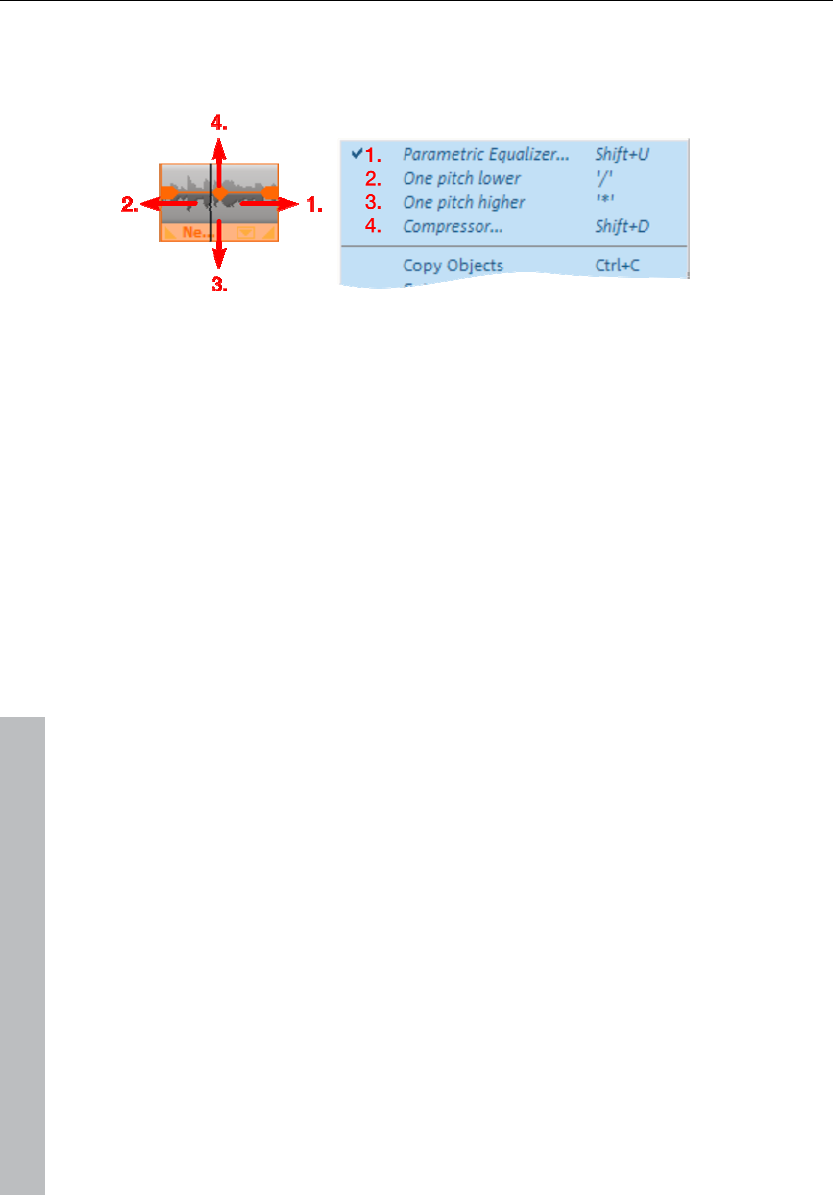
50 Arranging Objects
To do this, right click on the object and drag the object quickly to the right, to
the left, or upwards in order to access one of the four commands (the object
will not be moved as long as you use the right mouse button!)
The commands display in the menu here are only examples. All commands
that are available in a context menu's submenus may be accessed via Mouse
gestures
www.magix.com

Audio Objects 51
www.magix.com
Audio Objects
Audio formats
MAGIX Music Maker Rock Edition 4 loads and edits audio files in the formats
Wave (.wav), OGG Vorbis (.ogg), Windows Media Audio (.wma), MPEG (.mpg),
MP3 (.mp3), and CDA (audio CD tracks). The stereo or mono data of a file are
displayed as an object in the arranger of the MAGIX Music Maker Rock Edition
4. The material will be displayed as a waveform, optically representing the
sound to make editing easier.
Along with wave files, MP3 files, OGG Vorbis (.ogg), and ringtones can also be
exported.
Load and process audio files
All importable audio files can be accessed via the File Manager and previewed
(audio) by clicking the file name. Tracks from audio CDs can also be integrated
by dragging & dropping them into the arrangement.
Editing, fine positioning, volume adjustment, fading in and out, is all processed
using the "Object" tab directly in the arranger.
Please see the chapter "Arranging objects"
Smart Preview for the incorporated samples
The incorporated samples can be listened to while the arrangement is playing.
They always run synchronized to the current song that is playing.
You can load samples while putting together a song in real time and search for
appropriate new "building blocks" simultaneously.
You can add the loop to the arrangement by simply clicking with the mouse or
pressing "Enter" or remove it by pressing "Del". The subsequent loop can also
be selected quickly by pressing a key (arrow down) or you can switch to the
next instrument ("1"..."0") or the next bar ("Num +"), or by clicking on the
button.
52 Audio Objects
Change pitch/octave using the keyboard
You can quickly alter the octave of an included sample without having to
access the corresponding Soundpool folder in the Media Pool.
The "*" and "÷" keys on the numeric keypad (right on the keyboard) place the
sample one level higher or lower.
The "+" and "-" keys on the numeric keypad change the pitch via pitchshifting;
the respective effect in the audio effects rack is utilized for this.
Audio recording
Your own sounds like vocals, speech, noises, or instruments can be easily
recorded in MAGIX Music Maker Rock Edition 4 using the audio recording
function.
Click the REC button in the track box to specify the track for the
recording.
The display in the track box will change
Assuming you have everything connected properly (see below), the input signal
will be played back featuring all track effects (if there are any) (live monitoring
(view page 127)).
Live monitoring requires the use of ASIO drivers.
Click the red button on the transport bar to start the actual recording.
Connecting the source for recording
First of all, the source of the audio material must be connected to the sound
card input. Again, there are several possibilities which primarily depend on the
type of equipment you have.
If you are recording from a microphone, then please connect the microphone
to the microphone jack on your sound card (usually red).
www.magix.com

Audio Objects 53
www.magix.com
If you want to record material from a stereo system, then you can use the line-
out or AUX out jacks on the back of your amplifier or tape deck. This involves
connecting them to the sound card input (usually red).
If your amplifier has no separate output (other than for the speakers), then you
can use the connection intended for headphones for your recordings. In most
cases, you will need a cable with two mini-stereo jacks. This type of
connection has the advantage of being able to set the headphone input signal
level with a separate volume. As headphone connections generally are not the
best, it is advised that you use the line outputs if possible.
When recording cassettes from a tape deck, you can connect the tape deck's
line out directly to the sound card input.
When recording from vinyl records, you should not connect the record player's
output directly with the sound card because the phono signal needs to be pre-
amplified. A more suitable method would be to use the headphone connection
or an external pre-amp.
Adjusting the Signal Level
Adjusting the signal level to the sound card is also recommended to get the
best sound quality during digital recording.
Once a recording source is connected to the sound card, the "Record" button
opens the recording dialog and starts the recording source.
You can now adjust the recording level with the help of the LED display in the
recording dialog. For this, you must first check off "Show Levels".
If the adjustment is set too high, distortion occurs and the incoming signal
must be reduced. If you have connected the source through either an amplifier
or tape deck output to the sound card, you can only reduce the signal level in
your sound card’s software mixer interface. You can access the mixer directly
from within the recording dialog via the “Recording Level” button.
If you reduce input sensitivity by using the input fader, the resolution at which
the analog signal is digitized is also reduced. Try to set these automatic
controllers to the loudest sound level possible.
The maximum setting for an optimal level is the loudest part of the material.
The loudest part should be adjusted to be the maximum. The actual recording
begins when you press the "Record" button. At the end of the the recording
you will be asked if you want to use the recording. Upon confirmation, the
newly-recorded material will be placed at the next free position of the start
maker in the arrangement.
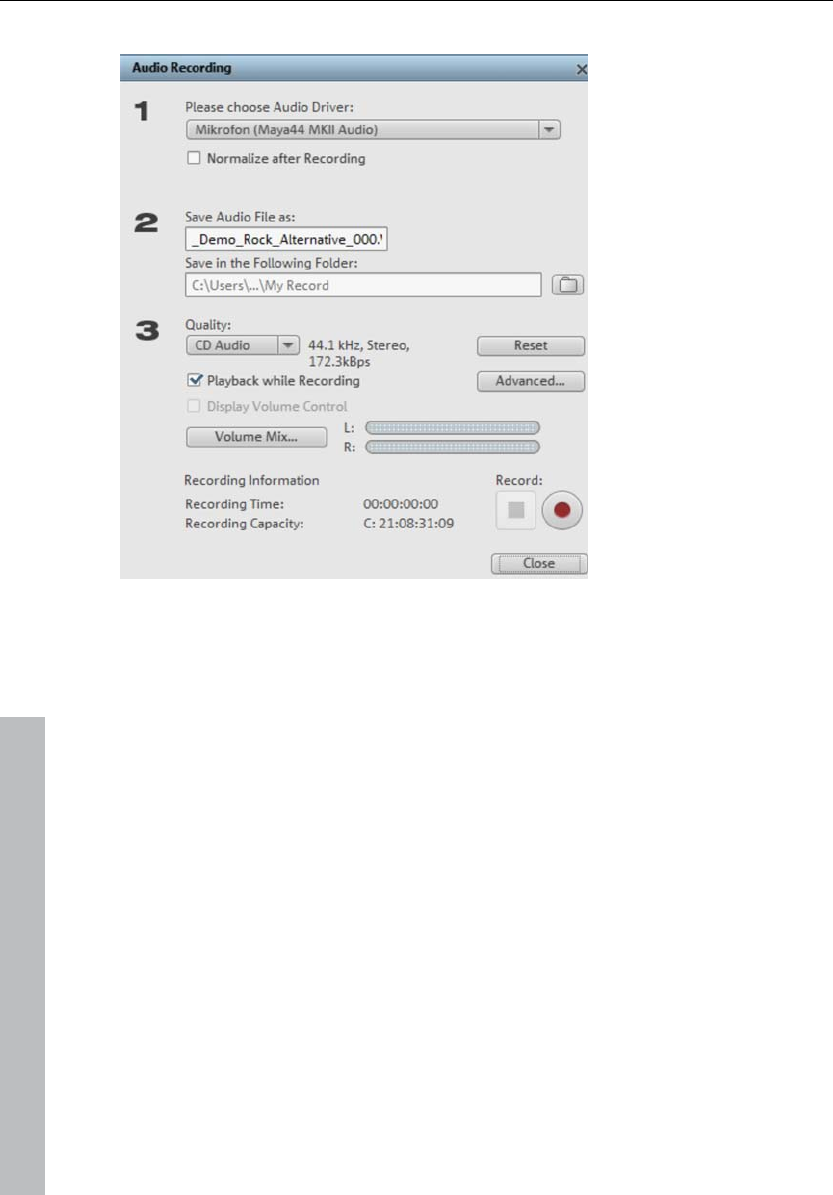
54 Audio Objects
Audio recording dialog
Normalize after recording: This option raises your material to the correct
volume level after recording is completed. In order to achieve good audio
results, you should try to record the source as loud as possible without
overmodulating it. The Peak Meter display helps in the recording dialog.
Audio driver: This selects the sound card for recording.
Save audio file as/save in the following folder: This select the title of the audio
file you wish to record. You can also select the folder where you wish to store
the file.
Recording quality: Sets the sound quality of the recording. The preset menu
allows you to choose between AM tuner, FM Radio, DAT (Digital Audio Tape),
and CD quality.
Display volume control (monitor): The peak meter allows you to monitor the
level of the incoming signal. Please read more on this in the section 'Adjusting
levels (view page 53)'.
Record: This button begins recording. The next free track will be used for
recording the audio material.
www.magix.com

Audio Objects 55
www.magix.com
Stop: Click this button to stop recording
Play during recording: If this option is active, then the arrangement will play
back during recording. This allows you to add recordings to the existing
arrangement.
Advanced: Use this button to open a window containing a selection of three
special functions.
Advanced options
"Mono" creates a mono recording and requires half of the hard drive space
required for stereo.
"Real-time sample rate adjustment" automatically matches the sample rate of
a new file to be recorded with the sample rate of the selected movie sound
track.
"Ducking" (reducing the sound volume): To add narration or other sound
material to a video that already has sound volume levels set, activate the
option "Automatic reduction of sound volume of remaining audio tracks". This
automatically reduces the volume of audio objects in the arranger during the
recording session ("ducking"). A volume curve controls the whole process,
produces the fading in and out of effects automatically and guarantees
consistent overall volume.
Import audio CD
The steps are similar to transferring Wave files into an arrangement:
Insert an audio CD into the CD/DVD drive of the PC
Go to your CD/DVD drive in the Media Pool. The individual CD titles appear in
the file list.
A simple mouse-click starts the playback of the CD title for sampling purposes
Drag & Drop the CD title into a track of the current arrangement, and it will be
digitally scanned and copied to the hard-drive. The files will be saved in the
import folder (may be specified under File > Settings > Program > Folder).
The audio object appears in the track and can be played back or edited
immediately.
CD Manager
This option opens the CD manager to select tracks from audio CDs and
partially or fully import them into the arrangement. You can also select and
configure the used drive if you have more than one drive.
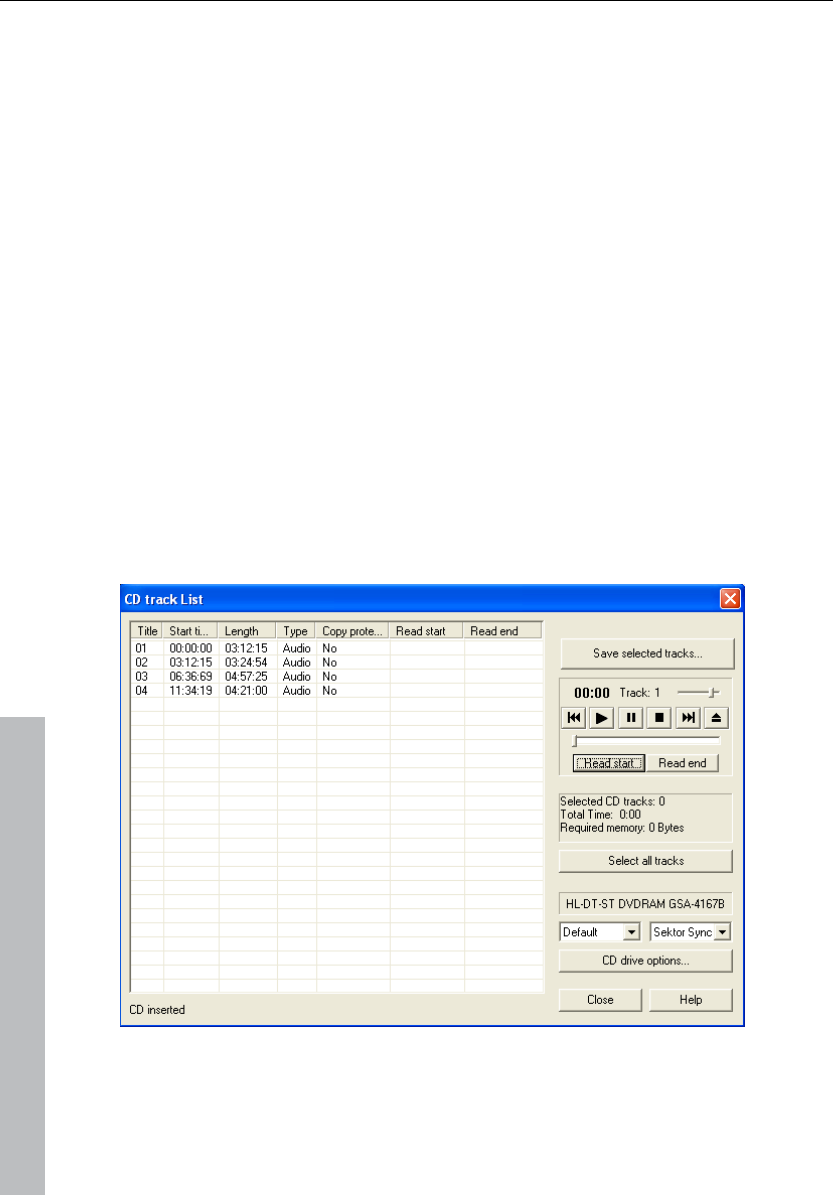
56 Audio Objects
The CD manager lets you import audio data using most CD and DVD drives.
You may have to contact your technical support to find out which drive is
suitable. The data is imported digitally, thus eliminating loss in sound quality.
Audio tracks are imported into the arrangement as Wave files. The files are
saved in the import folder ("File -> Properties > Program settings -> System ->
Path settings").
To import audio tracks via the CD manager you should proceed as follows:
1. Insert an audio CD into the drive and select "Import audio CD track(s)" from
the "File" menu. A dialog with a list of the CD tracks will open. If you have
more than one drive, you may have to first select the drive containing the
CD. You can do this in CD drive options.
2. Select the desired tracks (multiple selection by "Ctrl" + mouse-click).
3. Click on "Copy selected track(s)...".
4. The "Import project" dialog will now appear. Here you can enter the file
name and select the target directory.
5. The audio material is then copied from the drive onto the hard disk. A
progress bar is displayed.
6. Once copying is complete, the dialog will be closed and the tracks are
inserted into the arrangement as individual objects.
The track list dialog
On the left-hand side in the list you can choose which track(s)/title(s) you wish
to import from the CD. Several subsequent tracks can also be selected by
holding "Shift" and left-clicking; "Ctrl" + clicking selects several tracks; "Copy
www.magix.com

Audio Objects 57
selected track(s)" starts the audio copying process. A new object is created
for every track in the arrangement and the corresponding track marker is
created.
Transport control: This lets you start and stop
playback just like on a real CD player and skip
forward and backward in the playlist.
Use the small faders to control the preview volume. With the faders at the
bottom you can go to a specific position in a track. To import just one section
of a CD track, choose "Start selection" at the beginning of the section and
"End selection" at the end.
Below the transport control details on the total length and the memory capacity
of the selected track/section are displayed.
Select all tracks: All tracks are selected, for instance, to copy the entire CD.
In the right selection box you can select the read speed, and in the left one you
can select the export mode (see Configuring the CD-ROM).
CD drive options: Here you can change the settings and select the drive for
grabbing the CD if you have installed several CD drives (see also CD-ROM
drive dialog).
www.magix.com
"Import project" dialog: The "Import project" dialog appears after you have
selected the option "Copy selected tracks". Here you can specify name and
target address of the audio files. The audio files are subsequently numbered
(name -> name_1.wav, name_1.wav).
Copy-protected audio CDs
According to the copyright act, it is forbidden to copy a CD with copy
protection. However, an owner of a CD may create a backup copy for himself.
The problem is, however, that you cannot create a copy from copy-protected
CDs because they cannot be read using a conventional PC drive. In order to
create a backup of such a copy-protected CD, you have to play it on an audio
CD player and record it as a regular analog recording via the sound card.
Drive list dialog
Tracklist: This button opens the track list dialog for copying one or multiple
tracks.

58 Audio Objects
www.magix.com
Configuration: This button opens the configuration dialog where you can make
various special settings, SCSI IDs, etc.
Reset: Restores the default settings of the drive.
Add drive: Creates a new drive entry in the list, which you may wish to adjust.
Delete drive: Deletes a selected drive from the list.
Save setup: Saves the current drive list and all configuration data in a *.cfg file.
Load setup: Loads the current drive list and all configuration data from a *.cfg
file.
The CD-ROM configuration dialog
Drive name: Lets you edit the name of the drive in the list. This is useful if you
create more than one entry accessing the same physical drive.
Host adapter number: Lets you specify the number of your SCSI adapter -
normally "0".
SCSI-ID: Lets you set the ID of your CD-ROM drive. Be sure to set the correct
ID; there is no error checking!
SCSI-LUN: Select the SCSI-LUN parameter, normally "0".
Alias: Lets you select the manufacturer type of your CD-ROM drive.
Normal copy mode: Copies the audio data without any software correction.
Sector synchronization copy mode: Copies the audio data using a correction
algorithm. This is especially useful, since many CD drives have problems
finding an exact position again and gaps can occur.
Burst copy mode: Optimizes the speed of the copy process; no software
corrections made.
Sectors per cycle: Defines the number of audio sectors that should be read
from the audio CD in a read cycle. The higher the number of sectors, the faster
the copying process. Many SCSI systems have problems with more than 27
sectors.
Sync sectors: Sets the number of audio sectors that will be used for software
correction. A higher number results in a better synchronization but also in a
slower copying process.

Audio Objects 59
www.magix.com
Recording Audio CDs
In some cases the CD can be copied during recording. The CD track is simply
played on the CD/DVD-ROM drive and recorded by the sound card. You
should note that the digital track data from the digital analog converters of the
CD-ROM drive have to be converted into analog signals and then into digital
data by the analog/digital converters. Depending on the quality of the converter
used, this can lead to losses in quality.
Before beginning this, the "Load tracks via record dialog" option under "File ->
Properties -> Program settings -> Audio" has to be activated. The audio
output of the CD-R drive must also be connected with the input of the sound
card. This is already the case with most multimedia PCs (if not, then it can be
accomplished with a small cable inside the computer).
When "Load CD tracks via record dialog" is active, song parts can also be
added to the arrangement without having to load the entire track.
Change the playback tempo or pitch
If you want to combine audio material you have recorded yourself from
different sources, samples from Soundpools, or songs from CD with each
other, then you will often need to adjust the tempo or pitch of audio objects to
match each other. There's an automatic function which automatically adjusts
the tempo of audio objects when they are loaded to the arrangement's tempo,
plus advanced tools like the Remix Agent and the Loop Finder.
Automatic tempo adjustment when loading
In general, MAGIX Music Maker Rock Edition 4 automatically adjusts audio files
to the arrangement tempo. In normal cases, you won't need to worry about the
different tempos of audio files and Soundpool samples, since these are
automatically matched.
In the new arrangement (empty), the tempo will be determined by the first
samples loaded into it. All additional audio files will then be automatically
adjusted to this tempo. If you are planning a remix which is composed of
different samples with different tempos, then try to add the most important
sample first. This minimizes sound distortions compared to the other samples
via timestretching.
In order to be able to correctly adjust an audio object to the tempo, its output
tempo must first be detected. If the sound is a Soundpool sample, then the
tempo saved therein ("patched") will be used, and the tempo adjustment will
always work.

60 Audio Objects
www.magix.com
The tempo will be attempted to be calculated automatically for shorter
samples. The Remix Agent is launched optionally for longer samples ( > 15
seconds), e.g. entire songs from CD or MP3s. There, you additionally have the
option of adjusting the sample to the arrangement or the arrangement to the
sample.
In the dialog Program settings (view page 144) ("Y" key) -> Import, you can
deactivate the automatic tempo adjustment or limit it to patched samples.
Change tempo or pitch of individual objects manually
"Resampling", "timestretching", and "pitchshifting" provide high-quality effects
for you to change the pitch and tempo of selected audio objects dependent on
or independent from each other. You can access these tools via the effects
menu or object FX effects tracks.
These functions can be used for all audio files, i.e. for the included samples as
well as your own recordings, CD tracks, CD tracks, or sounds from the
Internet.
The Time Processor Effect (see timestretch/resample chapter) allows you to
specify different timestretch algorithms for the corresponding object, since the
best results often depend on the respective audio material and the different
algorithms.
The tempo setting on the transport controller allow the arrangement's tempo
to be changed retroactively. This affects all objects contained in the
arrangement, and in some circumstances this can lead to an increased
demand on the system and dropping out during playback. If this occurs, use
Apply function in the effects rack (view page 95) or the function Combine audio
(view page 152).
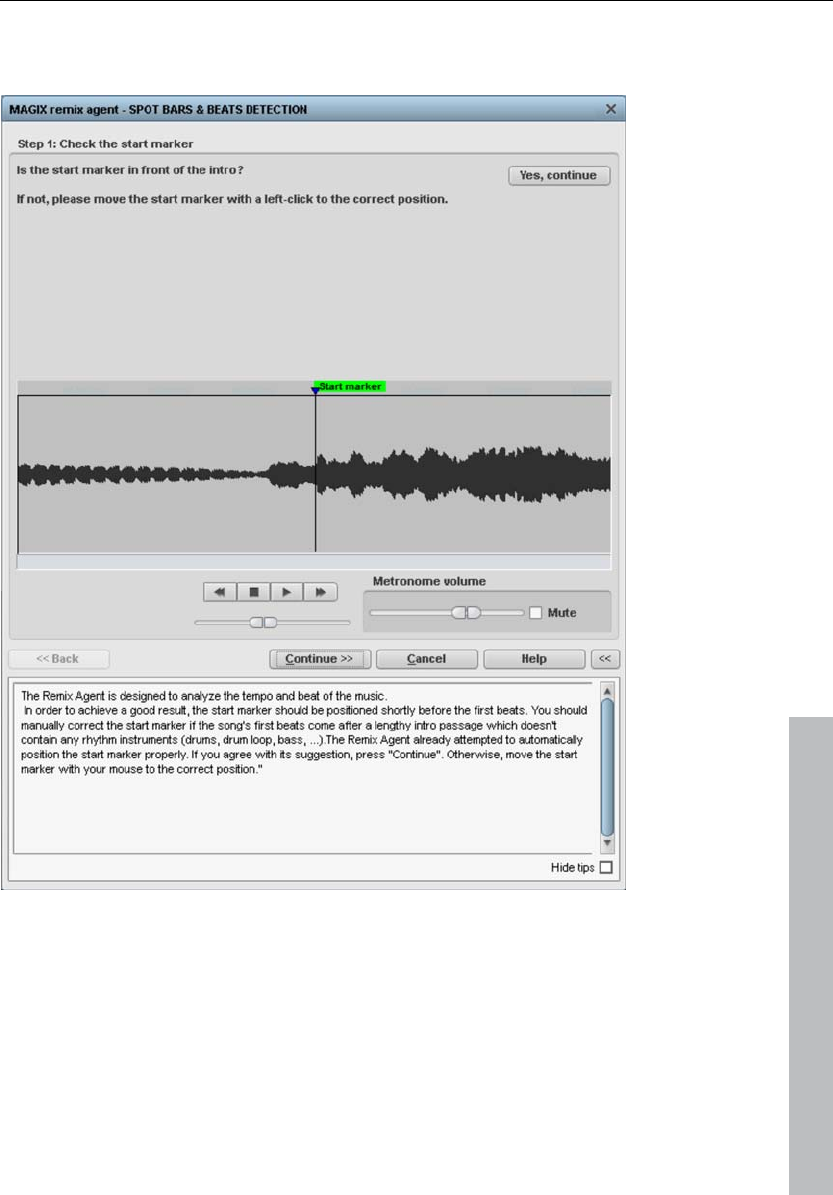
Audio Objects 61
Remix agent - Tempo and beat assignment
www.magix.com
The Remix Agent is a powerful tool that determines the tempo (measured in
beats per minute, or BPM) as well as the timing of the beats for a song’s
quarter notes. This is important if an audio CD title is imported into MAGIX
Music Maker Rock Edition 4, and you want to mix in sounds like drum loops,
effects, or synthesizer voices.

62 Audio Objects
www.magix.com
When to use the Auto Remix Assistant:
When the tempo of the arrangement must be adapted to the tempo of the
song.
When the tempo of the song must be adapted to the tempo of an existing
arrangement.
When the song is to be cut up precisely to create a remix object which can
then be rearranged as desired.
Requirements for using the Remix Agent
Songs must be longer than 15 seconds
Songs must be "rhythmic" (i.e. they can be danced to)
Songs must be in stereo format
Note: For analysis, it is presumed that the song is recorded in 4/4 time. If one
of the above requirements is not fulfilled, the Loop Finder can be used.
If songs longer than 15 seconds are dragged into the arrangement, the Remix
Agent is started automatically. When loading short samples (< 15 sec) the
tempo is specified automatically and some loops are similarly automatically
customized to the tempo of the arrangement. This also applies to previewing in
the Media Pool (Smart Preview).
This method can be deactivated individually in the audio/video options ("A"
key). You can find out more in the "File -> Properties -> Program settings"
section.
Preparation - Setting the start marker and object end
Before opening the Auto Remix Assistant, you should set the start marker at
the position in the song object in the arranger where you want detection to
start. If the song contains a long intro without beats, set the start marker after
the intro. As a rule of thumb, the Auto Remix Assistant should always be "fed"
dance music.
The start marker should be set before a quarter note beat or, better still, briefly
before a beat at the start of a bar.
If the start marker lies before the song object, the object is examined from the
beginning.
If detection is not performed by the end of the song, the object can be
shortened accordingly with the object handle at the end of the object.

Audio Objects 63
www.magix.com
Automatic Tempo Recognition
When the Auto Remix Assistant is launched, the selected song object is
analyzed and played back. A metronome begins to click according to the result
and lines visualize the positions of the quarter notes found in the wave-shaped
display.
The following cases are differentiated:
Position of the start of a measure (the one): red line.
Position of the other quarter notes (the two, three, and four): green lines.
Reliably recognized positions: thick lines.
Unreliably recognized positions: thin lines.
When tapped, blue lines appear.
If the tact and tempo information is already present, points are indicated above
the display at the appropriate positions. The metronome volume can be
regulated below and to the left of the wave-shaped display. To the right, the
BPM value is indicated. If a valid BPM value was found, it is displayed in green.
If the metronome clicks in time with the music, the measure start is correct. If
not, you can correct the tempo manually.
Setting the manual and Onbeat/Offbeat
If the result is incorrect, you can help the Auto Remix Assistant with a few
mouse clicks on the correction buttons.
There are two possibilities:
On the one hand, the "Tempo correction" list offers alternative BPM numbers
which could also fit with the music. The adjustable BPM values are detected
automatically – the total BPM can therefore deviate from song to song.
For more difficult audio material, we recommend using the "Tapping input"
mode. Either the "T" key must be pressed or the "Tap tempo" button must be
clicked with the mouse in time with the music. With repeated tapping of the
tempo correction button, one should keep an eye on the color in the BPM
display. In the "unlocked" condition (red), the tapping is not in time with the
music. One should tap until the "locked" condition is displayed. After a short
time, you will hear if the result is correct via the metronome.
Subsequently, offbeat correction takes place as required. If the detected
quarter note beats lie around the length of an eighth note (transferred behind
the real positions of the quarter note beats), one or more alternatives can be
selected from the onbeat/offbeat correction list.

64 Audio Objects
www.magix.com
Determining the start of a measure
Next, the starting point of the measure is corrected. The beat at the start of the
measure must always agree with the high tone of the metronome and/or the
red line in the wave-shaped display.
Corrections can be made by tapping; If the start of the measure can be be
heard, tap with the mouse or press the "T" key. Alternatively, you can also
select how many quarter notes the "one" is to be pushed to back.
If the starting marker was set briefly before the first beat of a measure, this
correction is not necessary.
Note: With all corrections, the metronome and visualization react to the lines in
the wave-shaped display only after a short delay.
Using BPM and beat detection
Now you may select one of the actions to be adapted to the arrangement song
(or vice versa) or cut up the songs at the ends of a measure.
Save only Tempo & Beat information
Only wave file data is stored. This makes sense if some manual post-correction
is required for determining beat/tempo.
When the data is stored, tempo & beat regulation can be released for future
tempo adjustments or to create object remixes.
Tempo adjustment
Setting the object tempo to the arrangement tempo
This fits the object length to the existing arrangement. Three different
procedures are possible: timestretching, resampling, or audio quantization.
Timestretching keeps the pitch of the song constant, but sometimes the
sound quality can suffer.
Resampling changes the pitch (similar to changing the speed of a record
player), and retains the sound quality of the song as much as is possible.

Audio Objects 65
www.magix.com
During audio quantization, the audio file takes the tempo adjustments into
consideration as if the first remix object (see below) were created and
combined immediately into a new audio file. If the recognition is uncertain,
extreme tempo fluctuation may result. It is particularly important to set the
starting marker so that the tempo is recognized definitely. The advantage of
audio quantization is that small tempo fluctuations in the music balance out.
The start of the measure always agrees with the start of the arrangement
measure and never plays out of time.
Setting the arrangement tempo to the object tempo
The arrangement adopts the detected BPM value. If you would like to use the
cut-up song as the basis for a new composition (e.g. for remixes), then this
option should be active.
Creating remix objects
The song is cut by beat into individual objects. Some applications may include:
To produce loops from complete songs which can then be used with other
material. Most importantly, not all remix objects are suitable as loops. Ideally,
less complex material should be used, e.g. drums from an intro.
To remix songs, thus changing the sequence of the objects, cutting or
doubling beats or to enrich the song with other loops or synth objects.
To mix two songs: If percussion and tempo fit perfectly, can you blend the
songs without "side effects"?
This option can be activated later from the "Object" menu, provided that the
tempo data is stored.
The "Audio quantization" option: Audio quantization fits new objects exactly in
time with the arrangement.
With homemade music, tempo fluctuations are common, and therefore
different measure lengths may result. Nevertheless, so that the objects fit into
the rigid timing pattern of the VIPs, the time processor is activated
automatically and object timestretching is used to correct the different lengths.
Setting resampling for small corrections: If the necessary corrections are very
small, better quality resampling can be used instead of timestretching.
Afterwards, you should not change the master tempo any longer, since definite
pitch changes may arise.
Remix objects in "Loop" mode: New objects are set in "Loop" mode. When
extending the object with the right object mouse handle, the original length of
the object is played again and again.

66 Audio Objects
www.magix.com
Setting the arrangement tempo to the object tempo: (see above)
Note: Time correction assigned to objects can be subsequently cancelled if the
time processor is called up and edited ("Timestretch/Resample object", or
double click on the object to open the FX racks associated with the time
processor).
Cancel: The dialog is closed.
Problems and Remedies regarding the Auto Remix Assistant
Problem: The playback stutters, the metronome is suspended, the computer is
overloaded... (on older computers.)
Remedy: We recommend changing to wave drivers ("P" key, "Playback
parameter" dialog) instead of DirectSound.
Problem: The metronome does not work and there are no lines on the the
wave-shaped display.
Probable cause: The material does not contain beats or the song contains a
passage without beats.
Remedy: The song should be limited in such a way that only rhythmic
passages are contained.
Possible 2nd reason: Inaccurate tapping or a false BPM value has been
entered.
Remedy: Try the tempo correction buttons or tap until the "locked" condition is
attained.
Problem: The metronome sounds inaccurately or is jerky, the lines in the wave-
shaped display are irregular and thinly drawn.
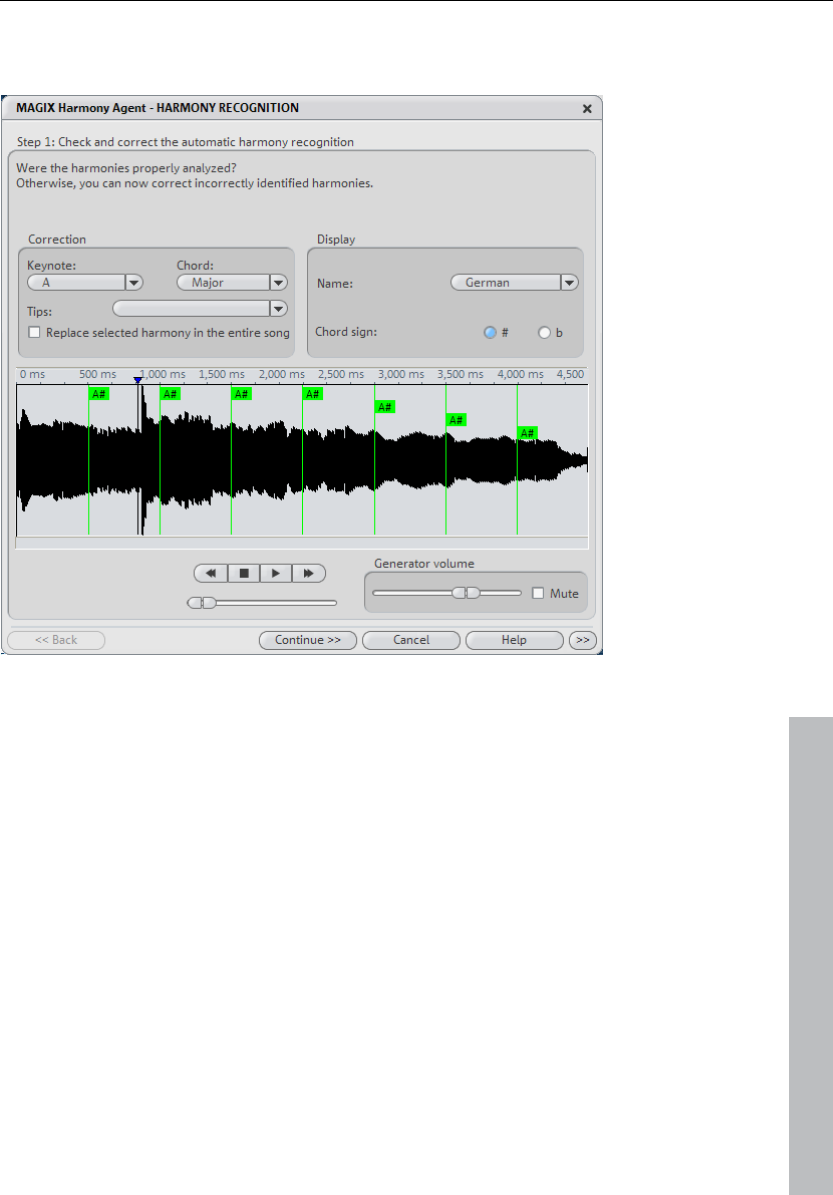
Audio Objects 67
Harmony Agent
The Harmony Agent is designed to analyze harmonies.
www.magix.com
The music track is analyzed first when you open the Harmony Agent. The
Harmony Agent tries to automatically identify the harmonies for each beat of
the music. Thus the right beat information is an important prerequisite for a
properly-functioning Harmony Agent.
During subsequent playback, the detected harmony is played by an internal
generator for verification purposes. You can adjust the volume with "Volume
Generator". "Mute" deactivates the generator.
The transport control controls playback of the music track. The position slider
below lets you quickly move to a certain passage.
Check and correct the automatic harmony recognition
After the analysis, you can manually correct harmonies which were not
correctly identified. Note that major chords are written with capital letters and
minor chords with lower-case letters.

68 Audio Objects
www.magix.com
Left click on the respective harmony symbol in the wave display. Hold the key if
you want to mark several subsequent harmonies. If you right-click on selected
harmony symbols, a menu containing alternatives will be displayed. The initially
recognized harmony is marked with an *.
If there are no alternatives, you can select the correct "Keytone" or "Chord"
from the "Correction" section of the menus. Use the option "Replace selected
harmony in the entire song" if you are sure that the incorrectly recognized
harmony is not included in the entire song. A mix-up between major and minor
is typical in this case.
Once you are sure that all harmonies are set correctly, click on "Continue".
Use harmony recognition
Here you can use the information from the Harmony Agent. There are different
possibilities to output harmonies.
You can create picture objects in the arrangement that display harmonies
graphically in the video monitor and in sync with the music.
You can save the information in the audio file. This also ensures that the
harmonies are available later. For instance, if you want to display the harmony
information in the timeline ("Edit -> Display Object Marker -> Harmony
Marker").
You can choose between different displays of the harmony symbols. You can
use German, English or Roman symbols to name the tones. Furthermore, you
can set the "preceding symbol" to force single harmony interpretation. With #,
all notes are shown as "sharps" (C#, D#, F#), with B they are displayed as
flats.
Text to Speech
This allows you to type in a certain text and have the computer “speak” the
words. Different types of voices are available and the volume and speed of the
speech can be altered. When you are pleased with the result, you can create a
WAV file that can be utilized like any other audio object in the arranger.
Load text: Here, texts in *.txt or *.rtf formats can be loaded.
Save text: A text can be saved.
Test: You can hear the result of the text that has been entered.
Voice: Choose from a variety of voice types.

Audio Objects 69
www.magix.com
Tempo: This regulates the speed at which the voice “speaks”.
Volume: This regulator controls the output volume.
Format: The quality of the WAV file generated is controlled with this function.
File: Choose the file path for the generated WAV file.

70 Video and Bitmap Objects
www.magix.com
Video and Bitmap Objects
Video and bitmap formats
MAGIX Music Maker Rock Edition 4 can load videos in the following formats:
AVI, Windows Media (*.wmv, *.asf), MAGIX Video (*.mxv) and Quicktime Movie
(*.mov) and export them as AVI files, Windows Media and MAGIX Video.
Also RTF text files can be loaded and used as subtitles.
Adjusting the video screen
The video screen can be positioned freely on the screen as well as adjusted in
size. To position it, you must first switch off the standard layout view in the
windows menu before you can move the video screen. To adjust its size, click
on the video screen with the right mouse key and select the desired size from
the object menu or define it yourself (‘user defined’). Please note that larger
screens require a greater computing performance!
Import and edit videos
Video objects may be imported and edited exactly like any other object. So
that you don;t have to decide blindly which object to import, there is a preview
function on the video monitor. Simply click on a video file in the Media Pool:
the corresponding video will be played back on the video monitor.
Via the context menu in the Media Pool (right-click on the selection list), you
can choose between three different view modes: Large icons (1), List (2) and
Detailed list (3). In the "Large Icons" view, videos will be displayed with a
preview frame in Media Pool - useful to create an overview of the available
video material.
If you want to use the video for your arrangement, drag it to the Arranger while
holding down the mouse key. During playback in the Arranger, the complete
video material will be played back on all tracks on the video monitor, including
all effects and in realtime.
Video objects may be edited just like any other objects: they may be selected
and moved with the mouse, hidden and un-hidden with the handles on the top
corners, and brightness may be altered using the middle handles at the top
edge. Please read the "Arranging Objects" (view page 44) to find out more!

Video and Bitmap Objects 71
www.magix.com
Simplify object presentation
With the TAB key you can switch between two object presentations. The
objects in the alternative presentation are not displayed frame by frame in the
arranger, but in simplified form. This saves working memory and improves
overall play performance. Scrolling and zooming in the arranger as wee as
various object manipulations are far quicker in TAB mode. The video display in
the video monitor is not influenced by the simplified object display.
Visualizer objects
You can load so-called visualizer objects into MAGIX Music Maker Rock
Edition 4 (*.vis files). The principle: The sound creates graphic changes to the
visualizer objects. The graphics and structures move according to the beat of
the music.
You can load visualizer objects in the same manner as other objects. The
"Audio & Video Effects" selection button is located on top of the Media Pool.
The submenu "Visuals" now contains many algorithms for different automatic
animations. Just try them out by dragging an audio object into the arranger
and playing it. If you click on the different visualizers with the mouse, you will
see in the video monitor how the computer animations mover according to the
beat of the music…
Visualizer objects can be used just like video and image objects: You can drag
them from the Media Pool into the arranger and arrange them as you like.
Extract sound from videos
Video with sound material appears in the arranger on two tracks as two
objects (an audio object and a video object). The two objects automatically
form a group.
To edit the video and audio material separately from one another, the objects
can be separated with the Ungroup (view page 151) function in the "Edit" menu
or button in the arranger. Now you can replace the audio or the video track, or
process each file separately. Rejoin/regroup the tracks with the ”Export
arrangement” function.

72 Video and Bitmap Objects
www.magix.com
Video effects
All video effects work in real time. In principle, almost any combination of
effects may be assigned to any video object: for example, mix mode stanzas
with a false color effect and a double playback velocity.
By overlaying of multiple videos or bitmaps, MAGIX Music Maker Rock Edition
4 proceeds from the bottom up. The background video object must be placed
in the upper track. It will be overlaid by and mixed with objects lying below.
Example, if you want to put a dancer on a landscape, place the landscape on
track 1, the dancer on track 2 and activate the Blue Screen effect for the
dancer.
Video effects are stored in the ”Video FX” directory. Open the directory by
clicking the corresponding Media Pool button. All video effects have a preview
function and can be dragged & dropped on a video object into the Arranger.
Title Editor
Text objects and title presets
MAGIX Music Maker Rock Edition 4 has an option which makes it very easy to
insert and edit titles.
The basis of these titles is the titles templates settings in the "Templates", and
these may be reached via the "Titles" button. To integrate a title template into
your project, proceed as follows:
Select a file. As usual, a simple click generates a preview in the video window.
This way, you can see how certain title settings will look and the effect they will
have in advance.
Once you’ve found the right track, drag & drop it onto a track in the arranger.
It is represented there as a title object. Several title templates contain
additional image objects, these titles require two tracks.
The title editor (see above) opens automatically. You can later open it again by
double-clicking (or by right-clicking in the context menu below "Title Editor").
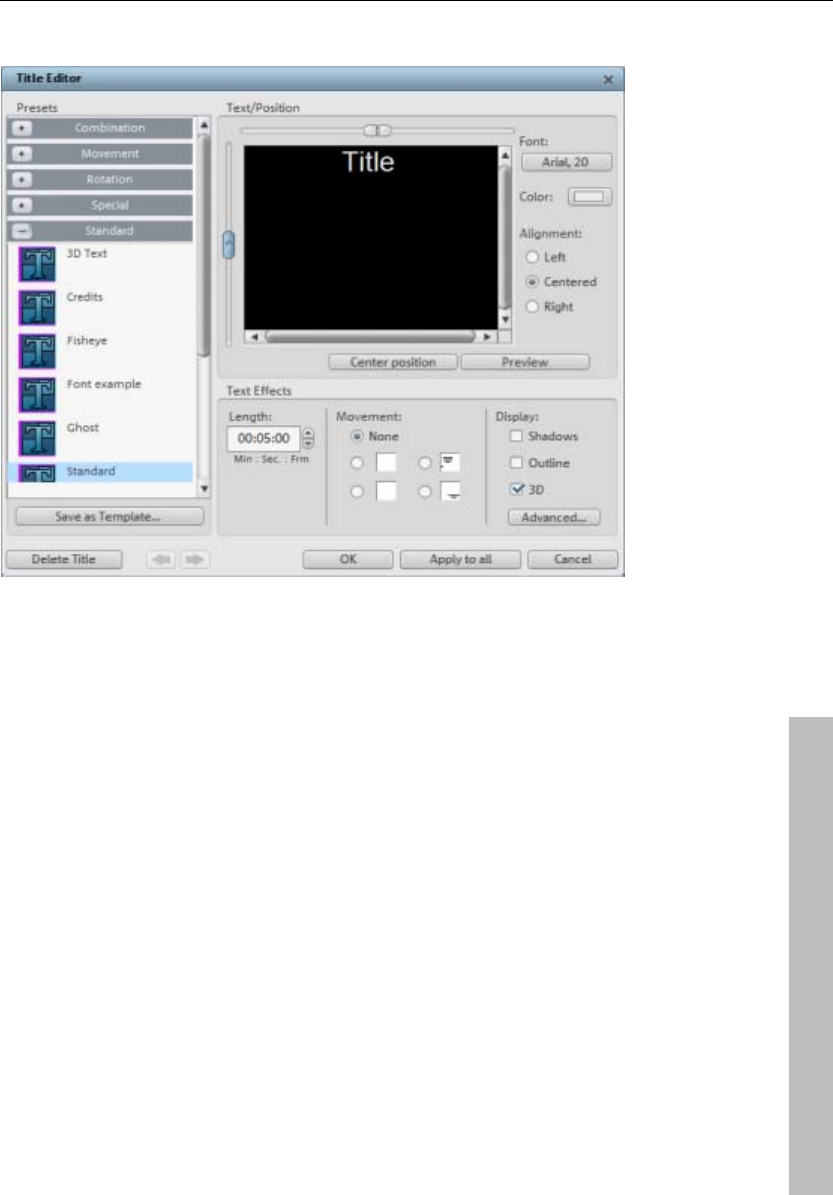
Video and Bitmap Objects 73
Title editor.
Enter text, e.g. for subtitles, lead or end credits. They can be displayed in all
kinds of fonts and colors.
www.magix.com
Menu presets: This menu contains the title templates from the Media Pool
title directory. This way you can try out different movements, effects and
designs. The presets are arranged in various subfolders; the icon and the
description will help you find the template you want.
Save as template: You can save the entire settings as a title template. You can
then easily drag & drop them from the Media Pool.
Text/position: Type the text for your video subtitles in the title editor. Use the
scrollbar to the left and above the text window to organize your text in the
video monitor. You can freely position the writing vertically and horizontally. If
you have selected moving text, this position determines the starting position.
Please note that setting movement to text places the starting position of the
title outside of the video window. You can, however, always change the
starting position.
Font type: Here you can enter the font type, size, color or type.

74 Video and Bitmap Objects
www.magix.com
Color: With this button you can choose your own color. If you want to format
individual words or letters, select them with the mouse and choose a different
format. If no selection is made, the entire text will be formatted.
Alignment: Specifies whether the title should be aligned left, right or at the
center.
Center position: Clicking "Center position" puts the title back in the middle.
Preview: This button starts the title preview in the video monitor, together with
the movie or scene. If you have selected a movement for the title, it will also be
animated in the video preview window. You can interrupt the preview anytime
by pressing "Stop".
Text effects: This function allows you to add motion, 3D shadows, and 3D
effects, or a border. These settings can be adjusted in detail using
"Advanced".
Length: Sets the duration of how long you would like to display the title.
If everything is as it should be, close the title editor by pressing "OK".
Video Compression
Compressed video data is typically saved in AVI files. AVI stands for ‘Audio and
Video Interleaved’, i.e. mixed picture and sound. Depending on the
compression rate, high data rates will be required – a good video starts at
about 2 MB per second, equivalent to compression of about 1:10 as opposed
to uncompressed video with 20 MB per second data flow rate. High quality
video systems only work with a compression of 3 or 2 – i.e. creating up to 10
MB per second data for video flow. Even uncompressed video can be used.
MAGIX Music Maker Rock Edition 4 can also process such high-resolution
video data completely. Within MAGIX Music Maker Rock Edition 4, video data
is processed in uncompressed format – all effects, mixes etc are carried out in
the highest quality. It is possible that replay of a project with several videos or
realtime effects may ‘jump’ more than is the case with smaller videos. This
does not harm the end result though – video export is calculated frame by
frame.

Video and Bitmap Objects 75
www.magix.com
Choppy or uneven playback
Don't panic if the picture on your screen is choppy or uneven. The finished
product will look perfect and play smoothly. Don't forget that MAGIX Music
Maker Rock Edition 4 calculates all effects in real time. This lets you see for
yourself what sort of influence each of the effects will have on your video
footage. Some effects make even today's high-performance PCs work quite
hard, and often, a steady, continuous video stream is simply not possible on
your PC. The final product, free from previous choppiness, is only available
after rendering it to DVD or exporting it. For that reason, you should first edit
the movie in its raw version without effects. The preview generally delivers a
steady picture, allowing you to work quickly and quietly. Towards the end, you
can add effects to your movies to give them a special touch of Hollywood!
General notes on AVI videos
The AVI format (Audio Video Interleaved) isn't actually a proper video format!
Rather, it is a so-called "container", where the conventions for transferring
audio and video files to the program are only loosely defined. The codec
(coder/decoder) actually defines what storage format is used. A codec
compresses audio/video data into its own unique format which can only be
read by the codec itself and is decoded when the film is played.
In concrete terms, a computer-generated AVI file can only be loaded by and
played on a different computer if the same codec is installed on it.
Many codecs (e.g. Intel Indeo® video) have now become standard components
of the Windows™ installation. Others like the popular DivX codec are not
standard. If you are generating an AVI file for future play on another computer
using one of these codecs, you should first install this codec on the other PC.
The best method available is to copy the codec installer to your export
directory and burn it every time you create a video disc (slideshow disc) for
play on computers.
You may encounter some problems when using older video editing cards with
codecs which only function with the card’s hardware. Such AVIs can only be
used on the computer which was used to create them. Try to avoid using this
kind of codec.

76 Video and Bitmap Objects
www.magix.com
Video export via TV-out
Video and graphics cards with a TV out socket can also export videos directly
to external video recorders. The arrangement must be played in full screen
mode when saved with external equipment.
Note: With many graphic cards, the tv output can only be activated when a
television or video recorder is connected before turning on the computer!
Switch the video monitor to full screen mode with Alt+Enter and start the
playback by pressing the space bar.
You can play the video directly from the arrangement. However, it can
sometimes lead to errors if the processor becomes overloaded as a result of
processing the audio and video effects in real-time.
If direct playback doesn’t work without causing errors, export the arrangement
to the AVI video and load it into a new arrangement which will then play
without any problems.
Occasionally, it is enough to just mix the soundtracks of the arrangement into
one. To do this, use the menu command “Edit” > “Audio mixdown”.

Synth Objects 77
www.magix.com
Synth Objects
MAGIX Music Maker Rock Edition 4 supplies several synthesizer plug-ins to
create your own drum pattern, bass or melody lines. The synthesizers produce
‘synth objects’ which are arranged on the tracks together with the other
objects.
Working with synth objects
Calling up the Synthesizer
The software synthesizer is to be found in a special file that is configured onto
the hard disk during installation. To open it, press the Synth-Button (in the
MediaPool File manager
The symbols for all the available synthesizer plug-Ins are now displayed in the
file list.
Creating synth objects
Any plug-in can be pulled into the arrangement by means of drag & drop. A
synth object appears on the relevant track and the operating console of the
plug-in is opened. Synth objects are programmed with the help of the
operating console.
Programming the synth object
Depending on the plug-in, various functions to create and control sound can
be applied via the operating console. Please read the following chapters
pertaining to the individual synthesizers in this regard.
To monitor programming, playback can be started and stopped at any time
with the space bar while the operating console is open. If the synth plug-in has
its own play button (e.g. the beat box), it will start the plug-in solo, without
playing the other tracks of the arrangement as well.
Arranging the synth object
Once you have finished programming the melodies or rhythms of the synth
object, you can close the operating console and arrange the synth objects on
the tracks. They can be stretched or compressed, faded in and out, turned
down or up etc. with the help of handles: These steps are the same for all
objects.

78 Synth Objects
www.magix.com
The operating console of every synth object can be reopened at a later stage
by double clicking or via the synth button if you would like to reprogram the
object. In addition, you can drag as many other synth objects of the same
software synthesizer as you like onto the tracks and program them separately.
Feeding the synthesizer plug-ins with new sounds
The synthesizer plug-ins supplied are already equipped with sounds, but it is
possible to exchange them. To do so, use drag & drop to drag any wave files
(as short as possible) from the file manager onto the operating console of the
respective plug-in.
More details on the individual synthesizers will be provided in the following
chapters.
BeatBox 2
Note: BeatBox 2 replaces the older BeatBox from previous versions and is not
compatible with them. Please read the notes for users of older MAGIX Music
Maker Rock Edition 4 versions.
BeatBox 2 is a 16-voice drum computer with hybrid sound synthesis and a
step sequencer. The proven handling concepts of the "old" BeatBox like matrix
programming with auto copy have been expanded with comfortable editing of
velocities and significantly improved sound synthesis, including a multi-effects
section (one effect per drum instrument).
A drum sound is created in BeatBox 2 using a sample (analogously to the old
BeatBox) which is combined with a synthetic sound that can be created using
up to three different synthesis models (hybrid sound synthesis). BeatBox 2 plus
enables detailed editing and automation of all sound parameters.
There are two styles of interface in BeatBox 2. While closed, you can listen to
included sounds or those you've made in BeatBox 2 without using too much
window space.
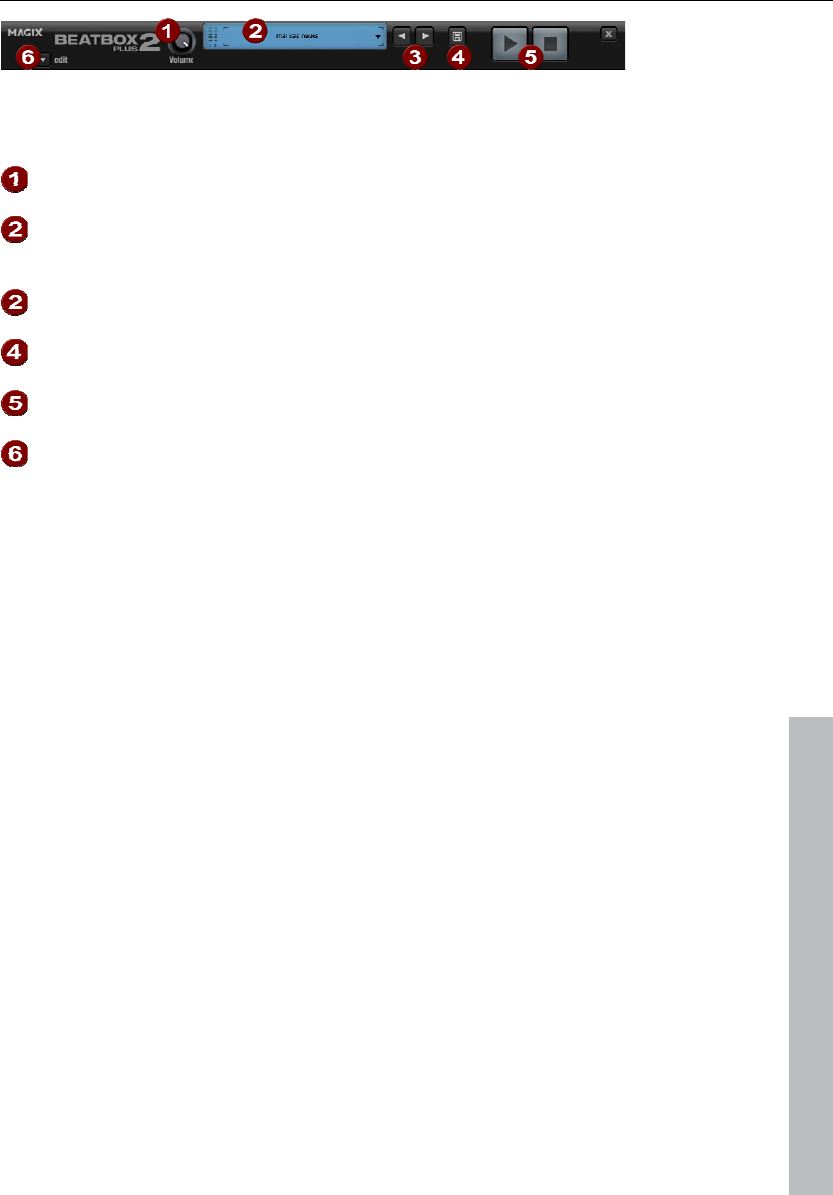
Synth Objects 79
Only the most important control elements are displayed when the program
window is minimized.
Volume controller: Controls the volume.
Peakmeter and preset name: The peakmeter lets you visually control
BeatBox 2. Click on the triangle beside the preset name to open the
preset list.
Next/Previous preset
Save preset: The preset includes the drum kit in use, the pattern, and any
possible automations.
Play/Stop: The playback controller in BeatBox 2 starts BeatBox without
playing the arrangement, too.
Edit button: The edit button opens BeatBox 2 for you to program your
own beats and sounds.
www.magix.com
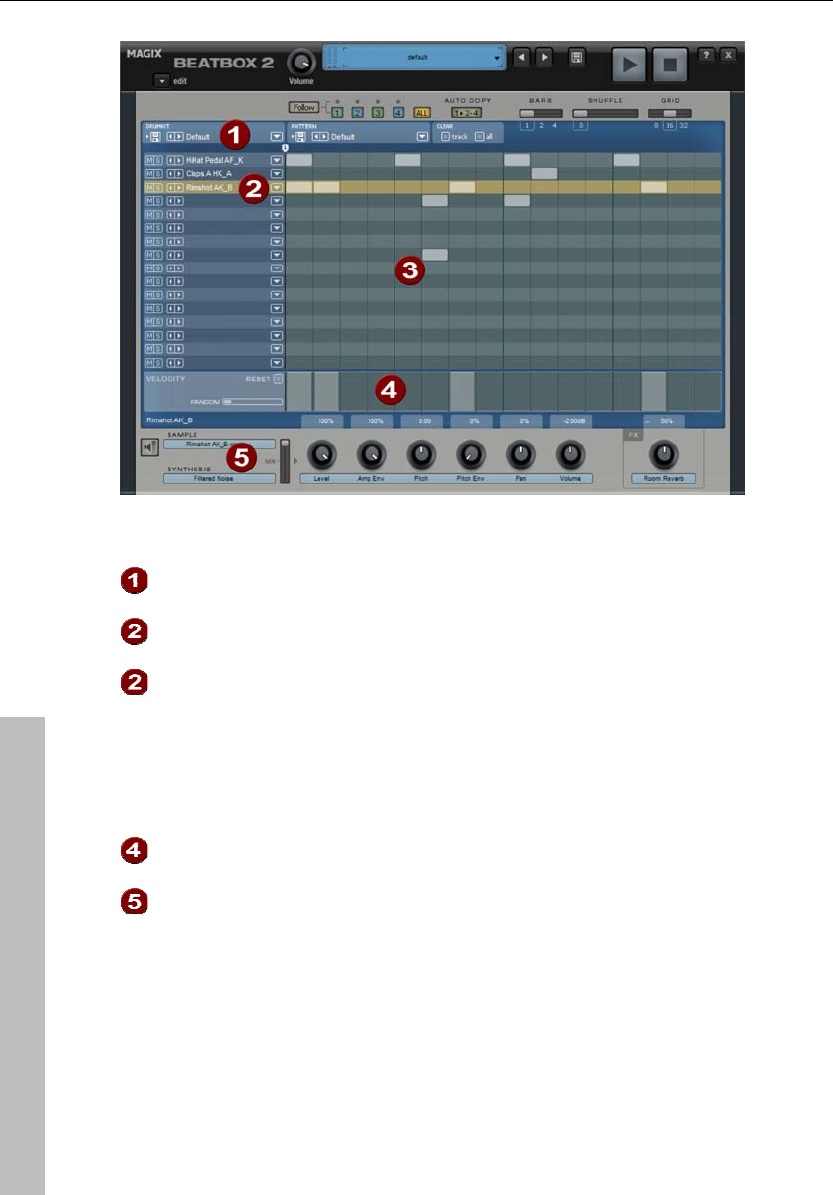
80 Synth Objects
Maximized BeatBox 2 window
Drum kit: This section loads drum kits (collections of different drum
instruments) and the individual drum instruments.
Selected drum instrument: The settings in the synthesis section (6) and
velocity/automation (5) always affect the selected drum instrument.
Pattern editor: Programs the beat sequence. In the top part, different
patterns (sequences) can be loaded and saved as well as different settings
for the view and function of the pattern editor. The matrix is where the
beat is programmed: One line corresponds to a drum instrument, and a
column matches a specific time position within 1-4 beats. If a cell is
clicked on, then the respective drum instrument will be triggered at this
position.
Velocity: In the velocity section, the velocity levels for the selected
instrument's beats are displayed as a bar for detailed editing.
Synthesis: Selected sound parameters and the level of the effect for the
selected drum instrument can be edited here.
www.magix.com
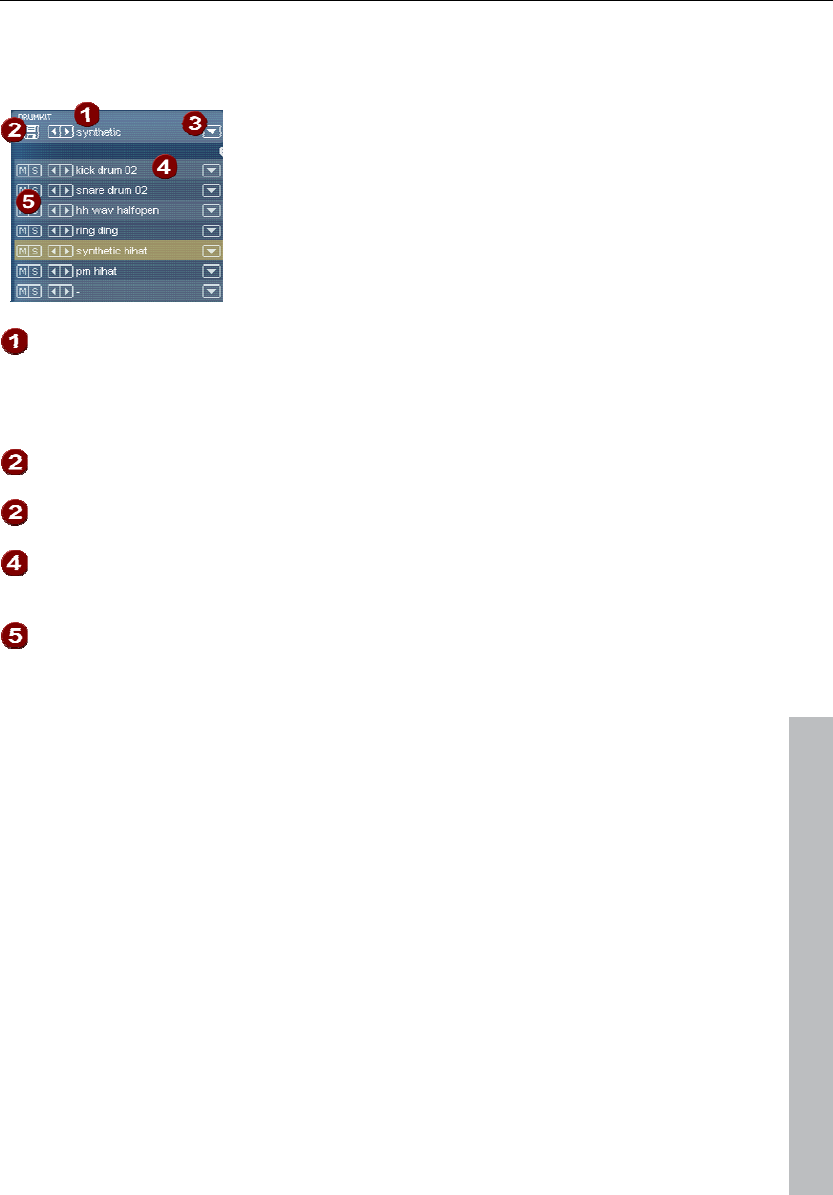
Synth Objects 81
In the following, the sections of BeatBox 2 will be discussed individually:
Drum kit
This section loads drum kits (collections of different
drum instruments) and the individual drum
instruments. You can also try out an already
programmed pattern with different kits or exchange
individual drum instruments.
Select drum kit: Use the <> buttons to switch through the different drum
kits. A drum kit is a collection of percussion instruments with matching
sounds, e.g. rock kit or electronic drums à la TR 808. By changing the
drum kit, you can add an entirely different sound to the rhythm you have
already created.
Save drum kit: Use this button to save the current collection of drum
instruments as a kit.
Drum kit list: Click on the arrow right of the name to open a complete list
of available drum kits.
Select drum kit: The arrow buttons function analogously to those of the
drum kit. The sequence of drum instruments in the kit can be resorted via
drag & drop.
Mute/Solo: The "solo" button switches a drum instrument solo, i.e. all
other instruments which are not "solo" will be muted. The "mute" button
mutes a drum instrument.
www.magix.com
New drum or effect sounds can by added to the current drum kit by drag &
drop from Windows Explorer. Drag a wave file to a drum instrument to create a
new drum sound based on this sample. BeatBox 2 copies the sample into the
sample folder to make sure that the instrument or kit created can be used
again later. You can drag a complete folder with wave files to the drum kit to
create a kit based on those samples.
Context menu
Right clicking a drum instrument always opens a context menu:
Copy/Paste: Copy an instrument from a track and paste it to another one.
Empty instrument: An empty instrument is added. No sound is played, it has
no name, and is used to clean up an unused track.
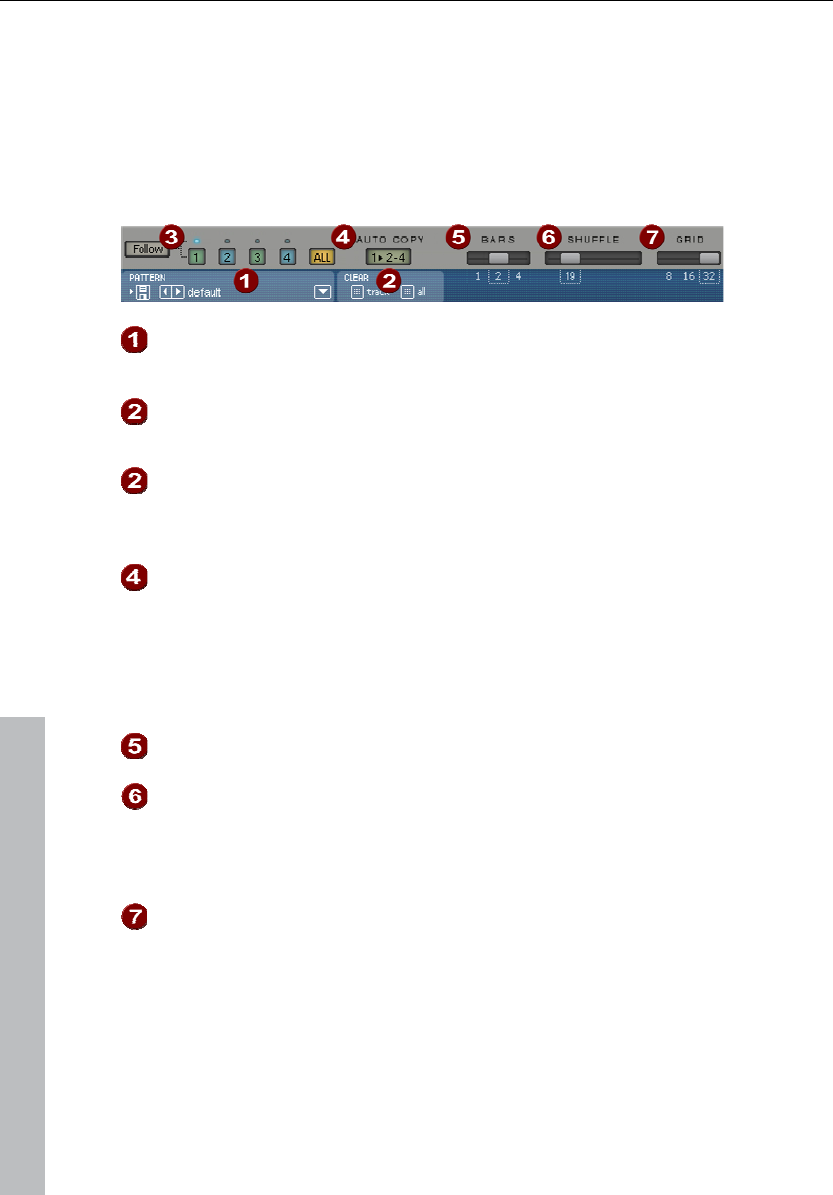
82 Synth Objects
Default instrument: The standard instrument is added. It has the standard
parameter for all synthesis shapes and serves as the starting point for your
own sounds.
Reset automation: BeatBox 2's own presets contain automations. These are
dynamic sound parameters like filter curves or pitch changes. This command
allows you to completely remove these for the selected instruments.
Pattern editor buttons
Pattern: Use the <> buttons to switch through the different patterns.
The arrow to the right opens a list of all available patterns, and the save
button stores the current pattern.
Clear track/all: All events for the selected instrument (track) or all events
for the pattern (all) are removed by clicking this button.
Bar selection: The bar you wish to edit can be selected via the
corresponding number button. Use the “Follow” button to select follow
mode, i.e. the step display follows the steps of the currently played beat.
All shows all bars of the pattern.
"1>2-4" Auto copy: If more than one bar is set as the pattern length,
"Auto copy" mode makes sure that the drum notes set in the first bar
are automatically placed into the next bars. This also makes it easy to
create a continuous beat, even with a loop length of four bars. Notes set
in the bars further back are not affected by the "Auto draw" function,
which, for example, makes faint variations detectable only in the fourth
bar.
Bars: The maximum length of a drum pattern is four beats. The length
can be selected via the small scroll bar.
Shuffle: This controller changes BeatBox 2's timing. If the fader is
turned to the right, the eighth of a rhythm is played more and more like a
triplet. If that sounds a bit too abstract – simply try it out, ideally with a
pure 1/16 hi hat figure; you'll soon see what the shuffle fader is capable
of.
Grid: Here you can set the time resolution of the BeatBox. You can
choose from 1/8 notes (only for very simple rhythms), 1/16 (default),
1/32 (for more refined constructions).
www.magix.com
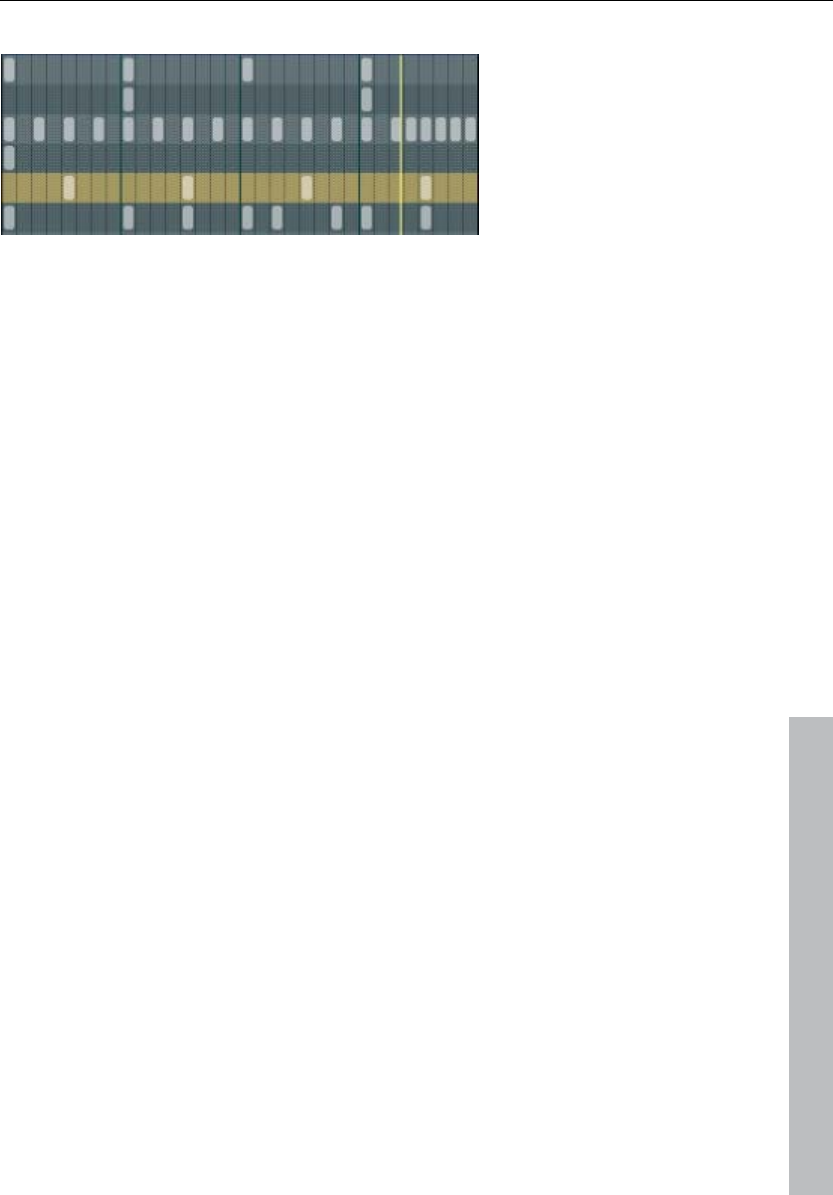
Synth Objects 83
Pattern editor - matrix
This is the heart of BeatBox. A click on any position in the drum matrix creates
or deletes drum notes (events). Clicking and dragging draws in a series of
notes. Together with the velocity editing options (view page 84) (velocity), you
can easily create drum rolls.
If "Shift" is held when you click on notes in the range, a rectangle can be
drawn out which selects the notes contained within this rectangle (lasso
selection). Selected notes can be copied by dragging them to a new position. If
"Ctrl" is also held down, then existing notes will remain at the target position.
Delete all selected notes by right clicking.
Two special commands are available for selection:
Shift + double click Select everything in the bar clicked on.
Shift + Ctrl + double click Select all
A simple mouse click cancels the selection. The selection is automatically
canceled after copying. If you want to keep your selection, hold down "Ctrl"
while copying.
www.magix.com
Keyboard shortcuts
Many functions in BeatBox 2 can be controlled with the keyboard, for example
a beat can be triggered with the "Enter" key live in a running pattern. Here's a
complete list of the keyboard commands:
General Key command
Open/Close editor e
Pattern editor - options
"1>2-4" Auto copy a
Follow f
Display bar 1... 4 1... 4
Show all bars 0
Grid finer/rougher +/-
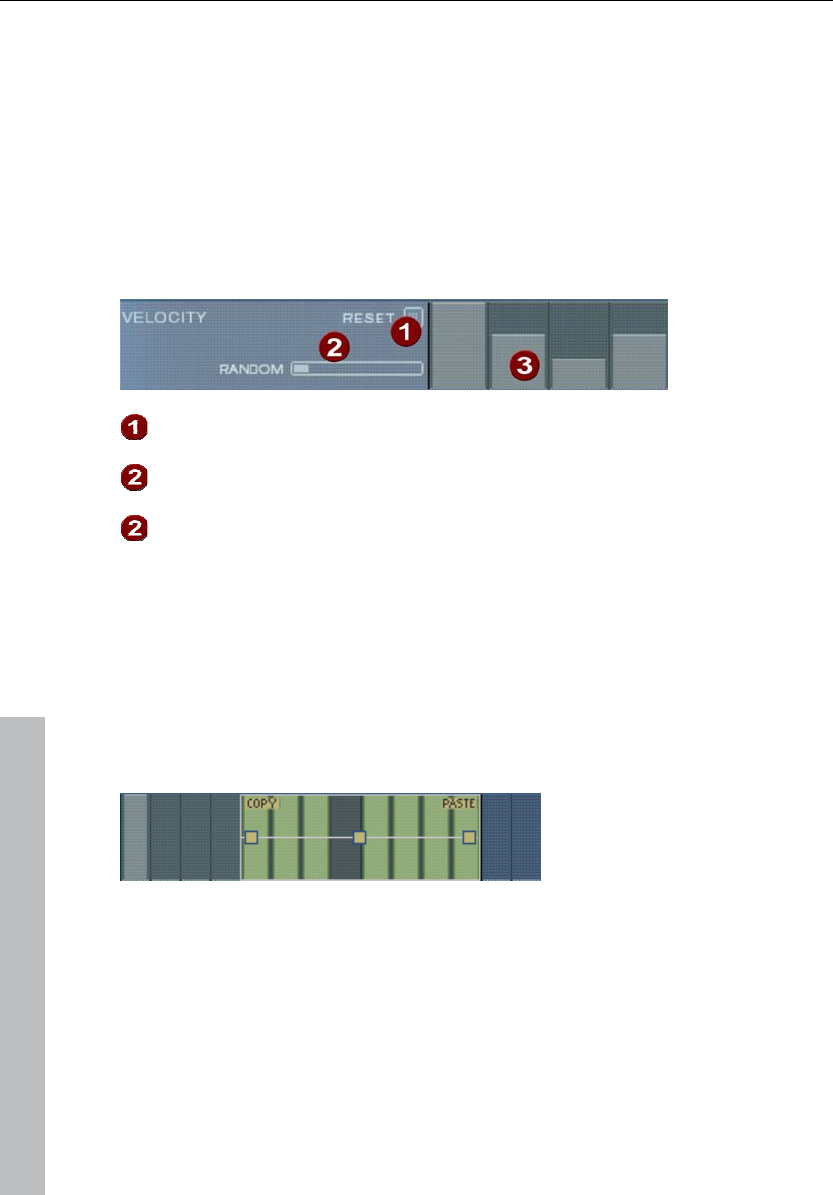
84 Synth Objects
Selected drum instrument
Previous/Next Cursor
up/down
Preview p
Live input Enter
Mute on/off m
Solo on/off sec
Velocity
The velocity section serves for editing the velocity of the individual drum notes
for the selected drum instrument.
Reset: Sets all velocity levels to 100%
Random: The random parameter adds random variations to the set
velocities. This helps make your beats sound more natural.
Velocity level: Every set note for the selected instrument is displayed as a
column and can be edited. Multiple columns can be edited at once - see
Editing velocity values (view page 84).
Editing velocity values
Hold down "Shift" and select any number of columns with the mouse.Two
special commands are available for selection:
Shift + double click Select everything in the bar clicked on.
Shift + Ctrl + double click Select all
The "Copy" button copies the selection to the clipboard. If you select this or
that track in another editor, then you can paste the notes there now from the
clipboard. If the target selection is larger than the contents of the clipboard,
then it will be inserted again. This lets you quickly add a short section
throughout the complete length of the pattern.
www.magix.com
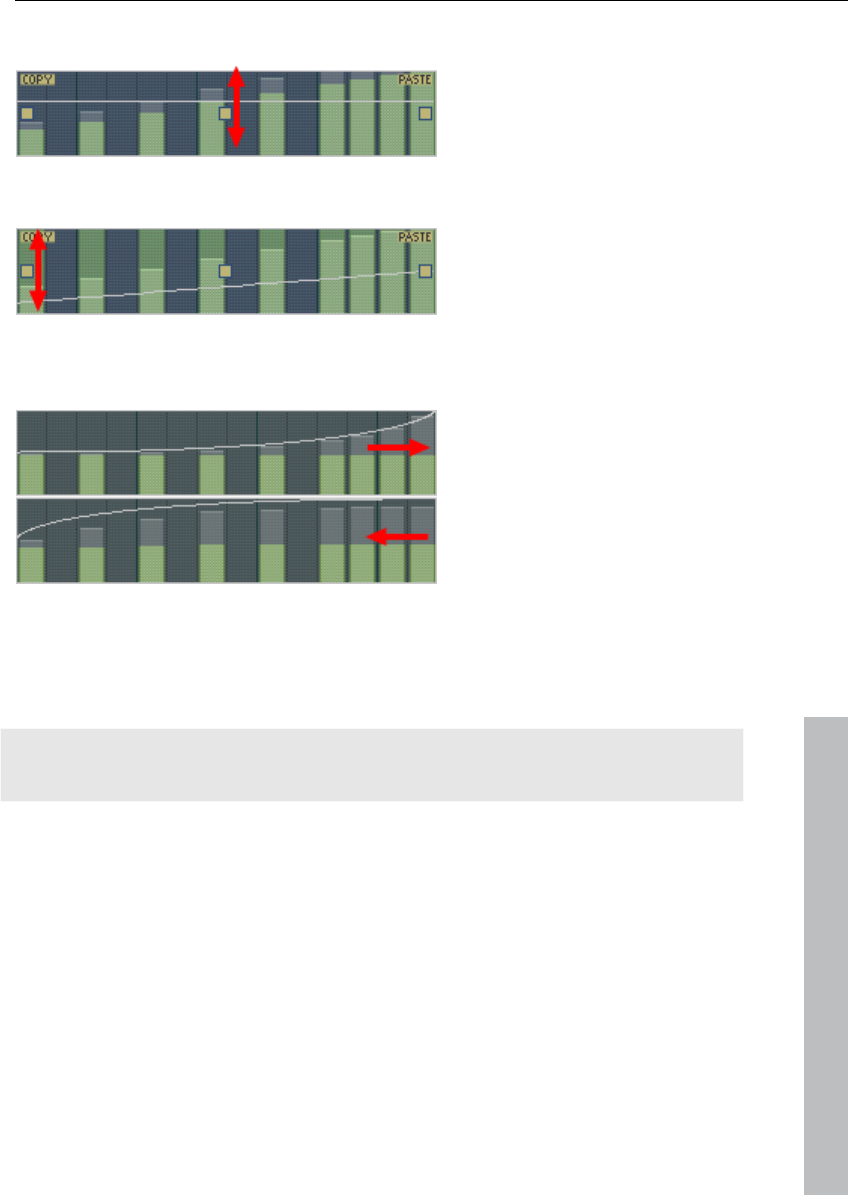
Synth Objects 85
The three handles allow the velocity values to be edited together.
The middle handle increases or lowers the values together.
An object can be faded in or out with the handles to the left and right upper
corners of the object.
If you move the handles horizontally you can change the curve shape of the
transition.
A single click in the velocity section cancels the selection again.
www.magix.com
Note: A selection of velocity values matches the selection of corresponding
notes in the matrix editor.
Synthesizer
In the lower section of BeatBox, you can set the sound for the selected drum
instrument.
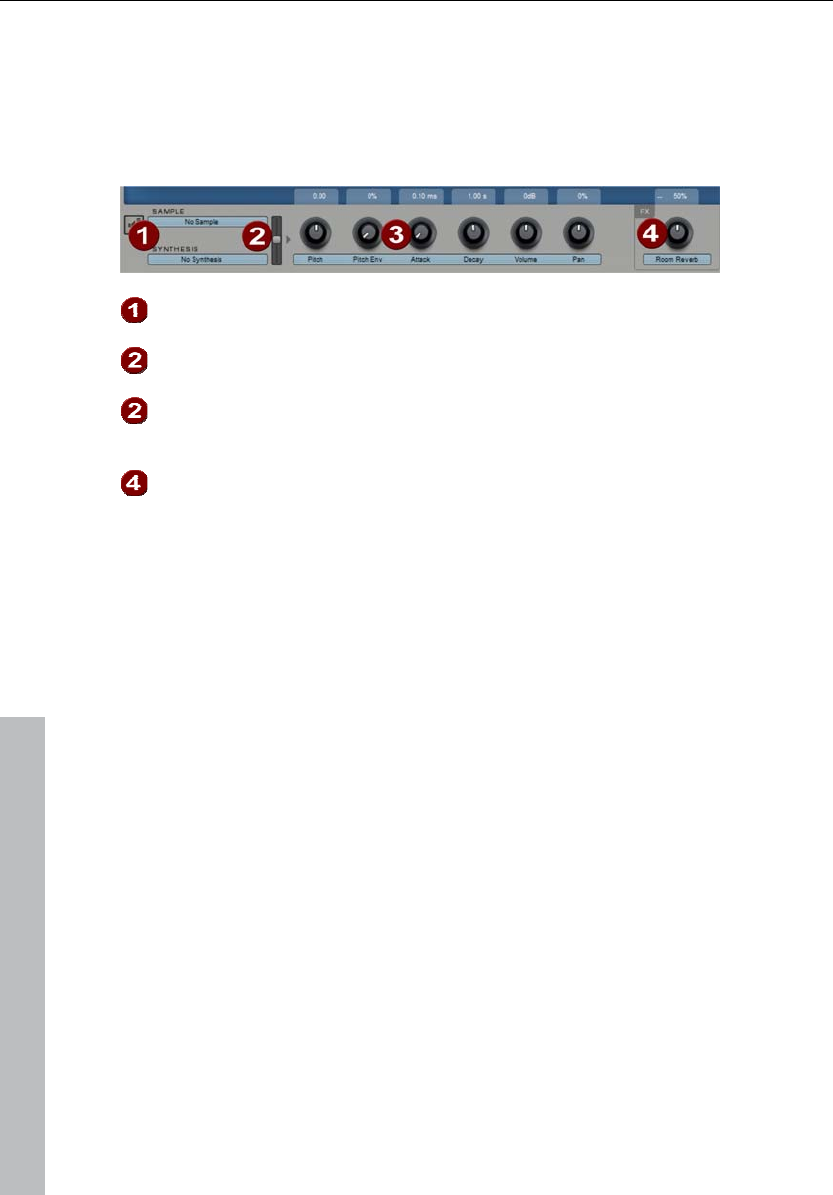
86 Synth Objects
The synthesis in BeatBox 2 consists of a combination of a simple drum
sampler and a synthesizer. There are three different synthesis models possible
for the synthesizer: "Phase Distortion Synth" (FM synthesis), "Filtered Noise",
and "Physical Modeling". The mixed signal of both components is then
processed by a multi-mode filter. An envelope curve ("envelope generator")
time-dependently controls modulations of in all components.
Preview drum istrument
Mix: Mix relationship between drum sampler and synthesizer.
Parameter controller: All six sound parameters for a drum sound can be
directly set and automated via the parameter controllers. The parameters
in question depend on the drum sound currently loaded.
Effects level: Each of BeatBox 2's drum instruments includes an effects
unit which is fed in after the actual sound synthesis and editing. The type
of effect depends on the selected drum sound.
SilverSynth Pro
"SilverSynth pro" is a virtual, analog synthesizer that was based on the
legendary Roland-TB303. This machine appeared in the early 1980s. It was
initially intended as an electronic bass accompanier, but it was at first hardly
taken seriously due to its "unrealistic" characteristics.
The device suddenly became useful later, when techno music was just
becoming popular. The brute force and screeching sounds that this unit
produced suddenly belonged to the major elements of an entire musical style.
Today’s techno productions still use the minimalist, synthetic but warm and
unmistakable sound of this synthesizer.
"SilverSynth pro" is the follow-up to the SilverSynth. The user now has more
influence on the sound. It features an "EnvMod" controller that makes the
typical 303 sound even squeakier. It also features a distortion controller for
adjusting the sound distortion, as well as an integrated echo.
Furthermore, SilverPro has a "Shuffle" controller for adding "groove" to your
synthesizer sequences. Finally, you can use the "MasterVolume" controller to
adjust the synthesizer volume.
www.magix.com

Synth Objects 87
www.magix.com
On the “SilverSynth” symbol is a menu that loads, saves, generates or deletes
(Clear all / Random).
Programming
On the left of SilverSynth there are four knobs and a switch to control the
sound of the synthesizer. On the right there is a step sequenced which you can
use to program the melodies.
Filter automation
The SilverSynth pro offers automation for the rotary button controllers to set
the filter and sound modulation. Each movement of the automatic controllers
can be recorded.
Play/Stop: The sequence of the step sequencers is played and/or stopped,
including recorded rotary button movements.
Record: Records the rotary button movements. The sequence of the step
sequencer is played while you record the results of real-time movements.
Clear record: Deletes the recording of the rotary button movements. Please
remember that the notes of the sequence in the step sequencer are re-set,
changed or deleted.
Turning knobs
waveform: You can choose from basic waveforms that represent the main
proportion of the sound. It is possible to switch between a rectangular
waveform and a saw-tooth waveform.
Cutoff: The Cutoff control steers the synthesizer’s low-pass filter. This control
is used to determine the brightness of the sound. At the upper limit the
synthesizer sounds brightest, at the lower limit of the rotary button, the
synthesizer sounds very hollow.
Resonance: Technically speaking, the resonance control sets how much the
low-pass filter resonates at its cutoff frequency. This is the frequency that is
controlled by the cutoff control. This control largely determines the warmth of
the sound.

88 Synth Objects
www.magix.com
Decay: This control is used to control whether the cutoff filter remains at the
same frequency or whether the filter frequency changes when a note is played
back. If decay is set to the upper limit, then every new note initially sounds a
little bright and then changes its sound as it progresses so that it loses more
and more of its brightness.
Tune: This control raises or lowers all sounds.
EnvMode: This control determines the flow of the envelope curve. The further
right the control is turned, the more high sounds will be added.
Distortion: Here you can override the sounds.
Delay: Delay can be used for reverb and echo effects. There are two controls:
"Feedback" (number of sounds repetitions) sets the intensity of the echo, and
"Length" sets the length of the echo. The length of the echo is set in relation to
the bars, and it adjusts to the current BPM value.
Master: The overall volume can be set in this section.
Shuffle: This control lends more "groove" to the synth sequences.
Step sequencer
A note cell can be occupied by the left mouse key; the right mouse can be
used to delete note cells. You can only set one note per column. To assist you,
a scale of notes appears at the lower edge.
If you click repeatedly on one and the same note cell, then you change the
octave for this note. The color of the cell changes according to the octave.
Blue corresponds to octave 1, red corresponds to octave 2 and green
corresponds to octave 3.
The lower rows (accent and slide) determine the further behavior of individual
notes. Accent increases the volume of the note a little. If a cell is placed in the
“Slide” row, then this note will not be struck again, only the pitch will be
modified.
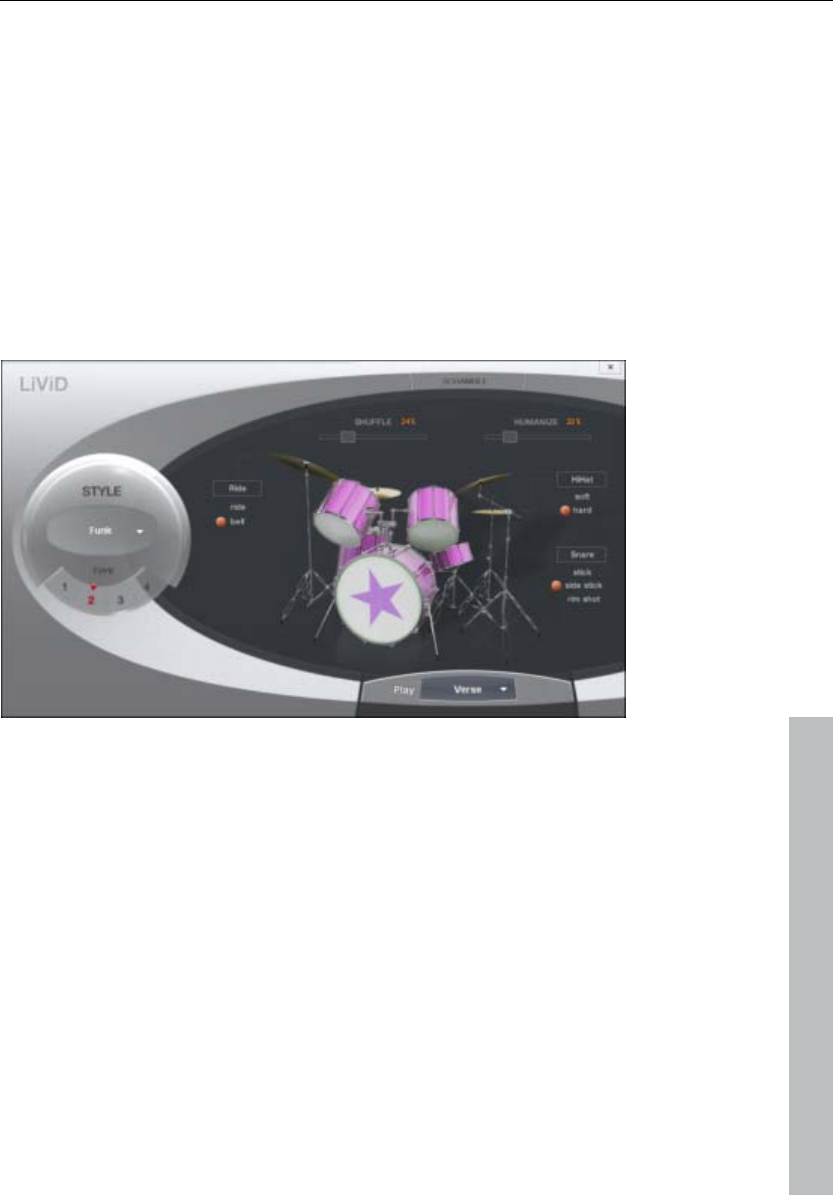
Synth Objects 89
LiViD - Little Virtual Drummer
MAGIX LiViD helps you to turn your ideas into songs. Enter a few basic details
and LiViD will play a full drum track, complete with intro, verses, choruses, fills,
bridges etc.; the entire song structure is laid out for your convenience. Brilliant
stereo drum samples recorded by professional studio musicians and a freely
adjustable “Humanize“ function will create an authentic drum feel with perfect
sound quality.
LiViD features four styles (pop, rock, funk, latin), each of which is subdivided
into four further substyles, as well as six song sections for each substyle (intro,
verse, bridge, chorus, outro, fill-in).
www.magix.com
Scramble: A random sequence of four one-bar patterns is generated internally
for each style/substyle/song section. “Scramble” generates a new pattern
order.
Shuffle: Shifts the second and fourth 16th note of a beat back by a freely
definable amount (100% = triplet rhythm).
Humanize: Randomly shifts all events backwards or forwards, or leaves them
unaffected. Note: these shifts are very subtle and not always immediately
perceptible!
Snare: Sets the snare stick style to “normal”, “side stick” (stick hits the rim
while resting on the skin) or “rim shot” (sticks hits the rim and skin
simultaneously). Exception: the snare’s quietest velocity level ( the "ghost
notes") is always “normal”.

90 Synth Objects
www.magix.com
Hi-hat: Sets the hi-hat sound to “soft” (fully closed) or to “hard” (half-open).
Exception: completely opened hi-hat (pop, type1, verse).
Ride: Sets the ride cymbal sound to “ride” (cymbal is hit on the rim) or “ride
bell” (cymbal is hit on the bell at the center).
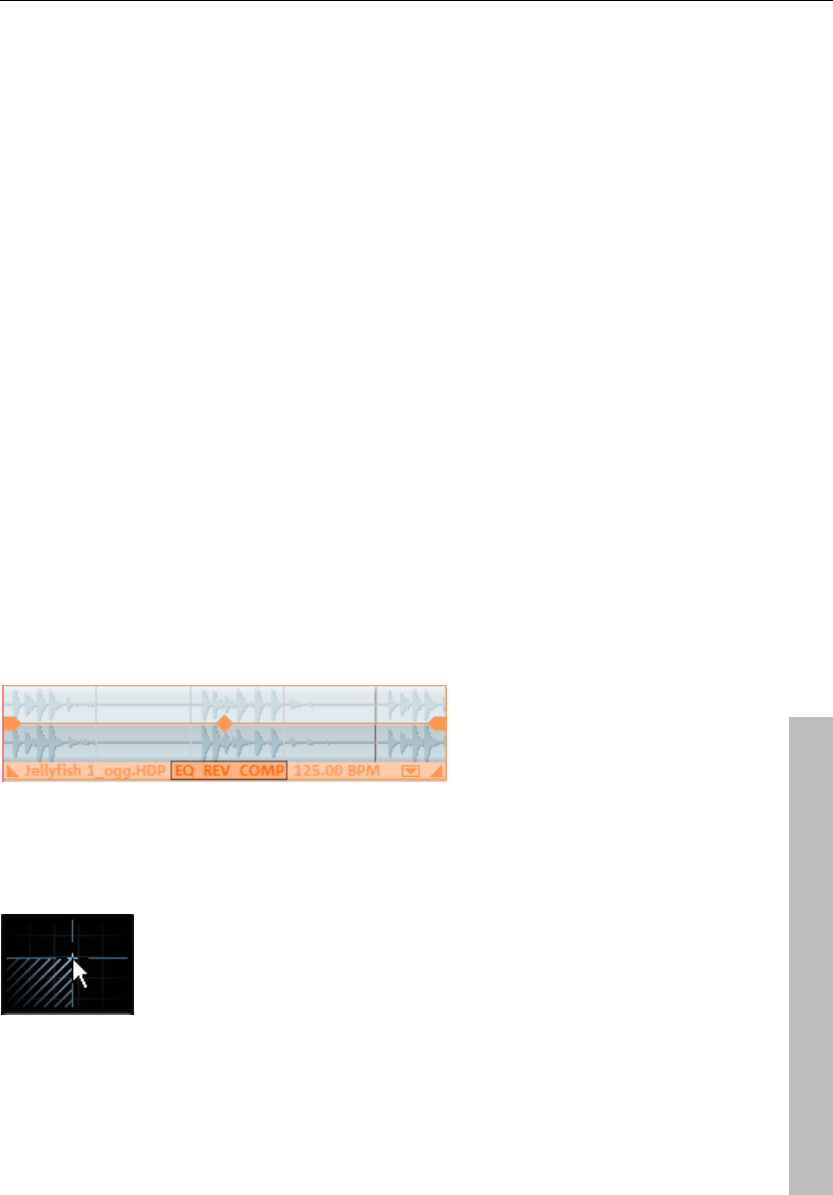
Audio effects 91
Audio effects
MAGIX Music Maker Rock Edition 4 offers you a multitude of infinitely variable
and intuitively adjustable audio effects.
Effects
The effects in MAGIX Music Maker Rock Edition 4 allow the sound spectrum of
all of the audio objects and synthesizers to be thoroughly manipulated. Since
most effects operate in real time, the effects offer ideal room for experimenting
with creative sound design.
Real-time effects
Real-time effects are calculated the first time the object is played back. The
audio file (original material) itself remains unaffected. The effect is recalculated
in real time each time it is played back. The object always retains its original
status when real-time effects are applied.
To change a real-time effect, open the effects rack or the effect's settings
dialog and drag the respective control elements; the changes will be audible
immediately.
The lower edge of an audio object in the arranger lists all currently active object
effects with abbreviations.
www.magix.com
Effect devices controls
Effects are controlled in the conventional way by the use of slider controls,
turning knobs, or buttons or alternatively using the graphic sensor fields.
Sensor fields: Sensor fields may be influenced intuitively with
mouse movements; the graphics and the respective effect
setting change in relation to each other.
92 Audio effects
Power switch: Every effect device in the rack may be switched on or
off separately. This button allows you to directly compare the neutral,
unedited sound of the audio object with the effect setting you have
chosen.
Reset: Every effect has a reset button that restores the effect
device’s initial default. In this state, the effect is not calculated into
the sound, and the effect is not rendered.
Preset selection list: Each effect device features a
selection of presets that are selected via the drop-down
menu.
A/B: The A/B button compares two settings with each other. If you
have selected a preset for the effect and make manual changes to it
later, you can compare the original preset sound with the new settings
by using the A/B button.
Note: The graphics displayed are only samples and these differ according to
the effects devices.
Non real-time effects
A few audio effects are not calculated in real time; instead, after the settings
dialog is closed, copies of the audio material are added for calculating the
effect. This way, no additional calculations will be required during playback.
To change these effects, use the undo function.
The following effects don't work in real time: Freely-drawn filters, gater,
reverse, invert phase.
Using audio effects
Audio effects can be added at different positions in the arrangement, at object
level, in a complete track, or in the master (i.e. everything you can hear).
Audio object effects
Object effects do not affect the entire arranger track, but rather individual
objects. The advantage to this is that effects which are only required at a
specific point in the arrangement only use up processing power at that
particular point.
www.magix.com
Audio effects 93
There are several ways to apply audio effects to individual audio objects:
1. Drag & drop: In the Media Pool setting "templates", the following folders are
visible "Audio FX", "Vintage FX". These contain presets for the most
important effects. These presets have a preview function and can be
dragged & dropped on an audio object in the arranger.
2. Right clicking on an audio object or via the "Effects -> Audio" menu opens
individual audio effects via a menu command.
3. Double clicking on an audio object opens the audio effects rack (view page
93). The most important effects are compiled into one dialog and some
special functions are still available, as is the option of saving all of the effects
settings.
Track effects
Besides the object audio effects, a separate track effects rack with equalizer,
reverb/echo, distortion/filter and compressor as well as the Vintage Effect Suite
plug-ins can be used.
The Vintage Effect Suite plug-ins are being loaded via the plug-in
slot.
You can open the track audio effects rack with the FX button.
A lit FX track button signifies that effects are active in the track.
The track effects can also be applied without having to open the mixer.
www.magix.com
The arranger's trackbox also features the track FX menu. In it, you
will find presets for track effects (view page 93) sorted according
to the instrument type.
Track effects always apply to all audio objects of a track. In comparison to
applying an effect to each object individually, this saves storage space. The
effect itself works the same way as object effects.
Master effects
Master effects influence the mixed sum of all audio tracks. To this end a
Master Audio Effects Rack and additional plug-ins are installed in the Mixer
window. Additionally, there is a 30-day trial version of MAGIX Mastering Suite
(view page 101) for the perfect sound
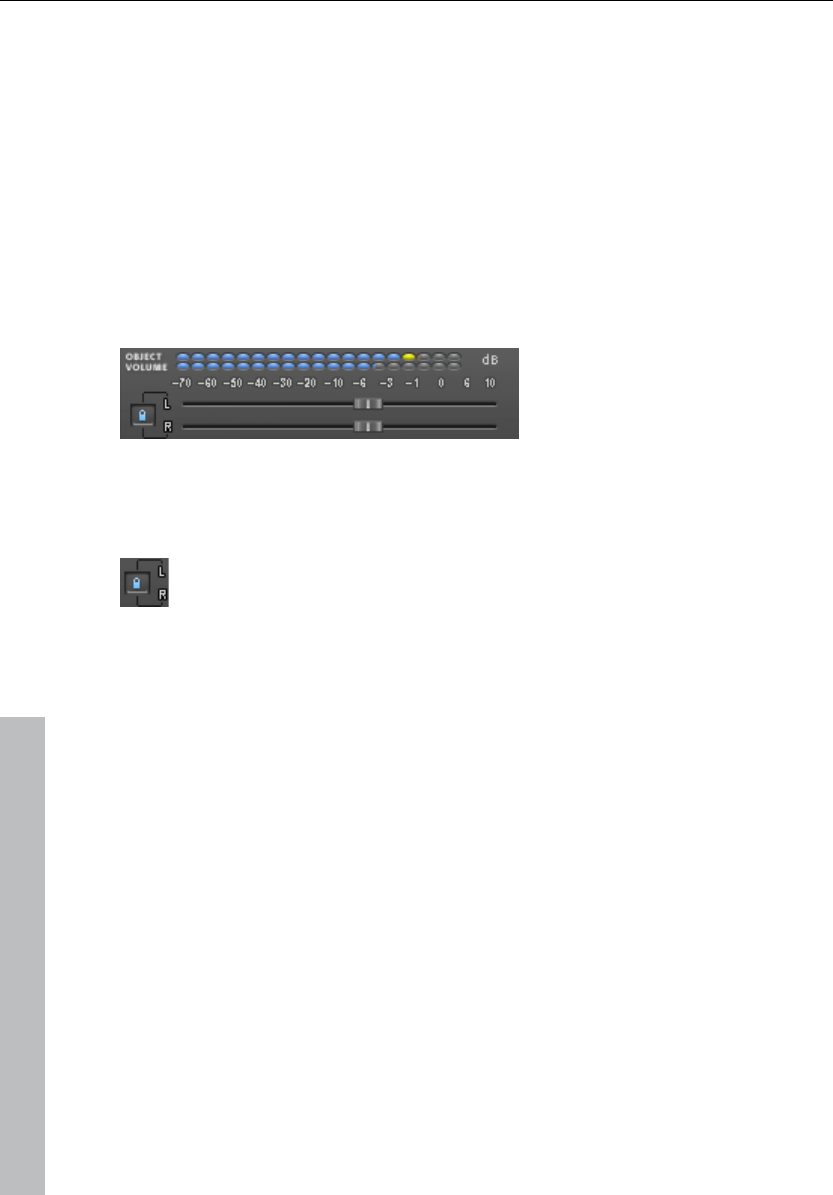
94 Audio effects
Object and master effects rack
The audio effects rack for objects can be opened by double clicking the audio
object. The audio effects rack for the individual tracks or for the entire sound
("master effect") can be opened via the FX buttons in the mixer window ("M"
key).
Besides the most important effects devices like the 10-band equalizer,
compressor, timestretch/resample (objects only), reverb/echo, sound warper,
and amp simulation, the following functions are available:
Object Volume
Here you can set the master level for the selected object. With some effect
combinations undesired distortion may appear as many effects increase
frequency ranges. In this case, you can reduce the master volume.
The faders for each stereo channel are usually moved together.
If you deactivate the left button, the object can be made into stereo panorama
by separate volume controlling for left and right.
Load/Save
The current settings for each applied effects device in the rack can be saved
as an effect preset, e.g. so that it can be used for other objects. Only the rack
effects that were used will be saved and loaded during this process. This
means that effects presets can also be combined.
This function is not yet available for the track effects rack.
Karaoke
This button at the very bottom of the effect rack causes a special karaoke
effect, which more or less eliminates any singing. During this process, typical
medium frequencies, where the human voice normally feels most at home, are
deleted during playing so that somebody else can take over the singing part.
Typical karaoke songs display the song text in subtitle form so that the singer
can follow along with the words. MAGIX Music Maker Rock Edition 4 offers a
www.magix.com
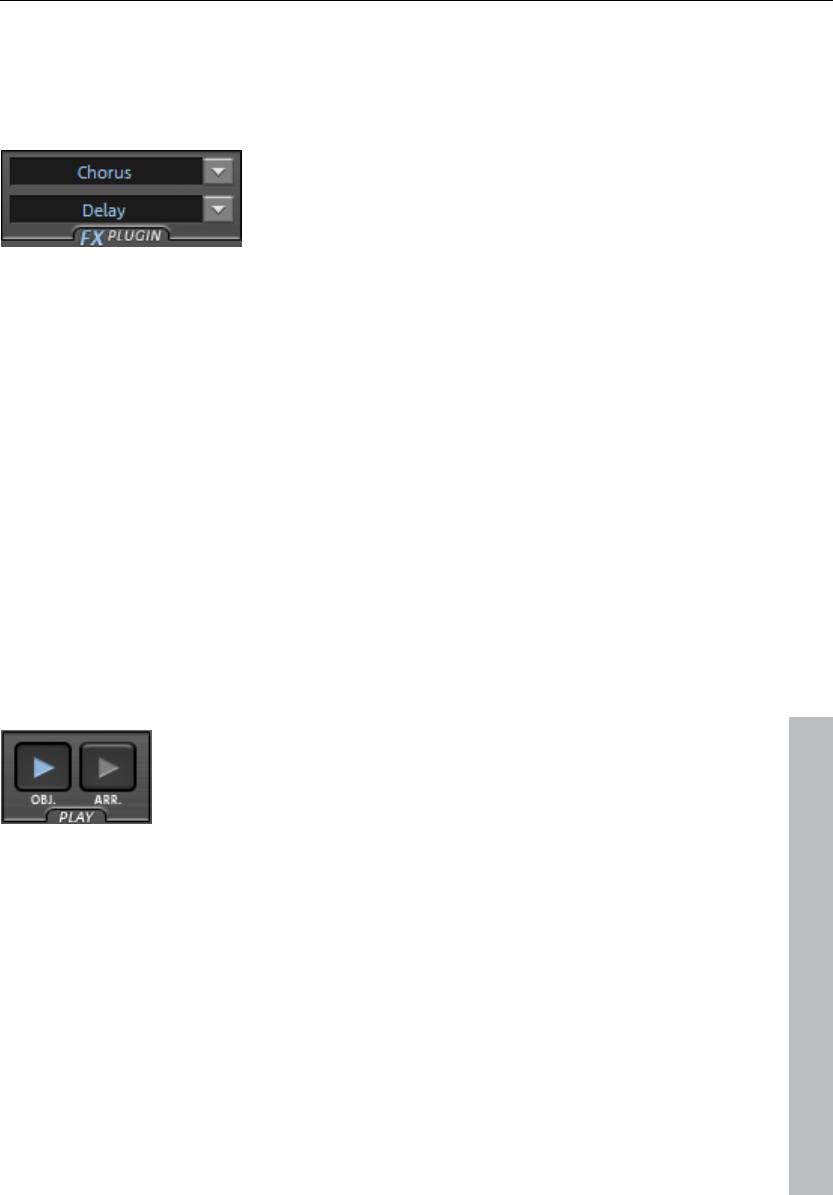
Audio effects 95
similar function: the title editor can be used to create the karaoke subtitles.
Please refer to the section ‘Title editor (view page 72)’ in the chapter on ‘Image
and video objects’ for this feature.
FX plug-ins
These buttons also open the effects from the
Vintage Effect Suite (view page 109).
Apply (destructive editing)
With "Apply" the current setting of an effect or of an entire effect rack can be
"calculated into" the audio object.
This has the advantage that no more processing power will be required for the
effect. The object will be replaced by a new audio file which contains the sound
of the object with the effect. This will then only be played – processor-heavy
"realtime" effect calculation is no longer required.
The disadvantage: Changing the effect settings is not a simple any more. You
can undo these "destructive" changes straight after using the Undo function in
the Edit menu (like every editing operation in MAGIX Music Maker Rock Edition
4). After saving the project this is no longer possible.
In the master effects rack there are no Apply buttons. Instead, the function can
be found in the Edit menu (Audio Mixdown (view page 152))
www.magix.com
Play object/Play arrangement
To the bottom right of the Audio FX Rack you will find two
playback buttons which either play the selected object or
the entire range. This lets you preview all effect settings in
realtime.
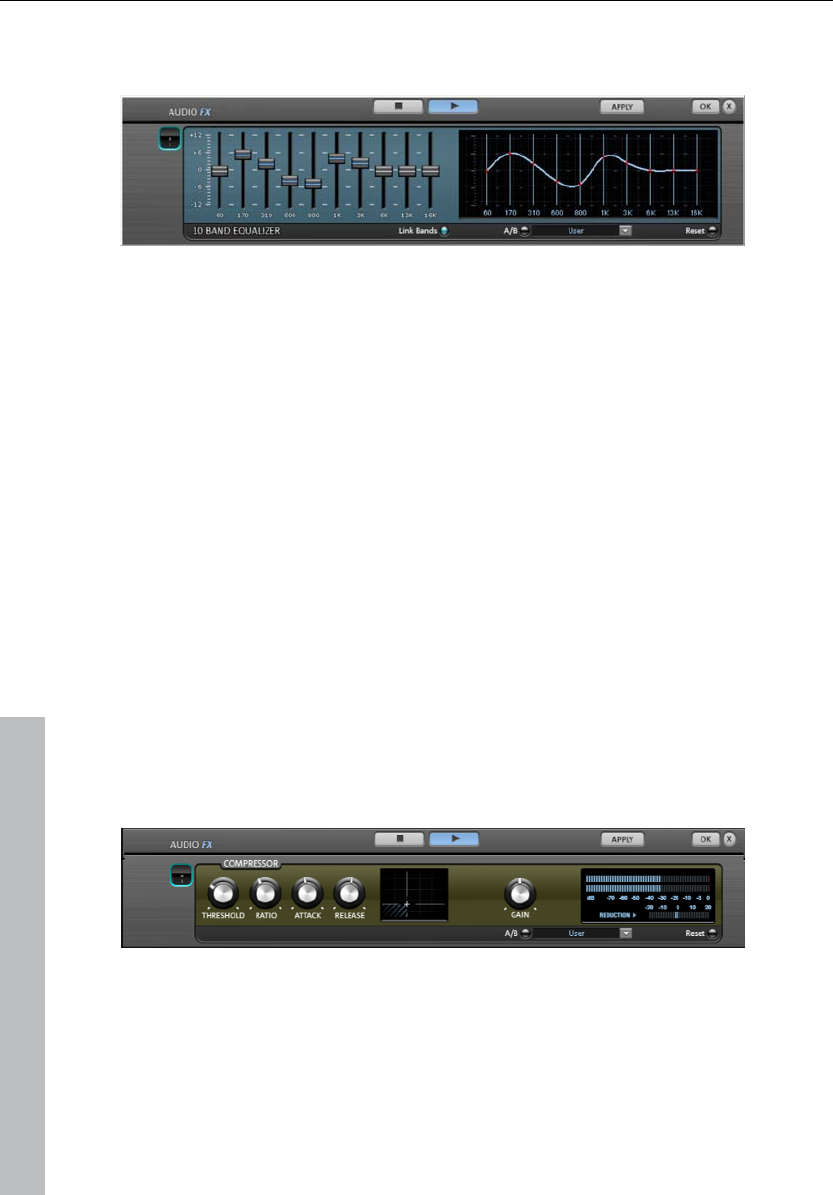
96 Audio effects
Equalizer
The 10-band equalizer subdivides the frequency spectrum into ten areas
('bands') and equips them with separate volume controls. This way it is
possible to create many impressive effects, from a simple boosting of the bass
to complete elimination of a certain range of frequencies. Note: If low
frequencies are boosted too much, the overall sound level is heavily increased
which may lead to distortion. In this event, adjust the overall volume downward
by using the 'master volume' control situated at the bottom center of the effect
rack.
Slider control: Each of the ten frequency ranges can be separately boosted or
turned down with the ten volume controls.
Link bands: Using this button randomly combines the frequency ranges with
each other in to avoid artificial-sounding overemphasis of an individual
frequency range.
Touch screen (right EQ section): This is the 'sensor field' of the EQ. Here you
can draw any type of curve with the mouse. This will be immediately translated
into a corresponding control setting on the left side of the EQ.
Compressor
The compressor is an automated dynamic volume control. It limits overall
dynamics, maintains the volume of loud passages so they stay loud, and
increases the volume of low passages. A compressor can be put to good use
for e. g bass recordings and vocals, but also as a master effect in the mixer for
subsequent editing of the overall sound.
www.magix.com
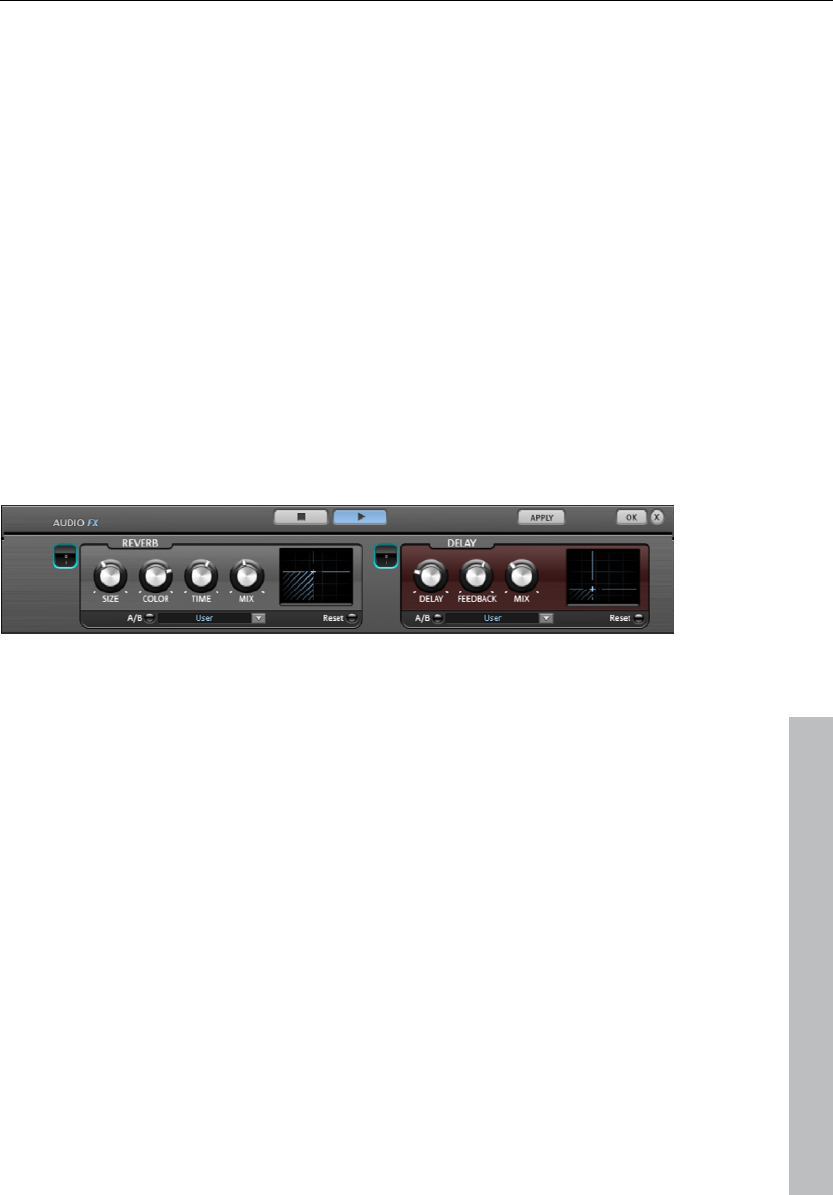
Audio effects 97
Processing is carried out using a "look-ahead" method, similar to high-quality
studio appliances. There are no peak overmodulations or other artifacts as the
algorithm can never be 'surprised' by sudden level peaks.
Ratio: This parameter controls the compression level.
Threshold: This sets the volume threshold below and above which
compression is applied.
Attack: Sets the algorithm's reaction time to increasing sound levels. Short
attack times can create an undesirable "pumping" sound, as the volume is
quickly reduced or increased correspondingly.
Release: Sets the algorithm's reaction time to falling sound levels.
Gain: The gain controller amplifies the compressed signal.
Reverb
The reverb effect device offers newly developed and very realistic reverb
algorithms to add more room depth to your recording.
www.magix.com
Reverb is probably the most important but also the most difficult effect to
generate.
Fundamentals
Our everyday experience shows that not every room matches every instrument.
Thus we have designed “virtual” rooms. However, it still remains important to
find the correct parameters. Here are some examples of parameters that are
decisive for the sound impression in real and virtual rooms:
Size of room: The larger a room, the longer the sound travels between walls
or objects. Our brain “calculates” the size from the time difference. The size
impression is mainly determined from so-called first reflections and the
discreet echo. We don’t notice a (diffused) reverb.

98 Audio effects
www.magix.com
The reverberation time is mainly influenced by the composition of the walls,
ceilings and floors. This reverb time is highly frequency-dependent. For
instance, the highs and mids are dampened more in rooms with curtains,
carpets, furniture and some corners than in an empty and tiled room.
The density of the reflection: The sequence of the first reflection is
particularly important. A room with many individually recognizable echoes feels
alive, especially if they are quite far apart.
The Diffusion: Simple reverb machines do not take into account that
reflections become more and more complex as they develop. They blur the
first echoes at the beginning, which sounds artificial and “two-dimensional” for
many signals. Our reverb effect works like a real room instead where individual
echoes can still be heard at the beginning of the reverb but then reflect
amongst each other more and more until they disappear in the signal sustain
as a so-called “diffused hiss”.
The 24 presets include many rooms that were designed for certain instruments
and applications and whose internal parameters have been optimized for these
applications. However, you can influence most of the characteristics of the
room using the provided sliders.
In addition to the rooms we have modeled two device types in the reverb effect
that allow you to create an artificial reverb for a longer time: Plate Reverb and
Spring Reverb.
Plate Reverb: A plate reverb consists of a large metal plate (often 0.5 to 1m²
thick or more), that is put into motion by a magnet and coil system (similar to a
loudspeaker). On the reverb plate so-called “taps” are positioned at different
locations. These are pick-ups comparable to those on a guitar. Reverb plates
have a very dense sound (high diffusion); no direct echo can be heard. They
are therefore ideal for percussive metal. With vocals a plate reverb generates a
smooth “wellness effect”.
Spring Reverb: You probably remember Spring Reverb from guitar and
keyboard amps, particularly older ones. At the bottom of these amps a unit
consisting of two to four spirals is mounted on a vibration-free carriage. As
with the reverb plate it uses systems for transforming the electric signal into a
mechanical one. There are different designs and sizes of spring reverb;
however, they all have the same quite peculiar sound: the typical “bloing”
sound when the springs are moved, similar to splashing. When the reverb dies
away the basic pitch of the spring(s) can usually be heard quite clearly.
Furthermore, the frequency range is considerably limited due to the losses in
the spirals and in the used pick-up/transmitter. Despite this, the sound is
special and some of the latest music styles (e.g. dub & reggae) would hardly
be possible without spring reverb.

Audio effects 99
www.magix.com
Parameters
The reverb effect has the following parameters:
Size: defines the size of the room (or the system for the plate and spring). With
some low “size” settings you can also reduce the distance between the
individual reflections. This allows resonance to develop (accentuated frequency
ranges), which can sound oppressive if the reverb sustain is too long. The
proper size for each instrument can be gauged by taking into account the
interplay between the room and the resonance.
Time: reverberation time. With this controller you can define how far the echo
will be absorbed, i.e. the time for the reverb to die away. Turning this knob to
the left minimizes the time. You will then only hear the first reflection. Turning
the knob to the right minimizes the absorption and thus results in a long
sustained reverberation.
Color: within certain limits you can influence the sound characteristic of the
effect. The effect of this controller depends on the used preset. In rooms
“Color” controls the dampening of the highs in the reverb (from dark to bright)
as well as pre-filtering of the signal. The controllers for plate and spring presets
also determine the dampening of the basses.
Mix: this controller sets the mix ratio between the original and the edited
signal. For rooms you can therefore quite easily move a signal further into the
room by increasing the effect share. The last four presets are intended for use
in an AUX channel of the mixer and are set to 100%.
Presets
The presets are primarily sorted by instruments; however, you can (and should)
choose which preset you want to use for which instrument. The rooms in
particular have completely different characteristics which are noticeable for
some and more subtle for others. Generally we recommend reverb with many
individually audible reflections and slight diffusions for dense arrangements. On
the other hand you can use Plate Reverb for minimally arranged songs in order
to create a dense atmosphere.
However, you should avoid adding reverb to too many instruments. Sometimes
some extra mixing is sufficient to move an instrument slightly away from the
total sound. It is often recommendable to adjust the sustain to the song
tempo, i.e. the faster the track, the shorter the reverb. Otherwise the sound
easily sounds washed-out and indifferent.
Here is a list of the presets and their characteristics:

100 Audio effects
www.magix.com
Drums and percussion
Drums: Studio A: small room, high diffusion, e.g. for percussion instruments
Drums: Studio B: slightly larger & more lively than A, medium diffusion, distinct
first reflections, signals seem closer than A
Drums: Medium-sized room: medium-sized room, moderate reverb, medium
diffusion, relatively few first reflections
Drums: empty hall: medium-sized empty hall, medium diffusion
Drums: Snare reverb plate A: plate reverb, high diffusion, relatively bright
sound character, typical hissing of a reverb plate.
Drums: Snare reverb plate B: reverb plate, high diffusion, slight dampening of
highs & basses, sound moves more to mids with time, stereo panorama
narrower than for A
Vocals
Voice: main hall A: standard hall, e.g. for monitoring/recording, medium-sized
room, medium diffusion, minimum sustain time
Voice: main hall B: like A, but as a small hall (longer delay times than A),
distinct reflection pattern, longer reverb time
Voice: early reflections: medium-sized room, low reverberation share, very
distinct early reflection pattern, e.g. for spreading vocals
Voice: warmer room: small, intimate room, dark character
Voice: studio reverb plate A: reverb plate with medium diffusion, slight dark
adjustment, comprehensive sound characteristics
Voice: studio reverb plate B: Like A, but more diffusion and bright to medium
sound adjustment, slight vintage character
Voice: large hall: large hall, medium diffusion, relatively long reverb time
Voice: cathedral: delayed attack, slight diffusion, complex echo pattern, some
hard reflections, dark voice adjustment, long reverb sustain
Guitar
Guitar: Spring reverb mono A: spring reverb simulation, typical oscillating
sound of the springs, limited frequency range
Guitar: Spring reverb mono B: Like A, slightly broader frequency range,
greater diffusion
Guitar: Spring hall stereo A: similar to spring hall mono A, but one
spring/transmission system per channel (L/R)As a result of the mechanical
interlinking of the systems, the reverberations meet at the middle of the stereo
field
Guitar: Spring reverb stereo B: Like stereo A, slightly broader frequency range,
greater diffusion
Keys (Piano, Synthesizer)
Keys: Stage reverb: Larger room with stage, high amount of complex first
reflections, slightly delayed attack, medium reverberation

Audio effects 101
www.magix.com
Keys: piano reverb: concert hall, long reverberation, medium diffusion,
minimum dark adjustment
Aux (to be used as a send effect in a mixer FX track)
Aux: Room: Standard room for the aux path, mix 100%, medium-sized,
medium diffusion, some distinct first reflections, low reverberation
Aux: Hall: Medium-sized hall (100% wet), medium diffusion, short reverberation
Aux: Reverb plate: Reverb plate (100% wet), high diffusion, light bright
adjustment
Aux: Spring reverb: Reverb spring (100% wet), stereo, high diffusion, slightly
medium sound characteristics
Delay (echo)
The echo effect is defined more closely with ‘delay’ and ‘feedback’ and
calculated into the original sound by means of ‘mix’.
Delay: Here the period of time between the individual echo’s can be
determined; the more you turn the control to the left, the faster the echo’s will
follow each other.
Feedback: Here the number of echo’s can be adjusted. Turned completely to
the left, there is no echo at all; turned completely to the right there are virtually
endless repetitions.
MAGIX Mastering Suite (demo version)
MAGIX Mastering Suite is included in MAGIX Music Maker Rock Edition 4 as a
demo version and may be used without any limits for 30 days after installation.
A full version of MAGIX Mastering Suite is available in MAGIX Music Maker
2008 Producer Edition (and its successors).
MAGIX Mastering Suite is a special effect rack for use with the mixer master
channel. Its effects serve the so-called "Mastering" with which the finished
mixed music file is given its last one-over.
The On/Off switches can switch the effects on and off individually. Each effect
has a range of presets that can all be picked from a list along the lower border
of the effect.
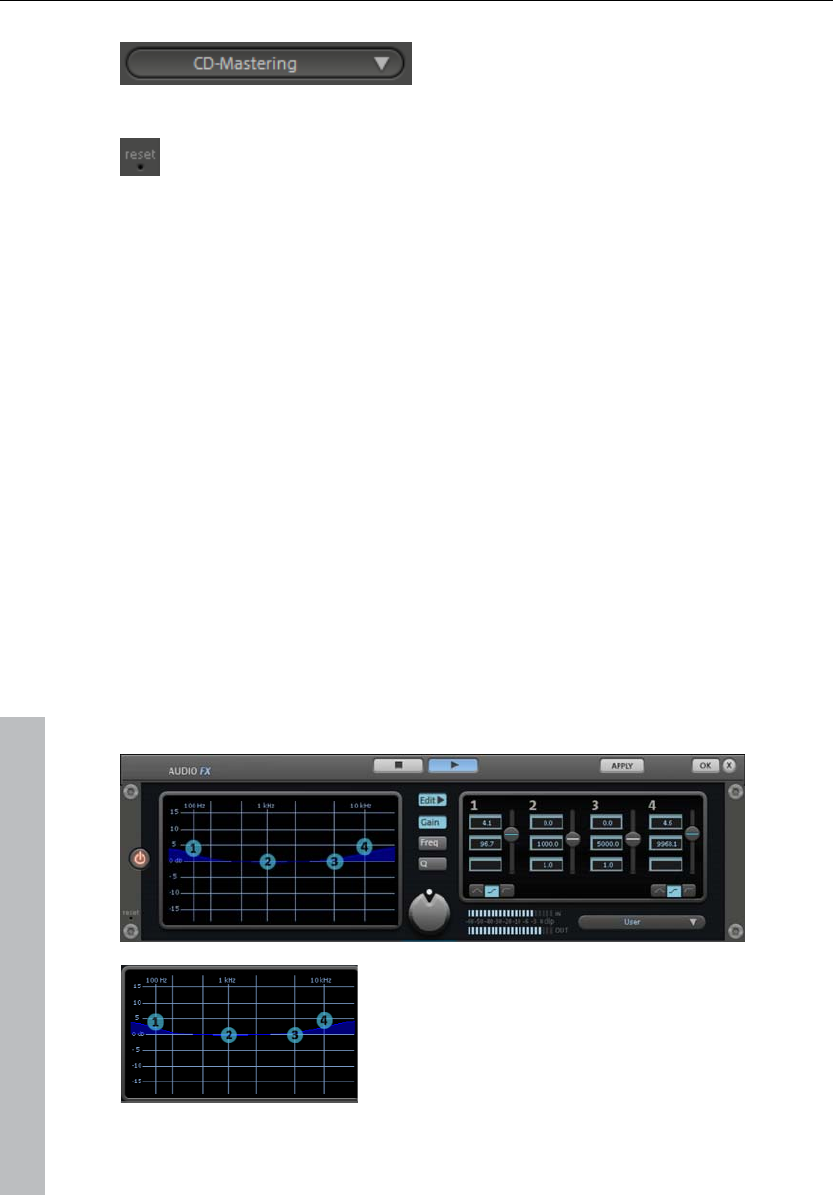
102 Audio effects
The settings of all effects can also be saved
together as one preset so that you can use
your ideal mastering setting again for other
arrangements.
Each effect can be reset by pressing the
"Reset" button. You can press the "Bypass"
button to temporarily deactivate the effects.
The MAGIX Mastering Suite consists of the following components:
Parametric EQ
Stereo Processor
MultiMax
Limiter
Digital Audio Meter
Parametric Equalizer
The parametric equalizer consists of four filter bands for adjusting the overall
sound of the music track. Each band is a filter with a typical "bell shape".
Within a certain frequency range and around an adjustable middle frequency,
you can increase or reduce the signal level gain. The width of this frequency
range is called bandwidth. The bandwidth is defined by the Q value. The higher
the Q value, the narrower and steeper the filter curve.
You can influence the basic sound of the mix by increasing and decreasing the
broadband to give it more "depth" (lower center = 200-600 Hz) or more "air"
(highs = 10Khz). You can also decrease the narrow bandwidth (high Q value) in
the frequency response, e.g. to remove disruptive frequencies.
Graphic: The resulting frequency path of the
equalizer is displayed in the graphic. The frequency
is spread out horizontally, the increase or decrease
of the respective frequency, vertically.
www.magix.com
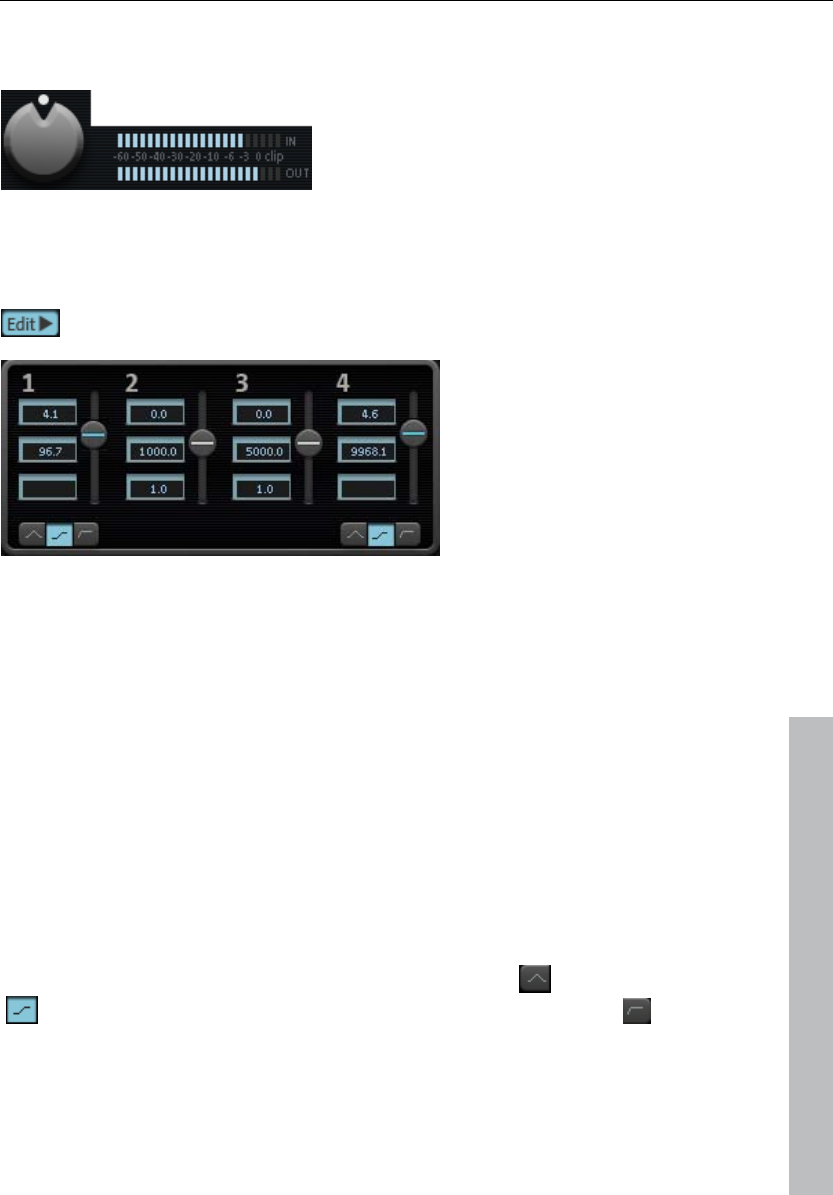
Audio effects 103
The blue bullets 1-4 symbolize the four wave bands. You can move them
around with the mouse until you find your desired frequency response.
Peak meter: The peak meter gives you control over the output level of the
equalizer. The adjacent master gain controller can be used to balance the level
with the EQ.
Edit: The "Edit" button opens the fine tuning for the four bands:
Parameter selection: With the buttons on the right you can select the
parameter that can be adjusted with four faders of each band. Furthermore,
there are number keys to enter every parameter of the bands.
www.magix.com
Gain dB: These controllers allow you to raise or lower the filter. Setting the
controller to 0 deactivates the filter and doesn’t use CPU power.
Freq. Hz: The center frequency of the individual filters can be set between 10
Hz and 24 kHz with the frequency controllers. Freely choosing the frequency
enables multiple filters to be set to the same frequency in order to have a
greater effect.
Q (bandwidth): Set the bandwidth of the individual filters between 10 Hz and
10 kHz.
There is still a peculiarity among bands 1 and 4; The filter curve for these
bands can be changed from a normal "peaking" EQ filter ( ) to "shelving"
( ) (this is the basic setting) and high (band 1) or high-cut (band 4) .
When using the "shelving" filter, a soft increase or decrease in all frequencies
happens above or below the filter frequency, and the Q parameter does not
have a function here. With a low-cut or high-cut filter, all frequencies below
(low-cut) or above (high-cut) the set frequency are filtered out.
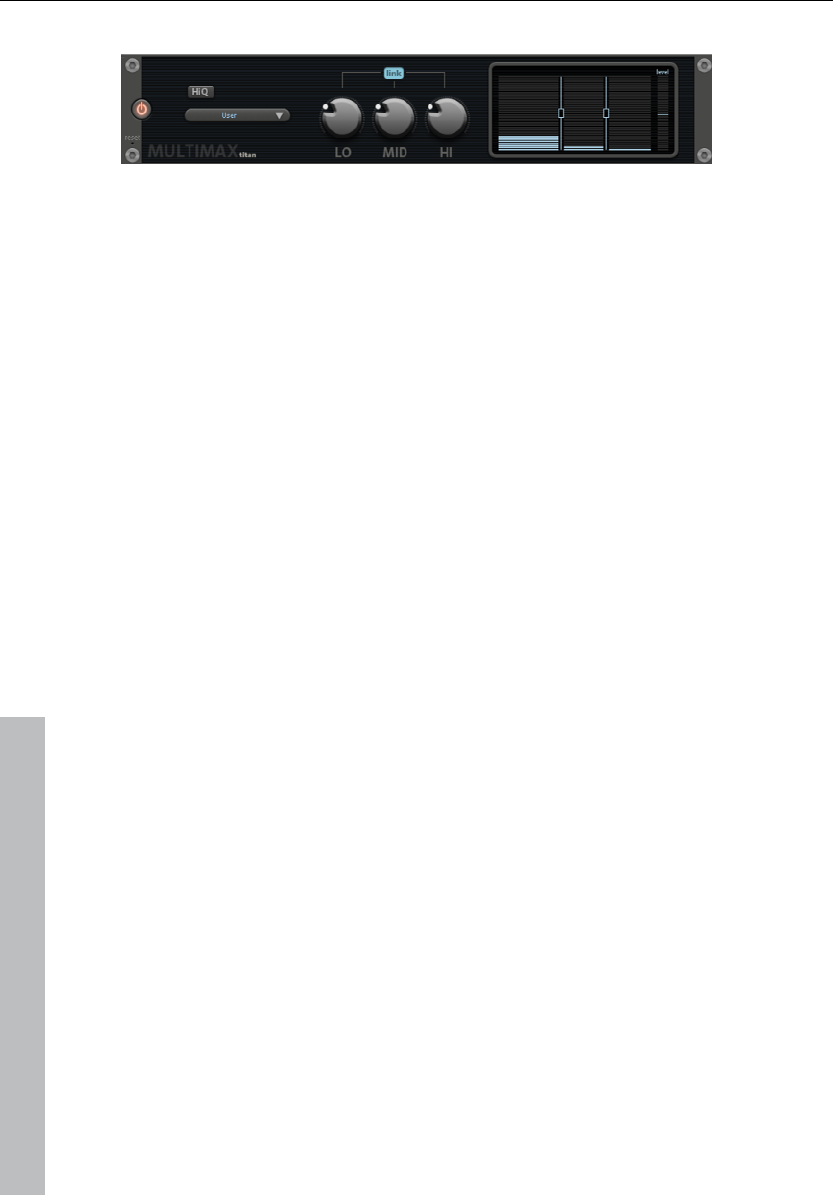
104 Audio effects
Multimax
MultiMax is a compressor with three independent frequency bands. The
dynamics are edited separately for each band.
The advantage of a multi-band compressor versus a "normal" compressor is
that the "pumping" tendency and other unwanted side effects are dramatically
reduced while editing the dynamics. For instance, this prevents a bass peak
from "reducing" the entire signal.
Multi-band technology also lets you specifically edit individual frequency
ranges.
Link: When this function is activated and one fader is adjusted, all faders are
changed at the same ratio. However, the way the dynamics are edited is not
affected.
HiQ: If the "HiQ" ("high quality") setting is activated, an even more precise
algorithm is used, however this requires more processing power. We
recommend switching this setting on before exporting the project.
Setting the frequency bands: The settings of the frequency bands are
changed directly via the graphic. Simply click on the separating lines to move
them.
Bass/mid/high: These controllers define the level of compression for each
frequency band.
Presets: Multimax provides access to presets for special applications, for
example:
Cassette NR-B decoder: MAGIX Music Maker Rock Edition 4 simulates
decoding of Dolby B + C noise suppression if a Dolby player is not available.
Cassettes recorded with Dolby B or C sound more muffled if played back
without corresponding Dolby.
Leveler: This setting automatically sets the entire material to an identical
volume level. The volume control knob is no longer required. Use this function
to equalize greater volume differences within a song. To equalize volume
variations between different songs, the function "Normalize loudness" is also
provided in the "Effects" menu.
www.magix.com
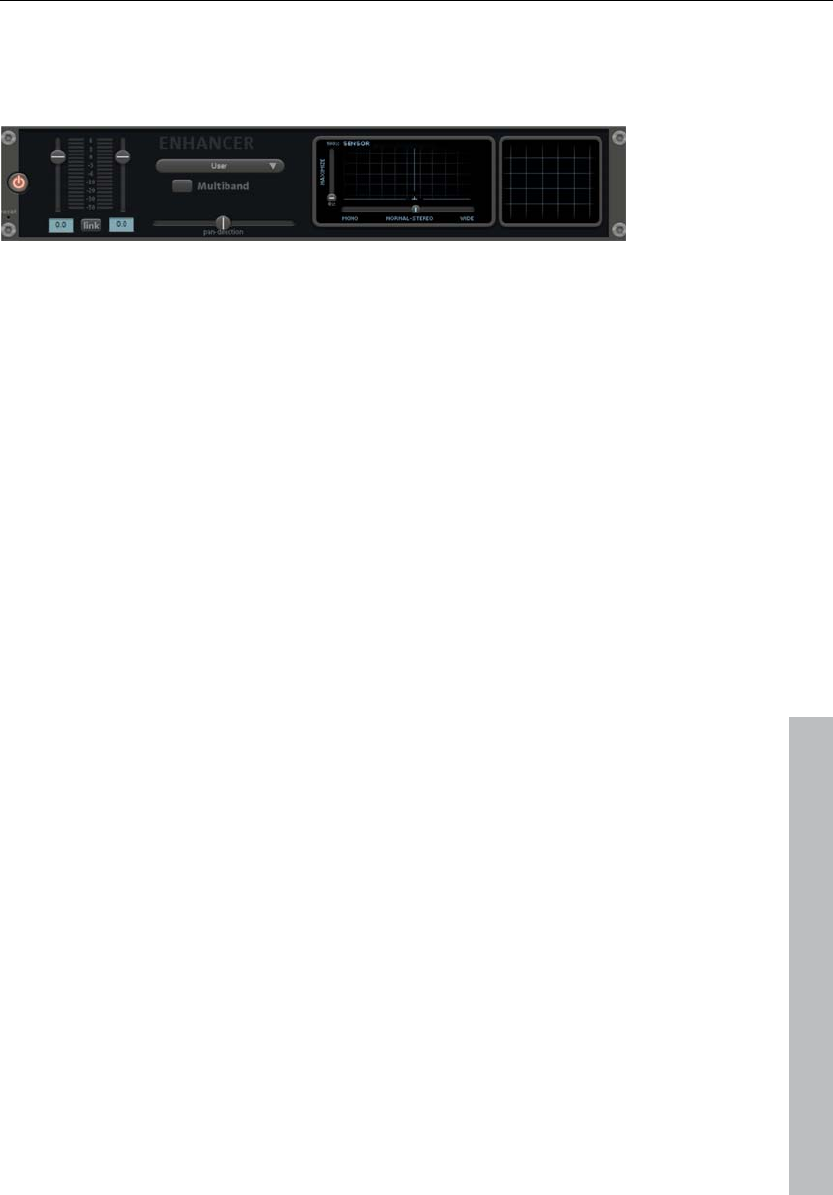
Audio effects 105
www.magix.com
nds De-Esser: These special presets help to remove overstressed hissing sou
from speech recordings.
Stereo FX
The Stereo FX enhancer allows you to determine the positioning of the audio
material in the stereo picture. If the stereo recordings sound out of focus and
undifferentiated, an extension of the stereo base width can often provide better
transparency.
the right channels include identical
material and the bandwidth control is pushed to the extreme left on “mono”,
his
ono.
single channel, thereby adjusting
the entire balance. The reduction of left and right levels is displayed under the
In order to achieve greatest compatibility with mono, the display should come
Karaoke presets: These presets open a special karaoke effect that more or
Bandwidth control: Adjusts the bandwidth between mono (on the extreme
left), unchanged bandwidth (center), and maximum bandwidth (”wide”, on the
extreme right). Reducing the bandwidth can produce a rise in the level. In
extreme cases, e.g. when the left and
the result can increase the level by 3 dB.
Raising the bandwidth (values of 100) diminishes the mono compatibility. T
means that recordings edited this way sound hollow when listened to in m
Volume control: Adjusts the volume of every
control buttons. A centered recording can later be moved to the left or right of
the stereo balance.
Stereo meter: This provides a graphic display of the phase relation of the audio
signal. You can use it to review the orientation of the signal in the stereo
balance and the effect of the stereo enhancer.
closest to a diagonal line. Otherwise some frequency ranges may erase
themselves if the stereo signal is played on a mono device.
less eliminates vocals. It deletes middle frequencies typical for human vocals
during playback so that someone else can do the singing.
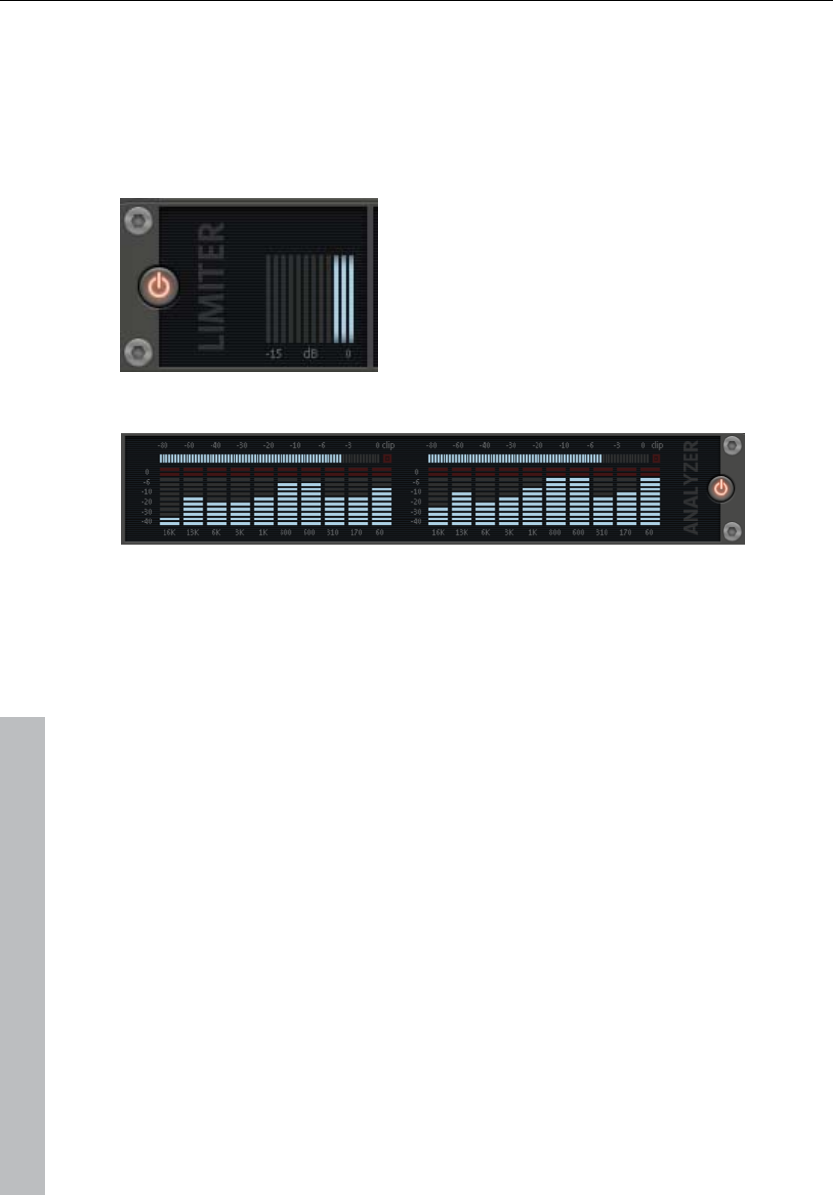
106 Audio effects
www.magix.com
ubtitles in the
video clip so that the singer can follow along. MAGIX Music Maker Rock
Edition 4 also comes with a suitable feature: the title editor, which can be used
to create karaoke subtitles. Please read the "Title editor" section in the chapter
"Images and video objects".
Limiter
In typical karaoke songs, the lyrics are usually displayed as s
The Limiter prevents clipping by automatically
lowering any volume levels that are too high.
Quiet parts remain unaffected. Unlike the
Compressor, this feature attempts to preserve
the basic sound as much as possible.
Digital Audio Meter
On the lower border of the MAGIX Mastering Suite there is a digital audio meter
which provides separate control method displays for 10 wave bands on each
channel. This device is used for orientation purposes, e.g. selective equalizer
editing.
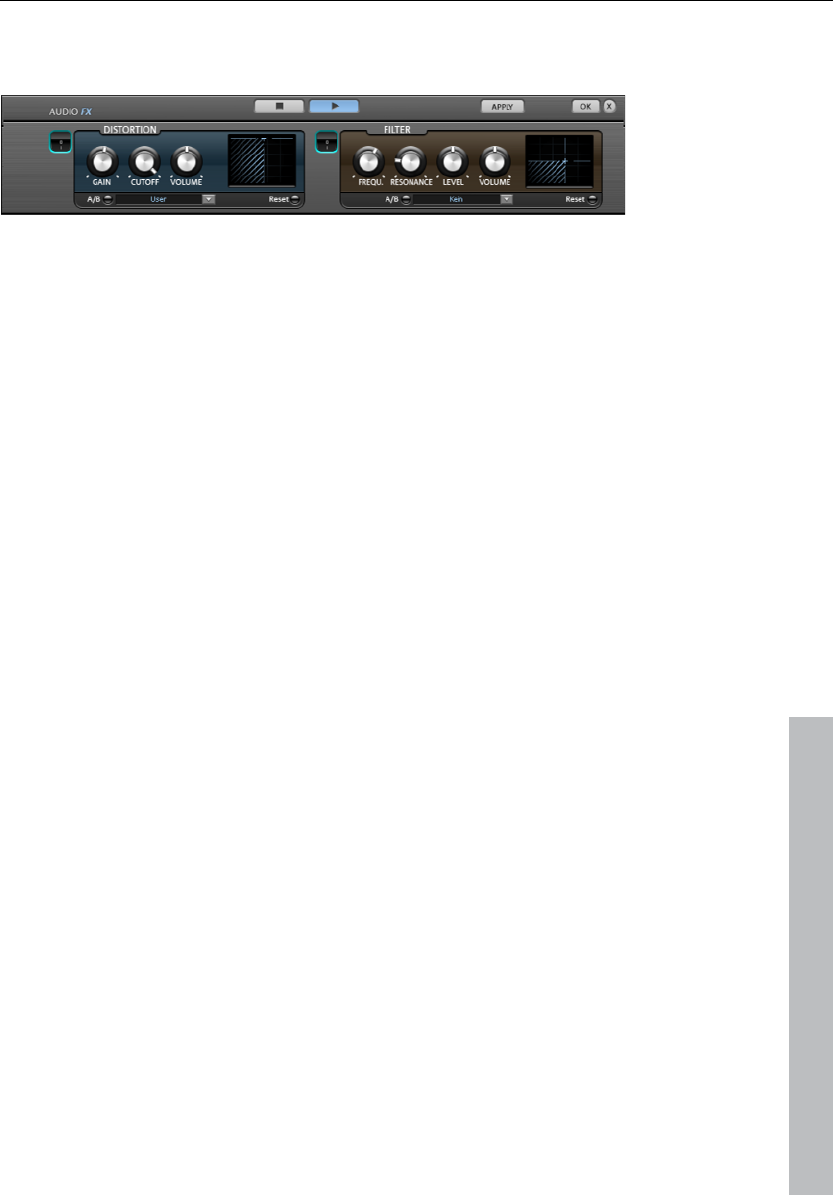
Audio effects 107
Sound Warper
modulates the audio object.
www.magix.com
Distortion
This is a distorter, which over-
Gain: With these controls you adjust the degree of distortion. ‘Gain’ designates
the prestage to an amplifier.
st the frequency ranges that are to be distorted.
Volume: Here you can adjust the volume of the distorter. The higher you set
the ‘gain’ control, the louder the distortion when compared to the overall
volume.
Filter
Frequency: Here you set the frequency that is to be filtered.
Level: Here the filtering intensity is adjusted.
Resonance: Here you set the range (band width) around the frequency which
is to be boosted together with the frequency.
Volume: Here the filter volume can be adjusted separately.
Cut off: Here you adju
Similar to an equalizer, the filter controls the volume of certain frequency
ranges. It is however also possible to completely suppress frequencies so that
very impressive distortions are possible.
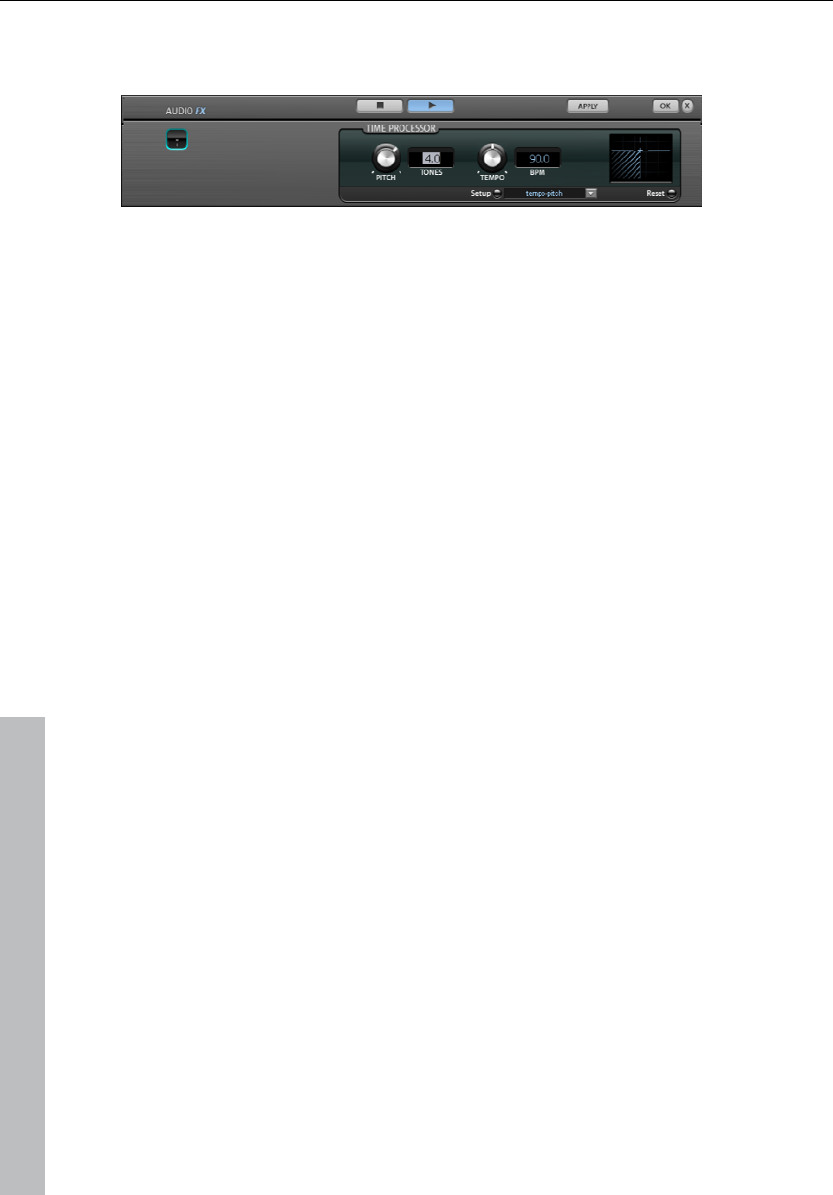
108 Audio effects
Timestretch and
www.magix.com
pitchshift
This effect device changes the object’s speed and/or pitch.
ect’s speed
(‘pitch-shifting’).
the tempo independent of the pitch ("time-
stretching"). The object acts as if it were compressed or stretched on the
the
formation on pitch and speed.
This button opens a setup dialog where you can select various
ing in standard quality. This method is
suitable for audio material without a pronounced beat. Beat markers are
Smoothed: Timestretching and pitchshifting for audio material without pulsing
nic orchestral instruments,
, and singing. Beat markers are not evaluated.
e material is "smoothed",
hase level. This
ing or solo
instrumentation. Problems in the shape of distortions may arise with more
complex spectra (sound mixes from various instruments or finished mixes).
Beat marker slicing: Beat-synchronous timestretching and pitchshifting via
splitting and temporal repositioning. Exactly set beat markers are required at
the beats or transients. The markers can be generated in real time
(automatically) or read from the WAV file if available (patched). In the Premium
version's included MAGIX Music Editor, a patching tool is provided for users to
set the markers themselves. The algorithm is suitable for rhythmic material that
can be divided into individual beats or notes. This requires a low audio level
before each beat or note.
Pitch: This control changes the pitch independent of the obj
Tempo: This control changes
track.
Tones/BPM: These fields are used to numerically enter the pitch or speed
change. Only MAGIX Soundpool files are suitable for numerical entries as
contain in
Setup:
pitchshifting and timestretching procedures.
Standard: Timestretching and pitchshift
evaluated to improve audio quality.
elements. The method is suitable for polypho
pauses, speech
Here a considerably more complex algorithm is used which requires more
processing time. The material can now also be used on very large factors
(0.2...50) without bringing about strong artifacts. Th
which makes the sound softer and emits it at an adjusted p
smoothing is hardly audible, for example, with speech, sing

Audio effects 109
www.magix.com
Beat marker stretching: Beat-synchronous timestretching and pitchshifting in
ed between beat markers positions so
that the beats or attacks at the beat marker positions are not impaired by
stretching. The markers can be generated in real time (automatically) or read
from the source file if available (patched). This method is suitable for rhythmic
material that can not be divided into individual beats or notes because the
beats or notes overlap each other.
Beat marker stretching (smoothed): Beat-synchronized timestr tching and
pitchshifting in high audio quality even with extreme time extension. Beat
be generated in
real time (automatically) or read from the WAV file if available (patched). This
idual
ecause the beats or notes overlap each other. This method
requires a lot of processing time which is why it should be used sparingly on
ry
udio quality. Suitable for all types of audio material. Beat markers are
evaluated to improve audio quality. This method requires so much processing
ons.
pitchshifting for vocal solos, speech,
or solo instruments. The material must not contain background noise, and
th
h. In addition, the formants remain
when pitchshifting.
standard quality. The material is stretch
e
markers are used at the beats or transients. The markers can
method is suitable for rhythmic material that can not be divided into indiv
beats or notes b
less powerful systems.
Universal HQ: Universal methods for timestretching and pitchshifting in ve
high a
time, that a realtime application is recommended only in exceptional situati
Using the apply function is recommended instead.
Monophonic voice: Timestretching and
excessive reverb may also be detrimental to the use of this method. Wi
suitable material the audio quality is very hig
Resampling: Pitch shift and tempo cannot be changed individually. This
method requires considerably little CPU time.
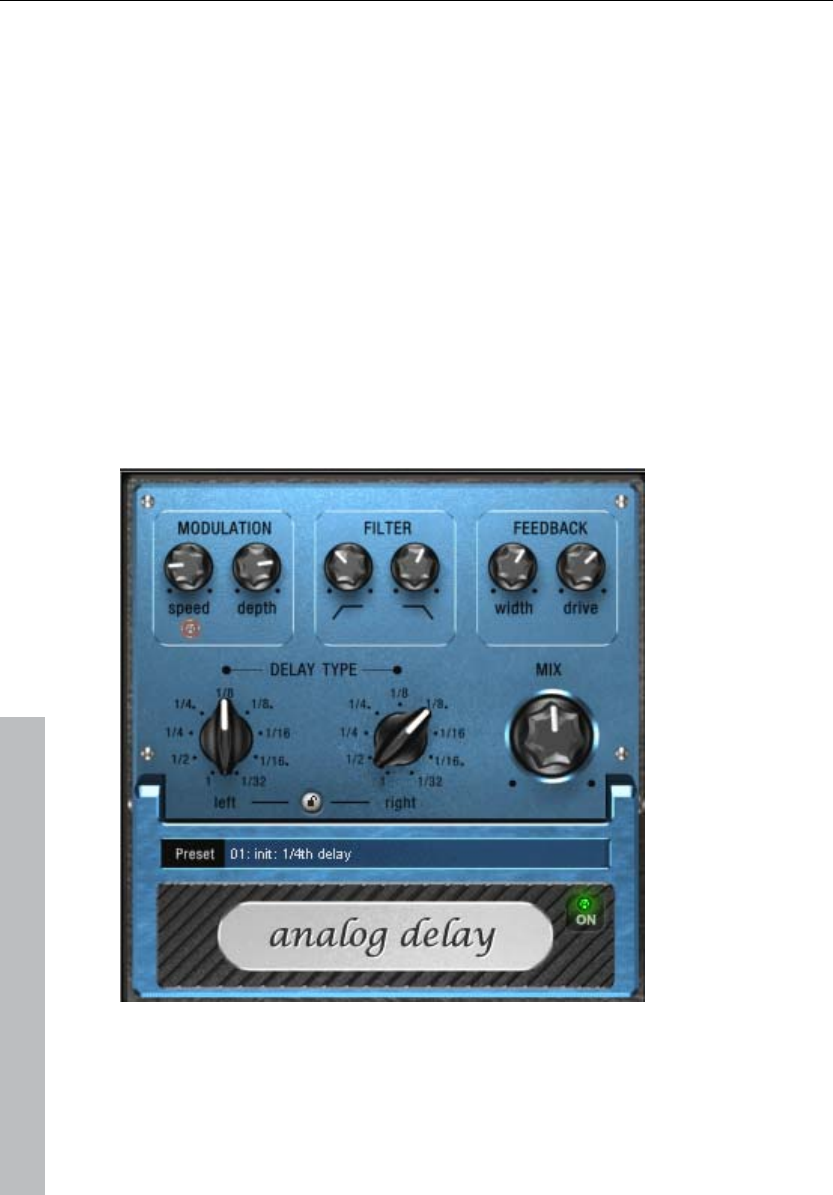
110 Audio effects
www.magix.com
f
given these effect a typical analog
the effects of this suite and explain how and
Vintage Effects Suite
If you're a guitar, bass or keyboard player, you'll probably recognize the look o
our new "vintage effects" suite. They are accurate digital models of analog
"standard effects" used by live musicians. Although we have adopted the
appearance of stomp boxes and have
sound they are ideal for studio use.
All effects of the Vintage Effects Suite are subject to a soft rule behavior –
internally, parameters are softly faded from the old to the new value. This is
particularly noticeable when presets change and is of a particular benefit when
playing in live mode.
In the following we will present
where to use them.
Analog Delay
This delay offers creative playing along with common delay effects. "Analog" in
this case means, for instance, that you can change the delay times while
playing without the risk of typical, scratching artefacts developing. Instead, the
times are softly faded out, similar to the old tape echo machines that used the

Audio effects 111
www.magix.com
tape speed to change the delay and where the system also had a certain
ck
e
These properties can be useful, for example to create "wild" dub/reggae-style
mpressed by an increasingly slight degree and distorted
similar to a tape.
eter
Analog delay has the following parameters:
Delay type
Delay type (l + r): Left and right delay times can be controlled separately (see
below). You can choose a note value for the control pots to snap to. Even and
syncopated note values from 1/2 to 1/32 are available. Note that the delay
times are always in relation to the project’s current tempo.
sluggishness.
"analog" in terms of this delay also means that typical tape echo sounds can
be mimicked, e.g. tape speed fluctuations and reduced highs during playba
("feedback"). The feedback has a two-band filter that can be used to creat
dark, high, or mid repetitions depending on the settings.
delays that move towards the center of the sound with each repetition and
even grind slightly. In this case, "analog" means that you cannot digitally
overdrive the delay. Even in a 'looped' repetition, the signal cannot be distorted
indefinitely, but it is co
Analog delay param
Link button (lock symbol): Press this button to control the “delay
type” pots for both channels simultaneously.
Mix: Adjusts the ration between the original signal and the echo.
Modulation
Speed: The tape warble speed. Low values result in very light fluctuations, high
values result in drastic warbling.
Depth: The warble intensity. When this control is turned all the way to the left,
there is no pitch modulation. For a subtle "analog" feel, we recommend a
setting between the 9 and 11 o’clock position.

112 Audio effects
Filter
www.magix.com
"Low" This control progressively reduces the bass frequency
as it is turned to the right, making the signal sound
"thinner".
"High" Once turned all the way to the right, the control only
attenuates the treble very lightly; turned completely to
the left, the delay repetitions become progressively
t, an additional effect is produced: the panning of the delays
increases. This is commonly referred to as a "ping-pong" delay.
to the left, the delayed signal is
e right, the feedback is seemingly
the repetitions continue for a long time.
"
this might take
som
less treble.
Feedback
Width: This controls the stereo width of the delay repetitions. When you turn
“Width” to the righ
Drive: When this control is turned all the way
repeated only once. Turned all the way to th
endless and
The actual strength of the effect is dependent on the material, since the
feedback loop (as explained earlier) is addressed via compression and uses a
"tape saturation" effect. If you send a "loud" signal to the delay, then the
feedback will sound longer than at a lower level as compression "brings it up
to a certain level. If you are used to "purely digital" delays, then
e getting used to, but it will probably sound "livelier".
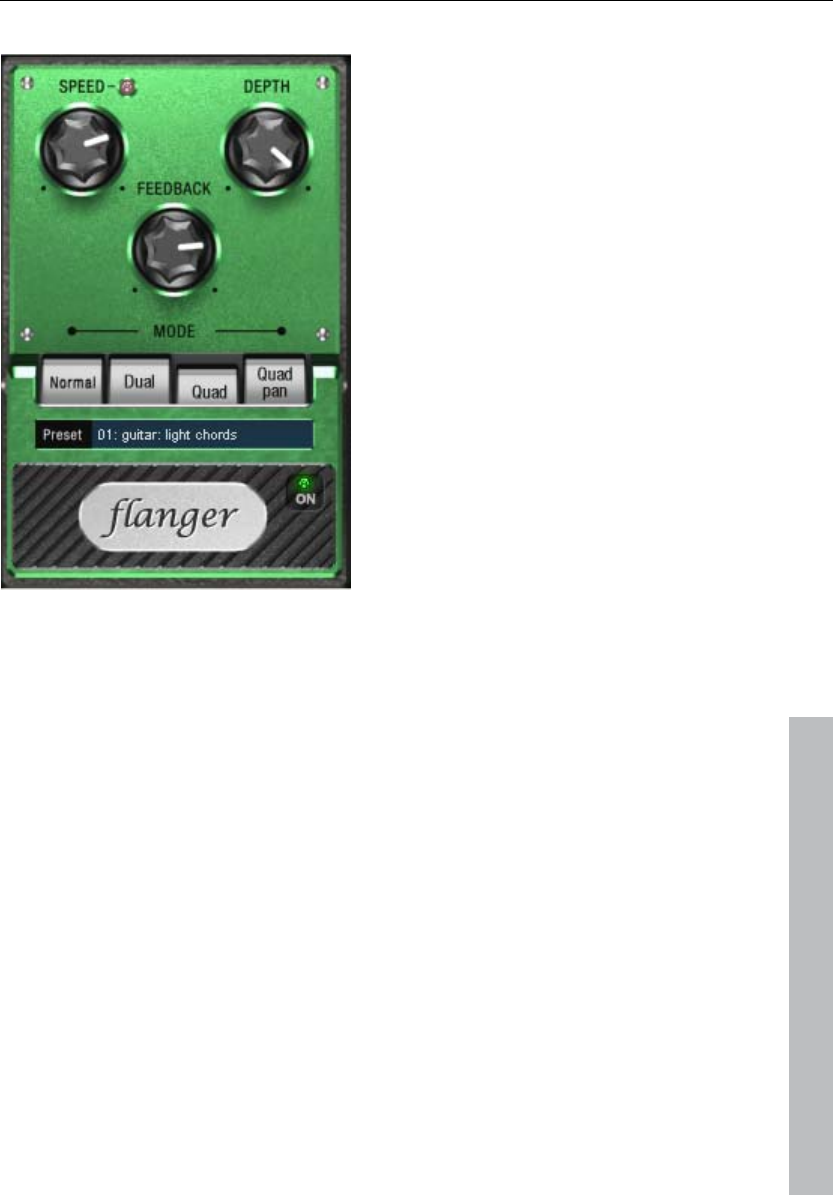
Audio effects 113
www.magix.com
r Flange
The "Flange" effect is similar to that of the chorus, but does have a different
technical and historical background. It came about by chance: Someone
(various sources say John Lennon) slowed down one of two running
interconnected tape machines in a studio with his hand. The result: The rather
brief delay of the second signal compared to the first resulted in cancellations
within the frequency spectrum, leading to a so-called comb filter effect (the
sum of both signals creates "peaks" and "lows" in the spectrum that look
familiar to the teeth of a comb).
Flanging is basically a chorus effect, but it has a lower delay time (less than 10
ms). "Release" or signal doubling is not highlighted here; the result is a much
more creative frequency response deformation.
A "complete" flange effect will definitely require feedback: The flange portion is
returned to the input to increase the effect. People often talk about the "jet
effect", since it resembles a jet on take-off.

114 Audio effects
www.magix.com
arameters
Speed: Modulation speed.
Depth: The overall amount of modulation.
Feedback: The volume of the internal feedback loop.
Mode:
Normal: Flanging.
Dual: Two parts, panned left and right.
Quad: Four parts, alternately panned left and right.
Quad pan: Like “Quad”, but the “Depth” control also sets the intensity of the
signal’s pan movements between left and right.
Flanger p
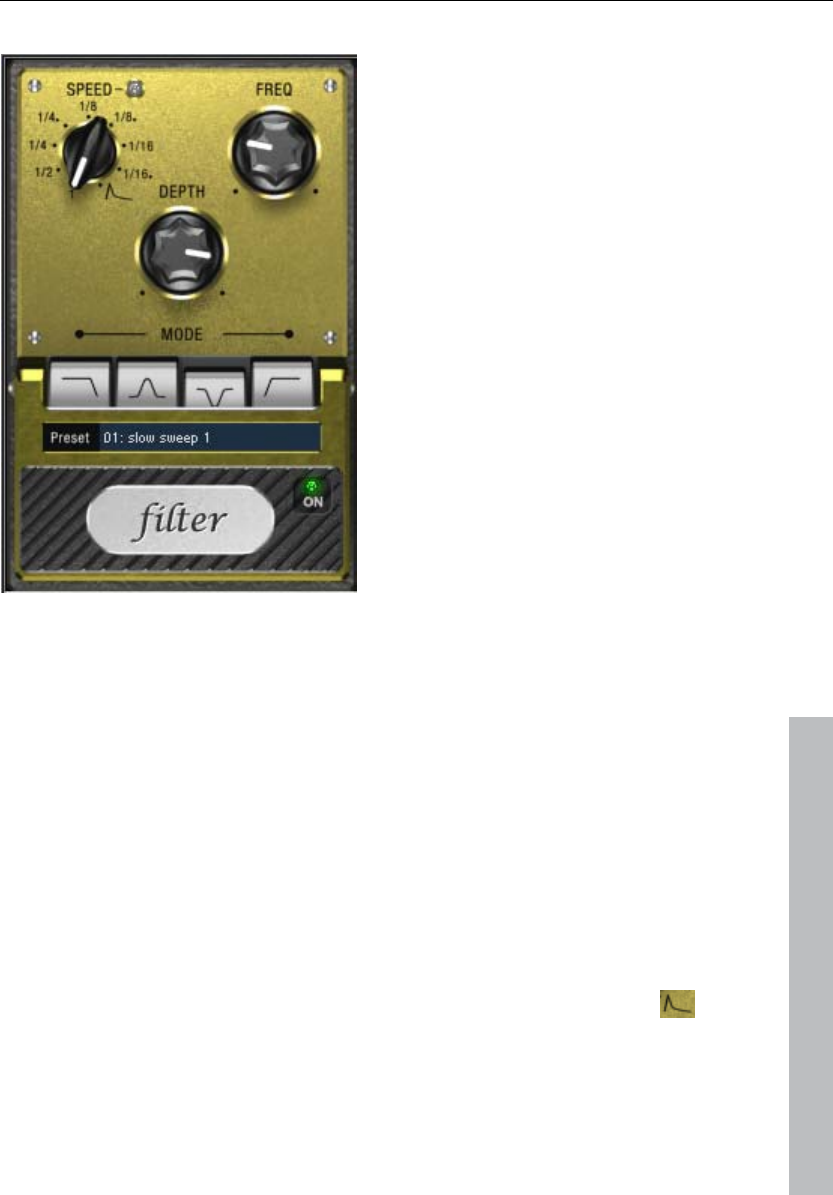
Audio effects 115
Filter
www.magix.com
"Filter" is a "modulation" effect like chorus and flanger. However, it controls the
frequency response of a modulation source as well as the pitch. There are
various filter types and modulation sizes available for this.
Possible areas of application are synthesizer sounds (filter sweeps on pads) or
creative distortions of drumloops (e.g. for variations, fills, etc). With guitars you
can create typical 'wah' effects: either by tempo modulation or in a special
mode, modulation via the envelope curve. The decisive factor is the current
signal strength above the frequency set for the filter.
Filter parameters
Speed: The modulation speed is set by note values ranging from 1/1 to 1/16
(even or dotted). Similar to analog delay, the tempo information is automatically
provided by the arrangement.
A peculiarity of the final position of the controller:
Tempo synchronization stops and modulation is controlled via the signal level.
Freq: This is the base frequency for modulating the filter, and generally takes
place above this frequency, i.e. the modulation increases the filter frequency.

116 Audio effects
www.magix.com
: This control determines the modulation depth, i.e. the amount by which
the speed control (or envelope mode, as described above) increases the base
frequency. For extreme effects, turn “Freq” all the way to the left and “Depth”
all the way to the right.
Filter modes
Low-pass
Depth
A filter with a slope of 24 dB/octave and a small
amount of resonance. The treble frequencies above
the base frequency (cut-off frequency) are filtered
steeply. This is great for filter sweeps on synth pads
and drum loops.
Band-pass Only the frequencies around the base frequency are
passed through the filter (24 dB slope with resonance).
Use this mode to create wah-wah effects for guitars.
Band
elimination
(„Notch-Filter")
Two parallel filters (–36 dB) with linked base
frequencies create two ‘notches’ in the frequency
spectrum. This allows you to create interesting sounds
(e.g. guitar chords), and it sounds similar to a phaser.
High-pass This mode achieves the opposite effect to the low-
pass filter. Frequencies below the base frequency are
filtered steeply. If you ‘thin out’ sections of your track
(for example, a drum track) with a tempo-based
for
the next object).
modulation, this can sound very effective when
contrasted with the full-range frequency spectrum (
example, if the filter is turned off for
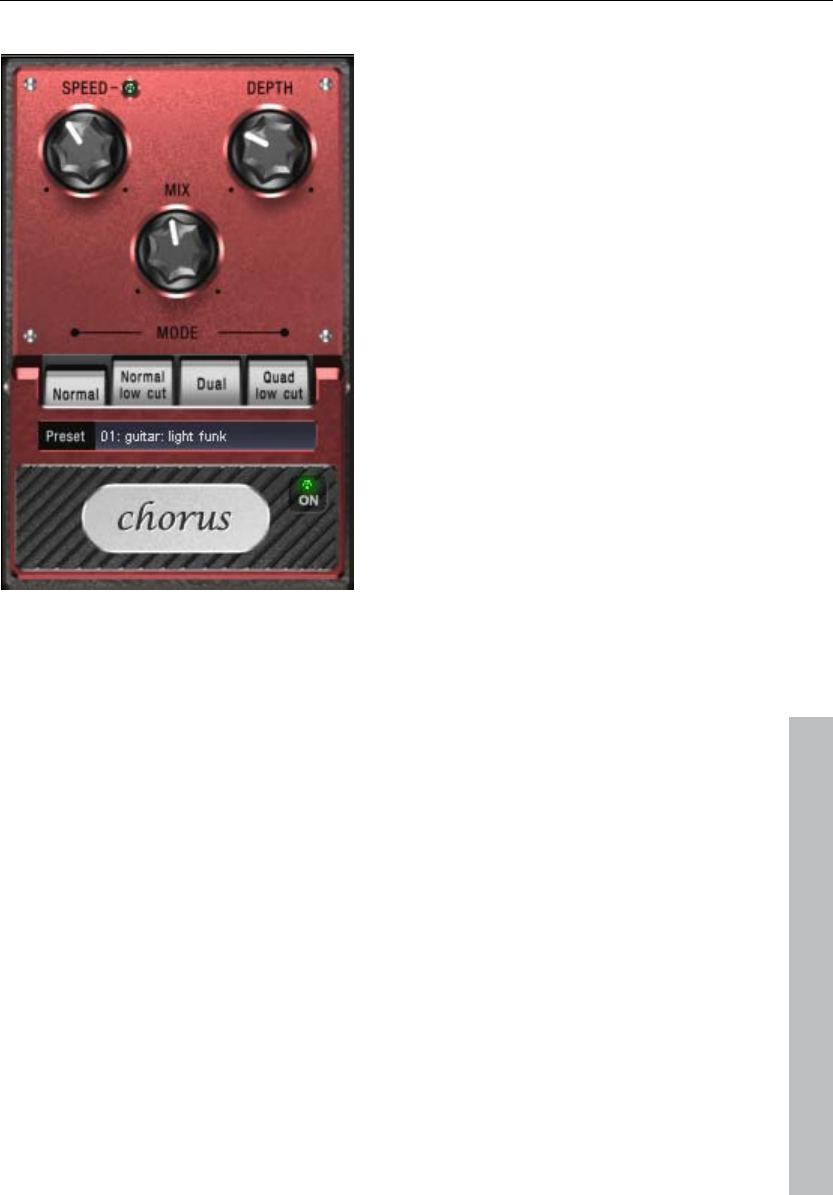
Audio effects 117
Chorus
s characteristic "floating" sounds which one typi
r synth pads. You can add acoustic "depth" to an
power to the sound or to create the illusion that it
www.magix.com
The chorus pedal create cally
recognizes from guitar o
instrument to add more
exists multiple times.
The chorus sound is created by using the so-called Doppler effect. You
probably have noticed this phenomenon daily life: The sound of an
approaching ambulance sounds higher than when it is moving away. This
effect is a result of the speed of the sound which first increases and then
decreases, thus also changing the sound pitch. If there were a second siren at
your location, an oscillation would develop between both sounds (just like
when two instruments are out of tune).
Chorus also splits the signal in at least two: direct sound and effects part. The
double effect is created by a short signal delay of the effect.
This delay is within the range of 10-30 ms (as in this one), this means that it is
short enough to be perceived as an "echo". The times would also be similarly
short if you were to double a guitar track for instance. A short delay in the mix
already sounds "doubled" but is not authentic. This is where the above-
mentioned "out-of-tune" effect comes in: The pitch of the effect signal is

118 Audio effects
www.magix.com
odulated by gently "drifting" forward and backward in the delay curve.
The result is a floating effect where the speed is influenced by drifting
Chorus parameters
You can enter the following parameters to control the floating effect:
Speed: Modulation speed. Low speeds create an even, continuous
development. High speeds produce vibrato-like qualities, but can also result in
an "underwater" effect.
Depth: Modulation depth. This determines how strongly the speed affects the
pitch modulation.
Mix: This sets the balance between the direct signal and the effects signal.
Mode: You can choose between four operating modes of the chorus effect:
“Normal” is a combination of the direct signal and the detuned delay signal.
“Normal, low-pass” is designed for bass-heavy signals like bass guitar. The
bottom end of the signal stays clear and well-defined, the effect is only audible
for the mid and treble frequencies.
“Dual” makes the source sound more lively than a single "part". The sound is
is
er".
“Quad, low-pass” is ideal for creating sounds such as deep synth pads with
slightly m
spread over the stereo panorama, which makes this mode seem "wider". The
character of the sound becomes livelier than with a single voice only, and it
also distributed over the stereo panorama, making the mode sound "broad
tight bass frequencies.
Tip: Similar to the stomp boxes our vintage effects are modeled on, there is a
"footswitch" below the pedal’s logo that can be clicked to turn the effect on or
off for A/B comparisons. All the effects of the Vintage Effects Suite have been
designed like this.
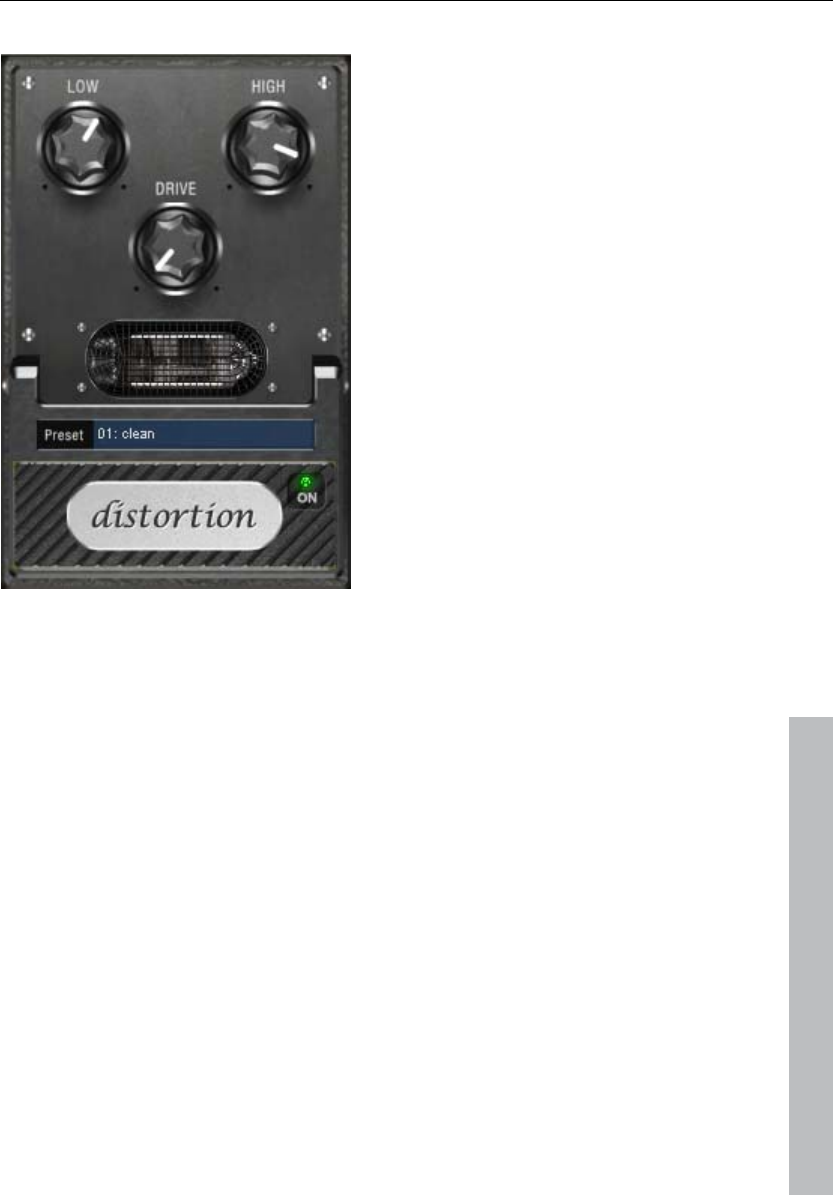
Audio effects 119
Distortion
The distortion pedal is a "high gain" distorter for crunch and lead guitar
sounds. If you like typically "British" amp sounds and want to quickly record a
guitar track with little effort, this pedal is for you.
www.magix.com
An entire valve pre-amp circuit has been modeled, including the typical EQ
curve. The amplification is "valve-typical", i.e. it doesn't start quickly but is
harmonic and soft. Even at full power the pedal still reacts softly to a guitar and
generate quite a variable sound:
Low: The "bass" controller. This allows you to set the share of basses, even
after the distortion. The type of prefiltering is important for guitar amps in
particular, and is characteristic for the basic sound. You should set the bass
controller depending on the basic sound of the guitar and the sound you are
aiming for ("powerful" or "cut").
High: Mainly controls the share of highs before and after the distortion. If you
are not using an external guitar speaker as a monitor, we recommend setting
the controller to the middle position or even moving it slightly to the right. This
its settings (e.g. pick-up choice and tone controller). For instance, you can
influence the distortion even more by using the volume knob on the guitar.
There are only three parameters on this effect; however, these interact with
each other and can thus
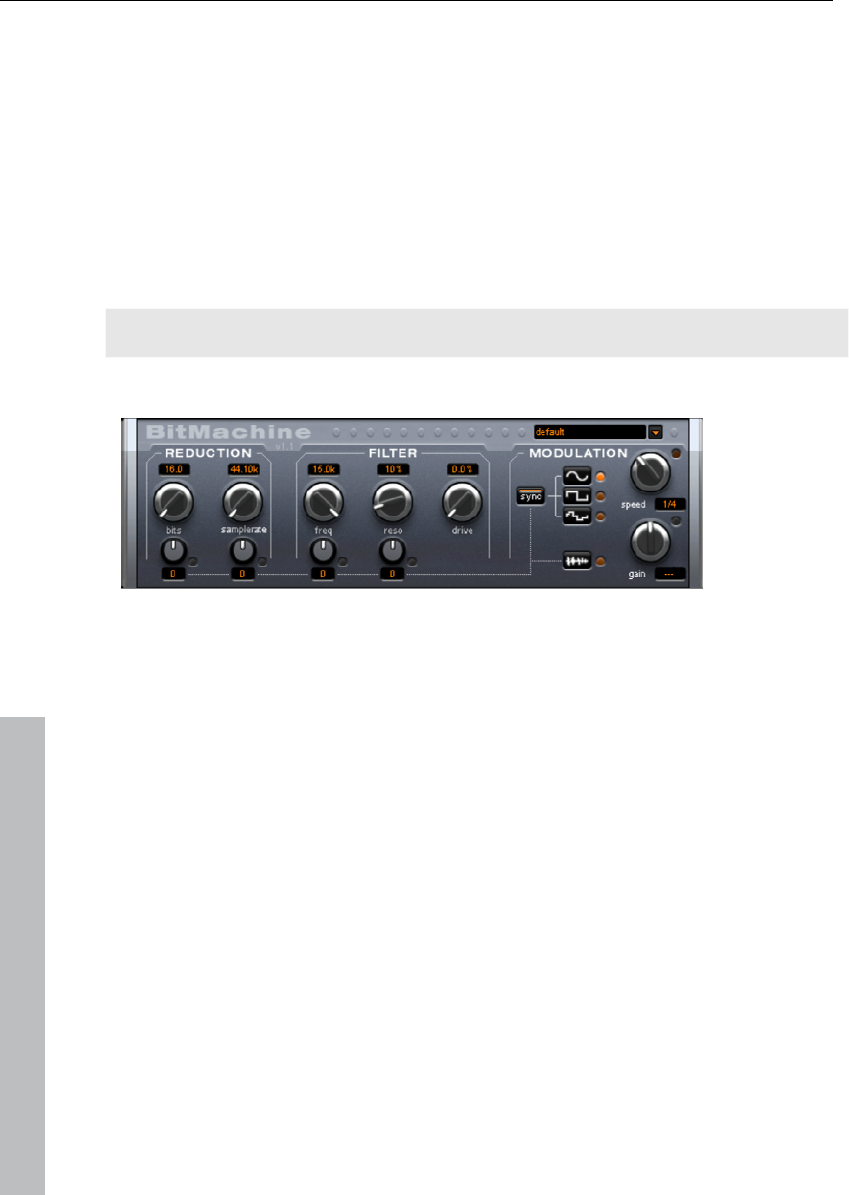
120 Audio effects
www.magix.com
sharp" highs disappear, which all guitar amps generate without the
suitable loudspeaker. At the same time the mids stand out more, which gives
the sound more "kick". On the other hand you can further emphasize the highs
if you want the sound to be more neutral.
Drive: The level of distortion. This controls the amplification used to operate
the "virtual valve circuit" (max. 60 dB). As the level increases, the valve goes
into overdrive and generates typical distortions. For a slightly distorted sound
("crunch"), it's sufficient to set the controller to 10-11 hours at maximum; the
modeled circuit also provides the usual "weight" for power rock chords, and
more. The further you turn this controller to the right, the more the mids of the
signal move to the fore so that the "high-gain" lead sound is better heard.
way the "
You can also use the distortion effect in combination with the amp simulation!
BitMachine
Audio material can always be edited into high quality with MAGIX Music
Rock Edition 4. Nevertheless, there are some situations, for example, a more
imperfect lo-fi sound would perfectly suit a drum
Maker
loop or a synthesizer sound.
lly
and
scratchy soundchips in home computers were commonplace.
el" where you can
encounter bit and sample rate reduction and downstream filters based on
Remember, for example, the first hardware samplers from the 80s that usua
only ran at 8 or 12-bit rates and at low sample rates. With the BitMachine,
changing the sound with such an "antique" device is no problem.
You can use the BitMachine to bring back to life the times when minimalist
The BitMachine opens up a gateway to "acoustic time trav
analog models.
Furthermore, the effect has a modulation section with which you can control
individual parameters using an oscillator (LFO) or the input signal.
We have designed a range of "typical" presets to demonstrate the time travel
abilities of the BitMachine. These can be opened at the top right of the
interface

Audio effects 121
www.magix.com
and a decrease in the dynamics. For example, 8-bit quantization will exhibit
quiet points sound "capped“. This effect is amplified the more you turn the dial
starts crackling or "groaning".
Sample rate
The audio material is "down-calculated" with this dial, i.e. the internal sample
rate is reduced. A new separation ratio between old and new rates is created.
In relation to this ratio, a sample from the data stream will be "dropped“ at the
various points.
The following section describes the details of BitMachine:
"Reduction" section
Bits
This dial controls the resolution of the audio material. Turning the dial to the left
results in 16-bit quantization (CD quality). The further it is turned to the right,
the lesser the signal dynamic becomes. In extreme cases (1-bit), there are only
"on“ or "off“ states.
At the intermediate levels, you’ll notice an increase in the background noise
dynamics of only 48 dB. Quieter points in the material sound noisy and very
to the left until it
Note: The two smaller dials from this section are explained under Modulation.
"Filter" section
The filter in the BitMachine is a digital model of one of the most well-known
filters in music electronics, i.e. the "Chamberlin 2-pole" filter used in old
Oberheim synthesizers. These types of filters sound exceptionally musical.
They can also be used quite creatively in the BitMachine, but should not be
ough deep
used exclusively to smooth out existing artifacts.
The filter works in the so-called "high-pass" mode, i.e. it lets thr
frequency (or medium) material according to setting, and dampens highs and
medium areas.
Freq:
You can specify the cut-off frequency of the filter using "Freq". Filtering starts
above this frequency.

122 Audio effects
www.magix.com
around the cut-off frequency can be strongly elevated to
elow self-oscillation. Sharp, cutting sounds are possible at this level, and
ffect becomes even clearer when you vary the cut-off frequency.
e themselves internally. With the "Drive“ dial, you can
Reso:
The signal in the area
just b
the e
Drive:
Both of the individual filters of the connections mentioned above have the
ability to overmodulat
regulate the amount of overmodulation. The more you turn this dial up, the
more the signal is overmodulated. In this case, the parameters of the internal
workings of the filter interact with one another. Increasing drive weakens the
resonance, but, at the same time, the signal gets more volume, more bass and
becomes acoustically fuller.
Note: The two smaller dials from this section are explained under "Modulation".
"Modulation" section
You can automate your effects via the settings in the modulation section.
Here, you’ll find the so-called low frequency oscillator (LFO), which resonates
To influence the resonance, use the two small dials in both the reduction and
e four dials display modulation targets.
e
The modulation is always added to the set value.
le: Turn the small dial beneath the "bits" dial fully to the left (Value: -50)
posite to one another: A negative setting is nothing
more than an inversion of the modulation, so you’re effectively turning down
the control signal.
with adjustable speed. You can influence the speed and type of resonance.
filter areas. Thes
Example: You’ve left the dial for the sample rate at its default setting. Chang
the small dial beneath from its middle position to either side. The modulation
for the dial value is added to the sample rate: The LFO now controls these
parameters proportionately and the sample rate reduction resonates at this
modulation.
You can use this technique on other dials as well. You just have to make sure
that the main dial isn’t turned up to full, because then the modulation wouldn’t
have any effect.
Examp
and the one beside it (beneath "sample rate") to the right (+50). You’ve now
assigned a modulation to both parameters with the LFO. They are not changed
uniformly, but rather op

Audio effects 123
www.magix.com
rms of the modulation section
Sine form
re wave (0 or 1, no intermediate level)
Random value (an internal randomizer will be queried at the set speed)
off this synchronization and set the speed
manually (in Hz).
on you’ll find a fourth button, the audio input signal. If
e
wavefo
We’ve already explained this example with the help of sine oscillation. The LFO
can be in:
Squa
Oscillator speed
The LFO speed is specified with the "speed“ dial. If the "sync“ button is active,
then the LFO adapts to the song speed, and the dial locks musical values into
place (e.g. ¼ note). Rhythmic paths of the sound distortion are therefore
enabled. You can also switch
Modulation with the "Envelope follower“
In the modulation secti
this mode is active, then the signal itself can be called upon to extract
“modulation tension”; a so-called "envelope follower" continuously scans th
volume of the input signal.
Note: The BitMachine doesn’t recognize the type of audio signal automatically.
For this reason, you should set the input sensitivity roughly with the "gain“ dial.
To do this, use the control LED: With accurate detection of the signal
dynamics, assigning the four small dials to modulation lows is easier and you
can use the full control range.
In envelope mode, the "speed“ dial is used to control the response speed of
the envelope (the display now switches to milliseconds). Lower times result i
faster respon
n a
se, higher times make the envelope rise (and fall) slower. You
should experiment with the signal according to its complexity. The presets
provided can only point you in a rough direction.
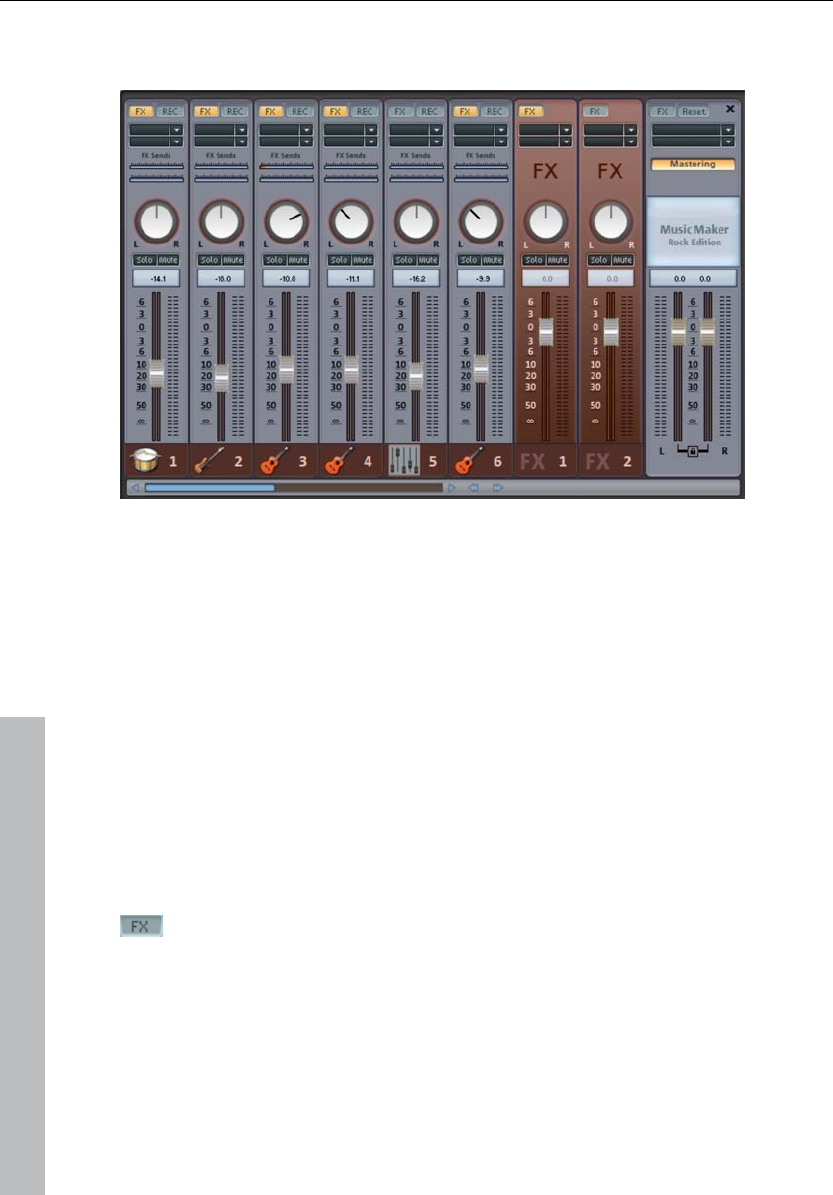
124 Mixer
Mixer
MAGIX Music Maker Rock Edition 4 includes a real-time mixer with a master
effects section that professionally mixes all the tracks within an arrangement.
The Mixer can be opened by pressing the "M" key or via the toolbar in the main
ple,
window (also: "View" menu > "Mixer".
The Mixer displays eight tracks simultaneously by default. With the «/» buttons
beside the scroll bars at the bottom, the Mixer can be increased or reduced in
size. You can view further tracks using the scroll bar.
Track effects
Alongside the audio effects in the object (Reverb/Echo, Timestretch/Resam
Compressor, etc.), a separate track effects rack with equalizer and
reverb/echo can be used in each mixer track.
You can open the track audio effects rack with the FX button.
A lit FX track button signifies that effects are active in the track.
Track effects always apply to all audio objects of a track. In comparison to
applying an effect to each object individually, this saves storage space. The
track effects work the same way as those of the Object Effect Rack (view page
93).
www.magix.com

Mixer 125
www.magix.com
formation on using and controlling the individual effects please read
ffects (view page 90)chapter.
Fader
Every channel has its own volume or brightness fader. As a result, the volume
can be lowered quickly and accurately, to add more bass or to fade out a
video that is just playing. This fader also acts on any linked MIDI files.
For more in
the Audio E
The stereo position for each track can be defined with the Pan
controls.
The "Solo" button switches a track to solo mode, i.e. all other tracks are
muted. Mute: The mute button mutes the active track.
Double clicking on each of the controls resets it to the passive basic setting, in
which no processor output is needed.
ders of the various tracks can be
compiled into control groups. To do this, first click on a fader and then, while
volume of multiple tracks together without having to
tios of the tracks. For example, you can set the volume of
an individual instrument of a drumset (kick, snare, HighHat) in such a way that
To ungroup a fader from a control group, click the instrument and press "Ctrl"
agai a new
group automatically deactivates an existing group.
Control groups
The volume, panorama, and FX send fa
holding down "Ctrl", click on all other faders that you wish to include in your
group. If you select "Shift", all faders in between the first one selected and the
next one will be grouped.
Now you can set the
change the volume ra
they can harmonize with one another. Now, if you group together the volume
faders of the tracks, you can set the master volume of the drumset.
n. There may only be one control group active at a time, creating
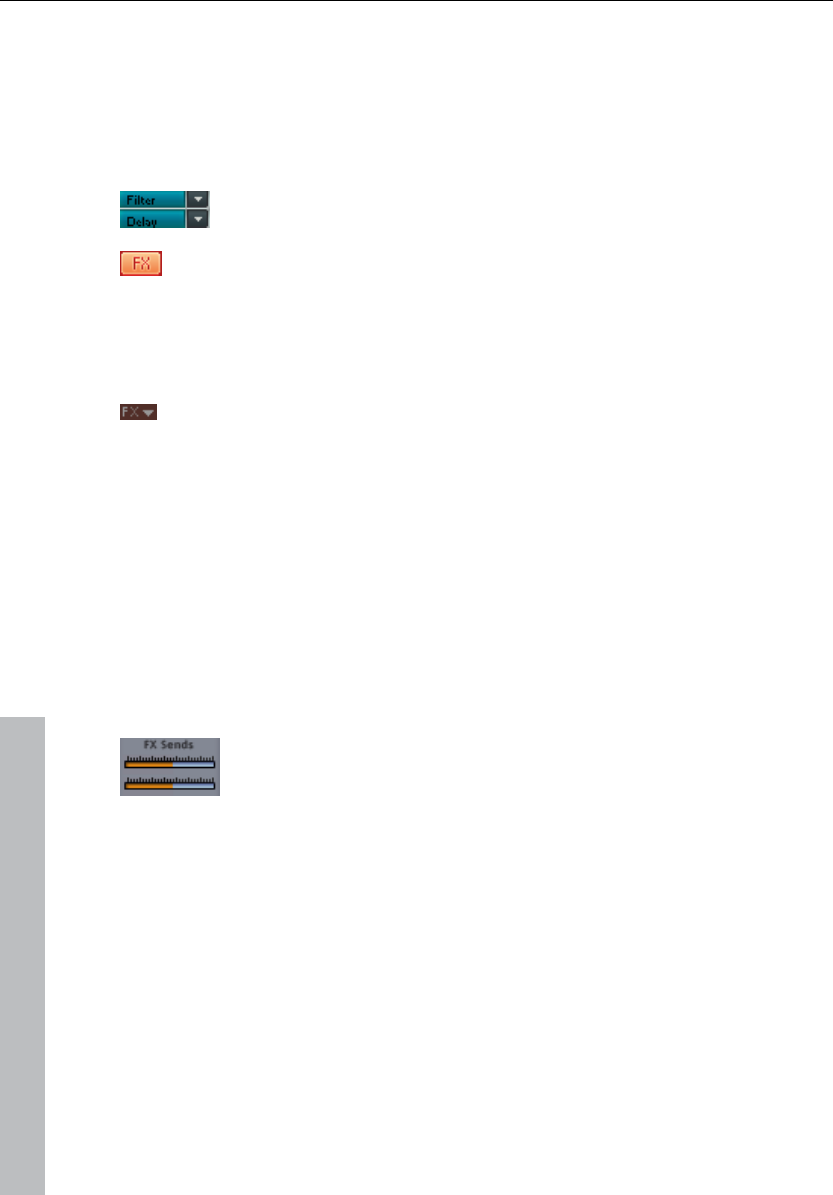
126 Mixer
Track effects
www.magix.com
audio effects, a separate track effects rack with equalizer,
o, distortion/filter and compressor as well as the Vintage Effect Suite
plug-ins can be used.
Besides the object
reverb/ech
The Vintage Effect Suite plug-ins are being loaded via the plug-
slot.
in
You can open the track audio effects rack with the FX button.
k button siA lit FX trac gnifies that effects are active in the track.
The track effects can also be applied without having to open the mixer.
The arranger's trackbox also features the track FX menu. In it, you
will find presets for track effects (view page 93) sorted according
Track effects always apply to all audio objects of a track. In comparison to
applying an effect to each object individually, this saves storage space. The
me way as object effects.
e
to the instrument type.
effect itself works the sa
For more information on using and controlling the individual effects, pleas
read the chapter Audio effects (view page 90).
FX tracks
Two FX send controllers (FX1 and FX2) are located below the
slots.
You can determine the volume at which you want the signal to be routed to th
two available FX tracks.
plugin
e
A send effect differs from a normal effect found in the track (Insert) insofar as it
can edit the signals from multiple tracks or objects simultaneously.
The FX are usually hidden in the Mixer. They will be displayed as soon as one
of the FX send controllers is used.
An FX track is a complete, additional mixer track which provides a complete
track FX rack and two plugin slots for use as a send effect.

Mixer 127
In the first FX track the hall function is activated as standard as it is the most
important application of the send effects.
The volume controllers serve to regulate the volume of the FX track and
corresponds to the old AUX return controller. The mute button is used to
switch the FX function on and off. The solo button enables you to single out FX
individual tr
displayed
acks. The peak meter of the tracks, which send to the FX track, are
grey. in
Live monitoring
Click the speaker button in a mixer channel to activate "low latenc
monitoring.
www.magix.com
y"
Instead of th
sou card
also applies
note that this only
.)
to be installed. ASIO drivers
are usually supplied with professional sound cards. For all cards without a
r, MAGIX has included a MAGIX Low Latency driver. This
O driver for any sound card (or on-board sound chip) that can
use WDM drivers. For
File – Setting
e objects, the channel now plays the audio signal arriving at the
’s input – through all the channel’s effects and without latency! This
to the AUX and master effects.
nd
You can now add effects to your vocal or instrumental performance while
recording them, and you can ‘
jam’ along to a complete arrangement in real-time. (Please
works during recording and playback, not while the arrangement is stopped
This monitoring method requires an ASIO driver
proprietary drive
provides an ASI
further information, please refer to the chapter "Menu
s/Information – Playback parameters…"
The MultiMax effect has a high-latency design, which is why it is deactivated
during live monitoring.

128 Mixer
Master track
www.magix.com
The FX button functions exactly like in the tracks. The complete mixer settings
can be reset with the "Reset" button.
MAGIX Mastering Suite: MAGIX Mastering Suite (view page 101) can be
opened here.
MAGIX Mastering Suite is included in MAGIX Music Maker Rock Edition 4 as a
demo version and may be used without any limits for 30 days after installation.
A full version of MAGIX Mastering Suite is available in MAGIX Music Maker
200 P8 roducer Edition (and its successors).
Both faders control the total volume.
Link buttons: If the link button is deactivated, the volume of the
right and left channels may be set individually.

Reprocess arrangement 129
www.magix.com
rrangement
t
eates
ows Media format. Your mail program is activated
simultaneously and the created file of an opened message is added as an
n 4 you can produce your own individual
ringtone melodies. Once completed, export the arrangement using the "Audio
as ringtone" op
In the export dialog you can select various formats for which useful tips and
tricks are also available.
Some advice on creating ring tones
Audio material: When designing your ring tone please take into account that
the loudspeakers of your mobile phone can only poorly reproduce bass tones.
High tones are also heard more easily in a loud environment. If your ring tone
includes MIDI Objects, you should activate VST Instruments on the respective
tracks in the arrangement, so that MIDI information included in your ring tone
becomes audible.
Some manufacturers offer VST effects which simulate the loudspeaker of your
mobile phone on the PC.
Length: Typical ring tones have a length of about five to sixty seconds. MAGIX
Music Maker Rock Edition 4 lets you create longer ring tones; however, you
should note that large ring tone files require sufficient memory in your mobile
phone.
File format: First, select a format suitable for your mobile phone from the
Export dialog. If several formats are possible, please note that the resulting
audio quality will vary. In general, the quality increases in tandem with the size
of the file. If your mobile does not support stereo audio playback, you can
activate the "mono" export option which reduces the required memory space
by about half. The size of the file that will be generated using your current
settings is displayed in the Export dialog.
Reprocess a
Export as email attachmen
The option "Send arrangement as email" in the "File" menu > "Internet" cr
a file in the Wind
attachment. Thus, any arrangement can be compressed without intermediate
steps and sent as an email immediately.
Export as ringtone
With MAGIX Music Maker Rock Editio
tion in the File menu.

130 Reprocess arrangement
www.magix.com
one: Depending on the type of
ery there are several possibilities
to transfer your ringtone from the PC to the phone:
link
2. Using a data cable and, if applicable, the transfer software supplied by the
To burn an audio CD, export your arrangement as a WAV file first:
Click on "File" and select the "Export arrangement -> Audio as wave..." option.
Soundcloud® is a community that is especially designed for musicians. The free
e space for your songs. Every song may
s
®
m.
Transferring the ringtone to your mobile ph
mobile phone and the items included in deliv
1. Wireless via infrared (IrDA) or BlueTooth
manufacturer
3. By WAP or MMS
Create Audio CD
The WAV file created can be burned as an audio CD with the included burning
program MAGIX Speed burnR.
Upload song to Soundcloud
version provides 120 minutes of storag
be embedded as a player widget into external websites; the widget even allow
comments along the timeline of the song and an optional download of the
original song.
If you have an Internet connection, then you will see the Soundcloud® player
here
For more information about the possibilities provided by the Soundcloud
community and the different premium accounts see www.soundcloud.com
http://www.soundcloud.co
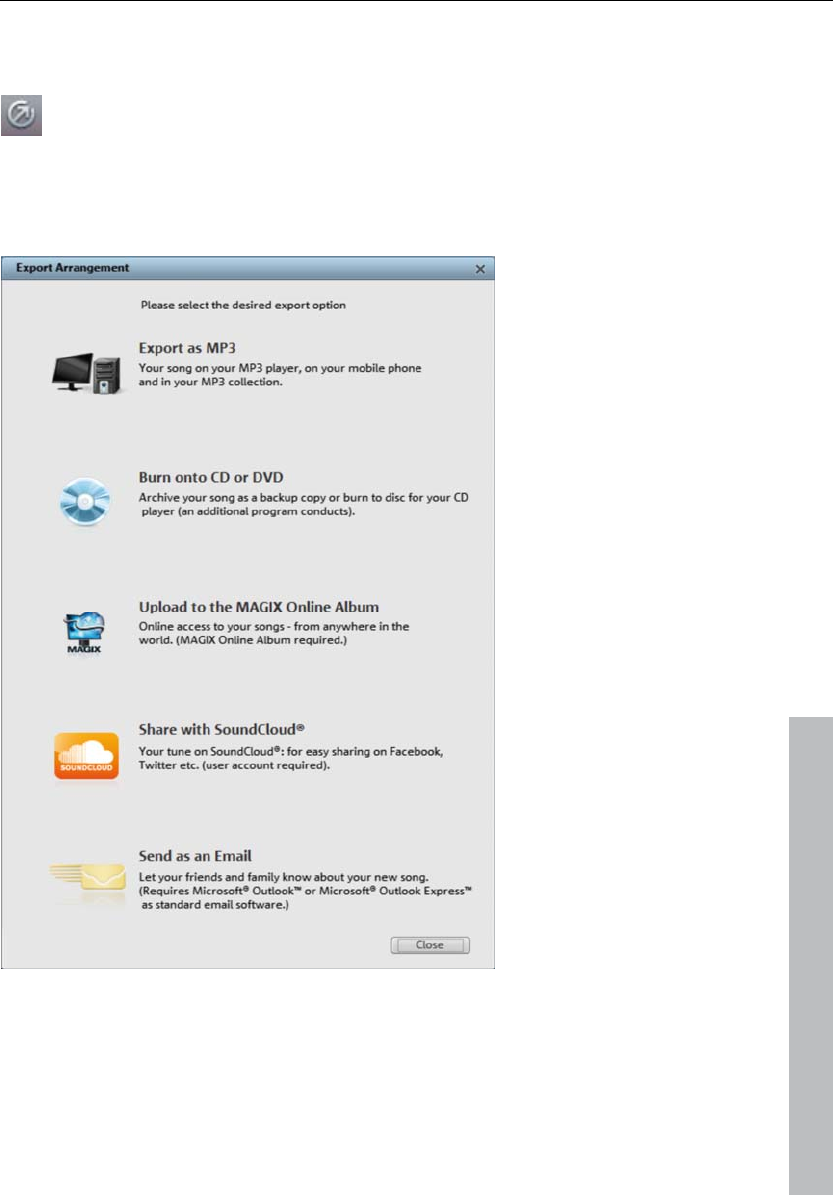
Reprocess arrangement 131
Common export options
The export icon on the toolbar opens the export wizard.
nt options for exporting your arrangement in different
to CD, or publishing on the Internet with different
platforms.
This bundles differe
formats, for burning on
www.magix.com
Export as MP3: This selection exports the arrangement in the popular MP3
format for use on the Internet or on mobile playback devices (Mp3 players,
mobile phones, etc.). For details about the export dialog, please see the
chapter concerning the file menu, particularly the "Export (view page 134)"
section.

132 Reprocess arrangement
www.magix.com
Burn to CD/DVD: This selection exports the arrangement in the best-possible
m for burning an audio CD. The option is
also available to backup the entire arrangement with all involved files onto CD
or DVD
Upload to MAGIX Online Album laden: Uploads the arrangement to MAGIX
nce
into
ebsites. More information about MAGIX Online Album is available in
"Online (view page 167)"
Send via email: Converts the arrangement into Windows Media and adds it as
an attachment to an email. An email program (e.g. Outlook Express) must be
installed and setup.
quality and opens an additional progra
. See Burn audio CD.
Online Album. This platform enables friends and acquaintances to experie
your work. The MAGIX Online Album online player may also be embedded
any other w
Note: If you only use browser-based email, then this function will not be
available. However, you could invite others to listen to your uploaded music via
email to your MAGIX Online Album or Youtube™. To do so, you will have to
use the functions of the respective website (for MAGIX, this is MAGIX Online
Media Manager).
Publish on SoundCloud: The arrangement will be uploaded to SoundCloud.
This requires a SoundCloud user account. Details on SoundCloud can be
found in the chapter Upload song to Soundcloud (view page 130).

File Menu 133
www.magix.com
New arrangement
Ctrl + N
A previously saved MAGIX Music Maker Rock Edition 4 arrangement is loaded
must
n 4 Arrangement will look for the objects in the same
directory as the arrangement itself.
Save arrangement
The current arrangement is saved under the existing name. If no name has
been selected, then a File requester opens, where the path and name can be
defined.
Keyboard shortcut: Ctrl + S
Save arrangement as...
This opens a file requester where you can define the path and the name of the
arrangement that is to be saved.
Keyboard shortcut: Shift + S
File Menu
A new MAGIX Music Maker Rock Edition 4 arrangement is created with this
menu item, with 16 tracks. More tracks can be added via the menu “Edit”.
Keyboard shortcut:
Load arrangement
with this menu item. Please note that the object files for the arrangement
also be available! MAGIX Music Maker Rock Edition 4 will look for the sounds
and videos that were used first in the path where they were located when the
arrangement was saved. If they are not found there, then the MAGIX Music
Maker Rock Editio
Keyboard shortcut: Ctrl + O

134 File Menu
www.magix.com
r more CD tracks like a regular file from the Media
s
CDs (v 55)" in the "Audio objects" chapter.
Shortcut: C
Common export options
sele tion of common export options here.
he section Export wizard (view page 130).
Import
Import audio CD tracks
You can simply import one o
Pool via drag & drop. If this convenient method fails for some reason, then thi
menu command may be accessed via the CD manager to insert tracks from
audio CDs directly into the arrangement. More on this can be found in the
section "Importing Audio iew page
Audio recording
See Audio recording (view page 52).
Keyboard shortcut: R
Export
You will find a quick c the most
Please read more on this in t
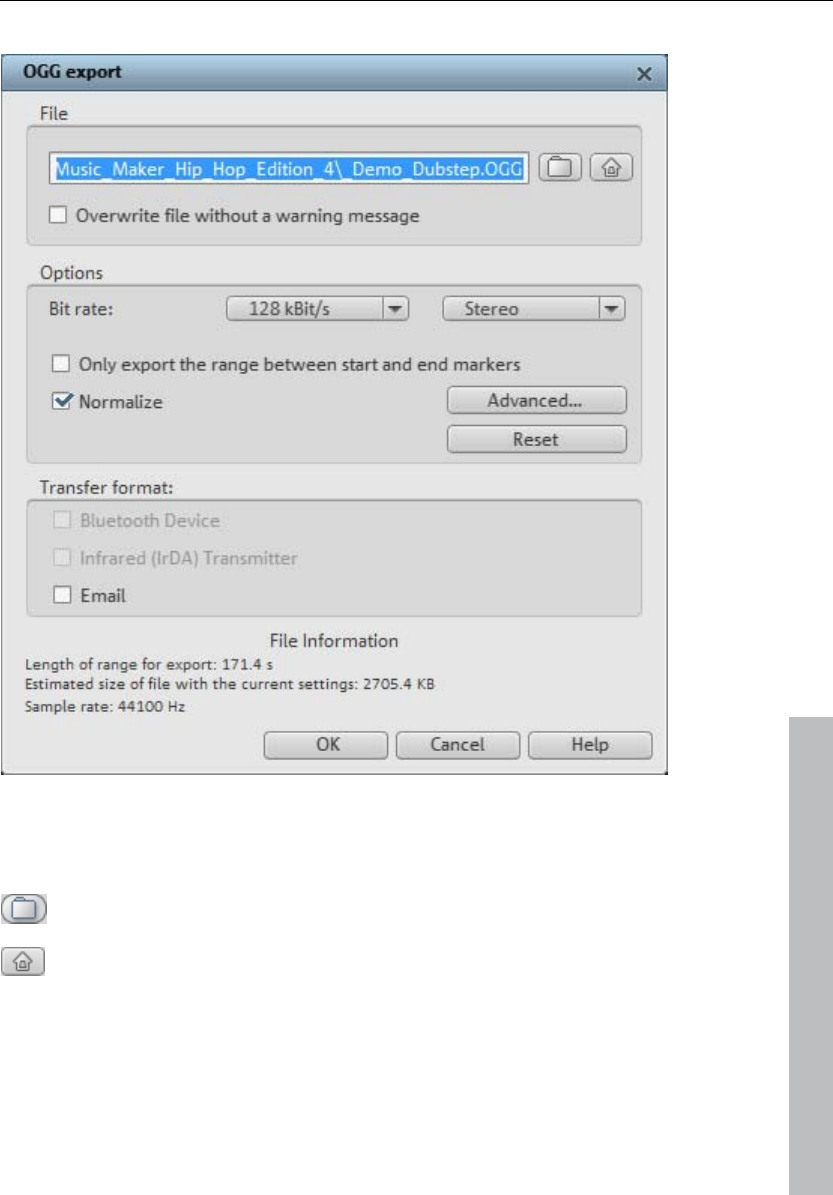
File Menu 135
www.magix.com
Audio export dialog
File
In File you can enter the file name for you exported file.
Use the folder symbol to select the folder into which you want to export
it. The dialog will remember the export path for future exports.
Use the "home" symbol to restore the original preset path.
With "Overwrite file automatically" you can perform multiple exports from the
same file.

136 File Menu
www.magix.com
Only export the area between the start and end markers: Set the option if you
wish to export only one of the clippings from the arrangement.
Bit rate: The "Bit rate" selection specifies the level of compression: The higher
the bit rate, the higher the quality of the exported audio file. On the other hand,
the bit rate determines the final file size: The smaller the bit rate, the smaller the
files.
Mono/Stereo/5.1 Surround: Most mobile devices have only one loudspeaker.
To save on memory, you can export in mono as well. In 5.1 Surround Mode
(see Mixer in Surround Mode) you can also export in MP3surround.
Advanced: Here you can open the advanced settings dialog for the
corresponding audio format (see below).
Normalize: This function should always be activated. It guarantees that the
music is not too loud/overmodulated or too quiet.
Transfer format:
Here you can state whether you want to send he exported arrangement to
mobile devices via Bluetooth, infrared or email. Read more in the Reprocess
arrangement (view page 128)chapter.
Audio as Wave
The audio material is exported as a standard wave file. This is the standard
format for further use on Windows PCs. These files are not compressed and
retain their full sound quality.
Keyboard shortcut: Alt+W
Audio as MP3
especi
form
Options
MAGIX Music Maker Rock Edition 4 supplies an optional MP3 encoder for
ally fast and good-quality conversions into the popular MP3 audio
. at
Hint: The MP3 encoder cannot be used as a codec for the audio track of AVI
audio files.

File Menu 137
www.magix.com
sion format
file.
d,
smaller the
file.
nly one loudspeaker. To save on
memory, you can export in mono for these devices.
. It guarantees that the
music is not too loud/overmodulated or too quiet.
Keyboard shortcut: Alt + M
rce audio codec with a high sound
ely small data volumes (comparable to MP3).
en in Win edia Audio format. Please read more
ting in the s Media Video Export (view page 140)
Transmis
Here you can specify how you wish to send the audio file to the mobile device.
Read more on this under Transferring files (view page 129).
Options
In the "Options" section you can set the format and the compression of the
audio
Bit rate: The "Bit rate" selection specifies the level of compression: The higher
the bit rate, the higher the quality of the exported audio file. On the other han
the bit rate determines the final file size: The smaller the bit rate, the
Mono/Stereo: Most mobile devices have o
Normalize: This function should always be activated
Audio as Ogg Vorbis
"Ogg Vorbis" is a royalty-free Open Sou
quality but relativ
Keyboard shortcut: Alt + Z
Audio as Windows Media
Exports the arrangem t dows M
on the advanced set s Window
section.
Keyboard shortcut: Alt+E
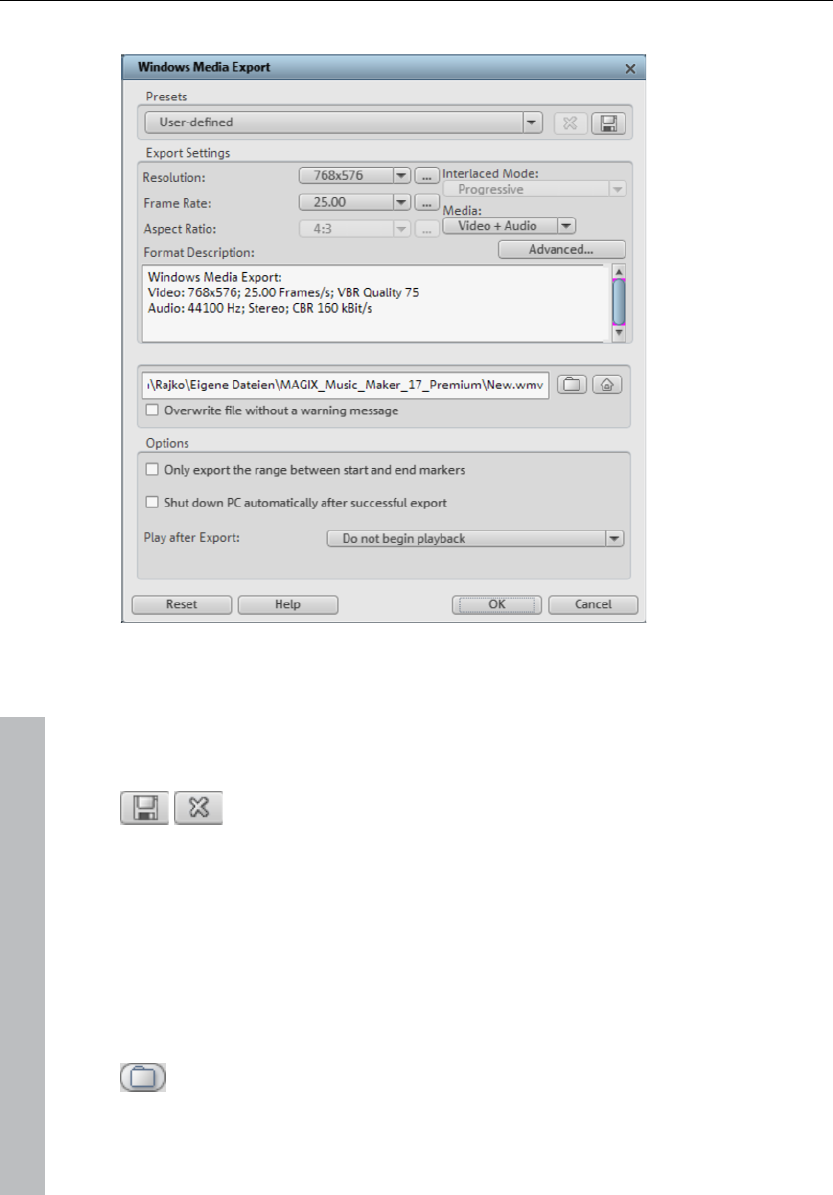
138 File Menu
Video export dialog
You can export your arranagement into various video formats. The options on
ing o the selected format.
u'll find the typical settings for the selected format
offer can vary accord t
Presets: Under "Presets", yo
for the most important applications.
You can save your personal settings by pressing the "Save" button
and remove them by pressing the "Delete" button.
set up neral export parameters like resolution,
page proportions and frame rate in the dialogs. Select the most-used values
from the list field, to set your own values click on the "..." button. The
"Advanced" button opens the specific settings dialog for selected video format
(see below).
In File you can enter the file name for you exported file.
Export settings: You can the ge
Use the folder symbol to select the folder into which you want to export
it. The dialog will remember the export path for future exports.
www.magix.com

File Menu 139
Use the "home" symbol to restore the original preset path.
With "Overwrite file automatically" you can perform multiple exports from the
same file.
Options
Shut down PC automatically after successful export: Use this option to have
the computer switch off automatically after lengthy export processes.
Only export the area between the start and end markers: Set the option if you
wish to export only one of the clippings from the arrangement.
Play after export:Here you can state whether you want to send he exported
arrangement to mobile devices via Bluetooth, infrared or email. Read more in
the Reprocess arrangement (view page 128)chapter.
Video as AVI
When exporting to AVI video, you can set and configure the size and frame
rate of the AVI video and the compression codec for audio (audio compression)
and video (codec).
Please also note the general info on AVI videos (view page 75, view page 139)!
Keyboard shortcut: Alt + A
www.magix.com
General info on AVI videos
very general conventions can be
specified like audio and video data and sent to a program. The exact memory
format of th
compresses ich only the
codec can work and decodes the files on playback again.
talled.
(for example, Intel Indeo video) have now become standard
components of the Windows installation, others, such as the popular DivX
and you wish to use
it other computers, install the corresponding codec on them as well.
The AVI format (Audio Video Interleaved) isn't actually a proper video format!
It's rather a so-called container where
e files is specified via the codec (coder/decoder). A codec
audio/video files into its own private format with wh
This means that an AVI file created on your computer can only be
loaded/played on computer B if this computer has the same codec ins
Many codecs
codec are not. If you create an AVI file with such a codec

140 File Menu
www.magix.com
On o the
hardware of the corresponding cards can be problematic. This type of AVI can
ec when possible.
ideo export
x are the settings
options in the"Advanced..." dialog.
, 9) are possible. Should compatibility problems arise on
playback, try an older codec with a lower version number.
streaming applications use constant bit rates. For VBR two pass modes the
in ses in order to optimally use the bandwidth for
highly-compressed movies for the Internet.
Bit rate/Quality/Audio format: The bit rate is decisive in defining the
e
the
0 can
,
ethods
supplied presets), like, for example, Internet streaming, Microsoft provides
ou
lder video editing cards certain codecs that function only with
only be used on the computer on which they were created. Avoid using this
type of cod
MAGIX v
Exports the movie in MAGIX video format. This format is used for video
recording by MAGIX video software and is optimized for digitally edited high-
quality video material.
Keyboard shortcut: Ctrl + Alt + M
Video as Windows Media
Exports the arrangement in Windows Media format. This is a universal
audio/video format from Microsoft. Accordingly comple
Manual configuration
Audio/Video codec: Various codecs corresponding to the various Windows
Media versions (7, 8
Bit rate mode: Constant and variable bit rates are possible, most devices and
movie is compressed two pas
display/audio quality. The higher this is, the better your videos will look and th
larger the files and the required encoding time will be. For variable bit rates,
bit rate is adapted dynamically to the requirements of the corresponding
picture or sound material. Here, either the quality value of between 1-10
be set or, for two-pass encoding, an average or maximum bit rate. For audio
the bit rate is set additionally by the audio format.
Import from the system profile (export type): For the most used m
(other than playback on mobile devices, with which you should use the
diverse system profiles to choose from. If you have the Windows Media
Encoder 9 installed, which is available from Microsoft as a free download, y
can edit the profiles or create your own. These can be loaded by pressing the
"Import from profile file" button.

File Menu 141
www.magix.com
d a
Alt + W
gement as email
t the
as an attachment to an open message. Any type of
arrangement can thus be compressed and sent without any intermediate
Shift + U
hed file to the music community
SoundCloud. For more information, please read the section SoundCloud (view
ram crashes in order to recover the
last status of files. This type of automatic backup gets the file extension MM_
your
Maker Rock
is
ent
u
ved in
In Clip info you can add the title, author name, copyright information an
description.
Keyboard shortcut:
Internet > Send arran
This option generates a compressed file in the Windows media format. A
same time, the respective mail program is activated and the previously
generated file is added
steps.
Keyboard shortcut:
Upload to Community
Use this menu item to send your finis
page 130).
Backup
Load backup arrangement
Using this command you can load a backup arrangement. Backup
arrangements are created automatically by MAGIX Music Maker Rock Edition 4
and can be used when, for instance, a prog
(underscore). This command is also useful if you unintentionally saved
change and wish to return to the previous version.
Keyboard shortcut: Alt + O
Backup > Create backup
With this menu point, you can put a complete MAGIX Music
Edition 4 arrangement, including all used multimedia files into one folder. Th
is especially useful when you wish to reuse or archive such an arrangem
later on, or when the files are located on multiple CDs so that on loading yo
continually have to change CDs. Furthermore, the effect files used are sa
a folder with the other files.

142 File Menu
www.magix.com
t.
Keyboard shortcut: Shift + R
Backup > Create backup in OGG format
, whereby all audio files used will
Backup copy > Burn backup copy to disc
rn arran s well as all the relevant files to CD or
ent, if
ram which is burned to the first disc of this type of backup,
guarantees easy re-recording of the backup.
Ctrl+Shift+R
lly selected files to CD/DVD
VD. File
Settings
Arrangement settings
operties of the arrangement can be set. Statistical
e name of the current arrangement.
Universal arrangement settings
Path: This is where you determine the folder on your hard drive in which your
arrangement is saved.
A dialog opens where you can specify the path and name of the arrangemen
You can create a backup copy as an OGG file
be compressed into OGG format. This way you can compactly archive your
song or put it on the web as a remix kit.
Keyboard shortcut: Ctrl + Alt + R
Use this option to bu the gement a
DVD.
Even larger arrangements can be burned straight to disc. The arrangem
necessary, will then be split up and burned automatically to multiple discs. A
restore prog
Keyboard shortcut:
Backup copy > Burn manua
Opens MAGIX Speed burnR to burn videos or other files onto CD/D
selection is done via drag & drop from MAGIX Speed burnR's Explorer.
Keyboard shortcut: Ctrl + B
In this dialog, the general pr
information about the arrangement is also displayed.
Shortcut: E
Properties
Name: Here you can enter th

File Menu 143
www.magix.com
Audio sample rate: The sample rate determines the pitch and the speed at
d back. The sample rate you can use depends
on your sound card (some sound cards even permit changing the sample rate
use depends on your sound card
n also set additional beat types. For
id a 6/8 beat would be the
s specified in the dialog are used
ojects.
See above
ultimedia files used in the
General options
autoscroll is activated, the screen view automatically shifts when
the playback marker reaches the right edge of the screen, which is particularly
ments. Scrolling requires constant recalculation of the
Simplified Object Display: This lets you switch between various object views.
d in the tracks either with detailed preview
frames or in simplified form. Audio objects are displayed either with one or two
ve form displays for stereo.
Shortcut: Tab
Number of tracks: Here you can set the number of tracks you wish to use.
which audio objects are playe
during playback). The sample rate you can
(some sound cards even permit changing the sample rate during playback). If
you halve the sample rate, wave audio objects are played one octave lower.
Type of beat: Several types of bars are available to choose from, for example
¾ beat. With various grid settings you ca
example, with a set 3/4 beat and a 1/8 note gr
result.
Use as presets for new projects: The setting
as the standard settings for newly created pr
Information
Name/Path:
Created on: Displays the time the arrangement was created.
Last changes: Displays the time when last saved.
Number of used objects: Displays the number of all objects in the
arrangement.
Used files: Here the names and paths to all m
arrangement are shown.
Program settings
Here you can set MAGIX Music Maker Rock Edition 4 according to your needs
and wishes.
Shortcut: Y
Autoscroll: If
useful for longer arrange
screen view, which may lead to interrupted playback if the amount of system
RAM is too low. If this happens, simply deactivate the autoscroll feature.
Here video objects are isplayed
separate wa

144 File Menu
www.magix.com
at
style are completely
Media Pool (instead of being grayed out).
r on the hard
corresponding
leted or
of
nd installed factory-provided Soundpool in the
ol will be hidden.
stalled state, MAGIX Music Maker Rock
Edition 4 displays a number of security queries at various parts of the program.
can be switched off by clicking the small box at the bottom
s
ition 4.
Automatic saving of backup arrangements: Here you can the time intervals
which automatic backup arrangements will be saved.
Soundpool
Hide unavailable loops: All Soundpools are saved into a database
automatically. The Media Pool lists all loops saved in the database, i.e. also
those which originate from external media (Soundpool discs) that may not be in
the drive at the moment. These results can be hidden, but this slows down the
search results in the Media Pool.
Hide instruments which are left empty in the style selection: Instrument
groups for which there are no loops present in a certain
hidden in the
Clean up Soundpool: Every detected Soundpool (on CD/DVD o
e, even if thedrive) is added to the database and displayed ther
medium is currently not in the drive or if the Soundpool has been de
moved. This option helps to remove these entries in the database.
Reset Soundpool: Deletes the Soundpool database. You have the option
maintaining the included a
database.
Hide advanced tooltips: The additional information for the detected loops in
the Media Po
Instruction dialogs:In its newly in
Every one of them
that says "Don't show this message again". To display these warning
messages, select the "Reactivate dialogs" option.
Program interface
Darken screen when dialogs are opened: Darkening signals modal dialog
which need to be closed before the rest of the program can be operated. This
can be deactivated if it disturbs you.
Hide news:This option deactivates the MAGIX News Center in the main
interface of MAGIX Music Maker Rock Ed

File Menu 145
www.magix.com
playing the
n switch off the preview when a playback is running
r
s well, provided the loops are clean, that is,
samples as well",
for longer
lly using pitchshifting. For this to work however, the used samples
first sample in the arrangement.
ied to
alog instead of digitally: If this option is activated, you
tput the
wave audio objects play and which drivers should be used.
Import
Preview samples (Wav,OGG): Preview Wave files while
arrangement: Here you ca
(Smart Preview).
Adapt waves automatically to the BPM: When loading to the arrangement o
previewing, MAGIX Music Maker Rock Edition 4 tries to adapt the samples to
the speed of the arrangement. This always works properly with newer MAGIX
soundpool samples as the tempo information is saved in the audio file. It
usually works with all other loops a
they are cut to entire bar lengths. (see the Arranger chapter)
With "For patched samples only", automatic timestretching can be
deactivated for all other samples. With "Apply to longer
longer samples will also be adapted if they contain tempo and bar information
provided by the Remix Agent.
Remix Agent for the tempo and beat recognition of longer samples (>15 s):
Here you can deactivate the automatic opening of the Remix Agent
samples (for example, CD tracks or MP3s).
Automatically adjust waves to pitch: A wave's pitch can be adjusted
automatica
(much like the samples on the MAGIX soundpool CDs) must have the
corresponding key and pitch information. The pitch of the arrangement will
then correspond to the pitch information of the
Use destructive adjustment for shorter samples: Usually, loaded samples are
adapted to the arrangement in realtime with timestretching. For computers
with lower processing power, this method can be deactivated – the
timestretching effect will then be calculated into a new file which is cop
the hard disk.
Import CD tracks an
can record audio CDs via the record button in the transport console. Read
more on this in the "Recording audio CDs" section in the "Audio objects"
chapter. (view page 59)
Audio
Wave output device: This option specifies which sound card or ou

146 File Menu
www.magix.com
d: Use these buttons to access the playback options window which
ettings
ave drivers may
wave
lay.
played at this higher resolution (internal 32-bit
possible, it's
ave
st
usually more important than fast reaction times, the
should be raised to 16384 or 32768 if dropouts occur.
at can be
stored in the memory of your computer.
Create "Undo" before destructive editing of audio data: To undo destructive
effects, the original files must be saved to the hard disk. If you use this type of
Advance
provides information on the current sound card. ASIO provides the s
dialog for the ASIO driver, e.g. the MAGIX Low Latency ASIO (view page 147)
driver.
Wave/Direct Sound/ASIO: Specifies which of the conventional Windows™
wave drivers should be used for the sound card, i.e. the DirectSound system
or ASIO.
Windows wave drivers have the advantage of being relatively stable against
strained peaks caused by large buffers. If playback becomes jerky as a result
of processor-heavy effects like time-stretching, switching to w
solve the problem. Otherwise the system may react more slowly with
drivers because of the large buffers, that is, all changes are heard with a de
16/24-bit wave/driver communication: If your sound card is able to play 24-bit
audio, your arrangement will be
float calculation). This is applicable only to wave drivers.
When using live monitoring and when playing and recording VST instruments in
real time, i.e. with as low a reaction time (latency) as
recommended that you use ASIO drivers. If your sound cards do not h
ASIO drivers, you can use the MAGIX Low Latency driver.
If you select ASIO as the driver model, you can set the output in the upper li
field (for cards with multiple outputs) and the ASIO driver in the lower list field.
Advanced opens the settings dialog of the ASIO driver. Please refer to the
sound card manual for more information.
Audio buffer:Here you can specify the buffer size that should be used for
playback of the entire arrangement or for previewing audio files in the Media
Pool.
As a rule of thumb: If response and loading times are too slow, reduce the
buffer size; otherwise increase the buffer size if the audio playback is choppy
or if real-time effect computation errors occur.
As error-free playback is
buffer size
Options
Save WAV's in RAM up to: Sets the maximum size of wave files th

File Menu 147
www.magix.com
al-time audio to wave file: If this option is activated, the entire
arrangement can be mixed live and recorded simultaneously. During playback
orded and written to a separate wave file. Every time playback stops
you will be asked if the portion you just played should be saved as a wave file,
for maximum compatibility. However, if you wish to increase performance and
g. on-board sound
and additional sound cards), you have to specify the device that you wish to
n manage latencies
of up to 256 samples.
-
ssed via normal audio with a sample
rate of 44.1 KHz, they either function not at all or the sound card's driver
huddy than when playing DVDs whose audio is set to 48 KHz. The
MAGIX Low Latency driver provides a significantly better resampling function
d
d thereby reduce the
processing load.
effect quite often, you can switch off the undo function and save on time used
to create an undo file as well as save space in memory.
Write re
you can, for example, control mixer fades and effects or, with the help of
keyboard shortcuts, you can play the beats in the arrangement – all activities
will be rec
loaded into the arrangement, or deleted.
MAGIX Low Latency ASIO driver settings
These settings usually do not need to be changed; they are already optimized
reduce latency, then you can change individual settings.
Audio device: If you have more than one audio device (e.
use for the MAGIX Low Latency driver here.
Buffer size: Sets sample buffer size. The smaller the buffer, the lower the
latency and the larger the CPU load. Modern computers ca
Always convert 44.1 KHz: Some on-board sound chips (AC97) and sound
cards (e.g. manufactured by Creative) support 48 KHz as the only hardware
side sampling frequency. If these are acce
changes the sample rate, usually into quite poor quality. You will be able to
recognize this by the sound during playback of soundpool files being much
more t
and is for this reason activated by default, that is, the output signal is booste
to 48 KHz. If you are certain that your sound card can play 44.1KHz sample
rates properly, you can deactivate this option, an

148 File Menu
www.magix.com
gs (view page 143, view page 142)
you made in MAGIX Music Maker Rock Edition 4 to their original settings.
Folders
Here you can set the path where
arrangements will be saved (Arrangements)
files are exported (Export) or imported (Import), and recordings (Recordings)
are saved,
files from the Soundpool are loacted (Soundpool)
your MP3 collection is available (My MP3s)
Reset Program Settings to Default...
Use this function to reset all program settin
Exit
Exits MAGIX Music Maker Rock Edition 4.
Keyboard shortcut: Alt+F4

Edit Menu 149
Edit Menu
Undo
www.magix.com
m
10 commands can be undone, including obje
ult of a change in
ct and cursor
your
back to the previous
anipulations. If you don’t like the res
arrangement, the Undo function will take you
arrangement.
Keyboard shortcut: Ctrl + Z
Redo
Redo lets you reverse the last Undo command.
Ctrl + Y
Object
Create a new object
Record a new object
A new audio object is recorded; see Audio recording.
Shortcut: R
Create speech from text
Please refer to the Audio objects (view page 68) chapter.
Keyboard shortcut: Ctrl + Shift + X
Create a new title object
Creates a new title object and opens the title editor (view page 72).
Keyboard shortcut:

150 Edit Menu
Cut
The marked objects are cut out of the current arrangement and placed
onto the clipboard. They can then be inserted at different positions.
shortcut: Ctrl + X
Copy O
Keyboard
bjects
T rs
n al and can be moved easily by holding the left mouse
button (drag & drop).
Keyboard shortcut: Ctrl + C
objects
This menu option lets you copy all selected objects. The copy appears next to
the orig mouse button (drag &
drop).
his menu option lets you copy all selected objects. The copy appea
ext to the origin
Duplicate
inal and can be moved easily by holding the left
Keyboard shortcut: Ctrl + D
Paste
The contents of the
in the current arr
Clipboard is added at the position of the start marker
angement.
positioned at the end of the most recently inserted
ommand is also
V
the clipboard is to
Ctrl + Num "+"
This menu option lets you delete all selected objects from the arrangement. To
highlight or select more than one object, use the “Shift” key while you click
with the mouse.
Keyboard shortcut: Del
The playback marker is
object so that the quick and easy multiple use of the c
possible. Existing objects now become overwritten.
Keyboard shortcut: Ctrl +
Multiple insertions
Like Insert, but you can stipulate how often the content of
be inserted.
Keyboard shortcut:
Delete objects
www.magix.com

Edit Menu 151
www.magix.com
ects
You c
sele n.
to -join t of an object, select “Build group” to
join all selected objects to a group.
Keybo
Save
The selected objects are saved in the takes directory. To use takes, please
ving object ly (view page 48)" in the PDF
manual.
Group objects
bje s into s soon as an object is selected in the
all objects in the group become highlighted so that you can work on
llectively.
Sho
trl + M
ys looped over the full length of the underlying data
material (audio or video file). To set a clip from a file as a loop, shorten the
d t back and choose the command
“Edit menu > Insert user-defined loop”. This function is very useful for setting
ing as a loop, as the silence at the beginning of a recording
Split obj
an cut up a selected object at the S marker position. If you have not
ed an object, all objects will be cut into pieces at the S marker positioct
Later on, if you want re he pieces
ard shortcut: T
objects as takes
read the chapter "Sa s separate
Keyboard shortcut: Shift + K
Grouping
Orders all selected o ct groups. A
group,
them co
rtcut: Ctrl + L
Ungroup objects
Turns all selected objects into free-standing objects again.
Shortcut: C
Loop range
Setting user-defined loops
Normally an object is alwa
object at the front an he with the handles
your own record
can be cut away.
Keyboard shortcut: Z

152 Edit Menu
www.magix.com
ed loops
Keyboard shortcut: Shift + Z
Track
Add track
A new empty track will be added to the arranger. In the "File > Arrangement
shortcut: Ctrl +K
joins all audio objects in one audio file ("mixdown"). Afterwards, the
l will only occupy one track and take up hardly any RAM (does
space on the hard drive [ca. 10 MB/min in stereo]). This way
er Rock Edition 4 automatically normalizes the audio file, i.e.
the loudest part of the wave audio object is identical with the highest figure of
resolu ion pea uarantees the same sound quality, even if you
repeat the mix down procedure or you combine the mix down file with other
s again and again. The mix down function is very helpful if
you want to go on using the mix down object.
Remove user-defin
The user-defined loop length is reset.
properties" the count of tracks can be set in large increments.
Keyboard
Audio mixdown
This option
audio materia
however take up
you get a clear overview of further objects as well as space for them.
MAGIX Music Mak
the 16-bit t k. This g
wave audio object
Tip: To cre he VI or WAate t final A V (or any other multimedia) file, we
recommend using the various option of the submenu "Export movie" option in
"File", instead of the mixdown function.
Keyboard shortcut: Shift+M
Range
MAGIX Music Maker Rock Edition 4 provides object-based functions as well a
"band-oriented" ed
s
iting functions. These always refer to the whole arrangement
st track as ll as to the area between the start and end from the first to the la we
marker.

Edit Menu 153
www.magix.com
ints is cut from the current arrangement
and placed on the clipboard. This section can be reinserted elsewhere.
Shortcut: Ctrl + Alt + X
between the in and out points is copied from the current
t to the clipboard. This section can be reinserted elsewhere.
in and out points is deleted from the current
not copied to the clipboard.
The contents of the clipboard are inserted at the current arrangement's
Similar in function to "Insert", but you can stipulate how often the content of
the clipboard is to be inserted.
Extract
The section between the in and out points is preserved, and all of the material
in front and behind it are deleted. Use this option to isolate a specific part of an
ther individual editing.
Shortcut: Ctrl + Alt + P
Cut
The section between the in and out po
Copy
The section
arrangemen
Shortcut: Ctrl + Alt + C
Delete
The section between the
arrangement and
Keyboard shortcut: Alt + Del
Insert
position of the in point.
Shortcut: Ctrl + Alt + V
Multiple insert
Shortcut: Ctrl + Alt + number block +
arrangement for fur

154 Edit Menu
www.magix.com
Move screen view
e com ands rtion together with the start marker will
be moved in the timeline. You can quickly skip between different jump markers
ject edges.
back sition
s the playback marker to the position of a jump marker. This function
ck markers to the
mark g playback, the playback marker
along with the playback range will be moved. Here, the old range is always
until the end so that you can remix your arrangement live once the jump
markers have been placed where you want them without losing the beat.
1..0
arke
marker at the position of the current playback marker. Here
you can note specific parts of the arrangement. With the "Move playback
Keyboard shortcut: Shift + 1...0
Create jump marker sequence
the currently selected playback area between the start
Keyboard shortcut: Ctrl+Shift+M
Delete all jump markers
Deletes all jump markers
Keyboard shortcut: Alt+Shift+M
Navigation
Using thes m , a viewable po
and ob
Keyboard shortcuts: See keyboard shortcut overview in the
Arranger View (view page 182) section.
Move play po
This set
can best be used via the keyboard.
When stopped, you can immediately move the playba
position of the saved jump ers. Durin
played
Keyboard shortcuts:
Set jump m r
This sets a jump
position" function you can quickly jump to these positions.
This option duplicates
and end markers by setting start markers equivalent to one another in the bar
ruler. Now you can jump to every jump marker using keyboard shortcuts.

Edit Menu 155
www.magix.com
jects
angement will be selected.
Select all ob
All objects in the arr
Keyboard shortcut: Ctrl + A

156 Menu effects
Menu effects
www.magix.com
Song Maker
With the help of Song Maker, you can automatically arrange multiple audio
objects (loops) using included samples for songs or song parts without having
to drag them individually from the Media Pool into the corresponding tracks.
1. Activate the Song Maker by pressing the “Song Maker” button or from the
Effects menu.
2. Select a music style.
3. Select the instruments that you want to use. If, for example, you only want a
rhythm section with drums and bass, deactivate the other instruments with
a mouse-click.
4. Select the song part or parts that you want to create. The parts differentiate
through their harmonic structure and instrument density, for example verses
have fewer instruments than refrains, while there are accompaniment
variations between the 1st and 2nd verses as well as in the refrains. The
pitch sequence from verse to verse remains the same. If you activate all
parts, Song Maker creates a complete song in the known structure of a
classical pop song. The intro-verse-refrain-verse-refrain-bridge-(transition or
solo)-refrain-outro.
5. Use the sliders to the right to set the speed and the length of your song.
6. "Chaos" draws a different loop of the corresponding instrument for each
new object. Normally, the same loop is continuously used in various pitches
for each element of the song such as verse, chorus etc.b If you use
"Automatic", a new song in a randomly generated style will be created
automatically, as soon as a song has been played.
7. Use the play button to preview the song maker's suggestion. If you do not
like the result, create other arrangements, song parts or enhancements.
You can return to a previous status anytime by clicking on "Undo" or
"Redo".
8. Once you're happy with Song Maker's suggestion, click on "Apply". The
building blocks are only now added to the Arranger. Alternatively, you can
recalculate the Song Maker suggestion into a WAV file. A click on “Cancel”
closes Song Maker and returns to the original arrangement status.
Shortcut: W

Menu effects 157
www.magix.com
Audio
Please read the chapter "Audio effects (view page 90)" for more details on
audio effects.
Mast r audio effect rack
Keyboard shortcut: B
intage effects and the
cts can be found in the chapter "Audio effects (view page 90)".
e
Opens or closes the master effects rack; you can also use the "Master FX"
button in the mixer window for this.
Mastering Suite
You can open the MAGIX Mastering Suite (view page 101) with this option.
Keyboard shortcut: U
Create speech from text
Please refer to the Audio objects (view page 68) chapter.
Keyboard shortcut: Ctrl + Shift + X
Object effect rack
e Object and master eSe ffects rack (view page 93).
Shortcut: Shift + A
Audio effects
This submenu includes all audio object effects plus the v
effects from the MAGIX Mastering Suite (Premium version only); the latter can
be used individually.
Individual effe
Volume
An assortment of different menu commands which influence the volume of your
audio objects.

158 Menu effects
www.magix.com
Mute/Unmute objects
mmand you can mute one or more selected objects. Selecting this
command again makes it audible once again.
F2
Set volume
This function, located in both the effects menu and the context menu, controls
am ing
tomatically dampens the volume of other audio objects. This
can be used to insert voiceovers into your arrangement or add commentary to
dampen the original sound of existing videos or all soundtracks equally.
In the dialog you can activate and deactivate the value of the dampening.
ge 54) (Audio
vel w out cl al. This searches for the largest signal
audio material e level of the object so that this position
y 0 dB (maximum overdrive).
tempo of your audio objects.
Timestretch and pitchshift
/pitchshift.
Shortcut: Shift + V
Use this co
Shortcut:
the sound volume for individual objects, just like the object handles in the
arranger.
Automatic volume d p
This command au
a film (with the original sound). You can also specify whether you want to
You can use this command while recording audio (view pa
recording, advanced options).
Shortcut: Alt + L
Normalize
The function "Normalize" raises the level of an audio object to the maximum
possible le ith ipping the materi
peak in the and raises th
matches exactl
Keyboard shortcut: Alt + N
Tempo and pitch
An assortment of different menu commands which influence the pitch and
See Timestretch

Menu effects 159
www.magix.com
Harmony Agent
The Harmony Agent is designed to analyze harmonies.
Read more on this in the corresponding section of the "Audio Objects (view
page 67)" chapter.
Keyboard shortcut: Alt+Shift+F
One pitch higher/lower
You can quickly alter the octave of an included sample without having to
undpool folder in the Media Pool.
AGIX Music Maker Rock Edition 4's remix
functions.
Audio > Remix Agent – Tempo and beat assignment
Maker Rock Edition 4 provides a Remix Agent for the automatic
access the corresponding So
The "*" and "÷" keys on the numeric keypad (right on the keyboard) place the
sample one level higher or lower.
The "+" and "-" keys on the numeric keypad change the pitch via pitchshifting;
the respective effect in the audio effects rack is utilized for this.
Remix
These are the commands for M
MAGIX Music
determination of the speed in BPM (beats per minute) and for the creation of
loop objects.
Please read more on this in the "Audio objects" chapter.
Audio > Create remix objects
If, while running the Remix Agent, the tempo and beat information were saved
implemented, this command starts it and opens
the presets dialog for creating remix objects.
ects
You can save the current effect combination of an audio object separately and
ou can deactivate all currently used effects
entirely (Reset) if you want to undo the changes.
to the audio file, this command can be used to create remix objects. If the
Remix Agent has not yet been
Load/Save/Reset audio eff
apply it to other objects later. Or y

160 Menu effects
www.magix.com
Load audio effects Ctrl + Alt + O
+ S
Reset audio effects Ctrl + Alt + H
two mono objects
With this option stereo recordings can be split into two mono objects which
the "Ungroup" button to edit the
channels as independent objects.
Edit image in external editor
aded
diting has been completed, is used in the MAGIX
aker Rock Edition 4 instead of the original material.
Ctrl + Shift + B
Opens the title editor (More information can be found in the section "Title
.
Shortcut: Ctrl + T
ct.
Shortcuts:
Save audio effects Ctrl + Alt
Convert stereo into
are then connected to a group. You can use
Shortcut: Alt + K
Video
Graphics files (BMPs or JPEGs) may be edited retroactively with an external
graphics program from the arranger. The selected image file is lo
automatically and, once e
Music M
Shortcut:
Title
Title Editor
Editor" on page 72) for the selected photo or video object
Load title template
Use this command to load previously saved title effects for the current obje
Shortcut: Alt + Shift + T

Menu effects 161
www.magix.com
mpla
ou can save the ination fo ct separately
nd apply it to oth
Shortcut: Alt + T
cts are selected, then the effects
will be appl ected object.
Shortcut: Alt + Shift + O
o effects
nt effects combination for each object
allow you t urrently used effects. The material will
the state it was in be applied the effect.
t: Alt + Shift + H
Save title te te
Y
a
current effect comb
er title objects later.
r each title obje
Load video effects
This command enables a saved effects combination to be loaded for the
currently loaded object. If multiple obje
combination ied to each sel
Save vide
This command saves the curre
separately.
Shortcut: Alt + Shift + S
Reset video effects
This option s o deactivate all c
be reset to fore you
Shortcu

162 View menu
View menu
www.magix.com
ode
in MAGIX Music Maker Rock Edition 4 to "Easy" mode's
simplified interface. More about this in the chapter "Arranger -> Normal
ock Edition 4 in normal
mode. If you can't find one of the functions while reading, make sure that you
Optimize arrangement view
Easy m
Switches the screen
mode/Easy mode".
This documentation describes MAGIX Music Maker R
don't have Easy mode turned on.
Arranger
The m is set at the be start arker ginning of the arrangement and the
t at the end of the last object in the arrangement such
ement may be played back in full.
of the
arrangement is visible. The vertical zoom steps (track height) remain preserved.
Keyboard shortcut: Shift + O
Change object presentation
This lets you switch between various object views. Here video objects are
displayed in the tracks either with detailed preview frames or in simplified form.
Audio objects are displayed either with one or two separate wave form displays
for stereo.
Shortcut: Tab
Highlight loop area
With this option, you can fade the loop area in and out, that is, the strip above
the first track which displays the area that will be played as an endless loop.
Keyboard shortcut: Shift + X
end marker is se
that the arrang
Zooms out of the arrangement so that the complete duration

View menu 163
www.magix.com
> Show bar marker/harmony marker
t or the Harmony Agent, the analysed material
receives beat and harmony information which is then shown in the arranger via
t Markers Ctrl + Shift + F11
Media Pool
n you can hide the Media Pool or make it visible again.
Med
Opens
lders via
Video monitor
V
video preview monitor in full-screen mode. The right
the context menu, the Esc-key returns you to normal
Shortcut: Alt + Enter
Show object marker
After using the Remix agen
these commands.
Shortcut: Bar Marker Ctrl + Shift + F9
Harmony
Markers
Ctrl + Shift + F10
Bea
Media Pool
With this optio
Shortcut: F
ia Pool views / template folders
the corresponding folder in the Media Pool.
It's even easier to access the corresponding Media Pool views and fo
the corresponding keyboard shortcut.
Show video monitor
Opens and closes the video window.
Shortcut:
Full-screen Video Monitor
This option shows the
mouse button opens
viewing mode.

164 View menu
www.magix.com
ideo
Audio peakmeter
monito ed int h displays the sound as
graphic.
rrangement ov
In the Overview mode, you can view the whole arrangement and you are also
object you want in a split second; zoom in directly to the
ve around the clip displayed in the arranger.
Shortcut: Alt + Shift + U
InfoBox
the preview monitor if you hold the
een.
Mix
With this option you can open and close the real-time mixer. Further
nd in the Mixer (view page 124) chapter.
M
s rack; you can also use the "Master FX"
s.
B
You can open the MAGIX Mastering Suite (view page 101) with this option.
Keyboard shortcut: U
Video output
This option switches the preview monitor on or off to display the existing v
objects in the Arranger.
T
a
he video r is transform o an analyzer whic
A erview
able to access any
video monitor or mo
The InfoBox mode shows help text in
mouse pointer over a button on the scr
Mixer
information can be fou
Shortcut:
Master audio effect rack
Opens or closes the master effect
button in the mixer window for thi
Keyboard shortcut:
Mastering Suite

View menu 165
www.magix.com
Determines whether the video monitor and Mediapool should be integrated into
shown on a separate window.
Standard layout
the main window or
Keyboard shortcut: L

166 Online menu
www.magix.com
de mands for uploading individual objects in the
arranger or files from the Media Pool as well as the entire arrangement, audio
or video. Vice versa, you can use the menu commands to download media
from MAGIX Online Album or Catooh or to open the website with the
corresponding service directly.
Catooh – the Online Content Library
Catooh provides you with high-quality photos, videos, and music for every
theme, expanded by intelligent iContent with professional Soundpools, DVD
menu templates, and brilliant MAGIX ShowMaker styles to help you make your
photo, video, and music projects reality. All of this is available directly from
your MAGIX software.
Just choose "Online" from the menu "Catooh" to set up an Internet connection.
Browse through the thematically sorted categories or view the results directly
by entering a keyword. After downloading, you can drag the objects from the
Media Pool directly into your arrangement.
Online menu
The Online menu provides access to MAGIX Online World and other online
functions in MAGIX Music Maker Rock Edition 4.
The submenus provi com
Tip: Read the introduction online http://rdir.magix.net/?page=JRF6LASAR2Z3!
Find media
Opens Catooh and loads your files directly into the arrangement.
Shortcut: O
Import media backup
iContent (for example, 3D transitions) which you buy and download from
Catooh is stored directly in your central My files\MAGIX Downloads\Backup
directory. If you have downloaded these files from other MAGIX programs, then
you can use the command "Import media backup" to make them accessible
for use in MAGIX Music Maker Rock Edition 4.

Online menu 167
www.magix.com
lbum
en
iately available from
anywhere in the world on a professionally-designed photo website, in well-
.
Upload your pictures directly from a camera phone, send the link, and share
sic.
Send custom designed e-cards with your own photos.
rd
MAGIX Online Album is available in three versions, of which the smallest (the
,
esigns or access by mobile
phone/PDA.
www.magix-photos.com.
r on the
otos directly from the program and optimize them in
ic of
e -> Send selected".
MAGIX Online A
In the MAGIX Online Album, you can post your favorite photos online and th
send the link to your friends. All photos are immed
organized photo galleries, as full-screen slideshows, or in the form of a
personal photo e-card.
Personalized photo website in many designs.
Unique Internet address (URL)
the picture with other camera phone users.
Full-screen online slideshows with fade effects and mu
Share your photos with friends, including Internet management and passwo
access to private albums.
Your photos online
FREE album with 500MB webspace for your photos) is entirely free.
The larger versions (CLASSIC or PREMIUM) are available for a monthly charge
but also come with many handy features, such as a faster website, 2,000 MB
or 5,000 MB storage space, more website d
More information about prices and included services is available at
Just three easy steps: Within minutes your first pictures will appea
Internet:
1. Select photos
Choose your favorite ph
just a few clicks. Put completed photo albums together and integrate mus
your choice.
Do it all offline on your PC - saves you money! Then select "Services" from the
program's menu bar "MAGIX Online Print Servic

168 Online menu
www.magix.com
2. Upload photos
In order to upload photos to your MAGIX Online Album simply log in using your
3. Done! Your own personal photo website is finished
on the net. As a photo gallery or fully
hotos on the road
edia Manager, you can quickly manage your
photo website, upload photos and music, create new albums, add designs and
. All online without even having to download any extra
software! Worldwide, easy, and quick in just a few clicks. At http://www.magix-
otos as unique e-cards with great designs, or as a photo email to
your friends and acquaintances.
email address. Naturally, access is protected via your personal password.
If you still don't have access, click on Register now! to activate your own
album in just a few minutes. Then off you go!
and your best photo memories are
automatic slideshow (fullscreen).
Now, invite all your friends with just one click or show your p
using your WAP-compatible camera phone.
Using your MAGIX Online M
text, and much more
photos.com
The following options are also available:
Send e-cards and photo emails
Send your ph
Order photo prints and gifts
Order paper prints or great photo gifts from your MAGIX Online Album and
have them delivered directly to your home, or pick them up from a photo lab in
your area. Delivery time is usually just 2 - 3 days.

Online menu 169
www.magix.com
magix.info - Multimedia Community
e
MAGIX Community at large a central platform for exchanging knowledge,
g
networking with other members.
Share your knowledge & get answers This MAGIX service offers you and th
photos, videos, and music, for discussing and evaluating, for communicatin
with one another, for presenting yourself, and
You will find the sections "Questions & Answers", "Show & Discuss", "Online
Training", and "Chat" where you can play an active or passive role in the
g
Display all questions & answers...
Use the questions which other community members have asked and the
rs to improve your own working methods, to
solve problems, and to get to know the details of MAGIX Music Maker Rock
Learn not only theoretically, but also practically what the program is capable
of: "learning by doing", quickly and uncomplicated.
Let your friends view the contents of your MAGIX.info screen over the
Internet on their PCs.
ideos together or for receiving support for
workflow while using the program (a
MAGIX Community. For this there's not only the www.magix.info
http://www.magix.info/uk portal, but magix.info directly in your product.
Ask questions online
If you have questions or problems with your MAGIX program or you're lookin
for tips & tricks concerning multimedia, then you're at the right place.
collective knowledge of the answe
Edition 4.
Launch the online training center
Ideal for viewing photos and v
questions arising during your creative
licensed client will be installed for this purpose).

170 Online menu
www.magix.com
This service offers:
Your desired domain (www.desiredname.com) and a subdomain (http://your-
xt effects,
d
everything without any ad banners!
(*.wmv) & music (*.mp3) options.
Additional software: MAGIX web mail for managing your email inbox.
is way,
you have enough time to find out everything about MAGIX Website Maker and
d managing your homepage.
nal Flash® design with pre-finished, customizable subpages, start
pages, profile pages, photo pages, video pages, and much more.
nable text fields with fantastic fonts and
animated text effects can be added and individually formatted with ease.
ckground music, or
integrate it all as an online music player with playlists.
,
buttons, and much more offer more possibilities for
designing unique websites than ever.
jects
ebsites.
Top extras: Enhance your website with a visitor counter, guest book, contact
form, and many other useful extras.
Export function: Conveniently add individual components of your website
(e.g. video player, slideshow, online music player) or even the entire website to
external sites as an embedded website.
More online services
MAGIX Website Maker
Not only is Internet surfing easy! Thanks to MAGIX Website Maker creating
websites also becomes child's play!
name.magix.net/website).
250 MB memory space with 5 email accounts, 1 GB each.
Website Maker with website templates, intros. Also animations, te
form and design objects, picture and graphic templates, and buttons. An
Photo (*.jpeg), video
MAGIX Website Maker offers 3 months of free, non-binding service. Th
all existing possibilities for editing an
MAGIX Website Maker offers everything for the perfect Flash® website:
Design templates: Numerous high-quality website templates in the latest
professio
Text & text effects: Freely positio
Multimedia content: Select your favorite photos, spectacular slideshows,
videos and an online video player with your own ba
Decorative elements: Attractive design objects, plenty of vector shapes
background images,
Animation objects: Large selection of dynamic, impressive animation ob
for breathtaking, moving websites.
Links: Easily add links to your own or external w

Online menu 171
www.magix.com
Proceed as follows:
After registering your desired domain, you can start creating your website right
(start animation) at the start of your
intro as a next step.
lace the mock text with your own text as you see fit. All
ow you want it, you can put your page online, so
for
esponding
away.
1. First, select a design for your website in MAGIX Website Maker
2. If you would like to place an intro
domain, select your
3. Now you can rep
free-standing elements on all webpages can also be moved as you please.
To do so, click to select the element and move it using your mouse.
4. Once everything is just h
that your domain can be accessed.
Online login details
In this dialog, you can save your login information (login and password)
MAGIX Online Album and all other MAGIX Online World as well as for Catooh,
making it unnecessary to login each time you access MAGIX Online World.
The saved data are valid for all other MAGIX programs for the corr
computer user.

172 Tasks menu
www.magix.com
enu you will find direct solution and short video explanations on how
to perform tasks in different topics. Not only will you find step-by-step
ess to
Tasks menu
In this m
instructions for sound and pictures here, but you also find quick acc
many of functions.
If you click on an entry with a camera symbol, then you will open a short
tutorial video which displays a solution. Entries without camera symbols offer a
solution to the problem immediately.

Help Menu 173
www.magix.com
you can display the "Welcome" dialog again. There, you
have a quick access to important functions during program start.
Documentation
Content
Use the command "Content" in the "Help" menu to open the start page of the
help file. You can read through the help file step-by-step and jump to specific
sections via the tree structure on the right hand side.
Context help
The mouse cursor will turn into an arrow with a question mark.
Click on any button of the main screen, to open program help which will
describe the control element in question.
Shortcut: Alt + F1
Display Tool Tips
Tooltips are small information windows that open up automatically if the mouse
pointer stops briefly on a button or some other area. They provide information
about the function of the button. These information boxes can be switched on
or off with this option.
Keyboard shortcut: Ctrl + Shift + F1
Start introductory video
The introductory video shows you how all the most important features work.
Specific topics are explained in detail in additional tutorial videos.
Keyboard shortcut: Ctrl + F1
To play the introductory video you may have to insert the program CD.
Help Menu
Show welcome dialog
With this command
Keyboard shortcut: Shift + F1

174 Help Menu
www.magix.com
orkshops
Multimedia Community with online tutorial videos.
Ask magix.info - Multimedia Community a question.
Update program / Upgrade functions
Register online
n opens the MAGIX homepage for online registration where you can
website
http://support.magix.net (see support) where various program updates and
can be downloaded.
sic Maker
ost
Problem: The entered code is incorrect (telephone activation)
Make sure your entry is correct; in most cases a typo is to blame.
ctly, dial the number of our Call Center. Our support
u may have to use manual dial-up.
Find knowledge & w
Opens the magix.info -
Help from other users
Ask the Knowledge Community a question online
This optio
register yourself as a MAGIX user.
Registration grants you access to the MAGIX support
help programs
With the registration form supplied (start menu under "MAGIX Mu
Rock Edition 4 -> Service and support -> Register") you can register via p
or fax. Simply print it out, fill it in, and send it off!
Shortcut: F12
Online Update
Connects directly to the online update page where you can get the latest
version of your program.
Activation problems
If the code is entered corre
staff will help you personally.
The MAGIX website won't open
Check your Internet connection; yo

Help Menu 175
www.magix.com
ax won't open
example, MS Word).
ith the activation code
You can always send questions via email to our support whenever you like.
can assist you as
uct name
Encoder/Decoder name
g)
ic Maker Rock Edition 4 on a new
computer, installed a new hard drive in my old computer (sound card,
If the program cannot be activated again after it has been activated multiple
stomer service (view page 8).
Displays copyright info and version number of MAGIX Music Maker Rock
The form for ordering via post/f
Check that an adequate text editing program is installed and activated (for
I still haven't received an email w
Check that your inbox isn't full.
Have a look in your spam folder.
Please have the following information at hand so that we
quickly and as specifically as possible.
Complete prod
Exact version number (to be found in the about box in the "About" menu item
of the "Help" menu)
Your user code (accessible via the "Activate via post/fax" dialo
Problem: I have installed MAGIX Mus
memory...), or installed it multiple times on the same computer. My activation
code is no longer accepted!
times, please contact the MAGIX cu
About MAGIX Music Maker Rock Edition 4
Edition 4.
176 Buttons overview and keyboard shortcuts
Buttons overview and keyboard shortcuts
www.magix.com
Toolbar
Save arrangement
Copy selected objects
Export
Insert
Undo last action (Undo) Song Maker
Redo action magix.info
Cut
Edition 4 there are many functions for which key
commands can be used to open your desired program at the touch of a
Menu entries
Functions of the Media Pool (Options menu)
eview function (Previewing Media Pool files in the arrangement
context)
File menu
Load/Save arrangement
New arrangement Ctrl+N
Load arrangement Ctrl+O
Save arrangement Ctrl+S
Save arrangement as Shift + S
Key shortcut
In MAGIX Music Maker Rock
button. In detail:
The Video monitor menu
Move and zoom of the arranger view
Playback Control (Move the playback marker and the playback area)
Smart pr

Buttons overview and keyboard shortcuts 177
www.magix.com
audio recording R
Common export options X
Audio a Alt + W
Audio as MP3 Alt + M
Audio as OGG Vorbis Alt + O
Audio as Windows Media Alt + E
Video as AVI Alt + A
Video a Alt + X
Vide a Alt + V
Backup copy
Load ba ment Alt + Y
Save Arrangement and Used
Media
Shift + R
Create backup copy as an OGG Ctrl + Alt + R
Used
Ctrl + Shift + R
ed files to
CD/DVD
Shift + Alt + R
Y
Arrangement settings E
Ctrl + Y
Select all Ctrl + A
Record a new object R
Ctrl + Shift + X
bject C
C
C
C
Insert Ctrl + V
ultiple insert Ctrl + "Num+"
Delete Delete
Select all Ctrl + A
Import
Import audio CD tracks C
Export
s WAV/ADPCM
s MAGIX video
s Windows Media video o
ckup arrange
Burn Arrangement and
Media onto CD/DVD
Burn manually select
Settings
Program settings
Exit Alt + F4
Edit menu
Undo Ctrl + Z
Restore
Object
Text to speech
Create a new title o trl + T
Cut trl + X
Copy trl + C
Duplicate trl + D
M

178 Buttons overview and keyboard shortcuts
www.magix.com
T
Ctrl + F
Group objects Ctrl + L
objects Ctrl + M
Z
p S
C
C
Ctrl + Alt + V
C Num+"
Ctrl + Delete
C
C
Mix audio Shift + M
marker, move playback position (see Playback control),
iew 2)).
Menu effects
B
+ Shift + F
o and beat recognition
W
io effects rack
g Suite U
trl + Shift + X
d equalizer
EQ
essor
or
Split
Save objects as takes
Ungroup
Set user-defined loop
Remove user-defined loo hift + Z
Range
Cut trl + Alt + X
Copy trl + Alt + C
Insert
Multiple insert trl + Alt + "
Delete
Extract trl + Alt + P
Track
Add new track trl + K
Navigation: Set jump
move view (see Move arranger v (view page 18
Edit image in external editor Ctrl + Shift +
Harmony Agent Alt
Temp Shift + K
Song Maker
Audio
Master aud B
Masterin
Text to speech C
Object effects rack Shift + A
10-ban Shift + Q
parametric Shift + U
Compr Shift + D
Stereo process Shift + P

Buttons overview and keyboard shortcuts 179
www.magix.com
Reverb hift + H
Distortion/Filter Shift + F
hift + N
Timestretch and pitchshift Shift + V
y Agent Alt + Shift + F
tch higher
ch lower
gent – Tempo and beat
ion
dio effects Ctrl + Alt + O
ts lt + S
effects + H
Video
xternal editor Ctrl + Shift + B
Title Editor Ctrl + T
te
Save title template Alt + T
Load video effects Alt + Shift + O
Save video effects Alt + Shift + S
+ Shift + H
tation
ker
t + F9
Harmony marker Ctrl + Shift + F10
Echo/ S
Mute/Unmute F2
Volume reduction Alt + L
Normalize S
Harmon
One pi Num *
One pit Num /
Remix A
recognit
Shift + K
Load au
Save audio effec Ctrl + A
Reset audio Ctrl + Alt
Convert stereo into two mono
objects
Alt + K
Edit image in e
Title
Load title templa Alt + Shift + T
Reset video effects Alt
View menu
Arranger
Optimize view Shift + O
Change object presen
Show loop range
Tab
Shift + X
Show object mar
Bar marker Ctrl + Shif

180 Buttons overview and keyboard shortcuts
www.magix.com
t + F11
File Browser F6
Catooh O
lt + A
ects lt + N
Video effects Ctrl + Alt + G
F
Ctrl + Alt + U
Title effects Ctrl + Alt + T
Arrangement overview Alt + Shift + U
M
ring Suite U
out
og Shift + F1
F
Alt + F1
C
Ctrl + F1
e F12
e Ctrl + Shift + F12
usic Maker A F1
Beat marker Ctrl + Shif
Media Pool
Media Pool F
Soundpool F5
Synthesizers F7
Templates F8
Audio effects Ctrl + A
Vintage audio eff Ctrl + A
Video mix effects
Visuals
Ctrl + Alt +
Video monitor
Show video monitor V
Mix
Mixer
Master audio effects rack B
Maste
Standard lay
L
Help menu
Show welcome dial
Table of contents 1
Context help mouse mode
Display tooltips trl + Shift + F1
Start introductory video
Register onlin
Online updat
About MAGIX M
Rock Edition 4
lt + Shift +

Buttons overview and keyboard shortcuts 181
www.magix.com
F5
F
F
ders
C t + A
io effects Ctrl + Alt + N
C
C
C
C
s
Ct
Ctrl + Alt + D
Ctrl + Alt + I
Ctrl + Shift + C
Ctrl + Shift + V
D e
Ctrl + Shift + N
A Shift + E
C R
Alt + Shift + L
Burn file to CD/DVD Alt + Shift + B
esolutions
Ctrl+Shift+4
20x480 Ctrl+Shift+5
720x576 Ctrl+Shift+6
768x576 Ctrl+Shift+7
User-defined resolution Ctrl+Shift+8
Media Pool
Settings
Soundpool
6 File Browser
Synthesizers F7
Templates
Template fol
8
Audio FX
aud
trl + Al
Vintage
Title effects trl + Alt + T
Video effects
cts
trl + Alt + G
Video mix effe trl + Alt + F
Visuals trl + Alt + U
View option
List rl + Alt + L
Details
Big symbols
File operations
Copy
Insert
Delete elet
Rename
Properties lt +
New folder trl +
Folder as link
Video Monitor
Fullscreen video monitor
Standard layout
Alt+Enter
L
Video Monitor
r
V
Video monitor
160x120 Ctrl+Shift+1
320x240
360x288
80x480
Ctrl+Shift+2
Ctrl+Shift+3
6
7

182 Buttons overview and keyboard shortcuts
www.magix.com
monitor to selected Ctrl+Shift+O
trl+Shift+2
trl+Shift+I
nd color trl+Shift+J
und color trl+Shift+K
ansparent
Adjust video
video
Reset to default size
Show time
C
C
Time foregrou C
Time backgro C
Ctrl+Shift+L Time background tr
Move Arranger view
Note: These commands similarly ack marker when it's stopped, move the playb
the marker always remains visible ment clip. in the arrange
To next object edge Ctrl + 0
object edge Ctrl + 9
b inning f arrangement
of arrangement
ark r
Go to end marker Ctrl+End.
Page Up/Down
it right/left n
he next jump marker gDn
e previous jump marker hift + PgUp
view - Increase/Reduc )
in)
size (zoom out)
Ctrl+4
Ctrl+5
C
en start and C +7
ent Ctrl+8
rack pitch A
ack pitch Alt+Arrow down
back control / playbac yback area
playback S
sition (stop playback,
E
Set jump marker Shift+1...0
To the previous
Go to eg o Home
Go to end end cap
Go to start m e Ctrl + Home
Page right/left
Grid un Ctrl+PgUp/PgD
Go to t Ctrl + Shift + P
Go to th Ctrl + S
Arranger e clip size (zoom
Increase clip e (zoom
Reduce clip
siz Ctrl+Arr
Ctrl+Arrow down
ow up
Zoom 1 frame Ctrl+1
Zoom 5 frames
Zoom 1 sec
Ctrl+2
Ctrl+3
Zoom 10 sec
Zoom 1 min
Zoom 10 min trl+6
Zoom view betwe
end marker
trl
Zoom over whole arrangem
Increase t lt+Arrow up
Reduce tr
Move play k marker / pla
Start/Stop pace bar
Stop at po
move playback marker to
current position)
scape

Buttons overview and keyboard shortcuts 183
www.magix.com
1Playback marker to jump marker ..0
Note: When stopped, the playback ved to the jump marker (after marker is mo
the end of the current loop).
Create jump marker sequence
(10 markers with intervals equal
k area)
Delete all jump markers Alt+Shift+M
length
a
ft+Arrow left/right
view
s
ject
to the current playbac
Ctrl+Shift+M
Move playback range Arrow left/right
Move playback one quarter of its Ctrl+Arrow left/right
Double/Halve playback are
length
Shift+Arrow right/left
Double/Halve playback area
length by a bar
Ctrl+Shi
ePreview/Smart pr
Preview of pitche Numbers 0..9
Change preview ob Arrow keys
Insert into arrangement Enter
Delete smart preview object Del

184 Index
www.magix.com
Index
A
About MAGIX Music Maker Roc
Activation problems
Add track
k 175
174
152
26
vel 53, 54
70
ng volume/brightness 48
55
Delay 110
111
ve editing) 60, 95
Arrangement overview 37, 164
142
162
35
/Reduce cl ) 182
17
Medi 35
Arranging Objects 44, 70
Arranging the synth object 77
Ask the Knowledge Community a question online 174
Audio 145, 157
Audio > Create remix objects 159
Audio > Remix Agent – Tempo and beat assignment 159
Audio as MP3 136
Audio as Ogg Vorbis 137
Audio as Wave 136
Audio as Windows Media 137
Audio CD support 18
Audio effects 17, 43, 91, 125, 126, 157
Audio export dialog 135
Audio formats 51
Audio mixdown 60, 95, 152
Audio object effects 92
Audio Objects 51
Audio peakmeter 37, 164
Audio recording 52, 134
Audio recording dialog 34, 54, 158
Automatic tempo adjustment when loading 59
Automatic Tempo Recognition 63
Edition 4
Add videos or images
Adjusting the Signal Le
Adjusting the video screen
Adjusti
Advanced options
Analog
Analog delay parameter
Apply (destructi
Arrangement settings
Arranger 29,
Arranger buttons
Arranger view - Increase ip size (zoom
Arranger with 32 tracks
Arranger, Video Monitor, and a Pool

Index 185
www.magix.com
me damping 158 Automatic volu
B
Backup 141
Backup > Create backup 141
ckup copy to disc
py > Burn manually selected files to CD/DVD
1
nd keyboard shortcuts 1
Backup > Create backup in OGG format 142
Backup copy > Burn ba 142
Backup co 142
BeatBox 2 78
Before you start 11
BitMachine 20
Build or split object groups 45
Buttons overview a 76
C
Calling up the Synthesiz 77 er
1
itch of individual objects manually
or pitch
options 131,
ource for recording
1
into two mono objects 1
1
ct
ject
1
149, 1
Catooh 17
Catooh – the Online Content Library 14, 43, 166
CD Manager 55
CD/DVD 41
Change object presentation 62
Change pitch/octave using the keyboard 52
Change tempo or p 60
Change the playback tempo 59
Check and correct the automatic harmony recognition 67
Choppy or uneven playback 75
Chorus 117
Chorus parameters 118
Common export 134
Compressor 96
Connecting the s 52
Content 173
Context help 73
Context menu 81
Control groups 125
Convert stereo 60
Copy 153
Copy Objects 50
Copyright 2
Create a new obje 149
Create a new title ob 149
Create Audio CD 28, 130
Create jump marker sequence 54
Create speech from text 57

186 Index
www.magix.com
Cut 150, 153
Creating synth objects 77
D
Database 42
Delay (echo) 101
Delete 153
Delete all jump markers 154
Delete object 50 s 1
, and moving files
1
Display Tool Tips 173
tortion 107, 119
Documentation 173
Deleting, copying 41
Determining the start of a measure 64
Digital Audio Meter 06
Display harmonies 34
Dis
Drive list dialog 57
Drum kit 81
Duplicate objects 46, 150
DVD 11
E
Easy mode 62 1
1
1
1
ls
131,
ent
ttachment
129,
rom videos
Edit image in external editor 60
Edit menu 77
Edit Menu 49
Editing velocity values 83, 84
Effect devices contro 91
Effects 27, 91
Equalizer 96
Exact object positioning 46
Exit 148
Export 134
Export arrangem 27
Export as email a 129
Export as ringtone 137
Extract 153
Extract sound f 71
F
Fader 125
Feeding the synthesizer plug-ins 78 with new sounds

Index 187
www.magix.com
File Menu 133
er 107, 115
Filter parameters 115
1
File manager settings 40
File menu 176
Filt
Find knowledge & workshops 174
Find media 166
Flanger 113
Flanger parameters 114
Folders 148
Formats and interfaces 17
Full-screen Video Monitor 63
Fundamentals 97
FX plug-ins 95
FX tracks 126
G
General in 39 fo on AVI videos 1
VI videos
Grid 31, 46
oup objects 151
Grouping 151
General notes on A 75, 139
General options 39, 143
Gr
H
Harmony A 159 gent 19, 34, 67,
1
1
Help from other users 174
Help menu 80
Help Menu 173
High-end 32-bit floating point 18
Highlight loop area 62
I
Import 145 60, 134,
os
1
Import media backup 166
Box 37, 164
Information 143
Import and edit vide 70
Import audio CD 55, 134
Import audio CD tracks 34
Info
Insert 153
Installation 13

188 Index
www.magix.com
ement as email 1
n 16
Internet > Send arrang 41
Introductio
K
Karaoke 94
Key shortcu 176 t
Keyboard shortcuts 83
L
Limiter 106
Live monitoring 30, 52, 127
Live Session 19 s
e Virtual Drummer
Load and process audio files 51
d arrangement 133
Load backup arrangement 141
ving arrangements
LiViD - Littl 89
Loa
Load title template 160
Load video effects 161
Load/Save 94
Load/Save/Reset audio effects 159
Loading and sa 44
Loop range 151
M
MAGIX Low Late 146, 147 ncy ASIO driver settings
(demo version) 93, 101, 128, 157,
Album 14, 132,
e World
1
14,
magix.info - Multimedia Community 14, 169
anipulating objects 26
Master audio effect rack 157, 164
ects
1
1
38, 163,
MAGIX Mastering Suite 164
MAGIX Online 167
MAGIX Onlin 14
MAGIX video export 40
MAGIX Website Maker 170
M
Master eff 93
Master track 28
Mastering Suite 57, 164
Media database 18
Media Pool 181
Media Pool views / template folders 163
Menu effects 156, 178
Metronome 34
Microscope 30

Index 189
www.magix.com
Mixdown tracks 48
er 19, 34, 36, 124, 164
More about MAGIX 14
es 16
154, 178, 1
Move playback control / playback marker / playback area 182
ve playback position 154
Move screen view 154
ack marker
ts
Microscope mode 16
Mix 164
Mix
More online services 170
Mouse gestur , 49
Move Arranger view 82
Mo
Move/Zoom with the mouse wheel 30
Moving the playb 33
Multimax 104
Multimedia files and objects 44
Multimedia Library 17
Multiple insert 153
Multiple insertions 150
Mute objects 45
Mute/Unmute objec 158
My MP3s 42
My Projects 41
N
Navigation 154
Navigation buttons 40
de
New arrangement 133
Non real-time effects 92
Normal mode/Easy mo 29
Normalize 158
O
Object 149
Object and master effects 124, 157 rack 93, 94,
ck 1
her/lower
Overview of the program interface 20
Object effect ra 57
Object fades 47
Object handles 47
Object Volume 94
One pitch hig 159
Online login details 171
Online menu 166
Online Update 174
Optimize arrangement view 162

190 Index
www.magix.com
Own recordings 18
P
Package contents 11
Parameters 99
Parametric Equali 102 zer
markers
g the start marker and object end
udio files
n
nd Remedies regarding the Auto Remix Assistant
ngs 42, 143, 1
Programming 87
gramming the synth object 77
Properties 142
Paste 150
Pattern editor - matrix 83
Pattern editor buttons 82
Play demo project 21
Play object/Play arrangement 95
Playback area, Start and end 31
Position audio objects 25
Preface 3
Preparation - Settin 62
Presets 99
Preview and load a 24
Preview functio 38
Preview/Smart preview 183
Problems a 66
Program setti 48
Pro
Q
Quick start 21
R
Range 152
Real-time effects 91
1
empo and beat assignment
ps
ent 129, 136,
for using the Remix Agent
Settings to Default...
Record a new object 149
Recording Audio CDs 59, 145
Redo 149
Register online 74
Remix 159
Remix agent - T 61
Remove user-defined loo 152
Reprocess arrangem 139
Requirements 62
Reset Program 148
Reset video effects 161

Index 191
www.magix.com
Ringtone export 19
Reverb 97
S
Save arrangement 133
Save arrangement as... 133
Save objects as takes 151
Save only Tempo & Bea 64 t information
1
1
1
1
and Onbeat/Offbeat
s
42, 1
r marker/harmony marker 1
Show welcome dialog 173
erSynth Pro 86
Simplify object presentation 71
w for the incorporated samples 38,
Software synthesizers 17
me advice on creating ring tones 129
Song Maker 19, 22, 156
d
tion
1
9, 1
43
System requirements 11
Save title template 61
Save video effects 61
Search the database 42
Select all objects 55
Select objects 45
Serial number 12
Set jump marker 54
Set volume 158
Setting Catooh 43
Setting the manual 63
Setting user-defined loop 151
Settings 42, 1 48
Settings templates 43
Shortening or looping objects 47
Show object marker > Show ba 63
Show video monitor 163
Silv
Smart Previe 51
So
Sound Warper 107
SoundCloud uploa 16
Soundpool DVD collec 15
Soundpool settings 38
Split objects 151
Splitting objects 45
Standard layout 165
Start introductory video 73
Step sequencer 88
Stereo FX 105
Support 75
Synth Objects 77
Synthesizer , 85

192 Index
www.magix.com
T
Takes 48, 151
Tasks menu 172
68, 149, 1
uration dialog
pitchshift 108, 1
72, 95, 149,
30, 93, 124, 1
es and Instrument icons
ack functions)
Tempo 35
Tempo adjustment 64
Tempo and pitch 158
Text to Speech 57
The CD-ROM config 58
The features 17
The track list dialog 56
Time display 34
Timestretch and 58
Title 160
Title Editor 160
Toolbar 176
Track 152
Track effects 26
Track position slider 35
Trackbox 29
Transport Bar (playb 33
Turning knobs 87
U
Undo 149
Ungroup objects 51 71, 1
loud 130, 132, 1
recognition
ion
Update program / Upgrade functions 174
Upload song to Soundc 41
Upload to Community 141
Use harmony 68
User interface 16
Using audio effects 92
Using BPM and beat detect 64
V
Various file list view m 40 odes
36, 1
itmap formats
1
Velocity 84
Video 60
Video and b 70
Video and Bitmap Objects 70
Video as AVI 39
Video as Windows Media 137, 140

Index 193
www.magix.com
Video Compression 74
eo effects 72
Video export dialog 138
r
1
162,
uite
Vid
Video export via TV-out 76
Video monito 163
Video Monitor 36, 181
Video output 64
View menu 179
Vintage Effects S 95, 110
Visualizer objects 71
Volume 157
Volume regulation 34
W
What’s new 16 in MAGIX Music Maker Rock Edition 4?
Working with synth objects 77
Z
Zooming 30
