Magix Music Editor 2.0 Owners Manual
User Manual: magix Music Editor - 2.0 - Owners Manual Free User Guide for Magix Music Editor Software, Manual
Open the PDF directly: View PDF ![]() .
.
Page Count: 382 [warning: Documents this large are best viewed by clicking the View PDF Link!]
- MAGIX music editor 2 Online Help Contents
- Obtaining help
- Getting Started
- Menu Reference
- Menu Reference
- Menu File
- Menu Edit
- Menu View
- Menu Object
- Menu Effects
- Effects Menu Overview
- DirectX Plug-Ins
- Equalizer
- Dynamics
- Stereo Enhancer
- Room Simulator
- Reverb/Echo Processor
- MultiMAX
- Get Noise Sample
- Denoiser
- Dehisser
- Declipping
- Remove DC Offset
- Resample / Timestretching
- Change Sample Rate
- Reverse
- Build Physical Loop
- Switch Channels
- Invert Phase
- Process only left/right channel
- Amplitude/Normalize
- Menu Range
- Range Menu Overview
- Range All
- Range Length To Beat 1...16
- Split Range
- Split Range for Video
- Store Range
- Get Range
- Get Range Length
- Store Marker
- Get Marker
- Set Markers on Range Borders
- Set Markers on Silence
- Delete Marker
- Delete all Markers
- Recall last Range (Menu)
- Range Editor
- Range Manager
- Object Lasso
- Edit Time Display
- Move Play Cursor
- Move Play Cursor to beginning
- Move Play Cursor to end
- Move Playcursor to Range Start
- Move Playcursor to Range End
- Left Move in Page Mode
- Right Move in Page Mode
- Left Move in Scroll Mode
- Right Move in Scroll Mode
- Move play cursor to left object border
- Move play cursor to right object border
- Move play cursor to left marker
- Move play cursor to right marker
- Edit Range
- Move range start left
- Move range start right
- Move range end left
- Move range end right
- Range to Beginning
- Range to End
- Flip Range Left
- Flip Range Right
- Beginning of Range -> 0
- End of Range -> 0
- Beginning of Range <- 0
- End of Range <- 0
- 0->Range<-0
- Range Start to Left Marker
- Range Start to Left Objectborder
- Range End to Right Marker
- Range End to Right Objectborder
- Range over all selected Objects
- Menu CD
- CD Menu Overview
- Load CD Tracks
- Set Track
- Set Subindex
- Set Pause
- Set CD End
- Set Track Markers automatically
- Set Track Markers on Object Edges
- Remove Index
- Remove all Indices
- Make CD
- Show CD-R Drive Information
- Show CD-R Disc Information
- CD Track Options
- CD Disc Options
- CD Text / MPEG ID3 Editor
- Set Pause Time
- Set Start Pause Time
- CD Arrange Mode
- Set Track Indices on Object Edges Options
- Menu Tools
- Menu Playback
- Menu Options
- Menu Window
- Menu Help
- music editor 2 Reference
- Working with music editor 2

Obtaining help
You can get help on the program on different levels and different methods:
In dialogs: Pressing F1
or clicking the help button (if provided) will call the appropriate Menu reference page with
descriptions on the dialogs elements. In the most cases you’ll get also a screenshot of the dialog,
where you can click on a specific control element to get help on it.
In the menu and toolbars: Click on a menu item and pressing F1 while
holding down the mouse button will also call the help page for the command. This works
adequately for toolbar icons.
Context help: by selecting Menu Helpà
Context Help the mouse will change into a question mark. Click on every screen element you
wants to obtain help about.
You can also read systematically in the Online help (you can say, it is an online manual, too). There are
several sections:
Getting Started
: That’s where you actually reading, here are the quickstart tutorials
What’s new ?: This is for owners of older versions of MAGIX music editor 2
Menu Reference:
All menu items in one view
Working with MAGIX music editor 2 : In the online help section "Working with MAGIX music
editor 2
" there are several chapters on general function of the program (e.g. the VIP working, mixer,
effects). To quickly getting started, read the Quickstart chapters in the "Getting started" book.
MAGIX music editor 2 Reference
: Here you will find reference tables on every keyboard shortcut, mouse mode, toolbar icon and
on all graphical elements of the program.
Page 2

Recording made easy
The first track
1. Start MAGIX music editor 2
by double clicking on its icon.
2. Click on the New VIP
icon in the upper toolbar (or Key E).
3. The dialogue Setup for new VIP appears. Key Backspace
to delete the "New" title, then name the project.
4. Click on the folder icon and explore to the audio recording location – this will set where the file is
stored. We suggest you create a new folder for the project by typing the name of the folder in the
Browse For Folde
r dialog. This will ensure all files are placed in the same folder.
5. Select 4 Tracks, then the appropriate Sample Rate. Click the Advanced
button to display the entire dialog, then uncheck the Auto Crossfade Mode box. Set the Units Of
Measurement to SMPTE.
A new VIP
is now ready to use.
Ready to record?
then click the OPT icon in the upper toolbar. A window will open showing various Record Parameters.
Experienced MAGIX music editor 2
users will notice the enhanced dialog and new peak meters based on the Visualization metering system!
7
. Check that all settings are correct as entered.
8. Make sure your soundcard driver is displayed in the Rec. Dev drop-down list and click on (enable)
Monitor
. The Visualization and track slot meters will now respond to your input signal.
9. Using the LED meters, adjust the input signal’s level so that the loudest peak doesn’t quite reach 0db.
(The Input signal’s level must be adjusted at the source, mixer, or soundcard fader). If a level of 0db or
higher is reached, a red marker line will appear in the Visualization meter - you should lower your input
gain if this occurs. The red ‘over’ marker will reset automatically after a few seconds, or you can click
the Reset Pk
button to reset the marker.
Note: You can adjust the display of the Record dialog Visualization meter to show input above 0db by
clicking on Setup (at the top of the meter) and selecting 6db Max in the Value Range/Display category.
This may make it easier to set levels in some cases.
10
. The Record Mode can be set to 16 bit, mono or stereo etc. If your input is mono, set the Mode to
mono. If it is stereo, set the mode accordingly.
Note: Don’t make the mistake of recording a mono file as a stereo track, as the recorded track will
become a stereo file with silence on one side.
11
. When ready, click the Record button to start recording.
An Object representing the recorded Wave file will immediately commence to be drawn in the track
slot.
12. To stop recording, click the Stop
button on the Record dialog. A dialog will pop up asking if you want to keep the track.
Page 4

13. Click Yes to keep the track. The dialog will close and your track will remain as an object in the VIP
.
Note : If you make a mistake and decide not to keep the recording, click Delete. Another dialog will
open asking for confirmation of the deletion. This instantly deletes the Object and the actual Wave file, so
you can easily redo the recording as many times as you like without cluttering up the VIP or your hard
disk!
14. Click OK to close the Record Parameter window. You’ve just completed recording your first record
in MAGIX music editor 2
! Well, almost - you should save it first!
15. Save your VIP project by pressing Ctrl + S - this is a good habit to begin now. Once it is saved, key
Home
to return the playback cursor to the start and press the spacebar to play back the track.
Page 5
Mixing Projects
Controlling Volume and Pan in Real-time
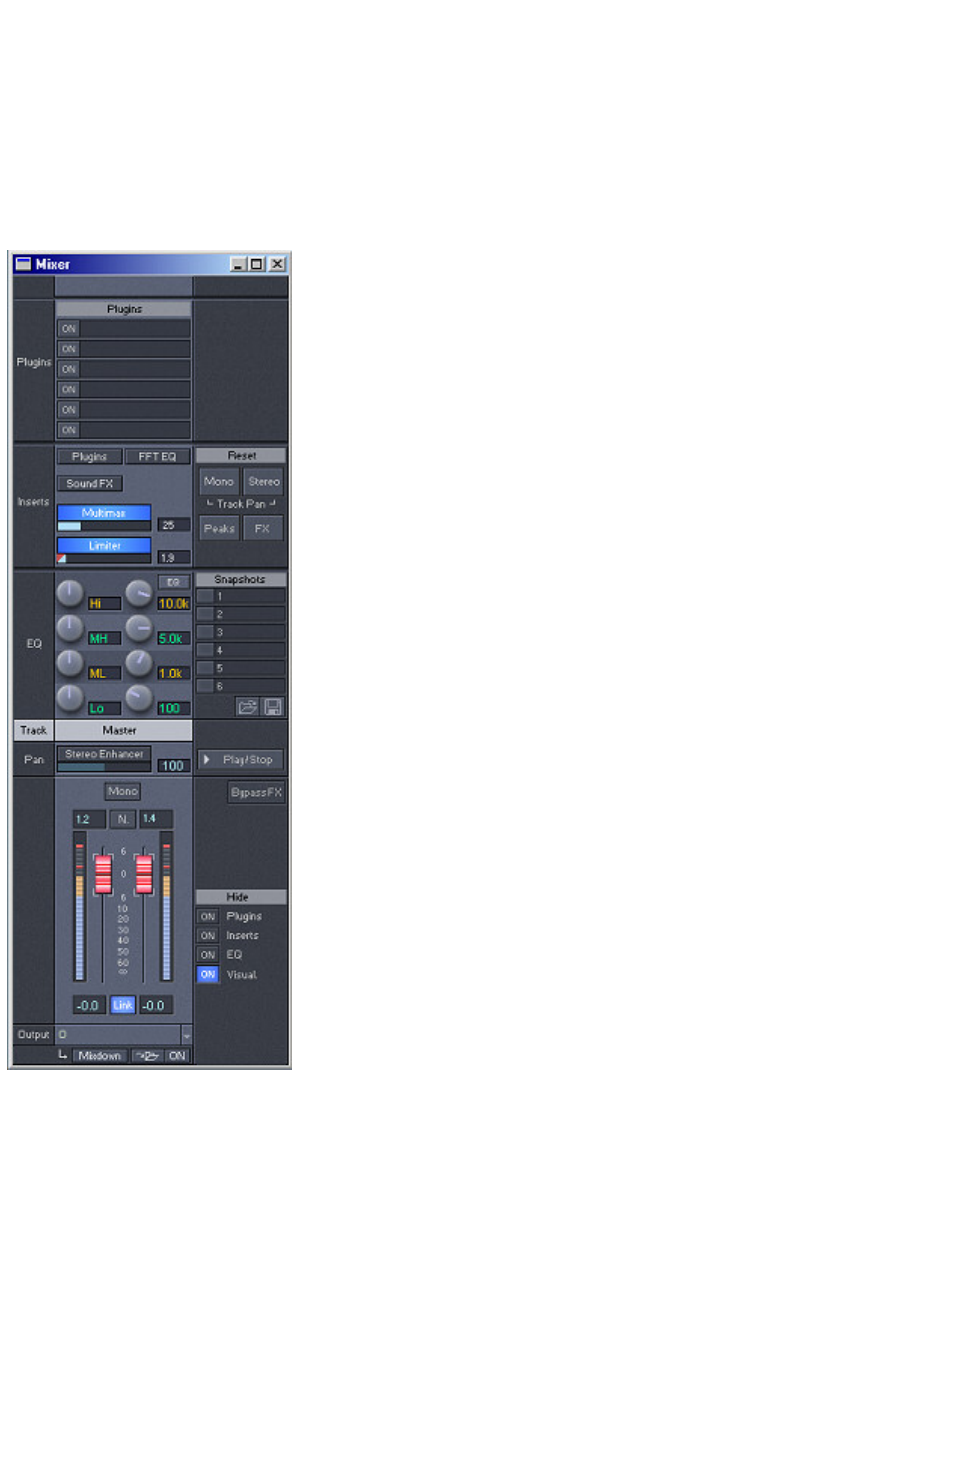
1. Click on the Mixer button in the Workspace section or key M and MAGIX music editor 2
’s Mixer window will open.
If you have a dual monitor setup, you can drag the Mixer to the second monitor. The Mixer is also
scalable, but for now leave it at the default setting.
For this Quick Start Guide, we will only examine very basic use of this extremely powerful interface. As
with all of MAGIX music editor 2
’s interfaces, the Mixer includes helpful ToolTips which indicate the function and current numerical
parameter settings for all controls. If you aren’t sure what a control does, just hover the mouse cursor
over the control and the ToolTip will tell you. So let’s dive in and start mixing.....
2. Press the Spacebar
to listen to your record. Do it sound too loud or too soft?
3. To adjust the volume, click and drag the Faders either up (louder) or down (softer). By all means,
make these changes while
you listen to the audio.
4. Double click on the Faders
Page 6

to quickly return it to default (0db) position.
5. When you have finished making volume adjustments, press the Spacebar
to stop audio playback.
Tip: To control playback, you can also use the floating Transport control
palette (key Shift+T), or the Play arrow button near the top right corner of
the Mixer to control playback. Clicking the Opt button next to the Play arrow
button will open the Play Parameter dialog, which provides further
configuration flexibility. You can also open the Play Parameter dialog by
pressing the P key. Various processor dialogs also include playback buttons.
Of course, there are also all the Playback menu items, or you can even
program your own hotkey shortcuts - MAGIX music editor 2 always offers
you many command choices so you can choose a method which suits the way
you like to work!
8. To adjust the pan position or your record, click on the Pan fader (the horizontal blue fader directly
above the word ‘Pan’) and drag the mouse left or right. Again, use your ears and make these
adjustments while
the audio is playing.
9. Double click on a Pan fader
to quickly return it to center default position
10. When you have finished making pan adjustments, press the Spacebar
to stop audio playback.
11. Save the changes you’ve made. (Ctrl + S)
Tip: You can use the spacebar to start and stop playback as often as
necessary.
Page 7
Make your record really shine
using real-time effects
Equalization
1. With the Mixer window still open, notice the four light blue knobs. These knobs control the 4-band
fully parametric EQ. Press the Spacebar
to start audio playback.
2. Listening to your record, do you notice that it's lack low-end? Click on the LF (LOW EQ)
knob and drag the mouse left to cut or right to increase.
3. Using the same methods as in step 2, adjust the MF1(Mid), MF2(Mid) and HF(Hi EQ). Use the
Spacebar
to stop and restart playback as often as necessary.
4
. Double click on the center of an EQ knob to quickly return it to center default (off) position.
5
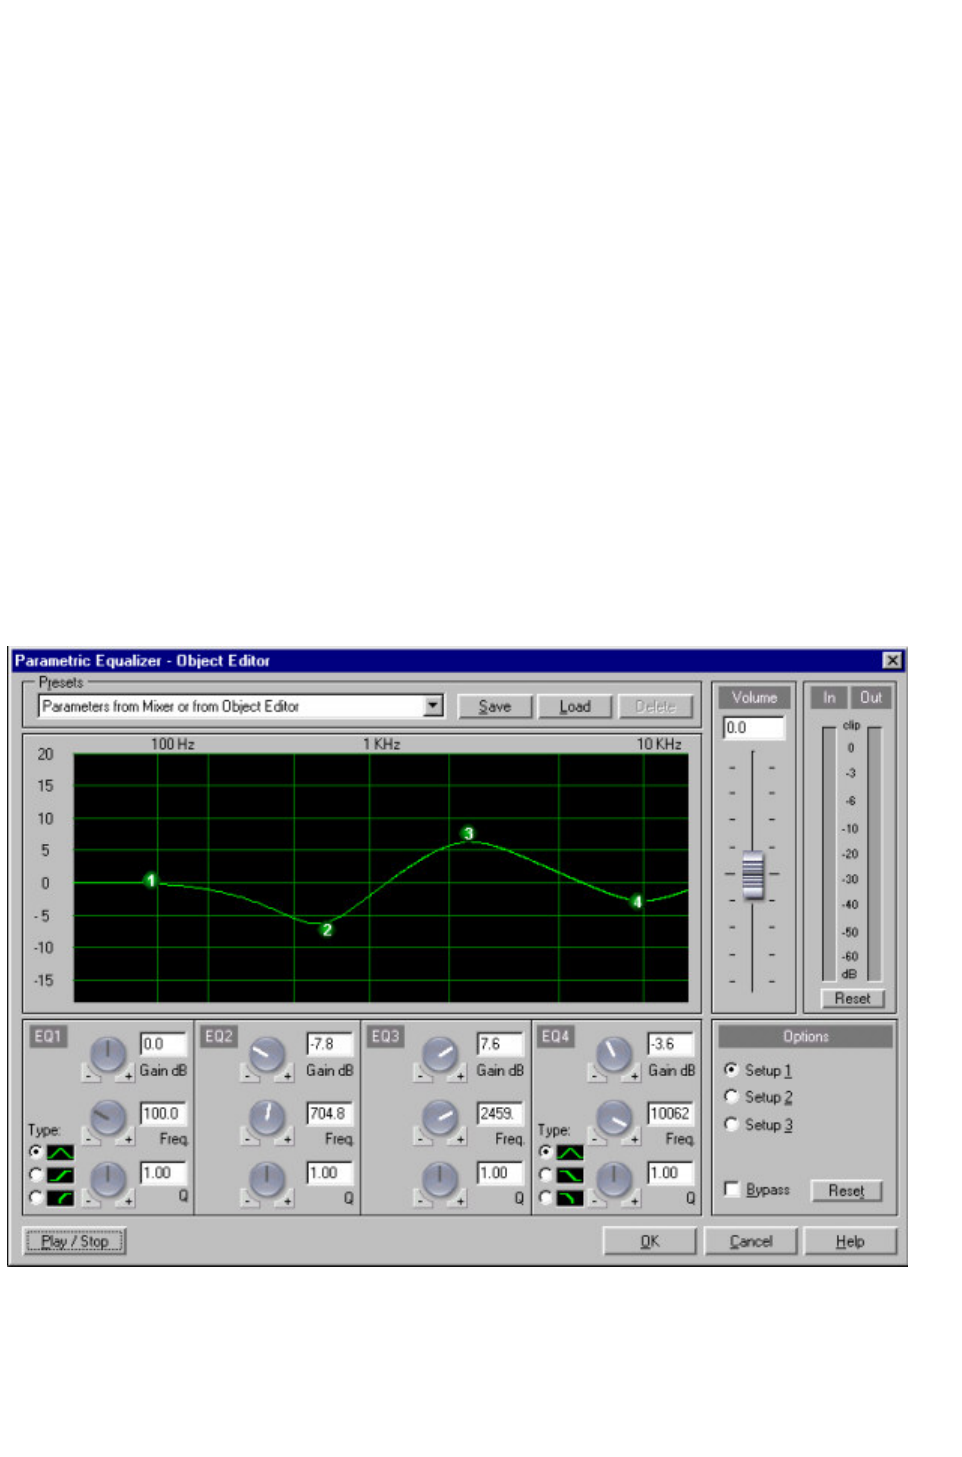
. Now try right clicking on any of the EQ knobs. This will invoke the 4 band parametric equalizer shown
below:
6. You can now adjust the EQ in real time using the 12 adjustment knobs, or by entering settings into the
settings boxes. The screen shows the EQ curve of your settings. Shelving and Pass Filter settings are also
available by selecting the appropriate Type radio button. In the shot above, EQ1 is set as a pass filter,
EQ4 is set as a shelving filter.
7
. Once you have selected your settings, you can switch back to the mixer – the settings you have selected
Page 8
are automatically applied to the mixer knobs and the gain of each band can be subsequently adjusted
from the mixer by using the knobs.
Compression
8. Directly above the four EQ knobs, you’ll see a gray multimax fader. This fader is used to apply
dynamics processing (compression) to your record. Press the Spacebar
to start audio playback.
9. Listen again to your record. Do it sound like it is too loud at times and too soft at others? Click in the
multimax fader and drag the mouse right to increase or left to decrease compression.
10. To quickly disable the compressor, double click on the center of the multimax fader.
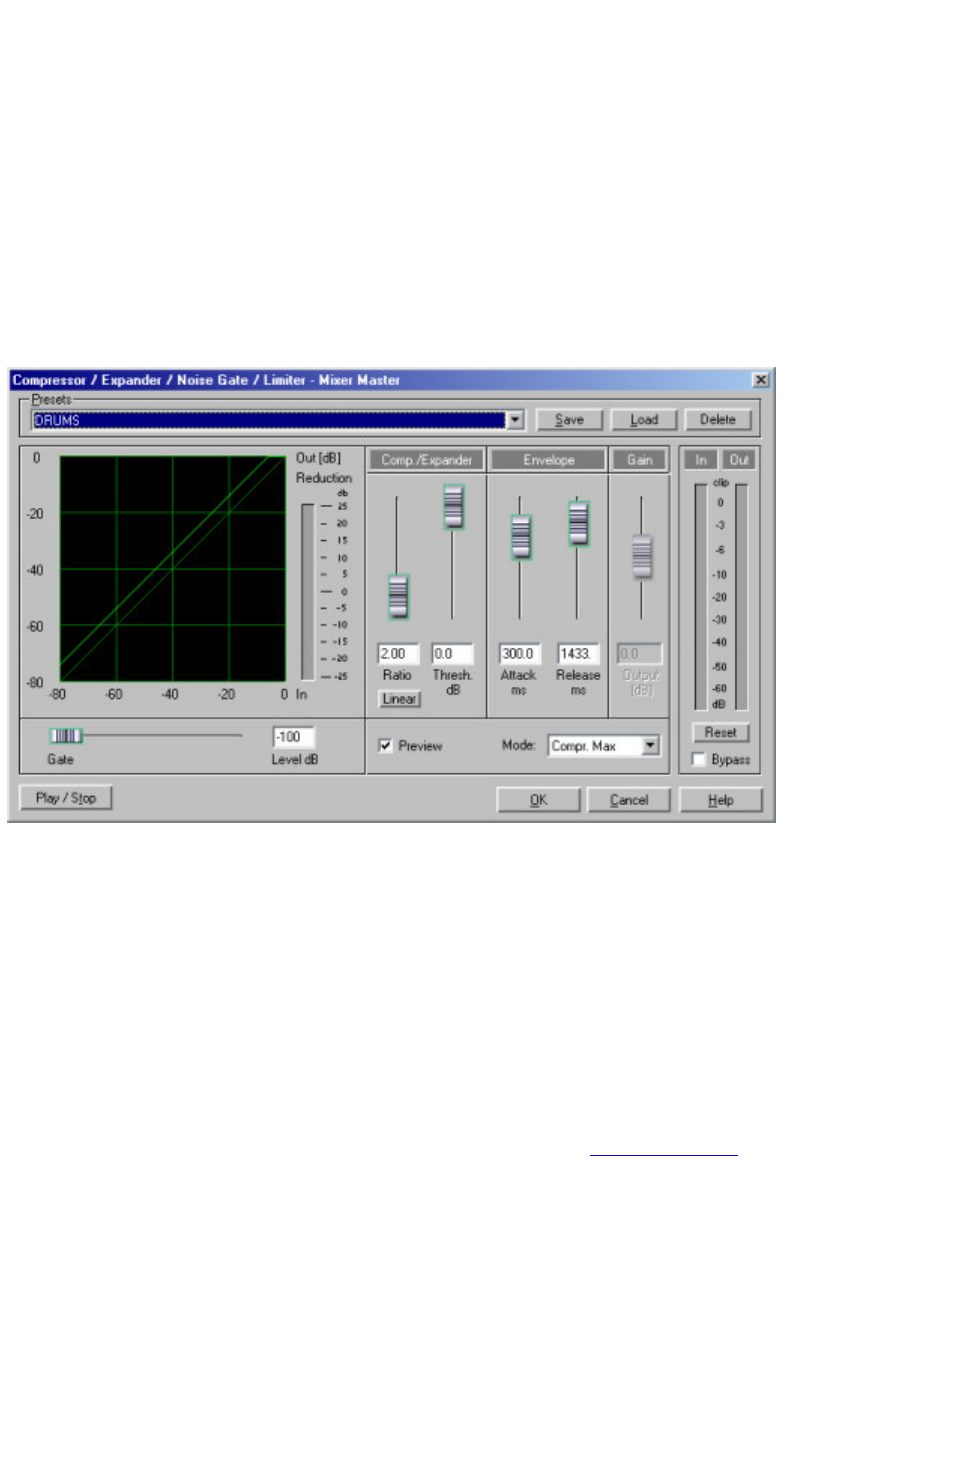
11. Now right click on the Limiter
fader below – this will invoke the compressor dialog shown below:
You can now adjust your compression settings by using the five adjustment Faders in this dialog. The
graph shows the gain reduction applied to the audio in real time. The Gain fader controls makeup gain.
Note that you can set the compressor into various modes using the mode box. The Gate fader under the
graph is used when the compressor is set to Noise Gate mode.
Delay and reverb
12. Directly above the compression section, you’ll see the sound FX button. This button is used to apply
some effects of to your tracks. Press the Spacebar
to start audio playback.
13. Listen again to your record. Might it benefit from a delay (echo) or reverb effect? Click on the sound
FX button - the MAGIX FX RACK with some effects from the "Effects"-Menue will open. Use the
MAGIX DUAL FX PROCESSOR with REVERB and DELAY
effects.
14. To quickly disable sound FX effects, click on the sound FX button and use the Power button of the
MAGIX DUAL FX PROCESSOR
.
Page 9

Mixing To A Stereo File
You will generally want to mix your virtual projects (VIP) incl. all mixer effects to a stereo file. There are
a few ways to do this in MAGIX music editor 2 , but in the Quick Start Guide we will cover only two:
Output To File and Mixdown by Bouncing.
Output to File
Once you have adjusted your chosen mixer settings for your record, you are ready to mix to stereo. At
the bottom of the Fader section in the mixer window, switch on Output To File by clicking the ON
button.
2. Select the location of the mixed file by clicking Mix (adjacent to the ON
button), browsing to the location and naming the Mixdown.
3
. Save your project! Start playback by your preferred method – the project will mix down to the file in
real time while you listen to the playback.
4. Close the Mixer by keying M
, then save and close your VIP by keying H.
5
. Key W to open the Open Audio File dialog and browse to the mixed file. Open the file to playback the
mix.
Bouncing Down
Often it is preferable to Bounce Down rather than Mix In File
, as more options are available for immediate use of the stereo mix file.
Track bouncing is an industry term for mixing selected tracks to a stereo buss. This can be done to gain
additional tracks by freeing up existing tracks, or as a mixdown technique for the entire project.
MAGIX music editor 2 bounces down ‘offline’. In other words, once the bounce down command is
issued, MAGIX music editor 2
shuts all interface functionality and concentrates purely on creating the mixed file. This can be very useful
if your mix contains intensive processing which overloads your system in real time.
With your record open, open the menue "Tools" and select "Track Bouncing".
1
. Note that various options are now available. In this case, select:
– From VIP Start to last Object End
– New VIP
– Save in 16 bit Format, Stereo
.
then click OK
.
2. Choose a name and location for the Bounce Down file. Click OK
.
3
. The Bounce Down is now performed "offline".
4. A new VIP
containing the Bounce Down file is automatically opened.
Page 10

You are now ready to edit or master the mixed stereo file!
Page 11

Editing
In the next section of this document, we will have a look at a new method for stereo editing which
includes virtual editing, but does not require a VIP.
1. Open the stereo mix VIP
from the previous page.
2
. Set the Snap function on by clicking on the Snap toolbar button (top of workspace)
3. Place the cursor at the beginning of the waveform by pressing the Home
key.
4. Now we will use an excellent MAGIX music editor 2 feature for zooming. Zoom horizontally into the
waveform by click/hold on the Grid And Marker Bar
at the location of the play cursor (i.e. the start of the file), then drag the cursor down.
Cutting
5. Our task is to delete the section of empty space (silence) at the beginning of the mix. First we must
select the silence as a Range by clicking on the small shaded area (actually a short Range) in the Grid
And Marker Bar at the start. Click and then hold/drag the Range to the left as shown below. The range
will show as the shaded area in the Grid And Marker Bar. Now playback will focus on the Range. To
select the Range section of the Object for editing, extend the Range over the Object by double clicking
the shaded area in the Grid And Marker Bar
.
6. Press the Delete key to delete the Range section of the Object. The selected area of the Object is
instantly deleted. This edit affects the VIP
only – the original wave file is untouched! We have now removed the dead space from the start.
7. You can adjust the position of the remaining Object by clicking and dragging to the start of the track
slot (as shown above), or you can press Home to return the playback cursor to the start, click on the
Object to select it, then select the Object>Object To Play cursor Position
menu item.
8. View the entire waveform by clicking the red All toolbar or the Zoom Out Horizontally
button.
Fades and Volume Curves
Fades and Volume changes in the VIP are virtual and can be implemented in various ways - following are
two methods :
9.
To create a Fade Out at the end of the mix, we will use the Object Handle method. While viewing the
entire waveform, click on the Object to select it - note that 4 small squares (Object Handles) appear at
either end of the Object.
10.
Hover the mouse cursor over the upper handle at the end of the Object. A bi-directional arrow appears,
indicating the Handle can be used to create a Fade.
11.
Drag the Handle to the left, creating a Fade Out as shown below. The waveform display adjusts
automatically to show the Fade.
12. Place the play cursor before the Fade by clicking on the Grid And Marker Bar,
then play the Fade. Voila - instant virtual Fade!
Page 12

13. Let’s assume we want to lower the volume of a section of the Object in the middle of the mix. One
way to do this (with MAGIX music editor 2 , there is always more than one way!) is by using the
Volume Curves. To activate the Volume Curves, click the VOL
button in the Track Properties section at the start of the track. The button will turn yellow and a yellow
Volume Curve will appear across the top of the Object.
14.
In the middle of the Object, create 4 Volume Handles by double clicking 4 times on the Volume Curve
(each double click slightly to the side of the previous)
15.
Volume Curve Handles are moved by clicking and dragging with the mouse. Select the second handle
from the left and drag it down to -15db (watch the ToolTip!), then select the third handle and drag it
down to -11db. Note that the waveform adjusts automatically to reflect the new gain changes.
Note : By selecting a Range which includes the Volume handles and starting playback, you can easily
adjust the handles in real time while listening to the changes. Selecting Loop Mode playback by clicking
the LOOP button on the Transport Control, Play Loop on the Play Parameter dialog or clicking the Play
Loop toolbar button will loop the playback.
Page 13

Object editing
Any waveform shown in a VIP track slot is an Object. Each Object references to the whole or part of a
Wave file, but the Object itself does not contain audio. Instead, the Object contains a drawing of the
audio and implements real time editing and processing as the audio is read by MAGIX music editor 2
. In other words, the referenced audio remains unchanged. This ‘virtual’ process is sometimes called
Non-Destructive Editing or Virtual Editing.
Your project can contain an unlimited number of Objects and each Object can be duplicated multiple
times throughout the VIP project.
Objects can be split, cut, copied, pasted, stretched and moved in many ways, all without affecting the
original audio files.
Page 14

Burning an audio CD
Burning Red Book compatible audio CDs is easy with MAGIX music editor 2 . In any multi track
project (VIP) you only need to add track markers (with the T
button in the toolbar) and the burning process can be started immediately!
1. Close the Mixer by keying M
and set the Workspace to CD Mastering mode.
2. Under the CD menu, select Set Track Indices On Object Edges. A red Track Index will appear at the
beginning of the track.
3. Save your project! (Ctrl + S)
4. Insert a new (blank) CD-R into your CD burner and click on the Make CD icon in the upper toolbar.
A dialog will open with several options.
5. For Mode, click on Burn on the fly. This uses MAGIX music editor 2
’s built in CD burning routines. All effects (fades, EQs, etc...) are calculated in real-time while burning.
6. In the next dialog CDR Recording Options select the recording speed (e.g. 2 * depending on the
capabilities of your CD recorder) and disable the Simulate Recording option to enable the CD writing
process.
7. Click OK to start the burning process.
You will also find a step-by-step explanation of the CD-Burning process here
!
Page 15

Virtual Wave Editing
MAGIX music editor 2
includes a new virtual mode for Wave Editing. In simple terms, edits to Wave projects are compiled in
the virtual domain until being saved at the completion of the particular editing session.
The new mode will be instantly familiar to experienced users as it is very similar to working in a VIP. An
‘object’ is transparently created representing the Wave project, allowing cut edits to be instantly
implemented and retained as virtual Undo files. This saves considerable time and hard disk space, as
each cut edit no longer has to be written to the hard disk. Once you are happy with the cut edits, you
simply save the changes (at some point, you have to commit!)
Volume and Pan edits are also virtual in this mode by using the Draw Volume or Pan Mouse Mode
toolbar buttons .
Processing edits are implemented by using the Mixer when in this mode. A special ‘Mixer’ is available,
providing all real time virtual effects which are normally available in the Mixer.
Processing edits via the Effects menus (such as EQ, compression, time stretching etc.) may still require
creation of a temporary Wave file and are therefore ‘destructive edits’ (although there are undo's, of
course). For all effects available in real-time we recommend using of the Mixer rather than the Effects
menu items.
The original ‘Destructive Editing’ mode is still the default mode when selecting Wave Editing (previously
Destructive Editing) from the Object menu. This is due to restrictions which cannot be bypassed when
editing files currently open in a VIP.
To use Virtual Wave Editing, open Wave projects directly instead of opening into a VIP.
Page 16

Menu File
Menu Reference
The project menu contains wide-range functions for generating, managing, loading and saving projects.
New Virtual Project
A new virtual project is opened.
Open Project
A new project is loaded, which was created by
MAGIX music editor 2 .
Save Project
The actual project is saved.
Save Project as...
The actual project is saved with a new name.
Save Complete VIP in...
The actual VIP with all needed files is saved to a
new directory.
Rename Project
The actual project gets a new name.
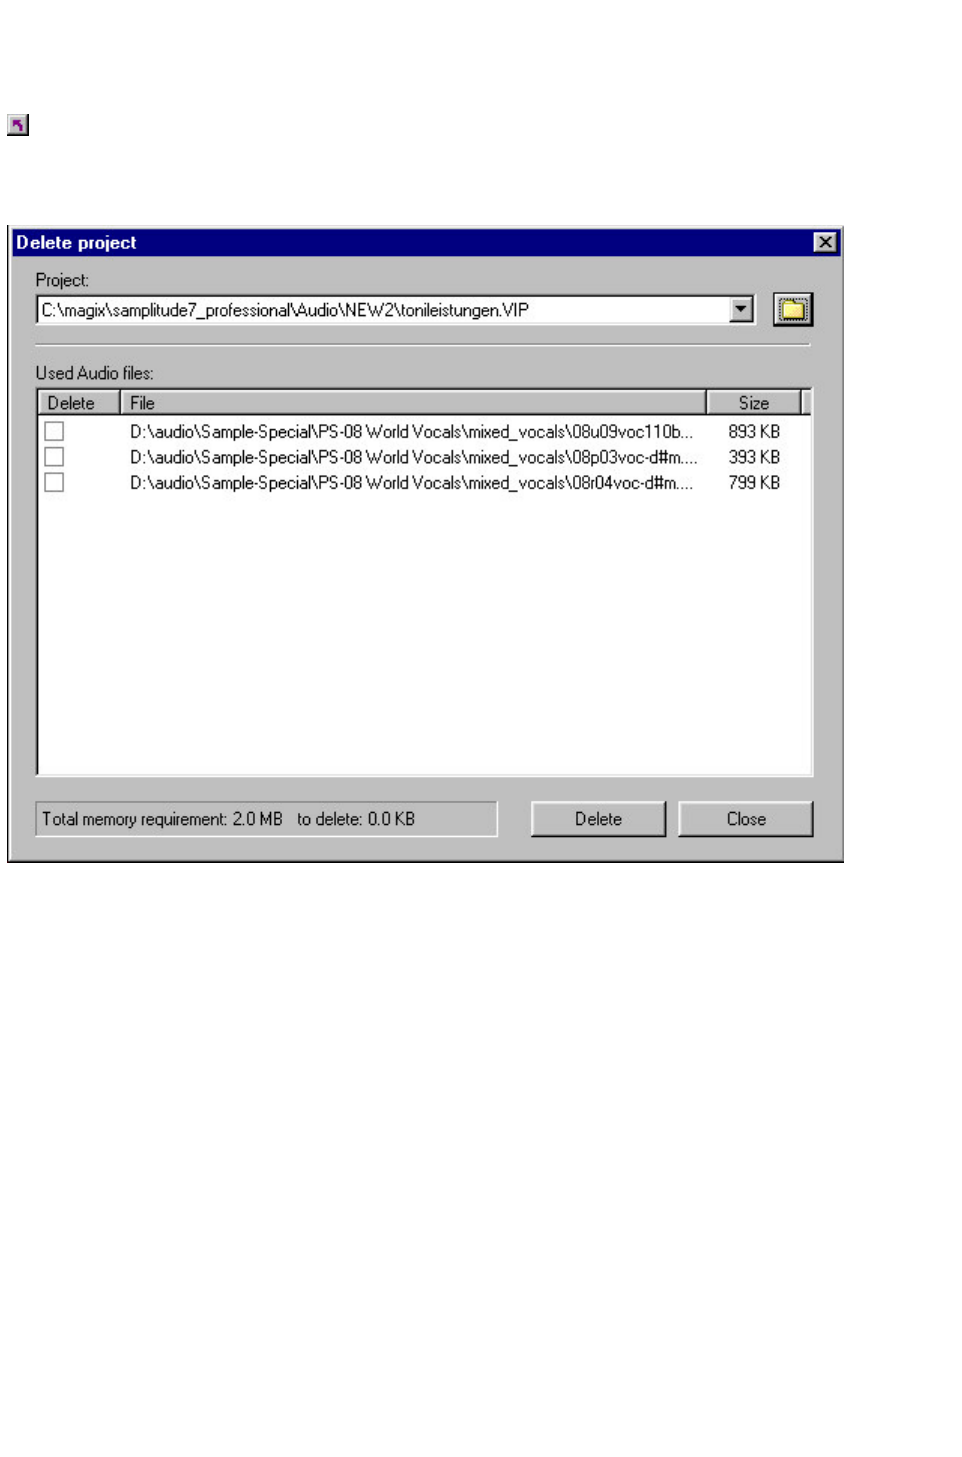
Delete Wave project(s) (HDP)
Deletes a HD Wave project from the hard disk
Delete Virtual project
Deletes a VIP and the wave projects used in this
VIP
Import Audio
The following file formats can be imported:
WAV, AIFF, MPEG Sample-Dump (PCM or
RAW Format).
Convert Audio
Converts several audio project formats.
Export Audio
A MAGIX music editor 2 project can exported
to the following file formats: WAV, MPEG,
Sample-Dump (PCM or RAW Format).
Close Project
This menu item in menu ‘File’ closes the selected
project window
Exit
Exits MAGIX music editor 2 .
Page 18

Open Project
Menu: File
This command opens various file types in MAGIX music editor 2
.
Here is a short explanation of the file types:
Virtual Project: Project in MAGIX music editor 2
, which makes use of Wave projects.
When loading a virtual project, all associated Wave projects (RAM and HD Wave projects) are opened
if they were not open prior to loading the VIP. The windows of the individual Wave projects remain
minimized to prevent cluttering of the screen. They are initially only visible as icons.
Once the Wave projects are loaded, the VIP project window is displayed.
Loading audio files
You can listen to every listed file before loading them You can change that in the Options for loading
audio files .
You can load several files at once. In the same way as in the Windows Explorer, you can extend your
selection by pressing the Ctrl-Key and select a range of files with the Shift-key.
If on the other hand you want to select an area in the explorer (with shift +
click), e.g. a whole directory, highlight the last title of the list, then press shift
and then highlight the first title on the list. Then click "open", and the tracks
appear in the correct order in the VIP.
RAM Wave (RAP): RAM Wave project.
RAM Wave projects contain audio data in MAGIX music editor 2 ’s proprietary format. These files are
loaded into the RAM memory of your computer, including their associated graphic files, marker
position information, etc.
HD Wave (HDP): HD Wave project.
HD Wave projects contain audio data, which is directly loaded from the hard disk, together with the
graphical information, marker position information, etc. The audio format used for these files is the WAV
format.
WAV (*.wave): WAV Files (Windows Standard Audio Format).
When opening a WAV file, MAGIX music editor 2 automatically creates an associated HD Wave
project. The HD Wave project file contains additional information about the audio file, such as marker
positions. Once the WAV file has been opened once in MAGIX music editor 2
, it can be loaded as a HDP from that point on.
Note: If a VIP is the active window, all loaded WAV projects are immediately turned into objects in the
VIP. Any selected range (range beginning) determines the position and track where the object is created.
An exception is, when the CD Arrange Mode from the Menu CD is set.
The objects are placed completely independent from any selected range. Instead, the objects are placed
in sequence (one after the other) with a pre-determined gap between them. The gap can be set with
CD->Set Pause Time. The gap represents the space between individual tracks on a CD.
AVI - Video for Windows video files
You can open a AVI file to edit the audio track of the video directly (without importing the audio data
from the video file). After finishing edit, replace the audio in the Video with Export Video Sound
Object:
Contains playback instructions (link to a Wave project, time position, parameters, etc.) for audio data.
Objects are used in virtual projects.
Shortcuts:
Toolbar:
Page 20

Keys: l
for RAM projects
Keys: SHIFT+l
for HD Wave projects
Keys: o
for virtual projects
Keys: w
for WAV files
Toolbar:
Page 21

Load CD Tracks
Menu: CD
Import entire audio CDs or single CD tracks in a project. However, as opposed to normal data, Audio
CDs have to be read first (grabbed or ripped). The data import is 100% digital, so there are no losses in
the sound quality.
If you want to import audio CD tracks, just follow these easy steps:
1. Insert an audio CD into your CD-ROM-drive and select "Load CD audio track" from the CD menu.
A dialogue with a list of the CD tracks will appear. If you have more than one CD-drive (or for example
an additional CD-writer) you will first have to choose the drive from which the CD is loaded. You can do
this in the CD-drive options
2
. Select the desired title(s) (pressing Shift + mouse button or Alt + arrow keys).
3
. Click on "Copy selected track(s)..."
4
. The "Project import" dialogue will appear. Here you can choose a file name and the target directory.
5
. Now, the audio material will be copied from the CD-drive to the hard disk. A state display informs you
of the current transfer state.
6
. Once the audio data has been transferred, all dialogues will be closed and the tracks will be added to
your master track as single objects.
The Track List Dialogue
All CD tracks are shown including start time and length. In the name column the track name is shown,
this is derived from the CD Text information, if the CD provides this information and the CD drive is able
to read it. Select a track by clicking it with the left mouse button, select a range of tracks with SHIFT +
mouse click, select several tracks with CTRL + mouse click.
Page 22

Copy selected track(s):
This button starts the audio copy process. For each track, a new object and the corresponding track
marker will be created in the arrangement.
Play:
Starts the audio-playback of the first selected track in the list (for testing).
Stop:
Stops playback.
Pause:
Stops playback that can subsequently be re-started with Play or with a renewed click on Pause
Skip:
Allows you to skip from song to song.
Auto Crossfade:
Turns on the automatic crossfade mode as you import audio tracks and automatically employs
crossfades.
Transfer CD Markers:
Markers already set on the CD are transferred to the VIP.
Select all tracks:
All audio tracks are selected (for example, if you want to copy all tracks of a CD). Pressing Ctrl and
clicking on the mouse button you can select more than one track.
CD-drive options: Here you can adjust some of the settings of the CD drive settings you are using and
choose the drive for "Ripping" CDs if you have more than one CD-drive installed in your system (see The
CD-drive dialogue
)
The CD-drive dialogue
Choose and configure your CD-drive. The CD manager permits the import of audio data using most
SCSI- and ATAPI-CD-ROM drives and CD writers. In case of doubt, ask our technical support which
drives are compatible. If you experience problems while reading audio tracks, you can choose between
several reading processes in the Configuration dialogue, which differ in the way the data is read or
"ripped".
Configuration: This button opens the Config dialogue
, in which you can set different special features, SCSI-IDs etc.
Reset:
Restores the initial drive configuration.
Add Drive:
Adds a new entry to the drive list. However, you will have to adjust the specific settings.
Page 23

Delete:
Deletes a selected drive from the list.
Save setup:
Saves the current drive list with all configuration-data in a *.cfg file.
Load setup:
Loads the current drive list and all configuration-data from a *.cfg file.
The "Import project" dialogue
The "Import project" dialogue appears after selecting the "Copy selected tracks" option. Type in a name
and a target directory for the new audio files. The audio files will receive a number in addition to the name
you chose ("name" -> name_1.wav, name_1.wav...).
The preset format for audio tracks (CDA files) is the WAV format. You are however free to convert
them into a compressed format, like MP3 while still reading the data. Just choose your audio format in
the "Import project" dialogue and click on the "Format settings" button to make your changes (More
information concerning the audio formats under Import sample
)
CD-ROM Configuration - Drive
Configuration:
Drive Name - Lets you edit the name of the drive in the list. This is useful if you create more than one
entry accessing the same physical drive.
Host Adapter Number - Lets you specify the number of your SCSI adapter - normally 0.
SCSI-ID - Lets you set the ID of your CD ROM drive. Be sure to set the correct ID, there is no error
checking!
SCSI-LUN - Select the SCSI LUN parameter, normally 0.
Alias - Lets you select a manufacturer type of your CD ROM drive.
CD-ROM Configuration - Copy Configuration:
Copy Mode Normal - Copies the audio data without any software correction.
Copy Mode Sector Synchronization - Copies the audio data using a software correction algorithm. This
is useful, because some CD ROM drives cannot seek exactly to the same position between two read
Page 24

accesses but MAGIX music editor 2 can correct these differences using this algorithm.
Copy Mode Burst - Optimizes the speed of the copy process, no software correction is done.
Sectors per Read - Defines the number of audio sectors per read cycle, the higher the number the faster
the copy process will be. Not all SCSI adapters support more than 27 sectors!
Sync Sectors - Defines the number of audio sectors used for the Sector Synchronization. A higher
number results in a better synchronization but also in a slower copy process.
Page 25

Save Project As
Menu: File
You can define the path and name of the new project you want to save your work under. RAM
projects and virtual projects will be saved with the new names (the source file remains untouched). HD
Wave projects are renamed on the hard disk. MAGIX music editor 2
will not generate a copy of it for reasons of conserving space on your hard drive.
Shortcuts:
Keys: SHIFT + s
Page 27

Rename Project
Menu: File
The ‘Rename Project’
command will let you rename a project file rather than save it to a different file. For RAM Wave
projects, only the internal names are changed (without being saved). But all corresponding files are
renamed immediately in the case of HD Wave projects.
RAM Wave projects need to be saved after renaming the project.
Page 29

Delete HD Wave Project
Menu: File
HD Wave projects are deleted from the hard disk. Use this command with caution
, as all corresponding files are lost.
(If you wanted to delete a HD Wave project (HDP) from a file manager such as Windows Explorer, it
would also be necessary to delete the graphic files related to the project files.)
Page 30

Import Audio
Menu: File
MAGIX music editor 2 gives you the option of importing Wave, AIFF, MPEG, MP3 , MS audio
(.wma), audio from .avi files or Sample Dump files into a MAGIX music editor 2
project. You will need to specify which type the project is going to be, a RAM Wave Project, or a HD
Wave project. MPEG files need to conform to the Layer 2 format. Any bit rate can be imported.
Difference between Open->WAV and Import Sample->WAV:
The command Open->WAV opens an already existing WAV file and edits the file as a HD Wave
project. MAGIX music editor 2
automatically creates a HDP file and the corresponding graphic file in the source folder.
When importing a WAV file, the complete file is copied. Additional hard disk space is needed and the
process takes much more time, since the audio file has to be copied with Open Project->WAV. Import
Sample->WAV has to be used when intending to use the WAV file as a RAM Wave project.
Page 32

Export Audio
Menu: File
The command ‘Export Sample’
will let you export HD Wave project or RAM Wave project files into Wave, MP3, MP3 with external
Encoder, MPEG, Windows Media, Real Audio, AIFF with Quicktime and dump files. You can save it
both in Mono or Stereo format.
When choosing compressed audio formats various compression options can be set.
A Note about Export Audio
:
The audio data files for HD Wave projects can be directly loaded or imported as WAV files by other
audio applications. The command Export Sample is only necessary if you want to copy the audio file.
Keep in mind that the hard disk requirement increases and that the copy process takes additional time.
This command has to be use to convert RAM Wave projects into WAV files.
Please note that direct editing of WAV files from CD-ROMs is not possible. Please use Import Sample
instead.
Page 33

Export Video Sound
You can load video files like audio files to work on the video soundtrack. This is used, when you dont
want to edit the audio, and just want to process the whole audio track with effects, like normalizing or
noise reduction. If you prefer a visual feedback, use the "Link Media" function instead.
After editing the video sound track, you can re-write sound track back into the video file. You also have
the possibility of replacing either the original video sound track or of producing a new video file. But
don’t worry, a new time-consuming compression of the video is unnecessary. No matter what, you can
change the audio format, for example, into compressed formats such as ADPCM. However, the
appropriate compression codecs must be installed.
Create AVI / Audio Copy: This option performs a track bouncing of the current VIP into a WAV file.
The AVI file is copied to a new file, which contains the new audio track. This option keeps the original
AVI.
Replace Audio in Video: This option performs a track bouncing of the current VIP into a WAV file. This
file is merged into the selected AVI file, so the AVI gets a new audio track.
Note: If the length of the video file and the audio are different, a warning is given. After exporting, the
longer one is truncated, no automatic synchronization is done. If you obtain such a warning, try to
resample your audio soundtrack to the appropriate length.
Page 34

Batchprocessing
Menu file
Batch processing automatically applies a single WAV project task to any number of other files (the
"batch") in exactly the same way – for large volumes, usually overnight.
Possible processings may include:
normalization
lineal fading (in and out)
real-time effects in the mixer master
Format conversion: Bit resolution(16/24/32), Sample rate, stereo/mono/left/right
Storage in all available export formats
For example, you can normalize a whole list full of 24bit WAV files to 96%, apply 5 ms fades at the
beginning and the end of each file, compress them with the multi-band compressor, change them all to
16bit mono, resample them on 22kHz and then saved them all as mp3s.
Source files
Here you can create a list of the files to be edited by selecting "Add file". Multiple selection is possible.
Select "Load directory" to add all of the audio files within a directory (including all sublists). All
importable audio formats are loadable in Samplitude. "Save list" creates a Playlist (in the common *.m3u
format) for using your selection of files later. "Remove" deletes all selected list entries. " Remove all"
deletes the complete list.
Effects
1. Normalization
You can normalize using percentages (%), decibels (dB) or manually by using the levels. For more
details, please read the Effects Menu chapter -> Amplitude/Normalize
2. Fades at the start and end of projects
Linear fades of any given length can be added to your files.
2. Master Effects
To avoid repetition in the batch processing dialogue, effects settings have been integrated with the mixer
preset files.
In the Samplitude mixer, you can export all mixer settings to the mixer preset (* mix). Simply press the
"Save mixer preset" button in the mixer (see illustration).
By loading these *.mix files into the batch processor ("Load preset"), all mixer effect settingsare
included (all other mixer preset data e.g. channel properties, groups, etc. are ignored). Mixer presets are
stored in the /fxpresets/batch directory and can be selected directly from the Listbox.
Page 35

Further effects
Besides mixer preset master effects, you can use the non-real-time effects Resampling/Timestretching,
DC removal and De-Clipping. Settings opens the applicable effects dialog.
Target format
You may select the bit resolution(16/24/32 bit), the sample rate, stereo/mono/left/right and format with
the applicable format option.
For more about the sample rate: Effects menu ( modify sample rate .
For more about export formats: Effects menu ( export audio.
Target files
There are several ways to save edited files:
"Replace file": Replaces the original file with the edited file. Should the file be used in the VIP, the VIP
must first be closed.
"Save and rename file in the source directory"/ "Save file in the following directory". The processed file
will be saved into the source directory or into another selectable directory, the file name will be expanded
by the given prefix/suffix. Additionally you can check "Delete source file after editing".
"Save with source directory path". The file is saved along with the path to its source, allowing you, for
example, to retain the sample CD structure.
Page 36

Save in Format
Menu: File
With this function, you have the possibility to convert projects between the different MAGIX music
editor 2
Wave project formats. This is useful if, for example, a RAM Wave project is to be converted into a HD
Wave project or a L&R Wave project (two linked mono files). Another option is the conversion to and
from stereo Wave projects to mono Wave projects.
Page 40

2 Mono à Stereo/LR Wave
Menu: File
Two mono projects are linked to one L&R Wave project. This is a convenient way of editing joined
mono samples with the same operations.
Make sure that the windows of the two projects to be linked are open. Select one of the objects as the
current object (click on the lower half with the left mouse button) and call up the ‘Link Projects’ menu
option. Next, click on the project you want to join. MAGIX music editor 2
will link the two projects.
MAGIX music editor 2
will automatically match the sample length of the two projects but not the bit resolution.
Page 42

Menu Edit
Menu Reference
This menu contains all functions, which are similar to cutting on a tape machine.
In virtual projects, you can select track sensitive , so only the selected tracks are manipulated.
When working with a virtual project (VIP) a selected range
is always required for the cut functions. The beginning and end of the selected range determine the start
and ends of a cut. The vertical position indicates which tracks are affected by the edit.
It is recommended to use the Auto-crossfade function to achieve smooth transitions between the edit
points. This will automatically create fades at the object edges.
Please note that these functions are processed for both channels when working with stereo and L&R
Wave projects. (If only one channel is to be edited, you will need to convert the Wave project into two
mono Wave projects. After editing the two mono Wave projects can be merged again.)
Undo
Undo last operation(s) (VIP).
Redo
Undo last Undo-operation(s) (VIP).
Undo History
Displays a list of recent editing steps for easy undo.
Cut
Cuts the selected range into the Clip (VIP, WAVE
PROJECTS).
Works dependent from chosen Object mode
Delete
Deletes the selected range. (VIP, WAVE
PROJECTS)
Works dependent from chosen Object mode
Copy
Copies the selected range into the Clip. (VIP,
WAVE PROJECTS)
Paste/Insert
Inserts sample data from the Clip at the play cursor
position. (VIP, WAVE PROJECTS)
Works dependent from chosen Object mode
Extract
Deletes sample data before and after the selected
range. (VIP, WAVE PROJECTS)
Insert Silence
Inserts memory in the length of the range. (WAVE
PROJECTS)
More....
All edit Commands here are working independent
from the chosen Object Mode
Clear
Replaces the selected range with silence. (VIP)
Copy and Clear
Copies the selected range into the Clip and clears it in
the project. (VIP)
Copy As
Copies the selected range into a new file. (WAVE
PROJECTS)
Overwrite with Clip
Overwrites sample data with the Clip.. (VIP, WAVE
PROJECTS)
Mix with Clip
Mix sample data with the Clip. (WAVE PROJECTS)
Crossfade Editor
Opens the Crossfade Editor
Auto Crossfade active
Activates the Auto Crossfade, which is applied after
each edit process to make smooth cuts.
Delete Undo Levels
Clears the Undo History to free Wave projects for
destructive Editing or Delete.
Page 43

Undo
Menu: Edit
MAGIX music editor 2
offers you a comfortable way of tracking your changes in virtual and wave projects. Up to 100 changes
can be kept in memory and traced backwards
That means, virtual processes and physical processes (such as normalize, reverb, filter with activated
Create Copy option etc.) can be reversed (undone).
Range and marker manipulations can also be undone using the ‘Undo’
feature.
Thanks to this extremely efficient feature, critical operations can simply be tried and then reversed to
return to the original status if the results are not satisfactory.
MAGIX music editor 2
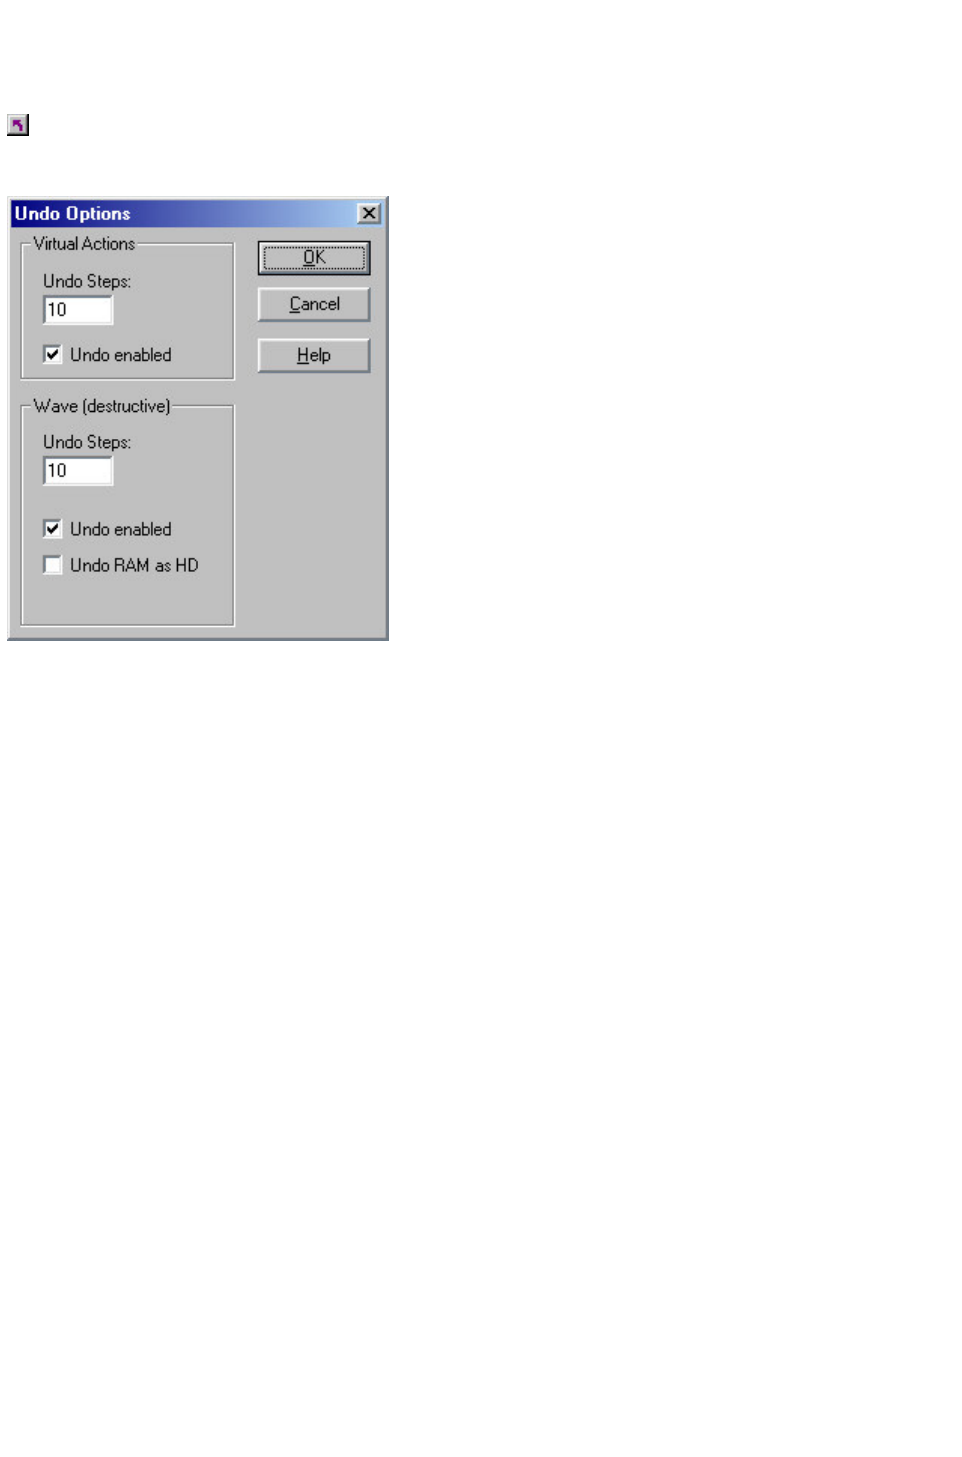
offers a convenient undo option for VIP objects. A maximum of 100 undo steps can be retraced. This
number can be configured in File/Preferences/Undo Definition.
When adding effects to audio material (menu option Effects), the undo option only works when the
selection 'Create Copy' has been chosen in the effect dialog.
Shortcuts:
Keys: CTRL+Z or Alt + Back
Page 44

Undo History
Menu: Edit
Displays the Undo History dialog. This dialog can be used to undo specific editing steps. By clicking on
an entry in the dialog, MAGIX music editor 2
returns the project to the state just prior to the editing step listed. To return to another state, simply click
on a different entry. This can be repeated unlimited times.
Page 46
Cut
Menu: Edit
Wave Projects:
The audio data in the selected range are copied from the current Wave project into the Clip. The
material behind the removed range is merged with the material in front of the removed range to close the
gap. The complete Wave project becomes shorter.
Please keep in mind that the Clip always contains the same attributes as the Wave project the material
was copied or removed from.
If you cut material from a mono Wave project, the Clip becomes a mono Wave project. If material from
a stereo Wave project is cut or copied to the Clip, the Clip becomes a stereo Wave project. Another
attribute adopted is the bit resolution and the sample rate of the originating Wave project. The previous
contents of the Clip are deleted.
After a successful removal of the selected material, MAGIX music editor 2 drops a marker at the
position the removed range previously started. This allows you to insert the contents of the Clip into the
Wave project at the exact same spot if you accidentally removed the material. Use the function Edit
>Paste/Insert Clip
to insert the Clip contents.
Virtual Projects (VIP):
In virtual projects the selected range is copied to the VirtClip and is removed from the current VIP
project. The VirtClip does not contain actual audio information, only the links to the audio files. The
VirtClip also contains as many tracks as the removed range.
The material behind the removed range is appended to the material in front of the removed range. The
VIP project becomes shorter if the selected range did cover all tracks. This way you can shorten Vips
which contain empty space behind the last object.
As with the Wave projects, a successful removal of the selected range drops a marker at the position the
removed range previously started. This allows you to insert the removed material with Edit >Paste/Insert
Clip
.
Shortcuts:
Toolbar:
Keys: Shift + Delete or X
Page 47

Delete
Menu: Edit
The data of the current range is deleted. The sample data after the deleted range is added at the position
the deleted range started. The sample length becomes shorter.
Please note that this command will not save the deleted data to the Clip. If you want to preserve the
deleted sample data, use the ‘Cut’ command. Using this the ‘Delete’ command will delete the data from
the current sample and preserve the contents of the Clip.
Shortcuts:
Keys: Delete
Page 48
Insert/Paste
Menu: Edit
The contents of the Clip are inserted into the current project behind the position of the play cursor or
the beginning of the currently selected range. The data or objects that are located behind the insert
position are moved out of the way to make room for the Clip contents. The samples or audio tracks
become longer. The Clip remains unchanged during the procedure. If the Clip was empty, an error
message is displayed.
After inserting the contents, the program selects a range over the inserted area. If you select Edit >Delete
, the inserted contents are removed and the project is returned to the original state.
In virtual projects
using selected ranges, the program utilizes the beginning position and relative track position as the insert
point for the VirtClip or Clip contents.
The following table shows how MAGIX music editor 2 responds in the case the clip and the project have
different channel numbers:
Clip Project Clip Channel Project Channel
Mono Mono Channel 1 Channel 1
Stereo Stereo Channel 1 Channel 1
Channel 2 Channel 2
Mono Stereo Channel 1 Channel 1
Channel 1 Channel 2
Stereo Mono Channel 1 Channel 1
Shortcuts:
Toolbar:
Keys: Shift + Insert or V
Page 50

Extract
Menu: Edit
This function is the counter part of the ‘Cut’
function.
Wave Projects:
The current range remains unchanged only the sections before and after the selected range are
permanently deleted. The audio file becomes shorter. The contents of the Clip
are unchanged.
Virtual Projects (VIP):
The objects before and after the selected range are deleted from the project. The contents of the
VirtClip remain unchanged.
Page 51

Insert Silence
Menu: Edit
The ‘Insert Silence’ option will insert ‘blank’ data at the current play cursor position or the starting
position of the currently selected range
.
If a range is selected, the length of this range is predefined in the dialog to insert.
The blank space will actually contain data with zero value. The data following the insertion point will be
added to the end of the blank space. The defined range is maintained, the length of the inserted space
extends the overall sample.
If you do not have sufficient memory to insert the workspace (i.e. with RAM projects), MAGIX music
editor 2
will display an error message.
Page 52

Delete Undo Levels
Menu: Edit
This feature will delete the Undo levels of a virtual project. This is useful, if for example certain Wave
projects are left in the Undo chain, but do not exist in the VIP anymore. You won't be able to process or
delete the Wave project if the Undo chain still contains a reference. After deleting the Undo levels, these
projects are available again.
Page 53

Append Projects
Menu: Edit
With this function a project can be appended with another project, i.e. the material of one project is
copied directly behind the material of the first.
You need to first select the object you want to append. Then you activate the menu and click on the
project you want to add to the first.
A particular use of this option is the 'cleaning up' of VIP's that contain numerous physical samples.
You can:
append a VIP with a VIP
This is good for bigger projects, you can edit parts of it in different files and finally put them
together
append a wave project with a wave project
A particular use of this option is the"cleaning up' of VIP's that contain numerous physical
samples.
append a wave project with a VIP
This is a smart method to transfer markers from a wave project to the VIP. Normally, when a
hdp is loaded into a VIP, the markers stay inside the audio file as "audio markers". Often it is
necessary to have these markers in the VIP. When you append a wave project with the VIP, the
wave data will be inserted as an object at the end of the VIP at the active track and the markers
from the hdp will be inserted in the VIP.
Page 54
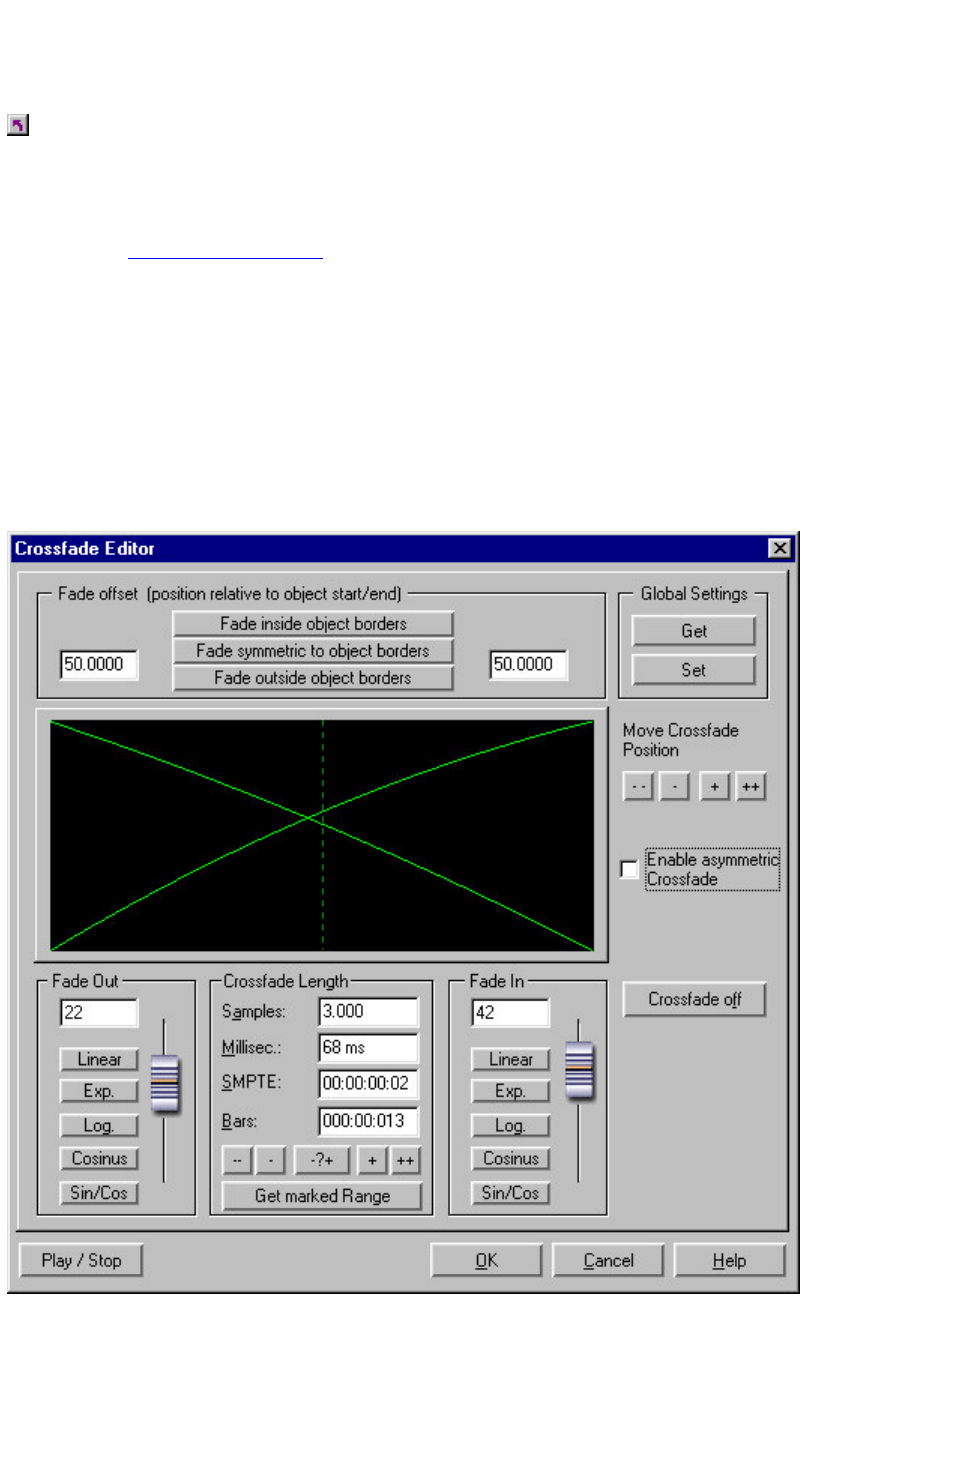
The Crossfade Editor
Menu: Edit
To apply a crossfade between two overlapping objects on a track, you have two methods:
With the normal fade in/out handles:
Activate the Auto crossfade mode
and fade in the second object. The first object will be faded out and mixed with the second, a crossfade
will be applied. The object remembers, if a crossfade was once applied. If you use this object (or a copy
of it) at another place in the VIP, you don’t have to activate Auto crossfade again to have this behavior.
Fade in the overlapping object will cause a crossfade again. You can reset this object quality by selecting
"Crossfade off" in the Crossfade editor.
With the Crossfade Editor
Select the second object and call the Crossfade editor.
The Crossfade parameters can be specified in the crossfade editor.
Crossfade Length
The length of the crossfade can be specified in different length units. Clicking "+ / -" expands / shortens
the crossfade by a minor step width, "++ / --" by a major step width. With "-?+" you can define these
step widths. The Crossfade length can also be transferred from the selected range (if there is one) with
Page 55

the "Get marked range
" button
Curve types
Available fade-in and fade-out curve types are Linear (0), Logarithmic/Exponential(-100..100), and
Sine/Cosine (-100..100). With the fader you can adjust the curve form continuously between these
extremes. Linear crossfades do not take as much processing power as non-linear crossfade curves.
Global Set
The currently selected settings for the crossfade can be used as default setting for newly created
crossfades. This mainly concerns the crossfades created after applying a "Split Object" command
(Keyboard: "t"), which are small symmetric, linear crossfades of 35 ms, fade offset 0%. So use it wisely,
if you set any other value here for new default, it has to be a reasonable one.
Global Get
Restores the global crossfade settings as parameters for the Editor configuration.
Get Range
The length of the currently selected range is used for the length of the crossfade.
Crossfade off
The button "Crossfade Off" deactivates the crossfade for the selected Object. The first object’s fade out
time is set to zero, the second preceding objects independent from its fade in / out settings
Play/Stop button
If a range is selected over the crossfade section, the crossfade can be pre-viewed with the Play/Stop
button. This also works while making adjustments in the editor dialog and allows you to audition the
crossfade parameters in real-time.
Move Crossfade
The object borders of both object will be moved simultaneously, this results in moving the whole
crossfade. Use the +/-/++/-- buttons like above.
Shortcut:
Key: Ctrl + F
Page 56
Auto Crossfade Active
Menu: Edit
If this option is turned on, all newly recorded or cut material in a VIP or material that is dragged from a
Wave project into a VIP track has an automatic fade in /out applied to it. If you perform a "split object
" command, the resulting two objects are crossfaded too. This is to avoid clicks at the beginning and end
of the object.
Global settings for Fade In and Fade Out parameters are assigned to the object. These settings can be
changed in the Edit->Crossfade Editor
. This can be necessary, when the audio material is already clean cut and the fade is impairing the attack
of the sample.
If two objects are overlapped that had an automatic crossfade applied to them a real-time crossfade is
the result. If an Object with a fade in is moved over a preceding object, a crossfade will be applied over
the two object, when auto crossfade is active.
The auto crossfade mode is an excellent tool to easily perform a linear cut of a spoken voice track, jingle
track etc., which requires a soft passage without the unwanted 'pops'. If needed, each crossfade can be
edited in the editor or by manually manipulating the handles.
Toolbar
Page 57

Set Silence
Menu: Edit
The data of the current range is replaced with silence.
Please note that this command will not save the deleted data to the Clip. If you want to preserve the
deleted data, use the Cut or Copy command. Using the Delete command will delete the data from the
current project and preserve the contents of the Clip.
Shortcuts:
Keys: Alt + Delete
Page 58

Overwrite with Clip
Menu: Edit
The current range is replaced with the Clip contents. The overall sample length remains unchanged. The
data that occupied this position before cannot be recalled. The Clip contents are not changed. The
assignment of the Clip channels follows the table mentioned above
.
In virtual projects
using selected ranges, the program utilizes the beginning position and relative track position as the insert
point for the Clip contents.
Shortcut:
Keys: Alt +V or Insert
Page 61

Mix with Clip
Menu: Edit
The range contents and the Clip contents are mixed. Channel assignment between project and Clip
follows the table above (See ‘Insert’
function). The contents of the Clip are not altered.
Since either component is combined with their full sample values, make sure that no over-modulation
takes place. This function is performed by way of addition. This assures on one hand, that the project
sample remains free of a sudden volume decrease. On the other hand, modification of the amplitude
might need to be performed before the mix to keep the resulting sample from clipping and distorting. For
information on amplitude modification, see ‘Editing Menu.’
Page 62

Delete Volume Handle
Menu: Edit
This function deletes volume curve events, which have been previously selected. Individual volume
events can be deleted by selecting the Object and Curve Mode mouse mode and double clicking the left
mouse button on a volume curve event. However, when deleting several curve events, the 'Delete
Volume Handle' function is the best tool. Use the Curve Mode and Grab Tool
to select multiple curve events.
Page 63

Delete Panorama Handle
Menu: Edit
This function deletes panorama curve events, which have been previously selected. Individual events
can be deleted by selecting the Object and Curve Mode mouse mode and double clicking the left mouse
button on a volume curve event. However, when deleting several curve events, the 'Delete Panorama
Handle' function is the best tool. Use the Curve Mode and Grab Tool
to select multiple curve events.
Page 64

View Menu
Menu Reference
This menu contains tools for manipulating the display of MAGIX music editor 2
.
Rebuild Graphic Data
Calculates new graphic data of a project.
Sections
Select number of views.
Fix vertically
Selects ranges always with full height.
Show Grid
Switch grid on or off.
Grid Lines
Select kind of grid.
Units of Measurement
Selects several units of measurement for the time
display.
Snap to Grid
Switches the snapping functions on and off.
Snap and Grid Setup
Chooses the kind of the snapping and gridding.
VIP Display Mode
Select and toggle Display Preferences in VIPs.
Horizontally
This sub menu contains all functions for horizontal
zooming and scrolling.
Vertically
This sub menu contains all functions for vertical
zooming and scrolling.
Page 65

Sections
Menu: View
MAGIX music editor 2
allows the optional display of one, two or three of the samples belonging to one Wave project or the VIP
itself. Other audio editing applications usually show only one window of a sample.
If you select ‘2’, MAGIX music editor 2 will display the same sample in two window . Each section can
be handled separately. It is possible, for example, to represent the complete sample in one section and a
zoomed in version of a certain range
in the other.
The mode ‘3 sections’
is especially useful for searching for loop points in Wave projects.
The whole sample can be shown in the upper section, while the section on the lower left displays the
beginning of the loop range and the section on the lower right the end of the range. Use the split range
function for this purpose (key b).
Go back to 1 view with Shift b!
This is only an example of the mode ‘3’
view. All sections can be handled independently.
You can also drag ranges over the section bounds. Establish the starting point of a range by clicking, then
keep the mouse button pressed, and change over to another section. MAGIX music editor 2
will show you the size of the range and at the desired location release the left mouse button to determine
the end of this range.
Page 67

Fix Vertically
Menu: View
Ranges can be dragged (pulled) in MAGIX music editor 2
horizontally and vertically as well. If this option seems too strange to you, you can fix the upper edge of a
range(s) to the maximum value and the lower end to the minimum value. Thus, you get the usual
representation in range dragging. However, a trade-off is, that you will not be able to define the vertical
extension of a section by choosing the vertical range button.
Page 68

Units of Measurement
Menu: Options
‘Units of Measurement’
is used to specify the grid dimensions. Several display options are available which will appear at the
upper section of the grid.
The units supplied with MAGIX music editor 2 are ‘Samples’, ‘Milliseconds’, three SMPTE Frame
options, the MSF format for red book CDs (SMPTE with 75 frames), SMPTE + Milliseconds (instead
frames), ‘Bars’
for BPM display and feets and frames for 16/36 mm film..
Page 71

Snap to Grid
Menu: View
This function switches the Grid on and off.
When working with virtual objects the Virtual Grid becomes available. Objects can only be shifted to the
beginning, the end, or the hot spot
of another object. The reference point is usually the beginning of the object to be shifted to. A hot spot
when defined will be used as a reference point as well.
If several objects have been selected, the move is performed in lining up the beginning of the last selected
object in the sequence with the reference object or Grid point. All selected objects remain their position
to each other.
This option can be used to easily rearrange objects with their audio patterns and gain sample-exact
connections.
Shortcuts:
Toolbar:
Keys: Ctrl + r
Page 72

Store Position and Zoom
Level
Menu: View
Stores positions and zoom factors. They can be called up using the 8 buttons below the Section track,
the "Get position and zoom factor" menu item and the NUM pad (to the right of the cursor keys). To
delete them again click the right mouse on the buttons.
Page 73

Get Position and Zoom Level
Menu: View
Loads one of the 4 possible setups for position and zoom factor, which have been stored before using
"Store Position and Zoom Factor". After they have been stored they can be called up by clicking the
mouse on the buttons below the track boxes or by using the Num pad (to the right of the keyboard).
Page 75

Object Menu
Menu Reference
Contrary to the menu Edit all functions in this menu exclusively manipulate selected objects in virtual
projects. Selected have no effect with these functions. Ranges are used to determine insertion points or
cut positions of objects. When inserting material into a virtual project, the range beginning has the same
function as the play cursor –
the material is inserted at the range beginning.
New Object
A new object is generated, using the audio data
from the last activated Wave project.
Cutting Objects
several object related copy/paste operations
Cut Objects
All selected objects are cut from the VIP and
transferred to the VirtClip.
Copy Objects
All selected object are copied from the VIP and
transferred to the VirtClip
Insert Objects
The objects in the VirtClip will be inserted at the
play cursor position.
Delete Objects
All selected objects will be deleted.
Extract Objects
All NOT selected objects will be deleted.
Duplicate Objects
All selected objects will be duplicated.
Duplicate Objects multiple
Multiple copies of all selected objects are copied.
A dialog with additional selections is displayed.
Split Objects on Marker Position
The object will be split into parts at VIP marker
positions.
Split Objects
Objects are separated at the selected range
borders or the play cursor position.
Trim Objects
The object borders are trimmed to the selected
range borders.
Mute Objects
The selected Object will be muted
Lock Objects
All selected objects will be protected from
moving, fading and/or size changes.
Unlock Objects
All selected objects will be unlocked.
Lock Definitions
Selects options for object locking.
Object to Playcursor Position
Moves Object to actual play cursor position
Build Loop Object
Generate an object with a loop range.
Hotspot
The current play cursor position is made a
reference point.
Select Objects
All objects in selected range are selected.
Switch Selection
Invert the selection.
Group
All selected objects build a group.
Ungroup
All selected objects will be ungrouped.
Object Background Color
Sets a background color for objects.
Object Foreground Color
Sets a foreground color for objects.
Object Name
Changes the name of objects.
Wave Editing
Opens the associated Wave project for
destructive editing.
Page 109

New Object
Menu: Object
Use this function to create a new object. The current range in the last activated Wave project will be
inserted into the virtual project at the play cursor position into the currently selected track. It will also be
the currently selected object. The object is inserted at the actual range position in the VIP.
Page 110

Split Objects
Menu: Object
This function splits or separates selected objects so that individual object sections can be further
manipulated. All selected objects are separated at the current play cursor position, which results in two
independent objects.
If a range is selected, the cut occurs on both
range borders. It is not necessary to select objects prior to choosing the range and calling the Split
Objects function. If an underlying object is separated, the newly created object covers the original
underlying object.
The two new objects have the same object properties (FX, Object volume, color...).
Shortcut:
Keys: t
Page 111

Heal/Unsplit objects
With this command you can join objects which were split into pieces (e.g. by accident). The objects
have to border each other in the VIP as well as its referred audio data has to fit. That means, the have to
refer to distinct, but bordering wave data of the same wave project. If this conditions are not fullfilled, the
command is greyed out. All object settings (fades, effects etc.) of the second object are removed, the
resulting object carries the settings from the first one.
Page 113

Object to Play cursor Position
Menu: Object
Moves the selected object to the actual play cursor position. If multiple objects are selected, the
selected object with the smallest track number is moved to the playcursor, all other selected objects are
moved relative to it (in consideration of the object modes).
Page 115

Build Loop-Object
Menu: Object
With this function, a loop can be defined within an object. An area, which indicates the loop length,
must be selected in the object first.
The object then becomes the loop object. That means that the number of loops can simply be 'raised'
with the 'length handlers' at the bottom of the object.
Such generated loop objects are ideal for generating long drum sequences from only one drum loop!
Loop objects also help to save memory, since in the VIP only one object is handled rather than multiple
objects or copies of the same material or very long samples!
Page 116

Set Hotspot
Menu: Object
The current play cursor position is turned into a reference point for the snap function. Instead of the
object’
s beginning, the hot spot is now used when the object is snapped to the grid.
Stroked vertical lines illustrate hot spots. Hot spots may stand outside an object (in front of or behind the
object).
This function is very useful for a case where the portion of an object to be synchronized does not line up
with it’
s beginning.
Page 117

Selecting Multiple Objects
with the Mouse
If the Shift or Ctrl key is pressed in addition to a mouse click, additional objects are selected without
undoing any previous object selection.
Prerequisite for this is the selection of the correct Mouse Mode: Object Mode, Object & Curve Mode,
and Universal Tool Mode all offer this functionality. In the Universal Tool Mode, the object is selected by
clicking on the lower half of the object.
Another method of selecting multiple objects is the use of the Object Lasso. Simply click the left mouse
button at an empty VIP track pane location to the left of the desired objects and drag a marquee (Object
Lasso) around the object you would like to select. Once the mouse button is released, the object
covered by the Object Lasso will be selected.
Also, see the information in Mouse Functions of the Individual Mouse Modes .
Page 118

Object Background Color
Menu: Object
Sometimes it is necessary to distinguish certain objects from others. MAGIX music editor 2 will let you
specify different colors for selected objects. Once you have selected one or more objects, choose
‘Object Background Color’ from the ‘Object’
menu and specify a different background color for the objects. After clicking on OK, all selected objects
will have the specified background color.
Page 122

Object Name
Menu: Object
Another way to distinguish certain objects is to give them a different name. MAGIX music editor 2 will
let you specify a name (such as ‘Verse’) with this option. Please note that the name only shows up if you
enabled this option in the ‘Object Draw mode’ definition window (available from the ‘Setup’
menu or by pressing Shift+Tab when the object is selected).
Page 124

Wave Editing / Destructive
Editing
Introduction
MAGIX music editor 2 is primarily a non-linear, non-destructive audio editor. This means that most of
your work is usually completed in the virtual domain (VIP), without making changes to the original audio.
However, there are some situations which are best completed by working directly on a Wave Project, as
if you were using a conventional audio editor. MAGIX music editor 2 can also function as a conventional
audio editor, but now offers two alternatives - Destructive Editing or the new virtual Wave Editing. When
working directly on Wave Projects, the powerful options offered by the Wave Editing system place
MAGIX music editor 2
a "cut" above other conventional audio editors!
Wave Editing / Destructive Or Virtual?
Using Wave Editing or Destructive Editing may not necessarily be the best method of completing your
editing task. For example, if you have duplicated an Object several times, all of the Objects would
contain the same edits after changes are applied and saved directly to the Wave Project window. But this
can also be an advantage at the other hand.
Please keep in mind that editing functions such as cut, copy, fades, crossfades, and so on can also all be
applied to the audio material in a non-destructive way in the VIP. Almost all effects can be used from
within the Virtual Project and applied to the Objects in the VIP Tracks.
With regard to the Effect Menu functions, the editing can also be performed "offline", in a destructive or
semi-destructive fashion which has similarities to Wave Editing. For example, the Effect Menu Room
Simulator function is always performed "offline". However, the option Create Copy (checked by default)
makes sure that a copy of the original material is processed with the effect and not the original audio
segment. The copy of the audio segment allows the use of Undo in the Virtual Project to return the
Object to its original state. Of course, this process utilizes additional hard disc space.
Also, remember that even if you work extensively with WAV files, you can complete all editing tasks
within a VIP. By importing the Wave Project into a VIP, you can complete editing steps faster and more
conveniently than in any destructive Wave editing application! For example, any type of cutting and
rearranging of audio segments can be performed in a non-linear, non-destructive, and extremely fast way
in the VIP. The Track Bouncing option in the Tools Menu allows you to take any material in a VIP and
turn it into a new WAV file which can then be imported into a VIP Project.
Note : As we shall see in this chapter, the new non-destructive Wave Editing mode is very similar to
working within a VIP , but the editing is carried out directly on the Wave Project
. This saves a lot of time in some cases (such as when working with sound or loop libraries).
Editing on Wave projects can be performed in two different modes, in the old "Destructive Editing"
mode or in (virtual) "Wave editing" mode.
Destructive Editing
This is the term used to describe the method for working directly on Wave projects in earlier versions of
MAGIX music editor 2
.
Page 125

When editing in Destructive Editing mode, the physical audio files are edited on a ‘destructive’ basis. This
means that the audio file is reconstructed with whatever effect or editing process you choose. There will
be Undo backups (assuming Undo is enabled), but these only exist while the file is open. Once the
Project is closed, the changes to the file are permanent. Of course, the Undo files consume large
quantities of hard disk space and can also take a long time to write to the hard disk!
When using Destructive Editing on a Wave Project, the changes are in general written back to the audio
file without having to use the Save Project command, as the changes are directly applied to the audio
material contained in the file. Once editing is finished, you simply close the Project. However, the Save
Project command needs to be used for saving marker information and other workspace specific items.
A RAP project needs to be saved to the hard disk to make the changes available the next time the
project is loaded. Since any editing is applied to the computers volatile RAM memory, the changes
would be lost as soon as the computer is turned off. The contents of the RAP project are loaded into the
RAM memory of the computer and are played back and edited in RAM. The Save Project command
will save any changes to the hard disk for storage and retrieval.
The Save Project As dialog lets you make a duplicate copy of the Wave Project window.
The original audio files are kept intact when using this command. Instead, a copy with the exact same
content is created. This can be a useful option for Destructive Editing.
MAGIX music editor 2 ’s development team designed a way to circumvent the disk space and time
inefficiencies associated with Destructive Editing. MAGIX music editor 2
introduces this new method, called Wave Editing :
Virtual Wave Editing
This is the new virtual wave editing mode introduced with MAGIX music editor 2
.
Read the new features quickstart "Virtual Wave Editing"
for an introduction to this mode.
There are some differences between the "destructive" and the "Wave editing" mode when working on
wave projects:
Rendering edit operations on saving
All edits: cut, paste, delete and insert are virtual. The positions, where the edit took place, are marked
by dotted lines. There will be no time consuming undo file creation any more. All the edit operations are
applied on the wave project, when you save it.
Section:
You can call the mixer, while working in the wave project. There you can apply every fx manipulation as
in the normal VIP section in real-time. These effects will be applied on the wave project, when you save
it. For more information on the Mixer section, read here
!
Menu fileàSave in format:
This will call the track bouncing Track bouncing dialog ( format conversions are possible). (Toolsà
Trackbouncing)
Auto Crossfade
The Auto crossfade option (Menu Edit) works in wave projects too, on every cut or insert operation the
default crossfades are applied, when auto crossfade is active. You can use the Crossfade Editor to edit
that crossfade, when you select the crossfade by selecting a range over the crossfade.
Page 126

New File with Drag and Drop
You can mark a range in the wave project and drag this range to an empty space somewhere t the
program desktop. A new wave project (untitled.wav) will appear. So you can easily make copies of the
whole or parts of the wave project.
Page 127

Lock Definitions
Menu: Object
Here you can select, which options should be disabled:
Disable Moving
Disables moving of objects (default). This is useful in multi-track projects to avoid delays between
several tracks.
Disable Volume Changes
The volume handles are disabled.
Disable Fade In/Fade Out
The fade handles are disabled.
Disable Length Changes
The length handles are disabled.
Page 130

Cut Objects
Menu: Object
The currently selected object is replaced with empty space and copied to the VirtClip. The length of the
current project remains and all other non-selected objects remain in their positions. The previous contents
of the VirtClip are replaced with the cut object.
If a range
is selected, all active objects are separated on the range edges.
Page 131

Insert Objects
Menu: Object
Objects in the VirtClip
can be inserted in the project at the current play cursor position. The other objects in the project
maintain their positions. Please note that the newly inserted object might cover portions of the already
existing objects. Simply drag the new object to a different set of tracks or reposition the object on the
same tracks.
Page 133

Duplicate Objects
Menu: Object
All selected objects are duplicated and pasted to the same position as the original objects. The original
object is overlaid with the copied object. The duplicate object can easily be shifted to a desired position
by using the mouse. If several objects have been selected before the duplication, press the shift key
before shifting to ensure that all objects remain in selected status and are shifted together.
This option does not make use of the VirtClip
, so all contents of the VirtClip remain unchanged.
This function is also available using your mouse. Press and hold the Ctrl-key, click on the object you
want to duplicate and drag the copy to a new position in the project.
Another option is to use the Drag & Drop functionality for the Object or Universal Mouse Mode:
If multiple objects are selected, press the Ctrl key and drag the selected objects to the new position. This
allows you to duplicate the selected objects easily and without using the VirtClip.
Page 136

Duplicate Objects Multiple
Menu: Object
This function duplicates multiple objects and places them in sequence. Another dialog is displayed,
which allows you to determine how many copies of the selected objects are to be duplicated, the
separating distance and the overall length of the duplication.
Duplicate Objects - Number of Objects
Determines the number of objects that are created.
Duplicate Objects - Group created Objects
When checked, all created objects are grouped together.
Duplicate Objects - Delta Time
This determines the relative position of each created object to the next (from the beginning of one object
to the beginning of the next). The default setting is the length of the selected object. At the default setting
the duplicated objects line up without a gap between them, this creates a seamless loop.
Duplicate Objects – Duration
As an alternative, the duration can be specified, which are the combination of time difference and the
number of duplicated objects.
Page 137

Menu Effects
Menu Reference
This menu will let you add high-grade effects to Wave projects and VIP Objects in destructive way.
The audio material will be physically altered. Read more on effects in general in the Using Effects in
MAGIX music editor 2
. More about destructive Effects read here
Normalize...
Sample data values in a selected range are
normalized.
Amplitude / 2
The amplitude of the samples is halved. (WAVE
PROJECTS)
Amplitude * 2
The amplitude of the samples is doubled. (WAVE
PROJECTS)
Fade In/out...
Sample data values in a selected range are faded in
or out.
Set Zero
Sample data values in a selected range are set to
zero .
DirectX Plug-Ins
Uses DirectX Plug-Ins for destructive editing
Graphic EQ
A graphic 10-band equalizer is opened.
Dynamics
Dynamic-Functions (Compressor, Limiter,
Expander, Gate)
Room Simulator
Simulates Reverb and other room effects.
Reverb/Echo...
An reverb/echo effect effect is calculated.
Declipping
Eliminates Clipping.
Remove DC-Offset
Removes a DC offset from the selected range.
Get Noise Sample
Copy the selected range to the noise sample
project for the noise reduction. This is a sample of
the noise print.
Noise Reduction
Removes Noise from the sample using the Noise
Sample
Dehisse
Removes low noise from the selected Wave
project. No noise print sample is needed.
Timestretching/ Pitchshifting/ Resample
Resampling, Timestretching and Pitch Shifting.
Change Samplerate...
Creates a new project with another sample rate.
Build Loop
A smooth loop is calculated.
Switch Channels
Switches left and right stereo channel.
Stereo Enhancer
Stereo bandwidth changes and panorama control.
Invert Phase
Sample data values in a selected range are inverted.
Page 139

DirectX Plug-Ins
This function allows you to use Microsoft DirectX compatible plug-ins with MAGIX music editor 2
. This complements the already existing superb effects with an unlimited number of 3rd-party effects.
The Mixer in MAGIX music editor 2
is also compatible with plug-ins, which can be used as real-time effects. However, the plug-ins have to be
able to process the audio data blocks immediately and completely, without changing the length of the
material. This is the case for most plug-ins (i.e. Wave Native Powerpack, Power Technology DSP FX,
Arboretum Hyperprism, TC Native Reverb and others). Other algorithms will fail, such as time stretching
plug-ins, since they are based on changing the length of the material.
The menu Effects
does not pose these limitations. All available plug-ins should work, even if they change the length of the
audio material or temporarily off-load the data blocks (i.e. Sonic Foundry Acoustic Modeler).
Working with the Plug-Ins
After opening the plug-in dialog, a list of installed DirectX Plug-Ins is visible. Double clicking on a
specific plug-in moves the plug-in to the left side of the dialog. The left side shows the active plug-ins. At
the same time the plug-in is moved into the active plug-in list, the dialog for the chosen plug-in is
displayed. The DirectX plug-in dialog allows you to make further settings for the effect. Additional
double clicks on entries in the right-side list add other plug-ins to the active plug-in list on the left side.
Dialog Elements
Play/Stop –
This button activates the real-time preview of the active plug-in listed on the left side of the display. This
function is ideal for testing of the chosen plug-in settings if the real-time calculation operates sufficiently.
Preview (only in Effects menu)– This function calculates a short segment of the audio material with the
active plug-in settings and plays back the audio segment. . Use this option if your system does not seem
to be able to sustain the real-time preview (button ‘Play/Stop’). The length of the off-line preview can be
determined with the setting System
(shortcut: y) – Test buffers.
Create Copy (only in Effects menu)– This decides whether MAGIX music editor 2
creates a copy of the original material. If the option is checked, the copy is appended to the end of the
audio file and the effect is processed over the copy instead of the original. This function allows the Undo
option to return the VIP object to the original state. It is therefore recommended to always use this
option!
Solo -
Only the selected Plug-In will be used.
Mute -
The selected Plug-In will be muted (bypass function). You can also bypass a plugin by unchecking the
preceding checkbox.
Remove –
the selected plugin will be removed from the effects chain.
Saving and Loading –
These two buttons in the upper left-hand section of the dialog allow you to save and load Plug-In
presets. A previously saved preset, which is saved in the standard fx-preset folder will be listed in the
selection box. A Plug-In Setup contains the information of utilized Plug-Ins, all the parameters, and the
order in which the Plug-Ins are set.
This allows you to easily transfer custom settings between several instances and projects in MAGIX
music editor 2
Page 140

(Mixer, Offline wave editing in the Effects menu).
With the copy/paste button
in the top right corner you can even quicker transfer plugin settings between different instances of a
plugin chain.
Page 141
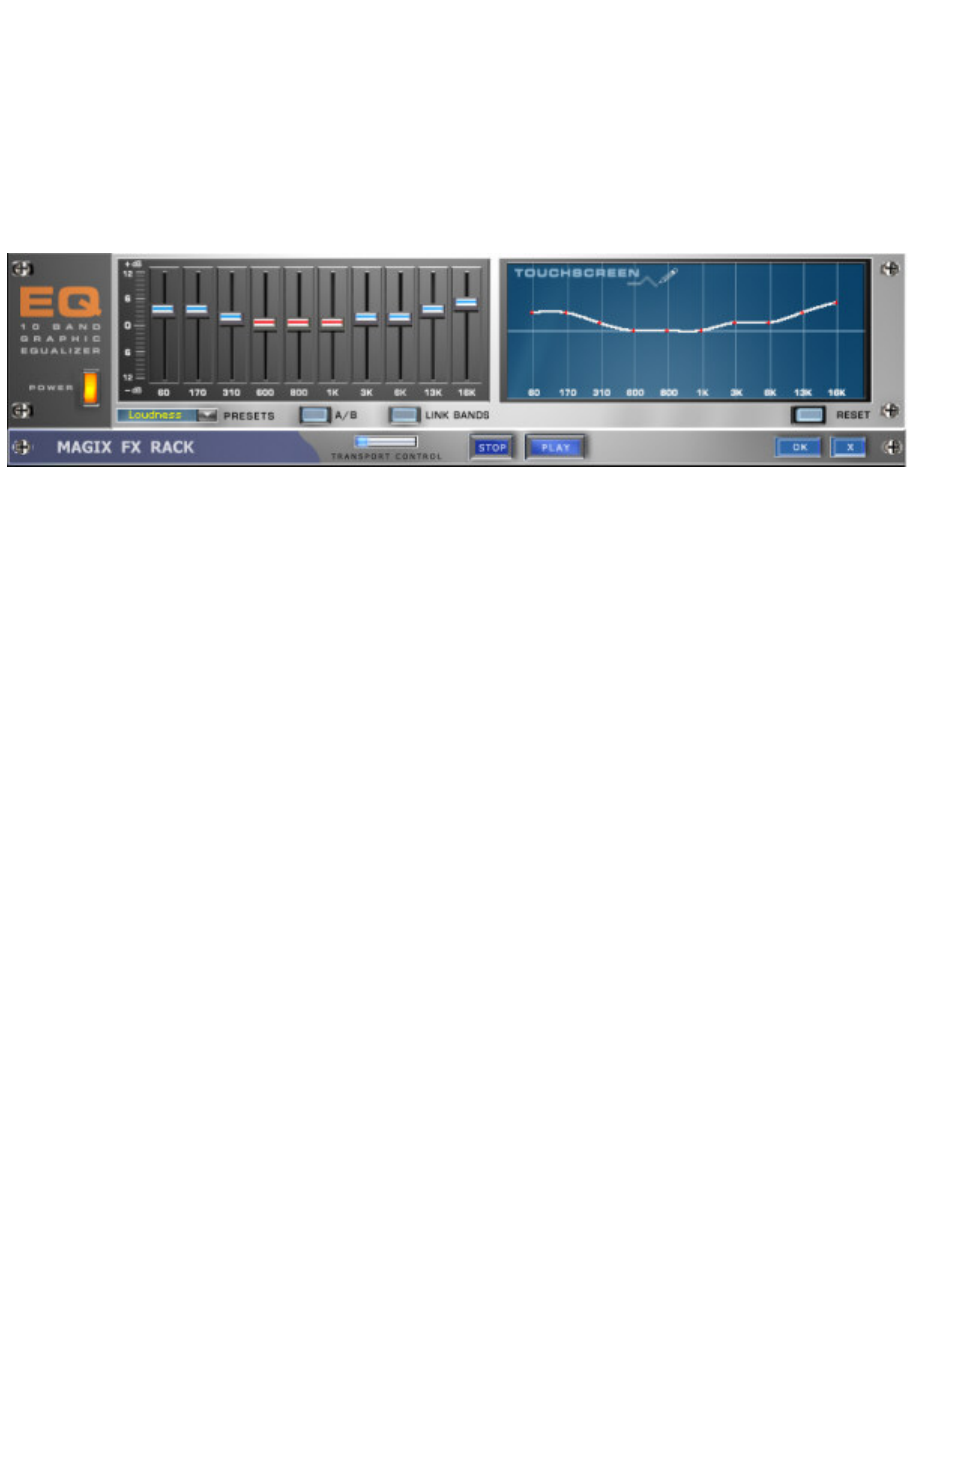
Graphic Equalizer
The 10-band-Equalizer splits the frequency spectrum into 10 areas ("bands") and provides them with
separate volume faders. This offers a whole spectrum of impressive effects, from a simple bass boost to
complete alienation of your sound. However, raising the levels too much, especially in the case of the
lower frequencies, will also increase the general sound level, and distortions may appear. In this case you
should lower the main sound level using the "Volume"-controllers in the main menu.
Slider:
Each of the 10 frequency areas can be raised or lowered separately using the corresponding 10 volume
sliders.
Link Bands:
This switch links the different frequency areas in a flexible way, avoiding override of isolated frequency
areas that would result in artificial sound.
A/B:
If you chose a preset value for an effect and want to change that value manually, you can compare the
original preset sound with the new settings by pressing the A/B button.
Reset:
Resets the equalizer to it's original (neutral) settings where no system resources will be used and no
effect will be added to the sound.
Touchscreen (right EQ section):
This is the "sensor field" of the EQ: draw a frequency curve using your mouse, and it will be immediately
translated into the corresponding slider positions on the left side of the EQ.
Page 142
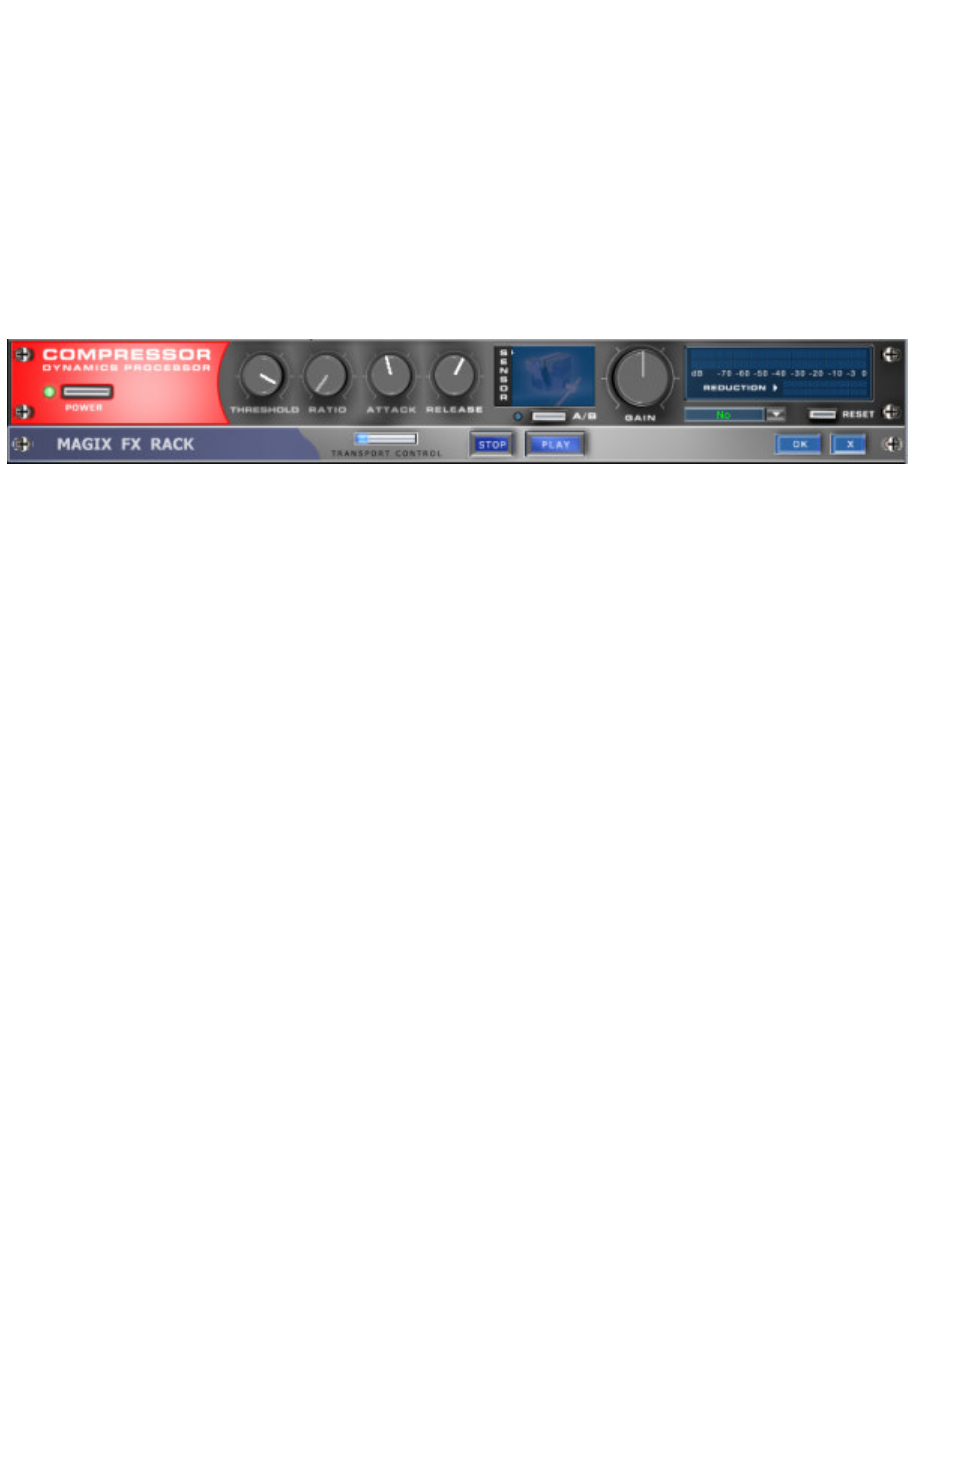
Dynamics
The Compressor is basically an automatic, dynamic volume controller. The dynamics of a track will be
limited, loud passages will stay loud whereas the volume of silent passages will be raised. The
compression is normally useful, if you want to make your material sound more powerful and smashing.
The grade of compression can be adjusted using the Ratio-controller. The threshold is controlled by the
Threshold button and attack and release can also be controlled by the corresponding buttons.
The processing of the track is as "prospective" as with high-end professional studio equipment. This
means that there are no peak overrides (blasting, clipping) or other disturbances, as the algorithm can not
be "surprised" by sudden peaks.
Sensor field:
The sensor field of the compressors can be manipulated intuitively, just by a movement of the mouse,
which will change the colour of the graphic and the effect settings.
Ratio:
This parameter controls the compression ratio.
Threshold:
Adjusts the threshold above or below the active compression.
Attack:
Adjusts the delay, in which the algorithm responds to increasing levels. Short attack times can result in a
"pumping" sound, as the volume will be raised or lowered very quickly.
Release:
This value controls the delay in which the algorithm reacts to falling levels.
A/B:
If you chose a preset value for the effect and then changed it manually, you can compare the original
sound settings with the new ones pressing the A/B buttons.
Reset:
Resets the Compressor to the original values. In this state no system resources are used and no effects
are added to the original sound.
Load/Save:
This option allows you to save the actual settings as an effects file, so that you can use them for other
projects.
Page 143
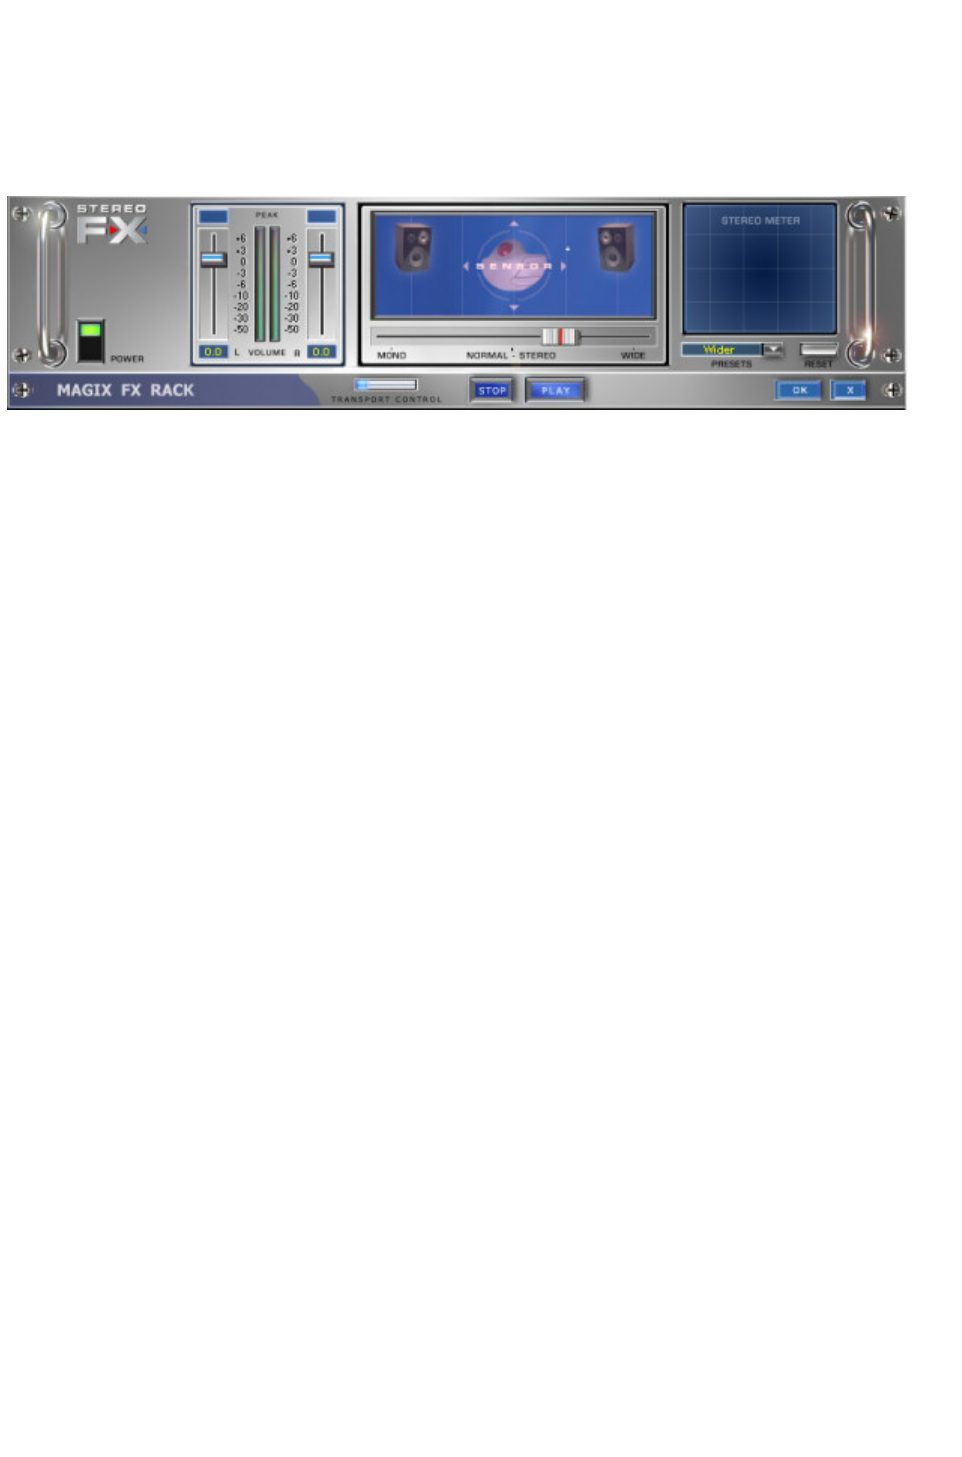
Stereo Enhancer
The Stereo-FX-Enhancer allows you to reposition your audio material in the stereo panorama.
Whenever a stereo recording sounds undifferentiated, the extension of the basic stereo-width can provide
a more transparent sound.
Basic stereo width controller:
Here you can adjust the width of the basic stereo panorama from mono (leftmost side), over unchanged
(in the centre) to maximum width ("Wide", rightmost side).
When setting the stereo panorama to smaller values, the sound level may rise. In an extreme case – it
means that if the left and right channels contain identical audio material and the Basic stereo width
controller is set to "mono" – the sound level increase can be as much as 3 dB.
While increasing the basic stereo width (values exceeding 100) the mono sound compatibility gets worse.
This means, that recordings that have been manipulated in such a manner will sound hollow during mono
playback.
Volume fader:
Adjust the volume for each channel and the stereo panorama. The damping for the left and the right
channel will be indicated in dB values under the controllers. This allows you to reposition an originally
centred recording to the right or to the left inside the stereo panorama.
Stereo-meter (correlation indicator):
This is a graphic display of the phase position of the audio signal. Here you can check the orientation of
your signal inside the stereo panorama and the effects caused by the Stereo-Enhancer.
In order to achieve the best possible mono-compatibility, the graphic should resemble a diagonal line. If
not, some frequency areas may eliminate each other when the stereo signal is played back on a mono
player.
Page 144

Room Simulator Dialog
Menu: Effects
Room Type
You can chose between several room types When choosing a room type, the Room Simulator loads
several parameters (non-editable) and a so-called "impulse response" associated with the settings. The
impulse response is a sample of reverb from real rooms, produced by a very short impulse. They are
used to "convolute" the audio data with it to produce a mega-realistic reverb. If the file was moved or
deleted, the Room Simulator displays an error message.
The files loaded with the standard presets (factory presets) are located in the same folder as the presets
(Folder ‘fx-preset’ in the MAGIX music editor 2
folder).
Preview
This option allows you to preview the current dialog settings.
Mix
Original %
This setting allows you to determine the amount of original signal that is to be mixed with the reverb
signal. A setting of 0% will only contain the reverb signal. At 50% both signals are present with the same
volume and amplitude amount.
Reverb dB
The setting determines the overall amplitude of the reverb effect in dB.
Create Copy
When checking this box MAGIX music editor 2 will create a copy of the selected range
into the same audio file as the original material. This can be done to compare the results with the original
material. Please consider the length of the selected range and the available hard disk space or RAM
memory! It must be activated for working with the Undo-Function in virtual projects.
Page 145
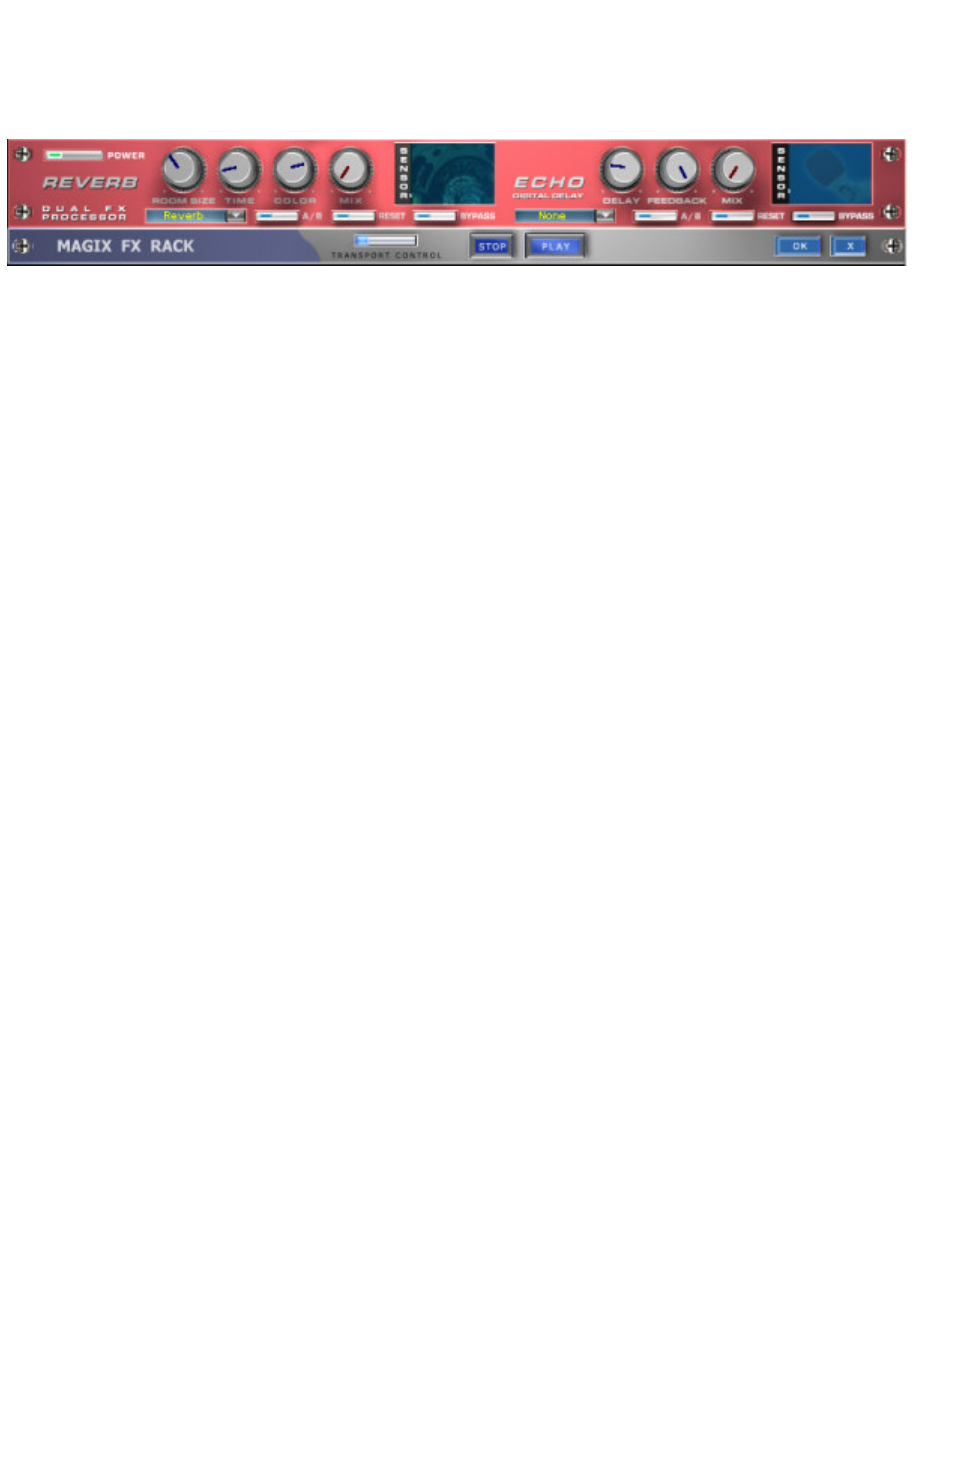
Reverb/Echo Processor
Reverb
Reverb supplies a high-quality reverberation which can be defined more closely with ‘room size’, ‘time’
and ‘colour’ and mixed into the original sound with ‘mix’.
Room size:
This control button controls a room simulator which calculates the reverb effect in dependency on the
room size. If the control is turned completely to the left, it sounds as if the audio object has been
recorded in a tiny room, turned completely to the right, one can listen to the object as if it had been
recorded in a cathedral.
Time:
Here the length of the ‘reverb trail’ is determined, i.e. the fading phase of the sound.
Colour:
Here it is possible to control the type of reverb – rather dull than high-pitched or vice versa.
Mix:
This control determines the mixing ratio between the unedited original sound (‘dry’ signal) and the reverb
portion (‘wet’ signal).
Echo
The echo effect is defined more closely with ‘delay’ and ‘feedback’ and calculated into the original
sound by means of ‘mix’.
Delay:
Here the period of time between the individual echos can be determined; the more you turn the control
to the left, the faster will the echos follow each other.
Feedback:
Here the number of echos can be adjusted. Turned completely to the left, there is no echo at all, turned
completely to the right there are virtually endless repetitions.
Page 146
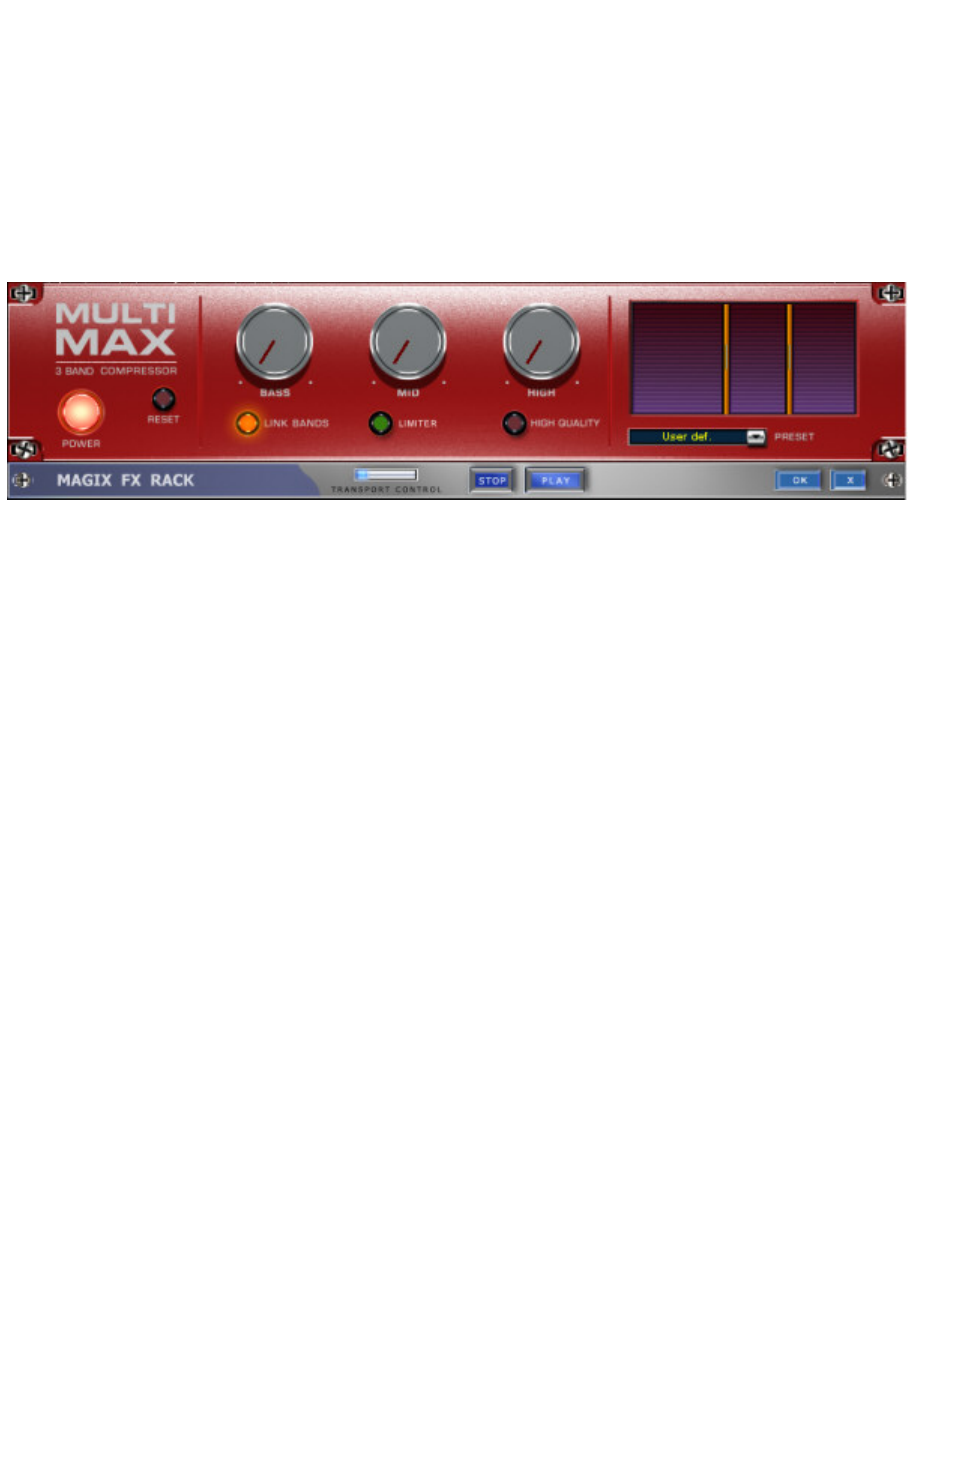
MultiMAX
The MultiMax is a compressor with three independent frequency bands. The dynamic processing takes
place separately for each band.
The main advantage of a multi-band compressor over a "normal" compressor is that warping and other
bothersome side-effects are reduced drastically by the dynamic processing. This means, for example, that
a single peak level in the bass section will not drag the level of the whole signal down.
Otherwise, the multi-band technology enables precise treatment of individual frequency bands.
Limiter
: The MultiMax contains a limiter that harmonizes levels so that, for example, too high a level is
automatically reduced, and quiet passages remain unaffected.
Tip: The limiter can also be used independently of the MultiMax!
Page 147

Get Noise Sample
Use this to get a sample of the noise used in the Noise Reduction function.
For general information on Noise Reduction read here
Here is an outline of using this function:
1. Select a range
in the audio material or select in a VIP object that contains only the noise print.
2. Copy the range to a special clipboard with Effects->Get Noise Sample. Especially for noisy material
such as tape hiss the rule of thumb works best: The longer the Noise Sample material the better the
algorithm will work!
3. Next, select the section in the Wave project or select the VIP object that needs the noise signal
removed.
4. Open the dialog Noise Reduction in the Effect menu.
5. In the Noise Sample box select the Noise Sample setting, since this project contains the noise print.
6. Make all desired changes in the dialog or load a preset and click on OK to process the sample.
7. You also may wish to preview the changes before committing them to the audio material by clicking on
the Preview button.
If you are satisfied with the changes you may click on OK to commit them to the audio material. You
may also refer to the section on Noise Reduction: Tips and Trick for information on finding the best
settings in this dialog.
Page 148
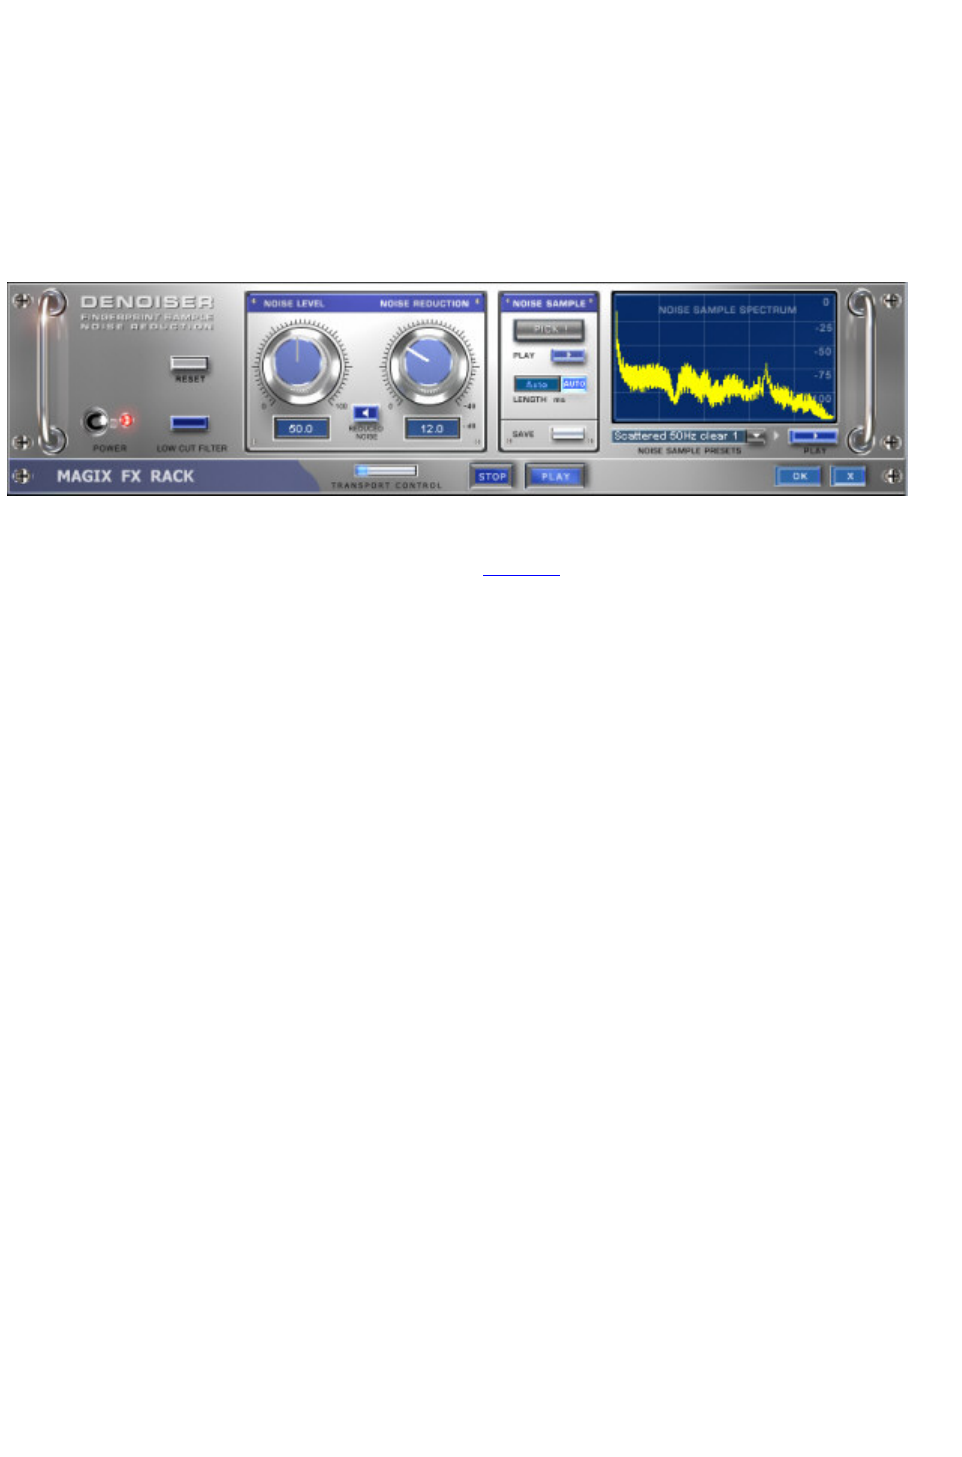
Denoiser
The Denoiser is especially useful for the elimination of continuous background noise, such as electric
buzzing, band noise, noise produced by the sound card, your HiFi equipment (for example, the turntable)
and LPs.
All the Denoiser needs is a sample of the disturbing noise. Some of the most common disturbing noises
are provided. It is however preferable to make your own noise sample. All you need is a short section of
audio material with the isolated disturbing noise.
Noise Level: This is the threshold at which the Denoiser starts to work. This value needs to be as exact
as possible. Low values will result in deficient damping of the disturbing noise and in formation of
artefacts such as disturbing sounds or "tweeting"(see artefacts
). Excessive values will produce a dull sound, as all higher frequencies of the music signal will be filtered
away. So it is recommendable to spend some time on the correct adjustment of this value!
Noise reduction:
To adjust the balance between the original signal and the processed signal. In many occasions it is better
not to eliminate the whole disturbing signal but to dampen it only 3-6 dB. This will help maintain the
natural sound of your sound material.
In case of buzzing sounds however, we recommend that you eliminate them completely.
Removed Noise
: To listen to the part of the sound material that the Denoiser is going to eliminate.
Noise Sample Section
Pick!
Generates a NoisePrint. A small noise sample will be taken from the actual position onwards. It is
important, that the noise sample includes no music or voices, but only the pure disturbing noise signal.
The actual position can be changed using the transport bar even if the module is already opened in order
to search for an ideal sample.
The noise print cannot be generated if the replay position is located between two objects. An error
message will appear to remind you.
Play:
To listen to the noise sample.
Auto:
If this switch is activated, the length of the noise sample will be chosen automatically.
Length:
Choose the length of the noise sample in ms, if the "Auto" switch is turned off.
Save:
The generated Noise Sample can be saved in the "Noise Print Sample" directory. It can then be selected
from the "Noise Sample Presets" selection whenever you need it.
Noise Sample Presets:
Choose one of the noise samples. The noise samples are located in the "Noise Print Samples" directory.
If you generated the noise sample using the "Pick!" function, then it will appear in the list titled
"NoisePrint".
Page 149

Play:
To listen to the noise sample. However, this is not possible if the noise sample has been generated using
the Pick! function.
Page 150
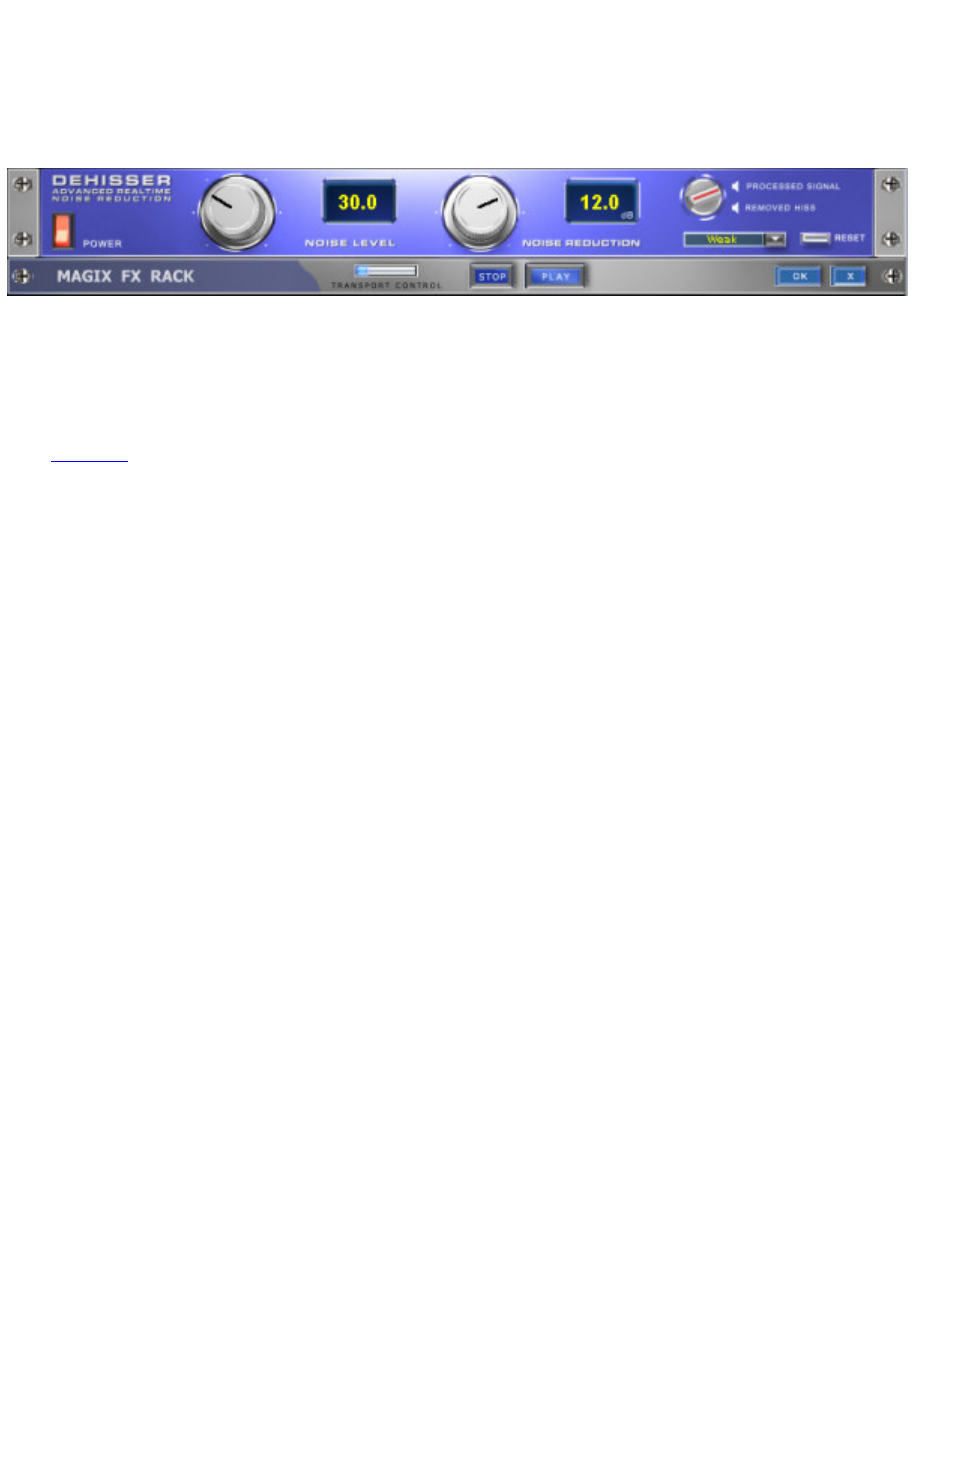
Dehisser
The Dehisser was especially designed to eliminate the band noise, which is all so typical for analogue
tape recordings, micro-preamps or AD-transducers.
Noise Level: Here you will have to determine as exactly as possible the noise level at which the Dehisser
starts to work. If you choose a level that is not high enough, the band noise will not be completely
eliminated. In such a case you will notice tweeting sounds (the so called "melodic band noise"). An
excessive value will result in a dull sound as part of the band noise and part of the original audio signal
recording will be eliminated by the Dehisser as well (for example: air intake sounds of brass instruments)
(see Artifacts
)
If the noise level on your recording is low, you should experience no problems while adjusting it.
Noise Reduction:
this option allows you to adjust the damping of the band noise in decibel units. In many occasions it is the
best solution, not to eliminate the noise completely, but to damp it only -3 - -6 dB, hence maintaining the
natural sound of the original material.
Removed Hiss:
This option allows you to listen to the music that would be filtered away by the Dehisser.
Page 151
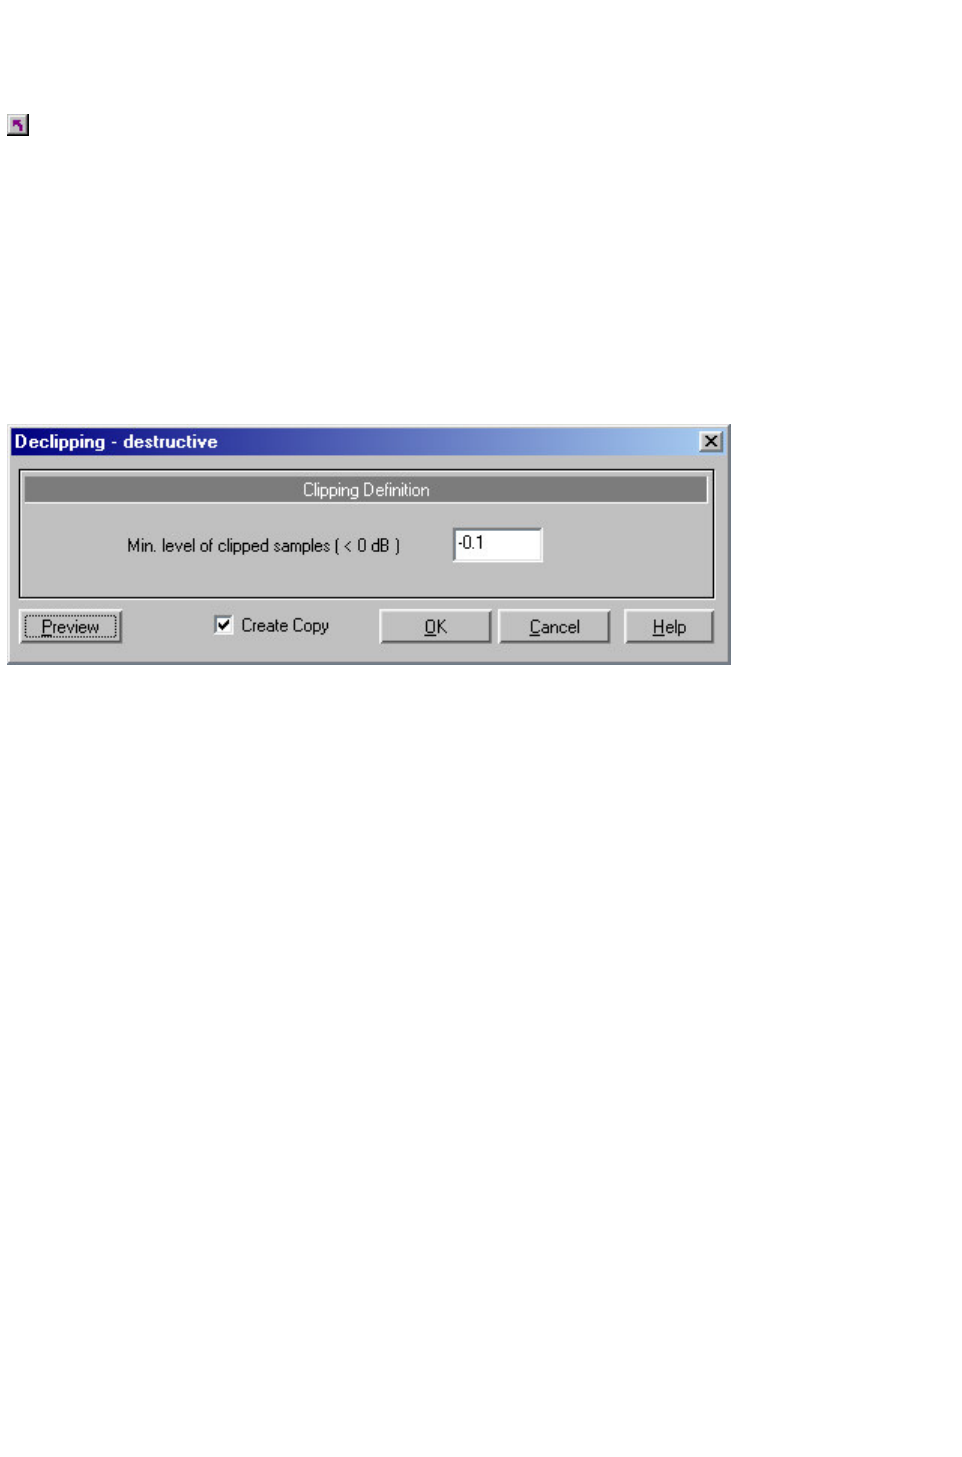
Declipping
Menu: Effects
MAGIX music editor 2
contains a one of a kind function to remove digital or analog clipping. Anybody who records audio has
encountered this one before. The perfect live recording contains clipping at the most important moment.
This alone may render the recording unusable!
MAGIX music editor 2
uses high-grade algorithms to interpolate the passages containing the clipping. The algorithm uses the
material before and behind the clipping as a reference point. Once processed, the total volume level for
the material can be reduced to prevent further clipping.
The declipping algorithm is especially useful for material that contains obvious clipping, such as a piano or
voice recording. Distorted drumbeats are normally not salvageable.
Minimal Level of Clipped Samples
This setting determines the volume level the algorithm considers offending material. There are sound
cards that exhibit different clipping behavior and this setting becomes an important issue. Some DAT
recorders have an analog protection mechanism so that the level never reaches the digital maximum
signal. In these cases a setting of –0.5 dB or lower make most sense.
By entering a value of –6 dB all samples above half of the digital maximum are considered ‘distorted’
and are recalibrated. Even analog distorted material can be improved with the algorithm.
Page 152

Resampling/ Timestreching/
Pitchshifting
Note: If you only want to change the sample rate of an audio file, use the Adjust sample rate option from
the Effects Menu.
All algorithms in this dialog use the time factor parameter and pitch as input parameter.
The time factor calculation (from the original length/original speed and the length required / speed
required) can be comfortably activated on the right side of the dialog.
Resampling
Samplers and PCM Synthesizers transpose samples during this procedure. Time factor and pitch are
dependent upon each other: the shorter the audio material, the more higher the pitch. The effect is
comparable with changing the playing speed of record players or tape recorders.
The effect is relatively loss-free, the sound loss is smaller than with all Timestretching/Pitchshifting
procedures. If pitch change is justified by changing the speed (and vice versa), use this algorithm.
When lengthening the audio material by resampling, very small aliasing effects may occur. the anti-
aliasing filter helps in this regard. Alternatively, since this filter requires additional CPU load, it can be
activated for the computation and the real-time preview. The filter is also available for the other
algorithms that use resampling internally when pitchshifting.
Pitch-Shifting/Timestretching
With all other algorithms, pitch and length variation are independently adjustable. These algorithms
produce artefacts, and depending upon the audio material, other algorithms may produce better results.
The algorithm used for Timestretching/Pitchshifting as a default object effect can be stored in the wave
project with the Timestretch-Patcher.
Algorithms for Pitchshifting / Timestretching
Standard
Smoothed
Beat Marker-based Slicing
Beat Marker-based Stretching
Monophone Voice
Standard
An algorithm is used that usually produces very good results. It uses factors (from 0.9 to 1.1) and fixed
Page 154

phases, which maintains the impression of space for stereo signals. For drum loops or other "beaty"
material, this algorithm is only occasionally suitable because it can change the groove and - in rare cases -
doubles or erases beats. The cross-fade length parameter determines sample length to be added to this
algorithm. The optimal size depends on the basic frequency and/or the deepest frequency in the material.
If the duration of one period is larger than the length of the cross-fade, the wave shape can be distorted
and may develop greater artefacts.
For 44.1 kHz samples, approx. 900 samples works satisfactorily. This corresponds to a frequency of
approx. 50 cycles per second.
With heavily periodic material (e.g. instrument samples) it is recommended that you mark the duration
from in front of a sample and then use this area as your desired length.
Time Compression (shorter sample length) usually works better with this as timestretching. When
combining two samples, reduce the longer sample rather than the other way around.
Use recommended when:
working with complex material (Mix)
the other algorithms fail
Load on the CPU: light
Smoothed
This is a substantially more complex algorithm which demands more computing time. The material can
now be processed even with very large factors (0.2... 50) without creating large artefacts. That’s
because the material is "smoothed", which creates a softer sound and changes phase position. This
smoothing is hardly audible in recordings of speech, singing or solo instruments. With more complex
spectra – mixed sounds from different instruments or fixed mixes – problems may arise. This algorithm is
not suitable for drum loops and other material with pronounced transience. The groove remains, but the
phase shift alters the ‘attacks’. In such cases, a small correction (factor approx. 0.9 - 1.1) often does the
trick.
Use recommended for:
orchestral instruments
speech recordings with background noise (e.g. video recordings)
Synth surfaces, guitars…
Use not suitable for:
Stereomix
Drum loops, percussion
Load on the CPU: very heavy
Beat marker-based slicing
This mode was primarily conceived for adjusting drum loops, but can also be used for other material
such as monophone bass lines or sequencer lines. The algorithm divides the material into individual
components – individual notes or beats marked by beat markers.
This "snippet". is then constructed in the new timeline: Individual beats are overlaid when the tempo is
increased. Small pauses appear between beats when the tempo is decreased.
Page 155

If you are able to use this algorithm, do so. It allows you to change the tempo without loss of quality and
with minimum CPU load.
Use recommended for:
Samples to be cut into individual notes or measures (beats)
Drum loops, but only when beats don’t overlap and there is little reverb
Use certainly not suitable for:
Anything else
Load on the CPU: very light
Beat marker-based stretching
This algorithm works like the standard algorithm, but synchronizes the stretched material with the beat
markers. The groove is consequently altered somewhat, and beats may be duplicated or deleted. In
contrast to the beat marker-based slicing algorithm (which may produce missing or incorrectly positioned
markers), this algorithm’s disadvantage lies in decreased synchronization performance. In practice, the
automatic generation of markers almost always produces good results. One should avoid placing beat
markers too close to each (< 1000 samples.)
Use recommended for:
All types of rhythmic samples that can’t be cut into individual notes or measures (beats)
Complex overlapping drum loops
For when beat marker-based slicing can’t be employed or when it’s too much bother to find the
perfect beat marker position.
Load on the CPU: light
Beat marker-based slicing and beat marker
stretching – Setting and evaluating beat
markers
Setting markers
The Beat markers can be set manually or automatically. Using the Timestretching Patcher, you can set
the markers and save them in the Wave file (patched). Use the Resampling/Timestretching dialog (Effects
menu) to set the destructive calculation of the (temporary) beat marker.
Evaluating patched markers
In the object editor, use the "Patched" flag to determine whether the beat markers should be calculated
automatically in real-time, or whether patched beat markers should be used (if available). In the
Resampling/Timestretching dialog (Effects menu) patched markers are used if the find beat marker option
is not employed.
Setting beat markers in the Timestretching Patcher or in the
Page 156

Resampling/ Timestretching Dialog (Effects menu)
Generating beat markers -- Options:
Find beat marker: The algorithm searches for and marks out beats in the audio material.
Beat recognition threshold: Sets the threshold for beat recognition. When the wave project is being
displayed, you can follow the placement of beats. This also works with VIP objects if the wave project is
kep open simultaneously.
Beat markers can be re-positioned, copied, deleted etc. by activating the applicable marker commands.
When new markers are created, the marker name must be assigned "Beat Marker". Before editing, we
advise that you set the beat recognition threshold to a high value and then delete the redundant markers.
It is quicker than adding markers manually.
You can only edit markers while the dialog is open by using the Timestretching-Patcher . This allows you
to check the results without having to close the dialog.
Monophone Voice
This is Timestretching and Pitchshifting for solo vocals, speech or solo instruments. The material must not
contain background noises and should be free of reverb. With suitable source material, the audio quality
is very high. The "Use formant correction" option secures the formants when pitchshifting so that the
"Mickey Mouse effect" doesn’t occur. You can therefore "compose" a background chorus from just one
solo voice. Formants can also be shifted across + - 12 half-tones to create voice distortion.
Typical uses are:
Intonation correction (imprecisely pitched notes should be removed as objects and worked on
separately)
Harmonizer effects: an object with singing can be copied and shifted downwards. If the pitch is
then changed, a second voice is generated, etc.
Creating background vocals from existing vocal samples
Timestretching
Speech sample distortion
Use recommended for:
solo vocals, speech or solo instruments without overlapping, little or no reverb or background noises.
Use certainly not suitable for:
Anything else
Load on the CPU: heavy
Page 157
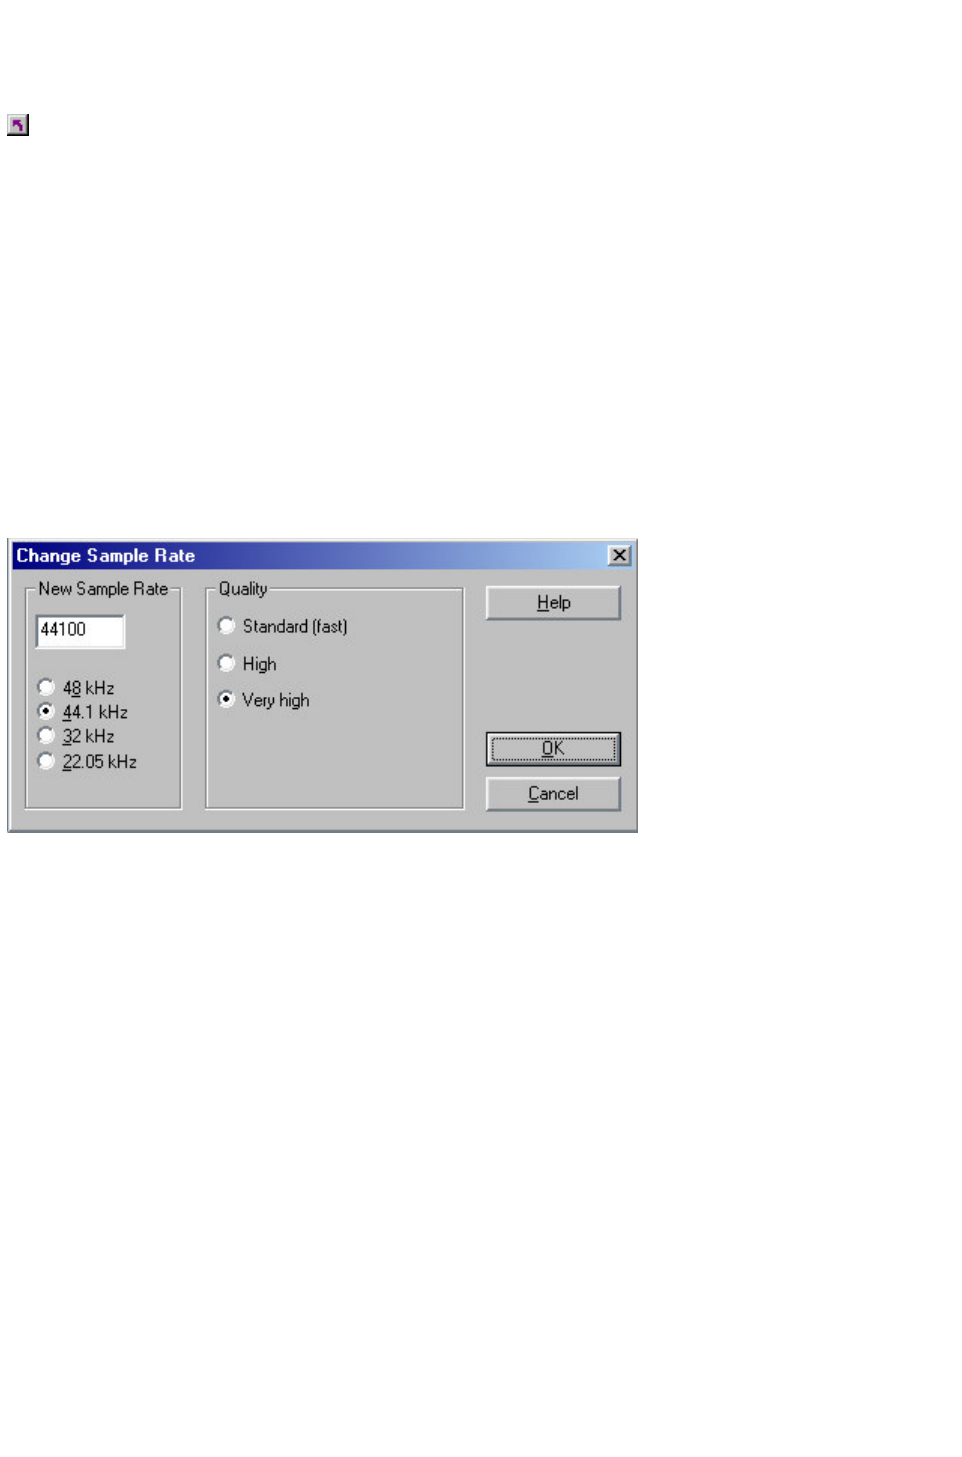
Change Sample Rate
Menu: Effects
Use this function to change the sample rate of a whole audio file. This may be needed to convert a DAT
recording at 48 kHz to 44.1 kHz for use on an audio CD.
After choosing the new sample rate you can select a filename for the new project.
If the resolution is increased, the sample rate change will take place without almost any quality loss - the
sample material will not experience fidelity reductions. (The needed hard disk space will increase
though.)
If the resolution is reduced, the overtones or high frequencies may be lost during the sample rate change.
For example, if the resolution of a 44.1 kHz sample is reduced to 22.05 kHz, the frequency response of
the resulting sample is reduced to 11.025 kHz. The frequency response is always half of the resolution
specified.
Please note that resampling to 44.1 kHz can also be done while recording in real-time.
The Playback Parameter window (Shortcut: p) contains a Varispeed option for real-time resampling
during playback. The Record window (Shortcut: r) will let you resample to 44.1 kHz in real-time from
any of the selected sampling rates.
New Sample Rate
Enter the new sample rate or select from one of the presets.
Quality
This setting determines the anti-aliasing quality during the reduction of the sampling rate and whether the
reconstruction filtering (Interpolation) is to be applied when increasing the sampling rate.
An interpolation algorithm is used, which is also applied during the real time resampling.
High
This adds a filter to dampen the aliasing frequencies or to improve the reconstruction (Interpolation).
Especially when using extreme conversion ratios, such as converting from a 48 kHz signal to a 22 kHz
signal, this setting may improve the results.
Very High
This setting uses a new algorithm, which internally utilizes a higher sample rate. The input and output
sample rates are divisible by this internal sample rate. (For example, the conversion from 48 to 44.1 kHz
uses an internal sample rate off 7.056 MHz). This ensures the highest possible quality.
This method is also used during CD-Bouncing if the sample rate of the project isn’
t equal to 44.1 kHz.
Page 158

Reverse
Menu: Effects
The sample data in the selected range is reversed along the time axis. The playback of the sample data
happens from the end to the beginning. This allows for very interesting effects, not to mention the ‘hidden
messages’
frequently referred to in various songs.
This function is reversible: if you do not select a new range, calling this function once more leads to the
original material.
Page 159

Build Physical Loop
Menu: Effects
This function utilizes a complex algorithm for optimizing loops in Wave projects. It is useful when
samples are to be used for instrumental sounds as well as wave table synthesizer.
Before you can process a sample you need to select a range in your sample that already defines the
rough edges of the sample loop. Remember that you can shift and vary a range during playback to find
the best loop position. A comfortable way to look at the loop positions is by activating the split range
mode by pressing ‘b’
. The sample will be displayed in 3 sections.
To gain an interruption-free loop the outer limits of the range will be set to zero. By applying a crossfade
to the material at the loop end containing the sample data in front of the loop beginning, MAGIX music
editor 2 will create a ‘smooth’
transition between loop end and loop beginning.
When a marker
is set in front of the selected range, the range between the marker and the beginning of the loop will be
used for the crossfade. This offers you a feature found in professional hardware samplers. To achieve a
short crossfade set the marker close to the loop beginning. To receive a long crossfade position the
marker further away from the loop beginning.
Notice that the distance between marker and beginning of the loop range needs to be smaller than the
loop range itself to make a crossfade possible.
Page 160

Invert Phase
Menu: Effects
The sample data within the selected range
is inverted along the amplitude axis. This phase inversion means that negative values become positive and
vice versa. This function, too, is reversible.
The ‘Invert’
function permits samples with different phases to be matched.
Along with the available mixing functions (which are, from a mathematical viewpoint, adding functions)
you can actually subtract samples by applying this function to the selected sample.
Page 162

Process only left/righ channel
Menu: Effects
Only the right / left channel of a stereo Wave project will be affected by effects when activating
"Left/Right processing only". This options is only available when in Wave editing /destructive Editing
mode.
The same effect have the L/R buttons in the lower left corner of the WAV project window.
Page 163
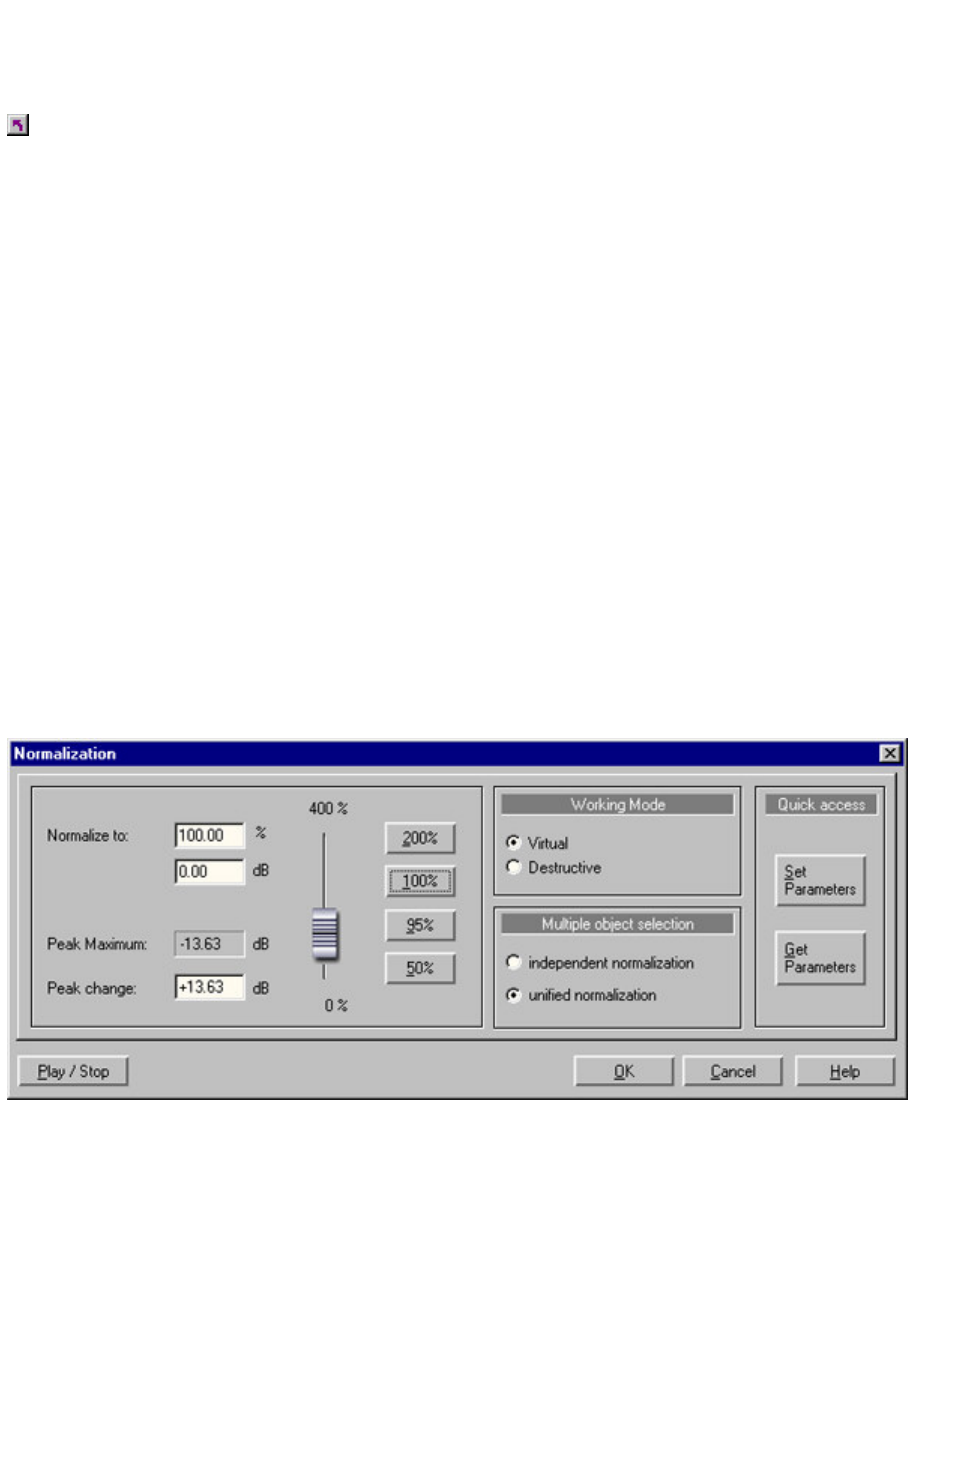
Normalize
Menu: Effects
Normalize File
This function modifies the sample's overall amplitude.
The data is altered so that the maximum amplitude occurring in a specified range is set to 100% (or any
other value between 1-400%). MAGIX music editor 2
will first attempt to detect the maximum and relate it to the percentage chosen. Then all other values are
weighted with the new factor.
The Normalize function is designed to fully modulate or over-modulate samples. A particular application
is processing that is done before a conversion from a higher sample resolution to a lower resolution takes
place. Since the dynamic range of the low resolution is smaller, it still can be fully utilized by applying the
Normalize function.
If working with sounds from one single instrument, you should set the factor to 100%.
If, however, your audio material has background percussion for example, you will be able to
over-modulate the sample to 120% to 200%. This will only cut off the new percussion peaks. The same
method allows you to alter the sound of natural instruments by over-modulating them.
As preparation for further physical processing, such as filters, reverb, dynamic compression etc., a level
reduction of 50-70% is suggested. This should avoid clipping during post processing.
An important reselect:
If the volume level during the recording is relatively low and the material is later normalized, the result will
not be of the same quality if the recording level is maximized to its fullest range. If for example the volume
level was only set to 50% of the possible range, the audio material will be in 15-bit quality. Even
normalizing the material to 100% will not change this aspect.
Normalize to: Here you can set the level to normalize the audio data to, by typing in the data fields,
adjusting the fader or pressing the preset buttons for 50, 95, 100 or 200% . The value is displayed in %
and dB. 0db=100% (full range). Normalizing over 0dB results to digital distortion.
Peak maximum: displays the highest detected peak in the selected range/object.
Peak change: displays the level change in dB according to the chosen normalize level and the detected
peak maximum
Working Mode
Virtual: This function will perform real-time normalizing on the selected objects. This is different than the
destructive normalizing, which will restructure the audio file.
The real-time normalizing will look for the peaks in the object and adjust the object volume so that the
highest peaks represent exactly the choosen normalize level.
This option is not available when working on wave projects (Wave editing)
Page 164

Destructive: The audio material in the wave project is physically altered. Undo is only available, when
Undo is enabled and the "create copy" flag is set.
Multiple selection
When multiple objects are selected, there are two different techniques to normalize the objects:
Independent normalization: Each object is normalized according to its own maximum
Unified normalization: The maximum is detected from all objects and each object is normalized
according to that value. This is the default behavior.
Quick Access
Set parameters: With this buttons you can set a normalize value (e.g. 99%) and the normalize method for
multiple selected objects, which is used when you call the Normalize function via the "Quick access
command".
Get parameters: to reload this parameters in the dialog.
Page 165

Normalize (quick access)
Quick normalize a selected range (wave projects) or selected objects (VIP) to a fix value. This value
you can define in the "Normalize
" dialog.
The working modes are always applied according to the project type, i. e. Wave projects in destructive
editing mode are normalized destructive, wave projects in virtual wave editing mode and VIP objects are
normalized virtual.
Key: n
Page 166

Fade In/Out
Menu: Effects
This function allows sample ranges to be faded in or out.
The amplitude is varied in its time characteristic from the start value of the beginning to the final value at
the end of the range
. When the function has been called, a window appears in which you can specific parameters for this
operation.
A simple Fade In operation would be performed with the parameters from 0% to 100%, whereas normal
Fade Out requires the specification from 100% to 0%.
The fade curve can be adjusted from linear to exponential or logarithmic.
Notice that real time fading is applied to virtual projects only (with handles
). For all other projects (RAM and HD), the sample data is physically altered.
Shortcuts:
Keys: f
Page 167

Menu Range
Menu Reference
MAGIX music editor 2 offers a convenient way of working with ranges. The ‘Range’
menu will let you use these options.
Range all
The range will cover the complete sample.
Move Play Cursor to beginning
Sets the play cursor to the beginning of the
project.
Move Play Cursor to end
Sets the play cursor to the end of the project.
Move Play Cursor to Range Start
Sets the play cursor to the beginning of the
selected range.
Move Play Cursor to end of range
Sets the play cursor to the end of the selected
range.
Left Move in Page Mode
Moves play cursor left
Left Move in Scroll Mode
Moves play cursor left and scrolls
Right Move in Page Mode
Moves play cursor right
Right Move in Scroll Mode
Moves play cursor right and scrolls
Range to beginning
The beginning of the range will be extended
toward to the beginning of the project.
Range to end
The end of the range will be extended toward the
end of the project.
Flip Range left
The current range is shifted left.
Flip Range right
The current range is shifted right.
Beginning of Range -> 0
Shifts the beginning of a range right to next zero
position.
End of Range -> 0
Shifts the end of a range right to next zero
position.
Beginning of Range <- 0
Shifts the beginning of a range left to next zero
position.
End of Range <- 0
Shifts the end of a range left to next zero
position.
Range Length to
Sets the range length to 1...16 beats.
Split Range
Splits current range in 3 views for better loop
search.
Split Range for Video
Splits current range in 3 views, zoomed down to
1 frame.
Store Range
Stores current on a function key.
Get Range
Recall range from function key.
Get Range Length
Recall the length of a range from function key.
Store marker
Stores current marker to a number key.
Get marker
Recall marker from a number key.
Set Markers on Range Borders
Sets 2 markers to start and end of the range.
Set Markers on Silence
Sets marker to silent positions in the sample.
Delete Marker
Deletes selected marker
Delete all Markers
Deletes all markers
Zoom Level and Store Position
Stores VIP zoom level and scroll position
Store Zoom Levels
Stores VIP zoom level
Page 169

Split Range
Menu: Range
This function is in particular useful for working with loops. If not already displaying in Split Range Mode
the project is first switched to this mode displaying three sections on the screen.
The upper section displays the whole sample. The section located at the bottom left displays the data
near the beginning of the range. The section at the bottom right displays the data near the end of the
range.
The boundaries of the range can be exactly positioned in the lower sections, while the upper section will
display the location of the entire range. You can also define ranges across several sections.
Shortcuts:
Keys: b
off Shift + b
Page 173

Split Range for Video
Menu: Range
This function is in particular useful for working with AVI Videos.
The upper section displays the whole sample. The section located at the bottom left displays the data
near the beginning of the range. The section at the bottom right displays the data near the end of the
range.
Both lower sections are zoomed down to single frame accuracy.
The boundaries of the range can be exactly positioned in the lower sections, while the upper section will
display the location of the entire range. You can also define ranges across several sections.
To undo the split, the display has to be returned to a 1 section display with Shift + b
or View->Sections->1.
Page 174

Store Range
Menu: Range
Another powerful feature of MAGIX music editor 2
is the option of defining and saving different ranges for future retrieval. An unlimited number of ranges can
be defined. You can for example specify different loops and compare them while you recall their ranges.
All ranges of a project can be seen in menu Tools->Range Manager. There all ranges can be renamed or
played.
When selecting this menu option, the selected range needs to be stored by entering a numerical value the
range is associated with.
Shortcuts:
Keys: ALT + F2 ... F10
You can define more ranges by using the submenu ‘Other’
. You will need to specify a name for the range selected.
Shortcuts:
Keys: ALT + F11
Page 175

Get Range
Menu: Range
By selecting this option, you can choose one of the defined ranges as the current range.
MAGIX music editor 2
even lets you choose a range while playing. The specified range becomes the current one and is audible.
Using this method, you can change between two ranges comparing them with each other.
Ranges can also be named and recalled with the Range Manager (Tools menu).
Shortcuts:
Keys: ctrl+F2 ... F10
Page 176

Get Range Length
Menu: Range
By selecting this option you can choose the length of one of the defined ranges as the current range.
MAGIX music editor 2
even lets you choose a range length while playing. The specified range becomes the current one and is
audible. Using this method you can change between two range length comparing them with each other.
Shortcuts:
Keys: Shift + Ctrl + F2 ... F10
Page 177

Store Marker
Menu: Range
You can store an unlimited number of markers wherever the play cursor is placed at.
Shortcuts:
Keys: SHIFT + 1 ... 0
Using the submenu ‘Other’
, you can define more markers with a desired name.
Shortcuts:
Keys: ?
The with the submenu item Auto number set markers will be in an arising numerical order
Shortcuts:
Keys: ‘
Defined markers can be seen above the sample data section of the project window in the marker bar
and can be moved with the mouse. Right-click on a marker to open a context menu with the most
important menu entries concerning markers. Double click between two markers on the marker bar marks
a range between the markers. Read more about markers here
Page 178

Get Marker
Menu: Range
By selecting this menu option, you can easily locate marker points. Simply specify the desired marker
location and MAGIX music editor 2
will position the play cursor at that location.
You can even select a new play cursor location during playback of the project.
Shortcuts:
Keys: 1 ... 0
Page 179

Set Markers automatically
Menu: Range
MAGIX music editor 2 automatically detects Silence and places a Marker each time Silence is
encountered. When working in a VIP, you can set MAGIX music editor 2
to split Objects wherever the Silence is encountered.
Important Tip: Only audio to the right of the Locator (Cursor), or audio within a marked Range will be
searched! If you wish to search the entire audio flippers the HOME key to place the Locator (Cursor)at
the beginning of the file.
Page 181

Delete Marker
Menu: Range
This function deletes the currently selected Marker.To select a Marker,either use one of the Get Marker
commands or hover the mouse Cursor over the Marker until the bi-directional arrow Cursor
appears,then click on the Marker.
Note:When using the mouse to select the Marker,the quickest method to then delete it is to select the
Marker as shown above,then press Delete on the keyboard.You can also right click on the selected
Marker and use the Delete Marker command there.
Page 182

Delete all Markers
Menu: Range
This function deletes all Markers in the currently focussed VIP or HD Wave Project.The command does
not simultaneously delete from the VIP and all HD Wave files referenced to the VIP –the command must
be applied separately to each HD Wave file.
In other words,deleting Markers from the VIP does not delete Markers from HD Wave files.
Page 183

Range Editor
Menu: Range
The beginning, the end and length of a selected range can be numerically changed in different units of
measurement. This function will let you specify minute details of a particular range you need to set.
If you change any of the values in the ‘Range Start’, ‘Range Length’ or ‘Range End’
sections, all other values will automatically be updated with the exceptions below:
Change values in the Range Start section: The end will be maintained.
Change values in the Range End section: The start will be maintained.
Change values in the Range Length section: The start will be maintained.
Please note the format of the ‘Bar’
dialog box. The format is displayed as a 4/4 beat with 96 clicks per quarter. Displayed are the bar, beat,
and clicks.
The number of beats per minute (BPM) can be set in the BPM dialog box in View->Snap Setup.
Page 185

Range Manager
Menu: Tools
The Range manager is a window illustrating all ranges of the current project. The current range
is selected by a colored bar. The range bounds are selected by clicking on the range name. The range
name can be changed in the lower line. Ranges can be deleted and new ranges can be saved.
The ranges with the names Backup 1..5 are the last five selected ranges to be quickly restored.
With the Play Once button you can playback the actual range once, with Play Loop
it is played as a loop. This way you can use the range manager as a simple jingle player!
Page 186

Object Lasso
Menu: Range
The normal way to select several objects at once would be to click on the free space on the right of the
object in the lower area of the track and to pull a frame around the selected objects.
Sometimes, however, there is not enough space between the objects. The object lasso solves this
problem.
Once activated, you can click on
an object and pull up a selection frame, without moving the object you clicked on (which would be the
case in the standard mode).
Once you selected your objects the mouse returns to the standard mode, that means that you will have to
reactivate the object lasso each and every time you want to use it.
Page 187
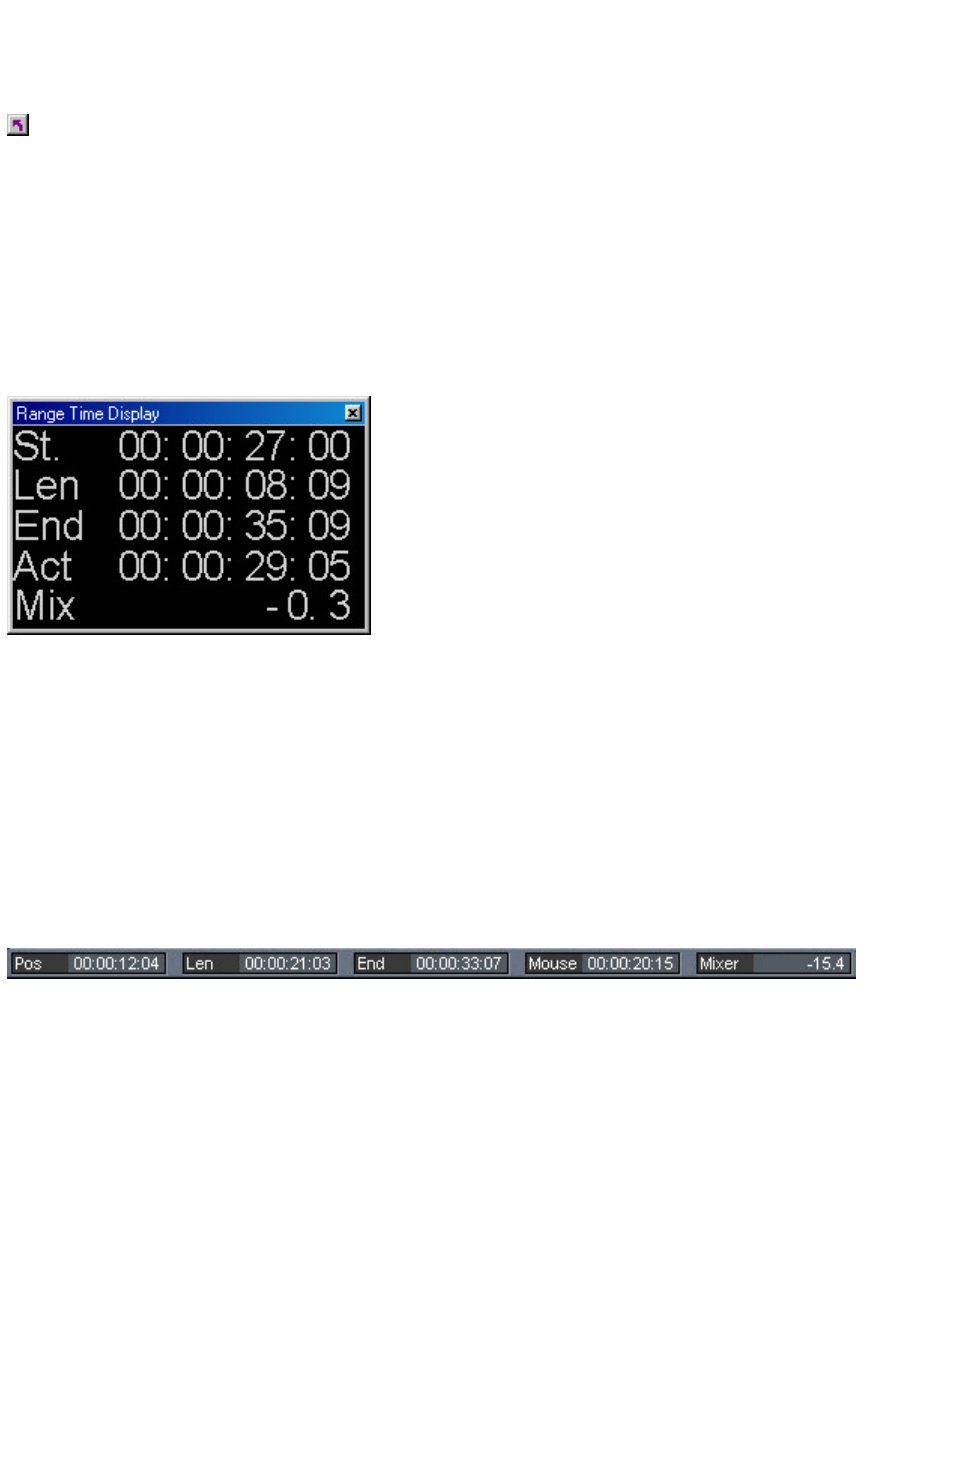
Time Display
Menu: Window
Shows or hides the time display window.
This window always shows the actual time position in the actual format. You can change this format with
the menu ‘Units of Measurement’
. We recommend the SMPTE format: hours:minutes:seconds:frames. The colors and the font for the
display can be changed in the context menu, opened by right-clicking in the Time display window. You
can zoom the window to any size and position it anywhere on the screen!
Up to five rows
of information can be displayed. Click the right mouse button on the Time Display to display a pop-up
menu that lets you choose the preferences for the Time Display.
St. - Start Position
This line shows the current range start position or the current real-time cursor position.
Len - Range Length
If a range is selected, this line displays the length of the range.
End - Range End Position
If a range is selected, this line displays the range end position.
Act - Current Cursor Position
This line shows the current cursor position.
Mix – Latest Mixer Position
This line shows the latest mixer position (not editable).
The same values are displayed in the time at the lower edge of the VIP Window
There you have the possibility to edit the values manually by double clicking in the corresponding field.
You can also access this function by the keyboard shortcuts alt+ numpad 1..5 or with the corresponding
menu items "menu rangeàedit time displayà
field 1..5"
Page 188

Move Play cursor to Range
End
Sets the start position of the play cursor to the end of the project.
Shortcuts:
Keys: Alt + cursor right
Page 192

Left Move in Page Mode
Menu: Range
When a Range is selected,this option moves the left boundary of the Range to the left (ie lengthens the
Range)in Page mode.Page mode scrolls offscreen on a sequential page basis.
When a Range is not selected,this option moves the Locator (Cursor)to the left in Page mode.
Shortcut :
Left arrow
Page 193

Right Move in Page Mode
Menu: Range
When a Range is selected,this option moves the left boundary of the Range to the right (ie shortens the
Range)in Page mode.Page mode scrolls offscreen on a sequential page basis.
When a Range is not selected,this option moves the Locator (Cursor)to the right in Page mode.
Shortcut :Right arrow
Page 194

Left Move in Scroll Mode
Menu: Range
When a Range is selected,this option moves the left boundary of the Range to the left (ie lengthens the
Range)in Scroll mode.Scroll mode scrolls offscreen on a continual basis.
When a Range is not selected,this option moves the Locator (Cursor)to the left in Scroll mode.
Shortcut :Shift +Left arrow
Page 195

Right Move in Scroll Mode
Menu: Range
When a Range is selected,this option moves the left boundary of the Range to the right (ie shortens the
Range)in Scroll mode.Scroll mode scrolls offscreen on a continual basis.
When a Range is not selected,this option moves the Locator (Cursor)to the right in Scroll mode.
Note:The above functions work best when using the keyboard shortcuts.
Shortcut :
Shift +Right arrow
Page 196

Move play cursor to left object
border
This option moves the Locator (Cursor)to the left border of the selected object.
Page 197

Move play cursor to right
object border
This option moves the Locator (Cursor)to the right border of the selected object.
Page 198

Move play cursor to left
marker
This option moves the Locator (Cursor)to the next marker to the left.
Shortcut:F2
Page 199

Move play cursor to right
marker
This option moves the Locator (Cursor)to the next marker to the right.
Shortcut:F3
Page 200

Move range start left
Choose this option to quickly extend the current marked Range to the left.
Shortcut:Alt +"/"
Page 201

Move range start right
Choose this option to quickly shorten the current marked Range from the left.
Shortcut:Alt +"*"
Page 202

Move range end left
Choose this option to quickly shorten the current marked Range from the right.
Shortcut:Shift +Cursor left
Page 203

Move range end right
Choose this option to quickly extend the current marked Range to the right.
Shortcut:Shift +cursor right
Page 204

Beginning of Range -> 0
Menu: Range
This function shifts the beginning of range to the right of the next zero position.
The function can be called from the keyboard by pressing the left Shift + Alt keys and ‘6’
on the numeric keypad at the same time. You can also press the PgUp key.
Shortcuts:
Keys: Page Up
Page 209

End of Range -> 0
Menu: Range
This function shifts the end of the range to the right of the next zero position (change in polarity). ‘Zero
position’
is the next sample value with zero value or the boundary between a positive and a negative sample value
(or vice versa).
This is particular useful for searching for loop points.
The function can be called from the keyboard by pressing the right Shift + Alt keys and ‘6’
on the numeric keypad or the PgDn keys.
Shortcuts:
Keys: Page Down
Page 210

Beginning of Range <- 0
Menu: Range
This function shifts the beginning of the range to the left of the next zero position.
The function can be called from the keyboard by pressing of the left Shift + Alt keys and ‘4’
on the numeric keypad. You can also press the PgDn key.
Shortcuts:
Keys: SHIFT + Page Up
Page 211

End of Range <- 0
Menu: Range
This function shifts the end of the range to the left of the next zero position.
The function can be called from the keyboard by simultaneously pressing the right Shift + Alt keys and
‘4’
on the numeric keypad or by pressing the Shift + PgDn keys.
Shortcuts:
Keys: SHIFT + Page Down
Page 212

CD Menu
Menu Reference
Load Audio CD Track(s)
Loads Audio CD tracks from CD-ROM drives.
Set Track
Set a track marker.
Set SubIndex
Set a sub-index marker.
Set Pause
Set a pause marker.
Set Track Indices on Silence
Sets track markers on silence
Set Track Indices on Object Edges Options
Options for automatic track marker generation
Pause Indices on Objects End
Sets pause markers on object end
Set Track Indices on Object Edges
Set track markers automatically on object edges.
Remove Index
Remove an index marker on marker position.
Remove all Indices
Remove all index markers.
Make CD
Displays the Make CD Dialog, which allows the
creation of an audio CD.
Show CD-R Drive Information
Shows information about the connected CD-R
drive.
Show CD-R Disc Information
Shows information about the CD-R media in the
CD-R drive.
CD Track Options
Shows CD-R track information.
CD Disk Options
Shows CD-R disc information.
Set Pause Time
Set the default pause time.
Set Start Pause Time
Set the default start pause time (before track 1).
Bouncing (Internal Mixdown)
Mix the selected range into one WAV file, replace
the related objects in the VIP.
MAGIX music editor 2
allows you to create audio CDs directly from virtual projects and any Stereo Wave project, regardless
how many tracks are in the VIP. The requirement is a sample rate of 44.1 kHz for the project.
When selecting the special "CD Arrange Mode" regardless of any selected range, the Wave projects are
loaded by automatically inserting a pre-determined space between the songs or objects. The distance can
be set with CD->Set Pause Time.
If a completed VIP represents a single track on the CD, use the Track Bouncing function to turn the
multiple tracks into a single Wave project. This Wave project can then be loaded as a ‘Track Object’
in a new CD VIP to properly place it among other track objects.
Page 219
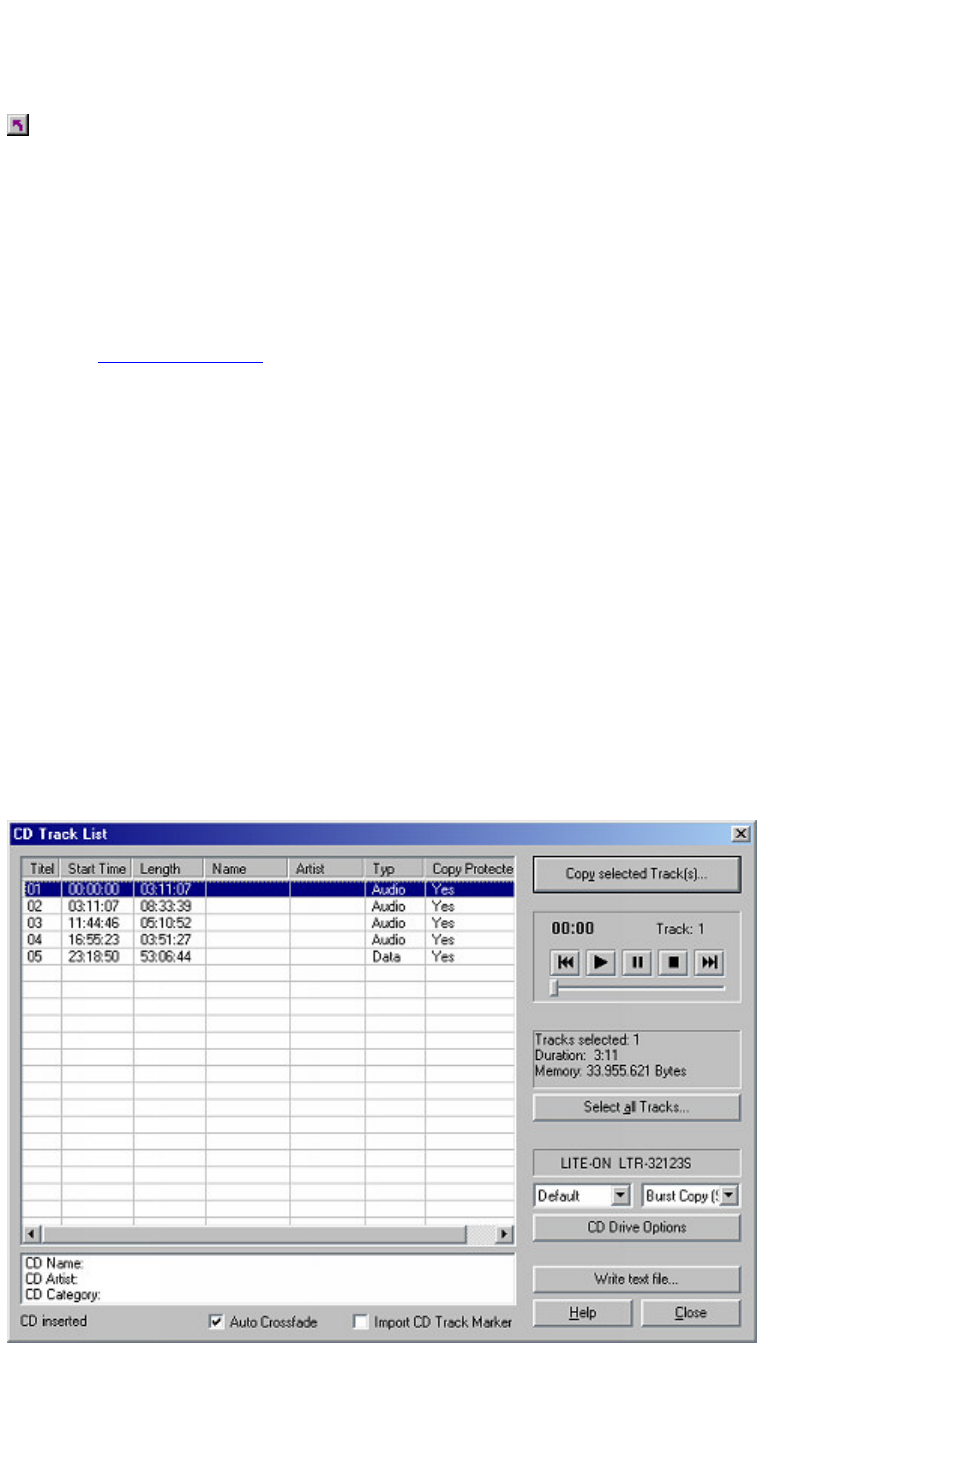
Load CD Tracks
Menu: CD
Import entire audio CDs or single CD tracks in a project. However, as opposed to normal data, Audio
CDs have to be read first (grabbed or ripped). The data import is 100% digital, so there are no losses in
the sound quality.
If you want to import audio CD tracks, just follow these easy steps:
1. Insert an audio CD into your CD-ROM-drive and select "Load CD audio track" from the CD menu.
A dialogue with a list of the CD tracks will appear. If you have more than one CD-drive (or for example
an additional CD-writer) you will first have to choose the drive from which the CD is loaded. You can do
this in the CD-drive options
2
. Select the desired title(s) (pressing Shift + mouse button or Alt + arrow keys).
3
. Click on "Copy selected track(s)..."
4
. The "Project import" dialogue will appear. Here you can choose a file name and the target directory.
5
. Now, the audio material will be copied from the CD-drive to the hard disk. A state display informs you
of the current transfer state.
6
. Once the audio data has been transferred, all dialogues will be closed and the tracks will be added to
your master track as single objects.
The Track List Dialogue
All CD tracks are shown including start time and length. In the name column the track name is shown,
this is derived from the CD Text information, if the CD provides this information and the CD drive is able
to read it. Select a track by clicking it with the left mouse button, select a range of tracks with SHIFT +
mouse click, select several tracks with CTRL + mouse click.
Page 220
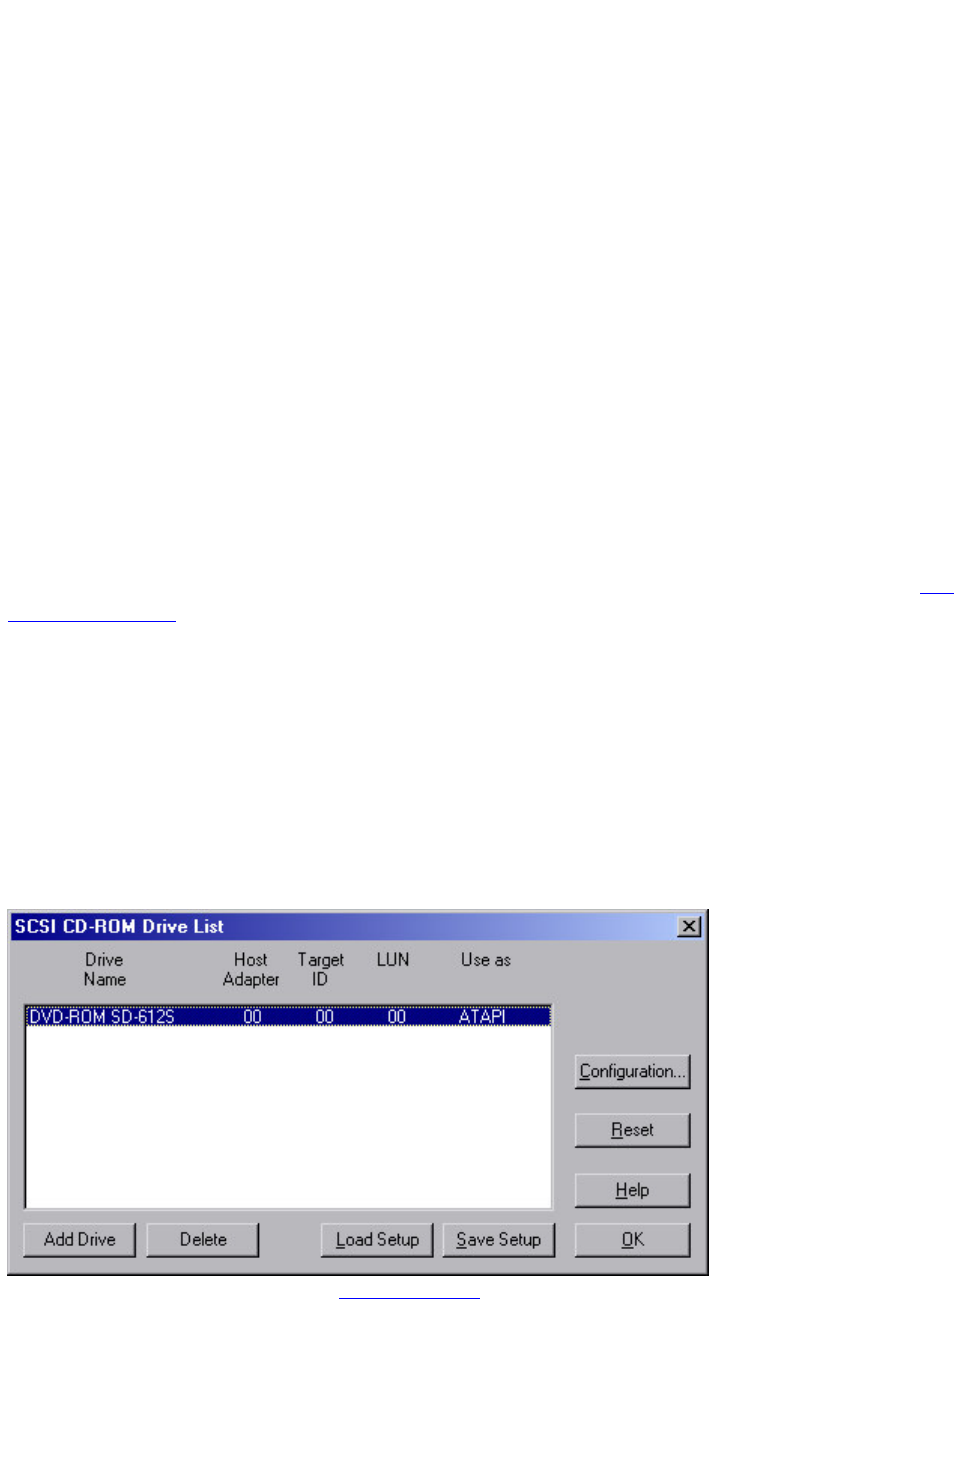
Copy selected track(s):
This button starts the audio copy process. For each track, a new object and the corresponding track
marker will be created in the arrangement.
Play:
Starts the audio-playback of the first selected track in the list (for testing).
Stop:
Stops playback.
Pause:
Stops playback that can subsequently be re-started with Play or with a renewed click on Pause
Skip:
Allows you to skip from song to song.
Auto Crossfade:
Turns on the automatic crossfade mode as you import audio tracks and automatically employs
crossfades.
Transfer CD Markers:
Markers already set on the CD are transferred to the VIP.
Select all tracks:
All audio tracks are selected (for example, if you want to copy all tracks of a CD). Pressing Ctrl and
clicking on the mouse button you can select more than one track.
CD-drive options: Here you can adjust some of the settings of the CD drive settings you are using and
choose the drive for "Ripping" CDs if you have more than one CD-drive installed in your system (see The
CD-drive dialogue
)
The CD-drive dialogue
Choose and configure your CD-drive. The CD manager permits the import of audio data using most
SCSI- and ATAPI-CD-ROM drives and CD writers. In case of doubt, ask our technical support which
drives are compatible. If you experience problems while reading audio tracks, you can choose between
several reading processes in the Configuration dialogue, which differ in the way the data is read or
"ripped".
Configuration: This button opens the Config dialogue
, in which you can set different special features, SCSI-IDs etc.
Reset:
Restores the initial drive configuration.
Add Drive:
Adds a new entry to the drive list. However, you will have to adjust the specific settings.
Page 221
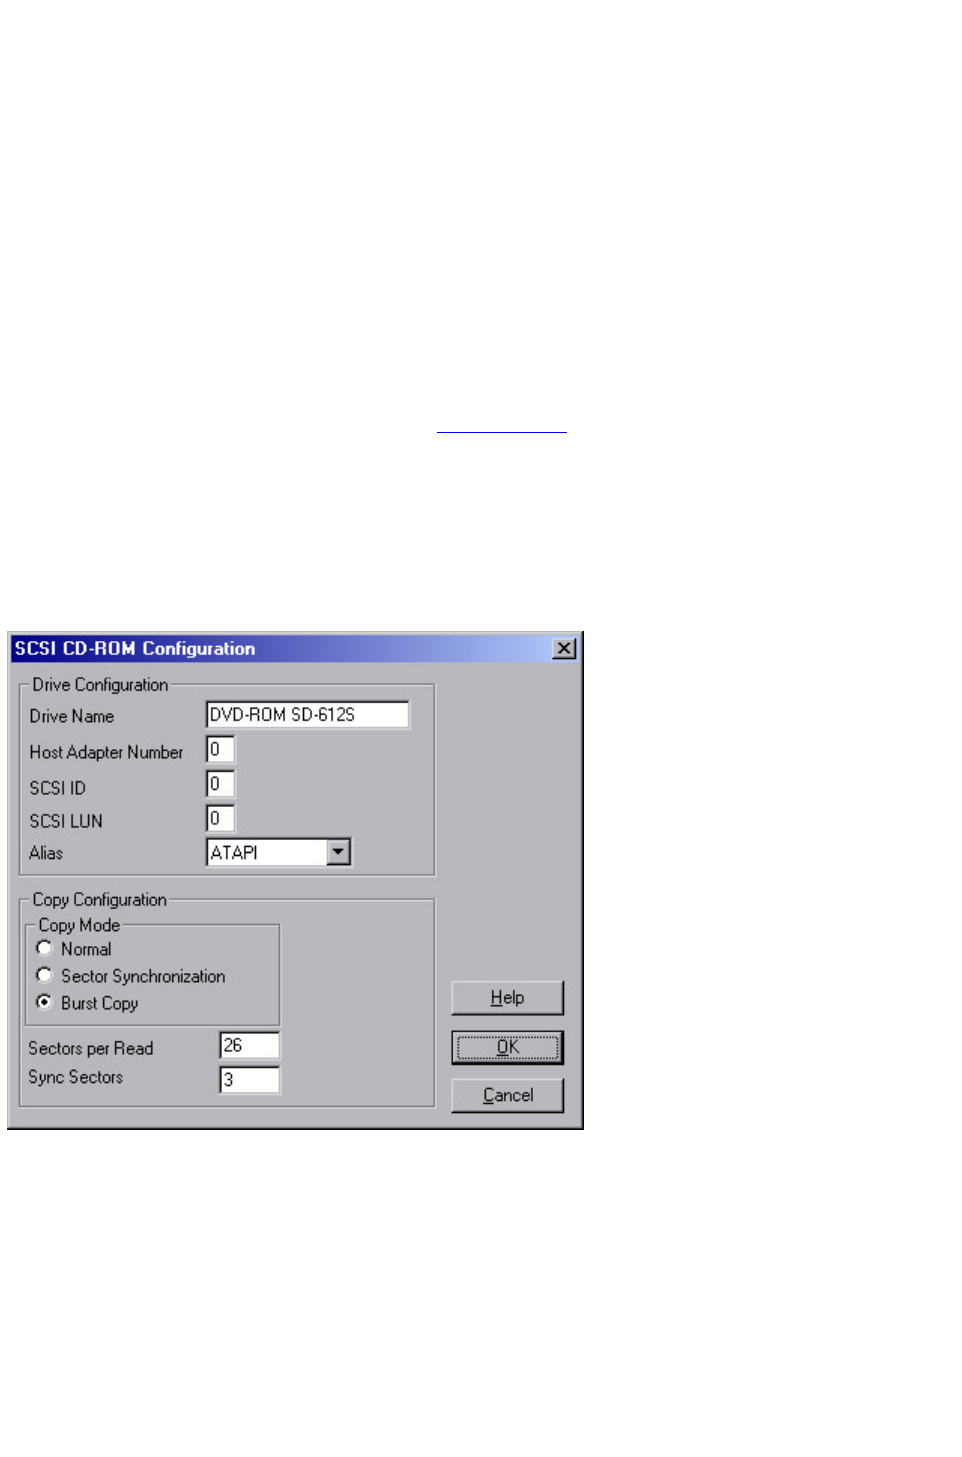
Delete:
Deletes a selected drive from the list.
Save setup:
Saves the current drive list with all configuration-data in a *.cfg file.
Load setup:
Loads the current drive list and all configuration-data from a *.cfg file.
The "Import project" dialogue
The "Import project" dialogue appears after selecting the "Copy selected tracks" option. Type in a name
and a target directory for the new audio files. The audio files will receive a number in addition to the name
you chose ("name" -> name_1.wav, name_1.wav...).
The preset format for audio tracks (CDA files) is the WAV format. You are however free to convert
them into a compressed format, like MP3 while still reading the data. Just choose your audio format in
the "Import project" dialogue and click on the "Format settings" button to make your changes (More
information concerning the audio formats under Import sample
)
CD-ROM Configuration - Drive
Configuration:
Drive Name - Lets you edit the name of the drive in the list. This is useful if you create more than one
entry accessing the same physical drive.
Host Adapter Number - Lets you specify the number of your SCSI adapter - normally 0.
SCSI-ID - Lets you set the ID of your CD ROM drive. Be sure to set the correct ID, there is no error
checking!
SCSI-LUN - Select the SCSI LUN parameter, normally 0.
Alias - Lets you select a manufacturer type of your CD ROM drive.
CD-ROM Configuration - Copy Configuration:
Copy Mode Normal - Copies the audio data without any software correction.
Copy Mode Sector Synchronization - Copies the audio data using a software correction algorithm. This
is useful, because some CD ROM drives cannot seek exactly to the same position between two read
Page 222

accesses but MAGIX music editor 2 can correct these differences using this algorithm.
Copy Mode Burst - Optimizes the speed of the copy process, no software correction is done.
Sectors per Read - Defines the number of audio sectors per read cycle, the higher the number the faster
the copy process will be. Not all SCSI adapters support more than 27 sectors!
Sync Sectors - Defines the number of audio sectors used for the Sector Synchronization. A higher
number results in a better synchronization but also in a slower copy process.
Page 223

Set Track
Menu: CD
Use this function to set a track marker
(Index Marker) on the current play cursor position. All markers behind the insertion point will be
renumbered.
Each track on your CD needs a track marker, typically set after a short pause at the beginning of the next
title.
Use the function ‘Track markers on object edges’
to create the markers automatically on the borders of the sample objects!
To manage the markers or to rename them use the Marker / CD Track Manager in the menu ‘Tools’
.
Shortcuts:
Toolbar:
Page 224

Set CD End
Menu: CD
Marks the End of the CD. This is important for burning a CD, when the project produces still audio
after the last objects end, for instance a reverb tail. To prevent MAGIX music editor 2
from cutting this audio, you can place the CD end marker after the last object in an appropriate distance.
Another use of the CD end marker is to burn a project partially on CD. The CD Burning always starts
with the first track marker set and ends with the end marker. All you have to do is to delete all preceding
track markers before the first track you want to burn. All audio before the first track marker will not be
burned on CD. The burning stops with the CD end marker. So you can place the CD end marker inside
the project to mark the end of the CD.
Page 227

Set Markers automatically
Menu: Range
MAGIX music editor 2 automatically detects Silence and places a Marker each time Silence is
encountered. When working in a VIP, you can set MAGIX music editor 2
to split Objects wherever the Silence is encountered.
Important Tip: Only audio to the right of the Locator (Cursor), or audio within a marked Range will be
searched! If you wish to search the entire audio flippers the HOME key to place the Locator (Cursor)at
the beginning of the file.
Page 228

Set Track Indices on Object
Edges
Menu: CD
This function sets track markers (Index Markers) automatically to the beginning of each VIP object in
the first VIP track.
Prior to using the function, execute Remove All Indices
to delete any possible track markers.
If there are multiple objects that make up a single track or title, you may want to use the Bouncing
function to combine the objects to ensure proper track assignments.
Shortcuts:
Toolbar:
Page 229
Make CD
Menu: CD
This dialog starts the CD writing process. MAGIX music editor 2
contains high-grade CD creation routines that are constantly updated. The software code is licensed from
Point Software & Systems.
If you want to find out which CD-R drives are supported, please read the file "CDR_Readme.txt" in the
installation folder or visit our web sites at http://support.magix.net
. .
MAGIX music editor 2
creates a TOC (Table of Contents) file prior to starting the CD creation. The name of the current VIP is
used and the extension *.tcx is added to the file. The TOC file is located in the same folder as the current
VIP. It is therefore important to save the VIP to the hard disk prior to starting the burning process.
For more Information on CD Mastering read here!
Burn "On The Fly":
Use this extremely powerful mode if you want to create the CD directly from within the VIP. All
necessary calculations are performed in real-time during the burning process. The following real-time
tasks are calculated during the process:
- Object effects, volume and panorama settings
- Fades and crossfades
- Mixing of tracks
- Mixer track effects
- Mixer section effects
- 32-bit Float to 16-bit conversion and dithering
To get a good idea whether your system is able to sustain the real-time processing needed for this
functionality, try this:
Play back the VIP sections that contain the largest number of tracks and/or where the most real-time
effects are used. Watch the DSP meter (bottom left-hand). Below are the expected performances at the
different DSP values:
- Below 25%: CD creation with up to 4x mode
- Below 50%: CD creation with up to 2x mode
- Below 90%: CD creation with up to 1x mode
- Above 90%: Real-time creation is not possible, use the second mode (Bouncing)
Shortcuts:
Toolbar:
Page 232
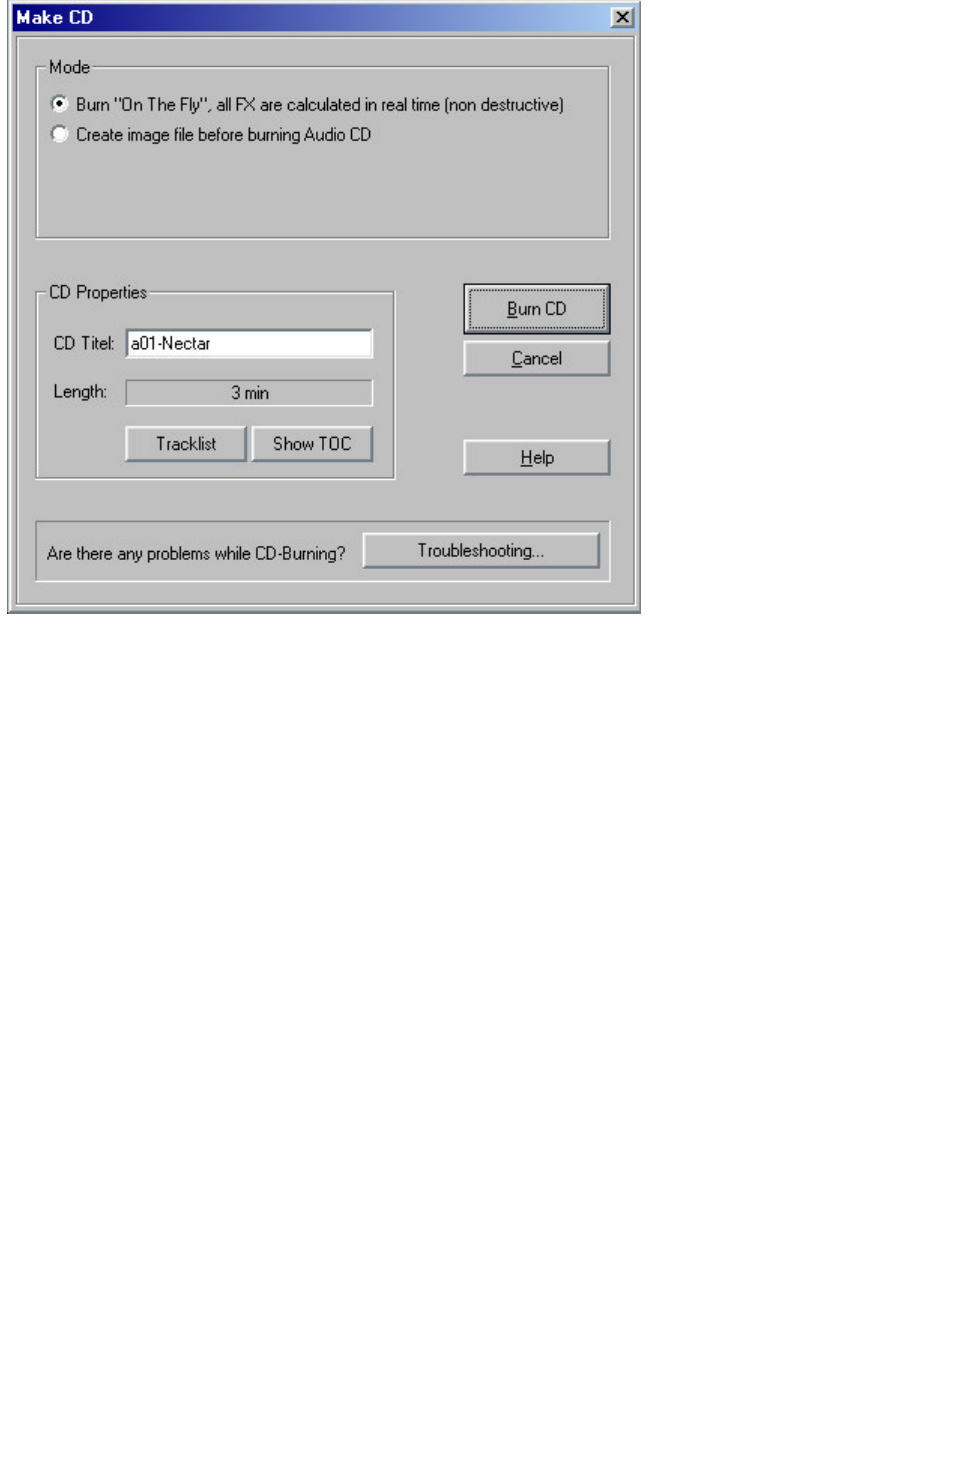
Generate a complete new file
Use this option if your system is not fast enough to sustain the real-time creation of the CD (see above).
This mode calculates all WAV files, including fades, crossfades, and volume automation into a new audio
file
. Any other real-time processing is also part of the newly created audio file. Make sure that you have
sufficient hard disk space prior to starting the process (approx. 700 MB for a complete CD).
The original WAV files used in the VIP remain unchanged. This makes this procedure non-destructive!
Use Uni Code for TOC
This is the default setting and is used for the internal CD creation process as well as the 32-bit version of
Point CDAudio.
Use ASCII Code for TOC
This format should only be chosen when using the 16-bit version of Point CDAudio.
Call external CDAudio Software
This lets you determine whether you want to automatically start the CD creation application ‘CDAudio’.
The current TOC information is passed to the application, so that the CD creation in the external
program can be immediately started. All MAGIX music editor 2
projects are closed and the application itself is closed down to prevent any type of file access conflicts.
If CDAudio is installed in any other folder than ‘C:\CDAUDIO’
you will need to enter the location of the application.
Only use this option if you do not want to use MAGIX music editor 2 ’
s internal audio CD creation and purposely want to use an external program.
Start CD-R burning module
Starts the MAGIX CD burning utility to burn any data files, e.g. mp3 files on CD.
Print TOC
This starts the external TOC Printer application. This convenient tool allows you to print the contents
information of the current CD. You may choose between a text style format to print the production
documentation and a formatted printout for the CD jewel case. Please refer to the on-line help for the
TOC Printer for more specific information!
Page 233

Show TOC
This button opens a text window, which shows the contents of the current TOC. The ‘Copy’
function can be used to copy the contents to the Windows Clipboard for use with other text editing
applications.
Export TOC
This function allows you to save a TOC file (*.TOC, *.TCX).
Burn On The Fly
See above description.
Page 234

Show CD-R Drive
Information
Menu: CD
This dialog shows you information about the active CD-R drive(s).
Among the information displayed is the manufacturer, drive name, hardware revision, cache size, and the
features supported by the drive mechanism.
The feature ‘Disc At Once’
is extremely important, since it is needed to produce Red Book compatible Audio CDs that are
accepted as masters by pressing plants
Page 235

Marker / CD Track Manager
Menu: Tools
All currently saved markers of the active project are shown with their name and position in this dialog.
The play cursor is moved to the respective marker
position by clicking on the dialog entry of the desired marker.
You can also change the marker names and create new markers. In addition, the dialog lets you delete
individual or all markers of a project.
Marker:
creates a new Marker at the actual Play cursor position
CD Track:
creates a new CD Track Marker at the actual Play cursor position
CD Sub index:
creates a new CD Sub index at the actual Play cursor position
CD Pause:
inserts a pause at the actual Play cursor position
Page 237
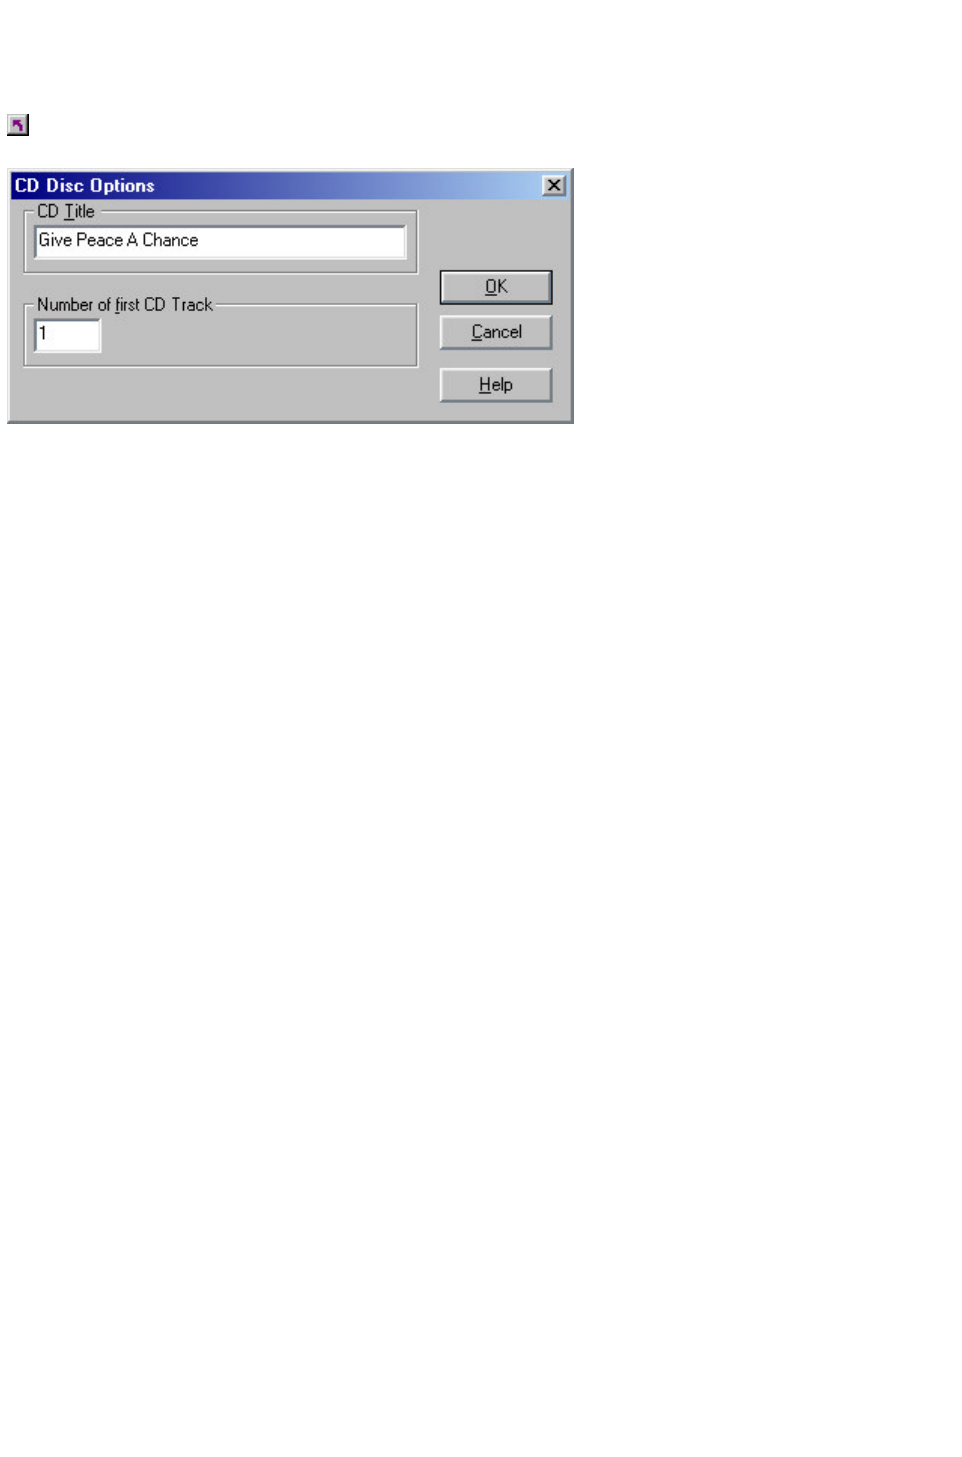
CD Disc Options
Menu: CD
This dialog configures settings for the current CD. Among them are:
CD Title –
The title is written to the CD and is used in the TOC Printer application to print the CD information.
UPC/EAN Code –
this code is also written to the CD and can be requested by special CD players that work with this
format.
Number of first CD Track –
Under certain circumstances, such as writing with Track-At-Once, the number of the first track can be
determined with this setting. When using the Disk-At-Once mode this setting does not have any
significance. The CD will always start with track 1 in this mode.
Page 238

CD Text / MPEG ID3 Editor
This function allows you to supply data regarding a song or CD content – such as album, artist etc.
MP3 files do not only transport audio data, but also information about the coded music piece through
so-called "ID3 tags". These are file appendages into which an encoder can write standardized
information. The ID3 tags are recognized by the decoders and displayed as music data by the MP3
player.
Page 239

CD Arrange Mode
Menu: CD
When you activate this menu item, MAGIX music editor 2
rearranges newly inserted objects and inserts pauses (conforming to the Red Book Standard) between
the objects.
We recommend the following procedure:
1.
1. Open a new VIP
2.
2. Activate the Special CD Arrange mode in the CD menu.
3.
3. Load wave files, audio tracks or make a recording using a microphone.
In the VIP you can see gaps between the individual objects – these are the pauses inserted. The length
of the inserted pause can be set in the dialog "Set Pause Time
".
Page 242

Set Track Indices on Object
Edges Options
Menu: CD
Here you can set various options for the automatic track marker generation.
Set Also Pause Indices on Objects Ends
Using this option Pause Markers are generated automatically on Objects ends when running function
"Set Track Indices on Object Edges Options ".
Time Offset for Indices on Object Edges
This option lets you set an offset for the generated track Markers.
No Indices on Object Crossfades
This option prevents Track Indices being placed between two overlapping Objects which segue via a
Crossfade. This makes it possible to use automatic track Marker generation even if crossfades are used
inside each track.
Page 243

Time Offset for Indices on
Object Edges
bmc Sam20002.BMP} Menu: CD
This option lets you set an offset for automatically generated track markers when running function "Set
Track Indices on Object Edges Options".
CD manufactures often demand a minimum offset of 300ms between the track marker and the beginning
of the audio, which therfore here can be provided.
Page 245

Tools Menu
Menu Reference
Track Bouncing
Converts a VIP to a HDP or WAV file.
Waveform Generator
Creates Standard Waveforms.
Range Manager...
The window of the range manager is opened.
Marker / CD Track Manager...
The window of the marker manager is opened.
Object Manager
Opens the Object Manager.
External Program1,2
Runs an external program with actual
project file.(only HDP).
Page 246
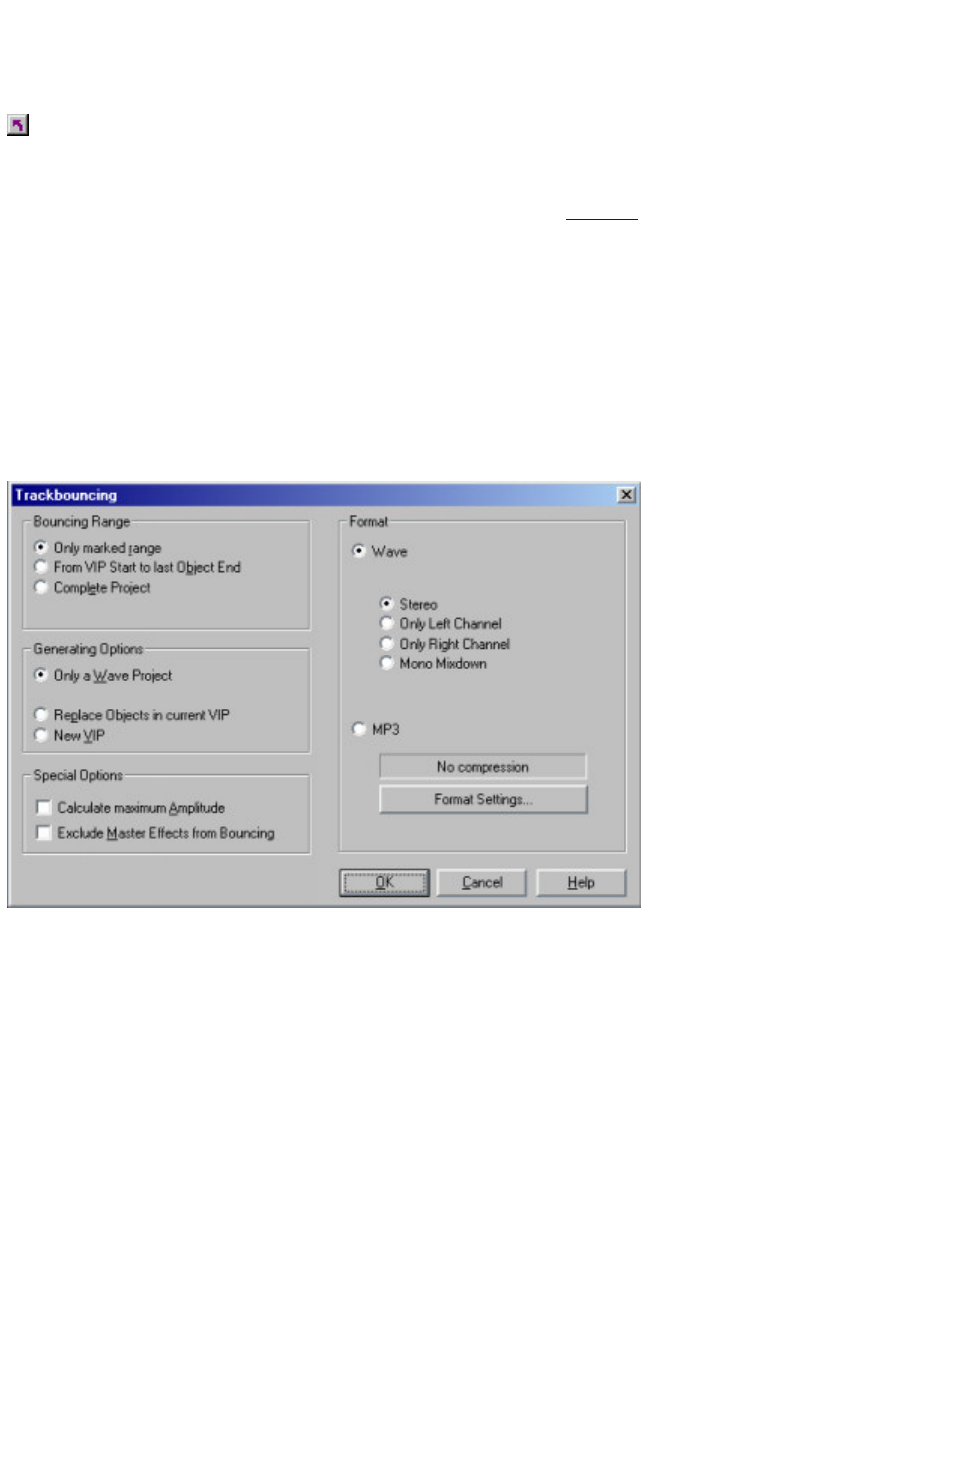
Track Bouncing
Menu: Tools
The current virtual multi-track project (VIP) can be converted into a WAV file or MAGIX music editor
2 HD Wave project and saved with a new name. All tracks in the VIP are mixed and all real-time
processing, cuts, crossfades, all Mixer settings, Mixer effects, DirectX
Plug-Ins, Volume automation, Panorama automation are included in the bounced version.
The function ‘Track Bouncing’
may require a large amount of storage, depending on the length of the VIP.
Four track projects are internally mixed to combine two tracks for playback on each channel. To prevent
clipping, an amplitude reduction of 6 dB is applied (which corresponds with a 50% representation of the
source material).
For eight track projects, the reduction is normally 12 dB. However, you can change the value in
File->Properties->Project Info (shortcut: i
).
Bouncing Sub Mix Busses
You can also bounce a Sub Mix bus, every track routed to the sub mix bus will be included in the
bouncing process, even recursive (if the track sending to the bus is a bus itself).
This becomes handy when you want to Mixdown all tracks sending to a specific submix bus.
If you bounce several tracks or just the active track (Option: only marked tracks/active track) with the
Option "New object in actual VIP" or "replace objects" and this selection includes a Sub Mix bus, then it
is possible that the resulting object will be placed at just this sub mix bus. It’s even most likely, this is
because busses usually not contain objects (although they can) and the object will be placed at the first
empty track found. In this case the track FX (including pan/volume automation) of the sub mix bus will be
excluded from the bouncing progress. This prevents that the fx are applied twice (once from bouncing
and once from the track real-time fx).
You cannot bounce Aux Busses in this way, you have to include the tracks, which are sending to these
busses to have the correct result.
Page 247

Bouncing (internal Mixdown)
Menu: CD
Use this function to convert the objects within a selected range to a new WAV file. The selected
objects in the VIP are replaced with the track-bounced version. This is very useful to combine multiple
objects into a single object so that the function to create track markers automatically
can be used.
If the VIP contains 24-bit objects, a dialog box will ask you whether the new file will be created as a
32-bit Float or 16-bit file.
16-bit (Integer):
The resulting file is a 16-bit resolution audio file. This is most useful if a CD is created that does not
contain any 24-bit objects.
However, if 24-bit objects are used, the bouncing process converts them to 16-bit material by using the
dithering settings.
32-bit (Float):
The resulting file is 32-bit (Float) resolution audio file. Use this option if the VIP also contains 24-bit
objects that are to maintain their high resolution.
Page 248
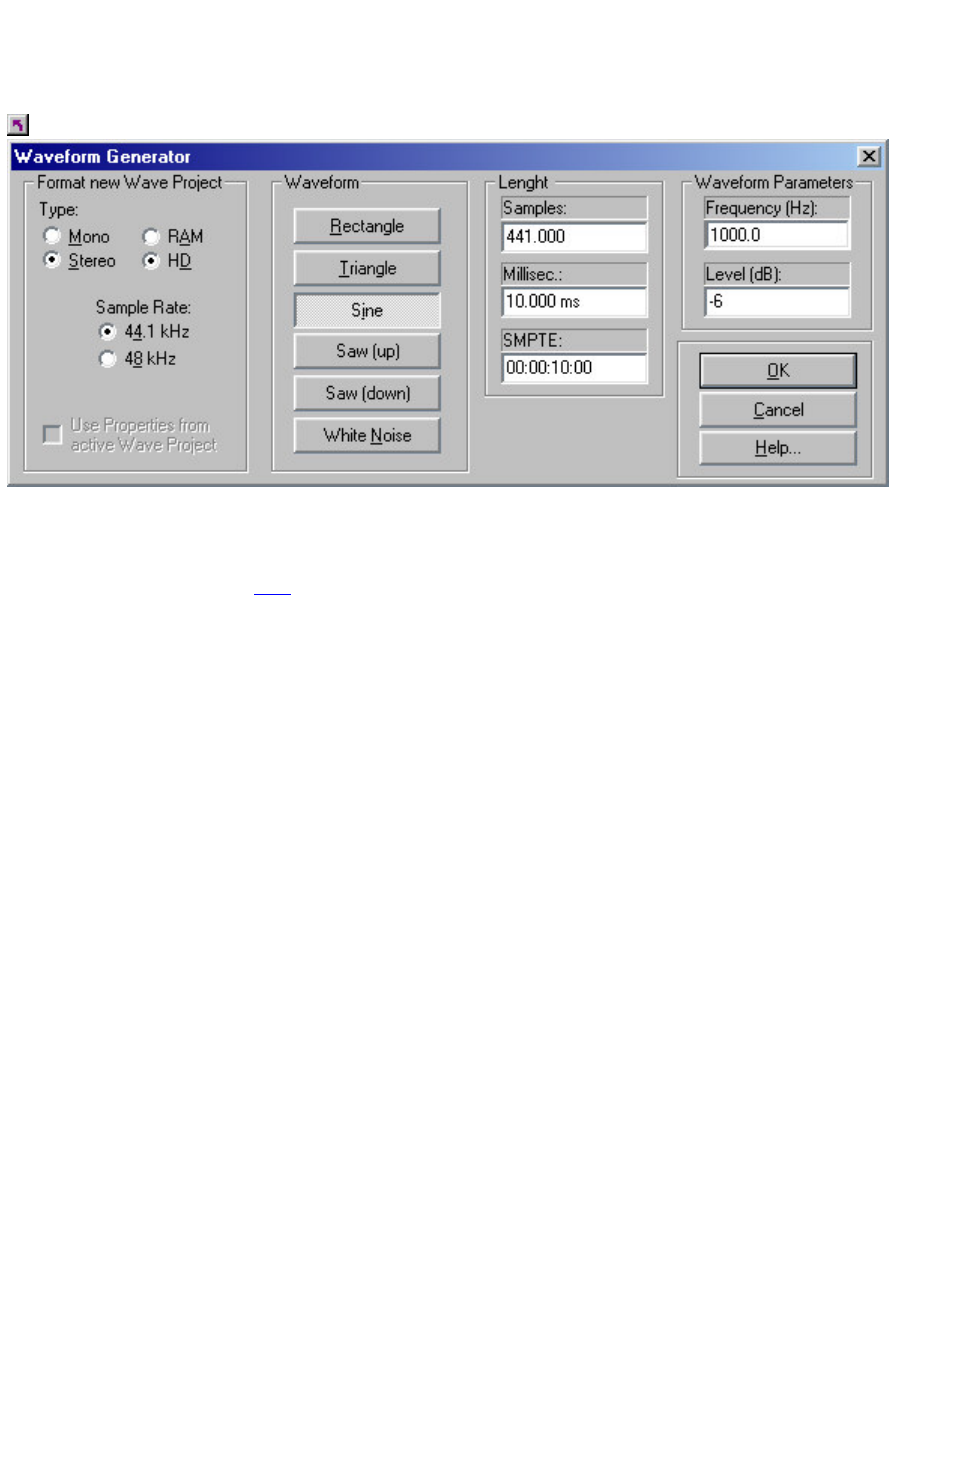
Waveform Generator
Menu: Tools
This dialog contains a powerful generator of several test tones. Please be sure to have activated a
Wave project (HDP or RAP) before opening this dialog!
The generated waveform is stored in the Clipboard with the same properties as the opened wave
project. Please rename the Clip
after generating the waveform, so it can be easily included into other projects without naming conflicts.
The generated samples are always fully amplified. The volume level can be easily reduced with the
normalizing function (Normalizing
).
Format new Wave Project:
select type and resolution of the new Wave Project
Waveform:
The following types can be selected:
Square, pulse, triangle, sine, saw up, saw down and white noise.
Length:
adjust the length of the new wave project
Waveform Parameters:
set the frequency and volume of the new waveform
Page 249

Range Manager
Menu: Tools
The Range manager is a window illustrating all ranges of the current project. The current range
is selected by a colored bar. The range bounds are selected by clicking on the range name. The range
name can be changed in the lower line. Ranges can be deleted and new ranges can be saved.
The ranges with the names Backup 1..5 are the last five selected ranges to be quickly restored.
With the Play Once button you can playback the actual range once, with Play Loop
it is played as a loop. This way you can use the range manager as a simple jingle player!
Page 250

Marker / CD Track Manager
Menu: Tools
All currently saved markers of the active project are shown with their name and position in this dialog.
The play cursor is moved to the respective marker
position by clicking on the dialog entry of the desired marker.
You can also change the marker names and create new markers. In addition, the dialog lets you delete
individual or all markers of a project.
Marker:
creates a new Marker at the actual Play cursor position
CD Track:
creates a new CD Track Marker at the actual Play cursor position
CD Sub index:
creates a new CD Sub index at the actual Play cursor position
CD Pause:
inserts a pause at the actual Play cursor position
Page 251

Object Manager
Menu: Tools
In the object manager all objects used in a VIP are indicated in sequence of their temporal appearance.
With this option the object manager features a function which is often offered in other programs with"Play
Lists".
In the object manager objects can be selected, which are also activated in the VIP. If you press play, a
range over the selected object is applied. Small objects can be identified and manipulated easily.
Ctrl + a mouse click will select several objects; Shift + a mouse click will select all objects between two
selects (like in the Windows Explorer).
Particularly productive in the object manager is the search function :
You can look for certain objects with it in full text mode rather than just the graphical representation of
the objects. For example you could look for all HD Wave projects with the name"XYZ.HDP' or all
objects that contain the name"Intro". You simply enter the search criteria in the text field and click
on"Search". All found objects will be selected and are available for further processing.
Page 252

External program 1,2
Menu: Tools
This menu item in menu ‘Special’ runs an external program with the actual project as parameter. This
makes it easy to export a MAGIX music editor 2
project to another audio software for special edits.
Use the ?-button to select the external program you want to run. After editing and saving the file in the
external program you can load it back to MAGIX music editor 2 using the recent file list in menu
‘Project’
.
This function works only with HDPs in Mono or Stereo Wave format!
Page 253
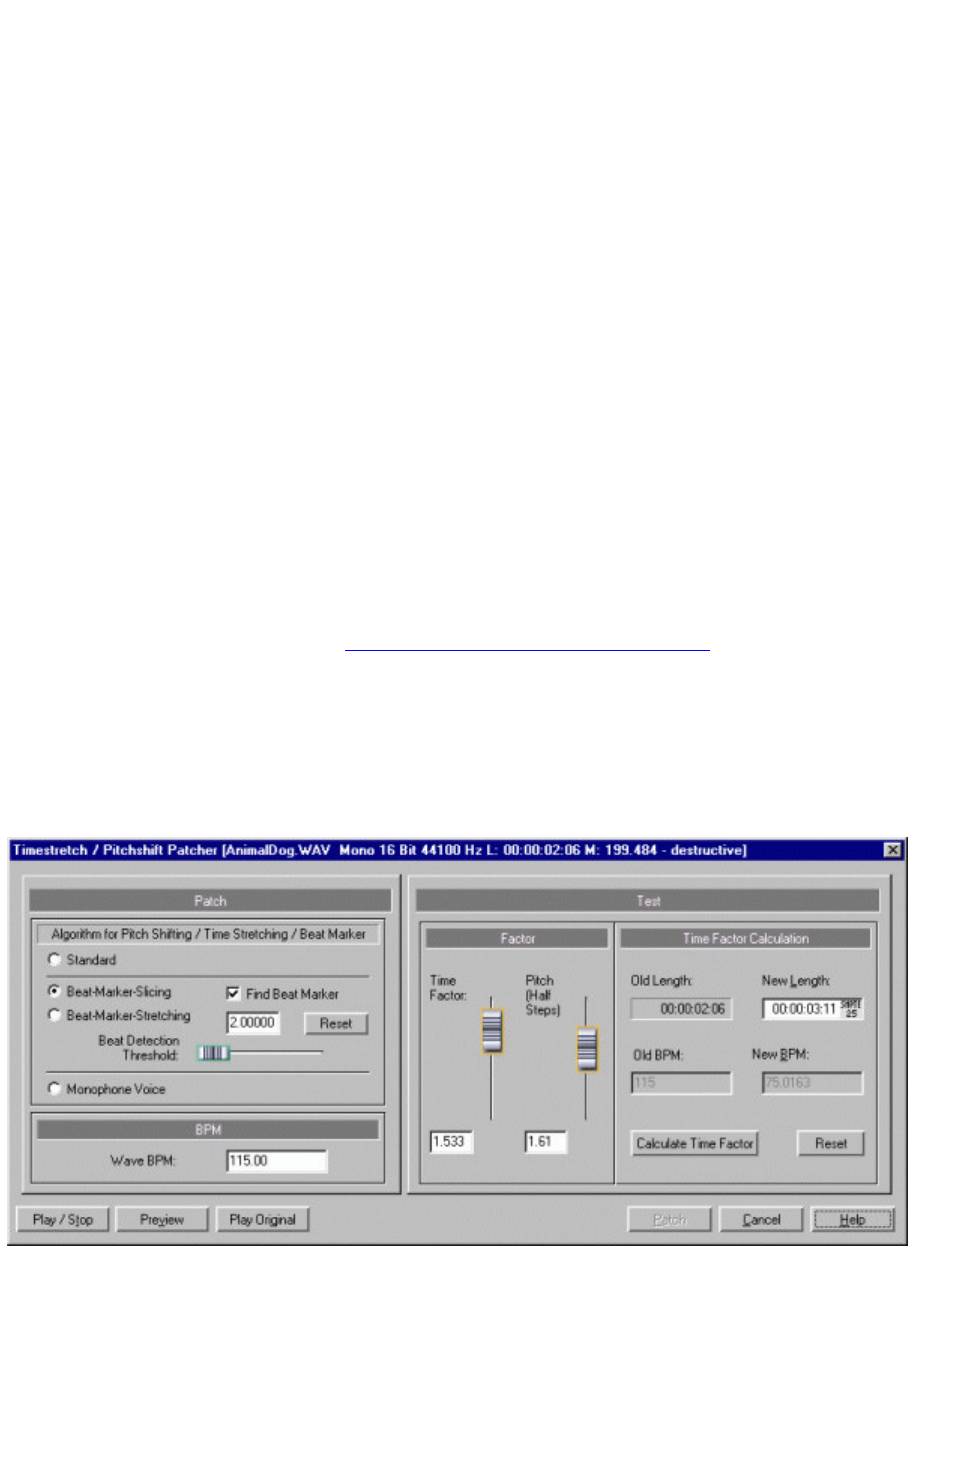
Timestretch Patcher
Overview
This tool enables wave files used in Samplitude and other MAGIX programs (e.g. MAGIX music
maker) to be patched.
Additional information and settings are written into the wave project to make them easier to find, thus
ensuring better Timestretching or Pitchshifting results.
The following can be patched:
Algorithms for Timestretching/ Pitchshifting
BPMs
Beat markers
Algorithms for Timestretching/ Pitchshifting
Different algorithms (besides the standard algorithm) can be used for real-time Timestretching and/or
Pitchshifting for better results. Check Resampling/ Timestretching/ Pitchshifting for more details. With the
Patcher you can store the optimal Timestretching algorithm in the wave project. This ensures that the
"correct" algorithm is used automatically when Timestretching/Pitchshifting is used on these projects as
object effects (e.g. with the Timestretch mouse mode).
Beat marker
Beat markers are also saved in the wave project when using beat marker-based algorithms.
In contrast to the Timestretching dialog, the patcher is non-modal, meaning that if the patcher is open,
you can move beat markers in a wave project while checking out the Timestretching result.
BPM value
Patches the BPM value (beats per minute). This is useful for when the Timestretching factor must be
determined later in order to adapt the wave project to the tempo of an existing arrangement.
Page 254

Patches in brief
Patches only work if you have opened the wave project in destructive wave editing mode and if it is not
open in a VIP simultaneously.
On the right of the dialog (Patch) you can select the algorithm to be used and specify the wave file
tempo. On the left side (Test) is the control element from the Timestretching/Pitchshifting Dialog.
It allows you to test the selected algorithm in connection with the Play/Stop and Play original buttons.
Patch saves the information in the wave file.
Samples from the MAGIX "music maker" product range soundpool contain the ptch information as of
version MAGIX music maker 2003.
Page 255

Menu Playback
Menu Reference
This menu gives you access to special functions dealing with manipulation of projects.
Playback->
Play once
Plays selected range (or from play cursor)
once.
Play loop
Plays selected range (or from play cursor)
looped.
Play into Loop
Plays from beginning of the project into a
selected range and loops it.
Stop
Stops playback.
Restart-Play
Restart playback from the beginning.
Playback Options
Select sample rate and output device for
playback, control scrubbing and varipitch.
Live Input Mode active
Activates the Live Input mode.
Record
Start Record on all tracks with activated REC
buttons
Record...
The Record properties window for the selected
track is opened.
Punch-In>
Punch In Mode active
Activates the Punch-In mode.
Punch In Record
Starts Punch-In recording.
Set Punch In Marker
Sets Punch-In marker.
Set Punch Out Marker
Sets Punch-Out marker.
Remove Punch Markers
Removes Punch-In and Punch-Out
markers.
Page 256
Play into Loop
Menu: Playback
Yet another way to play back in MAGIX music editor 2
is the Play Into Loop function. This will start the playback at the beginning of the audio tracks or the
current Position Line position and continues the playback until the end of a selected range is reached.
Once the end of the range is reached, the playback is then continued from the beginning of the range.
This is also a quick way of testing sample loops for playback samplers that work with MIDI sample
dump standard.
Tip: When working on loops, position the beginning of the audio sample at the beginning of the VIP track
or Wave project and select the range that would contain the loop. When the playback starts, the
beginning of the VIP track of Wave project is played back and continues to loop the selected range.
Tip: Don’t worry about destroying the set range when placing the position line. With the new range
history function the range will automatically restored when you start "play into loop"
Shortcuts:
Toolbar:
Page 259

Playback Options
Menu: Options
The Play Parameter window which appears after selecting this menu option is designed to quickly enter
playback parameters. Below is an explanation of the options available in this window.
Shortcuts:
Keys: p
Sample Rate
The sample rate can be changed here as long as the soundcard supports the new rate (some soundcards
even support changing the rate while playing the sample!). This is especially useful to hear notes in a
sample range played in a different octave. When selecting half the sample rate the pitch should be the
same. It would be played one octave lower.
Device
To specify the driver of the sound card use this dialog box. This is necessary if playback takes place
through a single sound card device (non Multi-Card Mode). This is especially important if multiple output
devices are located in the computer.
AutoScroll
The ‘AutoScroll’ section will let you activate the AutoScroll feature. It is especially useful when working
with long disk files. The HD Wave project window will follow the play cursor during playback.
When working in ‘2’ or ‘3’ section display mode, the AutoScroll feature will cause the individual sections
to follow the play cursor as well. If you have zoomed into one of the sections, the play cursor will move
through the section faster resulting in more screen redraws.
There are two alternatives in auto scrolling.
The ‘Soft’
option performs a smooth scrolling of the whole waveform, the play cursor stays in the center of the
display. This mode needs a fast graphics board, because the complete screen is scrolled between the
marker steps.
The ‘Page’ option performs a page by page scrolling.
Please note, that the auto scrolling requires certain processing power based on your processor, graphic
card and the resolution of the display. For this reason you might encounter small interruptions in playing
the audio files. Should this occur simply disable the auto scroll feature or raise the buffer size (select
‘Setup’ menu and click on ‘System’
).
Stop at Position
Page 264

Normally the play cursor returns to its starting position when the playback has been stopped by pressing
the space key. With this option you can change that behavior in a way, that the starting position will be
moved to the actual stop position (like a tape deck does). This works only when no range is selected.
(cf. Stop and go to current position )
Scrubbing
While pressing the 0 key on the numeric block (Num lock active) and moving the mouse you can
perform scrubbing. MAGIX music editor 2
starts playback at a very low speed, the mouse position relative to the start play cursor controls the
speed.
There are two scrubbing modes (in playback parameter window - key p):
Note:
When working with smaller buffer sizes (4000, 2000 samples) the scrolling becomes 'softer'. Please
verify the performance of your computer system and smaller buffer sizes to not produce playback
interruption.
The scrolling becomes ‘softer’
when using small buffer sizes (2000, 4000 samples). You may need to test your system for error free
playback with these small settings. Combined with the Soft Scroll mode, editing becomes very
convenient on faster computers.
Relative
The distance between the play cursor and the mouse sets the playback speed.
Absolute
The position of the mouse in the window sets the playback speed - at the left border playback speed is
200% backward, at the right border speed is 200 % forward, in the middle of the window the speed is
0.
There is a real time resampling performed for changing the playback rate without changing the sample
rate of the sound card. For best performance, use small play buffer sizes and a fast processor (Pentium II
recommended)!
Varipitch
MAGIX music editor 2
supports smooth changes of the pitch while playback, even in multi track projects (vertical slider in
playback parameter window - key p).
Activate the Varispeed mode with the ‘active’
button, then you can change the playback speed in various kinds:
Vertical slider
Changes the playback speed from -200% to +200%
Pitch Factor
Lets you specify a certain pitch factor manually
Halftones
Lets you specify a value of halftones. The playback will be transposed the number of halftones.
Internal Rate
Here you can set a sample rate for the varipitch calculation. If you want to play a WAV file with a
sample rate of 48 kHz but your sound card can only play rates up to 44.1 kHz simply set the internal rate
to 48 and activate Varispeed. You hear the same result as playing back with real 48 kHz!
This function is also very useful for digital playback to DAT with 44.1 kHz samples and vice versa!
BPM
Here you can type in the original bpm value of your material and a destination bpm value, which is
reached using the varipitch.
Important
Varipitch works also while recording! So you can set the pitch to -2 halftones, sing a song into the
computer, then switch off the varipitch - your track is transposed two halftones higher!
There is a real time resampling performed for changing the playback rate without changing the sample
Page 265

rate of the sound card. For best performance use small play buffer sizes and a fast processor (Pentium II
recommended)!
Page 266

Live Input Mode
Menu: playback
This is another very powerful feature of MAGIX music editor 2 – the Live Input Mode! When working
with this mode, MAGIX music editor 2
lets you use the real-time Mixer to mix live inputs from the sound card channels.
This turns MAGIX music editor 2 into a full-scale digital real-time Mixer with unlimited channels, internal
32-bit processing and effects, including DirectX
Plug-Ins!
The Basics:
The Live Input Mode basically functions similar to recording with multiple sound cards. All
channels/tracks that are to be used for live mixing have to be armed for recording –
each track has to be configured with the correct recording device and the track arming buttons need to
be active.
Once the playback of the VIP is started with the Spacebar, the live signals on the inputs of the audio
device(s) are routed through the Mixer. Use the controls in the Mixer window to create a mix. In
addition, any VIP object is also played back while
the live inputs are processed.
Latency:
The audio processing in MAGIX music editor 2
obviously takes time. This may lead to small delays at the outputs versus the incoming signal. This delay is
very much dependent on the VIP Buffer size. The latency can be reduced by using smaller VIP buffer
settings. Use settings that enable the program to process the real-time audio without introducing any
errors. A setting of 4 buffers at a buffer size of 8000 stereo samples creates a delay of 0.7 seconds. A
buffer size reduction to 2000 samples results in a delay of only 0.2 seconds. Experiment with the buffer
settings to find the optimal settings for your system!
The latency may not make it possible to use the Live Input Mode to replace an analog mixing console.
However, it leaves room for some very interesting application aspects.
Applications:
The Live Input Mode may be used for some of the following applications:
- Digital Mixer for ADATs – or other multi-track tape machines. During playback of an ADAT tape the
8 tracks are transferred via a digital audio card, such as the Prodif Gold, and processed by the MAGIX
music editor 2 Live Mixer. Since the material is transferred digitally, no quality loss is encountered, and
the latency is not significant, since the ADAT tape does not have any ‘live’
relevance.
- Effects and Mix Down during Recording – Use the function ‘Mix to File’ in the Mixer to create a new
WAV file from the master signal. This allows MAGIX music editor 2 to record through the Mixer into an
audio file. Don’t forget to rename the newly created audio file afterwards. Otherwise, the next ‘Mix to
File’
process will overwrite the contents of the previous take.
- MAGIX music editor 2 as Live Effect Processor – If you are looking for fancy effects that are not
offered by effect units in your rack, try to use some of the integrated effects in MAGIX music editor 2
. A live signal can be processed with the FFT Filter, the Multi Band Dynamics processor, and the Stereo
Enhancer. You may also use the many DirectX Plug-Ins available. There is no limit to your creativity!
Page 267
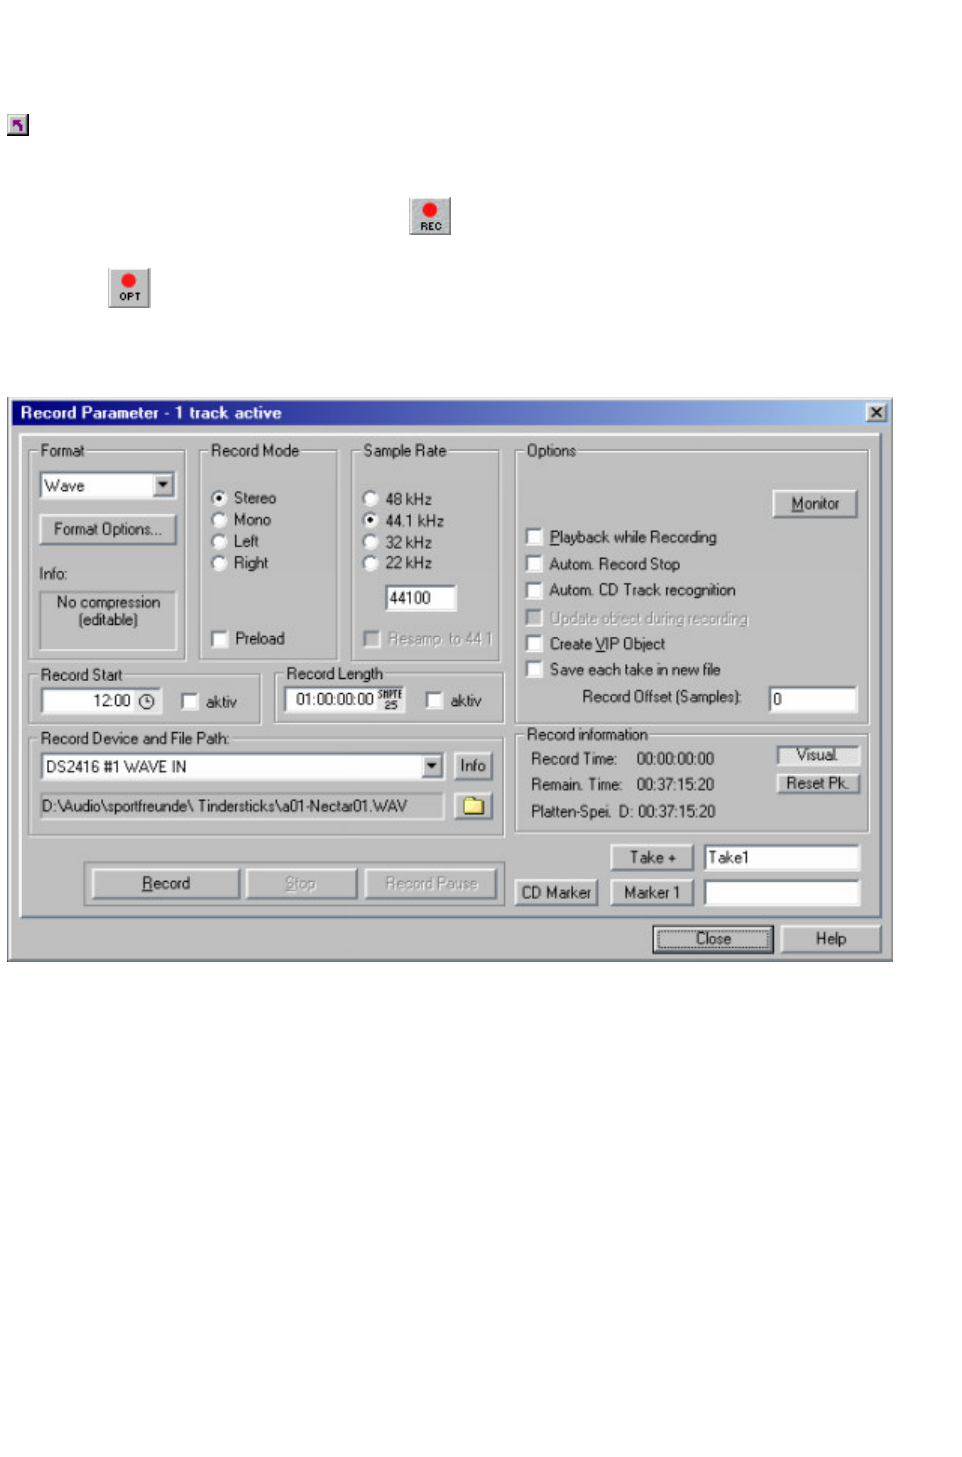
Record Options
Menu: Playback
This menu option opens the Record window. All necessary settings for the recording can be performed
here. If once set, you don’t need to open the dialog again, just start record by the record button at the
transport control or clicking the toolbar icon
Shortcuts:
Toolbar:
Key: r (second r
starts recording)
Click on the image for further descriptions!
Page 269

Playback While Recording
Menu: Playback
Simultaneous record and playback is especially important when wanting to monitor existing tracks while
recording a new track. This option allows you to turn the feature on. To conserve system resources and
keep the recording error free on slower systems, you may need to turn this feature off.
Record without Playback
Page 271

Punch In Mode
Menu: Playback
This option activates the Punch mode. Punch-In and Punch-Out are a process automating the recording
start and end of an audio segment. Once the Punch mode is active, the Punch-In Record
can be used to record audio segments without stopping the playback.
Requirements for this mode are one or more armed tracks. The tracks have to be configured in the same
way as for multi-track record – each track has to have a specific device selection. Use the ‘R’
button for each track to click the right mouse button and make the needed selection.
Punch Recording can be done in two ways:
1. Punch-In/Out ‘On-The-Fly’
This allows you to start the recording (punch in) at any time during the playback. Once the recording
commences, it can be stopped at any time (punch out), while the playback continues.
This is very similar to tape based multi-track recorders, which allow you to correct mistakes during
previous recording takes by overwriting segments of the tape.
Simply start the playback with the Spacebar. The Punch-In recording can be started by clicking on the
Punch Record
button in the toolbar. The same button punches out of the recording mode, while the playback continues.
To stop the playback, press the Spacebar.
2. Punch-In/Out with Markers
The second method is the punching in and out of recording using special markers. This is a more
automated way of dealing with punch-in/out recording. This is useful when specific punch-in and
punch-out points are determined and you don’t want to take any risks in possible punching in or out of
the recording. Don’t panic though! The punching in and out with markers lets you specify the exact points
the recording is to start and stop. Since you are working in a non-linear, non-destructive environment,
any mistake or unwanted take can be removed or undone without any problems. The previous material in
the track would still be there!
This is simply a very convenient way when it’s midnight and your fingers are getting tired!
To operate in this mode, a range has to be selected, which defines the beginning and end of the
recording. The functions Set Punch-In Marker and Set Punch-Out Marker are used to tell MAGIX
music editor 2 where to punch in and where to punch out. Next, set the play cursor to an appropriate
position prior to the punch-in point and start the playback/recording with the Punch Record
button in the Punch Toolbar.
Important: When working with the punch in/out functionality, make sure that the Auto Crossfade mode is
activated, by clicking on the corresponding button in the MAGIX music editor 2
toolbar. The auto crossfade will create smooth transitions between the takes. This helps to prevent little
pops and clicks!
There is also a way to perform looped punch-in recording
! Simply select a range over the desired punch region. The range is played back until you stop the
playback with the Spacebar. Each time the program loops through the range, new takes are recorded at
the punch markers.
Page 272

Live Input Mode
Menu: playback
This is another very powerful feature of MAGIX music editor 2 – the Live Input Mode! When working
with this mode, MAGIX music editor 2
lets you use the real-time Mixer to mix live inputs from the sound card channels.
This turns MAGIX music editor 2 into a full-scale digital real-time Mixer with unlimited channels, internal
32-bit processing and effects, including DirectX
Plug-Ins!
The Basics:
The Live Input Mode basically functions similar to recording with multiple sound cards. All
channels/tracks that are to be used for live mixing have to be armed for recording –
each track has to be configured with the correct recording device and the track arming buttons need to
be active.
Once the playback of the VIP is started with the Spacebar, the live signals on the inputs of the audio
device(s) are routed through the Mixer. Use the controls in the Mixer window to create a mix. In
addition, any VIP object is also played back while
the live inputs are processed.
Latency:
The audio processing in MAGIX music editor 2
obviously takes time. This may lead to small delays at the outputs versus the incoming signal. This delay is
very much dependent on the VIP Buffer size. The latency can be reduced by using smaller VIP buffer
settings. Use settings that enable the program to process the real-time audio without introducing any
errors. A setting of 4 buffers at a buffer size of 8000 stereo samples creates a delay of 0.7 seconds. A
buffer size reduction to 2000 samples results in a delay of only 0.2 seconds. Experiment with the buffer
settings to find the optimal settings for your system!
The latency may not make it possible to use the Live Input Mode to replace an analog mixing console.
However, it leaves room for some very interesting application aspects.
Applications:
The Live Input Mode may be used for some of the following applications:
- Digital Mixer for ADATs – or other multi-track tape machines. During playback of an ADAT tape the
8 tracks are transferred via a digital audio card, such as the Prodif Gold, and processed by the MAGIX
music editor 2 Live Mixer. Since the material is transferred digitally, no quality loss is encountered, and
the latency is not significant, since the ADAT tape does not have any ‘live’
relevance.
- Effects and Mix Down during Recording – Use the function ‘Mix to File’ in the Mixer to create a new
WAV file from the master signal. This allows MAGIX music editor 2 to record through the Mixer into an
audio file. Don’t forget to rename the newly created audio file afterwards. Otherwise, the next ‘Mix to
File’
process will overwrite the contents of the previous take.
- MAGIX music editor 2 as Live Effect Processor – If you are looking for fancy effects that are not
offered by effect units in your rack, try to use some of the integrated effects in MAGIX music editor 2
. A live signal can be processed with the FFT Filter, the Multi Band Dynamics processor, and the Stereo
Enhancer. You may also use the many DirectX Plug-Ins available. There is no limit to your creativity!
Page 273

Menu Options
Menu Reference
Project Information
Shows information about the actual project.
Synchronization
Options for external synchronization.(deLuxe
Version only!
System / Audio
Global system parameters .
Properties >
Sub menu for project properties
Show Playback Options
The Play Parameter window which appears after
selecting this menu option is designed to quickly
enter playback parameters.
Media-Link...
Synchronizes .AVI files to a MAGIX music
editor 2 project.
Text Comments
Edit text comments for the actual project.
Units of Measurement
‘Units of Measurement’ is used to specify the grid
dimensions.
Preferences >
Select global preferences
Undo-Definitions...
Select Undo options
Enable Profiling
Activates the DSP power display in the lower left
corner.
VIP_Mouse Mode
Switches between different mouse modes in
VIPs.
Wave Project Mouse Mode
Switches between different mouse modes in HD
and RAM Wave Projects.
Object Lock Definitions
Options for object locking
Snap Setup
Options for snap function
Grid Setup HID Setup
With this option, you can define the type of grid
that is used for the Show Grid option. Select
between several line styles.
Keyboard Shortcuts...
Defines keyboard shortcuts for all menu items. .
Edit Toolbars
Lets you customize toolbars
Reset Toolbars
Restores original toolbar state
Video Height
Set Height for Video track display
Font Selection
Selects font for grid and objects.
Font for Time Display
Selects font for the Time Display.
Color Settings
Select colors for the MAGIX music editor 2
display.
Set Preroll Time
Sets the Pre-Roll time.
Draw Setup
Controls VIP display options
Page 278
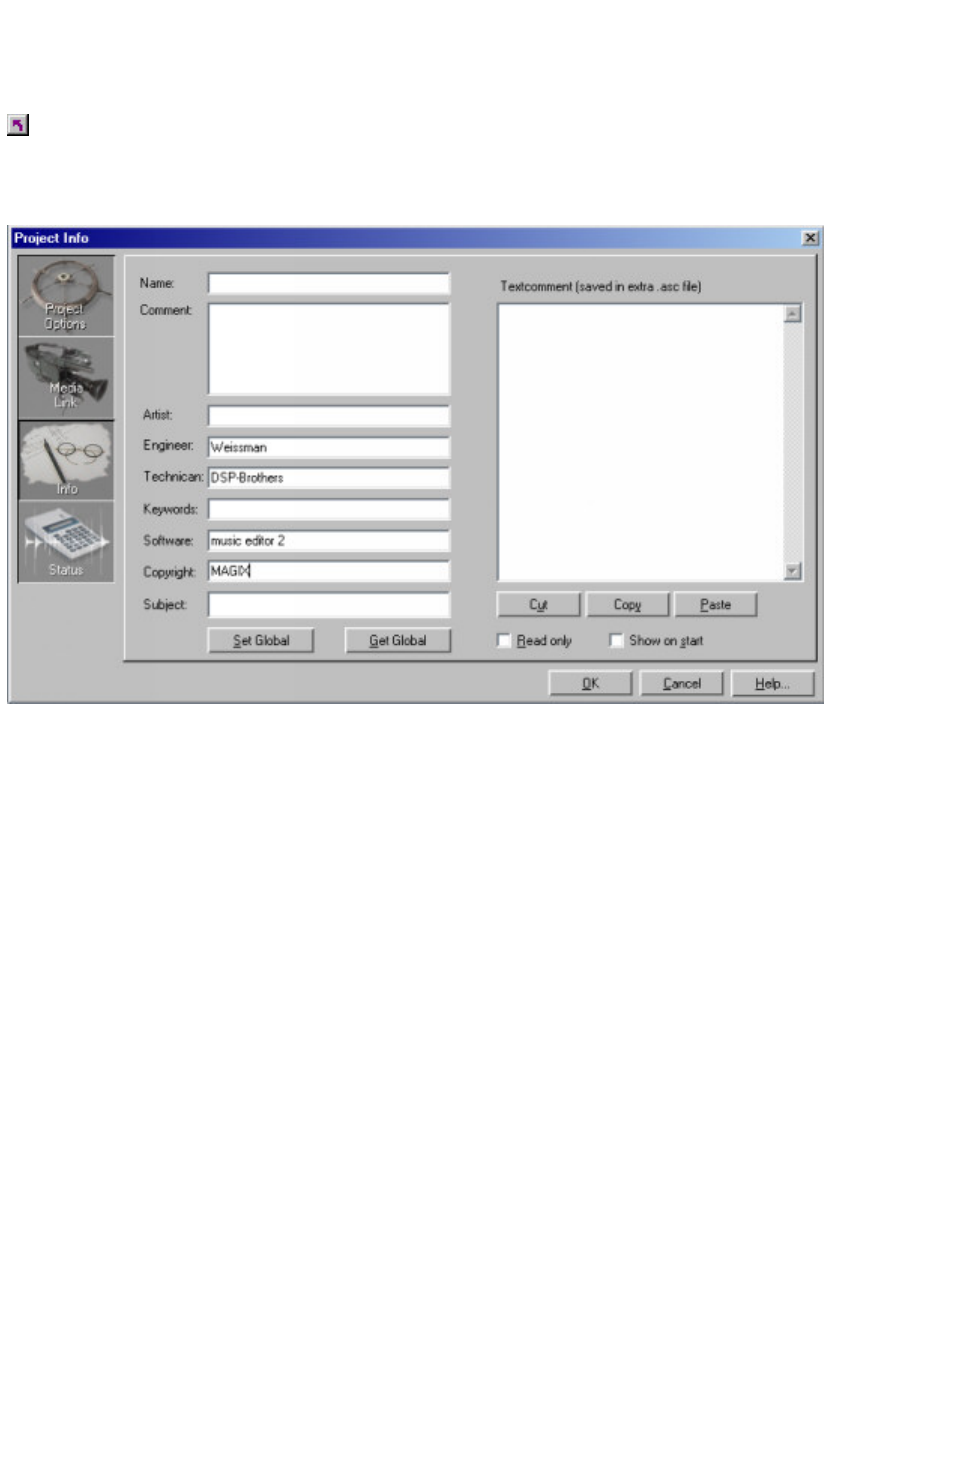
Project Information
Menu: Options
Select this option to display Project Information (an "over-view")about the current active Project (HD
Wave, RAP, or VIP).This includes creation date, memory size, path and file names. For Virtual Projects,
a list of all included physical files (including linked HD Wave Projects) is displayed.
The Project Information window will display: File Name, Path (location on hard disk), Number of Stored
Ranges, Number of Stored Cursors (Markers), Date the File was created, Date the File was last edited,
Number of Objects in the VIP, and a List of ALL Hard Disk and RAM Projects (HD Wave, RAP) used
in the VIP.
You can also add (type in) the following information:
Name, Comment, Subject, Artist, Engineer, Technician, Keywords, Software, and Copyright. This
dialog also allows you to set automatic backup options which run while the Project is open.
Set Global
Click on this button to Save the information you added (typed in) as a Global setting.
Get Global
Click on this button to recall the Saved information (Global setting) and add it to the current active
Project. This allows you to quickly add the same information to every Project you work on.
Cancel
Click on this button to close the Project Information window without accepting changes to the settings.
OK
Click on this button to accept the current settings and close the Project Information window.
Shortcuts:
Key: i
Page 279

Synchronization
Menu: Options
For a quick intro to synchronization issues refer to Synchronization - An Overview
MAGIX music editor 2
will slave to SMPTE/MTC/MC and can act as the master for MIDI Clock and MIDI Time Code.
To run MAGIX music editor 2 in multitasking with a sequencer a MIDI connection must exist between
the sequencer and MAGIX music editor 2
. That can be done through simple connection of a MIDI input to a MIDI output with for example a
MIDI interface of a soundcard.
Better is an internal combination of the programs through a Multi MIDI driver (available as shareware
software, e.g. Hubis MIDI Loopback from the MAGIX music editor 2 CD-ROM), which connects the
output of one program to the input of another one. Keep in mind that one program will need to act as the
'master', while the other takes the position of the 'slave'. Select the modes in the programs accordingly.
Starting and stopping is done from within the 'master'. If possible MAGIX music editor 2
should be the slave!
If MAGIX music editor 2
needs to be synchronized to a tape machine, such as a video recorder or a multi-track recorder, a
SMPTE interface with Windows driver is necessary.
Internally the computer interfaces process the SMPTE code as MIDI Time Code (MTC). You can also
use an external SMPTE to MTC converter and feed the MTC signal to a MIDI input port on a MIDI
interface in the computer.
MAGIX music editor 2 supports real chase lock sync (MIDI Clock and MIDI Time Code/SMPTE).
This means, that the internal sample rate of MAGIX music editor 2 ’s playback or recording is varied in
small steps, so that MAGIX music editor 2 can follow little timing changes of the sync master. This is
very useful when using sync between a tape or video recorder (master) and MAGIX music editor 2
(slave), because most tape machines always produce small pitch changes, which results in delays
between
the tape and MAGIX music editor 2 , when not using chase lock sync. If the timing changes are too big,
MAGIX music editor 2
produces heavy pitch changes, which may be reduced by entering smaller values for the Sync Velocity in
the sync dialog. Try values of 200 or more, when you need fast pitch changes in sync mode! In the lower
right status bar you can read the actual/maximal pitch change in cents ( 1 cent = 1/100 halftone).
Please know, that the chase lock sync performs a real time resampling (if not using ARC44), which
needs a certain processing power, so be carefully on slow machines!
When receiving SMPTE/MTC you can start and stop playback with the space key - MAGIX music
editor 2
will always be in sync!
Shortcut:
Key g
Description of the Dialog
Synchronization - MIDI Clock Input
Here the driver must be selected from which MAGIX music editor 2
will receive MIDI Clocks for the synchronization.
Synchronization - BPM
Enter the tempo to match MAGIX music editor 2 ’
s time-line with that of the external MIDI sequencer or sync equipment.
Page 280

Synchronization - MIDI Clock Output
Select the driver through which MAGIX music editor 2
will send MIDI Clocks to the synchronized equipment.
Synchronization - SMPTE / MTC Input
Select the device driver through which MAGIX music editor 2
will receive the SMPTE/MTC signal.
Synchronization - MTC Output
Select the device driver through which MAGIX music editor 2
will send the MIDI Time Code master signal.
Synchronization – Type
Select the proper frame rate. Use 24 frames for cinematic synchronization, 25 frames for PAL video,
and audio synchronization, 30 frames for NTSC video.
Synchronization - Pre-Roll Frames
You can specify, how many frames MAGIX music editor 2 is to ignore before the synchronization starts.
Here you can account for the fact, that certain analog instruments need time to reach the correct speed.
In order to have MAGIX music editor 2
link up to the proper time values, a certain pre-roll frame count can be specified.
Synchronization - Sync Velocity
You can specify how fast MAGIX music editor 2 follows a pitch change of the sync master. A value of
100 is good for normal purposes. If you need faster pitch changes, try 200 or 300. If you want to reduce
the pitch changes in MAGIX music editor 2
try a setting of 50 or 30!
Synchronization - SMPTE Offset
The SMPTE offset is indicated in milliseconds and in SMPTE frames. The offset is removed from the
incoming SMPTE time code signal to line up differences between tape material and recorded samples in
MAGIX music editor 2 . With an offset of '60:00:00' milliseconds (1 hour) a tape that was previously
stripped can be synchronized, if the start point for the recording/playback starts at 1 hour. MAGIX music
editor 2
will, however, start at the correct beginning position.
Synchronization - FX
With this parameter, possible inaccuracies during the positioning of long samples can be equalized.
Requirement is a flawless synchronization at the sample beginning. Follow the instructions in the chapter
'Problem Solutions'.
Synchronization - Active
Activates the section.
Synchronization - Use Hardware Pitch
This option uses the hardware’s pitch shifting capabilities to compensate for minor chase lock
adjustments. If this option is not checked, or if the sound card does not support the option, MAGIX
music editor 2
uses the computer CPU to apply any pitch corrections when sync variations occur.
Page 281

System / Global Audio
Options
Menu: Options
Shortcuts:
Keys: y
In the ‘System’ dialog, you have options to fine-tune MAGIX music editor 2
. You can specify parameters play and recording buffers , you can set internal resolution and the
resolution used for the sound device , furthermore you can name and order your playback and recording
devices.
Buffer Settings
A principal rule about buffers: the larger the buffer, the more reliability you gain in playing back audio
files (especially on slow systems or in full 16-track mode). However, if you increase the buffer size too
much, the computers processing time becomes longer and delays might be introduced in the overall
command handling. You will need to find a compromise between these two factors for each individual
computer system.
System Dialog - HD /Scrub Buffer
The default setting is 8000 Samples. This buffer is used for the playback of HD Wave projects. To gain
faster response times, try smaller settings.
System Dialog - VIP Buffers
Default setting is 16000 Samples. The buffer is used for the playback of virtual projects. Since an error
free playback is more important than fast response times, we suggest using a setting between 16000 and
32000 when working with a large number of tracks. This setting is the most important setting when
working with virtual projects and the real-time Mixer. Any of the other buffer types and settings are not
utilized in VIPs and the Mixer window!
System Dialog - Test Buffer
The default setting is 8000 Samples. This buffer is only used for the real-time preview in the Effect menu
dialogs.
System Dialog - Buffer Number
This setting determines how many of the above buffers are to be utilized (values between 2 and 9). A
higher setting for Buffer Number secures a more stable operation. However, the memory requirement
increases and the response time decreases. The actual buffer utilization can be monitored with the status
bar in the lower right-hand of the MAGIX music editor 2 screen.
Naming and rearranging devices
You can:
disable several non used input/output device by unchecking the box
Page 282

reorder the devices with the up/down buttons
name your devices to be more expressive by pressing rename
obtain capability info by clicking info
Page 283

Directories
This dialog is the place to set the default folders for the HDP, RAP, VIP and temporary files. MAGIX
music editor 2 uses these folders to store the various files. Unless you assign a different path and folder to
a project, MAGIX music editor 2
will use the settings specified by you in this dialog.
Project Files
To adjust the default path for Wave projects.
New Virtual Projects
To adjust the default path for virtual projects.
Temporary Files
To set the default path for the temporary files.
Page 284
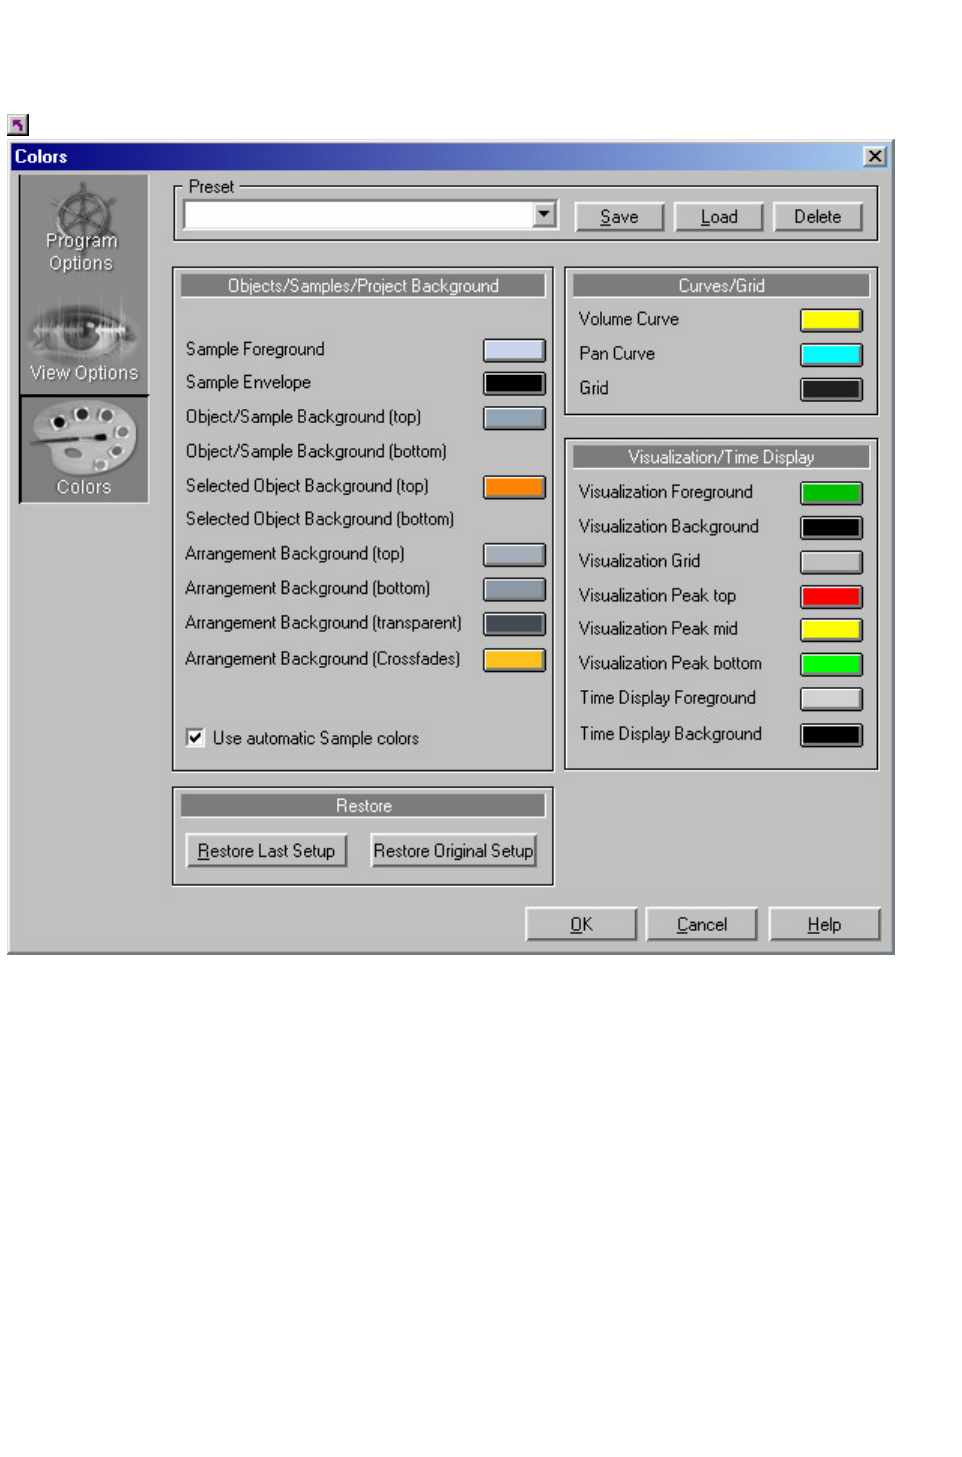
Color Settings
Menu: Options
MAGIX music editor 2
lets you specify the color for various areas of the screen. Use this menu option if you want to change the
default colors to another one. You can save / load your color schemes via the load save buttons, they are
saved by default in the fx-presets folder and will be listed in the presets list on top of the dialog.
Page 285
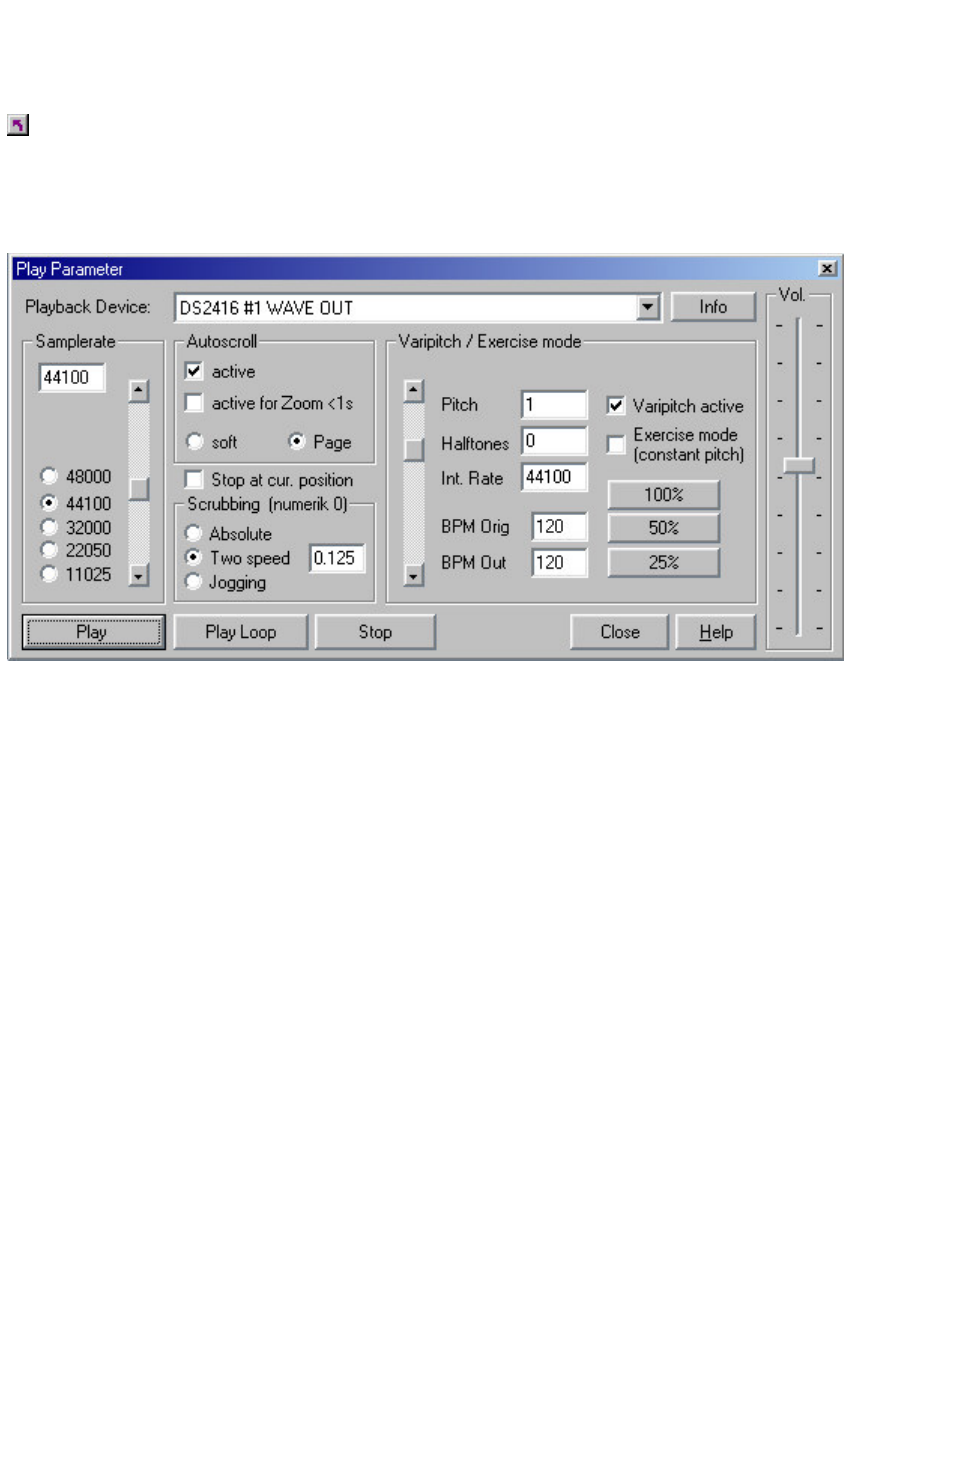
Playback Options
Menu: Options
The Play Parameter window which appears after selecting this menu option is designed to quickly enter
playback parameters. Below is an explanation of the options available in this window.
Shortcuts:
Keys: p
Sample Rate
The sample rate can be changed here as long as the soundcard supports the new rate (some soundcards
even support changing the rate while playing the sample!). This is especially useful to hear notes in a
sample range played in a different octave. When selecting half the sample rate the pitch should be the
same. It would be played one octave lower.
Device
To specify the driver of the sound card use this dialog box. This is necessary if playback takes place
through a single sound card device (non Multi-Card Mode). This is especially important if multiple output
devices are located in the computer.
AutoScroll
The ‘AutoScroll’ section will let you activate the AutoScroll feature. It is especially useful when working
with long disk files. The HD Wave project window will follow the play cursor during playback.
When working in ‘2’ or ‘3’ section display mode, the AutoScroll feature will cause the individual sections
to follow the play cursor as well. If you have zoomed into one of the sections, the play cursor will move
through the section faster resulting in more screen redraws.
There are two alternatives in auto scrolling.
The ‘Soft’
option performs a smooth scrolling of the whole waveform, the play cursor stays in the center of the
display. This mode needs a fast graphics board, because the complete screen is scrolled between the
marker steps.
The ‘Page’ option performs a page by page scrolling.
Please note, that the auto scrolling requires certain processing power based on your processor, graphic
card and the resolution of the display. For this reason you might encounter small interruptions in playing
the audio files. Should this occur simply disable the auto scroll feature or raise the buffer size (select
‘Setup’ menu and click on ‘System’
).
Stop at Position
Page 286

Normally the play cursor returns to its starting position when the playback has been stopped by pressing
the space key. With this option you can change that behavior in a way, that the starting position will be
moved to the actual stop position (like a tape deck does). This works only when no range is selected.
(cf. Stop and go to current position )
Scrubbing
While pressing the 0 key on the numeric block (Num lock active) and moving the mouse you can
perform scrubbing. MAGIX music editor 2
starts playback at a very low speed, the mouse position relative to the start play cursor controls the
speed.
There are two scrubbing modes (in playback parameter window - key p):
Note:
When working with smaller buffer sizes (4000, 2000 samples) the scrolling becomes 'softer'. Please
verify the performance of your computer system and smaller buffer sizes to not produce playback
interruption.
The scrolling becomes ‘softer’
when using small buffer sizes (2000, 4000 samples). You may need to test your system for error free
playback with these small settings. Combined with the Soft Scroll mode, editing becomes very
convenient on faster computers.
Relative
The distance between the play cursor and the mouse sets the playback speed.
Absolute
The position of the mouse in the window sets the playback speed - at the left border playback speed is
200% backward, at the right border speed is 200 % forward, in the middle of the window the speed is
0.
There is a real time resampling performed for changing the playback rate without changing the sample
rate of the sound card. For best performance, use small play buffer sizes and a fast processor (Pentium II
recommended)!
Varipitch
MAGIX music editor 2
supports smooth changes of the pitch while playback, even in multi track projects (vertical slider in
playback parameter window - key p).
Activate the Varispeed mode with the ‘active’
button, then you can change the playback speed in various kinds:
Vertical slider
Changes the playback speed from -200% to +200%
Pitch Factor
Lets you specify a certain pitch factor manually
Halftones
Lets you specify a value of halftones. The playback will be transposed the number of halftones.
Internal Rate
Here you can set a sample rate for the varipitch calculation. If you want to play a WAV file with a
sample rate of 48 kHz but your sound card can only play rates up to 44.1 kHz simply set the internal rate
to 48 and activate Varispeed. You hear the same result as playing back with real 48 kHz!
This function is also very useful for digital playback to DAT with 44.1 kHz samples and vice versa!
BPM
Here you can type in the original bpm value of your material and a destination bpm value, which is
reached using the varipitch.
Important
Varipitch works also while recording! So you can set the pitch to -2 halftones, sing a song into the
computer, then switch off the varipitch - your track is transposed two halftones higher!
There is a real time resampling performed for changing the playback rate without changing the sample
Page 287

rate of the sound card. For best performance use small play buffer sizes and a fast processor (Pentium II
recommended)!
Page 288
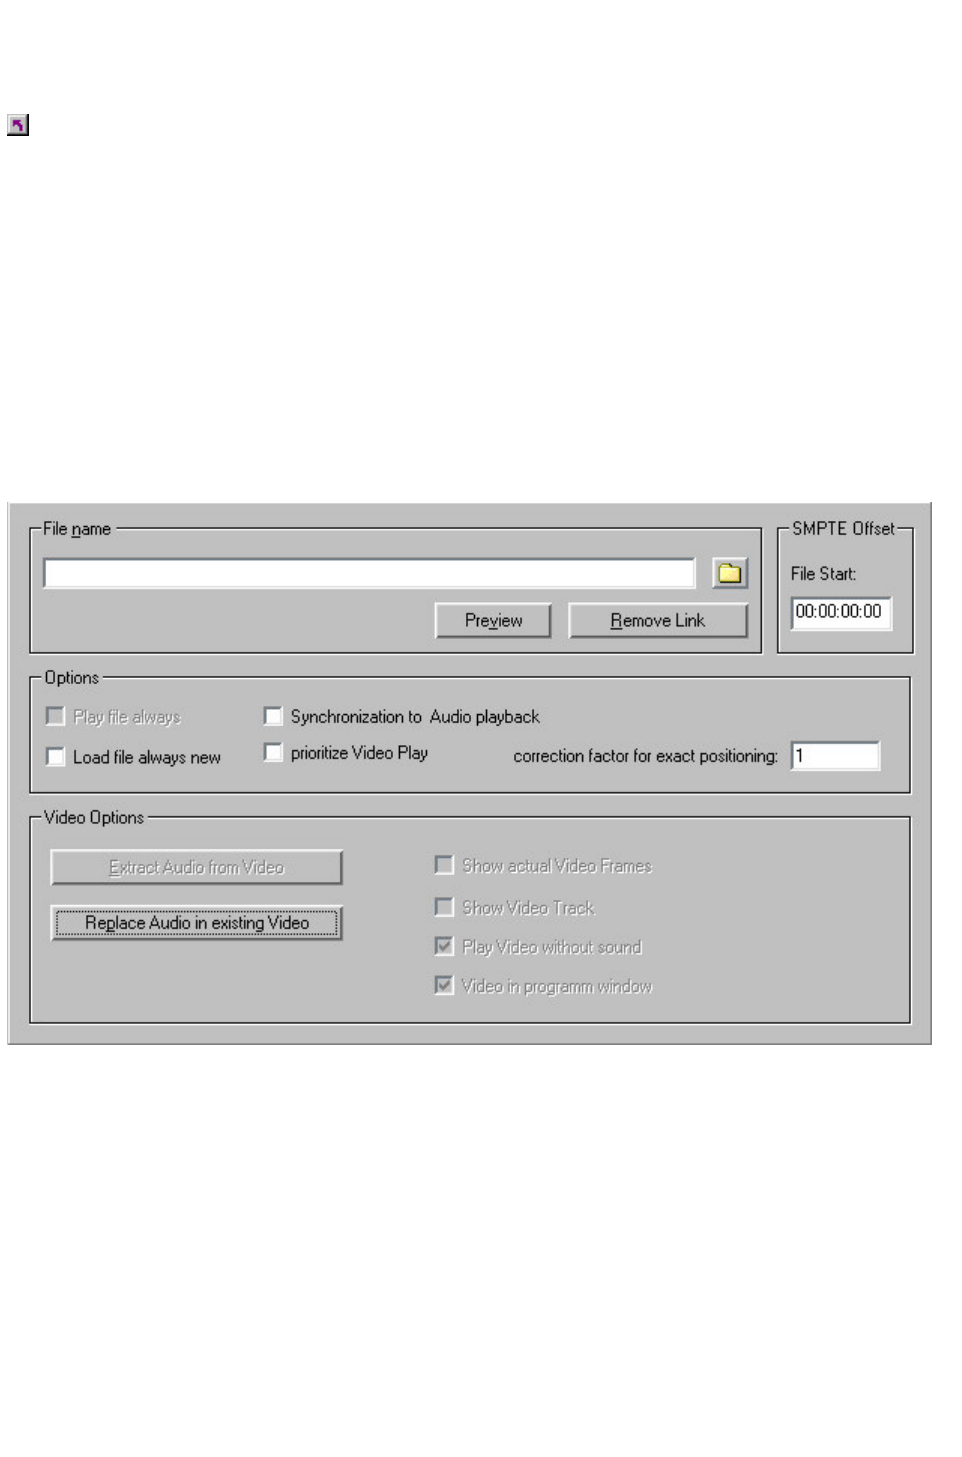
Media Link
Menu: Options
Media Link is one of the most powerful features of MAGIX music editor 2
. With this option, you have the opportunity to synchronize media files such as MIDI files or AVI files.
These can be complete MIDI songs or sequences (*.MID files), Video clips (*.AVI files) or other files
for which a MCI driver is installed in Windows.
Synchronizing of MAGIX music editor 2 projects with
Video-for-Windows movies (AVI)
With this capability, MAGIX music editor 2 is an excellent tool for film music arrangements. Film and
video clips are recorded as AVI files. A MAGIX music editor 2
virtual project can then be synchronized with it. The music, original sound, voice tracks, effects and much
more can be adjusted on the time line and played with the AVI video simultaneously. As the final step,
the audio signal can be recorded back to the videotapes original audio tracks or mixed for broadcasting.
File Name
Here you can specify the file name and directory where the media file is located. By clicking on the '?'
button you will receive a file requester dialog that allows you not only to look for the location on your
hard disk(s), but also let's you specify which media file type you are looking for. Once you have found
the media file, simply click on OK and MAGIX music editor 2
will make the link.
Offset
The Offset allows you to specify a different start time for the media file. The default is a zero position,
which means that the media file would be started at exactly 0 position, which is the beginning of the file. If
the offset is different than the 0 position the playback of the media file starts at the position you entered.
Here is an example:
Let's assume that we are working on the audio for an AVI file and the audio section does not appear until
15 minutes into the AVI file. It would be unnecessary to create 15 minutes of empty space at the
beginning of the VIP in order to line up the AVI frames and the audio. Instead we can specify an offset of
Page 289

15 minutes and the AVI file would start playback at 15 minutes into the video file. However, all the audio
in MAGIX music editor 2
would start at position 0.
It makes good sense to write down the offsets you are specifying for the individual projects you are
working with. This way you can easily identify offset references for your work.
Play Always
This checkbox allows you to specify whether MAGIX music editor 2 is to play the media file every time
you start playback or recording in MAGIX music editor 2 . If you uncheck the option, MAGIX music
editor 2
will not play back the media file. This is a quick way to turn off the playback of the media file.
Load Always New
If this option is checked, MAGIX music editor 2
will always load the media file for every playback or recording of your VIP or Wave project. If the box
is not checked the playback of the media file is performed with the contents of the memory. If the media
file is too large for the buffers, the playback is performed from the hard disk.
Synchronization to Audio playback
Synchronizes the new media link (e.g. AVI-Files) with the existing VIP
Extract Audio from AVI
If the file type is an AVI file with video and audio data, audio streams are extracted from all other
information and the audio information itself is put into a Wave project. This allows you to extract and edit
the audio apart from the rest of the contents in the imported file.
Replace Audio in Existing AVI
This option performs a track bouncing of the current VIP into 1 WAV file. This file is merged into the
selected AVI file, so the AVI gets a new audio track.
Create AVI / Audio Copy
This option performs a track bouncing of the current VIP into 1 WAV file. The AVI file is copied to a
new file, which contains the new audio track. This option keeps the original AVI.
Video Without Sound
This option applies for AVI files only. If the AVI file contains audio the playback of the AVI file and it's
audio could interfere with the audio playback in MAGIX music editor 2
. For this reason, it is suggested that you turn the audio playback for the AVI file off.
Video in MAGIX music editor 2 Window
This option also applies to the AVI file playback only. Normally, the AVI file is played back in a
completely independent window. This means, that if you run the MAGIX music editor 2 window
enlarged you will not see the playback of the AVI window. You would need to minimize the MAGIX
music editor 2 window or scale the window in order to display both windows on the screen. However,
by checking this option you can display the AVI window as another MAGIX music editor 2 related
window, which always stays on top during playback. This allows you to display the AVI movie at any
time the playback or recording in MAGIX music editor 2
takes place.
Show Video Tracks
This is a new feature in MAGIX music editor 2
! With this option, you can display a video track in the VIP window, which shows individual frames of
the AVI file. In the upper left-hand corner of the VIP window, the current frame is displayed when
clicking the play cursor at a particular location in the VIP tracks. This allows you to position audio events
and material at exact frame positions.
If you zoom into the window, the video track is also enlarged, showing the video frames at a lower zoom
level as well. If you select to display the window at its lowest zoom level, each frame is shown in the
video track.
Page 290

FX
The FX option allows the adjusting of small delays that can occur on slower computer systems for
example. The linking of media files with VIP or Wave projects is based on two playback processes, one
for the MAGIX music editor 2
window and one for the media file window. No synchronizing of material takes place during the playback
process. This means that on computers that have timing problems due to insufficient system resources or
speed the digital audio tracks and the media file may run 'out of sync'. With the FX option you can
specify a factor that is used to do internal sample rate conversion. How does that work?
Since we can not influence the playback speed of the media file, we need to adjust the playback speed of
the digital audio tracks. Imagine that a normal playback speed is represented with a factor of 100. If the
digital tracks play ahead of the media file, the playback needs to be slowed down. This would be
accomplished by multiplying the regular playback speed of 100 with a FX factor just a little below 1, for
example 0.998. This would result in a playback speed of 99.8, which is a little bit slower than the regular
speed. This way we would align the digital tracks with the media file.
On the other hand, if the digital audio tracks lag behind the media file playback, a factor higher and 1
would need to the entered. A value of 1.002 would be an example.
Rule of thumb for this factor is to use small value increments. The values should stay around 1. You will
need to experiment with this setting, since there is no hard rule about the system performance of an
individual computer system.
If you do not have any problems with the digital audio tracks and the media file playback staying in sync,
you should not enter any values in this field!
Remove Link
This button will unlink the media file from the MAGIX music editor 2
window. This effectively stops all association with the media file. If you do not need any further
referenced to the media file, you may use this option.
Preview
The Test button allows testing of the current link. By clicking the button the playback of the media file
should commence. If no playback is visible in a MAGIX music editor 2 window, you may need to check
the Video in MAGIX music editor 2
window option for AVI files. Other media files should be playing back through the Windows multimedia
extension, such as the MIDI file player.
Show Actual Frames
This options shows the actual video frames in the preview windows in the video track and the preview
section.
Page 291

Text Comments
Menu: Options
You can enter text comments to the current project via a simple text editor. This text can be displayed
at each new opening of the project. This will preserve important information about the project together
with the audio material.
Text Comments
Enter the text you would like to associate with the project here.
Text Comments - Show on Start
When this option is checked, MAGIX music editor 2
will display the text comment window when the associated project is loaded.
Text Comments - Read Only
This option makes the text comments read only, which does not allow any changes.
Page 292

CD Arrange Mode
Menu: CD
When you activate this menu item, MAGIX music editor 2
rearranges newly inserted objects and inserts pauses (conforming to the Red Book Standard) between
the objects.
We recommend the following procedure:
1.
1. Open a new VIP
2.
2. Activate the Special CD Arrange mode in the CD menu.
3.
3. Load wave files, audio tracks or make a recording using a microphone.
In the VIP you can see gaps between the individual objects – these are the pauses inserted. The length
of the inserted pause can be set in the dialog "Set Pause Time
".
Page 293

Wave Editing / Destructive
Editing
Introduction
MAGIX music editor 2 is primarily a non-linear, non-destructive audio editor. This means that most of
your work is usually completed in the virtual domain (VIP), without making changes to the original audio.
However, there are some situations which are best completed by working directly on a Wave Project, as
if you were using a conventional audio editor. MAGIX music editor 2 can also function as a conventional
audio editor, but now offers two alternatives - Destructive Editing or the new virtual Wave Editing. When
working directly on Wave Projects, the powerful options offered by the Wave Editing system place
MAGIX music editor 2
a "cut" above other conventional audio editors!
Wave Editing / Destructive Or Virtual?
Using Wave Editing or Destructive Editing may not necessarily be the best method of completing your
editing task. For example, if you have duplicated an Object several times, all of the Objects would
contain the same edits after changes are applied and saved directly to the Wave Project window. But this
can also be an advantage at the other hand.
Please keep in mind that editing functions such as cut, copy, fades, crossfades, and so on can also all be
applied to the audio material in a non-destructive way in the VIP. Almost all effects can be used from
within the Virtual Project and applied to the Objects in the VIP Tracks.
With regard to the Effect Menu functions, the editing can also be performed "offline", in a destructive or
semi-destructive fashion which has similarities to Wave Editing. For example, the Effect Menu Room
Simulator function is always performed "offline". However, the option Create Copy (checked by default)
makes sure that a copy of the original material is processed with the effect and not the original audio
segment. The copy of the audio segment allows the use of Undo in the Virtual Project to return the
Object to its original state. Of course, this process utilizes additional hard disc space.
Also, remember that even if you work extensively with WAV files, you can complete all editing tasks
within a VIP. By importing the Wave Project into a VIP, you can complete editing steps faster and more
conveniently than in any destructive Wave editing application! For example, any type of cutting and
rearranging of audio segments can be performed in a non-linear, non-destructive, and extremely fast way
in the VIP. The Track Bouncing option in the Tools Menu allows you to take any material in a VIP and
turn it into a new WAV file which can then be imported into a VIP Project.
Note : As we shall see in this chapter, the new non-destructive Wave Editing mode is very similar to
working within a VIP , but the editing is carried out directly on the Wave Project
. This saves a lot of time in some cases (such as when working with sound or loop libraries).
Editing on Wave projects can be performed in two different modes, in the old "Destructive Editing"
mode or in (virtual) "Wave editing" mode.
Destructive Editing
This is the term used to describe the method for working directly on Wave projects in earlier versions of
MAGIX music editor 2
.
Page 294

When editing in Destructive Editing mode, the physical audio files are edited on a ‘destructive’ basis. This
means that the audio file is reconstructed with whatever effect or editing process you choose. There will
be Undo backups (assuming Undo is enabled), but these only exist while the file is open. Once the
Project is closed, the changes to the file are permanent. Of course, the Undo files consume large
quantities of hard disk space and can also take a long time to write to the hard disk!
When using Destructive Editing on a Wave Project, the changes are in general written back to the audio
file without having to use the Save Project command, as the changes are directly applied to the audio
material contained in the file. Once editing is finished, you simply close the Project. However, the Save
Project command needs to be used for saving marker information and other workspace specific items.
A RAP project needs to be saved to the hard disk to make the changes available the next time the
project is loaded. Since any editing is applied to the computers volatile RAM memory, the changes
would be lost as soon as the computer is turned off. The contents of the RAP project are loaded into the
RAM memory of the computer and are played back and edited in RAM. The Save Project command
will save any changes to the hard disk for storage and retrieval.
The Save Project As dialog lets you make a duplicate copy of the Wave Project window.
The original audio files are kept intact when using this command. Instead, a copy with the exact same
content is created. This can be a useful option for Destructive Editing.
MAGIX music editor 2 ’s development team designed a way to circumvent the disk space and time
inefficiencies associated with Destructive Editing. MAGIX music editor 2
introduces this new method, called Wave Editing :
Virtual Wave Editing
This is the new virtual wave editing mode introduced with MAGIX music editor 2
.
Read the new features quickstart "Virtual Wave Editing"
for an introduction to this mode.
There are some differences between the "destructive" and the "Wave editing" mode when working on
wave projects:
Rendering edit operations on saving
All edits: cut, paste, delete and insert are virtual. The positions, where the edit took place, are marked
by dotted lines. There will be no time consuming undo file creation any more. All the edit operations are
applied on the wave project, when you save it.
Section:
You can call the mixer, while working in the wave project. There you can apply every fx manipulation as
in the normal VIP section in real-time. These effects will be applied on the wave project, when you save
it. For more information on the Mixer section, read here
!
Menu fileàSave in format:
This will call the track bouncing Track bouncing dialog ( format conversions are possible). (Toolsà
Trackbouncing)
Auto Crossfade
The Auto crossfade option (Menu Edit) works in wave projects too, on every cut or insert operation the
default crossfades are applied, when auto crossfade is active. You can use the Crossfade Editor to edit
that crossfade, when you select the crossfade by selecting a range over the crossfade.
Page 295

New File with Drag and Drop
You can mark a range in the wave project and drag this range to an empty space somewhere t the
program desktop. A new wave project (untitled.wav) will appear. So you can easily make copies of the
whole or parts of the wave project.
Page 296

Units of Measurement
Menu: Options
‘Units of Measurement’
is used to specify the grid dimensions. Several display options are available which will appear at the
upper section of the grid.
The units supplied with MAGIX music editor 2 are ‘Samples’, ‘Milliseconds’, three SMPTE Frame
options, the MSF format for red book CDs (SMPTE with 75 frames), SMPTE + Milliseconds (instead
frames), ‘Bars’
for BPM display and feets and frames for 16/36 mm film..
Page 297

VIP Mouse Mode
Menu: Options
Functions of the Individual Mouse Modes in Detail
VIP Mouse Modes – This submenu makes the following selections available. (These are also accessible
via the Mouse Modes Toolbar
):
Universal Mode – This is the default mode in MAGIX music editor 2
. All necessary functions can be executed with the left mouse button. The right mouse button accesses a
context sensitive pop-up menu.
The vertical position within each VIP track determines between Object handling or marker and range
manipulation. The upper half of a track lets you select ranges and set the position of the play cursor. The
lower half of the track makes object selection and manipulation possible. Object handles, and volume
and panorama curve events take precedence and can be modified at any position within the track.
Range Mode (Secure Mode) –
This mode lets you only modify the ranges and the play cursor position. Using two special keys,
additional functionality is available:
Period Key ‘.’: If the period key is pressed, MAGIX music editor 2
changes temporarily into the Object Mode. Once in the Object Mode you can easily select and
manipulate objects.
Minus Key ‘-‘: Pressing this key, MAGIX music editor 2
temporarily changes into the Curve Mode. In the Curve Mode, you can change the volume and
panorama automation curves.
These special functions provide a way to quickly reach all of the important functions, while protecting an
object from accidental moving. This is why this mode is also called ‘Secure Mode’
!
Object and Curve Mode –
The Object and Curve mode allow you to manipulate objects and automation curves with the left mouse
button.
Volume Draw Mode – The left mouse button draws volume automation curves. Before using this mode,
make sure the ‘V’
button for the desired track is active.
Panorama Draw Mode – The left mouse button draws panorama automation curves. Before using this
mode, make sure the ‘P’
button for the desired track is active.
Curve Mode –
The Curve mode allows you to manipulate existing volume and panorama automation curves.
Page 298

Wave Mouse Mode
Menu: Options
You can select between two draw modes for Wave projects (HD and RAM Wave projects):
Ranges Mode
:
The left mouse button is used to set the real-time cursor, select , and markers (default).
Draw Wave
In this mode you can use ‘freehand drawing’
to manipulate the waveform. This is useful to correct single samples, small distortion peaks, clicks etc...
Please use a zoom level of 1:1 or larger for exact handling!
Draw Volume
In this mode you can draw the volume of the sample, e.g. to create a special fade curve.
The middle of the display is volume 100%, the lower border is volume 0%, and the upper corner is
volume 200%.
Page 299

Object Mode
Link Curves to Objects:
This mode lets you combine the volume and panorama automation curve events with the object below
the events. Once linked, the curve events are moved with the objects. This is especially helpful, if the
curves are tailored to specific objects and need to be moved with the objects.
Link One Track:
This mode selects and collectively moves all objects in the same track that are located behind the current
mouse position. This is useful when the later parts of a track are already completed and additional work
needs to be performed at the beginning of the track. The later section of the track remains intact, even if
certain objects in the beginning need to be moved or space needs to be inserted.
Page 300

Keyboard Shortcuts
Menu: Options
The keyboard shortcuts in MAGIX music editor 2
can be customized to your own preferences. Any command found in the menus can be used to assign a
specific keyboard shortcut. We would suggest familiarizing yourself with the default settings before
changing the keyboard shortcuts. Most default assignments follow certain logic and many shortcuts are
related.
If you have made any mistake in assigning new shortcuts, you can always return to the default setting with
the ‘Restore Default’
button.
The shortcut settings are saved to the file '??????_TB.ini' (???? Stands for the your program version
executable file name) in the MAGIX music editor 2
directory when exiting the program. The next time the program is loaded, the customized shortcuts will be
retained.
A convenient option is the saving of Shortcut templates. The buttons ‘Save Shortcuts’ and ‘Load
Shortcuts’
allow you to customize the shortcut assignments and save them to templates that you can recall at any
time. For the first time two or more engineers can work on the same station and each having their own
set of customized keyboard shortcuts!
You can also customize the menus and hide menu items you not frequently or never use, e.g. Im-&
Export of unusual file formats if you never intend to use it.
The most important aspect of the dialog is the display of the MAGIX music editor 2 menu tree. You can
select which menu option is to be reassigned a new key. To accomplish this, simply click on the desired
menu option in the tree and then on the 'New Shortcut' box. Next, press the new key or key combination
and press or click on the 'Assign new Shortcut' button. Any possible combination of Shift, Alt, and Ctrl
with other keys is possible. Please do not use the space bar, ESC, or the Insert key. These functions are
hardcoded into MAGIX music editor 2
and can not be changed!
Page 301

Edit Toolbars
Menu: Options
With this command you open the tool bar editor for the according toolbar. The same function can be
called by right-clicking on the tool bar. All tool bars are customizable. You can customize any toolbar by
adding or removing any command, which is available as a toolbar icon.
Inside the toolbar editor there is a context-sensitive pop-up help.
Page 302

Video Height
Menu: Options
MAGIX music editor 2
allows you to link to an AVI file. The AVI movie is played back whenever the VIP or Wave project is
played back or recorded into. If the option to display the AVI frames in the VIP window, the height of
the AVI pictures is determined with this setting.
Page 305
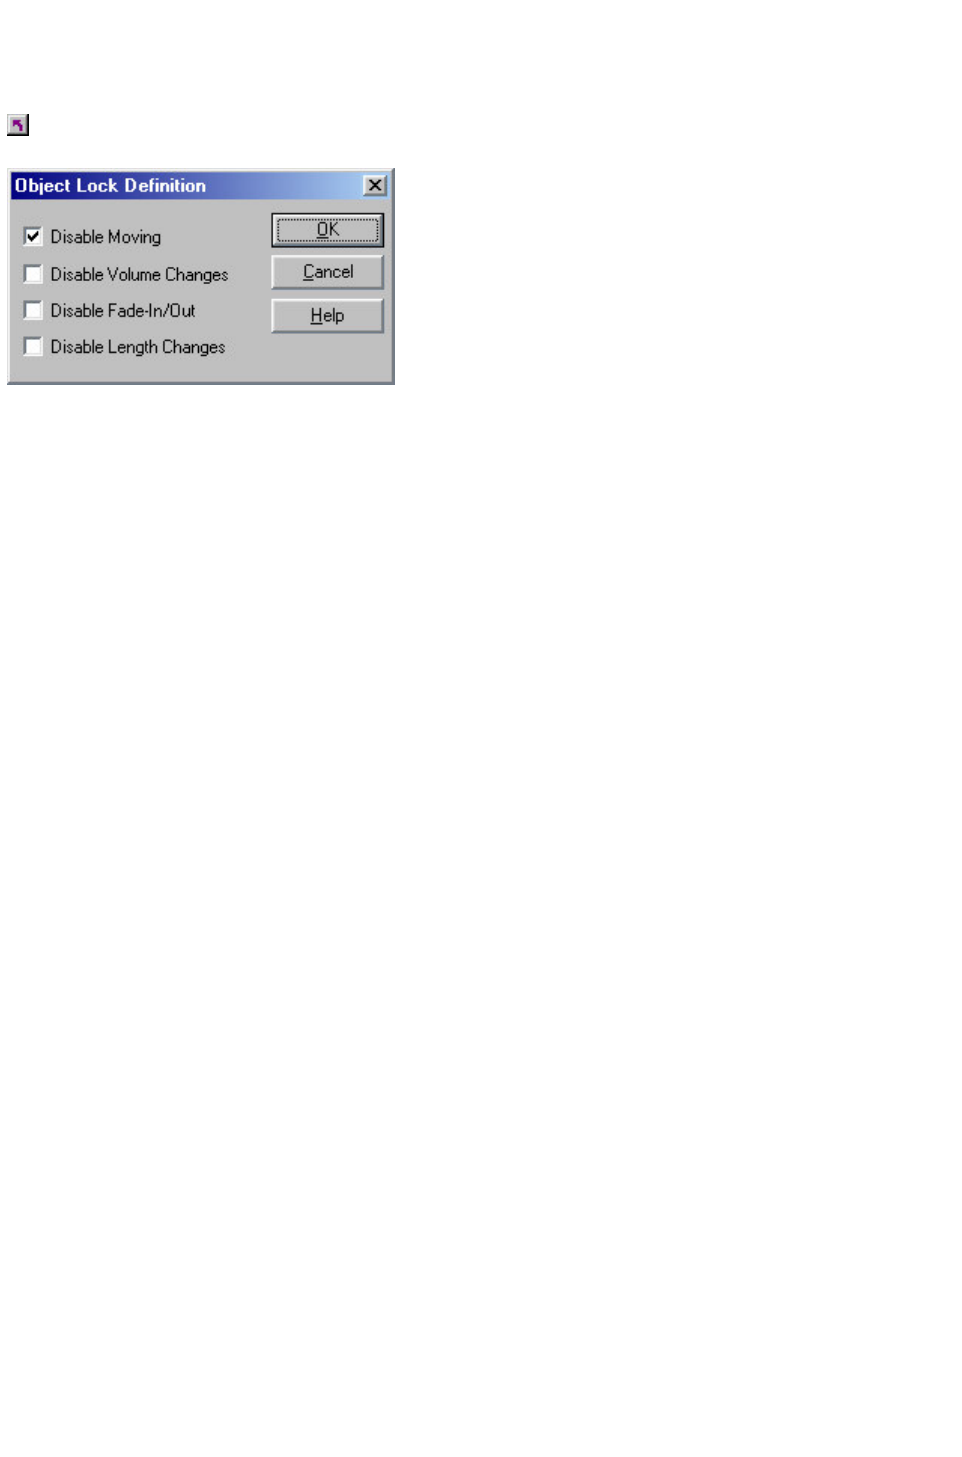
Lock Definitions
Menu: Object
Here you can select, which options should be disabled:
Disable Moving
Disables moving of objects (default). This is useful in multi-track projects to avoid delays between
several tracks.
Disable Volume Changes
The volume handles are disabled.
Disable Fade In/Fade Out
The fade handles are disabled.
Disable Length Changes
The length handles are disabled.
Page 309
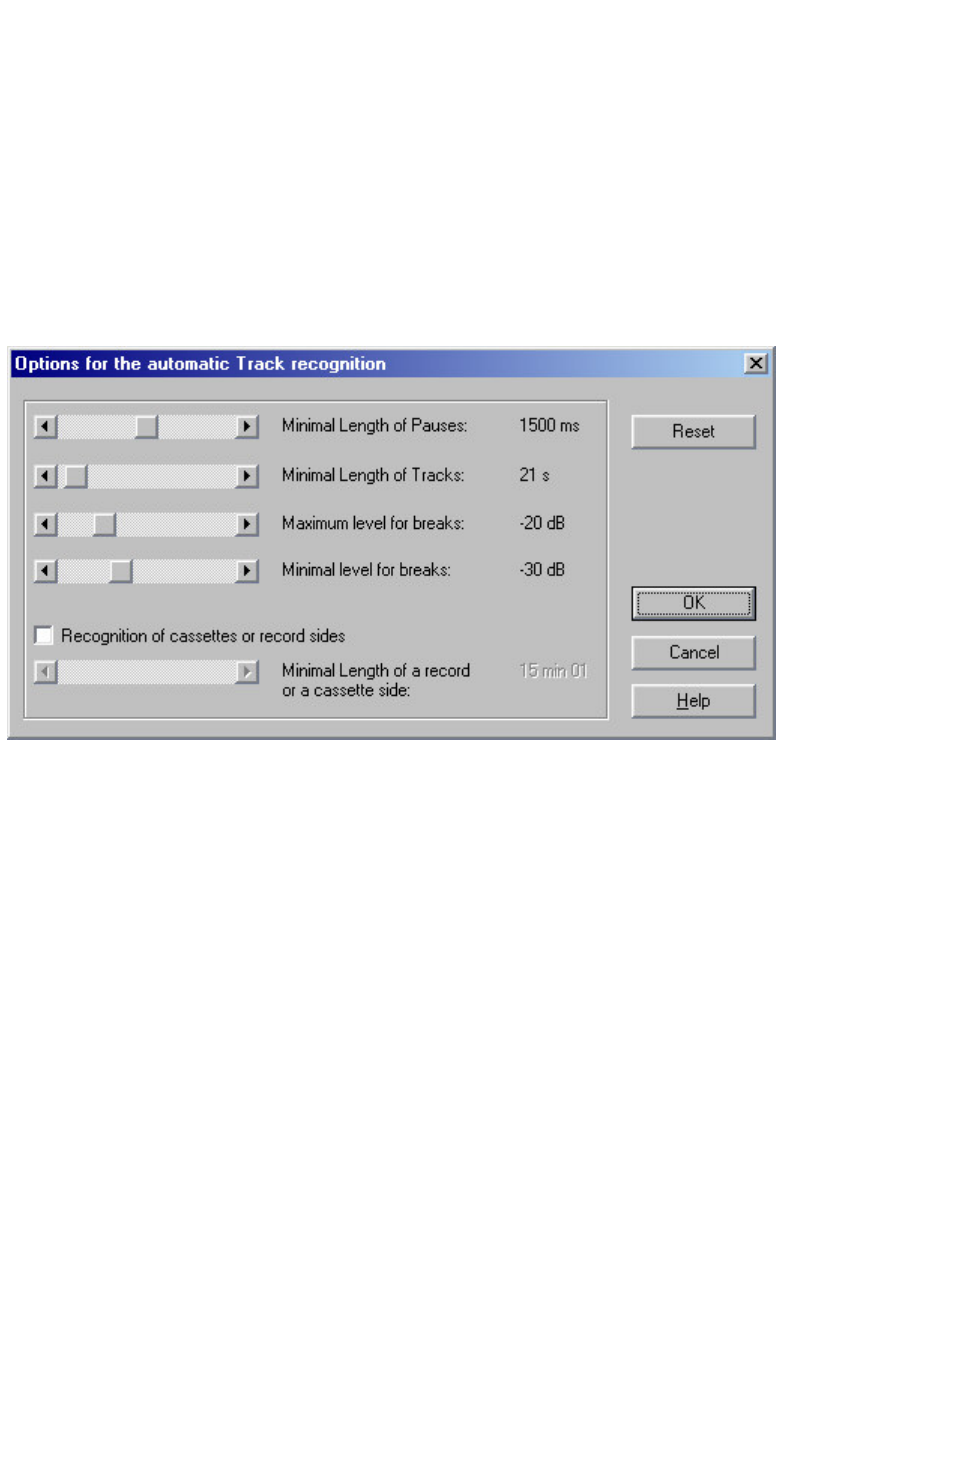
Options for Track Marker
recognition
Options for automatic track marker
Based on many tests using tapes and LPs, we preset values that will yield very precise results in most of
the cases. Should you be satisfied with an individual result, you can change these values under this
option.
Minimum length of breaks:
This is the time that the audio material must remain below a certain level in order to be recognized as a
break.
The longer this value, the fewer breaks will be detected. If the value is shorter, there is a possibility that
short silent sequences in a title might be recognized as a break.
Minimum length of tracks:
A new pause will only be recognized once this amount of time has passed since the last track marker.
If you are recording a tape with a pop song and want to write it on CD, you can set this value to 3
minutes. But if the tape contains short sound samples, the value has to be consequently much shorter.
Maximum level for breaks and Minimum level for breaks:
During the first step, music editor 2 searches for a suitable volume level for the break detection. With
these two parameters, you can limit the results before the process continues. If too many breaks were
detected, then you should move both controllers more to the right. In the opposite case, move them to
the left.
Detection of LP and cassette side:
In certain occasions you might want to record both sides of an LP immediately one after the other,
without interrupting the recording at the computer. The result is normally a very long audio file that
includes a very silent passage in the middle of the recording (the moment when you turned the LP or CD
over). Music editor 2 detects this as only one section and splits the object into two new objects and tries
the same with both of the resulting objects. In the best case, even the noises produced while turning the
LP or cassette over will be eliminated. You can increase the precision of this process, adjusting the
minimum length of the side of your LP or MC. Here are a few proposals:
Single:
10 minutes
LP:
Page 310

15 minutes
60 min MC
: 25 minutes
90 min MC
: 40 minutes
This is also correct for recordings that you made earlier and want to want to load into music editor 2
using the "Load audio file...".
If you are sure that the recording has not been made from 2 LP sides, than you should switch off this
function
Some final remarks:
- Sometimes it may be helpful to set first 2 or 3 markers by hand and to separate the objects using the
"T" key, especially if there are no big level differences in the recording. Music editor 2 will analyse the
new objects separately and will then obtain more precise results.
- Music editor 2 cannot detect the correct track markers in all and every case (for example, in live
recordings or classic music). If you have tried various different settings and are still not satisfied with the
result, then you should set the track markers by hand.
- If you want to edit audio CDs in the music editor 2, then you should insert the CD in your CD-ROM
drive and select the "Load Audio CD track(s)" function. In this case, all the necessary information
concerning the position of the track markers is directly imported from the CD.
Key: Strg+m
Page 311

Menu Window
Menu Reference
Cascade
Arranges all open windows.
Tile
Arranges all open windows.
Untile
Restores previous arrangement.
Arrange Icons
Arranges all icons.
Main Toolbar
Shows or hides the Main Toolbar. You
cannot use this command J
Positionbar
Shows or hides the Position Bar.
Punch/Playbar
Shows or hides the Punch/Play Bar,
including the Live Input option.
Mouse Mode Bar
Shows or hides the Mouse Mode toolbar.
Rangebar
Shows or hides the Range Bar.
Statusbar
Shows or hides the Status Bar.
Mixer
Shows or hides the real time Mixer window.
Time Display
Shows or hides the Time Display window.
Visualization
Shows or hides the Visualization window.
Transport Control
Shows or hides the Transport Control
window.
Close All Windows
Closes all open windows..
Iconise All Wave Projects
Changes all Wave projects to icons, VIPs
stay in full size.
Hide All Wave Projects
Hides all Wave project windows, VIPs stay
in full size.
Half Height
Changes the MAGIX music editor 2 screen
to half the height.
Window 1, 2, ...
Activates the window 1,2...
Page 312

Time Display
Menu: Window
Shows or hides the time display window.
This window always shows the actual time position in the actual format. You can change this format with
the menu ‘Units of Measurement’
. We recommend the SMPTE format: hours:minutes:seconds:frames. The colors and the font for the
display can be changed in the context menu, opened by right-clicking in the Time display window. You
can zoom the window to any size and position it anywhere on the screen!
Up to five rows
of information can be displayed. Click the right mouse button on the Time Display to display a pop-up
menu that lets you choose the preferences for the Time Display.
St. - Start Position
This line shows the current range start position or the current real-time cursor position.
Len - Range Length
If a range is selected, this line displays the length of the range.
End - Range End Position
If a range is selected, this line displays the range end position.
Act - Current Cursor Position
This line shows the current cursor position.
Mix – Latest Mixer Position
This line shows the latest mixer position (not editable).
The same values are displayed in the time at the lower edge of the VIP Window
There you have the possibility to edit the values manually by double clicking in the corresponding field.
You can also access this function by the keyboard shortcuts alt+ numpad 1..5 or with the corresponding
menu items "menu rangeàedit time displayà
field 1..5"
Page 324

Visualization
Menu: Window
MAGIX music editor 2
provides you with a special window featuring multiple ways to display the original volume level and
spectral structure of your projects. Default setting is a high resolution stereo peak-meter.
By clicking on the "Setup" button in the upper left corner of the visualization window you can made all
settings:
Mode:
You can choose between Oscilloscope, Peakmeter, Spectroscope (which is actually an spectrum
analyzer), Phase correlation ( Goniometer) and Spectrogram (visualizes the spectral structure in time).
Value/Range:
You can set the minimum/maximum value for all visualization modes and for the peakmeter furthermore if
it should show absolute peaks or RMS and the actual maximum value numerically.
Speed:
Here you define three different display speed for all visualizations, you can set custom values for the
damping: set the time value in ms that the visualization needs to change its display, if the input value has
changed by 10 dB.
Peak hold:
You can switch on/off Peak hold and define peak hold and decay time.
Spectral options:
Here you can make several settings for the Spectrum Analyzer visualizations Spectrogram and
Spectrograph, the number of used bands, if the bands are distributed linear or logarithmic, how the bands
value is calculated from the signal and the stereo options, where you can choose to display just left /right
signal or the sum or difference of the two channels.
Colors:
You can set the color for the Osci/Correlator line/grid/background and for the peakmeter/Spectrum
bars. The latter can work in solid (3 fixed colors for minimum-middle-maximum value) or gradient mode
(the three colors will be blended into each other).
Reset all:
all open visualization windows are reseted
Audio device
Open new Visualization:
Opens a new visualization window, where you can choose an alternate mode to have optimum control
over the signal. You can have up to four visualizations windows open, three for playback and one for an
input signal (opened by the record dialog).
Load/Save preset:
Choose from nice designed presets or save your own design for later use.
Page 325
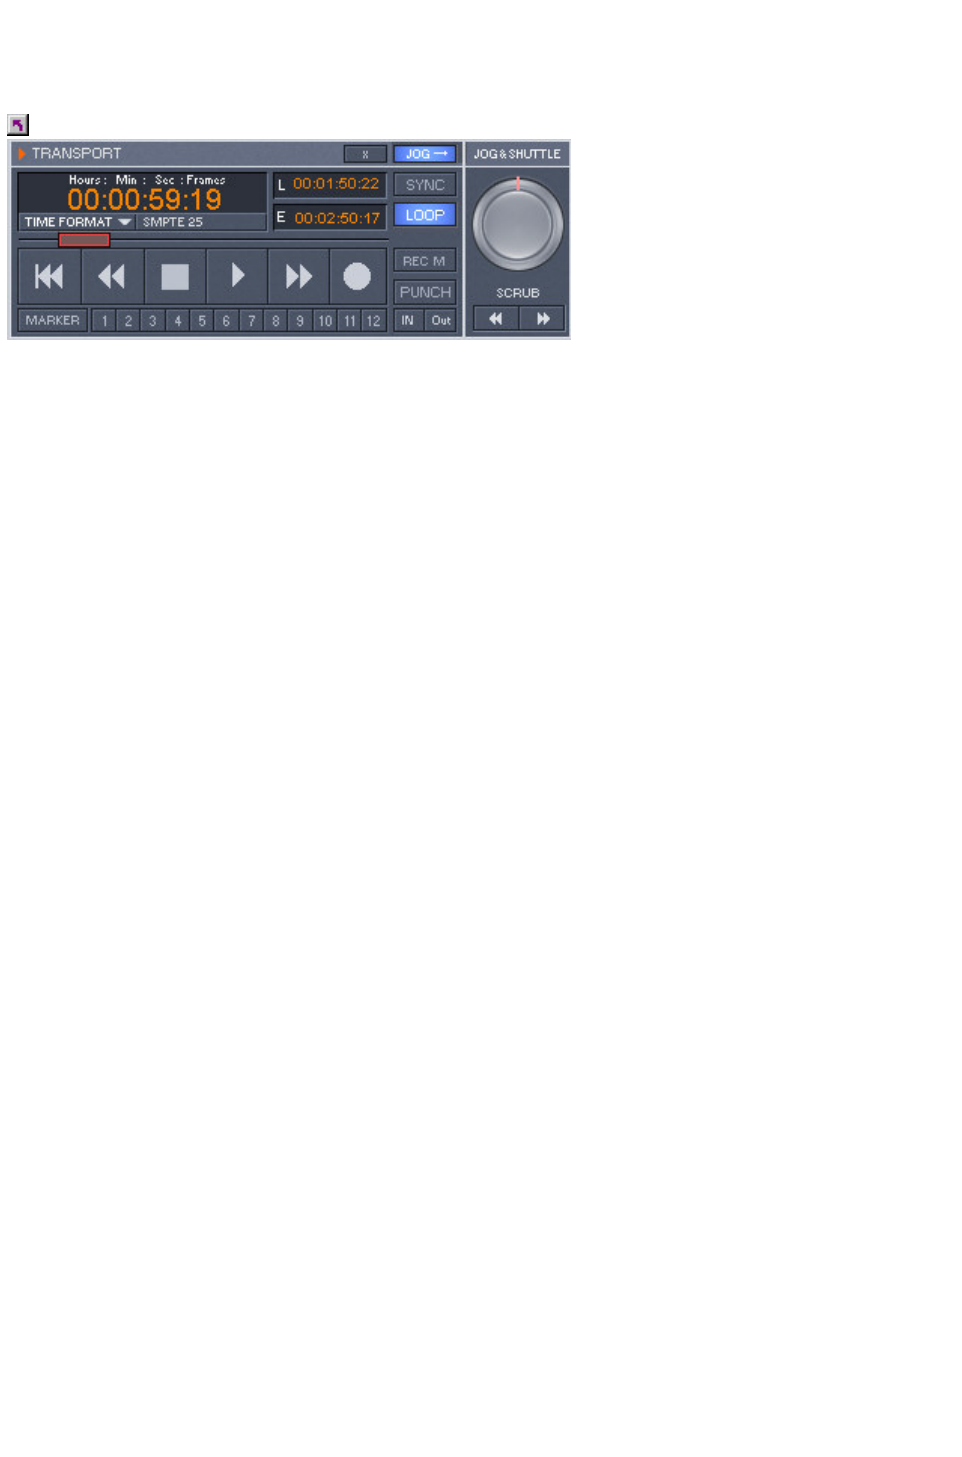
Transport Control
Menu: Window
MAGIX music editor 2
provides a very cool transport console!
Start / Stop / Forward / Rewind Buttons:
This allows positioning similar to that of a tape machine.
The little button in the upper right hand corner of the Playback button
(or right-clicking the Playback button) opens the Playback Parameter window for the stereo master
operation. This lets you determine the sample rate, playback device, and the Scrubbing/Varipitch
options.
Record button:
Starts the recording for all active tracks. This means that tracks with the red REC button enabled need
to be configured with the proper recording devices prior to starting the recording. Right-click on the REC
button for each track to select the device.
The little button in the upper right hand corner of the Record button
(or right-clicking the Record button) displays the Record Parameter window. This lets you make settings
such as ‘Playback during recording’ and also lets you record material directly from the Record
Parameter window.
Time Display:
This displays the current playback position of the project. Double-clicking on the window lets you
numerically enter a new playback position. Clicking the green arrow lets you set various units of
measurement.
L/R Time Display:
This displays the length of a selected range and is editable by double clicking the display.
Marker Buttons 1-12:
Clicking on one of the marker buttons saves the current playback position to the button. If it already
contains a previously saved position (marker appears in light color), the program will place the playback
position to the saved position. A right click clears the button memory and allows you to store a new
position to the button.
Marker Button:
This button open the Marker Manager for more detailed Marker editing.
Punch Button: This button switch MAGIX music editor 2
into punch record mode. This means that the recording process can be started any time during playback.
This is also called ‘On-The-Fly Recording’. This can be repeated numerous times. Punch In and Out
markers are set automatically. You can stop a punch in recording process with another click on the
Record button. However, this does not stop the playback of the project.
Punch In Button:
This sets the punch in position.
Punch Out Button:
This sets the punch out position. If the both the punch in and punch out markers are set, the punch
recording can be started with the Playback button. The program will play back the project until it reaches
Page 326

the punch in point. At the punch in point the program switches into record mode and continues until the
punch out marker has been reached. At the punch out marker the program switches back into playback
mode and continues the playback until it is stopped.
Sync Button:
This button opens the Synchronization window.
Loop Button:
The loop button activates the Loop mode, meaning that playback continues to loop through a previously
selected range.
RCMON Button: This button activates the Record Monitoring feature of MAGIX music editor 2
. All tracks that have their REC buttons activated are monitored with the peak meters. The inputs of the
audio device(s) are directly routed to the outputs of the soundcard, if the soundcard offers this
functionality (check with your soundcard manufacturer). This offers the same functionality as with real
tape machines.
Jog Shuttle:
The jog shuttle wheel varies the playback speed. This can be used to audibly spot material in your
project.
Scrub >> & Scrub <<:
These buttons allow you to scrub through your project. During scrubbing the playback of the project
continues with varying speed while the playback direction can be changed. This also offers a convenient
way of finding audio sections such as clicks or mistakes in the audio material.
Page 327

Menu Help
Menu Reference
This menu contains the context sensitive online help functions of MAGIX music editor 2
.
Help Index
Shows the items, for which
help is available.
Context Help
Activates the context sensitive
help system.
About Help...
How to use the online help
system.
About MAGIX music editor 2
...
Shows copyright notice and
the version of MAGIX music
editor 2 .
System Information
Shows information about
memory usage etc...
Page 333

System Information
Menu: Help
A window is displayed, containing information about the memory status and other parameters.
Particularly useful is the display of the free storage on all connected disk drives, the used system
resources utilized by MAGIX music editor 2 and the memory usage. Make sure the parameter for
system memory used by MAGIX music editor 2 never grows larger than the displayed overall system
memory available (physical RAM). If this happens, the performance of MAGIX music editor 2
is reduced caused by page swapping (virtual memory) done to compensate for the missing memory.
Page 337
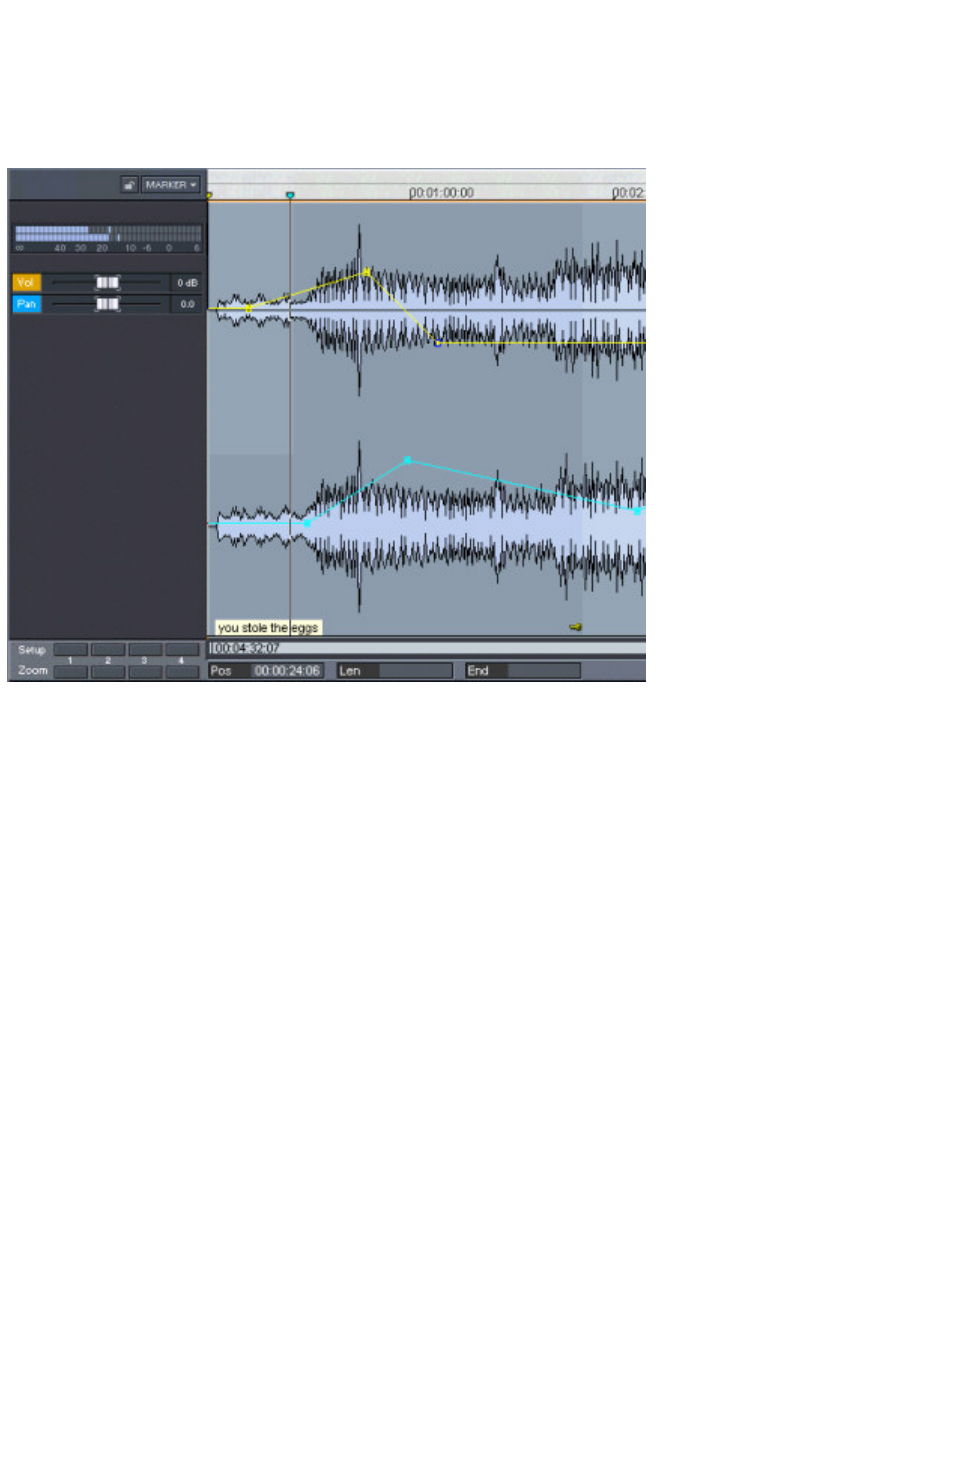
Virtual Project Components
VIP Window components allow you to set properties for the respective audio track and contains the
main editing area.
Window Title Bar
The title bar shows the name of the VIP and the sampling rate. It also shows the length of the project in
samples.
Lock
Locking a track will prevent you from accidentally moving or deleting objects in the track display. The
Lock Definitions in Object->Lock Object can be used to prevent or allow certain editing steps.
Volume Automation
MAGIX music editor 2 has extensive support for volume automation. Clicking on this button activates
the volume automation for a track. Once active you can assign certain volume fades by creating so-called
‘volume nodes’ along the volume automation line. These events are also referred to as ‘volume rubber
bands’
because of their rubber band like nature when moving them.
The volume automation can be enabled on a track by track basis. Once automation events are created,
they will reside on the track until the volume automation is turned off. However, the outline of the line or
curve is not lost. Once the automation is turned back on, the automation events are restored to where
you left them.
MAGIX music editor 2 allows you to change the automation events even during playback and has
several functions to make them ‘stick’
to specific objects.
Panorama Automation
Just like the volume automation the panorama or panning automation is a convenient way of adding fades
Page 338

from the left to the right channel and vice versa. It adheres to the same guidelines as the volume
automation.
Volume Fader
This fader sets the main level for the track volume. If the volume automation is active, the events along
the automation line will determine the level at a specific time event. However, the volume fader will allow
you to alter the overall level of the track and the automation events are scaled to the new main level
setting. This will prevent having to redraw the volume automation if the overall volume of track needs to
be adjusted.
Panning Fader
The panning fader works much like the volume fader and will have the same effect on any panning
automation assigned to the track.
LED Display
The LED display shows the track volume levels during recording and playback. It is updated in a
manner that closely resembles LED’
s on hardware consoles. However, on slower systems it is recommended to turn them off (Shift+TAB).
Object
Some DAW applications use so-called ‘regions’ that contain audio events. We chose to call these
regions ‘objects’
since they more closely resemble a separate entity that can be edited as an independent object. They are
like building blocks in a Lego™ house if you will. Each contains specific instructions about the audio
section that is edited and played back by the object.
Keep in mind that objects do not contain the actual audio material. Rather they are ‘pointers’ to the audio
in the physical audio files or windows (RAP and HDP). This is the reason why editing steps such as
moving, copying, dividing (splitting), cutting (deleting), or duplicating are extremely fast. After all, we are
only editing instructions
and not the actual audio itself.
Objects can also have their own Fade In, Fade Out and volume setting.
Range
Ranges in VIPs allow you to selectively edit objects that are located within a range. Ranges can be
moved, extended, or shortened to size them for specific needs. Let’
s assume that you wanted to select objects up to 2 minutes into the project. Selecting a range over the
contents up to the 2-minute position and choosing Object->Select Objects would do the trick!
Screen Formatting Buttons
These buttons can be assigned with a specific screen formatting setting. For example, clicking on the
second ‘S’
button while holding the Shift key and zooming into the window will always return the same setting when
clicking on this button again.
The ‘S‘ buttons store complete Zoom/Scrolling setups, while the ‘Z‘
buttons only store a custom zoom level.
Scroll Bars
The scroll bars allow you to move along the time line of the project if you have zoomed into the window
Page 339

horizontally..
You can also control the horizontal zoom level by dragging the borders of the scroll bar. The magnifying
glass buttons will also zoom in and out of the project display in preset increments.
Markers
These marker positions can be set with the Shift and number keys. This will even work during playback
to give you a quick way of marking your track.
Special markers are the Punch-In and Punch-Out markers as well as track index markers for CD
creation.
Any of the markers can be picked up with the left mouse button and dragged to a desired position. When
doing detailed work you may increase the resolution of the track display by zooming horizontally into the
track window.
Page 340
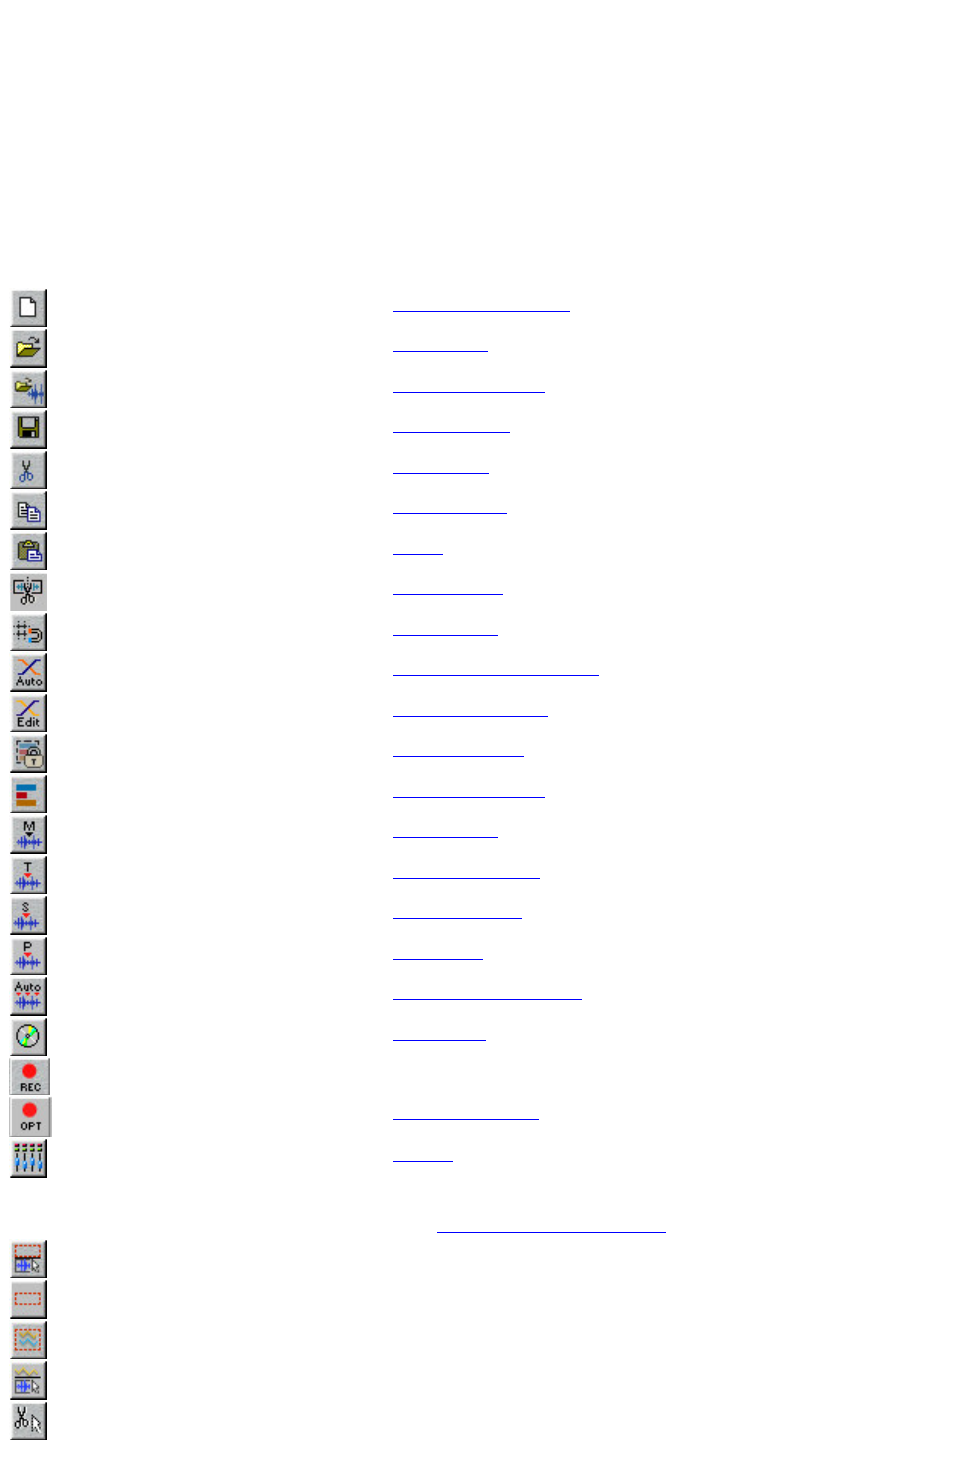
Toolbars
Toolbars are designed to help you work more efficiently with MAGIX music editor 2 . They are
shortcuts to major functions in MAGIX music editor 2
. Any of the toolbars can be moved. If you drag a particular toolbar to a new location, the toolbar turns
into a floating toolbar, which can be placed anywhere on the screen.
Show / hide any Toolbar in the Menu Window.
You can customize any toolbar by adding or removing any command, which is available as a toolbar
icon. So the following listing represents just the default configuration, which you can easily design to suit
your needs.
Main Toolbar
New virtual Project
Open VIP
Open WAV File
Save Project
Cut Range
Copy Range
Paste
Split Object
Snap on/off
Auto Crossfade Mode
Crossfade Editor
Group objects
Ungroup objects
Set Marker
Set Track Index
Set Sub Index
Set Pause
Auto Track Markers
Make CD
Record
Record Options
Mixer
Mouse Mode Toolbar
(see Details on Mouse Modes )
Universal Mode
Range Mode
Curve Move and Grab Mode
Object and Curve Mode
Cut Mouse Mode
Page 341
Timestretch Mouse mode
Draw Volume Mode
Draw Panorama Mode
Draw Wave Mode (only on Wave
Projects)
Scrubbing Mouse Mode
Zoom Mouse Mode
Normal Objectmode
Link Curves to Object
Link Objects of one Track
Position Toolbar
Section to beginning
Section one length left
Section half of its length left
Section half of its length right
Section one length right
Section to end
Set section in a VIP to the next/previous
object border
Set section to the next/previous marker
Set the zoom depth to 1, 10, 60 sec and
10 min
Zoom Wave In/ Out vertical
Range Toolbar
Play Cursor on left range border
Play Cursor on right range border
One range length left
One range length right
Range start to previous zero crossing
Range start to next zero crossing
Range end to previous zero crossing
Page 342

Range end to next zero crossing
Range Editor
Page 343
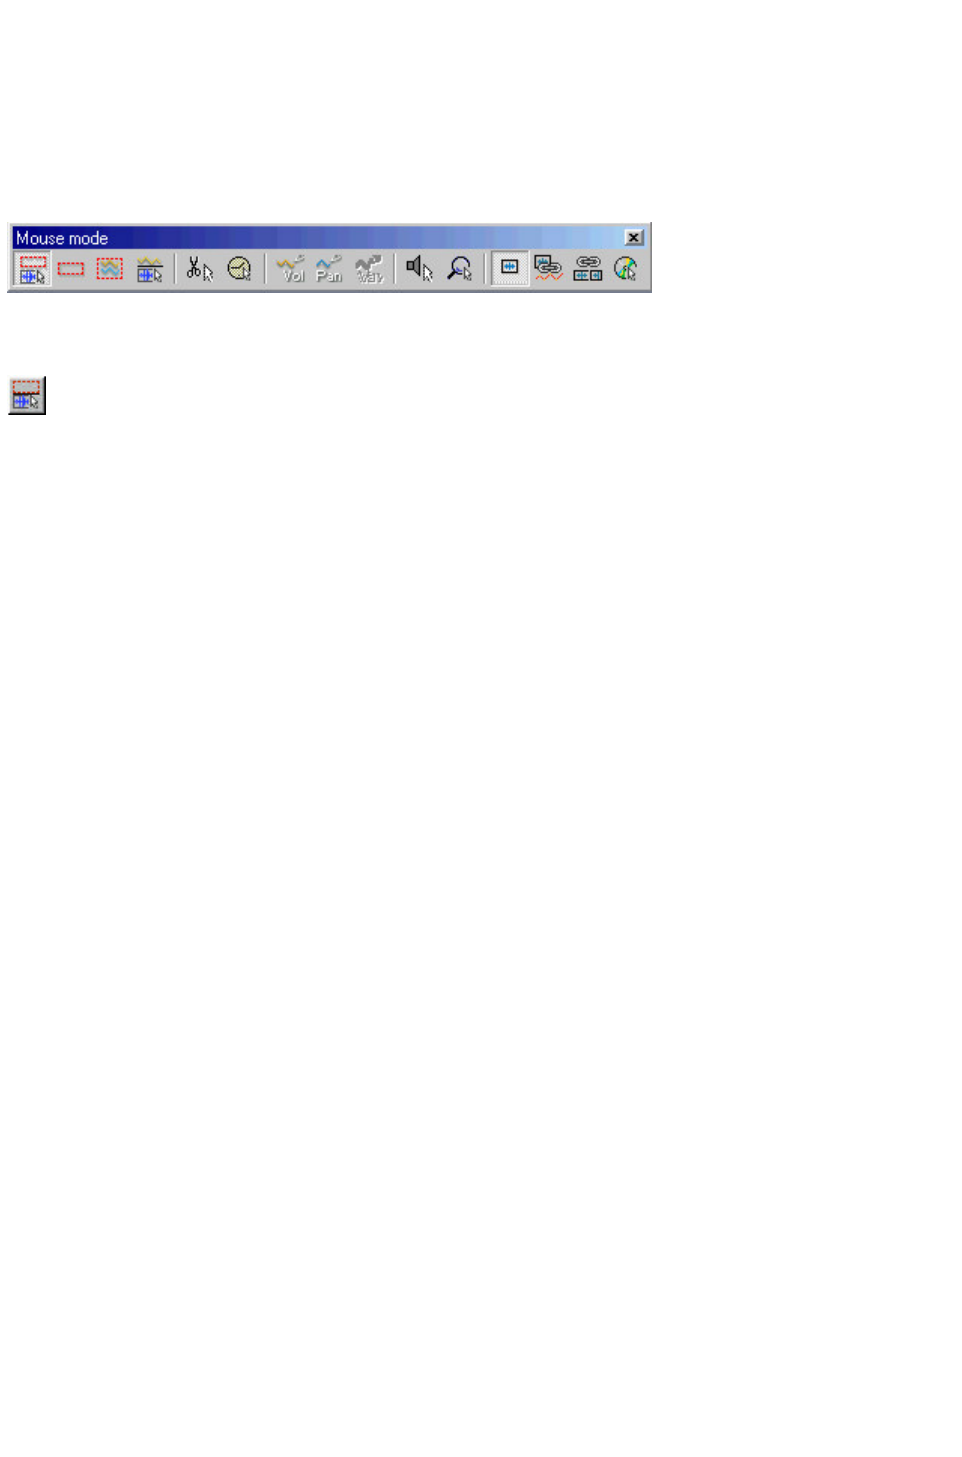
Details about the Individual
Mouse Modes
Click on the image for a shortcut!
The Universal Mode
Right Mouse Button:
Displays context sensitive pop-up menu.
Left Mouse Button:
Upper Track Pane:
Range:
Selecting ranges and moving ranges
(with Shift key).
Play Cursor:
Single click sets the real-time cursor
anywhere in the track.
Zoom:
Double click outside of a selected
range (or no range) zooms out.
Double click inside a selected range
zooms in.
Lower Track Pane:
Selecting Objects:
Single click selects objects (or
group of objects.)
Single click + Shift selects multiple
objects, including all objects
between the two clicks.
Single click + Ctrl selects multiple
single objects.
Moving Objects:
Dragging moves objects or object
groups.
Dragging + Shift moves objects or
object groups up or down the track
list without changing the time
position.
Duplicating Objects:
Dragging + Ctrl duplicates one or
more objects.
Dragging + Shift + Ctrl duplicates
one or more objects, while allowing
the objects to be moved up or down
the track list without changing the
time position.
Lasso Function:
Clicking next to an object while right
dragging the marquee (lasso) across
Page 344

multiple objects selects the objects
within the marquee.
Clicking next to an object while left
dragging the marquee (lasso) selects
multiple volume or panorama curve
events.
Complete Track
Object Handles:
The upper handles changes the
object volume. The changed level is
shown in dB in the upper left-hand
corner of the VIP.
The upper left and right handles
change the Fade In and Fade Out of
the object.
The lower handles resize the object.
Volume and Panorama Automation
Curves
Double click on the automation
curve creates a new curve event.
Another double click on the same
curve event deletes the event.
Single click on an event selects the
automation curve event.
Single click + Ctrl allows selection
of multiple events.
Dragging of a curve event moves the
selected event.
Dragging + Ctrl moves several
events.
To delete events, select the events
and use Edit->Delete … Handle.
The Range Mode (Secure Mode)
Right Mouse Button:
Displays context sensitive pop-up menu.
Left Mouse Button:
Range:
Selecting ranges and moving ranges
(with Shift key). Objects or
automation curves can not be
changed by accident (therefore
called ‘Secure Mode’).
Play Cursor:
Single click sets the play cursor
anywhere in the track.
Zoom:
Double click outside of a selected
range (or no range) zooms out.
Double click inside a selected range
zooms in.
Select Object Mode temporarily:
Using the ‘.’ (Period key)
temporarily switches to the object
Page 345

mode, which allows moving of
objects.
Select Curve Mode temporarily:
Using the ‘-‘ (Minus key)
temporarily switches to the curve
mode, which allows moving and
manipulating of automation curve
events.
The Curve Mode
Right Mouse Button:
Displays context sensitive pop-up menu.
Left Mouse Button:
Lasso Function:
Dragging the marquee or lasso
selects multiple volume or panorama
automation curve events.
Volume and Panorama Automation
Curves
Double click on the automation
curve creates a new curve event.
Another double click on the same
curve event deletes the event.
Single click on an event selects the
automation curve event.
Single click + Ctrl allows selection
of multiple events.
Dragging of a curve event moves the
selected event.
Dragging + Ctrl moves several
events.
To delete events, select the events
and use Edit->Delete … Handle.
The Object and Curve Mode
Right Mouse Button:
Displays context sensitive pop-up menu.
Left Mouse Button:
Selecting Objects:
Single click selects objects (or
group of objects.)
Single click + Shift selects multiple
objects, including all objects
between the two clicks.
Single click + Ctrl selects multiple
single objects.
Moving Objects:
Dragging moves objects or object
groups.
Dragging + Shift moves objects or
object groups up or down the track
Page 346

list without changing the time
position.
Duplicating Objects:
Dragging + Ctrl duplicates one or
more objects.
Dragging + Shift + Ctrl duplicates
one or more objects, while allowing
the objects to be moved up or down
the track list without changing the
time position.
Lasso Function:
Clicking next to an object while right
dragging the marquee (lasso) across
multiple objects selects the objects
within the marquee.
Clicking next to an object while left
dragging the marquee (lasso) selects
multiple volume or panorama curve
events.
Object Handles:
The upper handles changes the
object volume. The changed level is
shown in dB in the upper left-hand
corner of the VIP.
The upper left and right change the
Fade In and Fade Out of the
object.
The lower handles resize the object.
Volume and Panorama Automation
Curves
Double click on the automation
curve creates a new curve event.
Another double click on the same
curve event deletes the event.
Single click on an event selects the
automation curve event.
Single click + Ctrl allows selection
of multiple events.
Dragging of a curve event moves the
selected event.
Dragging + Ctrl moves several
events.
To delete events, select the events
and use Edit->Delete … Handle.
The Cut Mouse Mode
Right Mouse Button
: Displays context sensitive pop-up menu
Left Mouse Button
: Use the mouse as scissors to cut objects
The Pitch-shift/Time stretch mode
Page 347
Right Mouse Button
: Context menu
Left Mouse Button:
The lower right Handle allows compression or stretching of an object. A time stretching effect is created:
The object is not played as a loop or shorter version, but simply in a different play tempo.
Using the center handle, the pitch can be altered using pitch shifting.
The Draw Volume /Draw Panorama Mode
Right Mouse Button:
Displays context sensitive pop-up menu.
Left Mouse Button: Draws volume automation curves into VIP tracks. The ‘
Vol’ or ‘Pan’ button for a respective track needs to be active prior to drawing the volume or panorama
curve.
The Scrub Mode
Right Mouse button:
Context menu
Left Mouse button:
Scrub function
Click into project: Pre-listen with control over play tempo. The project will be played forward and back
controlled by the distance of the mouse pointer from the actual play cursor position. The larger the
distance the faster the play tempo. You can set 3 individual scrub modes in the play parameter window
Read more on scrubbing here!
The Zoom Mode
Right Mouse Button
: Zoom out
Left Mouse Button
: Zoom in
Page 348

Screen Elements
Program Title Bar
This bar not only shows you the current version of MAGIX music editor 2
, but also indicates which project is open and active.
Menu Bar
The menu bar shows you the available functions in MAGIX music editor 2
.
à Menu Reference
Toolbars
Toolbars are designed to help you work more efficiently with MAGIX music editor 2 . They are
shortcuts to major functions in MAGIX music editor 2
. Any of the toolbars can be moved. If you drag a particular toolbar to a new location, the toolbar turns
into a floating toolbar, which can be placed anywhere on the screen.
à Toolbars Reference
Floating Transport Control
The floating transport control window provides convenient audio transport buttons for the following
functions:
Record, Play, Stop, Reverse Play, Go To Start, Backward, Forward, Jog/Shuttle, Scrub, open
Synchronization dialog, open Playback dialog, open Record dialog, set Loop Mode, Position Control,
Input Monitor, Punch In/Out and Store Markers.
àTransport Control
Status Bar
The Status Bar shows information about the audio caching state and pertinent information about which
track is selected.
Also it gives you an indication of the buffer utilization. Buffers are used in MAGIX music editor 2
to achieve a larger number of tracks and handle the real time processing. They are largely responsible for
a smooth operation of the program. Improper buffer settings will result in audio interruptions or other
anomalies.
When first installing MAGIX music editor 2
you may want to stick with the default buffer settings until you have a better understanding how they
affect performance of your audio tracks. Please refer to the Reference Manual on a detailed description
of the buffers.
DSP Display
Many times, you would like to know how much more ‘room’ you have to add more tracks or enable
additional real time effects. MAGIX music editor 2 displays a CPU DSP meter in the lower left-hand
corner of the status bar in MAGIX music editor 2
. This meter gives you an idea what the load on the CPU looks like. The more tracks you add to your
multi-track project and/or the more real time effects you enable the more CPU processing power is
needed. The display will show you this increase.
It will also give you an indication if your operating system is configured optimally or if there is some other
process that all of a sudden kicks in. For example, if you are recording a 60 minute life recording from a
Page 349

DAT tape and at 45 minutes into the process the DSP display increases and you see errors being
introduced, there is a good chance that Windows is doing something in the background. Among the
possibilities are system cleaning tools or screen savers. It is best to disable those applications when
working with MAGIX music editor 2
.
The DSP display will give you a good idea how well your system performs. If an overload is indicated
you may either remedy the problem by increasing the buffer settings in MAGIX music editor 2
or by reducing the number of tracks and real time processing. At times, this may also be do to some
other problem caused by improper computer settings.
Page 350
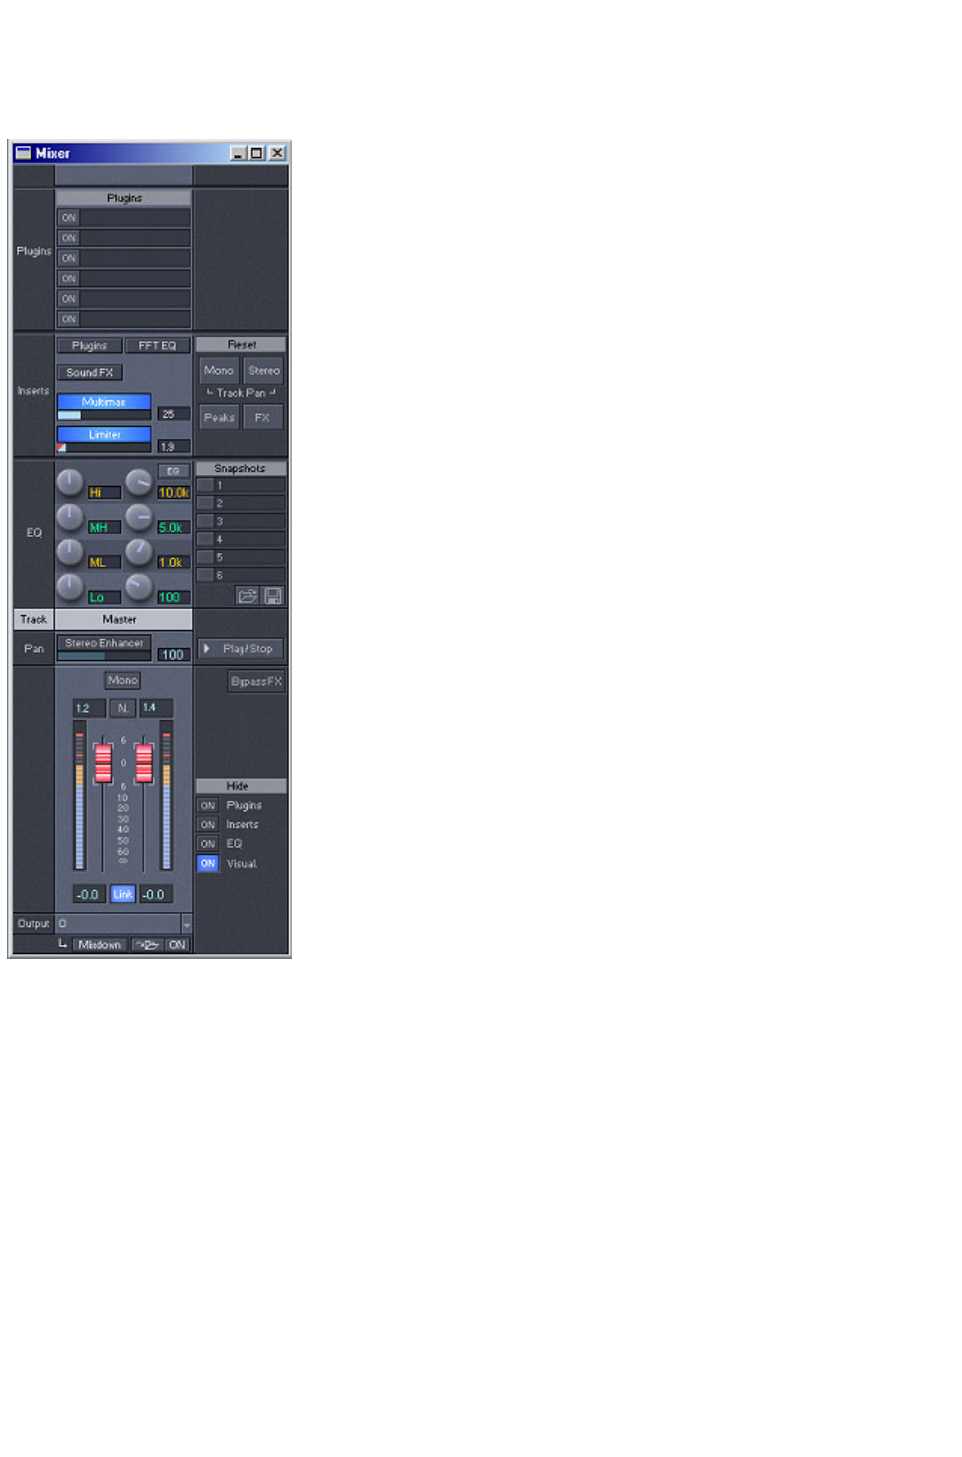
Mixer Window Components
Click on the individual components to see a description.
Page 351

Keyboard Shortcuts and
Microsoft Intellimouse™
Below are the default MAGIX music editor 2 shortcuts for the program. You may change the shortcuts
at any time with File->Preferences->Keyboard Shortcuts. For a description of the toolbar functions,
please refer to Toolbars
.
Sorted by Menu you’ll find it here.
Sorted by Function you’ll find it here
General
A
Range all
Ctrl-A
Redo
B
Split range into 3 Sections
Shift-B
Display gets 1 view
C or Ctrl-C
Copy range
Shift-C
Copy As
Alt-C
Copy and Clear (VIP)
E
New VIP
F
Fade In/Out
G
Synchronization
H
Close all Windows
I
Project Information
Ctrl-I
Import Sample
L
Load RAM-project
Shift-l
Load HD-project
K
Activate "link one track" temporarily
M
Open Mixer
ctrl+M
Mute Object
alt + M
Mute Track
N
Normalize (virtual)
Shift-N
Normalize (destructive)
O
Load virtual project
P
Play parameter
R
Record Dialog
Ctrl-R
Grid on/off
Shift-R
Grid definition
S, ctrl+S
Save project
Shift + S
Save project with new name
T
Split objects
Shift-T
Transport control
Ctrl-T
Trim objects
V
Paste
Alt-V
Overwrite with Clip (VIP)
ctrl+V
Paste with ripple
W
Load wave
Page 352

X
Cut range
ctrl + X
Cut with ripple
Y
System preferences
Ctrl-Z
Undo
Tab
Toggle object draw mode
Shift + Tab
Define object draw mode
Space
Playback on/off
Enter
Tile windows
Shift + Enter
Untile Windows
Esc
Abort playback, recording and
physical sample manipulations
Del
Delete range
Del + Ctrl
Delete with ripple
Shift+Del
Cut
Backspace
Restart Playback
Alt+ Backspace
Undo
Shift +Backspace
Recall last Range
Insert
Overwrite with Clip
Ctrl+ Insert
Copy into Clip
Shift+Insert
Paste Clip
Numeric 0
Scrubbing
Numeric ‘,’
Stop and go to actual position
#
Switch Grid on/off
‘
Set Marker (auto numbered)
?
Set Marker with name
0-9
Get Marker 1...10
0-9 + Shift
Store Marker 1 .. 10
Store Setups/Zoom
Numpad 1, 2, 3
Get Position and Zoom Level 1..3
Numpad 1, 2, 3
Get Zoom Level 1..3
ctrl+Numpad 1, 2, 3
Store Position and Zoom Level 1..3
ctrl+Numpad 4, 5, 6
Store Zoom Level 1..3
Range
Cursor left :
Scrolling left (page mode)
Cursor left+ Ctrl
Zoom In
Cursor left+ Alt
Scrolling left (scroll mode)
Cursor left+ Shift + Ctrl
Flip range left
Cursor right
Scrolling right (page mode)
Cursor right+ Ctrl
Zoom Out
Cursor right+ Alt
Scrolling right (scroll mode)
Cursor right+ Shift + Ctrl
Flip range right
Home
Play Cursor to beginning of project
Home+ Shift
range to beginning of project
Home+ Ctrl
Play Cursor to beginning of the range
Page 353

Home + alt
Section to range start
End
Play Cursor to end of project
End+ Shift
Range to end of project
End+ Ctrl
Play Cursor to end of range
End + alt
Section to range end
PgUp
Activate previous section
PgUp + ctrl
Range start to next zero crossing
PgUp + Shift
Range start to previous zero crossing
PgDn
Activate next section
PgDn + ctrl
Range end to next zero crossing
PgDn + Shift
Range end to previous zero crossing
Cursor up
Cursor up+ Ctrl
Zoom in vertically in VIPs
Cursor up+ Shift
Half section up (vertical scroll)
Cursor down
Cursor down +ctrl
Zoom out vertically in VIPs
Cursor down+ Shift
Half section down (vertical scroll)
Function keys
F1
Help
F1 + shift
Context Help
F2
Go to left marker
F3
Go to right marker
F4
Play over cut
F5
Play to cut start
F6
Play from cut start
F7
Play to cut end
F8
Play from cut end
F2-F10 + ctrl
Get range 1-10
F2-F10 + alt
Store range 1-10
F2-F10+ Shift + Ctrl
Get range length
F11+alt
Store range with new name
Mouse
For a full description of the mouse shortcuts, please see the section on Detailed Information about
Individual Mouse Modes
Microsoft Intellimouse:
Middle mouse click: Playback Start/Stop
Wheel: Scroll horizontally
knobs and faders can be tuned in fine ranges
+ Ctrl Zoom In/Out horizontally
+ Shift Zoom In/Out vertically
+ Ctrl + Shift Scroll vertically in VIPs
Page 354

Terminology
The following lists some specific terms that where defined to describe components of MAGIX music
editor 2
that are mentioned frequently throughout the documentation. Even if you were somewhat familiar with
some of the particulars, we would like to encourage you to read the definitions for the individual terms.
The terms are specific context related and are not further covered in the rest of the documentation. PC
typical terms such as button, window, and file requester are not explained here. Please refer to a PC or
Windows™ manual for further details on those terms.
Handle
Section
Range
Marker
Play Cursor
Object
Virtual Project
Wave Project
Wave_Editing
Page 355
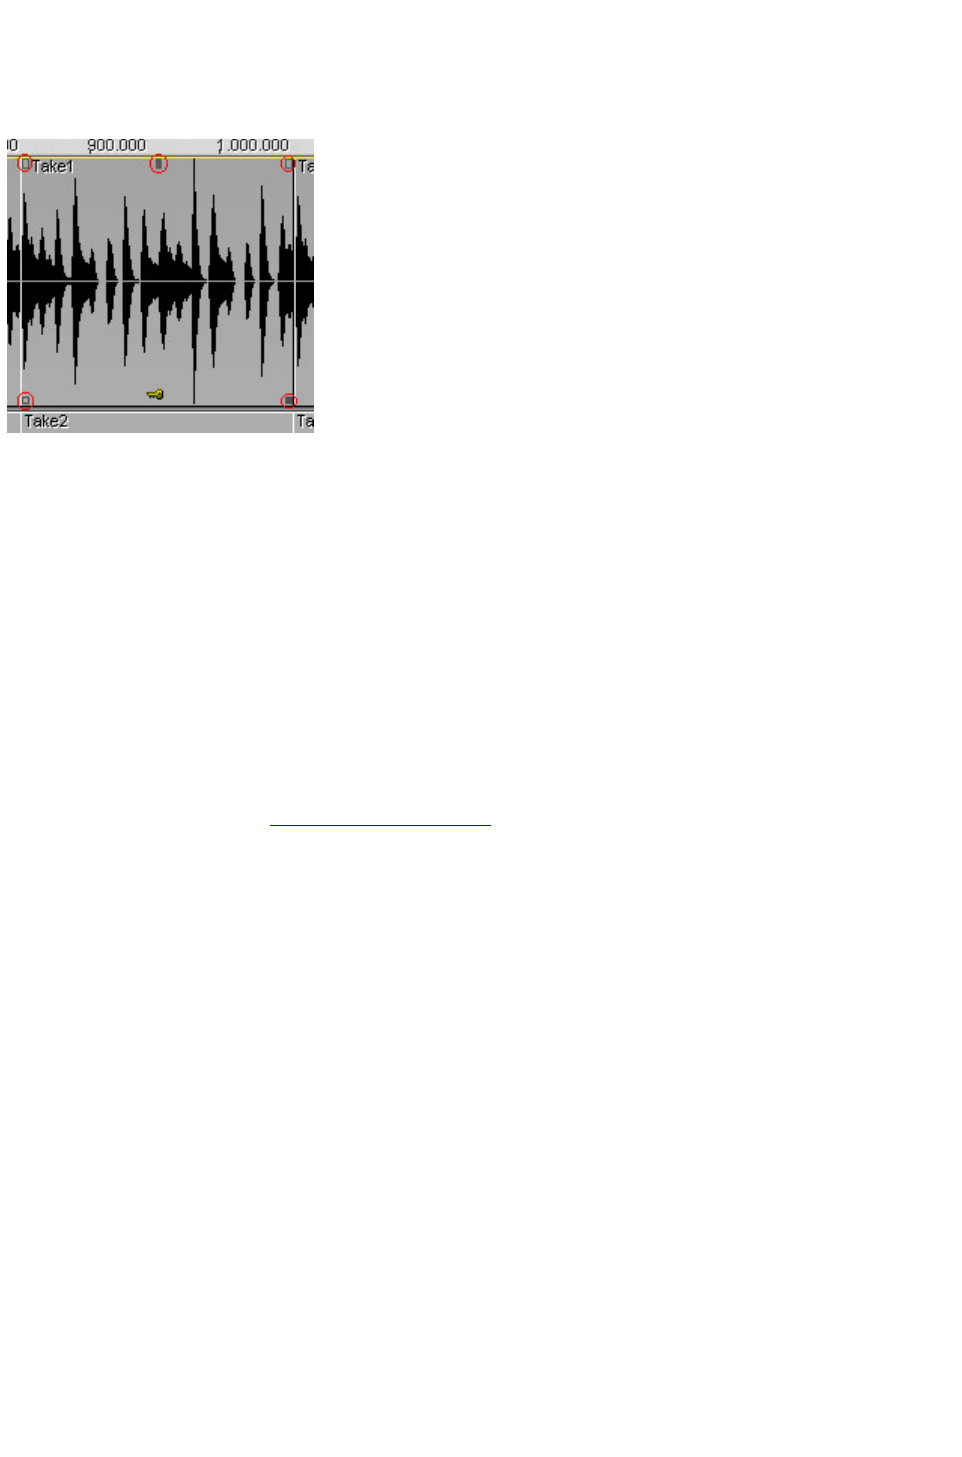
Handle
Handles are the five little rectangles that appear on the outline of a selected object.
With the handles you can adjust several object properties:
Lower Handles:
The left handle adjusts the object start time, where the object starts playing audio from the referred wave
project
The right handle adjusts the objects end time, where the object stops playing audio from the referred
wave project.
Note that you cannot move the left/right handle further than the start/end of the physical audio file.
Upper Handles:
The left handle adjusts the fade in time, the time span until fade in reaches the maximum object volume.
The right handle adjusts the fade out time, the time when fade begins to lower the object’s volume.
The middle handle
adjusts object volume. This works independently from the track volume fader or volume automation
curves.
For further information read Virtual Editing Concepts
.
Page 356
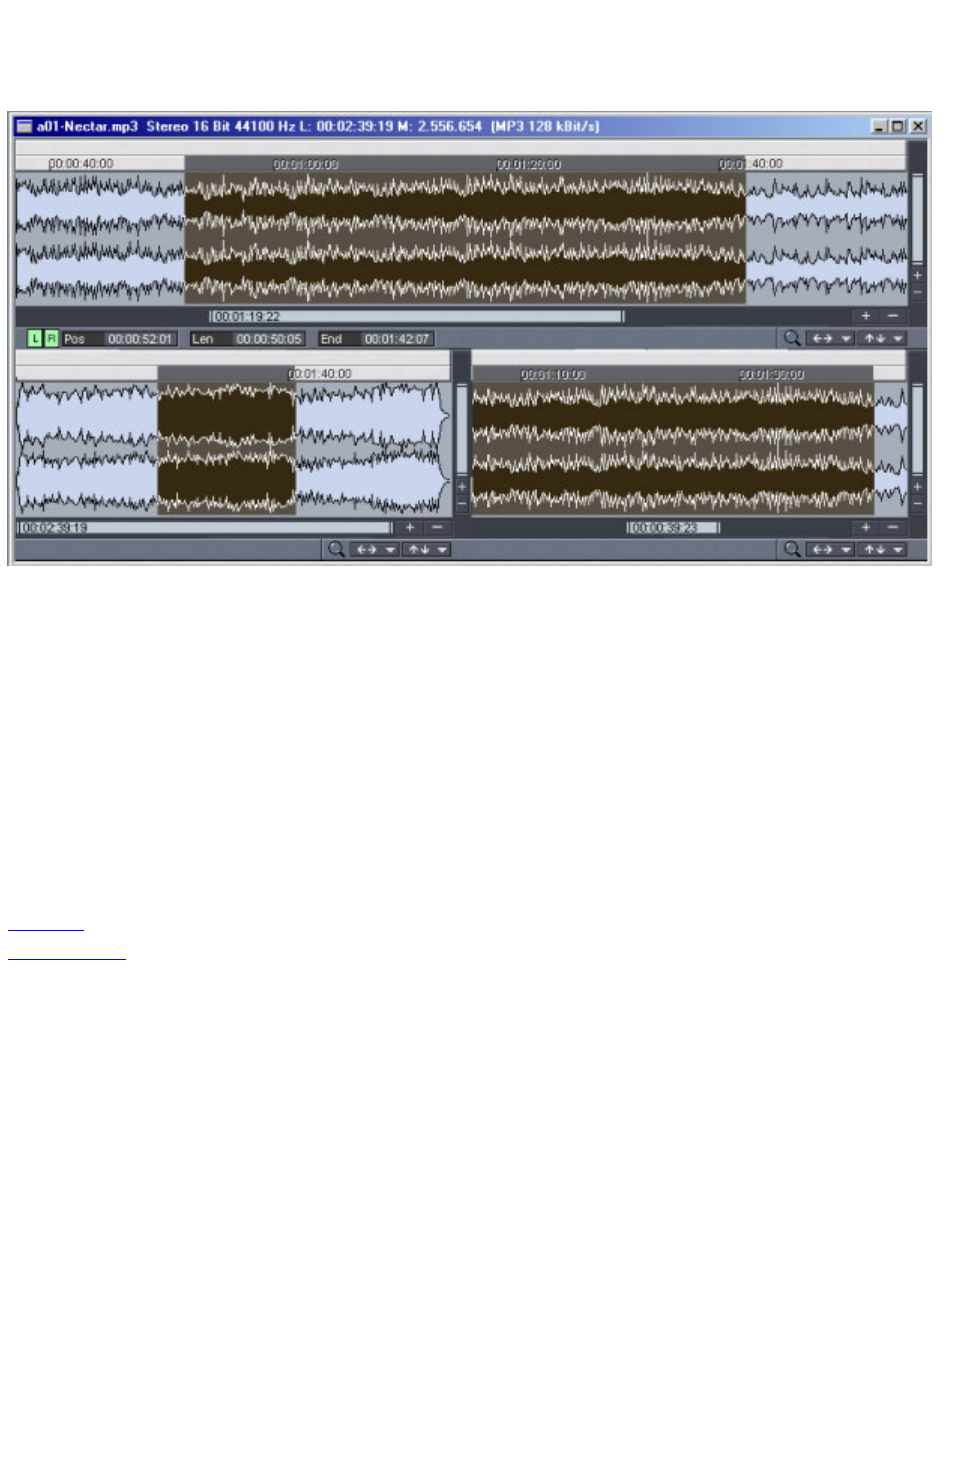
Section
"Section" means the visible part of a project. Which part of the project (or the whole one) is displayed,
depends on the zoom level.
MAGIX music editor 2
offers the possibility of displaying any project window in up to three sections. This enables you to show
the complete sample in one section while displaying smaller sections in one or two other sections. Each
section can be accessed and edited in separately.
Active Section when using Zoom Levels
If Zoom commands are used on one of the display sections, such as the buttons on the Position bar, it is
important to designate the section that is to be zoomed. Click on the left or right scrollbar of a section to
activate it.
You can step through the sections with the Page Up/Page Down keys!
Also see:
Sections
Split Ranges
Page 357

Range
A range can be selected with the mouse. Ranges can be played back with the Spacebar. It is defined by
the beginning and end .
The range is utilized to earmark sections, which will be used to manipulate the material in the range (Cut,
Insert, Normalize, Fade In, Fade Out, Move, Effects, Delete, etc.).
The second function is the definition of loops, which are repeated during playback.
The third task of the range is the configuration of section edges in which graphical data is displayed.
Every project can have an unlimited number of ranges defined. Up to 10 ranges can be accessed directly
through the function keys. Additional ranges can be accessed with the Range Manager. The vertical
range borders can be locked with the function Fix Vertically (Menu ‘View’
). This will set the height of the range to a maximum value, which is the default setting for virtual projects.
Read More in Navigating with Ranges
Page 358
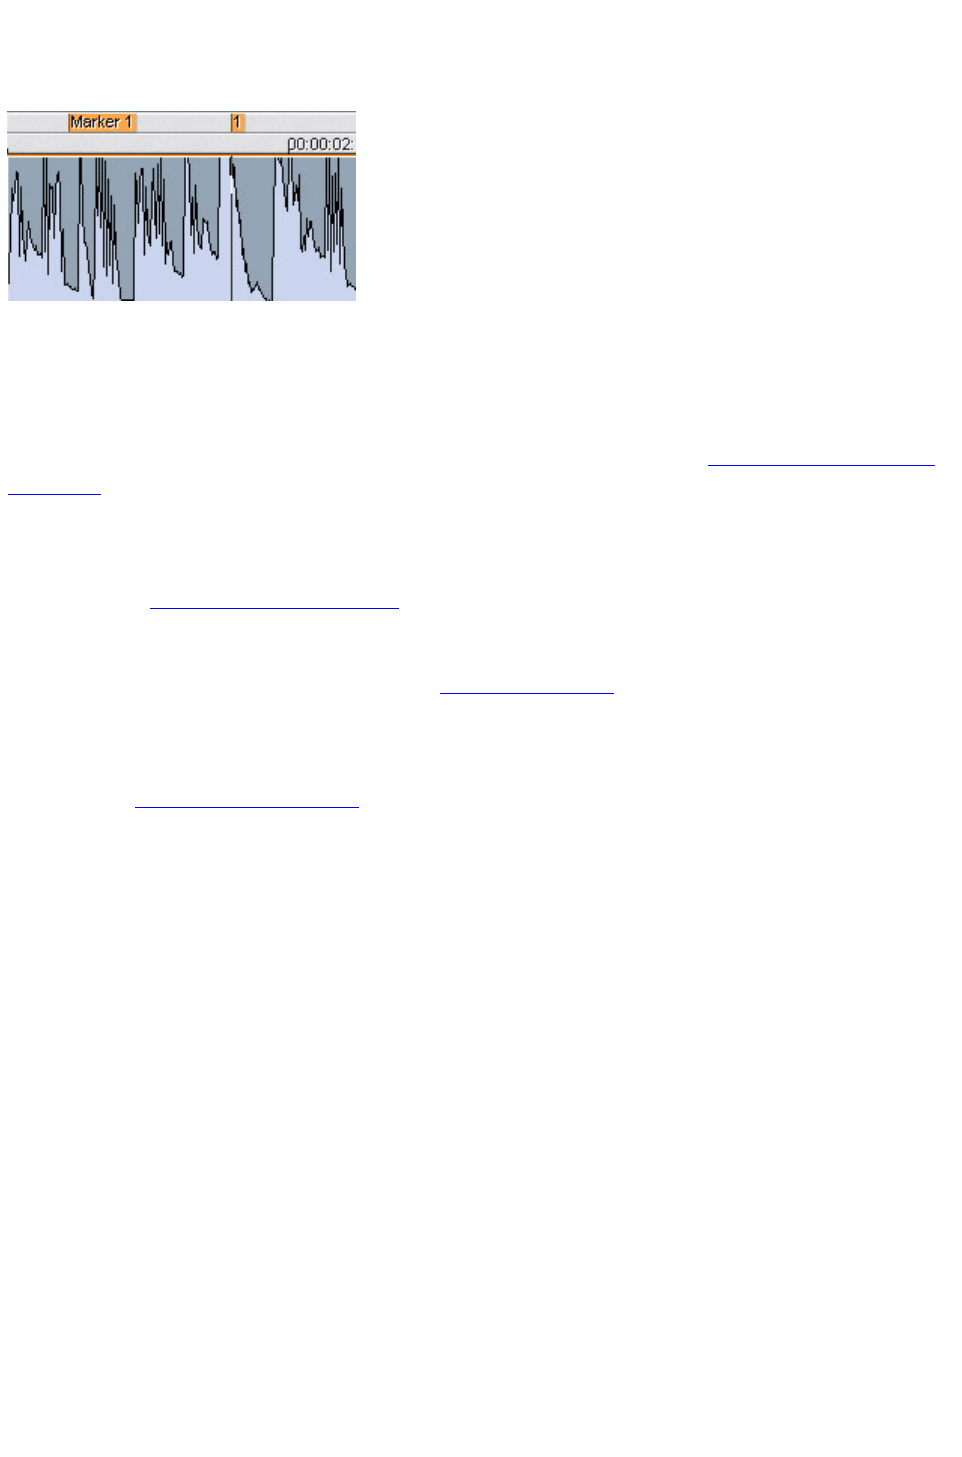
Marker
Markers are used to store positions. They are displayed as red bars carrying the marker name on a
special line (marker bar) on the upper edge of the project. Markers can be moved using the left mouse
button.
In a project any number of markers can be defined. 10 markers can be directly switched using the
number block.
Markers assigned to the number block are named "1" to "10". The menu item Range > Store Marker >
Additional
can be used to define and name additional markers, which will be displayed by name.
Additional markers besides the standard markers (red bars) are the triangular marker for the CD Burn
functions; red: CD track marker, green: CD sub index marker, blue: CD pause marker. For further
information see Functions for Creating CDs
When you click the right mouse button on the marker bar, a context menu appears, which offers you
convenient access to all important commands.
Markers can be managed and named using the Marker Manager...
(Tools menu or Marker context menu).
To put on a range between any two markers, you first click the first marker. Then you hold down the
Shift key and click the second marker. This will mark a new range.
Read more in Navigating with Markers
Page 359

Play Cursor
The Play Cursor or the Position Line is the vertical moving line during playback that shows the current
playback position.
The start position of the Play Cursor (playback start) is set by clicking the left mouse button into the grid
bar or marker bar. This deselects any previous range
.
You can restore the previously selected range by double clicking on the grid bar in the gray range.
Page 360

Objects
Objects in MAGIX music editor 2 simply are instructions to play a range from an audio file. The VIP
window contains objects in a virtual track. The term ‘virtual’
is used, because the object does not contain any audio itself. What it does contain is information to move
to a particular starting time in the physical audio file and play back the audio for the duration of the range
length specified by the length of the object.
In virtual projects the audio data is represented by rectangles („Objects" as it is called). An Object is the
representation of a sample or a segment marked within the sample. In other words: The Object is used as
a reference to the audio data, which is stored in the wave projects.
The lock symbol , which can be hidden and which is positioned on the lower border of each object,
can be used to protect an object against accidental modifications. The attributes to be protected can be
selected using Options for Locking Objects
.
For further information on Objects see term definitions of virtual projects.
Virtual Projects
Page 361

Virtual Project
Show the Virtual Project Window Components
Virtual projects are the centerpiece of MAGIX music editor 2
! In virtual projects you can arrange objects taken from multiple Wave projects and arrange complex
audio projects. All cut operations, volume level changes, fades, and more are completely virtual, meaning
that the audio material is not destroyed! This allows you to select the proper cut position, cut length,
volume level, effect setting, etc. by experimenting without loosing audio material or alter it.
Detailed information about working with virtual projects can be found in the Virtual Editing Concepts
.
The actual audio data is represented by rectangles („objects" as they are called. That is, an object is the
„image" of a sample or of an area marked therein. In other words: The object refers to the audio data.
Even if the present audio hardware can only play back up to 2 channels of audio (Stereo), tracks beyond
a stereo pair can be played back in a virtual project..
The display of the virtual project can be switched between two definitions. The Tab key allows you to
switch between the two modes. The key combination Shift + Tab displays the Editor dialog for the virtual
project display preferences. Attributes such as displaying only a single graphic form for Stereo tracks can
be chosen next to whether you want text displayed in the objects.
Using the mouse in virtual projects
The functions of the left mouse button for virtual work depend on the mouse mode selected in the mouse
mode bar.
VIP Mouse mode
Mouse functions of the different modes in detail
Vertical Zoom function in virtual projects
Hold down the Control key and use the vertical cursor keys to zoom in and out of the waveform display
in virtual projects. This comes in handy when you want to exactly evaluate soft sections in VIPs, for
example.
In addition you can use the commands of the position bar to navigate. Read more about Zooming here
!
Context menu
Click the right mouse button to open the context menu. Here all important commands for virtual work
can be found.
VIP window components
Page 362
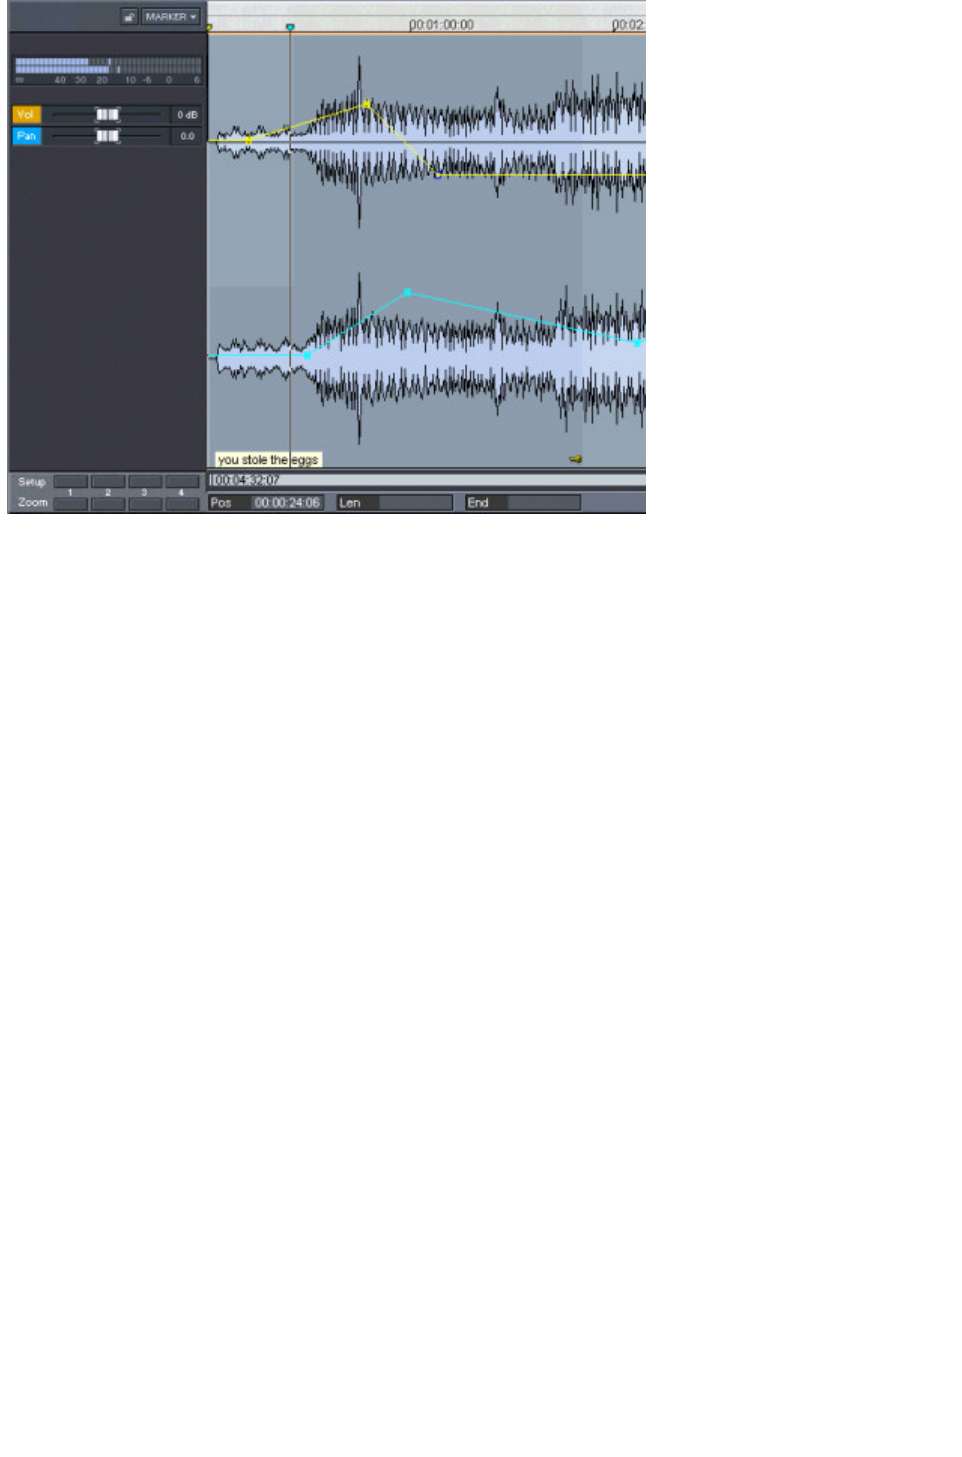
Page 363

Wave Projects
Menu: File
Wave project contain audio data. VIP Objects refer to this audio data. Access to the Wave project is
obtained by selecting the corresponding Wave Project window.
All wave project files particular to a VIP are open in the background, but are hidden by default. This is
because you don’t need to open the window of a wave project that is used in a VIP manually. You do
that more elegant by right-clicking a object and choosing "Wave Editing" from the context menu. The
corresponding Wave Project window for a VIP Object is brought into focus i.e. opened into the
foreground.
The focussed Wave Project contains the audio material that is referenced in the VIP Object. The
selected Range in the displayed Wave Project is the material used in the VIP Object – if a Range is not
selected, the audio material corresponding to the entire Object will automatically be selected as a Range
in the HD Wave Project.
Another elegant way to open a VIP’s wave project for editing is to open the Project information dialog
(key: "i") and double-click on the according wave project in the list.
If you close an Wave project window, it is hidden again. To unhide the windows, select "Iconise all
wave projects" from the windows menu.
The project file will not
be closed, since the file is referenced in any open VIP.
Wave projects can be opened and saved separately from VIPs, too. It is not necessary to open a VIP to
work on a Wave Project - you can open Wave Projects directly into the MAGIX music editor 2
workspace (File>Open Project>Wave Project, key W, drag from Explorer etc).
To open a wave file for editing you have to minimize a recently open VIP. Otherwise when you load a
wave project and a VIP is open, the wave project will be inserted in the VIP (and the wave project
window will be hidden). That can be a disadvantage, because MAGIX music editor 2
forbids all destructive changes on a wave project, if the affected part is used in a VIP object, an error
message appears: "This range of a physical project cannot be changed because it is used by VIP
objects!". If this occurs, either delete the VIP object (if it was inserted unintentionally) or save a copy of
the wave project with "save as...".
The title bar of the window displays the name of the Wave Project, the bit resolution, the length of the
sample, the resulting storage requirement and the edit mode. To activate the window, simply clicking into
the project window. MAGIX music editor 2
can work with an unlimited number of Wave Project windows displayed on the screen.
Most of the recording and playback concepts in VIPs also apply to the Wave Project windows. For
example, playback of a Wave Project window is also started and stopped with the Spacebar. You can
also use the buttons in the Transport Control window or the controls in the toolbar.
In previous versions of MAGIX music editor 2
, working in a Wave Project window worked much the same as with conventional sample editing
programs - you may already be used to those conventions. Any edits or processes applied to Wave
Projects were immediately written back to the hard disk file, as is the case with conventional tape
recorders.
In MAGIX music editor 2 , you can physically edit the audio material you recorded or imported direct in
a window we call a Wave Editing window (or the previous Destructive Editing window). The technical
term in MAGIX music editor 2
is HD Wave (*.hdp+*.wav) for Hard Disk Project and RAP for RAM Project, but this manual refers to
the collective files as Wave Projects.
Differences between RAM and HD Wave Projects:
The HD Wave Project is an audio file that is recorded to your hard disk, played back, and edited from
Page 364

the hard disk. You can work with Wave Project files that are theoretically infinitely long. In a VIP, these
files are still used, but are kept beneath the VIP interface - the files are referenced (re-created) as
Objects and the Objects are edited instead of the actual Wave Projects.
The RAM Wave project (called ‘RAP’
in earlier program versions) load their complete content into the RAM memory of the computer.
When working with RAM Wave projects, you can decide at the end, whether you want to keep the
changes or whether you want to discard them by simply not saving the changes to the file stored on the
hard disk. Since the material is completely loaded into the RAM memory of the computer, any changes
will be lost unless they are saved to the file stored to the hard disk (Shortcut: ‘s’
).
This method of editing and processing is equivalent to the computer’
s native behavior. However, with large data content as is the case with audio files, the computer suffers
from extreme speed loss since the operating system starts to transfer the memory contents to the virtual
memory file on the hard disk.
Page 365

Wave Editing / Destructive
Editing
Introduction
MAGIX music editor 2 is primarily a non-linear, non-destructive audio editor. This means that most of
your work is usually completed in the virtual domain (VIP), without making changes to the original audio.
However, there are some situations which are best completed by working directly on a Wave Project, as
if you were using a conventional audio editor. MAGIX music editor 2 can also function as a conventional
audio editor, but now offers two alternatives - Destructive Editing or the new virtual Wave Editing. When
working directly on Wave Projects, the powerful options offered by the Wave Editing system place
MAGIX music editor 2
a "cut" above other conventional audio editors!
Wave Editing / Destructive Or Virtual?
Using Wave Editing or Destructive Editing may not necessarily be the best method of completing your
editing task. For example, if you have duplicated an Object several times, all of the Objects would
contain the same edits after changes are applied and saved directly to the Wave Project window. But this
can also be an advantage at the other hand.
Please keep in mind that editing functions such as cut, copy, fades, crossfades, and so on can also all be
applied to the audio material in a non-destructive way in the VIP. Almost all effects can be used from
within the Virtual Project and applied to the Objects in the VIP Tracks.
With regard to the Effect Menu functions, the editing can also be performed "offline", in a destructive or
semi-destructive fashion which has similarities to Wave Editing. For example, the Effect Menu Room
Simulator function is always performed "offline". However, the option Create Copy (checked by default)
makes sure that a copy of the original material is processed with the effect and not the original audio
segment. The copy of the audio segment allows the use of Undo in the Virtual Project to return the
Object to its original state. Of course, this process utilizes additional hard disc space.
Also, remember that even if you work extensively with WAV files, you can complete all editing tasks
within a VIP. By importing the Wave Project into a VIP, you can complete editing steps faster and more
conveniently than in any destructive Wave editing application! For example, any type of cutting and
rearranging of audio segments can be performed in a non-linear, non-destructive, and extremely fast way
in the VIP. The Track Bouncing option in the Tools Menu allows you to take any material in a VIP and
turn it into a new WAV file which can then be imported into a VIP Project.
Note : As we shall see in this chapter, the new non-destructive Wave Editing mode is very similar to
working within a VIP , but the editing is carried out directly on the Wave Project
. This saves a lot of time in some cases (such as when working with sound or loop libraries).
Editing on Wave projects can be performed in two different modes, in the old "Destructive Editing"
mode or in (virtual) "Wave editing" mode.
Destructive Editing
This is the term used to describe the method for working directly on Wave projects in earlier versions of
MAGIX music editor 2
.
Page 366

When editing in Destructive Editing mode, the physical audio files are edited on a ‘destructive’ basis. This
means that the audio file is reconstructed with whatever effect or editing process you choose. There will
be Undo backups (assuming Undo is enabled), but these only exist while the file is open. Once the
Project is closed, the changes to the file are permanent. Of course, the Undo files consume large
quantities of hard disk space and can also take a long time to write to the hard disk!
When using Destructive Editing on a Wave Project, the changes are in general written back to the audio
file without having to use the Save Project command, as the changes are directly applied to the audio
material contained in the file. Once editing is finished, you simply close the Project. However, the Save
Project command needs to be used for saving marker information and other workspace specific items.
A RAP project needs to be saved to the hard disk to make the changes available the next time the
project is loaded. Since any editing is applied to the computers volatile RAM memory, the changes
would be lost as soon as the computer is turned off. The contents of the RAP project are loaded into the
RAM memory of the computer and are played back and edited in RAM. The Save Project command
will save any changes to the hard disk for storage and retrieval.
The Save Project As dialog lets you make a duplicate copy of the Wave Project window.
The original audio files are kept intact when using this command. Instead, a copy with the exact same
content is created. This can be a useful option for Destructive Editing.
MAGIX music editor 2 ’s development team designed a way to circumvent the disk space and time
inefficiencies associated with Destructive Editing. MAGIX music editor 2
introduces this new method, called Wave Editing :
Virtual Wave Editing
This is the new virtual wave editing mode introduced with MAGIX music editor 2
.
Read the new features quickstart "Virtual Wave Editing"
for an introduction to this mode.
There are some differences between the "destructive" and the "Wave editing" mode when working on
wave projects:
Rendering edit operations on saving
All edits: cut, paste, delete and insert are virtual. The positions, where the edit took place, are marked
by dotted lines. There will be no time consuming undo file creation any more. All the edit operations are
applied on the wave project, when you save it.
Section:
You can call the mixer, while working in the wave project. There you can apply every fx manipulation as
in the normal VIP section in real-time. These effects will be applied on the wave project, when you save
it. For more information on the Mixer section, read here
!
Menu fileàSave in format:
This will call the track bouncing Track bouncing dialog ( format conversions are possible). (Toolsà
Trackbouncing)
Auto Crossfade
The Auto crossfade option (Menu Edit) works in wave projects too, on every cut or insert operation the
default crossfades are applied, when auto crossfade is active. You can use the Crossfade Editor to edit
that crossfade, when you select the crossfade by selecting a range over the crossfade.
Page 367

New File with Drag and Drop
You can mark a range in the wave project and drag this range to an empty space somewhere t the
program desktop. A new wave project (untitled.wav) will appear. So you can easily make copies of the
whole or parts of the wave project.
Page 368

Navigating with Markers
Markers play an important role in your daily work with MAGIX music editor 2 . Markers are a way to
same time positions to ‘markers’
that can be recalled at any time. For example, when mastering a live recording from a DAT tape, it helps
tremendously if you could drop markers at every beginning of a song during the recording of the tape.
The markers can be dropped into the window to help you remember certain editing positions.
Selecting of markers is relatively easy. There are three main methods of selecting markers:
Click on the marker head on the marker bar above the track pane.
Press the corresponding number on the keyboard for numbered markers.
Step between Markers with "RangeàMove Play Cursorà
Marker left/right" Keyboard shortcuts F2 /F3
Another method of finding and selecting markers is with the Marker Manager. The Marker Manager lists
all markers in the project. A marker can be selected by simply clicking on the entry in the manager. The
Marker Manager also allows you to rename markers.
Examples for using Markers
Example 1:
The mastering of an audio CD requires so-called ‘index markers’. These are markers that are configured
either automatically (using the ‘Auto Track Markers’ button in the toolbar) or manually by clicking on the
‘Set Track Index’
button in the toolbar. The markers can be moved to adjust the relative starting position of a CD track.
Example 2:
Use the markers to simulate cuts in your audio tracks. By setting a marker and moving it around you can
audition cut positions. You may want to zoom into the window to work at a higher detail. The movement
of the marker will follow smaller increments.
Example 3:
Markers can be named with the Marker Manager in the Tools menu. By naming markers, you can easily
set up a few markers that you name according to sections in the audio. For example, you could use
markers to indicate ‘Verse 1’, ‘Bridge’, ‘Chorus 1’, ‘Intro’
and so on. You can quickly jump to those locations by selecting the marker head or by clicking on the
entry in the Marker Manager.
Another practical use is to quickly select a range between markers by double clicking between two
markers on the marker bar. If the play cursor stands between two markers, you can select the range over
this two markers by pressing shift-F2 /shift-F3 ("RangeàEdit Rangeà
Range start to left marker/Range end to right marker")
Page 369

Navigating with Ranges
Working with ranges in MAGIX music editor 2 is an important aspect for successful digital audio editing
and multi-tracking. A range in MAGIX music editor 2
simply outlines the area of a VIP or Wave project window that is being edited or altered in some way. In
fact, a range in a virtual project determines which tracks and objects are played and edited. Ranges can
be set, moved, extended, inverted, stored, recalled, and edited.
When working with special features of MAGIX music editor 2
, ranges become an important part, such as the track bouncing, for example. It is possible to combine the
contents of a VIP and bounce them into a single stereo audio file. During the track bouncing process, the
program asks you whether you want to use a selected range or whether the complete project is to be
used for the bouncing process.
When selecting a range in MAGIX music editor 2
, it is possible to select the range in one track only or across several tracks. By simply staying within the
horizontal limits of a track, the range would be selected within that track. To select the range across two
tracks, the range is extended beyond the horizontal limitations of the first track and drawn into the second
track. This can be applied to any number of tracks in the VIP display. It may be necessary to vertically
zoom in or out of the VIP window to display the desired tracks.
Ranges can be selected on a per-track basis. Once a range is selected it can easily be customized in
length (directional within one track) and height (across several tracks).
When using the range manipulation examples below, keep in mind that any
range can be selected. We will work with the snap function to make things a bit easier. However, using a
range that does not necessarily end with an object edge, allows you to manipulate material in any form
and length.
Example 1:
Multiple objects on adjacent tracks need to be selected to drag-copy them to a new location. Rather
than holding the Shift key and clicking on each of the objects to select them, simply select a range over
the desired objects and choose Object->Select Objects. This will select all objects that are covered,
either in part or completely, by the selected range.
Example 2:
A section needs to be completely cut out of the VIP tracks. For example, the producer decided that a
complete verse is to be cut out of the song to make it shorter and fit it into a radio play length. This could
be accomplished by selecting a range over all the tracks that represents the unwanted verse. Using
Edit->Cut will take the section out and closes the gap between the objects. This results in a shorter
version of the song.
Use the tools discussed below to adjust the range so that the exact borders of the unwanted section can
be established.
Example 3:
In Dance music, drum loops are often used for a good portion of the song. Rather than using precious
hard disk space to record the entire loop, you could simply create a virtual loop. This plays the loop
repeatedly, by starting the audio section from the beginning. Virtual loops can be stretched for any period
within a track to adjust the length of the desired loop.
Building virtual loop objects with Object->Build Loop Object requires the use of a selected range. The
range needs to stay within the confines of the selected object. Once the function is activated, the lower
right hand object handle can be used to drag the right edge of the object to the desired length of the
Page 370

virtual loop.
Example 4:
A selected range can be played back, using the various playback options of MAGIX music editor 2
. You may even adjust the range length and position while the playback takes place.
During editing of a news piece for radio, the producer of the show previews several ranges to cut the
full-length audio of the news report down to a usable length. Ranges can be used to audition the cuts and
to further edit objects.
Selecting a Range:
To select a range, move the mouse pointer to a section in the window display ( if in Universal or Range
mouse mode) and click the left mouse button. While holding the button clicked, drag a range by moving
the mouse to the right. The range is indicated by the vertical rectangle displayed in the window.
Next, release the mouse button. MAGIX music editor 2
displays the range values in the time fields underneath the horizontal scroll bar of the project window.
The Range can also be selected by dragging the range on the time bar. This at firsts selects a range only
for playback, not for editing functions. Only the according area on the time bar will be shown in another
color. A double click on this time bar area selects a range in the selected track, another double click
selects the range in all tracks, the next double click returns to the timebar only selection.
De-Selecting a Range:
If you want to select a different range or want to deactivate the current range selection, click the mouse
button once into the project window. The previous range disappears and the window can be used to
select a new range.
Reactivate Range
If you have deselected a range, you will notice, that the prior range is displayed as a gray area on the
time bar. Double clicking on this range selects the prior range again. You can also call "RangeàReactivate
Range" or press shift-Backspace. By further executing this command you can reactivate the last five
selected ranges.
Changing a Range:
If you want to change an already selected range outline (beginning, end, upper, and lower border),
simply click the left mouse button into the range and while holding the button, move the mouse in the
direction you want to extend or shorten the range. As soon as the mouse pointer crosses over the current
range border, the program picks up the border and snaps it to the mouse pointer. You now can move the
range border to the new point and release the mouse button.
You can also move the horizontal range borders with the keyboard: cursor left/right moves the start,
shift-cursor left/right the end of the range.
Moving a Range Horizontally:
Hold the Shift key while clicking inside a range. Next, hold the left mouse button clicked and move the
range to the new position. Release the mouse button to place the range at the new location.
Saving Ranges and Special Range Commands:
Ranges and markers can be saved with the help of menu functions or keyboard shortcuts.
MAGIX music editor 2 can store an unlimited number of ranges and markers. These and other special
functions to define, change, and use ranges can be found in the menu Ranges
Page 371

.
To manage saved ranges, use the Range Manager (Menu ‘Tools’
).
Changing Range Ends in Increments Using the Mouse:
This is most often needed when searching for optimized loop borders in Wave projects. The sections
can be split with a keyboard shortcut (Shortcut: ‘b’) or with Range->Split Range. All range borders are
displayed with a high-resolution zoom level.
Using Shift + b returns the display to a single section.
Page 372

Zooming
Zooming is used to display more or less information in a VIP window. When using higher zoom levels,
the track contents are displayed in higher detail. For example, automation curves may be edited more
easily by using a higher zoom level. The individual curve events are further apart and allow work that is
more detailed.
On the other hand, a long project may already be at a high zoom level and in order to see the complete
contents of the VIP you may need to zoom out.
MAGIX music editor 2
offers you a large number of options working with zoom levels in a VIP. For example, ranges can be
used to quickly zoom into the project by double clicking on the selected range. The length of the range is
used to make it the visible contents of the VIP window.
Another example is the double clicking of left mouse button in upper half of a track. This will zoom out of
the VIP window.
Here is a list of all the zoom features of MAGIX music editor 2
:
Zoom using the Position Toolbar:
The Buttons are quite self-explanatory, the red buttons are for zooming horizontally the wave form, the
blue ones for zooming tracks vertically. All Options are also available in the View Menu- Horizontal /
Vertical. So you can map your preferred keyboard shortcuts on it.
Zoom using the Mouse:
The mouse is used to select ranges for zooming. You can double click the mouse into the upper half of
the track pane to quickly zoom out of the VIP window. Each double click zooms out at a preset interval.
If a range is marked, you can zoom in the range by double clicking inside the range.
The most elegant method for zooming with the mouse is to click on the grid bar or marker bar and drag
the mouse vertically. Dragging up zooms out, dragging down zooms in.
Zoom using the Keyboard
Ctrl + Right Arrow zooms out of the window, Ctrl + Left Arrow zooms into the window. You can use
alt+ Arrow keys by themselves to ‘slide’
the track sections in the window to the left or right if the zoom level allows you to.
Zoom using the Scrollbar
The vertical and horizontal scrollbars of the VIP window can be used to change the zoom level of the
window. If the mouse pointer is positioned over the left or right end of the horizontal scrollbar, the pointer
changes into a left-right arrow. This lets you grab the ends of the scrollbar and change the zoom level of
the window. The length of the window section displayed is indicated on the left side of the horizontal
scrollbar. In other words, the numbers shown on the scrollbar tell you the length of the audio section
displayed in SMPTE time (minutes, seconds and frames).
The scrollbar can be dragged to the left or right to scroll through the window contents.
The vertical scrollbar lets you scroll through the available VIP tracks if the zoom level has changed to a
higher track display resolution. In other words, if you zoomed vertically into the VIP window, fewer
tracks are visible. At the same time the vertical scrollbar was reduced in length. You can grab the
scrollbar to display the other tracks in the VIP.
Page 373

Zoom using the Scrollbar Zoom Buttons:
To the right of the horizontal scrollbar are two sets of zoom buttons which allow you to zoom in and out
of the VIP window. The zoom increments are preset. Use the buttons below the vertical scrollbar to
zoom in and out of the vertical track display. The buttons to the right of the horizontal scrollbar can be
used to horizontally zoom in and out of the window (timeline zoom).
You may want to experiment with the different zoom methods and modes. Once you are more familiar
with their functionality you may find that you prefer one method to another. Make the most use of these
functions by using the one that seems most intuitive to you.
Saving the zoom levels allows you to quickly change back and forth between the two display resolutions.
Located at the right-hand bottom of the VIP window are 8 buttons that assist you with saving zoom
levels and scroll positions of the VIP window. They are labeled ‘S’ and ‘Z’. The ‘S’ setup button will
save the zoom level and scrolling position of the window. The ‘Z’
setup button only saves the zoom level.
Holding the Shift key and clicking on one of the setup buttons saves the zoom levels and relative scrolling
position.
Page 374

Scrubbing
Scrubbing is the ability to quickly move through the audio material for preview purposes. This is similar to
switching a reel-to-reel tape machine into the edit mode in which the motors are disengaged from the
transports and the reels can be turned by hand. However, the playback heads are still engaged and as the
reels are turned by hand, the audio is played back with the speed of the movement of the reels. This
enables you to quickly move to a position in the audio material or preview edits with a very slow speed.
Scrubbing in the digital world is a bit more complicated, since there are no real mechanics involved and a
subsequent ‘passing by’
of audio is achieved using different methods.
MAGIX music editor 2 accomplishes scrubbing by performing what is called ‘Varipitch’
real time sample rate conversion, which means that the pitch of the audio is increased or decreased,
while the playback speed stays the same. This effectively speeds up or slows the scrubbing speed. To
test the theory behind the varipitch function is to take a 44.1 kHz sample and convert it to a 48 kHz
sample without doing time stretching. The pitch will go up and the overall length of the audio material
shortens. However, the internal playback rate stays the same.
The rate of the sample conversion depends on the mouse movement. If the movement is large, the
playback pitch increases and the audio material ‘passes by’ faster. If the movement is small or moves in
the opposite direction, the playback pitch decreases, and the audio is ‘passing by’
slower or is reversed.
You enable scrubbing with the "0" on the numeric keypad or with the Scrub mouse mode. .
Furthermore you can scrub with the transport control
.
You can set the scrubbing type in the playback parameters dialog
(Keyboard short: p)
Playback Dialog – Scrubbing: While pressing the 0 key on the numeric block (Num lock active) or set
the VIP Mouse Mode to scrub mode and moving the mouse you can perform scrubbing. MAGIX music
editor 2
starts playback at a very low speed, the mouse position relative to the start play cursor controls the
speed.
Jogging:
The distance between the play cursor and the mouse sets the playback speed.
Absolute:
The position of the mouse in the window sets the playback speed - at the left border playback speed is
200% backward, at the right border speed is 200 % forward, in the middle of the window the speed is
0.
Two Speed:
You can define a user speed, this will be used for scrubbing with the scrub buttons in the transport
control.
A Tip About Scrubbing!
Scrubbing can be used to perform detailed work on audio sections in your material. Using the Relative
scrubbing mode may be the ticket to a more useful application of the scrubbing feature. Since the
Relative mode allows the audio playback to slow down, the closer the Real Time Position Line gets to
the mouse pointer position, you may be able to find sections in your audio material that represent a
crucial cut or event.
As soon as the numeric ‘0’
Page 375

key is released, the playback stops, and the Position Line is moved to the exact location where the
scrubbing playback stopped.
You may wish to work with different zoom levels to perform detailed work with the Relative scrubbing
mode.
Page 376

Virtual Project
Show the Virtual Project Window Components
Virtual projects are the centerpiece of MAGIX music editor 2
! In virtual projects you can arrange objects taken from multiple Wave projects and arrange complex
audio projects. All cut operations, volume level changes, fades, and more are completely virtual, meaning
that the audio material is not destroyed! This allows you to select the proper cut position, cut length,
volume level, effect setting, etc. by experimenting without loosing audio material or alter it.
Detailed information about working with virtual projects can be found in the Virtual Editing Concepts
.
The actual audio data is represented by rectangles („objects" as they are called. That is, an object is the
„image" of a sample or of an area marked therein. In other words: The object refers to the audio data.
Even if the present audio hardware can only play back up to 2 channels of audio (Stereo), tracks beyond
a stereo pair can be played back in a virtual project..
The display of the virtual project can be switched between two definitions. The Tab key allows you to
switch between the two modes. The key combination Shift + Tab displays the Editor dialog for the virtual
project display preferences. Attributes such as displaying only a single graphic form for Stereo tracks can
be chosen next to whether you want text displayed in the objects.
Using the mouse in virtual projects
The functions of the left mouse button for virtual work depend on the mouse mode selected in the mouse
mode bar.
VIP Mouse mode
Mouse functions of the different modes in detail
Vertical Zoom function in virtual projects
Hold down the Control key and use the vertical cursor keys to zoom in and out of the waveform display
in virtual projects. This comes in handy when you want to exactly evaluate soft sections in VIPs, for
example.
In addition you can use the commands of the position bar to navigate. Read more about Zooming here
!
Context menu
Click the right mouse button to open the context menu. Here all important commands for virtual work
can be found.
VIP window components
Page 378

Page 379

Integrating WAV projects as a
VIP Object
Method 1: Loading a WAV File into a VIP
Mark a range in the VIP and load the WAV file with File->Open->WAV Project. The file is inserted at
the beginning of the selected range as an object. The range also denotes the track into which the WAV
file is inserted. If no range is marked, the Object is inserted in the selected track, starting with the actual
play cursor position.
Method 2: Drag & Drop from the Explorer
The Tools menu lists the Explorer menu options. You may use the Explorer to display the contents of the
HDP Folder. The WAV files can be dragged into the VIP. The program automatically creates objects
and their associated HD Wave projects.
Page 380

Integrating a WAV project
range as a VIP Object
Drag & Drop from a WAV Project
- Open a WAV Project.
- Mark a range, which is to be incorporated into a virtual project (Complete Range: key ‘a’
).
- Create a new virtual project with File->New Virtual Project (Shortcut: ‘e’
) or with the corresponding button in the toolbar.
- Tile the open windows by pressing the ‘Enter’
key.
- Drag the selected range in the Wave project into the virtual project by clicking the left mouse button
into the range and dragging the range into a VIP track.
- A new object is created in the VIP at the position the mouse button was released.
Inserting Object by Menu Object->New Object
Open a Wave Project
- Mark a range, which is to be incorporated into a virtual project (Complete Range: key ‘a’
).
- Activate the VIP (or create one)
- With the menu command Object- New Object the marked range of the wave project is inserted at the
actual play cursor position of the currently selected track of the VIP.
Page 381

Selecting an Object with the
Mouse
Clicking the left mouse button selects the desired object.
Prerequisite for this is the selection of the correct Mouse Mode: Object Mode, Object & Curve Mode,
and Universal Tool Mode all offer this functionality. In the Universal Tool Mode, the object is selected by
clicking on the lower half of the object.
The five handles
on the outline of the objects identify any selection of objects. While the mouse button is held clicked, the
outline of the object is also displayed.
Clicking the mouse button outside of the object confines deselects any object selection.
Also, see the information in Mouse Functions of the Individual Mouse Modes
.
Page 382
