Magix Photo Designer 7.0 Owners Manual 7 Eng
User Manual: magix Photo Designer - 7.0 - Owners Manual Free User Guide for Magix Photo Designer Software, Manual
Open the PDF directly: View PDF ![]() .
.
Page Count: 102 [warning: Documents this large are best viewed by clicking the View PDF Link!]
- Copyright
- Introduction
- Support
- Brief Description
- Tutorial
- Working with the Browser
- Working with Images
- Working with the Mask
- Working with Objects
- Working with Text Objects
- Working with Batch Processing
- Effects
- The Toolbars
- The tool settings
- Configuration
- If you still have questions...
- Index
Manual

2 Copyright
www.magix.com
Copyright
This documentation is protected by law. All rights, especially the right
of duplication, circulation, and translation, are reserved.
No part of this publication may be reproduced in the form of copies,
microfilms or other processes, or transmitted into a language used
for machines, especially data processing machines, without the
express written consent of the publisher.
All copyrights reserved.
All other product names are trademarks of the corresponding
manufacturers. Errors in and changes to the contents as well as
program modifications reserved.
MAGIX and Goya are registered trademarks of MAGIX AG.
Other mentioned product names may be registered trademarks of the
respective manufacturer.
Copyright © MAGIX AG, 2002 - 2010. All rights reserved.

Introduction 3
www.magix.com
Introduction
MAGIX Photo Designer 7 is an image editing application, which helps
you handle all necessary photo editing tasks quickly and easily.
Import all common file formats or scan directly. The integrated
browser enables convenient searching for image files on your PC.
Images can be discreetly improved, retouched, distorted or
transformed into an oil painting. The Task Assistant helps you with
practical step-by-step user guidance.
Specific image sections, such as people, can be removed from the
image for moving or editing with effects. If you want to add them to
the image again, they can be semi-transparent, from covering to
invisible. You can assign various modes for combining these objects
with the main image.
All effects/filters can be applied either to the main image or the object
or even selectively with the aid of a brush.
At the end, the images can be printed flexibly or saved optimized and
Internet-ready.

4 Support
www.magix.com
Support
If you experience any problems with your software, please get in
touch with our support team:
Support website: http://support.magix.net
This website will lead you to the MAGIX user service page, which,
among other things, contains the following free offers:
FAQs (frequently asked questions) and general tricks and tips. In
most cases you’ll find the solution to your problem here. If not, use
the Email support form:
E-mail support form. Via the special form you inform our support
staff about your system. This information is used to solve your
problems quickly and competently. Simply fill out and send with a
mouse-click!
Support forum: You are not alone. Perhaps other users had a similar
problem and can help you solve yours. Our support staff are also
regular contributors.
Download section: Updates, improvements and patches are likewise
offered free of charge via download Many problems you may
experience are well-known to us, and which can be solved by
downloading the latest patch. Besides patches, there are also
wizards for checking and optimizing your system
Links: In the links list you will find the contact addresses of all the
most important hardware manufacturers.
You can also reach our support team by telephone:
UK: 0905 118 0888 (25p/min)
(open Monday to Friday 9:00 - 16:00 GMT)
Denmark: 077345695
(open Monday to Friday 10:00 - 17:00 CET)
Finland: 0942597819
(open Monday to Friday 10:00 - 17:00 CET)
Norway: 021543223
(open Monday to Friday 10:00 - 17:00 CET)
Sweden: 0852507027
(open Monday to Friday 10:00 - 17:00 CET)

Support 5
www.magix.com
Email: info@magix.net
Please have the following information at hand:
Program version
Configuration details (operating system, processor, memory, hard
drive...)
Sound card configuration (type, driver)
Information regarding other audio software installed

6 Table of Contents
www.magix.com
Table of Contents
Copyright 2
Introduction 3
Support 4
Brief Description 9
Object tool setting 9
Draw/Retouch with the brush 11
Effects 11
Mask 11
Objects 12
Tutorial 12
Program interface 13
Quick image optimization and multiple picture editing 17
Detailed image editing 20
Effects & Filters 31
Change image format 35
Working with the Browser 39
The Folder View 40
The File List 41
The Status Bar 44
Working with Images 45
Show images 45
Create, load and save pictures 46
Import Images 47
Print Images 48
Create Panorama Pictures 50
Deform pictures 51
Working with the Mask 53
Select all 53
Remove mask 53
Invert mask 53
Create mask from object 53
Mask > Expand/Reduce selection 54
Vignette 54
Loading/saving the mask 54

Table of Contents 7
www.magix.com
The Mask Tools 54
Working with Objects 56
Creating Objects 56
Adjust shape 56
Vignette 57
Apply Shadow 57
Include/include all 57
Object order 57
Copy objects from different images and programs 58
The Object Manager 58
Working with Text Objects 61
Text effects 62
Working with Batch Processing 63
Input 63
Actions 63
Output 64
Effects 65
Plugin Filters 66
Paint 67
Color Filters 67
Art Filters 70
Focusing Filters 71
Other Filters 71
Stylising Filters 72
Noise Filters 73
Coarsening Filters 74
Distortion Filters 74
Video Filters 76
Soften Filters 76
The Toolbars 78
Standard 78
Effect bar 79
Zoom 80
Dialog bar 80
1 Click 80
Effects 81
Toolbar 82
The tool settings 85
The mask tools settings 85
Brief Description 9
Brief Description
This section is a brief introduction to the functions of MAGIX Photo
Designer 7. The following paragraphs briefly describe the basic
functions, which will be described in more detail later on.
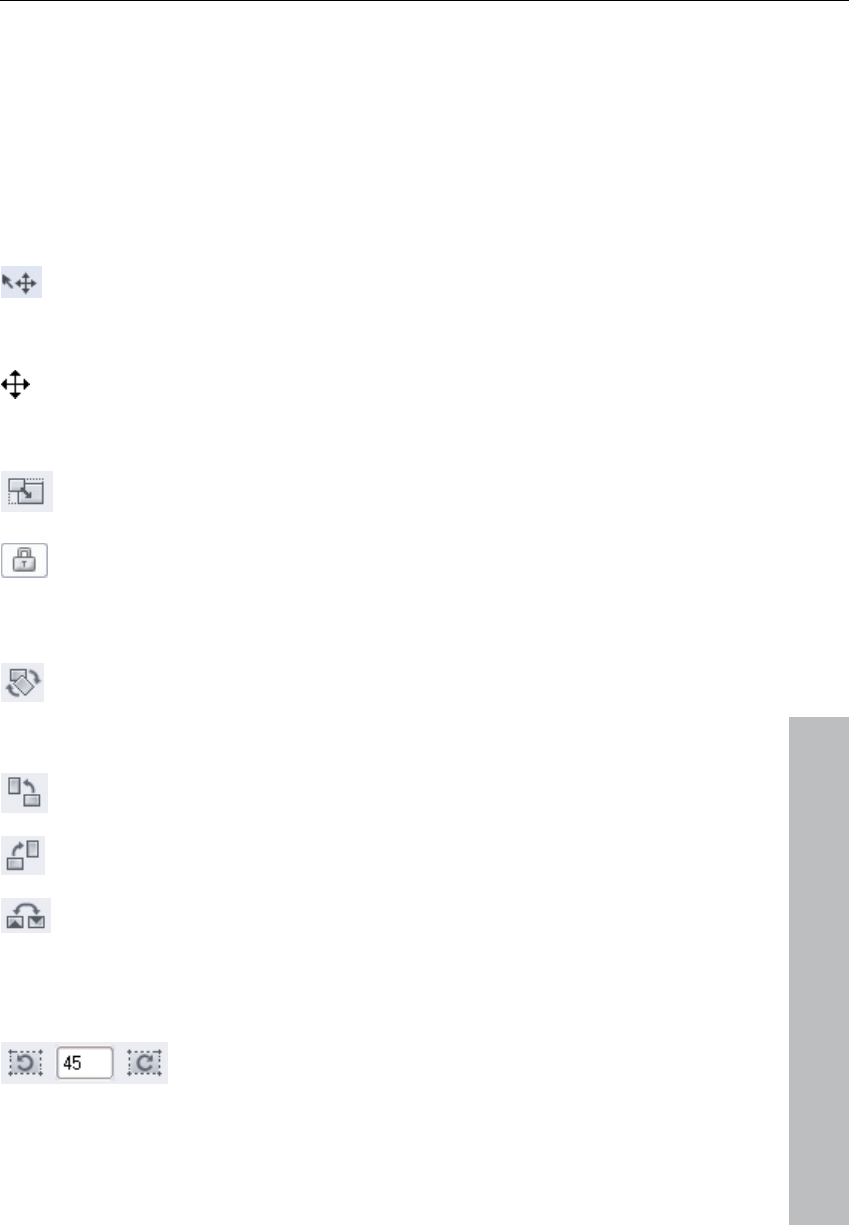
Object tool setting
Object Mode contains the following tool settings:
Move
An object can be moved at any time. When placed over an
object, the mouse curser turns into a double arrow.
Scale
By scaling an object, you can change its size. To do so, you
can pull on the edges or sides of the object selection frame
using your mouse.
If the "Keep aspect ratio" button is active, the ratio between
height and width will remain constant.
Rotate
By grabbing and pulling on its corners, an object can be
rotated.
www.magix.com
In addition, there are buttons for quick access to often-used angles
of rotation:
Rotate 90° to the left
Rotate 90° to the right
Rotate 180° (upside down)
Rotate numerically

10 Brief Description
To rotate the selected object a certain number of degrees, enter the
angle in the corresponding field and click on the button indicating the
direction of the rotation.
Tilt
By grabbing and pulling on its corners and edges, an object can
be tilted.
Distortion
By grabbing and pulling on its corners and edges, an object can
be distorted into any rectangular form.
3D distortions
By grabbing and pulling on its corners and edges, an object can
be distorted in perspective. In contrast to normal distortion, the
rules of representation in 3D perspective are respected.
Mirror
This lets you mirror the object horizontally and/or vertically.
Horizontal mirroring exchanges left for right.
Vertical mirroring exchanges the top and bottom.
Arrange
If you have many overlapping objects whose order you would like to
change, use these buttons:
Send object one layer to back
Send object one layer to front
See also Working with objects (on page 56)
www.magix.com
Brief Description 11
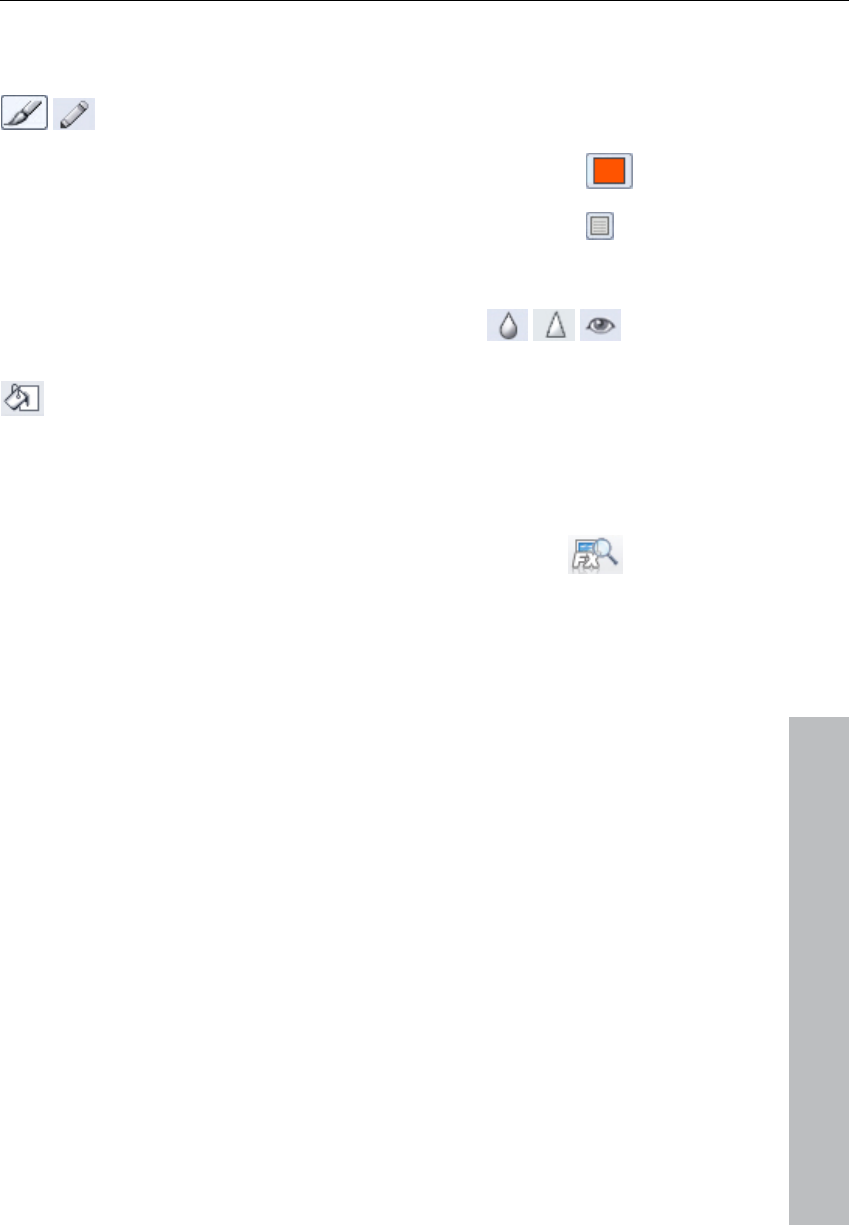
Draw/Retouch with the brush
Using the paintbrush or pencil tools you can draw or
retouch a picture.
To do this, select the corresponding tool and apply the
selected colour with the left mouse key.
With the tool parameters found at the top you can either select
a preset brush or create a customised brush from the palette
by selecting a tip and other parameters.
There are various further paintbrush tools for special
retouching work such as blurring, sharpening or red-
eye removal.
With the fill tool you can quickly fill a selected area or a
specific colour in the image with the set colour.
Effects
For retouching, please select an effect from the "Effects"
menu or from the Effects browser.
www.magix.com
The effects window with the corresponding effect settings is
displayed on the right. The effect is applied to the entire image, to a
single object or to any mask selection. You can change all effect
settings and immediately view the result. The selection mask can be
changed at any time, and you can even "paint in" all effects with a
brush.
An effect can partially affect the image if you increase its
transparency at the top of the effects dialog. This is where you can
combine the effect with the image in different ways in combine mode.
If you are satisfied with the changes, simply close the effects settings
dialog and the effect will be permanently applied to the image.
Mask
A mask can placed over the main image, which protects non-masked
areas from changes or can be used to create objects. Five different
masking options are available: Box mask, circular mask, lasso mask,
magic wand, and mask creation using a pencil. You can use the

12 Tutorial
www.magix.com
pencil mask to create areas with soft edges (vignettes). The magic
wand is useful for "extracting" certain image elements from the
background. If one of the mask modes is active, the tool settings will
display the suitable configuration options for each respective mode.
Objects
MAGIX Photo Designer 7 allows you to work with objects. A mask is
used to select and create a copy of an area that you can move freely
over the image. The copy can be reshaped and edited using different
colours and effects.
Tutorial
MAGIX Photo Designer 7 is a high-quality image processing software
package which is directly integrated into MAGIX photo and video
software:
First of all, this tutorial will introduce you to the software interface of
MAGIX Photo Designer 7 and demonstrate the practical functions of
MAGIX Photo Designer 7 using suitable examples on the following
pages. The helpful Task Assistant will appear now and then,
imparting useful tidbits of information where it can.
You'll find all of the described functions in the Tasks menu or via the
"1-click" button which starts the Task Assistant. The layout of our
tutorial corresponds to the main points found there:
Tutorial 13
Program interface
MAGIX Photo Designer 7 is a pixel-based image processing program
that masters all basic photo operations and has a number of directly
applicable effects, filters and distorters for use as presets for your
photos.
www.magix.com
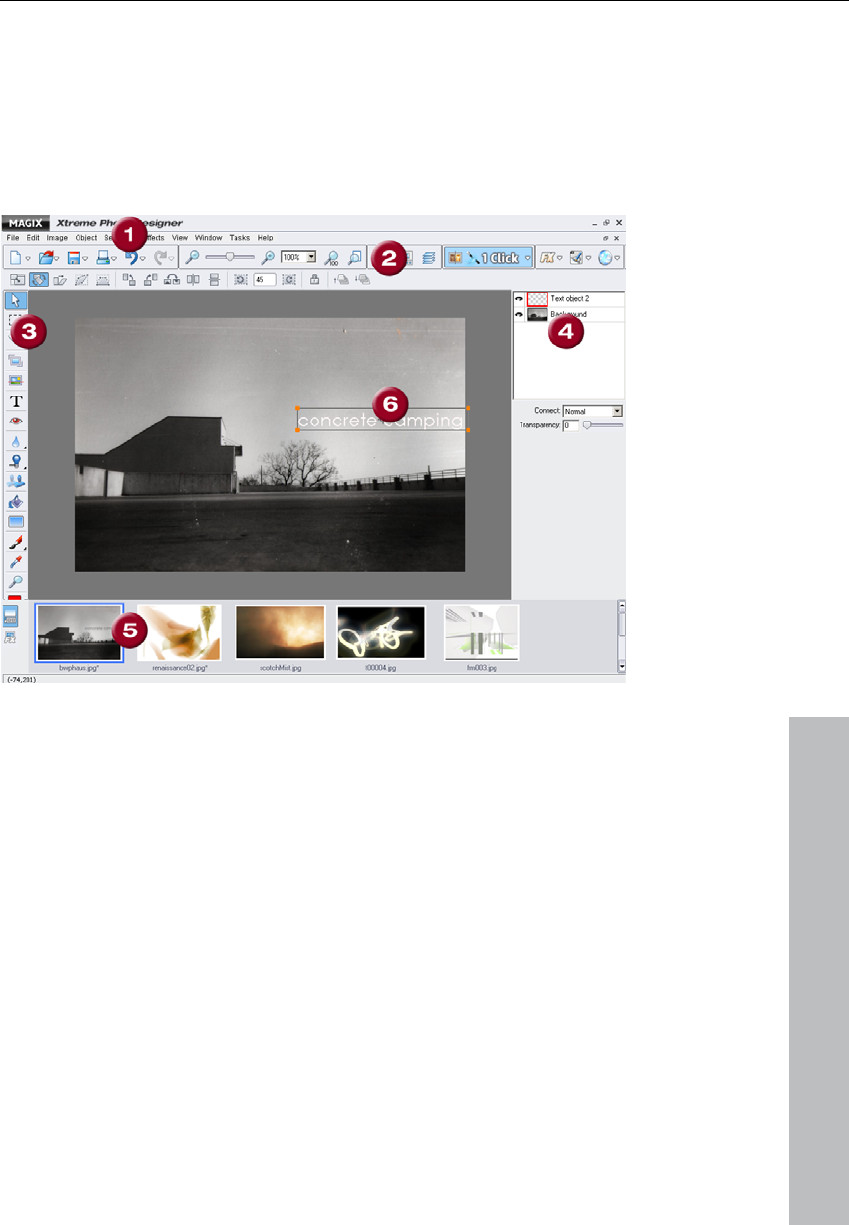
1. Menu bar
2. Toolbar
3. Toolbar + Option horizontal
4. Object Manager
5. Filmstrip view
6. Workspace (in the picture with the selected mask)
14 Tutorial
General usage tips
1. Most functions are usually only selectable and usable once a
picture has been loaded via the menu bar: "File" > "Open".
So that you always open the correct picture, we recommend
using the picture browser.
It searches through your folders and automatically shows each photo
in a thumbnail view including each title and filesize. Double-clicking
on a picture is enough to open it. Furthermore, you can delete, sort
or print directly from the picture browser of MAGIX Photo Designer 7.
2. Use the mouse wheel to increase or reduce the size of the view of
the picture you opened.
3. Via "Window" in the menu bar you can hide or show the symbol
bars and options, the Object Manager, the Effects Browser or the
filmstrip view. This way you can create the working environment that
suits you best.
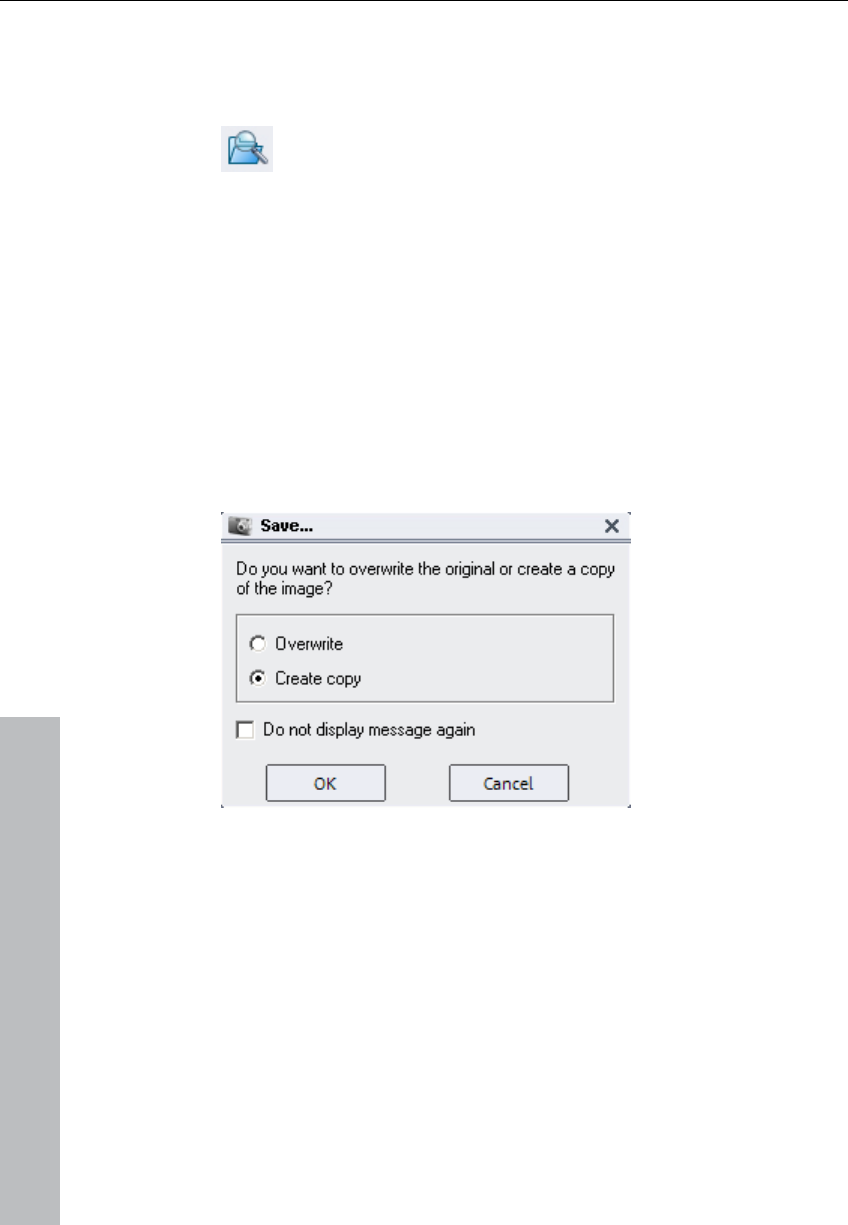
4. When saving a
picture either a copy
is created or the
original is overwritten
(see screenshot): Save
picture via the menu
list: "File" > "Save" or
the Save symbol in
the toolbar.
5. You can also choose to save pictures for the Internet, which results
in them being compressed. Compression settings can be changed in
the save dialog. Select "File" > "Save for Internet" from the menu.
Object Manager
In the screenshot graphic of the program interface you can see the
Object Manager (4) to the right, which sorts the various objects or
layers of a picture. You always work with the object selected there.
www.magix.com

Tutorial 15
www.magix.com
Creating objects
You can create objects by opening a mask. In the toolbar (3 vertical)
you'll find two tools for this purpose: the square mask and the lasso
mask for masks that are drawn freehand.
You can transform a mask into an object simply by right-clicking on
it. In the context menu that appears you'll find the "Object from
mask" option.
Another way to do this is via the keyboard shortcut for copying and
inserting: Ctrl + C and then Ctrl + V.
Scale objects
You can scale objects proportionally by holding down the Shift key
while simultaneously stretching your picture in or out. For this to
work, the object's orange-coloured handles have to be active.
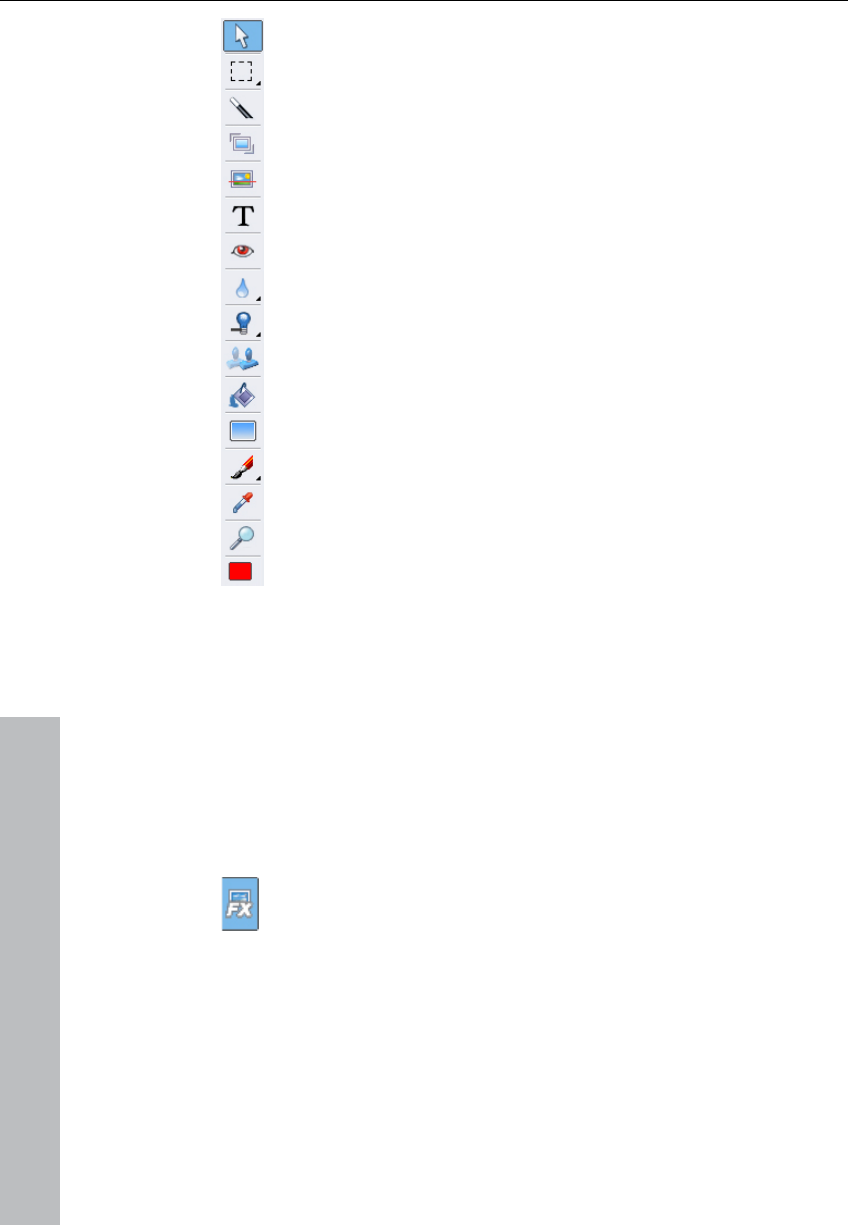
Toolbar
Tip: Use the toolbar as a quick access area for all the most important
tools, as soon as you're familiar enough with them all. Otherwise
almost every option can be found under "1-click" or the "Tasks"
menu anyway. These are always ordered in the most frequently used
combinations and presets alongside the Task Assistant, which
explains everything step by step.
16 Tutorial
Select, move, scale or rotate objects.
Clip or mask – Tool for creating objects & Lasso tool – For
selecting freehand shapes & Mask with brush – Creates a
freehand graphics layer
Magic wand – For selecting sections of a colour
Cut – For cutting a picture by hand
Level horizon
Text editing with comprehensive options for text layout
Red eye removal
Soft-focus effect & Sharpen
Marking/Cloning
Fill tool – Fills masks with the selected colour from the colour
field
Colour gradient (fade out borders and design backgrounds)
Brush for applying effects onto selected areas & Colour pen
for drawing freehand or drawing lines
Colour dropper (select colours on the screen and the colour
appears in the colour field)
Magnifying glass – For zooming in and out and examining
each and every pixel (should you wish to do so).
Colour field – Here you can select a colour with which to
paint
Smart, practical and can be used straight away
MAGIX Photo Designer 7 has two excellent tools that really separate
it from the rest of the image processing software out there. Even in
earlier versions MAGIX Photo Designer 7 had the versatile "Effects
Browser" and "Liquid colours" tools for freely designing and
modelling your photos. Both of these applications can be opened
from the menu bar. Both have been given extra functions and
enhanced in the latest version.
The Effects Browser mentioned can be opened via the "FX"
menu. There are a number of effects, filters and other presets
in it that can be applied to your picture with a single click.
In the Effects Browser to the bottom of the screen you have all the
picture effects at a glance and don't have to go searching for from
within various other tools. If you select one of the options, an
Assistant will open, which explains the individuals steps in detail.
www.magix.com
Tutorial 17
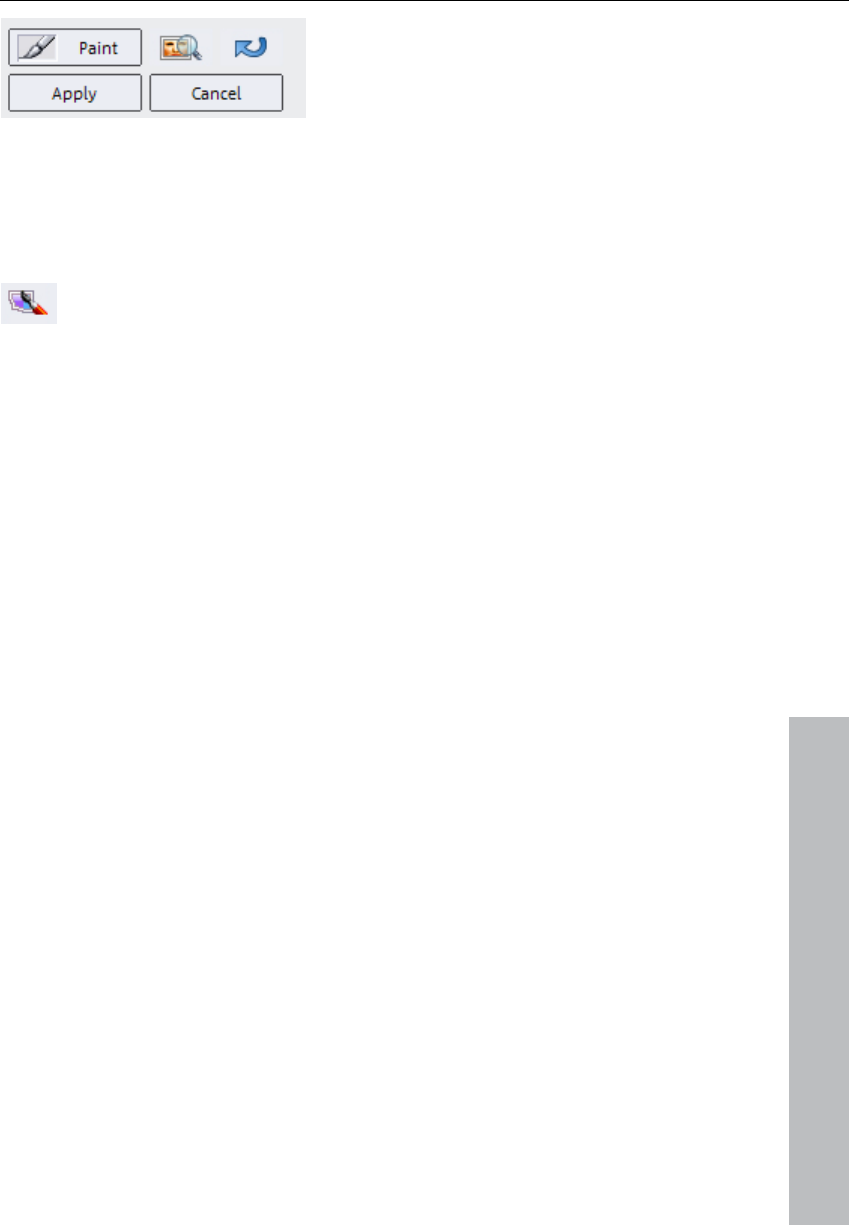
So as not to be experimenting
around on the picture without
having a clue what you're doing,
you can work with a preview.
The preview can be opened by
clicking on the red button in the
picture.
It shows you what effect applying this particular action to your photo
will have. To lock the effect, simply click on "Apply".
Use this button on the toolbar to open the "Liquid Colours
tool" dialog. This is where the fun starts:
With the move, grow, shrink, dent, bump, wave & explode options
you can really make some wild distortions on your pictures. With
advanced options you can set the direction and strength of the
distortion. This can all be done using your mouse. Really fun and
very, very easy.
The following pages describe various operations in MAGIX Photo
Designer 7, from quick image optimization to individual picture
creation – similar to the selection of options from the Task Assistant.
On the next page we start with "Quick image optimization" and
explain "Batch-processing".
www.magix.com
Quick image optimization and multiple picture
editing
Logically enough, quick picture optimization can also be explained
quickly. There are four options in the Tasks menu for "quick image
optimization":
Removing red eyes that appear when taking photos with a flash,
regardless whether photographed in analogue or digital.
Optimizing lighting to get the best colour value out of over and
underexposed photos.
Optimizing picture colour, either to remove colour faults or add
colour effects by increasing or decreasing the "colour saturation".
Correcting picture sharpness to help you get more out of shaky
recordings by "sharpening" transitions.
18 Tutorial
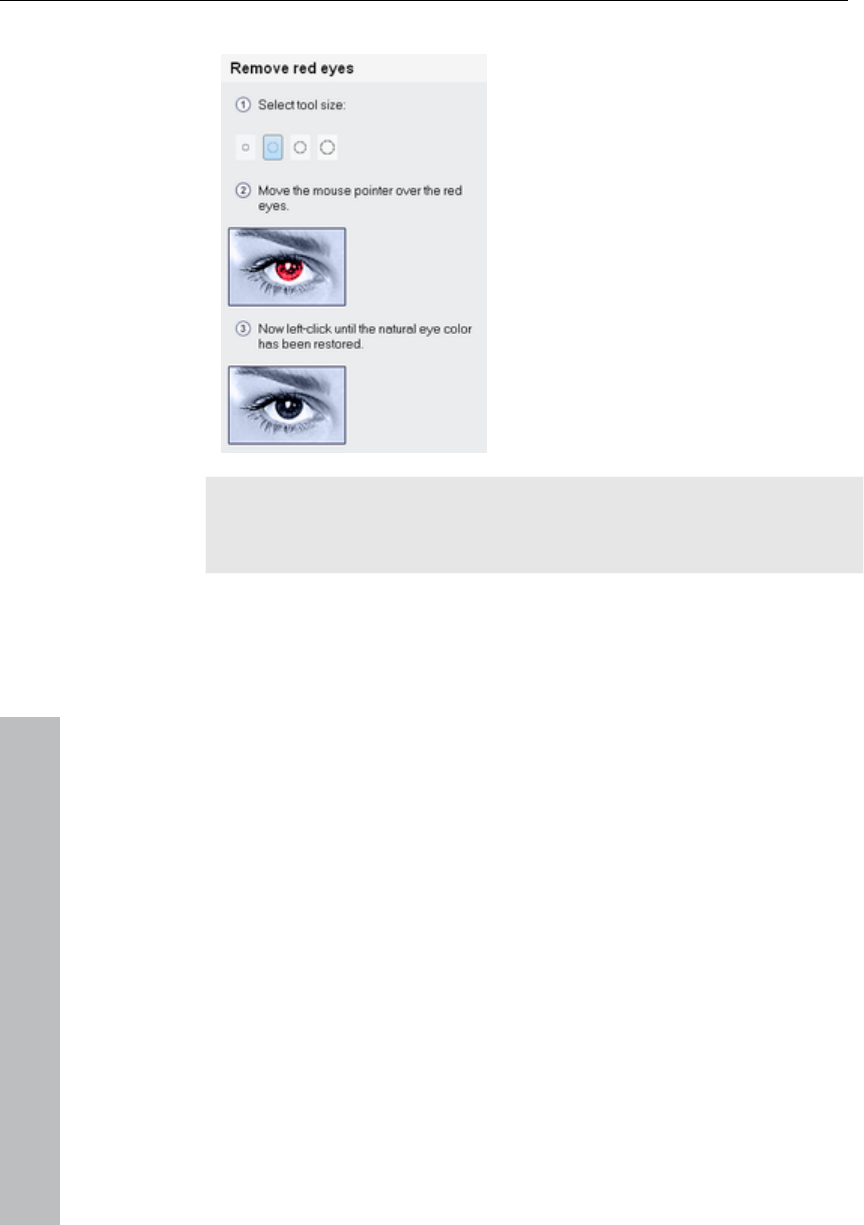
In the example...
In every one of these use-cases
there's a step-by-step explanation
which can be supplemented if
required with brushes or other
suitable tools at different strengths
and using varying painting shapes.
A small, soft brush is preset as the
red-eye removal tool, which prevents
painting over the edges, which would
smudge the white of eyes.
Sometimes the tool sizes provided
have to be adjusted to your
templates.
Note: Red-eye distortion can be fixed because the tool removes all
the red parts from the selected color spectrum. For this reason, you
can turn really bad red-eye into the deepest black, if you like.
www.magix.com
Tutorial 19
Editing multiple pictures at a time or "batch processing"
www.magix.com
Do you have lots of pictures to which you want to apply the same
change, like, picture size, 90° rotation, brightness & contrast
adjustment or increase picture sharpness. These are the typical areas
of application for so-called "batch processing". In MAGIX Photo
Designer 7 you'll find the point "Batch processing" in the "File" menu.
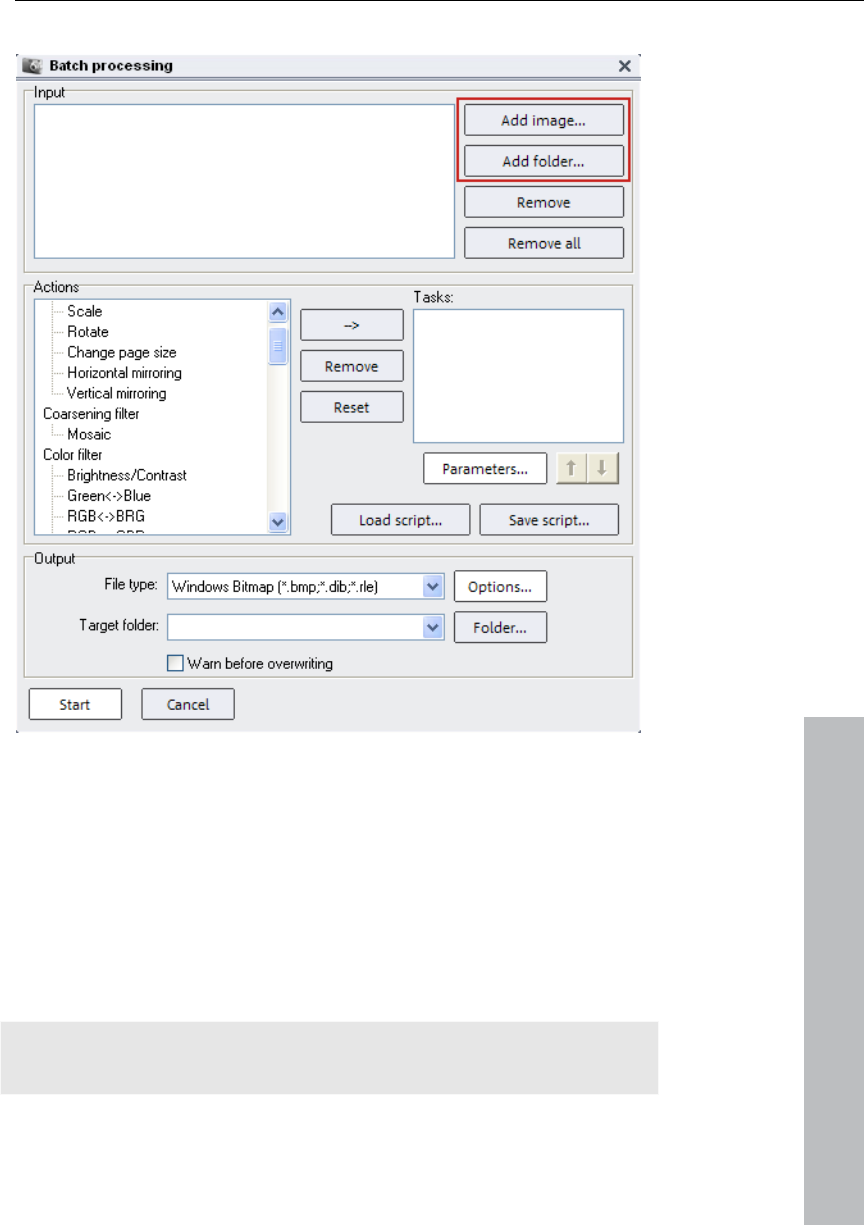
The following example demonstrates the usage of batch processing
in scaling, i.e. changing the picture size. You start by selecting
pictures using the dialog window of the batch processing function
and clicking on the "Add picture" or "Add folder" buttons.
Tip: If you use the thumbnail view of your browser, it's easier to find
the pictures you want.

20 Tutorial
www.magix.com
Select "Scale" from the "Actions" dropdown menu to change the
picture size. In "Parameters" you can fine-tune your input. In our
example, we enter the desired picture size. Make sure that the
checkbox in the "Aspect ratio" field is ticked. Then enter only one
value, either the length or the width.
Now select the file type and the target folder where you want to store
your picture after batch processing. Click "Start". Your pictures will
then be converted at lighting speed and saved to the target folder.
Detailed image editing
With "Tasks" you'll find six practical options for editing photos in
detail in the Task Assistant:
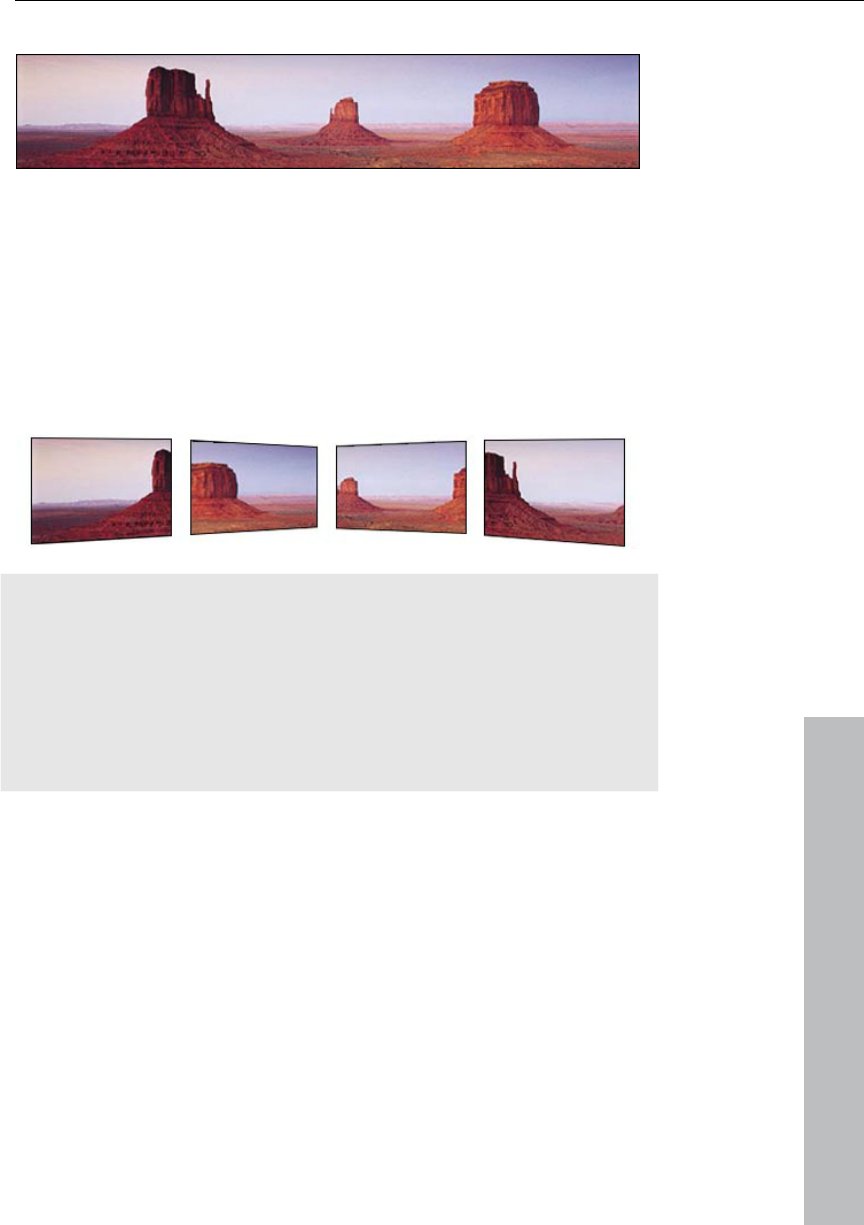
Create panorama picture – We show you how to make a panorama
picture from multiple source photos.
Crop person/object – cut, move around and effectively insert
elsewhere.
Design picture title – Text design with individual layouts. Carve
lettering into your photos!
Brighten areas – because some pictures need a bit more light to
brighten up dark corners.
Remove scratches and stains – give your analogue pictures a
chance: Scan them in first, then restore them in style.
Clone – Remove annoying objects from a picture simply by moving
the mouse over the affected pixels and copying a different section
(fantastic for retouching blemishes on skin).
Tutorial 21
Panorama
It's no coincidence that panorama shots of vast uninhabited
expanses and grandeur evoke our most romantic and happiest
memories of utopian sunsets and daring climbing adventures from
previous holidays.
MAGIX Photo Designer 7 provides all the romantics and hobby
photographers with an enormously able tool for creating personal
panorama pictures. You will, of course, need several interconnecting
photos.
www.magix.com
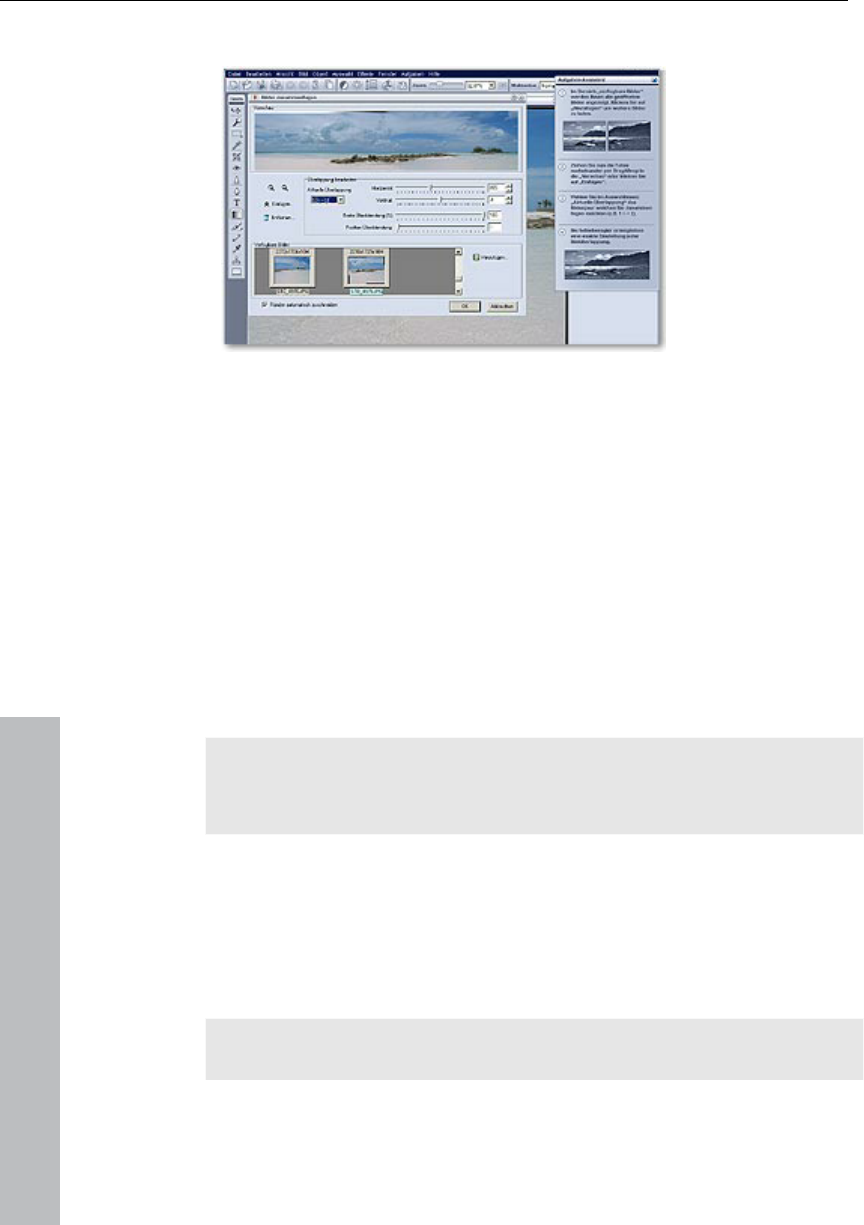
Tip: You should only take photographs in landscape or portrait
format. Make sure the photos are slightly overlapping when taking the
shots. In the program you can move the pictures around horizontally
or vertically, letting you position the identical picture portions on top
of one another. Keep an eye on the lighting and adjust the exposure
time according to the direction. Stay on one spot and try to move as
little as possible when taking the other shots for your panorama
picture.
22 Tutorial
Panorama: This is how you do it!
You can open the panorama picture creation dialog either via "File >
Panorama" or by using "Tasks > Create panorama pictures".
All of the pictures that are already open in MAGIX Photo Designer 7
are automatically displayed in the browser of the new dialog window.
From there you can use the mouse to drag them one after the other
into the preview list.
First sort out the order, then take care of the transitions.
You can horizontally and vertically define every transition individually.
To do so, you should always select the correct current overlap, for
example, [1]<->[2], [2]<->[3], then all you have to do is move around
the faders. That's it.
Tip: If you are a user of MAGIX Photo & Videoshow deluxe, why not
just use this ideas for your slideshow: Add a camera movement to
your panorama picture in MAGIX Story Maker.
Crop person or object
With the lasso you can catch runaway horses just like a cowboy or
fish out objects or people from photos. Just use the lasso tool from
MAGIX Photo Designer 7, it's perfectly suited to it. You can instantly
crop any mask you like and then insert them into other photos.
Note: A "mask" in MAGIX Photo Designer 7 refers to the clipping of a
picture that has been selected for the original. Clippings can be
www.magix.com
Tutorial 23
created in different ways, for example, with the mask tool that always
drags up a quadratic shape and is therefore called a "Rectangle
mask".
Object from mask
To be able to crop the "mask" as an "object", you have to right-click
on the mask and select "Object from mask" in the context menu
(alternately via "Object > Create > From mask"). The object now has
orange handles and can be moved around with the mouse. It is now
a layer on the picture. All object layers are visible and selectable in
the Object Manager.
Insert object and set edge blur
You can select an object using the mouse and insert it elsewhere.
For example: Cut using the key combination Ctrl+X and Insert into a
different picture with Ctrl+V. An inserted cropped object can be made
less obvious by using a vignette. A vignette creates blurring at the
periphery of the picture, i.e. a color gradient around the object. You
can freely specify the pixel magnitude of this gradient. You'll find the
vignette in the menu bar under "Object" > "Vignette". Your object has
to be selected in order to be able to use the vignette.
Freehand
www.magix.com
When you select "Crop object/person" using the lasso tool via the
Task Assistant, you create a freehand mask.
Crop the object as precisely as possible by using the tool
options of the lasso. You can insert or remove sections
after selecting the freehand object.
So, if you ventured outside the desired object border, the protruding
part can be pinpointed and removed from the object mask.
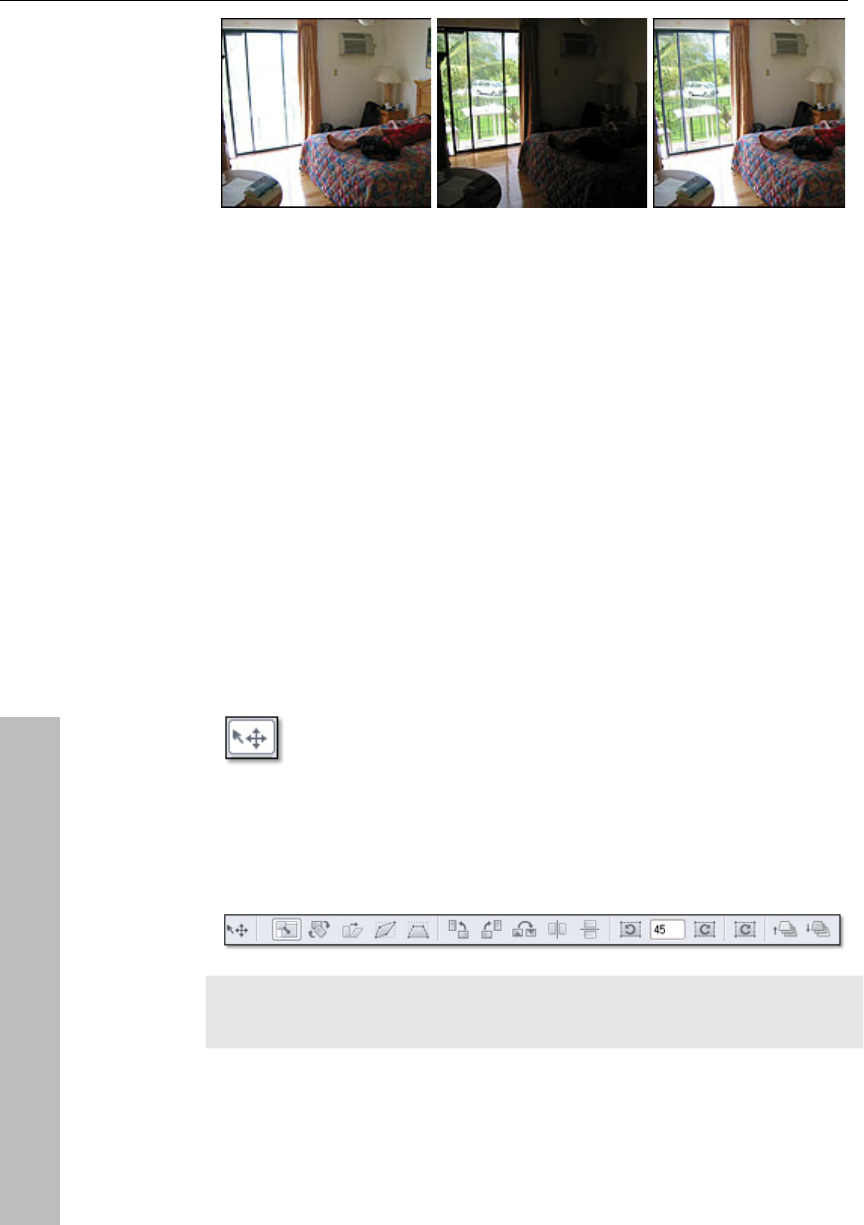
24 Tutorial
Photo 1 Photo 2 Photo 3
Step 1: Photo 1: Here, a photograph was taken of the room and we
see that the bright light from the window has caused the rest of the
picture to be overexposed.
Step 2: Photo 2 was taken with a small lens aperture for less light so
that the interior is in complete darkness, but the window, as
expected, is less lit and what's outside can be seen clearly.
Step 3: The photo montage in picture 3 involves the window from
photo 2 being cropped as an object using the lasso tool. Then the
object is cut out and inserted into photo 1.
Step 4: By double-clicking on the object, handles will appear to it
sides, which can then be used to scale the object, that is, you can
move it around precisely and rotate, stretch or tilt it any way you like.
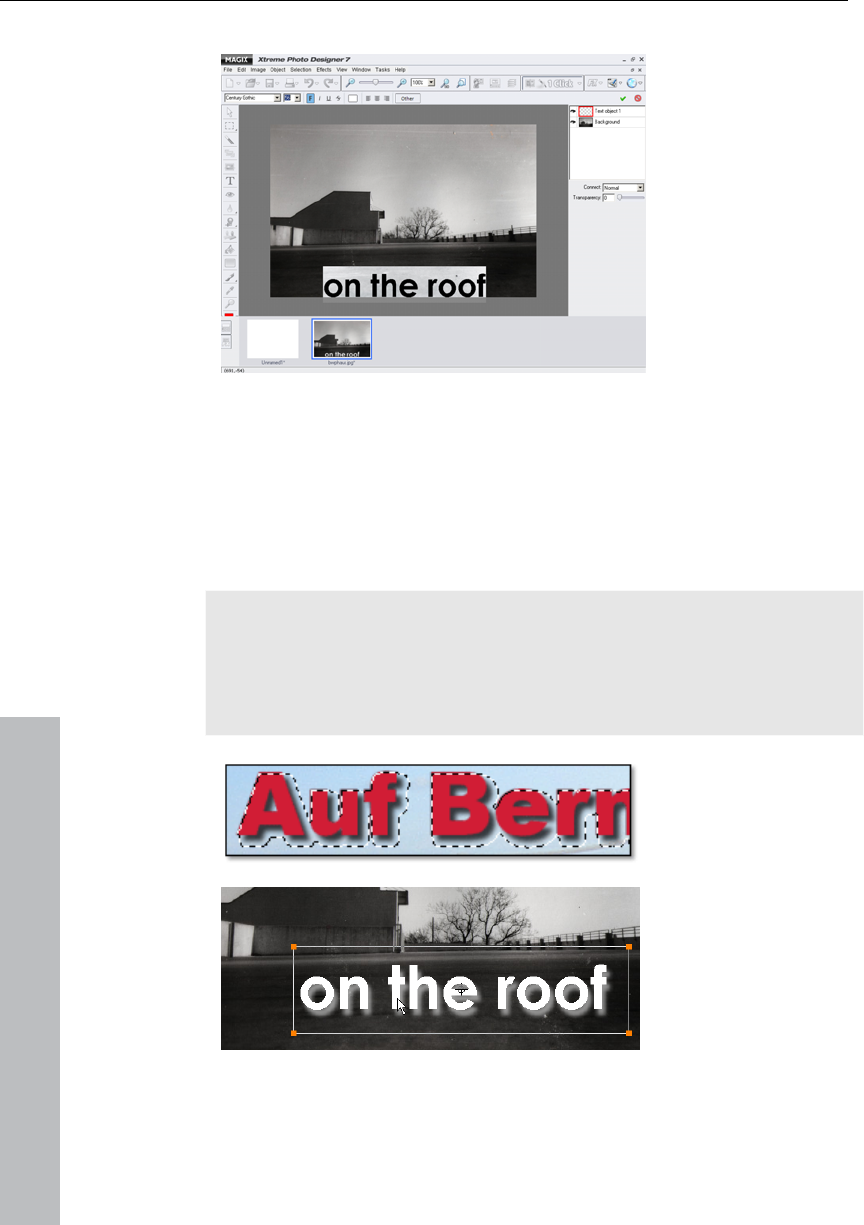
Tips for transforming objects
To transform objects, you have to open the tool shown here
for selecting and manipulating objects.
If you select an object on the workspace, orange-colored handles will
appear to its side.
You can now access a large amount of tool options:
Hint: If you can't see the tool options, you will have to make them
visible by selecting "Tool options" from the "Window" menu.
www.magix.com

Tutorial 25
www.magix.com
If you move the mouse over the individual symbols, a "tooltip" will tell
you what the option can be used for. Why not simply try a few of
them out? You'll probably find the options for perspective distortion
quite interesting, but you shouldn't miss the mirroring and rotating
options either. You can also use the lock to scale pictures
proportionally or block distortions being made.
You can change the order of the objects by using the last two
buttons on the option list.
Multiple objects on the workspace
Objects can also be selected by right-clicking the mouse in the
context menu. This means: if, for example, the background and two
additional objects cover one another on the workspace, then all three
layers will be shown in the context menu and can be opened from
there. This is a practical function if you're in danger of getting lost
among the jungle of objects in a photo montage.
Add name
Before starting, you should give your objects names in the Object
Manager, otherwise the individual layers cannot be differentiated from
one another. They can be renamed by right-clicking on the object in
the Object Manager.
Tip: This is how to create shadowing around objects: Select Object >
Add shadows from the menu list.
26 Tutorial
Design title of picture
Those of you who enjoy creating invitation cards will most likely also
enjoy using the text option of MAGIX Photo Designer 7. Start the title
design either using the Task Assistant or using the text tool.
Start wherever you like, the text can always be moved around as a
separate object later on. (Want to find object? – Always via the Object
Manager – see red marking)
Tip: When you open the text option using the text tool from the
toolbar, you can experiment around with shadow as well. Use
shadow with a similar colour to get smooth, unfrayed borders. Try out
the different settings for letter shadowing, e.g. edge blur, distance
and transparency.
Once you've
confirmed the text
object (see figure
below), the text will
become a mask and
can be moved
around like an object.
www.magix.com
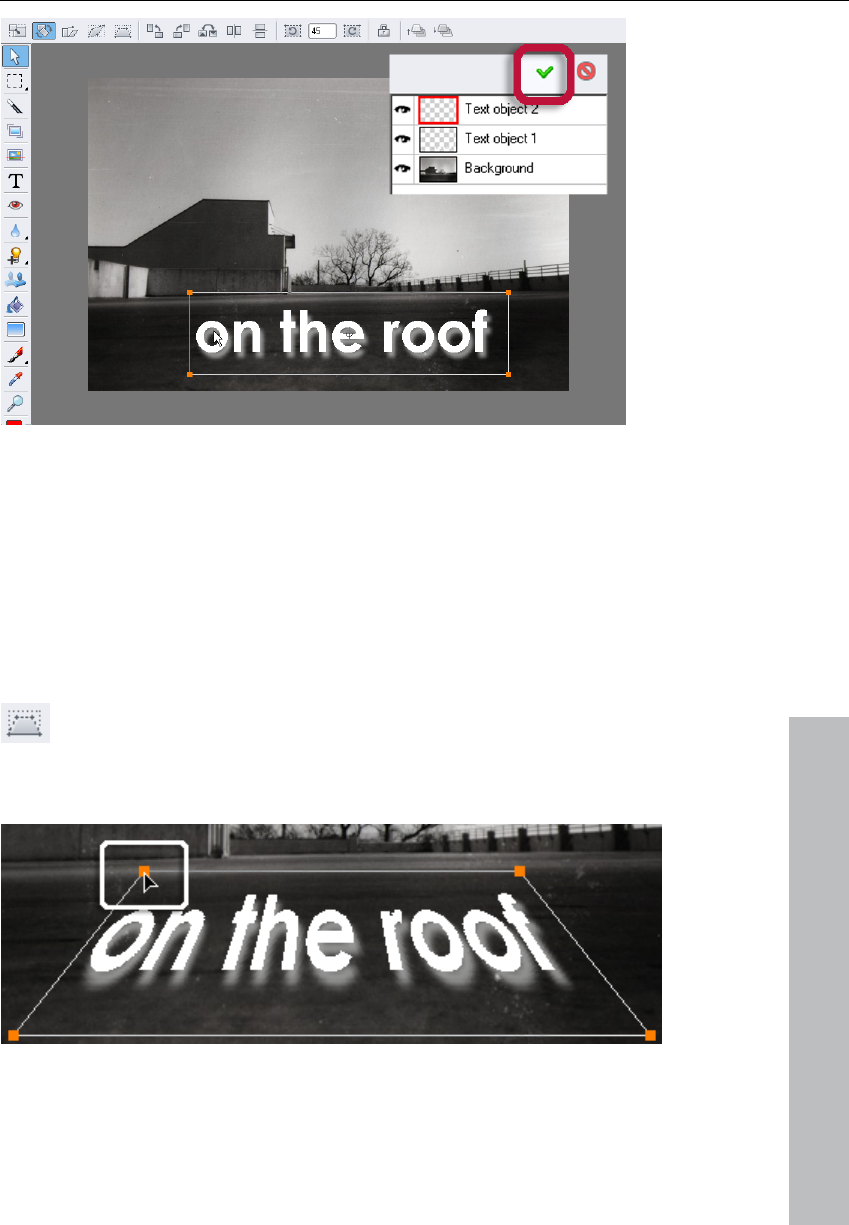
Tutorial 27
After double-clicking you can scale, rotate or tilt. When masked, the
text objects can also be deleted: simply press the Del key.
Reshape texts
Among the new feature is an option for distorting the perspective of
the text. After creating and confirming a text object, it is masked on
top of the picture background. Double-clicking or using the object
transformation tool creates an object frame with orange-coloured
handles that surround the text object.
www.magix.com
Select the symbol shown here from the tool options for
perspective distortion. Then grab one of the small orange
handles in the corner of the object frame using your mouse
and drag it in or out, the result can be seen in the picture.

28 Tutorial
www.magix.com
Selectively brighten areas
Brightening things up is all well and good, but what do you do when
only specific areas on the picture are in the dark, picture borders in
particular.
The solution is simple: You can selectively brighten an area. In the
example below, the photographer wanted to catch the dusky
atmosphere of the beach, but the back border portion of the photo
turned out too dark. The light ratios weren't precise enough, so more
targeted help was needed. All in all, the picture was brightened up a
little, however, a bit too strongly on the buildings and trees in the
background.
This is how it was done:
Select "Detailed image editing > Brighten areas".
Step 1: Choose the appropriate tool size.
Step 2: Move the brightness, contrast or gamma faders to get the
look you want.
Step 3: Now mark the areas that you wish to brighten using the tool.
The effect can be noticed immediately.
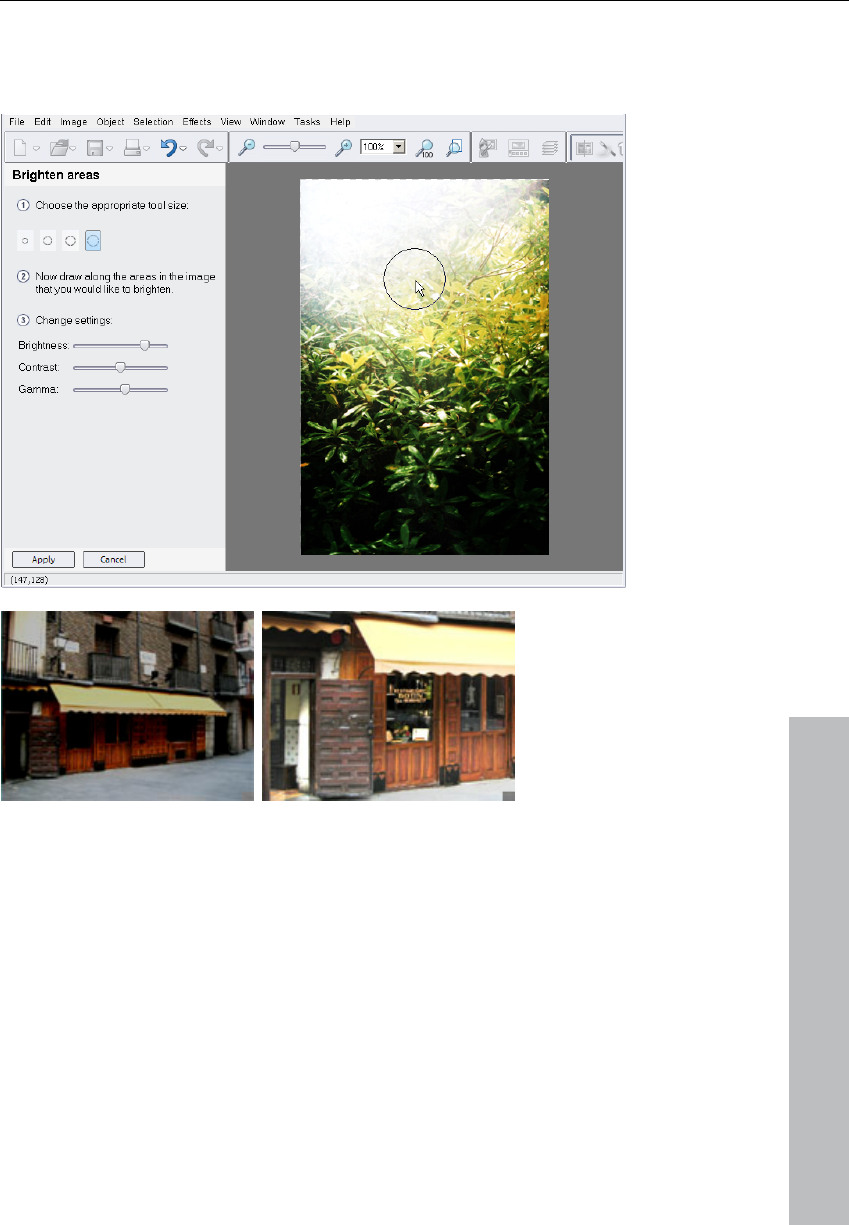
Tutorial 29
Step 4: Do some fine-tuning using the brightness, contrast and
gamma faders until you have the desired result. If the changes are
not precise enough, change the size of the tool.
www.magix.com
This way you'll be able to see the interior much more clearly. Here we
see the outside of a tavern. You can't see any of the inside of the
tavern in the photo. Just select the windows and brighten up the
scene as described previously.
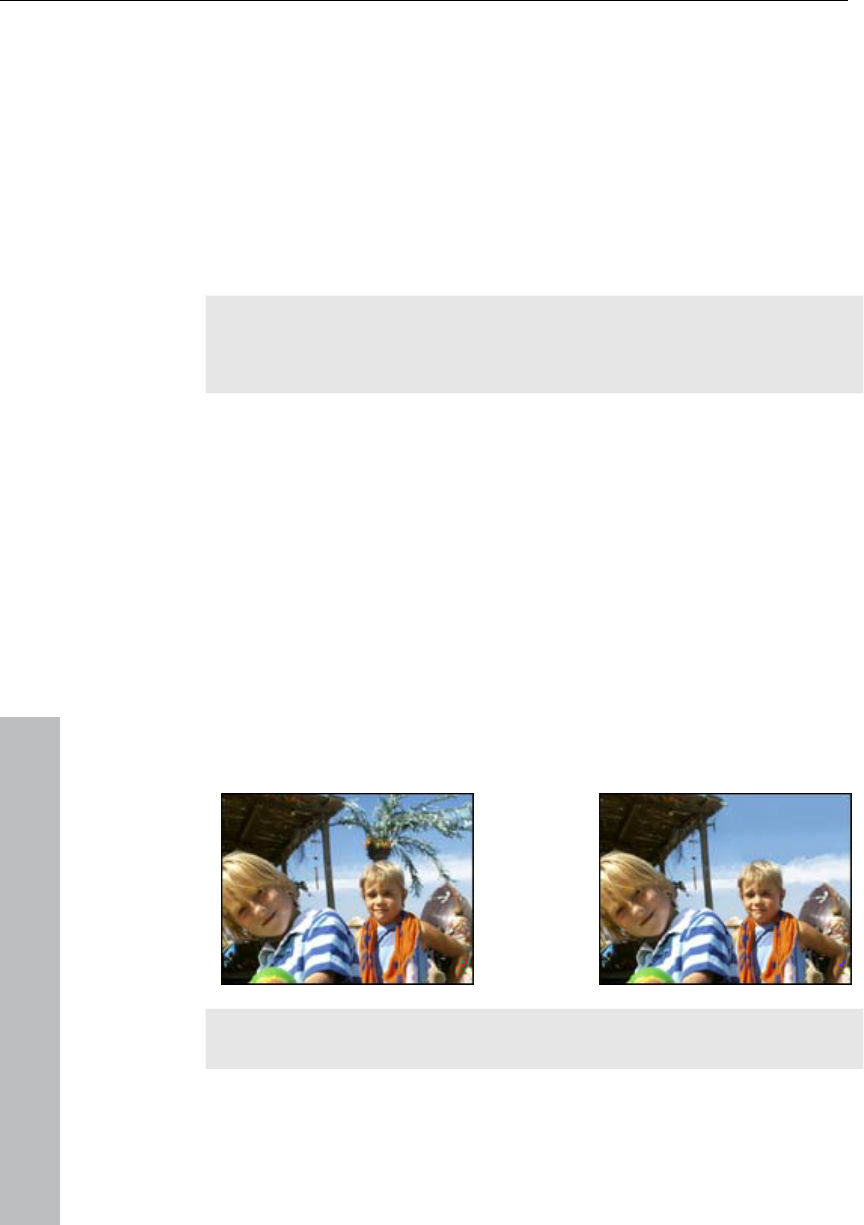
Isn't it amazing how much image information that could still be
retrieved?! In the example, brightness and contrast were first applied
to the entire motif and then the windows and doors were polished
with the paintbrush and "brightness" effect.
30 Tutorial
Removing scratches and stains
The Task Assistant provides you with a tool for retouching and
applying soft-focus to picture errors. We also recommend three tools
from the preset toolbar which can be used to restore: the brush,
colour-picker and colour gradient.
With the colour picker you can select a colour from anywhere on the
screen. If you now use the brush to paint, it will apply this exact
colour. This way you can skilfully paint over stains, spots, blisters and
other sources of irritation.
Tip: Use the magnifying glass for detailed tasks like this and use a
high zoom factor to catch exactly the colour you want and paint over
single pixels that you want to get rid of.
Cloning
To match our previous topic, "Remove scratches and stains", we'll
now have a look at an alternative editing option for retouching
pictures – this can be found in your Task Assistant under "Detailed
editing" > "Cloning".
Here you can also get rid of larger distortions. If you want to clone
something, you'll need the stamp tool. A usable reference point is
required for cloning. In the example below, the problem is that it
looks like there's a palm tree balancing on top of the guy's head. This
needs to be erased. The sky in the background is perfectly suited as
a reference point. In the end, there'll be two pieces of sky: the original
and the clone covering the palm tree. And the best thing about it is
that you'd never know there was one there in the first place.
Tip: You can use this to retouch really small defects, for example,
blemishes on skin. Select a reference point from the immediate
www.magix.com

Tutorial 31
www.magix.com
surroundings of the defect. Zoom into the picture and precisely paint
over the distorted points.
This is how it works:
Select "Effects" > "Clone"
Select a reference point with the mouse for cloning
Then click on the object you wish to retouch. You should now have
two points selected at a specific distance from one another.
You can now move the mouse over the object you wish to remove
while holding down the mouse button. Here, the pixels from your first
reference point are applied to where your mouse goes.
Effects & Filters
MAGIX Photo Designer 7 has an Effects Browser that quickly guides
you to where you want to go and provides playful tools like "Liquid
colour" and "Transform into painting". You've experienced some of
them already in the introduction.
Under the menu point "Individual picture creation" you can access
these special MAGIX Photo Designer 7 features and then employ the
help of the Task Assistant to assist you in implementing them
professionally. The options in this section are exciting, new and easy-
to-use.
In the menu of the Task Assistant you'll find four practical options for
uniquely and creatively transforming your pictures:
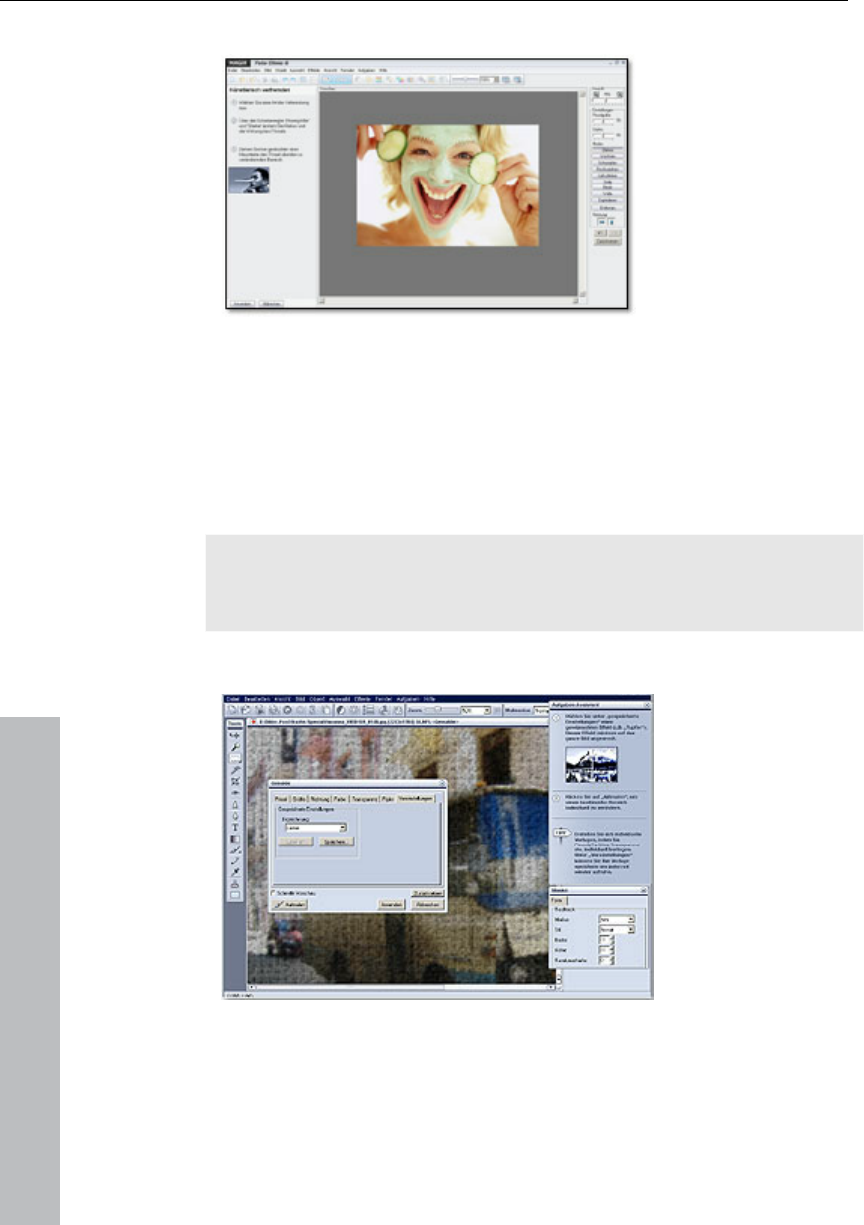
Artistic distortion – With "Liquid colour" you can conjure up bizarre
pictures and shapes from your motifs.
Transform into painting – Learn to appreciate the finer side of image
processing with the effects brush for user-defined size, direction,
transparency, colour and paper structure. The modern way to
"Modern Art".
The rotation effect lets you see the other side of your pictures!
Emboss – Add structure and stress to your pictures with the light
source, reflection, depth and smoothing options, which help you
emboss a material character into them.
32 Tutorial
Surgery without artistic malpractice
Cheeky fun effects are the results of artistic distortion. Whether it's
bumps or explosions, your photos better be prepared for some
heavy-handed action and one or two surprises. Use the "Reset"
button to revert your photo back to its original state. With "Delete"
you can repair the bumps and explosions precisely the way you want.
Practical for correcting small mistakes here and there, and not the
entire work.
Tip: Use the forward and back arrows to undo or redo each and
every step you take and fix mistakes without having to start from the
start.
Turn new into old – Transform photos into paintings
www.magix.com
Tutorial 33
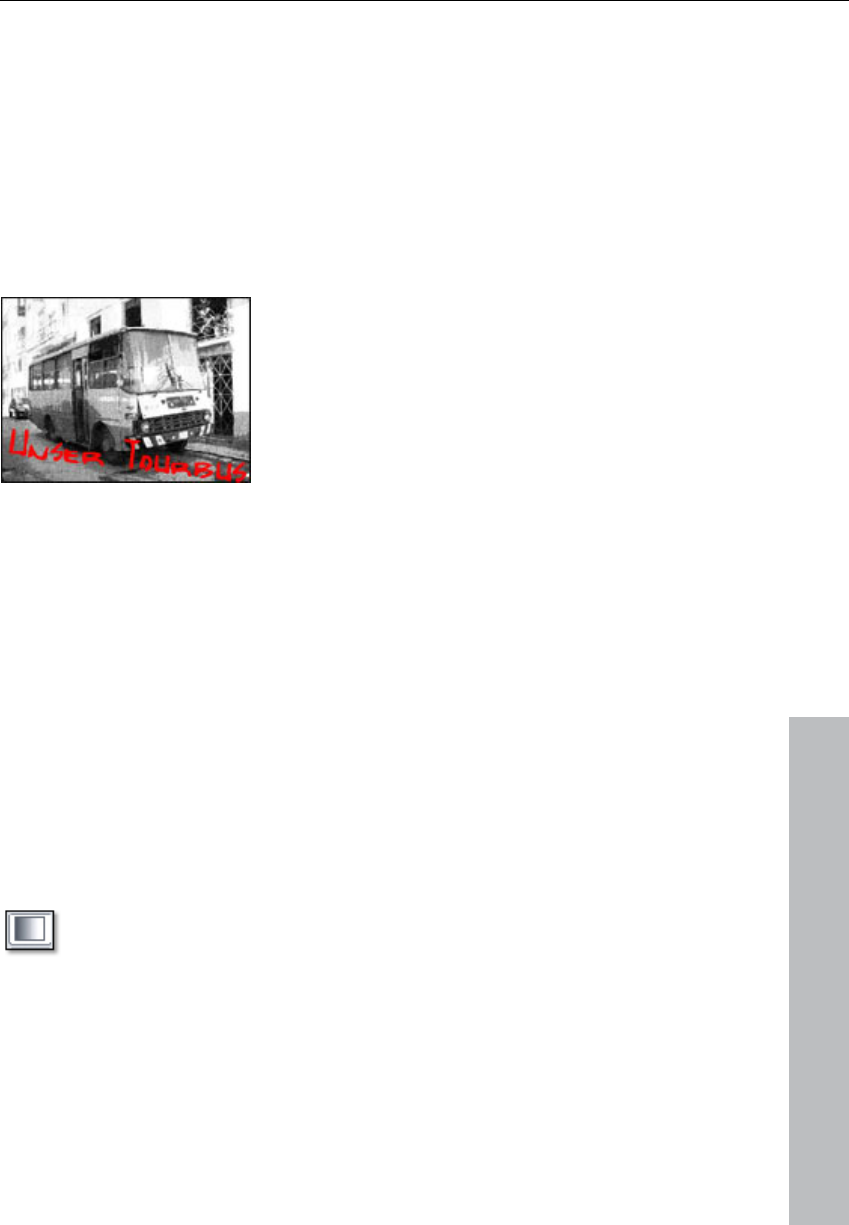
There's a very comprehensive feature to be found in > Paintings. This
is because it consists of a dialog window with diverse presets, which
pictorially change the optics of your motif: there are various materials
like pastels, oils or crayons, various structures like leather, coarse
wallpaper or canvas. If you select one of these settings, it will be
applied to your entire picture as an effect. But you can also use >
"Paint" to apply the effect to a specific area.
Our favourite effect: Newspaper print!
Emboss
The previously colourful picture of an
old Cuban car has been decolorized
and stylised using "Newspaper print"
("Transform into painting").
The depth of the picture was then
changed using the "Emboss" tool.
This transforms the photo into an eye-catching screen print. With
"Emboss" you can apply extreme filters to your pictures, quite original
if you like strong picture effects.
To finish, shadowy lettering was positioned in bright red and then
rotated, tilted and distorted.
Colour with colour gradient
www.magix.com
Finally, we'll take a look at colour gradients in the Effects and Filters
section. MAGIX Photo Designer 7 has a number of spectacular colour
combinations which let you create your own designs in no time. It's
especially suited to creating personalised CD covers or for colouring
less successful border gradients. One example would be a sky that is
totally white as a result of overexposure. A blue colour gradient can
colour in the sky later on.
You can use the colour gradient tool in MAGIX Photo
Designer 7 to select various preset gradients. The options
can be found in the tool options list. We recommend using
"Glow 2", "Transparent Blue" or "Alpha Blue" for the sky, all
of which can be seen in the example.
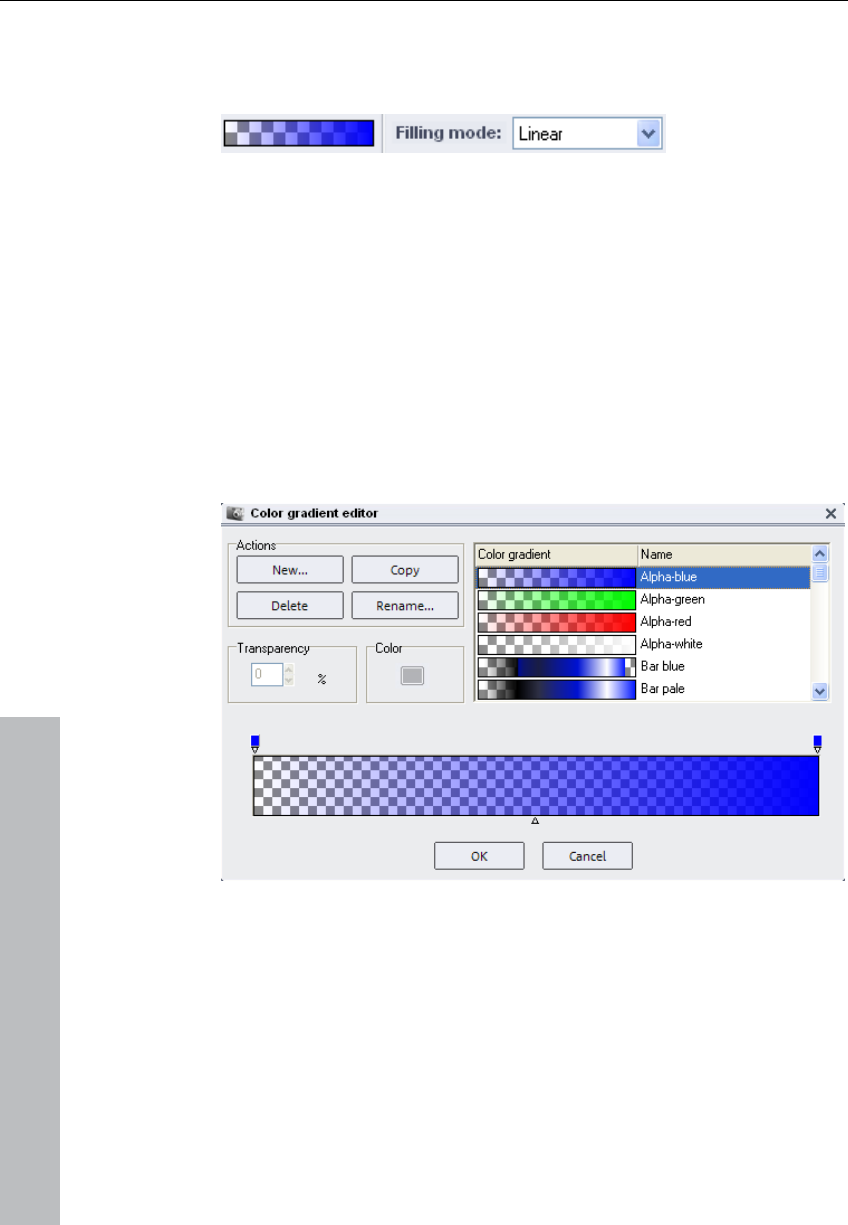
34 Tutorial
Select "linear" if you want to add colour along a line or at the picture
border. Additional modes are quadratic, square, etc., which can be
used to design or just edit graphics in general.
To define your own gradients, click on the option field of the colour
gradients and open the Gradient Editor. Once there, click on "Edit"
and create your own colour combinations for unique colour gradients.
To apply the gradient, select a starting point with the mouse from
which the gradient should start and then drag the gradient across the
picture (by clicking and holding down the mouse button).
The gradient is applied to the entire breadth, unless you previously
added a mask to the picture, which woulud result in the colour
gradient only being applied to the mask.
Colour gradient editor
In the colour gradient editor you can exactly specify the start and end
points of your colour gradient and even improve the individual colours
of each section.
First, you should define the transparency of your colour gradient, for
the starting point and end point as well. This is decisive as not every
gradient should cover an entire picture. For this reason the gradient
www.magix.com
Tutorial 35
should start 100% transparent. This can be implemented effectively
using the preset gradients with the description "Glow".
Change image format
The Task Assistant provides you with five options under the "Change
picture format" menu point: Rotate picture, mirror picture, cut picture,
scale picture and change aspect ratio. The first three options are so
easy that they don't need any further description at this point.
To differentiate between "Scale picture" and "Change aspect ratio"
you should use the following example.
www.magix.com
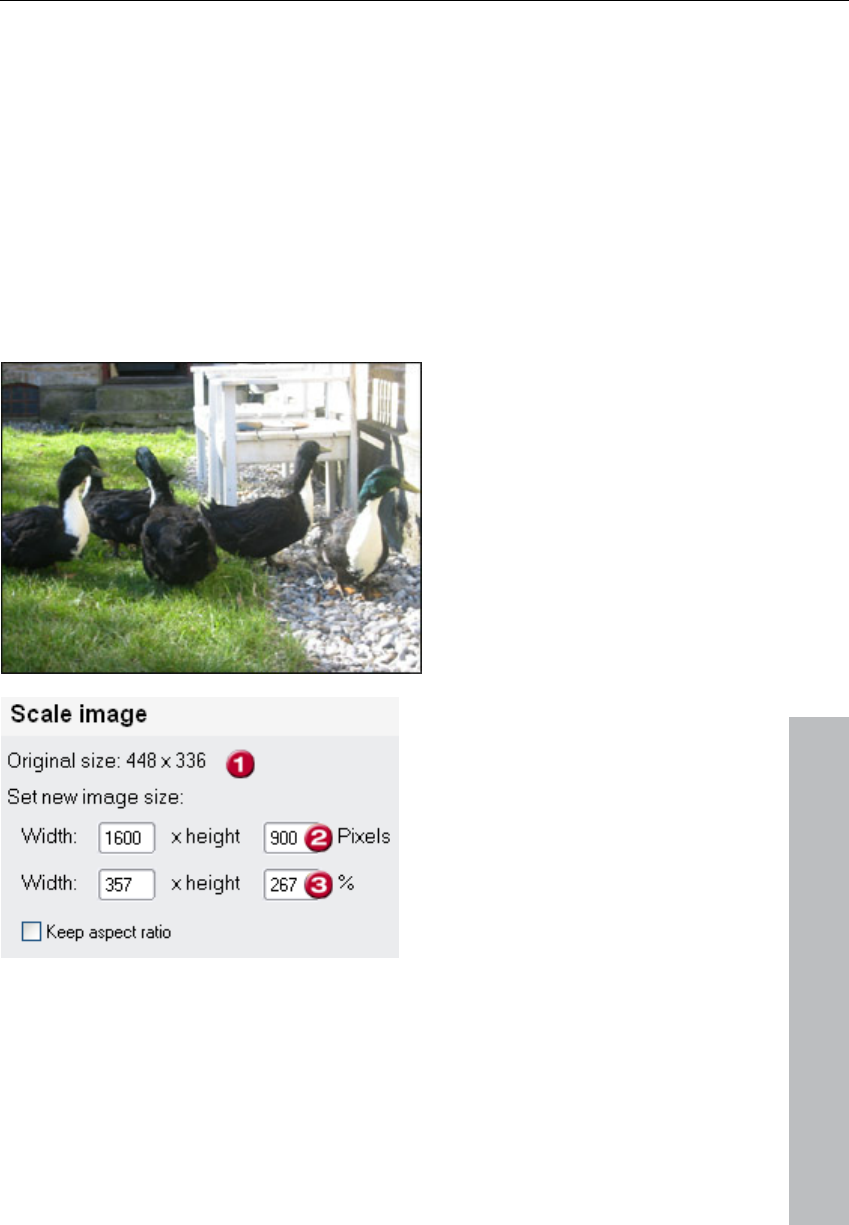
To the left you can
see the sample
picture with its
original aspect ratio
of 4:3. The photo
has 1600 x 1200
pixels in the original.
When scaling a
picture, you change
the actual picture
size and the number
of pixels with it. In
the example just
one parameter was
changed: the height.
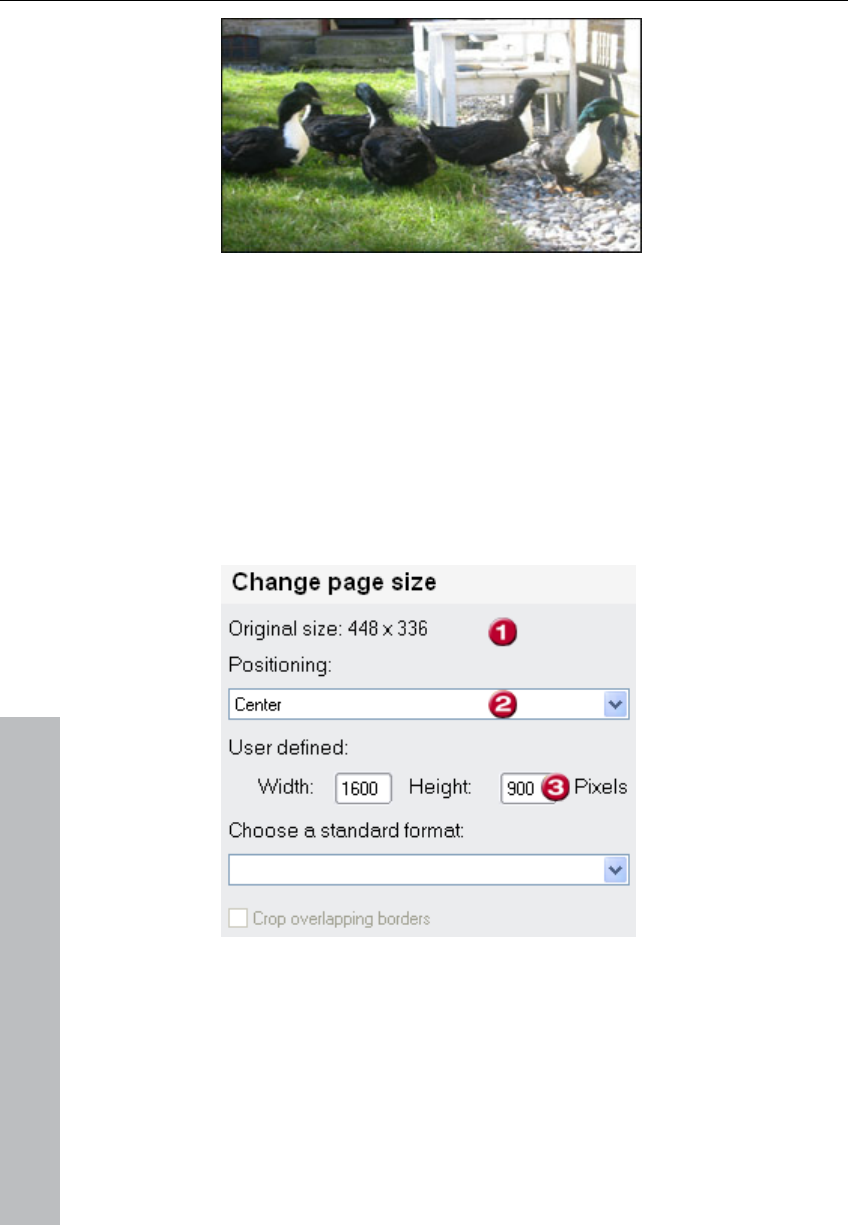
36 Tutorial
The picture's height
has been stretched.
If you keep the aspect ratio by checking the corresponding box, the
height and width are changed proportionately to one another. To stay
with the same example, reducing the height to 900 pixels would
result in the width being reduced to 1200 pixels.
If, on the other hand, you change the page size, your side areas of
the picture will be cut, thereby changing the page ratio and the size
of the working area. There are two options here:
Either you set the page size as user-defined and specify the width
times the height or you select a standard format.
Picture 1: In the first case, the user-defined variation, you can enter
any picture size you like (3) and specify the exact clipping of your
picture by specifying the placement (2): centered, top left, top right,
top center, ... bottom and so on.
www.magix.com
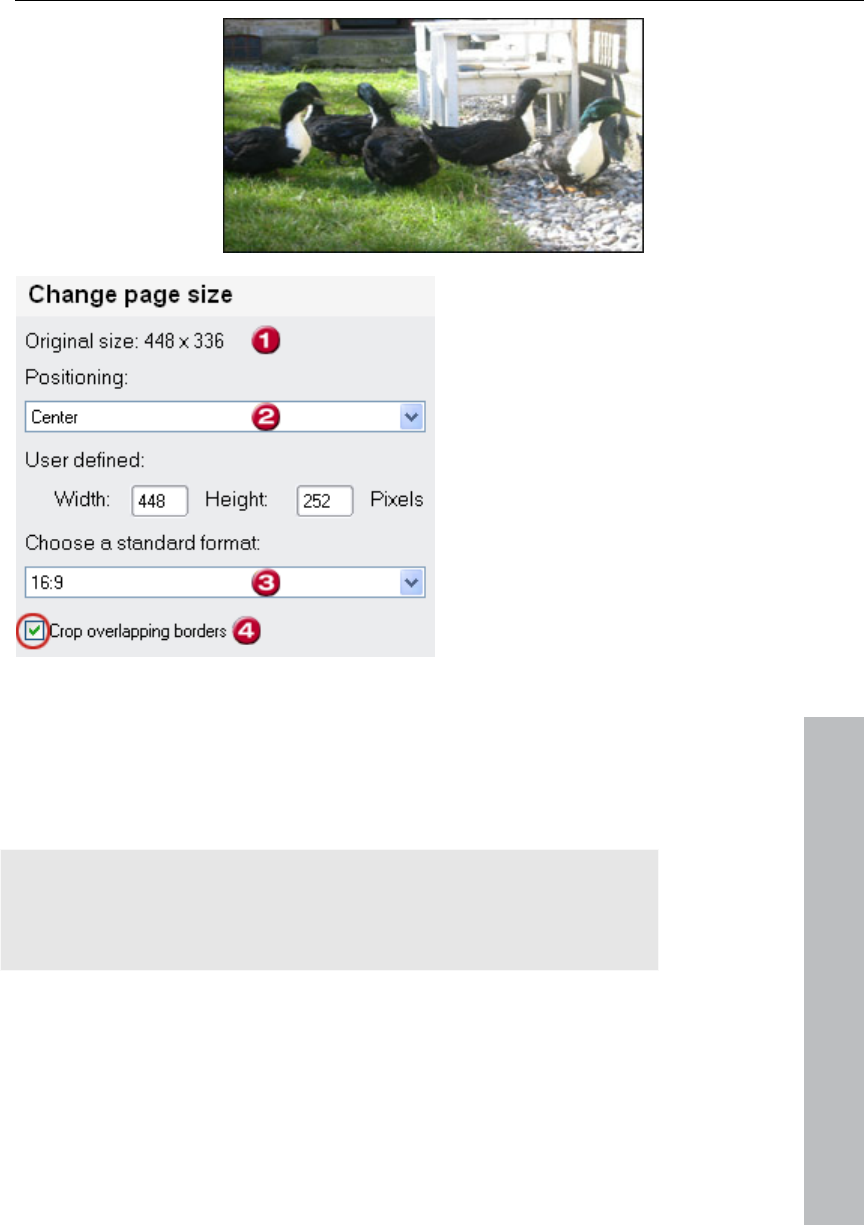
Tutorial 37
In our example, the
result remains the
same. The borders of
the picture are cut off
at the top and
bottom. A 16:9
format was created.
www.magix.com
Picture 2: In the second example when selecting a standard format
(3): quadratic 1:1, landscape 3:2, 4:3, 16:9 or end-wise 2:3, 3:4,
9:16, you save having to calculate the size and can optimize the
picture by setting the size to the standard values. You can specify the
placement just like in the first example (2). Set the tick (4) to remove
the undesired picture areas.
Note: 16:9 is today's normal format for widescreen TV screens. The
corresponding image processing is sensible if you want to create
matching DVD menu background pictures for slideshows in 16:9
format.

38 Tutorial
www.magix.com
Screenshot function
MAGIX Photo Designer 7 has a nifty screenshot function which can
be started via > "File" > "Screenshot".
You can select from a number of input options in the dialog window
to take a photograph either of the entire screen, the active window or
the content of the window. It's possible to use the mouse pointer for
this.
Set a "hotkey". The hotkey is a key which can be used to make
screenshots. Put a tick beside "Repeat" to take multiple screenshots
one after the other.
You can save the whole thing in one place and in the file format of
your choice. Select a format from the dialog window and set the
storage area.
Working with the Browser 39
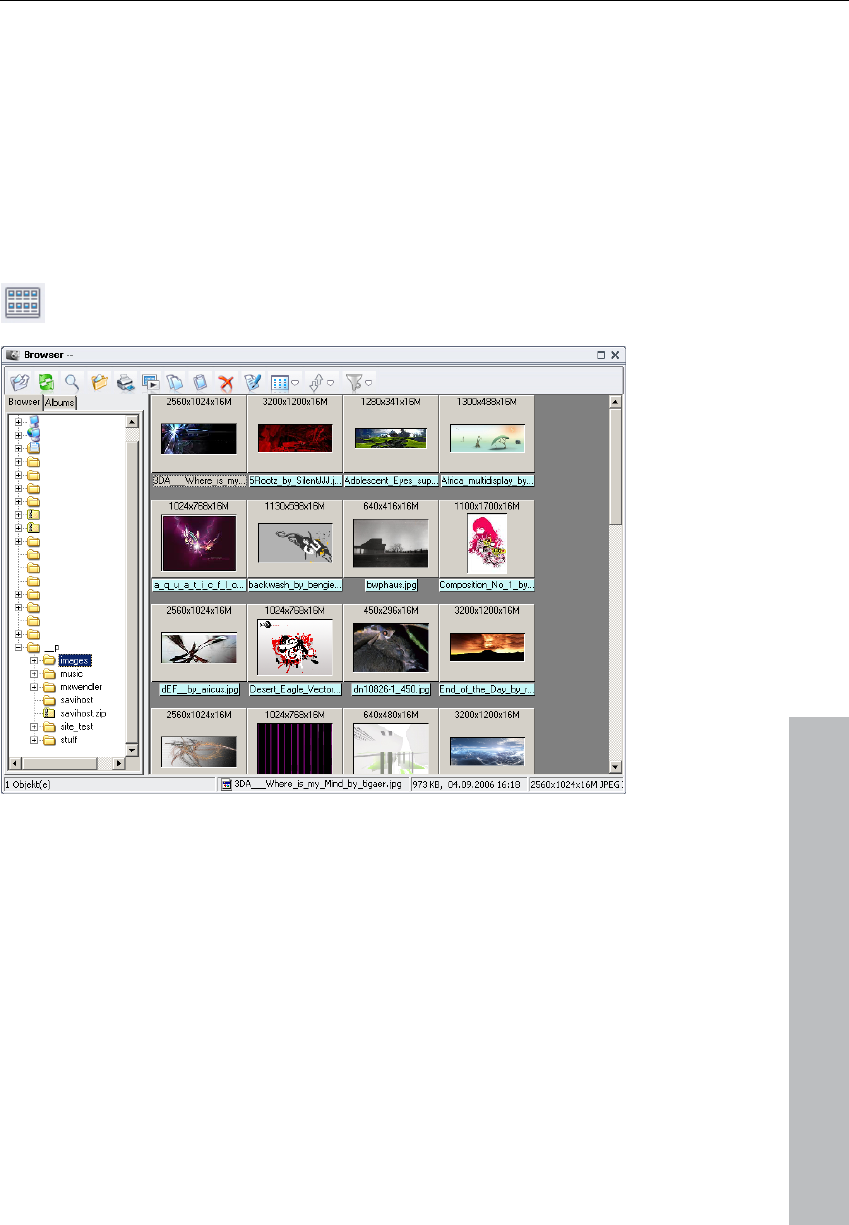
Working with the Browser
Exactly as in Windows Explorer, you can navigate files with the help
of a file tree system in MAGIX Photo Designer 7. Using thumbnails,
you can organise, open, edit, and print images or add a description,
organise into albums, and view photos as a slide show.
With regular use, large image quantities can be organised easily and
efficiently.
Open the browser by clicking on the browser button in the
effects bar (on page 78).
www.magix.com
40 Working with the Browser
The Folder View
Folder
By selecting the folder tab, the computer file system can be viewed in
the "tree" format. The contents of a marked folder are displayed in
the file list.
You can use this button to go
one level up
in the browser.
With this button you can reload the file list.
Album
Select the album tab to see all existing albums. Albums can also be
organised in specific hierarchies.
Create New Album: By selecting "New Album", you create a
new album in the current directory which remains in rename
mode until it is assigned a new name.
Create New Folder: To organise albums in specific hierarchies,
you can create sub-files here. This way you can, for example,
place albums with similar themes into one folder.
Add Image(s) to Album: When an album is selected, click on
"Add" and the "select images..." dialog opens. Here you can
drag & drop files or click on "add" or "add all" to add an image.
To verify, click "OK"
Delete and Rename Folder and Album: After right-clicking on an
album or folder, a pop-up menu appears where you can delete or
rename the album or folder.
www.magix.com

Working with the Browser 41
The File List
The right side of the browser window contains the file list, detailing
the contents of the currently marked folder or album.
Views
Images (and other files) can be displayed in 5 different views.
Thumbnails: Images are displayed as miniatures, other files are
displayed as symbols.
Other views include:
Tiles
Icons
List
Details
The details list offers up to 6 file information columns (file name, size,
type, date last changed, properties, and description).
Sorting a column is achieved by clicking on the column title. A further
click reverses the sequence of items. Columns can be hidden or
displayed in the column sub-menu.
Selecting Images
www.magix.com
Select a file with left mouse click.
Select a file area by selecting further images while holding down the
<Shift> key.
Select any files by selecting while holding down the <Ctrl> key.
Search photos
The search function is a great assistance in finding photos.
Enter any part of the name of the file you are looking for in the "File
name" field. The search will produce a list of matching images shown
in thumbnail format.

42 Working with the Browser
If you are working in album mode, you can insert the search results
into the Selected photos field and add to the current album by
pressing OK.
This function can be opened directly, without having to first open the
browser, by selecting the "Search file" menu.
Open
Open the marked image for editing in MAGIX Photo Designer 7
using the "Open" button or by double-clicking a file.
Print
The "Print several images (on page 49)" window opens when
you press "Print".
All selected images are located in the miniature list and can then be
assigned for printing.
Add to current album
Use "Add to current album" to add selected images to the active
album, by opening the folder and album views and marking one or
more images.
Slideshow
In "Slideshow", you pictures can be played back in a
straightforward slideshow.
All ticked pictures will be included in the slideshow. If you remove all
ticks by clicking once on an empty space in the list, all photos
located in the file/album will be included in the slideshow
Using the previous/next buttons you can skip or go back to earlier
pictures during the slideshow.
The slideshow configurations can be set under "File menu > General
settings " on the "Slideshow (on page 92)" tab.
Copy, Paste, Copy to..., Move to..., Delete and Rename Files
By pressing "Copy" in the pop-up menu, the marked files are copied
to the clipboard. "Paste" inserts files from the clipboard into the
folder/album.
www.magix.com

Working with the Browser 43
Buttons for "Copy to...", "Move to...", "Delete"
and "Rename"
If you select "Move to..." or "Copy to..." a dialog window appears for
the selection of the target folder. Confirm with OK and the selected
files are moved to the target folder and deleted from the output
folder. "Copy to..." places a copy of the files into the target folder.
"Delete..." moves the selected files in the file view into the waste
paper basket (after confirmation). In the album view, the files from the
album are deleted, but remain on the data medium. "Rename..."
allows a new file name to be assigned.
"Rename" is only available for selection if one file is selected. You can
then assign a new file name.
Rename Sequence
If several files are marked, they can be renamed as a unified
sequence.
In the "rename sequence" window, you can specify a template for the
new file names. All occurrences of the # symbol are replaced by
sequential numbering whose initial value can likewise be set. When
no # symbol is displayed, the numbering is added to the end of the
new name. The file extensions remain.
Description
www.magix.com
All files (images, other files, folders) can have their own description
added to them. Click with the right mouse button on a file and select
"description...", and a text window opens displaying the current
description text for editing.
The description belonging to a file is indicated in the browser status
bar, in the file tool tip, and in the detail view of the description
column.
Note: The descriptions are stored in the descript.ion file.
This format can be used by other programs (some file managers and
some image management programs). The descriptions can be read
and edited in these programs.
As long as you copy, shift or rename files in the MAGIX Photo
Designer 7 browser, the file descriptions remain. With file operations

44 Working with the Browser
in Windows Explorer or other programs that do not recognize the
description files, the descriptions are unfortunately lost.
JPEG Transformations
The JPEG format compresses an image to a smaller size, with some
reduction in image quality as a result. The image quality reduces each
time it is saved as a JPEG due to the technical nature of the format.
The options found here allow you to transform the image without
repeatedly compressing the JPEG file.
Options include: Horizontal and vertical mirroring, and 90° and 180°
clockwise or counter-clockwise rotation.
Sorting
You can sort pictures in your browser by setting sorting
criteria using the "Sort" button.
The following criteria are possible: File name, file size, date, file type,
properties, image width/height or size, bits per pixel, or the image
description.
Filter
Allows you to set the type of file displayed.
Image Information
If you glide over a file with the mouse cursor, a reference display
window appears in which the file name, image size, depth of colour,
type of file, file size, and description are indicated (image size and
depth of colour, of course, only for images).
The Status Bar
The status bar displays information about the currently marked file.
From left to right, the fields contain:
The number of files in folders/albums or the number of marked files
The file names or the file path (for albums)
File size and the date of the last change
Images: Size, depth of colour and abbreviated file format
The description, if available
www.magix.com
Working with Images 45
Working with Images
This section briefly describes the MAGIX Photo Designer 7 options for
importing and creating images, as well as changing their scale, page
size, and shape.
Show images
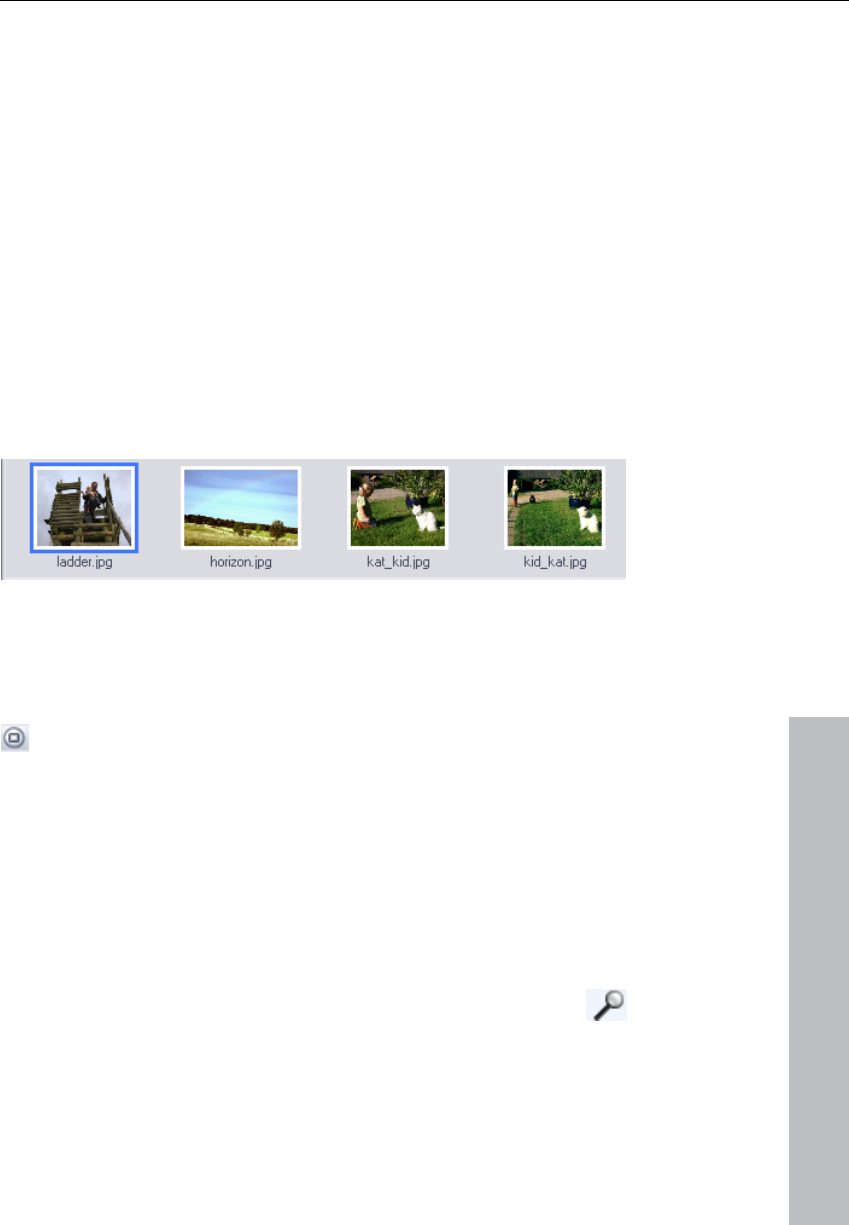
A loaded image will be scaled in such a way as to be completely
visible in full screen mode.
You can load as many images as you like into MAGIX Photo Designer
7. At the bottom, you will find the film strip view, where all loaded
pictures will appear as thumbnails. You can toggle between the
thumbnail images by clicking on them.
You can view the loaded pictures simultaneously by selecting an
ordering scheme (next to each other, overlapping, stacked, tiled)
under "Window > Order". Clicking on a picture selects it as the active
picture for editing, and it will appear with a lighter frame around it.
www.magix.com
To view an image maximised, use the "maximise" symbol in the
top right corner of the picture window.
All other screen elements (like toolbars (on page 78) and tool
windows (on page 78), effect browser (on page 78), object manager
(on page 78), film strip view (on page 78)and brush palette (on page
78)) can be brought to view or hidden on command in "Window
menu".
You can zoom in and out on every image using the mouse wheel or
the +/- keys in the number pad.
You can also use the zoom slider or the zoom tool provided.
By pressing the space bar, the mouse cursor is transformed into a
hand, which can be used to move sections and cut-outs.

46 Working with Images
Create, load and save pictures
Create
Select the "File -> New image..." menu item or press the
appropriate button in the "Standard bar".
In the dialog that appears, you can either select a size from a list or
enter an individual size, choose a "Paper colour" and set the print
resolution in dpi.
Load
Select the option with the same name in the "File" menu to open a file
dialog. MAGIX Photo Designer 7 can accept the following formats at
this time:
BMP, DIB, RLE, JPEG, TIFF, PNG, TGA, PCX, PSD, IFF, LBM, RAS,
WMF, EMF, PPM, PGM, PBM, Photo-CD, and its own PAI (*.pai)
format.
Use the browser (on page 39), opened by clicking the
browser button, to easily select and search the files you are
importing.
Save
Select "File > Save" to save an image, or choose "File > Save as" to
save it with a new name. MAGIX Photo Designer 7 can save in the
following formats: BMP, JPEG, TIFF, TGA, PCX, PNG, PSD, RAS,
PGM, PPM, and its own PAI (*.pai).
When you save an image, you have the option of either overwriting
the original file or making a copy.
Save for Internet
You can open the JPEG Export Assistant via the menu "File > Save
for Internet". This will help you find the correct JPEG correction
factor.
The original image and the compressed image are displayed side by
side so you can see how each selected compression factor affects
the quality of the image. This feature enables you to determine the
optimum compression while maintaining a reasonable level of quality.
www.magix.com

Working with Images 47
www.magix.com
The "Output" box displays the resulting file size as well as the
corresponding Internet download times at various transfer rates.
Note: Saving a JPEG image in progressive mode affects the way it
loads when viewed with an Internet browser. It will first appear at a
coarse resolution and will gradually improve as the page loads.
Keep Exif Camera Information
The EXIF (exchangeable image file) format is an international standard
that enables meta-information to be encrypted in the file header or
application segments of a JPEG file. This meta-information supplies
information on the shutter speed, aperture setting, and the date and
time the photo was taken.
Import Images
Import Images via TWAIN Interface
By using "File > Import > TWAIN" you can import via Twain-
compatible sources (practically all scanners and some digital
cameras) with "Select source..." and "Acquire...". A device-specific
dialog automatically appears.
Creating Screenshots
By using "File > Import > Screenshot" a dialog appears for setting
screenshots. MAGIX Photo Designer 7 can "photograph" either the
entire monitor screen, the active window (with frame) or only the
contents on screen.
This is possible via hotkey or timer (between 1 and 1,000 seconds)
functions. If the mouse pointer should be included, activate the
appropriate check box. After clicking the "Start" button the desktop
will be displayed and the screenshot created either after the timer has
elapsed or the hotkey is pressed.
48 Working with Images
Print Images
Printing an Image
By using "File > Print..." a dialog appears offering a print preview of
the current image. Positioning and scaling should be made prior to
printing.
Shortcut: Ctrl + P
A Pop-up menu appears when you right-click on an image. Image
placement and proportional scaling can thus be made.
The tool bar
The printer, paper adjustment, and additional printer-specific settings
can be changed in the toolbar under "Setup...". Pressing "Print"
sends the preview to the printer.
The "Automatic new layout" button repositions all images
according to the "Layout" tab settings (only available with "print
several images (on page 49) ").
The "Align on grid" button can be pressed in the toolbar. The
image is subsequently aligned on a grid when you move the
mouse.
The size of the preview can be changed by using either
"entire page", "increase view", and "decrease view".
The Index Tabs
Current Image: Here you can indicate the exact position and size of
the image on the paper in millimeters or inches. Alternatively, the
image can be shifted and scaled using the mouse.
Underneath each active image you can enter text in the text field.
Image-specific information can also be inserted automatically in the
form of TAGS: Click on the TAG>> button and a pop-up menu opens
offering tags for image name, file path, image dimensions, depth of
colour, resolution and file description. The text field indicates the
existing TAGs. The text generated is displayed beneath the image in
the print preview.
www.magix.com

Working with Images 49
www.magix.com
The selectable font and text alignment applies to all images on the
page if several are present.
Text: A headline or a subtitle can be added to the page to be printed.
The standard text which appears under the images can also be
specified.
Settings: The grid size and parameter dimensions can be specified in
millimeters or inches under "Settings".
Layout: (only with "Print more images") If you would like to print
several images on a page, you can specify the number of lines and
columns the paper should contain as well as the spacing between
images.
Print several images
Using "File > Print several images" allows you to place as many
images (for subsequent printing) in a preview as you wish. Besides all
of the properties available at "Print one image", the following are also
of help:
The Thumbnail Bar
Initially, no image appears in the preview. All images opened in the
editor are thumbnails in a bar to the left of the screen (or all marked in
the browser if called up from the browser).
You can drag & drop individual or several images into the preview.
Multiple images are arranged according to the "layout" tab setting.
If images are marked, they are also placed on the page by clicking
the "Arrange" button.
The "Add" button is useful for printing several images. Click on "Add"
and the "Select images..." dialog opens. Here you can select and
search for further images. The images can be positioned either by
drag & drop, by clicking on "add" or "add all" in the "selected images"
field. The selected images are then available in the thumbnail bar.

50 Working with Images
www.magix.com
Create Panorama Pictures
The "File > Create panorama pictures" menu item opens a dialog,
enabling easy creation of photo montages by gluing images
horizontally to create a panorama.
The window consists of three parts. At the top is the preview in which
you can shift the currently visible cut-out with the mouse. The two
magnifying glass buttons allow you to increase or decrease the size
of the view.
In the lower part of the screen (as with Print Multiple Images (on page
49)) is a bar with thumbnails of all images opened in the editor from
which you can click on "Add" and select the images to be added.
Multiple or large images should not be opened with the Editor.
Instead, add them here.
Images can be added in a sequence from right to left via drag & drop
or using the "Add" button.
The middle part of the window contains the control functions for
positioning and overlapping individual images.
Since images are inserted from the right, you can correct errors at
any time with the "Remove" button.
As soon as at least two images are in line, an overlap can be selected
for editing, starting between image 1 and image 2.
The "vertical" fader changes the vertical alignment (measured in
pixels), i.e. the right image is shifted upwards or downwards. The
"horizontal" fader sets the overlap of the two images (also measured
in pixels). Both images merge into one another within the overlap.
You can adjust the overlap with more precision using the "width
crossfade (%)" and "position crossfade" controllers. If the crossfade
does not cover the whole width of the overlap, reduce the width with
the automatic controller. If the crossfade is smaller, specify the
position using the position controller.
Furthermore, dead areas created from different image heights and
vertical alignments can be cut away by activating the "cut edges
automatically" option.

Working with Images 51
www.magix.com
Creating a Panorama
To create a panorama with images from your digital camera,
photograph a set of images with an overlap of about one-third of the
screen of the previous image (when using wide-angle lenses, exceed
one third overlap). Make sure the brightness of the images is
consistent by setting the aperture and exposure time. Correct any
discrepancies by using the brightness/contrast effect.
Now load the sequence of images, as described under "Create
panorama pictures". Select the overlapping sequence while using the
horizontal and vertical automatic controllers to look for suitable
positioning.
Deform pictures
Scale
To change the size of an image, select "Image > Scale" and in the
dialog window enter the new size and print resolution.
Shortcut: Shift + S
Rotate/Flip
Read more about the rotate and mirror options in the sub-menu
"Image > Rotate/Mirror".
Using "Rotate freely..." the image can be rotated at any angle. A
small preview shows the result. When "automatically clip edges" is
marked, the preview displays the clipped image by using ledger lines.
Shortcuts
Rotate freely.. Ctrl + R
Rotate 90° left
Shift + W
Rotate 90° right Shift + R
Rotate 180° Shift + E
Horizontal mirroring Ctrl + M
Vertical mirroring Ctrl + J

52 Working with Images
www.magix.com
Page size
If you change the size of an image with "Image > Page size...", the
image is not scaled but placed within the new dimensions in the way
specified at "Positioning". You can keep the aspect ratio or use one
of the standard formats that correspond to typical screen and photo
aspect ratios.
Keep the current aspect ratio or select one of the standard formats
that correspond to typical screen and photo aspect ratios.
Shortcut: Shift + P
Crop to mask
The "Image > Crop to mask" menu item requires a mask. If a mask
exists, everything outside the mask is removed from the image.
Shortcut: Shift + C

Working with the Mask 53
www.magix.com
Working with the Mask
If a mask exists, only the area covered by the mask can be edited,
while other areas are protected. However, a mask can be defined
only on the main image and not on objects.
Additionally, you can create objects from masks, see Working with
Objects (on page 56).
Select all
Selecting "Menu selection > Select all", the entire image will be
masked.
Remove mask
You can remove the mask by selecting the option "Menu selection >
Remove mask". Adjustments apply to the entire image.
Shortcut: Shift + Del
Invert mask
The command "Menu selection > Invert mask" inverts the mask,
selecting all the points of the image that were unselected in the old
mask.
Shortcut: Ctrl + I
Create mask from object
Select "Selection > Create mask from object" to make a copy of the
active object which then serves as mask.

54 Working with the Mask
Mask > Expand/Reduce selection
In the dialog window under the menu item of the same name in the
"Selection" menu you can specify the number of pixels by which the
area selected by the mask is to be expanded/reduced.
Vignette
Vignetting ( "Selection > Vignette..." ) blurs a band of variable width
along the edge of the mask.
Loading/saving the mask
You can save a mask for later use by selecting "Menu selection >
Save mask".
The Mask Tools
There are four different tools in the tool bar for specifying masks,
which can each be further specified in the tool setting (on page 85)
bar.
Auto scroll
It can happen, that you wish to apply a mask to a picture in zoomed-
in mode, which will result in parts of the mask lying over areas of the
image that are out of view. To do so, drag the mask slowly almost to
the end of the current image view, and using the "Auto scroll" option,
you can cause the image view to move automatically with the
selection.
Rectangular mask/round mask
Use these buttons to create rectangular and round
masks.
Draw a rectangle with the mouse over the area where the mask
should be. To make an ellipse, drag the shape starting from the
center. Pressing Ctrl during this process creates squares or circles.
More about settings options in Tool parameters mask (on page 85).
www.magix.com

Working with the Mask 55
Lasso mask/Magnetic lasso
The lasso mask lets you draw along the border of the
desired area.
When the mouse key is depressed, the line follows the mouse
pointer. When you release the left mouse key, you can draw a
straight line. If you use the magnetic lasso, the line snaps to the
edges of the image, i.e. those pixels that strongly differ from their
neighbouring ones. Finish the lasso selection with a double click. See
Mask Tool settings (on page 85).
Magic Wand
The Magic Wand masks the area around a clicked-on location
in which the deviation of the colour values is smaller than
those set in the tool window.
Setting options see Mask Tool Settings (on page 86)
Brush Mask
With the Brush mask you can paint the mask with your own
paintbrush which you can select independently from the
paintbrush or pen.
Setting options see Mask Tool Settings (on page 86)
www.magix.com

56 Working with Objects
Working with Objects
Objects in the image are the basis of flexible, object-oriented image
processing. Objects are images or image areas which independently
lie over the main image. In this form they can be moved about,
deformed, vignetted, painted or retouched freely without the main
image being affected. Only when the objects are reunited with the
image is the main image changed.
Creating Objects
Objects can either be created from a complete image (menu: "Object
> Create > From image" ) or they can be defined areas which are
copied out of the image. This defined area is always the current mask
on the image (see Working with the Mask (on page 53)). Create a
mask that covers the desired clipping and select the "Object > Create
> From mask" menu item. The clip is then converted into an object
and the mask is removed.
Shortcut: Ctrl + Up
Adjust shape
Move objects by clicking of the arrow button (Object mode) in
the tool bar, then clicking on the object, and moving it with your
mouse.
Using the mouse you can rotate, tilt, distort and scale objects. To
distort objects with the mouse, select distortion mode in the Tool
parameters > Object (on page 9). You can choose from: move, scale,
rotate (90° to the right/left, 180°, numerical to the right/left), distort,
and tilt horizontally or vertically.
The changes are non-destructive, meaning that the resulting files
have the resolution of the original. Thus, if an object is reduced in
size, and then blown-up again, this will have no effect on its picture
quality. This is valid as long as no alterations to the image file (like
painting, effects) have been undertaken.
www.magix.com

Working with Objects 57
Vignette
Vignetting makes the border around an object increasingly
transparent. This allows softer integration of an object into the main
image. Select "Object > Vignette..." to vignette and enter the width of
the transparent band in the dialog window.
Apply Shadow
Select "Object > Apply shadow..." to apply a shadow to an existing
object. In the associated dialog window you can set direction and
distance, colour, transparency, and edge blur of the shadow. Check
your settings with the "Preview" button. If you are satisfied with your
settings, confirm with "OK" and the appropriate shadow object is
generated.
Include/include all
To embed an object into an image, select "Object menu > Include".
The selected object will be merged with the background of the
image. By selecting "Include all", all objects will be merged with the
background.
Shortcut: Ctrl + Arrow down
www.magix.com
Object order
To determine and change the order and overlapping of all objects,
the "Object menu > Order" submenu is available.
This function can also be activated with "Object to
front" and "Object to back" buttons.

58 Working with Objects
www.magix.com
Copy objects from different images and
programs
You can copy objects from different images by moving them using
drag & drop onto an opened image window. (You can view all images
at once by selecting Window menu > images "next to each other",
"stacked", or "tiled".) You can also move objects onto the thumbnail
image in the film strip view.
You can even move objects into other applications via drag & drop
(for example, into a text processing program), as long as these
support this action.
The Object Manager
The object manager is activated with "Window > Object manager". It
presents current images as thumbnails placing the background at the
bottom and ascending through the objects in the image, so that the
object at the very top is represented by the top thumbnail in the
object manager. The object manager allows easy handling of images
consisting of a large number of objects without losing track of them.
The object manager consists of two columns. The left indicates
visibility and the right the thumbnail and name of the object.
Selecting Objects/Background
The active object (= selection) is marked with a red border. Left-click
on the thumbnail to make the associated object or the background
active.
Visibility
Objects and the background can be hidden by clicking on the
associated eye icon in the left column. Only inactive objects can be
hidden. This function lets you edit otherwise covered objects and
keep track of a complex project.
Connect/Transparency
"Connect" states how the objects or applied colours are connected
to the background when painting, cloning or filling. The settings
always apply to the current image and its objects. The following
options are available:

Working with Objects 59
www.magix.com
Normal The applied colour or the object covers the original
image, just like in real painting.
Addition The RGB colour values are added.
Subtraction The RGB colour values are added and 255 is
subtracted.
Multiplication The colour values are multiplied and divided by
255.
Division The larger colour value is divided by the smaller
one.
Difference Generates the difference between old and new
colour values.
If brighter A new colour in the original image is only covered if
the new pixel is lighter.
If darker The opposite of "If brighter".
Color
Colour tone and saturation of the applied colour or
the object are combined with the brightness of the
original.
Hue Only the colour tone is changed; saturation and
brightness remain as in the original.
Saturation Only saturation is applied, the colour tone and
brightness remain like the background.
Brightness Only brightness is applied, colour tone and
saturation remain like the background.
Invert The colour is inverted and applied to the original.
Logical AND The colour application is connected to the original
with a Boolean AND.
Logical OR The colour application is connected to the original
with a Boolean OR.
Logical EXOR The colour application is connected to the original
with a Boolean exclusive OR.
Red Only the share of red is used.
Green Only the share of green is used.
Blue Only the share of blue is used.
Transparency determines how much of the background comes
through the applied colour or objects. 100% means fully translucent
(i.e. normal translucency), 0% means fully transparent.
Context menu
Right-clicking an image or an object in the object list opens a context
menu enabling quick access to frequently required functions for
objects. In detail:

60 Working with Objects
www.magix.com
Object 1...Object n, background All objects of the image and
background are listed in the top
part of the context menu and can
be selected for editing.
Object from mask If a mask exists, the masked area
is converted into a new object.
Cut/Copy/Paste This command lets you copy or
cut an object into the clipboard
and paste it into a different image.
Rename You can use Rename to change
the name of the object.
Arrange Moves active object in Z-direction.
Delete Deletes the selection (= active
object).
Integrate Connects the selection with the
background.
Integrate all Connects all objects with the
background.
Working with Text Objects 61
Working with Text Objects
When you click on an image while in in text mode you can
enter text at this position.
The following text properties can be set in the text tool properties
bar.
Font type and size
Style (bold, italic, underlined or
crossed out)
Alignment (right, center or left)
Text color
To change these settings for an entered text you have to highlight the
text first and then change the respective parameters.
You have to press the Enter key to switch to a new line. Line changes
are not carried out automatically.
Click on the "Check" button to change text into a text object.
www.magix.com
This object can be positioned, scaled, rotated, and tilted freely in the
image just like any other object (see Working with objects on page
56). As long as the text objects are not yet added to the background,
you can always change it by simply clicking into the text object.
Click on Cancel to leave the edit mode.

62 Working with Text Objects
Text effects
"Other" opens a dialog where you can add a shadow or a
3D effect.
Shadow
Activate "Shadow" to apply a shadow to the text. Analogous to
"Object > Apply shadow... (on page 57)" you can define the
parameters of colour, direction, distance, transparency, and edge
blur.
3D Highlighting
Activate "3D Highlighting" to make the text look three-dimensional.
The parameters "Direction" and "Angle of incidence" affect an
imaginary light source. "Edge shape" and "Width" define the shape in
Z-direction (the "depth") to be used at the edges of the characters.
Smaller values for "Shine" result in small shine points, higher values
lead to diffuse reflection. Increasing the values of the "Reflection"
parameter makes the shine metallic. The plastic effect is best applied
to large and wide fonts.
www.magix.com

Working with Batch Processing 63
www.magix.com
Working with Batch Processing
With the batch processing in the "File" menu at "Batch processing..."
whole lists of images and entire directories can automatically be
loaded, edited, and saved.
Possible applications range from simple format conversion to
automatic thumbnail creation or focusing, colour correction, etc.
The Batch Processing dialog window has three areas:
Input
Use "Add file" to enter one or more images into the list of images to
be processed or add whole directories with "Add folder". You can
delete individual images from the list with the "Delete" button, or
delete the entire list with "Delete all".
Actions
Use the "arrow" buttons to add the desired actions from the list on
the left to the tasks. Use "Delete" to delete one or "Reset" to delete
all actions from the list of tasks (on the right side).
If available, the "Parameters" button opens a parameter window
which you can use to change the settings of the selected action.
Use the Arrow up/Arrow down buttons to change the order of the
tasks. A summary of the actions, called script, can be saved and
loaded with the respective buttons.

64 Working with Batch Processing
www.magix.com
Output
You can select a file type from the list of image formats for output of
processed images. Any possible setting options for the image format
are available at "Options...".
All images are stored in the target folder which you need to specify. If
you want MAGIX Photo Designer 7 to warn you prior to overwriting
existing files, tick the respective box.
After the processing is started with the "Start" button you can see the
current status in the status window. Click on "Abort" to end the
process.
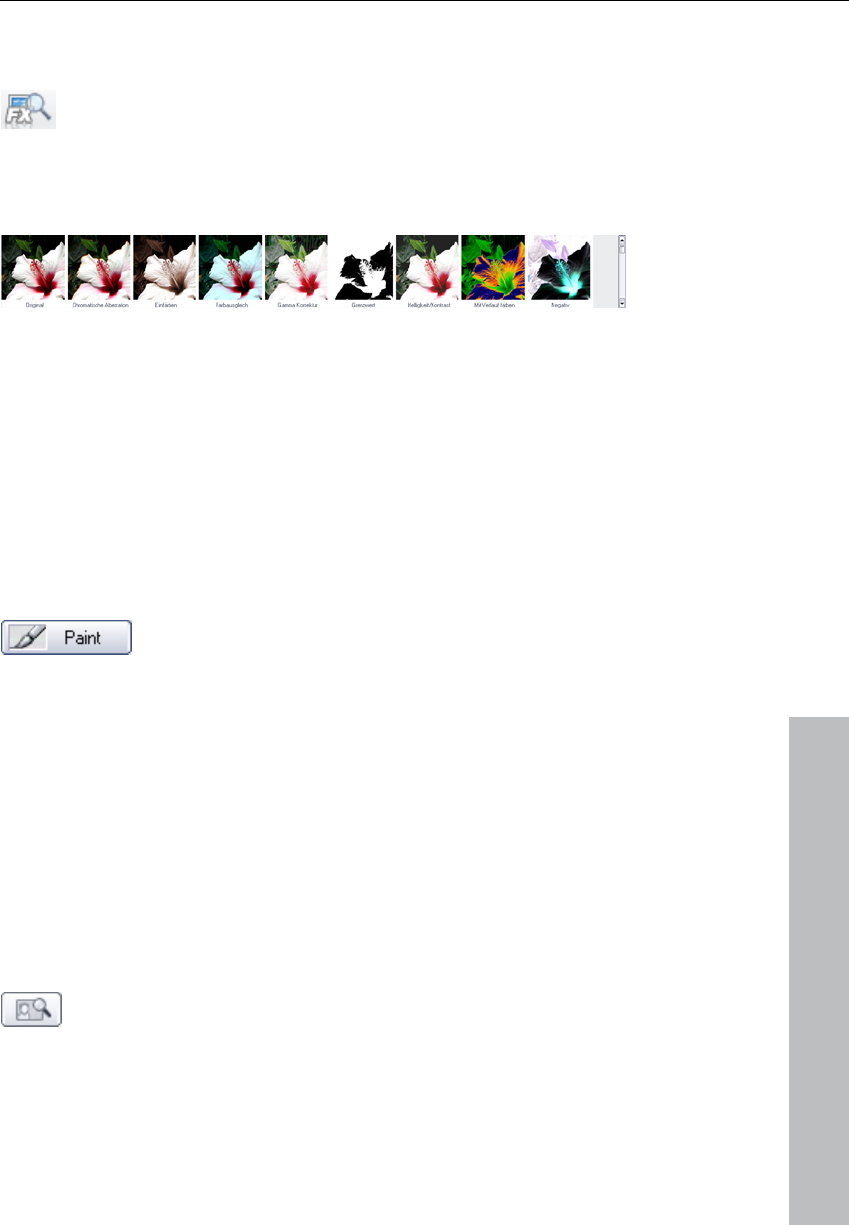
Effects 65
Effects
Choose an effect from the Effects menu or other category.
Alternatively, choose the Effect browser button to open the
effect browser.
The effect browser uses a sample image to show the results of
different effects.
When an effect is selected, it is applied to the whole image first. Each
time you change effect settings, they are displayed on the image.
This allows you to adjust the effect and see how it affects the entire
image.
The masking tool (on page 53) allows you to limit the effect to certain
areas of the image. We recommend softening the edges of the image
somewhat (in the tool window (on page 85) of the masking tool) to
better integrate the effect into the whole image. The magic wand
provides another masking option, allowing you to target a particular
colour within the image and change it using colour effects.
You can also use the pencil to apply effects by
choosing this button in the Effect settings dialog box.
www.magix.com
When you do this, the tool window for the pencil appears. When you
use the pencil to apply the effect, all pencil settings relating to shape,
size, and effect are available. However, colour characteristics
(structure, colour, spotting, and colour deviations) are inactive.
Pressing the right mouse button allows you to erase the applied
brush strokes. You can, therefore, first apply the effect onto a large
surface and then adjust the borders with the paintbrush.
You can also apply an effect using the gradient tool. Only the
transparency of the selected gradient type is used. This allows you to
fade an effect in or out, for example.
When you choose "Quick preview," a scaleable preview
window appears.
In this window, you can display the effect, or the original and the
effect side by side, in zoom mode. You can use the magnifying glass

66 Effects
buttons or the slider to zoom in and out of the preview. You can use
the mouse to scroll through the visible section in the window.
If you press this button, the effect is permanently
applied to the image.
At the top of the dialog you will also find a list box with the various
link modes and a transparency controller. These setting options
determine how the calculated pixels of the effect are combined with
those of the original image. A simple cover is set by default; however,
you can select other modes for special colour distortion and
retouching. Not every mode makes sense with every effect. With the
transparency controller you can make an effect "transparent". Read
more about the combination modes in the chapter Object manager
(on page 58).
Plugin Filters
In addition to the MAGIX Photo Designer 7 effects, external plug-in
filters are supported, which are compatible with the Adobe standards
(Photoshop®-compatible plug-ins). These effects are immediately
applied to the image or the selection, the flexible application options
(paint, masking tools, transparency) of the MAGIX Photo Designer 7
effects are not available for plug-in filters.
Hundreds of such filters from numerous developers can be found on
the Internet.
Including Filters
To include filters in MAGIX Photo Designer 7, select "Effect->Plugin
filter->Settings..." . Use "Add..." to select the folder where the desired
plug-ins are located. Filter files mostly are annexed "*.8bf". To only
check such file types, activate "Only check *.8bf files!".
To do a recursive scan of sub-directories, activate "Search sub-
directories".
However, you should only specify folders which actually contain filters
and are needed because otherwise the search for filters may
noticeably slow down the start of the program.
www.magix.com

Effects 67
www.magix.com
Paint
With the paintbrush or pencil tool you can draw in your image, i.e.
add paint, just as in other graphics programs. Details on the settings
can be found in the Paintbrush tool window (on page 87).
MAGIX Photo Designer 7 also includes painting as an additional
effect. However, there are some differences compared to regular
"painting":
The colour is applied as an effect (on page 65). This helps you vary
the transparency and link mode after applying the paint (see Object
Manager (on page 58)). The right mouse button allows you to erase
the added brush strokes. The brush strokes are only applied to the
image permanently when you press the "apply" button.
Deactivating the Paint button (here activated by default) applies the
colour to the entire image or section. This corresponds to a "Fill"
effect, although the selection can still be changed later before the
effect is finally applied.
Color Filters
Chromatic Aberration
Chromatic aberration, sometimes described as ‘purple fringing’ is a
type of image distortion caused by a camera lens. Chromatic
aberrations are caused by the cameras lens not focusing different
wavelengths of light onto the exact same focal plane (the focal length
for different wavelengths of light is different). The index of refraction
for blue light (short wavelengths) is larger than that of red light (long
wavelengths). The amount of chromatic aberration depends on the
dispersion of the glass.
Chromatic aberration makes images appear fuzzy. Selecting this
option simulates it as to create an interesting artistic effect. It can
also be used for correcting images taken using cameras with a poor
(very small) lens which contain the described shift of red and blue
shares.
Level Balance
The effect level balance adjusts the brightness distribution of the
image. Use the automatic controllers for the input area to stretch the

68 Effects
defined brightness range across the whole tonal value range (this
resembles an increase in contrast, but with greater control than in the
brightness/contrast effect).
Use the automatic controllers for the output area to compress the
brightness values across this range. With the gamma automatic
controller, the central tones can be altered, either for all colours (grey
channel) or specifically for the red, green or blue color channels.
Dye
Colour the entire selection with one colour selected with the Colour
Selection button.
Color Balance
Targeted colour balance for bright, middle and dark areas of
specified colours. Poor colouring in a image can be corrected by
changing the balance between red & cyan, green & magenta, and
blue & yellow.
Gamma Correction
With gamma correction you change the weighting of colours in the
medium range of the brightness spectrum for the red, green and blue
colour channels of your image. Select "Connect channels" to change
all values simultaneously. Gamma values >1 mean a brightening of
the medium hues, values <1 mean darkening.
This effect is available also via the quick access button.
Shortcut: F6
Limiting Value
Creates an image of only two hues. Colours with a brightness under
the limiting value are assigned to the minimum colour, colours above
it are assigned to the maximum colour.
Tip: Try this effect with a paint mode such as additive, subtractive
etc.
www.magix.com

Effects 69
Brightness/Contrast
Correct contrast and brightness of the image in the effects dialog and
check the result in the preview.
This effect is available also via the quick access button.
Shortcut: F5
Channels
Exchange the colour channels of the RGB colour model.
Paint with Gradient
Colours an image with a colour gradient available from the list. The
criterion for colouring may be brightness, saturation, hue of the red,
green or blue channel.
Negative
Creates a negative of the area to which the effect is applied.
Poster
A normal RGB image consists of 256 brightness values for red, green
and blue. With poster you can reduce these brightness values to a
new value in the range of 2-256. So, the image will lose colours due
to this effect: The less grades of brightness, the higher the colour
loss.
www.magix.com
Red/Green/Blue
Correct the weighting of red, green, and blue (see
brightness/contrast).
This effect is available also via the quick access button .
Shortcut: F7
Remove Red Eyes
Apply this effect to photos with a brush not bigger than the pupils of
the person to be edited to remove the occasional "red-eye" defect.

70 Effects
This effect is available via the quick access button.
Shortut: F8
Hue/Saturation/Brightness
Correct hue, saturation, brightness (as above).
Shade Curve
Manually correct all colour values in an image. By changing the
gradient of the shade curve you assign new brightness values to the
red, green, and blue channels (i.e. all channels simultaneously). The
starting value in each case is a straight line from bottom left to top
right. Areas which are corrected upwards will be brighter, otherwise
darker.
You can use the "White balance" option to carry out manual
white balance.
An incorrect white balance can lead to an unnatural blue or red hue.
Instructions: To use the white balance, click on the button to the right
of the label "White balance" and then select a point which represents
white or a light surface represented in the photographed lighting
conditions. The colour temperature is then corrected automatically.
Art Filters
Painting
This effect creates paintings which feel realistic by trying to "redraw"
the content of the image using a pre-defined brush shape. With the
many parameters on the Brush, Size, Direction, Colour, Transparency
and Paper tabs you can specify how this brush shape is used based
on the original image. It’s best to try the settings and experiment with
the parameters and the effects they have.
www.magix.com

Effects 71
www.magix.com
Focusing Filters
Focus
This is a simple focusing/blur tool which you can adjust via the slider
and apply with the paintbrush.
Tip: Vary the intensity of the effect by changing the transparency or
with paint modes such as 'If brighter' and 'If darker'.
Unsharp Mask
This filter is, although the name be confusing, a high-quality focusing
tool. The name is derived from the fact in the focusing process, the
image is compared to a soft-focus copy, and the differences are used
to enhance contrasts. With 'Radius' you set the radius within which
the filter searches for focusing information. Limiting value determines
how great the brightness difference to the original pixel must be to
replace it.
Other Filters
User Filter
Use this effect to create your own filter by combining a pixel value
with neighbouring pixels. In the 5x5 matrix, enter values in
accordance with the weighting of the pixels (e.g. 2 means twice the
value). The center field of the matrix is the point to which the effect is
applied. All pixels of the matrix are then added in accordance with
their weighting, divided by the divident and the compensation value is
added to the result. The result then replaces the pixel in the center of
the matrix. It’s best way to understand the effect is to experiment
with it.
Highlight
Creates plastic depressions/elevations in the image. When applying
the effect with the brush or filling masked areas, the edges serve to
raise/depress these areas. Parameters "Luminous intensity", "Light
colour", "Direction" and "Angle of incidence" influence an imaginary
light source. "Edge shape" and "Width" define the shape in Z-
direction (into the "depth" ) at the edges. Smaller values for "Shine"
result in small shine points, higher values lead to diffuse reflection.

72 Effects
www.magix.com
Increasing the values of the "Reflection" parameter makes the shine
metallic. If "Observe edges" is activated, the edges of the
object/image are observed, so you can create, e.g. three-dimensional
keys and buttons for websites.
Flip pages
The application of this effect gives the impression of the image being
flipped, i.e. rolled up at a corner. You can specify the corner and the
size of the rolled up area in the dialog. You can also define a colour
for the free background and the back of the image.
Stylising Filters
Bumpmap
This effect creates a relief view with the difference that you have a
light source that you can position. The resulting lighting effect makes
the image look very metallic. Experiment with the position of the light
source, intensity, unevenness and, above all, the height and width of
the light cone to find the optimal lighting.
Find Edges
Finds edges in the image. The thickness of horizontal and vertical
edges can be set with the associated slide controls, and also the
intensity of the effect.
Emboss
Makes the image look as if it is embossed in metal.
Relief
Creates a relief view of the image. Use 'Depth' to specify the intensity
and 'Direction' to define the direction of the light.
Additionally, you can select whether the edges of the relief are gray or
in the colour of the image, or whether the relief is added to the image.

Effects 73
www.magix.com
Noise Filters
Remove Stains
This effect calculates a mean colour value within the defined "Radius"
which only becomes active if the new colour value deviates from the
original by more than the "Limit". By trying out parameters and
purposeful application to the image, preferably with a soft brush, you
can make stains, dust and scratches invisible on the image.
Maximum
Searches the brightest pixel in the defined area and replaces the
current pixel by it (see Median).
Median
This effect calculates the median of the pixels within the area defined
by "Horizontal radius" and "Vertical radius" and replaces the current
pixel by that value.
Minimum
Searches the darkest pixel in the defined area and replaces the
current pixel by it (see Median).
Add Noise
Generates "random" noise and superimposes the image with it. Use
"Density" and "Intensity" to limit the intensity and deviation from the
original colour value. If "Coloured" is not ticked, the colour of the
pixels is preserved, they will only become brighter or darker.
Noise Reduction
Noise reduction is a soft-focus effect that does not make the image
fuzzy. This effect changes only those pixels whose colour value
exceeds that of neighboring pixels by a specific threshold value.
The "High Quality Correction" setting includes the next neighboring
pixels (a radius of 2 pixels) in the computation.

74 Effects
www.magix.com
Noise reduction (selective)
Noise reduction is a soft-focus effect that does not make the image
fuzzy. This effect changes only those pixels whose colour value
exceeds that of neighbouring pixels by a specific threshold value.
The "High Quality Correction" setting includes the next neighbouring
pixels (a radius of 2 pixels) in the computation.
Diffuse
The pixels in the image are dispersed like grains of sand. Select the
intensity by defining the maximal horizontal and vertical dislocation.
Coarsening Filters
Mosaik
Combines several pixels into a rectangle in such a way that a rough-
pixel, or mosaic image is created. Enter the number of lines and
columns to be combined in the dialog window.
Distortion Filters
Dent/Bump
Creates a dent or bump around the center of the image/object. Use
the slide control in the dialog window to regulate the intensity and the
type of the effect.
Tips: See whirl (on page 75)! Can create a caricature effect when
applied to faces with the brush.
Even Waves
Superimposes the image with horizontal and vertical waves of
adjustable length, amplitude and phase.
Fisheye-perspective
Distort images to look as seen by a fish so that centre of the image
bulges forward.

Effects 75
www.magix.com
Effect: Adjust the intensity of the bulge by moving the slider from
right to left.
In the above dropdown menu you can add an additional effect to the
bulge. The "Normal" setting here means that the "clean" fisheye effect
will be applied.
By using the slider next to the flip menu you can adjust the
transparency of the entire effect when using an additional effect.
Moving it to the leftmost position means maximum effect while only
the original image is displayed when set to the right.
Concentric Waves
Creates circular waves around the center of the image/object, similar
to a stone dropping into water. Wavelength and amplitude can be set
in the filter’s dialog window.
Tip: See also whirl (on page 75) filter!
Perspective
The Perspective effect bends image space 45° out from the image
plane or 45° into the image plane. This creates "straightened" lines
for high buildings photographed from below, for example.
Barrel/Pincushion Correction
Barrel distortion is an effect often associated with wide angle lenses
that causes an image to be spherized at the center. Pincushion
distortion is an effect caused by zoom lenses or telephoto adapters
that causes an image to appear ‘pinched’ at the center.
Selecting the Barrel/Pincushion correction option allows you to
correct barrel or pincushion image distortion, or add them to an
image as an artistic effect. The background colour of the resulting
image borders can be set under "Background".
Select the "Avoid Borders" option to zoom further into the image and
hide the background.
Whirl
Creates a whirl rotating around the center of the image/object.
Intensity and direction can be regulated with the slide control.

76 Effects
www.magix.com
Tip: To apply a whirl to an area of the image, mark it with the
rectangular mask, create an object and apply the effect to the object.
After that replace the object.
Influence the intensity of the effect with the brush! It’s best to select a
large, very soft brush. Application or erasing with this brush will make
the deformation more or less intense.
Video Filters
Deinterlace
This effect is mainly intended for snapshots of video images because
due to the suppressed field recording the image is often useless if
two fields are too different.
Use "Even" or "Odd lines" to select which field to remove and
"Interpolation" to define whether the lines of an image are simply
doubled or whether the missing lines are to be interpolated.
Soften Filters
Gaussian Blur
Creates a blurred image, but in contrast to "Blur", pixels are
weighted. Pixels further away from the point of focus are less
important than pixels closer by. The name is derived from the method
of data weighting with the help of a Gaussian bell curve, a function
that takes place around the pixel to be processed.
Here you can also define the "Radius" within which pixels are used
for calculation.
Gaussian Blur (Smart)
This function is similar to the Gaussian blur, but with the significant
difference that for pixel blurring only those neighbouring pixels are
used, whose colour doesn’t deviate more than the given "Limit"
parameter. This leads to blurred areas with similar colours, while
contrasting edges are preserved.

Effects 77
www.magix.com
Motion Blur
This function creates a directional blur, similar to that on a photo
taken with a slow shutter. Use "Distance" and "Direction" to define
the intensity and direction of the effect.
Camera Zoom
Creates an effect similar to a fast camera zoom. In addition to the
effect intensity, you can select between zoom in and zoom out, and
choose the zoom depth.
Rotation
The effect is similar to that achieved by quickly rotating a camera
while taking a picture. Available parameters are intensity and mode
(rotation left, rotation right, and rotation amount).
Blur
Creates a blurred image by averaging an area of points. "Horizontal
radius" and "Vertical radius" specify the number of pixels used for
blurring in horizontal and vertical direction.
Tip: Try paint modes "If brighter", etc.
78 The Toolbars
The Toolbars
A brief description of the toolbars follows:
Standard
Contains buttons for file operations, undo/redo, and for displaying
various windows.
New/Load/Save for file operations (on page
46)
File browser: Opens the file browser (see
Using the browser (on page 39)).
Print (on page 48)
Undo/Redo: Undo and Redo allow you to
undo any action. See also File menu-
>General settings->Undo/Redo (on page 92)
Film view: In movie view all loaded images
are displayed in the lower window. You can
toggle between the loaded images by clicking
on them.
Object manager: Opens and closes the
Object manager (on page 58)
www.magix.com
The Toolbars 79
Effect bar
Allows you to quickly select frequently used effects.
www.magix.com
Task Assistant. The Task Assistant helps you
perform typical image editing tasks with practical
step-by-step instructions.
Brightness/Contrast (on page 68)
Gamma Correction (on page 68)
Red/Green/Blue (on page 69)
Auto exposure/auto saturation: The contrast or hue
of the entire photo is adjusted automatically.
White balance: Opens the shade curve effect (on
page 70) for balancing the white tone.
Liquid Colour: This tool is ideally suited to create
caricatures and deform your images. A click on the
icon opens a preview in which the active image area
can be edited with the editing modes listed to the
right. Use the "Brush size" and "Thickness" sliders
to regulate radius and effect of the current mode.
Deactivate the respective direction arrows to protect
the image from modifications in horizontal or vertical
direction. "Reset" returns you to the original state.
Transform into painting: This tool transforms your
image into a painting. More can be found in Effects
> Painting (on page 70).
Effects browser: This shows you an example of the
change caused by the individual effects.
80 The Toolbars
Zoom
Is used to set the zoom level of the current
image.
1:1 restores the original size.
"Fit" fits image to window size.
Dialog bar
Task assistant: This feature gives you fast access to all
important functions.
In the "Tasks" menu you will find further step-by-step
instructions as well as hints & tips.
Movie view: In movie view all loaded images are
displayed in the lower section of the window. You can
toggle between the loaded images by clicking on them.
Object Manager: Opens and closes the Object Manager
(on page 58).
1 Click
White balance:Opens the Color curve (on page 70) for
white balancing.
Auto-exposure: Use this option to automatically correct
the exposure.
Auto-color: This option automatically corrects the color,
i.e. the brightness of all color channels (red/green blue) is
optimized. The best results are achieved with photos that
have lots of colors.
www.magix.com
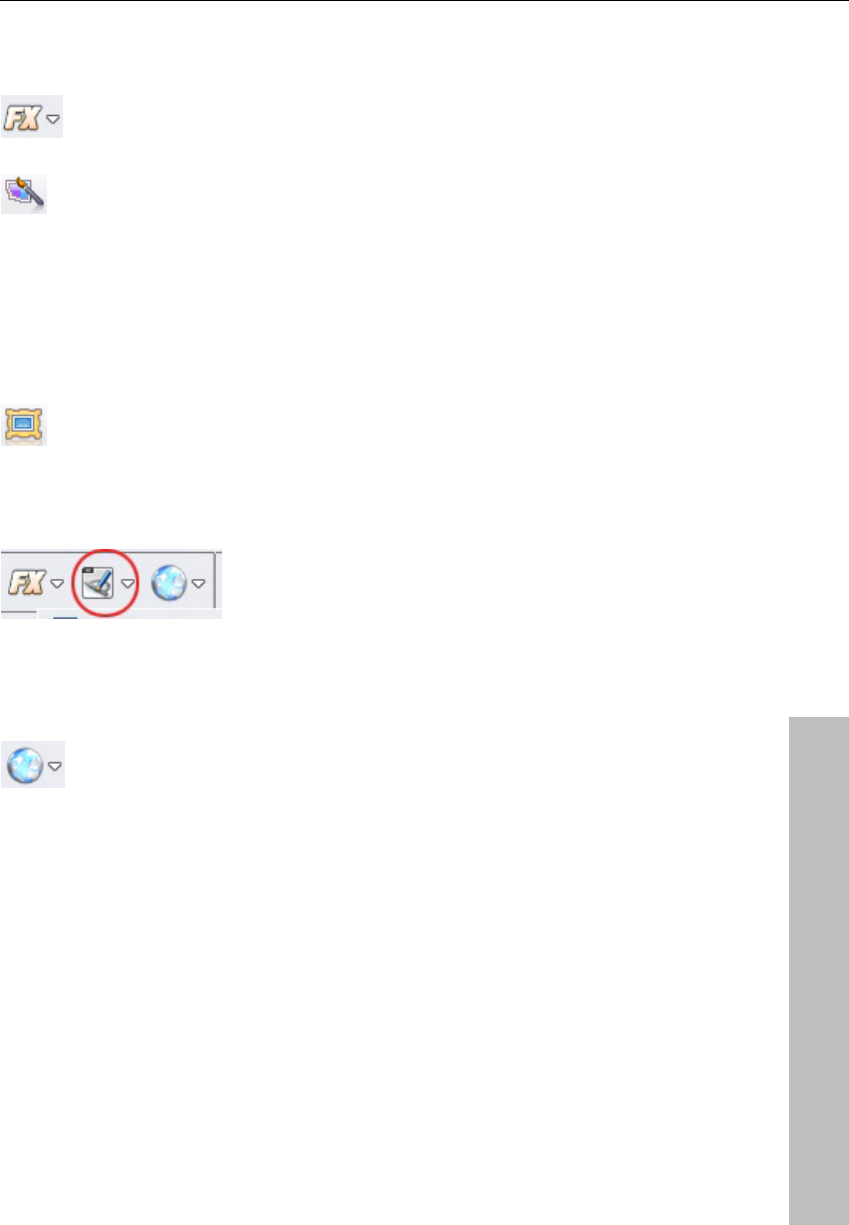
The Toolbars 81
Effects
The following effects are accessed via this button:
Liquid color: This tool is ideal for creating cartoons and
reshaping images. Clicking on the symbol opens a preview
in the active image area which can be used to edit the
active image section with the edit mode listed on the right
side. You can use the "Brush size" and "Brush strength"
sliders to adjust the radius and effect of the current mode.
By deactivating the corresponding arrow you can protect
the image from horizontal or vertical changes. "Reset"
restores the initial situation.
Transform into painting: This tool transforms your image
into a painting. Read more in Effects > Paintings (on page
70).
Depending on what you are planning to
use your document for you can choose
from cards, magazines, etc. and will
automatically be transferred to Xara
Xtreme Pro where you will find the
corresponding effects and functions.
www.magix.com
Clicking on this button lists all MAGIX Online
Services and you can access the service by clicking
on the corresponding page.
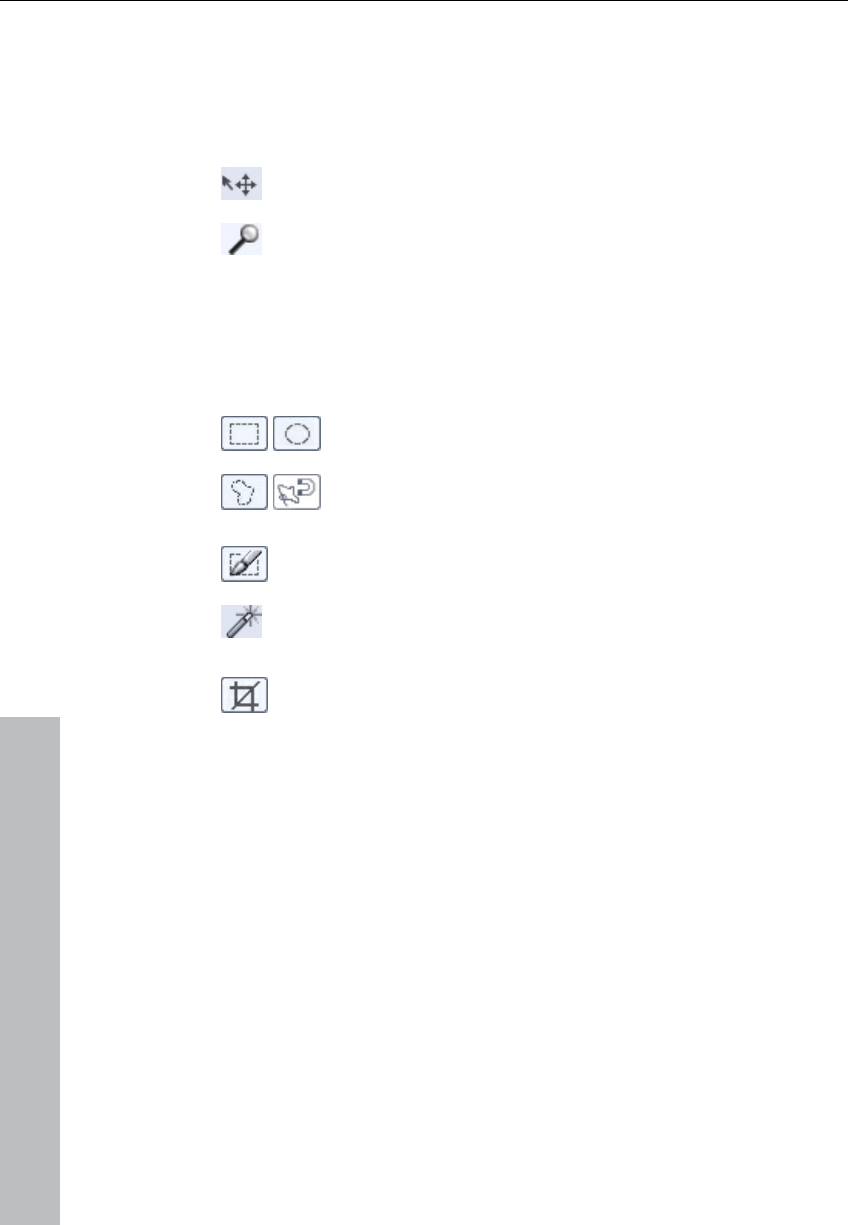
82 The Toolbars
Toolbar
This toolbar contains the most important functions for editing images
and selecting frequently used effects.
Object Mode (See Working with Objects (on page 56) )
Magnifying Glass: Serves to zoom in on image areas.
Draw a rectangle over the desired area to zoom in. You
can also zoom in and out of an image using the mouse
wheel.
Mask tools
(See Working with the Mask (on page 53)). A click on the small black
triangle at the bottom right at the button opens a pop-up menu
where you can select the mask mode.
Rectangle & round masks: Use this to create
rectangular and round masks.
Lasso mask: You can use the lasso mask to circle the
desired sections with the mouse. Finish by double-
clicking.
Brush Mask: This lets you paint the mask with your own
brush.
The magic wand is a special mask mode that allows you
to quickly select image areas with the same or similar
colours.
Crop: The crop tool allows you to draw a box around a
portion of the image and delete everything outside the
area selected. Objects above the image are retained,
however. After making a selection, the area outside the
selection will appear dimmed for better optical definition
of the selection. Now you can correct the trim area using
handles. By clicking on the tickmark button at the top
right, the image will be trimmed.
www.magix.com
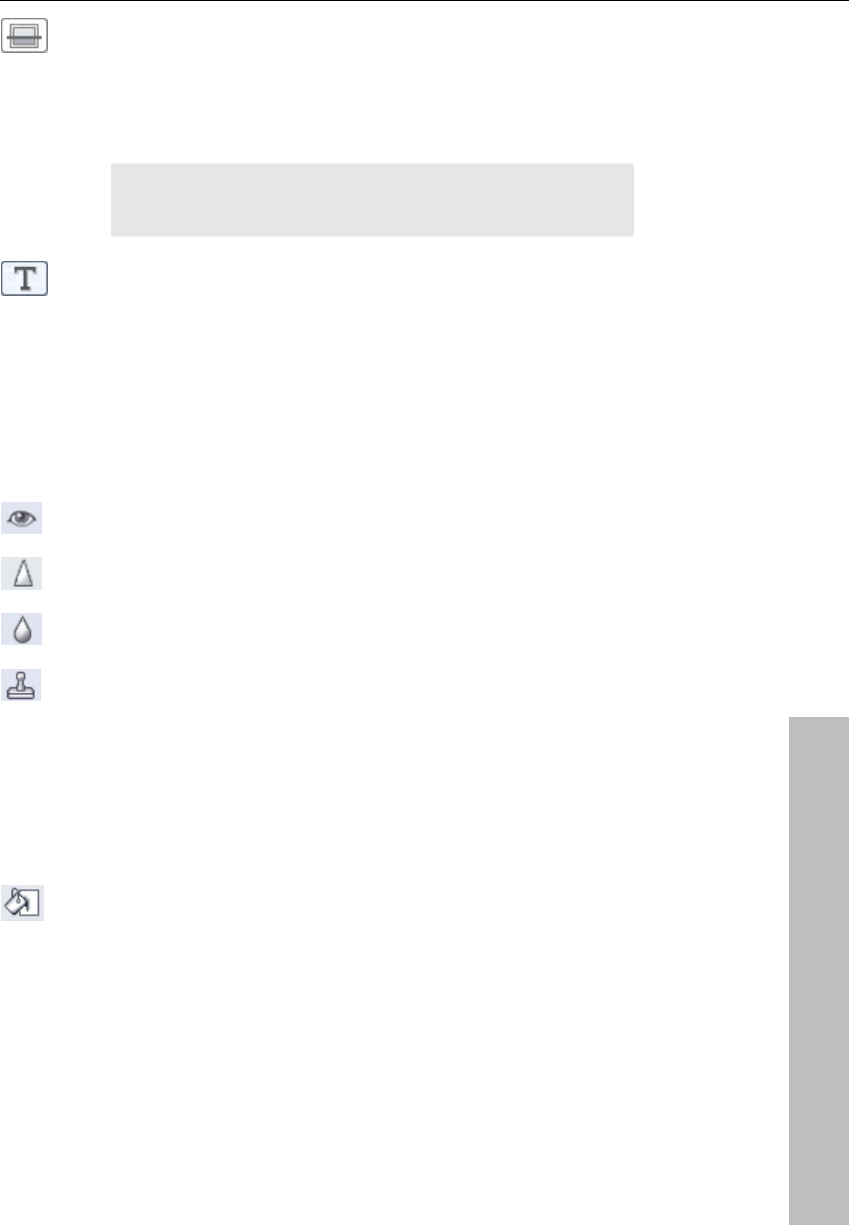
The Toolbars 83
www.magix.com
Level horizon: This button lets you straighten crooked
pictures. Simply draw a line using the mouse along the
crooked horizon. The picture will be rotated
automatically so the horizon line runs horizontally. The
option "No borders" prevents appearance of black
borders.
Hint: This function is also suitable for leveling scanner
imports.
Text: Click on the image to enter text. You can set the
font type, size, and style with the tool settings. You can
even add style elements to the text such as shadows
(see text tool settings (on page 60)). If you click on the
"Check" button, MAGIX Photo Designer 7 creates an
object containing the text at the clicked position (see
also Working with Objects (on page 56)). You can even
change the text later if you click on a text object in text
mode.
Remove red-eye
(on page 69)
Sharpen (on
page 77)
Blur (on page
77)
These three buttons allow you to
select the above effects and apply
them using the paint brush.
Copy stamp: Activates the cloning draw function. Use
cloning to change areas of an image, for example, to
remove unwanted persons or objects from a photo and
replace them with surrounding elements.
Hold down the Shift key + left or right mouse key to
select an area form the source. If you draw on a different
area of the image with a held-down mouse key, the
image pixels from the selected source will be copied
over.
Fill: The fill tool fills the selected area with the
foreground colour. If no mask has been selected, the
screen area to be filled is automatically selected (see
magic wand (on page 55)).
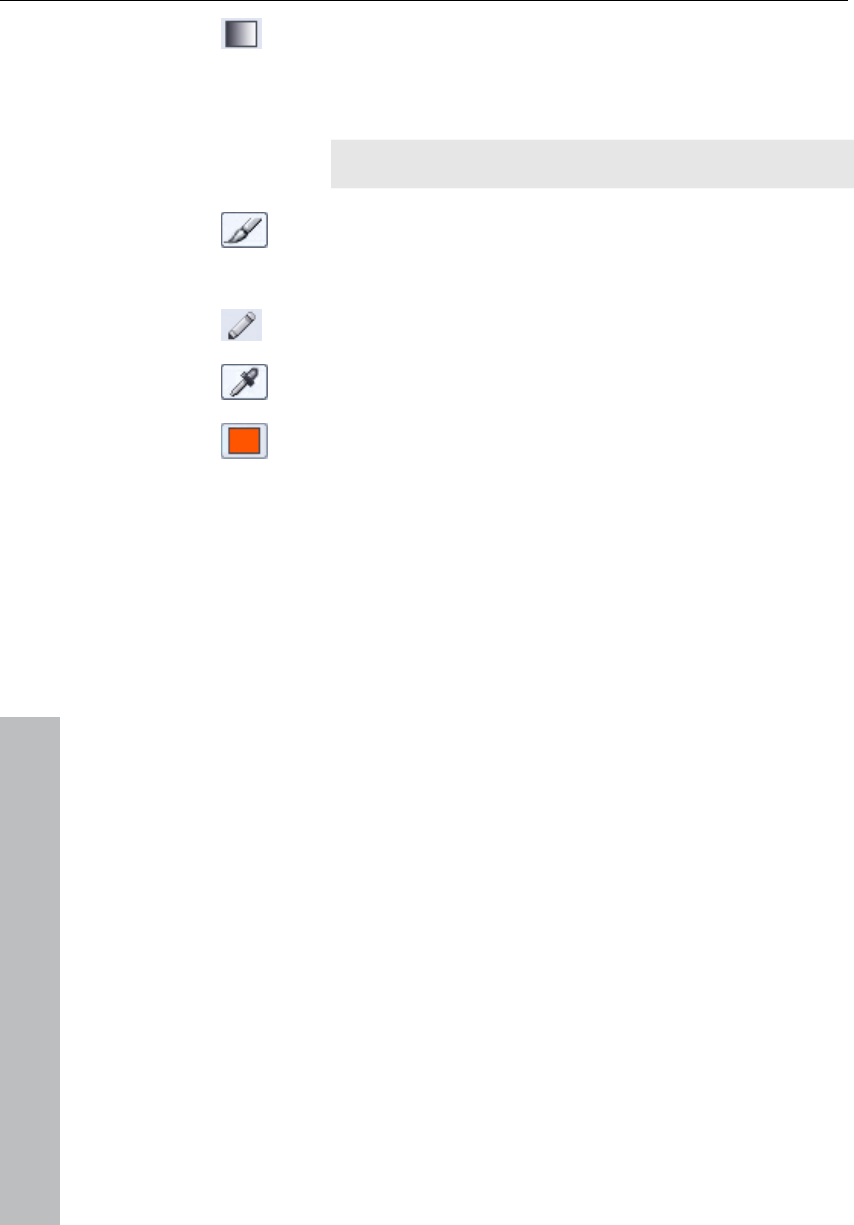
84 The Toolbars
Fill with Colour Gradient: In the associated tool window
you can select a colour gradient and apply it to the
image by drawing with the mouse.
-> Details on Gradient Tool Settings (on page 87) and
Colour Gradient Editor
Tip: Test transparent gradients with various effects.
Draw mode: In this mode you can paint with the current
paintbrush by depressing the left mouse button. Erasing
is achieved with the right mouse button (see Paintbrush
tool parameter (on page 87)).
Pencil: Like paint mode, but the default pencil tip is
smaller and harder.
Pipette: Samples a colour or colour area in the image
with a mouse click to make it the current painting color.
Colour: Clicking here opens a menu to select a new
painting colour. The colour selection provides four
different models for selecting a new colour and a box
with pre-defined colours, which you can exchange for
the current painting colour via drag & drop.
www.magix.com
The tool settings 85
The tool settings
In the tool settings bar you can change any option of the tools in
MAGIX Photo Designer 7. The tool settings bar is located at the top
of the program immediately below the menu. It always adapts to the
selected tool. The selected tool is therefore displayed on the left. The
tool bar can be displayed and hidden in the "Window" menu.
The mask tools settings
Different settings for the mask modes will be displayed in the tool
settings:
Rectangular Mask/Round Mask
Mode
New: Any existing mask is first deleted.
Add: Add to existing mask.
Subtract: Subtract new selection from existing mask.
Style
www.magix.com
Normal: You select the area with the mouse.
Fixed size: The mask has the defined width and height and you only
select the position of the mask.
Line (only for rectangle mask): The mask has the defined height and
you only select the position of a "Line selection" running across the
entire image width.
Column (only for rectangle mask): The mask has the defined width
and you only select the position of a "Column selection" running
across the entire image height.
Edge blur: You can define the width in pixels of a blurred transition
area at the edges of the mask.
86 The tool settings
Lasso mask/Magnetic lasso
Mode
New: Any existing mask is first deleted.
Add: Add to existing mask.
Subtract: Subtract new selection from existing mask.
Magic Wand
You can set tolerance for colours to be masked either using the RGB
colour model (red/green/blue) or the HSB colour model
(hue/saturation/brightness). Use the slide controls and input boxes to
regulate the colour channel tolerances.
Available modes are New and Add.
Brush mask
In this mode you can add or change the mask using a
paintbrush.
Mode
New: Any existing mask is first deleted.
Add: Add to existing mask with the left mouse button.
Subtract: Subtract new selection from existing mask.
Paintbrush shape
In the first field you can select the preset
paintbrush.
Clicking on the paintbrush palette icon opens the paintbrush
palette with detailed paintbrush settings.
www.magix.com

The tool settings 87
Drawing style
Paint freely: Freehand drawing mode.
Draw lines: Assists drawing straight lines.
See also Working with the Mask (on page 53).
The Gradient Tool settings
In gradient mode the following tool settings exist:
A preview of the gradient will be displayed.
A selection box will open where you can choose a gradient from a
list. This will then be the active gradient that can be applied to the
image with the mouse.
Double-click on a gradient or press the "Edit..." button to open it in
the Colour Gradient Editor.
Fill Mode: You can define whether gradient application is to be linear,
circular, conical, square or rectangular. Additionally, you can define
the number of gradient repetitions applied, whether the number of
colours is limited or not ("Limit number of colours to"), and how the
gradient concludes at the edges ("Edge areas").
The Color Gradient Editor
Here, you can edit and create new gradients.
www.magix.com
Edit: Insert a new colour marking into the gradient with a mouse click
above the colour bar, or delete existing colour markings by dragging
them out of the list. A color marking is activated by clicking on it.
Your colour and transparency can then be changed with
"Transparency" and "Colour" boxes.
Actions: Use "New" to create a completely new gradient and "Copy"
to duplicate an existing gradient for further editing.
88 The tool settings
The brush/pen tool settings
Different settings are displayed in the paintbrush and
pencil tool settings.
Hint: The same tool parameters also apply to all other tools that also
add colour or effects, i.e. sharpen, blur, remove red eye (on page 69),
and clone.
In the first field you can select the preset
paintbrush.
Clicking on the paintbrush palette icon opens the paintbrush
palette with detailed paintbrush settings.
Drawing style
Paint freely: Freehand drawing mode.
Draw lines: Assists drawing straight lines.
Connect/Transparency
Here you can select the various modes for combining the newly
applied paint with the background. More detailed information can be
found in the Object Manager (on page 58) section.
The Brush Palette
The Selection Tab
You can select a pre-defined brush from the dropdown list. A brush
is comprised of a brush tip, found under "Shape", and a selection
from the 27 variable properties. By clicking on the brush tip, a pop-up
menu with a selection of other tips is opened, and a new tip can be
assigned to the current brush. Changed brushes can be saved or
deleted here.
The Selection index card offers the parameters Size, Interval, Level,
Rotate, Pressure, Blurred edge, and Flow rate. When painting, the
brush tip is applied at the intervals specified at Interval (% of tip size).
Use Level and Rotate to compress and rotate the shape of the brush
tip. Blurred edge results in a soft focus of the tip. Pressure specifies
www.magix.com

The tool settings 89
www.magix.com
the intensity of application and Flow rate indicates the rate of colour
application when the mouse button is pressed, which leads to a
spray effect.
The Structure Tab
On this index card using "Preserve colour" and "Mix colour" functions
you can regulate how quickly the brush takes up colour from the
background, altering its painting colour.
Use "Smear" to define the ratio between applied colour and smeared
background with values ranging from 0 to 100%. Values greater than
90% result in a clear smear effect, while 100% produces pure smear
without colour.
If "Fade" is greater than 0, the brush will loose colour during constant
painting similar to a real brush until it no longer applies colour.
Note: Parameters "Smear", "Preserve colour" and "Apply colour" are
only visible for 'Paint' effects and do not affect other effects.
The Dots Tab
Here, you can define properties of dots stringed together during
painting. Use "Dots" to control how many dots are applied
simultaneously (Number) and at what random radius around the
mouse pointer (Radius) (radii > 0 signify a spray effect).
Settings under "Colour deviation" are again only visible with 'Paint'
effect. Use the "Hue", "Saturation", and "Brightness" slide controls to
define the maximal deviation of the colour applied from the paint
colour used.
If you activate "Linear deviation", such deviations are no longer
random, but occur at the specified speed.
The Orbitals Tab
Orbitals are strokes of the brush moving alone or in groups parallel to
or around the lines drawn with the mouse. If you activate Orbitals,
you can specify how many, how fast and at what intervals additional
strokes are applied around the line drawn with the mouse using
"Number", "Radius" and "Orbiting speed" parameters. Use "Radius
variance" and "Variance speed" to generate a varying radius. To paint
only orbitals without the main stroke, activate "Exclude center".

90 The tool settings
www.magix.com
Selection
You can select a pre-defined brush from the dropdown list. A brush
is comprised of a brush tip, found under "Shape", and a selection
from the 27 variable properties. By clicking on the brush tip, a pop-up
menu with a selection of other tips is opened, and a new tip can be
assigned to the current brush. Changed brushes can be saved or
deleted here.
The Selection index card offers the parameters Size, Interval, Level,
Rotate, Pressure, Blurred edge, and Flow rate. When painting, the
brush tip is applied at the intervals specified at Interval (% of tip size).
Use Level and Rotate to compress and rotate the shape of the brush
tip. Blurred edge results in a soft focus of the tip. Pressure specifies
the intensity of application and Flow rate indicates the rate of colour
application when the mouse button is pressed, which leads to a
spray effect.
Structure
On this index card using "Preserve colour" and "Mix colour" functions
you can regulate how quickly the brush takes up colour from the
background, altering its painting colour.
Use "Smear" to define the ratio between applied colour and smeared
background with values ranging from 0 to 100%. Values greater than
90% result in a clear smear effect, while 100% produces pure smear
without colour.
If "Fade" is greater than 0, the brush will loose colour during constant
painting similar to a real brush until it no longer applies colour.
Note: Parameters "Smear", "Preserve colour" and "Apply colour" are
only visible for 'Paint' effects and do not affect other effects.

The tool settings 91
www.magix.com
Dots
Here, you can define properties of dots, or dabs, stringed together by
the brush during painting. Use "Dots" to control how many dots are
applied simultaneously (Number) and at what random radius around
the mouse pointer they are applied (Radius) (radii > 0 signify a spray
effect).
Settings under "Colour deviation" are, again, only visible with 'Paint'
effects. Use the "Hue", "Saturation", and "Brightness" slide controls
to define the maximal deviation of the colour applied from the paint
colour used.
If you activate "Linear deviation", such deviations are no longer
random, but occur at the specified speed.
Orbitals
Orbitals are strokes of the brush moving alone or in groups parallel to
or around the lines drawn with the mouse. If you activate Orbitals,
you can specify how many, how fast and at what intervals additional
strokes are applied around the line drawn with the mouse using
"Number", "Radius" and "Orbiting speed" parameters. Use "Radius
variance" and "Variance speed" to generate a varying radius. To paint
only orbitals without the main stroke, activate "Exclude center".

92 Configuration
www.magix.com
Configuration
You can configure MAGIX Photo Designer 7 by selecting "Settings" in
the "File" menu.
Monitor Gamma
Select the "Monitor-Gamma" tab in the "Settings" dialog to change
the monitor’s colour representation. Gamma correction is a non-linear
modification of the colour spectrum that optimizes colour viewing for
monitors.
After activating gamma correction by ticking the control box, you can
adjust the colours by moving the slide controls. You should adjust all
three colour channels to balance the brightness of the colour fields.
Confirm your settings with "OK".
Undo/Redo
Select the "Undo/Redo" tab to set the number of steps that may be
undone.
Ticking the "Activate undo" control box allows you to undo work
steps. The next two control boxes allow you to limit the number of
steps and/or disk space that may be used for operations.
Mark "Redo" to be able to redo actions after undoing them.
Slideshow
You can set browser parameters for slideshows here. Set the image
display interval anywhere between 1 and 180 seconds. If you select
"Repeat", the slideshow will start over again once a cycle is
completed. The "Adjust to window size" option adjusts the size of
images that are larger than the current window. "Enlarge to fit
window" works the same way.

Configuration 93
www.magix.com
Other
Under "Other", the following settings can be specified:
Edit EXIF information: JPG files loaded from cameras contain meta
data, such as "rotate 90°", which is processed if this function is
activated.
Adjust image size during opening: Images are automatically
displayed as large as possible when opened.
Use JPX information during opening: If this option is activated, then
realtime effects from other MAGIX photo programs (Digital Photo
Maker, Media Manager, etc.), if available, will be applied to the image
when it is imported.
Convert image description as a text object: Attaches image
descriptions as a text object to the image file.
Create image copies automatically: A copy will be automatically
created when images are saved.

94 If you still have questions...
www.magix.com
If you still have questions...
Task Assistant
The Task Assistant is your information center. It helps you complete
your tasks and provides support at every step. Not only will you find
clear videos with step-by-step instructions, you also find quick
access to lots of functions.
The Task Assistant chapters can be found in the "Tasks" menu.
PDF manual
Much like the program Help, the electronic manual (PDF) contains the
entire program documentation. You can find it under "Start menu" >
"Programs" > "MAGIX Photo Designer 7" in the subfolder
"Documentation".
Note: To view the PDF file, you will need the "Adobe Acrobat Reader"
application, which you can download for free from the manufacturer's
homepage if it is not yet installed on your PC.
Program Help
The program Help contains hints on how to use the program and lots
of additional information. It's available to you at all times in the
program. You can search Help using keywords and cross references.
Homepage: The main Help page can be accessed via the "Help" >
"Contents" menu point.
Context Help: Press the "F1" key on your keyboard at any point in
the opened program and Help will open with the matching Help topic
(context help).

If you still have questions... 95
www.magix.com
MAGIX News Center
MAGIX supplies you with all the latest information on your software.
In the MAGIX News Center you can find out about all the links to
current online tutorials and tips & tricks on individual topics or
software application examples.
You will also be informed of the availability of brand new updates and
patches for your program as well as special offers, contests and
questionnaires.
The news is split into three color-coded sections:
Green for practical tips & tricks for your software
Yellow reports the availability of new patches and updates for your
product
Red for special offers, contests and questionnaires.
If there are no new messages, the button will be gray.
All available information is shown as soon as you click on MAGIX
News Center. If you click on one of the news items, you will be
forwarded to the corresponding website.

96 Index
www.magix.com
Index
1
1 Click............................................................................................ 80
A
Actions........................................................................................... 63
Add Noise ...................................................................................... 73
Add to current album...................................................................... 42
Adjust shape .................................................................................. 56
Album ............................................................................................ 40
Apply Shadow ................................................................................ 57
Art Filters........................................................................................ 70
Auto scroll ...................................................................................... 54
B
Barrel/Pincushion Correction .......................................................... 75
Blur ................................................................................................ 77
Brief Description ............................................................................... 9
Brightness/Contrast........................................................................ 69
Brush mask.................................................................................... 86
Brush Mask.................................................................................... 55
Bumpmap ...................................................................................... 72
C
Camera Zoom ................................................................................ 77
Change image format ..................................................................... 35
Channels ........................................................................................ 69
Chromatic Aberration...................................................................... 67
Cloning........................................................................................... 30
Coarsening Filters........................................................................... 74
Color Balance................................................................................. 68
Color Filters .................................................................................... 67
Colour gradient editor..................................................................... 34
Colour with colour gradient............................................................. 33
Concentric Waves .......................................................................... 75
Configuration.................................................................................. 92
Connect/Transparency ................................................................... 58
Context menu................................................................................. 59

Index 97
www.magix.com
Copy objects from different images and programs ..........................58
Copy, Paste, Copy to..., Move to..., Delete and Rename Files .........42
Create ............................................................................................46
Create mask from object.................................................................53
Create Panorama Pictures ..............................................................50
Create, load and save pictures........................................................46
Creating a Panorama ......................................................................51
Creating objects .............................................................................15
Creating Objects.............................................................................56
Creating Screenshots .....................................................................47
Crop person or object.....................................................................22
Crop to mask..................................................................................52
D
Deform pictures ..............................................................................51
Deinterlace .....................................................................................76
Dent/Bump.....................................................................................74
Description .....................................................................................43
Design title of picture ......................................................................26
Detailed image editing.....................................................................20
Dialog bar.......................................................................................80
Diffuse ............................................................................................74
Distortion Filters..............................................................................74
Dots ...............................................................................................91
Draw/Retouch with the brush..........................................................11
Dye ................................................................................................68
E
Editing multiple pictures at a time or................................................19
Effect bar........................................................................................79
Effects ................................................................................ 11, 65, 81
Effects & Filters...............................................................................31
Emboss .................................................................................... 33, 72
Even Waves....................................................................................74
F
Filter ...............................................................................................44
Find Edges .....................................................................................72
Fisheye-perspective........................................................................74
Flip pages.......................................................................................72
Focus .............................................................................................71
Focusing Filters...............................................................................71

98 Index
www.magix.com
Folder............................................................................................. 40
G
Gamma Correction ......................................................................... 68
Gaussian Blur................................................................................. 76
Gaussian Blur (Smart) ..................................................................... 76
General usage tips.......................................................................... 14
H
Highlight......................................................................................... 71
Hue/Saturation/Brightness.............................................................. 70
I
If you still have questions... ............................................................. 94
Image Information........................................................................... 44
Import Images ................................................................................ 47
Import Images via TWAIN Interface ................................................. 47
In the example................................................................................ 18
Include/include all ........................................................................... 57
Input .............................................................................................. 63
Introduction...................................................................................... 3
Invert mask..................................................................................... 53
J
JPEG Transformations.................................................................... 44
K
Keep Exif Camera Information......................................................... 47
L
Lasso mask/Magnetic lasso...................................................... 55, 86
Level Balance ................................................................................. 67
Limiting Value ................................................................................. 68
Load .............................................................................................. 46
Loading/saving the mask................................................................ 54
M
Magic Wand ............................................................................. 55, 86

Index 99
www.magix.com
MAGIX News Center.......................................................................95
Mask ..............................................................................................11
Mask > Expand/Reduce selection ...................................................54
Maximum .......................................................................................73
Median ...........................................................................................73
Minimum ........................................................................................73
Monitor Gamma..............................................................................92
Mosaik............................................................................................74
Motion Blur.....................................................................................77
N
Negative .........................................................................................69
Noise Filters....................................................................................73
Noise Reduction .............................................................................73
Noise reduction (selective)...............................................................74
O
Object Manager ..............................................................................14
Object order ...................................................................................57
Object tool setting ............................................................................9
Objects...........................................................................................12
Open ..............................................................................................42
Orbitals...........................................................................................91
Other..............................................................................................93
Other Filters....................................................................................71
Output............................................................................................64
P
Page size........................................................................................52
Paint...............................................................................................67
Paint with Gradient .........................................................................69
Painting ..........................................................................................70
Panorama.......................................................................................21
PDF manual....................................................................................94
Perspective.....................................................................................75
Plugin Filters ...................................................................................66
Poster ............................................................................................69
Print ...............................................................................................42
Print Images ...................................................................................48
Print several images........................................................................49
Printing an Image............................................................................48
Program Help .................................................................................94

100 Index
www.magix.com
Program interface ........................................................................... 13
Q
Quick image optimization and multiple picture editing...................... 17
R
Rectangular mask/round mask ....................................................... 54
Rectangular Mask/Round Mask ...................................................... 85
Red/Green/Blue.............................................................................. 69
Relief.............................................................................................. 72
Remove mask ................................................................................ 53
Remove Red Eyes .......................................................................... 69
Remove Stains ............................................................................... 73
Removing scratches and stains ...................................................... 30
Rename Sequence ......................................................................... 43
Reshape texts ................................................................................ 27
Rotate/Flip...................................................................................... 51
Rotation ......................................................................................... 77
S
Save............................................................................................... 46
Save for Internet ............................................................................. 46
Scale.............................................................................................. 51
Scale objects.................................................................................. 15
Screenshot function........................................................................ 38
Search photos................................................................................ 41
Select all......................................................................................... 53
Selecting Images ............................................................................ 41
Selection ........................................................................................ 90
Selectively brighten areas ............................................................... 28
Shade Curve .................................................................................. 70
Show images.................................................................................. 45
Slideshow................................................................................. 42, 92
Smart, practical and can be used straight away .............................. 16
Soften Filters .................................................................................. 76
Sorting ........................................................................................... 44
Standard ........................................................................................ 78
Structure ........................................................................................ 90
Stylising Filters................................................................................ 72
Support............................................................................................ 4
Surgery without artistic malpractice ................................................ 32

Index 101
www.magix.com
T
Task Assistant ................................................................................94
Text effects.....................................................................................62
The Brush Palette ...........................................................................88
The brush/pen tool settings ............................................................88
The Color Gradient Editor ...............................................................87
The File List ....................................................................................41
The Folder View ..............................................................................40
The Gradient Tool settings ..............................................................87
The Index Tabs...............................................................................48
The Mask Tools ..............................................................................54
The mask tools settings ..................................................................85
The Object Manager .......................................................................58
The Status Bar................................................................................44
The Thumbnail Bar..........................................................................49
The tool bar ....................................................................................48
The tool settings .............................................................................85
The Toolbars ..................................................................................78
Toolbar.....................................................................................15, 82
Turn new into old – Transform photos into paintings........................32
Tutorial ...........................................................................................12
U
Undo/Redo.....................................................................................92
Unsharp Mask ................................................................................71
User Filter .......................................................................................71
V
Video Filters....................................................................................76
Views .............................................................................................41
Vignette ....................................................................................54, 57
W
Whirl...............................................................................................75
Working with Batch Processing.......................................................63
Working with Images ......................................................................45
Working with Objects......................................................................56
Working with Text Objects ..............................................................61
Working with the Browser ...............................................................39
Working with the Mask....................................................................53

102 Index
www.magix.com
Z
Zoom ............................................................................................. 80
