Magix Video Pro X3 Owners Manual Eng
User Manual: magix Video Pro - X3 - Owners Manual Free User Guide for Magix Video Pro Software, Manual
Open the PDF directly: View PDF ![]() .
.
Page Count: 396 [warning: Documents this large are best viewed by clicking the View PDF Link!]
- Copyright
- Foreword
- Support
- Serial number
- System requirements
- Introduction
- What is MAGIX Video Pro X3?
- What's new in MAGIX Video Pro X3?
- Features
- Capture
- Import/Export formats
- Editing
- Burnable disc formats
- Savable window layouts
- Title effects with MAGIX 3D Maker
- Multicam editing
- Batch conversion
- Batch capturing
- Color correction
- HD audio support
- DVD authoring with up to 8 audio tracks
- Synchronization with external devices
- Support of "Shuttle Pro V2" and "Shuttle Express" from Contour
- Multimedia editable DVD menus
- Media library
- Additional features
- Notes for MAGIX Movie Edit Pro users
- Quick start
- Workspaces
- Video recording
- Object editing
- Insert object into the project
- Select and group objects
- Duplicate objects
- Extract sound from videos
- Shift objects
- Cutting objects
- Object handles
- Edit menu
- Trim Objects
- Shrink or interlace videos
- Save objects separately
- Attach to picture position in the video
- Transitions (fades)
- Search for gaps
- Simple cut
- Two-point cut
- 3-point editing
- Four-point editing
- Markers
- Multicam editing
- Title
- Effects
- Apply effects to objects
- Apply fades
- Video effects in the Media Pool
- Movement effects in the Media Pool
- Attach to picture position in the video
- Stereo 3D
- Audio effects in the Media Pool
- Design elements in the Media Pool
- Personalized templates in the Media Pool
- Extra effects
- Effects masks
- Image stabilization
- Image improvements for the entire movie
- Image improvements for individual objects
- Animate effects
- Preparing animations
- Place keyframe
- Copy keyframe
- Display keyframes of individual parameters
- Retroactively editing an effect's keyframes
- Soft movement
- Delete keyframe
- Change curve shape
- Editing an effects curve in the object
- Effects curves - Additional functions
- Stretching, compressing and displacing of effect curves.
- Animation from outside the image
- Stereo3D (deluxe version)
- Soundtrack
- Burn disc
- Special functions and wizards
- Automatic scene recognition
- Search for and remove ads
- Tempo and beat recognition
- Prerequisites for using the beat recognition assistant
- Preparation - Setting the start marker and object end
- Automatic Tempo Recognition
- Setting the manual and and Onbeat/Offbeat
- Determining the start of a measure
- Using BPM and beat detection
- Save only Tempo & Beat information
- Tempo adjustment
- Problems and Remedies regarding the Auto Remix Assistant
- Travel route animation
- Slideshow Maker
- Produce panorama pictures
- Batch conversion
- Options for using the final movie
- Create playable disc
- Export movie
- Video as AVI
- Video as DV-AVI
- Video as MPEG video
- MAGIX video export
- Video as Quicktime Movie
- Uncompressed movie
- Video as MotionJPEG AVI
- Movie as a series of individual frames
- Windows Media Export
- Video as MPEG-4 video
- Audio as MP3
- Audio as wave
- Export as transition...
- Single frame as BMP
- Single frame as JPG
- Animated GIF
- Export movie information as EDL
- Output audio/video
- Upload to Internet
- Managing video projects
- Menus
- File Menu
- New project
- Open
- Save project
- Save project as...
- Manage movies
- Export movie
- Import media files into project folder
- Clean up project folder
- Record audio / images / video
- Import Audio CD track(s)
- Scan image
- Import edit list (EDL)
- Output to device
- Batch conversion
- Burn CD/DVD
- Internet
- Backup copy
- Load backup project
- Clean-up wizard
- Settings
- Exit
- Edit Menu
- Undo
- Redo
- Cut objects
- Copying objects
- Paste objects
- Duplicate objects
- Delete items
- Select all objects
- Cut
- Musical cut adjustment
- Range
- Render range
- Discard rendered ranges
- Discard rendered range beneath the play cursor
- Form group
- Ungroup objects
- Wizards
- Mixdown Audio
- Audio and video mixdown
- Edit snap point
- Marker
- Move screen view
- Effects Menu (FX)
- Windows menu
- Help Menu
- File Menu
- Context menu (right click)
- Video objects
- Create frame table (new)
- Cut Trimmer
- Object trimmer
- Edit snap point
- Create still frame
- Motion
- Section
- Attach to picture position in the video
- Interpolation for interlace material
- Anti-flicker filter
- Border cropping adjustment:
- Video effects
- Insert objects into the project folder
- Fade in date as title
- Object properties
- Image objects
- Transitions
- Audio objects
- Text objects
- MAGIX 3D Maker objects
- Project folder
- Track
- Video objects
- Problems and solutions
- Online functions
- Keyboard shortcuts
- Activate codecs
- Annex: Digital Video and Data Storage
- MPEG-4 encoder settings
- Appendix: MPEG Encoder Settings
- MPEG glossary
- Glossary
- If You Still Have Questions
- Index

2 Copyright
www.magix.com
Copyright
This documentation is protected by law. All rights, especially the right of
duplication, circulation, and translation, are reserved.
No part of this publication may be reproduced in the form of copies,
microfilms or other processes, or transmitted into a language used for
machines, especially data processing machines, without the express written
consent of the publisher.
All copyrights reserved.
All other product names are trademarks of the corresponding
manufacturers. Errors in and changes to the contents as well as program
modifications reserved.
Copyright © MAGIX AG, 2008 - 2010. All rights reserved.
MAGIX is a registered trademark of MAGIX AG.
Created under license from Dolby Laboratories
Dolby and the double D symbol are trademarks of the Dolby Laboratories.
© 1992 - 2010 Dolby Laboratories. All rights reserved.
Other named product names may be registered trademarks of their
respective owners.
This product uses MAGIX patent pending technology.

Foreword 3
www.magix.com
Foreword
Thank you for choosing MAGIX Video Pro X3! Your new software offers you
the tools to edit video material at a professional level, including many
special functions like DVD authoring, multicam editing, and keyframe
animation.
The intuitive functionality featured by MAGIX Video Pro X3 will help you
achieve great results even after a relatively short introductory phase.
Thanks to the optimal hardware support, you can import your audio and
video recordings from any source to your computer. Cut them and optimize
them; add effects, titles, and transitions. MAGIX Video Pro X3 provides all
of the detailed editing options you need for ambitious video projects. When
you're finished, you can export your projects or burn them to disc in any
conventional format.
This documentation offers you an overview from the beginning, plus a quick
start with the program. The sections at the end provide a detailed and
systematic description of the numerous functions.
Have fun using MAGIX Video Pro X3,
The MAGIX team

4 Table of Contents
www.magix.com
Table of Contents
Copyright 2
Foreword 3
Support 10
Uninstalling the program 12
Serial number 12
Unlocking MAGIX Video Pro X3 12
System requirements 13
Introduction 14
What is MAGIX Video Pro X3? 14
What's new in MAGIX Video Pro X3? 14
Features 15
Notes for MAGIX Movie Edit Pro users 19
Quick start 21
Program start 21
Select, load, and play back videos 21
DV recording 24
How to capture analog video 25
Video editing 28
Enriching movies 34
Workspaces 35
Activate main screen 35
"Edit" screen 36
Media Pool 37
Toolbars 43
Program and source monitor 51
Arranger 54
Project folder 57
Adjusting the workspace 58
"Burn" screen 58
Video recording 60
Select the recording method 60
AVCHD/DVCPRO/AVC-Intra 61
HDV camera 64
DV camera 64
Video 70
Single frame 73

Table of Contents 5
www.magix.com
Audio 76
Screen 79
Recording AVCHD 80
Edit after recording 81
Creating new movies or attaching them 82
Object editing 82
Insert object into the project 83
Select and group objects 84
Duplicate objects 85
Extract sound from videos 85
Shift objects 85
Cutting objects 85
Object handles 86
Edit menu 87
Trim Objects 88
Shrink or interlace videos 90
Save objects separately 91
Attach to picture position in the video 91
Transitions (fades) 92
Search for gaps 96
Simple cut 96
Two-point cut 96
3-point editing 98
Four-point editing 100
Markers 101
Playback marker 101
Project markers 102
Ranges (in and out points) 102
Chapter markers 104
Scene markers 106
Ad markers 107
Multicam editing 107
Preparation 107
Source tracks and preview images 108
Multicam edit functions 109
Synchronize video objects using the sound track 111
Title 111
Creating titles using a template 111
Creating titles without a template 112
Title editor 113
Advanced settings 114
Edit title 115
Positioning titles 115
3D text 116

6 Table of Contents
www.magix.com
Fade in date as title 116
Effects 116
Apply effects to objects 117
Apply fades 119
Video effects in the Media Pool 119
Movement effects in the Media Pool 129
Attach to picture position in the video 134
Stereo 3D 134
Audio effects in the Media Pool 134
Design elements in the Media Pool 136
Personalized templates in the Media Pool 136
Extra effects 136
Effects masks 139
Image stabilization 140
Image improvements for the entire movie 142
Image improvements for individual objects 144
Animate effects 144
Preparing animations 145
Place keyframe 145
Copy keyframe 145
Display keyframes of individual parameters 146
Retroactively editing an effect's keyframes 146
Soft movement 146
Delete keyframe 147
Change curve shape 147
Editing an effects curve in the object 148
Effects curves - Additional functions 148
Stretching, compressing and displacing of effect curves. 150
Animation from outside the image 151
Stereo3D (deluxe version) 152
3D basics 153
Record 3D 154
Prepare 3D editing 155
Set playback mode for 3D 156
Align videos and pictures for 3D 156
Turn camera movements into 3D videos 158
Create titles for 3D videos 158
Export and burning 3D videos 158
Soundtrack 159
Load and edit audio files 159
Audio effects 160
Import audio CD 176
Adding a sound track using MIDI songs 179
Mixer 181

Table of Contents 7
www.magix.com
5.1 Surround 184
Set multiple sound tracks 189
Synthesizer 192
Scrubbing 196
Mixdown of audio objects 197
MAGIX Soundtrack Maker 198
Burn disc 199
Preview and editing 200
Menu 201
Templates 201
Edit disc menu 202
Edit DVD menus with Xara Xtreme Pro or Photoshop 210
Burn disc 218
Create PC show 224
Special functions and wizards 224
Automatic scene recognition 224
Search for and remove ads 226
Tempo and beat recognition 227
Travel route animation 232
Slideshow Maker 237
Produce panorama pictures 240
Batch conversion 241
Options for using the final movie 243
Create playable disc 243
Export movie 243
Output audio/video 249
Upload to Internet 257
Managing video projects 258
Project and movie settings 258
Program settings 267
Preview rendering 276
Backup copy 277
Load backup project... 278
Importing & exporting EDL files 278
Clean-up wizard 279
Menus 280
File Menu 280
Edit Menu 287
Effects Menu (FX) 296
Windows menu 301
Help Menu 303
Context menu (right click) 305

8 Table of Contents
www.magix.com
Video objects 305
Image objects 309
Transitions 311
Audio objects 312
Text objects 315
MAGIX 3D Maker objects 318
Project folder 320
Track 320
Problems and solutions 321
File will not load 321
Choppy or uneven playback 321
Problems and Remedies regarding the Auto Remix Assistant 322
Activation problems 322
Online functions 324
Integrated browser 324
MAGIX News Center 325
Embed Flash videos into your own web page 326
Keyboard shortcuts 328
Playback functions 328
Monitors 328
Arranger view 329
Move view 329
Mouse modes 330
File menu 330
Edit menu 331
Effects menu 332
Windows menu 333
Help menu 334
Edit keyboard shortcut 334
Activate codecs 335
Free activation (MPEG-2, MPEG-4, Dolby Digital 2.0 & 5.1) 336
Fee-based DVCPRO activation 337
Annex: Digital Video and Data Storage 338
Video Editing on the PC 338
MPEG Compression 338
General notes on AVI videos 339
Overview of the different disc types 339
MPEG-4 encoder settings 346
MPEG-4 347
AVC / H.264 351
AMR 357
AAC 357

Table of Contents 9
www.magix.com
Multiplexer 358
Appendix: MPEG Encoder Settings 360
General settings 360
Video settings 361
Advanced video settings 362
Audio settings 363
MPEG glossary 365
Motion estimation 365
Bit rate 365
Block 366
Chroma format 366
Field 366
Frame 367
GOP 367
I frames 368
Interlace 368
P frames and B frames 369
Prediction 369
Quantization scaling 371
Glossary 372
If You Still Have Questions 387
Tips for program help 387
Index 388

10 Support
www.magix.com
Support
Dear MAGIX customer,
Our aim is to provide convenient, fast and solution-focused support at all
times. To this end, we offer a wide range of services:
Unlimited web support:
As a registered MAGIX customer, you have unlimited access to web
support offered via the convenient MAGIX service portal on
http://support.magix.net, including an intelligent help assistant, high-quality
FAQs, patches and user reports that are constantly updated.
The only requirement for use is product registration on www.magix.com
The online community - on-the-spot support and a platform for exchange:
MAGIX customers have free and unlimited access to the online community
at www.magix.info, which includes approx. 100,000 members and offers the
opportunity to ask members questions concerning MAGIX products as well
as use the search function to search for specific topics or answers. In
addition to questions & answers, the knowledge pool includes a glossary,
video tutorials and a discussion forum. The multiple experts, found round-
the-clock on www.magix.info guarantee quick answers, which sometimes
come within minutes of a question being posted.
Email support for MAGIX products:
8 (eight) weeks of free email customer service (starting from the purchase
date) is automatically included with the purchase of any new MAGIX
product. MAGIX guarantees fast processing of your request and an
immediate reply.
Premium email support:
If you experience problems after the 8 weeks of free email support have
expired, you can purchase a Premium email support ticket in the MAGIX
Shop for USD 12.99 | CAD 13.99 | GBP 9.99 | AUD 18.99 | ZAR 120.00 |
EUR 12.99 | SEK 119.00 | NOK 99.00 | DKK 99.00. This ticket applies to a
specific problem and is valid until it is solved; it is therefore not restricted to
one email.
Reporting evident program errors is exempt from this regulation.
Please note: To be able to use the Premium email support and free product
email support via the Internet, you have to register your MAGIX product
using the serial number provided. This can be found on the CD case of your
installation CD or on the inside of the DVD box.

Support 11
www.magix.com
Additional telephone service:
Besides the large number of free customer service offers, we also offer a
fee-based telephone customer service.
Here you can find a summary of our technical support telephone numbers:
http://support.magix.net/
Mail (Europe): MAGIX Development Support, P.O. Box 20 09 14, 01194
Dresden, Germany
Mail (North America): MAGIX Customer Service, 1105 Terminal Way #302,
Reno, NV 89502, USA
Please have the following information at hand:
Program version
Configuration details (operating system, processor, memory, hard drive,
etc.), sound card configuration (type, driver)
Information regarding other audio software installed
MAGIX Sales Department
You can reach the MAGIX Sales Department workdays for help with the
following questions and problems:
Orders
Product consulting (pre-purchase)
Upgrade requests
Returns
Europe
Monday - Friday, 09:00-16:00 GMT
U.K.: 0203 3189218
Denmark: 699 18149
Sweden: 0852500858
Finland: 09 31581630
Norway: 0210 30665
North America
9 am to 4 pm EST Mon-Fri
Phone: 1-305-722-5810

12 Serial number
www.magix.com
Uninstalling the program
If you would like to uninstall MAGIX Video Pro X3, you can do so via the
control panel under "Software". Or go to "Programs > MAGIX > MAGIX
Video Pro X3 > Service and Support > Uninstall MAGIX Video Pro X3".
Serial number
A serial number is included in each product. This serial number is required
for the installation of the software and enables usage of additional bonus
services. Please store this number in a safe place.
What can a serial number do?
With a serial number your MAGIX Video Pro X3 is clearly assigned to you
and only you. This way improved and more targeted customer service is
made possible. Abuse of the software can be prevented with a serial
number, which ensures that optimum the price/performance ratio continues
is guaranteed.
Where can the serial number be found?
The serial number can be found on the reverse side of your CD/DVD case.
If your product is packed in a DVD box, then you'll find the serial number on
the inside.
For the versions that have been especially optimized for the Internet
(download versions), you'll get your serial number for activating the software
directly after purchasing the product via email.
When will you need the serial number?
The serial number is required when you start or register MAGIX Video Pro
X3 for the first time.
Note: We explicitly recommend registering your product (free), since only
then are you entitled to download updates and use MAGIX support (view
page 10) services.
Unlocking MAGIX Video Pro X3
After MAGIX Video Pro X3 has been installed and the serial number has
been entered, the software can be used for 30 days. After these 30 days
have expired, MAGIX Video Pro X3 must be activated.

System requirements 13
www.magix.com
System requirements
For Microsoft® Windows® XP / Vista® / 7
Intel® CoreTM Duo with 1.83 GHz, AMD® Dual core with 2.0 GHz
1 GB RAM
1 GB hard disk memory for program installation
Multichannel sound card recommended for surround sound editing
Minimum requirements for AVCHD/HD editing
Intel® CoreTM 2 quad processor with 2.83 GHz (Intel® CoreTM i7
recommended)
4 GB RAM
DirectX® 9.0c compatible graphics card, 512 MB graphics card space or
more and Pixelshader 2.0, ATI X300 or higher, NVIDIA GeForce 6600 or
higher
Blu-ray burner to create Blu-ray Discs
System requirements for 3D playback
Red/cyan glasses required for anaglyph 3D display (included).
A special monitor is needed for viewing using polarized filter glasses.
A 120 Hz monitor or a projector as well as compatible shutter glasses and
graphics card are required for shutter playback.
Supported devices:
IEEE1394/FireWire/DV/i.Link interface for use with DV/HDV camcorders
USB camcorder (DVD/hard disk/memory card) and webcams
VfW or DirectShow® compatible video, TV or graphics cards with video-in
WDM-compatible TV tuner cards, DirectX®9 and BDA driver compatible
DVB-T/-S tuner cards
Blu-ray, DVD-R/RW, DVD+R/RW, DVD RAM or CD-R/RW burners

14 Introduction
www.magix.com
Introduction
What is MAGIX Video Pro X3?
MAGIX Video Pro X3 is a professional video editing program for Windows
PC systems. High-performance, native HD editing, DVD authoring with up to
8 audio tracks, or keyframe animation with Beziér curve control is directed
at users with higher standards.
The program is clearly divided into intuitive modules. Videos, photos, and
audio from a wide range of sources can be transferred from various devices
to PC. Longer movies can be automatically separated into chapters or
scenes. You can also do the opposite and combine individual recordings to
make a single movie.
Once your video is finished, you can use it in different ways: Transfer it
back onto the tape or to your camcorder, export it in any conventional
format, or burn it directly to Blu-ray, DVD, or another disc format.
What's new in MAGIX Video Pro X3?
Import options
AVCHD import dialog (view page 62) with P2 memory card support
Import (view page 62) for NXCAM, DVCPRO, and AVC Intra
Importing of 3D stereo recordings (view page 154)
Importing of Xara Designer Pro or Photoshop files for menu creation (view
page 210)
Memory and loadable project folders (view page 57) (e.g. for transferring
edited objects to other projects)
Optimized start dialog
Video editing
New multi-track ripple mode (view page 46)
Video monitor zoom and workspace around the active video for motion
graphics and animations
Stereo 3D editing (view page 152)
Stereo 3D design templates
Effects masks (view page 139) for controlling the intensity of effects
Extended undo/redo handling (the number of possible undo steps may be
set variably now)
Revised effects dialog for position/size (view page 129) and camera/zoom
MAGIX Xara Designer link

Introduction 15
www.magix.com
Preview rendering (view page 276) (ranges may be rendered to increase
performance. Access to objects and tracks is maintained in this process)
Four-point editing (view page 100)
Apply effects to selected objects (view page 117)
Output options
AVCHD SmartRendering
Burn Blu-ray™ Discs with H.264 (optional)
Exports 3D stereo films (view page 152) as a file, disc, or to YouTube®
Upload video to Facebook (view page 257) ®
Additional
Increased speed via general performance boosting
Newly designed dialogs
Features
Capture
MAGIX Video Pro X3 features the following recording options:
AVCHD/DVCPRO/AVC-Intra/video DSLRs (and other drives)
HDV cameras: HDV1 and HDV2 camcorders
DV cameras: Mini DV camcorders or DV video recorders
Video: Analog TV, video input, VHS recorders, webcams
Audio: Microphones, cassette recorders, MiniDisc players, turntables
Screen: PC monitor
Single frame: Single and series images from webcams, video recorders,
video cameras, or TV cards
Analog capture requires capture cards compatible with DirectShow. DV
capture can be performed through an OHCI-compatible IEEE 1394 host
adapter (FireWire or iLink). A TV card can be used to record programs from
TV or from your video recorder.
Import/Export formats
Supported import formats:
Video: AVI, DV-AVI, MPEG-1, MPEG-2, MPEG-4, MTS, M2TS, MXV,
MJPEG, QuickTimeTM, WMV(HD)
Audio: WAV, MP3, OGG, WMA, MIDI, Dolby®Digital Stereo, Dolby®Digital
5.1 (deluxe version)

16 Introduction
www.magix.com
Pictures: JPEG, BMP, GIF, TIF, TGA (supports scanners and digital photo
cameras (TWAIN)
Supported export formats:
Video: AVI, DV-AVI, MPEG-1, MPEG-2, MPEG-4, MXV, MJPEG, Quicktime,
WMV(HD)
Audio: WAV, MP3, Dolby®Digital Stereo, Dolby®Digital 5.1 (only deluxe
version)
Pictures: JPEG, BMP
Note: MPEG-4, MPEG-2, and Dolby®Digital must first be activated online for
free. MP3 export requires installation of Windows Media Player min. Version
10.
Note: To import and export AVC and MPEG-4 files, the MPEG-4 codec must
be activated (view page 335). A dialog, will appear when the codec is
required.
AVCHD standard support
Files from AVCHD cameras may be imported directly. Newer computers are
capable of decoding and playing this format in real time.
MAGIX Video Pro X3 Caries out a performance test to ensure that the
computer features enough computing power. If this test is negative, the
AVCHD material will be converted into an MPEG-2 file to make sure it may
be processed on older systems as well.
AVCHD Lite
MAGIX Video Pro X3 now also supports the AVCHD Lite standard, which is
used by digital cameras for recording video (among other things).
AVCHD activation details
Attention: For AVCHD support, Dolby Digital Stereo and the MPEG-4 codec
must be activated. To convert AVCHD videos to MPEG-2, the MPEG-2
codec must be activated.
Editing
Program and source monitors: To provide an optimal overview, these two
separate preview monitors are integrated for the source material and movie
arrangement respectively.
The project folder is used for storing your material. It's useful for selecting
the necessary media for your current project. Use it to store video, audio,

Introduction 17
www.magix.com
titling files, and even edited versions or sections of films for use later in
your projects.
Picture optimization: This includes color improvement (RGB, saturation),
sharpness (focus, feathering), brightness regulator (brightness, contrast),
and the anti-flicker filter.
Sound optimization: The equalizer allows you to manipulate the frequency
spectrum, which is useful for reducing peaks, for example. The compressor
limits the signal's dynamics. The StereoFX processor controls the position
of the sound within the stereo panorama. The De-noiser and De-hisser are
professional noise reduction tools for removing noise and hisses.
Video effects: Such as creative filters, distortion, video mix (chroma key),
movement effects (e.g. camera/zoom or rotation), cropping, picture-in-
picture collages, video effect plug-in support, etc.
Automatic scene recognition
Slideshow Maker turns photo collages into spectacular multimedia shows
automatically.
MAGIX Soundtrack Maker creates background music automatically.
Burnable disc formats
DVD
WMVHD (high-resolution CD/DVD in WMV-Format, playable on PC)
Blu-ray Disc
AVCHD disc (on DVD and Blu-ray Discs)
MultiDisc (DVD + WMVHD)
Mini-DVD (DVD on raw CD)
JPEG disc (for export of photos onto a photo disc)
Project backups, backup copies, and 1:1 copies of DVDs
Savable window layouts
MAGIX Video Pro X3 offers a flexible user interface which allows windows
to be adjusted for any working situation. Both preview monitors can be
enlarged to fullscreen and moved around, e.g. to use multiple monitors
more effectively. Even the project folder, the Arranger, and the Media Pool
can be scaled and moved as a separate window.
Title effects with MAGIX 3D Maker
The title editor features the MAGIX 3D Maker 3D program for especially
high-quality 3D subtitles and texts. The title editor opens when a title
template is dragged from the "Title" folder onto the track. The title editor
provides access to MAGIX 3D Maker via the "As 3D title..." button.
Multicam editing
MAGIX Video Pro X3 enables multicam editing for up to nine cameras. The
different camera recordings may be played back in sync and edited together
as a single version.

18 Introduction
www.magix.com
Batch conversion
Time-saving conversion of multiple movies and videos in a single target
format via batch conversion (view page 241) is available under "File".
Batch capturing
When video material is imported from digital sources (miniDV cameras, DV
video recorders, HDV cameras), scenes which you would like to use can be
selected first and cut at once. To save space, HD files can be converted
directly into MPEG format.
Color correction
MAGIX Video Pro X3 offers 3-way color correction (view page 122) for
optimizing poor or incorrectly exposed videos. Color correction can be found
in the Media Pool under "Effects".
HD audio support
MAGIX Video Pro X3 supports audio formats that conform to Intel's High
Definition audio standard for sound cards. This means that MAGIX Video
Pro X3 can be used to produce stereo signals at a sampling rate of 192kHz
(32-bit) and 8-channel signals at a sampling rate of 96kHz (32-bit).
DVD authoring with up to 8 audio tracks
DVDs, Blu-ray Discs, and AVCHD discs may feature up to eight audio
tracks. This is especially useful for creating multi-lingual discs or video data
that contains different sound formats (5.1 Surround, stereo). More
information about creating different audio tracks is available in the chapter
"Dubbing (view page 189)".
Synchronization with external devices
MAGIX Video Pro X3 features synchronization with external devices via
MIDI or SMPTE (master or slave).
Support of "Shuttle Pro V2" and "Shuttle Express" from Contour
For easy work, an easy preset has been created that enables controlling
MAGIX Video Pro X3 with "Contour Shuttle Pro V2" and "Contour Shuttle
Express" quickly and efficiently.
Multimedia editable DVD menus
Many templates for DVD menus that are later used on TV to aid in film and
chapter selection are included with the program, some also in 16:9
widescreen format. These may simply be applied during burning to provide
a professional appearance to the DVD.

Introduction 19
www.magix.com
Every menu template may be customized with personal photos, thematic
animations, 3D titles, sound, intro videos, etc.
Media library
A license-free media library including music, video, and graphics files is
included for free use and combination. All files are clearly arranged on your
DVD in a well-arranged structure.
Tip: For additional multimedia content, you can also browse the online
media catalog Catooh by clicking "File -> Internet".
Additional features
Automatic scene recognition: Long films are divided into shorter scenes as
they are imported or retroactively.
Metadata logging during recording
Import of non copy-protected DVDs, including all audio tracks and chapter
markers
Master audio level display on the timeline
Alpha channel support for AVI videos
Sample-exact positioning for audio objects on the timeline
Project-transfer from professional audio programs Samplitude or Sequoia
via EDL interface
6-channel PCM Surround on Blu-ray Discs
Notes for MAGIX Movie Edit Pro users
For users who are used to working with MAGIX Movie Edit Pro, the user
interface can be switched to the "classical" Movie Edit Pro view via "Window
-> Window arrangement".
For everyone who has never used MAGIX Movie Edit Pro, we recommend
using Video Pro X's window arrangement. This arrangement provides the
most options.
The following provides a detailed overview concerning the differences
between MAGIX Video Pro X3 and MAGIX Movie Edit Pro:
Video monitors
"Movie Edit Pro" mode only has a preview monitor which is used for both
program and source monitor. When the project is stopped, files can be
selected in the Media Pool and played back with the transport control. To
play back the arrangement again, the arranger has to be clicked first.
The "Video Pro X" window arrangement provides two preview monitors; a
program monitor for previewing the project in the arranger, and a source

20 Introduction
www.magix.com
monitor for previewing files in the Media Pool. Both preview monitors have
different transport controls for separate control of the preview in the Media
Pool and playback of the project. More information about the preview
monitors can be found in the corresponding section of the chapter
"Inserting objects into the project (view page 51)".
Keyboard layout
The preset keyboard shortcuts are different and can be displayed in both
modes via "File -> Settings -> Keyboard shortcuts". MAGIX Video Pro X3
also allows familiar shortcuts from Movie Edit Pro to be loaded if they are
easier to work with. More information about keyboard shortcuts can be
found in the chapter "Keyboard shortcuts (view page 328)" and in the
shortcut pdf located in the program folder of MAGIX Video Pro X3.
Load files
In MAGIX Video Pro X3, files are dragged (drag&drop) to the desired
position in the arranger or loaded via the commands from the insert menu.
For more about commands in the insert menu, read the section "Insert
modes (view page 48)" in the chapter "Workspaces".
In Movie Edit Pro, files can also be loaded form the Media Pool by double
clicking them. Videos and image files are placed in the first track at the
location of the playback marker, and the associated sound track lands on
track 2. If another object is already there, then the new object will be
appended behind the last object on the first track. Titles appear on tracks 3
and 4, and additional audio material on track 5. You may also change this
behavior under "File -> Settings -> Program" via the tab "System" and
under "Behavior on double click".
Space bar behavior
In either program, use the space bar on your keyboard to start and stop.
Pressing the space bar again produces different effects according to the
respective program:
In Movie Edit Pro, the playback marker is placed at the last stop position.
In MAGIX Video Pro X3, the playback marker is kept at the current position.
This corresponds with the functionality of a tape recorder when stopped.
Playback behavior may be switched via "File -> Settings -> Program" and
then the "Playback" tab.
Project folder
In Movie Edit Pro, the project folder function is not available.
MAGIX Video Pro X3 features the project folder as a separate folder on the
right side, which serves as an intermediate store or catch-all for all kinds of
Quick start 21
project material. More information about this is available in the section
"Project folder (view page 57)" in the chapter "Workspaces".
Quick start
Program start
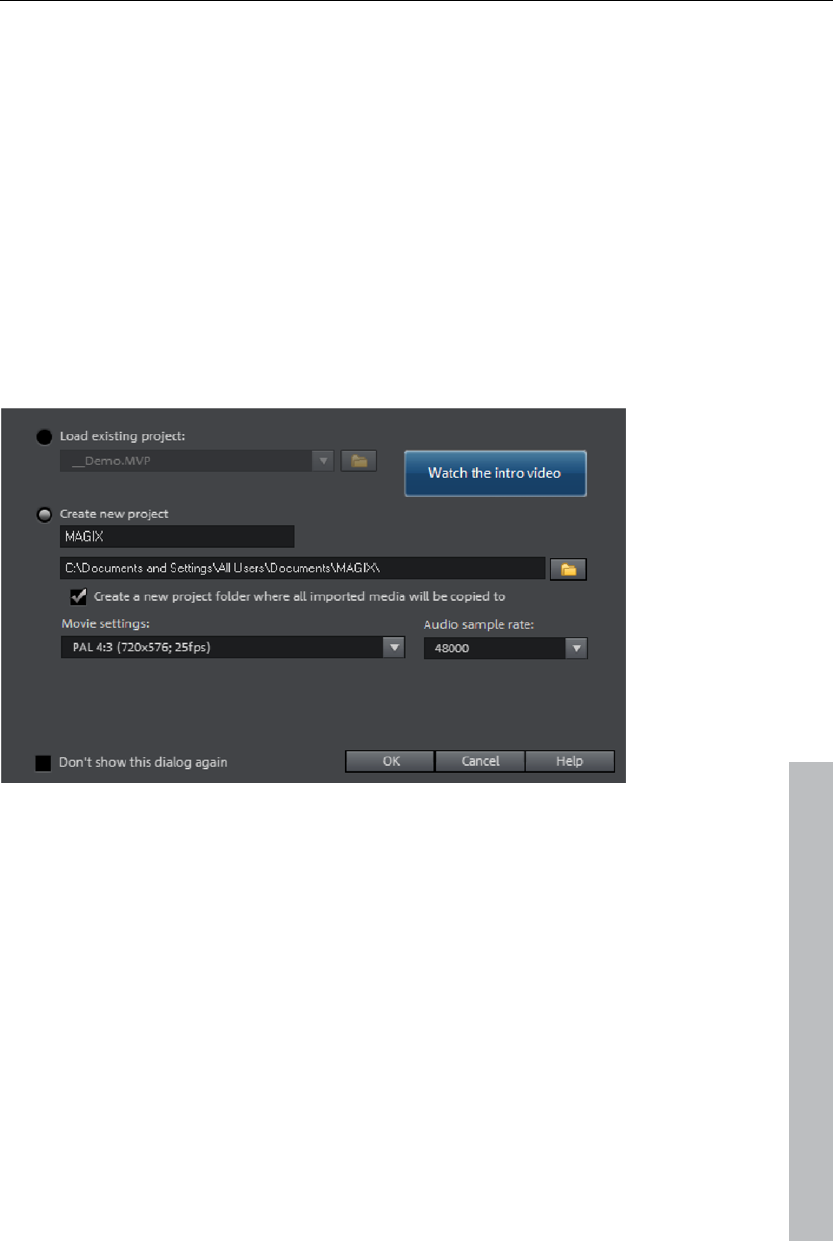
When you start MAGIX Video Pro X3 for the first time, the start dialog will
appear.
This dialog allows you to either "Load an existing project" or "Create a new
project". It also features the option "Create a new project folder". All data
that belongs to the movie will be saved in this folder.
www.magix.com
We're still at the very beginning, so let's stick with keeping an overview of
everything. Click "OK" to end the dialog and continue.
Select, load, and play back videos
In the beginning, it's probably best to load a video file for test purposes and
to get to know the program's functions.
22 Quick start
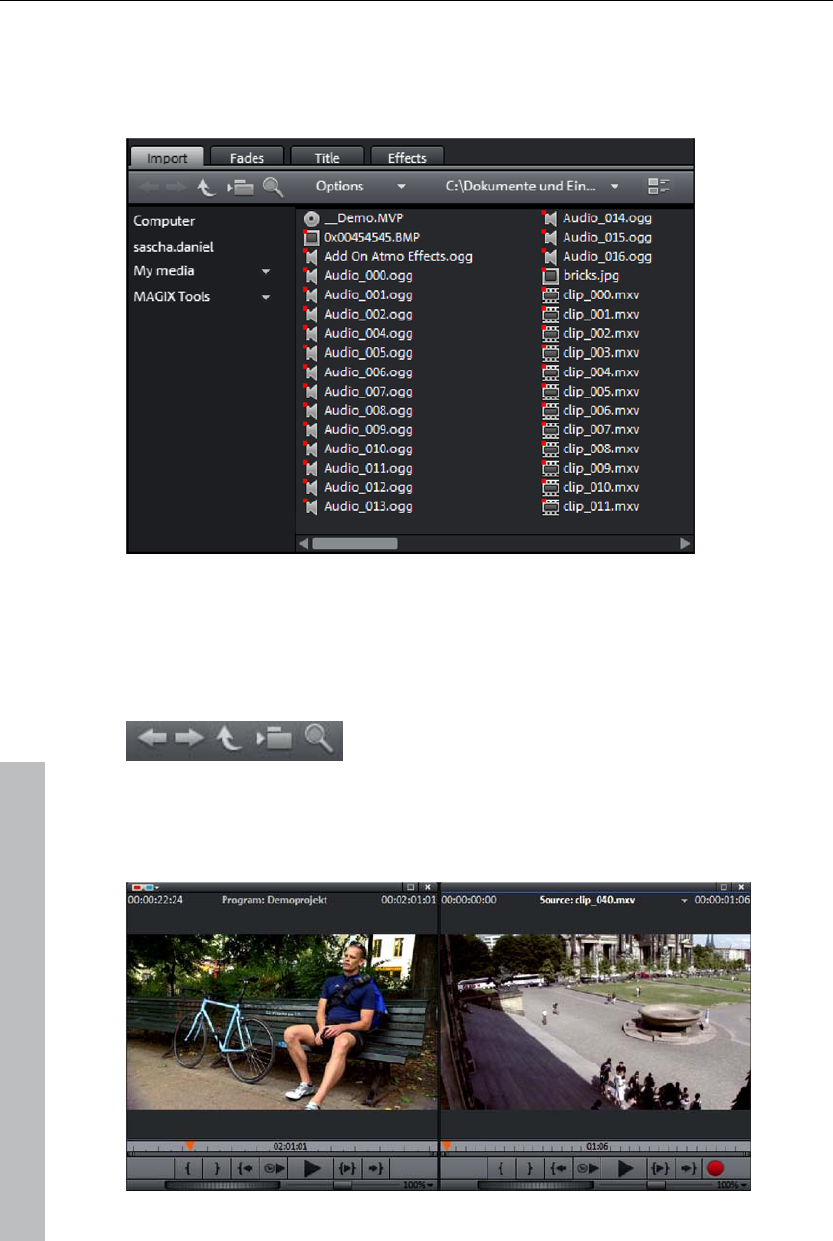
The Media Pool appears to the top right; four tabs provide access to all
important elements that are required for video projects. The first tab
displays all usable files (besides movies, also photos, images, audio files,
and even RTF text files for captions) in the current folder.
The navigation functions exactly the same way as a conventional file
manager: folders may be opened by double clicking them. The arrow keys
jump a step ahead or back in the folder structure. You may also display a
folder tree featuring the folder hierarchy and then use the seach function
(view page 38) to locate files according to different criteria.
All of the files in the file list can be loaded and used. Find a video file, e.g.
in the format *.mpg, *mxv, or *.avi.
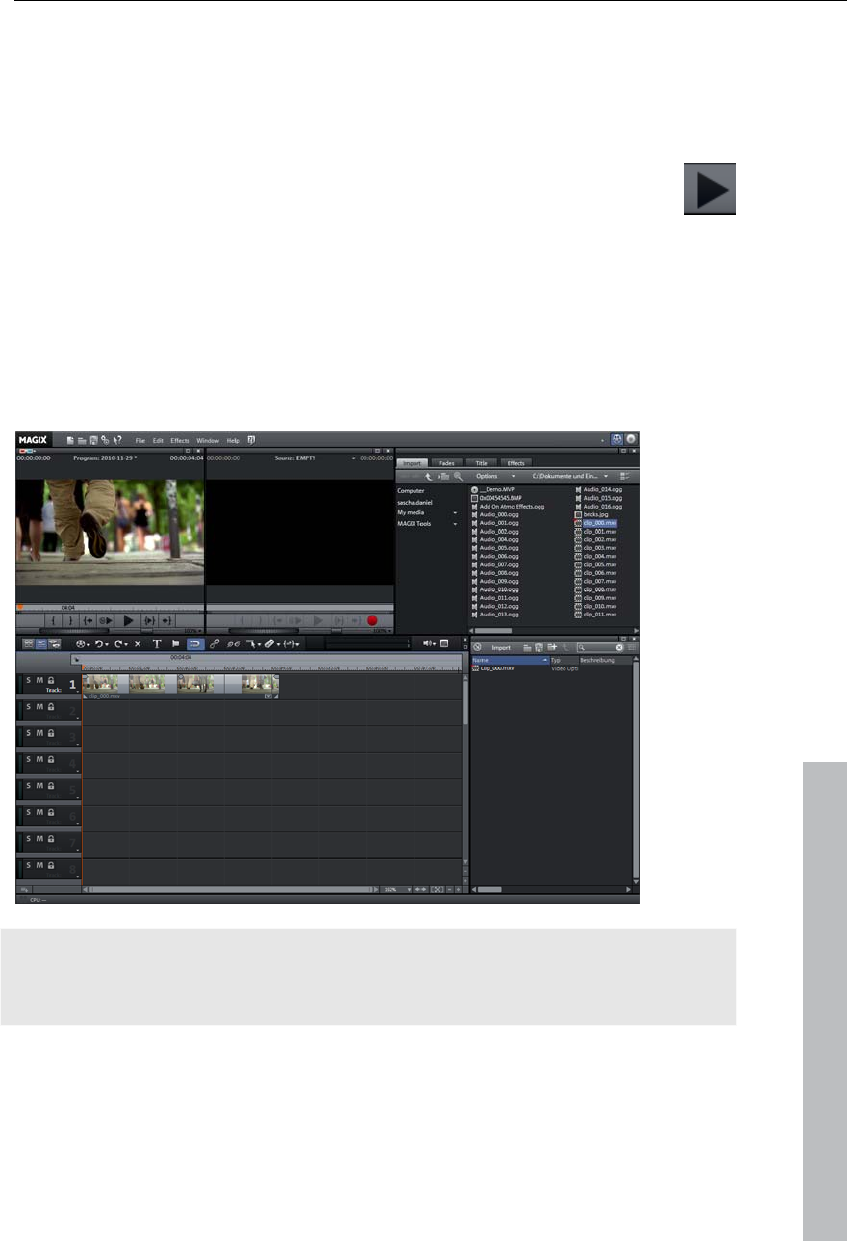
In the upper-left area, you will see two preview monitors.
www.magix.com
Quick start 23
The left program monitor is responsible for playback of objects in the
arranger. The right source monitor displays a preview of files in the Media
Pool.
In order to be able to play back movie files from the Media Pool in the right
source monitor, double click the file in the file list first. Double clicking loads
the file in the monitor first.
To play the video, click the play button on the transport control
under the source monitor to the right.
This method lets you select and play back different video files. Drag the
selected file (hold down the mouse button) from the Media Pool down into
the arranger. An object appears at the location on the track where you
release the mouse button to represent this video file.
Each object can be moved in any way in the arranger with the mouse, i.e.
horizontally on a track as well as vertically between tracks. Drag the video
object on the first track all the way to the left to the beginning of the track.
www.magix.com
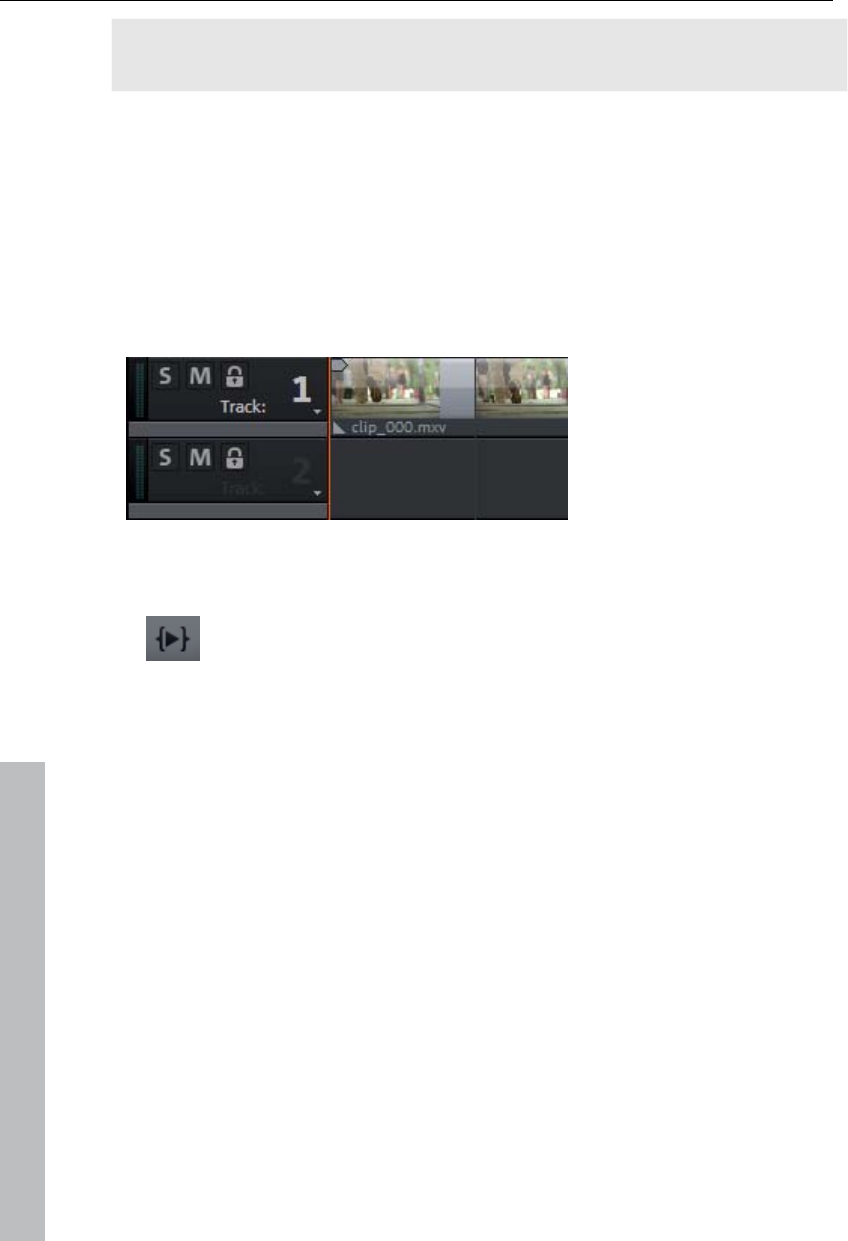
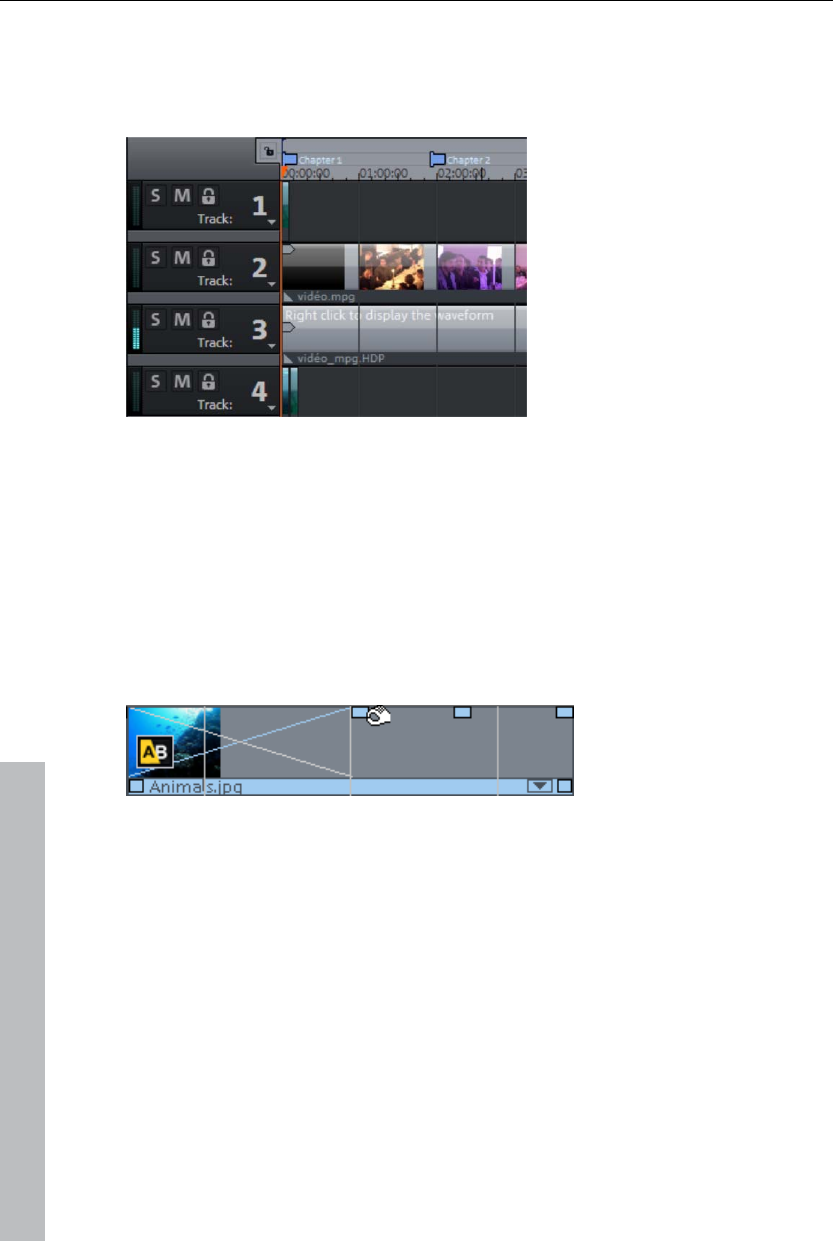
Note: If the video also has a sound track available, then a corresponding
audio object will appear underneath it on track 2 to symbolize the sound
track. Both objects are connected as a group.
Now that the first file has been loaded into the arranger, it can be edited,
cut, and exported. Other files may also be loaded onto the tracks to
combine movies, audio files, and photos.
To play back the arranger, click the play button on the transport control
under the program monitor to the left.
24 Quick start
Tip: An even easier way to do this is to press the space bar on your
keyboard.
During playback, a vertical line will move across the arranger: this is the
playback marker that displays the current position. You can reposition it by
clicking at different locations as desired.
You can also define playback ranges, e.g. to freeze a certain position
independent of the playback marker. Clicking in the timeline above the first
track lets you define an end point, i.e. the start point of the playback range.
If you right click further on, the end marker will appear to indicate the out
point of the playback range. The length of the playback area is shown in the
center of the section display.
The in and out points may be moved or set directly with the mouse. Left-
clicking positions the in point, and the right mouse button sets the out point.
To play back the range, click the "Play back range" button on the
transport control under the program monitor.
Now you know how to load and play back media files in different ways.
Would you like to try to make your own movie now?
If you want to continue with your own film material, select the "New movie"
option from the "File" menu and read the following chapters about video
recording.
If you wish to continue working with the test file, simply skip the following
recording tutorial and begin reading the "Video editing (view page 28)"
section.
DV recording
Connect the DV device (DV camcorders or DV video recorders) to your PC.
Switch the device's operating mode to "Video recorder" or "Playback".
www.magix.com
Quick start 25
To open MAGIX Video Pro X3's recording dialog, click the red "Record"
button on the transport control under the source monitor.
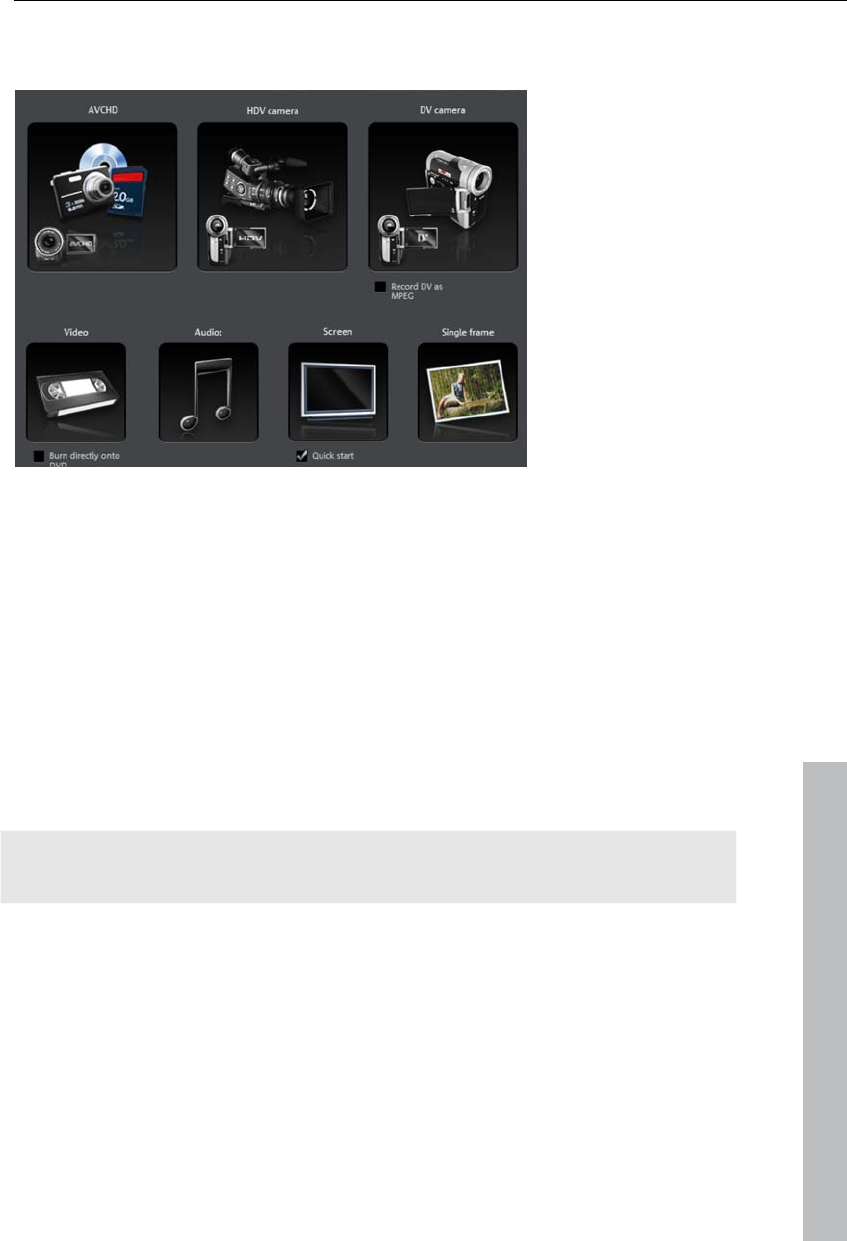
Select "DV camera" from the recording dialog. Uncompressed DV capture
requires approx. 220 MB per minute of video. If you would instead like to
record using the more space-saving MPEG format, then you should first
activate the "Record DV as MPEG" option.
This opens the actual recording dialog. Check to see if a DV camera driver
has been selected.
Name your recording. It's worth choosing a logical name which will allow
you to find it easily again on the hard drive.
www.magix.com
You can access the appropriate place on the camcorder tape by using the
remote control buttons: shuttle forwards, backwards, and start/stop
playback. To start recording, click the "Record" button. Keep an eye on the
remaining hard-drive space.
Cease capturing with the "Stop" button and exit the record dialog.
Tip: In the DV recording dialog, you can set clips from the DV video which
will then be recorded one after the other (batch capturing).
How to capture analog video
1. Wiring
Connect the video out of your DVD or VHS recorder to the video in (TV,
video or video in graphics card) of your computer, and the audio out to the
audio in on your sound card.
26 Quick start
Due to the variety of device configurations, it is difficult to say which cables
function best with your setup. If you’re not sure, check the manual of your
VCR or your TV, video, or graphics cards.
Example:
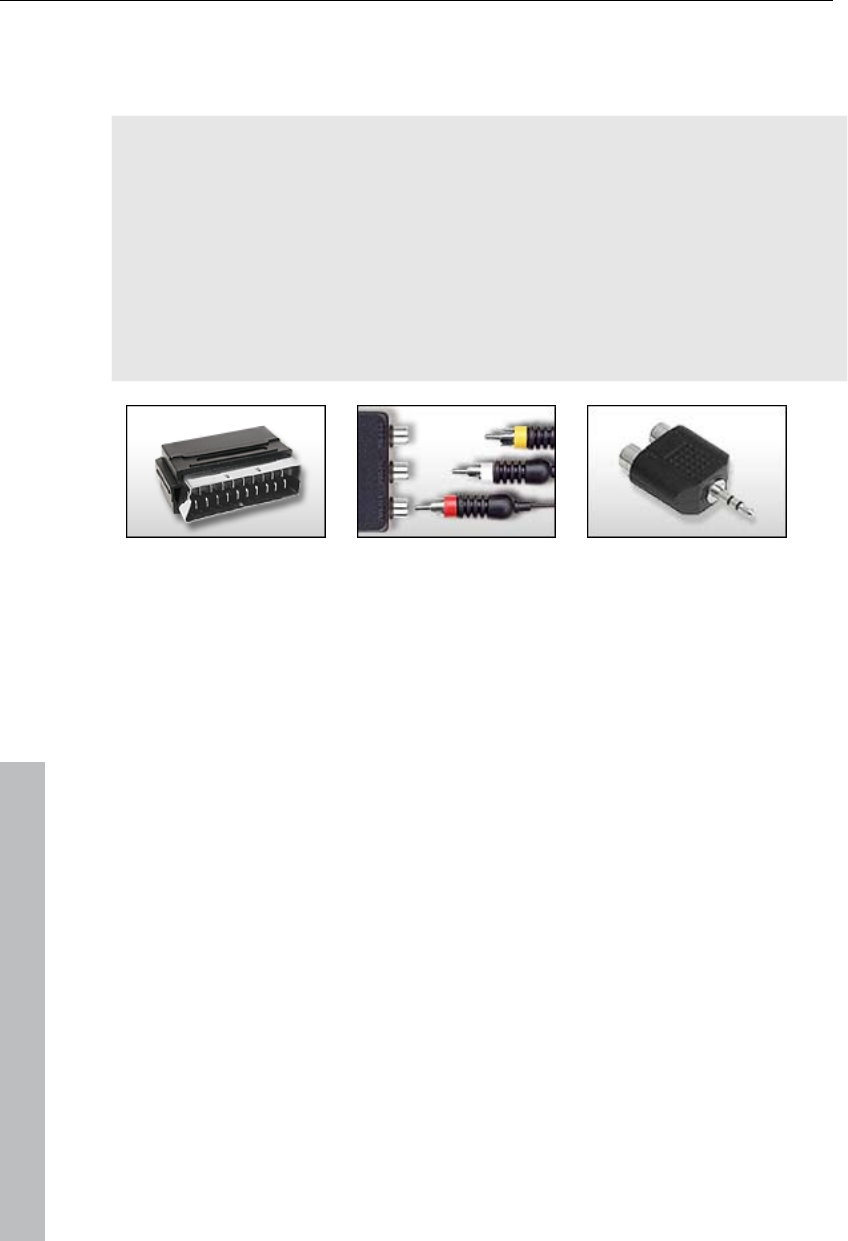
Europe: Many VCRs and DVD players have a SCART, 3 RCA (2 for stereo
sound, 1 for video), or S-Video/optical audio line out. In such case, you will
need a SCART to RCA adapter, a cable with 3 RCA jacks, or an S-Video
cable.
North America: Many VCRs and DVD players have a 3 RCA (2 for stereo
sound, 1 for video), or S-Video/optical audio line out. In such case, you will
need a cable with 3 RCA jacks, or an S-Video cable.
SCART/Cinch adapter SCART/Cinch adapter
with 3 RCA jacks
Stereo RCA/mini
phone jack adapter
Most sound card inputs are mini phone jacks. To connect the VCR audio out
to the sound card audio in, you will need a stereo RCA / mini phone plug
adapter.
Therefore, you will most likely have to buy a cable with 3 RCA plugs and a
stereo cinch/mini jack adapter from your local supplier.
www.magix.com
Quick start 27
2. Program start and record
To open MAGIX Video Pro X3's recording dialog, click the red "Record"
button on the transport control under the source monitor.
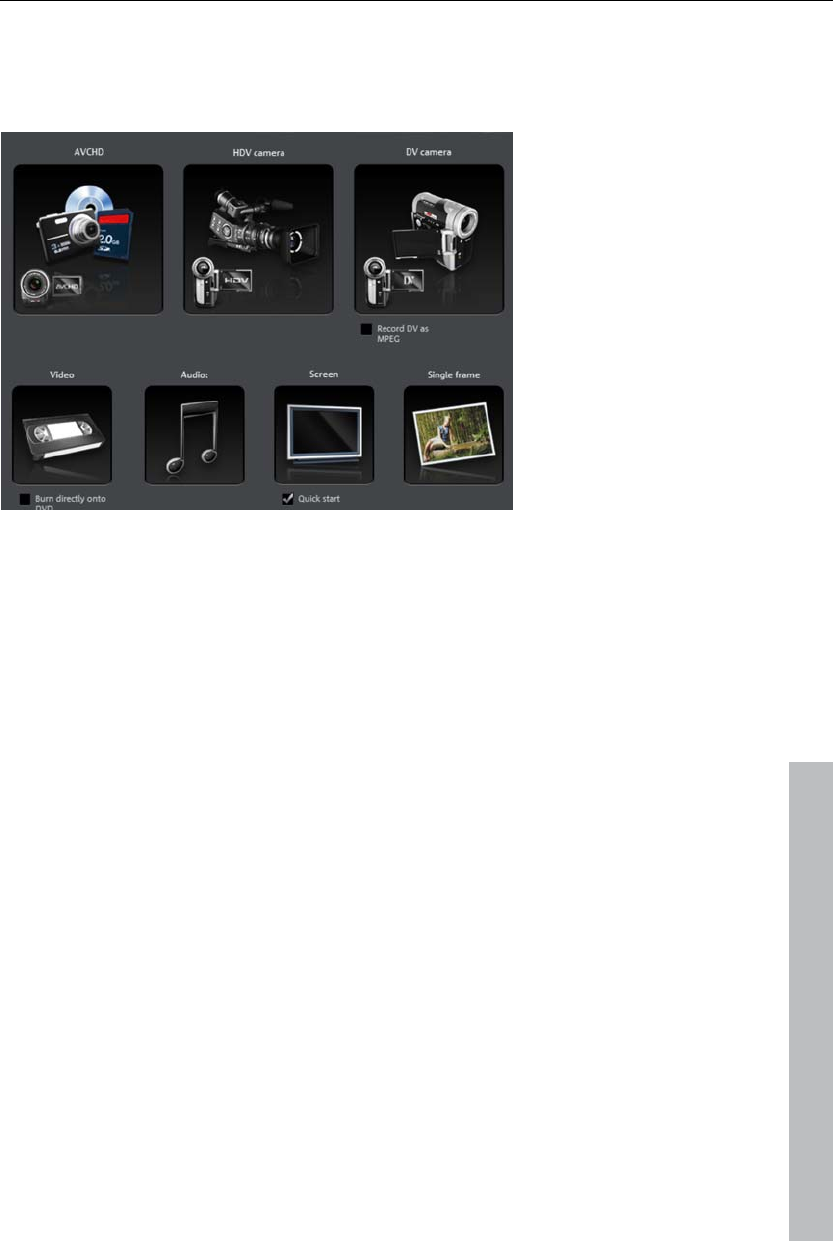
Select "Video" from the record dialog. If you would like to burn your video
directly to a DVD, then first activate the box "Burn directly to DVD".
This opens the actual recording dialog. In the record dialog, select the
appropriate driver for your video and audio cards (if you have more than
one installed). A video preview window is now displayed.
Name your recording. It's worth choosing a logical name which will allow
you to find it easily again on the hard drive.
www.magix.com
Start recording now by pressing the "Record" button in the dialog and end it
by pressing the "Stop" button. Pay attention to the number of "dropped
frames": If you get a reading of more than 10 dropped frames per minute,
then reduce the video quality to prevent your PC from overloading.
Cease capturing with the "Stop" button and exit the record dialog.
28 Quick start
Video editing
Timeline mode
All editing is done in the arranger. Your movies are displayed according to
time, i.e. the longer the representative object in the track, the longer the
associated movie.
Handles: All objects may be shortened by moving the mouse to one of the
lower corners of the object until it turns into a stretch symbol. You can now
stretch the object as much as you like. At the top corners of every object,
you’ll find two fade handles that can be adjusted to fade an object in or out.
The handle at the top center can be used to adjust the volume of audio
objects and the transparency of video objects.
Object selection: For advanced effects editing, the objects must be selected
first. Each object can be selected by clicking it. Objects will change color to
show that they have been selected. Multiple objects can be selected by
holding down "Shift". You can also click and drag out a rectangle to select
multiple objects. All objects included in the rectangle will be selected.
www.magix.com
Quick start 29
Editing effects: Selected objects can be edited with the effects from the
Media Pool.
The settings for each effect may be adjusted directly in the Media Pool.
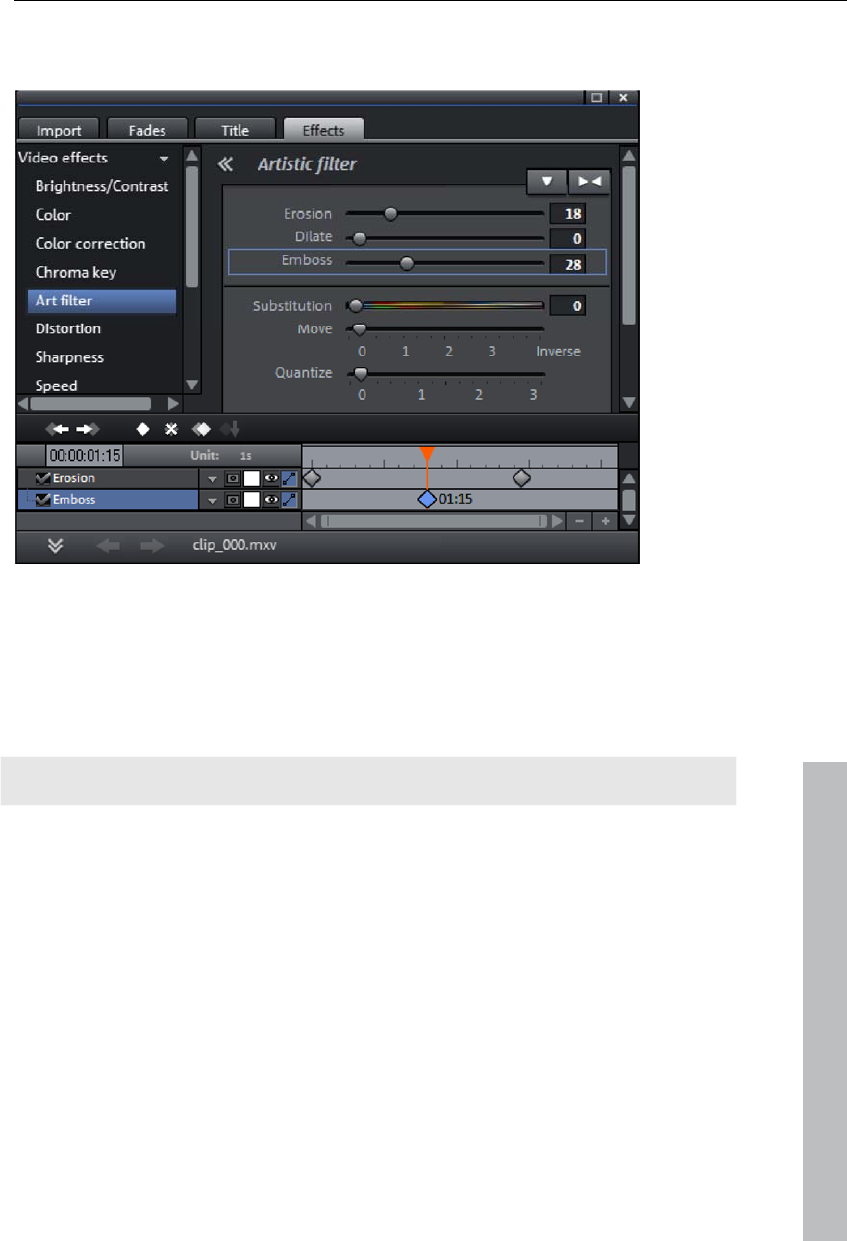
Most effects are controlled with keyframe animations or effects curves. The
intensity of the effect is controlled dynamically via individual points
(keyframes) or via a drawn curve (effects curve). Every button for the
keyframes or effects curve animations can be found after the effect is
selected in the lower area of the Media Pool.
www.magix.com
Note: To activate an effects curve, an initial keyframe must be set first.
Context menu: The context menu also offers a series of editing options for
objects. This may be opened by right clicking on an object. Different trim
editors can be opened which enable an exact cut with different transition
parameters. For video objects, there is another context menu than for audio
and title objects.
Remove unusable scenes
One of the most important work steps during import of your footage is
cutting out unusable scenes from the material. There are two options for
this:
Variant 1: The complete material is loaded into your project first and the
unusable scenes are cut out.
30 Quick start
Variant 2: Cut the material prior to importing it, and then proceed to import
only the scenes you need. This process is recommended for long movies
with a lot of editing; it functions either via the Media Pool or the project
folder.
Cut videos in the project
Let's assume that you have already imported your film material into a
project and would like to edit it now.
Play back your video by clicking "Play" on the program monitor's transport
control (or simply press the space bar on the keyboard).
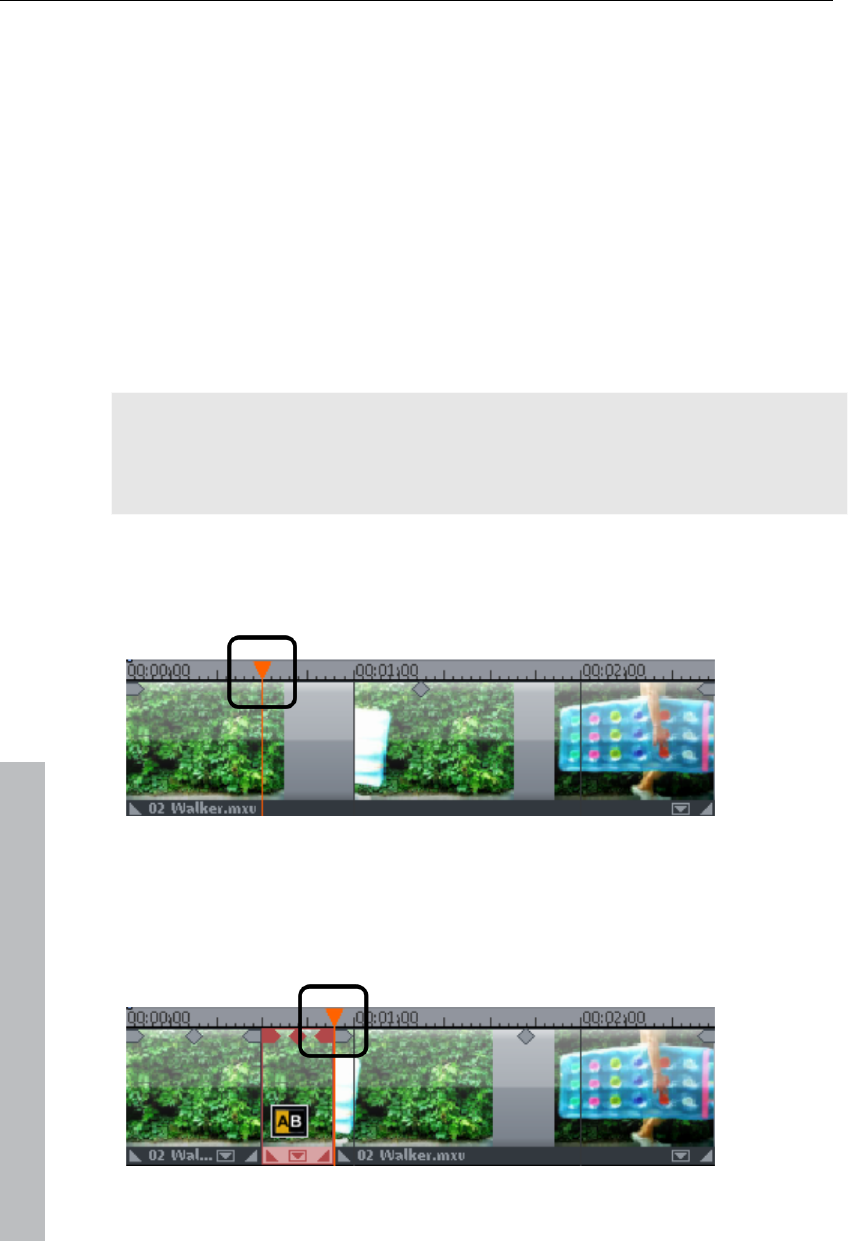
If during playback you have reached a scene that you would like to cut out,
click on the playback button in the transport control a second time. The
playback marker stays near the start of the scene to be removed.
Tip: In case of long films or to speed up searching, you may also fast
forward the video following the action on the program monitor. To do so,
drag the playback marker while holding down the mouse key across the
timeline (but not too fast!).
Set the playback marker exactly at the start of the unwanted material. The
zoom function is recommended to get a better view of longer videos (the +/-
buttons in the bottom right corner of the arranger).
Press the "T" key on the keyboard. This will have the effect of cutting the
current scene into two sections at the position of the playback marker.
Repeat these steps for the end of the unusable scene. Find the end of the
scene, place the playback marker as close as possible to the end point,
and then press the "T" key on the keyboard again.
www.magix.com
Quick start 31
Now you have "isolated" the unusable scene and may delete it from the
movie using the "Del" key on the keyboard. Before this, the scene must be
selected by clicking it with the mouse.
If you didn't work accurately during cutting, don't worry; you can use the
object handles to stretch or shorten the remaining objects to recover or
exclude material from the deleted section.
www.magix.com
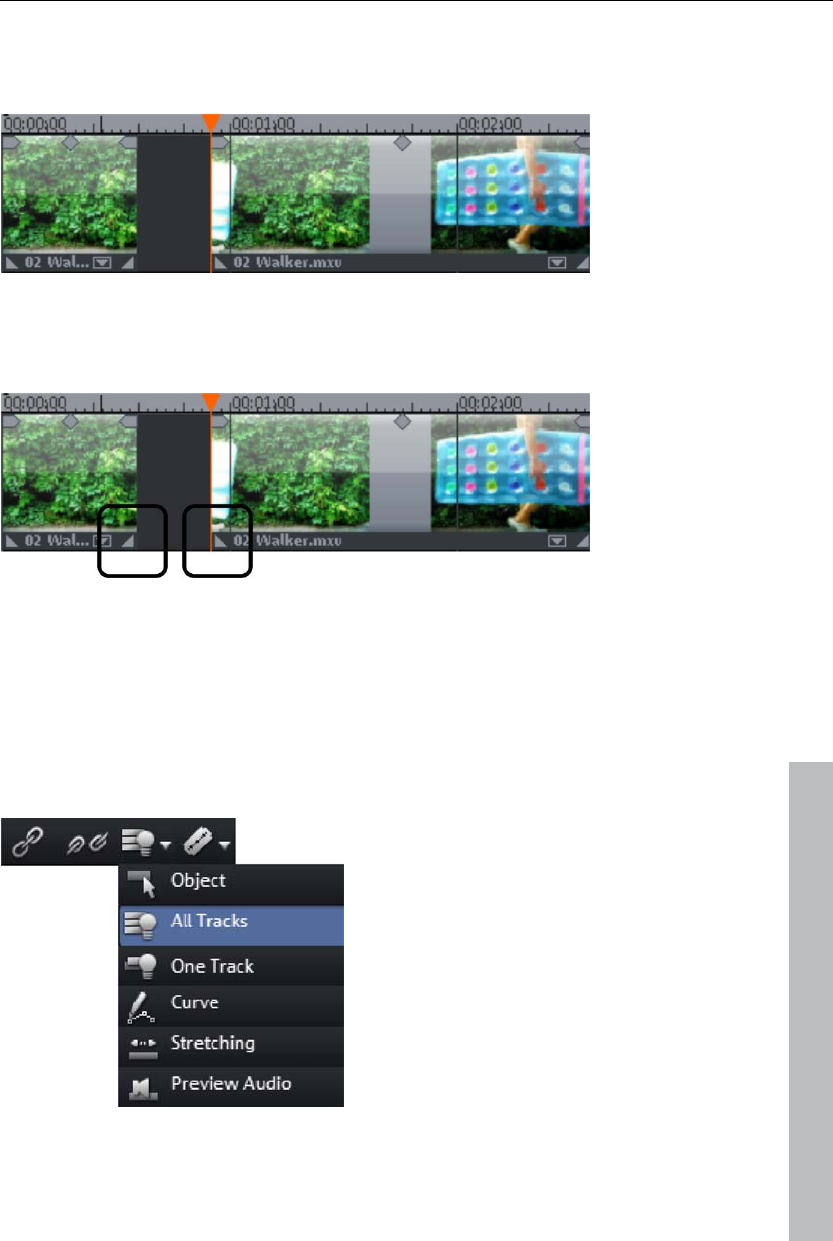
After deletion, a gap will appear in the film sequence at the position of the
removed material. How can you remove the gap from the movie? Easy: Pull
the later scenes up to the earlier scenes until they "dock" with each other.
Please make sure that the later scenes are all taken along during the pull,
otherwise the gap will have simply moved to the back of the film sequence.
To pull up later objects, use "All tracks" mouse mode, since this
automatically takes the objects on all tracks found later on the timeline
along with the object being moved.
32 Quick start
Note: If your project has not only a video track but also a sound track, then it
is often necessary to cut both of these tracks simultaneously. After
importing from the camera, video and sound tracks are automatically
grouped, which is why all cutting and moving actions have an effect on
video and sound tracks simultaneously. However, if you have added a
separate soundtrack which has not yet been grouped with the video
sequence, then you should group them before starting to edit. To do so,
select the video object and the audio object via "Ctrl" + click, and in the
"Edit" menu select the "Group" option (or click the group tool).
Feel free to experiment with the editing functions. Nothing can go wrong,
since all editing functions (like all editing processes) are nondestructive.
This means that all original material will remain unchanged on your hard
disk.
Importing individual scenes from longer movies
If you have saved a longer video as a file on your hard disk and only want to
use a section of it for your project, then proceed as follows:
Double click the desired file in the Media Pool. Double-click the file to load
it in the source monitor and play it back using the transport controls.
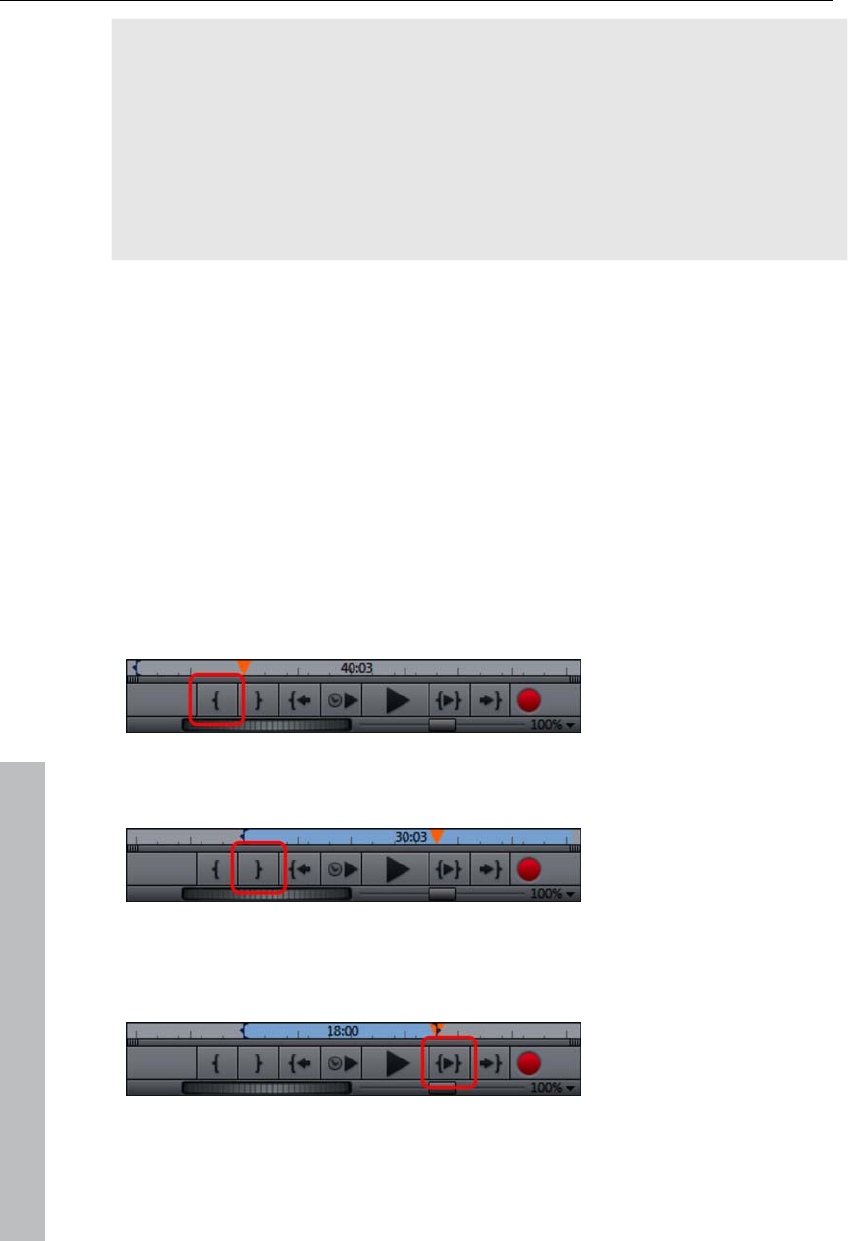
Find the range which you would like to import. Position the playback marker
above the transport control at the start position of the range and click the
"Set in point" button.
Next, position the playback marker at the end of the section and click the
"Set out point" button.
The currently selected range appears highlighted in blue in the range
display. You can playback this range separately with the "Playback range"
button.
All range limits can be moved by holding down the mouse button and
dragging. Once the range matches the section that you want to import, click
www.magix.com

Quick start 33
www.magix.com
on the preview monitor and drag the section onto the track. An object will
appear featuring the material you wanted to import. If you're not sure where
you would like to use the section in the project, you can drag it into the
project folder instead of onto the track.
Tip: You can also edit files that are located in the project folder in the same
way. A shortened file also contains information in the project folder about in
and out points so that you don't always need to reset these in case the
video needs to be re-imported at a later time. You can also drag each file
directly from the Media Pool into the project folder.
Regroup scenes
You will often want to move specific scenes or even groups of scenes to a
different place within a film. This happens completely intuitively: Single
scenes can be selected in any view by clicking them and moving them to
the desired position (drag & drop). You can also create scene groups which
can be moved together: "Ctrl" + mouse click lets you select more than one
scene, "Shift" + mouse click lets you select all of the scenes that lie in
between.
Finally, here are three tips for more extensive arranger work:
With the mouse modes "All tracks" or for "One track" (view page 46) doesn't
just move the selected scene, but all objects that are located behind the
object (one track) or all tracks (all tracks).
The commands "Group (view page 291)" and "Ungroup (view page 291)" let
you combine any scenes into groups which can then be moved together as
a block.
If cutting and moving around parts of your project has left it a little
unorganized, try using the project folder. The project folder is better suited
for intermediate storage of all of the objects you want to use in your movie.
You can either move all of the objects directly from the arranger into the
project folder by dragging them there (they will be removed from the
corresponding track), or you can copy the objects and paste them into the
project folder. Hold down "Shift" while you click to select multiple files. You
can also drag sections of files or files from the Media Pool and drag them
directly into the project folder.
Note: Please ensure that the project folder is reserved for the respective
project at hand. The contents will be saved together with the project and
made available the next time the same project is opened, but not when
another project is opened.
34 Quick start
Enriching movies
Burn DVDs and Blu-ray discs with interactive menus
You can burn your projects onto DVD or Blu-ray discs with an interactive
menu.
Note: Authoring for DVDs and Blu-ray discs is the same for both formats.
For multiple films that are subdivided into individual chapters, the disc
selection menu becomes even more important, allowing you to jump to each
movie or chapter using your remote control. To make sensible chapter
divisions in your movie, it should be split into sensible sections. Place the
play marker where you'd like to have it and choose the option "Chapter
marker" from the "Edit" menu (keyboard shortcut: Shift + Enter). If you
select the option "Automatic chapter markers", a chapter marker is
automatically placed at the beginning of every scene.
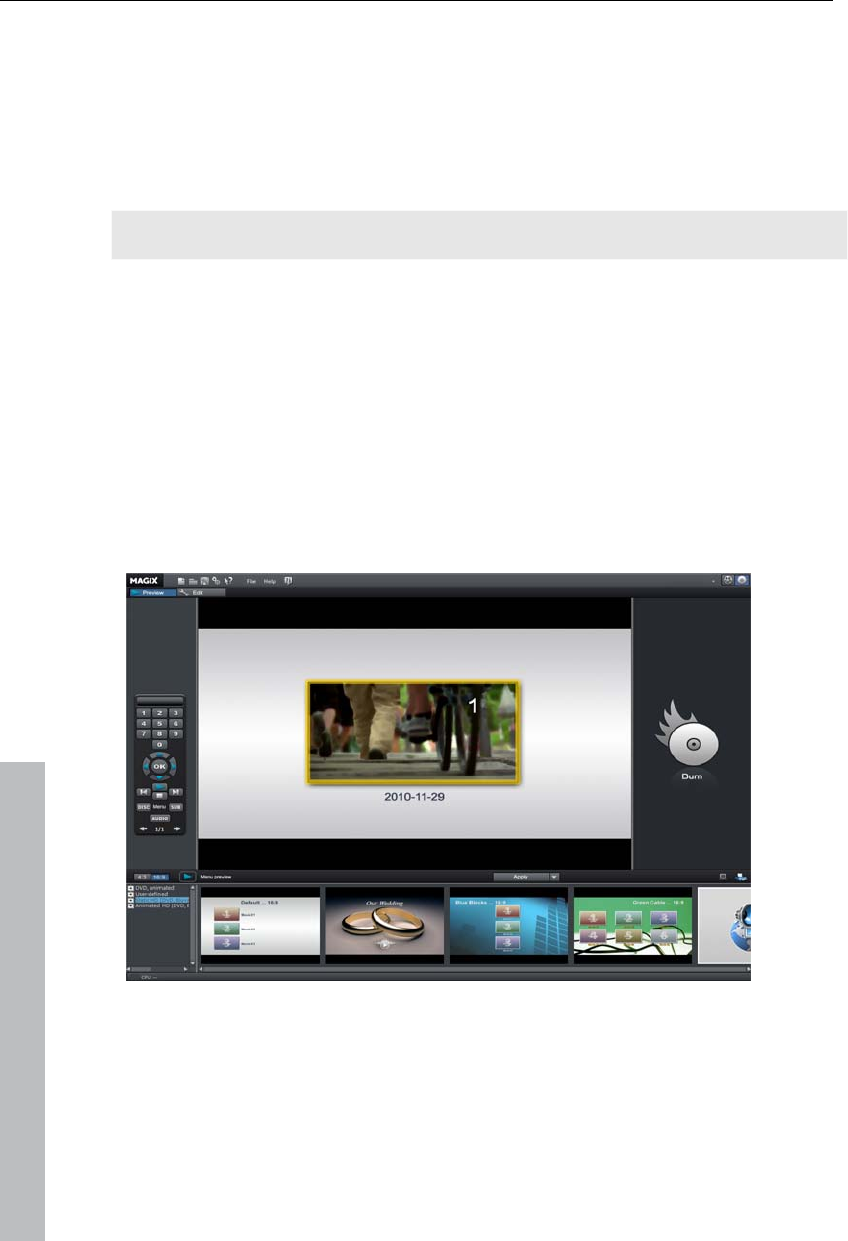
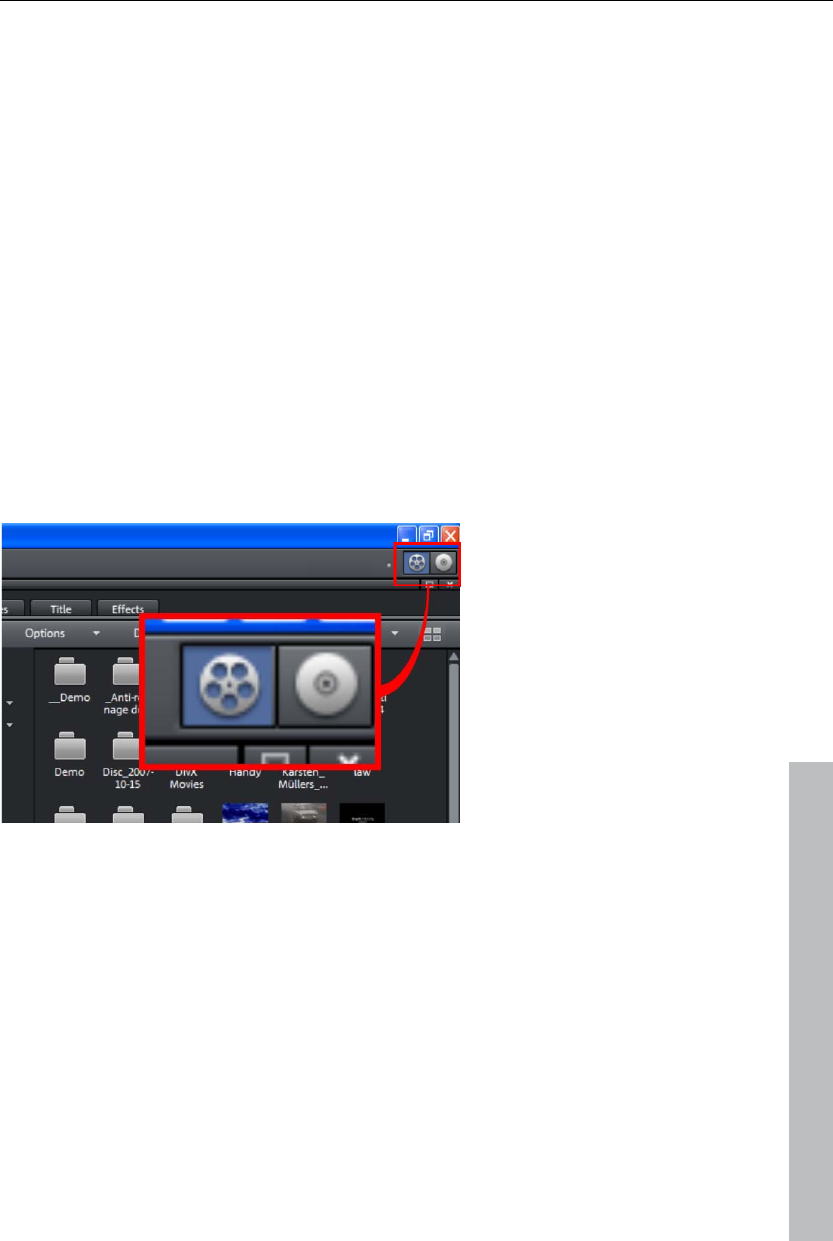
You can switch to the "Burn" screen by pressing the corresponding button at
the top right.
The "Burn" screen has two views: "Preview" and "Edit". The "Preview"
screen provides fast loading for a menu template followed by burning. More
detailed editing such as activation/deactivation of menu entries, creation of
new menu pages, or individualization of templates takes place via the "Edit"
screen.
Once the menu is finished, you may burn a disc to watch via your player.
www.magix.com
Workspaces 35
Export video as file
Besides burning the project, it may also be exported as a video file. When
exporting the file, the entire arrangement is combined as a single file that
may be saved to any folder on the hard drive. The available export formats
are listed in the menu "File -> Export film".
In order to load a video onto the Internet, the menu item "File -> Internet"
provides a direct connection to MAGIX Online Album and the Internet
portals YouTube®, Vimeo, and Facebook® .
Workspaces
This chapter will provide an overview of the screens that are available in
MAGIX Video Pro X3. Detailed explanations about the individual elements
are located further on in the manual.
Activate main screen
www.magix.com
MAGIX Video Pro X3 contains two views where all work is executed:
The "Edit" screen is the main view. Load the videos here and edit them in a
project window.
The "Burn" screen is a special view for burning discs. This especially
involves design on a selection menu, for example as used by DVDs and
other storage devices.
The above right allows you to switch between these screens.
36 Workspaces
"Edit" screen
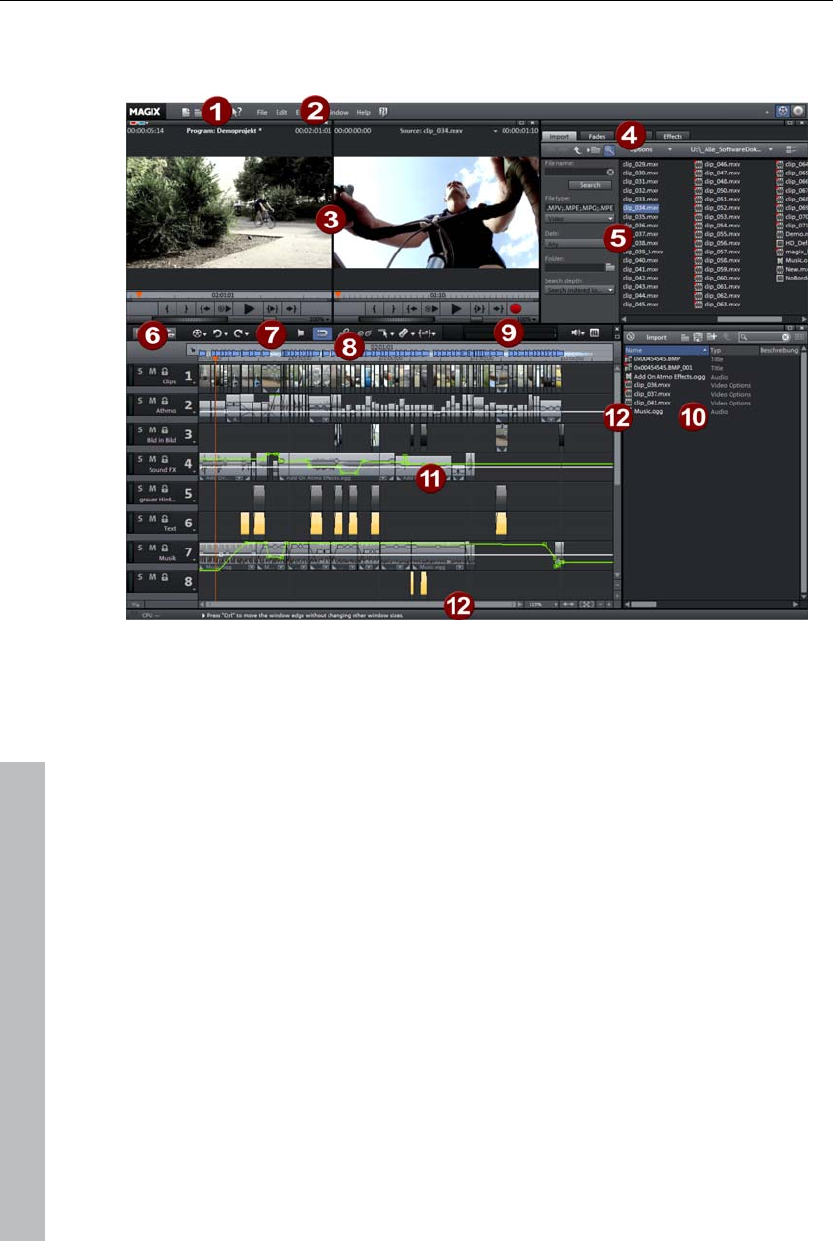
1 Upper toolbar (view page 43): These buttons are useful for quickly
accessing important commands.
2 Menu bar: This contains important MAGIX Video Pro X3 functions.
3 Program and source monitor (view page 51): Preview video and picture
objects here.
4 Templates: Find the folders for transitions, titles, effects, and pans here.
To preview a template, simply click on it.
5 Media Pool (view page 37): Load your photos and other media files via
the Media Pool. Use the navigation buttons to access any drive or folder
on your PC.
6 Buttons for overview and multicam mode: These switch to "Overview"
mode. Overview mode displays all of the objects on the first track and
enables quick sorting of scenes. The right button activates "Multicam"
mode.
7 Lower toolbar (view page 44): Select "Timeline" mode or various different
mouse modes for diverse editing functions.
8 Timeline: Defines the playback range. This also features a scaled
timeline.
9 Peak meter: The peak meter shows the sum of the current sound track's
volume.
10 Project folder (view page 57): Provides all of the collected files needed for
the project.
www.magix.com
Workspaces 37
11 Arranger (view page 54): All files may be dragged from the Media Pool or
the project folder to the track via drag & drop.
12 Scroll bars: The lower scroll bars may be dragged apart and pushed
together for zooming with the mouse. The right scroll bar zooms
vertically into the tracks. Click on the edge of the scroll bars with the
mouse button held down to change the visible window in the arranger.
Note: Various screen elements are only available via MAGIX Video Pro X3's
basic settings ("File -> Settings -> Basic settings").
Media Pool
The structure and workflow of the Media Pool is similar to that featured by
Windows Explorer; however, the difference is that only the used files are
displayed. This is used to access and load multimedia files of all kinds:
video files, audio files, fades, effects, and also complete projects.
www.magix.com
Preview function
A preview function for all of the files in the Media Pool can be started by
double-clicking or by pressing the playback button on the source monitor.
The transport control function in the source monitor allows you to select
sections from a longer video file in the Media Pool and load them. Please
refer to the chapter "Inserting objects into the project (view page 51)".
38 Workspaces
Importing
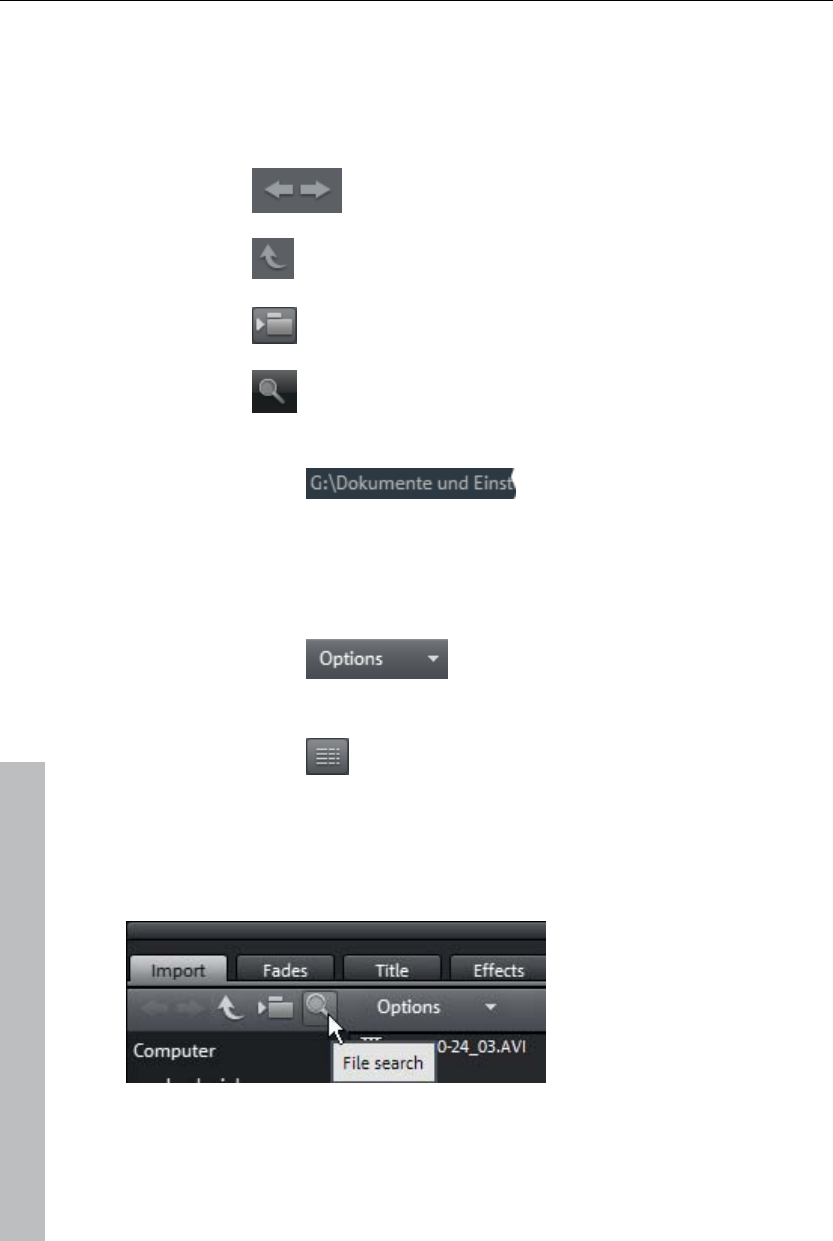
Navigation buttons
The navigation buttons let you navigate through your computer’s drives and
folders.
Forwards/
back
These buttons access the previously viewed
folders.
Up This button accesses the next highest folder level.
Folder tree This activates a folder tree to navigate through
your computer system.
Search The search function allows you to find specific
files quickly. You may specify your search
according to file type, date, or certain folders.
Browse history list
and path details The path information for the
current folder is displayed in
the center above. Use the
arrow button to open the menu
to find the folders you
previously visited.
Options All functions of the context menu (switch
views, rename, or delete files, etc.) can
also be accessed via the options button.
Display options Settings for how detailed the entries should be
listed may be made here.
Search
The Media Pool has an easy search function for finding files on the
computer. It may be activated and turned off again with the shown button.
File name: Enter any part of the name of the file you are looking for in the
"File name" field. The X symbol deletes the entry. A "?" may be used as a
placeholder for a single character, and "*" for any number of characters.
www.magix.com

Workspaces 39
www.magix.com
File type: Here you can enter a file name extension. Multiple entries are
separated using a semicolon. Below the entry field, various presets may be
selected for often-used file name extensions.
Date: Here, you can set time period limits on your search. Choose an entry
from the list.
Folder: If you don't want to search the entire computer, but only look on
certain drives or in a single folder, you can define a certain search path.
Search depth: Here you have various options that determine whether
additional locations should be searched.
Search indexed locations and the selected folder
Search indexed locations, the selected folder and personal files.
Search indexed locations, the selected folder, personal files and the project
file.
"Indexed locations" are folders, which are searched and cataloged in
Windows via the index list. If the index list is activated, the files in the
indicated folders will be indexed while the computer is idling, so that the
user's search query may be completed faster.
Note: In Microsoft Windows XP, the indexing service is usually deactivated
by default. The search functions in Windows Vista® may be installed with
the current version of "Windows Search". They make it possible to easily
add to the indexing service. Please refer to the installation instructions from
Microsoft.
Computer
The link button "Computer" displays the drives in the Media Pool. All drives
will be listed along with their drive letters and can be opened with a double
click.
User directory
The second button featuring the user's name opens their personal folder in
the Media Pool.
My media
The "My media" button lets you select "Projects", "My videos", "My music",
"My images", and "Recordings".
Projects
Switches to the folder where your projects and videos are usually stored.

40 Workspaces
www.magix.com
My videos
Displays all usable files found in "My documents\My videos."
My music
Displays the contents of the "My Documents\My Music" folder. MAGIX
Music Manager also suggests this folder for importing your music collection
into the database.
Slideshow music: This features the music that is included for dubbing.
My pictures
Switches to the "My documents\My pictures" folder. This folder is often used
by digital cameras and scanners to store transferred images by default. The
included MAGIX Photo Manager program also uses this folder (e.g. during
image import).
Recordings: MAGIX Video Pro X3 specifies standards for all recordings.
MAGIX tools
The "MAGIX tools" link selects links to "Downloads", "Database", "Online
Album", and "Internet Media".
Downloads: Use this button to access the media files that you downloaded
with Catooh.
Database: Use this button to open the database view. Right-clicking opens
the database search. The database first has to be created using the
supplied additional program, MAGIX Photo Manager.
Online Album: This buttons opens MAGIX Online Album. This provides a
shortcut to uploading and deleting data. To do this, you must first register
on MAGIX Online Album.
There are many ways to upload data:
1. While holding "Ctrl" down, select the data to be uploaded in the Media
Pool, and select "Copy" in the context menu (opened by right-clicking).
Switch to the MAGIX Online Album screen, open the desired folder, and
select "Paste" in the context menu.
2. In the Media Pool, click on "Online Album", and go to the desired
directory. Open the Windows Explorer, select the desired data with "Ctrl"
held down, and drag it into the Media Pool.
Both options will result in your desired data being uploaded to your MAGIX
Online Album.

Workspaces 41
www.magix.com
Hint: This function requires an Internet connection. To gain access, make
sure you have your login information (email address and password) ready.
Internet media: This opens MAGIX Video Pro X3's integrated browser (view
page 324). It offers you the possibility to collect media from the Internet to
use in the current project.
Fades
This features all fades sorted into the various categories. One click on a
category displays all of the blends that are contained.
To load a fade, click it and drag it onto the object that should be faded into.
Alternatively, you may select the object that you would like to fade into and
double-click on Fade in the Media Pool.
Title
This displays the title settings and the title editor (view page 113). These
presets are sorted into different categories and may be loaded by double-
clicking or drag & drop. The 3D title templates are also located here.
The text featured by title objects may be changed directly in the program
monitor by double-clicking.
Effects
This provides access to the effects that are sorted into the various
categories. Read more about this in the chapter "Effects (view page 116)".
Video effects
These are the various effects which can be applied to videos and stills. The
effects can be set after an object is selected in the respective effects dialog
which appears. For more information, see the "Video effects in the Media
Pool (view page 119)" chapter.
Movement effects
These are movement effects you can use to animate the frame by using
zoom or camera movements. For more information, go to the "Effects and
titles" chapter in "Movement effects in Media Pool (view page 129)".
Audio effects
In addition to many different audio effects presets (echo, reverb, equalizer,
compressor, etc.), you can also use the included synthesizer. A synthesizer
can be dragged onto the arranger like a multimedia file. It will be displayed
as a synth object. Use the corresponding control console to edit the synth
42 Workspaces
sounds and melodies. The control console opens automatically when the
synthesizer is dragged onto the arrangement for the first time. A synth
object can be opened for further editing later by double clicking.
Design elements
Multi picture-in-picture: These are various effects presets for image stacking.
Collages: These work similarly to normal picture-in-picture effects, but more
objects are used. Depending on the collage, arrange the selected objects
one after the other and drag the collage onto the first object.
Portrait effects: Select individual effects which are especially suited to
vertically formatted photos.
Image objects: These are various image objects like black bars, thought
bubbles for cartoons, etc.
Intros/Outros: These are beginning and end scenes for films with various
themes.
Visuals: Graphical displays of any played sounds which can be combined
with other video material.
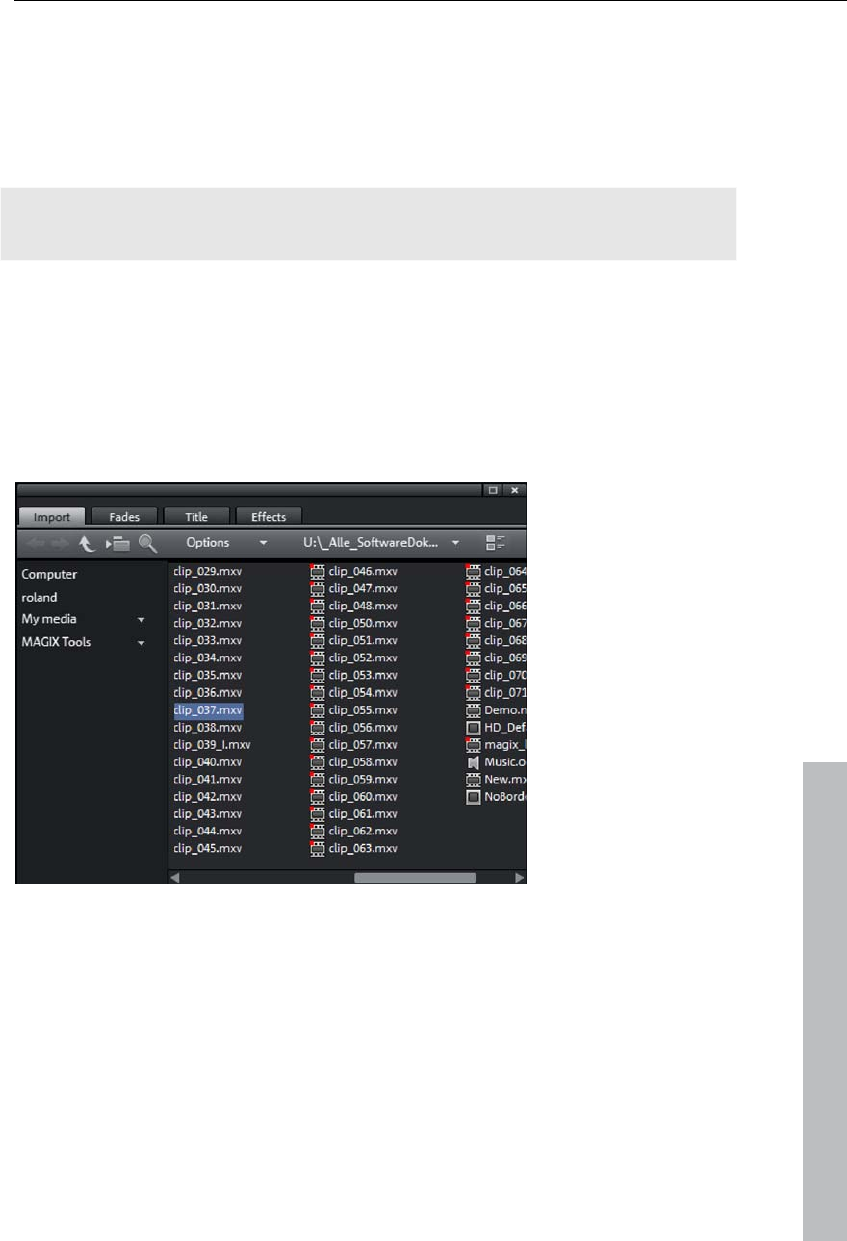
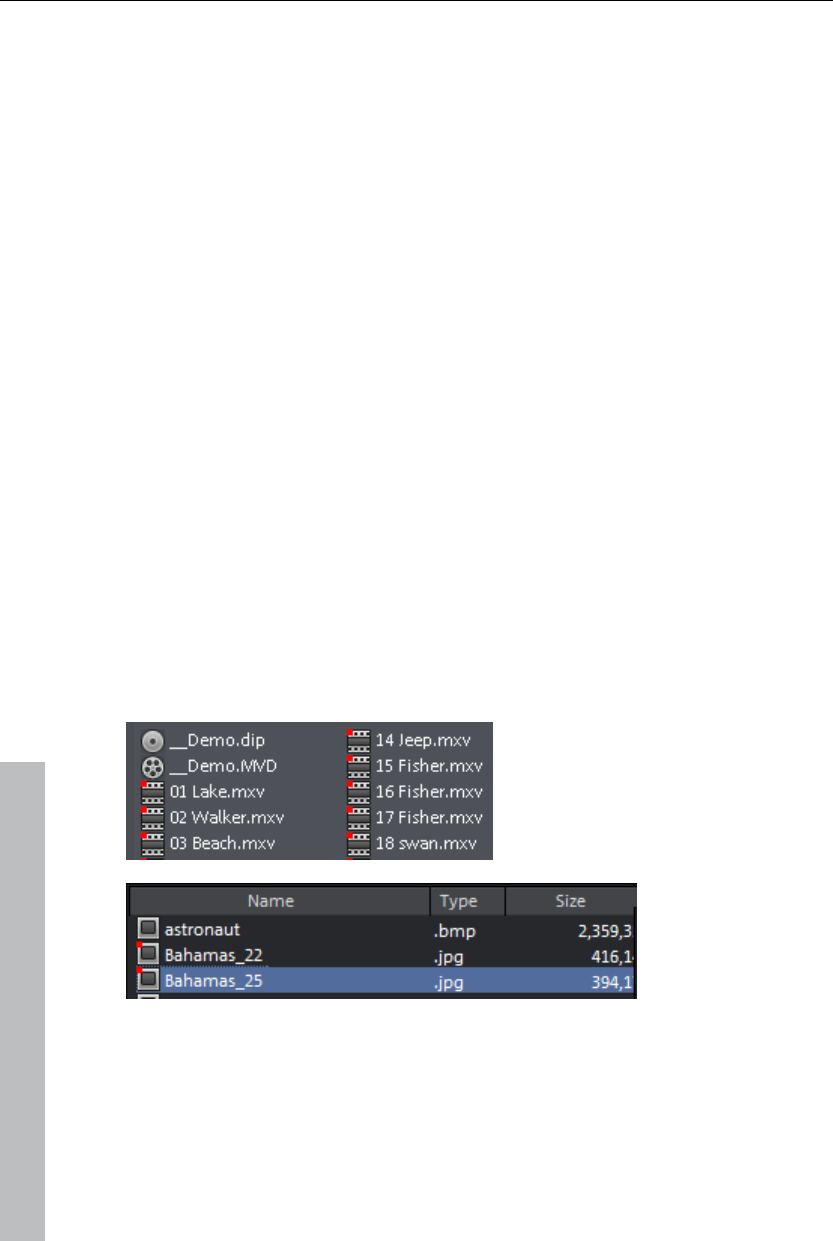
Various file list view modes
In the file list, all of the supported multimedia files and subfolders of the
currently selected folder are displayed. Three different views (list, detail,
large symbols) can be set by right clicking on the Media Pool context menu.
List: Only file
names are listed.
This view mode
displays the most
files
simultaneously.
Details: In the
details section the
type, size, and date
of modification are
shown for every
media file beside its
name. The list can
be sorted by
clicking on any of
these details.
www.magix.com
Workspaces 43
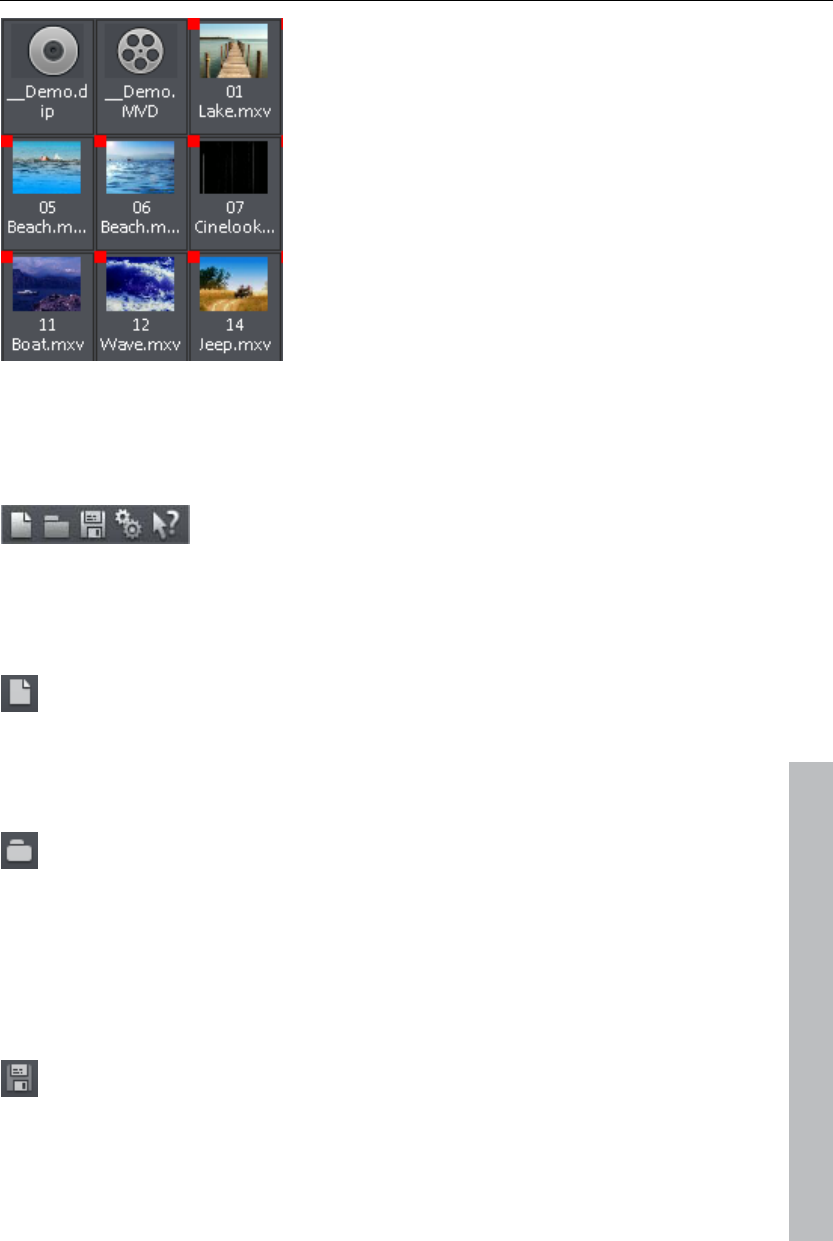
Large icons can be quite useful because they
show a preview frame for each movie and
picture file. This allows you to sort through
the material quicker. One disadvantage is
that it takes longer for the file list to be
displayed.
Toolbars
Upper button bar
The upper button bar can be found in the monitor to the top left. It has the
following functions:
New project
Creates a new MAGIX Video Pro X3 project. A dialog with settings for
a new disc project or a new film (view page 266) opens to get started.
www.magix.com
Keyboard shortcut: Shift + N
Load project
With this option you can load a project or a media file. Please note
that all media files associated with it must be loaded along with a
project. MAGIX Video Pro X3 will search for all used sounds and video
files in the folders in which they were located when the move was
saved.
Keyboard shortcut: Ctrl + O
Save project
The current movie is saved with the name displayed in the project
window. If you have not yet specified a name for your project, a dialog
will open wherein MAGIX Video Pro X3 asks you to do so.
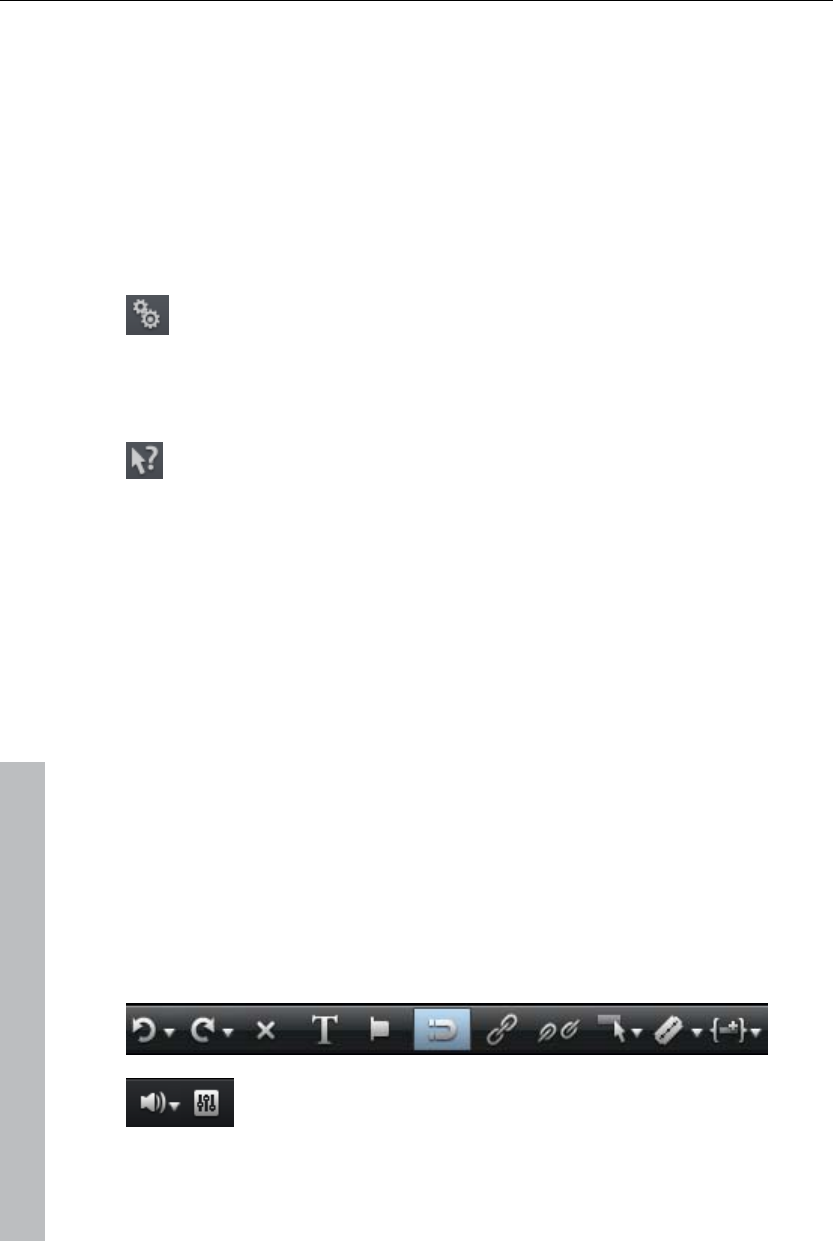
44 Workspaces
Please note: In the project file (*.MVP), all information about the used media
files, cuts, effects, and titles are saved, but not the picture and sound
material itself. This is found in the recorded or imported media files that
remain unchanged during the entire MAGIX Video Pro X3 editing process.
To save the full movie into a dedicated directory, for instance to continue
editing on a different PC, please use the command "Copy movie and media
into directory".
Keyboard shortcut: Ctrl + S
Program settings
Opens the program settings (view page 267).
Keyboard shortcut: Y
Context help
By choosing the context help entry from the "Help" menu, or by
clicking on the button in the top toolbar, the mouse cursor will turn into
an arrow with a question mark.
Then, when you click on any button of the main screen, program help
describing the control element in question will open.
Keyboard shortcut: Alt + F1
MAGIX News Center
The MAGIX News Center features links to current online tutorials and tips &
tricks on the software application examples. The "News" is indicated by
color according to content:
Green indicates practical tips & tricks for the software
Yellow reports the availability of new patches and updates
Red for special offers, contests and questionnaires
If no new messages are present, the button will appear gray. When the
MAGIX News Center is clicked, all of the available information will be
displayed. Click the messages to reach the corresponding website.
Lower toolbar
The following buttons are available:
www.magix.com
Workspaces 45
Select a movie to edit
Using the dropdown menu, you can control various movies within a
project.
Undo
With this command you can undo the last changes you made. This
way, it's no problem if you want to try out critical operations. If you
don't like the result, then you can always revert to the previous state
by using "Undo".
Clicking on the arrow next to the button opens a list of changes made until
now, allowing you to undo several changes made in sequence.
Note: You can adjust the length of the list to your needs in program settings
(view page 267). In general: The longer the list, the more RAM is used.
Keyboard shortcut: Ctrl + Z
Redo
This function undoes the previous "Undo" function.
Clicking on the arrow next to the button opens a list of changes made until
now, allowing you to undo several changes made in sequence.
www.magix.com
Note: You can adjust the length of the list to your needs in program settings
(view page 267). In general: The longer the list, the more RAM is used.
Keyboard shortcut: Shift + Y
Delete items
This command deletes the selected objects.
Shortcut: Del
Title editor
Opens the Title editor (More Informationen can be found in the section
"Title editor" on page 113) for the selected photo, video, or title object.
Keyboard shortcut: Ctrl + T
46 Workspaces
Set chapter marker
Places a chapter marker at the position of the playback marker. This
creates a chapter entry in the disc menu in case the movie is being
burned to disc.
You can rename the chapter markers by right clicking and selecting
"Rename". The new name will appear in the chapter menu (view page 201).
Shortcut: Shift + enter
Object grid
Use this button to switch the object grid on and off. When the object
grid is switched on, the objects snap into place beside one another so
that everything fits in seamlessly.
Form group
Orders all selected objects into groups. As soon as an object from
the group is selected, all other objects in the group will be highlighted
as well so that you can work on them collectively.
Keyboard shortcut: Ctrl + L
Ungroup objects
This turns all selected objects into free-standing objects again.
Keyboard shortcut: Ctrl + M
Mouse modes
MAGIX Video Pro X3 offers special mouse modes for different kinds
of editing. These may be selected using the small arrow next to the
button.
Mouse mode for individual objects
This is the preset mouse mode where most work is performed.
Select objects by left-clicking them. You can move an object by holding
down the mouse over it while dragging it to the desired position.
Keyboard shortcut: Alt + 1
All tracks
This mouse mode behaves similar to "Object" mouse mode.
www.magix.com

Workspaces 47
During movement of objects, all of these will be moved behind the selected
object. The complete background component of the arrangement, i.e. all
objects and gaps on all tracks, will therefore be maintained during any
movement.
This is practical in order to move a complete arrangement, e. g. to insert
new opening credits or to close gaps.
Shortcut: Alt + 2
One track
This mouse mode behaves similar to the mouse mode "All tracks".
When moving objects, only those objects will be moved that are located on
the same track behind the selected object.
Shortcut: 8
Curve mouse mode
This mouse mode is used especially for drawing effects curves.
The effects curve controls the intensity of the effect: The more higher the
curve point, the more intense the respective effects parameter at this
location. The curves can be used for video and image objects on the image
tracks and also for audio objects on the audio tracks.
More information about this can be found in the chapter "Animate objects",
section "Editing object effects curves".
www.magix.com
Keyboard shortcut: Alt + 3
Stretch mouse mode
This special mode is for customizing the length of objects.
With timestretching, audio objects can be expanded or compressed using
the handles at the bottom. The duration of the audio material is therefore
lengthened without changing the pitch. Playback of the video objects is
accelerated/decelerated with the help of the handles at the bottom.
Warning! If the object to be stretched or compressed is going to be animated
with an effects curve, then the option "Connect curve length with object
length (view page 149)" should be set for the effects curve.
Keyboard shortcut: Alt + 4
48 Workspaces
Preview audio
This mode
button i
allows you to preview audio objects (as long as the mouse
s held down).
In th
Pro X3 provides various options for how an object selected in
pasted into the project.
is mode, objects cannot be moved or changed.
Keyboard shortcut: Alt + 5
Paste modes
MAGIX Video
the Media Pool can be
Apply automatically
Pastes the
and image
file selected in the Media Pool into the arranger. Video
objects will always be placed behind the last object into
Single-track ripple
the first track; audio and text objects are separated into different
tracks.
marker an
Inserts an object from the Media Pool at the position of the playback
d simultaneously moves the objects on the track following
The le-track ripple behaves similarly to the intelligent ripple, the
difference is that only the objects on the target track are moved. Bordering
on, then it will be cut continued at the end of the
it.
sing
tracks are unchanged.
In contrast to automatic insertion, all objects will be inserted at the position
of the playback marker.
Videos and images are placed on the first track. If another object is found at
the playback marker positi
inserted object (so that the inserted object can start exactly at the point of
insertion).
Objects lying further along the track will be moved further down.
Multitrack ripple
track at
The object selected in the Media Pool will be inserted on the target
the position of the playback marker. All objects found at the
The ple behaves similarly to the intelligent ripple, but the
difference is that all objects on all tracks following the playback marker's
n
playback marker position will be split and moved down the length of
the inserted object. All objects on the track located further on will also
be moved.
multitrack rip
position will be moved.
In contrast to automatic insertion, all objects will be inserted at the positio
of the playback marker.
www.magix.com

Workspaces 49
www.magix.com
ition, then it will be cut continued at the end of the
d and moved further along the track.
Videos and images are placed on the first track. If another object is found at
the playback marker pos
inserted object (so that the inserted object can start exactly at the point of
insertion).
If other objects are located at the playback marker position, these will also
be separate
Objects lying further along on all tracks will be moved further down.
Replace
Po
Replaces the selected object with an object selected in the Media
ol.
verwrite O
Ov
ma
erwrites the object in the target track at the position of the start
rker with the object selected in the Media Pool.
Hint: I place. With n contrast to "Replace", no length adjustment takes
"Replace", any downstream objects are moved, while "Overwrite" overwrites
downstream objects as well (sometimes only partially), depending on the
length of the object being inserted in comparison to the object being
overwritten.
Cut button
You can access the individual options using the dropdown menu.
Split
This command cuts a scene at the point where the playback marker is
positioned. This way, two free-standing objects are created.
Keyboard shortcut: T
Remove start
This comma
is pos
nd cuts a scene at the point where the playback marker
itioned and removes the material before the playback marker.
Keyboard shortcut: K
50 Workspaces
Remove end
This command cuts a scene at the playback marker
position and removes the material behind the back
marker.
Shortcut: U
Hint: If the commands "Split" and "Remove beginning/end" are applied
without a selection, all objects at the position of the playback marker are
cut.
Remove scene
This command allows you to completely remove selected objects.
The parts that follow will be automatically moved to the end of the
object in front of the object to be removed.
Shortcut: Ctrl + Del
Split movie
Splits the movie at the playback marker position into two sections
within one project. These can be individually controlled using the
"Window" menu or the button "Select movie for editing" (see above).
Keyboard shortcut: Alt + W
Mute button
This button mutes the sound output. Clicking the triangle provides
selection of the audio track for multi-audio tracks
Mixer
This option allows you to display or conceal the real-time mixer. You
will find further information, especially with regard to the integration of
effects plug-ins, in the chapter "Mixer".
Keyboard shortcut: M
www.magix.com
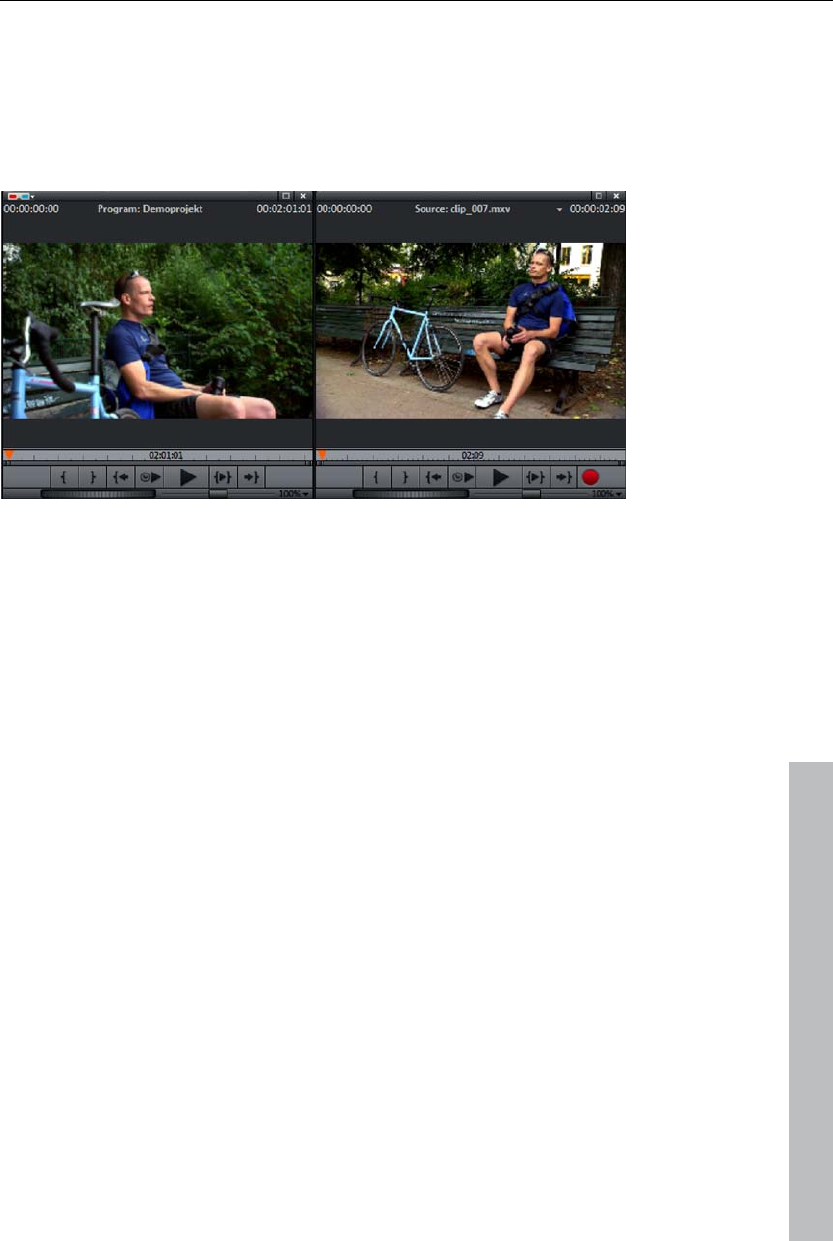
Workspaces 51
Program and source monitor
MAGIX Video Pro X3 features two video monitors: a program monitor for
object image output in the arranger and a source monitor for previewing
files in the Media Pool or project folder.
Time code
The time display may be displayed via the context menu in the program
monitor. Select the entry "Display play duration". This displays the current
position of the playback marker. The context menu also provides selection
of the foreground color, background color, and transparency.
If the time code is activated, it will be calculated into the video that is
exported. This also applies when burning a disc.
www.magix.com
Setting up the preview monitor
The program and source monitors may be set up variably:
You can adjust the size of each of the monitors. This can be accomplished
by clicking the screen with the right mouse button and selecting the desired
size from the context menu, either from the presets submenu or self-
defined ("Other resolution").
You may also position both of the monitors freely. Click on the top bar of
the monitor window and drag it down to any position you want. This may be
a separate monitor, for example, where you may maximize the window.
The option "Display playing time" displays a large time countdown in the
program monitor. This displays the current position of the playback marker.
The foreground and background colors as well as the transparency may be
adjusted via the context menu.

52 Workspaces
www.magix.com
Tip: Useful presets for the arranger and video monitor are provided via the
tab "Display presets (view page 273)" in the program settings.
Fullscreen view
The option "Video monitor fullscreen" in the context menu maximizes the
monitors. Alternatively, simply double-click on one of either monitors or
select the desired monitor by clicking it and then press "Alt + Enter".
You can also shift the monitor into full screen mode and access it via the
context menu (right mouse button). There, you can also hide and display the
basic transport controls.
"Esc" returns to the normal view (or click on "smaller" button to the right in
the fullscreen mode).
Film overview
The option "Film overview" in the "Window" menu enables an overview of
the entire Arranger. All objects in the Arranger will be displayed in the
program monitor. The overview display is especially recommended for work
with long movies because the reduced overview in the program monitor and
the zoomed detailed view in the Arranger present a good combination.
The film overview can be used for moving around in the movie and for
editing certain parts:
When you click on a certain object in the program monitor, the Arranger will
zoom into that object.
You can use the mouse to draw a frame in the preview monitor – the
corresponding section will be zoomed in the Arranger.
When you move the playback marker in the program monitor, the Arranger
playback marker will also move correspondingly.
Tip: If you use this option very often, then try using the corresponding
keyboard shortcut ("Shift + A").
Monitor zoom
The preview images of both monitors may be zoomed in and out to examine
specific details in the image more closely (zoom in) or to reduce the image
so that black edges result for use of animations (view page 151).
Click on the preview monitor and zoom out of the video image by holding
down "Ctrl" and using mouse wheel.
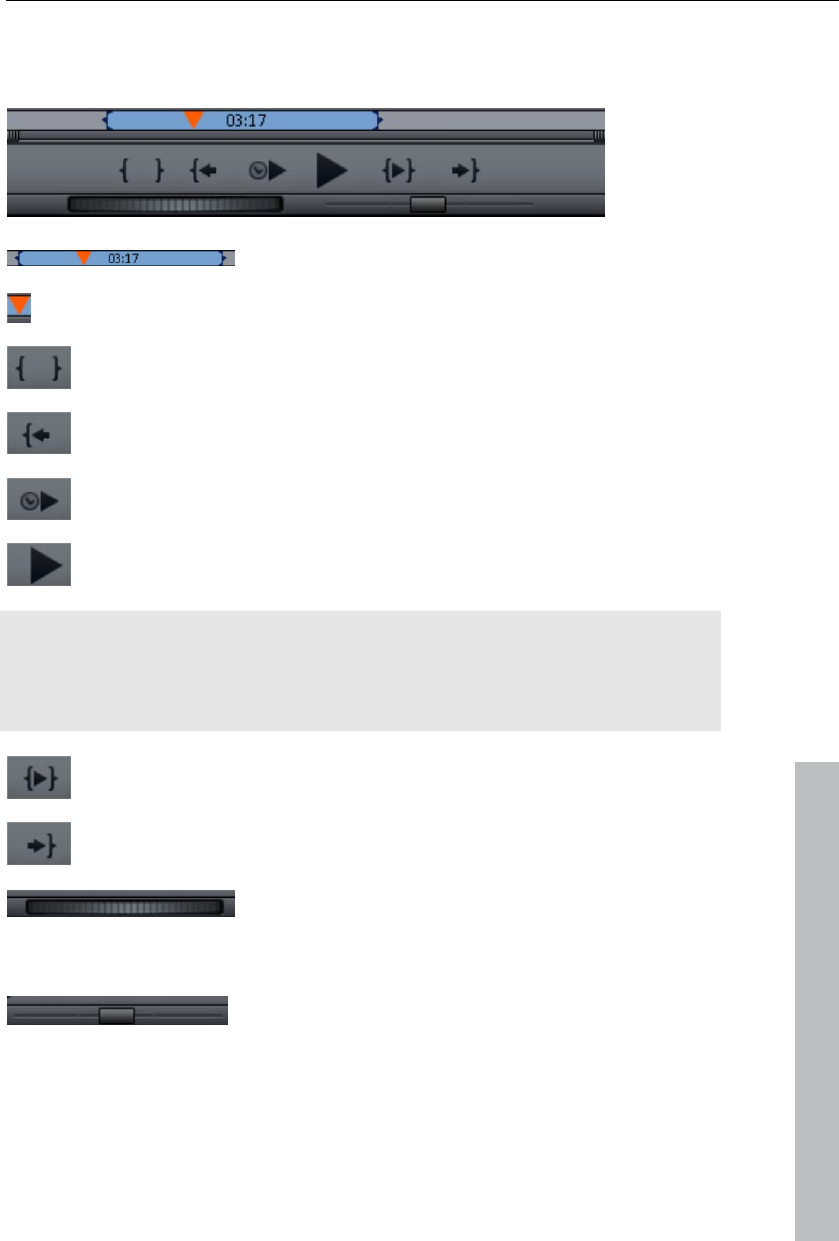
Workspaces 53
Transport control
Both transport controls enable the video material to be played back.
Range: Change the range between the in and out
points by clicking above the playback functions.
www.magix.com
Playback marker: This marker indicates the location of the image
currently displayed on-screen.
Set in/out points: Defines the start and end of the playback range.
To the start: This button sets the playback marker to the start of the
current area.
Playback by a frame: This button sets the playback marker just
behind the current frame and plays it back.
Play/stop (pause): The playback button in the middle starts
playback. A second click ends playback.
Tip: In the menu "File -> Settings -> Program -> Playback", you can set
whether the playback marker will go back to the start position (stop) after the
second click or following the appropriate shortcut (space bar), or if it should
stay at the current position (pause function).
Range playback: This button plays back the current range.
To the end: This button sets the playback marker to the end of the
current range.
Jog wheel: Using this wheel, you can move by
single frames within the video and position the
playback marker exactly at high zoom levels.
Shuttle control: The further the slider control is
moved to the side, the quicker the arrangement is
played in the corresponding direction. This way a
certain position can be reached quickly.
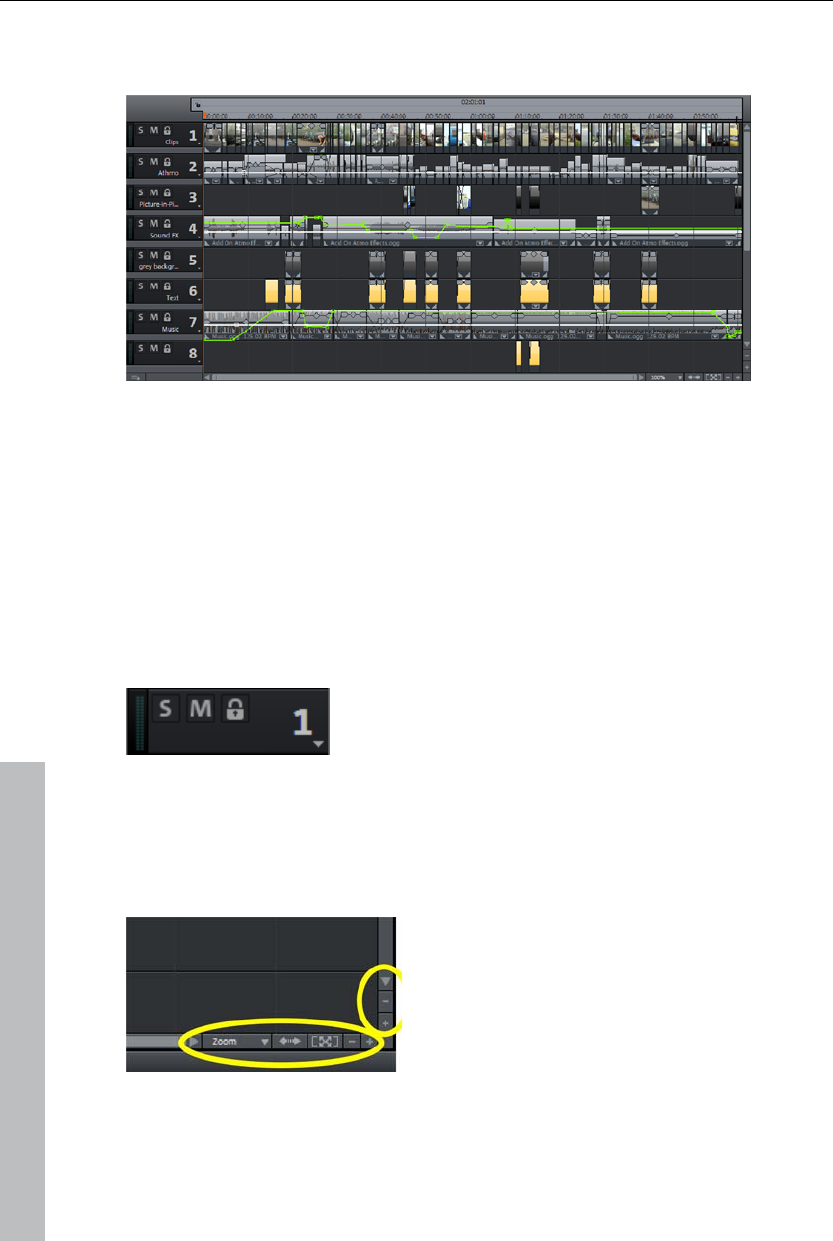
54 Workspaces
Arranger
The arranger offers a professional editing screen for post-production.
Tracks
The arranger offers tracks for multimedia material positioning and editing.
The number of tracks displayed may be specified in the file menu under
"Movie settings".
In principle, any object type may be placed on any of the tracks. Video and
image objects may also be combined with MIDI and audio objects on any of
these tracks. The maximum length of a movie is restricted to 6 hours.
At the beginning of each track is a track box where
you can mute a single audio track with the Mute
button or play them Solo.
Clicking the lock symbol protects all objects in a track against unwanted
editing. The track name can be changed by double-clicking on the text
above the buttons.
Zooming
The vertical zoom function sets the number of
visible tracks. For a lot of tracks, enlarging
the view (zooming) is sensible for editing a
single track or object.
Use the horizontal zoom functions to set up the visible section of the
arrangement on the timeline.
www.magix.com
Workspaces 55
Object zoom: Vertical and horizontal zoom stages are enlarged so
that all of the selected objects are displayed at maximum size.
When the function is shut off, the old zoom level will reactivate.
Multiple sound tracks
MAGIX Video Pro X3 offers up to eight multi sound tracks, e.g. to include
different audio streams on a single disc. An example of application might be
the creation of multilingual discs.
This kind of audio stream is assigned via the track box's context menu;
select "DVD audio track 1" - "DVD audio track 8". Every multi sound track
can be clearly named via the "Rename DVD audio track" entry in the
context menu.
Scrolling
The scroll bars serve to navigate in the arrangement. This enables the
visible section of the arranger to be moved.
The zoom level may be changed via the horizontal scroll bar by clicking the
bar's edge and dragging.
www.magix.com
The mouse wheel also enables horizontal and vertical scrolling. If the
mouse cursor is over the vertical scroll bar, scrolling will be vertical. If the
mouse cursor is over a horizontal scroll bar or in the arrangement, scrolling
will be horizontal.
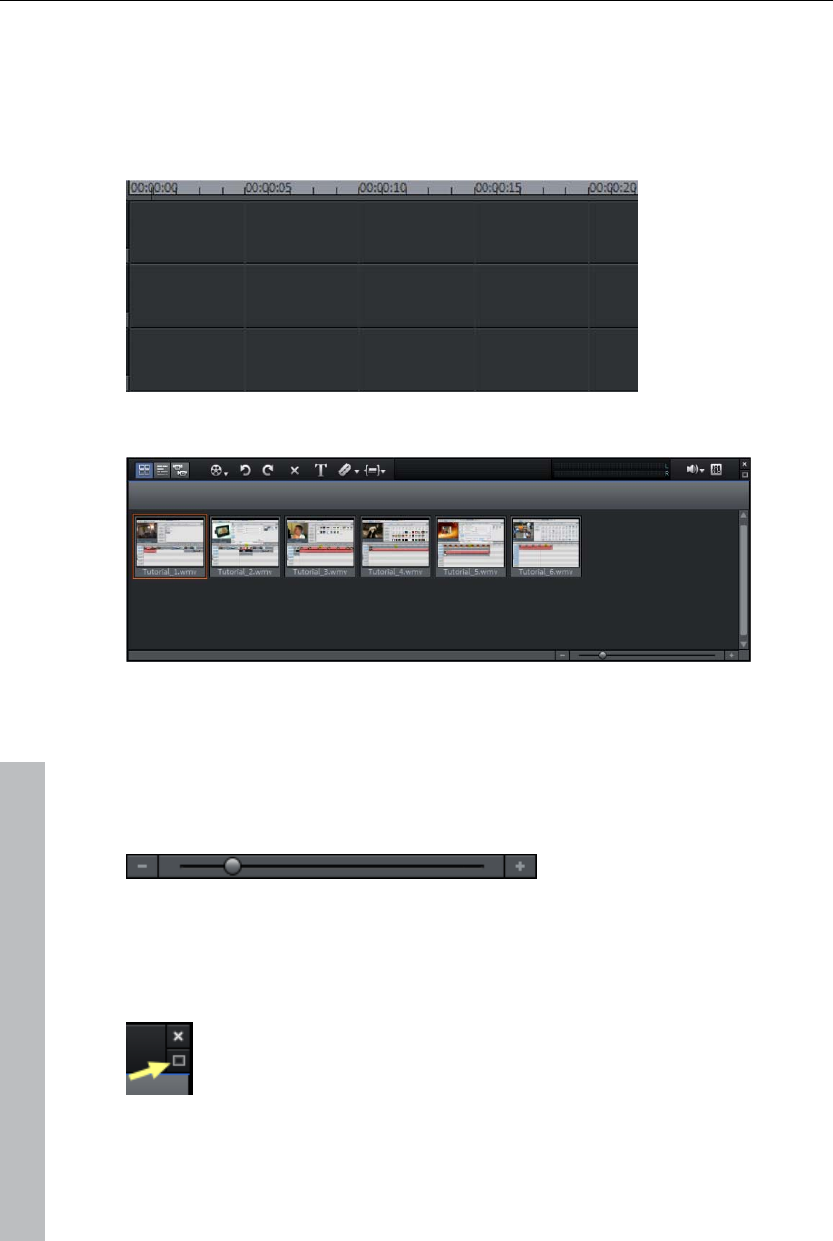
56 Workspaces
Show grid
The temporal stretching of the arrangements is displayed by the horizontal
spread of the tracks. To divide this display, a timeline featuring a grid is
displayed above the first track. This includes time increments in the units
(hours:) minutes: seconds: frames.
Overview mode
"Scenes overview" mode special display lists the arrangement of scenes. All
scenes are listed one after the other (in multiple lines, like in a text program)
and may be copied, cut, moved, deleted, and inserted.
"Overview" mode does not indicate start, playback, or end markers. The
scene that is being played features a frame.
The zoom slider enables the
view to be enlarged or
reduced.
This controller also specifies how many scenes are displayed. The smaller
the preview pictures, the more will fit onto the overview.
Maximize: Use this button to maximize the scene overview to
fullscreen.
www.magix.com
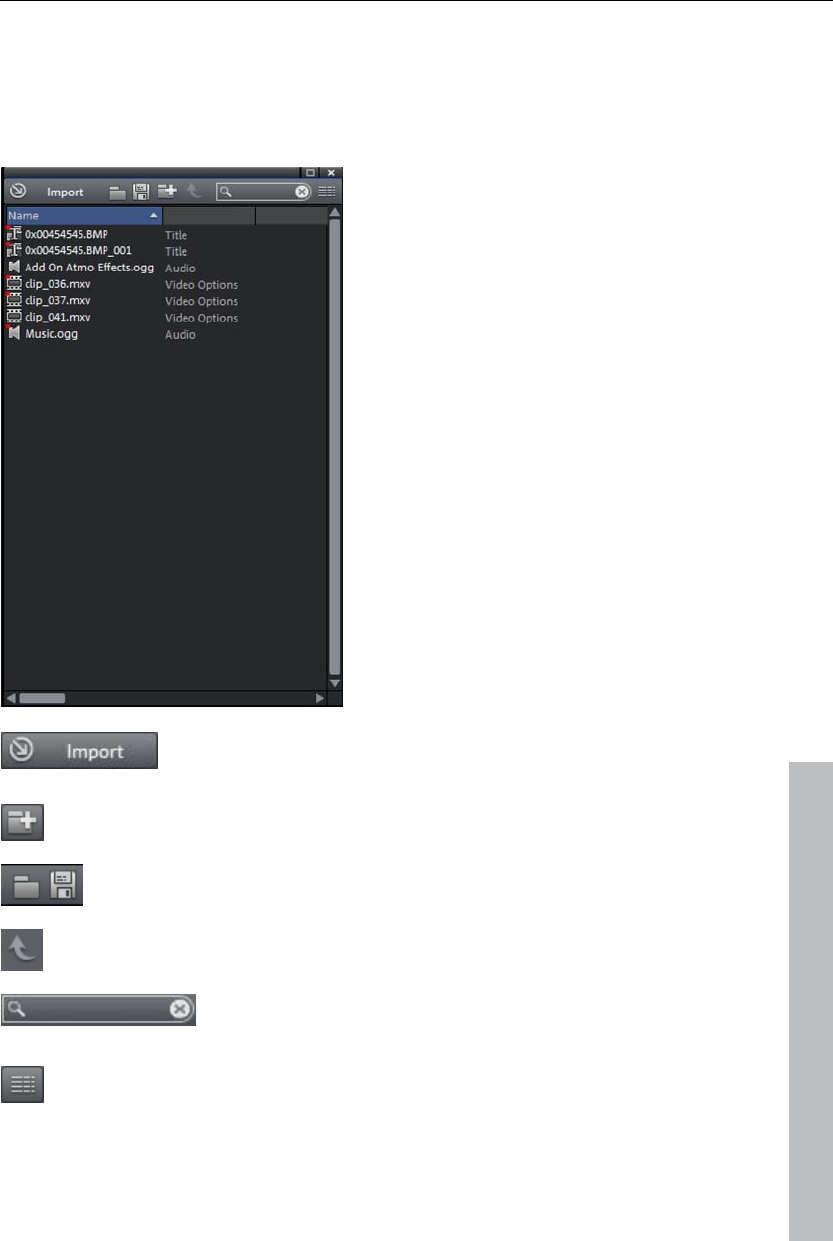
Workspaces 57
Project folder
The project folder may be considered an intermediate store for files or
objects.
The possible applications in this
case are diverse:
Material storage: Interesting files
from the Media Pool may be
combined in the project folder to
load them from there into the
project.
Cutting: You may cut different
sections from longer videos in the
project folder in order to use them
as separate objects in the
arrangement.
Exchange: You may move finished
objects from the arranger into the
project folder in order to use them
in other projects.
www.magix.com
As an alternative to drag & drop via the Media Pool,
this dialog enables a file to be loaded into the project
folder.
This adds a virtual folder to the project folder. Folders
cannot be created within folders.
Save or load the contents of the entire project here in
order to use it in other projects.
This button accesses the next highest folder level.
Search field: MAGIX Video Pro X3 searches through
all file names in the project folder for the text entered
and then lists the results.
Settings for how detailed the entries in the project
folder should be listed may be made here.
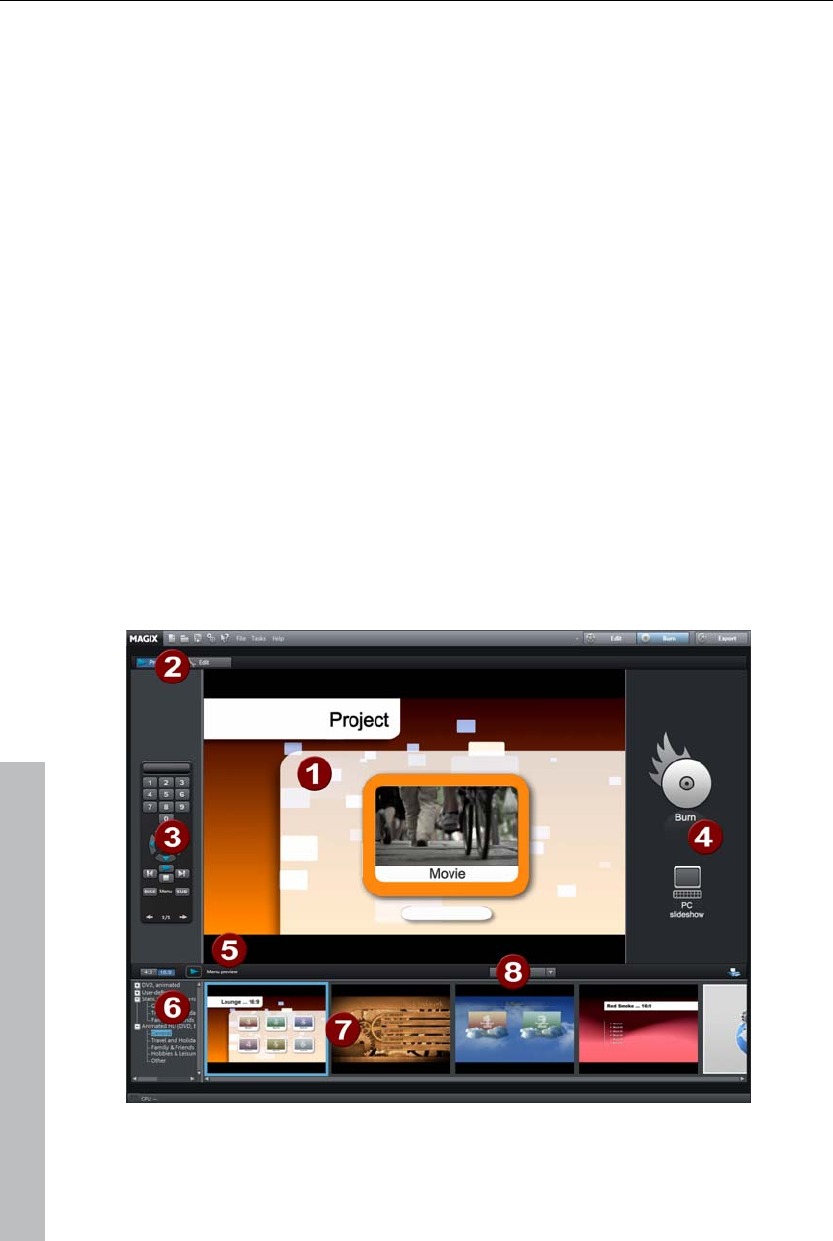
58 Workspaces
The project folder supports drag & drop in either direction, so you may move
elements from the project folder into the arrangement or move objects or
object groups from the arrangement into the project folder.
The context menu (view page 320) for project folder elements enables these
to be saved individually as takes (*.tk2) in order to use them in other
projects again; the entries may also be renamed.
Adjusting the workspace
The source and program monitors, the project folder, the arranger, and the
Media Pool may be shut off completely or freely repositioned. Custom
configurations for the "Edit" screen may be saved or accessed at any time
via the menu "Window -> Workspace -> Save...".
The menu "File -> Program settings -> Display templates" features useful
templates for certain configurations. On systems with only a single monitor,
only the first two templates are practical. The templates are explained on
the right side of the dialog. All window properties of the arranger, video
monitor, etc. can be changed after a template has been selected.
"Burn" screen
www.magix.com
Workspaces 59
1 Preview menu: This is a preview of the selection menu. Read more in
the "Menu (view page 280)" chapter
2 Switch view: Switch between the "Preview" and "Edit" views here.
3 Remote control: Check how your disc will react later when you press a
button on your remote control.
4 Output: Choose between burning the project or a show optimized for
PC.
5 Play preview: Play back the menu preview and test it with the remote
control here.
6 Template category: Switch between different templates for designing
menus.
7 Menu templates: Switch between different templates for designing your
menus.
8 Apply templates: Select whether a template should be assigned to the
page, the menu, or all disc menus.
Functionality
Switch to the "Burn" screen first by pressing the button
displayed.
Burn your movies including selection menus onto CD, DVD, or Blu-ray
DiscTM here.
www.magix.com
All movies loaded into the project will be included. If you want to remove
some of the loaded films, then switch to the "Edit" screen again and delete
the unwanted movies from the project there. To do so, switch to the
corresponding movie, open the "File" menu and select "Manage movies ->
Remove movie (view page 281)".
Note: The program is displayed differently at screen resolutions of 1280 x
1024 pixels and up. This makes the program more manageable and easier
to use. The work steps remain the same in spite of the different display.
For more information about the "Burn" screen, please read the chapter
"Burning discs (view page 199)".
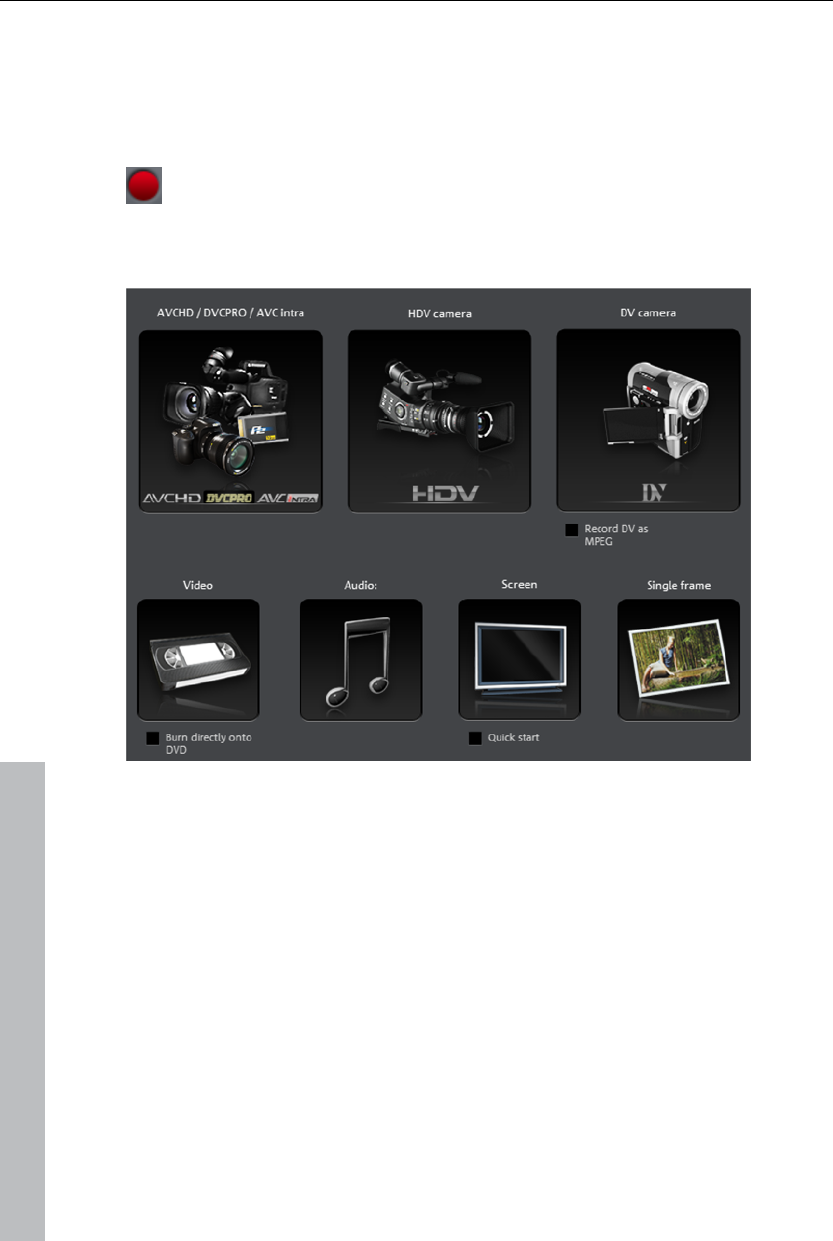
60 Video recording
Video recording
Select the recording method
To start recording, click on the "Record" button under the source
monitor.
The following selections are possible in the dialog window:
AVCHD/DVCPRO/AVC-Intra for AVCHD/DVCPRO/AVC-Intra cameras, but
also for digital cameras or video DSLR featuring memory card or hard drive.
This option may also be used to import media from removable storage
devices, USB devices, or hard drives as a clearly laid-out alternative to the
Media Pool.
HDV camera: For HDV1 and HDV2 cameras
DV cameras: For mini DV cameras and DV video recorders
Video: For analog video cameras TV, analog TV, VHS recorders, webcams
and others
Audio: For microphones, cassette recorders, MiniDisc players, turntables,
etc.
Screenshot: Records directly from the computer monitor.
Single frame: For single and series images from analog cameras, analog
TV, or VHS recorders, webcams, etc.
www.magix.com

Video recording 61
www.magix.com
AVCHD/DVCPRO/AVC-Intra
This option accesses a universal import dialog that is not only suitable for
AVCHD, DVCPRO, or AVC-Intra cameras, but also for external hard drives,
P2 memory cards, photo, and movie cameras that contain usable files
equally. MAGIX Video Pro X3 automatically recognizes the file structures
and shows only individual takes, making import convenient and easy.
Alternatively, these drives may also be controlled directly via the Media
Pool. The import dialog also features its own display filters and additional
options for convenience.
Note: DVCPRO and AVC-Intra import is optional and must be activated
(view page 335) for a fee.
Connect camera
Suitable cameras are essentially available in three designs:
Cameras featuring removable storage: These cameras includes a slot for a
memory card. Your computer should feature a card reader for the
associated medium so that you can simply insert the card from the camera
and import the desired material. Different camera models can be connected
via USB.
Cameras which burn DVDs directly (usually 80 mm diameter instead of the
regular 120 mm): The DVD can simply be taken out of the camera and
inserted into the computer. For so-called "Slot-in DVD" drives, look
beforehand in the operational manual whether or not 80 mm DVDs (also
called 3" DVDs or MiniDVDs) are acceptable.
Note: These variants require a special UDF driver (normally included with
the camera) be installed before the DVDs or removable storage can be
imported into Windows XP.
Cameras featuring a built-in hard drive: The camera reacts as a drive soon
as it is connected via a USB cable to the PC. This additional drive is then
visible in the Media Pool. A separate UDF driver doesn't usually need to be
installed.
Note: The variants listed here and their procedures are explained according
to our experience. We also recommend reading the camera's manual for
more detailed instructions and contacting the manufacturer in case of
problems.
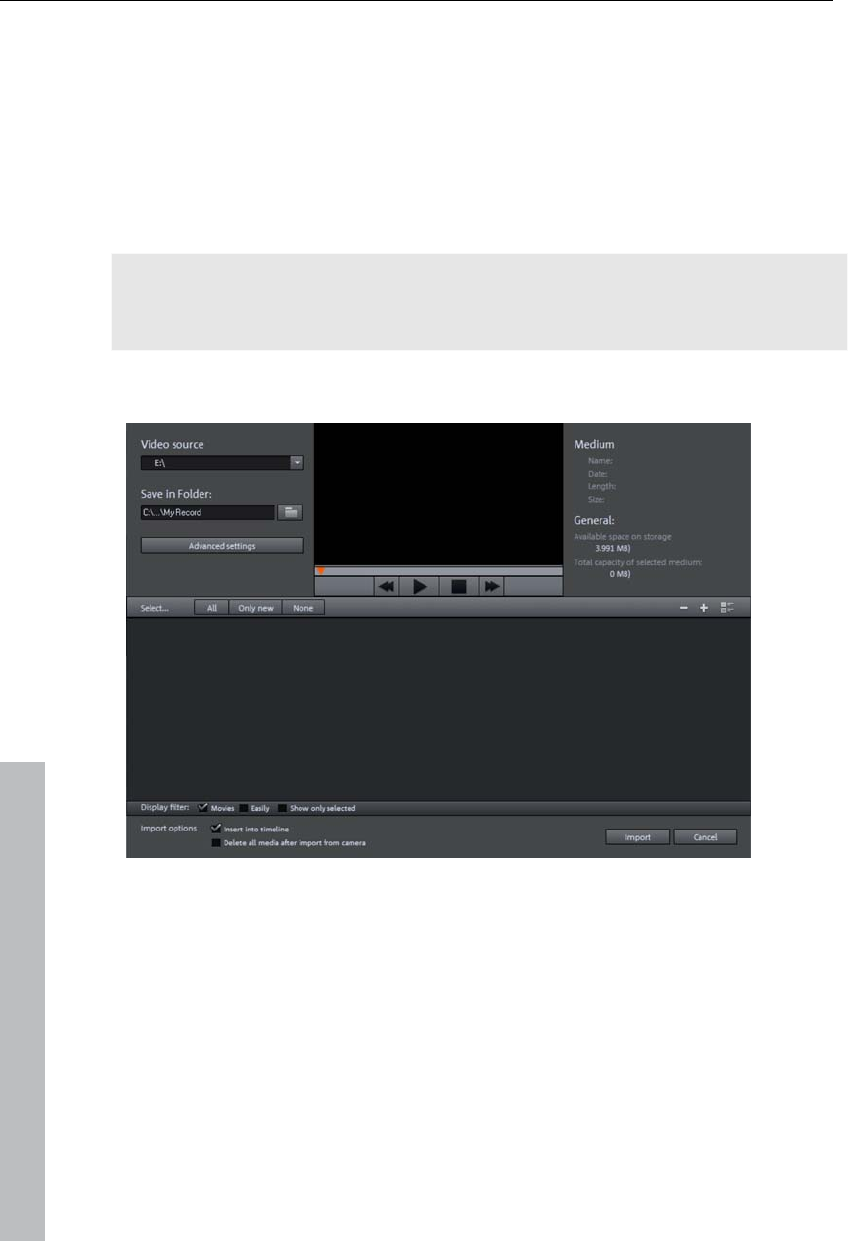
62 Video recording
Import
The option "AVCHD/DVCPRO/AVC-Intra" does not produce a recording as
such, but rather "only" the transfer of the already created video file and its
integration into the existing project.
On older systems, it may be helpful to transfer AVCHD files into MPEG-2
format. A corresponding query appears automatically as these files are
imported.
Note: During AVCHD import, it is necessary to activate (view page 335) the
MPEG-4 and the Dolby Digital Stereo Codec for copy protection reasons.
MAGIX Video Pro X3 offers this option as soon as the codec is required.
After you have selected a recording option, the following dialog opens.
Video source: Navigate to the drive that corresponds to the attached AVCHD
camera here.
Save in following folder: Create a target directory for the files to be imported
to here.
Advanced settings: Adjust various settings affecting the name and date of
the files to be created.
Preview monitor and transport control: Play and rewind the clips in the file list
here.
www.magix.com

Video recording 63
www.magix.com
Medium/general: An info area for the files is provided to the right next to the
preview monitor.
File list: The contents of the selected drive are shown here. Use the display
filters to reduce the types of files shown. You can select every file
separately using the little check boxes in order to import them later. At the
top right of the list you can find options for displaying the files.
Select: This offers self-explanatory options for file display ("all", "only new",
or "none").
Insert into timeline: With this option active, media will be inserted directly into
the timeline from MAGIX Video Pro X3. When inactive, they will be simply
copied into the target folder and may be selected from the Media Pool at
any time.
Delete all media after camera import: This option deletes the selected media
after importing from the camera.
Import: Starts the import process of the selected files into the target
directory.
Cancel: Closes dialog without import.
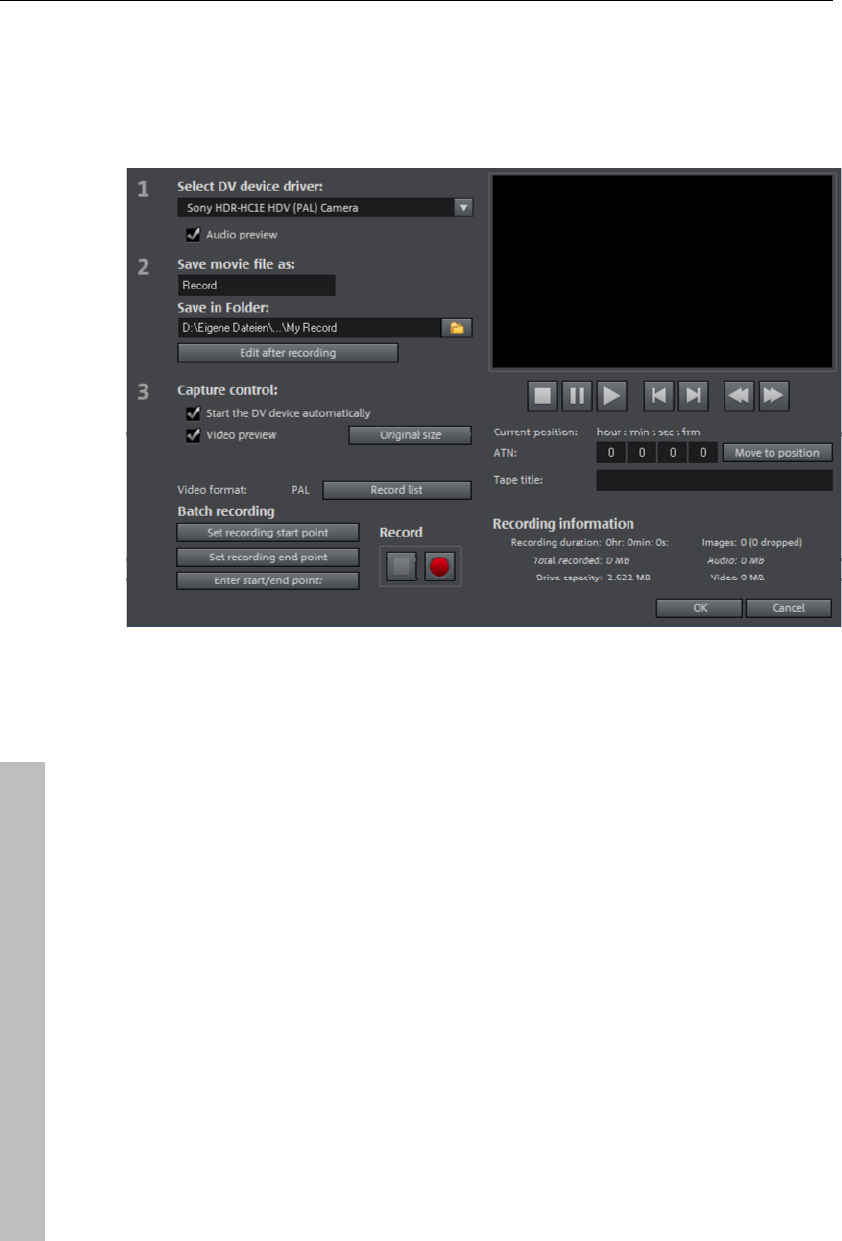
64 Video recording
HDV camera
Use this option to open the HDV camcorder record dialog. To do this you
have to connect an HDV 1 or HDV 2 camcorder.
The options in this dialog can also be found above in DV recording.
DV camera
Connect a DV or HDV camera
MAGIX Video Pro X3 supports continuous editing of DV (digital video) files.
You will require a DV recorder or DV camera with an IEEE-1394 interface
(also known as FireWire or iLink) as well as an OHCI-standard IEEE-1394
host adapter for your PC. You must also have Microsoft’s DirectX8.a (or
higher) installed.
Connect the digital output of the switched-off camera with the computer's
DV interface (also called FireWire or iLink).
Insert a DV cassette or the storage device into the camera.
Switch your camera’s operating mode to "Video recorder" or "Playback".
The camera is now ready to transfer the video to the computer.
www.magix.com
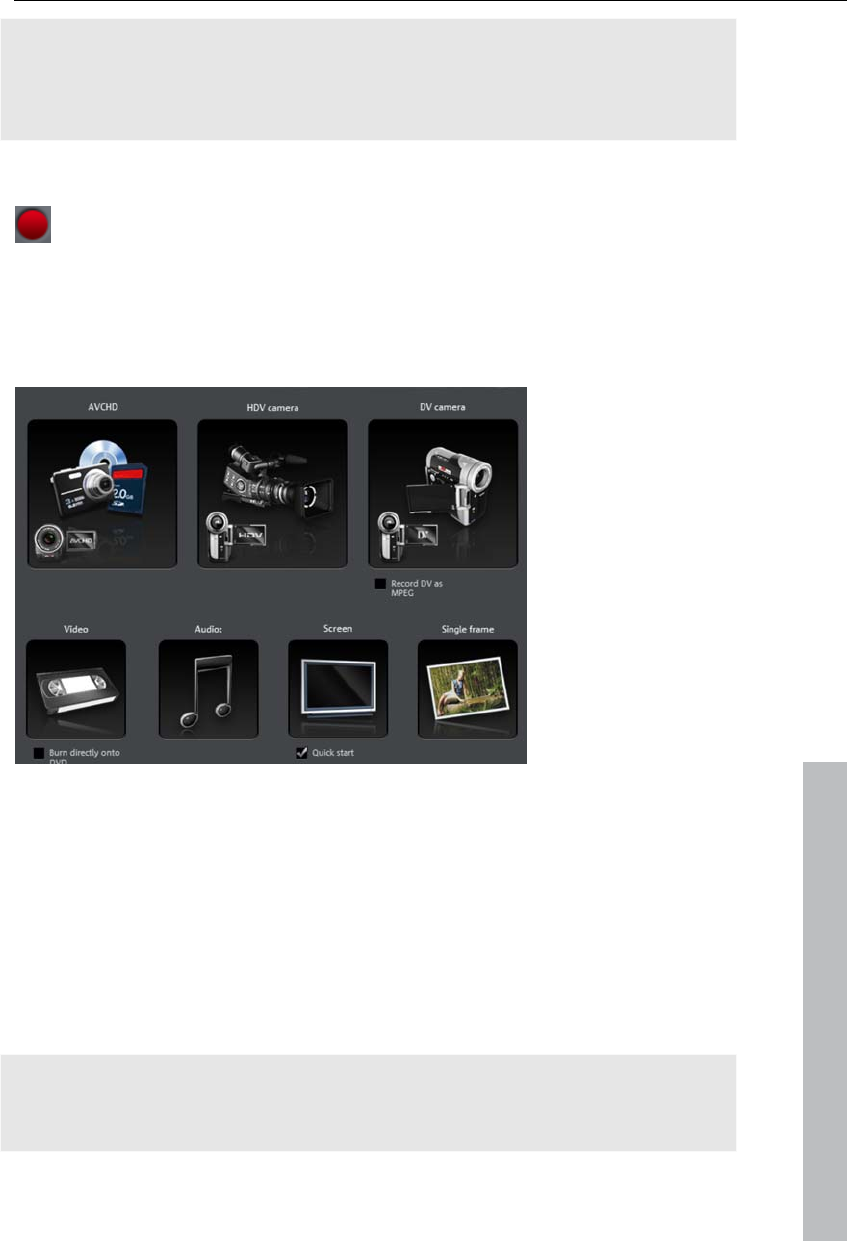
Video recording 65
Note: You may also use a HDV camera in DV mode to, for example, transfer
recordings in the old DV format. We have noted problems with this mode in
many cameras, and therefore recommend that the Record mode of the
camera is also switched to DV, switching the camera off and then on again.
Capturing DV recorders or cameras
To start recording, click the "Record" button below the source monitor.
Select "DV camera" from the recording dialog. Uncompressed DV capture
requires approx. 220 MB per minute of video. If you would instead like to
record using the more space-saving MPEG format, then you should first
activate the "Record DV as MPEG" option.
www.magix.com
This opens the actual recording dialog. Check to see if a DV camera driver
has been selected.
Name your recording. It's worth choosing a logical name which will allow
you to find it easily again on the hard drive.
You can access the appropriate place on the camcorder tape by using the
remote control buttons: shuttle forwards, backwards, and start/stop
playback. To start recording, click on the "Record" button. Keep an eye on
the remaining hard drive space.
Cease capturing with the "Stop" button and exit the record dialog. You can
see the recording in the film-strip in the lower third of the screen.
Tip: In the DV recording dialog, you can set clips from the DV video which
then will be recorded one after the other (batch capturing). Read more on
this in the chapter "Batch processing" (view page 69).
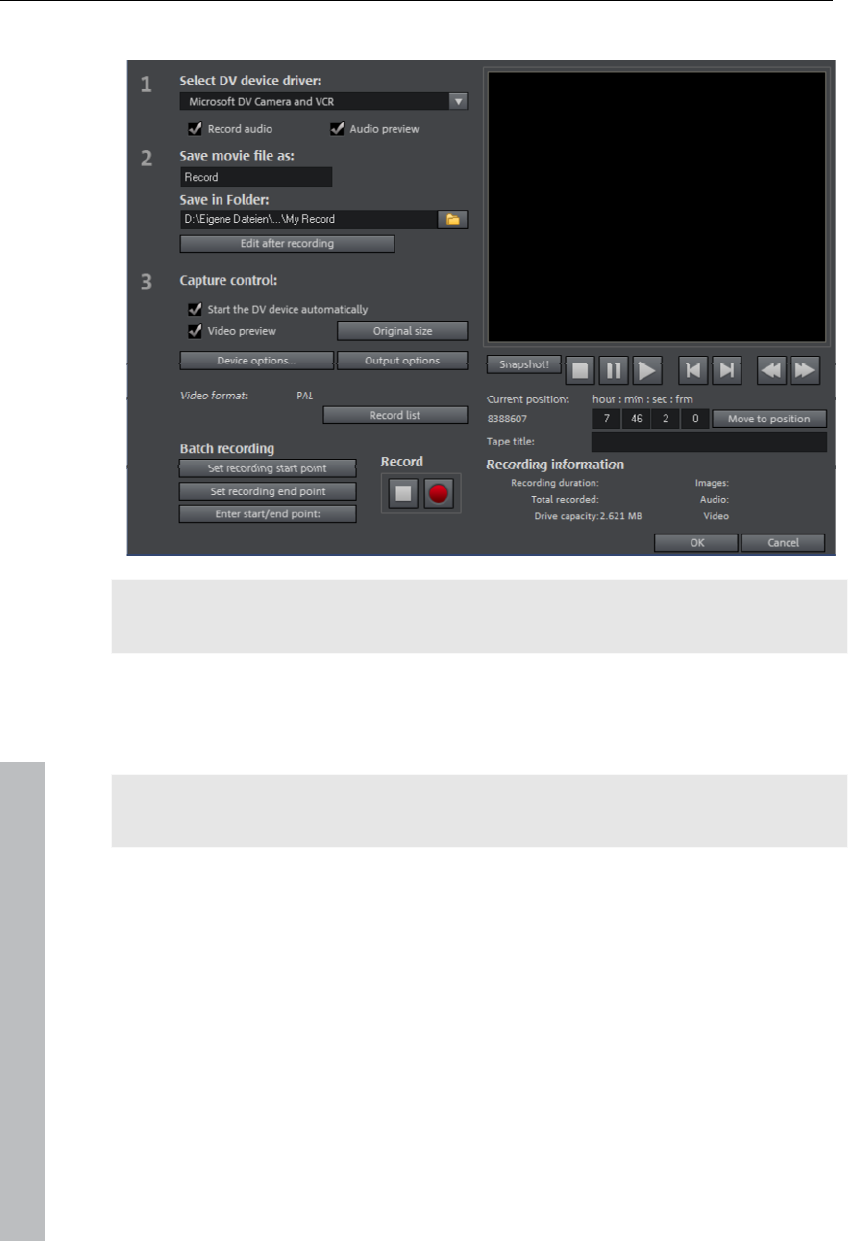
66 Video recording
"DV capturing" dialog
Note: Keep an eye on the available hard drive space before each recording.
DV capture requires approx. 220 MB per minute of video!
Select DV device driver: The device driver for your DV device should be
listed here. If "Record audio" is deactivated, then video without sound is
recorded only . "Audio preview" activates the audio output of the recording.
Note: The audio preview is deactivated at first, since DV cameras usually
include built-in speakers.
Save movie file as/save in following folder: Enter the name of the movie to be
recorded. You can also select the folder where you wish to store your video
file. The default recording directory is set by default, but you can change the
Path settings under menu item "File -> Program settings -> Path settings".
Edit after recording: This provides access to the automatic editing options.
Start device automatically: Starts the DV recorder or DV camera
automatically when the "Record" button is pressed. This does not function
with all digital cards/video devices.
Video preview: On the preview monitor you can see a preview of your movie.
www.magix.com

Video recording 67
www.magix.com
Original size: This option allows you to preview the video in the original size.
To return to the dialog use the "Esc" key.
Batch capturing: Here the start and end points can be set for the capturing.
This allows you to search the entire video for all captures to be used and list
them for planned batch capture. This is then processed in sequence when
the recording starts (via the red button). That way you don't need to record
each scene individually. You simply determine recording time points, and
the computer takes care of the rest. To set the start and end points
precisely, click "Enter start/end point (view page 68)"
Record list: Use this button to view the available list of already recorded
videos and scheduled recordings. All entries from the list can be selected
and deleted.
Record: Starts the recording process. Also contains the list of scheduled
recordings. These are processed step-by-step (batch capturing).
Stop: Stops the recording process.
Snapshot! With the Snapshot! button, you can create a frozen image directly
from the preview monitor. Start the camcorder and watch the preview
window. When the image you want appears, click "Snapshot". Or you can
navigate using the remote control to the position you want, and stop there in
Pause mode. Stopped playback on the DV camera will not deliver an image!
The images are saved in the record directory as graphics files in the set
resolution.
Remote control
MAGIX Video Pro X3 also supports remote controls for most digital
camcorders. This does not function with all digital cards/video devices. If
your hardware does not support the remote control function, the buttons will
not be usable.
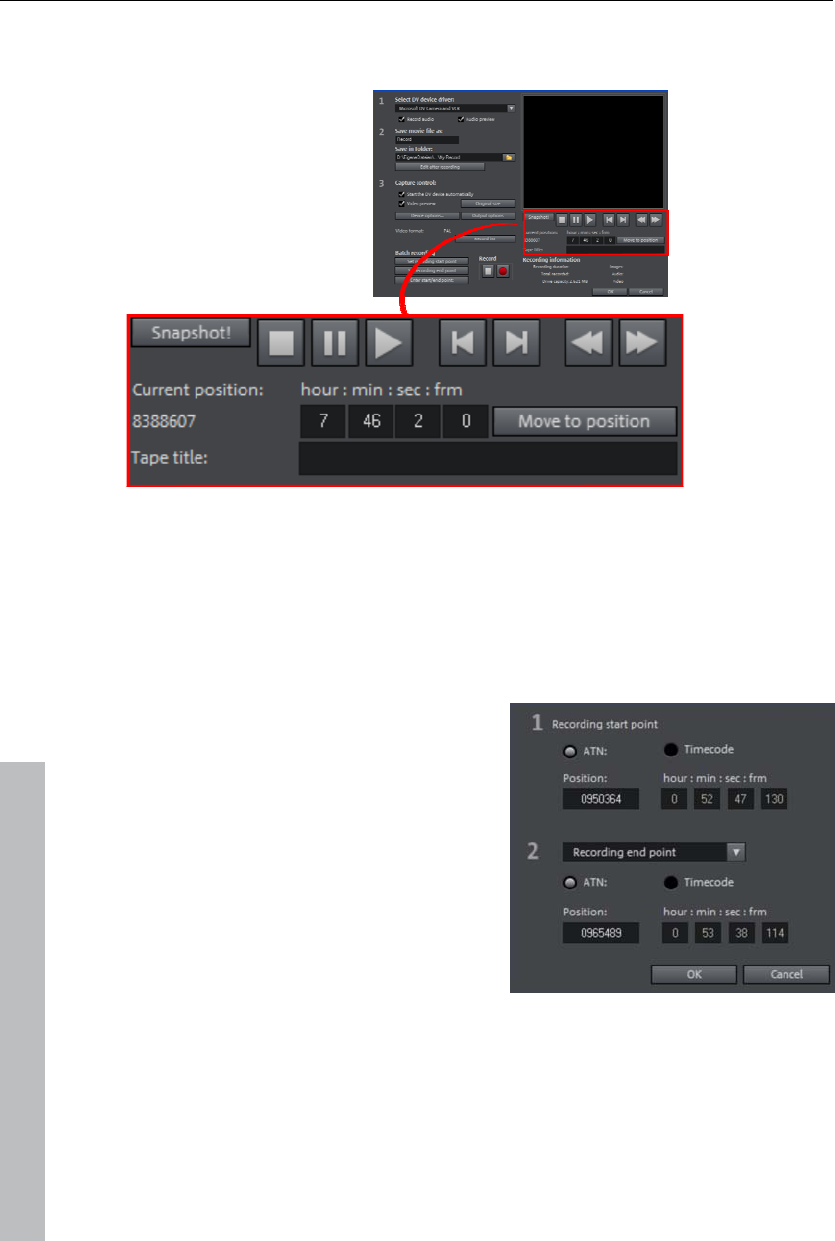
68 Video recording
The transport controls required for this are featured in the DV or HDV
recording dialog.
Tape title: Enter a name for your tape here. MAGIX Video Pro X3 requires
this name for the DV logging feature.
Recording information: Displays various information about your recordings.
Enter start/end point: Enter the exact start and end point or the recording
length for a scene.
Both values can be entered as ATN
(absolute track number) or as a
timecode in
hours:minutes:seconds:frames.
DV as MPEG
This recording selection dialog option allows you to transfer DV recordings
directly into the space-saving MPEG format on the harddisk.
www.magix.com
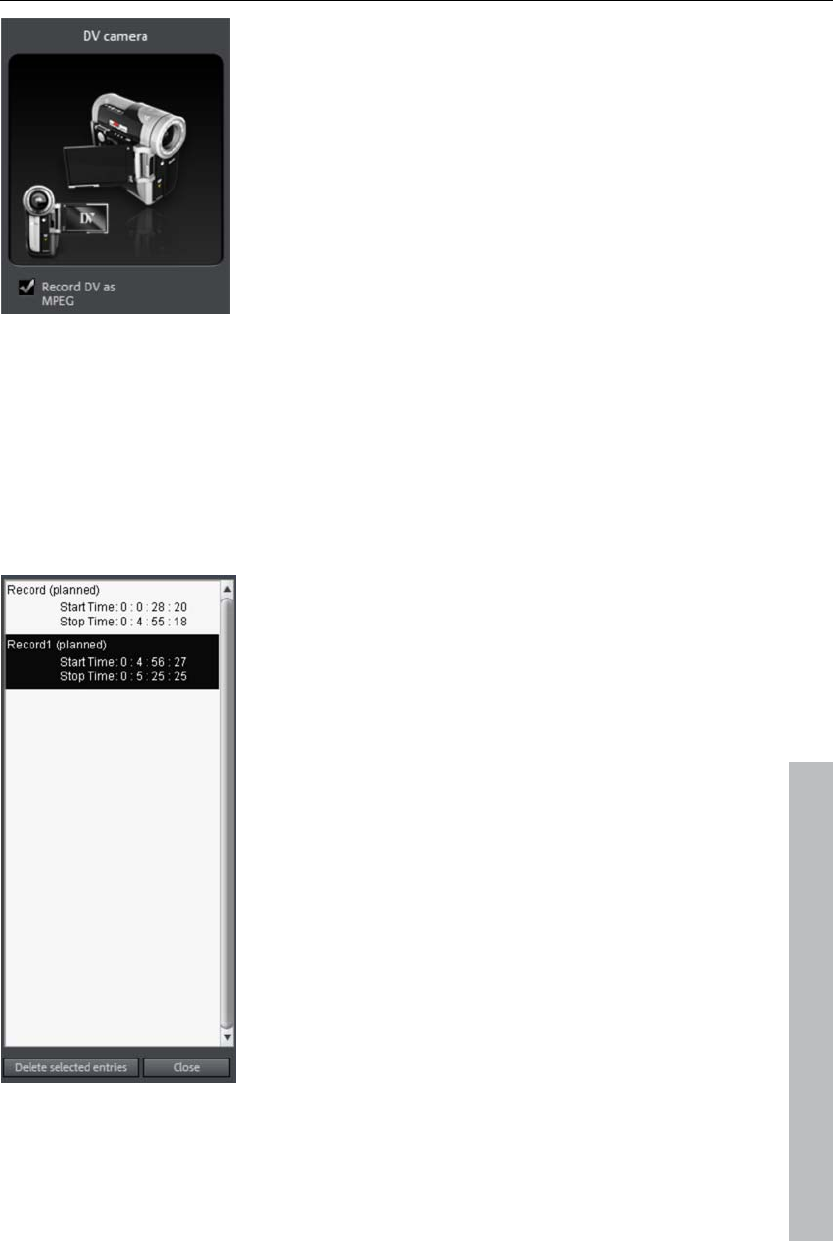
Video recording 69
From the "DV as MPEG" dialog window you can
find MPEG encoder settings options under
"Advanced".
You can also burn your DV material direct to disc
without any intermediate steps.
Recording list
Set the start and end points for the capture here. This allows you to search
the entire video for all captures to be used and list them for planned batch
capture. This is then processed in sequence when the recording starts (via
the red button). That way, you don't need to record each scene individually.
Simply specify the recording time points and the computer takes care of the
rest. To set precise start and end points, click "Enter start/end point (view
page 68)
www.magix.com
Recording list: Press this button to view the
available list of already recorded videos and
scheduled recordings. All entries from the list
may be selected and deleted.
Every batch recording is automatically logged.
Conversely, every "manual" DV and HDV
recording is transferred into the recording list in
order to restore lost recordings without much
effort.

70 Video recording
www.magix.com
Logging
Logging means that MAGIX Video Pro X3 also saves the original save
location, position and additional information (metadata, e.g. scene, take,
rating, comments, etc.) about DV video and audio files.
Everything copied using DV recording, DV to MPEG recording and HDV
recording appears in the recording lists of the corresponding recording
dialog. Recordings for which the corresponding video material is no longer
on the hard disk will appear as "planned recordings".
If MAGIX Video Pro X3 does not find the corresponding DV and WAV files
during the loading of a video, it will ask that the corresponding DV tape is
inserted into the connected camcorder again for automatic scene import.
You no longer have to save DV AVI and audio files (which can be very
large). If at a later time you would like to work on a film again, but do not
have the space to keep the material for it on your hard disk, then you can
simply delete the bulky DV AVI and audio files.
Video
This option allows a video recording to be made from analog sources.
Connect analog video source
Connect the video out of your camcorder, or DVD/VHS recorder to the video
in (TV, video, or video graphics card) of your computer, and the audio out to
the line in of your sound card.
Due to the variety of device configurations, it is difficult to say which cable
will function best with your setup. If you’re not sure, check the manual of
your VCR or your TV, video, or graphics cards.
Example:
Europe: Many VCRs and DVD players have a SCART, 3 RCA (2 for stereo
sound, 1 for video), or S-Video/optical audio line out. In such case, you will
need a SCART to RCA adapter, a cable with 3 RCA jacks, or an S-Video
cable.
North America: Many VCRs and DVD players have a 3 RCA (2 for stereo
sound, 1 for video), or S-Video/optical audio line out. In such case, you will
need a cable with 3 RCA jacks, or an S-Video cable.
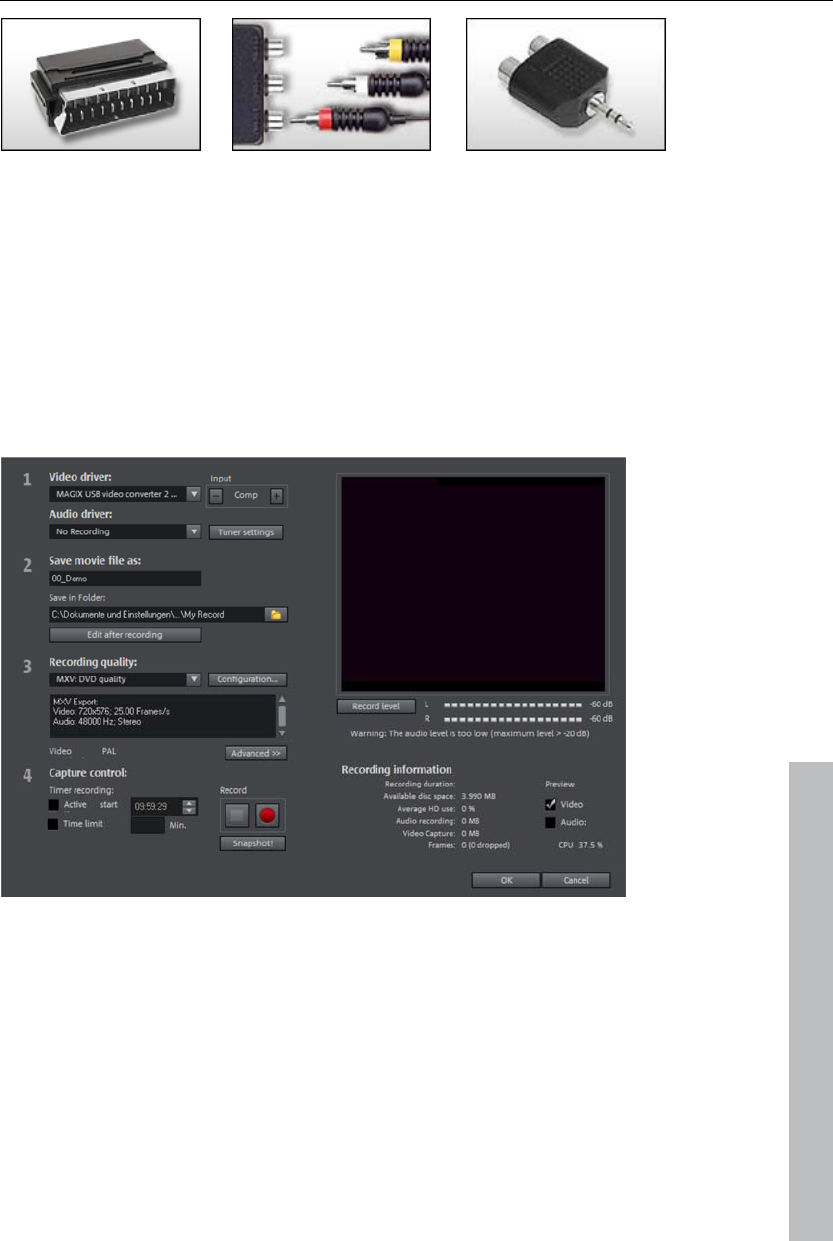
Video recording 71
SCART/Cinch adapter SCART/Cinch adapter
with 3 RCA jacks
Stereo RCA/mini phone
jack adapter
Most sound card inputs are 3.5 mini stereo jacks. To connect the VCR audio
out to the sound card audio in you will need a stereo RCA/ mini phono plug
adapter.
You will most likely have to buy a cable with 3 RCA plugs and a stereo
cinch/mini jack adapter from your local supplier.
Recording dialog
www.magix.com
Video/audio drivers: Set the video card or sound card for recording here. In
practically every case, the driver software supplied with the hardware must
be installed.
Input/tuner settings: If your video capture card supports multiple sources, i.e.
your card also has a TV tuner or multiple inputs (SVHS, composite, etc.),
then you can select the proper recording source and the TV channel to be
recorded here.
Save video file as/save in the following folder: Enter the title of the movie to
be recorded here. You may also select the folder where you wish to store

72 Video recording
www.magix.com
your video file. The standard recording folder is set as default. The location
of this folder may be changed via "Path settings" under "File -> Program
settings -> Folders".
Edit after recording: Use this to access the automatic editing options.
Recording quality: The list box enables you to select various predefined
levels of recording quality, e.g. depending on the purpose of the recording
and computer performance. These are sorted according to picture quality.
Use Configuration to fine-tune the quality for the preset. Presets you have
created yourself appear in this list as long as you use the default folder
provided as the save location.
Presets displayed with MPEG record directly in MPEG format.
The preset "AVI: user-defined" enables AVI videos to be recorded via the
codecs included with MAGIX Video Pro X3. There are several codecs for
various applications, e.g. "MSU Screencapture Lossless Codec", which is
used for screen capturing. Please also see the general information
provided on AVI video formats (view page 339).
Tip: Use the presets marked MPEG if you want to burn your recordings
straight away, since smart encoding helps omit laborious encoding after
recording.
Advanced...: Opens the video driver settings dialog.
Capture controls: This provides access to the "Red" record and "Stop"
buttons. These start and stop recording.
Timer recordings active/time limit: Specify the recording start time and length
to turn your PC into a fully functioning VCR.
Snapshot!: Snapshot! creates a still image directly via the preview monitor.
The images are saved in the recordings folder as graphics files in the
resolution you have set.
Recording information: This provides statistical information concerning
recording time, available hard drive capacity, recorded frames, and dropped
frames. Dropped frames are frames that have been left out because the
computer processor is too slow for the selected image format and cannot
accept all incoming frames.
Preview: Some graphics adapters allow you to reduce the system load by
deactivating the video preview. If you hear an "echo", deactivate the audio
preview.

Video recording 73
www.magix.com
Advanced configurations in the video capturing dialog
Here you can adjust certain settings for the video recording driver.
These dialog boxes, so-called “property sheets,” come with the video card
drivers. These driver-specific performance properties may deviate
depending on the cards. We also have a very limited influence on the
behavior of these drivers. If you encounter any difficulties, please contact
the video card manufacturer for the latest driver updates.
Input: Sets the crossbar of the video card.
The crossbar determines which video and audio input signal will be
recorded. The crossbars are connected in series to the video recording chip
itself. In the output field, the video output (for the crossbars) is the input for
the recording chip (video or audio decoder-in) of the video card. In the
“Input” field, select the signal source that will be used by the video card to
capture for this input. Many video cards have separate crossbars for audio
and video. If you have a problem, try out the different configurations until
the right sound matches the right image.
Composite-in = the normal video input (typically a cinch jack)
S-video = S-video input (mini-din jack)
SVHS-in = SVHS input (special cable)
Tuner-in = TV signal of the integrated tuner
Imagesetting
Video decoder: If the picture only appears in black & white or it flickers, the
video standard may be set incorrectly. In mainland Europe, PAL_B is used.
VideoProcAmp: Fine-adjustment of colors, brightness, contrast etc. We
recommend against changing any of the manufacturer’s settings.
Format: Please do not change anything here. The capturing format is set in
the "Recording quality" option in the video recording dialog.
Station selection
This option is only available if a TV tuner is integrated into your video card.
Single frame
Single frame image recording may be used to record snapshots from the
connected video source. This requires a DirectShow compatible video
recording or TV card or a corresponding USB device (e.g. a webcam).
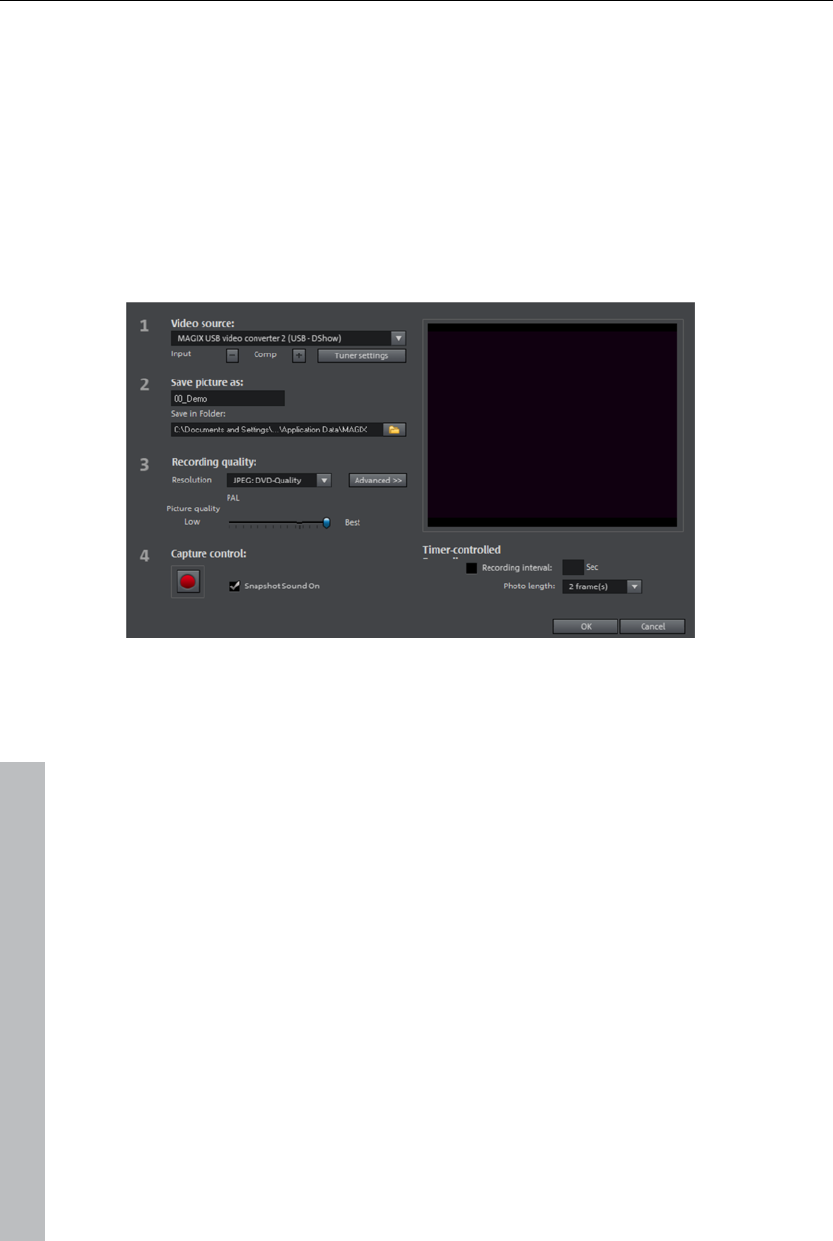
74 Video recording
The time control function allows you to automatically take snapshots. This is
useful for the following applications:
to create slideshows using videos,
for animation films (stop-motion recording),
for video surveillance,
or in time-lapse photography.
The recorded images are added to the current arrangement.
Recording dialog
Video source: You may set the video card used to take pictures here.
Save image as: Enter the title of the snapshot to be recorded here.
Snapshots are saved under this name and numbered consecutively. You
may also select the file path for storage.
Recording quality: Set the solution for the recording here. This corresponds
with the resolution options offered on the camera. Use the slider to set the
image quality. Using higher resolutions results in larger file sizes for each
recording. "Reset" resets the image quality to the preset value.
Advanced: Opens the video driver settings dialog.
Camera noise during recording: This causes the program to play a clicking
sound each time a snapshot is taken.
Recording controls: The red record button triggers a snapshot or
alternatively a series of recordings when using the time control function.
www.magix.com

Video recording 75
www.magix.com
Time Control
Recording interval: When active, starting recording produces a sequence of
images. Snapshots are saved according to the selected time interval and
numbered sequentially. For example, if snapshots are taken every two
seconds and then inserted every five frames into the slideshow, then a ten-
times time lapse recording will result.
Photo length in frames: Specifies how long the photos appear in the
slideshow.
Enhanced single-frame recording dialog settings
You can adjust certain settings for the video recording driver.
These dialog boxes, so-called "property sheets", come with the video card
drivers. The driver-specific features may slightly vary from driver to driver.
The MAGIX team has little direct influence on the performance of the
various drivers. If you encounter any difficulties, then please contact the
video card manufacturer for the latest driver updates.
Input: Sets the crossbar switch of the video card. This lets you define what
video and audio signal is used in the recording. The crossbars are
connected in series to the video recording chip itself.
Output: In the "Output" field, the video output (for the crossbars) is the input
for the recording chip (video or audio decoder in) of the video card. In the
"Input" field, you select the signal source to be used for this input by the
video card during recording.
Composite in = the normal video input (typically a cinch jack)
S-VHS in = S-VHS input (special cable)
Tuner in = the TV signal of the built-in tuner
Video decoder: If the picture only appears in black & white or it flickers, then
the video standard may be set incorrectly. PAL_B is used in Germany and
most European countries (France: SECAM; US/CAN: NTSC).
VideoProcAmp: For fine tuning of colors, brightness, contrast, etc. We
recommend against changing any of the manufacturer's settings.
Format: Do not change anything here! The capture format settings can be
changed under "Resolution" in the "Recording" dialog box.

76 Video recording
www.magix.com
Audio
Songs, noises, or instruments can be easily recorded in MAGIX Video Pro
X3 using the audio recording function. A hooked-up microphone or various
audio devices (especially a stereo system) can be used as recording
sources.
Connecting the source for recording
First of all, the source of the audio material must be connected to the sound
card input. Again, there are several possibilities which primarily depend on
the type of equipment you have.
If you are recording from a microphone, then please connect the
microphone to the microphone jack on your sound card (usually red).
If you want to record material from a stereo system, then you can use the
line-out or AUX out jacks on the back of your amplifier or tape deck. This
involves connecting them to the sound card input (usually red).
If your amplifier has no separate output (other than for the speakers), then
you can use the connection intended for headphones for your recordings. In
most cases, you will need a cable with two mini-stereo jacks. This type of
connection has the advantage of being able to set the headphone input
signal level with a separate volume. As headphone connections generally
are not the best, it is advised that you use the line outputs if possible.
When recording cassettes from a tape deck, you can connect the tape
deck's line out directly to the sound card input.
When recording from vinyl records, you should not connect the record
player's output directly with the sound card because the phono signal needs
to be pre-amplified. A more suitable method would be to use the headphone
connection or an external pre-amp.
Adjusting the Signal Level
Adjusting the signal level to the sound card is also recommended to get the
best sound quality during digital recording.
Once a recording source is connected to the sound card, the "Record"
button opens the recording dialog and starts the recording source.
You can now adjust the recording level with the help of the LED display in
the recording dialog. For this, you must first check off "Show Levels".
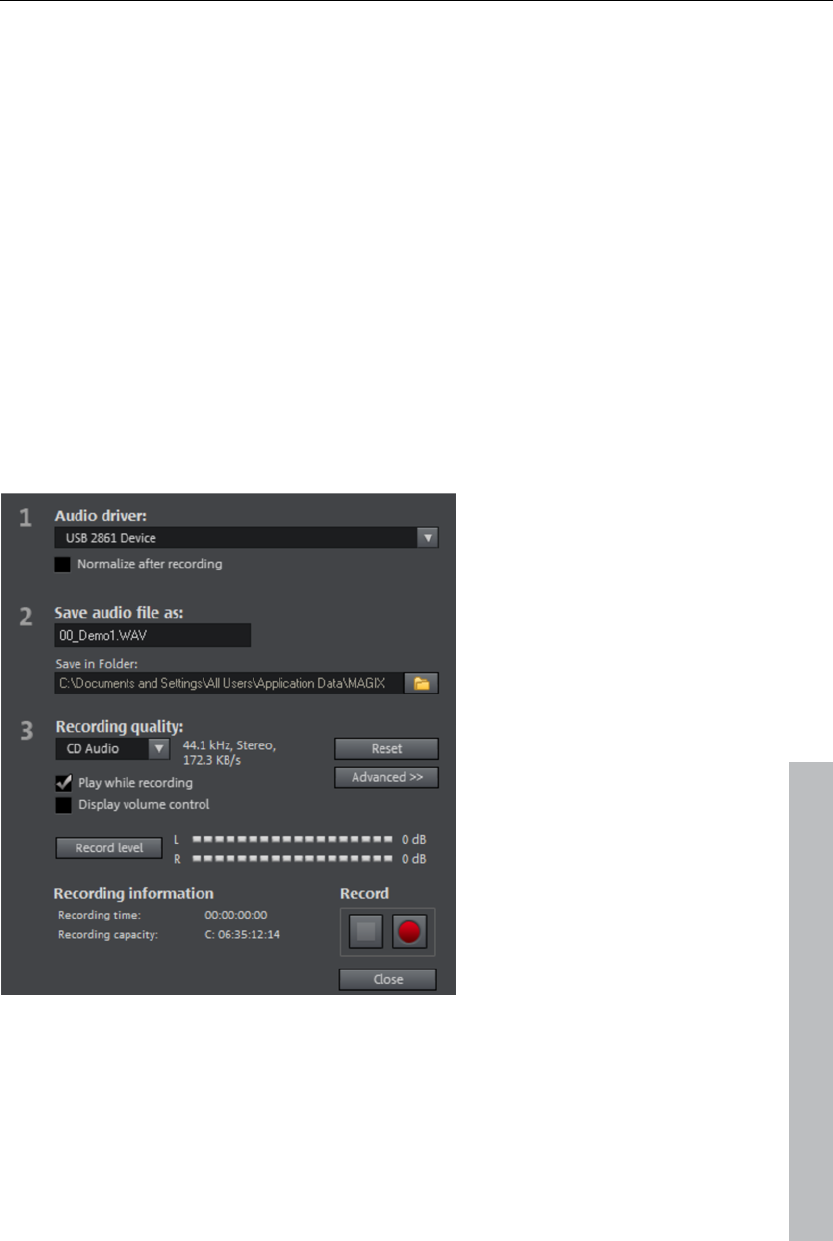
Video recording 77
If the adjustment is set too high, distortion occurs and the incoming signal
must be reduced. If you have connected the source through either an
amplifier or tape deck output to the sound card, you can only reduce the
signal level in your sound card’s software mixer interface. You can access
the mixer directly from within the recording dialog via the “Recording Level”
button.
If you reduce input sensitivity by using the input fader, the resolution at
which the analog signal is digitized is also reduced. Try to set these
automatic controllers to the loudest sound level possible.
The maximum setting for an optimal level is the loudest part of the material.
The loudest part should be adjusted to be the maximum. The actual
recording begins when you press the "Record" button. At the end of the the
recording you will be asked if you want to use the recording. Upon
confirmation, the newly-recorded material will be placed at the next free
position of the start maker in the arrangement.
Audio record dialog
www.magix.com
Audio driver: Selects the sound card for the recording.
Save audio file as/ Save file in the following folder: Here you can select the
title of the audio file you wish to record. You can also select the folder
where you wish to store the file.

78 Video recording
www.magix.com
Recording quality: Sets the sound quality of the recording. In the preset
menu you can choose between medium wave radio ("AM tuner"), UKW ("FM
Radio"), DAT (Digital Audio Tape) and CD quality.
Volume control: Using the peakmeter, you can monitor the level of the
incoming signal. Please read more on this in the chapter "Adjusting levels"
(view page 76)
Recording: This button starts the actual recording.
Stop: Click this button to stop recording
Normalize after recording: With this option activated, your material's volume
is raised to a proper level after recording is completed. In order to achieve
good results, you should try to record the source as loud as possible without
overmodulating it. To do so, refer to the peak meter reader in the recording
dialog.
Playba while recording: This option is particularly important for spoken
commentary, etc. If activated, the selected movie (or selected scene if
recorded in the "Edit" screen) is played while recording. This acts as
orientation for the movie.
Advanced: Use this button to open a window where you can select from
special features:
Advanced options
"Mono" creates a mono recording and requires half of the hard drive space
required for stereo.
"Real-time sample rate adjustment" automatically matches the sample rate
of a new file to be recorded with the sample rate of the selected movie
sound track.
"Ducking" (reducing the sound volume): To add narration or other sound
material to a video that already has sound volume levels set, activate the
option "Automatic reduction of sound volume of remaining audio tracks".
This automatically reduces the volume of audio objects in the arranger
during the recording session ("ducking"). A volume curve controls the whole
process, produces the fading in and out of effects automatically and
guarantees consistent overall volume.
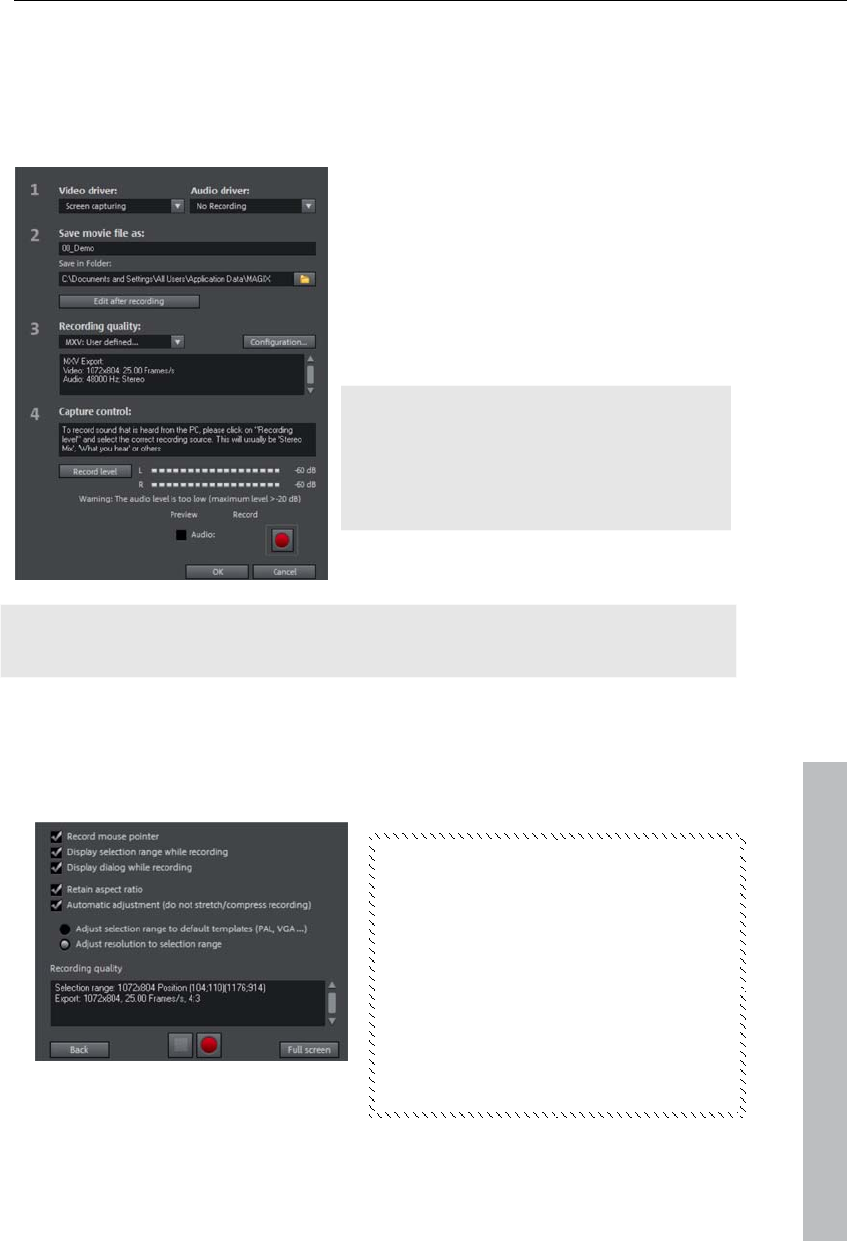
Video recording 79
Screen
Use this feature to record your screen content. This process is called
"screen capturing".
Under Recording quality, you will find
various presets for different
applications. You can either record the
entire monitor ("fullscreen"), a frame of
variable size (e.g. to film the Windows
Media Player display), or a different
video player. Click "Configuration" to
make custom size adjustments.
Hint: Because many video players work
with overlay, it is recommended to open
each player before starting the capture!
This way switching into "Overlay" mode
can be prevented.
Tip: Use the fullscreen presets under "Recording quality" which are
specially well-suited for AVI screen capturing.
www.magix.com
Click the "Record" button in the recording dialog. An additional dialog with a
red record button, a black stop button as well as a frame with dashed
bordering appears. Activate the option "Record mouse pointer" to record
the movements of the mouse pointer.

80 Video recording
www.magix.com
Now select the screen area you wish to record, i.e. the screen of the video
player in which the video is playing. Drag the frame over the area you wish
to record and adjust its size as required by dragging the edges and corners.
Hint: If you selected the "fullscreen" preset before, or clicked the "fullscreen"
button in the dialog before, the frame will appear outside the visible area.
The actual recording process can be started by pressing the red record
button. The recording starts; the record symbol appears in the task bar
(tray).
Once the video you wanted to record has come to an end, click on the
"Record/Stop" button to stop the recording. Recording ends and the
recording dialog is visible once again.
Recording AVCHD
This recording is actually not really a recording as such, but rather "only"
the transfer of the already created video file and its import into the existing
project.
AVCHD essentially requires a UDF driver (this is normally included with the
camera), since then DVDs and removable storage devices may be imported
into Windows. This is required for AVCHD cameras with a hard drive. The
camera will respond as a drive soon as it is connected via a USB cable to
the PC.
This additional drive is now present in the Media Pool and corresponding
M2TS files may now be imported from it. These files feature the extension
M2TS, which means they may simply be dragged from the Media Pool (top
right) downwards.
A convenient option featuring multiple options is provided by the AVCHD
import dialog (view page 61).
Note: This may be helpful under some circumstances on older systems that
convert AVCHD files into MPEG-2 format during import. A corresponding
query appears during importing of these files.
In order to play multiple tracks simultaneously, switch the hardware
acceleration on ("P -> Display options -> Playback in arranger -> Video
mode -> Hardware acceleration Direct3D). This option only functions with
current graphics cards (ATI Radeon 1300 or higher).
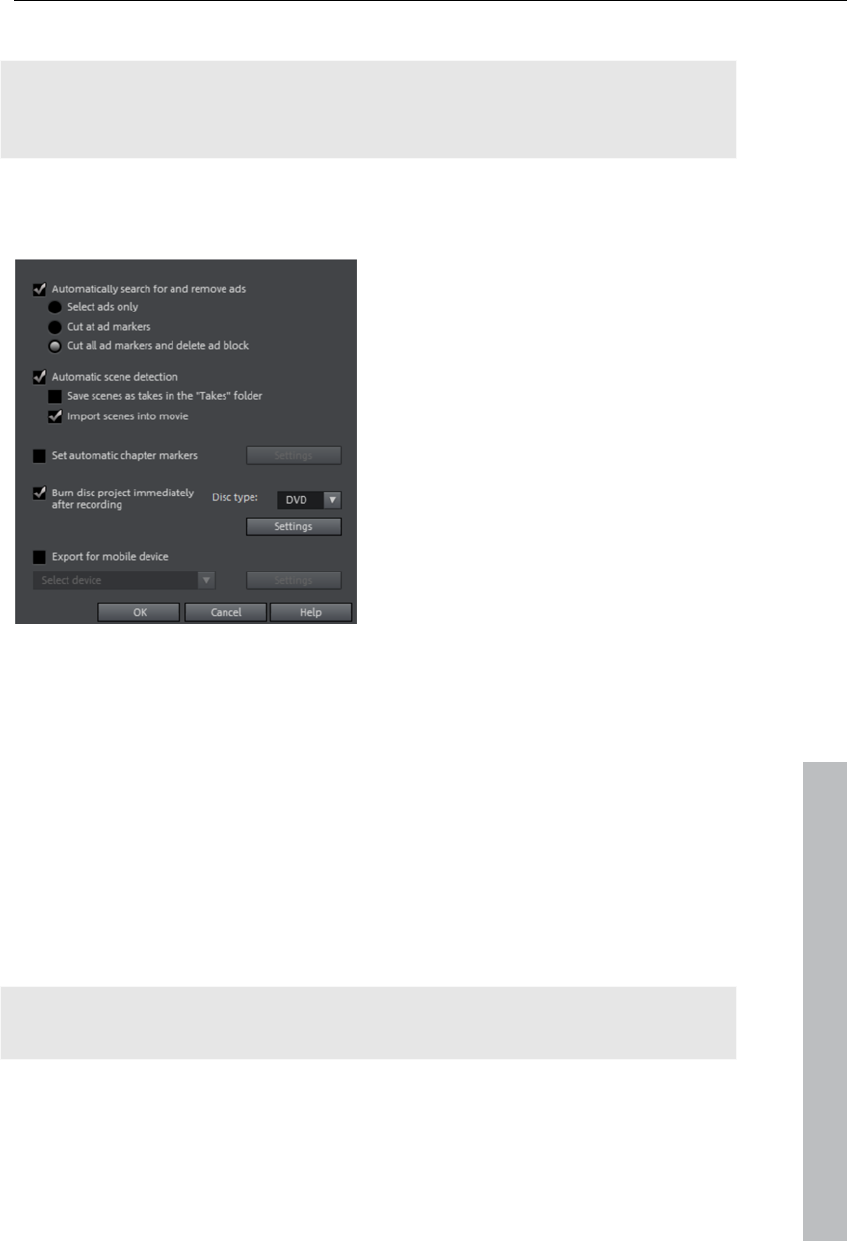
Video recording 81
AVCHD activation details
Attention: For AVCHD support, Dolby Digital Stereo and the MPEG-4 codec
must be activated. To convert AVCHD videos to MPEG-2, the MPEG-2
codec must be activated.
Edit after recording
The "Edit after recording" dialog can
be opened from all recording dialogs.
All editing steps from recording to
automatic burning can be carried out
without further user involvement.
The dialog "Edit after recording" allows you to:
Find and remove advertisements automatically: Please read the chapter
"Automatically search for and remove ads" (view page 226) chapter.
www.magix.com
Automatic scene recognition: Divide material into scenes. Please also read
the section "Automatic scene recognition (view page 224)".
Automatically set chapter markers: Please also read the section "Set
chapter marker automatically (view page 105)" in the chapter "Edit" in the
PDF manual (press "F1").
Burn project immediately after recording: You can use this option to record
and burn in a single step. Simply select the format you would like to burn,
insert a suitable blank disc into the drive, and then press record.
Note: Make sure that the selected recording quality corresponds with the
disc type (the preset "MPEG DVD" for DVDs).
If you use your own settings for MPEG encoding (e.g. half image resolution
for long-play DVDs) make sure that settings for recording and later for
burning are the same so that no new recording is necessary (Smart
encoding).

82 Object editing
www.magix.com
After recording, the program automatically switches to the "Burn" screen,
the burn window opens and the disc is burned. The last set layout is used
for the menu layout for the DVD.
Tip: This function is particularly suitable for burning lengthy disc projects
directly to disc, since recording may begin in the evening and DVD should
be finished by morning.
Export for mobile device: The recorded movie is immediately converted into
the format of the selected mobile device and transferred. The list field
contains the device which has been selected in the "Export video/audio
(view page 249)" dialog.
Settings: Opens the "Export settings (view page 243)" dialog for the selected
target device.
Note: If you enter a file name and memory path in the export dialog, then the
path is used but the file name is ignored. For EPG-controlled TV recordings
the name of the program is used instead.
Creating new movies or attaching them
If you record or load multiple movies one after the other, then you will need
to decide for every new film if it should be appended to the previous film or
created as a new one.
The choice you make here is important for the later design of the DVD
burning selection menu; movies will be entered into the first level of the
menu hierarchy and scenes are entered into the second level. Every movie
can also be edited in detail and enriched with effects, titles, and transitions
via the "Edit" screen.
Object editing
In the Timeline mode of MAGIX Video Pro X3, you are dealing with
"objects". This general description includes all media types positioned on
tracks in the Arranger. There are video objects for video files, audio objects
for audio files, image objects for images or photos, title objects for subtitles
and even synthesizer objects, which contain MIDI files.
In the following chapter you can read about what you can do with these
objects. The workflow for all objects is very similar.

Object editing 83
www.magix.com
Insert object into the project
Select files in the Media Pool
The source monitor allows material to be viewed prior to exporting it. A
preview function is also provided for all of the files in the Media Pool.
First, double click the desired file in the Media Pool which you would like to
preview. Image files are displayed immediately; video files must be loaded
first. A preview is also provided for special objects like titles or fades.
Use the playback button in the source monitor to start the preview. Audio
files may also be listened to beforehand via the play button, and a level
display will activate in the source monitor.
Load files
Media files can be loaded into the Arranger from the Media Pool in several
different ways:
The fastest way: Drag the desired file from the Media Pool into the desired
track. If an object is already present at this position, the file is inserted at
the desired time position on the next empty track below.
Load several files: If you would like to load several files, hold down the "Ctrl"
key while clicking on the entries you would like to use. If you would like to
load a sequence of files, hold the "Shift" key and click the first entry, then
on the last. All entries present in between will be selected. Every file can be
moved from the Media Pool to the Arranger via drag & drop.
Insert via menu command: You can also use the menu commands of the
"Insert modes" button. For more about this, read the section "Insert modes
(view page 48)" in the chapter "Workspaces".
Project folder: If you would like to combine your material separately, then
using the project folder is recommended. It can be used as a sort of
clipboard where files that may be used in the project are sorted ahead of
time. This creates a better overview and saves repetitive, annoying
navigation through folders in the Media Pool.
DVD files (VOB) with multiple audio tracks
MAGIX Video Pro X3 also loads VOB files that contain multiple audio tracks.
After the VOB file loads, simply click the audio object created and select the
desired audio track.
Note: To view and select audio objects in the arrangement, Timeline mode
must be active.

84 Object editing
Loading parts of longer movie files
For longer videos, it is recommended to define the areas which should be
loaded into the project before importing. An in and out point is set to define
the area for this purpose. To do so, proceed as follows:
Select a file from the Media Pool by double-clicking it. Play it back using the
play buttons on the source monitor to indicate the section which you want
to use in the project.
Either move the range markers directly by dragging them with the mouse or
set them using the buttons or the shortcuts "I" and "O". The shortcuts are
especially useful for exact positioning using the shuttle and the jog wheel
Left-click on the monitor image and drag it to the arranger. An object will
appear on the track and in the project folder simultaneously, corresponding
with the selected area.
You can also drag your selection into the project folder and use it in your
project later by dragging it from the project folder onto the arranger. The file
in the project folder has the same name in this case as the original file but
includes only the selected range.
You can also drag a file from the Media Pool into the project folder first and
then cut it from there with the help of the source monitor. The in and out
points that result are saved directly when the range is stretched.
Alternatively, objects may be moved the opposite direction from the
arranger into the project folder. In case the object should appear in the
project folder and in the arranger, hold down "Ctrl". This adds all object-
associated settings (fades, effects, animations) and enables different
editing work to be done on an object which then can be saved in the project
folder for later usage.
Note: For all operations involving insertion from the source monitor into the
arrangement, MAGIX Video Pro X3 features a variety of insert (view page
48) modes.
Select and group objects
To edit or delete objects using menus, you must first select them. To do so,
simply click on the object you wish to select. Objects will change color to
show that they have been selected.
When the Shift key is pressed, multiple objects are selected. You can open
up a rectangle positioning the mouse over the object, then holding down the
www.magix.com

Object editing 85
www.magix.com
mouse button and marking all objects within the rectangle (”elastic band
selection”) by left-click-dragging.
Any object can be combined with others to make up a group, to avoid the
objects being unintentionally moved out of relation to each other. Once they
are combined, clicking on one object of a group will select the entire group.
To group or ungroup objects, use the buttons in the tool bar or the
corresponding commands in the "Edit" menu.
Duplicate objects
Objects may be duplicated very easily. Click on the object to be copied with
the mouse while holding down the "Ctrl" key. This generates a copy, which
you can immediately drag to the desired position or cut separately.
Extract sound from videos
Video with sound material appears in the arranger on two tracks as two
objects (an audio object and a video object). The two objects automatically
form a group.
To edit the video and audio material separately from one another, the
objects can be separated with the Ungroup (view page 291) function in the
"Edit" menu or button in the arranger. Now you can replace the audio or the
video track, or process each file separately. Rejoin/regroup the tracks with
the ”Export arrangement” function.
Shift objects
Hold down the mouse button to move selected objects to any tracks and
positions per drag and drop. It is recommended to place objects, that belong
together on neighboring tracks and create separate tracks for audio and
video objects. Foregrounds and backgrounds, or videos that are to be
layered should lie on two tracks stacked one above the other.
If the Shift key is pressed while moving the object selection, the object’s
horizontal time position is maintained.
Cutting objects
All objects can be split. Each object section then becomes is then split into
individual objects.
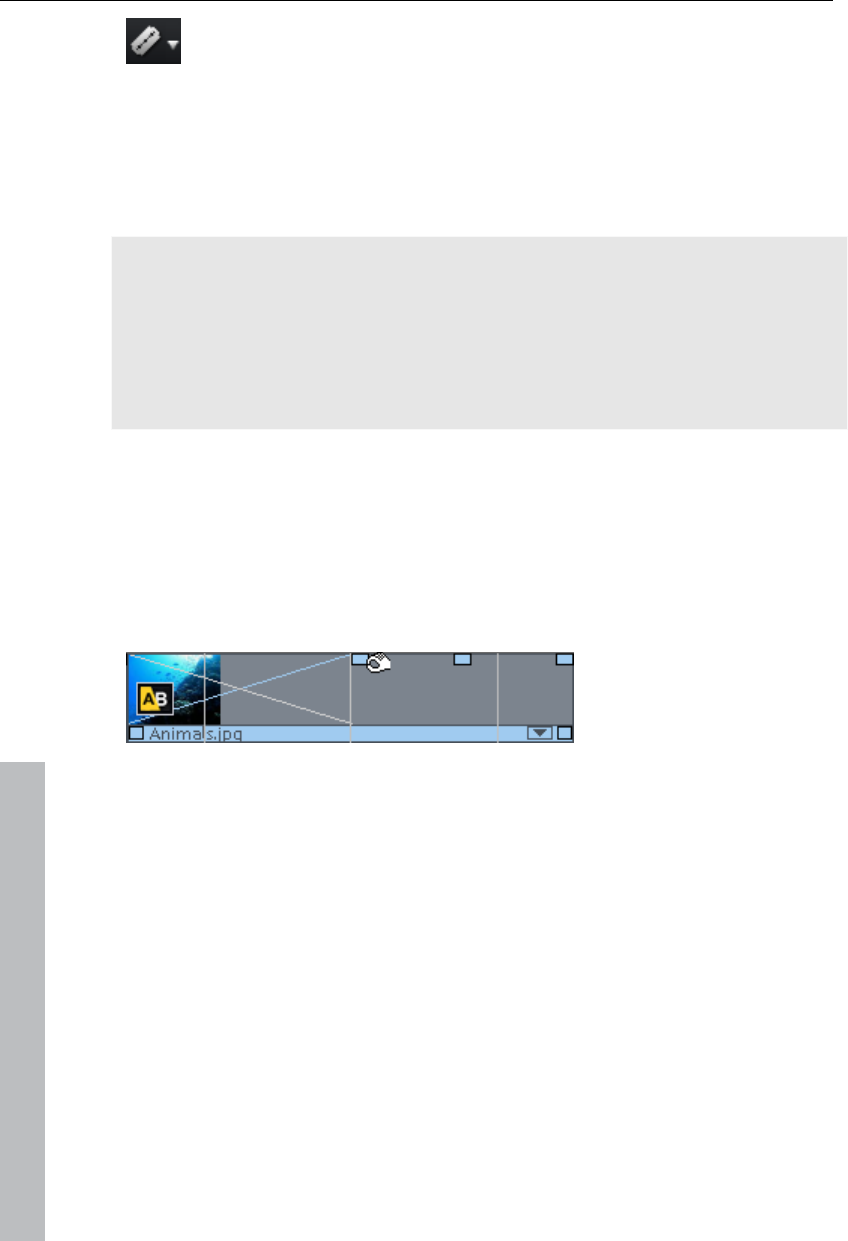
86 Object editing
First select the object to be split.
Position the playback marker at the position where the movie is to
be cut.
Click on the "cut" button or select the "cut" option in the "Edit" menu.
In order to rejoin these split objects at a later stage, simply highlight the
individual parts and select the command ‘forming group’ to join the selected
objects together alone group.
Hint: If the commands "Split" and "Remove beginning/end" are applied
without a selection, all objects at the position of the playback marker are
cut.
Tip: You can find detailed step-by-step instructions, on how to remove
unusable scenes from video material in the "Quick start" chapter on the print
manual.
Object handles
All objects can be re-sized with their lower edge “object handles”. Move the
mouse over one of the lower corners of the object until the mouse pointer
becomes a double arrow. Move the mouse over one of the lower corners of
the object until the mouse pointer becomes a stretch symbol.
5 "handles": Length, fade, transparency (volume)
An object can be faded in or out with the handles to the left and right upper
corners of the object. Cross-fades between different objects can be created
by overlapped positioning of objects that are fading in and out. The length of
the cross-fade can be adjusted with the handles.
Using the transparency/volume handle located centrally at the top of the
object, adjusts the transparency of video and Bitmap objects, or the volume
of audio and image objects.
If you adjust the middle handle of a video object all the way down, the object
will become transparent. If a second object is located on a track above it, a
black color will appear from below it, so that brightness will be reduced.
www.magix.com
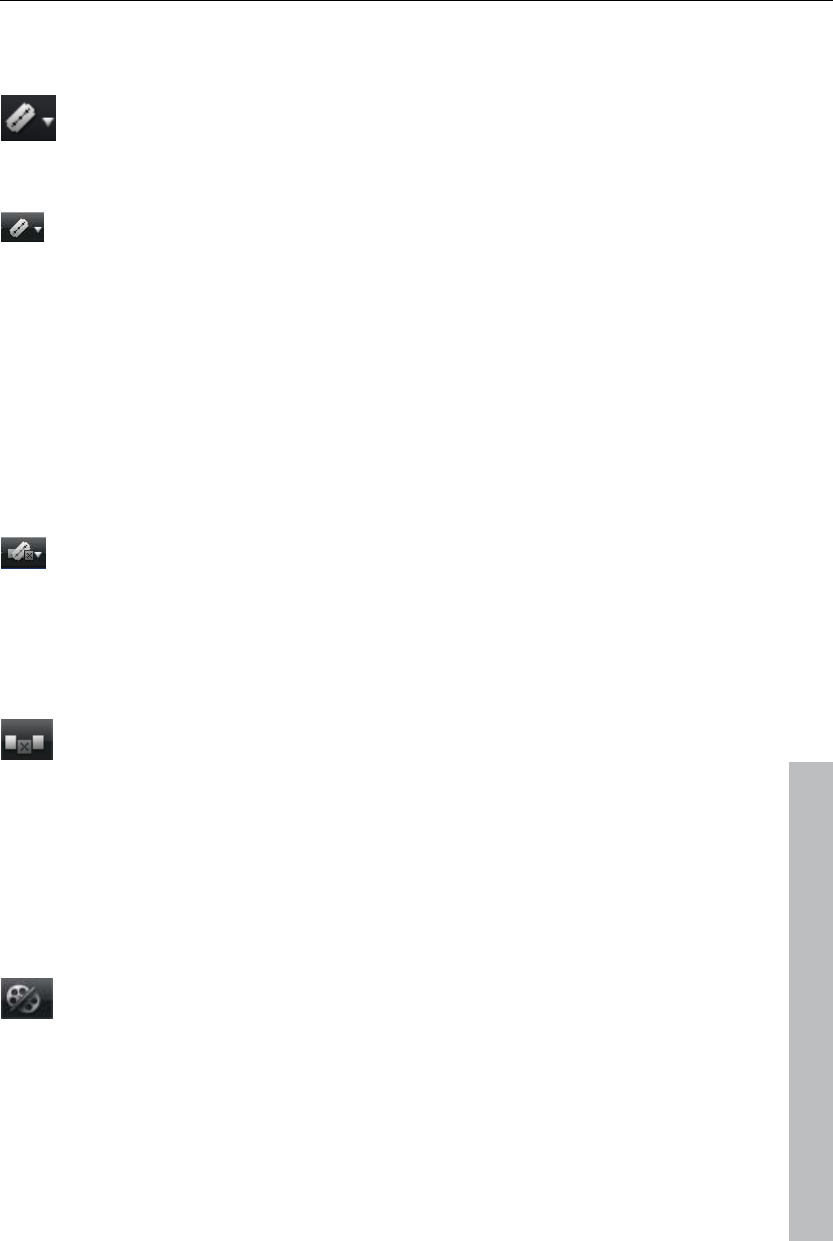
Object editing 87
Edit menu
With a click on the small arrow beside the cut button, you can access
the cut menu. There you will find further relevant commands.
Split
This command cuts a scene at the point where the playback marker
is positioned. This way, two free-standing objects are created.
Keyboard shortcut: T
Remove start
This command cuts a scene at the point where the playback marker is
positioned and removes the material before the playback marker.
Keyboard shortcut: K
Remove object end
This command cuts a scene at the playback marker position and
removes the material behind the back marker.
Shortcut: U
Remove scene
www.magix.com
If you want to cut a scene out of a movie retroactively, this option
automatically moves all objects, titles, and transitions on all tracks
forwards so that no gaps result.
Objects on other tracks which project into the area of the selected scene will
not be moved automatically; they will remain at the current position.
Shortcut: Ctrl + Del
Split movie
This command divides the movie into two individual movies at the
position of the playback marker. The current arranger retains the
portion that is located in front of the playback marker.
The remaining part will be erased from the current arranger and turned into
a new movie, which can be found in the "Window" menu.
Shortcut: Alt + Y
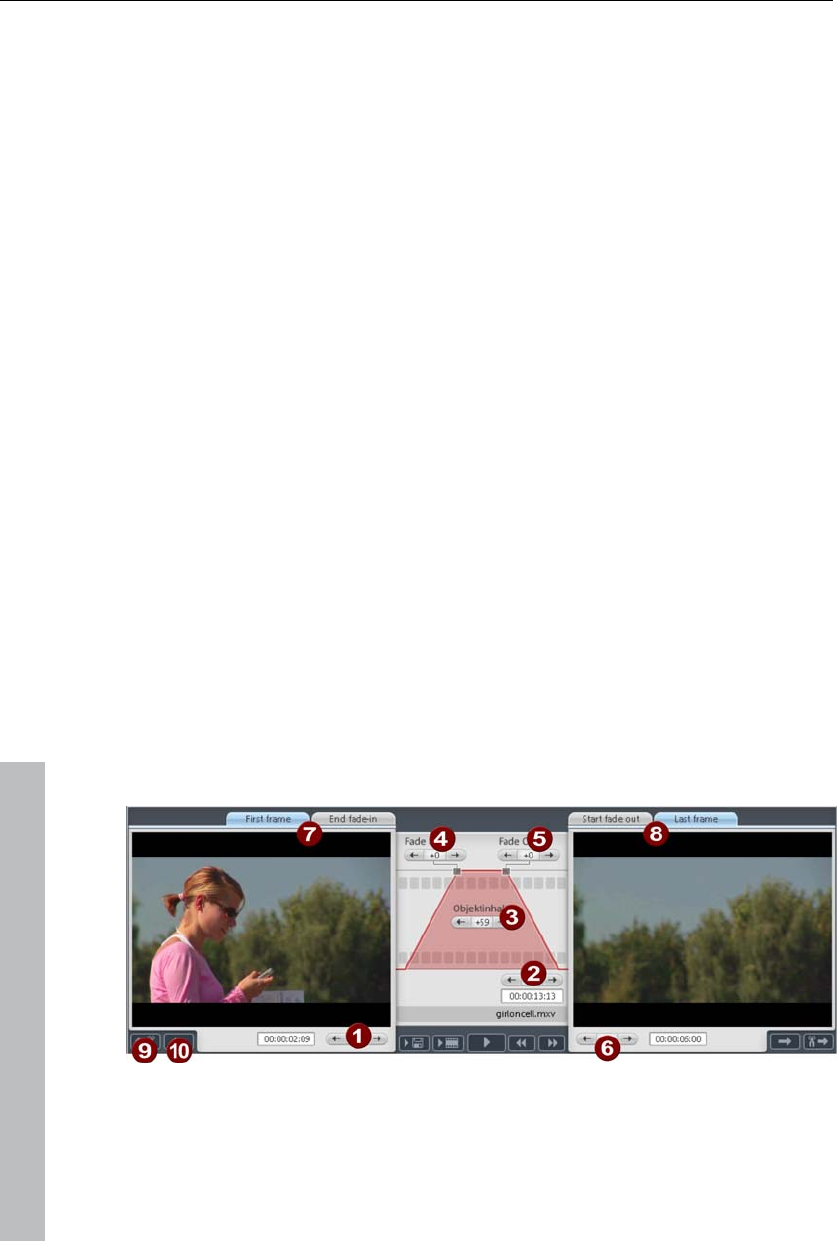
88 Object editing
Trim Objects
Trimming provides exact placement of object borders or transitions. MAGIX
Video Pro X3 has two different trimmers, and these can be opened using
the context menu for a video or image object.
General advice for operating both trim editors
Play functions: The trim window contains its own play functions that allow
the object to be played individually or in relation to the arrangement.
The right play button plays the arrangement normally. Note: Replays can
sometimes appear shaky because the processor may be overworked, and
some frames may be left out.
The middle play button plays the arrangement "frame-by-frame", which
means no frames are left out, but that the replay may be slower.
The left play button renders material before playing. This method ensures a
smoother playback.
The start marker in the timeline is reset when the rewind and fast-forward
functions are activated, allowing for complete control of transitions between
two videos.
Increments: A click on the +/- buttons in both trim editors places the handle
or the material within an object exactly into a frame. With the "Ctrl" key you
can increase the frame rate ( 5 frames/sec per mouse click).
Trimmer for individual objects
A schematic display of the selected object and its handles can be found in
the center of the trimming window.
Fade in/out (4, 5): These buttons adjust the upper fade handles of an object.
Object content (3): Here you can move the video material to be played
without changing the object length.
www.magix.com
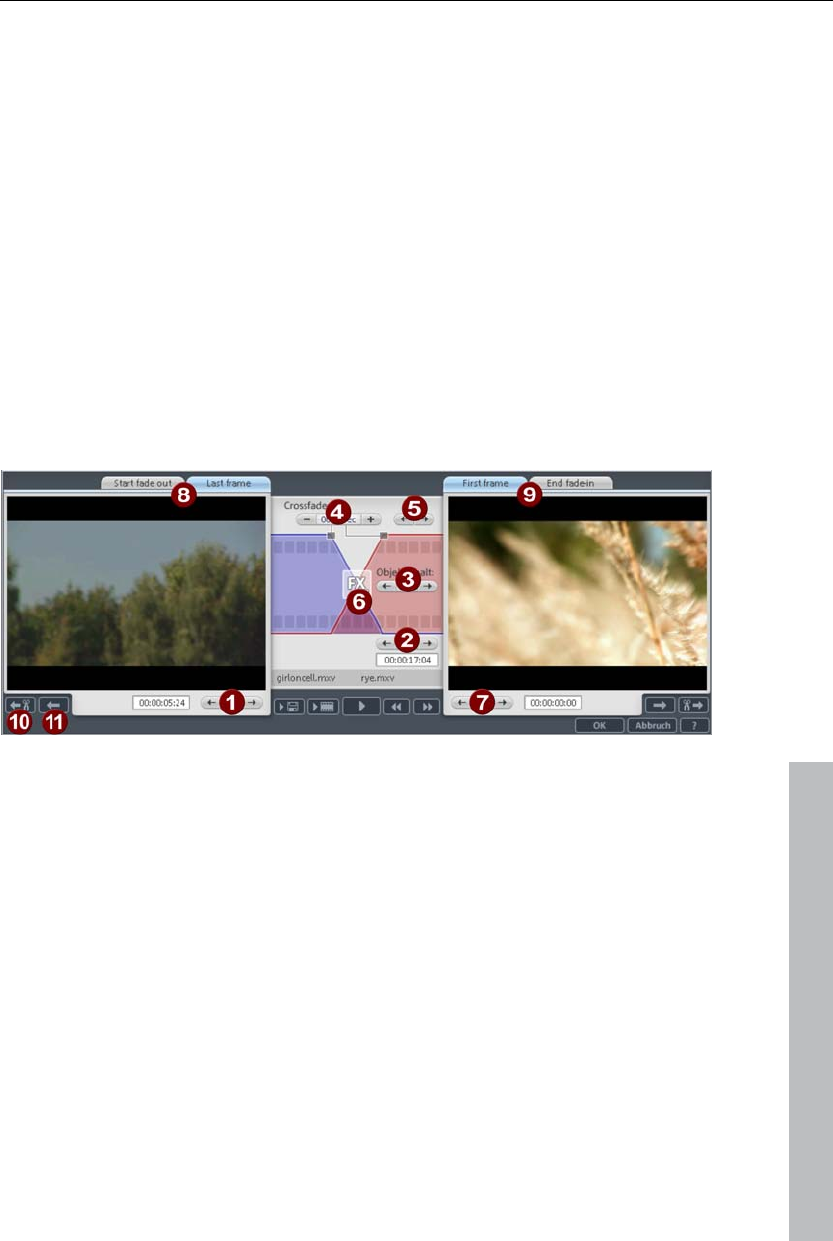
Object editing 89
Position (2): Moves the object on the track.
First frame/End fade-in (7): Toggles the left monitor between the first frame
of the object and the end of the transition.
Start fade-out/Last Frame (8): Toggles the right monitor between the start of
the transition and the last frame of the object.
Left/right arrow buttons (1, 6): Here you can adjust the lower object handles.
Next object/cut (9, 10): The buttons below and to the right skip to the
next/previous object and/or cut in the arranger. These buttons make it easy
to move and trim objects in the arrangement without having to leave the
trimmer.
Keyboard shortcut: Q
Cut trimmer
www.magix.com
A schematic display of the selected transition and its handles can be found
at the center of the trimming window.
Left arrow buttons (1): These buttons move the last frame of the first object
while adjusting the second. The length of the transition remains. The display
indicates the relative change in comparison with the starting situation when
the trimmer was opened.
Position (2): Moves the second object. The length of the transition is
changed. This corresponds with shifting an object in the arranger.
Object content (3): Moves the movie under the second object. The length of
the object and the object itself are not changed.
Crossfade (4): Changes the transition’s length between both objects. The
objects remain of equal length. The length can be numerically entered.

90 Object editing
www.magix.com
Middle arrow buttons (5): Shifts the existing transition. Both objects remain in
their positions, but the transition’s center point moves.
Transition (6): Displays the type of transition. A mouse click opens a popup
window from which you can select a transition.
Right arrow buttons (7): Move the first frame of the second object. The first
object and the transition remains. Only the length of the second object
changes.
Start fade-out/Last frame (8): Switches the left monitor between the start of
the transition and the last frame of the object.
First frame/End fade-in (9): Switches the right monitor between the first frame
of the following object and the end of the transition.
Next cut (10)/Next object (11): The buttons below and to the right skip to the
next/previous object and/or cut in the arranger. These buttons make it easy
to move and trim cuts in the arrangement without having to leave the
trimmer.
Keyboard shortcut: N
Shrink or interlace videos
Videos can be made smaller, e.g. in order to display a foreground video in a
section of a background video. Both videos must be arranged appropriately
in the arranger.
Place two videos one above the other in the tracks.
Place the foreground video on the track below the background video.
Note: Make sure that the mixing effect "Stamp" is active under "Video
effects -> Chroma key".
Select the foreground video
In the Media pool under "Effects -> Movement effects", select the entry
"Position/Size" or "Crop/Zoom".
Click and hold down the mouse button on the edges of the video in the
program monitor to change the section or the size. The selected video may
also be moved to the desired position in the program monitor in the same
way.
For more detailed information, see the section entitled "Movement effects in
Media Pool" in the chapter "Effects (view page 116)".

Object editing 91
www.magix.com
Save objects separately
Individual objects or object groups from the arranger may be saved
separately via the project folder as a separate files. For example, cut out
trailers, jingles, and so on that you need converted, and then save them for
other projects for reuse as a take.
A take file (*.tk2) contains a reference to a multi-media file or to a special
object (videos, sound, visuals, etc.) including all additional properties that
an object may possess (start and end time, fades, and effects including
effects curves).
To save, select the corresponding objects in the arranger and group them
as required ("G"). Next, select "Add to project folder" via the group's context
menu.
An entry will now be added there that is named after the object in the
arranger. The context menu (view page 320) allows you to name these
entries logically, comments may be added via "Properties", and save them
as a take.
Saved takes may be loaded via the "Load" button in the project folder.
Attach to picture position in the video
You can attach a video, picture or text object to moved picture content of
another video. The attached object automatically completes the movement
of a picture element from the film, making it appear magnetic. For example,
you could use this method to insert a hat that stays on someone's head
throughout, even if the person hops through the picture.
Let's roll:
Place an overlay object (e.g. a photo of a hat) on a track below a video with
a moving image element (e.g. a walking person).
Right click the object and select the "Attach to picture position in the video"
movie point.
Then click "Continue" in the dialog that appears.
Note: If you want to attach two objects, e.g. a title and a speech bubble, an
additional dialog appears, which lets you select the objects you want to
attach to your video.
The next dialog asks you to draw a frame around the image content to be
tracked. The content should have high contrast to its background.
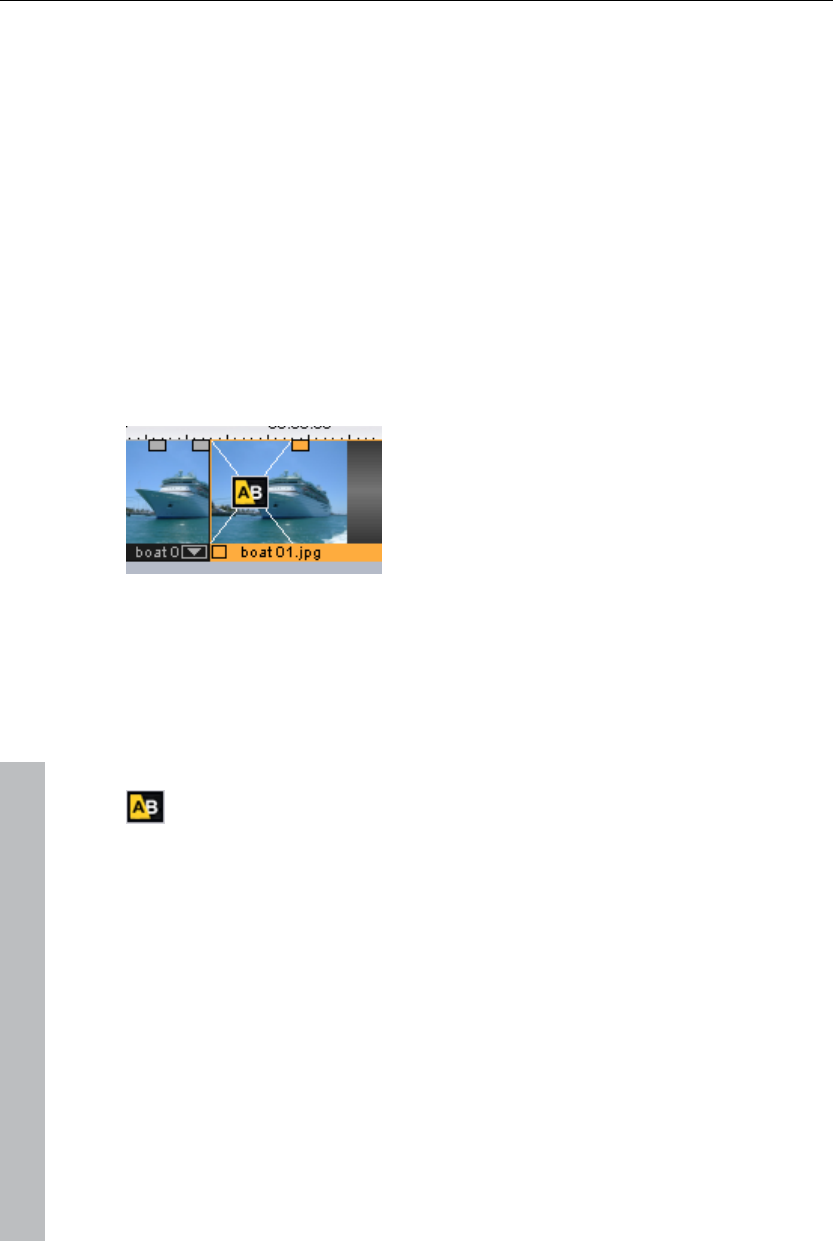
92 Object editing
Movement will be automatically calculated and a series of keyframes that
control the position and size of the effect according to your wishes will be
generated.
Transitions (fades)
When importing video files into the arranger, individual objects usually
follow directly after one another. This is called a "hard cut". However, you
can make scenes blend or “transition” into each other.
This means that for the duration of a transition, two objects are shown at
once and can be mixed "faded" together in different ways. You will find
numerous blends in the Media Pool’s transition directory.
Simple crossfade
A simple transition can be created in the arranger by dragging one object
over another. A crossfade will be automatically created. During this standard
transition, the brightness of both objects is increased, i.e. the first clip fades
out while the second clip fades in. The duration of the crossfade is
displayed in the arranger by white crossing lines. You can adjust the length
of the crossfade by dragging the upper handle of the second object to the
left or to the right.
To select a different fade click on the transition symbol displayed when
an object is selected.
The fade menu opens. The transition icon will change, depending on your
selection.
Fades from the Media Pool
To open the fade directory, click on the "Fade" button.
A click enables a preview of the fade on the preview monitor.
Simply drag the desired fade preset onto the border between the two
objects. Only when the mouse pointer with the transition preset is placed
over a scene change will it turn into an object symbol. The object at the
back will be shifted to the front to accommodate the transition.
www.magix.com

Object editing 93
www.magix.com
The length of a transition is decided by you, if a transition is shortened, it
means that the resulting effect is speeded up.
Some transitions can be adjusted even more exactly. To do so, click on the
corresponding fade symbol in the Timeline or in the Storyboard and select
"Settings". Thus, an object's fade symbol in the Media Pool can represent
an entire group of different effects.
The so-called alpha fades ("Iris", "Objects", "Random", etc.) are actually
pre-produced black and white videos combined with the alpha keying effect.
Other fades use sound effects. Look around at all the contents to form an
idea of what you can use in future projects.
Note: Use transitions economically! Most professional movies or TV shows
use hard cuts as the rule and transitions less frequently. Videos appear
unprofessional and too ornate if fade effects are added to every change of
scene.
Custom fades with Alpha-keying
Alpha keying extends the range of transition effects used in MAGIX Video
Pro X3 to produce black & white movie transitions or selected color fade-ins
and fade-outs. You can create such a video from any video material (also
color) by exporting it as a transition (File -> Export movie -> Export as
transition).
The loaded movie is then exported as a black and white video in mxv format
and stored in the fade directory. Afterwards, it will be available in the Media
Pool and the fade menu.
3D transitions
General options
3D effects offer exciting and varied opportunities to create transitions
between two videos. 3D effects may be accessed via "Fades" in the Media
Pool.
To achieve the most fluid display of 3D fades, the graphics card's
acceleration function is used. 3D functions on graphics cards may be used
via either of the software standards "Direct3D" or "OpenGL". These
standards are variably supported by the respective graphics card drivers.
For this reason you can switch between different fade settings for each
standard.

94 Object editing
www.magix.com
Settings
The fade settings enable the behavior and appearance of the 3D fades to
be influenced. Click the corresponding fade symbol for the object and
choose "Settings" to do this.
The following options are available:
Anti-aliasing: The edges of three-dimensional objects often produce
unpleasant step effects. Anti-aliasing (edge smoothing) reduces this effect,
however this requires increased computing performance. The setting
applies globally to all 3D fades, and switching on anti-aliasing during 3D
fades has the effect that all other 3D fades are also affected by this setting.
Mirror X/Y: These options enable the movement track of 3D objects to be
influenced within the fades. The option "X-axis mirror" mirrors the movement
of the object horizontally (along the X-axis). The option "Y-axis mirror"
mirrors the movement of the object vertically (along the Y-axis).
Troubleshooting
Problem: The 3D transition display in the video monitor is sluggish and
jittering.
Solution: The performance of 3D effects depends on the computing
performance of your graphics card. To achieve more fluid display, set anti-
aliasing in the settings dialog for the 3D fades or select a reduced resolution
for the program monitor. You should also ensure that the most current
drivers are installed for your graphics card. When exporting or burning to
disc, fades will always be displayed fluidly.
Problem: The 3D transitions remain black or displays errors during
Solution: The 3D fades use hardware-accelerated rendering via the graphics
card to calculate the image. This may lead to certain incompatibilities on
some systems. Ensure that the most current devices are installed for your
graphics card. In some circumstances, switching between rendering modes
(via the fades setting dialog) or deactivation of anti-aliasing may correct the
problem.
If there should still be problems, however, you can deactivate the hardware
acceleration. Refer to “Deactivating hardware acceleration”
Problem: A warning is displayed that there is insufficient graphics card
memory available for rendering the transition when exporting 3D transitions.
Solution: The video memory on your graphics card is insufficient for
calculating the 3D effect at the desired resolution. Select a lower resolution
as required (e. g. 720 x 576) in the export dialog's settings. In case the

Object editing 95
www.magix.com
problem continues to occur, deactivate the hardware acceleration (see
above).
Problem: Only a crossfade is displayed when previewing a 3D transition. A
warning message is displayed that insufficient graphics card memory is
available for the selected resolution.
Solution: The video memory featured by your graphics card is insufficient for
calculating the 3D effect at the desired resolution. Right click on the
program monitor and then select a reduced resolution under "Resolution
presets". If the problem continues to occur, try deactivating the hardware
acceleration (see above).
Problem: When viewing 3D fades, only a crossfade is displayed, and the
warning message: "An error occurred during calculation of the 3D fade. A
warning is displayed that the 3D transition may not be displayed correctly.
Solution: Deactivate the hardware acceleration. Hardware-accelerated
rendering via the graphics card increases performance exponentially,
however in some circumstances it may lead to problems on some systems.
In case image errors occur in the context of 3D fades, the hardware
acceleration may be deactivated for 3D fades. In "File -> Settings ->
"Program settings -> Video/audio", deactivate the option "Hardware
acceleration for 3D effects". To make this change applicable, the program
must be restarted.
3D series
The 3D series are a further development of 3D transitions (view page 93),
where the transitions are thematically sorted. For instance, you can let
photos pop up and disappear on a notice board or make it look as if the
photos were hung on the walls of a gallery.
There are several options to call up 3D series for photos or scene
transitions:
Click on the "Fades -> 3D -> 3D series" button in the Media Pool. Select the
desired 3D series and drag it onto the first scene or image transition where
the 3D transition should start.
In the transitions menu between two scenes choose "3D series". Click on
the desired 3D series to select it.
You can select how many of the subsequent fades should be replaced by
the 3D series in the dialog.

96 Object editing
Search for gaps
MAGIX Video Pro X3 enables you to locate gaps between objects where no
image material is located. This hinders unintentional black spots from
appearing. This option is located under "Edit -> Find gaps". A corresponding
dialog opens.
Optimize view: Zooms to the selected gap.
Mark section as gap: Spans a section over the selected gap.
Edit selected gaps: The selected settings are applied but no additional action
is taken.
Shortcut: Ctrl + Shift + C
Simple cut
All objects can be split. Each object section then becomes a completely
independent object.
First, select the object to be split.
Position the playback marker at the position where the movie is to be cut.
Click on the "cut" button or select the "cut" option in the "Edit" menu,
or just press "T" on the keyboard.
In order to combine these split objects again later, simply select the
individual parts and then choose the command "Form group" to join the
selected objects together into a group.
Note: If the commands "Split" and "Remove beginning/end" are applied
without a selection, all objects at the position of the playback marker are
cut.
Tip: You can find detailed step-by-step instructions, on how to remove
unusable scenes from video material in the "Quick start" chapter on the print
manual.
Two-point cut
Two-point cut makes importing files easy in order to insert new material at
certain positions quickly into complex projects. One point is placed in the
www.magix.com
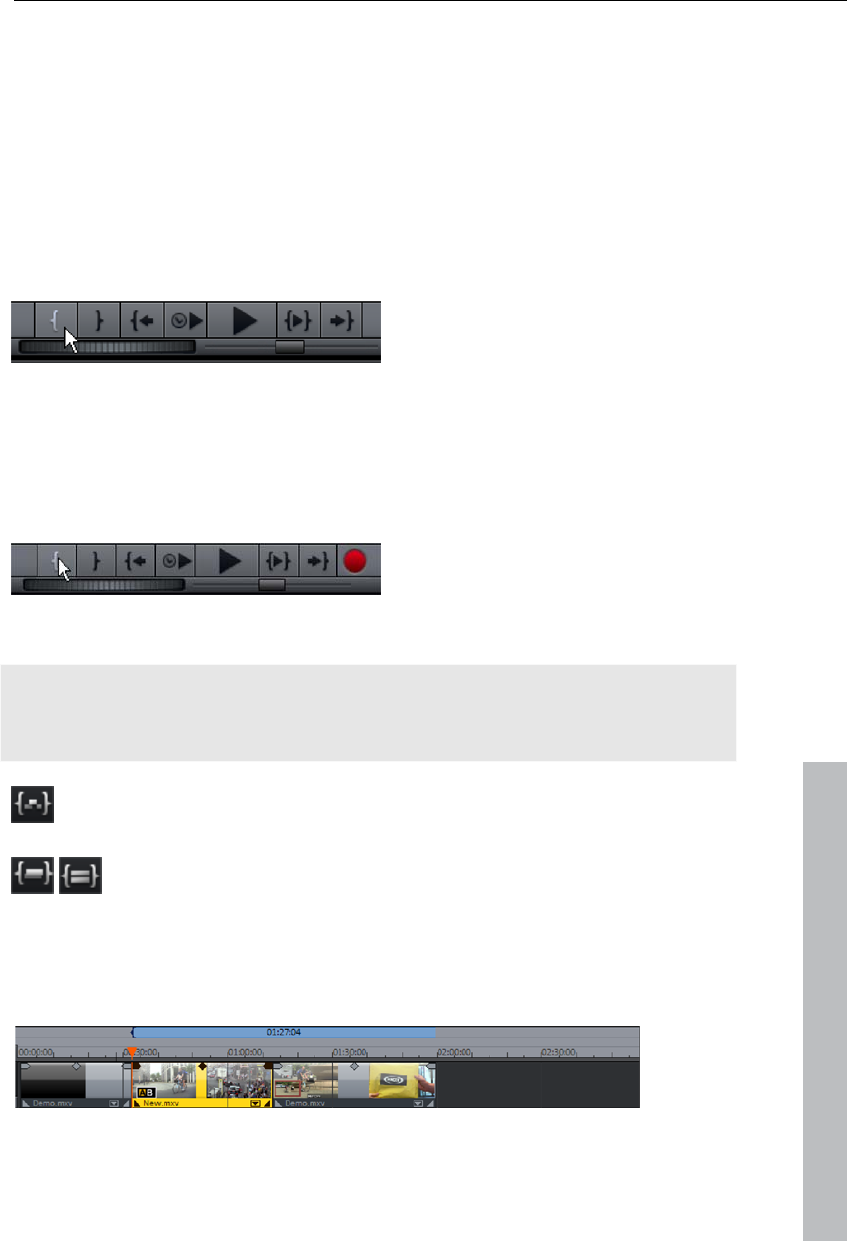
Object editing 97
arranger and another is placed in source monitor, and these are used in
either of the following variations:
Variation 1: Source in/destination in
The point in the arranger specifies the location where the new material
should be inserted into the project ("destination in") and the point in the
source monitor where the new material should be inserted ("source in").
Place the playback marker at the position in the arranger where the new
material should be inserted.
Click in the program monitor
on the button in the transport
control for the start of the
section (in point).
Double click the desired file in the Media Pool to load it into the source
monitor.
Find the position in the source monitor where the material should be
inserted.
Click the button in the source's
monitor's transport control for
the start of the section (in
point).
www.magix.com
Note: To insert the complete material, an in point doesn't need to be
inserted into the source monitor. Source in will now be the start of the
source material.
Select the insert mode "Overview (view page 49)" to overwrite
the material in the arranger behind the in point.
Or use one of the two ripple modes (single-track ripple or multi-
track ripple (view page 48)) in order to cut the material at the
position of the in point and move it to back.
"Overwrite" mode does not change the total length of the project. The new
material is only inserted at the position of the in point:

98 Object editing
The ripple modes move the old material in the range together with the
objects behind it to the end of the inserted material. This changes the total
length according to the length of the object:
Variation 2: Destination in/destination out
This variation functions based on exactly the same principle, only instead of
setting in points in both monitors, out points are placed. The new material is
placed in the arranger prior to the out point in this way. This variation
enables you to work from back towards the front to define the scene
transition.
3-point editing
The three-point editing is an insert process that operates based on three
reference points. This functions in three variations, which will now be
explained in more detail.
Variation 1: Destination in/destination out/source in
This variation defines a range in the arranger where the new material will be
inserted.
Initially, the program monitor is used to set an in and out point to stretch out
a range in the arranger.
A third point is then set in the source monitor to define the beginning
("source in") of the material to be inserted.
Finally, the range in the arranger is filled with the new material. The new
material is cut automatically at the end of the range.
Variation 2: Destination in/destination out/source out
This variation functions similar to variation 1, with the difference that the
point in the source monitor is not the beginning, but rather the end of the
new scene ("source out"). This means that the scene transition at the end is
specified and the new material moves into the front of the range. The new
material is cut automatically at the start of the range.
Variation 3: Source in/source out/destination in
This variation defines a range in the new material that should be inserted at
a certain position in the arranger.
www.magix.com
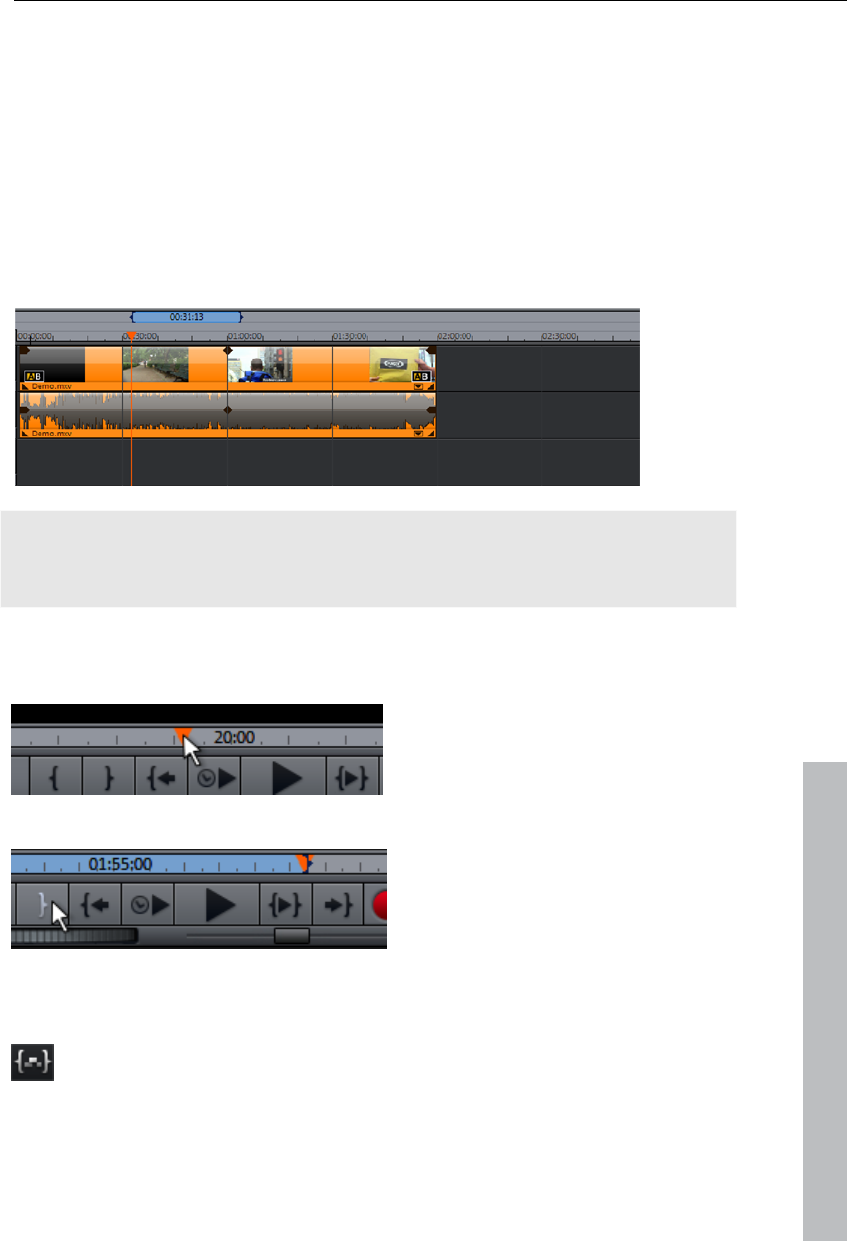
Object editing 99
Initially, a range is spanned out in the source material via an in and an out
point in the source monitor.
A third point is specified in the program monitor which defines the
beginning of the material to be inserted.
Finally, the range from the source monitor is inserted completely at the
position of the in point.
Variation 1 is illustrated according to this precise step-by-step illustration:
In the arrangement, determine an area that corresponds to the time window
and position of the video to be imported (destination in/out).
Tip: For the sake of clarity, it's recommended at the start to cut the material
within the range and then to drag is backwards or to delete it from the range
so that a gap is present.
Load the new material that you want to display inside the range by double
clicking in the source monitor.
www.magix.com
Position the playback cursor in
the source monitor at the start
position where the video should
be imported into the
arrangement (source in).
If you want to cut at the scene
end, set the playback cursor in
the source monitor at the
position where the end of the
scene should be and click the
button for the end of the range
(source out).
Select the insert mode "Overview (view page 49)" to fill the
range in the arranger with the new material, replacing it with
the existing material.
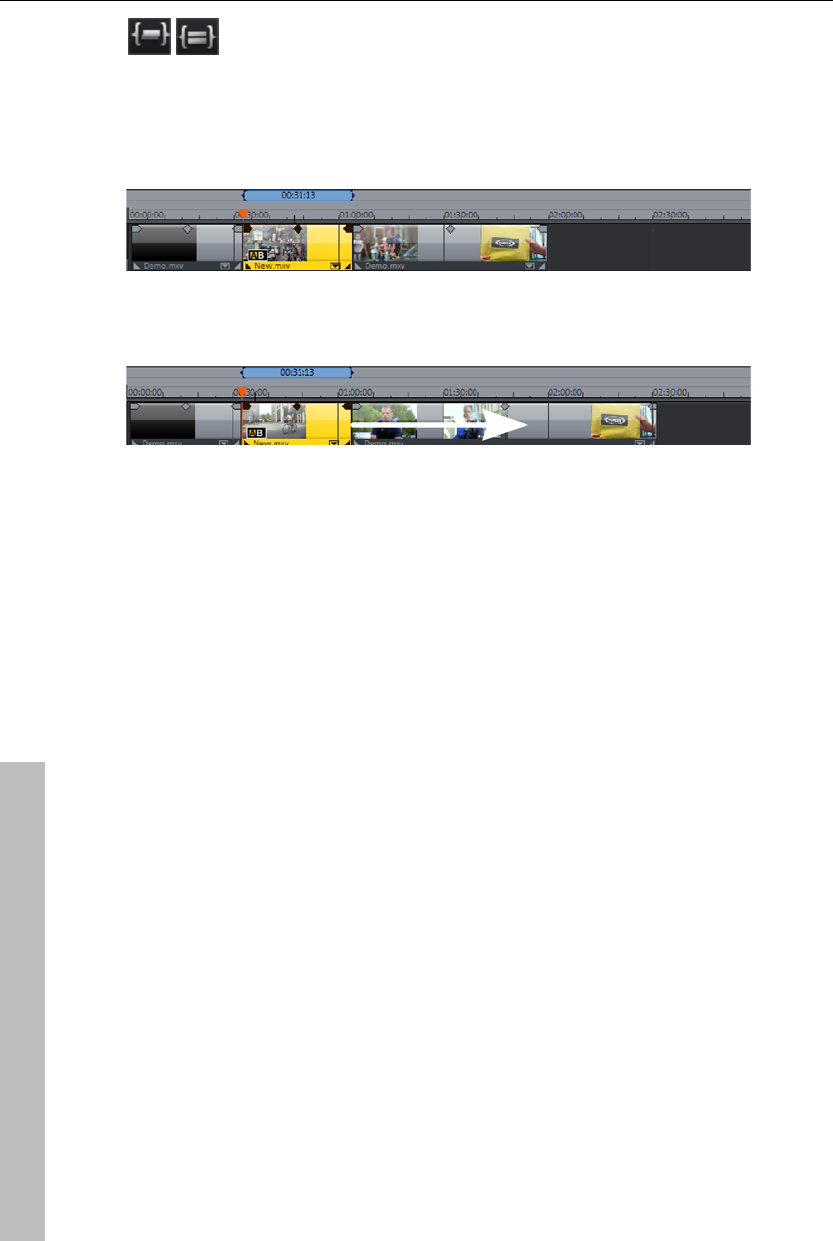
100 Object editing
Or use one of the two ripple modes (single-track ripple or
multi-track ripple (view page 48)) in order to cut the material
at the start of the range and move it to the end of the range.
"Overwrite" mode does not change the total length of the project. The new
material is only inserted at the start of the specified range:
The ripple function moves the material in the range together with the objects
behind. This changes the total length according to the length of the range:
Four-point editing
The four-point editing places new material into the project with the help of a
total of four marker points.
The motto: "whatever doesn't fit will be made to fit". A range is set in both
the source material as well as in the project, and one of the insert modes
described above is used. The function is the same for each mode (overwrite
and ripple): the section from the source material is inserted precisely into
the range specified in the arranger.
If both ranges are coincidentally the same size (which is normally the
exception), then the new material will be stretched or pinched automatically.
The playback speed of the video is changed analog to the timestretching
applied to the audio track.
Because timestretching for an audio track is only possible and sensible to a
certain degree, the audio is removed from larger changes (above a factor of
2). A corresponding confirmation dialog appears first so that the procedure
may also be canceled when in doubt, e.g. to carry out a three-point cut.
www.magix.com
Markers 101
Markers
MAGIX Video Pro X3 also allows you to set various types of markers within
your project.
The Lock button lets you lock all markers (jump
markers, chapter markers) against accidental
moving or deleting.
Playback marker
The playback marker indicates the point from which the
material – either the arrangement or a selected file from
the Media Pool – will be played back. There is a
playback marker below each preview monitor and an
additional one above the timeline in the arranger.
The playback marker is displayed as a red triangle below the monitors. In
the arranger it is displayed as a red triangle.
In order to move the playback marker, simply double click on the desired
area below the monitor. Alternatively, you can click on the playback marker
and move it by dragging it with the mouse. While being moved, the current
image will appear on the monitor, letting you see exactly where in the
material you are located.
www.magix.com
The playback marker in the video monitor can also be moved by clicking on
the lower section of the time scale in the arranger. The playback marker will
also be moved on the program monitor, as both markers are coupled to
each other.
The exact position of the playback marker can be seen in the time display at
the top left, below the corresponding monitor. There, you can change the
displayed values (Hour:Minute:Second:Frame) per mouse click to reach a
certain point in time. Simply enter the desired value and the playback
marker will jump to the corresponding position.
Tip: In the "Playback" tab under "File -> Settings -> Program", you can set
whether repeatedly pressing the space bar resets the playback marker to
the current position or moves it to the original position.
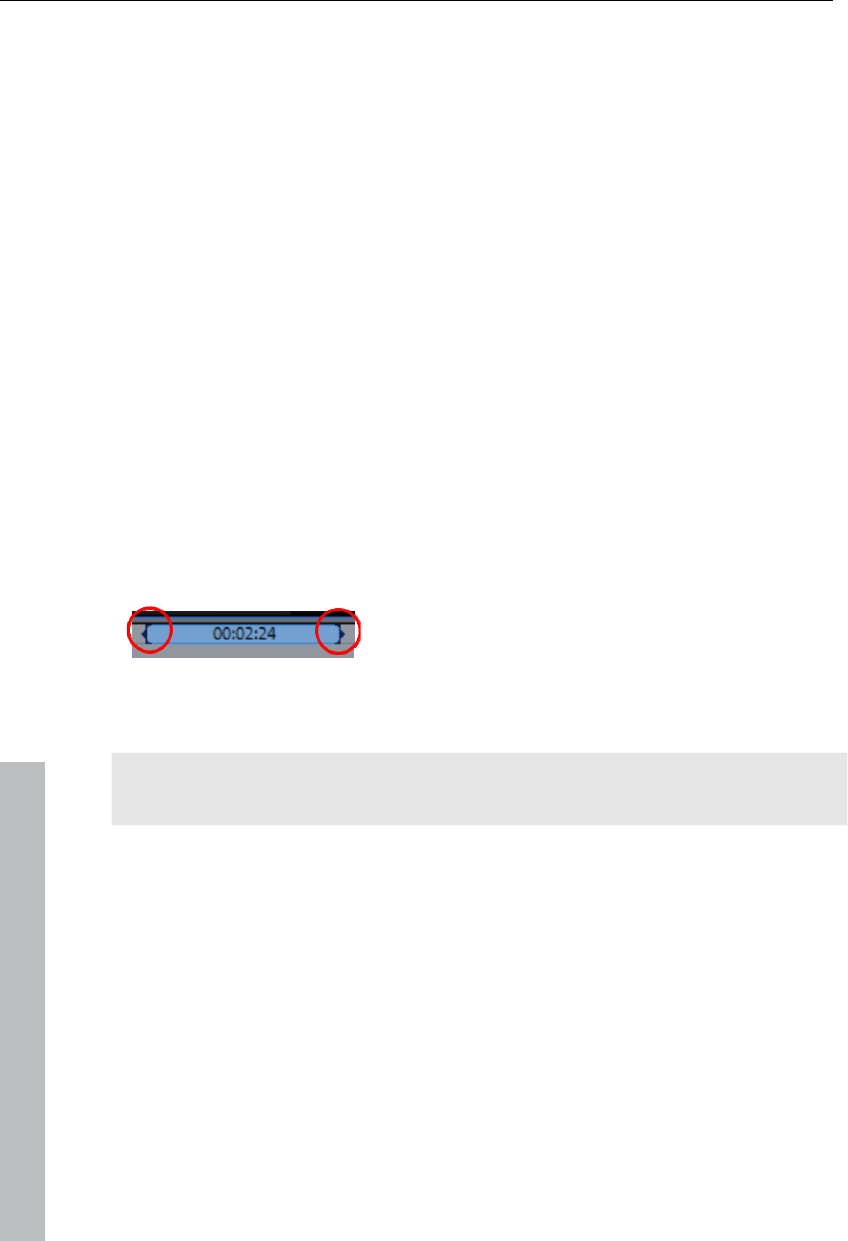
102 Markers
Project markers
The menu "Edit" provides the option to place a project marker (view page
293) at the current of the playback marker. These function as a mental
marker or indicate certain positions or events within the project.
After selecting the menu item, a dialog appears to input a name for the
marker to be created. The first 10 project markers may be selected using
the number keys 1-0 (0 accesses the 10th marker). This allows you to jump
to a particular position of a longer video immediately, without scrolling and
searching.
Project markers may be deleted or renamed via the context menu at any
time. This does not provide direct influence on the result, but they do make
the workflow much easier.
Ranges (in and out points)
Range markers are the "in points" (range start) and "out points" (range end).
They mark a certain range for playback that can be viewed by pressing the
"Playback range" button at the bottom of the corresponding monitor.
To the left, you can see an in point (range start), and an out point is visible
(range end) to the right
Hint: The value between both markers shows the length of the selected area
according to the pattern Hours:Minutes:Seconds:Frames.
Ranges in the video monitor
There are various options for changing the playback area and the in/out
points.
Set the playback marker at the desired position and press "Set range start"
or "Set range end" underneath the monitor to set the in and out points.
Click on one of the markers below the monitor and move it to the desired
position by dragging it.
Click one of the markers in the upper-most bar in the arranger and drag it.
Right clicking on the bar moves the out point to the position of the mouse
cursor. The area grows or shrinks in size correspondingly. Left clicking
moves the in point, whereby the area size stays constant (out point is
moved as well).
www.magix.com
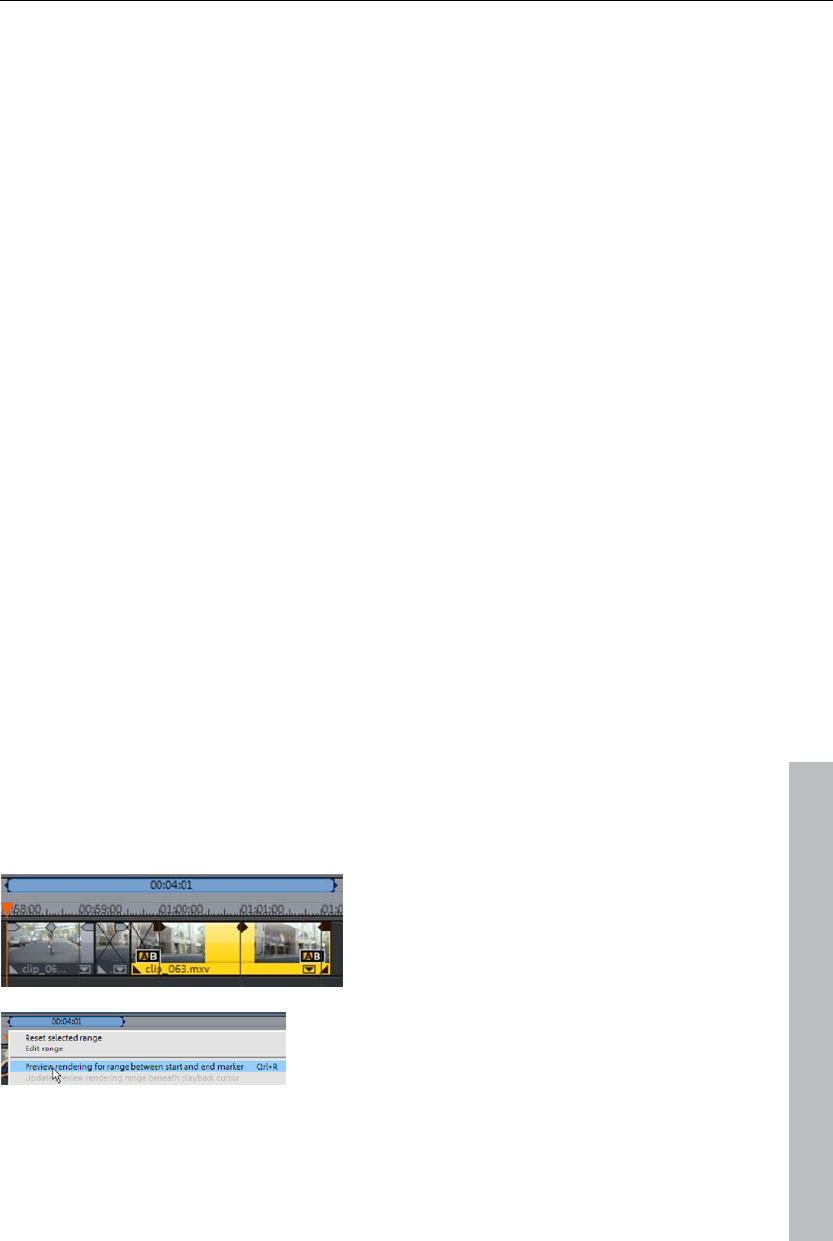
Markers 103
You can adjust the position of the entire range by clicking the blue bar
between the markers and moving it by dragging while holding down "Crtl".
Keyboard shortcut:
Set the start of the range (in point) at the position of the playback marker: "I"
Set the end of the range (out point) at the position of the playback marker:
"O"
Range markers in the source monitor
In/out points are set in the source monitor in the following way:
Set the playback marker at the desired position and press "Set range start"
or "Set range end" underneath the monitor to set the in and out points.
Click on one of the markers below the monitor and move it to the desired
position by dragging it.
You can adjust the position of the entire range by clicking the blue bar
between the markers and moving it by dragging.
For the exact functions of the range markers in the source monitor, please
read the section "Loading ranges from longer film files (view page 84)".
Shortcut:
Set in point (range start) at the position of the playback marker: I
Set out point (range end) at the position of the playback marker: O
Preview rendering
www.magix.com
You may also instruct MAGIX Video Pro X3 to render positions that are
finished. This is especially useful in case fluid playback is not possible due
to the applied effects and transitions. The advantage versus the option
"Combine audio and video" in the "Edit" menu is that all of the objects will
be maintained in the arrangement. The rendered material will only be played
in the background when the playback marker reaches the corresponding
position.
First, place an in and out point above
the range to be rendered.
Next, click the timeline below the range
marker and select "Render range" from the
context menu.
The range will now be combined.
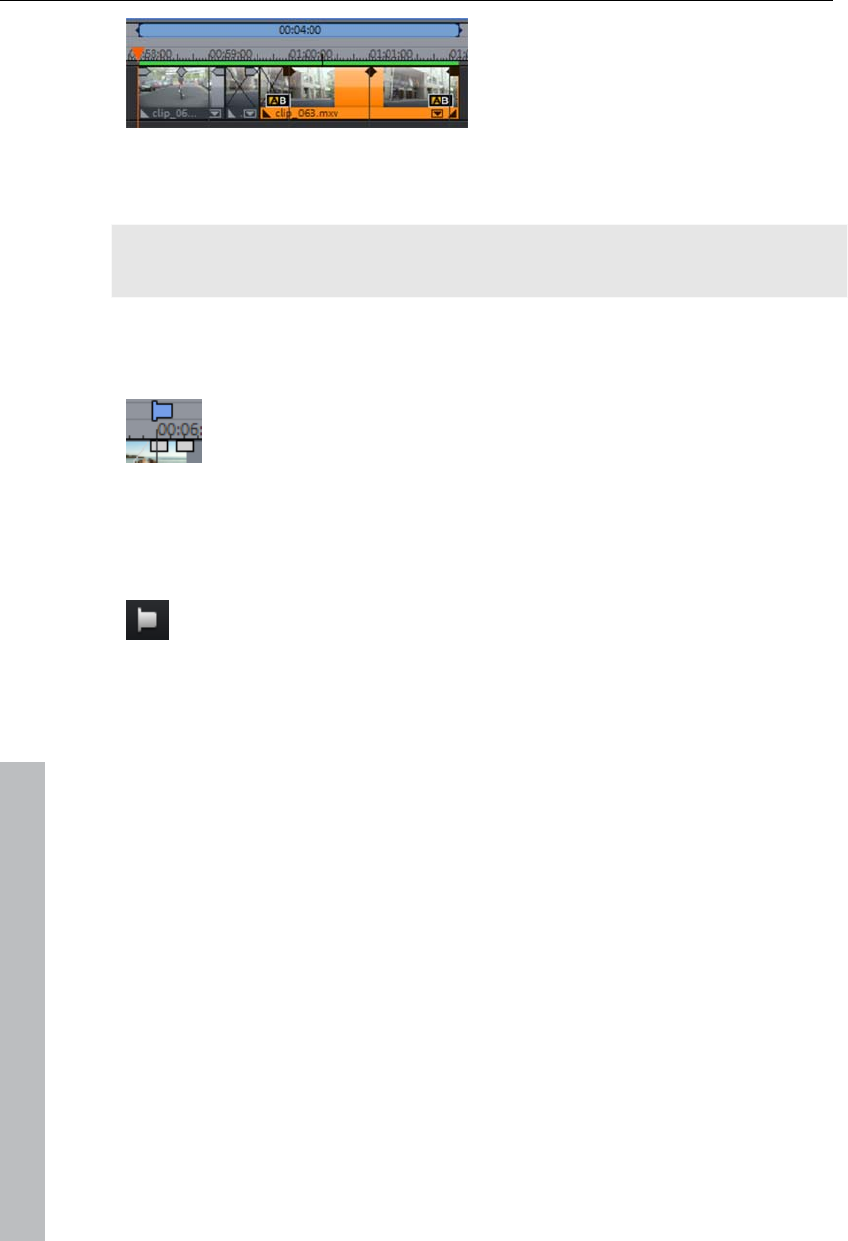
104 Markers
After rendering, a green line appears
in the timeline to symbolize that this
range has been rendered.
As soon the editing is complete for the range, the line is removed and the
rendered material is removed.
Note: The format that is used to render may be set via "File -> Settings ->
Preview rendering (view page 276)".
Chapter markers
The chapter marker defines the start of a new chapter. Chapters
serve to improve navigation when burning the project to disc (view
page 199).
The following options are provided via "Edit -> Marker" or by right clicking
on the playback marker.
Set chapter markers
Places a chapter marker at the position of the playback marker. This
creates a chapter entry in the disc menu in case the movie is being
burned to disc.
You can rename the chapter markers by right clicking and selecting
"Rename". The new name will appear in the chapter menu (view page 201).
Shortcut: Shift + enter
www.magix.com
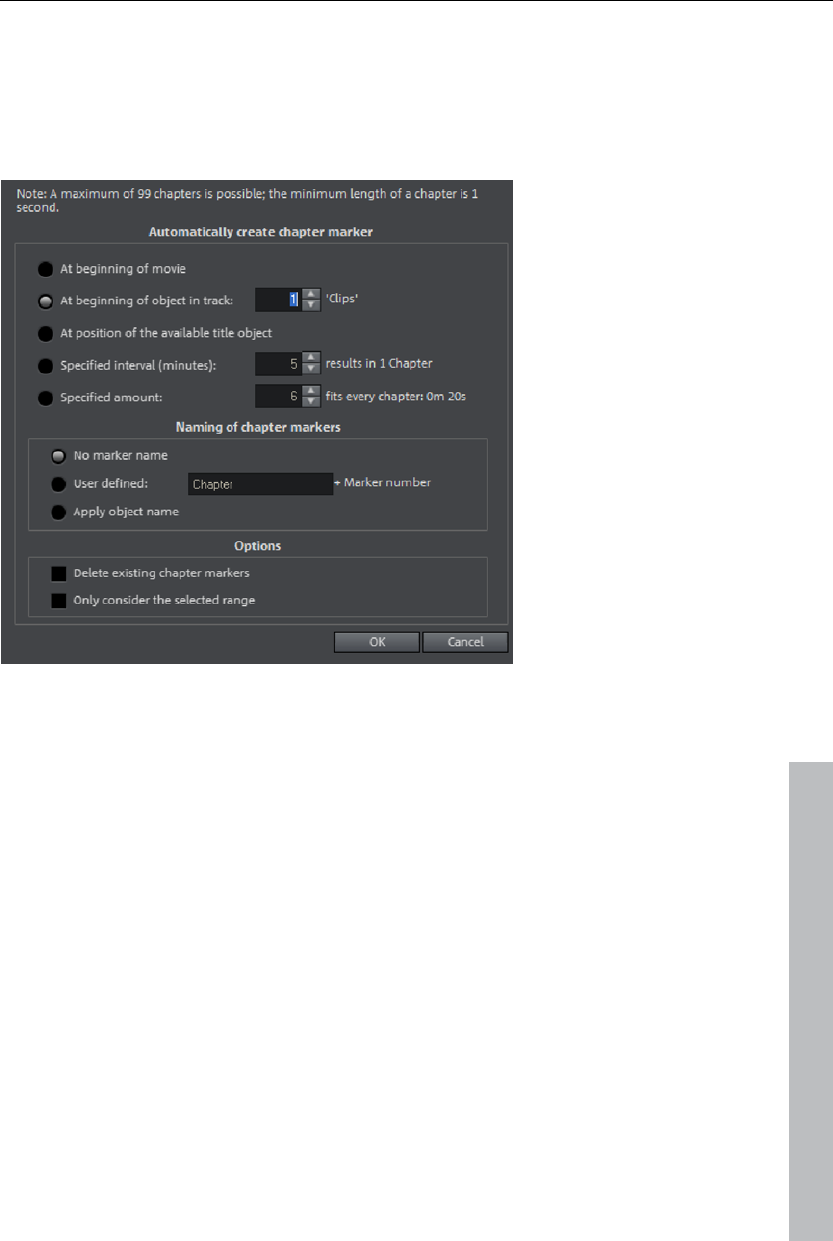
Markers 105
Set chapter markers automatically
This option automatically sets chapter markers in the arrangement
according to specific rules that will then appear in the film menu of a disc as
chapters. This is useful if a disc should be burned immediately after
recording.
There is a selection of options available for automatic chapter generation:
www.magix.com
At the beginning of the movie: The movie only contains one chapter in this
case.
At the start of objects on a track...: Every object in a track creates a chapter;
track 1 is preset.
At the position of existing title objects: Subtitles, for instance, as faded-in
subheadings, give the position of the chapter markers.
Provide interval (in minutes)/provide quantity: If the chapters are separated
without any particular method and are just needed for quicker navigation,
chapter markers may also be inserted in pre-defined intervals or as a pre-
defined number of chapter markers.
Titling of chapter markers: To title the chapter markers, a user-defined name
featuring consecutive numbers or the object name or text from the text
objects may be used.
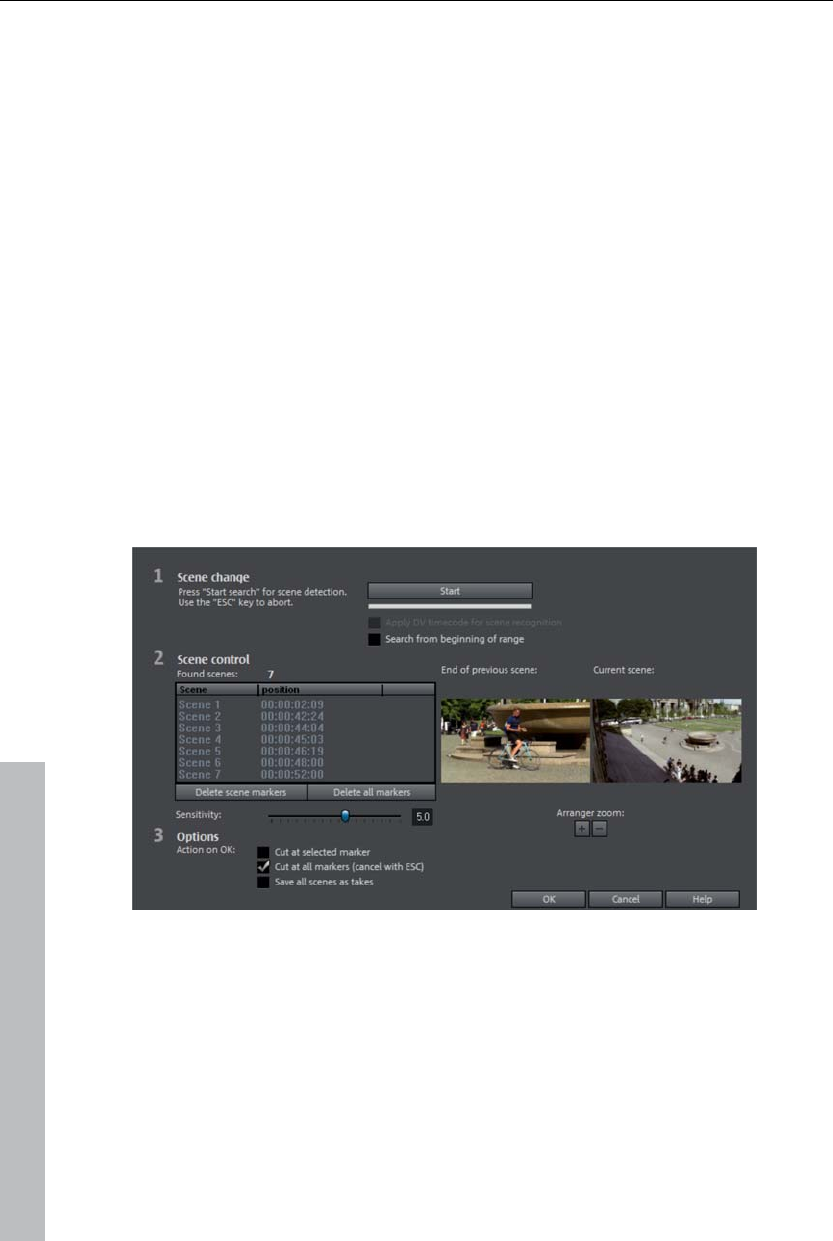
106 Markers
Optionally, existing chapter markers may be deleted and the automatic
chapter marker function may be limited to the area between the start and
end markers.
Shortcut: Alt + Shift + Enter
Delete chapter markers/delete all chapter markers
Delete one or all chapter markers. This removes chapter entries in the disc
menu if the film is burned to disc.
Shortcut: Ctrl + Enter / Alt + Ctrl + Enter
Scene markers
Scene markers separate a complete video into scenes. You can load any
video into MAGIX Video Pro X3 and have it divided into scenes.
Simply drag the desired video into the arranger. Then, right click on the
video and select "Scene recognition". The following dialog appears:
After clicking "Start search", an overview of the detected scenes will be
displayed underneath the scene control.
Delete scene markers: Here you can delete individual markers by selecting
them from a list.
Delete all markers: Deletes all project markers.
Action on OK: You have three possibilities: Either MAGIX Video Pro X3
splits your video into individual scenes ("Cut at all markers"), you select a
www.magix.com
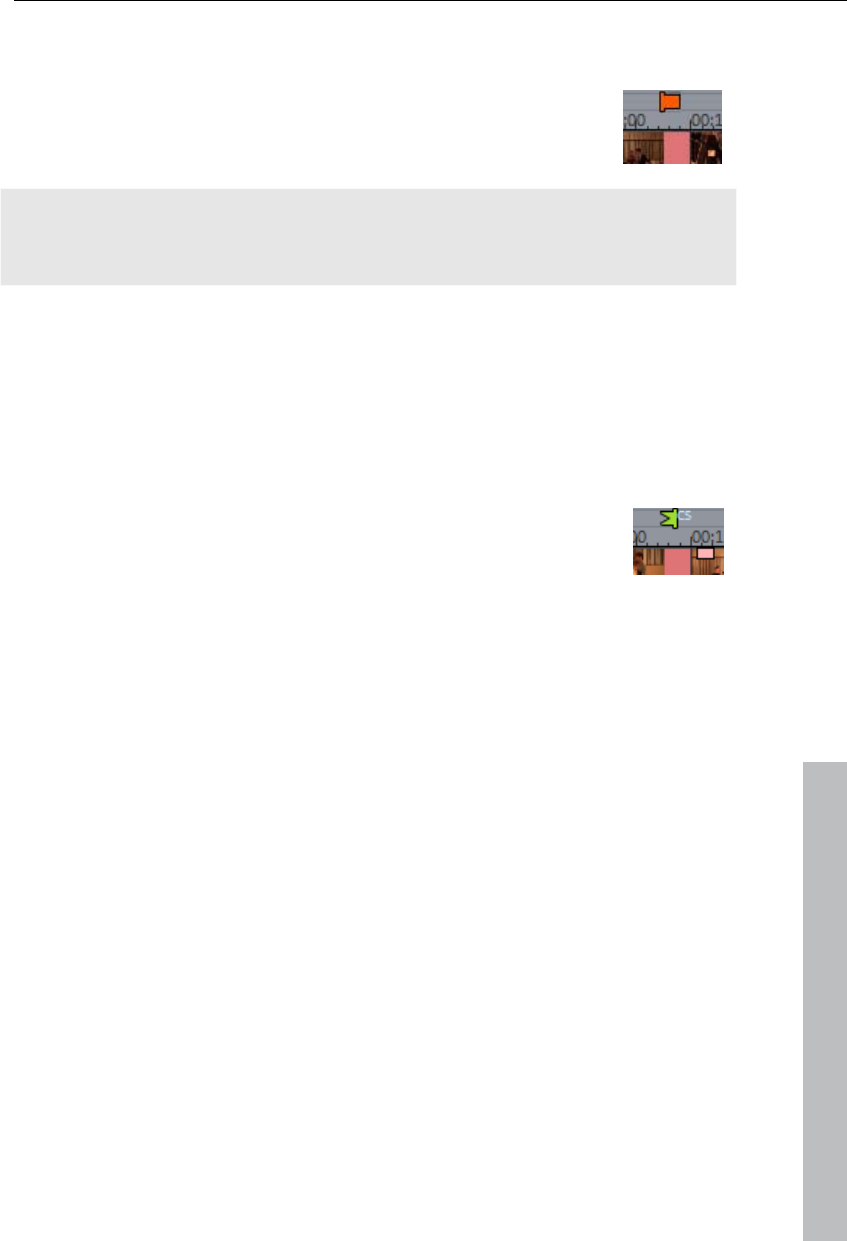
Multicam editing 107
scene and cut only at this position ("Cut at selected marker") or you can
save the scenes as "Takes (view page 91)".
After deciding in favor of one of these options, red scene
markers will appear on the timeline in the arranger. The scenes
can then be split according to the selected option and edited.
Note: An important difference between a scene and a chapter marker is that
a scene marker can be set only within a continuous video, while a chapter
marker can include several videos consecutive videos.
Additional information about scene recognition is provided in chapter "Insert
objects into the project (view page 224)".
Shortcut for scene recognition: Shift + Z
Ad markers
Ad markers indicate detected ad pauses. For more on this,
please read the "Search for and remove ads" chapter (view page
226).
Multicam editing
www.magix.com
Multicam editing enables easy cutting of various recordings of the same
scene from different camera perspectives. The preview monitor displays
image material from up to nine sources in sequence, from which the
"program" can be cut in real-time using your mouse, just like in a real studio.
Preparation
Multicam editing is a special arranger mode. The top two tracks serve as
target tracks; sound and video may copied from up to nine different source
tracks. The two top tracks must be empty when switching to "Multicam"
mode, since otherwise existing objects will be moved to a different track.
Next, load various video recordings of the same scene one under the other
starting on track 3 in the arranger.
It is important that the individual sources are synchronized to each other
exactly. It is best to find a noticeable movement, or a prominent sound, if
audio was recorded.
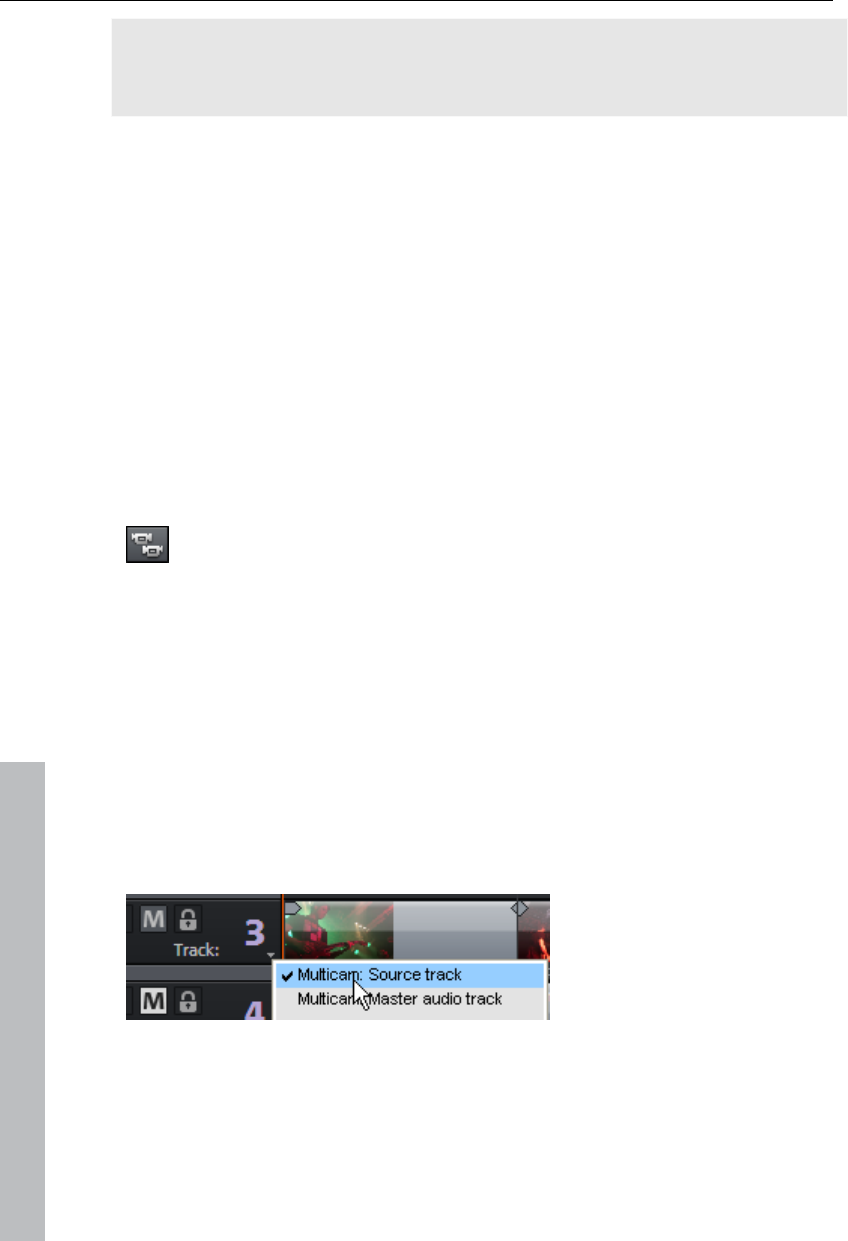
108 Multicam editing
Note: To localize the sound in the audio track exactly, you may have to
create a wave display of the track. Right click on the sound track and
choose "Create wave form display".
You can use a clapperboard during filming, since this offers both sound and
motion; an actor's clapping in front of running camera before the start of the
scene is also helpful. Set a grid point at this position in the object ("Alt +
Shift + P"). You can now move the source objects over each other so that
the grid points are aligned.
Two video sources with sound tracks may be synchronized automatically via
their audio material. To do this, use the "Align with other audio objects (view
page 111)" function in the audio objects context menu.
It is also important that you make all effect settings for the output material
(e.g. video or audio cleaning) before the multicam edit on the objects on the
source track and on the master audio track (view page 110). These effects
will be transferred to the objects in the target track with the edit. Otherwise,
you will have to apply the effects from every single object to the target track.
You can activate "Multicam" mode with this button or with the
"Multicam" command in the "Edit" menu.
Source tracks and preview images
The assignment of tracks as source tracks for the multicam cut takes place
automatically. A maximum of 9 tracks may be used as source at the same
time. When the multicam mode is activated, the source tracks will be
assigned to all tracks containing video objects starting from track 3.
You can also conduct or change the assignment manually. To do so, right
click on the trackbox of the corresponding track to active or deactivate a
track as a source track.
www.magix.com

Multicam editing 109
The source tracks are marked using color. This can be accomplished by
users if more than 9 source tracks are used.
For every assigned track, a preview appears in the source monitor, and the
frame's color corresponds to the color of the track, letting you assign each
preview image to the corresponding track.
If the objects created using multicam cut are located on the target track, a
preview image of the corresponding source track highlighted with a yellow
frame will be shown for length of playback.
Multicam edit functions
You can edit various sources in the the target track during playback in real
time or during stopped playback.
Real-time multicam editing
You can edit various sources together during playback in real time:
Start playback.
www.magix.com
Click on the desired source in the preview monitor. The corresponding
video added into the target track starting from this time point.
To switch the source, click in the source monitor at another source. A new
object will be created using the new source from this point in the target
track.
You can repeat this process as often as you like.
For precise editing in the target track, use the usual edit functions or the
Trimmer. Keep in mind that as long as you are in multicam mode, only the
object borders are moved, and not the objects themselves. Otherwise, gaps
or image jumps could form while you use the multicam edit function again
later.

110 Multicam editing
www.magix.com
Replacing an object's source
Replacing an object's video material in the target track with another source:
Select the object for which the source is to be replaced in the target track.
Click the source you want to replace the video material in the source
monitor object.
The video material will now be replaced by the new source. The project
length is not changed.
Insert cut
Insert material from one of the sources between any position on the target
track and the next object.
Place the playback marker on the desired position.
Click on the desired source in the preview monitor.
The material from this source will now be inserted into the target track. The
new object ends at the next object. The portion below an existing object is
overwritten in the process.
Overwrite range
You can overwrite a selected area of the target track with one of the source
videos.
At the upper edge of the arranger, select an area to edit by determining the
in point by clicking and the out point by right clicking. Or use the
corresponding buttons in the transport control.
Click on the desired source in the source monitor.
The target track will be overwritten with the video material from the selected
source in the selected area.
Master audio track
Normally, videos in the source track are edited together with their audio
tracks. Since the original sound can differentiate from camera to camera
due to different camera positions, you will probably prefer using either the
soundtrack from only one camera for all settings, or to replace the
soundtrack completely (for music videos, for example, you will use the
studio version of the original track).
Right click on the track box of one of the source audio tracks or a different
audio track and select "Multicam: Master audio track" from the context menu
to assign a master audio track for multicam editing. The master audio track
will be appear in a dark color.

Title 111
www.magix.com
Now, during every multicam cut, material from the master audio track will be
inserted on track 2, independent of the source track used.
Synchronize video objects using the sound track
Video objects can be synchronized using their sound tracks. During the
process, their soundtracks are compared for similarities. If videos come
from the same recording environment, the same acoustic events will be
found on their soundtracks (e.g. clapping the clapper board).
Synchronization of multiple objects on one track is possible. First, on the
reference track, select all audio objects that are to act as reference
positions. Then, on another track, select all audio objects that should be
moved.
Choose the "Align with other audio objects" function from the audio objects
context menu.
MAGIX Video Pro X3 attempts to locate the acoustic events in the reference
objects of the second track and to move these to the corresponding
position. Because the audio objects are grouped with their corresponding
video objects, video is also synchronized.
Title
Titles can be used for many applications: as a running text (ticker), subtitles,
speech and thought bubbles, to display date and time, and much more.
Creating titles using a template
The Media Pool includes the tab "Title" with folders filled with additional,
thematically named title templates.
Open one of these entries and select any title template. A simple mouse
click provides a preview, and double clicking creates a title object using the
template.
Note: Templates may be applied to an existing title object. Settings outside
of the text will be lost!
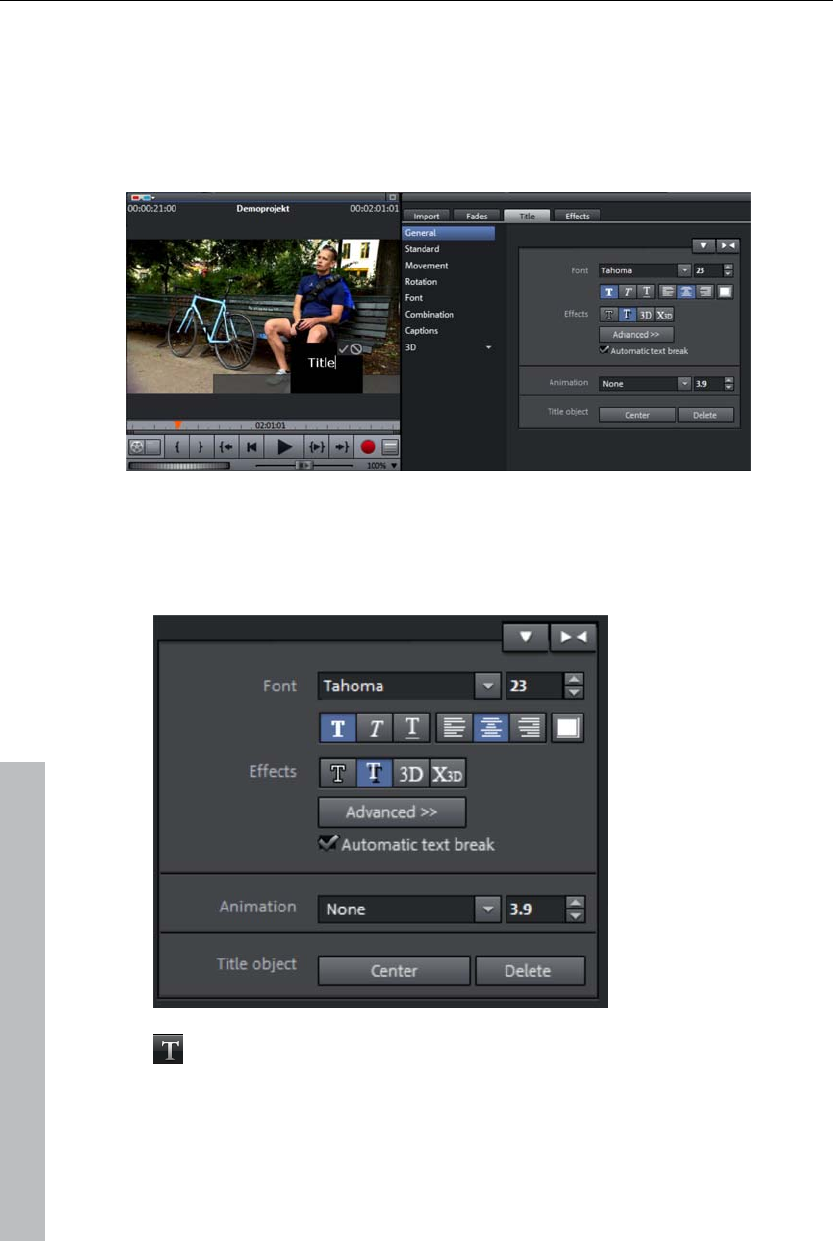
112 Title
Creating titles without a template
Try clicking on the entry "General" under "Title" in the Media Pool.
Next, click in the video monitor on the location where the title should be
positioned.
Next, simply enter the text via your keyboard.
After the text has been entered, click the check mark in the preview monitor
to confirm your entry.
You can later format your title in the Title Editor in the Media Pool.
They can be displayed in
all kinds of fonts and
colors.
If you want to format
individual words or
letters, select them with
the mouse and choose a
different format or color.
If no selection is made,
the entire text will be
formatted.
You can open the Title Editor via the T button.
www.magix.com
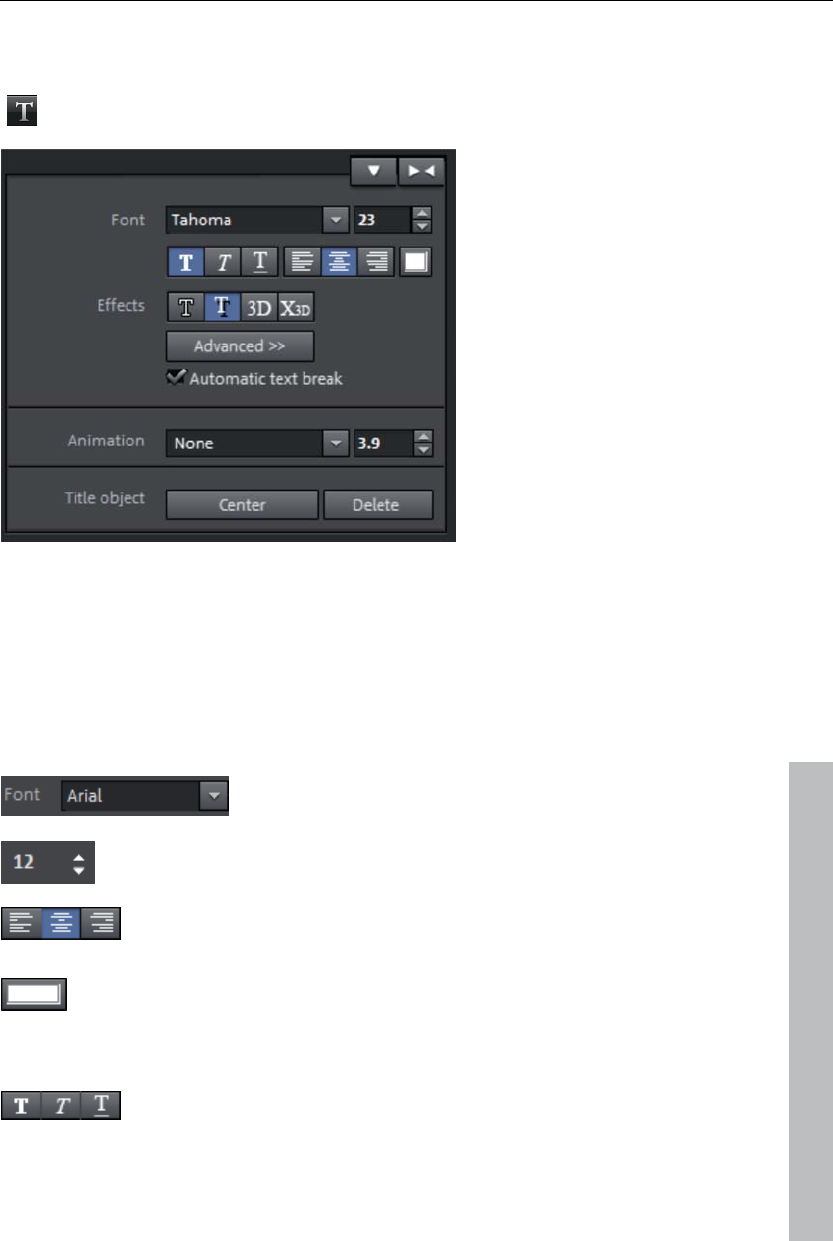
Title 113
Title editor
The button in the toolbar opens the title editor.
Enter text into the video monitor here, e.g. for subtitles, opening credits, end
credits. Text can be displayed in all kinds of fonts and colors.
If you want to format individual words or letters, select them with the mouse
and choose a different format or color. Without any selection, the entire text
will be formatted.
www.magix.com
Font
Font: Select the font used to display the text.
Font size: Set the size of the text here.
Alignment: Select whether the text should be justified on the
left, centered, or on the right within the positioning frame.
Color: Use this button to color the font.
Effects
Font style: Choose here whether all of the text or parts of it
should be shown bold, in italics, or underlined.
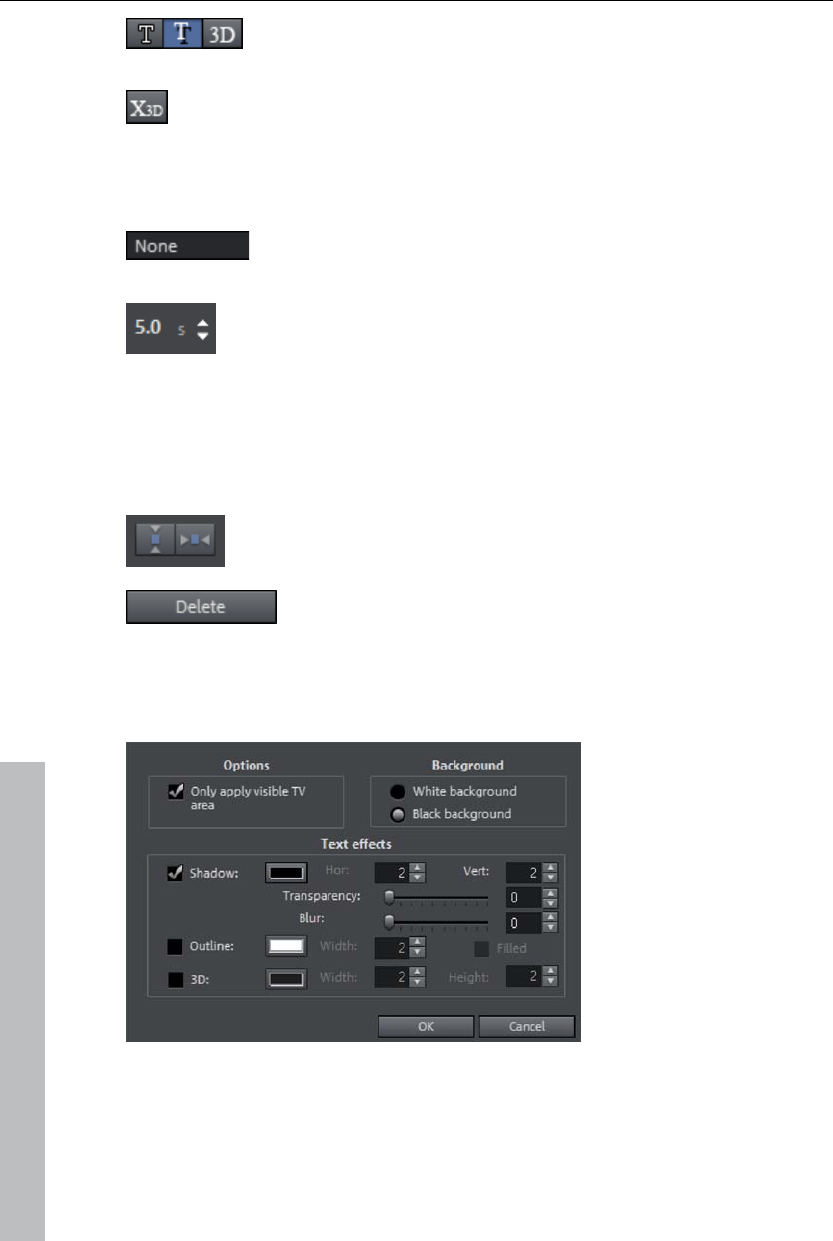
114 Title
Outline/shadow/3D: This function allows you to add shadows,
3D effects, and an outline to the text. These settings can be
adjusted in detail via "Advanced".
The X3D button converts the title object into a Xara 3D text
object. More about Xara 3D text objects is described in the
section "3D text (view page 116)".
Animation
You can make your credits scroll down the screen, and many
other text movements and effects and designs are also
available.
The display duration for the subject can be set here.
Templates for animated text are arranged in the other Media Pool
categories; the icon and the description are there to help you find the
correct settings.
Title object
Center position: Clicking "Center position" puts the title
back in the middle.
Delete: The whole title object, i.e. text and settings, will be
deleted.
Advanced settings
Only use visible TV area: The text will be zoomed so that it will always be
within the TV's limits, which is specified in the Movie effect settings (view
page 143).
www.magix.com

Title 115
Background: Specify here whether the text's background should appear
black or white. This is only meaningful if no other video or image object is in
the background.
Text effects: Here you can edit different text effects in detail. One color may
be set for each effect.
Shadow: The position of the shadow may be set on the horizontal and
vertical axes.
Transparency makes the background "shine through" more or less.
Soften: Makes the edge of the shadow harder or softer.
Outline: A border appears around the letters in the text.
Width: You can enter the width of the frame in points.
Color: Clicking on this button opens a color selection dialog, where you can
set the frame color.
Filled in: The text will be filled with the color selected in the Title Editor. If the
option is deactivated, only the frame will be visible, and the background will
appear instead of the color fill.
3D: The text appears with a 3D-style outline. The width and thickness of the
3D contour (H) can be set in points.
Edit title
www.magix.com
Click again on the title in the video monitor window or the title object in
"Timeline" mode.
Now change the text however you like.
Confirm your entry by clicking the check mark next to the positioning frame.
Positioning titles
Click in the video monitor once on the title; a positioning frame will appear.
Simply move the positioning frame via drag & drop.
116 Effects
The size of the positioning frame may be adjusted via the corners, and the
size of the text will also change accordingly.
Clicking the "Center position" buttons in the Media Pool under
"Title -> General" puts the title exactly in the middle.
3D text
3D text can be created directly from the title editor.
Click the title editor and then press the "3D" button.
The title object will now be turned into a MAGIX 3D object. If you have also
installed MAGIX 3D Maker, the program will open for you to work on the
text.
Presets are also located in the Media Pool under "Titles -> X3D". You
can enter or process text here.
Note: For more information about MAGIX 3D Maker, try the help file. You
can open it by pressing "F1" from within the program.
Fade in date as title
MAGIX Video Pro X3 can add a time or date (“time code”) to the picture
material. To add a time code, right-click the video object and choose the
“Fade in date as title” option from the context menu.
If you’re using a DV-AVI file (a digital recording from a camcorder, for
instance), the recording date will be used from the chosen place. If you’re
using a different file, the creation date will be used as the time code. The
title editor is then opened in order to customize the entry.
In the preview monitor context menu you will also find the "Display play
time" option. This will create a time code.
Effects
MAGIX Video Pro X3 offer a large palette of various video effects. The video
effects used the most can be found directly in the Media Pool, while others
can be found in the object context menu or in the "Effects" menu.
www.magix.com
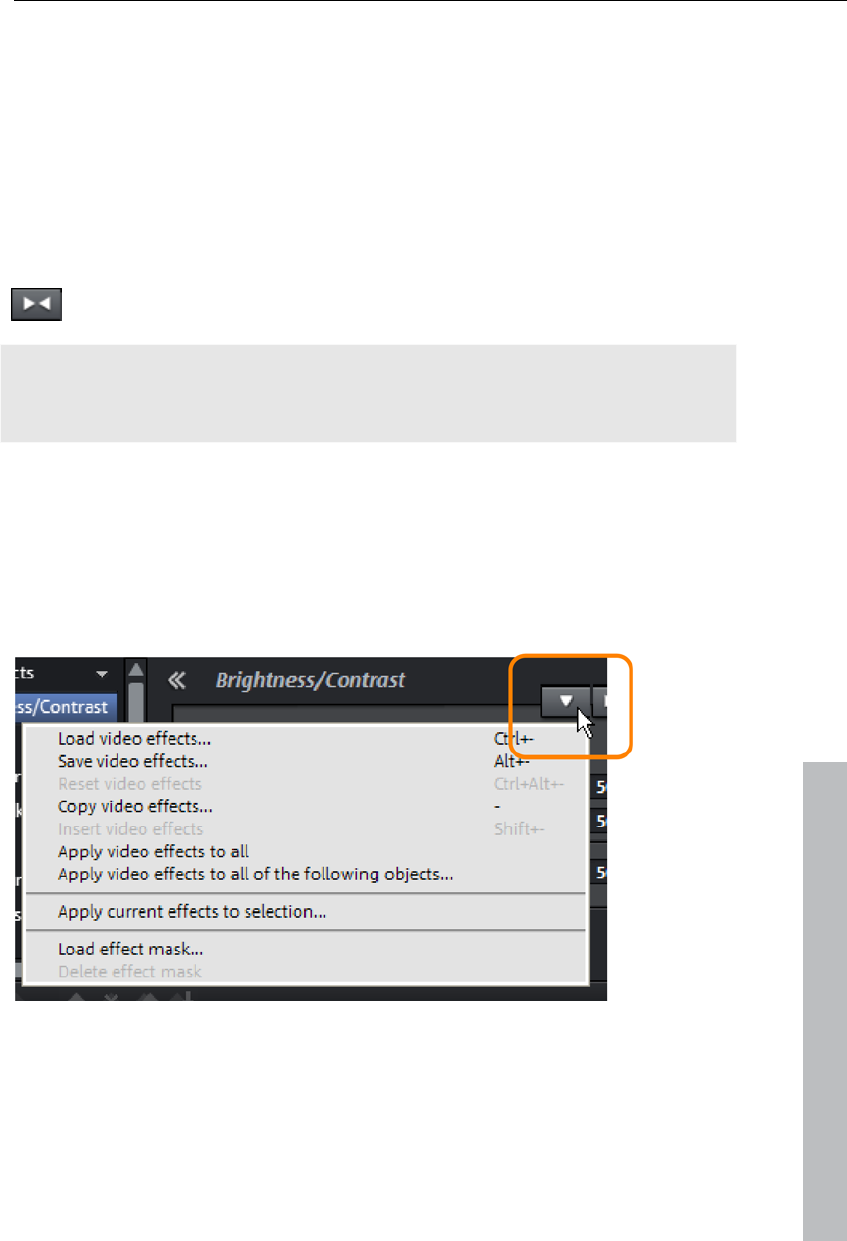
Effects 117
Apply effects to objects
There are various approaches for applying effects:
Video and audio effect presets are loaded into the corresponding object
from the Media Pool using drag & drop.
Effects that can be animated (in the Media Pool under "Effects -> Video
effects / movement effects") will be applied directly to the objects selected
beforehand as soon as changes are made in Media Pool.
This button resets all of the current effect settings.
Note: If you animated the effect using keyframes, resetting will affect the
entire animation. Individual keyframes may be deleted via click + Del (view
page 147).
Transfer effects settings
The items video effects (view page 119), movement effects (view page
129), and Stereo 3D (view page 152) on all effects pages provide the option
to transfer the current effects settings to other objects or to load previously
saved settings. Use the above right arrow button to open the video effects
menu.
www.magix.com
Save/load video effects: The current effects settings may be saved for use
later in other projects or previously saved settings may be loaded. A dialog
allows the effects to be selected.
Reset video effects: Resets the effects settings for the selected object.
118 Effects
Copy/insert video effects: Copies or inserts the current settings as a new
object. Use the dialog to select which settings should be copied.
Apply video effects to all: Copies the current effects settings to all objects in
the arrangement. Use the dialog to specify which setting should be copied.
Apply video effects to all following objects: Copies the current effects settings
to all of the following objects in the arrangement. Use the dialog to specify
which settings should be copied.
Apply current effects to selection: Copy the effects settings from the currently
selected object to all other objects included in the selection. The current
selection may be recognized by its orange color, and the currently selected
object is indicated by a yellow color. Press "Ctrl" + click to add objects to
the selection. Effects settings may be transferred quickly from one object to
other objects throughout the arrangement. A dialog will confirm which
parameters should be transferred.
Comparison image in the source monitor
When editing effects in video and image objects, MAGIX Video Pro X3
offers a comparison mode which lets you compare the before and after state
directly.
Selected object without effects: Outside of effects pages, the object is
displayed completely without effects; inside effects pages, the object is
displayed without effects from the current effects page. The "Color" effects
page remains open and all of the effects except "Color" are applied. This
options synchronizes the playback marker between the program and the
source monitor.
Selected object: The selected object is displayed with all of the applied
effects. The playback marker may be moved along the arrangement, for
example to compare the beginning with the end of an edited object. This
option synchronizes the playback marker between the program and source
monitor.
Before selected object: Displays the object before the selected object in the
same track. This enables the edited effects on sequential objects to be
compared more easily.
Following the selected object: The object located on the same track after the
selected object is displayed for comparison in the source monitor. This
enables edited effects on sequential objects to be compared more easily.
www.magix.com
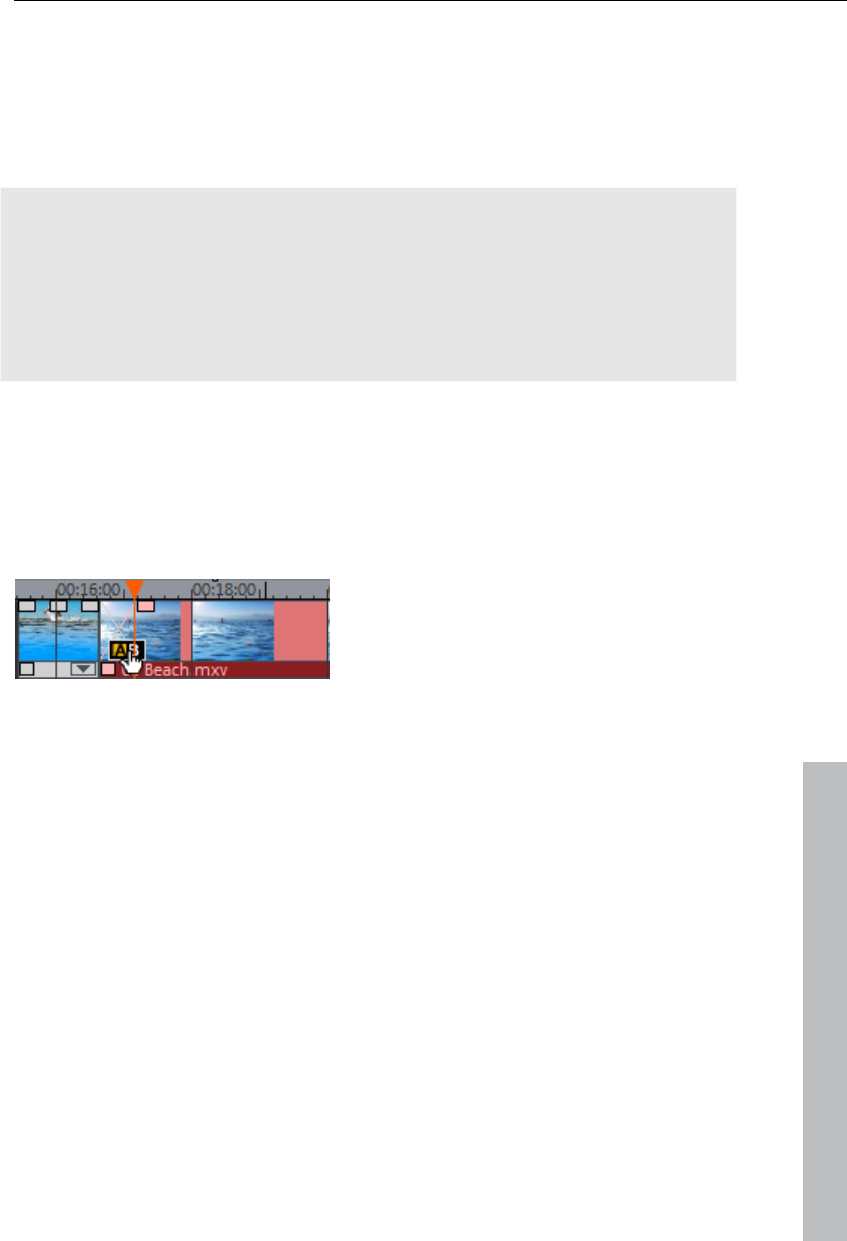
Effects 119
Select object...: Clicking selects the desired object. An object may therefore
be edited and then used as a reference for the following effects processes,
for example.
Remove comparison image: The comparison image is removed from the
source monitor.
Note: Program settings (view page 267) enables you to activate
"Comparison image in source monitor for editing effects in the Media Pool".
If this option is activated, the "Selected objects without effects" comparison
mode will be automatically activated when switching into the Media Pool
effects, and will be automatically deactivated when the mode is exited. This
serves to compare the original and edited image.
This automation will be suppressed if the option is deactivated.
Apply fades
Fades can be selected in the Media Pool under "fades" and moved into the
space between two objects using drag & drop. In addition, they are
available directly in the fades menu between two objects (see figure).
Find out more on this topic under “Transitions” (view page 92).
www.magix.com
Video effects in the Media Pool
Video effects in the Media Pool can always be opened independently from
the selection of an object.
The program monitor displays the starting image of the video. The playback
marker enables you to jump to a specific position in the video in order to
check the results of the effects by starting and stopping playback.
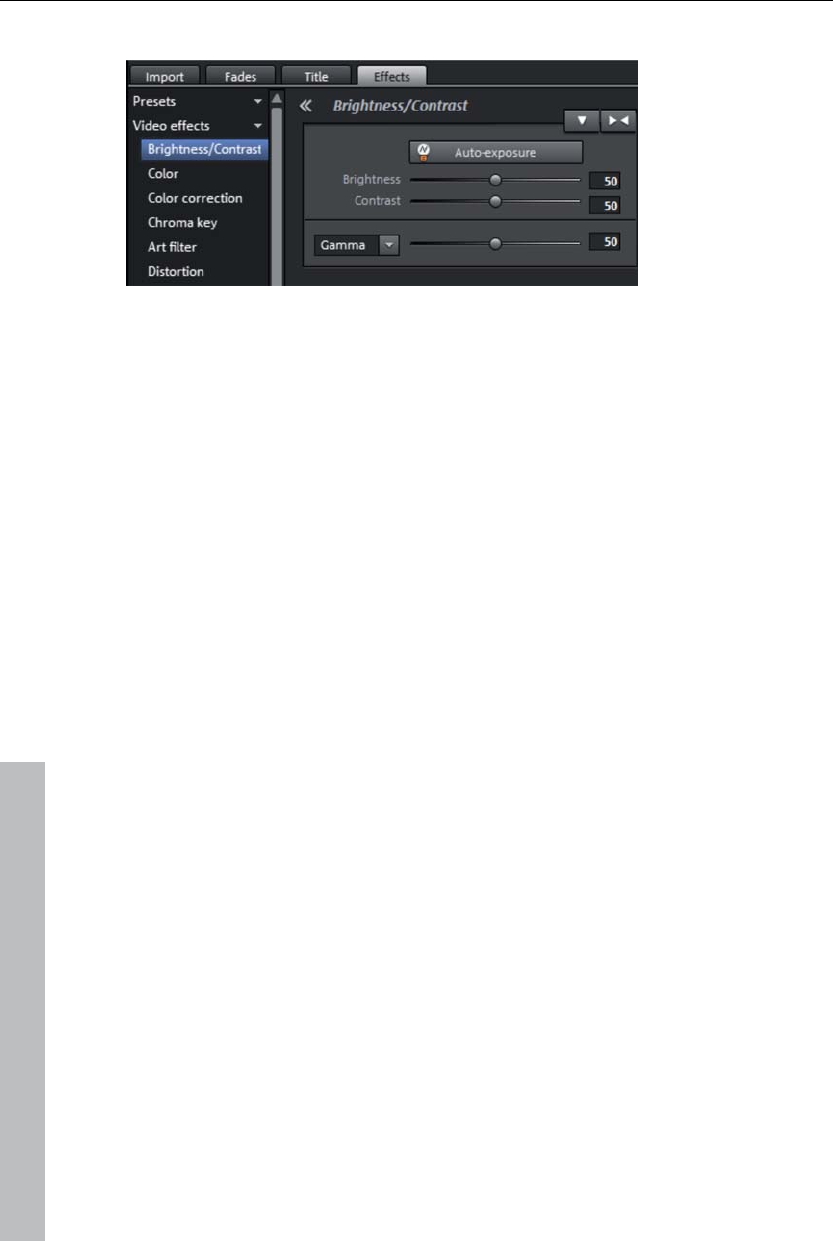
120 Effects
Brightness & contrast
Auto exposure: This button automatically optimizes the exposure, contrast,
and color with a few clicks. The other settings options in the dialog provide
more precise results.
Brightness/contrast: Use the sliders to increase or reduce the brightness and
the contrast of the picture.
Gamma: "Gamma" specifies the mean gray value provided by the various
color ranges. In the preset list, select various envelope curves to edit only
the dark, median, or brightest areas of the image.
The fader also sets the intensity of the brightening or darkening.
www.magix.com
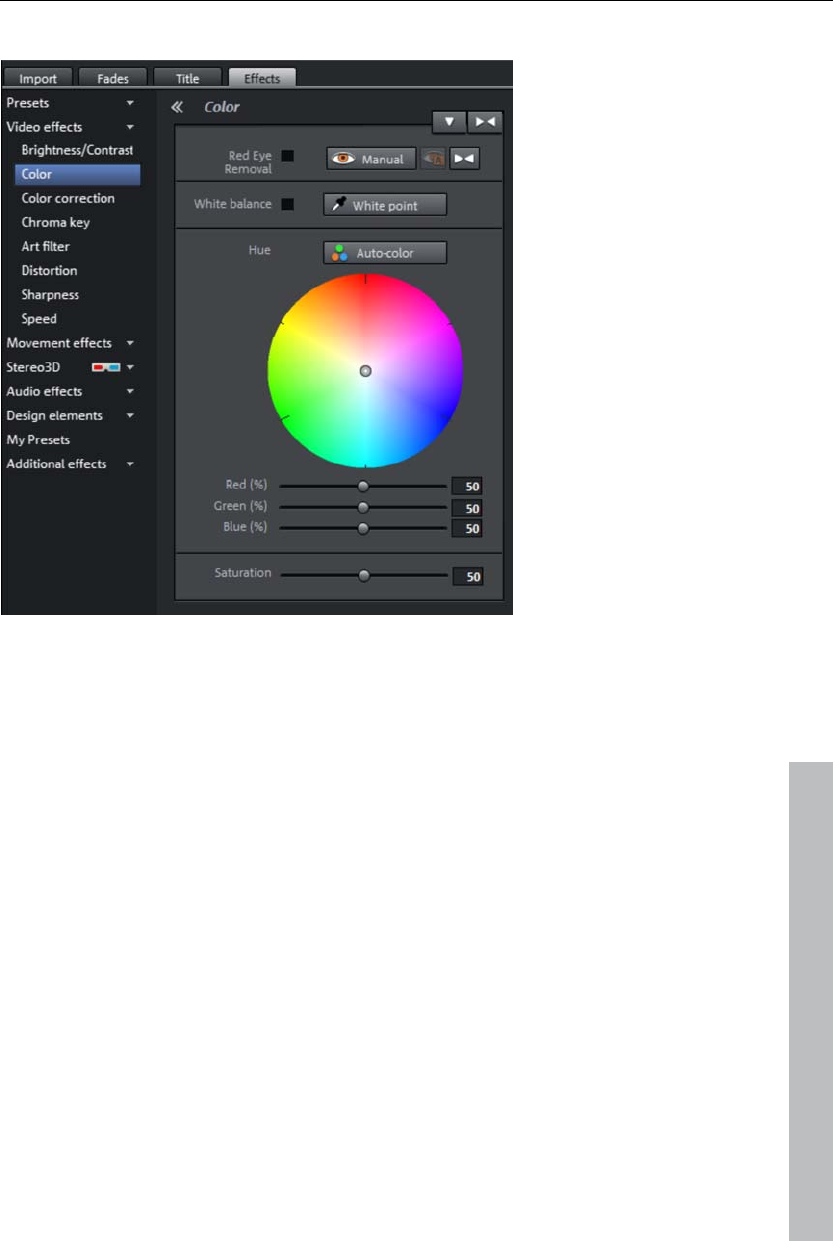
Effects 121
Color
White balance
www.magix.com
All light is not the same. Depending on whether it is sunlight or artificial
light, this will have an effect on color variation. The human brain is able to
compensate for this variation: A white sheet of paper will still look white
under candlelight, although it is in fact much more yellow than by daylight.
In order to imitate this filtering done by the brain, a camera must also
analyze and correct the light. White balance does the same thing to a
picture that the brain does by setting the camera to the so-called "color
temperature" of the surroundings.
If you do not possess a camera which performs this function automatically,
you can apply the white balance function in MAGIX Video Pro X3.
An incorrect white balance can lead to an unnatural blue or red hue.
Directions: To use the white balance, click on the button to the right of the
label "White balance" and then select a point which represents white or a
neutral gray to the "outside world". The color temperature is then corrected
automatically.

122 Effects
www.magix.com
Tip: Cool color effects can be achieved by setting a different color as the
white benchmark. There is definitely room for experimentation!
Red-eye removal
This photo function removes unnatural red eye that results from using a
flash. Click on the eye symbol and then select the red pupils in the preview
monitor using the mouse.
Hint: For photo optimization, we recommend you use MAGIX Photo
Manager. The program is installed automatically and can be used for quick
previewing and easy management of pictures from your database. It has a
tool for correcting red eye and setting auto color and white balance to
control discoloration in pictures.
Saturation
You can increase or reduce the color portions of images with the
“saturation” fader. A newly developed algorithm is applied which makes
color changes related to other parameters (for example contrast settings) in
order to achieve the most natural coloration possible. With just a little bit of
experimentation, you can achieve astounding results – anything from
turning summer snapshots into autumnal scenes to funky pop art!
Color shade
Select a color for coloring the image from the color chart.
Red/Green/Blue
Using the "Red/Green/Blue" slider, you can change the color portion mix for
each color.
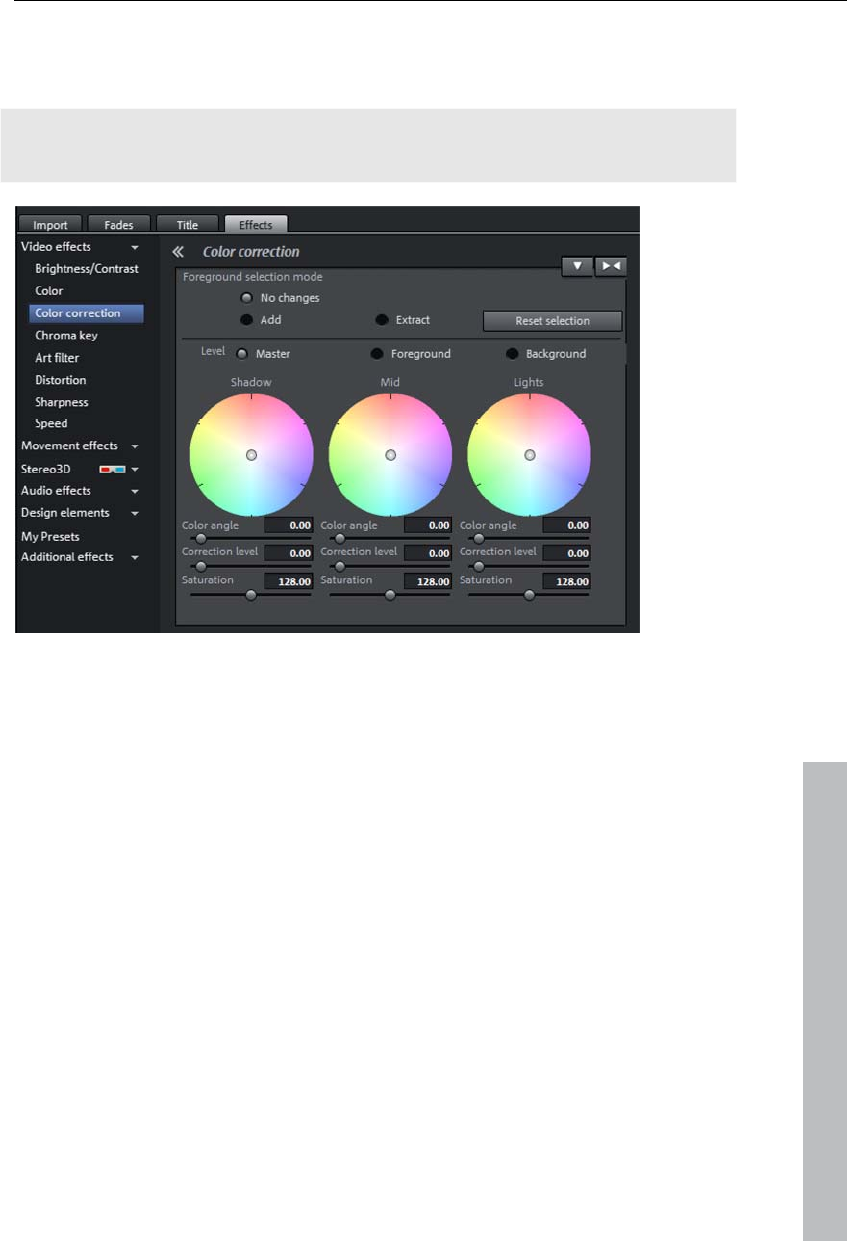
Effects 123
Color correction
The "Highs", "Mids" and "Shadows" ranges can be adjusted individually.
Note: Before using complex color correction, you should first check if
"Brightness/Contrast" and "Color" functions can help you.
By turning the mouse wheel, the work area of each color wheel can be
increased or decreased.
www.magix.com
Color angle: Determines the color on the color wheel, which the image
should be colored with in each brightness area.
Shortcuts: Shift + mouse wheel above each color wheel
Correction intensity: Sets the intensity of the coloration of each brightness
range.
Shortcuts: Ctrl + mouse wheel above each color wheel
Saturation: This lets you set the color saturation for the corresponding
brightness range.
Edit color ranges individually
Secondary color correction allows individual colors in video and image
objects to be adjusted. This includes essentially two layers, the fore and
background. The master layer may also be used to influence the overall
image.
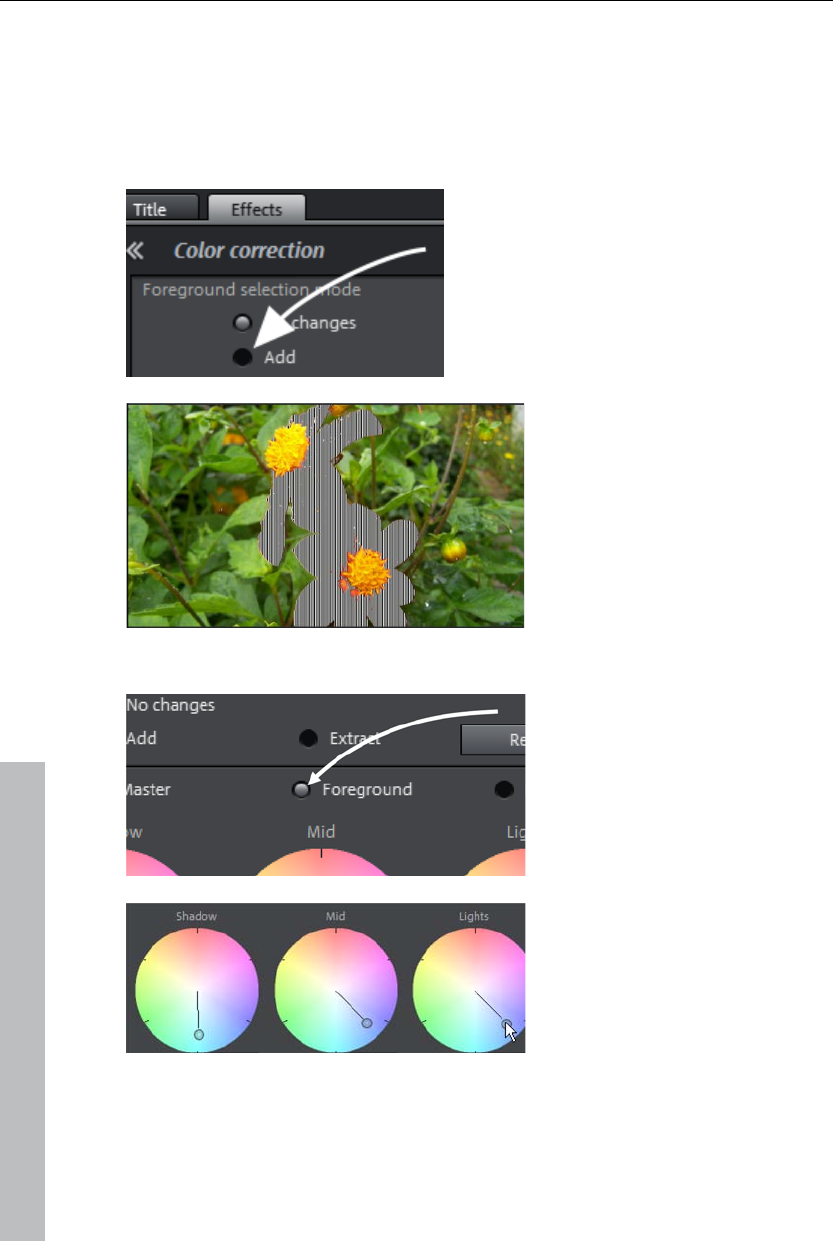
124 Effects
The foreground layer corresponds with the mask created, and editing in the
background changes all of the areas outside of this mask. The mask may be
assigned to a certain color or to multiple colors simultaneously.
To open color correction, click the video or image object and open the entry
"Color correction" via "Video effects" in the Media Pool.
"Add" allows a color to be selected with
the pipette tool to create a mask. MAGIX
Video Pro X3 displays the mask in black
and white stripes to highlight the current
selection.
Click with the pipette tool on the
color in the program monitor that
you would like to add to the
current layer until your selection
is complete.
Unwanted colors can be
removed from the selection
again by selecting "Remove"
and clicking the corresponding
color.
Select the layers (fore and
background) to edit.
Shadows, mid tones and
highlights of the selected color
and level may now be edited
separately (view page 122) in
the normal way.
www.magix.com
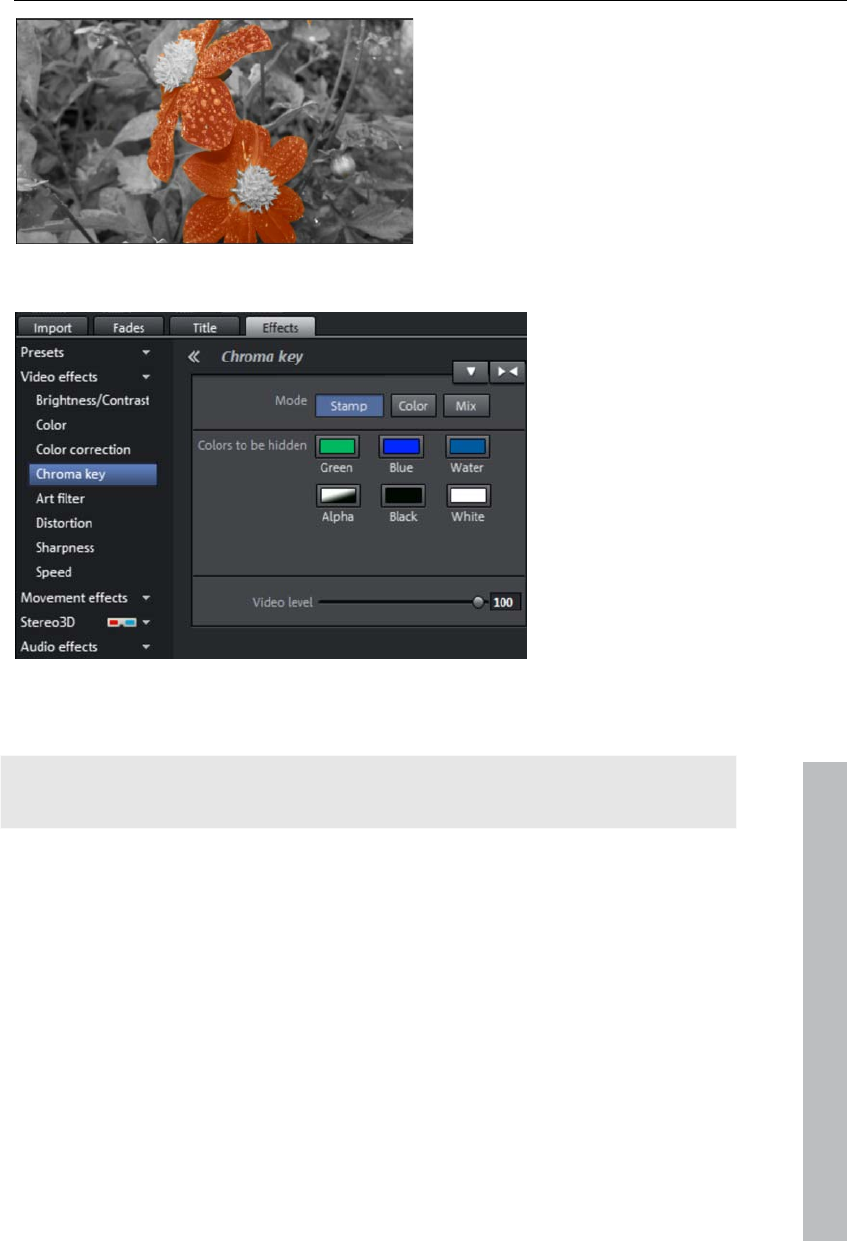
Effects 125
A classic example: Saturation of
all brightness areas on the
background layer is reduced,
and colors in the foreground are
adjusted as desired.
Chroma key
This section contains the mixing effects for chroma keying used to mix
together a foreground and background videos to create an overlay effect.
www.magix.com
Note: The background video must be present in the track above the object
for the foreground! For example, track 1: background, track 2: foreground
Stamp: The currently selected object is "stamped" onto the video on the
track above the object. This is only possible if the bottom video takes up
only a part of the image, as otherwise only the bottom (currently selected)
video would be visible. Normally, the object should be reduced or moved
first. This is done with the help of "Position/size" (view page 129) effect or
via the submenu "Section" in "Effects -> Video object effects".
Color: Select the range with the color that should be transparent in the video
monitor. The video is made transparent in the areas featuring this color,
and the video on the top track can be seen "through" these areas.
Mix: This button mixes the two videos together. Brighter areas accumulate
and quickly seem white; darker areas have less of an effect on the result.
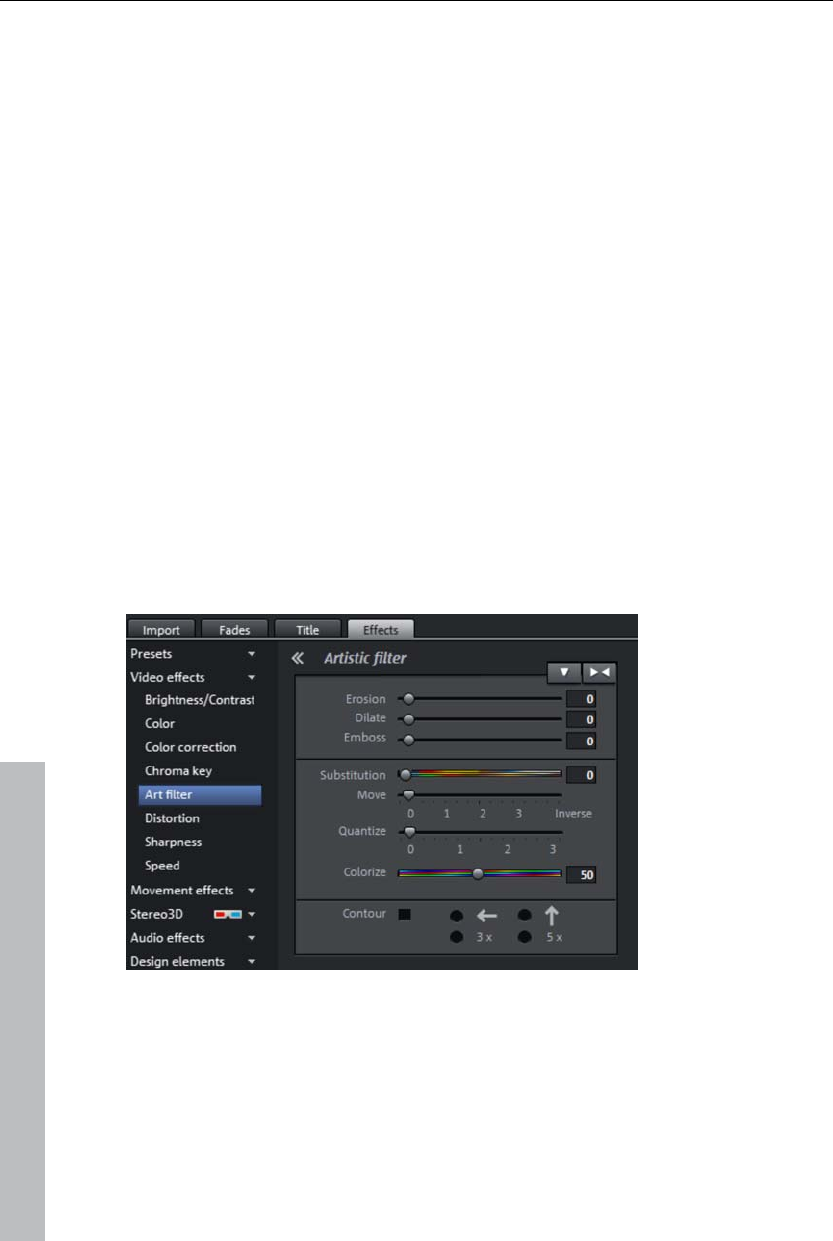
126 Effects
Green/blue/water/black/white: All green/blue/black/white areas of the video
below appear transparent. This studio-style effect makes it possible to
"place" a person who has been recorded in front of a blue (or green, white
or black) background into any type of landscape or background.
Alpha: This video effect uses the brightness of a video to control a cross-
fading effect between two other videos on neighboring tracks. The
additional videos should be arranged directly above and below the alpha-
keying object.
In all black parts of the alpha-keying object, the top video is faded in, while
in all white passages the bottom video is shown. Grey passages are
permeable for both videos and create a mixture of the two. In the case of
colored passages, the brightness of the color is used for control purposes.
Water: Only the contours of the upper video are mixed, which results in sort
of water effect..
Video level: The video level essentially changes the brightness of the video
before other video effects are applied. This can have significant influence on
the effects, especially in case of chroma keying. The level setting may be
automated so that two videos mix dynamically with each other. Read more
about this in the chapter "Animating objects (view page 144)".
Artistic filter
Erosion: The image is broken-up by means of small rectangles and
resembles a "patchwork".
Dilate: This works like erosion, but uses light surfaces instead of dark ones
to form the rectangle.
Emboss creates a relief of the image edges, in which case strong contrast
differences are interpreted as edges.
www.magix.com
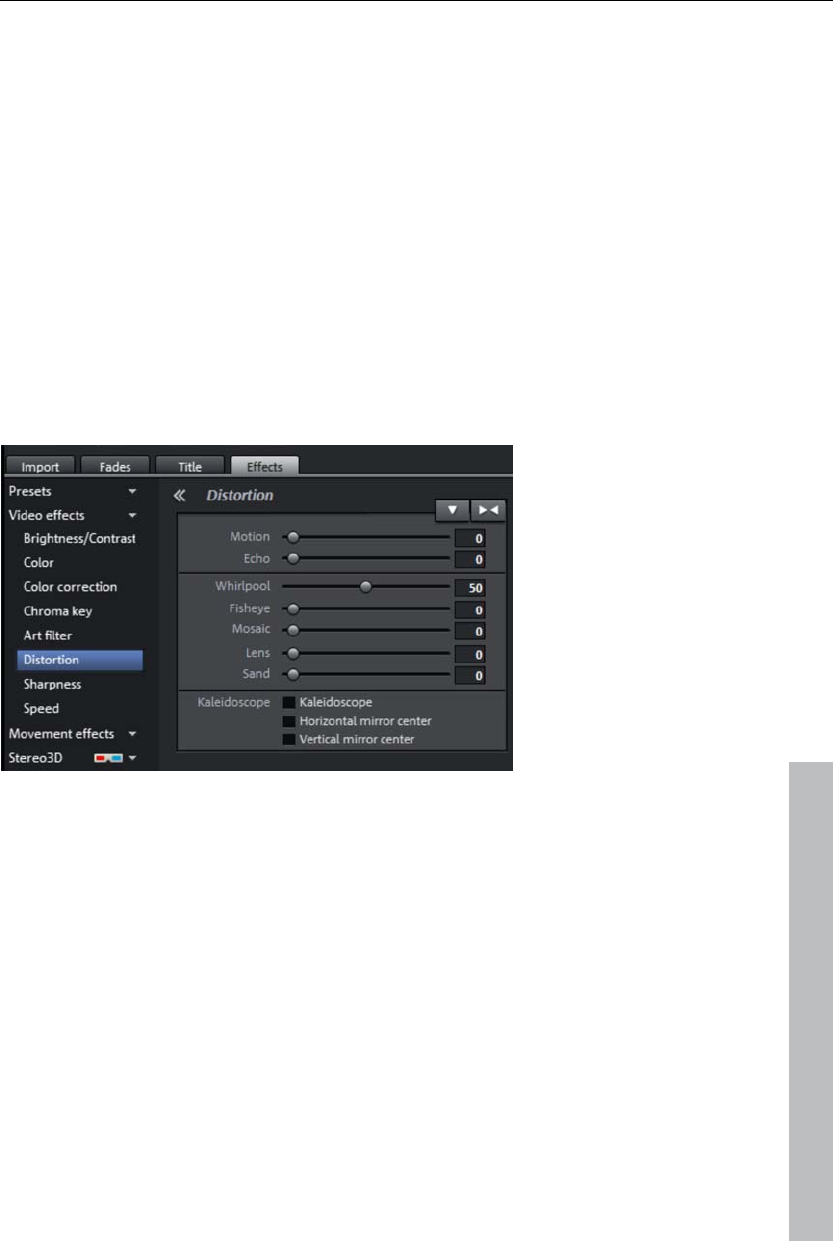
Effects 127
Substitution: Using the rainbow scale red, green, and blue components are
exchanged. Quickly create surreal landscapes or a green face!
Shift: The color values are inverted increasingly. Blue colors turn red, and
green appears purple.
Quantize: Depending on the setting, colors are either rounded up or down so
that the overall number of colors is reduced. This creates interesting grids
and patterns.
Color fill: Using this slider, color in the video with red, green, and blue colors
(the basic TV colors).
Contour: The image is reduced to its contours in two sizes (3 x 3 or 5 x 5). It
is possible to select either vertical or horizontal contours.
Distortion
www.magix.com
Motion: Moving parts of the image are enhanced and warped.
Echo: The moving images create an optical "echo"; previous images stand
still and gradually turn paler until they completely disappear.
Whirlpool: The image is twisted into an "S" shape.
Fisheye: The perspective is distorted as if the image were viewed through a
fisheye lens.
Mosaic: The video is depicted as a mosaic.
Lens: The image is dynamically distorted at the edges.
Sand: The image is depicted in a granulated manner.
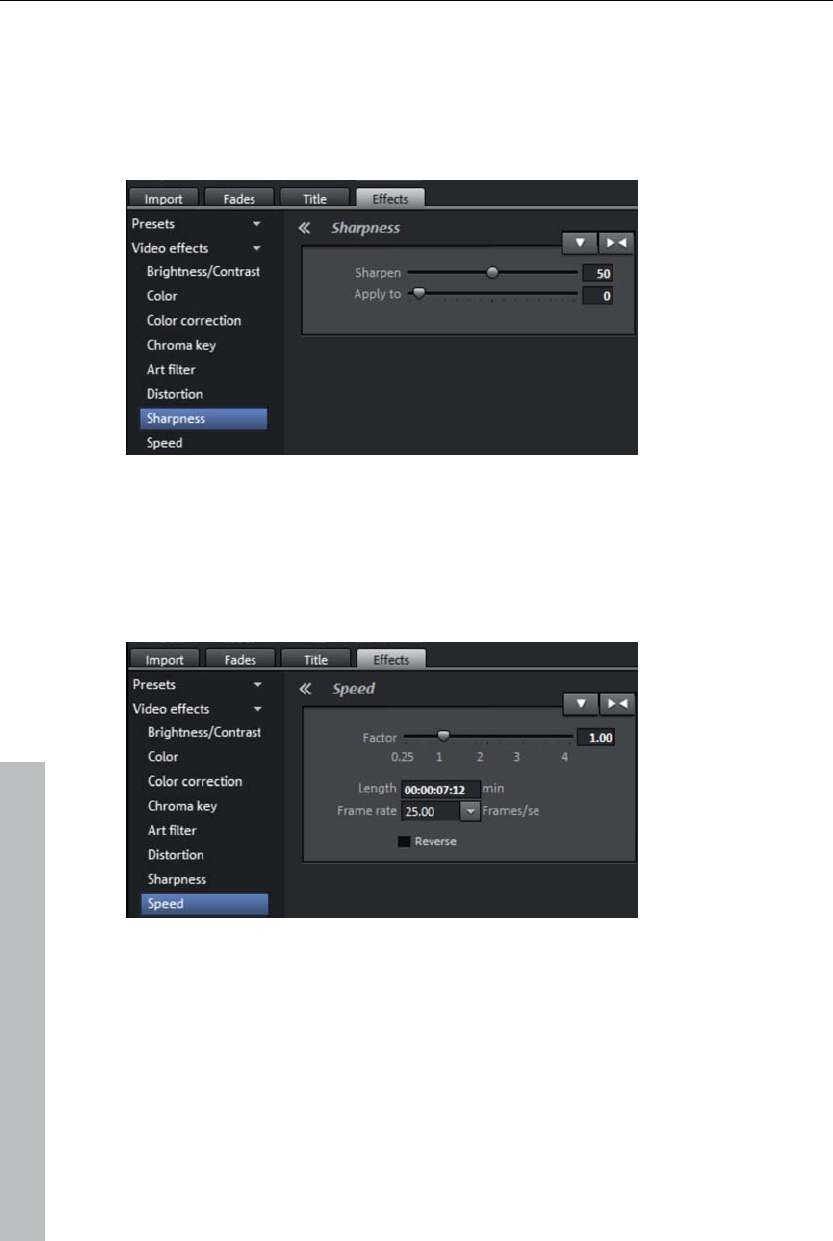
128 Effects
Kaleidoscope: The left upper corner is mirrored horizontally and vertically.
Mirror horizontal/vertical center: The object is mirrored vertically or
horizontally – it appears on its side or upside down.
Sharpness
The fader allows you to regulate the level of image sharpness or apply a
soft filter.
"Fine adjustment" allows you to set how sharp surfaces or edges should
appear. This enables you to effectively reduce image distortions (noise).
Speed
The playing speed can be adjusted with the slider control. The range
between 0 and 1 plays the video slowly; values above 1 accelerate
playback. If the playing speed is increased, the object length in the arranger
is automatically shortened.
Frame rate: Here you can set the video's frame rate directly. Changing it
directly effects the speed factor, while moving the knob conversely results in
changing video frame rate.
Reverse: This button reverses the playback direction (with the same tempo).
www.magix.com
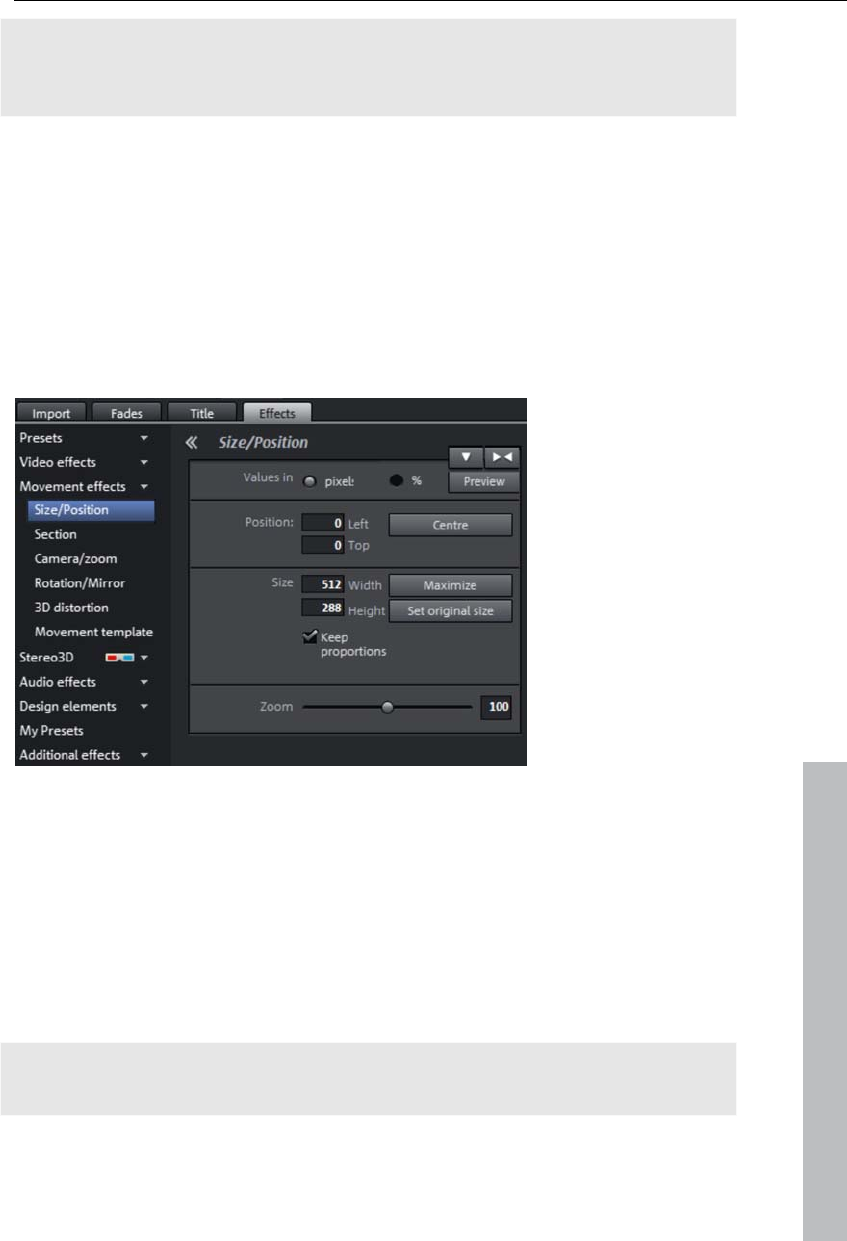
Effects 129
Note: Since the soundtrack of a movie cannot be played backwards, you
have to first separate the movie object from its soundtrack (view page 85).
The speed effects cannot be animated!
Animation
Nearly all preset effects may be automated or animated. To animate effects
or produce movements, please read the "Animating objects (view page
144)" chapter.
Movement effects in the Media Pool
Size & Position
www.magix.com
Values in: Set whether the values are applied in percent or pixels.
Position
Left: Enter the start position from the left image border.
Top: Enter the start position from the top image border.
Center: Based on the current image size, the image starting points (left and
top) will be positioned so that they are centered.
Note: Negative values can, of course, also be entered. The image borders
will then be outside of the visible area.
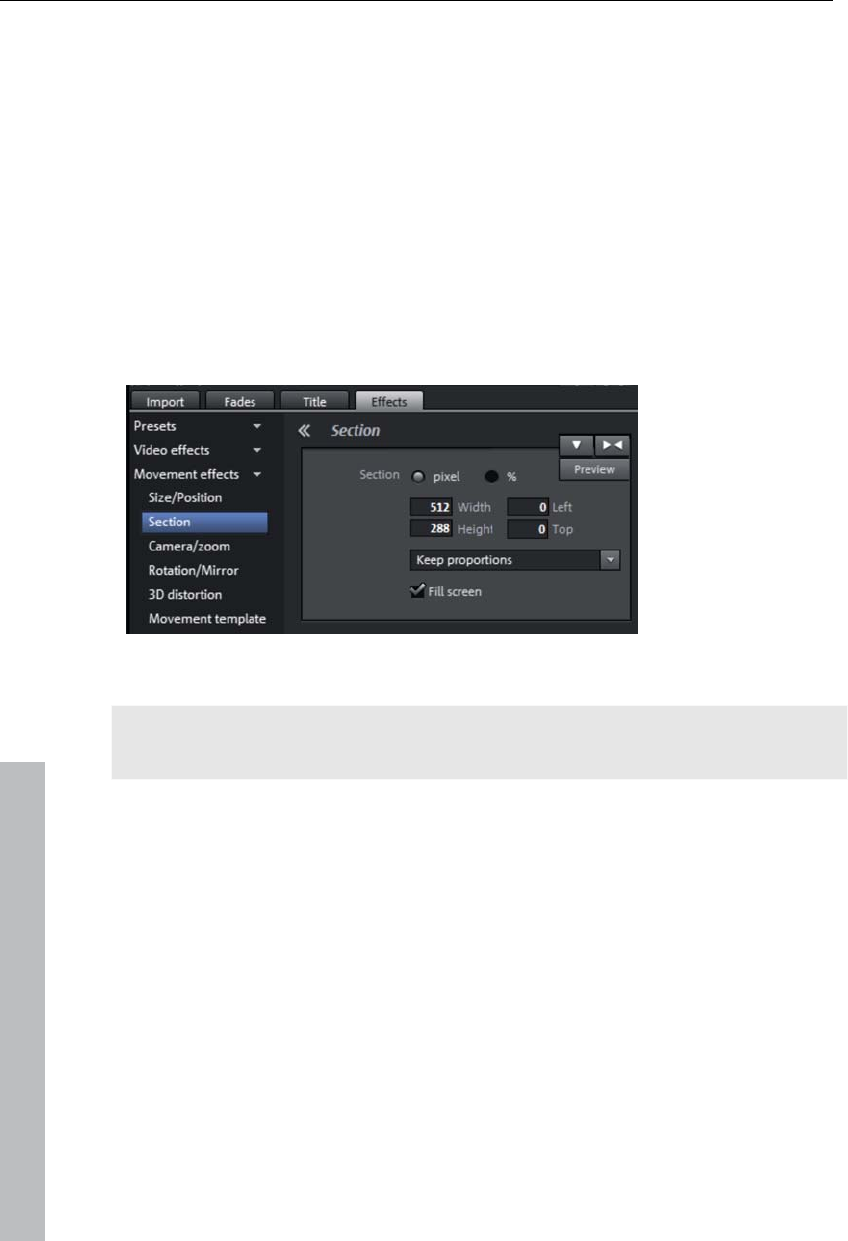
130 Effects
Size
Width: Enter the width of the image.
Height: Enter the height of the image here.
Maximize: The image will be maximized according to the movie's resolution.
Set original size: The image will be scaled to its original size.
Retain proportions: This option makes sure that the image will not be
stretched or distorted. The proportions of width to height will remain the
same.
Section
Sections may be used to display only a portion of the image.
Note: In order to move the section with a movement effect across the image,
please refer to the following section "Camera/zoom".
The program monitor enables an image section to be specified. Use the
eight handles to reduce the frame displayed in the monitor and move it to
the desired position.
Retain proportions: This menu enables you to select the format for the
section. The format of the original image is used as the default.
Fullscreen: If this check box is selected, the section will be zoomed to
fullscreen. If this option is deactivated, only the section of the image within
the frame will be displayed and the edge will remain black or filled with the
object behind it.
www.magix.com
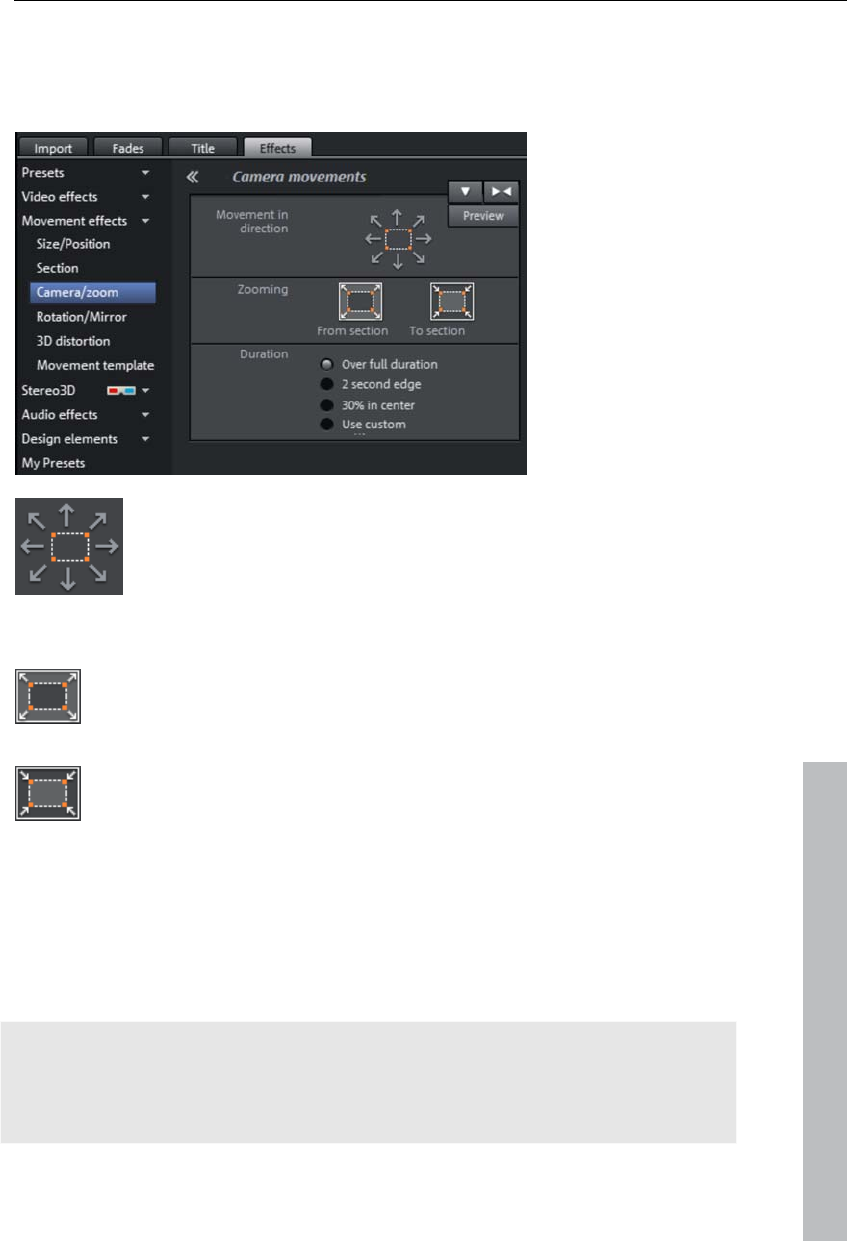
Effects 131
Camera/zoom
With this effect, you can move a previously selected frame inside the image,
creating an impression of camera movement or zoom.
Determine the direction in which the selected section or image
will move in the process during the time selected under "time
period". In addition to horizontal and vertical movements,
diagonal movements are also possible.
Preview: Displays a preview of the section at the playback marker location.
www.magix.com
Zoom out: The selected picture section is displayed and is then
zoomed out to display the entire picture according to the time set
in “Length of movement”. If no portion is previously set, a central
portion of 50% of the picture is set.
Zoom in: The entire picture is displayed and then zoomed in to
show only a smaller picture section according to the time set in
“Length of movement”. If no portion is previously set, a central
portion of 50% of the picture is set.
Direction & time
The option selected here sets the position where the keyframes of each
movement effect are set by default. You determine the positions where a
movements begins and ends.
Note: Automatically placed keyframes may be edited retroactively, and the
option will then be set to "User defined". Read the section "Change the
keyframes of an effect after the fact (view page 146)" in the chapter
"Animate objects".
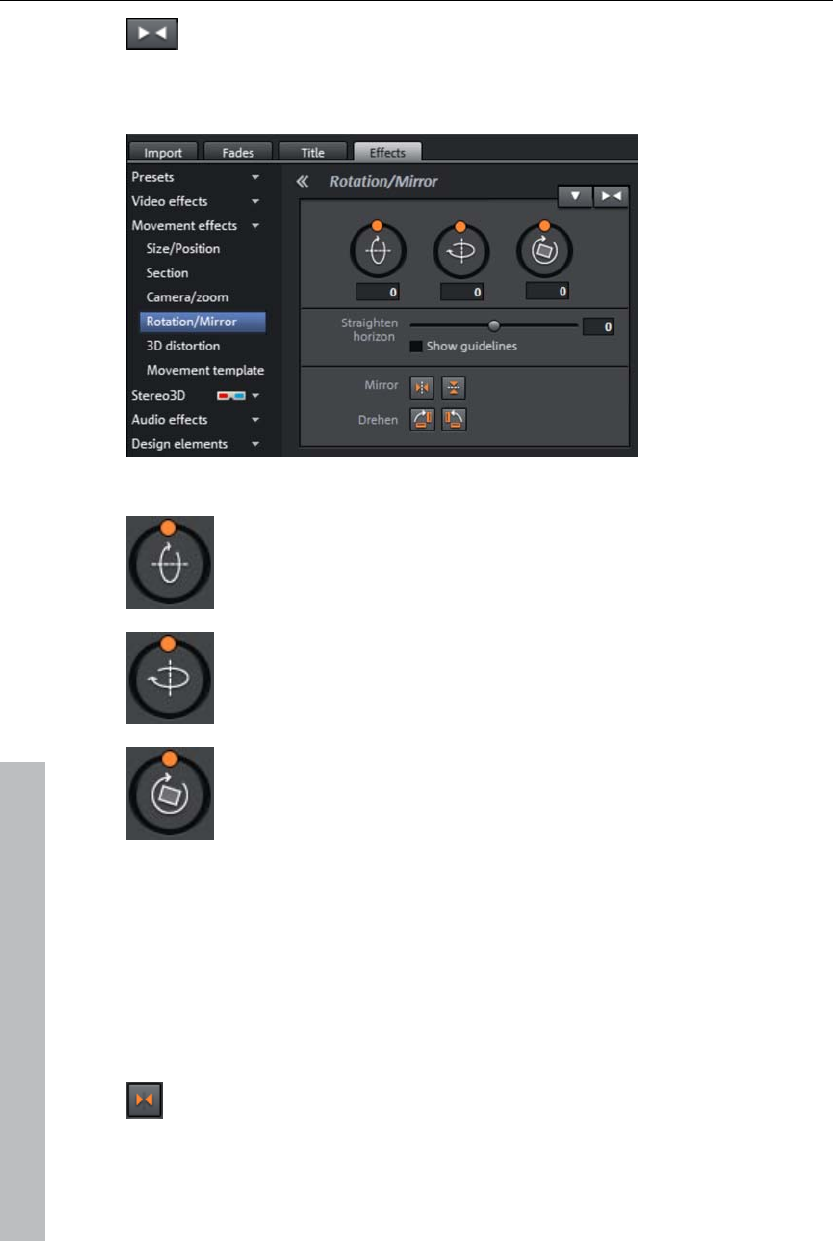
132 Effects
Reset: This option applies a static zoom to show the selected
section of the picture only.
Rotation/Mirror
Rotate
Rotates the image on the horizontal axis.
Rotates the image on the vertical axis.
Rotates the image around its center point.
Straighten horizon
The image can be rotated around the axis via the slider. The image is
automatically zoomed to avoid black edges.
Show guidelines: Activating this check box displays a grid in the program
monitor for orientation during horizontal straightening.
Rotate/Flip
Mirrors the image on the vertical axis.
www.magix.com
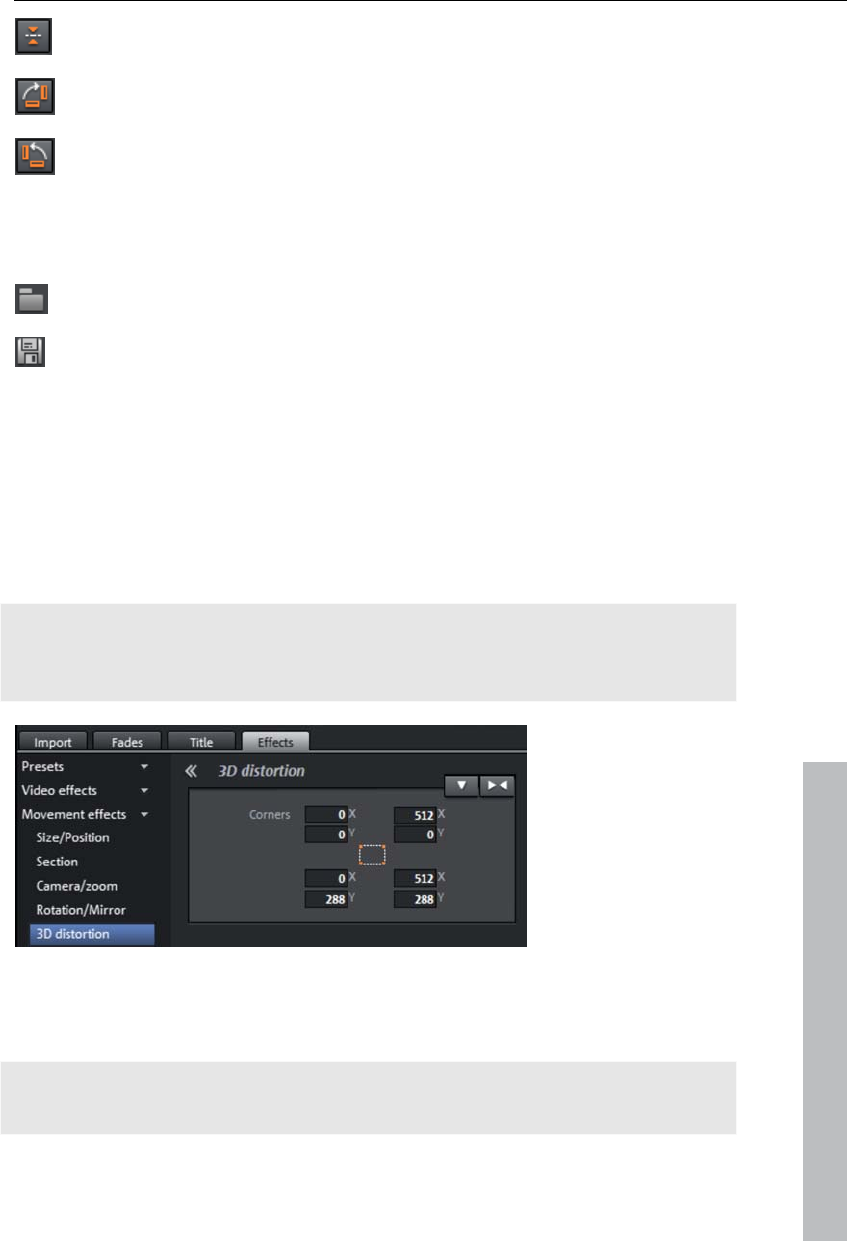
Effects 133
Mirrors the image on the horizontal axis.
Rotates the image 90° clockwise.
Rotates the image 90° counterclockwise.
Presets
Various useful presets are located here.
A dialog opens for opening presets from other folders.
Save your owns settings as a preset.
3D morph
This enables the perspective of images to be distorted and moved. This
produces a 3D impression by causing several components of the image to
appear further in front of others.
Enter the individual corner points numerically or move them in the program
monitor using the mouse here.
Note: Compared to Stereo3D, this does not involve genuine 3D positioning.
The image is only distorted so that it appears three-dimensional on a normal
two-dimensional monitor.
www.magix.com
Stereo 3D
This accesses the program's 3D functionality.
Note: Please also read the corresponding chapter "Stereo 3D (view page
152)".

134 Effects
www.magix.com
Animation
Nearly all preset effects may be automated or animated. To animate effects
or produce movements, please read the "Animating objects (view page
144)" chapter.
Attach to picture position in the video
You can attach a video, picture or text object to moved picture content of
another video. The attached object automatically completes the movement
of a picture element from the film, making it appear magnetic. For example,
you could use this method to insert a hat that stays on someone's head
throughout, even if the person hops through the picture.
Let's roll:
Place an overlay object (e.g. a photo of a hat) on a track below a video with
a moving image element (e.g. a walking person).
Right click the object and select the "Attach to picture position in the video"
movie point.
Then click "Continue" in the dialog that appears.
Note: If you want to attach two objects, e.g. a title and a speech bubble, an
additional dialog appears, which lets you select the objects you want to
attach to your video.
The next dialog asks you to draw a frame around the image content to be
tracked. The content should have high contrast to its background.
Movement will be automatically calculated and a series of keyframes that
control the position and size of the effect according to your wishes will be
generated.
Stereo 3D
This accesses the program's 3D functionality.
Note: Please also read the corresponding chapter "Stereo 3D (view page
152)".
Audio effects in the Media Pool
The Media Pool offers various opportunities to add effects to your audio
objects. Another advantage of this so-called "object-oriented" working
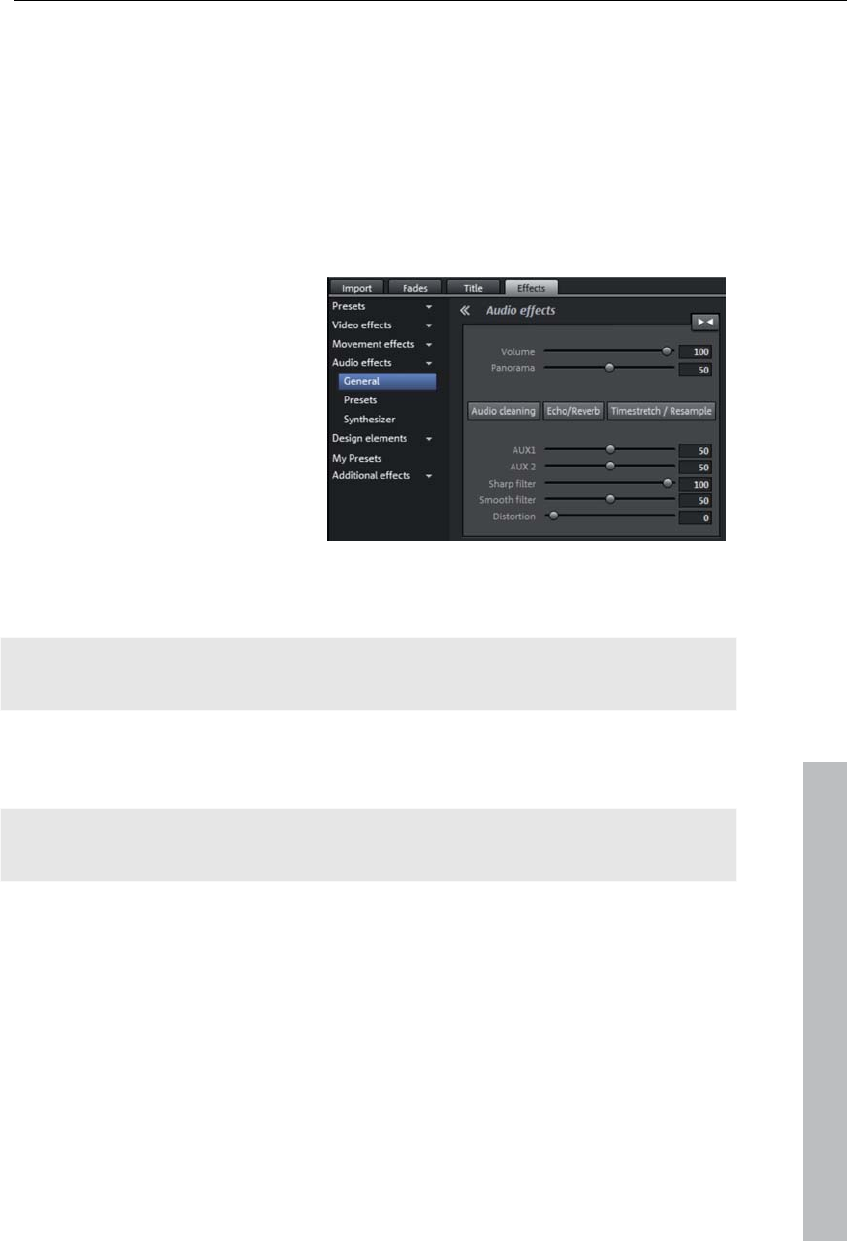
Effects 135
method is that automations are moved automatically with objects when they
are moved, since they are attached to the object and not to the track itself.
See the "Audio effects" (view page 160) section below for more detail.
Another advantage of this so-called "object-oriented" working method is that
automations are moved automatically with objects when they are moved,
since they are attached to the object and not to the track itself.
General
Under "Effects -> Audio effects -
> General", you will find audio
effects that can be animated
using effects curves (view page
144). This means that certain
effect settings can be changed
during playback.
Effect curves are always object related, i.e. they only apply to one object
and are moved or copied together with the object.
Note: The faders AUX 1 and AUX 2 control the volume at which the object's
signal is sent to the corresponding FX tracks in the mixer.
www.magix.com
Audio Cleaning (view page 160), Echo/Reverb (view page 165), and
Timestrech/Resample can also be accessed here.
Note: Volume and balance curves are also present in the track. The set
values in the curve are also active, respectively.
Audio effect templates
Here you'll find a broad palette of effects settings which you can add to
audio objects via drag & drop.
Synthesizer
Synthesizers can be loaded as individual objects. More information is
available in "Synthesizers".

136 Effects
www.magix.com
Design elements in the Media Pool
In this category you will find a large selection of decorative elements:
templates for image juxtapositions (multiple picture-in-picture) and collages,
moving objects (balloons flying through the frame, trains moving across the
picture, snowfall....), color fields for your own backgrounds, intro videos,
outro videos, visuals...
You should first look through all the options and take stock of what there is.
Open the categories one after the other to get a general impression. You
can see a preview of all deco elements.
A simple example for use are the frames (Media Pool > Effects > Design
elements > Image objects > Frames“). These are much like picture-frames
that can be modified by video mix effects. Simply drag them directly on an
object, which will then appear as if inside a picture frame.
The design elements create own objects on a different track. You can use
the lower handles to adjust the size of the borders to fit any length of the
video. You can also achieve interesting effects by inserting and discarding
borders within a video.
Personalized templates in the Media Pool
You personal effects configurations in the Media Pool can be saved and
applied again later. You can reach these customized configurations in the
Media Pool folder "Effects > My templates". They may be dragged onto
objects as usual.
First, this folder will be empty, of course, because you still have to create
your own configurations.
Extra effects
Video effects plug-ins are additional programs from third-party developers
that may be used to add additional video effects to video objects. MAGIX
Video Pro X3 supports the plug-in format of the freeware video editing
software "VirtualDub", as well as the "VitaScene" and "Adorage" programs
from "proDAD". A selection of tested VirtualDub plug-ins (.vdf files, also
called VirtualDub filters) may be downloaded as an installer package
directly from within MAGIX Video Pro X3.
Important applications for plug-ins include the application of special effects
and useful video editing tools.
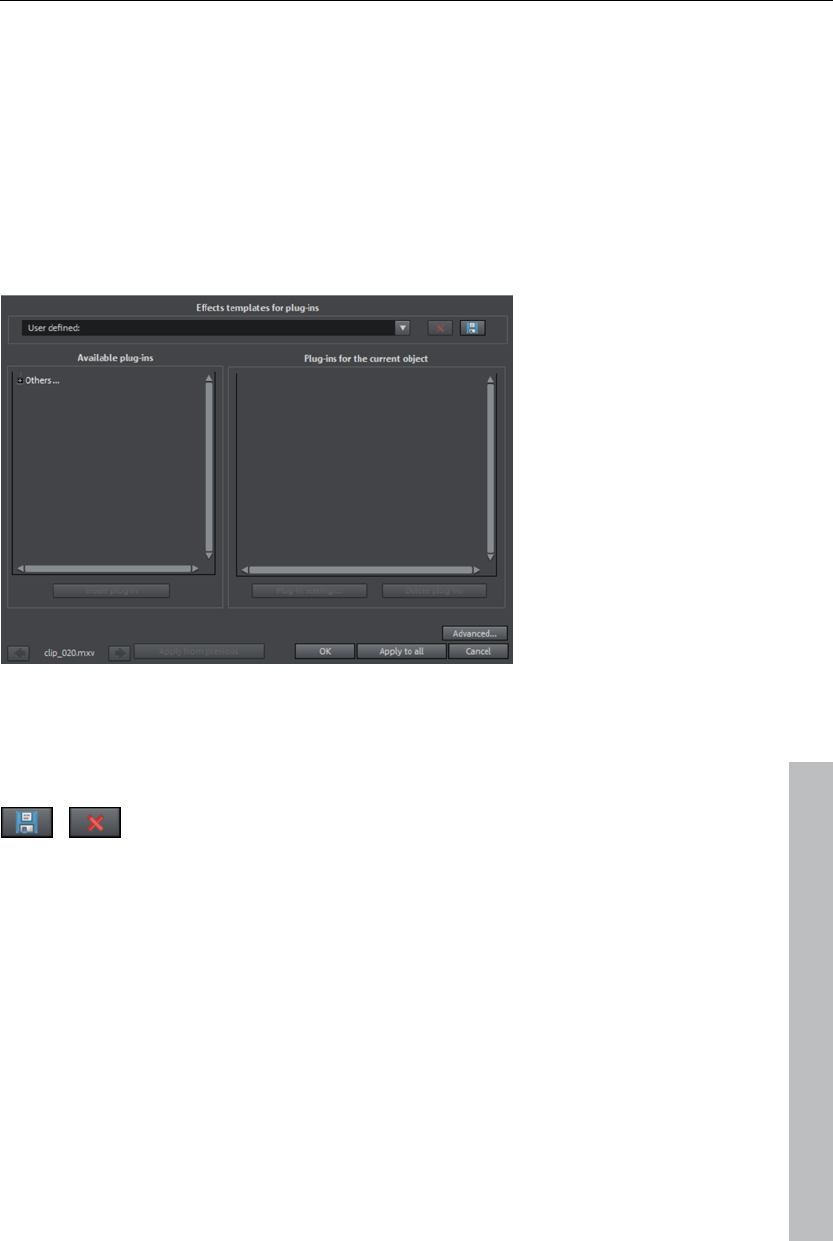
Effects 137
Using video effect plug-ins
In order to be able to use plug-ins, they must be installed first. MAGIX Video
Pro X3 checks whether plug-ins are already available. If not, it will offer to
download them from the Internet or to set the plug-in path manually.
In order to use a video effect plug-in, select the video or image object first,
then open "Effects -> Extra effects -> Plug-in manager" in the Media Pool
menu. This lists all available plug-ins on the right side of the dialog.
Video plug-ins manager
www.magix.com
Effect templates for plug-ins: MAGIX Video Pro X3 does not include plug-ins
due to licensing reasons. However, presets for removing the channel logo
(view page 139) are provided for some TV channels with the "logoaway"
plug-in.
You can save your settings by pressing the "Save" button and
remove them by pressing "Delete".
Available plug-ins: All available plug-ins are listed here.
Add plug-in: The selected plug-in is added to the editing chain ("Plug-ins on
the current object" list on the right). You may load as many plug-ins as you
like simultaneously. These will be processed according to the list sequence.
The plug-in order in the list may be changed via drag & drop.
Plug-in settings: Open the settings dialog for the selected plug-in here. All of
the plug-in settings in the entire list may be saved as a preset (effect
templates for plug-ins) .
Advanced...: Opens the Advanced settings dialog.
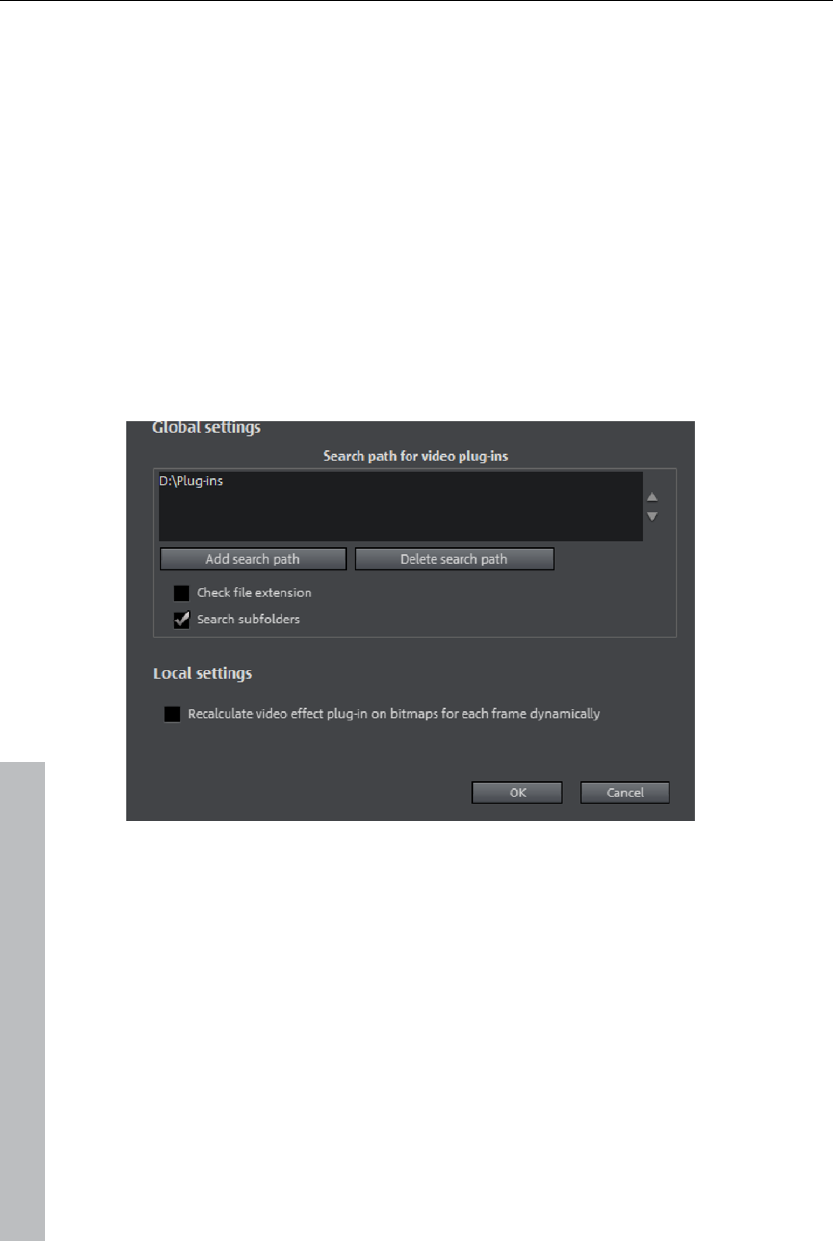
138 Effects
Navigation buttons: Switch to the previous or next movie via the navigation
buttons in the lower part of the dialog of a movie.
Apply from previous: Uses the settings of the most recently set movie. This
option is only active if you are editing objects in sequence with the
navigation buttons (see above).
OK: The adjustments made to the settings will be applied to the current
movie.
Apply to all: The effects will be applied to all video and picture objects in the
movie.
Cancel: Closes the dialog; the settings will not be applied.
Advanced...
In the "Advanced" dialog, you can specify the search path for plug-ins.
MAGIX Video Pro X3 checks these for available plug-in files at program
start and adds these to the list of available plug-ins. "Add search path" adds
new search paths, and "Delete searchpath" removes them from the list
again.
Check file extension: Accelerates the search for new plug-ins if a larger
number of plug-ins are available by not checking if they are valid.
Scan sub-directories: Extends the search to subfolders below the selected
paths.
www.magix.com

Effects 139
Local settings
Recalculate video effects plug-in on bitmaps for each frame dynamically: If you
apply a plug-in to a bitmap (image), then this option must be activated in
case the plug-in creates moving effects.
Remove a channel logo with the "Logoaway" plug-in
The "Logoaway" freeware plug-in by Krzystof Wojdan is a high-quality
option for removing the channel logo from your video material. The plug-in
attempts to remove the channel logo by reconstructing image elements
using from the surrounding area.
Since each station positions its logo at a different location and in different
sizes, you can select the presets for different channels from the effects
templates.
Hint: The broadcasting rights of each channel must be observed.
Commercial use of the edited material clearly constitutes a breach of
copyright.
Effects masks
Effects masks help you to apply effects in different areas of one video
image with varying intensity. A specific image is used as a mask to determin
the specific areas where the effect should be applied.
Typical application include:
www.magix.com
Image optimization: A typical example is a horizontal pan across a horizon,
in which case the upper or lower area of the image is brightened or colored
in.
Eye-catching color gradients, colorations and others
Special effects such as pixelation of a car license plate.
Effects masks are regular image objects, and as such may be animated or
attached to a certain image position to use them as moving video images.
Here's how it works:
Select the object in the arrangement to apply the
effects mask to.
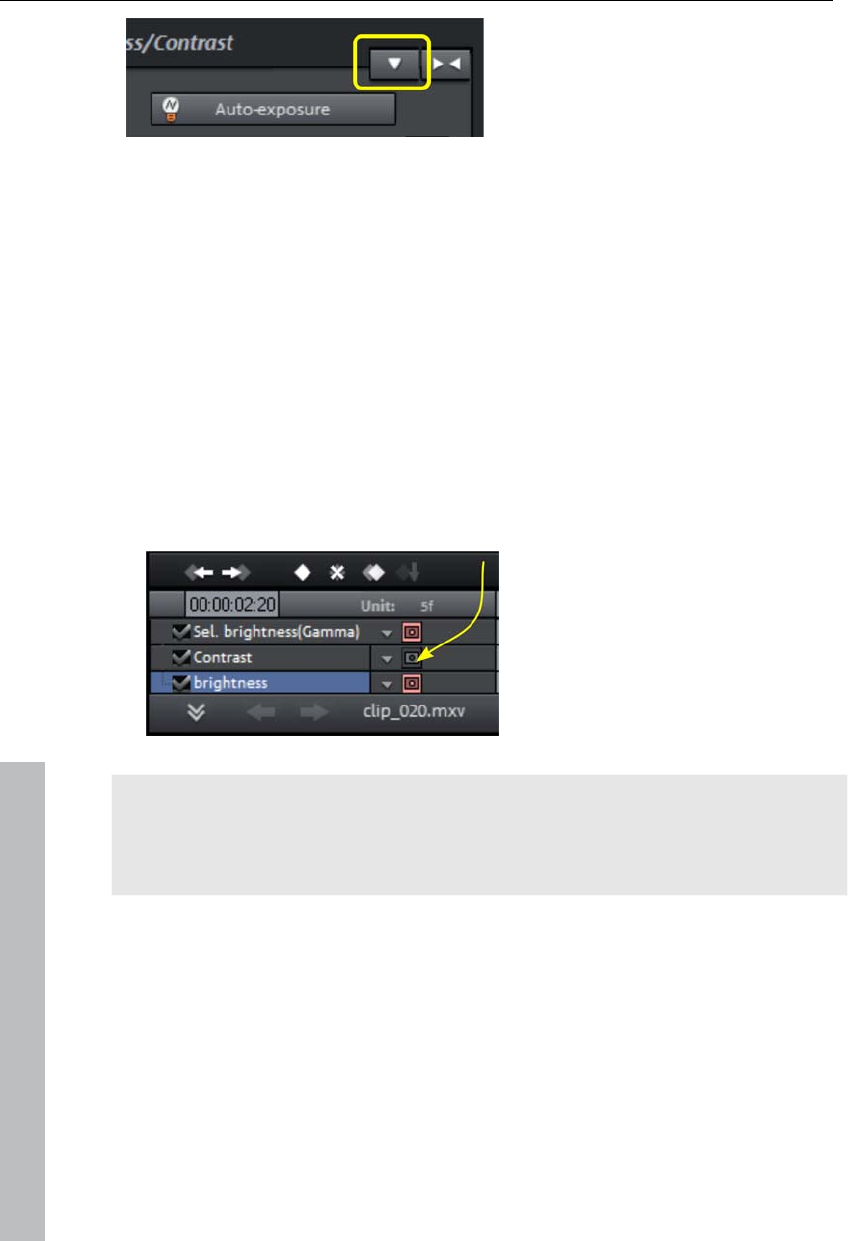
140 Effects
Open the desired effects page in
the Media Pool.
Click on the down arrow button and
select the "Load effects mask" entry
from the menu.
When using color images, the brightness values are used. The brighter the
area in the effects mask, the stronger the effect will be. Black indicates no
effect, and white indicates full effect.
To apply the mask at a certain position in the video, you must edit it again.
There are many options available for editing effects masks:
You can define the size and the position of the effect mask in such a way,
that the mask fits exactly over the image element to be edited. Please read
more on this in the section Position/size (view page 129).
You can attach the mask to the position in the video so that it moves
together with the image element. To find out more, read "Attach to picture
position in the video (view page 91)".
Or animate the effect mask object directly. Read more about this in the
chapter "Animate effects (view page 144)".
In the effects overview, the effects
mask can be deactivated for certain
effects. These effects will then be
applied to the whole image.
Click on the down arrow button and
select the "Delete effects mask"
entry from the menu to remove the
effect mask.
"T"
Tip: You can use your open effects masks, too. Any image or photo in JPEG
format can be used. You can draw a suitable image in a graphics program,
save it as a JPEG and load it using the "Load effects mask" option in
MAGIX Video Pro X3.
Image stabilization
The motion stabilizer reduces unsteady camera motion and helps to smooth
pans. This option can be accessed from the context menu of a video object
or the "Effects" menu > "Open video objects".
Functionality
Image stabilization balances undesired picture movements. The motion
stabilizer equalizes inadvertent movements in the image by moving the
www.magix.com
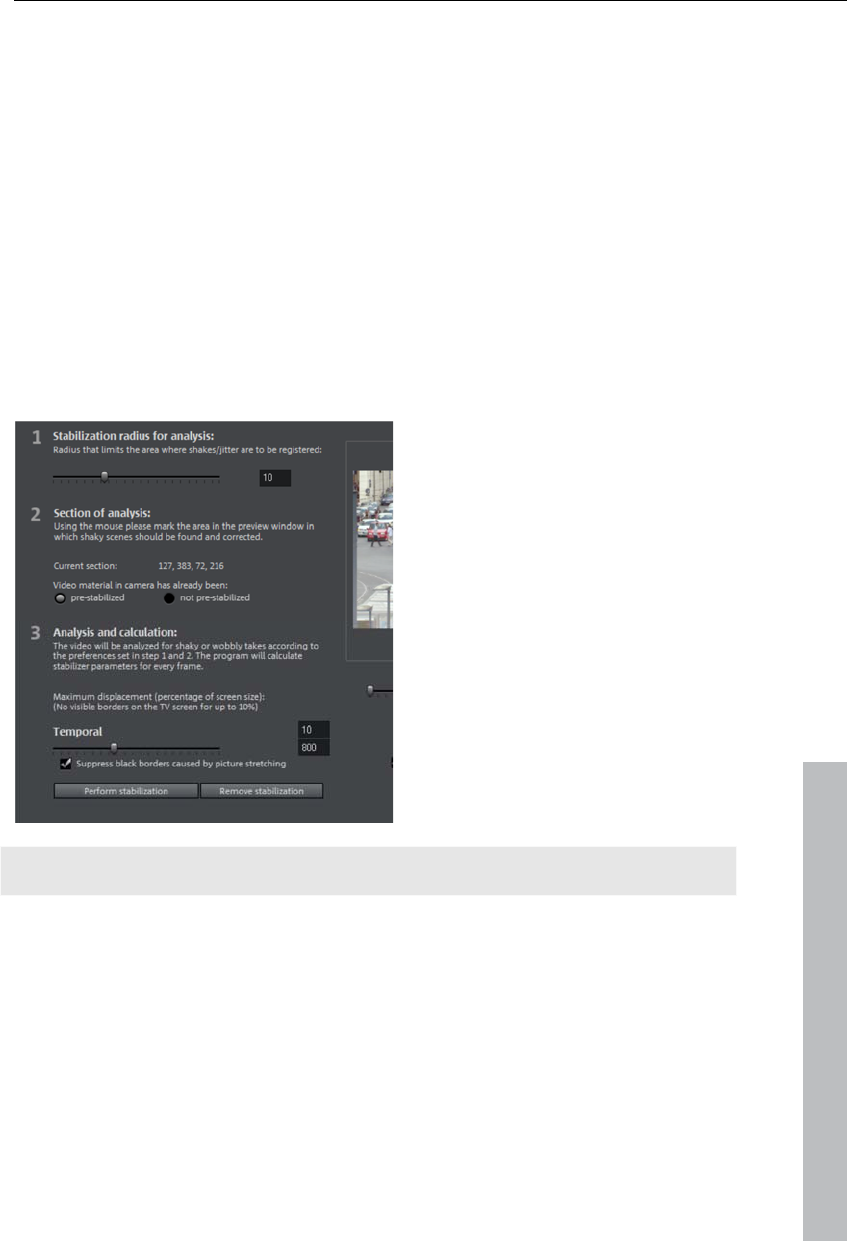
Effects 141
image in the opposite direction in accordance with the wrong movements.
This produces unusable edges in the footage that are cut off automatically,
and black strips, which are then removed using a zoom shot. The result: A
clearly more stable, almost imperceptibly larger picture.
Application
First you have to check the movie material for shaky scenes. To do this click
on the "Stabilize" button. Based on the preset parameters, a relative shift
between the pictures is calculated. After concluding the analysis, take a look
at the suggested correction, then use the slider for further adjustments.
Once you are happy with the final correction click OK. If the first scan did
not provide a satisfactory result, try changing the parameters below and
repeat the process.
Image stabilization dialog
www.magix.com
Stabilizing radius: To prevent the
motion stabilizer from recognizing
every camera movement as
unwanted shakiness, you can
determine the radius within which
movement is acceptable. The
larger the stabilization radius, the
more shakiness is corrected.
Note: Changing this parameter will require reanalysis of the source footage.
Analysis area: This area determines the area of the footage that should be
analyzed. The center of the image is preset. If shakiness occurs in another
part of the picture, relocate the analysis area. To do this, use the lasso to
"capture" the shaky area.
Temporal smoothing: This value determines the speed of the movements
considered blurry. This allows you to differentiate between a panning shot
and a nervous hand-held shot. Changes to this value are immediately
applied.
Cancel: Exits the dialog without making changes to the settings.

142 Effects
www.magix.com
Delete corrections: Resets the current settings.
New value: The altered value for the temporal correction is accepted and the
new correction curve is set.
Image improvements for the entire movie
You can open the effects from the the settings via the "Effects" menu. All of
the settings made here influence the entire movie. Settings are made
separately for each individual movie in the project.
On the right, you'll see a preview of the current setting. Use the position
slider to jump to different positions in the movie or to various scenes in
order to see how the selected setting affects the image material.
Exposure
Brightness/contrast: Use the sliders to increase or reduce the brightness and
the contrast of the picture.
Selective brightness (gamma): "Gamma" specifies the mean gray value that
is provided by the various color ranges. "Selective brightness" is the most
important function for image improvement. In the preset list, select the
various envelope curves to edit only the dark, median, or brightest areas of
the image.
Using the fader, you can also set the level of brightening or darkening.
Auto-exposure/auto-colour: These buttons enable you to change contrast
and color automatically with a few clicks. The other settings options in the
dialog provide more options to get the results you want.
Adjust colour space: This option is effective against powerful colors that
violate TV standards and can no longer be displayed correctly on-screen.
The color saturation of the affected material is thereby reduced until the
maximum permitted value is reached.
Color
Saturation: Use the saturation slider to increase or reduce the hue
proportions in the image. A newly developed algorithm is applied which
makes color changes related to other parameters (e.g. contrast settings) in
order to achieve the most natural coloration possible.
Hue: Use the palette to select a hue for coloring-in the picture.
Red/green/blue: Changes the color mix using the slide controller.

Effects 143
www.magix.com
Sharpness
This fader allows you to regulate the level of image sharpness.
The "fine tuning" option allows you to determine the level of focus for
particular surfaces or borders.
Anti-flickering filter intensity: The anti-flickering filter affects only still images.
It is especially intended for zooms in images with many edges and
transitions with high contrast (e.g. fences, bars, brick walls). High-frequency
images such as these begin to flicker when they are reduced in size. This
filter smoothes these edges somewhat.You should set the intensity of the
anti-flickering filter according to your preferences, because smoothing is
always a compromise between good contrast and fluid image sequence
during playback.
TV picture
This option provides optimal adjustment of the image size for a real
television screen (anti-cropping). Without this adjustment, the screen could
cut off edges of the image in some cases.
Fade in TV display area in the preview monitor: This option displays the
image borders of the television as lines in the preview monitor. The four
image borders of the TV area may be specified via the four input fields. Of
course, the real size of the TV image must be familiar for this. The following
process is available to determine this:
The four input fields also enable the borders of the four sides to be adjusted
freely in percent. In this case, the best approach is to determine a balance
between reduction, bar formation, and the image section:
If all four edges feature the same value, then the image will be reduced
proportionately. In this case no distortions will occur, but there will be bars
along the edges.
If different values are entered for the 4 fields, the image size is reduced
disproportionately. This will distort the image.
Apply margin to: With this option, the entered values for the four borders are
applied as an image reduction. The result may be checked immediately in
the preview monitor.
Determining the visible TV frame size
To determine the picture properties of your television as well as optimal
image size editor settings, you should perform a test run:
Load the project "Visible TV image" from the folder "My Media -> Projects -
> Visible TV image" in the Media Pool.

144 Animate effects
www.magix.com
Play back the film and read the instructions on the video screen.
Burn the project to CD or DVD
Place the disc into the player and play the film. Compare the TV picture to
the picture displayed on your video screen by MAGIX Video Pro X3.
Determine the proportional value of the borders cropped by the television
with the four measurement scales along the edges of the test picture.
Enter the values in the "Full TV size" editor.
The image size is now optimized to your TV picture. Please note:
Depending on device settings and disc media type, the cropping values may
vary slightly.
Image improvements for individual objects
The context menu or in "Effects -> Video object effects" features various
adjustments for selected video and image objects.
Interpolation for interlace source material: Select this option to remove
interlace artifacts from the (video) image. If, for instance, you extract still
shots from a video, interlace artifacts appear in sequences which feature
movement.
Anti-interface filter: Choose this option for still pictures with detailed
structures and high contrast. This filter reduces line flickering during TV
playback.
Border cropping offset: Select this option if the edges are cropped during
playback on your television. Values stored in "Film effect settings (view
page 143)" will be applied.
Animate effects
The "Effects" tab under "Video effects" and "Movement effects" provide you
with the effects which can animated using keyframes.
The following objects can be animated:
Video objects
Image objects (still images)
Title objects
Audio objects (in the Media Pool under "Effects" > "Audio effects" >
"General")
MAGIX 3D Maker objects (3D texts)
Visual objects
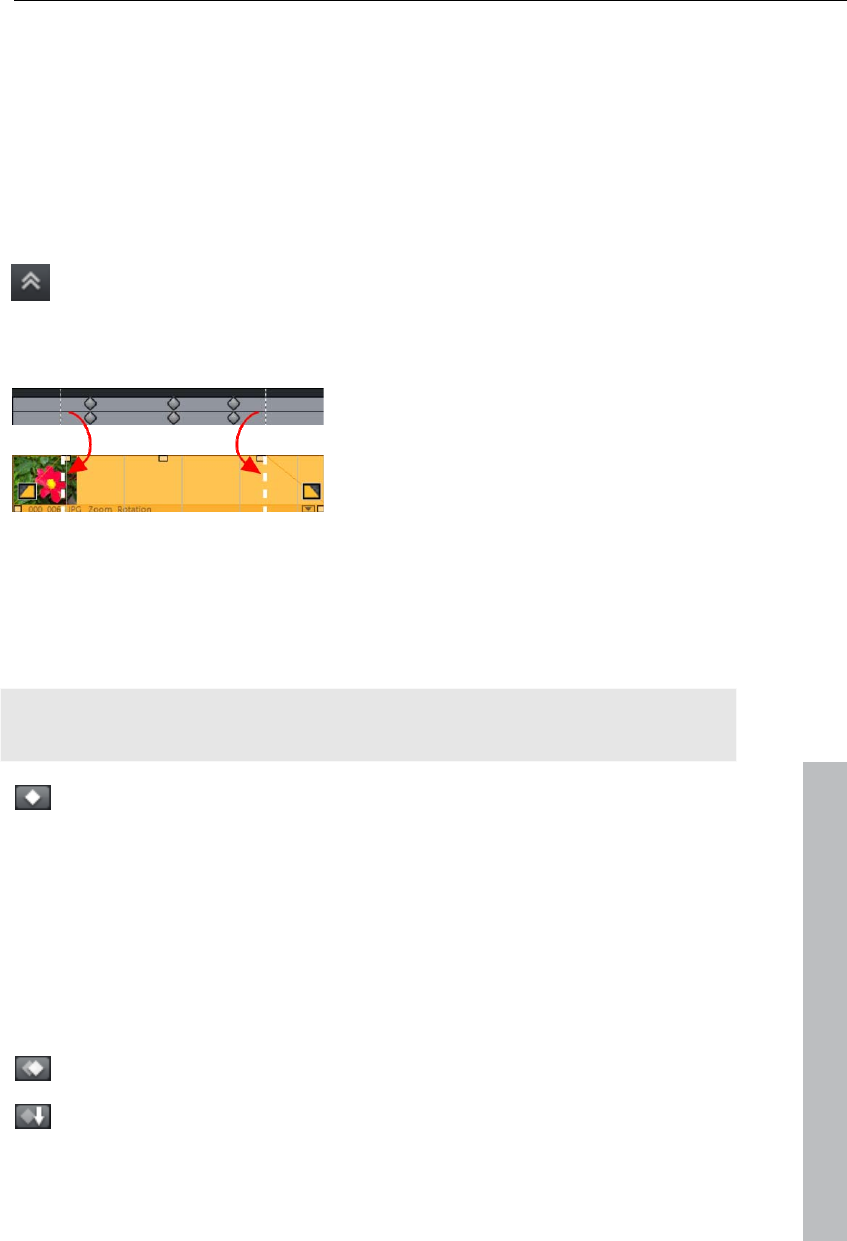
Animate effects 145
Preparing animations
First, select the object in the arranger to animate. For complex animations,
we recommend placing a marker beforehand for orientation.
In the Media Pool, open the "Effects" tab and click on the effect you would
like to animate under "Video effects" or "Movement effects".
If necessary, set up the effect however you would like it for the start of the
animation.
Using this button, at the bottom of the Media Pool, a timeline may be
shown or hidden. You can see here which animated effects are
currently applied to the selected object. Keyframes may be placed,
selected, moved, and deleted.
There are two stippled lines in the
timeline to help you orientate yourself
while you edit movement. These lines
will help you recognize the start or end
of the transition.
Place keyframe
Click the timeline to set the playback marker at the locations where a
keyframe should be added.
www.magix.com
Note: You can also use the timeline in the arranger for exact positioning.
Using project markers (view page 102) is recommended in this case.
This button places keyframes for all parameters required in the
animation.
Additional keyframes may be added simply by placing the playback marker
at the next keyframe location and changing the effects parameters directly.
The positioned keyframes may also be retroactively moved via drag & drop.
Copy keyframe
Select the keyframes to be copied by clicking them and then press
the "Copy" button.
Next, set the playback marker at the location for insertion and the
press the "Insert" button.
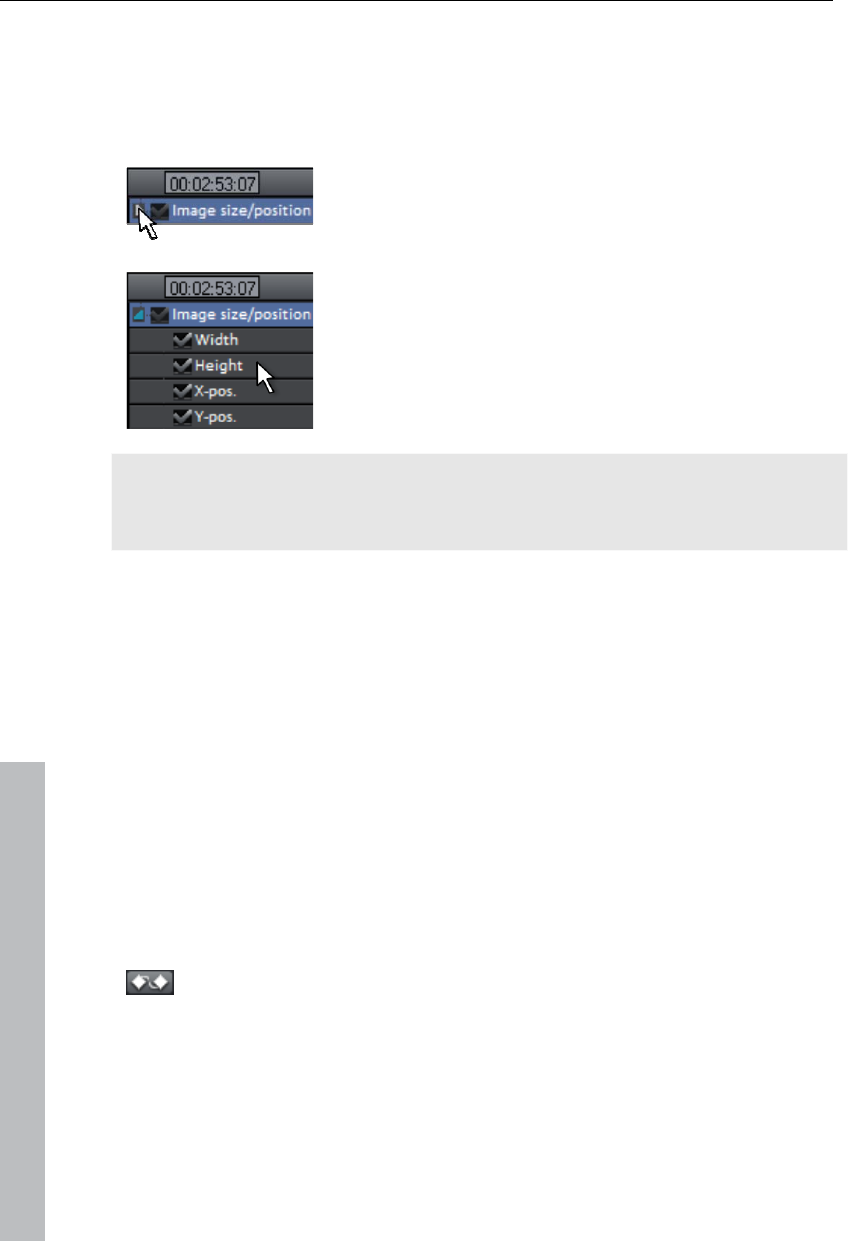
146 Animate effects
Display keyframes of individual parameters
Multiple keyframes are added simultaneously to effects if they include
multiple parameters.
Click the small arrow beside the name of the animated
effect to display all of its parameters.
Now all keyframes of the effects parameter can be
individually moved, deleted, activated, and
deactivated.
Note: Only those parameters are listed which are used for the animation. As
soon as another parameter is required for editing the effect, it becomes
visible to you here.
Retroactively editing an effect's keyframes
Previously set keyframes can be retroactively and temporarily moved and
their values edited.
Keyframes may be moved via drag & drop. Simply click on the keyframe to
be moved and drag it to the desired position.
To change an effects setting for an already positioned keyframe, click the
keyframe and adjust the effect in the Media Pool.
Soft movement
Normally, a hard, unnatural pan is the result of set keyframes.
This option makes sure that the progression of these movements is
executed more softly and more naturally.
It lets you activate the entire parameter group as well as individual
parameter curves.
www.magix.com
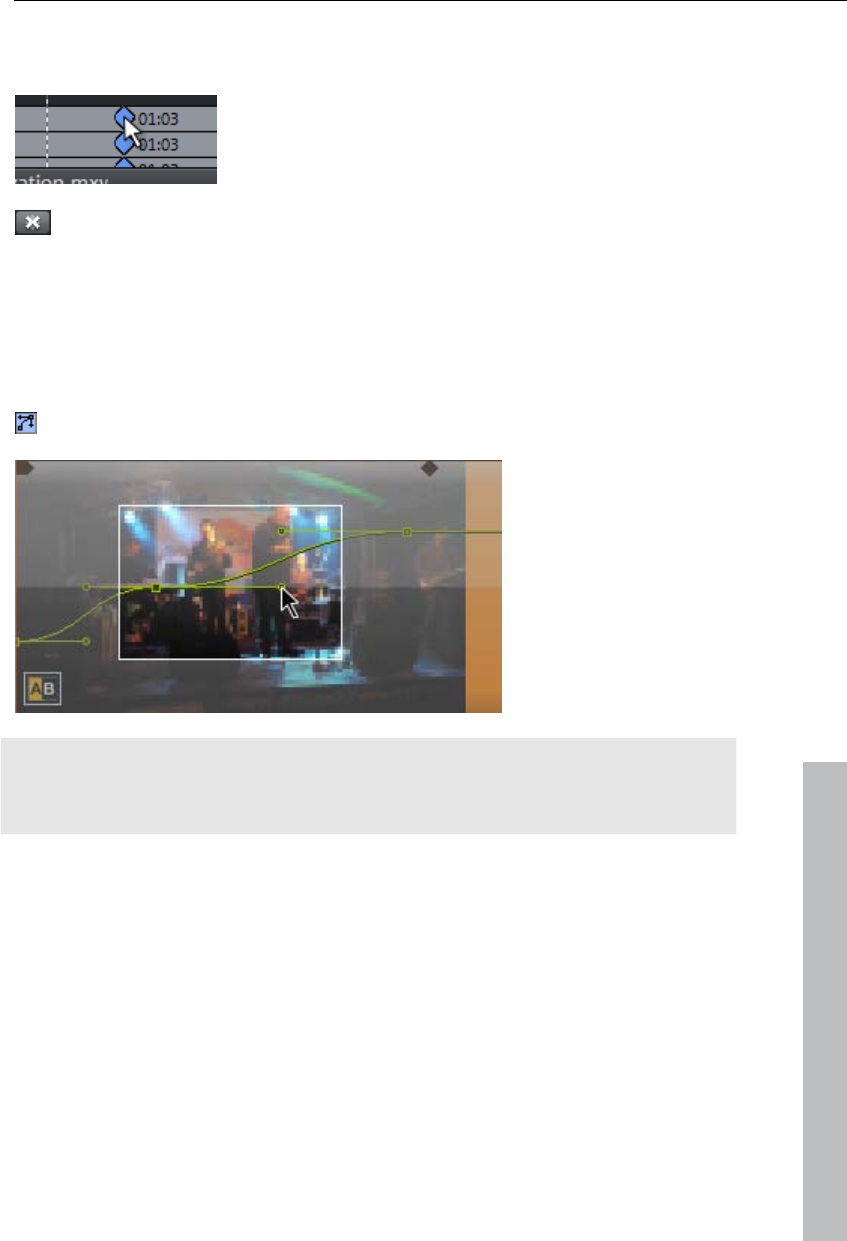
Animate effects 147
Delete keyframe
Select the keyframe to be deleted by clicking it.
This button removes the selected keyframe.
Change curve shape
Every curve point features two Bezier curve handles for softening curves
shortly before and after the handles.
The Bezier curve handles are activated by clicking on the curve until
the "Manual Bezier interpolation" mode is activated (see illustration).
Both Bezier handles
are connected to
each other and create
a soft Bezier curve
which is harmonized
with the effects curve.
www.magix.com
Tip: When working with individual curves or Bezier handles, using a higher
vertical zoom level is recommended to see and move curves and curve
points as precisely as possible.
The following function shortcuts may be used to work with with curve points
quickly and effectively:
Double click on a curve point to set the effect's default value.
"Shift" + drag to move a curve point vertically only.
"Ctrl" + drag to move a curve point only horizontally.
"Ctrl + Shift" + click on a curve point to create a Bezier handle from the
curve point.
"Ctrl + Shift" + click on a Bezier handle to uncouple the handles.
"Ctrl + Shift" + click on a curve to create and delete curve points.
"Del" deletes the selected curve point(s).
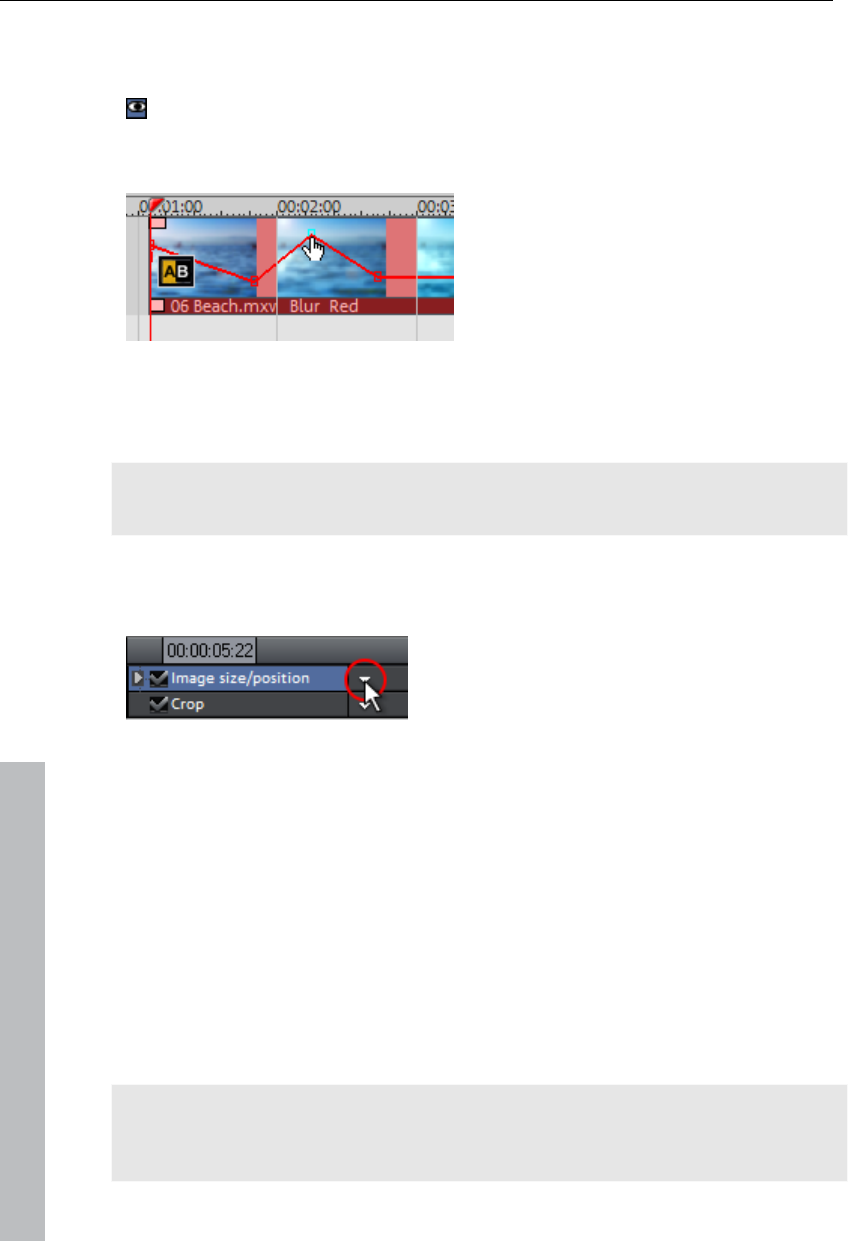
148 Animate effects
Editing an effects curve in the object
Activate effects curve: For each of animated effects parameter, a curve is
created and placed over the object. Click this button to display the
effects curve on the object.
Edit curve points: The curve point can
either be edited with the individual
curve points (in "Standard" mouse
mode) or by freely drawing the effect
curve (in "Curve" mouse mode).
New curve points can be added to the curve in "Standard" mode via "Ctrl +
Shift" and clicking; existing ones can be deleted in the same way. Every
curve point can be moved with the mouse horizontally and vertically.
Note: The buttons for activating effects curves are first displayed once the
first keyframe has been placed.
Effects curves - Additional functions
The context menu can also be opened via the small arrow beside the effects
indicator.
Delete effects: Removes the selected effect completely.
Delete effects curve: Removes the effects curve to be created again.
Copy effects curve: The effects curve is copied to the clipboard to be used at
other positions.
Insert effects curve: A previously copied effects curve can be inserted
elsewhere with this function at any time. This may be in the same object or
in another object.
Note: If you would like to insert the curve into a longer or shorter object,
then think about setting the option "Connect curve length with object length"
correctly before copying.
www.magix.com

Animate effects 149
www.magix.com
Connect curve length with object length: If this option is set, then changes to
object length will affect the effects curve accordingly.
In practice, this behavior is needed rarely, for example if objects are
stretched or compressed. The option is deactivated by default for this
reason.
Load effects curve: A previously saved effects curve may be loaded via this
menu item. This is useful, for example, if you have added your own default
animations.
Caution! The current effects curve will be overwritten as another one is
loaded.
Save effects curves: Effects curves can be saved as a separate file. This is
useful, for example, if you want to add your own default animations and
simply load them again at other positions again.
Tip: Be aware that during saving the setting "Connect curve length with
object length" is saved as well and applied during loading.
Edit effect curve...
This dialog serves to stretch, compress and move effect curves within an
object.The info bar of the dialog will display the effect, whose automation
curve is currently being edited.
Move position
Time axis: With each click on the arrow, you can move the effect curve
forward or back by the displayed time value.
Effect: Every click on the arrow up or down moves the effect curve by the
entered value. Depending on the effect, it is possible to enter exact or
percent values.
Stretching & compressing
Time axis: The effect curve will be stretched or compressed by the entered
time value. Invert reverses the curve on the time axis and reinserts it in
"reverse". The entire object duration will be considered.
Effect: The effect curve is stretched or compressed in its values, no time-
related editing takes place. The selected option (see table) is decisive in
editing.
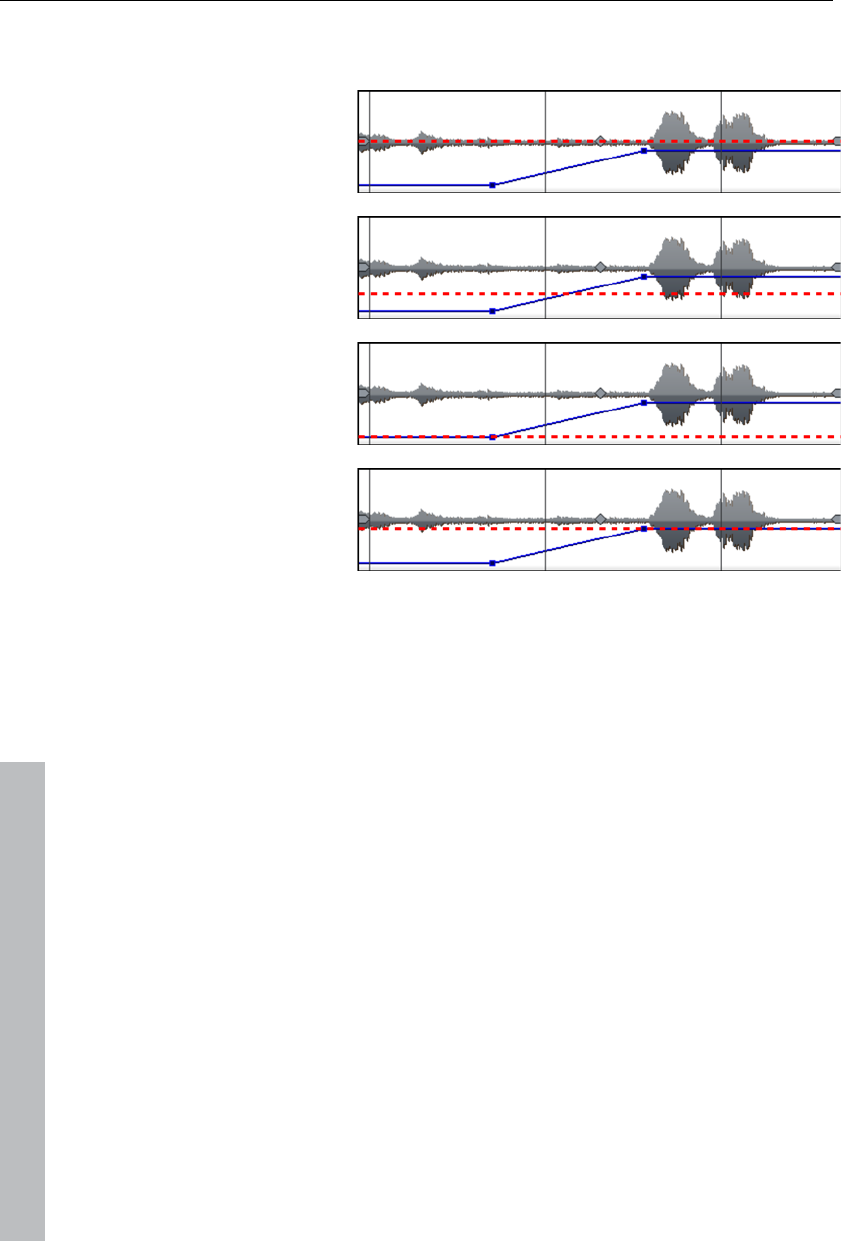
150 Animate effects
Mirror: The entire curve is mirrored along the X-axis, whose position is
determined by the following option (see table).
... around the object
center: The X-axis lies
exactly at the center of
the object.
...at the center of the
curve: The X-axis lies
between the upper and
lower automation point.
...at the curve minimum:
The X-axis lies at the
level of the lowest
automation point.
...at the curve
maximum: The X-axis
lies at the level of the
highest automation
point.
Stretching, compressing and displacing of effect
curves.
This dialog serves to stretch, compress and move effect curves within an
object.The info bar of the dialog will display the effect, whose automation
curve is currently being edited.
Move position
Time axis: With each click on the arrow, you can move the effect curve
forward or back by the displayed time value.
Effect: Every click on the arrow up or down moves the effect curve by the
entered value. Depending on the effect, it is possible to enter exact or
percent values.
Stretching & compressing
Time axis: The effect curve will be stretched or compressed by the entered
time value. Invert reverses the curve on the time axis and reinserts it in
"reverse". The entire object duration will be considered.
www.magix.com
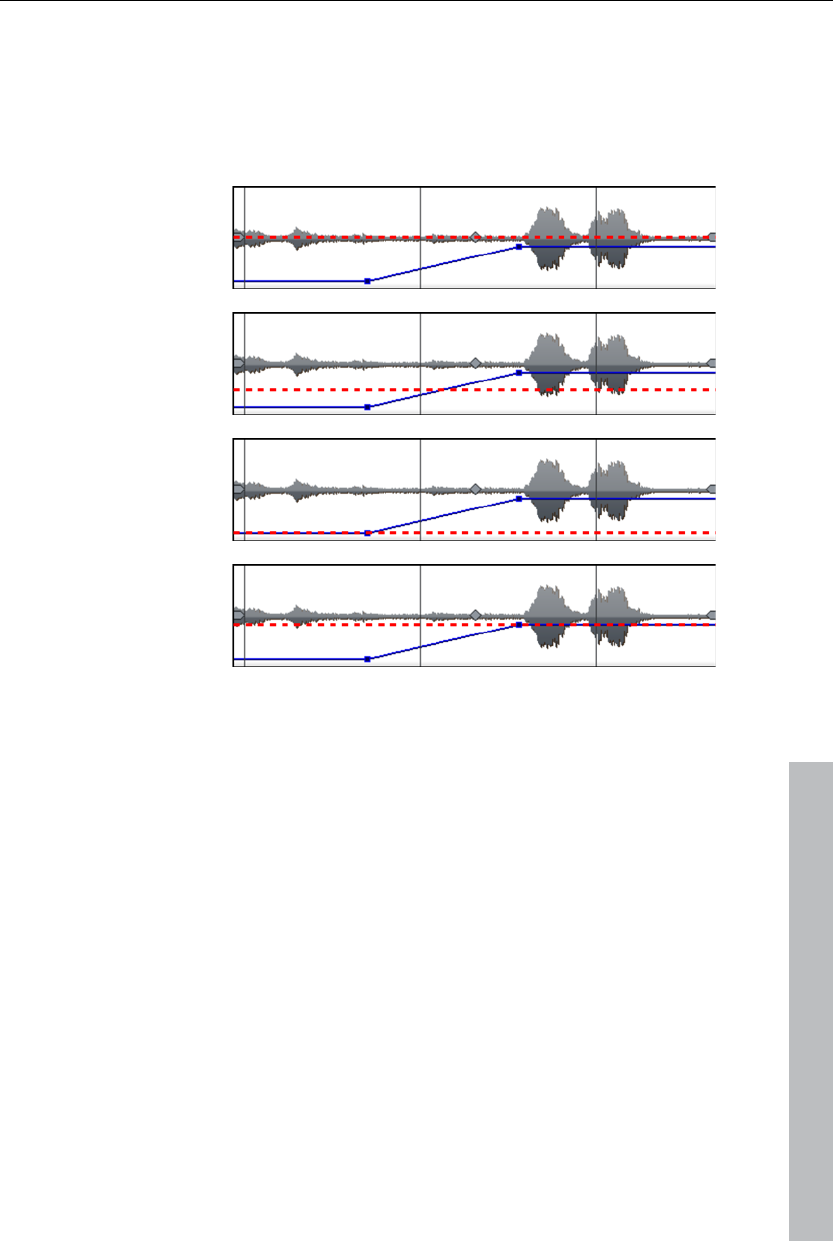
Animate effects 151
Effect: The effect curve is stretched or compressed in its values, no time-
related editing takes place. The selected option (see table) is decisive in
editing.
Mirror: The entire curve is mirrored along the X-axis, whose position is
determined by the following option (see table).
... around the object
center: The X-axis lies
exactly at the center of
the object.
...at the center of the
curve: The X-axis lies
between the upper and
lower automation point.
...at the curve minimum:
The X-axis lies at the
level of the lowest
automation point.
...at the curve
maximum: The X-axis
lies at the level of the
highest automation
point.
Animation from outside the image
www.magix.com
Animated effects come in handy to let titles or images "fly" through the
picture. It is recommended to st the in- and out-points of the animation
outside the frame of the image.
You will need a video object and a second object to be animated, for
example a title or a small object that is to fly through the video image.
Let's roll:
Click on the preview monitor and zoom out of the video image (Ctrl +
mouse wheel). This creates working room on the edge of the minimized
preview image.
Select the "Position/size (view page 129)" effect.
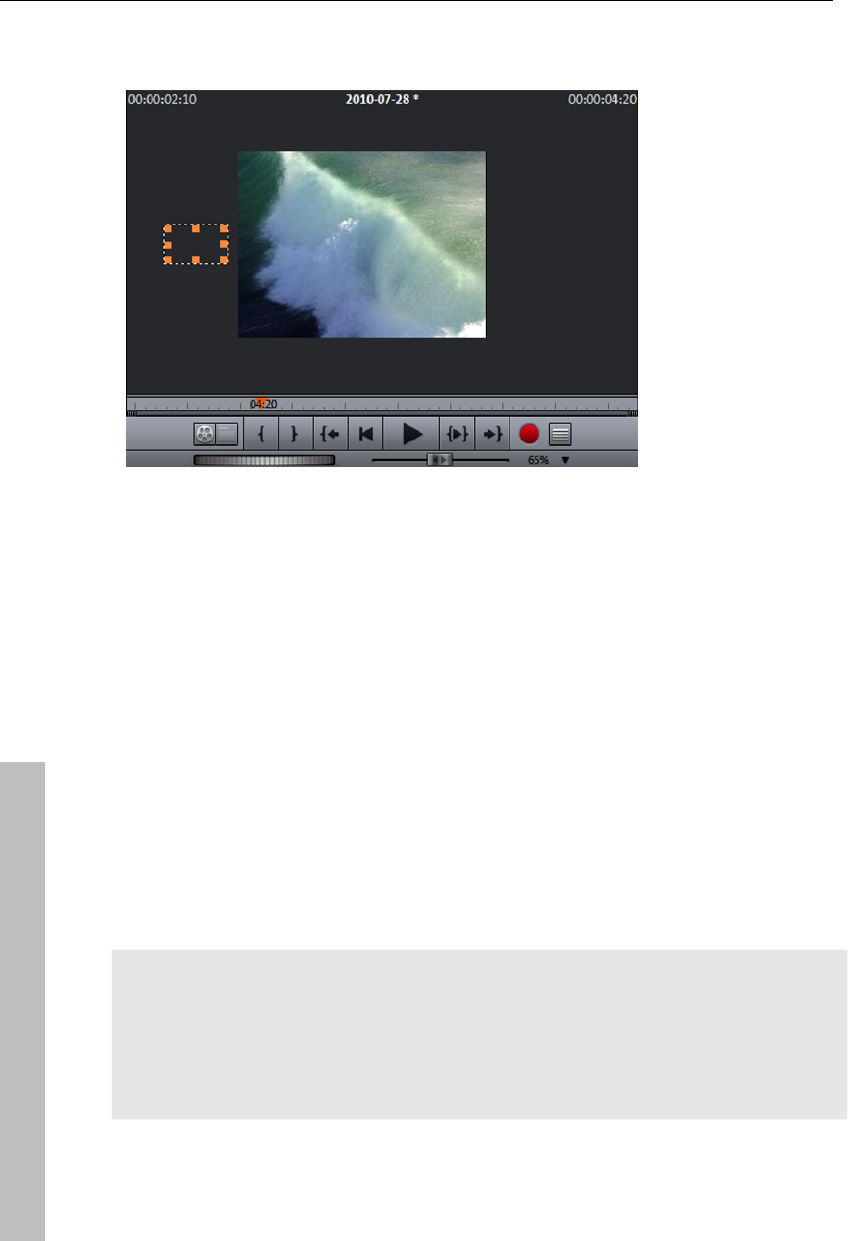
152 Stereo3D (deluxe version)
Move the object to be animated to the work space where the animation
should start, for example to the left of the preview image:
Position the playback marker at the position where the animation should
start.
Create a keyframe for the animation start.
Move the object to be animated to the work space where the animation
should end, for example to the right of the preview image.
Position the playback marker at the position where the object to be
animated should disappear from the image.
Create a second keyframe for the animation end and play back the result.
The object to be animated should now be flying from left to right through the
video picture!
Stereo3D (deluxe version)
MAGIX Video Pro X3 also enables creation and editing of 3D videos and
photos. Let's examine this complex topic to learn the basics and a few
golden rules. Next, we'll look at the individual work steps in detail.
Note on using 3D content: Some people experience unpleasant symptoms
(such as headaches, overexertion, eye strain or nausea) when they are
exposed to 3D video. For this reason, we recommend taking regular
pauses. If problems occur, you should stop all use immediately and consult
a doctor or an optician. Incorrect creation of 3D footage can also cause
these symptoms.
www.magix.com

Stereo3D (deluxe version) 153
www.magix.com
Warning to children: Children's eyesight (especially before the 6th year) is
still developing. We recommend consulting your child's doctor or optician
before permitting your child to view 3D videos.
3D basics
Human eyes perceive objects from 2 different angles and our brain
"calculates" images from this information. This way we can tell the distance
and position of an object. For this reason, 3D material should be shot
according to this principle.
Viewing 3D
A regular screen or TV can show images only in 2 dimensions, and various
technologies have been developed to enable perception of images in 3D. To
this day, all technologies share the following: You need special glasses to
deliver different information to the left and right eyes. We will examine these
technologies in detail later.
The three golden rules
Stay within limits during recording: To make a 3D recording (view page 154)
with realistic depth information, certain limits must be respected. The most
important rule is not to go below the point of minimum distance. Minimum
point is the point in the picture, where the camera is the closest.
Frame closest point: In order to place the 3D effect behind the imaginary
frame, both image components must over lay each other exactly at the
closest point. At the same time, the same objects must be visible at the
edges of both partial images, for which, if needed, you can use the
Cropping function in the Media Pool (view page 130).
Note: The imaginary window is a type of a plane, behind which the 3D movie
plays. You select the closest, frontmost point. Not keeping up with this rule
can result in the object to "jump out" of the imaginary window, which when
used too much, can cause headaches.
Maintain realistic eye angles: Object with a 3D depth effect viewed as a
red/cyan image (Anaglyph) without glasses will appear displaced. This
displacement should, if possible, take up less than 1/30 of the entire image.
Otherwise, it will appear that the eyes are looking in different directions.
Notice: Displacement may only occur along the horizontal axis.
Displacements on the vertical axis and rotated portions must be adjusted.

154 Stereo3D (deluxe version)
www.magix.com
Record 3D
The distance between eyes in humans is ca. 65 mm, which forms the so-
called "stereo base width". But because our eyes are dynamic and we can
even "cross" our eyes, it is possible to focus on objects that are closer.
Various techniques exist for 3D recording. Each method has its advantages
and disadvantages:
3D cameras with two lenses: The advantages are obvious; these cameras
produce 3D material without excessive work involved. The disadvantage is
that the stereo base width (lens distance) cannot be changed.
Two cameras on a special mount: This involves a little more work. Two
cameras are mounted on a special support to record material for the left
and the right side of the 3D image simultaneously; microphone booms for
stereo recordings may also be used for this purpose.
The disadvantage in this case is that the shutter releases have to be
pressed at exactly the same time if there are moving objects in the picture.
In case of video, both movies must be synchronized before being edited.
Advantages: Stereo base width may be changed by adjusting the distance
between the cameras; larger selection of camera models.
Two photos via the same camera: This technique only allows still images.
The camera is simply used to record two images from different
perspectives, and these are used as the right and left images. For best
results, use a tripod.
Consistently fast camera movement, e. g. along a street: Only a single
conventional camera is required in this case, but the range of applications
is very limited. This is the most cost-effective method for creating 3D
videos. Material is filmed at a speed of circa 6-to 15 km/h. During editing,
the edited video object is duplicated and one of the videos is played back
with a time lapse. The movement direction determines which is the right
and left image. 3D photos may also be created using this method.
Warning, minimum distance!
The position of the object closest to the lens is designated as the minimum
point. This minimum point may not exceed a specific minimum point; this is
easy to calculate via the following formula:
Note: Lens focal point (e. g. 25 mm) x stereo base width (e. g. 65 mm) x
1.5* /1 mm= minimum point (2437.5 mm ~ 2.44 m)
*1.5 is a factor derived from the cut-off appearing when filming through a
lens.
**1 mm is the so-called "deviation" or "spatial dimension". This only involves
a rough value in this case.

Stereo3D (deluxe version) 155
www.magix.com
Examples for 3D cameras:
Panasonic HDC-SDT750 ( base width 12 mm): minimum point is approx. 1.5
m.
Fuji REAL 3D W3 (base width 75 mm): minimum point at approx. 3 m; for
long-distance recordings as much as 8 m.
This so-called minimum point has an important role in other aspects of 3D
editing.
Prepare 3D editing
3D videos are filmed and saved by different cameras, which means:
depending on the camera model or recording method, the videos or images
vary.
In one file
Many cameras, especially for photo recordings, create one single file
containing the left and the right image next to one another.
Drag these files from the Media Pool directly into your arrangement.
Select the created objects.
Select the "Side-by-Side (left images left/right)" entry in the Media Pool
under "Effects > Stereo3D > Properties > Create stereo".
In multiple files
Some 3D cameras create a file for each the left and the right side. This
working technique works also if you simply take 2 pictures with a regular
photo camera.
In the Media Pool, open the folder in which the desired file can be found.
Sort the files in increasing order according to the date. This way, all files
will lie in pairs one below the other.
Now, select the files and drag them from the Media Pool directly into your
arrangement.
In the Media Pool select "Side-by-side (left image right/left) under "Effects >
Stereo 3D > Properties > Create stereo" for material with halved width.
Note: If you have created side-by-side material yourself (e.g. placed two
photos next to each other in an image file), proceed as described, but at the
end select the "side-by-side (left image left/right)" for material with full width.

156 Stereo3D (deluxe version)
Set playback mode for 3D
There are various techniques available for playback of 3D videos on the
computer. Depending on the technology used, the corresponding playback
mode may be activated in MAGIX Video Pro X3.
Select the 3D mode you want to work with in the upper left
corner of the video monitor.
Here is a list of available techniques and the corresponding requirements:
3D mode Technology Requirements
Display occurs in rows Polarizing filter Polarizing filter glasses
Special monitor, typically
referred to as a 3D monitor or
similar
Side-by-side display Shutter mode nVidia 3D Vision Kit
120 Hz monitor/projector
Note: Both of these modes should only be set in case the preview image is
output on a separate monitor. Shutter mode also requires a 3D-capable
graphics card.
Anaglyph display Color
anaglyphs
Red/cyan glasses
Align videos and pictures for 3D
Anaglyph display is recommended for this, which may be set via the video
monitor (view page 156). Only in this mode is precise geometric alignment
of images possible.
Note: In case you wish to edit 3D-video material, it is recommended to
conduct scene recognition and split the video into individual scenes. This is
necessary because the left and right side of each scene must be arranged
individually.
The so-called minimum point is the point in the picture that the camera is
closest too. This forms the "center" of the 3D image and must be defined as
such in MAGIX Video Pro X3.
www.magix.com
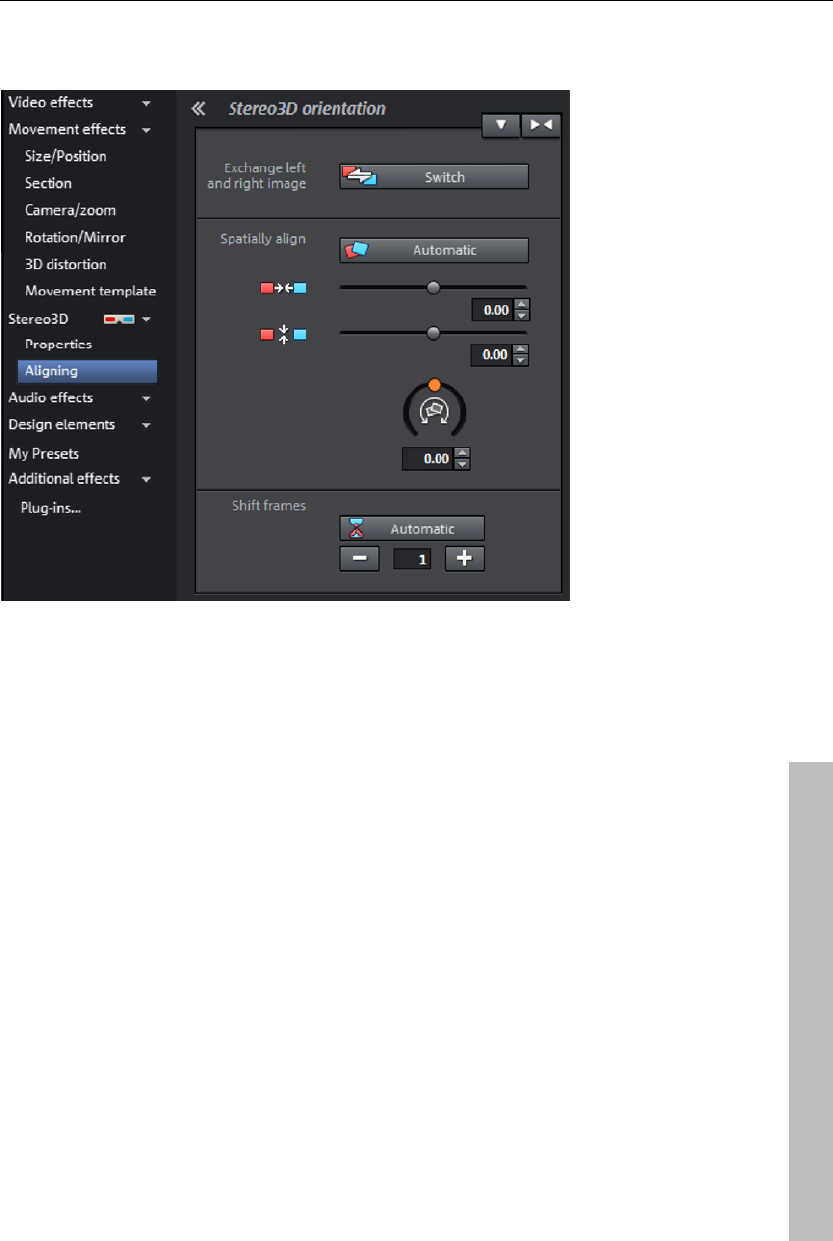
Stereo3D (deluxe version) 157
For this task, go to "Media Pool -> Effects -> Stereo 3D" and access the
entry "Aligning".
Juxtapose both images one over the other, so that the minimum point of
both is at the same location.
You should first see whether automations for spatial adjustment and
synchronization deliver desired results. Click on the button "Automatic".
www.magix.com
If this does not produce the desired effect, proceed as follows:
Find the minimum point in the image.
If the images are offset vertically, then these need to be balanced via the
slide controllers under "Spatially align".
If the images have rotational differences, you have to adjust these with the
rotation controller.
Try to juxtapose the closest points of both sides precisely using the upper
slider.
To test the results, put on the cyan/red glasses. In case the image has an
exaggerated spatial depth, try to position the left and right sides closer to
each other using the controls.

158 Stereo3D (deluxe version)
www.magix.com
Turn camera movements into 3D videos
Camera movements may be transformed into 3D videos by being duplicated
and converted via time displacement. To do so, you can simply record on
the right or the left side while, for example, driving along a street.
The speed should be set between 6-15 km/h (approx. 4-10 mph) and
depends on the frame rate, the focal point, and the distance of the objects
being filmed (among other things). At increased speeds, it may occur that
the spatial impression is too strong and the filmed material seems unnatural
and unpleasant.
If the video is in the arrangement, the stereo depth for the 2D object may
be set in the Media Pool via "Effects -> Stereo 3D --> Properties".
Depending on the direction of the recordings, you will have to move the
control either to the right or the left.
Check the results in the anaglyph display with red/cyan glasses
Correct any unrealistic effects by adjusting the controller in the opposite
direction.
If the spatial depth is exaggerated, reduce the changed parameters.
Note: Not only camera movements, but also other 2D materials may be
arranged spatially.
3D material may be edited with the same functions as 2D material.
Create titles for 3D videos
Xara3D title objects (view page 116) automatically have "real" 3D properties
and for this reason may be used in the arrangement without any problems.
Export and burning 3D videos
There are no special requirements for export and burning. Only the desired
3D technique is specified.
Anaglyph: This technique is recommended for uncomplicated playback of
finished videos or playback via conventional TV sets or projectors. Viewers
must simply put on a pair of red/cyan glasses to be able to enjoy a 3D film.

Soundtrack 159
www.magix.com
Side-by-side: Create 3D movies for a 3D-capable playback device without
having to compromise the quality. It doesn't matter initially whether your
video is viewed in "Shutter" mode or via "Polfilter".
Depending on your playback device, you should set double resolution in
order to produce full resolution for both the right and the left image.
Not all playback rates are capable of double resolution. If this is the case
for your device, 50 % pinched images will be displayed. The quality is
nevertheless higher than output via the anaglyph technique.
Note: When exporting to side-by-side formats, make sure that the vertical
resolution is the sum of both images, but the aspect ratio (e.g. 16:9) refers
to a partial image!
Export files/upload movies to the Internet
The standard path for all file exports via "File -> Export movie or file ->
Internet". Depending on the export format and destination, the export dialog
also allows the 3D technique to be used to be selected.
For direct selection as Windows Media Video 3D, click "Export" and select
"3D film" from the dialog.
Burn CD
When burning a Blu-ray DiscTM or DVD, you must first open the encoder
settings in the burn dialog and set the desired 3D technology. Next, you
may proceed to burn the disc as usual.
During the burning process, MAGIX Video Pro X3 automatically creates an
intro video with corresponding instructions that will play back when the disc
is placed into a drive.
Soundtrack
In principle, any track in MAGIX Video Pro X3 can be used as a sound
track. There are no specific track types. But it is easier not to mix object
types within one track.
Load and edit audio files
All importable audio files may be accessed in the Media Pool and
previewed via the video monitor of the by a clicking on the file name.
The files may be dragged into the arranger by holding down the mouse
button (drag & drop). Tracks from audio CDs may also be integrated via
drag & drop.
160 Soundtrack
Edits, fine positioning, volume settings, and fading in and out may all be
adjusted in the arranger using the object handles directly.
Various effect curves (view page 148) may be selected for audio tracks,
dynamically controlling selectable effects, volume or stereo panorama.
Audio effects
Using audio effects
Track effects
Track effects always apply to all audio objects of a track. This sets the mixer
(view page 160).
Audio effects plug-ins
MAGIX Video Pro X3 supports VST as well as DirectX audio plug-ins. These
are usually effects modules such as reverb, equalizer, dynamics
compression, etc.
Installation
Before using audio effect plug-ins, they first have to be installed – this
process may be different depending on the plug-in. VST plug-ins are
typically saved in a certain directory, which must be entered in the MAGIX
Video Pro X3 path settings. After the path has been indicated, MAGIX Video
Pro X3 scans it for working plug-ins and offers them to be used. You can
also indicated multiple locations where VST plug-ins are installed.
Using plug-ins
Two so-called slots for track effects are located in the channel
strip of the mixer for the corresponding track as well as in the
FX tracks.
Clicking on the small triangle will let you select an effect from
the list. Select "No effect" to remove a plug-in from the slot.
Master effects
Master effects influence the mixed sum of all audio tracks. For this purpose
a Master Audio Effects Rack and further plug-ins are provided. The deluxe
version includes the special MAGIX Mastering Suite (view page 171) for
perfect sound.
Sound optimization
This option opens an editor for correcting audio material discrepancies.
www.magix.com

Soundtrack 161
www.magix.com
Select the cleaning function you desire from the upper part of the dialog:
The equalizer (on page 163) allows you to manipulate the frequency
spectrum – perfect for cleaning up muffled dialog.
The compressor is a dynamic volume control that lends the overall sound a
deeper, richer quality.
The stereo FX processor justifies the position of the sound in the stereo
panorama.
DeNoiser, DeClipper, and DeHisser are professional noise reduction tools
that do exactly what their titles say they do.
Presets: You can try out the suitability of a number of presets in the preset
menu.
Temporarily deactivate all effects: Switches all the effects off.
Apply to all scenes: Applies the selected cleaning settings of all effects to
every scene of the movie.
Declipper
Should the input level of an audio recording be too high, overmodulation
may result at the louder parts (the signal peaks). This digital distortion is
also called "clipping": At the overmodulated area, the values that are too
high are simply cut off, and typical, quite unpleasant-sounding crackling and
distortion appear.
MAGIX Video Pro X3 contains a special function for dealing with digital
clipping and analog distortions. Of course, this only works to a certain
degree.
Using the fader you can set at what level the Declipper should register a
signal as being overmodulated and, if required, correct it (Clip level). This is
important, as different sound cards show different clipping methods. The
more the fader is turned up, the lower the level recognized by the program
as overmodulated. If the clip level is set too high, unwanted sound
modification may occur.
Get clip level: The clip level is gaged automatically.
Denoiser
The Denoiser removes persistent background noise like computer hum,
hissing, noises from sound charts, disturbance from ground circuits,
interference from audio equipment with high-impedance outputs (such as
record players), impact noise, or the turntable rumble.
The Denoiser requires a noise sample. Some typical noise sounds are
included in the "Preset" selection menu.

162 Soundtrack
www.magix.com
Set the degree to which the noise should be reduced with the fader. It is
often better to reduce interference signals by 3-6 dB rather than as much as
is possible in order to keep the sound "natural".
A different option consists of creating a noise sample yourself. All that's
needed is a short section from the audio track in which the distortion can be
found. To get it, switch to the DeNoiser dialog by pressing "Advanced".
DeNoiser – Advanced settings
Step 1: Choose a noise sample
First of all, a sample of the distortion you wish to remove must be selected,
i.e. a so-called "noise sample".
You have two options to choose from:
Pick out typical background noise: You can select and use a number of
typical background noises from the flip menu. Select one and listen to it by
pressing the "Play" button. If it is similar to the background noise in your
sound track, go ahead and use it (see "Step 2: Removing background
noise").
Extract a new noise sample from an audio track: You can also pick out a short
passage (from the existing sound track) in which you can hear the
background noise.
Automatic search: Searches especially quiet passages in which background
noise is most noticeable.
Previous / Play / Next: These buttons allow you to play all of the passages
found for easy comparison.
Save as: Once found, you can save noise samples to the hard drive. They
then appear as entries in the "Typical background noises" flip menu to be
used in other projects.
If you only wish to use the noise sample in the current project, you don't
have to save. Instead just go to the "Remove noise" category.
Step 2: Removing background noise
Noise level: The level of the noise reduction function should be set as
precisely as possible. Values that are too low are expressed at a low
distortion dampening level and in artifacts, like noises or "twittering" (see
below). High settings produce dull results – useful signals that sound similar
to hissing noises are also filtered away. Try to find the best setting for the
project at hand.

Soundtrack 163
www.magix.com
Reducer: This sets the balance between the original signal and the signal
with the applied noise reduction. It's often better to reduce interference
signals by 3-6 dB rather than as much as is possible, so as to keep the
sound "natural". In case of buzzing, it’s best to apply complete removal.
Dehisser
The Dehisser eliminates regular "white" noise typically produced by analog
tape recordings, microphone pre-amplifiers, A/D converters, or
transformers.
Noise reduction can be regulated in decibels with the fader. It is often better
to reduce interference signals by 3-6 dB rather than as much as possible in
order to keep the sound "natural".
Noise level: You can choose between different noise levels. The level of the
noise reduction function should be set as precisely as possible. Low
settings result in incomplete deletion of the hissing. Incomplete deleting of
hissing produces artifacts and should be avoided, since high settings will
produce dull results and some useful signals (i.e. woodwinds) which are
similar to hissing are also filtered away.
Equalizer
The 10-track equalizer divides the frequency spectrum into 10 areas (tracks)
and supplies them with separate volume controls to allow you to achieve
many impressive effects, from the simple rising of the bass to total sound
transformation. If you raise the low frequencies too much throughout the
whole level, it might cause distortions.
Fader: The volume of each of the 10 frequency bands can be set separately
with the 10 volume controls.
Link frequency bands: The frequency fields can be bundled together flexibly
in order to avoid artificial-sounding exaggeration in individual frequency
fields.
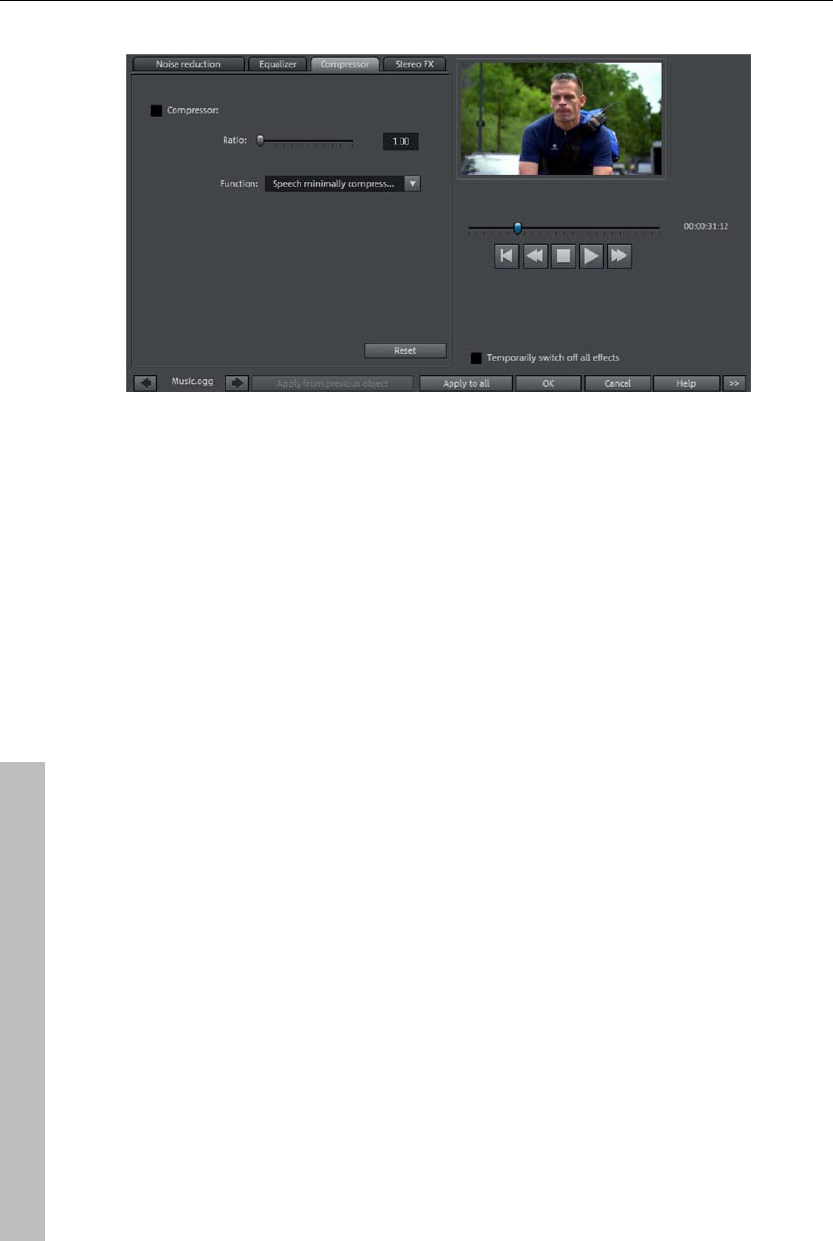
164 Soundtrack
Compressor
The compressor is an automated, dynamic volume controller. Loud
passages become quieter and the total value is raised. This makes the
volume more consistent and speech easier to understand. A compressor is
mainly useful in case background noise or music interferes with speech and
simply increasing the volume of the individual objects or tracks does not
result in any significant improvement.
Level: Regulates the level of compression applied (the "ratio").
Function: Defines the compressor depending upon the sound material.
Stereo FX
The stereo FX processor provides adjustment of the alignment of the audio
material in the stereo balance. If the stereo recordings sound weak and
undifferentiated, an extension of the stereo base width can often provide
better transparency.
Bandwidth control: Adjust the bandwidth between mono (on the extreme left),
unchanged base width (center) and maximum bandwidth ("wide" on the
extreme right).
Reducing the bandwidth can raise the overall level. In extreme cases, when
the left and the right channels include identical material and the bandwidth
control is pushed to the extreme left on "mono", the result can be a level
increase of 3 decibels.
Raising the bandwidth (values of 100) diminishes the mono compatibility.
www.magix.com
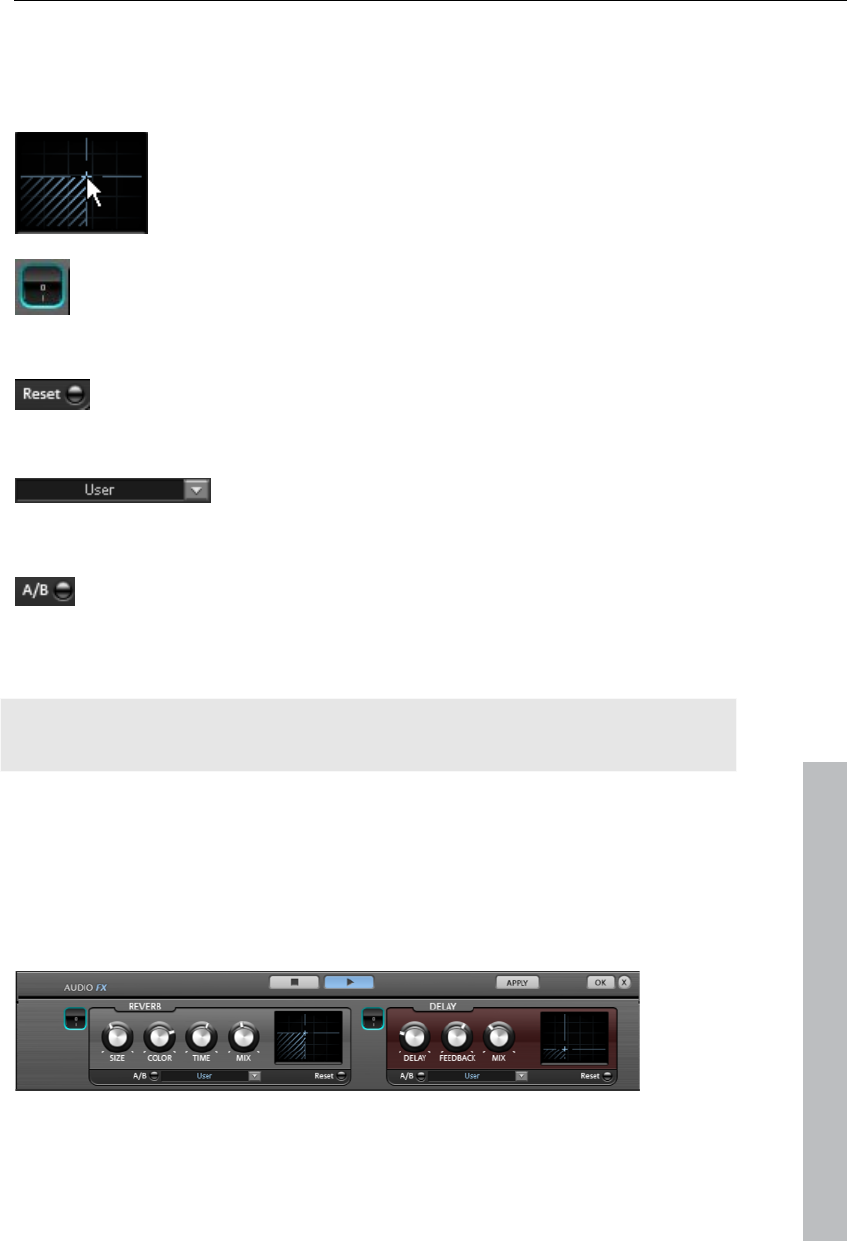
Soundtrack 165
Effect devices controls
Effects are controlled in the conventional way by the use of slider controls,
turning knobs, or buttons or alternatively using the graphic sensor fields.
Sensor fields: Sensor fields may be influenced intuitively
with mouse movements; the graphics and the respective
effect setting change in relation to each other.
Power switch: Every effect device in the rack may be switched on
or off separately. This button allows you to directly compare the
neutral, unedited sound of the audio object with the effect setting
you have chosen.
Reset: Every effect has a reset button that restores the effect
device’s initial default. In this state, the effect is not calculated into
the sound, and the effect is not rendered.
Preset selection list: Each effect device features a
selection of presets that are selected via the drop-
down menu.
A/B: The A/B button compares two settings with each other. If you
have selected a preset for the effect and make manual changes to
it later, you can compare the original preset sound with the new
settings by using the A/B button.
www.magix.com
Note: The graphics displayed are only samples and these differ according to
the effects devices.
Audio effect dialogs
Some of the following effects can be opened individually (via the context
menu), or as part of the track or master effects rack. However, the
functionality remains the same.
Reverb/Delay
The reverb effect device offers newly developed and very realistic reverb
algorithms to add more room depth to your recording.

166 Soundtrack
www.magix.com
Reverb
Reverb is probably the most important, but also the most difficult effect to
generate.
Fundamentals
Our everyday experience shows that not every room matches every
instrument. Thus we have designed "virtual" rooms. However, it still remains
important to find the correct parameters. Here are some examples of
parameters that are decisive for the sound impression in real and virtual
rooms:
Size of room: The larger the room, the longer the sound travels between
walls or objects. Our brain "calculates" the size from the time difference.
The size impression is mainly determined from so-called first reflections
and the discreet echo. We don’t notice a (diffused) reverb.
The reverberation time is mainly influenced by the composition of the walls,
ceilings, and floors. This reverb time is highly frequency-dependent. For
instance, the highs and mids are dampened more in rooms with curtains,
carpets, furniture, and some corners than in an empty, tiled room.
The density of the reflection. The sequence of the first reflection is
particularly important. A room with many individually recognizable echoes
feels alive, especially if they are quite far apart.
The diffusion. Simple reverb machines do not take into account that
reflections become more and more complex as they develop. They blur the
first echoes at the beginning, which sounds artificial and "two-dimensional"
for many signals. Our reverb effect works like a real room instead where
individual echoes can still be heard at the beginning of the reverb but then
reflect amongst each other more and more until they disappear in the signal
sustain as a so-called "diffused hiss".
The presets include many rooms that were designed for certain instruments
and applications and whose internal parameters have been optimized for
these applications. However, you can influence most of the characteristics
of the room using the provided sliders.
In addition to the rooms we have modeled two device types in the reverb
effect that allow you to create an artificial reverb for a longer time: Plate
Reverb and Spring Reverb.
Plate reverb
A plate reverb consists of a large metal plate (often 0.5 to 1m² thick, or
more) that is put into motion by a magnet and coil system (similar to a
loudspeaker). On the reverb plate, so-called "taps" are positioned at
different locations. These are pick-ups comparable to those on a guitar.
Reverb plates have a very dense sound (high diffusion); no direct echo can

Soundtrack 167
www.magix.com
be heard. They are therefore ideal for percussive metal. A plate reverb
generates a smooth "pleasant effect" with vocals.
Spring reverb
You probably remember spring reverb from guitar and keyboard amps,
particularly the older ones. At the bottom of these amps, a unit consisting of
two to four spirals is mounted on a vibration-free carriage. As with the
reverb plate, it uses systems for transforming the electric signal into a
mechanical one. There are different designs and sizes of spring reverb;
however, they all have the same quite peculiar sound: the typical "bloing"
sound when the springs are moved, similar to splashing. When the reverb
dies away the basic pitch of the spring(s) can usually be heard quite clearly.
Furthermore, the frequency range is considerably limited due to the losses
in the spirals and in the used pick-up/transmitter. Despite this, the sound is
special and some of the latest music styles (e.g. dub & reggae) would hardly
be possible without spring reverb.
Parameters
The reverb effect has the following parameters:
Size: Defines the size of the room (or the system for the plate and spring).
With some low "size" settings, you can also reduce the distance between
the individual reflections. This allows resonance to develop (accentuated
frequency ranges), which can sound oppressive if the reverb sustain is too
long. The proper size for each instrument can be gauged by taking into
account the interplay between the room and the resonance.
Time: Reverberation time. This controller lets you define how far the echo
will be absorbed, i.e. the time for the reverb to die away. Turning this knob
to the left minimizes the time. You will then only hear the first reflection.
Turning the knob to the right minimizes the absorption, and therefore results
in a long sustained reverberation.
Color: Within certain limits, you can influence the sound characteristic of the
effect. The effect of this controller depends on the used preset. In rooms,
"color" controls the dampening of the highs in the reverb (from dark to
bright) as well as pre-filtering of the signal. The controllers for plate and
spring presets also determine the dampening of the basses.
Mix: This controller sets the mix ratio between the original and the edited
signal. For rooms, you can quite easily move a signal further into the room
by increasing the amount of effect. The last four presets are intended for
use in an AUX channel of the mixer and are set to 100%.
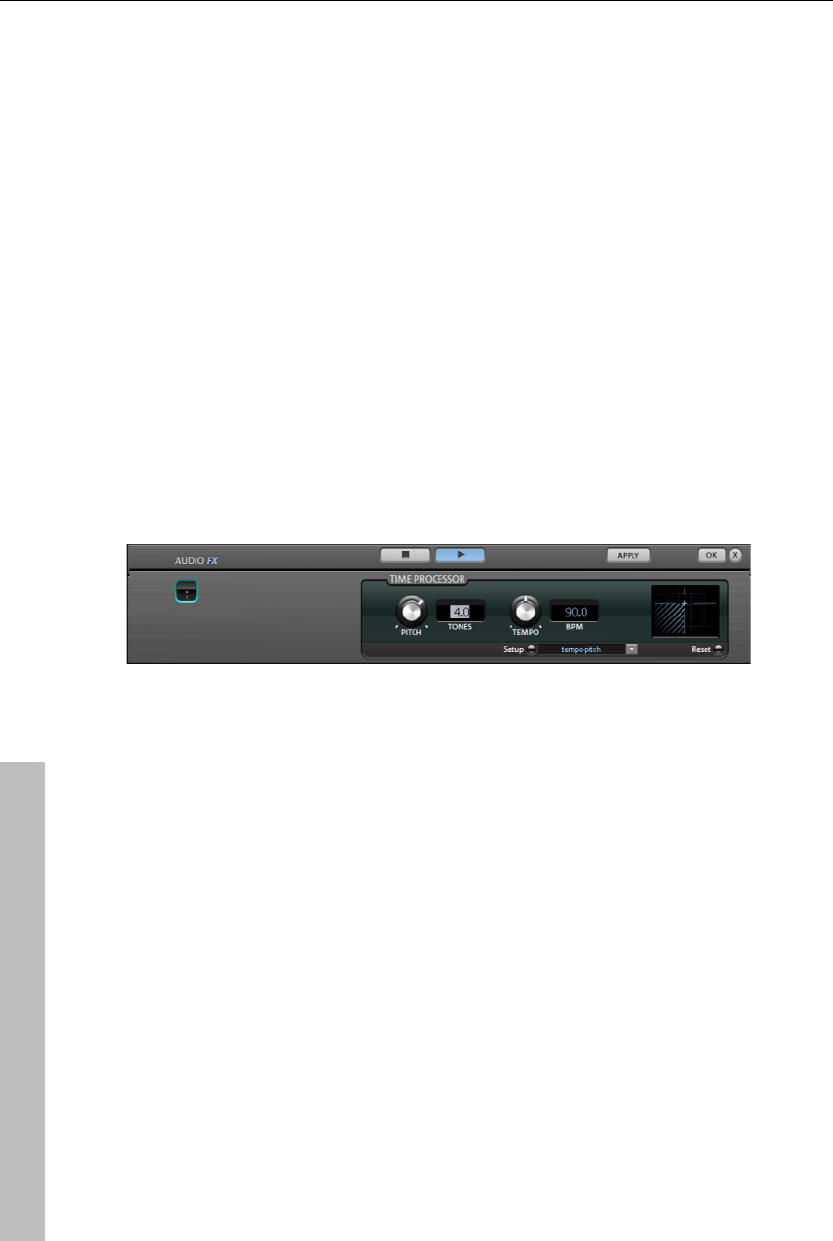
168 Soundtrack
Presets
The presets are primarily sorted by instruments, but you can (and should)
choose which preset you want to use for which instrument.
Delay
This effect is like an echo which delays the signal and repeats it.
Delay: This sets the period of time between the individual echoes. The more
the control is turned to the left, the faster the echoes will follow each other.
Feedback: This adjusts the number of echoes. Turn the dial completely to
the left, there is no echo at all; turn it completely to the right and there are
seemingly endless repetitions.
Mix: This fader determines how much of the unprocessed original sound
(dry signal) is subjected to the echo (wet signal). Application of this effect in
an AUX bus requires the controller to be set to 100% (all the way to the
right).
Timestretch/pitchshift
This effect device changes the object’s speed and/or pitch.
Pitch: This controller changes the pitch independent of the object’s speed
("pitchshifting").
Tempo: This controller changes the tempo independent of the pitch
("timestretching"). In this case, the object acts as if it were compressed or
stretched on the track.
Tones/BPM: These fields are used to enter the pitch or speed change
numerically. Only MAGIX Soundpool files are suitable for numerical entries
since these contain information on pitch and speed.
Setup: This button opens a setup dialog to select various pitchshifting and
timestretching procedures.
Standard: Timestretching and pitchshifting in standard quality. This method
is suitable for audio material without a pronounced beat. Beat markers are
evaluated to improve audio quality.
www.magix.com

Soundtrack 169
www.magix.com
Smoothed: Timestretching and pitchshifting for audio material without
pulsing elements. The method is suitable for polyphonic orchestral
instruments, pauses, speech, and singing. Beat markers are not evaluated.
A considerably more complex algorithm is used in this case, which requires
more processing time. The material may also be used with very large
factors (0.2...50) without causing severe artifacts. The material is
"smoothed", which makes the sound softer and emits it at an adjusted
phase level. This smoothing is hardly audible, for example, with speech,
singing or solo instrumentation. Problems in the shape of distortions may
arise with more complex spectra (sound mixes from various instruments or
finished mixes).
Beat marker slicing: Beat-synchronous timestretching and pitchshifting via
splitting and temporal repositioning. Exactly set beat markers are required
at the beats or transients. Markers may be generated in real time
(automatically) or read from the WAV file if available (patched). MAGIX
Music Editor provides a patching tool for users to set the markers manually.
The algorithm is suitable for rhythmic material that may be divided into
individual beats or notes. This requires a low audio level before each beat
or note.
Beat marker stretching: Beat-synchronous timestretching and pitchshifting
in standard quality. The material is stretched between beat markers
positions so that the beats or attacks at the beat marker positions are not
impaired by stretching. The markers can be generated in real time
(automatically) or read from the source file if available (patched). This
method is suitable for rhythmic material that cannot be divided into
individual beats or notes because the beats or notes overlap each other.
Beat marker stretching (smoothed): Beat-synchronized timestretching and
pitchshifting in high audio quality, even with extreme time extension. Beat
markers are used at the beats or transients. Markers may be generated in
real time (automatically) or read from the wave file if available (patched).
This method is suitable for rhythmic material that cannot be divided into
individual beats or notes because the beats or notes overlap each other.
This method requires increased processing time, which is why it should be
used sparingly on less powerful systems.
Universal HQ: Universal method for timestretching and pitchshifting in very
high audio quality. Suitable for all types of audio material. Beat markers are
evaluated to improve audio quality. This method requires so much
processing time that real-time application is recommended only in
exceptional situations. The apply function is recommended instead.
Monophonic voice: Timestretching and pitchshifting for vocal solos, speech,
or solo instruments. The material must not contain background noise, and
excessive reverb may also be detrimental to the use of this method. With
suitable material the audio quality is very high. The formants are also
maintained during pitchshifting.
Resampling: Pitchshift and tempo cannot be changed separately. This
method requires considerably little CPU time.
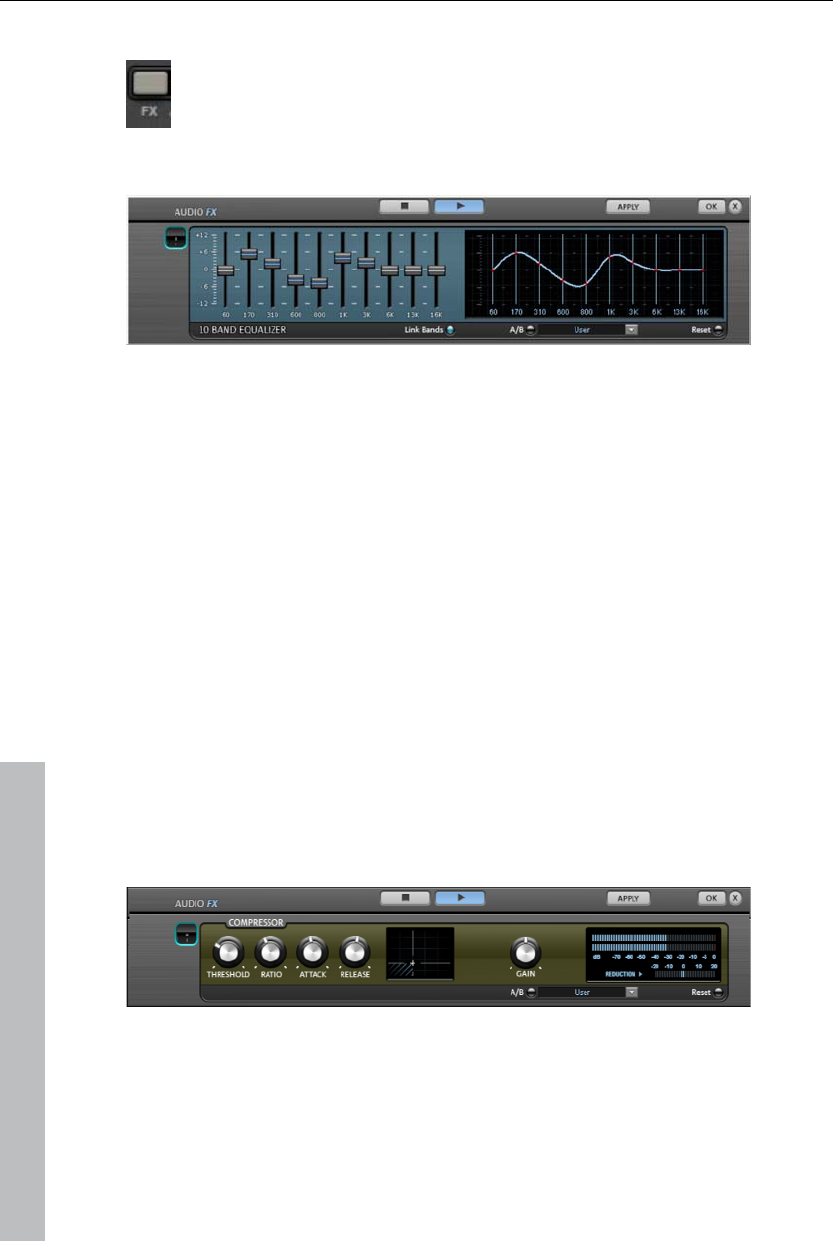
170 Soundtrack
Audio effects in the mixer
Audio devices are opened in the mixer via the "FX" button for each
track or in the master area on the right. Mastering also features the
MAGIX Mastering Suite (view page 171).
Equalizer
The 10-band equalizer subdivides the frequency spectrum into ten areas
('bands') and equips them with separate volume controls. This way it is
possible to create many impressive effects, from a simple boosting of the
bass to complete elimination of a certain range of frequencies. Note: If low
frequencies are boosted too much, the overall sound level is heavily
increased which may lead to distortion. In this event, adjust the overall
volume downward by using the 'master volume' control situated at the
bottom center of the effect rack.
Slider control: Each of the ten frequency ranges can be separately boosted
or turned down with the ten volume controls.
Link bands: Using this button randomly combines the frequency ranges with
each other in to avoid artificial-sounding overemphasis of an individual
frequency range.
Touch screen (right EQ section): This is the 'sensor field' of the EQ. Here you
can draw any type of curve with the mouse. This will be immediately
translated into a corresponding control setting on the left side of the EQ.
Compressor
The compressor is an automated, dynamic volume adjustment controller:
louder passages become quieter and quiet passages become louder.
A compressor is useful to make spoken passages more audible against
background noise or music in case simple increase of the overall volume is
www.magix.com
Soundtrack 171
insufficient. Several useful presets are included for this purpose, however
compression may also be set manually.
Ratio: This parameter controls the compression level.
Threshold: This sets the volume threshold below and above which
compression is applied.
Attack: Sets the algorithm's reaction time to increasing sound levels.
Release: Sets the algorithm's reaction time to falling sound levels.
Gain: The gain controller amplifies the compressed signal.
MAGIX Mastering Suite
MAGIX Mastering Suite is a special effect rack for use with the mixer master
channel. Its effects serve the so-called "Mastering" with which the finished
mixed music file is given its last one-over.
The On/Off switches can switch the effects on and off individually. Each
effect has a range of presets that can all be picked from a list along the
lower border of the effect.
www.magix.com
The settings of all effects can also be saved
together as one preset so that you can use
your ideal mastering setting again for other
arrangements.
Each effect can be reset by pressing the
"Reset" button. You can press the "Bypass"
button to temporarily deactivate the effects.
Note: 5.1 Surround mode only provides the compressor (view page 170)
and parametric equalizer devices in this case.
Parametric Equalizer
The parametric equalizer consists of four filter bands for adjusting the
overall sound of the music track. Each band is a filter with a typical "bell
shape". Within a certain frequency range and around an adjustable middle
frequency, you can increase or reduce the signal level gain. The width of
this frequency range is called bandwidth. The bandwidth is defined by the Q
value. The higher the Q value, the narrower and steeper the filter curve.
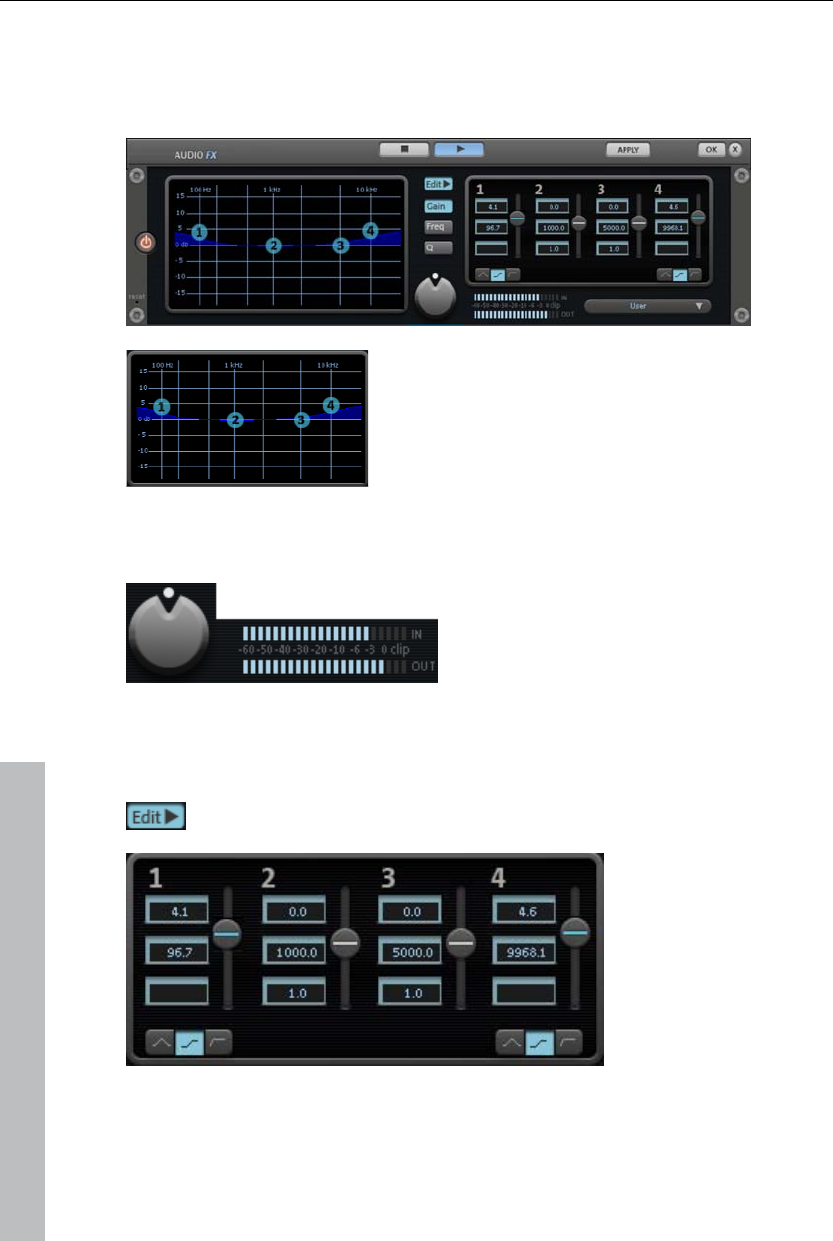
172 Soundtrack
You can influence the basic sound of the mix by increasing and decreasing
the broadband to give it more "depth" (lower center = 200-600 Hz) or more
"air" (highs = 10Khz). You can also decrease the narrow bandwidth (high Q
value) in the frequency response, e.g. to remove disruptive frequencies.
Graphic: The resulting frequency path of the
equalizer is displayed in the graphic. The
frequency is spread out horizontally, the
increase or decrease of the respective
frequency, vertically.
The blue bullets 1-4 symbolize the four wave bands. You can move them
around with the mouse until you find your desired frequency response.
Peak meter: The peak meter gives you control over the output level of the
equalizer. The adjacent master gain controller can be used to balance the
level with the EQ.
Edit: The "Edit" button opens the fine tuning for the four bands:
Parameter selection: With the buttons on the right you can select the
parameter that can be adjusted with four faders of each band. Furthermore,
there are number keys to enter every parameter of the bands.
www.magix.com
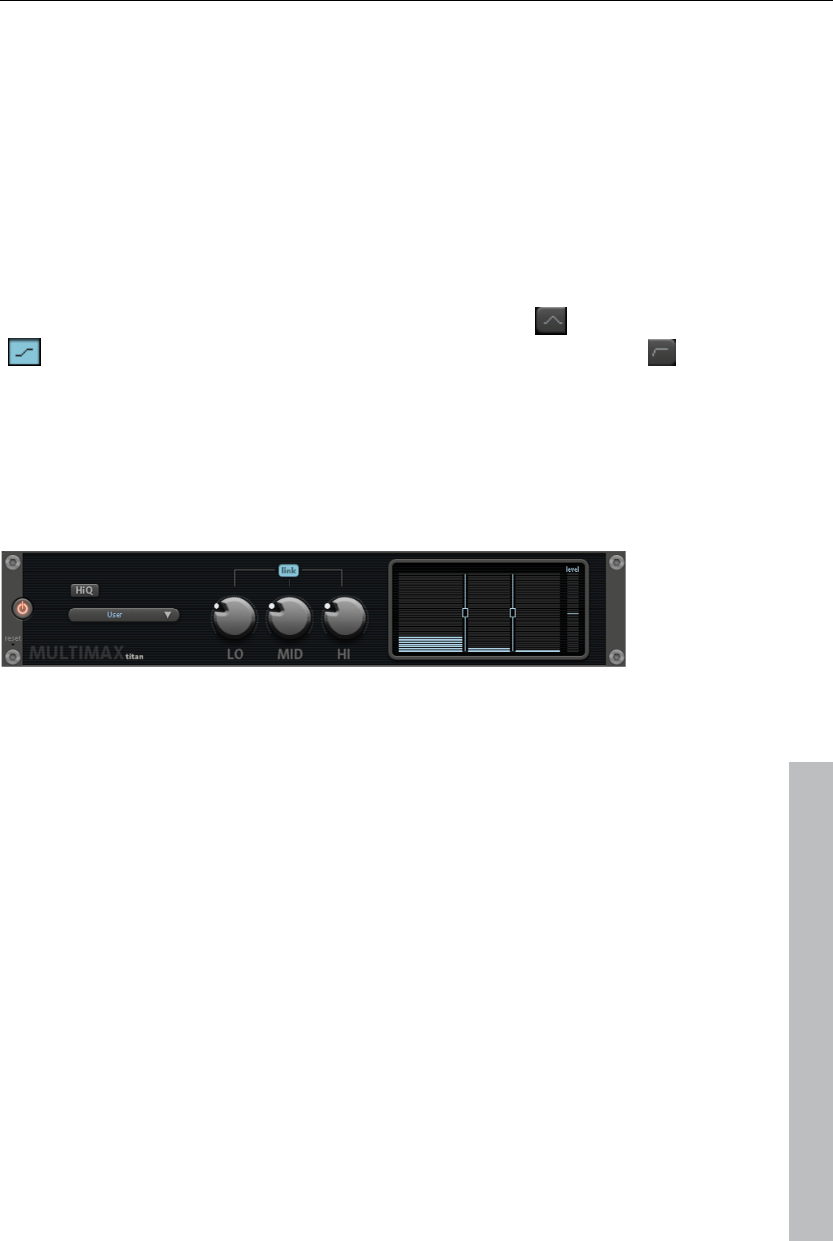
Soundtrack 173
Gain dB: These controllers allow you to raise or lower the filter. Setting the
controller to 0 deactivates the filter and doesn’t use CPU power.
Freq. Hz: The center frequency of the individual filters can be set between
10 Hz and 24 kHz with the frequency controllers. Freely choosing the
frequency enables multiple filters to be set to the same frequency in order to
have a greater effect.
Q (bandwidth): Set the bandwidth of the individual filters between 10 Hz and
10 kHz.
There is still a peculiarity among bands 1 and 4; The filter curve for these
bands can be changed from a normal "peaking" EQ filter ( ) to "shelving"
( ) (this is the basic setting) and high (band 1) or high-cut (band 4) .
When using the "shelving" filter, a soft increase or decrease in all
frequencies happens above or below the filter frequency, and the Q
parameter does not have a function here. With a low-cut or high-cut filter, all
frequencies below (low-cut) or above (high-cut) the set frequency are
filtered out.
Multimax
MultiMax is a compressor with three independent frequency bands. The
dynamics are edited separately for each band.
www.magix.com
The advantage of a multi-band compressor versus a "normal" compressor is
that the "pumping" tendency and other unwanted side effects are
dramatically reduced while editing the dynamics. For instance, this prevents
a bass peak from "reducing" the entire signal.
Multi-band technology also lets you specifically edit individual frequency
ranges.
Link: When this function is activated and one fader is adjusted, all faders are
changed at the same ratio. However, the way the dynamics are edited is not
affected.
HiQ: If the "HiQ" ("high quality") setting is activated, an even more precise
algorithm is used, however this requires more processing power. We
recommend switching this setting on before exporting the project.
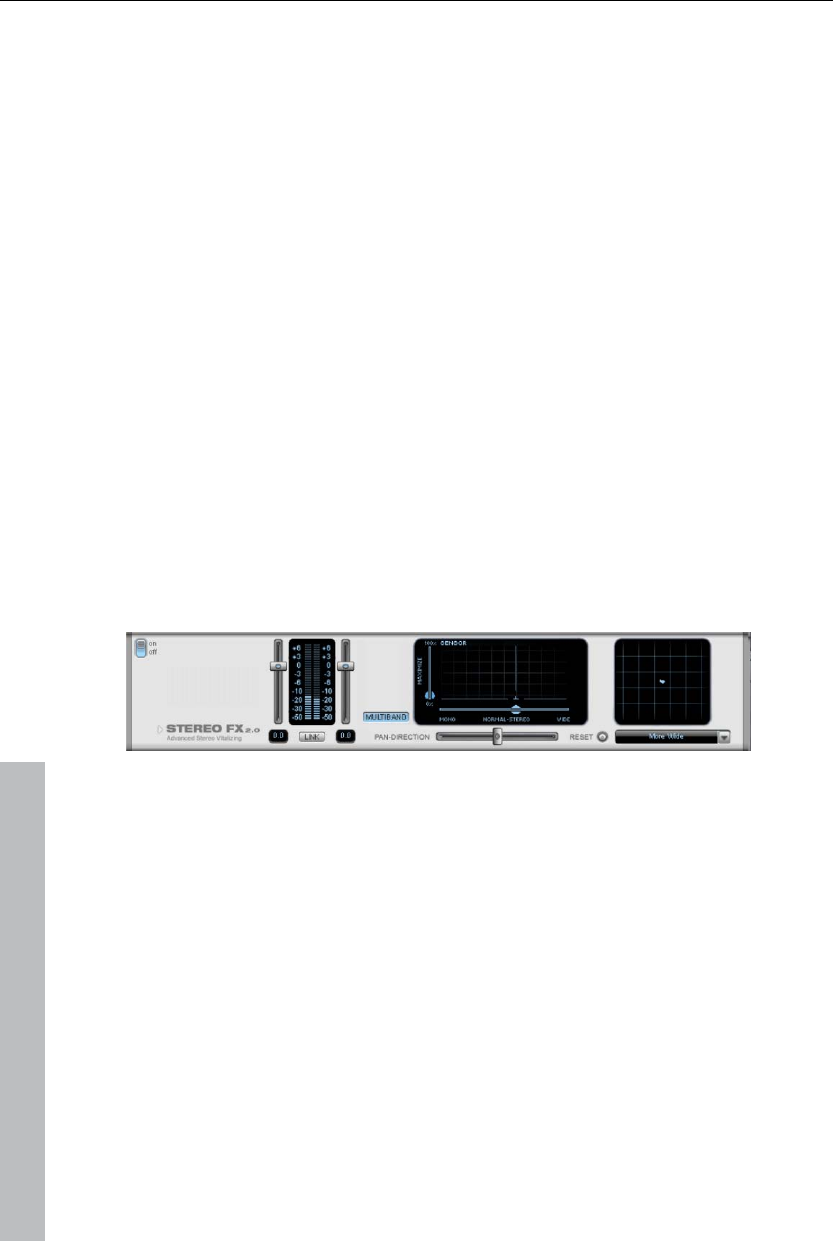
174 Soundtrack
Setting the frequency bands: The settings of the frequency bands are
changed directly via the graphic. Simply click on the separating lines to
move them.
Bass/mid/high: These controllers define the level of compression for each
frequency band.
Presets: Multimax provides access to presets for special applications, for
example:
Cassette NR-B decoder: MAGIX Video Pro X3 simulates decoding of Dolby B
+ C noise suppression if a Dolby player is not available. Cassettes recorded
with Dolby B or C sound more muffled if played back without corresponding
Dolby.
Leveler: This setting automatically sets the entire material to an identical
volume level. The volume control knob is no longer required. Use this
function to equalize greater volume differences within a song. To equalize
volume variations between different songs, the function "Normalize
loudness" is also provided in the "Effects" menu.
De-Esser: These special presets help to remove overstressed hissing
sounds from speech recordings.
Stereo FX
The Stereo FX enhancer allows you to determine the positioning of the
audio material in the stereo picture. If the stereo recordings sound out of
focus and undifferentiated, an extension of the stereo base width can often
provide better transparency.
Bandwidth control: Adjusts the bandwidth between mono (on the extreme
left), unchanged bandwidth (center), and maximum bandwidth (”wide”, on
the extreme right). Reducing the bandwidth can produce a rise in the level.
In extreme cases, e.g. when the left and the right channels include identical
material and the bandwidth control is pushed to the extreme left on “mono”,
the result can increase the level by 3 dB.
Raising the bandwidth (values of 100) diminishes the mono compatibility.
This means that recordings edited this way sound hollow when listened to in
mono.
www.magix.com
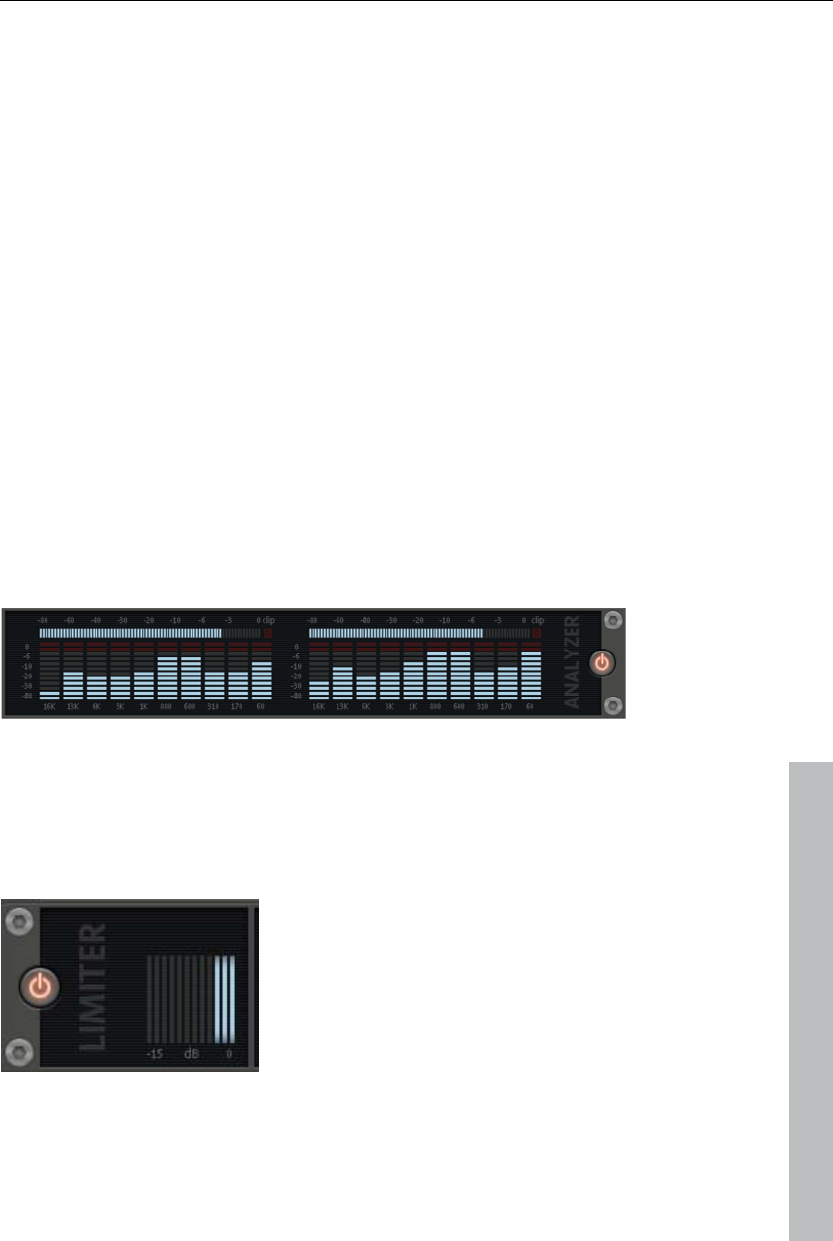
Soundtrack 175
Volume control: Adjusts the volume of every single channel, thereby
adjusting the entire balance. The reduction of left and right levels is
displayed under the control buttons. A centered recording can later be
moved to the left or right of the stereo balance.
Stereo meter: This provides a graphic display of the phase relation of the
audio signal. You can use it to review the orientation of the signal in the
stereo balance and the effect of the stereo enhancer.
In order to achieve greatest compatibility with mono, the display should
come closest to a diagonal line. Otherwise some frequency ranges may
erase themselves if the stereo signal is played on a mono device.
Karaoke presets: These presets open a special karaoke effect that more or
less eliminates vocals. It deletes middle frequencies typical for human
vocals during playback so that someone else can do the singing.
In typical karaoke songs, the lyrics are usually displayed as subtitles in the
video clip so that the singer can follow along. MAGIX Video Pro X3 also
comes with a suitable feature: the title editor, which can be used to create
karaoke subtitles. Please read the "Title editor" section in the chapter
"Images and video objects".
Digital Audio Meter
www.magix.com
On the lower border of the MAGIX Mastering Suite there is a digital audio
meter which provides separate control method displays for 10 wave bands
on each channel. This device is used for orientation purposes, e.g. selective
equalizer editing.
Limiter
The Limiter prevents clipping by automatically
lowering any volume levels that are too high.
Quiet parts remain unaffected. Unlike the
Compressor, this feature attempts to preserve
the basic sound as much as possible.
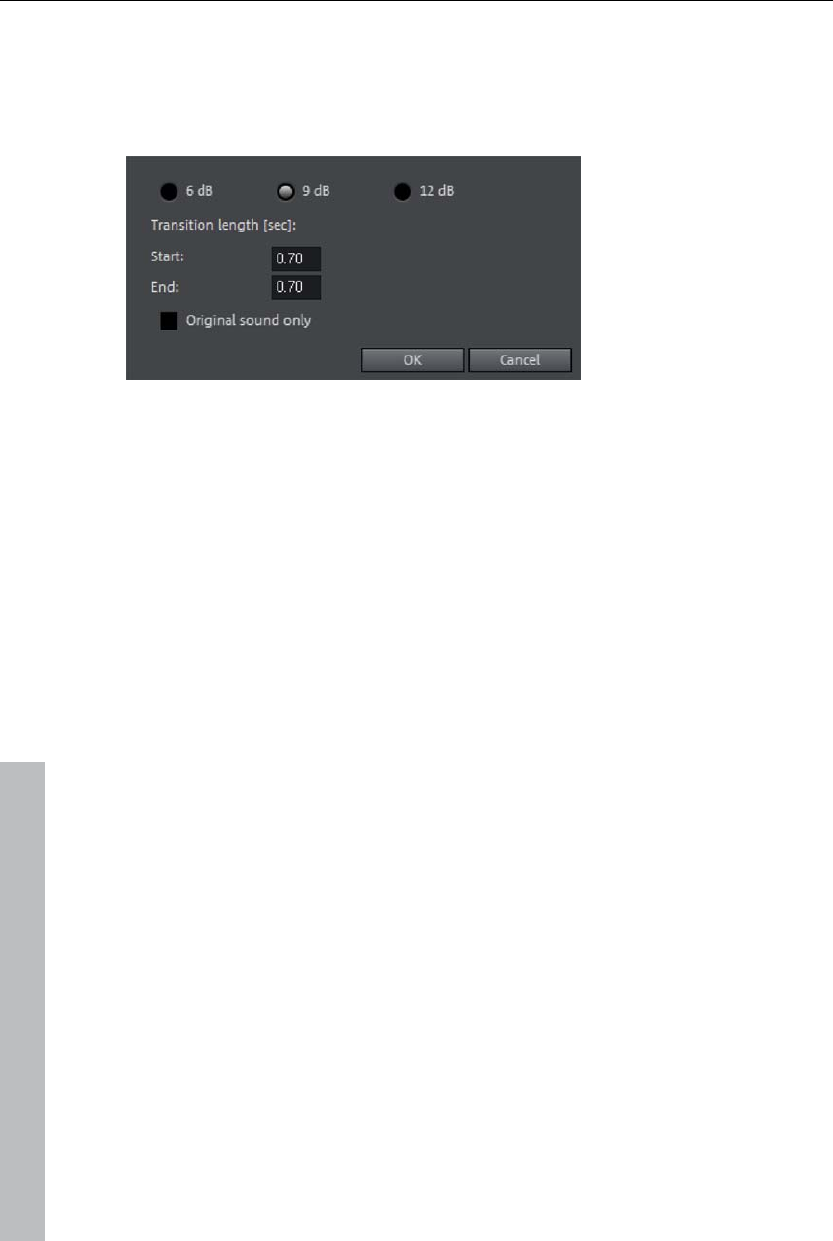
176 Soundtrack
Automatic track damping
This command from the context menu automatically dampens the volume of
other audio objects. The volume of the selected object on the track remains
unchanged.
Only original sound: Here you can also specify whether you want to dampen
the original sound of the video or all audio tracks.
Transition length: In the dialog you can activate and deactivate the value of
the dampening. You can use this command while recording audio (view
page 77) (Audio recording, advanced options).
Import audio CD
The steps are similar to transferring Wave files into an arrangement:
Insert an audio CD into the CD/DVD drive of the PC
Go to your CD/DVD drive in the Media Pool. The individual CD titles appear
in the file list.
A simple mouse-click starts the playback of the CD title for sampling
purposes
Drag & Drop the CD title into a track of the current arrangement, and it will
be digitally scanned and copied to the hard-drive. The files will be saved in
the import folder (may be specified under File > Settings > Program >
Folder).
The audio object appears in the track and can be played back or edited
immediately.
CD Manager
This option opens the CD Manager where you can select tracks from Audio
CDs and partially or fully import them into the arrangement. You can also
select and configure the CD-R if you have more than one drive.
The CD Manager lets you import audio data using most CD and DVD drives.
www.magix.com

Soundtrack 177
www.magix.com
You may have to contact your technical support to find out which drive is
suitable. Data is imported entirely digital. Audio tracks are imported into the
arrangement as wave files. The files are saved in the import folder.
(Program settings -> Folders).
To import audio tracks you should proceed as follows:
Select the desired CD-R drive if you have installed more than one drive.
Click on the "Track list" button.
Select the desired title from the track list (using the key combination Shift or
Alt and the cursor keys).
Click on "Save selected tracks... ". The audio material is now copied from
the CD drive onto hard disk. The progress is displayed.
Close the track and drive lists. In your arrangement there are now one or
several new objects that contaion audio material of the disc.
Drive list dialog
Tracklist: This button opens the track list dialog for copying one or multiple
tracks.
Configuration: This button opens the configuration dialog where you can
make various special settings, SCSI IDs, etc.
Reset: Restores the default settings of the drive.
Add drive: Creates a new drive entry in the list, which you may wish to
adjust.
Delete drive: Deletes a selected drive from the list.
Save setup: Saves the current drive list and all configuration data in a *.cfg
file.
Load setup: Loads the current drive list and all configuration data from a
*.cfg file.
The tracklist dialog
Copy selected track(s): This button starts audio copy. A new object is
created for every track in the arrangement and the corresponding track
marker is created.
Play: Starts the audio playback of the first selected track on the list (for
testing).
Stop: Stops playback.

178 Soundtrack
www.magix.com
Pause: Stops playback so as to start it later from the same position using
the "Resume" button.
Resume: Resumes playback if it had been paused before.
Select all tracks: All audio tracks are selected, for instance, to copy the
entire CD. Track markers can also be made using Shift or Alt pressed
together with the arrow keys. Multiple tracks can be selected by pressing
"Ctrl + mouse click".
Deselect all tracks: All markers are reset.
The CD-ROM configuration dialog
Drive name: Lets you edit the name of the drive in the list. This is useful if
you create more than one entry accessing the same physical drive.
Host adapter number: Lets you specify the number of your SCSI adapter -
normally "0".
SCSI-ID: Lets you set the ID of your CD-ROM drive. Be sure to set the
correct ID; there is no error checking!
SCSI-LUN: Select the SCSI-LUN parameter, normally "0".
Alias: Lets you select the manufacturer type of your CD-ROM drive.
Normal copy mode: Copies the audio data without any software correction.
Sector synchronization copy mode: Copies the audio data using a correction
algorithm. This is especially useful, since many CD drives have problems
finding an exact position again and gaps can occur.
Burst copy mode: Optimizes the speed of the copy process; no software
corrections made.
Sectors per cycle: Defines the number of audio sectors that should be read
from the audio CD in a read cycle. The higher the number of sectors, the
faster the copying process. Many SCSI systems have problems with more
than 27 sectors.
Sync sectors: Sets the number of audio sectors that will be used for software
correction. A higher number results in a better synchronization but also in a
slower copying process.
Scanning CD tracks with the recording dialog
Some CD-ROM drives do not support this mode (trying digital extraction
results in an error message), or they only support it with difficulty (results in

Soundtrack 179
www.magix.com
audio objects with crackling noise, skips, etc.). In this case, the CD may be
"scanned" by recording it into the computer. When recording the CD to the
computer, the CD titles are simply played back from the CD-ROM drive and
are re-recorded as .WAV by the sound card. Before recording a CD to your
computer, change the program settings in the"File -> Audio/Video options"
menu. To ensure easy recording of the CD titles via the "Recording" dialog,
the audio output on the CD-ROM drive must also be connected with the
sound card input. This connection is usually already set up on modern
multimedia PCs. If not, this is easily done by installing a cable inside the
computer case.
Adding a sound track using MIDI songs
A few words about MIDI: MIDI files do not contain the actual sounds like
wave files, only the note control information. This data is interpreted to
effect playback by the synthesizer chip on the sound card. This has several
advantages:
MIDI files need a lot less memory than wave files, so more MIDI files will fit
on a CD-ROM.
MIDI files can be adapted to any beat (BPM) without affecting the sound;
only the playback tempo needs to be changed.
MIDI files are very easy to transpose to another pitch; a section in a song
does not have to be saved in several different keys. The version in C major
is sufficient, and it can then be transposed to any key by simply clicking
with the right mouse button.
The disadvantage of MIDI files: The sound is not true audio. The audio is
only produced when the synthesizer chip on the sound card plays it back.
As a result, high-quality sound cards or external synthesizers will sound
completely different and better than standard sound cards, depending upon
the settings for playback "voices". Therefore, it is definitely worth using a
good sound card or external MIDI synthesizer with MAGIX Video Pro X3!
Arranging MIDI files
Integrating MIDI files in an arrangement:
Search for a directory containing MIDI files using the Media Pool located at
the left edge of the screen. Click on a file, and it will be played back
immediately. Now drag the desired file into the arrangement to finish the
process.
An object will appear which displays the MIDI notes as dots. The high notes
are dots in the upper section, and the lower notes are the dots further down
in the lower section. You can even see the velocity of the notes. The louder
the note is played, the brighter it appears on the screen.

180 Soundtrack
www.magix.com
MIDI objects may be arranged, the volume may be modified (middle handle)
or fades (in or out) may be added (top right and left handles) in the same
way as audio, video, or synthesizer objects. The "element bar" lets you
"open" an entire track instantly from a MIDI loop. If a MIDI file seems to be
empty, check the MIDI replay device in the "Playback parameters" window
("P" key or menu "File -> Settings -> Playback parameters"). Your sound
card driver or your MIDI interface must be set correctly to hear MIDI!
MIDI interface and external sound generator
Of course, MIDI objects can also be played back over a MIDI interface into
external synthesizers, sound modules, etc. Start by setting FX to 1.0. The
timing between MIDI and audio can be balanced later if you notice a delay
between the two. This is important for very slow arrangements, since the
sample rate on the sound card is not entirely. The MIDI drivers can be set in
the "Playback parameters" window ("P" key or menu "File -> Settings ->
Playback parameters").
Convert MIDI files to audio files
Before exporting (as a video, for example) an arrangement, all MIDI objects
must be converted into audio objects first, since these contain only pure
control information for the sound reproduction before they are exported.
First, connect the MIDI synthesizer (usually the sound card) output to the
sound card input. Now the MIDI file can be played back and simultaneously
recorded as an audio file using the record function. The result is an audio
file that can be processed and exported together with other multimedia files.
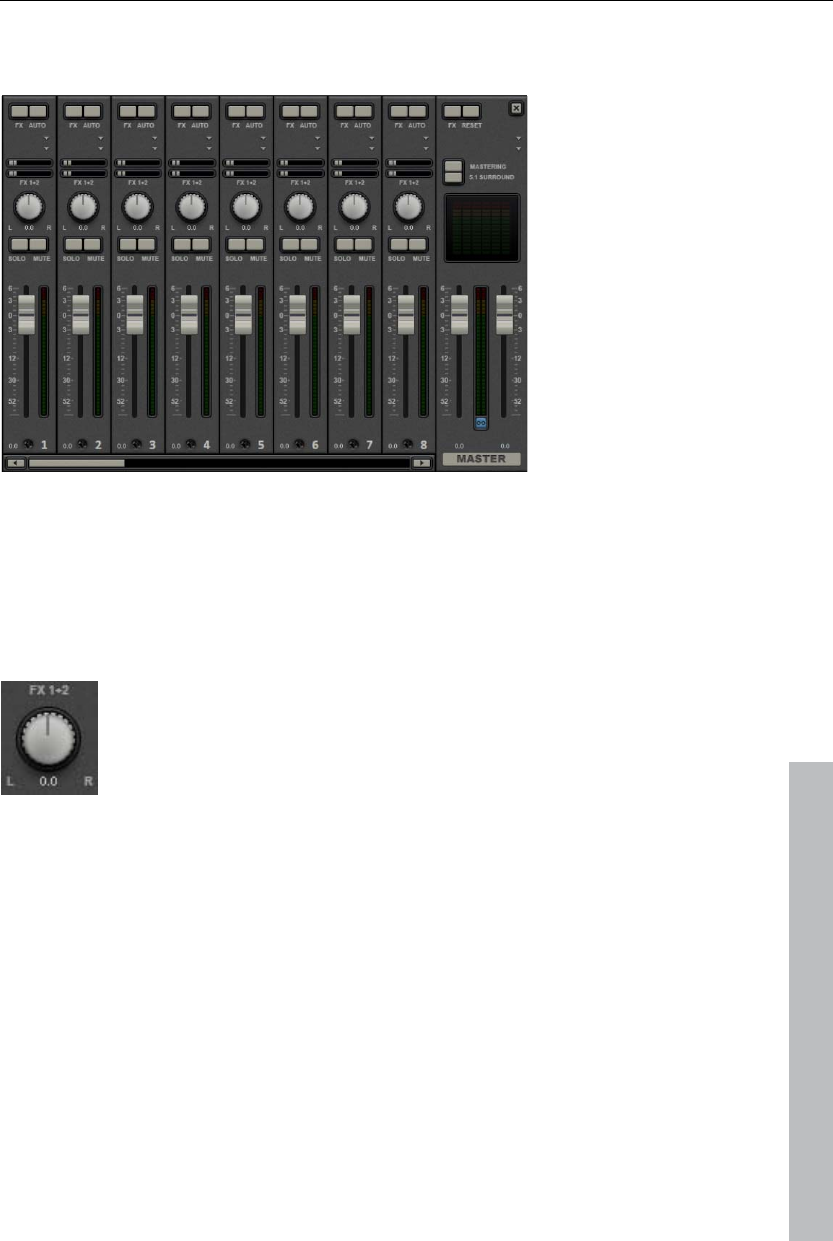
Soundtrack 181
Mixer
The Mixer can be opened by pressing the "M" key or via the button bar in
the main window (also: "View" > "Mixer").
Mixer tracks
Each track has its own volume or brightness fader. This fader also affects
added MIDI objects.
www.magix.com
The stereo position for each audio track is defined with the Pan
controls.
The "Solo" button switches a track to solo mode, i.e. all other tracks are
muted. The "Mute" button mutes a track.
Double clicking any of the controls resets them to their default passive
setting (no boost or cut in level), and no processor output will be required.
Track effects always apply to all audio objects of a track. This sets the mixer
(view page 160). Please read the chapter "Audio Effects (view page 160)"
for functionality and handling of the individual audio effects.
DirectX audio plug-ins
The MAGIX Video Pro X3 supports DirectX audio plug-Ins. These are
usually effects modules such as reverb, equalizer, etc.
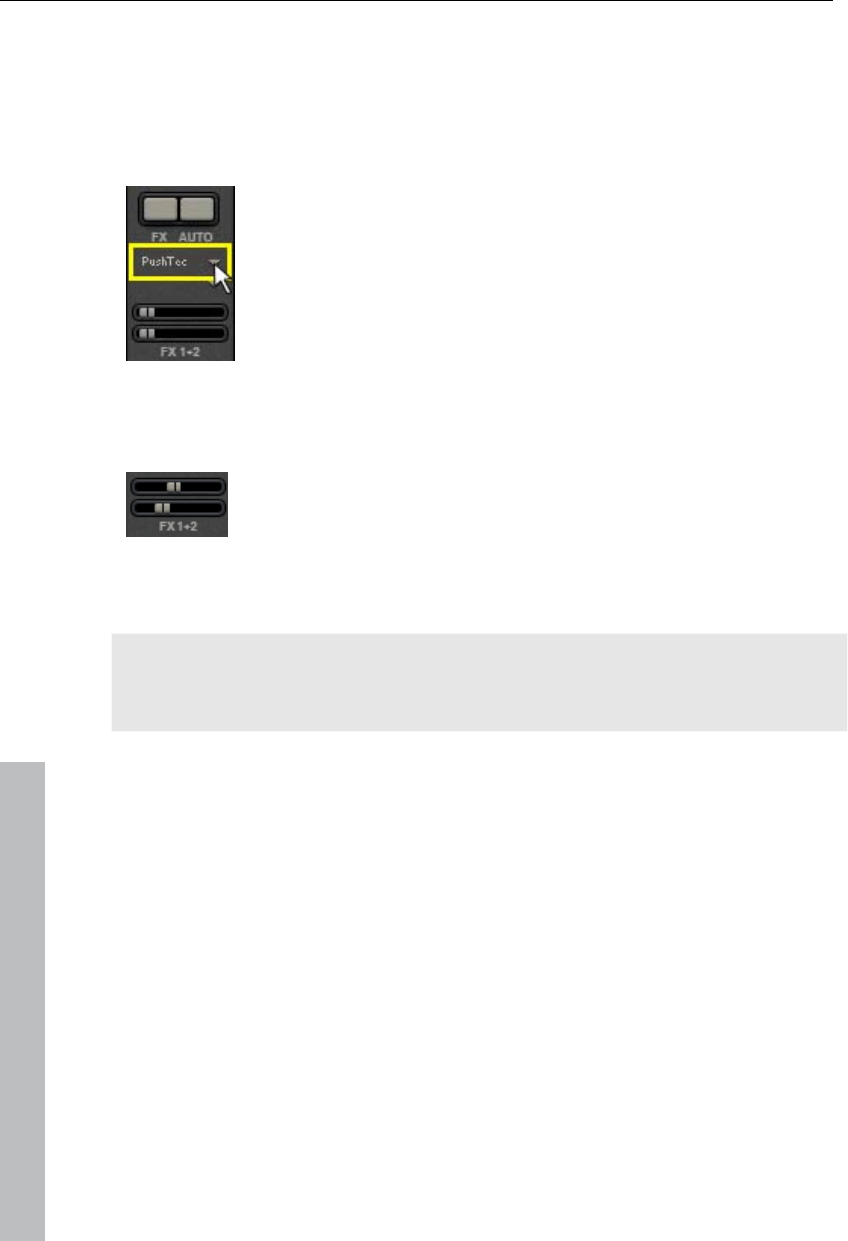
182 Soundtrack
The DirectX system must be installed on your PC prior to using the DirectX
plug-Ins – a manual installation is only required on rare occasions.
Generally, DirectX is already available through the Windows installation. If
your PC does not have the DirectX System installed or if it is out of date,
you can find a DirectX installer on the MAGIX Video Pro X3 disc. Of course,
DirectX plug-ins have to be installed first, depending on the plug-in used.
Two so-called "slots" for track effects are located in the
channel strip of the mixer for the corresponding track, plus in
the FX tracks.
Clicking on the small triangle will let you select an effect from
the list. Select "No effect" to remove a plug-in from the slot. A
left click temporarily disables the plug-in. Active plug-ins are
displayed in light blue. Right clicking on the slot opens the
settings dialog of the plug-in.
FX tracks (effect tracks)
Two FX send controllers (FX1 and FX2) are located below the
plug-in slots.
You can determine the volume at which you want the signal to be routed to
the two available FX tracks.
Note: Individual objects can also send to an FX track. For more information,
go to the "Effects and titles" chapter in "Audio effects" > "Audio effects in
the Media Pool“ (view page 134).
An FX track is a complete, additional mixer track which provides a complete
track FX rack and two plug-in slots for use as a send effect.
www.magix.com
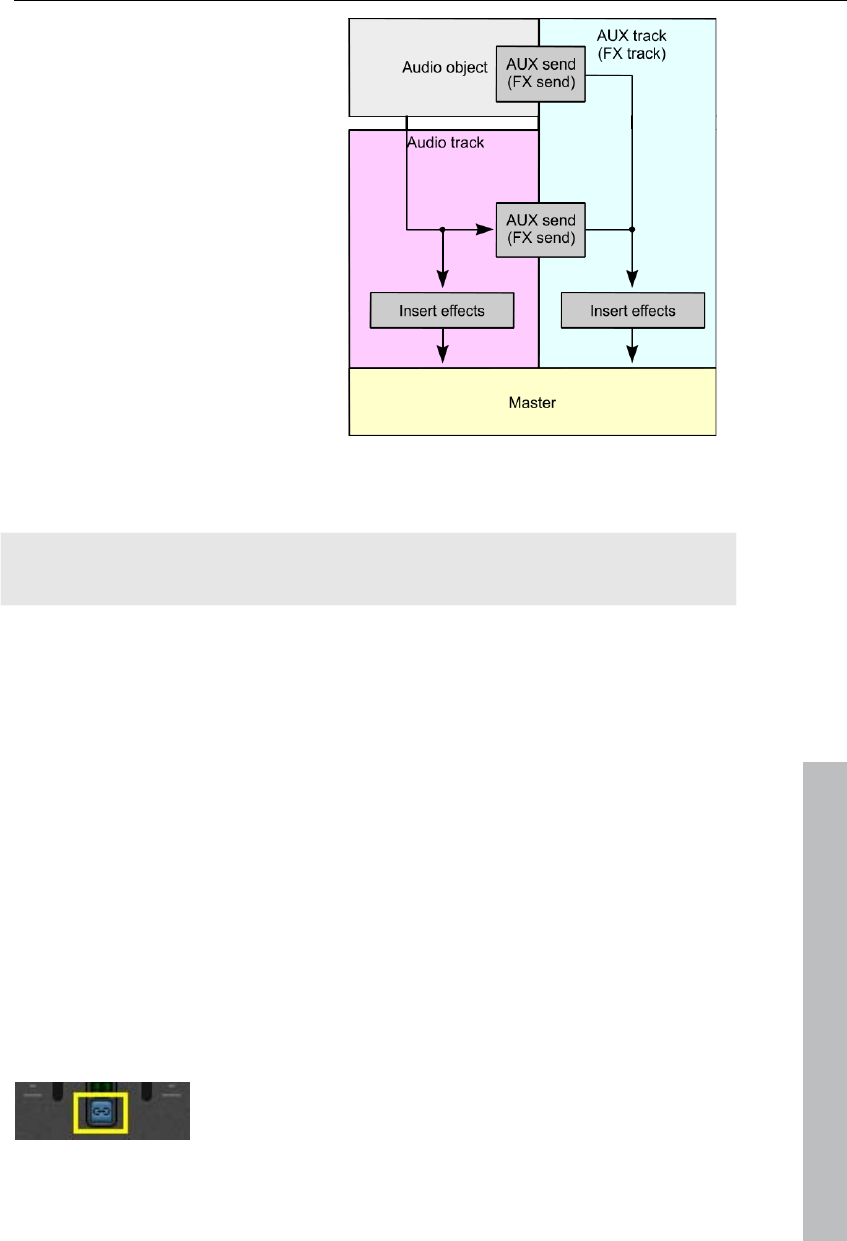
Soundtrack 183
A send effect differs from a normal
effect found in the track (insert)
insofar as it can edit the signals
from multiple tracks or objects
simultaneously.
It roughly corresponds to the
scheme of a parallel switch, while
an insert on a track is like a series
switch.
A special feature offered by
MAGIX Video Pro X3 is that audio
objects can also send directly to
the FX track.
The FX are usually hidden in the mixer. They will be displayed as soon as
one of the FX send controllers is used.
In the first FX track the hall function is activated as standard as it is the
most important application of the send effects.
The volume controllers serve to regulate the volume of the FX track and
corresponds to an old AUX return controller. The mute button is used to
switch the FX function on and off. The solo button enables you to single out
FX individual tracks. The peak meters of the tracks, which send to the FX
track, are displayed in grey.
www.magix.com
Master track
The FX button and the plug-in slots function exactly like in the tracks. The
FX button opens the master audio effects rack. The complete mixer settings
(including the FX tracks) may be reset via the "Reset" button.
Mastering: Opens the MAGIX Mastering Suite (view page 171).
5.1 Surround: This button switches the mixer to "Surround (view page 187)"
mode.
Both faders control the total volume.
Link buttons: If the link button is deactivated, the volume
of the right and left channels may be set individually.

184 Soundtrack
Volume and panorama automation
You can automate the volume and panorama course of a mixer track. This
means you can record this movement of the track volume faders and
panorama controls while playing the movie. This way, for instance, you can
simulate the movement of a sound source and volume adjustment from left
to right instantly during playback.
As long as the "Auto" button in a track is active, all movements of
the volume and panorama controller are recorded.
The automation is displayed as a curve in the arranger and can be edited
later with the mouse.
Note: Unlike the automation curve of the Mixer, the Dynamic Effects are
track-dependent, i.e. irrespective of the objects contained in the track.
5.1 Surround
MAGIX Video Pro X3 supports playback and export in authentic 5.1
surround.
Requirements
You will require a sound card or a sound chip which is integrated into the
computer's motherboard with six individual outputs to playback the
individual channels:
front left (L) / right (R)
centre (C) / subwoofer (LFE)
back left (Ls) / right (Rs)
Surround playback is possible with all audio driver models (see Playback
settings), (Wave, DirectSound, ASIO).
DirectSound is supported by most of the standard sound cards.
Wave drivers are similarly supported by many standard sound cards;
however, individual sound cards (for example, Soundblaster) require access
to DirectSound.
Note: 24-bit surround playback is often not possible, therefore please select
16-bit output.
www.magix.com

Soundtrack 185
www.magix.com
For surround output with ASIO drivers, you will require a 6-channel-capable
ASIO driver (e.g. MAGIX Low Latency). Older multi-channel audio cards
that activate their stereo output couples via multiple separate drivers are not
suitable.
Output of the six output signals is achieved in all driver models in the output
channels in the same (standardized) order:
Channels 1/2: L-R
Channels 3/4: C-LFE
Channels 5/6: Ls-Rs
When using WAV or ASIO drivers, the loudspeaker settings normally have
to be changed to 5.1 playback in the control panel.
In order to do this you have to start the Control Panel for "Sounds and audio
devices" and select "Loudspeaker settings", "Advanced", "5.1 surround
loudspeakers".
On most systems the program does this automatically while using
DirectSound.
Importing and exporting surround audio files
Import
When importing MPEG-2 files with Dolby Digital sound (e.g. VOB files from
DVDs or DVB-TV recordings), you can choose from two different
applications:
Mixdown: Surround sound is displayed as an audio object under the video
object, playback of the surround track is reduced and recalculated to stereo
playback. Use this option if you don't wish to edit the surround sound, but
rather wish to export it. You can also use it if you think that a stereo export
is enough to meet your requirements
Surround mix: The individual surround channel pairs (L-R, C LFE, Ls-Rs)
are split into three audio tracks as separate objects and the mixer is then
set to surround mode. This mode allows you to change the surround mix.
In MAGIX Video Pro X3 the import of Dolby Digital surround is always
executed as a mixdown. MAGIX Video Pro X3 can also import interleaved
wave files (multi-channel wave files), multi-channel Windows Media Audio
and MP3 surround files; a surround mix is always created.
Export
Surround mix exports can occur in any one of the following formats:
6-channel PCM files (interleaved wave)
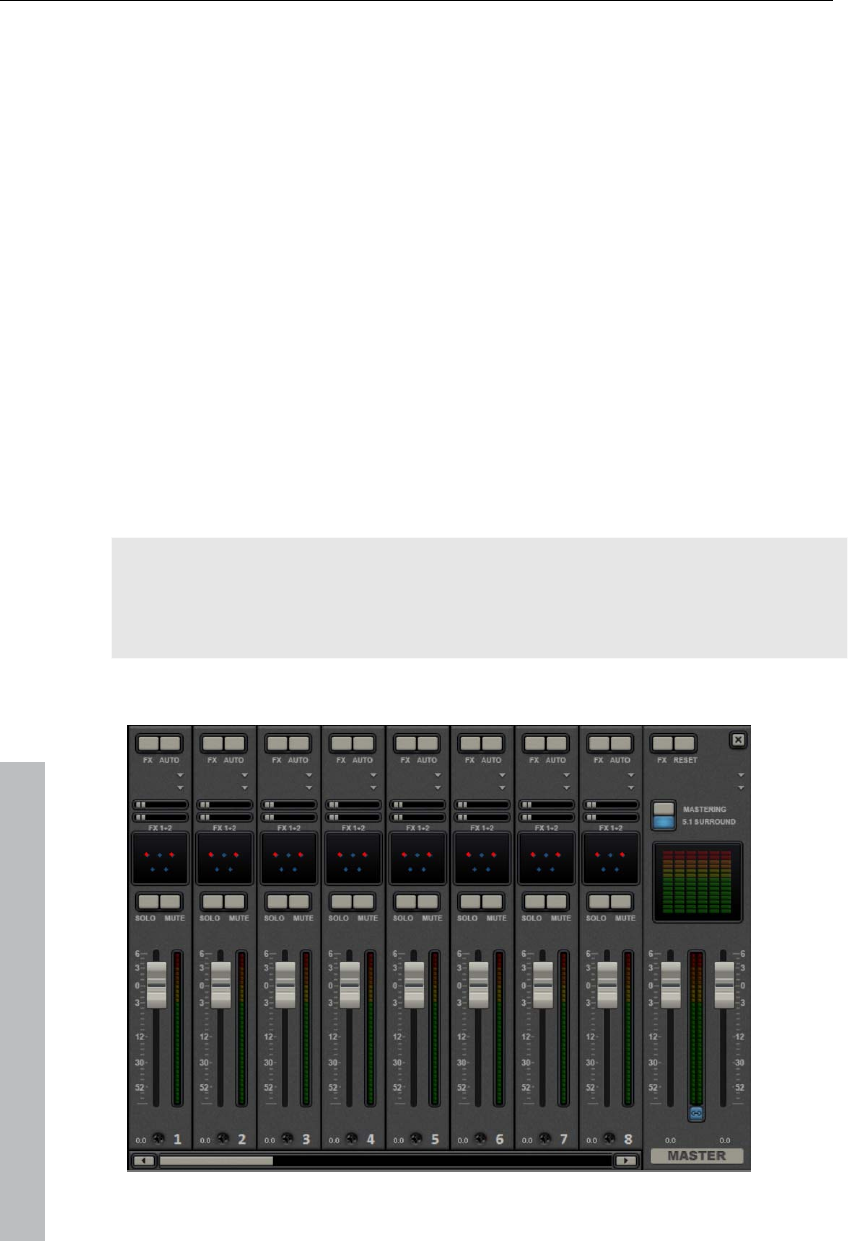
186 Soundtrack
Windows Media files (as a surround soundtrack of a Windows Media Video
or WMV-HD disc)
MPEG-2 files with a Dolby Digital audio track
The files created are fully compatible with the normal file formats, this
means that they can also be played on computers incapable of playing
surround (in normal stereo).
The export is performed via the same menu commands (e.g. "File -> Export
movie -> Audio as wave") like the normal stereo export. You will then be
asked if the export should be in stereo or surround format.
Export Dolby Digital surround via Smart Encoding
You can also burn material to be exported with surround sound again
without the need for the Dolby Digital codec (in MAGIX Video Pro X3 or
MAGIX Video Pro X3 without Dolby Digital encoder activation) to DVD or
export the corresponding MPEG files while keeping 5.1 surround sound. To
do so, use the "Smart Rendering" option which transfers the unprocessed
parts of the output material without renewed encoding. Read more on this in
the MPEG encoder settings section "General settings (view page 360)".
The import has to be executed as a mixdown, the audio material cannot be
changed (no fades, no audio cleaning, no volume adjustment). Harder cuts,
e.g. removal of commercials are allowed, but they may not happen precisely
according to the frame, but at the GOP (group of pictures) borders.
The mixer in surround mode
www.magix.com

Soundtrack 187
To activate surround playback, open the mixer (M key) and click on "5.1
surround" button in the master.
In the master, six peak meters for the individual channels are provided. The
normal panorama button turns into a representative display of the surround
editor (see below), which can be opened by clicking on the display.
The surround sound editor is also available to the effects tracks. For
example, you can send the original track to the front L/R speakers, the FX
track however will remain at the rear L/R speakers.
The master volume is applied to all channels, here the left controller
influences channels L and Ls, the right controller; channels R and Rs and
the middle value of both controller; the channels C and LFE.
The master plug-ins are only applied to the front channels.
The full effects palette of the mastering effects rack in MAGIX Mastering
Suite is not available in 5.1 surround mode, but rather only the compressor
and the parametric equalizer (from the Mastering Suite) are provided. The
settings of these effects have the same effect on all six channels.
5.1 Surround editor
www.magix.com
The selected mixer track's 5.1 surround editor allows you to arrange the
audio signal of a track (displayed as two red sound sources) in stereo
space. The signal is dispersed to the 5 (blue) loudspeakers which represent
the individual surround channels.

188 Soundtrack
www.magix.com
There are 6 channels:
L: front left
R: front right
C: center
Ls: back left/left surround
Rs: back right / right surround
LFE subbass (Low Frequency Effect) channel
Dispersing the signal to the 5 loudspeakers occurs after the sound source
emits a sound field of a certain level (displayed as red circles). The further
away a loudspeaker's source is, the lesser its share of the corresponding
loudspeaker channel. The position of the loudspeaker can be moved with
the mouse.
The subbass share (LFE) is set directly from the corresponding value table.
It can also be changed by dragging the mouse.
There are various modes in which you can use the source signal:
Mono: The (stereo) source signal is seen as mono material, the left and
right channels are mixed together and arranged together. The original
stereo information is lost here.
Stereo 1: Similar to mono mode insofar as the left and right channels are
moved together, but only a portion of the left source is audible in the
loudspeakers L and Ls and only a portion of the right source in the right
channels R and Rs. The stereo information remains as intact as possible.
Stereo 2: The left and right channels can be moved individually. The
distance between the left and right source is retained when you move the
left source. You can move an individual source by holding down the "Alt"
key.
Center/LFE: Only the left channel is arranged. In return, the LFE share is
drawn solely from the right channel. This mode is only important for
importing Surround material.
Width determines the level of the sound field of an individual source.
Automation:
Panning of the sound source on the loudspeaker can be automated to
simulate movements in the room.
For this to happen "Automation" must be activated. There are two methods
to create automations: record and draw.
To record (when automation is on), the sound source is moved between the
loudspeakers during playback. When recording the automation, the
"Record" check box lights up red.

Soundtrack 189
www.magix.com
The draw function is an alternative to drawing out complex movements.
When drawing in active mode, all panning movements are transmitted to the
time interval between the start and end marker (when the mouse button is
held). You can thus draw the entire movement curve for the selected time
range.
"Reset" deletes surround automation from the track.
There is no automation of the parameters for width and LFE, of the distance
between the left and right source in "Stereo 2" mode, or of the loudspeaker
positions.
Transfer surround tracks from Samplitude/Sequoia to MAGIX
Video Pro X3
Note: In order to be able to use Samplitude/Sequoia parallel to MAGIX
Video Pro X3, the programs will have to be synchronized with each other.
Read more about the topic "Synchronizing Samplitude/Sequoia with MAGIX
Video Pro X3".
Existing surround tracks are transferred directly to MAGIX Video Pro X3
from Samplitude/Sequoia. Set a playback marker first in MAGIX Video Pro
X3 at the starting position of the movie – the wave file will be added at the
position of this marker.
Note: In MAGIX Video Pro X3, the last six tracks must be free to ensure that
correct transfer can take place. Set the number of tracks to a higher number
in the Movie settings as required.
Switch to Samplitude/Sequoia
To transfer, open the menu item "Export to MAGIX Video Pro X3" in the
"File" menu under "Export".
Please note that when exporting, a sampling rate of 48 kHz should be set,
since this is the sampling rate used in DVD audio streams.
Click "OK" and enter the save location and a logical name for the surround
sound in the dialog that opens.
After export, the six surround channels will be loaded directly into MAGIX
Video Pro X3. 5.1 surround mode will be activated and the channels will
feature the corresponding track settings.
Set multiple sound tracks
Multiple sound tracks are provided for adding multiple audio tracks to the
video for selection via the disc's menu. This has primarily two main uses:
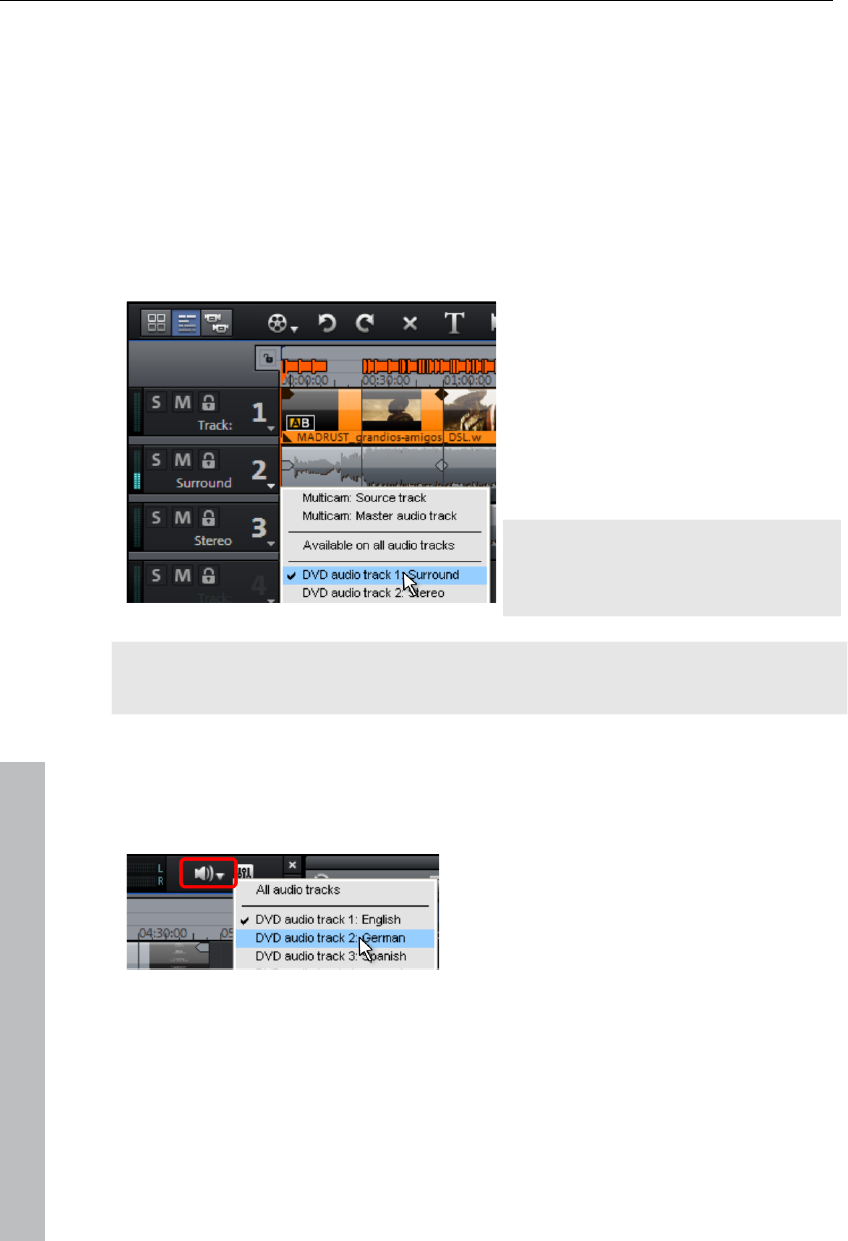
190 Soundtrack
Creating audio tracks for different languages
Mixing stereo and Surround audio separately
These two applications can be combined, since MAGIX Video Pro X3
features up to 8 separate multi-sound tracks.
Define multiple sound tracks
A context menu may be opened in the track boxes which enables every
track to be set as a DVD audio track. Name the tracks logically, because
they will appear in the menu of the burned disc later.
In the example, 2 different multi-
sound tracks ("stereo" and
"Surround") have been created.
Now assign the tracks for the
stereo sound to "Stereo" via the
DVD audio track's context menu
and the assign the Surround
sound tracks to the "Surround"
multi-sound tracks.
Note: This approach may also be
applied in the same way to create
a multi-language disc.
Note: In case different sound formats are needed for the multi-sound tracks,
these may be set via the encoder settings!
Dub individual languages
Once all multi-sound tracks have been defined, MAGIX Video Pro X3 sets
the first one by default for you to mix.
Once this is completed continue with the
other multi-sound tracks simply by
switching the active DVD audio track.
A recording may be muted by clicking the small arrow next to the button.
www.magix.com
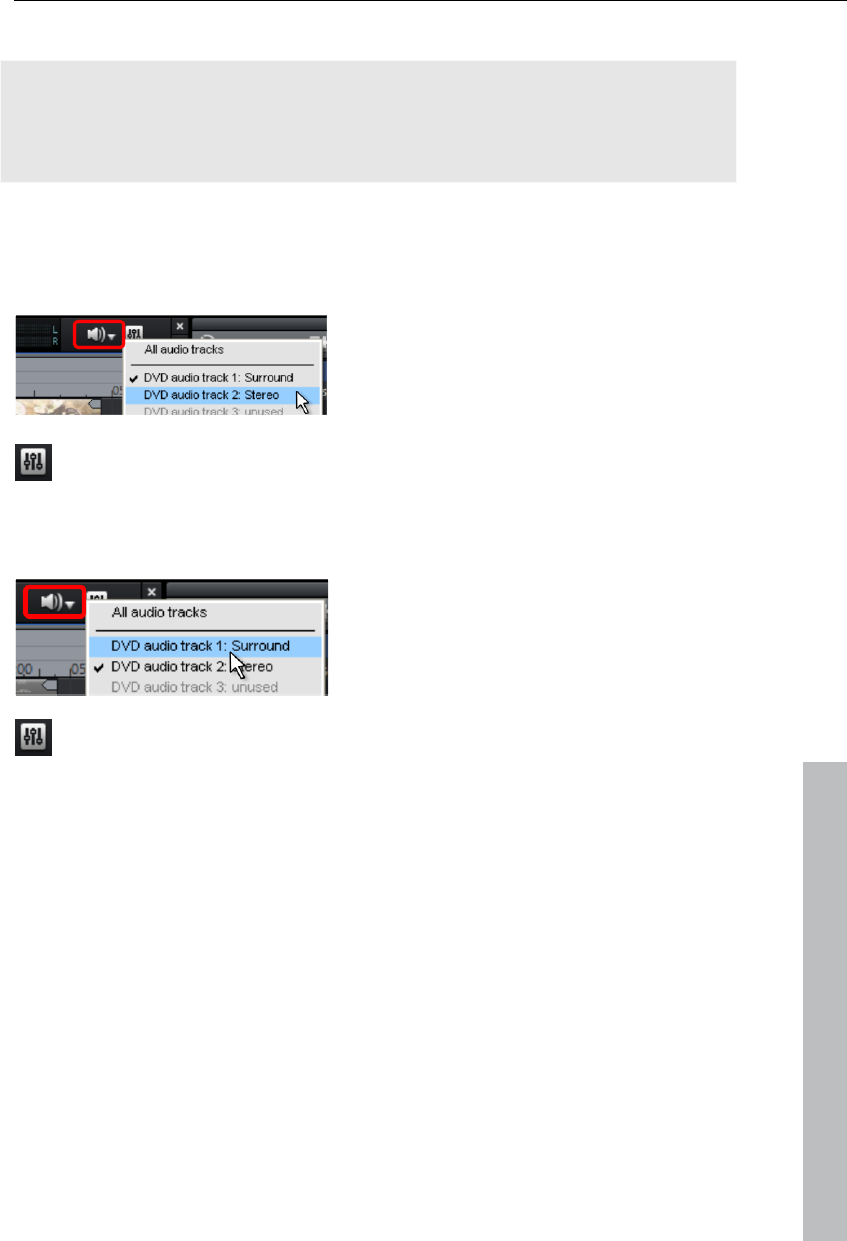
Soundtrack 191
Combine Surround and stereo tracks
Note: The method described here is only recommended if the stereo track
requires a separate mix, since it normally isn't necessary to add an extra
stereo track. Playback devices automatically apply a mix to stereo sound in
place of 5.1 Surround when it is required.
In case you want to create a disc which features 5.1 Surround as well as
normal stereo tracks, MAGIX Video Pro X3 offers a solution for this, too.
Mixing stereo
Now set MAGIX Video Pro X3 so that
only the stereo track can be heard. You
can mute the recording by clicking the
small arrow next to the button, and then
select "Stereo" in the DVD sound track.
Now open the mixer (view page 181), and if "5.1 Surround" mode is still
active, then shut it off. Mix the stereo as you normally would, and then
close the mixer.
5.1 Surround mix
www.magix.com
Now set MAGIX Video Pro X3 so that
only the Surround track can be heard.
Mute the recording by clicking the small
arrow next to the button, and then select
"Surround" in the DVD sound track.
Now open the mixer (view page 181) and activate 5.1 Surround mode.
Mix the Surround (view page 184) like usual.
Set formats of individual multi-sound tracks
Next, make the necessary changes to the formats of the multi-sound tracks.
These settings are located in the MPEG encoder settings panel, which may
be opened via the "Burn" dialog.
The simplified settings dialog displays an additional section for the multi-
sound tracks. Select the DVD sound track you want to adjust from the
dropdown menu. Next, assign the desired format to any track, i.e. 5.1
Surround to some tracks, stereo to others – just like in the illustration.
Click "Edit" to open the advanced audio settings dialog for the MPEG
encoder. Specify which format the selected DVD sound track should
feature. For more detailed information, read the section "Audio settings
(view page 363)" in the chapter "MPEG encoder settings (view page 360)".

192 Soundtrack
www.magix.com
Note: Even if all of the multi-sound tracks are created as 5.1 Surround
tracks, this setting must be made for each of the tracks.
Sound tracks which feature the setting "Apply to all multi-sound tracks" will
always be mixed with the other multi-sound tracks, although these will be
created using the format set for them.
Synthesizer
Creating synth objects
The software synthesizers are located in the "Audio effects presets" folder
in the Media Pool's "Effects" tab.
Icons appear there for all available synthesizer plug-ins. Use drag & drop to
add them to the arrangement. A synth object appears in the appropriate
track and the plug-in's interface opens. Synth objects can be programmed
via this interface.
Programming the synth object
Depending on the plug-in, various functions to create and control sound can
be applied via the operating console.
To monitor programming, playback can be started and stopped at any time
with the space bar while the operating console is open.
Arranging the synth object
Once you have finished programming the melodies or rhythms of the synth
object, you can close the operating console and arrange the synth objects
on the tracks. They can be stretched or compressed, faded in and out,
turned down or up, etc. with the help of handles: These steps are the same
for all objects.
The operating console of every synth object can be reopened at a later
stage by double clicking or via the synth button if you would like to
reprogram the object. In addition, you can drag as many other synth objects
of the same software synthesizer as you like onto the tracks and program
them separately.
Synth objects - effects and mixdown
Synth objects and audio objects may be edited using all available master FX
effects. You also can use the synth objects to control the effect curves. You
can adjust the level of every synth track precisely in the real-time mixer.
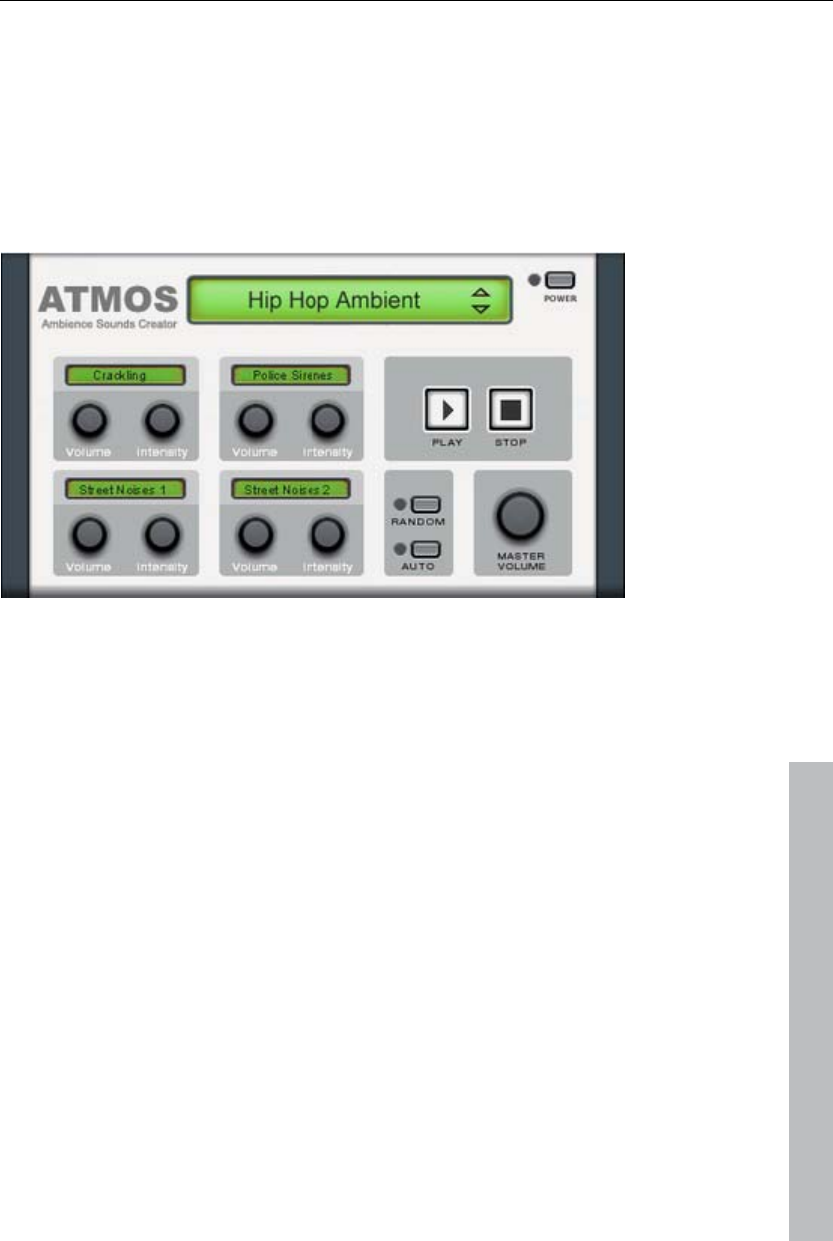
Soundtrack 193
The mixdown function (view page 197) mixes all tracks including the synth
objects down to a single file.
Atmos
Atmos is a synthesizer which can be used to easily create realistic nature
sounds in no time. From thunder and lightning to animal sounds and traffic
noise, Atmos helps you design natural-sounding atmospheric noises for
your projects.
In the upper border window, select the top category "Scenario". You can
select a desired nature sounds category (for example, "Thunder and
Lightning").
www.magix.com
In the middle of the window, a collection of control elements appears for
designing the desired "Ambience". Each element has its own description
(e.g. "Thunder") and two faders, i.e. "Volume" and "Intensity". The "volume"
control adjusts the loudness portion of the element. The "Intensity" fader
controls the behavior of the sound, depending on controller element. For
example, with "Thunder", you can set how often thunder and lightning
should sound; with "Rain", the strength of the rain can be regulated (if
moved to the far left, light rain can be heard, while if moved to the far right,
a downpour with loud splashing noises is audible).
At the bottom right border you will find a master volume fader with which
the master volume of the synthesizer can be set. Furthermore, the
"Randomize" setting is also located here. This way you can change the
settings of the control elements by yourself.
Drum & Bass machine 2.0
The Drum & Bass machine is a dual synthesizer, uniting both distinct styles
of drum’n’bass in one piece of equipment to produce fast beat crashes and
rumbling bass lines. With the Drum & Bass machine you need no special
skills to create authentic sounds for your drum’n’bass songs.
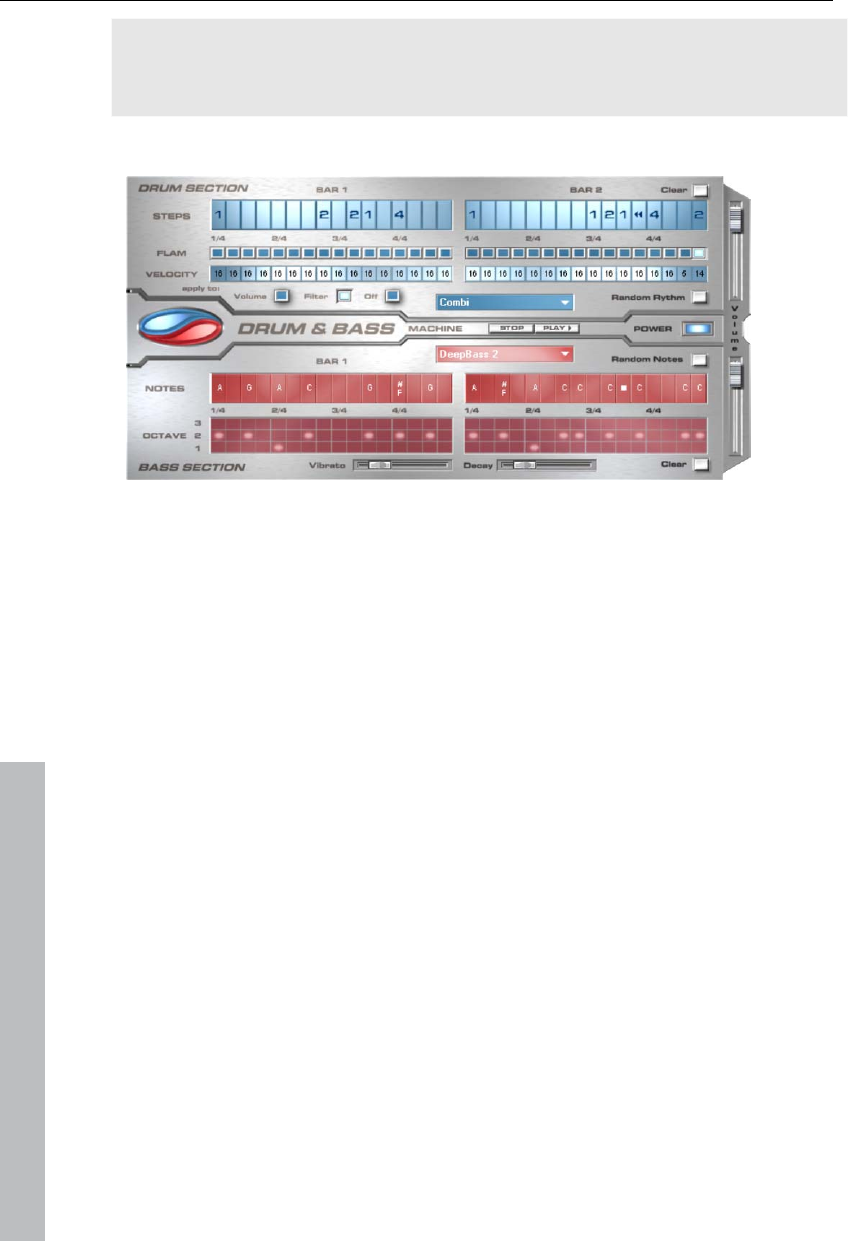
194 Soundtrack
A tip: The typical speed for Drum’n’Bass is usually around 160-180 BPM.
The Drum & Bass machine also fits in perfectly with other music styles, e.g.
bigbeat (120 BPM) or trip hop (80-90 BPM).
Setup
The top half of the synthesizer controls the rhythm section, the bottom half
controls the bass section. Between the two, on the left side you will see a
symbol where both sections can be turned on and off individually. You can
turn off the bass section, for example, so that you take only the drum
section break beat into the arrangement. The MAGIX Video Pro X3
arrangement mix will then only include the drum section in the mix file.
The volume control is on the right border, controlling the volume for both
sections. The play and stop buttons allow you to listen to your drum’n’bass
creations up front in MAGIX Video Pro X3.
The "Drum‘n’Bass" label covers a menu containing functions to load and
save drum’n’bass patterns (Load machine state/Save machine state), and
functions to delete or generate patterns (Clear all/Random all). The
submenu "Velocity presets" contains some help functions for programming
of the velocity row.
The rhythm section (top half)
You can easily create complex and authentic jungle break beat sounds. In a
professional recording studio, jungle break beats are created by dividing
any given drum loop into several small "bits" and putting them back together
in a different order. This lengthy process is significantly simplified by the
Drum & Bass machine. You just have to design your own new play
sequence.
You set up the new sequence in the top ("steps") row. The blue cells
indicate the individual sections ("notes") for the subdivision of the loop.
www.magix.com

Soundtrack 195
www.magix.com
A left mouse click on one of the blue cells allows you to select one of six
possible symbols. Each symbol represents a different note or other way of
playing the note. Every time you click on one of the blue cells, the next
symbol is chosen.
Rely on your own intuition and creativity when programming your beats. It is
not absolutely necessary to know the exact meaning of each individual
symbol in order to create cool and authentic beats.
Summary symbol description:
1: Play drum loop from beginning
2: Play drum loop from the second note
3: Play drum loop from the third note
4: Play drum loop from the fourth note
Backward symbol: Play backwards from this point
Stop symbol: Stops play
The right mouse button allows you to delete the step cells individually. The
"Clear" button on the right deletes all step cells; the drum loop is played in
its original sequence. The "Random rhythm" button generates a random
sequence. You can then alter the rhythm as you wish.
By clicking on the blue field in the bottom part of the rhythm section you
open a pop-up menu where you can select the drum loop sound. If you
select a different drum loop, it will be loaded and played as programmed by
you.
In the "Flame" row you can set the note to be played twice quickly in
succession instead of only once, allowing you to program rolls and fill-ins.
The "Velocity" row allows you to set intensity values between 0 and 16 with
the mouse (left mouse click increases value, right mouse click decreases
value). Use the three buttons under the "Velocity" row to determine how
these values will affect the sound of your loop. If you select "Volume", the
velocity value alters the volume for this cell (16 = loud, 0 = quiet). If you
select "Filter", the velocity value alters the filter strength for this cell (16 =
sharp, 0 = muffled). The "None" button blocks use of the velocity values.
The bass section (bottom half)
The bass section allows you to create the right bass lines for your rhythm
quickly. As in the rhythm row, there are two-step rows.

196 Soundtrack
With the first "Notes" row, you determine the sequence of the notes, i.e. the
sound sequence.
By clicking on a cell with the left mouse button, you open a pop-up window,
where you can select the notes.
By clicking with the right mouse button, you delete a cell.
If you click on an empty cell with the right mouse button, you will see a
"Stop" symbol. This function is similar to that in the rhythm section, i.e. it
stops the bass sound at this point.
In the "Octave" row you can determine the bass octave sound. Octave 1
creates a deep tone, Octave 3 a high tone. You can only set the octave
values if there is a note in the row above.
As in the rhythm section, there are also buttons for "Clear", "Random
notes", and a red selection field at the top border of the bass section. The
red selection field allows you to set the bass sound.
Underneath the step rows, you will also find two sliding controls for sound
adjustment. You can use the "Vibrato" control to make the bass tone
"swing" at its pitch. If the control is pushed all the way to the right, the swing
will be stronger; all the way to the left will have no effect on the pitch.
With the "Delay" controller you can set a time for the sound to completely
fade out. All the way to the right makes the sound fade out quickly (after
approx. ¼ second); all the way to the left means ongoing sound.
Scrubbing
The term "scrubbing" originates from the age of cassette players and
provides quicker monitoring of passages of a film or a piece of music. The
function plays short samples at the original speed.
Note: In order to preview individual audio objects completely, use "Preview
(view page 48)" mouse mode.
Scrubbing: Activate
Scrubbing can be activated via the menu
beside the speaker button on the upper edge
of the arrangement window.
Scrubbing: Modes
No scrubbing: Scrubbing is inactive. If the playback marker is set or moved,
then sound will not be played.
www.magix.com
Soundtrack 197
Scrubbing (1 frame): Scrubbing is active and samples are only 1 (video)
frame in length. The speed is 25 fps, i.e. 1/25 second. This mode is suitable
for positioning the playback marker exactly.
Scrubbing (long): Scrubbing is active, the sample length amounts to approx.
0.5 seconds. In this mode, locating specific events is particularly easy.
Play 1x during scrubbing: If this option is active, the current position will be
played one time. If it is inactive, then it will be repeated.
Application
If "Scrub" mode is selected, then you can simply set the playback marker
with the mouse at a location on the timeline. Hold down the mouse button
and move the playback marker to different locations in the arrangement.
Using the jog and shuttle wheels in the video monitor also enables
scrubbing, even for different hardware controllers, which makes the program
feel just like an analog video editing system!
Mixdown of audio objects
www.magix.com
If the arranger becomes too full to manage, the system is out of RAM, or
you just want to "summarize" your production, use the mix down function to
convert the entire audio arrangement into a single audio file. Just click on
the mix down button in the button bar or select the function from the
"Processing" menu.
You can choose a name and a destination for storing the mix down object.
The default directory is "My audio/video".
Storage of the audio arrangement will take up a little more space on your
hard-drive, but it requires less RAM for playback than an unmixed entire
arrangement.
Note: The mix down effect optimizes the volume automatically. Even if the
mix down function is used various times, you will not lose audio quality.
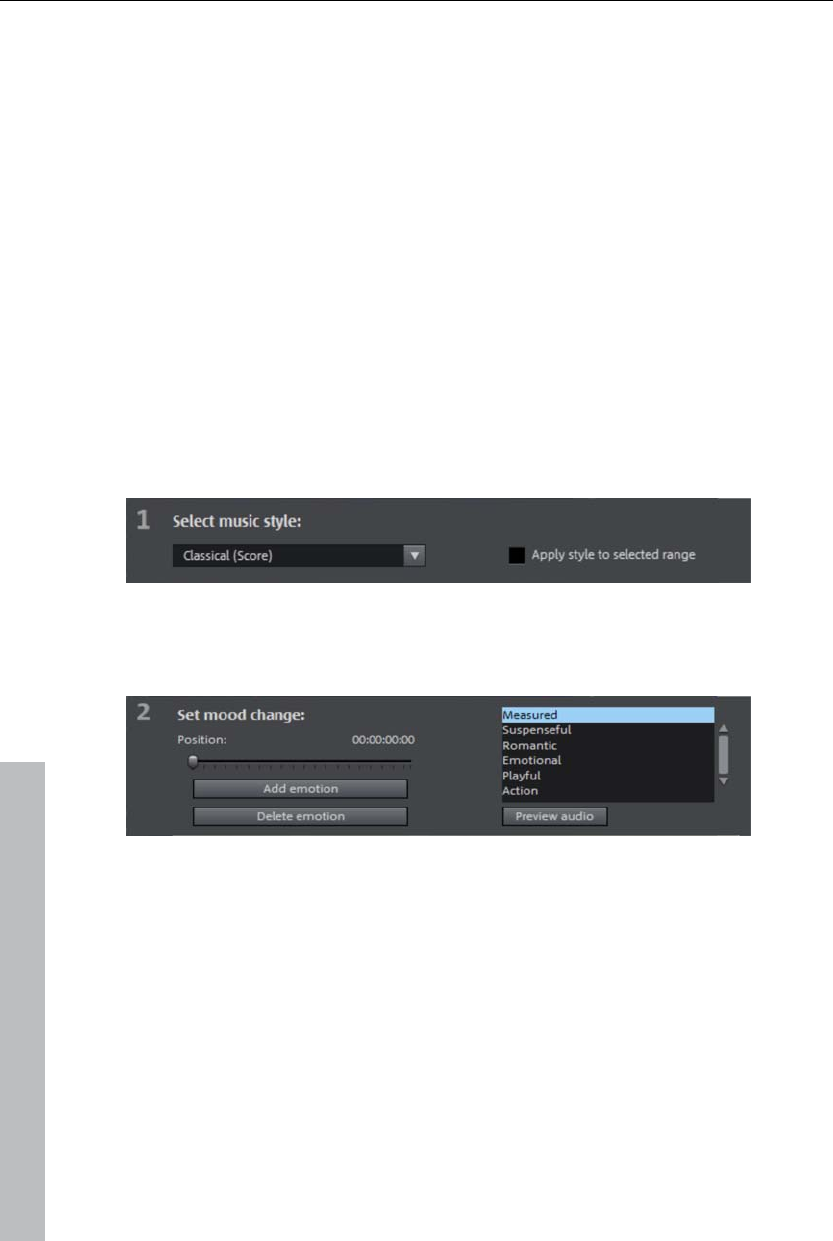
198 Soundtrack
MAGIX Soundtrack Maker
The MAGIX Soundtrack Maker adds atmosphere. Music tracks
corresponding to the specified mood are generated automatically. Even
mood changes are possible.
Open the MAGIX Soundtrack Maker using the Edit > Assistants (view page
291) menu. The work is split into 3 steps.
Then close the dialog by clicking on "Apply". If you click on "Cancel", the
dialog will be closed and all changes will be discarded.
Select music style
Choose a musical style first. The option "Apply only between start and end
marker" limit the length of the background music you want to create. Start
and end markers (view page 102) may be set with the left and right mouse
button if MAGIX Soundtrack Maker is open.
Set mood change:
You can select a mood from the list.
Preview: Preview the selected mood here.
Position: Use the position slider to skip to a certain position in order to set
the mood for a certain position. The start marker may be moved instead with
the left mouse button. The preview will be displayed in the video monitor
simultaneously.
Insert emotion: This button inserts the selected mood at the current position.
MAGIX Soundtrack Maker will then suggest a new position for the next
emotion by repositioning the position slider. Of course, you may also
position this elsewhere to insert further moods.
Delete emotion: Removes the currently set.
www.magix.com
Burn disc 199
Generate background music
Clicking "Create soundtrack" creates a new soundtrack. "Progress" shows
the current status.
Variations
If the background music that has been created is not suitable, a variation
may be created. This process may be repeated for the entire background
music as well as for individual emotions:
If you want to vary the entire background music, then simply click on
"Create variations".
If you only want this to apply to a certain emotion, then move to it with the
position slider first in the dialog (or the play marker on the main screen).
Activate the option "Vary only selected emotions". Now click "Create
variation".
Automatic cut adjustment: This option re-arranges the video and photo
objects in your project to match the music. Make sure this option is
deactivated in case this function is unwanted.
Burn disc
www.magix.com
Switch to the "Burn" screen first by pressing the button
displayed.
Burn your movies including selection menus onto CD, DVD, or Blu-ray
DiscTM here.
All movies loaded into the project will be included. If you want to remove
some of the loaded films, then switch to the "Edit" screen again and delete
the unwanted movies from the project there. To do so, switch to the
corresponding movie, open the "File" menu and select "Manage movies ->
Remove movie (view page 281)".
Note: The program is displayed differently at screen resolutions of 1280 x
1024 pixels and up. This makes the program more manageable and easier
to use. The work steps remain the same in spite of the different display.
200 Burn disc
Preview and editing
MAGIX Video Pro X3 provides two different modes for designing and
previewing the disc menu.
"Preview" mode simulates the behavior of a playback
device, e.g. DVD player or Blu-ray player.
You may also load a template quickly for the entire menu,
and then burn your disc.
"Editing" mode enables you to adjust many of the disc
menu's features. Templates are also available here that
may be flexibly adjusted to suit your needs.
Remote control
The virtual remote control is an important helper when it comes to checking
how the disc will perform later.
When the disc featuring the project is inserted into the player, this remote
control will control the preview picture just like a "real" remote control
controls the picture on a monitor or TV. The menu navigation may be
activated via the arrow keys or the "OK" button. Activated buttons are
highlighted.
The number keys select the corresponding entry on the
menu page. All menu entries are marked with a
corresponding number. Within a chapter menu, playback
is started from the particular scene. In the movie menu,
the corresponding chapter menu (if available) is changed
or movie playback is started.
Navigation button: Use these buttons to navigate in the
menu of the disc being burned. The individual entries may
be changed and confirmed by pressing "OK". The remote
control reacts exactly like a genuine DVD/Blu-ray player's
remote control.
Skip/move forward/back: This allows you to skip to the
next or previous scene while playing back your movie. In
the menu, you can skip forward or back from one menu
page to another.
Play: Starts the first entry in the menu. In case chapter
menus are available (view page 204), the chapter menu
will be displayed first. Press the play button again to start
playback at the beginning of the first scene of the first
chapter.
www.magix.com
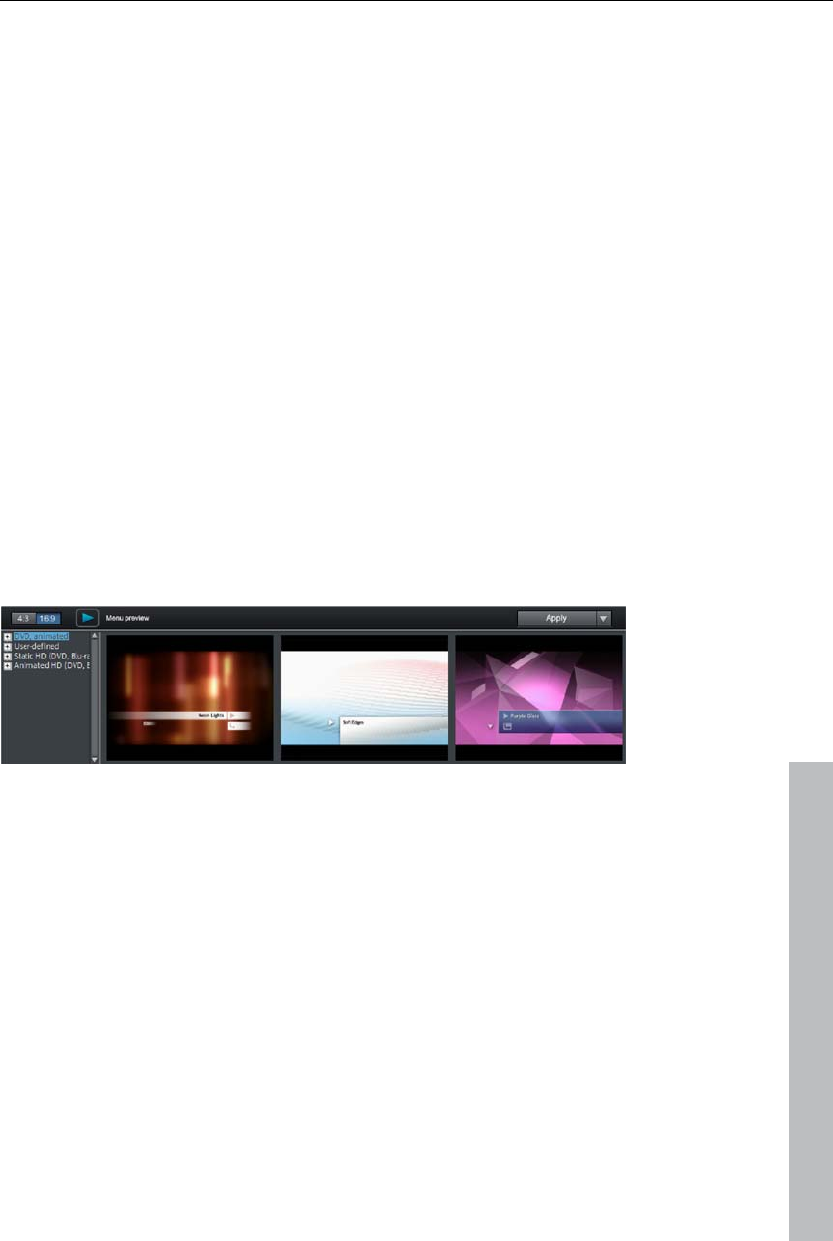
Burn disc 201
Stop: Pressing stop halts playback.
Disc: Switches to the first page of the film menu.
Sub: Switches to the chapter menu (if available) for the currently selected
film.
Menu
MAGIX Video Pro X3 can add graphical selection menus to your movies.
The menu is also burned to disc and appears when inserted into the player.
Just like with a purchased DVD or Blu-ray DiscTM, you may easily select
your movies with the help of preview pictures, or access particular chapters
within a movie.
Templates
Templates for DVD menus and layouts are provided below the preview
monitor and the editing elements.
The lower edge of the "Burn" screen features the templates.
www.magix.com
The left side features a tree structure that makes it easier to select the
template type. Select templates in the "16:9" or "4:3" (default) format using
the two buttons in the tree structure.
Animated (DVD): These templates contain background and introductory
videos as well as music. The control elements are displayed in various
states. The templates can only be used only for mini DVDs, DVDs and
AVCHD discs.
Static (4:3 only, DVD): These templates are suitable for normal background
pictures and elements.
Individual: These templates adjust to your disc project, i.e. the videos and
scenes you use are integrated directly into the menu.
HD static (16:9 only, for DVD, Blu-ray, AVCHD, WMV HD): These templates
contain super-sharp, high-res background images that are particularly
noticeable on HD TV devices.
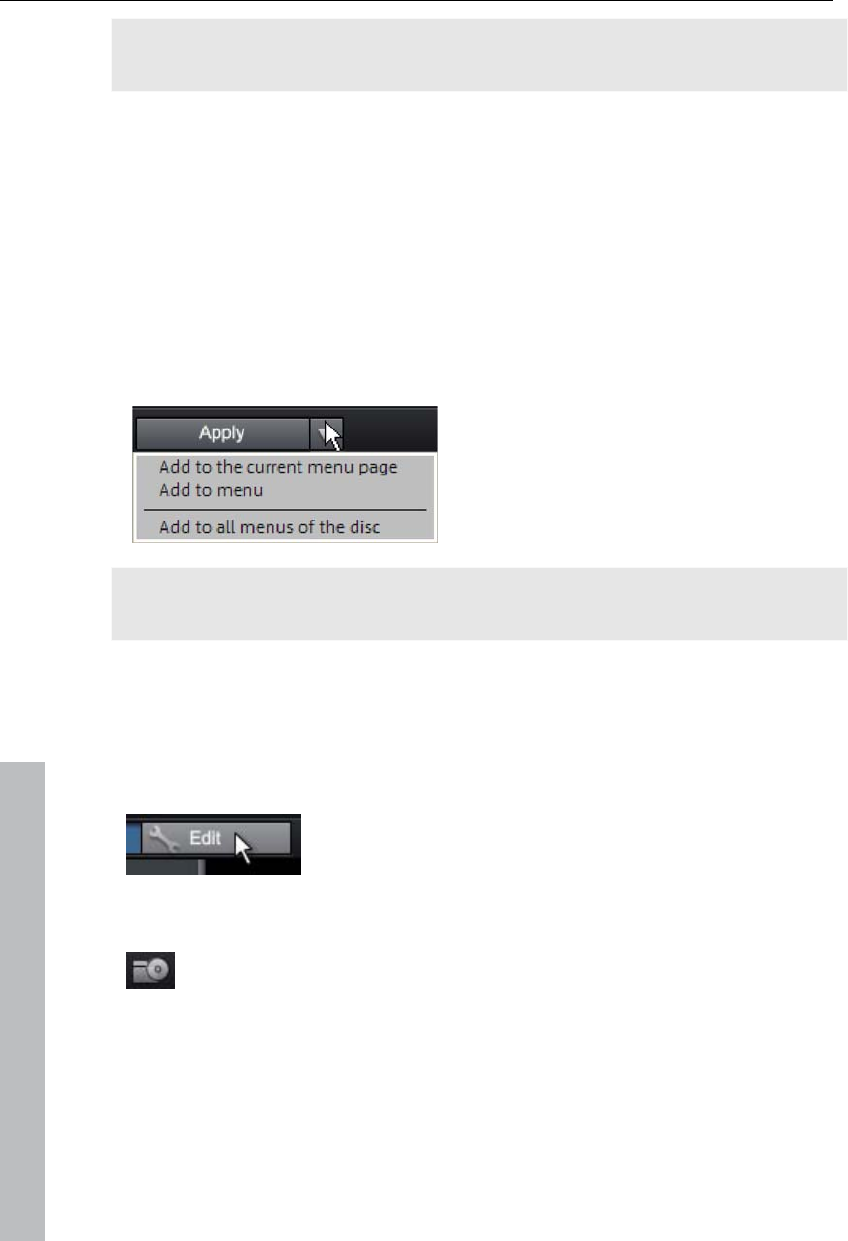
202 Burn disc
Note: These menus require "Film menu" and "Chapter menu" to be activated
in "Edit" under "Disc options".
If you selected a specific type of menu template, you can use the horizontal
scroll bar to view all the templates. There are a number of options for using
templates:
To apply a template to all menu pages, double click the desired template.
The entire template will be applied.
You may also combine various elements of the individual templates. Switch
to "Edit" mode to do this beforehand. If, for example, you wish to combine
the text format of a template with the background of another one, double
click on a complete template first. Next, click on the "Text" tab. No select
the desired template for the text.
The template (or individual template
elements) may be loaded for the
current menu (movie or chapter) as
well as for all menus.
Note: Some menu templates include intro videos featuring a smooth
transition to the menu page!
Edit disc menu
The preview pictures and the menu title can be moved freely in the preview
monitor. The menu may be edited very flexibly.
Activate the "Edit" button to do this.
Load on-disc editing project from disc
This button enables a DVD-/+RW in the drive to be loaded for on-disc
editing. More information about this is available in "On-disc editing".
Edit menu elements
Hold down the left mouse button and drag text boxes or graphical elements
to the desired position. The size may be adjusted by dragging out the
corners and edges of the frame.
www.magix.com
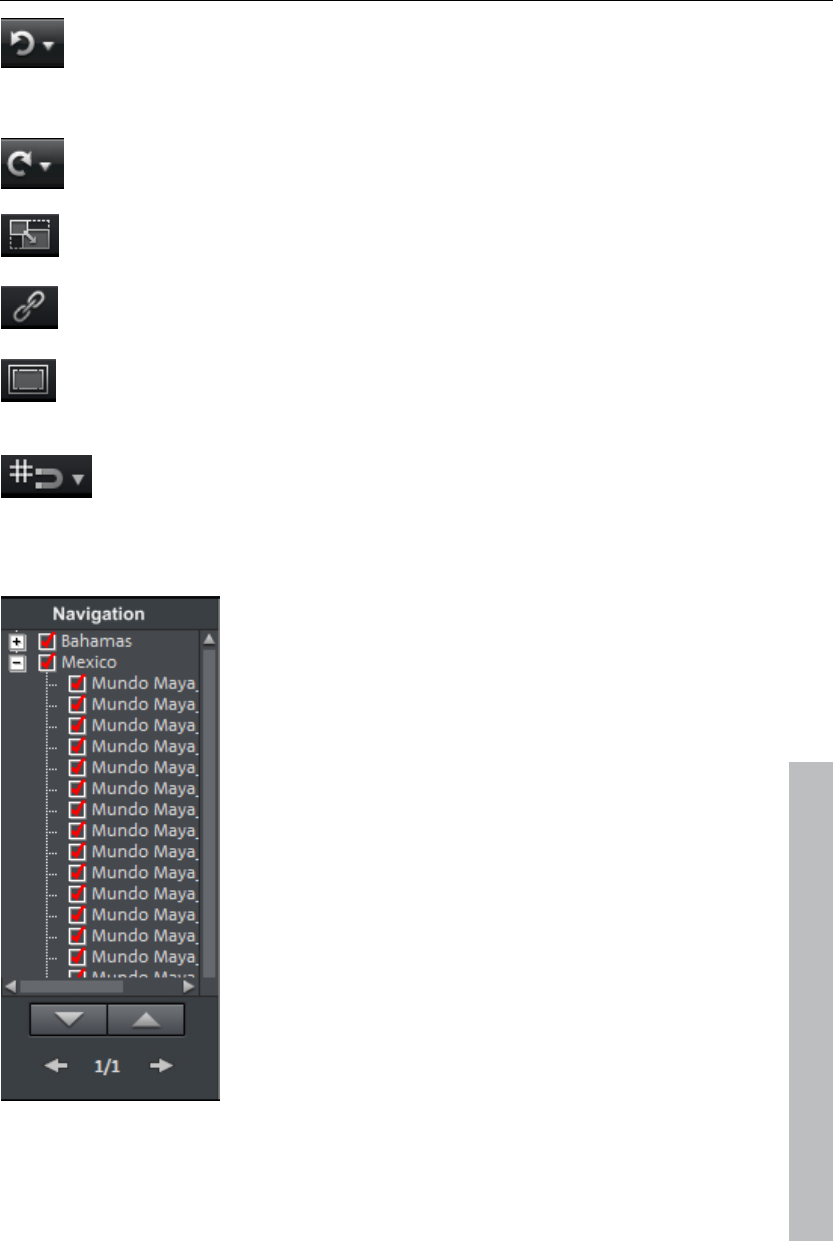
Burn disc 203
This command allows you to undo the last changes made. This
way, it's no problem if you want to try out critical operations. If the
result is unwanted, then you may always revert to the previous
state by clicking "Undo".
This function undoes the previous "Undo" function.
Set aspect ratio: To avoid distortion, use this button to set the
aspect ratio for the menu elements.
Group: Menu elements including the description text and number
may be moved or scaled in size.
Show TV display area in the preview monitor: This option displays
the image borders of the television (view page 143) as lines in the
preview monitor.
Grid: This button shows a grid to help position frames exactly next
to each other as required. A dialog may also be opened to set the
grid more precisely using the small arrow next to the button.
Navigation
www.magix.com
All movies are listed as first entries. The
corresponding menu level is the film menu.
All scenes are listed as second entries to the
right. The corresponding menu level is the chapter
menu.
Removing the red check deactivates the
corresponding entry in the photo menu. The
scenes are still displayed of course, but you can no
longer select them directly from the menu.
If you double click a superordinate film entry, then
the film menu will for editing.
If you double click one of the chapters listed, then
the chapter menu will open for editing.

204 Burn disc
www.magix.com
Disc options
You may deactivate the menus entirely or customize them here.
Intro video: Press this button to load videos to be used as introductions to
your DVD or mini DVD. The *.avi, *.mpg, *.mxv, *.vob formats are
supported. The intro is played immediately after the DVD has been inserted
into the player. The DVD menu will then appear. A check mark "Do not skip"
ensures that the intro video must be played completely each time the disc is
inserted and that it may not be skipped with the remote control or otherwise.
Film menu & chapter menu
The disc menu essentially consists of two layers:
Film menu: The upper layer includes the film menu, which is only used if a
project contains multiple movies.
Chapter menu: This is the lowest layer of the disc menu, which assumes the
chapter markers in a movie as menu entries. More information about this is
available in "Chapter markers (view page 104)".
Note: A chapter menu cannot contain more than 99 entries. If your movie
has more chapters, then you can either burn it without a chapter menu or
split it into multiple parts.
Note on SVCD compatibility
Some DVD players may have difficulty playing created SVCDs (despite
fault-free burning) if the disc contains a project burned in "Chapter and
photo menus" mode and contains several slideshows and/or a large number
of photos. These compatibility problems can be avoided by:
Using menu mode 1 or 2 for SVCD,
Only adding a single movie to the disc, or
Turning off the PBC (playback control) function, i. e. the menu navigation of
the DVD player.
Preview pictures: Shows/hides the preview pictures in the disc menu.
Numbering: The numbers beside the menu entries may be selected directly
using the remote control, but they might be unwanted at times. Use this
option to show/hide them.
Frame: A frame borders the preview pictures. If this is unwanted, it may be
removed easily using this option.
Burn disc 205
Create your own menu background
Every menu background can be created new from
scratch or edited.
A click on this button switches to the "Edit" interface and loads the selected
menu background as video. Here you can change and design the
background as you please. The created film must be saved and then
applied as a menu background.
Tip: If you would like to design a menu background yourself from scratch,
first press Ctrl + A to select all objects, and then Del, to delete them.
Design page
Background graphic: You have three options in this case. You can either set
a certain "color value" for the background. Or, you can select an image file
from your hard drive. You can also select a certain frame from a video in
your project.
New menu pages may also be added or irrelevant pages may be removed.
Adds a new menu page.
Removes the selected menu page.
Animated selection menus
www.magix.com
Audio-visual animations may also be added to the DVD menus. As required,
background videos are played as endless loops while the menu is shown on
the screen. Add background music in various formats or use any
background picture for each menu.
Sound/music: Load an audio file into the preview monitor and use it as an
animation in the menu background.
Video: Load a video or graphics file into the preview monitor and use it as
an animation in the menu background. In addition to the options for the
background graphic (see above), you may also use a sequence from a
loaded slideshow or from a different video file.
Background video options:
Create animated menu buttons: The preview images for individual movies in
the movie menu are shown as small movie samples. Set the start point and
length of the animation using the sequence options faders.
Use video's audio track: The audio track of the background video is used
with the menu.
206 Burn disc
Play menu animation as a loop: The background video (audio and/or video)
is played back as a loop.
Length of the menu view is set by: Audio/video or whichever medium is
longer. You can specify how long the background video should be here.
The other medium will be played as a loop.
Design button
MAGIX Video Pro X3 enables simple editing of any menu entry. They will
appear in the disc menu as buttons with preview images.
New menu entries may also be added or irrelevant pages may be removed.
Adds a new menu entry.
Removes the selected menu entry.
Tip: If you would simply like to deactivate unused menu entries, this may be
done via the navigation.
Note: The chapter menu is formed via chapter markers (view page 104) and
can be influenced in detail with these.
Pressing this button or double-clicking the menu entries
allows menu entries you have created to be edited. The
dialog with the properties of the menu entries (view page 207)
will open.
Edit in MAGIX Photo Designer: These buttons open
MAGIX Photo Designer for further editing of your
background pictures or the selected menu
elements.
Jump to linked page
To test the targets of menu entries, select the
desired menu entry and click the button.
www.magix.com
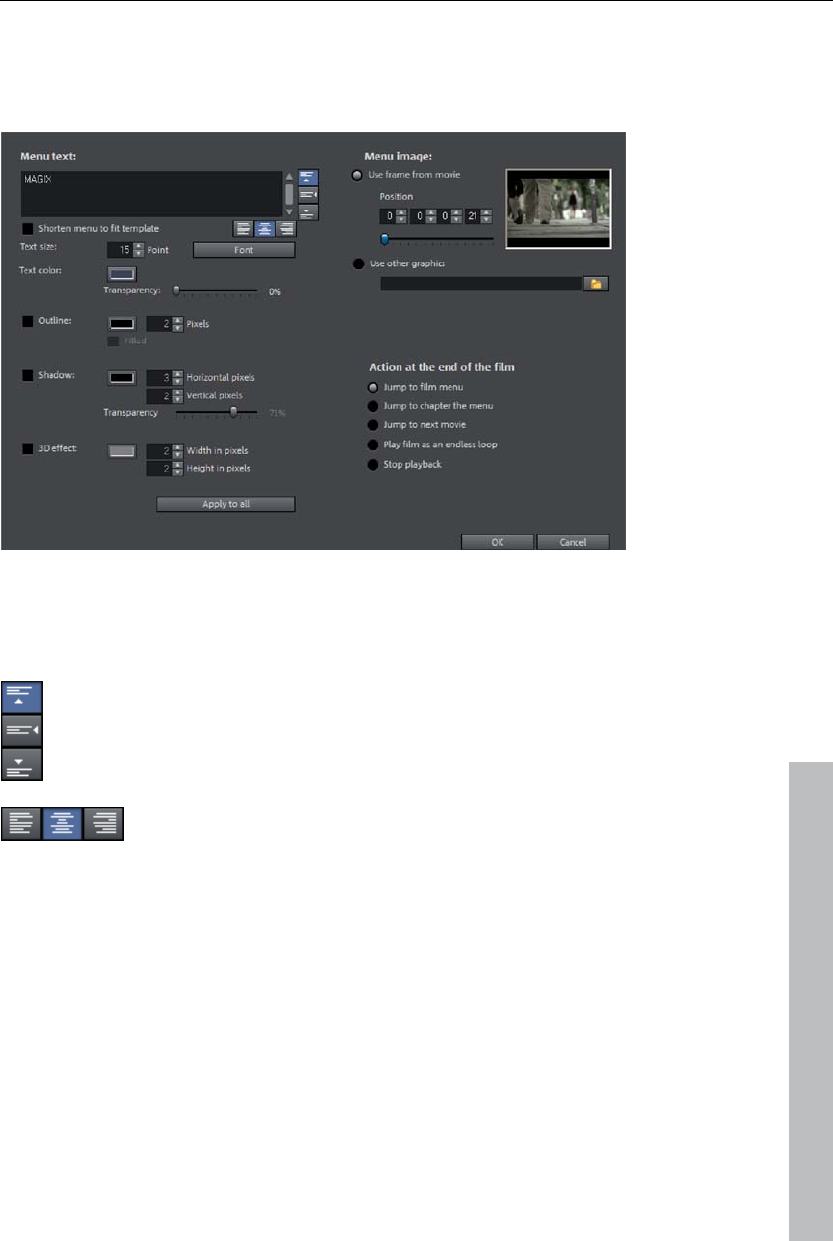
Burn disc 207
Menu entry/menu page properties
Double clicking the preview picture or a menu entry opens an editor for you
to adjust the preview picture or menu entry.
Menu text
In the text input field, you can enter any text to match the chosen menu
entry.
www.magix.com
Set the vertical direction of the text (upwards, centered or downward).
Set the horizontal direction of the text (left, centered or right).
Font size: Set the height of the text in pixels.
Font color: Define the foreground color of the text.
Font: Set which font and which style (bold, italic, etc.) should be used.
Shadow: Set the color and size of the shadow that will appear underneath
the text.
3D effect: If you would like to make your text appear three-dimensional, you
can set the width, height, and color of the 3D effect.

208 Burn disc
www.magix.com
Apply to all: Except for the text, all settings are applied to all entries in the
current menu.
Menu image
Use frame from movie: Use the fader to set which frame should be used in
the video as a preview picture. The numerical input fields are sorted as
follows: Hours:Minutes:Seconds:Frames.
Use different graphic: You can also load your own bitmap images to be used
as menu pictures.
Hint: It may be the case that there are no menu pictures in some menu
templates, so changing the menu picture won't have any noticeable effect.
Actions at the end of the movie (preview images in film menu only)
Enter which action should be carried out once the film has finished playing
here. Select from:
Stop playback: This option depends on the DVD player being used. Most
DVD players show the DVD player's own menu (or background picture)
after playback.
Jump to movie menu/chapter menu: Jumps back to the previously displayed
menu.
Tip: If one of these two options is not available, please check which menu
mode is set.
Jump to next movie: The next movie will be played without any additional
action.
Play movie as endless loop: Any movie may be burned onto a disc as a
loop. This means that the movie will be played as a endless loop until the
next menu entry is accessed using the remote control or playback is
stopped. This way, you can transform your TV into an aquarium, a train
journey, a fireplace or anything that you could watch over and over again.
Note: This option only functions for DVDs, Mini DVDs, or Blu-ray Discs.
Edit your own menu entries
There is another view in this dialog to edit menu entries you have created.
Menu links can be edited here. This makes it possible to link a menu entry
with a certain action, menu page, or a certain position in the movie.

Burn disc 209
No link: The menu element cannot be selected and has no function other
than to display menu text.
Link to page in current menu: Jumps to a menu page in the current movie or
chapter menu in the current film.
Link to another menu: Opens another movie or chapter menu.
Link to chapter in a movie: If this option is selected, enter a film and chapter
marker where playback should start.
Note: For DVDs, only chapters within the current movie may be jumped to.
Link to film start: The movie will play back from the start.
On-disc editing
On-disc editing allows you to burn more movies onto disc at a later stage
and customize the menu accordingly. It's also possible to just rework the
menu.
In order to be able to use on-disc editing, the DVD must have been burned
featuring the option "Prepare disc for on-disc editing". This option is located
in the burning options (view page 219) of the "Burn" dialog.
To put a film onto DVD, first load the film and then switch to the
"Burn" screen. Insert the DVD-/+RW and press "Load project".
www.magix.com
MAGIX Video Pro X3 will ask if the movie loaded in the "Edit" screen should
be added to the disc. If yes, then the existing menu on the disc will feature
the corresponding entry.
It is not possible to edit movies via the "Edit" screen later that you have
already burned onto disc. Use the function "Restore backup project" to do
this. Changes may only be made to the menu.
In addition to normal menu design (view page 201) options, you may also
hide entire movies in "On-disc editing" mode, for example, to replace them
with an entirely revised version.
Select the film in the navigation structure and press the Del key. To display
the film again, press Shift + Del.
210 Burn disc
Note: It is not possible to delete parts of DVD-/+RWs. Each new version of
the menu is added to the disc, which means that the amount of storage
space available is reduced accordingly. It is also not possible to delete
movies from the DVD. If you remove a movie from the menu, it will still be
played back if you have set the "Actions at the end of the movie"
accordingly. Please also note the "Menu entry properties (view page 208)"
in the burn window.
"Burn disc" enables you to create a "new" disc. In this case, only the new
movies and the adjusted menu will be encoded and burned to disc.
Edit DVD menus with Xara Xtreme Pro or Photoshop
Besides the option of editing the menu template directly in the preview (view
page 202), menu templates may also be exported as a Photoshop file
(*.psd) and edited in an external graphics program. This provides complete
control over the appearance of your menu including complex text effects
and the design of highlights.
Export menu
The transfer of the menu templates to the graphics program takes place in
one of two ways:
If a complex, longer edit is required or if you have created a menu
without a template, then use the PSD import/export function in the
menu editing functions.
Next, open the PSD file in the graphics program of your choice.
For smaller changes, you can also shorten this process: click the button "In
external editor" in the "Disc options" on "Design page".
A temporary PSD file will be added and opened in the program that has
been selected in the program settings as the menu editor (view page 272).
After editing has been completed and saved in this external program, the
temporary PSD file will be imported again and the menu page will be
updated immediately.
www.magix.com

Burn disc 211
www.magix.com
Menu text with external menu editing
Menu elements are transferred as a bitmap during PSD export as well as
during import of the edited PSD. This also applies to the text displayed in
the menu. This text may also normally be changed in the "Menu entry
properties" dialog. The menu text are adjusted if movies or chapters are
added or removed.
The PSD contains these texts as a bitmap and cannot be changed. During
importing, the bitmaps replace the original text entries. By the way, this is
maintained, and the font will only be set to a size of 0 so that texts are not
displayed in duplicate; the menu will therefore look identical after external
editing.
It is important that no more movies or chapters are added to the menu.
Otherwise the preview images, that have also changed along with the menu
structure will no longer match the bitmap text, since the bitmap text will not
match the changed references in the menu structure!
An example
A chapter with two entries is present. Entry 1 is named "travel preparations".
Entry 2 is named "arrival". A chapter named "the trip" is going to be added
between chapter 1 and chapter 2. The second chapter now becomes
chapter 3 and moves to the next menu page.
Normal text behavior: The second entry (now with preview image for the
newly inserted chapter) receives the new title "the trip". The next menu
page features chapter 3 as the first entry with the name "the trip".
Text after external menu editing: The second entry will feature the title
"arrival" (as a bitmap, as a component of the button), but the preview image
will feature the new chapter "the trip"! The next menu page now features the
preview image for chapter 3 (formerly chapter 2, "arrival"), this is now called
"travel preparations"! The name is a component of the button as a bitmap
for the first menu entry on the page, and this is "travel preparations" on the
first menu page. Completely out of order!
If the number of menu entries displayed is increased, this results from
copying the layer groups in the PSD (see below). Of course, the rendered
text layers are also copied into the layer groups, which results in incorrect
text again.
The best way to proceed is to edit the text entries at the very end, since
changes normally will not follow at this point. If changes are required
nevertheless, then proceed as follows:

212 Burn disc
www.magix.com
1. Restore the "correct" chapters or movie names by resetting the font size
in the dialog "Menu entry properties" to the default value. Two texts will
be displayed; the incorrect bitmap and the correct one.
2. Export the menu template as a PSD.
3. Delete the incorrect bitmap object in the corresponding layer and re-
import the PSD.
Of course, the menu text may also be added from the start via an external
graphics editing program only (in order to take advantage of the additional
options provided in this case). Delete the corresponding bitmap objects in
the PSD immediately after export and replace these with your own text
objects.
Structure of a PSD file
MAGIX Video Pro X3 produces a PSD file during export that contains a
layer for each object of the menu entry. This uses a naming scheme that
enables assignment of the objects in the file to their contents. Individual
layers feature mathematical signs that indicate their function. This naming
scheme is similar to that featured in Adobe Premiere and which is only
expanded occasionally in MAGIX Video Pro X3 to describe additional
mechanisms.)
This is how these mathematical characters are used:
Characters for layer groups
(+-) or (+) Play button/start film
(++) Chapter menu button
(+>) Next page
(+<) Previous page
(+^) Root menu button (jump back from chapter menu)
(+*) Menu title:
(^^) Layer group is ignored
Characters fro individual layers
(-) Layer contains text
(=1) Layer contains a bitmap with a highlight of the menu element.
(%) Preview image/thumbnail from the movie to be referenced
Bitmap information will be ignored during import and only the
size and position will be exported.

Burn disc 213
www.magix.com
Edit menu templates
The resulting PSD file will now be loaded into the external application. The
following steps may differ slightly depending on the application that is used.
The following steps, for example, describe the workflow in Photoshop CS,
Photoshop Elements 8, and the download version of Xara Xtreme Pro.
Editing a menu from 3 to 5 movies.
Photoshop Elements:
In Photoshop Elements, it is enough to touch an object with a held-down Alt
key on the video monitor and drag a copy of it to a new location. A movie
button and a chapter menu button should be duplicated each two times.
Assigning the movie takes place later via the index in the layer group
hierarchy. Make sure that the "x" chapter menu button ends up next to the
"x" movie button in the optical hierarchy. Otherwise, the screen will cause
confusion for its users.
Save the results.
Photoshop CS1:
In the context menu of the layer group to be duplicated in Photoshop CS1,
select "duplicate layer set". This must be done twice for the movie button
and the chapter menu button. Drag the created layer sets to the required
positions. To do so, the layer must be selected and the Ctrl button be held
down during the click.
Save the results.
Xara Xtreme Designer Pro 6:
In Xara Xtreme Designer Pro 6 you must first open the object galelry after
loading the PSD file. There, for each layer of the PSD file, corresponding
Xara layers will be created with contained objects. The layer groups are
represented with the names of individual Xara layers, with PSD layer names
separated by backslashes.
Find the layers of the group, which you would like to duplicate. In the
example, this refers to the 4 layers on the movie button ad two l ayers of the
chapter menu button. To ensure visual assignment of the objects to the
work area, you have to invest some effort since the Designer does not
select the corresponding objects when a layer is selected, and conversely it
doesn't select the layer when the work area with objects is selected. You
have to open a layer in the object gallery and select the contained object.
Now you will see the selection on the work space.
Now, the 6 layers will be copied along with the corresponding objects in the
object gallery by clicking on "duplicate". The newly created layers will
always be placed at the top position, so it makes most sense to copy the

214 Burn disc
www.magix.com
existing layers from the lowermost to the topmost. Otherwise, you will have
to restore the correct order of the new layers using drag & drop.
Now, select all objects of the button while holding the Shift key and move
them to a new position. Usually, you also have to select the frame and
chapter meny objects behind teh highlight layers and move those, too.
Mutliselection in the object gallery is not possible because the objects are in
various layers, and the program will prevent you from selecting them
together.
These steps must be repeated for the second additional button.
Finally, the changes must be saved as a PSD file. To do so, select "Export"
in the File menu ("Save as..." wouldn't work).
Change text font
Photoshop Elements:
In Photoshop Elements it is recommended that you export the template after
changing the font size of the text to be edited to 0. This way, no text will be
visible in the PSD to be exported. This step is necessary because in
Elements you cannot change anything in the created layer groups and
nothing in the existing font layer can be removed.
Create the desired font objects using the text tool. A separate layer will be
created for each font object. Name the layers clearly by selecting "Rename
layer" from the context menu. Change layer names so that they begin with
"(-)". If additional layers are needed for the text (for example background
picture/frame, etc), their names will also have to start with an "(-)".
Add the created layer to the proper layer set using drag & drop (for
example, the new label for the movie button to the "(+) menu entry" layer set
or the new header to the "(+) title" layer set. To do so, you select the layers
with the mouse inside the layer container and drop them into the proper
layer group.
Save the results.
Photoshop CS1:
In Photoshop CS1 you can access layer groups and can first delete text
layers in order to add your own text objects. Replace labels on movie
buttons, by opening all "(+) menu entry" layer sets and deleting text layers
("(-) ..."). Using the text tool, create new text objects, one next to each
movie button. Use all of the program's functions in order to realize your
ideas.
Drag the text layer using drag & drop into the layer container into the
respective layer sets. Adjust the layer names. Add an "(+)" to each text

Burn disc 215
www.magix.com
layer. You can generate additional layers that may be necessary for the
text, such as shadows, background frames or bitmaps, etc. During reimport,
all layers of a group with a (-) in front will be pooled into one text object.
Save the results.
Xara Xtreme Designer Pro 6:
In Xara Xtreme Designer Pro 6, activate the text tool after loading the PSD
file and write the desired text next to the movie button.
Now, you have to localize the existing movie buttons (object gallery
technology, see above). You can drag and drop the text object from the
background into the found layer and delete the text object there (Del or
"Delete" in the object gallery). Because naming takes place in the
surrounding layer and the objects in Designer themselves don't have
names, you don't have to rename anything.
Repeat this for every movie button and "Export" the result.
Adjust background and butttons
Photoshop Elements:
In Photoshop Elements you can only add something to existing button
graphics and highlights since individual layers in layer sets cannot be
deleted an no new layer sets can be created. The general method is similar
to text editing: create new layers and add these to existing layer sets using
drag & drop. Finally, adjust the layer names: All layers, containing the
highlight to be displayed, must again recieve a name that begins with a
"(=1)".
You can create graphics for your new menu for "Prev" and "Next" buttons by
dragging them into the open PSD file. They are, for example, 4 layers, two
button graphics and twop highlights. The highlight layers must be renamed
and scaled and placed on the screen using the mouse. Move the layers
using drag & drop into the "(+>) next button" or "(+<) prev button" layerset.
Save the results.
Photoshop CS1:
In Photoshop CS1 everything works similarly to Photoshop Elements. In
contrast to MAGIX Video Pro X3, generated layers can also be deleted, so
that button graphics can really be replaced.
Xara Xtreme Designer Pro 6:
In Xara Xtreme Designer Pro 6, the workflow is similar to creating new texts.
When the menu template is open, you can drag and drop, for example, 2
graphics for navigation buttons into the ready PSD. Two new layers will

216 Burn disc
appear in the menu template with two new graphics objects. Drag these into
the layer with the Bitmaps to be replaced. Renaming is unnecessary, since
the surrounding layers do this, too. Localization, scaling and moving on the
screen is analogous to Photoshop programs.
Play back menu in MAGIX Video Pro X3
After editing, a PSD file is created, which is imported into MAGIX Video Pro
X3 again and must then be assigned to a menu page as a template.
If access takes place via "Edit externally" see above (view page 210),
this is done automatically during saving and closing of the graphics
program. Otherwise, use the button "Import PSD" to do this.
This imports and converts the PSD (saved to an automatically generated
folder in the folder Content\DVD\Layouts, with TPL files and the generated
bitmap files).
Create DVD menus without a template
It is recommended that an existing menu template is adjusted first with a
graphics program. This exercise will help you learn about the functions and
structure of a DVD menu as a PSD file to create menus without using any
templates.
You can create PSD files without templates if the following is observed.
MAGIX Video Pro X3 can only use bitmap layers from the menu PSD file.
Text layers are read as a bitmap (graphic) so that MAGIX Video Pro X3
cannot make any changes to the text. Layer effects, etc. cannot be read by
MAGIX Video Pro X3. For this reason, all layers featuring additional
features in the graphics program need to be reduced/combined to bitmap
level.
The correct naming of layers is very important! MAGIX Video Pro X3
assigns the layers and layer groups to the menu items via their names,
which makes their correctness important. The characters added in front
(view page 210) of the layer names should therefore be observed.
A correct menu PSD contains the following elements:
background
menu title
x movie buttons with preview image, frame bitmap, text for menu, text for
numbering, highlight
one chapter menu button per movie button with bitmap and highlight
3 navigation buttons: in front, in the back, and the root menu
Background: The background utilizes all layers from the PSD file from the
very back to the foremost "usable" layer groups. All of the layers up until
www.magix.com

Burn disc 217
www.magix.com
this are combined via alpha layering. If the appearance of the background in
the graphics and in MAGIX Video Pro X3 is different, then this step may
also be made in the graphics program. In Photoshop, all associated layers
would be combined with the background layer.
Menu titles: In the next step, the layers of the menu title are added and
combined into a single layer group. This must feature a name that begins
with "(+*)". Besides the text layer, additional layers such as text
background, shadows, etc. may be present. All layers are unified as a single
layer via alpha layering.
Film buttons: Layers for film buttons are each combined as a layer group
that features the prefix "(+-)" or "(+)" at the beginning of its name. The
layers themselves have different functions that are kept together via this
naming prefix.
Preview image: The name of the layer for the preview image begins with
"(%)". In this case, MAGIX Video Pro X3 only reads the position and size of
the layer and uses this range to generate the preview image. In case
multiple preview images are present, their right corners will be combined
during importing.
Text layer: This includes text layers beginning with "(-)". "(-) index text"
serves as an identifier for the naming, all other text layers will bear the
name of the button label.
Highlight layer: The highlight layer is the top of the layer groups. Its name
begins with "(=1)". This should contain a highlight version (e.g. altered
color) of the frame bitmap.
All other layers will be combined into a frame bitmap.
Chapter menu buttons: The last portion features the layer groups for the
chapter menus and navigation buttons. These are named variously ("(++)"
or "(+>)","(+>)", and "(+^)"), by they feature the same principle the structure.
All highlight layers (beginning with "(=1)") become the highlight bitmap; all
other layers become the buttons bitmap via alpha layering.
The sequence of the layer groups from the PSD file is basically not
considered by MAGIX Video Pro X3. Characterization in the program takes
place in the order outlined here, even if the associated layer groups in are
saved in a different order in the PSD file.
An exception is formed by movie and chapter menu buttons: arrangement in
MAGIX Video Pro X3 takes place in the sequence featured by the PSD file.
The first chapter menu button detected belongs to the detected movie
button, the second to the second movie button, and so on.
218 Burn disc
Burn disc
Switch to the "Burn" screen first by pressing the button
displayed.
Burn your movies including selection menus onto CD, DVD, or Blu-ray
DiscTM here.
All movies loaded into the project will be included. If you want to remove
some of the loaded films, then switch to the "Edit" screen again and delete
the unwanted movies from the project there. To do so, switch to the
corresponding movie, open the "File" menu and select "Manage movies ->
Remove movie (view page 281)".
Note: The program is displayed differently at screen resolutions of 1280 x
1024 pixels and up. This makes the program more manageable and easier
to use. The work steps remain the same in spite of the different display.
Burning wizard
Click "Burn" to open the screen where you create DVDs, Blu-ray
Discs, or another video medium, including a menu.
Here you can select what kind of disc you would like to create. Under
"Additional options" you will find other disc formats that are used more
seldom.
Note: For each disc format there are different limitations. For example, with
many formats animated menus are not possible or no menus and transitions
at all are possible. You can find an overview of these limitations in the PDF
manual or in "Help" under "Appendix: Digital videos and storage media“.
www.magix.com
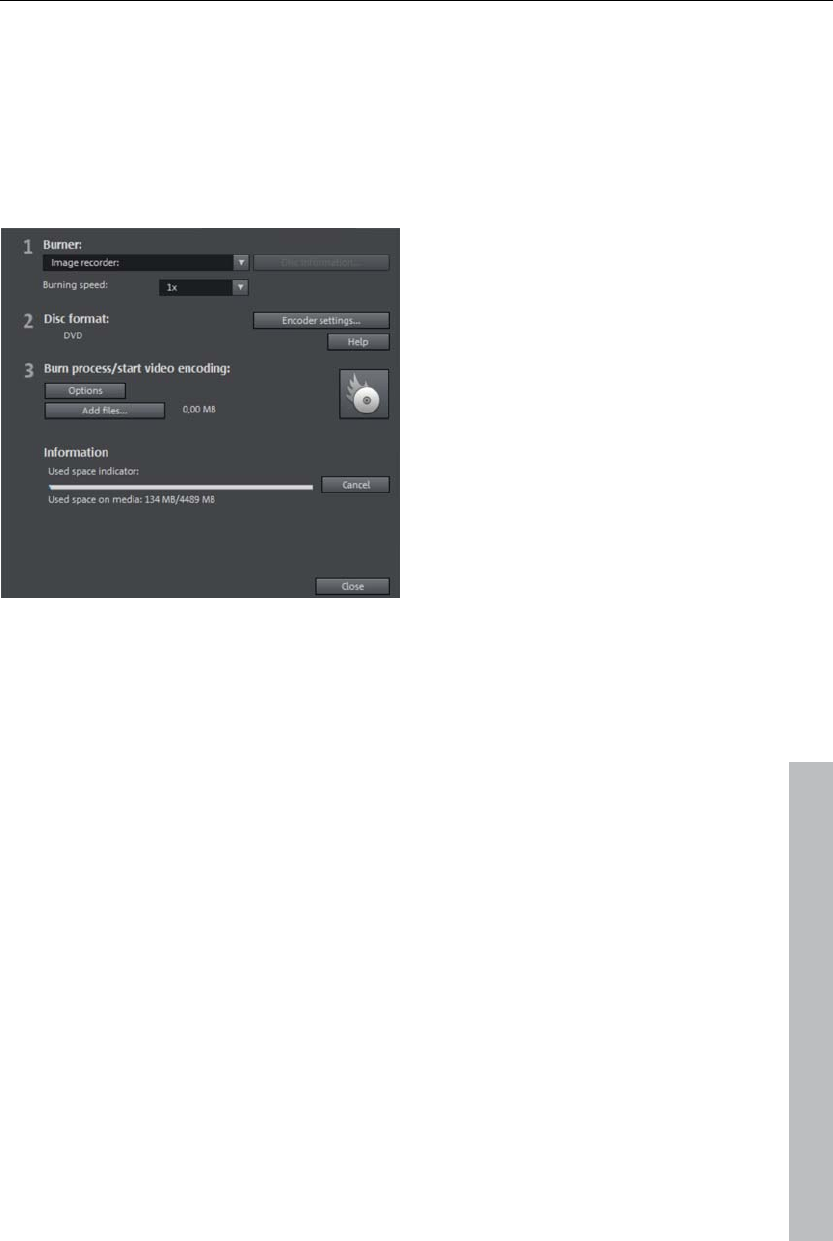
Burn disc 219
Burn dialog for DVD player
Here you can select your burner, the type of disc, the encoder settings.
MPEG-2 is used for DVDs. Blu-ray Discs also use MPEG-2, and higher
bitrates are employed in order to reach the higher HD resolutions. AVCHD
discs use a much more complex MPEG-4/H.264 codec, which is
documented in detail in the "MPEG-4 encoder settings (view page 346)
section of the PDF manual and in Help (F1 key).
Proceed as follows to burn a disc:
Set up burner and burn speed: If multiple burners are installed, you may
select which device you wish to use in this menu.
www.magix.com
Encoder settings: Use the "Encoder" button to access the selection dialog
to specify settings for the MPEG encoder (memory requirements, quality,
and duration of the MPEG conversion). "Advanced settings" accesses a
dialog featuring additional options. You can adjust all the fine settings for
the MPEG encoder here.
Burning disc/starting video encoding: The button "Burn disc" starts the disc
burning process. Every time you burn and every time a simulation is carried
out, the disc project is encoded. Please note that the MPEG file is not
deleted from the hard disk after the burn process has finished. Depending
on the length of the project, encoding and burning may take some time. The
time required can be seen in the dialog.
Creating an ISO image
The simplest way to create an ISO image is to select "Image recorder"
under "Burner". When starting the "Burning process", you have to specify a
name for the image file you wish to create.

220 Burn disc
www.magix.com
Options
Simulate first: If you are not sure about the write speed or memory
requirements of the selected disc, you can simulate the write process before
burning.
Add project backup: Use this option to add additional project data to the
CD/DVD together with the selected video format. You can then load the disc
project from the finished disc to re-edit it and create a changed version.
Activate buffer underrun protection: Many burners support techniques that
prevent "buffer underrun". Use this option to activate this protective feature
and burn your files at higher speeds (without risking making a coaster out of
your blank disc).
Completely format DVD/CD-RW media: This option reformats the RW media
and deletes all existing file material.
Prepare disc for OnDisc editing: With a DVD±RW, it is possible to add more
slideshows to the disc, or to edit the menu at a later date. The disc has to
be burned with the option "Prepare disc for OnDisc editing" activated.
Shutdown computer after burning: Activate this option to automatically turn
off the computer after encoding and burning has been completed. You
could, for instance, start the encoding and burning process in the evening,
and then you don't have to wait for the process to finish to switch off your
computer.
Activate the burner's defect management option: If a certain section of the
disc is defective, then this will be recognized by the burner and labeled as
such. No content will be saved there as a result.
Burn standard video DVD onto same disc: On a WMV HD disc you can use
this option burn an additional normal DVD video onto disc. This ensures that
your discs can also be played back on standalone DVD players. See Multi
disc.
CD/DVD title: This is the title of the DVD as displayed as disc name on the
PC. The disc project name is displayed here by default.
Disk space
Disc type Storage media Menu Quality Length (optimal
quality)
DVD DVD Yes *** 98 min.
WMV HD CD/DVD Yes ***** 107 min./DVD
15 min./CD

Burn disc 221
www.magix.com
Blu-ray DiscTM
(view page
342)
Blu-ray DiscTM Yes ***** 110 min.
AVCHD (view
page 342)
DVD/Blu-ray
DiscTM
Yes ***** 30 min./DVD
160 min./Blu-ray
DiscTM
Multi Disc CD/DVD Yes **** 45 min./DVD
7 min./CD
MiniDVD (view
page 341)
CD Yes *** approx. 20 minutes
JPEG DISC CD/DVD No ***** This depends on the
original images and
the DVD player*
* The set duration for some DVD players may be determined by this table.
The amount of image material that can be put onto a CD or DVD depends
on the sizes of the picture files.
You may also use the menu templates from the category "TV Showtime
DVD" for the disc types MiniDVD and DVD. Each picture of a slideshow is
displayed fullscreen on its own menu page (without having to playback the
slideshow).
For the MPEG-2 encoder especially, which is used for SVCDs, DVDs, and
MiniDVDs (i.e. CD-ROMs written in DVD file format), it can be difficult to
supply reliable relating to the required memory space. If the "variable bit
rate" of the MPEG-2 encoder is activated, encoding will occur according to
the movements in the picture. The required memory depends on the film
material; an action film would need more memory than a drama, for
instance.
If you cannot save your disc project on a single blank CD, you will have to
divide it up into different sections.
Further information on MPEG compression and formats can be found in the
chapter "Attachment: video and data storage devices (view page 338)" of
the PDF manual.
Test series with variable encoder settings
If you would like to know how much memory space you require for various
encoder settings, you should run some simulations before burning.
So you don’t waste any blank CDs while testing, you should activate the
“Simulate first” option.
Then create, for example, a short (ca. 5 min.) disc project and simulate
burning in multiple cycles with various settings.

222 Burn disc
After every simulation you can access the created file on the hard disk to
check how large the file has become.
From the results, you can extrapolate how much disc space your disc
project will require. The memory requirements of a 5-minute disc project
would have to be multiplied by 20 in order to estimate the space required for
a 100-minute movie. You should also add buffer for the selection menu.
(view page 201)
Separate project onto multiple discs
Automatically: If the disc project requires more memory than is available on
the CD or DVD, a dialog will appear before burning asking whether the disc
project should be automatically segmented for multiple discs. Confirm this
by clicking “Yes”. The disc project will then be automatically divided into
individual disc projects and burned sequentially onto multiple discs. This is
the easiest method since everything is automatic, and all you have to do is
insert a new blank CD when required.
Manual
Case 1: If several movies do not fit onto a single disc...
In this case, switch back to the “Record” screen and delete as many movies
as is needed until the remaining movies fit onto the disc. You can create a
new disc project and load and burn the other movies afterwards.
Case 2: When a long film doesn’t fit onto a disc...
In this case, the movie has to be split into two or more parts that will be
burned separately onto disc.
Switch back to the "Edit" view and place the start marker to the position at
which you wish to divide the movie. In the "Edit" menu, select "Cut ->
Separate movie".
All passages behind the start marker will be
removed from the movie and made into a
smaller movie. Both movies can be moved
using the "Select to edit" menu in the arranger.
Save both of them separately to your hard disk
(“Save movie” menu option, for example, as
“Part 1” and “Part 2”).
Remove one of the two movies (for example, "Part 2") from the disc project
("Manage movies -> Remove movie (view page 281)" menu option).
Switch to the "Burn" interface and burn the first film ("Part 1") to CD or
DVD.
www.magix.com

Burn disc 223
www.magix.com
Create a new disc project (“New” button), switch to the “Record” view and
load it into the second film (“Part 2”).
Switch to the “Burn” interface and burn the second movie to CD or DVD.
Encoder settings
Use the "Encoder settings..." button to access the selection dialog to specify
the properties of the MPEG encoder (memory requirements, quality, and
duration of the MPEG conversion
Preset: This features useful settings for the selected disc type. Here are
several sample DVD presets:
Long-play video DVD DVD with extra-long playing time. The bit rate is
reduced, which compromises quality.
Long-play music DVD DVD with extra-long playtime for music. The bit rate
for the soundtrack remains at the highest quality
level.
Standard DVD Normal DVD
Widescreen DVD Normal DVD in 16:9 format
Note: NTSC (USA and Japan) or PAL (Europe) may be selected for all
settings.
Bit rate: The bit rate determines the memory required for the completed
video. The higher the bit rate, the larger the file, and the shorter the
maximum playing time of the movie that fits on a disc.
Adjust bit rate: The expected file size of the finished video is estimated,
depending on the set bit rate. If the movie does not fit onto the disc, the bit
rate is corrected accordingly.
Quality: Specifies the quality of the encoding process. The higher the
quality, the better the finished video will look; however, encoding will take
considerably longer.
Smart rendering: Smart rendering considerably reduces the load of encoding
processing for MPEG files. During the production of MPEG files, only those
parts of the movie that were changed in the program are re-encoded.
Please note: The MPEG files contained in the movie must have the same
format, i.e. the bit rates (variable or constant), audio formats, image
resolutions and video formats must match.
Anti-interlace filter: This option should only be activated for playback on a TV
screen, since it is intended to reduce line flickering.
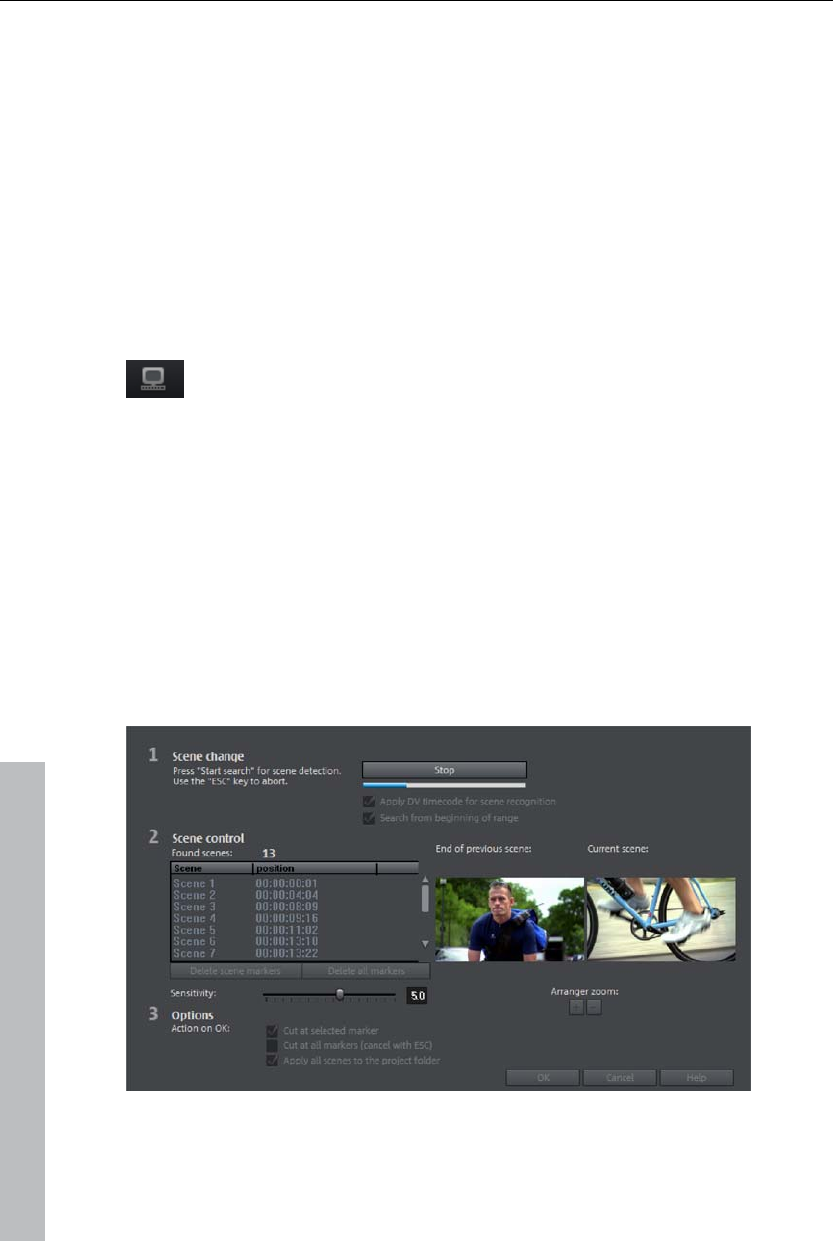
224 Special functions and wizards
3D mode: In case your project features 3D material that has been edited
with Stereo 3D, a mode may be selected here for burning the material to
disc. 3D is switched on as a standard.
To return to the standard settings, press the Reset button.
The "Advanced" button opens the "Advanced settings" dialog. You can
adjust all the fine settings for the MPEG encoder here. Details about the
"MPEG encoder settings (view page 360)" are available in the PDF manual
and in the help file.
Create PC show
Click this button and a presentation optimized for your PC will be
created.
First, enter a path where the PC show will be found again later, and click
"OK".
Special functions and wizards
In this chapter, we will introduce you to some of the especially useful
special functions.
Automatic scene recognition
Automatic scene recognition can be opened via the "Effects" menu. The
scene recognition function analyzes the film for scene transitions and scans
for drastic changes in the brightness and color distribution within the picture.
www.magix.com

Special functions and wizards 225
www.magix.com
Automatically created timestamps from digital video devices (the points in
time at which the device was turned on and off) are also marked as scenes.
First, select "Start" from the "Scene change" box. The search for possible
scene transitions will begin. If you have a large amount of material, then
this may take a while, but the image analysis has to be done just once for
each recording. The results are saved together with the video file.
If the scene recognition is performed again with the same source material,
then the scene transitions found are immediately displayed. If you are still
not happy with the resulting scene partitioning simply repeat and correct
where necessary.
All found scene transitions in the list can be checked in the dialog. Every
scene marker can be selected or deleted. Select a scene transition from the
list of found scene transitions and use the preview images to check whether
the found transition is really a scene change or not.
Tip: This option is helpful, for example, if a camera flash was captured in the
source footage. The flash from the camera would cause a sudden
brightness modification even though there was no actual scene change.
The preview always displays the end of the previous scene and the
beginning of the new scene. If the images do not differ except for the
brightness, then the scene may have been falsely recognized. In this case
select "Delete scene marker".
Via the zoom +/- buttons you can enlarge the part of the arranger where the
selected scene begins or previous scene ended.
You can use the "Sensitivity" controller to change the sensitivity of the scene
recognition to detect different scene changes, depending on the settings.
"Action on OK" lets you specify whether the movie should be cut at the
selected scene transition or at all scene transitions and whether the found
scenes should be saved as takes.
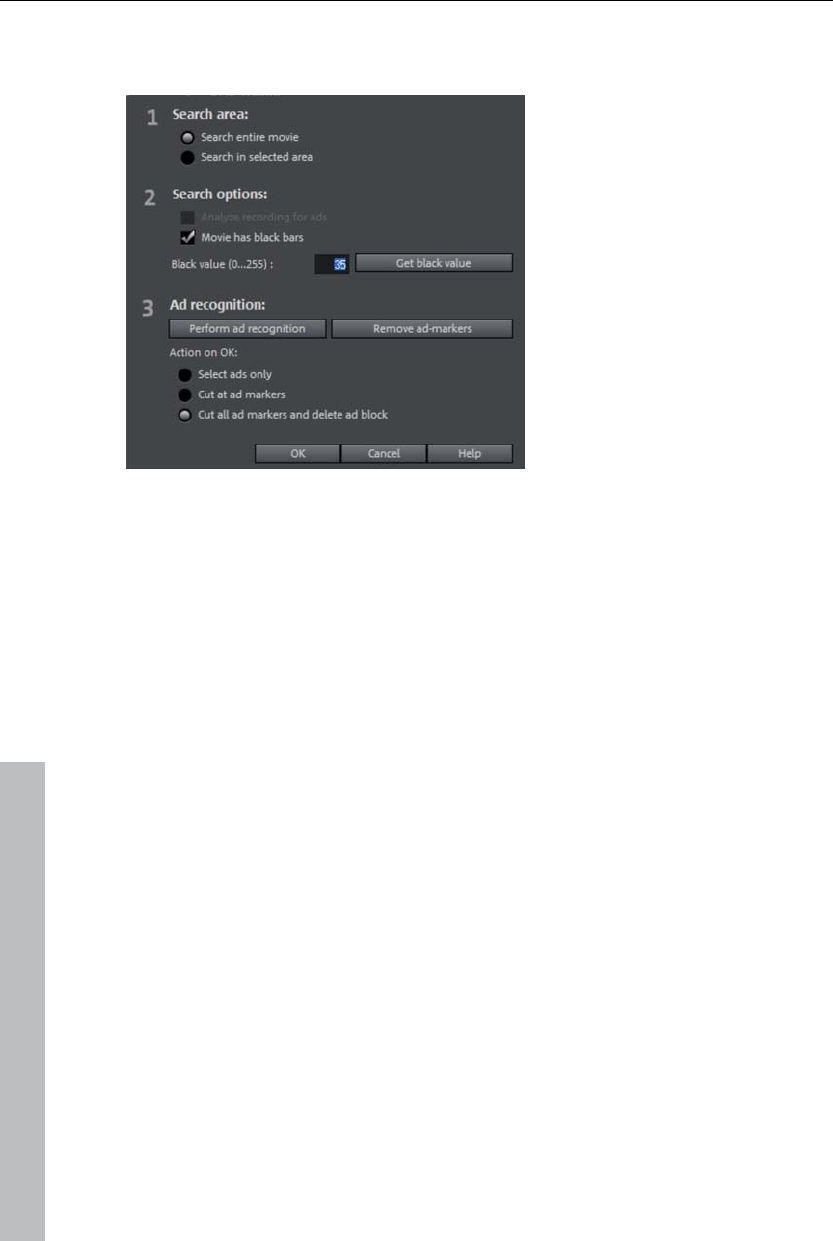
226 Special functions and wizards
Search for and remove ads
This wizard in the context menu for video objects may be used to locate and
remove advertising blocks in the recorded material automatically.
The principle: The program searches for typical signs of a beginning and
end of an ad break, these sections are selected and cut out, so that the ad
is removed. The ad-remover works particularly well for movies in 16:9
format. These movies in wide screen format have a black stripe at the top
and bottom of the screen. When the ads start, these stripes often disappear.
MAGIX Video Pro X3 searches for and removes those sections. "Get black
values" allows you to click on the black stripes in the video monitor with the
eyedropper tool to determine the black value for improved detection.
Another general sign of advertising is increased volume.
The dialog enables you to select whether you simply want to mark
commercial breaks initially or delete them immediately. Additional search
and display options are also available.
www.magix.com
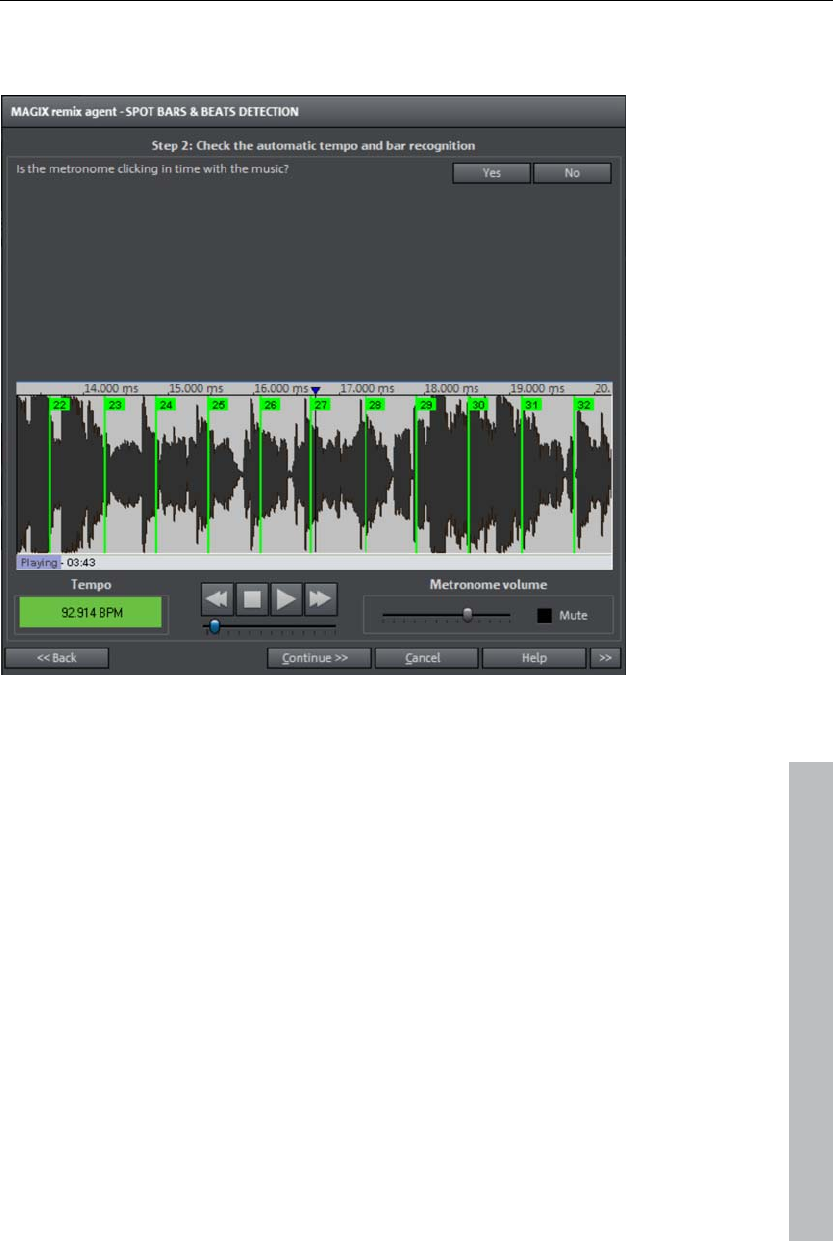
Special functions and wizards 227
Tempo and beat recognition
www.magix.com
The Tempo and beat recognition in MAGIX Video Pro X3 is a special tool for
video clips. This analyzes the rhythm of an existing piece of music. The
basis of this is the tempo, which is measured in BPM (= beats per minute).
After the BPM value of the music has been determined, the piece may be
separated into equal section (remix objects). The resulting objects, which
are exactly one beat long, will remain grouped so that the overall piece is
not unintentionally "rearranged". This does not hinder you from doing this,
however; simply click "Ungroup" to do this.
The resulting object borders are important for editing. Because all objects
may snap to each other on their edges, videos may be arranged to
transition exactly to the beat of the music: the points along the track where
videos lock together are exactly in time with the music.
Prerequisites for using the beat recognition assistant
Songs must be longer than 15 seconds
Songs must be "rhythmic" (i.e. they can be danced to)
Songs must be in stereo format

228 Special functions and wizards
www.magix.com
Preparation - Setting the start marker and object end
Before opening the Auto Remix Assistant, you should set the start marker at
the position in the song object in the arranger where you want detection to
start. If the song contains a long intro without beats, set the start marker
after the intro. As a rule of thumb, the Auto Remix Assistant should always
be "fed" dance music.
The start marker should be set before a quarter note beat or, better still,
briefly before a beat at the start of a bar.
If the start marker lies before the song object, the object is examined from
the beginning.
If detection is not performed by the end of the song, the object can be
shortened accordingly with the object handle at the end of the object.
Automatic Tempo Recognition
When the Auto Remix Assistant is launched, the selected song object is
analyzed and played back. A metronome begins to click according to the
result and lines visualize the positions of the quarter notes found in the
wave-shaped display.
The following cases are differentiated:
Position of the start of a measure (the one): red line.
Position of the other quarter notes (the two, three, and four): green lines.
Reliably recognized positions: thick lines.
Unreliably recognized positions: thin lines.
When tapped, blue lines appear.
If the tact and tempo information is already present, points are indicated
above the display at the appropriate positions. The metronome volume can
be regulated below and to the left of the wave-shaped display. To the right,
the BPM value is indicated. If a valid BPM value was found, it is displayed in
green.
If the metronome clicks in time with the music, the measure start is correct.
If not, you can correct the tempo manually.
Setting the manual and and Onbeat/Offbeat
If the result is incorrect, you can help the Auto Remix Assistant with a few
mouse clicks on the correction buttons.
There are two possibilities:
On the one hand, the "Tempo correction" list offers alternative BPM
numbers which could also fit with the music. The adjustable BPM values are

Special functions and wizards 229
www.magix.com
detected automatically – the total BPM can therefore deviate from song to
song.
For more difficult audio material, we recommend using the "Tapping input"
mode. Either the "T" key must be pressed or the "Tap tempo" button must
be clicked with the mouse in time with the music. With repeated tapping of
the tempo correction button, one should keep an eye on the color in the
BPM display. In the "unlocked" condition (red), the tapping is not in time
with the music. One should tap until the "locked" condition is displayed.
After a short time, you will hear if the result is correct via the metronome.
Subsequently, offbeat correction takes place as required. If the detected
quarter note beats lie around the length of an eighth note (transferred
behind the real positions of the quarter note beats), one or more alternatives
can be selected from the onbeat/offbeat correction list.
Determining the start of a measure
Next, the starting point of the measure is corrected. The beat at the start of
the measure must always agree with the high tone of the metronome and/or
the red line in the wave-shaped display.
Corrections can be made by tapping; If the start of the measure can be be
heard, tap with the mouse or press the "T" key. Alternatively, you can also
select how many quarter notes the "one" is to be pushed to back.
If the starting marker was set briefly before the first beat of a measure, this
correction is not necessary.
Note: With all corrections, the metronome and visualization react to the lines
in the wave-shaped display only after a short delay.
Using BPM and beat detection
Now you may select one of the actions to be adapted to the arrangement
song (or vice versa) or cut up the songs at the ends of a measure.
Save only Tempo & Beat information
Only wave file data is stored. This makes sense if some manual post-
correction is required for determining beat/tempo.
When the data is stored, tempo & beat regulation can be released for future
tempo adjustments or to create object remixes.

230 Special functions and wizards
www.magix.com
Tempo adjustment
Setting the object tempo to the arrangement tempo
This fits the object length to the existing arrangement. Three different
procedures are possible: timestretching, resampling, or audio quantization.
Timestretching keeps the pitch of the song constant, but sometimes the
sound quality can suffer.
Resampling changes the pitch (similar to changing the speed of a record
player), and retains the sound quality of the song as much as is possible.
During audio quantization, the audio file takes the tempo adjustments into
consideration as if the first remix object (see below) were created and
combined immediately into a new audio file. If the recognition is uncertain,
extreme tempo fluctuation may result. It is particularly important to set the
starting marker so that the tempo is recognized definitely. The advantage of
audio quantization is that small tempo fluctuations in the music balance out.
The start of the measure always agrees with the start of the arrangement
measure and never plays out of time.
Setting the arrangement tempo to the object tempo
The arrangement adopts the detected BPM value. If you would like to use
the cut-up song as the basis for a new composition (e.g. for remixes), then
this option should be active.
Creating remix objects
The song is cut by beat into individual objects. Some applications may
include:
To produce loops from complete songs which can then be used with other
material. Most importantly, not all remix objects are suitable as loops.
Ideally, less complex material should be used, e.g. drums from an intro.
To remix songs, thus changing the sequence of the objects, cutting or
doubling beats or to enrich the song with other loops or synth objects.
To mix two songs: If percussion and tempo fit perfectly, can you blend the
songs without "side effects"?
This option can be activated later from the "Object" menu, provided that the
tempo data is stored.
The "Audio quantization" option: Audio quantization fits new objects exactly in
time with the arrangement.
With homemade music, tempo fluctuations are common, and therefore
different measure lengths may result. Nevertheless, so that the objects fit
into the rigid timing pattern of the VIPs, the time processor is activated
automatically and object timestretching is used to correct the different
lengths.

Special functions and wizards 231
www.magix.com
Setting resampling for small corrections: If the necessary corrections are very
small, better quality resampling can be used instead of timestretching.
Afterwards, you should not change the master tempo any longer, since
definite pitch changes may arise.
Remix objects in "Loop" mode: New objects are set in "Loop" mode. When
extending the object with the right object mouse handle, the original length
of the object is played again and again.
Setting the arrangement tempo to the object tempo: (see above)
Note: Time correction assigned to objects can be subsequently cancelled if
the time processor is called up and edited ("Timestretch/Resample object",
or double click on the object to open the FX racks associated with the time
processor).
Cancel: The dialog is closed.
Problems and Remedies regarding the Auto Remix Assistant
Problem: The playback stutters, the metronome is suspended, the computer
is overloaded... (on older computers.)
Remedy: We recommend changing to wave drivers ("P" key, "Playback
parameter" dialog) instead of DirectSound.
Problem: The metronome does not work and there are no lines on the the
wave-shaped display.
Probable cause: The material does not contain beats or the song contains a
passage without beats.
Remedy: The song should be limited in such a way that only rhythmic
passages are contained.
Possible 2nd reason: Inaccurate tapping or a false BPM value has been
entered.
Remedy: Try the tempo correction buttons or tap until the "locked" condition
is attained.
Problem: The metronome sounds inaccurately or is jerky, the lines in the
wave-shaped display are irregular and thinly drawn.
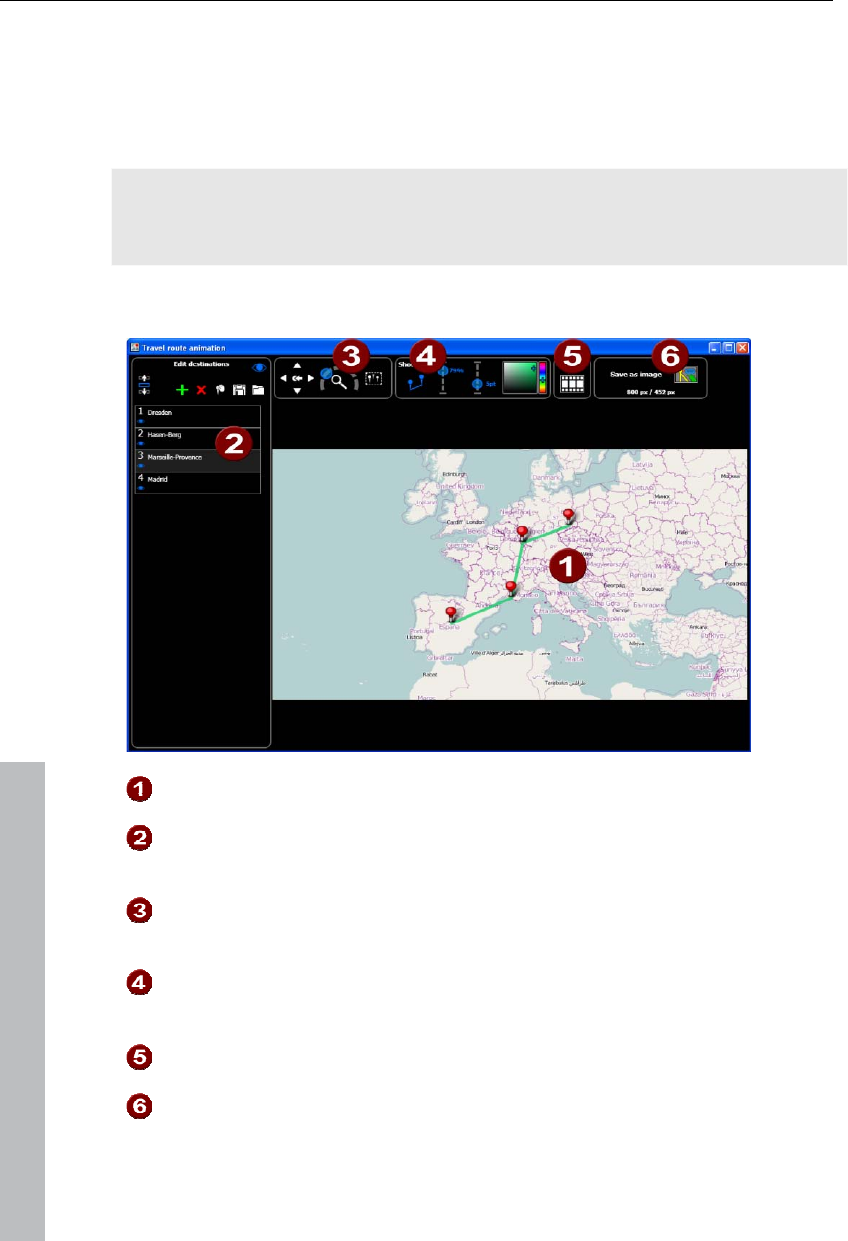
232 Special functions and wizards
Travel route animation
Open "Edit -> Wizards -> Travel route animation" to import and edit travel
routes in MAGIX Video Pro X3.
Note: In order to be able to use current map data, maps are fetched by the
travel route animation directly from the Internet. This requires an Internet
connection.
After opening the function, you will see the screen pictured here:
Map: Displays map material from openstreetmap.com.
Selected locations: All locations, searched using geonames.org or
selected manually on the map, will be shown on the list and marked
using pins.
Map section + zoom: The map may be moved by pressing the arrows.
Zoom enables you to zoom into the current section (+) to view more
details or to zoom out (-) for a better overview.
Show lines: If at least 2 locations are marked on the map, then this
function will be available for linking the locations. The line color and
thickness may be changed.
Animation: Create animations of your trip route and save them as a
video.
Save as image: The current map section may be saved as an image in
the format PNG, BMP, JPG, or TIFF.
www.magix.com
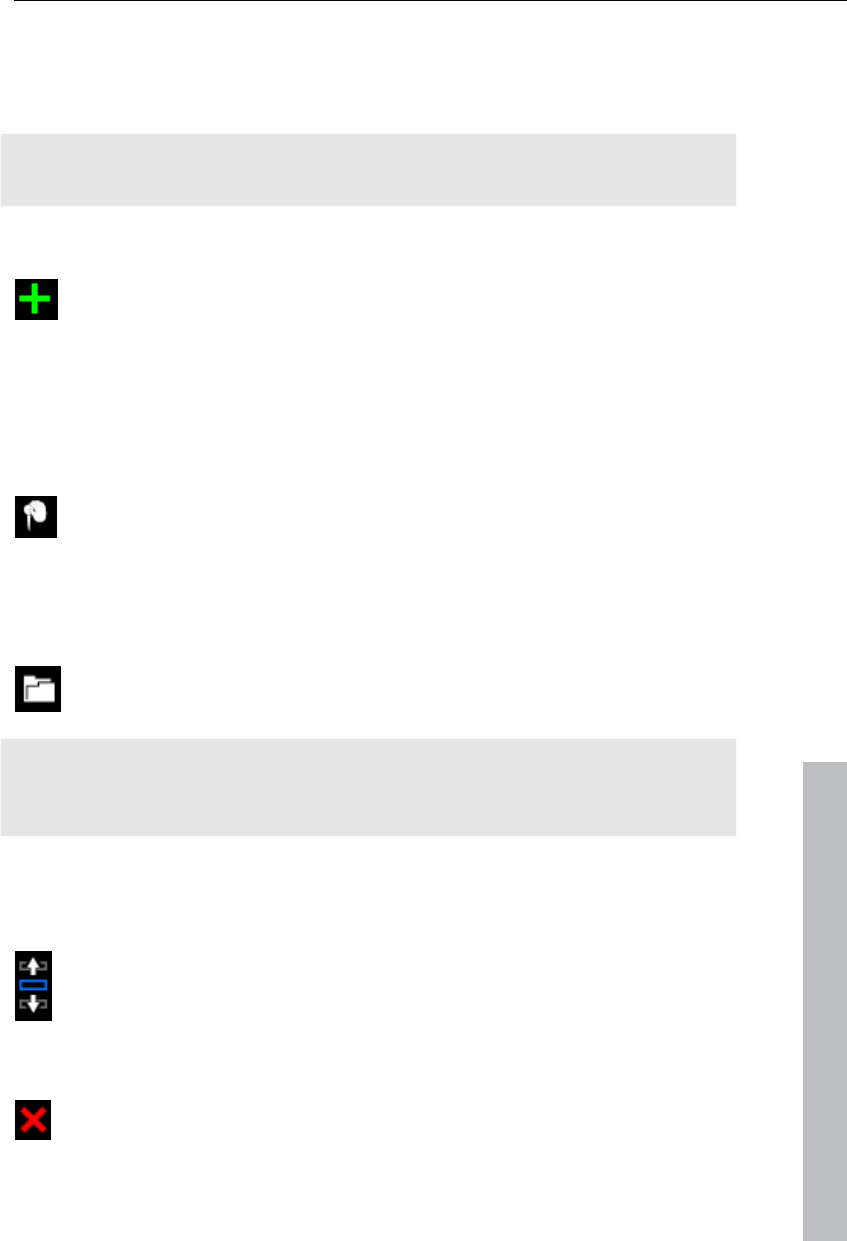
Special functions and wizards 233
Select locations in the map
There are several options for selecting locations on the map for creating a
list.
Note: If you would like to view details about a location, simply zoom via "+"
on the number block into the detail view.
Search and select locations:
Open "Edit locations" via the "+" button to add an entry. This will be
marked green behind existing locations.
Enter the name of the desired location. A list with possible matches
will open.
Click the desired location to add it; the marker will be added to the
map.
Manual tagging - search for locations and enter them by hand
Navigate on the map to the desired location.
Click "Edit destinations" to activate manually entered locations, or use
the keyboard shortcut "M".
Click the target destination. A list entry and a marker will be added.
Import GPX files
If you have created a route with a GPS device and saved it as a GPX
file, you can import it and show the route on the map.
www.magix.com
Hint: Depending on the length of the route, it can take some time for the file
to be imported and displayed. If you hide the pins that point to selected
locations, the map will load faster.
Move and delete selected locations
Move locations inside the list:
The sequence of the locations in the list matches the sequence in the
animation later. Change the sequence by selecting a location and then
pressing the arrow key up or arrow key down.
Remove selected locations from list:
To delete a location from the list, select the list entry and click this
button.
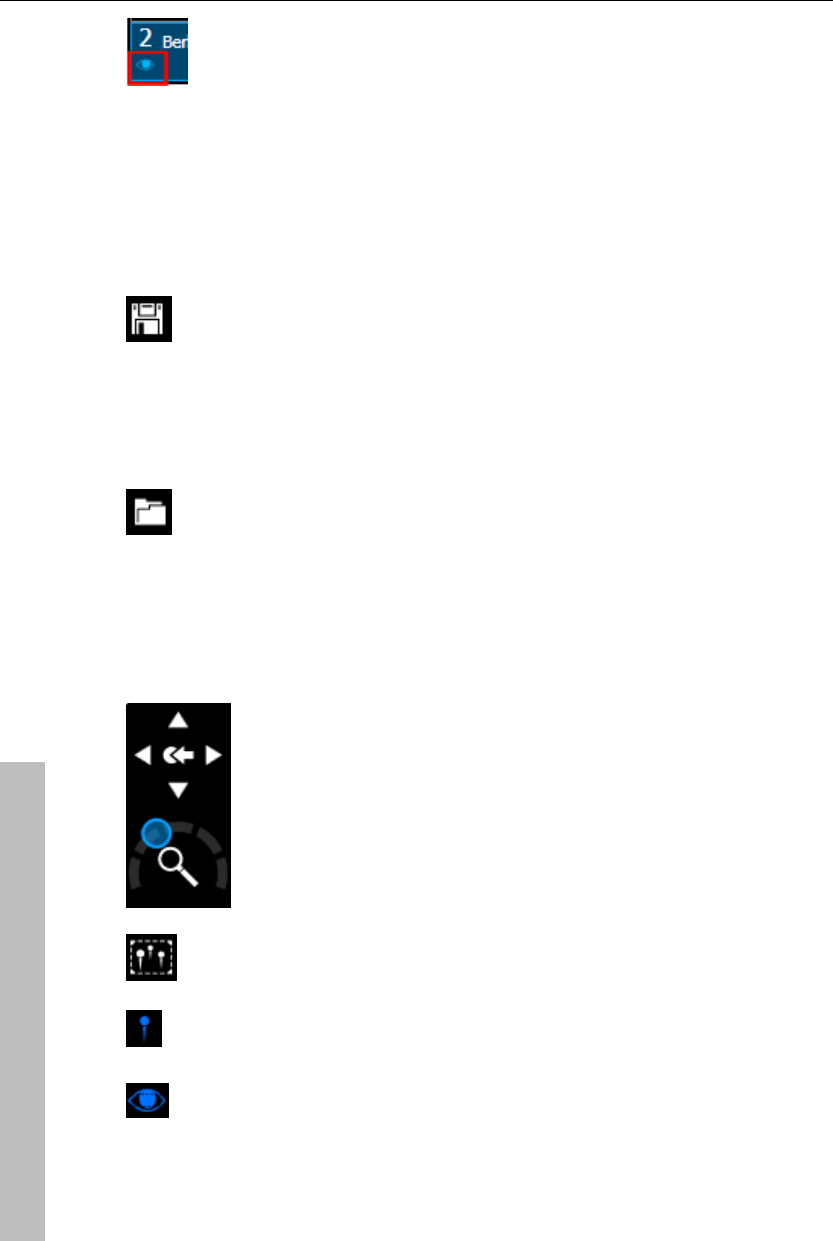
234 Special functions and wizards
Click the eye below the location entry to hide a location, and click the
eye again to show the location. Click on the eye again to display the
location again.
Save and load routes
The entire list of marked locations may be saved to load it later - without
having to search for and select all of the locations again.
Save list:
Click "Edit destinations" via this button or use the keyboard shortcut
"Ctrl + S".
Enter the save location and name of the location list in the dialog that
appears.
Click "Save" to back up the list and quit the dialog.
Open list:
To load a saved location list, click "Edit destinations" or use the
keyboard shortcut "Ctrl + O".
Navigate to the save location and select the location list in the dialog
that appears.
Click "Open" to close the dialog and the list will appear with the
corresponding locations.
Adjust map section
Use this button to move the map section upwards (north), ti the
right (east), downwards (south), or to the left (west).
The arrow keys on the keyboard may also be used to move.
Use this controller to zoom out of the map (left) or into it
(right). The keys "+" and "-" on the keyboard or the
mousewheel may also be used to zoom in and out.
If you would like to show all marked locations and reveal as much of
the map as possible, click this button and the map will be adjusted
accordingly.
If you would like to display only the route without the location
markers, click here and the pins will be hidden. A repeat click will
display them again.
If you want to, you can hide the list of locations to the left to show a
larger section of the map.
Another click on the eye symbol will show the list again.
www.magix.com
Special functions and wizards 235
Show lines (connect locations)
For two or more marked locations, the function "Show lines" will appear.
Use this function to connect the locations with a line on the map.
Click this symbol to show lines connecting selected locations.
The functions for line transparency, thickness, and color are to the
right.
Tip: The locations in the list may be moved in the list of the connecting
sequence should be changed. Simply drag the corresponding list entry with
the list and release the mouse button when you have placed the entry at the
correct location. Or use the arrow buttons below "Edit destinations".
Hide lines: To remove the lines, click the button "Show lines" again (the
button will turn white again).
Transparency and line thickness: Use the controller to
change the transparency (left controller) and the
thickness of the lines (right controller).
Line color: Set the color you like for the lines via the slider
and the color window.
www.magix.com
Tip: You can also create animation for the connecting line in the "Animation"
(view page 235) section and save it as a video.
Animation
For two or more marked locations, the function "Animation" will appear.
This enables you to display your travel route in motion and
even save it as a WMV format movie, e.g. to integrate it into
vacation movies or to send it.
Scroll map: Activate "Scroll map" and the map will move from location to
location when the animation is played back.
Soft animation: The animation starts slower, speeds up, and then slows
down before each location.
236 Special functions and wizards
Animate object: You can select an object to follow the trip route. Besides a
pre-selection of objects, e.g. a car or an airplane, you have the option of
loading your own subjects. Click the object selection on load object.
Animate line: The connecting line slowly connects all selected locations,
from the first to the last.. It is moving at the speed of an animated object.
Duration (seconds): You can adjust the duration of the animation however
you like, depending on the length of the route. Enter seconds into the filed
and test the results via the preview option to see if you like the animation.
Preview: Before you save an animation as a
video, test it to see if it looks the way you like by
clicking "Play".
Click this button and the animation will be saved
as a WMV video. Enter the save location and
name of the video in the dialog that appears.
Close: To leave the animation area, click "Close".
Create a picture of a map
You can create a picture from a section of a map (including location
markings), e.g. to print it.
Step 1: Zoom into the map until you have reached the desired level of detail.
Step 2: Click this button (shortcut "Ctrl + E") and
enter the save location and the name of the image
in the dialog that appears. You may also select
the format for the picture.
Note: This button indicates the height and width of the future image. These
values are adjusted as soon as window sizes are adjusted or when the
location list is shown.
Step 3: Click "Save" to create the image and close the dialog.
If you want to, you can hide the list of locations to the left to show a
larger section of the map.
Another click on the eye symbol will show the list again.
www.magix.com
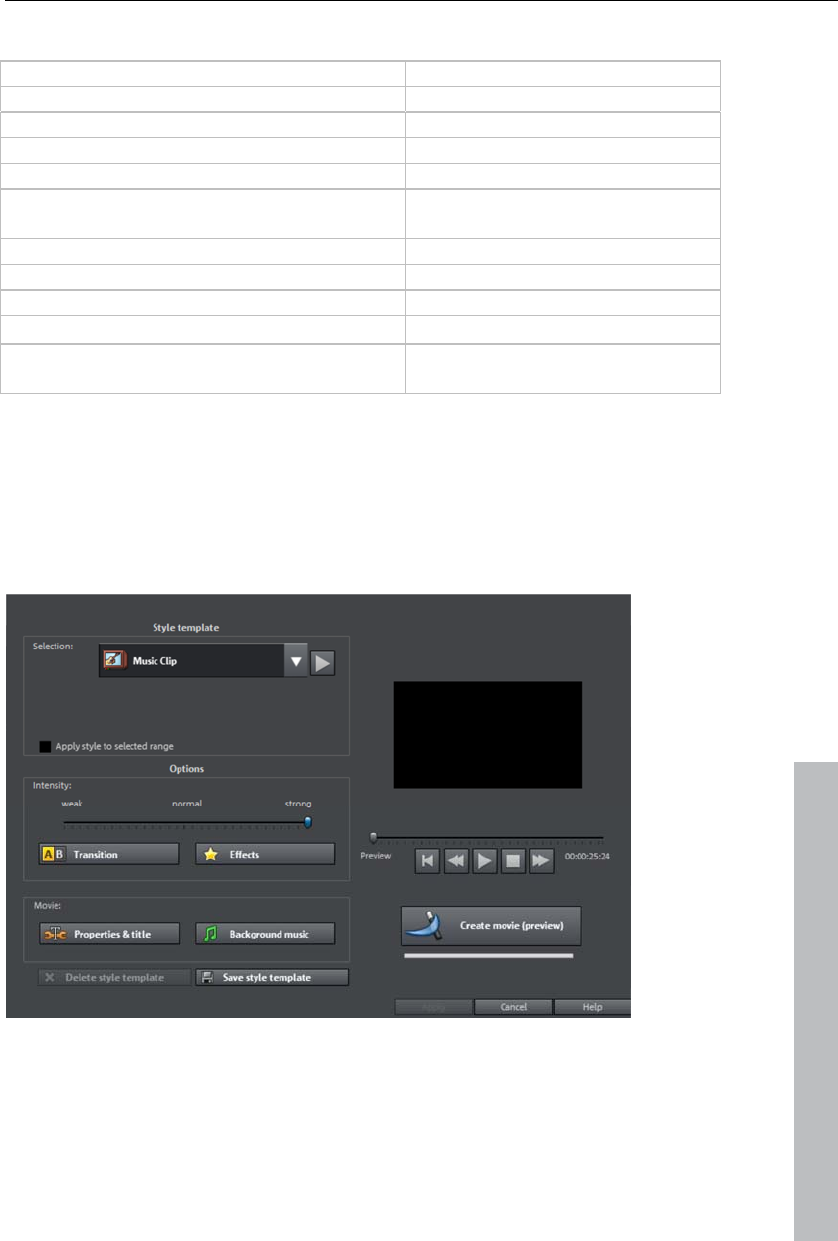
Special functions and wizards 237
Keyboard shortcuts
Manually marking locations "M"
Zoom into map "+" on the number block
Zoom out of map "-" on the number block
Save location list "Ctrl + S"
Load location list "Ctrl + O"
Save map section (with location markings)
as image
"Ctrl + E"
Move map section north (upwards) "Up arrow"
Move map section east (right) "Right arrow"
Move map section south (downwards) "Down arrow"
Move map section west (left) "Left arrow"
Cancel video export "Esc"
Slideshow Maker
Slideshow Maker is ideal for converting still images into moving pictures,
adding background music, and effects.
Open Slideshow Maker via "Edit -> Wizards".
www.magix.com
Style templates
Select a template that best matches your needs.

238 Special functions and wizards
www.magix.com
Intensity
Controls the portion of video and image objects that feature effects.
Transitions
The different sliders are used to set the portion of individual fade types.
3D / Other:
Fade duration: Set the length of the fades in seconds.
Random fades: The fades are set to random values.
Effects
The faders enable the respective effects types to be specified.
Random effects: The faders that control the amount of effects are set
randomly.
Treat special image formats intelligently: Panoramas and portrait photos can
be treated "intelligently". If this option is activated, then panoramas and
portraits will be treated with special effects adjusted to the format. These
effects can also be selected in the detail view.
If this option is selected, then these images will use the same effects as all
other images.
Details activates effects or fades in the corresponding category. The arrow
below the preview monitor plays a preview.
Properties & title
Film length
Resulting film length: This is an estimation of how long the film will be after
applying Slideshow Maker.
Available music: This is the complete length of the music that is currently
selected. Background music (view page 239) enables detailed settings for
the pieces of music to be used.
Adjust film length to the music: An attempt is made to adjust the length of
photo objects to the background music. If the film is too short the music will
be cut off. If the film is too long, the music will repeat.
Adjust music length to the film: Photo objects have a set length, and the
resulting film is filled with music. The music at the end of the movie is simply
faded out.

Special functions and wizards 239
www.magix.com
Including video objects
Process videos: If this option is set, then videos will be automatically
processed with effects and transitions.
Length: Settings may be made here about whether the original length of the
video should be maintained or if it should be shortened.
Opening and closing credits
Set the text for opening and closing credits here.
Text: Enter the corresponding text for opening and closing credits that
should be added by Slideshow Maker.
File: A title template, a video, or an image file may also be used.
Note: Titles created using Slideshow Maker may also be edited (view page
113) at any time.
Group associated images together
If this option is active, an attempt is made to detect associated events via
their date information and to separate them from each other optically.
Detection of individual events is based on the time span of these events to
achieve a sensible separation.
Begin group with black fade:A black fade is added between the different
events.
Begin group with title and black fade:A black fade is added between the
different events.A title is also faded in with a suitable duration, e.g.
1st/2nd/3rd day, provided the events take place over multiple days.
Begin group with title and picture:A black fade is added between the different
events.A title is also faded in with a suitable duration after the black fade,
e.g. 1st/2nd/3rd day, provided the events take place over multiple days.
Background music
Specify if and which music should be used for the background here.
Use background music: Adds background music.
Load file(s): A file selection dialog will open to choose a folder featuring
music; select one or multiple files.
Remove: The selected pieces of music are removed from the list and will not
be used.

240 Special functions and wizards
www.magix.com
Insert random: MAGIX Video Pro X3 selects random pieces of music from
the folder "Import -> My Media -> Slideshow music" in the Media Pool.
Preview: This button previews the selected piece of music.
Volume ratio: This slider controls the volume ratio between the original
sound and the background music.
Tip: Pieces of music in the first track are listed and used for the background
music, provided they are not removed.
Produce panorama pictures
This special function may be selected for highlighted photos under "Effects
> Video object effects > Create panorama". Using it, you can combine
several photos into a wide panorama photo. You don't need to create
exclusively "proper" panoramas; Let your imagination run wild and put
together anything you want to.
Tip: Optimize you photos beforehand, so that the transitions are not to be
seen in the finished panorama.
Select pictures for panorama
Load all necessary images into the film project as usual. The images that
should make up the panorama should be selected one after the other while
holding down the "Shift" key. Select the entry "Panorama photo" from the
context menu "Effects (view page 296) -> Video object effects".
Invert image sequence for panorama image
Sometimes photos are accidentally loaded in the wrong sequence or were
created from left to right. If you forgot to sort your photos correctly
beforehand, then simply click "Invert sequence".
Calculating the panorama image
If you click "Create", the panorama image will be processed. Depending on
the resolution and number of original images included, this may take some
time. The original photos are replaced in your slideshow with the panorama
image you've created, but the original files on the hard drive will remain
intact.
Hint: You can create a panorama image from a maximum of six images.
Click on "More options" for more information on the upgrade.

Special functions and wizards 241
Finished panorama (2 images)
Finished panorama from 2 images
Batch conversion
Batch conversion makes it is possible to convert multiple video files,
movies, objects, or whole projects into another format in just one step.
Open batch conversion
Batch conversion can be opened using different presets. A pre-selection
appears only if you have loaded a film or a project.
The following scenarios exist:
www.magix.com
Batch conversion has been opened from the context menu in the Media
Pool: The file selected in the Media Pool beforehand will be transferred to
the task list and can be converted to the available formats. In case of
projects which contain multiple movies, all movies will appear as individual
tasks.
Only one empty movie is open: A dialog opens additionally for batch
conversion, in which video files that have to be converted to other formats
can be selected and loaded.
A movie with video material and more than one object in the first track is
opened. A dialog opens, in which you can select which tasks should be
created for batch conversion.
- All scenes in the movie: All objects present in the 1st track will be
used as starting points for the video files to be exported. An
application for this could be that all scene beginnings of a movie
should be exported as bitmap files or a backup for a movie is to be
created as individual scenes.
- Multiple movies: The opened movie will be exported as a whole
video. Additional movies can be added to the list in the dialog.

242 Special functions and wizards
www.magix.com
Multiple movies with video material are open: The opened movie will be
exported as a complete video. This is especially useful for large projects
with a lot of individual movies, eliminating the need to export each one
individually.
Administration
Save and load your settings here. These include the list of files to be
exported and the export settings and names of all entries.
Caution! Batch conversion references the projects, movies, and the objects
contained therein directly. Keep in mind that when converting entire movies,
the source material must also be available. During conversion of individual
objects from movies, you have to make sure that the movie file has not been
changed between loading and saving.
Queued entries for batch conversion
This is the list of all objects that have to be converted into the indicated
format. Each task can have its own export settings.
Add files (not during conversion of individual objects from movies): Manually
add files, including video files and projects.
Remove selected: The marked tasks will be removed from the list.
Duplicate selected: If you would like to export tasks in multiple formats, you
can simply mark and duplicate them and assign individual export settings to
them.
Format settings for the selected conversion process
These are settings for the currently selected tasks, and multiple tasks can
be given a setting simultaneously. Select one or more tasks from the task
list.
Note on format setting for multiple tasks: If one of the marked tasks already
has an individual setting, its will be lost after another format is selected. To
prevent this, remove the selection for each task using Ctrl + mouse-click.
Set the target format in the flip menu. Windows Media Video format (*.wmv)
is the default.
Advanced settings: This opens the dialog for the advanced format settings.
This corresponds to the dialog for normal video export of a movie.

Options for using the final movie 243
Tip: If you give several tasks the same file name, the files created will be
documented intelligently. For example, you can easily convert and
simultaneously line up multiple movies that belong together thematically.
Shut down PC automatically after successful export
This option is especially useful when you export long movies and are using
an especially high-quality and resource-demanding export format. You can
leave the computer to work on the individual tasks and after finishing them it
will turn itself off.
Start batch conversion
Click on "Start conversion" to start the process. After ending conversion
processes, a list of all export processes with a message informing of its
success will appear.
Hint: During batch conversion, messages that appear during normal file
import will be for the most part suppressed. This is to enable the smoothest
conversion of all tasks. Therefore, please make sure that all files to be
converted or the project can be easily loaded before starting a batch
conversion.
Options for using the final movie
Create playable disc
www.magix.com
MAGIX Video Pro X3 allows discs to be burned for playback on
conventional playback devices (e.g. DVD players, Blu-ray players). For
more information, please see "Burning discs (view page 199)".
Export movie
A movie may be exported in different video formats via "File -> Export
movie". The options available vary according to the selected format.
Presets: These are typical settings for the selected format for the most
important applications.
Click "Save" to save your own settings and "Delete" to remove
them from the list.

244 Options for using the final movie
www.magix.com
Export settings: Specify general export parameters like resolution, aspect
ratio, and frame rate here. Select the most frequently used values from the
list fields; to set your own values click on the "..." button. The "Advanced"
button opens the specific settings for the selected video format. "File"
enables you to export your file to another folder than the preset one. The
option "Overwrite file without confirmation" option allows you to execute
multiple exports in the same file.
Other: "Other" also provides the option to switch off your computer
automatically after long encoding processes and to limit export to the
selected area (between the in and out point).
Output after export: Some formats allow special playback options (e.g. DV-
AVI on the camera or WMV export with output via Bluetooth to your mobile
phone).
Video as AVI
When exporting to AVI video, you may set and configure the size and frame
rate of the AVI video and the compression codec for audio (audio
compression) and video. Please see the general information about AVI
video formats (view page 339) as well.
Shortcut: "Ctrl + Alt + A"
Video as DV-AVI
This option exports the video as a DV encoded AVI. You will be asked for
which video standard you want to export DV data. PAL (Europe) or NTSC
(USA/Japan). The arrangement can be easily transferred to the Digicam via
the FireWire interface.
The window will provide further information on all available options. You can
access it via the button "Advanced..." in the "Export" dialog.
Keyboard shortcut: Alt + B
Video as MPEG video
MPEG stands for "Motion Picture Experts Group" and is a high-performance
compression format for audio and video files.
Details on the settings of the MPEG encoder can be found in the "MPEG
encoder settings" appendix.
Keyboard shortcut: Alt + C

Options for using the final movie 245
www.magix.com
MAGIX video export
Exports the movie in MAGIX video format. This format is used for video
recording by MAGIX video software and is optimized for digitally edited
high-quality video material.
Keyboard shortcut: Alt + D
Video as Quicktime Movie
Exports the movie in QuickTime movie format. This enables streaming
playback of audio and video files over the Internet.
As with RealMedia export, appropriate adjustments can also be made for
video site, frame rate, and codec settings. However, the export dialog does
not permit you to add commentary to the video.
For QuickTime files (*.mov) you have to install the QuickTime library.
Keyboard shortcut: Ctrl + E
Uncompressed movie
When exporting an uncompressed AVI video file you can adjust the size and
frame rate of the AVI video you wish to create. The video material will not
be compressed by a codec.
Note: This will create very large files!
Shortcut: "Ctrl + Alt + U"
Video as MotionJPEG AVI
Opens the export dialog for AVI video in Motion JPEG format. This format is
supported by digital picture frames, for example.
Shortcut: "Ctrl + Alt + O"
Movie as a series of individual frames
This option exports the video as a sequence of single frames in bitmap
format. This means a graphic file will be created for every frame of the
video. The image count may be determined in the export dialog under
"Frame rate".
Shortcut: "Ctrl + Alt + E"

246 Options for using the final movie
www.magix.com
Windows Media Export
Exports the arrangement in Windows Media format. This is a universal
audio/video format from Microsoft. The setting options in the Advanced
dialog are correspondingly complex.
Manual configuration
Audio/Video codec: Various codecs corresponding to the many versions of
Windows Media (7, 8, 9) are possible. If playback compatibility problems
arise, try an older codec with a lower version number.
Bit rate mode: Constant and variable bit rate modes are possible; however,
most devices and streaming applications require a constant bit rate. For
VBR two-pass modes, the movie is compressed in two passes for optimal
use of the bandwidth required for highly-compressed movies on the Internet.
Bit rate/quality/audio format: The bit rate substantially determines the display
and audio quality. The higher this is, the better your videos will look and the
larger the files and the required encoding time will be. For variable bit rates,
the bit rate is adapted dynamically to the requirements of the corresponding
picture or sound material. Here, either the quality value of between 1-100
can be set or, for two-pass encoding, an average or maximum bit rate. For
audio, the bit rate is set additionally by the audio format.
Import from system profile (export type): For the most used methods (other
than for playback on mobile devices; for this you should use the supplied
presets), e.g. Internet streaming, Microsoft provides a diverse selection of
system profiles. If you have the Windows Media Encoder 9 installed
(available from Microsoft as a free download), then you can edit the profiles
or create your own. These can be loaded by pressing the "Import from profile
file" button.
Go to Clip info to insert title, author name, copyright details, and a
description.
Keyboard shortcut: Alt + F
Video as MPEG-4 video
MPEG-4 is the most advanced video format available at the moment. Unlike
other formats, this provides very high-quality pictures at the same file size.
The presets list is correspondingly long. We recommend looking through
this list for settings for each application and corresponding device.
MPEG-4 refers to a highly complex "academic" standard that operates and
is supported variably according to make. To go into detail on these
differences and parameters would be beyond the scope of this
documentation. For this reason, indications, along with the operational

Options for using the final movie 247
www.magix.com
manual of your device, are given that should help create executable MPEG-
4 files. For more experimental users, the complete setup options of the
MPEG-4 codec can be found behind the "Advanced settings..." buttons.
Video/audio: MPEG-4 and the newer MPEG-4 H.264 are currently available,
and these are used with new devices especially. MPEG-4 video may be
combined with AAC or AMR sound (the latter is mainly for mobile
telephones). The combination of MPEG-4 H.264/AAC is more seldom
applicable (Apple iPod Video). MPEG-4 H.264 featuring AMR will almost
never occur.
Multiplexer: This features so-called container formats and special options for
Apple iPod, iPhone, and Sony PSP. MPEG-4 is usually used as an output
format, while mobile phones (but not iPhone) mostly use 3GP.
For more information about MPEG-4 encoder read the "MPEG-4 encoder
settings (view page 346)" chapter.
Shortcut: "Ctrl + Alt + G"
Audio as MP3
Note: MP3 export requires Windows Media Player version 10 and up.
The MP3 encoder cannot be used as a codec for the AVI audio file audio
tracks.
Options
The "Options" section allows the format and the compression level for the
audio file to be set.
Bit rate: "Bit rate" selection specifies the compression level: the higher the
bit rate, the higher the quality of the exported audio file will be. On the other
hand, the bit rate also determines the final file size: the smaller the bit rate,
the smaller the files will be.
Mono/stereo/5.1 Surround: Most mobile devices have only one loudspeaker.
To save on memory, you may export in mono for these devices. In "5.1
Surround" mode, you can also export in MP3 Surround. Read "Mixer in
Surround mode" for more about this.
Normalize: This function should always be activated. It guarantees that the
music is not too loud/overmodulated or too quiet.

248 Options for using the final movie
www.magix.com
Transfer format:
Specify here whether the created file should be transferred via device
connected via Bluetooth or via email.
Audio as wave
The movie's audio track is exported in the wave (*.wav) audio format.
Shortcut: "Ctrl + Alt + W"
Export as transition...
Please see "Creating custom alpha transitions"
Single frame as BMP
Exports the image at the position of the start marker and displayed on the
video screen as a BMP file.
Keyboard shortcut: Alt + M
Single frame as JPG
Exports the picture located at the current start marker and displayed in the
video monitor as a JPG file.
Keyboard shortcut: Alt + N
Animated GIF
The video will be exported as an animated GIF file (also called "AniGIF).
This file format is supported by many mobile phones.
Export movie information as EDL
Exports the current movie in a Samplitude-compatible EDL format. This
export is mainly intended for transferring audio files to Samplitude/Sequoia,
since the program cannot process all of the video formats MAGIX Video Pro
X3 can manage. Only object cuts, tracks, pans, and volume (with curves)
are transferred, since the EDL format only saves this information in a limited
manner.
Items that are not transferred: All effects, Surround positions, video
transitions, markers (chapter markers, scene markers).
The basic audio and video files will not be exported. They will either be
loaded by the EDL-importing program automatically (if they are available in
the same folder of the EDL file) or requested during importing.
Options for using the final movie 249
The following is a recommended approach for using an editing list in EDL
format:
Save the media you use beforehand in a folder (e.g. via "File -> Backup
copy -> Copy film and media to folder".
Export your film as an EDL editing list and add the EDL file in the same
folder as the media.
Load the EDL file into the importing program (e.g. Sequoia). The EDL file
provides the correct positioning of the individual media. After editing, you
can export the audio track as a WAV file, e.g. to import it again into MAGIX
Video Pro X3 to replace existing audio objects.
Note: Cut lists may also be imported from external programs. Select the
menu item "File -> Import cut list (EDL)" to do this.
Shortcut: Alt + D
Output audio/video
www.magix.com
This window lets you transfer your finished video onto external devices.
Besides the Camcorder options for digital camcorders (DV/HDV) and VHS
recorder for playing analog video for recording onto digital camcorders and
analog VCRs includes many options for further players such as mobile
video players, Smartphones, PDAs, or games consoles.
Video playback via TV output
Video or graphics cards with TV outputs allow you to transfer videos directly
to external analog video recorders. The arrangement must be displayed in
fullscreen mode and recorded by the external device. Make sure that the TV
output in the Windows Control Panel (in "Display") is active.

250 Options for using the final movie
www.magix.com
Warning: For many graphic cards, the TV output can only be activated when
a television or video recorder is connected before turning on the computer!
For the best video monitor quality via TV output, select "Overlay" mode.
When in doubt, make sure that "Overlay" mode is selected as the video
mode in the program settings ("File -> Program settings -> Display
options").
You can play the video directly from the arrangement. Errors may result if
the processor is overloaded by real-time calculations of video effects and
transitions.
If direct playback doesn't work without errors, open the menu item "Output
video" and select "VCR -> Render and output in fullscreen". All tracks and
effects are then combined as a single file. The file will be played back after
this analysis.
If you would like to play a finished movie several times, export it as an AVI
file and reload it into a new movie! It should then be possible to play the file
directly without constant rendering.
Playing videos on digital devices
The digital output always consists of two processes:
1. Exporting, i.e. compiling all tracks, video, music, effects, transitions, and
titles into one single video file. This video file is created in the format
required by the target device and then temporarily saved to your
computer's hard disk.
2. Output: In this case the created video file is transferred to the mobile
device or to the camera. The data is either written to the device via
FireWire as a removable device if connected to the USB port or
transferred by Bluetooth or infrared.
Both processes are normally performed together. However, you can only
export vie "File -> Export movie" or export via the option "Output file" in the
dialog "Output audio/video".
The Settings button opens the "Export" dialog (view page 243) of the file
format for your selected device.
Output DV/HDV
For digital output please select "File" > "Output audio/video" and then select
Camcorder in the device menu. For DV cameras you can select the device
DV camera for HDV camcorder HDV1 or HDV 2 Camcorder.
With Settings you can open the respective export settings dialog (DV-AVI
export for DV camcorder, MPEG export for HDV camcorder). For most
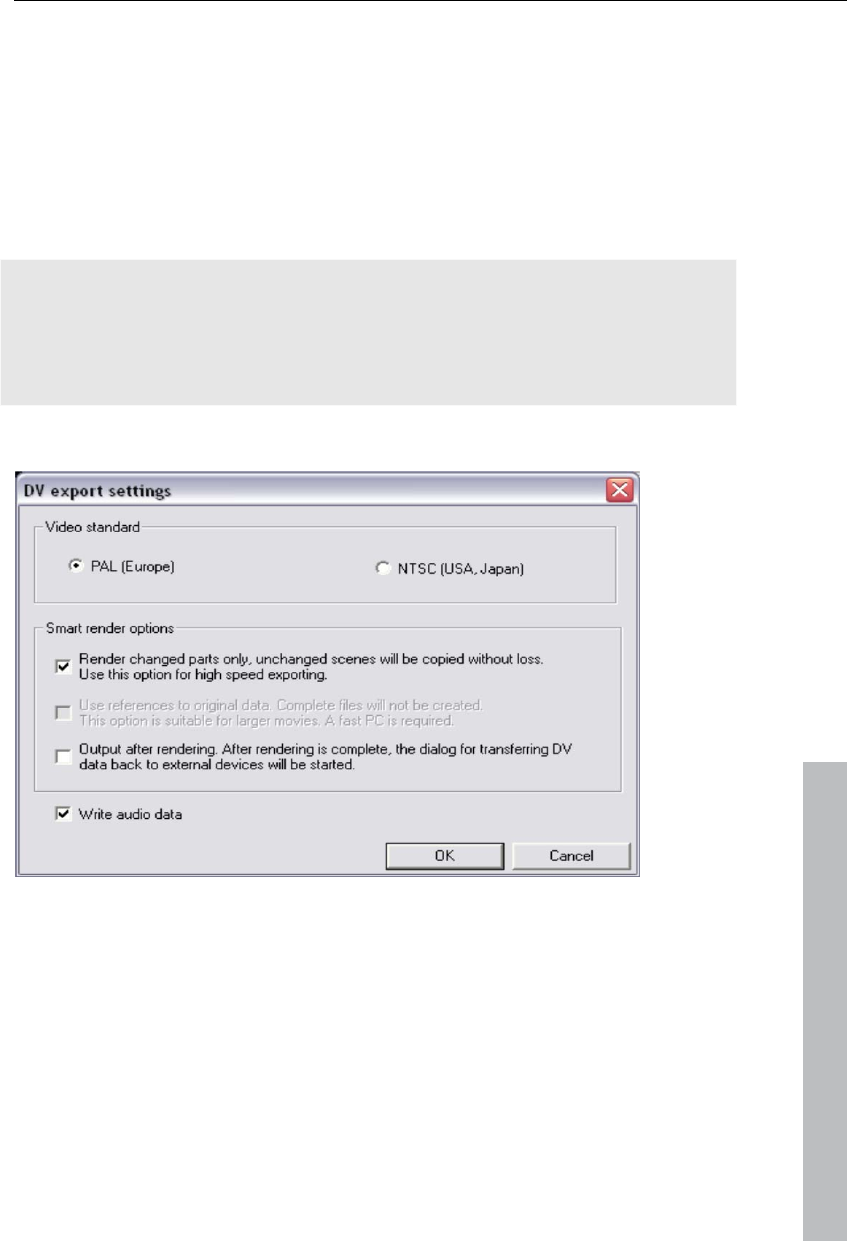
Options for using the final movie 251
applications you should use the settings defined here. Advanced takes you
to the DV export settings (More Informationen can be found in the section
"DV export settings" on page 251).
Now connect your camera and follow the displayed instructions.
If you want to export a rendered (already edited) movie to DV, there’s no
need to render it again. Simply activate the “Play own DV file” option and
select your DV video from the “My audio video” directory.
Tip: Digital cameras that can digitally record via a PC connection are usually
more expensive. You may be able to reduce your purchase costs
considerably by buying a digital camera that cannot transfer digitally and
have the function activated by a camera specialist. You should enquire
about this option before making your purchase.
DV export settings
www.magix.com
PAL/NTSC: The PAL format is used in Europe, and the US and Japan use
NTSC. This option usually does not require changing.
Render changed parts...: Non-edited original files are simply copied into a
completed DV AVI. Normally, you have to decompress the DV data, add the
set effects calculations, and recompress it. If no effects processing is
pending, then these steps may not be necessary. This option can be
permanently activated.
Use references to original material...: Unedited original files are exported
directly to the device. Effects are rendered in real time. Use this option for

252 Options for using the final movie
www.magix.com
finished movies without edits and effects, since real-time effects processing
of DV data causes high processor loads that often result in output errors.
Transfer DV back to device after export...: Deactivate this option if you are
only rendering your movie but do not want to export it. You can export your
movie later by clicking "Export own DV file" from the "Export" dialog.
Export to mobile devices
Most devices require certain format settings (file format, resolution, bit rate,
picture repeat rate, etc.) to be able to play a video.
The menu is divided into various device classes (mobile phones, organizers
and PDAs, games consoles, and video players) to make it easier to select
your device. The last three selections are saved as favorites in the top part
of the device list if you have more than one device or want to present your
movies to your friends.
If your device is listed here, you won't have to worry about the format
settings, because the necessary settings of the export dialog (view page
243) are automatically customized to the target device. Simply select your
device, and then click the "OK" button - that's all.
Transfer with Bluetooth
Warning! The procedure described here refers to Windows XP with Service
Pack 2!
Dialogs may be different depending on the Bluetooth driver and operating
system version, or their order may vary (e.g. for password allocation) when
transferring to your mobile phone. However, the process is usually similar if
other drivers are used. Read more on this in the help file or the
corresponding chapters of your operating system's manual and Bluetooth
adapter.
If you own a Bluetooth device, you can export the movie straight to your
device. To do so, your device and your PC must both have Bluetooth
interfaces. If your system has a Bluetooth device, you can activate the
"Transfer via Bluetooth" option.
After converting the movie into the desired format, the Bluetooth file transfer
assistant opens.
The first time you try to transfer files to your device via Bluetooth, you have
to specify your device as the receiver in the dialog by clicking on
"Search...", selecting your device and then pressing "OK". The name of
your device in the Bluetooth network is specified in the Bluetooth settings of
the device. Check your device manual for this. Select your device and
confirm your choice by pressing "OK".
Now enter a password of your choice, which you will later have to confirm
on your device and click on the "Continue" button in the assistant. Since

Options for using the final movie 253
www.magix.com
connections between multiple Bluetooth devices can be set up
simultaneously in a room, the password serves to identify certain
connections as well as to safeguard your data.
The order may be the other way around, depending on the Bluetooth device
driver, i.e. the mobile phone will request a password which must be
confirmed on your PC. It's important that you use the same password in
each case.
You may be asked once again to enter the file name and path of the movie.
In this case, we recommend using a folder that you will be able to find
again quickly to export the file (e.g. "...My Files/My Videos").
Click the "Scan..." button, open the set up folder, and select your video file
by double clicking it. Now, in the wizard, click the "Continue" button.
Next, you may have to activate the reception of files on the device and re-
enter the password. Afterwards, the transfer of the videos will begin
automatically.
Once the transfer has been completed successfully, "1 new message" will
display on your device. Read more on how to save and play videos in the
corresponding device manual.
Warning! We only recommend activating data reception via Bluetooth on
your device once this function is actually required, e.g. for transferring files.
Once you have completed the uploading process, you should deactivate
Bluetooth again, since permanently activated Bluetooth reception
constitutes a security risk!
My device is not in the list, what should I do?
User-defined:
If your device does not appear in the list after the online update, you can set
up the export settings manually. No need to worry though; you only have to
do it once, since these settings can be saved as a preset.
Read the instruction manual of your mobile device to find out which file format
is required for this. If your device supports multiple formats, then you can
experiment with the formats to get the best results.
Specify the file format by opening the target device's menu and selecting
"User-defined -> Video -> ...Format". If you then click on "Export", you arrive
at the Export dialog (view page 243) of the selected file format where you
can set all the advanced settings.
For details on these settings, please consult your device manual. Explanations
for the file format's settings can be found in the Overview of the device

254 Options for using the final movie
classes chapter, for the special settings of the export dialogs see "Export
movie (view page 254)" in the "File menu" chapter.
Tip: If the format settings for your device are not accessible, then you can
try out a different device from the same manufacturer and, using it as a
template, make adjustments accordingly.
If you find settings you like, we recommend saving these as a preset
for further use.
Overview of the device classes
This chapter explains the various supported device classes and which
peculiarities should be noted when manually setting the export format.
Quick overview of the device types*
Example devices MPEG-4 profiles (audio + video formats within MPEG-4
container format)
iPod & PSP AVC (video) + AAC (audio)
Mobile phones 3GP (video) + AMR or AAC (audio)
Additional video formats
Symbian mobile
phones
MPEG-4
Video players DivX / XviD
PDAs,
PocketPCs
WMV9
*No guarantee taken for correctness of information
Mobile phones
This refers to multimedia mobile phones and SmartPhones.
File format: For SmartPhones running the Symbian operating system, you
should ideally use the Real format for maximum compatibility, since
RealPlayer is integrated into the system. Many mobile phones also play
MPEG-4. It's important in this case that the correct container format (for
mobile phones, usually 3GPP) is set up ("Video as MPEG-4 video export")
Resolution: The resolution corresponds to the display size of your mobile
phone in pixels. Standard resolutions are 128 x 96 pixels (sub QCIF), 176 x
144 pixels (QCIF), 300 x 180 pixels, and 320 x 240 pixels (SmartPhones).
You can find out the resolution of your mobile phone from its
documentation. Many mobile phones require the precise setting in order to
play back videos. If the aspect ratio does not correspond to the display
resolution (300 x 180 corresponds to 5:3 instead of 4:3), then black bars are
www.magix.com

Options for using the final movie 255
www.magix.com
added. For broad displays (optimized for 16:9) we recommend the video
effects Aspect ratio 16:9 (anamorph/letterbox).
Frame rate: Picture repeat rate, i. e. the number of frames per second (fps).
For mobile phones this is usually reduced from 25fps to around 10 or 15fps
in order to save memory space and because mobile phone processors are
not powerful enough. If you don't have to save on memory, select the
largest frame rate possible (see device manual) because at low frame rates
the video can be very jerky.
Organizers and PDAs
Under "Organizers and PDAs", Pocket PCs and similar devices are listed.
File format: For Pocket PCs, you should ideally use Windows Media Video
format for maximum compatibility, since it usually only runs on modified
Windows Operating Systems (Windows Mobile), and the Windows Media
Player is integrated in the operating system.
Resolution: The resolution corresponds to the display size of the PDA,
mostly 320 x 240 pixels. You can find out the resolution of your PDA from its
documentation. A PDA can also play back at higher resolutions than those
set; mostly, however, the CPU is usually not able to handle this as it must
scale the picture before output, which can cause errors.
Frame rate: Picture repeat rate, i. e. the number of frames per second (fps).
If you don't have to save on memory, use the largest frame rate possible
(see device manual) because at low frame rates the video can be very jerky.
Games consoles
Several portable games consoles are also able to play videos. These
consoles are extremely limited in terms of overall settings for file formats.
Sometimes they even use their own variations of file formats.
Warning: Do not change the presets!
Warning: Sony PSP and Apple iPod video only play movies when they are
copied with a specific name into a pre-defined target folder. Always copy
movies for these devices from the export dialog along with the
corresponding presets (at the top of the "Preset" list and at the bottom
beside "Play after export").
Video players
Video players are considered to be video devices if they have been
developed especially for mobile video playback. They usually have relatively

256 Options for using the final movie
www.magix.com
large displays and their own hard disk or a very large flash card memory (in
GB).
File format: Mostly DivX AVI or WMV (Windows Media Video) are used.
While WMV is its own format, AVI is a so-called container format. This
means that the actual file format is set via the medium's codec (view page
339).
In addition to the AVI format, you will also have to set up a codec that your
mobile device supports when exporting AVI files.
A much-used codec for AVI is the DivX codec. This is supported by a large
number of portable video players. Specific standards have been set up
between the codec manufacturer DivX and the device manufacturers
(profiles) that a certified DivX device has to fulfill.
Unlike Windows Media or MPEG4, a separate audio codec (ACM codec) is
required for the sound in order to encode the sound track in the same high
compression at acceptable quality. Select the codec you wish to use for the
sound under Audio compression. MP3 56kBps is used as a preset. For
improved sound quality, you should read your device manual to find out
which sound formats AVI audio still supports and, if required, install further
ACM codecs from the Internet.
The DivX codec can be downloaded from www.divx.com
http://www.divx.com.
Resolution: Video players can handle almost every resolution up to TV
resolution (720x576), as most models can display your video picture in TV
resolution via an analog TV output. For the optimum picture quality on the
device display (if you do not wish to use the TV output) use the resolution
that the device can display.
Frame rate: Picture repeat rate, i. e. the number of frames per second (fps).
This isn't problematic, since the frame rate of the output material is used.
Warning: Sony PSP and Apple iPod video only play movies when they are
copied with a specific name into a pre-defined target folder. Always copy
movies for these devices from the export dialog along with the
corresponding presets (at the top of the "Preset" list and at the bottom
beside "Play after export").
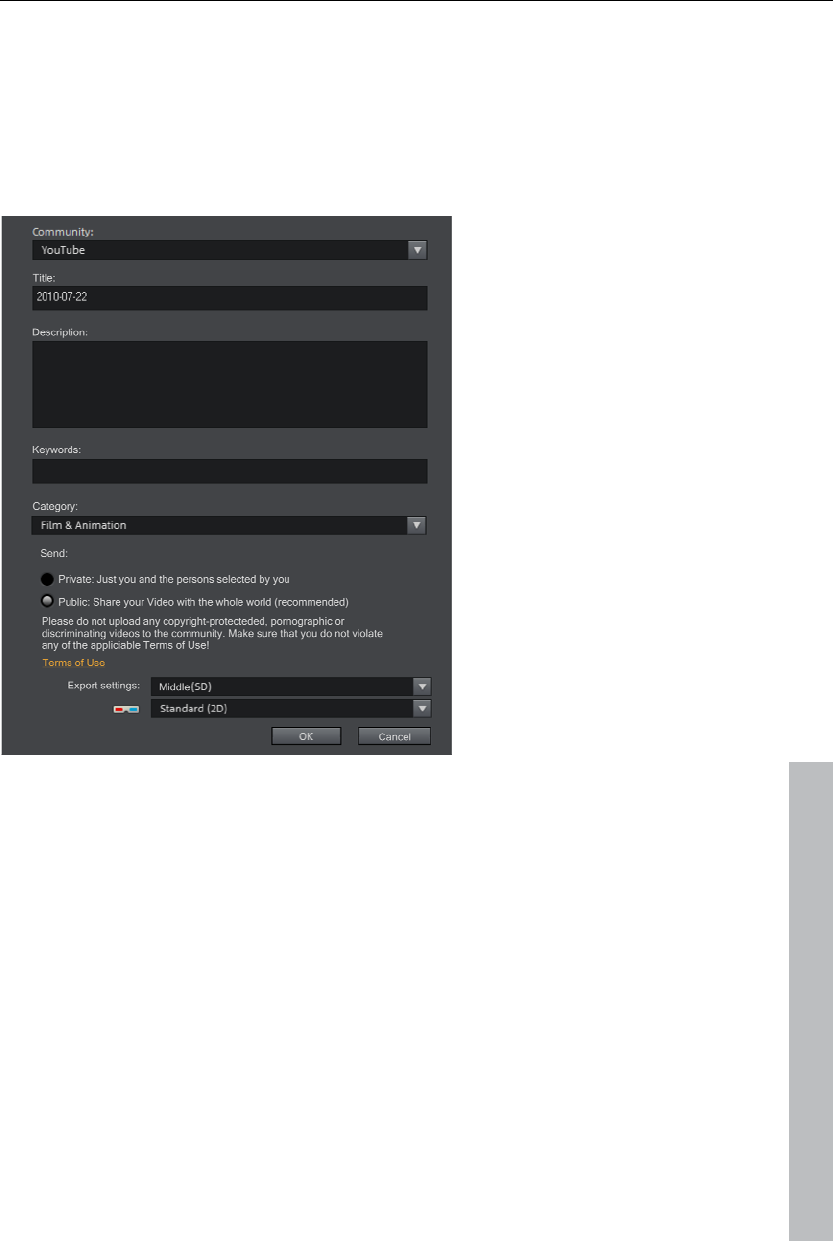
Options for using the final movie 257
Upload to Internet
With this option you can upload your movie directly to YouTube®, Vimeo or
Facebook (deluxe version). YouTube® maybe the best-known portal for self-
made clips of all kinds. Vimeo is an up-and-coming portal for more
demanding videos.
www.magix.com
Community: Select a platform: YouTube® or Video.
Name: Here you can enter the name of your movie.
Description: Here you can create a short description of your movie to orient
other community member as to its contents.
Category: Select the category for your movie here.
Send: Here you can select whether the film should be private, accessible
only to you and authorized persons, or public, meaning freely accessible.
Export settings:Here you can set various quality settings.
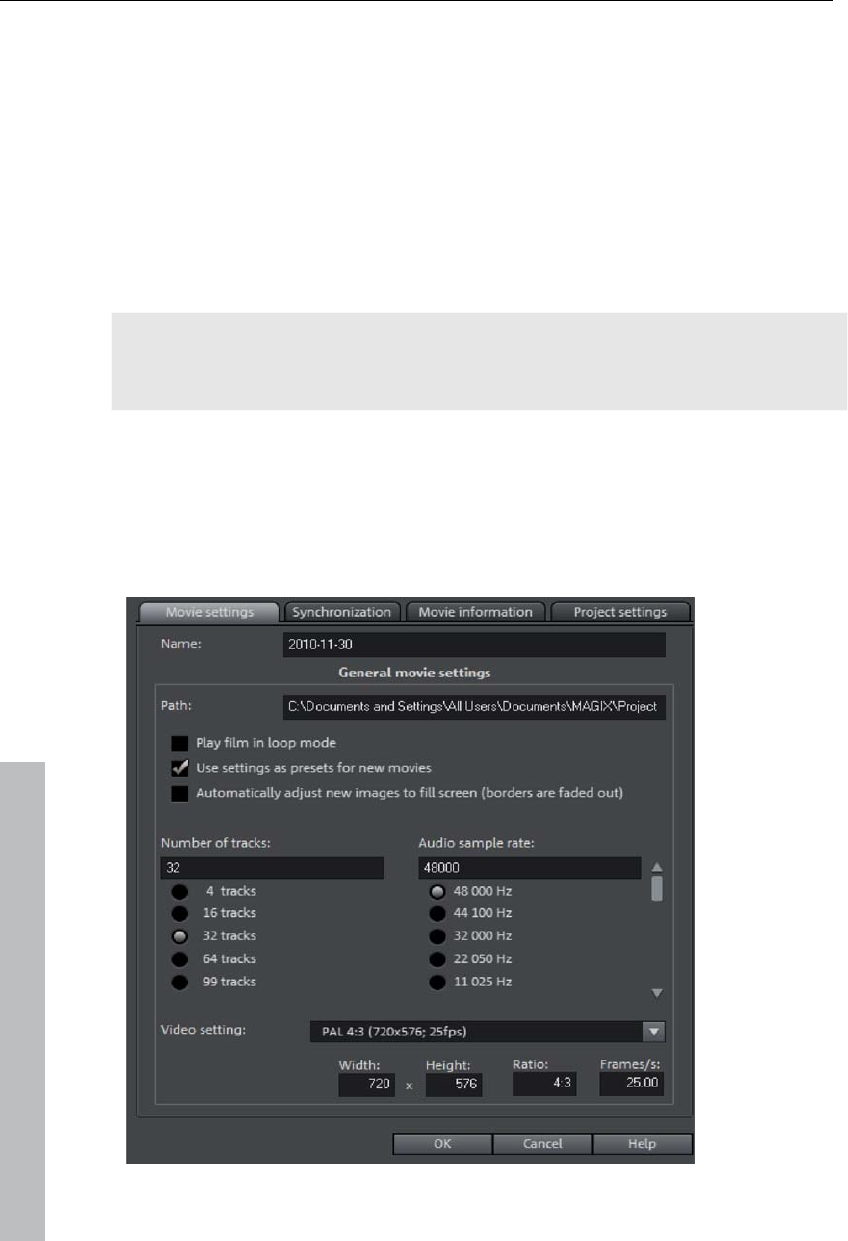
258 Managing video projects
Managing video projects
Project and movie settings
When you create a new video project, you can make settings for the new
project already in the start dialog. You can change these later.
In the following chapter we want to present the settings offered by MAGIX
Video Pro X3 for movies and projects.
Note: Please differentiate between settings for a concrete movie and project
and general program settings. The latter are described in detail in the PDF
manual or Help (F1 key).
All settings dialogs can be reached via "File > Settings".
Movie settings
Open the movie settings via "File -> Settings -> Movie..." or by pressing "E".
The following dialog opens:
www.magix.com

Managing video projects 259
www.magix.com
The buttons at the top are for the four tabs in the dialogs: "Movie settings ->
Synchronization ->Movie information" and "Project settings".
Movie settings
Name: You can enter the name of the current movie here.
Path: This is where you determine the path to the folder on your hard drive
where your movie is saved.
Play movie back in loop mode: The movie is then played over and over
again, i.e. once the movie reaches the end marker, it is started again from
the beginning.
Cut new images to fit the screen automatically: Fits all images and videos
inserted into the project automatically so that they fit the screen.
Number of tracks: Changes the track number.
Audio sample rate: The preset sample rate is 48 kHz. This sample rate is
applied to all recordings and is also a prerequisite for DVDs. This setting
guarantees optimum sound quality. Audio material at different sample rates
(e.g. CD audio at 44 kHz) is automatically adapted when loaded
(resampling). Only change this value if you are working with sound material
at a different sample rate or if your sound card does not support this sample
rate.
Video settings: You can select the standard settings for the picture format
and frame rate for PAL or NTSC images or for your own format. Please note
that MPEG encoding requires a width/height ratio divisible by 8.
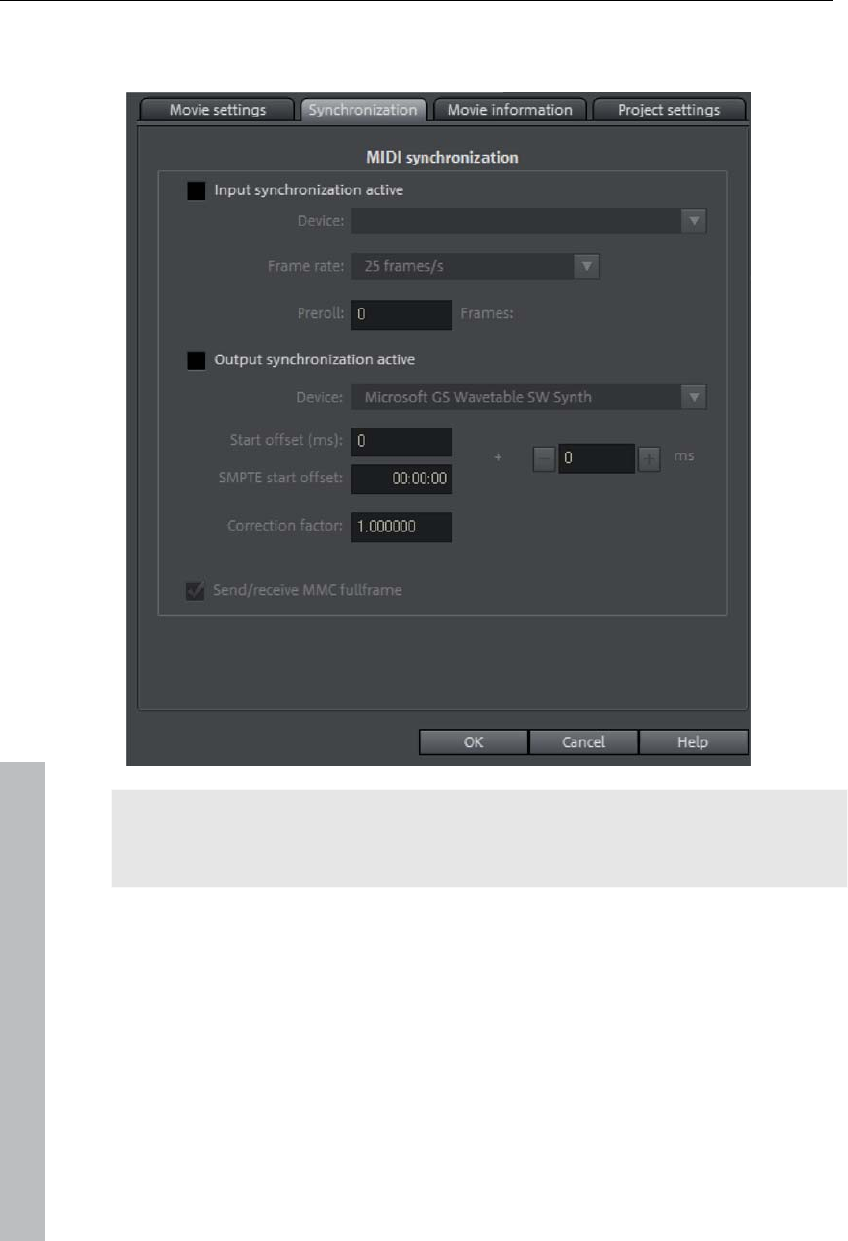
260 Managing video projects
Synchronization
Synchronization dialog
Note: You will find descriptions of all synchronization dialog elements here.
You can find a description of how the synchronization settings are made in
the "Synchronization settings" (view page 261) chapter.
Input synchronization: Here you must select the driver which the MAGIX
Video Pro X3 will receive the MIDI timecode. This setting will also be used
for SMPTE. With synchronization via SMPTE, please make sure that the
device corresponds to the SMPTE input of your MIDI interface.
Frame rate: Here you can determine the fitting SMPTE frame rate, for
example 24 for cinema film, 25 for PAL video and audio synchronization,
29.97 drop/non drop or 30 for NTSC video.
Preroll: Here you can enter a frame number which MAGIX Video Pro X3 will
ignore before it starts synchronization. This accommodates the fact that
www.magix.com

Managing video projects 261
www.magix.com
analog devices need time to reach their correct speed. To make sure that
MAGIX Video Pro X3 synchronizes to a valid time, this segment can be
skipped using pre-roll frames.
Output synchronization: Here you must select the driver, which MAGIX Video
Pro X3 will use to send MIDI timecode. When synchronizing via SMPTE,
please make sure that the device corresponds to the SMPTE output of your
MIDI interface.
Start offset (ms/SMPTE): Here you can enter a time value in milliseconds or
in SMPTE frames to be subtracted from the SMPTE time before the time is
used for synchronization. With an offset of 60:00:00 (1 hour), a tape whose
SMPTE code starts at 1 hour may be synchronized by MAGIX Video Pro X3
as starting at 0.
Specify synchronization
MAGIX Video Pro X3 is capable of being synchronized by external sources
or synchronizing external sources.
Synchronizing MAGIX Video Pro X3 with Samplitude or Sequoia is also
possible via a virtual MIDI cable (e.g. "MIDI Yoke" or Hubi's MIDI Loopback
Device"). The requirement in this case is simply that the virtual MIDI cable
has been installed successfully.
MAGIX Video Pro X3 as master
If MAGIX Video Pro X3 should synchronize external programs or sources,
then proceed as follows:
Open the Synchronization dialog (view page 260).
Under "Output synchronization", set the MIDI device that is connected to
the device that MAGIX Video Pro X3 is supposed to sync with.
In case you want to synchronize another program (e.g.
Samplitude/Sequoia) via a virtual MIDI cable with MAGIX Video Pro X3,
please make sure that the corresponding MIDI device is set in both
programs. The program to be synchronized must support MTC and be
configured as the "slave".
For example, if you use "MIDI Yoke NT1" under "Output synchronization",
then the device "MIDI Yoke NT 1" must also be set in the MTC input of the
program to be synchronized.
MAGIX Video Pro X3 as slave
MAGIX Video Pro X3 set as the slave causes the program to follow an
external source or another program during playback.
Open the Synchronization dialog (view page 260).
Under "Input synchronization", set the MIDI device that is connected to the
device that MAGIX Video Pro X3 is supposed to sync with.

262 Managing video projects
www.magix.com
In case you want to synchronize another program (e.g.
Samplitude/Sequoia) via a virtual MIDI cable with MAGIX Video Pro X3,
please make sure that the corresponding MIDI device is set in both
programs. The program that is set to be the synchronization source must
support MTC and be configured as the "master".
For example, if you use "MIDI Yoke NT1" under "Input synchronization",
then the device "MIDI Yoke NT 1" must also be set in the MTC output in the
master.
Synchronizing Samplitude/Sequoia with MAGIX Video Pro X3
This section should help you synchronize MAGIX Video Pro X3 with
Samplitude/Sequoia for Surround productions.
The introduction featured here provides a single example. In this case,
MAGIX Video Pro X3 is the master: Samplitude/Sequoia follows the time
information from MAGIX Video Pro X3 but sends information from the
transport control to MAGIX Video Pro X3. This method allows playback from
both programs to be started while they run synchronously.
The chapter "Transferring a Surround project to MAGIX Video Pro X3 (view
page 189)" explains how completed Surround projects are transferred from
Samplitude/Sequoia to MAGIX Video Pro X3 and how they are processed.
Requirements
Since synchronization occurs via MTC (MIDI time code), a virtual MIDI
driver must be installed. Examples are "MIDI Yoke" or "Hubi's MIDI
Loopback Device". Configure the driver as required so that at least two
virtual MIDI devices are available.
If a Surround project is to be created, then you require a Surround-capable
sound card with at least 6 channels.
Setting up MAGIX Video Pro X3
Open the synchronization dialog
Activate the box "Input synchronization active".
Under "Device", set the first free virtual MIDI device (e.g. "MIDI Yoke NT
1").
Now set the transport controls via MMC (MIDI machine control):
Click the "MMC button" to open the "MIDI machine control".
Activate the box "Receive MMC commands (slave)".
Under "Device", set the second free virtual MIDI device (e.g. "MIDI Yoke
NT 2").
Close both dialogs by pressing the "OK" button.

Managing video projects 263
www.magix.com
Setting up Samplitude/Sequoia
Start Samplitude/Sequoia; MAGIX Video Pro X3 can remain open.
Open the Samplitude/Sequoia synchronization dialog. Right-click the
"Sync" button on the transport console, or select the entry "Synchronization
settings" in the "Options" menu.
Activate the box "Output synchronization active".
Under "Device", set the first free virtual MIDI device (e.g. "MIDI Yoke NT
1").
Now set the transport controls via MMC (MIDI machine control):
Click "MMC settings" to open the "MIDI machine control" dialog.
Activate the box "Send MMC commands (master)", "Transport window as
remote control for external device", and "Space bar for remote control".
Under "Device", set the second free virtual MIDI device (e.g. "MIDI Yoke
NT 2").
Close both dialogs by pressing the "OK" button.
Now you can conveniently dub your movie in Samplitude/Sequoia while you
edit and cut your work in MAGIX Video Pro X3. Playback can be started
from both programs and always runs synchronously.
MIDI Machine Control (MMC)
MMC modes
The synchronization window provides settings for remote control via MIDI
Machine Control. MAGIX Video Pro X3 supports synchronization of external
devices via MMC. Three working modes are provided:
Receive MMC commands (slave): If you have set up MAGIX Video Pro X3 to
work as a slave, activate this option. MAGIX Video Pro X3 keeps track of
the JOG shuttle operations and fast forward and rewind commands of
external devices. MAGIX Video Pro X3 also receives the current playback
position of the device and displays it as an additional blue cursor of the
timeline.
Send MMC commands (Master): MAGIX Video Pro X3 operates as master.
The external device follows the time position every time the playback cursor
moves to a certain position within the arrangement.
While playing a range in MAGIX Video Pro X3, the MMC device stops once
the end of the range is reached. If this option is activated, the start and stop
commands sent by the space bar only control the MMC device.
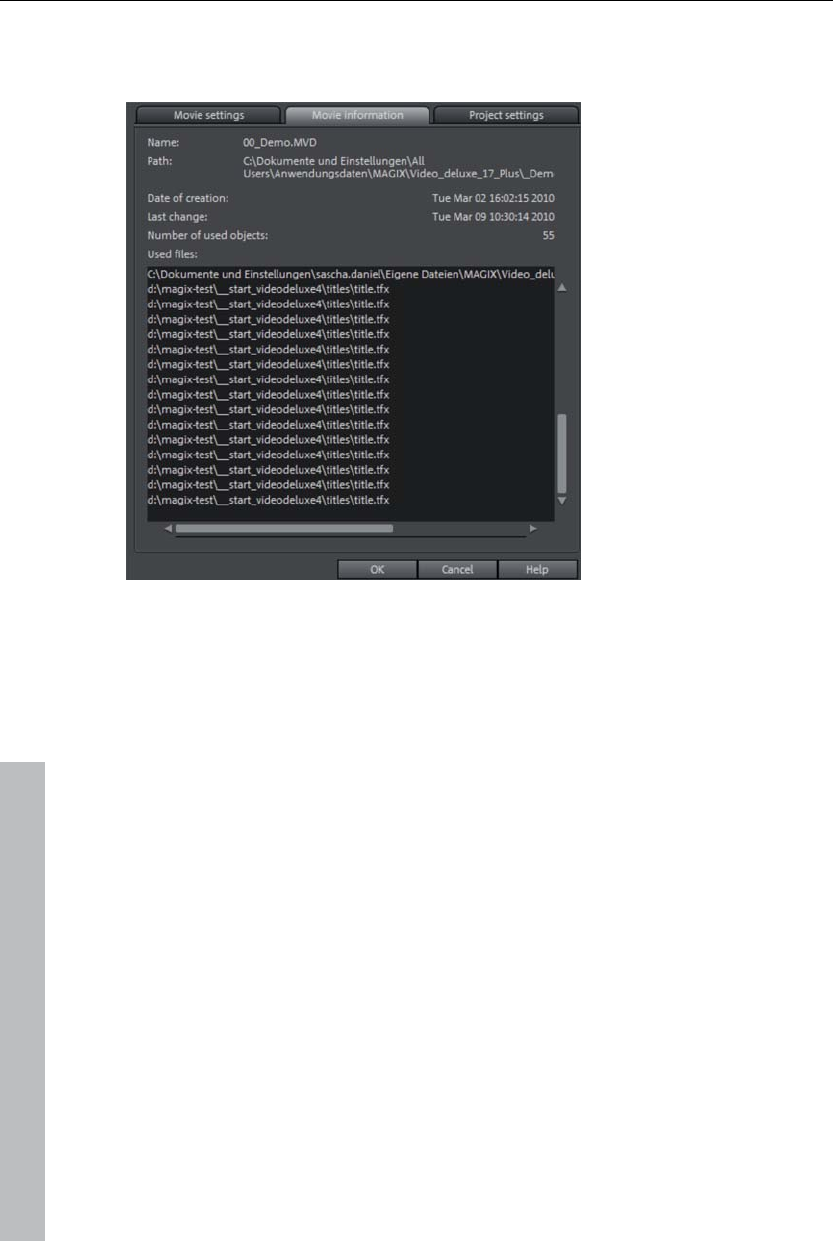
264 Managing video projects
Movie Information
This option opens an information window:
Name: Here you can enter the name of the current movie.
Path: This is where you select the folder on your hard drive in which your
movie is saved.
Created on: Displays the time the movie was created.
Last changed: Displays the time of the last save.
Number of used objects: Displays the number of all objects in the movie.
Used files: All files used in the movie are listed here.
Keyboard shortcut: E
Project settings
www.magix.com
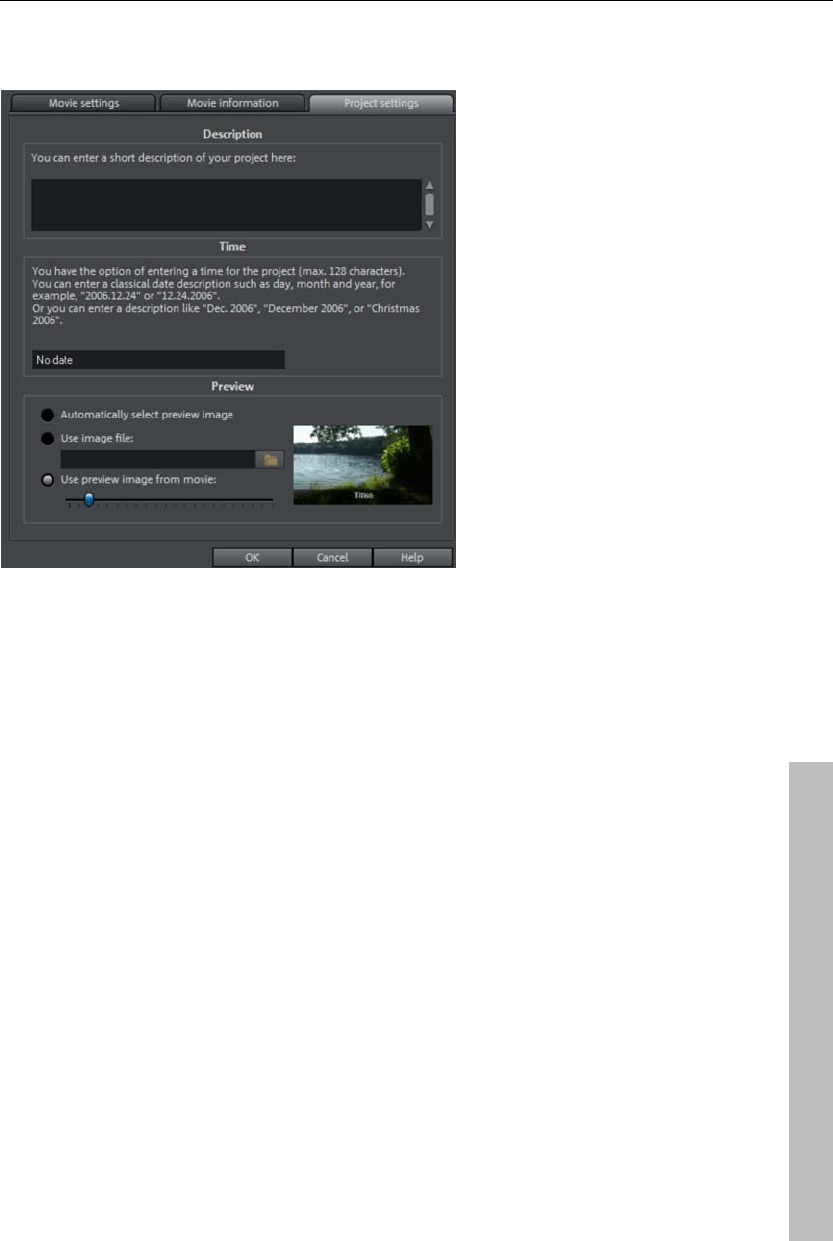
Managing video projects 265
You can change project settings here. A project can consist of multiple
movies and is saved as an mvp file.
Description: Here you can give you project a description - perhaps a few
statements about the state of the editing progress, etc. This field functions
like a notepad.
www.magix.com
Time point: You can assign your project a certain date. You can choose
between simply a date - e.g. "24.12.2009" - or a written-out description -
e.g. "Christmas 2009".
Preview: This is the preview in a data manager such as the Windows
Explorer, a comparatively insignificant setting. Instead of an automatic
selection, you can select a certain image or a preview frame from the
project.
Automatically select preview image
MAGIX Video Pro X3 uses an automatically-selected preview image.
Use image file
Clicking the folder button opens a dialog to load image files. In this dialog,
you can navigate to the directory where the image file is found and select it
by double clicking.
Use preview image from movie
Use the controller to select a frame from the corresponding directory.
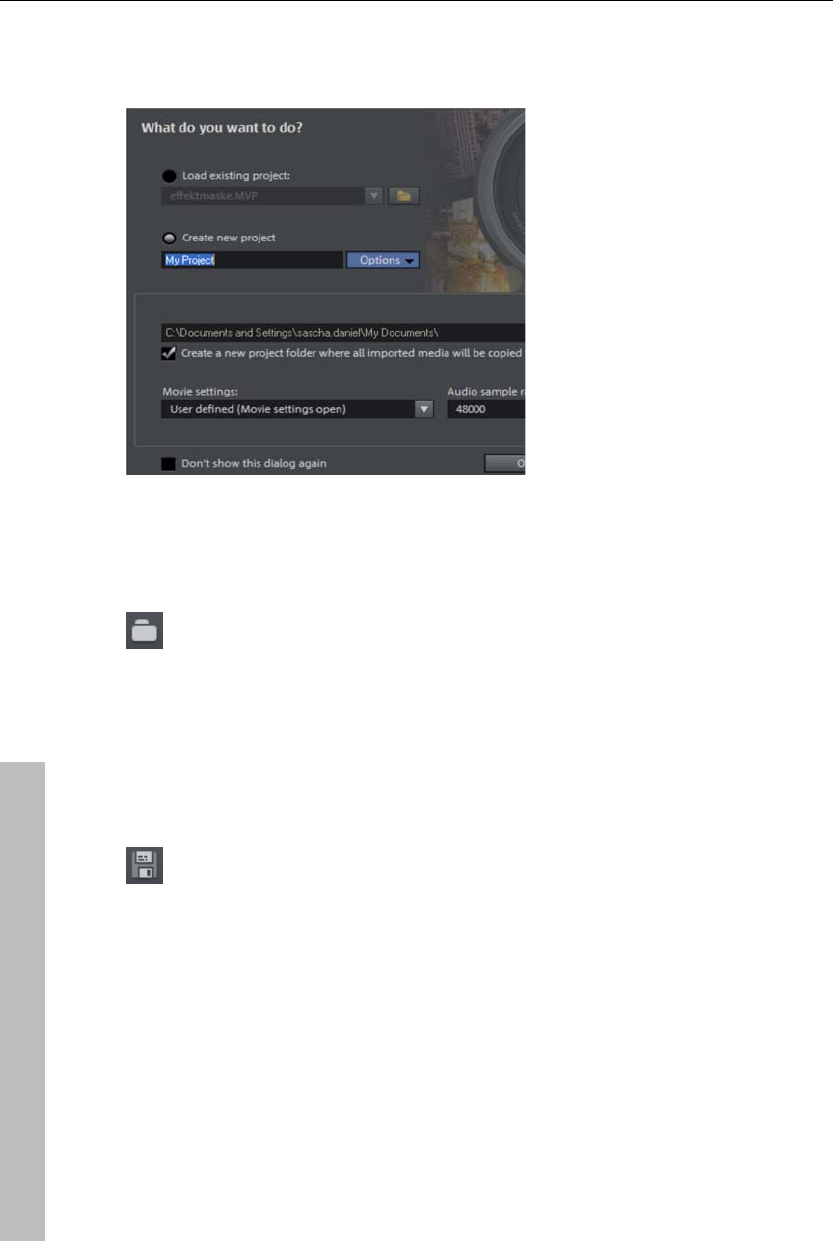
266 Managing video projects
New project disc settings or new movie
When you start MAGIX Video Pro X3 the following dialog will open:
Decide in this dialog if you want
to "Load an existing movie" for
further editing and burning to
disc, or if you want to "Create a
new movie". Under "Options"
you can "Create a new movies
folder". All data that belongs to
the movie will be saved in this
folder.
We're still at the very beginning, so let's stick with keeping an overview of
everything. Click "OK" to end the dialog and continue.
Open
With this option you can load a project or a media file. Please note
that all media files associated with it must be loaded along with a
project. MAGIX Video Pro X3 will search for all used sounds and
video files in the folders in which they were located when the move
was saved.
Keyboard shortcut: Ctrl + O
Save project
The current disc project is saved with the name displayed in the project
window. If you have not specified a name for your project yet, a dialog
will open for you to do so.
Shortcut: Ctrl + S
Save project as...
A dialog opens where you can specify the path and name of the video for
saving.
Keyboard shortcut: Shift + O
www.magix.com
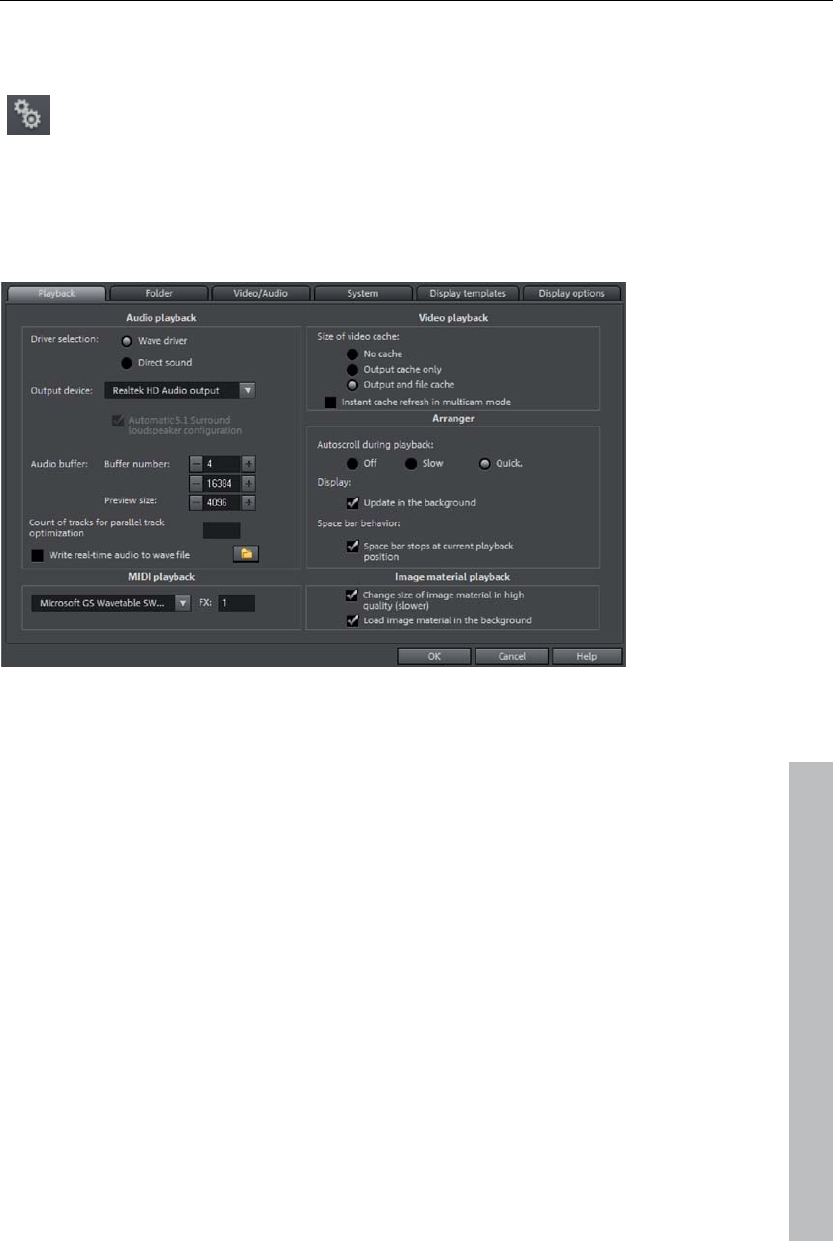
Managing video projects 267
Program settings
All basic settings for MAGIX Video Pro X3 are made in this window.
This allows you to influence the settings in MAGIX Video Pro X3 in
detail.
Keyboard shortcut: P
Playback
Audio playback
www.magix.com
Driver selection: Specify whether you wish to use the standard Windows
driver for the sound card or the DirectSound driver here. DirectSound is a
component of DirectX and, if required, is installed together with MAGIX
Video Pro X3. DirectSound has the advantage that the sound output (for all
modern sound cards or onboard sound chips) may also be used by other
programs simultaneously. Wave drivers are recommended if the CPU load
is increased, since the larger buffer allows load peaks to be absorbed better
(otherwise this would cause crackling).
Output device: Use this option to specify which sound card plays the wave
audio objects. This is especially important if multiple sound cards are
installed on the computer, e.g. "onboard sound" as well as an additional
sound card.
Audio buffer: In order to allow smooth playback of a complex arrangement,
MAGIX Video Pro X3 creates a RAM data buffer into which the current data
is loaded. Therefore, it is not the entire arrangement that is preprocessed;
instead, processing occurs step-by-step.

268 Managing video projects
www.magix.com
Number of buffers: Specify how many buffers should be used here. More
buffers increase stability for crackle-free playback of the arrangement, but
they also increase the memory requirement. When played via DirectSound,
only one buffer is used automatically.
Note: As a rule, if response and loading times are too slow, reduce the
number of buffers and their; otherwise, increase the buffer size if the audio
playback is choppy or if real-time errors occur. Since error-free playback is
usually more important than speedy reaction times, the buffer size should
be raised to 16384 or 32768 if dropouts occur. The possible number of
buffer updates is between 2 and 10.
Preview size: Specify the buffer size used to play the entire arrangement or
for previewing waves in the file manager.
Write real-time audio to wave file: If this option is active, the entire audio track
may be mixed live and recorded simultaneously. During playback, for
example mixer fades and effects may be controlled live and all real-time
activities are recorded and saved in a separate wave file.
MIDI playback
Specify which sound card or which MIDI interface should be used for MIDI
playback.
Video playback
Video cache size: The video cache ensures smooth on-screen playback for
files and effects by pre-loading them. The ideal setting depends on your
system; experiment to find the best playback performance on your system.
Arranger
Autoscroll during playback: If autoscroll is activated, the screen view
automatically shifts when the playback cursor reaches the right edge of the
screen, which is useful for longer arrangements. Select the size of the
scrolling steps: "Fast" (whole pages) or "Slow" (half pages).
Note: Scrolling requires constant recalculation of the screen view, which
may lead to interrupted playback if the amount of system RAM is too low. If
this happens, simply deactivate the autoscroll feature.
Display: update in background: The object display after move and zoom
operations in the arranger is updated in the background in order to allow
you to work smoothly.
Space bar behavior: Set whether stopping playback with the space bar
moves the playback marker to the current position or returns the marker to
its original position.
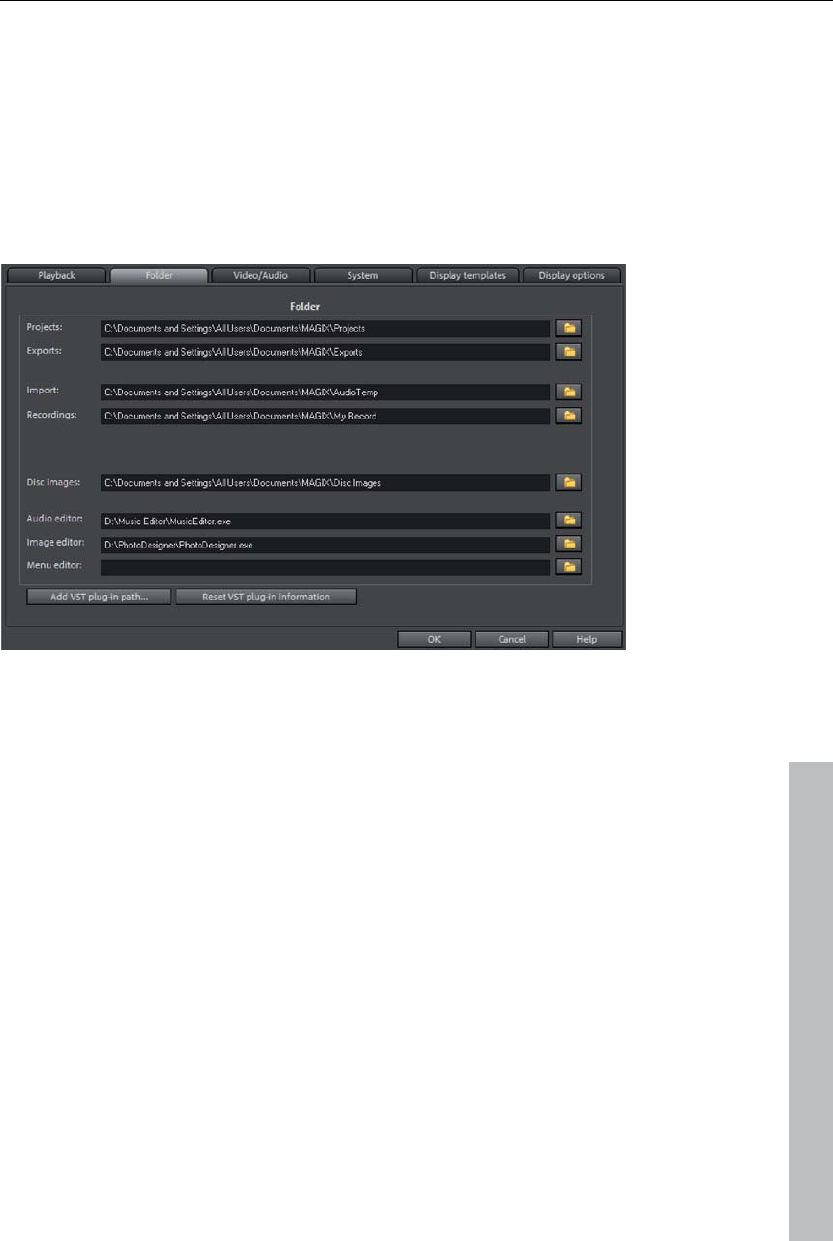
Managing video projects 269
Image material playback
Resizing high-quality image material: Use this feature to improve the quality
during resizing, particularly when downsizing to less than half of the original
size (e.g. for picture-in-picture effects). This also requires more CPU power.
Load image material in background: Image material is loaded in the
background to spare processing power.
Folders
Set the path where
projects are saved (Projects) here,
www.magix.com
where files are exported (Export) or imported (Import), and recordings
(Recordings) are saved,
where disc images are saved,
where EXE files for the external audio and picture editor are located so that
they are able to be launched via the context or effects menu.
and where the VST-plugins were installed.
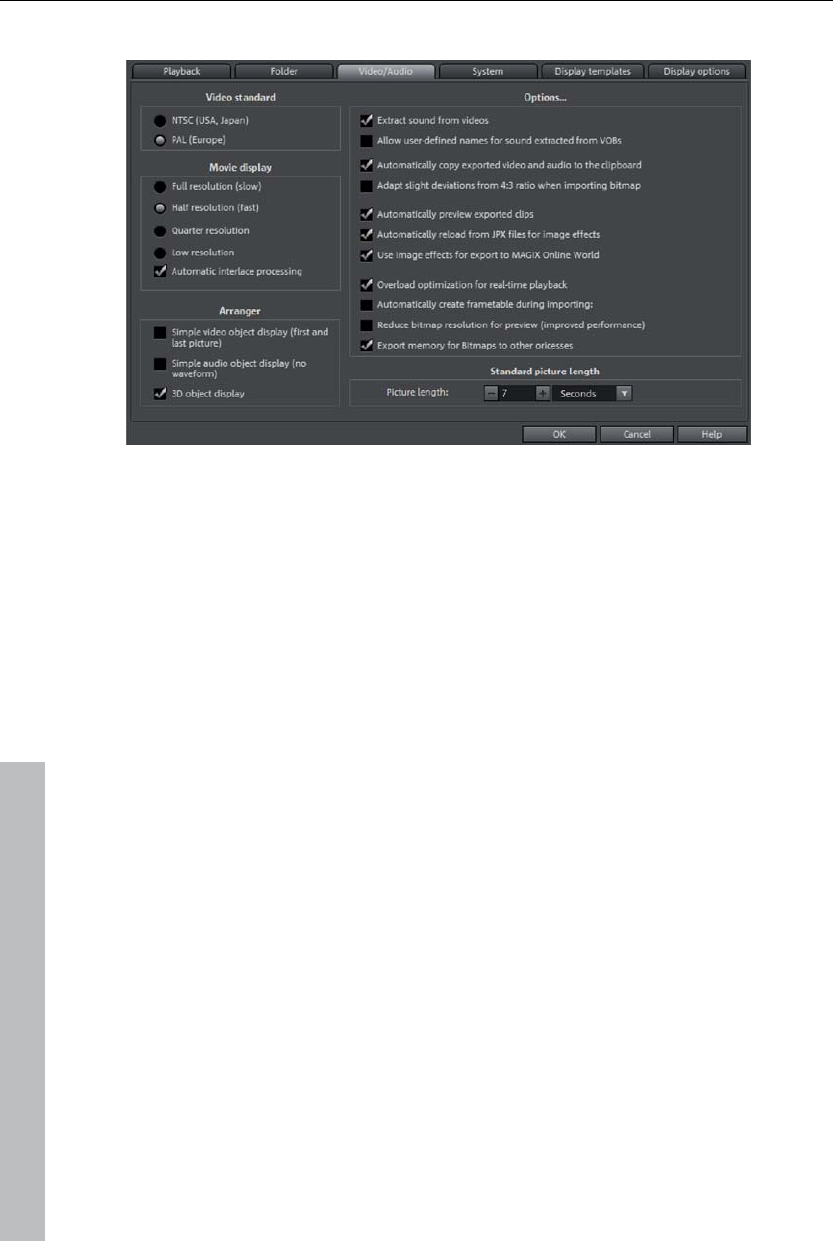
270 Managing video projects
Video/Audio
In this tab you will find all settings concerning video and audio files.
Video standard
PAL is used in Europe, the US and Japan use NTSC.
Movie display
The resolutions that can be set here concern only the picture display in the
Arranger. If playback becomes jerky, we recommend entering a lower value.
The quality of exported videos is not influenced by this.
Automatic interlace processing: MAGIX Video Pro X3 normally detects
whether the loaded video files were recorded with the interlace or
progressive processes automatically, and half-image format is detected for
interlaced movies. In case automatic detection fails, you can deactivate it
here and set the object properties (view page 308) of video objects to the
correct process.
Video options
Extract sound from video: If a video file contains video and audio data the
audio track of the video will also be imported if this option is activated. It will
be displayed as an audio object in the arrangement below the video object.
Both are automatically grouped together. If the audio track has to be edited
or replaced later, you first have to ungroup it ("Ungroup" button in the tool
bar or via the "Edit" menu).
Allow user-defined names for sound extracted from VOBs: Specifies whether a
warning will be displayed for each imported file during VOB import
(VTS_01_1.vob) allowing you to enter a name for your movie (check box
www.magix.com

Managing video projects 271
www.magix.com
"checked") or whether you would like an automatically generated name to
be assigned (check box "unchecked").
Automatically copy exported material to clipboard: This option is particularly
useful when used with other programs, such as Microsoft Powerpoint. If
activated, a multimedia file you have just created is immediately copied to
the clipboard and can be used in other applications. For instance, you can
insert it into an opened MS Powerpoint template by pressing "Ctrl + V".
Adjust 4:3 aspect ratio to screen: This option automatically customizes
photos that have an approximate 4:3 aspect ratio to the television's 4:3
picture. The pictures are therefore easily stretched or compressed. This
inevitably brings about distortions in the picture. If this option is deactivated,
black bars appear to the sides.
Automatically preview exported clips: This option starts the clip immediately
after exporting for verification.
Automatically load/save picture effects from JPX file: If you have edited
pictures using another MAGIX program (e.g. MAGIX Digital Photo Maker),
then a .jpx description file is saved along with the image which contains
information about effects editing and texts. This option adds that information
into your editing process.
Use picture effects when exporting to MAGIX Online Services: If this option is
selected, all the picture effects are included with the sent file.
Hardware acceleration for 3D effects: Here you can (de)activate hardware
acceleration of your graphics card for 3D effects. You can find more
information about this topic in the 3D fades (view page 93) chapter.
Automatically create frametable during importing: Sometimes, rebuilding a
frame table can get rid of problems in certain MPEG files. For example,
such problems can be present if the navigation (positioning of the playback
marker, transport) is bumpy or doesn't function at all.
Normally, when loading MPEG video, a frame table is not created in order to
speed up the loading process. If you do create one anyway, MPEG files are
normally noticeably faster and easier to edit.
Reduce bitmap resolution for preview: The resolution of image files is
reduced during playback to decrease required memory. This requires less
computing power than playback in full resolution; full resolution is always
calculated during export.
Arranger
Simple display of video objects: Displays only the first and last image of a
video in the Arranger.
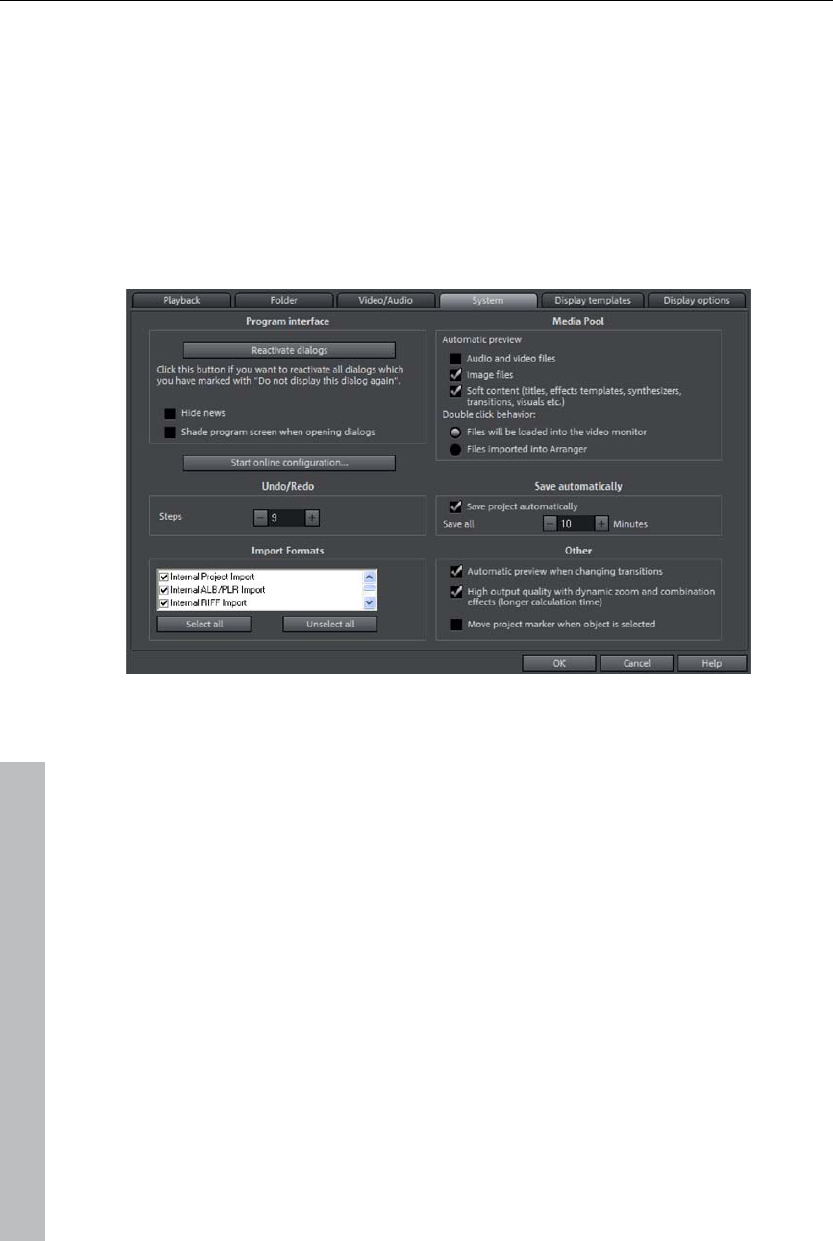
272 Managing video projects
Simple display of audio objects: Does not display a waveform for audio
objects in the Arranger.
3D object display: Shows objects in the Arranger three-dimensionally.
Standard picture length
Determines how long an image loaded in MAGIX Video Pro X3 is shown for
by default.
System
Dialogs: Once installed, MAGIX Video Pro X3 displays a number of security
queries in various parts of the program. Each of them can be switched off by
clicking the small box at the bottom that says "Don't show this message
again". To display these warning messages, select the "Reactivate dialogs"
option. "Hide news" enables current messages concerning MAGIX Video
Pro X3 to be deactivated, and the screen may also be set to darken when
dialogs are displayed.
Start online configuration: Configure the various services for MAGIX Online
World here.
Undo/redo: Set the maximum number of undo steps are available here.
Import formats: You can unselect file formats that you never use so that are
no longer imported. Bear in mind that several import modules exist for some
file types (AVI, WMA); MAGIX Video Pro X3 uses the fastest one in each
case. If you experience problems importing certain files, try experimenting
with deactivation of certain import modules, which forces the program to use
the slower, more compatible import module.
www.magix.com
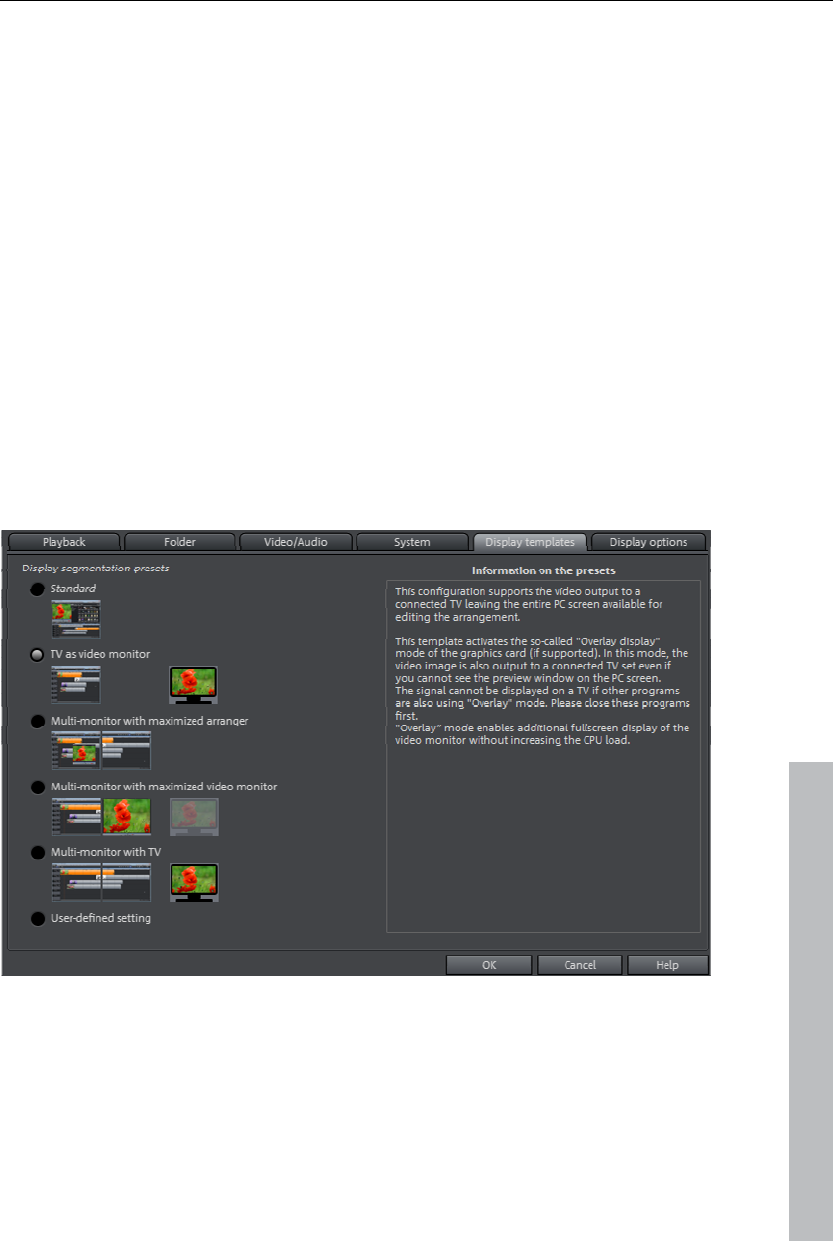
Managing video projects 273
Media Pool: Select which file types should be previewed automatically. You
may also select whether double clicking a file starts a preview in the Media
Pool or imports it directly into the arranger.
Automatic save: The automatic backup function may be set to save the
project in the project folder as a backup file with the ending "MV_" (instead
of the normal "MVD"). Select if and how often the project is saved as a
backup.
Other
Automatic preview during transitions: If this option is activated, a short
preview of the transition effect will be played quickly between two objects.
High-quality output for dynamic zoom and combination effects: This improves
the display quality of zooms and effects, but results in longer loading times.
Move playback marker when selecting objects: This option causes the
playback marker to move to the beginning of the selected object.
Display templates
www.magix.com
These presets provide a collection of useful configurations for display on the
monitor. On systems with only a single connected monitor, only the first two
are practical. The presets are explained on the right side of the dialog. All
window properties of the arranger, program monitor, etc. can still be
changed manually after the application of a preset.
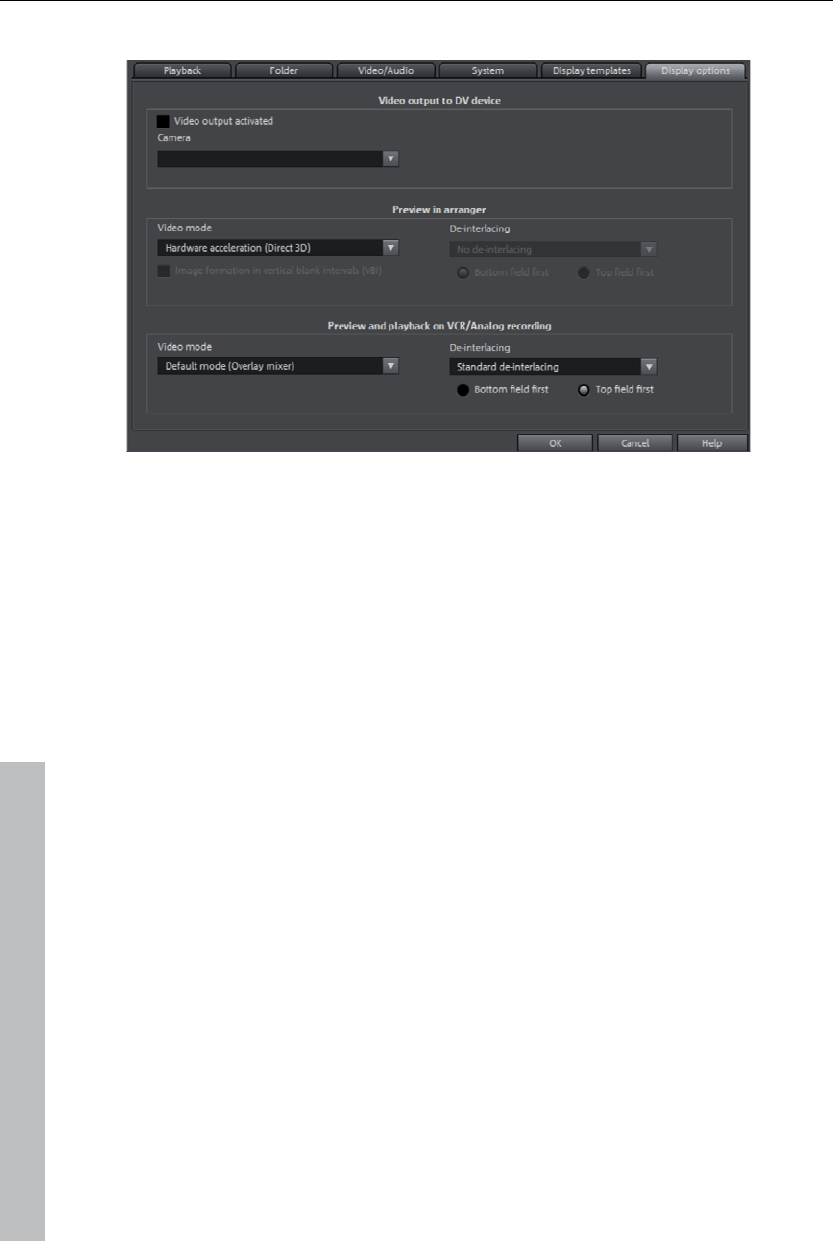
274 Managing video projects
Display options
Video output to DV device
Video output on a DV device: This option displays your arranger view on your
TV via your DV camera. This is useful if your graphics card doesn't have a
TV output. However, since your PC must then compress the video signal in
real time in DV-AVI format and in addition to processing all real-time effects,
so you need to have a powerful PC for jitter-free playback. Even if your
computer is not particularly powerful, you can still use this function to see
how your video looks on your TV screen, since the analog video output
signal of a good DV camera is better than the TV output of an average
graphics card.
Playback in the Arranger/Preview and playback in video recorder
You can set the playback mode separately for the arranger (including all
preview windows and effect dialogs), and the preview monitors during
recording and in the video recorder.
Video mode
Standard playback (video for windows): This is the standard mode that
functions on all systems.
Direct 3D (hardware mixer): This mode provides an extreme increase in
speed by letting the mixing, many effects, and various transitions be
calculated directly on the graphics card. Depending on the graphics card,
performance can increase by 300%. The graphics card will not be used
during export.
www.magix.com

Managing video projects 275
www.magix.com
Note: To use this mode the graphics card must posses at least 128 MB own
memory. You will need to install Direct 3D 9 or higher, and the graphics
card driver must support "High Level Pixel Shader Language 2.0". MAGIX
Video Pro X3 checks the corresponding properties when this mode is
selected, and switches it off if necessary.
Standard mode (overlay mixer): In this mode you can use a hardware-like de-
interlacing for the output on your PC screen or progressive scan-capable
projector. Playback of recordings with interlace turns out much better.
Alternative mode (video mixing renderer 9): This mode uses the hardware de-
interlacing function of modern graphics cards together with DirectX 9. Make
sure that you are using the most recent version of your graphics card driver,
which must be compatible with DirectX 9 to function properly. This mode
works better than the standard mode (overlay mixer) only for a few graphics
card models.
Image formation in Vertical Blank Intervals (VBI)
The image formation takes place in the vertical blank intervals of the
monitor signal (or the connected TV signal). This helps avoid image
interruptions. Warning: Because of the necessary waiting time on the next
VBI, this process adds significant computation time!
You can deactivate this option for digital displays such as TFT monitors. In
"Overlay" mode, image formation occurs exclusively via VBI.
Acceleration for high-resolution MPEG2 files
This option can be selected only in the "Hardware acceleration (Direct 3D)"
video mode and indicates that videos in MPEG-2 format will be processed
directly from the graphics card GPU. Depending on the graphics card
performance, an improvement of up to 300% can be achieved!
De-interlacing
The DirectShow modes "Overlay mixer" and "Video mixing renderer 9"
enable activation of hardware de-interlacing for the graphics card. For
general information about de-interlacing and the options "Top/bottom field
first", please read the corresponding article "De-interlacing (view page 368)"
in the manual.
Comparison image in source monitor for editing effects in the Media Pool
If this option is activated, the "Selected objects without effects" comparison
mode will be automatically activated when switching into the Media Pool
effects, and will be automatically deactivated when the mode is exited. This
serves to compare the original and edited image.
This automation will be suppressed if the option is deactivated.
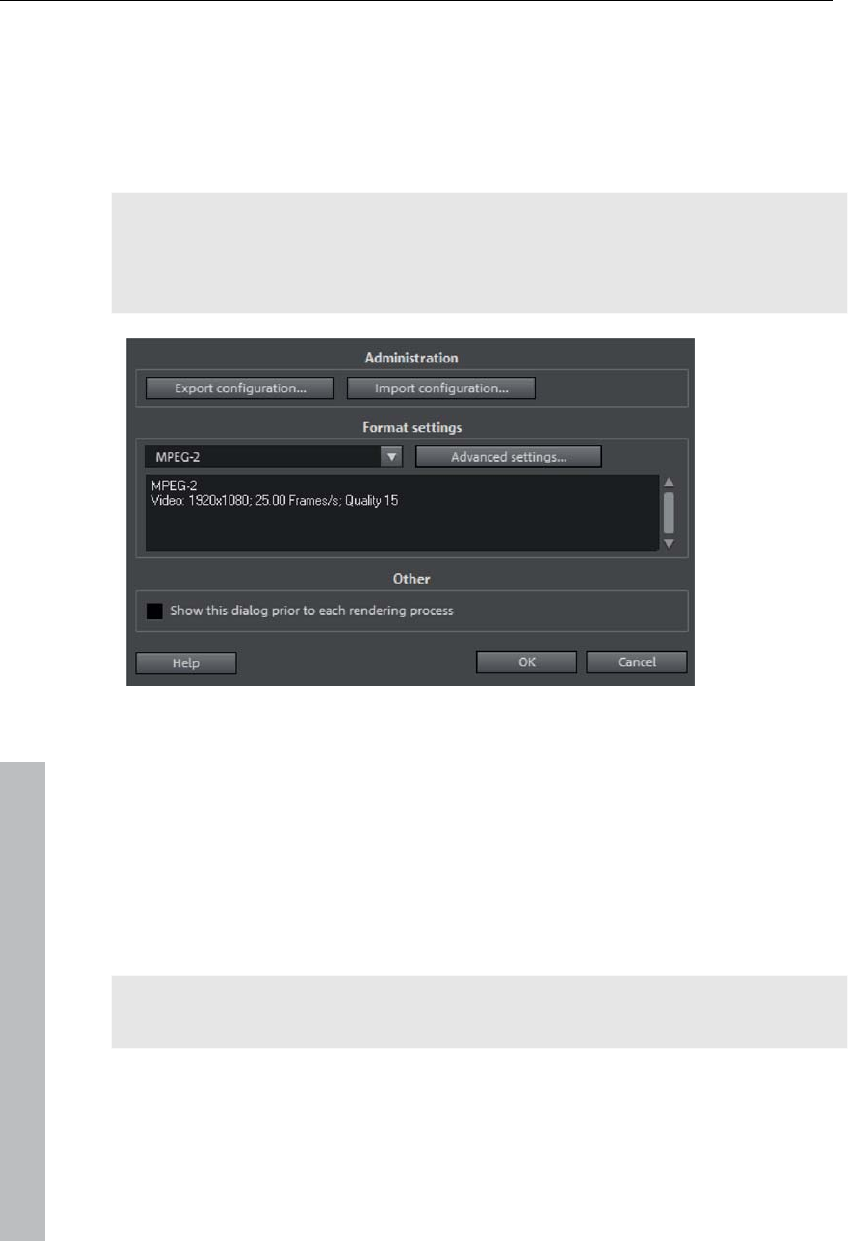
276 Managing video projects
Preview rendering
Use this dialog to set how MAGIX Video Pro X3 renders a set range in the
arranger. This dialogs may be accessed via "File -> Settings -> Preview
rendering".
The preview rendering function enables complicated passages in the project
to be rendered beforehand for fluid video previewing. This may be accessed
via the marker bar's context menu. More about this is discussed in the
chapter "Markers (view page 103)".
Admin: This provides options to load various settings (import configuration)
or save settings you have adjusted personally for use later (export
configuration).
Format settings: Specify here which format should be used to render a set
range. "Advanced settings" enables you to adjust the selected format to suit
your own particular requirements.
Other: Access this dialog prior to every rendering process (the dialog does
not appear by default).
Note: Rendering may take longer depending on the selected format and size
of the set range.
www.magix.com

Managing video projects 277
www.magix.com
Backup copy
Files must be saved to be able to be easily retrieved in case of a hard drive
crash or some other error.
Copy movie and media to folder/copy disc project and media to
folder
This menu option allows you to put a complete MAGIX Video Pro X3
arrangement, including all applied multimedia files, into one folder. This is
especially useful if you want to archive an arrangement for later use or in
case the files are on multiple data carriers (CDs, DVDs, etc) so that on
loading you continually have to change them. Effects files used are also
saved in a folder together with the other files.
If the option "Copy disc project, movies, and media in folder" is activated, all
movies in the current disc project, including all of the related media, are
combined and copied into the selected folder.
Note: MAGIX Video Pro X3 also features DV logging. Large DV-AVI and
audio files no longer need to be backed up, since MAGIX Video Pro X3
saves the position of this material on the DV tape and imports missing files
automatically when reloading the DV tape.
A dialog opens to specify the path and name of the video.
Shortcut:
Copy movie and media into folder "Shift + R"
Copy project and media into folder "Alt + S"
Burn project and media onto CD/DVD/burn data to CD/DVD
Use this option to burn the film as well as all associated files to disc. To do
so, you must have a burner installed on your computer and a blank CD must
be inserted.
If you choose the option "Burn project and media", the current project and
all of the associated media files are grouped together and burned onto disc.
Even larger projects can be burned straight to disc. The project, if
necessary, will be split up and burned automatically to multiple discs. A
restore program which is burned to the first disc of this type of backup
guarantees that the backup can be restored without any problems.

278 Managing video projects
www.magix.com
Restore project from video disc
This command restores a project backup that has been saved on a disc.
The disc must have been burned with the option "Add project backup" (see
"Burn disc" dialog options).
Choose which of the movies contained on the disc should be restored by
selecting it from the list and highlighting and selecting the corresponding
directory. You must also indicate the directory where the project should be
saved. A subfolder "Backupxxx" will be created in this folder where all
project files from the disc will be saved. All of the restored movies will be
loaded into MAGIX Video Pro X3 for editing.
Select the option "Restore image files only" and only the original image files
contained on the disc will be restored.
Load backup project...
This option loads an automatically created slideshow backup. This type of
automatic backup gets the file extension MV_ (underscore). This command
is only intended for use in emergencies, for example, if you unintentionally
saved your change and wish to return to the previous version of the movie.
Keyboard shortcut: Alt + O
Tip: Under "File -> Settings -> Program...", you can determine how often an
automatic backup will be created in the "System" tab under "Automatic
backup".
Importing & exporting EDL files
Import EDL (edit list)
The menu "File -> Import edit list (EDL)..." allows you to import edit lists in
the Samplitude EDL format into MAGIX Video Pro X3. It is important in this
case that the folder structure remains unchanged. During importing into
MAGIX Video Pro X3, the file locations must match the place where they
were when the cut list was created using Samplitude/Sequoia.
If an empty project is opened, the complete EDL file will be imported.
If the tracks are muted before importing the EDL file, then they will not be
removed.
If there are already objects in the project, then you will be asked the files
should imported into the project or if a new project should be created for
them.

Managing video projects 279
www.magix.com
Export EDL
The menu item "File -> Export movie" enables EDL files to be created using
the "Export movie information as EDL..." for additional editing in other
programs, e.g. Samplitude or Sequoia.
This section features a completely new input mask. Use the check boxes to
select whether video and/or audio should be exported. As required, a
selection may be made whether individual tracks should be rendered or
referenced as original files via EDL. Video rendering takes place in the DV-
AVI format, and audio rendering as WAV stereo. For Surround projects, 6
mono files will be rendered.
An export folder may be specified via the selection dialog. The EDL file and
the rendered files will be stored there as required.
Check boxes may be used to select whether the EDL file should be loaded
directly into Sequoia (if present). The program will either be launched
automatically, or the files will be added into a running instance of the
program. The user may enter the path to Sequoia in the input mask.
Clean-up wizard
The clean-up wizard helps delete projects from the hard drive, including all
of the media files used. Use this function to free up disk space for future
projects.
Caution: If the files you used in the movie have also been used in other
movies (like trailers, opening music, etc.), then you should make backup
copies of these files beforehand.
Shortcut: Ctrl + Shift + Y
Delete specific files
Choose this option if you would like to select certain files for deletion. In the
file selection dialog, you can select the desired files. In the next step, the
clean-up wizard searches for other files which belong to your selection.
Using this method, you can delete an entire movie with all of its
accompanying media, help, project, and backup files. Before they are
deleted, you will receive relevant information in a dialog and a confirmation
request.
Search and delete superfluous files
Choose this option if you would like to find unnecessary files or free up
some space on your hard drive. The clean-up wizard automatically looks for

280 Menus
extraneous files created during use of MAGIX Video Pro X3. Before they are
deleted, you receive relevant information in a dialog and a confirmation
request.
Advanced
"Advanced" lets you set which files and folders should be included in the
cleaning process.
Menus
Certain menu items are not available on the "Record" and "Burn" screens.
The menu reference describes the full menu as found on the "Edit" screen.
File Menu
New project
Creates a new MAGIX Video Pro X3 project. A dialog with settings for
a new disc project or a new film (view page 266) opens to get started.
Keyboard shortcut: Shift + N
Open
With this option you can load a project or a media file. Please note
that all media files associated with it must be loaded along with a
project. MAGIX Video Pro X3 will search for all used sounds and
video files in the folders in which they were located when the move
was saved.
Keyboard shortcut: Ctrl + O
Save project
The current disc project is saved with the name displayed in the
project window. If you have not specified a name for your project yet,
a dialog will open for you to do so.
Shortcut: Ctrl + S
Save project as...
A dialog opens where you can specify the path and name of the video for
saving.
Keyboard shortcut: Shift + O
www.magix.com
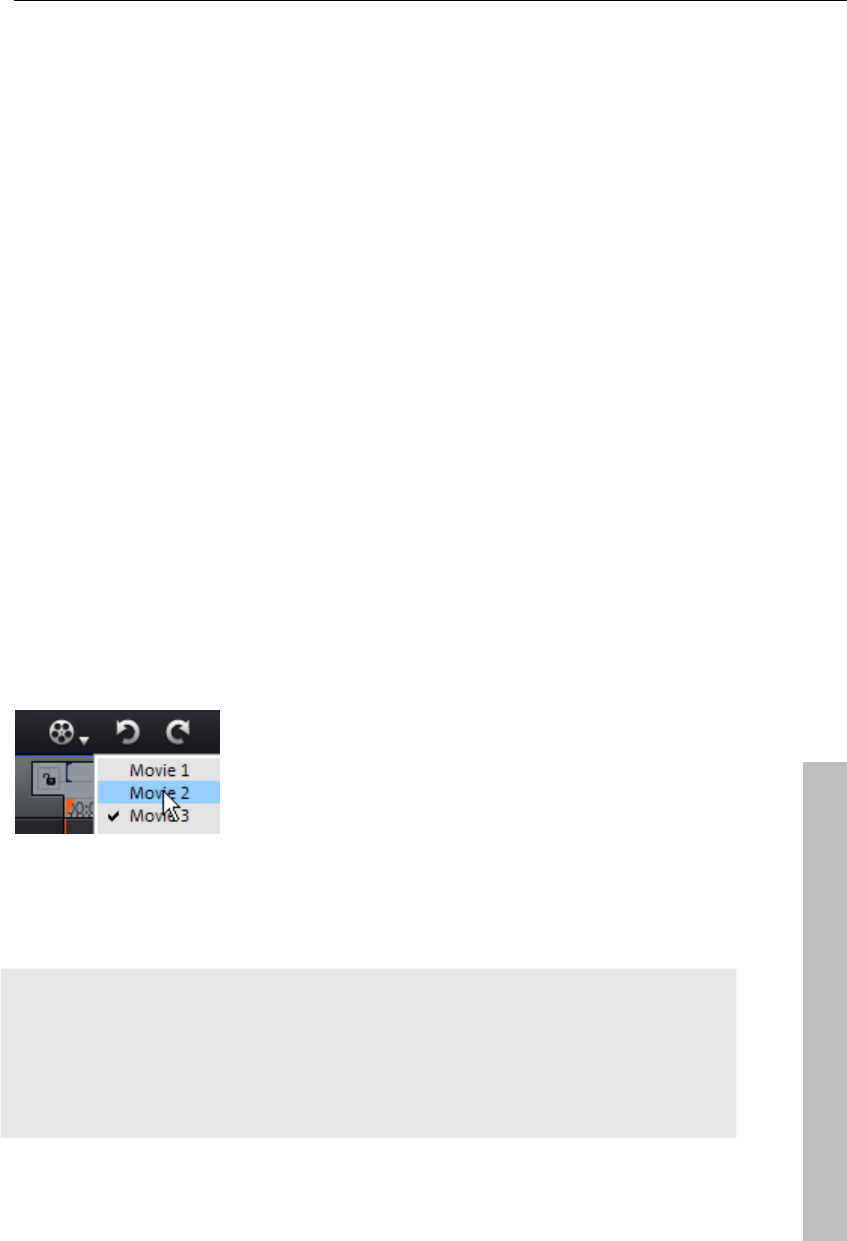
Menus 281
Manage movies
New movie
Use this option to create a new movie for your recordings and imported
files. Since a film is normally already opened, you will have to decide
whether the movie should be inserted into the existing project or if a new
project should be created.
Keyboard shortcut: Ctrl + Alt + N
Delete movie
This option lets you remove the current movie from the project. However, it
is still available on the hard drive and can be loaded again at any time.
Shortcut: Shift + F4
Attach movie
Using this function you can attach a movie to an opened one. This is then
attached to the end of the movie and automatically takes on the original
movie's settings.
Import movie file
Use this option to load a movie into your disc project. Please note that all
media files associated with it must be accessible. MAGIX Video Pro X3 will
search for all used sounds and video files in the folders in which they were
located when the move was saved.
www.magix.com
The "Select movie for editing" button lets you switch
between movies.
Export movie file
A dialog will open to enter a file name for the movie to be exported. The
movie may then be imported into other projects again.
Note: The movie file (*.mvd) includes all information about the media files
used, cuts, effects, and titles, but not about the image and sound material
itself. This is always contained in the recorded or imported media files,
which remains unchanged during editing with MAGIX Video Pro X3. In order
to save a movie in its own folder, e.g. for use on another PC, use the
function "Copy film and media to folder (view page 277)".
Shortcut: Ctrl + Alt + L
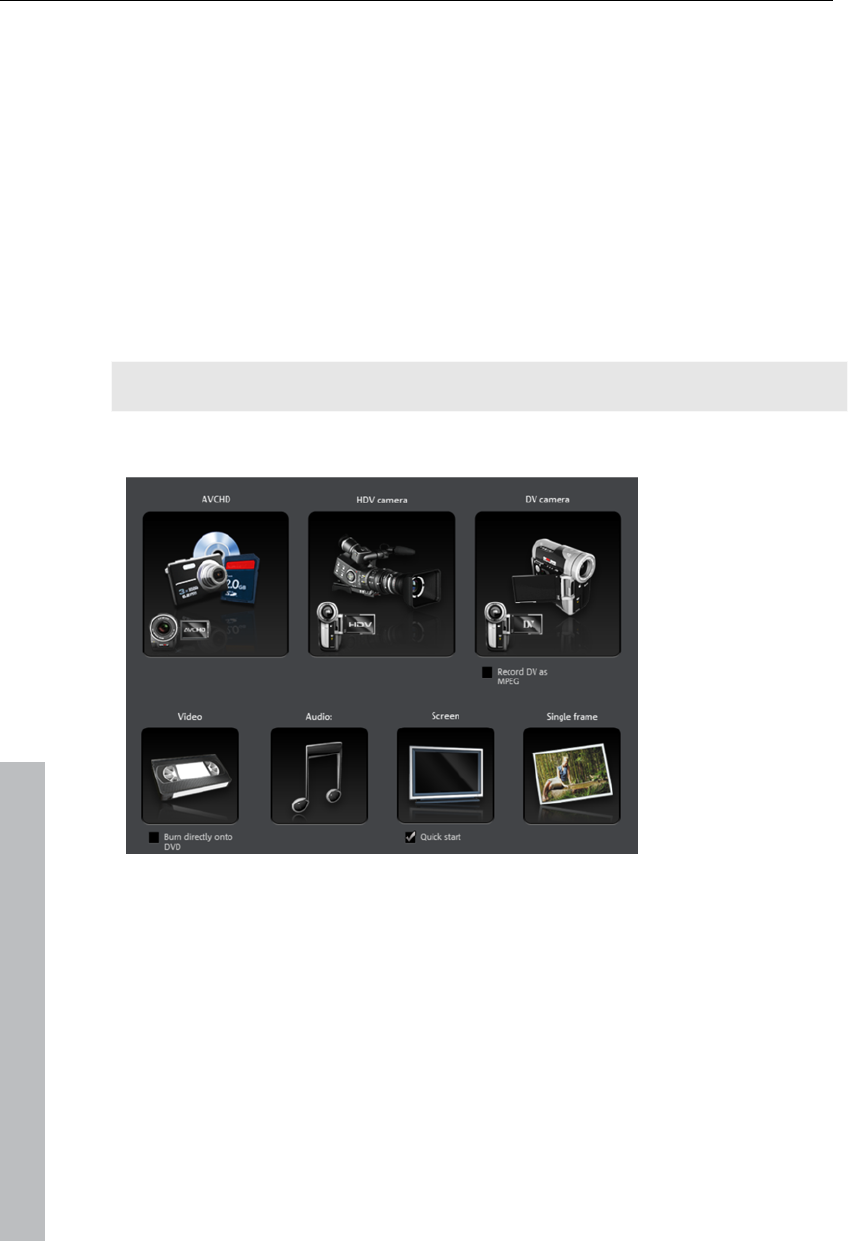
282 Menus
Export movie
This provides all export formats supported by MAGIX Video Pro X3 that
aren't covered by burning. Refer to "Exporting (view page 243)" for more
information.
Import media files into project folder
The files selected in the Media Pool will be imported into the project folder
(view page 57).
Clean up project folder
Unused media files will be removed from the project file.
Note: This function applies to the entire project.
Record audio / images / video
A selection window will open to choose the desired recording type. This may
also be accessed via the "Audio or video recording" button in the transport
controls.
Shortcut: R
Import Audio CD track(s)
A CD track may be imported via drag & drop from the Media Pool just like a
normal file. If this convenient method fails for some reason, then this menu
command may be accessed via the CD manager to insert tracks from audio
CDs directly into the arrangement. More about this is available in the
section "Import audio CD (view page 176)".
www.magix.com

Menus 283
www.magix.com
Scan image
Select scanner
The twain interface connects MAGIX Video Pro X3 with almost all current
scanners or digital cameras. Here's how to proceed the first time you scan
via the twain interface:
1. Install the twain software for the device.
2. Restart your computer.
3. Start MAGIX Video Pro X3.
4. Click on "File -> Twain scanner -> Select source", if the scanner works
with 32-bit software.
5. Click the device that you want to use in the dialog. This step will no
longer be necessary as long as the same device is used.
Start the scanning process
The scan window of your scan software will appear. Specify the resolution
and color depth in this window. Once the scan process is finished, the twain
software will normally switch off by itself – the scanned image file will be
added to MAGIX Video Pro X3 automatically. If the twain dialog remains
open, you will be able to scan multiple images in succession.
Import edit list (EDL)
Import cut lists in EDL format (view page 278) may be opened via this
menu.
Shortcut: Ctrl + D
Output to device
This command opens the dialog for outputting the completed video or its
soundtrack to analog or digital video recorders/camcorders or various
mobile devices such as smartphones, PDAs, video players, or games
consoles.
Please read the chapter "Output audio/video (view page 249)".
Shortcut: H
Batch conversion
This menu item accesses the batch processing (view page 241) function.
This quickly and efficiently converts multiple files, movies, or projects into
various video formats.
Shortcut: S

284 Menus
www.magix.com
Burn CD/DVD
Manually compile files
Opens MAGIX Speed burnR to burn videos or other files onto CD/DVD. File
selection is done via drag & drop from MAGIX Speed burnR's Explorer.
Shortcut: Ctrl + B
Copy CD/DVD direct
The dialog provides several options for creating a copy:
Copy: Here you can directly copy a non copy-protected CD or DVD.
Shrink: Compresses a DVD to the size of a regular single layer DVD+/-
R/RW. All files of the original DVD have to be on the hard drive.
Analog copy: Copies your video onto a disc via analog recording.
Read more about this in the chapter "Record".
Burn an already created (S)VCD/Video DVD
All necessary files, menus, and encoded video files needed to burn a
CD/DVD will be temporarily stored on your hard drive. After your disc is
burned, these are not automatically deleted. Using "Disc image" multi-copy,
you can uses these images to burn as many discs as you would like without
having to encode the files again.
In the dialog, choose the image you want. All necessary files are then
transferred to the MAGIX Speed burnR burning tool.
For more information on using MAGIX Speed burnR, read the program's
help file.
Internet
This is a list of menu entries regarding all of the services that are available
directly from within MAGIX Video Pro X3.
MAGIX Online Album/MAGIX Online Print Service/Catooh
For MAGIX Online World please read menu item Online!
Export to magix.info
This command allows you to export your movie to magix.info.
First, export your project in one of the following formats: asf, mov, mpg,
mpeg, mp4, wmv, 3gp, or avi. Next, access "File -> Internet -> magix.info ->

Menus 285
www.magix.com
Present videos on magix.info" to reach a page where you can upload your
video. You may need to register with magix.info.
Online login details
In this dialog, you can save your login information (login and password) for
MAGIX Online Album and all other MAGIX Online World as well as for
Catooh, making it unnecessary to login each time you access MAGIX Online
World.
The saved data are valid for all other MAGIX programs for the
corresponding computer user.
MAGIX Community
This is a direct connection between MAGIX and different communities like
YouTubeTM or VimeoTM.
Upload current movie as video
Uploads the current film to the selected portal or to the selected community.
Enter the data for video into the fields provided, so that the search function
for this portal can also find this video.
MAGIX Video Pro X3 partially uses the H.264 format for this, which is a
component of the MPEG-4 codec. Since Flash supports this format directly
and most communities and portals use the format, the film does not need to
be re-rendered on the corresponding server. This avoids loss of quality.
When HD material is uploaded, a resolution of 720p is used for the HD
format.
Upload all selected media in Media Pool
Uploads the media selected in the Media Pool to the corresponding portal or
the selective community.
Backup copy
Files must be saved to be able to be easily retrieved in case of a hard drive
crash or some other error.
For detailed information, read the Backup (view page 276) section in the
"Video project management" chapter.
Load backup project
This option loads an automatically created slideshow backup. This type of
automatic backup gets the file extension MV_ (underscore). This command
is only intended for use in emergencies, for example, if you unintentionally
saved your change and wish to return to the previous version of the movie.

286 Menus
Keyboard shortcut: Alt + O
Clean-up wizard
The clean-up wizard helps delete projects from the hard drive, including all
of the media files used. Use this function to free up disk space for future
projects.
Caution: If the files you used in the movie have also been used in other
movies (like trailers, opening music, etc.), then you should make backup
copies of these files beforehand.
Shortcut: Ctrl + Shift + Y
For detailed information, read the clean-up wizard (view page 279) section
in the "Video project management" chapter.
Settings
Movie settings
Opens the movie settings of the currently selected movie.
Keyboard shortcut: E
Program settings
Opens the program settings (view page 267).
Keyboard shortcut: Y
Keyboard shortcuts...
This menu entry opens a dialog for editing keyboard shortcuts (view page
334); this enables you to adjust MAGIX Video Pro X3 however you like.
Shortcut: Ctrl + Shift + U
Preview rendering
This menu opens the dialog for the preview rendering (view page 276)
settings
Shortcut: Alt + R
www.magix.com
Menus 287
Exit
Closes MAGIX Video Pro X3.
Keyboard shortcut: Alt + F4
Edit Menu
Undo
With this command you can undo the last changes you made. This
way, it's no problem if you want to try out critical operations. If you
don't like the result, then you can always revert to the previous state
by using "Undo".
Clicking on the arrow next to the button opens a list of changes made until
now, allowing you to undo several changes made in sequence.
Note: You can adjust the length of the list to your needs in program settings
(view page 267). In general: The longer the list, the more RAM is used.
Keyboard shortcut: Ctrl + Z
Redo
This function undoes the previous "Undo" function.
www.magix.com
Clicking on the arrow next to the button opens a list of changes made until
now, allowing you to undo several changes made in sequence.
Note: You can adjust the length of the list to your needs in program settings
(view page 267). In general: The longer the list, the more RAM is used.
Keyboard shortcut: Shift + Y
Cut objects
This function deletes the selected scene (or the selected object in
"Timeline" mode) and copies it to the clipboard. You can then use
the "Paste" command to copy it into any movie.
Keyboard shortcut: Ctrl + X
288 Menus
Copying objects
This function copies the selected scene (or the selected object in
Timeline mode) to the clipboard. You can then use the "Paste"
command to place it into any movie.
Keyboard shortcut: Ctrl + C
Paste objects
This command inserts the clipboard material (photo or object) at the
current position of the start marker.
Keyboard shortcut: Ctrl + V
Duplicate objects
This command duplicates all selected objects. The copies appear beside
the original and can be placed in the correct position using drag & drop.
Shortcut: D
Delete items
This function deletes the selected scene (or the selected object in the
Timeline mode).
Keyboard shortcut: Del
Select all objects
All objects in the arrangement will be selected.
Keyboard shortcut: Ctrl + A
Cut
Editing functions are also accessible using the toolbar. The last selected
function will appear in the toolbar as a button.
Split scene
This command cuts a scene at the point where the playback marker
is positioned. This way, two free-standing objects are created.
Keyboard shortcut: T
www.magix.com
Menus 289
Remove scene start
This command cuts a scene at the point where the start marker is
positioned, and deletes all material that precedes the start position
simultaneously.
Shortcut: Z
Remove scene end
This command cuts a scene at the point where the start marker is
positioned, and deletes all material behind the start position
simultaneously.
Shortcut: U
Remove scene
If you want to cut a scene out of a movie retroactively, this option
automatically moves all objects, titles, and transitions on all tracks
forwards so that no gaps result.
Objects on other tracks which project into the area of the selected scene will
not be moved automatically; they will remain at the current position.
Shortcut: Ctrl + Del
Split movie
This command divides the movie into two individual movies at the
position of the playback marker. The current arranger retains the
portion that is located in front of the playback marker.
www.magix.com
The remaining part will be erased from the current arranger and turned into
a new movie, which can be found in the "Window" menu.
Shortcut: Alt + Y
Musical cut adjustment
If you have edited your background music with the beat detection wizard
and a musical tempo was provided, then you can adjust the cuts to change
automatically in time with the beat using this command. All of the cuts (even
transitions) will be moved to correspond with quarter note positions.
Shortcut: Ctrl + Shift + H
Range
MAGIX Video Pro X3 provides object-based functions as well as "band-
oriented" editing functions. These always refer to the whole project from the
first to the last track as well as to the area between the start and end
marker.

290 Menus
www.magix.com
Cut out
The section between the in and out points is cut from the current
arrangement and placed on the clipboard. This section can then be
reinserted elsewhere.
Keyboard shortcut: Ctrl + Alt + X
Copy
The section between the in and out points is copied from the current
arrangement to the clipboard. This section can then be reinserted
elsewhere.
Keyboard shortcut: Ctrl + Alt + C
Delete
The section between the in and out points is deleted from the current
arrangement and not copied to the clipboard.
Keyboard shortcut: Ctrl + Del
Insert
The contents of the clipboard are inserted at the current arrangement's
position of the in point.
Keyboard shortcut: Ctrl + Alt + V
Extract
The section between the in and out points is preserved, and all of the
material in front and behind it are deleted. Use this option to isolate a
specific part of an arrangement for further individual editing.
Keyboard shortcut: Ctrl + Alt + P
Insert blank space
An empty section the length of the period between the in and out point will
be added to the first track. The objects following this will be moved.
Shortcut: C
Render range
The selected range will be rendered for the preview. See "Preview
rendering (view page 103)".
Shortcut: Ctrl + R

Menus 291
Discard rendered ranges
All rendered previews will be discarded; the video material will be rendered
again via the arrangement in real time and played back.
Discard rendered range beneath the play cursor
The rendered preview below the playback marker will be discarded; the
video material will be rendered again via the arrangement again in real time
and played back.
Form group
Orders all selected objects into groups. As soon as an object from
the group is selected, all other objects in the group will be highlighted
as well so that you can work on them collectively.
Keyboard shortcut: Ctrl + L
Ungroup objects
This turns all selected objects into free-standing objects again.
Keyboard shortcut: Ctrl + M
Wizards
Slideshow Maker
Opens the Slideshow Maker (view page 237)
www.magix.com
Keyboard shortcut: Ctrl + Shift + M
Soundtrack Maker
This command opens MAGIX Soundtrack Maker (view page 198).
Keyboard shortcut: W
Travel route animation
This menu entry opens the separate Travel route animation (view page 232)
program. This enables simple creation of animated travel routes with the
help of online maps.
Note: In order to be able to use current map data, maps are fetched by
Travel route animation directly from the Internet. This requires an active
Internet connection.

292 Menus
www.magix.com
Mixdown Audio
This option joins all audio objects in one audio file. The sound material will
only occupy one track of the arranger and will hardly affect the RAM, but it
will occupy approximately 10 MB (in stereo) on the hard drive. This will give
you more control over the arranger and more space for additional objects.
MAGIX Video Pro X3 automatically normalizes the audio file, i.e. the loudest
part of the wave audio object is identical with the highest figure of the 16-bit
resolution ceiling. This guarantees the same sound quality, even if you
repeat the mix down procedure or you combine the mix down file with other
wave audio objects again and again.
The mix function is very helpful if you want to go on using the mixdown
object. For the final AVI or WAV (or any other multi-media) file, which is
designed for burning a CD or for use on other PCs, use the "Export
arrangement" submenu options from the file menu instead of the mixdown
function.
Tip: Instead of using the mixdown function, you can use the various options
of th submenu "Export movie" in the File menu to create a final final *.avi or
*.wav (or any other multimedia) file.
Keyboard shortcut: Shift + M
Audio and video mixdown
In addition to the "Combine audio" function (see above), all video objects
including effects, fades, and edits are combined in a single MAGIX video file
(view page 244). If your computer starts to approach its limits, this enables
you to free resources for further editing.
Shortcut: Shift + M
Edit snap point
If the position of objects, object borders, markers, or of the playback marker
is changed with the mouse, then these will jump automatically to specific
"key positions" as soon as these are approached. This is called "snapping".
This enables objects at high zoom resolution to be positioned exactly
without gaps resulting, which will not be visible at this resolution. Normally,
object borders and markers snap together.
Per object, one additional snap point may now be placed within an object to
mark positions where other objects should snap to. This can be helpful, for
example, in case a title should be shown at a specific position of a video
object.

Menus 293
To set a snap point, select an object and place the playback marker at the
position where you would like the snap point to be.
"Set snap point" sets a snap point, and "Delete snap point" removes it
again. If the option "Set snap point" is selected at another position, the
snap point will be moved.
"Delete all snap points" deletes all snap points for all objects.
Shortcut: Ctrl + P
Marker
Set project marker
This option places a project marker at the current playback position. More
information about project markers is available in the chapter "Markers"
under "Set project marker (view page 102)".
Shortcut: Ctrl + Enter
Delete project marker
Deletes the selected project marker (view page 102). Project markers can
be deleted and renamed via the context menu.
Set chapter markers
Places a chapter marker at the position of the playback marker. This
creates a chapter entry in the disc menu in case the movie is being
burned to disc.
You can rename the chapter markers by right clicking and selecting
"Rename". The new name will appear in the chapter menu (view page 201).
www.magix.com
Shortcut: Shift + enter
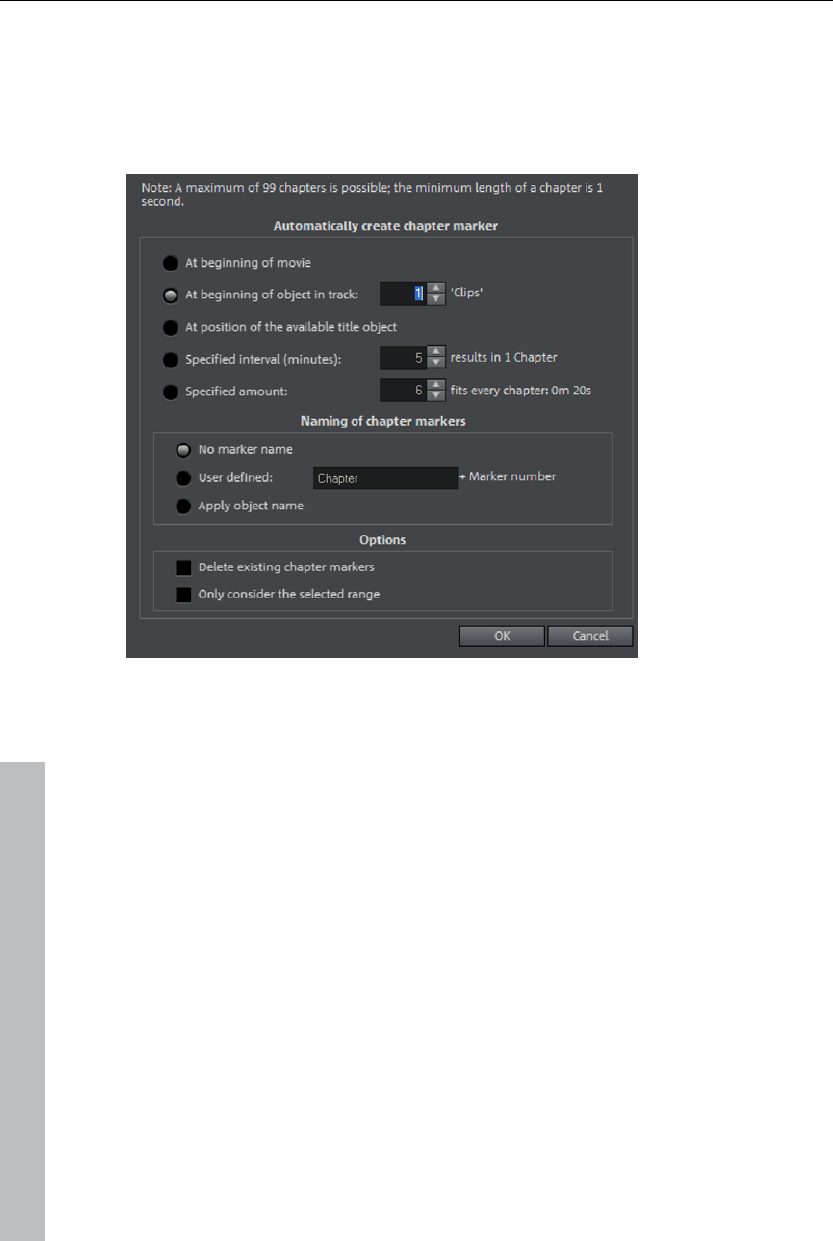
294 Menus
Set chapter markers automatically
This option automatically sets chapter markers in the arrangement
according to specific rules that will then appear in the film menu of a disc as
chapters. This is useful if a disc should be burned immediately after
recording.
There is a selection of options available for automatic chapter generation:
At the beginning of the movie: The movie only contains one chapter in this
case.
At the start of objects on a track...: Every object in a track creates a chapter;
track 1 is preset.
At the position of existing title objects: Subtitles, for instance, as faded-in
subheadings, give the position of the chapter markers.
Provide interval (in minutes)/provide quantity: If the chapters are separated
without any particular method and are just needed for quicker navigation,
chapter markers may also be inserted in pre-defined intervals or as a pre-
defined number of chapter markers.
Titling of chapter markers: To title the chapter markers, a user-defined name
featuring consecutive numbers or the object name or text from the text
objects may be used.
www.magix.com

Menus 295
www.magix.com
Optionally, existing chapter markers may be deleted and the automatic
chapter marker function may be limited to the area between the start and
end markers.
Shortcut: Alt + Shift + Enter
Delete chapter markers/delete all chapter markers
Delete one or all chapter markers. This removes chapter entries in the disc
menu if the film is burned to disc.
Shortcut: Ctrl + Enter / Alt + Ctrl + Enter
Marker -> Set range start/end
Sets a range start/end marker at the position of the playback marker.
Keyboard shortcut: I/O
Marker -> Jump to range start/end
Sets the playback marker at the position of the range start/end.
Shortcut: Shift + I/O
Range above blank space
The start and end of the range in the film will be set to the respective
borders of the empty space that is clicked on.
Shortcut: X
Marker -> Reset selected range
Deletes the range start and the range end.
Move screen view
Using these commands, a viewable portion together with the start marker
will be moved in the timeline. You can quickly skip between different
markers (skip, chapter, scene, ad-marker) and object edges.
Keyboard shortcut: See "Keyboard shortcuts", "Arranger". (view page
329)

296 Menus
www.magix.com
Effects Menu (FX)
Master effects
This menu item accesses the movie's effect settings (view page 142). The
settings affected here apply to the entire movie.
Shortcut: Ctrl + Shift + H
Video object effects
Scene recognition
Calls up the automatic scene recognition, which "cuts up" longer videos into
scenes for storage in the "Takes" directory.
Keyboard shortcut: Shift + Z
Image stabilization
Opens the image stabilization dialog to correct "wobbly" recordings. Read
more about this in the chapter "Image stabilization (view page 140)".
Shortcut: Ctrl + L
Find and remove ads
Opens the dialog for searching and removing advertising (view page 226).
Edit in external editor
Graphics files (BMPs or JPEGs) may be edited retroactively with an external
graphics program from the arranger. The selected image file will be loaded
automatically and used in MAGIX Video Pro X3 in place of the original
material automatically. MAGIX Video Pro X3 includes the high-performance
image editing program "MAGIX Photo Designer" for this purpose.
Shortcut: Alt + Shift + D
Save photos with effects
This allows you to save photos used in the movie and add the object effects
used in MAGIX Video Pro X3 (e.g. StoryMaker) to the photo.
Create panorama...
Opens the dialog for setting a panorama. Place as many photos in the
correct order as you like, and align brightness and color settings to get the
best results. You should make sure that the photos harmonize at the
transitions.

Menus 297
www.magix.com
Video effects
These are the various effects which can be applied to videos and stills. The
effects can be set after an object is selected in the respective effects dialog
which appears. For more information, see the "Video effects in the Media
Pool (view page 119)" chapter.
Video effect templates
This features general templates that can be added to the video objects via
drag & drop and several video mix effects that can be quickly and easily
applied, e.g. bluescreen.
Movement effects
These are movement effects you can use to animate the frame by using
zoom or camera movements. For more information, go to the "Effects and
titles" chapter in "Movement effects in Media Pool (view page 129)".
Movement effect templates
These are templates for movement effects. These can be added from the
Media Pool into the arrangement by double-clicking or via drag & drop.
Background design
Select a color, a picture, or any video on your hard disk which you would
like to serve as the background for the photo displayed. This function is
especially useful when photos have black bars around them, or if they are
reduced in size.
Reset background
Resets the background design (view page 297) settings to default settings.
Set as background
Uses the selected photo or video as the background.
Load video effects
This command enables a saved effects combination to be loaded for the
currently loaded object. If multiple objects are selected, then the effects
combination will be applied to each selected object.
Shortcut: Ctrl + -
Save video effects
This command saves the current effects combination for each object
separately.
Shortcut: Alt + -

298 Menus
www.magix.com
Reset video effects
This option allows you to deactivate all currently used effects entirely if you
want to undo the changes.
Shortcut: Ctrl + Alt + -
Copy video effects
Effects settings for an object may be copied to the clipboard to add (view
page 298) them to other objects.
Shortcut: -
Insert video effects
Video effects may be inserted into the selected object from other objects.
The settings must be copied (view page 298) beforehand into the clipboard.
Shortcut: Shift + -
Apply video effects to all
The current effects settings will be applied to all scenes and photos in your
movie.
Apply video effects to all of the following
The current effects settings will be applied to all scenes and photos in your
movie which lie behind the selected object.
Audio object effects
Normalize
The function "Normalize" raises the level of an audio object to the maximum
possible level without clipping the material. This searches for the largest
signal peak in the audio material and raises the level of the object so that
this position matches exactly 0 dB (maximum overdrive).
Shortcut: Alt + N
Automatic track damping
Please see Reduce volume (view page 176) in the audio effects chapter.
Shortcut: Alt + L

Menus 299
www.magix.com
Set volume
This function, located in both the effects menu and the context menu,
controls the sound volume for individual objects, just like the object handles
in the arranger.
Audio cleaning
Opens the "Audio Cleaning (More Informationen can be found in the section
"Sound optimization" on page 160)" dialog.
Shortcut: Alt + A
Echo/Hall
Please see "Reverb/Echo" in the chapter "Audio effects".
Keyboard shortcut: Shift + H
Timestretch/resample
Read more about this in Timestretch/resample.
Shortcut: Ctrl + Q
Surround
Surround, see Surround, chapter Audio effects
Keyboard shortcut: Ctrl + Shift + N
Load audio effects
This command enables a saved effects combination to be loaded for the
currently loaded object. If multiple objects are selected, then the effects
combination will be applied to each selected object.
Shortcut: Ctrl + +
Save audio effects
This command saves the current effects combination for each object
separately.
Shortcut: Shift + +
Reset audio effects
This option allows you to deactivate all currently used effects entirely if you
want to undo the changes.
Shortcut: Ctrl + Alt + +

300 Menus
BPM Wizard
Read the section concerning the Tempo and beat recognition in the chapter
"Audio" for more about this.
Shortcut: Alt + Shift + R
Volume curve
The most important effect, the volume, is available here directly. The
volume is also available via the Media Pool under "Effects -> Audio effects -
> General (view page 134)", where it may also be animated.
Shortcut: Ctrl + Shift + V
Title Effects
Title Editor
Opens the Title editor (More Informationen can be found in the section
"Title editor" on page 113) for the selected photo, video, or title object.
Keyboard shortcut: Ctrl + T
Load title effects
You can save the current effect combination for each title object separately
and apply it to other title objects later.
Shortcut: Alt + T
Save title effects
You can save the current effect combination for each title object separately
and apply it to other title objects later.
Shortcut: Ctrl + Shift + T
Design elements
Multi picture-in-picture: These are various effects presets for image stacking.
Collages: These work similarly to normal picture-in-picture effects, but more
objects are used. Depending on the collage, arrange the selected objects
one after the other and drag the collage onto the first object.
Portrait effects: Select individual effects which are especially suited to
vertically formatted photos.
Image objects: These are various image objects like black bars, thought
bubbles for cartoons, etc.
www.magix.com

Menus 301
Intros/Outros: These are beginning and end scenes for films with various
themes.
Visuals: Graphical displays of any played sounds which can be combined
with other video material.
Effects library
Using these menu choices, you can control the corresponding directories in
the Media Pool.
Synthesizer
Synthesizers can be loaded as individual objects. More information is
available in "Synthesizers".
Windows menu
Workspace
Switch between the classic Movie Edit Pro screen with a single monitor or
the normal MAGIX Video Pro X3 view. More information can be found in the
chapter "Notes for MAGIX Movie Edit Pro users (view page 19)".
Cut Trimmer
www.magix.com
Shows or hides the "Cut trimmer" window. This allows you to make fine
adjustments to the position of the selected video or image objects and their
handles – as well as the transition characteristics (transition type, length).
Please read the "Fine adjustment of video ("Trimming")" chapter for more
details.
Keyboard shortcut: N
Object trimmer
Shows or hides the trim window. This enables the position of the selected
video or image object and its handles to be adjusted more finely. Read the
chapter "Adjusting videos precisely" ("Trimming").
Shortcut: Shift + N
Mixer
This option allows you to display or conceal the real-time mixer. You
will find further information, especially with regard to the integration of
effects plug-ins, in the chapter "Mixer".
Keyboard shortcut: M

302 Menus
www.magix.com
Master audio effect rack
Opens or closes the master effects rack; you can also use the "Master FX"
button in the mixer window for this.
Keyboard shortcut: B
Mastering Suite
This opens the Mastering Suite (view page 171).
Source monitor
The source monitor provides an opportunity to preview and edit files in the
Media Pool, and these can in turn be dragged into the project folder or the
arrangement from the source monitor.
For the exact options for cutting in the source monitor, please see the
chapter "Section markers in the source monitor (view page 103)".
Program monitor
Hides or shows the program monitor.
Shortcut: Shift + V
Media Pool
With this option you can conceal the Media Pool or make it visible again.
Shortcut: Shift + P
Project
Shows/Hides the arranger
Project folder
Hides or shows the project folder.
Shortcut: Shift + B
Display settings
More about this is available in "Program settings -> "Display presets (view
page 273)".
Shortcut: Alt + Shift + V

Menus 303
Show movie overview
With this option, you can display an overview of the entire arrangement on
the video screen. It is particularly suitable for long and complex
arrangements to prevent you from losing track. You can view the whole
movie and you are, despite this, able to access the object you're looking for
in a split second – you can zoom in directly on the video monitor or move
around the clip displayed in the arranger.
Shortcut: Shift + A
Optimize movie view
The zoom level is set to 100% so that you can see every object and
the entire film.
The start and end markers are set to the beginning or end, so that the entire
movie can be played.
Shortcut: Ctrl + F
Zoom horizontal
Here you will find a range of functions for altering the visible time axis
section.
Zoom vertical
The number of simultaneously visible tracks can be changed here. The
more tracks are visible, the smaller they will appear.
Close all movies
www.magix.com
Closes all opened movies.
Help Menu
Help
This command is available for almost every feature of the program, and it
opens the "Help" file for the corresponding topic. Use this command to get
help on any of MAGIX Video Pro X3's functions.
Keyboard shortcut: F1
Content
Use the command "Content" in the "Help" menu to open the start page of
the help file. You can read through the help file step-by-step and jump to
specific sections via the tree structure on the right hand side.

304 Menus
Context help
By choosing the context help entry from the "Help" menu, or by
clicking on the button in the top toolbar, the mouse cursor will turn into
an arrow with a question mark.
Then, when you click on any button of the main screen, program help
describing the control element in question will open.
Keyboard shortcut: Alt + F1
Online tutorials
Interesting tutorials and useful tips for working with MAGIX Video Pro X3
can be found on the MAGIX website.
An online connection is required.
Display Tool Tips
Tooltips are small information windows that open up automatically if the
mouse pointer stops briefly on a button or some other area. They provide
information about the function of the button. These information boxes can
be switched on or off with this option.
Keyboard shortcut: Ctrl + Shift + F1
About MAGIX Video Pro X3
Displays copyright info and version number of MAGIX Video Pro X3.
Register online
This option opens the MAGIX homepage for online registration where you
can register yourself as a MAGIX user.
Registration grants you access to the MAGIX support website
http://support.magix.net (see support) where various program updates and
help programs can be downloaded.
With the registration form supplied (start menu under "MAGIX Video Pro X3
-> Service and support -> Register") you can register via post or fax. Simply
print it out, fill it in, and send it off!
Online Update
Connects directly to the online update page where you can get the latest
version of your program.
www.magix.com

Context menu (right click) 305
www.magix.com
System information
Information on the current date and time appear in this Information window,
in addition to the number of files that have just been opened, the total size
of the memory in the system and the size of the memory used by the
MAGIX Video Pro X3. In short, a list of all available drives and their
available memory capacity.
The memory area used by the MAGIX Video Pro X3 should never be larger
than the physical RAM in the computer, as otherwise the performance will
drop drastically during replay as a result of virtual memory swapping!
Keyboard shortcut: Ctrl + I
Reset Program Settings to Default...
Use this function to reset all program settings you made in MAGIX Video
Pro X3 to their original settings.
Context menu (right click)
Context menu can be reached by right clicking on a selected object. It offers
functions which are available and can be expected in the given context.
Video objects
Create frame table (new)
Sometimes, rebuilding a frame table can get rid of problems in certain
MPEG files. For example, such problems can be present if the navigation
(positioning of the playback marker, transport) is bumpy or doesn't function
at all.
Normally, when loading MPEG video, a frame table is not created in order to
speed up the loading process. If you do create one anyway, MPEG files are
normally noticeably faster and easier to edit.
Cut Trimmer
Shows or hides the "Cut trimmer" window. This allows you to make fine
adjustments to the position of the selected video or image objects and their
handles – as well as the transition characteristics (transition type, length).
Please read the "Fine adjustment of video ("Trimming")" chapter for more
details.
Keyboard shortcut: N

306 Context menu (right click)
www.magix.com
Object trimmer
Shows or hides the trim window. This enables the position of the selected
video or image object and its handles to be adjusted more finely. Read the
chapter "Adjusting videos precisely" ("Trimming").
Shortcut: Shift + N
Edit snap point
If the position of objects, object borders, markers, or of the playback marker
is changed with the mouse, then these will jump automatically to specific
"key positions" as soon as these are approached. This is called "snapping".
This enables objects at high zoom resolution to be positioned exactly
without gaps resulting, which will not be visible at this resolution. Normally,
object borders and markers snap together.
Per object, one additional snap point may now be placed within an object to
mark positions where other objects should snap to. This can be helpful, for
example, in case a title should be shown at a specific position of a video
object.
To set a snap point, select an object and place the playback marker at the
position where you would like the snap point to be.
"Set snap point" sets a snap point, and "Delete snap point" removes it
again. If the option "Set snap point" is selected at another position, the
snap point will be moved.
"Delete all snap points" deletes all snap points for all objects.
Shortcut: Ctrl + P
Create still frame
MAGIX Video Pro X3 can create a still frame of an object at the position of
the start marker.
Motion
Lets you move video objects on the screen. See "Movement" in the "Video
effects" chapter.
Section
Places video objects in a particular part of the screen. Please read the
"Video effects" chapter for more details.
Attach to picture position in the video
This can be used to attach the current video, image, or (3D) text object to a
movement path in another video object. Read more about this in the chapter
"Magnetic objects (view page 91)".
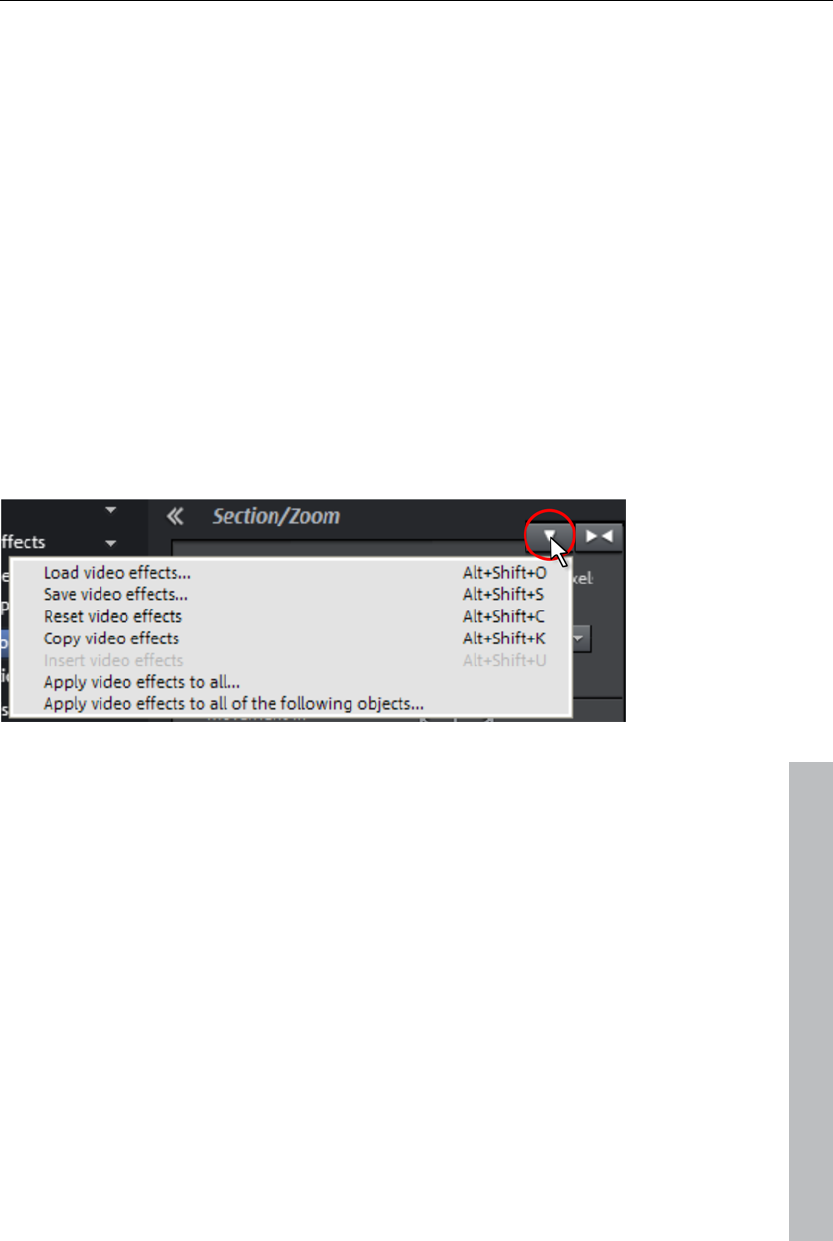
Context menu (right click) 307
Interpolation for interlace material
Choose this option to remove interlace artifacts from your video image. If,
for instance, you extract freeze frames from a video, ridge structures appear
in sequences which feature movement.
Anti-flicker filter
Choose this option for still pictures with detailed structures and high
contrast. This filter reduces line flickering during TV playback.
Border cropping adjustment:
Select this option if the edges are cropped during playback on your
television. Values stored in "Movie effects settings (view page 143)"
("Effects" menu) will be applied.
Video effects
The entries for this submenu are directly available in the Media Pool.
www.magix.com
Insert objects into the project folder
Every single object can be added to the project folder and used again later.
All of the object's properties will be maintained. This is useful, for example,
if the video material should be edited beforehand and then arranged in the
next step.
Fade in date as title
MAGIX Video Pro X3 can add a time or date (“time code”) to the picture
material. To add a time code, right-click the video object and choose the
“Fade in date as title” option from the context menu.
If you’re using a DV-AVI file (a digital recording from a camcorder, for
instance), the recording date will be used from the chosen place. If you’re
using a different file, the creation date will be used as the time code. The
title editor is then opened in order to customize the entry.

308 Context menu (right click)
www.magix.com
In the preview monitor context menu you will also find the "Display play
time" option. This will create a time code.
Object properties
This function displays all of the information about the currently selected
objects such as file name, position on the hard drive, tempo, etc. The object
editor also defines the foreground and background color of every object in
the arrangement. Depending on the type of object, the elements displayed
will vary.
General Information
The name of the selected object and the fore/background color for the
object in unselected status can be changed here. Additional information is
also displayed about which file the selected object points to.
Interlace/Deinterlace (only for video objects)
The tab "Interlace/Deinterlace" lets you specify the interlace editing of the
video material.
Interlace Properties: Normally, MAGIX Video Pro X3 automatically makes
suitable settings for this; however, if the video material is faulty, you may
have to make some adjustments yourself. If playback of the exported movie
is very jittery or if flickering occurs, or if some effects do not look how they
should, you can reverse the source material frames.
Deinterlace Options: Normally, the setting "Automatic interlace processing"
does not have to be changed. The frames are processed separately and
passed to the encoder when exported. If necessary, MAGIX Video Pro X3
will perform high-quality interlacing. If "No interlace processing" is set, then
it is assumed that the source material contains full frames.
For more information on interlacing, please see „Interlace“ (view page 368).
Tempo/Pitch (audio objects only)
If there is information about the tempo, then the tempo can be doubled or
halved here. The tempo can be detected using Tempo and beat recognition.
Keyboard shortcut: Ctrl + E

Context menu (right click) 309
www.magix.com
Image objects
Edit snap point
If the position of objects, object borders, markers, or of the playback marker
is changed with the mouse, then these will jump automatically to specific
"key positions" as soon as these are approached. This is called "snapping".
This enables objects at high zoom resolution to be positioned exactly
without gaps resulting, which will not be visible at this resolution. Normally,
object borders and markers snap together.
Per object, one additional snap point may now be placed within an object to
mark positions where other objects should snap to. This can be helpful, for
example, in case a title should be shown at a specific position of a video
object.
To set a snap point, select an object and place the playback marker at the
position where you would like the snap point to be.
"Set snap point" sets a snap point, and "Delete snap point" removes it
again. If the option "Set snap point" is selected at another position, the
snap point will be moved.
"Delete all snap points" deletes all snap points for all objects.
Shortcut: Ctrl + P
Change photo length
This dialog gives exact values regarding the display duration for the
selected photo. You may select multiple photos beforehand to change their
display duration at once.
Motion
Lets you move video objects on the screen. See "Movement" in the "Video
effects" chapter.
Section
Places video objects in a particular part of the screen. Please read the
"Video effects" chapter for more details.
Attach to picture position in the video
This can be used to attach the current video, image, or (3D) text object to a
movement path in another video object. Read more about this in the chapter
"Magnetic objects (view page 91)".
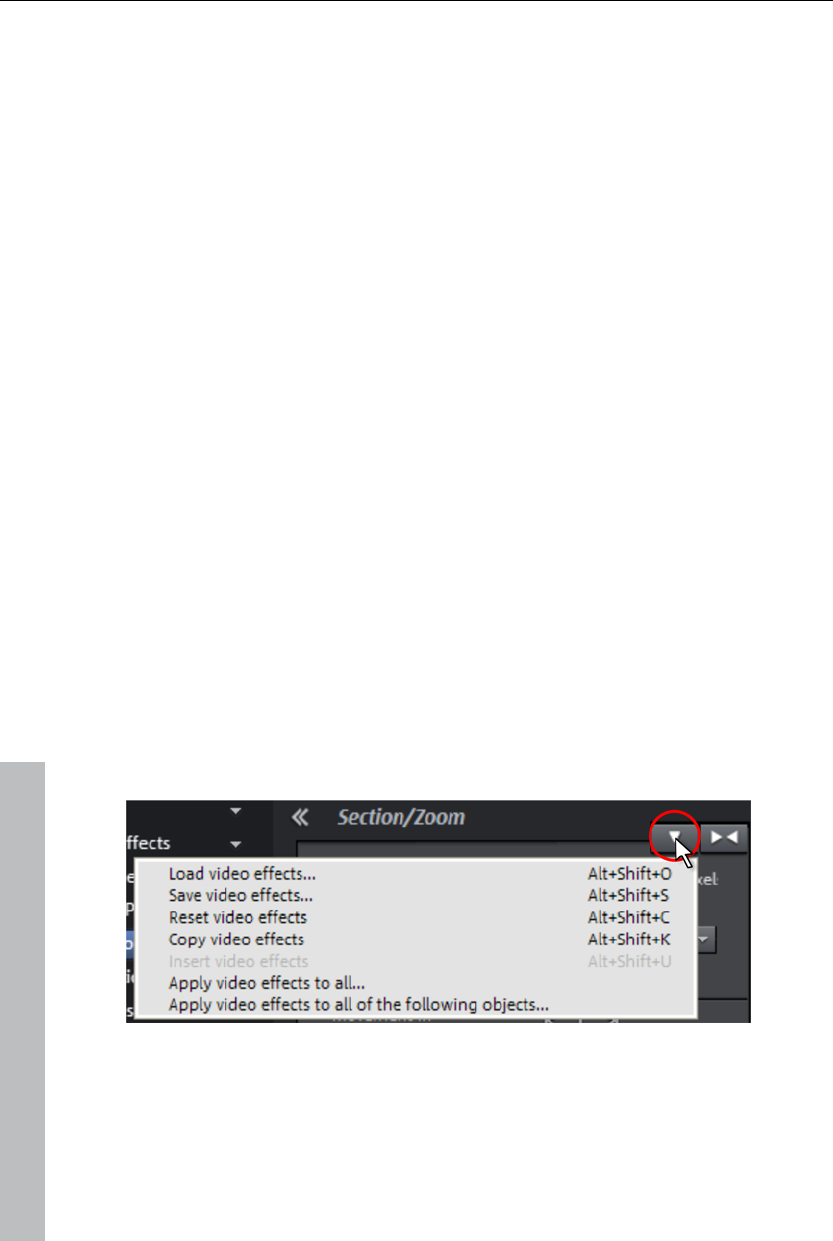
310 Context menu (right click)
Cut automatically to fit screen
This function ensures that images don't have black edges (in case they
don't fit into the given format).
Anti-flicker filter
Choose this option for still pictures with detailed structures and high
contrast. This filter reduces line flickering during TV playback.
Border cropping adjustment:
Select this option if the edges are cropped during playback on your
television. Values stored in "Movie effects settings (view page 143)"
("Effects" menu) will be applied.
Export to MAGIX Online Album
Log in to the MAGIX Online Album service and load images and music into
the album to share them with your friends and acquaintances in the Internet.
The assistant will lead you step-by-step through the uploading process.
After the process is finished, you can access your updated MAGIX Online
Album.
Export to MAGIX Online Print Service
Use MAGIX Online Print Service to order high-quality photo prints or
fantastic printed photo gifts of your valuable digital photos simply with one
click.
Video effects
The entries for this submenu are directly available in the Media Pool.
Insert objects into the project folder
Every single object can be added to the project folder and used again later.
All of the object's properties will be maintained. This is useful, for example,
if the video material should be edited beforehand and then arranged in the
next step.
www.magix.com

Context menu (right click) 311
www.magix.com
Object properties
This function displays all of the information about the currently selected
objects such as file name, position on the hard drive, tempo, etc. The object
editor also defines the foreground and background color of every object in
the arrangement. Depending on the type of object, the elements displayed
will vary.
General Information
The name of the selected object and the fore/background color for the
object in unselected status can be changed here. Additional information is
also displayed about which file the selected object points to.
Interlace/Deinterlace (only for video objects)
The tab "Interlace/Deinterlace" lets you specify the interlace editing of the
video material.
Interlace Properties: Normally, MAGIX Video Pro X3 automatically makes
suitable settings for this; however, if the video material is faulty, you may
have to make some adjustments yourself. If playback of the exported movie
is very jittery or if flickering occurs, or if some effects do not look how they
should, you can reverse the source material frames.
Deinterlace Options: Normally, the setting "Automatic interlace processing"
does not have to be changed. The frames are processed separately and
passed to the encoder when exported. If necessary, MAGIX Video Pro X3
will perform high-quality interlacing. If "No interlace processing" is set, then
it is assumed that the source material contains full frames.
For more information on interlacing, please see „Interlace“ (view page 368).
Tempo/Pitch (audio objects only)
If there is information about the tempo, then the tempo can be doubled or
halved here. The tempo can be detected using Tempo and beat recognition.
Keyboard shortcut: Ctrl + E
Transitions
Cut Trimmer
Shows or hides the "Cut trimmer" window. This allows you to make fine
adjustments to the position of the selected video or image objects and their
handles – as well as the transition characteristics (transition type, length).

312 Context menu (right click)
www.magix.com
Please read the "Fine adjustment of video ("Trimming")" chapter for more
details.
Keyboard shortcut: N
Settings...
A dialog with the settings for the corresponding transition will be displayed.
Depending on the transition, different settings are available.
Audio objects
Create wave form
In most cases, the waveform display of an audio file will not be required.
However, if you require this, e.g. to navigate while cutting video, a waveform
display can be produced manually via this function.
Edit snap point
If the position of objects, object borders, markers, or of the playback marker
is changed with the mouse, then these will jump automatically to specific
"key positions" as soon as these are approached. This is called "snapping".
This enables objects at high zoom resolution to be positioned exactly
without gaps resulting, which will not be visible at this resolution. Normally,
object borders and markers snap together.
Per object, one additional snap point may now be placed within an object to
mark positions where other objects should snap to. This can be helpful, for
example, in case a title should be shown at a specific position of a video
object.
To set a snap point, select an object and place the playback marker at the
position where you would like the snap point to be.
"Set snap point" sets a snap point, and "Delete snap point" removes it
again. If the option "Set snap point" is selected at another position, the
snap point will be moved.
"Delete all snap points" deletes all snap points for all objects.
Shortcut: Ctrl + P
BPM Wizard
Read the section concerning the Tempo and beat recognition in the chapter
"Audio" for more about this.
Shortcut: Alt + Shift + R

Context menu (right click) 313
www.magix.com
Insert objects into the project folder
Every single object can be added to the project folder and used again later.
All of the object's properties will be maintained. This is useful, for example,
if the video material should be edited beforehand and then arranged in the
next step.
Edit wave files externally
Audio files from the arranger can be post-edited in an external wave editor
program. The selected audio file is loaded automatically and, once editing
has been completed, is used in the MAGIX Video Pro X3 instead of the
original material. For this purpose, MAGIX Video Pro X3 comes with a
powerful audio editing tool: MAGIX Music Editor.
Keyboard shortcut: Alt + Z
Volume curve
The most important effect, the volume, is available here directly. The
volume is also available via the Media Pool under "Effects -> Audio effects -
> General (view page 134)", where it may also be animated.
Shortcut: Ctrl + Shift + V
Audio effects curves
This feature provides direct access to diverse object effects, and these can
be automated using a curve. All of the audio effects listed here are found in
the Media Pool under "Effects -> Audio effects -> General".
Align other audio objects with this track
Video objects grouped with audio objects may be used to synchronize
recordings from different camera perspectives.
For more information, please see the topic "Synchronize video objects using
the audio track (view page 111)".
Split stereo objects into mono objects
An audio object in stereo format can be split into two mono objects very
easily using this function. The original track will then feature the audio
object with the left channel, and an automatically added track will feature
the object with the right channel.
This is useful if the channels were switched by accident during recording,
i.e. due to incorrect cabling. In this case, simply open the mixer and set the
pan setting to the correct position for each channel.

314 Context menu (right click)
www.magix.com
Display track curves
The most recently selected track curve is displayed on the object for editing.
Use of a curve causes the parameters set in the mixer to be disregarded.
Note: The track curves of audio objects can be animated in the same way as
video effects. Read more about this in the chapter "Animating objects (view
page 144)".
Reset track curves
All track curves can be reset with this function. The settings made in the
mixer will be applied to the track again.
Caution! Before applying this function, make sure none of the track curves
will be need in the future.
Export to MAGIX Online Album
Log in to the MAGIX Online Album service and load images and music into
the album to share them with your friends and acquaintances in the Internet.
The assistant will lead you step-by-step through the uploading process.
After the process is finished, you can access your updated MAGIX Online
Album.
Object properties
This function displays all of the information about the currently selected
objects such as file name, position on the hard drive, tempo, etc. The object
editor also defines the foreground and background color of every object in
the arrangement. Depending on the type of object, the elements displayed
will vary.
General Information
The name of the selected object and the fore/background color for the
object in unselected status can be changed here. Additional information is
also displayed about which file the selected object points to.
Interlace/Deinterlace (only for video objects)
The tab "Interlace/Deinterlace" lets you specify the interlace editing of the
video material.
Interlace Properties: Normally, MAGIX Video Pro X3 automatically makes
suitable settings for this; however, if the video material is faulty, you may
have to make some adjustments yourself. If playback of the exported movie

Context menu (right click) 315
is very jittery or if flickering occurs, or if some effects do not look how they
should, you can reverse the source material frames.
Deinterlace Options: Normally, the setting "Automatic interlace processing"
does not have to be changed. The frames are processed separately and
passed to the encoder when exported. If necessary, MAGIX Video Pro X3
will perform high-quality interlacing. If "No interlace processing" is set, then
it is assumed that the source material contains full frames.
For more information on interlacing, please see „Interlace“ (view page 368).
Tempo/Pitch (audio objects only)
If there is information about the tempo, then the tempo can be doubled or
halved here. The tempo can be detected using Tempo and beat recognition.
Keyboard shortcut: Ctrl + E
Text objects
Title Editor
Opens the Title editor (More Informationen can be found in the section
"Title editor" on page 113) for the selected photo, video, or title object.
Keyboard shortcut: Ctrl + T
Disable effects
All effects applied to the text will be deactivated.
www.magix.com
Edit snap point
If the position of objects, object borders, markers, or of the playback marker
is changed with the mouse, then these will jump automatically to specific
"key positions" as soon as these are approached. This is called "snapping".
This enables objects at high zoom resolution to be positioned exactly
without gaps resulting, which will not be visible at this resolution. Normally,
object borders and markers snap together.
Per object, one additional snap point may now be placed within an object to
mark positions where other objects should snap to. This can be helpful, for
example, in case a title should be shown at a specific position of a video
object.
To set a snap point, select an object and place the playback marker at the
position where you would like the snap point to be.

316 Context menu (right click)
www.magix.com
"Set snap point" sets a snap point, and "Delete snap point" removes it
again. If the option "Set snap point" is selected at another position, the
snap point will be moved.
"Delete all snap points" deletes all snap points for all objects.
Shortcut: Ctrl + P
Load title template
A dialog for loading a title template will open.
Save as title template
This allows you to create your own templates using your title creations. The
function "Load title template" enables these templates to be used again
quickly.
Save as special effect
This function saves the title with all objects that have been grouped (view
page 291) with the title object. This enables you to create title templates
that contain all required overlay objects.
Convert to 3D title
The title object will now be turned into a MAGIX 3D Maker object, and a
limited version of MAGIX 3D Maker will open.
Attach to picture position in the video
This can be used to attach the current video, image, or (3D) text object to a
movement path in another video object. Read more about this in the chapter
"Magnetic objects (view page 91)".
Border cropping adjustment:
Select this option if the edges are cropped during playback on your
television. Values stored in "Movie effects settings (view page 143)"
("Effects" menu) will be applied.
Insert objects into the project folder
Every single object can be added to the project folder and used again later.
All of the object's properties will be maintained. This is useful, for example,
if the video material should be edited beforehand and then arranged in the
next step.

Context menu (right click) 317
www.magix.com
Object properties
This function displays all of the information about the currently selected
objects such as file name, position on the hard drive, tempo, etc. The object
editor also defines the foreground and background color of every object in
the arrangement. Depending on the type of object, the elements displayed
will vary.
General Information
The name of the selected object and the fore/background color for the
object in unselected status can be changed here. Additional information is
also displayed about which file the selected object points to.
Interlace/Deinterlace (only for video objects)
The tab "Interlace/Deinterlace" lets you specify the interlace editing of the
video material.
Interlace Properties: Normally, MAGIX Video Pro X3 automatically makes
suitable settings for this; however, if the video material is faulty, you may
have to make some adjustments yourself. If playback of the exported movie
is very jittery or if flickering occurs, or if some effects do not look how they
should, you can reverse the source material frames.
Deinterlace Options: Normally, the setting "Automatic interlace processing"
does not have to be changed. The frames are processed separately and
passed to the encoder when exported. If necessary, MAGIX Video Pro X3
will perform high-quality interlacing. If "No interlace processing" is set, then
it is assumed that the source material contains full frames.
For more information on interlacing, please see „Interlace“ (view page 368).
Tempo/Pitch (audio objects only)
If there is information about the tempo, then the tempo can be doubled or
halved here. The tempo can be detected using Tempo and beat recognition.
Keyboard shortcut: Ctrl + E

318 Context menu (right click)
www.magix.com
MAGIX 3D Maker objects
Edit settings...
A limited MAGIX 3D Maker version is opened to edit the selected object.
Edit snap point
If the position of objects, object borders, markers, or of the playback marker
is changed with the mouse, then these will jump automatically to specific
"key positions" as soon as these are approached. This is called "snapping".
This enables objects at high zoom resolution to be positioned exactly
without gaps resulting, which will not be visible at this resolution. Normally,
object borders and markers snap together.
Per object, one additional snap point may now be placed within an object to
mark positions where other objects should snap to. This can be helpful, for
example, in case a title should be shown at a specific position of a video
object.
To set a snap point, select an object and place the playback marker at the
position where you would like the snap point to be.
"Set snap point" sets a snap point, and "Delete snap point" removes it
again. If the option "Set snap point" is selected at another position, the
snap point will be moved.
"Delete all snap points" deletes all snap points for all objects.
Shortcut: Ctrl + P
Create still frame
MAGIX Video Pro X3 can create a still frame of an object at the position of
the start marker.
Motion
Lets you move video objects on the screen. See "Movement" in the "Video
effects" chapter.
Section
Places video objects in a particular part of the screen. Please read the
"Video effects" chapter for more details.
Attach to picture position in the video
This can be used to attach the current video, image, or (3D) text object to a
movement path in another video object. Read more about this in the chapter
"Magnetic objects (view page 91)".
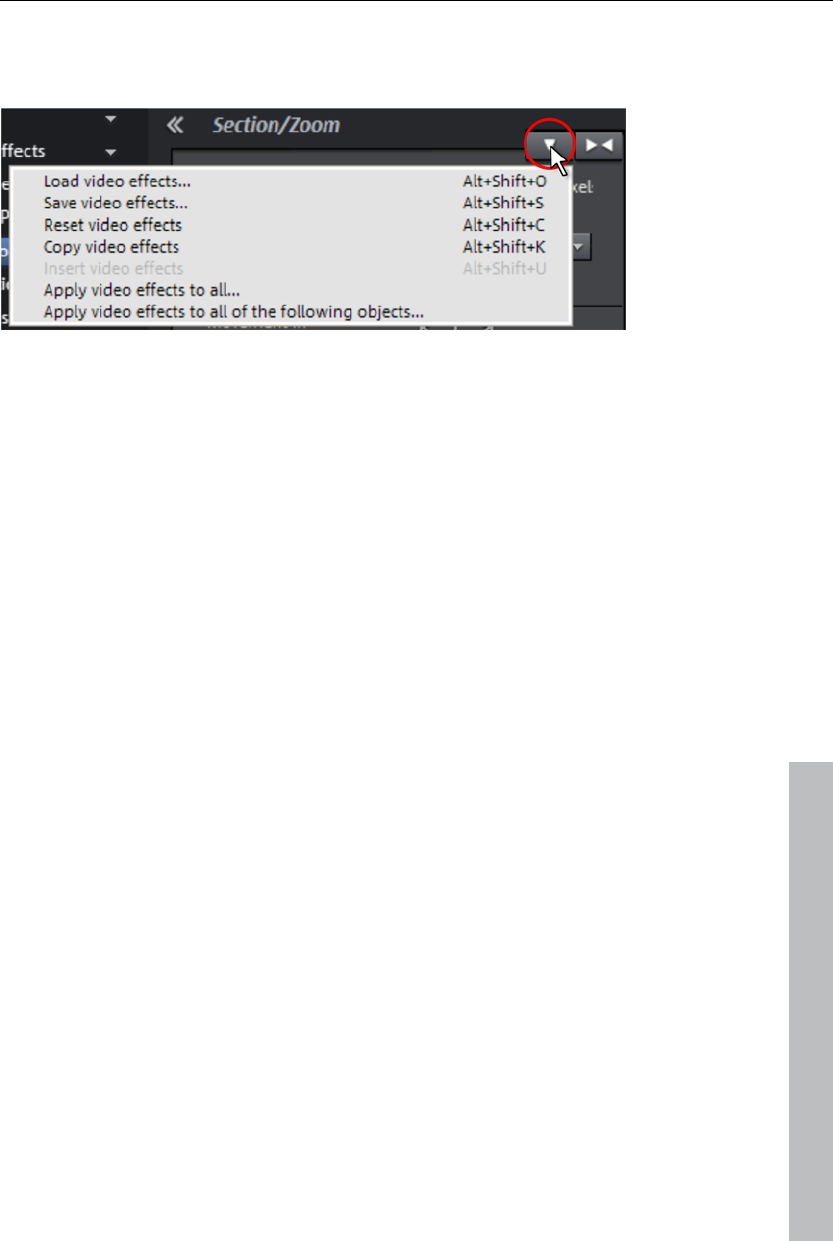
Context menu (right click) 319
Video effects
The entries for this submenu are directly available in the Media Pool.
Insert objects into the project folder
Every single object can be added to the project folder and used again later.
All of the object's properties will be maintained. This is useful, for example,
if the video material should be edited beforehand and then arranged in the
next step.
Object properties
This function displays all of the information about the currently selected
objects such as file name, position on the hard drive, tempo, etc. The object
editor also defines the foreground and background color of every object in
the arrangement. Depending on the type of object, the elements displayed
will vary.
General Information
www.magix.com
The name of the selected object and the fore/background color for the
object in unselected status can be changed here. Additional information is
also displayed about which file the selected object points to.
Interlace/Deinterlace (only for video objects)
The tab "Interlace/Deinterlace" lets you specify the interlace editing of the
video material.
Interlace Properties: Normally, MAGIX Video Pro X3 automatically makes
suitable settings for this; however, if the video material is faulty, you may
have to make some adjustments yourself. If playback of the exported movie
is very jittery or if flickering occurs, or if some effects do not look how they
should, you can reverse the source material frames.
Deinterlace Options: Normally, the setting "Automatic interlace processing"
does not have to be changed. The frames are processed separately and
passed to the encoder when exported. If necessary, MAGIX Video Pro X3

320 Context menu (right click)
www.magix.com
will perform high-quality interlacing. If "No interlace processing" is set, then
it is assumed that the source material contains full frames.
For more information on interlacing, please see „Interlace“ (view page 368).
Tempo/Pitch (audio objects only)
If there is information about the tempo, then the tempo can be doubled or
halved here. The tempo can be detected using Tempo and beat recognition.
Keyboard shortcut: Ctrl + E
Project folder
Rename
This command allows you to rename an object in the project folder. The
name is also used as a file name if you save the object as a take (*.tk2).
Save
This command enables an entry in the project folder (object or object group)
to be saved as a take file (*.tk2). More about this is available in the chapter
"Objects" under the section "Saving objects separately (view page 91)".
Delete
Removes the object from the project folder. The associated source file
(photo, video, audio, etc.) will not be deleted.
Properties
Displays the properties of the object (view page 308) in the project folder.
Insert movie
Inserts the selected object into the movie.
Open in video monitor.
Displays the selected object in the source monitor.
Track
This menu opens by right clicking on an empty range in the track.

Problems and solutions 321
www.magix.com
Paste objects
Inserts the contents of the clipboard at the click position.
Range above blank space
The start and end of the range in the film will be set to the respective
borders of the empty space that is clicked on.
Shortcut: X
Display track curves
This option hides or shows track curves for the corresponding track. Track
curves are only available fro the volume and panorama of an audio track.
These result if these are automated via the mixer. Read more about this in
the chapter "Audio tracks (view page 184)".
Shortcut: Alt + -
Reset track curves
The volume and balance track curves are reset; the automation for the
corresponding mixer settings (view page 184) is removed.
Problems and solutions
File will not load
If files cannot be loaded, this means that the format is either not supported
by MAGIX Video Pro X3, or the corresponding codec must be activated first.
Read the section "Import formats (view page 15)" for more information.
In case of AVI files, it is possible that the necessary codec in not installed.
For more, please refer to "General tips for AVI videos (view page 339)" in
the appendix "Digital video and storage devices".
Choppy or uneven playback
Don't panic if the picture on your screen is choppy or uneven. The finished
product will look perfect and play smoothly. Don't forget that MAGIX Video
Pro X3 calculates all effects in real time. This lets you see for yourself what
sort of influence each of the effects will have on your video footage. Some
effects make even today's high-performance PCs work quite hard, and
often, a steady, continuous video stream is simply not possible on your PC.
The final product, free from previous choppiness, is only available after

322 Problems and solutions
www.magix.com
rendering it to DVD or exporting it. For that reason, you should first edit the
movie in its raw version without effects. The preview generally delivers a
steady picture, allowing you to work quickly and quietly. Towards the end,
you can add effects to your movies to give them a special touch of
Hollywood!
Problems and Remedies regarding the Auto Remix
Assistant
Problem: The playback stutters, the metronome is suspended, the computer
is overloaded... (on older computers.)
Remedy: We recommend changing to wave drivers ("P" key, "Playback
parameter" dialog) instead of DirectSound.
Problem: The metronome does not work and there are no lines on the the
wave-shaped display.
Probable cause: The material does not contain beats or the song contains a
passage without beats.
Remedy: The song should be limited in such a way that only rhythmic
passages are contained.
Possible 2nd reason: Inaccurate tapping or a false BPM value has been
entered.
Remedy: Try the tempo correction buttons or tap until the "locked" condition
is attained.
Problem: The metronome sounds inaccurately or is jerky, the lines in the
wave-shaped display are irregular and thinly drawn.
Activation problems
Problem: The entered code is incorrect (telephone activation)
Make sure your entry is correct; in most cases a typo is to blame.
If the code is entered correctly, dial the number of our Call Center. Our
support staff will help you personally.

Problems and solutions 323
www.magix.com
The MAGIX website won't open
Check your Internet connection; you may have to use manual dial-up.
The form for ordering via post/fax won't open
Check that an adequate text editing program is installed and activated (for
example, MS Word).
I still haven't received an email with the activation code
Check that your inbox isn't full.
Have a look in your spam folder.
You can always send questions via email to our support whenever you like.
Please have the following information at hand so that we can assist you as
quickly and as specifically as possible.
Complete product name
Exact version number (to be found in the about box in the "About" menu
item of the "Help" menu)
Encoder/Decoder name
Your user code (accessible via the "Activate via post/fax" dialog)
Problem: I have installed MAGIX Video Pro X3 on a new computer, installed
a new hard drive in my old computer (sound card, memory...), or installed it
multiple times on the same computer. My activation code is no longer
accepted!
If the program cannot be activated again after it has been activated multiple
times, please contact the MAGIX customer service (view page 10).
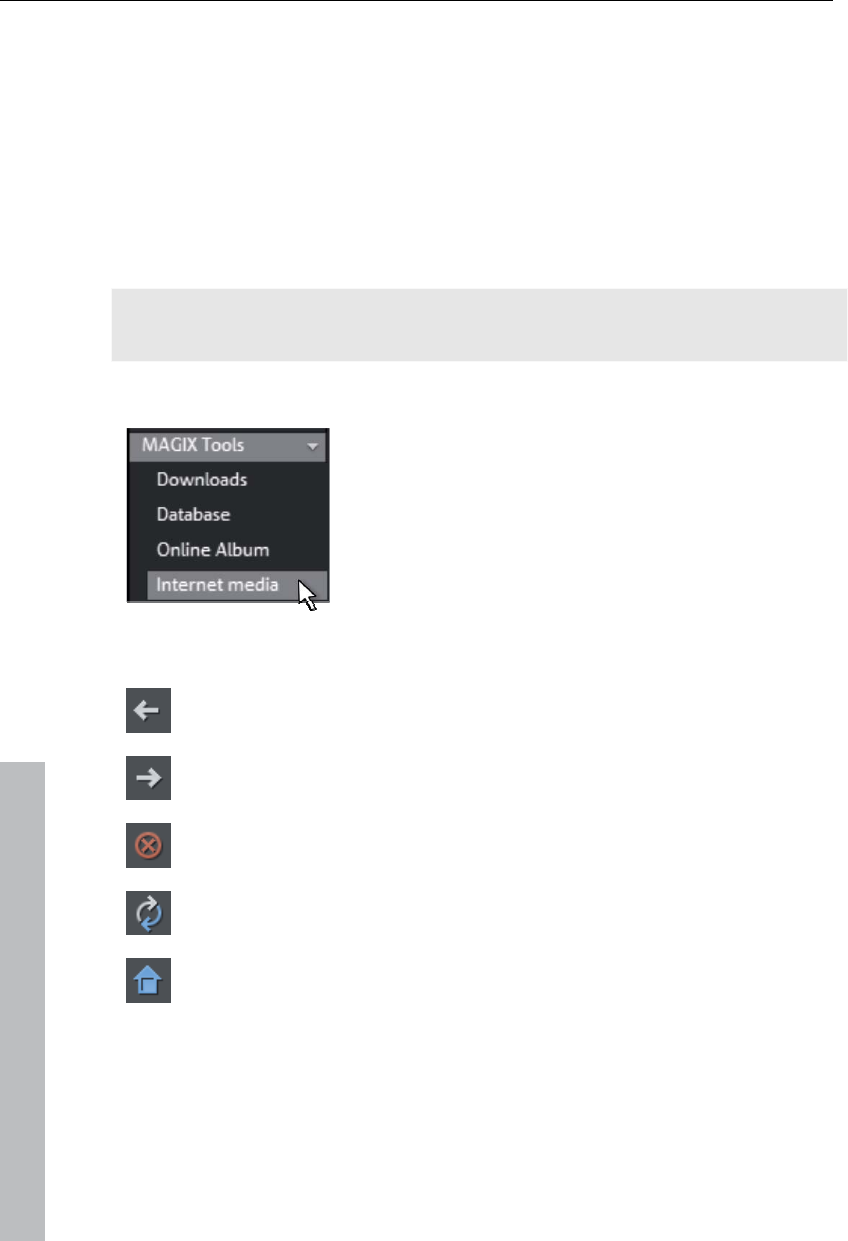
324 Online functions
Online functions
Integrated browser
The integrated browser offers many useful functions that help you collect
material for using in your project. All kinds of media can be collected –
images, videos, sound or simply text can be all integrated using the built-in
browser with great results.
Tip: You must have an Internet connection to use the full range of options
offered by the integrated browser.
Open browser
The integrated browser is opened by clicking on the
"Internet media" button in the Media Pool (see
Media).
Navigation in the browser
One page back: Switches to the previous page.
One page forward: Switches back to the page before the "One page
back" button was pressed.
Stop: Stops loading the selected page.
Reload: The current page will be reloaded.
Home: Returns to the home page.
In the address header, next to the navigation buttons, you can simply enter
an Internet address like http://www.magix.com. Press the enter button and
the corresponding page will be loaded.
www.magix.com
Online functions 325
Loading Internet media
The buttons described here are used to collect and load media directly from
the Internet into the current film. The corresponding functions can be found
in the context menu of the browser.
Save selected text: The selected text will be saved. It can then be
edited using the title editor (view page 113).
Start screen capture: Opens the capture dialog for starting screen
capture.
Download selected images: The selected images will be saved to
your computer.
Import screen capture of the opened Internet page: The loaded
Internet page will be saved as an image file.
Start audio recording: A dialog for audio recording opens.
Hint: For recording from the Internet, it is important that the sound
card is selected as the sound source.
Accept media after download
This option makes sure that the downloaded media are loaded into the
current movie right away.
Define the path for saving Internet media.
www.magix.com
To define the path for saving Internet media, simply click on the folder
symbol and navigate to the desired folder. Confirm your selection with OK.
MAGIX News Center
The MAGIX News Center features links to current online tutorials and tips &
tricks on the software application examples. The "News" is indicated by
color according to content:
Green indicates practical tips & tricks for the software
Yellow reports the availability of new patches and updates
Red for special offers, contests and questionnaires

326 Online functions
www.magix.com
If no new messages are present, the button will appear gray. When the
MAGIX News Center is clicked, all of the available information will be
displayed. Click the messages to reach the corresponding website.
Embed Flash videos into your own web page
To do this, you will need a basic knowledge of HTML pages and all
technical requirements for uploading your files to your web page.
Tip: If you do not have HTML skills, we recommend using MAGIX Online
Album. Without any previous knowledge, you can present videos, photos
and music on your own web page – all completely for free. Videos from
MAGIX Online Album can also be embedded in other websites as well.
Please note that a Flash video cannot be directly embedded into an HTML
page like a picture in JPEG format. For a Flash video, you will need a Flash
player embedded in the website to play back your video.
MAGIX offers you a download package with some Flash player goodies. It
can be downloaded here http://support.magix.net/dl/flvplayer.php.
The package contains the following files:
standalone_omk.swf - the Flash player
demo.html - a sample website, which demonstrated how the player can be
used
demo.flv - a demo video, which will be played by the Flash player on the
demo website
To reach your target quickly, simply adjust the demo website to your own
requirements and replace the demo video with your own. At the end, upload
all three files to your website.
If you need more information about the website's HTML code, we
recommend that you read an explanation of HTML documentation to better
understand the structure and functions of HTML.
If you understand HTML code, you will find another explanation of various
parameters using which you can influence the appearance and function of
the Flash player.
url The path to the video which is to be played back.
preview The path to an image in JPEG format. It is displayed as a
preview in stopped state before the video is played back.

Online functions 327
www.magix.com
sound The sound contained in the video will be played back if this
parameter is "true".
loop The video will be automatically played back from the start after
reaching the end if this parameter is "true".
tooltip Changing the position of the position cursor will display a tooltip
with position information if this parameter is "true".
swfborder A limiting line will be drawn around the player if this parameter
is true.
autoplay The video will be played back automatically when the page or
the player are loaded.

328 Keyboard shortcuts
www.magix.com
Keyboard shortcuts
Playback functions
Start/stop Space bar
Increase playback speed in stages "L"
"Shift + L"
Stop playback "K"
Reduce playback speed in stages until
negative direction
"J"
"Shift + J"
Accelerate playback speed in positive
direction
"Shift + left arrow"
Accelerate playback speed in negative
direction
"Shift + right arrow"
Stop (playback marker is stopped at the
current position)
"K"
Restart beginning at playback marker "Back"
Playback marker back to the beginning "Home"
Playback marker to end "End"
1 frame back "Left arrow"
1 frame forward "Right arrow"
5 frames back "Ctrl + left arrow"
5 frames forward "Ctrl + right arrow"
Set project marker "Ctrl + enter"
Play from range start to range end "#"
Playback at current frame "+"
Monitors
Program monitor
Other resolution "Alt + G"
Adjust video monitor to movie settings "Ctrl + G"
Adjust video monitor to selected video "Ctrl + Shift + G"
Show/hide playing time "Alt + I"
Time background transparent "Ctrl + Alt + I"
Anaglyph view "Ctrl + ."
View partially interlaced "Alt + ."
Standard (2D) "."
Side-by-side display "Shift + ."
Source monitor
Comparison image: selected object
without effects
"Alt + Shift + ,"
Comparison image: selected object "Alt + ,"

Keyboard shortcuts 329
www.magix.com
Comparison image: in front of selected
object
","
Comparison image: behind selected
object
"Ctrl + Shift + ,"
Comparison image: select object "Ctrl + ,"
Remove comparison image "Shift + ,"
Arranger view
Zoom in Ctrl + up cursor key
Zoom out Ctrl + down cursor key
Full screen playback Alt + Enter
Movie overview Shift + A
Optimize view Shift + B
Zoom 1 frame / 5 frames Ctrl + 1/2
Zoom 1s / 5s / 1min/ 10min Ctrl + 3/4/5/6
Zoom between red area markers Ctrl + 7
Entire movie Ctrl + 8
Move view
To next object edge "Alt + W"
To previous object edge "Alt + Q"
To movie start Home
To movie end "End"
To beginning of range "Ctrl + Home"
To end of range "Ctrl + End"
Page right/left "Page down/up"
Grid unit right/left "Ctrl + page down/up
To project markers 1-10 "Ctrl + 1/2/3/4/5/6/7/8/9/0"
To next/
previous project marker
"Ctrl + Shift + page down/up"
To next/
previous scene marker
"Shift + page down/up"
To next/
previous chapter marker
"Alt + page down/up"
To next/previous ad marker "Ctrl + Shift + W"
"Alt + Shift + W"
Go to previous/next marker "Q/W"
Search for gaps... "Ctrl + Shift + C"
Go to next empty range ">"
Go to previous empty range "Shift + >"

330 Keyboard shortcuts
www.magix.com
To next/previously selected object "Shift + W"
"Shift + Q"
Mouse modes
Mouse mode for individual objects "6"
All tracks mouse mode "7"
Single track mouse mode "8"
"Curve" mode "9"
Object stretch mode "0"
Preview audio objects "Alt + 6"
Context help "Alt + F1"
File menu
New project "Ctrl + N"
Open project "Ctrl + O"
Save project "Ctrl + S"
Save project as... "Shift + S"
Project folder -> Clean up project folder "Alt + Shift + X"
Record audio/images/video... "R"
Import edit list (EDL)... "Ctrl + D"
Export to device... "H"
Batch conversion... "S"
Burn Cd/DVD -> Manually compile files... "Ctrl + B"
Clean-up wizard "Ctrl + Shift + Y"
Export to device "H"
Load backup project "Ctrl + Shift + O"
Exit "Alt + F4"
Manage movies
New Ctrl + Alt + N
Remove from project Ctrl + F4
Export Ctrl + Alt + L
Export movie
Export as AVI "Ctrl + Alt + A"
Export as DV AVI "Ctrl + Alt+ D"
Export movie as an MPEG "Ctrl + Alt + P"
Video as MAGIX video "Ctrl + Alt + M"
Video as QuickTime movie "Ctrl + Alt + Q"
Uncompressed movie "Ctrl + Alt + U"

Keyboard shortcuts 331
www.magix.com
Video as MotionJPEG-AVI "Ctrl + Alt + O"
Movie as a series of individual frames "Ctrl + Alt + E"
Windows Media Export "Ctrl + Alt + V"
Video as MPEG 4 video "Ctrl + Alt + G"
Audio as wave "Ctrl + Alt + W"
Export as transition "Ctrl + Alt + T"
Single frame as BMP file "Ctrl + Alt + B"
Single frame as JPEG "Ctrl + Alt + J"
Animated GIF "Ctrl + Alt + F"
Export movie information as EDL "Alt + D"
Backup copy
Copy project and media into folder "Alt + S"
Copy movie and media into folder "Shift + R"
Settings
Movie E
Program Y
Keyboard shortcuts Ctrl + Shift + U
Preview rendering Alt + R
Edit menu
Undo "Ctrl + Z"
Redo "Ctrl + Y"
Cut objects "Ctrl + X"
Copy objects "Ctrl + C"
Paste objects "Ctrl + V"
Duplicate objects "D"
Delete items "Del"
Select all objects "Ctrl + A"
Cut
Split scene "T"
Remove scene start "Z"
Remove scene end "U"
Remove scene "Ctrl + Del"
Split movie "Alt + Y"
Musical cut adjustment "Ctrl + Shift + M"
Edit range
Cut section "Shift + Del; Alt + X"
Copy section "Alt + C"
Delete section "Alt + Del"

332 Keyboard shortcuts
www.magix.com
Insert section "Alt + V"
Extract section "Shift + X"
Insert empty space into selected range "C"
Preview rendering for range between
start and end marker
"Ctrl + R"
Build group "G"
Ungroup "Shift + G"
Wizards
Slideshow Maker Ctrl + M
Soundtrack Maker Ctrl++S
Mix audio Shift + D
Audio and video mixdown Shift + M
Set snap point Ctrl+P
Markers
Set project marker 1 - 10 "Shift + 1/2/3/4/5/6/7/8/9/0"
Set/rename project markers "Ctrl + enter"
Set chapter markers "Shift + Enter"
Set chapter markers automatically "Alt + Shift + Enter"
Delete chapter markers "Ctrl + Shift + Enter"
Delete all chapter markers "Ctrl + Alt + Enter"
Set range start "I"
Set range end "O"
Jump to range start "Shift + I"
Jump to range end "Shift + O"
Select range above blank space "X"
Move view see "Move view (view page 329)"
Effects menu
Movie effects settings "Ctrl + Shift + H"
Video object effects
Scene recognition "Shift + Z"
Image stabilization "Ctrl + L"
Edit with MAGIX Xtreme Photo Designer "Alt + Shift + D"
Video effects
Brightness/contrast "Alt + Shift + H"
Color "Alt + Shift + F"
Color correction "Alt + Shift + C"
Sharpness "Ctrl + Alt + S"
Video effects plug-ins "Ctrl + Shift + P"

Keyboard shortcuts 333
www.magix.com
Video mix effects "Ctrl + Alt + X"
Movement effects
Position/size "Alt + Shift + I"
Section "Alt + Shift + P"
Camera/zoom "Ctrl + Alt + Z"
Rotation/mirror "Alt + Shift + R"
Video effects
Load video effects "Ctrl + -"
Save video effects "Alt + -"
Reset video effects "Ctrl + Alt + -"
Copy video effects "-"
Insert video effects "Shift + -"
Audio object effects
Normalize "Alt + N"
Volume reduction "Alt + L"
Audio cleaning "Alt + A"
Echo/reverb "Shift + H"
Timestretch/resample "Ctrl + Q"
Load audio effects "Ctrl + +"
Save audio effects "Shift + +"
Reset audio effects "Ctrl + Alt + +"
BPM wizard "Alt + Shift + K"
Edit wave files externally "Alt + Z"
Volume curve "Ctrl + Shift + V"
Title effects
Title editor "Ctrl + T"
Load title effects "Alt + T"
Save title effects "Ctrl + Shift + T"
Effects libraries
Audio and video effects "Ctrl + Shift + E"
Transition effects "Ctrl + Shift + B"
Title effects "Alt + Shift + L"
Windows menu
Edit trimmer "N"
Object trimmer "Shift + N"
Mixer "M"

334 Keyboard shortcuts
www.magix.com
Master audio effects rack "B"
Program monitor "Shift + V"
Media Pool "Shift + P"
Project folder "Shift + B"
Activate next window "Tab"
Reset window arrangement "F9"
Display settings "Alt + Shift + V"
Film overview "Shift + A"
Optimize movie view "Ctrl + F"
Zoom horizontally/vertically see "Arranger view (view page
329)"
Help menu
Help "F1"
Context help "Alt + F1"
Display tooltips "Ctrl + Shift + F1"
About Xtreme "Alt + Shift + F1"
Edit keyboard shortcut
In this dialog you can specify keyboard shortcuts for all menu function of
MAGIX Video Pro X3. This allows you to adapt existing shortcuts to your
requirements or to add new ones.
The settings are automatically saved in a file upon closing the program, i.e.
they will be available the next time the program is used.
The display of the entire menu tree is the key function of MAGIX Video Pro
X3.
Add keyboard shortcut
To add a keyboard shortcut, proceed as follows:
Look for the required menu point and select it with a simple mouse click.
Under "Current menu point" the currently selected menu point will be
displayed.
Then, click on the "New keyboard shortcut" field.
Type in the keyboard shortcut. You can also use combinations of any key
with "Shift", "Alt", and "Ctrl".
Then click on "Assign shortcut". If the shortcut should already have been
assigned a corresponding warning will be displayed.

Activate codecs 335
www.magix.com
Note! Please do not use the space bar, "Esc", or "Insert" key ("0" in the
number block), since the functions of these keys are permanently assigned
in MAGIX Video Pro X3 and can not be changed.
Keyboard shortcut list
Reset: Activates all preset shortcuts again.
Load: Previously saved shortcuts are loaded and activated again.
Tip: MAGIX Video Pro X3 offers additional presets for those switching over
from other programs. This significantly simplifies getting used to MAGIX
Video Pro X3!
Note: The current settings will be overwritten during loading! Save your
current keyboard shortcuts in advance if you would like to keep them.
Save: The current keyboard shortcuts can be saved after naming the file
appropriately.
List: This button opens a window where a complete list of current keyboard
shortcuts appears. The included "Copy" button can be used to copy this list
to the Windows clipboard and then edit and print it using a text editor.
Activate codecs
If required you may activate the encoder/decoder for various file formats.
The corresponding activation dialogs will appear automatically when the
codec is used for the first time, for instance, when burning a DVD.
Why does it have to be "activated"?
To import (decode) or export (encode) certain video and audio formats, you
will require a specific codec. MAGIX Video Pro X3 will ask you if you want to
activate the codec as soon as you need it. The integration of decoders and
encoders from third parties into programs usually costs money. These
codecs are integrated via additional, voluntary activation in MAGIX
programs which, according to usage and degree of prevalence, can be free
or fee-based for special high-quality codecs. This way, MAGIX can continue
to be able to provide you with optimum value for money for your software.

336 Activate codecs
www.magix.com
Free activation (MPEG-2, MPEG-4, Dolby Digital 2.0 &
5.1)
To be able to use MPEG-2, MPEG-4, the Dolby Digital stereo import, and
Dolby Digital 5.1, you will have to activate the codec for free.
Activation can be done online via telephone or via post/fax. The quickest
and easiest way to order an activation code is via the Internet.
Order activation code online
Click on "Order online..." (Field 1). MAGIX Video Pro X3 will automatically
contact the MAGIX server and load the corresponding codec.
Note: Activation of the codec checks the registration data as required.
Activation of the codec only functions if your version of the program has
already been registered in your name. If you haven't registered MAGIX
Video Pro X3, then you can do this at any time.
If your computer has no Internet access, you have the following options for
activation:
Order activation code in MAGIX Service Center
Use this option to conduct activation from a different computer which has
Internet access.
Order activation code via post/fax
After clicking on "Order via post/fax" (field 2), your user code will appear.
This automatically assigns your personal activation code to your PC. Click
on "Continue to order form" to transfer your user code automatically to the
post/fax form. Now send the completed form as a print out to the
address/fax no. mentioned. Your activation code will be sent to you in just a
few days via post or fax. It can also be sent by mail if an email address is
stated.
Enter activation code
After receiving your personal activation code use the export or burn function
to reopen the activation dialog for the corresponding file format. Type or
copy the activation code into the input field in the dialog and click on
"Activate...".

Activate codecs 337
www.magix.com
Fee-based DVCPRO activation
To use the DVCPRO professional video format in MAGIX Video Pro X3, it
must first be activated first. This involves a fee-based activation process.
Order activation code online
Click on "Order online..." (Field 1). The web browser will open for you to
register MAGIX Video Pro X3 first (if you have not already done so). You
will then be forwarded to a website where you can request the
corresponding activation.
If your computer has no Internet access, then you have the following
options for activation:
Order activation code in MAGIX Service Center
Use this option to conduct activation from a different computer which has
Internet access.
Order activation code via post/fax
After clicking on "Order via post/fax" (field 2) your user code will appear.
This automatically assigns your personal activation code to your PC. Click
on "Continue to order form" to transfer your user code automatically to the
post/fax form. Now send the completed form as a printout to the address/fax
no. mentioned. Once payment has been processed successfully, your
activation code will be sent to you in the post/via fax in just a few days.
Optionally, it can also be sent by email if an email address is stated.
Enter activation code
After receiving your personal activation code use the export or burn function
to reopen the activation dialog for the corresponding file format. Type or
copy the activation code into the input field in the dialog and click on
"Activate...".

338 Annex: Digital Video and Data Storage
www.magix.com
Annex: Digital Video and Data Storage
Video Editing on the PC
Digital video processing with the PC is comparable to audio processing. The
analog medium that is video must first be digitized before it can be
processed by the computer.
Digital video processing functions quite similar to recording via a sound
card. The signal flow is measured in very short, regular intervals, and the
values resulting from it can then be processed by the computer. The
accuracy of each individual measurement results in the resolution, and the
frequency of the measurements results in the frame rate. The more precise
and frequent the signal is measured, the higher the quality of the digitized
video, but also the higher demands on the capture performance and the
required storage space. The Windows standard format for video files is AVI
(audio and video Interleaved).
Digitizing video adopts either the camera or the graphics card, a TV card
(e.g. Miro PCTV), or a video card (e.g. Fast AV Master). However, video
handling makes much higher demands upon the hardware if good image
quality is required. In order to be able to reasonably process video files on
today’s PCs, they must be compressed. Digital audio, on the other hand
only uses compression for saving storage space.
MPEG Compression
MPEG means "Moving Picture Experts Group" and defines a workgroup
which cooperates with the International Standards Organization (ISO) as
well as the international Electro Technical Commission (ETC) to develop
standards for video and audio coding.
Generally, the graphic data rate of the digital video standard is 167
megabits per second, which, when not compressed, requires a far higher
storage capacity than a DVD can offer. A one-sided DVD 5 with 4.7 GB
storage capacity is enough for 4 Minutes. For this reason, the available
pictorial material must be effectively compressed – a function which is
achieved with the MPEG procedure.
This procedure is based on the simple fact that up to 96% of digital video
data consists of repetition and can be compressed without visible
degradation of the pictorial quality.
Each MPEG compression is, however, a data reduction and as such
connected with information loss. If the video consists of very extensive

Annex: Digital Video and Data Storage 339
www.magix.com
details, or if the content changes very fast, then the picture may blur
(dependent on the strength of the compression and the quality of the
encoder).
Errors can also result from so-called compression artifacts such as small
color defects or images that are too dark.
At average compression rates under 3 megabits per second it is probable
that you will notice reduced quality. At rates around 6 megabit per second
the degradation in quality becomes almost invisible.
General notes on AVI videos
The AVI format (Audio Video Interleaved) isn't actually a proper video
format! Rather, it is a so-called "container", where the conventions for
transferring audio and video files to the program are only loosely defined.
The codec (coder/decoder) actually defines what storage format is used. A
codec compresses audio/video data into its own unique format which can
only be read by the codec itself and is decoded when the film is played.
In concrete terms, a computer-generated AVI file can only be loaded by and
played on a different computer if the same codec is installed on it.
Many codecs (e.g. Intel Indeo® video) have now become standard
components of the Windows™ installation. Others like the popular DivX
codec are not standard. If you are generating an AVI file for future play on
another computer using one of these codecs, you should first install this
codec on the other PC. The best method available is to copy the codec
installer to your export directory and burn it every time you create a video
disc (slideshow disc) for play on computers.
You may encounter some problems when using older video editing cards
with codecs which only function with the card’s hardware. Such AVIs can
only be used on the computer which was used to create them. Try to avoid
using this kind of codec.
Overview of the different disc types
MAGIX Video Pro X3 supports numerous disc types, and these depend on
whether you want to burn a movie or slideshow and which disc type you are
using (CD, DVD, or Blu-ray DiscTM), or the type of playback device or quality
required.
The table below will explain which disc types are best for different cases,
the differences in quality, and how much storage space each format
requires.

340 Annex: Digital Video and Data Storage
www.magix.com
More detailed information, consult the chapters concerning the individual
disc types.
Disc type Storage media Menu Quality Length (optimal
quality)
DVD DVD Yes *** 98 min.
WMV HD CD/DVD Yes ***** 107 min./DVD
15 min./CD
Blu-ray DiscTM
(view page
342)
Blu-ray DiscTM Yes ***** 110 min.
AVCHD (view
page 342)
DVD/Blu-ray
DiscTM
Yes ***** 30 min./DVD
160 min./Blu-ray
DiscTM
Multi Disc CD/DVD Yes **** 45 min./DVD
7 min./CD
MiniDVD (view
page 341)
CD Yes *** approx. 20 minutes
JPEG DISC CD/DVD No ***** This depends on the
original images and
the DVD player*
* The set duration for some DVD players may be determined by this table.
The amount of image material that can be put onto a CD or DVD depends
on the sizes of the picture files.
You may also use the menu templates from the category "TV Showtime
DVD" for the disc types MiniDVD and DVD. Each picture of a slideshow is
displayed fullscreen on its own menu page (without having to playback the
slideshow).
Digital Versatile Disc (DVD)
Quality
Featuring a resolution of 720 x 576 (PAL) and encoded with MPEG-2, 25
frames per second provides very good results.
Writable data storage formats
The recordable DVD market is currently split into three types: "DVD-RAM",
"DVD+RW", and "DVD-RW".
DVD-R/+R: This medium may only be written to once. The DVD-R may be
specified with file structures for DVD video, DVD audio, or DVD-ROM.

Annex: Digital Video and Data Storage 341
www.magix.com
DVD +RW: +RW drives allow re-writable DVDs to be created which may be
read by almost any commercial DVD-ROM or DVD player. The companies
involved are mainly Philips, Sony, HEWLETT PACKARD (as well as Ricoh,
Yamaha and Mitsubishi).
DVD-RW: This is a write/erase DVD technology promoted by Pioneer and
Sharp. This format was developed by the Pioneer company and should be
compatible with existing DVD players.
DVD-RAM: DVD-RAM technology is based on either Phase Change, MOs,
or hard disks, etc. and is now almost 100% incompatible with all available
players.
Due to the small storage capacity and incompatibility with DVD players,
setting on this standard is not recommended.
Note: MAGIX Video Pro X3 supports DVD±R and DVD±RW, but not DVD-
RAM.
Blank discs: Single-sided recordable blank discs featuring a capacity of 4.7
GB and a duration of approx. 2 hours.
Copy Protection
Macrovision (APS): The movie industry claims that even DVD-ROM drives
and decoders or diagram cards with composite outputs or s-video outputs
must support the Macrovision analog copy protection (APS). Only some
older DVD players do not possess APS.
APS adds additional signals to a DVD’s stored graphical data. The data is
almost unchanged. These supplementary signals disturb the
synchronization and the automatic recording regulation of most video
recorders to prevent recording of the video. They are not noticeable on the
television or the monitor, however.
Content Scrambling System (CSS): CSS prevents saving and duplication of
DVD video tracks to hard disk. The VOB streams of DVDs without CSS can
otherwise (like other video files) be loaded via the Import Video button
There are further types of copy protection besides APS and CSS which
ensure that retail DVDs cannot be copied without distortion
miniDVD
The miniDVD is nothing more than the DVD data format burned onto a CD-
ROM. Thus the MPEG-2 encoder and all other specifications of the DVD
data format are used, and only the data carriers are different. Because the

342 Annex: Digital Video and Data Storage
www.magix.com
CD-ROM can only save about a sixth of the quantity of data a DVD can
hold, the capacity of a miniDVD is accordingly limited to approx. 20 minutes
of movie.
MiniDVDs are particularly suitable for playing on the computer. For stand-
alone devices they must be tested on an individual basis as to whether the
device can handle the DVD format on a CD-ROM.
AVCHD disc
Use this format to create a high-resolution video. You can burn Blu-ray (BD-
R/RE) blanks as well as conventional DVD±R/RWs. In contrast to Blu-ray
Discs (view page 342), MPEG-4/AVC codec (view page 346) is applied as
the video format, which requires less memory at a comparable image
quality.
Compatibility
AVCHD disc on Blu-ray blank: Since this is a BD-conformant format, the disc
created can be played back in any conventional Blu-ray player. Playback
problems can almost always be traced to incompatibilities between Blu-ray
blanks and Blu-ray players. In this case, consult the instructions for your
Blu-ray player or ask the manufacturer which blanks are compatible with the
device.
AVCHD disc on DVD blank: The DVDs created with AVCHD video are not
supported by all Blu-ray players. The behavior of the devices is quite
different. Normal DVD players cannot replay AVCHD discs, since the AVC
format is not supported.
Blu-ray Disc™
Since early 2008, Blu-ray Discs are viewed as successors to DVDs and
offer especially high storage capacity of up to 27 GB in a single layer
(double-layer up to 54 GB) with very few write errors.
The term Blu-ray Disc comes from the blue color of the laser. Because a
color cannot be registered as a trademark, the letter "e" was removed from
the word "blue".
The high storage capacity of the Blu-ray Disc suits high definition videos
and slideshows in high quality perfectly, since these are characterized by
large file sizes (depending on material approximately 40 MB/sec) and very
high memory use. The MPEG-2 codec is used to create video.
Companies that were involved in developing Blu-ray technology have united
themselves into the Blu-ray Disc Association (BDA).

Annex: Digital Video and Data Storage 343
www.magix.com
Blu-ray Discs come in three varieties:
Only readable BD ROM (comparable to DVD video),
rewritable BD-RE (comparable to DVD±RW or DVD-RAM),
and as a disc that can be written to only once BD-R (comparable to
DVD±R).
Super Video CD (SVCD)
The Super Video CD (SVCD) is a technological advancement of the video
CD. SVCDs are also like VCD-specified CD-ROMs which can be played
using either a Super Video CD player (connected to the television), or
directly with the CD-ROM drive of a computer. Many DVD players can also
play SVCDs. MPEG-2 and the increase of the data transfer rate makes it
hard to tell videos from videos in DVD quality apart.
Resolution: SVCDs use the better MPEG-2 encoder in a standardized
resolution of 480 x 576 (PAL). The MPEG-2 format offers a maximum
resolution of up to 720 x 576 points and improved compression methods
characterized by excellent image definition and homogenity.
Hard disk capacity: An average 90-minute movie must be spread across 3
CDs. On one SVCD you can get about 30 minutes of good-quality movie.
Encoder setting: Compared to the VCD with 1.3, the data transfer rate is
doubled to 2.6 Mbit/s.
MPEG-2 format introduces the so-called variable bit rate (VBR). In contrast
to the constant bit rate (CBR) of the MPEG-1 encoders, this encoder has
the option of using more bits for movement-intensive sections, as well as
saving bits if picture content remains the same.
Video CD (VCD)
Video CDs are specific CD-ROMs for storing videos in certain forms.
Compression takes place using the MPEG-1 codec. VCDs can be played on
either a video CD player attached to a television or directly via the
computer's CD-ROM drive. Most DVD players can play VCDs.
Resolution: VCDs can play movies with a maximum resolution of 352 x 288
pixels (PAL) or 352 x 240 (NTSC) at 25 pictures per second. The resolution
of a VHS cassette offers for instance 300 x 360 pixels. More important than
the resolution is the use of a good MPEG-1 encoder. Since video images
constantly change, errors cannot always be perceived by the viewer.
Hard disk capacity: A VCD can store about 70 minutes of video. A typical
motion picture must therefore be stored on two VCDs. In order to get as
much video data on a normal CD as possible, one must forego correction
information on VCD/SVCD formats within the individual sectors (sub-

344 Annex: Digital Video and Data Storage
www.magix.com
ranges) of a CD. You can therefore fit 720 MB of video data on a 650 MB
blank CD. Due to improved burning and scanning technology it is now
possible to burn up to 985 MB video data on a 99min blank CD.
Encoder settings: Normally the video CD data is played at a data rate of
1150 kBits video and 224 kBits audio. By increasing the video bit rate to
3000kBits you can get the same resolution and an better-quality audio bit
rate. Movement artifacts disappear almost completely at approx. 2000 kBits
with the picture appearing a little less sharp. This pre-supposes, however,
that the player can also play back such a bit rate. The fact that many DVD
players can handle an increased data rate is due to well written player
software.
Experiment with higher data rates: If you do not need the full running time of
the VCD, then you can experiment with space to improve the quality of the
video!
JPEG disc
The "JPEG disc" is a special case for slideshows. No video file is created to
be burned, but rather every photo in the disc project is exported individually
with effects and burned to CD or DVD. Many modern DVD players can play
JPEG files directly.
If a project contains several slideshows, a subfolder will be created for each
one, and the corresponding images will be placed into each one. This
means that there are no menus, no sound, no animated effects or
transitions – although it does offer the best possible quality available for
playback on TV. This means that there are no menus, sounds, animated
effects or transitions, it does, however, offer the best possible quality
available for TV playback.
Slideshow disc
All slideshow image and audio files will be burned onto CD or DVD, together
with any effect settings and the MAGIX Media Manager CDR player
program. A MAGIX Media Manager CD is designed especially for photo
projects (slideshows).
The original photos are burned onto CD; Ideal for backing up valuable
recordings. During playback on your PC, the highest possible picture quality
is made possible. The following photo effects can be played by Media
Manager.
Brightness, contrast, gamma
Cropping and rotation
Title text (without text effects)

Annex: Digital Video and Data Storage 345
www.magix.com
If your project uses more effects, they won’t be visible on the Media
Manager CD. A VCD or DVD is more suitable for such projects.
The MAGIX Media Manager CDR ensures that the CD-ROM can be played
back on any Windows PC regardless of the software installed. The disc will
automatically begin playing the slideshow after the CD-ROM has been
inserted into the drive, provided the auto-play feature is enabled on your
PC. To enable the auto-play feature on your PC, select the "Auto Insert
Notification" option for your CD-ROM drive from the Windows Control Panel.
If deactivated, you can also start your CD-ROM slideshow manually:
1. Place your home-burned CD-ROM into your CD-ROM drive.
2. Open Explorer and click on the drive letter of the CD-ROM drive (usually
D:\).
3. Double-click "MediaManager.exe" to start the MAGIX Media Manager
CDR.
4. In the Explorer window of MAGIX Media Manager CDR, open the
slideshow playlist file ending with *.PLR and start the slideshow.
Additional information can be found in the help feature of MAGIX Media
Manager CDR (F1 key).
WMV HD (Windows Media High Definition Disc)
WMV WMV HD (Windows Media High Definition Disc) is a type of disc
optimized for playback of slideshows on PC. The movies are converted into
high-resolution Windows Media 9 format and a menu is added, like with
DVDs. You must have Windows Media Player 9 or higher installed on your
PC.
Video encoding will be preset for HDTV resolution (1280 x 720, also known
as "720p"). To select different resolutions, click on the button “Encoder
settings” and in “Presets” choose the following:
Standard PAL (720x576) or NTSC (720 x 480)
Standard PC resolutions (1024 x 768 or 1280 x 1024)
HDTV 720p (1280x720) or 1080i (1920x1080)
Multi Disc
A multidisc is a combination of different disc formats on one DVD. It
consists of 3 parts and offers the following advantages:
Maximum quality when played on a PC with WMV HD (Windows Media
High Definition Disc)
Fully compatible with DVD players due to a DVD part (Digital Versatile
Disc) (view page 340)

346 MPEG-4 encoder settings
www.magix.com
Greatest possible safety as a data backup of the project is added (burn
option (view page 219)).
Backup disc
Use this option to compile all movies in the current disc project, including all
connected media and burn them to disc.
Even larger projects can be burned straight to disc. The project, if
necessary, will be split up and burned automatically to multiple discs. A
restore program which is burned to the first disc of such a backup,
guarantees easy re-recording of the backup.
MPEG-4 encoder settings
Behind MPEG-4, you'll find a highly complex "academic" standard that
operates and is supported variably according to make.
Tip: First, check if there is a suitable preset in the export dialog for your
purposes. Before changes are made in "Advanced settings", the effects and
interplay of the different parameters should be familiar.
The "Advanced settings" are divided into "Video", "Audio", and "Multiplexer".
Under "Video", there is a choice between "MPEG-4 (view page 347)"
(H.263) and "AVC/H.264 (view page 351)". Depending on the purpose of
application of the material to be exported, both of these encoder settings
can be selected for compressing the video material. It is important in this
case to know how the material will be played back.
Under "Audio", there is a choice between "AMR (view page 357)" and "AC
(view page 357)". The AMR format is more suitable for mobile devices that
don't necessarily require high playback quality. ACC is more flexible, on the
other hand, but it is supported by fewer mobiel devices.
For material that is not exactly specific, encoder qualities recommend AVC
image and AAC sound, since these encoders are equally suitable for all
source material.
The option "Export as website" also creates an HTML page in an integrated
Flash player that can play back the video created. Read the topic "Embed
Flash videos into your own web site (view page 326)".

MPEG-4 encoder settings 347
www.magix.com
MPEG-4
The MPEG-4 (H.263) codec is especially useful for video material with little
or only slower movements.
Generic
MPEG-4 preset
Different presets located within the encoder.
(A)SP@L0-L5: (Advanced) Simple Profile in Level 0-5
(Q)CIF (Common Intermediate Format): CIF is a video format produced as
soon as 1990 with the video compression format H.261. At that time, the
format was used for video telephone conferences.
The "Q" in QCIF stands for "Quarter", and since resolution is halved in
terms of height and width compared to CIF, the entire size is only a quarter
of CIF.
QCIF was popular with mobile telephone manufacturers, since the
resolution of 176 x 144 pixels was sensible for the first affordable
SmartPhones (144 x 176).
(Half)D1: D1 corresponds with MPEG-2 DVD. HalfD1 has exactly half of the
entire number of pixels, meaning that the pixel number of the height and
weight is 2/3 of D1.
720p: Video stream with a resolution of 1280 x 720p (progressive).
Apple iPod: Apple iPod-compatible stream.
Sony PSP: Sony PSP-compatibler stream.
Profile/Level
So that profile and level are conformant with the other settings, pay
attention to the minimum and maximum values in the following tables.
Note! In case the settings are not included in this information, problems
playing back the encoded videos can lead to problems.
Table 1: The levels of the MPEG-4 simple profile (SP)
Level Typical
visual
sessio
n size
Max.
number
of
objects
Maximum
number
objects per
type
Max.
unique
quant.
tables
Max. VMV buffer size
(MB)
348 MPEG-4 encoder settings
www.magix.com
L0 QCIF 1 1 x simple 1 198
L1 QCIF 4 4 x simple 1 198
L2 CIF 4 4 x simple 1 792
L3 CIF 4 4 x simple 1 792
Continuation of table 1
Level Max.
VCV
buffer
size
(MB)
VCV
decode
r rate
(MB/s)
Max. total
VBV
buffer
size
(units of
16384
bits)
Max. VOL
VBV
buffer
size
(units of
16384
bits)
Max.
video
packet
length
(bits)
Max. bitrate
(kbit/s)
L0 99 1485 10 10 2048 64
L1 99 1485 10 10 2048 64
L2 396 5940 40 40 4096 128
L3 396 11880 40 40 8192 384
Table 2: The levels of the MPEG-4 advanced simple profile (ASP)
Level Typical
visual
session
size
Max.
number
of
objects
Max.
number
per type
Max.
unique
quant.
tables
Max.
VMV
buffer
size
(MB)
Max.
VCV
buffer
size
(MB)
VCV decoder
rate (MB/s)
L0 176x144 1 1x AS
or
simple
1 297 99 2970
L1 176x144 4 4x AS
or
simple
1 297 99 2970
L2 352x288 4 4x AS
or
simple
1 1188 396 5940
L3 352x288 4 4x AS
or
simple
1 1188 396 11880
L4 352x576 4 4x AS
or
simple
1 2376 792 23760
L5 720x576 4 4x AS
or
simple
1 4860 1620 48600
MPEG-4 encoder settings 349
www.magix.com
Continuation of table 2
Level Max.
percentage
of intra
MBs with
AC
prediction
in VCV
buffer
Max total
VBV
buffer
size
(units of
16384 bit
s)
Max. VOL
VBV
buffer
size
(units of
16384 bit
s)
Max.
video
packet
length
(bits)
Max. bitrate
(kbit/s)
L0 100 10 10 2048 128
L1 100 10 10 2048 128
L2 100 40 40 4096 384
L3 100 40 40 4096 768
L4 50 80 80 8192 3000
L5 25 112 112 16384 8000
Picture type
"Picture type" specifies which parts of a frame should be used as the basis
for the encoding:
Frame: A frame is a single image from a video sequence, also called a full
image.
Field: A half-image, two of which combine to produce a frame. Read more
about this explanation regarding "Interlace (view page 368)".
Field order
Note: This parameter is only available if the setting "Field" is selected for
"Picture type".
In case of interlaced streams, the half-image sequence is set. Read more
about this explanation regarding "Interlace (view page 368)".
Pulldown
Note: This parameter is only available if the setting "Frame" or "MBAFF"
(only for AVC/H.264)" is selected for "Picture type".
In normal cases, an image playback rate of 24 (or 23.976) frames per
second is use; the NTSC system however requires 30 (or 29.97) frames/s,
and there is a special algorithm for converting the video's frame rate. For
compilations or test purposes, switch this option to "No". In normal cases,
the setting can be set to "Auto".

350 MPEG-4 encoder settings
www.magix.com
Slice count
A frame can be divided into multiple slices for encoding. Specify the
maximum number of slices are permitted. If set to "0", then the number will
be determined automatically.
Bit rate control
The bit rate indicates how much data per second is saved in the video
(playback speed). This makes the bit rate the deciding parameter for the
video to be encoded.
Mode
Constant bit rate: The constant bit rate should only be used if the device
used to play the video supports constant bit rates.
Variable bit rate: The bit rate varies. For faster movements in the video, the
bit rate increases, and for still images or slow pans, a lower bit rate is
sufficient for creating the video in constant quality.
Constant quality: Similar to the "Variable bit rate" mode, the bit rate varies
according to the video material. The quality depends on the selected profile
and can be changed.
Constant quantizer: In this mode, a fixed colour quantization is used for the
macro blocks. Under Advanced settings, a value between 1 and 32 can be
set independent of the respective frame (I-Frame (view page 368), P-
Frame, or B-Frame (view page 369)). The higher the value, the stronger the
quantization: small values produce qualitatively high-quality images and the
data rate increases, and larger values produce a reduction in data, but the
quality suffers.
Bit rate (Bits/s)
In "Constant bit rate" mode: Exactly those values entered are applied to be
able to calculate the size of the video precisely.
In "Variable bit rate" mode: The values entered here are applied to the
video as an average as a guideline. The size of the video to be exported
can only be approximated.
Max. rate
This is the maximum bit rate that should be present in the video stream, i.e.
maximum number of bits that may be transferred to the decoder.
Note: This option is only available in "Variable bit rate" mode.
VBV buf. size
VBV is the abbreviation for "Video rate buffer verifier definition" and the size
of the buffer (storage area) that is applied to the encoding.

MPEG-4 encoder settings 351
www.magix.com
The larger the buffer is, the better the results will be, but the processing will
also take much longer. The smaller the buffer is, the more parallel
processing can take place at the same time in RAM.
Pixel aspect ratio
Specifies the page ratio of the individual image points (pixels).
Meaning: Different television norms and the standard pixel ratio. Select a
setting and the results are displayed as "X" and "Y".
X/Y: The actual pixel ratio. If under "Meaning" the setting "Custom" is
selected, then a custom ratio can be set.
GOP structure
Max key interval
Determines the maximum GOP (view page 367) length. High values mean
improved compression. Lower values create stronger security protection
and enable improved access to individual frames for processing the video.
B-frames count
The number of B-Frames (view page 369). Several applications, e.g. video
conferences, require a setting of "0" for this, i.e. no B-Frames, in order to
enable the shortest possible reaction times for transfer.
Scene change detection
If this option is activated the scenes will be detected during encoding, thus
allowing you to insert an I frame (view page 368) after a scene change.
Input info
Information about the incoming video stream is displayed here during live
recordings.
Statistics
Information about the encoder activity is displayed here during live
recordings.
AVC / H.264
The H.264/AVC codec is suitable for all types of material; however, it
requires relatively higher CPU power for later decoding.
In the advanced encoder settings of the AVC encoder the "Generic" options
in "Main Settings" are mainly interesting.

352 MPEG-4 encoder settings
www.magix.com
The AVC preset and video format can be adjusted here. For instance, if
DVD quality is desired you should select "DVD". The video format should be
selected specific to the country so that the material can be played on the
devices most commonly available in these countries. For instance, you
should select PAL for Germany, SECAM for France and NTSC for the US.
Generic
AVC preset
This is where the actual video stream that will be exported is selected.
Baseline: According to ISO/ICE 11172-1/2 standard
CIF: Corresponds with MPEG-1 VideoCD
Main: Corresponds with ISO/ICE 13818-1/2 standard
SVCD: Corresponds with MPEG-2 Super VideoCD
D1: Corresponds with MPEG-2 DVD
High: HIGH profile 1920x1080i
DVD: DVD video
HD DVD: HD DVD video
Blu-ray: Blu-ray Disc
Blu-ray HD: Blu-ray Disc in high definition
Sony PSP: Sony PSP-compatible format
HD 1280 x 720p: High profile with a resolution 1280x720p (progressive)
HD 1440 x 1080i: High profile with a resolution of 1440 x 1080i (interlaced)
Apple iPod: Apple iPod-compatible stream.
Video format
Specifies where the video to be exported should be. The encoder optimizes
video material for the selected mode of playback.
Auto: The format from the MAGIX Video Pro X3 project.
PAL: Phase Alternating Line, or PAL, is a process for color transmission for
analog TV that is primarily used in Europe, but also in Australia, South
America, and many African and Asian countries.
The image repetition rate for PAL is 25 Hz.
NTSC: NTSC stands for "National Television Systems Committee". This is a
US institution that defined the first color carrier system for TV which is now
used in most of America and some East Asian countries.
The image repetition rate for NTSC is 29.97 Hz.
SECAM: SECAM is a TV norm in France and eastern Europe for
transferring analog color video signal.
MAC: The MAC process (Multiplexed Analogue Components) involves TV
norms developed for satellite TV. They have also been developed for an
HDTV standard (HD-MAC).
Unspecified: This setting does not make any special optimization.

MPEG-4 encoder settings 353
www.magix.com
Tip: The best results are achieved with the setting "Auto", since this
automatically uses the project settings as a basis by MAGIX Video Pro X3.
Profiles
Defines which profile is applied in the AVC/H.264 stream.
Baseline profile: The basis of applications with limited computing
performance, especially for video conferences or videos on mobile
telephones.
Main profile: This profile was originally intended for the broadcast industry
and for backup purposes. The process has however retreated somewhat
from use, since "High Profile" has been developed for these purposes.
High profile: This profile is used for broadcast and backup applications, and
it is also used sometimes in the HDTV industry (High Definition Television).
For example, this profile for HD-DVD and Blu-ray Discs.
Level
H.264 defines different levels. The higher the level, the larger the video's bit
rate. In this table, you can see the maximum permitted values for the
respective level in relation to the selected profile.
Level Max.
macro
blocks per
seconds
Max.
image size
in macro
blocks
Max. video
bit rate
(VCL) for
baseline
and main
profile
Max. video
bit
rate (VCL)
for high
profile
Examples
(Resolution /
image rate in Hz)
1 1485 99 64 80 128 x 96/30.9
1.1 3000 396 192 240 176 x 144/30.3
1.2 6000 396 384 480 320 x 240/10
1.3 11880 396 768 960 320 x 240/36
2 11880 396 2 Mbit/s 2.5 Mbit/s 320 x 240/36
2.1 19800 792 4 Mbit/s 5 Mbit/s 352 x 480/30
2.2 20250 1620 4 Mbit/s 5 Mbit/s 352 x 576/25.6
3 40500 1620 10 Mbit/s 12.5 Mbit/s 720 x 480/30
3.1 108000 3600 14 Mbit/s 17.5 Mbit/s 1280 x 720/30
3.2 216000 5120 20 Mbit/s 25 Mbit/s 1280 x 1024/42.2
4 245760 8192 20 Mbit/s 25 Mbit/s 1920 x 1080/30.1
2048 x 1024/30
4.1 245760 8192 50 Mbit/s 62.5 Mbit/s 1920 x 1080/30.1
2048 x 1024/30
4.2 522240 8704 50 Mbit/s 62.5 Mbit/s 1920 x 1080/64
2048 x 1024/60
5 589824 22080 135 Mbit/s 168.75
Mbit/s
1920*1080/72.3
2048 x 1080/67.8
2560 x 1920/30.7

354 MPEG-4 encoder settings
www.magix.com
5.1 983040 36864 240 Mbit/s 300 Mbit/s 1920 x
1080/120.5
4096 x 2048/30
The setting "Level auto" specifies the encoder levels automatically, among
other things for the resolution of the video format specified under "AVC
preset" and the set profile bit rate. If a level is manually set in this case,
then other parameter values may not exceed the permitted maximum
values.
Picture type
"Picture type" specifies which parts of a frame should be used as the basis
for the encoding:
Frame: A frame is a single image from a video sequence, also called a full
image.
Field: A half-image, two of which combine to produce a frame. Read more
about this explanation regarding "Interlace (view page 368)".
MBAFF (macro block adaptive frame field): A macro block consists of 16 x
16 pixels. The encoder creates a "frame field" on this basis for encoding.
Field order
Note: This parameter is only available if the setting "Field" is selected for
"Picture type".
In case of interlaced streams, the half-image sequence is set. Read more
about this explanation regarding "Interlace (view page 368)".
Pulldown
Note: This parameter is only available if the setting "Frame" or "MBAFF"
(only for AVC/H.264)" is selected for "Picture type".
In normal cases, an image playback rate of 24 (or 23.976) frames per
second is use; the NTSC system however requires 30 (or 29.97) frames/s,
and there is a special algorithm for converting the video's frame rate. For
compilations or test purposes, switch this option to "No". In normal cases,
the setting can be set to "Auto".
Slice count
A frame can be divided into multiple slices for encoding. Specify the
maximum number of slices are permitted. If set to "0", then the number will
be determined automatically.

MPEG-4 encoder settings 355
www.magix.com
Bit rate control
The bit rate indicates how much data per second is saved in the video
(playback speed). This makes the bit rate the deciding parameter for the
video to be encoded.
Mode
Constant bit rate: The constant bit rate should only be used if the device
used to play the video supports constant bit rates.
Constant quantizer:
Variable bit rate: The bit rate varies. For faster movements in the video, the
bit rate increases, and for still images or slow pans, a lower bit rate is
sufficient for creating the video in constant quality.
Pass
Single pass: The encoder process takes place without prior analysis. This
requires the least amount of time, however quality suffers.
Multi-pass analysis: The first encoding is carried out at the same time as the
analysis for the second encoding is calculated.
Multi-pass encode: The first encoding is carried out at the same time as the
analysis for the second encoding is calculated and updated. This produces
the best results, but the process requires the most time.
Bit rate (Bits/s)
In "Constant bit rate" mode: Exactly those values entered are applied to be
able to calculate the size of the video precisely.
In "Variable bit rate" mode: The values entered here are applied to the
video as an average as a guideline. The size of the video to be exported
can only be approximated.
HSS rate
This is the maximum bit rate that should be present in the video stream, i.e.
maximum number of bits that may be transferred to the decoder.
Note: This option is only available in "Variable bit rate" mode.
CPB size
This sets the size of the "coded picture buffer“ in bits. This is the buffer
where the encoding is carried out. The larger the buffer is, the better the
results will be, but the processing will also take much longer.
Aspect ratio
In the film industry, this is an indictation of the ratio between width and
height of a rectangle, monitor, or screen.

356 MPEG-4 encoder settings
www.magix.com
There are 3 different sizes available:
Picture Aspect Ratio (also Display Aspect Ratio, DAR): This indicates the
desired aspect ratio of the video to be exported. Here are some examples
of typical aspect ratios: at home 4:3, 16:9 (typical for TV sets) or 16:10
(widescreen-flatscreens, widescreen notebooks), 3:2 for 35mm films and
photos. In cinemas you mostly find 1.85:1.
Pixel Aspect Ratio (PAR, pixel aspect ratio: Indicates the aspect ratio of
individual pixels. The majority of computer monitors have quadratic pixels
(PAR=1:1), for analog television monitors (PAL at 4:3) 128:117.
Sample Aspect Ratio (SAR, also Storage Aspect Ratio): Aspect ratio of the
saved resolution (number of pixels), e.g. 720:576 at PAL. It also calculates
picture aspect ratio and pixel aspect ratio: SAR = DAR / PAR.
Note: In the standard case, the "Aspect ratio" remains set the way it is. You
should only change the settings if the resulting video is exported distorted or
stretched or if you need to correct the video because it is in the wrong
aspect ratio.
GOP structure
Max GOP length
Determines the maximum GOP (view page 367) length. High values mean
improved compression. Lower values create stronger security protection
and enable improved access to individual frames for processing the video.
Max b-frames count
The maximum number of b-frames (view page 369). Several cases of
application, e.g. video conferences require "no b-frames" in order to achieve
the shortest possible reaction times during transfer.
Scene change detection
If this option is activated the scenes will be detected during encoding, thus
allowing you to insert an I frame (view page 368) after a scene change.
Input info
Information about the incoming video stream is displayed here during live
recordings.
Statistics
Information about the encoder activity is displayed here during live
recordings.

MPEG-4 encoder settings 357
www.magix.com
AMR
AMR involves a parametric codec with different data rates between 4.75
and 12.2 kbit/s. The 12.2-kbit/s settings throughly corresponds with the
GSM-EFR codec in terms of algorithm and audio quality.
This audio format is used by mobile telephones for transferring the
conversation and is optimized for encoding conversation (voices). Low bit
rates provide compensation for mobile phones in case of transfer errors, i.e.
bad reception. Depending on the signal strength, the compression increases
or decreases to enable the best possible quality for a conversation. The
AMR sound, on the other hand, encodes a fixed sample rate of 8,000 Hz
compared to AAC sound.
The advanced AMR audio menu includes the following settings options:
The bit rate can be set between 4.75 and 12.2kbit/s. The higher the bit rate,
the greater the file size and the higher level of audio quality. The standard
settings provide a bit rate of 7.4 kbit/s. The highest bit rate for this format is
more suited for transferring conversations.
AAC
The AAC audio was developed by MPEG, the Moving Picture Experts Group
(Dolby, Fraunhofer Institut für Integrierte Schaltungen in Erlangen, AT&T,
Nokia, Sony) as an audio data compression process, that was specified as
a further development of MPEG-2 Multichannel in the MPEG-2 standard.
It's also a further development of MPEG-2 audio. This format is equally
suitable for encoding general audio information and not especially optimized
for certain types of audio material. As with video material, the audio format
should be considered for playback later.
AAC audio can be encoded with a sample rate of 8,000, 16,000, 24,000,
32,000 or 48,000 Hz and in mono and stereo sound, respectively. By
default, the sound is set to 48,000 Hz stereo. The higher the sample rate is,
the larger the resulting file and higher the audio quality.
The advanced AAC audio menu includes the following settings options:
The bit rate can be set between 6 and 512 kbit/s. 160 kbits/s is active by
default. The higher the value is, the larger the resulting file and higher the
audio quality. After a certain limit, additional improvements to audio quality
will not be perceived. Bit rates under 64 kb/s are not recommended.
As an MPEG version, set MPEG-4 or the older, proven MPEG-2 format.

358 MPEG-4 encoder settings
www.magix.com
For the File Header Type, choose either RAW or ADTS. The "Header"
indicates an explanatory head for the beginning of the file segment, which
in fact takes up extra space, but is required for decoding under
circumstances.
- RAW indicates material which does not include a file header in audio
format. The audio material is therefore transferred directly without
any special additional information (raw).
This requires that decoding routines are able to process the material
without the explanatory file header. Especially in case "exotic"
sample rates are set, this can lead to problems during RAW
encoding.
- ADTS indicates a file header type which contains information for
encoded audio material. In case of doubt, select this file header
type, since fewer problems can be expected in this case.
Object type: This provides selection between "Main" and "Low complexity".
Low complexity: Data is present in a form that hinders different decoding
algorithms (noise replacement), but enables others (temporal adjustment
noise formation).
Main: This sets other focuses in the encoding, and other decoder
algorithms can be used.
Note: For example, Apple iPod requires "low complexity encoding".
However, you don't need to worry if you select the right preset for Apple
iPod in the export dialog.
Multiplexer
The multiplexer is a component of the encoder which combines audio and
video streams.
Output format
MPEG-4 file: This is an MPEG standard (ISO/IEC-14496) with the original
goal of supporting devices with less computing performance. Currently,
MPEG-4 has reached a wide bandwidth of application, from HD video to
support for mobile telephones.
JPEG2000 file: DCI (Digital Cinema Initiative) has been replaced by the
JPEG2000 format for encoding movies. The current distribution and
presentation of films has been taken over by digital projectors that play back
high-resolution Mj2 streams in outstanding image and sound quality.

MPEG-4 encoder settings 359
www.magix.com
3GPP file: A standard supported by plenty GSM and UMTS mobile
telephones. 3GPP is very similar to the MPEG-4 standard, but also supports
formats that are not permitted by MPEG-4.
ISMA compatible
The "Internet Streaming Media Alliance" combines video codec standards
(e.g. MPEG) and continuous transfer within computer networks (e.g. RTP
Real-time Transport Protocol) to ensure that videos available online can be
correctly transferred and played back.
Note: This option can only be activated, if under "Format“ the entry "MPEG-
4 file" has been selected.
For Sony PSP
Switch on this option if the video should be played back with the Sony PSP.
Note: This option can only be activated, if under "Format“ the entry "MPEG-
4 file" has been selected.
For iPod
Switch on this option, if the video should be played back with the Apple
iPod.
Note: This option can only be activated, if under "Format“ the entry "MPEG-
4 file" has been selected.
Live mode (get times from samples)
This option is only important for live transfers and is therefore not required
in MAGIX Video Pro X3.

360 Appendix: MPEG Encoder Settings
www.magix.com
Appendix: MPEG Encoder Settings
General settings
MPEG type: Set the output type of the created MPEG file. You can adjust
the encoder settings freely (to export your video in the corresponding
format, for instance) for further use in other programs or on your own
website.
If you open the encoder from a burn dialog, or intend to use the exported
material for VCDs, SVCDs or DVDs, then select the corresponding option.
This will adjust the settings of the encoder according to the standards
required for the corresponding discs to be played in a compatible player.
Video format: Automatically specifies the video format, aspect ratio, and
frame rate (see video settings (view page 361)). You can choose between
PAL or NTSC.
Interlace mode: The movie is encoded interlaced (i.e. in two half-screens,
so-called fields). This is essential for later playback on TV screens. If you
want to view the exported movie on your PC only and like a "cinemascope"
view, you can also encode by frame (progressively). Some video projectors
also support playback of progressively encoded image material. See
Interlace (view page 368).
Bit rate: The bit rate determines the memory requirement by the completed
video. The amount of data available can be used differently for different
display modes. 20 MB can be 4 seconds of DVD video, or 5 minutes of
Internet streaming at the thumbnail size. The quality of an MPEG video is
measured by the width of the created data stream, i.e. the bit rate. This is
the amount of transmitted data per time unit and is indicated in kBit/s or bit
per second.
Quality: Determines the quality of the encoding process, or the quality of the
movement (view page 365) to be more precise. The higher the quality, the
better the finished video will look, but encoding will take considerably
longer. The preset value "10" is a good compromise between speed and
quality.
Smart Rendering: Smart Rendering can considerably reduce the
encoding/processing strain of MPEG files. The production of MPEG files re-
encodes only those parts of the movie that were changed in the program
(e.g. by video cleaning or effects). Please note: The MPEG files contained
in the movie must have the same format, i.e. the bit rates (variable or
constant), audio formats, image resolutions, and video formats must match.

Appendix: MPEG Encoder Settings 361
www.magix.com
Quick, GOP-precise copying: This special Smart Rendering mode enables
MPEG material to be transferred without having to encode it for the target
medium, thereby greatly increasing the encoding speed. The video material
cannot appear to have been altered in any way; only hard cuts (without
fades) are permitted. These won't be executed precisely to the frame, but
will rather take place at the next GOP borders. For this reason, cuts should
be set somewhat more generously.
To burn DVDs in original 5.1 Surround Sound (Dolby Digital Audio) without
having to re-encode, this option has to be activated.
Allows you to rip the necessary settings from an existing MPEG file. This
can be useful if you want to merge MPEG files together without re-rendering
via Smart Rendering.
Video settings
Frame rate: PAL requires 25 frames/sec, NTSC 29.97 frames/sec. Please
note: encoding NTSC material as PAL or vice versa may be possible;
however, it will result in jittery images.
Aspect ratio: Lets you set the image side or pixel ratio. With MPEG 2 the
image format is displayed as image ratio; correspondingly there is 1:1
(square screen, not recommended), 4:3 (regular video) an 2.21:1
(cinemascope). This applies irrespectively of the selected video format.
With MPEG 1 the pixel format is specified instead. There is 1:1, CIR601
(corresponds to regular video) for 625 lines = PAL and 525 lines = NTSC
and the same in 16:9. When selecting the output format Video CD the pixel
format is automatically adjusted to the selected video format. Use with
caution, even if you only want to export MPEG 1.
The option Auto is set as default. Here you can adjust the Movie settings
(view page 291) accordingly.
Resolution: Width and height of the video corresponds with the settings in
the export dialog.
GOP structure: Here you can change the settings of the GOP (view page
367) sequence, i.e. the number of P frames per I frame within a GOP.
Please note that the total length of the GOP must not exceed 15 frames,
which corresponds to the default setting (1 I frame + 4 P frames + 5*2 B
frames = 15 frames).
However, you can reduce the length of the GOP sequence (while
compromising the image quality at the same bit rate). This speeds up the
encoding process considerably as the motion estimation while encoding P

362 Appendix: MPEG Encoder Settings
www.magix.com
and B frames requires high CPU performance. The speed of decoding, i.e.
playback, is also increased.
If I frame is set to 1, each frame is an I frame. If the value is set larger, the
setting describes the total length of the GOP.
Auto GOP: Closed GOPs do not contain relations to frames from
subsequent GOPs. MPEGs where all GOPs are closed, make MPEG editing
easier as the I frames only can be edited alone if the GOP is closed. Auto
GOP closes GOPs at scene changes, whereby two different and complex
procedures ("fast" and "VSCD") are used.
Bit rate mode
In "constant bit rate" mode a bit rate that constantly remains the same is
used. This option should be used for Video CDs, as it is only requried here.
With a constant bit rate the full power of MPEG compression can not be
used properly as bandwidth for non-moving scenes is lost.
"Variable bit rate" mode attempts to adjust the available storage space to
the requirements of the video you want to encode. The actual bit rate
fluctuates around a mean value. During calm sections of the video it may
drop to a minimum value, if there are movements in the scene it may rise to
the maximum value. There are two different regulation processes (mode 1
and mode 128).
Advanced video settings
MPEG profile and level: The MPEG-2 standard defines so-called "profiles"
and "levels". For creating SVCDs and DVDs you can use "Main profile and
Main level". The high profile adds additional properties to the data stream
like the option to display an image at a reduced resolution for restricted
transmission quality (SNR-scalable profile), or locally scaled, for instance an
HDTV data stream on a standard TV set. The 4:2:2 profile is used if the
image data is to be encoded for alternative chroma scanning. However,
these profiles are supported by very few encoders, and mainly only for
professional use.
These levels define the restrictions to the image resolution and the
maximum data rate. Low level can only reach a reduced resolution
(352x2888 = CIF); high level, or High 1440, enables encoding in HDTV
format.
Estimate movement: These parameters are controlled via the quality
controller (see General Settings).

Appendix: MPEG Encoder Settings 363
www.magix.com
Other
Noise sensitivity: This factor defines how sensitive the encoder will react to
noise in the source material. If the source material only contains a little
noise (digital recordings, computer animations, or material already de-
noised by video cleaning), then you don't have to change the default value
4, or you can even reduce to increase the quality further. However, if you
want to encode noisy material, then too low of a factor will considerably
increase the encoding time at the cost of quality. For an unedited analog
video you can increase the factor to 8-14.
Noise reduction (click on noise sensitivity): A noise filter is used with
adjustable settings from 1-31.
Advanced parameters
Additional expert settings are available in the tree to the right of the window.
These should only be changed by experienced users. They have been
optimized for general applications to such an extent that changes are only
necessary in exceptional cases.
Audio settings
Audio Type: You can use MPEG -1/-2, PCM (WAV), or Dolby® Digital. You
can also select "No audio" in the export dialog.
Sample rate: You can set a sample rate of 32, 44.1 or 48 kHz for the audio
track. VCDs and SVCDs require 44.1 kHz, DVDs require 48 kHz. To reduce
the size of audio data it is recommended to lower the bit rate instead of the
sample rate.
Mode: You can use mono, stereo, joint stereo, or dual channel. If audio type
"Dolby® Digital" is used, then "5.1 Surround" mode may also be selected.
Dual channel enables encoding of two mono tracks (e.g. different language
sound tracks) that can be switched during playback.
Joint stereo is an optimized stereo encoder which takes advantage of the
fact that the signal of both stereo channels is largely identical. Use joint
stereo if you can only use small audio bit rates, but still require a stereo
signal.
5.1 Surround is available only for surround projects for burning DVDs.
During this process, all 6 surround channels in the audio stream are
encoded.
Note! For Surround projects "Dolby® Digital" should be selected under
"Audio type", and "5.1 Surround" under "Mode".

364 Appendix: MPEG Encoder Settings
www.magix.com
Bit rate: Here you can set the audio signal bit rate. The higher the bit rate,
the better the playback quality. VCD requires 224 kBit/s, and for SVCDs and
DVDs select a value between 384 kBit/s and 448 kBit/s.
Dolby® Digital Details
Hint: These functions are available only in the "5.1 Surround" mode.
Dialog normalization: Set the dB level of spoken dialog. This value will be
used to adjust the total volume of DVD movies and different programs that
can be received by the DVB. To do this, you must first measure the volume
of spoken dialogs in your movies. The values 1-31 correspond to volume
levels of -1 to -31 dB.
Hint: Use the mixer's peakmeter to set the volume level. This process
produces only approximate results, because the exact measurement
requires a mean value and this cannot be easily measured with MAGIX
Video Pro X3.
The displayed value serves also as a reference value for "Dynamic Range
Control". Some areas are softer so that speech can be made louder, and
louder areas will be made softer to avoid overmodulations.
Background: Action-filled movies have larger volume differences between
spoken dialogs and loud scenes (during explosions, for example). Because
of this dialogs are softer than in quieter films which can be modulated
higher.
Surround mix level / Center mix level: These settings lead to an additional
damping of the surround channels and the central channel. Usually both
settings are set to -3 dB.
LFE channel: Switch off the LFE channel (Low Frequency Effect), e.g. if you
want to eliminate undesirable rumbling sounds in the low frequency range.
Normally, you should leave this option activated.
LFE filter: The LFE filter is a low pass filter, which lets through only the
lowest frequencies. If you are dubbing a project in Samplitude/Sequoia, and
have applied the LFE filter, you can switch off this function here, since this
filtering has already been accomplished.

MPEG glossary 365
www.magix.com
MPEG glossary
Motion estimation
Motion estimation is a further element for reducing data used in MPEG
encoding.
Motion estimation also occurs in the B and P frames. The image difference
that still exist after prediction (view page 369) are examined. Complex
algorithms are used to search for an original occurrence of the macro block
in the reference frame of each macro block of the P or B frame (these are
units of 2x2 blocks specially combined for this purpose), which have been
moved either by movement or by camera pan. They can then be left out in
the P and B frame. Only the information by how far and to where the macro
block has been moved is saved instead. This vector is called the motion
detector.
In the General encoder settings (view page 360), you can specify the quality
of the final MPEG video. This factor also influences the time required for
encoding. The longer it takes, the better the quality.
Bit rate
MPEG is a format used for storage and transferring. With older formats (e.g.
AVI) you could predict that 20 seconds of movie would result in 20 MB of
data. The file size is this a direct measurement of quality.
This is different for MPEG: The amount of data available can be used
differently for different display modes. 20 MB can be 4 seconds of DVD
Video or 5 minutes Internet streaming in thumbnail format. The quality of an
MPEG video is measured by the width of the created data stream, the bit
rate. This is the amount of the transmitted data per time unit; it is stated in
kBit/s or bit per second.
Bits, not bytes are used, since the data word width has to address the
transmission restrictions.

366 MPEG glossary
www.magix.com
The file size can be calculated from the average bit rate, if its length is
known:
F = (BRV + BRA) * t
F=File size BRV=
Video bit rate
BRA=
Audio bit rate
t=Length in s
Block
For almost all image file editing techniques the image is subdivided into 8 x
8 pixel blocks (image points). This should be noted if you would like to used
user-defined image resolutions (width/height), and they should always be a
multiple of 8.
Chroma format
The color value of each image point consists of the color values for the
primary colors red, green, and blue (RGB), and for traditional and technical
reasons it is transformed into one brightness value (Y = 0.299*R = 0.587*G
+ 0.114*B) and two color difference values (U = R - Y, V = G -Y).
The Y value alone produces the black and white picture. These signal
components allow brightness and color information to be handled
separately. The first data reduction occurs when single rows comprising a
picture are read. Because the human eye has a lower color resolution than
a brightness resolution, the color components are recorded only for every
other point of a row (4:2:2) for each four pixels grouped (4:1:0), i.e. color
signal under-reading.
4:2:2 This corresponds to the established TV standard. One piece of color
information is transmitted per row for two pixels which corresponds to a 2/3
compression of the output data.
4:1:0 This is the color coding used for DVDs and most other consumer
video applications. For each 4 pixels grouped together on two rows, one
unit of color information is saved. This corresponds to a output data
compression of 1/2.
Field
A half-image, i.e. two halves which combine to produce a frame (see de-
interlacing (view page 368)).

MPEG glossary 367
www.magix.com
Frame
A frame is a single image from a video sequence which also called a full
image. PAL video, for example, contains 25 frames per second, NTSC
29.97 frames.
Video recordings, with the exception of computer animations and still
frames, don't contain full images. Instead, they have double numbers of
half-images (fields) which are transmitted in an interlaced state. However,
we still refer to frames, since many predecessors of MPEG compression are
based on such frames. Video editing literature usually refers to frames.
GOP
Group of Pictures: The sequence of I frames and the P and B frames that
belong to them.
e.g. I B B P B B P B B I ...
(This GOP has a length of 9, with 2 P frames and 2 B frames)
I frames contain the entire image information of a frame, while P and B have
part of the information. So-called prediction (view page 369) and movement
approximation are methods used for reduction.
The combination P B B is called a subgroup.
I frames must appear in regular intervals in the data stream for image and
sound to be synchronized. Between the I frames only a limited count of P
and B frames is allowed. This explains a few things: Since P and B frames
contain only differential information, these differences will be larger with
time, since more and more changes takes place from frame to frame. A
large count does not make much sense, since GOP has a maximum length
of 15 (4P, 2B) in PAL and 18 (5P, 2B) in NTSC. (More than 2 B frames
between P frames is not allowed).
In a closed GOP, B frames of the last subgroup may contain only backward
predictions or references to the preceding P frame, but no references to the
following I frame, since it belongs to the next GOP.

368 MPEG glossary
I frames
Intra-frames: In these pictures, the entire image information of a frame is
saved and only information from this frame is used ("intra-frame encoded").
In contrast to the I frame, P and B frames save only the differences between
the current frame, and preceding and/or following frame are also found in
MPEG video (P frame = "predicted frame", B frame = "bidirectional frame",
see Prediction (view page 369)).
Interlace
For historical reasons, pictures in a movie are always recorded and
transmitted in the form of two fields; first the lines with even numbers and
then those with odd numbers. These fields are alternatively displayed with
double the frame rate. The (lazy) eye of the viewer or the processing of the
TV tube puts the two frames together to form one.
The output image First field Second field
You normally don’t have to worry about field processing. The video material
goes through the entire processing chain as fields and is exported again as
fields or burned onto DVD or shown on TV when played back on a DVD as
a full picture. Only in certain rare conditions is it necessary to go deeper into
this process. Two problems can occur:
1. Interlace artifacts
To be displayed on a computer monitor (during recording, in your TV/VCR,
and in the arranger during editing), the two fields must be combined to form
a full screen.
These two fields are not the same, since two fields are created during the
recording between which a 1/50 of a second gap is evident. Moving objects
can therefore produce artifacts on vertical edges.
www.magix.com

MPEG glossary 369
www.magix.com
Typical interlacing errors
You can use so-called de-interlacing to avoid this type of artifact. De-
interlacing places a picture in between the two fields (interpolated). If you
want to create stationary pictures from movies, then you should definitely
use a de-interlace filter.
In the system settings ("File" menu -> Program settings) you can set the
preview monitor display to use hardware de-interlacing during video
recordings for the video recorder and for display in the arranger.
2. Incorrect field rate
If you move around the series of fields in a movie data stream, then you will
see strong jitter and flicker effects. Picture objects move in a backward
movement – two steps forwards, one back – since a delayed field is shown
before the previous one. This can happen in the processing chain if you
export video material improperly with the wrong field order and then import it
into different material. We use MXV or MPEG "Top field first" format for all
analog recordings ("odd" in other programs).
DV-AVI on the other hand is saved with “Bottom Field First”.
You can correct the field series for each video object in its object settings.
See: "Menu -> Effects -> Object properties"
P frames and B frames
P frames save only the difference between the current picture and the
preceding I frame. The "P" comes from the term "prediction" which
describes this process.
B frames save the differences between the current picture and the I or P
frame preceding and following. This includes the information that was the
same before and remained the same after the current frame. Both directions
are analyzed (indicates the "B" in the name, i.e. "bidirectional-predicted").
You can read more under prediction (view page 369).
Prediction
Prediction is a method of data reduction used by the MPEG format. The
image elements already known from the previous or following frames are
removed from the data stream.

370 MPEG glossary
www.magix.com
How does it work?
The encoder has a precisely defined GOP, for example IBBPBBPBB. This
sequence is transmitted together with the encoder, which always knows
exactly which kind of frame comes next. I, P, and B frames are
differentiated.
Hint: When we talk about pictures, we mean frames of the video output, and
I, P an dB frames are the frames of the encoded video. Just as in movement
approximation, blocks (8x8 pixels) are united into macroblocks (16x16
pixels) during prediction.
The first frame is always the I frame. It is completely encoded from the first
picture. Afterwards, the 4th picture is analyzed for the creation of the first P
frame. (As already said, the encoder, and later the decoder, will know that
two B frames belong between them.) This image will also be completely
encoded, and afterwards all macroblocks that haven't changed in
comparison to the I frame will be deleted. They will be replaced by
corresponding references for the decoder that tell it "you already know what
should be shown here, and you can get it from the last I frame".
Now, the 2nd will be completely encoded, and all macroblocks identical to
the first I frame and the following P frame will be removed. References to
previous frames are called backward predictions, and references to
following frames are called forward predictions. The third picture will be
edited in exactly the same fashion.
The fourth picture we have already explained, and now we need the next P
frame, or picture number 7. Pictures 5 and 6 are B frames again, which are
compared to P frames to both sides of them (picture 4 and 7); these are
followed by the last two B frames. These have a special place, since in
closed GOPs, they may contain only backward predictions, and no
references to the next I frame, because it belongs to the next GOP.
Something else: Since the decoder is no prophet, the P frames are always
transmitted before the B frames! The GOP explained above will be encoded
and transmitted in the order it is written.
Original
GOP
I0 B01 B02 P01 B11 B12 P02 B21 B22 I1
Data
stream
I0 P01 B01 B02 P02 B11 B12 B21 B22 I1 ... for closed GOPs
I0 P01 B01 B02 P02 B11 B12 I1 B21 B22 P11... For open GOPs

MPEG glossary 371
www.magix.com
Due to this nested structure, it is easy to see that during direct editing of
MPEG material, complicated computations have to take place! These are
made easier using a frame table. A frame table contains a list, where the
information of every frame in the data stream is found, identifying the type
of frame it is.
Using Movement prediction (view page 365) P and B frames are likewise
reduced.
Quantization scaling
The single pictures in MPEG are saved using a compression method
comparable to JPEG with bitmaps and associated with quality loss. For this
single images are divided into 8 x 8 blocks (view page 366).
Each one of these blocks is then transformed into an 8 x 8 matrix (a table
with rows and columns) using a DCT (discreet cosinus transformation)
mathematical method. Each of these values is produced using all 64
individual pixels of the block, but the values in the matrix are ordered in
such a way that the image information is ordered according to its
importance.
This matrix will then be multiplied by another matrix, i.e. the quantization
matrix. Exactly how and why this matrix must be created is the biggest
secret of encoder programmers, since this determines the quality of the
whole encoding process. What is known is that the result should contain as
many zeros as possible! These zeros correspond to the "unimportant"
image elements mentioned and will not be transmitted in the data stream.
Depending on the encoder parameters regarding the target bit rate, fewer or
more values of the matrix will be declared unimportant by dividing the
quantization matrix by the quantization scaling factor. Since only whole
numbers are used, a division can produce a zero is the remainder is
discarded.
This factor is also a direct measure of the sought image quality of the MPEG
data stream, since the "Q" in "Q" factor stands for quantization and quality.

372 Glossary
www.magix.com
Glossary
Symbols & Numeric
720p
This is the "small" HD resolution, which is sized at 1280 pixels x 720 pixels.
The "p" stands for "progressive", i.e. full images are always displayed.
A
Aliasing
Aliasing, or alias effects, are mistakes that appear during digital scanning of
sounds, videos or images when the sample frequency (in audio editing) or
resolution (in video editing) used are too low.
ATN:
This is the abbreviation for "Absolute Track Number", which is the actual
tome code (time stamp) of DV and HDV recordings recorded using the
helical scan method.
Audio
This is then referred to as "audio" when the sound signal is saved directly
as such on the PC. The actual sound is recorded or played back here.
AudioID
Audio ID is a process used to determine the title and artist name base on
musical properties. An Internet connection is required to access the AudioID
database.
AVCHD
Stands for "Advanced Video Codec Definition". It is an HD format for video
cameras which has been developed by Panasonic and SONY. In
comparison to the HDV format, a meaningful quality improvement can be
seen here.
For the video recording MPEG 4 AVC/H.264, and for audio recording Dolby®
Digital or Linear PCM are used. The maximum bit rate is 25 Megabits/sec.
AVI
The AVI format (Audio Video Interleaved) isn't actually a proper video format!
Rather, it is a so-called "container" for which the conventions for transferring
audio and video files to the program are only loosely defined. More in this
topic can be found in General notes on AVI videos. (view page 339)

Glossary 373
www.magix.com
B
Backup disc
Copying of files to a different file storage medium to secure these files is
called backing up, or creating a backup.
Browser
A browser (also known as web browser, or Internet browser) is a computer
program that displays websites. The best-known browsers are Internet
Explorer, Firefox, Safari, and Opera.
Button
Refers to an element of the graphic user interface of a program. The button
initiates an action in the program via left mouse click.
Button
Refers to an element of the graphic user interface of a program. The button
initiates an action in the program via left mouse click.
C
Cache
Simply stated, this is a temporary folder where frequently accessed files are
saved so that they can be quickly launched while you are working.
CC
CC stands for "Connectivity Co-ordination" and describes how the change
of a domain name from one provider to another occurs (domain transfer).
Clip level
Signifies the volume level at which the recorded signal is overmodulated, or
"clipped".
Clipboard
The clipboard is used to temporarily store objects during execution of
commands like "copy" and "cut".
Clipboard
The clipboard is used to temporarily store objects during execution of
commands like "copy" and "cut".
compatible
Different devices are compatible with each other if they operate together
without any errors occurring.

374 Glossary
www.magix.com
Context menu
Context menu can be reached by right clicking on a selected object. It offers
functions which are available and can be expected in the given context.
Copyright
Protection of intellectual and creative property against unauthorized
copying.
Copyright
Protection of intellectual and creative property against unauthorized
copying.
CPU
Central processing unit: The name for the main processor of the computer
(CPU). Modern computers have even two or more processors, or one
processor with several cores.
Crossfade
Transitions, crossfades. Can be used to fade between objects.
D
Dialog
A dialog opens in a new window and lets the user interact with the program.
This means that the dialog can present information to the user and/or
expects to receive input from the user.
A dialog can contain various user elements which can be manipulated by a
simple mouse click. Keyboard entries are also possible.
Disc project
A "Disc project" includes everything that you want to put on your CD and
DVD.
This normally contains one or more movies and includes a menu
structure/menu design which allows you to choose a movie later on the CD
or DVD.
Disc types
The disc types determines the format and medium (CD, DVD, Blu-ray disc,
etc.) to which the current project will be burned.

Glossary 375
www.magix.com
DNS
The abbreviation DNS stands for Domain Name Service and refers to a
provider of Internet services that registers domain names for customers.
Domain
A domain is the website's Internet address. It consists of the name of the
Internet protocol (usually http://), the computer or network name (such as
www), the second-level domain (such as magix), and the top level domain
(like .com, .net).
Altogether we have: protocol://networkname.second-level-domain.top-level-
domain (such as "http://www.magix.com").
Domains are allocated by a country's so-called NIC (Network Information
Center). In Germany the DENIC is responsible for the release of domains.
Domain transfer
See CC. If you already have a domain, you can move it from your previous
provider to another provider.
Downmix
A method developed for audio technology to turn a Surround Sound
recording into a version with fewer channels. Most often (as is the case with
MAGIX Video Pro X3) this will be a stereo version.
Drag & drop
Enables files and objects to be moved freely between various applications
(or within an application) by dragging the object and letting it drop using the
mouse cursor.
F
Fader
Used for visual input of values. Similar to volume control on a mixing board,
you can control various parameters by sliding the fader. A very common
example for this is the zoom slider that lets you see a picture in more detail.
Field
A half-image, two of which combine to produce a frame (see interlace).
Flip menu
Drop down menus create menus consisting of lists of selectable choices.
They look very similar to text input fields, but have a button with a
downward-pointing symbol on the right-hand side.

376 Glossary
www.magix.com
Frame
A frame is a single image from a video sequence which also called a full
image.
A PAL video contains 25 frames per second; NTSC contains 29.97 frames.
H
Handles
Handles are the five little rectangles at the edges of selected objects. All
curve points can be moved by holding down the left mouse button.
Length handles: Bottom right and bottom left. You can use them to change
the length of an object.
Fade handles: Top right and top left. These can be used to softly fade an
object in or out.
Volume/Brightness handle: Above-center. You can use it to adjust the
volume or the brightness.
Hard disk
Storage medium with the largest storage capacity where the operating
system(s), programs, and files are saved. A hard disk can be built into the
computer, but there are also external hard disks which can be used with
different computers via a USB connection (portable drives or external hard
disk).
Hard disk drive
Storage medium with the largest storage capacity where the operating
system(s), programs, and files are saved. A hard disk can be built into the
computer, but there are also external hard disks which can be used with
different computers via a USB connection (portable drives or external hard
disk).
Hardware
The all-encompassing name for all internal components of a computer. For
example hard disk, graphics card, mainboard, etc. External peripheral
devices are also considered hardware, i.e. printer, scanner, monitor, etc.
The synchronization of single hardware components is coordinated by the
software.

Glossary 377
www.magix.com
HDD
Storage medium with the largest storage capacity where the operating
system(s), programs, and files are saved. A hard disk can be built into the
computer, but there are also external hard disks which can be used with
different computers via a USB connection (portable drives or external hard
disk).
HDTV
This acronym stands for "High Definition Television.
HTTP
Stands for Hyper Text Transfer Protocol and is used for transferring
websites onto the Internet (from web server to the browser). For this reason,
the abbreviation http:// always comes before the Internet address. This is
automatically inserted and does not have to be entered when entering the
Internet address.
Hyperlink
Hyperlinks (or in short "links") are references to other websites/online
documents (or other computer networks). They build the base of the World
Wide Web (WWW) as it is only via these hyperlinks that networking or
interlinking between the billions of website out there is actually possible.
I
ID3 tags
ID3 tags contain title information that can be added to a music title. This
includes the title, artist, album, as well as the genre, year of release, and
other criteria that can help searching through a database. The database is
created using this information.
Info: Title information will only be saved for MP3s in the so-called ID3 tags
(Identify an MP3), but other formats offer similar possibilities, like "Vorbis
comment" for the OGG Vorbis format, for example.
Image
An image is a representation of a CD, DVD, hard drive, or another storage
medium that is saved as a file.
The difference from a copy or backup is that an image contains information
about the structure of the original storage medium, and not just individual
files. This enables 01:01 copies of complete storage media to be created.

378 Glossary
www.magix.com
Caution! Copyright laws forbid copying of commercial CDs/DVDs, and for
this reason, this process can be prohibited by copy protection.
IMAP
Stands for Internet Mail Access Protocol and is an advanced procedure
used for receiving emails.
Interlace
Describes the creation of a full image from 2 half-images (fields).
In this process, even and odd lines are alternately assigned to one of the
two fields.
The human eye perceives both of the projected half-images as a single full
image, so that despite the slow image repetition rate (25 Hz for PAL, 29.97
for NTSC) a subjectively fluid image is seen.
Intro
"Intro" means the introduction or opening credits of a movie.
J
jpx
A format developed by MAGIX which is used for photo editing. It enables
free experimentation with effects without altering the original file. The effects
settings are also displayed when the photos are opened using a different
MAGIX program.
M
Menu
Menus contain practically all function of a program. They can be opened
using a simple mouse click on the corresponding menu. Keyboard shortcuts,
if available, are also found at the end of menu entries.
The graphical surface of a CD/DVD will also be represented as a menu.
Menu bar
Almost every program has a menu bar. It can normally be found underneath
the title line of the program. A simple mouse click opens a corresponding
menu.

Glossary 379
www.magix.com
MIDI
MIDI files do not contain the actual sounds like audio files, but only the note
control information which can be interpreted during playback by the
synthesizer chip on the sound card or an external synthesizer.
MMC
MMC stands for MIDI Machine Control and is part of the MIDI protocol.
Transport control and position data is conveyed using MMC.
Motherboard
This is the centerpiece of hardware components of a computer. All other
hardware components like CPU, RAM, hard disk, additional drives, graphics
cards, as well as other cards for specialized uses are connected to the
motherboard.
Motherboard
This is the centerpiece of hardware components of a computer. All other
hardware components like CPU, RAM, hard disk, additional drives, graphics
cards, as well as other cards for specialized uses are connected to the
motherboard.
Motherboard
This is the centerpiece of hardware components of a computer. All other
hardware components like CPU, RAM, hard disk, additional drives, graphics
cards, as well as other cards for specialized uses are connected to the
motherboard.
MOV
MOV is a video and audio format developed by Apple, which has since
become widely used with Windows. QuickTime supports lots of compression
technology, which make it possible to optimize audio and video and even
graphics for the Internet and multimedia/video applications. Conventional
(hardware) DVD players are not able to play this format.
Movie
In MAGIX Video Pro X3, an arrangement of various objects (videos, photos,
text, sound, etc.) is called a movie. A movie file has an "mvm" extension.
MP3
MP3 (actually MPEG-1 layer 3) is currently the most important standard for
compressing audio files.

380 Glossary
www.magix.com
MPEG
MPEG is short for "Moving Picture Experts Group" and refers to a
committee concerned with the standardization of video and audio data
compression as well as container formats.
MS audio
A process developed by Microsoft for compressing audio files with
properties similar to those of MP3.
MTC
MTC stands for MIDI Time Code and it transmits the exact playback position
via MIDI. In this way, programs and devices can be synchronized with each
other.
MXV
This is the MAGIX video format for quicker processing with MAGIX
products. It offers very low loss of quality, but it cannot be played via
conventional DVD players.
N
Noise Sample
Sample of a noise that is to be removed
NTSC (USA, Japan)
NTSC stands for "National Television Systems Committee". This is a US
institution that defined the first color carrier system for TV which is now
used in most of America and some East Asian countries.
The image repetition rate for NTSC is 29.97 Hz.
Numeric keypad
Also known as the numpad, or the number block.
O
Offset
With an offset of 60:00:00 (1 hour) you can, for example synchronize a tape
whose time code that starts at 1 hour, MAGIX Video Pro X3 however, still
starts the tape beginning at 0.
OGG VORBIS
This is a new, royalty-free format with similar properties to MP3.

Glossary 381
www.magix.com
P
PAL (Europe)
Phase Alternating Line, or PAL, is a process for color transmission for
analog TV that is primarily used in Europe, but also in Australia, South
America, and many African and Asian countries.
The image repetition rate for PAL is 25 Hz.
Play marker
The play marker is a red vertical line which moves from left to right during
playback. It indicates the current play position.
Playlist
Arrange your songs in playlists from various sources in different formats and
in whatever way you like, sometimes updated daily.
Important: Playlists are only links to songs on your hard drive or in your CD
drive.
When you add a song to your playlist whose real source is a CD in your
computer's drive, the song will no longer be playable when the CD is
removed from the drive.
Similarly, when you move a folder on your hard drive, the playlist will no
longer be able to play the song, since the link is no longer valid.
For the latter, however, there is a simple solution: If you know where the
song has been saved, then you can redefine the path. A corresponding
dialog window is provided for this purpose. You can reset the path by
navigating through the Explorer folders. The playlist is now correct once
again.
Plug-in
Plug-ins are additional programs that expand the functionality of the main
program. They are inserted into the main program.
POP3
Stands for Post Office Protocol (version 3) and is used in standard email
programs for receiving email (for example, Outlook Express). POP3 enables
email to be collected by the provider's email server and loaded into your
email program.

382 Glossary
www.magix.com
Project
A "Disc project" includes everything that you want to put on your CD and
DVD.
This normally contains one or more movies and includes a menu
structure/menu design which allows you to choose a movie later on the CD
or DVD.
Provider
A provider or ISP (Internet Service Provider) offers Internet services like
webhosting or domains (DNS). In relation to the MAGIX Website Service,
MAGIX is the provider.
R
RAM (Random Access Memory)
This is a hardware component of a computer. RAM is needed to temporarily
save files. This type of storage is erased when the computer is shut down or
reset. The larger this storage is, the faster you can work with programs to
change and save files.
Ratio:
The aspect ratio is the ratio between the height and width of a rectangle. In
practice these are photos, screens or projection screens. This method can
also be used to describe the aspect ratio of pixels.
Here are some examples of typical aspect ratios: at home 4:3, 16:9 (typical
for TV sets), or 16:10 (widescreen flat screens, widescreen notebooks), 3:2
for 35 mm films and photos. In cinemas you mostly find 1.85:1
Red Book
Specific standards have been established for the different CD types in order
to unify their data structure and to make them compatible with the different
CD drives. Their names refer to the color of the books where these
standards were written.
The term "Red Book" is common language for the Compact Disc Audio
Standard. The requirements listed here have to be observed for industrial
CP production. Audio CD players only read CDs created according to the
Red Book format. It is therefore necessary to first convert PC files into this
format before writing them onto an audio disc compatible with any audio CD
player.
Restore
Restoration of files originating from a backup will be called "Restoring".

Glossary 383
www.magix.com
RM
RealMedia includes all of the media formats from software developer
RealNetworks. RealMedia especially refers to the "RealVideo" video format
and the "RealAudio" sound format. The quality of RealVideo files is
comparably good at high compression rates, but does have some loss of
quality. These formats cannot be played back by (hardware) DVD players.
S
Scene
Freely definable section of a video in MAGIX Video Pro X3.
In general, a scene is a segment of a film that is a product of various
settings and conveys a certain action.
Screenshot
A screenshot is an image composed of all visible screen elements
(messages, open dialogs, etc.) at a certain time. By pressing the "Print
screen" key on the keyboard, this image is saved into the clipboard. Next,
open a program which can edit images and select "Insert" (shortcut
"Ctrl+V") in a new document to add the screenshot for editing and saving.
Note: Press "Alt + Print screen" on the keyboard to capture the active
window only.
Slider
Used for visual input of values. Similar to volume control on a mixing board,
you can control various parameters by sliding the fader. A very common
example for this is the zoom slider that lets you see a picture in more detail.
SMTP
Stands for Simple Mail Transfer Protocol and enables the exchange of
emails across computer networks.
Software
The name for all non-physical functional components of a computer. This
primarily includes computer programs and files that are meant to be used by
computer programs.
Storyboard mode
The Storyboard mode is the default edit screen view. This view offers an
easy, streamlined interface to simplify the editing process. The alternative
Timeline mode offers a more detailed interface for more extensive editing
and scene arrangements, the scene overview mode offers a complete

384 Glossary
www.magix.com
overview of all scenes on a small scale. You can toggle between the three
view modes using the Tab key.
Submenu
Besides normal entries, a menu can contain submenus that offer additional
functions. This makes menus more comprehensive.
Super Video CD (SVCD)
The Super Video CD (SVCD) is a technological advancement of the video
CD. SVCDs are also like VCD-specified CD-ROMs which can be played
using either a Super Video CD player (connected to the television), or
directly with the CD-ROM drive of a computer. Many DVD players can also
play SVCDs. MPEG-2 and the increase of the data transfer rate makes it
hard to tell videos from videos in DVD quality apart.
Resolution: SVCDs use the better MPEG-2 encoder in a standardized
resolution of 480 x 576 (PAL). The MPEG-2 format offers a maximum
resolution of up to 720 x 576 points and improved compression methods
characterized by excellent image definition and homogenity.
Hard disk capacity: An average 90-minute movie must be spread across 3
CDs. On one SVCD you can get about 30 minutes of good-quality movie.
Encoder setting: Compared to the VCD with 1.3, the data transfer rate is
doubled to 2.6 Mbit/s.
MPEG-2 format introduces the so-called variable bit rate (VBR). In contrast
to the constant bit rate (CBR) of the MPEG-1 encoders, this encoder has
the option of using more bits for movement-intensive sections, as well as
saving bits if picture content remains the same.
T
Toolbar
Here you will find small buttons that provide a function when clicked. For
example, you can cut out a selected object by clicking on the scissors.
Toolbar
All basic functions of the corresponding program can be found here. The
corresponding functions can be called up via mouse click.
Top-level domain
Top-level domains (TLD) are always those separated by a dot at the end of
an Internet address (for example, "http://www.magix.com" < here, .com is
the top-level domain). Among these are also country top-level domains,

Glossary 385
www.magix.com
such as .co.uk, .us, .de as well as so-called generic top-level domains like
.net, .org, .biz, and so on.
Traffic
Traffic (data transmission) occurs within your MAGIX Website Service as
soon as data is transferred across the Internet: for example, when
uploading or downloading files to your website or when someone else opens
your website.
U
Universal Plug & Play; UPnP
Universal Plug ‘n’ Play (UPnP) is a network protocol which enables data
exchange between different devices (PCs, hi-fi systems, video cameras,
PDAs, and webservers). UPnP allows various devices to participate in
network-wide communication, i.e. the initialization of functions and other
device functions. Long-winded configuring or installing of drivers is not
required as the devices can handle their own functions and data sources by
themselves. Find out more at www.upnp.org.
Hint: To work with UPnP you have to activate it first. This can be found
under "Options" ("Y" -> UPnP).
URL
URL stands for Uniform Resource Locator and describes where a source
can be found online (for example, a website). The address or the path to the
storage location of a file on your computer is known as a URL. Often the
term URL is used as a term for the domain. The URL for the MAGIX website
is: http://www.magix.co.uk
V
VirtualDub plug-in
Plug-ins are additional programs that expand the functionality of the main
program. They are inserted into the main program.
VirtualDub plug-ins are also referred to "VirtualDub filters" and have the
"VDF" file extension. You can use them to apply additional video effects to
video objects.
VST and DirectX plug-ins
Plug-ins are additional programs that expand the functionality of the main
program. They are inserted into the main program.
Two standards exist for audio editing: VST (Steinberg) and DirectX
(Microsoft). VST has asserted itself stronger in the current market.

386 Glossary
www.magix.com
W
WAV
Wave (*.WAV) is a standard uncompressed audio format.
Wave
Wave (*.WAV) is a standard uncompressed audio format.
Wave file
Wave (*.WAV) is a standard uncompressed audio format.
Webhosting
This means that an Internet Service Provider makes domains and webspace
available to its customers. With the MAGIX Website Service, MAGIX
provides webhosting to its customers.
Webmail
Webmail enables the customer to view and receive the contents of their
email inbox without having to install email software on their computer.
Customers of the MAGIX Website Service can use MAGIX Webmail for this.
Webmaster
A webmaster is responsible for the administration and maintenance of a
website. Often, the webmaster is also the owner of the website as well as
the domain that belongs to it. Once you have registered a domain in the
MAGIX Website Service, an email account will automatically be set up, for
example: "mailto:webmaster@domainname.co.uk".
Webserver
Webserver refers to the computer on which your host saves your website's
pages and which makes your pages accessible on the Internet 24-hours a
day.
WMA
A process developed by Microsoft for compressing audio files with
properties similar to those of MP3.
WMV
Windows Media Video (WMV) is a trademark video codec from Microsoft. If
you have Windows installed on your PC, then playing WMV files shouldn't
be a problem. Only a few (hardware) DVD players are able to play this
format. Read more about this in your DVD player's manual.

If You Still Have Questions 387
www.magix.com
This video format is very good for web videos as it allows relatively high
compression rates.
World Wide Web (WWW)
WWW stands for "World Wide Web" and is the most used service of the
Internet. On the WWW, web browsers (for example, Internet Explorer) are
used to display information via websites. The process is colloquially called
"Surfing the Internet".
If You Still Have Questions
Tips for program help
The "Help" file features hints on how to use the program and additional
information. Many important terms are indicated in the text in italics and an
explanation to them is reached by clicking on them.
Context help: Press the "F1" key at any point in the opened program and the
help file will open with the matching topic (context help).
Search function: Use the search function to find out information about
specific words. Enter either the individual word or use logical operators (OR,
AND, NEAR) to refine your search if you have several search words.
"OR" (between two words): All topics which contain both words or one of
the words will be listed.
"AND" (between two words): Only those topics will be listed which contain
both words.
"NEAR" (between two words): Only those topics will be listed which contain
both words. A maximum of six other words may be added between the
search terms.
"NOT" (before a word): Topics which contain this word will not be listed.
Print: Use the help program's print function to make a printout of individual
topics or entire sections. The print button is located at the top of the help
window in the toolbar.

388 Index
www.magix.com
Index
3
3D ..................................................................................................... 133, 152
3D morph .................................................................................................. 133
3D series .....................................................................................................95
3D text....................................................................................................... 116
3D transitions .............................................................................................. 93
5
5.1 Surround ..................................................................................... 184, 191
A
Abbreviations ............................................................................................328
Ad markers................................................................................................ 107
Adapt length to music................................................................................ 237
Add music ...................................................................................................76
Additional effects....................................................................................... 136
Adjust brightness....................................................................... 120, 142, 181
All tracks mouse mode .................................................................... 30, 33, 46
Alpha keying................................................................................................ 93
Analog video recording.......................................................................... 25, 70
Animate ..................................................................................................... 333
Animate effects .........................................................................................144
Animated GIF ............................................................................................ 248
Anti-flicker filter.......................................................................................... 143
Anti-interlace filter ..................................................................................... 144
Arranger .............................................................................................. 54, 267
Artistic filter ...............................................................................................126
Attach to picture position in the video..........................................................91
Audio cleaning........................................................................................... 160
Audio effects ....................................................................................... 41, 160
Audio recording ........................................................................................... 76
Audio track export .....................................................................................248
Automate................................................................................................... 184
Automatic scene detection ........................................................................ 224
Automatic volume damping ......................................................................... 78
Automatically cut ....................................................................... 224, 226, 237
Automation ........................................................................................ 184, 187
AVCHD.................................................................................................. 15, 61
AVCHD disc ..............................................................................................342
AVC-Intra ....................................................................................................61

Index 389
www.magix.com
B
Background music .....................................................................................176
Backup ..............................................................................................277, 278
Backup copy ..............................................................................................277
Basic view....................................................................................................56
Batch Capturing...........................................................................................69
Batch recording .....................................................................................67, 69
Beat detection............................................................................................227
Bezier curves.............................................................................................147
Blu-ray .......................................................................................................342
BMP export................................................................................................248
Border cropping adjustment.......................................................................144
Bounce ......................................................................................................197
Burn.....................................................................................................58, 199
Burn CD.....................................................................................................284
C
Camera/zoom ............................................................................................131
Center title .................................................................................................114
Center track position..................................................................................114
Chapter markers..........................................................................46, 104, 204
Chroma key .........................................................................................90, 125
Clean-up wizard.........................................................................................279
Codec ................................................................................................335, 339
Color..................................................................................................121, 142
Color correction .........................................................................................123
Compare....................................................................................................118
Compressor .......................................................................................164, 170
Computer.....................................................................................................39
Connect DVD player ....................................................................................25
Connect VCR...............................................................................................25
Context menu ..............................................................................................28
Continue ....................................................................................................220
Continue burning .......................................................................................220
Contrast.....................................................................................................120
Copy ............................................................................................................85
Create disc menu...............................................................................201, 202
Create menus ....................................................................................201, 202
Create new project...............................................................................43, 258
Curve mouse mode .....................................................................................47
Curve shape ..............................................................................................147
Curves ...............................................................................................144, 184
Customer service.........................................................................................10
Cut.............................................................................................30, 49, 85, 87
Cut commercials........................................................................................226

390 Index
www.magix.com
Cut trimmer ................................................................................................. 89
D
DeClipper .................................................................................................. 161
Decorate.............................................................................................. 42, 113
DeHisser ................................................................................................... 163
Deinterlace ................................................................................................ 275
Delete.................................................................................................. 45, 288
DeNoiser ................................................................................................... 161
Design ....................................................................................................... 237
Design buttons ..........................................................................................206
Design elements.................................................................................. 42, 136
Design page .............................................................................................. 205
Digitize VHS tapes ......................................................................................25
DirectX Plug Ins......................................................................................... 181
Disc formats ................................................................................................17
Distortion................................................................................................... 127
Dolby Surround .........................................................................................184
Driver selection .........................................................................................267
Dub .............................................................................................................76
Ducking ....................................................................................... 78, 176, 298
DV ......................................................................................................... 24, 64
DV as MPEG ............................................................................................... 68
DV-AVI ......................................................................................................244
DVCPRO..................................................................................................... 61
DVD...........................................................................................................340
Burn DVD............................................................................................... 284
Create DVD ........................................................................................... 243
DVD with surround sound ...................................................................... 184
Import DVD .............................................................................................. 83
E
Edit........................................................................................ 36, 82, 287, 331
Edit after recording......................................................................................81
Edit list .............................................................................................. 248, 278
EDL ................................................................................................... 248, 278
Effects ..................................................41, 116, 117, 160, 184, 238, 296, 332
Effects curves............................................................................................ 148
Effects masks............................................................................................ 139
Effects settings.................................................................................. 117, 142
Equalizer ........................................................................................... 163, 170
Exchange ....................................................................................................49
Export.......................................................................................... 35, 185, 243
Export audio ..............................................................................................249
Export formats........................................................................................... 243
Export movie ....................................................................................... 35, 243

Index 391
www.magix.com
Export video.........................................................................................35, 243
F
File.....................................................................................................280, 330
File formats..........................................................................................15, 339
File import....................................................................................................38
Film menu..................................................................................................204
Film overview...............................................................................................52
Folder ........................................................................................................269
Four-point cut ............................................................................................100
Full screen...................................................................................................52
G
Grid..............................................................................................................46
Group ....................................................................................................46, 84
H
H.264...........................................................................................................61
Handles .................................................................................................28, 86
Hard drive camera .......................................................................................61
HDV.............................................................................................................64
Help .............................................................................................44, 303, 334
Hints ..........................................................................................................272
I
Image stabilization.....................................................................................140
Import ..................................................................................................38, 185
Import Formats ............................................................................................15
In point...........................................................................................32, 84, 102
Insert .....................................................................................................48, 83
Insert date .................................................................................................116
Interfaces...............................................................................................36, 58
Interlace.....................................................................................................270
Interpolation for interlace material..............................................................144
J
JPEG export ..............................................................................................248
K
Key frames ................................................................................................144
Keyboard shortcuts....................................................................................328

392 Index
www.magix.com
L
Limiter ....................................................................................................... 175
Load ........................................................................................ 37, 43, 83, 266
Load CD titles.................................................................................... 176, 282
Load project ........................................................................................ 43, 266
Logging ....................................................................................................... 70
M
MAGIX Movie Edit Pro.................................................................................19
MAGIX tools ................................................................................................40
MAGIX Video CD ...................................................................................... 245
Magnet ........................................................................................................56
Mastering .................................................................................. 160, 171, 183
Mastering Suite ......................................................................................... 171
Media Pool .................................................................................................. 37
MIDI ..........................................................................................................179
Mirror......................................................................................................... 132
Mixdown .................................................................................................... 197
Mixer ................................................................................... 50, 170, 181, 186
MMC.......................................................................................................... 263
Modes (Storyboard/Timeline/Overview) ......................................................54
MotionJPEG-AVI ....................................................................................... 245
Mouse modes...................................................................................... 46, 330
Move ...........................................................................................................85
Move objects on all tracks ...........................................................................46
Movement effects ................................................................................ 41, 129
Movie selection ...........................................................................................45
MPEG................................................................................................ 244, 338
Multicam editing ........................................................................................ 107
Multicam mode .................................................................................... 17, 107
Multimax.................................................................................................... 173
Multisound tracks ...................................................................................... 189
Mute ............................................................................................................50
My Media.....................................................................................................39
N
Navigation .................................................................................................203
News Center ...............................................................................................44
O
Object editing .............................................................................................. 82
Object grid............................................................................................. 46, 56
Object handles ............................................................................................ 86

Index 393
www.magix.com
Object mouse mode.....................................................................................46
Object trimmer .............................................................................................88
One track mouse mode....................................................................30, 33, 47
Open files ............................................ 15, 159, 176, 266, 278, 282, 283, 285
Optimize image..........................................................................119, 142, 144
Out point........................................................................................32, 84, 102
Output video ..............................................................................................249
Overview..............................................................................................56, 303
Overview mode............................................................................................56
Overwrite .....................................................................................................49
P
Panorama ..................................................................................................240
Panorama automation ...............................................................................184
Personalized templates .............................................................................136
Pitch shift...................................................................................................168
Play .....................................................................................................21, 328
Playback markers ......................................................................................101
Polarizing filter...........................................................................................156
Prelisten mouse mode .................................................................................48
Preview......................................................................................................200
Preview rendering..............................................................................103, 276
Program monitor..........................................................................................51
Program settings .................................................................................44, 267
Project folder ...............................................................................................57
Project markers .........................................................................................102
Projects ...............................................................................................39, 264
R
Real time ...................................................................................................160
Record...................................................................................................25, 60
Record sound ..............................................................................................76
Recording ..............................................................................................24, 60
Red eyes ...................................................................................................122
Redo............................................................................................................45
Remote control ..........................................................................................200
Remove end ................................................................................................50
Remove scene.............................................................................................50
Remove start ...............................................................................................49
Remove TV channel logo...........................................................................139
Restore normal view ..................................................................................273
Rewrite ......................................................................................................220
Rotation .....................................................................................................132
Rotation & Mirror .......................................................................................132
Run of the panorama and volume curve ....................................................184
RW ............................................................................................................220

394 Index
www.magix.com
S
Saturation.................................................................................................. 122
Save............................................................................................................ 43
Save project ........................................................................................ 43, 266
Scene recognition...................................................................................... 224
Screen capture............................................................................................ 79
Scroll ...........................................................................................................55
Scrubbing .................................................................................................. 196
Search function ..................................................................................... 21, 38
Secondary color correction........................................................................ 123
Section & zoom .........................................................................................130
Serial number.............................................................................................. 12
Settings ....................................................................................... 44, 266, 267
Sharpness ......................................................................................... 128, 143
Shortcuts ................................................................................................... 328
Show grid .............................................................................................. 46, 56
Show text .................................................................................................... 41
Shutter mode..................................................................................... 156, 273
Single frame export ...................................................................................245
Single-frame recording .......................................................................... 67, 73
Size ........................................................................................................... 129
Size & position ..........................................................................................129
Slideshow Maker ....................................................................................... 237
Snap to other audio objects............................................................... 111, 313
Sound restoration ...................................................................................... 160
Soundtrack ........................................................................................ 159, 198
Source monitor............................................................................ 51, 103, 118
Spacebar................................................................................................... 267
Specify TV image ......................................................................................143
Speed........................................................................................................ 128
Spline curves............................................................................................. 147
Split .............................................................................................................49
Split movie................................................................................................... 50
Start dialog .................................................................................................. 21
Stereo FX .................................................................................................. 164
Stereo3D ...................................................................................................133
StoryMaker............................................................................................ 37, 41
Stretch mouse mode ...................................................................................47
Support........................................................................................................ 10
Suppress flickering .................................................................................... 143
Surround ........................................................................................... 184, 191
Synchronization......................................................................................... 260
Synthesizers...................................................................................... 135, 192
System requirements ..................................................................................13

Index 395
www.magix.com
T
Television ..........................................................................................249, 273
The burn dialog..........................................................................................219
Three-point cut ............................................................................................98
Timeline mode .............................................................................................28
Timer ...........................................................................................................75
Timestretch/pitchshift.................................................................................168
Title......................................................................................................41, 111
Title Editor ...........................................................................................45, 113
Tools............................................................................................................43
Track effects automation ...................................................................184, 187
Tracks..................................................................................................54, 181
Transitions ..................................................................... 41, 92, 119, 238, 248
Transport functions ......................................................................................53
Travel route animation...............................................................................232
Trimmer .......................................................................................................88
Two-point cut ...............................................................................................96
U
Uncompressed video .................................................................................245
Undo............................................................................................................45
Use plug-ins...............................................................................136, 160, 181
V
Video Comping ..........................................................................................107
Video effects........................................................................................41, 119
View.....................................................................................42, 273, 303, 329
Vimeo ........................................................................................................285
Volume automation....................................................................................184
Volume reduction.................................................................................78, 176
VST plug-ins ..............................................................................................181
W
Wave (WAV)..............................................................................................248
White balance............................................................................................121
Window..............................................................................................301, 333
Windows Media video................................................................................246
Workspaces.................................................................................................58
Y
YouTube ....................................................................................................285

396 Index
www.magix.com
Z
Zoom................................................................................................... 54, 131