Magix Xara 3D Maker 7.0 Owners Manual 7
User Manual: magix Xara 3D Maker - 7.0 - Owners Manual Free User Guide for Magix Xara 3D Maker Software, Manual
Open the PDF directly: View PDF ![]() .
.
Page Count: 170 [warning: Documents this large are best viewed by clicking the View PDF Link!]
- Welcome to Xara 3D Maker 7
- Purchasing and unlocking Xara 3D Maker
- What's New in Xara 3D Maker Version 7
- Other Xara products
- Getting Help
- Working with Xara 3D Maker
- How To ...
- Quick overview
- Open a new document
- Change the text
- Rotate and position the graphic
- Light the graphic
- Color the graphic
- Resize the graphic
- Add bevels & extrude
- Select characters
- Add shadows
- Create animations
- Creating cursor (CUR & ANI) files
- Importing 2D objects
- Apply the style of an existing graphic
- Create buttons, boards, boards + holes and borders
- Create screen savers
- Create Flash files
- Save and export
- Export options for GIF, PNG or BMP files
- Export options for JPG
- Export options for animated cursors (ANI)
- Export options for animated GIFs
- Export options for AVIs (movies and screen savers)
- Export options for screen savers (SCR)
- Export options for Flash bitmap format (SWF) files
- Export options for Flash vector format (SWF) files
- General info on AVI videos
- Exporting transparent title animations for movies
- Customize Xara 3D Maker
- Reference Section
- Legal
Welcome to Xara 3D Maker 7
Traditional 3D programs are notoriously difficult to use and understand. Not so Xara 3D Maker 7.
Unlike many 3D programs that take an age to learn and understand, Xara 3D Maker 7 has been created
to perform one job, and performs that job with style, speed and simplicity.
Xara 3D Maker 7 is solely designed to create the highest quality 3D text and graphics
, such as headings, logos, titles and buttons. It's the perfect way to add impact to your web pages,
mailshots, movie titles and credits, and presentations (all images are fully anti-aliased for that smooth,
professional quality). Xara 3D Maker 7 can also create awesome 3D animations in seconds - GIFs,
AVIs and simple Flash movie sequences - and you can even enhance your desktop by saving any
animation as a screensaver!
Getting started
These pages help you when you first install Xara 3D Maker 7.
The basics
Getting started
The design types
What's new in version 7
Customer support
How do I...?
Use this page
if you want to find out how to do something in Xara 3D Maker 7.
Last changed: 2/16/2011
Page 1

Purchasing and unlocking
Xara 3D Maker
When you run the downloaded trial version of Xara 3D Maker, the start screen will present you with
three options. Check the option you require and you will be presented with further instructions.
Activate with serial number
Select this option if you have already purchased your copy of Xara 3D Maker and enter the serial
number that you were given in the email confirming your purchase. Enter your email address so your
copy can be registered (if you have already registered this will be ignored). Then click Register Online
and Activate
.
Purchase online
Select this option if you would like to purchase a copy of Xara 3D Maker. You will be given a serial
number when you purchase.
Continue using trial
Select this option if you would like to continue using the free trial. To the right of this option it will tell you
how many days of the trial you have left. Then click Continue trial
.
Important note
: Please keep a record of the email address and password you used when purchasing Xara 3D Maker
since you may need them in the future, for example if you wish to upgrade.
Other ways to purchase
If you do not have the trial you can order directly on our website www.xara.com/ordering
and you will be given a serial number that can be used to unlock the trial later.
Xara titles are great value for the money, but we offer further generous discounts to academic
establishments on all our products. You can find details on our website.
Page 2
What's New in Xara 3D
Maker Version 7
Xara 3D Maker now offers:
Two new animation types, Scroll and Scroll In/Out, allow you to move letters, words and
phrases across the screen in a choice of directions, also giving you control over entrance and exit
speed and acceleration/deceleration.
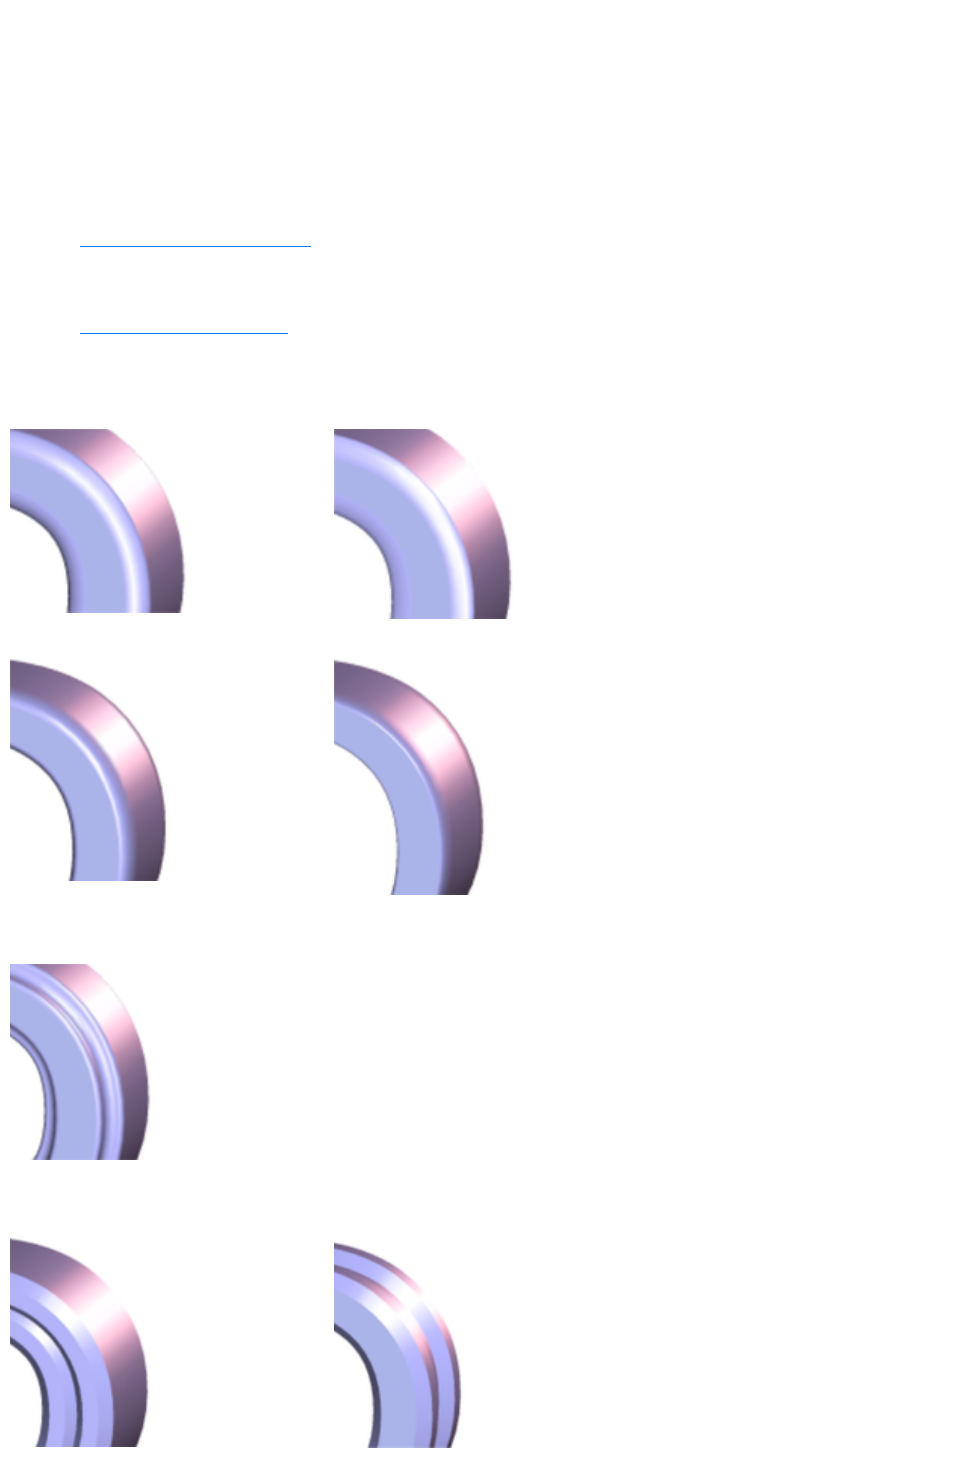
Seven new bevel styles add to the huge range of beveled types you can add to your 3D design.
These include:
Four new smoothed bevel types that give you a wider choice of rounded bevel types - Smoothed
1a and 1b, Smoothed 2a and 2b
Smoothed 1a
Smoothed 1b
Smoothed 2a
Smoothed 2b
A stylish addition to the Fancy Incut bevel types
Fancy Incut 3
Two new striking angled designs, Angle Faced and Angle Cornered
Page 3
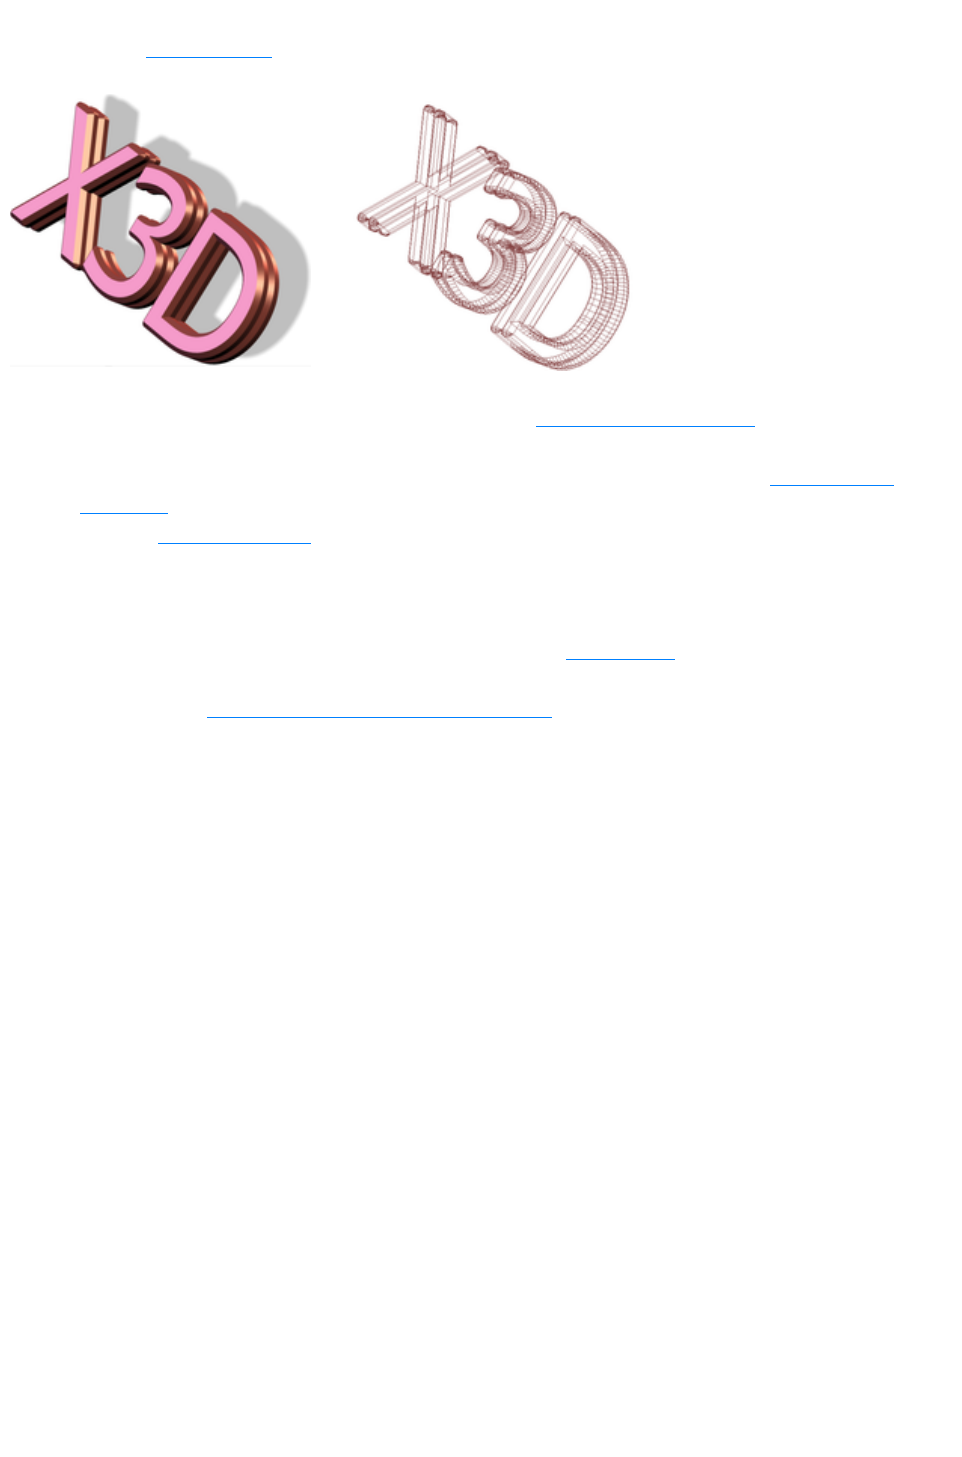
Angle Faced
Angle Cornered
A new View Options dialog allows you to enter an X & Y position for your image, and you can
also specify precise angles for its horizontal and vertical rotation.
View options let you rotate precisely around three axes and view your design as wireframe
Easier insertion of line and page breaks in the Text Options dialog box enables faster text
editing.
Instant access to hundreds of pre-built Xara 3D Maker samples via the new Open Sample
command in the File menu.
The new autosave feature ensures you won't lose any of your 3D designs, even if you exit Xara
3D Maker without saving changes - your current view will be saved and will automatically open
the next time you open the program.
On Windows 7 by default Xara 3D Maker now excludes fonts that are marked as hidden, from
its font list. However this can be turned off so that the hidden fonts do appear in the font list.
Refer to your Windows documentation for more information on Windows 7 hidden fonts.
You can now copy or cut and paste your 3D images to Microsoft Word and other programs.
Page 4
Other Xara products
There are trial versions and demo movies for many of these products at http://www.xara.com/products
.
Xara Photo & Graphic Designer 6
(formerly Xtreme) is quite simply the best value and
fastest all-in-one graphics package you'll find. For
drawings or photo work, for print or web graphics,
it's the perfect choice.
See http://www.xara.com/products/designer/
for more information.
Xara Designer Pro
(formerly Xtreme Pro) is our top of the range
product and includes all the features and templates
of Web Designer and Photo & Graphic Designer.
Plus it adds extra features that Pro designers need
including support for PDF/X, PANTONE® and
color separations, multi-core processor support for
extra speed, enhanced import/export filters, a pro
version of the photo panorama tool and more.
See http://www.xara.com/products/designer/
for more information.
Xara Web Designer
is unlike any web editor you will have seen before;
an easy template based solution that gives you total
page design freedom, no HTML skills required. It
offers comprehensive WYSIWYG web graphic,
web page and website creation features.
See http://www.xara.com/products/webdesigner/
for more information.
Create professional graphical NavBars and
DHTML menus in an instant with Xara Menu
Maker
- no technical or design skills required.
See http://www.xara.com/products/menumaker/
for more information.
Xara ScreenMaker 3D
is a screensaver maker that's fast, fun and easy to
use. Create animated 3D text or tumbling picture
cube screensavers.
See http://www.xara.com/products/screenmaker3d
/ for more information.
Page 5
Support
http://support.xara .com
The Xara support site above offers a comprehensive FAQ page (frequently asked questions)
which is constantly updated and available 24 hours, 7 days a week; always the best source for
instant answers. You can also contact our technical support staff using the form on the support
page, if you cannot find the answer to your question!
If you are an owner of a Xara product you can also submit a ticket to our support staff via the
support site above, but please remember we can only respond during office hours! Please note
TalkGraphics members cannot help with Xara account issues.
If you can't find the answer in this manual, we highly recommend viewing the Xara 3D Maker
introduction movie
. It is the ideal way to get to know Xara 3D Maker and get an overview of its features, allowing you to
make the most of the program.
If you need some help using this program, here are some sources of information that may be of use:
Program help - Choose Help topics from the Help menu to open Xara 3D Maker Help
(containing hundreds of pages of information).
Status bar - Try reading the text on the status bar at the bottom of the main Xara 3D Maker
window. It always describes what actions are currently possible and what they will do (even
during drags), and helps you learn to use the Xara 3D Maker tools. It also gives details of what
buttons and controls do as you move the pointer over them. See Status Bar for more details.
ToolTips - If you hold the mouse pointer over a button or control for a short while, then small
message appears telling you what it does.
Dialog boxes - If you want to know what a dialog box does or how to use it, click its help button
(displayed as a "?" mark).
Movies - Use menu "Help" > "Play Movie" or click here to watch the program introduction
movie.
The TalkGraphics forums - Post your question in the popular, dedicated Xara forums at
TalkGraphics.com (www.talkgraphics.com), where you can ask other Xara 3D Maker users for
advice or suggestions ? available 24x7. You can share tips and ideas, ask questions or offer
solutions to other users.
Xara Xone - Visit the Xara Xone (www.xaraxone.com) for a host of excellent Xara 3D Maker
support resources, including over ten years of Xara Designer tutorials, hints & tips, featured
artists, and Xara shareware
"The Outsider" newsletter (www.xara.com/outsider) Subscribe to our monthly newsletter "The
Outsider" (with monthly tutorials and tips, offers, inspirational art, and more).
Join the Xara community on Facebook or follow our news on Twitter.
Page 7

About Xara 3D Maker
Choose "Help" > "About Xara 3D Maker 7
". This displays general information about the program. If you contact Xara support, you may be asked
for this information.
Page 8
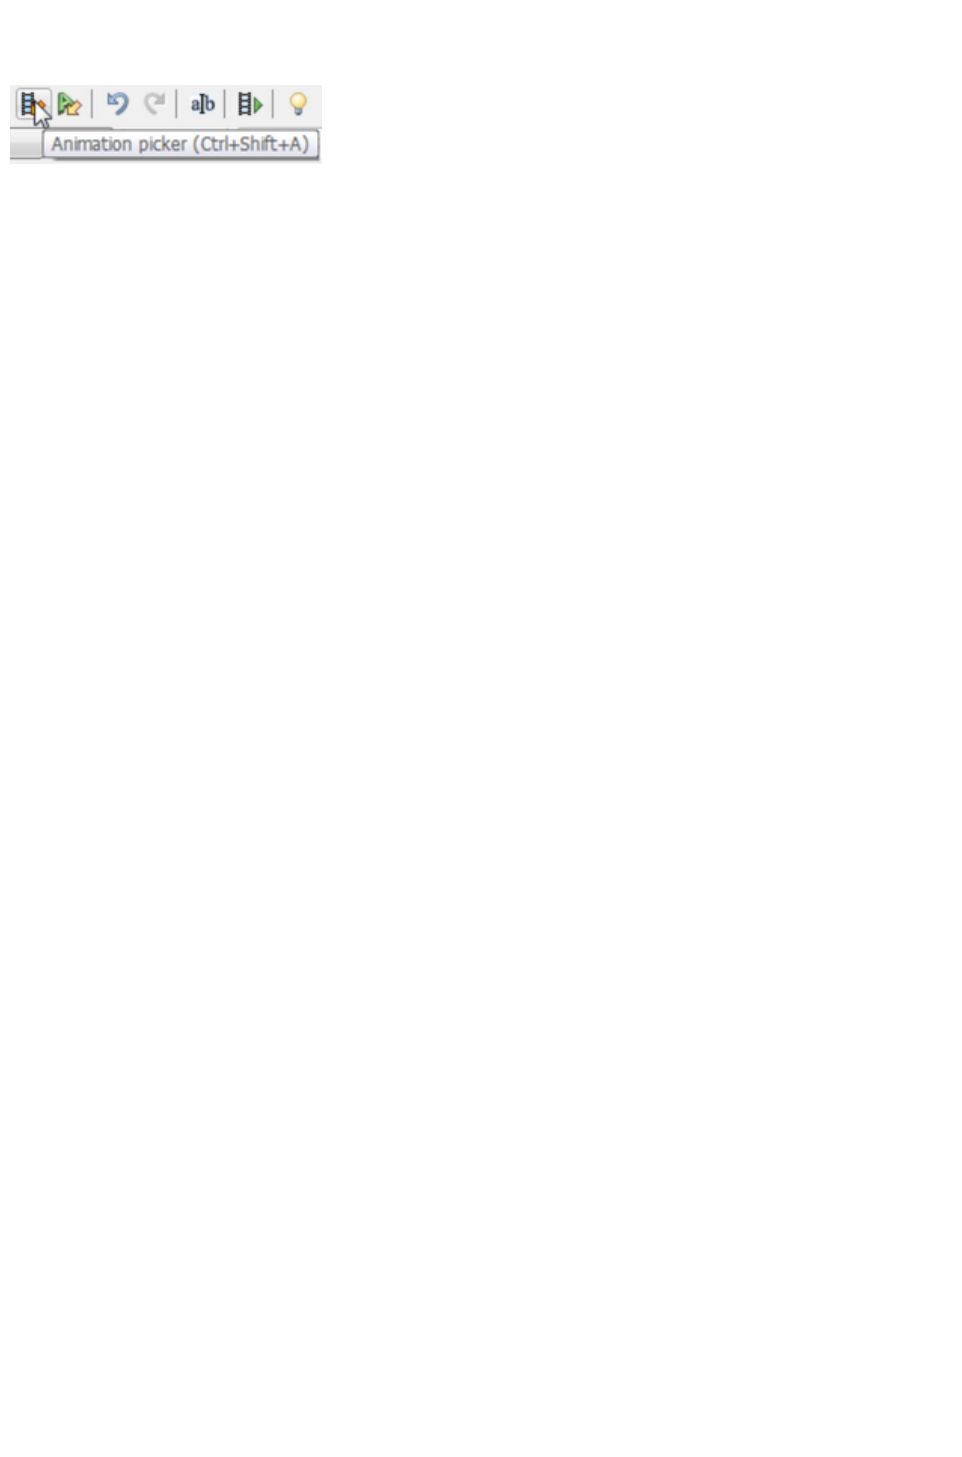
Tooltips
When you move over a button, the tooltip
tells you the function of the button.
Page 9
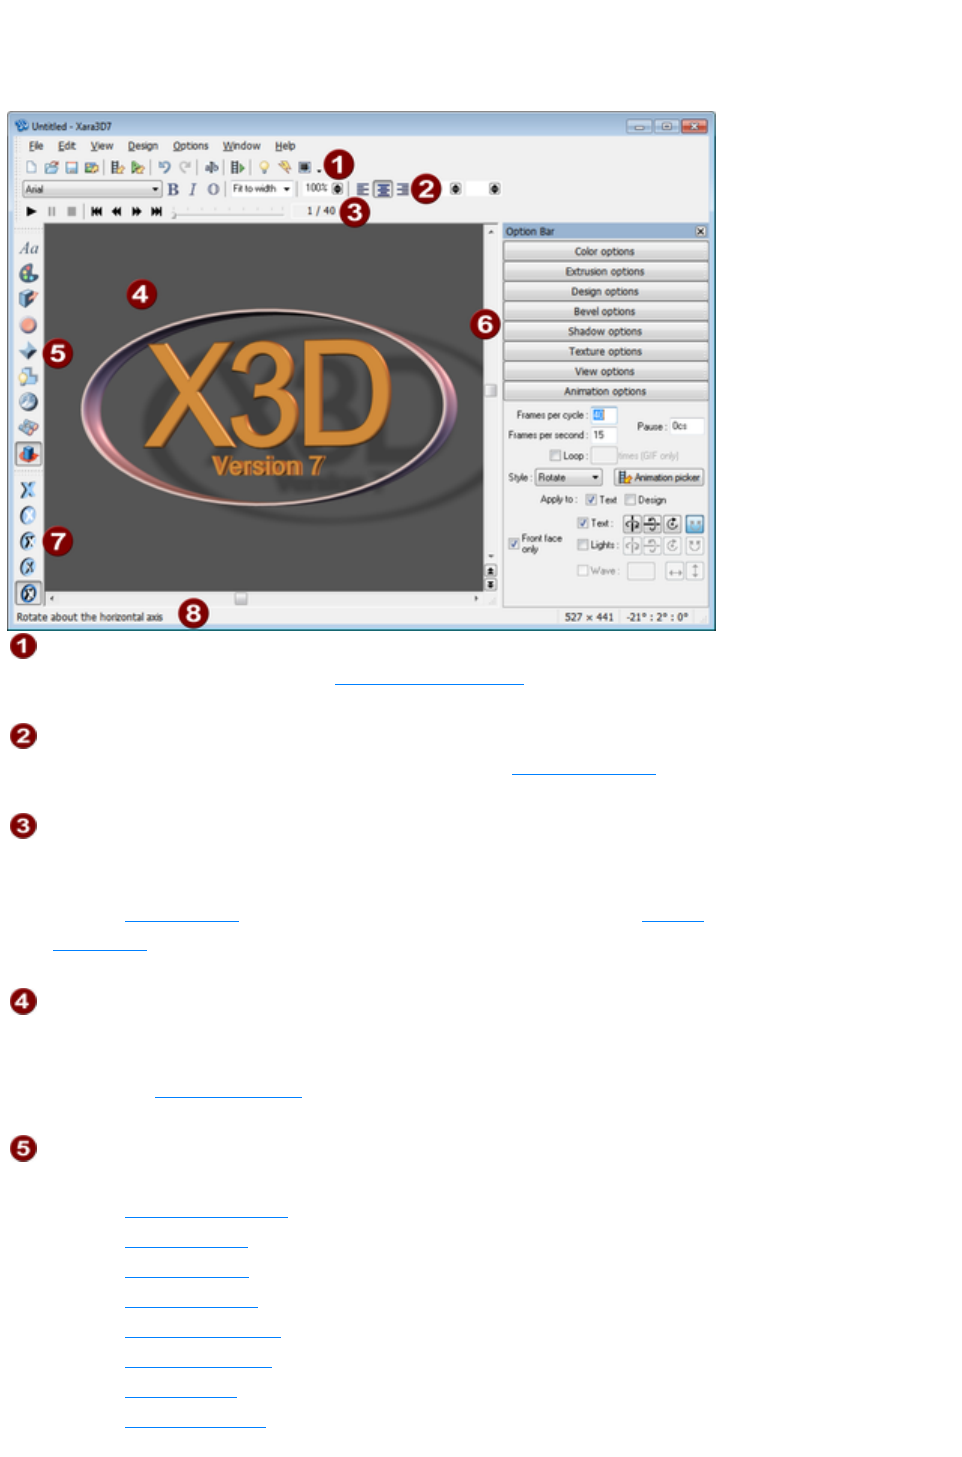
The Xara 3D Maker window
Display of the toolbars and Status Bar is optional. The Window menu lets you select which to display.
Standard toolbar: This provides common editing functions such as load
and save. For more details see The standard toolbar
.
Text toolbar:_This provides quick access to the main text editing
options such as font and size. For more details see The text toolbar
.
Time line: (Not displayed by default. Select Time line on the Window
menu.) This provides greater control over animations. It lets you start,
stop, pause and step through animations. For more details of the Time
line see The time line. For more details of creating animations see Create
animations
.
Preview area: The main part of the window shows a preview of your
graphic as you create it. You can edit the graphic by, for example,
dragging on a shadow to move the shadow, or dragging on the graphic to
change the extrude or bevel
.
Options toolbar:
This provides shortcuts to the different options available. These are:
Animation options
Bevel options
Color options
Design options
Extrusion options
Shadow options
Text options
Texture options
Page 11
View options
Option bars: Each bar contains settings for the options listed above.
They can be accessed by clicking on the required bar or by clicking the
required button on the options toolbar above. For more details see
Option bars
. You can move and dock the option bars, or remove completely.
Design toolbar: Offers shortcuts to the different design types of: text
only, button, board, board with holes and border. For more details see
Design options
.
Status bar: This provides feedback on available editing options and also
shows you the current size and rotation angles of the 3D graphic. For
more details see The status bar
.
Note:
Right click anywhere in the preview area (main window) to bring up a menu with options relating to that
item. For example, right-clicking the background gives you the opportunity to change the background
color and texture.
Page 12
Getting started
Traditional 3D programs are notoriously difficult to use and understand. This is not the case with Xara
3D Maker. Xara 3D Maker is so simple to use, literally anyone can produce high quality still and
animated 3D graphics in minutes.
We highly recommend viewing the Xara 3D Maker introduction movie. It is the ideal way to get to know
Xara 3D Maker and get an overview of its features, allowing you to make the most of the program. View
the movie
.
Creating a 3D heading is easy:
1. Start typing to enter the text you want. You can delete existing text using backspace.
oTypically the first step is to enter your own text which you can do by just deleting the default
text with the regular Delete key and typing your own. You can position the image in three
dimensions by simply dragging it on screen (as long as you don't have a background texture,
in which case use the scroll bars).
2. Select a font of your choice from the drop-down list in the text toolbar.
oYou will likely also want to customize it, which you can do by clicking any of the option bars
on the right hand side of the window (the buttons on the options toolbar also open these).
Any changes you make are reflected instantly on the image, making it easy and fun to
experiment.
3. Change the bevel and extrude if you wish.
oDragging on the graphic itself can change the extrude or bevel. You can also add a shadow
and drag it to the required position, and
4. Drag the text to get the angle you want.
5. Change the color of the text or background.
6. Resize the Xara3D window to set the size of the text.
7. Select Export on the file menu to save the heading as a BMP, PNG, GIF, JPEG, Flash SWF,
ICO (icon) or CUR (cursor).
Want an animated heading?
Creating animations
is just as easy. The animation options offer a wide range of different animation types from simple rotation
of the image to multi-page animations with alternating animation types per character.
Want to change the lighting angles or colors?
Simple. Click the light bulb button
. This displays the three lights that color the text (and a special striped light that creates the shadow).
Drag the lights to change the angles or double-click on a light to display the color picker.
Want to copy styles from an existing heading?
And if you don't want to create your own headings you can simply copy one
that's already been created by using the design picker (under design options) to copy some or all of the
attributes of an existing file to the current heading, or use the animation picker to copy animation settings.
Want to open one of the hundreds of samples that come with
Xara 3D Maker?
Choose Open Sample from the File
menu and choose from the huge selection of .x3d files arranged into folders depending on their design. A
Page 13

preview is displayed as you click on each file, so you can see the image before you open it.
Want to import your own 2D graphic?
You can import
Windows metafiles (EMF or WMF) or Xara XAR/WEB files. Then you can convert them to extruded
3D graphics.
When you're happy with the results, you can export either a static image or an animation or movie in any
of the most popular file formats. You can even create an animated screensaver either for use on your
own computer or for distribution to other people.
Want to copy your 3D image into another application?
No problem, just copy your design (choose Copy from the Edit
menu or press "Ctrl + C") and it's placed on your clipboard in 24bpp bitmap form, as well as in XAR
format. This means that you can paste it into any other application that handles bitmaps, such as
Microsoft Word or Outlook, or graphics programs, as well as other Xara products such as Xara
Designer Pro and Xara Photo & Graphic Designer. The XAR format supports a bitmap with a
transparent background, while the 24bpp bitmap has a solid background.
Page 14
How To ...
This section describes using Xara 3D Maker to create quality 3D headings or buttons and then exporting
static or animated files. In these descriptions we use 'graphic' as shorthand for the text or shape shown in
the Xara 3D Maker window.
In this chapter
Quick overview
Open a new document
Change the text
Rotate and position the graphic
Light the graphic
Color the graphic
Resize the graphic
Add bevels & extrude
Select characters
Add shadows
Create animations
Creating cursor (CUR & ANI) files
Importing 2D objects
Apply the style of an existing graphic
Create buttons, boards, boards + holes and borders
Create screen savers
Create Flash files
Save and export
Customize Xara 3D Maker
Page 15
Quick overview
Use these pages if you want to find out how to do something in Xara 3D Maker.
The basics
Text & 2D objects
Positioning & rotating
Changing the size
Changing the wording
Changing text spacing
Changing the font
Changing the color
Changing the bevel (edges)
Changing the 3D extrude (depth)
Changing the effects applied to selected characters
Changing the lighting
Creating hollow text
Shiny & matt surfaces
Selecting text
Typing international (accented) characters
Importing styles from an existing heading
Importing animation settings from an existing heading
Importing 2D objects
Creating 3D buttons, boards and border designs
Colors
Changing the text and background color
Changing the colors of the lights
Changing the shadow color
Changing the texture color (tint)
Creating and moving shadows
Changing the shadow color and type
Changing the shadow transparency and blur
Textures
and text
and the background
Changing the texture color (tint)
The lights
Changing their color and position
Buttons, boards and borders
Creating buttons, boards and border designs
Making the designs wider or narrower
Page 16
Changing the curvature of the corners
Changing the size of buttons
Animation
Creating an animation/movie
Creating and editing a multipage animation
Previewing an AVI movie
Importing animation settings from an existing heading
The Time Line
Saving
Saving for reloading later
Saving a graphic
Saving screensavers
Correcting mistakes
Undo & Redo
Customizing Xara3D
Changing the default document
Displaying and moving toolbars
Docking dialog boxes
Making your own menu items and shortcuts
Returning to default settings
Page 17

Open a new document
Click New on the File menu. This loads the default graphic. You can replace this default graphic with
your own ? see Customizing Xara 3D Maker
.
Alternatively click Open Sample on the File
menu to open one of the hundreds of sample files that come with Xara 3D Maker. A preview of the
image is displayed so you can see what it looks like before you open it.
Page 18
Change the text
The easiest way of changing the text is to delete the existing text (using Backspace) and then typing in the
wording you want.
You can also display the text cursor. Select the show/hide
cursor button on the standard toolbar.
You can then use the arrow keys on the keyboard to move the cursor in the text and to select part of the
text ? for more information on this, see select characters
.
To change the font or apply effects such as increasing the space between characters, you can use the
options in the text toolbar
.
Alternatively you can use the Text options dialog box
to select and change text and apply effects. This is often easier when you have several lines of text such
as in multi-page animations.
Page 19
Rotate and position the graphic
The easiest way to rotate the graphic is simply to drag on it in the Xara 3D Maker window or drag on
the background if you don't have a background texture (don't drag on the shadow ? this moves the
shadow). This lets you rotate the graphic horizontally, vertically or around its center line. Alternatively,
use the scroll bars.
Status bar
The Status bar shows the current angles (horizontal, vertical and rotation around the center line).
Positioning options
Normally the graphic is centered in the window. You can move the graphic to your preferred location
using View options
and changing the X and Y position values.
Alternatively you can use these keyboard shortcuts:
Alt-drag allows you to move the graphic freely around the screen. To return the graphic to the center of
the window press "Alt+Home" (this also cancels any rotation.)
"Ctrl + Alt-drag" allows you to move the graphic horizontally on the x axis.
"Alt + Shift-drag" allows you to move the graphic vertically on the y axis.
Rotate options
You can rotate your graphic by using the keyboard shortcuts below. Alternatively you can use View
options
to rotate your graphic horizontally, vertically and around its center line by precise increments in degrees.
To rotate around the horizontal (x) axis only:
"Shift-drag" on the window
or use the up/down arrow keys (1s rotation)
or use "Ctrl" and the up/down arrow keys (15s rotation)
To rotate around the vertical (y) axis only:
"Ctrl-drag" on the window
or use the left/right arrow keys (1s rotation)
or use "Ctrl" and the left/right arrow keys (15s rotation)
To rotate the graphic around its center line
"Ctrl + Shift-drag" on the window
or use "Shift" and the up/down arrow keys (1s rotation)
or use "Shift + Ctrl" and the up/down arrow keys (15s rotation)
To cancel any rotation: (graphic is face-on) press "Alt + Home"
Note:
Page 20

If the text cursor is displayed, hold down "Alt" to rotate the text or click the show/hide cursor button to
remove the cursor.
Page 21
Status bar
The Status bar shows the current angles (horizontal, vertical and rotation around the center line).
Positioning options
Normally the graphic is centered in the window. You can move the graphic to your preferred location
using View options
and changing the X and Y position values.
Alternatively you can use these keyboard shortcuts:
Alt-drag allows you to move the graphic freely around the screen. To return the graphic to the center of
the window press "Alt+Home" (this also cancels any rotation.)
"Ctrl + Alt-drag" allows you to move the graphic horizontally on the x axis.
"Alt + Shift-drag" allows you to move the graphic vertically on the y axis.
Rotate options
You can rotate your graphic by using the keyboard shortcuts below. Alternatively you can use View
options
to rotate your graphic horizontally, vertically and around its center line by precise increments in degrees.
To rotate around the horizontal (x) axis only:
"Shift-drag" on the window
or use the up/down arrow keys (1ÅŸ rotation)
or use "Ctrl" and the up/down arrow keys (15ÅŸ rotation)
To rotate around the vertical (y) axis only:
"Ctrl-drag" on the window
or use the left/right arrow keys (1ÅŸ rotation)
or use "Ctrl" and the left/right arrow keys (15ÅŸ rotation)
To rotate the graphic around its center line
"Ctrl + Shift-drag" on the window
or use "Shift" and the up/down arrow keys (1ÅŸ rotation)
or use "Shift + Ctrl" and the up/down arrow keys (15ÅŸ rotation)
To cancel any rotation: (graphic is face-on) press "Alt + Home"
Note:
If the text cursor is displayed, hold down "Alt" to rotate the text or click the show/hide cursor button to
remove the cursor.
Page 22

Positioning options
Normally the graphic is centered in the window. You can move the graphic to your preferred location
using View options
and changing the X and Y position values.
Alternatively you can use these keyboard shortcuts:
Alt-drag allows you to move the graphic freely around the screen. To return the graphic to the center of
the window press "Alt+Home" (this also cancels any rotation.)
"Ctrl + Alt-drag" allows you to move the graphic horizontally on the x axis.
"Alt + Shift-drag" allows you to move the graphic vertically on the y axis.
Rotate options
You can rotate your graphic by using the keyboard shortcuts below. Alternatively you can use View
options
to rotate your graphic horizontally, vertically and around its center line by precise increments in degrees.
To rotate around the horizontal (x) axis only:
"Shift-drag" on the window
or use the up/down arrow keys (1ÅŸ rotation)
or use "Ctrl" and the up/down arrow keys (15ÅŸ rotation)
To rotate around the vertical (y) axis only:
"Ctrl-drag" on the window
or use the left/right arrow keys (1ÅŸ rotation)
or use "Ctrl" and the left/right arrow keys (15ÅŸ rotation)
To rotate the graphic around its center line
"Ctrl + Shift-drag" on the window
or use "Shift" and the up/down arrow keys (1ÅŸ rotation)
or use "Shift + Ctrl" and the up/down arrow keys (15ÅŸ rotation)
To cancel any rotation: (graphic is face-on) press "Alt + Home"
Note:
If the text cursor is displayed, hold down "Alt" to rotate the text or click the show/hide cursor button to
remove the cursor.
Page 23

Rotate options
You can rotate your graphic by using the keyboard shortcuts below. Alternatively you can use View
options
to rotate your graphic horizontally, vertically and around its center line by precise increments in degrees.
To rotate around the horizontal (x) axis only:
"Shift-drag" on the window
or use the up/down arrow keys (1ÅŸ rotation)
or use "Ctrl" and the up/down arrow keys (15ÅŸ rotation)
To rotate around the vertical (y) axis only:
"Ctrl-drag" on the window
or use the left/right arrow keys (1ÅŸ rotation)
or use "Ctrl" and the left/right arrow keys (15ÅŸ rotation)
To rotate the graphic around its center line
"Ctrl + Shift-drag" on the window
or use "Shift" and the up/down arrow keys (1ÅŸ rotation)
or use "Shift + Ctrl" and the up/down arrow keys (15ÅŸ rotation)
To cancel any rotation: (graphic is face-on) press "Alt + Home"
Note:
If the text cursor is displayed, hold down "Alt" to rotate the text or click the show/hide cursor button to
remove the cursor.
Page 24
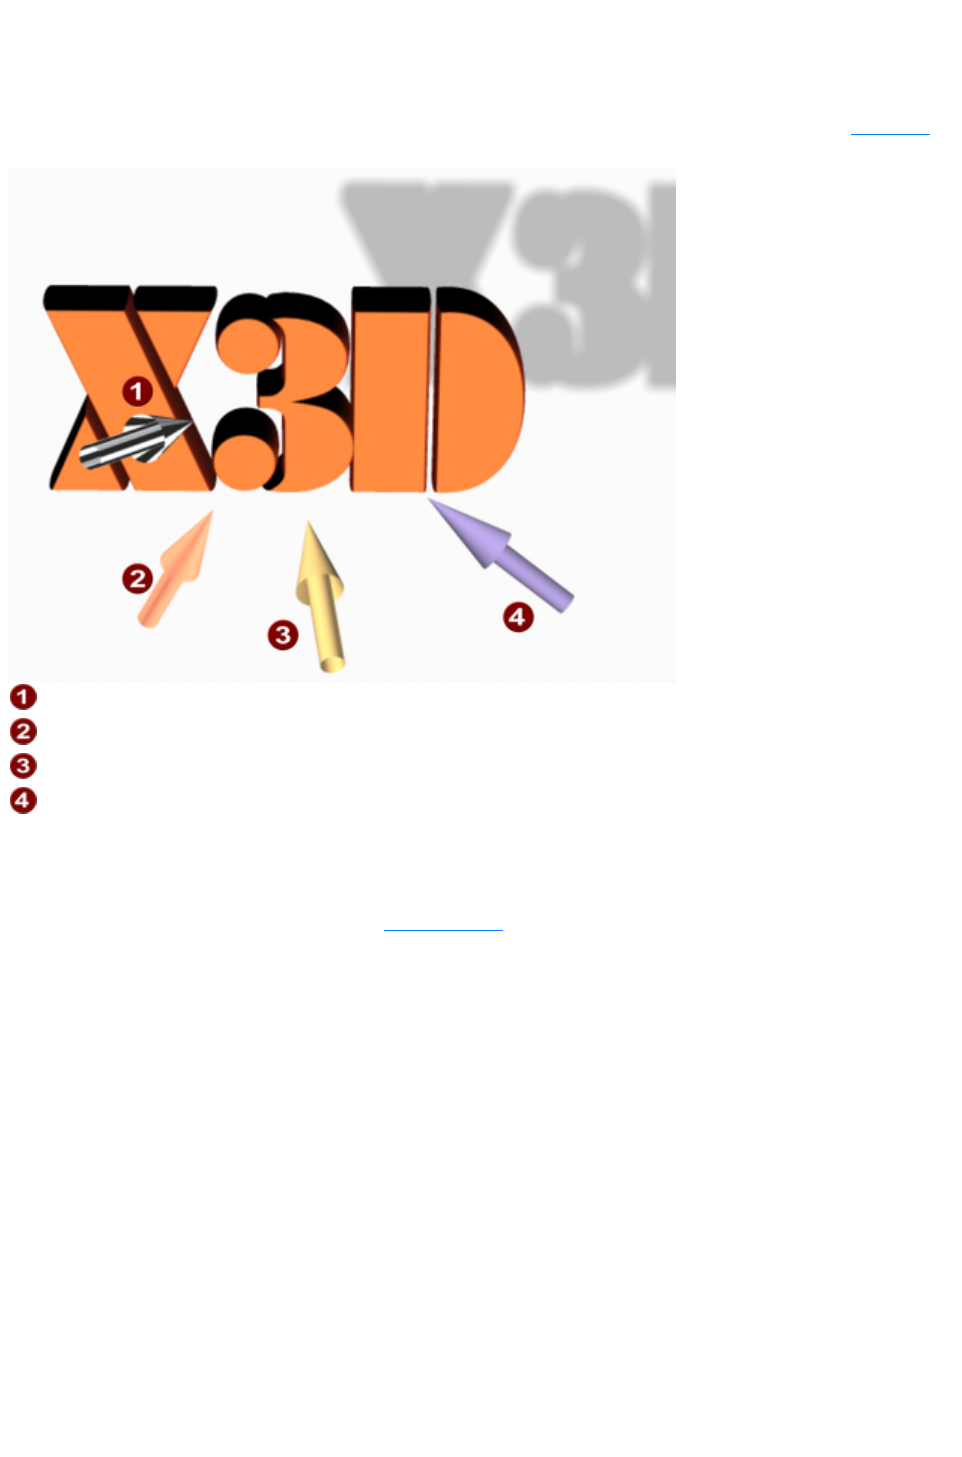
Light the graphic
Three colored lights create the highlights and shadows on the graphic. You can change the positions and
colors of each light. The fourth light (shown striped) controls the position of the shadow ? see shadows
.
Shadow
Light
Light
Light
To display the lights:
Click the 'light bulb' button
or choose Display lighting on the View menu
To change the color of a light, display the color options
dialog box by:
Double-clicking on the light
or choosing Light color 1, 2, 3 on the View menu.
To move a light just drag it. To move a light from in front of the object to behind it (or from behind to in
front) keep dragging the light left or right.
Page 25
Color the graphic
You can color the graphic either by changing the colors of the graphic or by changing the light colors
or both.
If you are creating a graphic and you want two or more colors on the text, it is easier to use pale colored
lights and to color the text. (The default text of Xara 3D Maker is an example of this: the X3D is pale
gray, Version is light blue and version number is dark blue. The light shining on the face of the text is an
orange cream color.)
The colors you see depend on the overlap of the lights, their colors and the graphic colors. The colors
are also influenced by whether the graphic has a matt or gloss surface (selected in extrusion options
).
The graphic can have different colors on the faces (front and back) and on the sides. You can change the
color or texture on a per-character basis. See color options
.
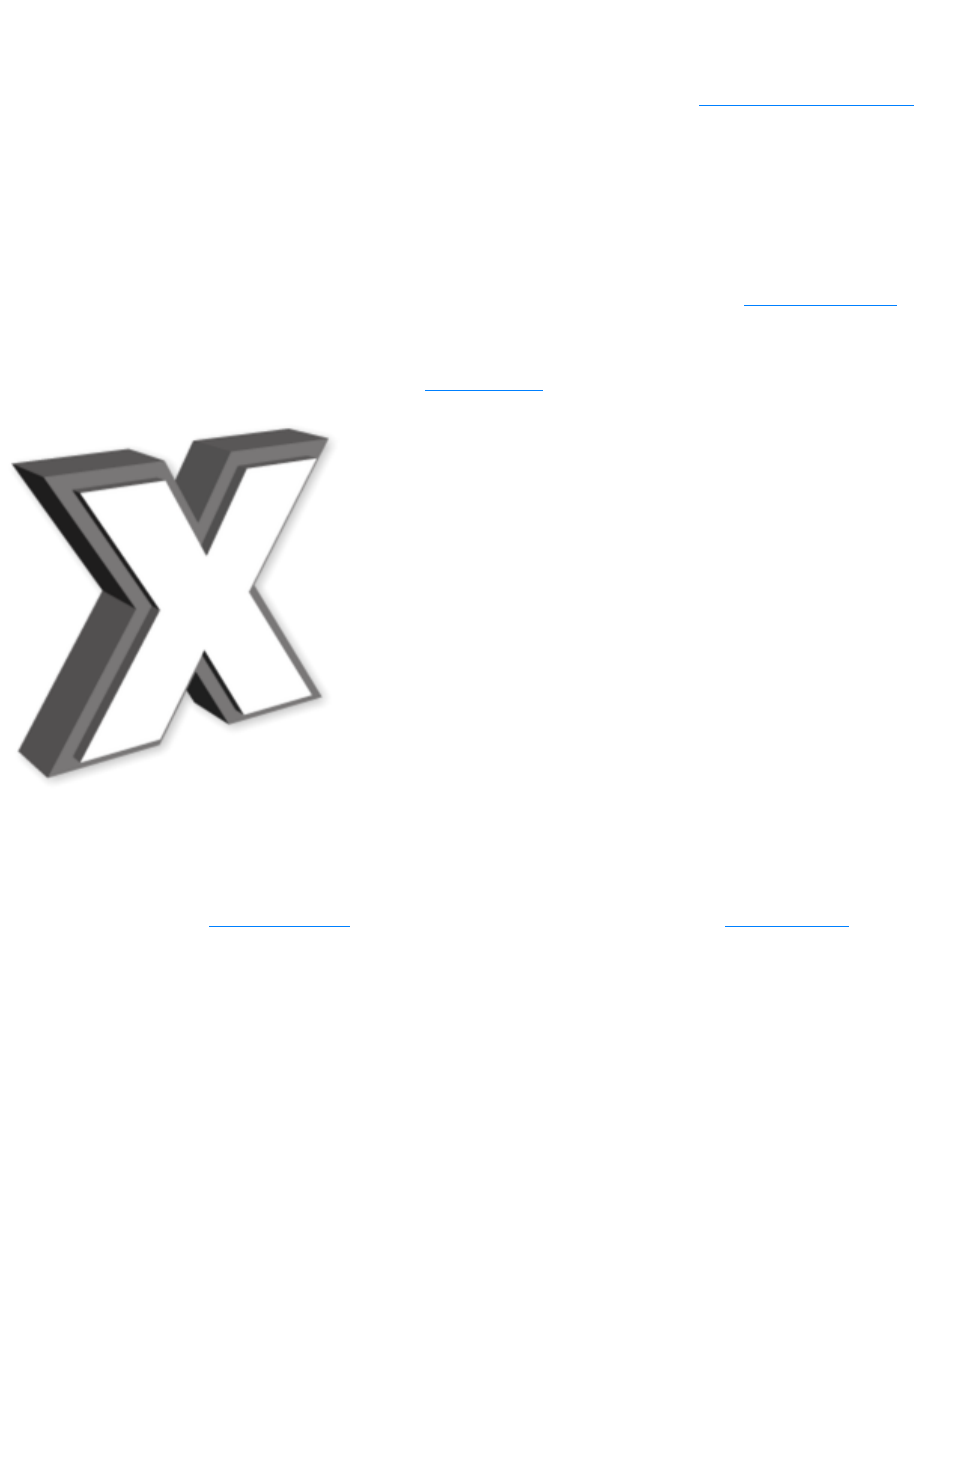
An example of an incut bevel with white face color and dark gray sides and bevel
Bevels display the color of the sides. Using square, round or triangular-faced or incut bevels can give the
effect of two colors on the face of the graphic.
You can also use textures to color the sides or faces. You can import any BMP. GIF, ICO, JPEG or
PNG file as a texture. Texture options let you scale, move or rotate the texture. Color options
let you tint a texture (an effect similar to placing a colored film over the texture).
Page 26
Resize the graphic
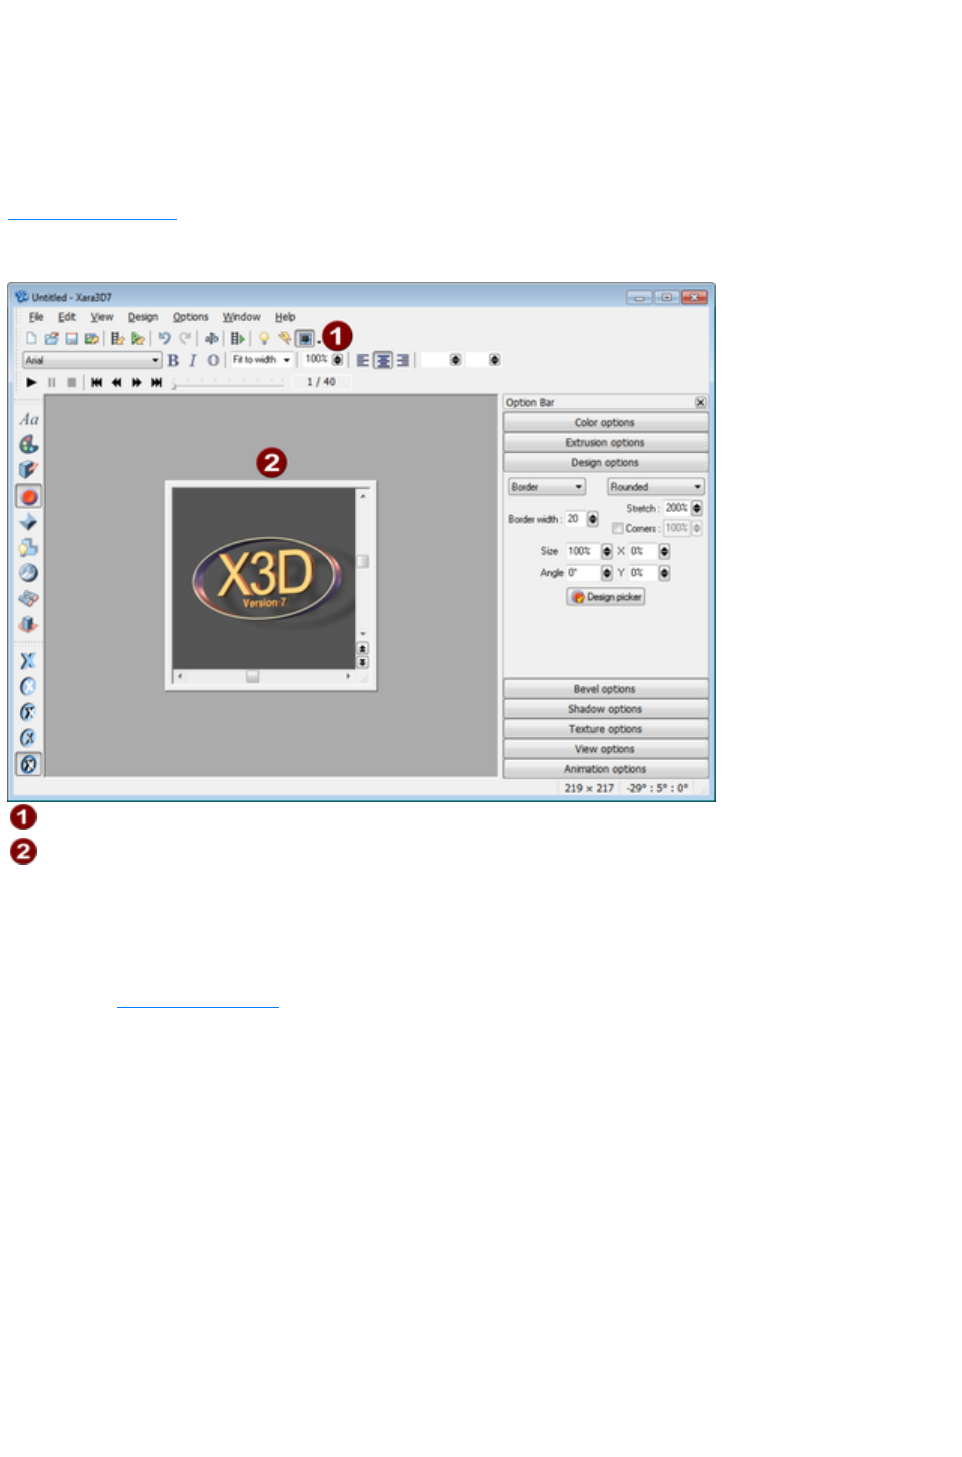
The easiest way to resize larger graphics is to resize the Xara 3D Maker window by dragging the
corners or sides.
For smaller graphics this can make the Xara 3D Maker window too small and you cannot see all the
buttons. To avoid this, choose Display frame on the Window menu or click the display frame button (
Standard Tool Bar
). This displays the graphic in a smaller frame which you can resize independently of the main Xara 3D
Maker window.
Display frame
The frame
An advantage of the frame is that you can set it to a specific size. Use Frame size on the Window
menu. When you save an X3D file when using the frame, Xara 3D Maker remembers the frame size and
always opens the graphic at that size.
To make the exported image the same size as the frame area, select Current window size and uncheck
Crop in the Export dialog box
.
Alternatively you can fix the graphic size using the font size drop-down list on the text toolbar. Choose
any value except Fit to width
.
Page 27
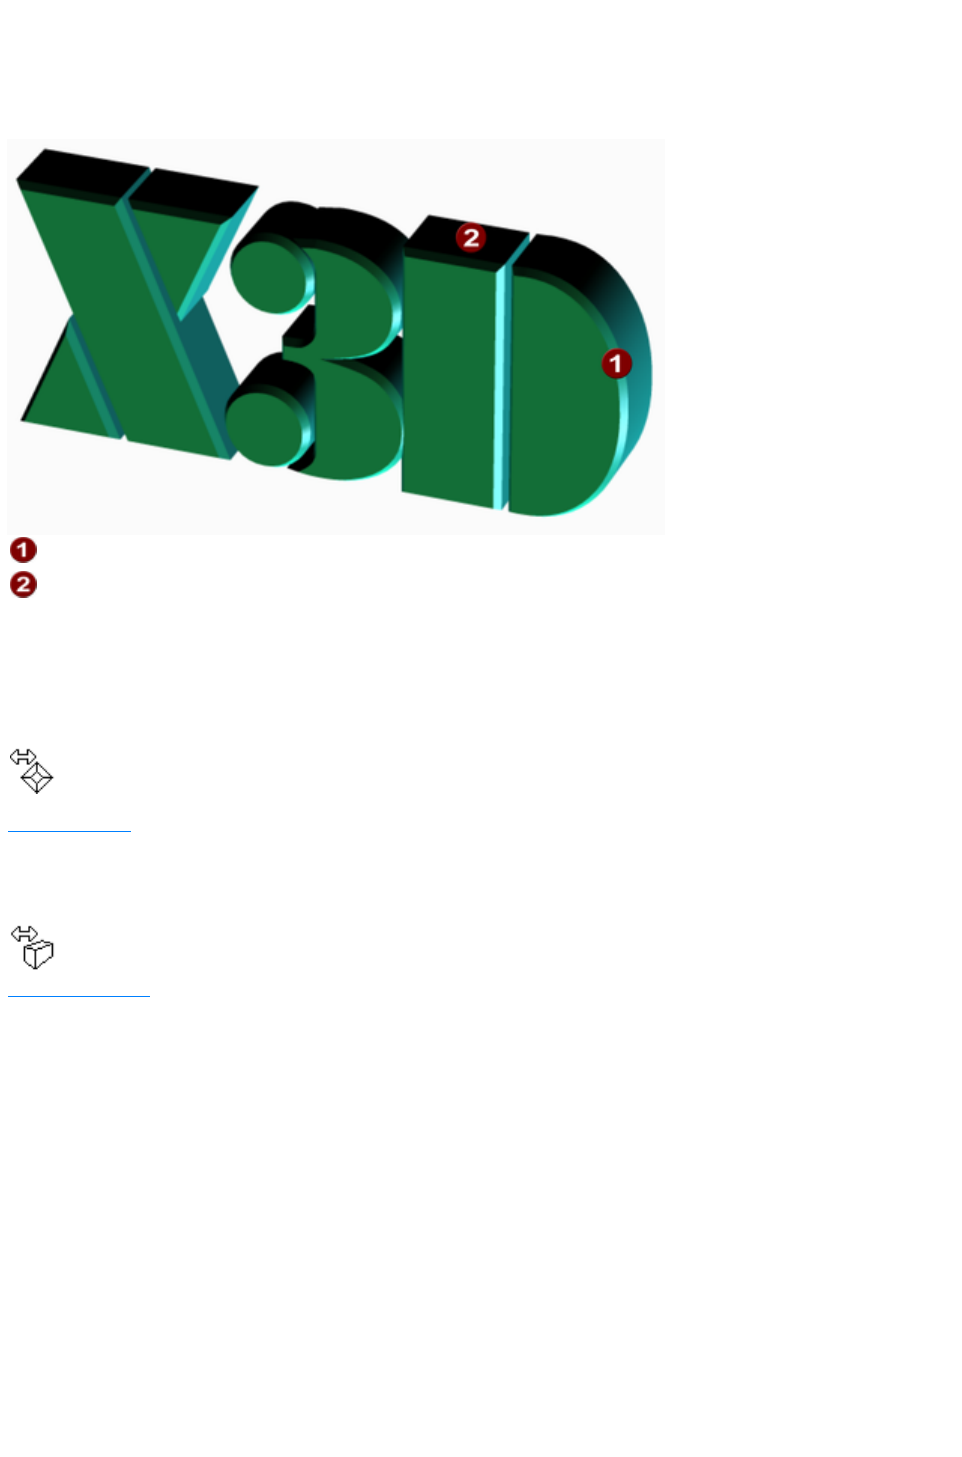
Add bevels & extrude
The bevel is the decorative transition between the faces and the sides of the graphic. The extrude is the
depth of the sides.
The bevel
The extrude
Bevel designs range from a simple angled or rounded bevel on the corner to complex rippled bevels that
run the length of the sides. Bevels are always applied to the sides of the graphic, not to the faces. The
result is to make the graphic larger and, with larger bevel sizes, text characters can merge into each other.
This also has an effect when the faces and sides are different colors ? the bevel takes the side color. To
alter the bevel, hover you mouse over the edge of the text while holding the shift key.
When the cursor changes to the bevel tool you can click and
drag the bevel to the required size.
Bevel options
let you have more advanced control, like choosing a bevel style. For small extrude values there may not
be enough space to display the complete bevel (depending on the bevel design.)
To change the extrude depth, just click and drag on the side of the text.
You will see the cursor appear when altering the extrude.
Extrude options
gives you more advanced control over the extrusion, and whether the graphic is matt or gloss.
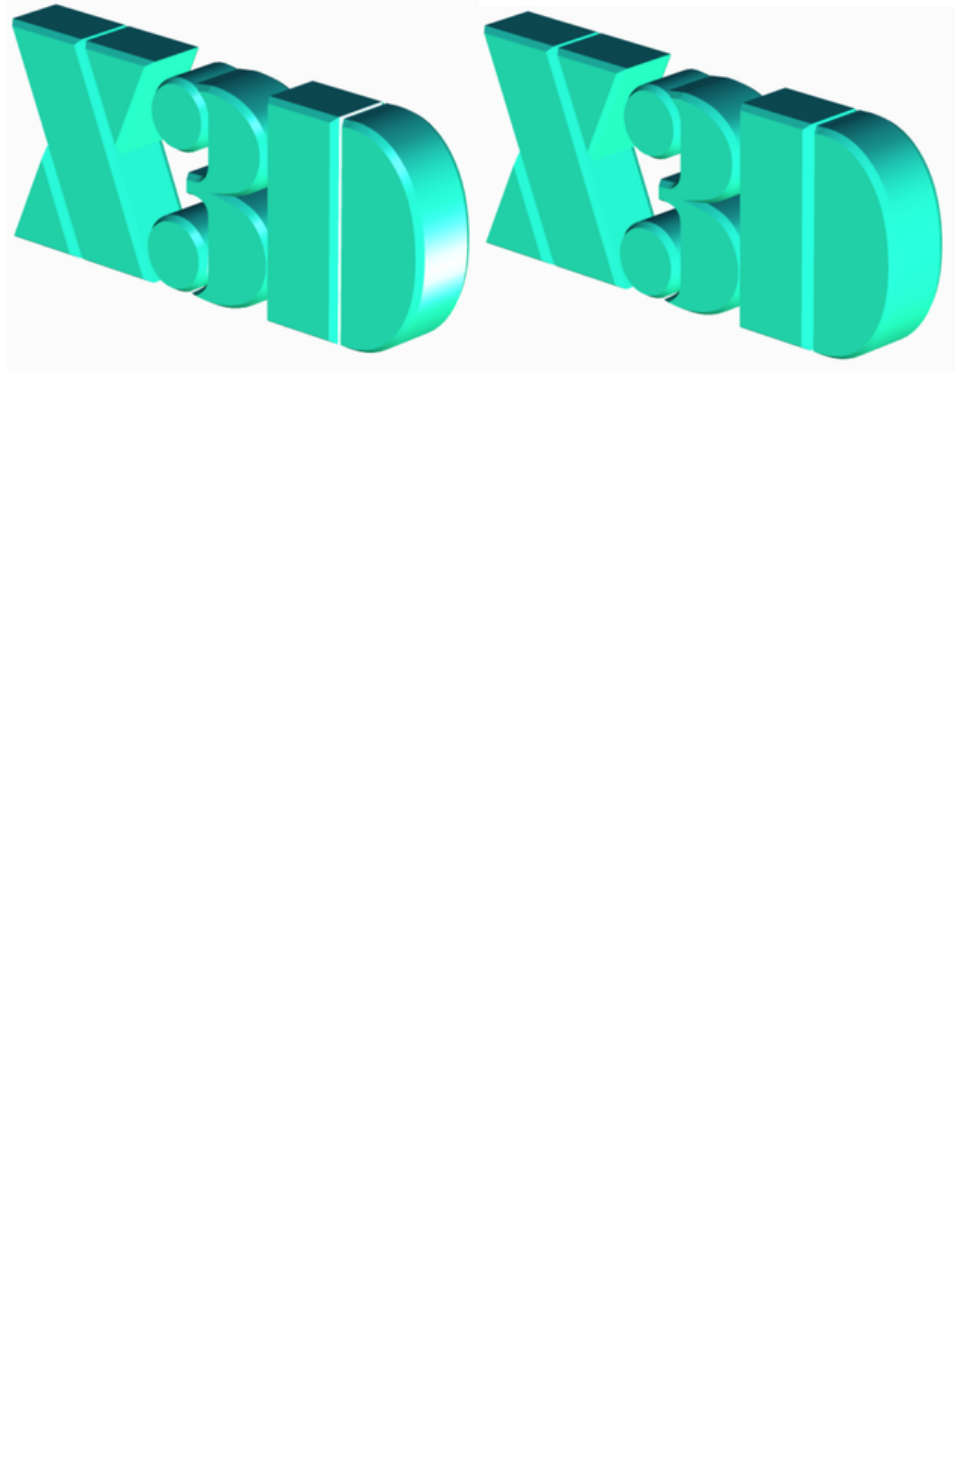
You can also choose the surface, either Gloss (reflective) or Matt
(non-reflective.) The surface affects the entire "feel" of the graphic. Gloss (shown below top) creates
shiny, metallic effects; matt (shown below bottom) more subtle, toned-down graphics. When swapping
between the two surfaces, you often need to move the lights to get the best results for that surface.
Page 28
Page 29
Select characters
Almost all Xara 3D Maker attributes (such as colors, bevels, textures, animation types) can be applied
character-by-character. (The exceptions are the shadow, the lighting and some animation types.) Before
you can apply an attribute to a character or block of characters, you must first select that character or
block.
First step is to display the text cursor. Click the show/hide
cursor button on the standard toolbar:
Then:
Use the arrow keys on the keyboard to move the cursor.
"Shift + left/right arrow keys" selects the character on the left or right.
"Ctrl + Shift + left/right arrow keys" selects all the characters from the cursor to the left or right of
the line.
"Ctrl + A" selects all characters.
"Ctrl + P" selects all characters on the current page (for multi-page animations.)
When you have a selected character or block, any changes you make apply only to that character or
block.
Page 30
Add shadows
A shadow behind the graphic gives an impression of the graphic floating above the surface and adds
realism.
To create a shadow, open the Shadow options dialog box and check Shadow
.
To move the shadow, either drag the shadow ? the cursor
will look like this when you hover over the shadow and can
drag:
Or display the lights. A fourth light (shown striped) controls the
shadow position?drag that light.
To change the color of the shadow
either double-click on the shadow or shadow light?this opens Color options ready to edit the
shadow color
or choose Shadow color on the View menu
or click Color options and choose Shadow from the drop-down list.
To change the shadow transparency, use Transparency in Shadow options
. Real shadows are usually semi-transparent and the shadow looks better when you can see some of the
background behind the shadow.
To change the shadow blur, use Blur
in shadow options. Real shadows do not have sharp edges (no blur) and you can use blur to soften the
edges. Large blur values are useful for creating "halo" effects. Move the shadow directly behind the
graphic and give the shadow a bright color to emphasize it.
Shadow styles
Shadow options have two styles of shadow:
Style 1
is a simple offset copy of the graphic. Artistically this is incorrect but looks 'right' for static images.
Style 2
is artistically correct and looks best with animations where the eye is more aware of the shadow shape.
Shadows and Flash vector format
Flash vector format does not support shadows. If you want your graphic to have a shadow, use a
different export format such as GIF or bitmap Flash.
Page 31

Shadow styles
Shadow options have two styles of shadow:
Style 1
is a simple offset copy of the graphic. Artistically this is incorrect but looks 'right' for static images.
Style 2
is artistically correct and looks best with animations where the eye is more aware of the shadow shape.
Shadows and Flash vector format
Flash vector format does not support shadows. If you want your graphic to have a shadow, use a
different export format such as GIF or bitmap Flash.
Page 32

Shadows and Flash vector format
Flash vector format does not support shadows. If you want your graphic to have a shadow, use a
different export format such as GIF or bitmap Flash.
Page 33
Create animations
You can easily create animated graphics using Xara 3D Maker. You have the option of either a single
image (single page) or a sequence of images (multi-page).
To create a single page animation, just create the image in the regular way then display Animation
options and choose the required options.
To create a multi-page animations, create the first image. Then press Enter to start a new page
and create the image for that page.
Alternatively you can use Text options. Click Insert page break
to start a new page.
Continue until you have created as many pages as you want. Then display Animation options
and choose the required settings.
These options apply only to multi-page animations:
Step animation
Overlap pages for Pulsate animations
Animation options and file format
Xara 3D Maker can save animations in several different formats: AVI, ANI, Flash SWF and animated
GIF. Some options in the Animation dialog box are not supported by all file formats. Pause is supported
by all formats except AVI movies. Loop
is supported only by animated GIF format (other formats play continuously.)
To preview an animation
Select the start/stop animation button on the standard toolbar.
To preview the animation in real-time, Xara 3D Maker displays a reduced-quality image. You have
greater control over quality when exporting to disk.
Editing the text for multi-page animations
Unless you have the cursor displayed, new text is added to the page currently displayed in the Xara 3D
Maker window. This can make editing slightly tricky. Either stop the animation and edit the text or use
Text options
.
The time line
Displaying the Time line
lets you step through an animation, frame-by-frame, or pause, stop or run the animation.
You can export an individual frame by pausing the animation at the frame you want and using Export on
the View
menu.
Applying animation effects to selected text
The animation style applies to all characters (see notes below) but you can apply most attributes of the
animation to just a selected character or block of characters. For example, for a Rotate
animation, you could have some characters rotating in a different plane to the others.
Rotate, Swing and Pulsate
animation styles have two versions, 1 animates all characters as a group and 2 animates each character
individually. You can mix versions by selecting part of the text and selecting the other version (1 or 2.)
Fade, Step and Typewriter
Page 34

animation styles: you cannot apply different settings to a selected area.
Tips for creating animations
Animations can create large file sizes, which are slow to download over the Internet. To keep animations
small we suggest:
Make the image as small as possible by selecting the Crop option on export.
Select Front face only for Rotate animations.
Have no more than about 20 frames per animation. (The fewer the better for keeping the size
down.)
For multi-page animations avoid having too many pages.
When exporting try selecting 16 colors (4-bit) with no dithering and optimized palette. When
images are animating, the banding is far less obvious than with a static image.
When exporting GIFs (animated or static) that have a complex background, try exporting them
as transparent GIFs.
Rotating the lights changes the file size only slightly.
For Flash animations, Fade or Step animations create much smaller files than the other animation
styles. For multi-page Pulsate animations, overlapping the pages creates smaller animations.
Don't get carried away! For example using loads of textures can create very large animation files.
Turning the shadow off can reduce file size.
When exporting select to optimize Per frame.
For tips when saving as a Flash SWF file see Tips for creating Flash files.
Page 35
Animation options and file format
Xara 3D Maker can save animations in several different formats: AVI, ANI, Flash SWF and animated
GIF. Some options in the Animation dialog box are not supported by all file formats. Pause is supported
by all formats except AVI movies. Loop
is supported only by animated GIF format (other formats play continuously.)
To preview an animation
Select the start/stop animation button on the standard toolbar.
To preview the animation in real-time, Xara 3D Maker displays a reduced-quality image. You have
greater control over quality when exporting to disk.
Editing the text for multi-page animations
Unless you have the cursor displayed, new text is added to the page currently displayed in the Xara 3D
Maker window. This can make editing slightly tricky. Either stop the animation and edit the text or use
Text options
.
The time line
Displaying the Time line
lets you step through an animation, frame-by-frame, or pause, stop or run the animation.
You can export an individual frame by pausing the animation at the frame you want and using Export on
the View
menu.
Applying animation effects to selected text
The animation style applies to all characters (see notes below) but you can apply most attributes of the
animation to just a selected character or block of characters. For example, for a Rotate
animation, you could have some characters rotating in a different plane to the others.
Rotate, Swing and Pulsate
animation styles have two versions, 1 animates all characters as a group and 2 animates each character
individually. You can mix versions by selecting part of the text and selecting the other version (1 or 2.)
Fade, Step and Typewriter
animation styles: you cannot apply different settings to a selected area.
Tips for creating animations
Animations can create large file sizes, which are slow to download over the Internet. To keep animations
small we suggest:
Make the image as small as possible by selecting the Crop option on export.
Select Front face only for Rotate animations.
Have no more than about 20 frames per animation. (The fewer the better for keeping the size
down.)
For multi-page animations avoid having too many pages.
When exporting try selecting 16 colors (4-bit) with no dithering and optimized palette. When
images are animating, the banding is far less obvious than with a static image.
When exporting GIFs (animated or static) that have a complex background, try exporting them
as transparent GIFs.
Rotating the lights changes the file size only slightly.
Page 36

For Flash animations, Fade or Step animations create much smaller files than the other animation
styles. For multi-page Pulsate animations, overlapping the pages creates smaller animations.
Don't get carried away! For example using loads of textures can create very large animation files.
Turning the shadow off can reduce file size.
When exporting select to optimize Per frame.
For tips when saving as a Flash SWF file see Tips for creating Flash files.
Page 37
To preview an animation
Select the start/stop animation button on the standard toolbar.
To preview the animation in real-time, Xara 3D Maker displays a reduced-quality image. You have
greater control over quality when exporting to disk.
Editing the text for multi-page animations
Unless you have the cursor displayed, new text is added to the page currently displayed in the Xara 3D
Maker window. This can make editing slightly tricky. Either stop the animation and edit the text or use
Text options
.
The time line
Displaying the Time line
lets you step through an animation, frame-by-frame, or pause, stop or run the animation.
You can export an individual frame by pausing the animation at the frame you want and using Export on
the View
menu.
Applying animation effects to selected text
The animation style applies to all characters (see notes below) but you can apply most attributes of the
animation to just a selected character or block of characters. For example, for a Rotate
animation, you could have some characters rotating in a different plane to the others.
Rotate, Swing and Pulsate
animation styles have two versions, 1 animates all characters as a group and 2 animates each character
individually. You can mix versions by selecting part of the text and selecting the other version (1 or 2.)
Fade, Step and Typewriter
animation styles: you cannot apply different settings to a selected area.
Tips for creating animations
Animations can create large file sizes, which are slow to download over the Internet. To keep animations
small we suggest:
Make the image as small as possible by selecting the Crop option on export.
Select Front face only for Rotate animations.
Have no more than about 20 frames per animation. (The fewer the better for keeping the size
down.)
For multi-page animations avoid having too many pages.
When exporting try selecting 16 colors (4-bit) with no dithering and optimized palette. When
images are animating, the banding is far less obvious than with a static image.
When exporting GIFs (animated or static) that have a complex background, try exporting them
as transparent GIFs.
Rotating the lights changes the file size only slightly.
For Flash animations, Fade or Step animations create much smaller files than the other animation
styles. For multi-page Pulsate animations, overlapping the pages creates smaller animations.
Don't get carried away! For example using loads of textures can create very large animation files.
Turning the shadow off can reduce file size.
When exporting select to optimize Per frame.
For tips when saving as a Flash SWF file see Tips for creating Flash files.
Page 38
Editing the text for multi-page animations
Unless you have the cursor displayed, new text is added to the page currently displayed in the Xara 3D
Maker window. This can make editing slightly tricky. Either stop the animation and edit the text or use
Text options
.
The time line
Displaying the Time line
lets you step through an animation, frame-by-frame, or pause, stop or run the animation.
You can export an individual frame by pausing the animation at the frame you want and using Export on
the View
menu.
Applying animation effects to selected text
The animation style applies to all characters (see notes below) but you can apply most attributes of the
animation to just a selected character or block of characters. For example, for a Rotate
animation, you could have some characters rotating in a different plane to the others.
Rotate, Swing and Pulsate
animation styles have two versions, 1 animates all characters as a group and 2 animates each character
individually. You can mix versions by selecting part of the text and selecting the other version (1 or 2.)
Fade, Step and Typewriter
animation styles: you cannot apply different settings to a selected area.
Tips for creating animations
Animations can create large file sizes, which are slow to download over the Internet. To keep animations
small we suggest:
Make the image as small as possible by selecting the Crop option on export.
Select Front face only for Rotate animations.
Have no more than about 20 frames per animation. (The fewer the better for keeping the size
down.)
For multi-page animations avoid having too many pages.
When exporting try selecting 16 colors (4-bit) with no dithering and optimized palette. When
images are animating, the banding is far less obvious than with a static image.
When exporting GIFs (animated or static) that have a complex background, try exporting them
as transparent GIFs.
Rotating the lights changes the file size only slightly.
For Flash animations, Fade or Step animations create much smaller files than the other animation
styles. For multi-page Pulsate animations, overlapping the pages creates smaller animations.
Don't get carried away! For example using loads of textures can create very large animation files.
Turning the shadow off can reduce file size.
When exporting select to optimize Per frame.
For tips when saving as a Flash SWF file see Tips for creating Flash files.
Page 39
The time line
Displaying the Time line
lets you step through an animation, frame-by-frame, or pause, stop or run the animation.
You can export an individual frame by pausing the animation at the frame you want and using Export on
the View
menu.
Applying animation effects to selected text
The animation style applies to all characters (see notes below) but you can apply most attributes of the
animation to just a selected character or block of characters. For example, for a Rotate
animation, you could have some characters rotating in a different plane to the others.
Rotate, Swing and Pulsate
animation styles have two versions, 1 animates all characters as a group and 2 animates each character
individually. You can mix versions by selecting part of the text and selecting the other version (1 or 2.)
Fade, Step and Typewriter
animation styles: you cannot apply different settings to a selected area.
Tips for creating animations
Animations can create large file sizes, which are slow to download over the Internet. To keep animations
small we suggest:
Make the image as small as possible by selecting the Crop option on export.
Select Front face only for Rotate animations.
Have no more than about 20 frames per animation. (The fewer the better for keeping the size
down.)
For multi-page animations avoid having too many pages.
When exporting try selecting 16 colors (4-bit) with no dithering and optimized palette. When
images are animating, the banding is far less obvious than with a static image.
When exporting GIFs (animated or static) that have a complex background, try exporting them
as transparent GIFs.
Rotating the lights changes the file size only slightly.
For Flash animations, Fade or Step animations create much smaller files than the other animation
styles. For multi-page Pulsate animations, overlapping the pages creates smaller animations.
Don't get carried away! For example using loads of textures can create very large animation files.
Turning the shadow off can reduce file size.
When exporting select to optimize Per frame.
For tips when saving as a Flash SWF file see Tips for creating Flash files.
Page 40

Applying animation effects to selected text
The animation style applies to all characters (see notes below) but you can apply most attributes of the
animation to just a selected character or block of characters. For example, for a Rotate
animation, you could have some characters rotating in a different plane to the others.
Rotate, Swing and Pulsate
animation styles have two versions, 1 animates all characters as a group and 2 animates each character
individually. You can mix versions by selecting part of the text and selecting the other version (1 or 2.)
Fade, Step and Typewriter
animation styles: you cannot apply different settings to a selected area.
Tips for creating animations
Animations can create large file sizes, which are slow to download over the Internet. To keep animations
small we suggest:
Make the image as small as possible by selecting the Crop option on export.
Select Front face only for Rotate animations.
Have no more than about 20 frames per animation. (The fewer the better for keeping the size
down.)
For multi-page animations avoid having too many pages.
When exporting try selecting 16 colors (4-bit) with no dithering and optimized palette. When
images are animating, the banding is far less obvious than with a static image.
When exporting GIFs (animated or static) that have a complex background, try exporting them
as transparent GIFs.
Rotating the lights changes the file size only slightly.
For Flash animations, Fade or Step animations create much smaller files than the other animation
styles. For multi-page Pulsate animations, overlapping the pages creates smaller animations.
Don't get carried away! For example using loads of textures can create very large animation files.
Turning the shadow off can reduce file size.
When exporting select to optimize Per frame.
For tips when saving as a Flash SWF file see Tips for creating Flash files.
Page 41
Tips for creating animations
Animations can create large file sizes, which are slow to download over the Internet. To keep animations
small we suggest:
Make the image as small as possible by selecting the Crop option on export.
Select Front face only for Rotate animations.
Have no more than about 20 frames per animation. (The fewer the better for keeping the size
down.)
For multi-page animations avoid having too many pages.
When exporting try selecting 16 colors (4-bit) with no dithering and optimized palette. When
images are animating, the banding is far less obvious than with a static image.
When exporting GIFs (animated or static) that have a complex background, try exporting them
as transparent GIFs.
Rotating the lights changes the file size only slightly.
For Flash animations, Fade or Step animations create much smaller files than the other animation
styles. For multi-page Pulsate animations, overlapping the pages creates smaller animations.
Don't get carried away! For example using loads of textures can create very large animation files.
Turning the shadow off can reduce file size.
When exporting select to optimize Per frame.
For tips when saving as a Flash SWF file see Tips for creating Flash files.
Page 42
Using the animation picker
A quick way of creating an animation is to copy the settings
from an existing X3D file.
Choose Import animation on the File
menu. This opens the animations folder, which contains ready-made animations in a wide variety of
styles. This short cuts the creation of animations. For each of the ready-made animations, the file name
gives you information about the animation type.
The preview in the animation picker shows how the current graphic would look with the animation
settings of the selected file.
Click Open
to apply those settings to the current graphic.
Page 43

Creating cursor (CUR & ANI) files
You can use Xara 3D Maker to create static cursors (CUR files) and animated cursors (ANI files) for
use within other programs (please refer to Windows Help for using icons, we cannot help in the use of
icon files).
Generally cursor files are small, standard sizes are 16x16, 32x32 and 48x48 pixels although you can
create custom sizes. Some programs have a maximum size of 256x256 pixels.
A cursor shows you exactly where in the window you are clicking (for example which menu item).
However, a cursor often covers two menu items. To determine which item to select, the cursor has a
'hotspot'. The item under the hotspot is the one you click on. Display hotspot on the view menu displays
a cross showing you where the hotspot is for that graphic. Drag the cross to move the hotspot?by default
the hotspot is in the center of the graphic.
Export options for ANI files
Page 44
Importing 2D objects
For use as a board or border design
You can import a 2D object for use as a board, board with holes or border design (if you are in text
only mode, you will automatically be switched to a button design type when importing). To do this, just
click the design picker button under design options or select Import design from the File
menu. Supported file formats are WMF, EMF and Xara's WEB and XAR files.
For use as a text character
You can also import 2D objects to use a character in your text. To do this, click Import on the File
menu. Supported file formats are WMF, EMF and Xara's WEB and XAR files. Showing the text cursor
(Ctrl+E) will allow you to choose the correct place to import the object. As it is then a text object, you
can color and animate it as you would with normal text.
Copying from Xara Designer Pro
You can design your own shapes in Xara Designer Pro then easily import them into Xara 3D Maker.
This is a quick and simple way of importing 2D shapes, and is a combination of both methods outlined
above. If you are in text design mode, the shape will be used as a text character. If you are creating a
board, board with holes or border design the object will be used as the design's overall shape.
In Xara Designer Pro copy the object you wish to use ("Ctrl + C"), or select Edit then Copy). Then
switch to Xara 3D Maker and paste the object ("Ctrl + V"), or select Edit then Paste
). If you wish, you can then copy your finished 3D design and easily paste it back into Xara Designer Pro
for use in your Xara Designer Pro documents.
Page 45
For use as a board or border design
You can import a 2D object for use as a board, board with holes or border design (if you are in text
only mode, you will automatically be switched to a button design type when importing). To do this, just
click the design picker button under design options or select Import design from the File
menu. Supported file formats are WMF, EMF and Xara's WEB and XAR files.
For use as a text character
You can also import 2D objects to use a character in your text. To do this, click Import on the File
menu. Supported file formats are WMF, EMF and Xara's WEB and XAR files. Showing the text cursor
(Ctrl+E) will allow you to choose the correct place to import the object. As it is then a text object, you
can color and animate it as you would with normal text.
Copying from Xara Designer Pro
You can design your own shapes in Xara Designer Pro then easily import them into Xara 3D Maker.
This is a quick and simple way of importing 2D shapes, and is a combination of both methods outlined
above. If you are in text design mode, the shape will be used as a text character. If you are creating a
board, board with holes or border design the object will be used as the design's overall shape.
In Xara Designer Pro copy the object you wish to use ("Ctrl + C"), or select Edit then Copy). Then
switch to Xara 3D Maker and paste the object ("Ctrl + V"), or select Edit then Paste
). If you wish, you can then copy your finished 3D design and easily paste it back into Xara Designer Pro
for use in your Xara Designer Pro documents.
Page 46

For use as a text character
You can also import 2D objects to use a character in your text. To do this, click Import on the File
menu. Supported file formats are WMF, EMF and Xara's WEB and XAR files. Showing the text cursor
(Ctrl+E) will allow you to choose the correct place to import the object. As it is then a text object, you
can color and animate it as you would with normal text.
Copying from Xara Designer Pro
You can design your own shapes in Xara Designer Pro then easily import them into Xara 3D Maker.
This is a quick and simple way of importing 2D shapes, and is a combination of both methods outlined
above. If you are in text design mode, the shape will be used as a text character. If you are creating a
board, board with holes or border design the object will be used as the design's overall shape.
In Xara Designer Pro copy the object you wish to use ("Ctrl + C"), or select Edit then Copy). Then
switch to Xara 3D Maker and paste the object ("Ctrl + V"), or select Edit then Paste
). If you wish, you can then copy your finished 3D design and easily paste it back into Xara Designer Pro
for use in your Xara Designer Pro documents.
Page 47

Copying from Xara Designer Pro
You can design your own shapes in Xara Designer Pro then easily import them into Xara 3D Maker.
This is a quick and simple way of importing 2D shapes, and is a combination of both methods outlined
above. If you are in text design mode, the shape will be used as a text character. If you are creating a
board, board with holes or border design the object will be used as the design's overall shape.
In Xara Designer Pro copy the object you wish to use ("Ctrl + C"), or select Edit then Copy). Then
switch to Xara 3D Maker and paste the object ("Ctrl + V"), or select Edit then Paste
). If you wish, you can then copy your finished 3D design and easily paste it back into Xara Designer Pro
for use in your Xara Designer Pro documents.
Page 48
Apply the style of an existing graphic
Sometimes you want to create a graphic that is similar to an existing graphic (either one you created or
one of the samples supplied with Xara 3D Maker.) For example, you might like the look of one of the
samples but are not sure how to create the effect. Xara 3D Maker makes it easy to copy either the
animation options or selected options from another graphic.
Copy the animation options
Use the animation picker (Import animation on the File
menu.)
As you click on file names, the preview shows you how the current graphic looks with the animation
settings of the selected file. When you find the animation effect you want, just click Open
to update the current graphic.
This just changes the animation settings?it does not change options such as wording, bevel, extrusion, and
so on. To copy these, see the following section.
Copy selected options
Use the style picker (Import style on the File
menu.) Like the animation picker, you can browse through files
and see how they affect the current graphic.
Unlike the animation picker, you can select which options to copy from the selected file. You could for
example copy both the lighting and the position (angles) from the selected file. You can copy any
combination of options from the file, including the animation settings.
Page 49
Copy the animation options
Use the animation picker (Import animation on the File
menu.)
As you click on file names, the preview shows you how the current graphic looks with the animation
settings of the selected file. When you find the animation effect you want, just click Open
to update the current graphic.
This just changes the animation settings?it does not change options such as wording, bevel, extrusion, and
so on. To copy these, see the following section.
Copy selected options
Use the style picker (Import style on the File
menu.) Like the animation picker, you can browse through files
and see how they affect the current graphic.
Unlike the animation picker, you can select which options to copy from the selected file. You could for
example copy both the lighting and the position (angles) from the selected file. You can copy any
combination of options from the file, including the animation settings.
Page 50

Copy selected options
Use the style picker (Import style on the File
menu.) Like the animation picker, you can browse through files
and see how they affect the current graphic.
Unlike the animation picker, you can select which options to copy from the selected file. You could for
example copy both the lighting and the position (angles) from the selected file. You can copy any
combination of options from the file, including the animation settings.
Page 51
Create buttons, boards, boards + holes and
borders
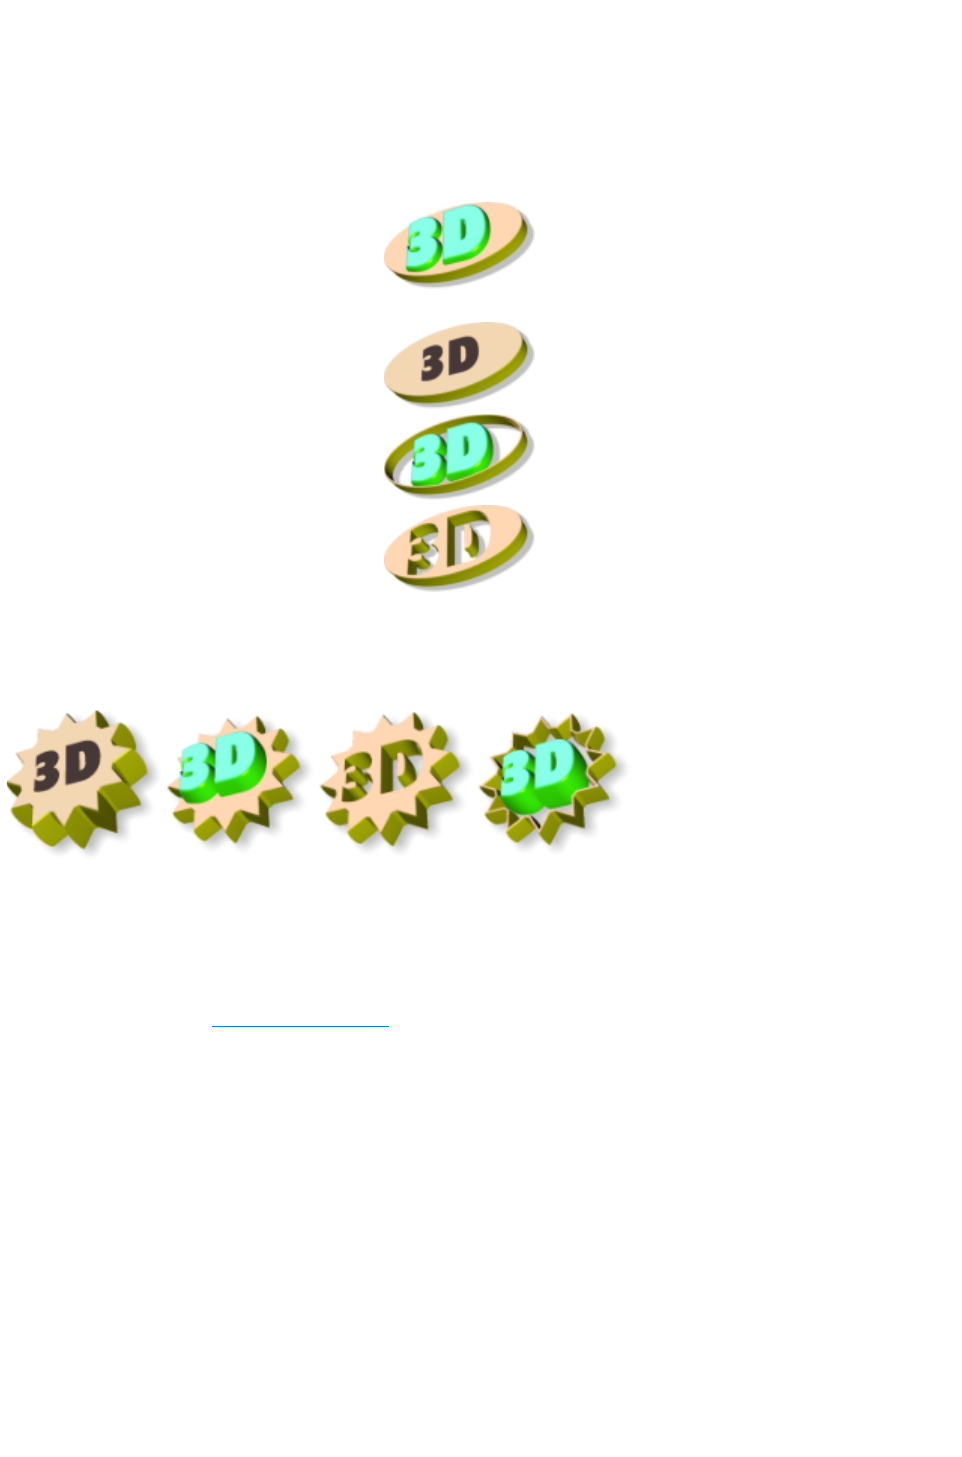
There are four different design types:
Boards.
Sit your heading on a solid board, so
the text extrudes from a solid
background.
Button.
Creates a button with the text flat on its
surface.
Borders.
Adds a border around your heading,
giving it more impact.
Board and holes.
As if you'd taken a saw to your board,
to give an impression of a cut-out
image.
You can either use one of Xara 3D Maker's predefined design shapes or import a shape from another
X3D file. The great thing is that one shape can be used with any of the design types above. One
design?four totally different combinations.
A design takes its values (bevel, lighting and so on) from the current graphic but you can of course select
new values if required.
Steps to creating a design:
1. Choose Open Sample from the File menu to choose a sample design provided with Xara 3D
Maker or create your own text for the you design. Animated designs can show multi-page
messages?see Creating animations for details.
2. Click one of the predefined shapes on the design toolbar on the bottom left of your screen, or
open design options and choose a design type from there using the Design picker. By default
this displays the designs folder (in the same folder where you installed Xara 3D Maker) but you
can browse to and choose any X3D, XAR or WEB file. If the file contains text, the first letter is
used as the design shape.
3. Change the value in Stretch to make the design wider or narrower.
4. For predefined design shapes you can control the corner radius. Uncheck Corners for the
default radius.
5. If necessary, edit the design in the regular way, for example, by changing the bevel, extrusion or
colors.
You can create interesting design shapes using symbolic fonts such as Geotype (supplied with Xara 3D
Maker.) Create a graphic with just the character you want to use as the design shape. Save the graphic
as an X3D file. You can then use that X3D file as an imported design shape in the future if you save it to
the designs folder.
Page 52

You can also use your own drawn design shapes. Import the shape as a metafile (or, if you are using
Xara X1 or later, just copy the shape and paste it into Xara 3D Maker) and export in X3D format to the
designs folder.
Page 53

Create screen savers
Screen savers protect the monitor screen from being burnt by a static image when the computer is not
being used and allow for a unique looking computer. Using Xara 3D Maker you can create a custom
screen saver either for use on your own computer or for distribution to other people.
Screen savers are always animated (because they need to show a moving image to avoid burning the
screen.) We suggest:
Use a dark-colored background, not white or other light colors.
Don't use light-colored text in areas that show little movement.
To create a screen saver:
1. Create the animation in the regular way (see tips) or select from one of the sample screensaver
animations in the Sample, Screensavers folder (choose Open Sample from the File menu or use
the style picker).
2. Choose Export screen saver on the File menu.
3. Xara 3D Maker screen savers are effectively movies within a screen saver. (See also Export
options for AVIs (movies and screen savers) for AVI options). There are a number of preset
options. Low is one third of your current screen resolution, medium is half, high is two thirds and
full is your full screen resolution. You can also choose from a number of standard resolutions by
choosing other. We recommend selecting a value half the screen area. (For example 512x384 for
a 1024x769 screen area.) This should give a good quality image without creating a large file size.
4. Choose either:
oInstall?this saves the screensaver and installs it as the default screen saver. The default folder
is your Windows system folder?this is the best folder to use. We recommend this option as it
is easier than manually installing a screen saver.
oSave?this saves the screen saver but does not install it as the default screen saver.
5. Enter a name for the screen saver file.
6. Click Save.
Because Xara 3D Maker has to generate each frame of the animation, this process can take a few
minutes.
Previewing a screen saver file
1. Browse to the screen saver (SCR) file.
2. Right-click on the file. This pops-up a menu.
3. Click Test to preview.
Using a screen saver file
If, in step 4, you installed the new screen saver as the default, everything is already set up for you. No
further action is necessary.
If you saved the screen saver to the Windows system folder:
1. Click Start on the Taskbar. If you are using Windows XP, go to step 3.
2. Choose Control Panel. Double-click Personalization.
3. Click Screen Saver.The Screen Saver Settings dialog lists all screen savers in the system folder.
4. Choose the screen saver you want.
5. Click OK to make the selected screen saver the default.
If you saved the screen saver to a different folder:
1. Browse to the screen saver file.
2. Right-click on the file. This pops-up a menu.
3. Click Install to select the screen saver. Then click OK to make the screen saver the default.
Page 54

Tips
To create a smooth screen saver animation it's recommended you create an animation with a fast
animation speed (15?20 frames per second) and between 50 and 100 frames in each cycle.
Windows stretches the animation to fill the screen. If you want the text to partially fill the screen,
in Xara 3D Maker select a point size, such as 72pt from the text size drop down, instead of Fit
to width.
For ideas on creating screen savers, look in the screensavers folder (in samples). This folder
contains a wide range of examples.
Page 55

Previewing a screen saver file
1. Browse to the screen saver (SCR) file.
2. Right-click on the file. This pops-up a menu.
3. Click Test to preview.
Using a screen saver file
If, in step 4, you installed the new screen saver as the default, everything is already set up for you. No
further action is necessary.
If you saved the screen saver to the Windows system folder:
1. Click Start on the Taskbar. If you are using Windows XP, go to step 3.
2. Choose Control Panel. Double-click Personalization.
3. Click Screen Saver.The Screen Saver Settings dialog lists all screen savers in the system folder.
4. Choose the screen saver you want.
5. Click OK to make the selected screen saver the default.
If you saved the screen saver to a different folder:
1. Browse to the screen saver file.
2. Right-click on the file. This pops-up a menu.
3. Click Install to select the screen saver. Then click OK to make the screen saver the default.
Tips
To create a smooth screen saver animation it's recommended you create an animation with a fast
animation speed (15?20 frames per second) and between 50 and 100 frames in each cycle.
Windows stretches the animation to fill the screen. If you want the text to partially fill the screen,
in Xara 3D Maker select a point size, such as 72pt from the text size drop down, instead of Fit
to width.
For ideas on creating screen savers, look in the screensavers folder (in samples). This folder
contains a wide range of examples.
Page 56

Using a screen saver file
If, in step 4, you installed the new screen saver as the default, everything is already set up for you. No
further action is necessary.
If you saved the screen saver to the Windows system folder:
1. Click Start on the Taskbar. If you are using Windows XP, go to step 3.
2. Choose Control Panel. Double-click Personalization.
3. Click Screen Saver.The Screen Saver Settings dialog lists all screen savers in the system folder.
4. Choose the screen saver you want.
5. Click OK to make the selected screen saver the default.
If you saved the screen saver to a different folder:
1. Browse to the screen saver file.
2. Right-click on the file. This pops-up a menu.
3. Click Install to select the screen saver. Then click OK to make the screen saver the default.
Tips
To create a smooth screen saver animation it's recommended you create an animation with a fast
animation speed (15?20 frames per second) and between 50 and 100 frames in each cycle.
Windows stretches the animation to fill the screen. If you want the text to partially fill the screen,
in Xara 3D Maker select a point size, such as 72pt from the text size drop down, instead of Fit
to width.
For ideas on creating screen savers, look in the screensavers folder (in samples). This folder
contains a wide range of examples.
Page 57

Tips
To create a smooth screen saver animation it's recommended you create an animation with a fast
animation speed (15?20 frames per second) and between 50 and 100 frames in each cycle.
Windows stretches the animation to fill the screen. If you want the text to partially fill the screen,
in Xara 3D Maker select a point size, such as 72pt from the text size drop down, instead of Fit
to width.
For ideas on creating screen savers, look in the screensavers folder (in samples). This folder
contains a wide range of examples.
Page 58

Create Flash files
Flash format is often used on web pages, especially for animations. There are two formats for Flash
files:
Bitmap format: the advantage of this is that you can use any Xara 3D Maker options, including
shadows.
Vector format: the advantage is that you can enlarge vector objects without losing quality. The
disadvantage is that some Xara 3D Maker options are not supported by Flash. Select Display
as Flash on the View menu to dim or hide unsupported options.
Alternatively you can export the Flash file with unsupported features converted to bitmaps. However this
can create large files and loses the scalability of vector files. Note that you cannot export shadows in
Flash vector format.
Tips for creating Flash files
Flash is not ideal for 3D graphics such as those created in Xara 3D Maker. You will often find that you
can create smaller files using other formats such as GIF. This is especially true for animations. If you want
to create Flash animations, we suggest:
Step or Fade animations produce smaller files than other styles.
Avoid bevels. Some bevels are better than others but typically bevels make files five to ten times
larger.
Use sans serif fonts such as Arial (serif fonts have small features at the end of strokes within
letters).
Page 59

Tips for creating Flash files
Flash is not ideal for 3D graphics such as those created in Xara 3D Maker. You will often find that you
can create smaller files using other formats such as GIF. This is especially true for animations. If you want
to create Flash animations, we suggest:
Step or Fade animations produce smaller files than other styles.
Avoid bevels. Some bevels are better than others but typically bevels make files five to ten times
larger.
Use sans serif fonts such as Arial (serif fonts have small features at the end of strokes within
letters).
Page 60
Save and export
Xara 3D Maker has two basic save and exporting options:
Save as an X3D format file. You can reload an X3D file for further editing in the future.
Export in another format (see File Formats for a full list of supported formats.) You cannot
reload exported files into Xara 3D Maker and edit them. (Although you can load BMP, GIF,
ICO, JPEG and PNG format files as textures.)
Note: If you want to copy your design into another application, copy your design (choose Copy from
the Edit
menu or press "Ctrl + C") on to the clipboard. The image is saved in 24bpp bitmap form, as well as in
XAR format, so that you can paste it into any other application that handles bitmaps, such as Microsoft
Word and Outlook, and graphics applications, as well as other Xara products such as Xara Designer
Pro and Xara Xtreme. The XAR format supports a bitmap with a transparent background, while the
24bpp bitmap has a solid background.
To save in X3D format?use Save or Save as on the File menu. (To reload an X3D file use Open on
the File
menu.)
To export a static image?use Export on the File
menu.
To export an animation?use Export animation on the File
menu.
To export a screensaver?use Export screensaver on the File menu. (More on screensavers
.)
When exporting, a dialog box will appear with a variety of options. Most of the options in this dialog box
are specific to the file format (GIF, AVI and so on.) Common to all formats are options to set the graphic
size:
Current window size:
Either export the current window or frame area (crop off) or the cropped area (crop on.)
Crop: Export just the area with the graphic. "Crop" ignores just the offset from the center caused by
displacing the graphic by Alt + dragging it (see rotate and position the graphic
).
User defined:
Lets you specify (in pixels) the area to export. This area can be bigger or smaller than the window or
frame size.
The above settings control exporting of BMP, CUR (cursor), static GIF, ICO (icons) JPEG and PNG
format files. Not all options apply to all formats?for example Progressive applies only to JPEGs and is
dimmed for other formats.
Note:
To print Xara3D work, we suggest you use the JPEG format as this is the most compact. However you
can also use BMP, GIF or PNG if preferred. Set the export size to be around 1000 pixels wide, and that
will produce a file that prints perfectly well. If you want to create poster sized images you may want to
increase the output size to say 2000 pixels maximum. It is NOT necessary to save images any larger.
This should produce a JPEG file under 100 Kbytes large which you can them import into another
program, such as Xara Designer Pro, for printing (just resize the image in your other program to the
desired size).
Note:
If you exit the program without saving, your current view is automatically saved as an X3D file and
reopened when you next start Xara 3D Maker.
Page 61

Export options for GIF, PNG or BMP files
GIF export is the most common and probably the best format for use on the web. GIF images can have
no more than 256 colors, which you might think is a limitation. However, using Xara 3D Maker's
advanced dithering and palette optimization features, you can get near perfect quality images using only
256 colors. Indeed you'll be surprised at how good GIFs with just 16 colors can be.
For all export formats you have control over not only the number of colors but also whether the image is
dithered and has an optimized palette. These are techniques to improve the image quality while using a
reduced number of colors. For example using only 16 color GIF nearly always produces the smallest file
size, but with no dithering the shading can be poor. By using an optimized palette and diffusion dithering
you can substantially increase the quality of the result.
There are no hard and fast rules as to which combination of export options is best?it depends on the
image and your requirements. Therefore we recommend exporting in a number of different formats to see
which is the best and has the smallest file size. Typical options to try include 16 color with diffusion
dithering, or 256 color with no dithering.
When exporting as a GIF or PNG you have the option of making it interlaced (progressive rendering as
it's downloaded) and whether the image is transparent.
To produce the best results when exporting transparent GIFs, set the background color to match your
web page, then check the Transparent
option in the export dialog (see Options below).
BMP export formats
Many other Windows programs can import BMP files but often they do not support the full range of
color depths available in Xara 3D Maker. This is beyond the control of Xara 3D Maker. If you have
problems importing BMPs, try a different color depth.
Other export options for BMP, Cursor, GIF, ICO, JPG and PNG
Dithering
Dithering is a technique of smoothing color transitions for 256 colors or less. None produces the smallest
file size but can show 'banding' when two colors blend together. Ordered and Diffused use different
algorithms to reduce banding. You may need to try the different options to decide which is the best for a
particular graphic.
Ordered dithering is available only with 256 colors.
Palette
This is the range of colors used in the exported bitmap. Optimized selects the most commonly used
colors and usually gives the best results. High-color and True-color depths contain the full range of colors
and so Palette is dimmed for these options.
Options
Transparent
- dimmed for BMP and JPEG as these formats do not support transparency. Transparency makes
background areas not covered by the graphic or shadow, transparent so you see the web page
background in these areas (see Note below). Transparency has two meanings:
for True-color PNGs, transparency is graduated so you partly see the web page background
through the shadow.
all other formats (including PNGs of 256 or fewer colors) use simple on-off transparency. That
is, the shadow is solid and the Xara3D background color shows through the shadow.
Note:
Xara 3D Maker 'anti-aliases' the edge of a transparent bitmap to the Xara3D background color. For
best results you need to make the background color the same or similar to the color of the page the
graphic will appear on.
Interlaced
- applies only to GIF and PNG. When displayed on a web page, interlaced bitmaps appear first as a
low-resolution image. The quality increases as more of the bitmap downloads. This is particularly useful
Page 62

for large bitmaps as the viewer sees the basics of the bitmap more quickly.
Progressive
- applies only to JPEG. This is similar to Interlaced in that a progressive JPEG displays with increasing
detail as more of the file downloads.
Quality
JPEG only. JPEG format compresses files by discarding unnecessary information. Quality controls how
much information is discarded. Default is 80%, which usually gives the best balance of quality and file
size. Above 80% produces larger files with little improvement in quality.
Below 75% the quality loss may be noticeable and you may need to use a higher setting. Our advice for
the best results is use the lowest quality setting that gives acceptable results.
File size
This tells you the size of the bitmap with the current settings. The smaller the file size, the faster it will
download over the Internet.
Preview window
This shows you how the exported bitmap will look with the current settings. It is a useful check that you
have selected the best settings for this particular graphic.
Export options for JPG
JPEG bitmaps are always 24-bit, true color, but the JPEG compression system means that the quality is
often not as good as a GIF. The quality setting determines how small the resultant file is?the higher the
quality, the larger the file. Quality settings less than 80% usually produce inferior images to those available
from using palette optimized GIFs.
A progressive JPEG is similar to an interlaced GIF. The JPEG displays first as blurred (low resolution)
image. As more of the file loads, the image comes into focus. Note that some older browsers do not
support progressive JPEGs?the image displays when all the JPEG has loaded.
Export options for animated cursors (ANI)
To learn more about creating cursors see creating cursor (CUR & ANI) files.
Because animated cursors can be quite large, you may find that a 16 color, optimized palette per frame,
produces the best results for the smallest file size. However you might need to experiment.
Dithering always makes cursors look better, but also makes them larger. When outputting at 256 colors
you may find that there is no need to turn dithering on.
Current window size lets you export just the area surrounding the text (Crop on) or the entire window
area (Crop
off).
User defined lets you specify the dimensions of the bitmap. With Fit to width
(on the text toolbar) selected, the text and the background scales to suit the values you type in. If you
specified a font size, the size of the text does not change but the background scales to the values you type
in. This is useful if you want to create several headings, all the same height and width.
Export options for animated GIFs
To learn more about exporting animated GIFs see creating animations
.
Because animated GIFs can be quite large, you may find that a 16 or 32 color, optimized palette per
frame, produces the best results for the smallest file size. However you might need to experiment.
Dithering always makes GIFs look better, but also makes them larger. When outputting at 256 colors
you may find that there is no need to turn dithering on.
Current window size lets you export just the area surrounding the text (Crop on) or the entire window
area (Crop
off).
Page 63
User defined lets you specify the dimensions of the bitmap. With Fit to width
(on the text toolbar) selected, the text and the background scales to suit the values you type in. If you
specified a font size, the size of the text does not change but the background scales to the values you type
in. This is useful if you want to create several headings, all the same height and width.
Export options for AVIs (movies and screen savers)
You can also export your Xara 3D Maker design as an AVI video file. You can configure AVI options
when exporting your file as an animation or screen saver.
Color depth.
Choose between the different amount of colors in your video. True color will give more accurate results,
but may create a large file. Try exporting at both color depths to se what results work best.
Current window size lets you export just the area surrounding the text (Crop on) or the entire window
area (Crop
off).
User defined lets you specify the dimensions of the bitmap. With Fit to width
(on the text toolbar) selected, the text and the background scales to suit the values you type in. If you
specified a font size, the size of the text does not change but the background scales to the values you type
in. This is useful if you want to create several headings, all the same height and width.
AVI options. Clicking this will allow you to choose from any of the AVI codecs on your computer. A
movie codec is basically the system used to create the movie file itself, and some formats are better than
others. Use the default, or select a codec of your choice. For some codecs you can also set the quality
percentage and how often key frames are set, and you can click Configure
for more options.
Export options for screen savers (SCR)
You can export Xara 3D Maker graphics as a Windows screensaver (SCR) file. See Create screen
savers
for more details.
Export options for Flash bitmap format (SWF) files
These options apply to both static and animated SWF files. More information on creating Flash files. To
learn more about exporting movies see creating animations
.
Current window size lets you export just the area surrounding the text (Crop on) or the entire window
area (Crop
off.)
User defined lets you specify the dimensions of the bitmap. With Fit to width
(on the text toolbar) selected, the text and the background scales to suit the values you type in. If you
specified a font size, the size of the text does not change but the background scales to the values you type
in. This is useful if you want to create several headings, all the same height and width.
Color depth:
the more colors, the larger the file size. For animations where each image appears for only a short period
you may find 256 colors gives satisfactory results.
Dithering
(dimmed except for 256-colors). None creates the smallest files but you may see bands of colors instead
of smooth color graduations.
Transparent
(dimmed for High-color): select this for a transparent background to the animation. Deselect for a solid
background.
Lossless and quality (dimmed except for true-color): quality values below 100% give smaller files but
Page 64

at a lower quality. Lossless
is equivalent to 100% quality. You may need to experiment to get the best trade-off between quality and
file size.
Export options for Flash vector format (SWF) files
These options apply to both static and animated SWF files. More information on creating Flash files
.
Note that Flash vector format does not support some Xara 3D Maker features (such as shadows and
textures). You can use Xara 3D Maker features not supported in vector format except shadows but
these get exported as bitmaps within the Flash file and can make the file much larger. If you intend to
output in SWF format, we suggest using the display as Flash option on the View menu.
Current window size lets you export just the area surrounding the text (Crop on) or the entire window
area (Crop
off.)
User defined lets you specify the dimensions of the bitmap. With Fit to width
(on the text toolbar) selected, the text and the background scales to suit the values you type in. If you
specified a font size, the size of the text does not change but the background scales to the values you type
in. This is useful if you want to create several headings, all the same height and width.
Quality:
the higher the quality, the larger the file. You may need to experiment to get the best trade-off between
quality and file size.
General info on AVI videos
The AVI format (Audio Video Interleaved) isn't actually a proper video format! It's rather a so-called
container where very general conventions such as audio and video data can be specified and sent to a
program. The exact memory format of the files is specified via the codec (coder/dec
oder). A codec compresses audio/video files into its own private format with which only that codec can
work and decodes the files again on playback.
This means that an AVI file created on your computer can only
be loaded/played on computer B if this computer has the same codec installed.
Many codecs (for example, Intel Indeo
? video) have now become standard components of the Windows installation. Others, such as the
popular DivX codec, are not. If you create an AVI file with such a codec and you wish to use it on other
computers, install the corresponding codec on them as well.
On older video editing cards certain codecs that function only with the hardware of the corresponding
cards can be problematic. This type of AVI can only
be used on the computer on which they were created. Avoid using this type of codec when possible.
Exporting transparent title animations for movies
If you plan to export a Xara 3D Maker animation to a MAGIX movie editing program, for example as a
title or caption to play on top of a movie, your animation will need a transparent background.
The standard AVI export in exports an animation with a solid background, covering the movie behind it.
To play it on top of a movie, you'll need a video effect (called chroma keying or blue screen) to remove
the background.
In this case, export the animation as a CFX file. This is a special file format used in MAGIX movie
editing and slide show programs. As well as containing a reference to the exported AVI file, the CFX file
holds all the transparency information you need to allow you to blend your animation perfectly with the
movie.
To export your animation as a .cfx file choose the file format "MAGIX CFX (*.cfx)" in the "Export
Animation" dialog.
Page 65

The transparent titles consist of the .cfx file and the associated AVI file which contains the animation
movie. The .cfx file contains the background transparency information. All AVI files are stored in
Documents and Settings\<User>\Local Settings\Application Data\Xara\Xara3D7\AVI_CFX (WIndows
XP) or Users\<User>\AppData\Local\Xara\Xara3D7\AVI_CFX (Windows 7 and Windows Vista).
The files must not be deleted or moved from there, otherwise the .cfx files will not work. However, the
.cfx files can be stored in the video project folder or anywhere else.
Note:
Substitute your own user name for <User> in the above file paths.
In the MAGIX slide show or video editing programs, the .cfx file has to be loaded via the Media Pool.
The Timeline Mode has to be active. Then you can drag the files into the timeline and they will be placed
on the title track automatically.
To use .cfx files in MAGIX programs, you need at least the following versions of the program: MAGIX
Movies on CD & DVD 6, MAGIX Xtreme Photostory on CD & DVD 6, MAGIX Movies2Go Version
2, MAGIX Movie Edit Pro 14.
Page 66

Export options for GIF, PNG or BMP files
GIF export is the most common and probably the best format for use on the web. GIF images can have
no more than 256 colors, which you might think is a limitation. However, using Xara 3D Maker's
advanced dithering and palette optimization features, you can get near perfect quality images using only
256 colors. Indeed you'll be surprised at how good GIFs with just 16 colors can be.
For all export formats you have control over not only the number of colors but also whether the image is
dithered and has an optimized palette. These are techniques to improve the image quality while using a
reduced number of colors. For example using only 16 color GIF nearly always produces the smallest file
size, but with no dithering the shading can be poor. By using an optimized palette and diffusion dithering
you can substantially increase the quality of the result.
There are no hard and fast rules as to which combination of export options is best?it depends on the
image and your requirements. Therefore we recommend exporting in a number of different formats to see
which is the best and has the smallest file size. Typical options to try include 16 color with diffusion
dithering, or 256 color with no dithering.
When exporting as a GIF or PNG you have the option of making it interlaced (progressive rendering as
it's downloaded) and whether the image is transparent.
To produce the best results when exporting transparent GIFs, set the background color to match your
web page, then check the Transparent
option in the export dialog (see Options below).
BMP export formats
Many other Windows programs can import BMP files but often they do not support the full range of
color depths available in Xara 3D Maker. This is beyond the control of Xara 3D Maker. If you have
problems importing BMPs, try a different color depth.
Other export options for BMP, Cursor, GIF, ICO, JPG and PNG
Dithering
Dithering is a technique of smoothing color transitions for 256 colors or less. None produces the smallest
file size but can show 'banding' when two colors blend together. Ordered and Diffused use different
algorithms to reduce banding. You may need to try the different options to decide which is the best for a
particular graphic.
Ordered dithering is available only with 256 colors.
Palette
This is the range of colors used in the exported bitmap. Optimized selects the most commonly used
colors and usually gives the best results. High-color and True-color depths contain the full range of colors
and so Palette is dimmed for these options.
Options
Transparent
- dimmed for BMP and JPEG as these formats do not support transparency. Transparency makes
background areas not covered by the graphic or shadow, transparent so you see the web page
background in these areas (see Note below). Transparency has two meanings:
for True-color PNGs, transparency is graduated so you partly see the web page background
through the shadow.
all other formats (including PNGs of 256 or fewer colors) use simple on-off transparency. That
is, the shadow is solid and the Xara3D background color shows through the shadow.
Note:
Xara 3D Maker 'anti-aliases' the edge of a transparent bitmap to the Xara3D background color. For
best results you need to make the background color the same or similar to the color of the page the
graphic will appear on.
Interlaced
- applies only to GIF and PNG. When displayed on a web page, interlaced bitmaps appear first as a
Page 67

low-resolution image. The quality increases as more of the bitmap downloads. This is particularly useful
for large bitmaps as the viewer sees the basics of the bitmap more quickly.
Progressive
- applies only to JPEG. This is similar to Interlaced in that a progressive JPEG displays with increasing
detail as more of the file downloads.
Quality
JPEG only. JPEG format compresses files by discarding unnecessary information. Quality controls how
much information is discarded. Default is 80%, which usually gives the best balance of quality and file
size. Above 80% produces larger files with little improvement in quality.
Below 75% the quality loss may be noticeable and you may need to use a higher setting. Our advice for
the best results is use the lowest quality setting that gives acceptable results.
File size
This tells you the size of the bitmap with the current settings. The smaller the file size, the faster it will
download over the Internet.
Preview window
This shows you how the exported bitmap will look with the current settings. It is a useful check that you
have selected the best settings for this particular graphic.
Export options for JPG
JPEG bitmaps are always 24-bit, true color, but the JPEG compression system means that the quality is
often not as good as a GIF. The quality setting determines how small the resultant file is?the higher the
quality, the larger the file. Quality settings less than 80% usually produce inferior images to those available
from using palette optimized GIFs.
A progressive JPEG is similar to an interlaced GIF. The JPEG displays first as blurred (low resolution)
image. As more of the file loads, the image comes into focus. Note that some older browsers do not
support progressive JPEGs?the image displays when all the JPEG has loaded.
Export options for animated cursors (ANI)
To learn more about creating cursors see creating cursor (CUR & ANI) files.
Because animated cursors can be quite large, you may find that a 16 color, optimized palette per frame,
produces the best results for the smallest file size. However you might need to experiment.
Dithering always makes cursors look better, but also makes them larger. When outputting at 256 colors
you may find that there is no need to turn dithering on.
Current window size lets you export just the area surrounding the text (Crop on) or the entire window
area (Crop
off).
User defined lets you specify the dimensions of the bitmap. With Fit to width
(on the text toolbar) selected, the text and the background scales to suit the values you type in. If you
specified a font size, the size of the text does not change but the background scales to the values you type
in. This is useful if you want to create several headings, all the same height and width.
Export options for animated GIFs
To learn more about exporting animated GIFs see creating animations
.
Because animated GIFs can be quite large, you may find that a 16 or 32 color, optimized palette per
frame, produces the best results for the smallest file size. However you might need to experiment.
Dithering always makes GIFs look better, but also makes them larger. When outputting at 256 colors
you may find that there is no need to turn dithering on.
Current window size lets you export just the area surrounding the text (Crop on) or the entire window
area (Crop
Page 68
off).
User defined lets you specify the dimensions of the bitmap. With Fit to width
(on the text toolbar) selected, the text and the background scales to suit the values you type in. If you
specified a font size, the size of the text does not change but the background scales to the values you type
in. This is useful if you want to create several headings, all the same height and width.
Export options for AVIs (movies and screen savers)
You can also export your Xara 3D Maker design as an AVI video file. You can configure AVI options
when exporting your file as an animation or screen saver.
Color depth.
Choose between the different amount of colors in your video. True color will give more accurate results,
but may create a large file. Try exporting at both color depths to se what results work best.
Current window size lets you export just the area surrounding the text (Crop on) or the entire window
area (Crop
off).
User defined lets you specify the dimensions of the bitmap. With Fit to width
(on the text toolbar) selected, the text and the background scales to suit the values you type in. If you
specified a font size, the size of the text does not change but the background scales to the values you type
in. This is useful if you want to create several headings, all the same height and width.
AVI options. Clicking this will allow you to choose from any of the AVI codecs on your computer. A
movie codec is basically the system used to create the movie file itself, and some formats are better than
others. Use the default, or select a codec of your choice. For some codecs you can also set the quality
percentage and how often key frames are set, and you can click Configure
for more options.
Export options for screen savers (SCR)
You can export Xara 3D Maker graphics as a Windows screensaver (SCR) file. See Create screen
savers
for more details.
Export options for Flash bitmap format (SWF) files
These options apply to both static and animated SWF files. More information on creating Flash files. To
learn more about exporting movies see creating animations
.
Current window size lets you export just the area surrounding the text (Crop on) or the entire window
area (Crop
off.)
User defined lets you specify the dimensions of the bitmap. With Fit to width
(on the text toolbar) selected, the text and the background scales to suit the values you type in. If you
specified a font size, the size of the text does not change but the background scales to the values you type
in. This is useful if you want to create several headings, all the same height and width.
Color depth:
the more colors, the larger the file size. For animations where each image appears for only a short period
you may find 256 colors gives satisfactory results.
Dithering
(dimmed except for 256-colors). None creates the smallest files but you may see bands of colors instead
of smooth color graduations.
Transparent
(dimmed for High-color): select this for a transparent background to the animation. Deselect for a solid
background.
Page 69

Lossless and quality (dimmed except for true-color): quality values below 100% give smaller files but
at a lower quality. Lossless
is equivalent to 100% quality. You may need to experiment to get the best trade-off between quality and
file size.
Export options for Flash vector format (SWF) files
These options apply to both static and animated SWF files. More information on creating Flash files
.
Note that Flash vector format does not support some Xara 3D Maker features (such as shadows and
textures). You can use Xara 3D Maker features not supported in vector format except shadows but
these get exported as bitmaps within the Flash file and can make the file much larger. If you intend to
output in SWF format, we suggest using the display as Flash option on the View menu.
Current window size lets you export just the area surrounding the text (Crop on) or the entire window
area (Crop
off.)
User defined lets you specify the dimensions of the bitmap. With Fit to width
(on the text toolbar) selected, the text and the background scales to suit the values you type in. If you
specified a font size, the size of the text does not change but the background scales to the values you type
in. This is useful if you want to create several headings, all the same height and width.
Quality:
the higher the quality, the larger the file. You may need to experiment to get the best trade-off between
quality and file size.
General info on AVI videos
The AVI format (Audio Video Interleaved) isn't actually a proper video format! It's rather a so-called
container where very general conventions such as audio and video data can be specified and sent to a
program. The exact memory format of the files is specified via the codec (coder/dec
oder). A codec compresses audio/video files into its own private format with which only that codec can
work and decodes the files again on playback.
This means that an AVI file created on your computer can only
be loaded/played on computer B if this computer has the same codec installed.
Many codecs (for example, Intel Indeo
 video) have now become standard components of the Windows installation. Others, such as the
popular DivX codec, are not. If you create an AVI file with such a codec and you wish to use it on other
computers, install the corresponding codec on them as well.
On older video editing cards certain codecs that function only with the hardware of the corresponding
cards can be problematic. This type of AVI can only
be used on the computer on which they were created. Avoid using this type of codec when possible.
Exporting transparent title animations for movies
If you plan to export a Xara 3D Maker animation to a MAGIX movie editing program, for example as a
title or caption to play on top of a movie, your animation will need a transparent background.
The standard AVI export in exports an animation with a solid background, covering the movie behind it.
To play it on top of a movie, you'll need a video effect (called chroma keying or blue screen) to remove
the background.
In this case, export the animation as a CFX file. This is a special file format used in MAGIX movie
editing and slide show programs. As well as containing a reference to the exported AVI file, the CFX file
holds all the transparency information you need to allow you to blend your animation perfectly with the
movie.
To export your animation as a .cfx file choose the file format "MAGIX CFX (*.cfx)" in the "Export
Page 70

Animation" dialog.
The transparent titles consist of the .cfx file and the associated AVI file which contains the animation
movie. The .cfx file contains the background transparency information. All AVI files are stored in
Documents and Settings\<User>\Local Settings\Application Data\Xara\Xara3D7\AVI_CFX (WIndows
XP) or Users\<User>\AppData\Local\Xara\Xara3D7\AVI_CFX (Windows 7 and Windows Vista).
The files must not be deleted or moved from there, otherwise the .cfx files will not work. However, the
.cfx files can be stored in the video project folder or anywhere else.
Note:
Substitute your own user name for <User> in the above file paths.
In the MAGIX slide show or video editing programs, the .cfx file has to be loaded via the Media Pool.
The Timeline Mode has to be active. Then you can drag the files into the timeline and they will be placed
on the title track automatically.
To use .cfx files in MAGIX programs, you need at least the following versions of the program: MAGIX
Movies on CD & DVD 6, MAGIX Xtreme Photostory on CD & DVD 6, MAGIX Movies2Go Version
2, MAGIX Movie Edit Pro 14.
Page 71

Export options for JPG
JPEG bitmaps are always 24-bit, true color, but the JPEG compression system means that the quality is
often not as good as a GIF. The quality setting determines how small the resultant file is?the higher the
quality, the larger the file. Quality settings less than 80% usually produce inferior images to those available
from using palette optimized GIFs.
A progressive JPEG is similar to an interlaced GIF. The JPEG displays first as blurred (low resolution)
image. As more of the file loads, the image comes into focus. Note that some older browsers do not
support progressive JPEGs?the image displays when all the JPEG has loaded.
Export options for animated cursors (ANI)
To learn more about creating cursors see creating cursor (CUR & ANI) files.
Because animated cursors can be quite large, you may find that a 16 color, optimized palette per frame,
produces the best results for the smallest file size. However you might need to experiment.
Dithering always makes cursors look better, but also makes them larger. When outputting at 256 colors
you may find that there is no need to turn dithering on.
Current window size lets you export just the area surrounding the text (Crop on) or the entire window
area (Crop
off).
User defined lets you specify the dimensions of the bitmap. With Fit to width
(on the text toolbar) selected, the text and the background scales to suit the values you type in. If you
specified a font size, the size of the text does not change but the background scales to the values you type
in. This is useful if you want to create several headings, all the same height and width.
Export options for animated GIFs
To learn more about exporting animated GIFs see creating animations
.
Because animated GIFs can be quite large, you may find that a 16 or 32 color, optimized palette per
frame, produces the best results for the smallest file size. However you might need to experiment.
Dithering always makes GIFs look better, but also makes them larger. When outputting at 256 colors
you may find that there is no need to turn dithering on.
Current window size lets you export just the area surrounding the text (Crop on) or the entire window
area (Crop
off).
User defined lets you specify the dimensions of the bitmap. With Fit to width
(on the text toolbar) selected, the text and the background scales to suit the values you type in. If you
specified a font size, the size of the text does not change but the background scales to the values you type
in. This is useful if you want to create several headings, all the same height and width.
Export options for AVIs (movies and screen savers)
You can also export your Xara 3D Maker design as an AVI video file. You can configure AVI options
when exporting your file as an animation or screen saver.
Color depth.
Choose between the different amount of colors in your video. True color will give more accurate results,
but may create a large file. Try exporting at both color depths to se what results work best.
Current window size lets you export just the area surrounding the text (Crop on) or the entire window
area (Crop
off).
User defined lets you specify the dimensions of the bitmap. With Fit to width
Page 72
(on the text toolbar) selected, the text and the background scales to suit the values you type in. If you
specified a font size, the size of the text does not change but the background scales to the values you type
in. This is useful if you want to create several headings, all the same height and width.
AVI options. Clicking this will allow you to choose from any of the AVI codecs on your computer. A
movie codec is basically the system used to create the movie file itself, and some formats are better than
others. Use the default, or select a codec of your choice. For some codecs you can also set the quality
percentage and how often key frames are set, and you can click Configure
for more options.
Export options for screen savers (SCR)
You can export Xara 3D Maker graphics as a Windows screensaver (SCR) file. See Create screen
savers
for more details.
Export options for Flash bitmap format (SWF) files
These options apply to both static and animated SWF files. More information on creating Flash files. To
learn more about exporting movies see creating animations
.
Current window size lets you export just the area surrounding the text (Crop on) or the entire window
area (Crop
off.)
User defined lets you specify the dimensions of the bitmap. With Fit to width
(on the text toolbar) selected, the text and the background scales to suit the values you type in. If you
specified a font size, the size of the text does not change but the background scales to the values you type
in. This is useful if you want to create several headings, all the same height and width.
Color depth:
the more colors, the larger the file size. For animations where each image appears for only a short period
you may find 256 colors gives satisfactory results.
Dithering
(dimmed except for 256-colors). None creates the smallest files but you may see bands of colors instead
of smooth color graduations.
Transparent
(dimmed for High-color): select this for a transparent background to the animation. Deselect for a solid
background.
Lossless and quality (dimmed except for true-color): quality values below 100% give smaller files but
at a lower quality. Lossless
is equivalent to 100% quality. You may need to experiment to get the best trade-off between quality and
file size.
Export options for Flash vector format (SWF) files
These options apply to both static and animated SWF files. More information on creating Flash files
.
Note that Flash vector format does not support some Xara 3D Maker features (such as shadows and
textures). You can use Xara 3D Maker features not supported in vector format except shadows but
these get exported as bitmaps within the Flash file and can make the file much larger. If you intend to
output in SWF format, we suggest using the display as Flash option on the View menu.
Current window size lets you export just the area surrounding the text (Crop on) or the entire window
area (Crop
off.)
User defined lets you specify the dimensions of the bitmap. With Fit to width
Page 73

(on the text toolbar) selected, the text and the background scales to suit the values you type in. If you
specified a font size, the size of the text does not change but the background scales to the values you type
in. This is useful if you want to create several headings, all the same height and width.
Quality:
the higher the quality, the larger the file. You may need to experiment to get the best trade-off between
quality and file size.
General info on AVI videos
The AVI format (Audio Video Interleaved) isn't actually a proper video format! It's rather a so-called
container where very general conventions such as audio and video data can be specified and sent to a
program. The exact memory format of the files is specified via the codec (coder/dec
oder). A codec compresses audio/video files into its own private format with which only that codec can
work and decodes the files again on playback.
This means that an AVI file created on your computer can only
be loaded/played on computer B if this computer has the same codec installed.
Many codecs (for example, Intel Indeo
 video) have now become standard components of the Windows installation. Others, such as the
popular DivX codec, are not. If you create an AVI file with such a codec and you wish to use it on other
computers, install the corresponding codec on them as well.
On older video editing cards certain codecs that function only with the hardware of the corresponding
cards can be problematic. This type of AVI can only
be used on the computer on which they were created. Avoid using this type of codec when possible.
Exporting transparent title animations for movies
If you plan to export a Xara 3D Maker animation to a MAGIX movie editing program, for example as a
title or caption to play on top of a movie, your animation will need a transparent background.
The standard AVI export in exports an animation with a solid background, covering the movie behind it.
To play it on top of a movie, you'll need a video effect (called chroma keying or blue screen) to remove
the background.
In this case, export the animation as a CFX file. This is a special file format used in MAGIX movie
editing and slide show programs. As well as containing a reference to the exported AVI file, the CFX file
holds all the transparency information you need to allow you to blend your animation perfectly with the
movie.
To export your animation as a .cfx file choose the file format "MAGIX CFX (*.cfx)" in the "Export
Animation" dialog.
The transparent titles consist of the .cfx file and the associated AVI file which contains the animation
movie. The .cfx file contains the background transparency information. All AVI files are stored in
Documents and Settings\<User>\Local Settings\Application Data\Xara\Xara3D7\AVI_CFX (WIndows
XP) or Users\<User>\AppData\Local\Xara\Xara3D7\AVI_CFX (Windows 7 and Windows Vista).
The files must not be deleted or moved from there, otherwise the .cfx files will not work. However, the
.cfx files can be stored in the video project folder or anywhere else.
Note:
Substitute your own user name for <User> in the above file paths.
In the MAGIX slide show or video editing programs, the .cfx file has to be loaded via the Media Pool.
The Timeline Mode has to be active. Then you can drag the files into the timeline and they will be placed
on the title track automatically.
To use .cfx files in MAGIX programs, you need at least the following versions of the program: MAGIX
Movies on CD & DVD 6, MAGIX Xtreme Photostory on CD & DVD 6, MAGIX Movies2Go Version
2, MAGIX Movie Edit Pro 14.
Page 74
Export options for animated cursors (ANI)
To learn more about creating cursors see creating cursor (CUR & ANI) files.
Because animated cursors can be quite large, you may find that a 16 color, optimized palette per frame,
produces the best results for the smallest file size. However you might need to experiment.
Dithering always makes cursors look better, but also makes them larger. When outputting at 256 colors
you may find that there is no need to turn dithering on.
Current window size lets you export just the area surrounding the text (Crop on) or the entire window
area (Crop
off).
User defined lets you specify the dimensions of the bitmap. With Fit to width
(on the text toolbar) selected, the text and the background scales to suit the values you type in. If you
specified a font size, the size of the text does not change but the background scales to the values you type
in. This is useful if you want to create several headings, all the same height and width.
Export options for animated GIFs
To learn more about exporting animated GIFs see creating animations
.
Because animated GIFs can be quite large, you may find that a 16 or 32 color, optimized palette per
frame, produces the best results for the smallest file size. However you might need to experiment.
Dithering always makes GIFs look better, but also makes them larger. When outputting at 256 colors
you may find that there is no need to turn dithering on.
Current window size lets you export just the area surrounding the text (Crop on) or the entire window
area (Crop
off).
User defined lets you specify the dimensions of the bitmap. With Fit to width
(on the text toolbar) selected, the text and the background scales to suit the values you type in. If you
specified a font size, the size of the text does not change but the background scales to the values you type
in. This is useful if you want to create several headings, all the same height and width.
Export options for AVIs (movies and screen savers)
You can also export your Xara 3D Maker design as an AVI video file. You can configure AVI options
when exporting your file as an animation or screen saver.
Color depth.
Choose between the different amount of colors in your video. True color will give more accurate results,
but may create a large file. Try exporting at both color depths to se what results work best.
Current window size lets you export just the area surrounding the text (Crop on) or the entire window
area (Crop
off).
User defined lets you specify the dimensions of the bitmap. With Fit to width
(on the text toolbar) selected, the text and the background scales to suit the values you type in. If you
specified a font size, the size of the text does not change but the background scales to the values you type
in. This is useful if you want to create several headings, all the same height and width.
AVI options. Clicking this will allow you to choose from any of the AVI codecs on your computer. A
movie codec is basically the system used to create the movie file itself, and some formats are better than
others. Use the default, or select a codec of your choice. For some codecs you can also set the quality
percentage and how often key frames are set, and you can click Configure
for more options.
Page 75
Export options for screen savers (SCR)
You can export Xara 3D Maker graphics as a Windows screensaver (SCR) file. See Create screen
savers
for more details.
Export options for Flash bitmap format (SWF) files
These options apply to both static and animated SWF files. More information on creating Flash files. To
learn more about exporting movies see creating animations
.
Current window size lets you export just the area surrounding the text (Crop on) or the entire window
area (Crop
off.)
User defined lets you specify the dimensions of the bitmap. With Fit to width
(on the text toolbar) selected, the text and the background scales to suit the values you type in. If you
specified a font size, the size of the text does not change but the background scales to the values you type
in. This is useful if you want to create several headings, all the same height and width.
Color depth:
the more colors, the larger the file size. For animations where each image appears for only a short period
you may find 256 colors gives satisfactory results.
Dithering
(dimmed except for 256-colors). None creates the smallest files but you may see bands of colors instead
of smooth color graduations.
Transparent
(dimmed for High-color): select this for a transparent background to the animation. Deselect for a solid
background.
Lossless and quality (dimmed except for true-color): quality values below 100% give smaller files but
at a lower quality. Lossless
is equivalent to 100% quality. You may need to experiment to get the best trade-off between quality and
file size.
Export options for Flash vector format (SWF) files
These options apply to both static and animated SWF files. More information on creating Flash files
.
Note that Flash vector format does not support some Xara 3D Maker features (such as shadows and
textures). You can use Xara 3D Maker features not supported in vector format except shadows but
these get exported as bitmaps within the Flash file and can make the file much larger. If you intend to
output in SWF format, we suggest using the display as Flash option on the View menu.
Current window size lets you export just the area surrounding the text (Crop on) or the entire window
area (Crop
off.)
User defined lets you specify the dimensions of the bitmap. With Fit to width
(on the text toolbar) selected, the text and the background scales to suit the values you type in. If you
specified a font size, the size of the text does not change but the background scales to the values you type
in. This is useful if you want to create several headings, all the same height and width.
Quality:
the higher the quality, the larger the file. You may need to experiment to get the best trade-off between
quality and file size.
General info on AVI videos
Page 76

The AVI format (Audio Video Interleaved) isn't actually a proper video format! It's rather a so-called
container where very general conventions such as audio and video data can be specified and sent to a
program. The exact memory format of the files is specified via the codec (coder/dec
oder). A codec compresses audio/video files into its own private format with which only that codec can
work and decodes the files again on playback.
This means that an AVI file created on your computer can only
be loaded/played on computer B if this computer has the same codec installed.
Many codecs (for example, Intel Indeo
 video) have now become standard components of the Windows installation. Others, such as the
popular DivX codec, are not. If you create an AVI file with such a codec and you wish to use it on other
computers, install the corresponding codec on them as well.
On older video editing cards certain codecs that function only with the hardware of the corresponding
cards can be problematic. This type of AVI can only
be used on the computer on which they were created. Avoid using this type of codec when possible.
Exporting transparent title animations for movies
If you plan to export a Xara 3D Maker animation to a MAGIX movie editing program, for example as a
title or caption to play on top of a movie, your animation will need a transparent background.
The standard AVI export in exports an animation with a solid background, covering the movie behind it.
To play it on top of a movie, you'll need a video effect (called chroma keying or blue screen) to remove
the background.
In this case, export the animation as a CFX file. This is a special file format used in MAGIX movie
editing and slide show programs. As well as containing a reference to the exported AVI file, the CFX file
holds all the transparency information you need to allow you to blend your animation perfectly with the
movie.
To export your animation as a .cfx file choose the file format "MAGIX CFX (*.cfx)" in the "Export
Animation" dialog.
The transparent titles consist of the .cfx file and the associated AVI file which contains the animation
movie. The .cfx file contains the background transparency information. All AVI files are stored in
Documents and Settings\<User>\Local Settings\Application Data\Xara\Xara3D7\AVI_CFX (WIndows
XP) or Users\<User>\AppData\Local\Xara\Xara3D7\AVI_CFX (Windows 7 and Windows Vista).
The files must not be deleted or moved from there, otherwise the .cfx files will not work. However, the
.cfx files can be stored in the video project folder or anywhere else.
Note:
Substitute your own user name for <User> in the above file paths.
In the MAGIX slide show or video editing programs, the .cfx file has to be loaded via the Media Pool.
The Timeline Mode has to be active. Then you can drag the files into the timeline and they will be placed
on the title track automatically.
To use .cfx files in MAGIX programs, you need at least the following versions of the program: MAGIX
Movies on CD & DVD 6, MAGIX Xtreme Photostory on CD & DVD 6, MAGIX Movies2Go Version
2, MAGIX Movie Edit Pro 14.
Page 77
Export options for animated GIFs
To learn more about exporting animated GIFs see creating animations
.
Because animated GIFs can be quite large, you may find that a 16 or 32 color, optimized palette per
frame, produces the best results for the smallest file size. However you might need to experiment.
Dithering always makes GIFs look better, but also makes them larger. When outputting at 256 colors
you may find that there is no need to turn dithering on.
Current window size lets you export just the area surrounding the text (Crop on) or the entire window
area (Crop
off).
User defined lets you specify the dimensions of the bitmap. With Fit to width
(on the text toolbar) selected, the text and the background scales to suit the values you type in. If you
specified a font size, the size of the text does not change but the background scales to the values you type
in. This is useful if you want to create several headings, all the same height and width.
Export options for AVIs (movies and screen savers)
You can also export your Xara 3D Maker design as an AVI video file. You can configure AVI options
when exporting your file as an animation or screen saver.
Color depth.
Choose between the different amount of colors in your video. True color will give more accurate results,
but may create a large file. Try exporting at both color depths to se what results work best.
Current window size lets you export just the area surrounding the text (Crop on) or the entire window
area (Crop
off).
User defined lets you specify the dimensions of the bitmap. With Fit to width
(on the text toolbar) selected, the text and the background scales to suit the values you type in. If you
specified a font size, the size of the text does not change but the background scales to the values you type
in. This is useful if you want to create several headings, all the same height and width.
AVI options. Clicking this will allow you to choose from any of the AVI codecs on your computer. A
movie codec is basically the system used to create the movie file itself, and some formats are better than
others. Use the default, or select a codec of your choice. For some codecs you can also set the quality
percentage and how often key frames are set, and you can click Configure
for more options.
Export options for screen savers (SCR)
You can export Xara 3D Maker graphics as a Windows screensaver (SCR) file. See Create screen
savers
for more details.
Export options for Flash bitmap format (SWF) files
These options apply to both static and animated SWF files. More information on creating Flash files. To
learn more about exporting movies see creating animations
.
Current window size lets you export just the area surrounding the text (Crop on) or the entire window
area (Crop
off.)
User defined lets you specify the dimensions of the bitmap. With Fit to width
(on the text toolbar) selected, the text and the background scales to suit the values you type in. If you
Page 78
specified a font size, the size of the text does not change but the background scales to the values you type
in. This is useful if you want to create several headings, all the same height and width.
Color depth:
the more colors, the larger the file size. For animations where each image appears for only a short period
you may find 256 colors gives satisfactory results.
Dithering
(dimmed except for 256-colors). None creates the smallest files but you may see bands of colors instead
of smooth color graduations.
Transparent
(dimmed for High-color): select this for a transparent background to the animation. Deselect for a solid
background.
Lossless and quality (dimmed except for true-color): quality values below 100% give smaller files but
at a lower quality. Lossless
is equivalent to 100% quality. You may need to experiment to get the best trade-off between quality and
file size.
Export options for Flash vector format (SWF) files
These options apply to both static and animated SWF files. More information on creating Flash files
.
Note that Flash vector format does not support some Xara 3D Maker features (such as shadows and
textures). You can use Xara 3D Maker features not supported in vector format except shadows but
these get exported as bitmaps within the Flash file and can make the file much larger. If you intend to
output in SWF format, we suggest using the display as Flash option on the View menu.
Current window size lets you export just the area surrounding the text (Crop on) or the entire window
area (Crop
off.)
User defined lets you specify the dimensions of the bitmap. With Fit to width
(on the text toolbar) selected, the text and the background scales to suit the values you type in. If you
specified a font size, the size of the text does not change but the background scales to the values you type
in. This is useful if you want to create several headings, all the same height and width.
Quality:
the higher the quality, the larger the file. You may need to experiment to get the best trade-off between
quality and file size.
General info on AVI videos
The AVI format (Audio Video Interleaved) isn't actually a proper video format! It's rather a so-called
container where very general conventions such as audio and video data can be specified and sent to a
program. The exact memory format of the files is specified via the codec (coder/dec
oder). A codec compresses audio/video files into its own private format with which only that codec can
work and decodes the files again on playback.
This means that an AVI file created on your computer can only
be loaded/played on computer B if this computer has the same codec installed.
Many codecs (for example, Intel Indeo
 video) have now become standard components of the Windows installation. Others, such as the
popular DivX codec, are not. If you create an AVI file with such a codec and you wish to use it on other
computers, install the corresponding codec on them as well.
On older video editing cards certain codecs that function only with the hardware of the corresponding
cards can be problematic. This type of AVI can only
be used on the computer on which they were created. Avoid using this type of codec when possible.
Page 79

Exporting transparent title animations for movies
If you plan to export a Xara 3D Maker animation to a MAGIX movie editing program, for example as a
title or caption to play on top of a movie, your animation will need a transparent background.
The standard AVI export in exports an animation with a solid background, covering the movie behind it.
To play it on top of a movie, you'll need a video effect (called chroma keying or blue screen) to remove
the background.
In this case, export the animation as a CFX file. This is a special file format used in MAGIX movie
editing and slide show programs. As well as containing a reference to the exported AVI file, the CFX file
holds all the transparency information you need to allow you to blend your animation perfectly with the
movie.
To export your animation as a .cfx file choose the file format "MAGIX CFX (*.cfx)" in the "Export
Animation" dialog.
The transparent titles consist of the .cfx file and the associated AVI file which contains the animation
movie. The .cfx file contains the background transparency information. All AVI files are stored in
Documents and Settings\<User>\Local Settings\Application Data\Xara\Xara3D7\AVI_CFX (WIndows
XP) or Users\<User>\AppData\Local\Xara\Xara3D7\AVI_CFX (Windows 7 and Windows Vista).
The files must not be deleted or moved from there, otherwise the .cfx files will not work. However, the
.cfx files can be stored in the video project folder or anywhere else.
Note:
Substitute your own user name for <User> in the above file paths.
In the MAGIX slide show or video editing programs, the .cfx file has to be loaded via the Media Pool.
The Timeline Mode has to be active. Then you can drag the files into the timeline and they will be placed
on the title track automatically.
To use .cfx files in MAGIX programs, you need at least the following versions of the program: MAGIX
Movies on CD & DVD 6, MAGIX Xtreme Photostory on CD & DVD 6, MAGIX Movies2Go Version
2, MAGIX Movie Edit Pro 14.
Page 80
Export options for AVIs (movies and screen savers)
You can also export your Xara 3D Maker design as an AVI video file. You can configure AVI options
when exporting your file as an animation or screen saver.
Color depth.
Choose between the different amount of colors in your video. True color will give more accurate results,
but may create a large file. Try exporting at both color depths to se what results work best.
Current window size lets you export just the area surrounding the text (Crop on) or the entire window
area (Crop
off).
User defined lets you specify the dimensions of the bitmap. With Fit to width
(on the text toolbar) selected, the text and the background scales to suit the values you type in. If you
specified a font size, the size of the text does not change but the background scales to the values you type
in. This is useful if you want to create several headings, all the same height and width.
AVI options. Clicking this will allow you to choose from any of the AVI codecs on your computer. A
movie codec is basically the system used to create the movie file itself, and some formats are better than
others. Use the default, or select a codec of your choice. For some codecs you can also set the quality
percentage and how often key frames are set, and you can click Configure
for more options.
Export options for screen savers (SCR)
You can export Xara 3D Maker graphics as a Windows screensaver (SCR) file. See Create screen
savers
for more details.
Export options for Flash bitmap format (SWF) files
These options apply to both static and animated SWF files. More information on creating Flash files. To
learn more about exporting movies see creating animations
.
Current window size lets you export just the area surrounding the text (Crop on) or the entire window
area (Crop
off.)
User defined lets you specify the dimensions of the bitmap. With Fit to width
(on the text toolbar) selected, the text and the background scales to suit the values you type in. If you
specified a font size, the size of the text does not change but the background scales to the values you type
in. This is useful if you want to create several headings, all the same height and width.
Color depth:
the more colors, the larger the file size. For animations where each image appears for only a short period
you may find 256 colors gives satisfactory results.
Dithering
(dimmed except for 256-colors). None creates the smallest files but you may see bands of colors instead
of smooth color graduations.
Transparent
(dimmed for High-color): select this for a transparent background to the animation. Deselect for a solid
background.
Lossless and quality (dimmed except for true-color): quality values below 100% give smaller files but
at a lower quality. Lossless
is equivalent to 100% quality. You may need to experiment to get the best trade-off between quality and
file size.
Page 81

Export options for Flash vector format (SWF) files
These options apply to both static and animated SWF files. More information on creating Flash files
.
Note that Flash vector format does not support some Xara 3D Maker features (such as shadows and
textures). You can use Xara 3D Maker features not supported in vector format except shadows but
these get exported as bitmaps within the Flash file and can make the file much larger. If you intend to
output in SWF format, we suggest using the display as Flash option on the View menu.
Current window size lets you export just the area surrounding the text (Crop on) or the entire window
area (Crop
off.)
User defined lets you specify the dimensions of the bitmap. With Fit to width
(on the text toolbar) selected, the text and the background scales to suit the values you type in. If you
specified a font size, the size of the text does not change but the background scales to the values you type
in. This is useful if you want to create several headings, all the same height and width.
Quality:
the higher the quality, the larger the file. You may need to experiment to get the best trade-off between
quality and file size.
General info on AVI videos
The AVI format (Audio Video Interleaved) isn't actually a proper video format! It's rather a so-called
container where very general conventions such as audio and video data can be specified and sent to a
program. The exact memory format of the files is specified via the codec (coder/dec
oder). A codec compresses audio/video files into its own private format with which only that codec can
work and decodes the files again on playback.
This means that an AVI file created on your computer can only
be loaded/played on computer B if this computer has the same codec installed.
Many codecs (for example, Intel Indeo
 video) have now become standard components of the Windows installation. Others, such as the
popular DivX codec, are not. If you create an AVI file with such a codec and you wish to use it on other
computers, install the corresponding codec on them as well.
On older video editing cards certain codecs that function only with the hardware of the corresponding
cards can be problematic. This type of AVI can only
be used on the computer on which they were created. Avoid using this type of codec when possible.
Exporting transparent title animations for movies
If you plan to export a Xara 3D Maker animation to a MAGIX movie editing program, for example as a
title or caption to play on top of a movie, your animation will need a transparent background.
The standard AVI export in exports an animation with a solid background, covering the movie behind it.
To play it on top of a movie, you'll need a video effect (called chroma keying or blue screen) to remove
the background.
In this case, export the animation as a CFX file. This is a special file format used in MAGIX movie
editing and slide show programs. As well as containing a reference to the exported AVI file, the CFX file
holds all the transparency information you need to allow you to blend your animation perfectly with the
movie.
To export your animation as a .cfx file choose the file format "MAGIX CFX (*.cfx)" in the "Export
Animation" dialog.
The transparent titles consist of the .cfx file and the associated AVI file which contains the animation
movie. The .cfx file contains the background transparency information. All AVI files are stored in
Documents and Settings\<User>\Local Settings\Application Data\Xara\Xara3D7\AVI_CFX (WIndows
XP) or Users\<User>\AppData\Local\Xara\Xara3D7\AVI_CFX (Windows 7 and Windows Vista).
Page 82

The files must not be deleted or moved from there, otherwise the .cfx files will not work. However, the
.cfx files can be stored in the video project folder or anywhere else.
Note:
Substitute your own user name for <User> in the above file paths.
In the MAGIX slide show or video editing programs, the .cfx file has to be loaded via the Media Pool.
The Timeline Mode has to be active. Then you can drag the files into the timeline and they will be placed
on the title track automatically.
To use .cfx files in MAGIX programs, you need at least the following versions of the program: MAGIX
Movies on CD & DVD 6, MAGIX Xtreme Photostory on CD & DVD 6, MAGIX Movies2Go Version
2, MAGIX Movie Edit Pro 14.
Page 83
Export options for screen savers (SCR)
You can export Xara 3D Maker graphics as a Windows screensaver (SCR) file. See Create screen
savers
for more details.
Export options for Flash bitmap format (SWF) files
These options apply to both static and animated SWF files. More information on creating Flash files. To
learn more about exporting movies see creating animations
.
Current window size lets you export just the area surrounding the text (Crop on) or the entire window
area (Crop
off.)
User defined lets you specify the dimensions of the bitmap. With Fit to width
(on the text toolbar) selected, the text and the background scales to suit the values you type in. If you
specified a font size, the size of the text does not change but the background scales to the values you type
in. This is useful if you want to create several headings, all the same height and width.
Color depth:
the more colors, the larger the file size. For animations where each image appears for only a short period
you may find 256 colors gives satisfactory results.
Dithering
(dimmed except for 256-colors). None creates the smallest files but you may see bands of colors instead
of smooth color graduations.
Transparent
(dimmed for High-color): select this for a transparent background to the animation. Deselect for a solid
background.
Lossless and quality (dimmed except for true-color): quality values below 100% give smaller files but
at a lower quality. Lossless
is equivalent to 100% quality. You may need to experiment to get the best trade-off between quality and
file size.
Export options for Flash vector format (SWF) files
These options apply to both static and animated SWF files. More information on creating Flash files
.
Note that Flash vector format does not support some Xara 3D Maker features (such as shadows and
textures). You can use Xara 3D Maker features not supported in vector format except shadows but
these get exported as bitmaps within the Flash file and can make the file much larger. If you intend to
output in SWF format, we suggest using the display as Flash option on the View menu.
Current window size lets you export just the area surrounding the text (Crop on) or the entire window
area (Crop
off.)
User defined lets you specify the dimensions of the bitmap. With Fit to width
(on the text toolbar) selected, the text and the background scales to suit the values you type in. If you
specified a font size, the size of the text does not change but the background scales to the values you type
in. This is useful if you want to create several headings, all the same height and width.
Quality:
the higher the quality, the larger the file. You may need to experiment to get the best trade-off between
quality and file size.
Page 84

General info on AVI videos
The AVI format (Audio Video Interleaved) isn't actually a proper video format! It's rather a so-called
container where very general conventions such as audio and video data can be specified and sent to a
program. The exact memory format of the files is specified via the codec (coder/dec
oder). A codec compresses audio/video files into its own private format with which only that codec can
work and decodes the files again on playback.
This means that an AVI file created on your computer can only
be loaded/played on computer B if this computer has the same codec installed.
Many codecs (for example, Intel Indeo
 video) have now become standard components of the Windows installation. Others, such as the
popular DivX codec, are not. If you create an AVI file with such a codec and you wish to use it on other
computers, install the corresponding codec on them as well.
On older video editing cards certain codecs that function only with the hardware of the corresponding
cards can be problematic. This type of AVI can only
be used on the computer on which they were created. Avoid using this type of codec when possible.
Exporting transparent title animations for movies
If you plan to export a Xara 3D Maker animation to a MAGIX movie editing program, for example as a
title or caption to play on top of a movie, your animation will need a transparent background.
The standard AVI export in exports an animation with a solid background, covering the movie behind it.
To play it on top of a movie, you'll need a video effect (called chroma keying or blue screen) to remove
the background.
In this case, export the animation as a CFX file. This is a special file format used in MAGIX movie
editing and slide show programs. As well as containing a reference to the exported AVI file, the CFX file
holds all the transparency information you need to allow you to blend your animation perfectly with the
movie.
To export your animation as a .cfx file choose the file format "MAGIX CFX (*.cfx)" in the "Export
Animation" dialog.
The transparent titles consist of the .cfx file and the associated AVI file which contains the animation
movie. The .cfx file contains the background transparency information. All AVI files are stored in
Documents and Settings\<User>\Local Settings\Application Data\Xara\Xara3D7\AVI_CFX (WIndows
XP) or Users\<User>\AppData\Local\Xara\Xara3D7\AVI_CFX (Windows 7 and Windows Vista).
The files must not be deleted or moved from there, otherwise the .cfx files will not work. However, the
.cfx files can be stored in the video project folder or anywhere else.
Note:
Substitute your own user name for <User> in the above file paths.
In the MAGIX slide show or video editing programs, the .cfx file has to be loaded via the Media Pool.
The Timeline Mode has to be active. Then you can drag the files into the timeline and they will be placed
on the title track automatically.
To use .cfx files in MAGIX programs, you need at least the following versions of the program: MAGIX
Movies on CD & DVD 6, MAGIX Xtreme Photostory on CD & DVD 6, MAGIX Movies2Go Version
2, MAGIX Movie Edit Pro 14.
Page 85
Export options for Flash bitmap format (SWF) files
These options apply to both static and animated SWF files. More information on creating Flash files. To
learn more about exporting movies see creating animations
.
Current window size lets you export just the area surrounding the text (Crop on) or the entire window
area (Crop
off.)
User defined lets you specify the dimensions of the bitmap. With Fit to width
(on the text toolbar) selected, the text and the background scales to suit the values you type in. If you
specified a font size, the size of the text does not change but the background scales to the values you type
in. This is useful if you want to create several headings, all the same height and width.
Color depth:
the more colors, the larger the file size. For animations where each image appears for only a short period
you may find 256 colors gives satisfactory results.
Dithering
(dimmed except for 256-colors). None creates the smallest files but you may see bands of colors instead
of smooth color graduations.
Transparent
(dimmed for High-color): select this for a transparent background to the animation. Deselect for a solid
background.
Lossless and quality (dimmed except for true-color): quality values below 100% give smaller files but
at a lower quality. Lossless
is equivalent to 100% quality. You may need to experiment to get the best trade-off between quality and
file size.
Export options for Flash vector format (SWF) files
These options apply to both static and animated SWF files. More information on creating Flash files
.
Note that Flash vector format does not support some Xara 3D Maker features (such as shadows and
textures). You can use Xara 3D Maker features not supported in vector format except shadows but
these get exported as bitmaps within the Flash file and can make the file much larger. If you intend to
output in SWF format, we suggest using the display as Flash option on the View menu.
Current window size lets you export just the area surrounding the text (Crop on) or the entire window
area (Crop
off.)
User defined lets you specify the dimensions of the bitmap. With Fit to width
(on the text toolbar) selected, the text and the background scales to suit the values you type in. If you
specified a font size, the size of the text does not change but the background scales to the values you type
in. This is useful if you want to create several headings, all the same height and width.
Quality:
the higher the quality, the larger the file. You may need to experiment to get the best trade-off between
quality and file size.
General info on AVI videos
The AVI format (Audio Video Interleaved) isn't actually a proper video format! It's rather a so-called
container where very general conventions such as audio and video data can be specified and sent to a
program. The exact memory format of the files is specified via the codec (coder/dec
oder). A codec compresses audio/video files into its own private format with which only that codec can
work and decodes the files again on playback.
Page 86

This means that an AVI file created on your computer can only
be loaded/played on computer B if this computer has the same codec installed.
Many codecs (for example, Intel Indeo
 video) have now become standard components of the Windows installation. Others, such as the
popular DivX codec, are not. If you create an AVI file with such a codec and you wish to use it on other
computers, install the corresponding codec on them as well.
On older video editing cards certain codecs that function only with the hardware of the corresponding
cards can be problematic. This type of AVI can only
be used on the computer on which they were created. Avoid using this type of codec when possible.
Exporting transparent title animations for movies
If you plan to export a Xara 3D Maker animation to a MAGIX movie editing program, for example as a
title or caption to play on top of a movie, your animation will need a transparent background.
The standard AVI export in exports an animation with a solid background, covering the movie behind it.
To play it on top of a movie, you'll need a video effect (called chroma keying or blue screen) to remove
the background.
In this case, export the animation as a CFX file. This is a special file format used in MAGIX movie
editing and slide show programs. As well as containing a reference to the exported AVI file, the CFX file
holds all the transparency information you need to allow you to blend your animation perfectly with the
movie.
To export your animation as a .cfx file choose the file format "MAGIX CFX (*.cfx)" in the "Export
Animation" dialog.
The transparent titles consist of the .cfx file and the associated AVI file which contains the animation
movie. The .cfx file contains the background transparency information. All AVI files are stored in
Documents and Settings\<User>\Local Settings\Application Data\Xara\Xara3D7\AVI_CFX (WIndows
XP) or Users\<User>\AppData\Local\Xara\Xara3D7\AVI_CFX (Windows 7 and Windows Vista).
The files must not be deleted or moved from there, otherwise the .cfx files will not work. However, the
.cfx files can be stored in the video project folder or anywhere else.
Note:
Substitute your own user name for <User> in the above file paths.
In the MAGIX slide show or video editing programs, the .cfx file has to be loaded via the Media Pool.
The Timeline Mode has to be active. Then you can drag the files into the timeline and they will be placed
on the title track automatically.
To use .cfx files in MAGIX programs, you need at least the following versions of the program: MAGIX
Movies on CD & DVD 6, MAGIX Xtreme Photostory on CD & DVD 6, MAGIX Movies2Go Version
2, MAGIX Movie Edit Pro 14.
Page 87

Export options for Flash vector format (SWF) files
These options apply to both static and animated SWF files. More information on creating Flash files
.
Note that Flash vector format does not support some Xara 3D Maker features (such as shadows and
textures). You can use Xara 3D Maker features not supported in vector format except shadows but
these get exported as bitmaps within the Flash file and can make the file much larger. If you intend to
output in SWF format, we suggest using the display as Flash option on the View menu.
Current window size lets you export just the area surrounding the text (Crop on) or the entire window
area (Crop
off.)
User defined lets you specify the dimensions of the bitmap. With Fit to width
(on the text toolbar) selected, the text and the background scales to suit the values you type in. If you
specified a font size, the size of the text does not change but the background scales to the values you type
in. This is useful if you want to create several headings, all the same height and width.
Quality:
the higher the quality, the larger the file. You may need to experiment to get the best trade-off between
quality and file size.
General info on AVI videos
The AVI format (Audio Video Interleaved) isn't actually a proper video format! It's rather a so-called
container where very general conventions such as audio and video data can be specified and sent to a
program. The exact memory format of the files is specified via the codec (coder/dec
oder). A codec compresses audio/video files into its own private format with which only that codec can
work and decodes the files again on playback.
This means that an AVI file created on your computer can only
be loaded/played on computer B if this computer has the same codec installed.
Many codecs (for example, Intel Indeo
 video) have now become standard components of the Windows installation. Others, such as the
popular DivX codec, are not. If you create an AVI file with such a codec and you wish to use it on other
computers, install the corresponding codec on them as well.
On older video editing cards certain codecs that function only with the hardware of the corresponding
cards can be problematic. This type of AVI can only
be used on the computer on which they were created. Avoid using this type of codec when possible.
Exporting transparent title animations for movies
If you plan to export a Xara 3D Maker animation to a MAGIX movie editing program, for example as a
title or caption to play on top of a movie, your animation will need a transparent background.
The standard AVI export in exports an animation with a solid background, covering the movie behind it.
To play it on top of a movie, you'll need a video effect (called chroma keying or blue screen) to remove
the background.
In this case, export the animation as a CFX file. This is a special file format used in MAGIX movie
editing and slide show programs. As well as containing a reference to the exported AVI file, the CFX file
holds all the transparency information you need to allow you to blend your animation perfectly with the
movie.
To export your animation as a .cfx file choose the file format "MAGIX CFX (*.cfx)" in the "Export
Animation" dialog.
The transparent titles consist of the .cfx file and the associated AVI file which contains the animation
movie. The .cfx file contains the background transparency information. All AVI files are stored in
Documents and Settings\<User>\Local Settings\Application Data\Xara\Xara3D7\AVI_CFX (WIndows
Page 88

XP) or Users\<User>\AppData\Local\Xara\Xara3D7\AVI_CFX (Windows 7 and Windows Vista).
The files must not be deleted or moved from there, otherwise the .cfx files will not work. However, the
.cfx files can be stored in the video project folder or anywhere else.
Note:
Substitute your own user name for <User> in the above file paths.
In the MAGIX slide show or video editing programs, the .cfx file has to be loaded via the Media Pool.
The Timeline Mode has to be active. Then you can drag the files into the timeline and they will be placed
on the title track automatically.
To use .cfx files in MAGIX programs, you need at least the following versions of the program: MAGIX
Movies on CD & DVD 6, MAGIX Xtreme Photostory on CD & DVD 6, MAGIX Movies2Go Version
2, MAGIX Movie Edit Pro 14.
Page 89

General info on AVI videos
The AVI format (Audio Video Interleaved) isn't actually a proper video format! It's rather a so-called
container where very general conventions such as audio and video data can be specified and sent to a
program. The exact memory format of the files is specified via the codec (coder/dec
oder). A codec compresses audio/video files into its own private format with which only that codec can
work and decodes the files again on playback.
This means that an AVI file created on your computer can only
be loaded/played on computer B if this computer has the same codec installed.
Many codecs (for example, Intel Indeo
 video) have now become standard components of the Windows installation. Others, such as the
popular DivX codec, are not. If you create an AVI file with such a codec and you wish to use it on other
computers, install the corresponding codec on them as well.
On older video editing cards certain codecs that function only with the hardware of the corresponding
cards can be problematic. This type of AVI can only
be used on the computer on which they were created. Avoid using this type of codec when possible.
Exporting transparent title animations for movies
If you plan to export a Xara 3D Maker animation to a MAGIX movie editing program, for example as a
title or caption to play on top of a movie, your animation will need a transparent background.
The standard AVI export in exports an animation with a solid background, covering the movie behind it.
To play it on top of a movie, you'll need a video effect (called chroma keying or blue screen) to remove
the background.
In this case, export the animation as a CFX file. This is a special file format used in MAGIX movie
editing and slide show programs. As well as containing a reference to the exported AVI file, the CFX file
holds all the transparency information you need to allow you to blend your animation perfectly with the
movie.
To export your animation as a .cfx file choose the file format "MAGIX CFX (*.cfx)" in the "Export
Animation" dialog.
The transparent titles consist of the .cfx file and the associated AVI file which contains the animation
movie. The .cfx file contains the background transparency information. All AVI files are stored in
Documents and Settings\<User>\Local Settings\Application Data\Xara\Xara3D7\AVI_CFX (WIndows
XP) or Users\<User>\AppData\Local\Xara\Xara3D7\AVI_CFX (Windows 7 and Windows Vista).
The files must not be deleted or moved from there, otherwise the .cfx files will not work. However, the
.cfx files can be stored in the video project folder or anywhere else.
Note:
Substitute your own user name for <User> in the above file paths.
In the MAGIX slide show or video editing programs, the .cfx file has to be loaded via the Media Pool.
The Timeline Mode has to be active. Then you can drag the files into the timeline and they will be placed
on the title track automatically.
To use .cfx files in MAGIX programs, you need at least the following versions of the program: MAGIX
Movies on CD & DVD 6, MAGIX Xtreme Photostory on CD & DVD 6, MAGIX Movies2Go Version
2, MAGIX Movie Edit Pro 14.
Page 90

Exporting transparent title animations for movies
If you plan to export a Xara 3D Maker animation to a MAGIX movie editing program, for example as a
title or caption to play on top of a movie, your animation will need a transparent background.
The standard AVI export in exports an animation with a solid background, covering the movie behind it.
To play it on top of a movie, you'll need a video effect (called chroma keying or blue screen) to remove
the background.
In this case, export the animation as a CFX file. This is a special file format used in MAGIX movie
editing and slide show programs. As well as containing a reference to the exported AVI file, the CFX file
holds all the transparency information you need to allow you to blend your animation perfectly with the
movie.
To export your animation as a .cfx file choose the file format "MAGIX CFX (*.cfx)" in the "Export
Animation" dialog.
The transparent titles consist of the .cfx file and the associated AVI file which contains the animation
movie. The .cfx file contains the background transparency information. All AVI files are stored in
Documents and Settings\<User>\Local Settings\Application Data\Xara\Xara3D7\AVI_CFX (WIndows
XP) or Users\<User>\AppData\Local\Xara\Xara3D7\AVI_CFX (Windows 7 and Windows Vista).
The files must not be deleted or moved from there, otherwise the .cfx files will not work. However, the
.cfx files can be stored in the video project folder or anywhere else.
Note:
Substitute your own user name for <User> in the above file paths.
In the MAGIX slide show or video editing programs, the .cfx file has to be loaded via the Media Pool.
The Timeline Mode has to be active. Then you can drag the files into the timeline and they will be placed
on the title track automatically.
To use .cfx files in MAGIX programs, you need at least the following versions of the program: MAGIX
Movies on CD & DVD 6, MAGIX Xtreme Photostory on CD & DVD 6, MAGIX Movies2Go Version
2, MAGIX Movie Edit Pro 14.
Page 91
Customize Xara 3D Maker
You can customize Xara 3D Maker by either changing the default graphic or by docking or undocking
dialog boxes or toolbars.
With the Window menu item Customize
you can add icons to a menu or the standard toolbar, customize the right-click menus available in the
main working area and even create your own custom menu. You can also change the keyboard shortcuts
there.
Note: if you experience a problem with your windows or toolbars at any time, or wish to return them to
their standard layout, click the Window menu then select Reset user interface
.
In this chapter
Changing the default document
Changing quality settings
Adding comments
Docking and undocking dialog boxes and toolbars
Moving toolbars
Option bars
Advanced customization
Reset settings
Changing the default document
If you want Xara 3D Maker to start up showing a different image:
1. Create the image you want to use as the starting (default) image.
2. Choose Save as default on the File menu.
This creates a file called Default.x3d, which appears in one of the following directories:
C:\Users\<User>\AppData\Local\Xara\Xara3D7 (if you are using Windows Vista or Windows
7)
C:\Documents and Settings\<User>\Local Settings\Application Data\xara\xara3D7 (if you are
using Windows XP)
Note:
Replace C in the above paths with the drive that Xara 3D Maker was installed on and <User> with your
own user name.
To revert to the standard default document:
Find the Default.x3d file that you previously saved as default in one of the above file paths and
delete the Default.x3d file. This restores the original default document, so that the next time you
open Xara 3D Maker, it reverts to displaying the standard new file image instead of the one you
created.
Changing quality settings
Th Settings option on the Window
menu lets you alter the quality settings for display and export (keyboard short cut Alt+Q). Usually the
default settings give excellent results, but you may wish to try different settings to fine-tune Xara 3D
Maker to your requirements.
Page 92
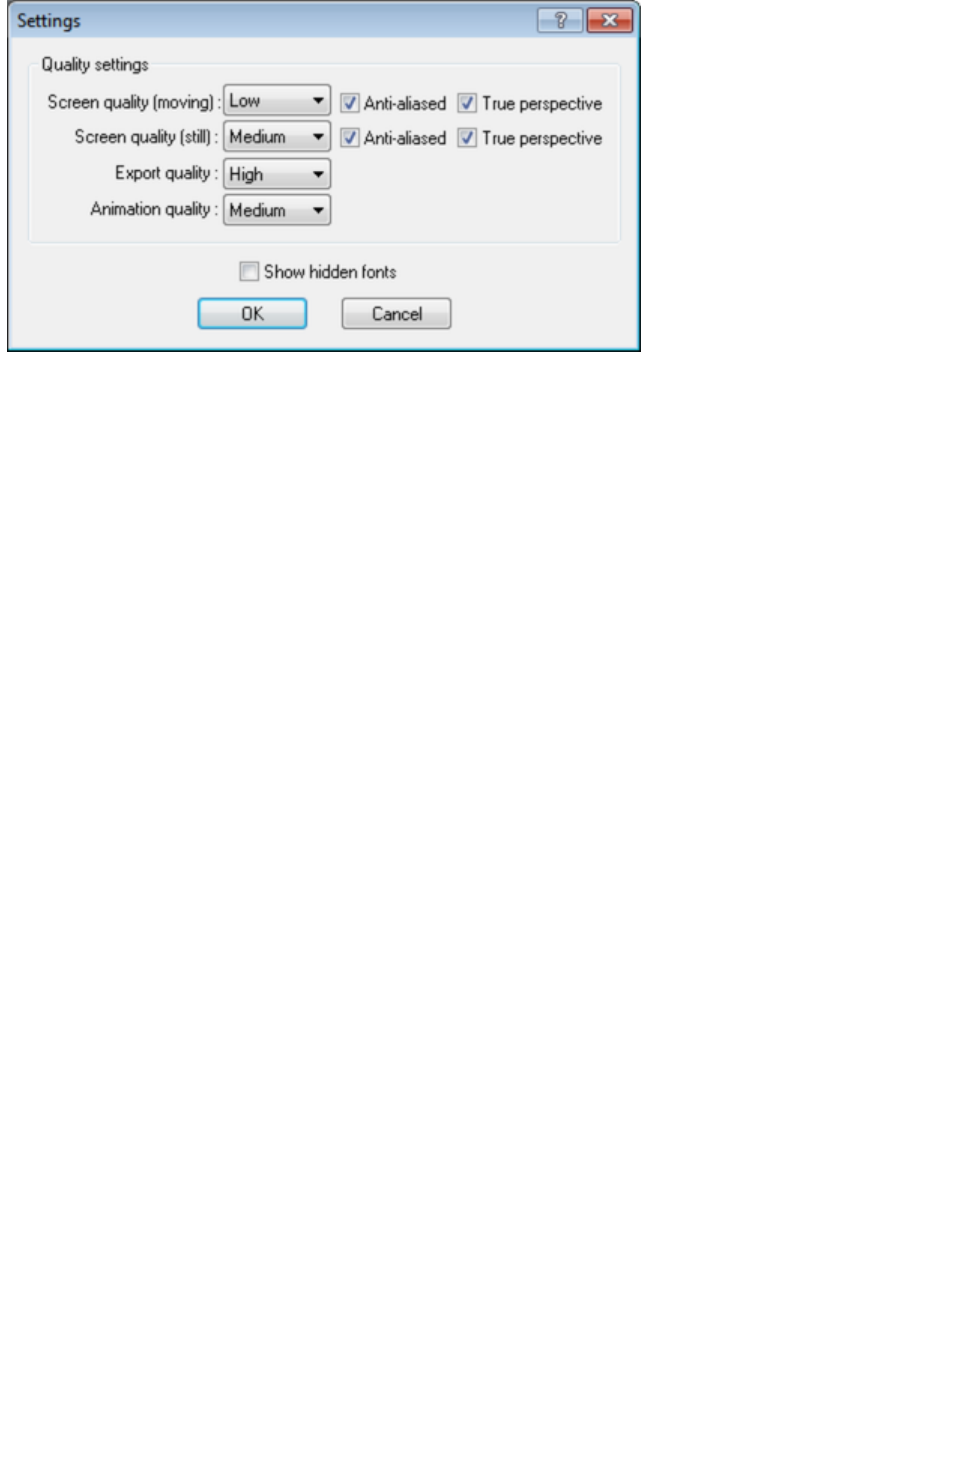
Screen quality
controls the quality of the on-screen display. Increasing the quality setting means that the preview takes
longer to redraw on screen. Static and moving images have separate controls: animations can use a lower
setting.
Anti-aliasing
is a technique of blurring the edges between color transitions. Turning anti-aliasing on gives better results
but takes longer to redraw.
True perspective
displays the heading with slightly non-parallel sides (as if drawn from a distant vanishing point.) This gives
better results for some images than displaying parallel sides. The drawback is the extra processing can
slow down redraw. This may be noticeable when previewing animations.
Export quality
controls images exported as static bitmaps. Increasing the quality may give better results for some
graphics in shadow or highlight areas. The drawback is that graphics may take longer to display on
screen.
Animation quality
controls images exported as animated GIFs and AVIs. As the viewer sees each frame only briefly, the
quality is less important than for static bitmaps. Note that increasing the quality too much can cause jerky
animation on slow computers.
If you are using Windows 7, by default rarely used fonts are hidden. If you would like them to be
displayed in 's font list, click Show hidden fonts
.
Note: If you are a Windows 7 user and the Show hidden fonts option is grayed out, go to your Control
Panel and choose Appearance and Personalization > Fonts. Exit and reopen Xara 3D Maker and
reopen the Settings dialog. You should now be able to edit the Show hidden fonts
option.
Adding comments
You can add comments to your own images or Xara 3D Maker sample files so that you and others can
see extra information or helpful hints on a file before you open it.
To add a comment to an image:
1. Open the image and choose Edit Comment from the Edit menu, or press "Ctrl + M".
2. Add the comment to the pop-up dialog box and click OK.
3. Save the file to save your comment.
The next time you choose Open from the File
menu, click the file in the Open dialog box. The file's comments are displayed below the preview
window.
Page 93

Docking and undocking dialog boxes and toolbars
To give you freedom in how you use the program, you can undock and move toolbars
and windows and position them where you wish. This is particularly useful if you have two monitors, so
you could for example put your windows on one screen and keep the other monitor dedicated to the
Xara 3D Maker workspace.
Note: If you experience a problem with your windows or toolbars at any time, or wish to return them to
their standard layout, click Reset user interface on the Window
menu.
Moving toolbars
There are five toolbars: standard, design, options, text and time line. You can turn these on and off via
the Window
menu.
You can drag them around the screen by clicking and holding them (see the image above) and dragging.
If you drag a toolbar to an edge of the program it will dock there. You can also just drag the toolbar out
elsewhere on the screen, and it will undock entirely and become free-floating.
Note: If you experience a problem with your windows or toolbars at any time, or wish to return them to
their standard layout, click Reset user interface on the Window
menu.
Option bars
The option bars can be found to the right of the screen when you first start Xara 3D Maker. Rather than
opening and closing endless windows, most of Xara 3D Maker's settings are contained here. You can
easily switch between the tabs to access the different features.
You can turn this entire panel off or on via the Window
menu. You can also tailor how you use the option bars as follows:
To undock an option bar.
Just click and drag one of the options (where it says color options, extrusion options etc.) out of its
current location. The window will undock, and you can position where you require. You can do this with
as many of the windows as you wish.
If you find the window is redocking when you don't want to, hold the Ctrl key while moving it.
To redock an option bar.
Just drag the window back to the panel options bar at the right of your screen, and the window will
redock.
Pinning an option bar open.
After undocking a window, by default it will minimize once you move your mouse away from it. As soon
as you move your mouse back, it will expand. To get the window to remain open, just click the little pin
icon at the top right of the window. Click again to return to the auto-hide format.
Removing or reopening an option bar.
Once undocked, you can click the X icon in the top right hand corner of that window to close it.
Note: If you experience a problem with your windows or toolbars at any time, or wish to return them to
their standard layout, click Reset user interface on the Window
menu.
Page 94

Advanced customization
's customization options are recommended only for advanced users. They can be accessed by clicking
Customize from the Window menu, or by right clicking on a toolbar and selecting Customize
.
Note: If you experience a problem with your windows or toolbars at any time, or wish to return them to
their standard layout, click Reset user interface on the Window
menu.
Customize options are broken down into five areas:
Commands
Here you can add icons to a menu or the standard toolbar, and even create you own custom menu.
Click a category to see related commands to its right. You can drag any of the commands to the
standard toolbar where they will be added to allow easy access to that tool or feature in the future. To
remove a button, just right click it and select delete.
Commands can also be dragged to any of the menus. Or you can create your own menu. Click the New
Menu option then drag the New Menu command to the menu bar at the top of your screen. To give the
menu a custom name just right click it and select Button Appearance
. You can then drag icons to it as you would with a standard toolbar (described above).
If you right click an icon or menu option, and select Start Group
, a divider will appear between it and the previous icon or option (grayed out for the first option in the
list).
Right clicking an icon and selecting Image and Text
will show a text label with the icon?useful if you forget what an icon does. To show all text labels, see the
Toolbars option below.
Toolbars
Another way of choosing which toolbars and options to display. It is quicker to use the Window
menu to achieve the same results.
If you select the standard toolbar, text options or time line, clicking Show text labels
will show descriptive text below each button.
Note:
The Design toolbar's text will only show if the toolbar is docked horizontally across the page or is
undocked completely. The text will not display when it is in its default position at the bottom right of your
screen.
Keyboard
Here you can set the keyboard shortcuts. Click the relevant category then the command for which you
wish to assign or change a shortcut. Any present shortcut will be listed under Current Keys. You can
click it and select Remove
to remove that shortcut entirely.
To add a new shortcut, just click in the Press New Shortcut Key
box and type the shortcut. Press the actual keys, do not type it, i.e., do not type the word "Alt", press
the Alt button as if you were using the shortcut.
Menu
This allows you to customize the right click menus available in the main working area. These are
currently set to be relevant to the work in progress., i.e., if you right click a shadow, you get options
relating to shadow control.
If you wish to change these, select the relevant menu from the Context Menus list, then go back to the
Commands
Page 95

screen and add or remove commands as described in the Commands section above.
Please note: The Application Frame menu is not used in this version of Xara 3D Maker.
Options
These options are mostly self explanatory.
Show ScreenTips on toolbars
: These are the little informational tool tips that appear when you hover your mouse over an icon.
Show shortcut keys in ScreenTips
: Grayed out if you turn off the Screentips option above.
Large icons: Icons lose quality, but are bigger to see. If using this option you will probably need to
rearrange your toolbars (see Docking and undocking dialog boxes and toolbars
).
Reset settings
To return all display settings to their default value (for example, windows, toolbars, time line and option
bars):
1. Click the Window menu then select Reset user interface.
2. Exit and reopen Xara 3D Maker. Your display settings will have returned to their standard
layout.
To return all settings to their default value:
1. Click the Window menu then select Reset all settings.
2. Exit and reopen Xara 3D Maker. Every setting that you have changed previously changed will
have returned to its default value.
Note: If you have previously created your own default document that displays when you click New from
the File menu, this default document will not be deleted by using Reset all settings, and will still be
displayed when you create a new file. See Changing the default template
for details on how to delete a default document that you have created.
Page 96
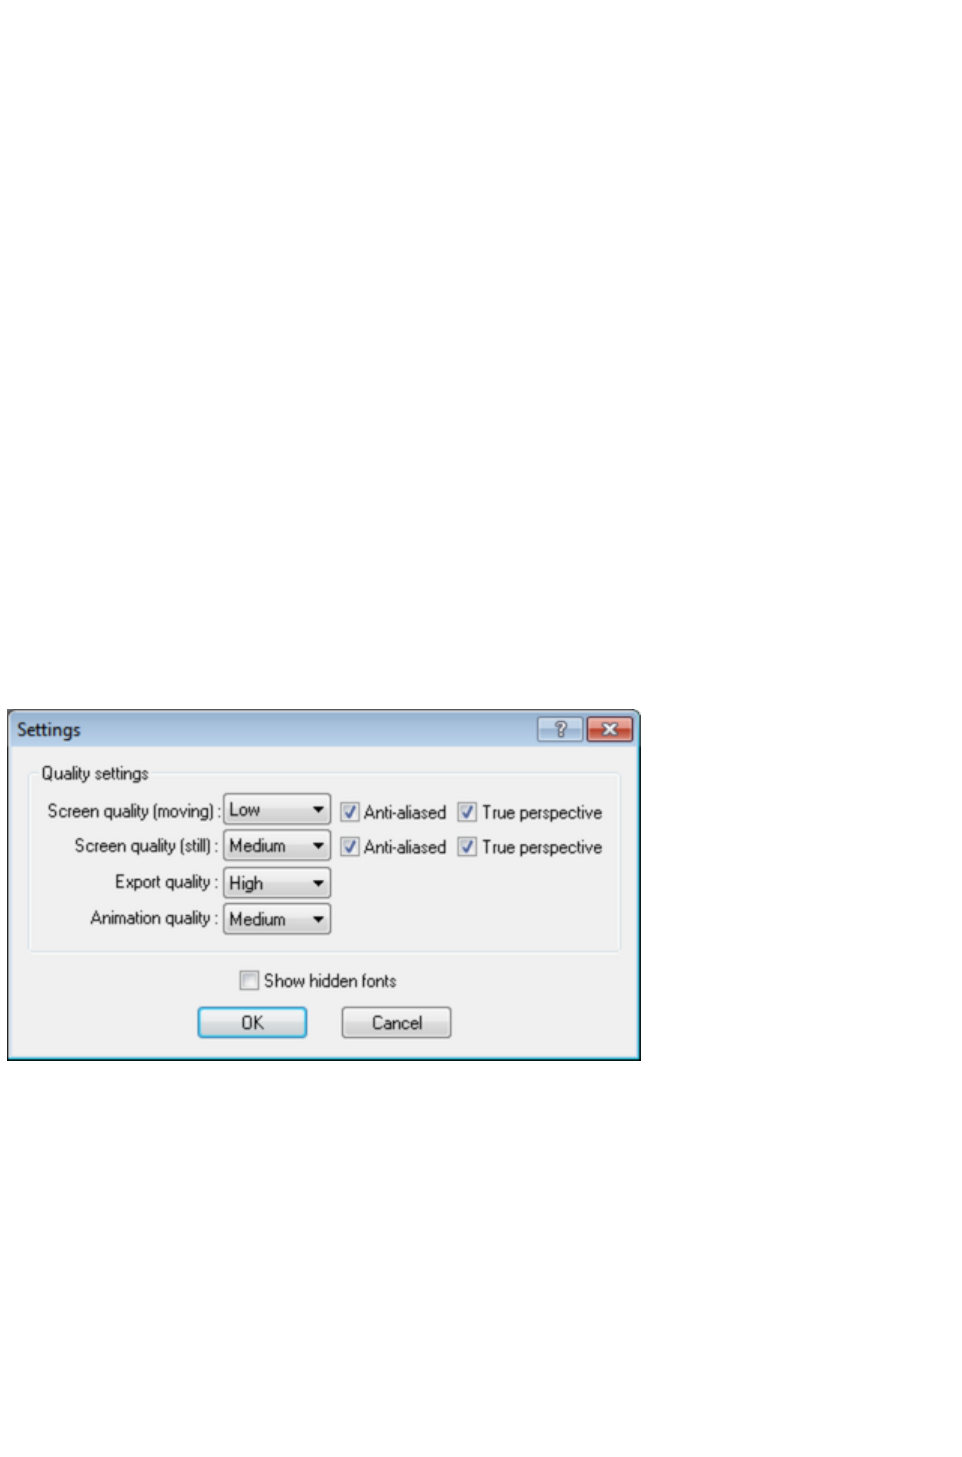
Changing the default document
If you want Xara 3D Maker to start up showing a different image:
1. Create the image you want to use as the starting (default) image.
2. Choose Save as default on the File menu.
This creates a file called Default.x3d, which appears in one of the following directories:
C:\Users\<User>\AppData\Local\Xara\Xara3D7 (if you are using Windows Vista or Windows
7)
C:\Documents and Settings\<User>\Local Settings\Application Data\xara\xara3D7 (if you are
using Windows XP)
Note:
Replace C in the above paths with the drive that Xara 3D Maker was installed on and <User> with your
own user name.
To revert to the standard default document:
Find the Default.x3d file that you previously saved as default in one of the above file paths and
delete the Default.x3d file. This restores the original default document, so that the next time you
open Xara 3D Maker, it reverts to displaying the standard new file image instead of the one you
created.
Changing quality settings
Th Settings option on the Window
menu lets you alter the quality settings for display and export (keyboard short cut Alt+Q). Usually the
default settings give excellent results, but you may wish to try different settings to fine-tune Xara 3D
Maker to your requirements.
Screen quality
controls the quality of the on-screen display. Increasing the quality setting means that the preview takes
longer to redraw on screen. Static and moving images have separate controls: animations can use a lower
setting.
Anti-aliasing
is a technique of blurring the edges between color transitions. Turning anti-aliasing on gives better results
but takes longer to redraw.
True perspective
displays the heading with slightly non-parallel sides (as if drawn from a distant vanishing point.) This gives
better results for some images than displaying parallel sides. The drawback is the extra processing can
slow down redraw. This may be noticeable when previewing animations.
Export quality
controls images exported as static bitmaps. Increasing the quality may give better results for some
Page 97
graphics in shadow or highlight areas. The drawback is that graphics may take longer to display on
screen.
Animation quality
controls images exported as animated GIFs and AVIs. As the viewer sees each frame only briefly, the
quality is less important than for static bitmaps. Note that increasing the quality too much can cause jerky
animation on slow computers.
If you are using Windows 7, by default rarely used fonts are hidden. If you would like them to be
displayed in 's font list, click Show hidden fonts
.
Note: If you are a Windows 7 user and the Show hidden fonts option is grayed out, go to your Control
Panel and choose Appearance and Personalization > Fonts. Exit and reopen Xara 3D Maker and
reopen the Settings dialog. You should now be able to edit the Show hidden fonts
option.
Adding comments
You can add comments to your own images or Xara 3D Maker sample files so that you and others can
see extra information or helpful hints on a file before you open it.
To add a comment to an image:
1. Open the image and choose Edit Comment from the Edit menu, or press "Ctrl + M".
2. Add the comment to the pop-up dialog box and click OK.
3. Save the file to save your comment.
The next time you choose Open from the File
menu, click the file in the Open dialog box. The file's comments are displayed below the preview
window.
Docking and undocking dialog boxes and toolbars
To give you freedom in how you use the program, you can undock and move toolbars
and windows and position them where you wish. This is particularly useful if you have two monitors, so
you could for example put your windows on one screen and keep the other monitor dedicated to the
Xara 3D Maker workspace.
Note: If you experience a problem with your windows or toolbars at any time, or wish to return them to
their standard layout, click Reset user interface on the Window
menu.
Moving toolbars
There are five toolbars: standard, design, options, text and time line. You can turn these on and off via
the Window
menu.
You can drag them around the screen by clicking and holding them (see the image above) and dragging.
If you drag a toolbar to an edge of the program it will dock there. You can also just drag the toolbar out
elsewhere on the screen, and it will undock entirely and become free-floating.
Note: If you experience a problem with your windows or toolbars at any time, or wish to return them to
their standard layout, click Reset user interface on the Window
menu.
Page 98

Option bars
The option bars can be found to the right of the screen when you first start Xara 3D Maker. Rather than
opening and closing endless windows, most of Xara 3D Maker's settings are contained here. You can
easily switch between the tabs to access the different features.
You can turn this entire panel off or on via the Window
menu. You can also tailor how you use the option bars as follows:
To undock an option bar.
Just click and drag one of the options (where it says color options, extrusion options etc.) out of its
current location. The window will undock, and you can position where you require. You can do this with
as many of the windows as you wish.
If you find the window is redocking when you don't want to, hold the Ctrl key while moving it.
To redock an option bar.
Just drag the window back to the panel options bar at the right of your screen, and the window will
redock.
Pinning an option bar open.
After undocking a window, by default it will minimize once you move your mouse away from it. As soon
as you move your mouse back, it will expand. To get the window to remain open, just click the little pin
icon at the top right of the window. Click again to return to the auto-hide format.
Removing or reopening an option bar.
Once undocked, you can click the X icon in the top right hand corner of that window to close it.
Note: If you experience a problem with your windows or toolbars at any time, or wish to return them to
their standard layout, click Reset user interface on the Window
menu.
Advanced customization
's customization options are recommended only for advanced users. They can be accessed by clicking
Customize from the Window menu, or by right clicking on a toolbar and selecting Customize
.
Note: If you experience a problem with your windows or toolbars at any time, or wish to return them to
their standard layout, click Reset user interface on the Window
menu.
Customize options are broken down into five areas:
Commands
Here you can add icons to a menu or the standard toolbar, and even create you own custom menu.
Click a category to see related commands to its right. You can drag any of the commands to the
standard toolbar where they will be added to allow easy access to that tool or feature in the future. To
remove a button, just right click it and select delete.
Commands can also be dragged to any of the menus. Or you can create your own menu. Click the New
Menu option then drag the New Menu command to the menu bar at the top of your screen. To give the
menu a custom name just right click it and select Button Appearance
. You can then drag icons to it as you would with a standard toolbar (described above).
If you right click an icon or menu option, and select Start Group
, a divider will appear between it and the previous icon or option (grayed out for the first option in the
list).
Right clicking an icon and selecting Image and Text
will show a text label with the icon?useful if you forget what an icon does. To show all text labels, see the
Toolbars option below.
Page 99

Toolbars
Another way of choosing which toolbars and options to display. It is quicker to use the Window
menu to achieve the same results.
If you select the standard toolbar, text options or time line, clicking Show text labels
will show descriptive text below each button.
Note:
The Design toolbar's text will only show if the toolbar is docked horizontally across the page or is
undocked completely. The text will not display when it is in its default position at the bottom right of your
screen.
Keyboard
Here you can set the keyboard shortcuts. Click the relevant category then the command for which you
wish to assign or change a shortcut. Any present shortcut will be listed under Current Keys. You can
click it and select Remove
to remove that shortcut entirely.
To add a new shortcut, just click in the Press New Shortcut Key
box and type the shortcut. Press the actual keys, do not type it, i.e., do not type the word "Alt", press
the Alt button as if you were using the shortcut.
Menu
This allows you to customize the right click menus available in the main working area. These are
currently set to be relevant to the work in progress., i.e., if you right click a shadow, you get options
relating to shadow control.
If you wish to change these, select the relevant menu from the Context Menus list, then go back to the
Commands
screen and add or remove commands as described in the Commands section above.
Please note: The Application Frame menu is not used in this version of Xara 3D Maker.
Options
These options are mostly self explanatory.
Show ScreenTips on toolbars
: These are the little informational tool tips that appear when you hover your mouse over an icon.
Show shortcut keys in ScreenTips
: Grayed out if you turn off the Screentips option above.
Large icons: Icons lose quality, but are bigger to see. If using this option you will probably need to
rearrange your toolbars (see Docking and undocking dialog boxes and toolbars
).
Reset settings
To return all display settings to their default value (for example, windows, toolbars, time line and option
bars):
1. Click the Window menu then select Reset user interface.
2. Exit and reopen Xara 3D Maker. Your display settings will have returned to their standard
layout.
To return all settings to their default value:
1. Click the Window menu then select Reset all settings.
2. Exit and reopen Xara 3D Maker. Every setting that you have changed previously changed will
have returned to its default value.
Note: If you have previously created your own default document that displays when you click New from
the File menu, this default document will not be deleted by using Reset all settings, and will still be
Page 100
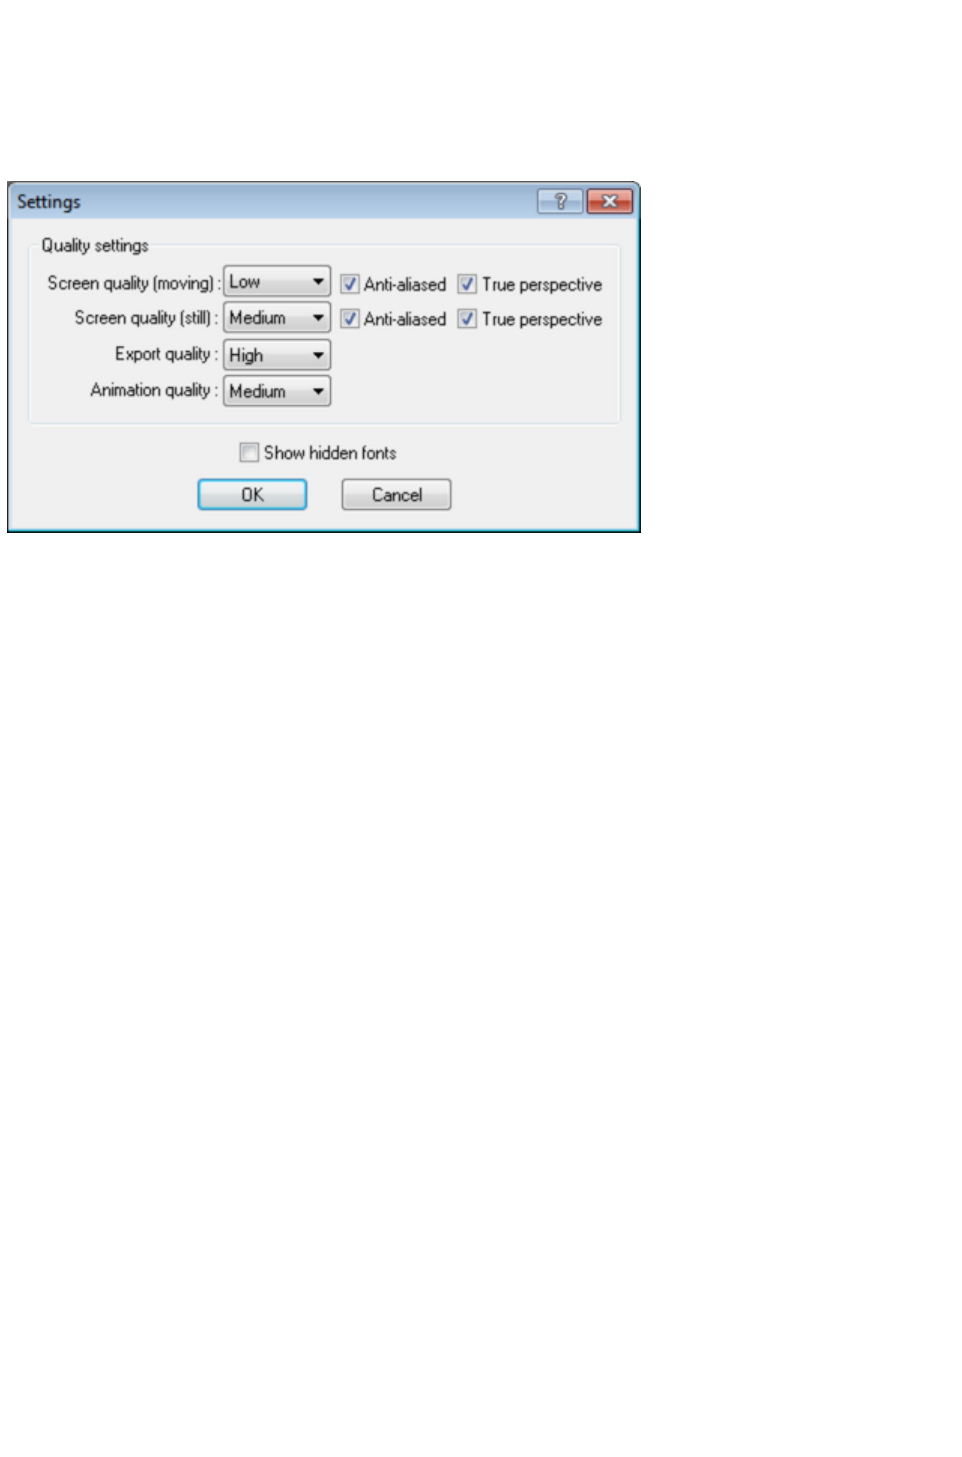
Changing quality settings
Th Settings option on the Window
menu lets you alter the quality settings for display and export (keyboard short cut Alt+Q). Usually the
default settings give excellent results, but you may wish to try different settings to fine-tune Xara 3D
Maker to your requirements.
Screen quality
controls the quality of the on-screen display. Increasing the quality setting means that the preview takes
longer to redraw on screen. Static and moving images have separate controls: animations can use a lower
setting.
Anti-aliasing
is a technique of blurring the edges between color transitions. Turning anti-aliasing on gives better results
but takes longer to redraw.
True perspective
displays the heading with slightly non-parallel sides (as if drawn from a distant vanishing point.) This gives
better results for some images than displaying parallel sides. The drawback is the extra processing can
slow down redraw. This may be noticeable when previewing animations.
Export quality
controls images exported as static bitmaps. Increasing the quality may give better results for some
graphics in shadow or highlight areas. The drawback is that graphics may take longer to display on
screen.
Animation quality
controls images exported as animated GIFs and AVIs. As the viewer sees each frame only briefly, the
quality is less important than for static bitmaps. Note that increasing the quality too much can cause jerky
animation on slow computers.
If you are using Windows 7, by default rarely used fonts are hidden. If you would like them to be
displayed in 's font list, click Show hidden fonts
.
Note: If you are a Windows 7 user and the Show hidden fonts option is grayed out, go to your Control
Panel and choose Appearance and Personalization > Fonts. Exit and reopen Xara 3D Maker and
reopen the Settings dialog. You should now be able to edit the Show hidden fonts
option.
Adding comments
You can add comments to your own images or Xara 3D Maker sample files so that you and others can
see extra information or helpful hints on a file before you open it.
To add a comment to an image:
1. Open the image and choose Edit Comment from the Edit menu, or press "Ctrl + M".
Page 102
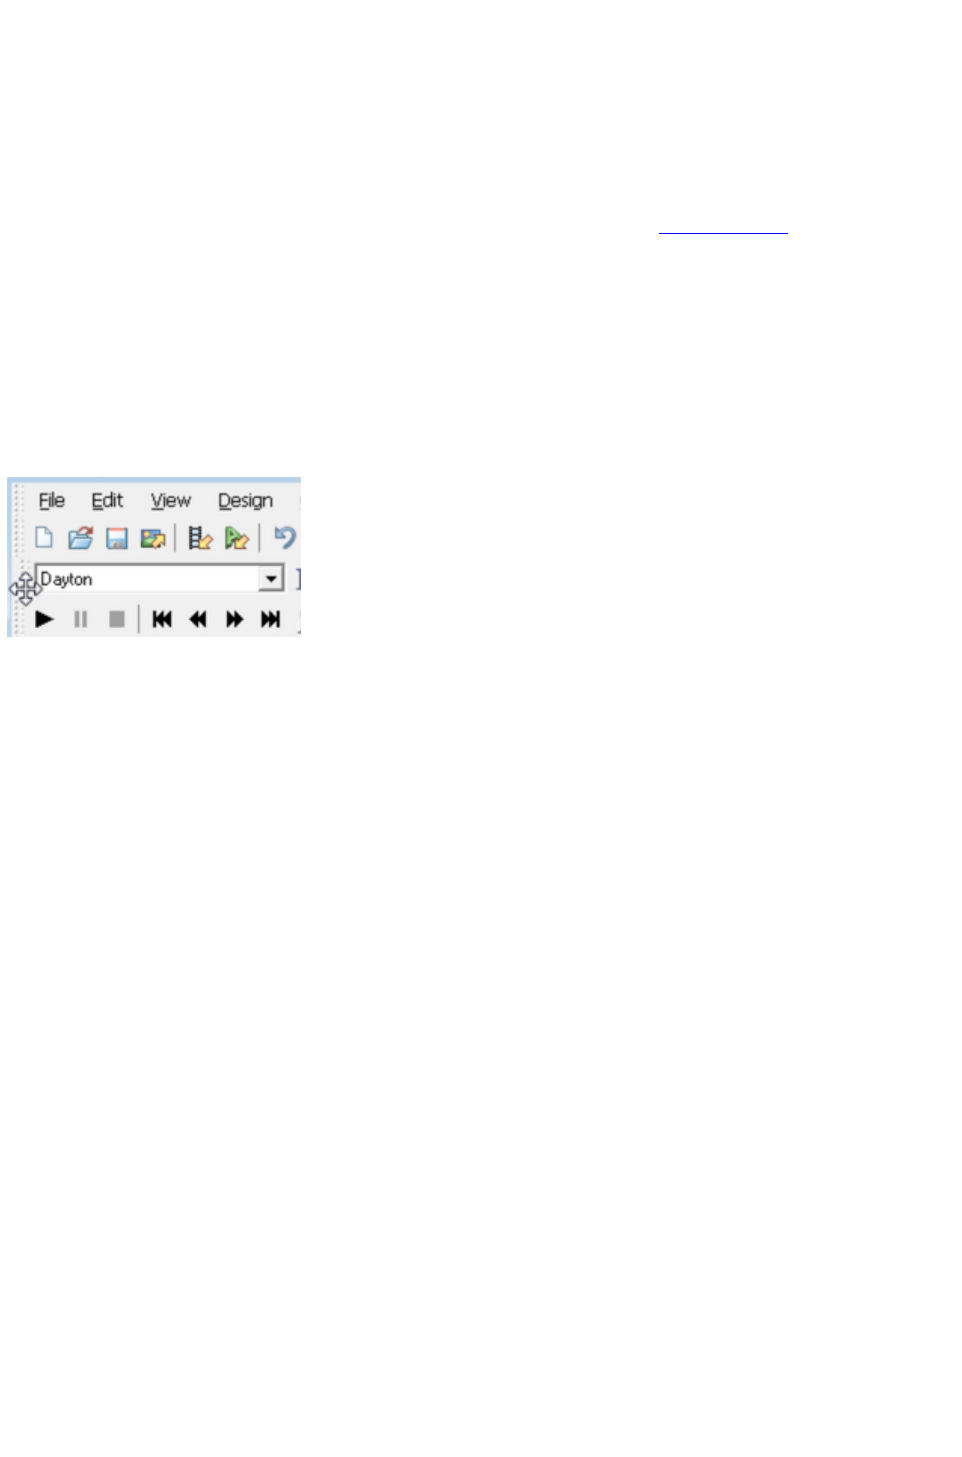
2. Add the comment to the pop-up dialog box and click OK.
3. Save the file to save your comment.
The next time you choose Open from the File
menu, click the file in the Open dialog box. The file's comments are displayed below the preview
window.
Docking and undocking dialog boxes and toolbars
To give you freedom in how you use the program, you can undock and move toolbars
and windows and position them where you wish. This is particularly useful if you have two monitors, so
you could for example put your windows on one screen and keep the other monitor dedicated to the
Xara 3D Maker workspace.
Note: If you experience a problem with your windows or toolbars at any time, or wish to return them to
their standard layout, click Reset user interface on the Window
menu.
Moving toolbars
There are five toolbars: standard, design, options, text and time line. You can turn these on and off via
the Window
menu.
You can drag them around the screen by clicking and holding them (see the image above) and dragging.
If you drag a toolbar to an edge of the program it will dock there. You can also just drag the toolbar out
elsewhere on the screen, and it will undock entirely and become free-floating.
Note: If you experience a problem with your windows or toolbars at any time, or wish to return them to
their standard layout, click Reset user interface on the Window
menu.
Option bars
The option bars can be found to the right of the screen when you first start Xara 3D Maker. Rather than
opening and closing endless windows, most of Xara 3D Maker's settings are contained here. You can
easily switch between the tabs to access the different features.
You can turn this entire panel off or on via the Window
menu. You can also tailor how you use the option bars as follows:
To undock an option bar.
Just click and drag one of the options (where it says color options, extrusion options etc.) out of its
current location. The window will undock, and you can position where you require. You can do this with
as many of the windows as you wish.
If you find the window is redocking when you don't want to, hold the Ctrl key while moving it.
To redock an option bar.
Just drag the window back to the panel options bar at the right of your screen, and the window will
redock.
Pinning an option bar open.
After undocking a window, by default it will minimize once you move your mouse away from it. As soon
as you move your mouse back, it will expand. To get the window to remain open, just click the little pin
icon at the top right of the window. Click again to return to the auto-hide format.
Page 103

Removing or reopening an option bar.
Once undocked, you can click the X icon in the top right hand corner of that window to close it.
Note: If you experience a problem with your windows or toolbars at any time, or wish to return them to
their standard layout, click Reset user interface on the Window
menu.
Advanced customization
's customization options are recommended only for advanced users. They can be accessed by clicking
Customize from the Window menu, or by right clicking on a toolbar and selecting Customize
.
Note: If you experience a problem with your windows or toolbars at any time, or wish to return them to
their standard layout, click Reset user interface on the Window
menu.
Customize options are broken down into five areas:
Commands
Here you can add icons to a menu or the standard toolbar, and even create you own custom menu.
Click a category to see related commands to its right. You can drag any of the commands to the
standard toolbar where they will be added to allow easy access to that tool or feature in the future. To
remove a button, just right click it and select delete.
Commands can also be dragged to any of the menus. Or you can create your own menu. Click the New
Menu option then drag the New Menu command to the menu bar at the top of your screen. To give the
menu a custom name just right click it and select Button Appearance
. You can then drag icons to it as you would with a standard toolbar (described above).
If you right click an icon or menu option, and select Start Group
, a divider will appear between it and the previous icon or option (grayed out for the first option in the
list).
Right clicking an icon and selecting Image and Text
will show a text label with the icon?useful if you forget what an icon does. To show all text labels, see the
Toolbars option below.
Toolbars
Another way of choosing which toolbars and options to display. It is quicker to use the Window
menu to achieve the same results.
If you select the standard toolbar, text options or time line, clicking Show text labels
will show descriptive text below each button.
Note:
The Design toolbar's text will only show if the toolbar is docked horizontally across the page or is
undocked completely. The text will not display when it is in its default position at the bottom right of your
screen.
Keyboard
Here you can set the keyboard shortcuts. Click the relevant category then the command for which you
wish to assign or change a shortcut. Any present shortcut will be listed under Current Keys. You can
click it and select Remove
to remove that shortcut entirely.
To add a new shortcut, just click in the Press New Shortcut Key
box and type the shortcut. Press the actual keys, do not type it, i.e., do not type the word "Alt", press
the Alt button as if you were using the shortcut.
Page 104
Menu
This allows you to customize the right click menus available in the main working area. These are
currently set to be relevant to the work in progress., i.e., if you right click a shadow, you get options
relating to shadow control.
If you wish to change these, select the relevant menu from the Context Menus list, then go back to the
Commands
screen and add or remove commands as described in the Commands section above.
Please note: The Application Frame menu is not used in this version of Xara 3D Maker.
Options
These options are mostly self explanatory.
Show ScreenTips on toolbars
: These are the little informational tool tips that appear when you hover your mouse over an icon.
Show shortcut keys in ScreenTips
: Grayed out if you turn off the Screentips option above.
Large icons: Icons lose quality, but are bigger to see. If using this option you will probably need to
rearrange your toolbars (see Docking and undocking dialog boxes and toolbars
).
Reset settings
To return all display settings to their default value (for example, windows, toolbars, time line and option
bars):
1. Click the Window menu then select Reset user interface.
2. Exit and reopen Xara 3D Maker. Your display settings will have returned to their standard
layout.
To return all settings to their default value:
1. Click the Window menu then select Reset all settings.
2. Exit and reopen Xara 3D Maker. Every setting that you have changed previously changed will
have returned to its default value.
Note: If you have previously created your own default document that displays when you click New from
the File menu, this default document will not be deleted by using Reset all settings, and will still be
displayed when you create a new file. See Changing the default template
for details on how to delete a default document that you have created.
Page 105
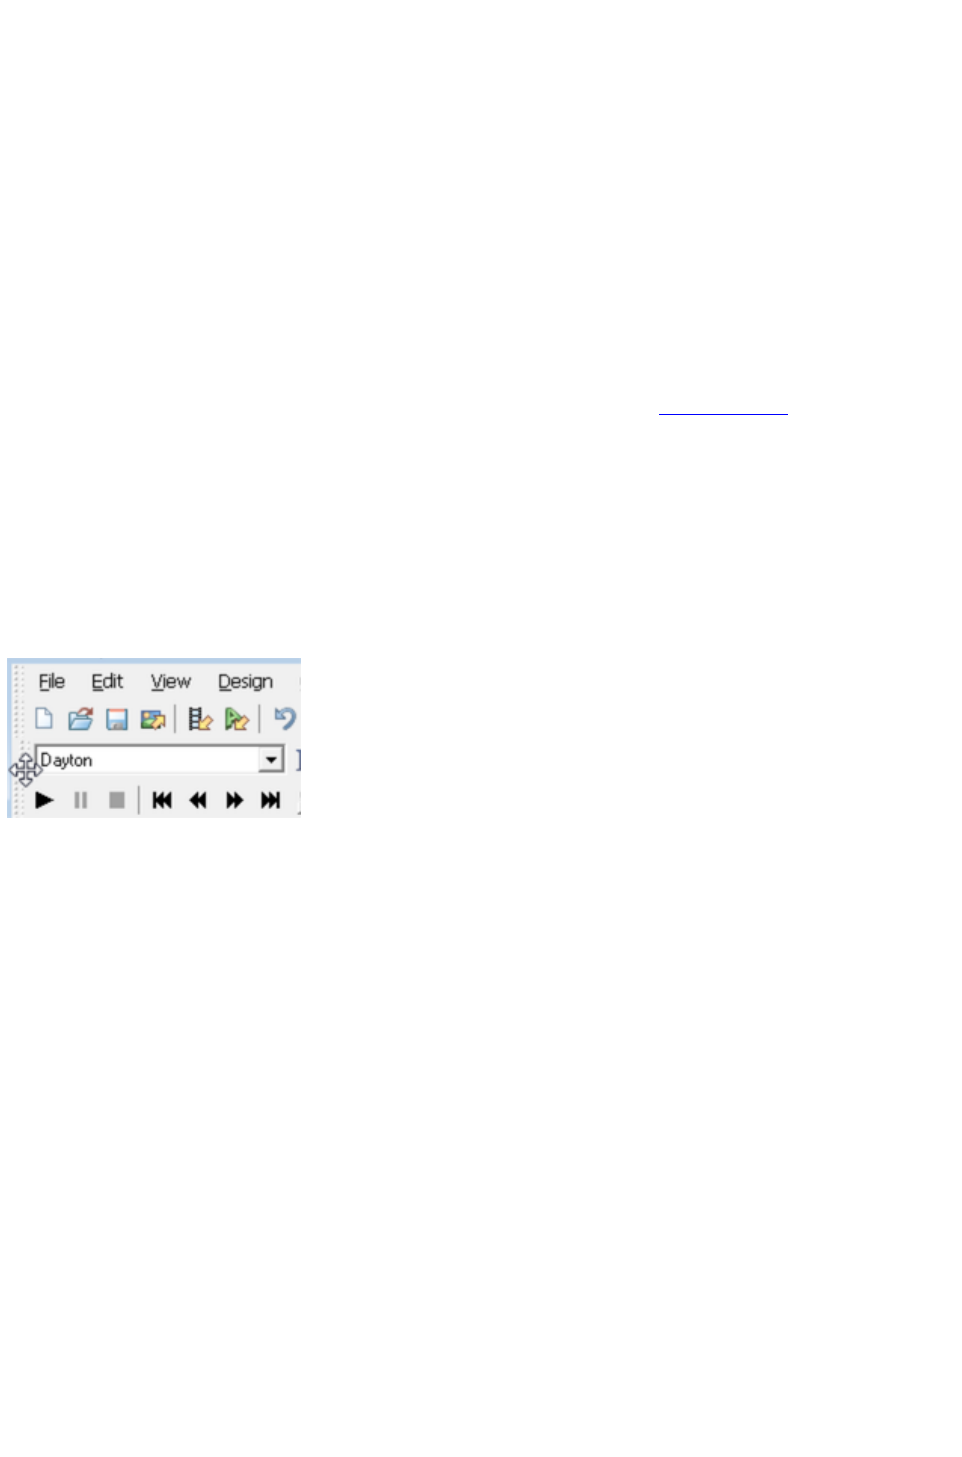
Adding comments
You can add comments to your own images or Xara 3D Maker sample files so that you and others can
see extra information or helpful hints on a file before you open it.
To add a comment to an image:
1. Open the image and choose Edit Comment from the Edit menu, or press "Ctrl + M".
2. Add the comment to the pop-up dialog box and click OK.
3. Save the file to save your comment.
The next time you choose Open from the File
menu, click the file in the Open dialog box. The file's comments are displayed below the preview
window.
Docking and undocking dialog boxes and toolbars
To give you freedom in how you use the program, you can undock and move toolbars
and windows and position them where you wish. This is particularly useful if you have two monitors, so
you could for example put your windows on one screen and keep the other monitor dedicated to the
Xara 3D Maker workspace.
Note: If you experience a problem with your windows or toolbars at any time, or wish to return them to
their standard layout, click Reset user interface on the Window
menu.
Moving toolbars
There are five toolbars: standard, design, options, text and time line. You can turn these on and off via
the Window
menu.
You can drag them around the screen by clicking and holding them (see the image above) and dragging.
If you drag a toolbar to an edge of the program it will dock there. You can also just drag the toolbar out
elsewhere on the screen, and it will undock entirely and become free-floating.
Note: If you experience a problem with your windows or toolbars at any time, or wish to return them to
their standard layout, click Reset user interface on the Window
menu.
Option bars
The option bars can be found to the right of the screen when you first start Xara 3D Maker. Rather than
opening and closing endless windows, most of Xara 3D Maker's settings are contained here. You can
easily switch between the tabs to access the different features.
You can turn this entire panel off or on via the Window
menu. You can also tailor how you use the option bars as follows:
To undock an option bar.
Just click and drag one of the options (where it says color options, extrusion options etc.) out of its
current location. The window will undock, and you can position where you require. You can do this with
as many of the windows as you wish.
If you find the window is redocking when you don't want to, hold the Ctrl key while moving it.
To redock an option bar.
Page 106

Just drag the window back to the panel options bar at the right of your screen, and the window will
redock.
Pinning an option bar open.
After undocking a window, by default it will minimize once you move your mouse away from it. As soon
as you move your mouse back, it will expand. To get the window to remain open, just click the little pin
icon at the top right of the window. Click again to return to the auto-hide format.
Removing or reopening an option bar.
Once undocked, you can click the X icon in the top right hand corner of that window to close it.
Note: If you experience a problem with your windows or toolbars at any time, or wish to return them to
their standard layout, click Reset user interface on the Window
menu.
Advanced customization
's customization options are recommended only for advanced users. They can be accessed by clicking
Customize from the Window menu, or by right clicking on a toolbar and selecting Customize
.
Note: If you experience a problem with your windows or toolbars at any time, or wish to return them to
their standard layout, click Reset user interface on the Window
menu.
Customize options are broken down into five areas:
Commands
Here you can add icons to a menu or the standard toolbar, and even create you own custom menu.
Click a category to see related commands to its right. You can drag any of the commands to the
standard toolbar where they will be added to allow easy access to that tool or feature in the future. To
remove a button, just right click it and select delete.
Commands can also be dragged to any of the menus. Or you can create your own menu. Click the New
Menu option then drag the New Menu command to the menu bar at the top of your screen. To give the
menu a custom name just right click it and select Button Appearance
. You can then drag icons to it as you would with a standard toolbar (described above).
If you right click an icon or menu option, and select Start Group
, a divider will appear between it and the previous icon or option (grayed out for the first option in the
list).
Right clicking an icon and selecting Image and Text
will show a text label with the icon?useful if you forget what an icon does. To show all text labels, see the
Toolbars option below.
Toolbars
Another way of choosing which toolbars and options to display. It is quicker to use the Window
menu to achieve the same results.
If you select the standard toolbar, text options or time line, clicking Show text labels
will show descriptive text below each button.
Note:
The Design toolbar's text will only show if the toolbar is docked horizontally across the page or is
undocked completely. The text will not display when it is in its default position at the bottom right of your
screen.
Keyboard
Here you can set the keyboard shortcuts. Click the relevant category then the command for which you
wish to assign or change a shortcut. Any present shortcut will be listed under Current Keys. You can
Page 107
click it and select Remove
to remove that shortcut entirely.
To add a new shortcut, just click in the Press New Shortcut Key
box and type the shortcut. Press the actual keys, do not type it, i.e., do not type the word "Alt", press
the Alt button as if you were using the shortcut.
Menu
This allows you to customize the right click menus available in the main working area. These are
currently set to be relevant to the work in progress., i.e., if you right click a shadow, you get options
relating to shadow control.
If you wish to change these, select the relevant menu from the Context Menus list, then go back to the
Commands
screen and add or remove commands as described in the Commands section above.
Please note: The Application Frame menu is not used in this version of Xara 3D Maker.
Options
These options are mostly self explanatory.
Show ScreenTips on toolbars
: These are the little informational tool tips that appear when you hover your mouse over an icon.
Show shortcut keys in ScreenTips
: Grayed out if you turn off the Screentips option above.
Large icons: Icons lose quality, but are bigger to see. If using this option you will probably need to
rearrange your toolbars (see Docking and undocking dialog boxes and toolbars
).
Reset settings
To return all display settings to their default value (for example, windows, toolbars, time line and option
bars):
1. Click the Window menu then select Reset user interface.
2. Exit and reopen Xara 3D Maker. Your display settings will have returned to their standard
layout.
To return all settings to their default value:
1. Click the Window menu then select Reset all settings.
2. Exit and reopen Xara 3D Maker. Every setting that you have changed previously changed will
have returned to its default value.
Note: If you have previously created your own default document that displays when you click New from
the File menu, this default document will not be deleted by using Reset all settings, and will still be
displayed when you create a new file. See Changing the default template
for details on how to delete a default document that you have created.
Page 108
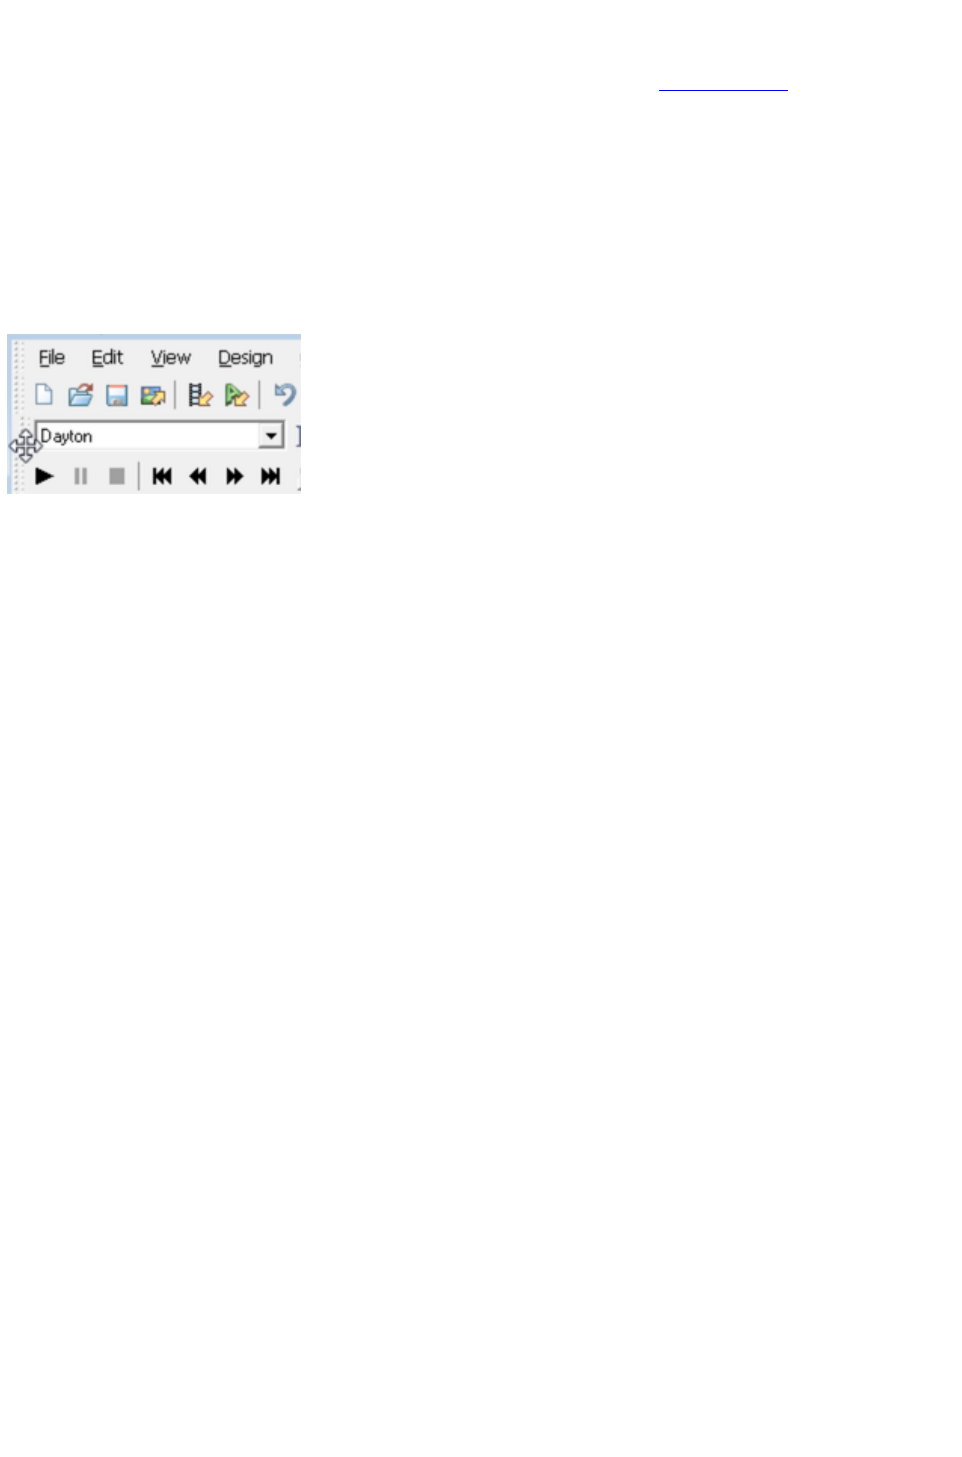
Docking and undocking dialog boxes and toolbars
To give you freedom in how you use the program, you can undock and move toolbars
and windows and position them where you wish. This is particularly useful if you have two monitors, so
you could for example put your windows on one screen and keep the other monitor dedicated to the
Xara 3D Maker workspace.
Note: If you experience a problem with your windows or toolbars at any time, or wish to return them to
their standard layout, click Reset user interface on the Window
menu.
Moving toolbars
There are five toolbars: standard, design, options, text and time line. You can turn these on and off via
the Window
menu.
You can drag them around the screen by clicking and holding them (see the image above) and dragging.
If you drag a toolbar to an edge of the program it will dock there. You can also just drag the toolbar out
elsewhere on the screen, and it will undock entirely and become free-floating.
Note: If you experience a problem with your windows or toolbars at any time, or wish to return them to
their standard layout, click Reset user interface on the Window
menu.
Option bars
The option bars can be found to the right of the screen when you first start Xara 3D Maker. Rather than
opening and closing endless windows, most of Xara 3D Maker's settings are contained here. You can
easily switch between the tabs to access the different features.
You can turn this entire panel off or on via the Window
menu. You can also tailor how you use the option bars as follows:
To undock an option bar.
Just click and drag one of the options (where it says color options, extrusion options etc.) out of its
current location. The window will undock, and you can position where you require. You can do this with
as many of the windows as you wish.
If you find the window is redocking when you don't want to, hold the Ctrl key while moving it.
To redock an option bar.
Just drag the window back to the panel options bar at the right of your screen, and the window will
redock.
Pinning an option bar open.
After undocking a window, by default it will minimize once you move your mouse away from it. As soon
as you move your mouse back, it will expand. To get the window to remain open, just click the little pin
icon at the top right of the window. Click again to return to the auto-hide format.
Removing or reopening an option bar.
Once undocked, you can click the X icon in the top right hand corner of that window to close it.
Note: If you experience a problem with your windows or toolbars at any time, or wish to return them to
their standard layout, click Reset user interface on the Window
menu.
Page 109

Advanced customization
's customization options are recommended only for advanced users. They can be accessed by clicking
Customize from the Window menu, or by right clicking on a toolbar and selecting Customize
.
Note: If you experience a problem with your windows or toolbars at any time, or wish to return them to
their standard layout, click Reset user interface on the Window
menu.
Customize options are broken down into five areas:
Commands
Here you can add icons to a menu or the standard toolbar, and even create you own custom menu.
Click a category to see related commands to its right. You can drag any of the commands to the
standard toolbar where they will be added to allow easy access to that tool or feature in the future. To
remove a button, just right click it and select delete.
Commands can also be dragged to any of the menus. Or you can create your own menu. Click the New
Menu option then drag the New Menu command to the menu bar at the top of your screen. To give the
menu a custom name just right click it and select Button Appearance
. You can then drag icons to it as you would with a standard toolbar (described above).
If you right click an icon or menu option, and select Start Group
, a divider will appear between it and the previous icon or option (grayed out for the first option in the
list).
Right clicking an icon and selecting Image and Text
will show a text label with the icon?useful if you forget what an icon does. To show all text labels, see the
Toolbars option below.
Toolbars
Another way of choosing which toolbars and options to display. It is quicker to use the Window
menu to achieve the same results.
If you select the standard toolbar, text options or time line, clicking Show text labels
will show descriptive text below each button.
Note:
The Design toolbar's text will only show if the toolbar is docked horizontally across the page or is
undocked completely. The text will not display when it is in its default position at the bottom right of your
screen.
Keyboard
Here you can set the keyboard shortcuts. Click the relevant category then the command for which you
wish to assign or change a shortcut. Any present shortcut will be listed under Current Keys. You can
click it and select Remove
to remove that shortcut entirely.
To add a new shortcut, just click in the Press New Shortcut Key
box and type the shortcut. Press the actual keys, do not type it, i.e., do not type the word "Alt", press
the Alt button as if you were using the shortcut.
Menu
This allows you to customize the right click menus available in the main working area. These are
currently set to be relevant to the work in progress., i.e., if you right click a shadow, you get options
relating to shadow control.
If you wish to change these, select the relevant menu from the Context Menus list, then go back to the
Page 110

Commands
screen and add or remove commands as described in the Commands section above.
Please note: The Application Frame menu is not used in this version of Xara 3D Maker.
Options
These options are mostly self explanatory.
Show ScreenTips on toolbars
: These are the little informational tool tips that appear when you hover your mouse over an icon.
Show shortcut keys in ScreenTips
: Grayed out if you turn off the Screentips option above.
Large icons: Icons lose quality, but are bigger to see. If using this option you will probably need to
rearrange your toolbars (see Docking and undocking dialog boxes and toolbars
).
Reset settings
To return all display settings to their default value (for example, windows, toolbars, time line and option
bars):
1. Click the Window menu then select Reset user interface.
2. Exit and reopen Xara 3D Maker. Your display settings will have returned to their standard
layout.
To return all settings to their default value:
1. Click the Window menu then select Reset all settings.
2. Exit and reopen Xara 3D Maker. Every setting that you have changed previously changed will
have returned to its default value.
Note: If you have previously created your own default document that displays when you click New from
the File menu, this default document will not be deleted by using Reset all settings, and will still be
displayed when you create a new file. See Changing the default template
for details on how to delete a default document that you have created.
Page 111
Moving toolbars
There are five toolbars: standard, design, options, text and time line. You can turn these on and off via
the Window
menu.
You can drag them around the screen by clicking and holding them (see the image above) and dragging.
If you drag a toolbar to an edge of the program it will dock there. You can also just drag the toolbar out
elsewhere on the screen, and it will undock entirely and become free-floating.
Note: If you experience a problem with your windows or toolbars at any time, or wish to return them to
their standard layout, click Reset user interface on the Window
menu.
Option bars
The option bars can be found to the right of the screen when you first start Xara 3D Maker. Rather than
opening and closing endless windows, most of Xara 3D Maker's settings are contained here. You can
easily switch between the tabs to access the different features.
You can turn this entire panel off or on via the Window
menu. You can also tailor how you use the option bars as follows:
To undock an option bar.
Just click and drag one of the options (where it says color options, extrusion options etc.) out of its
current location. The window will undock, and you can position where you require. You can do this with
as many of the windows as you wish.
If you find the window is redocking when you don't want to, hold the Ctrl key while moving it.
To redock an option bar.
Just drag the window back to the panel options bar at the right of your screen, and the window will
redock.
Pinning an option bar open.
After undocking a window, by default it will minimize once you move your mouse away from it. As soon
as you move your mouse back, it will expand. To get the window to remain open, just click the little pin
icon at the top right of the window. Click again to return to the auto-hide format.
Removing or reopening an option bar.
Once undocked, you can click the X icon in the top right hand corner of that window to close it.
Note: If you experience a problem with your windows or toolbars at any time, or wish to return them to
their standard layout, click Reset user interface on the Window
menu.
Advanced customization
's customization options are recommended only for advanced users. They can be accessed by clicking
Customize from the Window menu, or by right clicking on a toolbar and selecting Customize
.
Note: If you experience a problem with your windows or toolbars at any time, or wish to return them to
their standard layout, click Reset user interface on the Window
menu.
Customize options are broken down into five areas:
Page 112

Commands
Here you can add icons to a menu or the standard toolbar, and even create you own custom menu.
Click a category to see related commands to its right. You can drag any of the commands to the
standard toolbar where they will be added to allow easy access to that tool or feature in the future. To
remove a button, just right click it and select delete.
Commands can also be dragged to any of the menus. Or you can create your own menu. Click the New
Menu option then drag the New Menu command to the menu bar at the top of your screen. To give the
menu a custom name just right click it and select Button Appearance
. You can then drag icons to it as you would with a standard toolbar (described above).
If you right click an icon or menu option, and select Start Group
, a divider will appear between it and the previous icon or option (grayed out for the first option in the
list).
Right clicking an icon and selecting Image and Text
will show a text label with the icon?useful if you forget what an icon does. To show all text labels, see the
Toolbars option below.
Toolbars
Another way of choosing which toolbars and options to display. It is quicker to use the Window
menu to achieve the same results.
If you select the standard toolbar, text options or time line, clicking Show text labels
will show descriptive text below each button.
Note:
The Design toolbar's text will only show if the toolbar is docked horizontally across the page or is
undocked completely. The text will not display when it is in its default position at the bottom right of your
screen.
Keyboard
Here you can set the keyboard shortcuts. Click the relevant category then the command for which you
wish to assign or change a shortcut. Any present shortcut will be listed under Current Keys. You can
click it and select Remove
to remove that shortcut entirely.
To add a new shortcut, just click in the Press New Shortcut Key
box and type the shortcut. Press the actual keys, do not type it, i.e., do not type the word "Alt", press
the Alt button as if you were using the shortcut.
Menu
This allows you to customize the right click menus available in the main working area. These are
currently set to be relevant to the work in progress., i.e., if you right click a shadow, you get options
relating to shadow control.
If you wish to change these, select the relevant menu from the Context Menus list, then go back to the
Commands
screen and add or remove commands as described in the Commands section above.
Please note: The Application Frame menu is not used in this version of Xara 3D Maker.
Options
These options are mostly self explanatory.
Show ScreenTips on toolbars
: These are the little informational tool tips that appear when you hover your mouse over an icon.
Show shortcut keys in ScreenTips
Page 113
: Grayed out if you turn off the Screentips option above.
Large icons: Icons lose quality, but are bigger to see. If using this option you will probably need to
rearrange your toolbars (see Docking and undocking dialog boxes and toolbars
).
Reset settings
To return all display settings to their default value (for example, windows, toolbars, time line and option
bars):
1. Click the Window menu then select Reset user interface.
2. Exit and reopen Xara 3D Maker. Your display settings will have returned to their standard
layout.
To return all settings to their default value:
1. Click the Window menu then select Reset all settings.
2. Exit and reopen Xara 3D Maker. Every setting that you have changed previously changed will
have returned to its default value.
Note: If you have previously created your own default document that displays when you click New from
the File menu, this default document will not be deleted by using Reset all settings, and will still be
displayed when you create a new file. See Changing the default template
for details on how to delete a default document that you have created.
Page 114

Option bars
The option bars can be found to the right of the screen when you first start Xara 3D Maker. Rather than
opening and closing endless windows, most of Xara 3D Maker's settings are contained here. You can
easily switch between the tabs to access the different features.
You can turn this entire panel off or on via the Window
menu. You can also tailor how you use the option bars as follows:
To undock an option bar.
Just click and drag one of the options (where it says color options, extrusion options etc.) out of its
current location. The window will undock, and you can position where you require. You can do this with
as many of the windows as you wish.
If you find the window is redocking when you don't want to, hold the Ctrl key while moving it.
To redock an option bar.
Just drag the window back to the panel options bar at the right of your screen, and the window will
redock.
Pinning an option bar open.
After undocking a window, by default it will minimize once you move your mouse away from it. As soon
as you move your mouse back, it will expand. To get the window to remain open, just click the little pin
icon at the top right of the window. Click again to return to the auto-hide format.
Removing or reopening an option bar.
Once undocked, you can click the X icon in the top right hand corner of that window to close it.
Note: If you experience a problem with your windows or toolbars at any time, or wish to return them to
their standard layout, click Reset user interface on the Window
menu.
Advanced customization
's customization options are recommended only for advanced users. They can be accessed by clicking
Customize from the Window menu, or by right clicking on a toolbar and selecting Customize
.
Note: If you experience a problem with your windows or toolbars at any time, or wish to return them to
their standard layout, click Reset user interface on the Window
menu.
Customize options are broken down into five areas:
Commands
Here you can add icons to a menu or the standard toolbar, and even create you own custom menu.
Click a category to see related commands to its right. You can drag any of the commands to the
standard toolbar where they will be added to allow easy access to that tool or feature in the future. To
remove a button, just right click it and select delete.
Commands can also be dragged to any of the menus. Or you can create your own menu. Click the New
Menu option then drag the New Menu command to the menu bar at the top of your screen. To give the
menu a custom name just right click it and select Button Appearance
. You can then drag icons to it as you would with a standard toolbar (described above).
If you right click an icon or menu option, and select Start Group
, a divider will appear between it and the previous icon or option (grayed out for the first option in the
list).
Right clicking an icon and selecting Image and Text
will show a text label with the icon?useful if you forget what an icon does. To show all text labels, see the
Toolbars option below.
Page 115

Toolbars
Another way of choosing which toolbars and options to display. It is quicker to use the Window
menu to achieve the same results.
If you select the standard toolbar, text options or time line, clicking Show text labels
will show descriptive text below each button.
Note:
The Design toolbar's text will only show if the toolbar is docked horizontally across the page or is
undocked completely. The text will not display when it is in its default position at the bottom right of your
screen.
Keyboard
Here you can set the keyboard shortcuts. Click the relevant category then the command for which you
wish to assign or change a shortcut. Any present shortcut will be listed under Current Keys. You can
click it and select Remove
to remove that shortcut entirely.
To add a new shortcut, just click in the Press New Shortcut Key
box and type the shortcut. Press the actual keys, do not type it, i.e., do not type the word "Alt", press
the Alt button as if you were using the shortcut.
Menu
This allows you to customize the right click menus available in the main working area. These are
currently set to be relevant to the work in progress., i.e., if you right click a shadow, you get options
relating to shadow control.
If you wish to change these, select the relevant menu from the Context Menus list, then go back to the
Commands
screen and add or remove commands as described in the Commands section above.
Please note: The Application Frame menu is not used in this version of Xara 3D Maker.
Options
These options are mostly self explanatory.
Show ScreenTips on toolbars
: These are the little informational tool tips that appear when you hover your mouse over an icon.
Show shortcut keys in ScreenTips
: Grayed out if you turn off the Screentips option above.
Large icons: Icons lose quality, but are bigger to see. If using this option you will probably need to
rearrange your toolbars (see Docking and undocking dialog boxes and toolbars
).
Reset settings
To return all display settings to their default value (for example, windows, toolbars, time line and option
bars):
1. Click the Window menu then select Reset user interface.
2. Exit and reopen Xara 3D Maker. Your display settings will have returned to their standard
layout.
To return all settings to their default value:
1. Click the Window menu then select Reset all settings.
2. Exit and reopen Xara 3D Maker. Every setting that you have changed previously changed will
have returned to its default value.
Note: If you have previously created your own default document that displays when you click New from
the File menu, this default document will not be deleted by using Reset all settings, and will still be
Page 116

Advanced customization
's customization options are recommended only for advanced users. They can be accessed by clicking
Customize from the Window menu, or by right clicking on a toolbar and selecting Customize
.
Note: If you experience a problem with your windows or toolbars at any time, or wish to return them to
their standard layout, click Reset user interface on the Window
menu.
Customize options are broken down into five areas:
Commands
Here you can add icons to a menu or the standard toolbar, and even create you own custom menu.
Click a category to see related commands to its right. You can drag any of the commands to the
standard toolbar where they will be added to allow easy access to that tool or feature in the future. To
remove a button, just right click it and select delete.
Commands can also be dragged to any of the menus. Or you can create your own menu. Click the New
Menu option then drag the New Menu command to the menu bar at the top of your screen. To give the
menu a custom name just right click it and select Button Appearance
. You can then drag icons to it as you would with a standard toolbar (described above).
If you right click an icon or menu option, and select Start Group
, a divider will appear between it and the previous icon or option (grayed out for the first option in the
list).
Right clicking an icon and selecting Image and Text
will show a text label with the icon?useful if you forget what an icon does. To show all text labels, see the
Toolbars option below.
Toolbars
Another way of choosing which toolbars and options to display. It is quicker to use the Window
menu to achieve the same results.
If you select the standard toolbar, text options or time line, clicking Show text labels
will show descriptive text below each button.
Note:
The Design toolbar's text will only show if the toolbar is docked horizontally across the page or is
undocked completely. The text will not display when it is in its default position at the bottom right of your
screen.
Keyboard
Here you can set the keyboard shortcuts. Click the relevant category then the command for which you
wish to assign or change a shortcut. Any present shortcut will be listed under Current Keys. You can
click it and select Remove
to remove that shortcut entirely.
To add a new shortcut, just click in the Press New Shortcut Key
box and type the shortcut. Press the actual keys, do not type it, i.e., do not type the word "Alt", press
the Alt button as if you were using the shortcut.
Menu
This allows you to customize the right click menus available in the main working area. These are
currently set to be relevant to the work in progress., i.e., if you right click a shadow, you get options
relating to shadow control.
If you wish to change these, select the relevant menu from the Context Menus list, then go back to the
Page 118
Commands
screen and add or remove commands as described in the Commands section above.
Please note: The Application Frame menu is not used in this version of Xara 3D Maker.
Options
These options are mostly self explanatory.
Show ScreenTips on toolbars
: These are the little informational tool tips that appear when you hover your mouse over an icon.
Show shortcut keys in ScreenTips
: Grayed out if you turn off the Screentips option above.
Large icons: Icons lose quality, but are bigger to see. If using this option you will probably need to
rearrange your toolbars (see Docking and undocking dialog boxes and toolbars
).
Reset settings
To return all display settings to their default value (for example, windows, toolbars, time line and option
bars):
1. Click the Window menu then select Reset user interface.
2. Exit and reopen Xara 3D Maker. Your display settings will have returned to their standard
layout.
To return all settings to their default value:
1. Click the Window menu then select Reset all settings.
2. Exit and reopen Xara 3D Maker. Every setting that you have changed previously changed will
have returned to its default value.
Note: If you have previously created your own default document that displays when you click New from
the File menu, this default document will not be deleted by using Reset all settings, and will still be
displayed when you create a new file. See Changing the default template
for details on how to delete a default document that you have created.
Page 119

Reset settings
To return all display settings to their default value (for example, windows, toolbars, time line and option
bars):
1. Click the Window menu then select Reset user interface.
2. Exit and reopen Xara 3D Maker. Your display settings will have returned to their standard
layout.
To return all settings to their default value:
1. Click the Window menu then select Reset all settings.
2. Exit and reopen Xara 3D Maker. Every setting that you have changed previously changed will
have returned to its default value.
Note: If you have previously created your own default document that displays when you click New from
the File menu, this default document will not be deleted by using Reset all settings, and will still be
displayed when you create a new file. See Changing the default template
for details on how to delete a default document that you have created.
Page 120
Reference Section
This section provides details of the toolbars and windows in Xara 3D Maker in their default state, and
describes the function of each option. It is possible to customize the toolbars, for example, by adding
extra buttons. See Customize Xara 3D Maker for details on customizing. The previous section, How to...
, describes how to use these options to create 3D graphics.
In this chapter
The toolbars
The Option Bars
File Formats
Keyboard Shortcuts
Text Options Dialog Shortcuts
Accented characters and symbols
Page 121
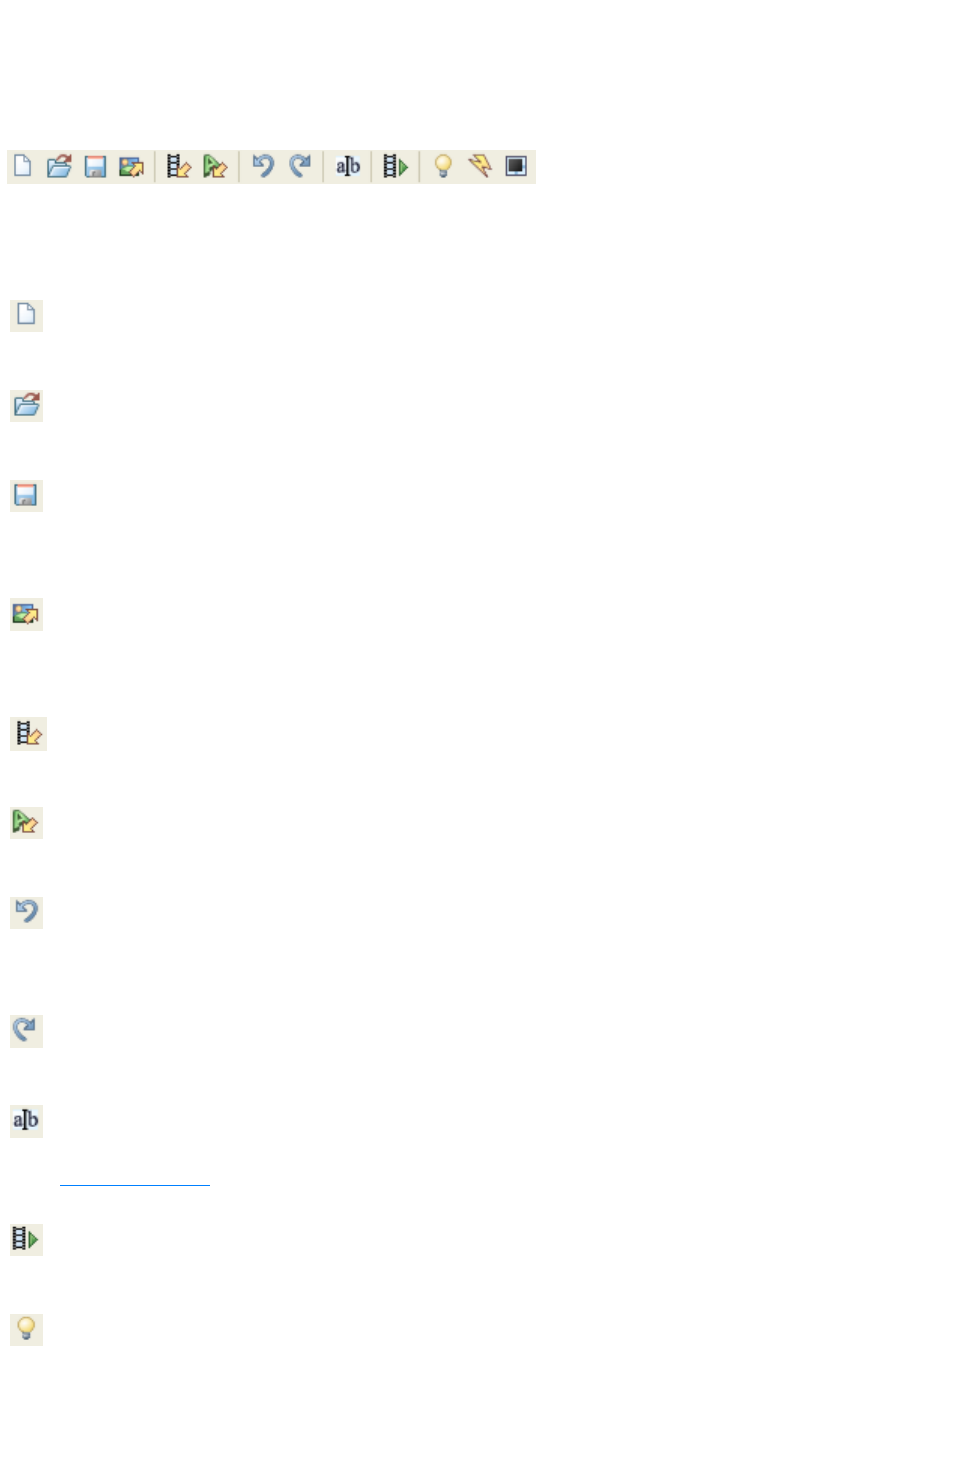
The toolbars
The standard toolbar
Many of these are standard Windows options such as load and save.
To display or hide this toolbar, use Standard toolbar on the Window
menu.
Options
New
?open a new graphic, displaying the default Xara 3D Maker
graphic ready for customizing.
Open
?open an existing X3D file. Or import a drawn shape in EMF,
WEB, WMF or XAR format and extrude the shape.
Save
?save the graphic in X3D format. Xara 3D Maker can reload
X3D files for future editing. (Xara 3D Maker cannot edit
exported files.)
Export image
(if Xara 3D Maker shows a static image) ? export the graphic in
BMP, CUR, Flash SWF, GIF, ICO, JPG or PNG format for
use on the web or in another program.
Animation picker
?opens the animation picker. An easy way to copy the animation
settings from an existing X3D file to the current graphic.
Style picker
?opens the style picker. An easy way to import selected settings
(such as colors or bevels) from an existing X3D file.
Undo
?if you make a mistake, click undo to correct that mistake. Xara
3D Maker has multi-level undo so you can discard a sequence
of changes?great for experimenting.
Redo
?if you click undo too many times, click redo to restore each
change in sequence.
Show/hide cursor?display a cursor in the text. This lets you
select and change characters in the middle of the text. (See
select characters
.)
Start/stop animation
?preview the animation within Xara 3D Maker (and you can still
edit the design while it's moving).
Show/hide lighting
?display the three lights that shine on the faces of the graphic.
You can then drag the lights to change the lighting.
Note:
Page 122
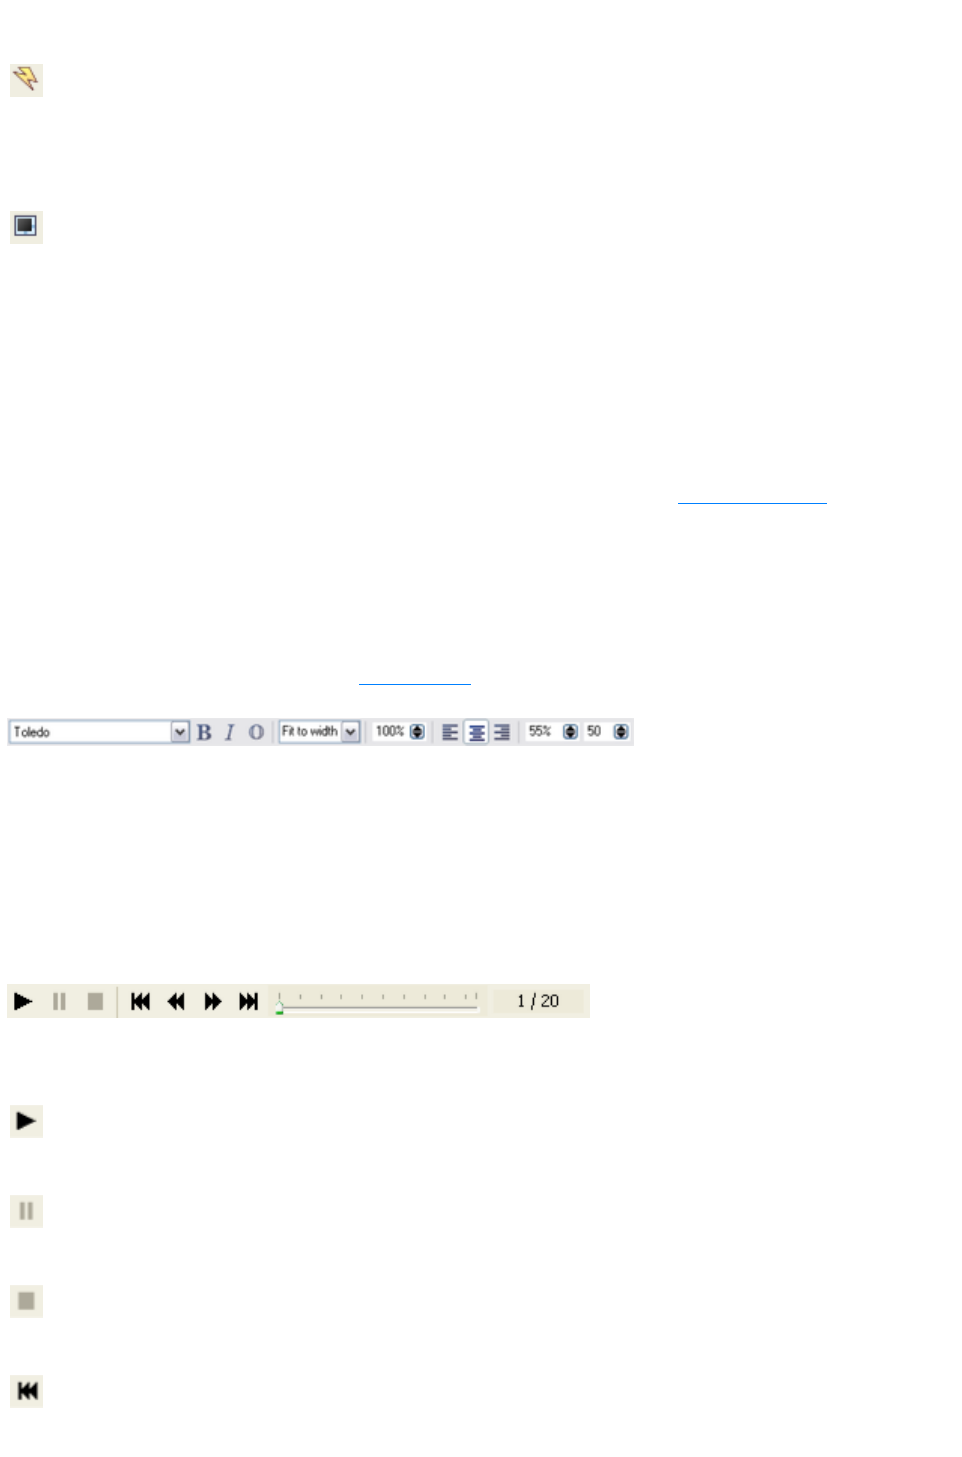
if the graphic has a shadow, a fourth, striped light that creates
the shadow is also shown.
Display as Flash
?Flash vector format does not support all Xara 3D Maker
features (such as shadows and some bevel types). Selecting
Display as Flash shows only options compatible with Flash
vector format.
Show/Hide Frame
?this displays the graphic in a small window (the Frame) within
the main Xara 3D Maker window. The advantage of the Frame
is that Xara 3D Maker remembers its size when you save the
file. Opening the file in the future displays the frame at that same
size. It is also useful for small graphics because you do not have
to make the main window tiny.
The options toolbar
This gives short cuts for the main editing dialog boxes in Xara 3D Maker. The Option bars
section describes these dialog boxes in detail.
To display or hide this toolbar, use Options toolbar on the Window
menu.
The text toolbar
These options duplicate options in the Text options
dialog box.
To display or hide this toolbar, use Text toolbar on the Window
menu.
Note: If you are using Windows 7 and have previously hidden rarely-used fonts in your Control Panel,
these fonts will not be displayed in the Xara 3D Maker text toolbar.
The time line
These options let you step through or play animations. You can also pause the animation at any
intermediate frame and then export that frame as a static image.
To display or hide the time line, use Time line on the Window
menu or press "Alt + L".
Options
Play?preview the animation in the Xara 3D Maker window.
This is the same as clicking Start/Stop animation
on the Standard Toolbar.
Pause
?pause the animation at the current frame. Click again to restart
the animation at the next frame.
Stop
?halts the animation. This is the same as clicking Start/Stop
animation on the standard Toolbar.
Rewind
?display the first frame (frame 1) in the animation.
Page 123
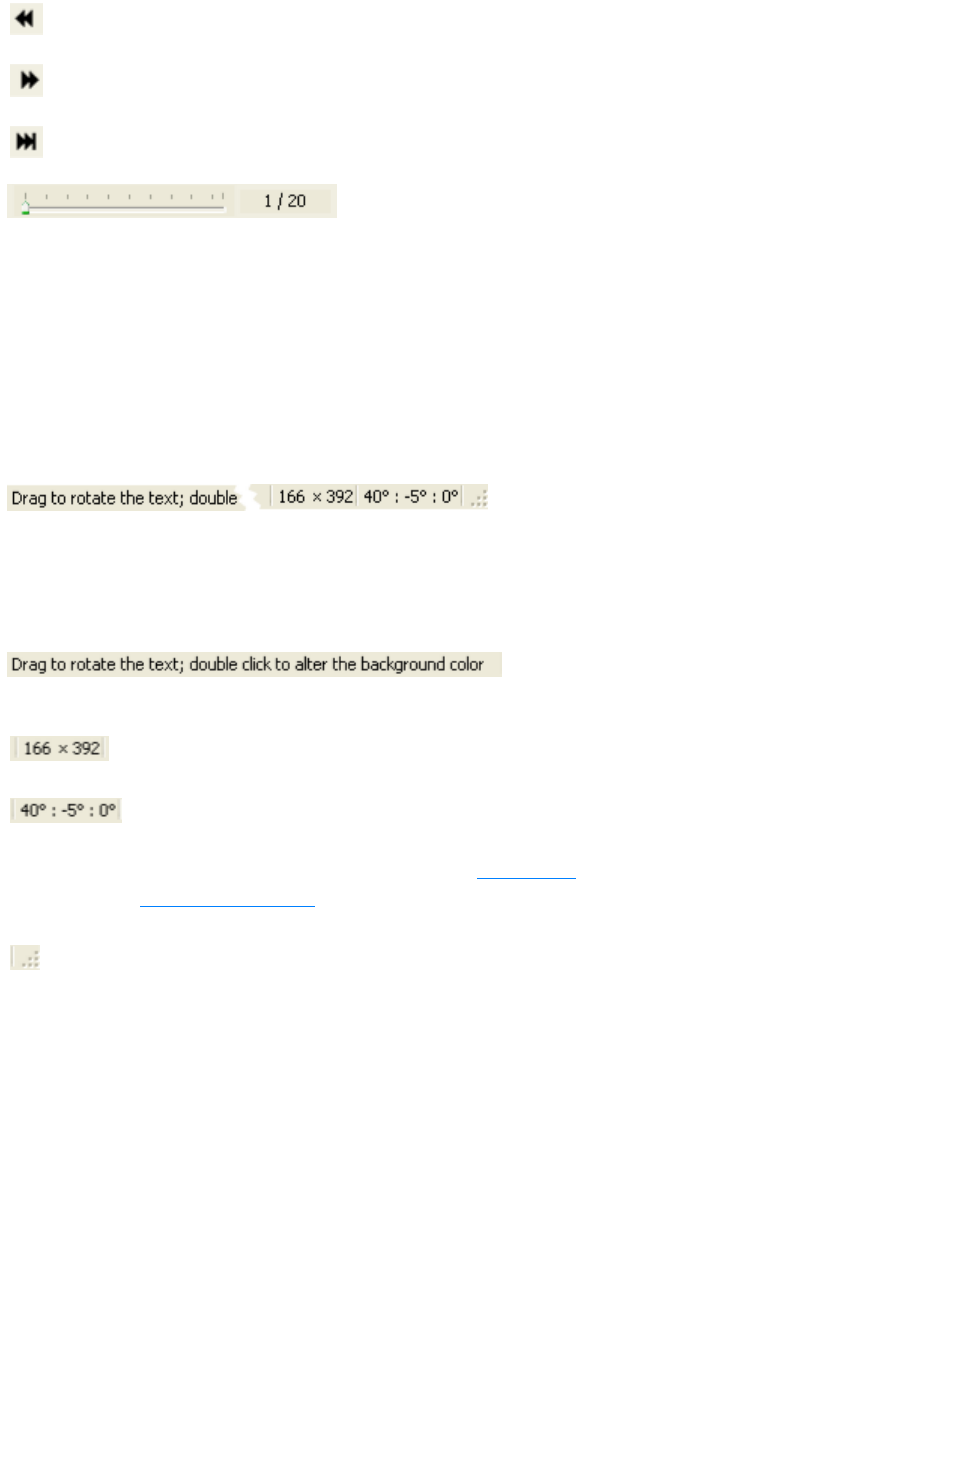
Back
?display the previous frame in the animation.
Forward
?display the next frame in the animation.
Fast forward
?display the last frame in the animation
Time line
?when the animation is playing, this displays progress through the animation.
Or you can drag the slider to move to a particular point in the animation.
Tip: You can display labels for the time line by choosing Customize from the Window menu, clicking
the Toolbars tab and clicking the Time line button off then on. Click the Show Text Labels box and
click Close
.
The status bar
This gives you information about the graphic and currently available options. When the window isn't
maximized you can click and drag the bottom right hand corner to resize the window.
To display or hide the status bar, use Status bar on the Window
menu.
Options
The left-hand section gives you information about editing options (when the mouse is over the editing
window) or button functions (when the mouse is over a button).
This section shows the size in pixels of the editing
window.
This section shows the rotation angles (vertical window
axis, horizontal window axis and horizontal text axis).
For more information on rotation see Rotate and
position the graphic
.
(Only shown when the Xara 3D Maker isn't
maximized.) Click and drag this to resize the Xara 3D
Maker window.
Page 124
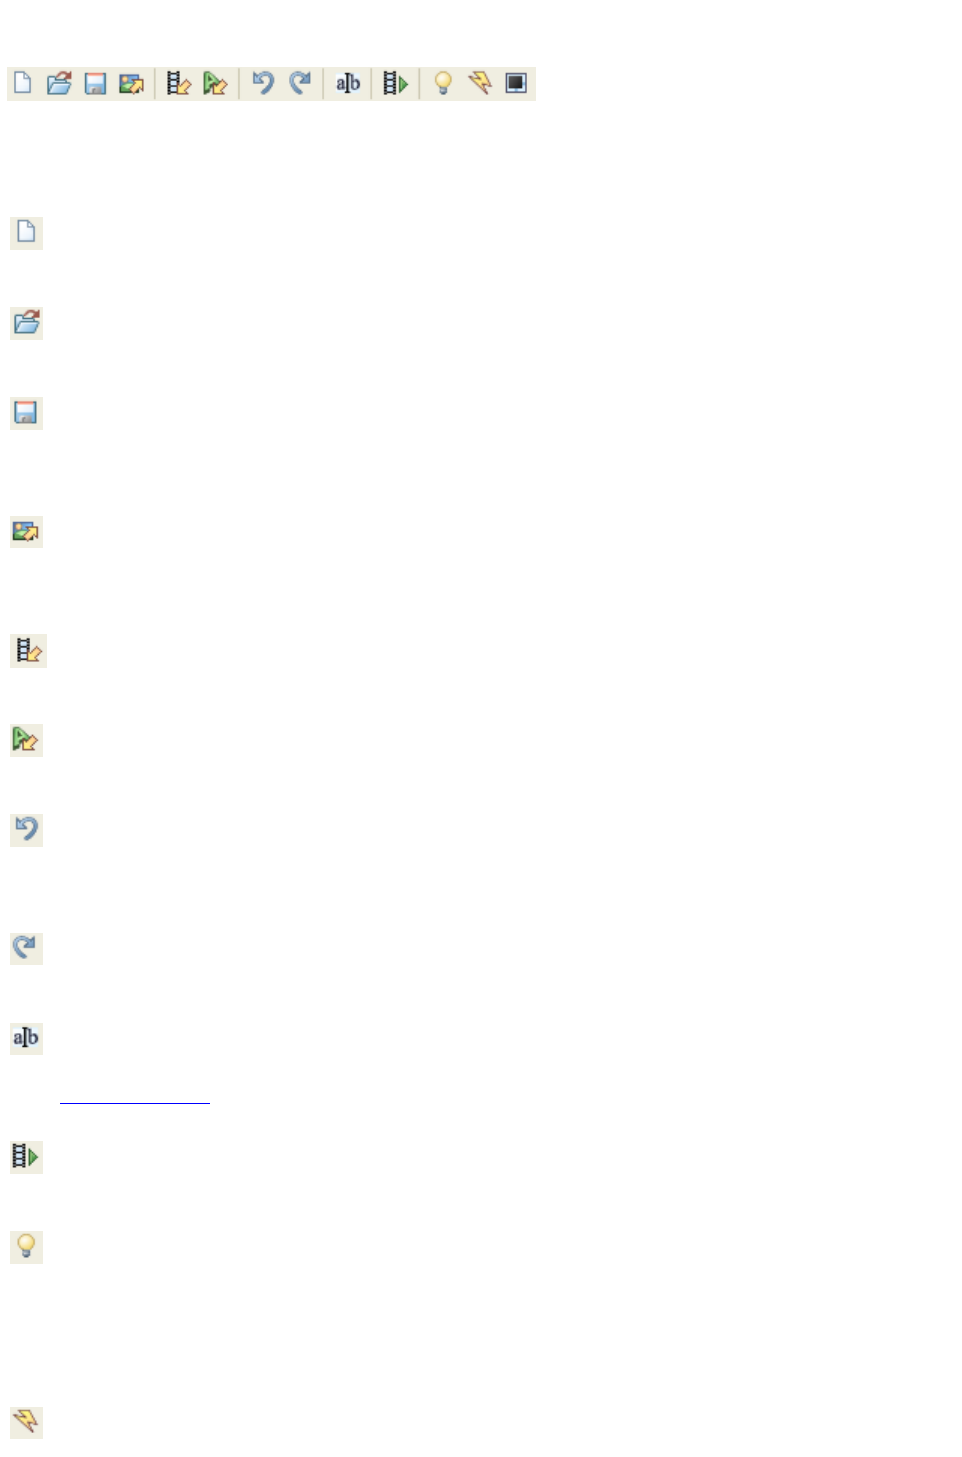
The standard toolbar
Many of these are standard Windows options such as load and save.
To display or hide this toolbar, use Standard toolbar on the Window
menu.
Options
New
?open a new graphic, displaying the default Xara 3D Maker
graphic ready for customizing.
Open
?open an existing X3D file. Or import a drawn shape in EMF,
WEB, WMF or XAR format and extrude the shape.
Save
?save the graphic in X3D format. Xara 3D Maker can reload
X3D files for future editing. (Xara 3D Maker cannot edit
exported files.)
Export image
(if Xara 3D Maker shows a static image) ? export the graphic in
BMP, CUR, Flash SWF, GIF, ICO, JPG or PNG format for
use on the web or in another program.
Animation picker
?opens the animation picker. An easy way to copy the animation
settings from an existing X3D file to the current graphic.
Style picker
?opens the style picker. An easy way to import selected settings
(such as colors or bevels) from an existing X3D file.
Undo
?if you make a mistake, click undo to correct that mistake. Xara
3D Maker has multi-level undo so you can discard a sequence
of changes?great for experimenting.
Redo
?if you click undo too many times, click redo to restore each
change in sequence.
Show/hide cursor?display a cursor in the text. This lets you
select and change characters in the middle of the text. (See
select characters
.)
Start/stop animation
?preview the animation within Xara 3D Maker (and you can still
edit the design while it's moving).
Show/hide lighting
?display the three lights that shine on the faces of the graphic.
You can then drag the lights to change the lighting.
Note:
if the graphic has a shadow, a fourth, striped light that creates
the shadow is also shown.
Display as Flash
Page 125
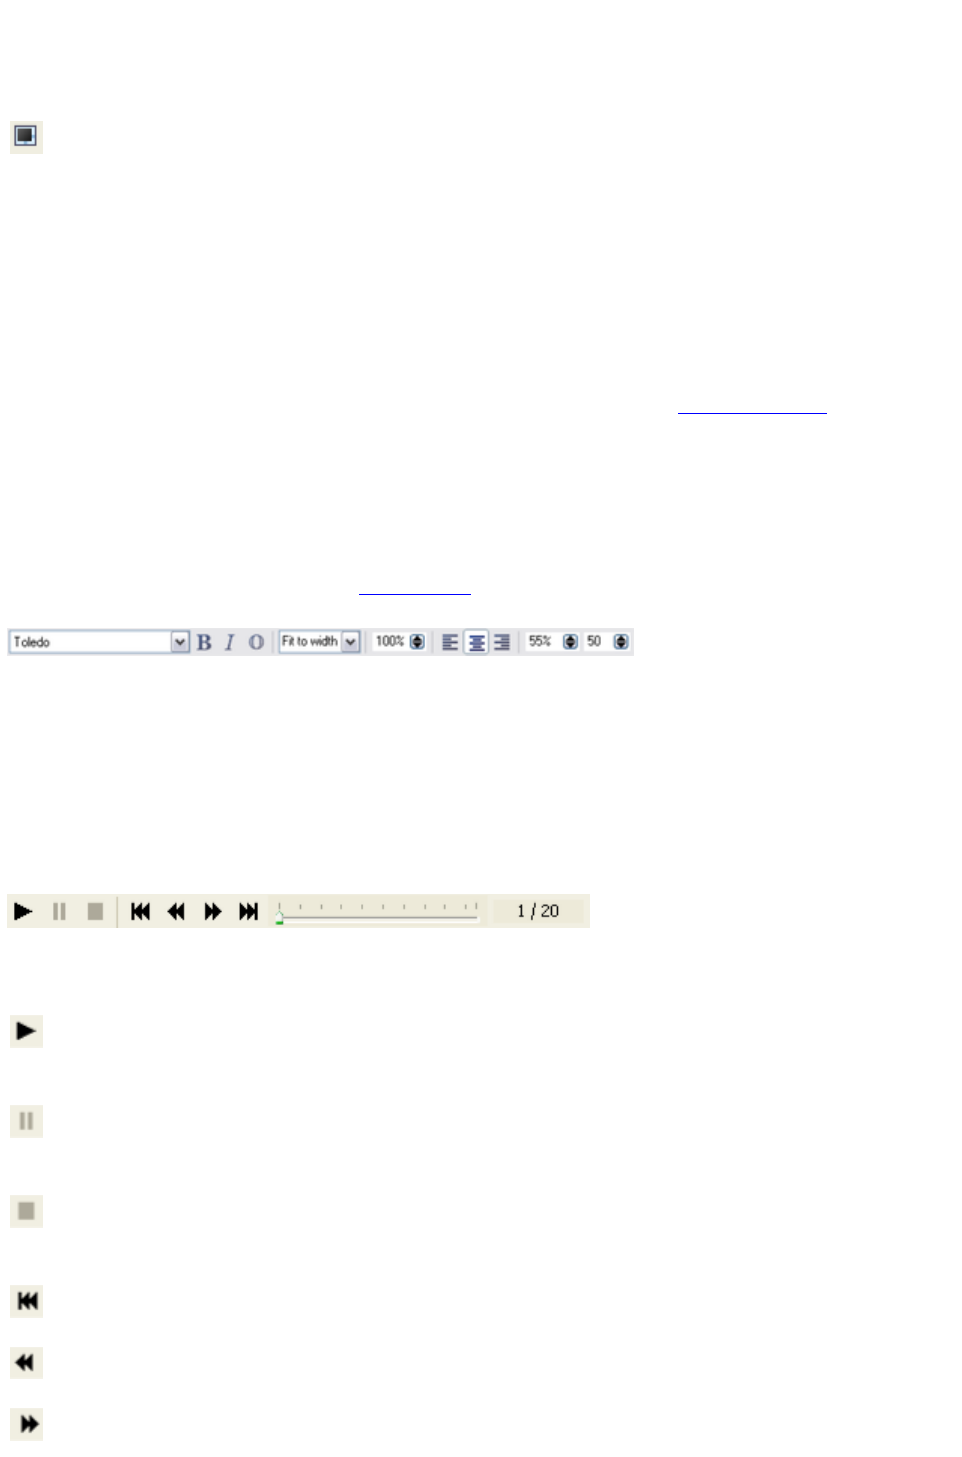
?Flash vector format does not support all Xara 3D Maker
features (such as shadows and some bevel types). Selecting
Display as Flash shows only options compatible with Flash
vector format.
Show/Hide Frame
?this displays the graphic in a small window (the Frame) within
the main Xara 3D Maker window. The advantage of the Frame
is that Xara 3D Maker remembers its size when you save the
file. Opening the file in the future displays the frame at that same
size. It is also useful for small graphics because you do not have
to make the main window tiny.
The options toolbar
This gives short cuts for the main editing dialog boxes in Xara 3D Maker. The Option bars
section describes these dialog boxes in detail.
To display or hide this toolbar, use Options toolbar on the Window
menu.
The text toolbar
These options duplicate options in the Text options
dialog box.
To display or hide this toolbar, use Text toolbar on the Window
menu.
Note: If you are using Windows 7 and have previously hidden rarely-used fonts in your Control Panel,
these fonts will not be displayed in the Xara 3D Maker text toolbar.
The time line
These options let you step through or play animations. You can also pause the animation at any
intermediate frame and then export that frame as a static image.
To display or hide the time line, use Time line on the Window
menu or press "Alt + L".
Options
Play?preview the animation in the Xara 3D Maker window.
This is the same as clicking Start/Stop animation
on the Standard Toolbar.
Pause
?pause the animation at the current frame. Click again to restart
the animation at the next frame.
Stop
?halts the animation. This is the same as clicking Start/Stop
animation on the standard Toolbar.
Rewind
?display the first frame (frame 1) in the animation.
Back
?display the previous frame in the animation.
Forward
Page 126
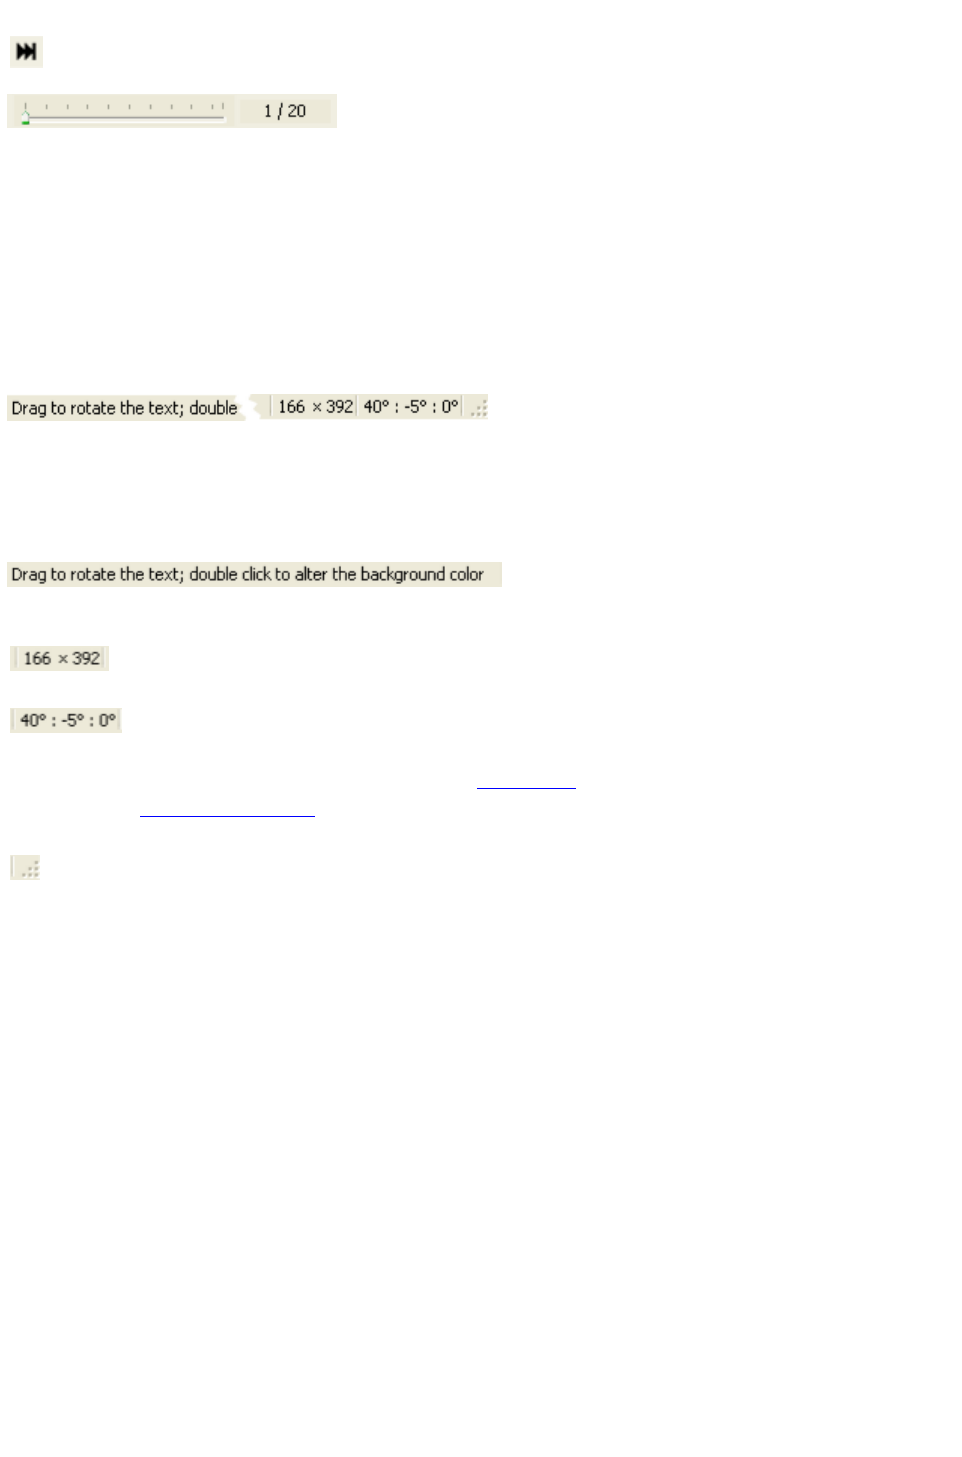
?display the next frame in the animation.
Fast forward
?display the last frame in the animation
Time line
?when the animation is playing, this displays progress through the animation.
Or you can drag the slider to move to a particular point in the animation.
Tip: You can display labels for the time line by choosing Customize from the Window menu, clicking
the Toolbars tab and clicking the Time line button off then on. Click the Show Text Labels box and
click Close
.
The status bar
This gives you information about the graphic and currently available options. When the window isn't
maximized you can click and drag the bottom right hand corner to resize the window.
To display or hide the status bar, use Status bar on the Window
menu.
Options
The left-hand section gives you information about editing options (when the mouse is over the editing
window) or button functions (when the mouse is over a button).
This section shows the size in pixels of the editing
window.
This section shows the rotation angles (vertical window
axis, horizontal window axis and horizontal text axis).
For more information on rotation see Rotate and
position the graphic
.
(Only shown when the Xara 3D Maker isn't
maximized.) Click and drag this to resize the Xara 3D
Maker window.
Page 127
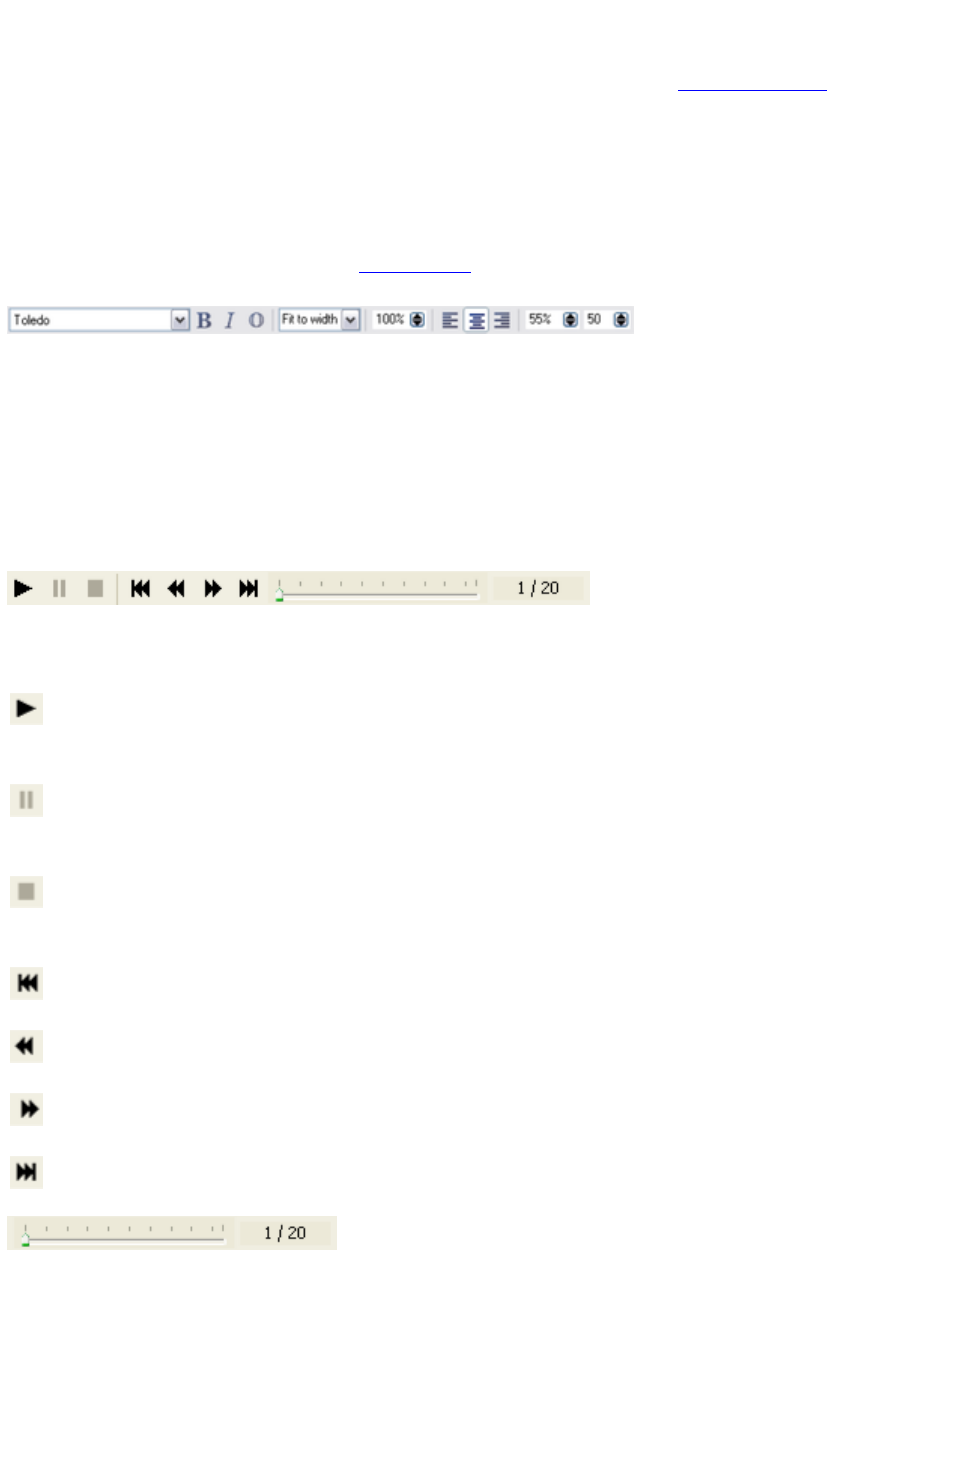
The options toolbar
This gives short cuts for the main editing dialog boxes in Xara 3D Maker. The Option bars
section describes these dialog boxes in detail.
To display or hide this toolbar, use Options toolbar on the Window
menu.
The text toolbar
These options duplicate options in the Text options
dialog box.
To display or hide this toolbar, use Text toolbar on the Window
menu.
Note: If you are using Windows 7 and have previously hidden rarely-used fonts in your Control Panel,
these fonts will not be displayed in the Xara 3D Maker text toolbar.
The time line
These options let you step through or play animations. You can also pause the animation at any
intermediate frame and then export that frame as a static image.
To display or hide the time line, use Time line on the Window
menu or press "Alt + L".
Options
Play?preview the animation in the Xara 3D Maker window.
This is the same as clicking Start/Stop animation
on the Standard Toolbar.
Pause
?pause the animation at the current frame. Click again to restart
the animation at the next frame.
Stop
?halts the animation. This is the same as clicking Start/Stop
animation on the standard Toolbar.
Rewind
?display the first frame (frame 1) in the animation.
Back
?display the previous frame in the animation.
Forward
?display the next frame in the animation.
Fast forward
?display the last frame in the animation
Time line
?when the animation is playing, this displays progress through the animation.
Or you can drag the slider to move to a particular point in the animation.
Tip: You can display labels for the time line by choosing Customize from the Window menu, clicking
the Toolbars tab and clicking the Time line button off then on. Click the Show Text Labels box and
click Close
.
Page 128

The status bar
This gives you information about the graphic and currently available options. When the window isn't
maximized you can click and drag the bottom right hand corner to resize the window.
To display or hide the status bar, use Status bar on the Window
menu.
Options
The left-hand section gives you information about editing options (when the mouse is over the editing
window) or button functions (when the mouse is over a button).
This section shows the size in pixels of the editing
window.
This section shows the rotation angles (vertical window
axis, horizontal window axis and horizontal text axis).
For more information on rotation see Rotate and
position the graphic
.
(Only shown when the Xara 3D Maker isn't
maximized.) Click and drag this to resize the Xara 3D
Maker window.
Page 129
The text toolbar
These options duplicate options in the Text options
dialog box.
To display or hide this toolbar, use Text toolbar on the Window
menu.
Note: If you are using Windows 7 and have previously hidden rarely-used fonts in your Control Panel,
these fonts will not be displayed in the Xara 3D Maker text toolbar.
The time line
These options let you step through or play animations. You can also pause the animation at any
intermediate frame and then export that frame as a static image.
To display or hide the time line, use Time line on the Window
menu or press "Alt + L".
Options
Play?preview the animation in the Xara 3D Maker window.
This is the same as clicking Start/Stop animation
on the Standard Toolbar.
Pause
?pause the animation at the current frame. Click again to restart
the animation at the next frame.
Stop
?halts the animation. This is the same as clicking Start/Stop
animation on the standard Toolbar.
Rewind
?display the first frame (frame 1) in the animation.
Back
?display the previous frame in the animation.
Forward
?display the next frame in the animation.
Fast forward
?display the last frame in the animation
Time line
?when the animation is playing, this displays progress through the animation.
Or you can drag the slider to move to a particular point in the animation.
Tip: You can display labels for the time line by choosing Customize from the Window menu, clicking
the Toolbars tab and clicking the Time line button off then on. Click the Show Text Labels box and
click Close
.
The status bar
This gives you information about the graphic and currently available options. When the window isn't
maximized you can click and drag the bottom right hand corner to resize the window.
To display or hide the status bar, use Status bar on the Window
Page 130
menu.
Options
The left-hand section gives you information about editing options (when the mouse is over the editing
window) or button functions (when the mouse is over a button).
This section shows the size in pixels of the editing
window.
This section shows the rotation angles (vertical window
axis, horizontal window axis and horizontal text axis).
For more information on rotation see Rotate and
position the graphic
.
(Only shown when the Xara 3D Maker isn't
maximized.) Click and drag this to resize the Xara 3D
Maker window.
Page 131
The time line
These options let you step through or play animations. You can also pause the animation at any
intermediate frame and then export that frame as a static image.
To display or hide the time line, use Time line on the Window
menu or press "Alt + L".
Options
Play?preview the animation in the Xara 3D Maker window.
This is the same as clicking Start/Stop animation
on the Standard Toolbar.
Pause
?pause the animation at the current frame. Click again to restart
the animation at the next frame.
Stop
?halts the animation. This is the same as clicking Start/Stop
animation on the standard Toolbar.
Rewind
?display the first frame (frame 1) in the animation.
Back
?display the previous frame in the animation.
Forward
?display the next frame in the animation.
Fast forward
?display the last frame in the animation
Time line
?when the animation is playing, this displays progress through the animation.
Or you can drag the slider to move to a particular point in the animation.
Tip: You can display labels for the time line by choosing Customize from the Window menu, clicking
the Toolbars tab and clicking the Time line button off then on. Click the Show Text Labels box and
click Close
.
The status bar
This gives you information about the graphic and currently available options. When the window isn't
maximized you can click and drag the bottom right hand corner to resize the window.
To display or hide the status bar, use Status bar on the Window
menu.
Options
The left-hand section gives you information about editing options (when the mouse is over the editing
window) or button functions (when the mouse is over a button).
This section shows the size in pixels of the editing
window.
This section shows the rotation angles (vertical window
axis, horizontal window axis and horizontal text axis).
Page 132
The status bar
This gives you information about the graphic and currently available options. When the window isn't
maximized you can click and drag the bottom right hand corner to resize the window.
To display or hide the status bar, use Status bar on the Window
menu.
Options
The left-hand section gives you information about editing options (when the mouse is over the editing
window) or button functions (when the mouse is over a button).
This section shows the size in pixels of the editing
window.
This section shows the rotation angles (vertical window
axis, horizontal window axis and horizontal text axis).
For more information on rotation see Rotate and
position the graphic
.
(Only shown when the Xara 3D Maker isn't
maximized.) Click and drag this to resize the Xara 3D
Maker window.
Page 134
The Option Bars
Choose Options toolbar from the Window menu to display or hide the option bars. These bars, which
as standard are on the right hand side of the Xara 3D Maker window, provide the main editing functions
(except rotating the graphic). Just click the relevant bar to bring up its options. You can also click the
buttons on the Options toolbar or use keyboard short cuts
to open and close these options (except Text options).
This section covers
Animation options
Bevel options
Color options
Design options
Extrusion options
Shadow options
Text options
Texture options
View options
Page 135
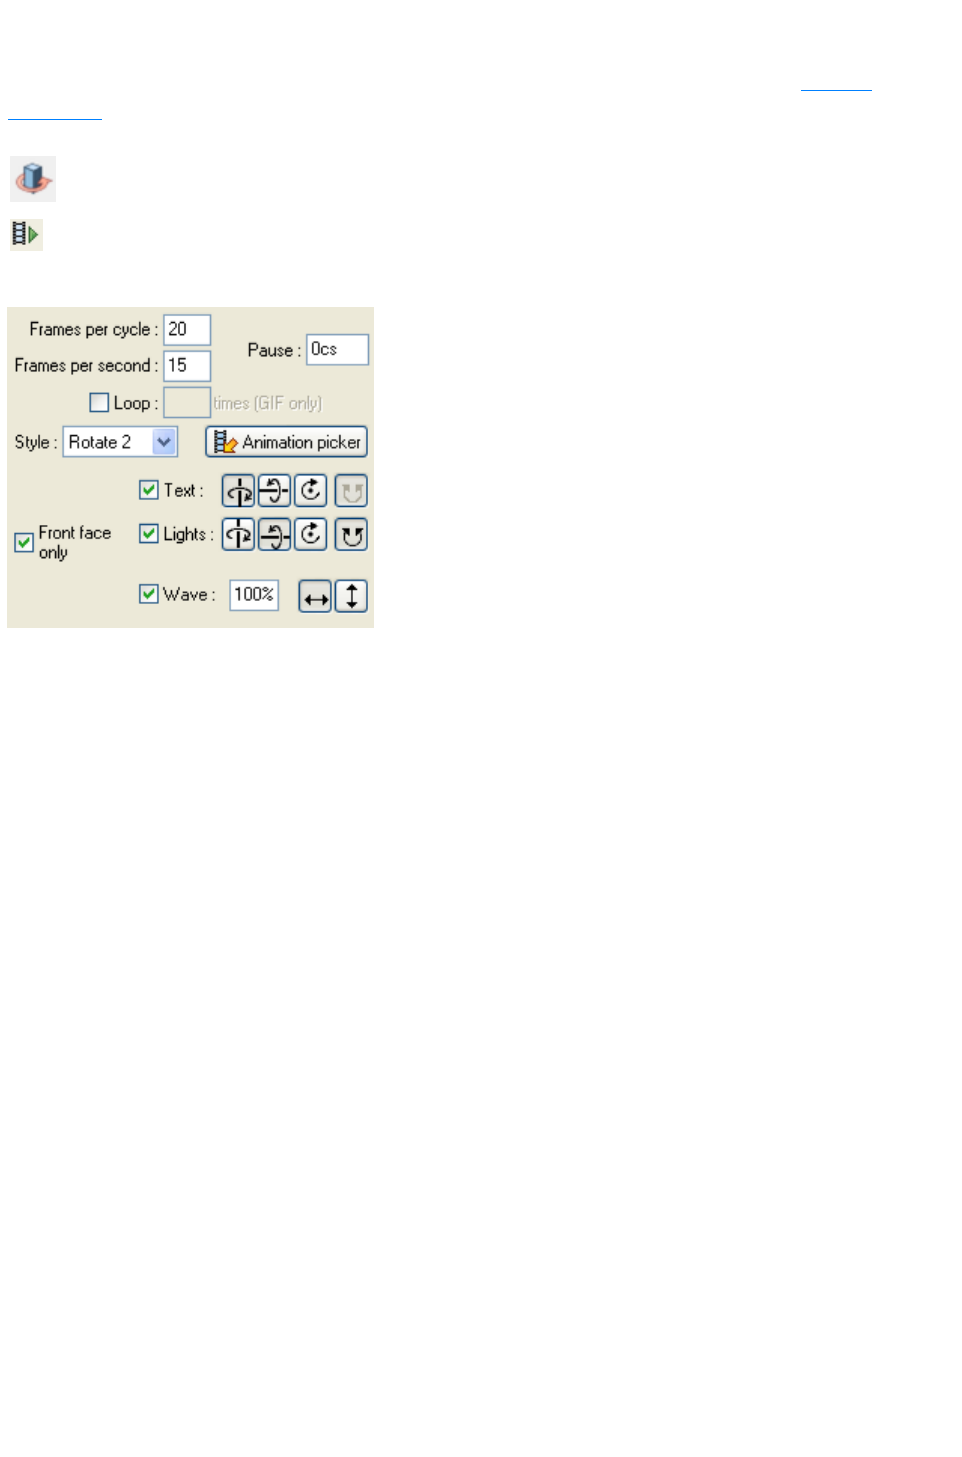
Animation options
You can create Animated GIFs and Flash and AVI movies using Xara 3D Maker. See creating
animations
for more details.
You can also display animation options by clicking this button in the
options toolbar.
You can preview the effect of the current animation settings by
clicking the start/stop animation button or pressing Ctrl-Space. Press
again to stop the animation.
Frames per cycle
For single-page animations, this is the number of frames in the animation. For multi-page animations, this
is the number of frames for which each page is displayed. Reducing the number of frames makes the file
size smaller but can give jerky animations. Dimmed for step animations, typewriter animations and pulse
animations.
Frames per second
This controls the speed of the animations. A low speed can give jerky animations. High speeds can also
give jerky animation if the program displaying the animation cannot keep up with the animation speed.
Dimmed for Step animations, Typewriter animations and Pulse
animations.
Pause & Loop
These options apply only to animated GIFs, Flash animations and (pause only) screen savers. They do
not apply to AVIs. Pause introduces a delay after the first frame. Loop
gives you the option of running the animation once only (Loop=1), continuously (uncheck the option) or a
specified number of times. Some browsers interpret values above 1 as 'play continuously'?this is a feature
of the browser not Xara 3D Maker.
Style
This selects the type of animation. As you select different styles, this dialog box changes to show only
options relevant to that animation type.
Note: Pulse and Typewriter
animations do not work on the board with holes design
Rotate, Swing and Pulsate
animations have two options: 1 animates the entire graphic as a single block, 2 animates each character
separately.
Page 136

Scroll and Scroll In/Out:
These two animations are similar in that they animate the text by scrolling it in either an X (horizontal), Y
(vertical), or Z (into or out of the screen) direction. Scroll is simpler and best if you want the text to move
continuously in one direction throughout the animation. While Scroll In/Out gives you more control and
allows you to scroll text in different directions on approach and departure from the center.
Scroll
: displays the text moving across the screen in one direction, with an optional pause in the middle.
Pause
determines the time that the text stands still in the middle of the animation, in 100ths of a second.
Normally for Scroll animations you'll want continuous scrolling with no pause, so just set this to 0.If you
want a pause it's usually best to use the Scroll In/out animation type instead.
You can control the speed at which your text enters (Start speed) and exits (End speed) the screen,
and the speed at which it moves in the middle (Mid speed
). If your text moves in the Z direction (into or out of the screen), so it comes from or goes to a point in
the distance, you'll often want much higher speed values because the text is seeming to move much longer
distances.
Page gap
allows you to control the distance between the contents of consecutive pages, with the default value of
100 giving a gap of around 3 times the text height. A lower value makes the pages appear closer
together. As with speed, animations with text moving long distances in the Z direction will often need
much larger page gap values. Experiment with different values to get the effect you want.
Scroll in/out:
is similar to scroll, but allows you to choose different directions for the text as it approaches and departs
from the centre of the animation. So for example you may choose to have the text approaching from the
distance in the Z direction (moving towards you out of the screen) until it reaches the centre (its IN
phase). And then, perhaps after a pause, moving horizontally to leave the screen (its OUT phase).
Pause
sets the time in 100ths of a second that the text stands still between the IN and OUT phases of the
animation.
The Speed
controls allow you to set the average speed of your text during the separate IN and OUT phases. As
with Scroll, text moving on the Z axis will probably need higher speed values.
Profile allows you to control how the speed of your text changes during the animation, but the overall
average speed is unaffected. A Scroll In - Profile
with a value of zero makes the text move to the center at constant speed. Increasing the profile figure
slightly causes the text to start a little faster, but slow down as it approaches the center. The more you
increase the profile, the more this effect is exaggerated, up to the maximum profile value of 99. The
overall time the text takes to cover the distance to the center does not change as the profile figure is
changed; only the speeds at the beginning and end of the sequence vary.
Similarly, a negative profile value has the opposite effect. A small negative value makes the text start
slightly slower and speed up slightly as it approaches the center. A larger negative value amplifies this
effect further. Scroll Out - Profile works just the same way for the out phase of the animation, but the
sense is reversed so that specifying the same profile value for both in and out phases gives symmetrical
results. So a zero value gives a constant speed. A small positive number makes the text start moving from
the center slower and then speed up. A larger value increases this effect. For multi-page animations,
Page gap is the same as with Scroll
.
Rotate: lets you rotate either the text or the lights or both. You can select the rotation plane and
direction. With Front face only checked you see only the front of the text; when unchecked you see
Page 137

both the front and back of the text. Checking Front face only
produces smaller animations because you never see the back of the text. Select whether you want the
text to rotate or the lights or both.
Swing: gives a pendulum effect with the text swinging to and fro. You can select amount of swing (the
Angle?default 180s) and the rotation plane and direction. Angle
mainly applies to multipage animations.
With Angle selected, the animation moves to the next page after each complete rotation (a complete left
& right or up & down cycle). With Angle unselected, the change to the next page is at the start of each
swing (for example, as the heading starts to swing left and then again as it starts to swing right). This
means you can create animations with half the number of frames as with Angle
selected.
Pulsate: gives the effect of the text pulsating in the selected axis. Shrink+grow and Grow+shrink apply
when either you have a pause in the animation or the animation does not loop continuously. For an
animation that loops continuously, without a pause, these options have the same effect. Overlap pages
applies to multi-page animations. The effect is that each page appears out of the previous page. With this
option unchecked, you see each page separately. Apart from creating some great animation effects,
overlapped animations create small file sizes. Minimum text size
lets you define how far back to pulsate the text.
Ripple:
This gives the effect of the text bobbing up and down character by character when in text mode. In other
design modes (such as button) the entire design moves. You can select the amplitude (how far the
characters or design go up and down) of the ripple, its axis and the direction in which the animation
starts.
Fade: the size of the text does not change but the text fades in or out from the background. Fade
is especially useful for Flash animations as it produces smaller file sizes than other animation styles.
Step: displays a series of static (non-rotation) headings in a multi-page animations. Displays each page in
sequence. Frame duration
sets how long each page in the animation will be displayed.
Typewriter: displays each character in sequence as if someone was typing the character on a keyboard.
Frame duration
sets the delay between characters.
Pulse: animates each character in sequence, making it either bigger (Size above 100%) or smaller (Size
below 100%.). Frame duration
sets how long to display each character for.
Wave: (for Rotate 2, Swing 1 and 2, Pulsate 1 and 2 animations only?only available for text.) Wave
is particularly effective with pulsate and looks best with longer lines of text. Adds a rippling wave along
the text. The animation effect moves in a horizontal only (for single line headings) or horizontal and
vertical direction (for multiple line headings) across the text or down the lines. %
lets you control the size of the wave.
Animation picker
Lets you import the animation properties from another Xara 3D Maker file. This imports only animation
properties?it has no effect on the wording, colors or lighting.
If you can't work out how to recreate the animation you see in another example, you can just copy that
animation using the animation picker.
Page 138
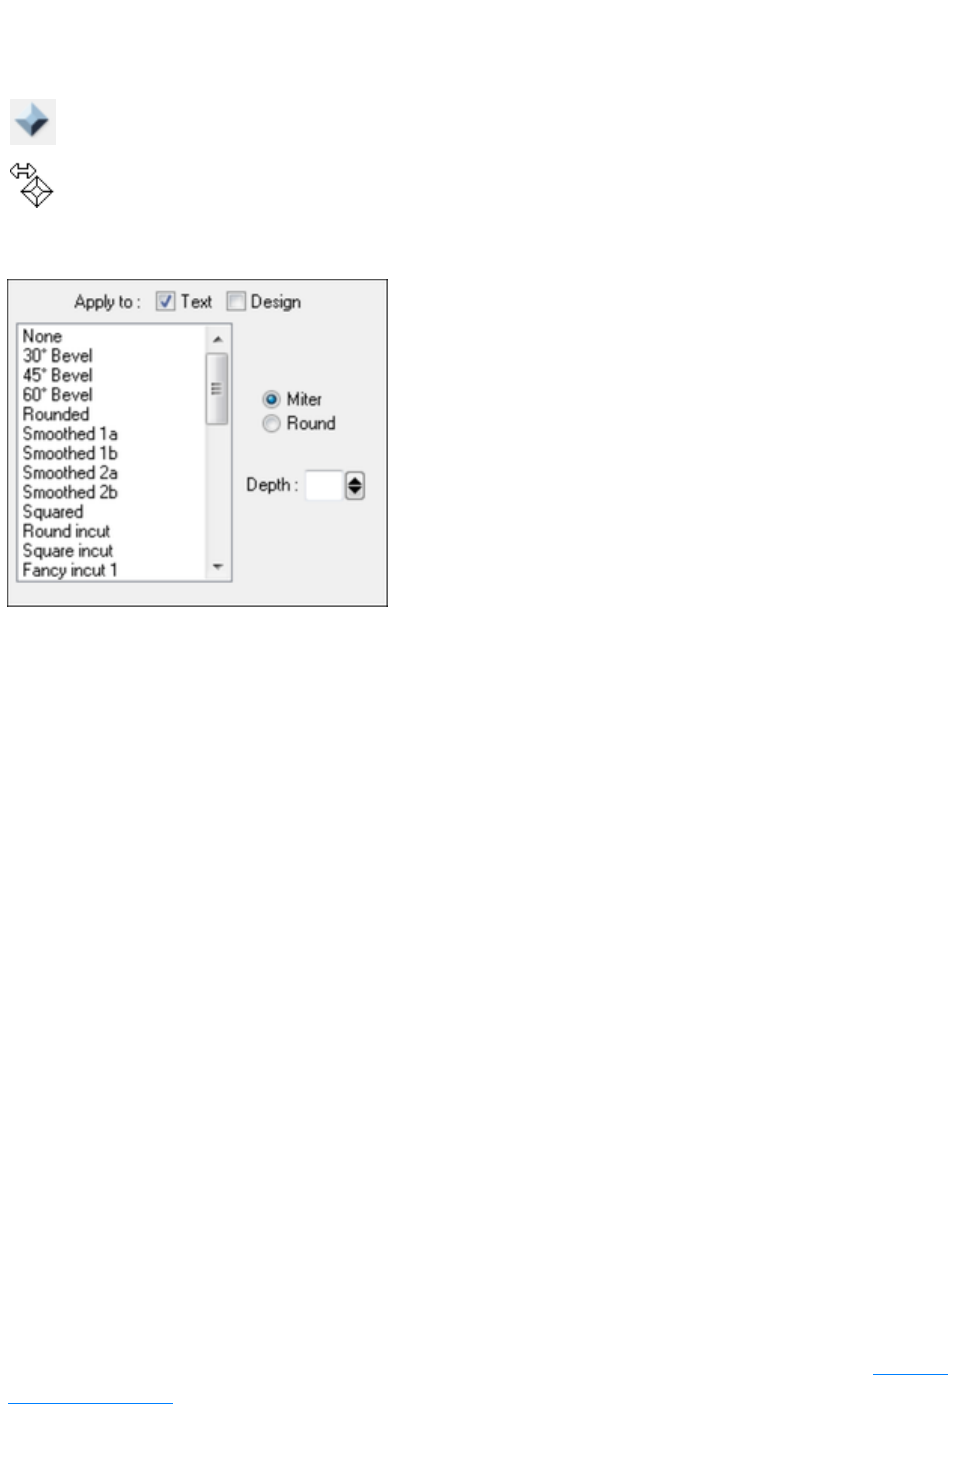
Bevel options
The bevel is the join between the sides and face of the graphic or button.
You can also display bevel options by clicking this button in the
options toolbar.
For quick interactive bevels on your design just hover your cursor
over the side of your object and hold the shift key so that your mouse
pointer changes to the bevel tool (see left). You can then just click
and drag the bevels on the object.
Apply to:
If you are using a board, board + holes or border design then you can choose whether to apply these
bevel settings to just the text, the board/border or both.
Bevel types:
This lists the different bevel designs available to you.
Miter/Round: This has an effect on sharp corners or serifs on text. Miter squares off corners, Round
creates smooth, rounded corners.
Depth:
This is the size of the bevel.
Flash file format does not support some bevel types or round corners. Selecting Display as Flash on
the View
menu removes unsupported bevel types from the list and dims miter/round.
Note: We recommend that you don't set the bevel depth to 1 to remove a bevel. Instead set the bevel
type to None
. A small bevel renders much more slowly than no bevel, especially if the bevel contains curves.
Tips
Bevels go along the sides, not the face. So, for example, selecting the Curved
bevel produces a bulge effect to the extruded part. This also means the bevel takes the color of the sides.
(The color of the face can be different to the color of the sides.)
Square faced and Square cornered
bevels are particularly effective when the sides are a different color to the face. This can give the effect of
a two-colored face to the text.
Beveled objects are slower to display than objects with no bevel.
The Miter/Round options affect the corners of objects. Usually text has sharp mitered corners, but you
can round the corners by selecting round. This is usually only obvious for fonts that have sharp corners or
serifs. (Selecting display as flash dims these buttons as Flash vector format supports only miters?more on
creating Flash files
.)
Page 139
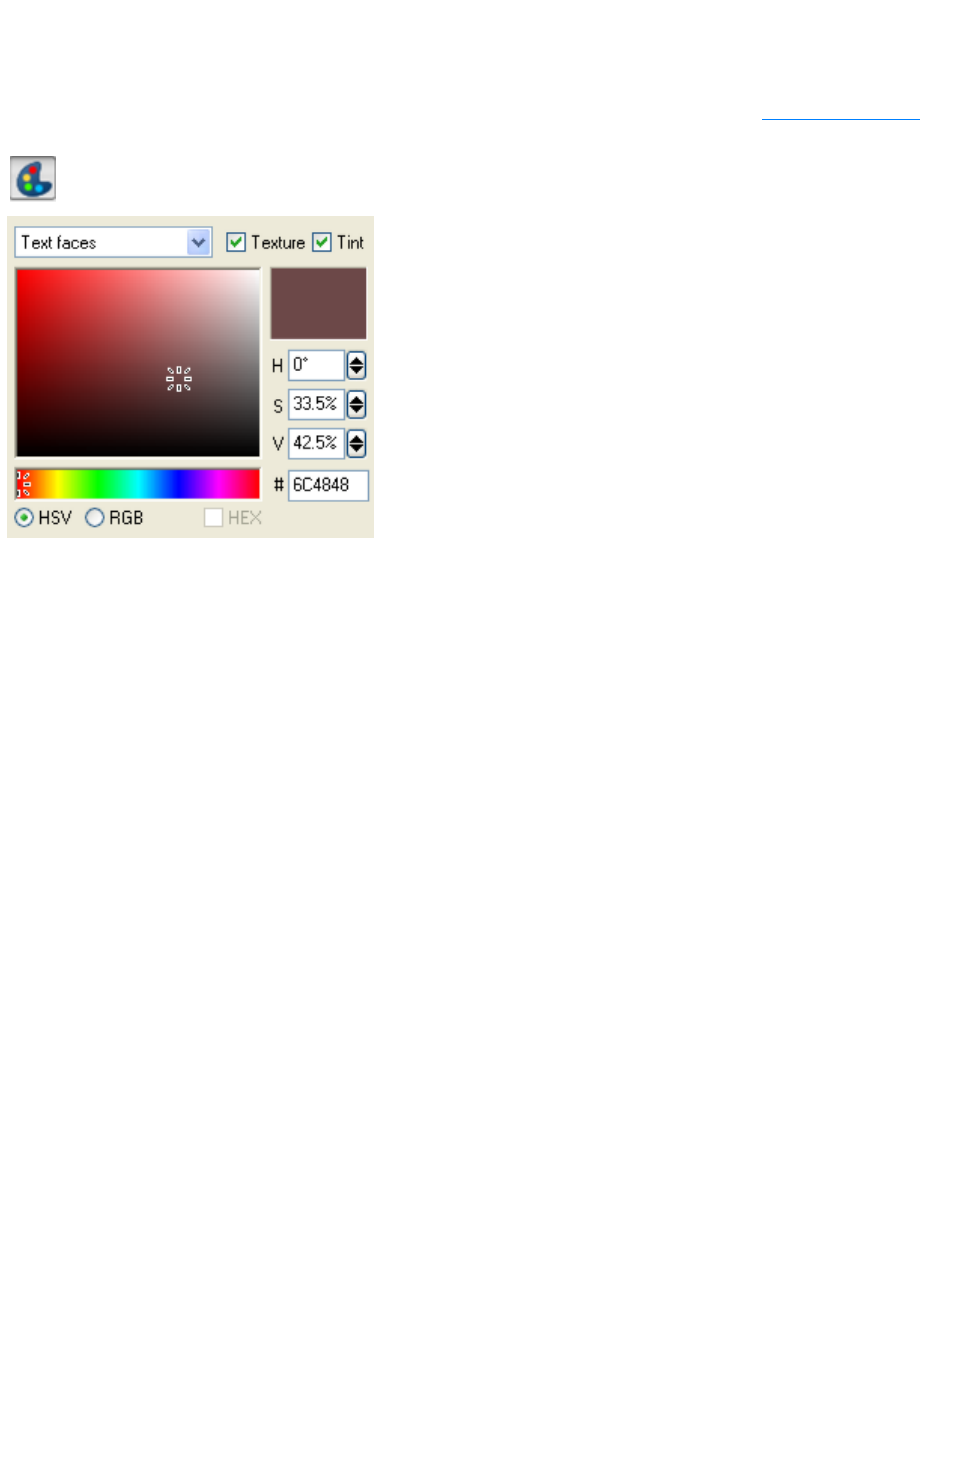
Color options
Here you can alter the colors of the faces and sides of the graphic, the lights, the shadow and the
background. If you use a texture, you can tint the texture. For more information see Color the graphic
.
You can also display color options by clicking this button in the
options toolbar.
Color list
This drop-down lists which parts of the graphic you can recolor. Each item can be a separate color; the
front and back faces of a graphic can be a different color to the sides, for example. the current color is
displayed in the square on the right of the dialog box. This square shows hatching if the text uses multiple
colors.
Texture
You can use a texture to pattern the faces of the text, the sides or as a background. If your web page
uses a background texture, we recommend using the same texture in Xara 3D Maker?this helps the
graphic to blend seamlessly into the web page, even if you intend to export as a transparent GIF. Use the
Texture options dialog box to change the texture.
Tint (Dimmed unless Texture
checked).
This lets you tint a face or sides texture; this is similar to laying a colored film on top of that texture. You
cannot tint background textures as they need to be the same as they appear on the web page.
Color panels
These let you select the color to use. The lower strip selects the basic hue, the upper panel the shade.
To adjust the shade:
Click or drag on the central area of the color picker. You'll see the exact color in the square to
the right.
To alter the hue:
Click or drag on the rainbow strip along the lower part of the dialog box.
HSV/RGB
This selects how to display the color values. You can define the same range of colors using either
option?use the color system you prefer.
HSV (Hue, Saturation, Value) Hue is a color wheel with values in the range 0-360 degrees.
Saturation and Value are percentages.
RGB (Red, Green, Blue) Enter values in the range 0-255 or 0-FF (see Hex below.)
Hex
Web page colors are often defined as two hex digits (range 00?FF). Displaying the colors using hex
digits can make it easier to match colors. Alternatively type six hex digits (range 000000?FFFFFF) into
the # field?many Internet color charts show colors in this format.
Flash file format does not support textures or shadows. Selecting Display as Flash on the View menu
Page 141

dims the Texture checkbox and removes Shadow
from the color list.
Page 142
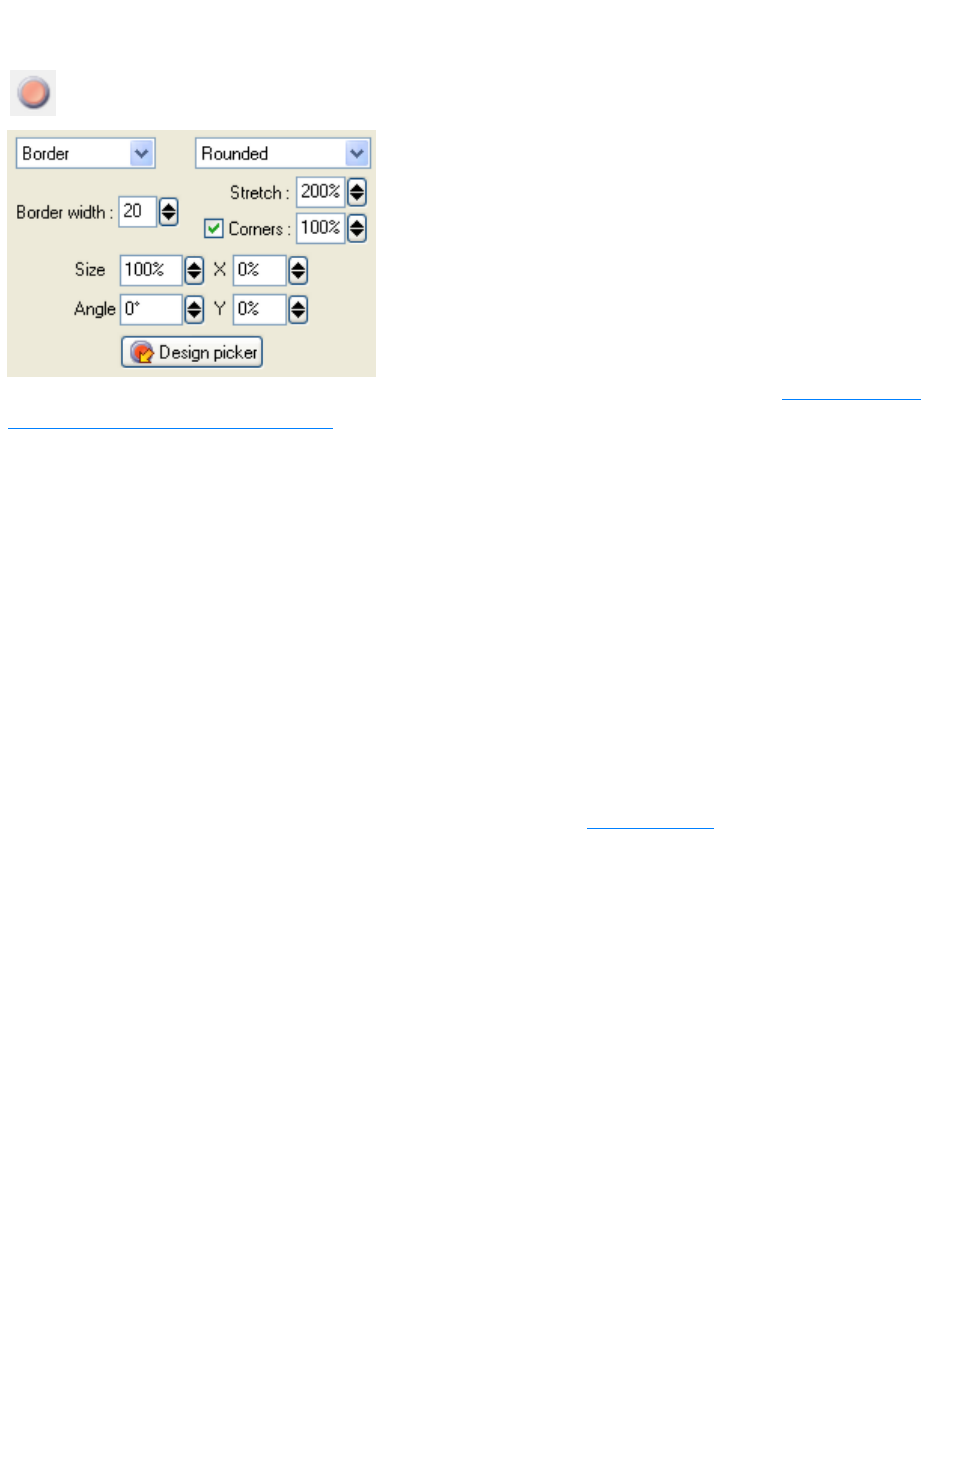
Design options
You can also display design options by clicking this button in the
options toolbar.
You can make a text message or shape into an instant design using these options. See Create buttons,
boards, boards + holes and borders
for more information on creating designs.
Design type
(left drop-down list)
Choose from a number of different designs:
Text
Creates the text only.
Button
Creates a button with the text flat on its surface.
Board
Sit your text on a solid board, so the text
extrudes from a solid background.
Board and holes
As if you'd taken a saw to your board, to give an
impression of a cut-out image.
Border
Adds a border around your text, giving it more
impact.
You can also easily switch between these design types using the design toolbar
.
Shape
(right drop-down list)
Lets you choose from a range of predefined button shapes.
Stretch:
This controls the width to height ratio. 100% is equal width and height. Above 100% makes the button
wider.
Corners:
Buttons can have square or rounded corners. With the check box selected (for rounded corners) type in
a value for the corner radius.
Size
(dimmed for text only designs): Lets you resize the text in relation to the button, board or border.
X-Y
(dimmed for text only designs): Lets you move the text in relation to the button, board or border.
Angle
(dimmed for text only designs): Lets you change the angle of the text in relation to the button, board or
border.
Design picker
You can import a design shape from any existing X3D file. This one design can then be used with any of
the design types listed above. One design = four different combinations. For text graphics, you import the
first character as the design shape. So, for the default graphic of X3D, you would import the X as the
Page 143
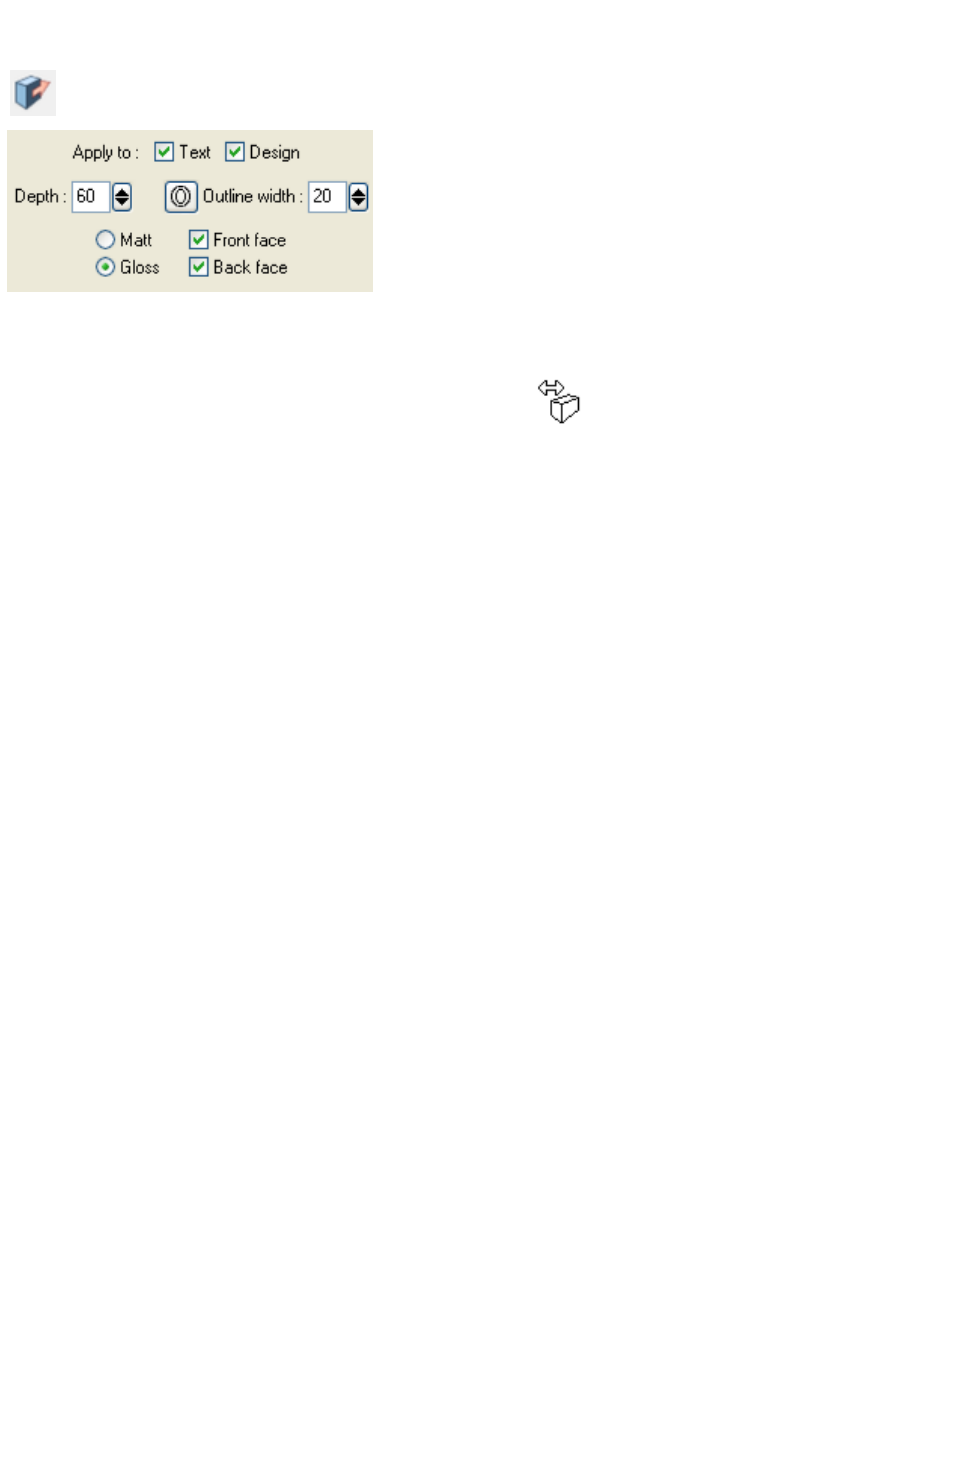
Extrusion options
You can also display extrusion options by clicking this button in the
options toolbar.
The extrude is the depth of the sides - the more extrude, the deeper the object. An object with a high
level of extrude will have a very large 3D effect. You can change the extrude by clicking and dragging on
the side of the text or board/border.
For quick, interactive extrusion on your design just hover
your cursor over the side of your text or board/border so
that your cursor changes to the extrusion tool (see right).
You can then just click and drag the extrusion of the
object.
These extrusion options offer greater control over extrusion.
Apply to:
If you are using a board, board + holes or border design then you can choose whether to apply these
extrusion settings to just the text, the board/border or both.
Depth:
Controls the size (depth) of the sides.
Outline:
Creates a hollow graphic. The difference between outline and turning off the front/back face is that
outlined graphics have thick sides and the bevel appears on both inside and outside edges of the side.
Turning off display of the faces creates wafer-thin sides and the bevel appears on only the outer edge.
Matt/Gloss:
Lets you give the graphic either a non-reflective or shiny surface.
Front face (
Dimmed for buttons): Selecting this makes the face of the graphic transparent so you see inside the sides.
For shallow angles (text almost face-on) you can see through to the back of the graphic.
Back face: Similar to Front face
but makes the back of the graphic transparent.
All options in this dialog box are available in Flash vector format.
Page 145
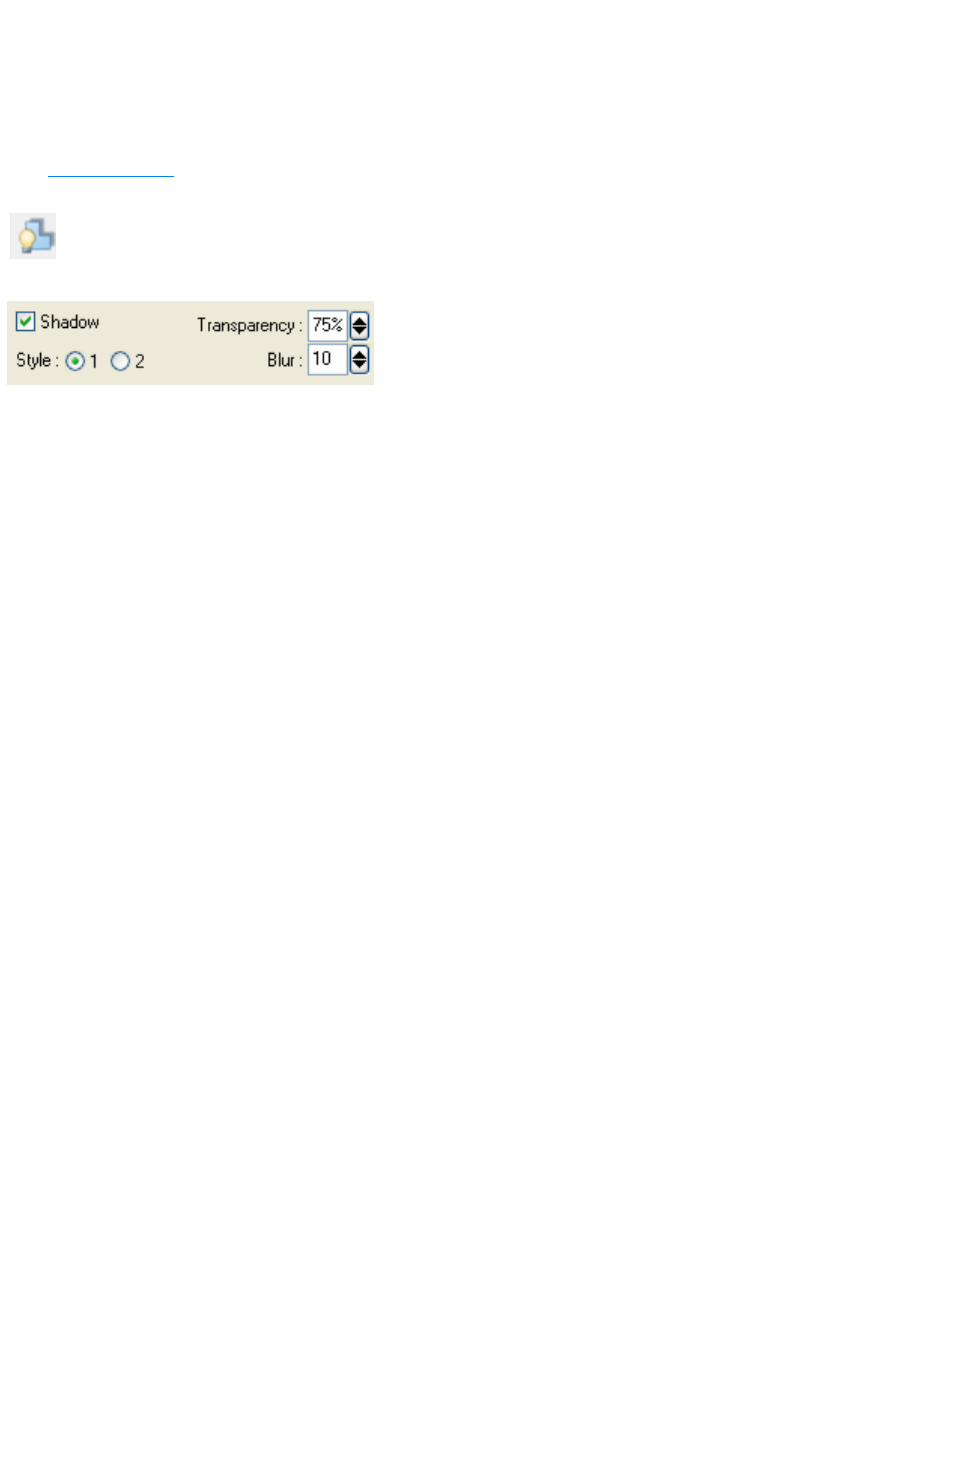
Shadow options
This gives you control over the optional shadow displayed behind the graphic. The position of the
shadow is controlled by one of the arrows in the lighting control. The shadow blur and darkness is
controlled from the shadow options. You can even control the color of the shadow for special effects.
See Add shadows
for more details on using shadows.
You can also display shadow options by clicking this button in the
options toolbar.
Shadow
Check this Shadow
option if you want a shadow.
Style:
Style 1 is a blurred copy of the graphic. Artistically this is not a true shadow but looks 'correct' for
simple drop shadows (the most common type). Style 2 is a true shadow and looks best in animations
where the eye is more aware of the shape of the shadow.
Transparency:
Controls how much of the background shows through the shadow. Semitransparent shadows are more
realistic than solid shadows.
Blur:
Controls how sharp or blurred the shadow appears. This can give the effect of either a pin-point light
source (little blur) or diffuse light source (greater blur). Shadows always look best with some blur
(real-life shadows are never sharp-edged.)
The Flash vector file format does not support shadows and so you cannot export shadows in this format.
Tips
GIFs with shadows are usually larger than with no shadow. Also the further the shadow is away from the
text, or the more blurred, the larger the file. To get the most realistic shadow effects on your web page,
ensure the Xara 3D Maker background matches that of the web page.
Page 146
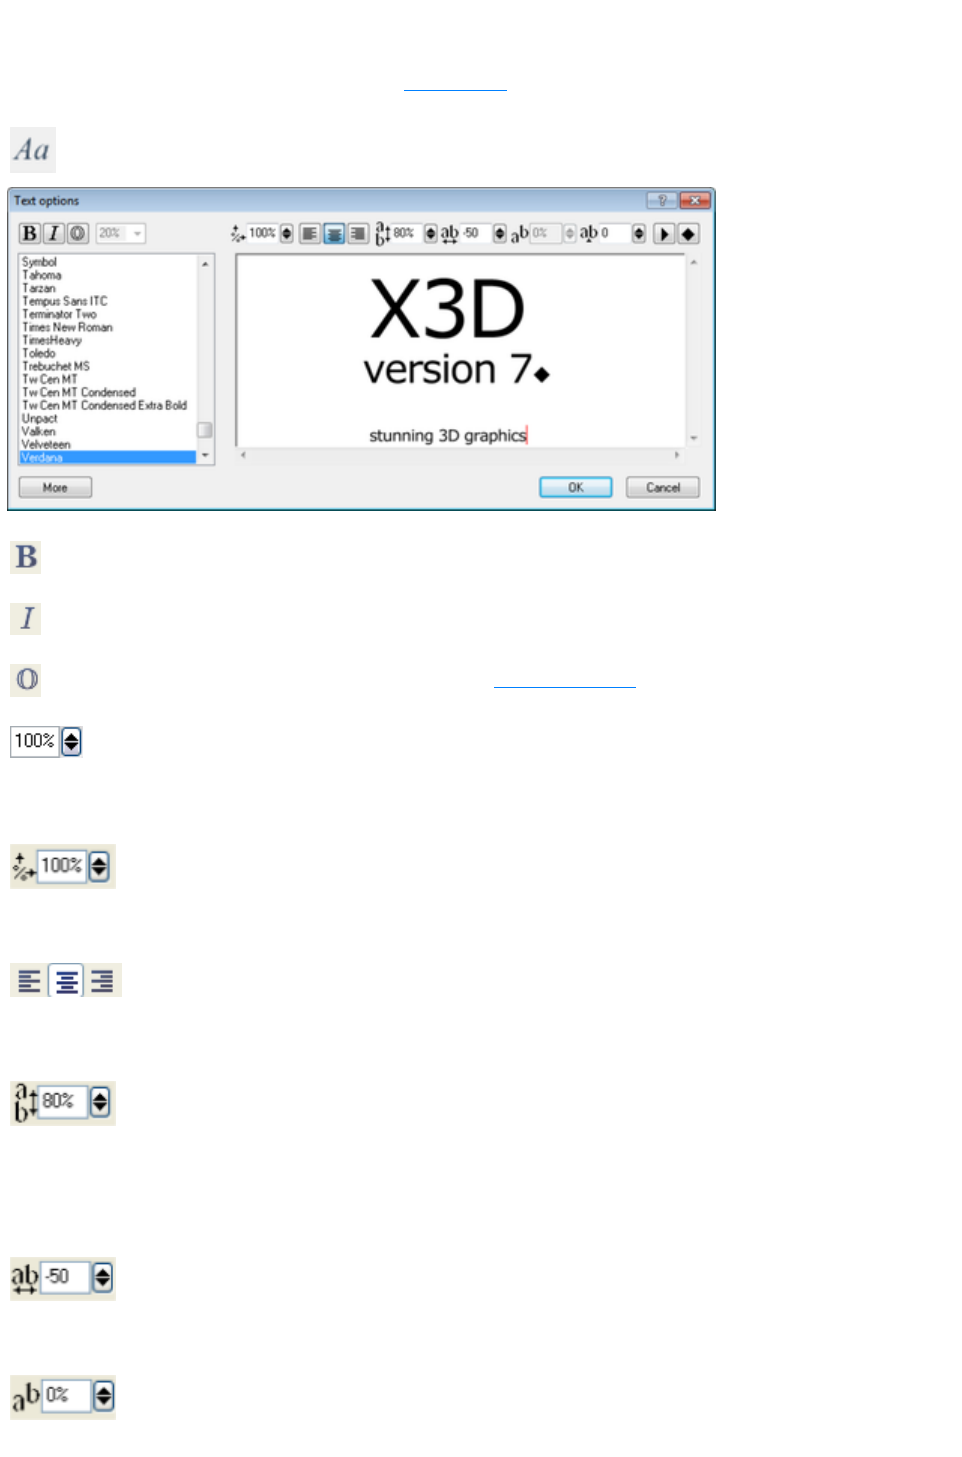
Text options
This duplicates many of the controls on the text toolbar
. If there is a selected area of text, any changes apply only to the selected characters.
You can also display text options by clicking this button in the options
toolbar.
Options at the top of this dialog box (left?right)
Bold:
Make the text Bold.
Italic:
Make the text Italic.
Outline: This duplicates outline in the Extrude options
(described earlier.)
Font size:
Dimmed unless there is a selected area of text. Lets you
make the selected characters smaller (below 100%) or
larger (above 100%) than other characters.
Aspect ratio:
Lets you compress (below 100%) or expand (above 100%)
character width. Values below 80% or above 120% can
distort the text?this depends on the font used.
Justification:
(also known as alignment.) Has no effect for a single line of
text. For multiple lines you can align the left-hand edges, the
centers or the right-hand edges of the lines.
Line spacing:
Has no effect for a single line of text. For multiple lines this
alters the spacing between the lines. Line spacing always
applies to the entire line. If you have a selected area of text,
any changes apply only to the line or lines containing the
selection.
Tracking:
This controls the spacing between characters. Negative
values move the characters closer together, positive values
move them apart.
Baseline shift:
Dimmed unless there is a selected area of text. Positive
Page 147
values raise the selected characters above other characters.
Negative values lower the selected characters.
Kerning:
Dimmed when there is a selected area of text. This controls
the spacing between the pair of characters either side of the
cursor. This is similar to tracking except that kerning applies
to a pair of characters. Tracking applies to either all
characters or the characters in the selected area.
Line break:
This puts any characters or words to the right of the cursor
on a line below characters or words to the left. You can type
a line break character from the keyboard using Shift + Enter.
In the Text Options image above, there is a line break
between 'X3D' and 'version 7'.
Tip: You can also insert a line break by clicking Insert Line
Break on the Edit
menu.
Page break:
This is used when creating multi-page animations to separate
each page. You can type a page break character from the
keyboard using Enter. The preview window displays this
symbol when you insert a page break, as shown after 'X3D
version 7' in the Text Options image above.
Tip: You can also insert a page break by clicking Insert
Page Break on the Edit
menu.
Font list
This displays all the TrueType fonts installed on your computer, including those installed with Xara 3D
Maker. Selecting a font name previews the text in that font.
Note:
If you are using Windows 7 and have previously hidden rarely-used fonts in your Control Panel, these
fonts will not be displayed in the Xara 3D Maker text toolbar.
Preview window
- shows you the text. You can select text in this preview (by dragging or using the arrow keys) and then
apply any of the options in this dialog box to just the selection.
More
Click this to display the character map and a list of available character sets.
Character map:
This shows you the characters in the current character set. Most fonts do not include every possible
character?missing characters appear as either a blank or a small rectangle. Click on a character for an
enlarged view. Double-click on a character to inset it into the text.
Character sets:
Windows has two types of font: Regular, which has 256 characters, and Unicode fonts, which have many
more characters arranged into separate sets of 256 characters. A typical Unicode font might include
several different versions of Latin characters (Regular, Central European, Baltic) plus Cyrillic and Greek
alphabets.
The U
button is dimmed for regular fonts.
For Unicode fonts, unchecking U lists the basic character sets. Not all fonts include every character set;
available sets are shown with > to the left of the character set name. (The >
Page 148
depends on information contained in the font?this is not always accurate.)
Checking U lists the different types of character (such as Arrows) in the font. Again >
shows available character types.
You can also add accented characters and symbols
using a range of shortcuts.
Right-click menu
Right-clicking on the text preview pops-up a menu:
Zoom to fit
?scale the text to fit in the window
Zoom in
?enlarge your view of the text
Zoom out
?show more of the text
These options change your view of the text. They have no effect on the actual text size.
You can also use a range of keyboard shortcuts in the Text Options dialog to perform the actions
described above. See Text Options dialog shortcuts
.
Note:
All options in this dialog box are available in Flash vector format.
Page 149
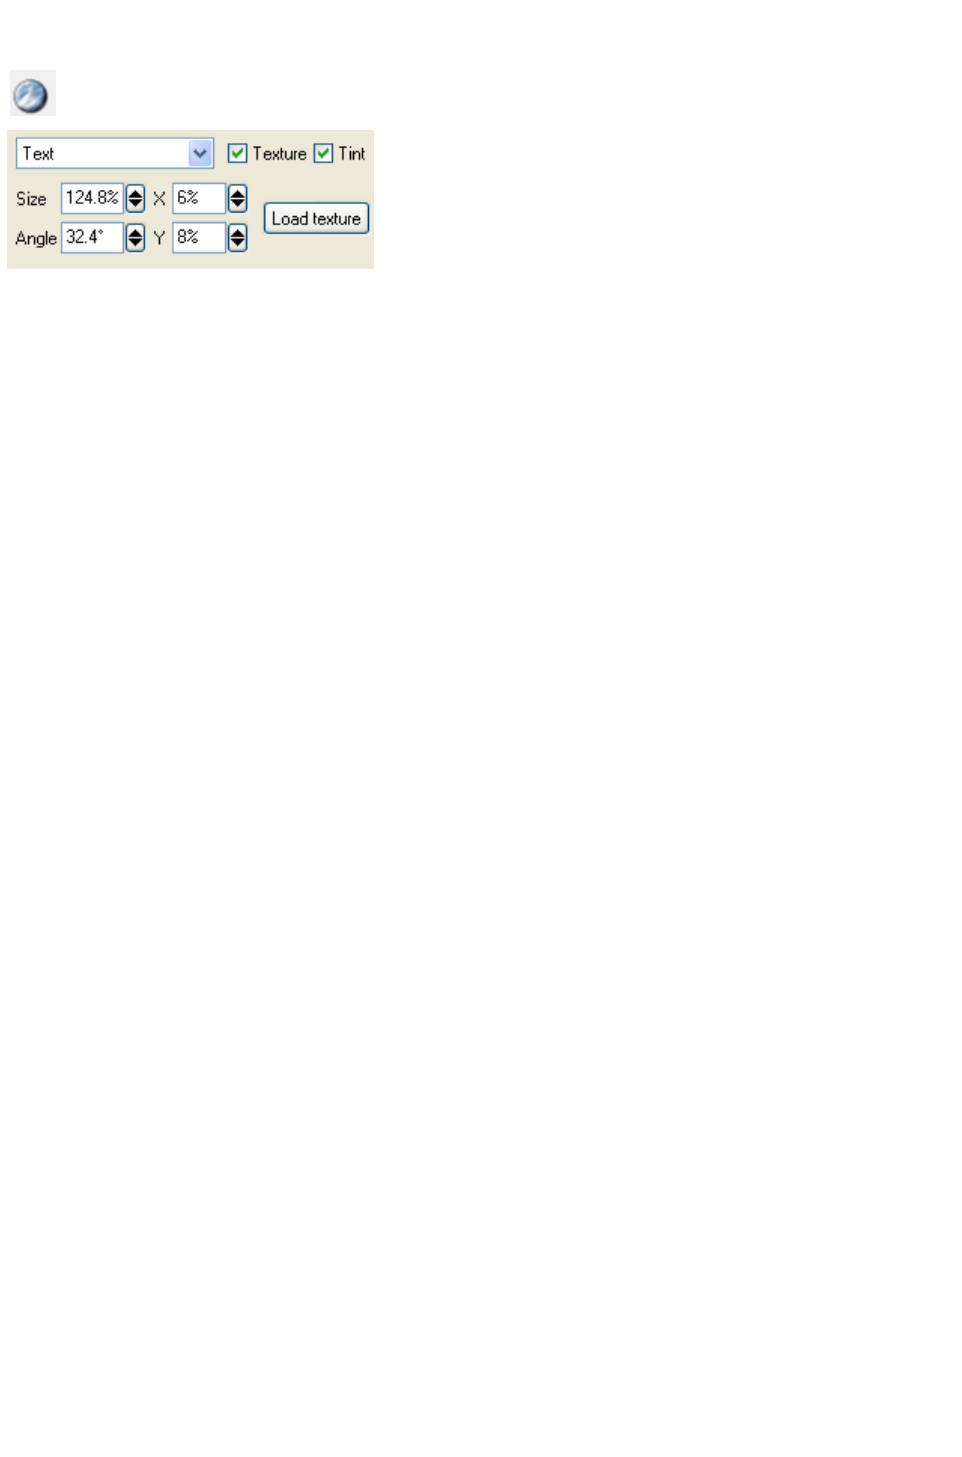
Texture options
You can also display texture options by clicking this button in the
options toolbar.
This dialog box lets you apply and change textures applied to any part of the graphic or used as a
background behind the graphic. You can use textures to give an interesting effect to objects and/or the
background. You can easily drag a bitmap on to the background, text face or text sides. You can use
any BMP, ICO, PNG, JPEG or GIF file. Textures can also be set for buttons, boards and borders with
the options below. You cannot resize or rotate background textures as they need to be identical to the
texture used on your web page.
Drop-down list:
This lets you select which parts of the graphic or the background you want to add a texture to or change
the texture of.
Texture:
Check this to add a texture to the selected part of the graphic or background. Uncheck to use plain color
(no texture) on that area.
Tint
(dimmed for Background): You can use the color editor to tint a texture; this is similar to laying a colored
film on top of that texture.
Size
(dimmed for Background): Lets you resize the texture. Increasing the size can make obvious the
individual pixels that make up the texture although this can create some interesting effects.
X-Y:
Lets you move the texture horizontally or vertically.
Angle
(dimmed for Background): Lets you rotate the texture.
Load a texture:
Opens a dialog box where you can preview and choose which texture to load from either your hard disk
or other source.
Flash vector file format does not support textures. Selecting Display as Flash on the View
menu dims all options.
Page 150
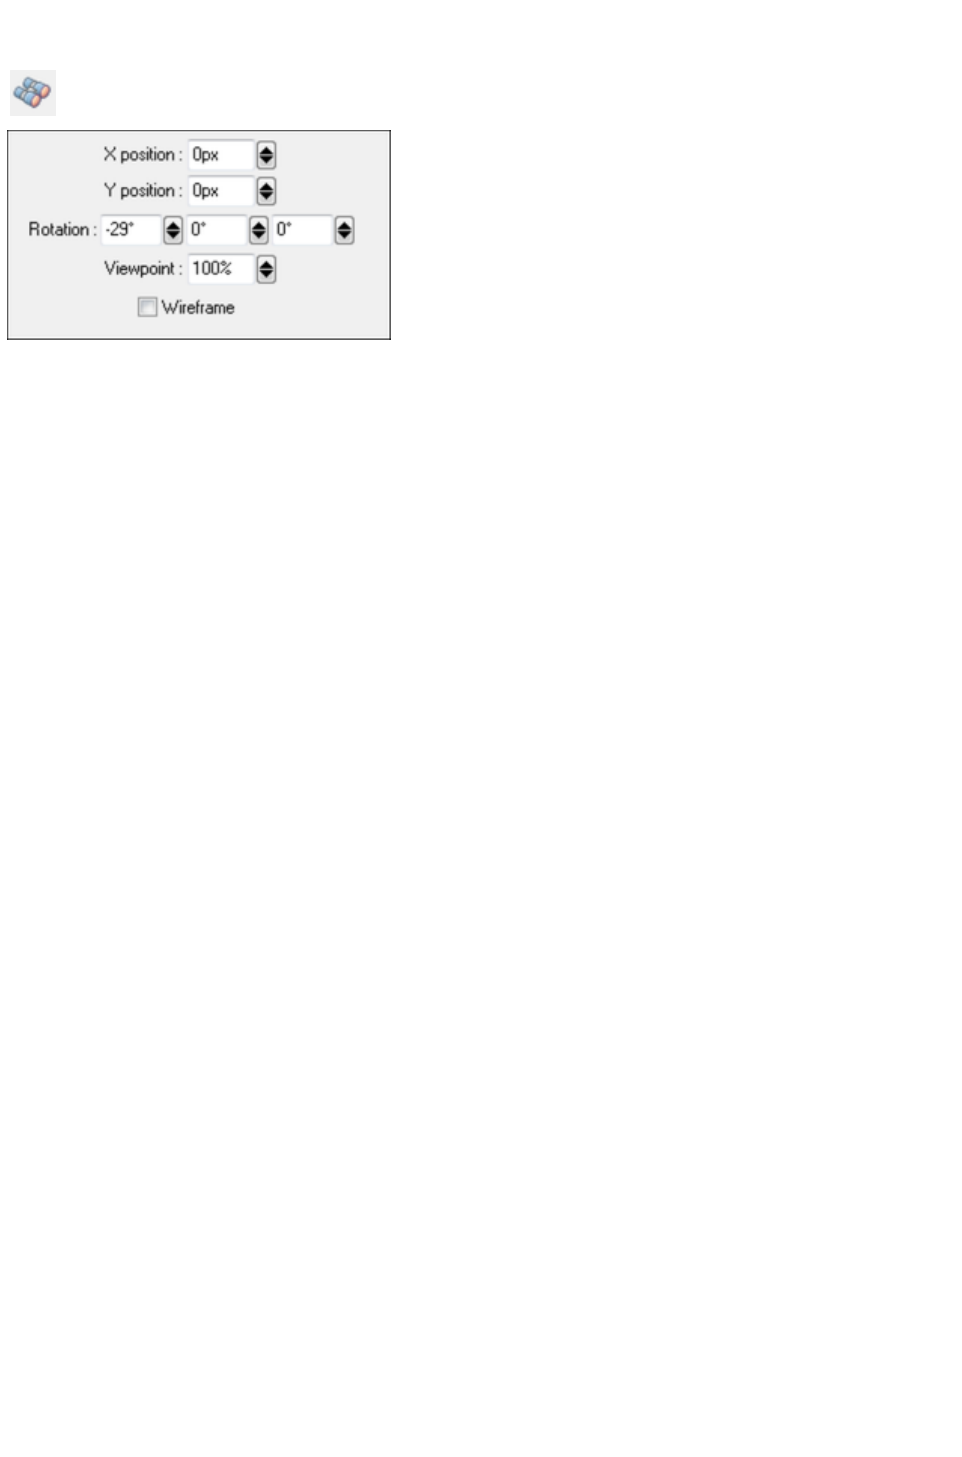
View options
You can also display view options by clicking this button in the
options toolbar.
These settings allow you to move and rotate your design in small increments. You can also make it seem
closer or farther away, and display it in a simplified wireframe style.
Tip:
You can move your design freely around the screen by holding down "Alt" and dragging across the
screen. This can help you position your design so it starts exactly where you want it.
X position:
Allows you to move the design horizontally across the screen. Type in a positive or negative value or
move the slider up or down.
Tip:
You can also do this by holding down "Ctrl + Alt" and dragging across the screen.
Y position:
Allows you to move the design vertically across the screen. Type in a positive or negative value or move
the slider up or down.
Tip:
You can also do this by holding down "Alt + Shift" and dragging across the screen.
Rotation:
Allows you to precisely adjust your design's rotation around its vertical axis (first rotation angle), the
horizontal axis (second angle) and the graphic's horizontal axis (third angle). By specifying a positive or
negative value here rather than rotating by dragging across the screen or using the scroll bars, you have
greater control over the exact angle of your design.
Tip:
You can also do this by holding down your keyboard's arrow keys. Holding down "Ctrl" while using
your arrow keys adjusts the vertical and horizontal rotation value (first and second angle) in larger steps,
while holding down "Ctrl + Shift" and using the arrow keys adjusts the vertical and horizontal rotation
(first and third angle) in larger steps.
Note:
If there is no rotation value for the first angle, then altering the second or third angle will both appear to
have the same effect.
Tip:
Press "Home" on your keyboard to reset position and rotation options to 0. Press "Alt + Home" if you
have the text cursor displayed.
Viewpoint:
This slightly distorts the design so that it appears as if the viewer has moved closer to or further away
(although the text size stays the same size). Choose or type in a value from 0-200%.
Tip:
You can also achieve this effect by pressing "Ctrl + Subtract (-)" or "Ctrl + Add (+)" on the numeric
keypad. Pressing "Ctrl + Asterisk (*)" resets your design to the default value of 100%.
Wireframe:
Select this to toggle your design into wireframe mode. This can help you to view your design or
Page 151

animation in a simplified way. The wireframe display can also be exported as both a static and animated
image.
Tip
: You can also press "Ctrl + Shift + W" to view your design in wireframe.
Page 152
File Formats
Xara 3D Maker can load and save/export in a variety of formats. This section describes the different
formats and where you would use them. See How To ...
for details on loading and saving files.
ANI
?Export only (animated cursors)
Animated cursors are usually 16x16, 32x32 or 48x48 pixels although custom sizes are allowed. Using
ANI files requires some programming knowledge as they are used internally in programs.
AVI
?Export only (animations)
A popular animation format but with fewer options than animated GIFs or Flash (SWF) animations.
BMP
?Export only
You can export 3D graphics for use in other programs. Xara 3D Maker can export in a range of color
depths. Some programs might not be able to load all variations.
CFX?Export only
This is a special file format used in MAGIX movie editing and slide show programs. It allows you to
save an animation with a transparent background for the use as title overlay. See Exporting transparent
title animations for movies
.
CUR
?Export only (animated cursor)
Cursors are usually 16x16, 32x32 or 48x48 pixels although custom sizes are allowed. Using CUR files
requires some programming knowledge as they are used internally in programs.
EMF
?Load only (metafile format)
You can load shapes in this format and extrude the shape.
GIF
?Export only
(static) ? GIF files are often used on web pages. This format has a maximum of 256 colors. All browsers
can display GIF files.
(animations) ? probably the most useful animation format.
ICO
?Export only (icons)
Icons are usually 16x16, 32x32 or 48x48 pixels although custom sizes are allowed.
JPG
?Export only (JPEG)
Originally developed for photographs, this format is useful for graphics with subtle color changes. All
browsers can display JPG files.
PNG
?Export only
Similar to GIF format but can produce smaller files and can display more colors. Modern browsers and
many other programs can display PNG files.
SCR
?Export only (Windows screen saver)
Lets you create your own custom screen saver. See Create screen savers
for tips.
SWF
?Export only
Page 153

(Flash?bitmap format, static or animations) -? Flash is often on web sites, especially for animations.
Bitmap format lets you use all Xara 3D Maker features, including shadows.
(Flash?vector format, static or animations) ? the advantage of vector format is that you can scale up a
graphic without losing quality. However not all Xara 3D Maker features are supported by Flash vector
format. For the smallest file size select Display as Flash on the View
menu. This disables all unsupported features. Alternatively you can export unsupported features as
bitmaps within the vector file. The drawback is that you may lose quality when enlarging the graphic.
Flash vector files cannot include shadows.
WEB
?Load only
These are files created in Xara Web Designer and is an alternative format to XAR files. See XAR
format, below, for details.
WMF
?Load only (Windows metafile)
This is an alternative to EMF (see above). We recommend using EMF format where possible.
X3D
?Load/Save
Xara 3D Maker's native format. You can load X3D files for editing the source graphic. We suggest
always saving your work in X3D format as this lets you edit the file in the future.
XAR
?Load only
These are files created in Xara Photo & Graphic Designer, Designer Pro or Web Designer. You can
load drawn shapes in this format and extrude them to create 3D shapes.
You can also import BMP, GIF, ICO, JPG/JPEG and PNG files for use as textures on the faces of the
3D graphic or as a background.
Page 154

Keyboard Shortcuts
*?options disabled when Display as Flash selected
Up/down arrow keys
Rotates around the horizontal (x) axis in
1-second increments
Left/right arrow keys
Rotates around the vertical (y) axis in
1-second increments
Up/down/left/right
arrow keys when text
cursor is displayed
Moves the text cursor in all 4 directions
Up/down arrow keys
when cursor is in an edit
box
Increase/decrease value by small amount
Back key
Deletes to the left of the text cursor
PageUp/Down
Moves to first/last page
Page Up/Page Down
when cursor is in an edit
box
Increase/decrease value by large amount
Page Up/Page Down
when text cursor is
displayed
Moves to last/next page
Enter
Insert new page
Home
If text cursor is not displayed, resets
position and rotation to default (graphic is
face-on and centered).
If text cursor is displayed, returns text
cursor to start of line.
Delete
Deletes to the right of the text cursor.
End
Moves to the end of the line.
Shift-drag
Rotates around the horizontal (x) axis
Shift+Enter
Insert new line
Shift+Home
Same as Ctrl+Shift+Home.
Shift+Insert
Pastes text.
Shift+Delete
Cuts text.
Shift+End
Move cursor to end of line and select all
characters in between.
Shift+up/down arrow
keys
Rotates the graphic around its center line in
1-second increments
Shift+Up/down/left/right
arrow keys when text
cursor is displayed
Selects text
Shift+Alt+up/down/left
right arrow keys
Rotates the graphic in small increments
Shift+Alt+up/down
arrow keys when text
cursor is displayed
Rotates the graphic around its center line in
1-second increments
Page 155

Ctrl+A
Select entire heading
Ctrl+B
Bold text
Ctrl+C
Copy
Ctrl+E
Display/hide cursor
Ctrl+F
Display as Flash
Ctrl+H *
Display/hide hotspot (for cursors)
Ctrl+I
Italic
Ctrl+L
Select line
Ctrl+M
Edit comment-comments are saved in
X3D files and let you add notes to files
Ctrl+N
New document
Ctrl+O
Open existing X3D file
Ctrl+P
Select entire page (for multi-page
animations)
Ctrl+R
Display/hide frame
Ctrl+S
Save in X3D format
Ctrl+T
Display/hide text toolbar
Ctrl+U
(When cursor displayed) force character
to right of cursor to upper-case
(When there is a selected character or
characters) force all characters in the
selection to upper-case
(Otherwise) no effect
Ctrl+V
Paste
Ctrl+W
(When cursor displayed) swap the case of
the character to right of cursor
(When there is a selected character or
characters) swap the case of all characters
in the selection
(Otherwise) no effect
Ctrl+X
Cut
Ctrl+Y
Redo (undo the last Undo)
Ctrl+Z
Undo last action
Ctrl-drag
Rotates around the vertical (y) axis
Ctrl+Shift-drag
Rotates the graphic around its center line
Ctrl+Alt-drag
Moves the design left and right
Ctrl+Home
If text cursor is not displayed, resets
position and rotation to default (graphic is
face-on and centered).
If text cursor is displayed, returns text
cursor to start of text.
Ctrl+Home when cursor
is in an edit box
Set to maximum value
Ctrl+Insert
Copies text
Ctrl+End
Set to minimum value
Ctrl+Alt+Shift+Up/dow
Rotates the graphic around its center line in
Page 156

n/left/right arrow keys
15-second increments
Ctrl+Shift+Up/down/left
/
right arrow keys
Rotates around the horizontal (x) axis in
15-second increments
Ctrl+Shift+Up/down/left
/
right arrow keys when
text cursor is displayed
Selects text
Ctrl+Shift+Alt+up/dow
n arrow keys when text
cursor is displayed
Rotates the graphic around its center line in
15-second increments
Ctrl+Alt+up/down
arrow keys when text
cursor is displayed
Rotates around the horizontal (x) axis in
15-second increments
Ctrl+Alt+left/right arrow
keys when text cursor is
displayed
Rotates around the vertical (y) axis in
15-second increments
Ctrl+up/down arrow
keys when cursor is in
an edit box
Increase/decrease value by large amount
Ctrl+up/down arrow
keys
Rotates around the horizontal (x) axis in
15-second increments
Ctrl+left/right arrow
keys
Rotates around the vertical (y) axis in
15-second increments
Ctrl+Shift+up/down
arrow keys
Rotates the graphic around its center line in
15-second increments
Ctrl+Space
Start/stop animation
Ctrl+Tab
Display/hide lights
Ctrl+Add (+) on
numeric keypad
Increase perspective
Ctrl+Subtract (-) on
numeric keypad
Decrease perspective
Ctrl+Multiply (*) on
numeric keypad
Reset perspective
Ctrl+Home
Move cursor to start of page
Ctrl+End
Move cursor to end of page
Ctrl+PageUp
Move to first page in a multi-page
animation
Ctrl+PageDown
Move to last page in a multi-page
animation
F5
Kern left 5/1000ths of an em
Ctrl+F5
Kern left 50/1000ths of an em
F6
Kern right 5/1000ths of an em
Ctrl+F6
Kern right 50/1000ths of an em
F8
Displays text cursor to enable editing
Page 157

Ctrl+Shift+A
Open animation picker
Ctrl+Shift+B *
Open design picker
Ctrl+Shift+C *
Open texture picker to choose a text
(faces & sides) texture
Ctrl+Shift+D *
Open texture picker to choose a side
texture
Ctrl+Shift+E
Open export image dialog box
Ctrl+Shift+F
Open texture picker to choose a face
texture
Ctrl+Shift+G *
Open texture picker dialog box to choose
a background texture
Ctrl+Shift+I
Import EMF/WMF metafile or
WEB/XAR format file
Ctrl+Shift+O
Select/deselect outline text
Ctrl+Shift+S *
Open color options to edit shadow color
Ctrl+Shift+U
(When cursor displayed) force character
to right of cursor to lower-case
(When there is a selected character or
characters) force all characters in the
selection to lower-case
(Otherwise) no effect
Ctrl+Shift+V
Paste character
Ctrl+Shift+W
Display as wireframe
Ctrl+Shift+X
Export animation
Ctrl+Shift+Y
Import style
Ctrl+Shift+Home
Select to start of text
Ctrl+Shift+End
Select to end of text
Alt+1
Open color options to edit light 1 color
Alt+2
Open color options to edit light 2 color
Alt+3
Open color options to edit light 3 color
Alt+A
Open animation options
Alt+B
Open bevel options
Alt+C
Open color options to edit text color
Alt+D
Open color options to edit side color
Alt+E
Open extrude options
Alt+F
Open color options to edit face color
Alt+G
Open color options to edit background
color
Alt+L
Display/hide time line
Alt+O
Display/hide option bars
Alt+Q
Open quality settings
Alt+R
Open Frame size dialog box
Alt+S
Open shadow options
Alt+T
Open text options
Alt+U
Open design options
Page 158

Alt+V
Open view options
Alt+X
Open texture options
Alt-drag
Moves the design up, down, left and right
Alt+Home
Resets position and rotation to default
(graphic is face-on and centered).
Alt+Shift+drag
Moves the design up and down
Alt+Insert
Redo.
Alt+Add (+) on numeric
keypad
Moves shadow plane forwards
Alt+Subtract (-) on
numeric keypad
Moves shadow plane backwards
Alt+Multiply (*) on
numeric keypad
Reset shadow plane
Alt+Up/down/left/right
arrow keys
Rotates the graphic in small increments
Alt+Up/down arrow
keys when text cursor is
displayed
Rotates around the horizontal (x) axis in
1-second increments
Alt+Left/right arrow
keys when text cursor is
displayed
Rotates around the vertical (y) axis in
1-second increments
Alt+Back key
Undo
Page 159

Text Options Dialog Shortcuts
There are also a selection of shortcuts that you can use to edit text in the Text Options
dialog.
None
Ctrl
Ctrl+Shift
Alt
Shift
Zoom normal
1
Zoom x2
2
Zoom x3
3
Zoom x4
4
Zoom in
Add
Zoom out
Subtract
Zoom normal
Multiply
Select all
A
Bold
B
Copy
C
Italic
I
Select line
L
Outline
O
O
Select page
P
Swap case
S
Upper case
U
Lower case
U
Paste
V
Swap case
W
Cut
X
Redo
Y
Undo
Z
Redo
Z
Insert line
break
Enter
Insert page
break
Enter
Enter
Start of line
Home
Start of text
Home
Select to start
of text
Home
Select to start
of line
Home
End of line
End
End of text
End
Select to end
of text
End
Select to end
of line
End
Page 160

Delete back
Back
Undo
Back
Delete
Delete
Cut
Delete
Copy
Insert
Redo
Insert
Paste
Insert
Small cursor
move
Cursor
Large cursor
move
Cursor
Text selection
Cursor
Cursor
Kerning
Cursor
Zoom in
Add
Zoom out
Subtract
Zoom reset
Multiply
Move to
previous page
Page up
Move to first
page
Page up
Move to next
page
Page
down
Move to last
page
Page
down
Kern left
F5
Large kern
left
F5
Kern right
F6
Large kern
right
F6
Kern up
F7
Large kern up
F7
Kern down
F8
Large kern
down
F8
Page 161

Accented characters and symbols
To produce the following characters and symbols in, press Ctrl and the keyboard key shown below,
then type your character.
Pressing Ctrl and the accent key followed by a space gives the accent alone. Some accents can be
combined by following one accent by another.
Accents
Ctrl key
Characters
Acute
'
aAâÂåÅæÆcCeEêÊGgiIkKlLmMnNoOô
ÔøØpPrRsSuUüÜwWyYzZ
áÁ??????cCéÉ????íÍ??lL??nNóÓ??????r
RsSúÚuU??ýÝzZ
Double acute
' x2
oOuU
oOuU
Breve
)
aAeEgGiIoOuU
aAeEgGiIoOuU
Breve below
) x2
HH
??
Inverted breve
(
aAeEiIoOrRuU
????????????
Caron
>
aAcCdDeEgGiIjkKlLnNoOrRsSt
TuUüÜzZ
aAcCdDeEgGiIjkKlLnNoOrRšŠtTuUuUž
Ž
Cedilla
,
cCdDgGhHkKlLnNrRsStT
çÇ??gG??kKlLnNrRsStT
Circumflex
^ or <
aAcCeEgGhHiIjJoOsSuUwWyYzZ
âÂcCêÊgGhHîÎjJôÔsSûÛwWyY??
Circumflex below
^ or < x2
dDeElLnNtTuU
????????????
Dieresis
:
aAeEhHiIoOtuUúÚùÙwWxXyY
äÄëË??ïÏöÖ?üÜuUuU????ÿŸ
Dieresis below
: x2
uU
??
Dot
.
bBcCdDeEfFgGhHiIlLmMnNpPrRsStTw
WxXyYzZ
??cC??eE??gG??iI????????????????????z
Z
Dot below
. x2
aAbBdDeEhHiIkKlLmMnNoOrRsStTuUv
VwWyYzZ
?????????????????????????????????????
?
Grave
`
aAâÂeEêÊiIoOôÔuUüÜwWyY
àÀ??èÈ??ìÌòÒ??ùÙuU????
Double grave
` x2
aAeEiIoOrRuU
????????????
Hook
?
aAâÂeEêÊiIoOôÔuUyY
??????????????????
Page 162

Hook
?
bBcC dDfFgGhkKmnNpPqtT
??????ƒƒ?????????????
Horn
+
oOóÓòÒõÕ??tT uUúÚ ùÙ ??
oO????????ÞþuU??????
Accents
Ctrl key
Hungerumlaut
"
oOuU
oOuU
Line below
- x2
bBdDhkKnNrRtTzZ
???????????????
Macron
-
aAäÄeEeEgGiIoOuUüÜ
aAaA??eE??iIoOuUuU
Ogonek
,
aAeEiIoOuU
aAeEiIoOuU
Ring
@
aAáÁuUwy
åÅ??uU??
Ring below
@ x2
aA
??
Slash
/
dDlLoOóÓ
dÐlLøØ??
Tilde
~
aAâÂeEêÊi InNoOôÔuUvVyY
ãÃ??????i IñÑõÕ??uU????
Tilde below
~ x2
eEi IuU
??? ???
Bar
-
bdDgGhHl tTzZ
bðÐgGhHl tTz?
Accents
Ctrl
key
Symbols
Ellipsis
. or &
.
…
Bullet
. or &
*
•
Em-dash
&
-
?
Quotes
'
' "
' "
Quotes
`
' "
' "
Quotes
,
' "
‚ „
Punctuation
&
<>
‹ ›
Punctuation
<
<
«
Punctuation
>
>
»
Daggers
+
space +
Page 163

† ‡
Symbols
&
$ % eE N pP tT
§ ‰ e ? ¶ ™
Punctuation
&
!?
¡¿
Ordinal
_
aA oO
ª º
Euro sign
-
cC
€
Cent
/
cC
¢
Copyright
@ or &
cC
©
Dong sign
_ or &
dD
?
Florin
&
f
ƒ
Mill sign
/ or &
mM
?
n superscript
&
n
n
Sound
recording
copyright
@
pP
?
Registered
@ or &
rR
®
Double S
&
sS
ß
Currency
symbols
- or &
F nN wW yY £
? ? ? ¥ £
Other
&
a A á Á i l o O
æ Æ ? ? ? ? œŒ
Fractions
/
0 1 2 3 4 5 6 7 8
½ ? ? ¼ ¾ ? ? ? ?
Superiors
&
0123456789
° ¹ ² ³ 4 5 6 7 8 ?
Subtract
-
-
-
Multiply
&
xX
××
Divide
&
:
÷
Plus-minus
- or _ or &
+
±
Equality
- or _ or &
=
=
Inequality
/
=
Page 164

?
Approximate
~
~
˜
Less than or
equal
- or _
<
=
Less than or
equal
<
- _
=
Greater than
or equal
- or _
>
=
Greater than
or equal
>
- _
=
Page 165

Legal
This documentation is protected by law. All rights, especially the right of duplication, circulation, and
translation are reserved.
No part of this publication may be reproduced in form of copies, microfilms or other processes, or
transmitted into a language used for machines, especially data processing machines, without the express
written consent of the publisher.
All copyrights reserved.
All other product names are trademarks of the corresponding manufacturers. Errors in and changes to
the contents as well as program modifications reserved.
Xara is a registered trademark of Xara Group Ltd.
Xara Group Ltd. is an affiliate company of MAGIX AG.
MAGIX is a registered trademark of MAGIX AG.
MAGIX Photo Designer 7: Copyright © MAGIX AG, 2000-2011.
Other mentioned product names may be registered trademarks of the respective manufacturer.
This product uses MAGIX patent pending technology.
Copyright © Xara Group Ltd., 1994-2011. All rights reserved.
Page 166

Xara Customer End User License Agreement
IMPORTANT NOTICE:
The Xara 3D Maker software ("Software") is the copyright of Xara Group Limited ("Xara") whose
principal place of business is at Gaddesden Place, Hemel Hempstead, Herts, HP2 6EX, United
Kingdom and may not be stored on any computer or copied without the license of Xara. You are offered
a license on the terms of the End User License Agreement ("EULA") set out below.
If you accept the terms of the License Agreement, select "Yes".
Selecting YES and installing the Software constitutes acceptance of the terms of the EULA. Please read
carefully and accept the terms and conditions of the EULA before installing the Software. Do not install
the Software if you do not agree to the terms and conditions of the EULA.
If you do not accept these terms and you have purchased the Software you may within 14 days of
purchase return the CD-ROM containing the Software, unused and intact or in the case of a download a
Letter of Destruction to your supplier together with proof of purchase for a full refund.
XARA 3D MAKER END USER LICENSE AGREEMENT ("EULA")
You are permitted to:
1. load or download the Software and use it only on a single client computer which is under your
personal control; except that you may
2. copy the Software from one computer to another under your personal control provided it is used on
only one computer at any one time and only by you. The copies must reproduce and include Xara's
copyright notices;
3. transfer the Software (complete with all its associated documentation) and this license to another
person provided that person has agreed to accept the terms of this Agreement and you
contemporaneously transfer all copies of the Software you have made to that person or destroy all copies
not transferred. If any transferee does not accept such terms then this license shall automatically
terminate. The transferor does not retain any rights under this Agreement in respect of the transferred
Software or license.
You are not permitted:
(a) to use the Software on any computer or system which permits electronic access to it by more than
one user;
(b) to rent, lease, sub-license, loan, copy (except as expressly provided in this Agreement), modify
adapt, merge, translate, reverse engineer, decompile, disassemble or create derivative works based on
the whole or any part of the Software or its associated documentation except as permitted by law;
(c) except as expressly provided in this Agreement, to use, reproduce or deal in the Software in any
way.
TERM
The license is effective until you terminate it by destroying the Software and its documentation together
with all copies. It will also terminate if you fail to abide by this Agreement. Upon termination you agree to
destroy all copies of the Software and its documentation including any Software stored on the hard disk
of any computer under your control. If you are using the trial version of the Software then any rights to
use the Software or images created with it terminates with the expiration of the trial period.
OWNERSHIP
You own only any CD-ROM (or authorized replacement) upon which the Software was supplied where
it was not downloaded. You may retain such CD-ROM on termination provided the Software has been
erased. Xara shall at all times retain ownership of the Software as recorded on the original CD-ROM
and all subsequent copies thereof regardless of form. This Agreement applies to the grant of the license
only and not to the contract of sale of the CD-ROM.
RESTRICTIONS
This license gives you the right to use images created with this Software with the following limitations:
1. The textures and fonts cannot be redistributed, sold or published in any form, commercial or
Page 167

otherwise.
2. Some fonts are provided by third parties who retain the copyright. In all cases copyright is reserved by
Xara or its licensors and is protected by international copyright law.
3. You may not use the images for any purpose which is prohibited by law.
WARRANTIES AND REMEDIES
1. Xara warrants that the storage media on which the Software may have been supplied will be free from
defects in materials and workmanship under normal use for a period of 90 days after the date of original
purchase. If a defect in any CD occurs during such period you may return it with proof of purchase to
your supplier who will replace it free of charge.
2. Xara warrants that the Software will perform substantially in accordance with its accompanying
documentation (provided that the Software is properly used on the computer and with the operating
system for which it was designed) and that the documentation correctly describes the operation of the
Software in all material respects. If Xara is notified of any significant error in the Software during the
period of 90 days after the date of original purchase it will correct any such error within a reasonable time
(by replacement if it chooses) or, at its option, refund the price of the Software (against return of the
Software and its documentation).
3. The warranties set out in paragraphs 1 and 2 above are your sole warranties and are in place of all
warranties conditions or other terms expressed or implied by statute or otherwise, all of which are hereby
excluded to the fullest extent permitted by law. Paragraphs 1 and 2 also set out your sole remedies for
any breach of Xara's warranties.
4. In particular Xara does not warrant that the Software will meet your requirements or that the operation
of the Software will be uninterrupted or error free or that all errors in the Software can be corrected.
You load and use the Software at your own risk and in no event will Xara be liable to you for any loss or
damage of any kind (except personal injury or death resulting from Xara's negligence) including lost
profits or any indirect or consequential loss arising from the use of or inability to use the Software or from
errors or deficiencies in it whether caused by negligence or otherwise, except as expressly provided in
this Agreement.
CONSUMERS
Nothing in this Agreement shall affect your statutory rights as a consumer.
LAW
This Agreement shall be governed by English law.
If you have any questions concerning this Agreement please write to Xara Group Limited,
Gaddesden Place, Hemel Hempstead, Herts, HP2 6EX, United Kingdom.
The bundled fonts and textures cannot be redistributed, sold or published in any form, commercial or
otherwise. Haxton Logos, Geotype, Greek Diner, Russel Write, Bouton International, Huxley Titling and
Whimsy fonts are provided by kind permission of Gary Bouton and remain © Gary Bouton, see
www.theboutons.com
. In all cases copyright is reserved by Xara or its licensors and is protected by international copyright
law.
Copyright
This documentation is protected by law. All rights, especially the right of duplication, circulation, and
translation are reserved.
No part of this publication may be reproduced in form of copies, microfilms or other processes, or
transmitted into a language used for machines, especially data processing machines, without the express
written consent of the publisher.
All copyrights reserved.
All other product names are trademarks of the corresponding manufacturers. Errors in and changes to
the contents as well as program modifications reserved.
Xara is a registered trademark of Xara Group Ltd.
Page 168
Xara Group Ltd. is an affiliate company of MAGIX AG.
MAGIX is a registered trademark of MAGIX AG.
Other mentioned product names may be registered trademarks of the respective manufacturer.
Copyright © Xara Group Ltd., 1994-2011. All rights reserved.
Windows and FrontPage are either trademarks or registered trademarks of Microsoft Corporation in the
United States and/or other countries. TrueType is a trademark of Apple Computer, Inc. registered in the
US and other countries. Macromedia, Flash and Dreamweaver are either trademarks or registered
trademarks of Adobe Systems Incorporated, in the United States and/or other countries.
Frankfurter Venetian, Geotype, Greek Diner, Haxton, Russel Write, Steppes, Bouton International,
Huxley Titling and Whimsy fonts kindly provided by Gary David Bouton, see www.theboutons.com
Other fonts are from a collection created by Fontbank Inc., which can be purchased from our web site
www.buyfonts.com
Many of the WMF symbols on the CD are letters from EFF fonts ? Creatures, Chess, Symphony,
Picturesque, Birdie and ArrowPi ? which are some of the variety of quality fonts from the EFF range
which can be purchased from our web site www.buyfonts.com
Other WMF symbols are courtesy of James Parry or come from the Publish Art CD produced by Ekits.
Details about this graphical resource can be found at: ekitsonline.com
or from jim@ekitsonline.com
Still more WMF symbols were produced from Gary David Bouton's symbolic fonts Geotype, Haxton
and Sympols. GeoType and Haxton are included on this CD, Sympols can be downloaded from Gary's
site www.theboutons.com
Other mentioned product names may be registered trademarks of the respective manufacturer.
Page 169
Copyright
This documentation is protected by law. All rights, especially the right of duplication, circulation, and
translation are reserved.
No part of this publication may be reproduced in form of copies, microfilms or other processes, or
transmitted into a language used for machines, especially data processing machines, without the express
written consent of the publisher.
All copyrights reserved.
All other product names are trademarks of the corresponding manufacturers. Errors in and changes to
the contents as well as program modifications reserved.
Xara is a registered trademark of Xara Group Ltd.
Xara Group Ltd. is an affiliate company of MAGIX AG.
MAGIX is a registered trademark of MAGIX AG.
Other mentioned product names may be registered trademarks of the respective manufacturer.
Copyright © Xara Group Ltd., 1994-2011. All rights reserved.
Windows and FrontPage are either trademarks or registered trademarks of Microsoft Corporation in the
United States and/or other countries. TrueType is a trademark of Apple Computer, Inc. registered in the
US and other countries. Macromedia, Flash and Dreamweaver are either trademarks or registered
trademarks of Adobe Systems Incorporated, in the United States and/or other countries.
Frankfurter Venetian, Geotype, Greek Diner, Haxton, Russel Write, Steppes, Bouton International,
Huxley Titling and Whimsy fonts kindly provided by Gary David Bouton, see www.theboutons.com
Other fonts are from a collection created by Fontbank Inc., which can be purchased from our web site
www.buyfonts.com
Many of the WMF symbols on the CD are letters from EFF fonts ? Creatures, Chess, Symphony,
Picturesque, Birdie and ArrowPi ? which are some of the variety of quality fonts from the EFF range
which can be purchased from our web site www.buyfonts.com
Other WMF symbols are courtesy of James Parry or come from the Publish Art CD produced by Ekits.
Details about this graphical resource can be found at: ekitsonline.com
or from jim@ekitsonline.com
Still more WMF symbols were produced from Gary David Bouton's symbolic fonts Geotype, Haxton
and Sympols. GeoType and Haxton are included on this CD, Sympols can be downloaded from Gary's
site www.theboutons.com
Other mentioned product names may be registered trademarks of the respective manufacturer.
Page 170
