Panasonic DMC LX15 Quick Guide QG EN
User Manual: panasonic DMC-LX15 - Quick Guide Free User Guide for Panasonic Camera, Manual - page3
Open the PDF directly: View PDF ![]() .
.
Page Count: 2
Quick Guide for 4K Photo
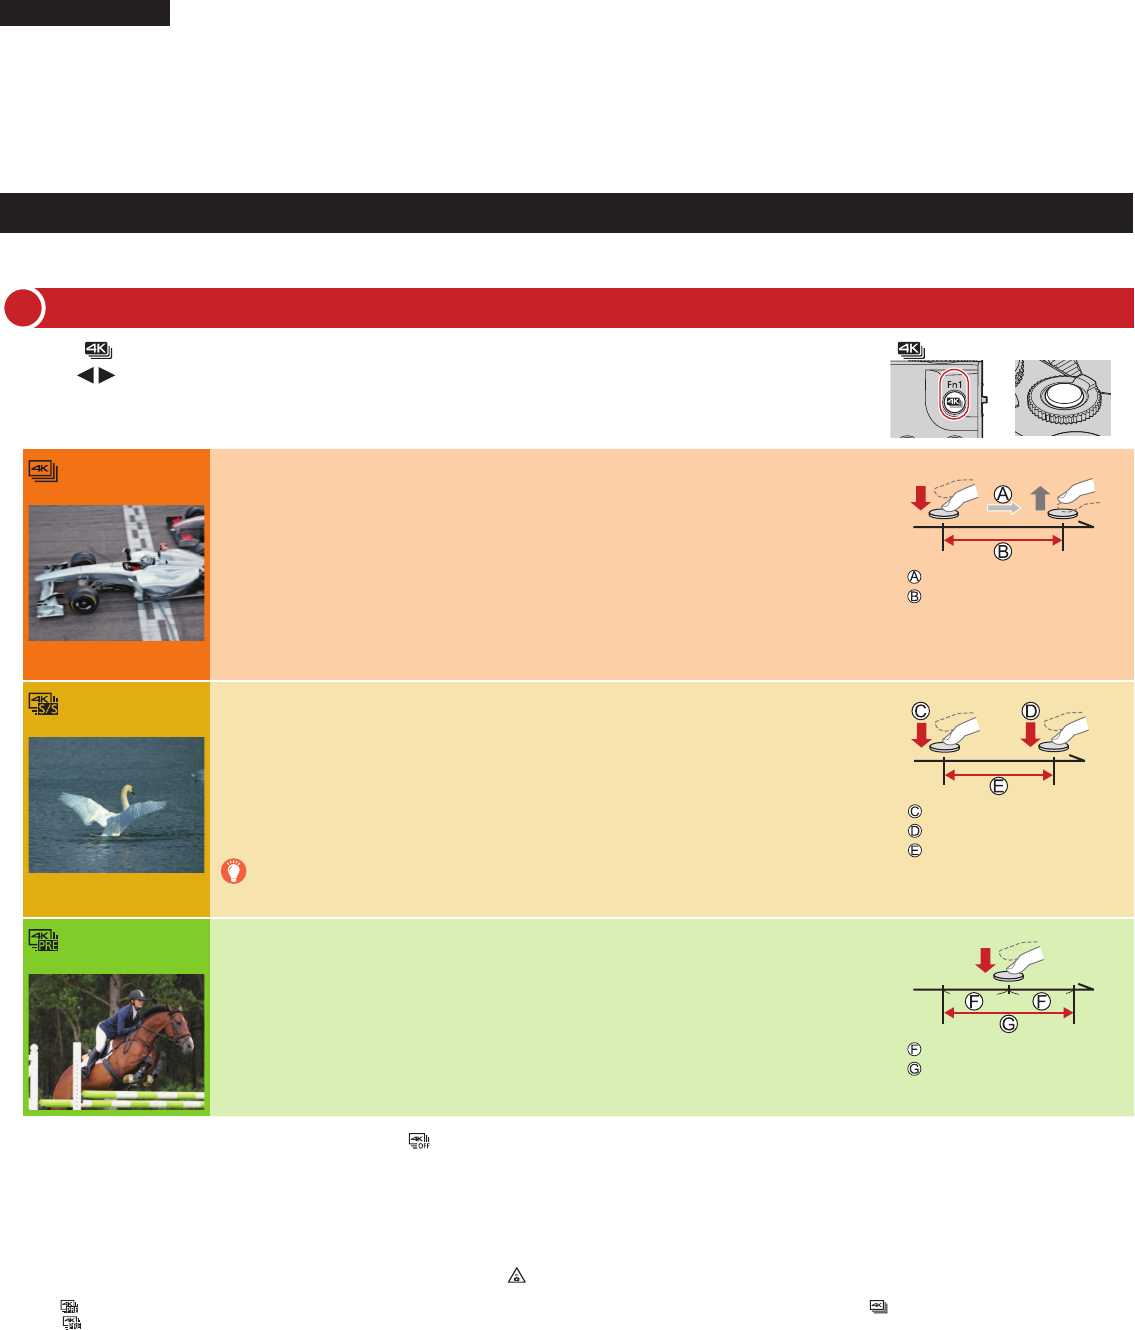
Catching the moment you really want ([4K Burst] / [4K Burst(S/S)] / [4K Pre-Burst])
You can select the desired moment from a burst of 4K photos taken at 30 frames/second and save that moment as a picture of approx. 8 million pixels.
1Press [ ] button [ ] button Shutter button
2Press to select the recording method and press [MENU/SET]
[4K Burst]
For capturing the best shot of a fast-moving subject (e.g., sports, aeroplanes, trains)
Burst recording is performed while the shutter button is pressed and held. The shutter sound
will be heard repeatedly.
1Press the shutter button halfway
2Press and hold the shutter button fully for as long as you want to
perform recording
●Recording will start approximately 0.5 seconds after you press the shutter button fully. Therefore, press
the button fully as soon as possible.
●If you are using Auto Focus, continuous AF will work while recording. Focus will be adjusted
continuously.
Press and hold
Recording is performed
[4K Burst(S/S)]
For capturing unpredictable photo opportunities (e.g., plants, animals, children)
Burst recording starts when the shutter button is pressed and stops when pressed again.
Start and stop tones will be heard.
1Press the shutter button fully
2Press the shutter button fully again
●If you are using Auto Focus, continuous AF will work while recording. Focus will be adjusted
continuously.
When you press the [Fn1] button while recording, you can add a marker.
(Up to 40 markers for each recording.) When selecting and saving pictures from a 4K
burst file, you can skip to the positions where you added markers.
Start (First)
Stop (Second)
Recording is performed
[4K Pre-Burst]
For recording as needed whenever a photo opportunity arises (e.g., the moment when a
ball is thrown)
Burst recording is performed for approximately 1 second before and after the moment that the
shutter button is pressed. The shutter sound will be heard only once.
1Press the shutter button fully
●In situations where you want to lock focus and exposure, such as when the subject is not at the
centre, use [AF/AE LOCK].
●Recording length: Approximately 2 seconds
Approximately 1 second
Recording is performed
■To cancel the 4K Photo functions: In step 2, select [ ].
●When you perform 4K burst photo recording, a 4K burst file will be saved in the MP4 format.
●Use a UHS Speed Class 3 card.
●Recording stops when the continuous recording time exceeds 15 minutes. When you are using an SDHC memory card, you can continue recording without interruption even if the
file exceeds 4 GB, but the motion picture file will be recorded and played back in separate files. If using an SDXC Memory Card, you can record a motion picture in a single file even
if the size is greater than 4 GB.
●When recording, the angle of view becomes narrower.
●If the surrounding temperature is high or 4K photos are recorded continuously, [ ] may be displayed and recording may be stopped halfway through. Wait until the camera cools
down.
●When [ ] ([4K Pre-Burst]) is set, the battery drains faster and the camera temperature rises. (to protect itself, the camera may switch to [ ] ([4K Burst]))
Select [ ] ([4K Pre-Burst]) only when recording.
ENGLISH
Recording 4K Photos
1
Digital Camera
Model No. DMC-LX15
SQC0462
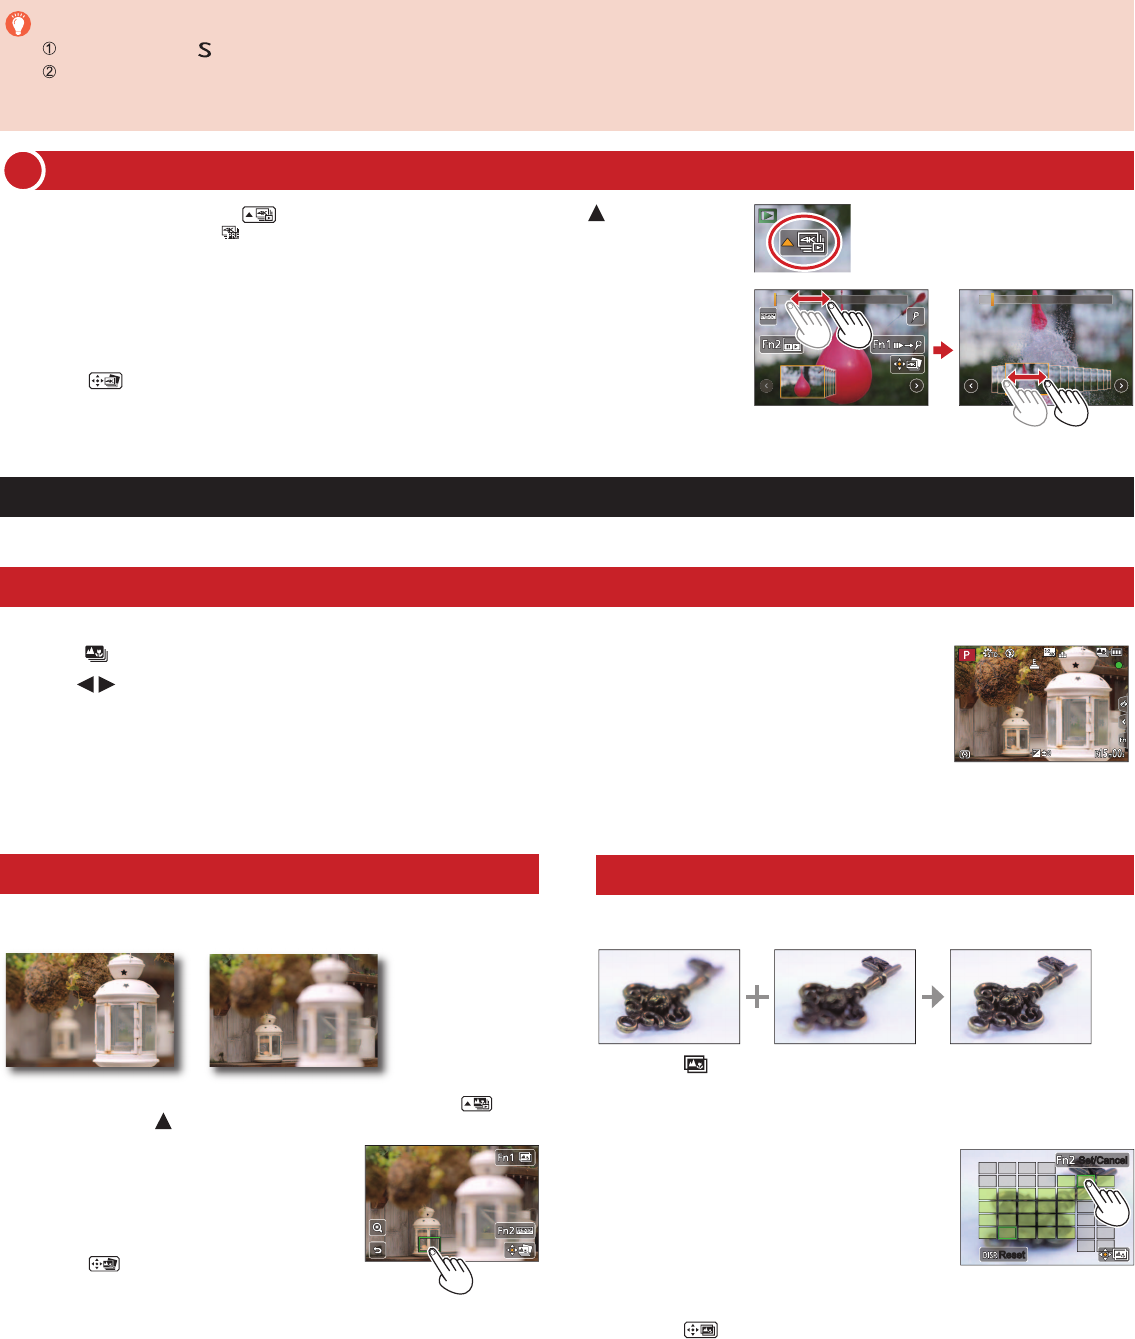
Selecting pictures from 4K burst file and saving
2
1Select a picture with the [ ] on the playback screen, and press
●In the case of recording with [ ] ([4K Pre-Burst]), proceed to the step 3.
2Drag the slide bar to perform rough scene selection
3Touch and drag the frames to select the frame you want to save as a picture
4Touch [ ] to save the picture
●The picture will be saved in JPEG format.
To record the subject with reduced blur
Set mode dial to [ ]
Set the shutter speed by rotating the rear dial
●Approximate shutter speed for outdoor recording in fine weather conditions: 1/1000 seconds or faster.
●If you increase the shutter speed, the ISO sensitivity becomes higher, which may increase the noise on the screen.
Changing a focus point after recording ([Post Focus] / [Focus Stacking])
You can record bursts of photos with the same quality as a 4K photo while automatically changing the focus point.
Recording using [Post Focus]
●We recommend using a tripod to perform [Focus Stacking].
1Press [ ] button
2Press to select [ON] and press [MENU/SET]
3Determine the composition and press the shutter button halfway
●Do not change the distance to subject or the composition.
4Press the shutter button fully to start recording
●When the recording progress bar disappears, recording automatically ends.
■To cancel [Post Focus]: Select [OFF] in step 2.
Increasing the focus range ([Focus Stacking])
You can combine multiple pictures from pictures recorded using [Post Focus] to create
a single picture with an expanded focus range.
1Touch [ ] on screen in step 2 of “Selecting a focus point
([Post Focus])”
2Choose a stacking method and touch it
Settings: [Auto Merging] / [Range Merging]
3(When selecting [Range Merging])
Touch the focus point
●Select positions at two or more points.
●Focus positions between the two points are
selected and the range of the in-focus portion is
displayed.
●The ranges that are greyed out are positions that
cannot be selected, or that would produce an
unnatural result if selected for focus stacking.
●Touch a position again to deselect it.
ResetReset
Set/CancelSet/Cancel
4Touch [ ] to combine and save the picture
●The picture will be saved in JPEG format.
Selecting a focus point ([Post Focus])
After recording, you can select a point on the screen to save a picture with that point
as the focus point.
1On the playback screen, select the image with the [ ]
icon and press
2Touch the focus point
●If there are no pictures with the focus on the
selected point, a red frame will be displayed, and
pictures cannot be saved.
●You can make fine adjustments to the focus by
dragging the slide bar during enlarged display.
3Touch [ ] to save the picture
●The picture will be saved in JPEG format.
