Pinnacle Studio 19 User Guide 19.0 Studio19 En
User Manual: pinnacle Studio - 19.0 - User Guide Free User Guide for Pinnacle Studio Software, Manual
Open the PDF directly: View PDF ![]() .
.
Page Count: 461 [warning: Documents this large are best viewed by clicking the View PDF Link!]
- Cover
- Contents
- Before you start
- Chapter 1: Using Pinnacle Studio
- Chapter 2: The Library
- Adding assets to a project
- Correcting media files
- Instant gratification: SmartMovie
- Understanding the Library
- The Navigator
- Project Bins
- Collections
- Favorites
- Managing Library assets
- The Browser
- Thumbnails and details
- Optional indicators and controls
- The Library preview
- Choosing what to display in the Library
- Tags
- Correcting media
- Video scene detection
- SmartMovie
- Chapter 3: The Movie Editor
- The compact Library
- Previewing in the project editors
- The Project Timeline
- The timeline toolbar
- The timeline track header
- Editing Movies
- Title Editor, ScoreFitter, voice-over
- Deleting clips
- Clip operations
- Selecting
- Multiple selection with keyboard and mouse
- Grouping and ungrouping clips
- Adjusting
- Over-trimming
- Trimming
- A rule for staying in sync
- Opening trim points
- The Trim Editor
- Editing modes
- Trimming the beginning of a clip
- Trimming the end of the clip
- Trimming gaps
- Trim both
- Slip trim
- Slide trim
- Monitoring trim points
- Moving and copying
- Using the Clipboard
- Speed
- Movies within movies
- Transitions
- Clip effects
- Clip context menus
- Chapter 4: Corrections
- Chapter 5: Effects
- Chapter 6: Montage
- Chapter 7: The Title Editor
- Chapter 8: Sound and music
- Chapter 9: Disc projects
- Chapter 10: The Importer
- The next step
- Using the Importer
- Importer panels
- The Import To panel
- The Mode panel
- The Compression Options window
- The Scene Detection Options window
- The Metadata panel
- The Filename panel
- Selecting assets for import
- Selecting files for Import
- Customizing the browser
- Adjusting the import file date and time
- Scan for assets
- Import from DV or HDV camera
- Import from analog sources
- Import from DVD or Blu-ray Disc
- Import from digital cameras
- Stop motion
- Snapshot
- Chapter 11: The Exporter
- Chapter 12: Setup
- Chapter 13: Screen capture
- Chapter 14: Multi-Camera Editing
- The Multi-Camera Editor workspace
- Basic steps in multi-camera editing
- Importing video and audio clips into the Multi-Camera Editor
- Synchronizing video and audio clips in multi-camera projects
- Choosing an audio source for your multi-camera project
- Editing multiple clips to create a multi-camera compilation
- Adding picture-in-picture (PIP) in the Multi-Camera Editor
- Managing multi-camera source files
- Saving and exporting your multi-camera project
- Using Smart Proxy for a faster, smoother editing experience
- Appendix A: Troubleshooting
- Contacting support
- Forums
- Top support issues
- Capture hardware compatibility
- Serial number information
- Error or crash while installing
- Hangs or crashes while launching
- Troubleshooting software crashes
- Case 1: Studio crashes randomly
- Get the latest version
- Optimize settings
- End background tasks
- Defragment your hard drive
- Update video and audio drivers
- Update Windows
- Optimize computer performance
- Free space on boot drive
- Uninstall and reinstall Pinnacle Studio
- Check for a corrupt project
- Check for corrupt media
- Reinstall Windows
- To use the system information tool:
- Case 2: Studio crashes after a user action
- Case 3: Studio crashes repeatably
- Export problems
- Disc playback problems
- Appendix B: Videography
- Appendix C: Glossary
- Appendix D: Keyboard shortcuts
- Appendix E: The installation manager

Pinnacle Studio
™
19 User Guide
Including Pinnacle Studio™ Plus and
Pinnacle Studio™ Ultimate

Contents i
Contents
Before you start. . . . . . . . . . . . . . . . . . . . . . . . . . . . . . . . . . 1
Abbreviations and conventions . . . . . . . . . . . . . . . . . . . . . . . . . . . 1
Buttons, menus, dialog boxes and windows . . . . . . . . . . . . . . . . . 2
Help and Tooltips . . . . . . . . . . . . . . . . . . . . . . . . . . . . . . . . . . . . . 3
Finding your version information . . . . . . . . . . . . . . . . . . . . . . . . . . 4
Upgrading . . . . . . . . . . . . . . . . . . . . . . . . . . . . . . . . . . . . . . . . . . 4
Chapter 1: Using Pinnacle Studio . . . . . . . . . . . . . . . . . . . . 5
The Importer. . . . . . . . . . . . . . . . . . . . . . . . . . . . . . . . . . . . . . . . . 5
The Exporter . . . . . . . . . . . . . . . . . . . . . . . . . . . . . . . . . . . . . . . . . 6
The central tabs . . . . . . . . . . . . . . . . . . . . . . . . . . . . . . . . . . . . . . 7
The Library . . . . . . . . . . . . . . . . . . . . . . . . . . . . . . . . . . . . . . . . . . 8
The next step . . . . . . . . . . . . . . . . . . . . . . . . . . . . . . . . . . . . . . . 10
The Movie Editor and the Disc Editor. . . . . . . . . . . . . . . . . . . . . . 11
The media editors . . . . . . . . . . . . . . . . . . . . . . . . . . . . . . . . . . . . 12
The Player . . . . . . . . . . . . . . . . . . . . . . . . . . . . . . . . . . . . . . . . . . 14
Pinnacle Studio Projects. . . . . . . . . . . . . . . . . . . . . . . . . . . . . . . . 14
Chapter 2: The Library . . . . . . . . . . . . . . . . . . . . . . . . . . . . 17
Adding assets to a project . . . . . . . . . . . . . . . . . . . . . . . . . . . . . . 18
Correcting media files . . . . . . . . . . . . . . . . . . . . . . . . . . . . . . . . . 19
Instant gratification: SmartMovie. . . . . . . . . . . . . . . . . . . . . . . . . 19
Understanding the Library . . . . . . . . . . . . . . . . . . . . . . . . . . . . . . 20
The Navigator . . . . . . . . . . . . . . . . . . . . . . . . . . . . . . . . . . . . . . . 23
Project Bins . . . . . . . . . . . . . . . . . . . . . . . . . . . . . . . . . . . . . . . . . 24
Collections . . . . . . . . . . . . . . . . . . . . . . . . . . . . . . . . . . . . . . . . . 25

ii Pinnacle Studio
Favorites . . . . . . . . . . . . . . . . . . . . . . . . . . . . . . . . . . . . . . . . . . . 27
Managing Library assets . . . . . . . . . . . . . . . . . . . . . . . . . . . . . . . 28
The Browser . . . . . . . . . . . . . . . . . . . . . . . . . . . . . . . . . . . . . . . . 31
Thumbnails and details . . . . . . . . . . . . . . . . . . . . . . . . . . . . . . . . 32
Optional indicators and controls . . . . . . . . . . . . . . . . . . . . . . . . . 36
The Library preview . . . . . . . . . . . . . . . . . . . . . . . . . . . . . . . . . . . 40
Choosing what to display in the Library . . . . . . . . . . . . . . . . . . . . 45
Tags . . . . . . . . . . . . . . . . . . . . . . . . . . . . . . . . . . . . . . . . . . . . . . 48
Correcting media . . . . . . . . . . . . . . . . . . . . . . . . . . . . . . . . . . . . 52
Video scene detection . . . . . . . . . . . . . . . . . . . . . . . . . . . . . . . . . 53
SmartMovie . . . . . . . . . . . . . . . . . . . . . . . . . . . . . . . . . . . . . . . . 55
Chapter 3: The Movie Editor. . . . . . . . . . . . . . . . . . . . . . . . 59
The compact Library . . . . . . . . . . . . . . . . . . . . . . . . . . . . . . . . . . 59
Previewing in the project editors . . . . . . . . . . . . . . . . . . . . . . . . . 61
The Project Timeline . . . . . . . . . . . . . . . . . . . . . . . . . . . . . . . . . . 64
The timeline toolbar . . . . . . . . . . . . . . . . . . . . . . . . . . . . . . . . . . 71
The timeline track header . . . . . . . . . . . . . . . . . . . . . . . . . . . . . . 80
Editing Movies . . . . . . . . . . . . . . . . . . . . . . . . . . . . . . . . . . . . . . 83
Title Editor, ScoreFitter, voice-over. . . . . . . . . . . . . . . . . . . . . . . . 90
Deleting clips . . . . . . . . . . . . . . . . . . . . . . . . . . . . . . . . . . . . . . . 91
Clip operations . . . . . . . . . . . . . . . . . . . . . . . . . . . . . . . . . . . . . . 91
Using the Clipboard . . . . . . . . . . . . . . . . . . . . . . . . . . . . . . . . . 106
Speed . . . . . . . . . . . . . . . . . . . . . . . . . . . . . . . . . . . . . . . . . . . . 108
Movies within movies . . . . . . . . . . . . . . . . . . . . . . . . . . . . . . . . 110
Transitions . . . . . . . . . . . . . . . . . . . . . . . . . . . . . . . . . . . . . . . . 111
Clip effects . . . . . . . . . . . . . . . . . . . . . . . . . . . . . . . . . . . . . . . . 118
Clip context menus . . . . . . . . . . . . . . . . . . . . . . . . . . . . . . . . . . 119
Chapter 4: Corrections . . . . . . . . . . . . . . . . . . . . . . . . . . . 123
Media editing overview . . . . . . . . . . . . . . . . . . . . . . . . . . . . . . . 126

Contents iii
Photo editing tools . . . . . . . . . . . . . . . . . . . . . . . . . . . . . . . . . . 132
Correcting photos . . . . . . . . . . . . . . . . . . . . . . . . . . . . . . . . . . . 134
Red-eye. . . . . . . . . . . . . . . . . . . . . . . . . . . . . . . . . . . . . . . . . . . 140
Correcting video . . . . . . . . . . . . . . . . . . . . . . . . . . . . . . . . . . . . 141
Video tools . . . . . . . . . . . . . . . . . . . . . . . . . . . . . . . . . . . . . . . . 142
Video corrections . . . . . . . . . . . . . . . . . . . . . . . . . . . . . . . . . . . 145
Stabilize . . . . . . . . . . . . . . . . . . . . . . . . . . . . . . . . . . . . . . . . . . 148
Correcting audio . . . . . . . . . . . . . . . . . . . . . . . . . . . . . . . . . . . . 148
Chapter 5: Effects . . . . . . . . . . . . . . . . . . . . . . . . . . . . . . 149
Effects in the media editors . . . . . . . . . . . . . . . . . . . . . . . . . . . . 151
Effects on the timeline. . . . . . . . . . . . . . . . . . . . . . . . . . . . . . . . 155
The Settings panel. . . . . . . . . . . . . . . . . . . . . . . . . . . . . . . . . . . 157
Working with keyframes . . . . . . . . . . . . . . . . . . . . . . . . . . . . . . 160
Video and photo effects . . . . . . . . . . . . . . . . . . . . . . . . . . . . . . 163
Working with transitions . . . . . . . . . . . . . . . . . . . . . . . . . . . . . . 168
Pan-and-zoom . . . . . . . . . . . . . . . . . . . . . . . . . . . . . . . . . . . . . 170
Chapter 6: Montage . . . . . . . . . . . . . . . . . . . . . . . . . . . . 175
The Montage section of the Library . . . . . . . . . . . . . . . . . . . . . . 177
Using montage templates . . . . . . . . . . . . . . . . . . . . . . . . . . . . . 178
Montage clips on the timeline . . . . . . . . . . . . . . . . . . . . . . . . . . 180
Anatomy of a template . . . . . . . . . . . . . . . . . . . . . . . . . . . . . . . 183
Montage editing . . . . . . . . . . . . . . . . . . . . . . . . . . . . . . . . . . . . 186
Using the Montage Editor . . . . . . . . . . . . . . . . . . . . . . . . . . . . . 186
Chapter 7: The Title Editor. . . . . . . . . . . . . . . . . . . . . . . . 191
Launching (and leaving) the Title Editor. . . . . . . . . . . . . . . . . . . 193
The Library . . . . . . . . . . . . . . . . . . . . . . . . . . . . . . . . . . . . . . . . 195
The Presets Selector. . . . . . . . . . . . . . . . . . . . . . . . . . . . . . . . . . 197
Preset Looks . . . . . . . . . . . . . . . . . . . . . . . . . . . . . . . . . . . . . . . 198

iv Pinnacle Studio
Preset Motions . . . . . . . . . . . . . . . . . . . . . . . . . . . . . . . . . . . . . 199
Creating and editing titles . . . . . . . . . . . . . . . . . . . . . . . . . . . . . 202
Background settings . . . . . . . . . . . . . . . . . . . . . . . . . . . . . . . . . 204
Look settings . . . . . . . . . . . . . . . . . . . . . . . . . . . . . . . . . . . . . . 205
The Edit window. . . . . . . . . . . . . . . . . . . . . . . . . . . . . . . . . . . . 210
Text and text settings . . . . . . . . . . . . . . . . . . . . . . . . . . . . . . . . 213
Titles and stereoscopic 3D . . . . . . . . . . . . . . . . . . . . . . . . . . . . . 219
The Layer List . . . . . . . . . . . . . . . . . . . . . . . . . . . . . . . . . . . . . . 221
Working with the Layer List . . . . . . . . . . . . . . . . . . . . . . . . . . . . 222
Working with layer groups . . . . . . . . . . . . . . . . . . . . . . . . . . . . 227
Chapter 8: Sound and music . . . . . . . . . . . . . . . . . . . . . . 233
The Audio Editor. . . . . . . . . . . . . . . . . . . . . . . . . . . . . . . . . . . . 235
Audio corrections . . . . . . . . . . . . . . . . . . . . . . . . . . . . . . . . . . . 241
Audio effects . . . . . . . . . . . . . . . . . . . . . . . . . . . . . . . . . . . . . . 246
Audio on the timeline . . . . . . . . . . . . . . . . . . . . . . . . . . . . . . . . 249
Timeline audio functions . . . . . . . . . . . . . . . . . . . . . . . . . . . . . . 249
Audio creation tools . . . . . . . . . . . . . . . . . . . . . . . . . . . . . . . . . 258
ScoreFitter . . . . . . . . . . . . . . . . . . . . . . . . . . . . . . . . . . . . . . . . 259
The Voice-over tool . . . . . . . . . . . . . . . . . . . . . . . . . . . . . . . . . . 261
Using Audio Ducking to automatically adjust volume . . . . . . . . 264
Chapter 9: Disc projects . . . . . . . . . . . . . . . . . . . . . . . . . . 267
Disc menus . . . . . . . . . . . . . . . . . . . . . . . . . . . . . . . . . . . . . . . . 269
Adding disc menus . . . . . . . . . . . . . . . . . . . . . . . . . . . . . . . . . . 272
Previewing disc menus . . . . . . . . . . . . . . . . . . . . . . . . . . . . . . . 275
Menu editing on the timeline . . . . . . . . . . . . . . . . . . . . . . . . . . 277
Timeline menu markers . . . . . . . . . . . . . . . . . . . . . . . . . . . . . . . 277
Authoring tools. . . . . . . . . . . . . . . . . . . . . . . . . . . . . . . . . . . . . 278
The Chapter Wizard . . . . . . . . . . . . . . . . . . . . . . . . . . . . . . . . . 281
The Menu Editor . . . . . . . . . . . . . . . . . . . . . . . . . . . . . . . . . . . . 285

Contents v
Menu buttons. . . . . . . . . . . . . . . . . . . . . . . . . . . . . . . . . . . . . . 285
The Disc Simulator . . . . . . . . . . . . . . . . . . . . . . . . . . . . . . . . . . 288
Chapter 10: The Importer . . . . . . . . . . . . . . . . . . . . . . . . 291
Using the Importer . . . . . . . . . . . . . . . . . . . . . . . . . . . . . . . . . . 292
Importer panels. . . . . . . . . . . . . . . . . . . . . . . . . . . . . . . . . . . . . 294
The Import To panel . . . . . . . . . . . . . . . . . . . . . . . . . . . . . . . . . 298
The Mode panel . . . . . . . . . . . . . . . . . . . . . . . . . . . . . . . . . . . . 302
The Compression Options window . . . . . . . . . . . . . . . . . . . . . . 306
The Scene Detection Options window . . . . . . . . . . . . . . . . . . . . 307
The Metadata panel . . . . . . . . . . . . . . . . . . . . . . . . . . . . . . . . . 308
The Filename panel . . . . . . . . . . . . . . . . . . . . . . . . . . . . . . . . . . 309
Selecting assets for import . . . . . . . . . . . . . . . . . . . . . . . . . . . . 311
Selecting files for Import . . . . . . . . . . . . . . . . . . . . . . . . . . . . . . 312
Customizing the browser . . . . . . . . . . . . . . . . . . . . . . . . . . . . . 317
Adjusting the import file date and time . . . . . . . . . . . . . . . . . . . 319
Scan for assets . . . . . . . . . . . . . . . . . . . . . . . . . . . . . . . . . . . . . 319
Import from DV or HDV camera . . . . . . . . . . . . . . . . . . . . . . . . 320
Import from analog sources . . . . . . . . . . . . . . . . . . . . . . . . . . . 326
Import from DVD or Blu-ray Disc . . . . . . . . . . . . . . . . . . . . . . . . 327
Import from digital cameras . . . . . . . . . . . . . . . . . . . . . . . . . . . 329
Stop motion . . . . . . . . . . . . . . . . . . . . . . . . . . . . . . . . . . . . . . . 329
Snapshot . . . . . . . . . . . . . . . . . . . . . . . . . . . . . . . . . . . . . . . . . 332
Chapter 11: The Exporter. . . . . . . . . . . . . . . . . . . . . . . . . 337
Output to disc or memory card . . . . . . . . . . . . . . . . . . . . . . . . . 341
Output to file . . . . . . . . . . . . . . . . . . . . . . . . . . . . . . . . . . . . . . 344
Output to cloud . . . . . . . . . . . . . . . . . . . . . . . . . . . . . . . . . . . . 352
Output to a device . . . . . . . . . . . . . . . . . . . . . . . . . . . . . . . . . . 356
Output to a MyDVD file. . . . . . . . . . . . . . . . . . . . . . . . . . . . . . . 357

vi Pinnacle Studio
Chapter 12: Setup . . . . . . . . . . . . . . . . . . . . . . . . . . . . . . 359
Watchfolders . . . . . . . . . . . . . . . . . . . . . . . . . . . . . . . . . . . . . . 359
Audio device. . . . . . . . . . . . . . . . . . . . . . . . . . . . . . . . . . . . . . . 360
Event logging . . . . . . . . . . . . . . . . . . . . . . . . . . . . . . . . . . . . . . 360
Export and Preview . . . . . . . . . . . . . . . . . . . . . . . . . . . . . . . . . . 360
Import . . . . . . . . . . . . . . . . . . . . . . . . . . . . . . . . . . . . . . . . . . . 364
Keyboard . . . . . . . . . . . . . . . . . . . . . . . . . . . . . . . . . . . . . . . . . 366
Project settings . . . . . . . . . . . . . . . . . . . . . . . . . . . . . . . . . . . . . 368
Storage locations . . . . . . . . . . . . . . . . . . . . . . . . . . . . . . . . . . . 369
Reset . . . . . . . . . . . . . . . . . . . . . . . . . . . . . . . . . . . . . . . . . . . . 369
Restore purchase. . . . . . . . . . . . . . . . . . . . . . . . . . . . . . . . . . . . 370
Chapter 13: Screen capture . . . . . . . . . . . . . . . . . . . . . . . 371
Starting a screen capture project . . . . . . . . . . . . . . . . . . . . . . . . 371
Recording your screen. . . . . . . . . . . . . . . . . . . . . . . . . . . . . . . . 372
Chapter 14: Multi-Camera Editing . . . . . . . . . . . . . . . . . . 375
The Multi-Camera Editor workspace . . . . . . . . . . . . . . . . . . . . . 376
Basic steps in multi-camera editing . . . . . . . . . . . . . . . . . . . . . . 379
Importing video and audio clips into the Multi-Camera Editor . . 380
Synchronizing video and audio clips in multi-camera projects . . 381
Choosing an audio source for your multi-camera project . . . . . . 382
Editing multiple clips to create a multi-camera compilation . . . . 384
Adding picture-in-picture (PIP) in the Multi-Camera Editor. . . . . 387
Managing multi-camera source files . . . . . . . . . . . . . . . . . . . . . 388
Saving and exporting your multi-camera project . . . . . . . . . . . . 389
Using Smart Proxy for a faster, smoother editing experience . . . 390
Appendix A: Troubleshooting. . . . . . . . . . . . . . . . . . . . . . 393
Contacting support . . . . . . . . . . . . . . . . . . . . . . . . . . . . . . . . . . 394
Forums . . . . . . . . . . . . . . . . . . . . . . . . . . . . . . . . . . . . . . . . . . . 394

Contents vii
Top support issues . . . . . . . . . . . . . . . . . . . . . . . . . . . . . . . . . . 394
Capture hardware compatibility. . . . . . . . . . . . . . . . . . . . . . . . . 399
Serial number information. . . . . . . . . . . . . . . . . . . . . . . . . . . . . 400
Error or crash while installing . . . . . . . . . . . . . . . . . . . . . . . . . . 401
Hangs or crashes while launching . . . . . . . . . . . . . . . . . . . . . . . 402
Troubleshooting software crashes . . . . . . . . . . . . . . . . . . . . . . . 404
Case 1: Studio crashes randomly . . . . . . . . . . . . . . . . . . . . . . . . 405
Case 2: Studio crashes after a user action . . . . . . . . . . . . . . . . . 409
Case 3: Studio crashes repeatably . . . . . . . . . . . . . . . . . . . . . . . 409
Export problems . . . . . . . . . . . . . . . . . . . . . . . . . . . . . . . . . . . . 410
Disc playback problems . . . . . . . . . . . . . . . . . . . . . . . . . . . . . . . 410
Appendix B: Videography . . . . . . . . . . . . . . . . . . . . . . . . 413
Creating a shooting plan . . . . . . . . . . . . . . . . . . . . . . . . . . . . . . 413
Editing . . . . . . . . . . . . . . . . . . . . . . . . . . . . . . . . . . . . . . . . . . . 414
Rules of thumb for video editing . . . . . . . . . . . . . . . . . . . . . . . . 418
Soundtrack production . . . . . . . . . . . . . . . . . . . . . . . . . . . . . . . 420
Title . . . . . . . . . . . . . . . . . . . . . . . . . . . . . . . . . . . . . . . . . . . . . 421
Appendix C: Glossary. . . . . . . . . . . . . . . . . . . . . . . . . . . . 423
Appendix D: Keyboard shortcuts . . . . . . . . . . . . . . . . . . . 439
General shortcuts . . . . . . . . . . . . . . . . . . . . . . . . . . . . . . . . . . . 439
Library . . . . . . . . . . . . . . . . . . . . . . . . . . . . . . . . . . . . . . . . . . . 440
Playing and transport . . . . . . . . . . . . . . . . . . . . . . . . . . . . . . . . 441
Importer . . . . . . . . . . . . . . . . . . . . . . . . . . . . . . . . . . . . . . . . . . 442
Movie interface . . . . . . . . . . . . . . . . . . . . . . . . . . . . . . . . . . . . . 442
Media editors . . . . . . . . . . . . . . . . . . . . . . . . . . . . . . . . . . . . . . 444
Title Editor . . . . . . . . . . . . . . . . . . . . . . . . . . . . . . . . . . . . . . . . 444
Appendix E: The installation manager . . . . . . . . . . . . . . . 445
Before you begin. . . . . . . . . . . . . . . . . . . . . . . . . . . . . . . . . . . . 445

viii Pinnacle Studio
Upgrade Installation . . . . . . . . . . . . . . . . . . . . . . . . . . . . . . . . . 446
Launching the Installation Manager . . . . . . . . . . . . . . . . . . . . . 446
Registration . . . . . . . . . . . . . . . . . . . . . . . . . . . . . . . . . . . . . . . 446
Supporting installations . . . . . . . . . . . . . . . . . . . . . . . . . . . . . . 447
The Welcome Screen. . . . . . . . . . . . . . . . . . . . . . . . . . . . . . . . . 447
Common controls . . . . . . . . . . . . . . . . . . . . . . . . . . . . . . . . . . . 447
Installing plugs-ins and bonus content . . . . . . . . . . . . . . . . . . . 448
System requirements. . . . . . . . . . . . . . . . . . . . . . . . . . . . . . . . . 448

Before you start 1
Before you start
Thank you for purchasing Pinnacle Studio™19. We hope you enjoy
using the software.
If you have not used Pinnacle Studio before, we recommend that you
keep the user guide handy for reference even if you don’t actually read
it all the way through.
In order to ensure that your movie-making experience gets off on the
right foot, please review the topics.
Note: Not all features described in the user guide are included
in all versions of Pinnacle Studio. For more information, please
visit www.pinnaclesys.com and click Compare.
Abbreviations and conventions
This guide uses the following conventions to help organize the
material.
Common terms
AVCHD: A video data format used by some high-definition
camcorders, and for creating DVD discs that can be read on Blu-ray
players. Successful editing of AVCHD files requires more computing
power than other formats supported by Pinnacle Studio.
DV: This term refers to DV and Digital8 camcorders, VCRs and tapes.

2 Pinnacle Studio User Guide
HDV: A ‘high-definition video’ format that allows video in frame sizes
of 1280x720 or 1440x1080 to be recorded in MPEG-2 format on DV
media.
1394: The term ‘1394’ applies to OHCI-compliant IEEE-1394,
FireWire, DV or i.LINK interfaces, ports and cables.
Analog: The term ‘analog’ applies to 8mm, Hi8, VHS, SVHS, VHS-C or
SVHS-C camcorders, VCRs and tapes, and to Composite/RCA and S-
Video cables and connectors.
Buttons, menus, dialog boxes and windows
Names of buttons, menus and related user interface items are written
in bold to distinguish them from the surrounding text.
Choosing menu commands
The right arrowhead symbol (>) denotes the path for hierarchical
menu items. For example:
• Select File > Burn Disc Image.
Context menus
A ‘context menu’ is a pop-up list of commands that appears when you
click with the right mouse-button on certain areas of the application
interface. Depending where you click, a context menu may pertain
either to an editable object (like a clip on an editing timeline), to a
window, or to a zone such as a control panel. Once open, context
menus behave just like the ones on the main menu bar.
Context menus are available in most parts of the Pinnacle Studio
interface. Our documentation generally takes for granted that you
know how to open and use them.

Before you start 3
Mouse clicks
When a mouse click is required, the default is always a left-click unless
otherwise specified, or unless the click is to open a context menu:
Right-click and select
Title Editor
. (Or, one might say, “Select
Title Editor
from the context menu.”)
Key names
Key names are spelled with an initial capital and are underlined. A plus
sign denotes a key combination. For example:
Press Ctrl+A to select all the clips on the Timeline.
Please refer to
Appendix D: Keyboard shortcuts
for a comprehensive
table of available shortcuts.
Help and Tooltips
Immediate help is available while you are working in Pinnacle Studio
via the Help menu.
Help
The Help menu lets you access a variety of learning resources. Click the
Help button > User Manual to access the Learning Center page with
links to video tutorials, the Pinnacle Studio 19 User Guide PDF, and
other community and support links.
Video tutorials
You can access video tutorials from the Learning Center page (Help >
User Manual) or by visiting the following sites directly:

4 Pinnacle Studio User Guide
•YouTube — http://www.youtube.com/user/pinnaclestudiolife
•StudioBacklot.tv — http://www.studiobacklot.tv/studio19
Get a 30-day, all-access pass to StudioBacklot.tv, featuring brand-
new Pinnacle Studio 19 content, loads of other training and a
royalty-free stock library. (Training is in English only.)
Tool tips
To find out what a button or other Studio control does, pause your
mouse pointer over it. A ‘tool tip’ pops up to explain the control’s
function.
Finding your version information
Whether you are considering upgrading your software or looking for
support, it’s good to know your version information. To check the
version of Pinnacle Studio that you have, click the Help button >
About.
Upgrading
There are different versions of Pinnacle Studio and features vary
depending on the version you have. For more information, please visit
www.pinnaclesys.com and click Compare.
For information about upgrading your software, click the Help
button > Online Offers & News > Software Offers.
Chapter 1: Using Pinnacle Studio 5
Chapter 1: Using Pinnacle Studio
For a simple outline of the digital movie-making process, you don’t
have to look any further than the central tab group of Pinnacle Studio’s
main window. The same steps apply to any type of production, from
an unpretentious slideshow with dissolves between each frame to a 3D
extravaganza containing hundreds of carefully-arranged clips and
effects.
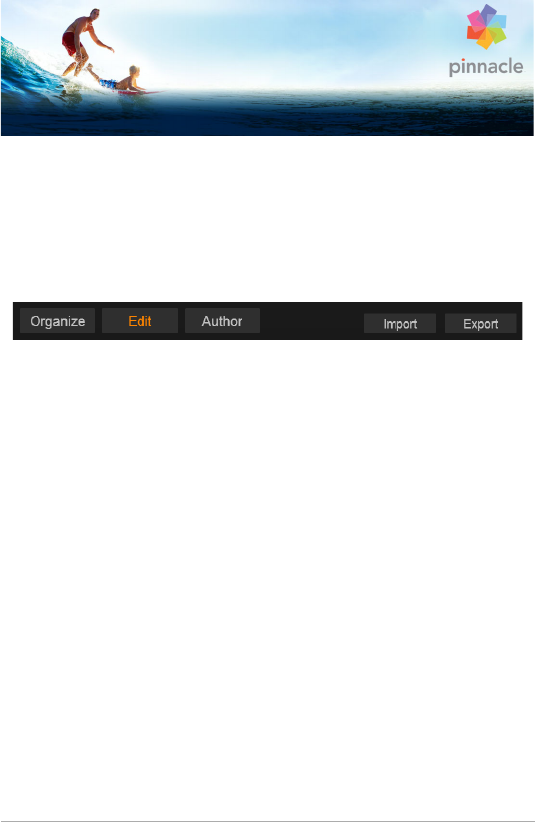
Pinnacle Studio’s main control bar summarizes the movie-
making process.
The Importer
Import on the right, is a preparatory step. It involves procedures like
‘capturing’ video from your analog or DV camcorder, bringing in
photos from a digital camera, and copying media files to your local
hard drive from a network location.
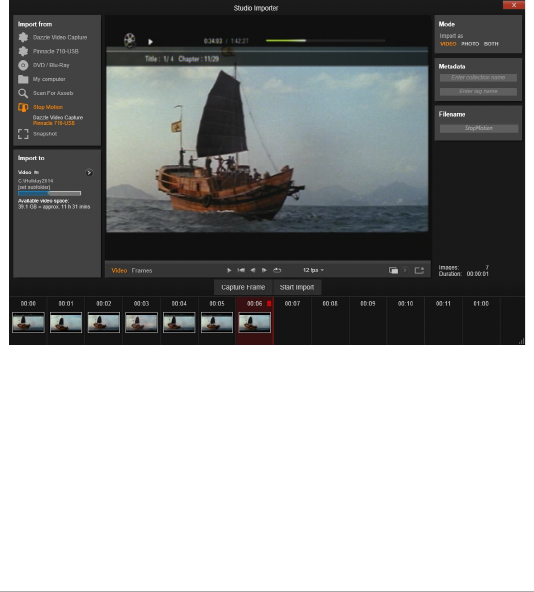
The Pinnacle Studio Importer provides tools for these tasks, along with
a Snapshot feature for grabbing frames from video files, and a Stop
motion tool for building up video frame-by-frame. See “Chapter 10:
The Importer” on page 291 for details.
File menu import commands: Choosing Import from the file menu has
the same effect as clicking the Import tab: it opens the Importer. The
menu provides three other import-related choices as well. Each of
6 Pinnacle Studio User Guide
these opens a Windows file dialog to permit import of files from a hard
drive or other local storage.
•Import previous Pinnacle Studio Projects lets you load movie
projects created with earlier versions of Studio.
•Import Studio for iPad App Projects lets you bring in projects
exported from Studio’s companion app for the iPad.
•Quick Import lets you directly select ordinary media files—photo,
video, audio and project—for import.
Studio Importer
The Exporter
At the other end of the movie-making process is Export. By the time
you get to this stage, the hard part of the task is behind you. The
creative energy that went into making your movie has paid off in a
production that now lacks only one ingredient—an audience.
Chapter 1: Using Pinnacle Studio 7
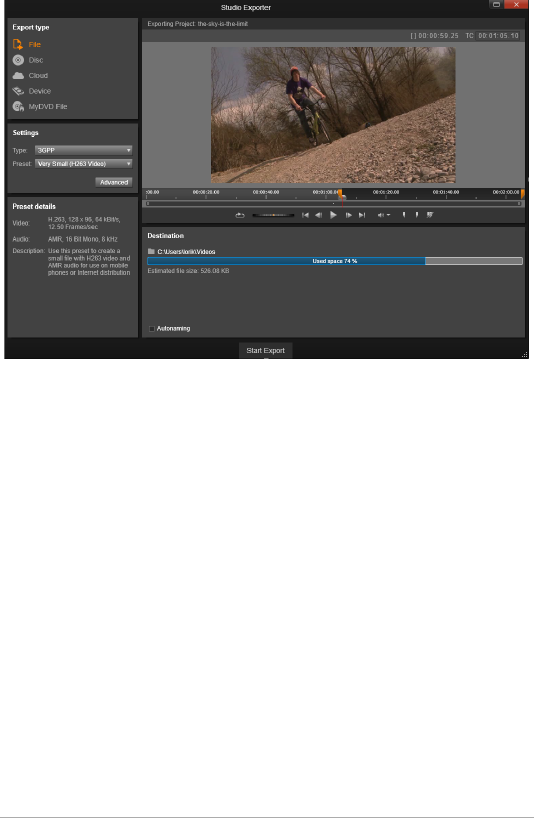
Studio Exporter
The Pinnacle Studio Exporter helps you over that last hurdle with tools
for taking your movie to its viewers, whoever and wherever they might
be. Create a digital movie file in the format of your choice, burn a DVD,
or upload directly to destinations in the Cloud like YouTube and Vimeo,
or to your personal Cloud-based storage area.
Like the Importer, the Exporter opens in a separate window, and
returns to the main window after its work is done. See “Chapter 11:
The Exporter” on page 337 to learn more.
The central tabs
The three central tabs, Library, Movie and Disc, are where most of your
work in Pinnacle Studio takes place. The first of these opens the main
view of the Library, where you can ‘curate’ your media collections.

8 Pinnacle Studio User Guide
The other tabs open the two project editors, one for digital movies,
and the other for disc projects, which are digital movies enhanced with
interactivity in the form of DVD menus.
The Library
The Library is a cataloging and management tool for all the file-based
resources – or
assets
– that you can draw on when authoring. Almost
all of the materials of your movie – video footage, music and audio
files, and many specialized resources such as transitions and effects –
originate as assets in the Library. Many Library assets are supplied with
Pinnacle Studio, and are available for royalty-free use. These include
professionally-designed titles, DVD menus, sound effects and more.
The Library uses project bins to organize assets. Project bins are virtual
folders for your assets. They are created automatically during import
and you can create them manually to organize your assets according
to your needs (for example, by project).
You can also use watchfolders to automatically monitor and import
media files that are added to the folders you choose to “watch”. For
information about activating watchfolders, see “Watchfolders” on
page 359. When you use watchfolders, a Library Media branch is
added to the Asset Tree in the Library. You will also see a Library Media
branch if Pinnacle Studio detects a library from a previous version of
Pinnacle Studio (you must enable watchfolders if you want to continue
populating this branch).
Main view
When you click the Library tab, the Library takes over the main window.
This ‘main view’ gives you spacious access to a number of cataloging
and search tools, including those for categorizing assets by means of
ratings and tags, and those for creating user-defined asset collections.
Chapter 1: Using Pinnacle Studio 9
Compact view
The ‘compact view’ of the Library squeezes virtually the whole
functionality of the main view into a panel embedded within certain
other windows, such as the Movie Editor and the Disc Editor. The
primary purpose of the compact view is to allow assets to be brought
into a movie or disc project from the Library by drag-and-drop.
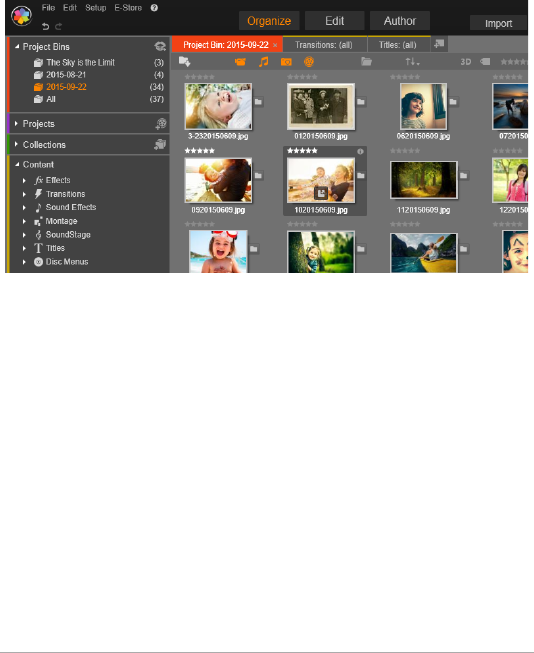
The main view of the Library consists of navigation controls
for exploring media assets (left) and a browser for examining
and selecting assets (right).
Player
The tools available from within the Library include the Player, a viewer
that works for all media types handled by the application. When used
from the main view of the Library, the Player opens in a separate
window. When the compact Library is used, an embedded version of
the Player appears in the same window. For more information, see
“The Player” on page 14.
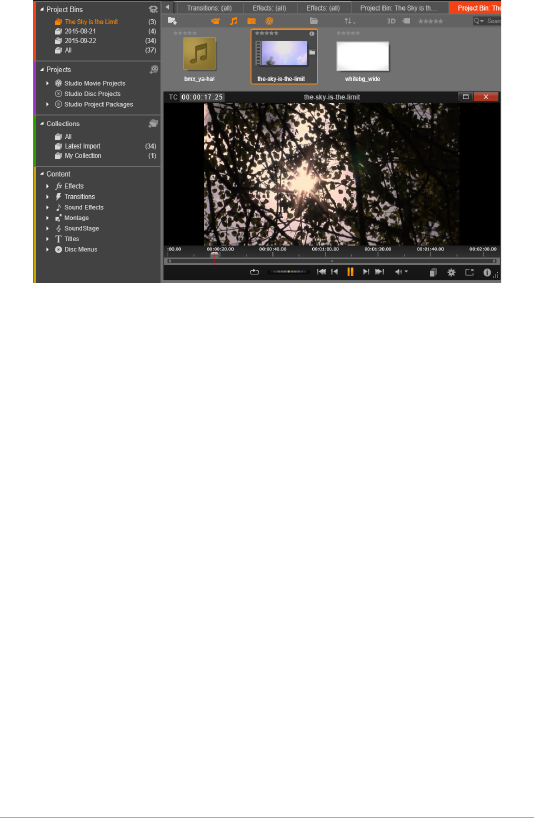
10 Pinnacle Studio User Guide
Previewing a Library video asset in the resizable Player
window, with full transport controls including a shuttle
wheel. You can keep working in the main window while the
pop-up Player is open.
For comprehensive coverage of the Library and its uses, please see
“Chapter 2: The Library” on page 17.
The next step
The next step, once you know your way around the Library and have
made any changes needed to the default set-up, is to start creating a
movie. There are two ways to go about this.
The usual way
If you want to exert detailed control over the way media assets are used
in your production, you will usually start building your movie or disc
project from scratch in one of the two project editors.
These are described below.

Chapter 1: Using Pinnacle Studio 11
The easiest way
For ultra-quick results, the Library offers another way. Clicking
SmartMovie at the bottom of the Library main view opens an extra tray
of controls. With either of these you select some visual media assets to
serve as the basis of the project, choose music for a soundtrack, and
make a handful of other customizations. Then the software takes over,
automatically generating a full-scale Pinnacle Studio project
containing the media and options requested. You can export the
project immediately, or edit it further by hand as you choose. For more
information, see “Instant gratification: SmartMovie” on page 19.
The Movie Editor and the Disc Editor
Once you have gathered your materials together and organized them
to your satisfaction in the Library, it’s time to get to work on a video or
a slideshow. If you are working on a disc production specifically, you
can immediately start work in the Disc Editor, which is just like the
Movie Editor but has extra tools for creating and setting up DVD
menus. For more information, see “Chapter 9: Disc projects” on
page 267.
If you aren’t planning on creating a disc, or aren’t sure, or if disc is only
one of the output media you are targeting, the Movie Editor is the right
place to start. Once your movie is completed, you can export it to the
Disc Editor and add in the menus.
The Movie Editor and the Disc Editor exist side-by-side, but apart from
the export feature just mentioned, they do not interact. If you want,
you can have a regular movie project and a disc project loaded
simultaneously, and switch from one to another at will.
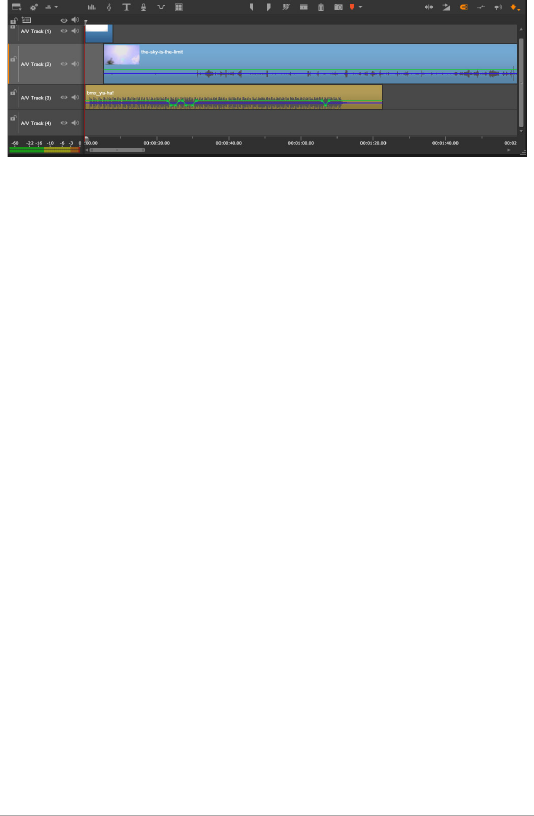
12 Pinnacle Studio User Guide
In both the Movie Editor and the Disc Editor, a multitrack
timeline occupies the lower part of the display. Most of the
‘clips’ on the timeline come from the Library; a few types, like
automatic background music, are generated with special
tools.
Both project editors include embedded versions of the Library and the
Player in addition to the timeline display. To build a project, drag assets
from the compact Library onto the timeline tracks, where they are
known as ‘clips’. Both the Movie Editor and the Disc Editor can be used
with Stereoscopic 3D as well as 2D material.
The preview type control above the Player lets you switch between
viewing the current Library asset (‘source’) and the current timeline
clip. In the Disc Editor, an additional preview type (‘menu’) lets you use
the Player as an editor for linking disc menus to points on the project
timeline.
Timeline editing, a central activity in project authoring. “Chapter 3: The
Movie Editor” on page 59.
The media editors
Additional windows are often needed for working with particular types
of media. In general, you can open an editor window appropriate to
any asset or clip by double-clicking the item.

Chapter 1: Using Pinnacle Studio 13
Corrections from the Library
The editors for the standard media types of video, photo and audio are
particularly important. When invoked from the Library (by double-
clicking an asset), each of these editors provides a suite of correction
tools appropriate to its media type. These tools can be applied directly
to Library assets in order to remove camera shake from video, trim
unwanted material from a photo, or suppress audio hiss, to give just a
few examples.
When a correction is applied to a Library asset, the media file is not
modified. Instead the correction parameters are saved in the Library
database. They can be altered at any time, or removed, as your needs
dictate. The corrections you make in the Library are brought with the
asset when you add it to your project timeline as a clip.
Corrections from the timeline
When you open one of the standard media editors by double-clicking
a timeline clip, the correction tools are again available, although in this
case they apply only to the clip in the project, not to the underlying
Library asset.
Transitions and Effects
When they are invoked from the project timeline, the media editors
also offer effects, which cover a wide-range of enhancements in all
three media types in the transition in, transition out, and effects
groups.
Transitions let you punctuate the passage of one clip to the next with
anything from a barely perceptible dissolve to an audience-awakening
flare.

14 Pinnacle Studio User Guide
Effects range from the practical (Brightness and contrast) to the
theatrical (Fractal fire). Effects can be animated with keyframed
parameter changes to any degree of complexity. They provide
innumerable ways to add creative interest to your productions. Some
effects are particularly designed for 3D material.
Pan-and-zoom
The Photo Editor provides one more tool, pan-and-zoom, of its own.
Like the effects just discussed, pan-and-zoom can be animated with
keyframes to create any desired combination of simulated pan and
zoom camera moves within the boundaries of a single photo.
For more information about Correction tools and the media editors,
see “Chapter 4: Corrections” on page 123 and “Chapter 5: Effects” on
page 149.
The Player
The Player is a preview screen in which you can examine Library media,
play back your movie project, work on disc menus, and much more. In
each window or context in which it is used, the Player exhibits
somewhat different controls. For an introduction to the Player and its
basic controls, please see “The Library preview” on page 40. For the
use of the Player in trim mode on the timeline, see “Clip operations”
on page 91. For information on using the Player with Montage, see
“Using the Montage Editor” on page 186. For the use of the Player in
editing disc menus, see “Previewing disc menus” on page 275.
Pinnacle Studio Projects
The movies and discs that you create in Pinnacle Studio are distilled
from the projects that you build on the timeline of the Movie Editor or
the Disc Editor.

Chapter 1: Using Pinnacle Studio 15
To manage projects, Studio must keep track of everything that goes
onto your timeline, and all the editing decisions you make with regard
to trimming, adding effects, and much more. Much of this information
is stored in the project file, which is in axp (Studio Movie) format.
In order to conserve hard drive space when dealing with files that can
be very large, the project file does not include the media items in your
movie. For these, only their location in the Library is stored.
The axp project file is the default file format for the File > Open, File >
Save and File > Save As menu commands. It may be the only one you
need.
Sometimes, however, it is convenient to have all the resources recruited
for a project gathered into a single, manageable unit for hassle-free
archiving, file transfer or upload. This is the purpose of an alternative
file format, the axx (Studio Project Package), which contains in a single
file all the materials your project uses, including media items. Of
necessity, files in this format are considerably larger than standard
project files.
Although it is not possible to directly edit a project in the package
format, Pinnacle Studio lets you open a project package with File >
Open by selecting axx in the file extension box. Studio seamlessly
unpacks the project, creates a new Library entry for the unpacked
version, and opens it for editing.
If you create a multi-camera project in the Multi-Camera Editor, the
project is saved as a mcam file. When you add an mcam file to the
timeline, it is added as a single track by default. You can expand it by
right-clicking the file in the timeline and choosing Edit Movie.

16 Pinnacle Studio User Guide
Chapter 2: The Library 17
Chapter 2: The Library
The Pinnacle Studio Library, displayed when you click the Organize
tab, is a cataloguing and management tool for all the file-based
resources you can draw on when authoring. Its purpose is to let you
choose and use the video segments, photos, sound bites, transition
effects, titles and other ‘assets’ (as they are often called) for your
movies as easily, rapidly and intuitively as possible.
The Pinnacle Studio Library
The Library’s classification scheme resembles what you might see in a
file-system viewer. While the viewer groups files under their physical
storage locations such as hard drives, the Library groups assets under
their type – video, photo, and so on. In other respects, the tree view
concept for accessing subgroups of assets is virtually identical and
should feel immediately familiar.
18 Pinnacle Studio User Guide
In addition to audio, photo and video files in standard formats, the
Library includes specialized auxiliary media like titles and disc menus.
They are found, along with transitions, filters and other effects, in the
main category called Content.
The Library can easily manage large media holdings such as are often
found nowadays even on a home system. All of the dozens of media
file types usable in Pinnacle Studio can be browsed, organized and
previewed within its integrated interface.
Assets are displayed either as icons or text records within collapsible
folders that stack up in the Library Browser. The folders may
correspond either to real directories in your computer’s file system, or
to virtual groupings based on ratings, file type, creation date, or
membership in a user-defined Collection.
Adding assets to a project
Two views of the Library are found in Pinnacle Studio. The Main view
takes over the application window when you click the Organize tab. It
uses the full available space to provide as much information as
possible.
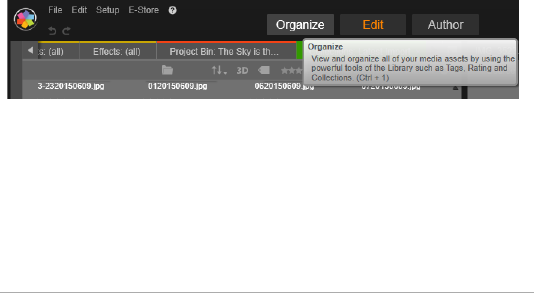
To open the Main Library view, click the Organize tab at the
top of the Pinnacle Studio application window.
The Compact view of the Library is a panel, either docked (as in the
Movie and Disc project editors) or floating (as in the Title Editor). The
Compact view retains the full functionality of the Library. Its primary

Chapter 2: The Library 19
purpose is to allow you to bring Library assets into a movie or disc
project with drag and drop.
The current set of Library tabs, and the contents of the Browser, are
common to all views of the Library. For instance, if you are browsing in
a particular folder of disc menus in the Main view, that same folder will
be open in the Compact view if you now switch to the Movie Editor.
Correcting media files
With regard to technical quality, media files are not all created equal.
Occasionally, you do come across the perfect photo, clip, or sound
effect. More often, though, the photo needs cropping, the video is
shaky, or the sound starts with an annoying hiss. Pinnacle Studio’s
media correction tools let you fix these and similar issues by applying
correction filters to a problem clip after you have placed it on the
timeline of your project.
Often, however, an even better solution is to apply the correction to
the Library asset itself, before adding it to a project. That way, any
production using the asset will start with the corrected version, not the
unsatisfactory original. Such corrections can quickly be made by
opening media editors from the Library. The file underlying the
corrected asset is not modified: instead, the correction parameters are
stored in the Library database and reapplied whenever the item is
displayed or used.
Instant gratification: SmartMovie
In addition to the core functions mentioned so far, the Library offers a
matching pair of tools for automatically constructing a complete
project using media resources you specify. Just select some photos or
video sequences, enter a few settings, and start. You can output the

20 Pinnacle Studio User Guide
project Studio generates without further modification, or refine it with
manual editing as you prefer. For more information, see “SmartMovie”
on page 55.
Understanding the Library
The Studio Library lets you manage and efficiently use the entire pool
of media and other assets available for use in your productions.
What exactly does the Library contain?
The full range of assets that you can draw on for your projects is
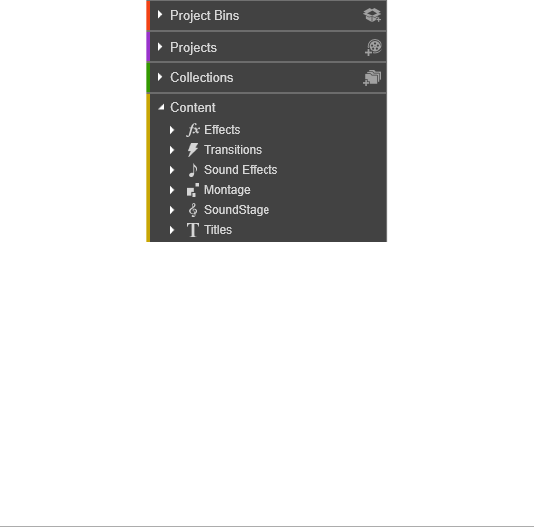
summarized by the four main branches of the Asset Tree. Each branch
is further divided into more specialized subsections.
The Project Bins branch organizes your imported media in virtual
folders. By default, the folders are labelled according to import date,
but you can right-click a folder to rename it and you can click the
Create new project bin button to add a new bin.
The Library Media branch appears only if you enable Watchfolders or
if your current version of Pinnacle Studio detects a previous library (see
“Watchfolders” on page 359). In most cases, Project Bins can be used
instead of the Library Media branch.
The Library Media branch contains the standard media files on your
system in subsections named Photos, Video, and Audio. Many
standard file types are supported. The purpose of the fourth
subsection, Missing media, is described below.
The Projects branch of the Asset Tree contains your own Pinnacle
Studio movie and disc projects. You can open a project right from the
Library and begin editing it, or you can add it to the timeline of another
project to serve as an ordinary clip.
Chapter 2: The Library 21
Collections are custom groupings of Library media. The more time you
spend on media management, the more you will probably use
Collections. They can serve as temporary holding places while you
work, or for classifying and setting aside media for later use.
Collections may be automatically generated, but most are user
defined. Hierarchically-organized Collections are also supported. The
top-level Collections in the hierarchy are used as subsections of the
Collections branch.
The Content branch is either a type of special effect (Effects and
Transitions), or a special media type. Ready-to-use, royalty-free
collections of all seven types are included with Pinnacle Studio.
Storage of Library assets
Every asset in the Library – every clip, sound, transition, and so on –
corresponds to a file somewhere in the local storage of your computer
system. The Library doesn’t ‘own’ these files, and never modifies them
unless specifically requested to do so. Rather, it keeps track of their
names, locations and properties in an internal database. The
information stored also includes any tags and ratings with which you
have annotated particular items, and the parameters of any correction
filters you have applied.
22 Pinnacle Studio User Guide
The database
The files that make up the Library database are stored in a folder with
single-user rather than shared access rights under Microsoft Windows.
If Pinnacle Studio is used on your computer by multiple users with
individual log-ins, a separate Library will be created for each.
Missing media
Operations like adding, removing and renaming a Library asset are
database operations that have no effect on the media file itself. When
you remove an asset from the Library, an option on the confirmation
dialog box does let you go one step further and delete the actual file
as well, but the option is off by default – you have to specifically
request the action.
By the same token, when you delete or move an asset file in Windows
Explorer or another application outside of Pinnacle Studio, the
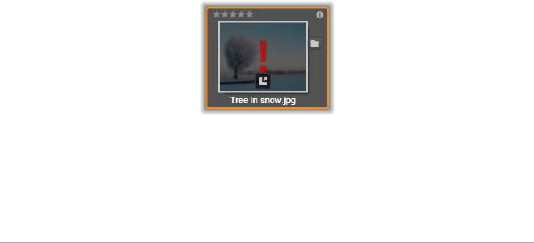
database record of the file continues to exist. Since the Library can’t
actually access the file, however, an error graphic is added to the file’s
listing. If the file still exists, but has simply been moved to another
folder or device, relinking it to the Library is easy. Double-click the item
to pop up a standard File Open dialog with which you can point the
way to the file’s new location.
Incidentally, to check if there are missing media anywhere in the
Library, look in the special subsection All media >Missing media of the
Asset Tree.
Chapter 2: The Library 23
Location tabs
Editing a video project involves coordinating the various media and
other assets at your disposal. As you proceed, it’s likely that you’ll find
yourself browsing repeatedly in various parts of the Library that are
relevant to the project. No doubt you will also change your viewing
and filtering options from time to time, depending on the material
you’re reviewing.
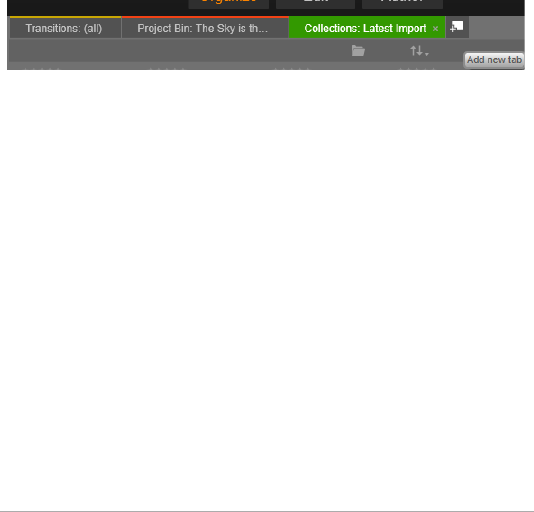
Like a web browser that uses a row of tabs to allow flipping effortlessly
amongst multiple open web sites, the Library lets you create and
configure location tabs as you work. The tabs provide direct access to
each of the various locations in which you are currently working.
Here three tabs give access to media required by different
parts of a disc project. The mouse pointer is poised to create
a new tab. To close a tab, click the x icon to the right of the
tab caption.
To set the location of the current tab, click a name in the Asset Tree.
Changes you make to viewing and filtering options while the tab is
active are retained between accesses.
The Navigator
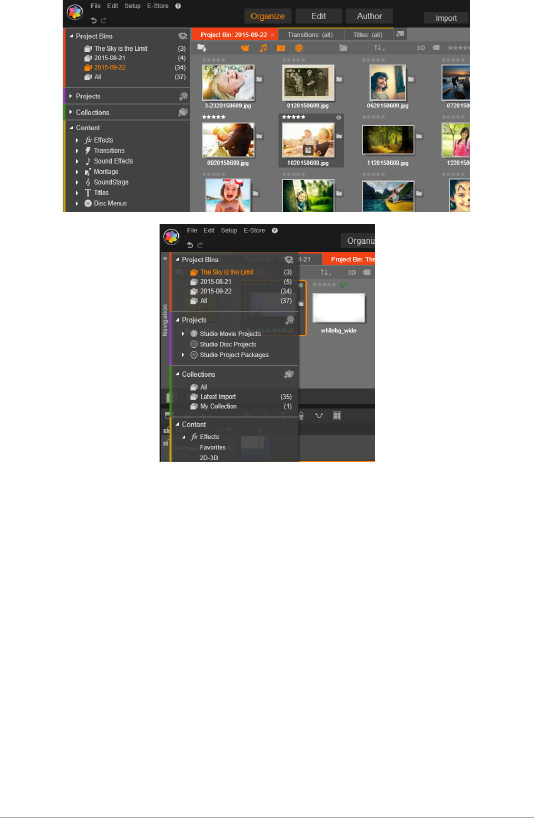
The entire gamut of Library assets is organized into an asset tree whose
folder-style structure and general usage should be familiar from file-
system tools like Windows Explorer. When you select a location in the
Navigator, the folder name appears on the caption of the active
location tab, and its contents are displayed in the neighboring Browser.
24 Pinnacle Studio User Guide
In the Main Library (top), the Navigator occupies the left-
hand pane of the workspace. In the compact view (bottom),
used by Studio’s project and media editing tools, the
Navigator is presented instead as a dropdown list on the
active tab.
Project Bins
Project bins are virtual folders for your assets. They are created
automatically during import and you can create them manually to
organize your assets according to your needs (for example, by project).

Chapter 2: The Library 25
To create a project bin
1In the Project Bins branch of the Library Asset tree, click the Create
a new project bin button
2 Type a name for you bin and click OK.
The bin is added to the end of the project bin list.
To rename a project bin
1In the Project Bins branch of the Library Asset tree, right-click a
project bin, and choose Rename.
The current name appears highlighted
2 Type a new name for the bin.
To rem ove a bin
•In the Project Bins branch of the Library Asset tree, right-click a
project bin, and choose Remove Project Bin.
Collections
From the Library’s point of view, a Collection is just an arbitrary
grouping of assets – a set of Library items with no organizing principle.
You may well have a good reason for gathering certain files into a
particular collection, but the Library doesn’t have to know what it is.
Inside a Collection, any asset can rub shoulders with any other.
One special Collection, with the name Latest import, is automatically
updated after each import operation to display the media added.
Immediately after importing, you can turn to this Collection and start
working with the new material.
Another automatically-generated Collection is Latest Smart Creation,
which stores the media you selected for your most recent SmartMovie
production.

26 Pinnacle Studio User Guide
To create a new collection
1 Click the icon in the header line of the Collections branch and
enter a name in the provided text field.
2 Complete the process by pressing Enter.
Tip: Alternatively, choose Add to collection > Create new
collection from any asset’s context menu.
To manage collections
1 Right-click a collection and choose a command for renaming or
deleting the collection, or for creating a subcollection that has the
current Collection as its parent ‘folder’.
To organize a collection
• Drag and drop a collection in the Navigator with the mouse. A
dragged Collection becomes a subcollection when dropped upon
another.
Displaying collected assets
Clicking the name of a Collection causes it to be displayed in the
Browser. As your mouse pointer passes over any listed asset, the
Collections to which the asset belongs ‘light up’ in the Navigator.
Operations on collected assets
These operations can be performed from the context menu of any
Collection item. To act on a group of items, first select them with the
mouse (using Ctrl-click and Shift-click for multiple selections as
needed) or by dragging out a frame around the items. Then right- click
within the selection to access the context menu.

Chapter 2: The Library 27
To add to a collection
• Choose a target Collection on the Add to collection submenu to
add the selected item or items.
Tip: Alternatively, drag the selection onto the target Collection.
To remove items from a collection
• Click the Remove command to remove the item (or items) from
the Collection. As usual with the Library, the underlying media
items involved are not affected, so removing a video or other item
from a Collection in the Library does not delete it from other
Library locations.
Favorites
Using Favorites is a quick way to mark and find your preferred content,
such as your favorite effects, transitions, and titles.
To mark content as Favorite
1 In the Navigation panel of the Library, open the Content branch,
and click a content type.
2 In the browser area of the Library, right-click a thumbnail and
choose Add to Favorites.
Content marked as Favorites appears at the top of the Library in a
Favorites folder (when the content is organized by folder). Each
type of content has its own Favorites folder that can be accessed
from the corresponding Content category in the Navigator panel.
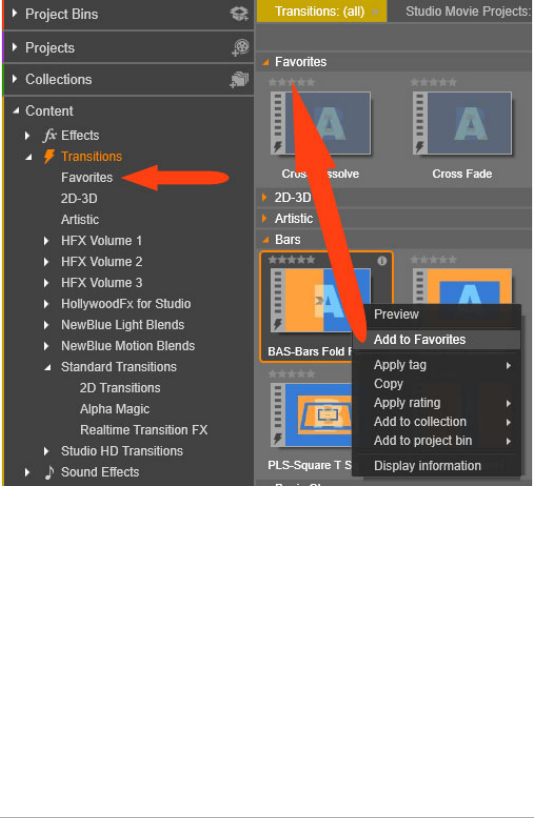
28 Pinnacle Studio User Guide
Favorites in the Library
Managing Library assets
Media and other assets find their way into the Library in several ways.
For instance, the original contents of the Content branch of the Library
are installed with Pinnacle Studio.
The Library automatically discovers some assets on your system by
regularly scanning Windows-standard media locations. These are set
up on Pinnacle Studio installation as watchfolders. Media files in these
locations will automatically be brought into the Library. You can add
Chapter 2: The Library 29
your own watchfolders (see below), and they will be automatically
updated, too.
Finally, you can import media manually by any of several methods.
Watchfolders
You can turn on Watchfolders to monitor directories on your
computer. If you add media files such as video clips to a watchfolder,
or one of its subfolders, the files automatically become part of a Media
Library branch in the Asset Tree. Updating occurs each time the
application is launched and while the application is running.
Watchfolders are set up on the Watchfolders page of the Setup control
panel. For each folder that you add, you can specify that either one
particular supported media type will be ‘watched for’, or all of them.
Please see “Chapter 12: Setup” on page 359 for more information.
Importing
If you need to import a large amount or variety of media, or to import
from analog media such as VHS tape, click the Import button near the
top of the application window to open the Importer. See “Chapter 10:
The Importer” on page 291 for full information.
Quick import: The Quick Import button at the top left of the
Library opens a Windows file dialog for fast import of files from a hard
drive or other local storage. New folders in the corresponding media
categories (photos, video, audio and projects) are created for the files
specified. In addition, the imported items are included in the Last
Import Collection.

30 Pinnacle Studio User Guide
Direct import via drag and drop: To select and import items in one step,
use drag-and-drop from Windows Explorer or the desktop into the
Browser. The new items are immediately displayed in the Collection
‘Latest Import’, which is created for the occasion if necessary.
Exporting directly from the Library
Any photo, video, audio file or project in the Main Library can be
directly exported “as is”, using the context menu commands described
below, to either a Cloud-based storage service or a disc. For other
exporting options, use the Exporter instead, by selecting the asset and
clicking the Export tab at the top of the window. See “Chapter 11: The
Exporter” on page 337 for full information.
To store a Library asset on a disc, select Burn Disc on the context menu.
You can burn just the file, or a disc image if you have made one. If you
select multiple assets, and then select Burn Disc, all of the assets will
appear on the Burn files to disc dialog. More assets can be added by
clicking the File icon and browsing. You can also delete files from the
list before burning.
Removing items from the Library
To remove an item from the Library, or a selection containing multiple
items, choose Delete selected from the context menu or press the
Delete key. A confirmation dialog lets you approve the list of media files
to be removed from the Library database. By default, the files
themselves will not be affected, but the Remove from library and delete
option lets you delete the files too, if desired. Be careful, as this
command works on all kinds of Library assets, including your Pinnacle
Studio projects if any of those are selected.
When all the files in a folder are removed, the Library hides the folder
as well.

Chapter 2: The Library 31
You may also remove a folder and all the assets it contains from the
Library when removing the folder from the watchfolders list. However,
this is not automatic and you will be asked if you want to keep your
current assets listed in the Library, but still stop monitoring the
location.
The Browser
This is the area in which the Library displays its media assets – the
videos, photos, audio, projects, collections and ‘content’ that are
available for you to use in your movie and disc projects. The items are
displayed either as a list of text records or as a grid of icons. Visual asset
types use thumbnail images for their icons; other types use graphic
symbols.
The Library would not be much help if the Browser displayed all its
assets at once. It therefore has several controls that help you screen out
items that aren’t relevant to your purpose. See “Choosing what to
display” below for details.
Controlling the Browser display
A group of controls in the Library’s footer bar provides general
functions for managing the way assets are presented in the Browser.
The info button, available in the main Library only, toggles
the display of a panel across the bottom of the Browser pane
where details about the current asset are displayed, such as
its caption, file name, rating, and any tags or comments associated
with it. The information may be edited, and for some assets, you can
also open the corrections tools by clicking the gear icon on the top left
corner of the pane.
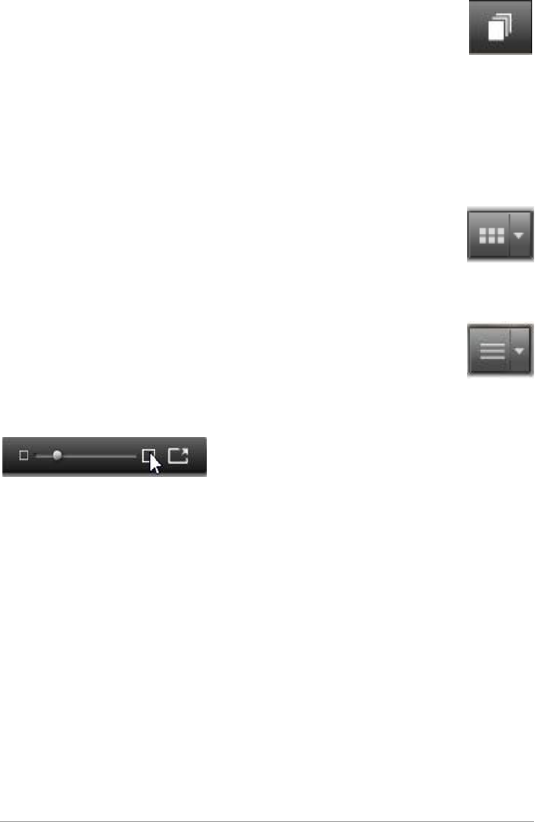
32 Pinnacle Studio User Guide
The scenes view button applies to video assets only. While
this button is active, items in the Browser represent the
individual scenes in a particular video, not the entire asset as
usual. See “The Library preview” on page 40 for more information.
In the main Library, this and the next two buttons are grouped at right
between the info button and the zoom slider. In the compact Library,
the three buttons are placed at left.
The thumbnails view button switches to viewing assets as
thumbnails rather than as text lines. A pop-up checklist
associated with the button lets you select the readouts and
controls that will appear beside thumbnails in the Browser.
The details view button switches to the alternative viewing
mode, in which each asset appears as a text listing. The pop-
up checklist with this button selects the text fields to be
displayed.
The zoom slider lets you magnify the
thumbnails to get a closer look, or pull
back for a wider view. This slider is always found at the right-hand end
of the footer bar.
Thumbnails and details
Each asset is displayed in the Library Browser in one of two formats,
depending on the view selected.
Because the icons of thumbnails view and the text records of details
view represent the same assets, they have certain features in common.
For instance, the context menu for assets is the same regardless of
which representation is used.
Chapter 2: The Library 33
Similarly, standard media assets (video, photo and audio), along with
Sound effects in the Content branch, open an appropriate media
editor for corrections when double-clicked in either view. The
corrections tools are also available when a media editor is invoked from
the timeline, but when applied to a Library asset the corrections are
carried forward into any future project that includes it. See “Correcting
media files” on page 19 for more information.
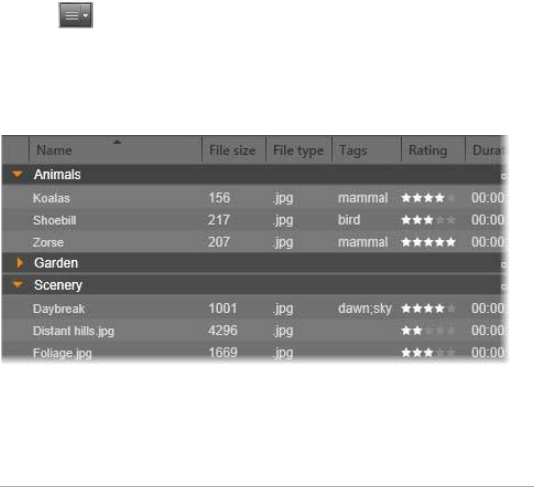
Details
In details view, each asset is presented as one line in a list of text
records. In thumbnails view, it appears as a thumbnail image (for visual
media types) or graphic icon.
To switch the Browser to details view, click the icon on the details view
button at the bottom of the Library. The arrow beside the button
pops up a panel listing the optional columns available to be included
in the text records (one column, Caption, is always present). Check the
boxes beside any of these – File size, File type, Date, Tags, Rating and
Duration – you wish to be shown.
In Details view, each asset is displayed as a one-line text
record. A pop-up checklist beside the Details view button lets
you select which columns to show.
34 Pinnacle Studio User Guide
Thumbnails
The thumbnails view button to the left of the details view button
selects thumbnails view, in which assets are represented in the Browser
by icons rather than text. The arrow alongside the button opens a pop-
up checklist on which you can choose additional data to be shown
with each icon. The options are Rating, Stereoscopic, Information,
Correction, Collection, Tag, Used Media, Caption and Shortcut.
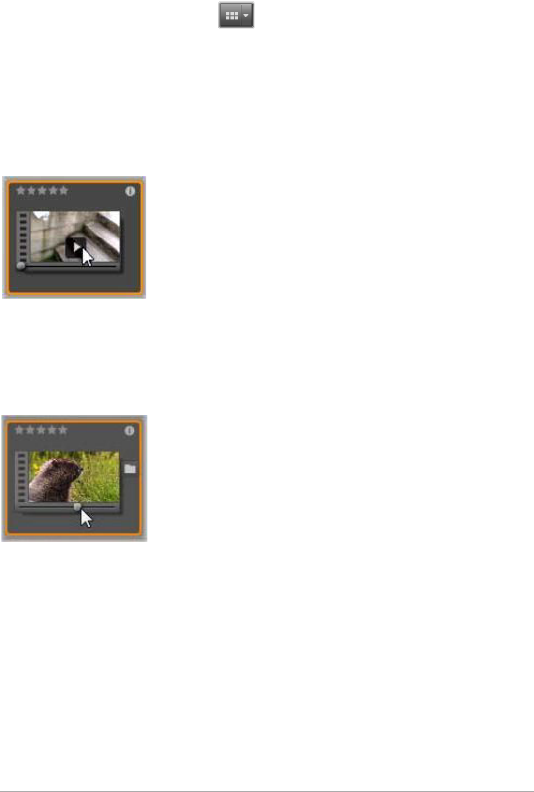
At the bottom center of most asset icons a
preview button, a standard triangular play icon
enclosed in a square, is displayed when the
mouse pointer is over the asset. In the compact
version of the Library (as seen in the project
editors and some media editors), the preview is
shown on the Source tab of the embedded Player. In the Main Library,
the Player occupies a floating, resizable window. See “The Library
preview” on page 40 for more information.
In either version of the Library, Alt-clicking the
preview button will give you a mini-preview on
the asset icon itself. With video and audio media,
you can control the mini-preview manually by
means of a scrubber that appears below the
thumbnail whenever the mouse is over the icon.
If the asset is a photo, a pop-up preview button replaces the standard
play symbol. Clicking it will display the photo in the pop-up Player.
When the Browser is in thumbnails view, a slider is available to control
the size of the icons. You will find the slider in the bottom right corner
of the Library. The icons can also be resized with the scroll wheel when
Ctrl is pressed and the mouse pointer is positioned over the Browser
pane.
Chapter 2: The Library 35
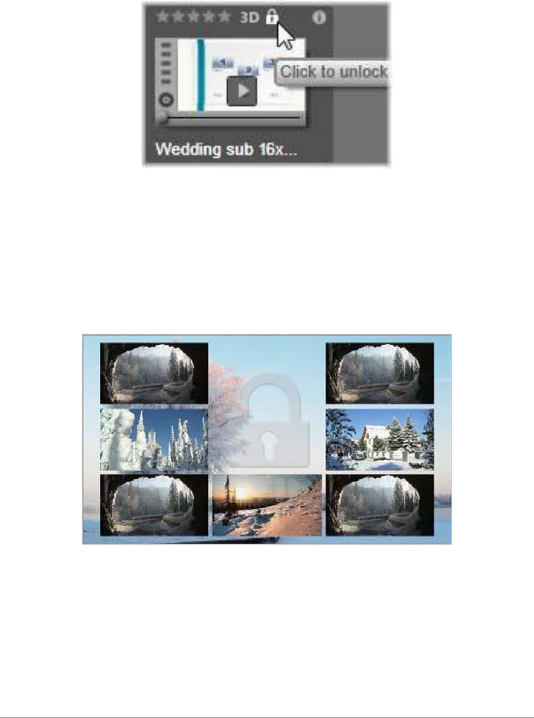
Locked content indicator: Some of the Disc Menus, Titles, Montages,
and other creative elements in the Library are locked to indicate that
you do not own a license to distribute them freely. This status is
indicated by the lock indicator.
Even though locked, the content can still be handled as usual. You can
edit it in the Library, and add it to a timeline. A project containing
locked content can be saved, put on a disc and exported.
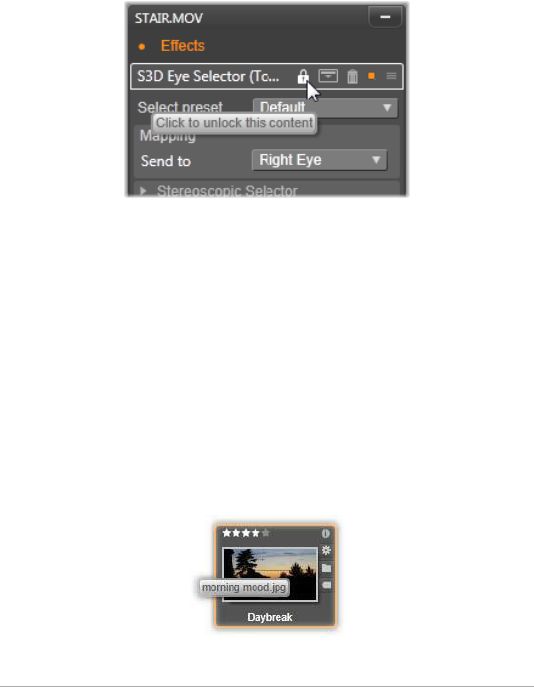
However, a translucent ‘watermark’ logo will appear on the locked
content.
The locked content watermark.
To purchase and unlock the content, use one of the following options:
• In the Library, click the lock symbol on the icon.
36 Pinnacle Studio User Guide
• During export of a project with locked content, a dialog will
appear prompting you to click the lock symbol.
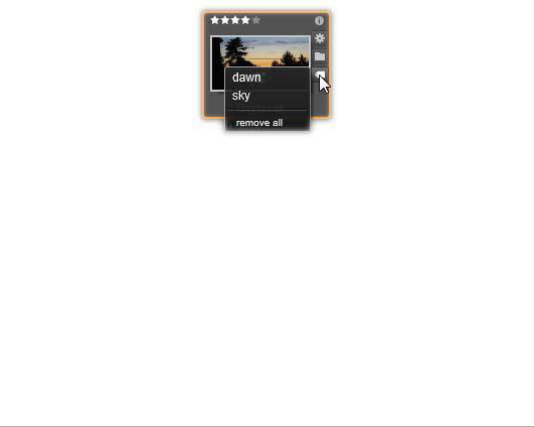
• When editing effects in one of the media editors, click the lock
symbol on the Settings panel. For more information, see “The
Settings panel” on page 174.
Optional indicators and controls
The optional indicators and buttons on an asset icon in the Library
Browser let you access and in some cases modify information about
the asset without having to burrow deeper. Use the pop-up checklist
on the thumbnails view button to determine which indicators and
buttons are displayed.
Caption: The caption below the icon is the Library alias for the asset,
which you can set with the Edit caption context menu command for
any asset. It is not necessarily the name of the underlying asset file
(which is shown in the tooltip).
Chapter 2: The Library 37
Shortcut: The presence of this indicator in the extreme upper left of a
thumbnail shows that the asset is a shortcut rather than an
independent media file. Shortcuts, which consist of a reference to an
existing media item along with a package of Corrections settings, can
be created from the File menu of the media editor for any Library asset.
Thereafter, they behave like ordinary assets, and are available for use in
your productions.
Tag i nd i c a t o r : The bottommost of the three symbols at the right of the
thumbnail is shown if the asset has any tags assigned to it. Hover the
mouse pointer over the indicator to bring up a menu on which the
existing tags for the asset are shown. As you pass the pointer over a
tag name on this menu, a remove button appears. Click it to unset the
tag. Click remove all at the bottom of the menu to clear all tags from
the asset. The creation and application of tags is discussed in “Tags” on
page 48.
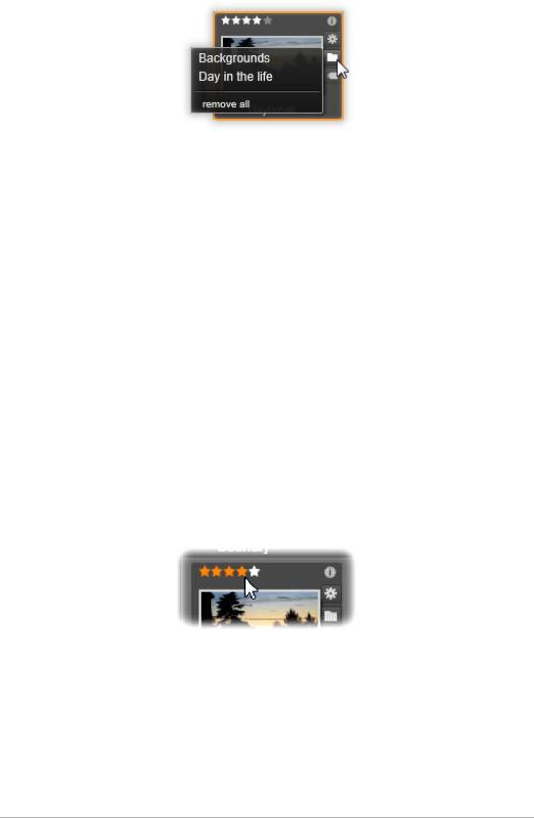
Collection indicator: Just above the tag indicator, the presence of this
symbol indicates that you have included the asset in one or more
Collections. To see which ones, hover the mouse over the symbol. As
with the tag indicator menu, a remove button is shown as you position
the mouse on each Collection name; click it to remove the asset from
the Collection. The remove all command removes the asset from all
Collections of which it is a member.
38 Pinnacle Studio User Guide
Corrections indicator: The Library allows you to apply image and audio
correction filters ‘non-destructively’ on Library media assets, meaning
that the original file remains intact. The types of corrections that have
been applied to an asset, and the parameters that were used to control
them, are stored in the Library database. If corrections have been
applied to an asset, the corrections indicator appears just above the
collection indicator. Click the indicator to open the applicable media
editor and update corrections settings. See “Correcting media files” on
page 19 for information about applying corrections to Library assets.
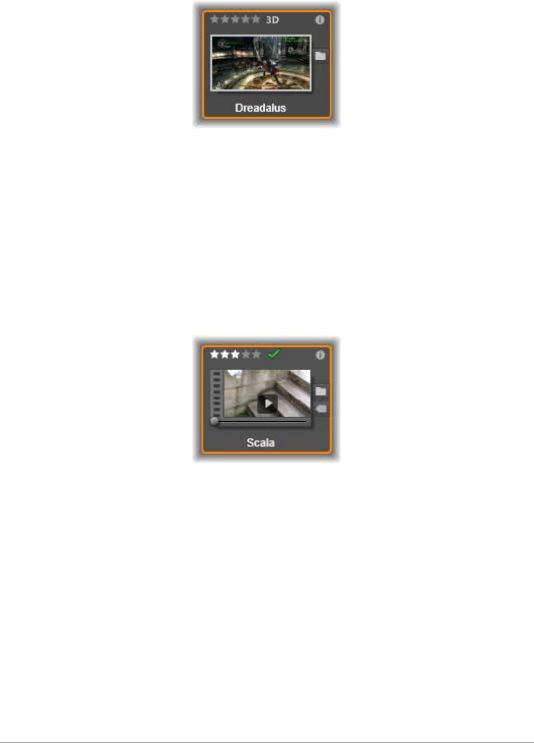
Ratings: The row of stars above the top left of the icon lets you set the
asset rating. If no stars are lit, the asset is said to be unrated. To set the
rating of one asset or a selection of assets, either click the
corresponding star on the indicator (click the first star twice to make
the asset unrated again) or choose the setting on the Apply rating
context submenu.
The Ratings control appears at the left above the asset
thumbnail. At top right is the Info button. The Corrections
indicator is also at upper right, just above the Collection
indicator.
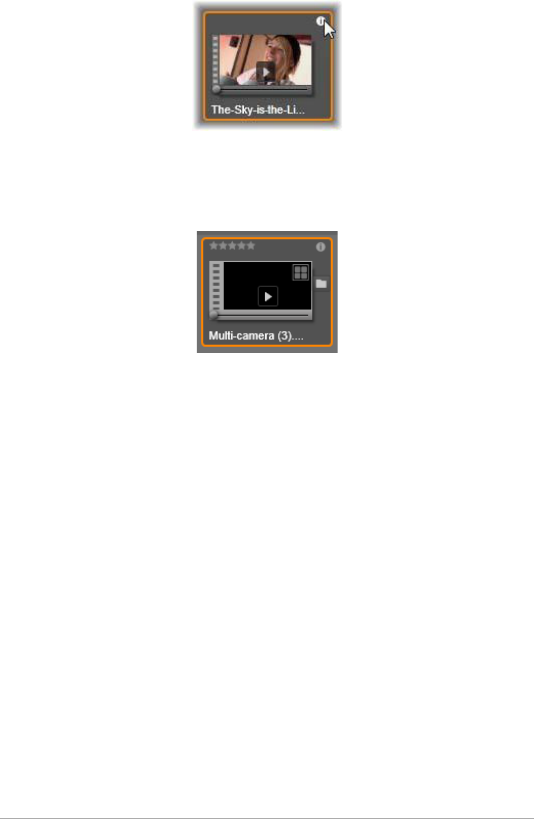
3D indicator: Assets whose content is designed for stereoscopic 3D
viewing carry a 3D indicator. The indicator appears when video and
Chapter 2: The Library 39
photo assets are automatically detected as stereoscopic while
importing them the Library, and when an asset has been manually set
as stereoscopic in corrections.
Used media indicator: A check mark is displayed to the right of the
ratings indicator if the asset represented by the thumbnail is currently
to be found in an open timeline within your project. The check mark is
rendered in green if the asset is used in the currently visible project;
otherwise it is gray. The used media indicator applies only to photo,
video and audio assets, not to items like transitions and titles that
come from the Content branch.
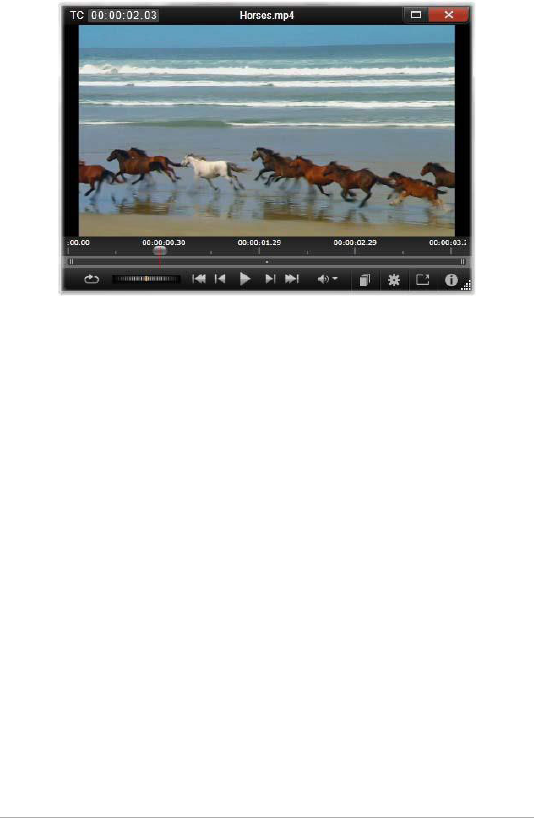
Information indicator: Clicking the information indicator opens the
information panel in the pop- up Player, where you can edit the asset’s
rating, title, and tags as well as view all its properties. Like most of the
other indicators, the information indicator can be turned on and off
using the thumbnails view pop-up.
40 Pinnacle Studio User Guide
Multi-Camera indicator: Projects created in the Multi-Camera Editor
have a four-pane square icon in the upper right corner of the
thumbnail.
The Library preview
Most types of Library asset support previewing in the Browser. The
capability is indicated by a preview button on the asset icon, and the
presence of a Show preview command on its context menu.
Remember too that most asset types can be previewed on the icon
itself with an Alt-click on the play button.
The Library Player
Clicking the preview button in the center of the asset icon loads the
item into the Library Player for viewing.
Chapter 2: The Library 41
Previewing a video clip in the Library Player window. The
transport controls are at the bottom, starting with a Loop
button at the far left and a shuttle wheel. The third in the
group of five arrow buttons starts playback. The two buttons
on each side of it are for navigating from asset to asset in the
Library folder.
Along the top of the Player, the current viewing position is displayed.
At the bottom is a toolbar of transport controls and function buttons.
Transport controls
First among the transport controls is the loop button, which causes
playback in a continuous loop from the start of the media. Next is a
shuttle wheel with which you can sensitively control the speed of
playback by dragging backwards and forwards on the control.
The center play button in the cluster of five arrow controls begins
preview of the video or audio asset. The two buttons on either side of
it are for navigating from the viewed asset to others in its folder. When
previewing a photo the play button does not appear; only the
navigation buttons remain.

42 Pinnacle Studio User Guide
Click the mute button to the right of the transport controls to toggle
the audio associated with the clip. A volume slider appears next to the
mute button when the mouse is over it.
Function buttons
Some buttons in the final group at the bottom of the Player appear
only with particular asset types. A video file uses all four types, in the
order shown and described here.
Scenes view: This button activates a mode in which the Browser
displays a separate icon or text record for each scene in the video file.
(As explained under Video scene detection, a scene in the most general
sense is just any portion of a video file.)
When Scenes view is active, the neighboring Open in corrections editor
button is removed, and a Split scene button takes its place. This allows
you to define your own scenes instead of, or as well as, relying on the
automatic scene detection feature.
For more information about video scenes in the Library see “Video
scene detection” on page 53.
Open in media editor: The media file is opened for editing in the
applicable media editor so that corrections settings can be adjusted.
Full-screen: The preview is shown in a special full-screen window, with
its own basic set of transport controls. To close the full-screen display,
click the close button in the top right corner of the window, or press
Esc.
Info: This button switches between the Player’s information and
playback views. The information view can be opened directly by
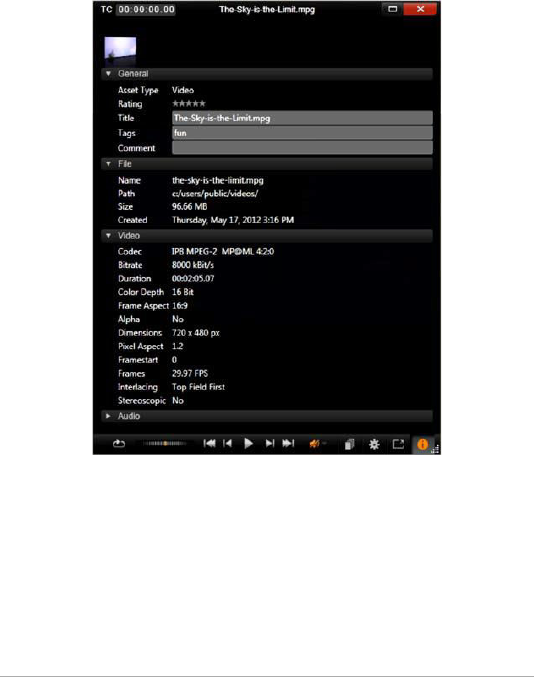
Chapter 2: The Library 43
clicking the info button on a media asset icon in the Browser. Audio
assets have no separate playback view; instead, full scrubbing controls
are shown in the information view.
In the information view, the properties that can be edited are Rating,
Title, Tags and Comment.
Here, data regarding a Library asset, a video, is displayed in
the Information view of the Player. Click the highlighted Info
button to return to the Playback view of the asset.
3D viewing mode switcher
When stereoscopic 3D content is being shown, the 3D viewing mode
switcher will appear. On opening the Player, the default mode from the
preview settings in the Control Panel is used for photos, videos, and
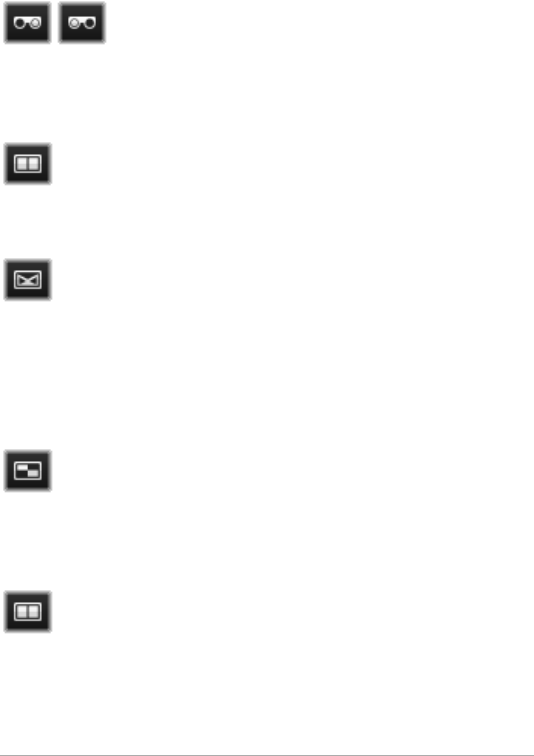
44 Pinnacle Studio User Guide
projects. The icon for the current mode is displayed beside a dropdown
arrow used for switching modes. The available modes are:
Left eye, Right eye: The preview for stereoscopic
content can be set to show only its left or right eye
view. This helps keep things simple at times when a
stereoscopic preview is unnecessary. Editing in these views is carried
out as for a 2D movie.
Side by side: This mode displays the frames for both eyes
horizontally adjacent to each other, with the left eye on the
left and the right eye on right. When editing, no stereoscopic
equipment is needed.
Differential: Differential mode is good for detecting the
‘depth’ of an image more easily, and especially for revealing
areas of ‘zero depth’. Differential mode show a 50% gray for
areas where identical information is being presented to both eyes; a
color difference is shown if the areas are not identical. If 2D material is
added to a stereoscopic 3D timeline in differential mode, since the
same content is shown to both eyes, the image will be a uniform gray.
Checkerboard: Checkerboard mode breaks the image up into
a 16 x 9 checkerboard pattern. The ‘white’ squares of the
checkerboard contain the view from one eye, the ‘black’
squares the other. Checkerboard mode provides a quick check on the
ways the left and right frames differ across the whole image.
3D TV (Side by Side): Use this mode to preview stereoscopic
content on a 3D TV display or with a 3D projector by
connecting it as a second monitor. This obviates the need for
a special graphics card or additional hardware. Configure the second
display to operate in its native resolution, and to extend your desktop,
not just mirror it. Make sure the input format is side- by-side.

Chapter 2: The Library 45
In the Control Panel Preview settings, choose Second Monitor from the
“Show external preview on” dropdown menu. Set up Studio with a
16x9 stereoscopic timeline. Finally, on the Player, click the Full Screen
button. Please see “Export and Preview” on page 360, and “Timeline
settings” on page 72 for help with these configurations.
Anaglyph: An Anaglyph stereoscopic preview is suitable for
viewing with red-cyan stereoscopic glasses, with no
additional hardware support required. Pinnacle Studio’s
anaglyphic display works well even for images with a lot of red, thanks
to a method very similar to the ‘optimized anaglyphs’ technique.
3D Vision: This stereoscopic mode is available with many
NVidia graphics cards after the 3D Vision feature has been
enabled in your NVidia configuration utility. The type of 3D display
offered depends on the hardware available. At the basic ‘Discover’
level, the 3D Vision display is anaglyphic.
Choosing what to display in the Library
The Library is much more than a passive storehouse of material for your
Pinnacle Studio productions.
The Library Browser has several features for decluttering your view by
hiding assets that aren’t relevant to your purpose. No matter how
numerous your media files, the combined power of these techniques
can greatly speed your browsing.
Location tabs
Most importantly, each location tab corresponds to a different
selection on the Navigator. Like web browser tabs, location tabs are
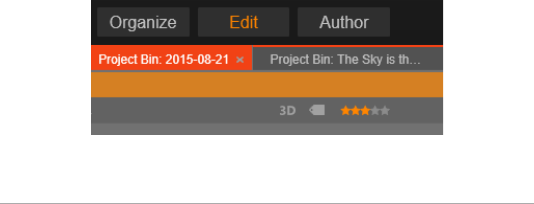
46 Pinnacle Studio User Guide
readily defined (click the ‘+’ icon at the right end of the tab list), and
come in handy for keeping track of multiple things simultaneously.
Clicking within the Navigator sets the location for the current tab;
conversely, clicking another tab transfers you to its saved location on
the tree. Only the assets within the chosen location are displayed in the
Browser. If the location has subfolders, however, their contents will be
included. To keep things simple, choose a location as near the bottom
of the folder hierarchy as possible.
Other controls let you restrict the display further by filtering out some
of the assets in the chosen location. Each location tab maintains its
own set of filters, so any change of filtering settings affects the current
tab only.
Filter by rating
The Filter by rating control at the top of the Library hides all assets that
don’t have at least the specified rating from one to five stars (zero stars
means ‘unrated’). To use the filter, simply click on the star that
represents the minimum rating you want to bother with. The default
filter setting is to show all assets regardless of rating.
See “Inadvertent filtering” on page 48 for instructions on switching off
all filters at once. To deactivate just the rating filter click the last
selected star or double-click any star.
In this close-up, three stars are highlighted, meaning that only
assets with ratings of three stars or better are on display. Here
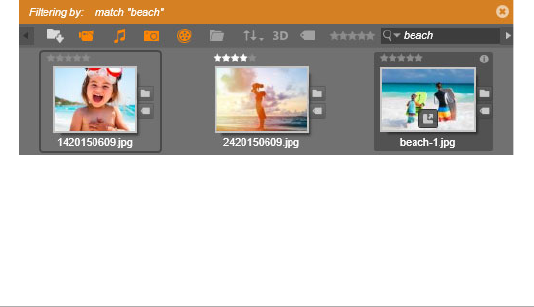
Chapter 2: The Library 47
the mouse pointer is poised to click the fifth star, which would
set the rating filter to hide all but five-star assets.
Filter by stereoscopic 3D
To display only stereoscopic 3D content, click 3D at the top of the
Library. To return to viewing 2D assets as well, click 3D again.
Filter by tags
Another way to narrow the field of displayed assets is with filtering by
tags. Tags are keywords that you can assign to assets as you work.
Once tags have been defined, you can use them in several ways to
control which assets are displayed by the Browser. See “Tags” on
page 48 for detailed information.
Search
At the top right of the Library is a search field that gives one further
way to filter the display. As you begin entering your search term, the
Browser continually updates the view to include only those assets with
text that matches your search term.
Even when multiple terms are separated by spaces, partial-word as well
as whole-word matches are allowed in each term. A dropdown list lets
you choose whether the search will be satisfied if even a single search
term matches the asset text, or if all terms must match for the asset to
be accepted.
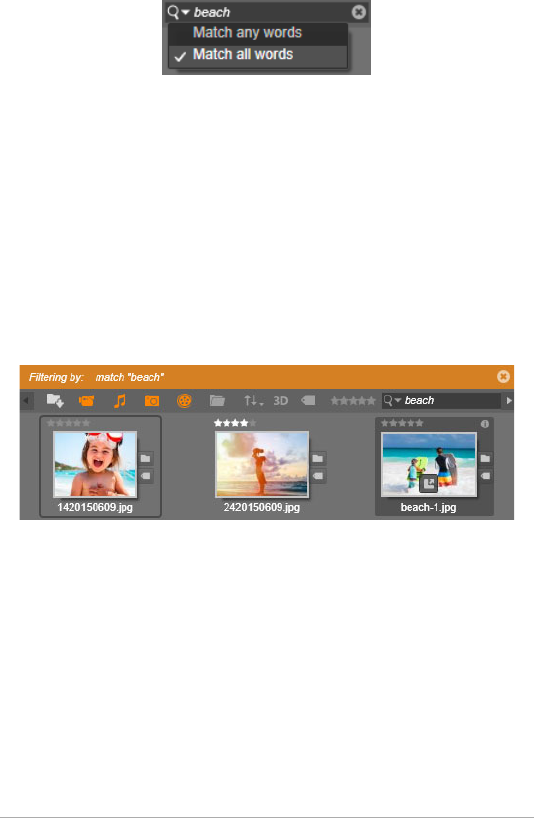
48 Pinnacle Studio User Guide
Inadvertent filtering
The various filtering methods can be combined at will. Should you
leave any of the filtering types switched on when you don’t need it, it’s
likely that some assets will be hidden that should be displayed. When
an item is unexpectedly missing in the Browser, verify that filters are
inactive.
The Browser guards against the possibility of inadvertent filtering by
displaying a ‘filter alert’ that remains visible as long as any filter is in
use.
A filter alert (orange bar) like the one shown here is displayed
at the top of the Browser whenever filtering is in force. Click
the x icon at the right-hand end to clear all filtering at once.
Tags
The Library is capable of handling a great number of asset files,
sometimes far more in even a single folder than can be viewed
conveniently. The Browser therefore provides a number of methods of
winnowing out irrelevant assets from the display.
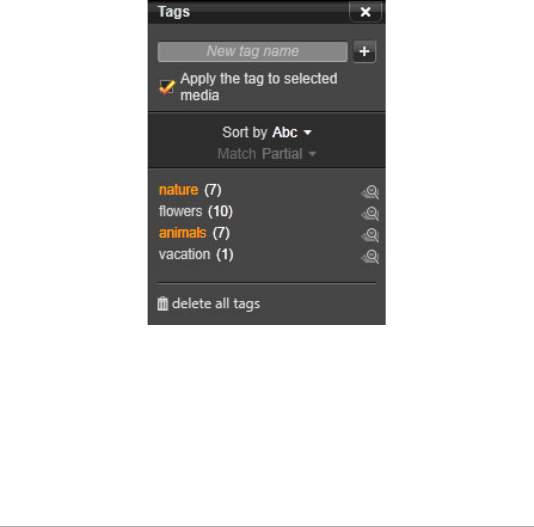
Chapter 2: The Library 49
One method of streamlining the display of assets in the Browser is
filtering by tags. A tag is simply a word or short phrase that you think
would be useful as a search term. It is up to you whether you assign
tags to your media, but if you do, they provide a powerful way of
selecting assets to display.
Tag management and filtering
Management of tags, and filtering by tags, are handled in a panel that
appears when the Tags button at the top of the Library is clicked. The
panel can also be invoked by choosing Apply tag > Create new tag
from any asset’s context menu.
The tags panel, with existing tags listed alphabetically.
At the top of the tags panel is a text box for entering new tag names.
The panel also lists all the tags you have defined so far, lets you delete
or rename them, and lets you choose which assets you want displayed
in the Library.
50 Pinnacle Studio User Guide
Creating, renaming and deleting tags
To create a new tag, click in the text box at the top of the tags panel
and type in your tag. Select the media that you want to tag, make sure
the Apply the tag to selected media box is checked, and click the Create
new tag button beside the text box. There is no limit to the number of
tags you can create. However, if you try to apply a name that isn’t new,
you will be notified that the name already exists, and it will not be
added to the selected media.
To apply an existing tag to all currently-selected assets in the Browser,
click the tag name. Selecting multiple assets to tag makes the process
much more efficient than if you could tag only one item at a time.
Hovering over a tag reveals the Rename and Delete buttons.
Clicking the tag itself applies it to any currently-selected
assets.
Hovering the mouse over a tag reveals the controls for renaming or
deleting the tag. To rename, click the Rename icon, type in the new
name, and press Enter. Click the Trashcan icon to delete the tag. To
delete all tags at once, use the Delete all tags button at the bottom of
the panel. If you are deleting a tag that is in use, you will be given a
chance to back out of the operation.
Sorting tags
In the middle of the tags panel is the Sort by dropdown, offering just
two choices: ‘Abc’, in which the tags are sorted alphabetically, or
‘Relevance’, which sorts them in descending order of their popularity
in the set of assets currently on display. Under the second choice, you
will see the tags being resorted each time one is checked or unchecked.

Chapter 2: The Library 51
Filtering with tags
Beside each tag name listed in the panel is a Filter icon that you can use
to narrow the set of items displayed in the Browser. As you check and
uncheck the tags, the view updates automatically.
The exact effect of your selections depends on another control, the
Match dropdown just above the tags. The list provides three options.
None displays only assets that have none of your checkmarked tags. In
a tagged set of animal photos, checking both the ‘dog’ and ‘cat’ tags,
then selecting ‘None’, should hide most of the pet pictures.
Partial selects assets with any of your tags, which happens to be exactly
those hidden by ‘No match’. If you leave ‘dog’ and ‘cat’ checked, but
switch to ‘Partial’, all the dogs and cats will be displayed, including the
handful of photos in which both animals appear. Photos with neither
tag will be hidden.
Full selects only the assets that have all your tags. Now with the same
boxes checked you should see only those photos in which at least one
cat and one dog appear. Notice that under ‘Partial’ you will see more
assets displayed as you check more tags, but with ‘Full’ you will see
fewer.
Turning off tag filtering
When tags are set to filter the contents of the Library, an orange bar at
the top of the Browser lists which tags are being used. To turn off
filtering by an individual tag, bring up the tag panel and uncheck the
tag’s Filter icon. To turn off all filtering at once, click the x button at the
right hand end of the orange bar.

52 Pinnacle Studio User Guide
The art of tagging
There is no prescribed way of using tags. The best way to use them –
if you do – is the way that works best for you. Consistency is important,
however. The more faithful and systematic you are about assigning
tags to your media, the more useful they will be.
Since the idea is to locate an asset quickly when you need it, tags
should be chosen to work well as search terms. With family photos,
your tags might include the names of the people in each shot. For
vacation video scenes, tags naming the locations visited would
probably be useful.
Videographic terms (‘two-shot’, ‘silhouette’, ‘exterior’) can also serve
as good tags by making it easier to find assets that fulfill particular
structural or creative requirements.
Correcting media
You can apply the media correction tools in the Video, Photo and
Audio editors directly to Library assets. This kind of editing does not
change the underlying files. Instead, the editing parameters are stored
in the Library database and are reapplied whenever the asset is
recalled. See “Chapter 4: Corrections” on page 123 for details.
An important purpose of the media correction tools is to allow you to
make ‘adjustments’ on material that is not correctly identified
automatically. With video footage, for example, the Adjustments
group of tools allows you to override the Library-assigned aspect ratio,
interlace mode and stereoscopic 3D format.

Chapter 2: The Library 53
Video scene detection
Using the Library’s automatic scene detection function, video footage
can be split into multiple scenes either automatically or manually.
Dividing raw files into scene-length portions can make some editing
tasks much less cumbersome than they would be otherwise.
The time required for scene detection varies depending on the length
of the clip and the detection method selected. A progress bar keeps
you informed of the status.
To initiate scene detection, select one of the methods on the Detect
scenes context menu command for video assets.
By date and time: This option often results in logical scene boundaries
that reflect your intention while shooting. In many digital recording
formats, such as DV and HDV, a discontinuity in the recorded timecode
data occurs whenever the camera is restarted after being stopped.
These shooting breaks are treated as scene breaks under the option.
By content: Under this option, the scene detection tool analyzes the
image content of the material frame by frame, and establishes a new
scene whenever there is an abrupt change in content. However, a quick
pan or rapid movement across the frame may produce some unneeded
breaks.
By time interval: In this variant you define the length of the scenes to
be created. A small editing window opens for entering the desired
value in hours, minutes, seconds and milliseconds. The scene duration
has a one second minimum. Press Enter to confirm your input.
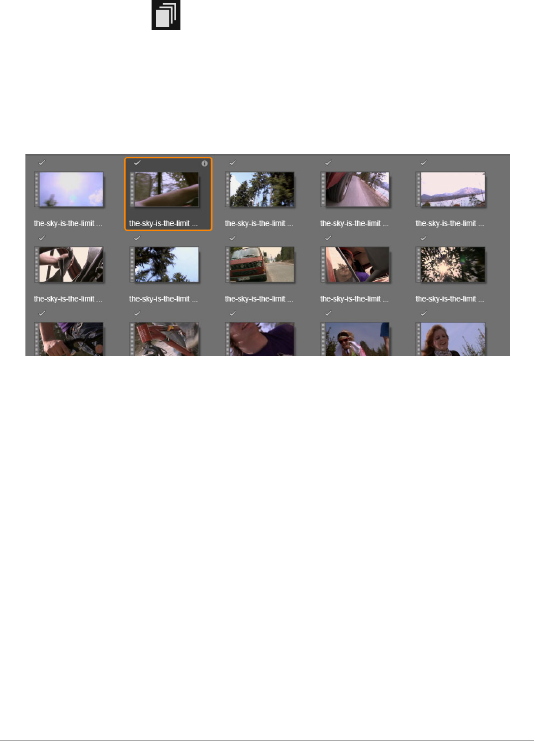
54 Pinnacle Studio User Guide
Show the scenes
To show the catalog of scenes for a particular video file, either select
Show scenes from its context menu; or select the clip, then click the
Scenes view button that appears at the bottom right of the Library.
Scene view is a temporary viewing mode. The orange bar at the top of
the Browser alerts you that scene view is active. At the right hand end
of the bar is an x button you can use to terminate the mode. Clicking
the Scenes view button again has the same effect.
A single video file can contain many scenes. This makes the
footage easier to manipulate during editing than if it were
treated as a single segment.
During editing, scene clips behave identically to other video clips.
Manually creating scenes
If you want to manually divide a video file into individual scenes, select
Show scenes from the asset’s context menu, or click the Scenes view
button. If you haven’t previously subdivided the file, it will now appear
in the Browser as a single scene.
In the Library Player, navigate within the clip to each frame where a
scene break should occur, then click the Split scene button. See
“Function buttons” on page 42 for further information.
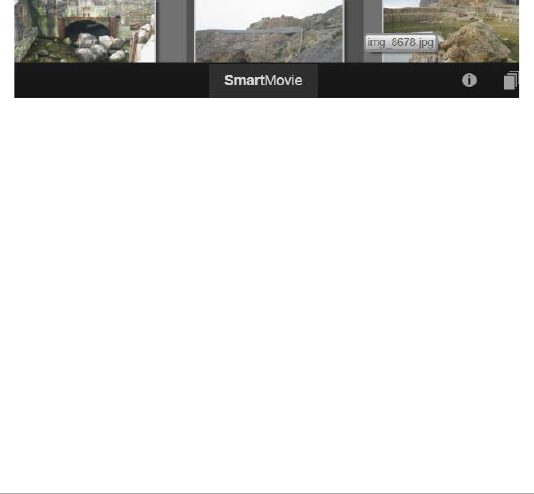
Chapter 2: The Library 55
Removing scenes
To empty the entire list of scenes for a video file, select Scene detection
> Remove scenes on the asset’s context menu.
To remove individual scenes, select one or more scenes then press
Delete.
SmartMovie
SmartMovie is a built-in project generator that allows you to create a
slideshow or movie production automatically based on media you
supply. The production will include animated transitions, a full music
soundtrack and eye-catching image effects.
At the bottom of the Library, just click SmartMovie.
To begin, select from the Library a series of photos or video files. Your
music might come from digital audio assets already in the Library, or
you can cook up a soundtrack on the spot with the ScoreFitter tool.
That might be all it takes, though you can work on the project further
with manual editing if you wish. Once you have a final product you
like, it takes only a few clicks to burn it onto a disc or save it as a file
for other uses, such as upload to the web.
The SmartMovie panel that slides up into the window from below
contains three subpanels. The leftmost of these presents information
about SmartMovie, and advice on how many files to include. The
center subpanel is a storage area with bins for photos and other

56 Pinnacle Studio User Guide
images (top) and audio. The right subpanel contains controls for
customizing the show.
Adding media
To add media to the production, drag them from the Browser into the
upper bin in the storage area. Drag thumbnails within the storage area
to get the order you want. Continue adding further images until you
are satisfied.
To add music, drag one or more sound files to the lower bin in the
storage area. Alternatively you can click the clef button in the
bottom left corner of the audio bin to create a music soundtrack in
ScoreFitter.
As media are added, the total running time of the source material is
displayed in the top-left corner of the bin. This is not necessarily the
length of the resulting movie.
Preview, edit and export
Once your media are in place, click the Preview button on the footer
bar below the tool. The project is created and presented in a preview
window. If necessary, you can return to the settings to modify your
media selections.
When you click the Preview button, the media you have chosen are
automatically saved in a Collection named Latest Smart Creation. If you
expect to make further use of this grouping of assets, rename the
Collection to prevent it being overwritten the next time you look at a
SmartMovie preview.
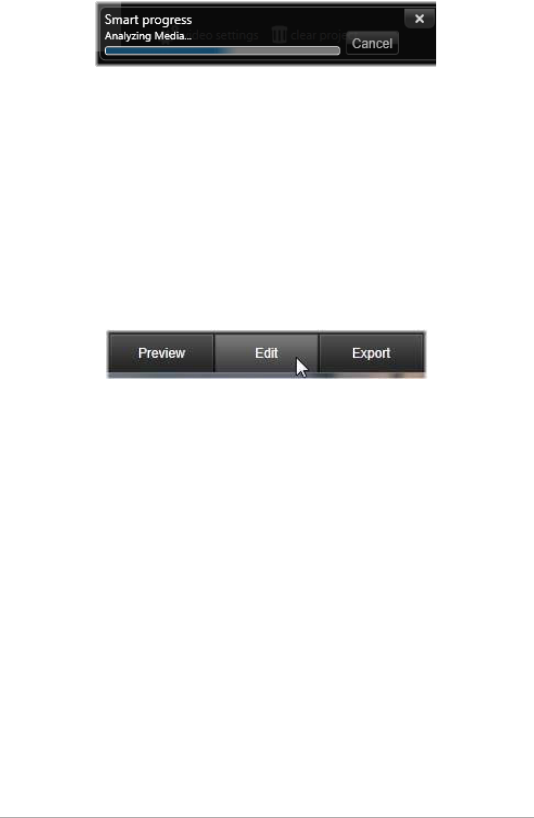
Chapter 2: The Library 57
The analysis phase of generating a SmartMovie may take
some time to complete the first time the material is analyzed.
Full rendering of the project, with progress indicated by
shading on the time-ruler of the Player, may introduce an
additional delay before a fully-detailed preview is available.
The Edit button brings your production to the Movie Editor timeline for
detailed editing. It’s a good idea to check that the timeline video
settings match your requirements for the show. The video settings
button on the settings panel provides access to these. Also see “The
Project Timeline” on page 64.
When the presentation is the way you want it, click Export to burn a
disc or create a file for upload.
The storage area
The photos in the upper bin are displayed as icons, while the music and
sound files in the lower bin appear as text lines giving the file name and
duration of each asset. Both bins support multiple selection, drag-and-
drop reordering, and a context menu with just two commands:
Delete selected: The selected media are removed from the SmartMovie
production. They remain available in the Library for other uses.
(Shortcut: Delete.)
Open editor: This command opens the Corrections tool of the Photo or
Audio Editor. Any modifications you make to the media apply only
within this SmartMovie production. (Shortcut: double-click.)
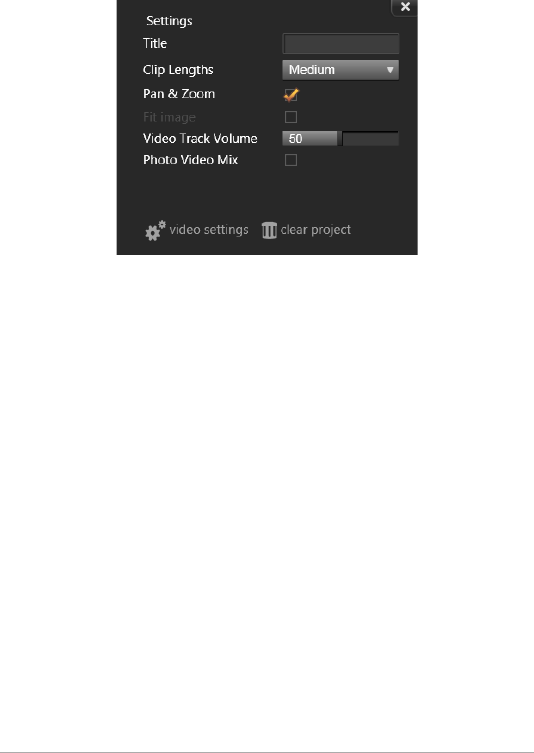
58 Pinnacle Studio User Guide
SmartMovie Settings
The settings on this subpanel customize the SmartMovie production.
The settings entered will be used the next time the production is
generated. The video settings button lets you set up the timeline
options that will apply if you take the production into the Movie Editor.
The clear project button removes all media from the project and
returns to default settings.
Title: Enter a caption to be used as the main title of the movie.
Clip lengths: The visual tempo of your movie increases as the clip
length is shortened. Maximum uses the original length of the asset.
Pan and zoom: Checking this option enlivens your presentation with
simulated camera moves.
Fit image: Check this option to enlarge material that is too small for the
frame format of your project.
Video Track Volume: Set the volume of the original audio in the video
segments. For a soundtrack of background music only, set to zero.

Chapter 3: The Movie Editor 59
Chapter 3: The Movie Editor
The Movie Editor is Pinnacle Studio’s main editing screen for digital
movie creation. The editor brings together three main components:
The Library, in its compact view, provides the assets available to your
project.
The Timeline lets you organize the assets as clips within a schematic
representation of your production.
The Player lets you preview Library assets before adding them to your
project. It also lets you view – on a frame-by-frame basis if you like –
how any part of the production will actually appear to your audience
when you export it, whether you save it as a file, burn it to a disc,
transfer it to a device, or upload it to the Internet.
Along with the Library, the timeline of your project, and the Player, the
Movie Editor window provides a variety of tools and panels for creating
and editing titles, adding effects, and other purposes.
The compact Library
The compact view of the Library, which uses the top left of the Movie
Editor screen, is a core feature of the editing environment. If you switch
back and forth between the Library and the Movie Editor, you will see
that the same location tab is selected in both views, and that the same
Library assets are on display.
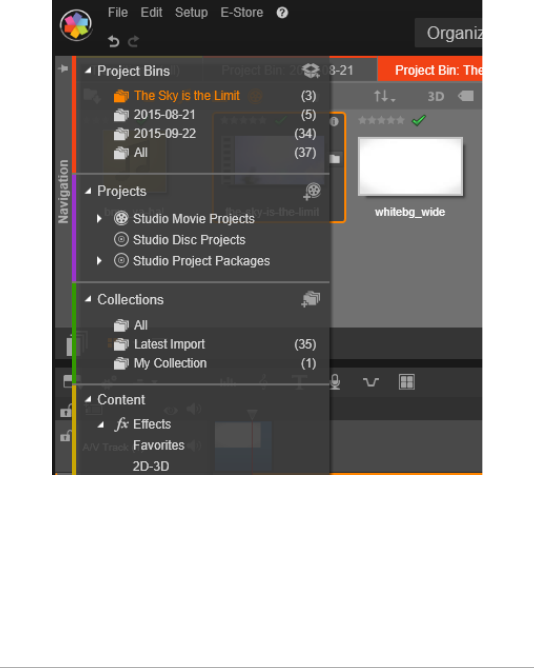
60 Pinnacle Studio User Guide
To make navigation easier in the compact view of the Library, the
location tabs across the top bear icons that indicate the type of content
that will appear in the Browser when the tab is clicked. To display a
different part of the Library, click the expand-collapse triangle beside
the icon. This opens the folder tree through which you can access any
Library asset.
Finding Library assets using the expandable Navigator in the
compact Library.
With the compact Library and the timeline together in the same
window, adding assets to your movie becomes a breeze: just drag the
items you want from the Library Browser onto the timeline.
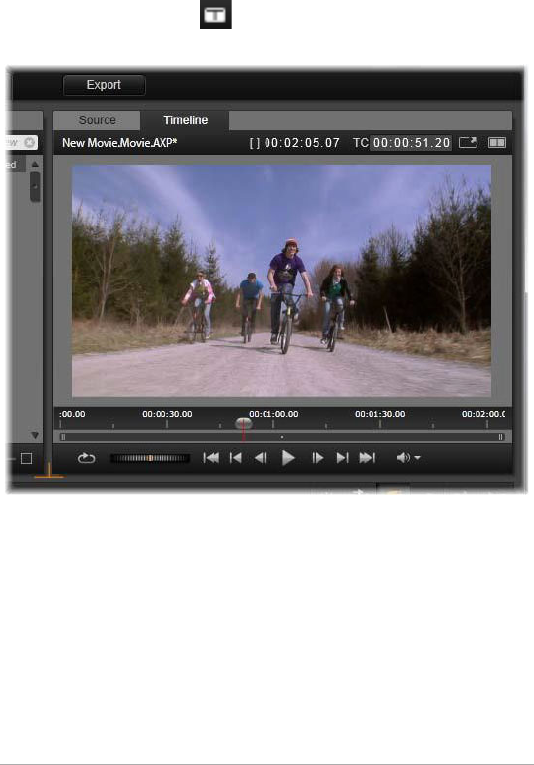
Chapter 3: The Movie Editor 61
Previewing in the project editors
You can operate the Player either in single or dual preview mode. Click
the Preview Mode button in the upper right corner of the Player
to toggle between them.
The Player in single mode. You can choose to view either
‘Source’ (Library) or timeline material.
Single mode conserves screen space by providing only one Player
preview. The Source and Timeline tabs above the Player indicate
whether Library or timeline material is being viewed, and allow you to
switch from one to the other.
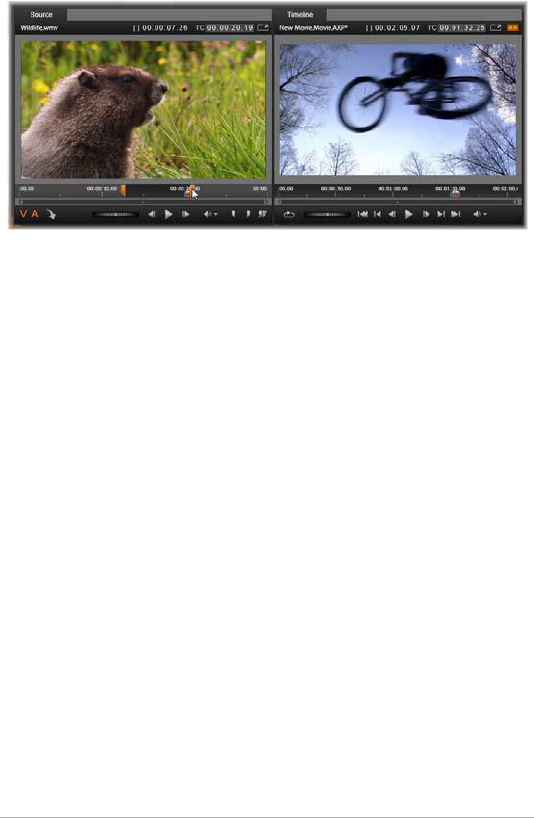
62 Pinnacle Studio User Guide
The player in dual mode. The side-by-side previews let you
browse the Library while keeping your current movie frame in
view.
In dual mode, Source (Library) material is shown in the left-hand
preview, and timeline material in the right-hand preview, each with its
own set of transport controls. The dual view makes it easier to locate
Library assets that fit well with your movie by making both the existing
and the prospective material visible simultaneously.
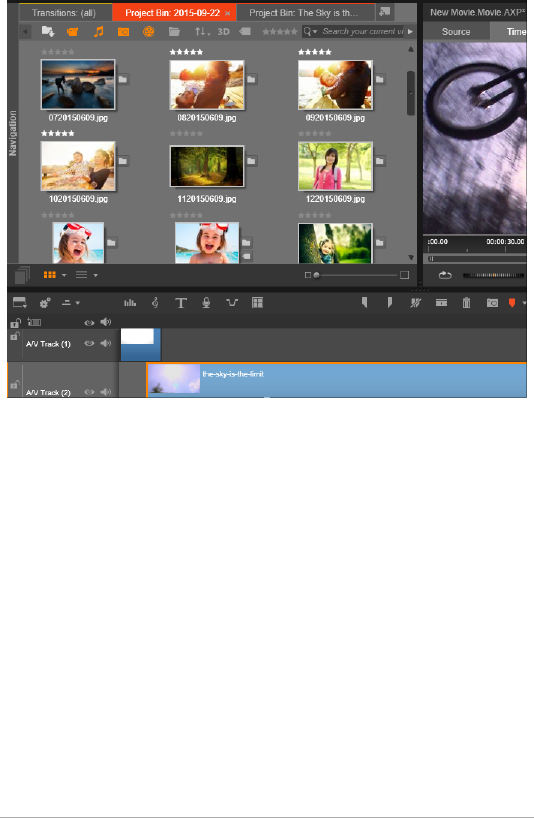
Chapter 3: The Movie Editor 63
A portion of the Movie Editor display, with the compact view
of the Library at upper left, the Player at upper right (partly
visible), and at bottom the timeline.
Disc editing
If you plan ultimately to release your movie on DVD with interactive
menus, you will at some point need the special features of the Disc
Editor. It provides all the same timeline editing features as the Movie
Editor, but also lets you create and work on the disc menus with which
users will navigate your production.
Pinnacle Studio lets you smoothly transition a movie to a disc project
at any time during development, so it’s all right to start in the Movie
Editor even if you end up targeting DVD for output instead of or as well
as the other options. Please turn to Chapter 9: Disc projects for
information about the special features provided for disc authoring. The

64 Pinnacle Studio User Guide
other aspects of timeline editing are covered in this and subsequent
chapters.
Slideshow productions
In addition to all types of video productions – ‘movies’ – the Movie
Editor (and the Disc Editor) can be used for authoring complex
slideshows and presentations from still images. The same editing
techniques apply in both cases.
The Project Timeline
The timeline is where you create your movie, by adding video, photo
and audio assets from the Library, by editing and trimming these core
media, and by enlivening them with transitions, effects, and other
enhancements.
Timeline fundamentals
The timeline consists of multiple tracks – as many as you require – in a
vertical stack. Tracks nearer the top of the stack are positioned towards
the front when viewed, their opaque parts obscuring the tracks below.
The basic action of movie authoring is to drag an asset from the Library
to a timeline track, where it is called a clip. With a little practice, you
can lay out a rough edit of a movie very quickly just by adding its main
media assets at their approximate timeline positions.
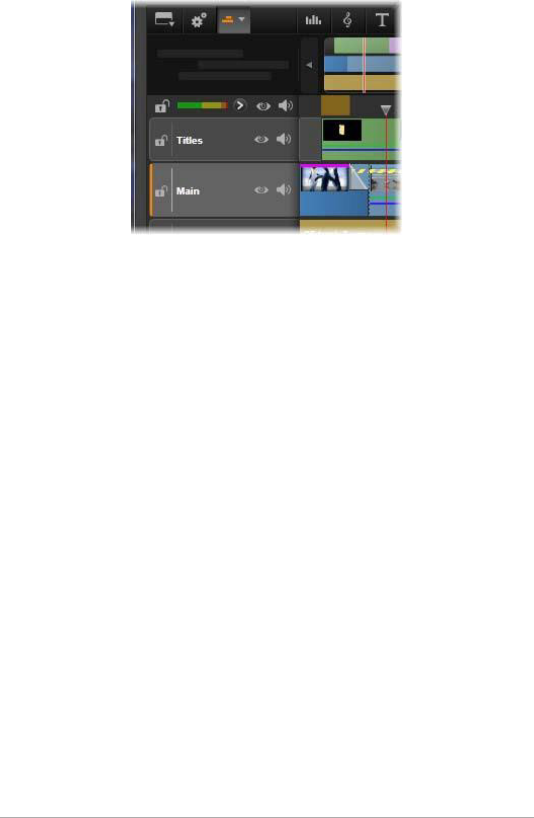
Chapter 3: The Movie Editor 65
At the left end of the timeline are track headers with several
controls per track: a lock button, the track name, and
monitoring buttons for the track’s video and audio. Here the
current default track is ‘Main’.
The track header: To the left of each track is a header area that provides
access to functions such as disabling video or audio monitoring for the
track.
The default track: One track is highlighted with lighter background
color, and is also marked with an orange bar to the left of the track
header. This is the default track. It has a special role in certain editing
procedures; for instance, it is the target track for pastes. To make
another track the default track, click in its header.
Your current position on the timeline corresponds to the video frame
shown in the Player when it is in Timeline mode. The current position
is indicated by a vertical red line, at the bottom of which is a draggable
scrubber handle. Another vertical line marks the same position in the
Navigator.
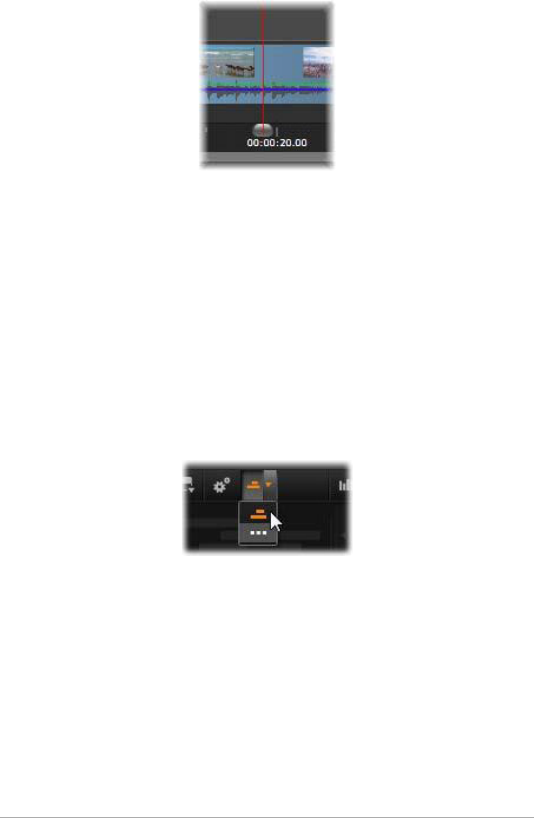
66 Pinnacle Studio User Guide
The toolbar
Above the tracks, the timeline toolbar provides several clusters of
editing-related tools. (In the Disc Editor, the toolbar also includes tools
specifically for disc authoring.)
The Navigator
The Navigator is an auxiliary navigation panel that can be revealed or
hidden by clicking its icon on the Navigation tool selector near the left
end of the timeline toolbar.
The full-width strip appears just below the toolbar. It gives a bird’s- eye
view of your whole project at a reduced scale. In the Navigator, the
bars representing clips have the same colors as they do on the timeline,
except that the bar representing the selected clip is drawn in orange.
Clicking in the Navigator allows you to speedily access any timeline
location.
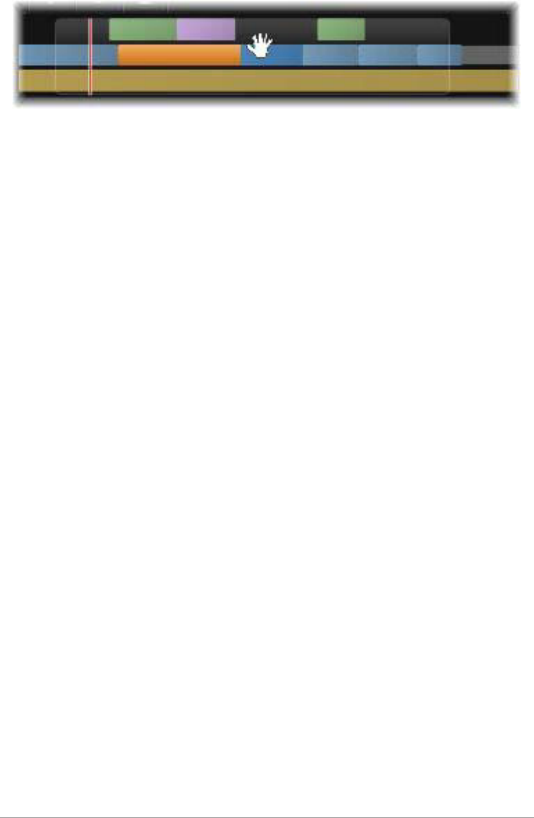
Chapter 3: The Movie Editor 67
A portion of the Navigator strip, showing the current position
(vertical line, left) and the translucent draggable view
window.
The gray rectangle that encloses a portion of the Navigator display –
the view window – indicates the section of your movie currently visible
on the timeline tracks.
To change which part of the movie is in view, click and drag
horizontally within the view window. The timeline scrolls in parallel as
you drag. Since your timeline position does not change, this may take
the scrubber out of view.
Zoom
To change the zoom level of the timeline, either click and drag
horizontally in the time-ruler along the bottom of the timeline, or drag
the sides of the view window. The first method has the advantage that
it always leaves the screen position of the playhead undisturbed, which
may make it easier to orient yourself after the zoom.
To change the zoom of the Navigator itself, use the plus and minus
buttons immediately to its right.
Double-clicking on the view window adjusts the zoom of both the
Navigator and the timeline such that your entire movie fits within the
Movie Editor window.
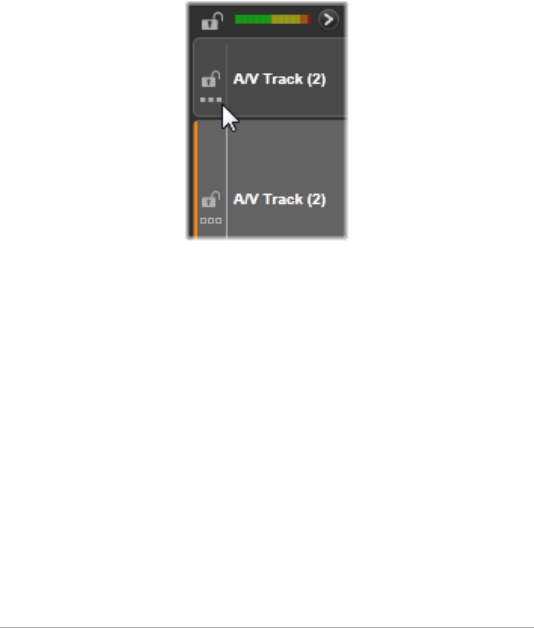
68 Pinnacle Studio User Guide
The Storyboard
Assembling a movie can involve juggling a large number of photos and
video clips, as well as deciding where to place titles, Montages and the
like. In the Storyboard, the clips on one track of your movie are
presented as a sequence of icons, so you can see at a glance what is
included and where. To choose which track to view in the Storyboard,
use the Storyboard link button in the track header.
Any of the photos, video, audio, projects, Montages and titles in the
Library can be added to your movie by dragging and dropping them
onto the Storyboard. Once there they can be rearranged, or removed
altogether if you change your mind.
Different types of clips are represented in the Storyboard with different
colors. For example, photos and videos have a blue frame, and projects
have a gray frame. As in the timeline, clips that have had effects
applied appear with a magenta line on the top, and clips with
corrections have a green line. A colored band connects the Storyboard
icon with the position of its clip on the timeline; a gap in the timeline
is reflected in a gap in the Storyboard. Once you become familiar with
the color coding, it will help you quickly visualize the structure of your
movie.
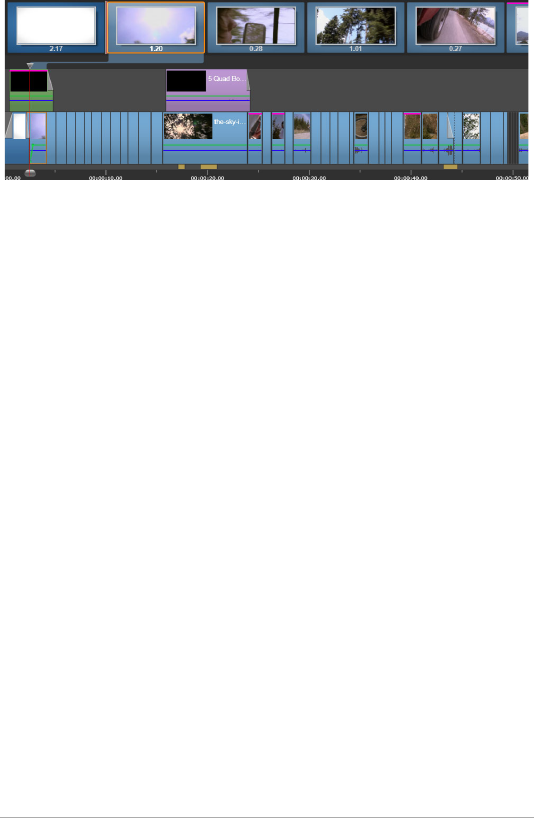
Chapter 3: The Movie Editor 69
The Storyboard displays a sequence of icons representing the
contents of one track. Effects (magenta) and corrections
(green) are indicated on the top edge of the icon; the length
of the clip is shown on the bottom.
The space just below the toolbar where the Storyboard appears is also
used by the Navigator (and in the Disc Editor by the Menu List). Which
tools is visible, if any, is controlled by the Navigation tool selector near
the left end of the timeline toolbar.
Navigating in the Storyboard
To scroll to a part of the Storyboard that is not in view, hover with the
mouse over the Storyboard until a hand cursor appears. Now click the
left button and drag the Storyboard. If you drag the mouse quickly and
release the mouse button, the Storyboard will briefly continue
scrolling, thus creating a ‘swiping’ behavior.
Alternatively you can hover over the Storyboard and use the mouse
wheel to scroll, or use the arrows at each end of the Storyboard.
Editing with the Storyboard
Although most editing takes place on the timeline tracks, the
Storyboard has some editing capability. For instance, effects can be
added directly to a clip on the Storyboard by dragging and dropping

70 Pinnacle Studio User Guide
the effect onto the clip. The clip’s context menu offers the same set of
commands here as on the timeline. Any editing that takes place on the
Storyboard is immediately reflected in the timeline, and vice versa.
Adding clips: Any photo, video, audio clip, project, Montage or title
can be added to your project by simply dragging it from the Library to
the Storyboard. An insertion line appears to indicate where the new
clip will be placed. You can select multiple clips to add them all at once.
Inserting or replacing clips: If you are inserting material between clips
already on the Storyboard, drag the new clip so that it overlaps the
right side of the clip that will precede it. When the insertion line
appears and a space opens up, drop the new clip into the gap.
To replace a clip, drag the new one onto the clip to be replaced. The
insertion line will appear, and the old clip will highlight to indicate
proper placement. The new clip must be the same type as the old. A
video clip cannot be replaced by a photo or audio clip, for example.
Selecting clips: To select a clip, click on its icon; an orange frame
around the clip indicates selection. The timeline scrubber will jump to
the beginning of the selected clip, and a connecting band of color will
link the Storyboard clip with its timeline counterpart. If the timeline
position of the selected clip is currently off-screen, it will be brought
into view.
You can select multiple clips using the Shift and Ctrl keys according to
the usual Windows conventions.
Reordering clips: To pick up a clip and move it, click on it until it is
selected, and then drag it to its new location. If necessary, the
Storyboard will scroll until you reach the desired position.

Chapter 3: The Movie Editor 71
Resizing
The height of the timeline, along with the relative proportions of the
Library and the Player, can be adjusted with the sizing grip in the form
of an inverted T in the middle of the screen.
To adjust the height of individual timeline tracks, grab and adjust the
separator lines between the track headers on the left. If the vertical size
of all tracks exceeds the available viewing area, a scroll bar at the right
will allow you to select which tracks are in view.
Set the height of the Storyboard (when it is visible) by vertically
dragging the horizontal separator along the Storyboard’s bottom
edge. For more information, see “Navigation tool selector” on
page 73.
The timeline toolbar
The toolbar above the Movie Editor timeline offers various settings,
tools and functions that apply to the timeline and timeline editing.
These are described in order from left to right.
Customizing the toolbar
The timeline toolbar can accommodate numerous buttons to help
editing go more smoothly. One set of buttons is available for the Movie
Editor and a somewhat larger set for the Disc Editor. The Customize
toolbar button at the far left of the toolbar lets you choose which
subset of the available buttons you wish to display.
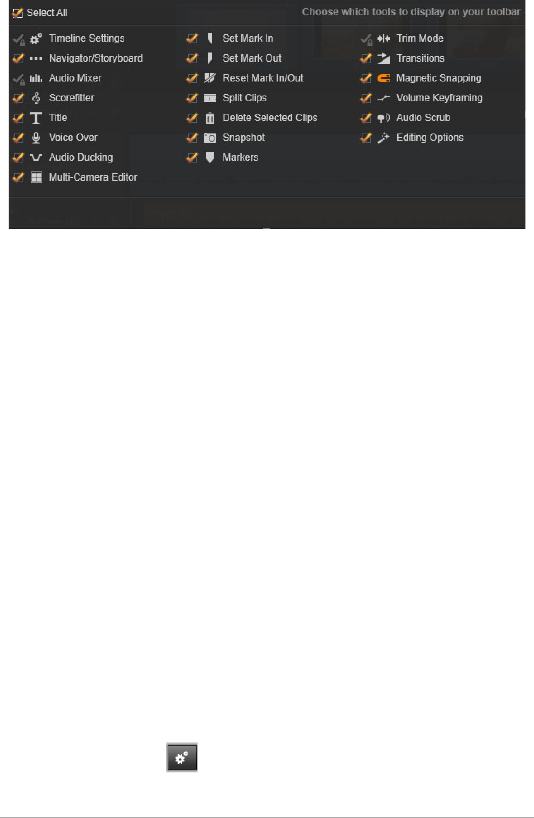
72 Pinnacle Studio User Guide
The Customize toolbar panel, with all available buttons
selected for display.
Clicking the button brings up a panel upon which all the other toolbar
buttons can be individually set as visible or hidden. The gray check
marks beside the Timeline settings button and a few others indicate
that these buttons are not optional and will be displayed as a matter
of course. Check or uncheck the boxes for the optional buttons until
the toolbar has been configured to your liking, or check the Select all
box to display all of the buttons.
Some of the commands invoked by buttons also have keyboard
shortcuts. These work whether the button is displayed or not. (See
“Appendix D: Keyboard shortcuts” on page 439 for more information.)
Timeline settings
By default your timeline settings are copied from the first video clip you
add to the timeline. If that will give the right result, you won’t have to
alter them.
If you do need to change these basic image properties of your project,
click the Gear button to open the timeline settings panel and
configure the four settings provided.

Chapter 3: The Movie Editor 73
Aspect: Choose between a 4x3 and a 16x9 display.
Imaging: Choose between Regular (2D) and Stereoscopic (3D).
Size: Choose amongst the HD and SD pixel resolutions available for the
given aspect ratio.
Frame rate: Choose from a selection of frame rates consistent with the
other settings.
These settings can be changed at any time during the development of
your movie, but you should be aware that a change of the frame rate
can cause a slight shifting of clips on the timeline as they adjust to new
frame boundaries.
Video material that is not in compliance with the chosen project
settings will be converted automatically on being added to the
timeline. If you are making a stereoscopic movie, 2D material may be
used but it will still look two dimensional, as both the right eye and left
eye views will be the same. 3D material can be used on a 2D timeline,
but only the left eye channel will be shown.
If you want to choose a video standard for your projects explicitly,
rather than relying on inheriting the format from the first clip added,
open the Project settings page of the application settings. See “Project
settings” on page 368.
Navigation tool selector
The space just under the toolbar can be occupied by the Navigator or
the Storyboard, or by neither. (In the Disc Editor there is a third
possibility – the Menu List.) The Navigation tool selector includes a
dropdown that lets you select which tool you want displayed in that
area.
74 Pinnacle Studio User Guide
Clicking on the selector icon toggles the visibility of the area itself.
See “The Navigator” on page 66 and “The Storyboard” on page 68 for
more about these navigation tools.
Audio mixer
This button opens the enhanced audio control area with
volume adjustment tools and access to the Panner, a
surround panning control.
ScoreFitter
ScoreFitter is the integrated music generator of Pinnacle
Studio, providing you with custom-composed, royalty-free
music exactly adjusted to the duration required for your
movie. See “ScoreFitter” on page 259.
Title
The Title button opens the Title Editor. If none of the many
supplied titles answers your need, why not author one of
your own? See “Chapter 7: The Title Editor” on page 191.
Chapter 3: The Movie Editor 75
Voice-over
The voice-over tool lets you record commentary or other
audio content live while viewing your movie. See “The Voice-
over tool” on page 261.
Audio Ducking
Audio Ducking is used to automatically lower the volume of
one track so that you can hear another track better. For more
information, see “Using Audio Ducking to automatically
adjust volume” on page 264.
Multi-Camera Editor
The Multi-Camera Editor is a workspace that lets you create
professional-looking video compilations from footage of
events that have been captured on different cameras, from
different angles. For more information, see “Chapter 14: Multi-Camera
Editing” on page 375.
Razor blade
To split one or more clips at the playhead position, click the
razor blade button. No material is deleted by this operation,
but each affected clip becomes two clips that can be
handled separately with respect to trimming, moving, adding effects
and so on.
If there are selected clips at the playhead on any track, only those clips
will be split. Both parts of those clips remain selected after the split.
76 Pinnacle Studio User Guide
If there are no selected clips at the playhead line, all clips intersected
by it will be split and the right-hand parts will be selected to facilitate
easy removal in case that is desired.
Locked tracks are exempt from the split operation.
Trashcan
Click the trashcan button to delete all selected items from
the timeline. “Deleting clips” on page 91 for details on how
other timeline clips may be affected by the deletion.
Snapshot
If, while previewing video on the timeline, you see a frame
that you would like to capture as a still image, click the
Snapshot button. This creates a photo of the image
currently being previewed, and puts it in the Snapshot folder under
Photos in the Library.
Using the Snapshot button on the timeline is a quick way to grab a
frame; for more control, use the Snapshot tool in the Video Editor.
Please see “Snapshot” on page 147 for more about the Snapshot tool.
Markers
The marker functions available here are identical to those
provided in the media editors for video and audio. Please see
“Markers” on page 144.
Instead of being attached to a particular clip, however, timeline
markers are considered to belong to the video composite at the
marked point. Only if there is a clip selection embracing all tracks at the
Chapter 3: The Movie Editor 77
marked point, and only if no track is locked, will the markers change
positions during timeline editing.
Trim mode
To open a trim point, place the timeline scrubber near the
cut to be trimmed and click the trim mode button. Click it
again to close trim mode. Please see “Trimming” on page 94
for more details.
Dynamic length transitions
Ordinarily when a transition is added to the timeline, it is
given the default length you have configured in Setup. Click
this button if you would like to override the default length.
When the button is highlighted, the transition durations can be set by
dragging the mouse to the right or left while placing the transition
onto a clip. For more about transitions, please see “Transitions” on
page 111.
Magnetic snapping
Magnet mode simplifies the insertion of clips during
dragging. While the mode is active, clips are ‘magnetically’
drawn to other items on the timeline when they approach
within a critical distance. This makes it easy to avoid the unnecessary –
though often indiscernibly small – gaps between items that are
otherwise apt to arise during editing. If you want to deliberately create
such a gap, however, simply turn off the mode to allow the preferred
placement.
78 Pinnacle Studio User Guide
Volume keyframe editing
The volume keyframe editing button toggles keyframe-
based editing of clip audio. While the button is engaged, the
green volume contour on each timeline clip becomes
editable. In this mode you can add control points to the contour, drag
contour sections, and other operations. While the button is off, the
volume keyframes are protected against modification.
Opening the Audio Mixer automatically activates the button.
Audio scrubbing
By default, the audio portion of a project can be heard only
during playback in the preview. The audio scrubbing button
on the timeline toolbar provides an audio preview even
while just ‘scrubbing’ through your movie by dragging the timeline
scrubber control.
The shuttle wheel of the Player also provides audio scrubbing.
Editing mode
The editing mode selector at the right- hand end of the timeline
toolbar determines the behavior of other clips when editing changes
are made.Material to the left of the edit point is never affected in
timeline editing, so this applies only to clips that extend rightward from
the edit point.
Three choices of editing mode are available: smart, insert and
overwrite. The default is smart, in which Pinnacle Studio selects from
insert, overwrite and sometimes more complex strategies in the
context of each editing operation.
Chapter 3: The Movie Editor 79
Smart mode is designed to maintain synchronization between timeline
tracks as far as possible. In a multitrack editing situation, clips typically
have vertical as well as horizontal relationships. When you have
carefully placed your cuts to coincide with the beats of a music track,
for example, you don’t want to disrupt everything when you make
additional edits.
Insert mode is always non-destructive: it moves other clips on the track
out of the way before inserting new material. It will also automatically
close gaps created by removing material. Only the target track is
affected. Any prior synchronization with other tracks from the edit
point rightwards is lost.
Insert is most useful in the early stages of a project, when you are
collecting and arranging clips on the timeline. It ensures that no
material will be lost, and makes it very easy to reorder clips and
sequences of clips.
In the later stages, when the structure of your project is approaching
its final state and you have started carefully synchronizing material on
different tracks, insert mode is less helpful. The very properties that
favor its use for the early stages (the ‘ripple’ behavior) count against it
when finalizing. This is where overwrite comes into play.
Overwrite directly affects only the clips you select. Changing the length
or position of a clip in overwrite mode will overwrite neighboring clips
(if you lengthen) or leave gaps (if you shorten). It will never affect the
synchronization between tracks.

80 Pinnacle Studio User Guide
Alternative mode
The smart editing mode works by predicting what you’re trying to do
and determining whether insert, overwrite or even some more complex
strategy would be best to apply. You’ll find it usually does what you
want, but there are sure to be other times when you have something
else in mind.
Many actions support both insert and overwrite, but no other
possibilities. Smart mode will use sometimes one and sometimes the
other, but if insert isn’t what you want, overwrite usually is, and vice
versa. All you need, therefore, is a method of overriding smart mode’s
default behavior.
To change insert to overwrite behavior, or overwrite to insert, hold
down the Alt key while carrying out your edit as usual. You can press
(or release) Alt as you please while setting up the edit: what counts is
the state of the key at the instant the operation is finally enacted, such
as when you drop dragged items onto the timeline.
The trick works in all editing modes, so it’s always available when you
need it. If you are not satisfied with the default behavior, just cancel or
undo as needed, then try again with Alt.
In one timeline editing operation – that of replacing one clip by
another while retaining its duration, effects and other properties – the
Shift key takes on a similar role. See “Replacing a clip” on page 89 for
details.
The timeline track header
In the header area of the timeline are a number of controls affecting
the arrangement and organization of the timeline tracks. These are
covered here, while the audio functions controlled from the timeline

Chapter 3: The Movie Editor 81
header, such as track volume, are described in the topic “Audio on the
timeline” on page 249.
The all tracks area above the track headers offers controls similar to
those found on each track header but with global effect: they apply to
all tracks simultaneously, overruling the individual settings.
Default track
The orange vertical line to the left of the track header, together with a
lighter background shade, identifies the default track. It provides a
destination track for certain functions, including send to and paste.
Newly-created titles and ScoreFitter songs are also added on this track.
For more information see “Sending to the timeline” on page 89,
“Using the Clipboard” on page 106, “Chapter 7: The Title Editor” on
page 191 and “ScoreFitter” on page 259.
To make another track the default track, simply click anywhere within
the track header other than on a button or other control.
Locking
Click the padlock buttons to protect a track from unintended edits. The
same button in the all tracks area confers this protection on the whole
project.
Storyboard link
The Storyboard is an alternative representation of a timeline track. A
small storyboard link button appears beneath the padlock button on
all track headers when the Storyboard is open. Click the button to
select a given track as the one linked to the Storyboard display.

82 Pinnacle Studio User Guide
Track name
To edit the name of a track, click the name once to access the in- place
editor, or select Edit track name from the track header context menu.
Confirm your edit with Enter, or cancel it with Esc.
Video and audio monitoring
The video and audio buttons in the track header control whether this
track contributes its video and audio to the composite output of the
project. They support the many editing situations in which it is
advantageous to block the output of one or more tracks in order to
simplify the preview. The same buttons in the all tracks area toggle
audio and video monitoring for the entire project.
Additional track functions
The following functions are available in the track-header context
menu:
New track: You can insert a new track either above or below the
existing track.
Delete track: Delete a track and all clips on it.
Move track: Drag the track header up or down to a new layer position.
As you drag, a bright horizontal line appears at valid placements.
Copy track: Keeping the Ctrl key pressed while moving a track will copy
the track instead of move it.
Track si ze: The context menu contains four fixed track sizes (Small,
Medium, Large, Very large). For custom sizing, drag the separator line
between the track headers to seamlessly adjust the height.

Chapter 3: The Movie Editor 83
View waveforms: Toggle the waveform view for audio clips.
Please see “Audio on the timeline” on page 249 for coverage of
Timeline audio functions.
Editing Movies
The first step in any movie editing session is to bring your project into
the Movie Editor to begin work.
To launch a new production: Choose File >New > Movie from the
main menu. Before adding your first clip, make sure that the timeline
video format will be right for the project (see below).
To edit an existing movie: Select a recent project from the File > Recent
menu; click File > Open to browse for a movie project to open; or
locate the movie you want to open in the Projects folder of the Library,
and double-click the thumbnail.
If your movie has been stored as a project package, it must be
unpacked before editing. Find your project in the Studio Projects group
in the Library, and use the Unpack project package command on the
thumbnail’s context menu.
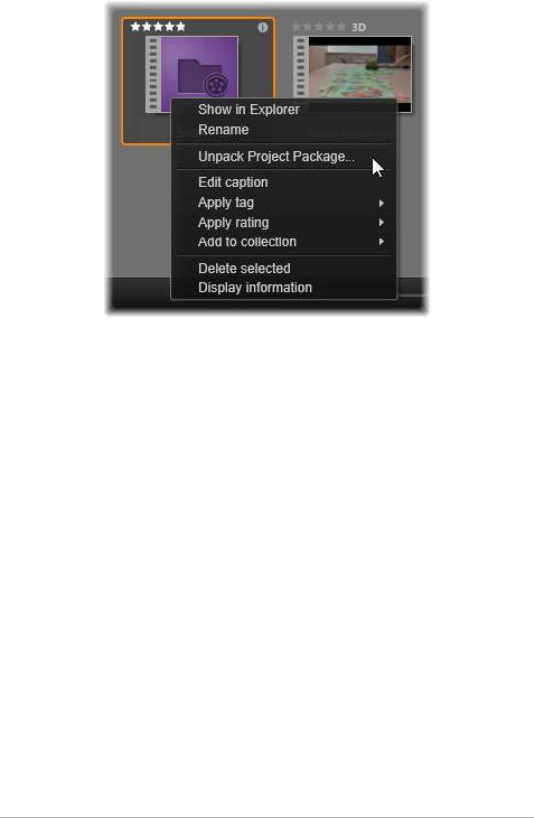
84 Pinnacle Studio User Guide
A project package thumbnail in the Library, with the context
menu open. After unpacking, the movie will appear on the
project’s timeline, ready for editing.
Alternatively, you can click File > Open and find the project package in
Explorer by choosing Studio Project Package (axx) in the file extension
box.
When unpacking is finished, the unpacked project is added to the
Library and opened on the project editor timeline, where it can be
edited as usual.
To open a Studio project: Choose File > Import previous Pinnacle
Studio projects. Please note that some features of projects created with
a previous version of Studio may not be supported in the current
version.
To import a Studio for iPad project: Choose File > Import Studio for
iPad App projects.

Chapter 3: The Movie Editor 85
Timeline settings
To start editing a new project, verify that the video format settings of
your project – aspect ratio, 2D or 3D, frame-size and playback speed –
are as you want them. You can choose in the Project settings tab of the
application settings to set the values of these properties automatically
by matching the first clip added to the project. You can also set them
manually. See “Project settings” on page 368 for configuring the
automatic feature, and “The timeline toolbar” on page 71 for
instructions on entering project settings manually.
Depending on your timeline settings, clips in some formats might not
be instantly playable. Such content will automatically be rendered in an
appropriate format.
Establishing tracks
With only minor exceptions, timeline tracks in Pinnacle Studio do not
have specialized roles. Any clip can be placed on any track. As your
projects become more complex, however, you will find it increasingly
helpful to give some thought to the organization of tracks, and rename
them according to their function in the movie. For information on track
properties and how to edit them, please see “The timeline track
header” on page 80.
Adding clips to the timeline
Most types of Library asset can be brought onto the timeline as
independent clips. The types include video and audio clips, photos,
graphics, ScoreFitter songs, Montage and titles. You can even add your
other movie projects as container clips that work just like video clips in
your project. Disc projects, however, cannot be added as container
clips to a timeline, since they require a capability – user interactivity –
that timeline clips don’t have.

86 Pinnacle Studio User Guide
Drag-and-drop
Drag-and-drop is the commonest and usually the most convenient
method of adding material to a project. Click any asset in the Movie
Editor’s compact view of the Library and drag it wherever you like on
the timeline.
When crossing into the timeline area during the drag and continuing
to the target track, watch for the appearance of a vertical line under
the mouse pointer. The line indicates where the first frame of the clip
would be inserted if dropped immediately. The line is drawn in green
if the drop would be valid, and red if it would not be possible to insert
a clip where indicated (because the track is protected, for example).
It is possible to insert multiple clips into the timeline at the same time.
Simply select the desired Library assets, then drag any one of them to
the timeline. The sequence in which the clips appear on the track
corresponds to their ordering in the Library (not the order in which you
selected them).
Magnet mode: By default, magnet mode is switched on. This makes it
easier to insert clips so that their edges meet exactly. The new clip
snaps to certain positions, like the ends of clips or the positions of
markers, as if drawn by a magnet once the mouse pointer gets close
to the potential target.
On the other hand, don’t worry about whether the first clip is right at
the start of the timeline. Not every movie starts with a hard cut to the
first scene!
Live editing preview
In order to eliminate the confusion created by complex editing
situations, Pinnacle Studio provides a full dynamic preview of the

Chapter 3: The Movie Editor 87
results of editing operations as you drag clips around on the timeline.
If things seem to jump around a bit more than you’re used to during
timeline editing, this is the cause. Don’t worry: you will quickly get used
to and learn to take advantage of the extra information provided. Take
it slowly at first. Watch the changes on the timeline as you hover the
dragged item over various possible landing places, and complete the
drop when you see the result you want.
If it turns out that drag-and-drop isn’t working the way you want,
either press Esc or move the mouse pointer out of the timeline area and
release the button. Either of these abandons the drag-and-drop
operation. To call back a drag-and-drop after it’s complete, press
Ctrl+Z or click the undo button.
Don’t forget that you can vary many timeline editing operations with
alternative mode: just press and hold Alt while dragging or trimming.
In a one-for-one clip replacement, Shift is also significant.
Advanced drag-and-drop
After you have assembled an assortment of clips on a timeline track,
it’s only matter of time before you want to start changing things
around. For instance, you might want to:
• Fill a gap with clips.
• Insert some clips before a specific clip.
• Replace a clip already on the timeline with a different one.
The smart editing mode helps you achieve these goals with ease.
Filling a gap
Smart mode makes it simple to fill a particular timeline gap with new
material, for example. Rather than having to painstakingly pre- trim the

88 Pinnacle Studio User Guide
new material to the space available, you simply drag items into the
gap. Any clips that are not needed for filling the gap will be dropped,
and the last clip used will automatically be trimmed to the appropriate
length. No clips already on the timeline are affected, so no
synchronization problems can result.
Inserting clips
Suppose that your goal is to add new material to the timeline at a point
where there is an existing clip. You don’t want the clip already there to
be overwritten, however; you just want it (and any clips to its right) to
move rightwards far enough to make room for the new material.
Here again, smart editing provides a painless answer. Simply drag the
new material to the start of the clip that is in the way, rather than into
a gap. The clip moves aside exactly as far as necessary.
Inserting with split
If you drop an item onto the middle of an existing clip, rather than at
a cut, the clip will be split. The new material is inserted at the point you
specified, and is followed immediately by the displaced portion of the
original clip.
In smart mode, synchronization of the target track with all other tracks
is maintained by inserting in each of them a gap of length equal to the
new clip. To avoid affecting the other tracks in this way, use insert
instead of smart mode. Alternatively, pressing Alt as you drop the new
material will cause it to overwrite a portion of the existing clip. A third
approach is to lock any track that should not be modified, although
this will affect the synchronization of clips on locked tracks with those
on unlocked tracks.

Chapter 3: The Movie Editor 89
Replacing a clip
To replace a clip, drag a single Library asset onto the clip you want to
replace while holding down Shift. The replacement clip will inherit any
effects and transitions that were applied to the original clip.
Corrections are not inherited, however, since they are usually meant to
address the issues of a particular media item.
In smart mode, the replace operation will succeed only if the Library
clip is long enough to cover the full length of the clip being replaced.
In other modes a Library clip of insufficient length will be extended
using over-trimming. The direction and amount of the extension is
based on your mouse position as you drag. For information on over-
trimming, please see “Over-trimming” on page 93.
If the Library asset is longer than needed, it will be truncated to the
same length as the clip being replaced.
Sending to the timeline
In addition to dragging a clip to the timeline, you can ‘send’ it to the
default track at the position of the playhead. The operation is
equivalent to drag-and-drop, so smart mode is applied accordingly
when deciding how other clips will be affected. The Send to timeline
command is found on the context menu of an individual asset or
multiple selection in the compact view of the Library.
Sending from the Player
There is also a second ‘send’ method that provides greater control.
If you click on a Library asset when working in the Movie Editor, the
Player switches to Source mode for previewing. For trimmable media
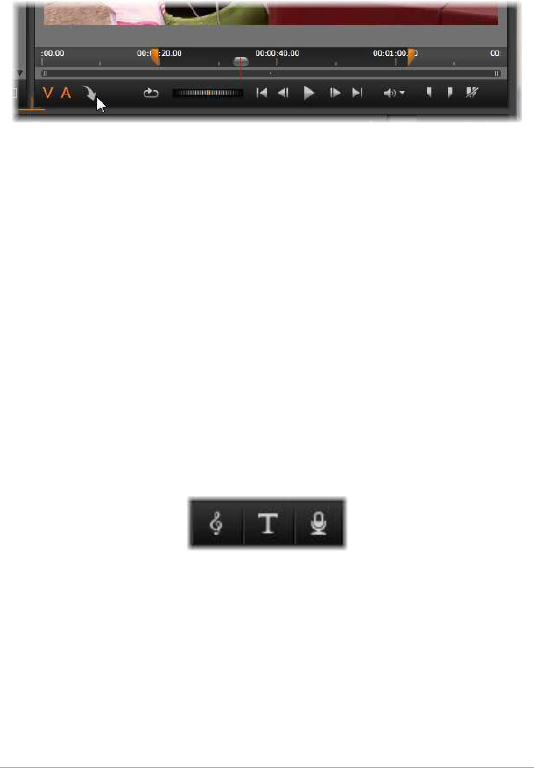
90 Pinnacle Studio User Guide
(video and audio), the Player also provides trim calipers for cutting out
a starting or ending portion of the asset.
Clicking the Send To Timeline button in the Player after
trimming a Library video asset.
After previewing the asset and trimming it if required, use the send to
timeline button at the bottom left of the Player. As usual, the asset is
added to the project on the default track and at the playhead. A useful
variation is to click anywhere within the Player screen and drag the
asset onto any desired timeline track. The asset is added at the drop
point rather than at the playhead.
Title Editor, ScoreFitter, voice-over
These three functions add new clips to the project’s timeline, clips that
are not underpinned by any Library asset. Instead, they are created
from settings and other actions you take during editing.
Once your editing is complete, both titles and ScoreFitter clips will be
sent to the default track on the timeline using the Send to timeline
function, while voice-over clips will go to the special voice-over track
instead. For details please see “Chapter 7: The Title Editor” on
page 191, “ScoreFitter” on page 259 and “The Voice-over tool” on
page 261.

Chapter 3: The Movie Editor 91
Deleting clips
To delete one or more clips, first select them, then press Delete.
Alternatively, click the trashcan icon on the timeline toolbar, or
choose Delete from the selection’s context menu.
In smart mode, if the deletion produces a gap that spans all tracks, it
is closed by shifting material to the right of the gap leftwards. This lets
you avoid accidentally creating empty sections in your movie, while still
ensuring that synchronization between tracks is maintained.
If the Alt key is held down when deleting, any gaps produced will be
left unclosed.
In insert mode, gaps on the tracks from which clips are deleted will also
be closed, but other tracks will be unaffected. No effort is made to
preserve synchronization to the right of the deletion.
With regard to synchronization, the safest editing mode for deletion is
overwrite, which will simply remove the clips and leave everything else
unchanged.
Clip operations
The timeline of your project provides comprehensive support for
selecting, adjusting, trimming, moving and copying clips.
Selecting
Select clips in preparation for performing editing operations upon
them. A selected clip receives an orange frame in the timeline and in
the Storyboard, and is displayed as solid orange in the Navigator.
To select one clip, click it with the mouse. Any previous selections are
removed. For a fast multiple selection, click in an open timeline area

92 Pinnacle Studio User Guide
then drag out a selection frame that intersects the clips of interest. To
select all clips with one command, press Ctrl+A.
To clear a selection click into any gap area of the timeline.
Multiple selection with keyboard and mouse
To create more complex multiple selections, left-click while pressing
Shift, Ctrl or both together.
To select a series of clips: Click on the first and Shift-click on the last.
The two clips together define a bounding rectangle, or selection frame,
within which all clips are selected.
Toggle selection of one clip: Use Ctrl-click to reverse the selection state
of a single clip without affecting any of the others.
Select rest of track: Press Ctrl+Shift-click to select all clips that start at
or after the start position of the clicked clip. This function is particularly
useful if you quickly want to get the rest of your timeline ‘out-of-the
way’ for inserting new material, or to manually ripple left to close
timeline gaps.
Grouping and ungrouping clips
You can select and group multiple clips so that you can move the clips
together. To group or ungroup clips:
1 In the timeline, select two or more clips.
2 Right-click one of the selected clips and choose Group > Group.
To ungroup the selection, right-click a group and choose Group >
Ungroup.

Chapter 3: The Movie Editor 93
Adjusting
As you move your mouse pointer slowly over the clips on your timeline,
you will notice that it changes to an arrow symbol while crossing the
sides of each clip, an indication that you can click and drag to adjust
the clip boundary.
Adjusting changes the length of a single clip on the timeline in
overwrite mode (since insert mode would cause synchronization
issues). If you drag the start of a clip to the right, a gap will be opened
on the left side. If there is a clip to the immediate left of the clip being
adjusted, dragging to the left overwrites it.
The adjustment pointer also appears when the mouse hovers at the
ends of a gap – an empty space on a timeline track with at least one
clip to its right.
It turns out that adjusting gaps in overwrite mode, as we do for clips,
is not especially helpful. However, gaps do come in handy when you’re
editing in smart mode if you want to ripple an individual track left or
right, ignoring any resulting synchronization issues. Adjusting gaps
therefore occurs in insert mode.
Even if no gap is available, incidentally, you can get the same result by
holding Alt while adjusting the sides of a clip.
Over-trimming
Over-trimming occurs when you try to extend the duration of a clip
beyond the limits of its source material, a situation you typically want
to avoid.
Notice that if you have over-trimmed your clip the invalid parts are
shown in pink.
94 Pinnacle Studio User Guide
Overtrimmed clip: The first and last frames will be frozen in
the over-trimmed sections.
Over-trimming is not a crisis situation. You do not need to take action
immediately. Pinnacle Studio will simply extend the clip as specified by
‘freezing’ the first and last frames of the clip into the over-trimmed
areas.
Depending on the duration of the over-trim, and the context, this
simple approach may be all you need. A brief freeze-frame can even be
visually effective in its own right.
The freeze-frame method will probably not give satisfactory results if it
happens during a sequence involving rapid motion, however. In such
exacting cases you might consider supplementing or replacing the clip,
or prolonging it with the Speed function. (See “Speed” on page 108.)
Trimming
Changing the length of clips or gaps on the timeline is called
‘trimming’.
Multitrack trimming is a valuable editing skill. By trimming multiple
tracks at once, you can assure that the clips coming later on the
timeline maintain their relative synchronization.
Trimming clips without consideration for content later on the timeline
can disrupt the synchronization of your project. Soundtracks that don’t
match the action and badly-timed titles are the kinds of problem that
may result.
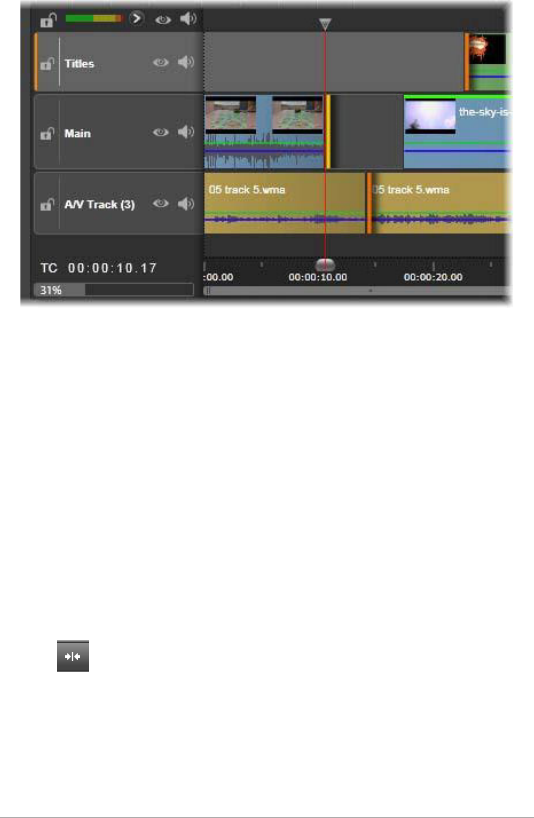
Chapter 3: The Movie Editor 95
Multiple track trimming
A rule for staying in sync
Pinnacle Studio has powerful trimming tools to allow you to perform
multitrack trimming without risk. Fortunately, there is a simple rule for
safeguarding synchronization even on a complex timeline: open
exactly one trim point on every track. Whether the trim point is
attached to a clip or a gap, and at which end, are up to you.
Opening trim points
To open a trim point on the active timeline track, position the timeline
scrubber near the cut you want to trim, then click the trim mode
button on the timeline toolbar. To open one trim point on each
non-empty track simultaneously, Shift-click the trim mode button.
Once in trim mode, you can open trim points with the mouse pointer
at the beginning or end of a clip. Notice that the trim pointer faces left
at the start of the clip and right at the end. While the trim pointer is
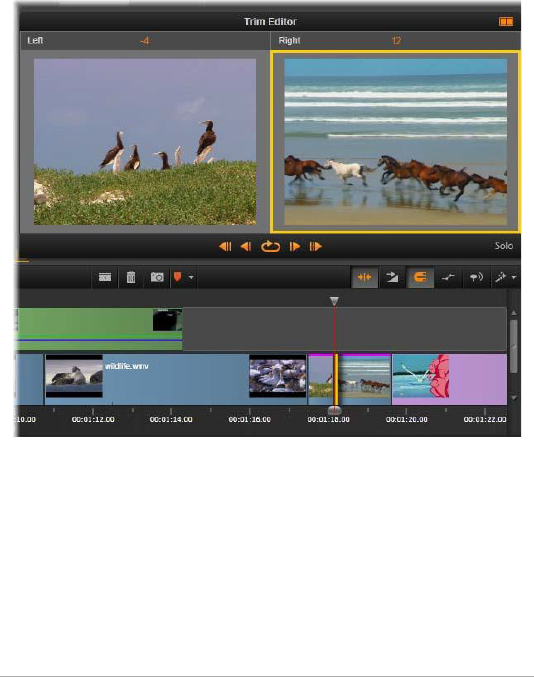
96 Pinnacle Studio User Guide
showing, click once at the point you want to trim. Then continue to
open trim points on other tracks if required.
You can open two trim points per track by holding down the Ctrl key
to create the second point. This feature is useful for the trim both, slip
trim, and slide trim operations, all described below.
The Trim Editor in dual mode. The yellow rectangle shows the
currently selected trim point at the start of a clip; the left side
shows the final frame of the outgoing clip.
When a trim point is opened several things happen:
• The left or right edge of the clip is highlighted with a yellow bar,
showing that it is currently selected. Trim points that are not
currently selected are shown with an orange bar.
• The Trim Editor opens, with the Player in dual preview mode.

Chapter 3: The Movie Editor 97
• The transport controls under the Player become trim adjustment
tools.
• The preview with the currently active trim point is outlined in
yellow.
The Trim Editor
In dual preview mode, the Trim Editor shows two frames from the
timeline. The currently selected trim point is always shown and has a
yellow rectangle around it. If the trim point is at the beginning of the
clip, the first frame of the clip is shown; at the end of the clip, the last
frame. You can switch the selected trim point by clicking in the other
preview window, or by pressing Tab.
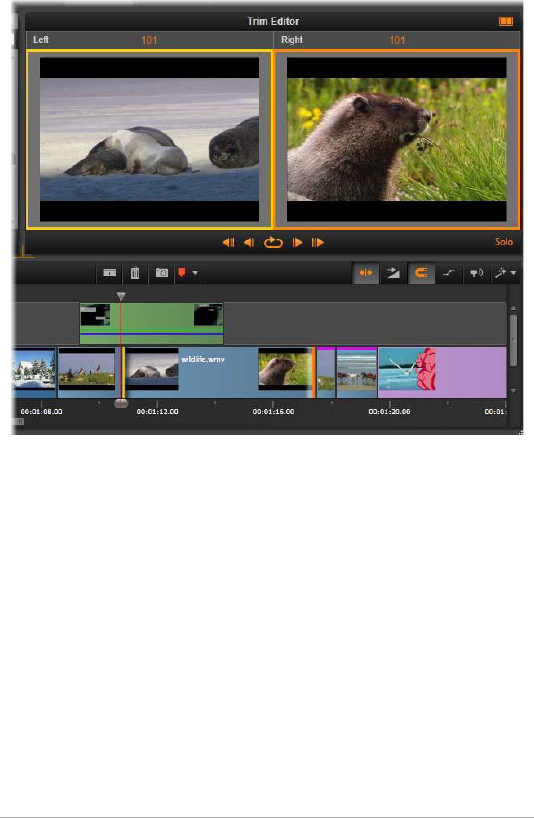
98 Pinnacle Studio User Guide
The Trim Editor in a slip trim operation. The left preview
shows the currently selected trim point; the right preview
shows the second trim point.
Which frame is shown in the second preview window depends on
which trim mode is being used. In a slip or slide trim, the second trim
point of the operation is displayed, surrounded by an orange
rectangle. In other cases, the second preview window shows the frame
on the other side of the cut at the selected trim point.
Above each preview window, the number of frames that have been
trimmed is displayed. If you think of the original cut point position as
zero, the number indicates how many frames the new position of the
cut point has moved.
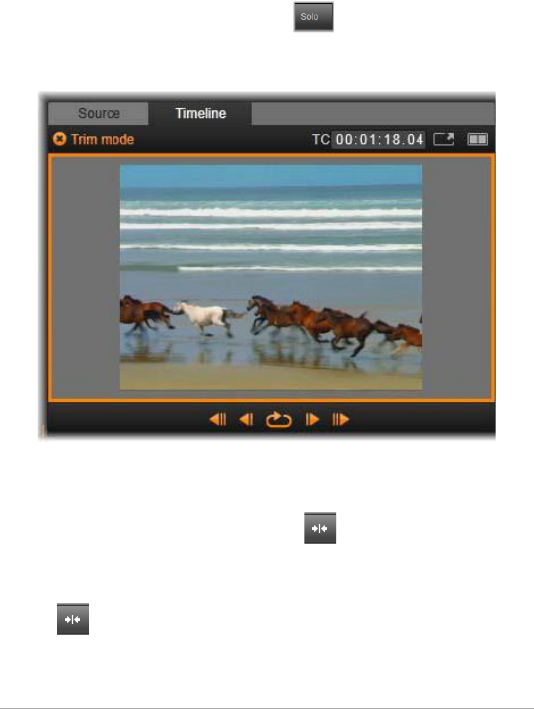
Chapter 3: The Movie Editor 99
The Trim Editor is by default in solo mode. The clip that has the trim
point is shown without the tracks above it and without any transitions
applied to it. This preview mode is most suitable for determining the
exact frame to trim. The default display of adjacent frames are a
complete composition of all the timeline tracks. You can toggle the
display behavior with the Solo button in the lower right corner
of the Trim Editor. When solo mode is deactivated, the preview shows
trim points in their timeline context.
The Trim Editor in single preview mode.
The Trim Editor opens in dual preview mode. To switch to single
preview, click the preview mode button in the upper right corner
of the preview area.
Closing trim mode: Trim mode can be closed by clicking the trim mode
button .
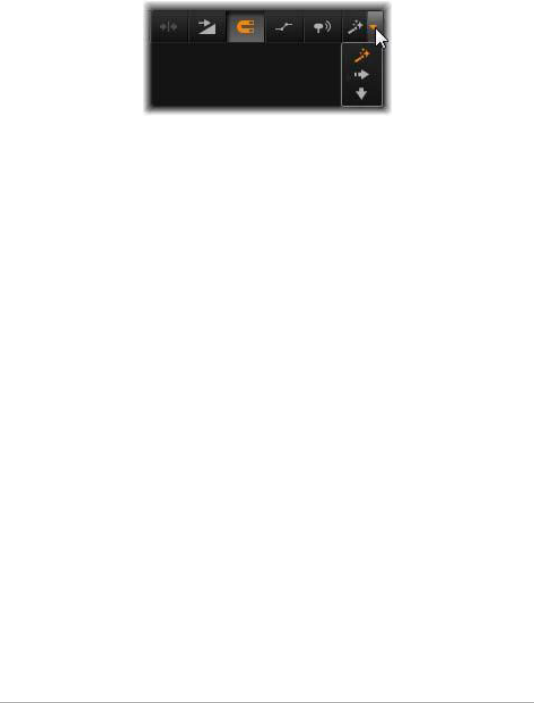
100 Pinnacle Studio User Guide
Editing modes
The current editing mode – smart, overwrite or insert – determines
how trimming will affect other clips on the timeline. Select the mode
from the dropdown list at the far right of the timeline toolbar.
Insert mode: Clips to the right of a trimmed clip and on the same track
will shift left or right to accommodate the new length of the clip.
Synchronization with other tracks may be lost, but no clips are
overwritten.
Overwrite mode: Only the clips you are trimming, and any neighboring
clips they happen to overwrite, are altered in this mode.
Synchronization across tracks is not affected.
Smart mode: For trimming, smart mode is equivalent to insert mode.
Trimming the beginning of a clip
Prepare to trim the beginning of a clip (the ‘mark-in’ point) by clicking
at the left-hand edge of the clip while the trim pointer is visible. With
a trim point thus established, you can add or remove frames from the
beginning of the clip.
To trim on the clip, drag the trim point to the left or right.
To trim on the Player, use the trim buttons to trim one or ten frames
either forwards or backwards. Click the loop play button for a looping
preview of the trim region.
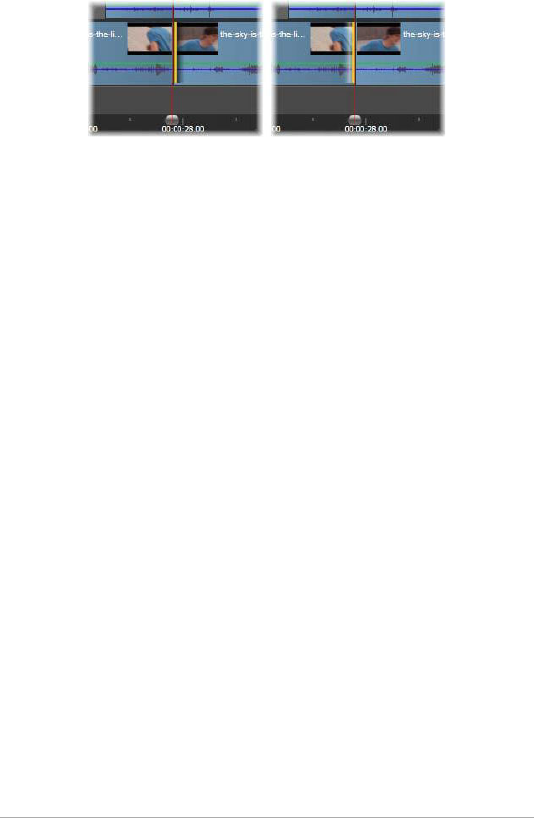
Chapter 3: The Movie Editor 101
The position of the playhead relative to the trim point helps
distinguish the in-point of a clip (left) from the out-point of
the previous clip (right).
Trimming the end of the clip
To trim the end of the clip (or ‘mark-out’ point), open a trim point by
clicking at the right-hand edge of a clip when the mouse pointer
changes to a rightward-pointing arrow. Now you can add or remove
frames from the end of your clip.
Once again you can trim directly on the clip by dragging the trim point,
or on the Player while it remains in trim mode.
Trimming gaps
The project’s timeline lets you trim not just the clips upon it but also
the gaps between them. Trimming gaps might not sound terribly
useful at first, but is in fact handy. For instance, the easiest way to insert
or delete space on a single timeline track is to trim the right- hand edge
of a gap. All clips to the right of the gap are shifted as a block when
this is done.
Also, when you need to open a trim point on each track in order to
maintain synchronization while trimming, you may often choose to
trim the duration of a gap rather than that of a clip. (Remember the
rule: one trim point on every track is required for keeping in sync.)
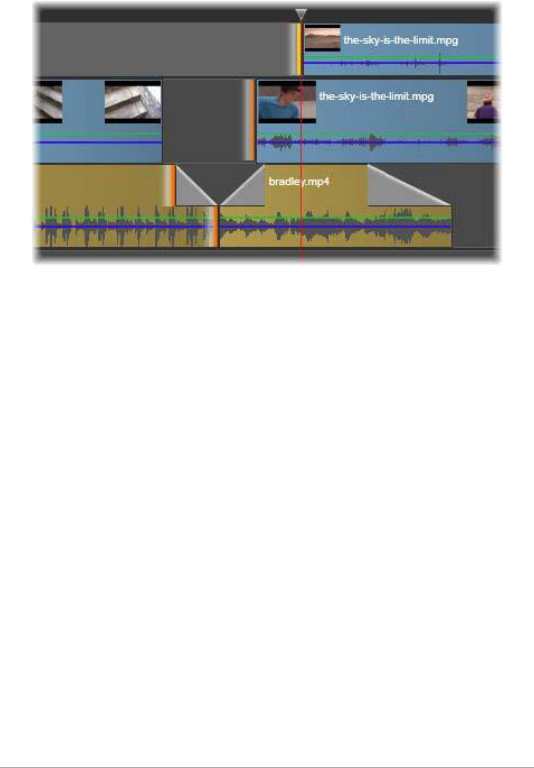
102 Pinnacle Studio User Guide
Trimming a gap, whether at the start or the end, is accomplished in
exactly the same way described above for trimming a clip.
Two gaps and an audio out point have been selected for
trimming. Because one trip point has been created on each
track, the entire production stays in sync when trimmed.
Trim both
In this operation, two adjacent clips (or a clip and an adjacent gap) are
trimmed simultaneously. Any frames added to the left-hand item are
taken away from the one on the right, and vice versa, as long as space
and material are available. All you are moving is the cut-point where
the items meet. One application for this technique is adjusting visual
cuts to the beat of a music soundtrack.
To start, click at the end of the left-hand clip to open the first trim
point, then Ctrl-click at the beginning of the right-hand clip to open
the second.
When positioned over the adjacent trim points you just opened, the
mouse pointer should be a horizontal two-headed arrow. Drag left or
right to move the clip boundary, or use the Player in trim mode.
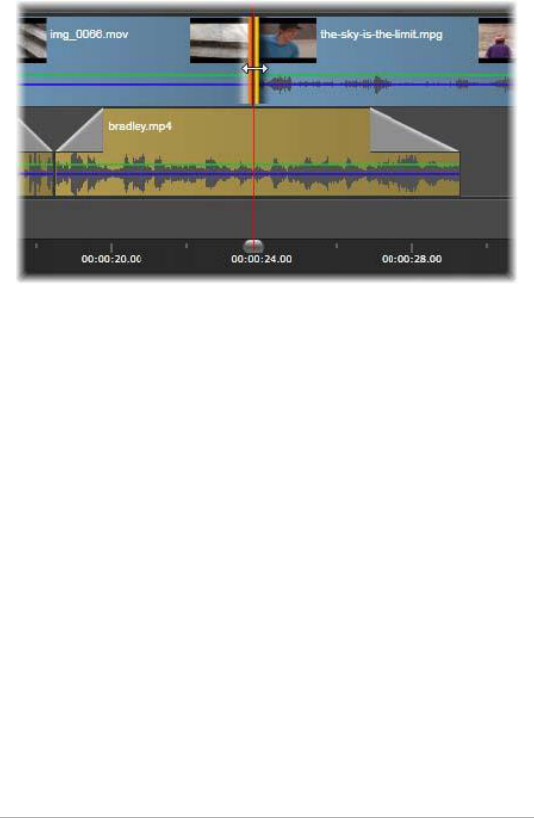
Chapter 3: The Movie Editor 103
Trim both: Adjacent out and in trim points have been
selected. Dragging the trim points affects the timing of the
hand-off from the outgoing clip to the incoming one, but
does not disrupt the timeline.
Slip trim
To change the starting frame of a clip within the source material, but
leave its duration unchanged, open one trim point at the start of a clip,
and another at the end of either the same clip or one later on its
timeline track.
Drag either trim point horizontally or use the Player trim controls to
reposition the clip within its source.
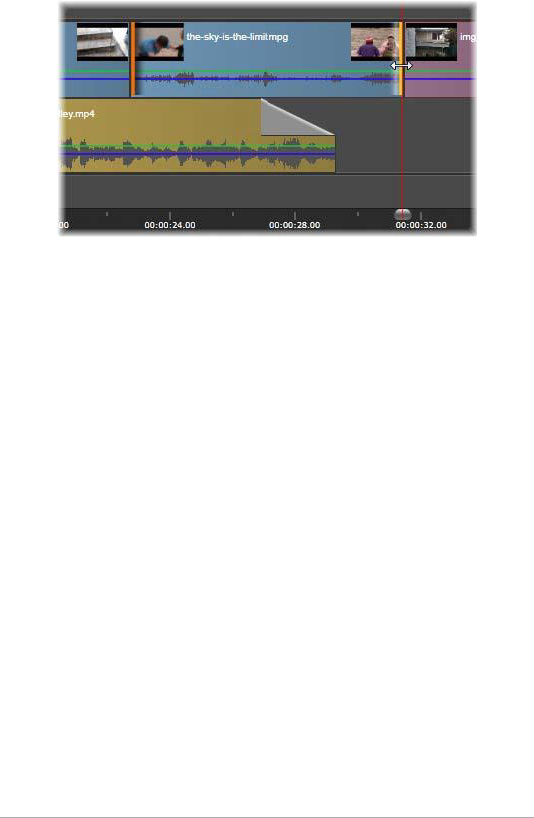
104 Pinnacle Studio User Guide
Slip trim: With the in and out trim-points of a clip selected,
dragging the clip changes its in and out points relative to the
original material, but doesn’t affect its start time or duration
on the timeline.
Slide trim
A slide trim is an extended version of the trim both technique described
above. In this case you open trim-points at the end of one clip and the
beginning of another later on the timeline. Instead of sliding a single
clip boundary along the timeline, as in trim both, you are sliding two
that move together. All clips between the two trim points are
repositioned earlier or later on the timeline.
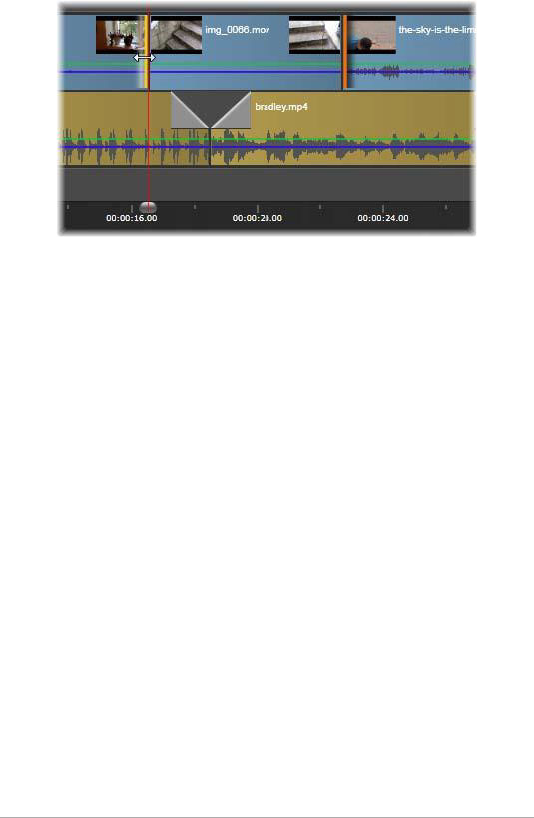
Chapter 3: The Movie Editor 105
Slide trim: An out-point has been opened for trimming on the
first clip, and an in-point on the third. Dragging either point
moves the center clip – or multiple clips, if more are present –
along the track while other clips remain stationary.
Both slip trimming and slide trimming can be useful for synchronizing
clip contents to material on other tracks.
Monitoring trim points
When you are trimming with multiple trim points, it is helpful to switch
the preview from one trim location to another to make sure that each
is properly set. Selecting a trim point for monitoring makes it the
source for audio and video during preview.
Monitoring is enabled for a trim point when it is created. When
multiple trim points are created in succession, you can fine tune each
one as you go. To select an existing trim point for monitoring, Ctrl- click
it. While trim mode is active, use Tab or Shift+Tab to cycle through the
open points.
After using Ctrl-click to monitor a trim point, trimming can be
controlled with the Left and Right arrow keys. Trim one frame using the
keys unshifted; add the Shift key to trim in 10-frame steps.

106 Pinnacle Studio User Guide
Moving and copying
To move a selection of one or more clips, place the mouse pointer on
any selected clip and watch for it to change to a hand symbol. When
it does, start dragging the clip to the desired position.
Move can be thought of as a two-step process. First, the selection is
deleted from the current timeline, according to the rules of the current
edit mode. Second, the selection is moved to the desired end position,
where it is inserted in a left-to-right fashion per track. The relative
position of all selected clips on all tracks is retained.
Moving a ‘sparse selection’ (a selection in which some clips per track
are selected while others in the same region are not) is possible, but
may be confusing unless executed in overwrite mode. Moving either
single clips or a complete timeline cross-section is more
straightforward and should be preferred when possible.
Holding down the Alt key while moving clips allows you to toggle
between insert and overwrite modes. Standard smart operation is the
same as insert, since the most frequent use of horizontal moves is to
reorder the playback sequence.
Copying clips: Holding down the Ctrl key while moving a selection of
clips will copy the clips instead of moving them.
Using the Clipboard
Although drag-and-drop operations provide somewhat greater power
when dealing with clips, the timeline does support the standard
Clipboard operations cut, copy and paste, with the usual shortcut keys.
The Clipboard also provides the only method for moving and copying
transitions and effects between clips.

Chapter 3: The Movie Editor 107
From the Library
After selecting one or more clips in the Library, select Copy from the
selection’s context menu or press Ctrl+C to put the selection on the
application’s Clipboard. (Cut, the other usual command for adding to
the Clipboard, is not available in the Library.)
On the timeline, position the playhead at the point where the paste
operation should begin, and select the desired track by clicking in its
header.
Now press Ctrl+V to insert the clips from the Clipboard onto the given
track, starting at the playhead.
If you select Paste from the timeline’s context menu rather than
pressing Ctrl+V, the clips will be pasted at the mouse pointer position
on the default track, not at the playhead.
You can repeat the paste operation with the same set of clips as often
as desired.
From the timeline
Select one or more clips on the timeline, then click either Copy or Cut
on the selection’s context menu, or press Ctrl+C (copy) or Ctrl+X (cut).
Both commands add the clips to the Clipboard; Cut removes the
original clips from the project, while Copy leaves them in place.
Paste the Clipboard contents onto the timeline as described above. The
clips paste onto the same tracks as they originally occupied; and with
the same horizontal spacing. Unlike drag-and-drop, the Clipboard
does not support moving clips between tracks.

108 Pinnacle Studio User Guide
Effects on the Clipboard
Clips to which effects have been added have a magenta line along the
upper edge. Right-click on the clip, or right-click the line, to access the
Effect context menu, which provides Cut all and Copy all commands
for transferring or sharing a set of effects between clips. Select one or
more target clips, then press Ctrl+V or click Paste on the timeline
context menu.
The effects stack will be pasted to all selected clips. The target clips
retain any effects they may already have had. The pasted effects stack
will be placed on top of the existing effects.
Transitions on the Clipboard
Right-click in the transition area in the upper corner at the start or end
of a clip to access the Transition context menu. Select Cut or Copy to
put the transition on the Clipboard.
As with effects, transitions can be pasted to one or more target clips,
but any existing transition of the type (start or end) being pasted will
be overwritten. The paste fails if the duration of the transition on the
Clipboard is longer than the target clip.
Speed
The Speed Control window is launched by selecting Speed > Add or
Speed > Edit in the context menu of a timeline video or audio clip. You
can adjust the settings to produce any degree of slow motion or fast
motion over a wide range. A clip to which Speed Control has been
applied is marked by a broken yellow line.
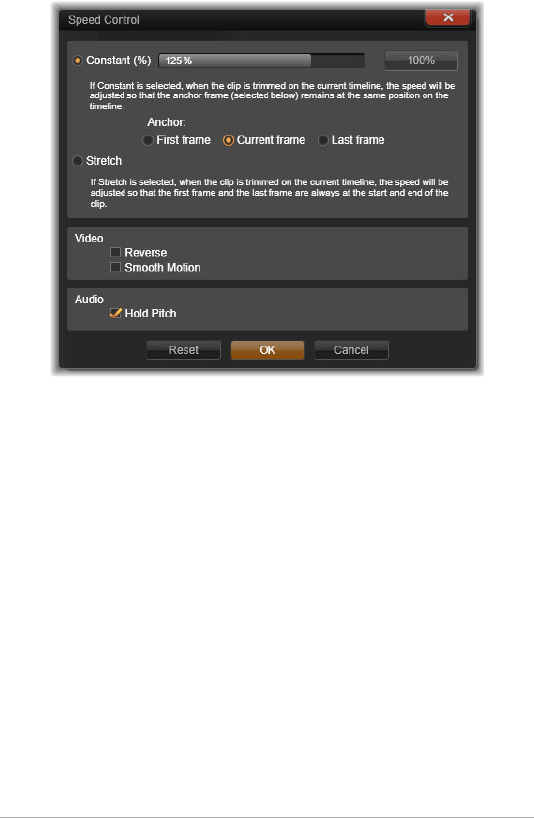
Chapter 3: The Movie Editor 109
The Speed Control window
The actual playback speed of your project always remains the same. It
is set once and for all by the frames per second rate in your project
settings. To achieve slow motion, new frames are interpolated between
the original ones; for fast motion, some source frames are suppressed.
The options provided on the dialog are divided into several groups.
Constant
Select the clip playback speed as a value from 10 to 500 percent
relative to the original material. Anything under 100 percent is slow
motion.
Anchor: When Constant is selected, the clip is anchored to the timeline
by a specified frame during trimming operations. You can choose the
first or last frame of the clip, or the frame indicated by the current

110 Pinnacle Studio User Guide
position of the playhead, to serve as the anchor. This can be useful for
coordinating action between the speed-affected clip and material such
as background music on other tracks.
Stretch
Under this option, the first and last frames of the clip as currently
trimmed will remain locked when the clip is trimmed on the timeline.
Shortening the clip, instead of trimming material from the end, speeds
it up just enough so that it finishes at the same frame as before.
Lengthening the clip by trimming its end rightwards slows it down
rather than exposing any trimmed material.
Video
Reverse reverses the direction of playback without affecting the speed.
Synchronous audio, if any, is suppressed with this option, since it is
generally undesirable to play sound backwards.
Smooth motion: This option applies a special transition technique to
achieve maximum fluidity of movement from frame to frame.
Audio
Hold pitch: This option maintains the original pitch of the recorded
audio even when it is played back accelerated or slowed. The function
becomes less effective the more the speed is changed. Beyond certain
limits, it is switched off completely.
Movies within movies
All the movie projects that you create in Pinnacle Studio appear as
assets in the Projects branch of the Library. But the purpose of Library

Chapter 3: The Movie Editor 111
assets is to serve as the ingredients of movies. What will happen if you
try to drag Movie Project A onto the timeline of Movie Project B?
The answer is simple enough: As with most types of assets, Project A
becomes a single clip on Project B’s timeline. From the standpoint of
timeline editing, it behaves just like any of your other video assets. You
can trim it, move it around, apply effects and transitions, and so on.
(The same is not true of disc projects. These cannot be used as clips in
another project.)
Nevertheless, a copy of the internal structure of Project A remains
intact inside this container clip, along with all of the project’s clips,
effects, titles and other components. What’s more, if you double- click
the container clip or select Edit movie from its context menu, a
subsidiary Movie Editor opens in a new window to let you work on the
‘sub-movie’. Any modifications you make affect only the copy of the
project inside the container clip, not the original.
The length of the container clip on the timeline of the main project is
not tied to the length of the sub-movie on its own timeline. Extending
or shortening the sub-movie in the nested editor does not alter the
length of the container clip in the parent movie. You need to manually
trim the container clip if you want it to match the duration of the sub-
movie.
Transitions
A transition is a specialized animated effect for easing – or
emphasizing – the passage from one clip to the next. Fades, wipes and
dissolves are common types of transition. Others are more exotic, and
many employ sophisticated 3D geometry to calculate the animated
sequences.
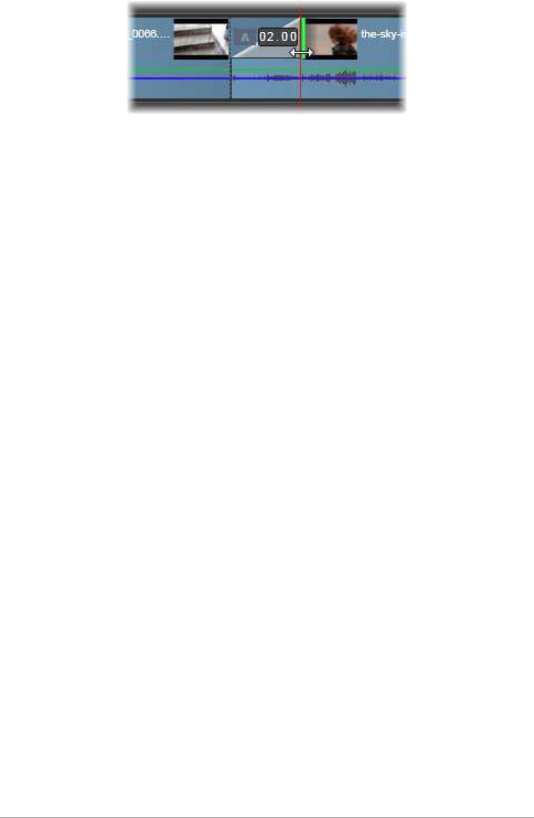
112 Pinnacle Studio User Guide
Creating a default fade-in transition by ‘folding back’ a clip’s
upper left corner.
Two transitions can be assigned to any clip, one at each end. A clip
newly created on the timeline has neither. When a new clip starts, it
does so with a hard cut to the first frame. When it ends, it switches to
the next clip (or black) with equal abruptness.
Pinnacle Studio offers a wide variety of transitions for softening,
dressing up or dramatizing the change from one clip to another.
Creating a transition
The most straightforward method of creating a transition is to click in
the top left corner of the clip on the timeline and ‘fold back’ the corner.
This creates a dissolve from the previous clip, if there is one, or a fade-
in if there is not. The wider you make the fold, the longer it will take
the transition to complete. Folding back the top right corner of the clip
results in either a dissolve to the following clip or a fade-out.
More elaborate transitions can be added to the timeline from their
section of the Library (under Creative Elements). When you find one
you want, drag it onto one end or the other of a timeline clip. The
length of the transition will be determined by the default duration
defined in the Pinnacle Studio Control Panel Project settings (one
second by default). If the clip already has a transition at the chosen
end, the new one replaces it. See “Project settings” on page 368 for
details.
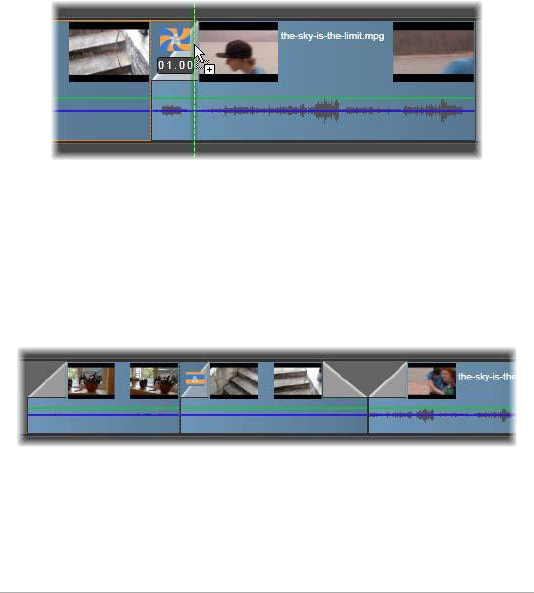
Chapter 3: The Movie Editor 113
If you are trying to add the transition to a clip which is shorter than the
default transition length, the transition will not be applied. One way to
avoid this problem is by making sure the dynamic length transitions
button on the timeline toolbar is active. While it is, you can control the
length of a new transition by dragging to the left or right as you place
it on the clip. You will see the corner of the clip fold back as you drag.
If the time-ruler is zoomed out enough, you will see the duration of the
transition numerically displayed; clicking in this readout lets you edit it
directly.
A transition dragged to a project’s timeline.
Another way to apply a transition uses the Send to timeline context
menu command for assets in the Movie Editor’s compact Library view,
or the Send-to timeline button in the Player when in Source mode. The
transition is added to the clip on the default track at the cut nearest
the playhead.
Transitions can be added at the start or end of any clip.
The context menu of a clip on the timeline lets you add a transition by
choosing either In transition > Add or Out transition > Add.

114 Pinnacle Studio User Guide
Finally, transitions can also be created in the applicable media editor,
which opens when you double-click the timeline clip. The media editor
provides editing controls similar to those for other types of special
effect. Please see “Working with transitions” on page 168 for full
information.
A fade-out transition is applied in ripple (or insert) mode, which creates
an overlap by shifting the right-hand clip and all its neighbors
somewhat to the left. This behavior saves the left-hand clip from
having to be extended rightwards to create the transition, which might
produce over-trimming. However, shifting the rightward clips causes a
break in the synchronization with other tracks that may have to be
worked around.
A fade-in transition is added in overwrite fashion. No synchronization
issue will result, but over-trimming may be produced in the left-hand
clip.
To invert the fade-in and fade-out behaviors, press the Alt key during
dragging and trimming.
To apply a transition to multiple selected clips, hold down the Shift key
while dragging a transition from the Library onto one of the selected
clips. The position at which you drop the transition on that clip
determines whether it will be placed at the beginning of each selected
clip, or the end. The transition will not be applied to any clips that are
shorter than the transition’s duration.
When the Dynamic length transition button is activated, the duration
you drag out for the transition on the target clip is used for all the
transitions created.
To keep tracks synchronized when inserting transitions in the out
position, use this multiple-apply feature to add the same transition

Chapter 3: The Movie Editor 115
once on each track. Since each track will be affected in the same way,
they will all remain synchronized.
When a fade-in follows a fade-out, the result is termed a ‘fade through
black’. The left-hand clip fades all the way out, then the right-hand clip
fades all the way in. It is not necessary to leave a one-frame gap
between the clips.
Rippling transitions
The ripple transition command is especially useful for creating a quick
slideshow from a set of still images, or a video pictorial from a set of
short clips. Such a presentation is more interesting if you connect each
pair of clips with a transition, which can be done quickly and easily by
using ripple transition.
Begin with a set of clips on the timeline, then add a transition of the
desired type to one of the clips. Select all the clips in the set, bring up
the context menu on the clip with the transition, and choose the ripple
transition command. This will apply the original transition to all the
selected clips. If the original clip had both an In transition and an Out
transition, you can choose either one to be rippled.
Any of the selected clips that already have a transition in place, or that
are too short for the new transition, will not be altered.
Removing multiple transitions
To remove transitions from several clips at once, select the clips, right-
click on one of them, and use the remove transitions command in the
context menu. All the transitions, both in and out will be removed from
the selected clips.

116 Pinnacle Studio User Guide
Replacing a transition
Select the transition you want and simply drag it onto an existing
transition. This replaces the transition animation while retaining the
original type (in or out) and duration.
Alternatively, you can choose Replace by on either the transition’s
context menu or the clip’s context menu. You will be offered a
selection of transitions to use.
Adjusting transitions
The durations of transitions can be adjusted just like those of clips.
Notice the adjustment pointer when the mouse is positioned near the
vertical side of the transition rectangle. Use this to change the duration
of your transition.
As usual, fade-out transitions use insert mode during adjustment,
whereas fade-in is done in overwrite mode. Hold down Alt while
adjusting to invert this behavior.
You can adjust a transition so that its duration is zero, effectively
deleting it. Alternatively, use Transition > Remove on the transition’s
context menu. Once again, ripple mode is used for fade- out, and
overwrite for fade-in, with the Alt key available to reverse the default.
To set the duration of a transition numerically, click the duration field
that appears when the mouse pointer is above the transition rectangle.
(Zoom the timeline in to enlarge the screen width of the transition
‘fold’ if the field does not appear.) Clicking the field activates in-place
editing, allowing you to enter a duration via the keyboard.
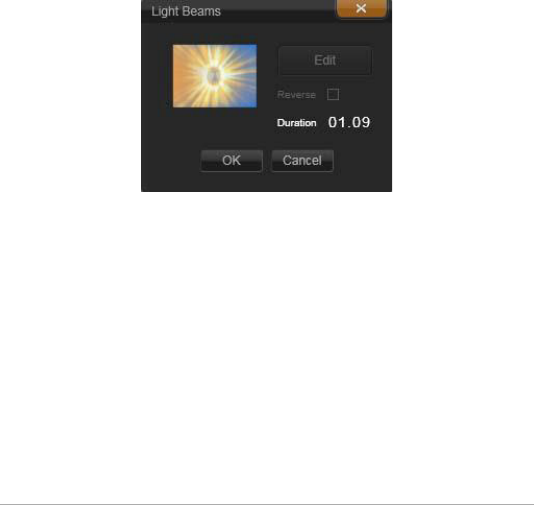
Chapter 3: The Movie Editor 117
Transition context menu
Find in Library: This command opens the Library Browser at the folder
containing the transition.
Edit: This command invokes a pop-up window, the basic transition
editor, where the transition duration can be set.
If the transition is one that offers a custom editor for configuring
special properties, the Edit button in the basic transition editor
provides access.
A Reverse check box is available with some transitions for reversing the
transition animation.
Basic transition editor
Copy: This command puts the transition on the Clipboard, together
with its type (fade-in, fade-out) and its duration. These properties will
be retained by the transition when pasted. It is therefore not possible
to paste a fade-in as a fade-out or vice versa.
To paste the transition to a particular clip, select Paste on its context
menu. To paste it to all selected clips, select Paste from the context
menu of an empty timeline area or any selected clip; or press Ctrl+V.
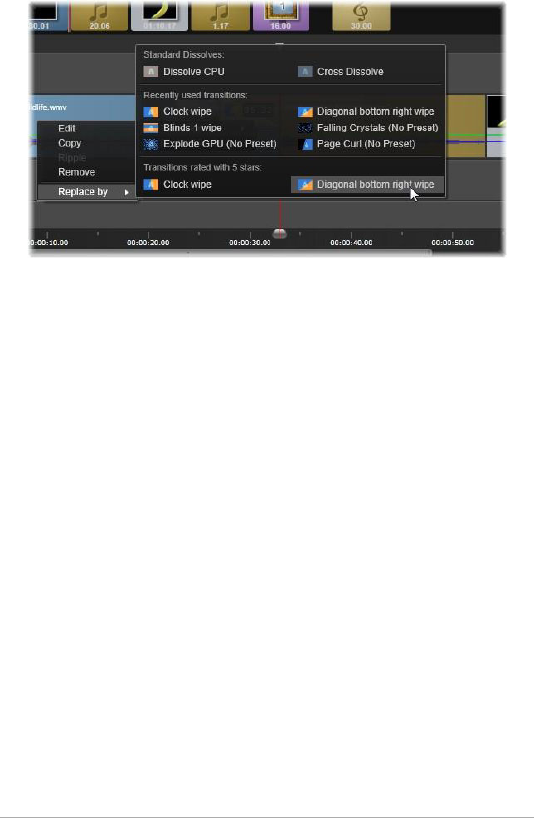
118 Pinnacle Studio User Guide
The Replace By submenu on the context menu for a transition
pops up a convenient palette of standard, recently-used and
5-star transitions. This pop-up is also seen when transitions
are added or replaced via a clip’s context menu.
Ripple: This command appears if more than one clip is selected. For
more information, see “Rippling transitions” on page 115.
Remove: This command deletes a transition. Fade-in transitions are
removed without further ado. Removing a fade-out transition causes
clips to the right to be rippled rightwards by the duration of the
transition. This can cause loss of synchronization with other tracks.
Replace by: A selection of transitions is offered: two standard dissolves,
the six transitions most recently used, and all transitions with a 5-star
rating.
Clip effects
Clip effects (also called filters or video effects) operate on one clip at a
time. Effects are of many kinds, and vary widely in purpose. With
keyframing, effect parameters can be arbitrarily varied throughout the
clip.

Chapter 3: The Movie Editor 119
To apply a specific effect to a clip, either locate it in the Effects section
of the Library and drag it to the clip you want to enhance, or double-
click the clip and select the effect from those offered under the Effects
tab of the clip’s media editor.
Multiple effects can be applied to a clip using either or both of these
methods. By default, multiple effects are processed for playback in the
order they were added.
On the timeline, the upper border of any clip to which an effect has
been applied is drawn in magenta. This clip effect indicator has its own
context menu, which provides the Clipboard commands for cutting
and copying effects between clips. See “Using the Clipboard” on
page 106 for more information.
Double-clicking any clip opens it in its media editor, where effects may
be added, removed or configured. Please see “Chapter 5: Effects” on
page 149 for detailed information.
Clip context menus
Right-clicking a clip opens a context menu with commands
appropriate to the item type. A video clip has a different menu than a
title clip, for example. Some commands are shared between most or
all types however. Differences of applicability are noted in the following
descriptions.
Edit movie: Available only for movie (container) clips, this command
opens the container in its own movie editor. The nested editor offers
the same functions and areas as the primary one.
Edit title: For titles only, this opens the Title Editor. (See “Chapter 7: The
Title Editor” on page 191.)

120 Pinnacle Studio User Guide
Edit music: This command is for editing ScoreFitter clips. (See
“ScoreFitter” on page 259.)
Edit Montage: Edit a Montage clip in the Montage Editor. (See “Using
the Montage Editor” on page 186.)
Open effects editor: Opens the media editor for the clip, whatever its
type, with the Effects tab selected. Montage, title and container clips
are treated in the same manner as ordinary video clips.
Speed: This command opens the Speed Control dialog, where you can
apply fast and slow motion effects to selected clips. This option is not
available for containers. See “Speed” on page 108.
Scaling: The first two options affect the treatment of clips that are not
in conformance with the current timeline format when brought into
the project. See “The timeline toolbar” on page 71.
• Fit displays the image at its correct aspect ratio, and scaled as
large as possible without cropping. Unused parts of the frame are
treated as transparent.
• Fill also maintains the aspect ratio of the image, but scales it such
that there are no unused parts of the screen. Portions of the
image will be cropped if the aspect ratios do not match.
To further fine-tune the scaling behavior of a clip, try pan-and-
zoom.
•Keep alpha, Remove alpha, Generate alpha: These commands
apply to content with an alpha channel (specifying transparency
pixel by pixel). Such alpha information can conflict with Pinnacle
Studio effects. The command isn’t available for pure audio clips.
Active streams: This command is available for disabling individual
streams in clips containing both video and audio. It is typically used as
an easy way to discard unneeded camera audio.

Chapter 3: The Movie Editor 121
Adjust duration: Enter a duration numerically in the pop-up window.
All selected clips will be trimmed to the duration requested by
adjusting their out points.
Detach audio: In clips with both video and audio, this command
detaches the audio stream into a separate clip on a separate track,
allowing advanced editing operations like L-cuts.
Find in Library: This command opens the Library Browser at the folder
containing the asset that is the source of the video, photo or audio clip.
Cut, Copy, Paste: Move or copy a selection of clips using Clipboard
commands instead of drag-and-drop.
Group: You can group multiple clips so that you can move the clips
together. When you no longer need the group or want to create a
different grouping, you can Ungroup the clips.
In Transition, Out Transition: These provide access to a set of operations
for managing transitions, including Add, Replace, Edit, Copy, and
Remove. For more information, see “Transitions” on page 111.
Delete: Delete the selected clip or clips.
Display information: Display properties of the clip and underlying
media files in textual form.

122 Pinnacle Studio User Guide
Chapter 4: Corrections 123
Chapter 4: Corrections
Pinnacle Studio provides media editors for each of the three main
media types: video, photos (and other images), and audio. The usual
way to access one of these editors is by double-clicking either a media
asset in the Library or a media clip on your project’s timeline.
All three editors provide two main families of tools, called Corrections
and Effects. These are presented as tabs at the top of the editor
window. (The Photo Editor has a third tab, for the Pan-and- zoom
tool.)
The four groups under the Corrections family in the Video
Editor. When an editor is invoked from the Library, the Effects
tab does not appear.
The tools in the Corrections family are designed to fix imperfections in
the video, photos and other media that you use in your projects. The
defects addressed by the tools are those most frequently encountered
in recorded media. You can straighten a photo with a tilted horizon,
improve the clarity of a muffled music track, or correct the ‘white
balance’ of a video scene, to name just a few possibilities.
The application of Corrections does not modify your media files
themselves. Instead, the parameters you set are stored either in the
Library database (associated with a particular asset) or in a project

124 Pinnacle Studio User Guide
(associated with a particular clip).
Correcting Library assets
Just one tool-family tab – Corrections – is available for use when you
bring Library assets into a media editor. The Effects tab, and Pan-and-
zoom for photos, appear only when the editor was opened to work
on a timeline clip.
Using corrected assets: When you apply Corrections to a Library asset,
the correction settings ride along with the asset when you add it to a
project. All future projects get the benefit of the correction. You can
make further corrections on the timeline, if you want, but they will
have no effect on the Library asset.
Save alternative corrections: Corrected Library assets can optionally be
saved (with File > Make new shortcut) as separate assets. This lets you
have two (or more) variations of a particular asset under different
captions, each incorporating a different set of corrections.
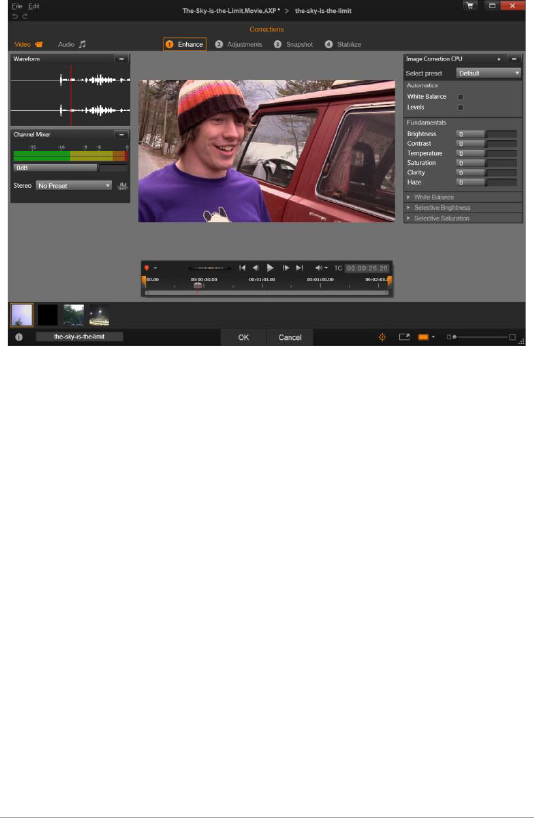
Chapter 4: Corrections 125
Working with the Enhance group of corrections in the Video
Editor.
Removing corrections: The context menu for Library assets that have
corrections includes a Revert to original command for restoring the
uncorrected state.
Corrections under direct export: If you choose to export Library media
directly, rather than build a project on the movie or disc timelines, the
correction settings are applied to the output.
Correcting timeline clips
When a clip from the Movie Editor or the Disc Editor timeline is opened
in one of the media editors, you can use the Corrections family of tools
to change it in any way you like without affecting either Library assets
or other clips. Such changes to the clip become part of your project.

126 Pinnacle Studio User Guide
If you want to remove corrections from a clip on the timeline, select
the context menu command Open Effects Editor, then switch to the
Corrections tool. The settings panels indicate with highlighting which
settings have been modified. Use this to locate and reset the
corrections.
For details on using a particular media editor, please see “Correcting
photos” on page 134; “Correcting video” on page 141; or “Correcting
audio” on page 148.
Media editing overview
The media editors can be opened to access the available tools in a
number of ways from both the Library and a project’s timeline.
To open from the Library:
• Do one of the following:
• Double-click the icon or text record of a video, photo or audio
asset.
• Select the Open in corrections command from the asset’s
context menu.
To open from the Library Player:
• After clicking the play button on a Library item to open the Library
Player, click the gear wheel icon at bottom right.
To open from the timeline:
• Do one of the following:
• Double-click the clip in the timeline.
• Select the Open effects editor command from the clip’s context
menu
Chapter 4: Corrections 127
• Use the context menu Effect > Edit on the colored strip that
appears along the upper edge of clips to which any effects have
been applied.
To close the media editor window:
• Do one of the following:
• Click the Cancel button; leaving the clip unchanged.
• Click the close (X) button in the upper right corner. If you have
made changes, you will be given a chance to save them.
• Click the OK button, confirming your changes.
Previewing
The central panel in each of the media editors is either a visual preview
of media showing the result of applying corrections and effects, or an
audio visualization.
When video media with an integral soundtrack is being edited, both
the Audio Editor and the Video Editor are available via tabs at the top
left of the window.
Previewing stereoscopic 3D images
Stereoscopic 3D images are edited in the same way as 2D images, but
there is an additional Preview window, which is shown only for 3D
images. The window shows the edited picture in stereoscopic 3D,
whereas the working area is shown in 2D. The Preview window also
has a switcher for changing the stereoscopic 3D preview mode.
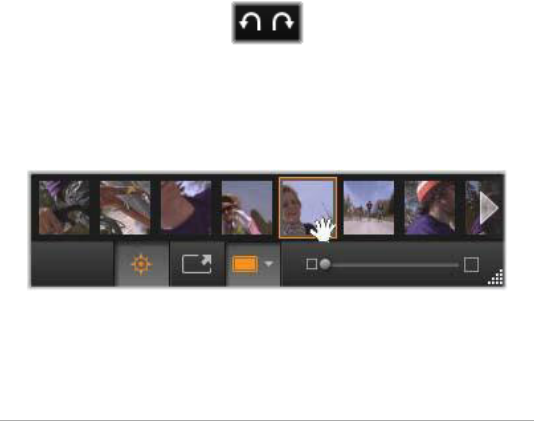
128 Pinnacle Studio User Guide
Title bar
File and Edit menus: If you invoked the media editor from the Library,
the File menu offers the ability to save a new copy (or ‘Shortcut’) of the
currently-loaded asset. A Shortcut is a special type of asset that has its
own parameters and settings but applies them to a media file that is
already associated with an existing asset. This lets you have multiple
versions of the same asset without having the overhead of storing a
separate media file for each one. Shortcuts are stored to the Library as
the original name plus a sequence number.
The Edit menu offers five standard editing commands: Undo, Redo,
Cut, Copy, and Paste.
Undo/Redo: As seen throughout Studio, the graphical undo and redo
buttons at the upper left of the media editor window step forward and
back through your editing history.
The Navigator
The Navigator strip at the bottom of all media editor windows gives
you an opportunity to load other Library items or other timeline clips.
When called from the Library, the Navigator at the bottom of
the media editor accesses other assets displayed in the Library
Browser.
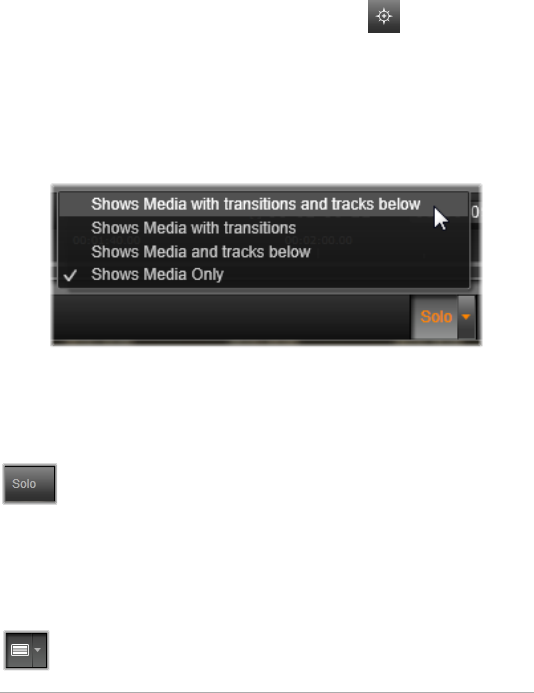
Chapter 4: Corrections 129
The current item is highlighted. You can switch to editing a different
item by clicking a different element in the Navigator, using the arrows
at right and left to assist scrolling if required. When you do so, any
changes made to the currently-loaded item are automatically saved, as
though you had clicked the OK button.
You can hide the Navigator by clicking its button at the bottom of
the media editor window.
View options
Sharing the bottom toolbar with the Navigator button is a series of
view-related buttons.
The Solo button gives access to a menu of options for
previewing underlying tracks in the media editor as well as the
current one, and for including the clip’s transitions, if any, in
the preview.
Solo: This button is available only if the media editor is
selected from the timeline. While it is highlighted, the current
clip in the Navigator is shown in isolation when previewed,
without taking into account the effect of any clips either above or
below it on the timeline. While the button is not highlighted, all
timeline tracks can contribute to the preview.
Before-and-after view: This button appears for photo media
only. For details, see “Before-and-after” on page 133.
130 Pinnacle Studio User Guide
Full screen: When active, this button scales the preview image
to the size of the current monitor and removes other tools
from view. To exit the full screen mode, press Esc, or use the
close (X) button at the top right of the window. The full-screen view
includes its own small overlay panel of transport controls.
Preview zoom options: Fit window adjusts the size of the
preview so that the height and width of the image do not
exceed the available space even when all tools are open. Set
to actual size displays the image at the original size of the source.
Zoom: The scroll bar at the far right of the toolbar provides continuous
scaling of the preview image.
Moving the preview in the window
The preview image can be dragged with the mouse anywhere within
the working area. This is useful for scanning the image while it is
zoomed in. The wave visualization in the Audio Editor is not draggable,
however.
Info and captions
The Info button at the bottom left of any media editor opens a window
with information about the current file.
The Caption field, which is available only when you invoke the media
editor from the Library, allows you to rename the current asset.
The settings panel
When you select an effect or tool that has adjustable settings, a panel
appears in the upper-right section of the window. Named presets are

Chapter 4: Corrections 131
available in the Select preset dropdown menu near the top of the
panel; these provide prepared combinations of settings that you can
adapt or use directly.
Setting numeric values: Numeric settings fields have a gray slider bar
within a darker gray field. Click once within this field to put it into
numeric input mode, where you can type the desired value for the
parameter. Alternatively, drag the slider bar to the left or right using the
mouse. Double-clicking restores the default value.
Comparing parameter sets: A highlighted (orange) dot appears to the
right of the field when the value of a setting is changed from the
default. Thereafter, clicking the dot toggles between the default and
the most recent non-default values. The dot to the right of the effect
or correction name toggles between the default and custom values of
all parameters.
Linked parameters: Some parameters are configured to change in lock-
step. The presence of a lock symbol indicates this. Click the symbol to
toggle the link.
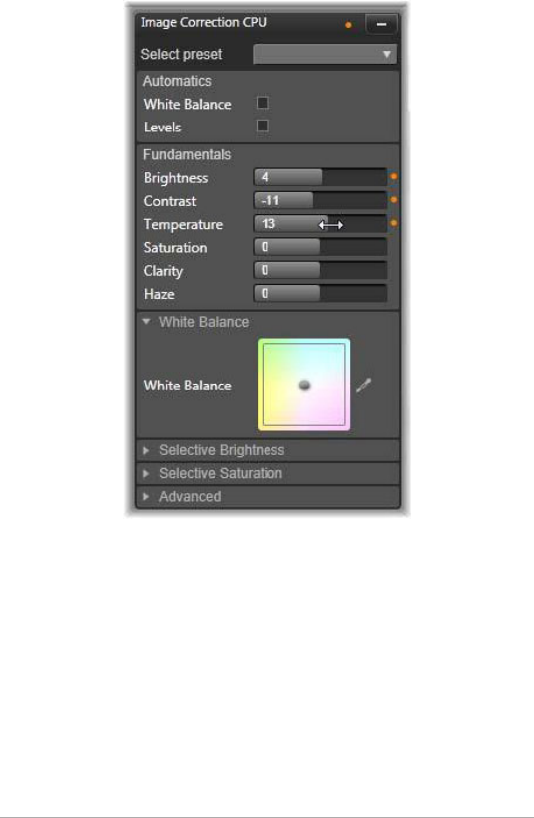
132 Pinnacle Studio User Guide
The settings panel lets you adjust the available settings for a
correction or effect. Here the settings for the Enhance group
of photo corrections are displayed.
Photo editing tools
These tools are located on the bottom bar of the Photo Editor. They are
available for photos and other graphic images loaded from the Library
only. Images opened from the timeline do not have access to them.
Chapter 4: Corrections 133
For information about opening the Photo Editor to access the
correction tools, along with general functions of the media editors,
please see “Media editing overview” on page 126.
Image rotation
Two rotary arrow icons are located to the left below the image preview.
Click the icons to rotate a Library image either clockwise or
counterclockwise in 90-degree increments.
Rotation is only available in the Photo Editor when a photo is opened
from the Library. Clips opened from a project’s timeline can be rotated
using the 2D Editor effect.
Before-and-after
When editing photos you can directly compare the original against the
corrected version. The three available views can be accessed by the
arrow at the right of the button.
Split image: The lower half of the preview displays the corrections. You
can adjust the vertical position of the dividing line by dragging the
center portion of the line up or down with the mouse. You can also
divide the image diagonally by grabbing the line on either side and
rotating.
Full image side-by-side: The right image shows the corrections.

134 Pinnacle Studio User Guide
Full image above and below: The lower image shows the corrections.
Correcting photos
The five corrections available within the Photo Editor are Enhance,
Adjustments, Crop, Straighten and Red-Eye. The first two are
controlled by means of panels that open in the upper-right corner of
the Photo Editor; the other three are controlled interactively on the
image preview.
Enhance (photos)
This correction opens the Image Correction CPU panel of tools for
fixing problems to do with color and illumination. The tools can also
be used creatively to achieve custom looks or stylistic effects that
extend, not just repair, the original material. They are presented in the
groups described below.
Automatics
The two special tools in this group adjust the image automatically after
analyzing its brightness spectrum. You can change the tool settings
further by hand to customize the adjustment if required.
White Balance: When you check the White Balance box, a color
temperature setting for the image is computed, and the Temperature
bias slider is displayed. Use the slider to customize the setting
interactively as you preview.
Levels: Checking this box activates an automatic illumination
adjustment, and opens a set of three controls. The first is Optimization,
a dropdown list that lets you set the overall behavior of the tool by
choosing either “Contrast” (optimization of contrast only) or “Full”
(general lighting optimization).

Chapter 4: Corrections 135
The Brightness and Vibrance sliders can take on values ranging from –
10 to +10. A zero setting represents no change to the automatically-
chosen value. Brightness provides a general boost or cut in brightness
that is applied equally across the whole image. Vibrance, which is
designed primarily for use with images of people, is similar to a
saturation control, but minimizes the unnatural appearance
characteristic of oversaturated skin tones.
Fundamentals
This group of controls allows you to adjust the general lighting
properties of your image.
Brightness: This control provides an overall brightness adjustment that
impacts the light and dark areas of the image equally. For finer control
in brightness editing, use the Selective Brightness tool instead (see
below).
Contrast: This control increases the difference between the light and
dark areas of an image. Boosting the contrast may enliven a dull
photograph, although at the risk of losing definition in areas that are
already very bright or very dark.
Temperature: The color temperature control changes the color
composition of an image to make it seem ‘warmer’ or ‘cooler’. Indoor
lighting such as a tungsten bulb or candlelight is perceived as warm,
while daylight, especially shade, is perceived as cold. Using the
temperature control primarily changes the yellow and blue values in an
image, with little effect on green and magenta.
Saturation: This control regulates the color intensity of an image.
Increasing the value pumps up the colors, making them more vivid, or
even lurid. Decreasing the value drains the image of color until at zero
only shades of gray remain. For finer control of saturation, use Selective

136 Pinnacle Studio User Guide
Saturation instead. A related adjustment is Vibrance, which is often
preferred in portraits because it preserves skin tones.
Clarity: Increasing Clarity boosts contrast in the midtones, tending to
sharpen edges in an image. A small increase in Clarity often improves
a picture’s overall appearance.
Haze: Increasing Haze lightens the image by compressing its dynamic
range upwards. What was originally black becomes gray; lighter tones
are also brightened, but to a diminishing degree. This produces a
simultaneous lightening and softening effect. The opposite result,
darkening and detailing, is achieved by setting negative values of Haze.
This drops the brightness floor of the image, sharpening the highlights
and midtones by a downward expansion of the dynamic range.
White balance
If the white or gray areas of an image bear a slight tint or color cast,
the controls in this group can help restore a natural appearance.
Gray-scale picker: Activate the picker then click in a nominally white or
gray area of the image, where no coloration ought to be present. The
image white balance will be automatically adjusted so as to remove the
unwanted tint.
Color circle: Browse the color field by moving the control point away
from the center until a natural image appearance is achieved.
Selective brightness
To enable you to edit particular brightness zones in an image without
impacting others, five separate brightness controls are provided:
Blacks: This slider affects only the darkest areas in the image. For best
results, leave editing both Blacks and Whites until last.

Chapter 4: Corrections 137
Fill light: Increasing this slider may produce better detail in shadowy
(but not black) areas of a full-contrast photograph.
MidRange: The zone impacted by this slider includes the entire
medium range of illumination.
Highlights: This slider affects the bright locations in the image. It can
be used to mute areas overexposed due to flashes, reflections or
brilliant sunshine.
Whites: This slider impacts the parts of the image that are considered
‘white’. Edit Whites and Blacks last.
Selective saturation
Whereas the standard Saturation correction increases color saturation
equally across the entire spectrum, Selective saturation allows for
individually boosting or suppressing the primary and secondary colors.
For example, if blue appears to be too strong, it can be turned down
while other colors retain their intensity.
Adjustments
During import, Studio automatically detects certain parameters, but a
variety of factors can lead to the occasional incorrect identification.
Adjustments allows any of these basic image properties to be changed,
if needed.
Alpha
Your photo may have an Alpha channel, an 8-bit grayscale image plane
that defines the transparency level of each pixel in your photo. If you
wish to remove the alpha channel, choose the Ignore Alpha option.
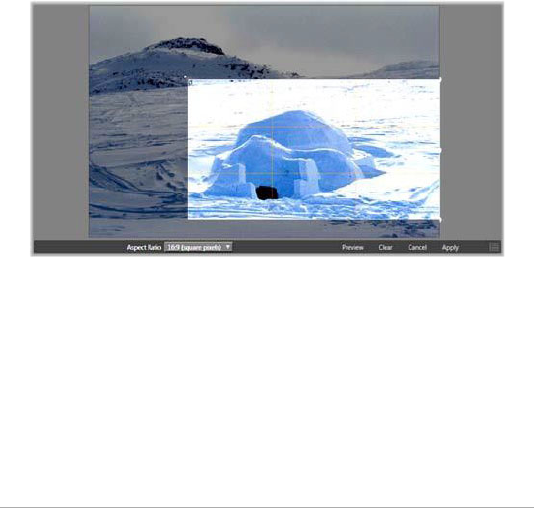
138 Pinnacle Studio User Guide
Interlacing
If the Interlacing options on the image were misidentified on import,
use this dropdown to impose the correct setting.
Stereoscopic 3D
If the format of a 3D image file was wrongly identified on import, set
the correct stereoscopic layout with this dropdown list.
Crop
Use this tool to emphasize a specific section in an image, or to remove
undesired components.
Cropping an image.
Bounding box (cropping frame): After you select the cropping tool, a
resizable frame is placed over the image. Drag the sides and corners of
the frame to crop the image, or drag the center of the bounding box
after cropping to adjust its position.
Aspect ratio: The Aspect ratio dropdown on the control bar can be use
to ensure that the crop rectangle maintains a desired standard
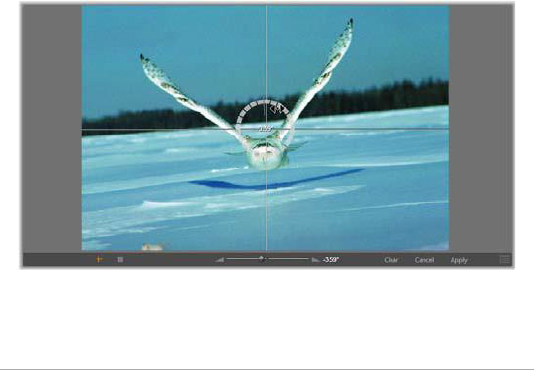
Chapter 4: Corrections 139
proportion while being resized. Standard (4:3) and wide (16:9) frame
aspect ratios are supported.
Preview: This function displays the cropped image without the
surrounding material. Press Esc or click the image to return to the
editing view.
Clear, Cancel and Apply: Clear returns the bounding box to its original
dimensions; Cancel closes without saving any edits made; Apply saves
the changed image without exiting the editor.
Straighten
This correction enables you to straighten an image in which elements
that should be exactly horizontal or vertical are visibly tilted. Unless you
have cropped the image, it dynamically resizes as you rotate to keep
the corners from being visibly cut off. With a cropped image, no
resizing takes place as long as there is sufficient excess material to fill
in the empty corners.
Ready to straighten an image (with crosshairs).

140 Pinnacle Studio User Guide
Several functions pertaining to Straighten are provided on the toolbar
below the preview.
Guide line options: The two buttons at the far left of the toolbar set
the mode for the lines that are superimposed on the preview as a guide
to straightening. Selecting either button deselects the other. The
Crosshairs (leftmost) button adds a pair of crossed lines that can be
dragged with the mouse to serve as a reference for true vertical and
horizontal alignment anywhere in the image. The Grid button
produces a fixed, repeating grid pattern over the entire image.
Set angle: To set the degree of rotation you can either use the slider on
the toolbar below the image, or click and hold the left mouse button
while dragging over the image. Rotations up to 20 degrees in either
direction are supported.
Clear, Cancel and Apply: Clear sets the image back to its original state;
Cancel closes without saving any edits made; Apply saves the changed
image without exiting the editor.
Red-eye
This tool corrects the red-eye effect that often occurs in flash
photography when the subject’s gaze is towards the camera. Mark the
area around both red eyes with the mouse. Extreme precision
shouldn’t be necessary, but you can experiment with changing the area
slightly if you are dissatisfied with the correction.
Clear, Cancel and Apply: Clear sets the image back to its original state;
Cancel closes without saving any edits made; Apply saves the changed
image without exiting the editor.
Chapter 4: Corrections 141
Correcting video
Like the other media editors, the Video Editor has a central preview
display, and an area at right for correction and effect settings. If the
video includes an audio track, floating panels for audio management
will also appear. These are positioned originally at upper left, but you
can drag them to new docking positions on either side of the window.
For information about opening the Video Editor to access the
correction tools, along with general functions of the media editors,
please see “Media editing overview” on page 126.
For details on the controls available when the Audio tab is selected,
please see “The Audio Editor” on page 235.
Video / audio switch
If an audio track is present, a tab is provided at the top left of the
screen for switching to the Audio Editor.
Waveform display
This floating panel shows a section of the audio volume graph over the
span of the video. The region of the waveform that is shown is
centered on the current playback position.
When you switch to the Audio Editor, you will see a video preview
panel at the same screen location.
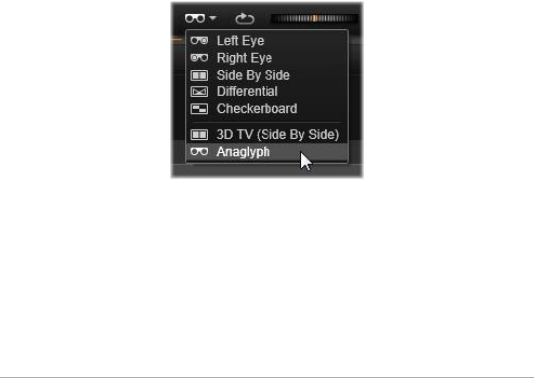
142 Pinnacle Studio User Guide
Video tools
These tools are located on the toolbar below the Video Editor preview.
Just below the tools is a time-ruler with a scrubber for moving through
the video. At the left are the marker controls. For more information,
see “Markers” on page 144.
The remaining controls are devoted to previewing and trimming the
media. Many of the controls are also to be found in the Audio Editor.
Unless otherwise noted, the descriptions here apply to both. (Please
see “The Audio Editor” on page 235, for further information.)
Stereoscopic 3D: The icon and dropdown arrow to the left of the loop
play button let you choose amongst several modes for viewing 3D
material. The icon has a different appearance for each mode.
If your video is in 3D, but the dropdown arrow does not appear, go to
Adjustments to choose the correct 3D setting. See “Adjustments” on
page 137 for more information.
Shuttle: The shuttle wheel provides smooth, bidirectional control over
a range of speeds when browsing video or audio. Both media types
can be viewed at a reduced speed. Shortcuts J (reverse), K (pause), L
(forward), and each of these in combination with the Shift key (for
slow play), allow easy scrubbing and shuttling from the keyboard also.

Chapter 4: Corrections 143
Transport controls: The oval arrow icon activates looping playback. The
remaining controls are (from left to right): Jump backward, Frame
backward, Play, Frame forward, Jump forward.
Audio monitor: The loudspeaker icon sets the system playback volume
but does not affect the recorded audio level. Click once on the
loudspeaker to mute, or click on the slider to the right of the icon to
adjust monitoring volume. To set the playback level of the clip itself,
use the channel mixer. See “Channel mixer” on page 237.
Time-code displays: The left field indicates the duration of the media
as trimmed. The right field displays the current play position. For a
Library asset, the play position is relative to the start of the media. For
a timeline clip, the play position within the project is given.
Setting the position numerically: Click the right-hand time-code field
for the position and enter a position in ‘hh:mm:ss.xxx’ format. When
you press Enter, the playhead jumps to the specified location if that
position is present on the clip. Press Esc to undo the change and exit
the input mode.
Asset trimming: For Library assets, the orange calipers at either end of
the time-ruler let you choose your own entry and exit points for
playback. Doing so establishes the clip endpoints when the asset is
used in a project.
Ruler: The time-ruler displays a scale whose gradations depend on the
current zoom factor. If you click anywhere on this ruler, the playhead
(see below) jumps to this position.
Playhead: This red line, with its handle the scrubber, is synchronized
with the image currently displayed (for video) and also with the red line
shown on the waveform display (for audio). You can position it
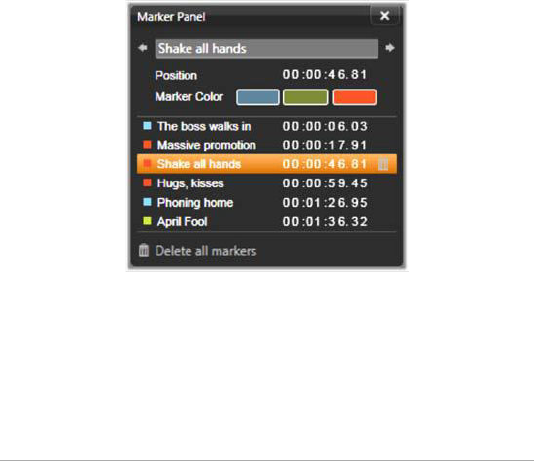
144 Pinnacle Studio User Guide
arbitrarily by clicking and dragging the scrubber, or by dragging within
the waveform.
Scroll bar and zoom: By dragging the double lines at the end of the
scroll bar to the right and left, you change the zoom level of the
display. When the bar becomes smaller, the scroll bar can be moved
back and forth as a whole, enabling you to zoom into an audio clip’s
waveform or scrub with extra precision. Double-click the scroll bar to
return it to the full width of the clip. You can also zoom in and out by
dragging left and right on the ruler area.
Markers
Markers are visual reference points that can be set on the time-ruler to
identify changes of scene or other editing cues.
The Marker Panel
Setting and moving markers: Position the playhead at the location
where the marker should be set. Click the toggle marker button at the
left of the toolbar, or press M. Only one marker may be set per frame.
To move a marker: Ctrl-click and drag left or right.

Chapter 4: Corrections 145
Deleting the marker: Click the marker to move the playhead to that
position, then either press M or click the toggle marker button.
You can also delete markers using the list on the Marker Panel, which
opens when you double-click a marker on the ruler, or click the down-
arrow next to the toggle marker button.
The Marker Panel shows the markers that have been set within the
media currently on view, in ascending order, with color code, name,
and position. Most of the available commands apply to the currently-
selected marker. The exception is the Delete all markers button at the
bottom of the panel.
Clicking a marker in the list selects it for editing. At the same time, the
playhead jumps to the marker position.
Edit name: The name field lets you enter a distinctive name for the
currently-selected marker if desired. The left and right arrows beside
the name provide another way of moving through the marker list.
Position: Edit the position of a marker directly here as time-code.
Marker color: Set the color of the current marker (and markers
subsequently created), by clicking one of the available color buttons.
Trashcan: The trashcan icon on each row of the marker list lets you
delete individual markers.
Video corrections
The correction tools within the Video Editor are Enhance, Adjustments,
Snapshot and Stabilize.

146 Pinnacle Studio User Guide
Enhance (videos)
The Enhance corrections for video are the same as those for photos
and other images. See “Enhance (photos)” on page 134.
Adjustments
During import, Studio automatically detects certain parameters, but a
variety of factors can lead to the occasional incorrect identification.
Adjustments allows any of these basic image properties to be changed,
if needed.
Alpha
If your video has an Alpha channel and you wish to remove it, choose
the Ignore Alpha option.
Aspect ratio
If the aspect ratio of a video asset was not recognized correctly on
import, or if the frame proportions must be manually changed for
another reason, use this dropdown menu to select the desired setting.
The adjustment does not change the amount of the image on display.
Instead, visible area is stretched (or shrunk) independently in width and
height to make it fit the desired frame boundaries.
Interlacing
If the Interlacing options on the image were misidentified on import,
use this dropdown to impose the correct setting.
Stereoscopic 3D
If the format of a 3D image file was wrongly identified on import, set
the correct stereoscopic layout with this dropdown list.
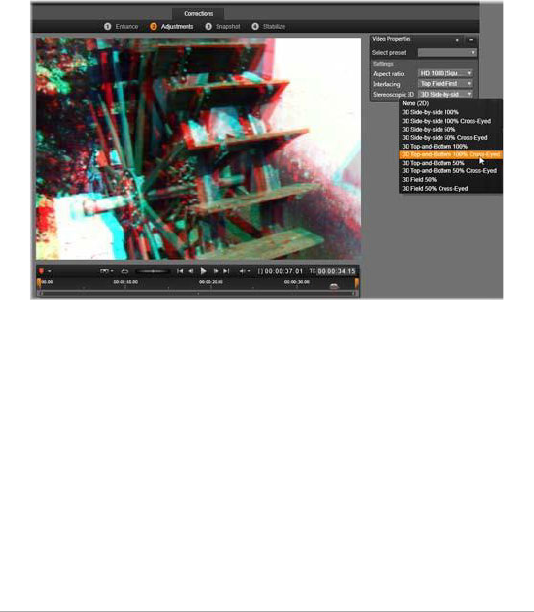
Chapter 4: Corrections 147
Snapshot
The snapshot tool enables you to acquire a single frame from a video,
crop it, and save it as a photo. Its controls are similar to those for the
Crop correction for photos.
Selection Frame and Aspect Ratio: The frame for selecting an image
cutout can be resized by grabbing its sides and corners, or dragged
within the preview by grabbing it in the center.
Correcting the stereoscopic 3D properties of a Library asset.
Preview: Preview shows the selected cropped image without the
snapshot tools. Press Esc or click once on the image to view the tools
again.
Apply: This command exports the cropped image as a JPEG file, and
switches off the snapshot editing mode in the preview. Snapshots are
stored in the library under My Pictures > Images. Locate the new item
by returning to the Library and clicking the special find added item
button that is displayed temporarily on the Library footer bar. The new
media file itself is created in:

148 Pinnacle Studio User Guide
[Registered User]\My Documents\My Pictures\Images
Clear and Cancel: Clear sets the selection frame back to its original
setting (whole image), while Cancel exits snapshot editing without
creating any new media.
Stabilize
Similar to the electronic stabilization in digital camcorders, this tool
minimizes shake and jitter caused by inadvertent camera movement.
When using this effect, the outer areas of the image are removed and
a varying portion of the image is enlarged up to 20 percent in order to
fill the frame.
After Stabilize has been applied, the video must be rendered to
preview accurately. Instead of using the Play control on the toolbar,
click the Render & Play button on the Stabilize panel to preview.
Correcting audio
The Audio Editor can be used both for audio-only media such as .wav
files and for video with an included (‘original’ or ‘synchronous’) audio
track.
For information about opening the Audio Editor to access the
correction tools, along with general functions of the media editors,
please see “Media editing overview” on page 126.
For an overview of audio-related information, please see “Chapter 8:
Sound and music” on page 233. For coverage of the Audio Editor, see
“The Audio Editor” on page 235. Please see “Audio corrections” on
page 241 for descriptions of the individual correction tools.
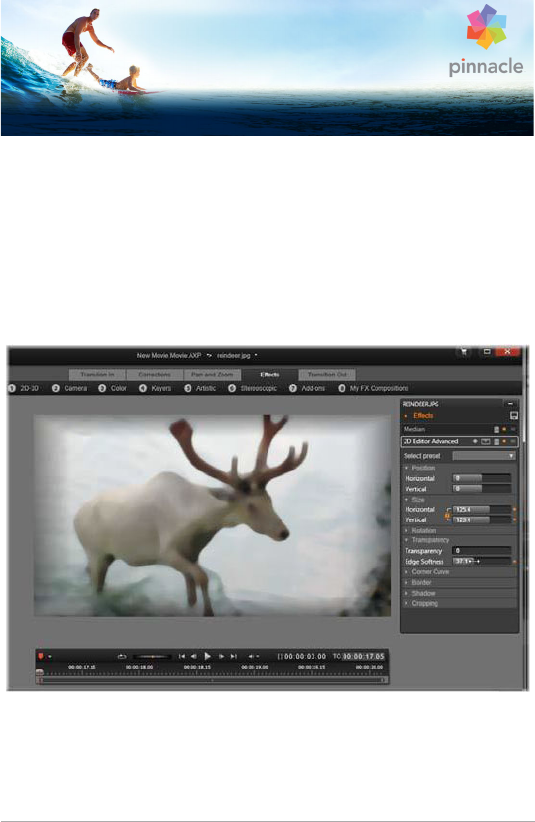
Chapter 5: Effects 149
Chapter 5: Effects
Pinnacle Studio has three media editors, one each for video, photos
and audio. Their general operation is described in “Media editing
overview” on page 126.
One of the main functions of the three media editors is to provide
applicable add-on tools in three families – Transitions, Corrections and
Effects – along with the specialized Pan-and-zoom function in the
Photo Editor only.
Working with visual effects in the Photo Editor. At top, several
groups of effects are listed. In the center a preview shows the
image with effects applied; parameters to customize them are
available at right. At bottom, transport controls and a
timeline support animating the effects with keyframing.

150 Pinnacle Studio User Guide
Only the Corrections family is provided when the media editors are
opened from the Library. When they are opened from the timeline of
a movie or disc project, however, the full range of tools becomes
available. This chapter provides a general introduction to effects
editing, then focuses on the visual effects in the Photo and Video
editors, as well as Pan-and-zoom. Audio corrections and effects are
described in “Chapter 8: Sound and music” on page 233.
Corrections vs. effects
The tools in the Corrections family are meant primarily for remedying
the imperfections that are often encountered in actual media files –
poor white balance in photos, wind noise in soundtracks, and so on.
Unlike effects, the correction tools can be applied to Library assets, not
just to clips on the timeline. When corrections have been applied in the
Library, their benefit is passed on to any project that uses the improved
assets. Please see “Chapter 4: Corrections” on page 123 for details
about Corrections and how to use them.
About effects
‘Effects’ is an umbrella term taking in a wide range of software tools
for manipulating your media. It includes presentational tools like 2D
Editor, atmospheric transformations like Old film, and some theatrical
touches like Fractal fire that you may find are too much fun not to use.
Like Corrections, you can apply effects to clips on the timeline of a
project. Just double-click the clip to open the appropriate media editor
with its Effects tab already open.
Effect compositions
Achieving a desired look, behavior or sound can take a combination of
several effects, applied in a particular order. Both video and audio
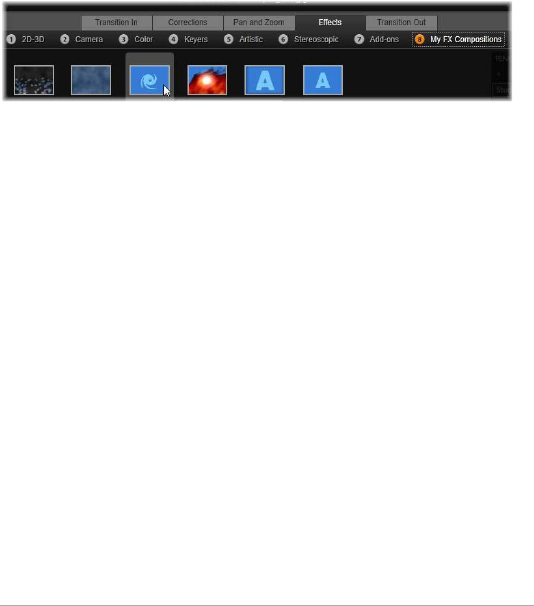
Chapter 5: Effects 151
effects may be needed. For each effect, parameters must be adjusted
to get the results you are looking for. Once you have found the right
combination, the set of effects can be saved as a special type of asset–
an effect composition. With effect compositions, even complex
manipulations of your media can be readily achieved.
Effect compositions can be created in the media editor (using the save
button at the top of the Effects setting panel) or on the timeline (using
the Effect > Save As FX Composition context menu command).
Along with the seven other groups under the Effects family, a
group named My FX Compositions (right) appears as soon as
any compositions are added to the Library.
They are stored in the Effects section of the Library under My FX
Compositions and can be used in the same way as ordinary effects.
Pan-and-zoom
The Photo Editor provides a third tab, Pan-and-zoom, to go along with
Corrections and Effects. The pan-and-zoom tool is a versatile accessory
with which you can add motion and drama to any high-resolution
photograph, among other uses. See “Pan-and-zoom” on page 170 for
details.
Effects in the media editors
Like other resources for your project, effects are stored in the Library.
You’ll find them in the Navigator under Effects in the Creative Elements
branch. As with other types of Library resource, you can use all the
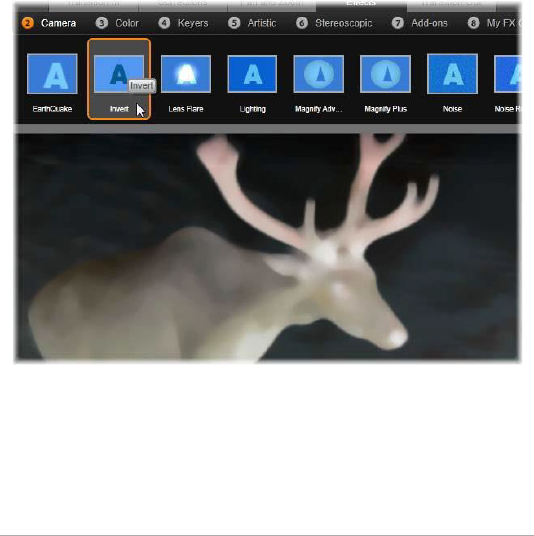
152 Pinnacle Studio User Guide
usual features – Collections, ratings, tags, and so on – to help you
organize the many effects available.
You can apply an effect from the Library directly to a clip on the
timeline of a project with drag-and-drop. Clips to which an effect has
been added are indicated by a brightly-colored upper border.
When you double-click a timeline clip, its media editor opens
automatically with the Effects tab preselected. Up to eight groups of
effects are available, depending on which version of Pinnacle Studio
you are working with. Click the name of the group to see the effects it
contains.
The Camera group of Effects is open in the Photo Editor. The
mouse pointer is positioned over the thumbnail for the Invert
effect (left side), causing it to be automatically demonstrated
on the preview.
The thumbnail icons for the effects in the currently-selected group are
shown in a full-width tray at the top of the work area. With visual

Chapter 5: Effects 153
effects, as your mouse pointer hovers over the effect icons, the preview
shows how the clip you are editing would appear if each effect were
applied. When you have made your choice, click the effect’s thumbnail
to apply it.
Customizing an effect
Once you have applied an effect to a clip, by either of the methods
mentioned above, you can return to the media editor at any time to
manipulate the effect’s settings. Double-click the clip on the timeline,
or select Open effects editor if you wish to customize the effect. See
“The Settings panel” on page 157 for further information.
To save your modifications and return to the timeline, click OK. To
cancel modifications and return to the timeline press Cancel.
Creating Effect Compositions
The set of effects used by a clip, and their settings, can be saved as an
Effect Composition by clicking the Save button in the upper right
corner of the Settings panel. Enter a name for your Composition in the
dialog box that appears, and clear the checkmark for any effect you
don’t want included. See “The Settings panel” on page 157 for further
information.
Switching to a new clip
Even without leaving a media editor you can switch from one timeline
clip to another by means of the Navigator, a schematic representation
of your project that is optionally shown in the space just above the
footer bar of the editor window.
To toggle the visibility of the Navigator, click the compass rose icon
at the bottom right of the window.
154 Pinnacle Studio User Guide
Each clip in your project is represented in the Navigator by a colored
bar. The layout of the bars on a horizontal time axis with vertically-
arranged tracks exactly matches the timeline. The bar representing the
clip now being edited is highlighted in orange.
Here the mouse pointer is poised over the compass-rose
button to turn off the Navigator panel immediately above,
where project clips are represented by horizontal bars.
If you click on one of the other bars, any changes you’ve made to the
current clip will be automatically saved; the clip corresponding to the
bar you clicked on will then be loaded. If the new clip is of a different
media type, the appropriate editor will switch in automatically.
Solo mode
Sometimes while editing an effect, it is useful to see the other timeline
layers – those above and below the current layer containing the clip
you are working on. On other occasions, you can simplify a complex
editing situation by turning off the other track.
Solo mode is started or stopped with the Solo button and its
accompanying dropdown menu in the lower right area of the media
editor. Three configurations are possible:
•Off: When soloing is on, clicking once on the button will turn it
off. All layers from the timeline are then used in the preview.
Sometimes the current layer may be obscured by a layer above it
on the timeline.
Chapter 5: Effects 155
•Show media and the tracks below: Under this option, the current
layer and all layers below it are previewed, but the clips on layers
above the current layer are hidden.
•Show media only: This option allows only the layer you are
currently working on to appear in the preview.
Previewing effects
In the Creative Elements section of the Library you can preview a
sample of each effect either directly on the icons in thumbnails view,
or in the separate Player window. These samples will give you some
idea about the look of the effect, but can often do no more than hint
at the possibilities that will be available once customization,
keyframing, and combination with other effects are considered.
As mentioned earlier, you can see the effect previewed on your own
media – without actually applying it – by hovering over the effect icon
in a timeline clip’s media editor. Then to apply the effect, simply click
on the thumbnail.
Effects on the timeline
To check whether a timeline clip has had any effects applied to it, look
for a magenta stripe along the clip’s upper edge. Both this clip effect
indicator and the clip itself provide useful context menu commands for
effect management.
The clip effect indicator is a contrasting stripe along the top
edge of any clip to which an effect has been applied.

156 Pinnacle Studio User Guide
A clip with corrections displays a green stripe along the upper edge,
but there are no relevant context menu commands.
Clip context menu
Open effects editor: This opens the media editor appropriate for the
clip, with the Effects tab preselected. There you can apply new effects
to the clip, or modify existing ones.
Paste: Effects can be cut or copied to the Clipboard using commands
on the Effect submenu. The Paste command lets you apply the effect
to one or more other clips.
Clip context menu: Effect
The context menu of any clip to which at least one effect has been
applied will include an Effect submenu that provides a number of ways
of manipulating the effects that are present. The clip effect indicator
has a reduced context menu containing only the Effect submenu.
Cut all, Copy all: With these functions, effects assigned to a clip can be
cut or copied to the Clipboard, from which they can be pasted to one
or more other clips as described above.
Delete all, Delete: Remove all the effects at once from a clip with Delete
all, or delete a particular effect by selecting it on the Delete submenu.
Save as FX Composition: Save the effects applied to the clip, or a subset
of them, as an Effect Composition. In the dialog that opens, click on
the FX Composition Name box and enter the caption that will identify
the Composition in the Library and elsewhere. Uncheck any of the
applied effects that you don’t want included in the Composition.
Edit: From this submenu of applied effects choose one to open for
configuration in the clip’s media editor.

Chapter 5: Effects 157
Find in Library: Open to the page of the Library Browser that contains
a particular effect, with its thumbnail already selected.
Real-time vs. rendered
Adding effects to a clip increases the amount of computation Pinnacle
Studio must do to give you a smooth preview. Depending on your
computer’s hardware, the ‘rendering’ process for a clip can easily
require more computing time than can be managed in real time; that
is, while the preview is actually running.
In this circumstance, some ‘pre-rendering’ will be required before the
clip can preview acceptably. Rendering progress is shown on the time-
ruler by yellow (‘to be rendered’) and green (‘now being rendered’)
shading. The shading is removed as soon as pre-rendering is complete.
Options for rendering are set in the Preview page of the Pinnacle
Studio Control Panel. (See “Export and Preview” on page 360).
If effects are not playing back smoothly, try increasing the Optimization
Threshold value. This will increase the amount of pre- rendering time
while improving the preview quality. If rendering is taking too long, on
the other hand, the Optimization Threshold value can be decreased, or
rendering can be turned off by altogether by setting it to zero. Other
factors that affect playback and rendering time are the format, size and
frame rate selected for the project. These can be changed in Timeline
settings. Please see “Timeline settings” on page 72.
The Settings panel
The Settings panel provides a list of the effects that have been assigned
to the current clip (whose name is given at the top). Click an effect
name in the list to select it; this causes its settings to be displayed for

158 Pinnacle Studio User Guide
inspection and editing in the parameters area below the list. Most
effects also offer a dropdown list of preset parameter combinations.
Though a clip might have transitions, Corrections and Pan-and-zoom
in addition to effects, the Settings panel on the Effects tab does not list
these. Turn to the other tabs to access the settings information for their
tools.
When a clip has multiple effects, they are applied in the order they
were added, which is the reverse of the order in which they are listed
(new effects are added at the top of the list, not the bottom). To
change the order, drag the effect header up or down in the list.
The right-hand end of the effect header has four buttons for
operations related to that effect. From left to right they are:
Diamond: Toggle keyframing for parameters of the effect. See
“Working with keyframes” on page 160.
Expand All Settings: All the groups of settings for the effect can be
expanded for editing or closed with one click.
Trashcan: Remove the effect from the clip.
Dot: Toggle the effect on and off. You can switch the effect off for
comparison purposes without deleting it and losing your settings.
Drag handle: Use either this zone or the name area for dragging the
effect up or down in the effect list when the clip uses multiple effects.
As mentioned above, effects are applied in bottom-up order. In some
cases, changing the order can dramatically affect the cumulative result.
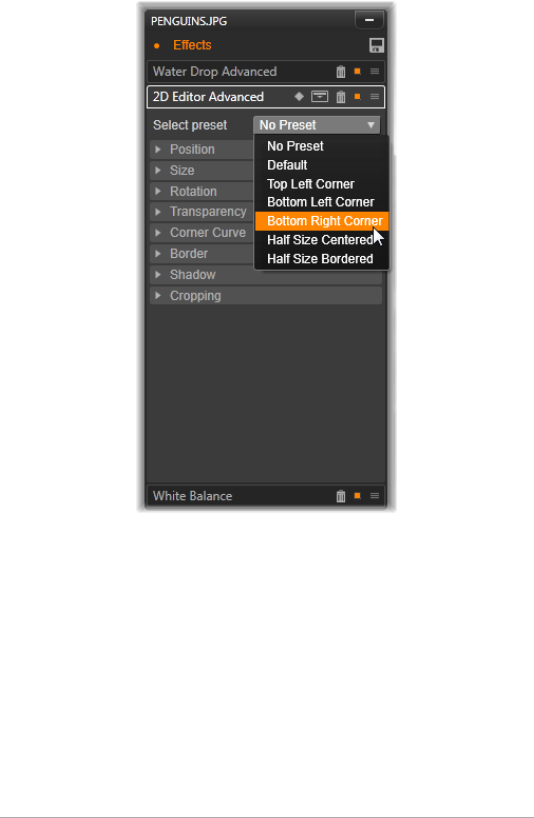
Chapter 5: Effects 159
The Settings panel: Here, three effects (Water drop, 2D Editor
Advanced, White Balance) have been applied to the current
clip. A preset for the 2D Editor Advanced effect is being
selected (highlighted box).
Modifying parameters
Parameters are organized into named groups of related controls. Click
the expand/collapse triangle on the group header to open the group
and access its parameters, or close it and conserve screen space. The
currently selected element is highlighted with an orange frame. To

160 Pinnacle Studio User Guide
move forward to the next element, use Tab; use Shift+Tab to move
backward.
Numeric parameters are controlled by horizontal sliders, with a gray
bar that you can drag horizontally to change the value. For more
precise control, use the Left or Right arrow. Double-click the bar to
reset a particular parameter to its default value.
Most effects furnish a dropdown list of preset parameter combinations
for fast selection of variants. Once a preset has been selected, you can
customize it by editing the parameters if desired.
When you are finished with a media editor, and are ready to return to
the timeline, click OK at the bottom of the window to approve your
changes, or Cancel to abandon them.
Working with keyframes
The normal use of some types of effect is to transform the source
material in a uniform way from beginning to end. Atmospheric effects
like Old film, and effects that change only the coloration of the clip, are
among those in this category. Their parameters are generally set once
and for all at the start of the clip. This is the static use of an effect.
Other effects, such as Water drop, depend on a sense of motion. They
are likely to be effective only when their parameters are allowed to vary
throughout the clip. The easiest way to this animated use of an effect
is to use a preset that has animation built in, like most of those for
Water drop. In this kind of keyframe animation, one or more
parameters of the effect has a different value at the end of the clip than
it did at the beginning. On playback, the parameters are updated after
every frame to move smoothly from the start value to the end value.

Chapter 5: Effects 161
Keyframing isn’t limited to just the start and end frames of a clip.
Keyframes can be defined with particular values of effect parameters
at any point in the clip to produce effect animations of arbitrary
complexity. If, for example, you would like an image to reduce to half-
size by the middle of the clip and return to full size by the end, you
would need to add at least a third keyframe.
Basic keyframing
Here’s an outline of how to use keyframing to program the changes in
an effect parameter during the playback of a clip.
1 Double-click a clip on the timeline to load it into its media editor.
2 Add an effect, then activate keyframing by clicking the diamond
icon on the effect header if it is not already highlighted.
3 A keyframe line appears below the time-ruler. Any keyframes that
have been added to the clip for the current effect to date are
displayed as gray diamonds.
A keyframe is added automatically at the beginning of the clip.
This keyframe cannot be moved or deleted. If the effect and preset
combination you chose is animated rather than static, there will
be a keyframe generated at the end as well. You can delete or
move the end keyframe; if you do so, all parameter values are
sustained from the last remaining keyframe to the end of the clip.
4 Set the playhead to the position in the clip at which you want to
establish a change of some effect parameter such as size, position
or transparency.
5 Modify the parameter using the Settings panel. If keyframe editing
is turned on, a new keyframe will be automatically added at the
playhead position. If a keyframe already exists, the parameter data
it represents will be modified.

162 Pinnacle Studio User Guide
Keyframe operations
For each effect, only one keyframe can be attached to any frame of the
clip. The keyframe defines the instantaneous value of every clip
parameter for the frame where it is set.
Add or delete a keyframe: To add a keyframe at the playhead position
without adjusting any parameters, or to delete an existing keyframe at
the position, click the toggle keyframe button on the far left of the
transport toolbar.
Move a keyframe: To move a keyframe along the keyframe line (and
thus along the timeline), click it and drag.
Jump to a keyframe: Use the arrow buttons to the left and right of the
keyframe button, or click directly on the keyframe in the keyframe line,
to move the playhead to that position. The keyframe should highlight,
indicating that it is now the target keyframe for deletion or parameter
editing.
Keyframing multiple parameters
Sometimes it is desired to keyframe multiple parameters of the same
effect on separate schedules.
For example, suppose you wish to change the Size parameter of an
effect smoothly over the whole clip, while changing another, let us say
Rotation, at several points along the way. Here are two ways of
approaching this:

Chapter 5: Effects 163
Method 1: Set up the Size keyframes first, then add the more
numerous Rotation frames where needed. At each of these, a correct
Size value will be calculated.
Method 2: Add the effect twice: once to adjust the keyframes for
overall changes (Size, in the example), then another time to make
multiple keyframe changes (Rotation).
Video and photo effects
The effects provided for use with video also work with photos, and vice
versa. Only Pinnacle Studio-supplied effects are described here. For
third-party plug-in effects, please consult the manufacturers’
documentation.
Blur: Adding Blur to your video produces a result similar to shooting
out of focus. The Blur effect allows you to add separate intensities of
horizontal and vertical blurring over the whole frame or any
rectangular region within it. You can easily blur out only a selected
portion of the image, such as a person’s face, an effect familiar from
TV news coverage.
Emboss: This specialized effect simulates the look of an embossed or
bas-relief sculpture. The strength of the effect is controlled by the
Amount slider.
Old film: Old movies have a number of traits that are usually
considered undesirable: grainy images caused by early photographic
development processes, spots and streaks from dust and lint adhering
to the film, and intermittent vertical lines where the film has been
scratched during projection. The effect lets you simulate these
‘blemishes’ to give your footage an antique look.

164 Pinnacle Studio User Guide
Soften: The Soften effect applies a gentle blurring to your video. This
can be helpful for anything from adding a romantic haze to minimizing
wrinkles. A slider controls the strength of the effect.
Bevel crystal: This effect simulates viewing the video through a pane of
irregular polygons arranged into a mosaic. Sliders let you control the
average dimensions of the polygonal ‘tiles’ in the image and the width
of the dark edging between neighboring tiles from zero (no edging) to
the maximum value.
2D Editor: Use this effect to enlarge the image and set which portion
of it will be displayed, or to shrink the image and optionally add a
border and shadow.
Earthquake: The Pinnacle Studio Earthquake effect jiggles the video
frame to simulate a seismic event, whose severity you control with
sliders for speed and intensity.
Lens flare: This effect simulates the flaring seen when direct bright light
overexposes an area of a film or video image. You can set the
orientation, size and glow-type of the main light.
Magnify: This effect lets you apply a virtual magnifying lens to a
selected portion of the video frame. You can position the lens in three
dimensions, moving it horizontally and vertically within the frame, and
nearer to or further from the image.
Motion blur: This effect simulates the blurring that results when a
camera is moved rapidly during exposure. Both the angle and the
amount of blurring can be set.
Water drop: This effect simulates the impact of a drop falling onto the
surface of water, producing expanding, concentric ripples.

Chapter 5: Effects 165
Water wave: This effect adds distortion to simulate a series of ocean
waves passing across the video frame as the clip progresses.
Parameters allow you to adjust the number, spacing, direction and
depth of the waves.
Black and white: This effect subtracts some or all of the color
information from the source video, with results ranging from partly
desaturated (the ‘Faded’ preset) to fully monochrome (‘Black and
white’). The Amount slider controls the strength of the effect.
Color correction: The four sliders in the parameters panel for this effect
control the coloration of the current clip in terms of:
•Brightness: The intensity of light.
•Contrast: The range of light and dark values.
•Hue: The location of light on the spectrum.
•Saturation: The quantity of pure color, from gray to fully
saturated.
Color map: This effect colorizes an image using a pair of blend ramps,
or color maps. Stylize your footage with bold color treatments, add
duotone and tritone style colorization, or create striking editorial
transitions. The effect can be used for anything from fine control of
monochrome images to psychedelic color transformations.
Invert: Despite its name, the Invert effect doesn’t turn the display
upside-down. Rather than the image itself, it is the color values in the
image that are inverted: each pixel is redrawn in its complementary
light intensity and/or color, producing a readily recognizable but
recolored image.
This effect uses the YCrCb color model, which has one channel for
luminance (brightness information) and two channels for chrominance

166 Pinnacle Studio User Guide
(color information). The YCrCb model is often used in digital video
applications.
Lighting: The Lighting tool enables correction and enhancement of
existing video that was shot with poor or insufficient lighting. It is
particularly suitable for fixing backlit outdoor sequences in which the
subject’s features are in shadow.
Posterize: This Pinnacle Studio effect lets you control the number of
colors used to render each frame of the clip, all the way from the full
original palette down to two colors (black and white) as you drag the
Amount slider from left to right. Regions of similar color are coalesced
into larger flat areas as the palette shrinks.
RGB color balance: RGB Color Balance serves a dual role in
PPinnacle Studio. On the one hand, you can use it to correct video that
suffers from unwanted coloration. On the other, it allows you to apply
a color bias to achieve a particular effect. For example, a night scene
can often be heightened by adding blue and slightly reducing overall
brightness. You can even make video shot in daylight look like a night
scene.
Sepia: This Pinnacle Studio effect imparts the appearance of antique
photography to the clip by rendering it in sepia tones rather than full
color. The strength of the effect is controlled by the Amount slider.
White balance: Most video cameras have a ‘white balance’ option for
automatically adjusting their color response to ambient lighting
conditions. If this option is switched off or not fully effective, the
coloration of the video image will suffer.
The White balance effect corrects the problem by allowing you to
specify which color should be taken as ‘white’ in this image. The
adjustment needed to make that reference color white is then applied

Chapter 5: Effects 167
to every pixel of the image. If the reference white is well chosen, this
can make the coloration seem more natural.
Effects and stereoscopic 3D
Some video and photo effects have features designed for 3D media.
For instance, some of the provided effects offer a stereoscopic mode
that is activated by a check box in the effect parameters. Meanwhile,
the effects in the Stereoscopic group itself let you modify the 3D
properties of your material. The group includes:
The S3D Depth Control: This effect allows you to adjust the parallax of
stereoscopic footage. By default, the effect is presented in Standard
mode, in which a single Depth slider lets you control the amount of
divergence between the left and right frames, whether to correct or
match source material, or as a special effect.
The advanced mode offers separate Shift and Zoom control groups,
each containing a Horizontal and a Vertical slider. The Shift sliders let
you control the divergence between the left and right frames, while the
Zoom sliders control their magnification. Both properties can be
controlled independently in the horizontal and vertical dimensions, but
by default the Zoom aspect ratio is locked. Click the lock icon to adjust
the horizontal and vertical zoom independently.
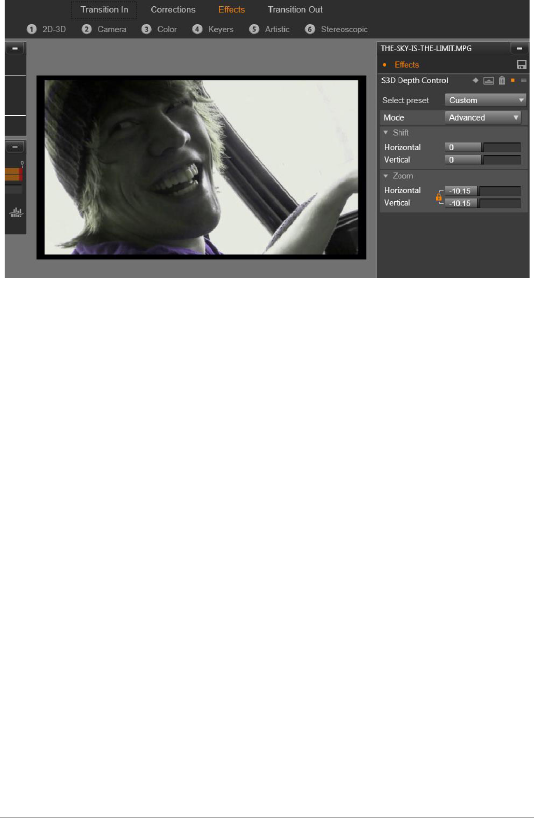
168 Pinnacle Studio User Guide
The Shift settings in the S3D Depth Control effect allow you
to change the relative position of the left and right eyes
horizontally and vertically.
S3D Eye Selector: The Eye Selector effect is presented in two variations;
one for left eye, and the other for right; it is used for uniting left and
right eye video streams on a 3D timeline.
A pair of clips at the same timeline index, one for left eye and the other
for right eye, can be combined to produce stereoscopic output by
applying the eye selector effect to the upper clip.
The effect can also be employed to extract either the left or right
stream from a 3D clip by setting the Source to Left Eye or Right Eye,
and direct it to either eye using the Mapping dropdown.
Working with transitions
The Transition In tab to the left of Corrections and Effects, and the
Transition Out tab on the right, offer access to all the transitions in the
Library, grouped as you find them there. Some transitions may offer
settings for properties like reverse motion, color and softness that can’t
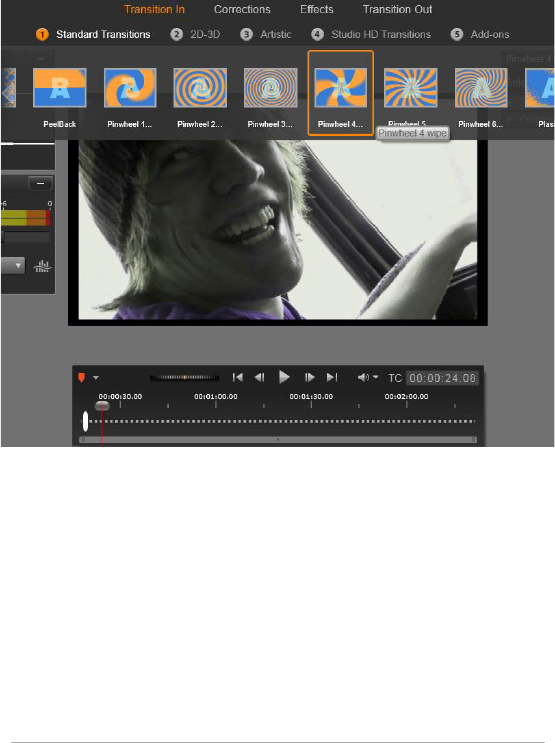
Chapter 5: Effects 169
be edited on the timeline. The media editors also provide transport
controls and a time-ruler to help in previewing the transition and
adjusting its duration.
Choosing a transition in the media editor. The same
transitions and controls apply to both in and out transitions.
When you have chosen a transition at the top of the screen, its settings
panel will open on the right side of the media editor. Select a preset
from the dropdown list, if one meets your need, or edit the parameters
of the transition directly using the controls provided.
When you are offered a choice of colors, click in the color box to open
a color selector, or click the color picker icon beside the box to choose
a color from anywhere on the screen using a special mouse pointer.
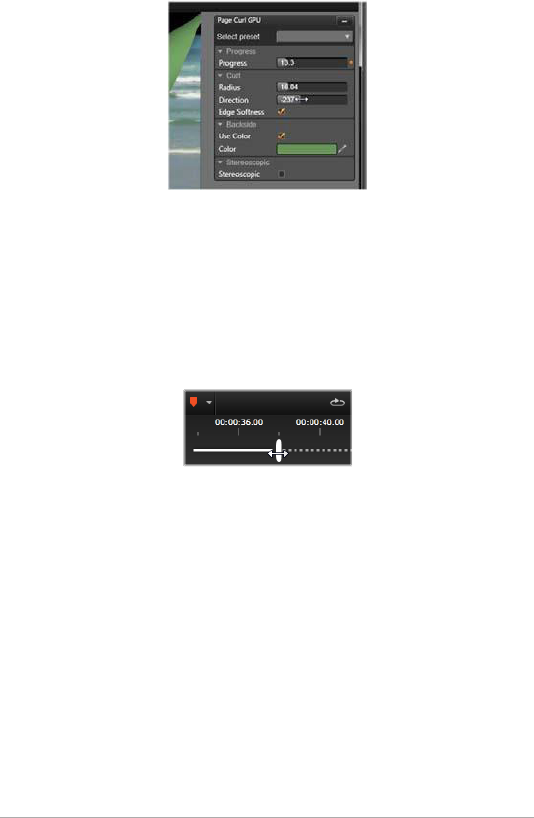
170 Pinnacle Studio User Guide
A white fade bar on the time-ruler below the media editor preview
controls the duration of an incoming transition at the left end of the
scale, or an outgoing one at the right. Only a transition currently being
edited is active, as determined by whether the Transition In or the
Transition Out tab is selected. Click the Play button to preview the
selected transition, or grab the scrubber to preview the transition at
your own speed.
Pan-and-zoom
The pan-and-zoom tool is available for photos and images when they
have been opened in the Photo Editor from the timeline. Access the
tool by clicking the Pan-and-zoom tab at the top of the screen.
With pan-and-zoom, an area from within the picture is used to fill the
whole video frame. The area can be of any size and shape. On
playback, it will be enlarged sufficiently to fill the video frame without
empty areas.
If you define two or more areas, pan-and-zoom animates your
presentation of the image by zooming in and out while traversing it
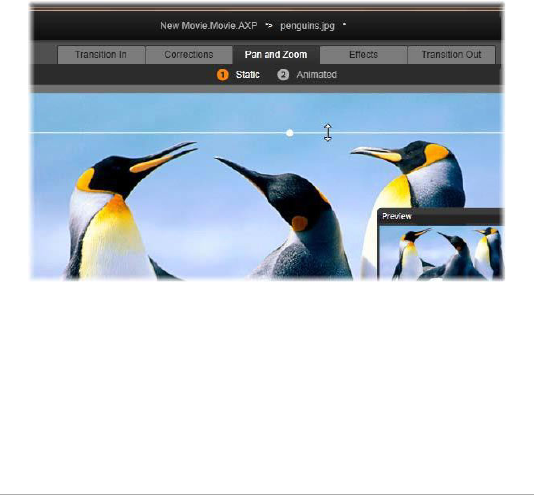
Chapter 5: Effects 171
with simulated camera movements as it moves smoothly from one area
to another.
The pan-and-zoom tool utilizes the full available resolution of your
original photo, so if the picture is large enough you will not forfeit
detail by zooming in.
Adding pan-and-zoom
To apply pan-and-zoom to a photo clip on the timeline, double-click it
to open the Photo Editor.
Because you are opening from the timeline, the Effects tab will be
preselected in the Photo Editor. Switch to the Pan-and-zoom tab.
In this illustration the Pan-and-zoom tab has been selected
and remains set to the default Static mode. The selection
frame, which we see is being resized with the mouse, defines
a region of the image that will be magnified to fill the entire
frame, as shown in the floating preview panel (bottom right).
Pan-and-zoom has two alternative operating modes, which are
selected with buttons just above the preview. In the Static mode, a
single unchanging image region is shown throughout duration of the
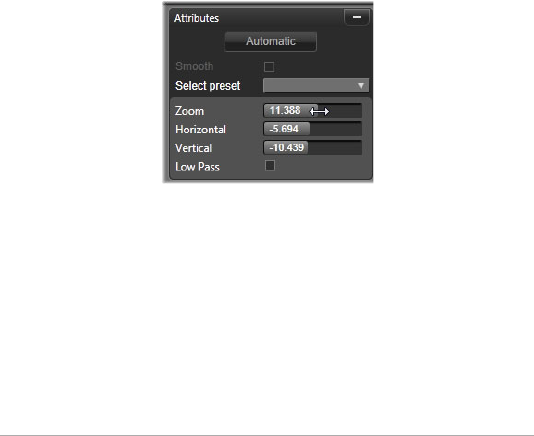
172 Pinnacle Studio User Guide
clip. In the Animated mode, separate regions are defined for the first
and last frame of the clip; on playback, a smooth ‘camera move’ from
one to the other is shown. Animated mode also allows keyframing, in
which any number of additional defined regions can be added to the
pan-and-zoom camera path.
Static mode
In Static mode, a gray selection frame with round control points is
displayed over the image. You can enlarge, reduce, and move this
frame, but you cannot change its proportions (aspect ratio). A small
floating preview window displays the currently- defined selection.
The zoom and position can also be controlled numerically using sliders
in the Attributes panel. Double-click the sliders to reset the values, or
single click to enter a numeric value.
Animated mode
When Animated mode is set, the image is automatically analyzed and
an initial size and position both for the start and end is automatically
set. The generated animation begins zoomed in slightly on the image
subject, then pulls back to the full size available. If the image has a
different aspect ratio than the video frame, enough zoom is applied
throughout to prevent blank areas from appearing.

Chapter 5: Effects 173
To support the extra functionality of Animated mode, the color of the
selection frame is used to indicate its place in the animated sequence.
The start frame is green, and the end frame is red. Frames at any
intermediate point are drawn in white.
When multiple frames are visible, you can drag the frames as needed
by positioning your mouse over either the edge of the frame or the
center dot. Moving the white frame will automatically add a keyframe
at the current position.
Keyframing pan-and-zoom
With keyframing, you can create a customized pan-and-zoom
animation of arbitrary complexity, though simple sequences of a few
steps may be all you ever need.
Switch to Animated mode as described above, and note that two
frames have been added to the preview. These special start and end
keyframes, which as mentioned above are drawn in green and red
respectively. They can be dragged in space but not time.
If you don’t require intermediate keyframes, positioning the start and
end frames completes your session.
For a more complex animation, however, position the scrubber where
a change of camera motion should occur. To create a new keyframe,
simply set the white selection frame to the desired size and position.
The new keyframe is represented by a lozenge-shaped gray icon in the
keyframe line below the clip timeline.
Add as many keyframes as necessary. When you are finished, click OK
to return to the timeline of your project.

174 Pinnacle Studio User Guide
Manually adding a keyframe: To add an explicit keyframe at the
playhead position without altering the current animation path, click
the toggle keyframe button on the far left of the transport toolbar.
Moving a keyframe: You can drag a keyframe along the timeline to
reposition it in time.
Jumping to a keyframe: To jump to a keyframe in order to modify or
delete it, use the arrow buttons to the left and right of the keyframe
button, or click directly on the keyframe in the keyframe line. When the
playhead is directly over a keyframe, the keyframe will highlight.
Deleting a keyframe: To delete a keyframe, click its icon on the
keyframe line to navigate to the right frame, then click the Delete
keyframe button on the far left of the transport toolbar.
The Settings panel
The Settings panel provides a number of controls for configuring the
pan-and-zoom tool.
•Smooth provides gentle braking when approaching a direction
change in the keyframe animation path.
•Select preset: Choose from a number of static and animated
presets.
•Zoom, Horizontal, and Vertical display the numerical values of the
current frame. Double-click the sliders to reset the values.
•Low pass filters out small-scale movements to achieve a smooth,
optimized animation.
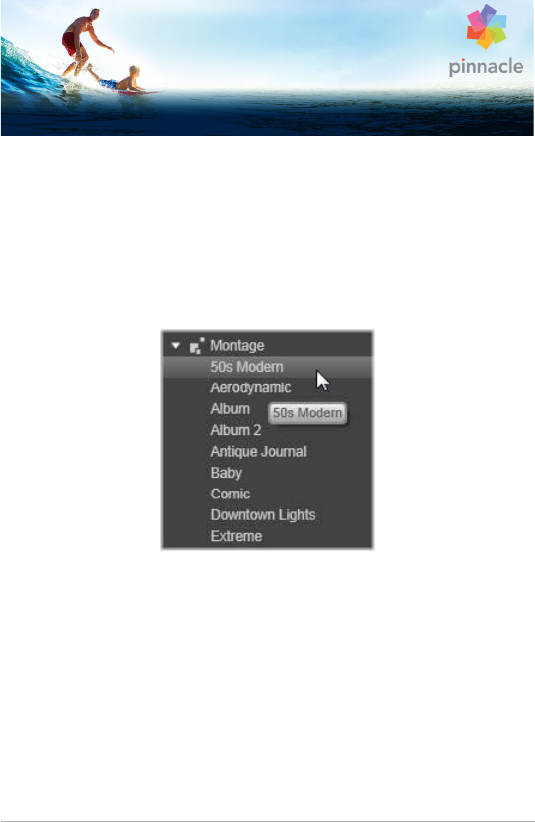
Chapter 6: Montage 175
Chapter 6: Montage
Pinnacle Studio’s Montage is a method of enhancing your movies with
off-the-shelf slideshow, animation and multitrack editing effects.
Numerous professionally designed sequences, called templates, are
available to give your productions instant impact. The templates are
grouped into matching themes, so that along with the technical
sophistication of the templates you will also find it easy to maintain a
consistent look.
But the prepared templates are only half the magic of Montage. The
other half is customization. Montage templates have slots that can
contain several types of custom data, including video, text captions,
photos and more. You can fill in a slot just by dragging a suitable asset
to the corresponding displayed drop zone.
Montage in the Library
Templates are grouped by theme in the Montage section of the Library.
Each theme consists of a set of templates that can be added to your
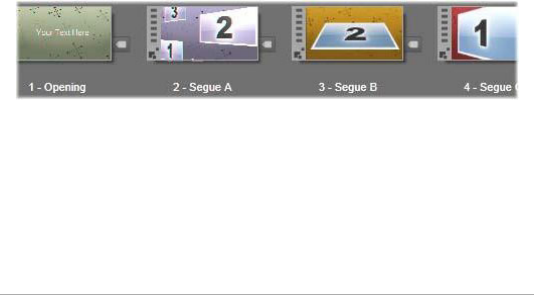
176 Pinnacle Studio User Guide
project as ‘Montage clips’. You can create attractive, visually consistent
sequences that integrate artist-created titles and animations with your
own photos and video. See “The Montage section of the Library” on
page 177 for further information.
Montage titles vs. standard titles
Although you can make fancy ‘titles’ from Montage templates, these
are not the same as those made in the Title Editor. Each has its
particular strengths.
Montage templates are especially easy to use, and can provide effects
not available in ordinary titles. On the other hand, the Title Editor gives
you greater control over the appearance of titles and the animation of
their graphical elements.
The template collection
Each of the templates in the Library’s Montage section is designed to
cover a typical presentational need. Within each theme, the available
templates are designed to complement one another when used in the
same project.
Templates in the Library’s Montage section. Some details are
shown (e.g. the presence of text captions) and some omitted
(e.g. ratings) because of current Library settings.
For instance, most themes provide an Opening template and a
matching Ending template. Many themes also provide one or more

Chapter 6: Montage 177
Segue templates you can use when transitioning from one video or
image clip to another.
Montage in your project
The first step in using a chosen template is to drop it onto your
project’s timeline. Once there, the Montage template is treated as an
ordinary, self-contained video clip. To customize the clip by filling in the
template’s blanks, you will double-click the Montage clip to open the
Montage Editor. For more information, see “Using the Montage
Editor” on page 186.
Each template defines a video or graphic sequence with blanks to be
filled in by you. The available customizations can take several forms.
For instance, most templates provide one or more slots, or ‘drop
zones’, for video or image clips. Many let you supply text captions for
titles, and some have additional parameters for other special
properties.
If you want to use other clips from the timeline to customize the
Montage, they can be added using the Paste to Drop Zone command
from the Montage clip’s context menu, without opening the Montage
Editor.
The Montage section of the Library
Montage templates are stored in their own section of the Library. To
find it, click the down arrow on any Library tab, and select Montage,
which is listed in the Creative Elements section.
The play button on any Montage icon loads the template into the
Player, where it can be previewed with standard transport controls.
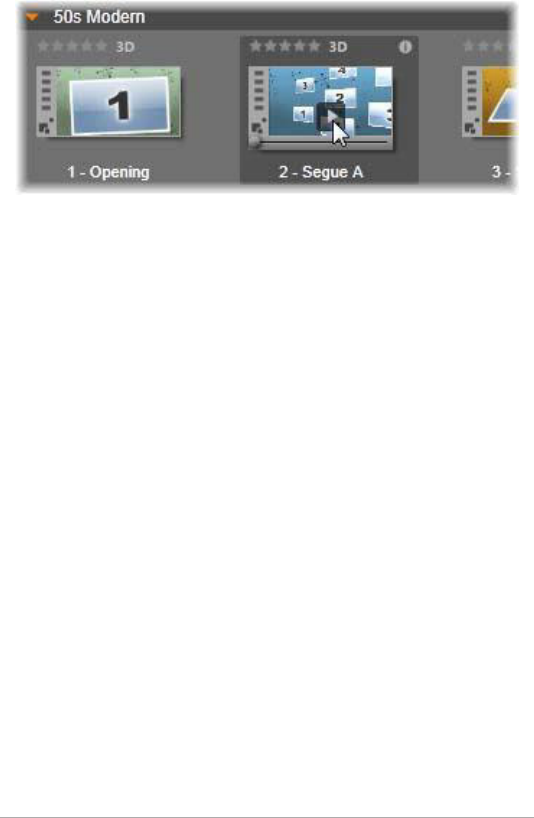
178 Pinnacle Studio User Guide
Click the Play button on the icon to preview the template.
To use a template in your project, drag the icon from the Compact
Library in the Movie Editor or the Disc Editor to the project’s timeline.
Using montage templates
Montage templates are stored in the Montage section of the Library,
where they are grouped by theme. To use a template, simply drag its
thumbnail to the timeline of your project from the Compact Library in
the Movie Editor or the Disc Editor.
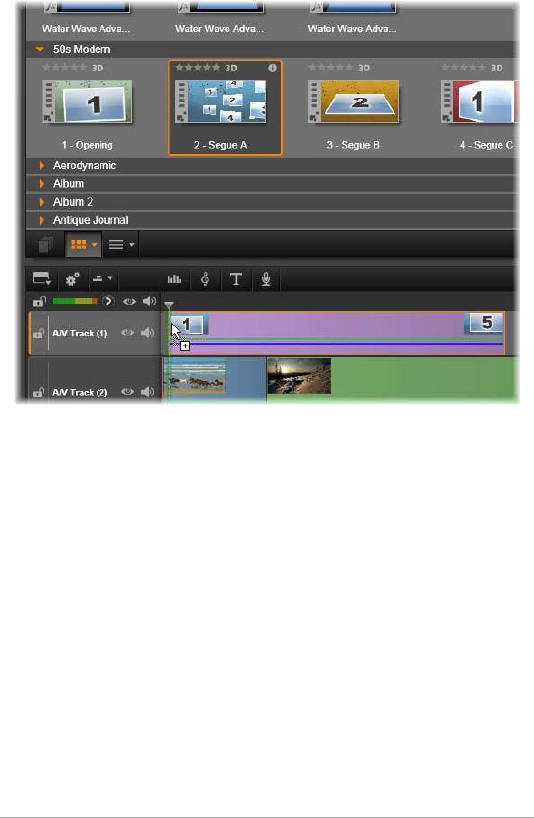
Chapter 6: Montage 179
To use a template, drag its thumbnail onto the timeline. The
numbers on the clip indicate that five subclips are available for
customization.
Montage clips on the timeline can be trimmed and edited much like
ordinary video. You can add transitions and effects, adjust their audio,
and so on. You can even fill the slots in the Montage with timeline clips.
For fully customizing the clip with your own content, however, a
special editing tool is needed. This is the Montage Editor, which opens
when a Montage clip is double-clicked on the timeline. It can also be
accessed with the clip context menu command Edit Montage.
The Montage Editor allows the user to customize a Montage clip by
adjusting its built-in settings or specifying video and audio clips for it
to use.
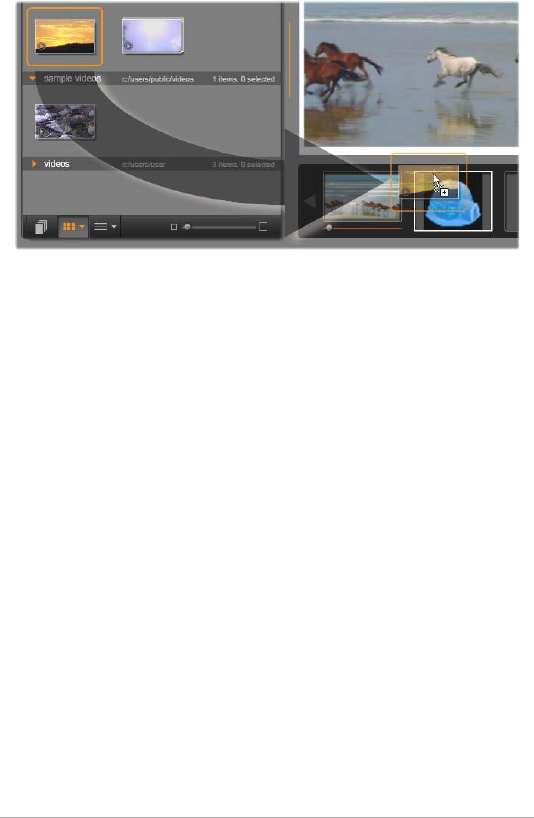
180 Pinnacle Studio User Guide
The Montage Editor lets you specify template elements such
as video or image clips, property settings, and text captions.
Clips are added by dragging them from the editor’s Compact
Library to drop zones below the Player. Here, a Library clip is
ready to drop on the second zone. The clip will replace the
igloo graphic now occupying the zone.
Template backgrounds
Some templates have built-in graphical backgrounds, a selectable
background color, or both. Many of these also provide a Background
check box in the Montage Editor; leave the box unchecked if you want
a transparent background. This allows the Montage to be used on an
upper timeline track over a background of the video or photo material
on the tracks below.
Montage clips on the timeline
Montage clips behave like ordinary video clips when it comes to
operations on the timeline of a movie or disc project, such as adding
transitions, trimming and positioning.
A Montage template dropped onto the timeline is added by one of
three methods: insert, overwrite and replace. When the editing mode

Chapter 6: Montage 181
button on the toolbar is set to smart, the replace method is chosen
automatically. The default length of the clip varies from one template
to another.
Inserting a Montage template: A Montage can be added anywhere on
the timeline. If a Montage clip is placed in the middle of an existing
clip, it will interrupt that clip on playback, and the current editing
mode will determine whether the second part of the original clip is
overwritten or simply delayed.
If you wish to insert a Montage at a cut point, between or adjacent to
other clips but without disturbing them, begin by checking that the
magnet button on the timeline toolbar is turned on. This ensures that
when you drop one clip very near the start or end of another, it will
automatically be positioned so that the clips adjoin exactly. Also set the
editing mode button to insert, so that existing material moves
rightward to make space when you drop the clip, rather than any
portion of it being overwritten.
Replacing an existing Montage template: To replace an existing
Montage template on the timeline, hold down the Shift key on the
keyboard, then drop the new template onto the old one. The new clip
takes over not just the location but any existing customizations of the
old clip. The placement lines, drawn in blue, show the boundaries of
the clip to be replaced; regardless of its designed default length, the
new clip will inherit these boundaries.
Overwriting clips with a Montage template: If you want to drop a
Montage template onto a timeline track and have it simply overwrite
other clips on the track without making any changes to the remainder
of the timeline, you may do so by setting the editing mode button to
overwrite. The length of the Montage clip will determine how much of
the track is overwritten.

182 Pinnacle Studio User Guide
Trimming Montage clips
Although trimming operations on the timeline are the same for
Montage clips as for video clips, the actual result produced by
trimming may vary depending on the nature of the template.
In an all-animated template, such as a fancy rolled title, the animation
always runs to completion. The animation speed therefore depends on
the clip duration. Shortening the clip causes the animation to run
faster, but does not truncate the sequence.
Clips that include video, in contrast, can be trimmed in the usual way.
Many themes include a variable-length video subclip. When one of
these is present, the clip can be expanded as far as the length of the
subclip will allow – indefinitely, if the subclip happens to be a still
image.
Transitions and effects
Transitions can be used at the beginning and end of Montage clips in
the same way as with other clip types.
Video and audio effects can also be added to Montage clips as usual,
and apply to all the content the clip embodies. However, a few effects,
such as Speed, are not available for use with Montage clips.
To add an effect to a Montage clip, right click on the Montage clip on
the timeline and choose Open Effects Editor from the context menu.
Alternatively, drag an effect from the Library and drop it on the clip.
Effects are located in the Creative Elements section of the Library.
To edit, copy or delete an effect on a Montage clip, right click on the
magenta line along the top of the clip and make the applicable choice
on the Effect context submenu.
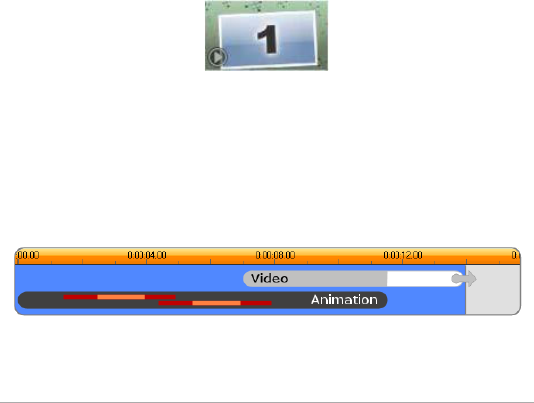
Chapter 6: Montage 183
Anatomy of a template
For examples of how themes work, let’s examine the included ‘50s
Modern’ theme, which contains five templates.
All the templates in this particular theme use the same backdrop
design – an abstract, scrolling pattern. It is continuously visible except
during full-frame video segments. The coloring of the pattern is set
using a parameter control available for each of these templates in the
Montage Editor.
Now let’s look at each template in turn to see how it is constructed
from the elements – clips and captions – that you supply in the
Montage Editor.
Opening: An Opening template usually starts with some sort of
animation, including titles, and ends with full frame video. Our ‘50s
Modern’ example follows that pattern.
The scrolling background animation runs through most of this
sequence. Within the animation, two customizable captions are
displayed. They are represented in the diagram below by lines on the
Animation bar. Both captions are flown into and out of the frame (dark
line color), with a one and a half second pause for stationary display
(light line color) in between.
Schematic representation of the Opening template in the ‘50s
Modern’ theme, at its default length of about 14 seconds.
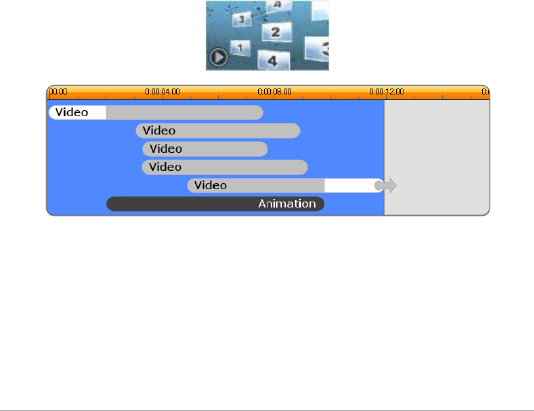
184 Pinnacle Studio User Guide
Just as the second caption is leaving the frame, an animated panel
containing the running video subclip is launched. The video zooms to
full frame by 11:18 in the template clip, and remains so through to the
end (the white portion of the ‘Video’ bar in the diagram).
By default, the length of this template clip is 14:00. The embedded
video clip starts at a fixed offset of 7:03 and runs to the end; its length
is therefore 6:27. If your video subclip is long enough, you can
lengthen the overall clip, extending the full-frame video portion. This
capability is indicated in the diagram above by the arrow at the end of
the ‘Video’ bar.
Segue A: Segue templates connect two full-frame video sequences by
means of some kind of animation. This first Segue example begins with
two seconds of full-frame video, then zooms out to reveal a formation
of multiple video panels running simultaneously. Zooming in on the
final subclip leads to an expandable section of full-frame video.
Segue A integrates multiple video sources.
Segue B: This Segue achieves the basic aim of connecting two video
clips more simply than the previous one. The first subclip starts at full
frame, then zooms out while rotating away from the viewer. When the
reverse side of its rotating panel comes into view, the second subclip is
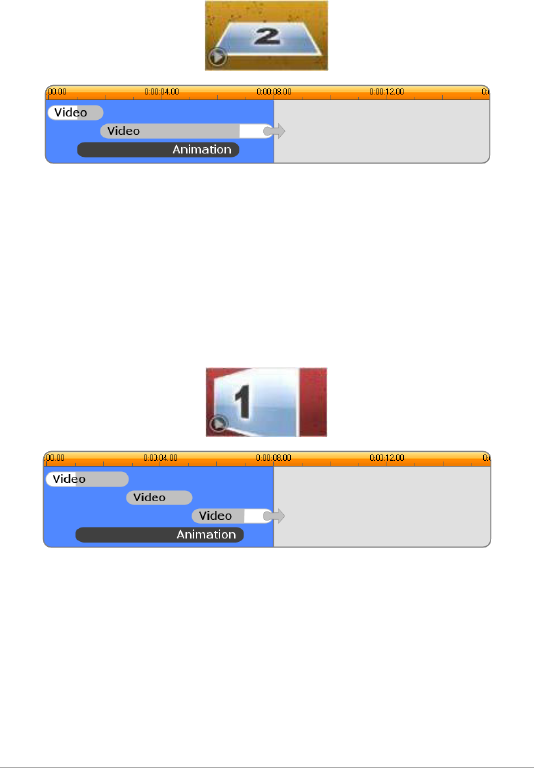
Chapter 6: Montage 185
seen to have replaced the first. The panel zooms in to fill the frame
towards the end of the clip.
Segue B creates a simpler transition.
Once again, the full-screen segment of the second subclip can be
extended by expanding the template clip on the timeline.
Segue C: This is similar to Segue B, except that the flying video panel
takes an extra spin in the middle to admit one more subclip into the
sequence.
Segue C includes a bridging video subclip.
The final subclip is again expandable.
Ending: The purpose of an Ending template mirrors that of an Opening
template, and in this example the internal structure is also mirrored
almost exactly. Full-frame video recedes to a flying panel that gives way
to animated captions – exactly the opposite of the Opening sequence

186 Pinnacle Studio User Guide
described above. The one difference is that in this case the full-frame
video portion of the clip is not extendable.
The Ending template is almost a mirror image of the Opening
one.
Montage editing
Studio’s main tool for customizing a Montage clip is the Montage
Editor, which allows you to interact with all the settings a Montage
provides. Using the editor, you can add content from the Library,
change the background, and edit any text in the Montage. The editor
can be invoked from a Montage clip on the timeline of a project by
double-clicking the clip or with Edit Montage on its context menu.
A useful trick lets you add timeline clips directly to a Montage clip via
the Clipboard. Copy the chosen clip using the Copy command on its
context menu or Ctrl+C. Then right-click the Montage clip to open its
context menu. Choose Paste to Drop Zone, then choose from the
graphical submenu of all the available slots in the Montage to select
one as the destination.
Using the Montage Editor
Each Montage template has its own set of slots for video and photo
content, represented by drop zones in the Montage Editor. Most
templates have at least one slot; the most is six. Some also provide text
captions and other parameters to customize special features.
Chapter 6: Montage 187
The Montage Editor is split into five parts. On the left, the compact
version of the Library provides access to your videos and photos; on the
right is a customization panel including any text fields or other controls
required by template parameters. The Player shows you the results of
your changes. Below the Preview are the drop zones for your video and
images.
Interior trimming of Montage clips
When a Montage template begins or ends with a user-settable amount
of full-frame video, as many do, the Montage Editor timeline provides
handles for adjusting the lead-in and lead-out times – the durations of
the full-frame portions. Click a handle and drag left or right to adjust
either duration separately. The duration of the center part of the clip –
the animated part – will shorten or lengthen accordingly. If you want
to balance the lead-in and lead-out without affecting the duration of
the center portion, click between the handles and drag.
Part of the Montage Editor, with the timeline (bottom) and
drop zones for video or images (middle). The lower portions
of the Library and the Player are also visible. Click and drag on
the timeline to adjust the timing of the Montage.
For a detailed explanation of the template structure, see “A n a t o m y o f
a template” on page 183.

188 Pinnacle Studio User Guide
Working with drop zones
Clearing drop zones: To delete a subclip from its drop zone, right- click
the zone and select Remove Media from the context menu.
Muting subclip audio: Some drop zones are marked with an audio
symbol, indicating that the audio portion of any video in that zone will
be included in the Montage clip’s audio. If you don’t want the audio
to be used, click the symbol to mute the subclip.
Choosing the start of your subclip: Video in a drop zone can be
adjusted to start from an offset in the subclip. Click and drag the start
of clip slider located under the drop zone to adjust the start frame. The
keyboard left and right arrow keys are handy for making fine
adjustments.
If the drop zone you are working with is active at that time index, the
preview will reflect any changes to the start frame. When you are fine
tuning the start frame of a subclip, it’s a good idea to set the scrubber
position to the location where the Player preview will be of the greatest
assistance.
Using the start of clip slider changes neither the position of the subclip
within the template nor its duration, but only which excerpt of the
subclip is used. If you set the start of the subclip so late that the video
runs out while its zone is still active, the subclip’s last frame will be
frozen to fill the allocated time.
Adding effects within drop zones: It is possible to apply video or audio
effects directly to a Montage subclip by dragging the effect to the drop

Chapter 6: Montage 189
zone. As usual, a magenta stripe on the top of the clip signals that
effects have been applied.
Removing effects within drop zones: Look under Effects the zone’s
context menu for the Delete all command, or for the Delete submenu
on which you can select the effect to be deleted.
Note: If you remove or replace the media in a drop zone, all the
effects applied to that media are removed, too.

190 Pinnacle Studio User Guide
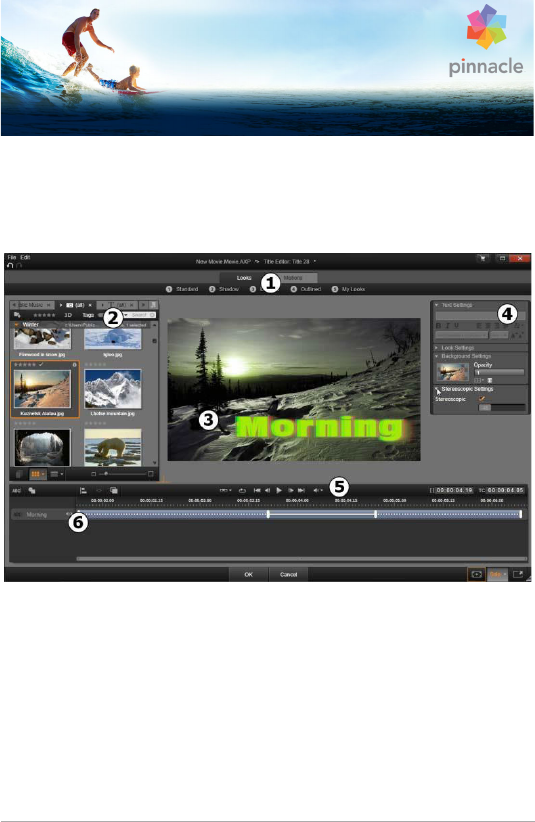
Chapter 7: The Title Editor 191
Chapter 7: The Title Editor
Pinnacle Studio’s Title Editor is a powerful tool for creating and editing
animated titles and graphics. Its extensive suite of text and image
effects and tools provides innumerable possibilities for the visual
design of your movie.
Areas of the Title Editor: 1. Presets Selector; 2. Library; 3. Edit
Window; 4. Settings Panel; 5. Toolbar; 6. Layer List
These are the main areas of the Title Editor display, numbered as in the
illustration above:
1The Presets Selector provides tabs for Look and Motion presets,
with the presets organized by style within each tab. A Look is a
visual styling of a text or shape layer in your title; a Motion is an
animation routine that can be assigned to any layer but is most

192 Pinnacle Studio User Guide
often applied to text. See “Preset Looks” on page 198 and “Preset
Motions” on page 199 for further information.
Hover your mouse over any preset to see how it will affect your
title. A single click applies the preset to the current layer. After
being applied, Looks can be customized using the Settings Panel.
2The Library provides resources for building your titles. The tabs
across the top provide access to all available media and content.
This compact version of the Library is functionally identical to the
full Library as described in “Chapter 2: The Library” on page 17.
3The Edit Window is your main work area when authoring or
editing a title. It provides a scrubbable preview of your title with
hands-on editing. See “The Edit window” on page 210 for details.
4The Settings Panel has separate collapsible subpanels for each of
three settings categories: Text settings, governing the style and
size of text captions; Look settings, for the configuration of faces,
edges and shadows; and Background settings, which pertain to
the title’s background layer.
5The Toolbar has four control groups. From left to right: the add
text and add shape tools; a set of layer manipulation controls; a
full set of transport controls including a loop button; and a pair of
counter readouts showing the duration of the title and the current
playback position.
6The Layer List: Each graphical or textual element constitutes a layer
in the title, which is a stack of such layers. The opaque parts of
each layer obscure the layers below; the bottommost layer can
obscure only the background.
In addition to listing each layer by name, the Layer List includes an
animation timeline showing the time span during which each
layer is active, and the Motions that have been assigned to it.
These properties can be adjusted by dragging.
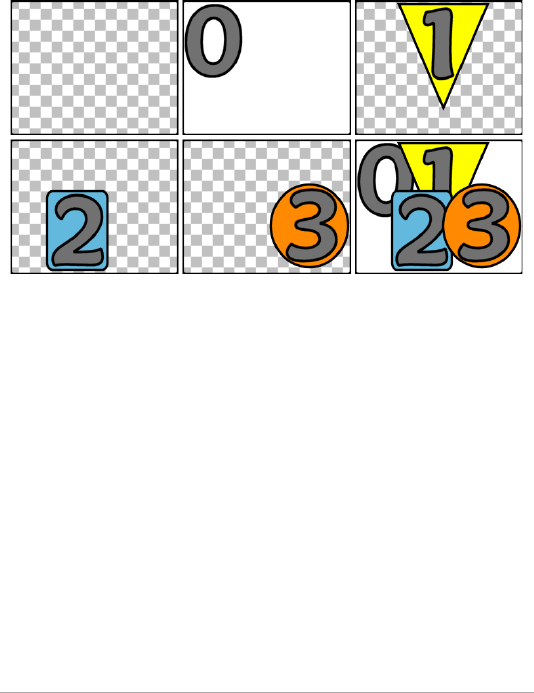
Chapter 7: The Title Editor 193
The process of building up an image in layers is called ‘compositing’.
Because the information in each layer is maintained separately, to be
combined only when the image is output, it is possible to return to the
composition at any time and add new layers, and to adjust, reorder,
remove or replace existing ones.
Building up an image in layers starting with an empty frame
(top left). The checkerboard pattern indicates transparency.
Although backgrounds can have transparent or translucent
areas, here we add an opaque background (0) for clarity,
followed by successive layers with some opaque content (1,
2, 3). In the final composition (bottom right), upper layers
obscure those below.
Launching (and leaving) the Title Editor
The Title Editor can be invoked in two ways: by double-clicking any title
in the Library or on your project’s timeline; or by clicking the Title
button on the toolbar of the timeline.

194 Pinnacle Studio User Guide
Keywords in title names
Some of the provided titles in the Library have transparent areas
through which the content of underlying tracks will be visible. The
names of these titles all contain the keyword ‘overlay’.
‘Full-screen’ titles have no transparent areas: they fully occupy the
video frame. Their names contain the keyword ‘fullscreen’.
In the Library, you can easily view only the titles of one or the other type
by searching on the appropriate keyword.
Tip: Other search keywords to try out with titles in the Library
are ‘roll’, ‘crawl’, ‘name’ and ‘title’.
Saving the title
Use Save Title as in the File menu in the Title Editor to store titles to
your computer’s file system. From there, titles can be exported to other
computers, and shared with other Pinnacle Studio users. If you save to
a watchfolder, the edited title will appear in your Library automatically.
Closing the Title Editor
To close the Title Editor, use any of the following methods:
• Click the OK button at the bottom of the Title Editor. If you
opened the title from the Library, you will be prompted to save
any changes to the title under a new name. If you opened the title
from a timeline, your new or updated title becomes part of the
current project.
• Click on the Cancel button at the bottom of the Title Editor. Any
changes you have made are discarded.

Chapter 7: The Title Editor 195
• Click the Cancel button (X) at the top right of the window. This is
equivalent to clicking Cancel, except that if you have made
changes you will be given an opportunity to save before closing.
The Library
The Library appears in the Title Editor as a tabbed panel on the left side
of the window. The tabs across the top give access to all the available
media and content. This compact view of the Library is functionally the
same as the main view described in Chapter 2. For editing titles, the
Library sections of interest are Photos, Video, and Movie Projects.
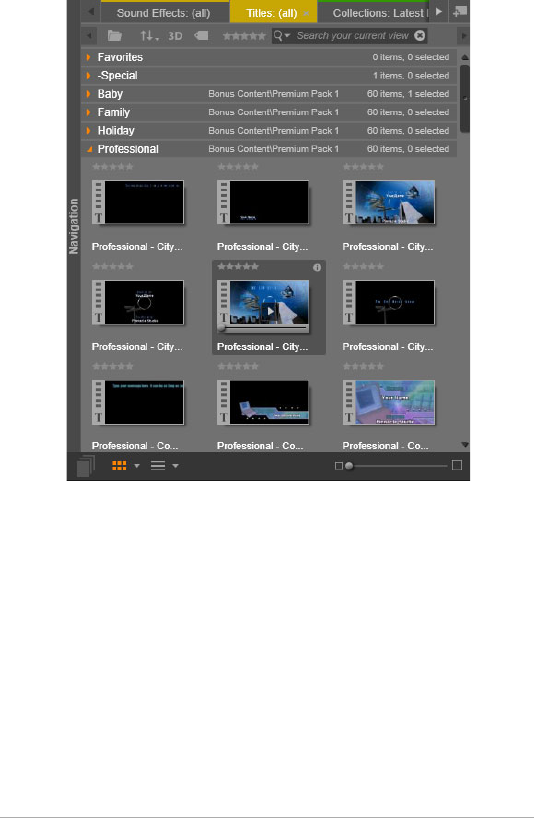
196 Pinnacle Studio User Guide
The compact version of the Library in the Title Editor provides
the same comprehensive access to your media as the full
version.
Adding Library media to a title
To add a video or photo to the title, drag it from the Library into the
Edit Window. The new element is created at a default size where you
drop it in the Edit Window. You can then move, resize or rotate it as
you like.
To add a video or photo as a full-screen background for your title, drop
it onto the background drop-zone of the Background Settings
subpanel. See “Background settings” on page 204 for details.
Chapter 7: The Title Editor 197
You can also use a video or photo as the fill for the face, border or
shadow of your text. To do so, first add a face, border, or shadow to
your Look Settings using the add buttons. Then drop your photo or
video into the drop zone to the right of the Fill.
The Presets Selector
Quickly setting up an attractive title is easy with the Title Editor’s
Presets Selector. After entering your text, and with the text layer still
selected, apply any of the preset Looks to it with a single mouse- click.
To make it even easier, as you hover the mouse over any Look icon, the
Edit Window previews the effect on your title of applying the Look to
the current layer.
Even if you can’t find exactly the Look you want among the presets,
you can often save time by starting with one that’s almost what you
want, then tweaking it in the Look Settings subpanel.
The Presets Selector, with the Looks tab selected. Clicking the
name of one of the listed preset families opens a pop-down
tray of icons.
To give your title some visual impact, there’s nothing like a bit of
animation. Click the Motions tab of the Presets Selector. The three
groups of presets available correspond to phases in the life of a layer.
The Motion presets are categorized by the role they play in
introducing the layer, displaying it, or removing it from view.
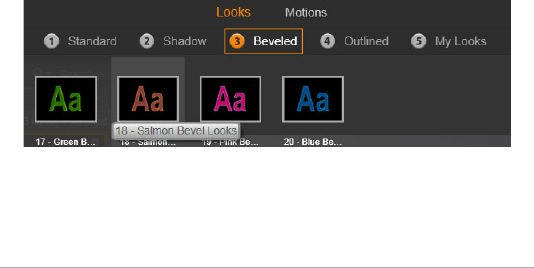
198 Pinnacle Studio User Guide
As with Looks, Motions can be previewed as they will appear in your
title by hovering the mouse over any of the preset icons. Once your
mind is made up, you can apply the chosen Motion with a single click.
Preset Looks
The Looks tab of the Title Editor Presets Selector provides visual styles
that can be applied to the text and shape layers in your title.
Previewing Looks
To preview a particular Look on a particular layer, first select the layer,
then open the Looks tab of the Presets Selector and hover your mouse
over the thumbnails. As you hover, the Edit Window previews your title
as it would appear with the selected Look applied. This lets you
immediately gauge its effect in context.
Applying a Look
To apply a preset Look to a text or vector graphics layer, first select the
layer with the mouse by clicking in the Edit Window or the Layer List.
You can also affect more than one such layer simultaneously using
multiple selection or a layer group.
To begin using Looks, select a family of presets: Standard,
Shadow, Beveled or Outlined. Hover over thumbnails to
preview presets; click the thumbnail to apply one to the
current layer.

Chapter 7: The Title Editor 199
Having selected the layer or layers to change, use one of the following
methods to apply a Look:
• Click its thumbnail in the Presets Selector.
• Drag the thumbnail from the Presets Selector onto the layer in the
Edit Window.
• Drag the thumbnail from the Presets Selector onto any of the
layers or grouped layers in the Layer List header.
Preset Motions
The Motions tab of the Presets Selector contains the animation
routines that give the Title Editor much of its power. These Motions are
assigned to and operate on single layers in your title. The Motions are
divided into three classes based on the portion of the layer’s lifespan
they affect: enter, emphasis and exit.
• An enter Motion controls the arrival of the layer – its first
appearance within the running title.
• An emphasis Motion maintains audience focus on the content of
a layer by giving it an attention-getting action during its time on-
screen.
• An exit Motion takes the layer off-stage again, completing its life
cycle.
Each layer is allowed to have one Motion of each type. All Motions are
optional, however, and it’s also quite possible to have a title with no
Motions at all.
The Motions collection
In each of the three types of Motion, most of the animations can be
grouped into several standard classes based on their mode of action.

200 Pinnacle Studio User Guide
Letter-based Motions operate at the level of individual letters in a text
caption (other kinds of layer are treated as consisting of a single
‘letter’). For instance, in the enter Motion ‘Letters turn’, the letters in
the text layer are first seen edge on, then rotate in place one by one
until all are in their normal orientation.
Word-based Motions work similarly, but with words as the smallest
unit of animation. In the enter Motion ‘Words from bottom’, the
words in the layer float up into position one by one from below the
frame.
Line-based Motions are meant for layers with multiple lines of text,
each of which is processed in turn. In the enter Motion ‘Lines from
behind’, each line of text is brought onto the screen along a
perspective track as though it originated from behind the viewer’s own
position.
Page-based Motions affect the entire layer simultaneously. One
example is the enter Motion Barrel roll, which ‘rolls’ the layer into
position from above as though it were painted on the side of an
invisible rolling barrel.
Matching the enter and exit Motions
Most enter Motions have a corresponding exit Motion with which they
can be paired if visual consistency is desired. For example, a layer that
enters with the ‘Words from infinity’ Motion could be configured to
exit with ‘Words to infinity’. However, this kind of consistency is only
an option, not a requirement, and you can mix and match Motions of
the three types in any way you choose.

Chapter 7: The Title Editor 201
The Presets Selector offers Enter, Emphasis and Exit Motions.
Each layer in a title can use one Motion of each type.
Previewing Motions
To preview a particular Motion on a particular layer, first select the
layer, then open the Motions tab of the Presets Selector and hover your
mouse over the thumbnail of interest. As you hover, a looping preview
of the title animation will begin to run in the Edit Window so that you
can immediately see the effect.
Adding Motions
To add a particular Motion to a particular layer, first select the layer,
then do one of the following:
• Click the Motion’s thumbnail in the Presets Selector.
• Drag the Motion’s thumbnail from the Presets Selector to an
accessible layer (one not masked by other layers) in the Edit
Window.
• Drag the Motion’s thumbnail from the Presets Selector onto any
of the layers or grouped layers in the Layer List header.
Upon using any of these methods, the Motion will be added to the
layer, replacing the existing Motion of the same type on that layer, if
any. See “The Layer List” on page 221 for details on working with
Motions in the Layer List.

202 Pinnacle Studio User Guide
Creating and editing titles
A title in Pinnacle Studio’s Title Editor is built from elements of four
types:
The background layer: By default, the background is fully transparent.
For overlay titles, this is normally what you want. For special purposes,
or for full-screen titles, you can choose a color, a gradient, an image,
or video for the background. For additional flexibility, the Background
Settings also include an opacity control. See “Background settings” on
page 204.
Video and image layers: The resources that make up these layers
originate in the Videos, Photos and Movie Projects sections of the
Library. The layers support the same operations as text and shape layers
except for the application of Looks.
Text and shape l ayers: These are ‘vector-based’ layers, meaning that
they are stored not as bitmapped images like video and photo files, but
as a kind of ‘recipe’ for recreating the images from straight and curved
line segments to which properties (e.g. color) and special effects (e.g.
blur) can be applied. Like video and image layers, these vector-based
layers can be dragged, resized, rotated and grouped, and you can
apply Motions to them. Unlike the other layers, however, they can also
be customized with Looks from the Looks section of the Presets
Selector. See “Preset Looks” on page 198 for details.
Motions: Motions are animation routines that can be applied to any
layer in the title composition except the background. Motions are
selected and applied from the Motions tab of the Presets Selector.
Once a Motion has been applied to a layer, its timing can be adjusted
in the Layer List timeline. See “Preset Motions” on page 199 and ““The
Layer List” on page 221 for further information.

Chapter 7: The Title Editor 203
Creating text and shape layers
To create a text layer, either click the add text button in the header bar
of the Layer List timeline, or simply double-click an empty area of the
Edit Window. A new layer containing default text will appear. The text
is automatically selected, and will be replaced if you now begin to type.
To create a shape layer, click the add shape button (to the right of add
text), then make a selection on the pop-up menu. The available choices
include circle, square, ellipse, rectangle, horizontal and vertical ‘pill’
shapes, and triangle. Upon selection, a new layer of the given shape
and a default size appears in the center of the Edit Window.
Editing layers
The remainder of this chapter provides details on editing the
background and layers in the Title Editor.
• To learn about customizing the Background layer, see
“Background settings” on page 204.
• For information on moving, resizing, rotating and rearranging all
types of foreground layers, see “The Edit window” on page 210
and “The Layer List” on page 221.
• To learn about editing text and setting text properties, see “Text
and text settings” on page 213.
• For working with stereoscopic titles, see “Titles and stereoscopic
3D” on page 219.
• Multiple selection and grouping is covered under “Working with
layer groups” on page 227.
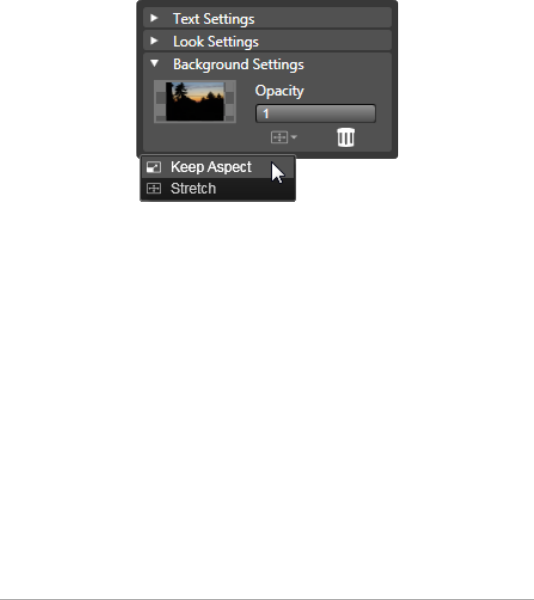
204 Pinnacle Studio User Guide
• Finally, to learn about Motion editing in the Layer List timeline,
refer to “The Layer List” on page 221.
Background settings
Unlike the foreground layers in a title, the special background layer
does not appear in the Layer List, and is not modifiable in the Edit
Window. Instead, the background is controlled from the Background
Settings panel.
The Background Settings panel lets you create the
background of a title. The small preview area serves as a Color
Selector button, and also as a drop target for videos or images
from the Library. Here the Aspect Ratio menu has been
opened by clicking the button just above.
The default background for a title is fully transparent. If your title
appears on an upper track in your project’s timeline, any video or other
imagery on the tracks below will be visible behind the title foreground.
To create a solid or gradient background, click the background preview
area. This brings up a color selection dialog, and also provides an
eyedropper that allows you to pick up a color from anywhere within
the Title Editor window.
You may choose to have a gradient background by choosing the
Gradients tab at the top of the color palette. Additional gradient

Chapter 7: The Title Editor 205
markers can be set by single-clicking below the gradient bar. Gradient
markers can be removed by dragging them vertically out of the bar
area.
To use video or a still image as your background, drag the item down
from the Videos or Photos sections of the Library to the background
preview, which also serves as a drop zone.
To make the background translucent, position the opacity slider
anywhere between fully transparent (all the way to the left) and fully
opaque. Double-clicking the slider returns it to full opacity.
To reset the background to its default state (with no background), click
the trashcan button.
Look settings
The Settings panel provides access to the Look Settings, where you can
examine, modify, add or delete the individual detail layers that are
overlaid to generate a particular Look.
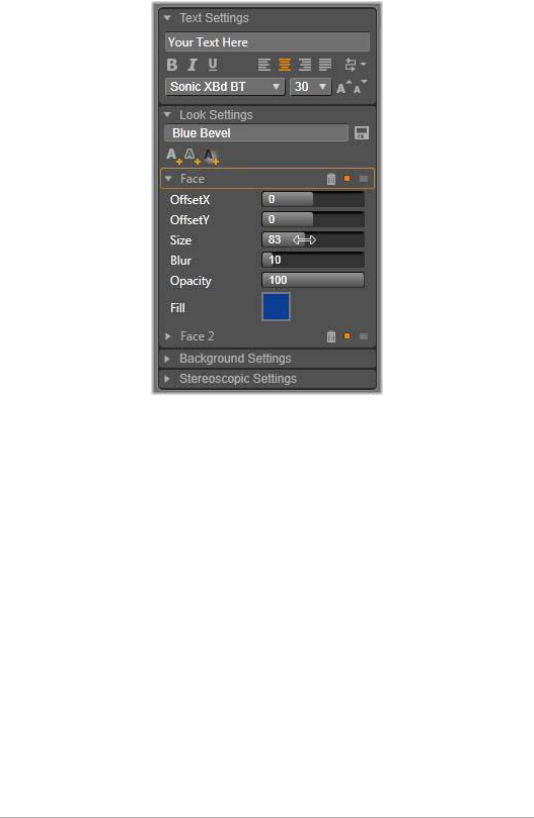
206 Pinnacle Studio User Guide
Click the ‘Look Settings’ arrow on the Settings panel to open
a subpanel where the Look of a layer can be edited. Under the
name of the currently-selected preset (‘Blue Bevel’) are three
buttons for creating new detail layers. The edit panel for the
Face detail is open.
There are three types of detail layer: face (surface), edge and shadow.
The three types differ not in the settings they support, but in the
default position at which they will be inserted in the layer stack. Unless
explicitly dragged out of position, face details always appear at the top
of the stack, followed by edges, and finally shadows. After a detail has
been created, however, it can be dragged up or down in the layer stack
as desired.
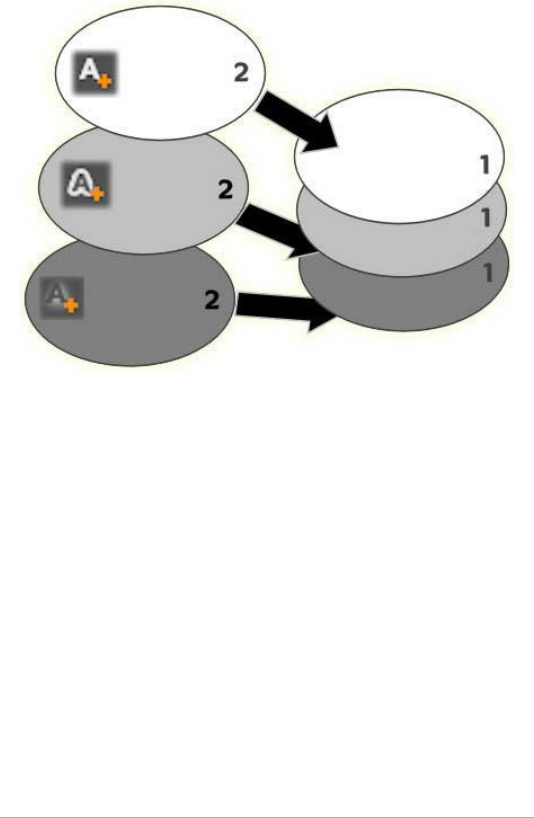
Chapter 7: The Title Editor 207
Face, Edge and Shadow: A new face detail (left, top) is added
above the uppermost existing face layer; new edge and
shadow details are added below the bottommost layer of
their respective types.
The properties of individual detail layers can be modified by means of
controls on collapsible panels in the Looks Editor.
The following detail properties are available:
•Offset X, Offset Y: These sliders set the position of the detail layer
relative to the nominal position of the text or graphic to which the
Look is applied. The range of offset is -1.0 (left, or bottom) to
+1.0 (right, or top). The maximum offsets represent one eighth
the width and one eighth the height of the Edit Window work
area.
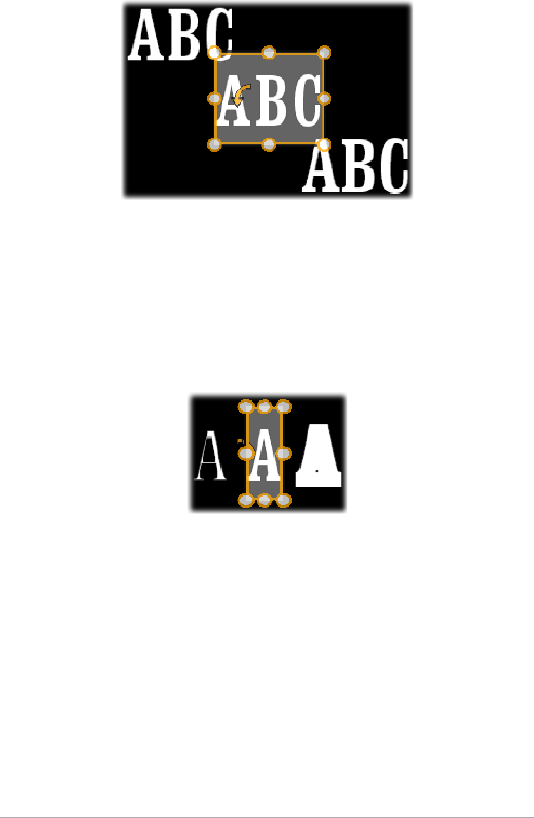
208 Pinnacle Studio User Guide
In this example, a Look with three detail layers has been
applied to a single text layer. The detail layers are configured
identically except for their offset values, as follows: top left (-
1.0, 1.0); center (0, 0); bottom right (1.0, -1.0).
•Size: This slider sets the thickness of the segments used to draw
the text or graphic, from zero to 2, where 1 represents the default
thickness.
This example includes three detail layers with varying size
values. From left to right: 0.90, 1.0, 1.20. The visual effect of
varying the size depends on the default thickness of the
strokes in the layer. In a text layer, this depends on the font
family and size chosen.
•Blur: As this slider increases in value from 0 to 1, the detail layer
affected becomes increasingly ghostly and indistinct.

Chapter 7: The Title Editor 209
The detail layers in this example differ only in their blur
settings. From left to right: 0.15, 0, 0.40.
•Opacity: This slider sets the opacity of the detail layer from 0
(transparent) to 1 (opaque).
•Fill: Click the color swatch button to open a color picker in which
the fill color of the detail layer can be set. The color picker includes
an eyedropper button to pick up a color from anywhere in the
Title Editor. To set a gradient background, choose the Gradients
button at the top of the color palette. Additional gradient markers
can be set by single-clicking below the gradient bar. Gradient
markers can be removed by dragging them vertically out of the
bar area.
Working with detail layers
In addition to setting the properties of existing detail layers, you can
add details of any of the three types, delete details, and reorder the
detail layer stack.
To add a detail layer, click one of the three small buttons at the top
right of the Look Settings. From left to right, these create a new face,
edge and shadow layer respectively. The placement of the new detail
layer in the layer stack is determined by its type, as explained above.

210 Pinnacle Studio User Guide
To delete a detail layer, click the trashcan button in the header bar of
the detail’s edit panel.
To rename a detail layer, double-click its name, type the name you
want, and press Enter.
To temporarily hide a detail layer, click the dot-shaped visibility toggle
icon in the detail’s header.
To close down or open up the edit panel of a detail layer, click the
arrow button at the left-hand end its header bar.
To reorder detail layers, drag the header bar of the edit panel to its new
location. If the Look you are editing contains more than two or three
layers, it can be easier to follow the action if you close down the panels
first so that the whole stack is visible at once.
Saving a custom Look
Once you have finished editing a custom Look, you can save it to the
‘My Looks’ presets group by clicking the save look button in the
header bar of the Look settings. Before saving, it’s a good idea to
rename the Look. To do so, double-click the current name in the
settings, type a descriptive name for the Look, and press Enter.
Once the Look is saved you can retrieve it at will through the Presets
Selector, under ‘My Looks’.
The Edit window
The Edit Window is the main preview and editing area of the Title
Editor. This is where you rearrange, resize and rotate the foreground
layers of your title.
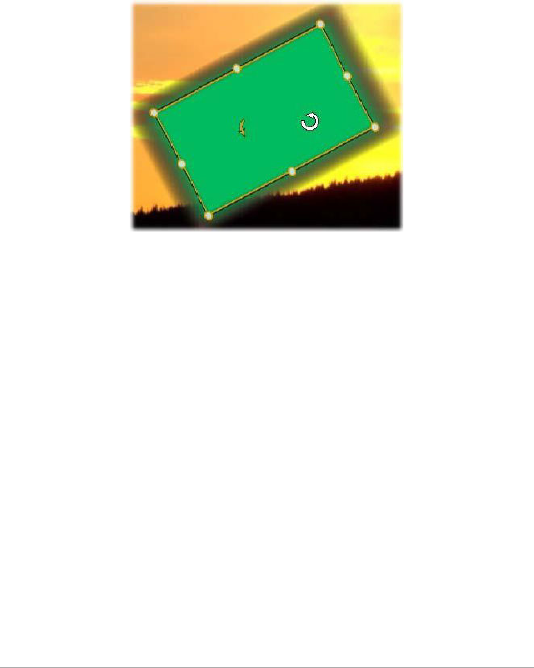
Chapter 7: The Title Editor 211
A necessary first step for most kinds of editing is to select the layer or
layers your want to affect. Selected layers are drawn within a frame
having eight control points for sizing and a rotation handle at the top
for rotating the selection in one-degree increments. Most types of layer
can be ‘grabbed’ for dragging to a new position by clicking directly on
the control frame.
Rotating a shape object within the Edit Window. The smaller
dot at the top center of the control frame is the rotation
handle for the layer. To rotate a layer, click down on its
rotation handle and drag. When you are over the rotation
handle, the mouse pointer will show as a circular arrow.
With text and shape layers, some of the layer content may appear
outside the control frame. This occurs if one of the ‘details’ within the
Look is defined with a horizontal or vertical offset that moves the detail
away from the nominal location of the layer. See “Applying a Look” on
page 198 for more information.
Layer operations in the Edit Window
The operations described here are for a single layer, but can be
extended to work with multiple layers simultaneously. See “Working
with layer groups” on page 227 for more information.
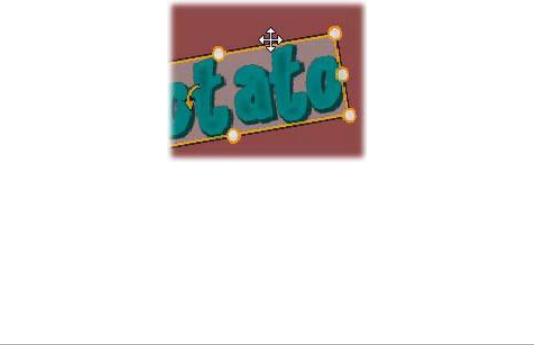
212 Pinnacle Studio User Guide
To select a layer in the Edit Window, click in the layer rectangle with the
mouse. This causes the layer’s control frame to appear, ready for
editing.
Layers respond to mouse clicks anywhere within their containing
rectangle (the rectangle shown by their control frame when selected).
This means that you may not be able to manipulate a layer that is
visible only because it lies beneath a transparent area within the
rectangle of another layer. To perform any editing with the mouse in
such cases, you should first hide the upper layer(s) as described under
“The Layer List”. See page 181 for details.
To move any non-text layer, click down anywhere within its rectangle
and drag to the new position.
To move a text layer, position the mouse near the edge of the layer’s
control frame until you see the drag pointer (four-way arrows) appear,
then click and drag normally. Clicking inside the frame, as you would
do a non-text layer, would instead activate text-edit mode. See “Text
and text settings” on page 213 for detailed information.
To resize a layer but retain its proportions, click down on a corner point
of the control frame and drag outwards or inwards until the desired
size is achieved.
To resize a layer and modify its proportions, click a side point of the
control frame and drag. By resizing with the center control point on

Chapter 7: The Title Editor 213
two adjacent sides in succession, you can produce any desired size and
proportion.
To rotate a layer, click down on its rotation handle and drag. For finer
control over the rotation, move the mouse pointer away from the
center of rotation while dragging. The extra distance makes it possible
to define smaller angles between one mouse position and the next.
To change the stacking position of a layer, right-click the layer, and
select from its context menu one of the commands on the Order
submenu: Send to Back, Send Backward, Bring to Front, Bring
Forward. Convenient keyboard shortcuts are available for all four
operations; respectively, Ctrl+Minus, Alt+Minus, Ctrl+Plus and
Alt+Plus.
Another approach to reordering layers, which may be more convenient
in titles where several layers overlap, is to use the Layer List. For more
information, see “The Layer List” on page 221.
To delete a layer, select the control frame or select it in the Layer List,
then press Delete. Alternatively, you can use the context menu
command Delete Layer. If the layer is a text layer in text-edit mode, the
Delete command (and the Delete key) apply to the layer’s text only, not
the layer itself.
Text and text settings
For all the graphical sophistication of the Title Editor, in many instances
the primary reason for using titles is the text they contain. The editor
therefore provides several specialized options to help you ensure that
you can get your text looking exactly the way you want. The text
operations we will look at below include:
• Editing the text

214 Pinnacle Studio User Guide
• Changing fonts, font sizes and styles
• Setting text justification and flow
• Copying and pasting text properties
The areas of the Title Editor of most interest in text work are the Edit
Window and the Text Settings panel. For styling a text layer, the Looks
section of the Presets Selector and the Look settings panel also come
into play. See “Preset Looks” on page 198 and “Look settings” on
page 205.
Text-edit mode
As described elsewhere, when dragging a text layer you have to be
careful to click at the edge of the control frame, rather than anywhere
within it, to avoid accidentally putting the layer into text- edit mode.
For the operations described here, however, text-edit mode is exactly
what we want. In a newly-created text layer, text- edit mode is already
enabled: you can begin to type immediately and the default text will
be replaced.
To activate editing for an existing text layer, click anywhere inside the
control frame. Text-edit mode becomes active and – to save you an
often-required step – all existing text in the layer is automatically
selected. As usual, selected text is indicated by highlighting.

Chapter 7: The Title Editor 215
A text layer with all text selected. From left to right, the text
editing controls in the header bar above govern letter styling
(bold, italic, underline); text alignment and text flow; and font
name and size. In text-edit mode, the mouse pointer over the
layer has the ‘I-beam’ shape as shown here.
To modify the text itself, simply start typing. The highlighted text
disappears and the text you type takes its place. As you type, the
current insertion point (the place in the text where new letters are
inserted) is indicated by a vertical line.
If you want to add new text without losing what was already there,
click at the desired insertion point after putting the layer in text-edit
mode, or use the arrow keys to maneuver the insertion point as
desired.
You can also highlight (and thus replace) only part of the text before
typing: drag across the letters with the mouse, or hold down Shift
while using the arrow keys. You may also triple click to select all of the
text in the layer or double click on a word to select just that word.
Lastly, if you want to select all the text in the layer again, you can use
the mouse or arrow keys as just described, or give the standard
shortcut Ctrl+A.

216 Pinnacle Studio User Guide
The Text Settings panel
The topmost Settings subpanel is this group of controls for editing and
styling the content of the current text layer.
Using the text field
In cases where text in the Edit Window is difficult or impossible to
access for editing, the text field in the panel provides another
convenient way to select and edit your text. This is the approach to take
if the text is off-screen at the scrubber position, which can happen
when Motions are involved. The text field expands to provide up to
three lines as you type, then adds a scroll bar if further lines are
entered.
Styling highlighted text
Most of the Title Editor text controls are probably quite familiar to you
from using similar controls in other applications. Those that apply to
the highlighted text only are these:
Font styling: To set or unset the bold, italic or underline properties of
the selected text, use the toggle buttons in the header bar, or the
standard keyboard shortcuts Ctrl+B, Ctrl+I and Ctrl+U. The buttons
light up when their respective style options are active.
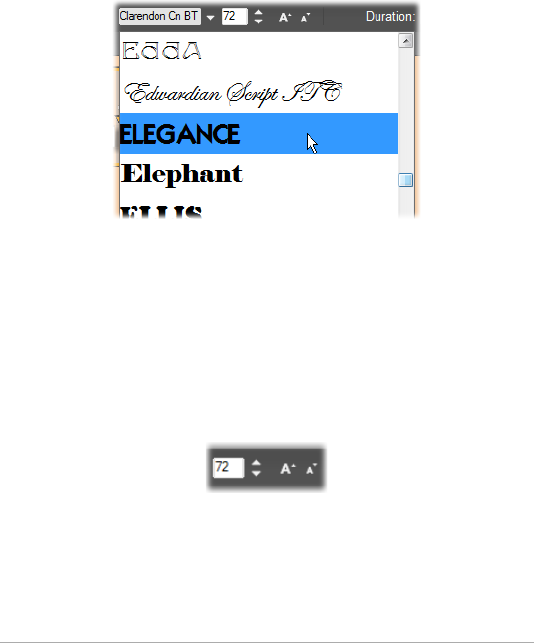
Chapter 7: The Title Editor 217
Font name: Your titles are the perfect place to experiment with fancy
display fonts, so you’ll likely be accessing this dropdown list quite
often. If you have many fonts on your system, the list can be quite long.
For ease of navigation, pressing the first letter of a font name will take
you instantly to the corresponding alphabetical location in the list.
Click the font you want, or move to the name using the up and down
arrow keys and press Enter.
To select a font, open the dropdown list and click the one you
want. The font is applied to the currently-highlighted text
only.
Font size: The Title Editor provides several methods of setting the font
size. You can enter a new value directly into the font-size edit field (up
to 360), or use the neighboring dropdown arrow to display a list of
sizes. Further to the right, the shrink font and enlarge font buttons
change the size in intervals that widen as the font size increases.
Copying and pasting text styles
With both text and shape layers, the Copy Attributes and Paste
Attributes context menu items, found by right clicking on a the control
frame in the Edit Window, let you copy Looks from one layer to
218 Pinnacle Studio User Guide
another without having to open the Looks section of the Presets
Selector.
With text, this operation also replicates the font name, size and style
from one text layer to another, and also works on partial selections
within text layers.
Text alignment
For titles with multiple lines of text, the Title Editor provides a standard
menu of justification options. The default for new text layers is center
justification (Align Center on the dropdown list), in which each
separate line is horizontally centered in the available space. The
additional options provide for Align Left, Align Right and Justify.
Text flow
To accommodate the various conventions of different languages with
regard to the direction in which lines of text are written, and for
maximum graphical design flexibility, the Title Editor offers a menu of
eight text flow options. These options, which work in concert with the
justification options just discussed, affect not just the way the text is
displayed but also the meaning of standard keys like Home and End.
Styling with Looks
As explained in the topic “Preset Looks” on page 198, the appearance
of text and shape layers can be transformed by the application of Looks
from the Presets Selector. In a partially-highlighted text layer, applying

Chapter 7: The Title Editor 219
a Look affects only the highlighted text. In principle, each of individual
character in your title could be given its own Look.
Titles and stereoscopic 3D
If you are working on a stereoscopic 3D project, you don’t have to
settle for a 2D title. The Library includes many titles identified as 3D,
but any title at all can make use of stereoscopic text.
To set a 2D title as stereoscopic, select a text layer, then check the
Stereoscopic box on the Stereoscopic Settings subpanel. Now the Text
Depth setting becomes available; it allows you to change the apparent
distance between the text and the viewer. If you save the title to a
watchfolder, its Library thumbnail will carry the 3D indicator.
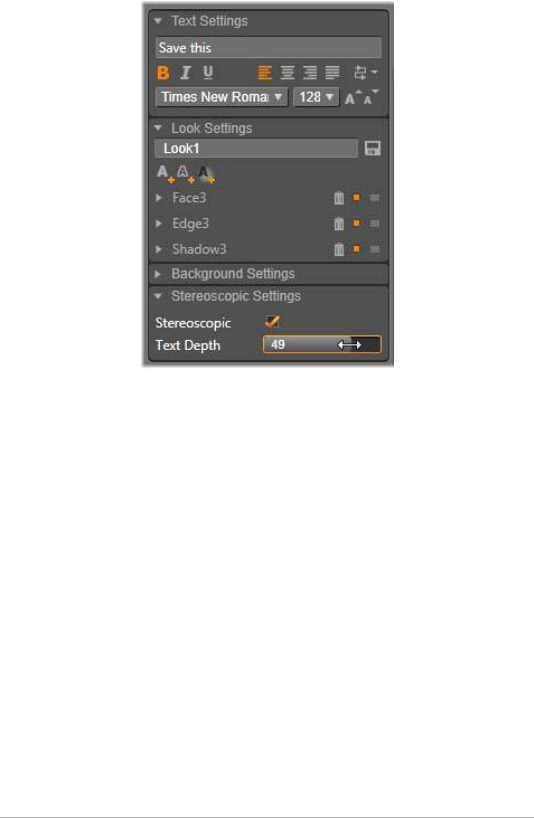
220 Pinnacle Studio User Guide
A stereoscopic title that has been opened from the Library or a 3D
timeline will provide a stereoscopic preview. A stereoscopic title on a
2D timeline will preview in 2D only; the timeline settings must be
changed to 3D in order to get stereoscopic playback.
Text depth: To change the depth of a text layer – its apparent distance
from the viewer – select the layer and open the Stereoscopic Settings
subpanel. Make sure the Stereoscopic box has an orange checkmark
displayed. As you increase the value in the Text Depth slider, the text
recedes from view; decreasing the value brings the text closer.
As you adjust the depth of the text, you may have to adjust the font
size as well. Moving the text into the distance can decrease its apparent
size to the point of unreadability, while bringing the text closer can
make it too large to fit in the title frame.
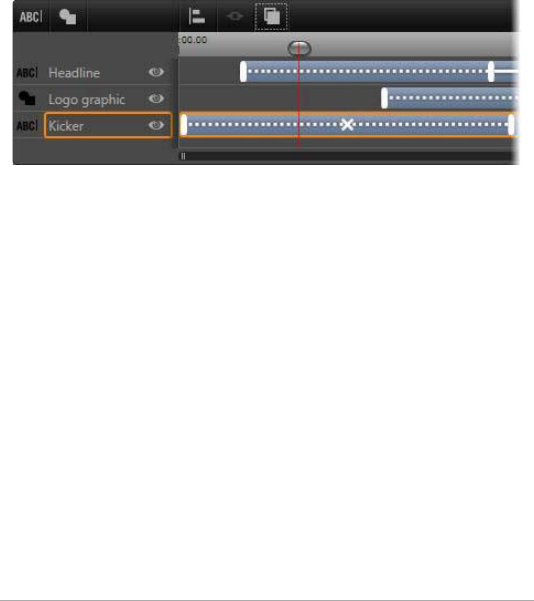
Chapter 7: The Title Editor 221
The Layer List
The Layer List, which occupies most of the bottom part of the Title
Editor display, has two columns: one of layer headers, and one of
timeline tracks. In each row, the header contains the name of the layer,
and a visibility button. To the right of the header, the timeline track
serves as a graphical editor for controlling the lifespan of the layer
within that of the title as a whole, and the durations of any Motions
that have been assigned to the layer.
The left-hand portion of the Layer List contains the layer
headers; to the right is an animation timeline where the
timing of each layer, and of any Motions applied to them, is
displayed and can be modified. (Only the leftmost portion of
the timeline is shown here.)
If the title you are editing was opened from the Movie Editor or the
Disc Editor, the Layer List timeline represent the current length of the
clip. To modify it, return to the timeline of your project and trim the
title there.
If the title was opened from the Library, and so is not bound to a clip
in the project, its length can be edited in the Title Editor. Set the desired
duration by entering a value directly into the duration counter at the
right side of the toolbar. All layers will be adjusted relative to the new
duration.

222 Pinnacle Studio User Guide
The Layer List toolbar is home to several important groups of controls
(see “The toolbar” on page 224).
Working with the Layer List
The Layer List is a multitrack timeline very similar in conception to the
timeline of the project itself in the Movie Editor or Disc Editor. Some
operations, such as those to do with Motions, are particular to the Title
Editor, however.
Layer operations
The procedures described here are all carried out in the header area of
the Layer List.
Selecting layers
Clicking a header in the Layer List has the same effect as selecting the
layer in the Edit Window (and vice versa). The layer name highlights,
and the layer’s control frame appears. Multiple selection is also
allowed, using the standard Windows mouse and keyboard
combinations Shift-click (extend selection), Ctrl-click (toggle selection
of one item), and Shift+Ctrl-click (extend selection from last item
clicked). See “Working with layer groups” on page 227 for information
on how to use multiple selections.
Layer names and renaming
When you create a new layer, the Title Editor gives it a default name
based on the resource name or file name. Since the default names are
often not very descriptive of the layer contents, it may be helpful in a
title with a number of layers to give them custom names that make it
easier to tell at a glance which name goes with which layer.

Chapter 7: The Title Editor 223
The name of a new text layer is the same as its default text (“Your text
here”). Unless you give the layer a custom name, its default name will
continue to match whatever text you type into the layer. Once you do
rename a text layer, further changes to the text are no longer reflected
in the layer name. The default behavior can be restored by setting a
blank name, however.
To rename the primary layer, click its name. An edit field opens with the
existing name selected. Type the new name, then press Enter or click
outside the edit field to finish.
Reordering layers
As we saw in the topic “Layer operations in the Edit Window” on
page 211, the position of a layer in the layer stack can be altered by
means of commands on the Layer context submenu, or by keyboard
shortcuts such as Ctrl+Plus (Layer > Bring to Front).
The Layer List offers a more direct approach: simply drag the layer
header to a new position in the list. This is particularly handy in
situations where overlapping layers make mouse selection difficult. As
you drag the layer, an insertion line shows where the layer will appear
in the list when dropped.
Using multiple selection (see “Selecting layers” on page 222) you can
drag several layers at once to a new position.
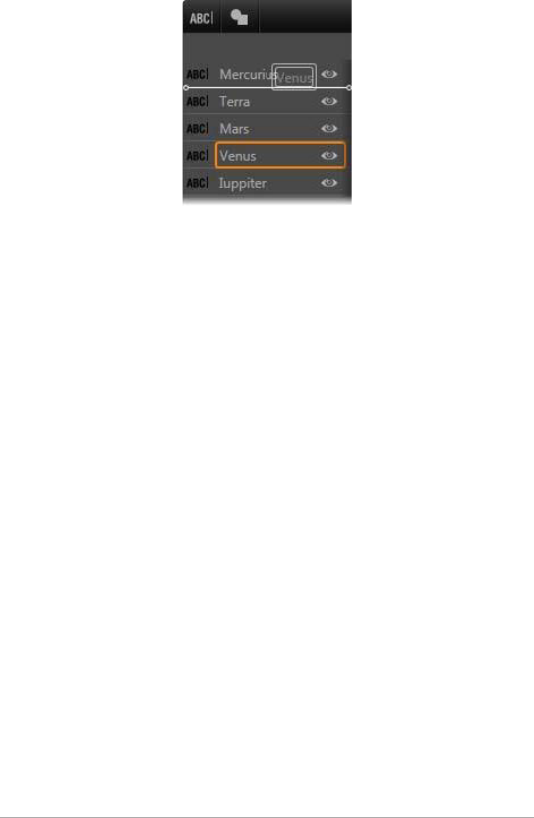
224 Pinnacle Studio User Guide
Hiding and locking layers
A complex title can get crowded very quickly as you add layers to the
composition, and Motions to the layers. The visibility button at the
right-hand end of the layer header is handy for simplifying such
situations.
Click the eye-shaped visibility button to temporarily remove a layer
from the Edit Window. The layer’s information and settings are
preserved, but you will be able to work on other layers for the time
being without the hidden layer obscuring either your view or your
mouse actions. Click again to restore the layer to visibility.
The toolbar
The controls and readouts on this header bar are in groups. From left
to right:
•The add text and add shape buttons allow you to create new
‘vector-based’ layers to which Looks from the Presets Selector can
be applied. Clicking add text adds a new text layer with a default
Look and caption. As a shortcut for add text, you can simply
double-click any unused area of the Edit Window. Clicking add
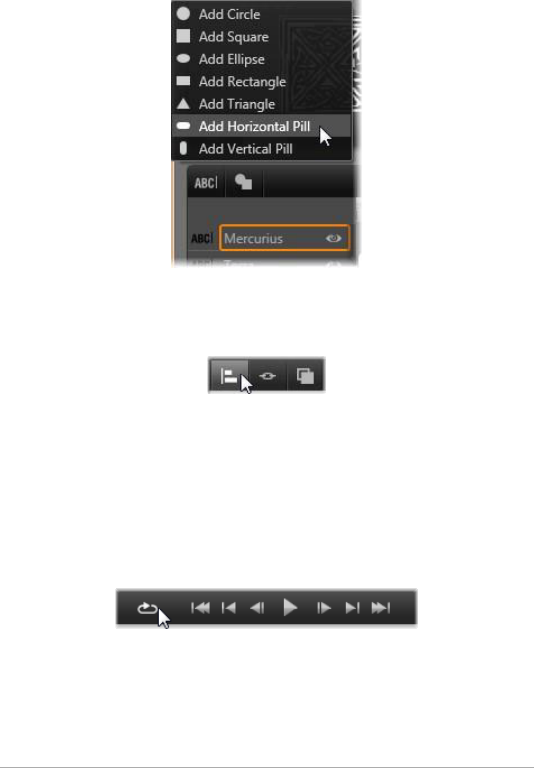
Chapter 7: The Title Editor 225
shape opens a pop-up menu from which you can select a
particular shape as the contents of the new layer.
• Each of the align, group and order buttons opens a pop-up menu
of commands that can affect multiple layers. These commands are
covered under “Working with layer groups” on page 227.
• The 3D viewing mode switcher appears if you are editing a
stereoscopic 3D title. Please see the “3D viewing mode switcher”
on page 43 for information on the available formats.
• The transport buttons allow you to preview your title without
leaving the Title Editor. From left to right, the functions of the
buttons are: loop play, jump to start, go back one frame, play/
pause, advance one frame, and jump to end.
The loop play button loops continuously once started; to halt
it, click anywhere on the Edit Window, or click loop play
again. As usual, pressing Space provides a convenient
shortcut for stopping and starting playback.
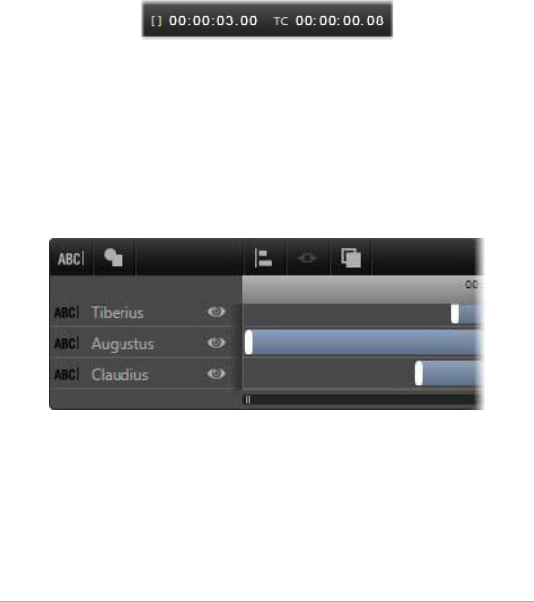
226 Pinnacle Studio User Guide
•The System Volume and Mute button allows you to adjust the
speaker volume of your system. It does not change the audio level
of any clips on your timeline.
• The counters show the duration of the title and the current position
of the Layer List timeline scrubber in the usual hours, minutes, seconds
and frames format. For titles that come from your project rather than
the Library, the scrubber position shown is relative to the start of your
project’s timeline, not the start of the clip.
Editing layers and Motions
When a layer is created, its duration is set to the full span of the title
of which it is a part. To delay the first appearance of a layer in the
running title, or to banish one layer while continuing others, drag the
ends of the layer along the timeline in the same fashion as clip editing
on the timeline of your project.
A title is like a stage on which the layers are actors who come
on for their big scene and then depart. Trimming the layers in
the Layer List timeline allows you to control precisely the
timing of their entrances and exits.
Up to three Motions – one of each type – are allowed to each layer.
These are also displayed on the timeline, where their durations too can

Chapter 7: The Title Editor 227
be adjusted. Enter and exit Motions are each anchored to their
respective ends of the layer lifespan, but the end of the enter Motion
and the start of the exit Motion can be freely edited with the mouse.
If the layer has an emphasis Motion, it occupies whatever unused
duration remains (up to the whole length of the title).
Three layers with Motions. The top layer has only an Emphasis
Motion (solid line), which therefore uses the full duration. The
bottom layer has Enter and Exit Motions, and a static interval
between them. The center layer has Motions of all three types.
The Enter Motion is being trimmed (note the horizontal arrow
cursor); as its length changes, the Emphasis Motion self-
adjusts to consume fully any unused time.
To replace one of the Motions used by a layer, simply add the new
Motion as usual: an existing one of the same type will be overwritten.
To delete a Motion without replacing it, select the layer and click the
small ‘x’ in the center of the Motion’s timeline graph.
Working with layer groups
The Title Editor Layer List allows you to group layers on either a
temporary or a permanent basis.
To create a temporary group, you will use standard multiple selection
techniques whether in the Edit Window or on the Layer List. You can
then make changes, such as applying a Look, to all the members of the
group simultaneously. The group remains whole only until you click
another layer or an empty area of the Edit Window, whereupon the

228 Pinnacle Studio User Guide
layers resume their individual existences. In a temporary group, the
control frames of each member are all visible at once.
To create a permanent group, you first create a temporary group, then
click the group button on the Layer List toolbar (or use the Group
command from any member’s Grouping context submenu).
Once created, the group stays together until you explicitly disband it
with the ungroup button or menu command, or by dragging the
member layers out of the group in the Layer List. One further
command, regroup, automatically reconstitutes the last group to have
been ungrouped.
When a permanent group is selected, it has a shared control frame that
encloses all its members. The control frames of the individual members
are not visible.
Permanent groups have their own header entries and timeline track in
the Layer List. The group header can be expanded or collapsed to reveal
or hide the headers for the member layers. When the group is open,
its member layers are indented with respect to the group header.
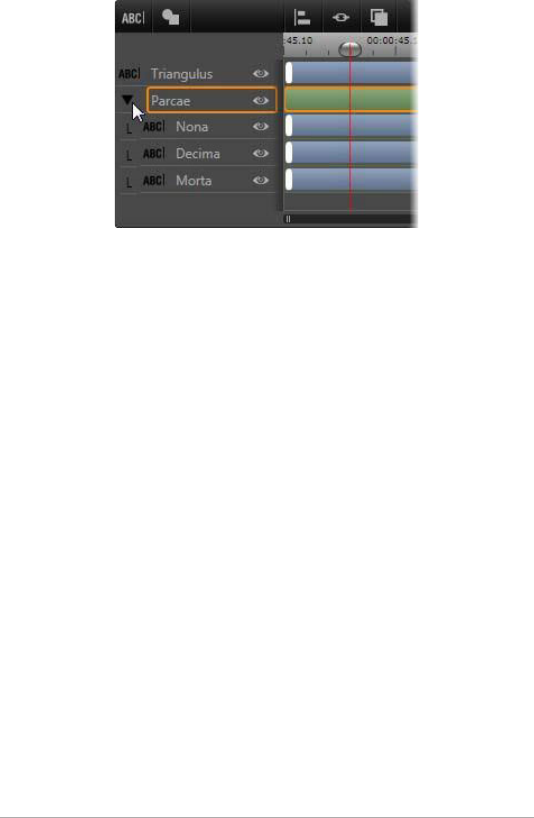
Chapter 7: The Title Editor 229
An ordinary layer and a group with three member layers in the
Layer List. The timeline graphics show that Motions have been
applied to the group itself and to one of its members. The
mouse pointer is positioned to collapse the group, which
would hide the names of the member layers.
Temporary groups and permanent groups respond differently to many
commands as detailed below.
Note: Even when a layer belongs to a permanent group, it can
still be individually selected, either in the Edit Window (unless
the group itself is currently selected) or the Layer List. A member
layer can even be added to a temporary group with other layers
inside or outside the permanent one.
Multiple selection of layers
The first step in making a group is to select the multiple objects that
will comprise it. In the Edit Window, this can be accomplished in two
ways:
• By clicking and dragging with the mouse to mark out a selection
rectangle (a ‘marquee’) that intersects all the objects you want to
group.
• By clicking the first object you want to group, then Ctrl-clicking
each of the others.

230 Pinnacle Studio User Guide
Another approach to multiple selection uses the Layer List. For more
information, see “Working with the Layer List” on page 222.
Edit Window operations on the group
Both temporary and permanent groups can be repositioned, resized
and rotated.
To reposition any group, drag it to the new position as though it were
an individual layer.
To rotate a permanent group, drag the rotation handle of the shared
control frame. All members of the group revolve about their common
center like planets revolving around the Sun.
To rotate a temporary group, drag the rotation handle of any member.
All members of the group rotate about their own centers like planets
rotating on their axes.
To resize a permanent group, drag any control point of the shared
frame. The size of the whole group changes as though you were
stretching a rubber sheet with all the layers painted on it.
To resize a temporary group, drag any control point of any member’s
control frame. Each layer is affected individually, expanding or
contracting in place about its own center.
In resizing operations on groups, as with individual layers, dragging by
a corner control point preserves the aspect ratio of the layer, whereas
dragging by a side control point allows the proportions to be altered.
Applying properties to a group
Once a temporary group is selected, any property settings you make
will affect every member to which the property is applicable:

Chapter 7: The Title Editor 231
•If you apply a Look, any text or shape member will receive it.
•If you add a Motion by right-clicking a Motion icon and choosing
Add to selected layer(s), the result will be the same as if you had
added it to each member individually.
•If you select a font, or change any other text styling attribute,
every text member of the temporary group will be updated.
Except in the first case, permanent groups have their own rules for
these operations:
•If you apply a Look, it works the same as with a temporary group:
all text and shape layers in the group are affected.
•If you add a Motion to a permanent group, the group is treated
for the purposes of animation as a single graphic object, without
regard to the letters, words or lines its members may contain.
However, the individual Motions of its members continue to run
along with that of the group as a whole.
•Text stylings cannot be applied to a permanent group.
Aligning layers in temporary groups
The final type of group operation, one that applies to temporary
groups only, is provided by the group align button on the Layer List
toolbar. The commands, of which there are three for horizontal and
three for vertical alignment, affect all the members of the group except
for the first selected, which sets the position for the others.

232 Pinnacle Studio User Guide

Chapter 8: Sound and music 233
Chapter 8: Sound and music
Video may be thought of as primarily a visual medium, but the role of
sound in your movies is often no less important than that of the images
on the screen.
Feature film and television productions include numerous types of
audio, beginning with the dialog and other sounds created during live
action. In your movies, that raw soundtrack – the original or
synchronous audio – is imported along with the video, and remains
bound to it unless you explicitly separate them.
Most commercial productions also require sound effects – slamming
doors, crashing cars, barking dogs – and incidental music, which may
consist of music created especially for the production, songs taken
from recordings, or both. With the ScoreFitter tool, you can even
create a full-length musical background track at the press of a button.
Voice-overs and other types of customized audio are also often
needed.
Audio features of Pinnacle Studio
On the timeline of your movie or disc project, audio clips behave very
similarly to clips of other types, but the timeline also has some features
just for audio.

234 Pinnacle Studio User Guide
In this group of timeline toolbar buttons, the highlighted
buttons are audio-related: Audio Mixer, Create Song, Voice
Over, and Audio Ducking.
At the right-hand end of the toolbar, these buttons activate
audio keyframing (left) and audio scrubbing (right).
For instance, the timeline toolbar includes a button for a pop-up audio
mixer and a button for controlling clip dynamics with keyframes. One
button lets you create a ScoreFitter background music clip; another in
the same group lets you record a voice-over. Further along on the
toolbar is a toggle button for audio scrubbing; which allows you to
monitor audio in brief snatches as you drag the scrubber along the
timeline.
The Library
Audio and music clips enter your productions via the Library, which
handles audio files in wav, mp3 and other standard formats. When you
want to add audio files to your production, you can do so by dragging
the desired asset from the Library Browser directly onto the timeline of
your project.
Corrections and effects
The correction tools in the Audio Editor let you apply various repairs
and customizations, including noise reduction, compression and
equalization, to audio clips in your project. Unlike effects (discussed
next), these tools can also be applied to audio assets in the Library.

Chapter 8: Sound and music 235
When you later use the asset in a project, the corrections will come
with it; you can modify them further from the timeline if you choose.
Corrections are non-destructive, meaning that the corrected audio file
is not modified in any way.
The effects in the Audio Editor provide a number of ways of enhancing,
transforming or having fun with sound clips on the timeline. Unlike the
correction tools just discussed, effects can’t be applied directly to
Library assets, but only within a project. The effects come with preset
parameter combinations that you can further edit according to your
needs.
The Audio Editor
The Audio Editor provides tools for previewing, analyzing and
manipulating digital audio from wav, mp3 and other file types. It
includes special features for the original or synchronous audio track
created during video recording.
For the general interface of the Audio Editor and the other media
editors, please see Media editing overview.
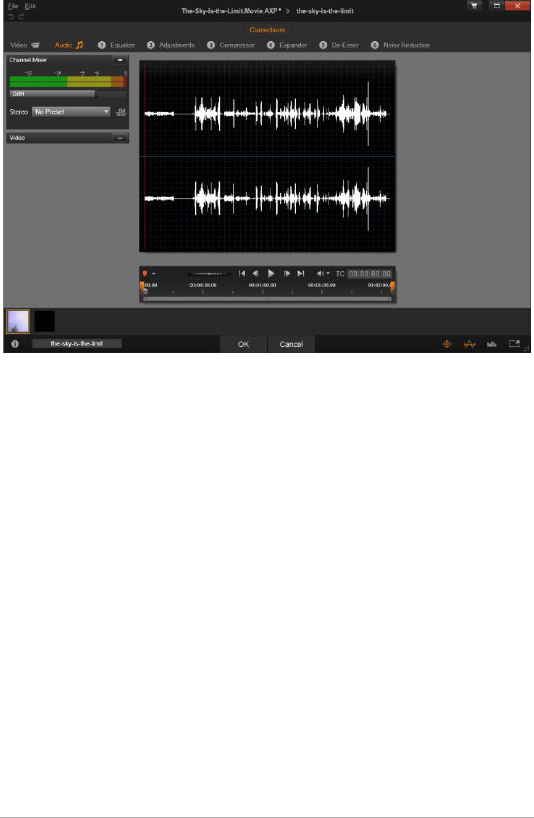
236 Pinnacle Studio User Guide
Trimming and editing the stereo soundtrack of a Library video
asset. At left is a video monitor panel and the channel mixer.
The darkened portion of the waveform (center) represents
material removed from this stereo sound by trimming on the
timeline at bottom. The Compressor correction filter has been
applied (right).
The Audio Editor provides two sets of tools for different purposes.
These are Corrections and Effects. Corrections are available both for
Library assets and for clips on your timeline of your movie or disc
project. Effects are available for timeline clips only.
Corrections
When opened from either the Library or the timeline, the Audio Editor
provides access to a suite of correction tools for overcoming common
flaws such as excess sibilance in recorded speech. If you are editing a
Library asset, any changes you make will be preserved when it is later

Chapter 8: Sound and music 237
used in a project. Changes to a clip on the timeline, however, have no
impact outside the project to which they belong.
For information about opening the Audio Editor to access the
correction tools, along with general functions of the media editors,
please see “Media editing overview” on page 126. The transport and
marker controls are the same as for editing videos, and are described
in “Video tools” on page 142. For descriptions of the audio editing
tools themselves, see “Audio corrections” on page 241.
Effects
As just mentioned, when the Audio Editor is opened from the timeline,
it provides a set of correction tools whose main purpose is to repair
defects in media. These tools can be applied directly to assets in the
Library as well as clips in the project.
With timeline clips only, the Audio Editor also provides a set of audio
effects. These afford a wide range of possible ways to adjust or
enhance your clips. Please see “Audio effects” on page 246 for details.
Channel mixer
The channel mixer allows you to make level adjustments and redirect
audio signals from their original channel assignments to new ones. For
instance, you can use the mixer to condense separate stereo channels
to a left or right mono channel.
The mixer panel originally opens in the left-hand column of controls,
but can be dragged to a new docking position at either side of the
window. Other panels will reposition themselves as needed while you
drag.
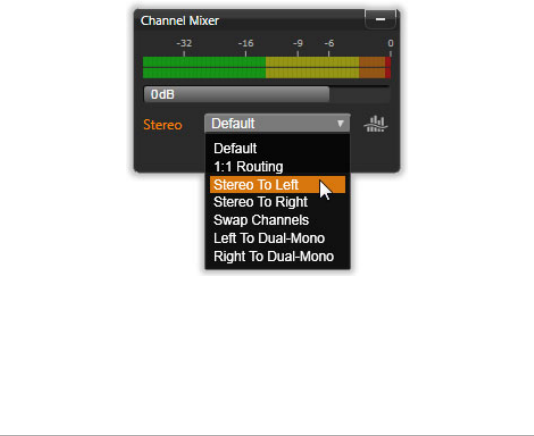
238 Pinnacle Studio User Guide
If you need functions the channel mixer does not provide, consider
applying the Channel Tool effect to the clip. See “Audio effects” on
page 246 for information about the Channel Tool.
Level adjustment: Click on the slider under the level meters to set the
playback level of the clip. The level you set will be used whenever this
clip is played or used in a timeline. The red area on the meters
represents overmodulation of the sound and should be avoided if
possible. To determine the maximum level you can safely use, click the
normalize button.
Channel routing: This dropdown list contains all options for redirecting
audio signals, such as a channel exchange (left interchanges with right,
for example), or combining a two-channel stereo signal onto one
mono channel. The 1:1 routing option routes the audio signal without
changes.
Selecting a Channel Routing option in the Channel Mixer. Just
above the list is the Level Adjustment slider (at the default
setting of 0dB). To the right of the list is the Normalize button.
Normalize button: The normalize button examines the audio samples
in the loaded sound to determine the amount of uniform increase that
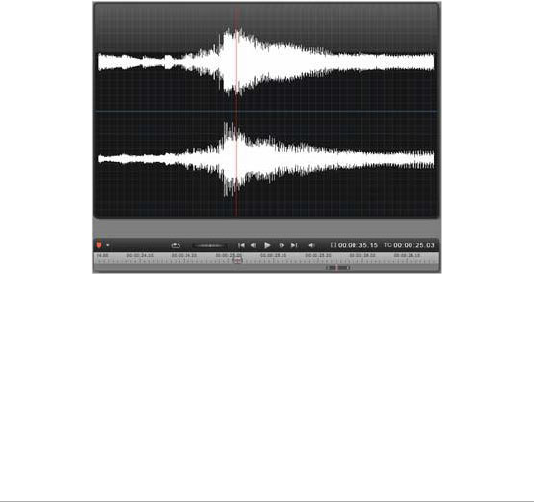
Chapter 8: Sound and music 239
can be applied without overmodulation (harsh digital clipping) of any
sample. Unlike compression and limiting, which modify the dynamics
of audio material, normalization preserves dynamics by uniformly
increasing (or decreasing) amplitude.
Waveform graph and frequency spectrum
The waveform The waveform graph of the audio is shown in the
central display. It shows statically how the amplitude of the sound
changes with time. If you zoom in on the sound as far as possible, the
vertical lines on the graph indicate individual sound samples. The
waveform graph is also seen in the Library (‘source’) Player when an
asset is selected.
The waveform graph shows the change in audio levels over
time. For stereo recordings, the graph is horizontally divided
as shown here, with the left channel uppermost.
An alternative, dynamic view of the same audio material is given by the
frequency spectrum display, which shows the changing spectral
composition of the sound as it plays back.
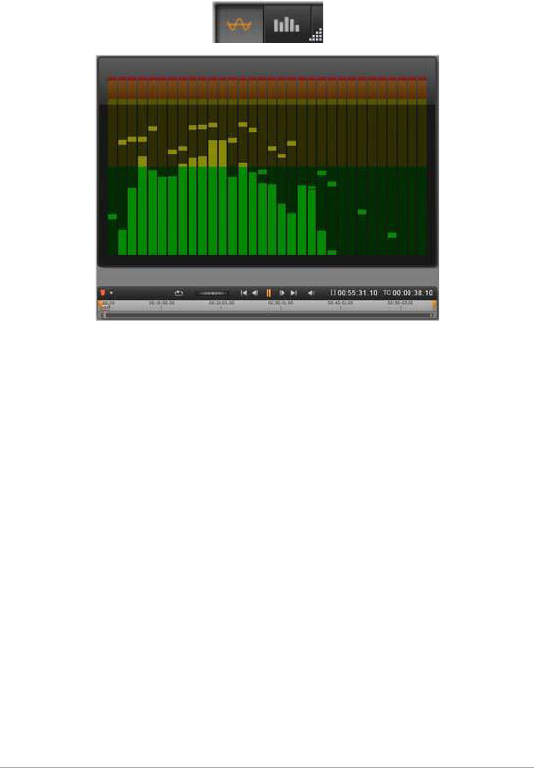
240 Pinnacle Studio User Guide
The waveform and frequency buttons at the lower right of the Audio
Editor let you switch between these complementary displays at will.
The frequency spectrum breaks down the audio signals by
frequency bands, showing the sound level in each band.
Lower frequencies are on the left. Peak levels are shown as a
small box above each main bar for which a peak has been
detected in the past few seconds.
Controls for synchronous video
If you are editing video that has a synchronous audio track, both video
and audio editing facilities are available through the Video and Audio
buttons at the top of the window. While you are in the Audio Editor, a
video monitor panel is also available.
Video / audio switch
If video is available, a tab is provided at the top left of the screen for
switching to the Video Editor. For details on the controls available
when the Video tab is selected, please see “Correcting video” on
page 141.
Chapter 8: Sound and music 241
Video monitor
If synchronous video exists for the currently-selected audio, a small
video preview panel opens at the upper left of the Audio Editor. While
you are previewing the sound, the video monitor lets you follow the
action visually as well. If you switch to the Video Editor, you will see a
waveform display panel at the same screen location. See “Correcting
video” on page 141.
Audio corrections
The correction facilities in the Audio Editor are Equalize, Compressor,
Expander, De-esser and Noise reduction. Each can be applied both to
Library assets and to timeline clips.
Equalize
Equalizers are similar in principle to the treble and bass controls of an
audio system, but with finer adjustment capabilities. This equalizer
divides the audio spectrum into five frequency bands, each centered on
a specified frequency and with a settable amount of gain.
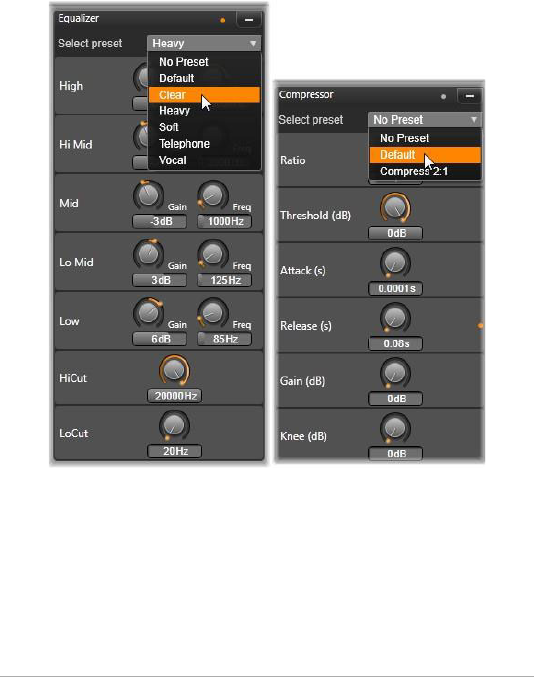
242 Pinnacle Studio User Guide
Preset list: A number of fixed presets can be selected from the
dropdown list; for example, you can select a ‘telephone voice’ effect.
Gain: Using the Gain parameter, you can determine the amount that
the respective frequency band contributes to the overall sound (from -
18 to +18).
Settings and presets for the Equalize and Compressor audio
corrections. Most Expander settings (not shown) are the same
as those of Compressor. See the description for details.
Frequency: Using the Frequency parameter you can specify the center
frequency of each band.

Chapter 8: Sound and music 243
LoCut and HiCut: These controllers completely eliminate frequencies
below or above a set value. The default values allow all frequencies.
Adjustments
The only parameter available under the Adjustment tool the is LFE
(Subwoofer), which lets you either activate or deactivate the
Subwoofer channel for a particular clip, or to stay with the Library’s
setting, determined on import.
Compressor
A compressor smooths the dynamics instant by instant in an audio
signal, scaling back the loud sections while typically boosting the
overall sound. This gives the impression of a stronger signal, even
though the level peaks are not higher after compression than before.
Light compression is very commonly applied in audio mastering of
music tracks. Compression can also be used creatively in numerous
ways depending on the material.
Preset list: Choose from a number of premade parameter sets for the
compression filter.
Ratio: This control sets the compression ratio, which is the amount of
compression applied to sections of the input signal that exceed the
Threshold setting. For example, a 2:1 compression ratio means that a
2 dB increase of source level above the threshold produces only a 1 db
increase in the output level. The allowed range is from 1:1 (no
compression) up to 100:1 (hard limiting).
Threshold: All levels above this setting are attenuated by the value set
in Ratio. You can apply an overall boost with the Gain controller to
compensate for the level lost.

244 Pinnacle Studio User Guide
Attack and Release: Attack governs how quickly the compressor
responds to an audio signal that has crossed the threshold. Larger
values delay the onset of compression, allowing (for example) the brief
attack of a piano note to remain distinct, while applying compression
as usual for sustained sounds. Release controls the speed with which
compression is switched off when the signal falls back below the
threshold.
Gain: It is best to make adjustments to the gain after it has already
been compressed.
Knee: A higher knee value causes compression to take hold gradually
as the threshold sound level is approached and departed from, rather
than switching on all at once. This changes the tonal qualities of the
compressed sound.
Expander
The Expander decreases the gain of signals that fall below a chosen
threshold. Expanders provide a gentler way of reducing noisy low- level
signals than the abrupt cut-off of a gate.
Ratio, Threshold, Attack, Release: These parameters have the same
meanings as in the Compressor (see above).
Range: This controls the maximum gain reduction (attenuation).
Hold: This determines how long the expander remains active after the
initial attack. Increasing this value is useful when, between louder
signals, there are small pauses or much quieter passages that should
not be amplified. In this use, the expander works like a noise gate.
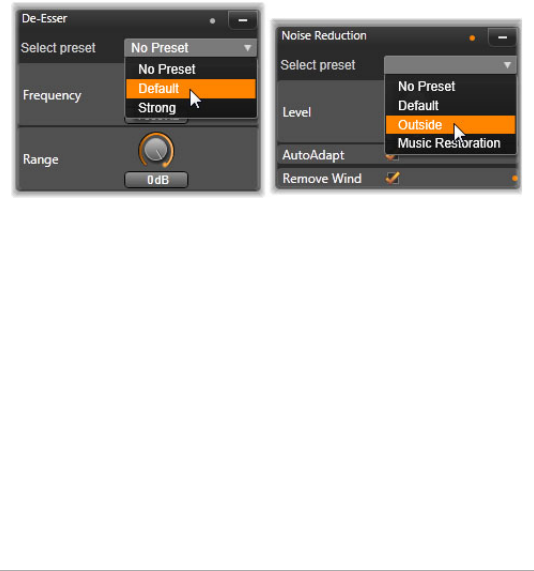
Chapter 8: Sound and music 245
De-esser
This audio filter inconspicuously removes distracting sibilance from
recorded speech. The available parameters allow individualized fine
adjustment of the effect.
Frequency: This knob sets the frequency above which the De-esser is
deployed.
Range: This knob controls the maximum attenuation that will be
applied to the detected sibilance.
Setting and presets for the De-esser and Noise Reduction
audio corrections.
Noise reduction
Using the noise reduction filter you can reduce or eliminate undesirable
background noise. The filter reacts dynamically to changing amounts
and kinds of noise within the material.
Noise reduction can be applied for a range of problems. The results
obtained may differ, however, depending on the source material and
the origin of the problem. In many cases the results can be optimized
through targeted use of the Level and Fine Tuning parameters.

246 Pinnacle Studio User Guide
Since a new setting may take a few seconds to go into effect, make
changes slowly and in small steps, carefully auditioning each change.
Level: Outdoor video recordings in which the subjects are far from the
microphone frequently suffer from excess background noise. It may
even be enough to obscure sounds of interest, such as the subjects’
voices. Under the same conditions, the operating noise of the
camcorder itself, or the words of its operator, may be amplified to an
off-putting degree. Experiment with the Noise reduction level until the
best possible results for the source material have been achieved.
AutoAdapt: While this option is active, Noise reduction automatically
and dynamically adapts to the type and amount of noise in the
material. The Fine tuning option is ignored while AutoAdapt is
selected.
Fine tuning: This controls the amount of correction. Its effect is only
significant when lower Level settings are used, and it has no effect at
all when AutoAdapt is active.
Remove wind: Select this check box to activate a filter that reduces
wind and similar background noises in the current audio.
Audio effects
Audio effects, like video effects, are found in the Library under the
Creative Elements branch. One way to add an effect to your project is
to drag it from the Library onto any audio clip (including video clips
with synchronous audio).
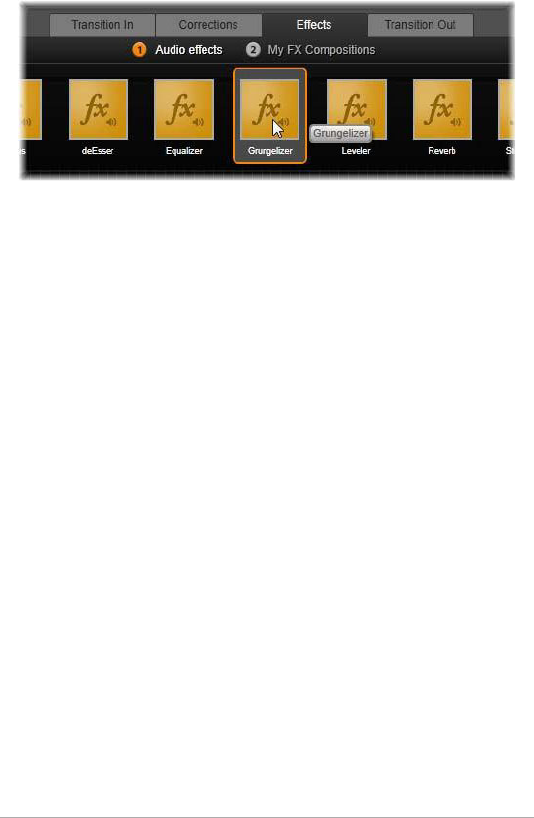
Chapter 8: Sound and music 247
Adding the Grungelizer audio effect to the current clip.
Usually, though, effects are added with the help of an Effects panel in
the Audio Editor, which lets you easily preview and customize them.
The panel is available whenever you are working on timeline clips with
audio. The panel is not available when you open the Audio Editor from
the Library. (In contrast, the tools on the Audio Editor’s Corrections
panel are always provided.) See “The Audio Editor” on page 235, and
“Audio on the timeline” on page 249 for details.
The overall interface for audio effects is exactly the same as that for
video effects. The common features are not covered here. (See
“Chapter 5: Effects” on page 149.) A few audio effects, such as the
Equalizer and the De-esser, double as correction tools. These are
covered under “Audio corrections” on page 241. Let’s now take a look
at the other audio effects.
Channel tool: The basic action of this effect is to route your stereo
audio signal. It allows you to connect either or both of the left and
right input channels to either or both of the output channels. In
addition, channel tool offers special-purpose presets, including phase
reverse and voice removal – the ‘karaoke’ effect.
Chorus: The Chorus effect creates a richer sound by repeatedly
reintroducing ‘echoes’ into the audio stream. By controlling properties
such as the frequency with which the echoes recur, and the decay in

248 Pinnacle Studio User Guide
volume from one repetition to the next, a variety of results is possible,
including flanger-like sounds and other special effects.
Grungelizer: The Grungelizer adds noise and static to your recordings.
It can make your clips sound as though you were hearing them on a
radio with bad reception or a worn and scratched vinyl record.
Leveler: This effect helps compensate for a common problem in
recording audio for video productions: the imbalance in the recorded
volume of different elements in the original audio. For instance, your
commentary as you shoot the video may be recorded at such a high
level that it overwhelms other sounds at the location.
The trick in using the Leveler is to find a target volume somewhere
between that of the loud and soft audio in the original clip. Below that
volume, Leveler increases the original level by a fixed ratio. Above the
target volume, Leveler acts as a compressor, reducing the original level.
With careful adjustment of the parameters, the internal balance of the
audio can be significantly improved.
Reverb: The Reverb effect simulates the effect of playing back the
source sound in a room of a given size and sound reflectivity. The
interval between the arrival of the original sound at the listener’s ears
and the first echoes is greater for a large room than a small one. The
rate at which the echoes die away depends on both the room size and
the reflectivity of the walls.
The presets for Reverb are named for the type of room they simulate,
from the passenger cabin of a car all the way up to a huge
underground cavern.
Stereo echo: This effect allows you to set separate delays on each of
the left and right channels, with feedback and balance controls to
provide a variety of interesting sounds.

Chapter 8: Sound and music 249
Stereo spread: This effect allows you to decrease or increase the
apparent width of the stereo listening field in an audio clip. Most often
it is used to create a mix that sounds more open and spacious.
Audio on the timeline
The audio levels and stereo or surround positioning of individual clips
can be adjusted directly on the timeline using audio keyframing. The
same operations can also be accomplished with the Audio Mixer panel,
which pops out to the right of the timeline header when you click its
access button. Both methods have their own advantages. Making the
adjustments on the timeline gives a good sense of time versus volume
or balance, whereas the Audio Mixer, in combination with the Panner,
facilitates mixing – separately adjusting the volume and balance of
each audio- containing track.
Surround sound
The Panner tool is fully surround-capable. For maximum flexibility, you
can position any clip’s audio as desired in a two-dimensional listening
field – from front to rear as well as left to right.
If you mix the audio for every clip as though for surround playback, you
can still output a movie file with a stereo soundtrack using just the left-
right balance information. If you further decide to output your project
on DVD, the 5.1 surround-sound production will already be complete.
Timeline audio functions
Along with the track management functions, the header area of the
timeline is also home to a number of audio controls.
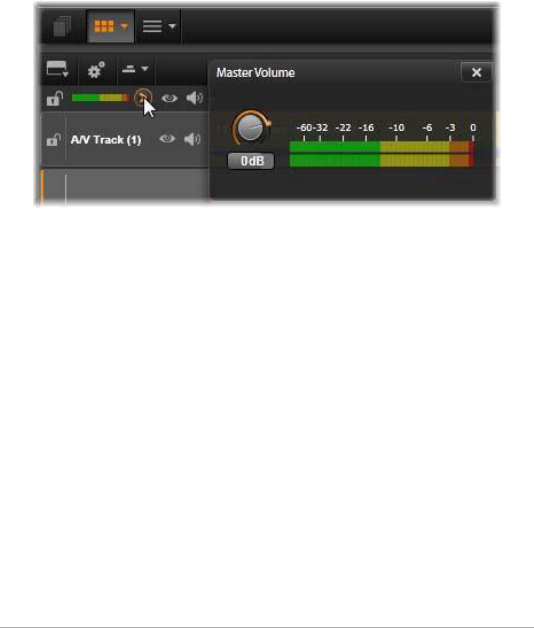
250 Pinnacle Studio User Guide
Master playback level
Above the timeline track headers is a master playback level indicator.
As you preview your project, it shows the total output from all tracks
as currently mixed. The expand icon to the right of the indicator opens
a small floating window with separate level indicators for each output
channel, and a master gain control to trim the output level up or down
uniformly.
Click the icon next to the master playback level indicator to
open the Master Volume panel, where you can apply an
overall volume gain to the composite audio output of your
project.
Audio mixer
The audio mixer panel pops out to the right of the track headers when
you click its access button in the timeline toolbar. For each timeline
track, the panel provides two fader knobs.
Track level: The left knob sets the output level of the track as a whole.
Its numeric value is shown in a small pop-up window when the mouse
pointer is over the knob. The default value of 0dB (which you can
restore with a double-click on the knob) means that no overall change
is applied to the original volume of the clips on the track. Clicking on
the small window opens an edit field where you can enter the desired
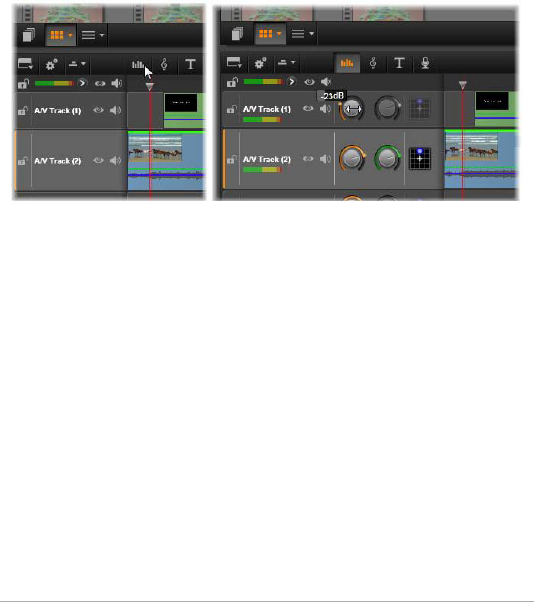
Chapter 8: Sound and music 251
level. You can also set it by dragging horizontally within the small
window.
Clip level: The other knob sets the level of the current clip at the
scrubber position. If no clip is currently selected on the track, this
second knob is unavailable. The volume contour of a clip can be
controlled with keyframes, as discussed immediately below. When
keyframing is in use, the clip level knob causes new keyframes to be
created or existing ones to be repositioned.
When its access button above the timeline (L) is clicked, the
audio mixer panel pops out to the right (R). Each track has
two knobs. The first adjusts the level of the track’s overall
audio output, the second controls the levels of the current
clip. It can be keyframed for moment by moment level
control. The third icon on each track opens the Panner.
Volume keyframing
An audio clip’s level can be varied at will using keyframing, which
allows you to create a volume envelope that reflects the dynamic
changes you want within the clip. The envelope appears as a green line
on the clip; the keyframes are represented by small, square ‘control
handles’ along the line. On playback, the clip volume tracks the
envelope line as it moves smoothly from one keyframed level to the
next.
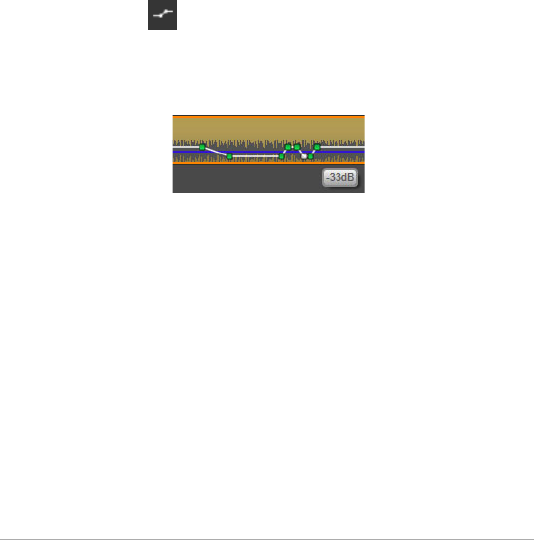
252 Pinnacle Studio User Guide
If there are no keyframes on a clip, the volume contour is a horizontal
line representing the default clip volume. To add a keyframe, make sure
the volume keyframe editing button on the timeline toolbar is selected,
then click on the volume contour of the clip. Alternatively, you can
position the scrubber to the desired keyframe location, then simply
click the clip level knob; this second method works whether or not the
keyframe editing button is lit. In either case, a control handle should
appear on the clip. From now on, each change to the clip volume
either creates a new keyframe, if there is not one at the current
position, or updates the value of one that is already present.
To allow keyframe editing with the mouse, activate the Volume
Keyframing button in the group of buttons at the right-hand end
of the timeline toolbar. Now when you position the mouse pointer over
the green volume contour on an audio clip, you will see that the
contour responds by highlighting in white.
A number of mouse-based keyframe editing functions are now
available. Before taking on any serious keyframe editing, take a few
minutes to familiarize yourself with the commands in this set. They
enable you to manipulate keyframes quickly without having to
repetitiously move to a chosen keyframe and operate the clip level
knob.
The default style of editing operations for volume keyframes favors
maintaining sections of constant clip level rather than continuously
wandering up and down along ‘ramps’ in the contour line. In cases
where this does not produce the editing result you desire, try again
while holding the Alt key. This turns off any automatic adjustments
that might otherwise be made.
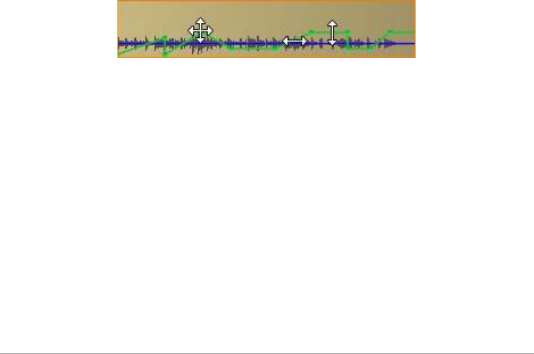
Chapter 8: Sound and music 253
Insert a new keyframe by clicking the contour line.
Instantly create a keyframed fade by Ctrl-clicking the contour line. This
inserts both a new keyframe at the point you clicked and a second one
with the volume set to zero. If you clicked in the first half of the clip,
the second keyframe is added at the start to create a fade-in; if you
clicked in the second half of the clip, a fade-out is created by placing
the second keyframe at the end.
Create abrupt level changes by dragging horizontal sections between
neighboring keyframes up or down. This produces vertical steps in the
volume contour.
Reposition swells and fades by dragging ‘ramps’ (rising or falling
sections of the contour line) laterally within the clip.
Reposition control handles in two dimensions to any allowed point
between their immediate neighbors (or the ends of the clip). You can
simultaneously change both the time index of the keyframe and the
clip volume that will take effect when playback reaches it.
The arrows in this illustration show the uses of the mouse in
keyframe editing. An individual control point can be dragged
in all directions. Ramps and flat sections are respectively
limited to horizontal and vertical movement only.
Delete a keyframe by dragging it onto another keyframes or by moving
it vertically away from the contour.
Set a linear fade-in or fade-out by dragging either of the upper corners
of the clip horizontally toward the center. Notice before you start that
the unfolded corner of the clip becomes slightly dog-eared when the
mouse hovers over it. The corner can now be dragged further into the
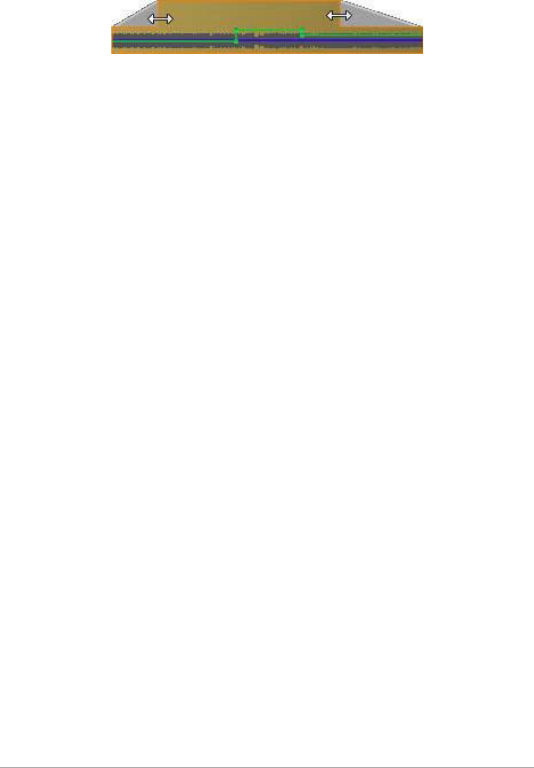
254 Pinnacle Studio User Guide
clip, creating a fade. The wider you make the ‘folded-over’ area, the
longer will be the duration of the fade.
Fade durations can be edited with the mouse as shown here.
You can also click on the folded-over area to open a small
dialog box for editing the duration numerically.
Edit an existing fade by positioning the mouse over the vertical line
descending from the inward corner of the ‘fold’. Make sure the
bidirectional arrow pointer is displayed, then drag the edge as desired.
The context menu for control points on the volume contour provides
the commands Add keyframe, Delete keyframe and Delete all
keyframes. (Either the first or the second of these commands will be
grayed, since only one of them can apply at a time.)
The Panner
This tool lets you regulate the apparent location of the sound source
in relation to a listener within a ‘surround’ listening field. Like the clip
volume tool it works with keyframes assigned to the clip, and so is
active only when the timeline scrubber is positioned on an audio clip
or a video clip with synchronous audio. The contour line for panning
changes is drawn in blue.
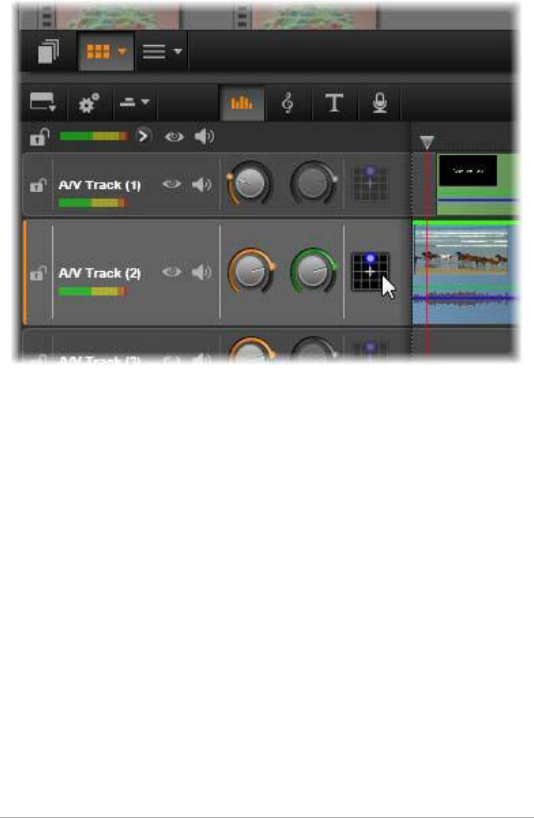
Chapter 8: Sound and music 255
In the Audio Mixer, the third icon in each track gives access to
the Panner, where you can control the positioning of the
track’s audio output in a two-dimensional ‘surround’
listening space.
For the purposes of timeline editing, all panning occurs in surround
mode, so you only have to deal with a single version of the Panner
controls. The surround-panned clips can be mixed down to other
output configurations after editing of the project has been completed.
This lets you work with a single set of panning decisions for all formats
you might eventually produce.
Changes made with this tool apply to the current clip only. They stay
with the clip even if you move or copy it to another track.
To open the Panner, click its access button in the track header mixer
panel. This button is grayed if there is no clip on the track at the
scrubber position. The sound source is denoted by a blue spot on a
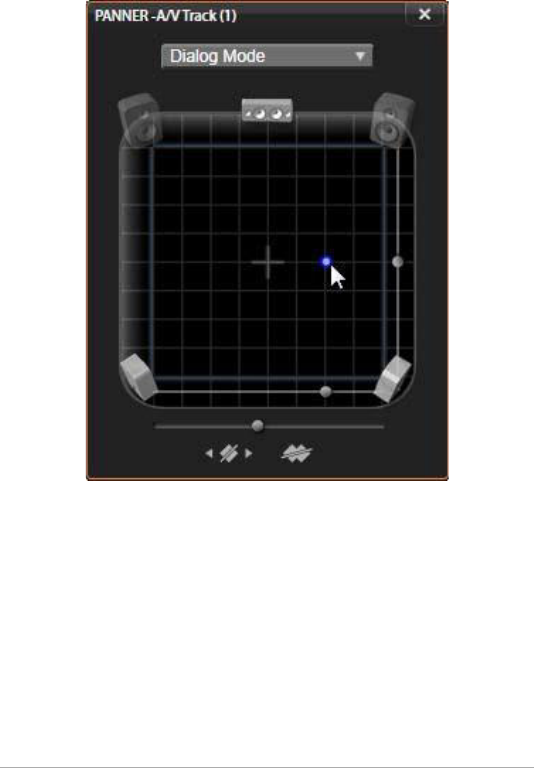
256 Pinnacle Studio User Guide
two-dimensional grid. The listener is situated in the center, facing
forward.
Positioning the clip audio using the Panner in Dialog mode.
Note that the icons for the front corner speakers are
translucent, indicating that they are not used in this mode. As
adjusted here, the audio for the track will be heard coming
from the right.
Selection list
The dropdown list at the top of the Panner window provides three
methods for distributing the sound across the set of six surround
speakers.

Chapter 8: Sound and music 257
5.1 is the best general purpose setting for natural sound reproduction.
Use it for general atmospheric sounds, such as barking dogs, or cars
passing by. The five main speakers are represented by icons in the work
area. The sixth, the LFE (low-frequency effects) speaker, is too low-
pitched to provide positional cues. Its level in the surround mix is
controlled by a slider beneath the work area.
Center channel off is the preferred setting for an immersive music
track.
Dialog mode combines the center speaker with the two at the rear. This
combination is suitable for dialog involving multiple speakers.
Work area
The main body of the Panner window schematically depicts a listening
area with a typical arrangement of loudspeakers. The cross icon in the
center of the area indicates the position of the listener.
A blue control point sets the position of the sound source. The speaker
symbols at the edge of the work area show your typical surround 5.1
speaker arrangement, with the screen at the top.
If you want to control the sound source position in one dimension,
horizontal or vertical, use the slider at the bottom or right of the work
area respectively.
LFE channel: Surround supports a special subwoofer channel (the ‘.1’
in ‘5.1’) that allows you to boost or cut the lowest frequencies for
special effects. Control the LFE enhancement with the slider under the
work area. Since the ear is unable to pinpoint the location of these low-
frequency sounds, the LFE is not assigned to a spatial position.
Keyframe buttons: The keyframe buttons at the bottom of the panel
allow you to add, remove and navigate between keyframes. The Add

258 Pinnacle Studio User Guide
symbol automatically switches to Delete if you are positioned on an
existing keyframe’s position.
Audio creation tools
The Movie Editor provides two authoring tools that allow you to build
your own soundtrack rather than depending solely on Library- supplied
media. Both tools are accessed with buttons on the toolbar above the
timeline of your project.
ScoreFitter is Pinnacle Studio’s resident composer. You can use it to
generate either incidental music or a full background scores for your
production. ScoreFitter music clips can be of any desired length, and
take only seconds to specify and create in the style of your choice. By
default, a ScoreFitter clip exists only within your project, but you can
also save particular music selections to the Library for re-use.
Just above the timeline in the project editor, the ScoreFitter
button (under the mouse pointer) and voice-over button (far
right) provide access to tools that let you author new audio
material.
The voice-over tool lets you record live material – vocal or otherwise –
using a microphone attached to your computer. Its most common use
is for voice-overs and narrative tracks, but you can record any sound at
all, providing it can be produced on cue. The tool creates an audio file
that is automatically imported to the Library then added to your project
at the scrubber location. The clip is added to the special voice-over
track rather than the current track as with other media types.
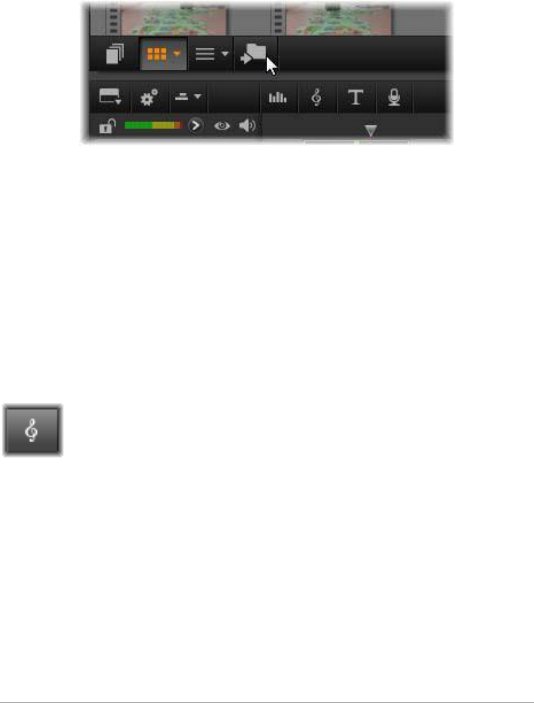
Chapter 8: Sound and music 259
Locating the Library asset
As mentioned above, a new Library asset is created each time you make
a voice-over, and one can optionally be created from ScoreFitter as
well. In both cases, a new button appears on the Library footer bar.
A new button is temporarily added to the Library footer bar
when a new ScoreFitter or voice-over asset is added to the
Library. Click the button to locate the Library folder containing
the asset.
Click the button to navigate in the current location tab to the Navigator
folder where the new item is stored. The button relates only to the
operation just completed, and is removed after a short time.
ScoreFitter
Pinnacle Studio’s ScoreFitter automatically creates
background music in the category of your choice. Within
that category, you select one of several songs, and within
that song, any of a number of versions. The list of versions available
also depends on the duration of background music you specify.
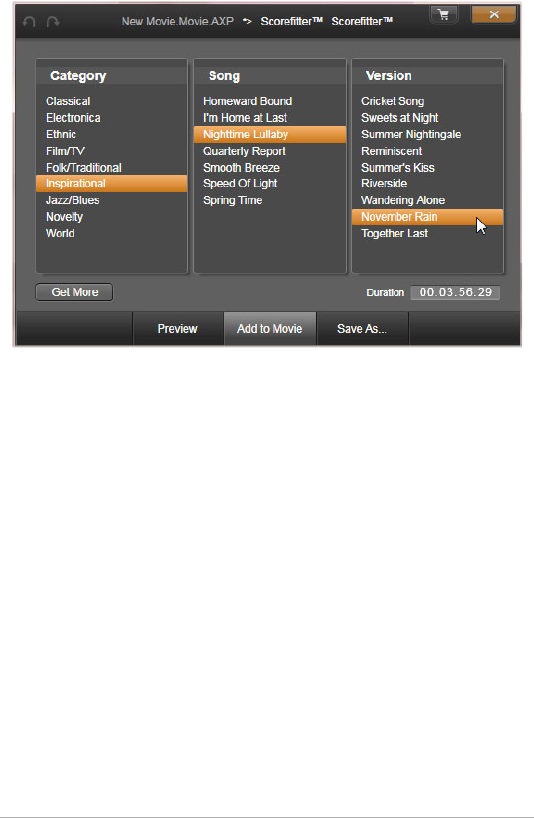
260 Pinnacle Studio User Guide
The ScoreFitter window. Select a Category, Song, and
Version, then click the Add To Movie button.
To create music for a particular set of clips, select those clips before
clicking the Create song button to open ScoreFitter. (To select your
whole movie, use Edit > Select All or press Ctrl+A.) The total length of
the selected clips will determine the initial setting for the music
duration, but you can modify the value at any time by trimming the clip
on the timeline or by editing the Duration counter in the tool.
In ScoreFitter, choose a category, song and version from the lists
provided. Each category offers its own selection of songs, and each
song its own selection of versions. Use the Preview button to audition
the song while the tool is open.
Enter a name for the clip in the Name field and adjust its duration with
the Duration counter, if desired. The music clip you create will be
adjusted to fit exactly the duration you select.

Chapter 8: Sound and music 261
When you have made your choice, click the Add to Movie button.
Studio creates the new clip on the active track beginning at the current
time index (as shown by the timeline scrubber and the preview frame
in the Player).
Expanding your song collection
ScoreFitter songs come in collections called ‘libraries’. The Standard
library, which is included with Studio, includes more than 40 songs in
styles ranging from Folk to Electronica. Additional libraries may be
purchased from within Studio as they become available by clicking the
Get More button.
The Voice-over tool
Recording a voice-over in Studio is as easy as making a
telephone call. Just open the Voice-over tool, click Record
and speak into a microphone attached to your computer.
You can narrate as you watch the movie play so that your words match
the action on the screen. You can also use the tool as a quick way of
capturing ambient music or home-made sound effects via your
microphone.
Before you can record audio using the Voice-over tool, you will need
to connect a microphone to the input jack of your PC sound board.
Review the video scenes in your movie and decide where you want the
voice-over to begin and end. When you are ready, open the Voice-over
tool.
Select your starting point on the timeline of your project. You can do
this by selecting a clip, playing the movie and stopping it at the desired
point, or by dragging the timeline scrubber.
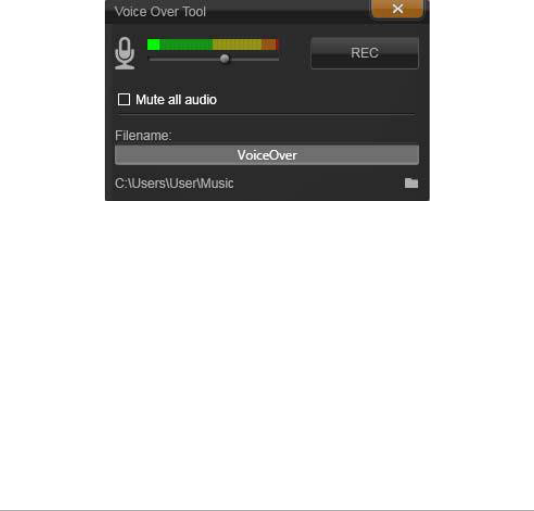
262 Pinnacle Studio User Guide
Position the microphone for use and try speaking a test phrase to check
your recording level (see “Voice-over level” below). When you are
satisfied, click the Rec button (which toggles to a Stop button during
recording).
A three-second countdown is displayed, then your movie begins to run
in the Player. Perform your narration, and click the Stop button when
done.
Now you will be asked if you want to keep the recording. If you answer
in the affirmative, the voice-over clip will be added to your Library and
will also be placed automatically on the voice-over track on the
timeline.
The Voice-over tool, ready to go. Just click the Rec button,
count to three along with the software, then start talking.
Additional controls
Voice-over level: As you record, watch the peak level meter display to
make sure that your microphone is generating a strong signal but not
overmodulating. Watch this meter to make sure your recording levels
get neither too high nor too low. The indicator changes color from
green (0-70% modulation), through yellow, to red.

Chapter 8: Sound and music 263
Filename: With this text field you can preset the file name used for
voice-over audio files. The first file is given the name you specify; if you
leave it unchanged, later files are given a numeric suffix – e.g. ‘Voice-
over (1)’ – that increases with each take.
Location: Clicking on the folder icon lets you navigate to a new file
system folder for storing voice-over clips.
Adjust the recording level slider as necessary to stay in the right range.
The slider is located immediately below the peak meter. Generally, you
should try to keep your audio peaking in the yellow (71-90%) and out
of the red (91-100%).
Mute all audio: The existing sounds on your movie soundtrack are
sometimes distracting when you are trying to record a voice-over. This
check box allows you to switch off timeline audio completely during
recording.
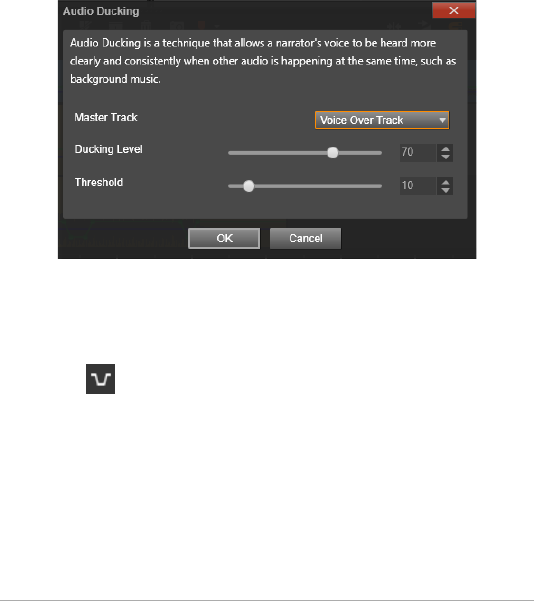
264 Pinnacle Studio User Guide
Using Audio Ducking to automatically adjust volume
Audio ducking is used to automatically lower the volume of one track
so that you can hear another track better. For example, if you have a
video project that includes music and voiceover, you can use audio
ducking to automatically decrease the music volume when the narrator
is speaking. You can adjust the threshold that triggers “ducking” and
you can adjust by how much the volume of the background track will
drop.
To apply Audio Ducking
1 In the Timeline, select the track that you want to “duck” (to
selectively lower the audio level), and click the Audio Ducking
button on the toolbar.
2In the Audio Ducking dialog box, choose the main track that you
want to hear from the Master Track box.
3 Adjust the following sliders:
• Ducking Level — determines the volume decrease. Higher
numbers result in a lower volume.
• Threshold — determines the master track volume level that will
trigger a volume decrease for the other track(s). You will likely
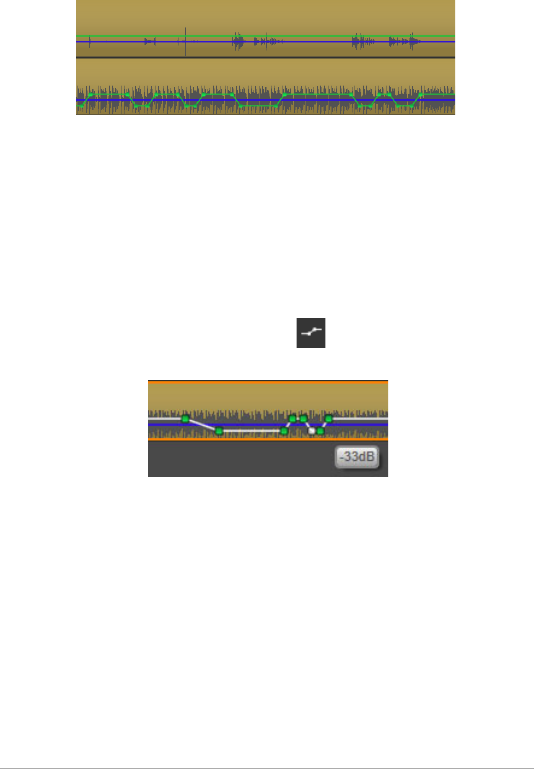
Chapter 8: Sound and music 265
need to experiment with different settings to achieve the results
you want.
In this example, the top track is a voiceover track that was set
as the Master Track. Ducking was applied to the music track
on the bottom to selectively lower the music volume
whenever the narrator was speaking on the voiceover track,
as indicated by the blue waveform. The green line represents
the volume level and shows where the volume changes occur.
Note: You can tweak audio ducking results manually by clicking
the Volume Keyframing button on the toolbar, and
dragging, adding, or removing nodes on the volume line.
In Volume Keyframing mode, the green volume line changes
to white when you hover over it with the pointer.
To remove Audio Ducking
• In the Timeline, right-click a track that has Audio Ducking applied,
and choose Remove Ducking.

266 Pinnacle Studio User Guide

Chapter 9: Disc projects 267
Chapter 9: Disc projects
With the advent of DVD, Blu-ray and AVCHD discs, video technology
has developed into an interactive medium that gives both the
videographer and the audience new possibilities.
In a disc project you can go beyond the old idea of creating a movie to
be viewed in strict sequence from beginning to end. Now the audience
themselves can decide which parts of the production to view, and in
what order.
Disc authoring is the process of designing and creating the structure
that allows this interaction. Pinnacle Studio provides automated
features that make authoring easy while still giving you full control.
If you want to create a disc quickly by using a preset template with
menus and music, you can export your project directly to a MyDVD®
file. For more information, see “Output to a MyDVD file” on page 357.
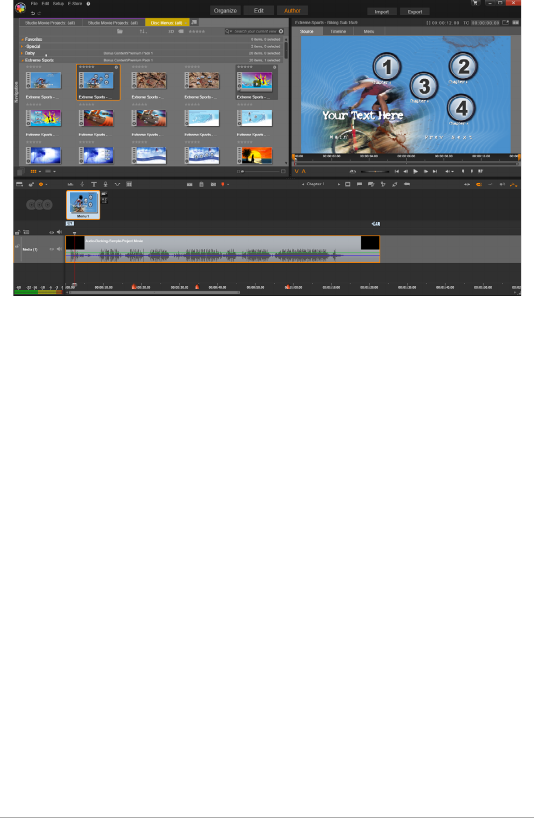
268 Pinnacle Studio User Guide
The Disc Editor in Pinnacle Studio. Here, one menu has been
added to the Menu List, and is now available for use. The
Player (top right) in this window provides a special mode for
editing the behavior of menu buttons.
Your disc project can begin in the Disc Editor, using the same controls
and techniques that you would in the Movie Editor, or you can import
a movie project into the Disc Editor to add a disc menu to it. Please see
“Chapter 3: The Movie Editor” on page 59 for information on how to
construct a movie.
The upper part of the Disc Editor screen includes two functional areas:
the Compact Library, from which disc menus and other resources are
drawn; and the Player, where you can preview menus and other media
and edit menu interactions.
Next below these is the timeline toolbar, with all the controls from the
Movie Editor, plus the additional controls necessary for creating disc
menus. The area below the timeline toolbar is shared by three separate
navigation tools: the Menu List, where the your project’s menus are
stored, the Navigator, and the Storyboard.

Chapter 9: Disc projects 269
Only one of the Navigator, the Storyboard, and the Menu List can be
visible, or this area can be hidden altogether The Navigation tool
selector, near the left end of the timeline toolbar, controls this area.
Under the navigation area is the timeline for the media that will be the
primary content of your disc. All use the full width of the window.
Disc menus
The essential feature that makes disc authoring possible is the menu.
A particular disc may have one, a few or many menus, each consisting
of a still image or a short video loop. Areas within the menus, called
buttons, can be selected by the viewer to activate other content on the
disc.
Some buttons cause playback to resume from specified locations,
called chapters, on the timeline of your production. These chapter
buttons often show a thumbnail frame or video loop as a clue to their
content. If a return marker is encountered during playback, it will send
the viewer back to the menu at that point.
Other buttons cause a transfer to another menu, or to another page of
the same menu. Multipage menus, with each page displaying several
chapter buttons along with automatically-managed navigation
buttons, facilitate productions of almost any size. However, there is a
limit of 99 on the total number of chapters and return markers allowed
in a single production.

270 Pinnacle Studio User Guide
The Menu List
Unlike timeline clips, the menus in your production are not bound to a
particular time offset. Instead, a disc player will loop the menu until
user interaction is received.
Because menus exist ‘outside of time’, Pinnacle Studio provides the
Menu List, a special area above the Disc Editor timeline to
accommodate the menus in your project. Dragging a menu from the
Library into the Menu List makes it available for use in your project.
Designing menu interactivity
A disc production may contain just one menu, or it may have many.
Each menu contains graphically distinct areas, generically called
‘buttons’, that can be activated by the viewer, perhaps using the
navigation keys on a DVD remote control.
The behavior of disc menu buttons can be set up using controls in the
Disc Editor window. Alternatively, you can invoke the Chapter Wizard
to create and configure a set of buttons automatically according to
your chosen settings.
Activating a button either starts your movie playing back from a
chosen point, or transfers control to another menu with its own
buttons. The possible targets for menu buttons are:
•A timeline location: Upon activation, playback resumes from a
chosen frame. The location, and the content found there, are
referred to as a ‘chapter’ of your movie.
•Another menu: Buttons can link to any menu in the Menu List.
•Another page of the same menu: Multipage menus always
include next and previous buttons for navigating between their
pages.
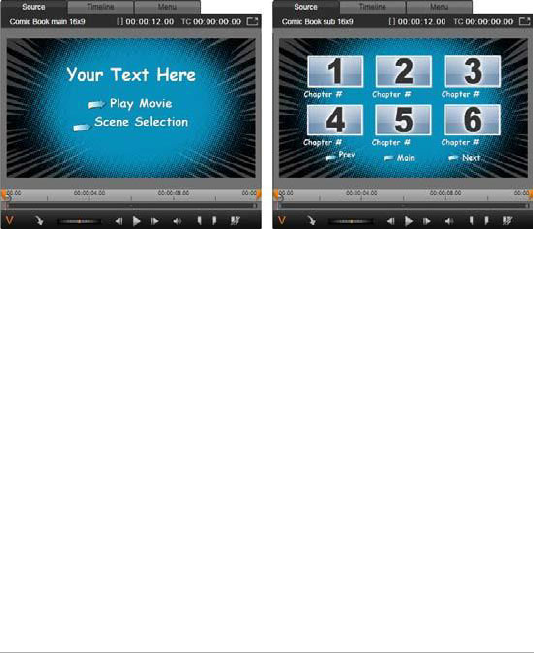
Chapter 9: Disc projects 271
Automatic page creation
As you insert new chapter links into a multipage menu, additional
pages are created automatically as needed. These appear in the Menu
List alongside those already in the project. A connector graphic links
pages belonging to the same menu. To insert new linked chapters, use
either the Insert Link button on the toolbar, or the Chapter Wizard.
A main menu and its matching multipage menu in the Library
Player.
Next and Previous: It is the presence of the special next and previous
buttons that causes a menu to support the multipage behavior. To
create a multipage menu from an existing main menu, simply add
buttons of both these types. Likewise, deleting either or both of the
next and previous buttons from a multipage menu removes the
automatic features.
Multipage menus in the Menu List
The icons of multipage menus are connected in the Menu List by a
special graphic. It shows that the menus are linked, which is to say that
you can navigate from one page within the menu to another by means
of the next and previous buttons.
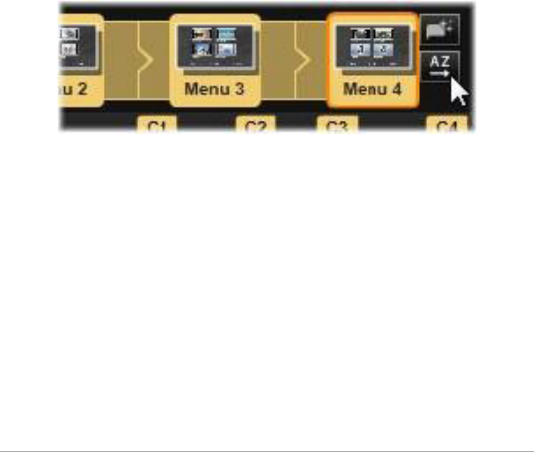
272 Pinnacle Studio User Guide
Splitting and joining: To unlink neighboring menu pages from each
other, click the connector graphic between them. The graphic is
removed. Pages to the left of the mouse remain with the original
menu, while those to the right form a new, separate menu (with a new
background color for its menu icons). Click in the gap between
neighboring multipage menus to regroup them into a single menu.
Sorting chapters: A time-saving tool meant primarily for multipage
menus is the sort button that appears with the Chapter Wizard button
to the right of the menu’s last page. When you have been working on
a menu for a while – adding, deleting and rearranging chapters,
perhaps even while editing the movie itself in parallel – you are likely
to find that the chapter buttons are no longer in timeline order across
the set of pages. Unless you want a custom order for some reason, the
remedy is a single click on the sort button.
Pages from a multipage menu. The connector graphic shows
that navigation within these pages is provided by Next and
Previous buttons. The Sort button (top right, under pointer)
arranges the chapter buttons in timeline sequence.
Adding disc menus
The disc menus section of the Library contains a collection of menus
for a variety of occasions and in a spectrum of visual styles. Each menu
comprises a background picture, a text title, and a set of navigation
buttons appropriate to the menu’s purpose.

Chapter 9: Disc projects 273
To add a disc menu to your production, open the Compact Library in
the Disc Editor, choose a menu in the Disc Menus (under Creative
Elements), and drag it to the Menu List. To edit the actions assigned to
the menu’s buttons, you can use the authoring tools provided on the
timeline in conjunction with the Player, or get some automated help
from the Chapter Wizard. To modify the appearance of a menu (or
create one from scratch) you will use the Menu Editor.
Menu types
Each menu design in the Library has two variations: main and
multipage.
Main menu: In most productions, the first menu seen by the viewer is
of this type. Main menus usually contain buttons with the default
captions Play Movie and Scene Selection; you can change these if you
like. Although the buttons’ link targets are also up to you, it helps your
audience if you stick to convention. For instance, the Play Movie button
is normally configured to start playing back your movie from the
beginning, and Scene Selection typically switches to a subsidiary menu,
one with links to the ‘chapters’ of your movie.
Multipage menu: A scene selection menu often needs to provide more
of these chapter buttons than will fit on a single screen. To solve this
problem, Pinnacle Studio supports multipage menus, which have
additional buttons just for navigation between menus. The behavior of
these buttons is built in. A pair of next and previous buttons lets the
view move between pages within the same menu; while a home
button causes a transfer to the project’s first menu.
Tip: To display the main menus side-by-side with their matching
multi-page menus in the Library, right-click in the gray area next
to a menu and choose Sort by > Name.
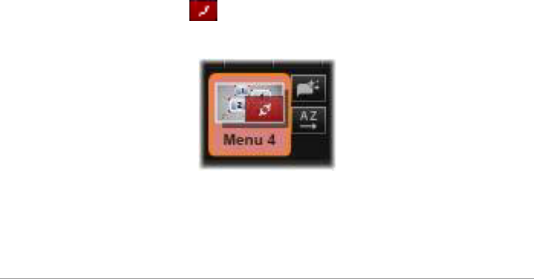
274 Pinnacle Studio User Guide
Menu buttons
The number of chapter buttons per page varies from one menu design
to another, so one criterion for selecting a menu is the number of clips
you want it to handle. But if you want a different number of buttons
on a particular menu, you can add or delete buttons in the Menu
Editor, which is launched by clicking the Edit button on the Player. See
“The Menu Editor” on page 285 for details.
Menus with fewer buttons usually have more space for captions; those
with many buttons will have to settle for abbreviated captions or none
at all. Whether you need captions, and if so whether they should be
simple (“Chapter 1”) or descriptive (“Cutting the Cake”) is a matter of
your authoring style and the content of your movie.
Unlinked menus and buttons
Only the first menu in the Menu List is automatically available to the
user (and then only if there is any content on the timeline to serve as
the initial chapter). Menus added later do not become part of your
production’s menuing system until you link them with the first menu.
The link may be indirect, involving one or more intermediate menus,
but until it exists the menu is an unreachable island. Such a menu is
indicated by the symbol in the bottom right-hand corner of its
Menu List icon thumbnail.
A special indication is also given in the Player for menu buttons that
have not yet been linked either to a timeline location (a chapter) or to
another menu. A linked button shows which chapter (e.g. ‘C1’) or
Chapter 9: Disc projects 275
menu (e.g. ‘M1’) it connects to. An unlinked one shows a question-
mark icon instead. (If the button indicators are not visible, click the
show/hide chapter numbers check box below the Player.)
Previewing disc menus
The Disc Editor, like the Movie Editor, includes a Player for previewing
Library assets and timeline clips. For a general introduction to the
Player, please see “The Player” on page 14.
The special functions provided by the Player when viewing menus in
the Menu List are described here. Clicking a menu in the Menu List puts
the Player into Menu input mode and previews the selected menu. You
can also switch to that mode directly while any menu is selected by
clicking the Menu tab above the Player screen in the Disc Editor.
Special controls also appear at the bottom of the Disc Editor Player.
Menu Edit button: Creating or modifying the design and
layout of disc menus is the task of the Menu Editor.
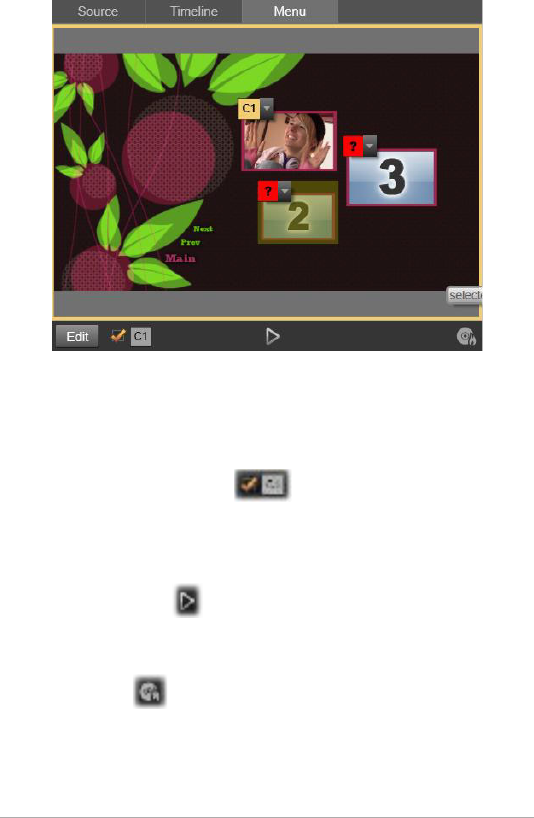
276 Pinnacle Studio User Guide
With Menu selected as the Player input mode (top), the Player
provides interactive zones on the preview screen for assigning
chapter links. Here ‘C1’ shows a chapter link has been
assigned to the Play Movie button; the ‘?’ over the Scene
Selection button shows that it is not currently assigned.
Show Link Numbers checkbox : Check this box to cause link
numbers to be displayed in the preview over every button in the menu.
The link numbers match the format and color of the timeline chapter
flags.
Disc Simulator button : This button invokes the Disc Simulator
window where you can preview your project with full interactivity to
make sure your menus are behaving as expected.
Burn Disc button : When you are ready to test your project on an
actual disc, click this button (or Export at the top of the screen) to
invoke the Exporter, which will guide you through the process of
‘burning’ your movie onto an optical disc.

Chapter 9: Disc projects 277
Link indicators
As seen in the illustration above, when a menu with unlinked chapter
buttons is previewed, those buttons are indicated by red question
marks rather than a chapter number. Except perhaps for an unused
subset on the final page of a multipage menu, all the chapter buttons
on your menus should link to your movie.
Menu editing on the timeline
Developing a project for optical disc, such as DVD, in Pinnacle Studio’s
Disc Editor gives you lots of opportunities for putting your creative
stamp on the production.
Every aspect of a disc menu – the details of its visual appearance, the
linking of its on-screen buttons, the precise timing of its ‘chapters’ –
can be edited in Pinnacle Studio. For the visual aspects, you will turn to
the Menu Editor, but the linking of buttons and the timing of chapters
are both controlled within the Disc Editor itself.
For an overview of the Disc Editor interface, please see “Chapter 9: Disc
projects” on page 267.
Timeline menu markers
The chapter buttons on a disc menu can be individually linked to any
point on your movie’s timeline. In the Disc Editor, those points are
indicated on the timeline by chapter markers on the Chapter Track,
which is a specialized timeline track that materializes above the other
tracks when a first menu is added to your movie. (The track is removed
again if all menus are deleted.) The caption of a chapter marker
consists of the letter ‘C’ followed by the chapter’s sequence number in
its menu.
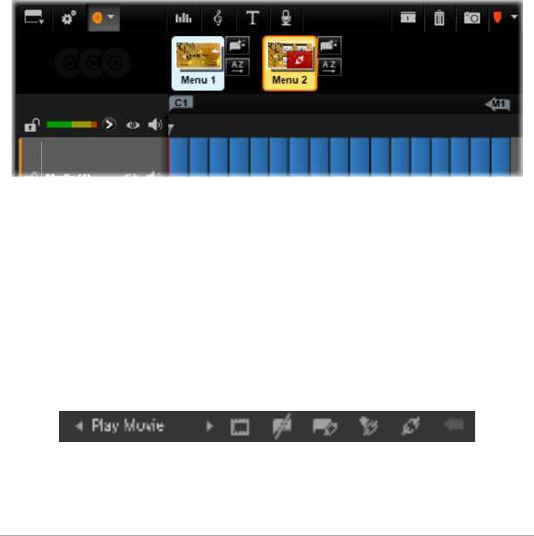
278 Pinnacle Studio User Guide
Return markers, which mark automatic exit points from the timeline
back to a disc menu, are also shown in the Chapter Track. The caption
of a return marker is the letter ‘M’ with the sequence number of the
target menu.
Regardless of the length of your production, you are limited to a
combined total of 99 chapter buttons and return markers.
The color of chapter and return markers matches the Menu List icon
color of the menu to which the markers are assigned. Markers can be
repositioned on the timeline by dragging. See “Timeline editing of
chapter and return markers” on page 281 for details.
Dropping a menu onto an empty Menu List causes a chapter
marker to be inserted at the start of your movie’s first clip
(provided it has one) as the target of the menu’s Play Movie
button. A return marker, marking an exit back to the menu, is
placed at the end of the movie.
Authoring tools
In the Disc Editor, the timeline toolbar provides a number of authoring
tools that you can use directly without switching windows or views.
Tools on the Disc Editor toolbar.
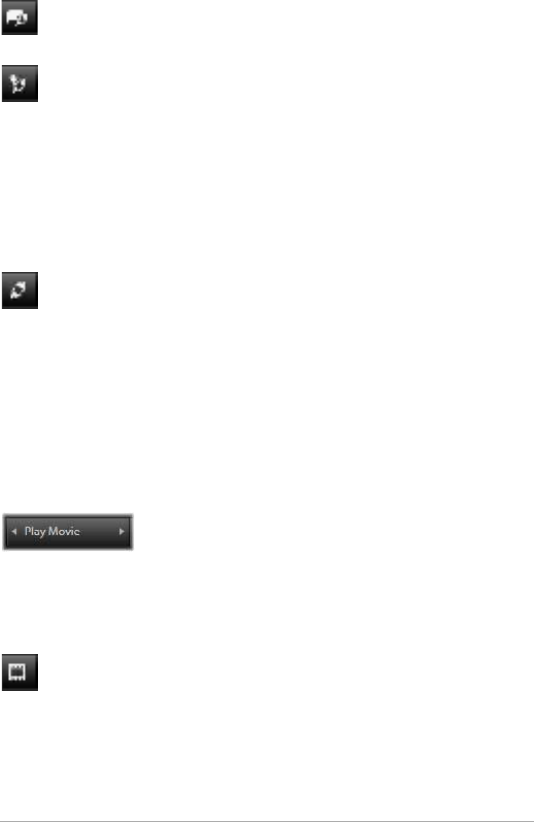
Chapter 9: Disc projects 279
Create link: This button links the currently-selected chapter
button in the Player to the location of the timeline scrubber.
Insert link:
This button facilitates work with multipage menus by
moving all existing button links (starting at the currently selected
chapter button in the Player) one position towards the end.
In a multipage menu, the act of inserting a link may begin a chain
reaction by forcing an existing link onto the next page, a link from
there onto the page following, and so on to the final page, which itself
will be created if necessary.
Remove link: Clicking on this button will remove the link that
exists between the button on the menu and the chapter marker
on the Chapter Track. An ‘unlinked’ chapter marker will remain on the
Chapter Track. This unlinked chapter can be manually linked by drag-
and-drop to another button on the Menu Preview, or it may remain as
an unlinked chapter, in which case, during playback, it will work to
jump through your disc using the jump button on your remote control.
You may also right-click on one or more chapter markers and choose
Remove Selected Link.
Button cycle: By clicking on the left and right arrows
of this control, you can scroll through available
buttons and make them active for editing. Click on the button caption
to edit it. Buttons also may be selected by clicking the button links in
the Player when a menu is previewed.
Set thumbnail: Clicking this button generates a thumbnail image
of the frame at the timeline scrubber position, and displays it on
the menu button selected in the button cycle control if it is of the
Thumbnail type. For more information about menu button types,
please see “Menu buttons” on page 285.
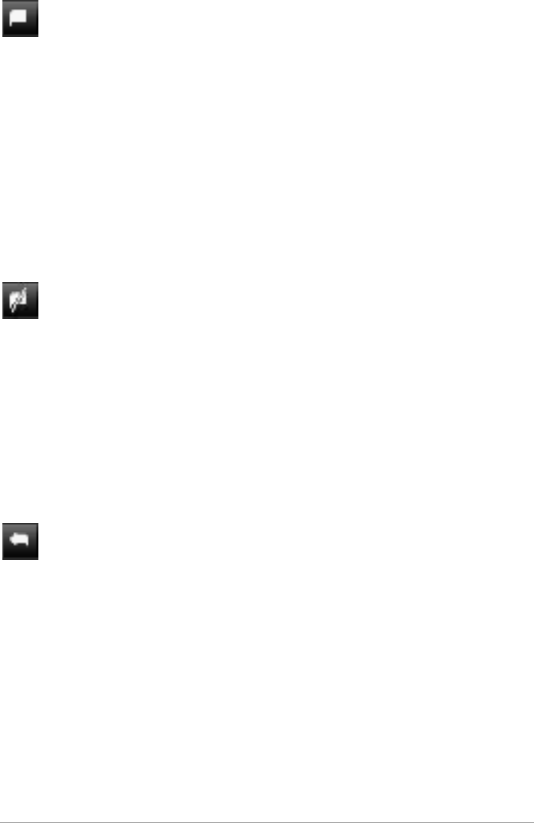
280 Pinnacle Studio User Guide
Create unlinked chapter: Unless the timeline scrubber is exactly
positioned at a chapter or return marker, clicking this button will
add a chapter marker to the Chapter Track, but will not link it to any
menu. An unlinked chapter can also be created by double-clicking in
the Chapter Track area just above the other timeline tracks.
The unlinked chapter can later be manually linked by drag-and-drop to
a button on the Menu Preview if that’s what you want. However, an
unlinked chapter also serves a useful purpose in its own right: during
playback, it designates one of the points to pause at when browsing a
DVD with the jump button on the remote control.
Remove chapter: When the timeline scrubber is positioned at a
chapter, the Create unlinked chapter button takes on the
opposite function, and a modified symbol. Clicking on it will remove
both the chapter marker and the link that binds it to a menu, if it has
one. You can also remove chapters with the Delete Selected Chapter
context menu command when one or more chapter markers are
selected. To remove the links from chapter markers, leaving them
unlinked but still on the Chapter Track, use Remove Selected Links from
the same menu.
Create return: Unless there is already a marker at the timeline
scrubber position, this button will add a return marker to the
Chapter Track.
A return marker is active during viewing only if playback commenced
from the same menu the marker is associated with. (On the timeline,
the marker color should match that of the associated menu’s icon in
the Menu List.) When playback reaches the frame associated with an
active return marker, it will jump back to the associated menu.

Chapter 9: Disc projects 281
Delete return: If there is a return marker at the scrubber position,
the Create return button converts to Delete return, with an
appropriately changed symbol.
The Remove chapter button, and the Delete selected chapter context
menu command, can both also be used to delete return markers.
Timeline editing of chapter and return markers
Chapter and return markers are tied to particular frames on your
timeline at which playback will be launched from a disc menu
(chapters) or at which playback again gives way to the originating
menu (returns). Both types of marker can be dragged with the mouse
to change the location at which they take effect in the movie.
When you are previewing a menu, dragging a chapter marker from the
Chapter Track to a button on the Player will relink the button. The
reverse operation, dragging a button from the Player to a point on the
Chapter Track, is an alternative method of creating a new chapter
marker.
A project that contains one or more disc menus must have a return
marker permanently positioned at the end of the Chapter Track. This
guarantees that any chapter played on the disc will encounter a valid
return. The final return marker can thus not be deleted.
The Chapter Wizard
When a multipage disc menu has been dragged from the Library into
the Menu List, a Chapter Wizard button is displayed at the top right
corner of the menu icon. Clicking on this button will open the Chapter
Wizard window.
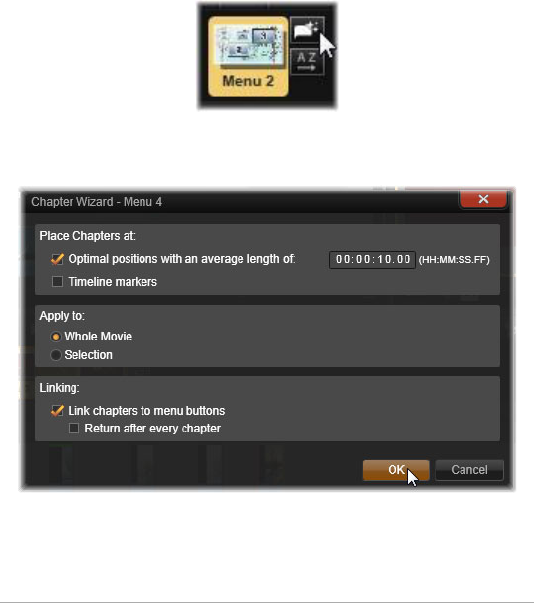
282 Pinnacle Studio User Guide
Why use the Chapter Wizard?
The Chapter Wizard provides a fast way to create chapters for your
movie. Chapter markers will be added to the Chapter Track on the Disc
Editor timeline to show where each chapter begins. With the Link
chapters to menu buttons option (see below), each chapter will be
represented by one chapter button on a series of automatically-
generated menu pages; these pages are linked into a series by next and
previous buttons.
By activating chapter buttons when the menu is viewed, the viewer is
able to play the movie from any of the provided starting points.
The Chapter Wizard is great for setting up slide shows and scene
selection menus. If you are archiving video to disc, you can use it
generate a menu that will serve as a scene catalog. The series of menu

Chapter 9: Disc projects 283
pages created can be arbitrarily long. Its length depends on how many
chapters are created and on how many chapter buttons are provided
in the menu’s page design.
Incidentally, the Chapter Wizard does nothing that you could not do
yourself using the available disc authoring tools within the Disc Editor
(and they remain available for tweaking the generated menu
afterwards). Its purpose is to speed your creative process by taking over
much of the routine work that setting up a multipage menu entails.
Using the Chapter Wizard
The Chapter Wizard controls are grouped into three horizontal panels.
When you have configured the controls to your satisfaction, click OK.
The Chapter Wizard will carry out its work of creating new chapters for
your production, complete with markers on the timeline and (by
default) an automatically-generated set of menu pages with as many
chapter buttons as necessary.
Place chapters at
This is the uppermost panel in the Chapter Wizard. The two options
here can be used separately or together.
Optimal positions: When this box is checked, the Chapter Wizard
creates chapters at a selected interval along the timeline, but will adjust
the chapter to a nearby clip boundary when one is available. The
desired average chapter length is specified in seconds. The initial value
is based on the length of your movie. To adjust it, either click directly
on the number and type, or drag horizontally within the text box.
Timeline markers: This option assumes that you have prepared timeline
markers to indicate to the Chapter Wizard particular places in your
movie to which a chapter link must be created.

284 Pinnacle Studio User Guide
Apply to
The second panel in the Chapter Wizard provides options that control
the scope of the wizard’s operation.
Whole movie: Chapter markers will be created throughout the entire
movie.
Selection: Chapter markers will be placed only within the range from
the beginning of the first selected clip to the end of the final one.
Options
The third panel offers two final choices, which may be set
independently.
Link chapters to menu buttons: When this option is selected, as many
pages will be added to the menu as are needed to accommodate
buttons for all of the created chapters. Without this option, the
chapter markers are created on the timeline in the ‘unlinked’ state, and
no menu pages are created.
If you want to link an unlinked marker to a menu button, drag it to the
button while previewing the menu in the Player. Even if you leave it
unlinked, the chapter marker will still serve as an available resumption
point when the viewer is skipping through the disc with the jump
button on the remote control.
Return after every chapter: Checking this option will add a return
marker at the end of each chapter. By default, the markers are placed
so that each chapter will play up to the start of the chapter following,
then return to the originating menu. To change the menu that a return
marker is linked to, drag the marker to the menu icon in the Menu List.
Remember, however, that the return marker will only be active when
playback was launched from the menu to which the marker is linked.

Chapter 9: Disc projects 285
The Menu Editor
The Menu Editor shares most of its controls and usage with the Title
Editor (see “Chapter 7: The Title Editor” on page 191). The present
section focuses on features particular to the Menu Editor.
Starting the editor
To open a menu in the Menu Editor, either click the Edit button on the
Player while previewing the menu, or double-click it in the Menu List.
As with the Title Editor, when the Menu Editor opens, one line of text
is already highlighted. To edit it, just start typing. To start editing a
different line, click inside its text box and highlight the characters you
want to change. To stop editing text, click on an empty area of the
window.
The button cycle
One feature that differs between the Menu Editor and the Title Editor
is the button cycle, a control also present in the Disc Editor. In both
cases it is located on the right side of the toolbar, just above the
timeline. Click the left and right arrows on the control to step through
the active buttons in the menu, and make one available for editing.
Note: If you only want to edit text for the buttons on your
menu, you do not need to enter the Menu Editor at all; instead,
edit the button name directly in the button cycle control of the
Disc Editor.
Menu buttons
Any visual element of your disc menu can be used as a ‘button’ that
links to other content in your movie. Elements designated ‘Not a
button’, on the other hand, have no linking behavior.

286 Pinnacle Studio User Guide
Button types
A menu button’s type is the only factor that determines its behavior. Its
text and appearance should almost always be consistent with that
behavior in a well- authored disc production, but they don’t affect it.
Five button types are available.
Normal: This type of button lets your text, image or shape serve as a
link to any chapter marker on your disc project timeline, or to a menu
in your Menu List.
Thumbnail: This variation on the Normal button type allows a
thumbnail from your timeline to be displayed on the button.
Previous and Next: These button types automatically handle navigation
between the pages of multipage menus in the Menu List. During
playback, the buttons are hidden automatically when their targets do
not exist (on the first and last pages of the multipage set). Because
their behavior is fixed, it is not possible to link these buttons to chapter
markers.
Root: A button of this type links to the first menu in the Menu List. Its
behavior cannot be changed.
Buttons for multipage menus
If you add both a Next and a Previous button to any menu, it can serve
as a multipage menu. If either button type is absent, the menu cannot
be used in the multi-page mode.
Button presets
Click the Buttons tab at the top of the Menu Editor to view the
available categories of premade menu buttons. Select a button and it
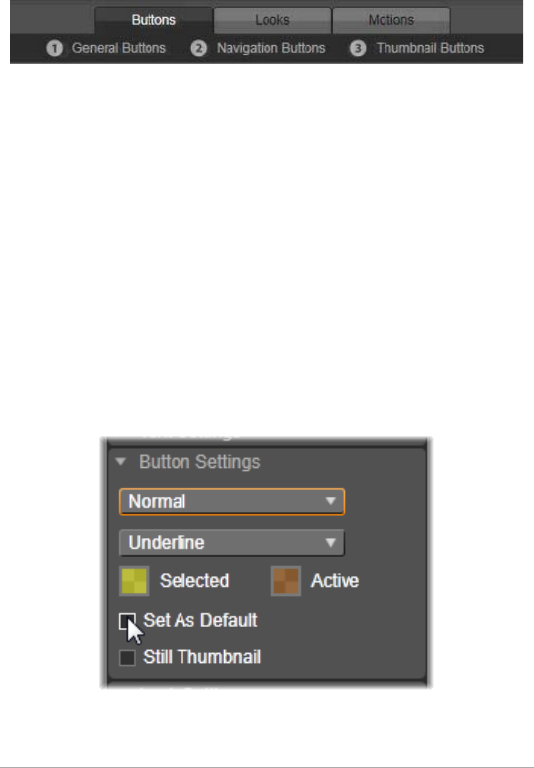
Chapter 9: Disc projects 287
will appear in the middle of the preview area, where it can be dragged
to the desired position.
The three categories reflect the button types discussed above.
The Navigation category includes all buttons of the Previous,
Next and Root types.
General Buttons: These images are intended for use with Normal
buttons, which may be linked to any chapter marker on your timeline.
Navigation Buttons: These designs are meant for Next, Previous and
Root buttons with hard-wired navigation.
Thumbnail Buttons: These include a thumbnail area where a timeline
clip can be previewed.
Button settings
The Button Settings panel is to the right of the Menu Editor preview.
The Button Settings panel is part of the Menu Editor.
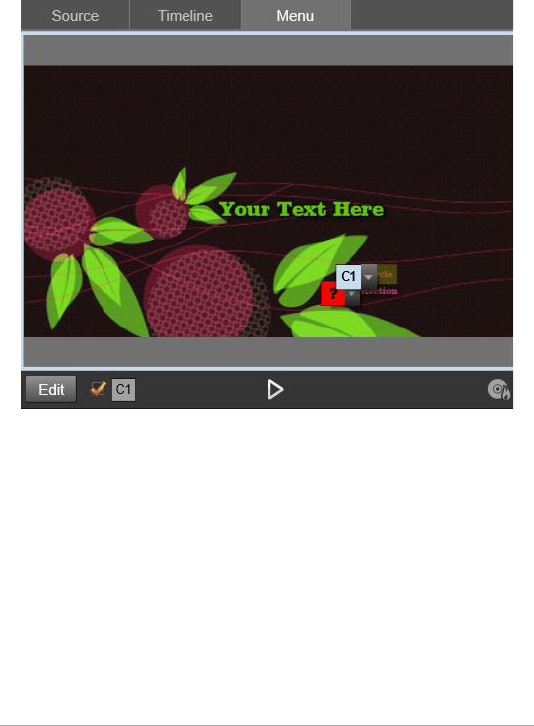
288 Pinnacle Studio User Guide
The Disc Simulator
To preview your project after setting up its menus, click the play button
at the bottom of the Player. This activates the Disc Simulator window.
When the Disc Editor Player is previewing a menu in your
project’s Menu List, a button (bottom center) is provided for
testing your project in the Disc Simulator.
Provided the project is built correctly, the simulator should open at the
main menu, with ‘Play Movie’ and ‘Scene Selection’ links ready for the
viewer to use.
To move from link to link within the preview, use the DVD navigation
buttons on the bottom right or click the links directly in the preview.
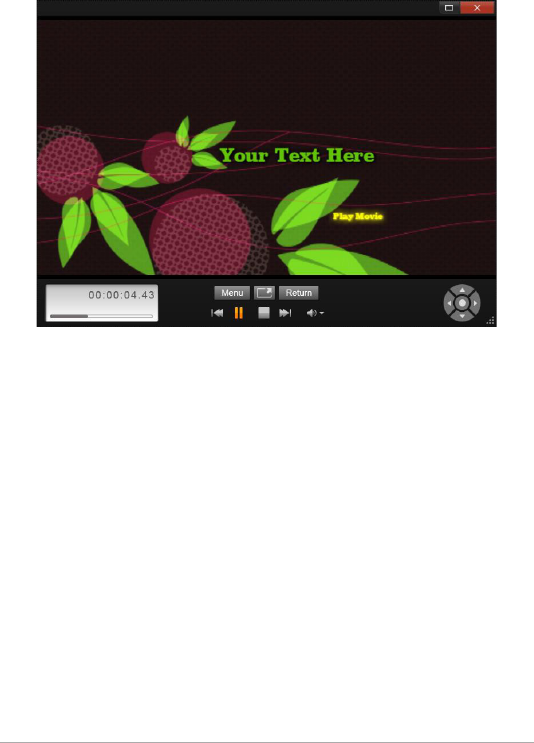
Chapter 9: Disc projects 289
Take the time to verify all the chapter and menu links your production
includes. Every desired user interaction should be checked: slip-ups are
frustrating for the viewer, and easily avoided.
In the Disc Simulator, you use a control set similar to that
found on a DVD remote control. Menu interactions and
playback can be fine-tuned and fully tested before you burn
the project to disc.
Once you are happy with the project, it can be exported as a movie file,
saved to a disc image file, or burned to a disc. See “Chapter 11: The
Exporter” on page 337 for more information.

290 Pinnacle Studio User Guide

Chapter 10: The Importer 291
Chapter 10: The Importer
Pinnacle Studio lets you incorporate many kinds of media into your
video productions. When these are stored externally to your computer
– on a camcorder tape, say, or a memory stick from your digital
camera, or a cloud-based service – they must be transferred to local
storage before you can use them.
This transfer process is variously called ‘capturing’, ‘importing’ or
‘downloading’, depending on the media involved and the method of
transfer. Because most audiovisual recordings now are stored in digital
form from the start, transfers can typically be achieved with no loss of
quality. Only when transferring from analog or tape-based sources
(e.g. VHS, Hi8 or DV tape) is there still a ‘capture’ process, often
involving conversion to digital form. The terms ‘import’ and
‘importing’ can be used to signify all methods of bringing images and
sound into the Library for use in your productions.
The file-based assets you can use in Pinnacle Studio – including video,
photographic and audio media, and Pinnacle Studio projects
themselves – must be imported from a source such as a local hard drive
into the Library before they can be used. In most cases, importing is
handled automatically using ‘watchfolders’. However, the Importer
can also be used to import assets from local folders that are not set up
as watchfolders.
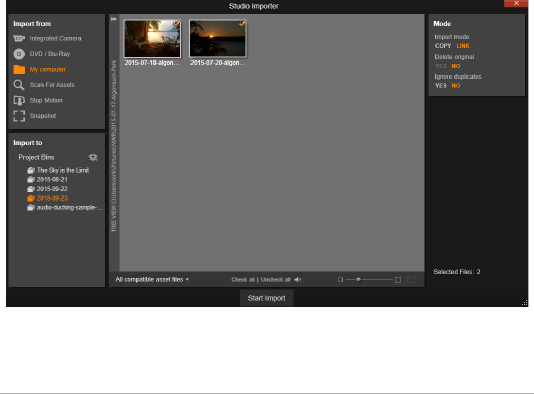
292 Pinnacle Studio User Guide
The next step
After Studio has finished importing your assets, you will be able to
access the imported files for use in your productions. For more
information, see “Chapter 2: The Library” on page 17.
Using the Importer
The very first step in importing is to open the Studio Importer by
clicking the Import button at the top left of the screen.
The Importer consists of a large central area surrounded by a number
of smaller panels. One of these, the Import From panel at the top left
of the display, has a pivotal role. It provides a list of device types that
can serve as the source of your import operation. Your choice of input
source in turn determines the rest of the Importer display. Above all,
the set of controls and views offered in the central area for preview,
browsing and selecting material depends on the chosen import type.
Studio Importer
Importing can be regarded as a four-step process:

Chapter 10: The Importer 293
1 Select the import source on the Import From panel.
2 Confirm or adjust the settings on the other panels.
3 Select material to import from the chosen source.
4 Initiate the import operation.
At this point Studio begins transferring the requested audio, video and
pictorial material from the source device to your hard drive (if
necessary), using the locations set in the Import To panel. The media
are then immediately added to the Library. Once the import operation
is complete, the Importer returns control to the prior screen, from
which you can access the imported files through the Library. (See
“Chapter 2: The Library” on page 17.)
Importing stereoscopic 3D content
Pinnacle Studio will recognize content as stereoscopic 3D and mark it
as such for files with the following properties:
• MTS: MVC, SBS50, SBS100 (if H264 stream markers are present)
• WMV: Multistream, SBS50, SBS100, TAB50, TAB100 (if metadata
tags are present)
• MP4, MOV with H264: SBS50, SBS100 (if H264 stream markers are
present)
• MPO: Multistream
• JPS, PNS: SBS50, SBS100
If Studio has not correctly identified your 3D media, choose the correct
setting from the Stereoscopic 3D dropdown in the Adjustments group
of Corrections tools. Please see “A d j u s t m e n t s ” o n p a g e 146 for details.

294 Pinnacle Studio User Guide
Importer panels
The actual selection of material to be imported takes place in the
central area of the Importer. Each import source uses the central area
somewhat differently.
Depending on the input source, the central area shares the Importer
interface with up to five auxiliary panels with standardized functions.
The Import From panel
This is the top left panel of the Importer, a position that reflects its vital
role in setting up the import operation.
The photos, music and video footage or projects you want to import
may reside on a variety of device types and technologies. The
supported import sources include:
• All types of auxiliary file-based storage media, including optical
drives, memory cards and USB sticks (see “Import from file” on
page 311). Click My computer in the Import From panel to select
individual files for import from drives connected to the computer.
• Click Scan For Assets to import all files of specific types from a set
of one or more directories.
• DV or HDV video cameras using an IEEE-1394 (FireWire)
connection. See “Import from DV or HDV camera” on page 320.
Devices are listed by name in the Import From panel by their
device names (e.g. “DV Device”). Select the applicable one.
• Analog video cameras and recorders (see “Import from analog
sources” on page 326). Any analog capture hardware on your
system is listed by name (e.g. “Pinnacle Systems 710-USB”).
• DVD and Blu-ray discs. See “Import from DVD or Blu-ray Disc” on
page 327.
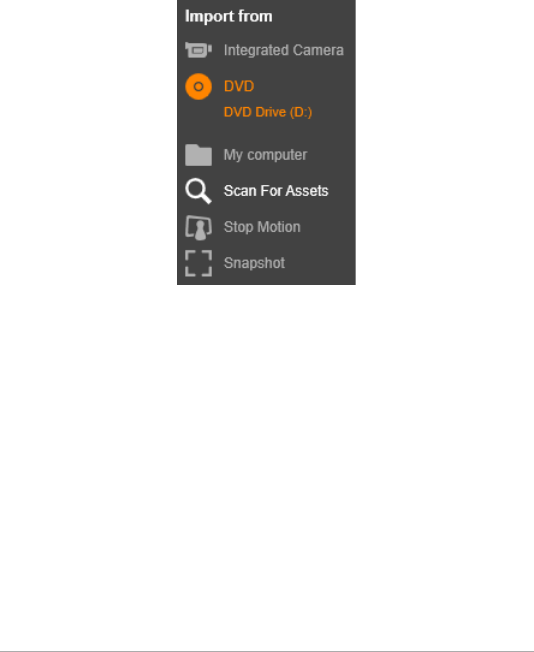
Chapter 10: The Importer 295
• Digital still cameras. See “Import from digital cameras” on
page 329.
Some sources in the Import From panel are chosen from a sub-list of
actual devices that appears when you click the main source entry. In
the illustration, DVD / Blu-Ray has been clicked. The user can now
choose between the two DVD drives installed on this particular system.
Single-frame import
Studio provides two special modes for importing single frames, rather
than continuous footage. These modes are:
•Stop motion: Create an animated film by importing one frame at
a time from a live video source. See “Stop motion” on page 329.
•Snapshot: Import individual images from tape or from a live
source like a webcam. See “Snapshot” on page 332.
Adjusting analog audio and video levels
Analog capture hardware may provide additional controls for
modifying parameter levels of the audio and video signals. Such a
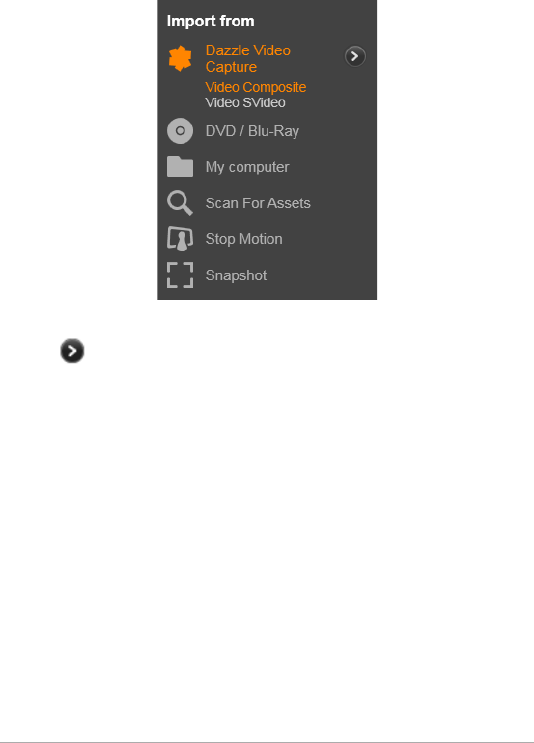
296 Pinnacle Studio User Guide
capability is useful for correcting exposure problems and the like in the
source material, and when you need to compensate for differences in
video from multiple sources.
To access the controls, select the analog source, then click the more
button beside the source name. This opens the Analog Input
Levels window.
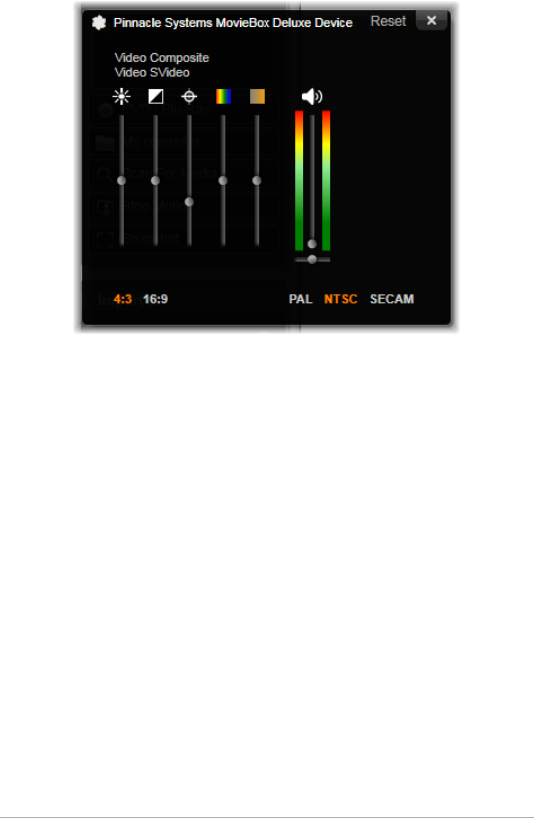
Chapter 10: The Importer 297
The Analog Input Levels window lets you adjust a number of
video and audio parameters. The Hue slider (fourth from left)
is not used with PAL sources.
Although you can also adjust these levels with the appropriate
correction in the Video Editor, setting them correctly for capture can
save you from having to worry about color correction later on.
Setting your audio options correctly as you capture will help in
achieving consistent volume levels and quality.
Particular capture devices may offer fewer options than are shown and
discussed here. For instance, with hardware that doesn’t support
stereo captures, an audio balance control will not appear.
Video: Choose the type of video you are going to digitize by clicking
the appropriate source button (Composite or SVideo). The five sliders
allow you to control the brightness (video gain), contrast (ratio of
lightest to darkest), sharpness, hue and color saturation of the
incoming video.

298 Pinnacle Studio User Guide
• The hue slider can be useful for correcting unwanted color shifts
in NTSC material; it is not available when capturing from a PAL
source.
• The saturation slider regulates the ‘color saturation’ – the amount
of color – in the image. (An image with zero saturation has only
black, white and gray tones.)
Audio: The sliders on the right side of the panel let you control the
input level and stereo balance of the incoming audio.
The Import To panel
After importing from external devices, media items and Pinnacle Studio
projects will be accessible as files on your own computer. The Import
To panel of the Importer lets you specify where those files will be
stored. Separate folders are available for projects, video, audio and
picture items, but the Import To panel only lists those that are relevant
to the current import source, as configured in the Import From panel.
As the number of media files and movie projects on your system grows,
it becomes increasingly useful to give some thought to how best to
organize the material into folders and subfolders such that in the
future you can most readily retrieve any desired item. The controls on
the Import To panel are designed to automate this process to whatever
degree you choose.
Working with import folders
Until you specify otherwise, the Importer uses the standard document
folders for video, music and pictures within your Windows user
account, and a default folder for your Pinnacle Studio projects. The
illustration shows a typical setup in Windows. To change an import
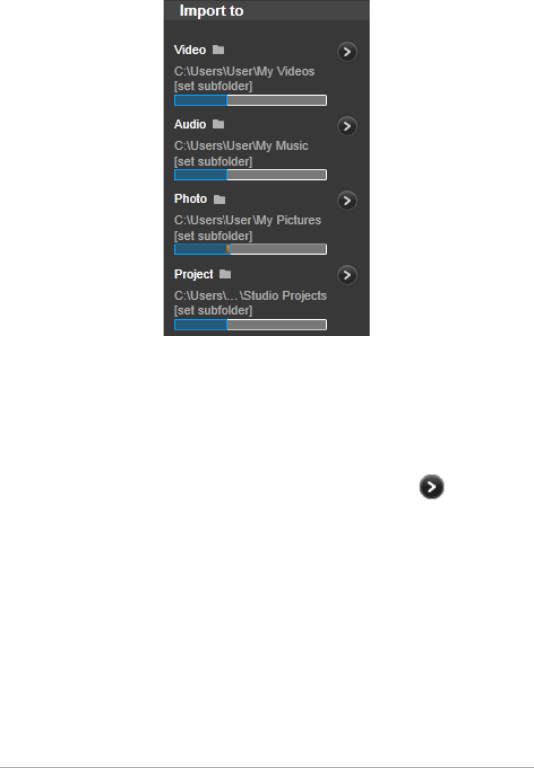
Chapter 10: The Importer 299
folder, click either the small folder button or the current folder path.
(See “Selecting an import folder” on page 300.)
The folders you choose for each asset type, whether default or custom,
serve as base locations for your imported files. In order to manage your
file-based assets effectively, you can also specify either a custom
subfolder name or a method of automatically- generating a name
based on either the current date or the creation date of the imported
material. Click either set subfolder or the more button for the
media type to access the subfolder options. (See “Setting a subfolder”
on page 301.)
For example, if you set your main video folder to “c:\vid”, and your
subfolder naming method to “Current month”, any video you import
will be transferred to a folder with a name like “c:\vid\2012-10”.
Fill-level indicator: This bar graph shows for each import destination
how much room is left on the storage device. The first part of the bar
represents space already occupied on the device. The colored extension
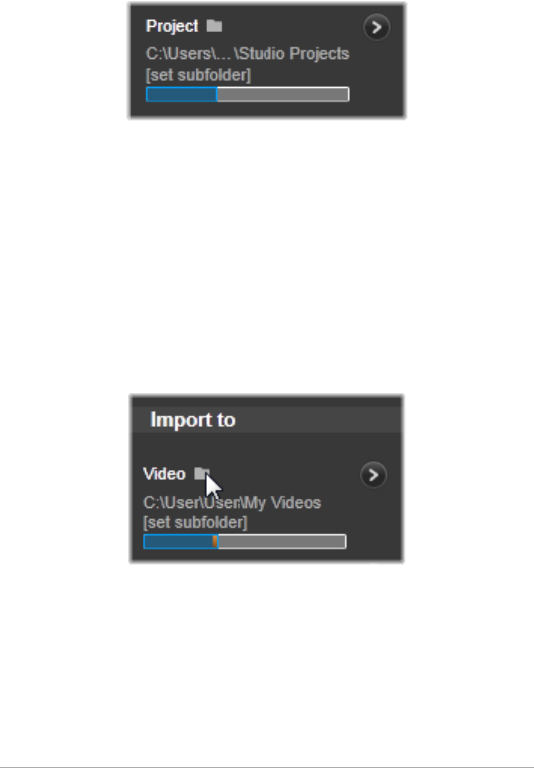
300 Pinnacle Studio User Guide
shows how much room will be required by any currently-selected
media files or project files awaiting import.
Available storage space display
Note: If a destination device reaches 98 per cent full during
import, the operation is halted at that point.
Selecting an import folder
To choose a different base folder for a given asset type, click the
corresponding folder button or folder name on the Import To panel.
This opens a folder selection box where you can navigate to, and if
necessary create, the folder you want to use.
Folders that contain subfolders are indicated with a plus icon to the left
of the folder icon if they are currently closed, and a minus icon if they
are open. Clicking the icon reverses the state of the folder.
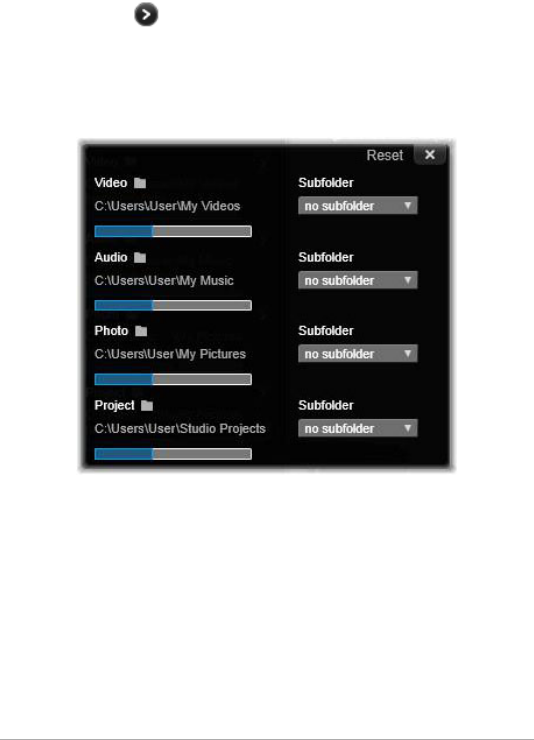
Chapter 10: The Importer 301
Setting a subfolder
To designate a subfolder of the base folder as the actual import
destination for the asset type, click either the set subfolder button or
the more button . These buttons open a dialog window that
represents an expanded version of the Import To panel, one that
includes controls needed to set the subfolder name or the naming
method for each asset type supported by the currently-selected import
source.
The expanded Import To dialog window for file-based assets.
Since files can be of any asset type, controls for all four types
are provided. Most other sources import only video media,
and don’t show the Audio, Photo and Project controls.
The row of controls for each asset type includes a dropdown list of
naming options:
No subfolder: With this option, the files you import will be stored in
the base folder.

302 Pinnacle Studio User Guide
Custom: When you choose this option, an in-place edit box appears.
Enter the name of the subfolder in which to store your next import or
imports of the asset type.
Today: Your imports will go to a subfolder named with the current
date, in the format “2012-10-25”.
Creation date: Each imported file will be stored in a subfolder named
with the creation date of the asset, in the same format as above. When
multiple assets are brought in as part of a single import operation, this
may entail creating or updating multiple subfolders.
Current month: This is the same as the Today option but without the
day portion, e.g. “2012-10”.
After making your choice, click the ‘x’ button at the top right of the
dialog window to return to the Importer.
The Mode panel
The Mode panel of the Importer provides a place to adjust the options
offered by several import sources.
DV / HDV import options
The options for DV and HDV import are in three groups on the Mode
panel.
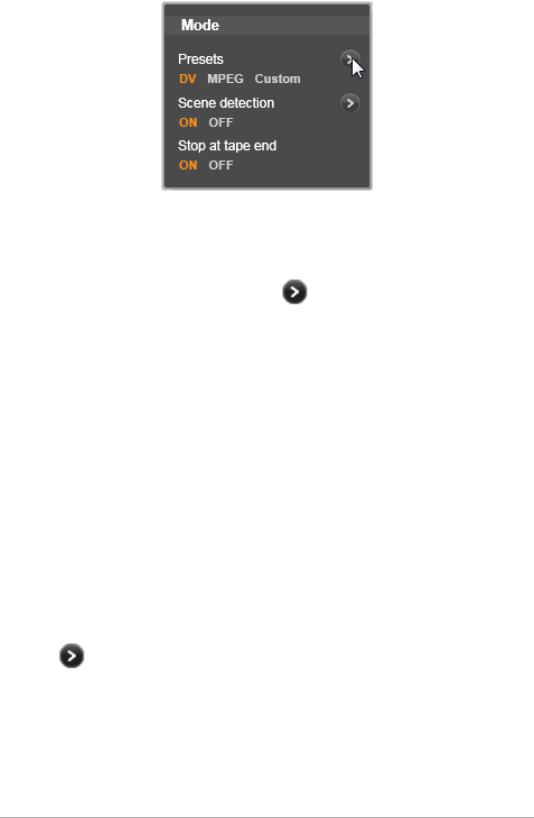
Chapter 10: The Importer 303
Presets: The Presets group offers two standard configurations for video
and audio compression, and a custom setting that lets you fine-tune
compression parameters in the Compression Options window, which
opens when the upper more button is clicked. For more
information, see “The Compression Options window” on page 306.
The fixed presets are:
• DV: This provides full-quality DV capture, using about 200 MB of disk
space per minute of video.
• MPEG: MPEG compression produces smaller files than does DV, but
requires more computational horsepower to encode and decode. This
could result in slower performance on older computers.
Scene detection: When the scene detection feature is enabled, your
footage is divided up on import into ‘scenes’ that can be displayed and
manipulated separately in the Library. This greatly simplifies the task of
locating material of interest during editing. Click the lower more
button to open the Scene Detection Options window. (See “The
Scene Detection Options window” on page 307.)
Stop at tape end: This option tells Pinnacle Studio whether to
automatically stop capturing if a blank area of tape is encountered. A
blank area – one without timecode striping – indicates virgin tape.
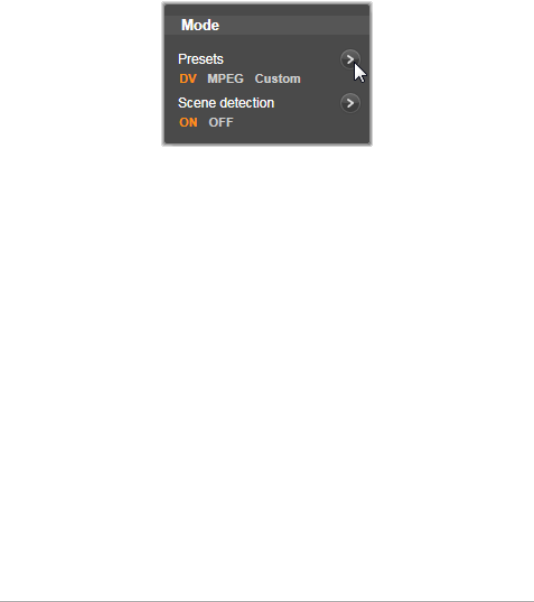
304 Pinnacle Studio User Guide
Provided you have avoided leaving any blank spots during shooting (by
slightly overlapping neighboring shots), this option allows for
unattended capture.
Import options for analog media
The options for analog import are similar to those just discussed for
digital sources. See below for explanations of the Compression Options
and Scene Detections Options windows.
Import options for file-based assets
The Mode panel provides two options affecting importing from file.
Import Mode: This option determines whether the media file or project
file is physically copied from the source location to the target folder of
the local hard drive (as specified on the Import To panel.) If Copy is
selected, the file is copied. If Link is selected, the file is not copied and
a link is created in the Library to the file in its original location.
It is strongly recommended that files on network drives be copied to
the local hard drive.
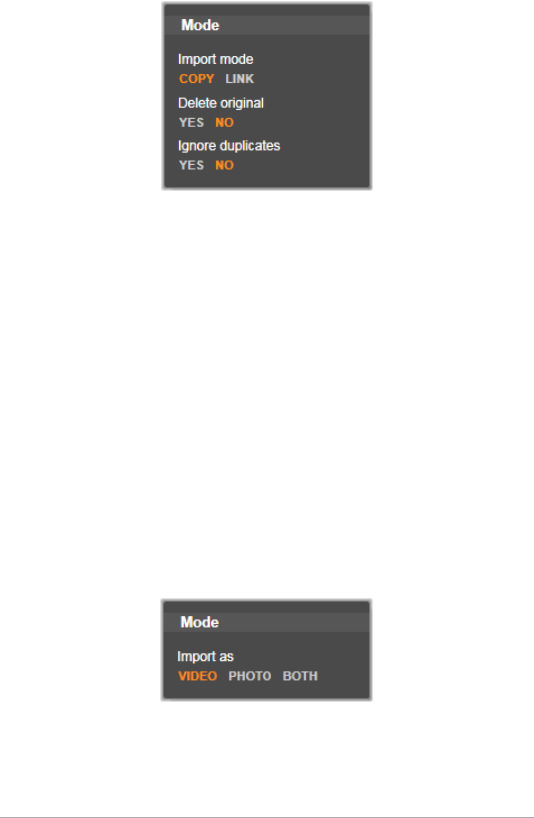
Chapter 10: The Importer 305
Delete original: When this option is enabled, the original copies of the
files you import will be deleted after copying. This option is handy if
you are using the Importer to consolidate your assets and don’t want
your hard drive cluttered with redundant copies.
Ignore duplicates: This option helps you deal with redundant media
files or project files you already have, by telling the Importer not to
import extra copies of files that may be differently-named but are
apparently identical.
Import options for stop-motion capture
In stop-motion animation, a series of individual frames is captured
from a live video source. Depending on your plans for the stop-motion
sequence, you can instruct the Importer to integrate the individual
frames into a movie, or simply import each frame as a picture, or both.
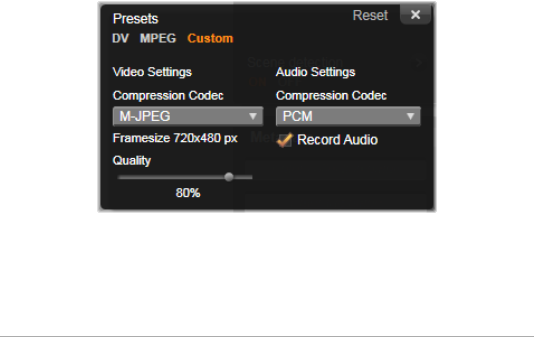
306 Pinnacle Studio User Guide
The Compression Options window
The options provided in the Mode panel for both DV / HDV and analog
import include access to this window for fine-tuning compression
preferences. If you select either of the DV and MPEG presets, you can
use this window to review the actual settings used. Editing the settings
here automatically selects the “Custom” preset.
Because some options are contingent on others, not all will be visible
simultaneously.
Video settings
Compression Codec: Use this dropdown list to select the codec you
want to use.
Framesize: This line shows the dimensions of the captured video.
Quality, Data rate: Some codecs present quality options in terms of a
compression percentage (Quality), and others in terms of the required
data transfer rate in KB/sec (Data rate).
Compression Options for digital and analog video import.
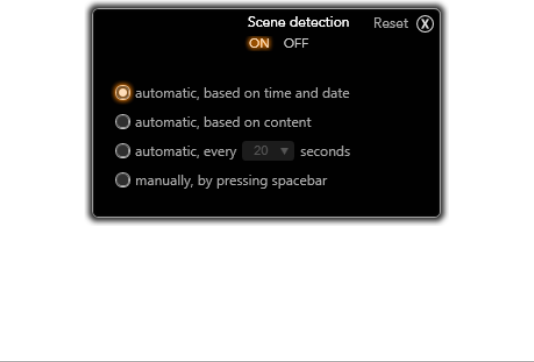
Chapter 10: The Importer 307
Audio settings
Compression: This dropdown shows the codec that will be used to
compress the incoming audio data.
Record audio: Clear this checkbox if you are not planning to use the
captured audio in your production.
The Scene Detection Options window
The options provided in the Mode panel for both DV / HDV and analog
import include access to this window for configuring scene detection
preferences.
Automatic scene detection is a key feature of Studio when working
with DV and HDV sources. As video capture proceeds, Studio detects
natural breaks in the video and divides it up into scenes.
Scenes can be independently viewed and managed in the Scenes view
in the Library.
The Scene Detection Options window for DV or HDV import.
When importing from analog sources, only the last two
options are supported.

308 Pinnacle Studio User Guide
Depending on which capture device you are using, automatic scene
detection is carried out either in real time during capture, or as a
separate step immediately after capture is completed.
The four scene detection options are:
•Automatic based on shooting time and date: This option is
available only when you are capturing from a DV source. Studio
monitors the time stamp data on the tape during capture, and
starts a new scene whenever a discontinuity is found.
•Automatic based on video content: Studio detects changes in the
video content, and creates a new scene wherever there is a large
change in the images. This feature might not work well if the
lighting is not stable. To take an extreme example, a video shot in
a nightclub with a strobe light would produce a scene each time
the strobe flashed.
•Create new scene every X seconds: Studio creates new scenes at
an interval you choose. This can be useful for breaking up footage
that contains long continuous shots.
•Manually, by pressing spacebar: Select this option if you want to
monitor the entire capture process and decide for yourself where
scene breaks should occur. Press the Space key each time you
want to insert a scene break during capture.
The Metadata panel
In the Metadata panel, you can enter information that will be
associated with the imported media file or project file in the Library.
This can make it easier to find and manage the clip when you are
searching the Library for assets to use in a movie.
Use the Collection field to enter the name of a Collection to which all
imported assets will be added. You can enter the name of an existing
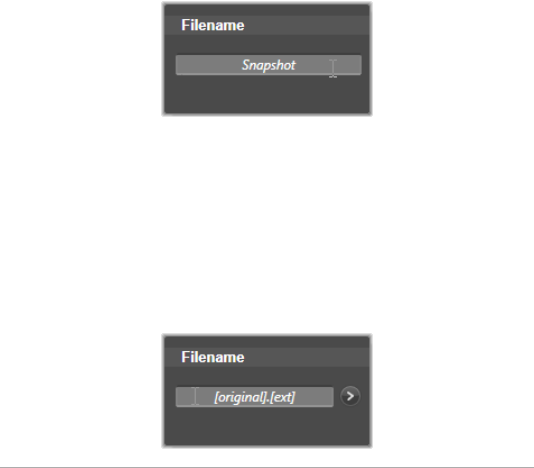
Chapter 10: The Importer 309
Collection, or create a new Collection by entering a new name. (See
“Collections” on page 25.)
You can enter tags for the asset in the Tag field; these can later be used
to find the asset. (See “Tags” on page 48.)
The Filename panel
This panel of the Importer is where you specify the names under which
your imported media files or project files will be stored.
Each type of input source has a default filename assigned by Studio.
For instance, the default filename when importing a Snapshot is
“Snapshot”. To change it, click in the space and type the name you
want.
The Importer never overwrites an existing file when importing. If a file
with the same name as the target name already exists, a sequence
number is added to the name of the incoming file.
When importing from file-based assets, additional file naming features
are available. By default the naming formula for a file-based input is
given symbolically as “[original].[ext]”, meaning that the original
filename and extension are used.
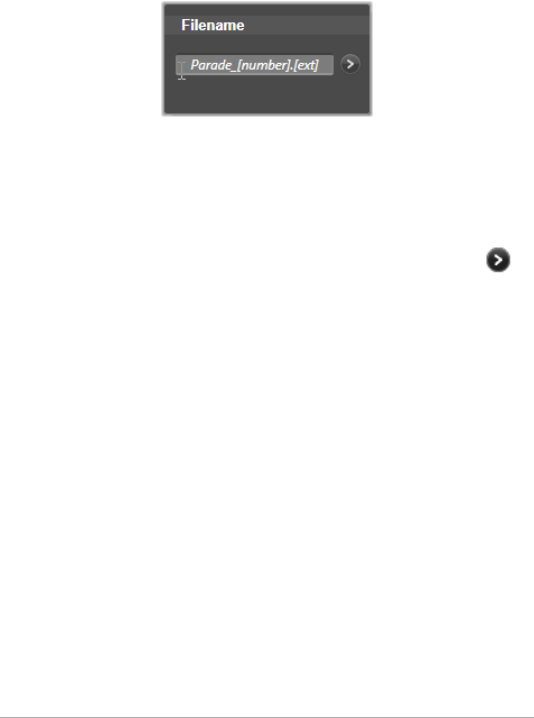
310 Pinnacle Studio User Guide
If you want a custom name, enter it into the edit box as usual; however,
in the case of file-based assets the target filename has two parts: a
stem, which you supply, and a tail, which is generated by one of three
simple rules at the time of import.
The default rule adds a unique sequence number to every filename.
While you are entering your custom name, the edit box shows only the
stem. But when the name is displayed at other times, the rule for the
tail part of appears as well.
To select a different rule for the tail part, click the more button .
This opens a dialog window with two dropdown lists. The first lets you
choose between “original” and “custom” for the stem. You can use
this if you ever want to revert to importing files under their original
names. The second dropdown, which is displayed only for custom
names, gives the available rules for generating the tail part:
•Number: This is the same rule used by other media types to avoid
name collisions. If your stem is “Parade”, the first file copied will
be named “Parade” (plus the original file extension), the second
will be named “Parade_001”, and the numbers then continue in
sequence.
•Creation time: The time of day when the file was created, in
hours, minutes, and seconds, is used to generate file names like
“Parade_20-30-00” for a file that was created at exactly 8:30 in
the evening.
•Time of day: This is like the previous option, but the time of
importing the file is used.
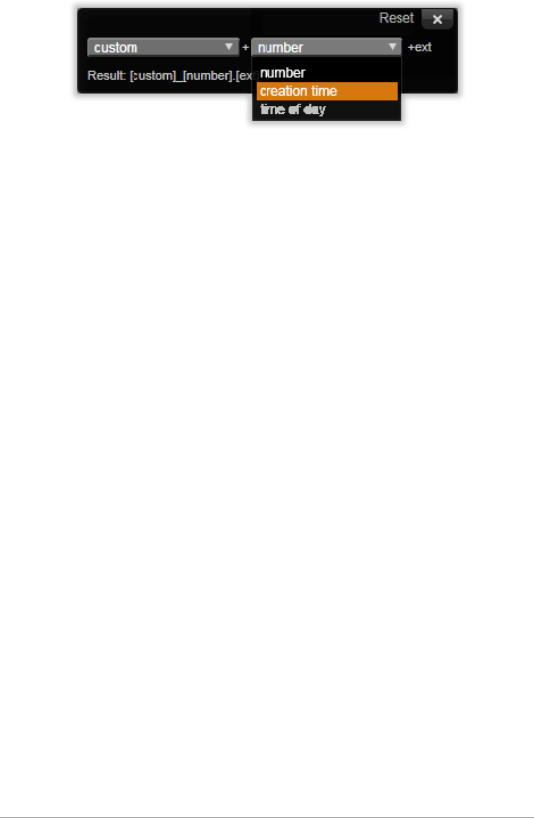
Chapter 10: The Importer 311
The Import Filename configuration window.
Selecting assets for import
Each source supported by the Importer has its own appropriate set of
controls for selecting the material to be imported. When you click the
source name in the Import From panel, the central area of the Importer
configures itself appropriately with the controls you need.
Import from file
There are two methods for importing media files and project files from
file-based storage media including local hard drives, optical drives,
memory cards and USB sticks:
• Select My computer in the Import From panel of the Importer to
select specific asset files or groups of files for import.
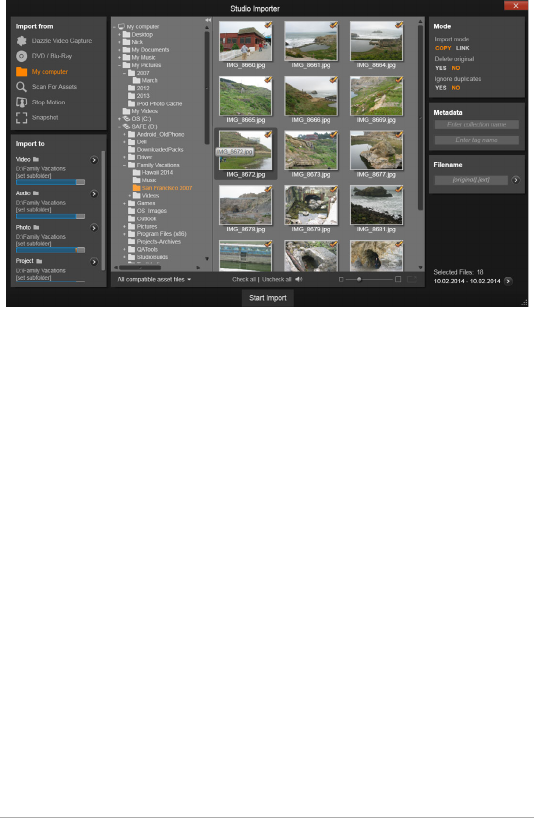
312 Pinnacle Studio User Guide
When importing from file-based assets, the Importer provides
a folder and file browser in the central area. This is flanked on
the left by the Import From and Import To panels, and on the
right by the Mode, Metadata, and Filename panels. The Start
Import button at bottom sets things in motion after the
desired asset files have been selected.
•Select Scan For Assets in the Import From panel to select one or
more folders and import all assets of the desired types that are
found in those folders.
Selecting files for Import
When you select My computer in the Import From panel, the job of
selecting the files to import belongs to the folder and asset-file browser
in the central area of the display.
A single import operation can take in multiple types of files from
multiple source folders. Each selected file will be copied to the correct
folder for its asset type (as specified in the Import To panel).
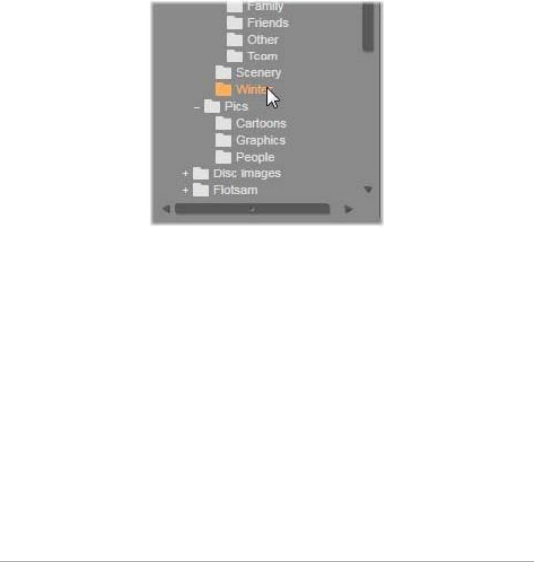
Chapter 10: The Importer 313
The folder and file browser
The left hand column of the browser is a hierarchical view of all folders
on all file-storage devices attached to your computer. These devices
include hard drives, optical disc drives, memory cards and USB sticks.
Navigation in this “folder tree” is similar to that in Windows Explorer
and other programs. Folders containing other folders are indicated by
a plus sign to the left of the name when they are closed and by a minus
sign when they are open. Click the sign to open out (“expand”) or close
down (“collapse”) a folder’s list of subfolders.
Only one entry in the folder tree can be highlighted at a time. Any
media files or project files contained in that folder are immediately
listed in the larger, right-hand division of the browser. You can preview
files on the spot, and earmark those you intend to import by checking
the box at the top right of corner of each file icon.
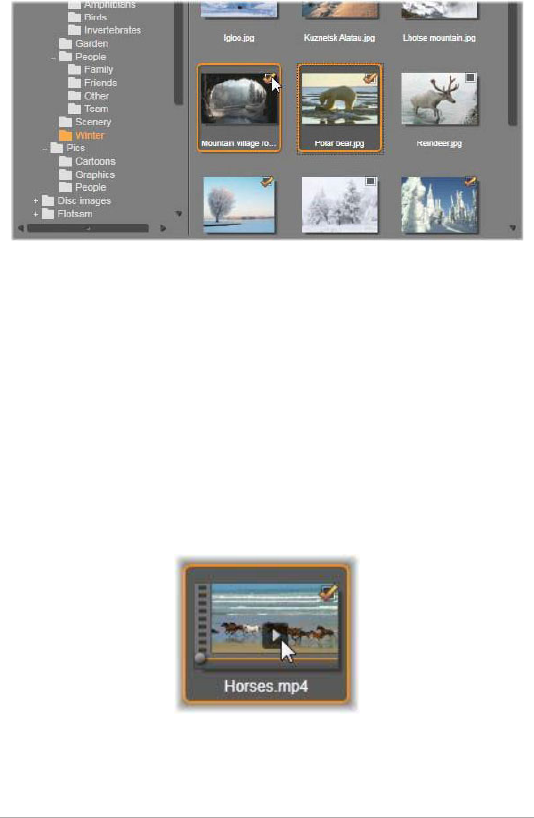
314 Pinnacle Studio User Guide
Here, the folder ‘Photos\Winter’ is open, revealing a set of
image files. To select (or unselect) files for import, click the
checkbox in the top right corner of one or more icons. In the
illustration, four files have been selected.
Previewing media and project files
Previewing audio and video: The file browser includes built-in
previewing for all supported asset types. Click the play button in the
center of video, audio, and project file icons in the Library to preview
the assets they represent. For quick viewing, video files play back within
the icon frame itself. Click anywhere on the icon to halt playback;
otherwise the entire file is previewed.
Full-screen photo preview: To view a digital photo or other picture file
at full-screen resolution, double-click its icon, or click the full- screen
button in the toolbar beneath the browser, or press the F11 key.
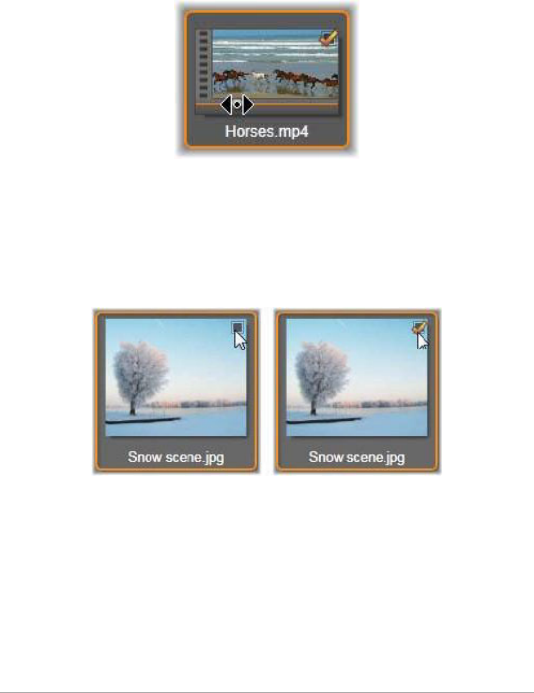
Chapter 10: The Importer 315
Scrub preview: Audio, video and project file icons provide a scrubber
control immediately below the file icon. Click and drag the scrubber
knob to manually review any part of the file. The mouse pointer
changes to a two-headed horizontal arrow when it is correctly
positioned for scrubbing.
Marking files for import
To mark asset files one at a time for importing, click the checkbox at
the top right corner of the file icon. This box is checked automatically
when you browse to a new folder for all the files on display.
Click the checkbox to mark or unmark the file.
Marking multiple files: The browser also provides a method of
checking or unchecking a group of highlighted files simultaneously. To
highlight an individual file, simply click on its name or its icon; the
highlighted state is indicated by an orange border. To highlight
additional files, click icons in conjunction with either of the Shift and
Ctrl keys, as follows:
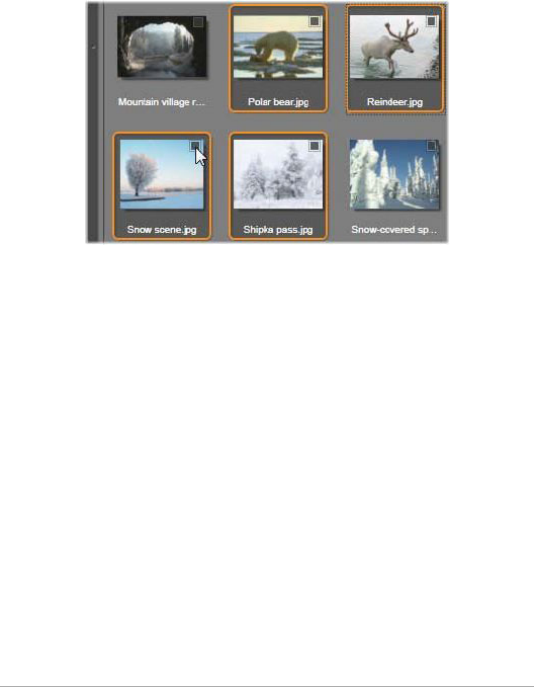
316 Pinnacle Studio User Guide
• Click while pressing Ctrl to add or remove the highlighting from
one file without affecting the others in the group.
• Click while pressing Shift highlights the clicked icon and all those
between it and the previously clicked icon, inclusive. Highlighting
is removed from any icons not within the range.
A group of four highlighted image file icons. Marking or
unmarking any one will affect the whole group.
You can also highlight a range of icons directly with the mouse, by
dragging out a rectangle that intersects the icons you want to include.
Click the first icon and move to the last one before releasing the mouse
button.
Having highlighted some icons you want to import, click the checkbox
of any one of them to mark or unmark the entire group at once.
Check All and Uncheck All: Click these buttons along the bottom of the
file browser to mark for importing either all or none of the asset files
listed in the current folder. The buttons do not affect any files currently
selected in other folders.

Chapter 10: The Importer 317
Use the Check All button to mark all asset files in the current
folder.
Each time a file is added to or removed from the list of those to be
imported, the file browser updates the count in the selection status
indicator at the bottom right of the display.
Customizing the browser
Several controls allow you to configure the file browser appropriately
for your display hardware and requirements.
Close the folder tree: To maximize the space for viewing files, click the
left-pointing double-arrow icon at the top of the folder tree scroll bar.
This collapses the folder tree to a vertical bar down the left-hand side.
At the top of the bar is the right-pointing double- arrow that will
reopen the tree. The name of the current folder is also shown.
Filter the file list: Another way to optimize your use of the file area is
to limit the files shown to include only one asset type. This is the
function of the asset filter dropdown at the bottom left of the browser.
By default, all supported media file and project file types appear in the
browser, but you can limit the view to picture files, audio files, video
files or project files by your selection here. To see exactly which file
types are included in a selection, hover on the item for a second or two
to pop up the list.
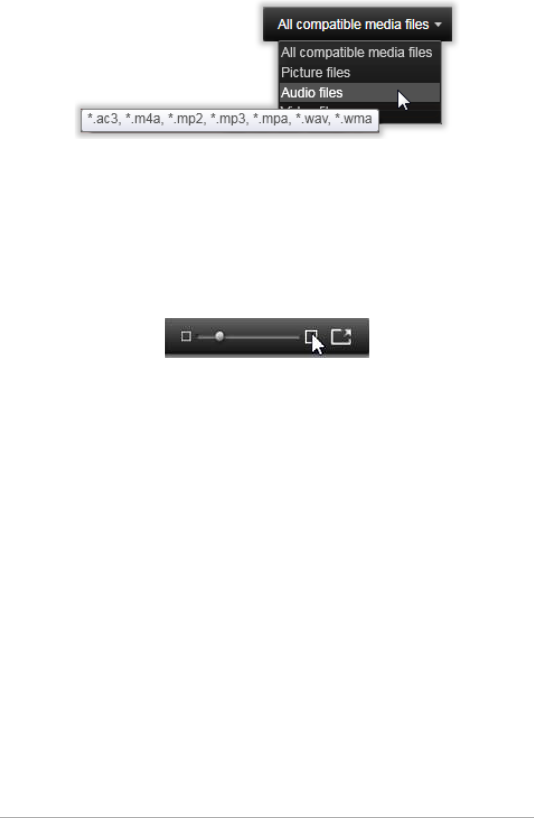
318 Pinnacle Studio User Guide
Hovering over the Audio files option brings up a list of file
types from which audio import is supported.
Zoom slider: A final tool for managing screen real estate is the zoom
slider at the bottom right of the browser. Move the slider leftwards to
reduce, or rightwards to increase, the size of the preview images in the
file browser.
There are three ways of moving this slider with the mouse:
• Click on the slider knob and drag to the left or right.
• Click beside the slider knob to nudge it in the appropriate
direction.
• Click the minus/plus buttons at the ends of the slider scale to
move the knob by a larger amount.
Full-screen photo: To preview a selected photo on the full monitor
screen, click the rightmost button.
Set preview volume: To set the playback volume of audio and video
clips for previewing, hover the mouse pointer in the area of the audio/
mute button in the bottom bar of the file browser. A volume slider will
appear beside the button. Drag the knob up and down to control the
volume. Click the audio/mute button itself to toggle audio muting.
Chapter 10: The Importer 319
Adjusting the import file date and time
The internal clocks of the recording devices are often set incorrectly,
resulting in incorrectly timestamped media files. The Importer can
correct this kind of problem by setting the date and time of the
imported files according to your specifications.
To correct the file time or date:
Use the more button on the selection status indicator to open a
window that offers two options for adjusting the timestamps:
•Correct time zone: This slider changes the file-system timestamp
of any media files you import by up to 12 hours in either direction.
You can use this adjustment to compensate for the time difference
when you bring home video from your travels.
•Set date and time: These fields lets you enter an arbitrary date and
time. The timestamp of any media files you import will be set to
this.
Scan for assets
When you select Scan For Assets in the Import From panel, a
hierarchical folder view is displayed, much like the one shown for My
computer. Expanding and collapsing folders works as usual, including
the use of the Plus and Minus keys as shortcuts.
Since you are selecting folders rather than files to be scanned, the
media files and project files contained in the folders are not shown. A

320 Pinnacle Studio User Guide
checkbox appears next to each name in the folder tree, and four pop-
up lists are offered on the toolbar at bottom.
These lists offer a menu of file types to import in each category: Video,
Photo, Audio and Projects. By default, the file extensions on each menu
are all checked, meaning that all the appearing file types will be
included in the import operation. Uncheck the file extensions for any
types that you do not wish to import.
To start importing, mark all the folders from which you want to import
files. Use the file-type lists just discussed to narrow the range of
incoming file types, if desired.
When selections have been made, click the Scan and Import button at
the bottom to begin the Import operation. This will import all files of
the selected types in the chosen directories.
Import from DV or HDV camera
To prepare for importing digital video, switch on your DV or HDV
device in play mode and select it in the Import From panel of the
Importer.
You will also need to make sure that your destination folder,
compression presets, and other options are set up in the other panels
the way you want them. (See “Importer panels” on page 294.)
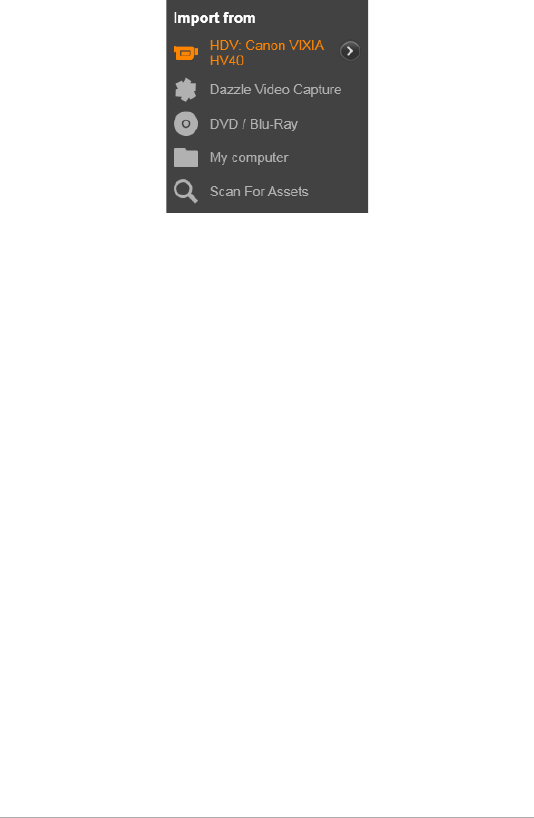
Chapter 10: The Importer 321
Previewing video
The video currently playing on the source device should now be visible
in the preview area at the central area of the display. Along the right
edge of the video preview is a scale showing the moment- by-moment
audio level.
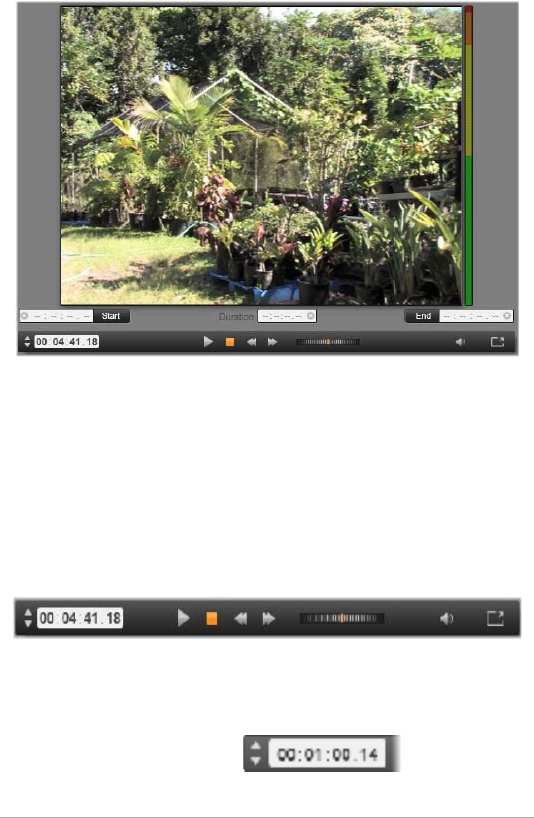
322 Pinnacle Studio User Guide
When a DV or HDV source is selected, the central area of the
Importer provides controls for previewing and importing the
taped material.
Below the preview image is a row of controls for automating capture
by setting mark-in and mark-out points. For more information, see
“Recording video and audio” on page 324.
Another row of controls, the transport bar, serves as your navigation
console for the source device.
The transport bar for DV and HDV import, with (from left) jog
controls and timecode readout, transport buttons, a shuttle
control, and an audio button with a pop-out slider for
controlling the preview volume.
The current timecode indicator shows your
playback position according to the timecode recorded onto the tape
Chapter 10: The Importer 323
when it was shot. The four fields represent hours, minutes, seconds
and frames respectively. To the left of the indicator is a pair of arrow
buttons; use these to jog the position one frame back or frame forward
at a time.
From left to right, the transport buttons are play/
pause, stop, rewind and fast forward. These buttons relay commands
to your camera. Using them is equivalent to using the camera’s
onboard controls, but typically more convenient.
Drag the orange needle on the shuttle control
to the left or right to change the playback position in the reverse and
forward directions respectively. The motor speed increases as you drag
the needle further off center. When you release the needle, it homes to
the center position and pauses playback.
Set preview volume: To set the playback volume for previewing, hover
the mouse pointer in the area of the audio/mute button in the bottom
bar of the file browser. A volume slider will appear beside the button.
Drag the knob up and down to control the volume. Click the audio/
mute button itself to toggle audio muting.
Mark-in, mark-out: The mark in and mark out timecode fields above
the ends of the transport bar indicate the planned starting point and
ending point of a video capture.
Note: DV and HDV sources are also suitable for snapshots.

324 Pinnacle Studio User Guide
Recording video and audio
The Importer supports two approaches to selecting a range of video to
be imported.
In the manual approach, you simply watch the preview playback and
press Start Capture at the start of the desired footage. When you reach
the end of the segment, press Stop Capture. If you have continuous
timecode on the source footage, and have set Stop at tape end to ‘Yes’
in the Mode panel, you can walk away and leave the Importer to switch
off when the input is exhausted.
The automatic method of capture is good for setting the endpoints of
your capture (the “mark-in” and “mark-out”) points with single- frame
precision, and for unattended importing that should halt before the
end of the recorded material.
Sometimes you may want to use set the mark-in time and leave mark-
out blank. When you click Start Capture the Importer will locate your
start time then capture until you tell it to stop (or at tape end).
You can also set a mark-out time and leave the mark-in time blank.
When you click Start Capture import will begin immediately, and end
automatically at the mark-out point. Entering a duration and entering
a mark-out time are equivalent. Whichever you specify, the Importer
calculates and displays the other one automatically.
Note: Before starting the import operation, verify that the
settings on the Import To panel and other panels (see “Importer
panels” on page 294) have been configured correctly.
Chapter 10: The Importer 325
To capture manually with the Start Capture and Stop Capture
buttons:
1 Make sure that the mark-in and mark-out points are not set. If
needed, use the button associated with the field to clear it with
one click.
2 Manually start playback of the source tape before the desired
starting point of the capture.
3 Click the Start Capture button when the starting point is reached.
The button caption changes to Stop Capture.
4 At the end of the segment click the button again. The captured
material is stored in the Library.
5 Manually halt playback (unless automatic shutoff is in effect as
noted above).
To capture automatically by setting mark-in and mark-out
points:
1 Use the time counter controls to set the mark-in and mark-out
values – the start and end points of the desired footage.
To set the mark-in point, either enter a value directly into the start
field, or navigate to the desired point and click the Start button. A
similar approach can be used to set the mark-out point.
2 Click Start Capture. Studio positions the source device to the
mark-in point and automatically begins recording.
3 When the mark-out point is reached, import is terminated and the
source device is stopped.
4 The captured material is stored in the Library.
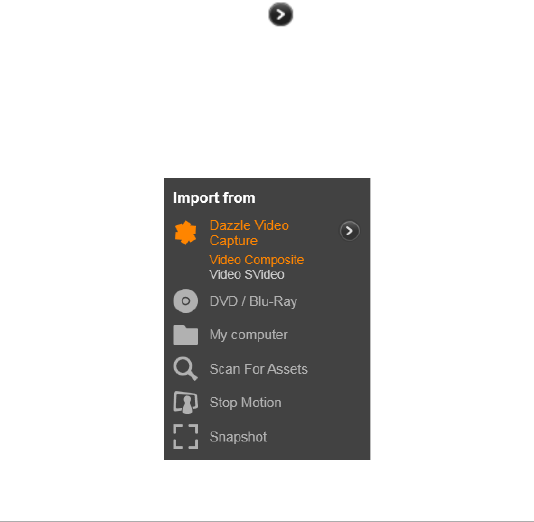
326 Pinnacle Studio User Guide
Import from analog sources
To record analog video (e.g. VHS or Hi8) you need a converter that
connect to your computer and that has the required video and audio
connections. This is also the case when recording from analog sound
sources, such as a record player. Currently supported devices include
Pinnacle products such as 500/510-USB, 700/710-USB and DVC 100,
and webcams based on DirectShow technology.
To prepare for importing from an analog source, switch on the device
and select it by name in the Import From panel of the Importer. Also
choose the applicable input (e.g. “Video Composite” or “Video
SVideo”). If you wish to tweak the incoming analog signal prior to
digitization, click the more button , which provides access to the
Analog Input Levels window. (See “Adjusting analog audio and video
levels” on page 295.)
Before starting the capture, make sure that your destination folder,
compression presets, and other options are set up in the other panels
as you want them. (See “Importer panels” on page 294.)

Chapter 10: The Importer 327
To capture from an analog source:
1 Verify that the input device is connected (e.g. “Video S-Video”).
2 Start the playback device just before the point at which you would
like capture to begin.
Video and audio previewing should now be active. (If not, check
the cabling and the converter installation.)
3 Click the Start Capture button to start recording.
The button caption changes to Stop Capture.
4 At the end of the segment click the button again. The captured
material is stored in the Library.
5 Halt the source device.
To capture for a specified duration:
1 Verify that the correct input is connected (e.g. “Video S- Video”).
2 Enter the desired capture duration in the Duration time-counter
control below the video preview.
3 Start the playback device just before the point at which you would
like capture to begin.
Video and audio previewing should now be active. (If not, check
the cabling and the converter installation.)
4 Click the Start Capture button to start recording.
The button caption changes to Stop Capture.
5 The capture operation will stop automatically after the desired
duration has been captured. You may also stop the capture
manually by clicking the Stop Capture button.
Import from DVD or Blu-ray Disc
The Importer can import video and audio data from DVDs and BDs
(Blu-ray discs).
328 Pinnacle Studio User Guide
Note: Blu-ray authoring is not included by default. To add it,
choose Help > Purchase Blu-ray, and follow the steps to
complete the purchase. If you have already purchased Blu-ray
authoring for Pinnacle Studio 19, but need to reactivate it, see
“Restore purchase” on page 370.
To begin, insert the source disc in its drive and select it in the Import
From panel of the Importer. If you have more than one optical drive,
choose the correct device among those listed.
Note: Copy-protected media cannot be imported.
Before starting the capture, make sure that your destination folder and
file name are set up in the other panels the way you want them (see
“Importer panels” on page 294).
Because large files can be involved when importing from optical discs,
selecting the correct import directory is important. In particular, ensure

Chapter 10: The Importer 329
that the designated storage location has sufficient space available (see
“The Import To panel” on page 298).
Previewing the disc files
The media on optical discs are accessed through the computer’s file
system. For this reason, the previewing controls in the central area, the
methods for selecting files, and the procedure for importing, are the
same as for ordinary file-based assets (except that the unneeded folder
view starts in the closed position). Please see “Import from file” on
page 311.
Import from digital cameras
Like optical disc drives, the media on digital cameras is accessed
through the computer’s file system. The camera may appear on the
source list as a removable disk drive. Previewing, selecting and
importing are the same as for ordinary file-based assets (except that
the folder view starts in the closed position).
Stop motion
The Stop Motion function of the Importer allows you to create
animated films by stitching together frames grabbed from a live video
source, such as an analog video camera or webcam. The result of your
Stop Motion import will be either a movie at 8 or 12 frames per
second, the collection of still images you grabbed, or both, depending
on Mode panel settings.
To prepare for Stop Motion import, make sure the source device is
switched on, then select it by name under the Stop Motion heading in
the Import From panel of the Importer. (See “The Import From panel”
on page 294.)
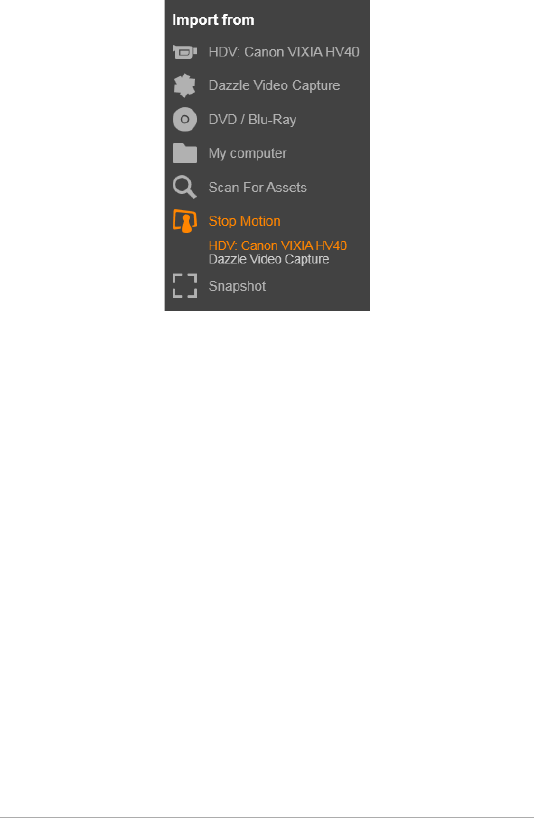
330 Pinnacle Studio User Guide
Before starting the capture, make sure that your destination folder,
options and file name are set up in the other panels the way you want
them. For more information, see “Importer panels” on page 294.
If your source equipment is functioning correctly, you should have a
live preview in the central area of the Importer window. Click the full-
screen button at the right-hand end of the transport bar to preview on
the full monitor screen.
When you are ready to capture an image, click the Capture Frame
button. A thumbnail of the grabbed frame is added to the Image Tray
at the bottom of the window. For more information, see “Using the
Image Tray” on page 334. Since this is a stop motion sequence, after
each image is grabbed you will generally make small changes to the
scene you are shooting in order to create the illusion of motion from
frame to frame.
To make your task of visualization easier, the Stop Motion preview
includes an “onion skin” effect, whereby successive frames are shown

Chapter 10: The Importer 331
simultaneously in translucent layers so that the differences can be
clearly seen. This feature can be configured on the control bar.
The number of images shot so far and the duration of the film (based
on the number of images, rounded off) are displayed to the right
below the control bar.
The Stop Motion control bar
This bar provides transport and other functions for Stop Motion
import. From left to right:
•Video and Frames indicators: These let you switch between
previewing the live video feed and previewing the captured frames
in the Image Tray. You can review – and if necessary replace –
particular frames without having to undo other work.
•Counter: This readout shows your current position within the
animation in hour, minutes, seconds and frames. The counter
value depends on the number of frames you have grabbed and
the animation speed in frames per second. The up and down
arrow buttons to the left of the counter provide single stepping
when previewing your animation.
•Navigation buttons: These buttons are for previewing your
animation. A loop button lets you cycle the animation
continuously for easy checking.
•Frame rate: This rate, in frames per second, determines how many
frames you will have to create in order to amass one second of
movie time. This rate influences the apparent speed of the
animation.
•Onion skin settings: Click the more button to open a small
window where the onion skin feature can be configured. The first
slider shows the difference in transparency between successive
frames, while the second controls the number of frames, in
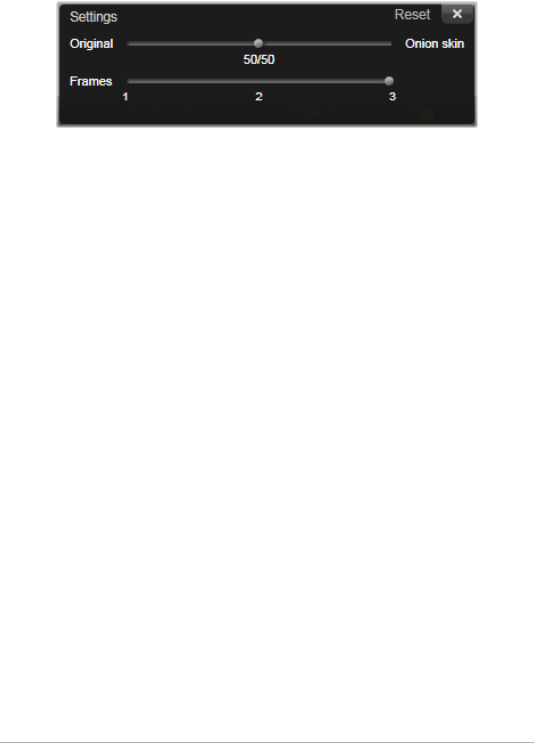
332 Pinnacle Studio User Guide
addition to the current one, that will take part in the effect.
Experiment with both settings until you find the levels that work
best for your movie.
Importing the animation
When you have added all the frames you want to the animation, click
the Start Import button. The Importer adds your animated movie, and/
or the individual frames you captured, to the appropriate sections of
the Library.
Snapshot
The Snapshot function of the Importer is used to record individual
frames (still images) from cameras or players connected to the system.
To prepare, make sure the source device is switched on, then select it
by name under the Snapshot heading in the Import From panel of the
Importer. For more information, see “The Import From panel” on
page 294.
Before starting the capture, make sure that your destination folder and
file names are set up in the other panels as you want them. For more
information, see “Importer panels” on page 294. Now start your
camera, or roll your tape, and start monitoring the embedded preview
display in the central area of the Importer window. Click the full-screen
button at the right-hand end of the transport bar to preview on the full
monitor screen.
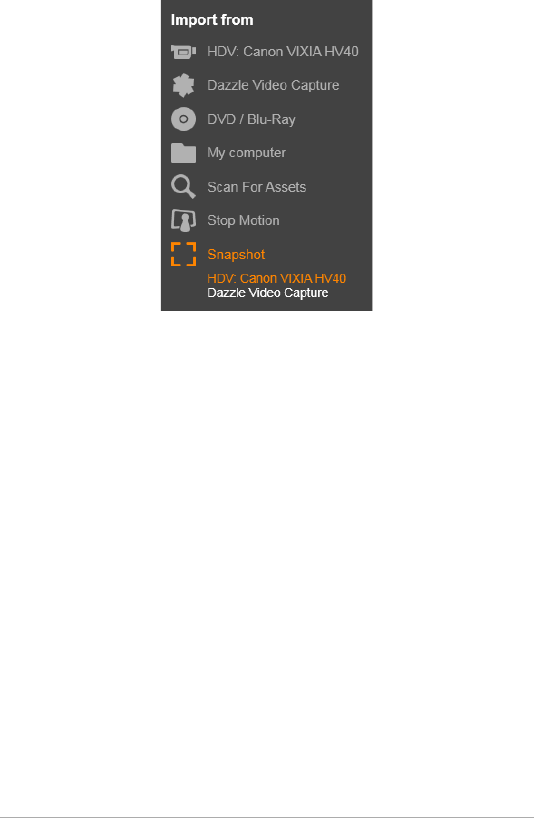
Chapter 10: The Importer 333
When you want to capture an image as it goes by, click the Capture
Frame button.
A thumbnail of the grabbed frame is added to the Image Tray at the
bottom of the window.
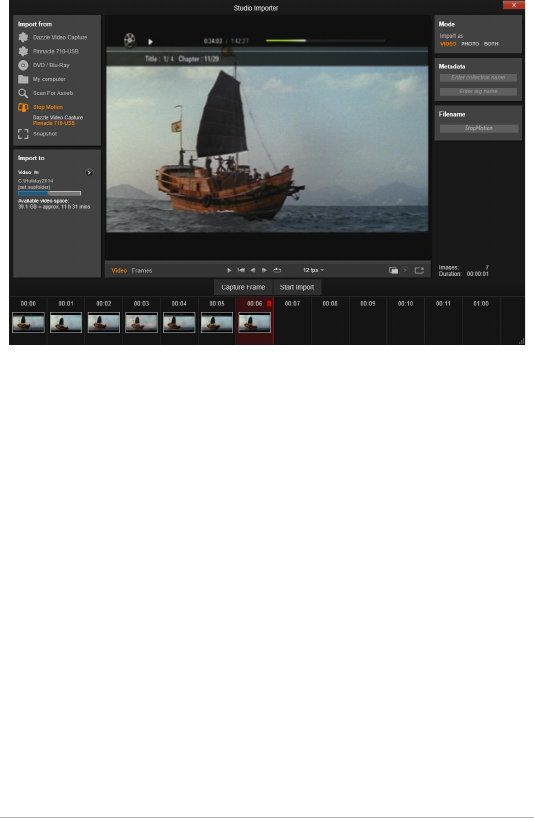
334 Pinnacle Studio User Guide
Capturing snapshots in the Importer. While previewing live or
taped video in the central area of the window, use the
Capture Frame button to grab still images. Grabbed frames
accumulate in the Image Tray at the bottom of the window
until you click the Start Import button to transfer them to the
Library.
Capture as many additional frames as are required. The Importer adds
each one in turn to the collection growing in the Image Tray. In the
course of capturing, you can change tapes, re-aim your camera, and
so on as you see fit. The source video doesn’t need to be uninterrupted
as long as there is signal present when you actually click the Capture
Frame button.
Using the Image Tray
For on-the-spot review of a frame you have already grabbed, click the
thumbnail of any but the most recent frame in the Image Tray. This
switches the preview display from the video source to the captured file,
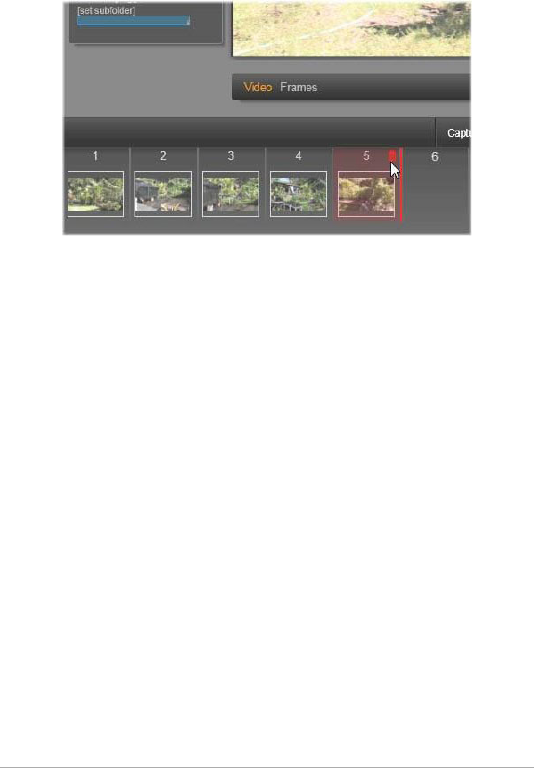
Chapter 10: The Importer 335
and activates the File indicator. You can also activate the indicator by
clicking it directly.
Click the File indicator or any thumbnail in the Image Tray to
review images already grabbed. Here, thumbnail 5 has been
clicked, and the mouse pointer is poised over the trash-can
icon to delete it. The heavy line to the right of the selected
thumbnail is where the thumbnail of the next grabbed frame
would be inserted.
To delete a captured frame, select it in the Image Tray, then click the
trash-can icon that appears in the top right corner of the thumbnail.
To switch back to previewing video after reviewing files in the Image
Tray, click the Live indicator beneath the preview display.
Importing the frames
When you have grabbed all the frames you want from the video
source, click the Start Import button. The Importer adds the grabbed
images to the still images section of the Library.

336 Pinnacle Studio User Guide
Chapter 11: The Exporter 337
Chapter 11: The Exporter
One of the great things about digital video is the large and growing
number of devices that can make use of it. Studio lets you create
versions of your movie for whatever video viewers your audience will
be using, from hand-held DivX players and mobile phones to HDTV
home theaters.
When you have finished editing your project, open the Exporter by
pressing the Export button at the top of the screen. With a few clicks
you can tell the Exporter everything it needs to know to output your
movie or asset in the format that best fits your requirements.
Note: To export directly from the Library without using the
Exporter, please see “Exporting directly from the Library” on
page 30.
The Exporter will ensure that your project is complete before it is
exported. If there is any missing media, your project cannot be
exported until the media is either relinked or deleted from the project.
For more information, see “Missing media” on page 22.
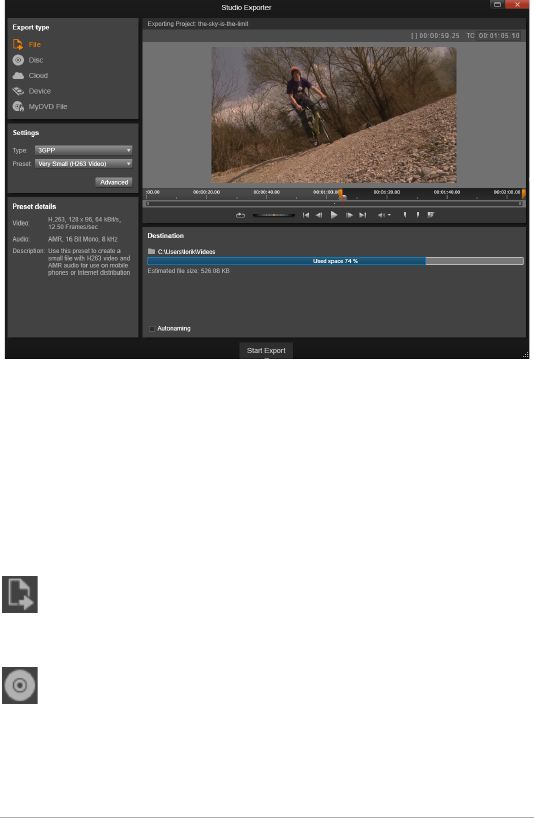
338 Pinnacle Studio User Guide
The Exporter. The buttons at upper left set the export
destination to File, Disc, Cloud (the Internet), (portable)
Device, or MyDVD File. Other controls let you set output
options as needed for the chosen output type. The name of
the project appears above the Player, while the panel below it
shows the currently-selected output format.
Begin by selecting one of the File, Disc, Cloud and Device buttons to
set the media type of your finished project.
File output creates movie files that can be viewed from just about
anywhere: your hard drive, your website, your portable movie
player – even your mobile phone. See “Output to file” on page 344.
Disc output lets you copy a movie onto a recordable disc in your
computer’s CD, DVD or Blu-ray recorder (also called a ‘burner’),
or onto a flash memory card. You can also direct the Exporter to create
a copy, or ‘image’, of the disc on your hard drive, without actually
burning it. See “Output to disc or memory card” on page 341.
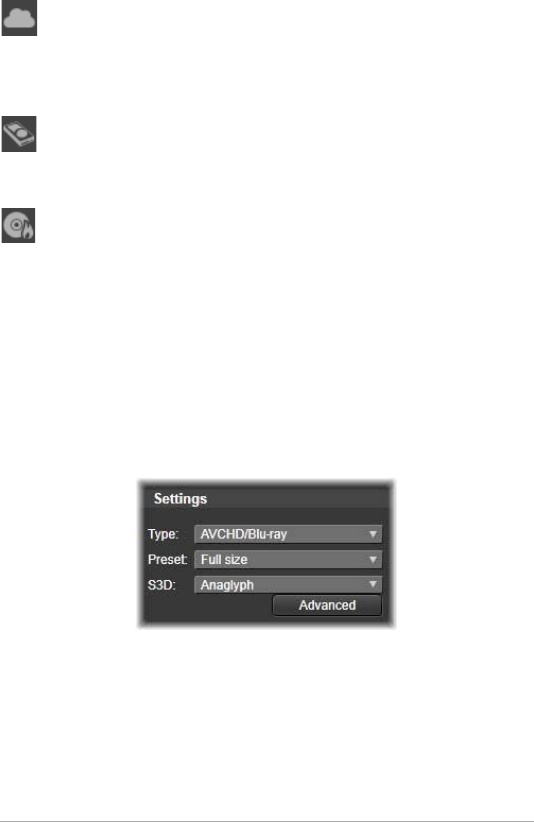
Chapter 11: The Exporter 339
Cloud output creates a file for uploading to a cloud-based
service provider, where you can decide whether to limit your
audience to a few close friends or share your project with the world.
See “Output to cloud” on page 352.
Device output creates a file that can be viewed from your
portable movie player, mobile phone, tablet computer, or similar
device. See “Output to a device” on page 356.
MyDVD File creates a file that can be used in the MyDVD
application. MyDVD lets you access templates to quickly create a
final DVD with titles, graphics, and full menus. For more information,
see “Output to a MyDVD file” on page 357.
Configuring output
Output can be configured quickly within each media type using the
dropdown lists in the Settings panel. If you need hands-on control,
click the Advanced button to open a panel of options for the media
type.
When you have confirmed your settings, click either Create Image or
Burn Disc to output in disc format, Start Publishing to send your movie
to the Cloud, or Start Export to begin saving as a file or to a portable
device.
340 Pinnacle Studio User Guide
Preparing your movie for output
Before your movie is completely ready for output some preprocessing
will usually be required. In general, Pinnacle Studio will need to
‘render’ (generate video frames in the output format) any transitions,
titles, disc menus and video effects you’ve added to your movie. Any
files generated during the rendering process are stored in the auxiliary
files folder, whose location you can set in the application settings
window.
Create between markers
For output to file or to the Cloud, you have the option of exporting only
a selected portion of your movie. Adjust the trim calipers in the Player
or the Timeline to indicate which part of the movie you want to export.
Set the Mark In and Mark Out calipers to export a segment of
the timeline.

Chapter 11: The Exporter 341
Output to disc or memory card
Studio can output movies directly onto DVD and Blu-ray discs, if the
requisite disc-burning hardware is available on your system.
Whether or not you have a disc burner, Studio can also create a ‘disc
image’ – a set of files containing the same information as would be
stored onto the disc – in a directory on your hard drive. The image can
subsequently be burned onto a disc or transferred to a flash memory
card.
Note: Blu-ray authoring is not activated by default. To activate
it, choose Help > Enable Blu-ray authoring.
DVD and Blu-ray
If your system has a DVD burner, Studio can create two types of DVD
disc: standard (for DVD players) and AVCHD format (for Blu-ray
players).
If your system has a Blu-ray recorder, you can record onto any
recordable media supported by the device.
Your standard DVD discs can be played back:
• On any DVD player that can handle the recordable DVD format
your burner creates. Most players can handle the common
formats.
• On a computer with a DVD drive and suitable playback software.
• On any HD DVD player.
Your Blu-ray disc, or DVD disc in AVCHD format can be played back:
• On the Panasonic DMP-BD10, the PlayStation 3, and other Blu- ray
players (not all players support the AVCHD format, but most do).
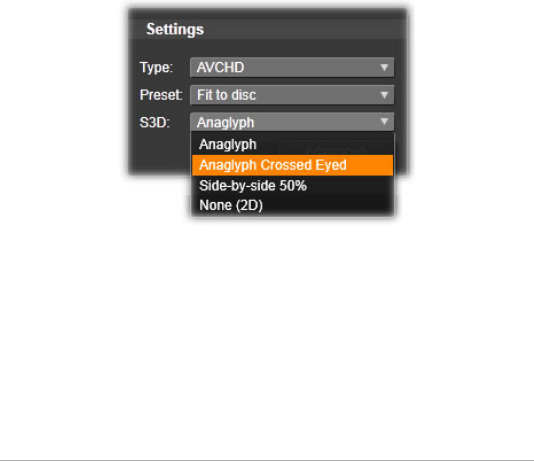
342 Pinnacle Studio User Guide
• On a computer with a Blu-ray drive and suitable playback
software.
SD card, Memory Stick and Built-In Media
AVCHD 2.0 disc structures can be written to flash memory cards, such
as SD cards or Memory Sticks, or even to devices with built-in media
support (e.g. camcorders with AVCHD 2.0 support).
Creating 3D discs
If your project is in stereoscopic 3D, you can easily create 3D discs in
DVD, AVCHD and AVCHD 2.0 formats. On the Settings panel, the S3D
dropdown menu lets you choose the correct mode. Use Anaglyph,
Anaglyph Crossed Eyed, or Side-by-side 50% to create the disc.
Stereoscopic 3D choices for AVCHD.
A multistream 3D project can be exported in AVCHD 2.0 format to
flash memory, such as an SD card, Memory Stick or built-in media
storage.
Outputting your movie
Studio creates your disc or disc image in three steps:
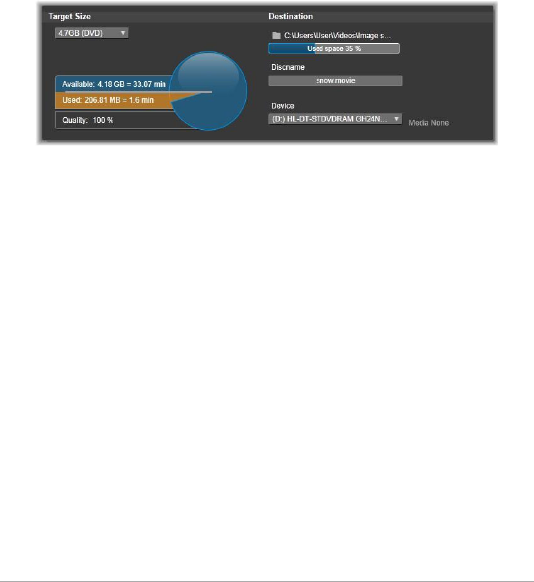
Chapter 11: The Exporter 343
1 First the entire movie must be rendered to generate the MPEG-
encoded information to store on the disc.
2 Next, the disc must be compiled. In this phase, Studio creates the
actual files and directory structure that will be used on the disc.
3 Finally, the disc must be burned. (This step is skipped if you are
generating a disc image rather than an actual disc.)
To output your movie to disc, or to a disc image:
1 Click the Disc tab to bring up this display:
The circular display summarizes your disc usage. It also shows an
estimate of the time the movie will occupy on your writable disc.
Use the folder button to change the hard drive location Studio
uses for storing auxiliary files. If you create a disc image, it too will
be stored in that folder. The dropdown list on the lower display
specifies the disc burner to use if more than one is available.
2 On the Settings panel, select the disc Type you are using, then
whichever video quality and disc usage Preset best matches your
intent.
If you wish to fine-tune your output settings, choose the Custom
preset then click the Advanced button to bring up the Advanced
Settings panel.
3 Click the Burn Disc button.
Studio goes through the steps described above (render, compile,
and burn) to create the disc. Click the Create Image button to
perform the identical steps but omit the burn step.

344 Pinnacle Studio User Guide
4 When Studio has finished the burning operation, it ejects the disc.
5 If you want to burn a previously created image press the Burn
Image button.
Quality and capacity of disc formats
The differences amongst the various disc formats can be boiled down
to these rules of thumb regarding the video quality and capacity of
each format:
• DVD: Each disc holds about 60 minutes of full-quality MPEG-2 video
(120 minutes if the disc recorder supports dual-layer recording).
• DVD (AVCHD): Each disc holds about 40 minutes of full-quality
AVCHD video per layer.
• BD: Each disc holds more than 270 minutes of HD video per layer.
Output to file
Studio can create movie files in all of these formats:
•3GP
• Audio only
•AVCHD/Blu-Ray
•AVI
•DivX
•DivX Plus HD
•Flash Video
•Image
• Image Sequence
•MOV

Chapter 11: The Exporter 345
•MPEG-1
•MPEG-2
•MPEG-4
•MTS
•*Real Media
•Smart
• Windows Media
•XAVC
*Supported in 32-bit only.
Choose whichever format matches the needs of your audience and the
details of their viewing hardware.
The size of the output file depends on both the file format and the
compression parameters set within the format. Although compression
settings can easily be adjusted to produce small files, heavy
compression comes at the expense of quality.
The detailed settings for most formats can be adjusted by choosing the
Custom preset and clicking the Advanced button. Other presets load
settings designed for typical situations.
If you are exporting a stereoscopic 3D project, an S3D menu will
appear, offering various 3D formats, or the option of exporting your
project in 2D.
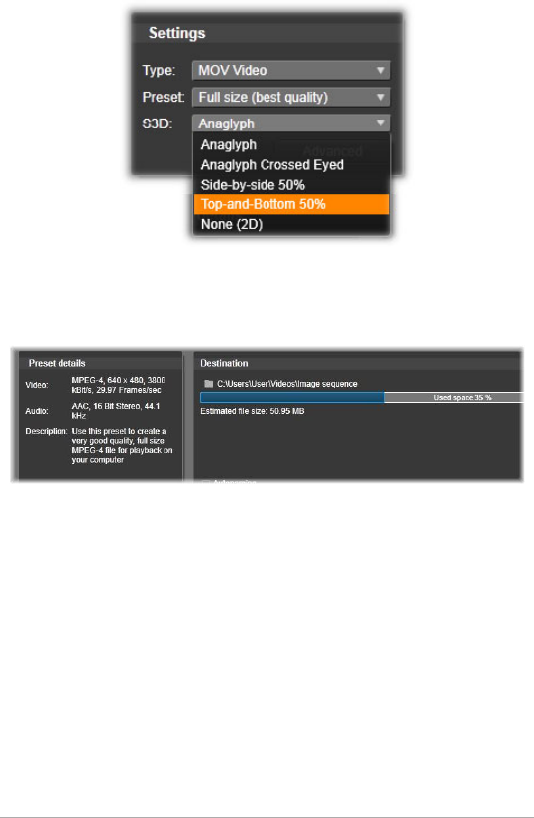
346 Pinnacle Studio User Guide
When your output options are in place, click the Create file button. A
file browser opens to let you specify a name and location for the video
file you are creating.
When you are exporting a movie to a file, these panels on the
Exporter display your export settings.
As a convenience after output has completed, the Exporter provides
shortcuts for opening Windows Media Player and the QuickTime
Player. To view your output file as soon as you have created it, click the
icon representing the player of your choice.
3GP
Pinnacle Studio can generate movies in this widely-used file format
using your choice of MPEG-4 or H.263 video compression, along with
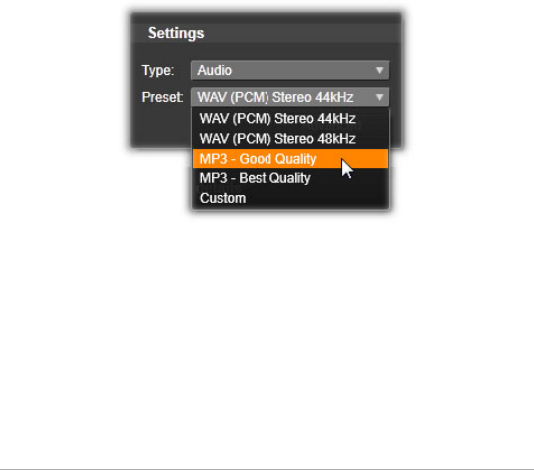
Chapter 11: The Exporter 347
AMR audio compression. The format is adapted to the comparatively
modest processing and storage capabilities of mobile phones.
The list of presets for this file type offers two frame sizes in either
encoder. Choose Small, at 176x144, or Very Small, at 128x96.
Audio only
Sometimes a movie’s soundtrack can stand alone without visuals. Live
entertainment footage, and video recordings of interviews and
speeches are instances in which an audio-only version might be
desirable.
Pinnacle Studio lets you save your soundtrack in wav (PCM), mp3 or
mp2 format.
Click the preset that best meets your needs; or choose Custom, then
click the Advanced button to open the Advanced Settings panel.
AVCHD/Blu-ray
AVCHD/Blu-Ray is the ‘transport stream’ version of MPEG-2. It may
contain video in MPEG-2 or H264/AVC compression. Its applications
include HD playback on AVCHD-based camcorders and Sony’s
PlayStation 3 home game console.
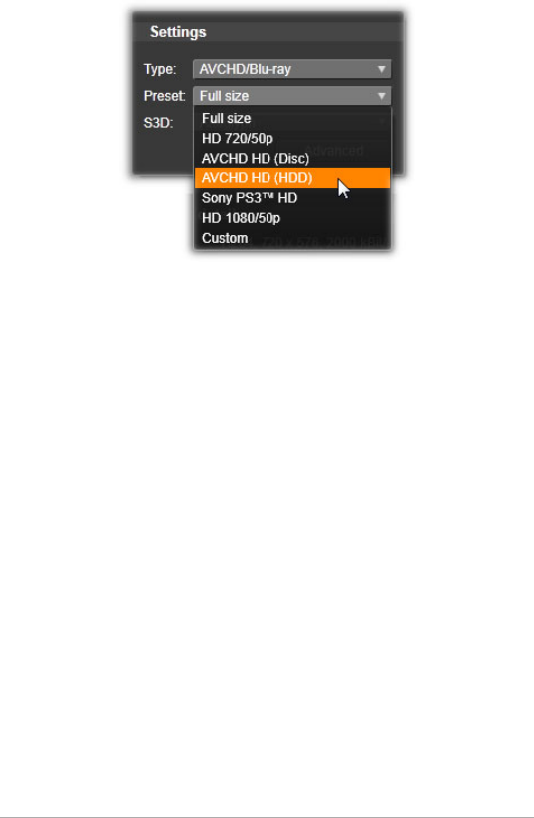
348 Pinnacle Studio User Guide
Click the preset that best meets your needs; or choose Custom, then
click the Advanced button to open the Advanced Settings panel.
AVI
Although the AVI file type for digital video is itself widely supported,
the actual coding and decoding of video and audio data in an AVI file
is performed by separate codec software.
Studio supplies a DV and an MJPEG codec. If you wish to output your
movie as an AVI in some other format, you can use any DirectShow-
compatible codec installed on your PC, as long as that codec is also
installed on the PC that will play your movie.
Click the preset that best meets your needs; or choose Custom, then
click the Advanced button to open the Advanced Settings panel.
DivX
This file format, based on MPEG-4 video compression technology, is
popular for video files disseminated over the Internet. It is also

Chapter 11: The Exporter 349
supported by a range of DivX-compatible hardware devices, from DVD
players to portable and handheld units.
Click the preset that best meets your needs; or choose Custom, then
click the Advanced button to open the Advanced Settings panel.
DivX Plus HD
This file format, based on H264 video compression technology, is
popular for HD video files disseminated over the Internet.
Click whichever of the quality presets matches your needs; or choose
Custom, then click the Advanced button to open the Advanced
Settings panel.
Flash Video
Studio supports output in Flash Video (flv) format, version 7. Virtually
all current web browsers are able to display this popular format, which
has been widely adopted by social networking sites and news sites.
Click the quality preset that matches your needs; or choose Custom,
then click the Advanced button to open the Advanced Settings panel.
Image
A frame of your video project can be exported as an image, a JPG, TIF
or Custom. If you select the Custom option, use the Advanced button
to open the Advanced Settings panel.
Image sequence
A section of your video project can be exported as a series of images,
one per frame. The video selected must be at least one second long.
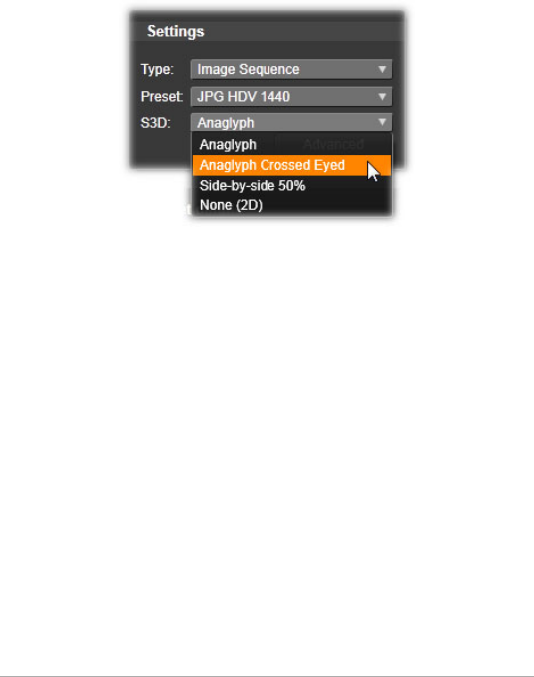
350 Pinnacle Studio User Guide
Each second of video will generate between 25 and 60 images,
depending on the frame rate setting.
The images can be TIF, JPG, TGA, or BMP, in a variety of sizes. If the
project is in stereoscopic 3D, you will be offered S3D formats for
output.
MOV Video
This is the QuickTime file format. It is particularly suitable when the
movie will be played on the QuickTime player.
The presets provide a variety of size and encoding options.
MPEG
MPEG-1 is the original MPEG file format. MPEG-1 video compression
is used on VideoCDs, but in other contexts it has given way to newer
standards.
MPEG-2 is the successor format to MPEG-1. Whereas the MPEG-1 file
format is supported on all Windows 95 and later PCs, MPEG-2 and
MPEG-4 files can only be played on PCs with appropriate decoder
software installed. Several of the MPEG-2 presets support HD (High
Definition) playback equipment.

Chapter 11: The Exporter 351
MPEG-4 is another member of the MPEG family. It offers image quality
similar to MPEG-2 but with even greater compression. It is particularly
suitable for Internet use. Two of the MPEG-4 presets (QCIF and QSIF)
create ‘quarter-frame’ video sized for cell phones; two others (CIF and
SIF) create ‘full-frame’ video suitable for handheld viewers.
Custom presets: With all MPEG variants, Custom lets you configure
movie output in detail by clicking the Advanced button to open the
Advanced Settings panel.
Real Media
Real Media movie files are designed for playback on the Internet. Real
Media movies can be played back by anyone around the world who
has the RealNetworks RealPlayer software, which is a free download
from www.real.com.
Click the Advanced button to configure your output with the
Advanced Settings panel.
Windows Media
The Windows Media file format is also designed for streaming Internet
playback. The files can be played on any computer where the Windows
Media player – a free program from Microsoft – is installed.
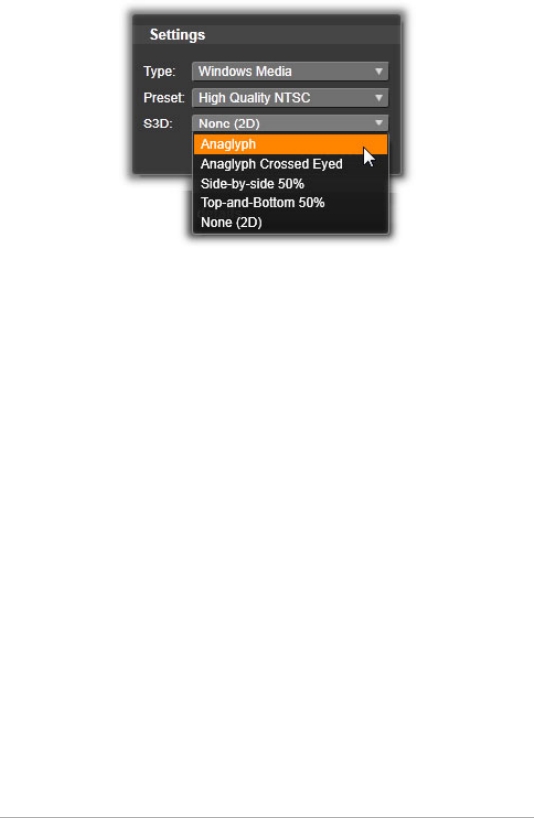
352 Pinnacle Studio User Guide
Click the Advanced button to configure your output with the
Advanced Settings panel.
Output to cloud
The Pinnacle Studio Exporter lets you share your movie creations with
your social network on Facebook, with your professional peers on
Vimeo, and with potentially the entire world on YouTube.
Storing your media and projects on the Cloud means they are also
accessible from your smart phone or tablet, and can easily be
transferred between computers for collaboration and convenient
access.
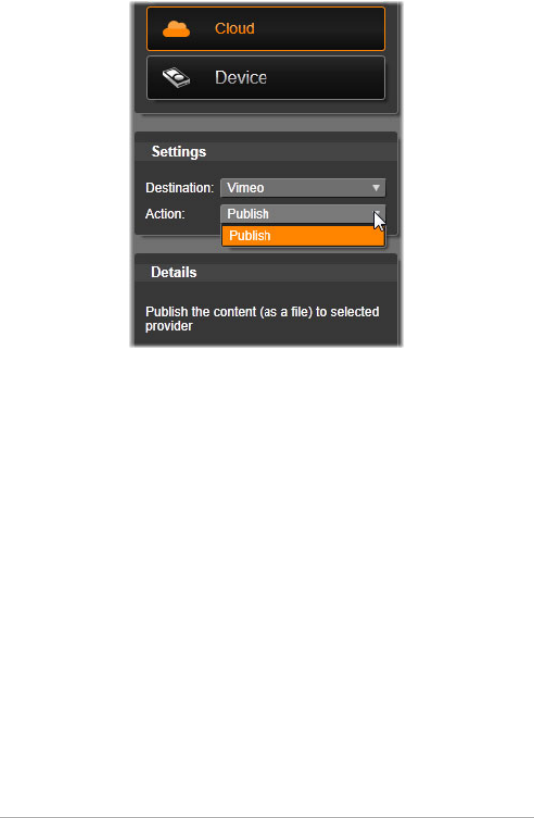
Chapter 11: The Exporter 353
When uploading to the Cloud, whether to Facebook, Vimeo
or YouTube, the only action available within the Exporter itself
is ‘Publish’. Settings are chosen after logging in to the service
provider.
After selecting a sharing provider, click the Start Publishing button at
the bottom of the Studio Exporter window. If you are not already
logged in to the provider’s site, a log-in page will appear.
After logging in, select a format for uploading your project. The
choices provided in the Format dropdown are Fastest (360p), Standard
(480p), HD (720p) and HD (1080p). Each specifies a different
combination of frame size and video data rate.
Facebook
After logging in to your Facebook account, you can enter a new Title,
or Description for your movie, and select Format and Privacy settings
from the dropdown menus.

354 Pinnacle Studio User Guide
Use the Start button at the bottom of the Studio Exporter window to
render and upload your project.
Vimeo
After logging in to your Vimeo account, you can modify the movie’s
Title, Description and Tags. Choose the Format you prefer from the
dropdown menu.
When ready, click the Start button at the bottom of the window to
render and upload your project.
YouTube
After logging in to your YouTube account, you can enter a new Title,
Description, or new Tags. Choose your Format and Privacy settings
from dropdown menus.
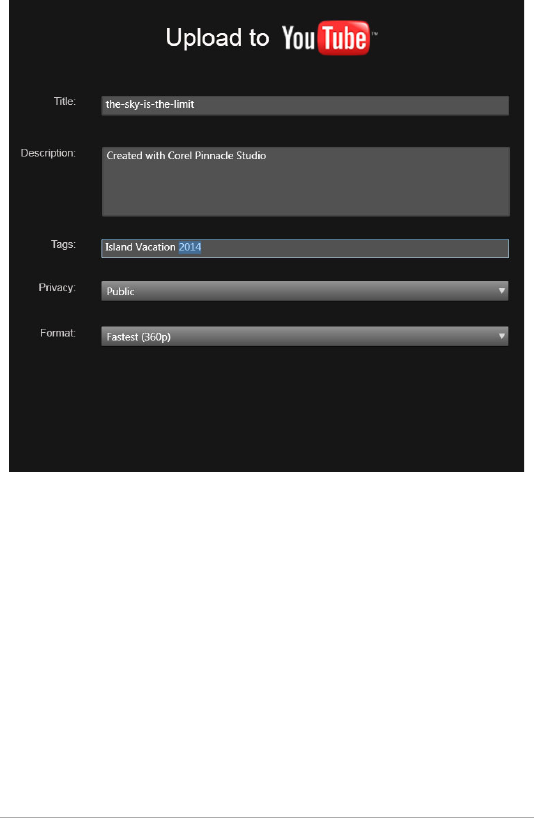
Chapter 11: The Exporter 355
Adding tags
When the settings are to your satisfaction, click the Start button at the
bottom of the window to render and upload your file.
After uploading
When the upload is finished, you have the option of opening a web
browser to view your creation, or returning to Studio. For Facebook,
YouTube and Vimeo, your file must be processed before it can be
viewed online, and so may not be immediately available.

356 Pinnacle Studio User Guide
Output to a device
Studio can create movie files that are compatible with the following list
of devices:
•Apple
• Microsoft Xbox and Xbox One
• Nintendo Wii
• Sony PS3 and PS4
• Sony PSP
If you are exporting a stereoscopic 3D project, you will be offered the
3D formats compatible with the selected device.
Apple
Studio supports exporting files that are compatible with popular Apple
devices like iPod, iPhone and iPad, and Apple TV as well.
The file format used for iPod and iPhone compatible devices is based
on MPEG-4 video compression technology. The combination of
powerful compression with a small 320x240 frame size produces very
small output files relative to the more expansive formats. The three
quality presets select different data rates, each providing a different
balance of quality and file size.
Apple TV as well as iPad compatible files are based on the H.264 video
compression standard. Output frame size is either 960x540 for Apple
TV (first generation) or 720p (later generations).

Chapter 11: The Exporter 357
Microsoft Xbox and Xbox One
Microsoft Xbox presets allow you to create files for full-screen playback
on your Xbox. Two formats are available: DivX SD based on MPEG-4
video compression technology, and WMV HD.
Nintendo Wii
Pinnacle Studio can generate files for playback on your Nintendo Wii
with the support of both AVI and FLV output formats.
Sony PS3 and PS4
You can export files to your PlayStation by selecting the Sony PS3 or
Sony PS4 export type. Studio supports the following file formats: Full
size, which is in DivX file format at 720 x 400, and HD 1080/60i.
Sony PSP
Studio allows you to export files which are compatible with the
popular Sony PlayStation Portable devices. Output files are based on
MPEG-4 video compression technology.
As with the iPod-compatible type, the combination of powerful
compression with a small 320x240 frame size produces very small
output files relative to other formats.
Output to a MyDVD file
The MyDVD File option creates a file that can be used in the MyDVD
application. MyDVD is an easy disc authoring application that uses
templates to help you create professional-looking disc projects that
include menus, and music. For more information about MyDVD, see
the Help available in the MyDVD application.

358 Pinnacle Studio User Guide
You can open MyDVD by clicking the Pinnacle MyDVD shortcut on your
desktop or by searching for Pinnacle MyDVD on your Start screen or
Start menu.
To save a MyDVD file
1 After you create and edit your project in the Timeline of the Edit
workspace, save your project.
2 Click the Export tab.
3In the Studio Exporter, click MyDVD File in the Export type list.
Note: Only the timeline items are exported to a MyDVD file.
Because MyDVD lets you create menus to finalize your disc, any
menu items from Pinnacle Studio are removed in the exported file.
4In the Settings area, choose the Type of disc and a Preset.
5 Click Start Export, navigate to where you want to save the file,
type a file name, and click Save.
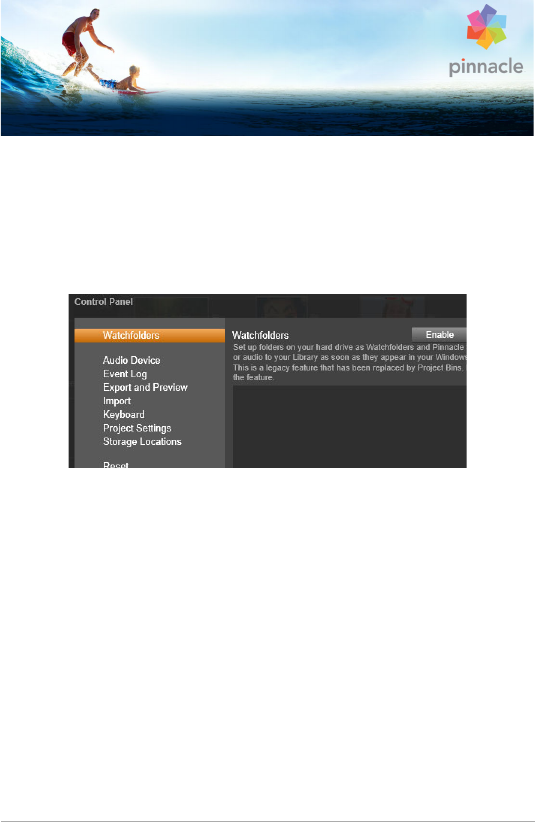
Chapter 12: Setup 359
Chapter 12: Setup
Pinnacle Studio’s central configuration window is called the Control
Panel.
To begin, on the Pinnacle Studio main menu, select Setup > Control
Panel. When the Control Panel appears, choose a page from the
directory on the left side of the window.
The Pinnacle Studio Control Panel is a central configuration
window for the application.
The eight pages of Control Panel settings are described here in turn.
Watchfolders
Watchfolders are folders on a hard drive or other storage medium that
are monitored by Pinnacle Studio. When the contents of a watchfolder
change, the Library is automatically updated.
When you use watchfolders, a Library Media branch is added to the
Asset Tree in the Library. You will also see a Library Media branch if
Pinnacle Studio detects a library from a previous version of Pinnacle

360 Pinnacle Studio User Guide
Studio (you must enable watchfolders if you want to continue
populating this branch).
You can create as many watchfolders as you wish and optionally set
them up to watch for only one media type (video, image or audio)
instead of all three, the default.
To designate a folder on your system as a watchfolder, click the Enable
button, and then the Add Folder button below the watchfolders list,
and navigate to the folder you wish to add. To cancel watchfolder
behavior, select the folder in the list and click the Remove Folder
button.
Click the Apply button to direct the Library to update its catalog in light
of the watchfolder changes.
Audio device
This setup page provides the parameters available for recording devices
(such as microphones) that are connected to the computer. Click the
device name to access the Windows settings dialog for the device.
Event logging
Messages are logged in this window during certain operations, such as
importing a number of files. You can check here for details about any
problems that may have occurred during these operations.
Export and Preview
These settings affect the representation/display of video.
Quality: These options control the quality of video previewing
throughout the application.

Chapter 12: Setup 361
•Best Quality: Provides previewing at full resolution – the resolution
at which the project will ultimately be exported. Under this option
there may be dropped frames during playback on slower systems.
•Balanced: At this setting, the recommended one for ordinary use,
some quality optimizations are omitted for the sake of a faster
preview. In most cases the difference is barely noticeable.
•Fastest Playback: The preview is optimized in favor of processing
efficiency, which may be helpful on a slower system.
Show full-screen preview on: Select the computer monitor (if more
than one is available) on which you want the full-screen preview to be
displayed.
Show external preview on: Select from a list of available devices and
signal outputs (if any).
External preview standard: Select the TV standard of the connected
video monitor.
Playback Optimization
Optimization threshold: The optimization threshold determines how
much rendering is done when you preview your project. It can be set
anywhere from Off (0) to Aggressive (100). Whether a particular
timeline ‘slice’ will be rendered depends on the amount of
computation needed to prepare the effects and transitions that are
used, and on the value of the optimization threshold. If this value is set
all the way to Aggressive, Pinnacle Studio will pre-render all transitions,
titles, disc menus and effects even when the output would have been
previewable; this can considerably delay playback.
If optimization threshold is set to Off (zero), on the other hand, the
yellow and green markings that indicate rendering progress are not

362 Pinnacle Studio User Guide
displayed; instead, all effects are played back in real time. However, this
can result in reduced playback quality (lost frames, ‘jerky’ playback) if
the number and complexity of effects outstrips the available processing
capacity of the system.
Render while play: When the Automatic setting is used, the application
decides on the basis of system information whether real- time
rendering can be done during playback. If the Off setting is used,
rendering is disabled during playback but resumes when playback is
stopped.
Third-party Codecs: Lets Pinnacle Studio use third-party codecs that are
installed on your computer so you can work with additional video
formats. Note: Some third-party codec packs might cause crashes or
errors in Pinnacle Studio.
Hardware Acceleration
When activated, this feature shifts part of the processing load from the
CPU to auxiliary hardware, such as the GPU (Graphics Processing Unit)
of your graphics card. The level of support for hardware acceleration
depends on the type of CPU and graphics card on your computer.
• Most NVidia cards support the CUDA architecture. When this is
accessible, the GPU is used to assist with H.264 decoding.
• Machines equipped with a recent Intel CPU having the Intel Quick
Sync Video feature can use it for rapid decoding and encoding of
H.264 and H.264 MVC material.
To choose Hardware Acceleration type
1 Choose Setup > Control Panel > Export and Preview.
2In the Hardware Acceleration area, choose an option from the
Type dropdown.
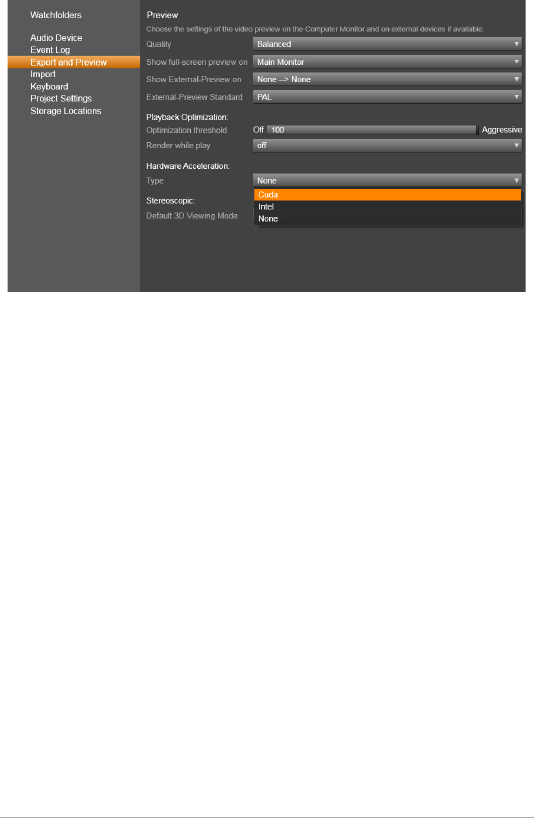
Chapter 12: Setup 363
Hardware Acceleration options
Default 3D Viewing Mode: This setting selects the default for
stereoscopic 3D content throughout Pinnacle Studio. See 3D viewing
mode switcher for more information. Please see “Choosing what to
display in the Library” on page 45 for more information.
•Left eye or Right eye: The preview for stereoscopic content can be
set to show only its left or right eye view.
•Side By Side: In Side By Side preview mode, you can monitor the
individual 2D images for both sides at the same time.
•Differential: Rather than the image content itself, the differences
between the left and right frames are displayed. Identical areas
show as neutral gray.
•Checkerboard: Right and left eye views alternate in adjacent cells
of a 16x9 grid.
•Anaglyph: An Anaglyph stereoscopic preview is suitable for
viewing with red-cyan stereoscopic glasses.
•3D TV (Side by Side): This mode is to be used with a 3D – capable
second monitor or projector.

364 Pinnacle Studio User Guide
•3D Vision If your system is 3D Vision capable and stereoscopic 3D
is turned on in your driver settings, any stereoscopic content will
be previewed in 3D Vision by default.
No stop when activating 3D Vision: This setting is available when
Studio is run on a PC with a 3D Vision- capable system which has
stereoscopic 3D turned on in the driver setting. By default, the No stop
when activating 3D Vision setting is set to off. When turned on,
playback will automatically stop wherever a 3D Vision preview is being
activated or deactivated during playback.
Import
The default options for the Pinnacle Studio Importer may be set here;
however, you can adjust or override them in the Importer at the time
of importing.
Folder options: View or set the default storage locations for media and
projects that are to be physically copied during import; unlike linked
imports, including the Library’s Quick Import feature, which simply link
to existing files without relocating them. The folder locations are
initially set to the user’s music, video and images folders as configured
in Windows, and to the default folder for saving Studio projects.
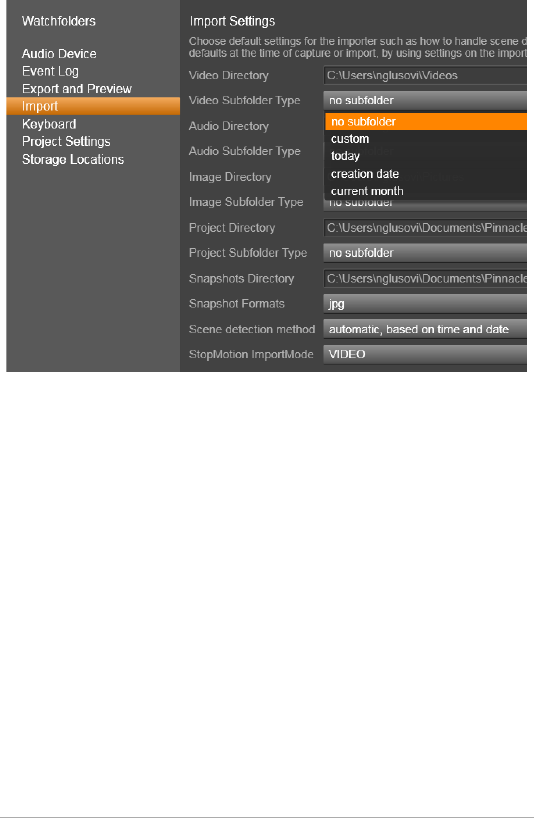
Chapter 12: Setup 365
Selecting a video subfolder type on the Import Settings page.
After locating and selecting the folder you want to serve as the base
folder, you can optionally set up a subfolder:
•No subfolder: With this option, the files you import will be stored
in the base folder.
•Custom: When you choose this option, a Custom Project
Subfolder box will appear. Click it to enter a name for the
Subfolder for that media type.
•Today: Your imports will go to a subfolder named with the current
date, in the format “2012-10-25”.
•Creation date: Each imported file will be stored in a subfolder
named with the creation date of the asset, in the same format as
above. When multiple assets are brought in a single import
operation, this may mean creating or updating multiple folders.
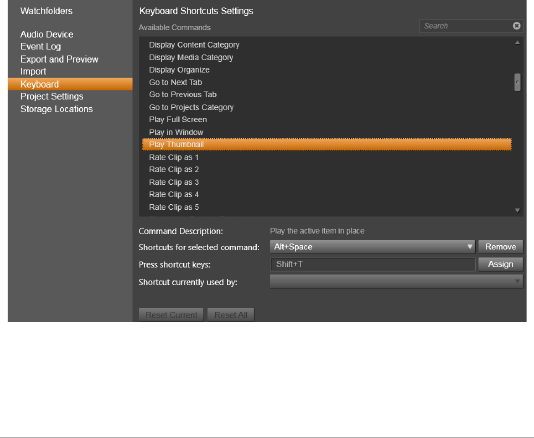
366 Pinnacle Studio User Guide
•Current month: This is the same as the Today option but without
the day portion, e.g. “2012-10”.
•Scene detection: This sets the default detection method for scene
detection. “The Scene Detection Options window” on page 307.
•Stop motion: This sets the default import method for the frames
you capture with the Stop Motion feature. See “Stop motion” on
page 329.
Keyboard
Studio provides both an extensive default set of keyboard shortcuts
and a means of customizing them. The Keyboard page of the Control
Panel lists all commands to which shortcuts can be applied, together
with their currently-assigned shortcuts where applicable. The
commands are grouped by section.
Keyboard shortcut settings window.

Chapter 12: Setup 367
To add a keyboard shortcut:
1 Select the target command.
2 Click in the Press shortcut keys edit box.
3 Press the keys for the desired shortcut. If the shortcut is currently is
already in use, the Shortcut currently used by dropdown list will
show any conflicting commands.
4 Click the Assign button to assign the entered shortcut to the
selected command.
Adding a shortcut does not delete associations between a particular
keyboard sequence and other commands it gives access to. In fact, it
is possible for different commands to use the same shortcut provided
they occur in different contexts. For instance, Ctrl+L is the default
shortcut for two commands, Timeline > Lock Track and Media Editor
> Rotate Left; which one is activated depends on what part of Pinnacle
Studio you are currently using.
To delete a shortcut:
1 Select the target command.
2 Choose the shortcut to delete from the Shortcuts for selected
command dropdown list.
3 Click the Remove button.
Restoring defaults
Controls are also provided that allow you to restore the default
keyboard configuration either for the currently-selected command (the
Reset Current button) or for all commands at once (the Reset All
button).

368 Pinnacle Studio User Guide
Project settings
On this page of the Pinnacle Studio Control Panel, you can select your
default settings for new projects, titles and transitions.
New movie project format: Select a resolution (such as PAL or HD
1920x1080i), as the default for every newly created timeline.
Alternatively, let the first clip placed on the timeline define the format
for the project with the option Detect format from first clip added to
project. The format for the current timeline may be changed at any
time while editing, by using the timeline settings located at the left end
of the timeline toolbar.
Default durations: Set the default durations of titles, images, and
transitions when they are first brought to the timeline. (Once there, of
course, the clip length can be trimmed as required.)
Ruler zooming: When this option is checked, dragging horizontally on
the time-ruler zooms the timeline in and out. In this mode, you will
need to drag directly on the scrubber handle to scrub or to reposition
the playhead. When ruler zooming is turned off, you can click
anywhere on the ruler to move the playhead. In either case, zooming
may also be performed by using any of:
• The Plus and Minus keys on the numeric keypad
• The Navigator at the top of the timeline
• The scrollbars under the previews
Activate trim mode by clicking near cuts: Turn this on to launch trim
mode by clicking. If this setting is off, trim mode can be activated with
the Trim Mode button on the timeline toolbar.

Chapter 12: Setup 369
Storage locations
This page allows you to set where to save media and projects you
create with Pinnacle Studio. You can separately specify locations for
each of the following file types:
• Studio Movie Projects
• Studio Disc Projects
•Titles
•Menus
•Restore Project
This folder is used both for project packages that have been
unpacked for further work and for projects imported from Studio
for iPad.
• Render Files
This folder is for the temporary files produced while rendering
items requiring intensive computation, such as video effects.
The changes made here apply only to future file operations; any
existing files remain in their current locations.
Delete render files: You can delete render files to save space without
concern over permanently losing data. Note, however, the files will be
recreated the next time your project needs to be rendered.
Reset
You can restore your version of Pinnacle Studio to its default state
(sometimes called “factory default”). All customizations will be lost,
but saved projects are not affected.

370 Pinnacle Studio User Guide
To reset Pinnacle Studio to the default state
1 Save any open projects that you want to keep.
2 Click Setup menu > Control Panel.
3 Click Reset in the directory to display the Reset to Default Settings
page.
4 Click the Reset button, and then click OK and restart the
application.
Restore purchase
You can restore purchases that you have made through Pinnacle
Studio. For example, purchases need to be restored if you move
Pinnacle Studio to a new system.
To restore purchases made in Pinnacle Studio
1 Click Setup menu > Control Panel.
2 Click Restore Purchase in the directory to display the Restore
purchase page.
3 Click the Restore button, and click OK.

Chapter 13: Screen capture 371
Chapter 13: Screen capture
Record computer actions and mouse movement by using the screen
capture feature in Pinnacle Studio. This feature lets you create videos
that require visualization in a few easy steps. You can also define the
capture area for more emphasis and focus or integrate voice-overs.
You can capture audio from your computer system and microphone
and capture side-by-side apps that are displayed in Windows Snap
view.
This section contains the following topics:
•Starting a screen capture project
•Recording your screen
Starting a screen capture project
To open the Screen Capture window
• Click the Live Screen Capturing program tile on the Start screen
(Windows 8) or select Live Screen Capturing from the programs
list in Start menu (Windows 7).
The capture area frame automatically covers the entire screen by
default and appears along with the Screen Capture toolbar.
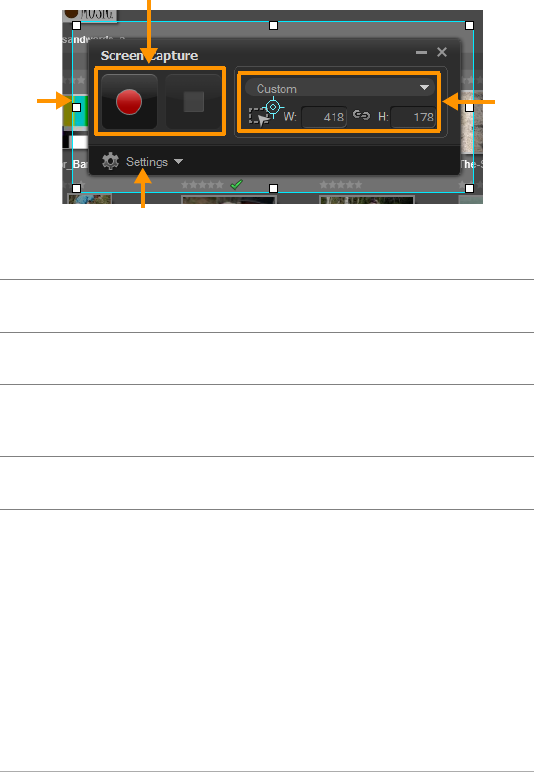
372 Pinnacle Studio User Guide
Screen Capture toolbar basics
Recording your screen
Before taking the actual screen capture, make sure to configure the
settings of the video first.
To configure your video
1Click Settings.
2In File Settings, specify the following details:
Part Description
1 Capture area frame Specifies the display area to capture. This covers
the entire screen by default.
2 Recording Controls Contains the buttons that control your screen
capture.
3 Capture area frame
dimensions
Specifies the active program to capture and the
exact dimensions of the area to capture in the
Width and Height boxes.
4 Settings (default view) Lets you specify file, audio, display and keyboard
shortcut settings.
1
2
3
4

Chapter 13: Screen capture 373
• Filename — Enter a filename for your project.
• Save to — Lets you specify the location where you want to save
the video file.
Note: Screen captures are saved to your Documents folder
(...Documents/Pinnacle Studio Screen Capture/19.0) by default.
Click to add a new folder and change the location where the
file is saved.
• Format — Choose an option from the available formats in the
drop-list.
• Frame rate — Lets you specify the number of frames to be used
when recording.
Note: Using a lower frame rate is ideal for uploading videos to
the Internet as it yields a smaller file size but with less accuracy on
screen dynamics. A higher frame rate produces a larger file size
and is most useful for detailed presentations to capture actual
screen dynamics.
3In Audio Settings, choose one of the following Voice options:
• Click ON to record a voice-over. Click the Sound Check button to
test your voice input.
• Click OFF to disable voice-over recording.
4In the Audio Settings, choose one of the following System audio
settings:
• Click ON to include system or microphone audio and adjust the
slider to your preference.
• Click OFF to disable System audio.
5In Control Settings, the following options are available:
• Mouse click animation — Enable to include mouse clicks in the
screen capture.
• Enable F10/F11 shortcut key — Turns the keyboard shortcuts for
screen capture on and off.

374 Pinnacle Studio User Guide
Note: If the screen capture shortcut keys are in conflict with the
program you want to capture, it is recommended that you disable
this feature to avoid accidental stops or pauses while recording.
6In Monitor Settings, choose a display device.
Note: The program automatically detects the number of display
devices available on your system. Primary monitor is selected by
default.
To record your screen capture
1Choose one of the following options:
• Full screen — lets you capture the entire screen. When you
launch the Screen Capture toolbar, this option is enabled by
default.
• Custom — lets you specify the area to capture. The capture area
dimensions are displayed accordingly. You can also specify an
application window to capture by choosing an option from the
list of active programs.
2Click Settings to access more options.
Note: To include voice-overs and system audio, you must enable
and configure the respective settings before you start recording.
3Click Start / Resume Recording to start the screen capture.
All activities inside the specified capture area are recorded. Screen
capture starts after the countdown.
Note: You can press F10 to stop and F11 to pause or resume the
screen capture.
4Click Stop Recording to finish your screen capture.
Note: Note: The screen capture is added to the custom folder that
you have specified and you will be prompted to add it to the
Pinnacle Studio Library.

Chapter 14: Multi-Camera Editing 375
Chapter 14: Multi-Camera Editing
The Multi-Camera Editor lets you create professional-looking video
compilations from footage of events that have been captured on
different cameras, from different angles.
The easy multi-view workspace lets you edit on the fly, as the video clips
play back simultaneously—up to *six cameras. With a simple click, you
can switch from one video clip to another in the same way a broadcast
studio switches from one camera to another to capture a different
angle or element of a scene.
Footage can be captured on a wide range of video recording devices,
such as action cameras, drone cameras, DSLRs, or smartphones. You
can also include audio captured independently on a microphone.
*Number of cameras depends on the version of the software you have.
This section contains the following topics:
•The Multi-Camera Editor workspace
•Basic steps in multi-camera editing
•Importing video and audio clips into the Multi-Camera Editor
•Synchronizing video and audio clips in multi-camera projects
•Choosing an audio source for your multi-camera project
•Editing multiple clips to create a multi-camera compilation
•Adding picture-in-picture (PIP) in the Multi-Camera Editor
•Managing multi-camera source files
•Saving and exporting your multi-camera project
•Using Smart Proxy for a faster, smoother editing experience
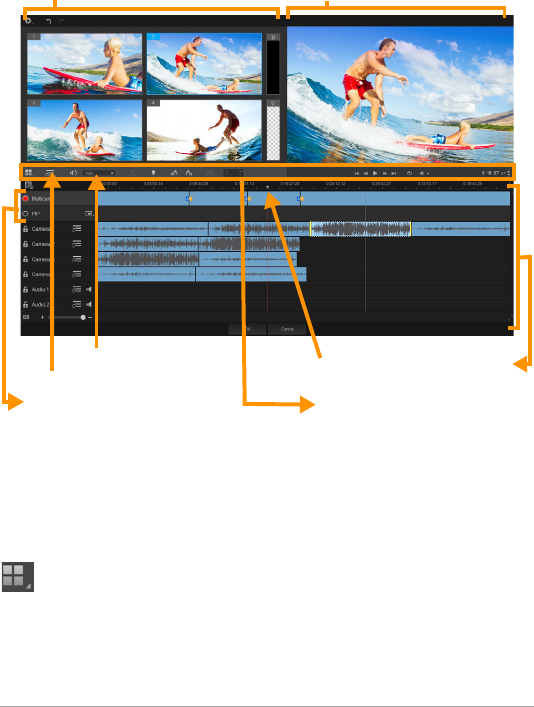
376 Pinnacle Studio User Guide
The Multi-Camera Editor workspace
The image below identifies the main features of the Multi-Camera
Editor.
Toolbar, playback, and other controls
The controls found in the workspace are listed below.
The main toolbar includes the following controls:
Camera Number — Lets you set the multi-view pane to show four
or six cameras, depending on your version of the software.
Multi-view pane Main preview pane
Timeline
Multi-Camera and PIP tracks
Source Sync Type
Main Audio
Scrubber
Toolbar and playback controls
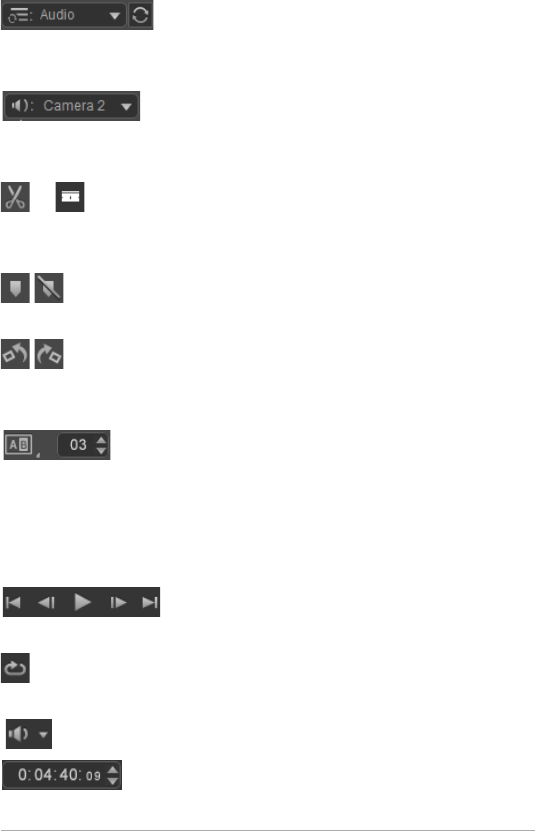
Chapter 14: Multi-Camera Editing 377
Source Sync Type — Lets you synchronize the
clips. For more information, see “Synchronizing video and audio clips
in multi-camera projects” on page 381.
Main Audio — Lets you select a preferred audio
source. For more information, see “Choosing an audio source for your
multi-camera project” on page 382.
or Split Clip — Lets you split a clip into segments. For more
information, see “To split a clip in the Multi-Camera Editor” on
page 387.
Set/Remove Marker — Lets you add markers on the Camera
tracks for editing purposes, such as audio synching.
Rotate Left and Rotate Right — Let you rotate clips in the
Camera tracks before you add them to your Multi-Camera track or your
PIP track. Note: Only unlocked tracks can be rotated.
Transition and Duration — Lets you apply a transition
between clips in the Multi-Camera track and set the duration for the
transition. For more information, see “To add a transition between
multi-camera segments” on page 386.
The main preview pane includes the following controls:
Playback bar with Home, Previous Frame, Play,
Next Frame, and End buttons.
Loop — Lets you play the selected track continuously by looping
back to the start when it reaches the end.
Set Volume — Lets you adjust the audio volume for playback.
Timecode control — Lets you view and set the time/
frame that appears in the main preview pane and where the scrubber
378 Pinnacle Studio User Guide
is set in the timeline. Click the arrows or a click number value to set a
time/frame.
The timeline includes the following controls:
Source Manager — Lets you add and remove clips. For more
information, see “Managing multi-camera source files” on page 388.
Show/Hide Audio Waveform View — Lets you view the audio
waves for Camera and Audio tracks.
Lock/Unlock — Appears on individual tracks. Locking tracks is
recommended after you synchronize them.
Include/Exclude from Synchronization — Lets you determine
which tracks are included in the synchronization process.
Mute/Unmute — Lets you turn the audio off (mute) or on
(unmute) for the selected audio track.
Zoom to Timeline — Located in the lower left corner of the
timeline, this control lets you expand or compress your project so you
can view the whole project in the timeline.
Zoom Level slider — Drag the slider or click
the Zoom in (plus sign) or Zoom out (minus sign) to change the zoom
level for your project. This is particularly helpful when editing individual
segments in the Multi-Camera track.
The following general controls appear in the upper-left corner of the
application window:
Settings — Lets you access the Proxy Manager and Save As. For
more information, see “Using Smart Proxy for a faster, smoother
editing experience” on page 390 and “To save your multi-camera
project” on page 389.

Chapter 14: Multi-Camera Editing 379
Undo and Redo — Lets you undo or redo most actions.
Basic steps in multi-camera editing
The following steps provide a basic overview of the multi-camera
editing process.
1Import the video and audio clips that you want to use into the
Pinnacle Studio Library.
2Choose the clips in the Library and import them into the Multi-
Camera Editor, using a special import window that lets you assign
the clips to “Camera 1”, “Camera 2”, etc...
3Synchronize the clips across the timeline. You can do this
automatically if all the clips have audio, but there are a range of
methods you can use for synchronization.
4Choose the audio you want to keep (if you are using the original
audio). You can choose a separate audio track as well.
5Start building your multi-camera compilation. You can play all the
clips simultaneously, and in the multi-view pane, click the
“Camera” that you want to show. You can switch clips as many
times as you like. The selected footage displays in the main
preview pane. You can then review your project in Multi-Camera
track and fine-tune it.
6Exit the Multi-Camera Editor to further refine and output the
project using Pinnacle Studio.
Important! It’s best to finish your multi-camera editing before you
exit the Multi-Camera Editor. Changes that you make to your
project after you leave the Multi-Camera Editor might not be
supported by the Multi-Camera Editor (the changes will be
reverted).

380 Pinnacle Studio User Guide
Importing video and audio clips into the Multi-Camera
Editor
The first step in creating a multi-camera project is to import your clips
into the Multi-Camera Editor. In most cases, this will be a selection of
clips from the same event that have been imported to the Pinnacle
Studio Library.
You can work with up to six video clips at one time and include up to
two independent audio clips.
To import video clips into the Multi-Camera Editor
1In the Pinnacle Studio Library, select all the clips you want to use.
2Do one of the following:
• On the timeline toolbar, click the Multi-Camera Editor
button .
• Right-click a selected clip and choose Multi-Camera Editor.
3In the Multi-Camera Import window, type a name in the Project
Name box.
4Verify the clips in the project clip list in the right pane.
If you want to reorder the clips, drag a clip to a new position in
the list.
If you want to add more video or audio clips, choose the track you
want in the Library pane, and drag it to the project clip list.
If you want to remove a clip, right-click a clip and choose Remove.
5Click OK.

Chapter 14: Multi-Camera Editing 381
Synchronizing video and audio clips in multi-camera
projects
You can synchronize your video and audio clips so that they are all
aligned to the same moment in time. The easiest way to do this is to
let the Multi-Camera Editor analyze the audio for each of the clips and
sync the clips automatically. If your recordings are planned, you can use
a special audio signal, such as clapping your hands (similar function to
using a clapper board in professional shoots). Some events have
natural audio cues that help the sync process, such as music
performances or sporting events with a start signal.
You can also synchronize the clips by using markers, shooting time, or
you can adjust them manually by dragging the clips in the timeline to
the timecode you want. For example, you could use a common visual
element, such as a flash to sync videos manually. These methods are
helpful if your video footage doesn’t include audio or the audio
waveforms within the clips are difficult to sync, or you simply prefer to
align the clips manually.
In some cases you might need to use a combination of the
synchronization options, depending on your source footage.
To synchronize video and audio clips in the Multi-Camera
Editor
1After importing your clips to the Multi-Camera Editor, choose one
of the following options from the Source Sync Type drop-list on
the toolbar:
• Audio — Click the Sync button next to the drop-list to
synchronize the clips in the timeline. Note: Your video clips must
include audio to use this option.
382 Pinnacle Studio User Guide
• Marker — Select a clip in the timeline, play the clip or scrub to
the position you want by using a visual cue, and click the Set/
Remove Marker button on the toolbar to add a marker.
After a marker has been added to each clip, click the Sync
button on the toolbar to align the clips according to the
markers.
• Shooting Date/Time — Click the Sync button to synchronize
the clips according the shooting date and time as indicated by
the metadata recorded by the camera. Note: The clocks must be
in sync on the cameras to get accurate results.
• Manual — In the timeline, drag each clip to the position you
want by using a visual cue.
Note: If there are clips that you want to exclude from the
synchronization process, click the Exclude from
Synchronization button on the corresponding track. Click
the button again (Enable for Synchronization ) to include
the track.
Tip: After you synchronize your clips, you can use the Lock
buttons on the individual tracks to ensure that the tracks
stay synchronized during the editing process.
Choosing an audio source for your multi-camera
project
After you import and synchronize your clips in the Multi-Camera Editor,
you can make some decisions about the audio for your project. For
example, if you have four video clips, and they all include audio, it is
recommended that you listen to each clip individually, and choose the

Chapter 14: Multi-Camera Editing 383
one that has the best sound quality. You can also choose to use a
separate audio clip.
Other options let you use the audio from all clips, none of the clips, or
switch audio (Auto) when you switch cameras, a choice you might
make to take advantage of the audio captured with sport or other
action footage.
By default, the audio for Camera 1 is selected.
To choose an audio source for your multi-camera project
1With your clips displaying in the Multi-Camera Editor timeline, on
the toolbar, click the Main Audio box and choose a Camera or
Audio clip. Click Play to listen the quality of the audio for each
clip.
2Choose the Camera or Audio clip that you want to use for your
project. The audio from all other tracks will be muted.
Other options include:
• Auto — Switches the audio to match the clip that you are
playing
• None — No audio is included in the multi-camera project. You
can add your audio in Pinnacle Studio, after you leave the Multi-
Camera Editor.
• All Cameras — Plays audio from all clips, simultaneously
Tip: If you plan to edit the audio in Pinnacle Studio after you exit
the Multi-Camera Editor, please note that the setting you
choose in Main Audio determines what tracks will be available
as audio tracks in Pinnacle Studio.

384 Pinnacle Studio User Guide
Editing multiple clips to create a multi-camera
compilation
After you import and synchronize your clips in the Multi-Camera Editor,
and choose your audio settings, you can start editing your clips to
create a multi-camera compilation. The multi-view pane in the Multi-
Camera Editor helps make this task fun and easy. Much like a DJ
switches and blends tracks to create a new music compilation, the
Multi-Camera Editor lets you visually switch between video tracks and
blend them together with transitions.
If you notice that playback is slow or lacks smoothness, you can check
the Smart Proxy settings. For more information, see “Using Smart Proxy
for a faster, smoother editing experience” on page 390.
After you build your basic compilation using the multi-view pane and
the main preview pane, you can fine-tune your project in the Multi-
Camera track and take advantage of editing features, such as
transitions and a clip splitting tool. Note that some types of edits, such
as rotating a clip, must be done in the individual Camera tracks before
you add the clips to your compilation in the Multi-Camera track.
To create a multi-camera compilation
1With your clips in the Multi-Camera Editor timeline, click the Play
button below the main preview pane.
Footage from all cameras can be viewed simultaneously in the
multi-view pane.
2To start building your project, as the videos play in the multi-view
pane, click the preview for the camera that you want to show.
The footage from the selected camera displays in the main
preview pane.
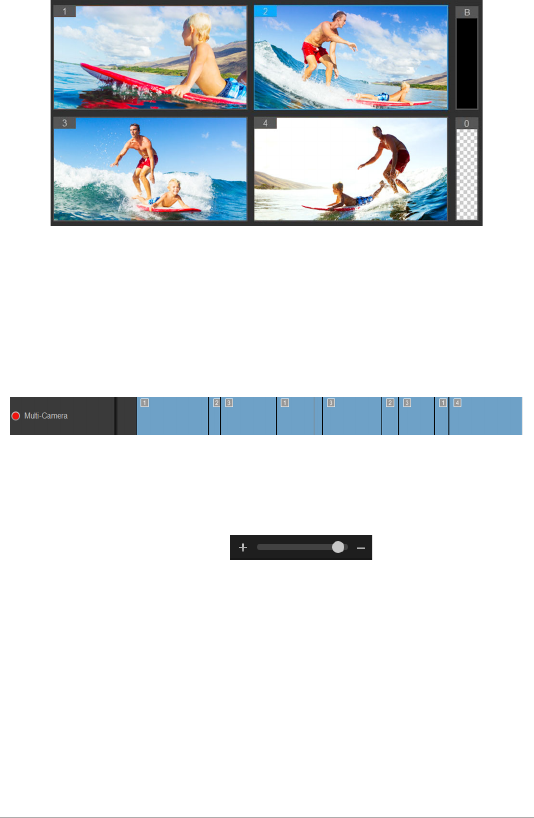
Chapter 14: Multi-Camera Editing 385
The multi-view pane appears to the left of the main preview
pane. Footage from all cameras can be viewed simultaneously
in the multi-view pane.
3To switch cameras, click a different camera preview in the multi-
view pane. You can switch cameras as many times as you like. You
can review your project in the Multi-Camera track.
The Multi-Camera track in the timeline displays the camera
segments in your compilation.
If you want to adjust the zoom level for the Multi-Camera track,
drag the zoom level slider in the lower left
corner of the timeline.
4After you have completed a first pass using the multi-view pane,
you can refine the timing for a switch in the Multi-Camera track by
playing your project or scrubbing to the position that you want to
edit, clicking a camera segment and dragging the edge until the
frame where you want the switch to occur appears in the main
preview pane.
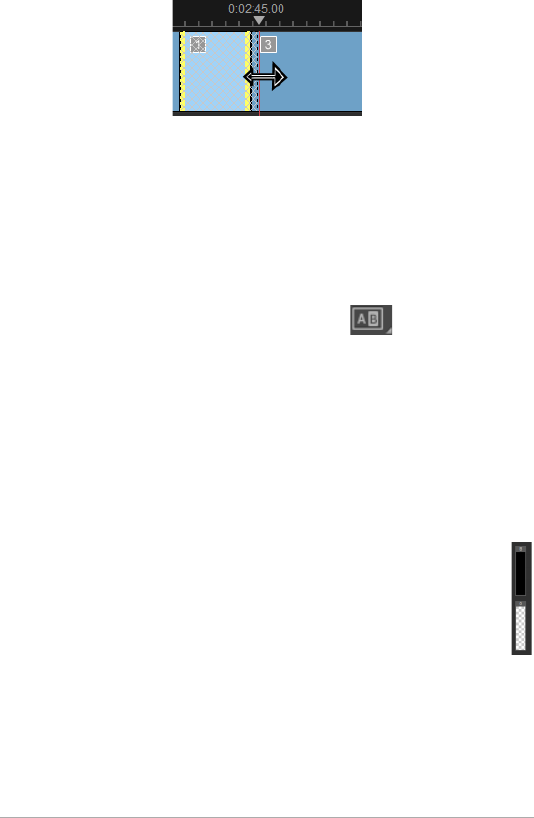
386 Pinnacle Studio User Guide
To switch a segment in the Multi-Camera track to a different
Camera, right-click the segment and choose a different Camera
from the context menu or click the camera preview in the multi-
view pane.
To add a transition between multi-camera segments
1In the Multi-Camera track, click a segment.
2On the toolbar, click the Transition button . The button has a
yellow outline when active and a transition icon (“AB”) appears in
the timeline
If the button is grayed out, gently drag the edge of a segment by
a small amount to reactivate the button.
A Crossfade transition is applied by default.
3On the toolbar, type a time in the Duration box for the transition.
Tip: You can add black or blank segments to your project.
You can change a segment that is already in the Multi-
Camera track to a black or a blank by right-clicking the
segment and choosing Black or Blank. You can apply a
transition between a video segment and a Black segment.
To add a black or blank segment while playing your
project, instead of clicking a camera preview in the multi-view
pane, click the Black (B) or Blank (0) swatch to the right of the
camera previews.

Chapter 14: Multi-Camera Editing 387
To split a clip in the Multi-Camera Editor
1In the timeline, select a clip in the Multi-Camera or PIP track and
click Play or drag the scrubber to the position where you want to
make the cut.
2Click the Split Clip button.
Note: Splitting a clip is useful when you want to replace part of
a segment with a different camera, essentially adding another
switch.
Adding picture-in-picture (PIP) in the Multi-Camera
Editor
You can add a picture-in-picture (PIP) effect to your multi-camera
project. PIP lets you play a video in one area of the screen while the
main video plays in the background.
The image above illustrates the concept of picture-in-picture
(PIP).
388 Pinnacle Studio User Guide
To add a picture-in-picture (PIP) effect to your multi-camera
project
1After you create your multi-camera compilation in the Multi-
Camera track, click the Play button or scrub to the position in
the Multi-Camera track where you want to add a PIP effect.
2In the timeline, click the circle on the PIP track to activate the
track.
The circle will have a red fill when active .
3In the multi-view pane, click the preview for the Camera you want
to use.
The segment is added to the PIP track.
4To set the end point for the segment, in the PIP track, click the end
of the segment and drag it to the position you want in the
timeline.
5To choose a corner for the PIP, click the Change PIP Position
button on the PIP track and choose the position you want.
The PIP position can be seen in the main preview pane.
Managing multi-camera source files
You can use the Source Manager to add and remove video and audio
clips from tracks in your multi-camera project. You can also view
information about the clips, such as the duration of the clip, clip
location, and you can lock or unlock tracks.
To add, remove or manage clips with the Source Manager
1In the upper left corner of the timeline, click the Source Manager
button .
2In the Source Manager dialog box, do any of the following:
Chapter 14: Multi-Camera Editing 389
• Click the Lock/Unlock button for a track to unlock a track for
editing or to lock a track to prevent editing.
• To add a clip to a track, select a track, click the Add Clips button
, navigate to the clip you want to add, and click Open. The
clip appears in the numbered list for the track.
• To delete clips from a track, select a track, in the list of clips for
that track, mark the check box next to the clips that you want to
delete, and click the Delete button .
Saving and exporting your multi-camera project
When you finish building your multi-camera project, you can save it so
that it can be edited, exported, and shared from Pinnacle Studio.
Important! It’s recommended that you finish your multi-camera
editing before you exit the Multi-Camera Editor. Changes that you
make to your project in another editor might not be supported if
you re-open the project in the Multi-Camera Editor. This means
that some changes will be reverted.
To save your multi-camera project
• Click the OK button at the bottom of the window to save your
project to the current name (as indicated in the upper-right corner
of the window). This also closes the Multi-Camera Editor.
If you want to rename your project, before you exit, click the
Settings button , choose Save As, and type a name in the
Project name box.
Your multi-camera project appears in the PInnacle Studio Library.
To open your multi-camera project (.mcam) in Pinnacle Studio, in
the Edit workspace, drag your multi-camera project from the
Library to the Timeline. By default, the project appears as a

390 Pinnacle Studio User Guide
composite clip. To expand the clip to work with individual tracks,
right-click the clip in the Timeline and choose Edit Movie.
Using Smart Proxy for a faster, smoother editing
experience
The main purpose of Smart Proxy is to provide a more fluid editing and
previewing experience when working with large, high resolution video
files.
Smart Proxy creates lower resolution working copies of larger source
files. These smaller files are called “proxy” files. Using proxy files speeds
up editing of high resolution projects (for example, projects that have
HDV and AVCHD source files).
Proxy files are source-dependent rather than project-dependent. In
other words, proxy files can be shared among different projects.
When you render a video project, the original, high-quality video
source files are used.
You can use the Smart Proxy Manager to enable or disable Smart Proxy,
change the default resolution threshold that enables Smart Proxy, and
access the Smart Proxy File Manager and Smart Proxy Queue Manager
to manage existing and future proxy files.
To enable or disable Smart Proxy
• Click the Settings button > Smart Proxy Manager > Enable
Smart Proxy.
Note: The Smart Proxy feature is enabled by default if the
computer’s hardware can support the feature.

Chapter 14: Multi-Camera Editing 391
To set the resolution threshold and location for Smart Proxy
files
1Select Settings > Smart Proxy Manager > Settings.
2In the Smart Proxy dialog box, set a resolution threshold for the
creation of proxy files and choose a proxy folder.
To manage proxy files
1Select Settings > Smart Proxy Manager, and choose one of the
following options:
• Smart Proxy File Manager — Lists the source and proxy files. You
can use this manager to delete proxy files you no longer need.
• Smart Proxy Queue Manager — Lists source files for which proxy
files will be generated (according to the current settings)

392 Pinnacle Studio User Guide

Appendix A: Troubleshooting 393
Appendix A: Troubleshooting
Before you begin troubleshooting, take some time to check your
hardware and software installation.
Update your software: We recommend installing the latest operating
system updates for Windows.
Check your hardware: Ensure that all installed hardware is functioning
normally with the latest drivers, and is not flagged as having a problem
in Device Manager (see below). If any devices are flagged you should
resolve the issue before starting the installation.
Get the latest drivers: We also highly recommend installing the latest
drivers for your sound card and graphics card. Each time it is launched,
Pinnacle Studio verifies that both cards support DirectX.
Opening Device Manager: The Windows Device Manager, which lets
you configure your system’s hardware, has an important role in
troubleshooting.
The first step in accessing Device Manager is to right-click on My
Computer, and then select Properties from the context menu. This
opens the System Properties window. The Device Manager button is
listed on the left panel.
Ensure that all installed hardware is functioning normally with the
latest drivers, and that nothing has been flagged in Device Manager
with the yellow exclamation mark icon indicating an error condition. In
the case of a driver problem that you cannot resolve yourself, contact
the device manufacturer or your computer vendor for assistance.

394 Pinnacle Studio User Guide
Contacting support
Learn about all of your support options on our website:
www.pinnaclesys.com/support
Most common issues are already documented in our Knowledgebase
and we encourage you to use this option first. To search the support
Knowledgebase effectively, please include the name of the product in
your query.
Forums
Please visit our discussion forums to join the conversation on Pinnacle
Studio. Scroll down the forum list to find the forum in your language:
go.pinnaclesys.com/forums
Top support issues
The remainder of this chapter draws on some of the Knowledgebase
articles most consulted by users. The text presented here may be less
detailed or current than that provided on-line. For the full text available
under each document ID, please refer to the on-line knowledge base.
Compatibility with past content
Document ID 384211
Much, but not all, of the additional creative content from previous
versions Pinnacle Studio can be used directly in the current version of
Pinnacle Studio, as can many content offerings from third-party
providers. Some of these are included in the product itself. A few of the
third-party content packages require a paid upgrade to work with

Appendix A: Troubleshooting 395
Pinnacle Studio. For some others, no compatible version has been
released.
Content-support chart
Pinnacle Studio content Support
HFX Plus, Pro, Mega Supported – Included in Pinnacle
Studio
RTFX 1 Supported*
RTFX 2 Supported*
Hollywood FX Volume 1 Supported – Included in Pinnacle
Studio
Hollywood FX Volume 2 Supported – Included in Pinnacle
Studio
Hollywood FX Volume 3 Supported – Included in Pinnacle
Studio
Premium Pack Volume 1 Supported – Included in Pinnacle
Studio
Premium Pack Volume 2 Supported – Included in Pinnacle
Studio
Creative Pack Volume 1 Supported – Included in Pinnacle
Studio
Creative Pack Volume 2 Supported*
Creative Pack Volume 3 Supported*
NewBlue Film Effects Supported – Included in Pinnacle
Studio
NewBlue Stabilizer Supported – Included in Pinnacle
Studio
NewBlue Video Essentials II Supported – Included in Pinnacle
Studio
396 Pinnacle Studio User Guide
NewBlue Video Essentials IV Supported – Included in Pinnacle
Studio
NewBlue Video Essentials VI Supported – Included in Pinnacle
Studio
NewBlue Video Essentials VII Supported – Included in Pinnacle
Studio
Winter Pack Supported*
ScoreFitter Volume 1 Supported – Included in Pinnacle
Studio
ScoreFitter Volume 2 Supported – Included in Pinnacle
Studio
ScoreFitter Volume 3 Supported*
Title Extreme Supported – Included in Pinnacle
Studio
Third-party Ultimate/Ultimate
Collection content discs Support
Studio 11 - Stagetools: Moving
Picture
Not supported
Studio 11 - BIAS SoundSoap V1 PE Supported – Paid upgrade required
Studio 11 - ProDAD VitaScene Supported – Paid upgrade required
Studio 12 - ProDAD VitaScene Supported – Paid upgrade required
Studio 12 - Red Giant Magic Bullet
Looks
Supported*
Studio 14 - Red Giant Knoll Light
Factory
Supported*
Studio 14 - Red Giant ToonIt Supported*
Appendix A: Troubleshooting 397
Studio 14 - Red Giant Trapcode 3D
Stroke
Supported*
Studio 14 - Red Giant Trapcode
Particular
Supported*
Studio 14 - Red Giant Shine Supported*
Third-party eStore content Support
BIAS SoundSoap V2 PE Supported*
Studio 17 - Red Giant Magic Bullet
Looks Indie Pack
Supported*
Studio 17 - RedGiant Particular
Studio Preset Pack
Supported*
Studio 17 - RedGiant Shine Studio
Preset Pack
Supported*
Studio 17 - RedGiant ToonIt Studio
Preset Pack
Supported*
Studio 17 - RedGiant Knoll Studio
Preset Pack
Supported*
Studio 17 - Red Giant Trapcode
Starglow
Supported*
Studio 17 - Red Giant Warp Supported*
ProDad Vitascene Supported*
ProDad Adorage Supported*
ProDad Adorage FX Pack 10 Supported*
ProDad Adorage FX Pack 11 Supported*
NewBlue Video Essentials I Supported*
NewBlue Video Essentials II Supported*
NewBlue Video Essentials III Supported*

398 Pinnacle Studio User Guide
*Might not be supported in the 64-bit version of Pinnacle Studio.
proDAD Mercalli Supported*
Third-party bonus DVD plugins Support
Bravo Studio 1, 2 & 3 Not supported
BWPlugins 1, 2 & 3 Not supported
Dziedzic Effects Pack 1 & 2 Not supported
eZedia Effects Not supported
NewBlue Art Effects 1 Not supported
NewBlue Effects Not supported
NewBlue Time Effects 1 Not supported
PE CameraPOV Not supported
proDAD Adorage Supported*
proDAD Heroglyph 1 Not supported
proDAD Heroglyph 2 Not supported
proDAD Vitascene 1.0 Supported*
StageTools Moving Picture Full Not supported
StageTools Moving Picture LE Not supported
Vance Effects Not supported
Algorithmix Not supported
NewBlue Audio Enhancements 1 Not supported
NewBlue Audio Essentials 1 Not supported
NewBlue Audio Essentials 2 Not supported
NewBlue Audio Essentials 3 Not supported
NewBlue Audio Essentials 4 Not supported
Third-party eStore content Support

Appendix A: Troubleshooting 399
Capture hardware compatibility
Document ID 384431
Pinnacle Studio has been tested and found to work successfully with a
wide variety of video capture hardware. However, some older devices
are not supported.
Supported hardware
The following capture devices will work with all versions of
Pinnacle Studio.
USB-based
• 710-USB
• 510-USB
• 700-USB
• 500-USB
• MovieBox Deluxe
•DVC-90
• DVC-100
• DVC-101
• DVC-103
• DVC-107
• DVC-130 (no 64-bit drivers available)
• DVC-170 (no 64-bit drivers available)
PCI-based
• 700-PCI (Pinnacle Studio Deluxe 2)
• 500-PCI (Pinnacle AV/DV)
• Any 1394 card

400 Pinnacle Studio User Guide
Unsupported hardware
The following list of hardware came with older versions of Studio and
is no longer in warranty or supported.
•DC10
•DC10 Plus
•MovieBox
® DV
•Dazzle
® DVC 80, 85
•Linx
•MP 10
• S400
Serial number information
Document ID 384215
This FAQ will give you information on the location of your
Pinnacle Studio serial numbers, and how to use your serial number
from a previous version to activate an upgrade to Pinnacle Studio.
Finding your serial number
For a product that you downloaded, the serial number is shown on the
confirmation page at the end of the ordering process, and in the
confirmation email sent at that time.
If you own a physical copy of the product, the serial number is shown
on either the inside or the outside of the DVD case, if one is included;
and on the outside of the paper sleeve otherwise.
If you have lost your serial number, please check the knowledge base
for document 232809, How to replace a lost Pinnacle Studio serial
number.

Appendix A: Troubleshooting 401
Looking up your customer information:
1 Start by logging in at www.pinnaclesys.com.
2 Browse to ‘Your Product’.
3 Choose your products again from the products section.
4 Your serial number is listed in the ‘Your products’ window that
comes up.
Using a serial number when upgrading
To upgrade Pinnacle Studio, you will need the serial number from the
old version.
After you have found your old serial number, start the install. A
window will appear asking for both the new and old numbers. Put
them in the correct windows and click Next.
Error or crash while installing
Document ID 284219
Here are some tips for troubleshooting errors or crashes that could
occur while installing Pinnacle Studio.
Specific Errors
Error 1402: If you are getting a 1402 error during installation, please
follow the instructions in document 364555 in the knowledge base,
Error 1402 on installation.
Error on install “Setup will now abort installation”: If this error occurs
during installation, please follow the instructions in knowledge base
document 363187, Error on install “Setup will now abort installation”.

402 Pinnacle Studio User Guide
General troubleshooting
Here are some further avenues to explore if you are having trouble
getting the application to install.
Try cleaning the disc: Inspect the install disc, checking its surface for
smudges and dirt. If cleaning is necessary, use a soft cloth, not paper
towels or any abrasive material. Wipe from the center of the disc to the
outer edge rather than a circular motion. Once the disc is clean, try
installing again.
Another optical drive: Many systems have two optical drives; for
instance, a DVD burner and a separate DVD reader. Put the disc that
won’t install into the other drive, if available, and retry.
Restart the computer: In some cases the installation can crash if
Windows Update is running. If that happens, it is best to restart the
system as requested by Windows before trying again to install Studio.
Startup tasks/programs: If you are familiar with msconfig, you can use
this tool to disable any programs launched at start-up that might be
interfering with the Studio installer.
When all else fails
If the disc is damaged with deep scratches or cracks so that it won’t
install, please contact support. Please have your Pinnacle Studio order
number or proof of purchase (receipt) from the store available.
Hangs or crashes while launching
Document ID: 284223
If Pinnacle Studio previously launched successfully and now does not,
review any changes that have been made to the computer recently for

Appendix A: Troubleshooting 403
possible clues. If necessary, undo the changes to see if the problem
goes away.
Further troubleshooting steps:
1Restart the computer: Unstable software behavior of
undetermined cause can often be fixed by resetting the system.
This is almost always a good place to start when troubleshooting.
2Wait a few minutes: If Pinnacle Studio still won’t launch, wait a
few minutes to let it finish launching. On some computers it may
take a little while for the launch to complete.
3Update Studio: When troubleshooting any problem, it is always
best to use the latest version of the software if possible.
4Disconnect capture hardware: If possible, unplug any capture
hardware and try launching Pinnacle Studio again. If you can’t
launch with your webcam plugged in, try it unplugged, and vice-
versa. You may have to set the webcam up in the same way every
time you launch Studio.
5Download and reinstall hardware drivers: During the Studio
software launch process we do check that you have a DirectX
compatible graphics and sound card. Download and reinstall the
latest version of the driver for the graphics card that is on your
system. If you need assistance with this step, please contact the
graphics card manufacturer.
6End background tasks: There are a couple ways to accomplish
this. One is to use start-up management software to assist in
eliminating unnecessary programs that launch on Windows start-
up. Many shareware and freeware programs of this type have
been created. Use an Internet search engine such as Google or
Yahoo to search for ‘startup managers’. We don’t endorse any
particular one, but recommend you try a couple to see which one
works best for you.

404 Pinnacle Studio User Guide
Alternatively, you can also use the Microsoft System Configuration
Utility (msconfig), which is part of Windows, to disable start-up
programs.
Whichever route you take, we recommend disabling all programs
and then re-enabling them one at a time until the conflicting
program is located.
7Reinstall: If all of the above fail, you may want to try uninstalling
Pinnacle Studio from the Control Panel “Programs and Features”
list. Once it is uninstalled, reinstall Pinnacle Studio and try
launching again.
Troubleshooting software crashes
Document ID: 384231
If Studio is crashing repeatedly, the cause of the problem is most likely
a configuration issue, or a problem with a project file. Many customers
fix this type of issue by:
• Optimizing their computer
• Rebuilding a corrupt project
• Recapturing a corrupt clip, etc.
• Uninstalling and reinstalling Pinnacle Studio
For further troubleshooting, determine which of the failure modes
below best matches your problem, then read on to review the
suggested troubleshooting steps for that case.
Case 1: Pinnacle Studio crashes randomly. There doesn’t seem to be
any one thing that will cause the crash, but it seems to crash
frequently.
Case 2: Pinnacle Studio crashes after a user action such as a click on a
certain tab or button. The crash is predictable and consistent.

Appendix A: Troubleshooting 405
Case 3: Pinnacle Studio crashes repeatedly when you perform some
specific combination of steps.
Case 1: Studio crashes randomly
Here are some troubleshooting steps to try. You can work through
them in order until you get a result.
Get the latest version
Make sure that you have the latest version of Pinnacle Studio installed.
Optimize settings
Check these Preview settings in Pinnacle Studio that may be adjusted
to get better results.
Quality: Select ‘Fastest Playback’ and see if your results improve.
Optimization threshold: Turning this setting off will let you discover
whether it helps your crashing problem. However, poor preview
playback may result if the threshold is not used, or is not properly
adjusted.
Render while play: Try turning off this option if you notice that the
crash tends to occur while you are previewing.
End background tasks
It is important with this type of problem to unload any background
processes before using Pinnacle Studio.
Many ‘tasks’ (software programs) run ‘in the background’ on every
Windows system, usually without drawing attention to themselves.

406 Pinnacle Studio User Guide
Occasionally, however, one of these may be the cause of instability in
a particular application.
In Windows 7 or Windows 8, the Ctrl+Alt+Delete key combination
leads to the Task Manager. The Processes tab will show you what is
running. See knowledge base document 229157, How do I turn off
background programs that are interfering with system performance
and software installation?, for detailed instructions about how to
proceed.
Defragment your hard drive
See knowledge base document 232457, Windows hard disk
defragmenting information, for instructions and advice on this step.
Update video and audio drivers
Make sure that you have the latest sound and video card drivers loaded
from their manufacturer’s websites.
You can determine what sound and video card you have by checking
in the Device Manager list in Windows (under Sound, video and game
controllers and Display adapters).To determine the manufacturer and
date of its driver, double-click the card name. Now click the Driver tab
to see all the driver information including Driver Provider and Driver
Date.
Driver updates are often released through the websites of the
hardware manufacturers.
Update Windows
Make sure you have all available Windows updates for your computer.

Appendix A: Troubleshooting 407
Optimize computer performance
Windows provides a built-in tool for this purpose.
1. Right-click Computer (or My PC) and select Properties.
2. Click the Advanced System Settings link.
This will bring up the System Properties window.
3. Click the Settings button in the Advanced section.
4. Select Adjust for best performance, and click OK.
Free space on boot drive
Make sure you have 10 GB or more on your boot drive for paging. If
you do not have 10 GB, you will need to free up some space.
Uninstall and reinstall Pinnacle Studio
If none of the suggestions so far help, you could have a corrupted
installation of Studio. If that is the case, you should try uninstalling
Pinnacle Studio and then reinstalling it. You can uninstall Pinnacle
Studio from the Windows Control Panel, by clicking Uninstall a
program. Uninstall Pinnacle Studio. Once Pinnacle Studio is
uninstalled, install it again from your disc or program download.
Check for a corrupt project
Try rebuilding the first few minutes of your project. If this does not
cause any instability, try adding a few more minutes to the project.
Continue to rebuild the project if the system remains stable.

408 Pinnacle Studio User Guide
Check for corrupt media
If the instability seems to occur when you manipulate certain audio or
video clips, you should recapture or import the audio or video. If the
media were imported and created by another application, you should
capture with Studio and create a test project. While Studio works with
many video formats, the clip you have may be corrupt or in an
uncommon variant format. If you have a wav or mp3 files that seems
to be problematic, convert the file to the other format and then import
the file.
Reinstall Windows
This is quite a drastic step, but if the steps to this point have not
helped, Windows itself may be corrupt. The heavy processing demands
made on your system by a multimedia authoring tool like
Pinnacle Studio can reveal instabilities that might not show up with
ordinary applications. One way to help determine if your Windows
install is part of the problem is to run the Microsoft system information
tool. This tool keeps track of when Windows crashes.
To use the system information tool:
1 In the Windows Run dialog box (Windows key + R), type
Msinfo32 in the search window. Press Enter to bring up the
System Information window.
2Expand the Software environment category on the left side of the
window.
3 Click on Windows error reporting.
If the Windows Error Reporting window has many entries, it could be
an indication that the OS is unstable or that the computer has a
hardware issue. Inspecting the entries may show what caused the
crash. If most of the crashes involve system software like Window

Appendix A: Troubleshooting 409
Explorer, then the OS has a problem. Frequent random crashes are
another common sign of a corrupt Windows installation.
Case 2: Studio crashes after a user action
If Pinnacle Studio crashes, or tends to crash, when you click on some
particular tab or button, start by trying all of the steps in Case 1 above.
Such a problem usually means that Studio is not installed properly or
has become corrupt, so uninstalling Studio, then reinstalling it, and
then patching the latest version should correct the situation.
To try to determine if the failure is specific to a particular project, create
a test project and add a few scenes to the timeline from the sample
video. Then click on the tab or button that seems to cause the failure.
If this test project does not crash, it may mean that the problem is with
the actual project you are working on rather than with Studio or your
system. If the test project does fail, please contact support and provide
us with the details on the exact failure mode. We will try to recreate
the problem.
Case 3: Studio crashes repeatably
If Studio crashes when you performing some specific procedure or
combination of steps, start by trying the troubleshooting steps given
above for Case 1, since this is just a more complicated version of Case
2. It is often very difficult to pin down the exact sequence of steps that
results in a failure. A simple test project using the sample video, as
noted above, will be a big help first in your own investigations, and
second to help achieve a fast resolution if support is required.

410 Pinnacle Studio User Guide
Export problems
If errors are reported, or the application freezes or performs incorrectly
while exporting a file or disc, please check our knowledge base for
articles regarding the specific failure scenario you are experiencing.
Disc playback problems
Document ID: 384235
If you have a problem with DVDs created by Studio not playing back,
or appearing to be blank, the steps below should help to resolve it.
Other kinds of playback problems may be addressed elsewhere in the
knowledge base.
• If the video on your disc plays back, but the sound does not, read
document 222577, Discs burned with Studio have no sound.
• If only a portion of your disc project appears on the DVD, or if
recent changes are missing, try document 219785, DVD created
with Studio is missing part of the project.
If your DVD does not play back, or appears blank:
1 Check the disc for cleanliness. Ensure that there are no obvious
smudges or scratches on the disc surface. If the disc is dirty, clean
it with a soft cloth (don’t use a paper towel) by wiping the DVD
radially from the center to the outside edge, not in a circular
motion.
2 Insert the disc into a DVD drive on the computer and verify that it
contains file-system folders.
• Double-click My Computer or This PC.
• Right-click the DVD drive and choose Explore.

Appendix A: Troubleshooting 411
There should be two folders on the DVD, named ‘audio_ts’ and
‘video_ts’. The ‘audio_ts’ folder should be empty, while ‘video_ts’
should contain files with bup, ifo and vob extensions.
If the files are present, the issue definitely relates to playback as
such rather than the burning of the disc. Conversely, if the disc is
in fact blank, you are looking at a burn problem rather than a
playback problem. In that case, follow the instructions in
document 214533, Studio burn problems.
3 If the disc fails in your set-top DVD player, try playing it back on
the computer. The disc should play back successfully when DVD
player software like PowerDVD and WinDVD are used. DVD
playback in Windows Media Player may work depending on your
version of Windows. If you have problems playing the disc DVD
even on your computer’s DVD drive, read document 221479,
Playing DVDs on your computer.
4 Try playing the DVD on other set-top players. Some equipment
may not play a certain brand of DVD or a certain DVD media
format (-R, +R, -RW or +RW).
If you are uncertain whether the DVD player supports a given
media type, check the manufacturer’s website for information.
If the disc type is not supported by the player, you will need to
recreate the disc in another format. If the disc plays in one DVD
player but not another, it may be that the second player is on the
verge of device failure, or that it cannot reliably read writable
media. In this situation, experiment with DVD brands and types
until you find a combination that works dependably on your
equipment.
5 Confirm that the project you created is set for the playback format
used in your region (e.g. NTSC for North America, PAL for Europe).
If the project, and hence the disc, are in the wrong format, some
DVD players will not be able to play the disc.
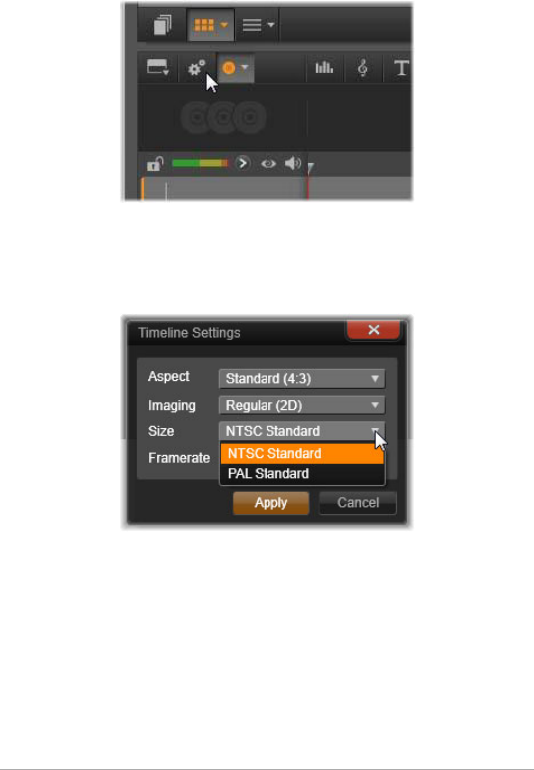
412 Pinnacle Studio User Guide
To check the project video format, click the gear icon at the top
left of the timeline in the Disc Editor.
Opening the timeline settings dialog.
On the Timeline Settings dialog, make sure that the Size dropdown is
set to the right standard.
Checking the Size setting.
You can also set the default video standard for projects on the Project
Settings page of the Pinnacle Studio setup dialog.

Appendix B: Videography 413
Appendix B: Videography
To shoot good video, then create from it an interesting, exciting or
informative movie, is something anyone with a little basic knowledge
can achieve.
Starting from a rough script or shooting plan, the first step is to shoot
your raw video. Even at that stage, you should be looking ahead to the
editing phase by making sure you will have a good set of shots to work
from.
Editing a movie involves juggling all your fragments of footage into
some kind of harmonious whole. It means deciding on the particular
techniques, transitions and effects that will best express your intent.
An important part of editing is the creation of a soundtrack. The right
sound – dialog, music, commentary or effect – can work with the
visuals to create a whole greater than the sum of its parts.
Pinnacle Studio has the tools you need to create professional-quality
home video. The rest is up to you – the videographer.
Creating a shooting plan
It is not always necessary to have a shooting plan, but it can be very
helpful for large video projects. The plan can be as simple or as
complex as you like. A simple list of planned scenes might be enough,
or you might also want to include some notes regarding detailed
camera directions or prepared dialog. The really ambitious can go all
the way to a full-fledged script in which every single camera angle is

414 Pinnacle Studio User Guide
described in detail along with notes about duration, lighting and
props.
Draft of a simple shooting plan
Editing
Using varying perspectives
An important event should always be shot from varying perspectives
and camera positions. Later, during editing, you can use the best
camera angles alone or in combination. Make a conscious effort to
Title: Jack on the kart track
No. Camera angle Text / Audio Duration Date
1 Jack's face with helmet,
camera zooms out
“Jack is driving his first
race...”.
Noise of engines in the
background.
11 sec Tue.
06/22
2 On the starting line,
driver's perspective; low
camera position.
Music is played in the hall,
noise of engines.
8 sec Tue.
06/22
3 Man with a starting flag
is accompanied into the
scene to the start
position. Camera stays,
man goes out of the
scene after start.
“Let's go...”.
Carry out the start, add
starting signal.
12 sec Tue.
06/22
4 Jack on the start
position from the front,
camera follows, shows
Jack up to the bend,
now from behind.
Music from the hall no
longer audible, fade up
same music from CD over
noise of engines.
9 sec Tue.
06/22
5 ...

Appendix B: Videography 415
tape events from more than one camera angle (first the clown in the
circus ring, but then also the laughing spectator from the clown’s
point of view). Interesting events can also take place behind the
protagonists or the protagonists may be seen in a reverse angle. This
can be helpful later when trying to establish a sense of balance in the
movie.
Close-ups
Don’t be stingy with close-ups of important things or persons. Close-
ups usually look better and more interesting than long shots do on a
television screen, and they work well in post-production effects.
Long shots / Semi-long shots
Long shots provide the viewer with an overview and establish the scene
of the action. However, these shots can also be used to tighten longer
scenes. When you cut from a close-up to a long shot, the viewer no
longer sees the details, and it is thus easier to make a chronological
jump. Showing a spectator in a semi-long shot can also provide visual
relief from the main action, and the opportunity of a transition away
from the action if desired.
Complete actions
Always shoot complete actions with a beginning and an end. This
makes editing easier.
Transitions
Cinematic timing requires some practice. It is not always possible to
film long events in their entirety, and in movies they often have to be
represented in severely abbreviated form. Nonetheless, the plot should

416 Pinnacle Studio User Guide
remain logical and cuts should almost never call attention to
themselves.
This is where the transition from one scene to the next is important.
Even if the action in neighboring scenes is separated in time or space,
your editorial choices can make the juxtaposition so smooth that the
viewer bridges the gap without conscious attention.
The secret to a successful transition is establishing an easily-felt
connection between the two scenes. In a plot-related transition, the
connection is that of successive events in an unfolding story. For
example, a shot of a new car might be used to introduce a
documentary about its design and production.
A neutral transition doesn’t in itself imply a story development or a
change of time or place, but can be used to smoothly connect different
excerpts from a scene. For example, cutting away to an interested
audience member during a podium discussion lets you then cut back
unobtrusively to a later point in the same discussion, omitting the part
between.
External transitions show something apart from the action. For
example, during a shot inside the marriage registry, you might cut to
the exterior of the marriage registry, where a surprise is already being
set up.
Transitions should underscore the message of the film and must always
fit the respective situation, in order to avoid confusing viewers or
distracting from the actual story line.
Logical sequence of action
The shots strung together during editing must interact appropriately in
relation to the action. Viewers will be unable to follow the events

Appendix B: Videography 417
unless the story line is logical. Capture viewer interest from the very
beginning with a fast-paced or spectacular start and maintain that
interest until the very end. Viewers can lose interest or become
disoriented if scenes are strung together in a manner that is illogical or
chronologically false, or if scenes are too hectic or short (under three
seconds). There should be some continuity of motif from one scene to
the next.
Bridging the gaps
Make an effort to bridge the gaps from one filming location to
another. You can use close-ups, for example, to bridge chronological
jumps, zooming in on the face, then back out after a few seconds onto
a different scene.
Maintain continuity
Continuity – consistency of detail from one scene to the next – is vital
in providing a satisfying viewing experience. Sunny weather does not
fit with spectators who opened their umbrellas.
Tempo of cuts
The tempo at which a film cuts from one scene to the next often
influences the message and mood of the film. The absence of an
expected shot and the duration of a shot are both ways of
manipulating the message of the film.
Avoid visual disjunctions
Stringing together similar shots in succession may result in visual
disjunctions. A person may be in the left half of the frame one moment
and in the right half of the frame the next, or may appear first with and
then without eyeglasses.

418 Pinnacle Studio User Guide
Do not string together pan shots
Pan shots should not be strung together unless they have the same
direction and tempo.
Rules of thumb for video editing
Here are some guidelines that may be helpful when you come to edit
your movie. Of course, there are no hard and fast rules, especially if
your work is humorous or experimental.
• Do not string together scenes in which the camera is moving.
• Pans, zooms, and other moving shots should always be separated
by static shots.
• Shots that follow one another should be from different camera
positions. The camera angle should vary by at least 45 degrees.
• Sequences of faces should always be shot alternately from varying
angles of view.
• Change perspectives when shooting buildings. When you have
similar shots of the same type and size, the picture diagonal
should alternate between front left to rear right and vice versa.
• Make cuts when persons are in motion. The viewer will be
distracted by the ongoing motion and the cut will go almost
without notice. In particular, you can cut to a long shot from the
middle of the motion.
• Make harmonious cuts; avoid visual disjunction.
• The less motion there is in a shot, the shorter it should be. Shots
with fast movements can be longer.
• Long shots have more content, so they should also be shown
longer.

Appendix B: Videography 419
Ordering your video sequences in a deliberate manner not only permits
you to produce certain effects, but even enables you to convey
messages that cannot or should not be shown in pictures. There are
basically six methods of conveying messages through cuts. Let’s look
at each in turn.
Associative cuts
Shots are strung together in a certain order to trigger associations in
the mind of the viewer, but the actual message is not shown. Example:
A man bets on a horse race and, in very next scene, we see him
shopping for an expensive new car at a car dealership.
Parallel cuts
Two actions are shown in parallel. The film jumps back and forth
between the two actions; making the shots shorter and shorter until
the end. This is a way of building suspense until it peaks. Example: Two
different cars drive from different directions at high speed toward the
same intersection.
Contrast cuts
The film purposely cuts unexpectedly from one shot to another, very
different shot, in order to point up the contrast to the viewer. Example:
A tourist lying on the beach; the next shot shows starving children.
Substitutionary cut
Events that cannot or should not be shown are replaced by other
events (a child is born, but instead of childbirth, the blossoming of a
flower bud is shown).

420 Pinnacle Studio User Guide
Cause and effect cuts
Shots are related by virtue of cause and effect: without the first shot,
the second would be incomprehensible. Example: A man fights with
his wife and, in the very next shot, is seen sleeping under a bridge.
Formal cuts
Shots that vary in content can be strung together if they have
something in common – the same shapes, colors, or motions, for
example. Examples: A crystal ball and the earth; a yellow raincoat and
yellow flowers; a falling skydiver and a falling feather.
Soundtrack production
Soundtrack production is an art, but it is an art one can learn. Of
course, it is no easy task to create a superb narration, but short,
informative comments are often very helpful for the viewer. Whatever
narration there is should sound natural, expressive and spontaneous,
not wooden or stiff.
Keep comments brief
A general rule applicable to all commentary is that less is more. Pictures
should speak for themselves, and things that are evident to viewers
from the pictures require no comment.
Preserve original sounds
Spoken commentary should be mixed with both the original sounds
and the music in such a way that the original sounds can still be heard.
Natural sound is part of your video footage and should not be cut
away altogether if at all possible, because video without natural sound
can easily seem sterile and lacking in authenticity. Frequently, however,

Appendix B: Videography 421
the recording equipment captures noises from aircraft and cars that do
not appear in the scene later. Sounds such as these, or loud wind
noises, which can be distracting or annoying, should be masked,
filtered or replaced with appropriate narration or music.
Select appropriate music
Appropriate music adds a professional finishing touch to your movie
and can do a lot to reinforce the message of a video. The music
selected, however, should always be appropriate to the message of the
film. This is sometimes a time-consuming matter and a challenge, but
greatly appreciated by the viewer.
Title
The title should be informative, describe the contents of the movie, and
arouse interest. If it’s also a striking turn of phrase, so much the better.
When it comes to presentation, the Title Editor gives almost unlimited
scope for creative visuals. It’s one place in your production where
you’re not tied to the reality of actual footage, so you can let your fancy
run free.
Of course, the ultimate goal is to communicate, so some basics almost
always hold true. For instance, a concise title in a large, legible font is
likelier to get its message across than one that is over- decorated or too
long.
Title colors
The following combinations of background and text are easy to read:
white with red, yellow with black, and white with green. Exercise
caution with very white titles on a very black background. Some video

422 Pinnacle Studio User Guide
systems are unable to handle contrast ratios in excess of 1:40 and are
unable to reproduce such titles in detail.
Time on screen
As a rule of thumb, a title should be displayed long enough to be read
twice. Allow about three seconds for a title with ten letters. Allow an
additional second of on-screen time for every five additional letters.
‘Found’ titles
Besides postproduction titles, natural titles like directional signs, street
signs or title pages of local newspapers also create interesting
possibilities.

Appendix C: Glossary 423
Appendix C: Glossary
Multimedia terminology contains computer and video terminology.
The most important terms are defined below.
720p: A high-definition (HD) video format with a resolution of
1280x720 and progressive (non-interlaced) frames.
1081i: A high-definition (HD) video format with a resolution of
1440x1080 and interlaced frames.
ActiveMovie: Software interface by Microsoft for the control of
multimedia devices under Windows. See
DirectShow
,
DirectMedia
ADPCM: Acronym for Adaptive Delta Pulse Code Modulation, a
method of storing audio information in a digital format. This is the
audio encoding and compression method used in CD-I and
CD-ROM
production.
Address: All available saving positions in a computer are numbered
(addressed). By means of these addresses each saving position can be
occupied. Some addresses are reserved for the exclusive use of
particular hardware components. If two components are using the
same address, this is called an “address conflict”.
Aliasing: An inaccurate display of an image due to the limitations of
the output device. Typically, aliasing appears in the form of jagged
edges along curves and angled shapes.
Anti-aliasing: A method of smoothing out jagged edges in bitmap
images. This is usually accomplished by shading the edges with pixels

424 Pinnacle Studio User Guide
intermediate in color between the edge and the background, making
the transition less apparent. Another method of anti-aliasing involves
using higher resolution output devices.
Aspect ratio: The ratio of width to height in an image or graphic.
Keeping the aspect ratio fixed means that any change to one value is
immediately reflected in the other.
AVI: Audio Video Interleaved, a standard format for digital video (and
Video for Windows
).
Batch capture: An automated process that uses an
Edit decision list
(EDL)
to locate and recapture specific clips from a videotape, usually at
a higher data rate than the clip was originally captured.
BIOS: Acronym for Basic Input Output System, which refers to basic
input and output commands saved in a
ROM
, PROM or
EPROM
. The
essential task of the BIOS is the control of input and output. When the
system is started, the ROM-BIOS carries out some tests. See
Parallel
port
,
IRQ
,
I/O
.
Bit: Abbreviation of “BInary digiT”, the smallest element of a
computer’s memory. Among other things, bits are used to store the
color values of pixels in an image. The more bits used for each
Pixel
,
the greater the number of available colors. For example:
• 1-bit: each pixel is either black or white.
• 4-bit allows 16 colors or gray shades.
• 8-bit allows 256 colors or gray shades.
• 16-bit: allows 65,536 colors.
• 24-bit: allows about 16.7 million colors.
Bitmap: An image format made up of a collection of dots or “pixels”
arranged in rows. See
Pixel
.

Appendix C: Glossary 425
Blacking: The process of preparing a videotape for insert editing by
recording video black and continuous control track on the entire tape.
If the recording deck supports timecode, continuous timecode will be
recorded simultaneously (also called “striping”).
Brightness: Also “luminance”. Indicates the brightness of video.
Byte: One byte corresponds to eight bits. With one byte, exactly one
alphanumeric character can be displayed (i.e. a letter, number).
CD-ROM: Mass storage media for digital data, such as digital video.
CD-ROMs can be read from but not written (recorded) onto; ROM is
an acronym for Read-Only Memory.
Channel: Classifications of information within a data file to isolate a
particular aspect of the file. For example, color images use different
channels to classify the color components in the image. Stereo audio
files use channels to identify the sounds intended for the left and right
speakers. Video files use combinations of the channels used for image
and audio files.
Clip: In Pinnacle Studio, any media element used on the timeline of a
movie or disc project. Clip media include videos, audio files, photos,
titles, and Montage.
Clipboard: A temporary storage area shared by all Windows programs,
used to hold data during cut, copy, and paste operations. Any new
data you place onto the clipboard immediately replaces the existing
data.
Closed GOP: See
GOP
.
Codec: Contraction of compressor/decompressor – an algorithm that
compresses (packs) and decompresses (unpacks) image data. Codecs
can be implemented in either software or hardware.

426 Pinnacle Studio User Guide
Color depth: Number of bits delivering the color information for each
pixel. A 1-bit color depth allows 21=2 colors, an 8-bit depth allows
28=256 colors, and a 24-bit depth allows 224=16,777,216 colors.
Color model: A way to mathematically describe and define colors and
the way they relate to each other. Each color model has its own
strengths. The two most common color models are ??RGB and ??YUV.
Color saturation: Intensity of a color.
Complementary color: Complementary colors are opposite in value to
primary colors. If you were to combine a color with its complement,
the result would be white. For example, the complementary colors of
red, green and blue are cyan, magenta and yellow respectively.
COM Port: A serial port located on the back of your computer for
attaching a modem, plotter, printer or mouse to the system.
Composite video: Composite video encodes luminance and
chrominance information into one signal.
VHS
and 8mm are formats
that record and play back composite video.
Compression: A method for making files smaller in size. There are two
types of compression: lossless and lossy. Files compressed with a
lossless scheme can be restored unchanged from their original state.
Lossy schemes discard data during compression, so some image
quality is sacrificed. The loss of quality may be negligible or severe
depending on the amount of compression.
Cropping: Choosing the area of an image to be displayed.
Data rate: The quantity of data transmitted per unit time; for example,
the number of bytes read from or written to a hard drive per second,
or the amount of video data processed per second.

Appendix C: Glossary 427
Data transfer rate: The measurement of the speed at which
information passes between the storage device (e.g. CD-ROM or hard
drive) and the display device (e.g. monitor or MCI device). Depending
on the devices used, some transfer rates may offer better performance
than others.
DCT: Discrete Cosine Transformation – part of JPEG image data
compression and related algorithms. The brightness and color
information is saved as a frequency coefficient.
DirectShow: System extension by Microsoft for multimedia
applications under Windows. See
ActiveMovie
.
DirectMedia: System extension by Microsoft for multimedia
applications under Windows. See
ActiveMovie
.
DirectX: A bundle of several system extensions developed by Microsoft
for Windows 95 and its successors to make possible video and game
acceleration.
Dissolve: A transitional effect in which the video is faded from one
scene to the next.
Dithering: Increasing the number of apparent colors in an image by the
application of color patterns.
Decibel (dB): A unit of measurement of the loudness of sound. An
increase of 3 dB doubles the loudness.
Digital8: Digital videotape format that records DV-coded audio and
video data on Hi8 tapes. Currently sold only by Sony, Digital8
camcorders and VCRs can play both Hi8 and 8mm cassettes.
Digital video: Digital video stores information bit by bit in a file (in
contrast to analog storage media).

428 Pinnacle Studio User Guide
DMA: Direct Memory Access.
Driver: A file containing information needed to operate peripherals.
The video capture driver operates a video capture board, for example.
DV: Digital videotape format for recording digital audio and video on
¼”-wide metal evaporated tape. Mini-DV tapes hold up to 60 minutes
of content, while standard DV tapes can hold up to 270 minutes.
ECP: “Enhanced Compatible Port”. Enables accelerated bi-directional
data transfer via the parallel port. See
EPP
.
Edit decision list (EDL): A list of clips and effects in a particular order
that will be recorded to your output disc or file. Studio allows you to
create and edit your own edit decision list by adding, deleting and
reordering clips and effects in the Movie Editor and the Disc Editor.
EPP: “Enhanced Parallel Port”. Enables accelerated bi-directional data
transfer via the parallel port. See
ECP
.
EPROM: “Erasable Programmable Read-Only Memory”. Memory chip
that after programming retains its data without power supply. The
memory contents can be erased with ultraviolet light and rewritten.
Fade to/from black: A digital effect that fades up from black at the
beginning of a clip or down to black at the end.
Field: A frame of video consists of horizontal lines and is divided into
two fields. The odd lines in the frame are Field 1; the even-numbered
lines are Field 2.
File format: The organization of information within a computer file
such as an image or word processor document. The format of a file is
usually indicated by its “file extension” (e.g. doc, avi or wmf).
Filters: Tools that alter data to produce special effects.

Appendix C: Glossary 429
FireWire: Apple Computer’s trademarked name for the
IEEE-1394
serial data protocol.
Field: A frame of interlaced video consists of horizontal lines and is
divided into two fields. The odd lines in the frame are Field 1; the even-
numbered lines are Field 2.
Frame rate: The frame rate defines how many frames of a video
sequence are played in one second. The frame rate for NTSC video is
30 frames per second. The frame rate for PAL video is 25 frames per
second.
Frame size: The maximum size for displaying image data in a video or
animation sequence. If an image intended for the sequence is larger
than the frame size, it must be cropped or scaled to fit.
Frequency: The number of repetitions in a periodic process (like a
sound wave or an alternating voltage) per unit of time. Usually
measured in repetitions per second, or Hertz (Hz).
GOP: In MPEG compression the data stream is first divided into
“Groups Of Pictures” – sections of several frames each. Each GOP
contains three types of frames: I-Frames, P-Frames (pictures) and B-
Frames.
GOP size: The GOP size defines, how many I-Frames, B-Frames and P-
Frames are included in one GOP. For example, current GOP sizes are 9
or 12.
Hardware codec: Compression method that uses special hardware to
create and play back compressed digital video sequences. A hardware
codec may offer better encoding speed and image quality than a codec
implemented completely in software. See
Codec
,
Software codec

430 Pinnacle Studio User Guide
HD: High Definition video. Most HD formats in use have a resolution of
either 1920x1080 resolution or 1280x720 resolution. A substantial
difference exists between the 1080 and 720 standards: the larger
format uses 2.25 more pixels per frame. This difference substantially
increases requirements for processing 1080 content in terms of
encoding time, decoding speed, and storage. The 720 formats are all
progressive. The 1080 format has a mixture of progressive and
interlaced frame types. Computers and their displays are inherently
progressive, whereas television broadcasting has been based on
interlaced techniques and standards. For HD terminology, we indicate
progressive with the letter ‘p’ and interlaced with the letter ‘i’.
HDV: A format for the recording and playback of high-definition video
on a DV cassette tape. has been established as the ‘HDV’ format.
Instead of the ‘DV’ codec, HDV uses a flavor of MPEG-2. There are two
varieties of HDV: HDV1 and HDV2. HDV1 is 1280x720 resolution with
progressive frames (720p). The MPEG transport stream is 19.7 Mbps/
s. HDV2 is 1440x1080 resolution with interlaced frames (1080i). The
MPEG transport stream is 25 Mbps/s.
Hi8: Improved version of Video8 using S-Video recorded on metal
particle or metal evaporated tape. Because of higher luminance
resolution and wider bandwidth, the result is sharper pictures than
Video8.
HiColor: For images, this normally means a 16-bit (5-6-5) data type
that can contain up to 65,536 colors. TGA file formats support images
of this type. Other file formats require prior conversion of a HiColor
image into TrueColor. For displays, HiColor normally refers to 15-bit (5-
5-5) display adapters that can display up to 32,768 colors. See
Bit
.
Huffman coding: Technique used in JPEG and other data compression
methods in which seldom occurring values receive a long code, while
frequently-occurring values receive a short code.

Appendix C: Glossary 431
IDE: “Integrated Device Electronics” – a hard-drive interface that
combines all drive control electronics on the drive itself, rather than on
the adapter connecting the drive to the expansion bus.
IEEE-1394: Developed by Apple Computers and introduced as
FireWire, this is a serial data transmission protocol with rates up to 400
Mbits/sec. Sony offers a slightly modified version for transmitting DV
signals named i.LINK, providing transmission speeds up to 100 Mbits/
sec.
Image: An image is a reproduction, or picture of something. The term
is often applied to digitized pictures, consisting of pixels, that can be
shown on a computer display and manipulated by software.
Image compression: Method of reducing the amount of data required
to store digital image and video files.
Interlaced: The screen refresh method used by television systems. The
PAL TV image consists of two interleaved image halves (fields) of 312½
lines each. The NTSC TV image consists of two image halves of 242½
lines each. The fields are displayed alternately to produce a blended
image.
Interleave: An arrangement of audio and video to promote smoother
playback and synchronization or compression. The standard AVI
format equally spaces audio and video.
I/O: Input/Output.
IRQ: “Interrupt Request”. An “interrupt” is a temporary break in the
main processing stream of a computer so that housekeeping or
background tasks can be performed. Interrupts can be requested by
either hardware (e.g. keyboard, mouse) or software.

432 Pinnacle Studio User Guide
JPEG: Joint Photographic Experts Group, and the standard developed
by them for compressing digital frames based on DCT.
Kbyte (also KB): One Kbyte (kilobyte) contains 1024 bytes. The “K”
here stands for the number 1024 (210), and not 1000 as in the metric
prefix.
Key color: A color whose display is suppressed so that a background
image can show through. Most commonly used when overlaying one
video sequence on top of another, allowing the underlying video to
display wherever the key color appears.
Keyframe: A video frame for which the value of a particular parameter
of a video or audio effect is specified. During playback the animation
of effects is accomplished by adjusting parameters smoothly from one
key-framed value to the next. Animating effects by means of keyframes
is often called ‘keyframing’.
LPT: See
Parallel port
.
Luminance: See
Brightness
.
M1V: (File extension for) an MPEG file that contains video data only.
Mbyte (also MB): One Mbyte (megabyte) corresponds to 1024 Kbytes
– 1024 x 1024 bytes.
Mark In / Mark Out: In video editing, the mark in and mark out times
refer to the starting and ending timecodes that identify the portions of
clips to be included in the project.
MCI: Media Control Interface. Programming interface developed by
Microsoft recording and playing back audio and video data. It is also
used to connect a computer to an external video source such as a VCR
or laser disc.

Appendix C: Glossary 433
Modulation: The encoding of information upon an empty carrier
signal.
Motion-JPEG (M-JPEG): A Video for Windows format, specified by
Microsoft, for encoding video sequences. JPEG compression is used to
compress each frame individually.
MPA: (File extension for) an MPEG file that contains audio data only.
M1V, MPEG, MPG
MPEG: Motion Picture Experts Group, and the standard developed by
them for the compression of moving images. Compared to M-JPEG, it
offers 75-80% data reduction with the same visual quality.
MPG: (File extension for) an MPEG file that contains both video and
audio data.
MPV: (File extension for) an MPEG file that contains video data only.
Non-interlaced: Describes an image refresh method in which the
complete image is generated as a single field without skipping lines. A
non-interlaced image (most computer monitors) flickers much less
than an interlaced image (most TVs).
NTSC: National Television Standards Committee, and the color TV
standard created by them in 1953. NTSC video has 525 lines per frame
and 60 image fields per second. It is used in North and Central
America, Japan and other countries. See
PAL
,
SECAM
.
PAL: “Phase Alternation Line”, a color TV standard developed in
Germany and used throughout most of Europe. PAL video has 625
lines per frame and 50 image fields per second. See
NTSC
,
SECAM
.
Parallel port: Parallel port data is transmitted via an 8-bit data line. This
means that eight bits (one byte) can be transmitted at once. This kind

434 Pinnacle Studio User Guide
of transmission is much faster than serial transmission, but is not
appropriate for long-distance connections. Parallel ports are often
named “LPTn”, where n is a number (e.g. “LPT1”). See
Serial port
.
Pixel: The smallest element of a monitor image. The word is an
abbreviation of “picture element”.
Port: Electrical transfer point for the transmission of audio, video,
control or other data between two devices. See
Serial port
,
Parallel
port
.
Primary colors: The colors that are the basis of the RGB color model:
red, green, and blue. It is possible to create most other colors on a
computer screen by varying the blend of these primaries.
QSIF: Quarter Standard Image Format. An MPEG-1 format specifying a
resolution of 176 x 144 under PAL and 176 x 120 under NTSC. See
MPEG
,
SIF
.
Quantization: One part of the JPEG image data compression strategy.
Relevant details are represented precisely, while details that are less
relevant for the human eye are represented with less precision.
Raster: The area of a video display that is covered by sweeping the
electron beam of the display in a series of horizontal lines from upper
left to lower right (from the viewer’s perspective).
Redundancy: This trait of images is exploited by compression
algorithms. Superfluous information can be eliminated during
compression and restored without loss during decompression.
Resolution: The number of pixels that can be displayed on the monitor
horizontally and vertically. The higher the resolution, the more details
can be displayed. See
Pixel
.

Appendix C: Glossary 435
RGB: Red, Green and Blue: the primary colors in additive color mixing.
RGB designates the method used in computer technology of encoding
image information in pixels, each containing some combination of the
three primaries.
ROM: Read Only Memory: Memory storage that, having been
programmed once, retains its data without requiring electrical power.
See
EPROM
.
Run Length Encoding (RLE): A technique used in many image
compression methods, including JPEG. Repeating values are not stored
separately but with a counter to indicate how many times the value
occurs in succession – the length of the “run”.
Scaling: Adaptation of an image to a desired size.
SCSI: Small Computers System Interface. SCSI was long preferred as
the hard drive interface for some high-performance PCs because of its
high data rate. Up to eight SCSI devices can be connected to a
computer at the same time.
SECAM: “Séquentiel Couleur à Mémoire”, a color TV transmission
system used in France and Eastern Europe. Like PAL, SECAM video has
625 lines per frame and 50 image fields per second. See
NTSC
,
PAL
.
Serial port: Data transmitted via a serial port is processed one bit at a
time; that is, “serially” – one after another. The transmission rate is
much slower than that of a parallel port, where parallel data lines allow
multiple bits to be sent simultaneously. Serial ports are named
“COMn”, where n is a number (e.g. “COM2”). See
Parallel port
.
SIF: Standard Image Format. An MPEG-1 format specifying a resolution
of 352 x 288 under PAL and 352 x 240 under NTSC. See
MPEG
,
QSIF
.

436 Pinnacle Studio User Guide
Single frame: A single frame is part of a series or sequence. When this
series is viewed at sufficient speed, the illusion of a “moving picture” is
created.
Software codec: Compression method that can create and play back
compressed digital video sequences without special hardware. The
quality of the sequences depends on the performance of the complete
system. See
Codec
,
Hardware codec
.
Still video: Still images (or “freeze-frames”) extracted from video.
S-VHS: Improved version of VHS using S-Video and metal particle tape
to deliver higher luminance resolution, resulting in sharper pictures
than VHS. See
VHS
,
S-Video
.
S-Video: With S-Video (Y/C) signals, the brightness (luminance or “Y”)
and the color (chrominance or “C”) information are transferred
separately using multiple wires, avoiding modulating and
demodulating the video and the resulting loss of picture quality.
Timecode: Timecode identifies the position of each frame in a video
sequence with respect to a starting point (normally the beginning of
the shot). The usual format is H:M:S:F (hours, minutes, seconds,
frames), e.g. “01:22:13:21”. Unlike a tape counter (which can be
“zeroed” or reset at any point in a tape), timecode is an electronic
signal written onto videotape, and is permanent once it is assigned.
Transition: A bridging effect between adjacent video or audio clips,
ranging from a simple “cut” to a showy animated effect. Common
transitions like cuts, fades, dissolves, wipes, slides and audio cross-
fades are part of the language of film and video. They can convey
passages of time and changes of viewpoint concisely – and often
subliminally.

Appendix C: Glossary 437
TrueCol or: The name indicates an image with enough color resolution
to appear “true to life”. In practice, TrueColor normally refers to 24-bit
RGB color, which allows about 16.7 million combinations of the red,
green and blue primary colors. See
Bit
,
HiColor
.
TWAIN driver: TWAIN is a standardized software interface allowing
graphics and capture programs to communicate with devices that
supply graphical data. If the TWAIN driver is installed, the capture
function of a graphics application can be used to load images directly
from your video source into the program. The driver supports 32-bit
programs only and captures images in 24-bit mode.
VCR: “Video cassette recorder”.
VHS: “Video Home System” – Popular video standard for home VCRs.
Half-inch tape is used to store “composite” signals incorporating both
brightness and color information.
VISCA: Protocol used with certain devices for controlling external video
sources from computers.
Video8: Analog video system using 8mm tape. Video8 recorders
generate composite signals.
Video CD: CD-ROM standard that uses MPEG compressed videos.
Video decoder: Converts digital information into analog video signals.
Video encoder: Converts analog video signals into digital information.
Video for Windows: A Microsoft Windows system extension that can
record digital video sequences to files on a hard drive and subsequently
play them back.

438 Pinnacle Studio User Guide
Video scan rate: Frequency with which the video signal is scanned
onto an image display. The higher the video scan rate, the higher the
image quality and the less noticeable the flicker.
WAV: (File extension for) a popular file format for digitized audio
signals.
White balance: In an electronic camera, this is the adjustment of the
amplifiers for the three color channels (red, green and blue) so that
white areas of the scene do not show a color cast.
Y/C: Y/C is a color signal with two components: brightness information
(Y) and color information (C).
YUV: The color model of a video signal where Y delivers the brightness
information and U and V the color information.

Appendix D: Keyboard shortcuts 439
Appendix D: Keyboard shortcuts
The tables below display the default hotkey assignments in Pinnacle
Studio. Keys can be individually remapped in Setup. The defaults can
also be restored there, either individually or for all the shortcuts at
once. For more information, see “Keyboard” on page 366.
The terms Left, Right, Up and Down in the tables refer to the arrow
(cursor) keys.
General shortcuts
Ctrl+1 Open Main Library tab
Ctrl+2 Open Movie tab
Ctrl+3 Open Disc tab
Ctrl+4 Close focused window
Ctrl+5 Open Title Editor (from Movie Editor)
Ctrl+6 Open Exporter
Ctrl+ I Open Importer
Ctrl+S Save project, title or menu
Alt+F4 Close application
Shift+F10 Access context menu
Ctrl+Z Undo
Ctrl+Y Redo
Ctrl+A Select all
Shift+Ctrl+A Deselect all
440 Pinnacle Studio User Guide
Ctrl+C Copy to clipboard
Ctrl+V Paste from clipboard
Ctrl+X Cut to clipboard
End Go to end
Home Go to beginning
Alt+Enter Play using full screen
Esc Exit full-screen viewing, or close
panel
Delete Delete without copying to
clipboard
Double-click Open appropriate editor (Media,
Titler, Project, Montage etc.)
F1 Open context sensitive help
Library
Ctrl+N New collection
Alt+Click Play in thumbnail
Numbers 1-5 Rate selected clip(s)
Number 0 Remove rating from selected clip(s)
Page Up Scroll up a page
Page Down Scroll down a page
Right Expand folder in tree
Left Collapse folder in tree
Arrow keys Navigate up, down. left, right
Delete Delete selected clip and / or media
F7 Show / hide tagging interface
General shortcuts

Appendix D: Keyboard shortcuts 441
Playing and transport
Spacebar Play and pause
Shift+Spacebar Loop playback
Alt+Enter Play using full screen
Esc Exit full-screen viewing
Alt+Click Play in thumbnail
J Fast reverse (hit multiple times for
faster playback)
K (or Shift K) Pause playback
L Fast forward (hit multiple times for
faster playback)
Shift+L Slow forward (hit multiple times for
slower playback)
Shift+J Slow reverse (hit multiple times for
slower playback)
Right (or X) Step forward 1 frame
Left (
or
Z) Step back 1 frame
Shift+Right (
or
Shift+X) Step forward 10 frames
Shift+Left (
or
Shift+Z) Step backward 10 frames
D (
or
Page up) (
or
Ctrl+Left) Jump backward to cut
F (
or
Page down) (
or
Ctrl+Right) Jump forward to cut
Ctrl+I Jump to mark in
Ctrl+O Jump to mark out
. (period) Jump to next marker
, (comma) Jump to previous marker
442 Pinnacle Studio User Guide
Importer
Enter Stop Motion: Capture Frame (when
capture frame is open)
Right Expand folder in tree
Left Collapse folder in tree
Arrow keys Navigate up, down. left, right
Ctrl+A Check all
Ctrl+Shift+A Uncheck all
F4 Start Import
Movie interface
A
(or I)
Mark in
S
(or O)
Mark out
Shift+I Clear mark in
Shift+O Clear mark out
Shift+U Clear mark in and out
Scroll Lock Audio Scrub On/Off
E (or Home) Go to start
R (or End) Go to end
P Toggle Magnetic Snapping
; (semicolon) Split clip(s) at scrubber position
M Add/Delete marker
. (period) Jump to next marker
, (comma) Jump to previous marker
Ctrl+. (period) Open Marker list panel

Appendix D: Keyboard shortcuts 443
Delete Delete selected clip(s) from timeline
Double-click on clip in timeline Open media editor for clip
B Send preview clip to the primary
track on the timeline (at scrubber
position)
H Swap Preview between timeline and
source
Ctrl+5 Open Title Editor
F5 Show/Hide Audio Mixer
F7 Create Song
Numeric pad + Zoom in the timeline
Numeric pad - Zoom out the timeline
[ (left bracket) Zoom out on the timeline
] (right bracket) Zoom in on the timeline
Ctrl+[ Fit timeline to window
Ctrl+] Show every frame (zoom in)
Alt Provides the alternate behavior when
editing on the timeline (insert/
overwrite)
TTrim Mode On/Off
Right Trim 1 frame right (with trim open)
Left Trim 1 frame left (with trim open)
Shift+ Right Trim 10 frames right (with trim
open)
Shift+ Left Trim 10 frames left (with trim open)
Ctrl+Click on trim Add second trim point to the same
track
Movie interface

444 Pinnacle Studio User Guide
Shift+Click on trim Open similar trim point on all tracks
Tab Cycle focus on open trim points
Media editors
Numbers 1-8 Choose a corrections or effects
category
Double-click slider Return slider to default
Ctrl+L Rotate Photo Left
Ctrl+R Rotate Photo Right
Alt+Enter Play using full screen
Esc Exit full-screen viewing
Title Editor
Shift+Left Expand character selection left
Shift+Right Expand character selection right
Shift+Ctrl+Left Same as Shift+Left (expand by
word)
Shift+Ctrl+Right Same as Shift+Right (expand by
word)
Ctrl+B Toggle bold
Ctrl+I Toggle italic
Ctrl+U Toggle underline
Ctrl+A Select all
Ctrl+D Deselect all
Spacebar With timeline area selected: Start
and stop playback
Movie interface

Appendix E: The installation manager 445
Appendix E: The installation manager
The Pinnacle Studio Installation Manager looks after the job of
installing Pinnacle Studio and any additional content included in your
purchase of the application.
Before you begin
For a trouble-free installation of Pinnacle Studio, we recommend a
number of preparatory steps.
Begin by confirming that your computer meets the minimum system
requirements for the product. Note that some operations, such as
AVCHD encoding, have more stringent requirements. For more
information, see “System requirements” on page 448.
Next, ensure that your Studio serial number is available. For a
downloaded copy of the application, you will find this information in
your order confirmation mail; you can also retrieve it from your
customer account. If you obtained your copy of Pinnacle Studio on
disc, the serial number will be found on the DVD sleeve. We
recommend that you keep a record of your serial number in a safe
place.
On some systems, it may be advisable to disable antivirus protection
before installing Pinnacle Studio.
Note: Pinnacle Studio can be installed on a system containing a
previous Studio installation: both versions will coexist.

446 Pinnacle Studio User Guide
Upgrade Installation
If a qualifying previous version of the software is currently installed on
the computer, the Installation Manager will automatically recognize its
presence and permit the upgrade.
Qualifying versions include:
• Pinnacle Studio 10 to 18
•Avid Studio
• Avid Liquid 6 to 7
If none of these is currently installed on the machine, you will be
prompted to provide instead the serial number of the previous
product.
Launching the Installation Manager
If you bought Studio from an Internet store as a downloadable file, the
Installation Manager will start when you run the executable program
you downloaded. (Even before you do so, consider making a copy of
the downloaded files to a back-up location like a DVD or an external
hard drive.)
If you bought Studio on a DVD disc, the Installation Manager will
autostart on most systems when that disc is inserted. If it does not
launch automatically on your computer, please locate and run the file
“Welcome.exe” in the root directory of the DVD.
Registration
Your first launch of the Installation Manager begins by displaying an
input form for activating and registering your product. Although you
are allowed to activate Pinnacle Studio (validating your user license)

Appendix E: The installation manager 447
without registering the product, registration is recommended. In
addition to making possible streamlined product support for problems
like losing your serial number.
Supporting installations
The application requires a number of Windows software components,
including the .NET Framework, to be present on your system. The
Installation Manager determines automatically if the components are
available, and installs them if necessary. Such supporting installations
require additional time, but the main Pinnacle Studio installation will
resume as soon as they have completed, even if the system was
restarted in the process.
The Welcome Screen
The Welcome Screen lets you choose between two styles of
installation:
Standard Installation installs the application and all available plug-ins.
It is recommended for most users.
The Customized Installation option lets you choose to install only a
subset of the add-ons available.
Common controls
Some controls are available under either installation method:
• The Change installer location button lets you specify the folder
that contains the installation files you want the Installation
Manager to handle. You will only need to use it if you have moved
the installation files after first use. The button opens a folder

448 Pinnacle Studio User Guide
browser that lets you point the Installation Manager to the new
location.
• The links provided under Learn while installing give access to
information on just about any Studio-related topic.
Installing plugs-ins and bonus content
As described above, the Installation Manager can optionally install a
rich variety of content in addition to the Pinnacle Studio application
itself. In a Standard Installation, all available add-ons and plug-ins are
installed. In a Customized Installation, you can choose exactly which
items to install.
Even if you elect not to install particular content items during the initial
installation of the application, you may return to the Installation
Manager at any time to update your installation.
System requirements
In addition to your Pinnacle Studio software, an efficient editing
system requires certain levels of system performance as noted below.
Remember too that while specifications are important, they do not tell
the whole story. For instance, the proper functioning of hardware
devices can also depend on manufacturer-supplied driver software.
Checking the maker’s web-site for driver updates and support
information can often be helpful in solving problems with graphics
cards, sound cards and other devices.
Operating system
A 64-bit operating system is recommended if you are planning to edit
HD material.

Appendix E: The installation manager 449
RAM
The more RAM you have, the easier it is to work with Pinnacle Studio.
You will need at least 1 GB of RAM to achieve satisfactory operation,
and we highly recommend 2 GB (or more). If you work with HD or
AVCHD video, the recommendation rises to 4 GB.
Motherboard
Intel Pentium or AMD Athlon 2.4 GHz or higher – the higher the better.
AVCHD editing demands a more powerful CPU. The minimum
recommendation ranges up to 2.66 GHz for editing 1920- pixel
AVCHD video. A multi-core system like Core i7, Core i5 or Core i3 is
recommended.
Graphics card
To run Studio, your DirectX-compatible graphics card needs:
• For typical use, at least 128 MB of onboard memory (256 MB
preferred).
• For HD and AVCHD, at least 256 MB (512 MB preferred).
The hard drive
Your hard drive must be capable of sustained reading and writing at 4
MB/sec. Most drives are capable of this. The first time you capture,
Studio will test your drive to make sure it is fast enough. Video files are
often quite large, so you also need a good amount of available hard
drive space. For instance, video in the DV format fills 3.6 MB of hard
drive space per second of footage: a gigabyte every four and a half
minutes.

450 Pinnacle Studio User Guide
For capture from video tape, we recommend using a separate hard
drive to avoid competition between Pinnacle Studio and other
software, including Windows, for use of the drive.
Video capture hardware
Studio can capture video from a variety of digital and analog sources:
• All types of auxiliary file-based storage media, including optical
drives, memory cards and USB sticks.
• Files from drives connected to the computer.
• DV or HDV video cameras using an IEEE-1394 connection.
• Analog video cameras and recorders.
• DVD and Blu-ray discs.
• Digital still cameras.
Pinnacle Studio™ 19 User Guide
Copyright 2015 Corel Corporation. All rights reserved.
Product specifications, pricing, packaging, technical support and
information (“specifications”) refer to the retail English version only. The
specifications for all other versions (including other language versions)
may vary.
Corel patent information: www.corel.com/patent
INFORMATION IS PROVIDED BY COREL ON AN “AS IS” BASIS, WITHOUT
ANY OTHER WARRANTIES OR CONDITIONS, EXPRESS OR IMPLIED,
INCLUDING, BUT NOT LIMITED TO, WARRANTIES OF MERCHANTABLE
QUALITY, SATISFACTORY QUALITY, MERCHANTABILITY OR FITNESS FOR A
PARTICULAR PURPOSE, OR THOSE ARISING BY LAW, STATUTE, USAGE OF
TRADE, COURSE OF DEALING OR OTHERWISE. THE ENTIRE RISK AS TO
THE RESULTS OF THE INFORMATION PROVIDED OR ITS USE IS ASSUMED
BY YOU. COREL SHALL HAVE NO LIABILITY TO YOU OR ANY OTHER
PERSON OR ENTITY FOR ANY INDIRECT, INCIDENTAL, SPECIAL, OR
CONSEQUENTIAL DAMAGES WHATSOEVER, INCLUDING, BUT NOT
LIMITED TO, LOSS OF REVENUE OR PROFIT, LOST OR DAMAGED DATA OR
OTHER COMMERCIAL OR ECONOMIC LOSS, EVEN IF COREL HAS BEEN
ADVISED OF THE POSSIBILITY OF SUCH DAMAGES, OR THEY ARE
FORESEEABLE. COREL IS ALSO NOT LIABLE FOR ANY CLAIMS MADE BY
ANY THIRD PARTY. COREL’S MAXIMUM AGGREGATE LIABILITY TO YOU
SHALL NOT EXCEED THE COSTS PAID BY YOU TO PURCHASE THE
MATERIALS. SOME STATES/COUNTRIES DO NOT ALLOW EXCLUSIONS OR
LIMITATIONS OF LIABILITY FOR CONSEQUENTIAL OR INCIDENTAL
DAMAGES, SO THE ABOVE LIMITATIONS MAY NOT APPLY TO YOU.
© 2015 Corel Corporation. All rights reserved. Corel, the Corel logo, the
Corel Balloon logo, Pinnacle Studio, Dazzle, and MovieBox are trademarks
or registered trademarks of Corel Corporation and/or its subsidiaries. All
other product names and any registered and unregistered trademarks
mentioned are used for identification purposes only and remain the
exclusive property of their respective owners.
Please respect the Rights of Artists and Creators. Content such as music,
photos, video and celebrity images are protected by the laws of many
countries. You may not use other people's content unless you own the
rights or have the permission of the owner.