Pinnacle Studio 9 Plus 02 Us M3 M2 Man 9.0 Quick Start Guide E
User Manual: pinnacle Studio - 9.0 - Quick Start Guide Free User Guide for Pinnacle Studio Software, Manual
Open the PDF directly: View PDF ![]() .
.
Page Count: 377 [warning: Documents this large are best viewed by clicking the View PDF Link!]
Pinnacle Studio 9
Including Studio SE, Studio QuickStart,
Studio Standard and Studio Plus
Easy, MORE Powerful,
MORE Creative Video Editing
ii Pinnacle Studio 9
Special thanks to Mike Iampietro, William Chien, Richard Edgley,
Ivan Maltz, Jon McGowan, Keith Thomson, Jörg Weselmann, and
Chris Zamara.
Documentation: Nick Sullivan
Copyright © 1996-2004 Pinnacle Systems, Inc. and its licensors. All
rights reserved. You agree not to remove any product identification
or notices of the property restrictions from Pinnacle Systems’
products or manuals. Pinnacle Systems, Pinnacle Studio Plus,
TitleDeko, RTFx and VST are registered trademarks and/or
trademarks of Pinnacle Systems, Inc. and its subsidiaries in the
United States and other countries.
Manufactured under license from Dolby Laboratories. © 1992-2003
Dolby Laboratories. All rights reserved. Dolby is a trademark of
Dolby Laboratories. mpegable DS 2.2 © 2004 Dicas Digital Image
Coding GmbH. Pentium, Centrino, the Intel Centrino logo and the
Intel Inside logo are trademarks or registered trademarks of Intel
Corporation or its subsidiaries in the United States and other
countries. QDesign MPEG-1 Layer 2 Fast Encoder/Decoder © 1996-
2002 by QDesign Corporation. QuickTime and the QuickTime logo
are trademarks used under license. The QuickTime logo is registered
in the U.S. and other countries. The RealProducer is included under
license from RealNetworks, Inc. Real Producer version 8.0.
copyright 1995-2002, RealNetworks, Inc. “RealProducer",
“RealVideo,” “RealServer,” and “Real” logo are trademarks or
registered trademarks of RealNetworks, Inc. All rights reserved.
SmartSound is a registered trademark of SmartSound Inc.
Windows Media is a trademark of Microsoft Corporation. All other
trademarks are the property of their respective owners.
No part of this manual may be copied or distributed, transmitted,
transcribed, stored in a retrieval system, or translated into any human
or computer language, in any form by any means, electronic,
mechanical, magnetic, manual, or otherwise, without the express
written permission of Pinnacle Systems, Inc.
Pinnacle Systems, Inc.
280 North Bernardo Avenue
Mountain View, CA 94943
Printed in the USA.
Table of contents iii
Table of contents
BEFORE YOU START..................................................XI
Equipment requirements.........................................................................xi
Abbreviations and conventions.............................................................xiv
On-line help........................................................................................... xv
CHAPTER 1: USING STUDIO ....................................... 1
Undo, Redo, Help and Unlock................................................................. 2
Setting options......................................................................................... 3
Edit mode .................................................................................................... 5
The Player................................................................................................6
Playback controls..................................................................................... 8
Further editing topics............................................................................. 11
Expanding Studio .................................................................................. 11
CHAPTER 2: CAPTURING VIDEO.............................. 15
The Capture mode interface.................................................................... 17
The Diskometer ..................................................................................... 19
The Camcorder Controller..................................................................... 20
The capture process..................................................................................21
Capture hardware................................................................................... 21
Capture step-by-step .............................................................................. 23
Scene detection ...................................................................................... 25
iv Pinnacle Studio 9
Digital capture .......................................................................................... 26
SmartCapture: Preview-quality capture................................................. 27
Full-quality capture................................................................................ 29
Audio and video levels – digital ............................................................ 31
Analog capture.......................................................................................... 32
Capture quality options.......................................................................... 32
Audio and video levels – analog............................................................ 33
CHAPTER 3: THE ALBUM .......................................... 35
The Video Scenes section ......................................................................... 38
Opening a captured video file................................................................ 40
Viewing captured video......................................................................... 43
Selecting scenes and files ......................................................................44
Displaying scene and file information................................................... 45
Comment view.......................................................................................46
Combining and subdividing scenes .......................................................47
Redetecting scenes................................................................................. 49
The Transitions section............................................................................ 50
The Titles section...................................................................................... 52
The Still Images section ...........................................................................53
The Sound Effects section........................................................................ 54
The Disc Menus section............................................................................ 56
CHAPTER 4: THE MOVIE WINDOW........................... 59
Movie Window views................................................................................62
Storyboard view..................................................................................... 62
Timeline view........................................................................................ 63
Text view............................................................................................... 67
The toolboxes ............................................................................................ 67
The Video toolbox................................................................................. 69
The Audio toolbox................................................................................. 71
Table of contents v
CHAPTER 5: VIDEO CLIPS ........................................ 73
Video clip basics ....................................................................................... 74
Adding video clips to your movie ......................................................... 74
Working with multiple capture files...................................................... 75
Interface features ................................................................................... 76
Trimming video clips................................................................................78
Trimming on the Timeline using handles.............................................. 78
Clip-trimming tips .................................................................................82
Trimming with the Clip properties tool................................................. 83
Resetting trimmed clips......................................................................... 85
Splitting and combining clips .................................................................. 86
Advanced Timeline editing ...................................................................... 87
Insert editing..........................................................................................89
Split editing ...........................................................................................91
Using video effects .................................................................................... 95
Working with the effects list..................................................................96
Changing effect parameters ................................................................... 98
Fading effects in and out .......................................................................99
Previewing and rendering.................................................................... 100
Video effects – the basic set....................................................................101
Cleaning effects....................................................................................... 103
Auto color correct................................................................................ 103
Noise reduction.................................................................................... 104
Stabilize ............................................................................................... 104
Time effects ............................................................................................. 105
Speed ................................................................................................... 105
Strobe................................................................................................... 106
Color effects ............................................................................................ 107
Black and white ................................................................................... 107
Color correction................................................................................... 108
Posterize .............................................................................................. 108
Sepia .................................................................................................... 109
vi Pinnacle Studio 9
Fun effects ............................................................................................... 109
Lens flare............................................................................................. 110
Noise.................................................................................................... 110
Water drop........................................................................................... 111
Style effects..............................................................................................112
Blur...................................................................................................... 112
Emboss ................................................................................................ 113
Mosaic ................................................................................................. 113
Old film ............................................................................................... 114
Stained glass ........................................................................................ 115
The SmartMovie music video tool......................................................... 115
CHAPTER 6:
TWO-TRACK EDITING WITH STUDIO PLUS ... 119
Introducing the overlay track...............................................................119
A/B editing .......................................................................................... 121
The Picture-in-picture tool................................................................... 123
The Chroma key tool ........................................................................... 128
Selecting colors ................................................................................... 135
CHAPTER 7: TRANSITIONS..................................... 137
Transition types and their uses ............................................................ 138
Previewing transitions in your movie ..................................................141
Audio transitions ................................................................................. 142
The Ripple Transition command ......................................................... 143
Trimming transitions ............................................................................. 144
Trimming with the Clip properties tool............................................... 145
CHAPTER 8: STILL IMAGES .................................... 147
Editing still images ................................................................................. 150
Editing image clip properties............................................................... 150
The Frame Grabber ............................................................................... 158
The Frame grabber tool ....................................................................... 158
Table of contents vii
CHAPTER 9: DISC MENUS....................................... 161
Disc authoring in Studio...................................................................... 163
Using menus from the Album..............................................................165
The DVD Player Control ..................................................................... 167
Editing menus on the Timeline............................................................ 168
Editing with the Clip properties tool ................................................... 170
The Disc menu tool.............................................................................. 175
CHAPTER 10: THE TITLE EDITOR .......................... 177
Launching the Title Editor................................................................... 178
The Title Editor controls ....................................................................... 179
Title-type buttons................................................................................. 179
Object toolbox ..................................................................................... 180
Editing-mode selection buttons ........................................................... 183
Object layout buttons........................................................................... 185
Clipboard and delete buttons ............................................................... 187
Text-styling controls............................................................................ 187
The Title Editor Album .........................................................................189
The Looks Browser ............................................................................. 189
The Backgrounds section..................................................................... 191
The Pictures section............................................................................. 192
The Buttons section ............................................................................. 193
CHAPTER 11: SOUND EFFECTS AND MUSIC........ 197
The Timeline audio tracks ...................................................................199
The CD audio tool ............................................................................... 201
The SmartSound tool ........................................................................... 203
The Voice-over tool .............................................................................205
Trimming audio clips ............................................................................. 208
Trimming with the Clip properties tool............................................... 208
Audio volume and mixing...................................................................... 210
Anatomy of an audio clip .................................................................... 211
Adjusting audio on the Timeline ......................................................... 213
The Volume and balance tool.............................................................. 215
viii Pinnacle Studio 9
Audio effects............................................................................................ 220
Noise reduction.................................................................................... 221
Equalizer.............................................................................................. 223
Grungelizer .......................................................................................... 224
Karaoke ............................................................................................... 225
Leveler................................................................................................. 226
Reverb ................................................................................................. 226
CHAPTER 12: MAKING YOUR MOVIE..................... 229
Outputting to a camera or video recorder... ......................................... 231
Output your movie to videotape .......................................................... 232
Save your movie as an AVI file........................................................... 234
Save your movie as an MPEG file....................................................... 237
Save as RealVideo or Windows Media ............................................... 239
Share your movie via the Internet........................................................ 240
Output your movie to DVD, VCD or S-VCD......................................242
Copying an AVI file to tape................................................................. 245
APPENDIX A: SETUP OPTIONS .............................. 247
Capture source settings........................................................................ 248
Capture format settings........................................................................ 252
Edit settings .........................................................................................256
CD and voice-over settings.................................................................. 260
Make tape settings ............................................................................... 262
Make AVI file settings ........................................................................ 264
Make MPEG file settings .................................................................... 266
Make RealVideo file settings...............................................................268
Make Windows Media file settings .....................................................271
Make disc settings ............................................................................... 272
APPENDIX B: TIPS AND TRICKS ............................ 277
Hardware ............................................................................................. 277
Software............................................................................................... 279
Increasing the frame rate ..................................................................... 281
Studio and computer animation........................................................... 282
Smart Capture Tips (DV only) ............................................................ 282
Table of contents ix
APPENDIX C: TROUBLESHOOTING ....................... 285
Technical help on-line ............................................................................ 286
Studio crashes in Edit mode ................................................................ 289
Capture error occurs on starting capture.............................................. 294
Studio hangs when rendering...............................................................297
CD or DVD burner is not detected ...................................................... 299
Studio hangs on launch or does not launch.......................................... 300
HollywoodFX transitions are still watermarked after upgrading......... 302
“Cannot initialize the DV capture device” error appears in Capture mode
............................................................................................................. 302
Installation problems ............................................................................. 306
Operation problems ............................................................................... 308
APPENDIX D: VIDEOGRAPHY TIPS ........................ 315
Creating a shooting plan...................................................................... 316
Editing ................................................................................................. 317
Rules of thumb for video editing......................................................... 320
Soundtrack production......................................................................... 322
Title ..................................................................................................... 323
APPENDIX E: GLOSSARY........................................ 325
APPENDIX F: LICENSE AGREEMENT .................... 341
APPENDIX G: KEYBOARD SHORTCUTS................ 345
INDEX ........................................................................ 349

Before you start xi
Before you start
Thank you for purchasing Pinnacle Studio. We hope
you enjoy using the software.
This manual covers all versions of Studio, including
Studio Plus. Differences between versions will be
noted as applicable. Most of the time, the word
“Studio” will be used generically to refer to all versions.
If you have not used Studio before, we recommend that
you keep the manual handy for reference even if you
don’t actually read it all the way through.
In order to ensure that your Studio experience gets off
on the right foot, please review the three topics below
before continuing to Chapter 1: Using Studio.
Equipment requirements
In addition to your Studio software, here is what you
need to make a Studio editing system.
Computer
• Intel Pentium or AMD Athlon 800 MHz or higher
(1.5 GHz or higher recommended)
xii Pinnacle Studio 9
• Microsoft Windows 98 SE, Windows “Millennium”,
Windows 2000 or Windows XP (recommended).
The MicroMV digital video format is supported only
under Windows XP.
• Graphics card compatible with DirectX 9 (ATI
Radeon or NVIDIA GeForce2 or higher
recommended)
• Sound card compatible with DirectX 9
• Audio system with Dolby Pro Logic compatibility if
previewing surround-sound mixes is required
• 256 MB of RAM (512 MB recommended)
• CD-ROM drive
• DVD drive for installing the bonus DVD containing
tutorial, electronic manual and bonus content. The
same content is available free on CD-ROMs from
the Pinnacle e-store (shipping cost not included).
• Speakers
• Mouse
• A microphone, if you want to record voice-overs
• 500 MB of free hard drive space to install software
• Optional CD burner for creating VideoCDs (VCDs)
or Super-VideoCDs (S-VCDs)
• Optional DVD burner for creating DVDs
The hard drive
Your hard drive must be capable of sustained reading
and writing at 4 MB/sec. Most drives are capable of
this. The first time you capture at full quality, Studio
will test your drive to make sure it is fast enough.
Video in the DV format occupies 3.6 MB of hard drive
space per second, so just four and a half minutes of DV
video will consume a full gigabyte on the drive.

Before you start xiii
If disk space is a concern with your DV captures, use
SmartCapture to capture your video at preview quality
(see “SmartCapture: Preview-quality capture” on page
27). This feature uses much less disk space. An entire
tape can fit in as little as 360 MB.
Tip: We recommend using a separate hard drive
dedicated to video capture. This avoids competition
between Studio and other software, including
Windows, for use of the drive during capture.
Video capture hardware
Studio can capture video from a variety of digital and
analog sources. Please see “Capture hardware” on page
21.
Video output hardware
Studio can output video to:
• Any DV or Digital8 camcorder or VCR. This
requires an OHCI-compliant IEEE-1394 (FireWire)
port (as provided by Pinnacle Studio DV). The
camcorder must be set up to record from DV Input.
• Any analog (8mm, Hi8, VHS, SVHS, VHS-C or
SVHS-C) camcorder or VCR. This requires Pinnacle
Studio DC10plus, Studio AV, or another Pinnacle
card with analog outputs. Output to analog
camcorders or VCRs is also possible using a
Pinnacle Studio DV or other OHCI-compliant 1394
port if your DV or Digital8 camcorder or VCR can
pass a DV signal through to its analog outputs (see
your camcorder manual and Chapter 12: Making
your movie, for more information).

xiv Pinnacle Studio 9
Abbreviations and conventions
This guide uses the following conventions to help
organize the material.
Terminology
Studio: “Studio” and “Studio Plus” refer to the editing
software.
DV: The term “DV” refers to DV and Digital8
camcorders, VCRs and tapes.
1394: The term “1394” refers to OHCI-compliant
IEEE-1394, FireWire, DV or i.LINK interfaces, ports
and cables.
Analog: The term “analog” refers to 8mm, Hi8, VHS,
SVHS, VHS-C or SVHS-C camcorders, VCRs and
tapes, and to Composite/RCA and S-Video cables and
connectors.
Buttons, menus, dialog boxes and windows
Names of buttons, menus and related items are written
in italics to distinguish them from the surrounding text,
whereas window and dialog names are written with
initial capital letters. For example:
Click the Edit menu button to open your menu in the
Title Editor.
Choosing menu commands
The right arrowhead symbol (¾) denotes the path for
hierarchical menu items. For example:
Select Toolbox ¾ Generate Background Music.

Before you start xv
Keyboard conventions
Key names are spelled with an initial capital and are
underlined. A plus sign denotes a key combination. For
example:
Press Ctrl+A to select all the clips on the Timeline.
Mouse clicks
When a mouse click is required, the default is always a
left-click unless otherwise specified:
Right-click and select Go to Title/Menu Editor.
On-line help
Two kinds of immediate help are always available
while you are working in Studio:
• On-line help: Click the help button in the Studio
main menu bar, or select the Help ¾ Help topics
menu, or press F1 to open Studio’s on-line help file.
• Tool tips: To find out what a button or other Studio
control does, pause your mouse pointer over it. A
“tool tip” appears explaining its function.

Chapter 1: Using Studio 1
CHAPTER 1:
Using Studio
Creating movies with Studio is a three-step process:
1. Capture: Import source video material – your “raw
footage” – to your PC hard drive. Possible sources
include analog videotape (8mm, VHS etc.), digital
videotape (DV, Digital8), and live video from a video
camera, camcorder or webcam.
Capture mode is covered in Chapter 2: Capturing
video.
2. Edit: Arrange your video material as desired by
reordering scenes and discarding unwanted footage.
Add visuals, such as transitions, titles and graphics, and
supplementary audio, such as sound effects and
background music. For DVD and VCD authoring,
create interactive menus that give your audience a
customized viewing experience.
Edit mode is the arena for most of your work in Studio.
See “Edit mode” later in this chapter (page 5) for a
fuller introduction.
3. Make movie: When your project is complete,
generate a finished movie in your choice of format and
storage medium: tape, VCD, S-VCD, DVD, AVI,
MPEG, RealVideo or Windows Media.
Make Movie mode is covered in Chapter 12: Making
your movie.
2 Pinnacle Studio 9
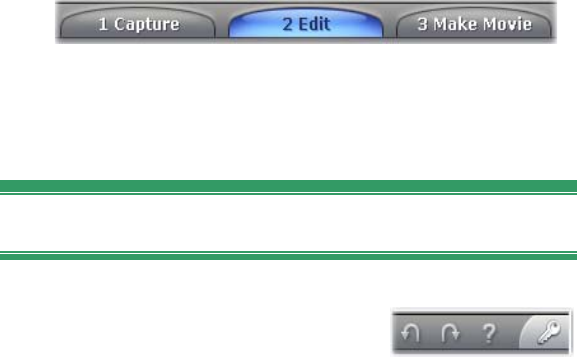
Setting the mode
Select which step of the movie-making process you
want to work on by clicking one of the three mode
buttons at the top left of the Studio window:
When you switch modes, the Studio screen changes to
display the controls needed for the new mode.
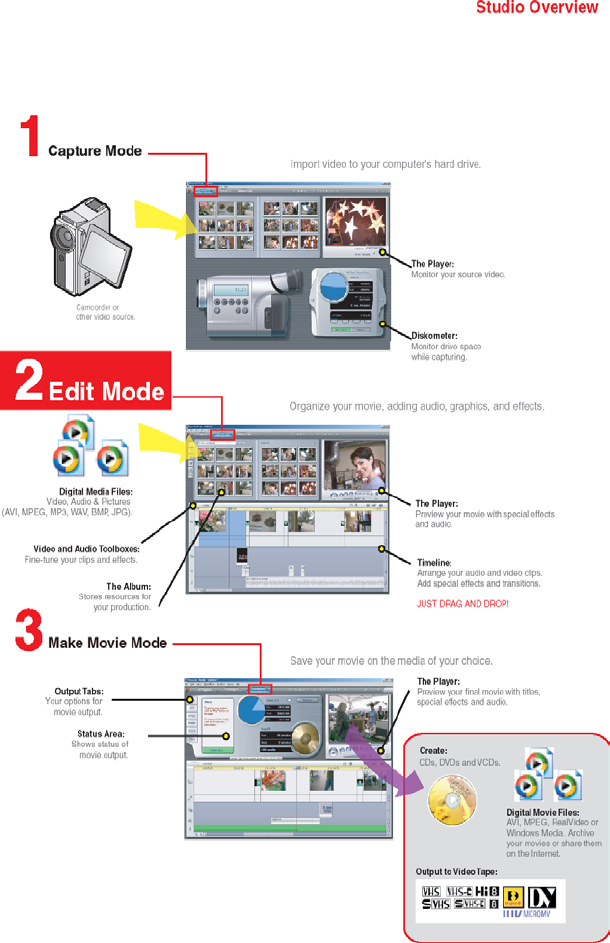
Undo, Redo, Help and Unlock
The Undo, Redo, Help and
Unlock buttons are always to be
found in the top right corner of the Studio window, no
matter which of the three modes you are currently
working in.
• Undo allows you to back out of any changes you
have made to your project during the current session,
one step at a time.
• Redo reinstates the changes one by one if you undo
too far.
• The Help button launches Studio’s on-line help
system.
• The Unlock button lets you expand Studio by
purchasing and installing premium content. (See
page 11 for details.)
All other controls on the Studio screen are dedicated
to tasks within the current mode.
Chapter 1: Using Studio 3
4 Pinnacle Studio 9
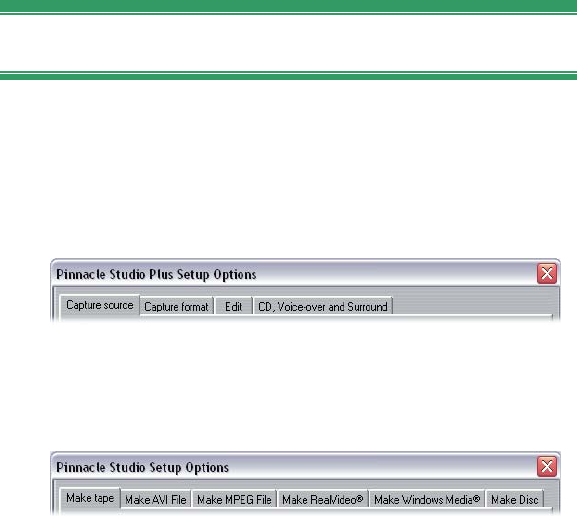
Setting options
Most options in Studio are set using two tabbed dialog
boxes.
The first lets you control options related to Capture
mode and Edit mode. It has four tabs:
The other dialog box is concerned with options relating
to Make Movie mode. It has six tabs, one for each of
the six movie output types:
Each panel of both dialog boxes can be opened
individually with a corresponding command on the
Setup menu (e.g. Setup ¾ Capture Source). Once either
dialog box is open, however, all of its panels are
available through the tabs.
For simplicity, we generally refer to the different
options panels independently, as in “the Capture
source options panel”.
Detailed explanations of the options in both dialog
boxes are contained in Appendix A: Setup Options.
Chapter 1: Using Studio 5
EDIT MODE
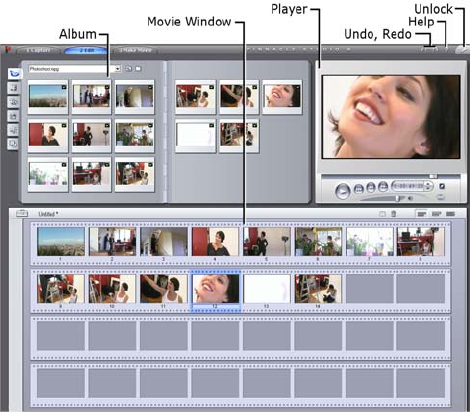
Studio opens in Edit mode each time it is launched,
because that is the mode you use most often. The Edit
mode display includes three main areas.
The Album stores resources you will use in your
movies, including your captured video scenes.
The Movie Window is where you create your edited
movie by arranging video and sound clips, and by
applying transitions and effects.
The Player provides playback and previewing for
whichever item is currently selected in Studio. That
may be an Album resource – such as a video scene,
title or sound effect – or your edited movie, complete
with transitions, titles, effects and several audio tracks.
The Player is covered below.
6 Pinnacle Studio 9
See Chapter 3: The Album and Chapter 4: The Movie
Window for detailed information on those topics.
The Player
The Player displays a preview of your edited movie, or
of the item currently selected in the Album.
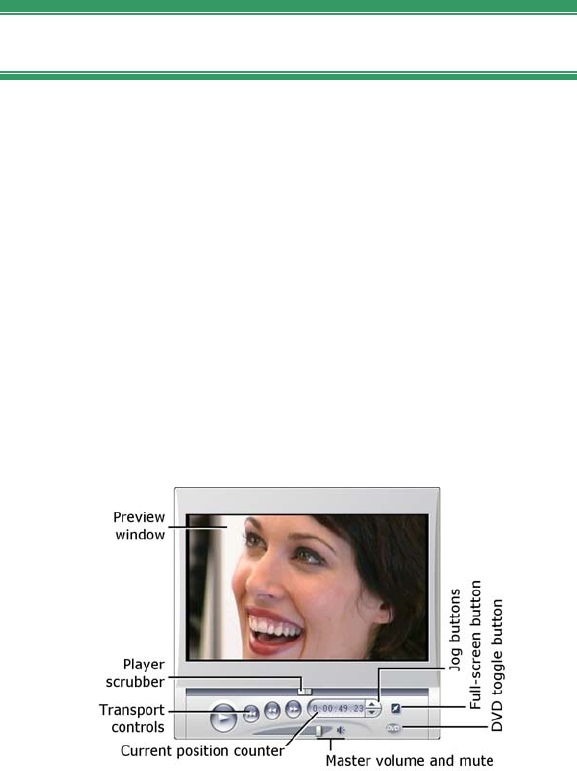
It consists of two main areas: a preview window and
playback controls. The preview window displays video
images. The playback controls allow you to play the
video, or go to an exact position within it. These
controls come in two formats: standard and DVD.
Standard mode
The standard playback controls are similar to those on a
camcorder or VCR. They are used for viewing ordinary
video.
DVD mode
The DVD playback controls emulate the navigation
controls on a DVD player or remote control. Use them
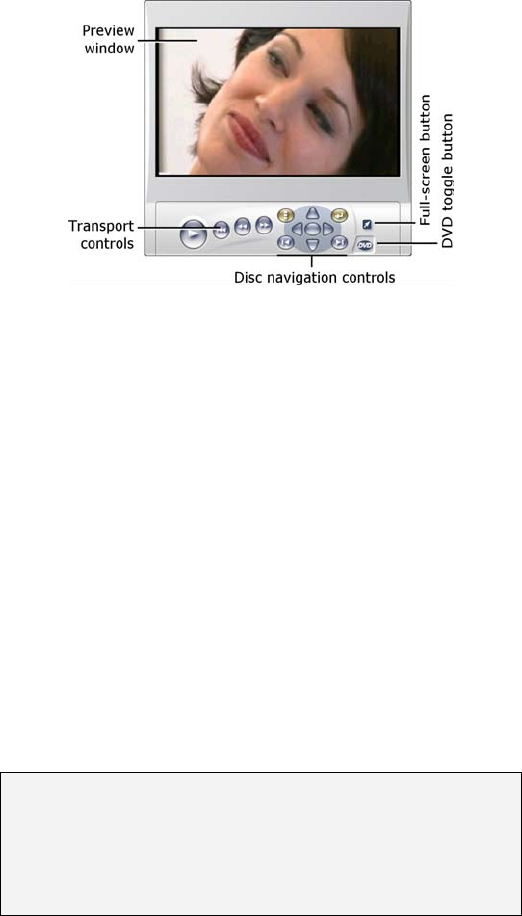
Chapter 1: Using Studio 7
for previewing your DVD, VCD or S-VCD disc
productions, including menu interaction.
The preview window
This is a point of focus in Studio because you use it so
often, especially for previewing your movie. It can also
be used to display:
• Any type of Album content.
• Still images or titles from your movie.
• Changes to video effects in real time while you
adjust the parameter controls for the effects.
• Still frames from your video.
While viewing a still frame, you can step by as little
as a single frame in either direction with the “jog”
controls.
Note: The illustrations in this documentation use 16:9
(widescreen) video. When 4:3 (standard) video is
previewed, the Player is proportioned somewhat
differently than shown here, but its general appearance
is the same.
8 Pinnacle Studio 9
The DVD toggle button
Switch between the two playback modes with
the DVD toggle button at the bottom right-hand
corner of the Player. This button is only available when
your edited movie contains at least one menu.
Playback controls
The Player presents either of two sets of playback
controls depending on the playback mode you choose.
When you play your movie back as ordinary video, you
will be using the standard playback controls. If your
movie uses disc menu navigation, you can play it back
as an optical disc with interactive on-screen menus by
using the DVD playback controls. Both groups of
controls are covered below.
The full-screen preview button: This button, just
below the bottom right-hand corner of the
preview window, switches to a full-screen preview. It
is available in both playback modes. The full-screen
display ends when your movie ends, or you double-
click the screen or press the Esc key.
Standard playback controls
These buttons control playback in the Player.
Play / Pause: The Play button previews the
movie from the current position. Once preview
begins, Play becomes Pause. When playback is
paused, the Album scene or Movie Window clip
at which previewing stopped remains selected. The
[Space] key can also be used to start and stop playback.
Chapter 1: Using Studio 9
Fast reverse, Fast forward: These buttons let
you preview your movie at two, four or ten times
the normal speed, in either direction. Use them to
scan for a particular piece of video you want to
work with. Click the buttons repeatedly to loop through
the speed factors.
Go to beginning: This button halts playback and
skips back to the first frame of the material being
previewed.
Jog buttons: This pair of controls normally steps
your movie forward and backward by one frame
at a time. To step by seconds, minutes or hours instead
of frames, select the corresponding field in the counter
(see below), then use the jog buttons to modify it.
The Player scrubber
Use the Player scrubber to quickly traverse your
captured video or edited movie in either direction. The
scrubber position corresponds to the position of the
current frame in the captured video file (not just the
current scene) or in the edited movie (not just the
current clip). Thus the scrubber bar always represents
the entire length of the content being viewed.
As you move the scrubber, the preview window shows
the current frame.
The ability of the preview to keep up with the scrubber
depends on the speed of your computer. If you move
the Player scrubber slowly, the preview display
responds smoothly. As you increase the rate at which
you move the scrubber, the preview will jump frames.
The point at which it does so depends on your
hardware. The smoothness of the preview also
diminishes as the overall length of the material being
scrubbed increases.
10 Pinnacle Studio 9
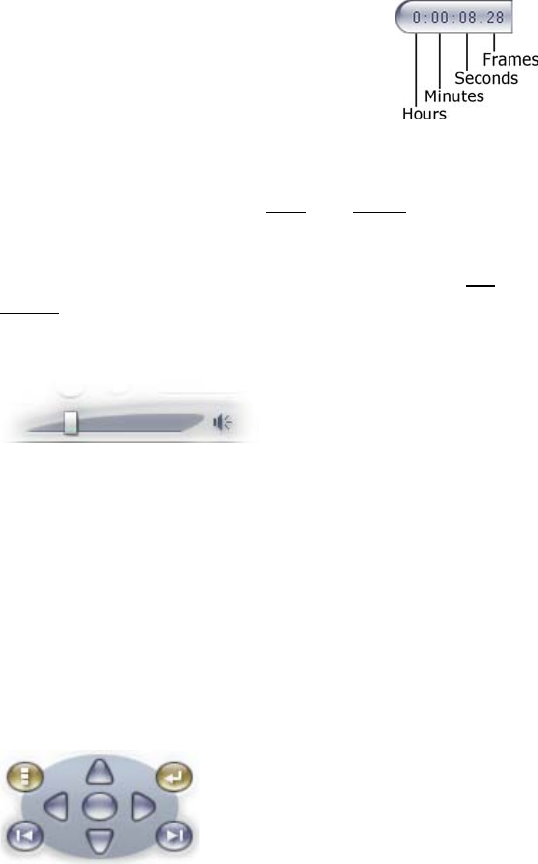
The counter
The counter displays the current
playback position in hours, minutes,
seconds and frames. You can directly
modify the counter fields to select an
exact frame to view or at which to start
playback. Simply click on the number you wish to
change and type a new value. To move to a different
field, click again or use the Left and Right arrow keys.
You can also modify the value in a selected field by
using the jog buttons beside the counter or the Up and
Down arrow keys.
The master volume slider
This control sets the overall audio volume during
preview playback. It is equivalent to turning up the
master volume on your sound card using the system
volume tool. It does not affect the volume of the final
movie Studio creates in Make Movie mode.
The small loudspeaker icon at the right of the control
serves as a master mute button during playback.
DVD playback controls
These controls include the four
standard transport buttons
detailed above (Play/Pause, Fast
reverse, Fast forward, Go to
beginning) plus the DVD Player
Control, which is described under “The DVD Player
Control” on page 167.

Chapter 1: Using Studio 11
Further editing topics
Please see the following for details on specific editing
topics:
• Chapter 5: Video clips
• Chapter 6: Two-track editing with Studio Plus
• Chapter 8: Transitions
• Chapter 8: Still images
• Chapter 9: Disc menus
• Chapter 10: The Title Editor
• Chapter 11: Sound effects and music
Expanding Studio
One way to add pizzazz to your productions is to use a
variety of video and audio filters, animated transitions,
VCD and DVD menus, and sound effects.
Studio comes with comprehensive collections in all
these areas, but it’s also designed to grow along with
your needs. When you want a particular filter,
transition, menu or effect that isn’t part of the basic set,
an easy-to-use upgrade mechanism lets you find,
purchase and install the materials you need without
even leaving the program.
Some of the premium content available for
Studio does not even require downloading.
Studio’s Bonus Content DVD includes
numerous items, like the disc menu at left, that
initially appear as “locked” content in Studio,
12 Pinnacle Studio 9
symbolized by a small padlock symbol in the top-left
corner of the icon. Such items can be upgraded by
purchasing an unlocking code called an activation key.
Each key unlocks a small group or theme pack of
related content.
Additional items of locked content will be provided for
download as they become available. These items can
sampled and purchased within Studio using the same
activation method as for the premium content included
with the program installation.
New tools, new media, new frontiers
You can purchase additional media and filters in any of
three ways from within Studio:
• With the Help ¾ Purchase activation keys
menu command (or the unlock shortcut
button at the top right of the Studio screen).
This opens a special browser window in which you
can access a catalog page for any type of premium
content that interests you.
• With the Album commands More transitions, More
sound effects and More menus.
These commands are found on the dropdown lists in
the corresponding sections of the Album. They will
enable you to download, try out and purchase
additional premium content that was not included
with the program installation.
• By clicking the unlock theme pack buttons found in
some parts of Studio.
These buttons can be found whenever premium
content is on display within Studio. The one above,
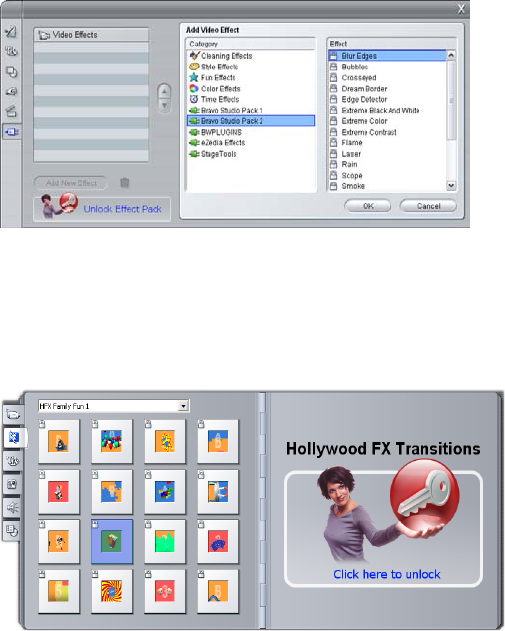
Chapter 1: Using Studio 13
when seen in the Audio effects tool and the Video
effects tool, would let you unlock a pack of audio or
video filters.
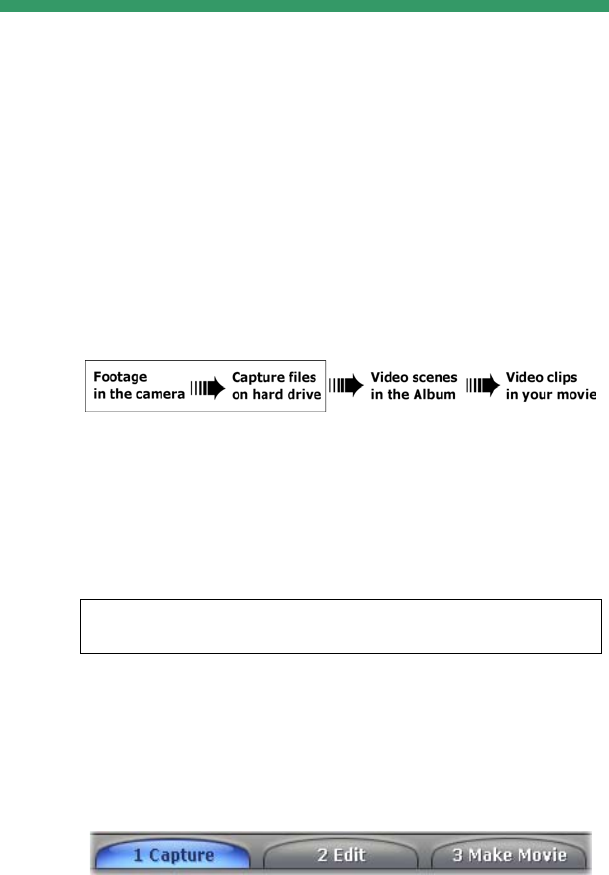
Here, the “Bravo Studio Pack 2” page is open in the
Video Effects tool. The Unlock Effect Pack button
could now be used to unlock the effects in this set.
Similar buttons in the Album let you purchase all the
media on a particular Album page as a theme pack.
The Transitions section of the Album, open to the
“HFX Family Fun 1” theme pack of Hollywood FX
transitions. Click anywhere in the unlock panel on
the right-hand page to unlock this set of transitions.
How unlocking works
“Unlocking” premium content for Studio means to
obtain a license allowing you unrestricted use of the
content on the single machine where Studio is installed.

14 Pinnacle Studio 9
The licensing mechanism employs two distinct but
mutually related codes:
• An activation key for each premium content item
you purchase
• Your Passport, which is a number generated the first
time you install Studio on your computer. You can
view your Passport by selecting the Help ¾ My
Passport menu command.
Because the Passport is specific to one computer, you
will need to obtain new activation keys if you install
Studio on a different machine. These will be provided
at no charge, but your user licenses for both Studio and
any premium content you have obtained then apply to
the new machine only.
Note: Although your Passport is specific to an
individual computer, it is not affected by ordinary
hardware modifications such as adding or removing
expansion cards, drives or memory.
If you don’t have an Internet connection...
You can purchase and apply premium content
activation keys even if you don’t have an Internet
connection on the computer where Studio is installed.
When you click one of the unlock links within Studio, a
dialog will be displayed showing information needed
for ordering the specific content you want, including:
• An Internet URL where you can activate the content
• Numeric identifiers for the Studio program and the
item you want to activate
• Your Passport and your Serial Number
Navigate to the given URL from another computer,
enter the information, and complete the purchase as
directed.
Chapter 2: Capturing video 15
CHAPTER 2:
Capturing video
Capture is the process of importing video from a video
source such as a camcorder to a file on your PC’s hard
drive. Clips from this “capture file” can then be used in
Studio as ingredients of your edited movies. You can
open capture files into the Album in Studio’s Edit
mode (see Chapter 3: The Album).
Capture is the first step in using your video footage.
Studio is able to capture from both digital (DV,
MicroMV) and analog video sources. See “Capture
hardware” on page 21 for details on configuring Studio
to capture from your equipment.
Availability: Capturing video from MicroMV camcorders is supported
only under Windows XP.
Switching to Capture mode
The very first step in capturing is to switch into
Studio’s Capture mode by clicking the Capture button
at the top of the screen.
16 Pinnacle Studio 9
This opens the Capture mode interface, enabling you to
set up and carry out video capture. The details of the
interface are somewhat different for analog than for
digital video sources.
Topics in this chapter
• “The Capture mode interface” (below) introduces the
controls and displays for both analog and digital
captures.
• “The Capture Process” (page 21) covers setting up
for your hardware, gives step-by-step capturing
instructions, and describes the automatic scene
detection feature.
• “Digital capture” (page 26) and “Analog capture”
(page 32) cover topics specific to each type of source.
Chapter 2: Capturing video 17
THE CAPTURE MODE INTERFACE
The tools and controls you see in Capture mode are
different depending on whether your capture hardware
is digital or analog.
Digital capture
If your video source is digital, your Capture mode
screen will look like this:
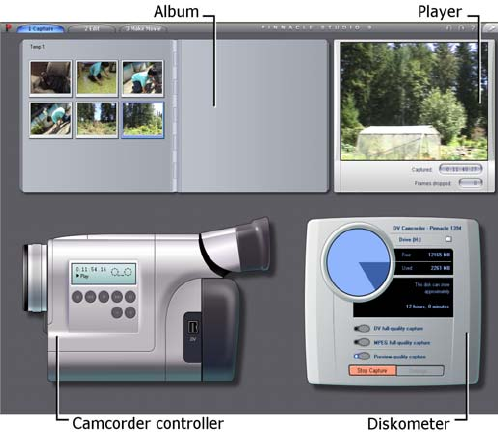
The Album, at the top left of the screen, displays icons
representing the video scenes as they are captured. The
Player, at top right, lets you view the incoming video
while cueing for capture, and monitor the capture itself.
Readouts on the Player tell you the exact length of the
captured video, and the number of frames dropped
during the capture (normally zero).
18 Pinnacle Studio 9
The Camcorder Controller, at bottom left, provides a
tape counter display and a set of transport controls for
operating the playback device. Finally, the Diskometer,
at bottom right, displays the capture space remaining
on the drive. It also provides the Start Capture button
and buttons for setting capture options.
The Diskometer and the Camcorder Controller are
described in detail beginning on page 19.
Analog capture
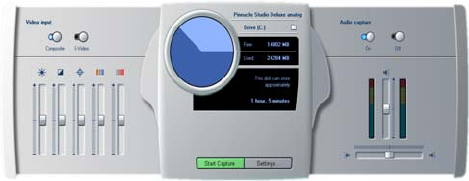
Both the Album and the Player are used in analog as
well as digital captures, so when you capture from an
analog source the top half of the screen is the same as
shown and described above for digital sources.
Not the bottom half of the screen, however. It now
features a second version of the Diskometer, with two
fly-out panels for adjusting audio and video levels
during capture. (The panels are described under “Audio
and video levels – analog” on page 33.)
Digital vs. analog
To summarize, the digital and analog setups reflect two
major differences in capability:
• The digital setup lets you control the tape transport
of the camcorder or VCR using the Camcorder
Controller.
• The analog setup lets you modify audio and video
levels dynamically during capture.
Chapter 2: Capturing video 19
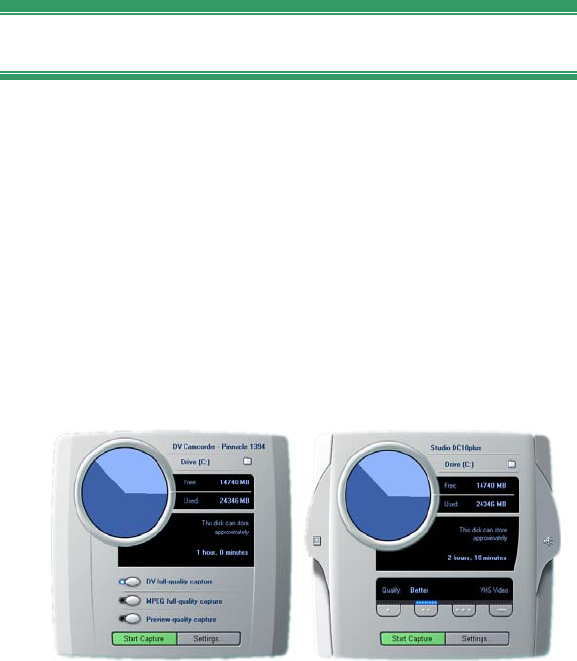
The Diskometer
The Diskometer displays, both numerically and
graphically, the amount of space available on your
capture drive. It also indicates the approximate duration
of video that can be accommodated, which depends on
both the available space and the configured capture
quality. Capture quality settings are selected using the
preset buttons that are displayed on the Diskometer for
some capture devices, or by entering custom settings.
See “Capture source settings” (page 248) and “Capture
format settings” (page 252) for information on capture
settings.
The Diskometer when capturing from a digital
source (L) and an analog source (R). Click the side
tabs on the analog version to open fly-out panels for
adjusting video and audio levels during capture.
The Start capture button on the Diskometer begins and
ends the capture process. The caption changes to Stop
capture while the operation is in progress.
The default save location for captured video is your
system’s Shared video directory.
20 Pinnacle Studio 9
Setting the capture directory: To save captured video
to a different location, click the file folder button .
This displays the Select Folder And Default Name For
Captured Video dialog. The folder you assign will be
used to store captured video during this and future
sessions. The file name you enter will be offered as the
default file name on your next capture.
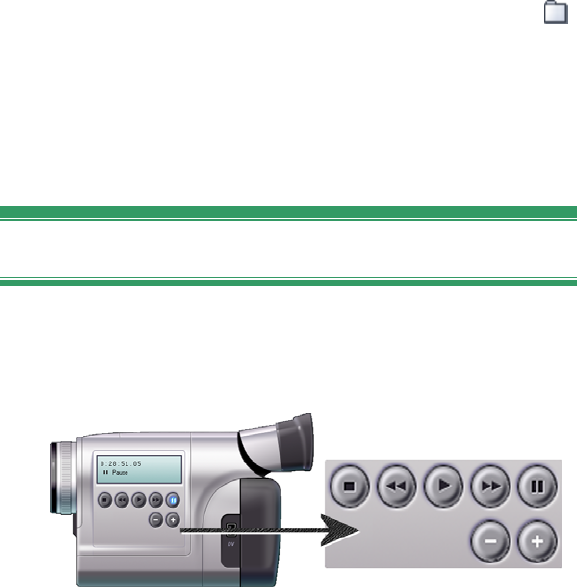
The Camcorder Controller
This panel of transport controls is shown in Capture
mode if you are capturing from a digital video source.
(Analog devices must be cued and operated manually.)
The Camcorder Controller and a close-up view of
the transport controls. The counter window above
the control buttons displays the current position of
the source tape, along with the current transport
mode of the camcorder.
From left to right, the transport control buttons are:
Stop, Rewind / Review, Play, Fast forward / Cue and
Pause.
The Frame reverse and Frame forward buttons (second
row) let you locate the exact frame you want. These
two buttons are available only when the device is in
pause mode.

Chapter 2: Capturing video 21
THE CAPTURE PROCESS
Studio lets you capture video from a variety of analog
and digital hardware types. Choose the device you wish
to use on the Capture source options panel. See
“Capture hardware” (below) for more information.
Performing the actual capture is a straightforward step-
by-step procedure (see page 23). As the capture
proceeds, Studio automatically detects the natural
breaks in the incoming video and divides the material
into “scenes”. Upon detection, each scene is added to
the Album, where it is represented by an icon of its first
frame. Automatic scene detection is described starting
on page 25.
Some capture options apply to digital captures only or
to analog captures only. These are covered in their own
sections, “Digital capture” (page 26) and “Analog
capture” (page 32).
Capture hardware
Studio can capture digital and analog video from the
following sources, depending on your hardware:
• Digital: A DV, MicroMV or Digital8 camcorder
connected to an IEEE-1394 (FireWire) port.
• Analog: A camcorder or VCR with analog outputs
connected to a DirectShow-compatible capture board
or external device.
• Analog: A USB video camera or webcam.
22 Pinnacle Studio 9
Availability: Capturing video from MicroMV camcorders is supported
only under Windows XP.
Pinnacle Systems offers a complete line of DV, analog,
and combination capture boards and devices. For more
information see your dealer or visit our web-site:
www.pinnaclesys.com
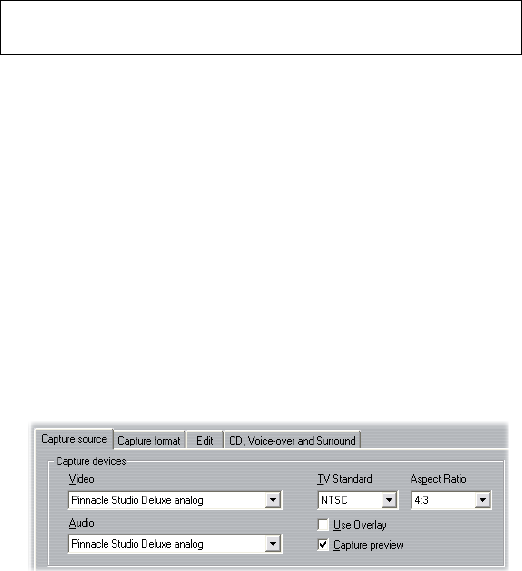
To select a capture device:
1. Click the Setup ¾ Capture Source menu command.
The Capture source options panel appears.
2. Select the devices you want to use from the Video
and Audio dropdown lists in the Capture devices
area, and click OK.
See “Capture source settings” on page 248 for
detailed information about the Capture source
options panel.
Standard vs. widescreen capture
Studio can capture in both the standard (4:3) and the
widescreen (16:9) frame aspect ratios. With digital
hardware, the frame format is detected automatically.
With analog hardware, you use the Aspect ratio
dropdown on the Capture source options panel to
select the format that matches the source material. You
can’t use this setting to change one format to another: it
simply lets Studio know how to display the video at the
correct aspect ratio.

Chapter 2: Capturing video 23
Capture step-by-step
Here is a step-by-step outline of the capture process.
The instructions apply to both digital and analog
captures, with differences noted as required.
Further information relating to some of the steps can be
found elsewhere in this chapter. Also see Appendix A:
Setup Options (page 247) for detailed descriptions of
the Capture source and Capture format options panels.
To capture video:
1. Verify that your equipment is properly connected.
For a digital (DV or MicroMV) capture, your
camcorder or VCR must be connected to your PC’s
1394 port.
For an analog capture, connect the source video to
the Composite or S-Video input of your capture
hardware. Connect your source audio to the audio
input of the capture hardware, if there is one;
otherwise, connect the audio to the audio input of
your PC’s sound card.
2. Click the Capture button at the top of the screen if
you are not already in Capture mode. The Capture
mode interface is displayed (see page 17).
3. Click the desired capture setting on the Diskometer.
If you need to make detailed adjustments, click the
Diskometer’s Settings button, which opens the
Capture format options panel (page 252).
For a DV capture, keep in mind that full-quality
capture uses much more disk space than does
preview quality. If you are planning to output your
finished movie to disc (VCD, S-VCD or DVD),
24 Pinnacle Studio 9
you may choose to make your full-quality capture
in MPEG rather than DV format.
For an analog capture, keep in mind that the higher
the quality setting, the larger will be your captured
video file. See “Digital capture” (page 26) and
“Analog capture” (page 32) for further explanation
of these options.
4. Click the Start capture button on the Diskometer.
The Capture Video dialog box is displayed.
5. Type in a name for the video capture file you are
about to create, or accept the default name. You can
optionally also enter a limiting duration for the
capture.
If you are making multiple DV captures in preview
quality from the same tape, use the file naming
convention described on page 28. It will help
streamline the Make Movie process later on.
Note: Windows 98 and Millennium have file size
limitations. For FAT16 disks the limit is 2 GB. For
FAT32 disks the limit is 4GB. Studio estimates
how much video of the desired quality the largest
allowable file can accommodate, and displays this
as the maximum duration for the capture.
6. If you are capturing from an analog camcorder or
VCR, start playback now. This step is unnecessary
with a digital-source capture, as Studio will control
the playback equipment automatically when needed.
7. Click the Start capture button in the Capture Video
dialog box. The button caption changes to Stop
capture.
Capture begins. The Player displays the incoming
digitized video that is being saved to your hard

Chapter 2: Capturing video 25
drive (unless you have unchecked Capture preview
on the Capture source options panel).
During capture, Studio performs automatic scene
detection based on the current setting in the
Capture source options panel.
8. Click the Stop capture button to end capture at a
point you select.
Studio automatically stops capturing if your hard
drive fills up or the maximum duration you entered
is reached.
Scene detection
Automatic scene detection is a key feature of Studio.
As video capture proceeds, Studio detects natural
breaks in the video and divides it up into scenes. A new
icon is created in the Video Scenes section of the
Album for each scene detected.
Depending on which capture device you are using,
automatic scene detection is carried out either in real
time during capture, or as a separate step immediately
after capture is completed.
You can configure scene detection using the options
under Scene detection during video capture on the
Capture source options panel (Setup ¾ Capture
Source). Not all scene detection options are available
with every type of video source. Options that do not
apply to your setup are disabled in the dialog.
The four possible options are:
• Automatic based on shooting time and date: This
option is available only when you are capturing from

26 Pinnacle Studio 9
a DV source. Studio monitors the time stamp data on
the tape during capture, and starts a new scene
whenever a discontinuity is found.
• Automatic based on video content: Studio detects
changes in the video content, and creates a new
scene wherever there is a large change in the images.
This feature might not work well if the lighting is not
stable. To take an extreme example, a video shot in a
nightclub with a strobe light would produce a scene
each time the strobe flashed.
• Create new scene every X seconds: Studio creates
new scenes at an interval you choose. This can be
useful for breaking up footage that contains long
continuous shots.
• No automatic scene detection: Select this option if
you want to monitor the entire capture process and
decide for yourself where scene breaks should occur.
Press the [Space] key each time you want to insert a
scene break during capture.
DIGITAL CAPTURE
This section covers aspects of capturing from a DV
source deck (camcorder or VCR) and a 1394 port. To
read about capturing from analog hardware, please see
“Analog capture” on page 32.
Preview quality and full quality
When capturing in DV format from a DV device,
Studio offers the choices of preview quality (Smart-
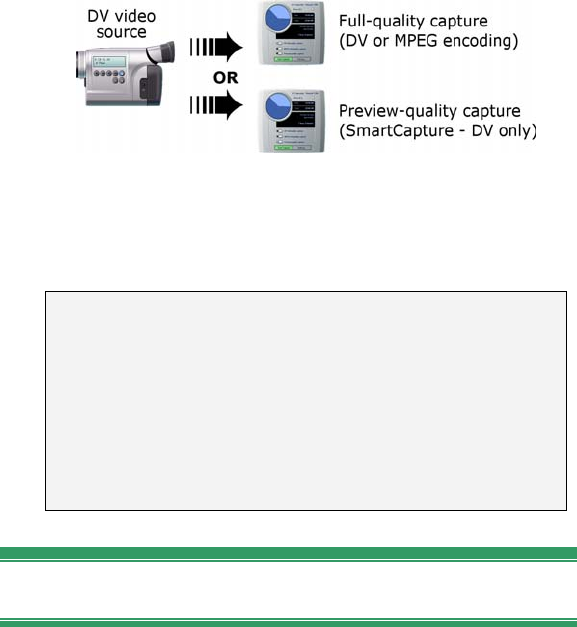
Chapter 2: Capturing video 27
Capture) and full quality. At full quality, two types of
encoding are available: DV and MPEG.
The two DV capture quality choices are covered in
detail in the following pages. This section concludes
with a note on adjusting audio and video levels in
digital captures (page 31).
Note: If you are using a MicroMV camcorder con-
nected to a 1394 port, the user interface in Capture
mode is almost identical to that for DV equipment.
However, most DV capture options and features are
not available with MicroMV captures, including
preview-quality capture and DV encoding. Captures
from MicroMV are always encoded as MPEG-2.
MicroMV is supported only under Windows XP.
SmartCapture: Preview-quality capture
SmartCapture is a unique feature of Studio. It allows
you to capture from DV videotape to a file of reduced-
quality video using minimal hard drive space. With
SmartCapture, you can capture an entire tape onto your
hard drive rather than having to pick and choose which
portions to capture. You can work with this “preview-
quality” material throughout the editing of your movie.
When your movie is finished and ready for output,
Studio will recapture any preview-quality clips at full
28 Pinnacle Studio 9
quality, automatically controlling your source deck to
locate and capture the footage. The reduced quality of
the preview video therefore has no impact on the
quality of your finished movie. Scenes captured at
preview quality are denoted in the Album by a dotted
border.
Continuous timecode
For the greatest convenience in using SmartCapture,
your digital tape must have continuous DV timecode.
Studio cannot capture in preview quality through
breaks in the timecode. If your camcorder has a
timecode-striping feature, stripe your tape before
shooting. If it does not, the simplest way to avoid
timecode gaps is to overlap your shots if you start and
stop the camcorder during shooting. Before beginning a
new shot, rewind a few frames so that there will not be
a blank spot.
SmartCapture can still be used with tapes that do not
have continuous timecode throughout, but a separate
capture file must be created for each segment of the
tape. SmartCapture will stop capturing when a break in
timecode is detected. To continue capturing, cue the
tape to the start of the next video segment and click
Start Capture again.
Naming convention
If you capture multiple segments from the same tape,
we strongly recommend the following naming
convention: For each capture file that originates from
the same tape, use a name that starts with the same
word.
For example, if you have a tape that contains three
different activities from your vacation, you might call

Chapter 2: Capturing video 29
the captures “vacation-picnic”, “vacation-sailing” and
“vacation-soccer”. Because Studio processes the files
in alphabetical order when recapturing, following this
convention will greatly reduce the number of times you
have to switch tapes during the Make Tape process.
Analog tapes and Digital8 camcorders
SmartCapture requires DV timecode. Analog tapes
(Hi8 and 8mm) do not have DV timecode even when
played in a Digital8 camcorder. As a result, it is not
possible to use SmartCapture with analog tapes played
in a Digital8 camcorder. To use your analog tapes with
Studio, either capture them at full quality, or copy them
to DV tape.
Full-quality capture
You have two choices for the way the video data is
encoded and compressed in full-quality captures. For
most purposes, DV format is the logical choice, but if
you are planning to output your finished movie to disc
(VCD, S-VCD or DVD), you may prefer the MPEG-1
or MPEG-2 format instead.
Because of the intensive computation required for
MPEG-2 encoding, older computers may not be fast
enough to achieve a satisfactory MPEG-2 capture. The
type of capture hardware you have and the capture
quality you choose also help determine the minimum
CPU speed needed. In cases where Studio is able to
estimate that your computer is not fast enough to carry
out a particular capture, it will advise you of the
problem and give you a chance to cancel the operation.
30 Pinnacle Studio 9
An MPEG movie requires much less disk space than
the equivalent full-quality DV movie, although thanks
to SmartCapture this is not generally a concern.
DV
DV is a high-resolution format with correspondingly
high storage requirements.
Your camcorder compresses and stores video on the
tape at 3.6 MB/s, at a quality equivalent to broadcast
video. With full-quality capture, the video data is
transferred directly from the camcorder tape to your PC
hard drive with no changes or additional compression.
Because the video quality is high, capturing at this
setting does consume a lot of disk space, so you may
want to pick and choose small segments to capture
instead of the entire tape.
You can calculate the amount of disk space you will
need by multiplying the length of your video in seconds
by 3.6, which gives the number of megabytes required.
For example:
1 hour of video = 3600 seconds (60 x 60)
3600 seconds x 3.6 MB/s = 12,960 MB (12.7 GB)
Hence 1 hour of video uses 12.7 GB of storage.
To capture at full quality, your hard drive must be
capable of sustained reading and writing at 4 MB per
second. All SCSI and most UDMA drives are capable
of this. The first time you initiate a full-quality capture,
Studio will test your drive to make sure it is fast
enough.
MPEG
DVD and S-VCD discs both use files in MPEG-2
format, an extension of the MPEG-1 format used for

Chapter 2: Capturing video 31
VCDs. MPEGs intended for use on the Internet will be
at lower resolutions and in MPEG-1 format.
The Capture format options panel (Setup ¾ Capture
Format) includes a variety of options to control the
quality of MPEG captures. Refer to “Capture format
settings” on page 252 for detailed information about
MPEG quality options.
Audio and video levels – digital
With DV and MicroMV captures, you are using audio
and video that have been encoded digitally during
recording, right in the camera. When you transfer the
footage through a 1394 port to your computer, the data
remains in the compressed digital format throughout,
so you cannot adjust the audio or video levels during
the capture. This is in contrast to analog captures,
where the audio and video can be adjusted as capturing
takes place.
With digital captures, you defer any needed adjustment
of audio and video levels until Edit mode, where Studio
provides plug-in video effects for adjusting the visual
balance of a clip, and audio effects to enhance the
sound. These effects allow you to adjust individual
clips rather than having to make global adjustments
affecting all the video in a capture file.
For more information see “Analog capture” (below),
“Using video effects” (page 95), and “Audio effects”
(page 220).

32 Pinnacle Studio 9
ANALOG CAPTURE
The topics in this section relate to capture with analog
equipment, such as:
• A camcorder or VCR with analog outputs connected
to a DirectShow-compatible capture board or
external device.
• A USB video camera or webcam.
If you are using a DV or MicroMV camcorder
connected to your computer via a 1394 port, please
refer instead to “DV capture” on page 26.
Capture quality options
With most analog capture hardware, Studio offers three
preset quality choices – Good, Better and Best – plus a
Custom option. Your hardware’s capabilities determine
how the presets translate into particular settings for
picture size, frame rate, compression characteristics
and quality. Keep in mind that the higher the quality,
the more disk space is required. Choose the Custom
preset to configure your own video capture settings.
For more information on video capture settings, see
Appendix A: Setup Options (page 252).
Chapter 2: Capturing video 33
Audio and video levels – analog
Studio provides fly-out panels for controlling video and
audio levels during capture. This feature is especially
useful when you need to compensate for differences in
video captured from multiple sources.
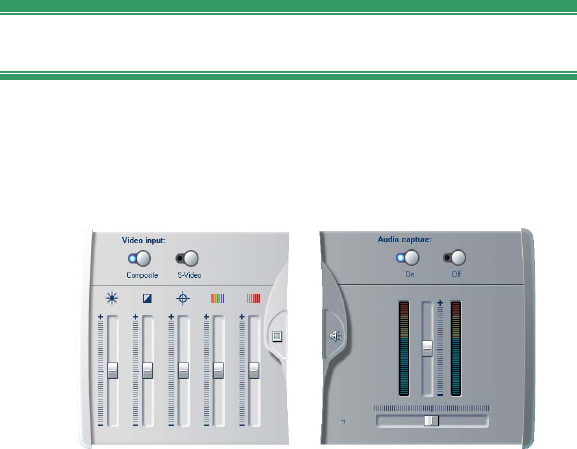
Video (L) and audio (R) panels for
setting levels during analog capture.
Although you can also adjust these levels with the
appropriate Video effects in Edit mode, setting them
correctly for capture can save you from having to
worry about color correction later on.
Setting your audio options correctly as you capture will
help in achieving consistent volume levels and quality.
Particular capture devices may offer fewer options than
are shown and discussed here. For instance, with
hardware that doesn’t support audio captures in stereo,
a balance control will not appear on the audio panel.
Video
Choose the type of video you are going to digitize by
clicking the appropriate Source button (Composite or
S-Video). The five sliders allow you to control the

34 Pinnacle Studio 9
brightness (video gain), contrast (black level),
sharpness, hue and color saturation of the incoming
video.
Note: The Hue slider does not appear when capturing
from PAL equipment.
Audio
Use the Audio capture buttons to control whether
Studio should capture the audio along with the video.
Select the Off button if your source is video only. The
sliders on the tray let you control the input level and
stereo balance of the incoming audio.
Chapter 3: The Album 35
CHAPTER 3:
The Album
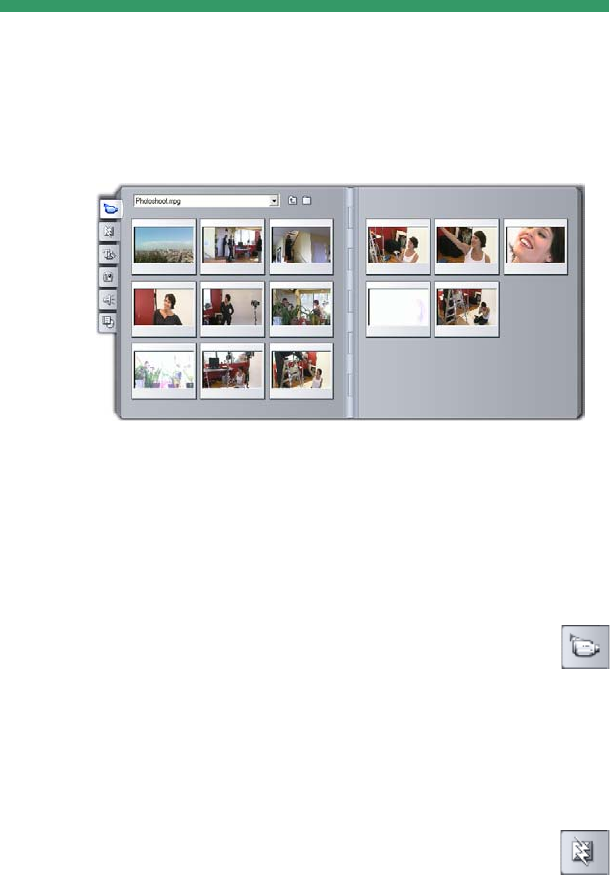
The Video Scenes section of the Album. Click the
tabs down the left side of the Album to access the
materials in the other sections.
The source materials you need for making a movie are
stored in the various sections of the Album, each of
which is accessed by its own tab as follows:
Video Scenes: This section contains your
captured video footage. You can access and
preview the capture files directly, or you can load one
into the Album, where its scenes are represented by
thumbnail icons. To use some of the scenes in your
movie, just drag their icons into the Movie Window.
See “The Video Scenes section”, page 38.
Transitions: This Album section contains fades,
dissolves, slides, and other transition types,

36 Pinnacle Studio 9
including the elaborate Hollywood FX transitions. To
use a transition, position it next to or between video
clips and graphics in the Movie Window. See “The
Transitions section”, page 50.
Titles: This section contains editable titles,
which you can use as overlays or as full-screen
graphics. You can create your own titles from scratch,
or use or adapt the supplied ones. Studio supports rolls,
crawls, and many typographical effects. See “The
Titles section”, page 52.
Still Images: This is a section of photographs,
bitmaps and grabbed video frames. You can use
these images full-screen or as overlays on the main
video. Most standard image file formats are supported.
See “The Still Images section”, page 53.
Sound effects: Studio comes ready with a wide
range of high-quality sound effects. You can also
use wav, mp3 and avi files that you have recorded
yourself or obtained from other sources. See “The
Sound Effects section”, page 54.
Disc Menus: Studo has an extensive collection
of chapter menus to use in DVD, VCD and
S-VCD authoring. You can use these as they are,
modify them, or create your own. See “The Disc
Menus section”, page 56.
Using the Album
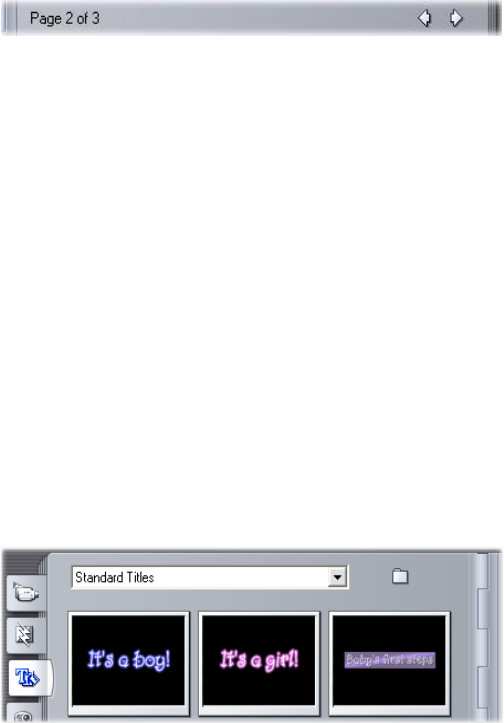
Each section of the Album contains as many pages as
are necessary to hold the icons representing the items in
that section. At the top right of each Album page,
Studio shows the current page number and the total
page count for the section. Click the arrows to move
forward or back through the pages.
Chapter 3: The Album 37
All types of Album content can be previewed simply
by clicking on the icons.
This chapter introduces each of the Album sections in
turn, beginning with a detailed discussion of the all-
important Video Scenes section. Actually using the
contents of the Album to create your edited movie will
be the subject of chapters 4 through 11.
Source folders for Album content
The scene icons in the Video Scenes section come from
a captured video file, while the Transitions section is
filled from resource files associated with the Studio
program.
The icons in each of the other four Album sections are
different: they represent the files contained in a
particular disk folder. Each of these sections – Titles,
Images, Sound Effects and Disc Menus – has a default
folder assigned to it, but you can select a different
folder if desired.
The icons in the Titles section represent files stored
in a selected source folder on your hard drive. The
dropdown list at the top of the Album page lets you
select either “Standard Titles” or “My Titles” from
the installed “Titles” folder. The folder button beside
the list lets you look elsewhere on your hard drive.
The Disc Menus section works similarly.

38 Pinnacle Studio 9
The source folder for the section’s content is listed at
the top of the left Album page, next to a small Folder
button . To change the source of the current section,
either select a folder from the dropdown or list, or click
the button, browse to another folder on your system,
and select any file. The file you select will be
highlighted in the repopulated Album section.
Some Album sections also provide a Parent folder
button to facilitate moving around within a group of
folders containing appropriate media.
THE VIDEO SCENES SECTION
This is where the editing process really begins –
in the Video Scenes section of the Album with
your captured raw footage. In a typical production,
your first step will probably be to drag some scenes
from the Album down into the Movie Window (see
Chapter 5: Video Clips).
In the Album, scenes are displayed in the order in
which they were captured. This order cannot be
changed, since it is determined by the underlying
capture file, but scenes can be added to your movie in
any order you choose. Similarly, while you can’t trim
(edit) Album scenes, you can use any desired portion of
a scene when it appears as a clip in your movie.
Interface features
The Video Scenes section offers several special
interface features:
• The icons of scenes captured at preview quality are
drawn with a dotted outline in the Album. Scenes
captured at full quality do not have this outline.
Chapter 3: The Album 39
• Scenes that have been added to the Movie Window
are distinguished in the Album by a green
checkmark. The checkmark remains as long as any
clip in the Movie Window originates with that scene.
• To see how a particular Album scene is used in your
current project, use the Album ¾ Find Scene in
Project menu command. Studio highlights any clips
in the Movie Window that originate in the selected
scene (or scenes). To go the other way, use the Find
Scene in Album command, which is on the right-
click menu for Movie Window clips.
• Nearly all menu commands that apply to scenes are
available both on the main Album menu, and on the
pop-up menu that appears when you right-click a
selected scene. When this documentation calls for a
menu command like Album ¾ Combine Scenes,
remember that an equivalent command is usually
available on the pop-up “context” menu as well.
Summary of operations
Because of its central role, the Video Scenes section of
the Album provides an extensive set of operations.
These are covered below in the following topics:
• Opening a captured video file
• Viewing captured video
• Selecting scenes and files
• Displaying scene and file information
• Comment view
• Combining and subdividing scenes
• Redetecting scenes
40 Pinnacle Studio 9
Opening a captured video file
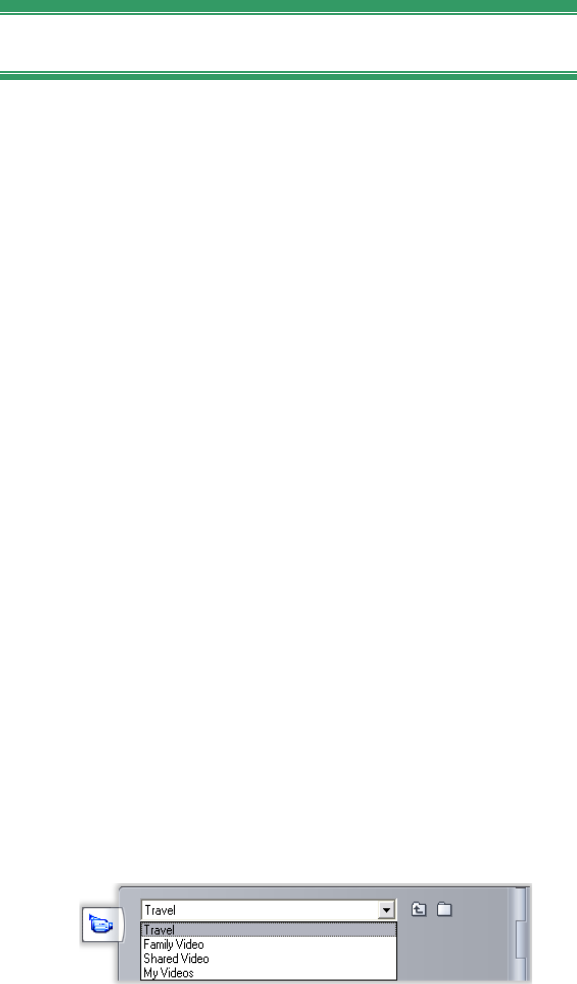
The default locations for your video files are the
Windows default capture folder and the My videos
folder. When you are viewing the folder contents page
of the Video Scenes section, both of these locations
always appear on the dropdown list at the top of the
Album.
You can also choose other hard drive folders to access
stored video files. Both the current and previous folders
are also listed, if they are different from the two
standard locations, making four different folders that
may appear in the list at any one time.
Under Windows XP, the system capture folder is
located in the Windows’ “all users” documents folder.
The capture folder’s real name is My videos, but
Windows Explorer and Studio customarily call it by an
alias, Shared videos. This distinguishes it from My
videos in the user’s personal documents folder.
Under versions of Windows with no special shared
video folder, the default capture folder is called:
C:\My Documents\Pinnacle Studio\Captured Video
Under Windows 98, the full pathname of the My
Videos folder is:
C:\My Documents\My Videos
Chapter 3: The Album 41
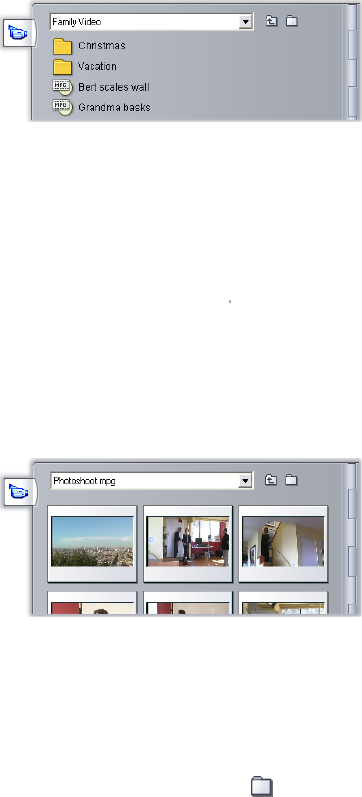
Opening a folder
The folder contents page is displayed whenever you
choose a new folder. It lists both the subfolders and the
digital video files within the folder you chose:
Three ways to open a folder:
• Select the folder name on the dropdown list on the
folder contents page.
• Select a folder listed on the folder contents page.
• Click the parent folder button .
Opening a file
When you open a video file, the file contents page is
displayed, showing icons that represent the scenes in
the file:
Three ways to open a digital video file:
• Select the file name on the dropdown list on the file
contents page.
• Double-click a file listed on the folder contents page.
• Click the browse for file button and use the Open
dialog to locate an avi, mpg or mp2 file on your
hard drive.
42 Pinnacle Studio 9
Scene detection and thumbnails
The Album now fills with the detected scenes from
your captured video (see “Scene detection” on page 25).
Each scene is denoted by a thumbnail frame – an icon
of the scene’s first frame. It may be that the first frame
doesn’t make a good icon for the scene, so Studio lets
you pick a different one if desired.
To change thumbnails in the Album:
1. Select the scene to be changed.
2. Use the Player to find the frame you want used for
the thumbnail.
3. Click the Album ¾ Set Thumbnail menu command.
Video aspect ratios
Most digital video files provide format information that
allows Studio to detect the frame aspect ratio of 4:3 or
16:9 automatically. If the file does not provide aspect
ratio information, Studio defaults to the standard 4:3
format.
The Aspect Ratio 4:3 and Aspect Ratio 16:9 commands
on the Album menu let you manually set whichever
ratio you need. These commands also appear on the
right-button context menu for video scenes in the
Album.
Studio does not allow you to mix footage of different
aspect ratios in the same movie. If you want to add
16:9 footage to a 4:3 movie, or 4:3 footage to a 16:9
movie, you must first use whichever Aspect Ratio
command is needed to bring the Album scenes into
conformity with the movie. The new clips will be
squeezed or stretched as needed to match the movie.
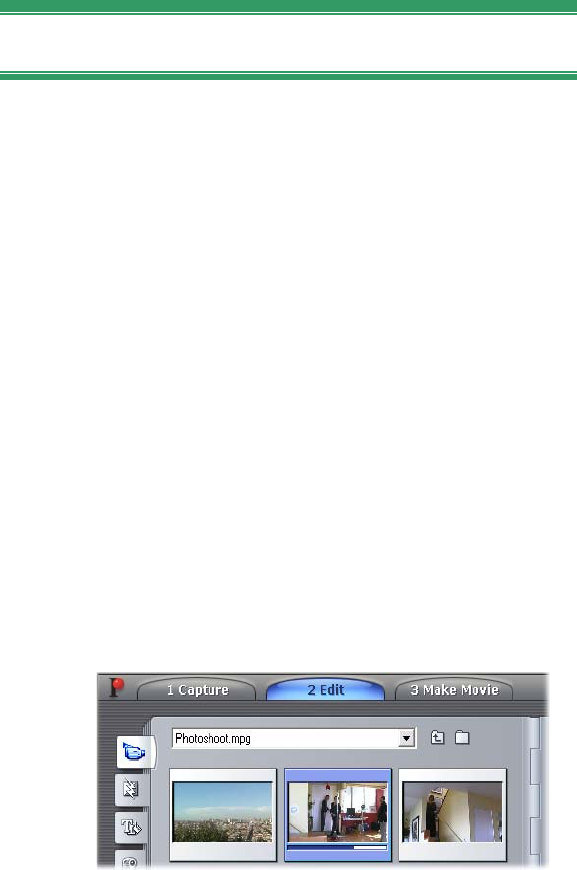
Chapter 3: The Album 43
Viewing captured video
Individual or multiple scenes in the open captured
video file can be viewed at any time.
To view captured video starting at a selected scene:
1. Click on the scene’s icon in the Album.
The Player displays the first frame of the selected
scene.
2. Click the Play button in the Player.
The Player now plays the selected scenes and any
subsequent ones. Progress is indicated in three
ways.
• The scenes highlight successively as they are
played.
• The Player scrubber shows the current point of
play relative to the entire movie.
• Scene thumbnails display a progress bar during
preview. As you continue to view your captured
video, the progress bar moves from one
thumbnail to the next.
Previewing digital video files
When a folder is open in the Album and the name of a
digital video file is selected, you can use the Player to
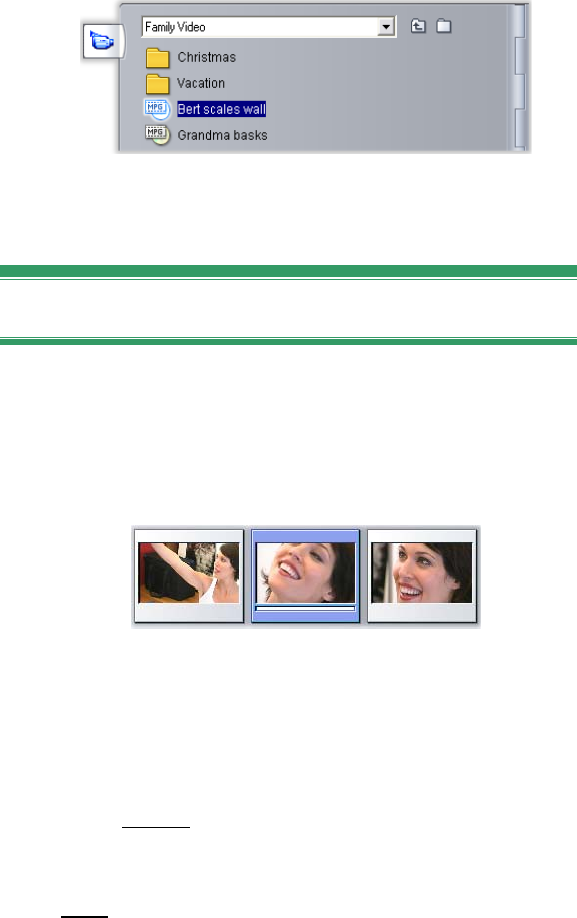
44 Pinnacle Studio 9
preview the video without actually opening the file into
the Album.
You can even select multiple files for playback using
standard selection techniques.
Selecting scenes and files
Studio offers a variety of ways to select scenes and
other items in the Video Scenes section of the Album.
Selected video scenes are indicated by a highlighted
border. Selected folders and video files are shown with
text highlighting.
Selected scenes have a highlighted border (center).
Selection techniques follow standard Windows
conventions. Use any of the following, separately or in
combination:
• Choose the Edit ¾ Select All menu command or
press Ctrl+A to select all the scenes (or files and
folders) currently displaying in the Album, including
those on other pages.
• Shift-click to select a range of neighboring items.
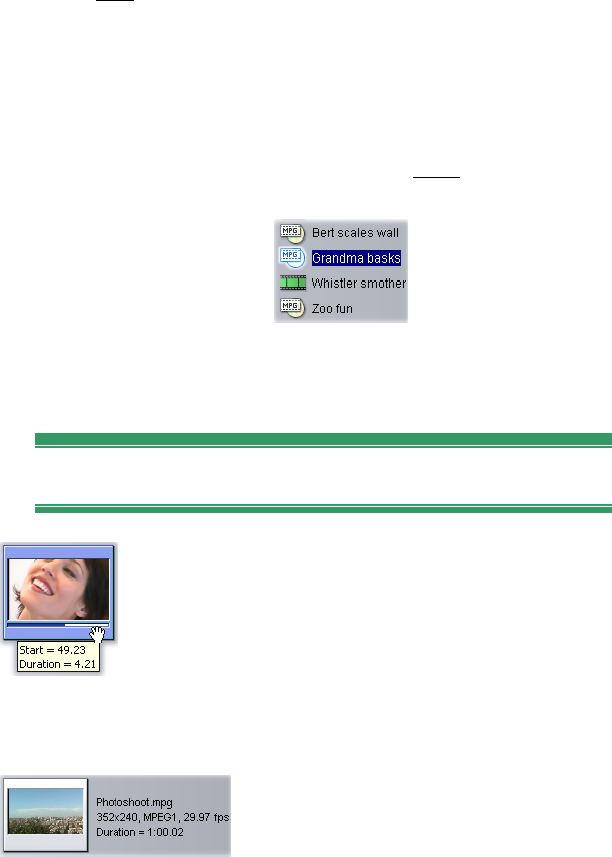
Chapter 3: The Album 45
• Ctrl-click to add or remove individual items from the
selection.
• Starting with the mouse pointer over a blank area of
the Album page, click and drag to “marquee” an area,
selecting all the items that intersect the area.
• Use the arrow keys to navigate the Album grid. Use
the arrows in combination with Shift to select items
as you go.
Selected folders and video files have highlighted text.
Displaying scene and file information
As you move the mouse pointer over video
scenes, the pointer changes to a grabber symbol.
If you pause momentarily on the scene, the start
time and length is displayed in a pop-up box. If
you leave the grabber on the scene, the display
persists for several seconds. The start time shown is the
timecode from the original source video, in minutes,
seconds, and frames.
For information regarding video files
when the Video Scenes section is in
folder view mode, select Details view
in the Album’s right button context
menu. The file name, resolution, aspect ratio, duration
and frame rate are displayed. Switch back to a more
compact listing with Icon view.
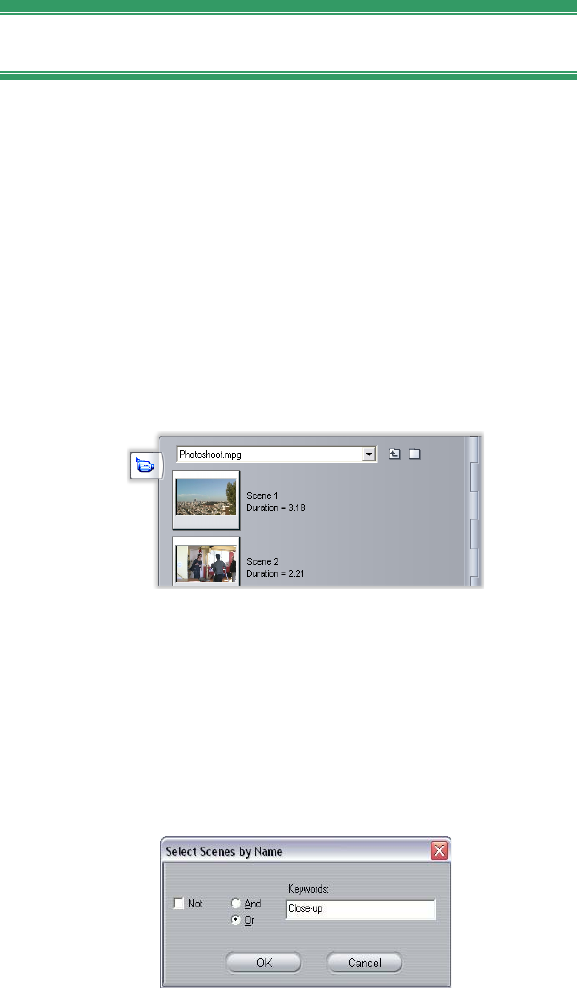
46 Pinnacle Studio 9
Comment view
In the default view for the Video Scenes section,
known as Scene view, each scene is represented by a
thumbnail frame icon. To see more information about
each scene, use the Album ¾ Comment View menu
command.
In comment view, editable captions are displayed for
Album scenes. The usage of these captions is up to you:
they might be search keywords, or scene names, or text
comments describing the scene content. The default
caption is generated from the scene’s sequence number
and duration (e.g. “Scene 3, 7:21”).
If you click on a video scene, an in-place text field
appears, allowing you to enter the custom name or
comment.
Selecting scenes by name
A related option lets you select video scenes by
scanning for keywords in the comments. Use Album ¾
Select By Name to open this dialog box:
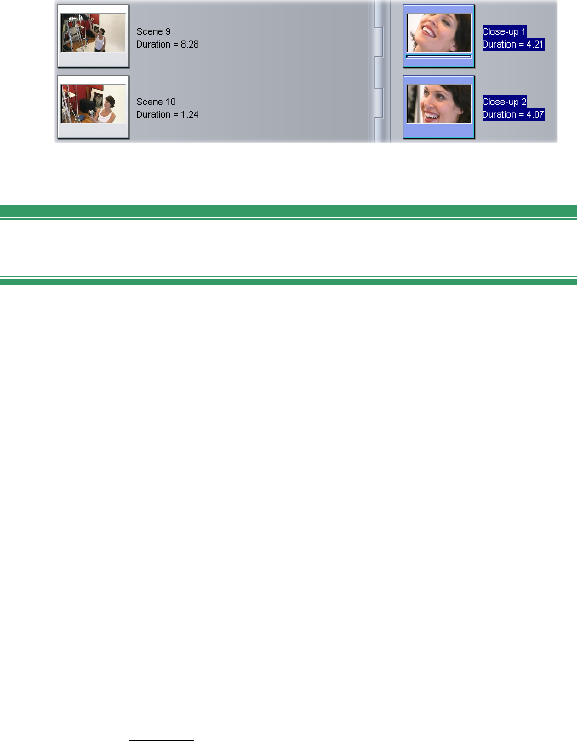
Chapter 3: The Album 47
Enter a keyword into the text field and click OK to
highlight all Album scenes whose caption contains the
keyword. The default captions are not searched – only
the ones you have customized.
Combining and subdividing scenes
After previewing your scenes, you might want to
combine or subdivide some into larger or smaller units.
Such adjustments are easily made.
To combine scenes in the Album:
1. Select the scenes to be combined.
2. Select Album ¾ Combine Scenes.
The selected scenes are combined into one.
Only selected adjacent scenes can be combined.
Furthermore, they are joined in the order in which
they appear in the Album, regardless of the order in
which they were selected. (Album order proceeds
across rows and then down the page.) To revert,
press Ctrl+Z, or click the undo button.
If the scenes you selected were not all neighbors,
each set of adjacent scenes is combined, but the
different sets are not combined with each other.
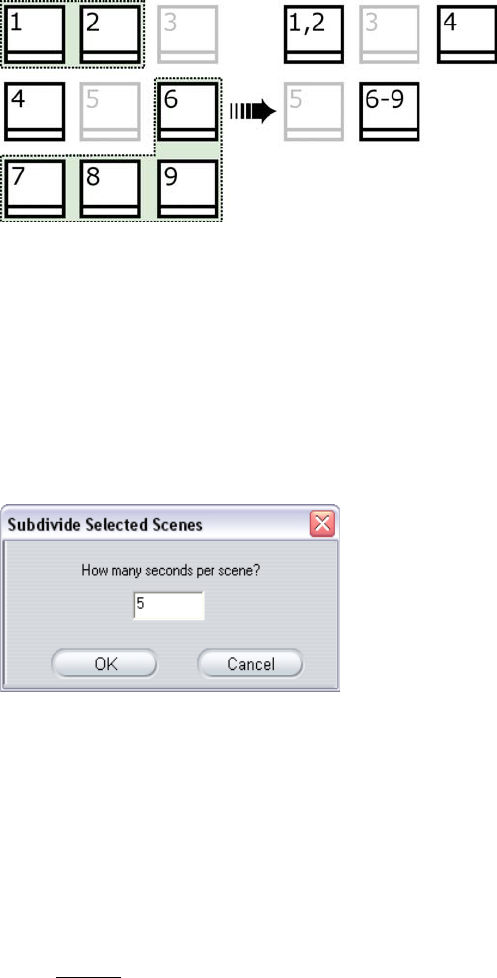
48 Pinnacle Studio 9
Several selected scenes (black) are merged into two
longer scenes. Having no neighbors, scene 4 is
unaffected, even though it was part of the selection.
To subdivide scenes in the Album:
1. Select the scenes to be subdivided.
2. Select Album ¾ Subdivide Scenes.
The Subdivide Selected Scenes dialog box appears.
3. Choose the length of the subdivided scenes by
typing in a value.
The smallest allowed subdivision is one second.
Any video remaining after subdivision is added to
the last scene.
4. Click OK.
A progress bar appears, the scene is subdivided,
and new scenes are added to the Album. To revert,
press Ctrl+Z, or click the undo button.
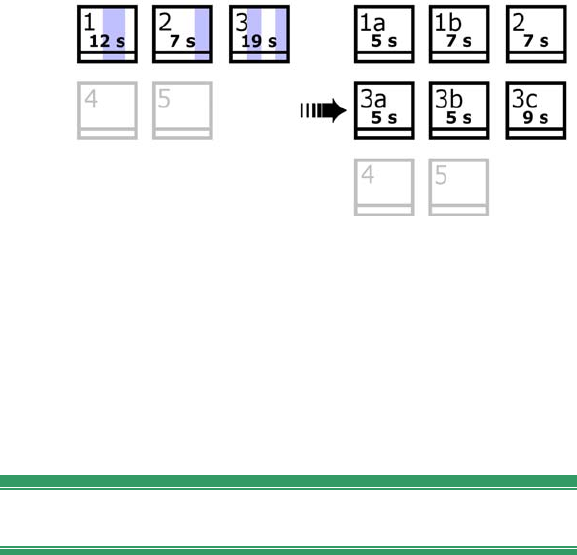
Chapter 3: The Album 49
You can subdivide these scenes still further, if
desired, down to the minimum duration of one
second.
Three selected scenes are subdivided to a duration
of five seconds. The vertical stripes indicate five-
second divisions within each scene. The uneven clip
timings at right occur because time left after
subdivision is added to the final divided scene; that
is also why scene 2 is ultimately unaffected by the
subdivision operation.
Redetecting scenes
If you combine or subdivide scenes and later decide
that you’d prefer to restore them to their original state,
you may redetect any scene or selection of scenes. The
detection results are identical to those obtained after
capturing, provided the same scene detection technique
is used.
If you have subdivided scenes, you must first
recombine them. Even if you cannot exactly recall the
initial state and so recombine more than is necessary,
the detection process will restore the original scene
sequence.
50 Pinnacle Studio 9
To redetect scenes:
If you need to recombine any scenes, first select the
subdivided scenes, then apply the Album ¾ Combine
Scenes menu command.
1. Select the scenes you wish to redetect.
2. From the Album menu, select either Detect Scenes
by Video Content or Detect Scenes by Shooting
Time and Date.
A progress window appears as Studio detects the
scenes and repopulates the Album.
THE TRANSITIONS SECTION
The Transitions section of the Album provides a
large set of drag-and-drop clip transitions. To
keep things manageable, the transitions are divided into
groups. Use the dropdown list to select which group of
transitions you want to view. All the transitions in the
group are displayed, using as many Album pages as
necessary.
To learn about transitions, and how you can use them
in your movies, see Chapter 7: Transitions.
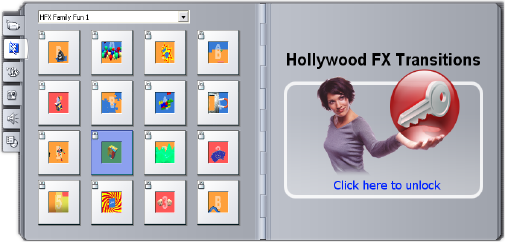
Chapter 3: The Album 51
Studio’s transitions collection includes 74 standard
transitions, 52 Alpha Magic transitions, 16 unrestricted
Hollywood FX 3-D transitions, and many more
“locked” Hollywood FX transitions (with a padlock
symbol in the top-left corner of the transition icon).
Using the locked transitions
These demo transitions are freely available for you to
try, but a Studio 9 “watermark” will be superimposed
on part of the video frame during playback. To make
use of these transitions in an actual production, simply
open the Album to the desired transition, then click in
the unlock panel on the same Album page. You can
purchase an activation key in just a few minutes, with
no need to exit Studio.
The Transitions section of the Album, open to the
“HFX Family Fun 1” theme pack of Hollywood FX
transitions. Click anywhere in the unlock panel on
the right-hand page to unlock this set of transitions.
For more information about purchasing premium
content for Studio, see “Expanding Studio” on page 11.
Displaying the transition name
As you move the mouse pointer over the transition
icons in the Album, the pointer changes to a grabber
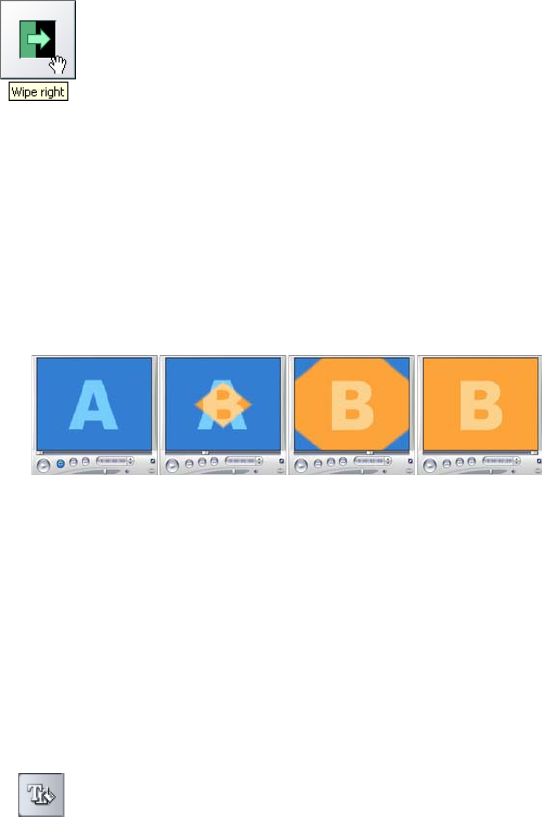
52 Pinnacle Studio 9
symbol (indicating that the transition can be
dragged from the Album to the Movie
Window). If you pause momentarily on the
icon, the name of the transition is displayed.
The display persists for several seconds or until
your mouse pointer moves off the transition.
Previewing transition effects
When you click on a transition icon, the Player
demonstrates the transition using the convention that
“A” represents the original clip and “B” the new clip.
The demonstration cycles for as long as the icon
remains selected.
To see a detailed view, stop the Player and use the jog
buttons (Frame reverse and Frame forward) to step
through the transition one frame at a time.
THE TITLES SECTION
This section of the Album contains a collection
of text titles in a variety of styles. They can be
used in your movie as either full-screen or overlay titles.
The difference is that in an overlay title the transparent
background is replaced by other material (usually a
video clip), whereas in a full-screen title, the
background is replaced with black.

Chapter 3: The Album 53
In the Album, a gray checkerboard is used
to indicate the portion of a title that will be
treated as transparent in overlays. As with
video scenes, titles that have been added to your
current project are indicated in the Album by a green
checkmark symbol.
With Studio’s powerful built-in Title Editor, you can
readily create your own titles when needed. However,
you may find it easier still to start with one of the
supplied titles and customize it in the Title Editor.
The Titles folder: The icons in the Titles section
represent files in the folder named at the top of each
left-hand page in the section. Titles that you have
created or modified can be added to the section by
saving them into this folder from the Title Editor. You
can also select a different folder to be the source of the
section (see “Source folders for Album content” on
page 37).
For information on using titles in your movie, see
Chapter 8: Still images.
THE STILL IMAGES SECTION
This section of the Album displays thumbnail
icons of image files, which may include grabbed
video frames, photographs and bitmapped drawings.
Most standard image file formats are supported. As
with video scenes, images that are in use in your
current movie are indicated by a green checkmark
symbol.

54 Pinnacle Studio 9
The Still Images folder: The icons in the Still Images
section represent files in the folder named at the top of
each left-hand page in the section. Images can be added
to the section by storing them in this folder. For
instance, you can save grabbed video frames into the
folder from the Frame grabber tool, or save a title from
the Title Editor. You can also select a different folder
to be the source of the section (see “Source folders for
Album content” on page 37).
For information on using still images in your movie,
see Chapter 8: Still images.
THE SOUND EFFECTS SECTION
Studio comes with a wide range of ready-to-use
sound effects. These wav files are installed into a
number of folders, covering categories such as
“animals”, “bells” and “cartoons”.
The Sound Effects folder: This section of the Album
displays the sound files contained in one disk folder,
named at the top of each left-hand page in the section.
You can display the sounds in a different folder – not
necessarily one of those installed by Studio – by
selecting a different folder to be the source for the
section (see “Source folders for Album content” on
page 37).
Besides wav (Windows “wave”) files, music files in
mp3 format and avi animation files are also displayed
in this section of the Album, and may be drawn upon
for supplemental audio in your productions.
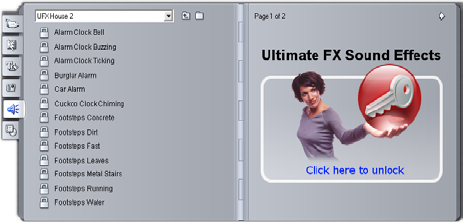
Chapter 3: The Album 55
Any sound clip can be previewed simply by clicking its
name or icon.
For information on using sounds in your movie, see
Chapter 11: Sound effects and music.
Along with the many unrestricted sound effects that
come with Studio, you will also find several folders of
effects in the UFX, or “Ultimate FX” series. These
effects are “locked” (indicated by a padlock symbol
beside the sound effect name in the Album).
Using the locked sound effects
These demo effects are freely available for you to try,
but a Studio 9 “watermark” will be superimposed on
part of the video frame whenever the sound is playing,
and an intermittent beep will be added to the
soundtrack. To make use of the effects in an actual
production, simply open the Album to the desired
effect, then click in the unlock panel on the same
Album page. You can purchase an activation key in just
a few minutes, with no need to exit Studio.
The Sound Effects section of the Album, open to the
“UFX House 2” theme pack of Ultimate FX sound
effects. Click anywhere in the unlock panel on the
right-hand page to unlock this set of effects.
For more information about purchasing premium
content for Studio, see “Expanding Studio” on page 11.

56 Pinnacle Studio 9
THE DISC MENUS SECTION
This section of the Album contains a collection of
artist-designed menus for VCD, S-VCD and
DVD authoring. Menus in Studio are really specialized
titles: they can be created and edited in the Title Editor,
and either saved from the editor into a disk folder or
incorporated directly into your movie.
As with video scenes and other visual resources, disc
menus that are in use in your movie are distinguished
in the Album by a green checkmark symbol.
For information on using disc menus in your movie,
see Chapter 9: Disc menus.
The Disc Menus folder: The icons in the Disc Menus
section represent files in the folder named at the top of
each left-hand page in the section. Menus can be added
to the section by storing them in this folder. You can
also select a different folder to be the source of the
section (see “Source folders for Album content” on
page 37).
The motion background symbol: Some of the menus
supplied with Studio incorporate a background of
moving video rather than a static picture, and you can
also create such menus yourself. This “motion
background” can help give a professional look to your
finished disc.
Menus with motion backgrounds are indicated by a
small symbol in the bottom right-hand corner of the
Album icon.
Availability: Menus with motion backgrounds are not supported in
the SE and QuickStart versions of Studio.
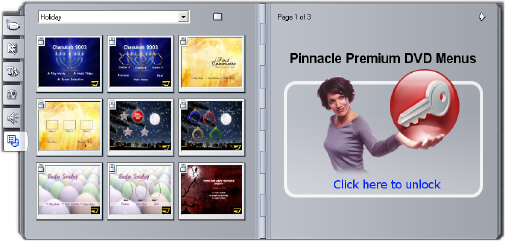
Chapter 3: The Album 57
Along with the many standard menus and motion
menus that come with Studio, you will also find several
folders of menus in the “Pinnacle Premium DVD
Menus” series. These menus are “locked” (indicated by
a padlock symbol in the top-left corner of the menu
icon.). Many of these professional DVD menus include
looping soundtracks.
Using the locked menus
The demo menus are freely available for you to try, but
a Studio 9 “watermark” will be superimposed on part
of the video frame whenever one is playing. If you
want to use one in an actual production, simply open
the Album to the desired menu, then click in the unlock
panel on the same Album page. You can purchase an
activation key in just a few minutes, with no need to
exit Studio.
The Disc Menus section of the Album, open to the
“Holiday” theme pack of Pinnacle Premium DVD
Menus. Click anywhere in the unlock panel on the
right-hand page to unlock this set of menus.
For more information about purchasing premium
content for Studio, see “Expanding Studio” on page 11.
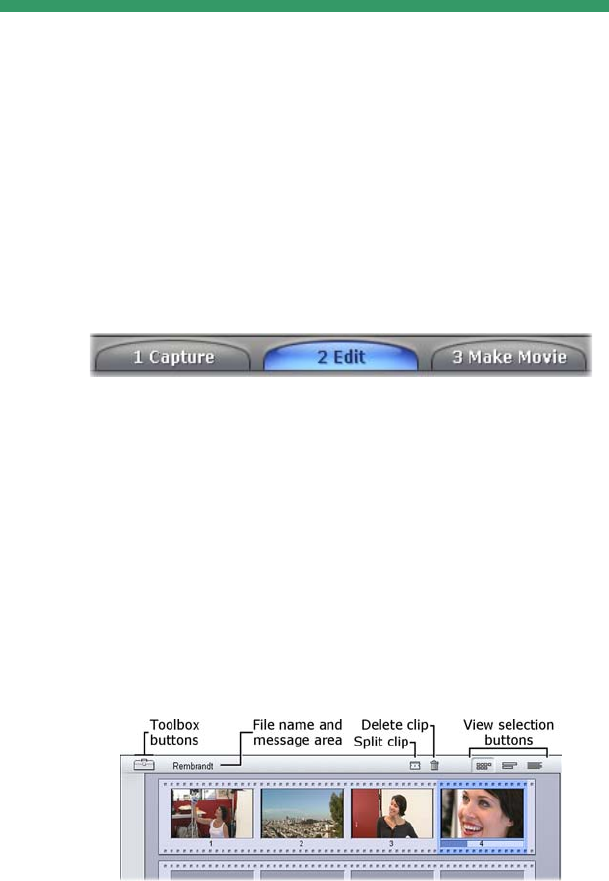
Chapter 4: The Movie Window 59
CHAPTER 4:
The Movie Window
The Movie Window, where you build your movie from
the raw materials in the Album, occupies the bottom
half of the screen in Studio’s Edit mode. To access the
Movie Window, first switch to Edit mode if you are not
already there:
The Movie Window title bar contains several important
controls and displays. The toolbox buttons at the left of
the title bar open the Video toolbox and the Audio
toolbox, which are discussed on page 67.
To the right of the toolbox buttons is a text area where
the project file name is displayed. Status and warning
messages are also displayed in this area when required.
Further still to the right are the Clip Split and Clip
Delete buttons, while at the far right are three view
selection buttons (see “Movie Window views” on page
62).
60 Pinnacle Studio 9
Split clip/scene button – the razorblade
Click this button to split the currently-selected
clip in the Movie Window, or the currently-
selected scene in the Album.
No information is lost. If the item is an Album scene, it
is split at the indicated point into two shorter scenes. If
the item is a clip in the Movie Window, it is duplicated
and automatically trimmed to the split point.
The razorblade button can be used in conjunction with
the track-locking buttons in the Movie Window’s
Timeline view to carry out special operations such as
insert editing, and edits in which the audio leads or lags
behind the video. See “Advanced Timeline editing” on
page 87.
Splitting a clip: The placement of the edit line in the
original clip determines the split point. When you
apply the razorblade tool, Studio duplicates the clip
and trims away the portion after the split point in the
first copy and up to the split point in the second.
Delete Clip button – the trashcan
This button deletes the currently-selected content
in any of the Movie Window views. By default,
when video clips on the main video track of your
project are deleted in any view, the gap in your movie
Chapter 4: The Movie Window 61
that would otherwise be created by the deletion is
automatically closed up, and clips on other tracks are
removed or shortened as required to keep everything in
sync.
If you delete clips on other tracks, the default behavior
is that gaps between them are not automatically
removed, so the timing of other clips is not affected.
If you press the Ctrl key while clicking the delete
button, or pressing the Delete key, the default behavior
for the current track is reversed. That is, on the main
video track, Ctrl+Delete leaves a gap when the clip is
removed, while on the other tracks, the gap on the track
is closed up. In neither case are other tracks affected.
You can also access the delete operations through the
right-button context menu for clips on the Timeline.
The delete options on the right-button menu for
Timeline clips are not the same for clips on the main
video track (L) as for those on other tracks (R). The
menus summarize the context-dependent keyboard
shortcuts.
Positioning: edit line, scrubbers
The current position is the frame showing in the Player
when you are working with a clip in the Movie
Window. In the Timeline view, it is indicated by the
edit line. The current position can be changed by
moving either the Timeline scrubber (to which the edit
line is attached) or the Player scrubber.
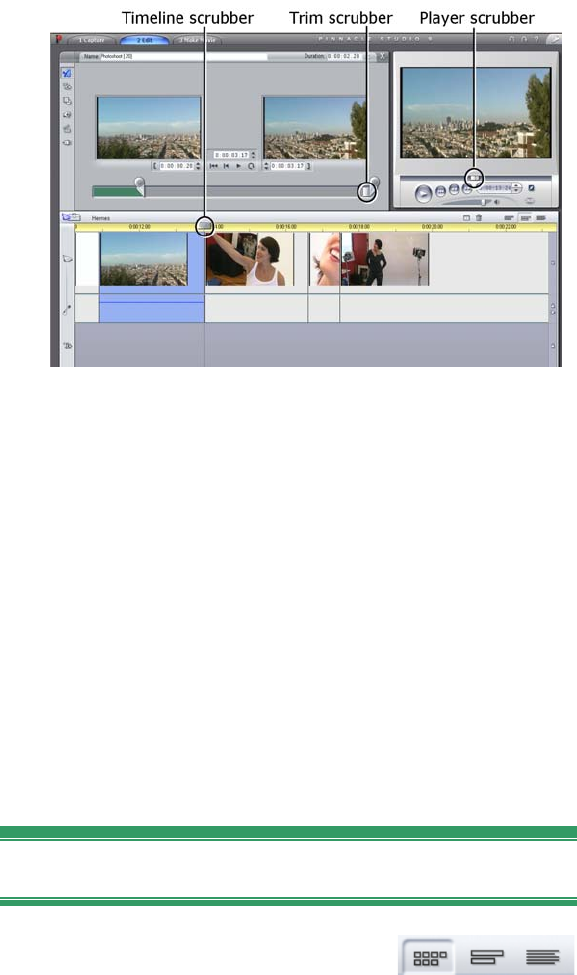
62 Pinnacle Studio 9
When the Clip properties tool is open, a third
scrubber, the trim scrubber, is available for
adjusting the current position within the clip during
trimming.
MOVIE WINDOW VIEWS
The Movie Window provides three different views of
your project: Timeline, Storyboard and Text. Select the
one you want to use by clicking the view selection
buttons in the upper right corner of the Movie Window.
Storyboard view
Storyboard view shows the order
of video scenes and transitions. It
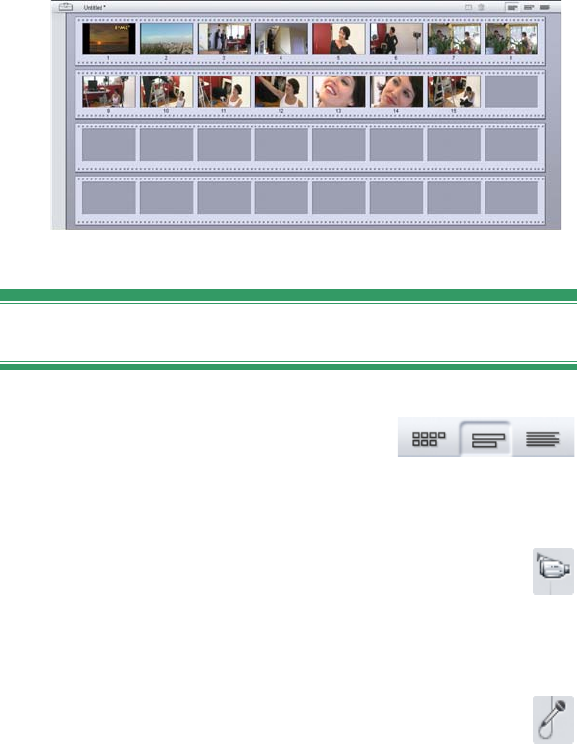
Chapter 4: The Movie Window 63
uses thumbnail icons for quickly structuring a movie.
You can choose large or small thumbnails in the Edit
options panel.
Timeline view
Timeline view shows the positions
and durations of clips relative to
the Timescale. This view also displays up to eight
tracks on which you can place various types of clip:
• Video, plus full-screen disc menus, titles
and graphics: The video track contains the
primary visual material in your production. See
Chapter 5: Video clips, Chapter 9: Disc menus and
Chapter 8: Still images for more information.
• Original (or “synchronous”) audio: The
original audio track contains the audio that
was captured along with the video from your camera.
You can manipulate the audio clips on this track to
achieve various effects using insert-editing and split-
editing techniques. See “Insert editing” (page 89)
and “Split editing” (page 91) for more information.

64 Pinnacle Studio 9
• Overlay video and audio: In Studio Plus,
video and images placed on the overlay track
can be used with the Picture-in-picture and
Chroma key tools to give your video
productions a professional appearance. These
features are locked in other versions of Studio,
producing “watermarked” output when used. You
can upgrade to Studio Plus at any time if you need its
advanced capabilities. Original audio for overlay
video is stored on the linked audio track. See
Chapter 6: Two-track editing with Studio Plus for
details about the overlay track.
• Title and graphic overlays: Images placed on
the title track will be rendered as overlays
upon the main video, with transparent backgrounds.
See Chapter 8: Still images and Chapter 9: Disc
menus for more information.
• Sound effects and voice-overs: The audio
clips on this track are mixed with the original
audio track and the background music track to create
the final soundtrack for your movie. See Chapter 11:
Sound effects and music for full information.
• Background music: The background music
for your movies can be created to any desired
duration with the SmartSound tool (page 203) or
imported with the CD audio tool (page 201). Your
soundtrack can also make use of mp3 and other
music files (see page 197).
• Disc menus, chapter marks and return-to-
menu links: This is an extra track that appears
above the video track whenever the movie has at
least one disc menu. See Chapter 9: Disc menus for
information.
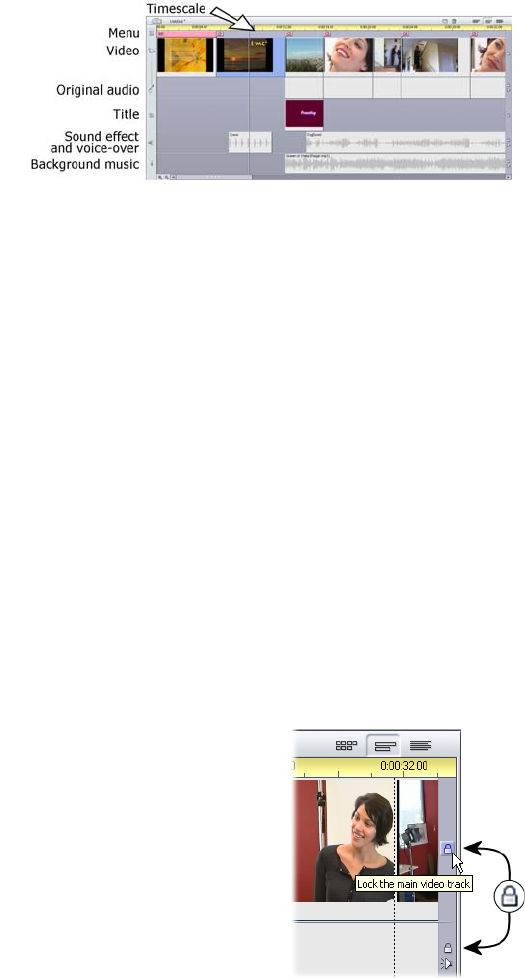
Chapter 4: The Movie Window 65
Because many editing operations can be carried out
only in Timeline view, you should choose it whenever
extensive, detailed or advanced editing is required.
Track locking
The video track normally takes precedence over all
other tracks for trimming or deleting. This has several
consequences:
• When you trim a video clip, clips running
simultaneously on other tracks are also trimmed.
• When you delete a video clip, the time segment it
used is also removed from any parallel clips.
• Clips that fall entirely within a deleted video clip’s
span are also deleted.
These behaviors can be bypassed when necessary with
a feature that allows you to “lock” any track indepen-
dently of the others, thereby excluding it from editing
and playback operations.
The padlock buttons along
the right edge of the Movie
Window, can be clicked to
toggle locking for the
corresponding track. Track-
locking gives Studio insert-
edit and split-edit capability
(see Chapter 5: Video clips).
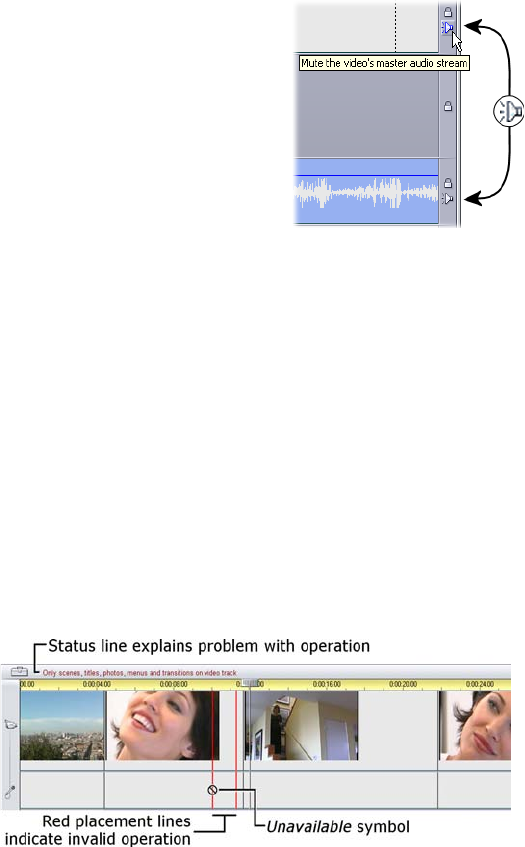
66 Pinnacle Studio 9
Track muting
The audio tracks can be
individually muted with the
mute buttons at the right edge
of the Movie Window. These
buttons have the same
function as the mute buttons
in the Volume and balance
tool. (See page 215 for more
information.)
Placement feedback
Studio gives you several types of feedback about your
actions as you place clips in the Timeline view.
The status line: The status line area on the left of the
Movie Window title bar displays messages as you
place clips and perform other actions.
Placement symbols: While you are dragging a clip
into position on the Timeline, Studio provides feedback
to tell you whether the current placement of the clip is
valid. The mouse pointer shape and the colors of the
vertical placement lines indicate what you can and
cannot do.
For example, if you attempt to drag a sound onto the
video track, the placement guidelines turn from green
to red, the mouse pointer changes from “copy” to
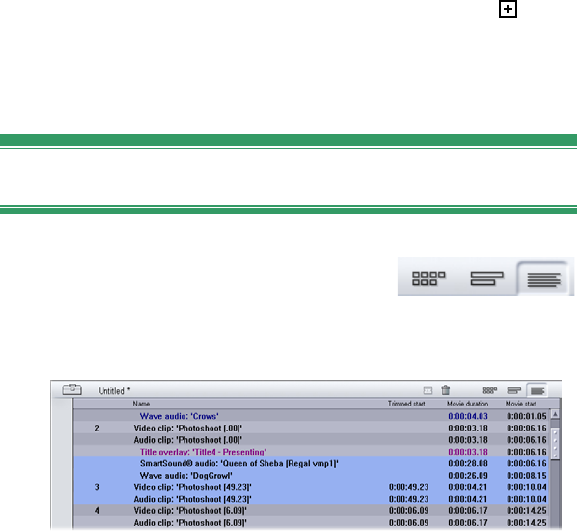
Chapter 4: The Movie Window 67
“unavailable”, and the status line tells you, “Only
scenes, titles, photos and transitions on video track.”
Green placement lines with the “copy” pointer mean
that an action is valid; red placement lines with the
“unavailable” pointer ; show that it is not.
Text view
The Movie Window Text view is a
list showing the start and end times
of clips, as well as their duration. In addition, custom
names for clips are visible in this view.
THE TOOLBOXES
The toolboxes provide a convenient point-and-click
interface for editing operations – adding clips to your
movie, modifying existing clips and applying special
effects. Studio provides separate toolboxes for video
and for audio operations.
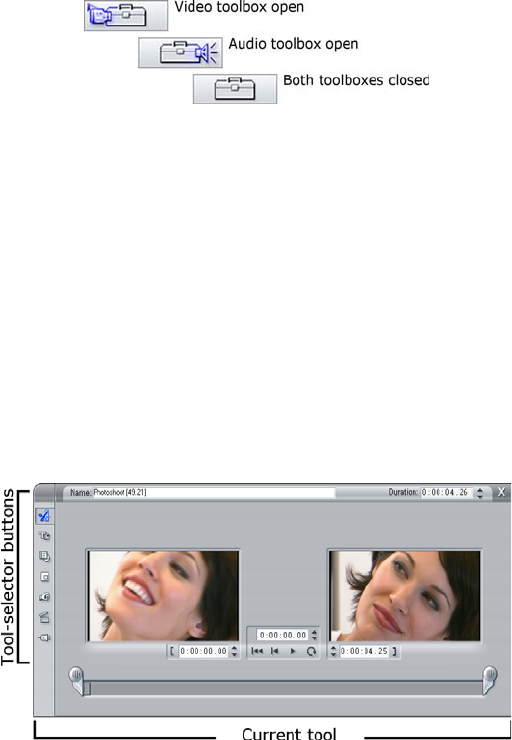
68 Pinnacle Studio 9
The toolboxes are available only in Edit mode. They
are opened and closed with the buttons at the top left of
the Movie Window.
Select the toolbox you want to open by moving your
cursor over the icons. The individual buttons highlight,
indicating which toolbox will open when you click.
The Album is then replaced by the toolbox display,
which contains two main areas:
• Tool selector buttons in a panel on the left. Clicking
one of these opens the corresponding tool.
• The currently-selected tool on the right. Double-
clicking a clip in the Movie Window also displays
the corresponding tool (except for title clips, which
are opened directly in the Title Editor when you
double-click).
All the tool-selector buttons, except the top one in each
set, open specialized tools. The top button in both
toolboxes is the Clip properties tool. It displays a tool
appropriate for trimming and otherwise editing the type
of clip currently selected in the Movie Window.
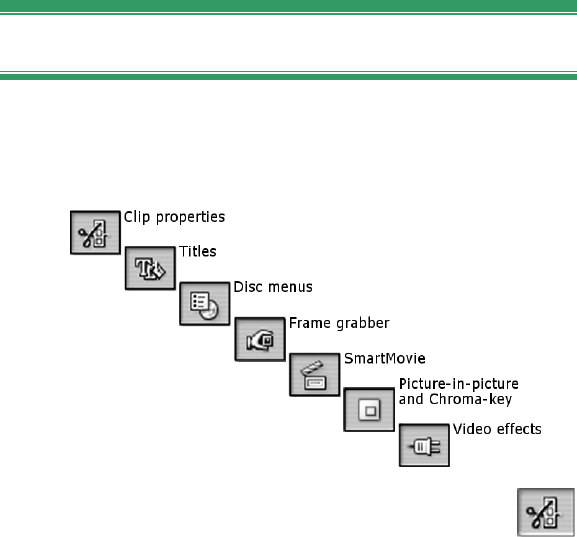
Chapter 4: The Movie Window 69
The Title Editor
One powerful tool that is not directly accessed through
the toolboxes is the Title Editor, in which you can
combine text, images and other graphic resources to
make titles and disc menus for your Studio productions.
Access the Title Editor through the Title and Disc menu
tools, or with the Go to Title/Menu Editor command
from the right-button context menu in the Movie
Window. See Chapter 10: The Title Editor for full
information.
The Video toolbox
The six tools in this toolbox modify or create visual
clip types, including video clips, titles, still images and
disc menus.
Clip properties: The Clip properties tool
adjusts the start and end times of any type of
clip. This is called “trimming”. The tool also allows
you to type in a descriptive name for the clip. The tool
also presents additional interface components
appropriate to the type of clip being edited.

70 Pinnacle Studio 9
Titles: This tool lets you edit the name and
length of titles. The Edit Title button provides
access to the Title Editor window where you can
change the text and appearance of the title.
Disc menus: The Disc menu tool has a number
of controls for editing the links between the
buttons on a disc menu and entry points into your
movie called chapter marks, which are represented on
the menu track in the Movie Window. The Edit Menu
button opens the Title Editor, where you can modify
the visual appearance of a menu.
Frame grabber: This tool takes a snapshot of a
single frame from your movie or from your
current video source. You can use it in your movie, or
save it for use in other applications. As with Capture
mode itself, this tool presents a different interface if
your current capture source is DV than if you are using
a non-DV source.
SmartMovie: This tool automatically com-
bines your source footage with the digital song
file of your choice to create a music video in any of a
variety of styles.
Video effects: Studio provides numerous plug-
in video effects with this tool. Each video clip
or still image in your project can use effects, whether
alone or in combination.
Along with its basic library of useful effects, Studio
provides some “locked” premium effects that you can
try out. For information about purchasing premium
content for Studio, see “Expanding Studio” on page 11.
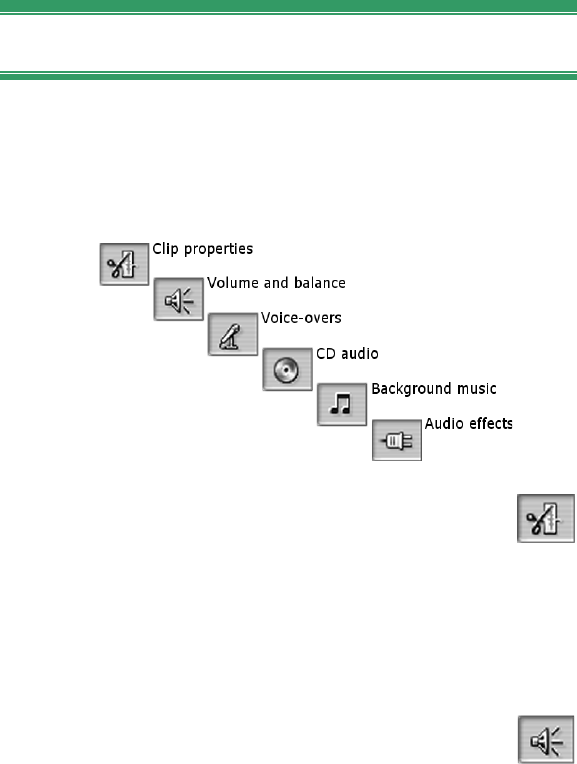
Chapter 4: The Movie Window 71
The Audio toolbox
The six tools in this set operate on or create audio clips
– “original” audio, voice-overs, sound effects and other
audio files, CD tracks and SmartSound background
music.
Clip properties: The Clip properties tool lets
you adjust (“trim”) the start and end times of
any type of clip. You can also enter a descriptive name
for the clip to replace the default name if desired. (Clip
names are displayed when the Movie Window is in
Text view.) The tool’s other controls vary depending
on the type of clip.
Volume and balance: This tool gives you
master volume controls for each of the three
audio tracks: original audio (audio captured with
video), sound effects and voice-overs and background
music. It also enables you to mute any or all of the
tracks, and to add real-time volume fades. Use the
balance and surround control to position each track
independently of the other two in a one-dimensional
stereo or two-dimensional surround-sound space.
When the overlay track is open, the tool provides a
72 Pinnacle Studio 9
fourth set of controls, which affect the overlay audio
track.
Availability: Surround sound is not supported in the SE and
QuickStart versions of Studio.
Record voice-overs: To record a voice-over,
simply click the Record button and begin
speaking into your microphone.
Add CD audio: Use this tool to add tracks, in
whole or in part, from an audio CD.
Background music: This tool lets you add
background music using SmartSound, Studio’s
powerful music generator. Choose a style, song,
and version. Studio will create a musical soundtrack
that matches the duration of your movie.
Audio effects: This tool lets you apply plug-in
effects to any audio clip. The popular VST
standard for audio plug-ins is supported, enabling you
to augment your library with add-on and third party
effects. Factory-supplied effects include a configurable
noise reduction filter, graphic EQ, reverb and others.
Some “locked” premium effects are also included for
you to try out. For information about purchasing
premium content for Studio, see “Expanding Studio”
on page 11.

Chapter 5: Video clips 73
CHAPTER 5:
Video clips
The cornerstone of most Studio video projects is the
Album section containing your captured video scenes.
To create your edited movie, you drag scenes from the
Album into the Movie Window, where they are treated
as editable video clips.
This chapter explains how to set the “in” and “out”
(start and end) points for each clip. The Movie
Window’s editing interface makes this “trimming”
process simple, rapid and precise. The methods covered
in this chapter for trimming video (“Trimming video
clips”, page 78) can for the most part also be applied to
the other types of clip (such as titles and sound effects)
that are covered in later chapters.
A later section of the chapter covers more advanced
editing techniques, including split edits and insert edits,
that you can use to give your movies a more
professional look. See “Advanced Timeline editing” on
page 87.
Finally, we’ll look at using visual effects in Studio, and
at some of the effects you can use in your movies - to
correct a flaw, to communicate an idea, or just for fun.
See “Video effects” on page 95.

74 Pinnacle Studio 9
VIDEO CLIP BASICS
The first step in creating a movie is to introduce some
video scenes from the Album into the Movie Window,
where they become editable clips. At some point you
will probably also add some transitions, titles, audio
and other extras, but a set of video scenes is the starting
point for just about any project.
This section explains how to add scenes to your movie,
and how to work with scenes from multiple capture
files. It also covers some interface features that provide
useful feedback as you work.
Adding video clips to your movie
There are two ways to add a video clip to your movie:
Drag and drop: Drag a scene from the Video Scenes
section of the Album and drop it into the Movie
Window. This is normally the easiest and quickest way
to put together a rough cut of your movie. You can
drag multiple scenes simultaneously if you wish.
The clipboard: The standard clipboard operations (Cut,
Copy and Paste) can be used with video clips in the
Movie Window. The Copy operation works on Album
scenes also.
When a scene or clip is pasted into the Movie Window,
it is inserted at the first clip boundary starting at the
edit line position. You can use the standard keyboard
shortcuts for clipboard operations (Ctrl+X for cut,

Chapter 5: Video clips 75
Ctrl+C for copy, Ctrl+V for paste), or select the desired
operation from the right-button menu.
When the Movie Window is in Timeline view, you can
drop a video scene or clip onto any of the following:
• The main video track. If the clip has associated audio,
it is added to the original audio track. This video
will serve as the background for any overlay video or
titles that on the lower Timeline tracks.
• The overlay track. Video on this track is
superimposed on the contents of the video track. The
picture-in-picture and chroma key effects are used to
make a portion of the overlay frame transparent so
that some of the main video can be seen. Except in
Studio Plus, any clips on the overlay track are
displayed with a “watermark” graphic. If you decide
to use the overlay track in your movies, you can
upgrade to Studio Plus at any time.
• The title track. In Studio Plus, if the overlay track is
hidden, dropping a video clip on the title track cause
the overlay track to open and the clip to be placed
upon it. In other versions of Studio, or when the
overlay track is already displayed, the title does not
accept video clips.
• The sound effects track or the background music
track. Attempting to drop a video clip on either of
these tracks actually drops the clip’s original audio.
Working with multiple capture files
For some projects you may want to incorporate scenes
from multiple source tapes, or from different capture
files made from one tape. To achieve this, load in each

76 Pinnacle Studio 9
of the files in turn and drag whichever scenes you want
from each file into your movie.
To use multiple capture files:
1. Drag scenes from the first capture file into the
Movie Window.
2. Using the dropdown list or the folder button in the
Video Scenes section of the Album, open the
second capture file. Studio displays scenes from
only the current file in the Album. See “Opening a
captured video file” on page 40 for detailed
information on this step.
3. Drag scenes from the second captured file into the
Movie Window. Continue in this manner until you
have gone through all the files.
Because any given movie can be in only one of the
standard 4:3 format and the widescreen 16:9 format,
Studio does not let you mix frame formats in the Movie
Window. The first video clip you add to a movie
determines the movie’s frame format, and later clips
must conform to it. Use the Aspect ratio commands on
the Album menu to convert scenes from one format to
the other. (See “Video aspect ratios” on page 42 for
more information.)
Interface features
Studio provides a variety of visual cues regarding the
video clips in the Movie Window:
• Clips from video that was captured at preview
quality are shown with a white dotted outline. These
clips will be automatically recaptured at full quality
during the Make Movie process.
Chapter 5: Video clips 77
• When a clip is added to the Movie Window, a green
checkmark appears on the Album’s icon for the
corresponding scene. The checkmark remains as
long as any clip in the Movie Window belongs to
that scene.
• To see the original location of a clip in your source
video, use the Find Scene in Album command on the
right-click menu for Movie Window clips. Studio
highlights the Album scene from which the selected
clip is drawn. To go the other way, use the Album ¾
Find Scene in Project to show how a particular
Album scene is used in your current project.
• When neighboring scenes from the Album are placed
in sequence in the Movie Window, the border
between the clips is displayed as a dotted line. This
is to help you keep track of your clips, and does not
affect how they can be manipulated in the Movie
Window.
• In Timeline mode, any special effects you have
applied to a clip are indicated by small icons along
the bottom of the clip. These correspond to the effect
groups shown on the Video effects tool browser. You
can open the tool for parameter editing by double-
clicking any of the icons.
The star icon below this video clip shows that one or
more of the effects in the “Fun effects” group has
been applied.

78 Pinnacle Studio 9
TRIMMING VIDEO CLIPS
In general, captured video scenes contain more material
than you actually require for your movie. “Trimming”
– the process of adjusting the in and out points of a clip
to remove unwanted footage – is a fundamental editing
operation.
No data is lost by trimming: Studio sets new start and
end points for the clip in the Movie Window, but the
source of the clip - the original Album scene – remains
intact. This means you can always reset clips to their
original state, or select different trim points.
Studio offers two ways to trim any clip (video scenes,
transitions, titles, still images, audio clips and disc
menus):
• Directly on the Timeline (see “Trimming on the
Timeline using handles” below).
• Using the Clip properties tool (see “Trimming with
the Clip properties tool” on page 83).
A video clip can be trimmed to any desired in and out
points within the limits of the original scene.
Trimming on the Timeline using handles
The quickest way to trim is by dragging the edges of
clips directly on the Timeline. Watch the Player as you
trim, so you can find the frame on which you want to
begin or end.
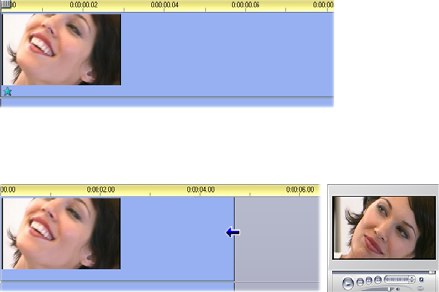
Chapter 5: Video clips 79
Let’s first consider the simplest trimming case, in a
movie with only one clip. Then we’ll turn to the more
usual situation of trimming a single clip that is
surrounded by other clips.
To trim a single clip on the Timeline:
1. Delete all but one clip from the Timeline. If the
Timeline is empty, drag a scene in from the Album.
2. Expand the Timescale to make fine adjustments
easier.
Position the mouse pointer anywhere on the
Timeline except directly over the edit line. The
pointer becomes a clock symbol. Click-drag it to
the right to expand the Timescale.
This illustration shows maximum expansion, where
each tick mark represents a single frame:
3. Position your mouse pointer over the right edge of
the clip. The pointer becomes a left-pointing arrow.
4. Click-drag to the left while keeping an eye on the
Player, which updates continuously to show the last
frame in the trimmed clip.
As you shorten the clip, the arrow cursor becomes
two-directional, indicating that the clip edge can be
dragged both left and right. You can reduce the clip
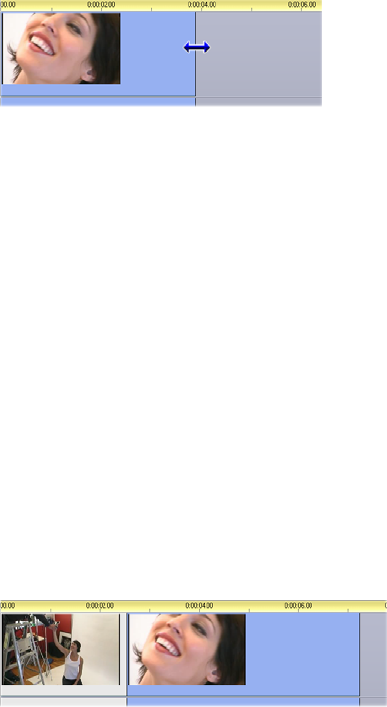
80 Pinnacle Studio 9
to as little as a single frame, or increase it up to the
end of the source scene.
5. Release the mouse button. The clip is now trimmed.
Multiple clips
The secret to trimming a clip when multiple clips are
on the Timeline is that you must first select the clip to
be trimmed by clicking on it with the mouse.
To trim with multiple clips on the Timeline:
1. Set up the Timeline with two short clips.
2. Expand the Timescale by right-clicking in the ruler.
Choose 30 seconds from the pop-up menu.
3. Click the second clip. The video track should now
look something like this:
You can trim the right-hand edge of the clip just as
in the single-clip example above. As you do so, the
last frame of the clip is displayed in the Player. As
long as the second clip remains selected, you can
continue to trim more video by dragging the edge to
the left, or restore some of the trimmed video by
dragging the edge to the right.
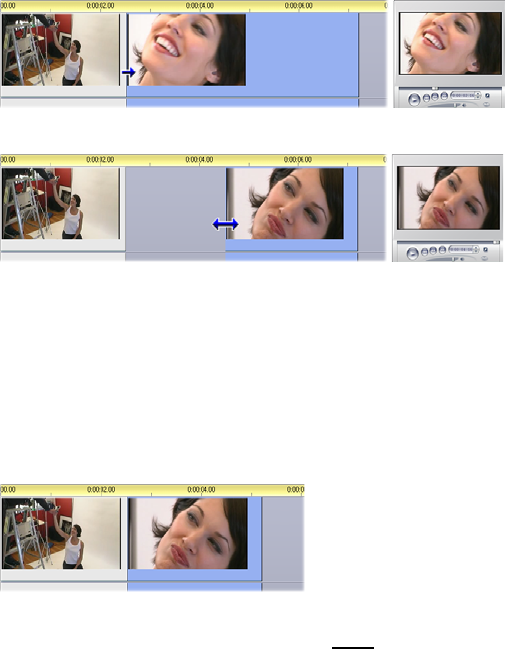
Chapter 5: Video clips 81
4. With the second clip still selected, move your
mouse pointer over the left edge of clip until the
pointer changes to a right arrow.
5. Drag the left edge of the second scene to the right.
As you drag, the first frame of the clip is displayed
in the Player. As long as the clip remains selected,
you can continue to trim more video by dragging
the edge to the right, or restore some of the trimmed
video by dragging the edge to the left.
6. Release the mouse button. The clip you trimmed
snaps back against the right edge of the first clip.
Gaps and fills: Trimming with the Ctrl key
As we have seen in the example above, when you
shorten a clip on the video track, the clip and any clips
to the right of it move leftwards as necessary so that no
gap is left. At the same time, clips on other tracks are
shortened to keep the whole Timeline in sync. When
you trim a clip on any other track, however, gaps are
not automatically closed up, and no other track is
affected.

82 Pinnacle Studio 9
This default trimming behavior simplifies editing under
most circumstances, but Studio also gives you a way to
invert the behavior when needed. If you press the Ctrl
key before you begin trimming a clip on the video track,
neither that clip nor any other will be repositioned, and
gaps are not closed up. There is no effect on other
tracks.
Meanwhile, using Ctrl when trimming clips on other
tracks again inverts the normal behavior. The clips on
the track will close in to fill any gap left by the trim.
Clips on tracks besides the one being trimmed are again
unaffected.
Note: See page 60 for a description of the parallel
behavior of Ctrl when deleting clips.
Clip-trimming tips
If you are having difficulty manipulating the edges of
clips during trimming, try the following:
• Verify that the clip you wish to trim is selected, and
that it is the only one selected.
• Expand the Timescale until it is easier to make fine
adjustments.
• Avoid expanding the Timescale too far, which
makes clips appear very long. If that happens, undo
until the scale is the way you want it; or reduce the
scale by dragging it towards the left; or select an
appropriate value from the Timescale’s context
menu.
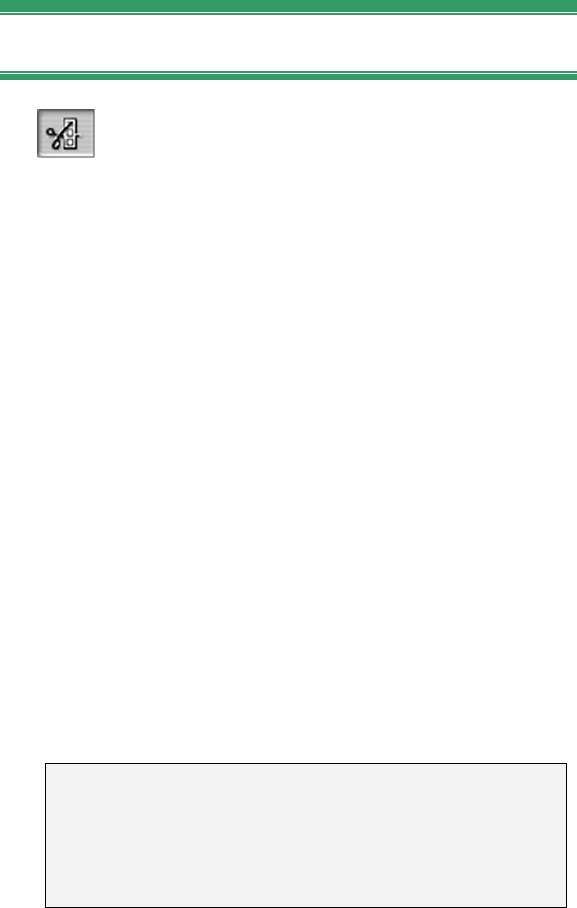
Chapter 5: Video clips 83
Trimming with the Clip properties tool
Although it is possible to trim video clips
directly on the Timeline with full frame
accuracy, rapid, precise trimming is often easier to
achieve with the Clip properties tool. To access this
tool, select the clip you want to change, then use the
Toolbox ¾ Modify Clip Properties menu command, or
click one of the toolbox buttons at the top left of the
Movie Window. (Clicking the same button a second
time will close the tool.)
In the case of video clips – in fact, any clips other than
titles – you can also open and close the Clip properties
tool by double-clicking the clip in any Movie Window
view.
The Clip properties tool can be used to modify any
kind of clip. It offers an appropriate set of controls for
each type.
The Name text field: For a video clip, most of the clip
property controls are for trimming. The only exception
is the Name text field, which lets you assign a custom
name to the clip to replace the default one assigned by
Studio.
The Name field is provided on the Clip properties tool
for all clip types. Clip names are used by the Movie
Window’s Text view, and can also be viewed as fly-by
labels when your mouse moves over clips in the
Storyboard view.
Preview areas: Separate preview areas show the in and
out frames of the trimmed clip, together with a counter
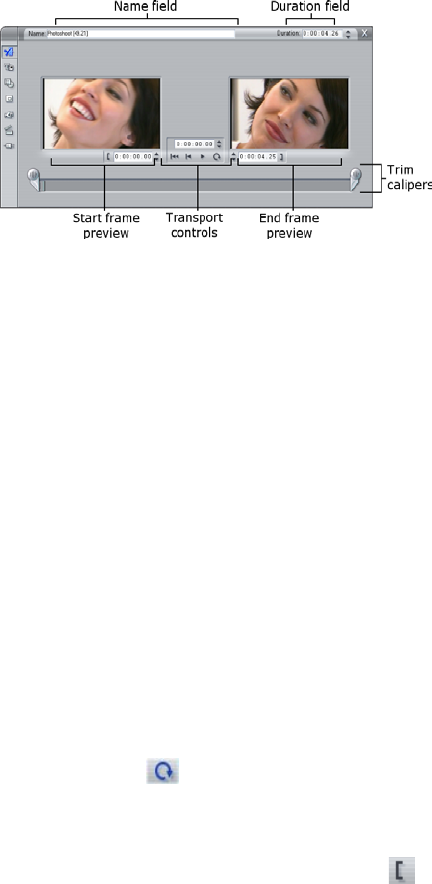
84 Pinnacle Studio 9
and jog buttons. The layout of each preview area is
similar to that of the Player during normal editing.
Setting playback position: A scrubber control across
the bottom of the tool lets you set the playback position
anywhere within the clip. You can also set the playback
position using the counter and jog buttons located
between the two preview areas.
Using the counters: The positions reported by all three
counters are relative to the beginning of the clip, which
is position 0:00:00.0. As with the counter on the Player,
you can adjust the counters in the Clip properties tool
by clicking in one of the four fields (hours, minutes,
seconds, frames) to select it, then using the jog buttons.
When none of the fields is explicitly selected, the jog
buttons apply to the frames field.
Transport controls: While the Clip properties tool is
in use, the transport controls in the center area
substitute for those that normally appear on the Player.
These special transport controls include a Loop
play/Pause button that can be used to cycle
repeatedly through the trimmed portion of the clip
while the trim points are being adjusted.
Setting the trim points: The left bracket button
beside the counter in the left preview area, and the right
Chapter 5: Video clips 85
bracket button beside the counter in the right
preview area, set their respective trim points to the
current position.
You can also adjust either trim point by:
• Entering a value directly into its counter
• Adjusting a counter field with the jog buttons
• Dragging the corresponding trim caliper
The Duration text field: This field shows the length of
the trimmed clip in hours, minutes, seconds and frames.
If you modify the value, either by editing the numbers
directly or by clicking the associated jog buttons, the
effect is to change the out point of the clip. Of course,
you cannot reduce the duration to less than a frame, or
increase it beyond the limits of the original video scene.
Usage tip: If you want to switch from trimming one
clip on the video track to trimming another, just click
on the new clip while the Clip properties tool remains
open, or drag the Timeline scrubber to the new clip.
Resetting trimmed clips
If you change your mind about a particular trim
operation (or group of operations) after previewing,
either use the Undo button (or Ctrl+Z) or manually
reset the trimmed clip using one of these methods:
• Drag the clip’s right edge directly on the Timeline
until it stretches no further,
• In the Clip properties tool, drag the trim calipers to
the ends of the clip.

86 Pinnacle Studio 9
SPLITTING AND COMBINING CLIPS
If you want to insert one clip on the video track into the
middle of another clip, split the latter into two parts
then insert the new item. “Splitting” a clip actually
results in it being duplicated. Both clips are then
automatically trimmed so that the first ends at the split
point and the second begins there.
To split a clip in Timeline view:
1. Choose the split point.
You may use any method that adjusts the current
position, such as moving the Timeline scrubber,
clicking Play and then Pause, or editing the counter
value in the Player.
2. Either right-click within the clip you wish to split
and select Split Clip from the pop-up menu; or,
make certain the edit line is positioned where you
wish to split the clip, and click the Split clip/scene
(razorblade) button (see page 60).
The clip is split at the current position.
To restore a split clip:
• Use the Undo button (or press Ctrl+Z). Even if you
have performed other actions since you split the clip,
the multilevel undo allows you to step back as far as
needed. Or,
• If undoing is not desirable because of intervening
actions that you don’t want to discard, you can
replace both halves of the split clip with the original
from the Album. Or,
• Delete one half of the split clip, and trim out the
other.

Chapter 5: Video clips 87
To combine clips in the Movie Window:
Select the clips you wish to combine, then right-click
and choose Combine Clips.
The operation is allowed only if the combination of
clips will also be a valid clip – that is, a continuous
excerpt of the source video. On the Timeline, clips that
can be combined meet along a dotted edge.
ADVANCED TIMELINE EDITING
Availability: The advanced editing techniques discussed below are
not supported in the SE and QuickStart versions of Studio. The
additional advanced features of Studio Plus, making use of the
overlay track, are covered in Chapter 6: Two-track editing with Studio
Plus.
During most editing operations, Studio automatically
keeps the clips on the various Timeline tracks
synchronized. For instance, when you insert a scene
from the Album onto the video track, the relative
positions of all clips to the right of the insertion remain
unchanged.
Sometimes, though, you might like to override the
default synchronization. You might want to insert a
new video clip into your project without displacing any
clips of other types. Or you might want to edit video
separately from its accompanying original audio – a
valuable technique with several variations, discussed
below.
Such special edits are possible using the track lock
buttons along the right edge of the Movie Window in
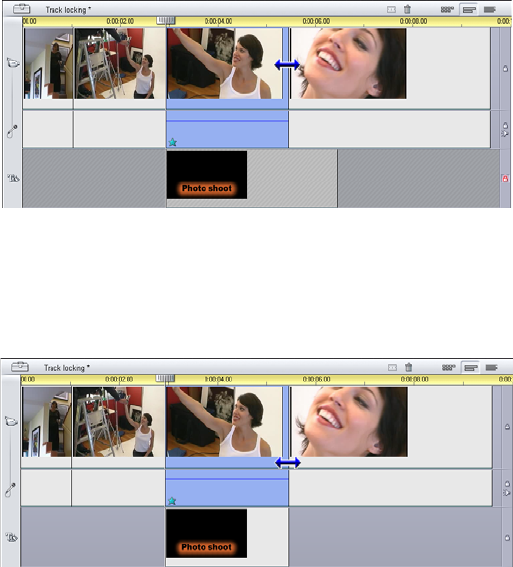
88 Pinnacle Studio 9
Timeline view. Each of the standard tracks (all except
the menu track) provides a lock button. See “Track
locking” on page 65 for more information on track
locking.
A locked track is grayed out in the Timeline view,
indicating that the clips on the locked track cannot be
selected or edited in any of the three views; nor are
they affected by editing operations on unlocked tracks.
Apart from the menu track, any combination of tracks
can be locked.
Locking the title track, for example prevents the
duration of a title from being changed even when you
trim clips on the main video track at the same time
index.
When the title track is unlocked, trimming the main
video clip above it automatically trims the title.
Chapter 5: Video clips 89
Insert editing
In ordinary Timeline editing, a video clip and the
original audio that was captured with it are treated as a
unit. Their special relationship is symbolized in the
Movie Window by the dotted line connecting the video
track indicator with the original audio track indicator,
showing that the latter is dependent on the former.
The track lock buttons make it possible to deal with the
two tracks independently for operations like insert
editing, which typically means replacing part of a clip
on the video track while the original audio track
continues uninterrupted.
Availability: Insert editing is not supported in the SE and QuickStart
versions of Studio. Under Studio Plus, insert editing may also be
carried out on the overlay video and audio tracks, using analogous
methods to those described here.
For instance, in a sequence that shows someone
recounting a story, you might wish to insert a shot of an
audience member smiling (or sleeping!) without
breaking away from the main audio.
To perform an insert edit on the video track:
1. In the Timeline view of the Movie Window, click
the original audio track’s padlock button to lock
the track.
The lock button is highlighted in red, and the
track itself is grayed to show that its contents
will not be affected by editing operations.
2. Clear space on the video track for the video clip
you want to insert. Position the Timeline scrubber
at the point you want the insertion to start and use
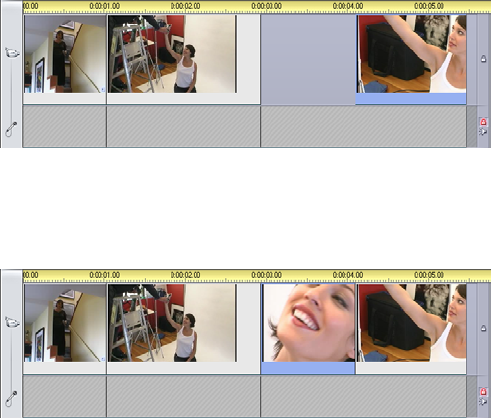
90 Pinnacle Studio 9
the Split clip/scene button. Now move to the point
where the insertion should end and again split the
clip. Finally, delete the portion of video that will be
replaced by the insertion.
Because the audio track is still intact, having been
locked, the video to the right of the insertion point
does not move leftwards to fill the gap you have
made in the Timeline, for the video and audio
would then no longer be synchronized. If you were
to preview your video now, you would see a black
screen as the gap portion played back, but the
soundtrack would be normal.
3. Now all that remains is to place the clip you want to
insert. Drag the clip (whether from the Album or
elsewhere on the Timeline) into the hole in the
video track that you’ve just opened up.
If the inserted clip is too long for the space you
created it is automatically trimmed to fit the space.
You can adjust the trimming with the Clip
properties tool.
Insert editing on the original audio track
The converse insert-editing operation, in which a sound
clip is inserted into the original audio track over

Chapter 5: Video clips 91
unbroken video, is needed less often but is also readily
performed in Studio.
The procedure is analogous to the one for inserting
video: simply reverse the roles of the two tracks at
every step.
Split editing
In “split editing”, a clip’s audio and video are
separately trimmed so that the transition to one occurs
before the transition to the other.
Availability: Split editing is not supported in the SE and QuickStart
versions of Studio. Under Studio Plus, split editing may also be
carried out on the overlay video and audio tracks, using analogous
methods to those described here.
In an “L-cut”, the video precedes its sync audio; in a
“J-cut”, the audio comes first.
Tip: For faster, more precise trimming, you may find it
helpful to have the Clip properties tool open when
following the procedures in this section. To open the
tool, just double-click one of the video clips before you
begin.
The L-cut
In an L-cut, the cut to new video comes before the cut
in the audio.
Imagine a videotaped lecture in which the video
periodically cuts away from the speaker to show travel
or nature scenes illustrating the lecture topic.
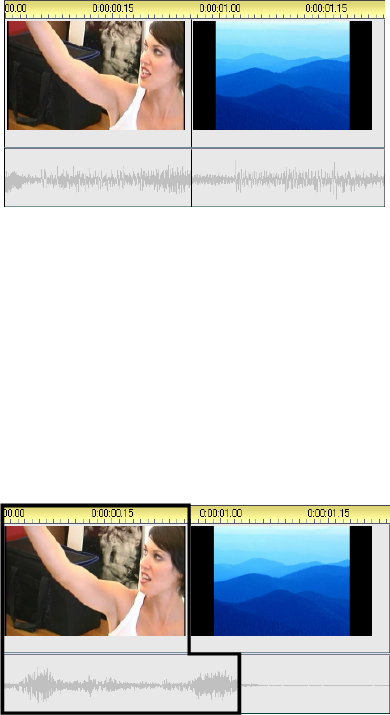
92 Pinnacle Studio 9
Audio and video cut simultaneously.
Instead of cutting the audio and the video
simultaneously, you might decide to let the speaker’s
voice overlap into the following scene. This makes it
clear to the audience that the new scene they are now
watching illustrates whatever explanation the speaker
has been providing.
Notice that the video and audio clip boundaries in the
completed cut form an L-shape.
Audio cuts after video. The resulting “L” shape is
outlined in this illustration.
There are many effective uses of this technique. It can
be considered whenever the second clip’s video serves
to illustrate the first clip’s audio.
To perform an L-cut:
1. Adjust the Timeline so you can easily count off the
number of frames or seconds you want to overlap.
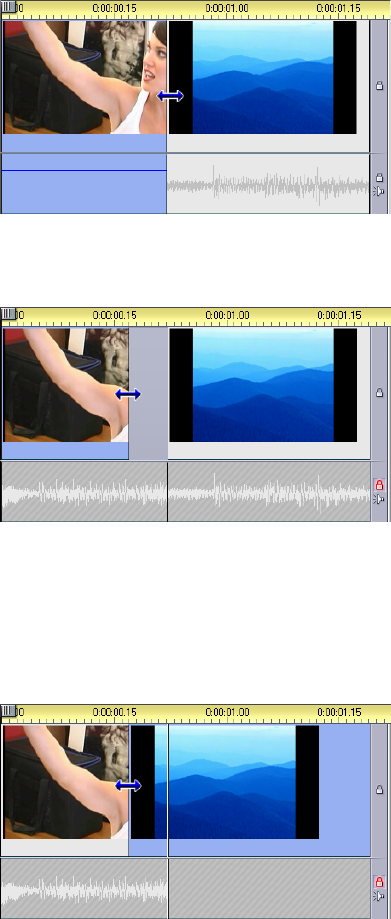
Chapter 5: Video clips 93
2. Select the left-hand clip and trim its right edge to
the point where you want the audio to end.
3. Lock the audio track. Now drag the right-hand edge
of the same clip’s video leftward to the point where
the following clip’s video should start.
4. With the audio track still locked, drag the second
clip’s video to the left until it meets the original clip.
If there isn’t enough excess video at the start of the
second clip to make this trim possible, you will first
need to trim off a sufficient amount from both its
video and audio then try again.
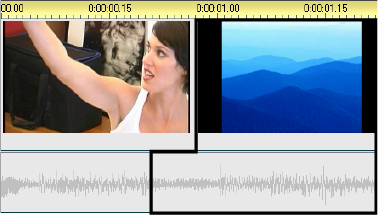
94 Pinnacle Studio 9
5. Unlock the audio track.
The video now cuts away to the second clip ahead
of the audio. Video has been trimmed from the end
of the first clip, and audio has been trimmed from
the start of the second clip.
The J-cut
In the J-cut, the new audio cuts in before the video
switches. This can be effective when the second clip’s
audio prepares the viewer for the material in the scene.
Returning to the videotaped lecture example, let’s say
we are now going to switch back to the speaker at the
end of the interpolated footage. If we let the next part
of the lecture appear on the soundtrack a few moments
before the video shows us the podium again, the
change will be much less abrupt.
This time the clip boundaries outline the letter J:
Audio cuts before video. The resulting “J” shape is
outlined in this illustration.
To perform a J-cut:
1. Adjust the Timeline so you can easily count off the
number of frames or seconds you want to overlap.
2. As before, trim back the right edge of the left-hand
clip, both video and audio, by the overlap interval.

Chapter 5: Video clips 95
3. Lock the audio track. Now drag the right-hand edge
of the same clip’s video back to the right by the
overlap interval.
4. Unlock the audio track.
The audio now cuts away to the second clip ahead
of the video.
Note: The procedures described above for performing
the L-cut and the J-cut are not the only possibilities.
With the J-cut, for example, another method would be
to trim the right-hand clip to the desired start point of
the video then, with the video track locked, drag the
audio portion leftwards to overlap the audio of the left-
hand clip.
USING VIDEO EFFECTS
Most video editing consists of selecting, ordering and
trimming video clips, of connecting clips with
transition effects and combining them with other
materials such as music and still images.
Sometimes, though, you also need to modify the video
images themselves, manipulating them in some way to
achieve some desired effect. Studio’s Video effects tool
provides an extensive set of plug-in video effects that
can be applied either to video or still images. See page
101 for descriptions of the basic set of effects supplied
with Studio.
The Video effects tool is the seventh tool in the
Video toolbox. It has two main areas: at the left,
an effects list showing which effects are already
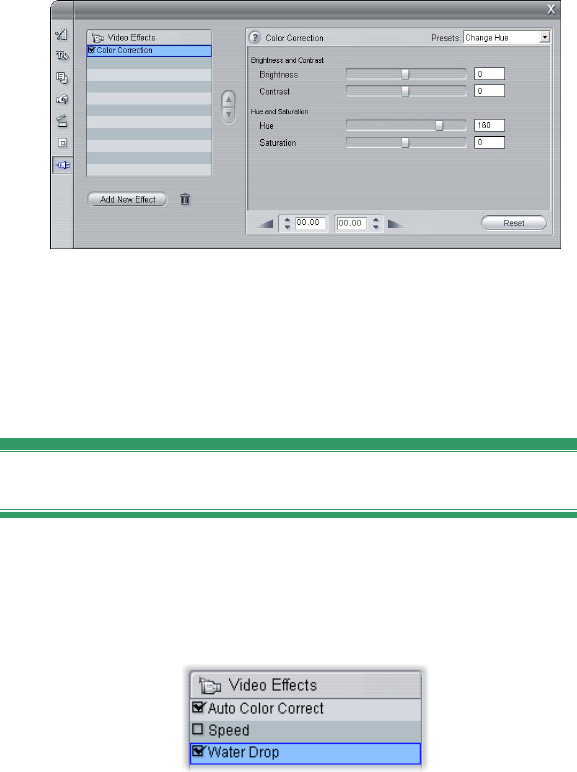
96 Pinnacle Studio 9
attached to the currently-selected clip(s), and at the
right, a parameters panel where you can tune the effect
as required.
Video effects vs. audio effects
In most respects, the Video effects tool and the Audio
effects tool work identically, except for the type of
material they apply to.
Working with the effects list
Each video or image clip in your project can be
modified by one or more video effects. Each effect is
applied to the original image in turn, in the order in
which they are listed on the Video effects tool.
The checkboxes next to each effect name allow you to
enable and disable effects individually without have to
remove them from the list (which would cause any
customized parameter settings to be lost). In the above
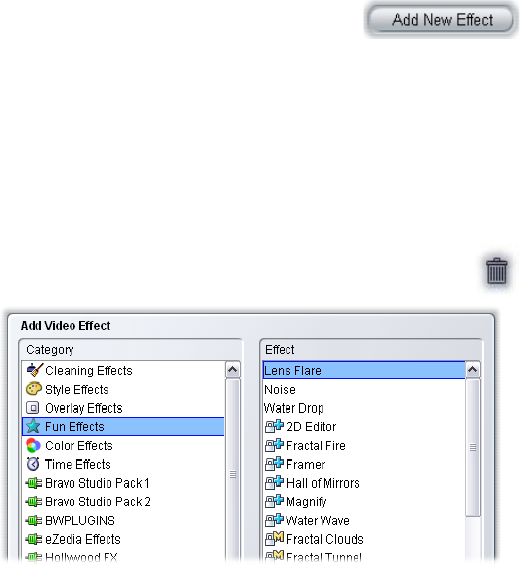
Chapter 5: Video clips 97
illustration, the “Speed” effect has been disabled while
the other two effects on the list remain in force.
Adding and deleting effects
To add an effect to the list for the
current clip, click the Add new effect
button, which opens an effects browser on the right-
hand side of the tool window.
Click an item in the browser’s Category list to display
the names of the individual effects in that category.
Select the effect you want, then click the OK button to
add the effect.
To remove the currently-selected effect from
the list, click the delete effect (trashcan) button.
The Video Effects browser is open here to the “Fun
Effects” page. Entries having a padlock symbol are
premium effects requiring separate purchase. In the
illustration, variants of the padlock symbol indicate
effects belonging to the Plus and Mega expansion
packs, which both offer effects in several categories.
Premium video and audio effects, like other locked
content in Studio, can be used freely, but cause a
“watermark” graphic to be added to the video when
played back. If you want to use the effect in an actual
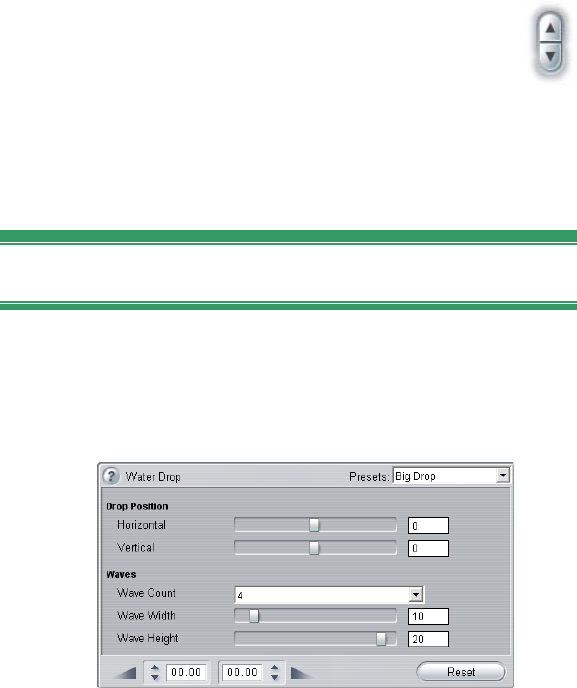
98 Pinnacle Studio 9
production, you can purchase an activation key without
leaving Studio. For information about purchasing
locked video and audio effects, and other premium
content for Studio, see “Expanding Studio” on page 11.
Changing the order of effects
The cumulative result of using more than one
effect on the same clip can vary depending on
the order in which the effects are applied. With
the up and down arrow buttons to the right of
the effects list, you can control the position of each
effect in the processing chain. The buttons apply to the
currently-selected effect.
Changing effect parameters
When an effect is selected in the effects list, the
parameters panel on the right-hand side of the Video
effects tool window provides controls for adjusting the
effect’s parameters, if any.
The controls for the basic library of effects supplied
with Studio are described below (beginning on page
103). Add-on effects are described in their own on-line
documentation, which you can access from the
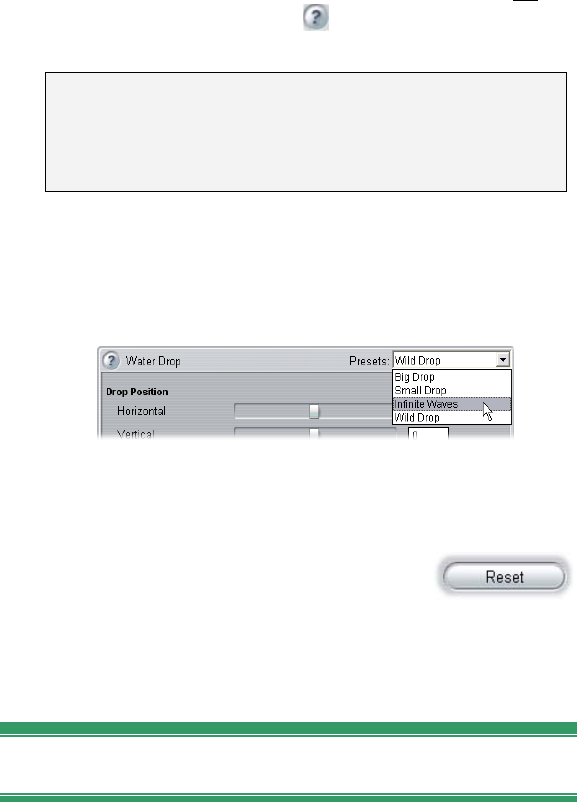
Chapter 5: Video clips 99
parameters panel by pressing function key F1 or
clicking the help button at the top left of the
parameters panel.
Note: Some plug-in effects may provide their own
parameter windows with specialized controls. In those
cases, the parameters panel on the effects tool displays
a single Edit button, which accesses the external editor.
Using parameter presets
In order to simplify the use of parameters, many effects
offer presets that let you configure an effect for a
particular use simply by selecting a name from a list.
Often, the quickest way to configure an effect is to start
with the preset that comes closest to what you want,
then fine-tune the parameters by hand.
Resetting effects: A special type of
preset is the factory default setting of
each effect. The default can be restored at any time by
clicking the Reset button at the bottom of the
parameters panel.
Fading effects in and out
You can smooth the application of an effect by fading
it in at the beginning of the clip, fading it out at the end
of the clip, or both.
When an effect fades in, some or all of its numeric
parameters start out at neutral, default values (usually
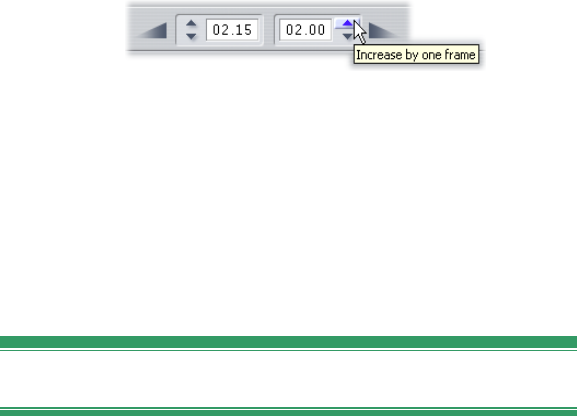
100 Pinnacle Studio 9
zero). As the clip begins to play, each affected
parameter gradually approaches its configured value,
until by the end of the fade duration the effect is at full
strength. Fading out reverses the process, by moving
from the configured to the neutral values in the closing
portion of the clip.
The durations for fades are set in seconds and frames
using the counters at the bottom of the parameters
panel for the effect. Fades can be set to any length, but
the total of the fade in and the fade out must be less
than or equal to the total duration of the clip.
To turn a fade off, set the corresponding fade counter to
zero.
Previewing and rendering
While you are working with the Video effects tool,
choosing effects and adjusting parameter settings, the
Player gives a dynamically-updated preview of the
current frame in your movie. Previewing a single frame
may not be very revealing when you are working with
the Time effects (page 105), or effects that evolve over
the duration of the clip (like the Water drop effect,
page 111).In those cases, you will need to play back the
clip to see the full impact of the effect you are applying.
Because many effects require intensive calculation, a
fully smooth and detailed preview of the full clip won’t
be instantaneously available in most cases. Each time
effects are added or removed, or settings are changed,

Chapter 5: Video clips 101
Studio commences “rendering” the clip –
recalculating its final appearance – in the
background without interrupting your
workflow. The progress of rendering is
indicated by a colored bar that advances from
left to right along the Timescale above the
clip in the Movie Window.
Options affecting background rendering are provided
by the Edit options panel (Setup ¾ Edit). See
“Rendering” on page 258 for details.
VIDEO EFFECTS – THE BASIC SET
Your starter library of video effects is divided into five
categories:
• Cleaning effects help correct defects in the source
video, such as noise and camera shake.
• Time effects change the tempo of playback without
affecting the appearance of the video frames
themselves.
• Color effects let you modify the coloration of a clip,
whether subtly or dramatically.
• Fun effects like Water drop and Lens flare provide
extra scope for creativity and fun in your movies.
• Style effects like Emboss and Old film let you apply
distinctive visual styles for added impact.
Availability: In the SE and QuickStart versions of Studio, the Time,
Color, Fun and Style effects are rendered with a “watermark”
overlying the video until unlocked by purchasing the appropriate
activation key. See page 11 for details. The effects in the Overlay
group provide the underlying functionality for the overlay features
(Picture-in-picture and Chroma key) of Studio Plus. These features
are covered in Chapter 11: Two-track editing with Studio Plus.
102 Pinnacle Studio 9
Building your effects library
Studio’s plug-in architecture means that you can
continue to add new effects to your video effects
library as they become available. Expansion packs of
effects from Pinnacle and other vendors will integrate
seamlessly with the program.
Some expansion effects are shipped with Studio as
locked, premium content. These include Pinnacle’s
Plus and Mega video effect packs, and a variety of
third-party effects. Such effects can be previewed in
Studio as usual, but are “watermarked” with a special
graphic during playback.
Purchasing an activation key will remove the
watermark. This can be done without leaving Studio.
For more information about obtaining premium content
for Studio, see “Expanding Studio” on page 11.
When context-sensitive help documentation for an add-
on pack of video effects is available, it can be viewed
by clicking the help button at the top left of the
parameters panel for each effect.
Warning: Studio’s plug-in video effects are computer
programs. They are theoretically capable of actions
with the potential to damage or disrupt your system,
such as modifying or deleting files and editing the
system registry. Pinnacle advises against installing
third-party plug-ins except those from trusted vendors.
Chapter 5: Video clips 103
CLEANING EFFECTS
Cleaning effects help correct defects in the source
video, such as noise and camera shake.
Note: Studio’s video cleaning effects are general-
purpose filters designed to reduce the most common
problems found on a wide range of material. They are
not a panacea. Your results will vary depending on the
original material and the severity and nature of the
problems.
Auto color correct
This effect compensates for incorrect color balance in
your video. The idea is similar to the “white balance”
setting on a camcorder.
Brightness: Color correction may affect the brightness
of the image. You can apply a manual correction, if
needed, with this slider. (Technically, the control
modifies the “contrast gamma” of the image rather than
its actual brightness.)
Note: The Auto color correct effect may introduce
video noise into the clip as a side-effect of processing.
If this happens to a troublesome degree, add on the
Noise reduction effect described below.
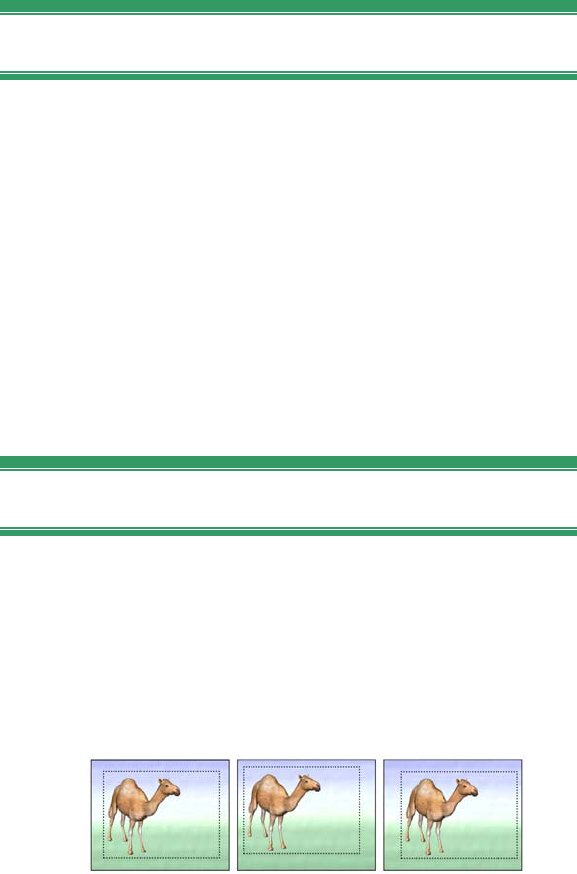
104 Pinnacle Studio 9
Noise reduction
This plug-in applies a noise-reduction algorithm that
may improve the appearance of noisy video. In order to
minimize artifacts (image defects caused as a side-
effect of image processing), noise reduction is only
performed in areas of the frame where the amount of
motion falls beneath a certain threshold value.
Motion threshold: This slider governs the threshold
value. Moving the slider rightwards increases the
amount of motion the effect will tolerate, thus tending
to increase the proportion of the image that will be
affected. At the same time, the danger of introducing
unacceptable artifacts into the video is also increased.
Stabilize
Like the electronic image stabilization feature in many
digital camcorders, this effect minimizes jerkiness or
jitter from camera movement. The edges of the image
are discarded, and the center is magnified by about
20% to fill the frame. By adjusting the boundaries of
the selected region on a frame-by-frame basis, Studio is
able to compensate for the unwanted camera motion.
Studio’s Stabilize effect works by expanding a
selected area (inner lines) to full-frame size. The
area is adjusted from frame to frame to compensate
for slight aiming differences caused by camera shake.
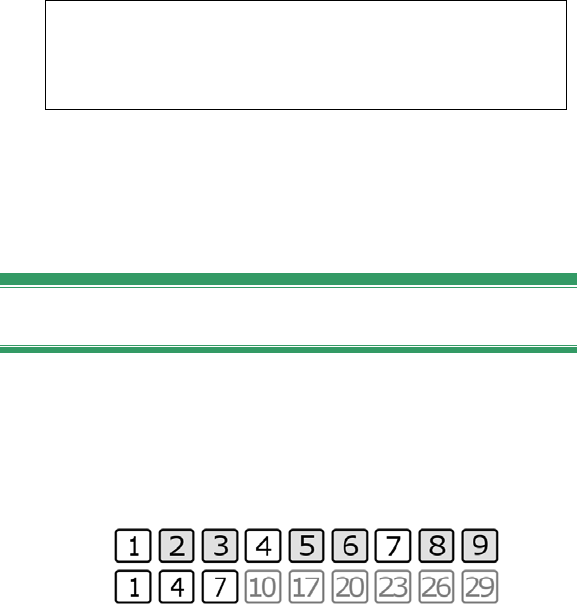
Chapter 5: Video clips 105
TIME EFFECTS
Availability: Unrestricted use of the effects in this group is not
included with the SE and QuickStart versions of Studio. Until
unlocked with the appropriate activation key, a “watermark” graphic
appears over part of the video frame when clips using any of the
effects are played back. See page 11 for details.
Time effects change the tempo of playback without
affecting the appearance of the video frames
themselves.
Speed
This effect allows you to set the speed of any video clip
from one-tenth to five times normal. Set the slider to
the speed you wish to apply to the clip. Notice that the
clip changes length in the Movie Window as you vary
its speed.
Playback speed is increased by omitting frames.
Here, the movie will run at triple speed. In the first
nine frames of the original clip (top), two out of
every three frames will be dropped when the final
movie (bottom) is generated.
Conversely, you can change the playback speed of a
clip directly on the Movie Window Timeline. After
selecting the clip and opening the parameters panel for
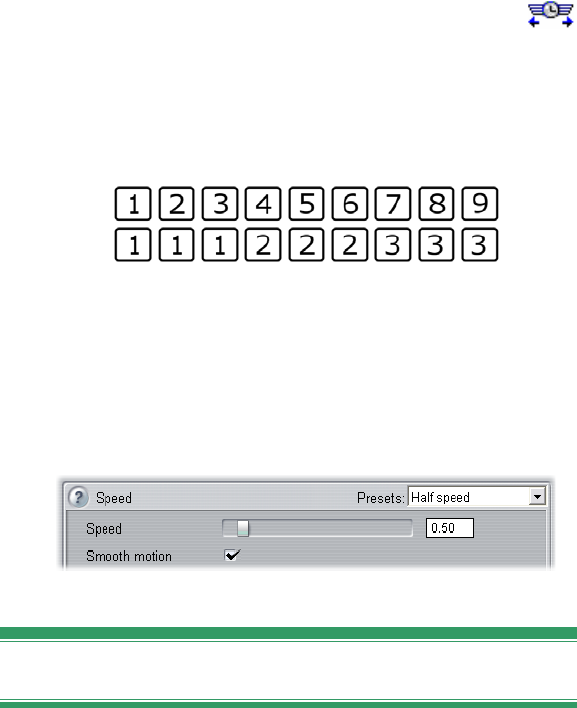
106 Pinnacle Studio 9
the Speed effect, move your mouse pointer to the clip’s
right-hand edge. When the Speed change pointer
appears, click and drag the edge of the clip as though
you were trimming its length. You can select anywhere
from one-fifth to ten times the original duration. The
actual trimming of the clip – the range of frames it
incorporates – is not affected.
Playback speed is reduced by repeating frames. Here,
the movie runs at one-third speed as each frame is
played three times before moving onto the next.
Slowing a clip down can make its motion look choppy.
The Smooth motion option creates intermediate frames
that reduce the choppiness.
Strobe
The Strobe effect creates “frozen” motion like that of a
dancer under strobe lights. The Strobe repetition
parameter indicates how many times to repeat each
displayed frame in the currently-selected clip. The
maximum setting is 50.
The clip duration remains constant; Studio drops
frames to make room for the repeated ones.
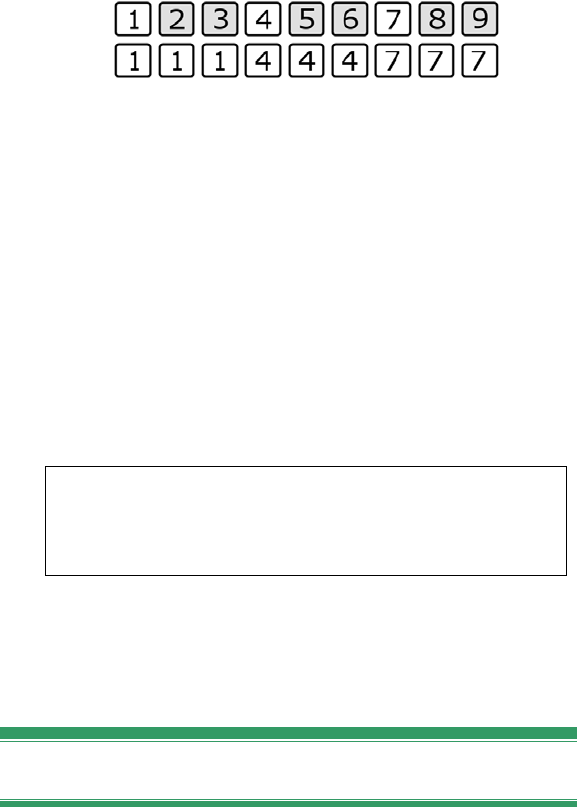
Chapter 5: Video clips 107
The strobe effect omits some frames and repeats
others. Here, with strobing set to 2, six frames
(shaded) will be dropped from the first nine frames
of the clip (top). In the final movie (bottom), the
remaining frames are repeated twice each.
COLOR EFFECTS
Availability: Unrestricted use of the effects in this group is not
included with the SE and QuickStart versions of Studio. Until
unlocked with the appropriate activation key, a “watermark” graphic
appears over part of the video frame when clips using any of the
effects are played back. See page 11 for details.
Color effects let you modify the coloration of a clip,
whether subtly or dramatically.
Black and white
This effect subtracts some or all of the color
information from the original video, with results
ranging from partly desaturated (the “Faded” preset) to
fully monochrome (“Black and white”). The Amount
slider controls the strength of the effect.

108 Pinnacle Studio 9
Color correction
The four sliders in the parameters panel for this effect
control the coloration of the current clip.
Brightness: This is the relative intensity of light,
without regard to color. Try adjusting both brightness
and contrast to correct video that is underexposed or
overexposed.
Contrast: The range of light and dark values in a
picture or the ratio between the maximum and the
minimum brightness values. Moving the slider to the
left lowers contrast, forcing all areas of the image
towards medium brightness values. Moving the slider
to the right increases contrast, making dark areas darker
and bright areas brighter.
Hue: This is the visual property that allows us to
distinguish colors. The slider biases all the colors in a
clip towards red (right) or green (left). This can be
especially useful for correcting flesh tones in some
video.
Saturation: This is the quantity of pure color, ranging
from zero (no color at all – a gray scale) to fully
saturated (the maximum color intensity your output
system can deliver). Move the slider leftwards for a
tonally-reduced, washed-out look; or rightwards for
extra vibrancy.
Posterize
This effect lets you control the number of colors used
to render each frame of the clip, all the way from the

Chapter 5: Video clips 109
full original palette down to two colors (black and
white) as you drag the Amount slider from left to right.
Regions of similar color are coalesced into larger flat
areas as the palette shrinks.
Sepia
This effect imparts the appearance of antique
photography to the clip by rendering it in sepia tones
rather than full color. The strength of the effect is
controlled with the Amount slider.
FUN EFFECTS
Availability: Unrestricted use of the effects in this group is not
included with the SE and QuickStart versions of Studio. Until
unlocked with the appropriate activation key, a “watermark” graphic
appears over part of the video frame when clips using any of the
effects are played back. See page 11 for details.
Fun effects like Water drop and Noise provide extra
scope for creativity and fun in your movies.
Note: Some advanced effects in this group can only be
used under Windows 2000 or Windows XP, and are
not available with other Windows versions. The effects
with this restriction are Lens flare and Water drop.
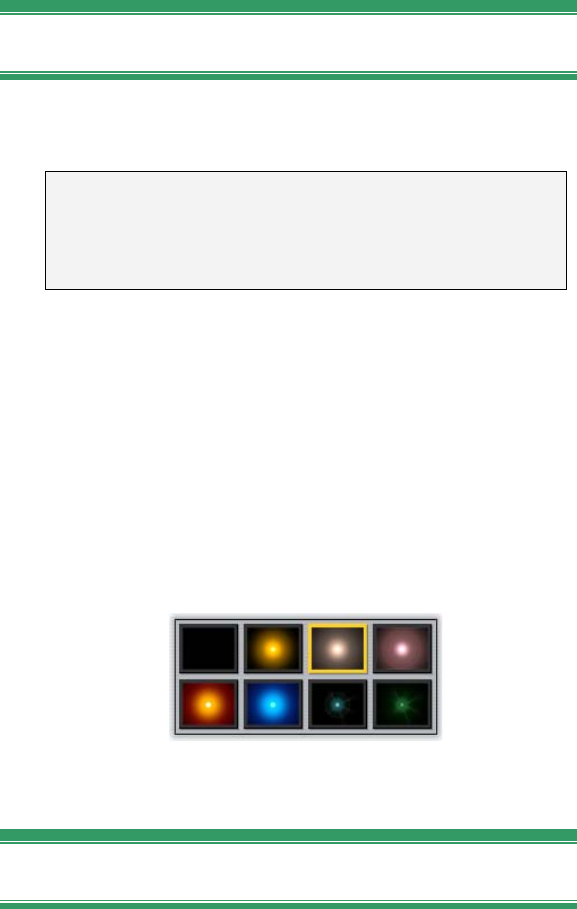
110 Pinnacle Studio 9
Lens flare
This effect simulates the flaring seen when direct bright
light overexposes an area of a film or video image.
Tip: The parameters of this effect do not give good
feedback during stationary preview. You can use the
playback controls or the scrubbers to see the impact
they have during playback.
The Flare direction dropdown list sets the axis of
movement of the light to one of eight available
orientations.
The Size slider sets the size of the main light.
The icons in the Type box let you choose from a
number of models that determine the appearance and
coloring of the main light. You can remove the light
altogether by selecting the first option, though its
secondary effects – rays and reflections – should still
appear.
The eight Type options.
Noise
This effect adds a layer of simulated video noise,
reminiscent of the “snow” seen in faulty television
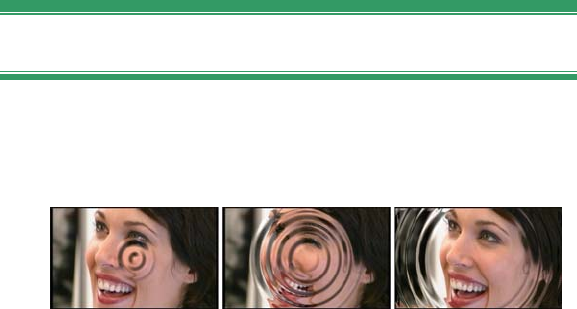
Chapter 5: Video clips 111
reception. The slider controls set the amount and
characteristics of the noise:
• Amount: Set the strength of the effect.
• Variation: Slightly vary the random noise pattern by
setting a different “seed” value for the randomizer.
• Transparency: Combine the original and the
modified images in any desired proportion. Moving
this slider rightwards moderates the overall effect.
Clear the Color noise checkbox if you don’t want to
disturb the original coloration of the image.
Water drop
This effect simulates the impact of a drop falling onto
the surface of water, producing expanding, concentric
ripples.
Stages in the Water Drop effect (“Big drop” preset).
Two sliders, Horizontal and Vertical, set the drop
position, and so the origin point of the waves.
The next three parameters let you set the number of
ripples (1-8, or Infinite), plus the Wave width and Wave
height. The “infinite” choice for the Wave count
dropdown means that rippling will continue for the full
duration of the clip, whereas with the numeric choices
the effect ends when the last ripple has expanded
beyond the edges of the video frame.
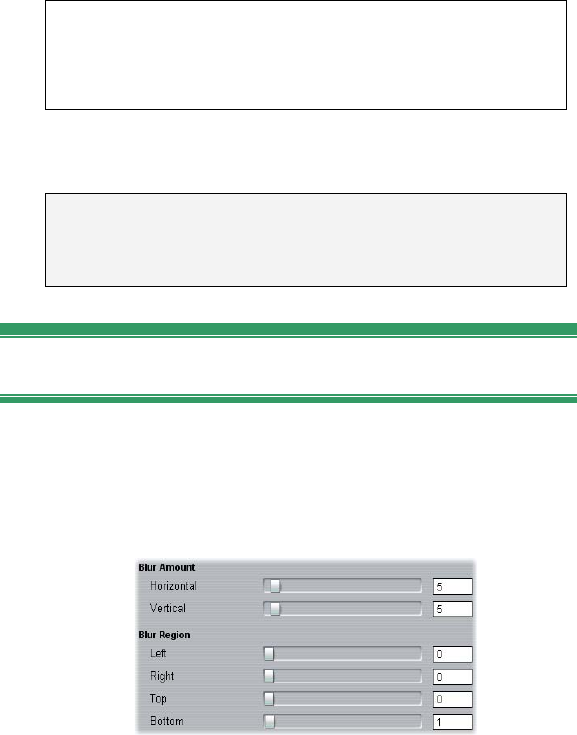
112 Pinnacle Studio 9
Finally, the Refraction slider controls the amount by
which water refracts the light as it enters and leaves the
wave. The resulting distortion increases as the slider
moves right.
STYLE EFFECTS
Availability: Unrestricted use of the effects in this group is not
included with the SE and QuickStart versions of Studio. Until
unlocked with the appropriate activation key, a “watermark” graphic
appears over part of the video frame when clips using any of the
effects are played back. See page 11 for details.
Style effects like Emboss and Old film let you apply
distinctive visual styles for added impact.
Note: The Stained glass effect in this group can only
be used under Windows 2000 or Windows XP. It is not
available with other Windows versions.
Blur
Adding blur to your video produces a similar result to
shooting out of focus. Studio’s Blur effect allows you
to add separate intensities of horizontal and vertical
blurring over the whole frame or any rectangular region
within it.
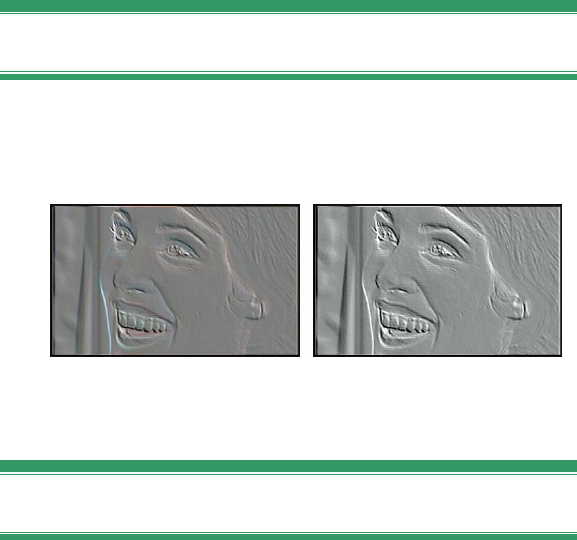
Chapter 5: Video clips 113
The Horizontal and Vertical sliders control the amount
of blur in their respective directions from zero (no blur)
to the maximum value.
The Left, Right, Top and Bottom sliders specify the
margins of the blurred region as percentages of the
frame width and height. Setting all the sliders to zero
applies the blurring to the entire frame. You can use
these sliders to blur out only a selected portion of the
image, such as a person’s face, an effect familiar from
TV news coverage.
Emboss
This specialized effect simulates the look of an
embossed or bas-relief sculpture. The strength of the
effect is controlled by the Amount slider.
Emboss can be used with the Color Correction effect to
adjust contrast and brightness (right).
Mosaic
This effect breaks each frame of the video image into
increasingly large squares of solid color as you move
the Tile size slider to the right. The color of each square
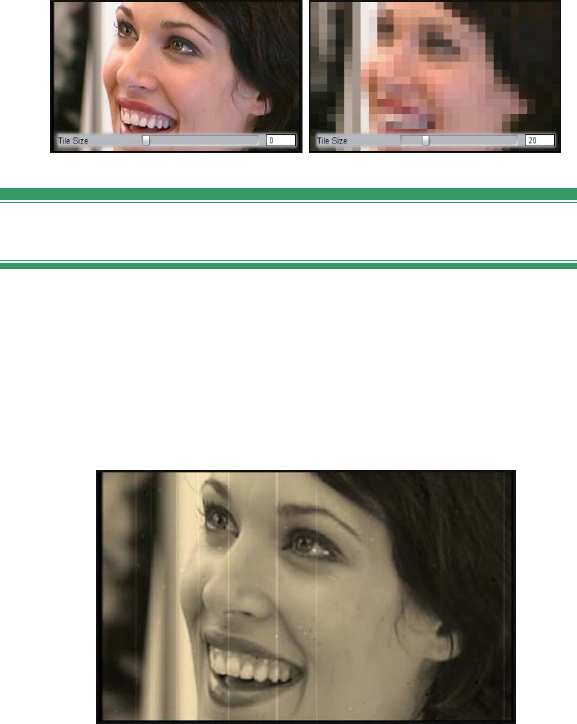
114 Pinnacle Studio 9
is determined by averaging the colors in the
corresponding area of the original.
Old film
Old movies have a number of traits that are usually
considered undesirable: grainy images caused by early
photographic development processes, spots and streaks
from dust and lint adhering to the film, and intermittent
vertical lines where the film has been scratched during
projection.
The Old film effect lets you simulate these defects to
lend your pristine video the appearance of movies that
have suffered the ravages of time.
The three options on the Color dropdown list let you
set the coloring of the video to full color, black and
white, or sepia.
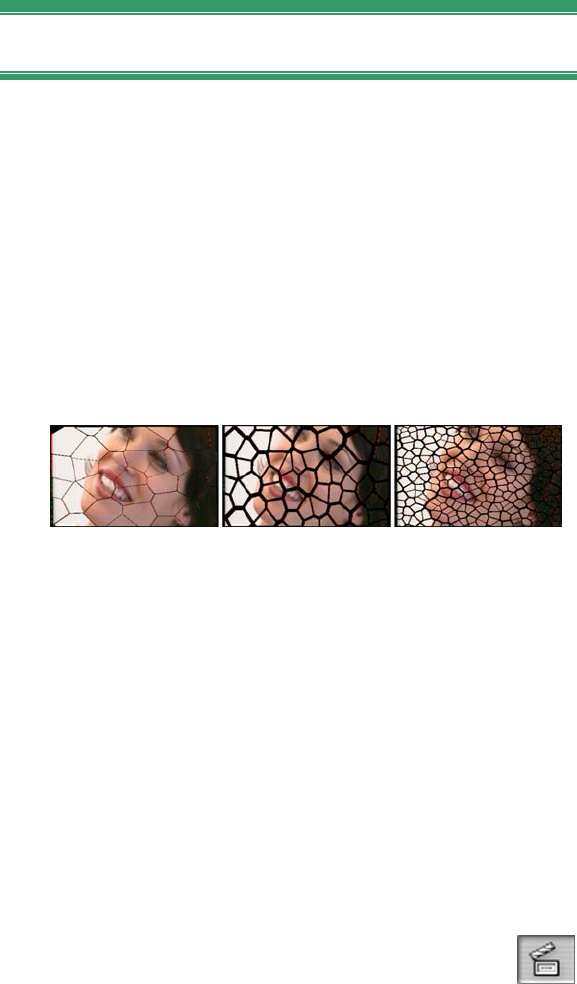
Chapter 5: Video clips 115
Stained glass
This effect simulates the appearance of viewing the
video through a pane of irregular polygons arranged
into a mosaic.
The Horizontal and Vertical sliders control the average
dimensions of the polygonal “tiles” in the image. Move
the sliders to the right to increase the tile size, or left to
decrease it.
The Joint slider sets the width of the dark edging
between neighboring tiles from zero (no edging) to the
maximum value.
Three variations of the Stained Glass effect
THE SMARTMOVIE MUSIC VIDEO TOOL
Creating a music video seems like a big job, even with
the convenient editing features of Studio. Dozens of
brief clips must be carefully aligned to the beat of the
soundtrack, in order that the music and video are
properly coordinated.
With Studio’s SmartMovie tool, however, you
can construct a dynamic, beat-synchronized
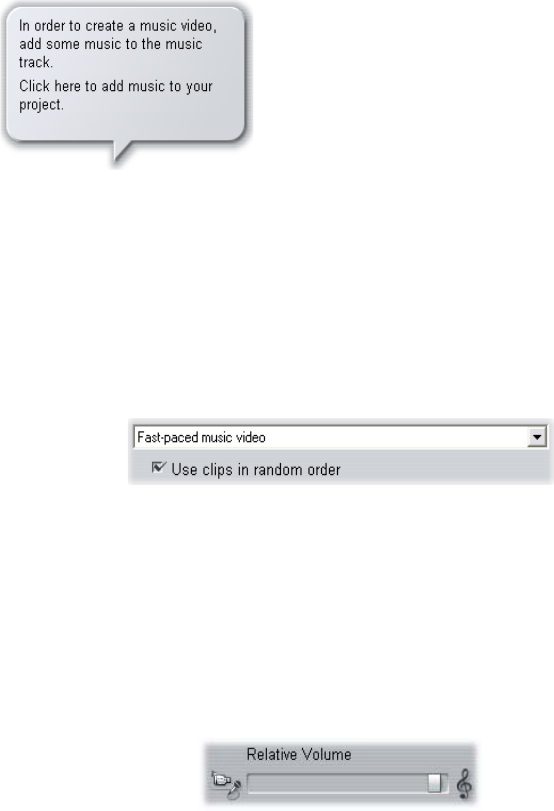
116 Pinnacle Studio 9
music video almost instantly, in your choice of styles
and using any combination of video footage and music.
The tool walks you through the
creation process with simple step-
by-step instructions. To begin, use
the Album to locate the video
footage you want to include, and
drag the scenes onto the Movie
Window.
With the visuals in place, add a SmartSound, CD audio
or digital music (wav, mp3) clip to the background
music track. The duration of this clip determines the
length of your music video. For best results, your video
footage should be at least twice as long as your music
clip.
Select a style from the dropdown list at the top of the
tool window. The Use clips in random order option lets
you mix up the video without regard to its initial
sequence. This option, which is the default with some
styles, will give a relatively uniform texture to the
finished product, but at the expense of any narrative
continuity in the original material.
The Relative volume slider adjusts the prominence of
the background music track relative to the other audio
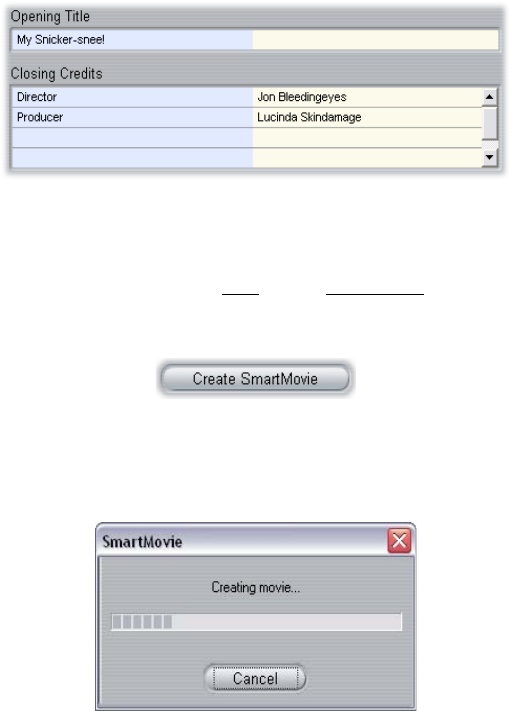
Chapter 5: Video clips 117
tracks. Move the slider all the way to the right if you
want to hear only the music track in the finished video.
The last configuration step is to enter the text to use for
the opening and closing titles. Each text line consists of
two edit fields. Use Tab and Shift+Tab to jump
between the left and right fields.
Finally, click the Create SmartMovie button and sit
back while Studio generates your movie.

Chapter 6: Two-track editing with Studio Plus 119
CHAPTER 6:
Two-track editing with
Studio Plus
Studio Plus brings the power of multitrack video
editing to Studio with the addition of an auxiliary video
track on the Movie Window Timeline called the
overlay track. Now you can use advanced picture-in-
picture and chroma-key effects while retaining the
convenience of Studio’s streamlined and intuitive user
interface.
Introducing the overlay track
Upon installation, the Timeline displays the five tracks
familiar to long-time Studio users: the video track with
its original audio track, and the title, sound effect and
music tracks.
To open the new overlay track, drag a video clip from
the Album n into the Movie Window and drop it on
the title track o. The overlay track instantly appears
with the clip properly positioned upon it p. (See
illustration next page.)
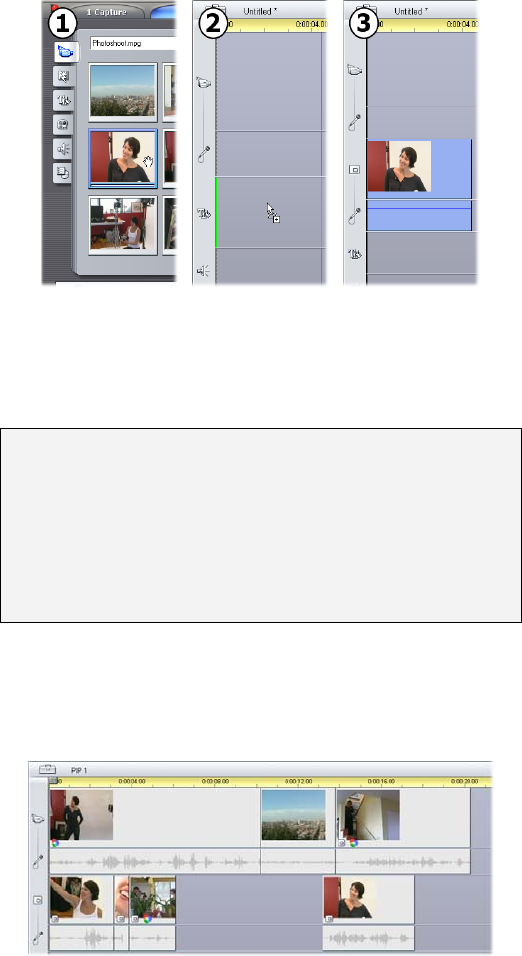
120 Pinnacle Studio 9
Drop video on the title track to open the overlay track.
Along with the overlay track, Studio adds an overlay
audio track to accommodate the video clip’s original
audio information.
Note: If you have used earlier versions of Studio, you
may remember that the Title track, as it is now called,
was formerly known as the “Title overlay track”, or
simply the “overlays track”, reflecting that titles on this
track are superimposed on the video. To simplify the
terminology, we now use “overlay” only to refer to the
second video track.
Once the overlay video and audio tracks have been
opened, Studio no longer accepts video clips on the
title track. Drag clips from the Album directly onto
either the video or overlay track as required.
Video clips on the video and overlay tracks.
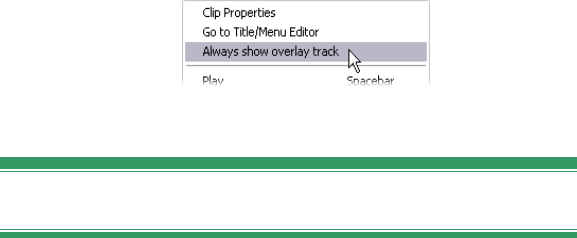
Chapter 6: Two-track editing with Studio Plus 121
Displaying and hiding the overlay track
As we have just seen, the overlay video and audio
tracks are displayed when you add your first overlay
clip. Similarly, when you remove the last clip from
these tracks, Studio again hides them from view.
This default behavior help keep the Movie Window
uncluttered, but if you are making frequent use of
overlay video, you might prefer to have the track
visible at all times. This can be achieved by activating
the Always show overlay track command on the pop-up
“context” menu that appears when you click on the
Movie Window with your right mouse button.
A/B editing
The second video track in Studio Plus often simplifies
the editing tasks – insert edits, L-cuts and J-cuts –
discussed under “Advanced Timeline editing” on page
87.
An insert edit, for instance, becomes a trivial operation:
simply drag the clip to be inserted onto the overlay
track, and trim it as desired. (See “The Picture-in-
picture tool” below if you want the second video to
appear at reduced size so that only part of the main
video is obscured.)
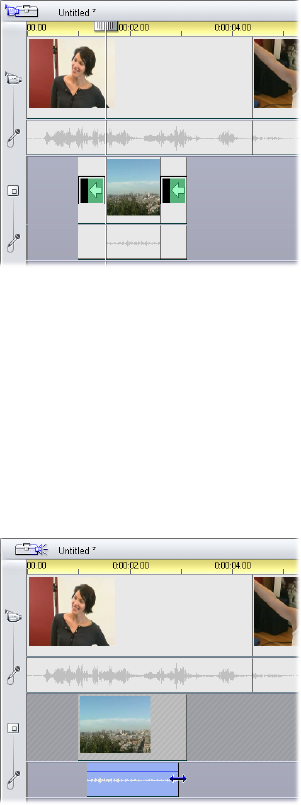
122 Pinnacle Studio 9
An insert edit on the overlay track. The main video is
obscured while the B clip is playing.
In the J-cut and the L-cut, the audio portion of a clip
begins a little before (J) or a little after (L) the video.
They are often used together to soften the start and end
of an inserted clip.
Split editing on the overlay track. The overlay video
track has been locked, allowing the B clip’s audio to
be trimmed. The main audio can be reduced or
muted as needed.
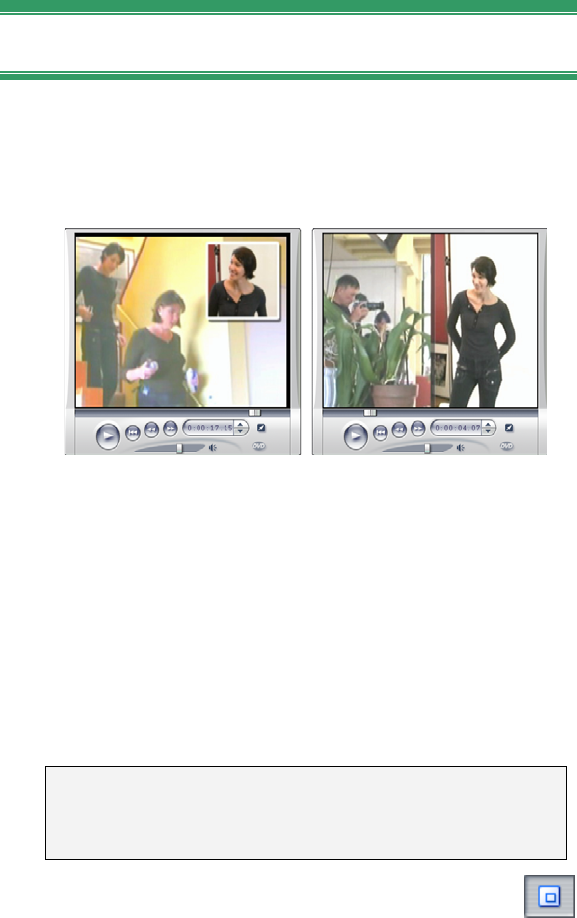
Chapter 6: Two-track editing with Studio Plus 123
The Picture-in-picture tool
Picture-in-picture (often abbreviated to “PIP”) – the
inclusion of an additional video frame within the main
video – is a versatile effect familiar from its use in
professional TV productions.
Picture-in-picture with optional border, shadow and
rounded corners (left). Split-screen effects, like the
vertical split at right, are among the variations that
show off the versatility of the PIP tool.
To use picture-in-picture, start in the usual way by
dragging some video clips onto the Movie Window
Timeline. Drop the clips you want for background
video onto the video track. The foreground clip – the
PIP clip – goes on the overlay track underneath the
main clip.
Note: If you are planning a split-screen effect, like the
one shown at right in the illustration above, it doesn’t
matter which of the two clips goes on which track.
With the clips in place, select the foreground
clip and open the Picture-in-picture and
Chroma key (PIP/CK) tool. It is the sixth tool in the
Movie Window’s video toolbox. We usually refer to
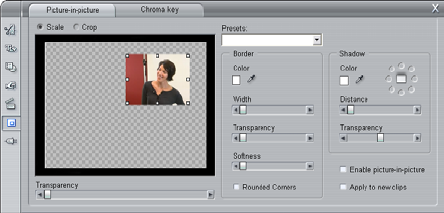
124 Pinnacle Studio 9
the two aspects of the tool separately as the Picture-in-
picture and the Chroma key tools.
The Picture-in-picture and Chroma key (PIP/CK)
tool is really two tools in one. Because they are used
independently, we treat them as separate tools. This
illustration shows the PIP side of the tool. Click the
Chroma Key tab at the top of the tool to switch.
Picture-in-picture tool controls
Most of the left-hand side of the PIP tool is taken up
with an interactive layout area where you can both
view and modify the dimensions, placement and
cropping of the overlay video. The adjustments that
you make are reflected in the Player preview as you
work.
The layout area has two modes, selected by the Scale
and Crop radio buttons.
Scale mode: The gray, checked region in the layout
area represents the transparent portion of the overlay
frame, through which any underlying video can be seen.
In typical PIP usage, this accounts for most of the
screen, the overlay being sized small enough that the
main video is not unnecessarily obscured. You can
modify the PIP frame in three ways:
• Click on the PIP frame and drag it within the layout
area to reposition it within the main video frame.
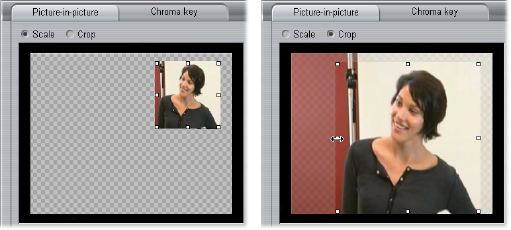
Chapter 6: Two-track editing with Studio Plus 125
• Use the center control points on the edges of the PIP
frame to change its dimensions arbitrarily.
• Use the control points at the corners of the PIP frame
to change its size but not its proportions (“aspect
ratio”).
Crop mode: In this mode the layout area represents the
entire overlay frame, regardless of its actual
dimensions as set in Scale mode. The rectangle defined
by the control points shows which portion of the frame
is visible. Outside the visible area, the frame is semi-
transparent, letting the checked pattern show through.
As in Scale mode, the side control points allow for free
adjustment of the crop rectangle, whereas the corner
control points preserve its aspect ratio.
The PIP tool in Scale (L) and Crop (R) modes.
Presets: Choose a preset name to set up all the PIP
controls at once to the predetermined values associated
with that name. You can choose a preset as a first
approximation to your desired settings, then adjust
them manually until you get exactly what you want.
Transparency: Use this slider if you want the
underlying video to show through the overlay itself.
Moving the slider to the right makes the overlay, with
its border and shadow, increasingly transparent.

126 Pinnacle Studio 9
Border: These controls set the
color, width and transparency of
the border that will be drawn
around the overlay frame. Set the
width to zero (slider all the way to
the left) if you don’t want a border
at all. See page 135 for
information on how to use the
color controls.
The Softness slider controls the
amount of blurring on the outside edge of the border.
Move the slider left for a hard edge, or right to blend
the border with the background video. Check the
Rounded corners box if you want to round off the
corners of the PIP rectangle.
Shadow: These controls set the
color, width, angle and trans-
parency of the drop shadow effect
that gives the illusion of the
overlay frame floating above the
background video. Set the width
(using the Distance slider) to zero
if you don’t want a shadow to appear.
The dial-shaped shadow-angle control gives you eight
choices for the placement of the shadow relative to the
frame.
Enable picture-in-picture: This checkbox allows you
to turn the PIP effect on and off.
Apply to new clips: This option is handy when you
want to set up the same PIP settings for a number of
different clips. As long the option is checked, PIP will
automatically be applied to each new clip that you drag
onto the overlay track, using the same settings that
were displayed the last time the tool was open.
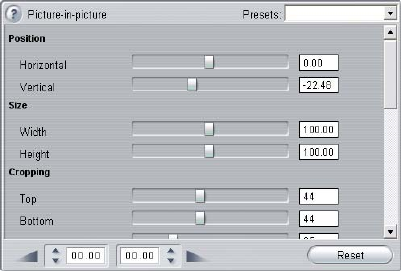
Chapter 6: Two-track editing with Studio Plus 127
The PIP effect interface
If you prefer to enter your PIP parameter settings
numerically rather than graphically, you can turn to an
alternative interface provided by the Video effects tool.
You can also combine the two methods, using the PIP
tool’s graphical interface to specify the initial settings,
then fine tuning them with the numerical effect
parameters.
The Picture-in-picture effect is found in the Overlay
Effects group. The available parameter settings are
almost identical to those offered by the PIP tool:
Parameter settings for the Picture-in-picture effect.
Position: The Horizontal and Vertical sliders set the
offset of the center of the PIP frame from the center of
the background frame.
Size: The Width and Height sliders set the size of the
PIP frame as a percentage of its original dimensions.
Cropping, if used, can further reduce the final size of
the PIP frame on the screen.
Cropping: The four sliders in this group trim away a
percentage of the original PIP video frame, allowing
you to remove unnecessary portions of the image and
focus on the main subject.

128 Pinnacle Studio 9
Video: The Transparency slider lets the main video
show through the PIP overlay to any desired degree.
Border: The parameters in this group are equivalent to
the Border settings on the PIP tool, allowing you to set
the overlay border’s color, thickness, transparency and
edge softness, and to select the rounded corners option
if desired. One bonus of the effect interface is that there
are separate Width and Height controls to control the
border thickness, rather than the single setting provided
by the tool.
Shadow: As with the Border group, these parameters
are essentially the same as those on the PIP tool, except
that the Horizontal offset and Vertical offset parameters
afford slightly more flexibility in positioning the
shadow than the tool’s Distance and Angle settings.
The Chroma key tool
Chroma key is a widely-used technique that allows
foreground objects to appear in a video scene even
though they were not present – and often could not
have been present – when the scene was shot. When an
action star tumbles into a volcano, or battles a giant
cockroach, or saves the crew with a daring space-walk,
the chances are that chroma key or a related technology
was involved in the scene.
Chroma key effects are often called “blue-screen” or
“green-screen” effects because the foreground action is
shot in front of a uniform blue or green background.
The background is then electronically removed, leaving
only the foreground action to be superimposed on the
actual background of the final scene, which has been
separately prepared.
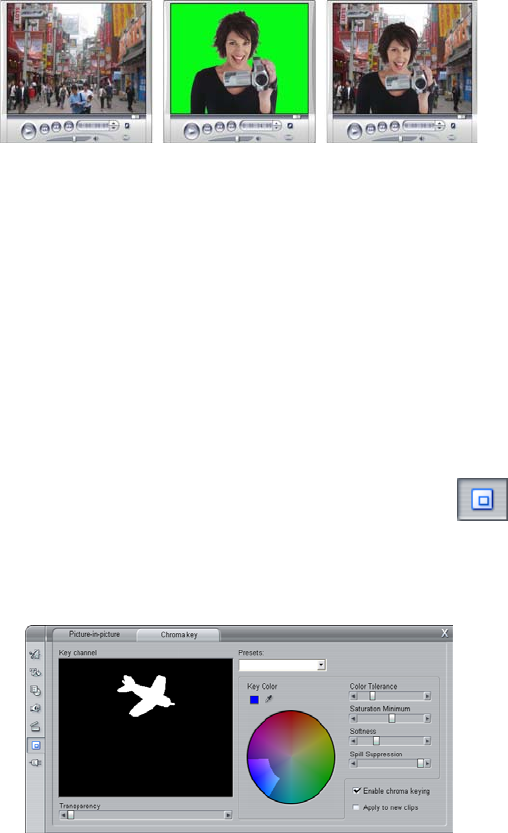
Chapter 6: Two-track editing with Studio Plus 129
Blue and green are the generally-preferred colors for
chroma key use because their removal from an image
will not affect human skin tones, but in principle any
hue can be used with Studio’s chroma key tool.
Creating a scene with chroma key: A clip on the
video track (L) is chosen as the background for a
green-screen clip on the overlay track (C). Chroma
keying removes the green to complete the scene (R).
As with picture-in-picture, the first step in using
chroma key is to drag some video clips onto the
Timeline. Drop the clips you want for background
video onto the video track. The foreground clip, which
should have a uniform, highly-saturated background
like the center clip in the illustration above, goes on the
overlay track below the main clip.
With the clips in place, select the foreground
clip and open the Picture-in-picture and
Chroma key (PIP/CK) tool. It is the sixth tool in the
Movie Window’s video toolbox. Select the Chroma key
tab to display the controls you will need.
The chroma key side of the PIP/CK tool.
130 Pinnacle Studio 9
Chroma-key tool controls
The chroma key tool constructs a “mask”, shown in the
Key channel graphic on the left side of the tool, where
the transparent part of the frame is drawn in black, and
the opaque part – the part you will see in the final video
– is drawn in white. Most of the remaining controls are
used to define exactly which areas of the frame will be
included in the transparent part of the mask by setting
the “key color” and related properties.
Transparency: Use this slider if you want the
underlying video to show through the normally opaque
overlay. Moving the slider to the right makes the
overlay, with its border and shadow, increasingly
transparent.
Presets: The tool provides two presets, called “Green
screen key” and “Blue screen key”. These provide good
starting points for setting up the tool if you are using
one of the standard chroma key colors.
Key color: Use the color swatch or eye dropper buttons
to select the color that will be removed from the video
frame leaving only the desired foreground. See page
135 for information on how to use the color controls.
Rather than an actual color, you are really selecting
only a hue, without regard to the other properties –
saturation and intensity – that in combination with hue
make a complete color specification. The chosen hue is
shown by the position of the highlighted region on the
circumference of the color circle display.
Color tolerance: This slider controls the width of the
range of hues that will be recognized as belonging to
the “key color”. Moving the slider to the right increases
the angle of the arc covered by the highlighted region
on the color circle.
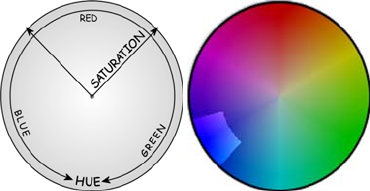
Chapter 6: Two-track editing with Studio Plus 131
The color circle on the Chroma key tool highlights a
range of hues (around the circumference) and color
saturation values (along the radius). Any pixel in the
overlay frame whose hue and saturation fall within
the highlighted region will be treated as transparent.
Saturation minimum: Saturation is the amount of hue
in a color. A pixel with zero saturation (corresponding
to the center of the color circle) has no hue: it falls on
the “gray scale”, whose extremes are white and black.
Chroma key works most effectively when the
background is highly and uniformly saturated, allowing
a high setting of this slider. In the real world, vagaries
of lighting and apparatus often result in a background
that falls short of the ideal. Moving the slider left
allows a wider range of saturation values to be matched,
indicated by a highlighted region that extends farther
towards the center of the color circle.
Softness: This slider controls the density of the
underlying video. When it is positioned all the way to
the left, the main video is entirely black. As you move
the slider to the right, the main video approaches full
density.
Spill suppression: Adjusting this slider may help
suppress video noise or fringing along the edges of the
foreground object.
Enable chroma keying: This checkbox allows you to
turn the chroma key effect on and off.
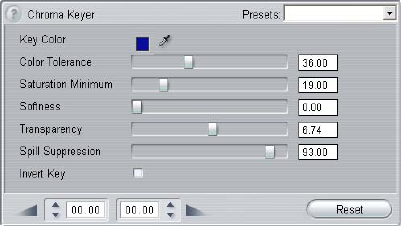
132 Pinnacle Studio 9
Apply to new clips: This option is handy when you
want to set up the same chroma key settings for a
number of different clips. As long the option is checked,
chroma key will automatically be applied to each new
clip that you drag onto the overlay track, using the
same settings that were displayed the last time the tool
was open.
The chroma key effect interface
If you prefer to enter your chroma key parameter
settings numerically rather than graphically, you can
turn to an alternative interface provided by the Video
effects tool. You can also combine the two methods,
using the chroma key tool’s graphical interface to
specify the initial settings, then fine tuning them with
the numerical effect parameters.
The Chroma key effect is found in the Overlay Effects
group. The available parameter settings are almost
identical to those offered by the chroma key tool, but
provides one more option, Invert Key. When this option
is activated, the normally opaque parts of the key are
treated as transparent, and the transparent parts as
opaque, so that the underlying video shows through
only where the foreground object in the overlay video
is not.
Parameter settings for the Chroma key effect.

Chapter 6: Two-track editing with Studio Plus 133
Chroma key tips
No matter how good your software may be, successful
use of chroma key depends on carefully setting up your
shot, and may require experimentation to get the details
just right. Here are some tips to get you started:
Light the backdrop as evenly as possible: Very often,
background coloring that looks flat to the naked eye
will prove on playback to have areas that are too dark
or too washed out to work well for chroma keying,
which favors even, saturated color. Use multiple lights
on the backdrop to ensure that it is well-lit across its
whole area and without hotspots. Diffuse sunlight, as
produced by a light overcast sky, can work well when
shooting out of doors is an option.
Note: A professional background cloth for chroma key
work is available as an inexpensive purchase at the
Pinnacle web-site.
Don’t let the subject shadow the screen: Arrange
your subject and foreground lighting so that no
shadows fall across the backdrop. The subject should
be not less than one metre (three feet) in front of the
backdrop.
Choose foreground colors carefully: Don’t have your
subject wear green if you are shooting on a green
screen, or blue for a blue screen; those areas will be
removed if they are taken to match the key color. You
have to be especially careful about this when working
with less even backdrops that require you to set a wider
color tolerance in the chroma keyer.
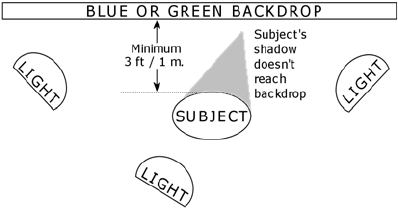
134 Pinnacle Studio 9
Make a smooth profile: Chroma keyers do better with
a smooth edge than a jagged or complex one, so try to
have your subject present a smooth profile to the
camera. Hair is particularly tricky, and should be
slicked down if possible. If the subject can wear a hat,
so much the better.
Setting up a chroma key shot. The backdrop is well
and evenly lit, and positioned well behind the subject
so that shadows do not interfere. The lighting of the
subject should be arranged to suit the background
that will be keyed into the shot.
Use tight framing: The wider your frame, the larger
your background needs to be, and the more difficult it
is to control your shot. One way to keep things simple
is to shoot your subject from the waist up rather than in
full view.
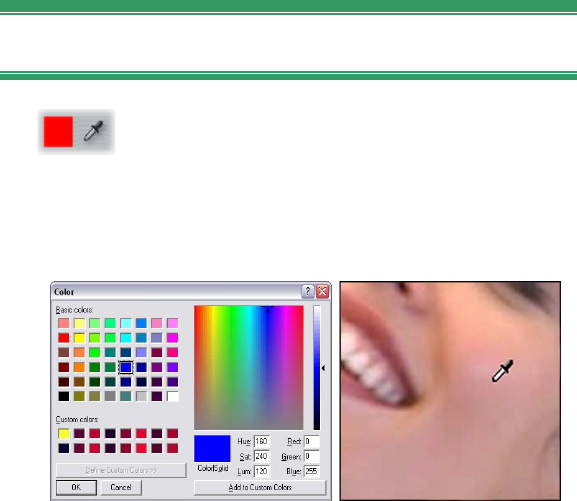
Chapter 6: Two-track editing with Studio Plus 135
Selecting colors
To select colors in tools and effects that
provide a color parameter, click either on the
color swatch (left) or the eye dropper button. The first
opens a standard color picker dialog; while the second
lets you choose a color by clicking anywhere on the
screen.
Two ways to set colors: The Windows color picker
dialog (L) opens when you click the color swatch
button provided in some tools and effects. Click the
eye-dropper button to select a color from the Player
preview window or elsewhere using a mouse pointer
in the form of an eye-dropper (R).
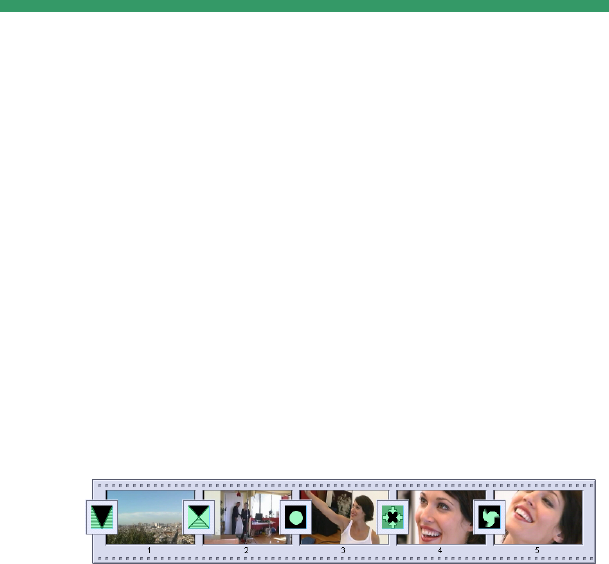
Chapter 7: Transitions 137
CHAPTER 7:
Transitions
A transition is an animated effect that eases – or
emphasizes – the passage from one clip to the next.
Fades, wipes and dissolves are common types of
transition. Others are more exotic, and may even
involve sophisticated 3-D graphics.
Transitions are stored in their own section of the
Album (see “The Transitions section” on page 50). To
use a transition, drag it from the Album into the Movie
Window and drop it beside any video clip or still image.
A series of transitions (the icons between the video
clips) in Storyboard view.
In Timeline view, you can drop the transition on either
the main video track, the overlay track, or the title track.
On the video track, the transition provides a bridge
between two full-screen clips (or between one clip and
blackness if the transition has only one neighbor, as at
the beginning of the movie). On the overlay and title
tracks, the transition bridges two neighboring clips (or
one clip and transparency).
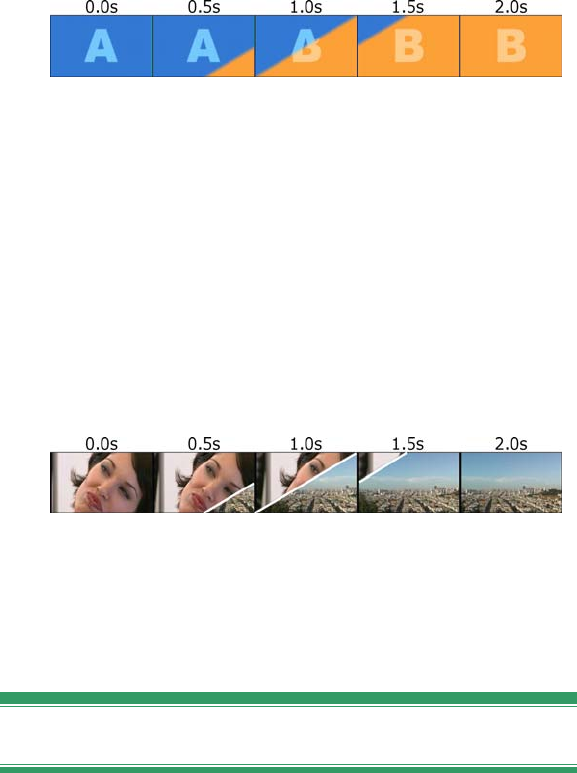
138 Pinnacle Studio 9
Diagram: Five snapshots from the life of a 2-second
diagonal wipe transition.
If a transition is to last for two seconds (the default
transition duration in a fresh Studio installation), the
second clip begins to run two seconds before the first
clip is finished. At the outset, only the first clip is
visible; by the end, the second clip has completely
replaced the first. The details of what happens in
between, as the first clip is gradually removed and the
second gradually appears, depend on the transition type.
Since the video clips overlap, the total duration of the
pair of clips is reduced by the duration of the transition.
Here is the same transition as above, this time using
actual video. For clarity, the transition boundary in
the three center frames has been emphasized in white.
Both clips continue to run while the transition is in
progress.
Transition types and their uses
Like all effects, transitions should be used not for their
own sake but to serve the overall needs of your movie.
Well-chosen transitions can subtly reinforce the
meaning of the movie and how it plays without
drawing attention to themselves. Observing the way
transitions are used in professionally-produced video
on television will suggest many ways to improve your

Chapter 7: Transitions 139
own movies. Generally, it is advisable to refrain from
overusing transitions that cause abrupt changes or
otherwise draw attention to themselves: there’s a big
difference between a subtle dissolve and a heart-shaped
wipe.
The basic transitions discussed below – fades, dissolves,
wipes, slides and pushes – are all among the first group
of transitions (the Standard Transitions) in the Album.
A set of more elaborate transitions is found in the
Alpha Magic group, which is the second entry in the
dropdown list of transition groups in the Album.
The many other groups on the list all belong to the
Hollywood FX, a large set of complex transitions
featuring three-dimensional graphics. The Hollywood
FX transitions are discussed at the end of this section
(page 140).
Cut: A cut is the minimal transition – an instantaneous
shift from one scene to the next. In Studio, it is the
default transition. A cut is appropriate when there is a
strong inherent connection between one clip and the
next; for instance, when the camera changes position or
angle within a scene.
Fade: This transition fades into the beginning of
a video clip from a black screen, or from the end
of a clip to a black screen. A fade dropped between two
clips creates a fade down followed by a fade up. The
fade transition is the first transition icon in the Album.
A fade is usually used at the beginning and end of a
movie, or when there is a large break in continuity, as
when a new section begins. For example, a movie of a
play might benefit from inserting a fade between acts.
140 Pinnacle Studio 9
Dissolve: A dissolve is similar to a fade, except
that the new scene begins to fade up even while
the old one is fading down. The visual overlap
this produces is less dramatic than a fade, but less
abrupt than a cut. A short dissolve can take the edge off
a cut, while a long dissolve is useful to suggest the
passage of time.
Wipe, slide and push: In each of
these standard transition types, the
incoming video is gradually
revealed behind an edge that moves across the frame in
a certain direction. The Album icons shown with this
paragraph represent a leftward wipe, a down-and-left
slide and a rightward push respectively.
In a wipe transition, both the old and new video occupy
their normal position in the frame throughout the
transition. The new video comes into view as the
transition edge crosses the frame, rather like new
wallpaper being rolled on over old.
A slide is similar to a wipe, but in this case the frame of
the new video slides across the screen until it reaches
its home position. The effect is reminiscent of a blind
being pulled down over a window.
A push is similar to a slide, except that the old video is
pushed out of the frame as the new video enters, like
advancing a filmstrip from one frame to the next.
Hollywood FX for Studio
Pinnacle Systems’ Hollywood FX includes a
large number of dramatic 3-D transitions and
effects. These are ideal for opening sequences,
sports and action footage, or music videos. Hollywood
FX satisfies professional expectations for quality
without sacrificing ease of use.
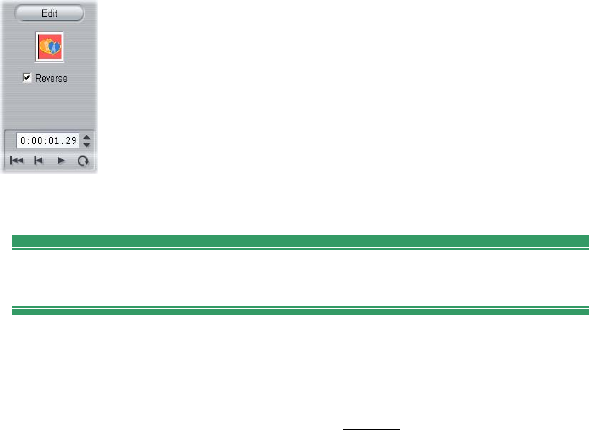
Chapter 7: Transitions 141
A basic set of fully-functional Hollywood FX is
included with Studio, along with “watermarked” demo
versions of many others. Apart from the watermark (a
special graphic superimposed on part of the video), the
demo effects can be previewed normally within Studio.
If you like the demo versions, you can purchase them
in the same way as other locked content in Studio. For
more information, see “Expanding Studio” on page 11.
Also available for purchase on-line is the HFX Creator
editing tool for Hollywood FX. This software lets you
customize your Hollywood FX, or create new ones
from scratch. HFX Creator includes advanced
keyframe editing for flight paths and all parameters,
powerful warp plug-ins, and a 3D text generator. You
can also create a wide range of 3D
MultiWindow Effects using external video
sources, and add real-life 3D objects and
lighting.
To initiate the purchase of HFX Creator, click
the Edit button in the Clip properties tool for
any Hollywood FX transition.
Previewing transitions in your movie
Studio lets you preview transitions in the Player. Just
drag and drop a transition into the Movie Window,
click the Play button (or hit [Space]) and see how the
transition works with your material.
You can also preview transitions by scrubbing through
them in the Player or on the Timeline of the Movie
Window.
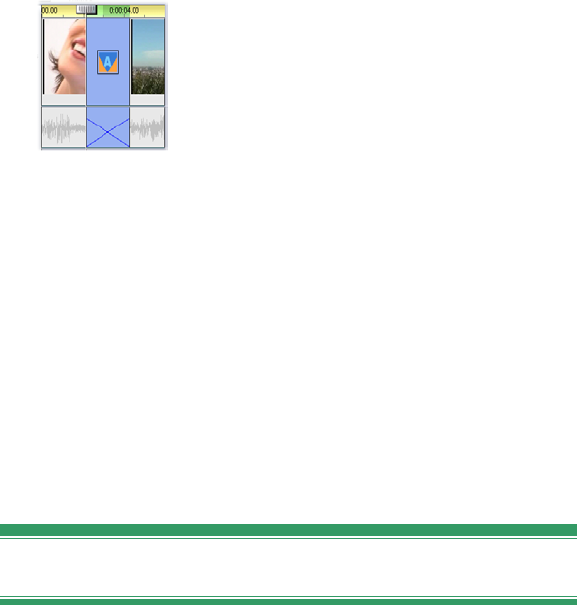
142 Pinnacle Studio 9
Background rendering of Hollywood FX
Background rendering is an optional feature in which
the computation needed to create a detailed preview of
Hollywood FX transitions is carried out as a “back-
ground task” with no interruption of your workflow.
Options affecting background rendering, including the
option of disabling it altogether, are provided by the
Edit options panel (Setup ¾ Edit). See “Edit settings”
on page 256 for details.
Until the rendering of a transition is
complete, the Player will preview it at
reduced resolution and frame rate.
Studio gives you feedback on the
progress of background rendering with
a temporary progress bar graphic in the
Timescale. The bar gradually changes color as the
rendering operation progresses.
3-D acceleration for Hollywood FX
Studio can use the 3-D accelerator hardware on your
graphics board to speed up the computation of
Hollywood FX previews. If you have 3-D acceleration,
select it in the Edit options panel (Setup ¾ Edit).
If you don’t have hardware 3-D acceleration, the 3-D
calculations are performed in software, which generally
takes longer.
Audio transitions
Video clips in the Movie Window normally have
synchronous audio. In the absence of a transition, both
video and audio cut from one clip to the next. When a
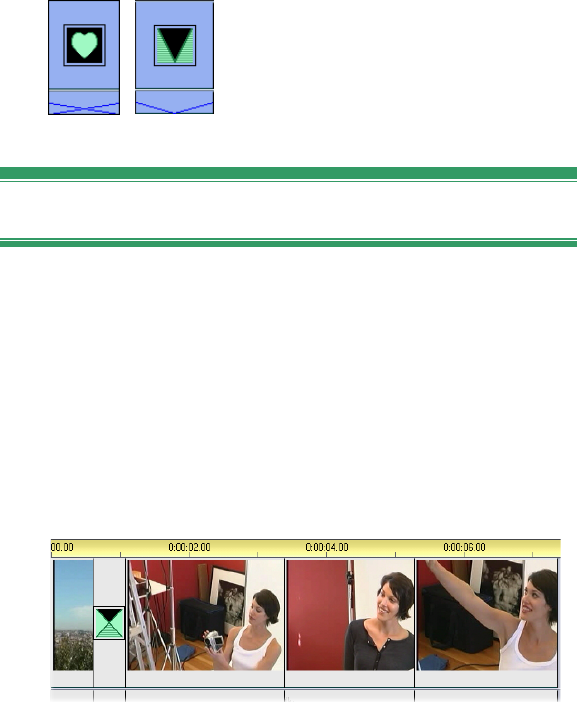
Chapter 7: Transitions 143
transition is placed between two clips, the audio cross-
fades (the audio equivalent of a dissolve).
The only exception to this rule is the Fade transition,
which takes the audio completely out then back in
again.
Normal transitions cause a cross-
fade in the audio (left). In a Fade
transition (right), the audio fades
down then up along with the video.
The Ripple Transition command
This Studio feature is especially useful for creating a
quick slideshow from a set of still images, or a video
pictorial from a set of short clips. Such a presentation is
more interesting if you connect each pair of clips with a
transition. Ripple Transition gives you a quick and easy
way of achieving that.
Begin with a set of a clips on the Timeline, then add a
transition of the desired type between the first two clips.
Now select all the clips except the first, click on any of
them with the right mouse-button, and select Ripple
Transition from the pop-up menu.
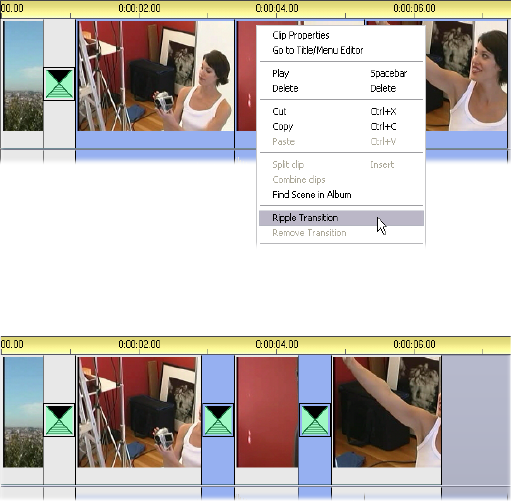
144 Pinnacle Studio 9
Studio inserts a duplicate of the original transition
between each pair of selected clips.
TRIMMING TRANSITIONS
Although transitions are not true clips, they are handled
very similarly to clips within Studio’s editing
environment. Like clips, you can trim transitions either
directly on the Movie Window Timeline, or by using
the Clip properties tool.
See “Trimming on the Timeline using handles” on page
78 for a discussion of the first method. The maximum
allowed duration of a transition is one frame less than
the shorter of the neighboring clips.

Chapter 7: Transitions 145
Trimming with the Clip properties tool
The Toolbox ¾ Modify Clip Properties menu command
invokes the Clip properties tool for the selected clip.
For all transition types, this tool provides previewing
controls, and the ability to set two properties:
• To set the duration of the transition, change the value
in the Duration counter. A transition’s duration must
always be less – if only by a single frame – than the
shorter of its neighboring clips.
• The Name text field lets you assign a custom name
to the clip to replace the default one assigned by
Studio. The Name field is provided on the Clip
properties tool for all clip types. Clip names are used
by the Movie Window’s List view, and can also be
viewed as fly-by labels when your mouse hovers
over clips in the Storyboard view.
Many transition effects also support a “reverse
direction” option, which causes the transition animation
to run backwards, allowing a rotary wipe, for example,
to be either clockwise or counterclockwise. The
Reverse checkbox is enabled when the current
transition supports this option.
If you have purchased the HFX Creator application,
you can open it within Studio by clicking the Edit
button on the Clip properties tool for Hollywood FX
transitions. HFX Creator is an external editing program
with many options, whose use is described in its
accompanying documentation.
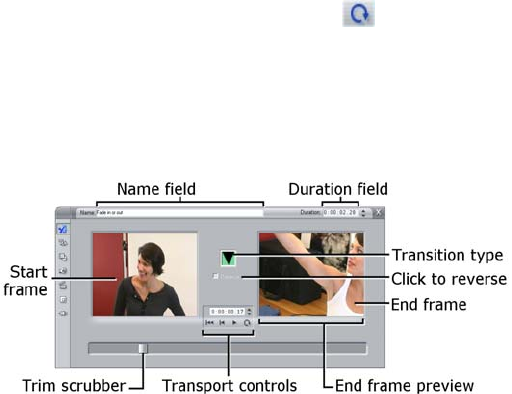
146 Pinnacle Studio 9
Previewing in the Clip properties tool
The Clip properties tool provides previewing controls
for transitions similar to those for video clips. See
“Trimming with the Clip properties tool” on page 83
for more information.
The preview areas show the last full frame of the
outgoing clip and the first full frame of the incoming
one. The preview frames update as you edit the
Duration field.
The transport controls let you preview the transition
effect in the Player either frame by frame or at full
speed. The Loop play/Pause button cycles through
the transition repeatedly at normal playback speed.
Both the counter (with its associated jog buttons) and
the scrubber give you direct access to any desired point
within the transition.

Chapter 8: Still images 147
CHAPTER 8:
Still images
Video usually means images in motion, but most
productions also include stationary titles or graphics,
and may include other types of still image as well.
The still images you can use in your movies include:
• All types of text captions and graphics, including
scrolling credits and “crawled” messages.
• Photos or drawings stored in disk-based image files.
• Individual video frames obtained with the Frame
grabber tool.
• “Disc menus” for DVD and VCD authoring. These
specialized images are covered in Chapter 9: Disc
menus.
Any of these still image types can be treated in either of
two ways, depending on which track you drop them
onto in the Movie Window Timeline:
• To add a full-screen image with a solid background,
add the image to the video track.
• To add an image so that it appears in your movie
with a transparent background, superimposed over
the clips on the video track, place it on the title track.
The color of the pixel in the top-left corner of the
image will be treated as transparent when the image
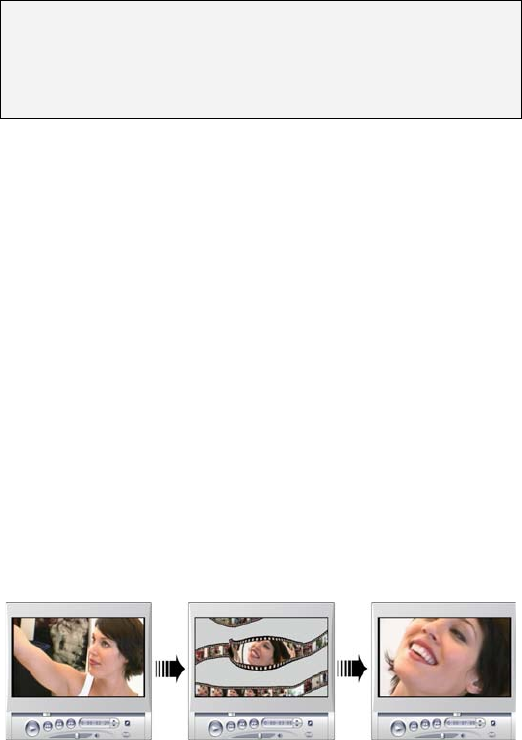
148 Pinnacle Studio 9
is placed on this track. For optimum results, you may
need to prepare the image in an image-editing
application beforehand.
Note: Studio Plus users have an additional option, the
overlay track, for adding their images to the Timeline.
See Chapter 6: Two-track editing with Studio Plus, for
details.
The Album has separate sections for titles, bitmapped
images and disc menus. All these resources are stored
as separate files on your hard drive. You can also create
titles and disc menus of your own in Studio’s Title
Editor and add them directly to your movie without
first saving them as separate files (see Chapter 10: The
Title Editor). Similarly, still video frames can be added
directly from the Frame grabber tool (see “The Frame
Grabber” on page 158).
Full-screen images
A full-screen image is one that is placed on the video
track. It fills the entire screen, replacing the video.
When the preceding video clip ends, Studio plays the
still image clip. The visual effect is that the video ends,
and is replaced by the graphic until the next clip begins.
Overlay images
An overlay image is one that is placed on the title track.
It is superimposed on the current video clip, without
replacing the video.

Chapter 8: Still images 149
Controlling transparency in overlay images
Viewed in the Album, or in a graphics editor, an
overlay image appears to have a solid background.
When you place it on the title track, however, the
background disappears, allowing the video to show
through.
Studio uses the color of the top-left pixel of the image
to determine which areas will be transparent. Pixels
that match this color are not drawn when the image is
rendered over video.
This scheme works well for still images that have
consistent solid background colors. Sometimes, you
may have to edit the top-left pixel of a bitmapped
image to get the transparency effect you want. Any
image-editing program – even the Windows Paint
accessory – will do the job.
The automatic transparency feature applies to images
that are imported into Studio via the Title Editor as
well as those that are accessed through the Album.
Making a slideshow
If you would like to assemble a quick slideshow of still
images or video clips, you may want to take advantage
of Studio’s Ripple Transition feature to quickly insert a
chosen transition between each pair of clips or images.
See page 143 for details.

150 Pinnacle Studio 9
Applying effects
Most of Studio’s plug-in video effects can be applied to
still images. (The exceptions are effects like Speed and
Strobe that only make sense for moving video.) See
“Using video effects” on page 95 for detailed
information.
EDITING STILL IMAGES
As with other types of clip, you can trim still images
directly on the Movie Window Timeline, or by using
the Clip properties tool.
See “Trimming on the Timeline using handles” on page
78 for a discussion of the first method. The difference
with a still image clip is that you can extend it to any
duration you choose, whereas a video clip can be no
longer than the original Album scene.
Effects like Blur, Posterize and Color correction can
be applied to still image clips of all types in the same
way as to video clips. See “Video effects – the basic
set” on page 101.
Editing image clip properties
The Toolbox ¾ Modify Clip Properties menu command
opens a version of the Clip properties tool appropriate
for the type of the currently-selected clip. The topmost
tool icon in the video toolbox can also be used.
Chapter 8: Still images 151
With bitmapped images, including ordinary photos and
image files, and with disc menus, double-click the clip
for a third way to access the tool. Double-clicking a
title, however, opens it directly into the Title Editor
instead.
All versions of the Clip properties tool allow you to set
the duration and name of the current clip, as follows:
• To set the length of time the still image is displayed,
change the value in the Duration counter.
• The Name text field lets you assign a custom name
to the clip to replace the default one assigned by
Studio. Clip names are used by the Movie Window’s
Text view, and can also be viewed on the fly-by
labels that appear when your mouse hovers over
clips in the Storyboard view.
See The Clip properties tool for disc menus is
described in Chapter 9: Disc menus. See Chapter 10:
The Title Editor for details about editing the properties
of titles.
Editing photos and graphics
The Clip properties tool for editing bitmapped images
allows you to perform several important image-
processing tasks:
• Zoom in on your pictures and photos in order to crop
away unneeded material and focus on only the
essential part of the image;
• Rotate the image in 90-degree increments to permit
the use of photos taken in “portrait” mode;
• Remove the “red-eye” effect that can occur when the
subject of a photograph looks directly into the
camera when the flash goes off;
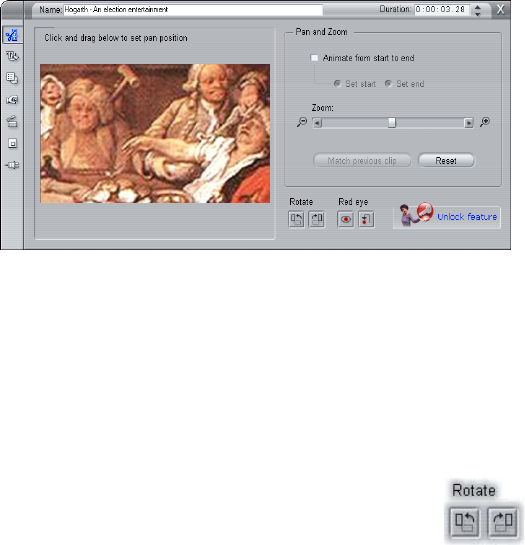
152 Pinnacle Studio 9
• In Studio Plus, put together “pan-and-zoom”
animations in which a high-resolution image is
viewed as a succession of smoothly-connected close-
ups at various degrees of magnification. This
technique is closely associated with the well-known
documentary filmmaker Ken Burns.
The Clip properties tool for photos has pan-and-
zoom controls for focusing on an area of interest. In
Studio Plus, pan-and-zoom can be animated to
create the effect of traversing the image from one
focus to another. In other versions of Studio,
animated pan-and-zoom can be “unlocked”, if
required, by purchasing an activation code.
If an image needs rotating by 90 degrees to
bring it into “landscape” mode (wider than
high), start by clicking one of the image
rotation buttons. If needed, click the button more than
once until the clip is properly oriented.
If you want to reframe the image, click directly on
the tool’s preview window and, while holding the left
mouse down, drag the image in any direction until it is
properly positioned. Release the button to complete
the operation. Next, use the Zoom slider to magnify or
reduce the image size as desired. Adjust the position

Chapter 8: Still images 153
and magnification with these controls until the image is
cropped and framed to your satisfaction.
The Reset button removes all your position and zoom
changes, restoring the original framing of the image.
The red-eye reduction feature helps restore
a natural appearance to photos in which the
subject’s eyes are tinged with red. (This
problem is caused by light from the flash unit bouncing
off the retina of the eye when the subject is looking
directly into the camera.)
To activate red-eye reduction, click the left button in
the red eye group. The button stays down when clicked.
Now click the image preview with the left mouse
button above and to the left of the area in which red-
eye should be applied. While holding the button down,
drag down and to the right until the area is fully
enclosed. When you release the mouse button, the red-
eye reduction effect is instantly applied within the
rectangle you have outlined.
It is usually not necessary to be highly precise when
marking out the red-eye reduction area. In fact, a larger
rectangle may even yield a better result than a smaller
one that encloses the eyes and no more. If the red-eye
reduction does not clear up the problem entirely on the
first attempt, try again with a different rectangle size.
Studio’s red-eye reduction algorithm provides excellent
results with a wide variety of photos. However, some
photos are better-suited to the process than others.
To remove red-eye reduction once applied, click the
right-hand button in the red eye group.

154 Pinnacle Studio 9
Animating Pan-and-zoom in Studio Plus
If you own Studio Plus, or purchase an activation key
by clicking the unlock button on the pan-and-zoom
controls, you can create effective animations from your
photos and graphic images. Use the highest-resolution
images available with this technique, since they allow
greater magnification levels before there is perceptible
loss of quality.
Start creating a pan-and-zoom
animation by clicking the
Animate from start to end
checkbox to activate the animation feature for the
current clip. This enables the Set start and Set end radio
buttons, with Set start initially selected. Use the pan-
and-zoom controls to set the framing you want to see at
the start of the clip. Finally, click the Set end button,
then use the controls to set up the framing you want for
the end of the clip.
When the clip is played back, Studio will generate the
intervening frames to connect your start and end views
in a smooth animation.
The procedure above describes the simplest form of
pan-and-zoom animation. Effective uses include:
• Moving from a full-frame photograph to a detail
view of a person or thing somewhere in the image.
This gives a similar result to zooming in while
shooting video. This might be used to prepare the
viewer for a sequence of shots exploring the same
close-up subject in multiple views, or providing
further close-ups of different parts of the same scene.
• Moving out from a detail to the full-frame view, as
though zooming out with the video camera. In the
Chapter 8: Still images 155
above scenario, this returns the viewer to the original
context, perhaps closing a chapter or episode within
your movie.
• Panning across a wide scene to absorb its details one
by one. This technique can be used to impart a sense
of discovery when a dramatic or humorous detail
finally comes into view.
Complex pan-and-zoom animations
When you apply pan-and-zoom to a number of copies
of the same image in succession, it is as though you are
taking your viewer on a guided tour. In effect you are
telling a story, one that gradually unfolds as you draw
attention to one detail after another.
Story-telling may be difficult or not, but implementing
your story in Studio is very simple. Once you have set
up the first clip, with the first pan-and-zoom “camera
move”, simply copy it as often as necessary, and
change the end setting for each clip.
You almost always want the start framing of a new clip
in the sequence to match the end framing of the
previous clip, in order that the sequence of moves will
be smoothly connected. On the second clip, and all
those that follow, click the Match previous clip button
wherever you want continuity.
In order to allow the movie to dwell on each detail for a
while after you pan to it, insert a non-animated copy of
the image between each move. Connect these static
clips into the sequence as usual with the Match
previous clip button.
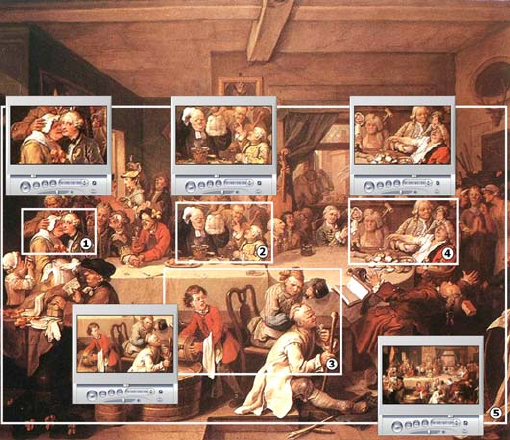
156 Pinnacle Studio 9
The pan-and-zoom controls are used here to focus in
turn on four vignettes in the satirical painting “An
Election Entertainment” by English artist William
Hogarth. A fifth view pulls back to show as much of
the entire canvas as will fit in a wide-screen frame
without black sidebars. The tool automatically
generates smooth motion from one view to the next,
panning and zooming simultaneously as needed.
The pan-and-zoom effect interface
As an alternative to setting up your pan-and-zoom
animations with the Clip properties tool, you can enter
the start and end framing properties numerically with
the Pan and zoom video effect. This alternative
interface is provided by the Video effects tool. You can
also combine the two methods, using the tool’s
graphical interface to specify the initial settings, then
fine tuning them with the numerical effect parameters.
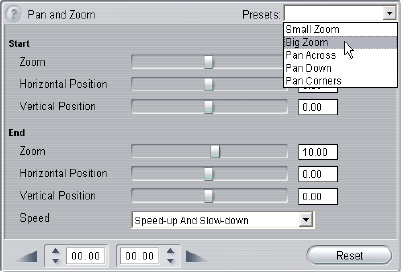
Chapter 8: Still images 157
The Pan and zoom effect is found in the Fun Effects
group. Most of the available parameter settings are
exactly parallel to those offered by the Clip properties
tool: you can set Zoom, Horizontal position and
Vertical position in both the Start and End parameter
groups.
You have an additional option in the Speed dropdown,
which sets a “velocity envelope” for the traversal from
the start to the end positions. With “Speed-up and
slow-down”, “Speed-up at start” and “Slow-down at
end”, the moving frame gradually accelerates to
“cruising speed” near the beginning of its motion, or
decelerates towards the end rather than stopping
abruptly, or both. The motion usually appears more
natural when one of these is applied than with the
remaining choice, “Constant speed”.
Parameter settings for the Pan-and-zoom effect.

158 Pinnacle Studio 9
THE FRAME GRABBER
The Frame Grabber can capture a still image from any
video capture source supported by Studio, or extract a
single frame from any video clip in your current project.
The grabbed frame can be added directly to your movie
or saved out to disk in any of a number of standard
graphics formats.
Once you have saved a grabbed frame to disk, you can:
• Use it in other software applications.
• Manipulate it in image-editing software.
• Import it back into your movies as a still image via
the Album or the Title Editor.
The Frame grabber tool
Use the Frame grabber tool in conjunction with
the Player. To access it, open the Toolbox and
click the Frame grabber button.
Play the movie or source video until the frame you
want is displayed in the Player, then click the Grab
button. The grabbed frame appears in the tool’s
preview area, ready to be added to your movie or saved
as a file on disk.
Grab from: Select a source for the frame grabber by
clicking either the Movie or the Camcorder button at
the top of the tool. Choosing Camcorder means that the
frame grabber will use your current video source, as
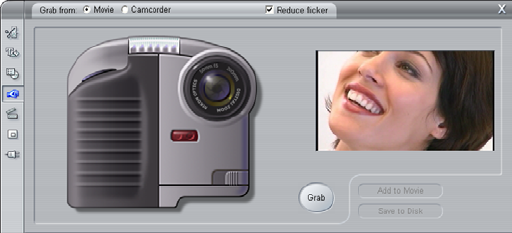
Chapter 8: Still images 159
configured in the Capture Source options panel (page
248) and the Capture Format options panel (page 252).
The Frame grabber in grab-from-movie mode. When
you grab from an external source (e.g. a camcorder),
the Camcorder Controller is displayed. With DV
equipment, you can navigate the source tape from
within the tool.
Transport controls: If your source video is a DV
camcorder, MicroMV camcorder or VCR connected to
a 1394 port, Studio provides convenient on-screen
transport controls for locating the frame you wish to
grab. For a description of these controls see “The
Camcorder Controller” on page 20.
Reduce flicker: If the source video of the frame grab
contains a large amount of motion, the grabbed frame
may show flickering, which can be reduced or
eliminated by checking the Reduce flicker option.
Because Reduce flicker also reduces resolution
somewhat, you should not use the option if the overall
result is undesirable for a particular image.
Grab: Click the Grab button when you have located
the frame you want to grab in the Player and
configured the Reduce flicker option. The grabbed
160 Pinnacle Studio 9
frame is displayed in the tool’s preview area, and the
two output buttons (Add to Movie and Save to Disk) are
enabled.
Add to movie: This button inserts the grabbed frame
into the Movie Window video track ahead of the
currently-selected clip.
Save to disk: This button opens a Save As dialog so
that you can select a folder, file name and image format
for the file in which the grabbed frame will be stored.
The dialog also provides controls that let you set the
resolution of the saved image to any of several standard
sizes, to the original size of the grabbed frame, or to a
custom size that you enter.
If the “aspect ratio” (the ratio of the width to the height)
of the size you choose is different from that of the
grabbed frame, the image is stretched as necessary.
This can introduce visible distortion of shapes; for
instance, people may appear either unnaturally thin or
unnaturally squat.

Chapter 9: Disc menus 161
CHAPTER 9:
Disc menus
With the advent of the DVD, VCD and S-VCD disc
formats, video has become an interactive medium, with
new possibilities for both videographer and audience.
Developing – “authoring” – a disc in one of these
formats means going beyond the old idea of creating a
movie to be viewed in strict sequence from beginning
to end. Now the audience can decide which parts of the
movie to view, and in what order.
The essential new feature that makes disc authoring
possible is the menu. A particular disc may have one, a
few or many menus, each consisting of a still image or
short video sequence. Areas within the menus, called
buttons, can be selected by the viewer to activate links
to other content on the disc. Activating a link causes an
immediate transfer to any of:
• A normal video sequence, which in this context is
called a “chapter”. Chapter buttons often show a
thumbnail frame from the video to which they link.
• Another page of the same menu. Multiple pages are
used when a menu has too many buttons to fit on a
single page.
• A different menu.
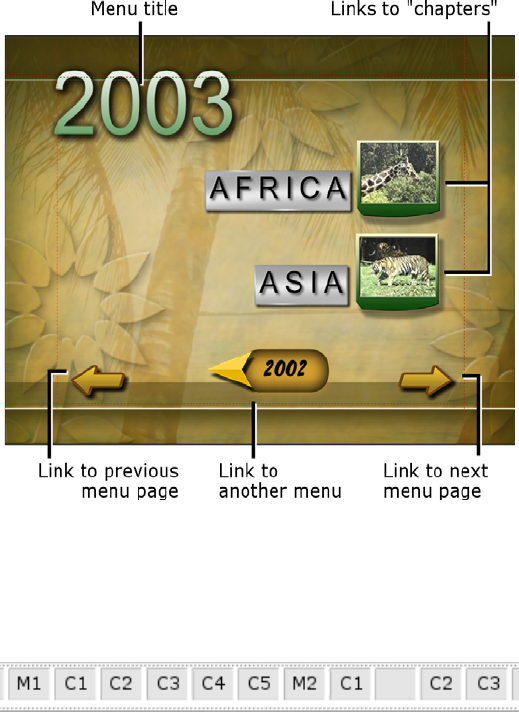
162 Pinnacle Studio 9
Unlike any other kind of clip, menus automatically
loop. When the end of a menu clip is reached during
disc preview or playback, it is immediately restarted.
This produces a jump in the playback position affecting
all clips that run simultaneously with the menu,
regardless of type – video (if the menu is an overlay),
audio or still image.
The following diagram is patterned after the Movie
Window storyboard. It shows how the menu pictured
above, which appears in the diagram as M1, might fit
into the overall scheme of a simple movie with two
menus.
Each menu is followed in the movie by several chapters,
all but one consisting of a single clip. Our menu, M1,

Chapter 9: Disc menus 163
has links to five chapters. Our menu is designed to
display two chapter links per page, so three pages are
required to accommodate all the links. (The second
page is the one appearing in the illustration.) We’ve
also given each page a link to the M2 menu.
The simple layout of this short movie can easily be
extended to organize large numbers of clips. Much
more complex movies are also constructed from the
same elements: multi-page menus with links to
chapters and to other menus.
Availability: Discs with multiple menus are not supported in the SE
and QuickStart versions of Studio.
Disc authoring in Studio
For the purposes of editing in Studio, a disc menu is
just one more type of clip. As with titles, you can use
or adapt the menus provided in the Album, or construct
your own from scratch in the Title Editor (see Chapter
3: The Album and Chapter 10: The Title Editor).
To get a feeling for what is involved, try creating the
pair of “instant” projects described below. You don’t
have to go as far as making discs, but you can preview
your movie using the DVD playback controls on the
Player (see “The DVD Player Control” on page 167).
Instant video scene catalog: In an empty project,
multi-select a good number of scenes from the Album
and drag them onto the video track. Now switch to the
Disc Menu section of the Album (the bottom tab) and
drag any of the menus to the beginning of the Timeline.
When Studio asks if you would like to “automatically
164 Pinnacle Studio 9
create links to each scene after the menu”, click Yes
(see “Using menus from the Album” on page 165). A
new track appears at the top of the Timeline, and a
small “flag” appears over each of your clips. These
represent links from the menu you just added. And
that’s it – sit back and watch the show.
Instant slideshow: This time, start in the Still Images
section of the Album. Drag as many images as you like
onto the video track of an empty project, then drag in
any disc menu as the first clip on the Timeline, and
again click Yes when asked if you want links
automatically created. Turn next to the Transitions
section of the Album, pick any transition, and drag it
between the menu and the first of your still images.
Finally, select all of the still images (click the first,
then shift-click the last), click with the right mouse
button, and choose Ripple Transition from the pop-up
menu. Instant slideshow!
Menus and titles
The similarity noted on page 163 between titles and
disc menus is not just on the surface: a menu is
essentially “a title with buttons”. In fact, any still image
type can be used as the basis for creating a menu within
the Title Editor.
Like titles, menus can be used either in full-screen
mode on the video track or as overlays on the title track.
When a menu is used as an overlay, its background
image is suppressed: only buttons, captions and
graphics are displayed. This allows the menu to have a
moving video background.

Chapter 9: Disc menus 165
Using menus from the Album
The Disc Menus section of the Album contains a
collection of menus that have been designed for
particular occasions, authoring styles and chapter
counts. Each menu provides a background picture, a
title, a set of chapter buttons (generally with spaces for
thumbnail frames), and a pair of Next page and
Previous page buttons.
The number of chapter buttons per page varies from
one menu design to another, so one criterion for
selecting a menu is the number of clips you want it to
handle. It is generally more convenient for the viewer
to browse a few menu pages with many buttons per
page than many pages of a few buttons each.
During editing, you see all the buttons that the menu
provides. During playback, the only buttons visible are
those to which you have assigned links.
Menus with fewer buttons have more space for
captions; those with many buttons will have abbrevi-
ated captions or none at all. Whether you need captions,
and if so whether they should be simple (“Chapter 1”)
or descriptive (“Cutting the cake”) is a matter of your
authoring style and the content of your movie.
In the VCD and S-VCD formats, the viewer must select
chapters numerically (by keying numbers on the remote
control), so it is usual to provide button captions that
include the chapter number when authoring for these
formats.
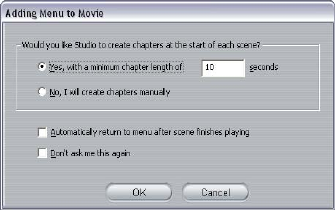
166 Pinnacle Studio 9
Dropping menus on the Timeline
When you drag a menu from the Album and drop it
onto the video track or the title track, Studio gives you
the option of automatically generating links to all video
clips to the right of the menu on the Timeline. Multiple
clips are combined into chapters if necessary to achieve
the minimum chapter length you specify.
This is the quickest, easiest way to link in a disc menu,
but may not be what you want in a particular authoring
situation. If you check the Don’t ask me again
checkbox, your choice of Yes or No becomes the
default action when you drag in a menu in future. You
can also set the default action, or reinstate the
confirmation window, in the When adding a menu area
of the Edit options panel (see “Edit Settings” on page
256).
To create your chapter links manually, rather than
using the automatic linking feature, use the Set disc
chapter command on the pop-up context menu for each
video clip you want to add, or use the Set chapter
button on the Clip properties tool for disc menus.
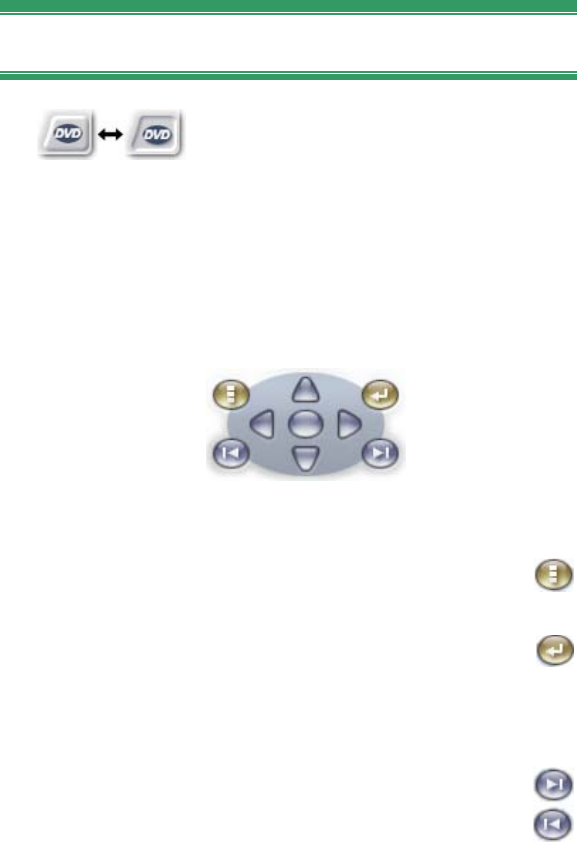
Chapter 9: Disc menus 167
The DVD Player Control
Studio’s Player provides a specialized
set of controls for previewing movies
that contain menus, patterned after the button layout on
a typical DVD remote control. Switch the Player to
DVD mode by clicking the DVD toggle button at the
bottom right corner of the Player.
A grouping of DVD controls appears and activates
below the Player preview screen:
Here are the functions of the individual DVD controls:
Main menu: Jumps to the first menu in your
movie and begins (or continues) playing.
Previous menu: Jumps to the most recently
active menu and begins (or continues) playing.
Clicking the button again jumps back from the menu to
the most recent clip.
Previous chapter, Next chapter: Clicking the
Previous chapter button takes you to the start of
the current chapter if you aren’t there already.
Click again to move on to the previous chapter. The
Next chapter button takes you forward to the next
chapter in the movie. Within a menu, these buttons step
backwards and forwards respectively through the menu
pages.
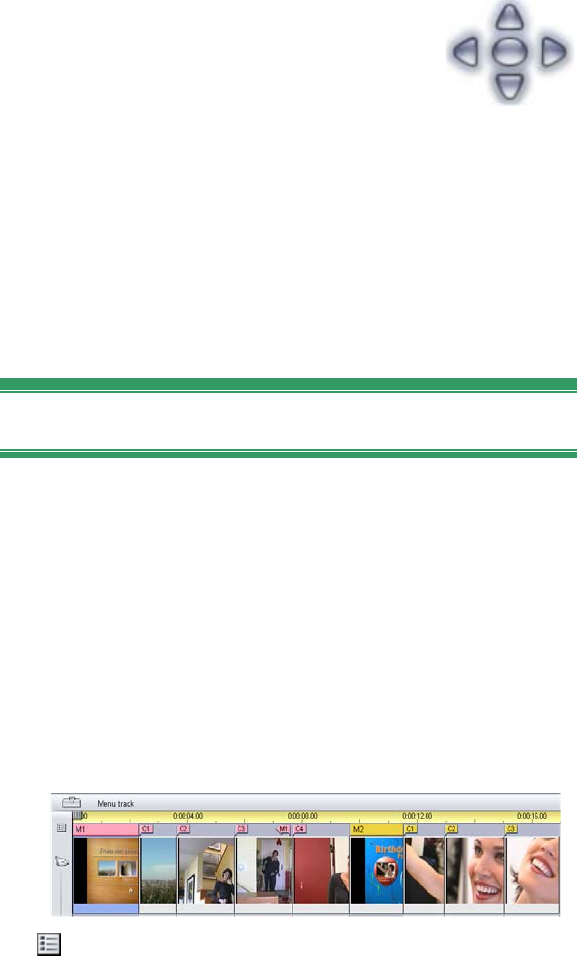
168 Pinnacle Studio 9
Button selection: The four arrow
controls in this cluster move the on-
screen cursor within a disc menu to
select one of its buttons. The oval
button in the middle of the cluster activates the
currently-selected on-screen button, which is indicated
by highlighting.
Activating menu buttons directly
One feature of the Player that set-top DVDs don’t have
is the ability to click the buttons directly on the screen.
Whenever a button is visible in the Player preview area
in DVD mode, you can click it to follow the button link.
Editing menus on the Timeline
Menus can be trimmed on the Timeline just like any
other still image clip (see “Trimming on the Timeline
using handles” on page 78).
Setting the clip duration is generally less crucial for
menu clips than for other types, since menus cycle
during playback while waiting for user input. If you
want a looping video background or looping audio with
your menus, though, you will want to match the menu’s
duration to that of the clips involved.
The menu track
Menu buttons link to particular points within your
movie. Those points are marked by flags on the menu
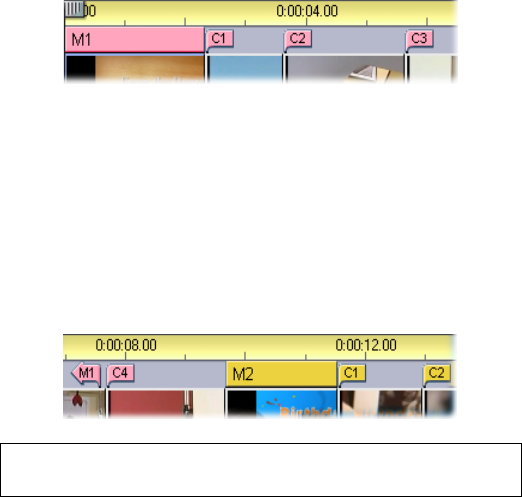
Chapter 9: Disc menus 169
track, which materializes above the video track the first
time a menu is added to your movie (and vanishes
again if all menus are removed).
The menu itself is marked by a colored rectangle in the
menu track (M1 and M2 in the illustration above). Each
link to a chapter is shown by a “C” flag. Here is a
close-up of the first part of the Timescale, showing the
rectangle identifying the first menu, and the chapter
flags for three of the clips it links to.
The next part of the Timescale in the overview
illustration above includes the fourth chapter link from
M1, and a link (the left-pointing arrow) from the end of
the previous clip back to the menu. A result of setting
this link is that the C4 clip can only be reached from
the menu. The C4 clip is followed by menu M2, which
– along with the flags that belong to it – is
automatically drawn in a new color.
Availability: Discs with multiple menus are not supported in the SE
and QuickStart versions of Studio.
Editing on the menu track
Flags on the menu track can be moved by dragging
them with the mouse, thereby changing the location at
which the link takes effect in the movie. When a video
clip is moved, any flags attached to the clip are moved
along with it.
170 Pinnacle Studio 9
To create a link:
Right-click the menu track or the video track and
choose either Set Disc Chapter or Set Return to Menu,
depending on the kind of link you want to create.
Return to menu links are always created at the end of
the current clip, rather than at the exact point where
you click. You’ll rarely want to return from the middle
of a clip, but you can drag the link flag to a new
position if the occasion arises.
To reposition a link:
Click the flag for the link and drag it along the menu
track to its new position.
To delete a link:
• Right-click the link flag and choose Delete from
the pop-up menu; or,
• Select the flag, highlighting it, then press the Delete
key.
Editing with the Clip properties tool
The Clip properties tool for disc menus allows
you to create, edit and fine-tune chapter links,
and provides access to the Title Editor for adjusting the
visual content of the menu.
Like the Clip properties tool for other clip types, this
tool lets you set a custom name for the menu by editing
the Name field and trim the clip by editing the
Duration field.
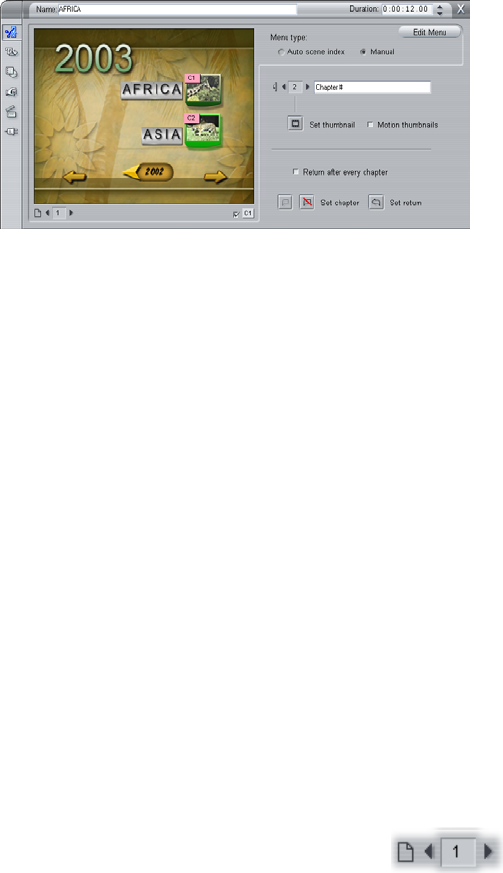
Chapter 9: Disc menus 171
The Edit menu button at the top right of the tool opens
the menu in the Title Editor. There you can change
every visual aspect of the menu: its background and
button images, the appearance and contents of its
captions, and more. For full information about the
many capabilities of the Title Editor, see Chapter 10:
The Title Editor.
The preview area on the left side of the tool shows how
the menu looks and also has interactive features you
can use when establishing chapter links. (These are
described on page 174 under “Chapter-editing
controls”.) The other controls are in four groups:
• Menu-previewing controls
• The Menu type options
• Link property controls
• Chapter-editing controls
Menu-previewing controls
These controls are located below the preview area.
Page selector: For menus with multiple
pages (those with more links than a single
page can accommodate) the arrow buttons let you
select which page is active in the preview area. You
can select any page in the menu for which links have
been defined.
172 Pinnacle Studio 9
Alternative methods of selecting menu pages:
• Step through the pages by clicking the page link
buttons in the preview area.
• Use the Button selector control (described on page
172) to choose a button on any page of the menu.
Show link numbers checkbox: Check this
box to cause link numbers to be displayed in
the preview area over every button in the menu. The
link numbers match the format and color of the chapter
flags on the menu track.
The Menu type options
This pair of options determines whether you or Studio
will organize the chapter links for this menu.
If you choose Auto scene index, Studio will ensure that
your chapter links are in the same order on the menu as
they are in the movie itself, even if you shuffle the
order of the clips in the Movie Window. With the
Manual setting, the order in which chapters are shown
on the menu is up to you.
Tip: If you want to sort your chapter links yet still
retain future control of their order, you can click Auto
scene index first (to sort the links), then Manual.
Link property controls
The controls in this area set the display properties of
the chapter links on the menu.
Button selector: Every link button in your
menu, no matter which page it is on, has a
unique sequence number. Use the arrow buttons on this
Chapter 9: Disc menus 173
control to select the menu button you want to work on.
The selected button is highlighted in the preview area.
You can also select a button by clicking on it in the
preview area.
Button caption text field: Edit the text
for the current button without going to
the Title Editor. The “#” character in button captions
has a special meaning: Studio replaces it with the
button’s sequence number. Use this feature to ensure
that your buttons are correctly numbered regardless of
changes in the layout of the menu. To edit other
characteristics of a button caption – its position, font,
and styling – click the Edit menu button to invoke the
Title Editor.
Set thumbnail button: By default, the
thumbnail frame displayed on a menu button is
the frame to which the button links. You can choose
any frame in your movie to be the thumbnail, however.
Just move the Timeline scrubber to the exact frame you
want (as shown in the Player), and click the set
thumbnail button.
Moving thumbnails checkbox: Check this
option if you would like your menu’s
buttons to show moving video from their target
chapters rather than a static thumbnail frame.
Because this feature requires that the moving
thumbnails be pre-rendered, the results won’t
appear immediately when you preview your
movie in the Player. Instead you will see a
“background rendering” progress bar appear
in the Timescale over the menu clip. The bar
gradually changes color as the rendering
operation progresses. Editing is not interrupted –
Studio carries out the rendering while you work.
174 Pinnacle Studio 9
For more on background rendering, see “Hollywood
FX for Studio” (page 140); and “Edit Settings” (page
256).
Chapter-editing controls
The controls in this area select or modify the individual
chapter buttons within a menu.
The Set chapter buttons: These
buttons set or sever the link
between the currently-selected chapter button on the
menu and its target clip.
To set a link: Position the Timeline scrubber within a
menu, video or still image clip, and click the Create
chapter button. For video and still image clips, the
chapter point is set to the exact location of the scrubber
within the clip.
To clear a link: Click the Delete chapter button.
Set return button: This creates a “return-to-
menu” link at the end of the current clip, which
is where you almost always want it. During playback,
the link causes an immediate jump to its menu. To
create a return-to-menu link in the Clip properties tool,
position the Timeline scrubber in the clip where you
want the link, and click Set return to menu.
The Return after every chapter checkbox: Set this
option to add a return-to-menu link after every chapter
in this menu. Clearing the checkbox removes all the
return-to-menu links for this menu, whether they were
added manually or automatically.
Creating links with drag-and-drop
The Clip properties tool for disc menus supports drag-
and-drop as a quick and convenient way to establish
links for menu buttons.
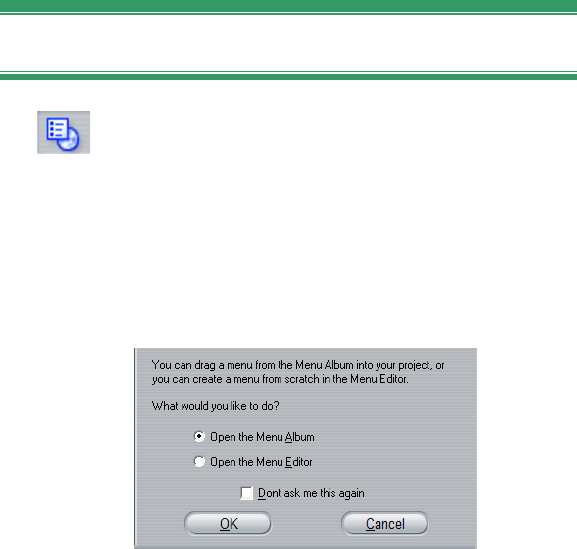
Chapter 9: Disc menus 175
To create a link using drag-and-drop:
• Click the clip in the Movie Window that you want
to link to, and drag it onto a button in the Clip
properties tool preview area. The button is linked to
the first frame of the clip. Or,
• Click the button for which you want to create a link,
and drag it onto a clip in the Movie Window. In this
case you are linking to the point within the clip at
which you “drop” the button – generally not the first
frame.
The Disc menu tool
If you open this tool while a menu is selected, it
is equivalent to opening the Clip properties tool;
otherwise, it provides a Create Menu button that takes
you into the Title Editor to begin the process of
creating a new disc menu.
Because developing a menu is a relatively intricate
operation, Studio takes the opportunity to remind you
that pre-built menus are available in the Album.
When you decide that this reminder is no longer needed,
check the Don’t ask me this again box before clicking
the OK button.
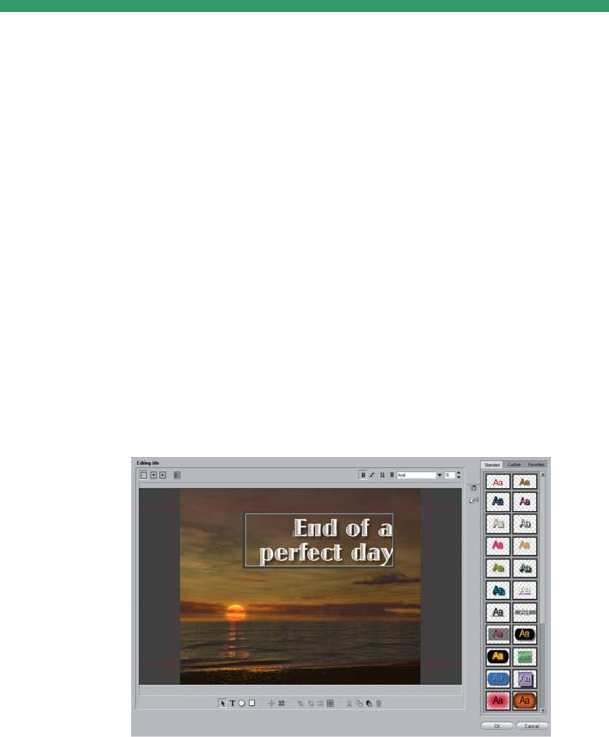
Chapter 10: The Title Editor 177
CHAPTER 10:
The Title Editor
Studio’s built-in Title Editor is a powerful facility for
creating and editing titles and other graphics. Its
extensive suite of text and image effects and tools
provides endless possibilities for the visual design of
your movie.
The Title Editor is not limited to creating passive titles.
For disc projects, you can also add and edit the special
buttons needed for handling viewer interaction with the
menus of VCD, S-VCD and DVD movies.
Creating a title in the Studio 9 Title Editor tool. The
large area containing the picture and the text is the
Edit Window, while the panel occupying most of the
right-hand side is the Title Editor Album. Other
controls are in clusters around the Edit Window.

178 Pinnacle Studio 9
Launching the Title Editor
Reflecting the versatility of the Title Editor is the
variety of ways of accessing it from Studio’s Edit mode,
using either one of the tools in the Video toolbox (see
page 69) or a mouse command on one of the Timeline
tracks (see page 63).
• To create a full-screen title or menu: Select Go to
Title/Menu Editor from the right-button context
menu in the Timeline video track.
• To create an overlay title or menu: Double-click
the Timeline title track.
• To create a title or menu from the toolbox: Open
the Create title tool and click Title Overlay or Full
Screen Title.
• To edit a full-screen title: Double-click the title in
any Movie Window view, or right-click the title and
select Go to Title/Menu Editor.
• To edit a full-screen menu: Double-click the menu
in any view and click the Edit Menu button, or right-
click the menu and select Go to Title/Menu Editor.
• To edit an overlay title or menu: Double-click the
clip on the title track or in List View, or right-click it
in any view and select Go to Title/Menu Editor.
• To edit a title or menu from the toolbox: With the
clip open in the Clip properties tool, click the Edit
Menu or the Edit Title button.
If the list seems overwhelming, don’t let it concern you.
In practice, getting to the Title Editor by the nearest
available means will give the result you want. If you do
accidentally create an overlay when you want a full-
Chapter 10: The Title Editor 179
screen title or menu, or vice versa, just drag it onto the
other Timeline track. If you find yourself creating a
title when you wanted a disc menu, you can easily
switch over in the Title Editor.
THE TITLE EDITOR CONTROLS
The main Title Editor controls are laid out in clusters
around the Edit Window (see the picture on page 177).
Title-type buttons
The four buttons in this cluster sit
on the left side of the screen above
the Title Editor’s Edit Window. Only one of them can
be selected at a time. Choose the first button if you are
creating a still title. The second creates a roll, in which
the title text and graphics travel upwards on the screen
as the title displays, like the credits at the end of a
move. The third creates a crawl, in which the title is
displayed as a single line of text moving from right to
left across the screen like the bulletins on a TV news
show.
Availability: Rolls and crawls are not supported in the SE and
QuickStart versions of Studio.
The fourth button is for creating disc menus, which you
can usefully think of as “titles with buttons”. In fact, a
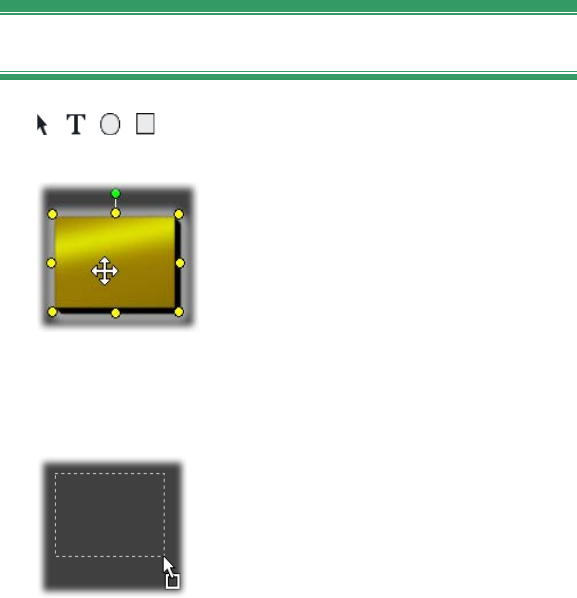
180 Pinnacle Studio 9
menu is just like any other title except for two
attributes:
• A menu has at least one button. A title has none.
Adding a button to a title turns it into a menu, and
deleting the last button on a menu turns it into a title.
By the same token, if you click the Menu button
while editing a title, Studio automatically adds a
button to the title.
• A menu cannot have rolling or crawling text. The
Title Editor does not allow you to add menu buttons
to a rolled or crawled title.
Object toolbox
This cluster of four Title Editor tool
buttons is located at left below the Edit Window.
The first tool (the arrow) is used for
all editing operations upon the
currently selected object. A selected
object is surrounded by a number of
control points with which you can
change its size, position, proportions,
and other geometrical features.
The other three tools are for creating objects in the Edit
Window – text boxes, ellipses and rectangles.
Each is used in the same general way.
Click one of the three tools, then click
the Edit Window at the point where
one corner of the object should be.
Drag the mouse to outline the new
object as indicated by the dotted line.
Chapter 10: The Title Editor 181
When the object has the size and proportions you want,
release the mouse. Whatever its type, the object is
created with the specified dimensions.
Its other attributes – color, shading,
shadow, etc. – are determined by the
currently selected look in the Title
Editor Album. All attributes can later
be changed at will.
After the object is created, the object tool you used
deselects, and the selection arrow again becomes active.
The object itself is selected – shown in the usual way
by its control points – and can now be manipulated
with the mouse.
Reordering objects in three dimensions
Because objects can overlap
one another, it is easy to get
into situations where an object
that should be completely
visible is partly or wholly
obscured by one or more other
objects. In such cases, use the
four reordering commands on the Title Editor’s Layers
menu. These commands affect the currently-selected
object, symbolized by rectangle “3” in the diagram.
• Bring to Front: The object is moved out in front of
all other objects. In the diagram, object 3 is now in
front of object 1.
• Send to Back: The object moves behind all other
objects. Object 3 is now behind object 5.
• Bring Forward One Layer: Object 3 now lies in
front of objects 2, 4 and 5, but is still behind object 1.
• Send Back One Layer: Object 3 is now behind
objects 1, 2 and 4, but is still in front of object 5.
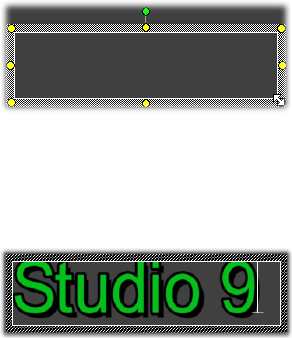
182 Pinnacle Studio 9
About text objects
Selecting a text object is different in one important way
from selecting a rectangle or ellipse: the object’s text
field is put into a “ready” state in which any keyboard
activity will cause the field to activate and start
displaying the input text.
The activation of the text field is indicated by a text
insertion cursor, the changed appearance of the object
frame, and the disappearance of the control points.
When a text object is not selected, you can activate its
text field directly by clicking in the middle of the
object. If you want the selection frame and control
points to appear, you must click on the edges of the
object. With other types of object, you can click
anywhere in an object to select it.
To deactivate a text field, click anywhere in the Edit
Window outside the text object.
Because text plays a central role in most titles and
menus, the Text Editor will automatically create and
activate a text object in the center of the Edit Window
if you simply begin typing at a time when no text
object already exists.
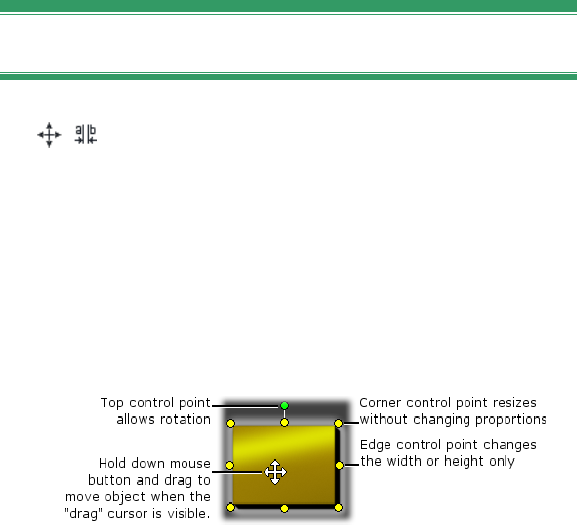
Chapter 10: The Title Editor 183
Advanced text editing features
As in a word processing program, the Title Editor
allows you to format a selected range of characters.
Simply mark an adjacent set of characters with the
mouse and apply the formatting you desire.
Supported operations on character ranges include text
styling (font, style and look), clipboard operations (cut,
copy, paste), delete, and a number of special
positioning, spacing and scaling commands that are
accessible only from the keyboard. For details on these,
please consult Appendix G: Keyboard Shortcuts.
Editing-mode selection buttons
These two buttons form the second cluster
along the bottom of the Title Editor’s Edit
Window. Their function is to govern which of two sets
of editing operations is available for the currently-
selected object.
• The first button is on by default when an object is
newly created. It enables the move, scale and rotate
operations with a selection frame containing nine
control points:
• Clicking the second button enables the skew
operation, which requires only a single control point.
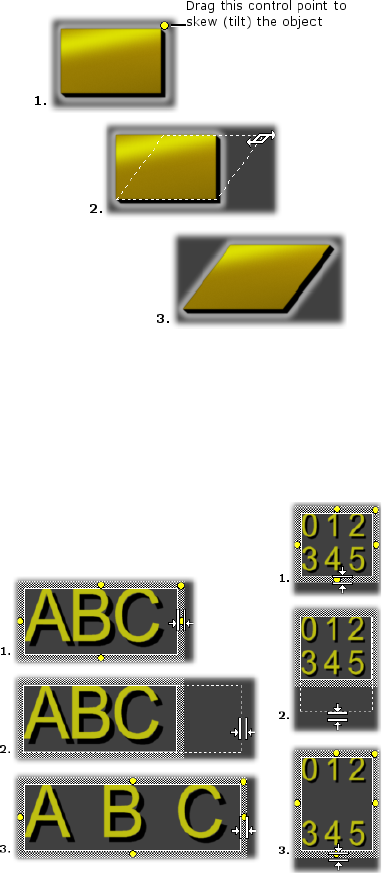
184 Pinnacle Studio 9
With text objects, the second button provides two
further operations, kern and change leading, accessed
by control points in the center of each edge of the text
frame:
Kern (L) and Change leading (R)
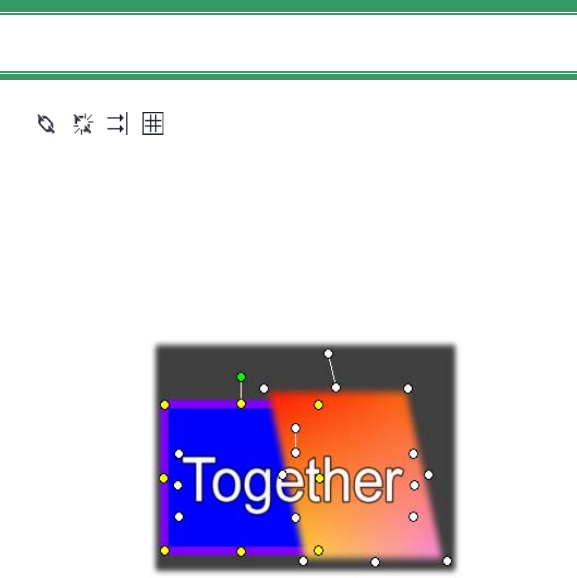
Chapter 10: The Title Editor 185
Object layout buttons
The two left buttons in this cluster are
for grouping and ungrouping Title Editor objects. The
first button is available when multiple objects are
selected. Its action is to link the objects into a group – a
composite object that is treated as a single entity by
editing operations. When a group is selected, all its
control points are visible simultaneously, and any of
them may be used to manipulate the group.
A grouping of three objects
The second button, which is available whenever a
group object is selected, separates the group into its
constituent objects.
Although it is possible to “group groups”, grouping is
always just one level deep, so ungrouping a supergroup
will result in all the constituent objects being
individuals again.
The next button opens a pop-out menu of 11 operations
that apply only to groups. The first six let you align a
set of objects along any one of their four edges or either
of their two mid-lines. The next pair of commands
provides for spacing the objects at equal intervals in

186 Pinnacle Studio 9
either the vertical or horizontal directions, and the final
three resize the objects so that they have equal width,
equal height, or both. All of these commands are
particularly useful in menu creation, since you
generally want menu buttons to be laid out in a regular
fashion.
The final object layout button opens
another pop-out menu, this one concerned
with object justification. The nine options
here are in a graphical form resembling a
tic-tac-toe board. Clicking one of the nine
areas moves the object to the correspon-
ding corner of the screen (as defined by the “text-safe”
area delimited by red dashed lines), or to the center.
Multiple selection of objects
The first step in making a group is to select the multiple
objects that will comprise it. This can be accomplished
in either of two ways:
• By clicking and dragging with the mouse to mark out
a selection rectangle (a “marquee”) that encloses all
the objects you want to group; or,
• By clicking the first object you want to group, then
Ctrl-clicking each of the others.
Temporary groups
Any selection of multiple objects functions as a
temporary group, and can be moved, aligned, rotated,
colored etc. as a unit. The temporary grouping loses its
identity as soon as you click elsewhere in the Edit
Window, however, whereas a group created with the
group button persists until explicitly ungrouped.
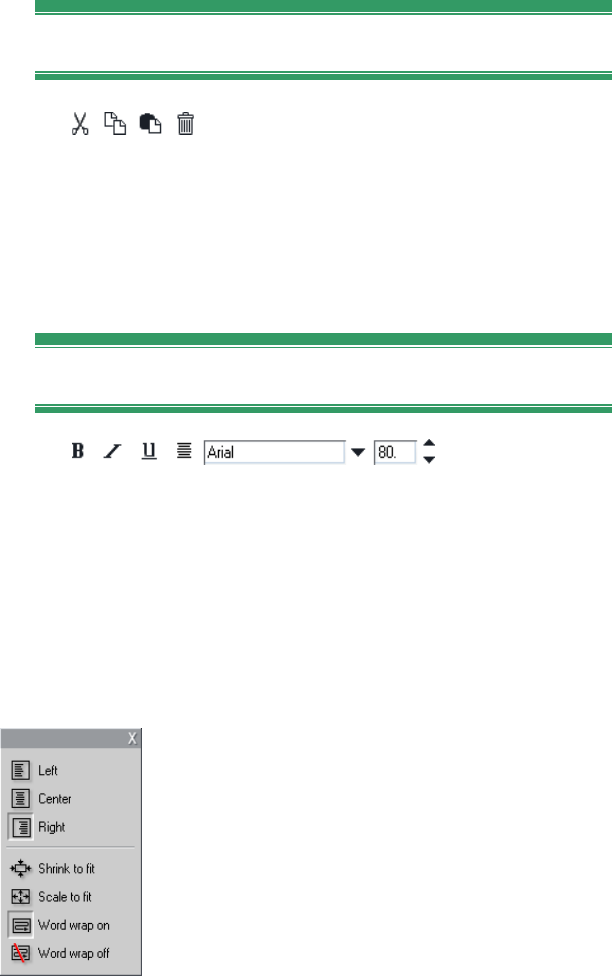
Chapter 10: The Title Editor 187
Clipboard and delete buttons
The buttons in this cluster provide the
familiar editing operations Cut, Copy, Paste and Delete,
all of which operate on groups, individual objects, or
on selected text within a Title Editor text object. The
first three work with the Windows Clipboard, while the
fourth simply deletes the chosen material without
affecting the Clipboard.
Text-styling controls
The controls in this cluster at the top right of the Title
Editor’s Edit Window should look familiar to anyone
who has used word-processing software. The controls
apply both to currently-selected text and to any new
text that may be entered until the settings are changed
again.
At the left are three font style buttons, which select the
bold, italic or underlined styles respectively.
Perhaps surprisingly, the underlined style
button – alone among these controls – can be
applied to any type of object, not just text (try
it!). This makes it possible to use the
underlined highlighting style with buttons
created from graphic objects: rectangles,
ellipses and pictures.
The fourth button opens a pop-out menu of
text-formatting options. Unlike the other

188 Pinnacle Studio 9
controls in the cluster, which govern the appearance of
individual characters, the options on this menu apply to
all the text in a given text box.
The three justification options – Left, Center and Right
– affect the placement of the text within its box (and
not the placement of the box itself within the Edit
Window, which is the function of the object
justification menu ).
Shrink to fit, Scale to fit, Word wrap on and Word wrap
off are options that determine how your text is treated
when you resize a text box. With Word wrap on, which
is the default for a new text box, resizing the box
results in the text being reformatted – word-wrapped –
to the new box width (while the resulting new height of
the text in turn governs the height of the box). Word
wrap off removes all “soft” line breaks (line breaks
added for word wrapping), then makes the box as wide
as necessary to contain the text. Word wrap mode is
automatically turned on again if you type further
characters into the text box.
With Scale to fit, the text is stretched during resizing to
follow both box dimensions. With Shrink to fit, the text
remains its original size unless the box is made smaller,
in which case the text is resized as in Scale to fit.
Neither to fit command changes the line divisions of
the text.
The font dropdown list and the font-size selector
complete the text-styling controls group.

Chapter 10: The Title Editor 189
THE TITLE EDITOR ALBUM
The Title Editor Album is the rectangular panel on the
right-hand side of the Title Editor screen. It contains
resources for building menus and titles in the same way
that the main Studio Album contains resources
for creating movies.
The Title Editor Album is controlled by the four
buttons shown at left, which are located between
the Edit Window and the Album itself. Each
button opens one of the four Album sections: the
Looks Browser, the Backgrounds section, the Pictures
section and the Buttons section.
The Looks Browser
This section of the Title Editor Album has three
subsections, accessed by the Standard, Custom
and Favorites tabs across the top.
The Standard tab is a collection of styles that can be
applied to the text and other objects you use in your
titles. Each style consists of a color (or color gradient,
or transparency) for each of the “face” (surface), edge
and shadow of the object to which it applies, plus a
separate blurring parameter for each. A final parameter
is shadow direction, for which there are eight
possibilities.
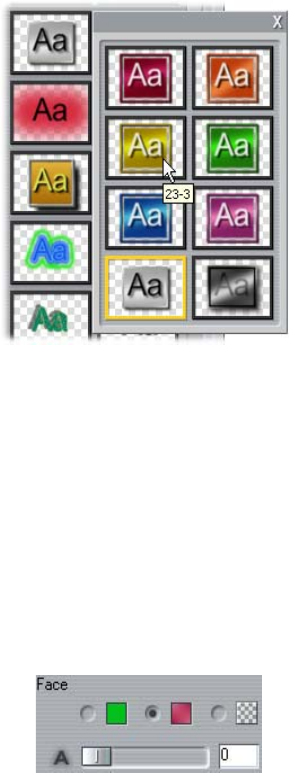
190 Pinnacle Studio 9
To change the look of an existing object, simply click
on the look you want while the object is selected. New
objects are created with the most recently selected look.
Selecting a look in the Looks Browser: Each button
in the Standard tab is available in eight styles, which
are presented to you as a submenu. Each look has a
numeric ID that displays as a tool-tip under your
mouse. Above, the mouse is on look 23-3.
The Custom tab lets you customize the supplied looks
or create your own by adjusting the parameters listed
above. Three identical sets of controls adjust the
parameters for face, edge and shadow respectively.
Here are the face controls:
The three option buttons across the top select a solid
color, a gradient, or no color (transparency). Clicking
the color swatch beside the first button invokes an
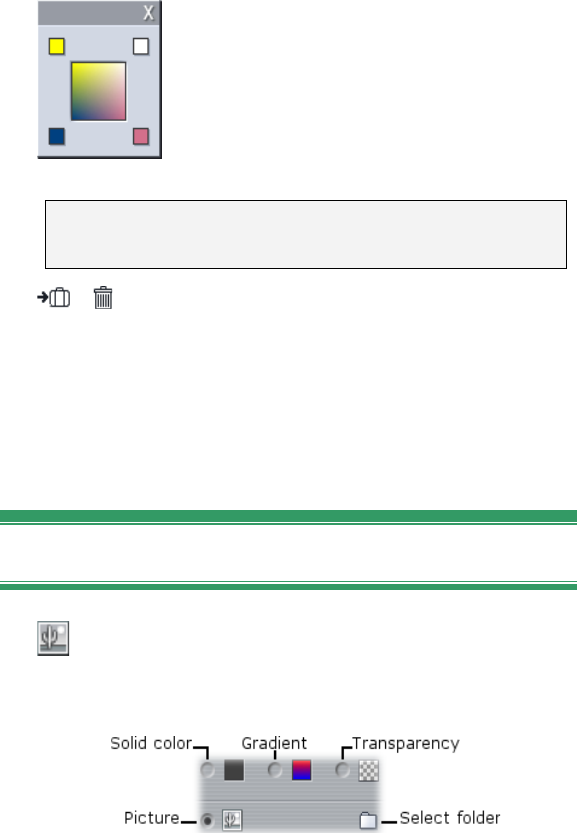
Chapter 10: The Title Editor 191
otherwise standard Windows color-picker dialog to
which an Opacity slider (0-100%) has been added.
The swatch beside the second button
pops up a gradient designer that lets you
define a gradient by assigning the
starting colors to each corner of a square
surface. Click the color swatches in the
corners of the gradient window to set the
color for that corner in a color-picker dialog.
Note: Some of the more elaborate supplied looks em-
ploy special internal features and so cannot be edited.
The Favorites tab lets you save particular
custom looks that you may want to re-use in the future,
to spare you from having to remember or record the
parameters you used. Click the left-hand button to save
the current look as one of your favorites. Click the
right-hand button to delete the currently-selected
“favorite”.
The Backgrounds section
A title or menu can have four types of background:
a solid color, a gradient, transparency (no
background at all) or an image file (such as a drawing,
photograph or saved video frame).
The color and gradient options in the Backgrounds
section of the Title Editor work in just the same way as

192 Pinnacle Studio 9
those described above for the Looks Browser (page
189), except that the color or gradient you select is
instantly applied to the background of the title you are
editing.
If you are working on an overlay title, you may find
interesting ways to use the Opacity setting on the color-
picker dialogs for these buttons, especially when the
overlay is coupled with transitions.
Normally, though, you’ll use a transparent background
for titles, and transparency is the default background
selection for a new title or menu.
The final option for backgrounds is picture – an image
file in any standard format. As with many of the
sections of Studio’s main Album, the backgrounds are
drawn from a source folder that may be changed using
the folder button. The image file you select with the
folder button becomes the new background, and the
image files in the folder are displayed as thumbnails on
the Album panel. If necessary, the Title Editor stretches
the background image until it fills the width or height
of screen but does not change its proportions.
The Pictures section
As with the background pictures just discussed,
the images in the Pictures section of the Title
Editor Album can be of any standard type. Instead of
being stretched to fill the Edit Window, however, these
pictures are added to the title as picture objects and
displayed at normal size with eight control points that
allow them to be repositioned and resized (though not
rotated or skewed).

Chapter 10: The Title Editor 193
Picture objects behave just like text objects and the two
types of graphic object with respect to grouping,
alignment and similar controls.
The Buttons section
Since buttons are the magic ingredient that turns
titles into interactive menus, this section of the
Title Editor Album is mainly of interest for DVD, VCD
and S-VCD authoring.
Broadly speaking, a button is an area of the screen with
which the user can interact in some way. Buttons are
classified according to the action they produce when
the user activates them, and not by their appearance,
which generally should be chosen to give a strong clue
to their behavior, but is not required to. The four types
of button are:
• Normal: Clicking the button causes playback to
jump to a chapter (that is, ordinary video) or another
menu. The link between the button and its target is
created in the Clip properties tool, not in the Title
Editor.
• Thumbnail: This special form of the normal button
type displays a thumbnail frame (or a moving
thumbnail preview) from the part of the movie to
which it links.
• Previous: This button appears on the second and
later pages of multi-page menus (menus with more
links from normal or thumbnail buttons than will fit
on one page). It links to the previous menu page.
• Next: This button appears on all but the last page of
multi-page menus; it links to the following page.
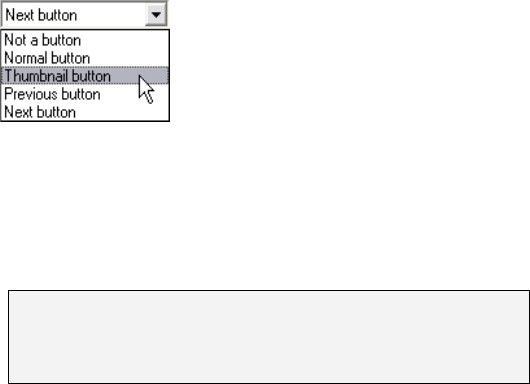
194 Pinnacle Studio 9
The button art supplied with Studio includes several
examples of each type. Each button is an image file in
Targa (tga) format. Examination of the files in an art
program like Adobe PhotoShop or Paint Shop Pro will
show that the transparent portion of the button image,
and the special area for the display of thumbnails
(where applicable), are defined by an alpha channel
included with the image.
As usual, a folder button lets you select the disk
directory from which the displayed images are obtained.
To use a supplied button, simply drag it from the
Album into the Edit Window, where it becomes a
button object – essentially an identical twin of the
picture object.
The default action of the supplied
buttons is determined by their file
names, but a new action can be
assigned to the currently-selected
button object from the dropdown
list in the Buttons section of the Title Editor Album.
The first choice on this list, “Not a button”, removes
the action from the object – now it is merely a graphic.
The other choices correspond to the button types listed
above.
Tip: Remember, it’s not the button’s appearance that
determines its behavior, but the button type you select
from the menu.
In fact, you can make any non-group object – whether
text, rectangle, ellipse, picture or button – function as a
button just by selecting it in the Edit Window and
choosing a new button type from the dropdown list.
Chapter 10: The Title Editor 195
Would you like to make a button that says “Grandma”
and link it to the video of Grandma’s birthday party?
Just create a text object, make it as fancy as you like
with text stylings and the Looks Browser, and assign it
the normal button action. Back in the Clip properties
tool, link the new button to the chosen video clip and
the job is done.
Button highlighting
DVD menus (but not VCD and S-VCD
menus), give visual feedback by high-
lighting the current button as the user
scrolls around the menu. Special active
highlighting distinguishes a button that is
in the process of being actuated, just before the action
is performed. (You can preview this highlighting effect
in the Player, and interact with the menu using either
the mouse or the Player’s DVD controls.)
The Title Editor lets you assign the color that will be
used for each type of highlight, and a style option that
governs how the highlights will be drawn. The controls
for these settings are located below the button-type list:
Click the Active and Selected color swatches to set the
highlight colors that work best with your menu. It may
help to make your menus clearer if you use consistent
highlighting colors for all the menus on a disc.
The three highlight style options, from left to right, are:
• Box: The highlighting is drawn as a rectangle
enclosing the button.
• Follow shape: The highlighting covers the visible
area of the button, whatever its shape.
• Underline: The button is underlined.
196 Pinnacle Studio 9
These highlight options can be applied to any type of
button made from any type of object, not just the button
images brought in from the Album. Clear the Highlight
style checkbox if you want to disable button
highlighting while working in the Title Editor.

Chapter 11: Sound effects and music 197
CHAPTER 11:
Sound effects and music
Video may be thought of as primarily a visual medium,
but the role of sound in your movies is often no less
important than that of the images on the screen.
Feature film and television productions include
numerous types of audio, beginning with the dialog and
other sounds created during live action. In your movies,
that raw soundtrack is brought in along with the video
during Capture mode. It appears in the Movie Window
Timeline view on the original audio track below the
video track. In Studio Plus, original audio may also
appear on the overlay audio track.
Most commercial productions also require sound
effects – slamming doors, crashing cars, barking dogs,
etc. – and incidental music, which may consist of music
created especially for the production, songs taken from
recordings, or both. Voice-overs and other customized
audio are also often needed.
You can use all these types of add-on sound in your
own movies:
• A good starter set of effects in wav format is
installed with Studio, and others are available from
many sources.

198 Pinnacle Studio 9
• The SmartSound tool automatically creates a music
track of any desired duration in a variety of styles.
• You can drop mp3 files from the Album onto the
Timeline or import CD audio tracks with the CD
audio tool.
• The Voice-over tool lets you add narration or
commentary as you preview your edited video.
Audio, whatever its type, is added to your production
as clips in the Movie Window. These can be moved
around, trimmed and edited in much the same way as
video clips and still images.
Once a sound clip is part of your movie, you can
modify it with fades and other volume adjustments.
You can adjust the positioning of your clips within a
stereo or surround mix, and even change that
positioning arbitrarily within the clip. You can also
apply Studio’s audio effects, including noise reduction
and reverb among others.
Availability: Surround sound is not supported in the SE and
QuickStart versions of Studio.
About surround sound
A “surround” mix goes beyond standard two-channel to
provide a theater-style enveloping sound field for your
DVD productions. Studio lets you set the apparent
position of each audio track independently within the
mix, and to “pan” the track (reposition it, whether
smoothly or abruptly) in any desired direction as often
as necessary over the course of your movie.
To preview surround sound while editing in Studio,
your PC’s sound card must be connected to one of:
• A sound system that includes a decoder with Pro
Logic or Pro Logic 2 compatibility, such as a

Chapter 11: Sound effects and music 199
powered speaker system with Pro Logic support or a
Pro Logic-compatible AV receiver.
• A sound card and speaker system with Dolby Digital
5.1 compatibility.
For best results a digital audio connection (RCA or
optical) is recommended.
Note: Even if you cannot hear your surround mix when
previewing, it will still appear on your DVDs, but a
surround preview allows more accurate mixing.
A surround soundtrack can be output to the DVD in
either of two forms:
• In Dolby Digital 5.1 format, each of the six surround
channels is stored discretely on the disc and will be
routed directly to the corresponding speaker when
played back on a full 5.1 surround playback system.
• In Dolby Digital 2.0 format, the surround mix is
encoded onto two channels. When your DVD is
played back on systems with a Pro Logic or Pro
Logic 2 decoder, and a 5.1 or better speaker layout,
the original surround information is recreated. On
other systems, the encoded soundtrack will be heard
as conventional stereo.
The Timeline audio tracks
The Movie Window’s Timeline view contains several
audio tracks:
Original audio track: This contains the audio captured
along with your video clips. It is sometimes called
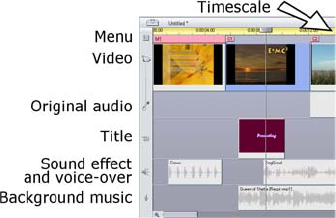
200 Pinnacle Studio 9
“synchronous” audio because it is recorded
simultaneously with the video track.
Overlay audio track: The original audio for video
clips on the overlay track.
Sound effect and voice-over track: Sound effects and
voice-overs are the typical content on this track. Sound
effects are brought into your project from the Sound
Effects section of the Album (see “The Sound Effects
section” on page 54). Voice-overs are created with the
Voice-over tool (described on page 205).
Background music track: Use this track to include
mp3 or wav audio files, SmartSound background
music generated by Studio, and music (or other content)
from audio compact disks (CDs). Audio files are
imported via the Sound Effects section of the Album
(see page 54). Create SmartSound clips with the
SmartSound tool, and CD audio clips with the CD
audio tool (see “The SmartSound tool” on page 203
and “The CD audio tool” on page 201).
The Timeline audio tracks: original audio, sound
effect and voice-over, and background music. A
fourth audio track appears when the overlay track is
visible; it contains the original audio for video on
that track.

Chapter 11: Sound effects and music 201
Switching audio tracks
Although the audio tracks do have their specialized
roles, as described above, these mainly control the
choice of track where new clips will appear. Original
audio will always be placed on the original audio track
when a new video clip is brought in; new voice-overs
will always be created on the sound effects and voice-
overs track; and new CD audio and SmartSound clips
will be added to the background music track.
Once a clip has been created, however, you can move it
to a different audio track if it is convenient to do so:
each track is actually able to accommodate any type of
audio clip. This gives you the flexibility to use two
sound effects simultaneously, for example, simply by
placing one of them on the background music track.
The only audio track with special status is original
audio, either for the main video track or, when it’s in
use, the overlay track. By default, audio clips on this
track are edited in parallel with the contents of the
video track at the same time index. To treat the audio as
a separate clip, lock the video track (by clicking the
padlock icon on the right side of the Movie Window).
See “Advanced Timeline editing” on page 87 for more
information.
The CD audio tool
Use this tool to create an audio clip from a CD
track. You can preview tracks within the tool,
and select either a whole track or an excerpt to add to
your movie.
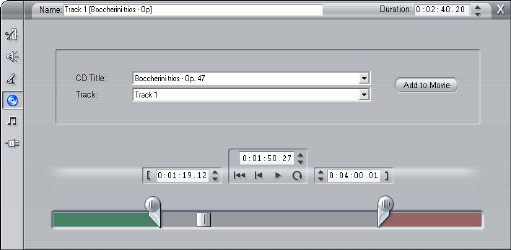
202 Pinnacle Studio 9
If there is a CD in the drive that you have not
previously used in a Studio project, Studio will ask you
to enter its name before continuing. The controls on the
tool will become available only when Studio can offer
at least one entry on the CD Title dropdown list.
Select the CD from which you wish to capture audio in
the CD Title dropdown list, and a track on that CD
from the Track list. Since CD Title is also an editable
text field, you can change the name by which Studio
refers to this CD, if desired. The name change applies
to both the current and future sessions.
Having selected the CD and track, you can now
optionally trim the clip and give it a custom name using
the other controls on the tool. These controls are
common to most audio clip types, and are used for
editing as well as creating clips. They are covered on
page 208 under “Trimming with the Clip properties
tool”.
Finally, click the Add to Movie button. Studio creates
the new clip on the background music track beginning
at the current time index (as shown by the Timeline
scrubber and the preview frame in the Player).
The first time you preview the portion of your movie
that contains the new clip, Studio will ask you to insert
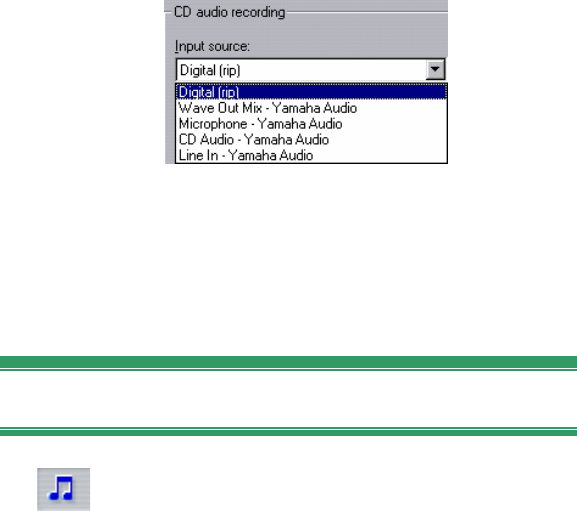
Chapter 11: Sound effects and music 203
the CD (if it is not already in the drive), so that the
audio data can be captured. You won’t need to repeat
this step subsequently unless you lengthen the clip.
CD recording options
Depending on your CD drive, Studio offers a number
of recording options. The choices are found in the CD.
Voice-over and Surround options panel (Setup ¾ CD,
Voice-over and Surround):
The default method is digitally “ripping” from your CD
to Studio. If you have an older CD drive that can’t
transfer the audio digitally, Studio lists alternative
options based on the capabilities of your system’s
audio hardware.
The SmartSound tool
SmartSound automatically creates background
music in the style of your choice. Within that
style, you select one of several songs, and within that
song, any of a number of versions. The list of versions
available also depends on the duration of background
music you specify.
To create music for a particular set of clips, select those
clips before opening the SmartSound tool. (To select
your whole movie, use Edit ¾ Select All or press
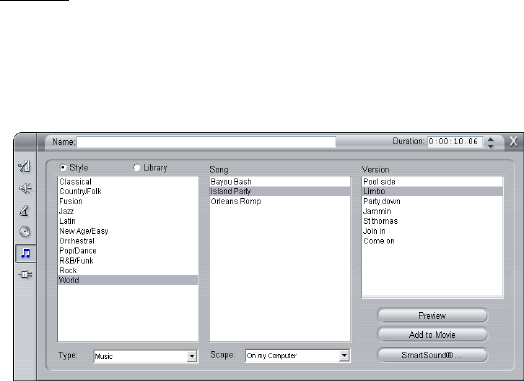
204 Pinnacle Studio 9
Ctrl+A.) The total length of the selected clips will
determine the initial setting for the music duration,
though you can modify the value at any time by
trimming on the Timeline or directly editing the
Duration counter in the tool.
In the SmartSound tool, choose a style, song and
version from the lists provided. Each style offers its
own selection of songs, and each song its own selection
of versions. Use the Preview button to audition the
song while the tool is open.
Enter a name for the clip in the Name field and adjust
its duration with the Duration counter, if desired. The
music clip you create will be adjusted to fit exactly the
duration you select.
If you would rather work with SmartSound sound
effects instead of songs, select Sound effects rather than
Music on the Type dropdown list.
You can change the selection of songs available to you
by choosing a different option on the Scope dropdown
list. Choosing All will give you access to the entire
SmartSound catalog, if you have an Internet connection.
You can preview any of the songs, and purchase any
that your movie may require.
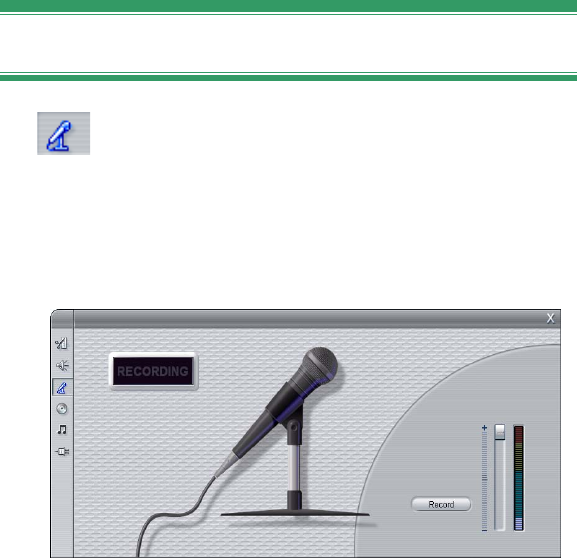
Chapter 11: Sound effects and music 205
When you have made your choice, click the Add to
Movie button. Studio creates the new clip on the
background music track beginning at the current time
index (as shown by the Timeline scrubber and the
preview frame in the Player).
The SmartSound button at the bottom right of the tool
opens a dialog with options and tools for maintaining
your SmartSound library.
The Voice-over tool
Recording a voice-over in Studio is as easy as
making a telephone call. Just open the Voice-
over tool, click Record and speak into the microphone.
You can narrate as you watch the movie play so your
words match the action on the screen. You can also use
the tool as a quick way of capturing ambient music or
home-made sound effects via your microphone.
Before you can record audio using the Voice-over tool,
you need to connect a microphone to the input jack of
your PC sound board. You must also have at least one
video clip in the Movie Window.
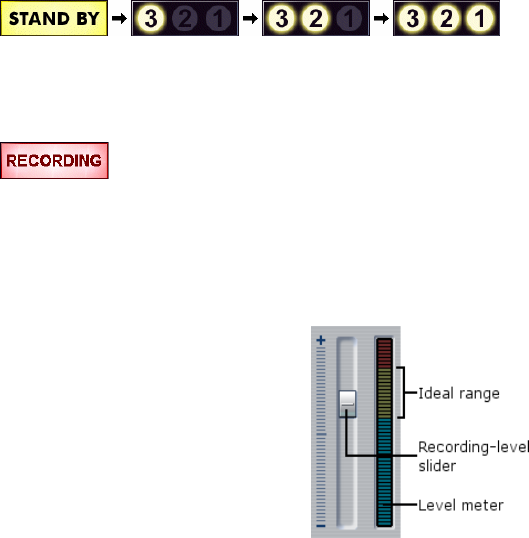
206 Pinnacle Studio 9
Review the video scenes in your movie and decide
where you want the voice-over to begin and end. When
you are ready, open the Voice-over tool. Note that the
recording lamp – the dark rectangle in the upper left of
the above illustration – is not lit.
Select your starting point on the Movie Window
Timeline. You may do this by selecting a clip, playing
the movie and stopping it at the desired point, or by
moving the Timeline scrubber.
Position the microphone for use and try speaking a test
phrase to check your recording level (see “Voice-over
level” below). When you are satisfied, click the Record
button (which toggles to a Stop button). Wait for a few
moments as the recording lamp first signals STAND BY
then steps through a 3-2-1 countdown.
When the recording lamp signals RECORDING, and the
movie begins to play back in the Player, perform your
narration.
Finally, click the Stop button. The lamp goes out, and
the voice-over clip is automatically placed on the sound
effects and voice-overs track. Review the clip by
selecting it then clicking the Play button.
Voice-over level
The record level for a voice-
over clip is set when you create
the voice-over and cannot be
changed thereafter. However,
you can adjust the playback
volume at any time. The record
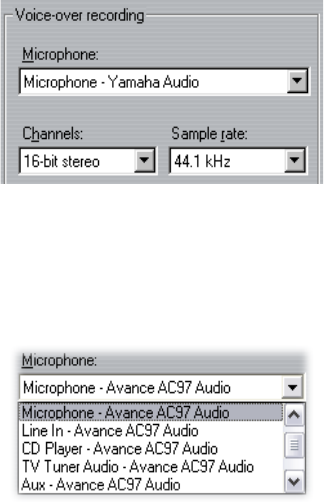
Chapter 11: Sound effects and music 207
level is set with the Recording level slider and its
accompanying level meter on the Voice-over tool.
Watch this meter to make sure your recording levels
don’t get too high or low. The indicator changes color
from blue (0-70% modulation), through yellow, to red.
Generally, you should try to keep your audio peaking
in the yellow (71-90%) and out of the red (91-100%).
Voice-over recording options
The Studio setup dialogs include several settings that
affect your recording configuration and quality. This
section provides a brief summary. See “CD, Voice-over
and Surround settings” on page 260 for detailed
information.
To access these options select Setup ¾ CD, Voice-over
and Surround from the main menu bar.
The Microphone dropdown list on this dialog lists the
multiple ways a microphone can be connected to your
particular sound card. The entries on the list should
look something like the following, from a system with
an Avance AC97 sound card:

208 Pinnacle Studio 9
Choose from this list, then connect your microphone in
the manner indicated (e.g. Microphone or Line In).
The Channels and Sample rate adjustments on the
options dialog control the quality of voice-overs or
other recorded audio. Set them at the highest quality
level you anticipate needing, but keep in mind that
increasing quality requires more disk space.
TRIMMING AUDIO CLIPS
As with other clip types, you can trim audio clips either
directly on the Timeline or by using the Clip properties
tool. See “Trimming on the Timeline using handles” on
page 78 for a discussion of the first method.
Most types of audio clip can be trimmed from a
minimum of one frame up to the full original length of
the clip content. SmartSound clips can be trimmed on
the Timeline down to as little as one second, and
upward without limit.
Trimming with the Clip properties tool
The Toolbox ¾ Modify Clip Properties menu command
invokes the Clip properties tool for the selected clip.
You can also access the tool by double-clicking any
audio clip.
To begin with, the tool provides controls that let you
view or edit two properties shared by all clips:
• To set the duration of the clip, change the value in
the Duration counter.
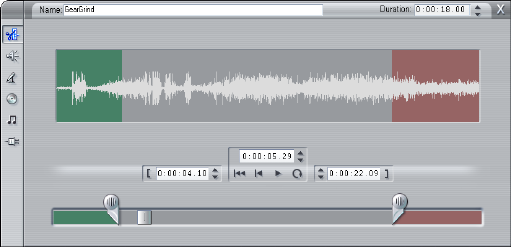
Chapter 11: Sound effects and music 209
• The Name text field lets you assign a custom name
to the clip to replace the default one assigned by
Studio. The clip name is used by the Movie
Window’s List view, and can also be viewed as a
fly-by label when your mouse hovers over the clip in
the Storyboard view.
The other controls provided by the tool depend on the
type of audio clip you give it.
Original audio, sound effects and voice-overs
The Clip properties tool provides the same kind of
trimming controls for sound-effect and voice-over clips
as for video clips, but displays a graph of the audio
waveform instead of visual preview areas.
To learn how to trim with these controls, see
“Trimming with the Clip properties tool” on page 83.
Remember that clips on the original audio and the
overlay audio tracks can only be edited independently
when the corresponding video track is locked. See
“Advanced Timeline editing” on page 87.
CD Audio
For CD Audio clips, the Clip properties tool uses the
same trimming controls as above, but additionally
provides dropdown selectors for CD Title and Track.

210 Pinnacle Studio 9
You can use these to change the source of the clip at
any time. CD Title is also an editable text field, so you
can enter the actual title of the CD.
SmartSound®
SmartSound clips can be edited to almost any length,
except that very short clips at some particular durations
may not be available in every combination of Style and
Song. This tool is essentially identical to the tool for
creating SmartSound clips (described under “The
SmartSound tool” on page 203), except that the Add to
movie button is replaced by the Accept changes button.
AUDIO VOLUME AND MIXING
The audio levels and stereo positioning of individual
clips can be adjusted either directly on the Timeline, or
with the Volume and balance tool. Each technique
offers its own advantages. Adjusting on the Timeline
gives you a good sense of time versus volume or
balance, whereas the Volume and balance tool
facilitates mixing – separately adjusting the volume and
stereo balance of each of the audio tracks.
For disc authoring, the Volume and balance tool lets
you choose to create a surround soundtrack, rather than
stereo. The tool lets you dynamically position any of
the audio tracks from front to rear as well as left to
right.
Availability: Surround sound is not supported in the SE and
QuickStart versions of Studio.
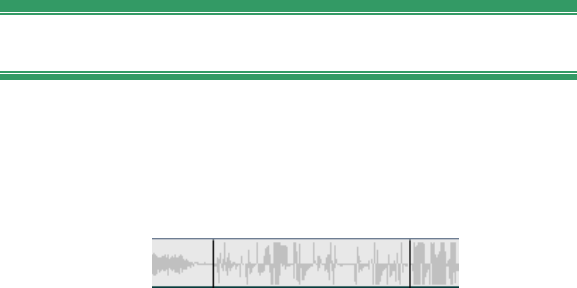
Chapter 11: Sound effects and music 211
Anatomy of an audio clip
An audio clip icon on the Timeline has several parts.
The boundaries of each clip are denoted by vertical
bars. The actual content of the audio is indicated by a
waveform graph:
Waveform graph excerpt from three neighboring clips.
The appearance of the waveform graph tells you
something about the character of the sound. A quiet
sound has a narrow waveform, close to the centerline
of the clip. A loud sound has a waveform with larger
peaks and troughs, reaching almost to the borders of
the clip. A continuous sound, such as a car engine, has
many pulses packed closely together. A staccato sound
has brief pulses separated by silences where the
waveform is a horizontal line.
Adjustment lines
The blue volume line graphically models the volume
changes you have made to the track and clip. If you
have not adjusted the volume at all, the line runs
straight along the clip at about three-quarters of the clip
height. This is the “zero gain” (0 dB) level, where the
clip’s original volume has been neither increased nor
decreased.
If you raise or lower the volume of the entire track, the
volume line remains horizontal, but is now higher or
lower than the zero-gain base level.
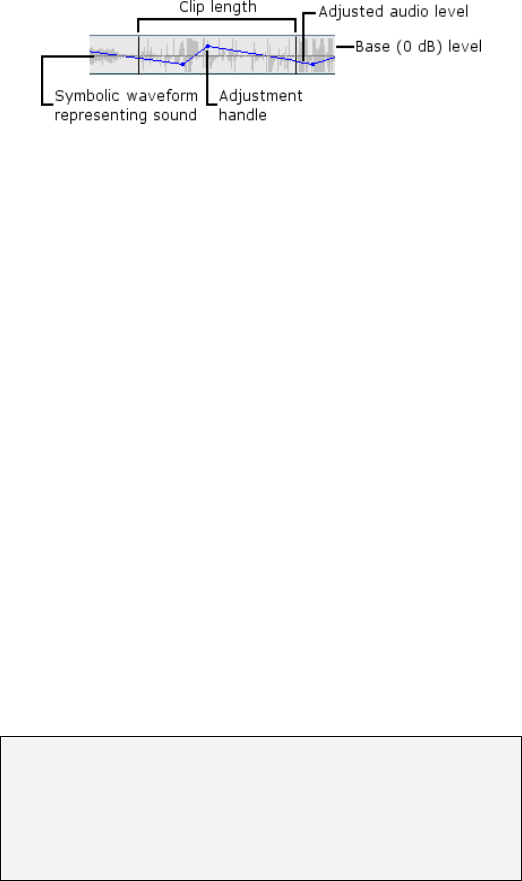
212 Pinnacle Studio 9
Finally, if you make volume adjustments within the clip,
the line consists of sloping segments that meet at
volume adjustment handles.
Unlike the waveform graph, or the adjustment lines for
balance and fade (see below), the volume adjustment
line is scaled logarithmically. Perceived volume varies
logarithmically with the strength of an audio signal, so
this feature allows the adjustment line to model more
accurately what you really hear. For instance, an
upward-sloping line segment will produce a smooth,
steady fade up from the starting to the ending level.
The green stereo balance line and the red front-back
balance (“fade”) line work similarly to the volume line,
except that in both cases the neutral position is the
vertical center of the clip, and the adjustment scale is
linear.
Raising the stereo balance line positions the audio
clip’s output further to the listener’s left, while
lowering it positions the clip further to the listener’s
right. Similarly, raising the fade line moves the clip
away from the listener, and lowering it brings the clip
towards the listener.
Note: You can only view and edit a clip’s fade line
when the Volume and balance tool is in surround
mode. The effect of adjusting the line can be previewed
only on systems where surround-sound playback is
available.
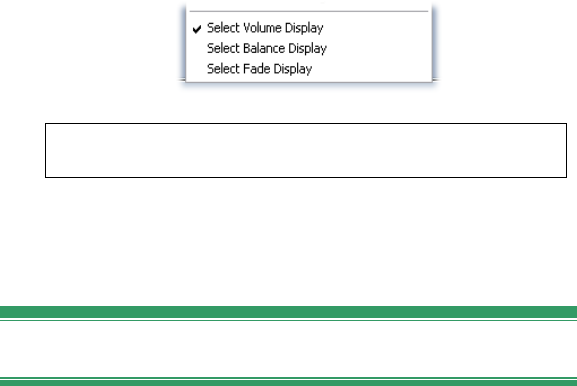
Chapter 11: Sound effects and music 213
To select which of the three adjustment lines is
currently displayed, use the audio clip’s right-button
context menu:
.
Availability: Surround sound is not supported in the SE and
QuickStart versions of Studio.
Adjusting audio on the Timeline
Audio levels can be adjusted directly within a clip on
the Timeline. Use the mouse pointer to adjust the blue
volume line or either of the balance lines (see
“Anatomy of an audio clip” on page 211).
When you add a new audio clip to the Timeline:
• The volume adjustment line of the newly-created
clip connects the lines from the preceding and
following clips if any are present.
• If no volume adjustments have been made to other
clips on the track, the volume line through the new
clip is horizontal. Its height reflects the overall track
volume as set in the Volume and balance tool.
• If no volume adjustments have been made either to
other clips or to the overall track volume, the volume
line through the new clip is at three-quarters height.

214 Pinnacle Studio 9
To adjust the volume of a clip on the Timeline, select it
(by left clicking), then move your mouse pointer close
to the line. The volume adjustment cursor will appear:
Click the left mouse button, and drag up or down
within the clip. The volume line bends as it follows the
mouse.
When you release the mouse, Studio creates an
adjustment handle on the volume line.
When your mouse pointer is positioned over an
adjustment handle on a selected clip, a highlighted
version of the volume adjustment cursor appears. With
this cursor, you can click and drag the adjustment
handle both vertically and horizontally.
Right-click an adjustment handle to access the context
menu command Delete volume setting. This command
removes one adjustment handle. Use Remove volume
changes to remove all the handles from the clip.
Adjusting balance and fade
The left-right and front-back balance lines have the
same editing features as the volume line just discussed,
except that with them the neutral setting is at half the
clip height, instead of three-quarters as it is for volume.
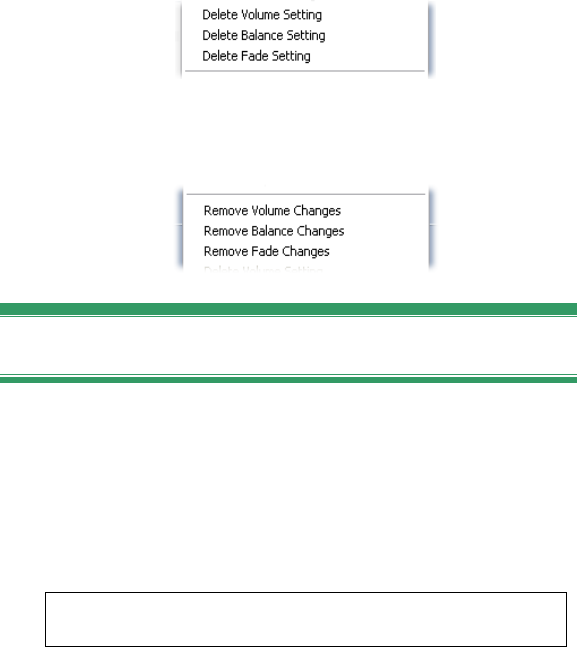
Chapter 11: Sound effects and music 215
In the case of left-right (stereo) balance, adjusting the
line upwards from the center positions the audio further
to the left. With front-back balance (“fade”), adjusting
the line upwards moves the apparent source of the
audio away from the listener, while adjusting the line
downwards brings the audio closer (towards the rear
speakers).
Removing changes
An individual adjustment handle can be deleted with
one of the Delete setting commands on the handle’s
right-button context menu:
To remove all audio adjustments of one type from a
selected clip, select the appropriate command from the
clip’s context menu:
The Volume and balance tool
Compared to adjusting audio on the Timeline, the
Volume and balance tool offers a greater degree of
adjustment functionality organized into one convenient
location. It also provides both left-right and surround-
sound balance controls. The tool operates in a similar
way to a traditional audio mixer.
Availability: Surround sound is not supported in the SE and
QuickStart versions of Studio.
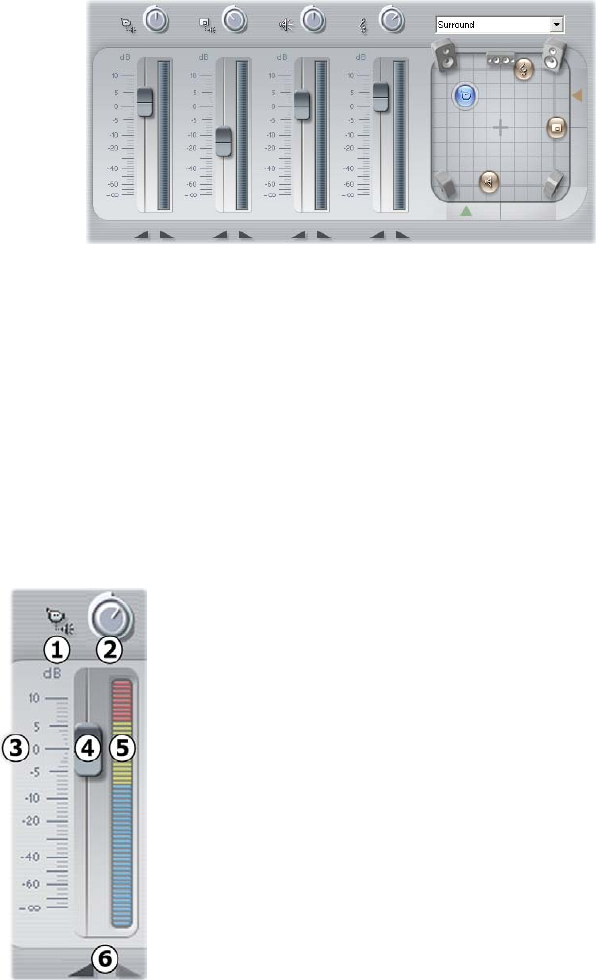
216 Pinnacle Studio 9
The Volume and balance tool provides individual level
controls for each of the audio tracks: original
audio (left in illustration), overlay audio, sound effect
and voice-over, and background music (right). The
overlay audio controls are displayed only when the
overlay video and audio tracks are open in the Movie
Window.
The balance control, located in the right-hand part of
the tool, can be used in either of two modes, as selected
in the dropdown list above: stereo (one-dimensional)
and surround (two-dimensional.
Each audio track has its own set of level
controls. The set for the original audio track
is shown at left.
The individual controls and displays include a
track mute button n. When this button is in
its down position, no audio clips from the
track will be used in your movie. The track
mute button’s icon has a second purpose: it
identifies which track the level controls apply
to. This is the only visible point of difference
amongst the three sets of controls.
The track level knob o raises or lowers the
overall volume for the track. It therefore

Chapter 11: Sound effects and music 217
affects the vertical position of the volume adjustment
lines on all clips on the track, but does not change their
contour. Click on the knob and drag it with a clockwise
rotation (up to the 2 o’clock maximum position) to
increase the volume. Use a counterclockwise rotation
(down to the 6 o’clock minimum) to lower the volume.
Level knobs, full off (L), default (C) and full on (R).
The track’s relative level scale p, with its associated
fader q, are calibrated in decibels (dB). The 0 dB mark
corresponds to the level at which the clip was recorded.
Each increase of 3 dB doubles the perceived volume,
and each decrease of 3 dB halves it.
The position of the fader knob shows the volume level
at the current playback position in your movie, relative
to the level at which the current clip was recorded.
Drag the knob up or down to modify the level. The
knob is “grayed” (disabled) if there is no clip on the
track at the current time index. If the track is muted, the
knob is grayed and set to the bottom of its range.
Adjusting the fader results in a volume adjustment
handle being added to the track as described above.
A track’s playback volume contour, or envelope,
combines the overall track level with the relative level
at each point on the track. This combined level, which
is shown graphically by the volume adjustment lines on
audio clips, is applied to the actual audio data to
produce the track’s output level, as represented on the
level meter r, which illuminates during playback to
show the level at the current time index. To avoid
audio “clipping” – the unpleasant sound produced by
attempting to set volume levels outside the range of a
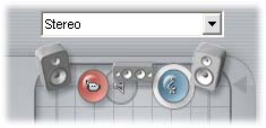
218 Pinnacle Studio 9
digital signal – ensure that the meter level never quite
reaches the top of the bar.
The fade buttons s produce a fade-in from or a fade-
out to the current position of the movie. For a visual
confirmation of their effect, watch the behavior of the
clip’s volume adjustment line when the fade buttons
are clicked. The fade duration is variable from zero to
fifty-nine seconds. Adjust it in the Edit options panel
(Setup ¾ Edit) under Volume fades. Fades are not
available too close to the beginning or end of a clip.
The balance control
This control has two modes, stereo and surround,
which you select from the dropdown list above the
control.
In either mode, the position of each track at each point
in the movie is shown by a corresponding speaker icon.
The icon matches the one on the muting indicator for
the corresponding track.
In stereo mode, you set the position of the track by
dragging its speaker icon left and right between a pair
of main speakers:
The original audio track (L) and the background
music track (R), on opposite sides of a stereo mix.
The sound effect and voice-over track icon is shown
as a gray outline (left of center), indicating either
that the track has been muted or that there is no clip
on the track at the current time index.
In surround mode, you can position each track from
front to back (“fade”) as well as from left to right
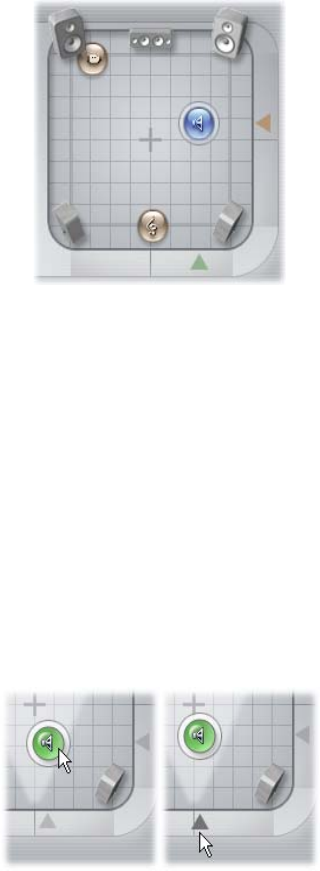
Chapter 11: Sound effects and music 219
(“balance”). Each track can be independently placed
anywhere within the rectangular listening area.
Surround mode: Here, the original audio track has
been placed farthest from the listener, near the left
front speaker. The sound effect and voice-over track
is on the right, closer to the listener. The background
music track is centered, and closer still.
There are two ways to set the position of a track’s icon
in the balance control. Either click on any track’s icon
and drag it to the desired position, or move it by
dragging the triangular locator knobs below and to the
right of the control. The locator knob below the balance
control adjusts the left-right positioning of the audio
output from the currently-selected clip, while the knob
on the right adjusts the front-back positioning.
Drag track icon directly (L) or with locator knob (R).
220 Pinnacle Studio 9
Viewing volume and balance contours
Each audio clip in your project displays a contour line
showing one of its volume, left-right balance or front-
back balance. To select which of the three types of line
is displayed, use the commands on an audio clip’s
right-button context menu (see “Anatomy of an audio
clip” on page 211).
The contour lines can be modified directly on the
Timeline using adjustment handles. For details, see
“Adjusting audio on the Timeline” on page 213.
Note: You can only view and edit a clip’s fade (front-
back balance) line when the Volume and balance tool
is in surround mode.
AUDIO EFFECTS
You can modify any audio clip in your project using
Studio’s plug-in audio effects, which are accessed with
the Audio effects tool in the Toolbox.
The Audio effects tool is the sixth tool in the
Audio toolbox. The operation of this tool is
identical to that of the Video effects tool. See “Using
video effects” (page 95) for a complete description.
As with video effects, your library of audio plug-ins is
expandable. Any audio effect using the popular VST
standard can be used in Studio just like the effects
supplied with the program.
Availability: Audio effects other than Noise reduction are provided
as locked, “watermarked” content in the SE and QuickStart versions
of Studio. The watermark graphic, and periodic beep on the
soundtrack, can be removed with the appropriate activation key. See
page 11 for details.
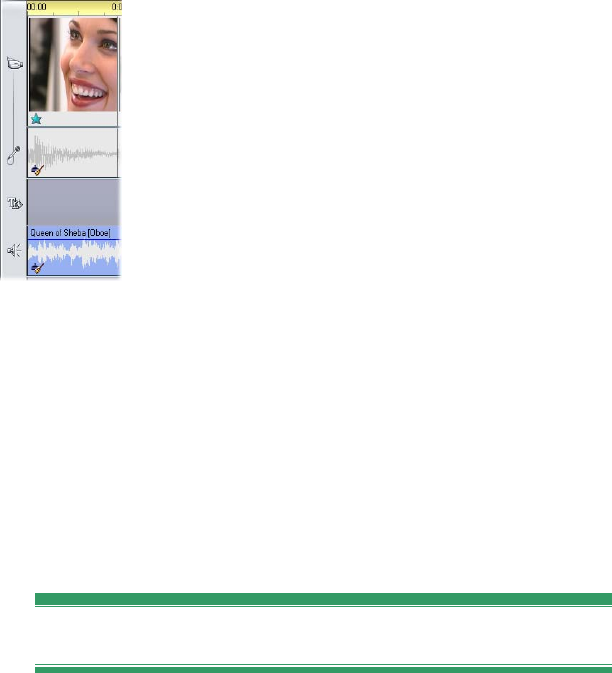
Chapter 11: Sound effects and music 221
Icons for audio effects
In Timeline mode, any special effects you have
applied to an audio or video clip are indicated
by small icons along the bottom of the clip.
These correspond to the effects groups shown
by the Add new effect browser in the Audio
effects and Video effects tools. You can open the
appropriate tool for parameter editing by
double-clicking any of the icons.
In the illustration, the Noise reduction effect has
been applied to both audio clips. The star icon
below the video clip shows that one or more of
the effects in the “Fun effects” group has been applied
to it.
The basic audio effects
Studio’s basic set of audio effects include the Noise
reduction filter and a variety of VST plug-ins. Some of
the latter use their own parameter editing windows
instead of the parameters panel in the Audio effects tool
and the Video effects tool.
Noise reduction
This advanced filter suppresses unwanted noise in any
audio clip. The filter responds dynamically to the
changing noise conditions within the clip. The preset
you choose provides the starting point from which the
adaptive algorithm proceeds.
You can often further improve your results by adjusting
the Noise reduction and Fine tuning parameters. There
is a lag of about a second before any new setting has an
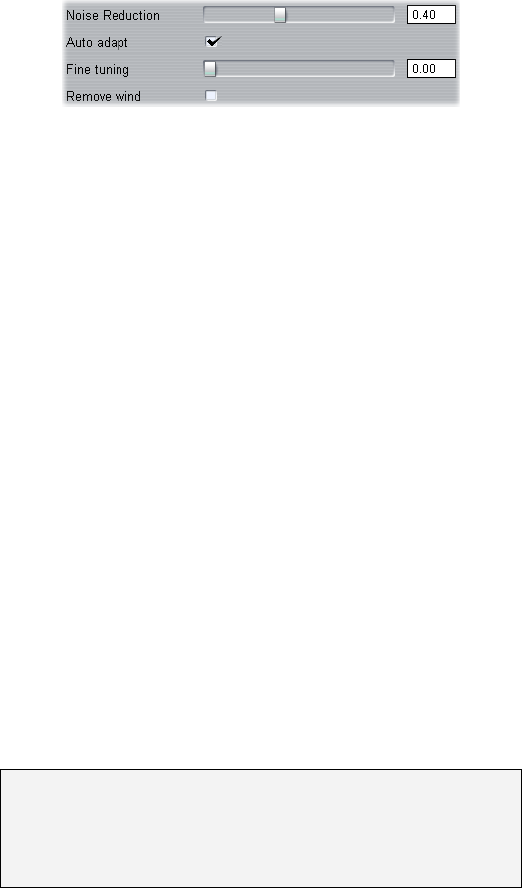
222 Pinnacle Studio 9
audible effect, so you should make changes in small
amounts then pause to check if there is an improvement.
Noise reduction: When a camcorder is used outdoors
with the actors distant from the microphone, the
“source noise” may be very high, and to make matters
worse the internal noise of the camcorder may be
amplified to intrusive levels. If a lapel microphone
connected to the line input of the camcorder were used
when taping the scene, however, the source noise could
be quite low. Adjust this control to match the noise
conditions of the actual signal.
Fine tuning: This controls the amount of cleaning to
be used. It is only needed when the Noise reduction
level is low, since at higher levels the noise has already
been eliminated.
Auto adapt: When this option is checked, the filter
automatically adjusts to changes in the type or amount
of noise in the clip. The Fine tuning is not used when
Auto adapt is active.
Remove wind: This checkbox engages a filter that
reduces wind noise and similar unwanted background
sounds in the audio clip.
Note: The Noise reduction filter will help with a wide
range of material, but it is not a panacea. Your results
will vary depending on the original material and the
severity and nature of the problems.
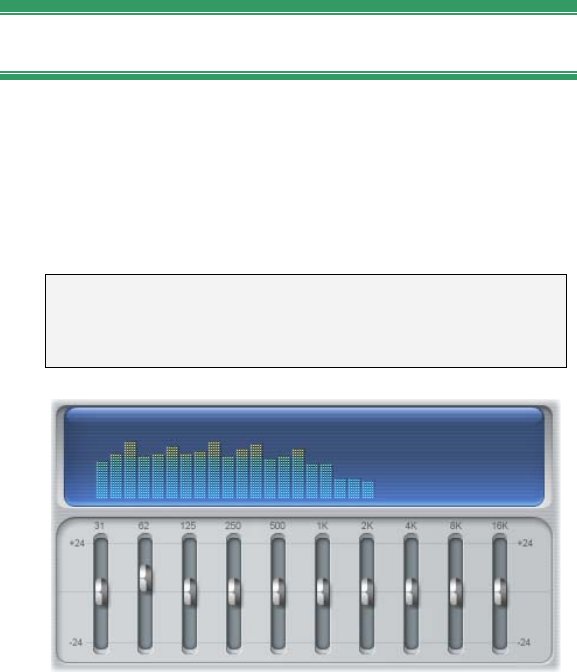
Chapter 11: Sound effects and music 223
Equalizer
This effect is similar in concept to the treble and bass
“tone” controls on audio equipment, but provides a
much finer degree of adjustment. It divides the audio
spectrum into ten bands, each centered on a different
sound frequency.
Note: In musical terms, each equalization band covers
one octave, and the center frequency is close in pitch to
the note B.
The sliders let you increase or decrease the contribution
of each band’s frequencies to the total sound over a
range of 48 dB (-24 to +24). The adjustment to a band
is applied full strength at the center frequency, and
tapers to zero in either direction.
The display above the slider shows the activity across
the audio spectrum as your project is played back.
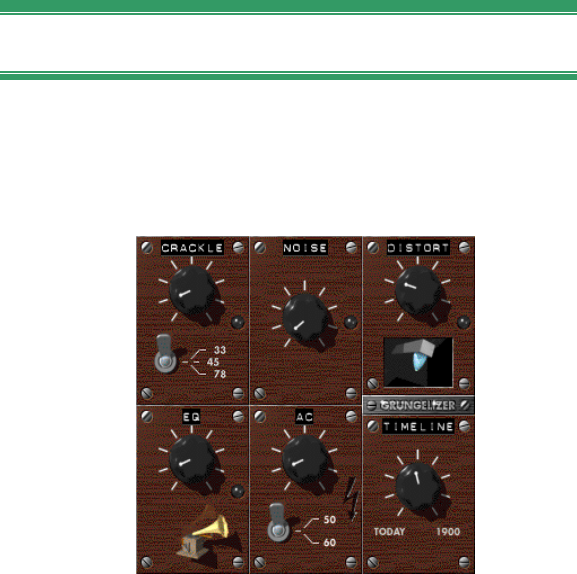
224 Pinnacle Studio 9
Grungelizer
The Grungelizer adds noise and static to your
recordings. It can make your clips sound as though you
were hearing them on a radio with bad reception or a
worn and scratched vinyl record.
Crackle: This dial adds crackle to create that old vinyl
record sound. The farther to the right you turn the dial,
the more crackle is added.
RPM switch: When emulating the sound of a vinyl
record, this switch lets you set the turntable speed in
revolutions per minute (33, 45 or 78 RPM).
Noise: This dial regulates the amount of static noise
added.
Distort: Use this dial to add distortion.
EQ: Turn this dial to the right to cut off the low
frequencies, and create a more hollow, lo-fi sound.
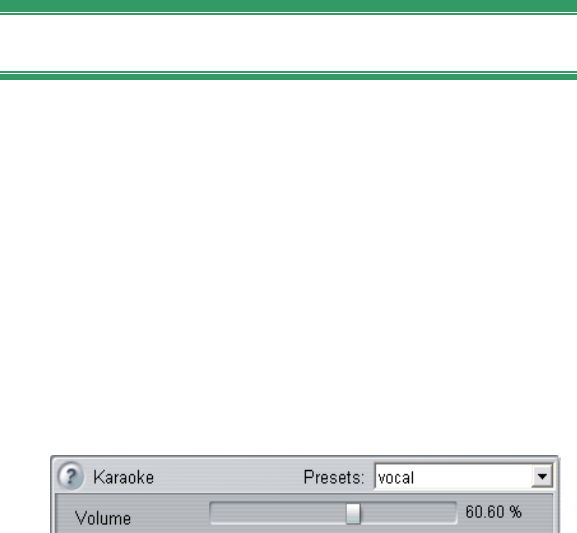
Chapter 11: Sound effects and music 225
AC: This emulates the constant, low hum of AC
current.
Frequency switch: This sets the frequency of the AC
current (50 or 60 Hz), and thus the pitch of the AC hum.
Timeline: This dial regulates the amount of overall
effect. The farther to the right (1900) you turn this dial,
the more noticeable the effect.
Karaoke
Apply this effect to clips such as mp3 songs or audio
CD tracks to remove the main vocal from the
performance. What remains – the accompaniment – can
be used as background music, or as the backing for
your own vocal in a voice-over or video clip.
The Karaoke effect depends on the fact that the main
vocal part in a recording is usually divided about
equally between the two stereo channels. The plug-in
digitally compares the channels and removes the
common part from both. Not all recordings are well
suited for karaoke use.
Volume: This slider lets you adjust for variations in the
total output volume that may be introduced by Karaoke
processing. Move the slider towards the left if the audio
is too loud with the filter applied, or towards the right if
it is too soft.

226 Pinnacle Studio 9
Leveler
This effect helps compensate for a common problem in
recording audio for video productions: the imbalance in
the recorded volume of different elements in the
original audio. For instance, your commentary as you
shoot the video may be recorded at such a high level
that it overwhelms other sounds at the location.
The trick in using the Leveler is to find a target volume
somewhere between that of the loud and soft audio in
the original clip. Below that volume, Leveler acts as an
expander, increasing the original level by a fixed ratio.
Above the target volume, Leveler acts as a compressor,
reducing the original level. With careful adjustment of
the parameters, the internal balance of the audio can be
significantly improved.
Target level: This slider sets the target volume.
Compression: Move this slider to the right to increase
the amount by which the louder sounds are reduced.
Threshold: This slider controls the minimum level at
which expansion will be applied. It is used to avoid
expanding faint background sounds into audible noise.
Expansion: Move this slider to the right to increase the
amount by which the softer sounds are amplified.
Reverb
The Reverb effect simulates the effect of playing back
the source sound in a room of a given size and sound
reflectivity. The interval between the arrival of the
original sound at the listener’s ears and the first echoes
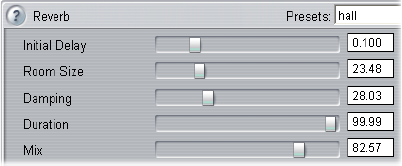
Chapter 11: Sound effects and music 227
is greater for a large room than a small one. The rate at
which the echoes die away depends on both the room
size and the reflectivity of the walls.
The presets for Reverb are named for the type of room
they simulate – from the passenger cabin of a car all the
way up to a huge underground cavern.
Initial Delay: This slider sets the amount of delay from
the start of the sound until the reverb kicks in. For
naturalistic results, a smaller value would be used when
modeling a smaller room.
Room Size: This slider sets the size of the modeled
room. A larger room sounds more spacious because of
the longer interval between reflections of the sound
waves.
Damping: This slider controls a damping factor that
reduces higher-frequency reflections as the sound
waves bounce off surfaces in the virtual room. More
damping generally produces a warmer sound, less
damping a brighter sound.
Duration: This slider controls the length of time it
takes from the onset of a particular sound until the
reverberations die away. It corresponds to the
efficiency with which sound is reflected from the walls
and other contents of the virtual room.
Mix: This slider controls the amount of the original
sound that is mixed into the output from the effect.
When the slider is all the way to the left, only the
original sound is heard.

Chapter 12: Making your movie 229
CHAPTER 12:
Making your movie
Studio gives you a variety of ways to share your video
productions. This chapter explains how to:
• Attach a DV or MicroMV camcorder or a DV VCR
(MicroMV with Windows XP only)
• Connect an analog (VHS or S-VHS) camcorder or
VCR
• Connect a TV set or video monitor
• Output your movie to videotape
• Save your movie as an AVI file
• Save your movie as an MPEG file
• Share your movie via the Internet
• Save your movie as a Windows Media or RealVideo
file
• Output your movie to disc for playback on a DVD,
VCD or S-VCD player
• View a DVD, VCD or S-VCD movie on a computer
All these operations are available in Make Movie mode,
which you access by clicking the Make Movie button at
the top of the screen.
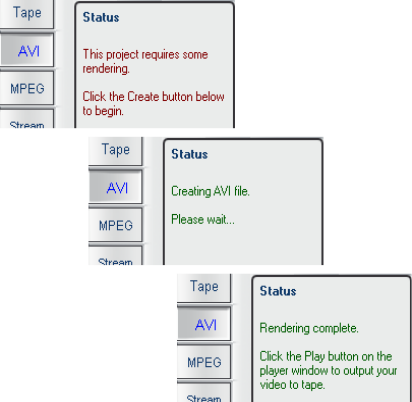
230 Pinnacle Studio 9
Preparing your movie for output
Before your movie is actually ready for output some
preprocessing will generally be required:
• If your movie includes clips that were captured in
preview quality, Studio will prompt you to load your
source tape(s) into your DV camcorder or VCR.
Studio will then recapture the clips at full resolution.
• Studio will need to render (generate video frames for)
any transitions, titles, disc menus and video effects
you’ve added to your movie, unless they have
already been rendered in the background (see “Edit
settings”, page 256). If all or part of the movie was
captured in MPEG format, that footage must be
rendered in its entirety.
The Make AVI status panel before,
during and after rendering.
When Studio has completed its batch capture and
rendering, the Make Movie Status panel will indicate
that your movie is ready for output.
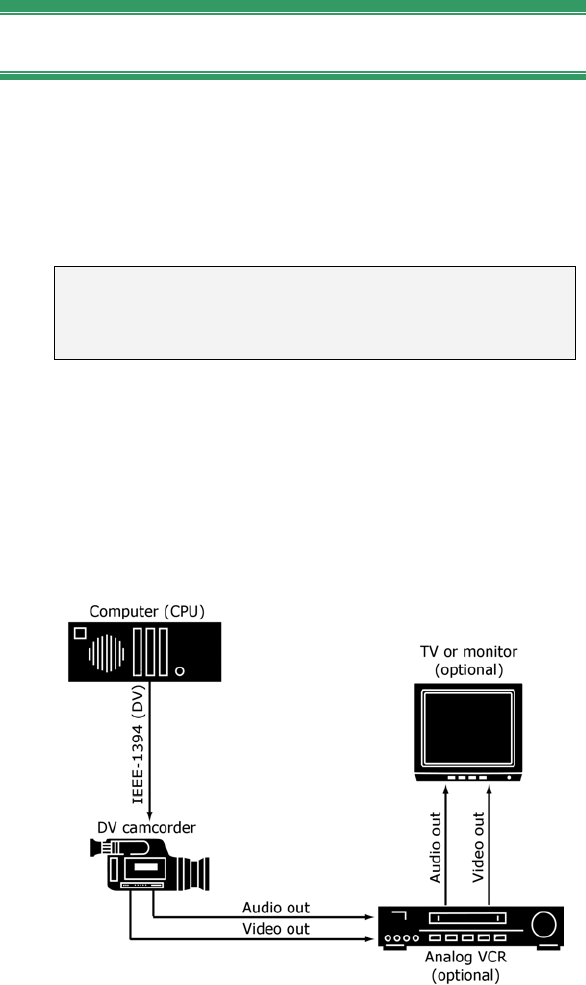
Chapter 12: Making your movie 231
Outputting to a camera or video recorder...
... via IEEE-1394 cable
If your recording device has a DV input, just connect it
to your digital video card with an IEEE-1394 (or
“i.LINK”) cable. The connector at the camcorder end
should be labeled DV IN/OUT.
Note: On machines that don’t support recording back
to the camcorder, including many PAL devices, the DV
connector is called simply DV OUT.
... with analog audio / video cables
If you have a Studio product with an analog (TV or
video) output, such as Studio DVplus or DC10plus,
connect the video outputs of the capture card to the
inputs of the video recorder and the audio outputs of
the sound card (or Studio DVplus) to the audio inputs
of the video recorder.
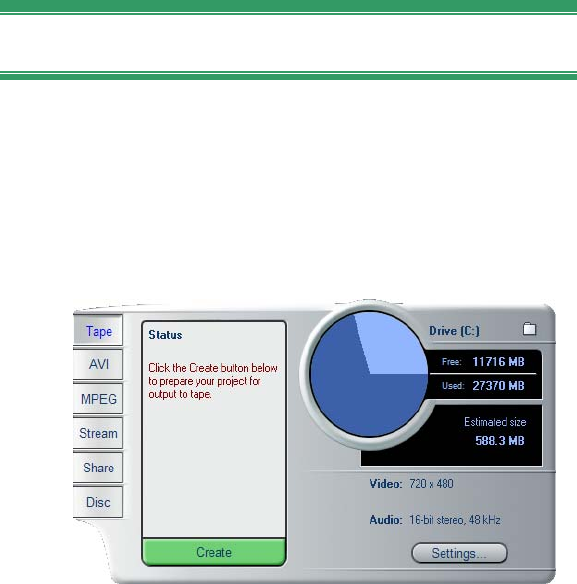
232 Pinnacle Studio 9
Connecting a TV set or video monitor
Many camcorders have an integrated display, making it
unnecessary to attach a video monitor.
Otherwise, to view your movie as it is recorded, a TV
set or a video monitor must be attached to the video
outputs of your recorder. Video outputs are not always
available on DV camcorders.
Output your movie to videotape
Switch to Make Movie mode, and check that your
camcorder or VCR is connected and ready to record
your movie.
To output your movie to videotape:
1. Click the Tape tab to bring up the controls shown
here:
2. Click the Create button.
3. If you have used preview-quality clips, Studio
displays a dialog box prompting you to insert the
original DV tape(s) into your DV playback device
so that clips can be recaptured at full quality.

Chapter 12: Making your movie 233
It’s good practice to slide the record-
inhibit tab on your master tapes to
“Save” to ensure there’s no accidental recording
over original material.
Note: Studio relies on continuous, uninterrupted
timecode to recapture these clips. If your original
tapes have discontinuous timecode (a zero timecode
at a location other than the beginning of your tape),
you must manually cue to the portion of the tape
that holds the clip(s). Studio will then perform an
accurate recapture of the clip(s) and provide you
with trim handles. (You can see the extra frames by
opening any recaptured clip with the Clip
properties tool.)
4. The parts of your movie that were captured in
MPEG format must now be rendered.
For other captured footage, Studio begins the
process of Intelligent Rendering, whereby it renders
only the parts of your movie that actually require it
– video effects, transitions, overlays and disc menus,
for example – but does not re-render any unaltered
original footage. Intelligent Rendering saves you
time and disk space.
Intelligent Rendering is entirely automatic, except
that you may be asked to insert any audio CDs that
are part of your movie. During Intelligent
Rendering, Studio tells you what part of the
Intelligent Rendering process it is performing via
messages in the Status window, concluding with a
message telling you Intelligent Rendering is
complete.
You can terminate the Intelligent Rendering
process at any point by clicking the Cancel button.
Once canceled, however, it cannot be resumed: the

234 Pinnacle Studio 9
make tape operation must be started again at the
beginning.
Once rendering is complete, Studio requires a few
seconds to prepare for output to your camcorder or
VCR.
5. Verify that the camcorder/VCR is powered on, and
that you have inserted a tape cued to where you
wish to begin recording. You now have two options:
If you record your movie onto a DV tape, Studio
gives you the option to automatically start and stop
recording on the DV device. Click the Settings
button then activate the check box in the Output
options area.
If you are recording onto analog tape, start your
VCR recording now.
Finally, click Play in the Player.
Copying an AVI file to tape
Studio’s Create Tape interface also includes support
for transferring an AVI file directly to videotape. See
“Copying an AVI file to tape” on page 245 for details.
Save your movie as an AVI file
In some instances, you may wish to output your movie
in AVI file format. Generally, AVI files are larger than
MPEG files, but AVIs can be played back on a wider
range of computers.
If you choose to save your movie as an AVI file, Studio
gives you control over several codec settings. Files can
be greatly reduced in size; however, do keep in mind
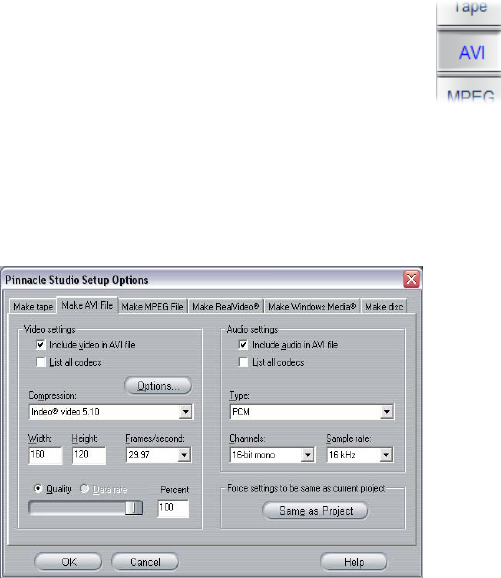
Chapter 12: Making your movie 235
the trade-off between file size and quality: the more
you compress, the more you reduce quality.
Both video and audio compression are adjustable.
Video compression adjustments include frame size,
frame rate and data rate (after compression). For audio,
you can select monaural (single channel) instead of
stereo, and adjust the bit depth and sampling rate.
The default codec included with Studio is the Studio
DV codec. If you wish to output your movie in another
format, you can use any DirectShow-compatible codec
installed on your PC, as long as that codec is also
installed on the PC that will play your digital movie.
To save your movie as an AVI file:
1. Switch to Make Movie mode by clicking
the Make Movie tab at the top of the
Studio main window. The Make Movie
controls appear. Click the AVI tab.
2. Click the Settings button. Verify that the Include
video and Include audio checkboxes are selected.
(Note: If you selected “DV Video Encoder” in the
Compression dropdown, the Include audio option is
unavailable.)

236 Pinnacle Studio 9
Options are provided for turning off either the
audio or the video. You may want to make an AVI
audio-only file for import into another program.
Alternatively, you might want to omit the audio
from a small web-page video in order to minimize
the file size.
The remaining options pertain to compression. For
more information see “Make AVI file settings” on
page 264.
3. Check the Diskometer to make sure you have
enough drive space.
4. Click the green Create AVI file button. Enter a
name for your AVI file when prompted.
The default directory for saving your file is:
C:\My Documents\Pinnacle Studio\My Projects
Click OK to start creating the file. To create the
AVI, Studio will decode any MPEG video in the
project, render any titles, effects and Hollywood FX
transitions, then compress the resulting frame using
the codec you specified in the Make AVI File
options panel.
This is generally a slow process: the actual time
depends on the speed of your computer and the
length of your video.
Checking your results
Once your movie has been rendered, you will
probably want to review the results. Click the
open file button to the left of the Settings button, and
select the avi file you have just created (or any other
that you want to view). Windows Media Player will
then open and display the file.
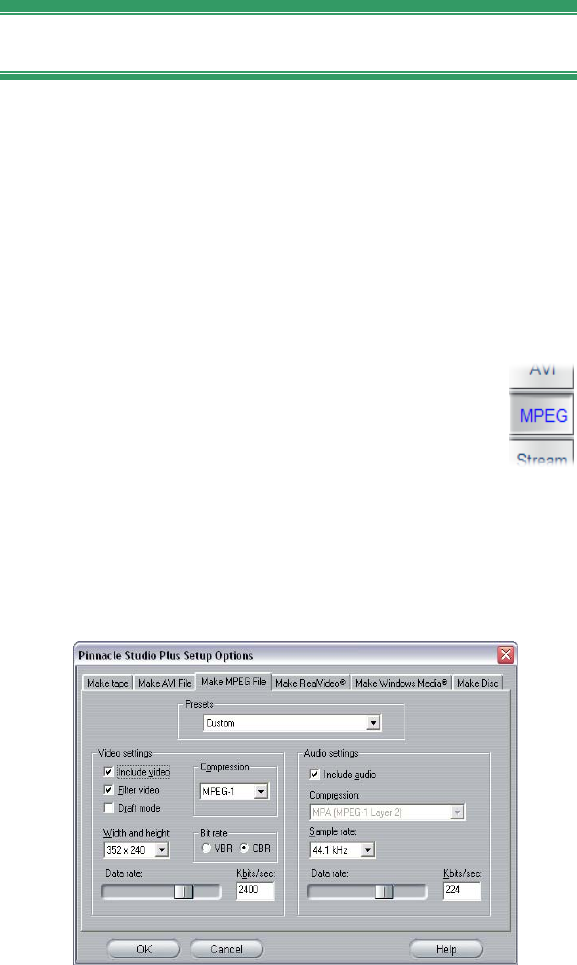
Chapter 12: Making your movie 237
Save your movie as an MPEG file
The MPEG-1 file format is supported on all Windows
95 and later PCs. MPEG-2 files can only be played on
PCs with MPEG-2 decoder software installed.
Generally, MPEG files are smaller than AVI files, and
depending on the AVI options used may be of higher
quality.
To save your movie as an MPEG file:
1. Switch to Make Movie mode by clicking
the Make Movie tab at the top of the
Studio main window. The Make Movie
controls appear. Click the MPEG tab.
2. Click the Settings button to bring up the Make
MPEG File options panel, and choose the preset
that meets your need. For more information on the
“Custom” preset, see “Make MPEG file settings”
on page 266.
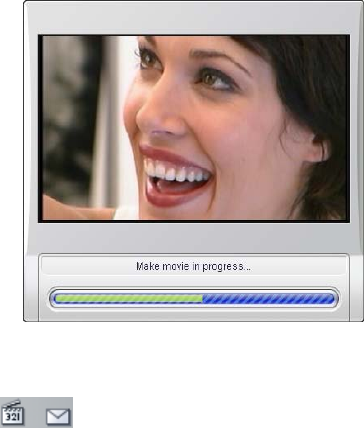
238 Pinnacle Studio 9
3. Check the Diskometer to make sure you have
enough drive space.
4. Click the green Create MPEG file button. Enter a
name for your mpg file when prompted.
The default directory for saving your file is:
C:\My Documents\Pinnacle Studio\My Projects
Click OK to start creating the file. A progress bar
on the Player lets you monitor the creation of your
movie.
Checking your results
Once your movie has been rendered, two new
buttons appear to the left of the Settings
button. The first of these launches Windows Media
Player so that you can check your MPEG movie. The
second button is the Send email button.
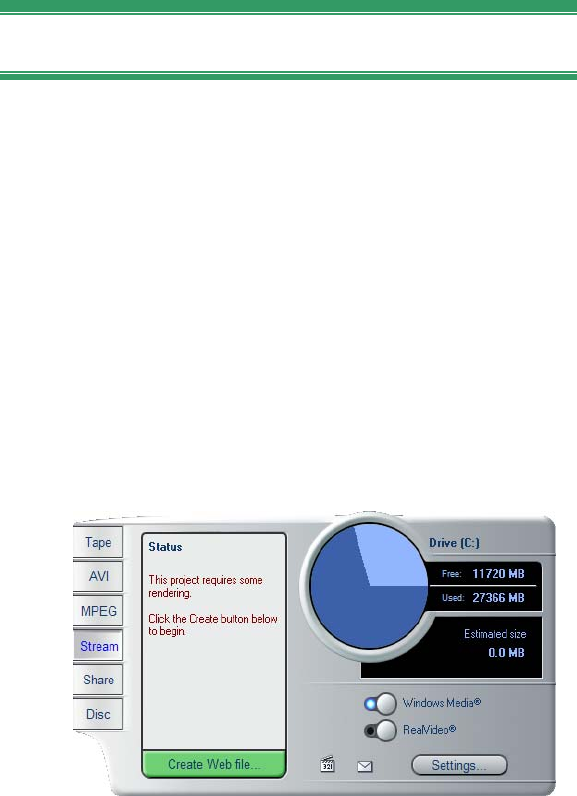
Chapter 12: Making your movie 239
Save as RealVideo or Windows Media
With the RealVideo and Windows Media formats, you
can save your movies for playback on the Web. You
can share those movies with anyone around the world
who has compatible software:
• For RealVideo, the RealNetworks® RealPlayer®, a
free download from www.real.com.
• For Windows Media, the Window Media Player, a
free download from www.microsoft.com.
To output your movie to RealVideo or Windows
Media:
1. Click the Stream tab to bring up these controls:
2. Click the Windows Media or the RealVideo button.
Click the Settings button to bring up the options
dialog for the file format you have chosen. For
more information see “Make RealVideo file
settings” (page 268) and “Make Windows Media
file settings” (page 271).
240 Pinnacle Studio 9
3. Click the green Create Web file button.
Type in a name for your rm (RealVideo) or wmv
(Windows Media) file. The default directory in
which your file will be saved is:
C:\My Documents\Pinnacle Studio\My Projects
Click OK to start creating the file. As usual, the
progress bars in the Player give you feedback on
the processing of each clip.
Checking your results
Once your movie has been rendered, two
new buttons appear to the left of the Settings
button. The right-hand button of the pair is
the Send email button. The left-hand one
launches RealPlayer or Windows Media Player,
depending on the output format you chose.
Clicking the Send email button opens a Choose Profile
dialog box which asks for your email Send name, then
accesses your email program and attaches your movie
to a new message.
Share your movie via the Internet
Availability: On-line movie sharing is not supported in the SE and
QuickStart versions of Studio.
Studio makes it easy to share your movie on the
Internet. Click the Share button to bring up the controls
shown below:
By default, Sharing displays the first frame of your
movie on your personal MyStudioOnline web page. An
icon of that frame appears beside the Set thumbnail
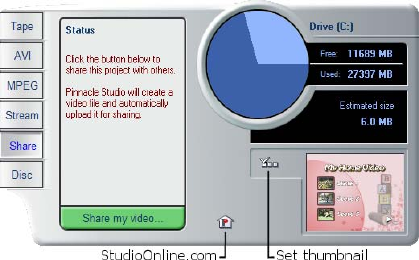
Chapter 12: Making your movie 241
button. If you want another frame of your movie to
appear, use the playback controls in the Player to find
the frame of your choice, then click the Set thumbnail
button.
Click the green Share my video button to begin the
process of sharing your movie.
Your video-sharing account allows you to store up to
10MB (about 5 minutes) of video online. If your movie
is too large to fit into your allotted space, a message
will appear alerting you. In this case, reduce the file
size by reducing the duration of your movie.
Uploading your movie
If this is your first video to share, Studio uses your
Internet connection to open the log-in page of Pinnacle
Systems’ video-sharing web site. Sign up for your
personal account by answering the on-screen questions.
Studio then uploads your movie to the web site, where
it is converted to RealVideo and Windows Streaming
Media formats.
Your browser opens to your personal MyStudioOnline
page where you choose a “video postcard” template to
display your video, and then send emails to family and
friends, inviting them to view your creation.

242 Pinnacle Studio 9
Output your movie to DVD, VCD or S-VCD
If your system is equipped with a CD burner, Studio
can create VCD or S-VCD discs on either CD-R or
CD-RW media.
Your VCD discs can be played back:
• On a VCD or S-VCD player.
• On some DVD players. Most DVD players can
handle CD-RW media, but many will not reliably
read CD-R. A majority of DVD players can handle
the VCD format.
• On a computer with a CD or DVD drive and MPEG-
1 playback software (such as Windows Media
Player).
Your S-VCD discs can be played back:
• On an S-VCD player.
• On some DVD players. Most DVD players can
handle CD-RW media, but many will not reliably
read CD-R. DVD players sold in Europe and North
America usually cannot read S-VCD discs; players
sold in Asia often can.
• On a computer with a CD or DVD drive and MPEG-
2 playback software.
If your system has a DVD burner, Studio can create (in
addition to the above) DVD discs on any recordable
DVD media supported by the drive.
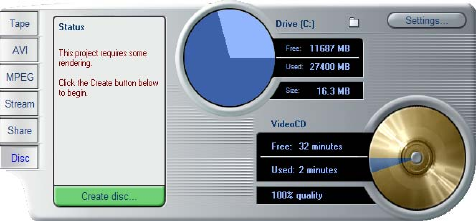
Chapter 12: Making your movie 243
Your DVD discs can be played back:
• On any DVD player that can handle the recordable
DVD format your burner creates. Most players can
handle the common formats.
• On a computer with a DVD drive and playback
software.
Whether or not you have a DVD burner on your system,
Studio also lets you save a DVD image – a set of files
containing the same information that would be stored
onto a DVD disc – to a directory on your hard drive.
The DVD image can subsequently be burned to disc.
Studio creates your disc or disc image in three steps.
1. First the entire movie must be rendered to generate
the MPEG-encoded information to store on the disc.
2. Next, the disc must be compiled. In this phase,
Studio creates the actual files and directory
structure that will be used on the disc.
3. Finally, the disc must be burned. (This step is
skipped if you are generating a DVD image rather
than an actual disc.)
To output your movie to disc, or to a DVD image:
1. Click the Disc tab to bring up these controls:
The Make Disc control panel is wider than the other
output panels to accommodate an extra
244 Pinnacle Studio 9
Diskometer-style display showing the amount of
space consumed by your movie on the output disc.
Also shown are the length of your movie, and a
reminder of the disc-type and quality setting you
have chosen.
2. Click the Settings button to bring up the Make Disc
options panel (see “Make disc settings” on page
272). There you can select the output format for
your movie, set up quality options, and configure
your disc burner.
To the left of the Settings button is a Browse for
folder button where you can choose a new location
for the storage of auxiliary files generated during
the Make Disc operation. If you are creating a DVD
image, it will also be located in this folder.
3. Click the green Create disc button. Studio goes
through the steps described above (render, compile,
and if necessary burn) to create the disc or disc
image you have specified in the settings dialog.
4. When Studio has finished the burning operation, it
ejects the disc.
Quality and capacity of disc formats
The differences amongst the DVD, VCD and S-VCD
disc formats can be boiled down to these rules of
thumb regarding the video quality and capacity of each
format:
• VCD: Each disc holds about 60 minutes of MPEG-1
video, with about half the quality of DVD.
• S-VCD: Each disc holds about 20 minutes of
MPEG-2 video, with about two-thirds the quality of
DVD.
• DVD: Each disc holds about 60 minutes of full-
quality MPEG-2 video.
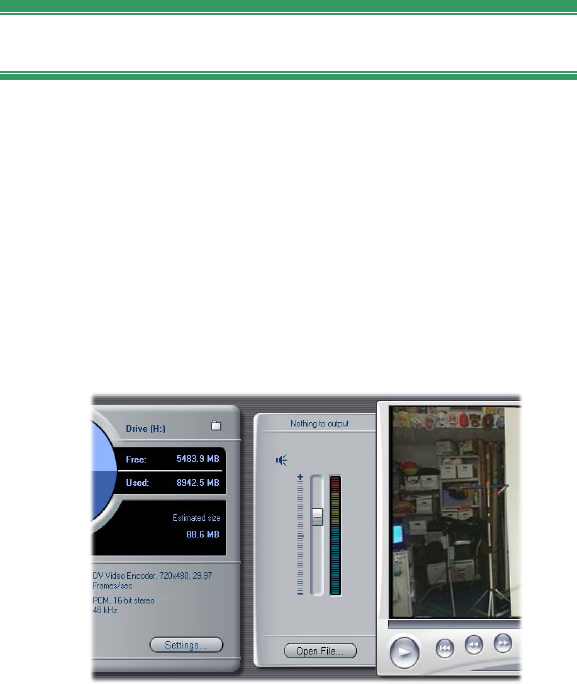
Chapter 12: Making your movie 245
Copying an AVI file to tape
When the Tape tab is selected in Make Movie mode
(see “Output your movie to videotape”, page 232, and
“Save your movie as an AVI file”, page 234), a small
side-panel opens on the Player. The controls on this
panel enable you to output an AVI movie directly to
videotape. The Open file button lets you select an avi
file for recording, while the slider adjusts the volume
level when the file is being played back. After the file
loads, simply click the play button on the Player to
initiate recording.
Side-panel projecting from Player in Make Tape mode.

Appendix A: Setup options 247
APPENDIX A:
Setup options
Settings are provided to adjust various aspects of
Studio’s operation. The default values have been
chosen to work well for the majority of situations and
hardware. However, you may wish to modify them to
suit either your work style or your specific equipment
configuration.
About Studio setup options
Studio’s setup options are divided between two dialog
boxes, both with several tabbed panels.
The Main Options dialog box has four panels covering
options relating to Capture mode and Edit mode.
Access this dialog box and activate a particular tab
simultaneously by selecting one of the commands in
the first group on the Setup menu.
The Make Movie Options dialog box has six panels,
one for each of the six movie output types. Access this
dialog box by selecting one of the commands in the
second group on the Setup menu.
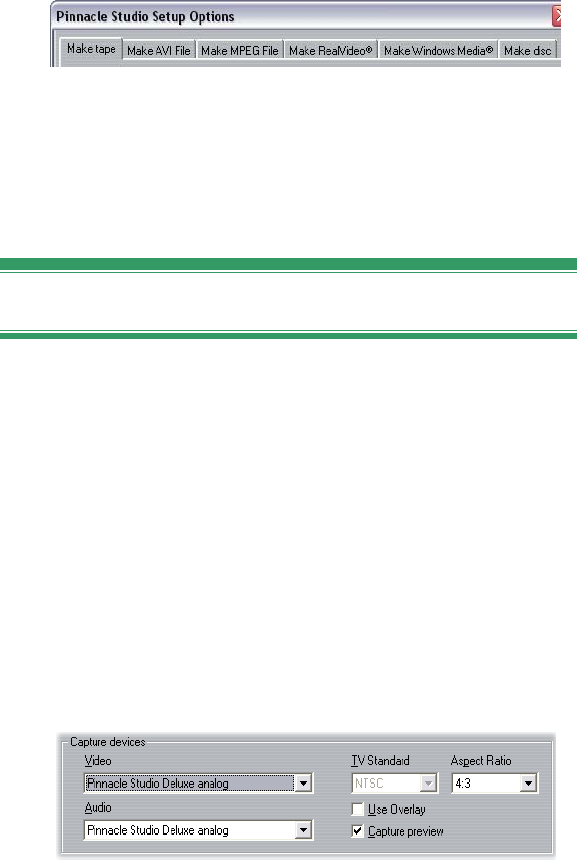
248 Pinnacle Studio 9
Option settings in Studio apply to both the current and
future Studio sessions. There is no master reset. If you
want to return to the factory preset values, use the
information in the following sections, which deal with
all ten options panels in turn.
Capture source settings
This panel is divided into three areas: Capture devices,
Scene detection during video capture and Data rate.
The changes you make affect all future captures. If you
want to configure only one capture session, make sure
you restore the old values before the next session.
Capture devices
Studio senses which capture hardware you have
installed on your system for both video and audio. If
you have more than one available capture device in
either category, choose the one you want to use for the
current capture session.
Video: The devices listed here may include both digital
(DV, MicroMV) equipment connected via an IEEE-
1394 cable and various types of analog video source
(Studio DC10plus, TV tuner card, USB-connected
Appendix A: Setup options 249
camera, etc). Your selection determines the availability
of some other Capture source settings, and of many
settings on the Capture format panel.
Audio: Your choice of audio devices is constrained by
which video device is selected. With most analog
devices, for instance, you can choose any of your sound
card inputs; your equipment configuration determines
which one you should use.
TV standard: Choose the standard that is compatible
with your capture device and your TV or video monitor
(NTSC or PAL). NTSC is the standard used in North
America and Japan. PAL is the standard used in most
other places. With some capture devices you may have
an additional choice: the SECAM standard used in
Russia, France and some other countries. If you
purchased your Studio product in North America, the
option is permanently set to NTSC.
Use overlay: If you are performing an analog capture
with Studio AV/DV, you will have the option of using
the “overlay” capability of your graphics hardware
when previewing the capture. This may make the
preview smoother, but is not supported by all graphics
cards. Turn off this option only if it causes problems.
Capture preview: This option controls whether the
incoming video will be previewed in the Player during
capture. Because generating the preview uses a
significant amount of processor time, previewing may
cause dropped frames during capture on some systems.
Only turn off the option if you are having a problem
with dropped frames.
When capturing from a MicroMV camcorder, however,
this option is set to Off by default and cannot be
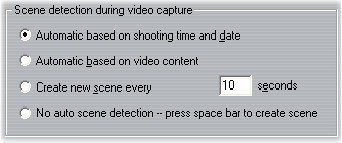
250 Pinnacle Studio 9
changed. Preview the source video using your
camcorder’s built-in monitor instead.
Aspect ratio: This dropdown list specifies whether the
video source for future analog captures should be
interpreted as having normal (4:3) or widescreen (16:9)
format.
Scene detection during video capture
The effect of these scene detection options is described
under “Automatic scene detection” on page 25. The
options that are actually available depend on the
capture device being used: not all devices support all
modes.
The first option, “Automatic scene detection based on
shooting time and date”, is available only if you are
capturing from a DV source.
Your DV camcorder records not only images and
sound, but also the time, date, and various camera
exposure settings (see your camcorder manual for more
detail). This information is termed data code, and is
transferred through the IEEE-1394 link along with the
video and audio.
Under the default setting, Studio uses the data code
information to determine when each new scene begins.
It grabs the first frame of each new scene to use as an
icon for display in the Album.

Appendix A: Setup options 251
Data code does not work if the tape:
• includes one or more blank (unrecorded) sections
• is unreadable due to tape damage or electronic noise
• was recorded without the camcorder time or date set
• is a copy of another tape
• was shot on an 8mm or Hi8 camcorder, and is now
being played back on a Digital8 camcorder.
Under the final option – “No auto scene detection” – a
new scene is created each time you press the [Space]
key.
Data rate
The DV format uses a fixed 5:1 compression ratio,
which implies a data transfer rate for real-time capture
of approximately 3.6 megabytes per second (MB/sec).
The transfer rate of your capture drive must be at least
4 MB/sec to allow for any variations across the drive.
Test data rate: Click this button to
test the data rate of your current
capture drive. Studio writes and
reads a file of known length, and
gives you a read-out of the results
in KB/sec (4000 KB/sec equals 4
MB/sec).
If you have attempted to capture DV scenes and your
capture drive can’t accept the DV data rate, a dialog
box will inform you of the problem. You have the
options of choosing another drive or adding one that
meets the data rate requirement.
Folder browser: This button sets the disk directory
(and thus the drive) in which your captures will be
saved, and lets you specify a default file name for
captures. The Test Data Rate button will perform its
test on the drive where this capture directory is located.
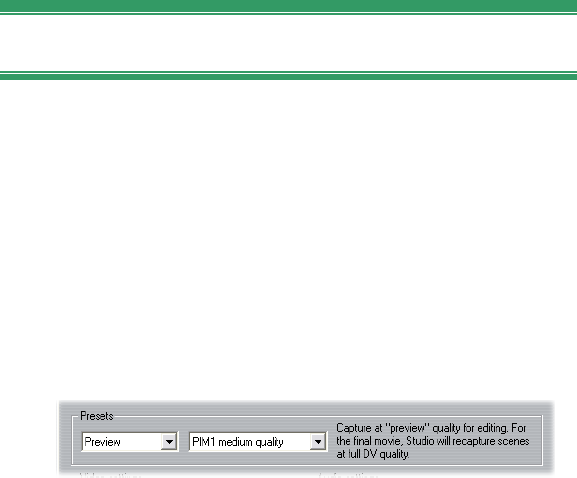
252 Pinnacle Studio 9
Capture format settings
The options available here depend on the capture
device you are using (from the Capture source tab).
You will not see all the settings described below
displayed at once.
Presets
The settings in the other areas on the Capture format
panel depend on your choice in this Presets area. The
available presets depend in turn on your capture
hardware.
For a DV capture source, the main capture options are
selected in the first of two dropdown lists. (The other
list provides any applicable sub-options.) The choices
are:
• DV: Full quality DV capture, which uses about 200
MB of disk space per minute of video. The
advantage of this setting is that you won’t have to
recapture clips at full resolution when you output
your finished movie. There are no sub-options with
this setting. DV capture is recommended over
MPEG if outputting your project to videotape is a
possibility.
• MPEG: Capturing to MPEG takes less space than
DV but more time – both when capturing and later,
when you output your movie. The quality presets
(High, Medium and Low) are available as sub-
options, plus a Custom preset that lets you configure

Appendix A: Setup options 253
the video settings manually. The best preset to use is
the lowest one that meets the requirements of all the
devices on which your movie will be played. Use
Low if you are outputting only for VCD; Medium if
you need to accommodate S-VCD; and High if your
movie will be output for DVD.
• Preview: Preview-quality dramatically decreases the
disk space needed for capturing by lowering the
video quality – but only during editing. When
outputting your movie, Studio will recapture any
preview-quality clips at full quality. Sub-options
include several preset combinations of compression
method and quality, plus a Custom option that leaves
the details up to you.
Other types of capture device provide a single list of
quality options – generally Good, Better, Best and
Custom.
MicroMV and Studio AV/DV Analog captures both
use fixed capture settings with no further options.
Video settings
The settings available in this area depend on both the
capture device and the options selected for it in the
Presets area. Only applicable settings are shown. The
settings are editable only if you are using a Custom
preset.
List all codecs: By default this checkbox is not
checked: the only codecs listed are those that have been
certified by Pinnacle Systems for use with preview-
quality capture. If you check the option, all codecs
installed on your PC will be listed.
254 Pinnacle Studio 9
Using codecs that have not been certified by Pinnacle
Systems for use with Studio preview-quality capture
may produce undesirable results. Pinnacle Systems
cannot provide technical support for problems
associated with the use of codecs that are not so
certified.
Options: This button gives you access to any setup
options offered by the codec (compression/decom-
pression software) you have chosen.
Compression: Use this dropdown list to select the
codec you want to use.
Width, Height: These fields control the dimensions of
the captured video.
Frame rate: The number of frames per second you
wish to capture. The two numerical options represent
full-speed and half-speed video respectively. The lower
number (14.985 for NTSC, 12.50 for PAL or SECAM)
saves disk space at the expense of smoothness.
Quality, Data rate: Some codecs present quality
options in terms of a compression percentage (Quality),
and others in terms of the required data transfer rate in
KB/sec (Data rate).
MPEG type: Select one of the two flavors of MPEG
encoding: MPEG1 or MPEG2. The former is almost
universally supported on Windows computers; the
latter gives better quality for a given compression ratio.
Resolution: This is a dropdown list giving the
resolutions available with the capture options you have
picked. Increasing both the width (the first figure) and
the height by a factor of two increases the amount of
data to be processed by a factor of four.
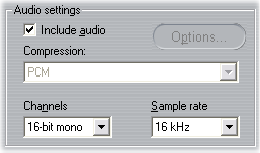
Appendix A: Setup options 255
Pre-filter: This option activates a smoothing algorithm
to improve apparent picture quality when capturing at
lower resolutions. The sharpness of the image is
slightly reduced.
Fast encode: This option speeds up the encoding
process with some reduction in quality when capturing
to an MPEG file. You may want to evaluate the effect
of this option in your production using a short test
capture.
Horizontal resolution: The Full option captures more
detail; the Half option creates every second horizontal
pixel by interpolation.
Crop: Activate this option to trim the edges from the
incoming video to eliminate “noise” that can occur at
the frame borders with some analog sources.
Vertical fields: A video frame consists of two
interleaved “fields”. The Both option specifies that both
fields should be captured; One uses only one of the
fields, reducing the vertical resolution by half. This
mode is useful when creating videos that will be played
back on a computer, since computer devices display
only one field in any case.
Audio settings
These audio capture settings are editable only if you are
using a Custom preset.

256 Pinnacle Studio 9
Include audio: Clear this checkbox if you are not
planning to use the captured audio in your production.
Options: This button gives you access to any setup
options offered by the codec (compression/
decompression software) you have chosen.
Compression: This dropdown shows the codec that
will be used to compress the incoming audio data.
Channels, Sample rate: These settings control audio
quality. “CD quality” is 16-bit stereo, 44.1 kHz.
MPEG capture
This area is visible only when the MPEG preset for
capture from DV has been selected.
The three options on the dropdown list control whether
MPEG encoding is performed during capture, or as a
separate step when capture is complete.
• Use default encoding mode lets Studio decide which
of the other two choices to use given the speed of
your computer.
• Encode in real time means that capture and encoding
occur in one step. This will produce good results
only on a fast enough machine.
• Encode after capturing means that encoding will not
be performed until the capture itself is complete.
This takes longer but is more reliable if you have a
slower CPU.
Edit settings
These settings are split into six areas, which are
covered in the subtopics below. Hardware settings
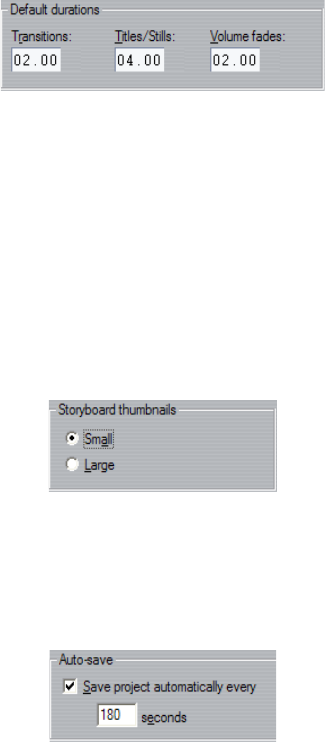
Appendix A: Setup options 257
relating to editing are on the CD, Voice-over and
Surround panel (see page 260).
Default durations
These duration times are measured in seconds and
frames. The seconds counter advances every 30 frames
for NTSC, or 25 frames for PAL.
The three settings here control the initial duration value
for transitions, still images and volume fades when
added to your movie. The durations can be trimmed to
custom values during editing. The default values upon
installation are as shown in the illustration above.
Storyboard thumbnails
Select Large to get more detail in the thumbnail frames
shown by Storyboard view in the Movie Window. The
default is Small.
Auto-save
This option, which is turned on by default, configures
Studio to save your current project at the specified
interval.
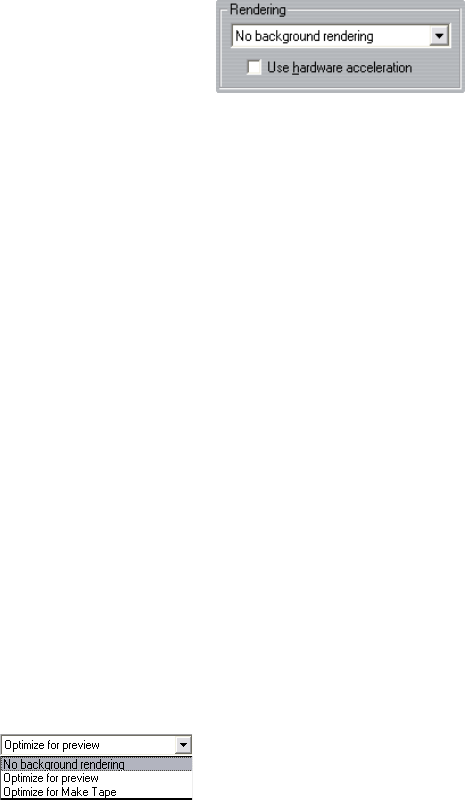
258 Pinnacle Studio 9
Rendering
This area furnishes several options that affect rendering
– the process in which the video for your final movie is
generated from materials you have assembled in the
Movie Window.
Depending on the speed of your computer system,
Studio may be unable to calculate some of its more
complex effects rapidly enough to provide a completely
smooth and detailed preview in the Player. Among the
items which Studio may not be able to generate in real
time are:
• Many plug-in video effects;
• Many Hollywood FX 3-D transitions;
• Moving thumbnail frames in disc menus;
• SmartSound background music tracks.
Without special handling, the time needed for Studio to
provide previewing for these effects in the Player could
hamper your work flow.
Studio gives you two ways of managing this situation:
• Background rendering: This feature, which you
turn on by choosing either of the Optimize for items
on the dropdown list, lets the computation of the
preview run behind the scenes while you work. Until
the rendering is complete, the Player will show the
simplified preview described below.
You can optimize background rendering
options for preview in the Player or for
output to videotape.

Appendix A: Setup options 259
The choices involve a trade-off: optimizing for
preview will speed up background rendering but
slow down the Make Tape step, whereas with
Optimize for make tape the reverse is true. If you are
not planning to output your project to videotape,
Optimize for preview is always the better choice.
As illustrated under “Moving Thumbnails
Checkbox” on page 173, a progress bar in the
Timescale reveals the progress of background
rendering.
• Simplified preview: If you choose No background
rendering, Studio provides a less detailed preview.
For instance, Hollywood FX transitions are shown at
lower resolution and a reduced frame rate, while
menu thumbnails are shown as static instead of
moving.
Use hardware acceleration: Check this option to use
the 3-D acceleration capability of your graphics card to
speed up the generation of Hollywood FX transitions.
Do not use this option if your graphics card does not
offer 3-D acceleration, or if you experience display
problems when the option is set.
Folder for auxiliary files
Studio generates auxiliary files in many circumstances
as you edit and output your project. These are all stored
under the disk folder specified here. Click the Folder
button to change the auxiliary files’ location – usually
because you need to save space on a particular drive.
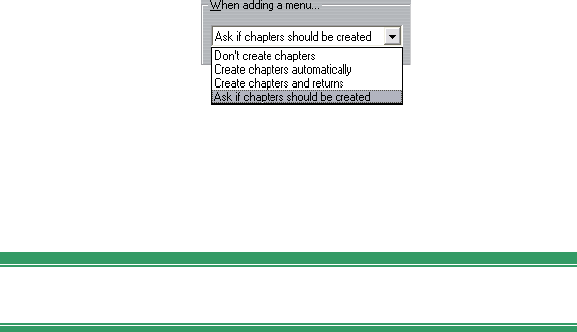
260 Pinnacle Studio 9
When adding a menu
When you place a disc menu on the Timeline, Studio
inquires whether you want to generate chapter links
from the menu to all the clips that follow it (at least
until the next menu). The choices on this dropdown list
let you avoid the confirmation dialog by specifying that
you always don’t or always do want the links to be
created, or that you want Studio to create links from a
new menu to its chapters and also return links back to
the menu from the end of each chapter. A final option,
“Ask if chapters should be created”, enables the
confirmation dialog, restoring the factory default.
Minimum chapter length: If you have specified that
Studio should create chapter links automatically when
you add a menu, multiple clips are combined into
chapters if necessary to achieve this minimum duration.
CD and voice-over settings
The three areas on this panel provide audio hardware
settings relating to editing and preview.
CD audio recording
Input source: This dropdown list lets you choose the
method of transferring audio CD data to files on your
computer when capturing CD content. The highest-
quality transfer is digital – “ripping” the CD tracks.
Channels, Sample rate: These settings control audio
quality. “CD quality” is 16-bit stereo, 44.1 kHz.

Appendix A: Setup options 261
Drive letter: If you have multiple CD drives, choose
one to use as the CD audio source for your movies.
Voice-over recording
Microphone: A dropdown list of choices for attaching
a microphone to your hardware.
Channels, Sample rate: These settings control audio
quality. A typical setting for voice-overs is 16-bit mono
at 22.05 kHz.
Surround-sound playback
Enable discrete 5.1 playback: Check this box if the
desktop audio system you use when previewing your
Studio project supports discrete 5.1 audio. Leave it
unchecked if you are previewing in surround-sound
with a Pro Logic compatible system, or in stereo..
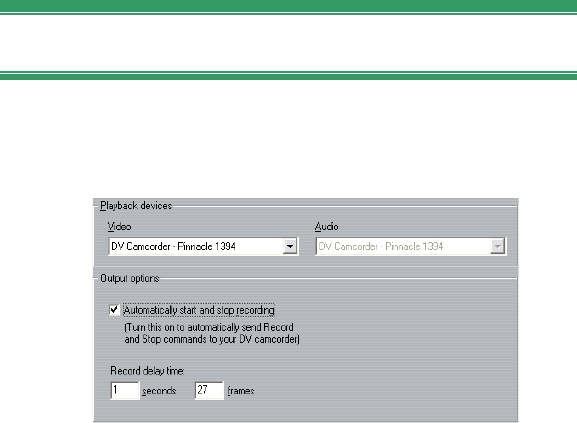
262 Pinnacle Studio 9
Make tape settings
Studio automatically senses the hardware you have
installed, and configures the Make Tape playback
destination accordingly.
If you are printing (making tape) to a DV device, you
can choose to have Studio start and stop the device
automatically instead of having to do it yourself.
To control printing automatically:
1. Click the Make Movie button on the main menu bar.
The upper half of the screen changes to display the
Make Movie window.
2. Click the Tape tab.
3. Click the Settings button. The Make tape options
panel opens.
4. Check the Automatically start and stop recording
box to enable the automatic function.
With most DV devices there is a small delay
between receiving the command to record and the
actual start of recording. In Studio, this is referred
to as the “record delay time”. It varies from device
to device, so you may need to experiment with the
value for best results with your particular device.
Appendix A: Setup options 263
5. Click OK.
6. Click Create.
Studio renders your movie, then sends the record
command to your DV device. Studio outputs the
first frame of your movie (without audio) for the
duration entered for record delay time, giving the
device time to bring the tape up to speed and begin
recording.
Hint: When you play back your tape, if the first
part of your movie was not recorded, you should
increase the Record delay time setting. On the other
hand, if your movie begins by holding onto the first
frame as though it were a still photograph, you
should decrease the setting.
Hint: If you wish to send black to your recording
device during its record delay time, place a blank
title in the video track just before the start of your
movie (a blank title is video black). If you wish to
record black at the end of your movie, place a blank
title in the video track following the final frame of
your movie.
Output to the screen
One of the options on the Video dropdown in the
Playback devices area is “VGA display”. With this
option, your completed project will be played back
onto your monitor screen rather than to an external
device.
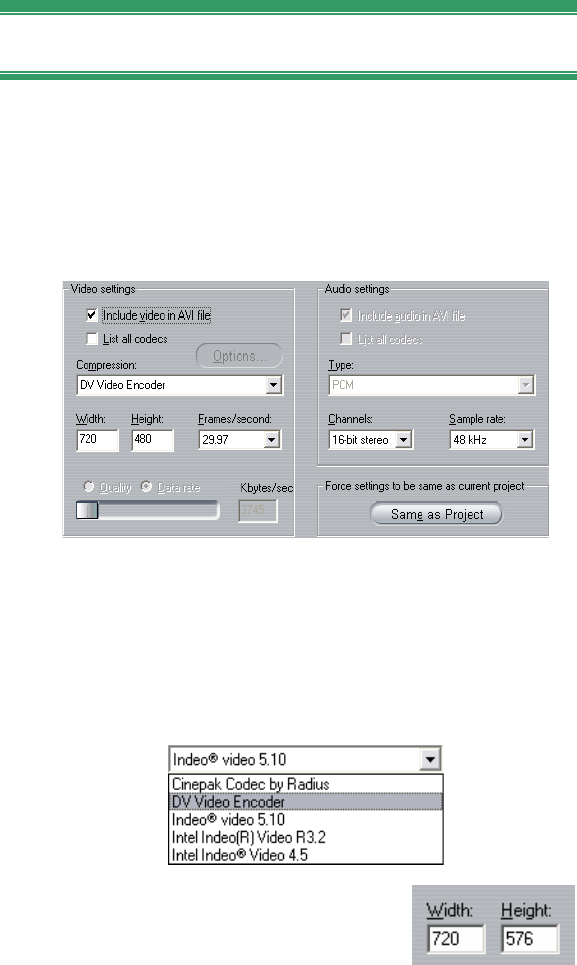
264 Pinnacle Studio 9
Make AVI file settings
The Make AVI file options panel lets you adjust
compression settings, whether to minimize the size of
the output file, to increase its quality, or to prepare it
for a special purpose (such as distribution via the
Internet) where there may be requirements involving
characteristics such as frame size.
Video settings
Compression: Choose the compressor (codec) that is
most suitable for your intended use. When making an
AVI file, you’ll want to choose your compression
settings for the capabilities of, and codecs supported by,
the intended viewer’s computer platform.
Width, Height: The frame size is
measured in pixels. The default
setting is the resolution at which
Studio captures. Decreasing the
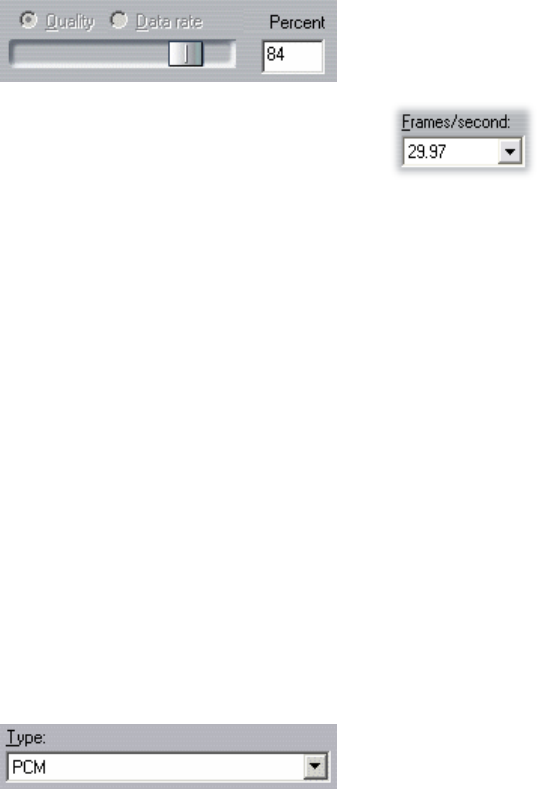
Appendix A: Setup options 265
width and height greatly decreases file size, although
compression moderates this effect.
Quality, data rate: Depending on the codec being
used, you can adjust the quality percentage or data rate
with the slider. The higher the percentage or rate you
choose, the larger the resulting file.
Frames/second: The default value is
29.97 frames per second for NTSC
video, or 25 frames per second for
PAL. You may want to set the frame rate lower for
applications such as Web video. Most Pentium-based
computers can play 352 x 240 at 15 frames per second
smoothly. Higher performance PCs will be able to play
back video with larger frame sizes and higher frame
rates smoothly.
Audio compression settings
Audio settings: If you want to keep file sizes to a
minimum, audio for many digital uses can be set to
8-bit mono at 11 kHz. As a rule of thumb, try 8-bit
11 kHz for audio that is mostly speech, and 16-bit
stereo at 22 or 44 kHz for audio that is predominantly
music. By comparison, CD-ROM music is 16-bit stereo
sampled at 44 kHz. Another convenient rule of thumb
for audio compression is that 11 kHz is roughly
equivalent to AM radio quality. 22 kHz equates to FM
radio quality, and 16-bit stereo, 44 kHz to audio CD
quality.
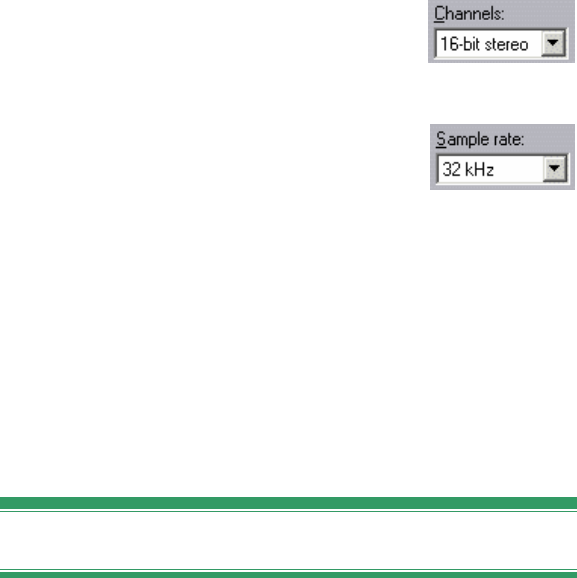
266 Pinnacle Studio 9
Type: In most cases, you will choose either PCM
(Pulse Code Modulation) or ADPCM (Adaptive Delta
PCM).
Channels: You may choose between
8- and 16-bit mono and stereo sound.
Sound quality and file size increases
when you add a second channel or increase bit depth.
Sample rate: Digital audio is
produced by taking regular instaneous
samples of the continuous analog
waveform. The more samples, the better the sound. For
example, audio CDs are recorded at 44 kHz, 16-bit
stereo. Audio can be sampled at frequencies as low as
11 kHz for many digital uses, particularly for speech.
Force settings to be the same as the project
Click the Same as project button to make your AVI
output use the same format as the highest resolution
clip in your current project.
Make MPEG file settings
The Make MPEG File options panel allows you to
adjust MPEG compression settings.
Presets are provided You can choose presets for a
variety of applications. There are presets for Internet
playback, PC and multimedia playback, and for writing
VideoCD (VCD), S-VCD and DVD files.
The Custom preset allows you to exclude the source
audio or video, and to independently vary your audio
and video data rates.
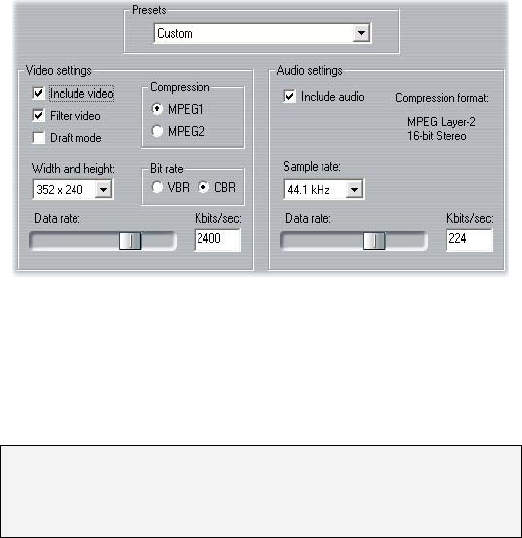
Appendix A: Setup options 267
Video settings
Compression: You can choose either MPEG-1 or
MPEG-2 compression. MPEG-2 offers higher
resolution and higher quality than MPEG-1.
Note: MPEG-2 files require special decoder software.
If you do not have an MPEG-2 decoder installed on
your PC you will not be able to play MPEG-2 files.
Width, Height: The frame size is measured in pixels.
Decreasing the dimensions greatly decreases the
amount of data, and therefore the file size, but com-
pression reduces the effect. The maximum resolution
for MPEG-1 is 384 x 288. The maximum resolution for
MPEG-2 video is 720 x 576.
Bit rate: Choose whether to create the MPEG file with
VBR (variable bit rate) or CBR (constant bit rate)
encoding. The VBR option uses less storage at a given
quality level than CBR, but may cause problems when
the file is viewed using some DVD players. If you
observe jerky or stuttering playback, use CBR.
Data rate: You can adjust the data rates for audio and
video separately by using the sliders. Higher data rates
yield higher quality, at the cost of larger files.
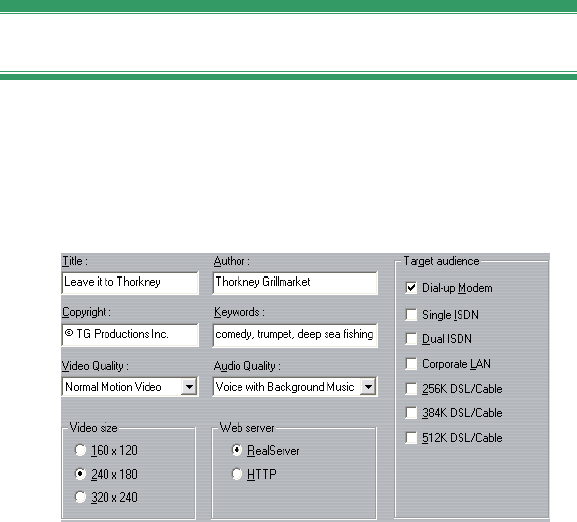
268 Pinnacle Studio 9
Audio settings
Sample rate: Digital audio is produced by taking
discrete samples of a continuous analog waveform –
the more samples, the better the sound. MPEG supports
two sample rates, 44.1 kHz and 48 kHz.
Data rate: You can adjust the data rates for audio and
video separately using the sliders. Higher data rates
yield higher quality at the cost of larger files.
Make RealVideo file settings
The Make RealVideo File options panel allows you to
adjust RealVideo file settings. These configure the
creation of files that are to be played back with the
popular RealNetworks® RealPlayer®, free for the
download from www.real.com.
Title, Author, Copyright: These three fields are used
to identify each RealVideo movie, and are encoded into
it so that they are not visible to the casual viewer.
Keywords: This field accepts up to 256 characters, and
allows you to encode keywords into each movie. It is

Appendix A: Setup options 269
typically used to identify the movie for Internet search
engines.
Web server: The RealServer option allows you to
create a file that can be streamed from a RealNetworks
RealServer. The RealServer supports a special feature
that senses the connect speed of the viewer’s modem,
and adjusts its transmission rate to suit. The option
allows you to select up to seven Target audience data
rates. Because the file size, and your upload time,
increase with each data rate you add, select only those
target audiences you think are actually needed.
To make use of the RealServer option, the ISP hosting
your web-site must have the RealServer software
installed. If you are unsure, contact your ISP for
confirmation, or use the standard HTTP option, which
allows you to optimize playback for exactly one of the
six Target audience options listed.
Note: GeoCities provides RealServers to their
“homesteaders”.
Target audience: This selects the target audience
modem connect speed. The lower the speed, the lower
the quality of the video. If you wish your viewers to be
able to view your movie as it loads, you should select a
target audience rate that their modems can handle.
When you select a target audience, you are actually
specifying a maximum bandwidth for your RealMedia
stream. Bandwidth, measured in kilobits per second
(Kbps), is the amount of data that can be sent through
an Internet or network connection in a given time span.
Standard modems (those that use ordinary telephone
lines) are classified by the bandwidth they are able to
process. Common values are 28.8 and 56 Kbps.
270 Pinnacle Studio 9
In addition to these standard audiences, you can record
clips for connection speeds of 100 Kbps, 200 Kbps, or
higher. These higher bandwidths are suitable for
audiences that use corporate Local Area Networks
(LANs), cable modems or Digital Subscriber Line
(DSL) modems.
If you want to keep file sizes to a minimum, audio for
many digital uses can be set to 8-bit mono at 11 KHz.
As a rule of thumb, try 8-bit 11 KHz for audio that is
mostly speech, and 16-bit stereo at 22 or 44.1 KHz for
audio that is predominantly music. For comparison,
CD-ROM music is 16-bit stereo sampled at 44.1 KHz.
Video quality: These choices let you balance the rival
requirements of image quality and frame rate.
• No video: When this selection is made, the output
file will contain audio only.
• Normal motion video: Recommended for mixed
content clips to balance video motion and image
clarity.
• Smoothest motion video: Recommended for clips
that contain limited action, such as newscasts or
interviews, to enhance overall video motion.
• Sharpest image video: Recommended for high-
action clips to enhance overall image clarity.
• Slide show: The video appears as a series of still
photos, providing the best overall image clarity.
Audio quality: This dropdown menu lets you choose
the characteristics of your audio track. Studio uses this
information to select the best audio compression for
your RealVideo file. Each successive option provides
better audio quality but a larger resulting file.
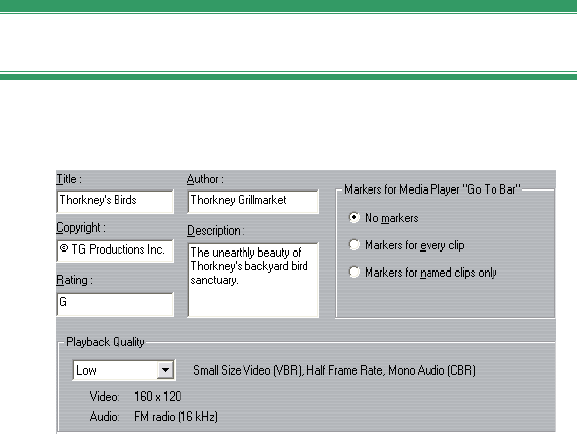
Appendix A: Setup options 271
• No audio: When this selection is made, the output
file will contain video only.
• Voice only: This option provides adequate quality
for spoken audio in clips without music.
• Voice with background music: This option is
designed for situations where, even though
background music may be present, the spoken audio
predominates.
• Music: Use this option for a monaural track in which
music is prominently featured.
• Stereo music: Use this option for a stereo music
track.
Video size: These choices allow you to automatically
resize your movie. The smaller the resolution, the
lower the data rate your viewers need to handle.
Make Windows Media file settings
The Make Windows Media File panel lets you adjust
options for creating Windows Media Player files.
Title, Author, Copyright: These three fields are used
to identify each Windows Media movie, and are
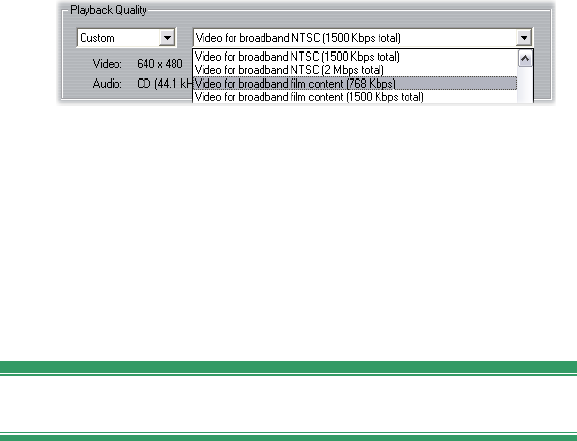
272 Pinnacle Studio 9
encoded into it so they are not visible to the casual
viewer.
Description: This 256-character field lets you enter
keywords for encoding into the movie. It is typically
used to identify the movie for Internet search engines.
Playback quality: Choose the playback quality of your
movie based on the capability of the target platform –
the computer(s) that will play the movie. The exact
audio and video parameters corresponding to the
current choice are displayed in the space below the list.
The Custom option lets you fine-tune the settings by
selecting from a list of possible combinations.
Markers for Media Player “Go To” bar: You have
the option of including Windows Media “file markers”
as you compress. These markers allow viewers to go
directly to the beginning of any clip. The markers are
listed by clip name. Clips you have not named get a
Studio default clip name derived from the Project
Name and the clip’s original timecode start point.
Make disc settings
The Make Disc options allow you to adjust options for
creating VCD, S-VCD or DVD discs, and for creating a
DVD disc image on a hard drive.
To create a VCD or S-VCD requires a CD or DVD
burner; to create a DVD requires a DVD burner.
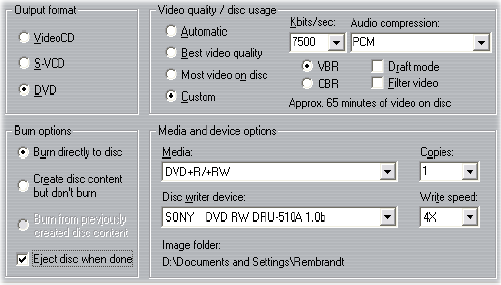
Appendix A: Setup options 273
Output format
Select VideoCD (VCD), S-VCD or DVD. Options in
other areas of the panel are dependent on this choice.
Burn options
Burn directly to disc: Your movie will be burned onto
disc according to the format you have selected under
Output format.
Create disc content but don’t burn: This choice is
only available when the output format is DVD. Your
disc burner is not used. Instead, the same files that
would normally be saved onto a DVD disc are stored
into an “image folder” on a hard drive. The location of
that folder is shown in the Media and device options
area (see page 275).
Burn from previously created disc content: This
choice is only available when the output format is DVD.
Instead of using your current project directly to burn a
disc, a previously-created disc image is now sent to
your DVD burner. This lets you divide the work of
creating a disc into two separate steps that can be
performed in separate sessions if desired. It is
particularly useful when you want to make several
274 Pinnacle Studio 9
copies of the same project. Although the project is not
used directly in making the disc, it must nevertheless
be open in Studio when the disc is burned.
Eject disc when done: Check this box if you would
like Studio to automatically eject the disc after the burn
process has been completed.
Video quality / disc usage
Quality settings: These settings (Automatic, Best video
quality, Most video on disc and Custom) are available
for S-VCD and DVD discs only. The first three are
presets that correspond to particular data rates. The
Custom option lets you set the data rate to another
value. In each case, an estimate is provided of the
amount of video the disc can accommodate at the
current setting.
Kbits/sec: This combination dropdown list and edit
field lets you choose or specify the data rate – and
hence the video quality and maximum duration – of the
disc. Higher values correspond to better quality and
lower capacity.
Filter video: This option enables a smoothing filter
that may improve the apparent quality of video at lower
data rates. Image sharpness is slightly reduced.
Draft mode: This option speeds up the MPEG
encoding process at the expense of some reduction in
quality.
Audio compression: Choose one of four options for
storing your movie’s soundtrack to DVD:
• PCM encoding for stereo sound is supported by all
DVD players, but takes up more space on the DVD
than MPEG.
Appendix A: Setup options 275
• MPEG audio support is always provided on PAL
players. On NTSC players it is broadly supported,
but theoretically optional.
• Dolby Digital 2-channel encoding can be used to
compactly store either a stereo or a surround
soundtrack. To hear the surround mix requires
equipment with Dolby Pro Logic compatibility. On
other systems, it will be heard as a normal stereo mix.
• Dolby Digital 5.1-channel encoding stores the
surround channels discretely. To hear the surround
mix on playback requires a surround amplifier and
speaker system.
VBR/CBR: Choose whether to write the MPEG data to
the disc using VBR (variable bit rate) or CBR (constant
bit rate) encoding. The VBR option uses less storage at
a given quality level than CBR, but may cause
problems when the file is viewed using some DVD
players. If you observe jerky or stuttering playback, use
CBR.
Media and device options
Media: Choose an entry from this dropdown list
matching the type and capacity of disc to which you are
burning your project.
Disc writer device: If you have more than one disc
burner on your system, select the one you want Studio
to use.
Copies: Select or enter the number of copies of this
disc that you want to create.
Write speed: Choose one of the available speeds, or
leave this field blank to have the speed auto-selected.
Image folder: The location of the DVD image folder
that will be used for the Burn options / Burn from disc
image setting.

Appendix B: Tips and tricks 277
APPENDIX B:
Tips and tricks
Here are some hints from Pinnacle technical specialists
on choosing, using and maintaining a computer system
with video in mind.
Hardware
To use Studio effectively, your hardware should be
optimally prepared and configured.
It is recommended that you use UDMA IDE drives as
they provide reliable video transfer performance with
Studio. We highly recommend you capture to a hard
drive other than the one upon which Windows and the
Studio software are installed.
Since recording video sequences in the DV format
requires a data transfer rate of approximately 3.6 MB
per second, your hard drive should maintain a
performance level of at least 4 MB/s. Higher transfer
rates will ensure reliability and help avoid problems
with output to tape.
You can calculate the amount of hard drive space
you’ll need for your video using the 3.6 MB/sec value.

278 Pinnacle Studio 9
For example:
1 hour of video = 3600 seconds (60 x 60)
3600 seconds x 3.6 MB/s = 12,960 MB
Hence 1 hour of video uses 12.9 GB of storage.
Due to their automatic internal calibration, standard
hard drives regularly interrupt the continuous data
stream in order to recalibrate themselves. During
capture, this is not apparent since images are
temporarily stored in memory. But during playback,
only a limited number of images can be temporarily
stored in this manner.
For smooth playback, a continuous, uninterrupted data
stream is required. If not, the image will “jerk” at
regular intervals, even though all frames are present
and even if the hard drive is very fast.
Preparing your hard drive
Prior to capturing video, you should:
• Close background applications. Before opening your
Studio product, hold down the Ctrl and Alt keys on
the keyboard, then hit Delete. This will open the
Close Program window. Click on the individual
applications listed in the Close Program window and
click the End Task button. Do this for all
applications listed in the Close Program except
Explorer and SysTray. Software utilities are
available for Windows 2000 and XP that can assist
with this procedure.
• Click on Start ¾ Programs ¾ Accessories ¾ System
Tools ¾ ScanDisk
Make sure Thorough is checked, and click Start
(this may take a while).
Appendix B: Tips and tricks 279
• After ScanDisk is done, click on Start ¾ Programs
¾ Accessories ¾ System Tools ¾ Disk Defragmenter
(this may take a while).
• Turn off energy-saving features. Point your mouse
on your Desktop, right-click, and select Properties ¾
Screensaver (under Energy… Settings). Make sure
everything under Settings for… power schemes is set
to Never.
Note: Video-editing programs do not multitask very
well. Do not use any other program while making
movie (videotape or CD) or capturing. You can
multitask while editing.
RAM
The more RAM you have, the easier it is to work with
Studio. You will need at least 256 MB of RAM to work
with the Studio application, and we highly recommend
512 MB (or more).
Motherboard
Intel Pentium or AMD Athlon 800 MHz or higher.
Software
Color depth adjustment
1. 16-bit color depth is recommended.
2. Position your mouse over your Desktop, right click,
and select Properties ¾ Settings.
3. Under Colors, choose High Color (16-bit).
The overlay settings affect only the display on the
computer monitor, while recorded sequences will
280 Pinnacle Studio 9
always appear in full color and resolution at the video
output.
Windows 98 Second Edition
To improve system performance under Windows 98SE,
you can make the following modifications.
Hard drive settings:
1. Go to Start ¾ Settings ¾ Control Panel ¾ System.
Click on the Performance tab, then File System,
then the Troubleshooting tab.
2. Click to the left of Disable write-behind caching
for all drives option to select it and click OK.
3. Under the Hard-disk tab, set the Read-ahead
optimization option to None.
4. Ensure that DMA is enabled for your hard drive.
CD-ROM drive setting:
Under Windows 98, you can specify automatic
notification for a CD-ROM.
1. Select Start ¾ Settings ¾ Control Panel ¾ System
¾ Device Manager.
2. Click on CD-ROM.
3. Click on your CD-ROM drive name.
4. Select Settings ¾ Options.
5. Deactivate Auto insert notification.
Do not operate an enhanced IDE CD-ROM drive in
parallel with an enhanced IDE hard drive. This
combination can lead to an unnecessary reduction
in the speed of your hard drive. Instead, use the
second IDE interface for your CD-ROM drive.

Appendix B: Tips and tricks 281
Taskbar:
Switch the clock on the taskbar off.
1. Right-click the mouse on the taskbar.
2. Select Properties.
3. Deactivate the Show Clock option.
Increasing the frame rate
If your system is unable to achieve an adequate frame
rate (25 fps for PAL/SECAM, 29.97 fps for NTSC), try
the following:
Deactivate network driver and applications
Network operations often cause interruptions during
recording and playback. We recommend not working
in a network.
Audio recording
Record audio only when you actually need it, because
sound requires a great deal of processor time during
video recording We recommend a PCI soundboard.
Digital video with audio
When recording digital video sequences with audio,
remember that the audio also takes up hard drive space:
• CD quality (44 kHz, 16-bit, stereo) requires about
172 KB/sec.;
• Stereo quality (22 kHz, 16-bit, stereo) about 86
KB/sec., and
• Mono quality (22 kHz, 8-bit, mono) still requires 22
KB/sec.
282 Pinnacle Studio 9
The better the sound quality, the more space is
consumed. The highest quality (CD) is rarely required.
However, the lowest quality (11 kHz/8-bit, mono)
rarely provides acceptable audio sequences.
Studio and computer animation
If you are editing computer animation with Studio or
wish to combine animation with digital video,
remember to create your animations using the same
frame size and image refresh rate as your original video:
Quality TV-Cropping PAL NTSC Audio
DV Yes 720 x 576 720 x 480 44 kHz 16-bit stereo
Failure to do this will result in unnecessarily long
rendering times and the possibility of visible flaws
when the animation is played back.
Smart Capture Tips (DV only)
SmartCapture relies on continuous, uninterrupted
timecode to recapture your clips. If your original tapes
have multiple sections of discontinuous timecode, each
section was captured as a separate file. Before it can
recapture your clips, Studio will prompt you to cue the
tape to the section where that clip is recorded.
To help you recognize the correct section of tape, the
Preview window will display an image of the first
frame of the clip. When you have cued to the correct
section, Studio will recapture all required clips from the
Appendix B: Tips and tricks 283
section. If you have followed the naming convention
suggested on page 28, Studio will proceed to the next
section of tape and repeat the process until all required
clips from that source tape have been recaptured. Not
following the naming convention results in changing
source tapes much more often.
When Studio recaptures your clips, it will capture about
a second of extra footage at the start and end of your
clip. Studio automatically trims each clip to match the
exact start and end points you chose for your movie,
but this extra captured footage allows you to adjust
start and end points of each clip if you happen to
change your mind after recapturing. You can do this
either on the Timeline or with the Clip properties tool.
Starting with continuous timecode
To avoid the multiple captures problem altogether, we
recommend striping your tapes with timecode before
you begin to shoot, if possible (see “Continuous
timecode” on page 28).

Appendix C: Troubleshooting 285
APPENDIX C:
Troubleshooting
Before you begin troubleshooting, take some time to
check your hardware and software installation.
Update your software: We recommend installing the
latest operating system updates for Windows 98, ME,
2000 or XP. You can download these updates from:
windowsupdate.microsoft.com/default.htm
Make sure you have the latest version of the Studio
software installed by clicking the Help ¾ Software
Updates menu from within the program. Studio will
use the Internet to check for possible updates.
Check your hardware: Ensure that all installed
hardware is functioning normally with the latest drivers,
and is not flagged as having a problem in the Windows
Device Manager (see below). If any devices are flagged
you should resolve the issue before starting installation.
Get the latest drivers: We also highly recommend
installing the latest drivers for your sound card and
graphics card. During the Studio software launch
process we do verify that your sound card and video
card support DirectX.
Go to the manufacturers’ web-sites to get the latest
drivers for your sound and graphics cards. Many users
286 Pinnacle Studio 9
have NVIDIA or ATI graphics cards, for which the
latest drivers are available at:
www.nvidia.com and www.atitech.com
Those with Sound Blaster audio cards can get updates
here:
us.creative.com
Opening Device Manager
The Windows Device Manager, which lets you
configure your system’s hardware, has an important
role in troubleshooting.
The first step in accessing Device Manager under all
versions of Windows is right-clicking on My Computer
then selecting Properties from the context menu. This
opens the System Properties dialog. With Windows 98
or Millennium, simply select the dialog’s Device
Manager tab. With Windows 2000 or XP, click the
Device Manager button on the Hardware tab.
TECHNICAL HELP ON-LINE
The Pinnacle Support Knowledge Base is a searchable
archive of thousands of regularly-updated articles about
the most common questions and issues users have
regarding Studio and other Pinnacle products. Use the
knowledge base to find answers to any questions you
may have about installing, using or troubleshooting
Pinnacle Studio.
Appendix C: Troubleshooting 287
Access the knowledge base with your web browser by
visiting:
http://pinnacle.custhelp.com
The knowledge base home page will appear. You don’t
have to register to browse the knowledge base, but if
you want to send a specific question to technical
support staff you will need to create a knowledge base
account. Please read any knowledge base articles
relevant to your inquiry before contacting technical
support.
Using the knowledge base
In the Product dropdown, select “Studio Version 9”. If
appropriate, you can also select a Sub-Product, a
Category, or both. Selecting a sub-product or category
may reduce the number of irrelevant hits you will get
from your search, but may also eliminate helpful
articles of a more general nature. If you’re not sure
what category to pick, leave the selection at All
Categories.
To search for an article, type a short phrase or group of
keywords in the text box. Don’t get too wordy; the
search works best when given just a few words.
Search example
In the list below of common troubleshooting issues, the
first item is, “Studio crashes or hangs in Edit mode”.
Type “Crash in edit mode” in the search box and click
the Search button. You should get back somewhere
between 60 and 150 hits. The very first one, “Studio
crashes in Edit”, lists the known causes for this issue
and their remedies.
288 Pinnacle Studio 9
If you search instead on the single keyword “Crash”,
you will get far fewer hits, all relating to crashes in
Studio.
If one search does not turn up an article that seems
relevant to your problem, try modifying the search by
choosing a different set of keywords. You can also use
the Search by and Sort by options to select for specific
or popular articles.
Searching by Answer ID
If you know the Answer ID number of the answer
you’re looking for, you can access the item directly.
For example, if you are getting a capture error when
you press the Capture button, someone might refer you
to knowledge base article 2687, “I am getting a capture
error with Studio”. In the Search by dropdown, select
“Answer ID”, enter the ID number in the text box, and
click Search.
Top knowledge-base search issues
1. Studio crashes in Edit mode (ID 6786).
2. Capture error appears when attempting to start
capture (ID 2687).
3. Studio hangs when rendering (ID 6386).
4. CD or DVD burner is not detected (ID 1593).
5. Studio hangs on launch or does not launch (ID
1596).
6. HollywoodFX transitions are still watermarked
after upgrading (ID 1804).
7. “Cannot initialize the DV capture device” error
appears in Capture mode (ID 2716).
The information on the following pages is based on
these often-viewed knowledge base articles.

Appendix C: Troubleshooting 289
Studio crashes in Edit mode
Answer ID 6786
If Studio is crashing, the cause is most likely either a
configuration issue or a problem with a project or
content file. This type of issue can often be fixed with
one of the following methods:
• Uninstalling and reinstalling Studio.
• Optimizing the computer.
• Rebuilding a corrupt project.
• Recapturing a corrupt clip.
To help troubleshoot the problem, determine which of
the failure modes listed below best matches the
symptoms you are experiencing, then refer to the
corresponding set of instructions:
• Case 1: Studio crashes randomly. There doesn’t
seem to be any one thing that will cause the crash,
but crashes happen frequently.
• Case 2: Studio crashes every time you click on some
particular tab or button within Edit mode.
• Case 3: Studio crashes each time you carry out some
specific sequence of steps.
Case 1: Studio crashes randomly
Try each of the following solutions in turn:
Get the latest version of Studio: Make sure that you
have the latest version of Studio 9 installed. The latest
version can be found on our website at:
www.pinnaclesys.com/support/studio9

290 Pinnacle Studio 9
Be sure to close all other programs before installing a
new version.
Adjust Studio settings: Choose No background
rendering in the Rendering dropdown list, and clear the
Use hardware acceleration checkbox. Both options are
found on the Edit options panel (see page 256).
End background tasks: Close other applications and
unload any background processes before using Studio.
• In Windows 98 and Windows Millennium, manage
background processes by pressing Ctrl+Alt+Delete
to open the Task Manager. Close all the items on the
list except Systray and Explorer.
• Under Windows 2000 and Windows XP, press
Ctrl+Alt+Delete to open the Task Manager. You
probably won’t see much under the Applications tab,
but the Processes tab will show you the software that
is currently running. Since it can be difficult to be
sure which processes should not be closed, software
utilities are available for Windows 2000 and XP that
can assist with this procedure.
Defragment your hard drive: Over time, the files on
your hard drive can become fragmented (stored in
multiple parts in different areas of the drive), which
slows down access and may lead to performance
problems. Use a disk defragmenter utility like the one
supplied with Windows to prevent or correct this
problem. Access the built-in defragmenter with the
Disk defragmenter command on your Programs ¾
Accessories ¾ System tools menu.
Update audio and video drivers: Make sure that you
have obtained the latest drivers for your sound and
video cards from their manufacturers’ web-sites. You
Appendix C: Troubleshooting 291
can see what sound and video cards you have in the
Windows Device Manager.
To determine what video card you have, click the plus
sign in front of Display Adapters in the Device
Manager list. The name of your video card is now
displayed. Double-clicking the name opens another
dialog, where you choose the Driver tab. Now you can
view information about the driver’s manufacturer, and
the names of the driver’s constituent files.
The sound card is displayed in the Sound, video and
game controllers section of Device Manager. Again,
double-clicking the name lets you access the driver
details.
Update Windows: Make sure you have all the latest
Windows updates that are available.
“Adjust for best performance”: Use this system
option to turn off visual extras in Windows 2000 and
Windows XP that consume additional CPU time.
Right-click My Computer, select Properties from the
context menu, then click on the Advanced tab. Under
Performance, click the Settings button to open the
Performance Options dialog. Select the Adjust for best
performance option and click OK.
Update DirectX: Update to the latest version of
DirectX. You can download it from Microsoft here:
www.microsoft.com/windows/directx
Open up space on your boot drive: Make sure you
have 10 GB or more free space on your boot drive for
paging.
292 Pinnacle Studio 9
Uninstall, reinstall and update Studio: In case your
Studio installation has become corrupted, try this
procedure:
1. Uninstall Studio: Click on Start ¾ Programs ¾
Studio 9 ¾ Uninstall Studio 9, then follow any on-
screen instructions until the process is complete. If
the uninstaller asks whether you want to delete a
shared files, click Yes to all. Disconnect the camera
and cable from your DV board, if you have one.
2. Reinstall Studio: Insert your Studio CD and
reinstall the software. Make sure you are logged in
as the Administrator (or as a user with Admin
privileges) when installing Studio. It is strongly
recommended that Studio be installed in its default
directory on the main OS drive.
3. Download and install the latest version of Studio:
Click the Help ¾ Software Updates menu
command to check for updates. If a new version of
Studio is detected on our web-site, you will be
asked to download it. Download this patch file to a
location where you can find it easily (such as the
Desktop), then exit Studio. Finally, double-click the
downloaded file to update Studio.
Rebuild corrupt project: Try rebuilding the first few
minutes of your project. If no problems occur,
gradually add to the project, checking periodically to
ensure that system stability is maintained.
Fix corrupt video or audio: Sometimes the instability
may occur only when you manipulate certain audio or
video clips. In such cases, you should recapture the
audio or video. If the audio or video was created by
another application, recapture it with Studio if possible.
While Studio supports many video formats, the
particular clip you have may be corrupt or in an
Appendix C: Troubleshooting 293
uncommon format. If you have a wav or mp3 file that
seems to be problematic, convert the file to the other
format before importing the file. Many wav and mp3
files on the Internet are corrupt or non-standard..
Reinstall Windows: This is quite a drastic step, but if
the previous steps have not helped, Windows itself may
be corrupt. Even though your other applications may
appear to be running properly, the size of the video
files used in Studio may well tax your system to the
point that a latent instability is revealed.
Case 2: Clicking a tab or button crashes Studio
Please start by trying the steps given above for Case 1.
This kind of problem often means that Studio was not
installed properly or has become corrupt. Uninstalling
Studio, reinstalling it, and patching to the latest version
will generally solve the difficulty.
Otherwise, try creating a new project called
“test01.stu” to try to determine if the failure is specific
to a particular project. Open the demo video file and
drag the first few scenes onto the Timeline. Now click
on the tab or button that seems to cause the failure. If
this test project does not crash, it may be that the
problem is with the project you are working on rather
than with Studio or your system. If the test project does
fail, please contact our support staff and provide us
with the details on the exact failure mode. We will try
to recreate and solve the problem.
Case 3: Performing certain steps crashes Studio
This is just a more complicated version of Case 2, and
the same troubleshooting steps apply. Since it may be
quite difficult to determine the exact sequence of steps
that produces the failure, you will need to be

294 Pinnacle Studio 9
methodical in your approach. Creating a small test
project, as described for Case 2, helps eliminate
variables that may confuse your test results.
Capture error occurs on starting capture
Answer ID 2687
Some problems can be traced to incompatibilities or
issues with particular third-party capture cards:
• ATI: Studio should work with most All In Wonder
cards.
• Hauppauge: Please see the FAQ on our web site for
information regarding Hauppauge cards.
• Dazzle: The Dazzle DVC 80, DVC 150 and Fusion
are supported. Please the FAQ on our web site for a
complete list of supported Dazzle hardware.
Troubleshooting steps
The initial goal, before you capture, is to see video
playing in the preview window.
1. Check capture source settings in Studio. Since you
may have more than one capture device in your
system (1394 cards, TV tuners, webcams, etc.) you
must be sure to select the correct capture source. In
Studio’s Capture Mode, click the Settings button,
then click the Capture Source tab on the Setup
Options dialog. Select your video capture device on
the Video dropdown list.
If the option for your desired capture device is not
listed then go to the Windows Device Manager. If
Appendix C: Troubleshooting 295
the capture driver for your capture device is flagged
or not listed, reload the capture driver as follows:
• Pinnacle drivers: Use the CD to locate and install
the Pinnacle drivers for the card you have
installed.
• Third party drivers: Use the CD that came with
the capture device or call the manufacturer (or
visit their web-site) for the most current driver.
2. If you are capturing from an analog source, make
sure the correct analog type is selected. In the
Diskometer window (in Studio’s Capture mode),
click the left tab to open the fly-out panel of analog
video settings. Select Composite or S-Video as
needed.
If the correct item is already selected, select the
other one, then toggle back to the correct one after a
few seconds. This can help reset Capture mode to
properly detect the input signal.
3. If you are capturing from an analog source, check
your cabling. The cabling should match the
Composite or S-Video setting you selected above. If
possible, try a different cable, tape and VCR to see
if the problem can be traced to one of those
components.
4. Make sure the player heads are clean, and that the
tape is in good condition. Make sure all physical
connections are secure.
5. If you are capturing from an analog source, you
will need to press the play button on the source
deck before capturing – there are no on-screen
controls. If your player is not playing when you
click the Capture button, you will get a Capture
Error.

296 Pinnacle Studio 9
If you continue to get a Capture Error after trying the
above steps, please test your setup with the AMCAP
capture application. AMCAP is a generic application
used to test device compatibility. If you can’t capture
with AMCAP, your capture card probably doesn’t have
the right driver for your version of Windows.
To use AMCAP:
1. Click Start ¾ Programs ¾ Studio 9 ¾ Tools ¾ Am
Capture.
2. In the AMCAP window, select your capture device
on the Devices menu.
3. Clicking the Options ¾ Preview menu command
should show video in the AMCAP window if the
cabling is correct and the source (camcorder, VCR,
etc.) is turned on. To capture, click on the Capture
menu and select Start Capture. There may be some
selections for setting up your capture card.
Note: AMCAP will not work with capture devices that
have hardware MPEG encoders (e.g., MovieBox USB,
PCTV Deluxe, MP20, and the TDK Indi device).
In the unlikely event that you cannot capture in Studio
with your capture card even after all troubleshooting
steps have been tried, you can work around the
problem by capturing outside of Studio then importing
the captured video into Studio for editing and output.

Appendix C: Troubleshooting 297
Studio hangs when rendering
Answer ID 6386
With this type of problem, Studio “gets stuck” during
rendering (preparing your video for output in Make
Movie mode). To identify the solution in a particular
case, try the troubleshooting steps for whichever of the
following failure modes best matches your situation:
• Case 1: Rendering stops immediately after it starts.
• Case 2: Rendering stops randomly in a project. It
typically does not stop in the same spot if rendering
is attempted multiple times.
• Case 3: Render stops at the same spot in a project no
matter how many times rendering is attempted. This
failure mode has more than one possible cause.
Case 1: Rendering stops immediately
If the hang occurs immediately upon clicking the
Create button, there is some configuration problem on
your system. Try rendering the supplied demo video. If
this fails, the problem is confirmed as a system issue,
since we have not been able to reproduce a render
problem with the demo file during our in-house testing.
Possible solutions:
• Uninstall and reinstall Studio.
• Uninstall other software that might conflict with
Studio (other video editing software, other video
codecs, etc.).
• Make sure that you have installed any available
service packs for the version of Windows you are
running.
298 Pinnacle Studio 9
• Reinstall Windows over itself (that is, without
uninstalling first). In Windows XP, this procedure is
called Repair.
Case 2: Rendering stops randomly
If the render hangs at random points even within the
same project, the failures may be due to background
tasks, power management or a thermal problem in the
computer.
Possible solutions:
• Check your hard drive for errors and defragment it.
• End any background tasks, such as virus checkers,
drive indexers and fax modems.
• Turn off any power management.
• Install cooling fans in the computer case.
Case 3: Render always stops at the same point
If rendering always hangs at the same spot in a
particular project, see if other projects have the same
problem. If not, the problem project could be corrupt; if
they do, try to isolate a common factor.
Finding a solution to this type of failure is much easier
if you can identify a particular item in the project that is
causing the rendering to stop. Removing the item or
trimming it may allow the rendering to complete,
though in some cases the failure may simply turn up
elsewhere in the project.
Some possible solutions and workarounds:
1. Look at the clips in the project for corrupt video
frames. These may show up as gray, black, blocky
or distorted frames. If you find any, trim the clip to
exclude the offending frames. You could also try
recapturing the footage.

Appendix C: Troubleshooting 299
2. Defragment your hard drive.
3. Ensure that you have ample storage – preferably
tens of gigabytes – on the hard drive you use for
video. Rendering may use large amounts of storage,
and can be disrupted if space is insufficient.
4. If you have a separate capture drive, make sure to
move the auxiliary files folder to that drive.
5. Copy the section where the render stops and put it
into a new project. Include 15 to 30 seconds on
either side of the error. Try rendering this excerpt to
an AVI file and, if successful, use the file to replace
the offending section of the original project.
6. Render the entire project to an AVI file, then create
a new project and import the file. If you are making
a disc, you will need to add your chapter marks and
menus to the new project. This workaround works
best with NTFS partitions to avoid the 4 GB file
limit in FAT32 partitions (allowing only 18 minutes
of DV video).
CD or DVD burner is not detected
Answer ID 1593
If Studio cannot locate your disc burner when you want
to create your disc project, you should get the error
message, “No disc writer device found!” It may be
either Studio or Windows that is failing to recognize
the drive. If it occurs following the installation of a
patch to Studio, it is likely that the patching process did
not work correctly; in that case, uninstall, reinstall and
update Studio as described in item 2 below.

300 Pinnacle Studio 9
Some possible solutions and workarounds:
1. Verify that the burner is listed in Device Manager.
If it is not, review your burner’s documentation or
contact the manufacturer to get the device installed
properly.
2. Uninstall and reinstall Studio from your original
CD, then update it with the most recent patch. See
page 292 for instructions.
3. Check the disc burner manufacturer's web-site for a
firmware update. You can find the firmware
version for your burner on its properties dialog in
Device Manager.
4. In Device Manager again, check the hard drive
controller to see if it is a VIA or an Intel controller.
VIA’s web-site is:
www.viaarena.com/?PageID=2
Intel’s site is:
appsr.intel.com/scripts-df/filter_results.asp?
strOSs=19&strTypes=DRV&ProductID=182&
OSFullName=Windows*+2000&submit=Go%21
5. If you have other disc burning software, such as
Nero, Adaptec or Roxio Easy CD Creator, try
upgrading that software to the latest version. If
Studio still can’t detect the drive, uninstall the other
disc burning software and try again.
Studio hangs on launch or doesn’t launch
Answer ID 1596
Problems on launch can manifest in various ways.
Studio may give an error message when launching, or it
may freeze in mid-launch, or it may “hang” – fail to
Appendix C: Troubleshooting 301
return control to you – after what had seemed an
uneventful launch.
In all such cases, try any or all the following:
1. Restart the computer. After the reboot, double-click
the Studio icon.
2. Wait a few minutes to confirm that the application
is really hung. Even when you suspect Studio has
failed to launch, wait a few minutes more just in
case. On some computers, the launch process may
take longer to complete than you anticipate.
3. Uninstall and reinstall Studio. (See page 292 for
instructions.)
4. Download and reinstall the driver for your sound
card. Remember that the sound card must support
DirectX.
5. Remove the sound card from the system. Some
older sound cards may not work well with newer
versions of Windows. This can be verified by
shutting down the computer, removing the sound
card and restarting. If Studio now launches, you
probably need to replace the sound card (assuming
you have updated to the latest drivers as suggested
in the previous step).
6. Download and reinstall the software for the
graphics card. Remember that the card must
support DirectX.

302 Pinnacle Studio 9
HollywoodFX transitions are still
watermarked after upgrading
Answer ID 1804
When upgrading to PRO, make sure you have
completed the installation and obtained a keycode. The
installer will prompt you to insert a keycode.
To get a keycode, go to www.hollywoodfx.com and log
into your account. In the lobby, click on Register a
Product.
If you have already registered PRO, you can simply
click on Get New Keycode.
“Cannot initialize the DV capture device”
error appears in Capture mode
Answer ID 2716
The error message reads in full: “Pinnacle Studio
cannot initialize the DV capture device. Please ensure
that the camcorder is connected and the power is on.”
This error message occurs only when you are capturing
from a digital source (DV, MMV or Digital8
camcorder) plugged into the DV port (also called a
“FireWire” or “1394” port).
If you are capturing from an analog source:
• You need to correct your capture source setting. In
the Capture devices box on the Capture source
options dialog, notice that Video and Audio are set to
“DV Camcorder – Pinnacle 1394”, the default
Appendix C: Troubleshooting 303
setting. To capture from an analog source, select the
applicable devices in both lists.
• Many analog capture cards lack an audio in jack, so
you must both set the audio capture device in Studio
to your sound card's line in, and cable the analog
audio source (VCR or analog camcorder) to the line
in jack on the sound card.
Possible solutions if you are capturing from a digital
source:
1. Verify that the camera is in VTR/VCR mode. For
capturing, the device should be running on AC
power, not batteries.
2. Disconnect and reconnect the 1394 cable. Make
sure you are not mistakenly using a USB cable
connected to a USB port. Studio will not capture
from a DV or Digital8 camcorder unless it is
connected via the DV port.
3. Turn the camcorder off then back on. The mouse
pointer should briefly turn to an hourglass when
you turn on the camcorder as the device is detected
and Windows loads the driver. By default,
Windows XP will display a message when the
power to the camcorder is cycled.
4. Shut down the computer and move the 1394
capture card into another PCI slot. If you don't have
an available slot, swap the capture card with a card
in a different slot. Restart the computer.
The Windows hardware wizard should detect the
“new” hardware automatically. Follow any on-
screen instructions to finish loading the driver if
any appear. Check Device Manager to see if the
driver loaded properly.
5. Verify that the 1394 port and the DV/D8 camcorder
drivers are both loaded properly in Device Manager.
See “Checking the drivers” immediately below.

304 Pinnacle Studio 9
Checking the drivers
The procedure for checking your 1394 port and digital
camcorder drivers is somewhat different depending on
which version of Windows you are using.
To check the drivers under Windows 98SE and
Windows Millennium:
1. Open the Windows Device Manager. (See page 286
for instructions on accessing Device Manager.)
2. You should not have any drivers with the yellow
exclamation mark error flag on them. If you do,
the driver that is flagged is not loaded properly and
will not work correctly.
3. The driver for the capture card is an OHCI-
compliant IEEE-1394 host controller driver and is
listed under the heading 1394 Bus Controller.
4. The driver for the camcorder is listed under
Imaging Devices. When loaded properly, it is called
“Microsoft DV camera and VCR” in Windows
98SE, and “brand-name DV camcorder” in
Windows Millennium, where brand-name
represents “JVC”, “Sony”, “Canon”, etc.
5. Select the drivers in turn and click first the Remove
button then the Refresh button.
The driver should reload properly. Under Windows
98SE it will ask for the Windows CD. Follow the
on-screen instructions until the reload is complete.
Under Windows Millennium, Device Manager
should be able to find the driver on your hard drive
and not ask you to insert a CD, but if it does, follow
the on-screen instructions.
Appendix C: Troubleshooting 305
To check the drivers under Windows 2000 and
Windows XP:
1. Open the Windows Device Manager. (See page 286
for instructions on accessing Device Manager.)
2. You should not have any drivers with the yellow
exclamation mark error flag on them. If you do,
the driver that is flagged is not loaded properly and
will not work correctly.
3. The driver for the card is an OHCI-compliant
IEEE-1394 host controller driver and is listed under
the heading IEEE 1394 Bus host controllers.
4. The driver for the camcorder, when loaded properly,
is listed under the heading Imaging Devices.
Click the Uninstall button in the Device
Manager toolbar, then the Scan for hardware
changes button .
5. The driver should reload properly. It should not
need to ask for the Windows CD, but if it does,
follow the on-screen instructions.
If no error flags are displayed...
Both drivers may be present without any error flags.
We recommend that you then uninstall and reload both
drivers as follows:
1. Uninstall the DV camcorder driver.
2. Disconnect your DV or Digital8 camcorder from
the 1394 port.
3. Uninstall the OHCI-compliant 1394 host controller
driver.
4. Reinstall the host controller driver.
5. Reconnect your DV or Digital8 camcorder.
Your camcorder should be automatically redetected
and the driver reloaded.

306 Pinnacle Studio 9
Repairing your Windows installation
If you have Windows 2000 or Windows XP and
continue to get the “cannot initialize” message after
trying all the steps above, it may be that the 1394
drivers built into Windows are corrupt. We recommend
that you reinstall Windows on top of itself (i.e. without
uninstalling first). For this you will need to run the
Windows installer from your original Windows CD. In
XP the procedure is called Repair. We recommend that
you contact your computer manufacturer for help if
required.
INSTALLATION PROBLEMS
I am getting an error installing Studio from CD
Solution 1: Restart the computer. After the computer
has finished restarting, try to install Studio again.
Solution 2: Inspect the CD for scratches, fingerprints
or smudges. Clean off the CD with a soft cloth if
necessary. Install Studio again.
Solution 3: End background tasks. Here’s how:
Windows 98SE and ME:
Before installing the Pinnacle software, hold down the
Ctrl and Alt keys on the keyboard, then hit the Delete
key. This will open the Close Program window. Click
on the individual applications listed in the Close
Program window and click the End Task button. Do
this for all applications listed in Close Programs except
Explorer and SysTray. Some of these applications may
Appendix C: Troubleshooting 307
control other devices in your system: if a device no
longer works you can get it to work again by rebooting
your system.
To keep applications from loading when your PC is
started (or rebooted), use the following steps.
1. Click on Start ¾ Run
2. In the Open box, type: msconfig
3. Click OK.
In the System Configuration Utility window, click on
the far right tab called Startup. Remove all checks from
the boxes except for System Tray (SysTray.exe).
Windows 2000 and XP
Use the End Process button in the Windows Task
Manager, or employ one of the software utilities
available for Windows 2000 and XP that can assist
with this procedure.
Hardware not found during installation.
Possible cause: The PCI slot in which the hardware is
installed was not assigned an IRQ in the BIOS or it
may be sharing an IRQ with another device. It may also
be that the card is not seated completely into the PCI
slot.
Solution: Try reseating the card in its original slot or in
a different one. In most cases, you may be able to get a
different IRQ assignment by simply shutting off the
computer and installing the DV card or other hardware
in another slot.

308 Pinnacle Studio 9
OPERATION PROBLEMS
Images are missing from the recording, or the
video is jerky.
Possible cause: Your hard drive’s transfer speed is too
low.
Solution: When working with some UDMA hard
drives, the playback may “jump” when an AVI file is
played back at higher data rates. This can be traced
back to the fact that the hard drive carries out a
recalibration while reading the file, thus interrupting
playback.
This problem is not caused by Studio, but is the result
of the manner in which the hard drive operates and
interacts with other system components.
There are several solutions you can use to increase the
speed of your hard drive:
1. End task on background applications. Before
opening your Studio product, hold down the Ctrl
and Alt keys on the keyboard, then hit the Delete
key. This will open the Close Program window.
Click on the individual applications listed in the
Close Program window and select End Task. Do
this for all applications listed in the Close Program
window except Explorer and SysTray.
2. Click on Start ¾ Programs ¾ Accessories ¾
System Tools ¾ ScanDisk.
3. Make sure Thorough is checked, and click Start
(this may take a while).

Appendix C: Troubleshooting 309
4. After ScanDisk is done, click on Start ¾ Programs
¾ Accessories ¾ System Tools ¾ Disk
Defragmenter (this may take a while).
5. Turn off energy-saving features (right-click on your
Desktop and select Properties ¾ Screensaver
(under Energy… Settings). Make sure everything
under Settings for… power schemes is set to Never.
6. Go to Start ¾ Settings ¾ Control Panel ¾ System.
Click on the Performance tab, then File System,
then the Troubleshooting tab.
7. Click to the left of the Disable write-behind
caching for all drives option to select it and click
OK.
8. Under the hard-disk tab, set the Read-ahead
optimization option to None.
In general, this will result in an increase in the data
transfer rate. Caution: In some hard drives, it can
result in a decrease in the write rate!
Note: Video-editing programs do not multitask very
well. Do not use any other program while making
movie (videotape or CD) or capturing. You can
multitask while editing.
There is no video in the Player preview.
Solution 1: Change video resolution and/or color depth
on the Display Properties dialog:
1. Right-click your Desktop and select Properties,
then click the Settings tab on the dialog.
2. Under Colors, try each of 16-bit, 24-bit and 32-bit.
3. Under Screen resolution, again try each available
setting from 800x600 upwards.

310 Pinnacle Studio 9
Solution 2: You may be using either a generic
Windows graphics card driver or an older version of
your graphics card. Your graphics card driver may also
be corrupt. Please contact your graphics card vendor to
ensure you have properly installed the most current
driver. Reinstall your graphics driver with the help of
your video card manufacturer’s technical support, or
download and install the latest driver from the
manufacturer’s web-site.
Solution 3: You may not have DirectX installed
properly. Go to Start ¾ Programs ¾ Studio ¾ Help ¾
DirectX Diagnostic Tool. On the Display tab, click the
Test button next to Direct Draw. After running that test,
run the Direct 3D test. If your card fails either of these
tests, please contact your graphics card vendor for
support.
Note: Please visit our web-site for additional help with
troubleshooting DirectX issues, include specific
solutions for particular capture hardware.
The playback to the computer monitor is jerky –
audio or video frames are dropped.
Solution: If you are using preview quality, remember
that it has no effect on the quality of the final tape.
When you make tape, Studio will go back to the DV
source and record full-quality video from it.
My DV device control is unavailable or
unreliable under Windows 98.
Possible cause: You are not using Windows 98 Second
Edition as an operating system, and the Second Edition
device drivers are more robust.
Appendix C: Troubleshooting 311
My batch capture is inaccurate (DV tapes only).
Possible cause: You do not have continuous, uninter-
rupted timecode on your source tapes. SmartCapture
needs continuous timecode to accurately locate and
recapture your clips.
Solution: Make sure your source tapes have continuous,
uninterrupted timecode (see “Continuous timecode” on
page 28); or,
Make sure you are cueing to the segment of tape that
holds the clip you are currently attempting to recapture
(see page 233).
When I output to tape the video and/or audio
stutters or is absent.
Background: There are many possible causes for this
kind of problem. To understand why, consider that the
data coming from and flowing to your camera is
vulnerable to interference at any stage along its journey.
Digital data travels from the camcorder through the
IEEE-1394 cable, into the 1394 card and onto the
system main board. It now crosses to the hard drive
cable and up to the hard drive, where it is finally
recorded. Outflowing data makes the same trip in
reverse. Any process that disrupts or delays the flow of
data at any point is a potential source of video output
problems.
Solution 1: Make sure that you are losing no frames
during video capture. Dropped frames during capture
may result in problems during output as well. Capture
problems have a different set of troubleshooting
options. See the Pinnacle knowledge base on our web
site at:
www.pinnaclesys.com/support/studio9
312 Pinnacle Studio 9
Solution 2: Save your current project, close all your
applications, and restart the system. When Windows
comes back, open your project in Studio without
running any other programs, and try to output to tape.
If the issues persist, try the next solution.
Solution 3: Tune your system:
• Remove wallpaper from the Desktop.
• Remove temporary Internet files from the system
and empty the Recycle Bin.
• Check the system for viruses.
• Turn off any screen savers, and disable any power-
saving features of the operating system or the BIOS.
Most power-saving features can be accessed via the
Power Options icon in Control Panel.
• Some systems have further power-saving features
that can only be disabled in the BIOS. Please refer to
your system’s documentation for more information.
• Some USB devices – scanners, webcams etc. – can
interfere with other types of software including
video-editing applications like Studio. As a
troubleshooting measure, these devices should be
temporarily removed.
Solution 4: Improve hard drive efficiency.
• Use a separate capture hard drive: When working
with digital video, the use of a second, separate hard-
drive for captured video data is recommended. This
eliminates the problem of Windows competing with
Studio for the capture drive – for instance, when it
updates the system swap file.
• Defragment the hard drive: Hard drives become
“fragmented” with use, meaning that files are stored

Appendix C: Troubleshooting 313
inefficiently in small chunks rather than as a single
block. This can slow file access significantly, so it is
important to defragment the hard drive on a regular
basis. The Disk Defragmenter utility can be found in
the Accessories ¾ System Tools folder on the Start
menu of most Windows installations.
• Check hard drive data rates: The Pinnacle video-
editing software has a built-in test that measures the
speed at which the capture drive transfers data. If the
drive is not running at optimum performance levels,
some video-editing operations may fail.
To run the hard drive data transfer rate test:
• Click on Setup ¾ Capture Source. In the lower right
of the setup box, click the Test Data Rate button.
The hard drive test will run. On most systems, data
rates will be between 25,000 and 35,000 Kbytes/sec.
Note: If you make changes to the system that increase
the speed of the capture hard drive – such as enabling
DMA – you will need to run the hard drive data rate
test again so that the software will recognize the
change.
Solution 5: Use our PPE utility.
Use Pinnacle’s PCI Performance Enhancer utility,
which is installed on the Tools submenu under Studio’s
entry on your Start ¾ Programs menu.
Solution 6: Update the hard drive controller driver.
In Device Manager, check the hard drive controller to
see if it is a Via or Intel controller. If it is, get a driver
314 Pinnacle Studio 9
update from the vendor’s web-site (as usual, enter the
URL as continuous text on a single line):
VIA:
www.viaarena.com/?PageID=2
Intel:
appsr.intel.com/scripts-df/filter_results.asp?
strOSs=19&strTypes=DRV&ProductID=182&
OSFullName=Windows*+2000&submit=Go%21

Appendix D: Videography tips 315
APPENDIX D:
Videography tips
To shoot good video, then create from it an interesting,
exciting or informative movie, is something anyone
with a little basic knowledge can achieve.
Starting from a rough script or shooting plan, the first
step is to shoot your raw video. Even at that stage, you
should be looking ahead to the editing phase by making
sure you will have a good set of shots to work from.
Editing a movie involves juggling all your fragments of
footage into some kind of harmonious whole. It means
deciding on the particular techniques, transitions and
effects that will best express your intent.
An important part of editing is the creation of a
soundtrack. The right sound – dialog, music,
commentary or effect – can work with the visuals to
create a whole greater than the sum of its parts.
Studio has the tools you need to create professional-
quality home video. The rest is up you – the
videographer.

316 Pinnacle Studio 9
Creating a shooting plan
It is not always necessary to have a shooting plan, but it
can be very helpful for large video projects. The plan
can be as simple or as complex as you like. A simple
list of planned scenes might be enough, or you might
also want to include some notes regarding detailed
camera directions or prepared dialog. The really
ambitious can go all the way to a full-fledged script in
which every single camera angle is described in detail
along with notes about duration, lighting and props.
Draft of a simple shooting plan:
Title: “Jack on the kart track”
No. Camera angle Text / Audio Duration Date
1 Jack's face with helmet,
camera zooms out
“Jack is driving his
first race...”.
Noise of engines in
the background.
11 sec
Tue.
06/22
2 On the starting line,
driver's perspective; low
camera position.
Music is played in
the hall, noise of
engines.
8 sec
Tue.
06/22
3 Man with a starting flag is
accompanied into the
scene to the start
position. Camera stays,
man goes out of the
scene after start.
“Let's go...”.
Carry out the start,
add starting signal. 12 sec
Tue.
06/22
4 Jack on the start position
from the front, camera
follows, shows Jack up to
the bend, now from
behind.
Music from the hall
no longer audible,
fade up same music
from CD over noise
of engines.
9 sec
Tue.
06/22
5 ...

Appendix D: Videography tips 317
Editing
Using varying perspectives
An important event should always be shot from varying
perspectives and camera positions. Later, during
editing, you can use the best camera angles alone or in
combination. Make a conscious effort to tape events
from more than one camera angle (first the clown in the
circus ring, but then also the laughing spectator from
the clown’s point of view). Interesting events can also
take place behind the protagonists or the protagonists
may be seen in a reverse angle. This can be helpful
later when trying to establish a sense of balance in the
movie.
Close-ups
Don’t be stingy with close-ups of important things or
persons. Close-ups usually look better and more
interesting than long shots do on a television screen,
and they work well in post-production effects.
Long shots / Semi-long shots
Long shots provide the viewer with an overview and
establish the scene of the action. However, these shots
can also be used to tighten longer scenes. When you cut
from a close-up to a long shot, the viewer no longer
sees the details, and it is thus easier to make a
chronological jump. Showing a spectator in a semi-
long shot can also provide visual relief from the main
action, and the opportunity of a transition away from
the action if desired.
Complete actions
Always shoot complete actions with a beginning and an
end. This makes editing easier.
318 Pinnacle Studio 9
Transitions
Cinematic timing requires some practice. It is not
always possible to film long events in their entirety,
and in movies they often have to be represented in
severely abbreviated form. Nonetheless, the plot should
remain logical and cuts should almost never call
attention to themselves.
This is where the transition from one scene to the next
is important. Even if the action in neighboring scenes is
separated in time or space, your editorial choices can
make the juxtaposition so smooth that the viewer
bridges the gap without conscious attention.
The secret to a successful transition is establishing an
easily-felt connection between the two scenes. In a
plot-related transition, the connection is that of
successive events in an unfolding story. For example, a
shot of a new car might be used to introduce a
documentary about its design and production.
A neutral transition doesn’t in itself imply a story
development or a change of time or place, but can be
used to smoothly connect different excerpts from a
scene. For example, cutting away to an interested
audience member during a podium discussion lets you
then cut back unobtrusively to a later point in the same
discussion, omitting the part between.
External transitions show something apart from the
action. For example, during a shot inside the marriage
registry, you might cut to the exterior of the marriage
registry, where a surprise is already being set up.
Transitions should underscore the message of the film
and must always fit the respective situation, in order to
avoid confusing viewers or distracting from the actual
storyline.
Appendix D: Videography tips 319
Logical sequence of action
The shots strung together during editing must interact
appropriately in relation to the action. Viewers will be
unable to follow the events unless the storyline is
logical. Capture viewer interest from the very
beginning with a fast-paced or spectacular start and
maintain that interest until the very end. Viewers can
lose interest or become disoriented if scenes are strung
together in a manner that is illogical or chronologically
false, or if scenes are too hectic or short (under three
seconds). There should be some continuity of motif
from one scene to the next.
Bridging the gaps
Make an effort to bridge the gaps from one filming
location to another. You can use close-ups, for example,
to bridge chronological jumps, zooming in on the face,
then back out after a few seconds onto a different scene.
Maintain continuity
Continuity – consistency of detail from one scene to the
next – is vital in providing a satisfying viewing
experience. Sunny weather does not fit with spectators
who opened their umbrellas.
Tempo of cuts
The tempo at which a film cuts from one scene to the
next often influences the message and mood of the film.
The absence of an expected shot and the duration of a
shot are both ways of manipulating the message of the
film.
Avoid visual disjunctions
Stringing together similar shots in succession may
result in visual disjunctions. A person may be in the left

320 Pinnacle Studio 9
half of the frame one moment and in the right half of
the frame the next, or may appear first with and then
without eyeglasses.
Do not string together pan shots
Pan shots should not be strung together unless they
have the same direction and tempo.
Rules of thumb for video editing
Here are some guidelines that may be helpful when you
come to edit your movie. Of course, there are no hard
and fast rules, especially if your work is humorous or
experimental.
• Do not string together scenes in which the camera is
moving. Pans, zooms, and other moving shots should
always be separated by static shots.
• Shots that follow one another should be from
different camera positions. The camera angle should
vary by at least 45 degrees.
• Sequences of faces should always be shot alternately
from varying angles of view.
• Change perspectives when shooting buildings. When
you have similar shots of the same type and size, the
picture diagonal should alternate between front left
to rear right and vice versa.
• Make cuts when persons are in motion. The viewer
will be distracted by the ongoing motion and the cut
will go almost without notice. In particular, you can
cut to a long shot from the middle of the motion.
• Make harmonious cuts; avoid visual disjunction.
Appendix D: Videography tips 321
• The less motion there is in a shot, the shorter it
should be. Shots with fast movements can be longer.
• Long shots have more content, so they should also
be shown longer.
Ordering your video sequences in a deliberate manner
not only permits you to produce certain effects, but
even enables you to convey messages that cannot or
should not be shown in pictures. There are basically six
methods of conveying messages through cuts:
Associative cuts
Shots are strung together in a certain order to trigger
associations in the mind of the viewer, but the actual
message is not shown. Example: A man bets on a horse
race and, in very next scene, we see him shopping for
an expensive new car at a car dealership.
Parallel cuts
Two actions are shown in parallel. The film jumps back
and forth between the two actions; making the shots
shorter and shorter until the end. This is a way of
building suspense until it peaks. Example: Two
different cars drive from different directions at high
speed toward the same intersection.
Contrast cuts
The film purposely cuts unexpectedly from one shot to
another, very different shot, in order to point up the
contrast to the viewer. Example: A tourist lying on the
beach; the next shot shows starving children.
Substitutionary cut
Events that cannot or should not be shown are replaced
by other events (a child is born, but instead of
childbirth, the blossoming of a flower bud is shown).

322 Pinnacle Studio 9
Cause and effect cuts
Shots are related by virtue of cause and effect: without
the first shot, the second would be incomprehensible.
Example: A man fights with his wife and, in the very
next shot, winds up sleeping under a bridge.
Formal cuts
Shots that vary in content can be strung together if they
have something in common – the same shapes, colors,
or motions, for example. Examples: A crystal ball and
the earth; a yellow raincoat and yellow flowers; a
falling skydiver and a falling feather.
Soundtrack production
Soundtrack production is an art, but it is an art one can
learn. Of course, it is no easy task to create a superb
narration, but short, informative comments are often
very helpful for the viewer. Whatever narration there is
should sound natural, expressive and spontaneous, not
wooden or stiff.
Keep comments brief
A general rule applicable to all commentary is that less
is more. Pictures should speak for themselves, and
things that are evident to viewers from the pictures
require no comment.
Preserve original sounds
Spoken commentary should be mixed with both the
original sounds and the music in such a way that the
original sounds can still be heard. Natural sound is part

Appendix D: Videography tips 323
of your video footage and should not be cut away
altogether if at all possible, because video without
natural sound can easily seem sterile and lacking in
authenticity. Frequently, however, the recording
equipment captures noises from aircraft and cars that
do not appear in the scene later. Sounds such as these,
or loud wind noises, which can be distracting or
annoying, should be masked, filtered or replaced with
appropriate narration or music.
Select appropriate music
Appropriate music adds a professional finishing touch
to your movie and can do a lot to reinforce the message
of a video. The music selected, however, should always
be appropriate to the message of the film. This is
sometimes a time-consuming matter and a challenge,
but greatly appreciated by the viewer.
Title
The title should be informative, describe the contents of
the movie, and arouse interest. With the Title Editor
there are no limits to how creative you can be. As a rule,
you can let your fancy run free when designing a title
for your video.
Use a short, clear title
Titles should be short and in a large, legible font.
Title colors
The following combinations of background and text are
easy to read: white with red, yellow with black, and
white with green. Exercise caution with very white
324 Pinnacle Studio 9
titles on a very black background. Some video systems
are unable to handle contrast ratios in excess of 1:40
and are unable to reproduce such titles in detail.
Time on screen
As a rule of thumb, a title should be displayed long
enough to be read twice. Allow about three seconds for
a title with ten letters. Allow an additional second of
on-screen time for every five additional letters.
“Found” titles
Besides postproduction titles, natural titles like
directional signs, street signs or title pages of local
newspapers also create interesting possibilities.

Appendix E: Glossary 325
APPENDIX E:
Glossary
Multimedia terminology contains computer and video
terminology. The most important terms are defined
below. Cross-references are indicated by .
ActiveMovie: Software interface by Microsoft for the
control of multimedia devices under Windows.
DirectShow, DirectMedia
ADPCM: Acronym for Adaptive Delta Pulse Code
Modulation, a method of storing audio information in a
digital format. This is the audio encoding and
compression method used in CD-I and CD-ROM
production.
Address: All available saving positions in a computer
are numbered (addressed). By means of these addresses
each saving position can be occupied. Some addresses
are reserved for the exclusive use of particular
hardware components. If two components are using the
same address, this is called an “address conflict”.
Aliasing: An inaccurate display of an image due to the
limitations of the output device. Typically, aliasing
appears in the form of jagged edges along curves and
angled shapes.
Anti-aliasing: A method of smoothing out jagged
edges in bitmap images. This is usually accomplished
326 Pinnacle Studio 9
by shading the edges with pixels intermediate in color
between the edge and the background, making the
transition less apparent. Another method of anti-
aliasing involves using higher resolution output devices.
Aspect ratio: The ratio of width to height in an image
or graphic. Keeping the aspect ratio fixed means that
any change to one value is immediately reflected in the
other.
AVI: Audio Video Interleaved, a standard format for
digital video (and Video for Windows).
Batch capture: An automated process that uses an
edit decision list to locate and recapture specific
clips from a videotape, usually at a higher data rate
than the clip was originally captured.
BIOS: Acronym for Basic Input Output System, which
refers to basic input and output commands saved in a
ROM, PROM or EPROM. The essential task of
the BIOS is the control of input and output. When the
system is started, the ROM-BIOS carries out some tests.
Parallel port, IRQ, I/O
Bit: Abbreviation of “BInary digiT”, the smallest
element of a computer’s memory. Among other things,
bits are used to store the color values of pixels in an
image. The more bits used for each pixel, the
greater the number of available colors. For example:
1-bit: each pixel is either black or white.
4-bit: allows 16 colors or gray shades.
8-bit: allows 256 colors or gray shades.
16-bit: allows 65,536 colors.
24-bit: allows about 16.7 million colors.
Appendix E: Glossary 327
Bitmap: An image format made up of a collection of
dots or “pixels” arranged in rows. Pixel
Blacking: The process of preparing a videotape for
insert editing by recording video black and continuous
control track on the entire tape. If the recording deck
supports timecode, continuous timecode will be
recorded simultaneously (also called “striping”).
Brightness: Also “luminance”. Indicates the brightness
of video.
Byte: One byte corresponds to eight bits. With one
byte, exactly one alphanumeric character can be
displayed (i.e. a letter, number).
CD-ROM: Mass storage media for digital data, such as
digital video. CD-ROMs can be read from but not
written (recorded) onto: ROM is an acronym for
Read-Only Memory.
Channel: Classifications of information within a data
file to isolate a particular aspect of the file. For
example, color images use different channels to
classify the color components in the image. Stereo
audio files use channels to identify the sounds intended
for the left and right speakers. Video files use
combinations of the channels used for image and audio
files.
Clip: In Studio, any media type that goes on the Movie
Window Storyboard or Timeline, including video
images, trimmed video scenes, images, audio files and
disc menus.
Clipboard: A temporary storage area shared by all
Windows programs, used to hold data during cut, copy,
and paste operations. Any new data you place onto the
clipboard immediately replaces the existing data.
328 Pinnacle Studio 9
Closed GOP: GOP
Codec: Contraction of compressor/decompressor – an
algorithm that compresses (packs) and decompresses
(unpacks) image data. Codecs can be implemented in
either software or hardware.
Color depth: Number of bits delivering the color
information for each pixel. A 1-bit color depth allows
21=2 colors, an 8-bit depth allows 28=256 colors, and a
24-bit depth allows 224=16,777,216 colors.
Color model: A way to mathematically describe and
define colors and the way they relate to each other.
Each color model has its own strengths. The two most
common color models are RGB and YUV.
Color saturation: Intensity of a color.
Complementary color: Complementary colors are
opposite in value to primary colors. If you were to
combine a color with its complement, the result would
be white. For example, the complementary colors of
red, green and blue are cyan, magenta and yellow
respectively.
COM Port: A serial port located on the back of your
computer for attaching a modem, plotter, printer or
mouse to the system.
Composite video: Composite video encodes luminance
and chrominance information into one signal. VHS
and 8mm are formats that record and play back
composite video.
Compression: A method for making files smaller in
size. There are two types of compression: lossless and
lossy. Files compressed with a lossless scheme can be
restored unchanged from their original state. Lossy
schemes discard data during compression, so some
Appendix E: Glossary 329
image quality is sacrificed. The loss of quality may be
negligible or severe depending on the amount of
compression.
Cropping: Choosing the area of an image to be
displayed.
Data rate: The quantity of data transmitted per unit
time; for example, the number of bytes read from or
written to a hard drive per second, or the amount of
video data processed per second.
Data transfer rate: The measurement of the speed at
which information passes between the storage device
(e.g. CD-ROM or hard drive) and the display device
(e.g. monitor or MCI device). Depending on the
devices used, some transfer rates may offer better
performance than others.
DCT: Discrete Cosine Transformation – part of
JPEG image data compression and related
algorithms. The brightness and color information is
saved as a frequency coefficient.
DirectShow: System extension by Microsoft for
multimedia applications under Windows.
ActiveMovie
DirectMedia: System extension by Microsoft for
multimedia applications under Windows.
ActiveMovie
DirectX: A bundle of several system extensions
developed by Microsoft for Windows 95 and its
successors to make possible video and game
acceleration.
Dissolve: A transitional effect in which the video is
faded from one scene to the next.
330 Pinnacle Studio 9
Dithering: Increasing the number of apparent colors in
an image by the application of color patterns.
Decibel (dB): A unit of measurement of the loudness
of sound. An increase of 3 dB doubles the loudness.
Digital8: Digital videotape format that records DV-
coded audio and video data on Hi8 tapes. Currently
sold only by Sony, Digital8 camcorders and VCRs can
play both Hi8 and 8mm cassettes.
Digital video: Digital video stores information bit
by bit in a file (in contrast to analog storage media).
DMA: Direct Memory Access.
Driver: A file containing information needed to
operate peripherals. The video capture driver operates a
video capture board, for example.
DV: Digital videotape format for recording digital
audio and video on ¼”-wide metal evaporated tape.
Mini-DV tapes hold up to 60 minutes of content, while
standard DV tapes can hold up to 270 minutes.
ECP: “Enhanced Compatible Port”. Enables
accelerated bi-directional data transfer via the
parallel port. EPP
Edit decision list (EDL): A list of clips and effects in a
particular order that will be recorded onto your output
tape, disc or file. Studio allows you to create and edit
your own edit decision list by adding, deleting and
reordering clips and effects in the Movie Window.
EPP: “Enhanced Parallel Port”. Enables accelerated bi-
directional data transfer via the parallel port;
recommended for Studio DV. ECP
EPROM: “Erasable Programmable Read-Only
Memory”. Memory chip that after programming retains
Appendix E: Glossary 331
its data without power supply. The memory contents
can be erased with ultraviolet light and rewritten.
Fade to/from black: A digital effect that fades up from
black at the beginning of a clip or down to black at the
end.
Field: A frame of video consists of horizontal lines
and is divided into two fields. The odd lines in the
frame are Field 1; the even-numbered lines are Field 2.
File format: The organization of information within a
computer file such as an image or word processor
document. The format of a file is usually indicated by
its “file extension” (e.g. doc, avi or wmf).
Filters: Tools that alter data to produce special effects.
FireWire: Apple Computer’s trademarked name for
the IEEE-1394 serial data protocol.
Frame: A single image in a video or animation
sequence. If using full NTSC or PAL resolution, one
frame consists of two interlaced fields. NTSC, PAL,
field, resolution
Frame rate: The frame rate defines how many frames
of a video sequence are played in one second. The
frame rate for NTSC video is 30 frames per second.
The frame rate for PAL video is 25 frames per
second.
Frame size: The maximum size for displaying image
data in a video or animation sequence. If an image
intended for the sequence is larger than the frame size,
it must be cropped or scaled to fit.
Frequency: The number of repetitions in a periodic
process (like a sound wave or an alternating voltage)
per unit of time. Usually measured in repetitions per
second, or Hertz (Hz).
332 Pinnacle Studio 9
GOP: In MPEG compression the data stream is
first divided into “Groups Of Pictures” – sections of
several frames each. Each GOP contains three types of
frames: I-Frames, P-Frames (pictures) and B-Frames.
GOP size: The GOP size defines, how many I-Frames,
B-Frames and P-Frames are included in one GOP.
For example, current GOP sizes are 9 or 12.
Hardware codec: Compression method that uses
special hardware to create and play back compressed
digital video sequences. A hardware codec may offer
better encoding speed and image quality than a codec
implemented completely in software. Codec,
Software codec
Hi8: Improved version of Video8 using S-Video
recorded on metal particle or metal evaporated tape.
Because of higher luminance resolution and wider
bandwidth, the result is sharper pictures than Video8.
HiColor: For images, this normally means a 16-bit
(5-6-5) data type that can contain up to 65,536 colors.
TGA file formats support images of this type. Other
file formats require prior conversion of a HiColor
image into TrueColor. For displays, HiColor
normally refers to 15-bit (5-5-5) display adapters that
can display up to 32,768 colors. Bit
Huffman coding: Technique used in JPEG and
other data compression methods in which seldom
occurring values receive a long code, while frequently-
occurring values receive a short code.
IDE: “Integrated Device Electronics” – a hard-drive
interface that combines all drive control electronics on
the drive itself, rather than on the adapter connecting
the drive to the expansion bus.
Appendix E: Glossary 333
IEEE-1394: Developed by Apple Computers and
introduced as FireWire, this is a serial data
transmission protocol with rates up to 400 Mbits/sec.
Sony offers a slightly modified version for transmitting
DV signals named i.LINK, providing transmission
speeds up to 100 Mbits/sec.
Image: An image is a reproduction, or picture of
something. The term is often applied to digitized
pictures, consisting of pixels, that can be shown on a
computer display and manipulated by software.
Image compression: Method of reducing the amount
of data required to store digital image and video files.
Interlaced: The screen refresh method used by
television systems. The PAL TV image consists of
two interleaved image halves ( fields) of 312½ lines
each. The NTSC TV image consists of two image
halves of 242½ lines each. The fields are displayed
alternately to produce a blended image.
Interleave: An arrangement of audio and video to
promote smoother playback and synchronization or
compression. The standard AVI format equally
spaces audio and video.
I/O: Input/Output.
IRQ: “Interrupt Request”. An “interrupt” is a
temporary break in the main processing stream of a
computer so that housekeeping or background tasks can
be performed. Interrupts can be requested by either
hardware (e.g. keyboard, mouse) or software.
JPEG: Joint Photographic Experts Group, and the
standard developed by them for compressing digital
frames based on DCT.
334 Pinnacle Studio 9
Kbyte (also KB): One Kbyte (kilobyte) contains 1024
bytes. The “K” here stands for the number 1024
(210), and not 1000 as in the metric prefix.
Key color: A color whose display is suppressed so that
a background image can show through. Most
commonly used when overlaying one video sequence
on top of another, allowing the underlying video to
display wherever the key color appears.
Key frames: In some compression methods, such as
MPEG, the video data of certain frames – the key
frames – is stored completely in the compressed file,
while any intervening frames are only partially saved.
On decompression these partial frames reconstruct their
data from the key frames.
Laser disc: Medium that stores analog video.
Information on laser discs cannot be modified.
LPT: Parallel port
Luminance: Brightness
M1V: (File extension for) an MPEG file that contains
video data only. MPA, MPEG, MPG
Mbyte (also MB): One Mbyte (megabyte) corresponds
to 1024 Kbytes – 1024 x 1024 bytes.
Mark In / Mark Out: In video editing, the mark in
and mark out times refer to the starting and ending
timecodes that identify the portions of clips to be
included in the project.
MCI: Media Control Interface. Programming interface
developed by Microsoft recording and playing back
audio and video data. It is also used to connect a
computer to an external video source such as a VCR or
laser disc.
Appendix E: Glossary 335
Modulation: The encoding of information upon an
empty carrier signal.
Motion-JPEG (M-JPEG): A Video for Windows
format, specified by Microsoft, for encoding video
sequences. JPEG compression is used to compress
each frame individually.
MPA: (File extension for) an MPEG file that contains
audio data only. M1V, MPEG, MPG
MPEG: Motion Picture Experts Group, and the
standard developed by them for the compression of
moving images. Compared to M-JPEG, it offers 75-
80% data reduction with the same visual quality.
MPG: (File extension for) an MPEG file that contains
both video and audio data. M1V, MPEG, MPA
MPV: (File extension for) an MPEG file that contains
video data only. MPA, MPEG, MPG
Non-interlaced: Describes an image refresh method in
which the complete image is generated as a single field
without skipping lines. A non-interlaced image (most
computer monitors) flickers much less than an
interlaced image (most TVs).
NTSC: National Television Standards Committee, and
the color TV standard created by them in 1953. NTSC
video has 525 lines per frame and 60 image fields per
second. It is used in North and Central America, Japan
and other countries. PAL, SECAM
PAL: “Phase Alternation Line”, a color TV standard
developed in Germany and used throughout most of
Europe. PAL video has 625 lines per frame and 50
image fields per second. NTSC, SECAM
Parallel port: Parallel port data is transmitted via an
8-bit data line. This means that eight bits (one
336 Pinnacle Studio 9
byte) can be transmitted at once. This kind of
transmission is much faster than serial transmission,
but is not appropriate for long-distance connections.
Parallel ports are often named “LPTn”, where n is a
number (e.g. “LPT1”). Serial port
Pixel: The smallest element of a monitor image. The
word is an abbreviation of “picture element”.
Port: Electrical transfer point for the transmission of
audio, video, control or other data between two devices.
Serial port, Parallel port
Primary colors: The colors that are the basis of the
RGB color model: red, green, and blue. It is possible to
create most other colors on a computer screen by
varying the blend of these primaries.
QSIF: Quarter Standard Image Format. An MPEG-1
format specifying a resolution of 176 x 144 under PAL
and 176 x 120 under NTSC. MPEG, SIF
Quantization: One part of the JPEG image data
compression strategy. Relevant details are represented
precisely, while details that are less relevant for the
human eye are represented with less precision.
Raster: The area of a video display that is covered by
sweeping the electron beam of the display in a series of
horizontal lines from upper left to lower right (from the
viewer’s perspective).
Redundancy: This trait of images is exploited by
compression algorithms. Superfluous information can
be eliminated during compression and restored without
loss during decompression.
Resolution: The number of pixels that can be
displayed on the monitor horizontally and vertically.
The higher the resolution, the more details can be
displayed. Pixel
Appendix E: Glossary 337
RGB: Red, Green and Blue: the primary colors in
additive color mixing. RGB designates the method
used in computer technology of encoding image infor-
mation in pixels, each containing some combination of
the three primaries.
ROM: Read Only Memory: Memory storage that,
having been programmed once, retains its data without
requiring electrical power. EPROM
Run Length Encoding (RLE): A technique used in
many image compression methods, including JPEG.
Repeating values are not stored separately but with a
counter to indicate how many times the value occurs in
succession – the length of the “run”.
Scaling: Adaptation of an image to a desired size.
SCSI: Small Computers System Interface. SCSI was
long preferred as the hard drive interface for some
high-performance PCs because of its high data rate. Up
to eight SCSI devices can be connected to a computer
at the same time.
SECAM: “Séquentiel Couleur à Mémoire”, a color TV
transmission system used in France and Eastern Europe.
Like PAL, SECAM video has 625 lines per frame and
50 image fields per second. NTSC, PAL
Serial port: Data transmitted via a serial port is
processed one bit at a time; that is, “serially” – one
after another. The transmission rate is much slower
than that of a parallel port, where parallel data lines
allow multiple bits to be sent simultaneously. Serial
ports are named “COMn”, where n is a number (e.g.
“COM2”). Parallel port
SIF: Standard Image Format. An MPEG-1 format
specifying a resolution of 352 x 288 under PAL and
352 x 240 under NTSC. MPEG, QSIF
338 Pinnacle Studio 9
Single frame: A single frame is part of a series or
sequence. When this series is viewed at sufficient speed,
the illusion of a “moving picture” is created.
Software codec: Compression method that can create
and play back compressed digital video sequences
without special hardware. The quality of the sequences
depends on the performance of the complete system.
Codec, Hardware codec
Still video: Still images (or “freeze-frames”) extracted
from video.
S-VHS: Improved version of VHS using S-Video and
metal particle tape to deliver higher luminance
resolution, resulting in sharper pictures than VHS.
VHS, S-Video
S-Video: With S-Video (Y/C) signals, the brightness
(luminance or “Y”) and the color (chrominance or “C”)
information are transferred separately using multiple
wires, avoiding modulating and demodulating the video
and the resulting loss of picture quality.
Timecode: Timecode identifies the position of each
frame in a video sequence with respect to a starting
point (normally the beginning of the shot). The usual
format is H:M:S:F (hours, minutes, seconds, frames),
e.g. “01:22:13:21”. Unlike a tape counter (which can be
“zeroed” or reset at any point in a tape), timecode is an
electronic signal written onto videotape, and is
permanent once it is assigned.
Transition: The visual connection between adjacent
video clips, ranging from a simple “cut” to a showy
animated effect. The common transitions like cuts,
fades, dissolves, wipes and slides are part of the visual
language of film and video. They can convey passages
of time and changes of viewpoint concisely – and often
subliminally.
Appendix E: Glossary 339
TrueColor: The name indicates an image with enough
color resolution to appear “true to life”. In practise,
TrueColor normally refers to 24-bit RGB color, which
allows about 16.7 million combinations of the red,
green and blue primary colors. Bit, HiColor
TWAIN driver: TWAIN is a standardized software
interface allowing graphics and capture programs to
communicate with devices that supply graphical data.
If the TWAIN driver is installed, the capture function
of a graphics application can be used to load images
directly from your video source into the program. The
driver supports 32-bit programs only and captures
images in 24-bit mode.
VCR: “Video cassette recorder”.
VHS: “Video Home System” – Popular video standard
for home VCRs. Half-inch tape is used to store
“composite” signals incorporating both brightness and
color information.
VISCA: Protocol used with certain devices for control-
ling external video sources from computers.
Video8: Analog video system using 8mm tape. Video8
recorders generate composite signals.
Video CD: CD-ROM standard that uses MPEG
compressed videos.
Video decoder: Converts digital information into
analog video signals.
Video encoder: Converts analog video signals into
digital information.
Video for Windows: A Microsoft Windows system
extension that can record digital video sequences to
files on a hard drive and subsequently play them back.
340 Pinnacle Studio 9
Video scan rate: Frequency with which the video
signal is scanned onto an image display. The higher the
video scan rate, the higher the image quality and the
less noticeable the flicker.
WAV: (File extension for) a popular file format for
digitized audio signals.
White balance: In an electronic camera, this is the
adjustment of the amplifiers for the three color
channels (red, green and blue) so that white areas of the
scene do not show a color cast.
Y/C: Y/C is a color signal with two components:
brightness information (Y) and color information (C).
YUV: The color model of a video signal where Y
delivers the brightness information and U and V the
color information.

Appendix F: License agreement 341
APPENDIX F:
License agreement
Pinnacle End User License Agreement
This End User License Agreement ("License") is a legal agreement
between you and Pinnacle Systems ("Pinnacle") regarding Pinnacle’s
software and the accompanying documentation (collectively, the
"Software"). CAREFULLY READ THE FOLLOWING LICENSE.
USING THIS SOFTWARE INDICATES YOUR ACCEPTANCE OF
THIS LICENSE. IF YOU DO NOT ACCEPT OR UNDERSTAND
THE TERMS OF THIS LICENSE, YOU SHOULD NOT INSTALL
THE SOFTWARE AND SHOULD PROMPTLY RETURN THIS
PRODUCT TO THE PLACE OF PURCHASE.
1. License Grant. Subject to the restrictions set forth below, this
License grants you a non-exclusive, perpetual license to (a) install the
Software on only one computer; (b) use or authorise use of the
Software on only one computer; (c) make one copy of the Software, in
machine-readable form, solely for backup purposes; provided you
include all copyright and other proprietary rights notices on the copy
and (d) transfer the Software and this License to another party if the
other party agrees to accept the terms and conditions of this License.
If you transfer the Software, you must at the same time either transfer
all copies to the same party or destroy any copies not transferred. If
you transfer possession of any copy of the Software to another party,
your License is automatically terminated. Some features of the
Software may be locked and require that you activate, either for free
or subject to payment of additional license fees, the features before
you may use them. Additionally, Pinnacle may, either for free or
subject to payment of additional license fees, grant you a license for
plug-ins to the Software produced or distributed by Pinnacle (the
"Plug-ins"). Your use of any such features and any of the Plug-ins
shall be subject to the terms of this Agreement, unless accompanied
by another license agreement, in which case the Plug-ins license
agreement shall prevail.
342 Pinnacle Studio 9
2. License Restrictions. You may not, or allow any third party to, (a)
rent, lease, sell, loan or otherwise transfer the Software or any of your
rights and obligations under this License; (b) install the Software on a
network for use by multiple users, unless each user has purchased a
license; (c) reverse-engineer, decompile or disassemble the Software
or hardware in whole or in part; (d) remove or destroy any copyright
notices or other proprietary markings of the Software or any third-
party software; (e) modify or adapt the Software, merge the Software
into another program or create derivative works based on the Software;
(f) make copies of or distribute, for profit or otherwise, the Software,
except as expressly provided above; (g) make any alteration,
modification, connection, disconnection, improvement or adjustment
of any kind to or use the Software except as explicitly contemplated in
the enclosed documentation and in this License and (h) sublicense,
transfer or assign this License or any of the rights and obligations
granted under this License, except as explicitly contemplated in this
License. Any purported transfer or assignment will be void.
3. Export Restrictions. The export and re-export of Pinnacle
software products are controlled by the United States Export
Administration Regulations and such software may not be exported or
re-exported to any country to which the United States embargoes
goods. In addition, Pinnacle software may not be distributed to
persons on the Table of Denial Orders, the Entity List, or the List of
Specially Designated Nationals. By downloading or using a Pinnacle
software product you are certifying that you are not a national of any
country to which the United States embargoes goods and that you are
not a person on the Table of Denial Orders, the Entity List, or the List
of Specially Designated Nationals.
4. Ownership. The license granted hereunder does not constitute a
transfer or sale of ownership rights in or to the Software. Except for
the license rights granted above, Pinnacle retains all rights, title and
interest in and to the Software including all intellectual property rights
therein. The Software is protected by applicable intellectual property
laws, including United States copyright laws and international treaties.
5. Third Party Proprietary Property. This Software may contain
the proprietary property of others, which has been licensed to Pinnacle.
Your use of the Software is expressly subject to your agreement not to
remove any copyright notices or other proprietary markings of the
third party software.
6. Security. You acknowledge and agree that in order to protect the
integrity of certain third party content, Pinnacle and/or its licensors
may provide for Software security related updates that will be
automatically downloaded and installed on your computer. Such
Appendix F: License agreement 343
security related updates may impair the Software (and any other
software on your computer which specifically depends on the
Software) including disabling your ability to copy and/or play
"secure" content, i.e. content protected by digital rights management.
In such an event, Pinnacle and/or its licensors shall use reasonable
efforts to post notices promptly on Pinnacle’s web site explaining the
security update and providing instructions to end-users for obtaining
new versions or further updates of the Software that restore access to
secure content and related features.
7. Updates. You acknowledge and agree that Pinnacle may
automatically check the version of the Software and/or its components
that you are using and may provide updates or fixes to the Software
that may be automatically downloaded to your computer. Updates
provided after the expiry of the Limited Warranty period set forth in
Section 9 below are not covered by any warranty, express, implied, or
statutory.
8. Term and Termination. This License shall be effective upon
installation of the Software and shall terminate upon the earlier of
(a) your failure to comply with any term of this License; (b) return,
destruction or deletion of all copies of the Software in your possession
or (c) transfer of the Software and this License to another party in
accordance with Section 1(d). Pinnacle’s rights and your obligations
shall survive termination of this License.
9. Limited Warranty. Pinnacle warrants to the original licensee that
the Software, as delivered, will perform in accordance with the
accompanying documentation for a period of 30 days from the date of
the original purchase (“Limited Warranty”). Pinnacle’s entire liability
and your exclusive remedy for breach of the preceding Limited
Warranty shall be, at Pinnacle’s sole option, repair or replacement of
the Software that does not meet the warranty set forth herein and that
is returned to Pinnacle. This limited warranty shall be void if failure
of the Software has resulted from any accident, abuse, misuse or
misapplication by you. Any replacement Software will be warranted
for the remainder of the original warranty period or 30 days,
whichever is longer.
10. NO OTHER WARRANTIES. EXCEPT AS SET FORTH
ABOVE, THE SOFTWARE IS PROVIDED ON AN “AS IS” BASIS.
YOU ASSUME ALL RESPONSIBILITIES FOR THE QUALITY
AND PERFORMANCE OF THE SOFTWARE. TO THE
MAXIMUM EXTENT PERMITTED BY APPLICABLE LAW,
PINNACLE DISCLAIMS ALL WARRANTIES, EITHER EXPRESS
OR IMPLIED, INCLUDING BUT NOT LIMITED TO IMPLIED
WARRANTIES OF MERCHANTABILITY, NONINFRINGEMENT,
344 Pinnacle Studio 9
AND FITNESS FOR A PARTICULAR PURPOSE. LICENSOR
DOES NOT WARRANT THAT THE FUNCTIONS CONTAINED
IN THE SOFTWARE WILL MEET YOUR REQUIREMENTS, BE
UNINTERRUPTED OR ERROR FREE.
11. LIMITATION OF LIABILITY. YOU AGREE THAT IN NO
EVENT WILL PINNACLE BE LIABLE FOR ANY
CONSEQUENTIAL, SPECIAL, INDIRECT, INCIDENTAL OR
PUNITIVE DAMAGES WHATSOEVER, EVEN IF PINNACLE
HAS BEEN ADVISED OF THE POSSIBILITY OF SUCH
DAMAGES. IN NO EVENT SHALL PINNACLE’S LIABILITY
EXCEED THE TOTAL AMOUNT OF THE FEES PAID FOR THE
SOFTWARE. Some states/jurisdictions do not allow the limitation or
exclusion of incidental or consequential damages in certain
circumstances, so the above limitations may not apply in some
circumstances.
12. General. This License is governed by the laws of the State of
California and by the federal laws of the United States, without
reference to conflict of laws principles. The federal and state courts
within the County of Santa Clara, California shall have excusive
jurisdiction to adjudicate any dispute arising out of this License and
you hereby consent to the personal jurisdiction of the federal and state
courts within the County of Santa Clara, California. This License is
the entire agreement between you and Pinnacle and supersedes any
other communication with respect to the Software. No modification of
or amendment to this License will be effective unless in writing
signed by both parties. If any provision of this License is held invalid
or unenforceable, the remainder of this License will continue in full
force and effect.

Appendix G: Keyboard shortcuts 345
APPENDIX G:
Keyboard shortcuts
The terms Left, Right, Up and Down in this table refer
to the arrow (cursor) keys.
Main Studio interface
Space bar Play and stop
J Fast reverse (hit multiple times for
faster playback)
K Halt playback
L Fast forward (hit multiple times for
faster playback)
X or Ctrl+Up Step forward 1 frame
Y or Ctrl+Down Step back 1 frame
A or I Mark in
S or O Mark out
Ctrl+Left Trim in point by -1 frame
Ctrl+Right Trim in point by +1 frame
Alt+Left Trim out point by -1 frame
Alt+Right Trim out point by +1 frame
Alt+Ctrl+Left Rolling trim out point by -1 frame
(trims following clip too)
Alt+Ctrl+Right Rolling trim out point by +1 frame
G Clear mark in and mark out
D Go to mark in (in trimmer tool)
F Go to mark out (in trimmer tool)
E or Home Go to start
R or End Go to end
346 Pinnacle Studio 9
Left Select previous clip
Right Select next clip
Delete Delete selected clip(s)
Insert Split clip at scrubber position
Page up Go to next page in Movie Window
Page down Go to previous page in Movie Window
Numeric pad + Zoom in the Timeline
Numeric pad - Zoom out the Timeline
C Set menu chapter
V Clear menu chapter
M Set return to menu
Ctrl+Page up Go to previous menu chapter
Ctrl+Page down Go to next menu chapter
Title Editor
Alt+Plus Bring to front
Alt+Minus Send to back
Ctrl+Plus Bring forward one layer
Ctrl+Minus Send back one layer
Ctrl+0 Text justification off
Ctrl+1 Text justification: bottom left
Ctrl+2 Text justification: bottom center
Ctrl+3 Text justification: bottom right
Ctrl+4 Text justification: middle left
Ctrl+5 Text justification: middle center
Ctrl+6 Text justification: middle right
Ctrl+7 Text justification: top left
Ctrl+8 Text justification: top center
Ctrl+9 Text justification: top right
Ctrl+K Kern, leading and skew
Ctrl+M Move, scale and rotate
Shift+Left Expand character selection left
Shift+Right Expand character selection right
Appendix G: Keyboard shortcuts 347
Ctrl+Left Reduce horizontal scale of, or
squeeze (kern), text selection
depending on current edit mode
(move/scale/rotate or
kern/skew/leading)
Ctrl+Right Increase horizontal scale of, or stretch
(kern), text selection
Ctrl+Down Reduce scale or leading of text
selection depending on current edit
mode
Ctrl+Up Increase scale or leading of text
selection
Shift+Ctrl+Left Same as Ctrl+Left (coarse)
Shift+Ctrl+Right Same as Ctrl+Right (coarse)
Shift+Ctrl+Down Same as Ctrl+Down (coarse)
Shift+Ctrl+Up Same as Ctrl+Up (coarse)
Alt+Left In text selection: Move characters
left. No selection: Move left all text
from cursor to end of line.
Alt+Right In text selection: Move characters
right. No selection: Move right all
text from cursor to end of line.
Shift+Alt+Left Same as Alt+Left (coarse)
Shift+Alt+Right Same as Alt+Right (coarse)
Index 349
Index
A
A/B editing, 121
Abbreviations, xiv
Album
Clipboard operations, 74
Disc Menus section, 56, 165
Drag-and-drop editing, 74
Filled during capture, 17
Image sections, 148
Interface features, 38
Introduced, 17
Menu usage, 39
Overview, 35
Previewing, 6, 37
Preview-quality scenes, 27
Selecting video scenes, 44
Sound Effects section, 54
Source folders, 37
Still Images section, 53
Title Editor. See Title Editor
Album
Titles section, 52
Transitions section, 50, 137
Video Scenes section, 38, 73
Album menu
Combine Scenes, 47
Comment view, 46
Details view, 45
Find Scene in Project, 39, 77
Icon view, 45
Scene detection commands, 50
Scene view, 46
Select By Name, 46
Set Thumbnail, 42
Subdivide Scenes, 48
Alpha Magic transitions, 139
Analog
Capture quality options, 32
Levels during capture, 33
Outputting to, 231
Animated pan-and-zoom, 154
Animation, 282
Aspect ratios (frame formats), 22,
42
Capture option, 250
Mixing, 76
Audio
Adjusting on Timeline, 213
Background music, 200
Insert editing, 90
Original, 199
Overlay, 120
Overlay, original, 200
Sound effects, 200
Synchronized with video, 87
Synchronous, 63, 142, 199
Tracks on Timeline, 199
Transitions, 142
Uses of, 197
Using in Studio, 198
Using without video, 75
Voice-overs, 200
Volume and mixing, 210, 215
350 Pinnacle Studio 9
Audio clips, 63
Interface details, 211
Trimming, 208
Audio compression, 265
Settings (for AVI output), 265
Audio effects, 220
Basic, 221
Equalizer, 223
Grungelizer, 224
Icons, 221
Karaoke, 225
Leveler, 226
Noise reduction, 221
Reverb, 226
Tool, 220
Unlocking, 97
Audio levels
Changing during capture, 18
In analog capture, 34
In DV capture, 31
Audio toolbox, 71
Audio track
Linked to video track, 89
Audio tracks, 201
Auto color correct (video effect),
103
Automatic scene detection. See
Scene detection
AVI
AVI vs. MPEG, 234
Saving movie as, 234
AVI files, 54
B
Background
In Title Editor, 191
Background music, 61, 63
CD, 201
Formats, 200
SmartSound, 203
Background rendering, 258
Enabling and disabling, 142
Of Hollywood FX, 142
Of moving menu thumbnails, 173
Of video effects, 100
Backgrounds section
Of Title Editor Album, 191
Balance
Adjusting on Timeline, 214
Balance and volume, 71, 210
Bit rate (VBR vs. CBR), 267, 275
Black and white (video effect),
107
Blur (video effect), 112
Buttons
Chapter. See Disc menus
Clip, 59
Clip delete, 60
Clip split, 59
DVD toggle, 6
Edit menu, 70
Highlighting, 195
Mode, 3
Playback, 8
Razorblade, 86
Reset (pan-and-zoom), 153
Split clip, 86, 89
Split clip/scene, 60
Start/stop capture, 19
Tool selector, 68
Toolbox, 68
Track-locking, 87
Undo, Redo, Help and Unlock, 2
View selection, 59
Buttons section
Of Title Editor Album, 193
C
Camcorder Controller, 18, 20, 159
Capture, 15
Analog quality options, 32
Analog vs. digital, 18
And the Album, 17
Audio and video levels, 33
Change directory, 20
Device selection, 22
Devices, 248
Directory, 19
Drive-speed, 30
Index 351
Encoding, 26
File-naming convention, 24, 28
File-size limitations, 24
Format options, 252
From analog sources, 32
From DV, 26, 29, 31
From MicroMV, 27, 31
Full-quality, 26, 29, 30
Hardware, 21
MPEG options, 256
Preparing hard drive, 278
Preview-quality, 26, 27
Scene detection, 25
Source options, 248
Sources, 21
Step-by-step, 23
To multiple files, 75
Capture mode
Interface, 17
Introduced, 1
Capture settings, 19
Captured video
Folders, 40
Opening file, 40
CD audio clips
Properties of, 209
CD audio tool, 72, 201
CD, voice-over and surround
options, 260
CD-ROM drive, 280
Chapter links. See Links
Chapters
On menu track, 168
Chroma key
Background cloth for, 133
Tips, 133
Tool, 128
Video effect, 132
Clip properties
Duration, 151
Name, 151
Clip properties tool, 66, 69, 71
For audio clips, 208
For disc menus, 170
For still images, 150
For transitions, 145
For video clips, 84
Trimming with, 83, 145
Clipboard
With Album and Movie Window,
74
Clips
Audio, 63
Changing name, 83
Combining, 87
Deleting, 60
Splitting, 60, 86
Trimming on the Timeline, 78
Trimming tips, 82
Video, 63
Close-ups, 317
Color correction (video effect),
108
Colors
Selecting, 135
Combine Clips menu command,
87
Compression
AVI audio, 265
AVI video, 264
Computer, requirements for, xi
Configuration. See Options
Continuity (videography tip), 319
Conventions, xiv
Counter, 10
Cross fade
In audio, 142
Cut (transition), 139
Cuts
Associative, 321
Cause and effect, 322
Contrast, 321
Formal, 322
Parallel, 321
Substitutionary, 321
Tempo of (videography tip), 319
D
Data rate
For DV capture, 251
352 Pinnacle Studio 9
Delete clip button, 60
Deleting clips, 60
Deleting scenes, 60
Devices
Capture, 22, 248
Dialog boxes
Main Options, 247
Make Movie Options, 247
Options, 247
Digital8
No timecode on analog tapes, 29
DirectX, xii
Disc
MPEG encoding, 29
Previewing, 167
Saving movie to, 242
Disc chapter command, 166
Disc menu tool, 70, 175
Disc menus, 161
Automatic link creation, 166
Button captions, 165
Chapter editing, 174
Creating, 177
Described, 161
Editing, 177
Editing links, 170
Editing on Timeline, 168
Link numbers during editing, 172
Loop during playback, 162
Menus vs. titles, 164
Moving Thumbnails option, 173
Name and duration, 170
On moving video, 164
Opening in Title Editor, 171
Placing on Timeline, 166
Sample movie layout, 162
Section (of Album), 56, 165
Setting thumbnail, 173
Supplied, 165
Unlocking, 57
VCD, S-VCD limitations, 165
Discs
Authoring, 1, 36, 56, 147, 163, 193,
210
Diskometer, 18, 19
Dissolve (transition), 140
Drag-and-drop
Editing, 74
From Album, 74, 137
Setting menu links, 174
Drive space
For DV capture, 30
Drive speed
For video capture, 30
Insufficient data rate, 251
Durations (of transitions etc.), 257
DV, xiv
Capturing, 26, 31
Data rate for capture, 251
Outputting to, 231
Storage calculation, 30
Timecode, 28
DVD
Menus, 56, See Disc menus
MPEG encoding, 29
Output movie to, 242
Playback controls, 6, 10, 163
Player control, 167
Previewing, 167
E
Edit
Video clips, 73
Edit line
Clips inserted at, 74
Edit menu button, 70
Edit mode
Interface, 5
Introduced, 1
Edit options, 256
Editing, 317
A/B, 121
Advanced, 65, 119
Disc menus, 168
Insert, 89
Split, 91
Still images, 150
Editing photos and other images,
151
Editor, Menu and Title, 177
Index 353
Effects
Audio. See Audio effects
Video. See Video effects
Emboss (video effect), 113
Equalizer (audio effect), 223
Equipment requirements, xi
F
Fade
Adjusting balance on Timeline,
214
Fade (transition), 139
Fades
Default duration of, 257
In video effects, 99
File name
Project, 59
File types
AVI, 54, 229
Image, 53
MP3, 54
MPEG, 229
MPG, 229
RealVideo, 229
Sound, 54
WAV, 54
WMV, 229
File-naming convention, 28
Find Scene in Album command,
39
Find Scene in Project command,
39
Flags
Placing on menu track, 169
Folders
Still images, 54
Titles, 53
Fonts, 188
Frame formats. See Aspect ratios
Frame grabber, 158
Tool, 70, 148
Tool, described, 158
Frame rate
Increasing, 281
Full-screen images
Described, 148
G
Glossary, 325
GOP
Closed, 328
Size, 332
Grab frames tool
Described, 158
Graphics
Editing, 151
Groups
Temporary, In Title Editor, 186
Grungelizer (audio effect), 224
H
Hard drive, 280
Preparing for capture, 278
Space for video capture, 30
Speed for video capture, 30
Hardware
Acceleration, 259
Capture, 21
Help button, 2
Highlighting
Of menu buttons, 195
Hollywood FX
And 3-D acceleration, 142
And background rendering, 142
Editing, 141, 145
Previewing, 142
Transitions, 139, 140
Unlocking, 51
I
Icons for effects
Audio, 221
Video, 77
IEEE-1394, xiv
Cable, 231
Images. See Still images
354 Pinnacle Studio 9
Insert edit
A/B, 121
Insert editing, 89
Audio, 90
Introduced, 89
Method, 89
Internet, 240
Sharing movies on, 229, 240
J
J-cut
A/B, 122
Defined, 91
Explained, 94
Jog buttons, 9
K
Karaoke (audio effect), 225
Ken Burns, 152
Keyboard conventions, xv
L
Layers
In Title Editor, 181
L-cut
A/B, 122
Defined, 91
Explained, 91
Lens flare (video effect), 110
Leveler (audio effect), 226
Levels, Audio and video
In analog capture, 33
In DV capture, 31
Links
Adjusting, 169
Automatic creation of, 166
Creating, 169
Deleting, 170
Editing, 170
In disc menu tool, 174
On disc menus, 161
Repositioning, 170
Return to menu, 170
Setting with drag-and-drop, 174
Show numbers while editing, 172
Locked content, activating, 11
Locking tracks, 65
Indication of, 88
Long shots (videography tip), 317
M
Make Movie mode, 229
Introduced, 1
Making movies, 229
Media Player, 236, 238, 239
Menu and Title Editor, 177
Menu buttons
Highlighting, 195
Menu commands, xiv
Menu Editor. See Title Editor
Menu links. See Links
Menu track, 168
Editing, 169
Flags, 168
Menus, Disc. See Disc menus
MicroMV
Capturing, 27, 31
Microphone
Connecting, 207
Modes
Capture, 17
Edit, 5
Introduced, 1
Make Movie, 229
Setting, 2
Mosaic (video effect), 113
Movie
Previewing, 6
Movie Window, 59
Clipboard operations, 74
Drag-and-drop editing, 74
Find scene in Album, 39, 77
Interface features, 76
Positioning, 61
Status message area, 59
Trimming on the Timeline, 78
Index 355
Views, 62
MP3 files, 54
MPEG
AVI vs. MPEG, 234
Capture options, 256
Captures from DV, 30
Encoding of DV captures, 26, 29
For DVD etc., 29, 30
MPEG-1 vs. MPEG-2, 267
Quality options, 31
Saving movie as, 237
Multiple capture files
Using, 75
Multiple selection
In Title Editor, 186
Multitrack editing, 119
Music, 197, See Background
music
Selecting (videography tip), 323
Music video. See SmartMovie
Muting tracks, 66
N
Names
In Text and Storyboard view, 83
Of clips - changing, 83
Noise (video effect), 110
Noise reduction (audio effect), 221
Noise reduction (video effect), 104
NTSC, 249
O
Objects
In Title Editor, 180
Old film (video effect), 114
Optical disc. See Disc
Options, 247
Aspect ratio for analog capture,
250
Audio compression for AVI output,
265
Capture devices, 248
Capture format, 252
Capture source, 248
CD, voice-over and surround, 260
Data rate, 251
Edit, 256
Frame rate, 265
Main dialog, 247
Make AVI file, 264
Make Disc, 272
Make Movie, 247
Make MPEG file, 266
Make RealVideo file, 268
Make tape, 262
Make Windows Media file, 271
MPEG capture, 256
Organization of, 247
Output to VGA display, 263
Overlay for analog capture
preview, 249
Preview during capture, 249
Scene detection, 250
Setting, 4
TV standard, 249
Video compression, 264
Original audio
Properties, 209
Synchronized with video, 87
Original sounds
Preserving (videography tip), 322
Output
To AVI file, 234
To Internet, 240
To MPEG file, 237
To optical disc, 242
To RealVideo, 239
To videotape, 232
To Windows Media, 239
Overlay effects, 119
Overlay images
Controlling transparency in, 149
Described, 148
Overlay track, 119
Always show option, 121
Audio, 200
Audio, original, 120
Displaying, hiding, 121
Introduced, 119
Opening, 119
356 Pinnacle Studio 9
Overlays track
And still images, 147
P
PAL, 249
Pan and zoom
Video effect, 156
Pan-and-zoom
Animated, 154
Complex animations, 155
Photos, 152
Tool, 151
Parameters for effects
Resetting, 99
Parameters for plug-in effects
Presets, 99
Parameters for video effects
Editing, 98
Passport, 14
Perspectives
Varying, 317
Photos
Editing, 151
Panning and zooming, 152
Red-eye reduction, 153
Rotating, 152
Picture-in-picture
Tool, 123
Video effect, 127
Playback controls, 6
DVD, 6, 10, 163
Fast forward/reverse, 9
Go to beginning, 9
Jog buttons, 9
Play/Pause, 8
Standard, 6, 8
Playback speed
Changing, 105
Player, 17
During Timeline trimming, 78
Introduced, 6
Previewing transitions, 52, 141
Scrubber, 9
Player control
DVD, 167
Plug-in effects
Unlocking, 97, 102
Posterize (video effect), 108
Presets for effects, 99
Preview
During capture, 249
Simplified, 259
Preview quality
Album icons, 38
Indicated in Movie Window, 76
Preview window, 6, 81
Preview Window, 7
Previewing
Discs, 167
Hollywood FX, 142
Menus, 6
Transitions, 52, 141
Video effects, 100
Problems and solutions, 285
Product names, xiv
Project. See Movie
Push (transition), 140
R
Razorblade button, 60
RealVideo
Saving movie as, 239
Recording voice-overs, 205
Quality, 207
Red-eye reduction
Explained, 153
Removing, 153
Redo button, 2
Rendering
Defined, 258
Reordering objects
In three dimensions, 181
Requirements, equipment, xi
Return to menu link, 170
Reverb (audio effect), 226
Ripple transition, 143, 149, 164
Index 357
S
Save as MPEG File, 237
Save as RealVideo, 239
Save as Windows Media, 239
Save to disc, 242
Scene detection, 25, 42
Menu commands, 50
Options, 250
Scenes. See Video scenes
Scenes (videography tip), 320
Scrubber, 9
SCSI, xii
Sepia (video effect), 109
Set Thumbnail menu command, 42
Settings. See Options
Setup menu, 4
Setup options, 247
Simplified preview, 259
Slide (transition), 140
Slideshow, 143, 149, 164
Slow motion, 105
SmartCapture, 27
From Digital8, 29
Timecode, 28
SmartSound
Clip properties, 210
Duration of clips, 208
Tool, 72, 203
Sound effects, 63, 197
Properties, 209
Section (of Album), 54
Unlocking, 55
Sound files, 54
Speed
Of playback, changing, 105
Speed (video effect), 105
Split Clip menu command, 86
Split clip/scene button, 60, 86
In insert editing, 89
Split edit
A/B, 122
Split editing
Introduced, 91
Splitting clips, 86
Restoring from, 86
Stabilize (video effect), 104
Stained glass (video effect), 115
Start/stop capture button, 19
Stereo
Adjusting balance on Timeline,
214
Still images
Creating, 148
Default duration of, 257
Described, 147
Editing, 151
Folder, 54
Full-screen, 148
Full-screen vs. overlay, 147
Overlay, 148
Section (of Album), 53
Transparency in, 149
Trimming, 150
Trimming and editing, 150
Types, 147
Still Images
Rotating, 152
Storyboard view, 62
Studio Plus, 119
S-VCD
Menus, 56, See Disc menus
MPEG encoding, 29
Output movie to, 242
Synchronization (of video and
audio)
Overriding, 87
T
Text editing
Advanced, 183
Text view, 62, 67, 83
Thumbnail frames
In Album, 42
Setting in disc menus, 173
With moving video, in menus, 173
Timecode
Continuous, 28
358 Pinnacle Studio 9
Not on analog tapes, 29
Striping, 28
Timeline
Adjusting volume on, 213
Audio tracks, 199
Editing disc menus on, 168
Locking tracks, 87
Overlay video, 119
Placing disc menus on, 166
Tracks, 63
Trimming clips on, 78
Timeline view, 62, 63
Advanced editing in, 87
Insert editing, 89
Splitting clips in, 86
Timescale, 63
Title
Choosing (videography tip), 323
Colors (videography tip), 323
Title Editor, 177
Advanced text editing, 183
Introduced, 69
Launching, 178
Multiple selection in, 186
Title Editor Album, 189
Backgrounds section, 191
Buttons section, 193
Looks Browser, 189
Pictures section, 192
Title Editor controls
Clipboard and delete buttons, 187
Mode selection buttons, 183
Object layout buttons, 185
Object toolbox, 180
Selection tool, 180
Text styling, 187
Title-type buttons, 179
Title Editor objects, 180
Reordering layers, 181
Text, 182
Title track
Locking, 88
Titles
Crawls, 179
Creating, 177
Editing, 177
Folder, 53
Rolls, 179
Section (of Album), 52
Titles and overlays track
And still images, 147
Titles tool, 70
Toolbox, 59
Audio, 71
Video, 69
Toolboxes, 67
Tools
Audio effects, 72, 220
Automatic background music, 72
CD audio, 72, 201
Chroma key, 128
Clip properties, 66, 69, 71, 83, 170,
208
Disc menu, 70, 175
Frame grabber, 70
Pan-and-zoom, 151
Picture-in-picture, 123
SmartMovie, 70, 115
SmartSound, 203
Titles, 70
Video effects, 70, 95
Voice-overs, 72, 205
Volume and balance, 71, 210, 215
Track lock buttons, 87
Tracks
Audio, 199, 201
Background music, 200
Indication when locked, 88
Locking, 65
Menu, 168
Muting, 66
Original audio, 199
Overlay, 119
Sound effect and voice-over, 200
Title, 88
Video, 65, 87
Video linked to audio, 89
Transitions
Adding to movie, 137
Alpha Magic, 139
Criteria for selecting, 138
Cut, 139
Index 359
Default duration of, 257
Described, 137
Displaying type, 51
Dissolve, 140
Effect on clip duration, 138
Fade, 139
Groups, 51
Hollywood FX, 139, 140
In audio, 142
Looping in preview, 146
Naming, 145
On Timeline, 137
Previewing, 52, 141, 146
Reversing direction, 145
Ripple transition, 143, 149, 164
Section (of Album), 50
Setting duration of, 145
Standard, 139
Three-dimensional, 140
Trimming, 144
Types of, 138
Unlocking, 51
Videography tip, 318
Wipe, slide, push, 140
Transparency
In overlay images, 149
Transport controls
On-screen, 18, 20
Trashcan button, 60
Trim scrubber, 66
Trimming
Audio clips, 208
Described, 78
Introduced, 73
On the Timeline, 78
Still images, 150
Tips, 82
Transitions, 144
Undoing, 85
Video clips, 78
With Ctrl key, 81
Troubleshooting, 285
TV set
Simultaneous output to, 232
U
UDMA, xii
Undo button, 2
Unlock button, 2
Unlocking
Disc menus, 57
Explained, 13
Hollywood FX, 51
Plug-in effects, 97, 102
Premium content, 11
Sound effects, 55
USB video camera
Capturing from, 32
Use hardware acceleration, 259
V
VCD
Menus, 56, See Disc menus
MPEG encoding, 29
Output movie to, 242
VGA
Output movie to, 263
Video
Aspect ratios. See Aspect ratios
Capture. See Capture
Frame format. See Aspect ratios
Options, 33
Output hardware, xiii
Video capture
Step-by-step, 23
Video clips, 63
Applying effects to, 95
Changing name, 83
Changing playback speed, 105
Combining, 87
Editing, 73
Finding Album scene, 77
Interface features, 76
Preview-quality, 76
Properties tool, 84
Shortened by transition, 138
Splitting, 86
Synchronization with audio, 87
Trimming, 78
360 Pinnacle Studio 9
Trimming on the Timeline, 78
Trimming tips, 82
Undoing trim, 85
Using audio portion only, 75
Video effects, 95
Adding, 102
Adding and deleting, 97
Auto color correct, 103
Basic, 101
Black and white, 107
Blur, 112
Changing parameters, 98
Chroma key, 132
Cleaning effects, 103
Color correction, 108
Color effects, 107
Emboss, 113
Fading in and out, 99
Fun effects, 109
Icons, 77
Lens flare, 110
Mosaic, 113
Noise, 110
Noise reduction, 104
Old film, 114
Pan and zoom, 156
Picture-in-picture, 127
Posterize, 108
Presets, 99
Previewing and rendering, 100
Sepia, 109
Speed, 105
Stabilize, 104
Stained glass, 115
Strobe, 106
Style effects, 112
The effects list, 96
Tool, 95
Unlocking, 97
Water drop, 111
Video levels
Changing during capture, 18
In analog capture, 33
In DV capture, 31
Video monitor
Simultaneous output to, 232
Video postcard, 241
Video scene catalog, 163
Video scenes
Adding to movie, 73, 74
Album interface features, 38
Combining and subdividing, 47
Comments, 46
Displaying length of, 45
Finding in Album, 39
Folders, 40
In-use indicator, 39, 77
Neighboring, 77
Order of, 38
Preview-quality, 27, 38
Redetecting, 49
Section (of Album), 38
Selecting, 44
Splitting, 60
Thumbnail frames, 42
Viewing, 43
Video Scenes section
Views, 46
Video toolbox, 69
Video track, 65, 75, 87
And still images, 147
Linked to audio track, 89
Videography, 315
Videotape
Output to, 232
Views, Movie Window
Storyboard, 62
Text, 62, 67
Timeline, 62, 63
Voice-over tool, 205
Voice-overs, xii, 63
Properties, 209
Recording, 205
Recording quality options, 207
Volume, 206
Voice-overs tool, 72
Volume
Adjusting on Timeline, 213
Fades, Default duration of, 257
Mixing, 210, 215
Voice-over levels, 206
Volume and balance tool, 71, 210,
215
Index 361
W
Water drop (video effect), 111
WAV files, 54
Windows
Millennium, 24
Windows 98, 24
Windows Media
Saving movie as, 239
Windows Media files, 229
Wipe (transition), 140